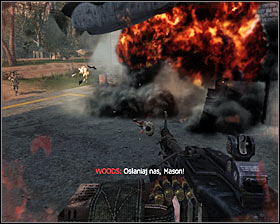
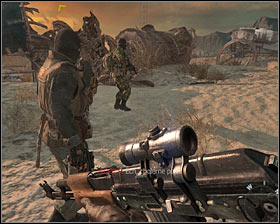
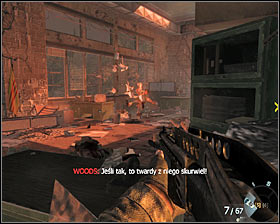
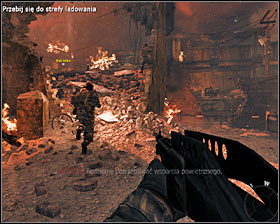
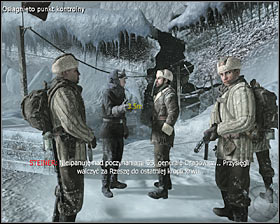
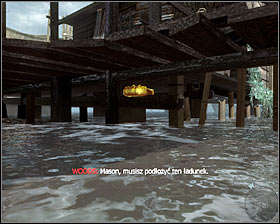
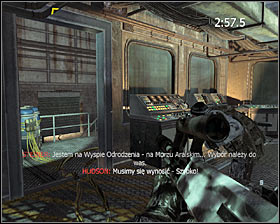
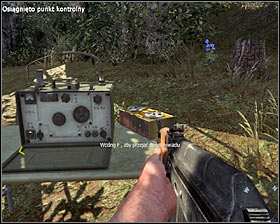
This guide prepared for the game titled Call of Duty: Black Ops contains very precise description of going through all playable missions, which made up a campaign for a single player. In every description there are clues connecting to the ways of performing the given tasks and skillfully eliminating the enemies you meet on your way.
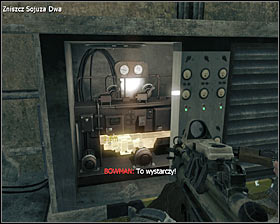
The additional advantage of this guidebook are clues, which help to find secret service data, here they are secrets. They are marked green in this description of completing the game. Moreover, at the end of the guide, there is a list of all secrets with bigger photos, which will help you to find them.
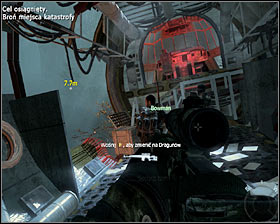
Jacek "Stranger" Halas ()
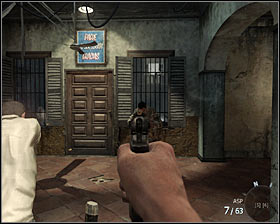
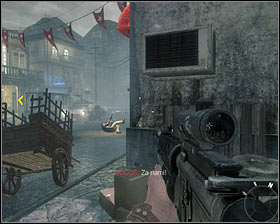
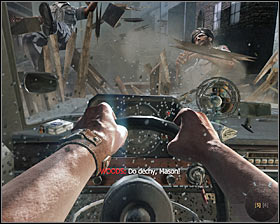
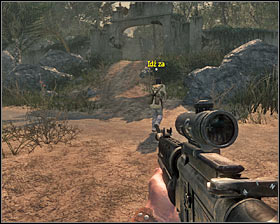
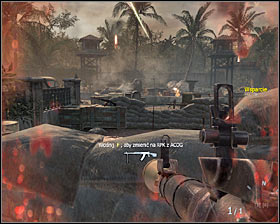
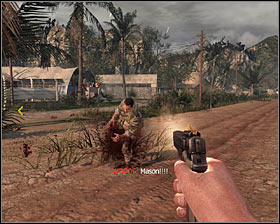
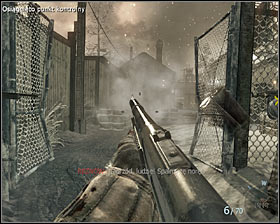
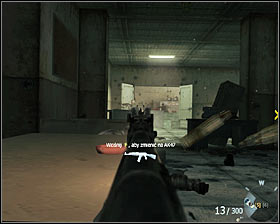
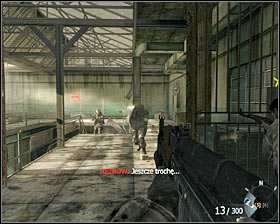
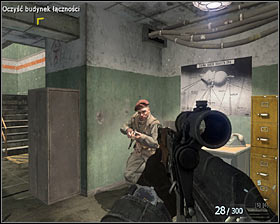
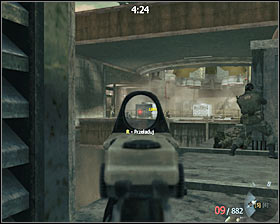
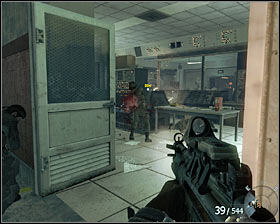
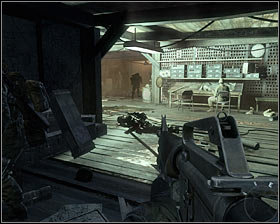
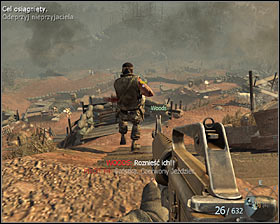
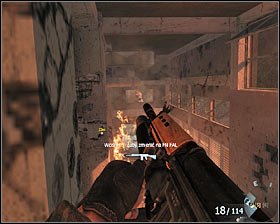
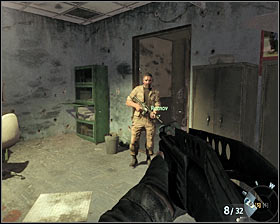
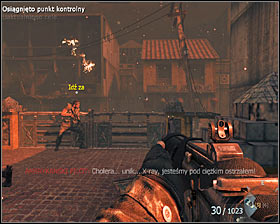
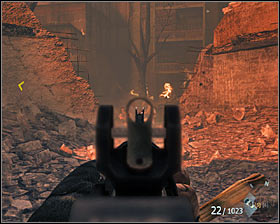
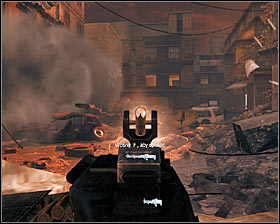
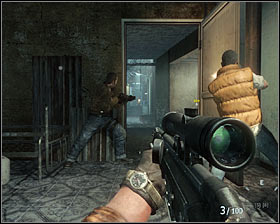
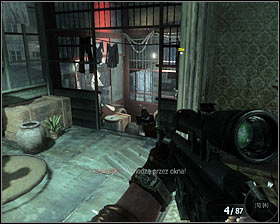
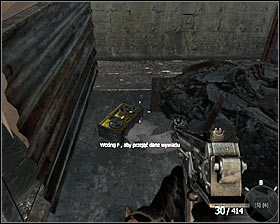
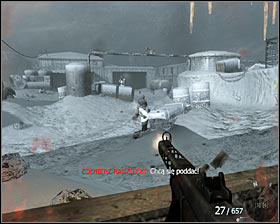
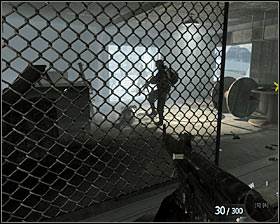
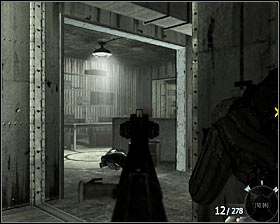
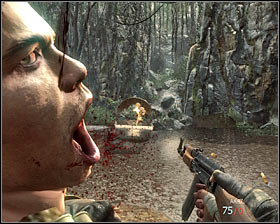
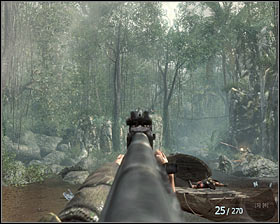
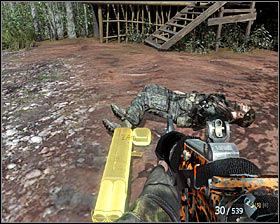
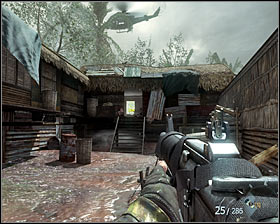
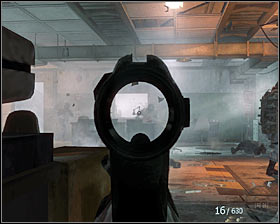
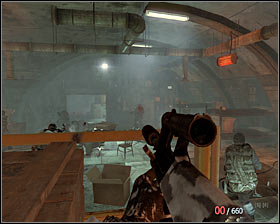
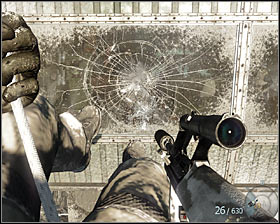
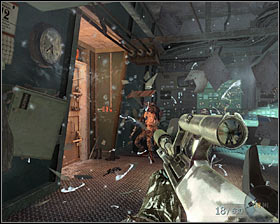
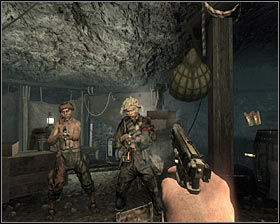
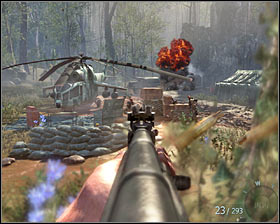
The description of completing the mission: Start with eliminating the enemy on the right #1. You can help yourself by bringing the vision closer pressing the right button of the mouse. Wait till the bartender throws you new gun and stand by the bar exit #2.
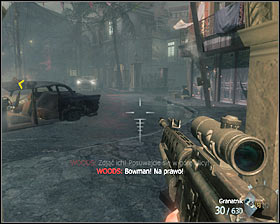
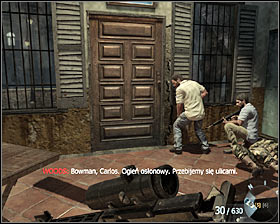
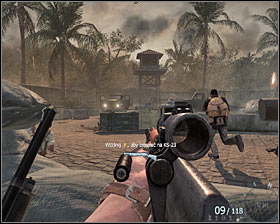
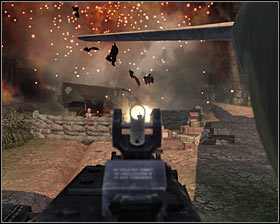
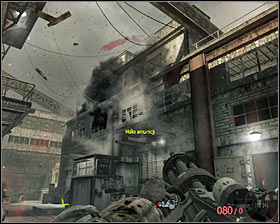
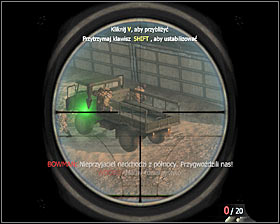
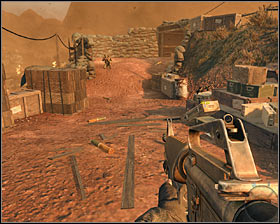
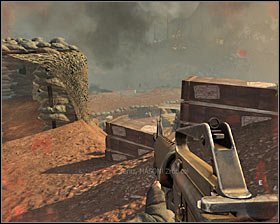
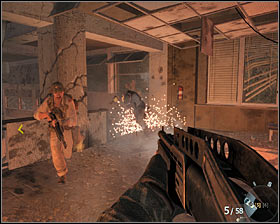
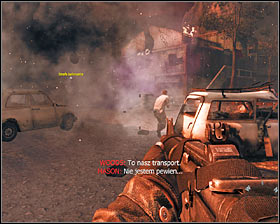
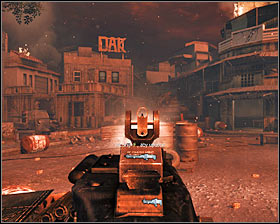
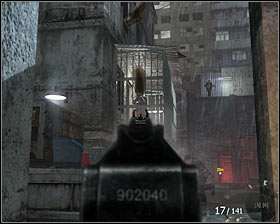
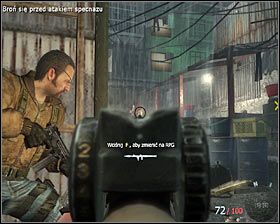
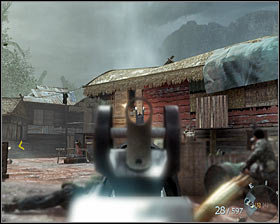
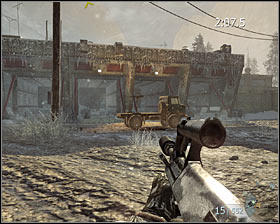
Run outside and start shooting enemies standing by nearby cars #1. It is worth hiding behind a wall (C key) which will make the risk of getting hurt less probable. After eliminating the nearest enemies, choose the bazooka as it is suggested by the game (key 5). Go straight #2.
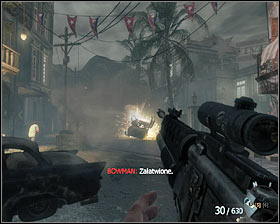
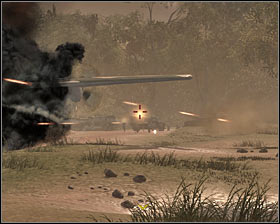
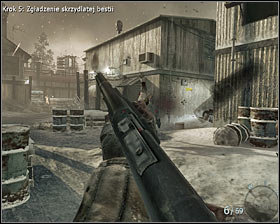
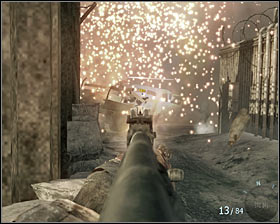
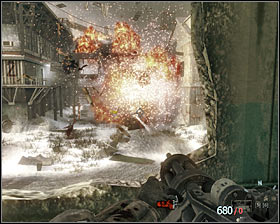
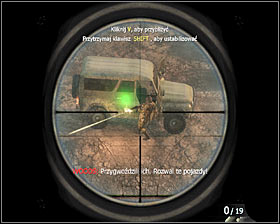
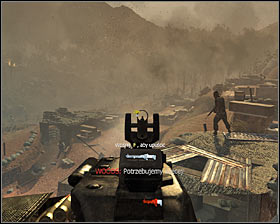
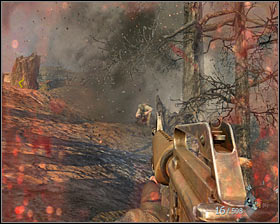
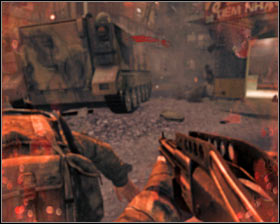
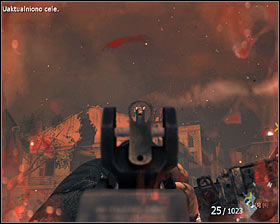
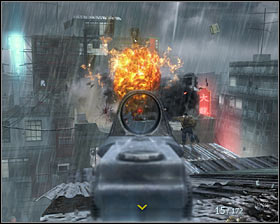
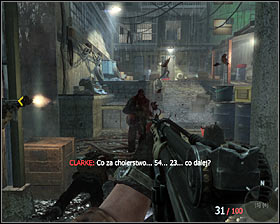
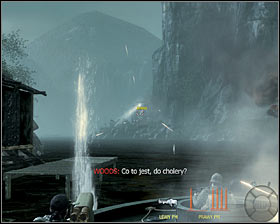
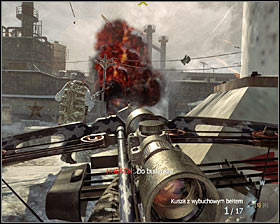
Start using the bazooka. First destroy new cars which appear in the neighborhood #1, although you can aim at groups of enemies #2.
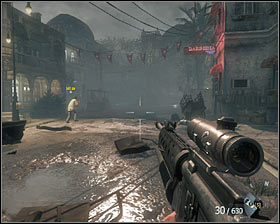
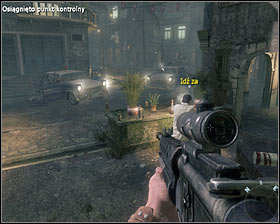
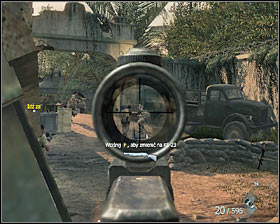
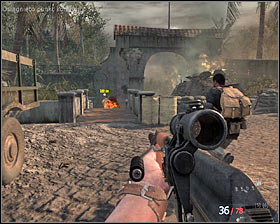
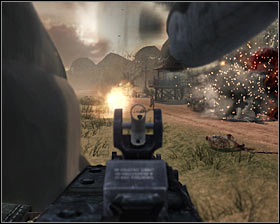
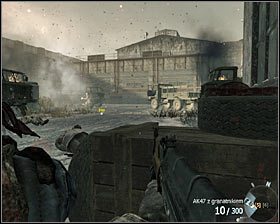
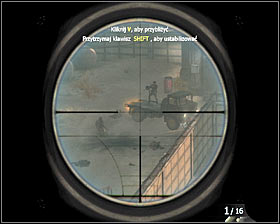
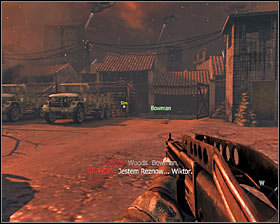
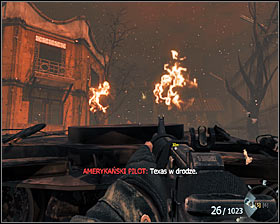
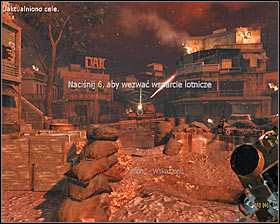
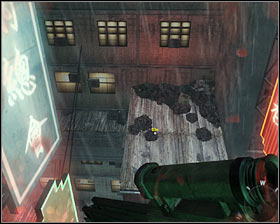
Move toward the square you can see in the distance #1. I suggest you to stand on the right. After a moment, a new car will arrive #2 and you can let the main hero get hit. After avoiding the crash, it is worth turning around and destroying the car mentioned above by using the bazooka.

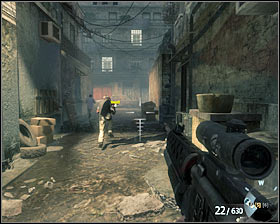
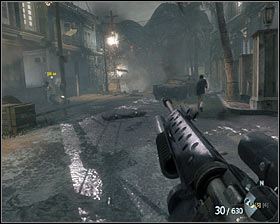
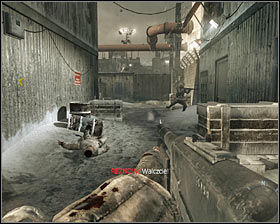
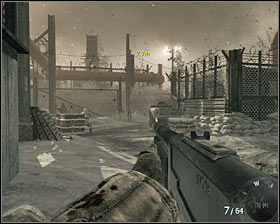
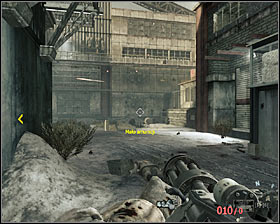
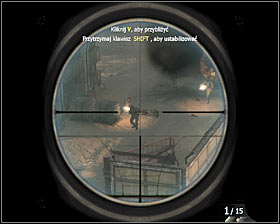
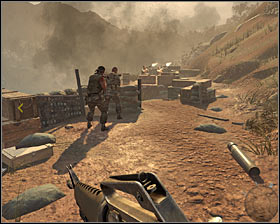
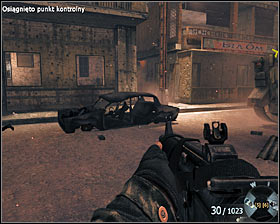
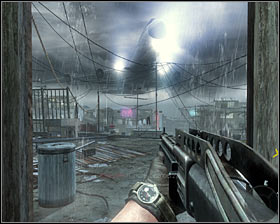
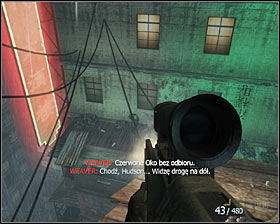
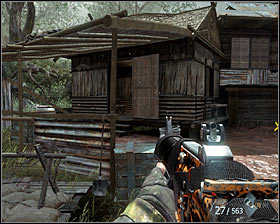
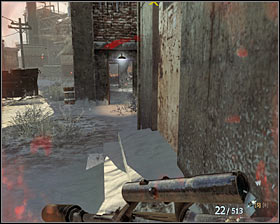
Run to the other side of the street #1. You can ignore the enemies gather at the square or, if you feel the urge, blow up few vehicles situated nearby. Run after your teammates choosing a narrow valley between the buildings #2.
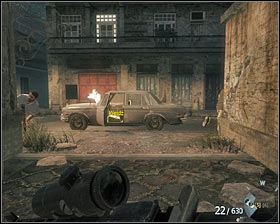

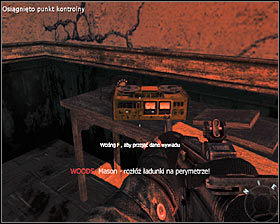
Come closer to a car parked here #1, and the main hero as well as his mates take their places inside the car. First press and hold the right mouse button #2, to use the back gear.
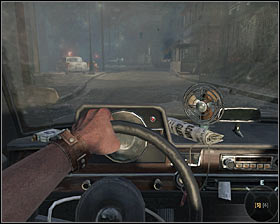
Now you have to press and keep the left mouse button for a change #1. Fortunately, you do not have to drive the car, so enjoy the view and all the fighting around you #2. After watching a cut-scene, you will find yourself in a completely new place.
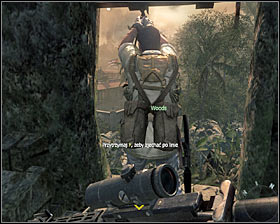
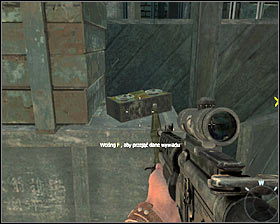
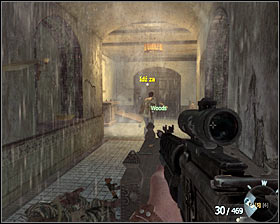
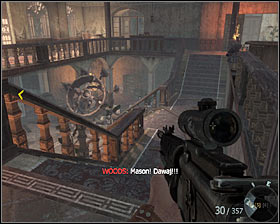
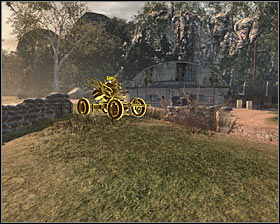
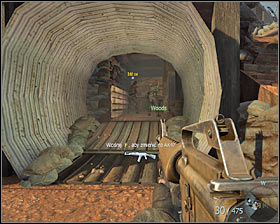
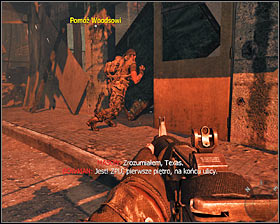
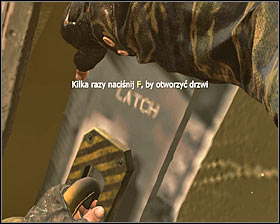
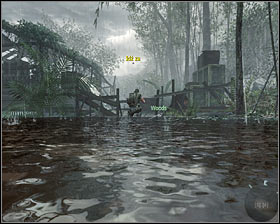
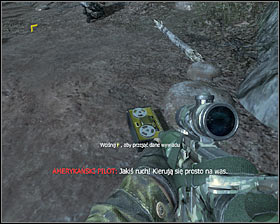
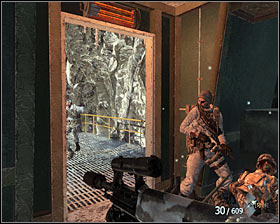
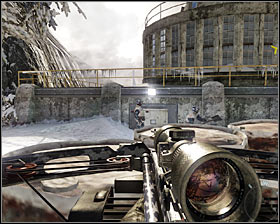
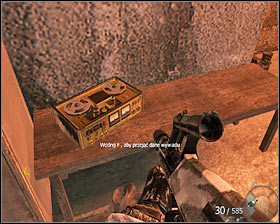
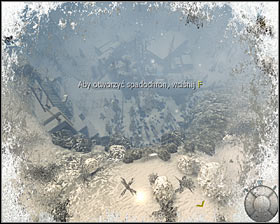
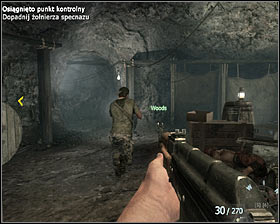
Go to Woods #1 and keep pressing F key, thanks to which you will automatically slide down the rope. After reaching the new place, follow your teammates inside a nearby building #2.

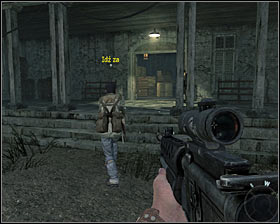
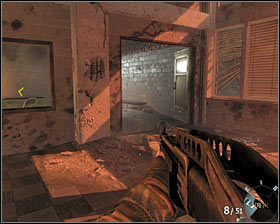
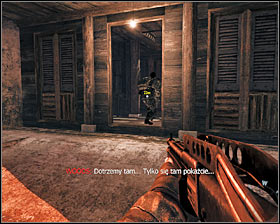
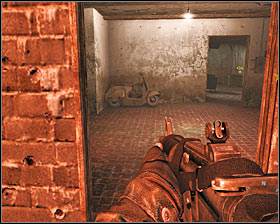
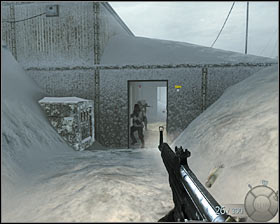
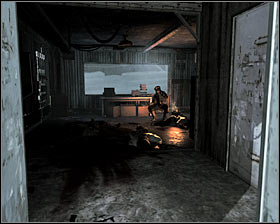
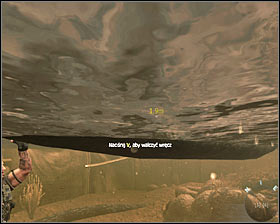
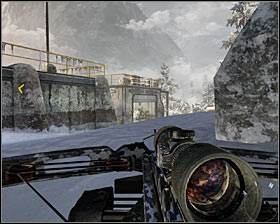
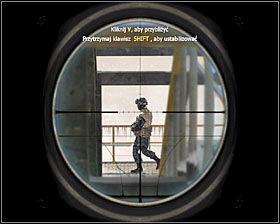
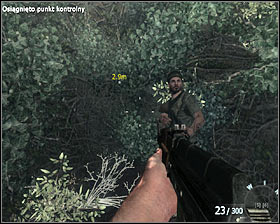
There is one guard inside and according to the clue, you will get, it is worth surprising him. Come up to the enemy from behind and pres V key #1, to eliminate him quietly. Now you can leave the building #2. After coming outside, hide behind the rocks and wait for the escort to come.
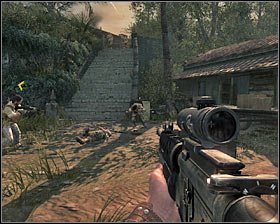
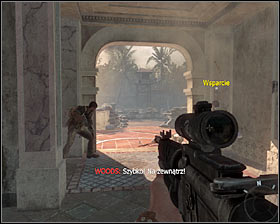
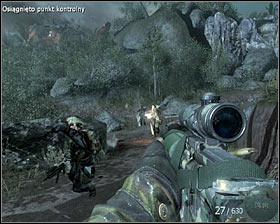
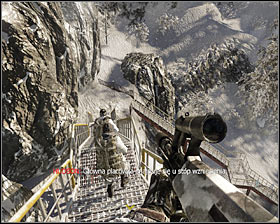
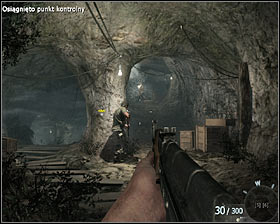
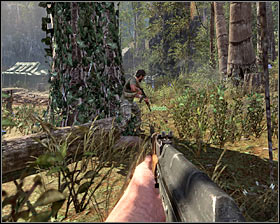
Follow you teammates' steps who are heading towards a nearby hill #1. Watch out for the enemies staying in this area #2, on this level as well as on the higher one. In such case you have to start fighting, although your allies help you to eliminate them.

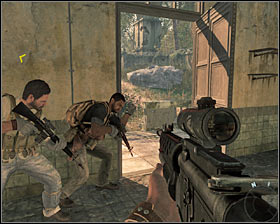
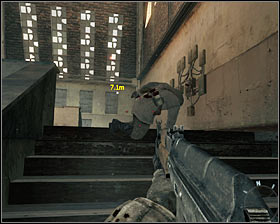
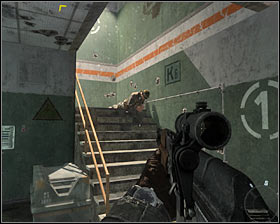
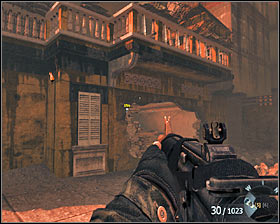
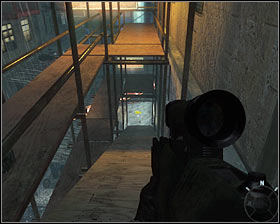
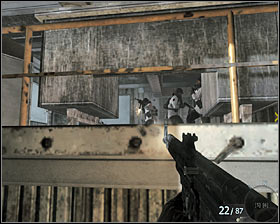
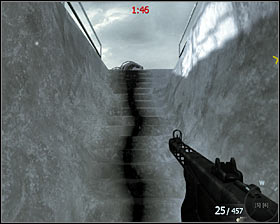
Go upstairs. Soon you will reach a new building #1. Stand behind your teammates and prepare for the attack #2. Don't step up unless you want to risk.
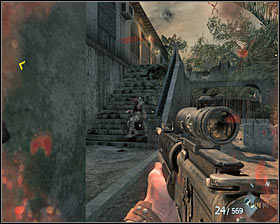
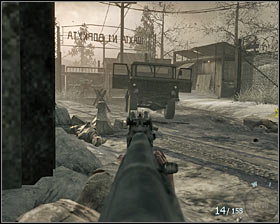
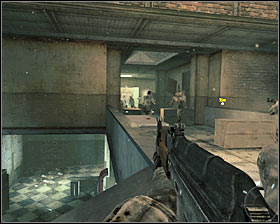
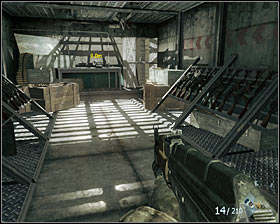
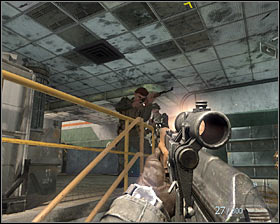
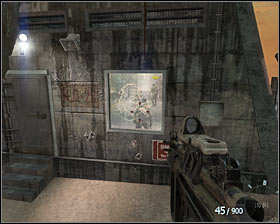
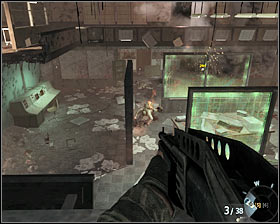
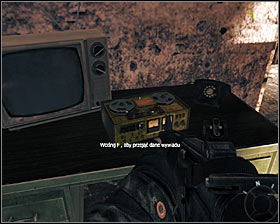
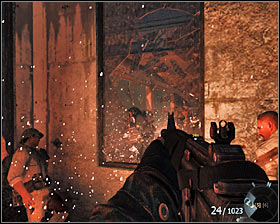
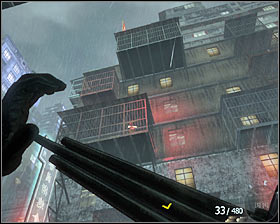
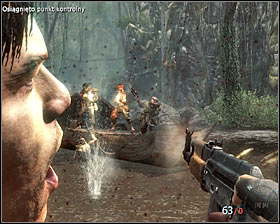
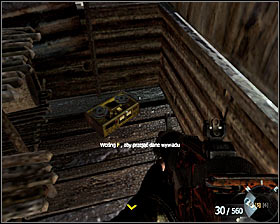
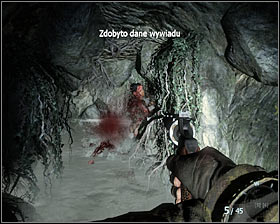
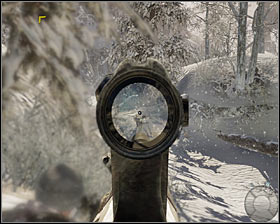
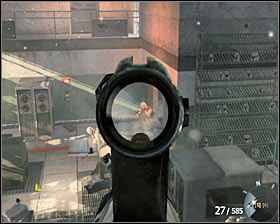
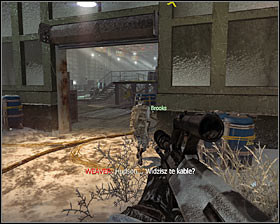
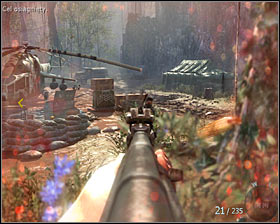
From this point shoot the enemies situated on the right #1, using the wall and other objects to hide. After eliminating the enemies, stay in the same building and look around and you will find secret service data #2.
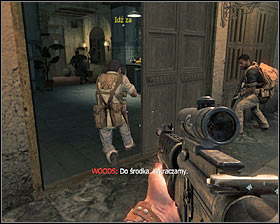
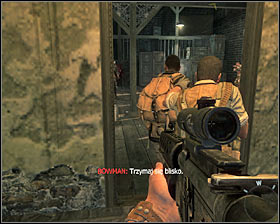
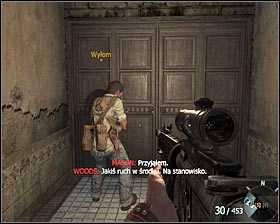
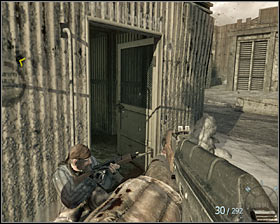
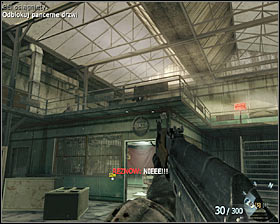
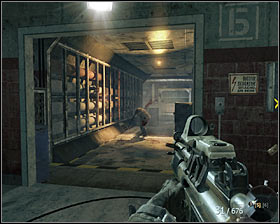
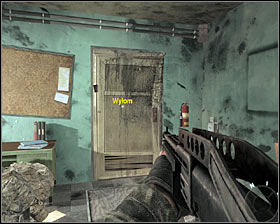
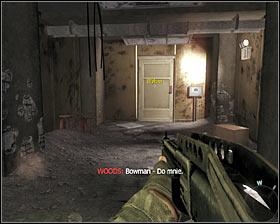
You can join your friends. Watch out for other enemies who can appear on your way, especially the one guarding the door #1. Go to the second floor with the whole team and wait till Woods forces the new door open #2 (if nothing happens, make sure Bowman stands by it).
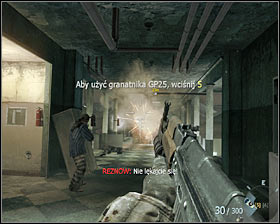
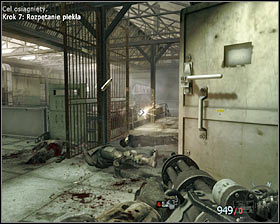
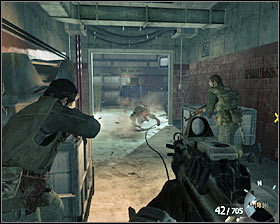
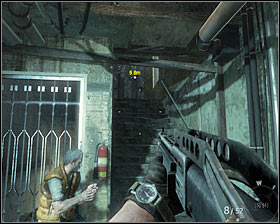
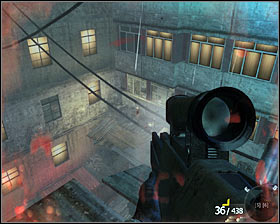
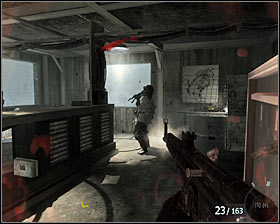
Eliminate other enemies who have been hiding inside this building #1. After securing this area, follow your teammates. Next corridor is also occupied by the enemies #2, so you have to watch out. Never put yourself in front of enemies' fire and use grenades.

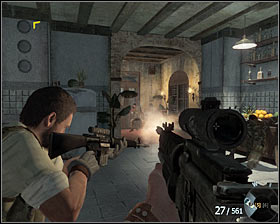
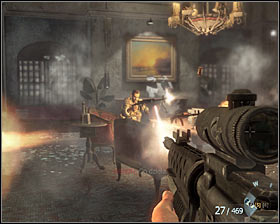
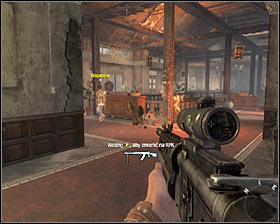
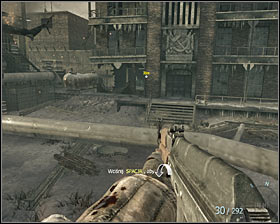
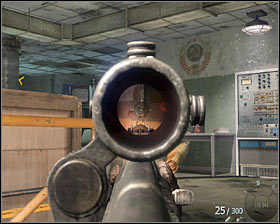
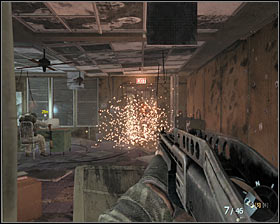
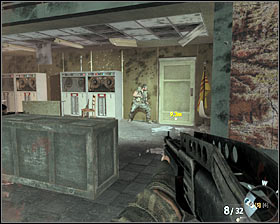
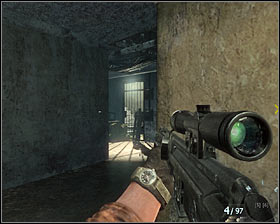
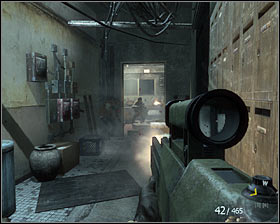
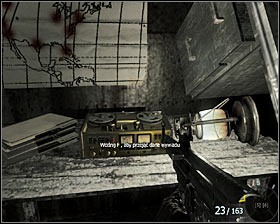
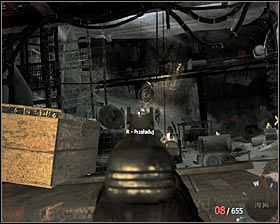
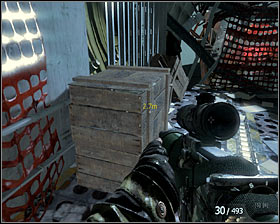
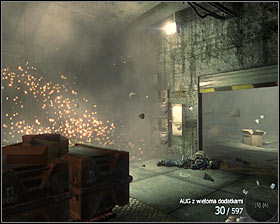
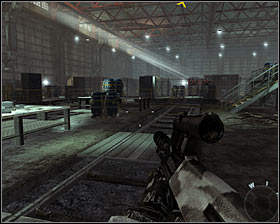
You will come across enemies later inside the building #1. During the fight it is worth using a gun with a telescope, because many enemies will hide behind chests. Move forward until your team reach the closed door #2.
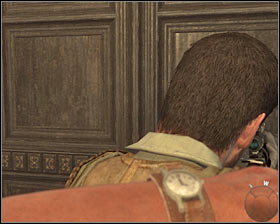
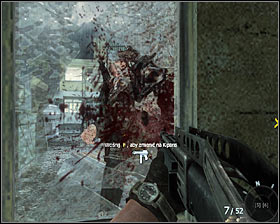
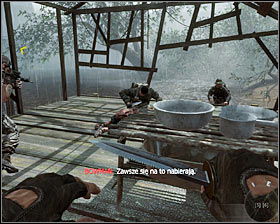
Stand directly behind Woods #1, as a result a partially interactive scene will be activated. Now you can eliminate few enemies in a simple way #2, because it will be possible to slow down the time. Don't forget to turn right so you do not miss anything.
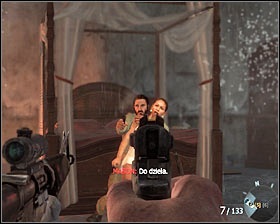
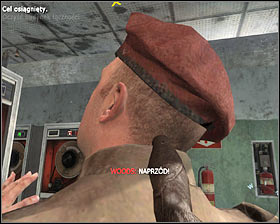
After completing another mission, come up to Woods and once again stand behind him #1. This time you will have a few seconds to eliminate Castro himself and to do it you have to shoot him in his head #2.
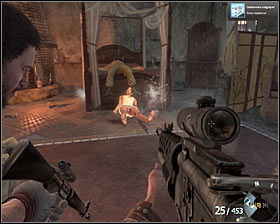
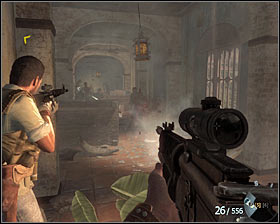
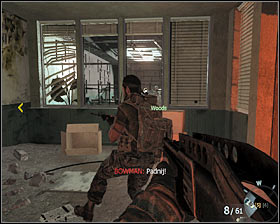
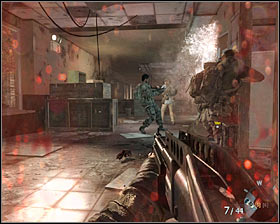
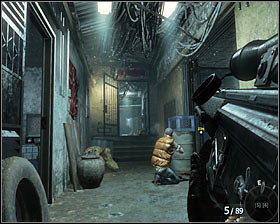
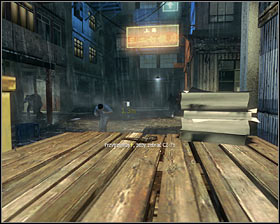
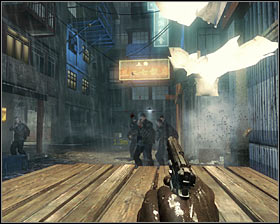
Prepare for eliminating a young lady held by Castro because she will attack your team #1. Now you can leave the building. Quickly hide behind the nearest boxes and start eliminating the enemies situated in this area #2. Stay in this position for few seconds because other enemies may appear.
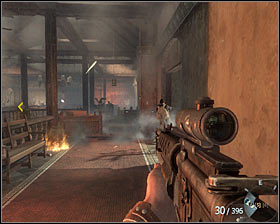
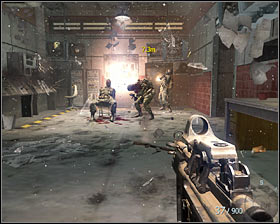
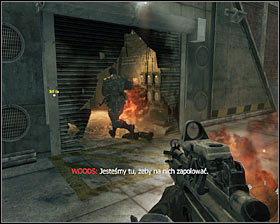
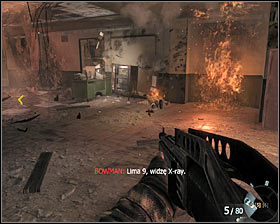
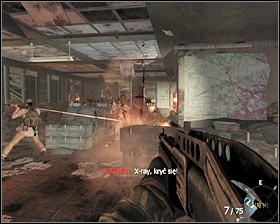
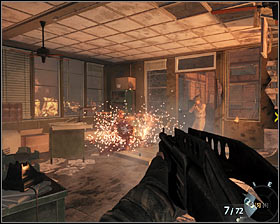
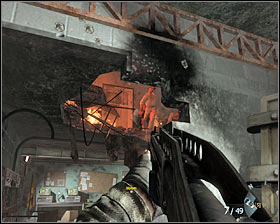
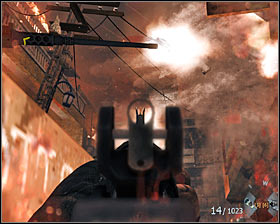
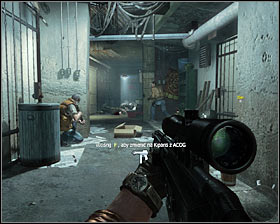
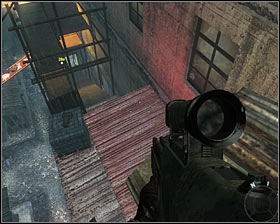
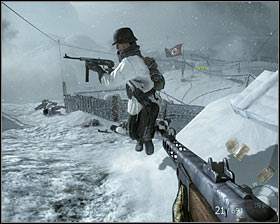
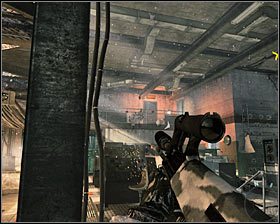
Now you can go inside a burning building #1. It is worth using sight to eliminate the targets which are far away. First try to stay in the right part of the building, then gradually go straight #2.
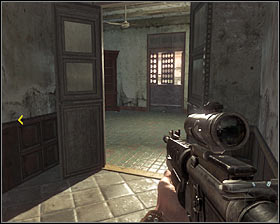
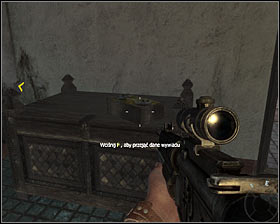
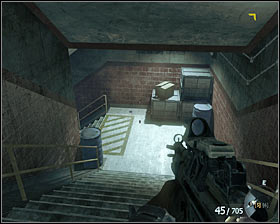
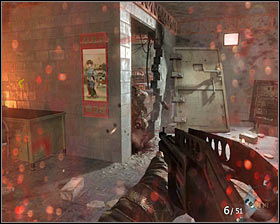
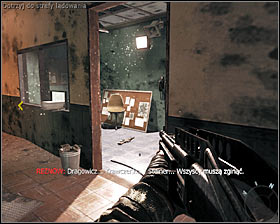
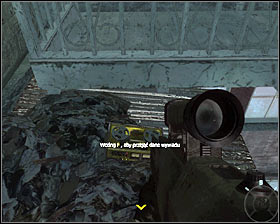
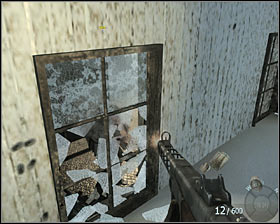
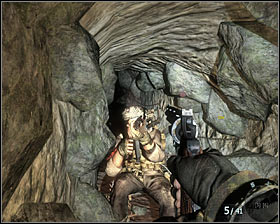
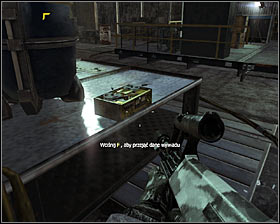
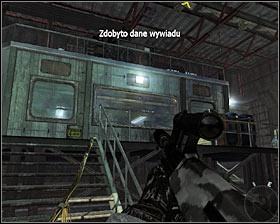
After fighting, go inside the rooms on the right #1. Go to bedroom and look for secret service data on the table #2.
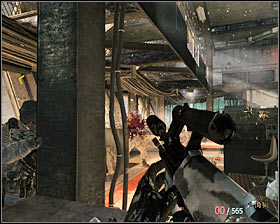
Now you can come back to the main room inside the burning building. Use the stairs to go to the ground floor #1. Next head towards the exit of the building #2 and prepare for a serious fight with a hostile troop.
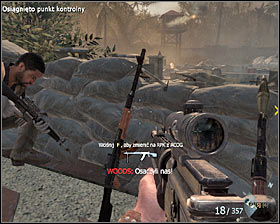
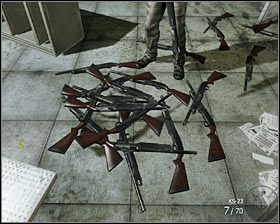
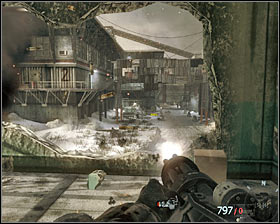
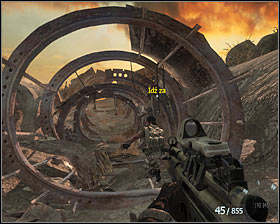
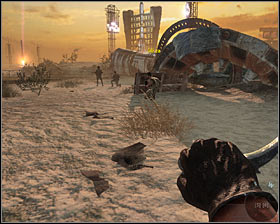
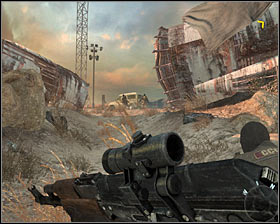
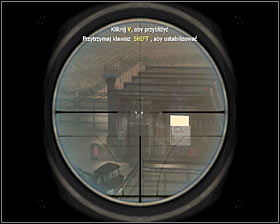
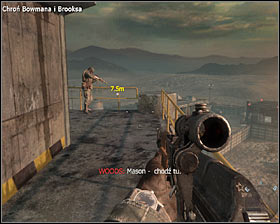
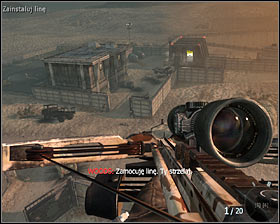
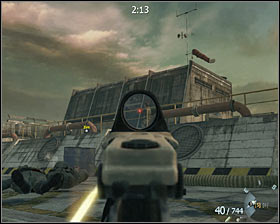
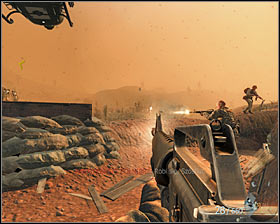
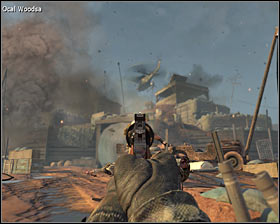
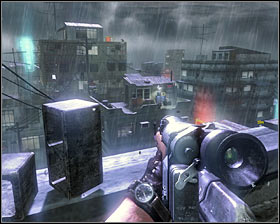
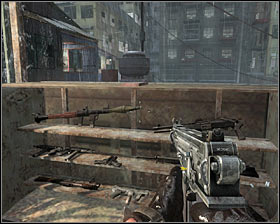
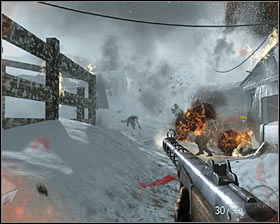
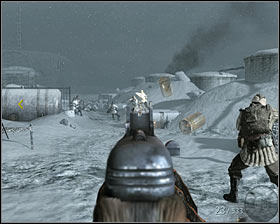
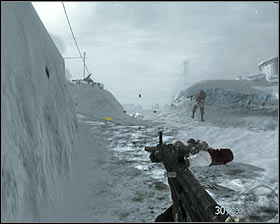
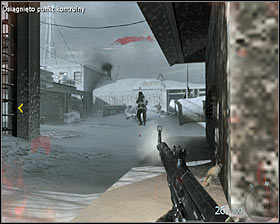
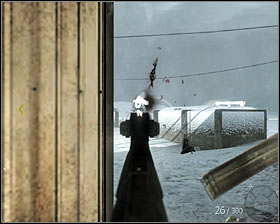
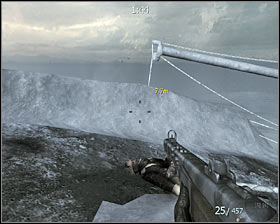
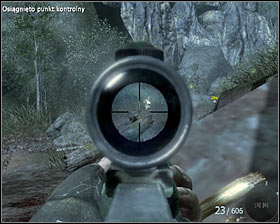
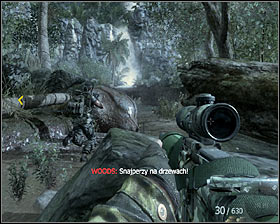
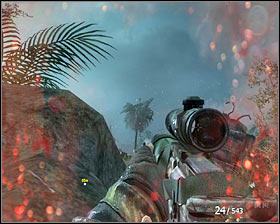
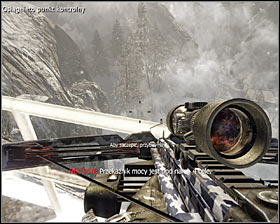
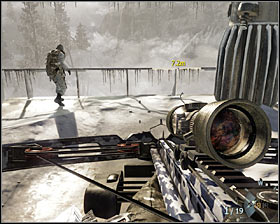
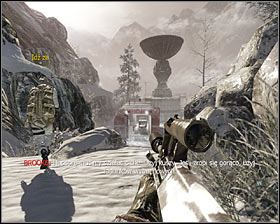
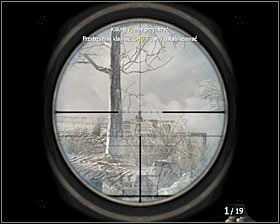
Immediately after going outside, go left and hide behind a wall or bags with sand #1. Notice there are many guns in the area so you don't have to worry about running out of ammunition. First I suggest eliminating the snipers hidden on a nearby towers #2.
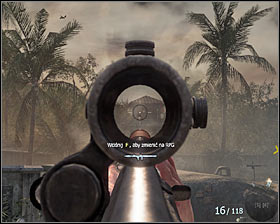
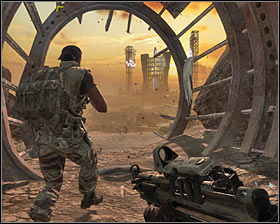
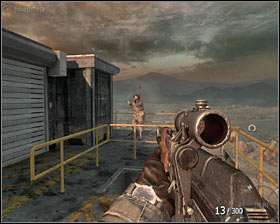
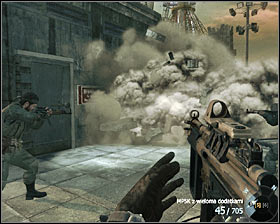
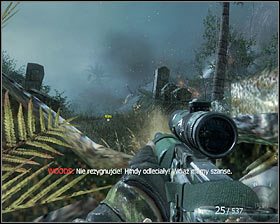
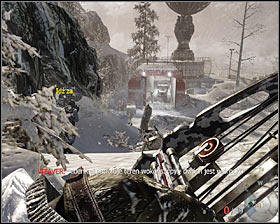
After eliminating snipers, start eliminating other enemies. To eliminate bigger groups of enemies, it is worth using bazooka or RPG launcher, which you can find nearby #1. Keep on fighting, try to stay close to your allies if it is possible #2.
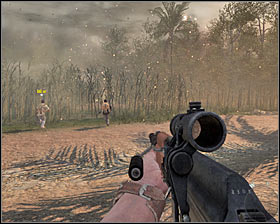
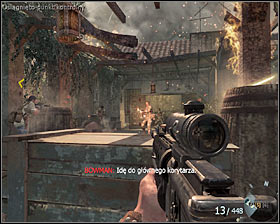
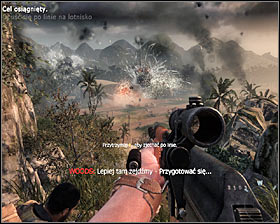
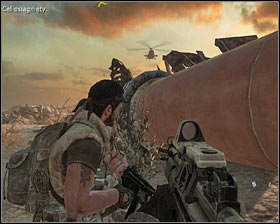
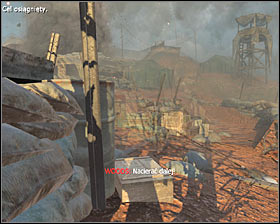
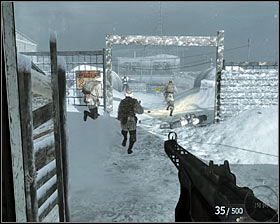
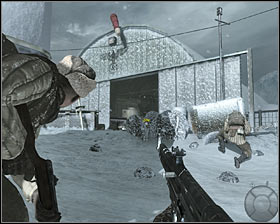
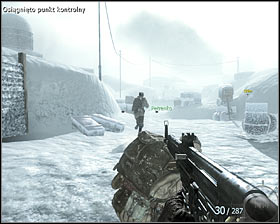
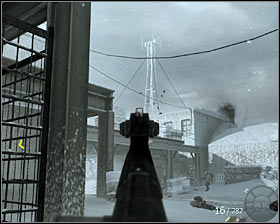
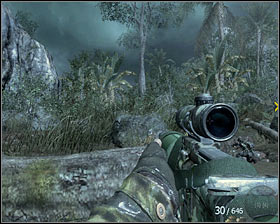
You have to fight until you get orders. Follow Woods and Bowman #1. Run towards reed field #2. During the run across the field, you cannot stop. After few moments you will reach the airport.
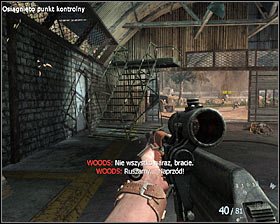
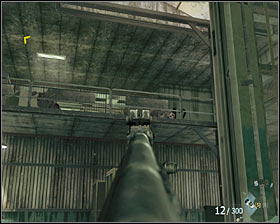
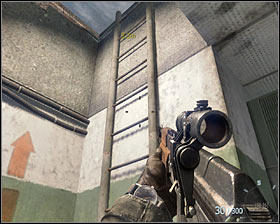
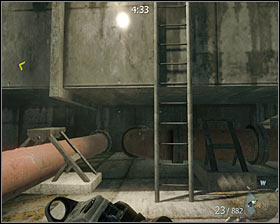
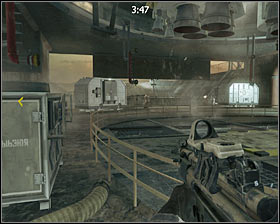
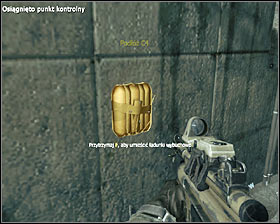
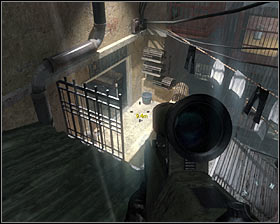
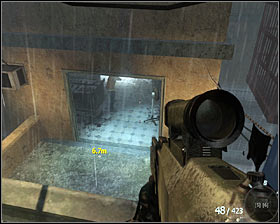
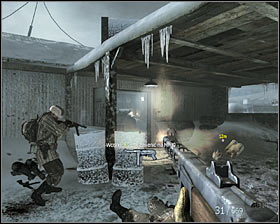
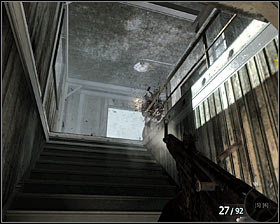
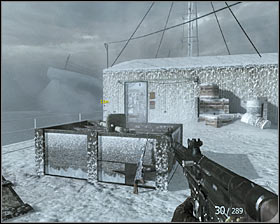
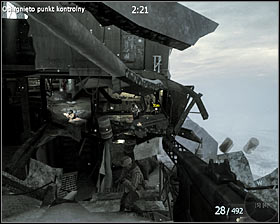
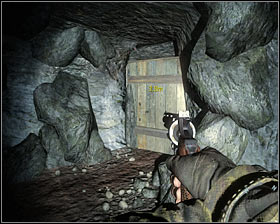
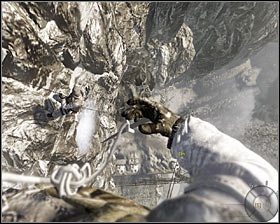
Stand in a right place #1 and press F key to slide down the rope. Run into a nearby hangar. When you're inside, use a small ladder #2 and collect the last secret service data in this mission.
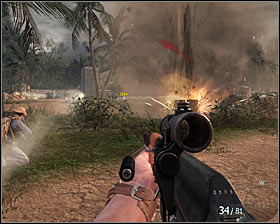
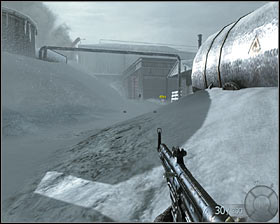
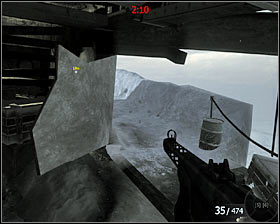
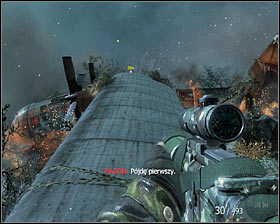
Now you can leave the hangar. Here run straight all the time #1 (there is sprint hidden under the SHIFT key), do not stop and ignore nearby explosions. The aim is to reach another hangar with a plane inside #2. Go onto this machine.
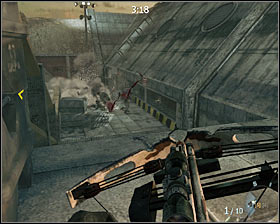
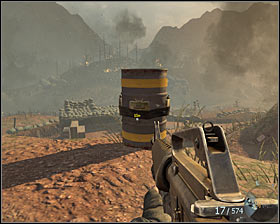
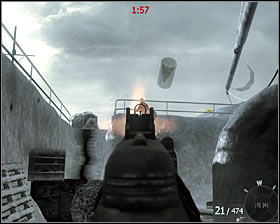
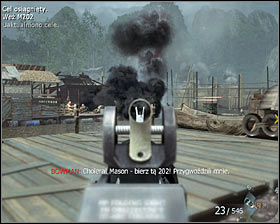
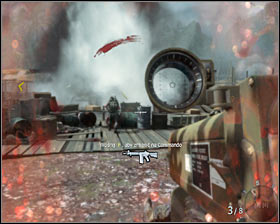
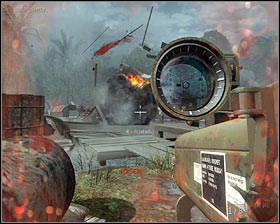
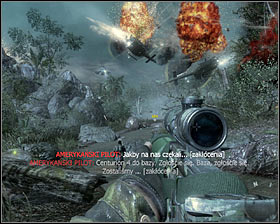
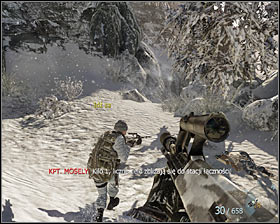
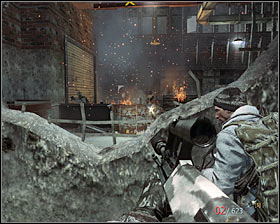
Now you have to use the cannon situated inside the plane. When you shoot the enemies, remember to shoot the explosive barrel first #1. Try to eliminate hostile machines regularly #2.
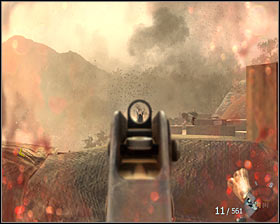
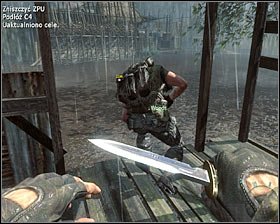
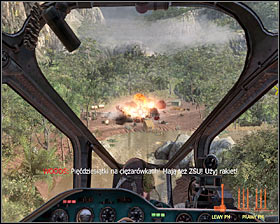
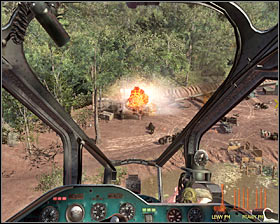
Later in this scene focus on an enemy with a rocket launcher standing on a small tower #1. Apart from that, eliminate nearby ZPU as soon as possible #2. You have to fight as long as your hero decides to jump off the plane.
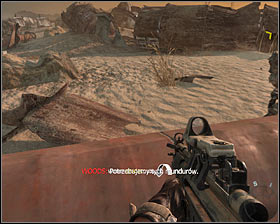
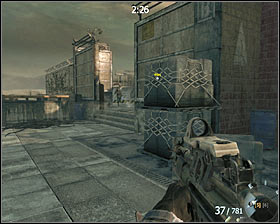
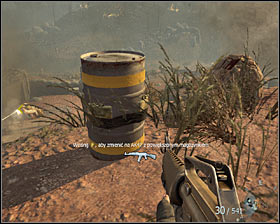
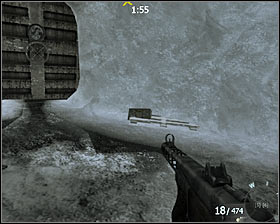
Use the pistol to eliminate the enemies running at you #1, then move toward ZPU pointed out by the game #2.
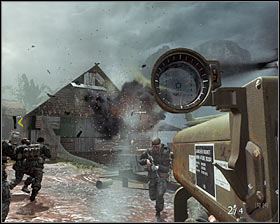
Aim at trucks parked at the airport #1. You have to eliminate these vehicles with ZPU so the plane will be able to fly. The main hero, as you can easily assume, will be caught by the enemy #2.
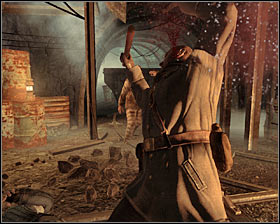
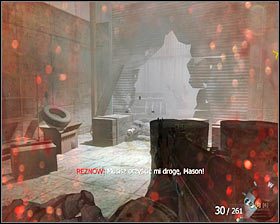
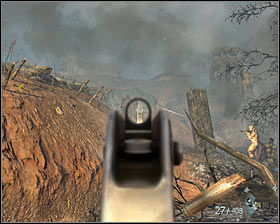
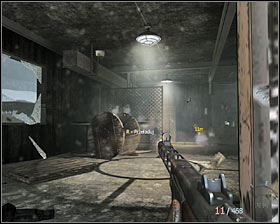
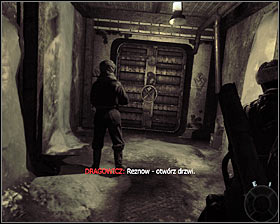
The description of completing this mission: After regaining control over the main hero, come up to the guard #1 and press the V key to hit him with a stone #2. You cannot wait too long or move far away from the place because the mission would end up too soon.
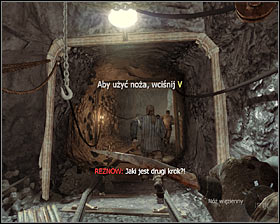
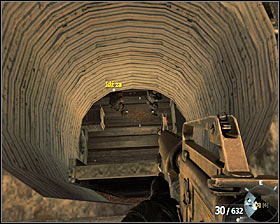
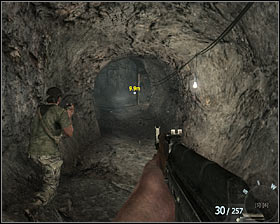
Run after Reznow to a nearby tunnel #1. Ignore the guards you come across or attack them with a knife #2. In the second case, introducing the attack is possible in two ways - by pressing the left mouse button or the V key.
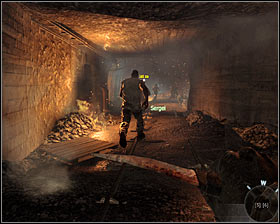
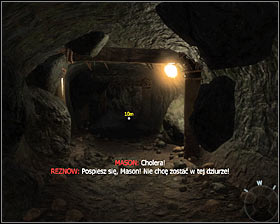
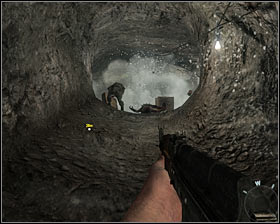
You don't have to help other prisoners, although it is possible. Go along the main tunnel, near the train tracks. Soon you will reach a burning tunnel #1. Keep on running forward. Go into the lift with other prisoners #2 and wait till it takes you to the right place.
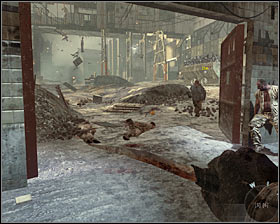
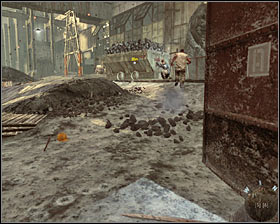
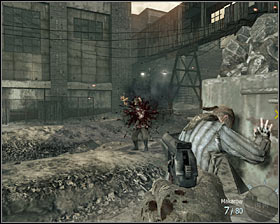
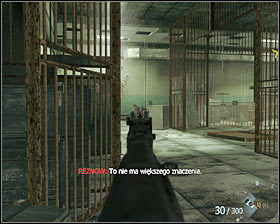
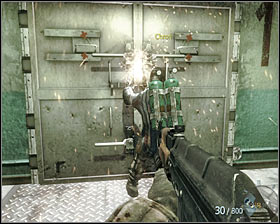
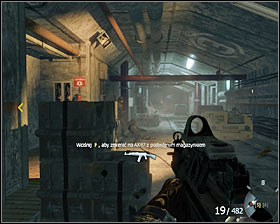
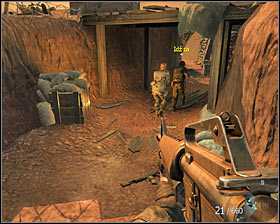
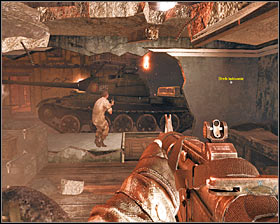
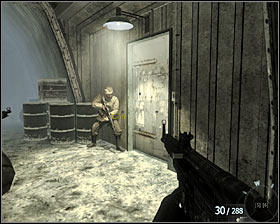
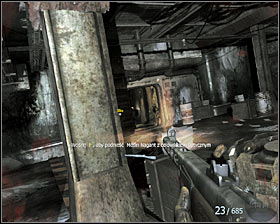
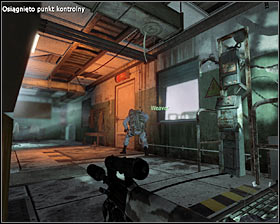
Wait until Sergei brutally eliminates a new guard #1 and move forward. After reaching a closed gate #2 pick up a Makarow pistol from one of the dead guards. Stay there as long as the prisoners manage to open the gate.
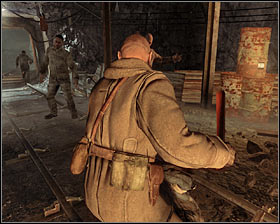
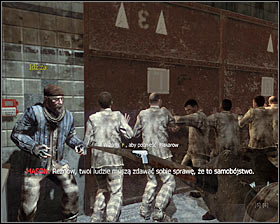
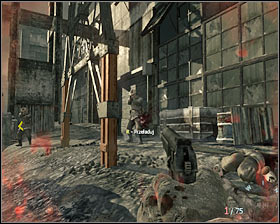
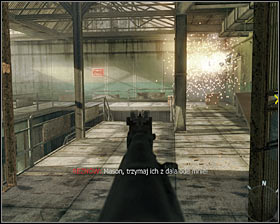
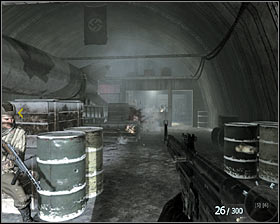
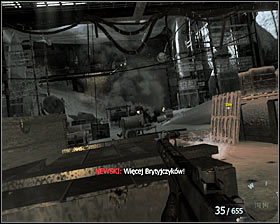
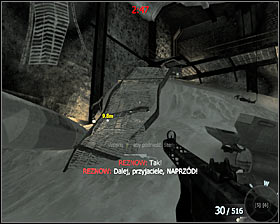
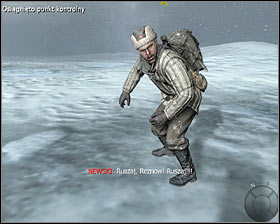
It is essential to stand somewhere on the side because the prisoners running out of the building will be shot #1. Wait till Reznow moves toward the wagon on the right and run after him #2. After getting to the place, prepare your gun (there are extra guns in this area).
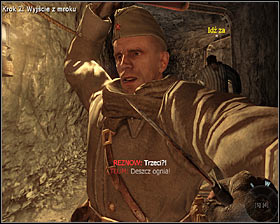
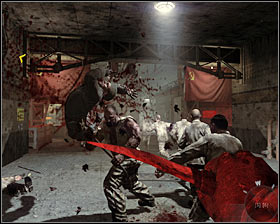
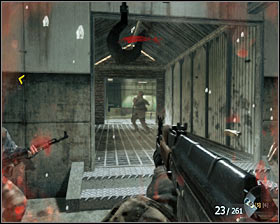
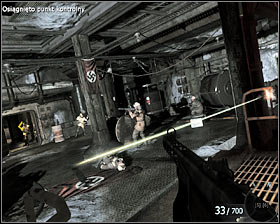
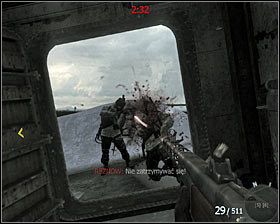
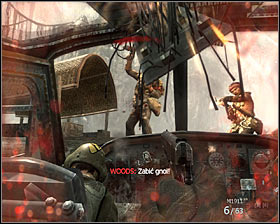
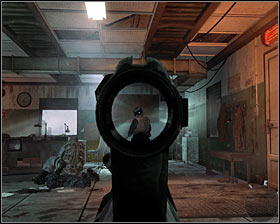
You are going to experience a very demanding scene. You have to go behind the wagon, eliminate guards who will appear one by one on the left #1 and on the right #2 . Always listen to Reznow's calls who will inform you about the direction of enemy's attack. Do not go too far from the railway otherwise you can experience machine gun attack.
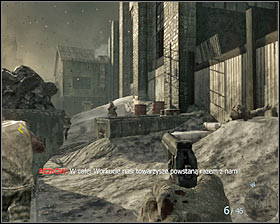
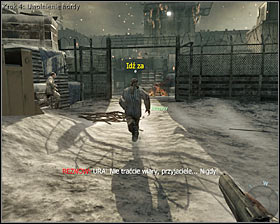
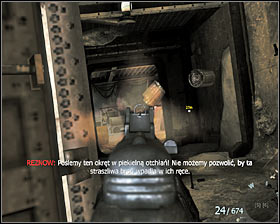
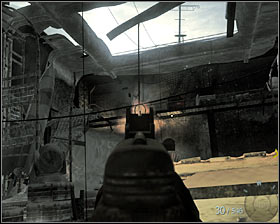
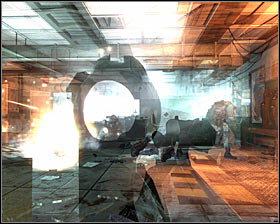
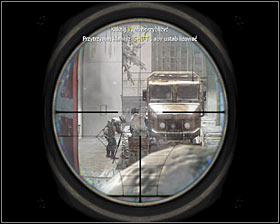
Notice that is one place it will be possible to aim at loaded barrel #1, which allows you to eliminate a bigger group of guards easily. Reznow will soon stop pushing the wagons further. Run after him towards an open gate #2.
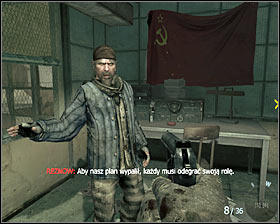
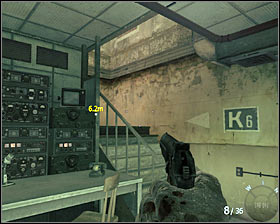
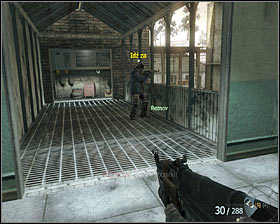
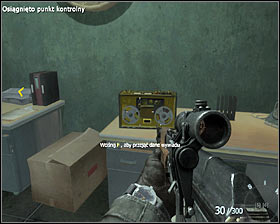
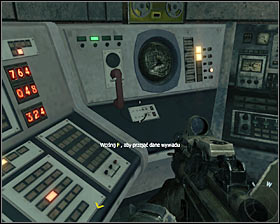
You have to run after Reznow all the time. Fortunately you won't meet any enemies on your way so you have reasons to worry. After going inside the building, listen to a short talk and go upstairs #1. Soon you will reach a radiostation and you should start talking to Reznow again #2.
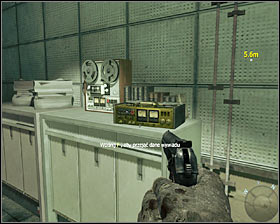
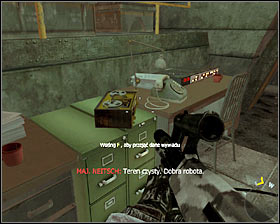
After finishing talking turn right and take secret service data from the drawer #1. Use the stairs situated nearby #2, and after few moments you will reach the roof. Come up to two prisoners standing in this place.
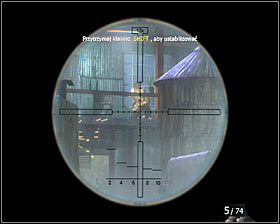
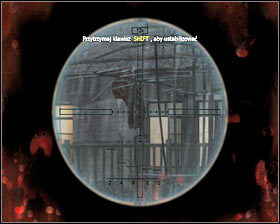
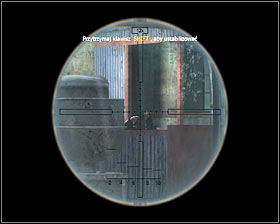
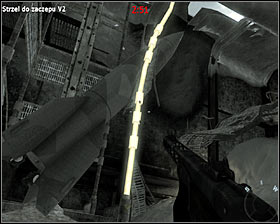
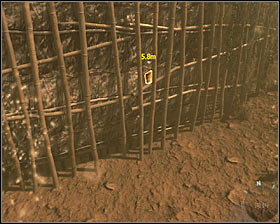
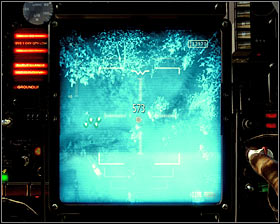
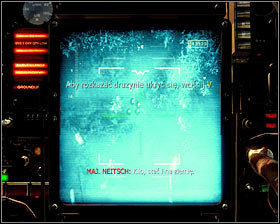
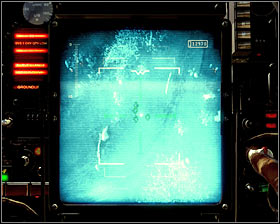
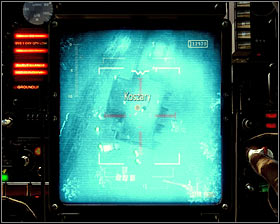
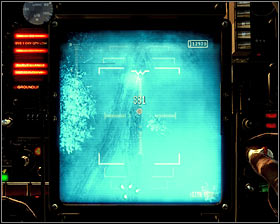
You have to use an extraordinary sling to eliminate all three targets. Every time you want to use the sling, set it into a proper position and hold S key. The proper position to eliminate the target on the right is presented on the screen #1, and to eliminate the target in the middle - screen #2.
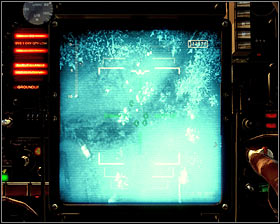
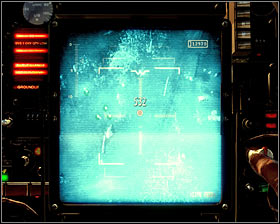
You still have to eliminate the target on the left and again I suggest you to look at screen presented above #1. After eliminating all targets, leave this area going downstairs to the ground floor. Find raffles situated on the ground #2 and pick up one of them.
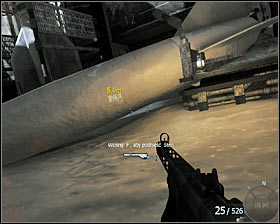
Leave the building and use the raffles to destroy padlocks on a nearby gate #1. You can go straight. Eliminate the guards you meet with your new gun #2. Remember to attack them from a medium and short distance because the ruffle won't do if the distance is too long.
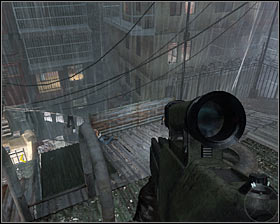
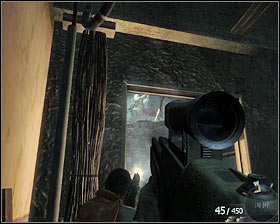
I suggest choosing the closest passage between the buildings #1. Watch out for the guards standing on the highest level as well the ones on the left #2. Luckily, it is easy to surprise the ones on the left.
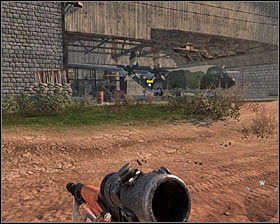
Soon a hostile helicopter will appear above your heads but the biggest problem is to deal with new guards arriving in trucks. It is worth changing the raffle to a machine gun and aim at fuel barrels of the trucks #1. Make sure you have eliminated people running out of vehicles #2.
Go toward the building marked by the game, watch out for single enemies on your way #1. Go inside #2 and immediately go upstairs.
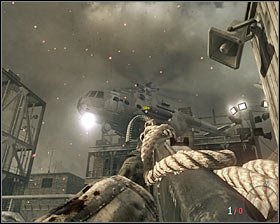
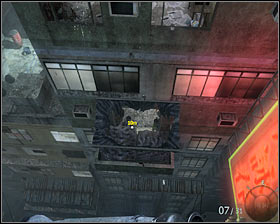
Stand by the entrance to the roof and wait till the helicopter shoots this place. Quickly run to a person who has just been killed and pick up the harpoon #1. Aim at the side of the helicopter #2, as a result, it will get destroyed in an effective way. Naturally, you can't wait too long because you can get shot by the people from the helicopter.
After the explosion press SPACE to jump over the rail situated here #1. Move toward the new building and help the prisoners to eliminate the guards one by one. It is worth looking for a machine gun with a bazooka #2, thanks to which you can eliminate bigger groups of enemies quickly.
You have to help in clearing the whole ground floor by eliminating single enemies who were left behind #1. Now choose the corridor leading to the warehouse #2.
New opponents will run out of the room situated in front of you and it is advisable to shoot from behind a curtain #1. Turn right and run towards the door held by Sergei #2. The main hero will automatically slide to the other side. Sergei himself unfortunately won't have so much luck.
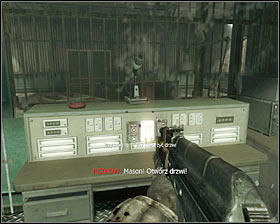
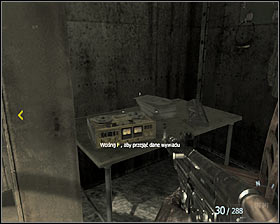
The main priority is to enable the rest of prisoners to reach this room. To do it you have to go to a small room situated in front of you, precisely under the balcony occupied by the guards #1. After getting inside, find console and press the F key #2.

It is worth staying here for a while, because you can get shot by guards standing upstairs. Answer with fire after most prisoners join the fight #1. Turn left twice and check the small room on the ground floor #2. Near the radiostation there is secret service data.

Go to the main room and go upstairs to upper balconies #1. Start attacking enemies who appear in the distance #2. Don't risk too much and remember about hiding when you shoot.
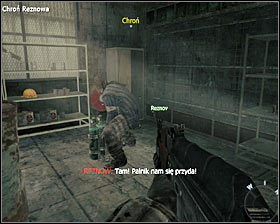
Follow Reznow to a small passage between buildings #1. The aim is to reach the place where Reznow finds a burner #2. According to the instruction you got, your new task will be to protect the ally.
Prepare because the first group of guards will blow up the left wall and you will have to eliminate them fast #1. Follow Reznow. You can expect the attack of other enemies near the passage you have already been to #2.
Reznow will soon reach armored door of the warehouse #1 and here the biggest battle will take place. All enemies will appear on the left side of the warehouse #2.

Watch out for the enemies equipped with armors #1. You have to eliminate them with skillful shots in the head because normal attacks won't do. If your hero gets seriously hurt, hide behind a metal curtain #2, you will be able to shoot from behind it.
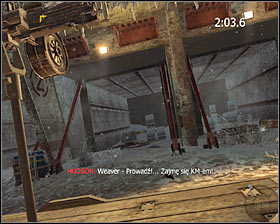
You have to protect yourself as long as Reznow informs you about unblocking the access to the warehouse. Get inside quickly and take the Machine of Death #1. Go out of the warehouse and start eliminating the enemies #2. Watch out not to heat up your minigun and use the ammunition wisely so you can use it longer.
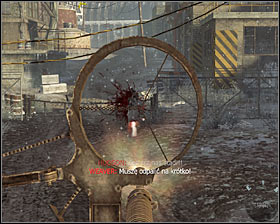
Come forward and stand by the hole in the wall of the building #1, which was made during previous attacks of your enemy. Remember about avoiding longer and unnecessary series. The most important thing is to eliminating cars #2.

After clearing the area enough, jump down. Here take care of enemies situated by the upper passage #1. Gradually move forward with the rest of prisoners. Watch out for the enemies hiding on higher floors in nearby buildings #2, eliminate them as fast as possible.
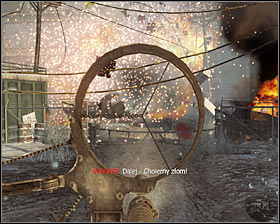
Sooner or later you will use up minigun ammunition so remember to pick up a machinegun from the ground in advance. Go on moving forward #1. If you no longer have your minigun, destroy cars using grenades #2.
Beating the last group of enemies #1 can turn out to be difficult, so don't forget about safe firing from behind nearby hiding places. You have to fight as long as the enemies use tear gas and the main hero loses consciousness for few moments #2.
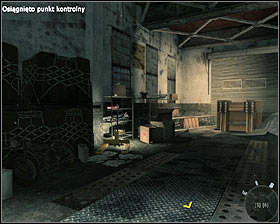
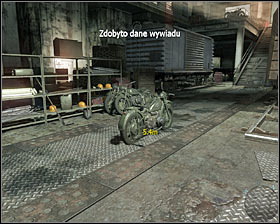
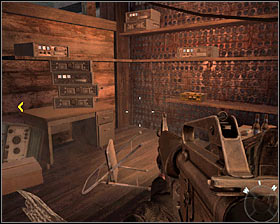
At the beginning check the drawers situated behind the motorbike Reznow is sitting on #1. You will find here secret service data for this stage of your mission. Go to the other motorbike #2.
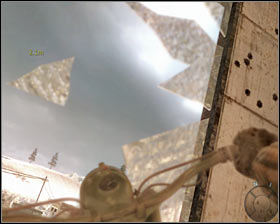
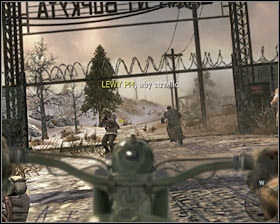
At the beginning, press the W key, thanks to which you will get out of the warehouse in an effective way #1. Soon you will have to use other direction keys. The aim is to reach the main gate of the camp situated on the left #2.

Ride after Reznow all the time #1. Notice that you can eliminate the enemies you come across with a single shot (left mouse button) #2. It is advisable because you don't have to aim at them precisely or worry about ammunition.
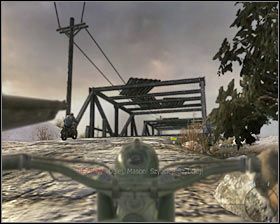
Ignore the helicopter appearing above your heads #1, because you can't destroy it. After a while, you will reach a truck. Come up to it #2, and the hero will jump onto it automatically.
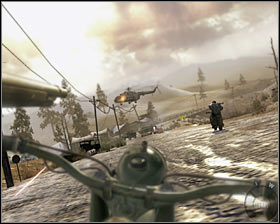
Now you have to use the machine standpoint. First eliminate the hostile bikers #1 and watch out well because you can miss someone. Apart from that, you have to destroy single vehicles #2. You can continue ignoring the helicopter.

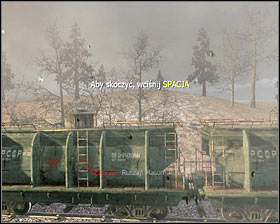
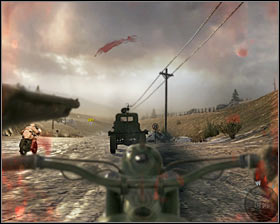
Keep on shooting #1, because the gun you are using has no ammunition limit. You have to defend yourself as long as there is a chance to jump onto a moving train by using SPACE #2. Mission will be over soon.
Attention! Another stage is U.S.D.D., but there are no playable scenes. The only thing you can do is to watch out in some particular moments. The next proper mission is the stage called Executive Order.
The description of completing the mission: Follow Woods's footsteps #1. Remember to stop and squat (the C key) every time your teammate does it #2.
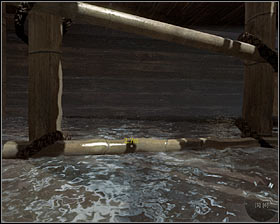
After few moments, you should reach a bigger area where Woods stops again #1. There is a long and quite important cut-scene waiting for you. Follow your teammate. Squat by the pipes #2 and wait until two helicopters fly away.
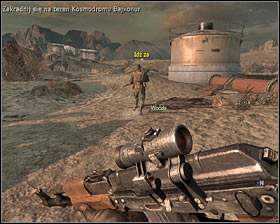
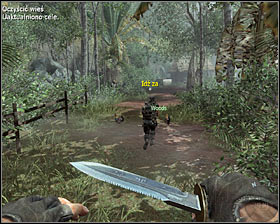
Go right and after few moments you will jump over a pipe in the same place where Woods has done it #1. Go towards two guards #2, on the way listen to your ally's plan concerning the way of eliminating enemies.
In accordance with already worked out tactic, carefully come up to the guard on the left (the one who stands) #1. Eliminate him precisely at the same moment when Woods attacks the other person #2. You have to use the knife by pressing the V key.
Press and hold the V key #1, as a result, the main hero will automatically drag the body of the guard who has just died to a more secluded place. After a short break (new cut-scene) put on the uniforms of the guards you have just eliminated. Follow Woods #2.
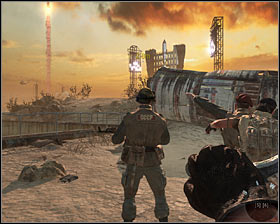
Stop after meeting a group of guards #1 and wait till the discussion is over. You can go on. The aim is to head toward a parked jeep where two allies will eliminate new enemies without your help #2.

You can go toward the camp #1. Now you will go towards the highest communication building #2.
Wait till your team mates distract the guards who block the access to the communication building #1. Prepare for attack. When Woods pushes the door open, run inside and eliminate the first guard with a knife #2.
There are few other guards in the area #1 and from now on you will have to use a machine gun. At the same time watch out for new enemies who can run down the stairs from the higher floor #2. Eliminate them and head towards the stairs.
On the first floor you will be greeted by soldiers - no surprise here #1. It is worth waiting until they come up to you themselves or skillfully leaning out without risking too much. A similar situation will take place on the second place #2.
When the fights on the second floor are over, look around and you will find secret service data on one of the desks #1. Now use the ladder leading to the roof #2.
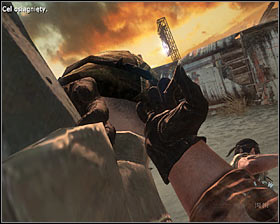
It is a good idea to surprise the enemy standing in front of you #1, as a result, he will be thrown over a balustrade. However, watch out for the other two soldiers - one of them should appear on the right, and the second one - behind you #2.
Now come up to Woods #1, he will give you a crossbow with explosive missiles. Don't bother to stabilize the view because the shots don't have to be precise. On the other hand it is worth bringing the view closer by using the right mouse button or the V key. Start with blowing up a truck #2.
Jeep is second on your list #1. Wait until enemies appear near you and first destroy the vane with a machine position #2.
Now you can start eliminating regular soldiers #1, aim at bigger groups. You have to help your allies in eliminating all enemies but there is no point in using all missiles as they will come in handy later. Wait until the main hero modifies the crossbow to transform it into some kind of harpoon #2.
Aim at a bunker, which you can see in the distance, to be more precise, aim at a piece of wall near the window by which an enemy is standing #1. The shot doesn't have to be precise because the game will set everything correctly. Now the main hero will start sliding down the rope. Before you rush inside, shoot the soldier standing by the window who was mentioned above #2.
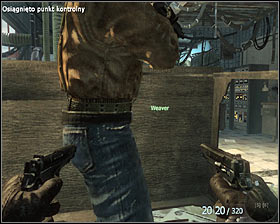
Use the fact that you are in a slow time mode and kill two enemies hiding in a bunker #1. You can come up to Weaver who is imprisoned #2. After a short discussion the action will move to a new place.
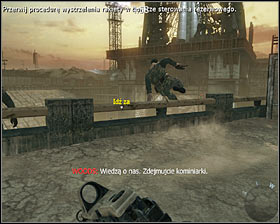
Notice you only have five minutes to stop the procedure of firing the missile. If there are no long obstacles on your way, after reaching your aim you should have two more minutes to spare. Run after your teammates #1. Jump over the balustrade and slide to a lower level #2.
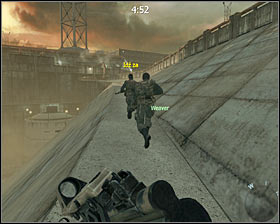
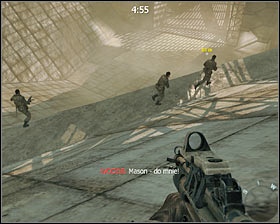
DO NOT SLIDE AGAIN! Turn right instead and run after Weaver #1. Watch out because on the left in the distance you will notice the enemies #2. Try to eliminate them from this position. If you have difficulties with aiming and using a machine gun, think about using a crossbow (the best option are explosive missiles, not the typical ones ).
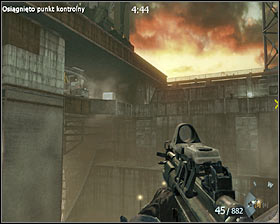
Use the ladder #1 after you make sure the area is safe. Otherwise you can get killed. When you are upstairs, prepare one of the curtains and continue shooting #2. Remember you cannot stay in one place too long, so shoot in long series. It is a good idea to take a machine gun from one of the enemies as soon as possible (the best option is a gun with built grenade launcher).
Head toward you current aim. New enemies should appear after you come up to silos #1. Eliminate them and go on. Shoot the enemies you can see in the distance and head toward the passage on the right #2. I suggest you to keep your eyes open because you will be not protected from the enemy's fire. It is advisable to use a crossbow or grenade launcher.
Don't worry if you have to stay here a bit longer because your aim is not far away. You have to get through the passage on the right #1. Here eliminate all people running towards you as well as opponents situated at upper balconies #2.
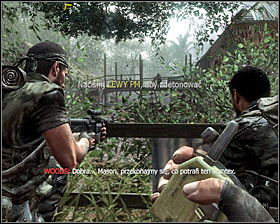
The aim is to reach the stairs. When you are upstairs, the game will set the timer. Listen to a short conversation and then go to a place marked by the game #1. Hold the F key to put on C4. Now you can go few meters back and detonate the charge (left mouse button) #2.
Go inside quickly and look for new secret service data #1. Wait for a while and come back outside with one of your allies. Pick up the launcher situated in front of you #2.
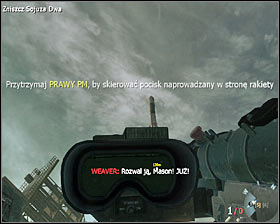
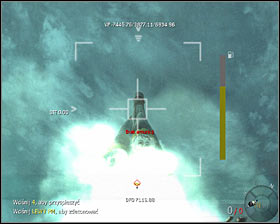
Quickly turn left, to be more precise - toward the rocket #1. Shoot the missile, which will have to be steered manually #2. Fortunately, you don't have to do too much, the point is to hit the rocket and as a result, you will be rewarded with an explosion.
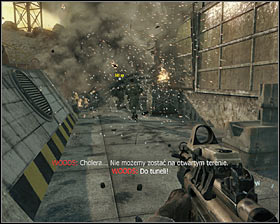
Follow your teammates #1, ignore minor explosions which will happen in the area as well as the enemies on fire who you will notice in few moments. Turn left and use the hole #2.
Here run straight ahead all the time, then go downstairs to a lower level #1. Prepare yourself because you start bumping into new enemies over the corner #2. Remember to hide. You don't have to hurry because there are no time limits this part of the mission.
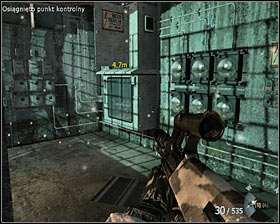
Carefully secure all corridors #1. After few moments you will reach a control room #2. You have to be more careful here because glass walls break easily. Moreover, many enemies hide here so it is advisable to look around carefully.
In another tunnel #1 a little bit longer fight will take place. Move forward as far as you can and help yourself by using crossbow or grenade launcher. Soon you will reach a new control room, situated on the right #2. Get inside and eliminate all enemies.

Check this control room carefully. You will find the last in this mission secret service data on the left of the entrance #1. You can go on. Another corridor will be fiercely protected by your enemies #2.
Carefully move forward. Hide on the left when you come up to evaporating steam. Soon few enemies will run in here and you will have to eliminate them quickly #1. It is important to start shooting them immediately because it will be difficult to notice them later on. You can go to the end of the corridor where the end of this mission will take place #2.
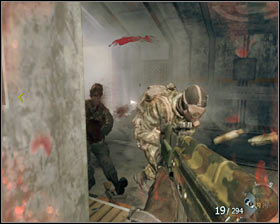
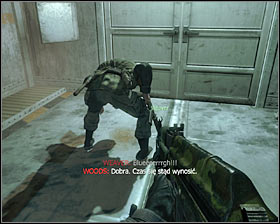
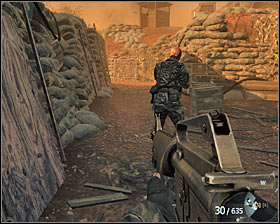
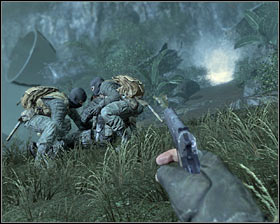
The description of completing the mission: You will regain the control over your hero after you get yourself together after the accident. Start dragging injured Hudson toward trenches #1 (it is enough to hold the W key). The main hero will automatically stop after reaching his destination safely #2.
You can get into the bunker on the right #1. Try to stay as close as possible to your team mates. Watch out because you can die after going up to the surface. Shoot the enemies you see #2, but remember to squat and hide behind the bags with sands when it is possible.
Go further when you notice that your teammates set off. Now you should head towards a small bridge #1. Watch out because one of the enemies will jump on you here. Press the F key in a rhythmical way to eliminate him in accordance with the instruction you have received #2.

You can go on. You must stop after reaching the crossroads #1. Prepare to eliminate the enemies running toward you as well as the ones attacking from above. After eliminating all enemies, head right with the rest of the team #2.
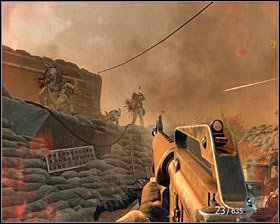
Prepare to eliminate new enemies who will appear above your heads #1. It is important to kill them as quickly as possible otherwise you risk being shot. Continue following your teammates and stop in places where the enemies have appeared #2.


After few moments in the distance you should notice an enemy with a fire thrower #1. You can eliminate him yourself or wait till other team mates do it. Next time remember not to come up too close to the enemies with throwers. Continue hiding in trenches and stay close to your teammates #2.
At one point one of armored vehicles will literally fall on you #1. You don't have to worry, it will not press you but you will have to crawl under it (left CTRL) #2.
Pay attention to a numerous group of enemies running from the left #1. Eliminate only aims which are close, the rest will die during the raid. You can go on. As it happened before, stop at the same places as your friends and eliminate enemies running toward you #2. Watch out for the enemies who can get into trenches. Don't let them surprise you.
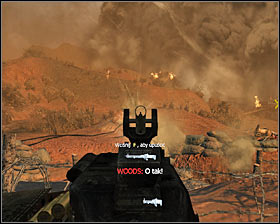
The aim is to reach a bunker where Woods has already been stationed #1. Start eliminating the enemies from this spot. Notice there is a machine gun position, which will make your task much easier #2.
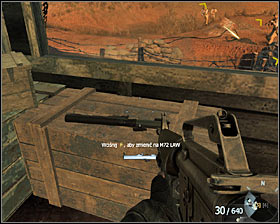
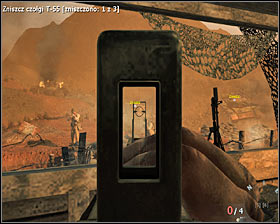
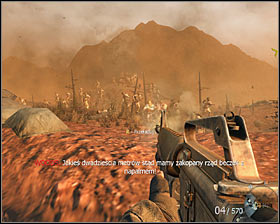
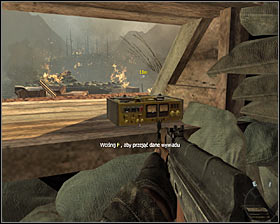
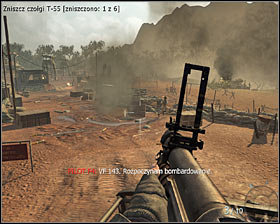
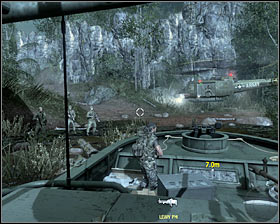
Soon you will receive a message about three T-55 tanks getting closer. Fortunately, you will find the bazooka necessary to destroy these machines in one of the bunker and the game will show you the way to it #1. Wait until you can see at least one tank #2.
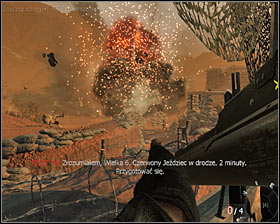

After firing the missile and seeing the explosion #1 which is the proof of hitting your target, squat and reload your gun peacefully. Destroy these three tanks in the same way. It is worth looking around the area. Look around the biggest tent #2, and you will find secret service data.
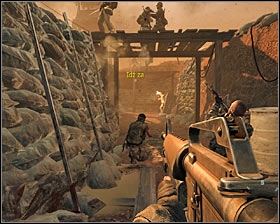
Now head toward the point marked by the game #1, eliminate single enemies on your way of course. The aim is to reach a hole #2, into which you have to jump.
Follow your teammates and soon you will reach the place #1, where furious fights take place. First try to eliminate the enemies who are the nearest #2. Keep in mind that the enemies will "reborn", so you won't be able to occupy one place forever waiting for the whole team to die.
After clearing the area, follow your team down #1, and you should reach a machine gun position which is worth using. I suggest you to head toward the bunker on the left #2.
Get inside the bunker and here you will also find a machine gun position #1. Start eliminating enemies who are situated near your team from this spot. Again you can't stay here too long because the enemies will reborn anyway. After eliminating most enemies, go back to your teammates #2.
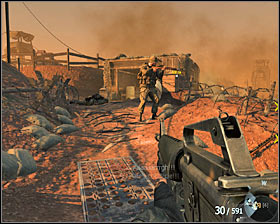
Quickly come up to the barrel situated on the right side of your enemies #1 and press the F key to kick it. Notice that it caused the fire in the left part of trenches. Quickly hide behind bags with sand and eliminate enemies who have come up to your team #2.
The second barrel is situated a bit further #1 and you should behave in the same way as you did before. After setting all trenches on fire, immediately run after your team and come near the bunker you hid in some time ago. Find the entrance presented on the second screen #2 leading to a bigger underground bunker.
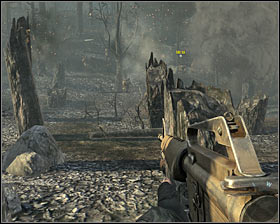
After getting inside the bunker find new secret service data #1. Now you can get back to the surface and choose a path leading to another location (you will head toward a destroyed part of a forest) #2.
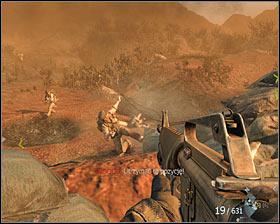
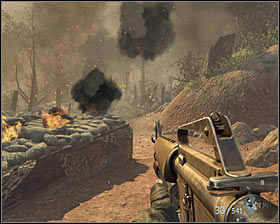
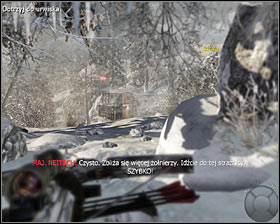
You are going to perform a difficult task - you have to take over a hill occupied by the enemy. Head toward your destination #1 and start shooting enemies #2. Remember to be hidden. It is worth taking your time. Allow your allies to eliminate some of the enemies.

First of all you have to watch out for the enemies hiding in trenches while you are climbing #1, because there is a risk you won't see them soon enough. Always check the area around you #2, making sure you didn't miss anyone.
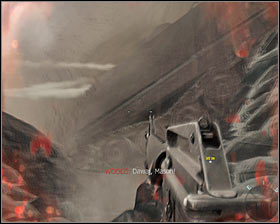
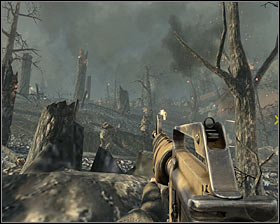
I suggest to stay in the left part of the hill #1, although it is not necessary to succeed. The most important thing is to eliminate enemies one by one and not leaving anyone behind. When you reach the top #2 the main hero will get dazed by the grenade - don't worry, this scene is fully directed.
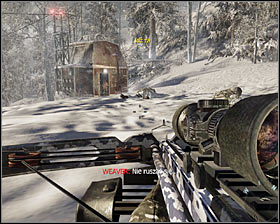
Prepare because you will have to save Woods's life soon. Wait till the game allows you to shoot and aim at the head of a man standing in front of you #1. You can get inside a nearby bunker #2.
While you are exploring the building, stop in a room with many appliances #1, because the you will find the last in this mission secret service data. Now you can head toward the surface #2.
Run up to a parked jeep #1. You can use grenade launcher during the drive #2. It is worth knowing that ammunition is limited so aim at bigger groups of enemies.
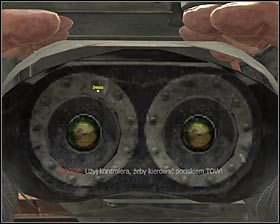
This time you will have to destroy six hostile tanks. Every time when you get closer to a tank or a group of tanks, you will be automatically asked to use a controller #1.Trace the tank you have chosen #2 and fire the missile.
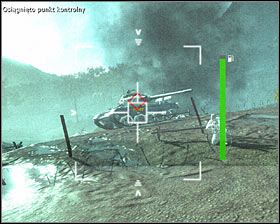
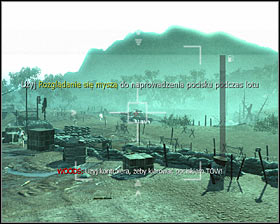
If the shot is not precise enough, you can make amends before the missile hits the aim #1. Don't worry, if you miss the game will let you try again. Destroy all six tanks in such a way and the mission will be over #2.
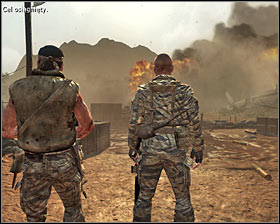
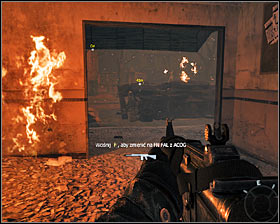
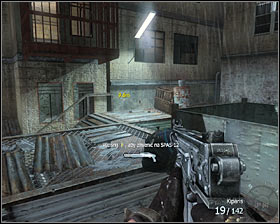
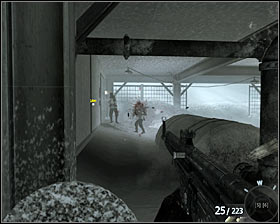
The description of completing the mission: The proper part of the mission starts inside one of the buildings. Wait for Woods to fetch you SPAS-12 ruffle with incendiary ammunition #1. You can use this gun for at least few minutes and it will do great to shoot from a short distance. Start with eliminating enemies in the next room #2.
Another room will be also occupied by the enemy #1, but they will be shot by the team from a helicopter. Continue securing this floor of the building #2. Fortunately the enemies will appear quite near the main hero so you won't have to aim at the precisely.
Watch out for a bigger group defending themselves in one of the biggest buildings #1. After reaching the place where you can see new enemies behind the windows #2 immediately turn right. Allow other team members to eliminate the closest enemies and the join the fight.
Soon you will reach a bigger room with stairs. First use the raffle to eliminate the nearest targets #1. As far as the enemies in the distance are concerned #2, it is worth using a machine gun with grenade launcher, they will die faster. After eliminating them it is worth taking the raffle you got from Woods again.
After securing the area go downstairs and go around the flames #1. Watch out for a single enemy - he will run out of the shelter #2.
Other enemies will be standing on the higher floor #1, so you have to eliminate them quickly. Wait for your allies to come and after a short talk come up to the closed door #2. Hold the F key for few seconds to burst them open.
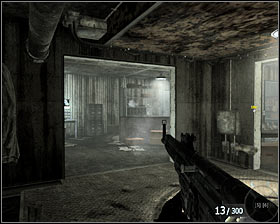
There are two enemies in another room and you have to eliminate them in a split second #1. Prepare for another difficult fight. After getting into a new room, first stand behind Woods #2, and then go to the room on the right.
You have to secure the whole area. You don't need to hurry but don't let anyone surprise you. At the end take care of the enemies situated downstairs #1. When the fight is over, go downstairs and go towards the door. Woods should be there #2.
Enter a new corridor and after few moments you will reach a new door which you will have to break (hold the F key) #1. After getting inside, you will get dazed but your old friend, Reznow will save you. Listen to the conversation and then head towards the exit to leave this room #2.
Check the small room you should notice on the right #1, which allow you to find secret service data. Leave the room and go straight #2, to be more precise, go toward the allies you can see in the distance.
Enter a new building #1, you will have to run through it. The good message is that you won't meet any enemies on your way. Keep on following your allies until you reach the ruins of a destroyed building #2.
Go upstairs and carefully come up to soldiers who are being under the fire. Take a radio from one of them #1. Make sure you are squat and turn left. Track the building inside which the enemies are hiding #2, and then press the right mouse button. Wait a few seconds for the air support - they will eliminate the enemies.
Eliminate the enemies standing on the right #1. If the raffle is not effective, look for a machine gun (with grenade launcher if possible). After securing the area, jump down and behind the armored vehicle #2.

If you want you can eliminate few enemies from this spot, especially the ones on the roof and higher floors of the buildings #1. Wait till air support is ready again, choose a tracking device from a warehouse and trace the building situated in front of the armored vehicle #2. Wait for the bombing again.
You can follow the armored vehicle. After the machine turns right, you go straight #1 and enter the building on the left. Find new secret service data #2.

Watch out for the enemies who can appear in the area #1. Notice the hostile tank. Trace it by the appliance you know #2. Do not worry if the tank goes back a little, because it will be destroyed anyway during the bombing.
Spend a while on eliminating the nearest enemies and focus again on eliminating the ones on the roof #1 and balconies. You have to reach a place where you "order" a bombing and to achieve that you should go through buildings situated on the left side of the main road #2.
You will meet few enemies on your way which is not surprising #1. Be alert, some enemies can use raffles. The aim is to reach a place where the goal marked by the game will be directly in front of you #2.
Leave the building, hide by the wreck and mark the building to be shot from air in a way you have already learnt #1. After the bombing, go straight #2, join Woods and the rest of soldiers. Jump over the balustrade here.
Ignore all the enemies in the area and come up to Woods #1. Now you have to press the F key rhythmically #2 to unblock the entrance to a new building. The main hero will lose consciousness again but there won't be any negative consequences.
Go upstairs. First surprise two enemies #1, then another group of three #2. Jump through the window and make a few steps. You will see a short cut-scene.
Follow Woods. Watch out because there are two groups of hostile soldiers in the area #1. It is a good idea to eliminate them with precise shots performed from behind the hiding place. After securing the area, head towards the building where hostile ZPU is situated #2.
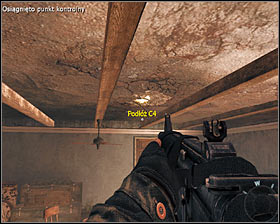
When you get inside the building, look at the ceiling #1 and put C4 in a place marked by the game (you have to hold the F key). Leave the building and detonate the charge from a safe distance #2.
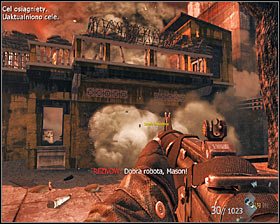
Go to the same building again and head towards a new hole in the wall #1. You don't have to worry about a tank situated here - it will be destroyed soon. Head toward the square where the final part of this mission will take place #2.

Before you do anything, go right and find a building with a characteristic hole in the wall #1. After getting inside, find the last for this mission secret service data #2. You can go back to the square.
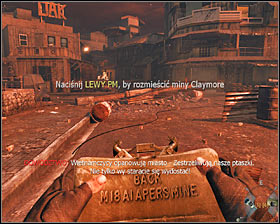
The enemies will attack in few seconds so you can prepare yourself. You will find Claymore mines in the area #1, which you could put on the roads leading here #2.
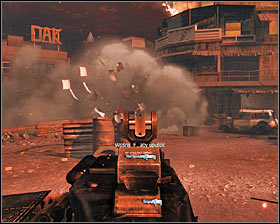
Go back to the central part of the square. The enemies will soon attack and during the battle it is worth using one of two machine gun positions #1 #2. Fortunately, you don't have to constantly walk between the positions because allies will help you to eliminate the enemies. When you shoot, first aim at the closes targets and use short shots to prevent the gun from heating up.
After dealing with the first wave of attack, I suggest you going away from the standpoint situated in the eastern part of the square, because a tank belonging to the enemy will appear in this very place #1. Wait until air support is unblocked and mark enemy's machine in a well known way #2.
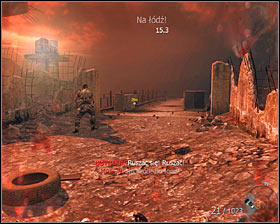

Defend yourself as long as you get the information about the planned escape. Immediately stop fighting and run with your allies west #1. Jump to the boat. The mission will end with a crafty made explosion #2.
The description of completing the action: This stage starts with a really strange interrogation. First you have to press the right button of the mouse to break the window #1, then press the left button twice to perform a sequence of hits #2.
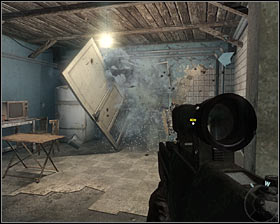
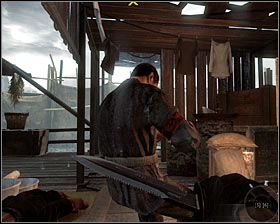
After few moments you will be attacked by the enemy. Start with hiding behind a knock down table #1. Eliminate two opponents who should run in here. Other two opponents have to be eliminated in another way by shooting a bottle containing a poisonous gas #2.
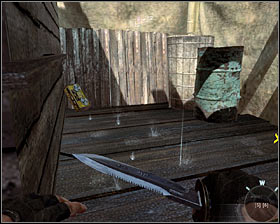
Do not leave this area. Go right #1 and look for secret service data. You should remember that if you stay here for too long, escaping gas will kill you. Immediately after finding the secret, go back to the place where you started and look for a ladder situated on the right #2.

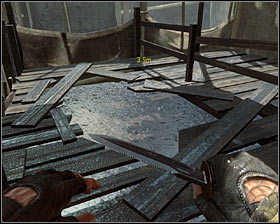
You will have to face the enemy in the corridors #1 and after eliminating the first group of opponents, it is worth checking their bodies, picking up their raffles and machine guns. The aim is to reach the stairs leading to a higher floor #2.
In accordance with the warning you have received, immediately eliminate the enemy hidden by the window on the right #1. You can go to the higher floor. After reaching the roof #2 run straight shooting the enemies situated nearby.
Take a machine gun or a sniper shotgun from one of eliminated enemies because new opponents will appear on the roof and by windows of one of the buildings situated nearby #1. It is worth aiming at explosive barrels on the roof #2, because it will help you to eliminate a bigger group of enemies.
After killing all enemies go to the place from which you are going to jump #1. You have to run very fast (SHIFT key) and at the last moment pres SPACE key. As a result, you will land on one of the balconies of a new building #2.
Enter a warehouse situated on the right #1. It is advisable to choose a gun with a telescope, you can also choose a machine gun. Start eliminating enemies who show up in the second corridor #2.
Watch out for enemies hiding in the room on the left. At least one of them can be killed by shooting through the crate #1, but soon somebody will run at you (don't let them surprise you!). Keep on moving forward, eliminating enemies showing up in the distance #2.
Be careful when you reach the further part of the corridor #1. One of the enemies can use a deafening grenade so you should stay on one side to avoid being shot and at the same time be able to shoot back. Turn right twice. Raffle will be useful during other fights because new enemies will be very close to you. #2.
Continue marching but watch out for the new enemy hiding behind the crate #1. Turn left and come close to the exit of the building #2. It is worth taking the gun from one of the eliminating enemies because it will be useful in future missions.

Start carefully eliminating the soldiers standing in front of you. Especially watch out for the enemy standing on the roof on the left #1 and for the sniper hiding by one of the windows on the highest floor #2. Do not lean out too much because you can experience massive fire of the enemy.
After securing the area, head left with your allies #1. Here you will also face difficult fight. Just as it happened before, watch out for the enemies standing on balconies #2 or hiding by the windows.
Go further and you will notice few enemies sliding down the ropes from the roof of nearby buildings. If you have a gun with a telescope, it is worth eliminating them before they touch the ground #1. Carefully secure the whole area, watching out for new snipers. After clearing the area, go towards the stairs leading to a lower level #2.
After going down, watch out for new enemies who will appear above your heads #1. Try to eliminate them from a distance and then enter the new area. After reaching a bigger pipe #2 perform a jump and the main hero automatically will go down.
Now go straight. Stand in such place to eliminate two enemies standing in front of you #1. Jump down and follow your team, passing the roofs of the buildings #2.
The aim is to reach the place where you start sliding down the roof in a slow time mode #1. Notice that new enemies appeared downstairs #2 and try to eliminate them all before the game slows down. If you don't succeed, you will have to eliminate the rest too.
Check the area situated straight way from the place where you are standing now and you will find secret service data #1. You can now watch a short scene with a hostile helicopter and use mini-warehouse #2.
It is worth taking a machine gun with a telescope because in a moment you will have to start eliminating enemies situated nearby #1. Remember to stay behind a wall so you won't be an easy target. After securing the area, choose a good weapon for short and medium distance and follow your team #2.
The aim is to reach the balcony marked by the game #1. Enter the building. Watch out for the enemies who will blow up the door situated nearby #2. It is worth shooting in a random way because reaching them will be very difficult.
Move further, passing a narrow corridor. Watch out for the enemies jumping down to a nearby room #1, as well as for the ones who waiting upstairs #2. Carefully go outside eliminating other enemies.
Go towards the entrance of the new building #1 and prepare for eliminating the enemies running towards you. Again watch out for the soldier standing behind the crate. After few moments you should reach a small warehouse #2.
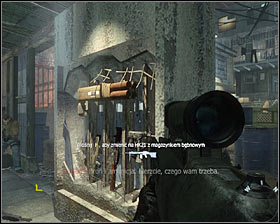
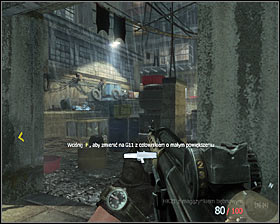
In few seconds you will have to protect this place from enemy's attack. Use the goods from the warehouse #1. I suggest machine gun HK21 or G11 and standing somewhere on the right #2.
After starting the fight first try to eliminate the aims which are further #1. However, be ready because sooner or later some opponents will get closer #2. React to it properly by shooting in longer series.

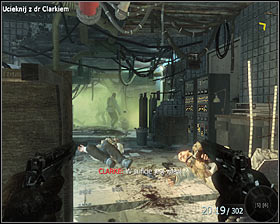
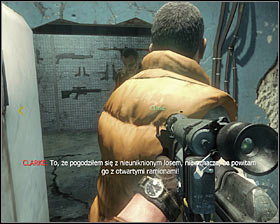
You have to defend yourself until Clark opens the door #1. Immediately head there. After going outside, jump to the fragments of the roof, performing a longer jump at the end #2, which will be finished with presenting an important cut-scene.
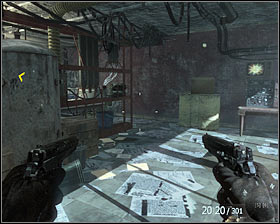
After regaining control over the main hero, follow Weaver. You will have to eliminate few enemies standing downstairs #1, as well as two men hiding on two balconies upstairs #2.

Jump towards the lower fragment of the roof #1. and then toward another one. Now turn left. Come up to the edge and kill the enemies you can see downstairs #2. After eliminating then jump towards the fragment of the roof they were standing on.
Continue following Weaver. Jump down onto a small ref fragment of the roof #1. After the landing you must turn around and look for the last in this mission secret service data #2.
Now you can head downstairs #1. After watching the new cut-scene quickly press F key to pick up the gun #2.
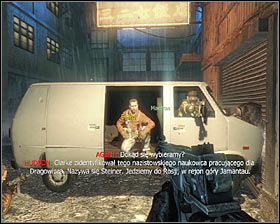
Start using the gun mentioned above to eliminate the enemies aiming at you #1. Luckily, your allies will appear soon and help you in eliminating the enemies. Come up to a van #2, which will help you to complete this mission.
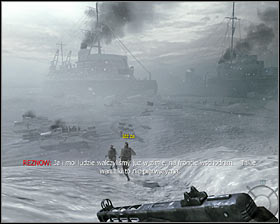
The description of completing this mission: Follow Petrenka #1. You can stop when you reach one of the vehicles #2. You will watch a longer cut-scene and the further part of the mission will take place in another place.
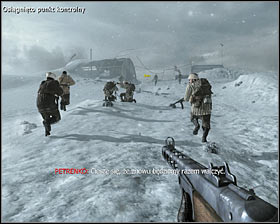
Start attacking a German headquarters #1. After reaching the place go towards the trenches #2. You can kill the enemies you will meet on your way but most of them will be eliminated by your teammates.
You will meet a bigger group near a small crossroad #1 and it is worth eliminating the enemies using your hands. Turn right here. Watch out for the enemy soldiers hiding by the windows of the building on the left #2. You have to eliminate them one by one.
Successively you can stab yourself eliminating the enemies on your way #1. It shouldn't be difficult, especially with so many allies. After reaching the part with a roof #2 first eliminate the opponents hiding in the building on the left.

Stay in this place for few moments attacking nearby enemies #1. Move successively north, hide by the curtains #2 to shoot other enemies.
Be careful because in a while a bigger group of enemies will appear on your way #1. Fortunately, your allies situated nearby will help you. Go to the left building and towards the entrance to the new part of the camp #2.

I suggest running towards the wall where your teammates are hiding #1. Start shooting from this place. Come closely to the entrance of the nearest building and first eliminate the enemies standing on the ground floor #2.
Find the stairs leading up stairs but watch out for the enemy lurking around #1, don't let him surprise you. The rest of enemies at the floor can be eliminated by shooting them through a hole under one of the desks #2.
Go to another room situated upstairs and eliminate a single enemy #1. Check the area on the right to get new secret service data #2.
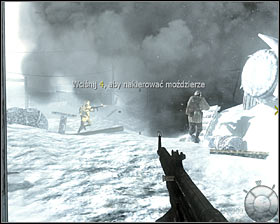
The person you are looking for is not in the building, so you can come back to the ground floor #1. Go toward the passage where other allies are standing #2 and read the information concerning the possibility of using mortar support.
Go straight. Hide behind the curtains after reaching the battlefield and mark the building on the right to be shot #1. If all opponents won't die at once, you can repeat the attack but remember that the number of this type of missions is limited. To get closer to another group of enemies it is worth going through the building on the right #2.
Carefully get closer to the exit #1 and mark the enemies standing on a balcony. Watch out at the same time for other opponents who will be appearing near the exit from the right building #2.
Now I suggest to enter a building on the right which has already been mentioned before. Eliminate the enemies #1, then use the stairs to reach the floor. Come closer to one of the windows. You shout see a group of enemies who can be killed by using a mortar and pestle #2.
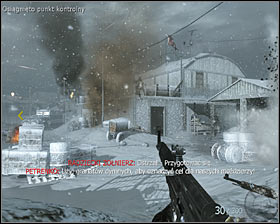
After securing the area, go downstairs and start moving towards the hangar, the enemies will be standing in front of it #1. Inside you will be greeted by new enemies, no surprise here #2, but there shouldn't be too many of them.
Go towards a smaller room situated on the other side of the hangar and check it which allow you to obtain new secret service data #1. You can get closer to the door where the rest of the team is waiting #2. Wait till one of the allies bursts it open.
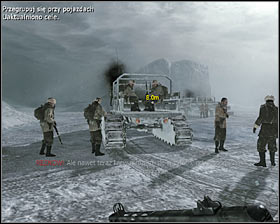
Follow Petrenka. You will come across the enemies after reaching the surface #1. Remember not to hurry and to use all objects in the area to hide. It is worth constantly looking for new weapons, which will help you to eliminate enemies (among other things a machine gun with a telescope and Panzerschrek). After reaching the crossroads #2 go left.
After few moments you will reach a building and of course you will have to eliminate enemies hiding inside #1. Go inside and turn left. If you choose the passage #2 you will surprise your enemies.
Carefully come up to a place where the hostile soldiers defend themselves and start attacking them #1. I suggest you to pay special attention to a machine gun position on the upper balcony #2, which you should neutralize as soon as possible.
After clearing the area, attack your enemies #1. The aim is to get to the entrance of a new building #2 and at the beginning you may not notice them. When you clear up the area, go towards the stairs leading upstairs.
You will meet enemies here too. Pay special attention to the enemies hiding behind a fell table #1. After clearing the area, start attacking soldiers hiding on a nearby roof #2.
Now head towards the entrance of the building with the antenna #1. Ignore the enemy running from the inside because you are safe here. Try not to shoot Steiner who is inside the building #2, because you will have to talk to him. The action will soon move to a new location.
You are going to experience a long and interactive insert. Follow your teammates and stop in a place where Steiner is standing #1. Listen to a talk and then follow the others into a destroyed ship #2.
Now you will have to go through few rooms in complete darkness #1. Fortunately, on your way you won't meet any enemies so you don't have to be careful. Soon you will reach a closed door #2. In accordance with the instruction come up to the door and hold the F key to open them.
Go to a new, bigger location #1. Follow Steiner to a new closed door #2. As you have done it before, use the F key to unlock the passage. You are going to experience a series of longer cut-scenes.
You will regain the control over the hero when British commanders appear. Leave the room and start attacking your enemies. First attack the one who are the closest targets #1, and after eliminated these ones start eliminating the ones who are further #2. Of course use the curtain while fighting.
Go towards a corridor leading to another location #1. Shoot enemies and enter a new room. Start attacking the enemies who appear in the distance #2.
Here the battle will last longer because new commanders will slide down on the ropes #1. Don't let anybody surprise you and shoot safely from behind a curtain. Don't forget about securing upper balconies because single enemies may hide here #2.
After securing the area come up to the rocket situated on the right #1. Press the F key for few seconds and as result, main hero will arm a bomb #2. Mind you have only three minutes to run away. Don't worry - it is more than necessary.
Start shooting the left pipe marked by the game #1. As a result, a destroy balcony will OPUSCIC SIE and then you will be able to use it #2.
Turn right and then left. Watch out because the commandoes will attack you by the entrance #1. Eliminate them and go left. After reaching a new location and eliminate the rest of enemies #2.
Choose a narrow passage leading to another part of the ship #1. Here run straight. Soon you will notice new enemies in front of you #2 and it is a good idea to take care of them.
After eliminating the enemies look around the area and on the ground you will find secret service data #1. When you obtain data, use the nearby stairs #2.
When you get upstairs, turn right and run to the place marked by the game fast #1. The main hero will automatically slide down the rope. Run after your ally so you will be in a safe distance from the ship #2. In a few seconds the mission will be over.
The description of completing the mission: When you regain the control over the main hero, use the pistol to kill two enemies before the helicopter comes #1. In few seconds you will have to open the helicopter's door #2 and to do it you have to rhythmically press the F key.
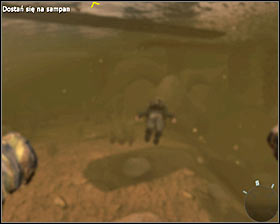

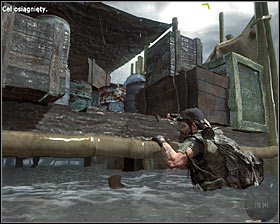
After being saved, swim after your teammate #1. Make sure to stay under water for the whole time because if you swim up to the surface your enemies can notice you. Swim up to the place marked by the game #2. You have to be precise here to surprise one of hostile soldiers.
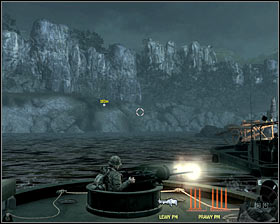
Start with shooting a single enemy standing on a boat in front of you #1, and then shoot a bigger group on the left #2. I suggest you hurry because the "shield" - the enemy you have already killed - won't do for long.
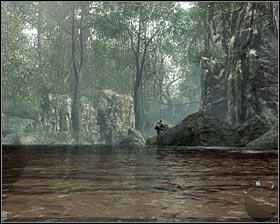
Stay in this place and shoot a group of enemies who will appear on the cliff in the distance #1. When you eliminate them, start swimming towards the bank where your allies will wait for you #2. Fortunately, this time you won't have to swim under water because there is nobody else in the area.

When you reach the bank, a new group of enemies will attack you. Hide behind one of the rocks and start attacking your enemies #1. You can shoot in longer series but later you won't need a weapon. Follow Woods #2. Notice that the hero took out a knife on your way. It means that from now on you should stay in hiding.
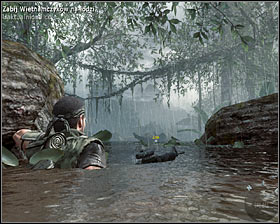
Soon you will start swimming toward two enemies on a boat #1. Remember to stay under water the whole time. Swim up to a place marked by the game #2 and press the V key, which allow you hero to eliminate an hostile soldier quietly.
Continue swimming after Woods and after few seconds you will reach a place where you will be able to leave the water #1. If it is possible, try squat all the time and follow your friend's orders. At the beginning wait until the rest eliminate a new group of enemies #2.
Jump to the water again #1. Here you have to dive and set an explosive charge in a place marked by the game #2. It is done by pressing and holding the F key.
You won't detonate the charge at this point so swim up to the surface in the same spot as Woods #1. Carefully follow your teammate #2, remember to keep squatting all the time.
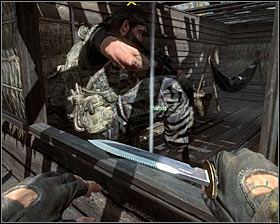
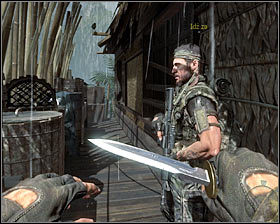
Jump over the window #1 to get inside a hut. Here turn right and press the V key to kill a guard sleeping here #2. Notice that Woods eliminated his teammate in the same way.
Get inside another room in the hut. Check the area on the left and you will find secret service data #1. Come closer to an enemy sitting a few steps away #2 and eliminate him.
After listening to a talk, jump to water through a hole in the floor #1. Swim up to a place where explosive charge is situated #2. Just as you did it before, you will have to hold the F key for a while.
Wait until the main hero will automatically unlock the passage and go straight but stay under water all the time #1. Don't be afraid when the boat falls inside the water and use the ladder to go up #2.
Now you can run after Woods towards the village #1. Stop with your friends in a place marked by the game #2. Wait till the discussion is over and press the left mouse button to detonate the explosive charge you set up earlier.
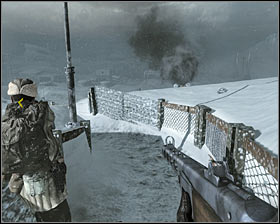
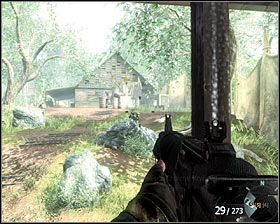
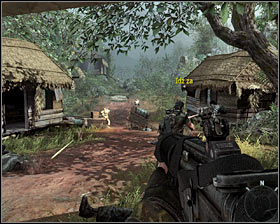
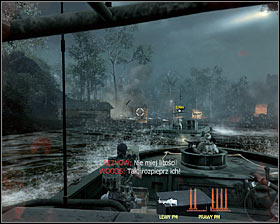
Start attacking the village. Hide and first start eliminating enemies on a nearby bridge #1. Gradually move forward minding other enemies situated on the higher levels of constructions #2.
Watch out for the machine gun position which is situated in the area 1. It is worth observing the windows of the buildings you pass by because your enemies may lurk inside #2. Fortunately, your teammates will help you to eliminate other enemies.
After reaching the place where you have to turn right, check the hut situated in front of you #1. Inside you will find new secret service data #2. Now you can go outside and start fighting again.
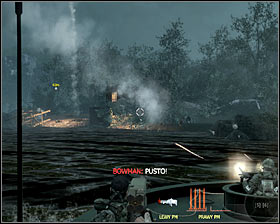
Soon you will reach a port and watch out for the enemies hiding on the left #1. Now you can hurt the enemies standing on the other side of the river by aiming at an explosive barrel situated next to them #2.
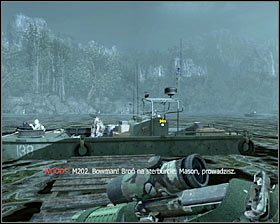
When you here a proper order, run to a place where the body of a killed ally with M202 is #1. First I suggest you using this weapon to destroy a hostile boat patrolling the river #2, and then to kill the enemies standing on the other bank.
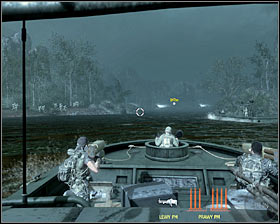
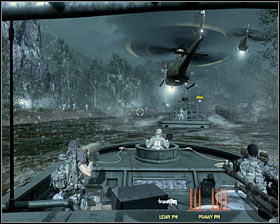
Now move left. As a result, you will notice a hostile gun. Shoot a missile at it #1. Use the opportunity and blow up the other hostile boat. Wait for the backups and IMMEDIATELY eliminate a group of enemies who will appear on the roof of the building on the left #2.
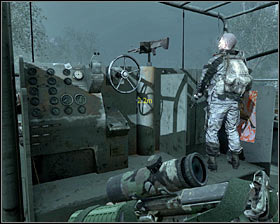
I suggest to look for a machine gun with a grenade launcher. Head towards a newly unblocked passage in one of the buildings on the left #1. Take care of the enemies inside the building, stand by the window and start shooting enemies #2. Don't forget you can use grenade launcher to eliminate the targets which are unattainable.
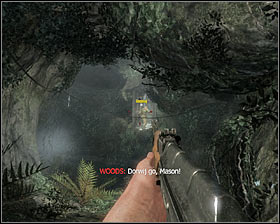
Now follow your teammates. Watch out for a bigger group of enemies between the huts #1. It is worth using grenade launcher to eliminate the enemies. The aim is to reach a place with the entrance to a tunnel #2.
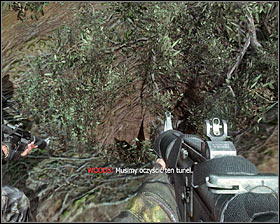
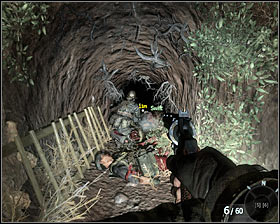
Wait for the entrance to the tunnel to be blown up and get inside #1. After watching a short cut-scene, turn on a flashlight according to the instruction you will receive (press SHIFT) and follow Swift #2.
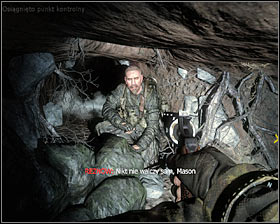
You will come across Reznow on your way, you can talk to him for a while if you want #1. Unfortunately Swift will get killed soon by a hostile soldier #2. It is unavoidable but of course you can eliminate the enemy before he attacks you.
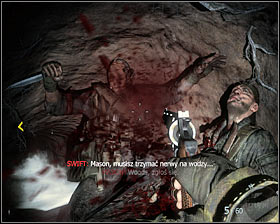
Go further. After reaching a bigger room #1 prepare for eliminating a new group of enemies, It is worth being alert here because it is difficult to notice the enemies. Wait for Reznow to appear and come up to the chest he will stop next to #2. Press the F key, as a result, you will unlock the passage together.


Now you can follow Reznow. He will be also taken by surprise #1 but he will manage to eliminate the enemy. Now it's your turn - go towards the tunnel. A single enemy will run out in a few seconds #2 and you have to shoot him fast.
Choose the left tunnel #1, from which an eliminated enemy has just run out. Start exploring the tunnel carefully. When you are about halfway, on the right you will find the last in this mission secret service data #2.
Prepare to eliminate another enemy #1, who will appear almost immediately after finding the secret service data. Continue exploring the tunnel, eliminate single enemies you meet on your way #2, they will attack you quite regularly.
You will be attack by a group of enemies around the corner #1, so you will have to stay alert. The aim is to reach a small door #2. Open it and get into a bigger cave.
If you want, you can look around the area. It is not required and you don't have listen to the recording to the end. Go toward the exit #1. Notice the tunnel started falling down #2. Fortunately, it is enough for press the W key and the hero will automatically skip all the obstacles on your way.
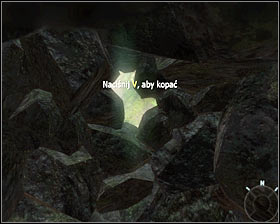
After reaching a blocked exit start pressing the V key according to the instruction #1, as a result, you will get rid of the stones. You are going to watch the last cut-scene which will end with a jump (you won't have to do anything) onto the helicopter #2.
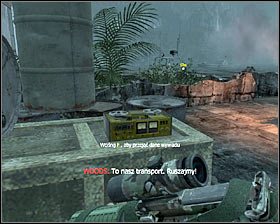
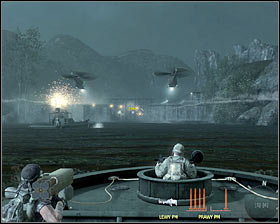
The description of completing the mission: Go straight. Check the boxes on the left #1, because you will find there the first in this mission secret service data. Head towards the boat situated few steps further #2.
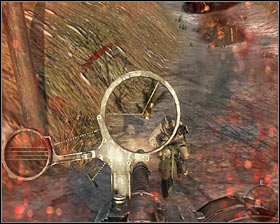
Jump onto the boat and look for the rudder #1. Spend few moment to learn how to steer a boat #2 - you can steer it by using directional keys and bring the vision closer by the V key (it is very useful during the fight). You have a machine gun and a rocket launcher (to be more precise, giving orders to allies who are on board). In both cases ammunition is unlimited, although the gun can get too warm and after shooting all four rockets in every series the operator will need few seconds to reload it.
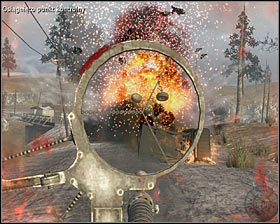
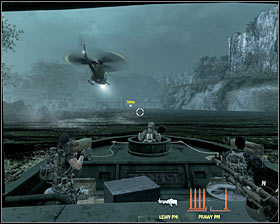
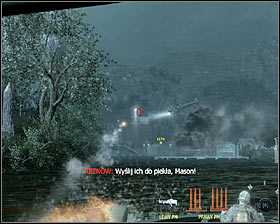
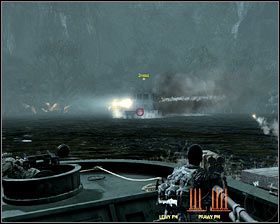
Swim towards the target #1. You will come across your enemies after reaching a bigger area and then start destroying the building on the left #2 and eliminate hostile soldiers you will meet there. Always eliminate the ones with a launcher first because they are the most dangerous.
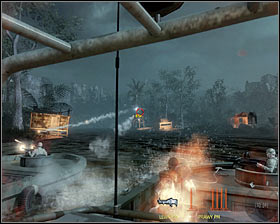
Now destroy a tower you can see in the distance #1 and start shooting the area around it because new enemies will appear there more or less regularly #2. If it is possible, try moving all the time because as a result, your boat won't be a sitting duck for the enemies.
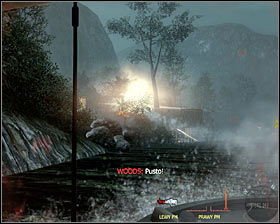
After clearing out the area, head towards another location #1. Here you will have to destroy three moving rocket launchers, which will appear on nearby hills #2. Don't save your own rockets, fire at least 2-3 missiles at every targets, as a result, you will be sure that it is destroyed.
When you destroy all three machines, ignore other soldiers who are in the area and swim towards another aim of this mission #1. The barrier you can see in the distance will be destroyed by the helicopters belonging to the allies #2.

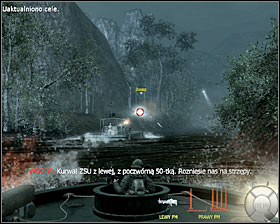
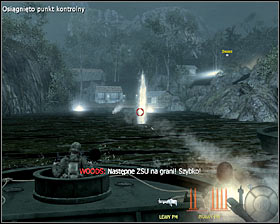
Watch out for a new tower on the right #1, which has to be destroyed as soon as possible. You should also eliminate the enemies with launchers who are situated around the tower. New ZSU will soon appear on the left #2. Destroy the machine before you get too close to it.
Continue travelling by boat. In a few moments you will notice two new towers in the distance #1 #2 and of course it is a good idea to destroy them from the distance. Keep on following the arrows showing you the right way.
Prepare to destroy another machine belonging to the enemy which appear on the hill on the left #1. One by one destroy the buildings you can see on the left #2 and at the same time kill enemies with launchers.

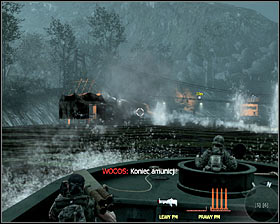
In a few moments you will experience unpleasant surprise - hostile boats will attack you #1. Just as you destroyed vehicles, fire missiles towards all boats which should solve the problem quickly. Apart from the boats, you will have to destroy a new ZSU on the hill #2.

Continue travelling by boat, watch out for single enemies with launchers. In a few moments you will come across two new boats #1 and you will behave just as you did before. Apart from the boat destroy new hostile vehicle and a tower you can see in the distance #2.

You are going to face some kind of boss because the last hostile boat will be definitely more resistant #1. Move between nearby buildings according to the instruction #2, look for opportunities to fire a series of rockets. After few successful attempts the boat will go down.
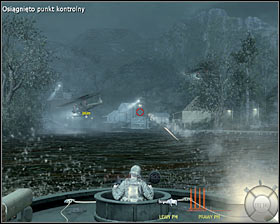
Now you will watch a cut-scene. When it finishes, swim straight #1. Don't worry about not having armor anymore because you will not come across any enemies. After few dozen seconds you will reach your destination #2, and the main hero will automatically moor the boat by the bank.
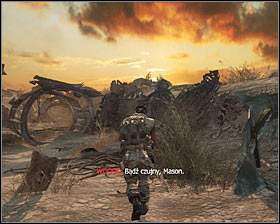
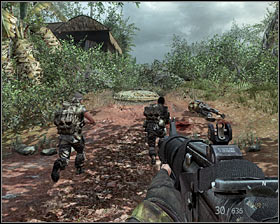
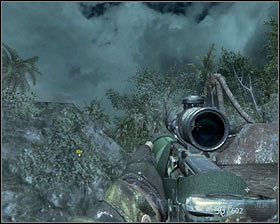
Follow your teammates and take secret service data from the ground #1. You will come across hostile soldiers in a few seconds #2. You must use the stones you come across on your way because it is safer to shoot from behind them.
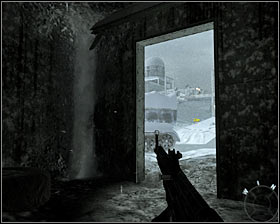
Don't hurry too much and use the fact that you have a gun with a telescope which allow you to aim precisely at targets in the distance #1. A group of enemies will run out from bushes on the left #2, so look around and don't let the enemies surprise you.
Near the waterfall #1 you will get a warning concerning snipers in the area but your team mates will take care of them. Now turn left and at the same time watch the destruction of hostile flying machines by the helicopters belonging to allies #2.
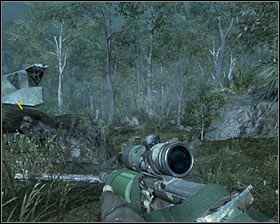
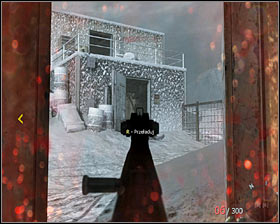
You will have to eliminate one of the enemies yourself #1. Head towards the ruins #2, where you are going experience some difficult fights with the Specnaz units. Remember to use curtains which are available and eliminate the enemies from the distance.
Don't leave the area until you eliminate all enemies. Go further, eliminate another sniper hiding on a tree #1. There are few regular enemies to eliminate left near the wreak of a plane #2.

Go towards the wreak and get onto the wing according to the instruction #1. Here go straight, ignore the fact that the parts of the wing are breaking. After reaching the other side, jump down and take secret service data from the ground #2.
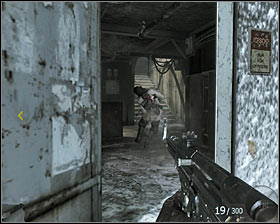
Now you can enter the wreak of a destroyed plane #1. Here go straight. Stand by the box #2 and wait till your team mates check its content, It will turn out that instead of gas, there are China Lake grenade launchers. It is worth picking up this kind of weapon now.
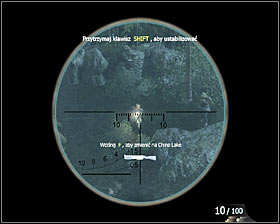
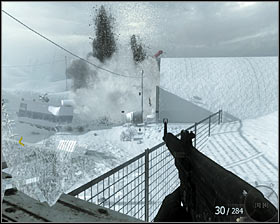
Stand near a hole #1. The best way to eliminate the enemies you can see below is to use the grenade launcher you have just obtained #2. Of course consider the fact that the missiles won't be flying straight, so you should aim a bit higher.
Watch out for the enemies who will appear on the hill on the left #1. Some of them will use a rocket launcher, so they should be eliminated immediately. If you don't want to use the grenade launcher, you can pick up a Dragunow machine gun from the ground and eliminate the enemies but shooting them in their heads #2.
Protect yourself until the hostile helicopters appear #1. Unfortunately, you can't destroy them and you just have to wait for the cut-scene. A similar situation took place right after the abduction - you won't be able to use the gun #2, because there won't be any bullets inside. The mission will end soon.

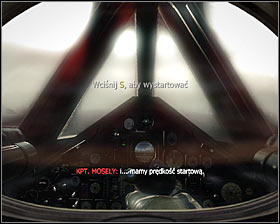
The description of completing the mission: This mission starts with interactive cut-scene. After you sit down in the cockpit of Blackbird plane, press the left mouse button to start the engines #1, and when the plane speeds up on the runway, press S #2 to leave the ground.
You are going to experience untypical fragment of the mission. You will have to give orders to a unit on the ground from the Blackbird plane. Make sure you know the basic rules of steering. If you want to move the video camera, use directional keys. The left mouse button will help you to bring the vision further and you can use this option later to observe hostile vehicles. Press the right mouse button to bring the vision closer, which will be useful if you want to give precise orders.
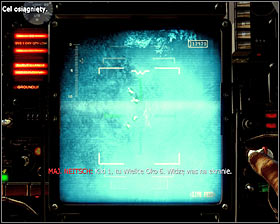
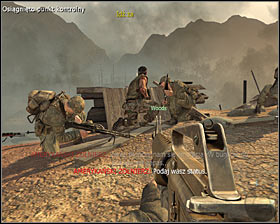
Start from moving the video camera north (up) and stop the vision on a group of four #1. Move the video camera east (right) and press SPACE #2 to make your soldiers move to a new place.
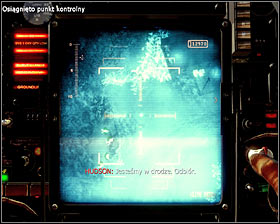
When you hear the message about the escort coming, quickly move the video camera north-east and press SPACE to track the hiding place #1. Wait till subordinated soldiers enter the building. Unfortunately, despite your attempts the vehicles will stop in front of the hiding place and hostile soldiers will get inside. Prepare to take control over one of the soldiers you are commanding #2.
Wait until hostile soldiers enter the building and shoot the one standing on the right with one precise shot in the head #1. Quickly hide behind the nearest curtain because the enemies will use a flash grenade #2.
After regaining consciousness start attacking the hostile soldiers running through the left door #1. Shoot in long series so your enemies won't have an opportunity to start shooting. Fight until all enemies are eliminated #2 .After a while the action will move to the Blackbird and you will have to keep on supporting the soldiers on the ground.
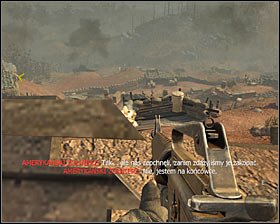
Send your people north #1. Two hostile enemies are situated north-east from this spot. Track them #2 and press SPACE, order your subordinated soldiers to eliminate them. After a successful elimination, send your men there.
Now send your soldiers further east, to be more precise towards a control point marked by the game #1. Now send your men south-east, BUT only after you hear the message about the patrol coming, track your subordinated soldiers and press the V key #2, and order them to hide.
Peacefully wait for the patrol to pass your men #1. Now send them east, to be more precise towards a nearby road #2.
After getting to the place, it is a good idea to order your team to hide again (the V key) #1, you don't have to do it if you check the way north and decide that nothing is coming. When hostile vehicles pass by, track the barracks #2 and order your men to march. After a while you will become one of the soldiers commanded from the air again.
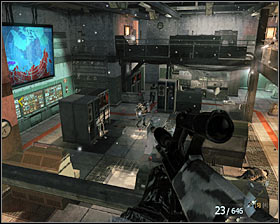
Wait till your team mate burst the door open and start clearing the barracks eliminating the enemies #1. Of course it is worth shooting from behind a good curtain, don't let anyone come near you. After you win the battle, go downstairs and check the area on the left and you will find secret service data #2.

Go to another room and set an explosive charge in a place marked by the game #1. Move back to be safe and detonate the charge #2. After a while you will go back to the Blackbird for the last time.
Make sure there are no vehicles coming from the north. If you see something, don't forget to order your men to hide. Send your men north #1, and soon you will come back to the ground for sure. Wait till a hostile patrol leaves and press the W key to get up #2.

Run after Weaver. When you notice a guard with a dog, lie down (CTRL key) #1. Wait till your opponent leaves his team. You can follow Weaver who will run around the building in the same direction as the clock's hand moves #2.
The aim is to reach the balustrade. Stand in a place suggested by the game #1 and hold the F key to get hold of the balustrade. Now you have to slide down the rope. Press the right mouse button to push back from the rock wall #2, but then quickly press the left button. Repeat this sequence until you reach a safe lower level.
Come up to the balustrade again #1 and get hold of it. This time you only have to press the right mouse button. When the time slows down, fire few missiles in the direction of a guard standing by the window #2.
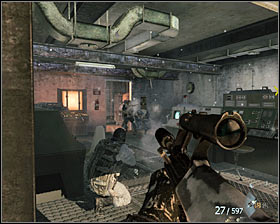
After you get inside, use the slow time mode to eliminate the enemies standing in front of you #1. Now you can get through the left door #2 (if it doesn't open, you can try to start the game from the checkpoint).
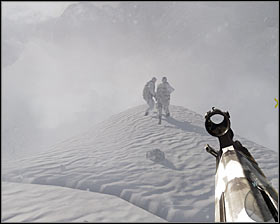
Follow your teammates #1. There is a long way ahead of you, but fortunately you won't come across any enemies. Stop after reaching crossroads. Use a regular machine gun with a silencer to eliminate one of the enemies standing nearby #2. Fortunately your team mate will eliminate the other enemy.
You can go further #1. After few moments you will reach a bigger campsite #2. During this mission it is possible to stay in hiding. It is advisable because in case of an alert the backups would come. Choose the crossbow and change to a normal type of ammunition (press 5 key again). It is crucial information because explosive missiles wouldn't obviously let you shoot from behind a curtain.
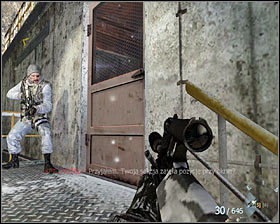
There are six enemies in the area and you will have to eliminate "only" four of them. Start with eliminating a single enemy patrolling the area in front of you #1. Try to kill him before he reaches a nearby building. Then turn right and kill the guard patrolling a balcony #2.

There are two guards working by a truck on the right #1. Kill only one of them because your teammate will kill the other one. Then there are two enemies to be eliminated who are inside the building on the left #2. In this case, kill one of them and wait until your teammate kills the second one.

Follow one of your teammates #1, keep on squatting. Soon you will reach a place where two guards are working #2. Kill one of them and let your allies eliminate the other enemy.

Another enemy is patrolling the area on the right #1. After eliminating him, move right and aim at a guard standing in front of the building #2.
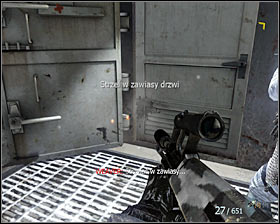
Again follow your teammate. After reaching the balconies, lead and eliminate the last guard using a crossbow #1. Go downstairs. Prepare a machine gun and use it to eliminate it do destroy two hinges of the door #2.
Wait until Weaver kills a guard and go upstairs. Come up to the door #1 and hold the F key. You don't have to lurk here. Start shooting the enemies who are downstairs #2.Remember to hide because the enemy will find it difficult to shoot you.
After securing the ground floor, go to the other side of the balcony but watch out for the enemies running out from a small room #1. Eliminate them and check the room they were hiding in and you will find secret service data #2.
Eliminate new enemies who will appear on the ground floor #1. Of course here you can use a crossbow but it is worth leaving some explosive missiles for later. Go downstairs and start shooting enemies who will appear on the balcony you have already checked #2.
During the fight focus on eliminating the enemies who managed to jump onto the lower level and get close to your team #1. When the fight is over, go to the other side of the room and in a place marked by the game #2 hold the F key to neutralize the antenna of the radar.

Now you can leave the room, go downstairs #1 and leave the building. In few minutes your friend because an enemy with a rocket launcher will attack him #2, and unfortunately it is not possible to kill him earlier. Notice that his attack will also cause avalanche so you will have to start doing something fast.
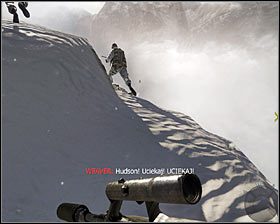
When you have control over the main hero again, jump over a hole #1. Now run after your teammates #2, help yourself by choosing the sprint option. Remember to press SHIFT every time the character jumps onto a lower level.
After few seconds you will reach an edge #1, where your team mates will be waiting for you. During the flights you don't have to make any amendments, you only have to press the F key after you see a message on the screen to open a parachute #2. Wait till the main hero lands safely in a new place.

Run after your teammates. Stand behind a wall and start shooting the enemy in this area #1. As you secure the area move forward step by step. You can also use a crossbow with explosive missiles aiming at bigger groups of enemies or at vehicles parked in the area #2.
Ignore a machine gun position you can see in the distance and run along the wall of the building on the right toward the entrance situated in front of you #1. Stand by a destroyed wall and shoot the enemies you can see inside #2.

Go towards the main part of the warehouse but watch out for the enemies who will appear in the entrance #1. After clearing the area go to this spot with your team mates. After a few moments you will reach an exit leading to a bigger warehouse #2.
After getting inside the warehouse first go straight #1. Check the tables with the barrels and on one of them you will find the last in this mission secret service data #2.
Now you can go to the control room #1, your friends will be standing there. At first you won't have to do anything but then the door will open again #2, and you will have start fighting. Notice you will only have three minutes to run away.

After leaving the control room stand somewhere on the left #1 and start attacking the enemies running into the warehouse. Of course it is worth using a crossbow which will allow you to eliminate bigger groups in an easy way. Watch out for single hostile soldiers who will try to come closer #2. You have to react quickly enough.
Come up to the entrance of the warehouse from the left side #1 and start shooting enemies standing outside. Get especially interested in the operator of a machine gun position #2, who is really dangerous.
After clearing the area stand up and move toward the vehicle with a machine gun position mentioned earlier #1. Come closer to the machine and the main hero will automatically take the position behind the steering wheel of the vehicle #2.
Start attacking the enemies running toward you (of course you can bring the vision closer) #1. If it is possible shoot constantly and use the opportunity to blow up all vehicles in the area #2. You have to protect yourself until one of your friends starts the car and you leave.
The description of completing the mission: You will regain the control over the hero at the end of the scene presenting a Russian roulette. When the first enemy gets killed, use the gun to eliminate two other enemies #1. You can follow Woods #2.
After few moments you will come across the first group of enemies #1. Don't forget to attack the enemies from the distance and from a good curtain if that is possible. Go upstairs #2, but watch out for other enemies and the grenades they are throwing at you.
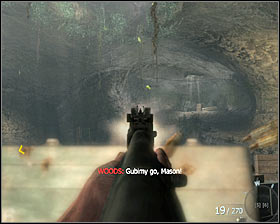
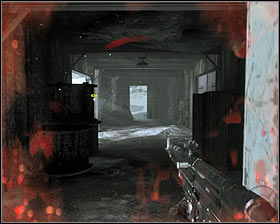
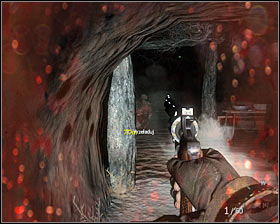
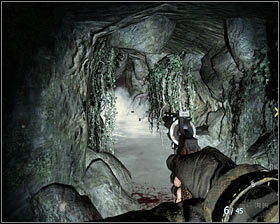
Clear the area from the enemies and go toward another tunnel #1. One by one eliminate the enemies who will appear on your way. First attack the enemies who are higher than you are. Soon you will come up to a cave and here you will have to especially watch out for the enemies on a higher level #2.
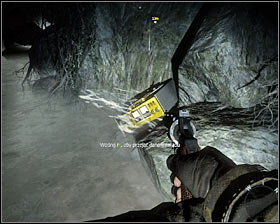
Shoot from behind a curtain until you eliminate all enemies. Check the area on the right and in one of the drawers you will find secret service data #1. Follow Woods. After reaching another part of the cave shoot a Specnaz soldier who will try to run away #2.
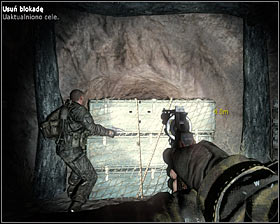
Now you have to get to a higher level. To do it come up to Woods #1, and after watching a short cut-scene you will be able to continue the trip. When you reach the surface, follow Woods. Wait till your friend stands behind one of the #2 and look around the area and plan an attack.
I suggest to start with destroying one of explosive barrels #1. Start shooting the enemies hiding in this area #2, try to surprise them. Do not forget to hide (e.g. behind a fell tree), and you won't get hurt.

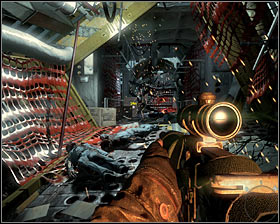
After you win the fight, go right and near the radio you will find secret service data #1. Now head toward Hind helicopter #2. Get closer the pilot's cabin and wait till the main hero sits behind the steering wheel of the machine. Woods will help you to take off and after a while you will have full control (well, almost full) control over the helicopter.
Spend few moments to get to know the basic rules of steering a helicopter. You should use the mouse and directional keys. You don't have to worry to maintain the proper altitude, because it will be regulated automatically if it is necessary. The helicopter is equipped with a gun (left mouse button) and rockets (right mouse button). It theory you have unlimited amount of ammunition but you can't heat the gun and after shooting eight missiles you will have to wait few seconds to load it up again.
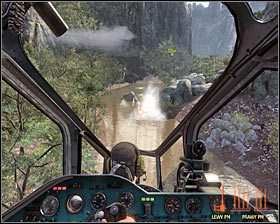
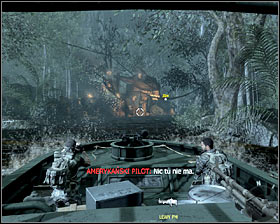
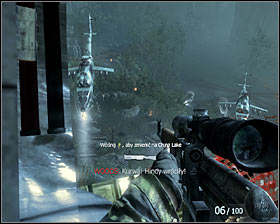
Start eliminating hostile boats on the river #1. Use rockets to destroy machines and buildings, because you won't have to aim precisely r shoot for a long time. Other enemies are on a drawbridge situated further #2.
Fly further and eliminate boats one by one. After reaching a bigger camp, it is worth start with destroying the tank with gasoline #1. Then start eliminating enemies with a rocket launcher and hostile vehicles #2.
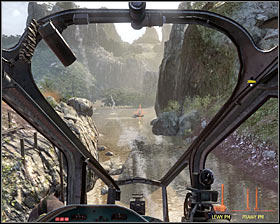

You can continue flying over the river and eliminating hostile boats. Watch out for the most resistant ships patrolling the area #1. Apart from that you will have to destroy a hostile Mi-8 helicopter #2. Remember you shouldn't fly straight ahead, use the rockets and you will achieve your goal faster.
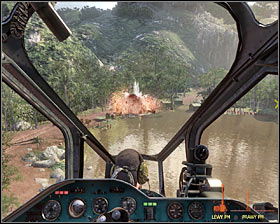
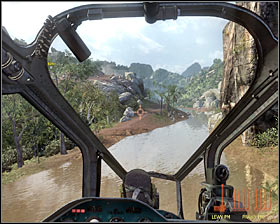
At the end eliminate the enemies on the ground, especially the ones at supply point #1. Now you can set off to another area on the map #2. Prepare for difficult moments because you will soon notice a launcher on your radar.
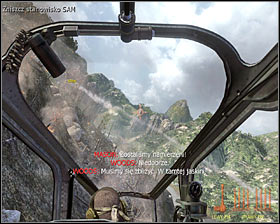
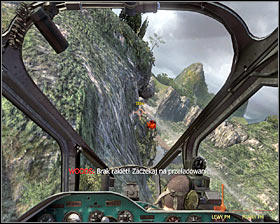
Immediately after hearing the message about the launcher situated on a nearby hill, turn left flying sideways over the jungle #1. The rackets flying at you can be destroyed by the gun but it is better to focus on flying properly. The aim is to reach a place where the launcher won't be able to reach you #2.
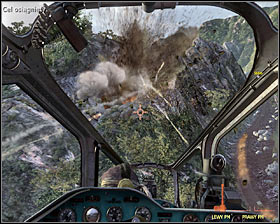
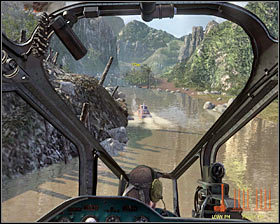
Prepare a proper amount of rockets, fly right fast and shoot the launcher #1 before it will be able to track you. You can continue flying over the river and of course eliminating hostile boats on your way #2.
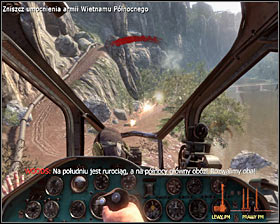
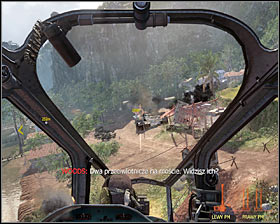
After reaching a bigger area you will have to eliminate the targets marked by the game #1. Remember to avoid flying straight and using the rockets which are available. While clearing the main part of the camp #2 watch out for the enemies with WYRZUTNIE and kill them first.
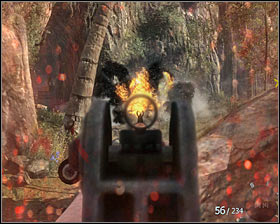
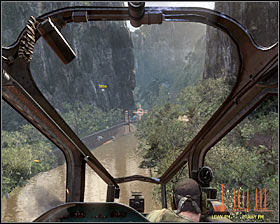
At the very end I suggest to leave two anti-aircraft positions situated at both banks of the river, near the bridge #1. Make sure you have cleared up the area and continue flying #2.

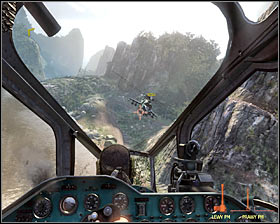
Soon you will have to face two hostile Hind helicopters #1 #2. During the fight in the air help yourself by pressing A and D keys, thanks to it you won't be an easy target. Use the rockets too and focus always on attacking one helicopter at a time.
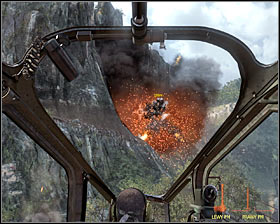

Shoot until one of the machines explodes (not only if it is on fire) #1. Now you can fly towards the aim situated in the jungle #2. After reaching your destination allow Woods to land safely.
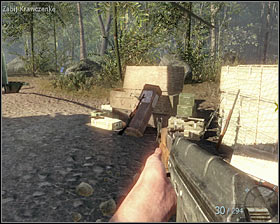
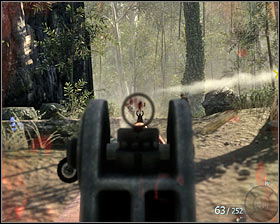
Notice a quite impressive ammunition storage #1. It is worth taking gun which will be useful during fights from a medium distance. You will come across the first group of enemies in a short while #2. During the fight don't forget to use stones and trees as curtains.
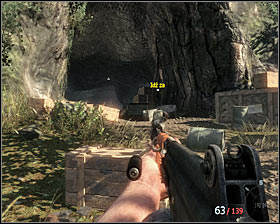
It is a good idea to aim at fuel barrels near the trucks #1, as a result, you will have an easy access to the enemies standing near them. Gradually get to a big entrance to the cave #2.
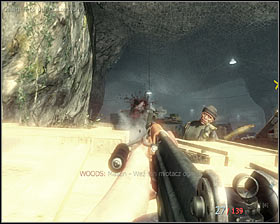
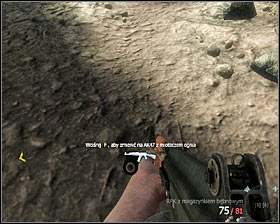
There are many new enemies inside #1, So you have to be very careful. If you want , you can pick up a machine gun with a fire thrower according to Woods's advice #2, but it is not obligatory.
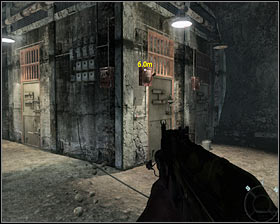
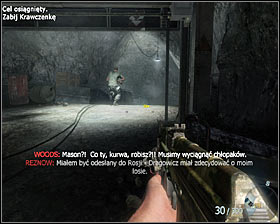
When the fight is over, come up to a place where the prisoners are kept #1, as a result, the main hero will free them automatically. Now you can follow Reznow towards the part of the cave which is unlocked #2.
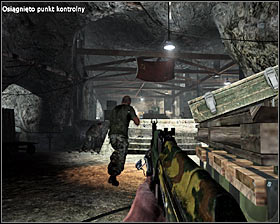
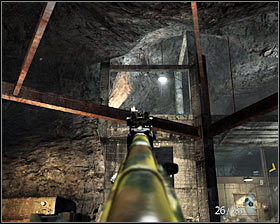
Start shooting the enemies when you get closer to the stairs #1. Watch out for the enemies with rocket launchers as well as the soldiers on the upper balconies #2. If you have a gun with fire thrower use it every time your enemies come up to you. Fight until you eliminate all enemies as well as backups which appear later in the battle.
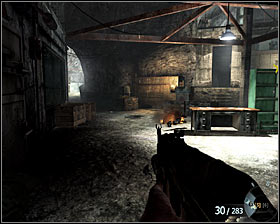
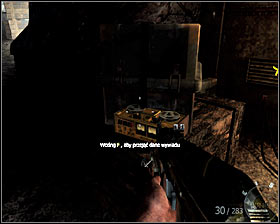
After the fight is over check the area on the left #1. It will allow you to get the last in this mission secret service data #2.
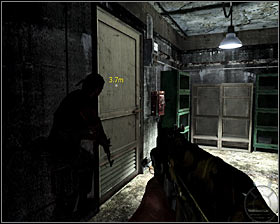
Now you can head towards the stairs leading to a higher level #1. Here you must find a door #2 and press the F key to burst them open. You are going to watch a cut-scene which will be the end of this mission.
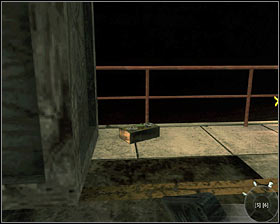
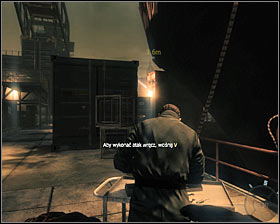
The description of completing this mission: Wait peacefully until you get orders and are asked to get into action by Reznow. Start with opening the door #1 by holding the F key. Carefully come up to a guard standing few steps further #2 and press the V key to perform a quiet execution.
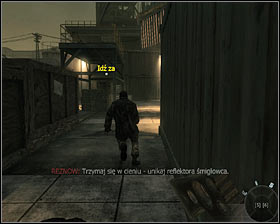
After eliminating the guard, check the area on the left quickly and you will find secret service data #1. Try to do it before the area will be lit by a big reflector because if they track you, performing your mission will be VERY difficult. Run after Reznow #2.
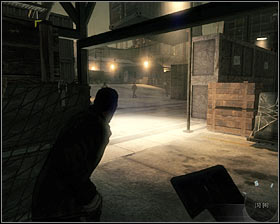
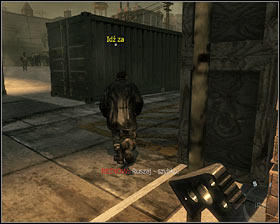
Hide behind the chests with Reznow #1. Don't move from this spot and wait until the reflector lights this area. Wait till Reznor leaves his hiding place and run after him towards the container you can see in the distance #2. This time you will have to stop right behind him too.
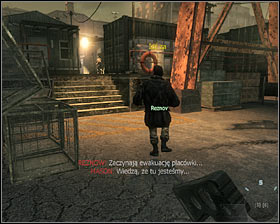
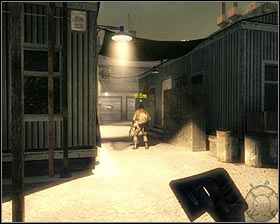
Again run after Reznow #1 and remember to go straight. After reaching a new place, don't hide for a change but immediately come closer to a guard standing in a well lit place #2. Perform a quiet execution (the V key).
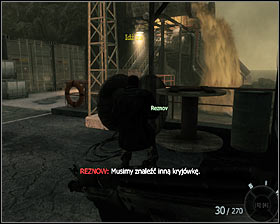
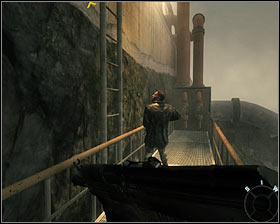
Ignore the fact that you obtained firearms because you won't need it for now. Continue following Reznow. Hide in the shadow #1 and wait till the area is checked by a new reflector. Head towards nearby stairs. The aim is to reach a ladder #2.
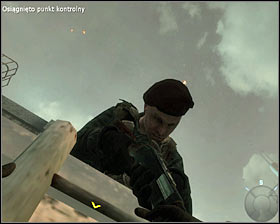
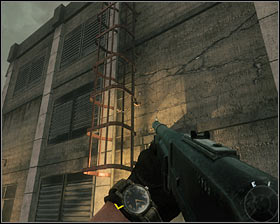
Watch out because when you try to use the ladder, a guard will appear in front of you #1. You have to react fast and press the V key to eliminate them quietly. Now you can go upstairs. Turn left and head towards a new ladder #2.
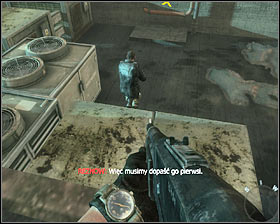
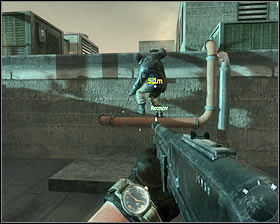
Ignore the explosion you can see in the distance and follow Reznow #1. Wait till your friend climbs the higher level #2, and then come up to it yourself and press SPACE.
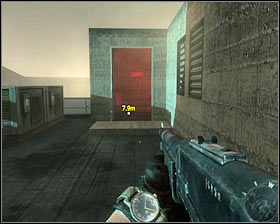
s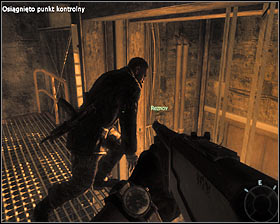
Go toward the entrance to a new building #1, and when you are inside, jump through the hole in the floor to a lower level. Come up to Reznow #2, and the main hero should automatically slide the rope to reach a lower level. Wait till you open the manhole together.
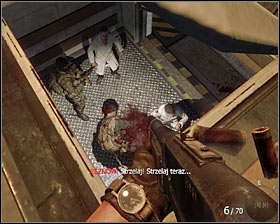
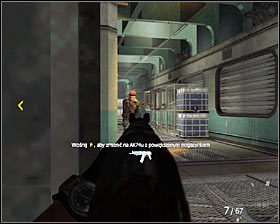
Use your raffle to eliminate two men standing downstairs #1. You can also kill the scientists because you won't get punished for it. Jump down, take a machine gun from one of the enemies and start shooting the enemies in the other corridor #2. Of course remember to use the walls and other objects as a curtain.
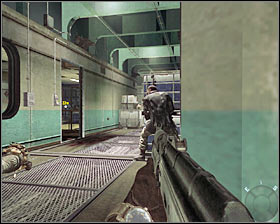
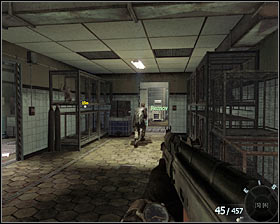
Now you have to keep on moving towards the laboratory. You can stay in the main corridor #1, but it is better to use sideways passages #2, thanks to which you won't risk being attacked from few sides.
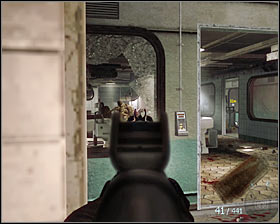
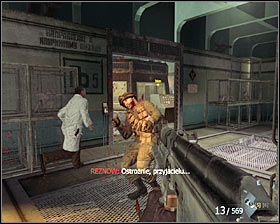
Eliminate the enemies carefully, look for the ones hiding behind the curtains #1. If it is possible, don't leave anyone behind to minimize the risk of dying. Watch out when you try to enter the laboratory. One of the hostile soldiers will run towards you #2.
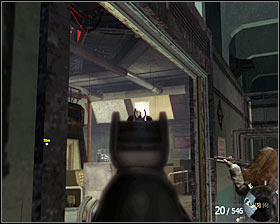
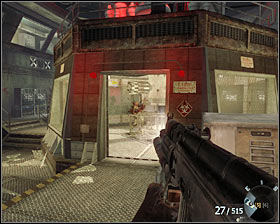
Stand at the entrance to the laboratory and start shooting the enemies situated in another room. Take special interest in the enemies occupying the upper balconies #1. Enter the laboratory and eliminate the soldier hiding in a central room #2.

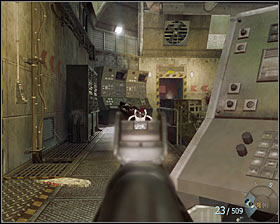
Get into the central room, take secret service data #1 and FAST go back. Fortunately, even if you don't, you won't have to look for this secret again. Move in the same direction as clock's hands and eliminate the enemies who appear in front of you #2.
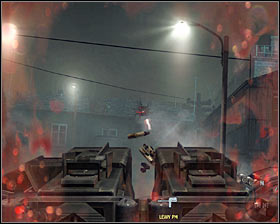
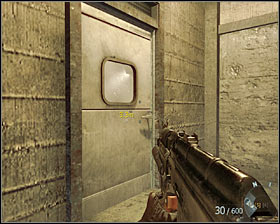
The aim is to get to a passage marked by the game #1. Go straight and after a few moments you will reach a door #2. After opening the door, there will be a longer cut-scene and the action will go back to the point which took place 20 minutes ago, and now you will use Hudson.
Another part of the mission will start in an armored vehicle. You can't steer the machine because you will have to deal with eliminating enemies. As usual there are two types of gun to choose from with unlimited ammunition and some other limits. The left mouse button is connected with the gun (don't let it get too warm!). The grenade launcher can be used in three ways - by pressing the 4 key, the G key or the middle mouse button. I don't recommend bringing the vision closer (the right mouse button), because as a result, you may not notice somebody on your way and die (the armored vehicle won't stop).
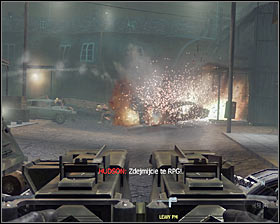
At the beginning deal with destroying the parked vehicles #1. Moreover, eliminate the enemies with launchers standing on the roof in front of you as soon as possible #2.
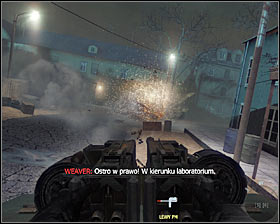
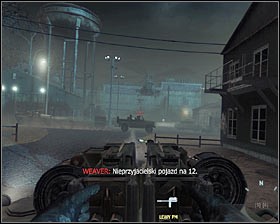
You will notice other enemies when the armored vehicle turns left and you should aim again at parked cars #1. After you turn right, start destroying the helicopter on the ground #2, as well as two tanks on the left.
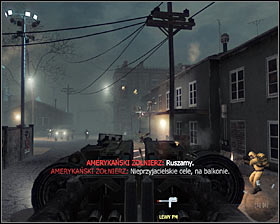

When you turn east, deal with new enemies on the bridge #1 and after eliminating them, attack the enemies by the tank. Try don't leave anyone alive when the armored vehicle turns north #2. Here continue shooting.
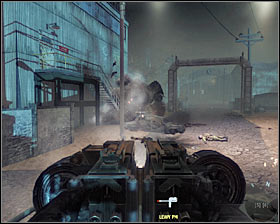
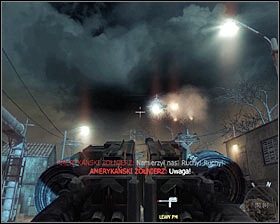
As usual first blow up hostile vehicles #1, and as a result, you will eliminate the soldiers standing near them easily. You have to fight as long as there is a new helicopter above you #2. Unfortunately, you won't be able to destroy the machine. The helicopter will attack the armored car you were travelling in but your hero won't get seriously hurt.
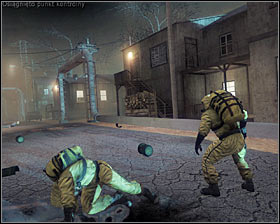
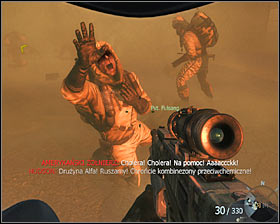
Wait until the main hero gets himself together #1. Notice that Nova 6 gas was used and now you have to use a uniform #2. The most important thing is to prevent the viewfinder from being destroyed because it can lead to hero's death. As a result, it is advisable to wait in the back, let other soldiers deal with dangerous factors. Fortunately, if you get hurt, you will go back to the last checkpoint and you will get a new, undamaged uniform.
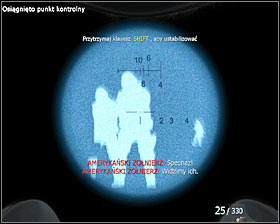
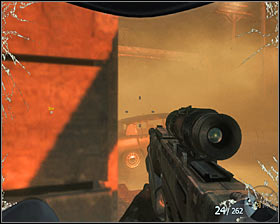
First go north. Use the telescope to track the nearest enemies #1, as a result it will be very easy. Of course remember to hide because the enemies will find it easy to track you. Move north-west SLOWLY and keep on using the telescope to track the enemies #2.
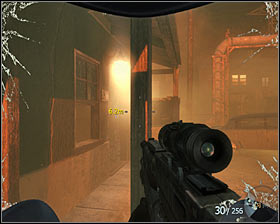
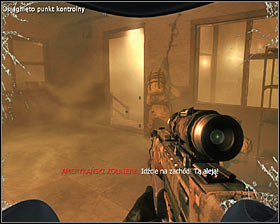
The aim is to reach the entrance of one of the buildings #1. As you were told, get inside quickly to avoid being shot from the helicopter. Go through the whole building. Be careful when you reach the exit #2, track new enemies using the telescope.
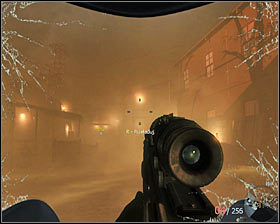
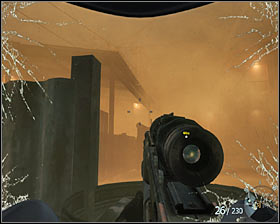
Before you go outside, make sure you have eliminated a sniper hiding on a higher floor of the building on the right #1. Head east now. The second sniper should be on the left #2. At the same time watch out for the enemy who will run at you from north-west.
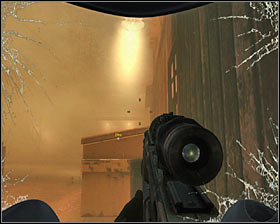
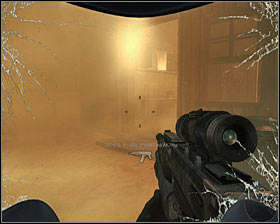
Keep on marching. Watch out for the enemies hiding on the floor situated in front of you #1. An explosion will take place there. Before you go there, enter the building on the right #2.
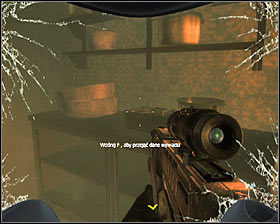
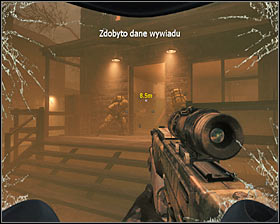
Check the rooms on the ground floor and you will find the last in this mission secret service data #1. Now you can go outside and head towards the burning building mentioned before #2.
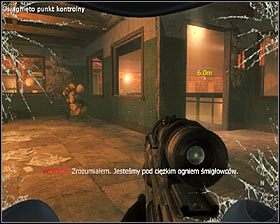
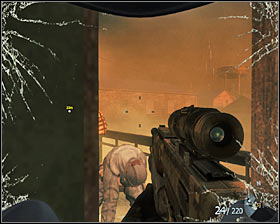
Go to the floor. When you get there, hide with the rest of the team by the window #1 and start shooting hostile soldiers in this area. At the same time watch out for the enemies who can try to come closer #2.
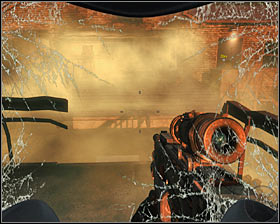
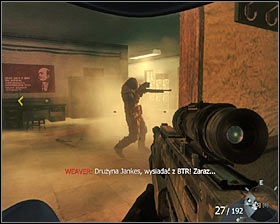
After securing the area go to a balcony and go straight #1, you will reach a new building. In the next room don't let an enemy surprise you #2. After eliminating him, go to the ground floor and then towards the exit from the building.
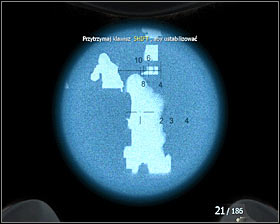
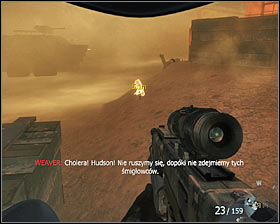
Use the telescope again to eliminate the enemies hiding in this area #1. Soon you will be ordered to destroy two hostile helicopters flying above your heads. Wait till the situation is stable, run up to a place marked by the game and quickly pick up Striel #2.
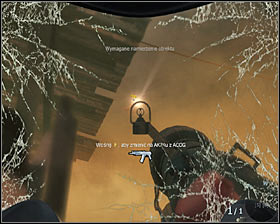
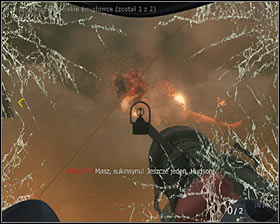
Try to stand in such place to avoid being attack but regular hostile soldiers. Wait till one helicopter appears and then track it (you don't have to press anything) #1. When you hear a constant noise, fire a missile which will shoot down the helicopter #2. You have to deal with the second flying machine in the same way.
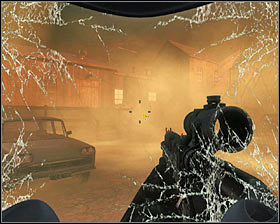
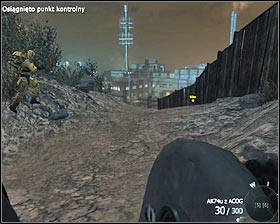
Now you can use a machine gun instead of a launcher (the best option is the one with the telescope). Now go north-west #1. Notice that after reaching a new zone #2 you friends have already take off their uniforms so you don't have to worry about destroying a viewfinder.
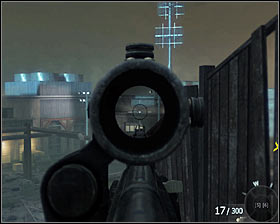
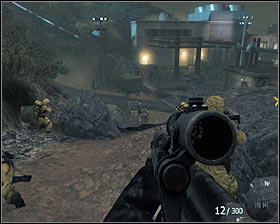
Start attacking a laboratory complex. First start eliminating snipers situated on the roof of the building visible in the distance #1. After eliminating them, start attacking enemies situated in front of you #2.
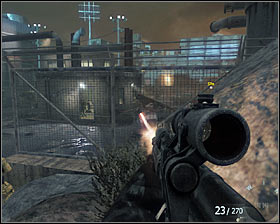
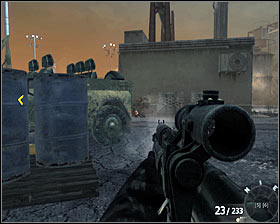
Get close to the gate and start eliminating other enemies #1. According to the suggestion, it is a good idea to go left which allow you to surprise many enemies #2.

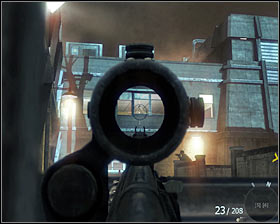
One by one eliminate all snipers who will appear on the roofs on nearby buildings quite regularly #1. When you come close to the entrance of the laboratory, first eliminate the enemies situated on the floor #2. Watch out for the enemies who can run in here - it is sensible to kill them quite early.

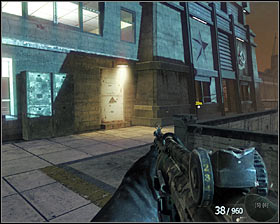
If you want, you can use a rocket launcher found nearby #1 to eliminate bigger groups of enemies, however in the meantime make sure nobody gets near you. Step by step move towards the main entrance of the building #2.
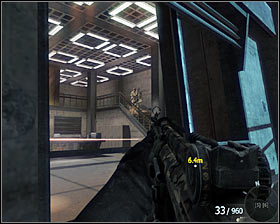
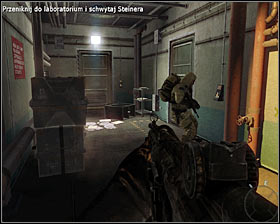
Stop by the exit or window attacking the enemies inside #1. The enemies will occupy the ground floor and first floor so you have to look around. After eliminating all enemies, get inside and move towards the left corridor #2.
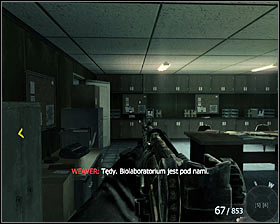
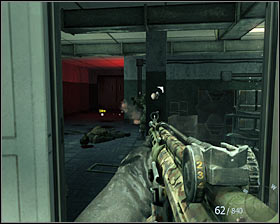
You are going to experience a difficult fight. Just as in the case of fights played in the body of Mason, it is worth going through the rooms on both sides #1, avoiding the main corridor. The last group should defend themselves near a badly lit corridor #2. Kill the enemies and wait until Weaver appears. He will unblock the further passage.
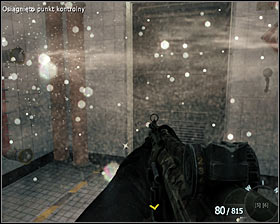

Get into the contaminated zone and stop in a marked place to initiate the process #1. Watch out because when the door opens, a single soldier will attack you #2. Move towards the staircase and be ready to eliminate other enemies.
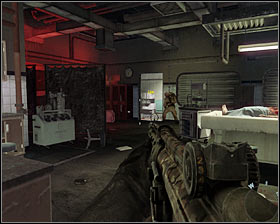
After going down to B-2 level, wait for Weaver again because only he can unlock another passage #1. Use another staircase and after going to a lower level go through a sideways passage #2.
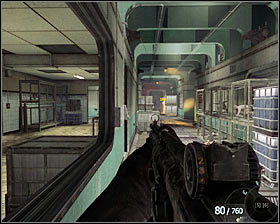
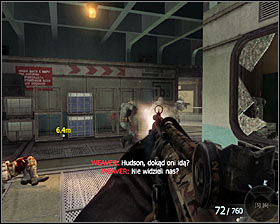
Watch out for a injured soldier who you have to kill as well as for a single soldier hiding around a corner #1. Go towards the laboratory. Near your destination a group of soldiers will pass you by #2, and it is a good idea to surprise them and not let them fire back.
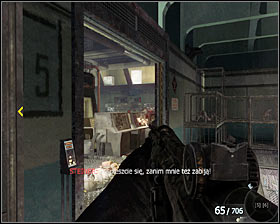
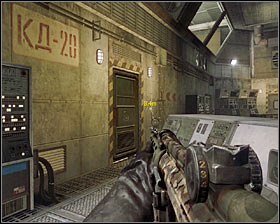
You will come up to a room you already know but new enemies appeared in there #1. After eliminating all enemies, head towards the closed door #2. Come up to the terminal and hold the F key to unlock the passage. Now you will watch a long cut-scene.

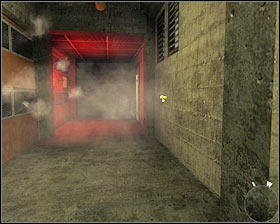
After watching the cut-scene, leave the room #1. Go straight #2, and the mission will end soon.

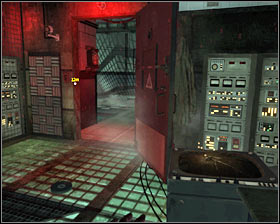
The description of completing the mission: This stage should be treated as a long, interactive cut-scene. Your movements will be limited, quite regularly you will experience different visions and you won't meet any enemies. Wait till Mason frees you #1 and leave this room #2.
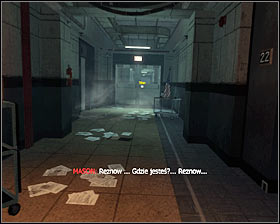
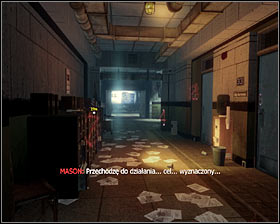
After reaching a new corridor, go straight #1. Stop after opening the door. Check the left corridor #2.
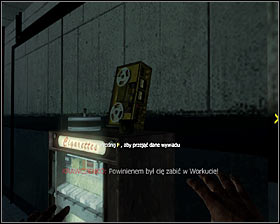
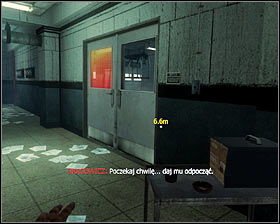
The first in this mission secret service data are situated on the machine selling cigarettes #1. Take the secret, go back to the crossroads and this time go straight. Come up to the door on the right #2.
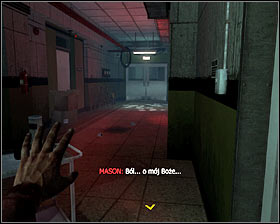

After regaining control over the main hero, get out of the room and go right #1. Check a badly lit part of the corridor and in the dust bin you will find secret service data #2. Now you can go left.
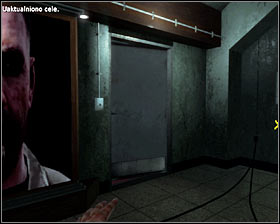
Go towards a bigger room you can see in the distance #1. When you get inside, watch the whole recording and then at the end use the sideway door #2.
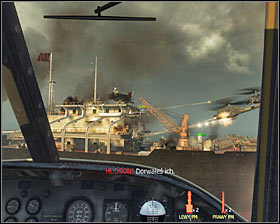
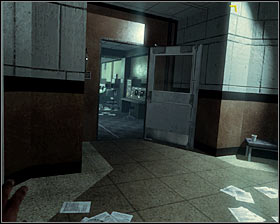
Continue going straight #1. You will lose consciousness again. After regaining control over Mason, get into the room on the left #2.
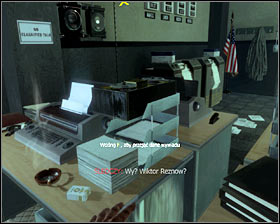
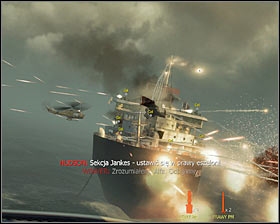
First go left then look for the last in this mission secret service data, situated on one of the desk, near the type writer #1. Now you can leave the room #2. Go straight and when you reach a new place, the game will take over the control over your character.
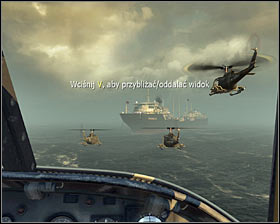
The description of completing this mission: You have to be patient because it will take a while before you be able to control the helicopter #1. All settings of steering are the same as in one of the previous missions (directional key and mouse to set the direction of the flight, V to see closer, both mouse buttons to use the gun and rockets). Start destroying the targets on a hostile ship marked by the game #2. Of course move constantly to avoid being an easy target for the enemies.

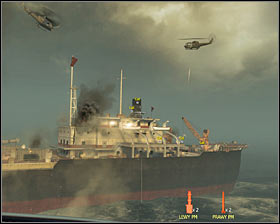
You have to move along the ship, blowing up all objects marked by the game #1 #2, Remember to avoid staying in one place because in such case you will be shot. In a moment the helicopter of the allies with a group if friends will land on the ship and your task will be to protect them.
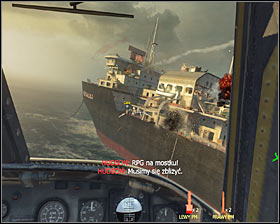
In general the rules are still the same. Still you have to attack the targets marked by the game #1 #2, but this time hostile soldiers will be these targets. The difficulty is that you have to eliminate soldiers quite quickly, otherwise they will attack your allies.
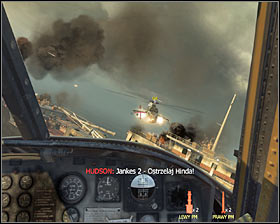
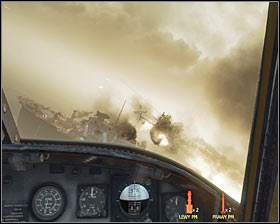
At the end of the mission you will have to fight a hostile Hind helicopter. During the fight remember to use A and D keys. As a result, you will fly sideways #1 and avoid the missiles fired in your direction. At the same time try to fire missiles to shoot a hostile unit #2.
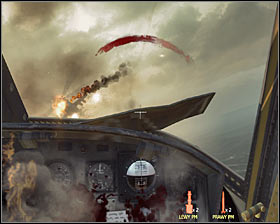
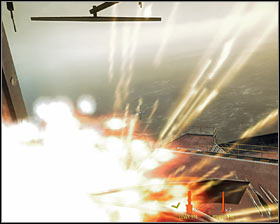
Notice that despite the destruction of flying enemy unit #1, your helicopter has been damaged too. Set the machine onto the landing situated on the deck of a hostile ship #2. After a short cut-scene you will be able to start fighting on your own.
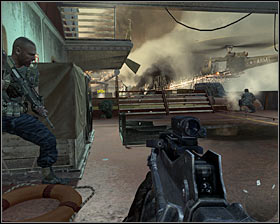
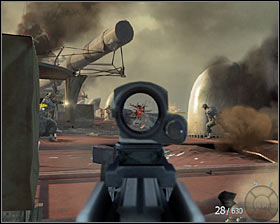
You can move straight. At the beginning you will not have to eliminate enemies because one of your allies' helicopter will take care of things #1. However be prepared that you will have to manage without support from the air. Attack your enemies from the distance if it is possible #2 and use all objects in the area to hide.
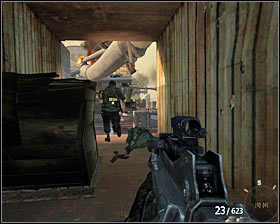
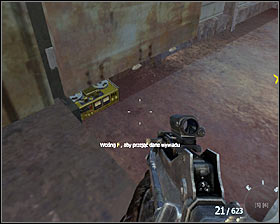
Go to the left container #1, eliminate the enemies who are further way from this very spot. When you leave the container, turn left and on the ground you will find the first in this mission secret service data #2.

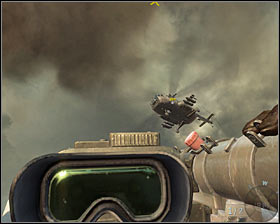
Go to a place marked by the game fast and pick up Valkyrie rocket from the ground #1. Wait until one of the helicopters appears above you #2.
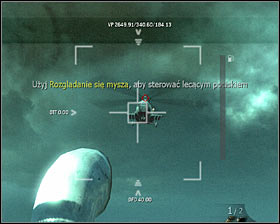
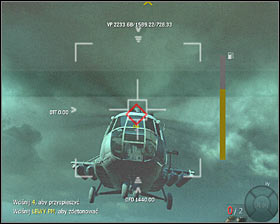
Aim at a helicopter #1. You don't have to be precise because the game will allow you to change the missile's direction #2, and it is worth using this option. In a similar way you will destroy the second flying machine of the enemy.
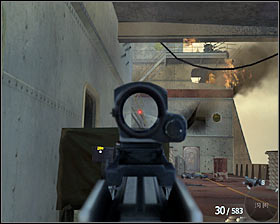
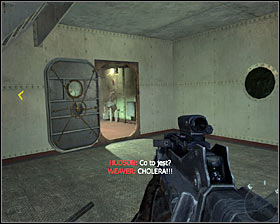
Again pick up a machine gun and go straight. Watch out for a bigger group which will appear soon on the ship's deck as well as for sniper situated on the higher level #1. Head towards the place marked by the game. It will be unlocked when your teammates join you #2.
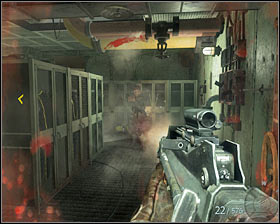
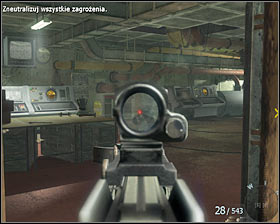
Go straight, turn left and go downstairs to a lower desk. Prepare for eliminating few enemies guarding a small storage #1. After eliminating enemies use the stairs. Here you are going to face the enemies #2 and make sure the enemies hiding in this area won't surprise you.
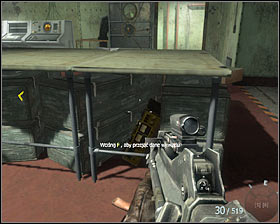
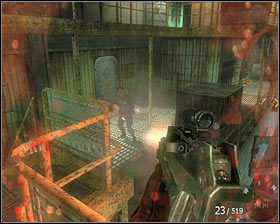
After winning the fight, look for a desk on which there will be among other things a kettle. Under the desk you will find new secret service data #1. Now you can get into a much bigger location. Here first eliminate the enemies who are the closest #2.
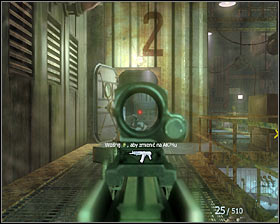
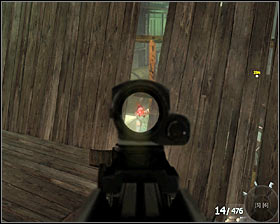
Go upstairs and prepare for eliminating new soldiers who will appear in front of you #1. Head towards the end of the balcony, hide behind the desks #2 and from here try to eliminate the enemies standing on a lower level.
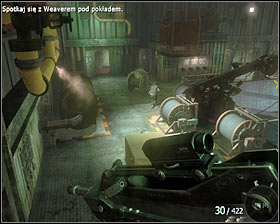
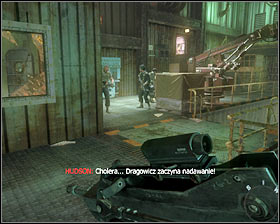
Don't worry if you can't shoot for a while. Go downstairs #1 and go right. You have to come up to Hudson #2 and listen to a short talk. The action will move to a new place.
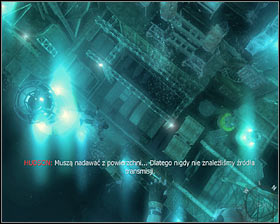
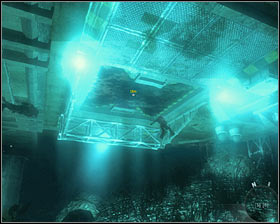
Wait peacefully till the main hero falls onto the bottom #1. Press and hold the W key and Mason will automatically swim to a place #2, where you get out of water.

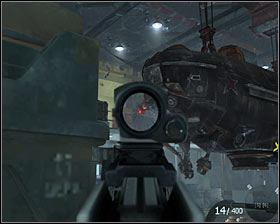
Wait till one of your friends open the door. Start shooting the enemies in another room #1. Especially watch out for the enemies standing on upper balconies because they are really dangerous #2.
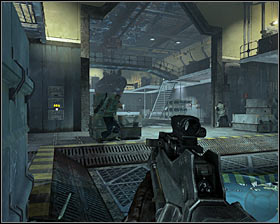

Gradually get through the room #1. Still focus on eliminating enemies who are on upper balconies and don't get scared when you see a submarine falling down. Head towards the aim and prepare for eliminating new enemies who will be running outside #2.
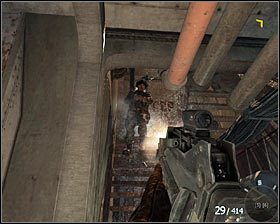
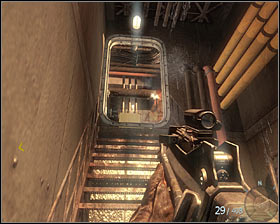
Get inside. Quickly eliminate the enemies standing on the flight of stairs #1, as well as the ones waiting for you on a higher level #2.
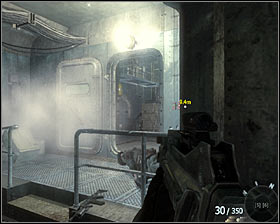
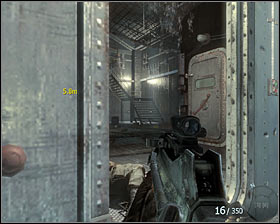
When you get upstairs, eliminate an enemy hiding in front of you. Other enemies are situated on the right #1. Don't hurry and carefully eliminate your targets #2.
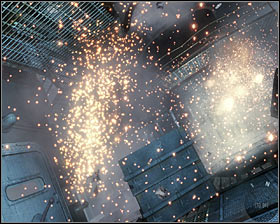
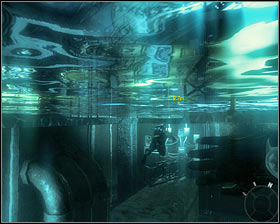
When you try to get into the next room, you will witness an explosion #1, but fortunately you aren't in any danger. Swim after Hudson and soon you will reach a place where you will be able to go out of water (you have to press SPACE) #2.
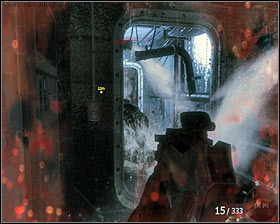
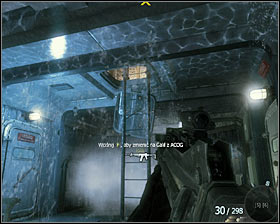
Head towards the near door and eliminate the enemy waiting there #1. In another part of a flooded corridor you will have to eliminate a single enemy. The aim is to reach a ladder #2 and use it to go to the higher level.
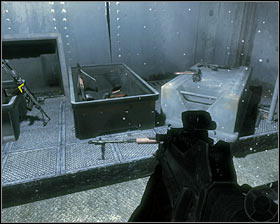
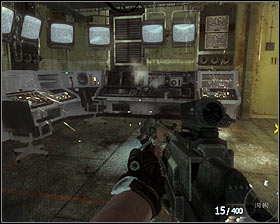
Pay attention to a weapon storage #1, and then check oput an underwater complex. On your way you will have to eliminate at least one enemy. You have to reach a much bigger room #2.
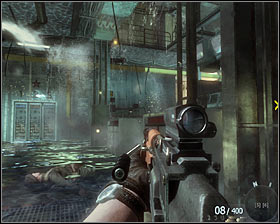
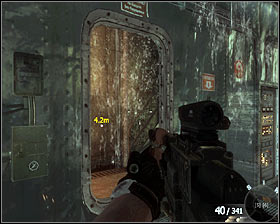
While securing the room, I suggest you to be careful you may not notice your opponents because of the explosions #1. Head towards a small passage #2, next to which there are stairs leading to a higher level.
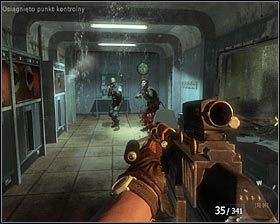
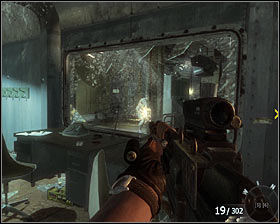
Watch out for two enemies hiding in the control room you will enter in a minute #1. After eliminating them, destroy the window on the right and start shooting other hostile soldiers #2.


After securing the whole area, check the room you are in and under the desk on the left you will find the last secret service data #1. You can start securing the next room #2, there should be at least two soldiers inside.
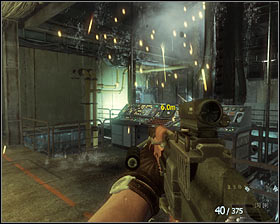
Check the area on the left because one of the soldiers can surprise you there #1. You can come up to a big console #2, and as a result, a new cut-scene will appear.
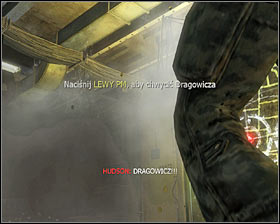
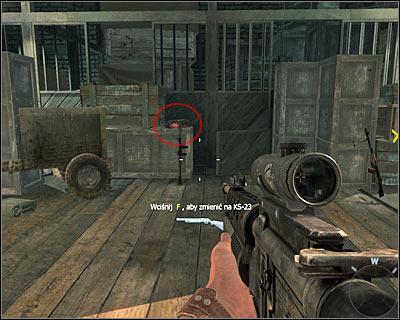
There are two important things you have to do - wait for the right moment and press the left mouse button to get hold of Dragowicz #1, and then press SHIFT and the V key at the same time to drown him #2.
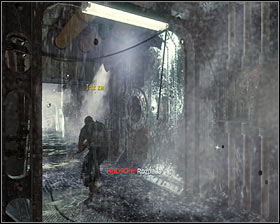
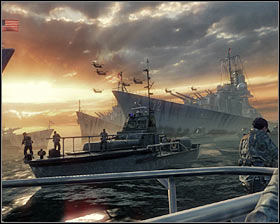
Run after Hudson #1. After getting into the water fortunately you won't have to manage Mason. You can enjoy the ending #2. Congratulations!
PS. Don't turn the game off because after the last subtitles (you can rewind them) you will have a nice surprise :)
There are 42 secrets to find, they are called secret service data. In every mission there are three objects to find. The only exception is the stage called G.D.C.C., because there are no interactive scenes.
Every time you find a secret, the game saves the information so even if you die before completing the mission or reaching a control point, you won't have to collect the secret again.
Finding secret service data is a part of the description of completing the mission for a single player (green), so I suggest you use this chapter to find the secrets you have missed quickly.
The game allows you to check current progress connected with finding secret service data and you can do it from the main menu (campaign and INTEL LOCATION).
SECRET SERVICE DATA 1/3
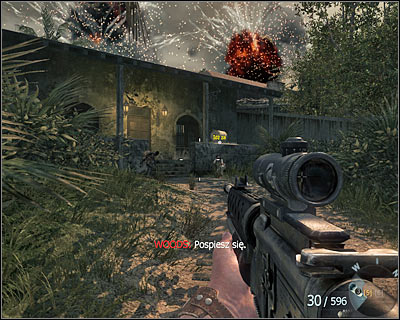
After successful escape in a car and getting to a new place, you have to reach a building presented on the screen above. Massive explosions will take place far in the distance behind the building.
When you get inside and eliminate all enemies, check the check next to the rocket launcher.
SECRET SERVICE DATA 2/3
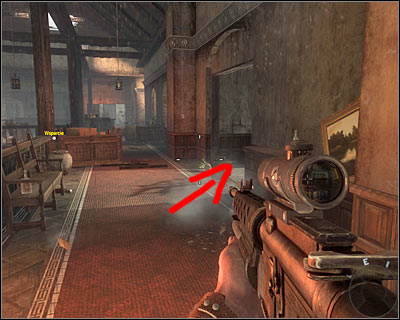
After reaching a burning building secure the whole floor and the use the passage on the right.
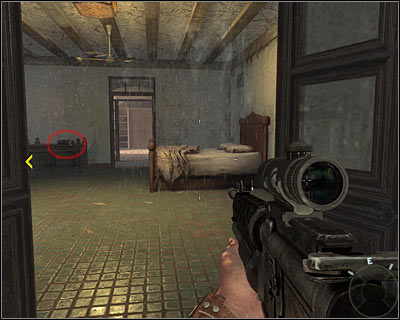
Turn left and enter the bedroom. The secret is on the shelf you can see in the distance.
SECRET SERVICE DATA 3/3
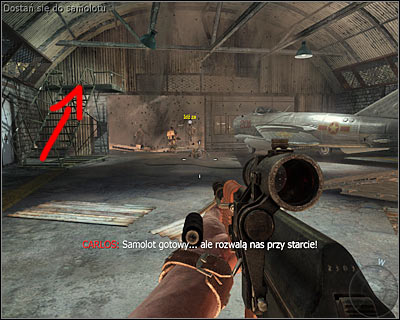
When you reach an airport (at the end of the mission), enter the closest hangar. Here use a ladder situated on the left.
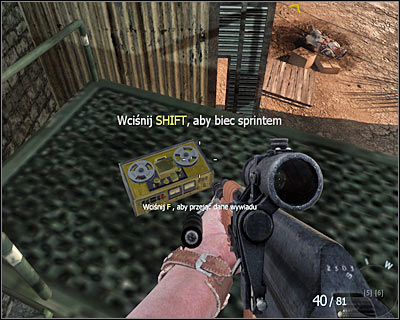
Secret is situated on the top of a metal construction.
SECRET SERVICE DATA 1/3
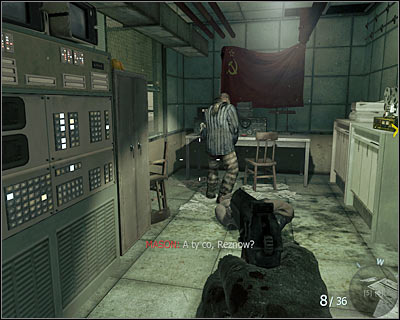
After getting through a big square, you and Reznow will get inside one of the buildings. Wait until you are asked to go to the tower but stay in the same place as Reznow.
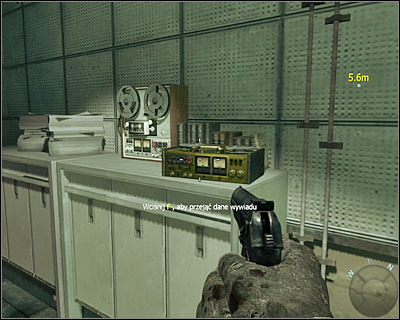
Turn right and the secret is in one of the drawers.
SECRET SERVICE DATA 2/3
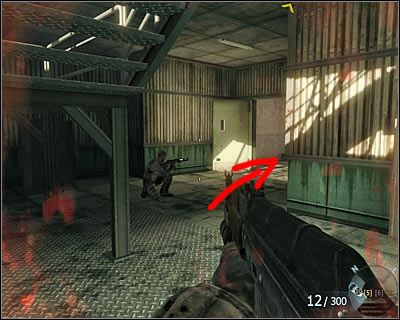
You have to reach a place where the main hero slides under the door held by Sergei. After eliminating all enemies, go to a room situated on the right (do it before go upstairs to upper balconies).
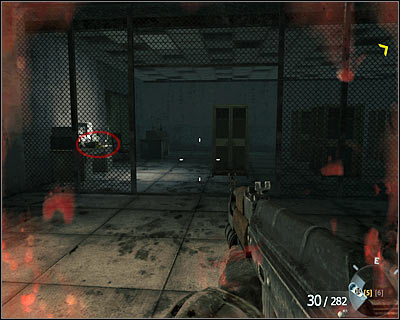
Secret is behind the bars on the left.
SECRET SERVICE DATA 3/3
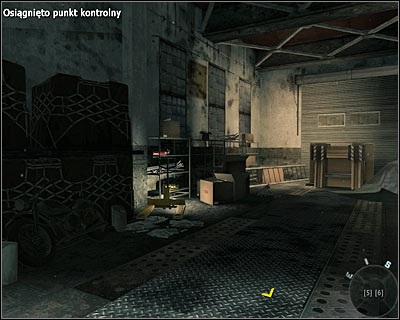
At the end of the mission you will reach a warehouse where Reznow will be sitting on one of the motorbikes. Check the small area directly behind him.
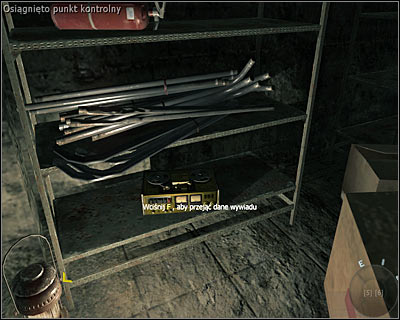
The secret is situated on the lowest shelf in one of the cabinets on the left.
SECRET SERVICE DATA 1/3
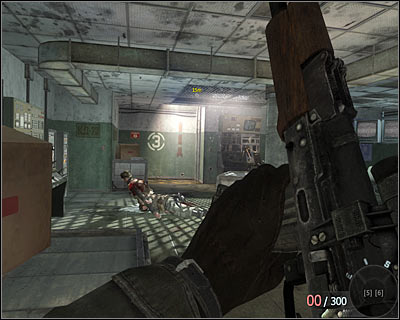
While exploring the communication building stop on the highest second floor (number 3 painted on one of the walls). Look around BEFORE you use the ladder.
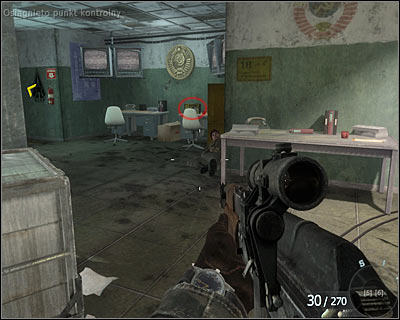
The secret is on one of the desks on the right.
SECRET SERVICE DATA 2/3

After completing the part of the mission in which you had to mind the time, you will have to blow up a wall to get into the control room.
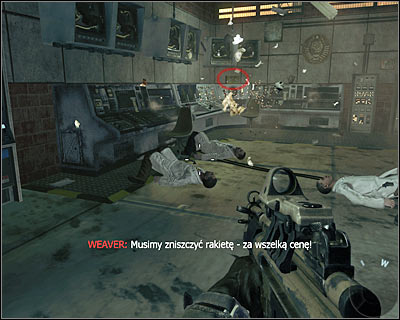
Go to the other side of the room fast. The secret is on the left.
SECRET SERVICE DATA 3/3
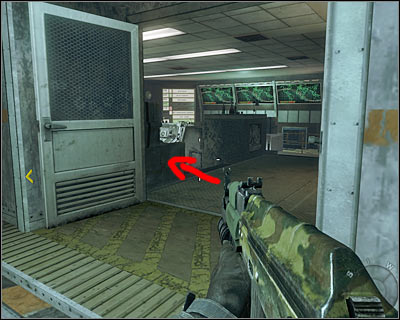
At the end of the mission stop after finding a bigger control room (it will happen BEFORE you reach the corridor with evaporating steam). Get inside and turn left after eliminating your enemies.
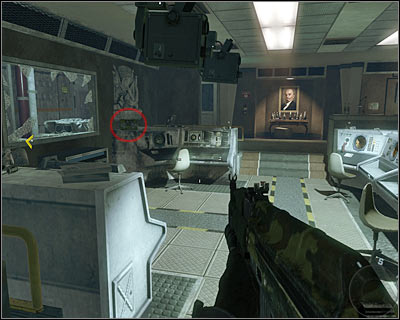
The secret is on the left by the window on one of the desks.
SECRET SERVICE DATA 1/3
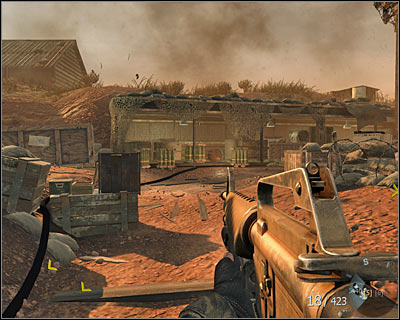
Soon after destroying three T-55 tanks at the beginning of this mission you will be asked to go to another location with your team. Ignore this order for a while (and DON'T jump through a big hole). Look around the area instead and go to a bigger tent.
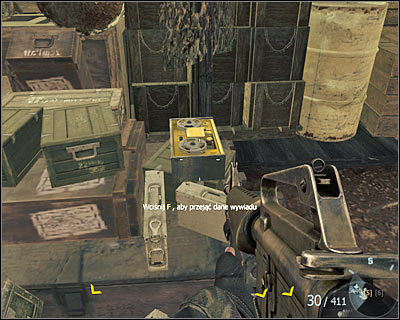
Secret service data is near the ammunition kept in here.
SECRET SERVICE DATA 2/3
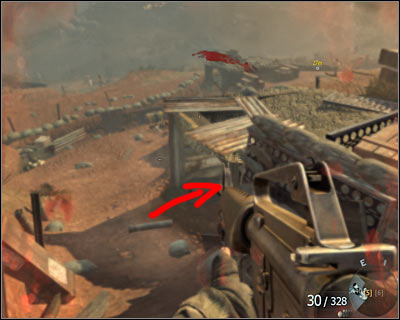
After finishing the fights on the hill where you pushed the barrels to put trenches on fire, go to the machine gun position on the left. Find the entrance to an underground bunker.
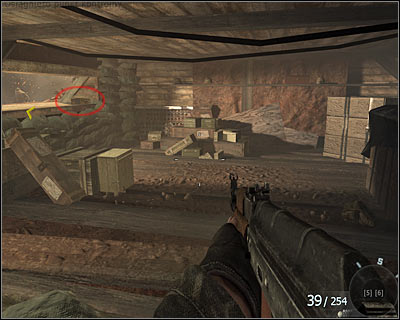
The secret is on the left.
SECRET SERVICE DATA 3/3
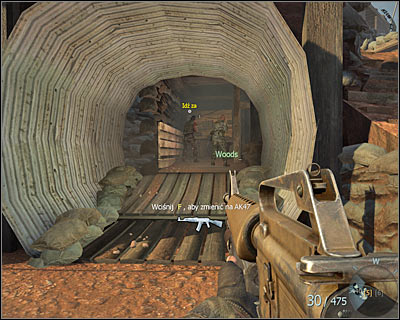
After taking over the part of the hill which used to be occupied by the enemies, go into a burning building.
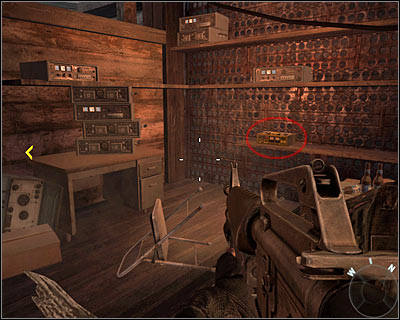
While exploring the building stop after finding few objects - the secret is hidden among them. It is a room with a flag on the wall.
SECRET SERVICE DATA 1/3

After meeting Reznow, use the exit which now is no longer blocked.
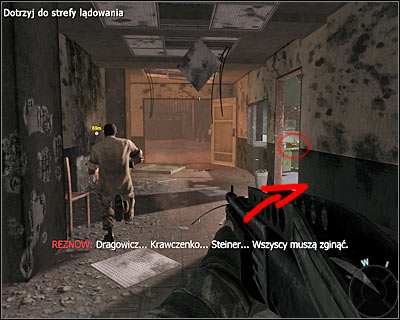
Stop immediately and go into a small room situated on the right and you will find the secret on one of the desks.
SECRET SERVICE DATA 2/3
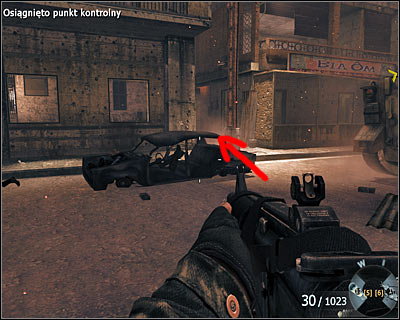
While following an armored vehicle and eliminating your targets with support from the air, you will reach a place where your allies' machine will turn right. Just go straight here and enter the building on the left.
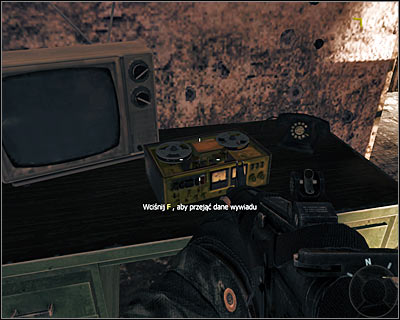
Secret is in the first room of the building, just by the TV.
SECRET SERVICE DATA 3/3
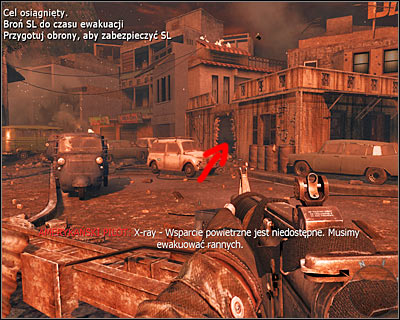
After blowing up a hostile ZPU you will reach a square where the final battle will take place. Don't wait till your enemies appear and go right. Find a building with a hole in the wall (a white car is parked by it) and go inside.
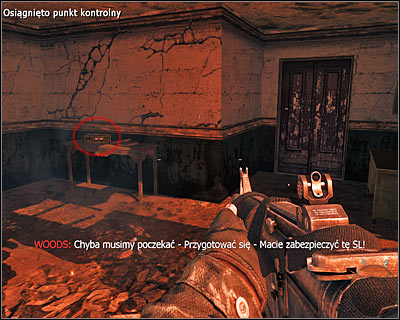
The secret is inside the building on a small table.
SECRET SERVICE DATA 1/3
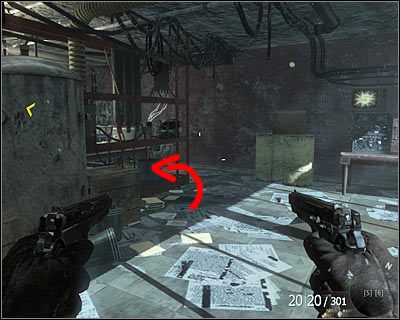
When the hearing is over and a bigger group of enemies is eliminated, check the part of the room on the right which is not lit. You have to hurry otherwise you will be affected by a poisonous gas.

Secret is situated on the desk on the right near the computer.
SECRET SERVICE DATA 2/3
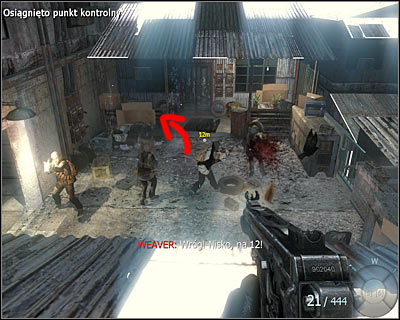
While exploring the roofs you should reach a place where you start sliding down a metal fragment in a slow motion mode. After eliminating the enemies, check the area under the roof which you will see directly in front of you.
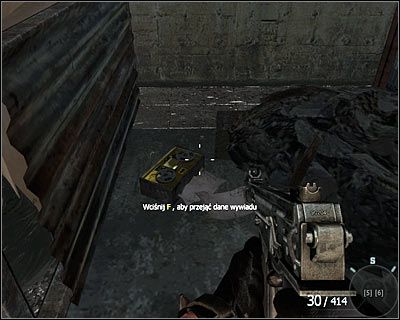
Secret is on the ground on the left.
SECRET SERVICE DATA 3/3
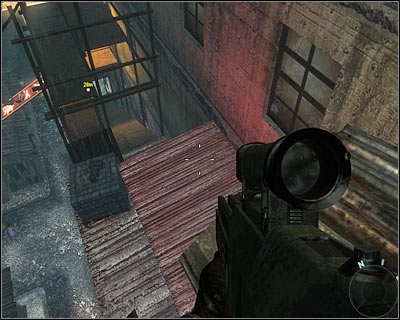
In the final part of the mission you will follow Weaver jumping from one roof onto another. Stop at the end, to be more precise - after jumping off the red fragment of the roof (don't use the tunnel leading down yet!).
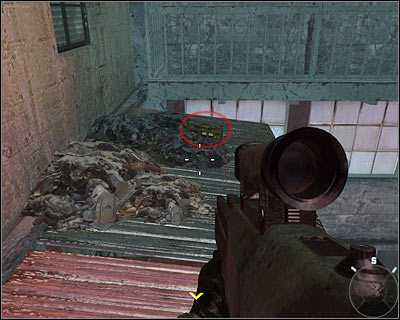
After jumping onto the red fragment of the roof, turn around and the secret will be in front of you.
SECRET SERVICE DATA 1/3
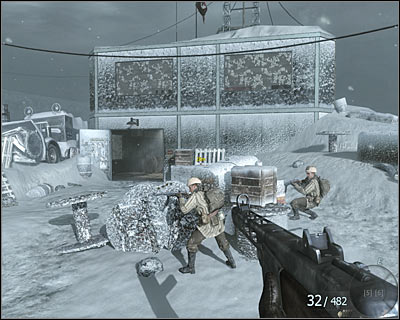
After reaching the first building where Steiner is hiding, go inside. When you eliminate all enemies, go upstairs.
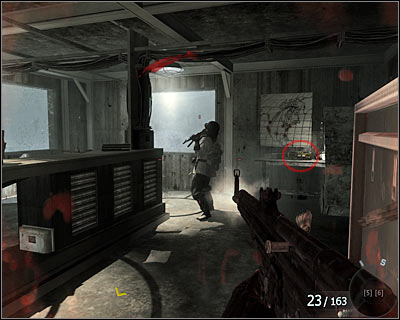
After eliminating the enemies go to the next room and turn right. The secret is on one of the desks under a map hanging on the wall.
SECRET SERVICE DATA 2/3

After reaching the field, you are able to use a mortar. You should reach a HANGAR where the enemies were shot. Go inside.
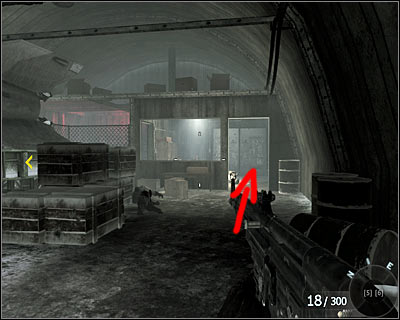
Go to the other side of the hangar and check a small boot in one of the corners. The secret is on the table.
SECRET SERVICE DATA 3/3

At the end of this mission you will have to watch out for the time while trying to run away from the ship. Stop after reaching icy stairs.
Instead using the stairs, turn right and the secret should be on the ground.
SECRET SERVICE DATA 1/3
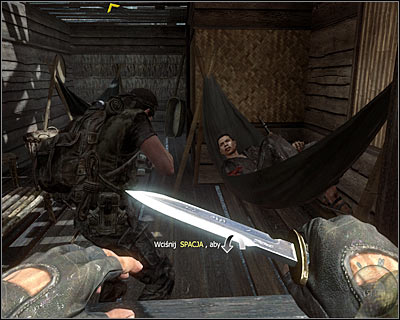
At the beginning of this mission you will have to stay in hiding and follow Woods's steps, stop after reaching the cabin with a sleeping guards. After killing the enemies, move to another room.

Ignore the enemy who you can see in the distance and turn left. You will find the secret on the ground.
SECRET SERVICE DATA 2/3
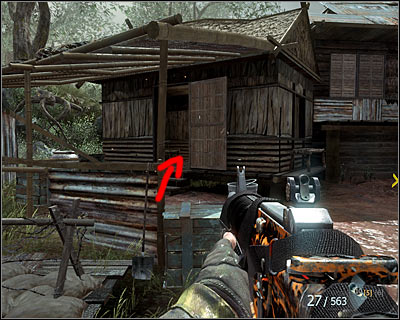
Stop soon after the begging of a battle in the village, more precisely after reaching the place where you have to turn right and come up to the river. Go straight instead and enter the hut which is situated the nearest and has a roof.
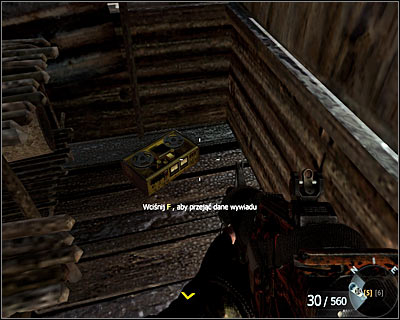
After getting inside the hut, go forward and turn left. The secret is situated on the ground.
SERCET SERVICE DATA 3/3
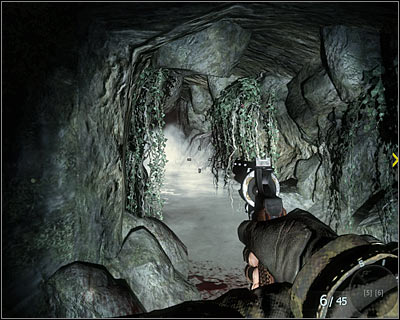
While going through the tunnel at the end of the mission stop and wait until one of Vietcong soldiers attacks you. After eliminating the enemy, choose the tunnel on the left from which he has come.

While going through the tunnel, look around to find a recording on the right.
SECRET SERVICE DATA 1/3
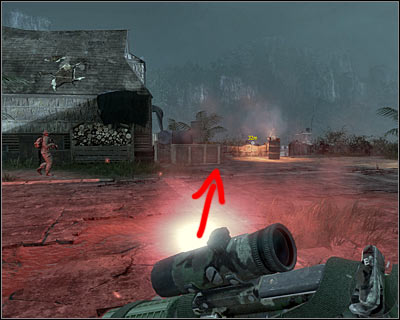
Right after starting the mission head towards the boat, BUT do not come too close.
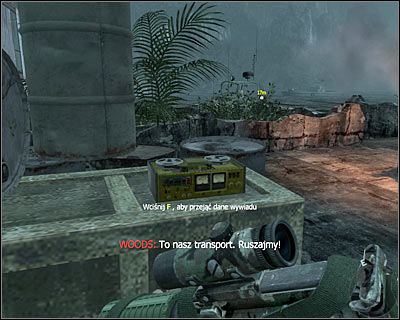
Stay near the airport. The secret is on the boxes.
SECRET SERVICE DATA 2/3

After crossing the water by boat, you will have to follow your team mates.
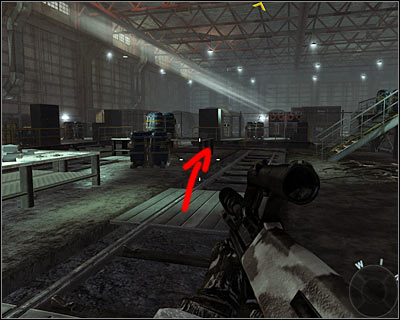
Check the path leading to another area of the mission and you will find the secret.
SECRET SERVICE DATA 3/3

After reaching the wreak of a plane, walk on its wings.
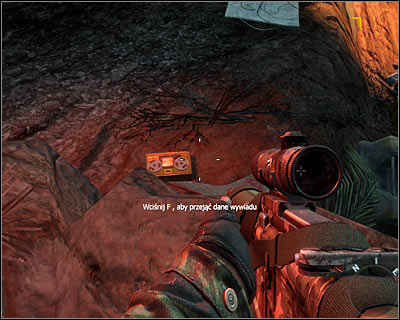
The secret is situated on the ground, near the way down of the wing (before you go inside the plane).
SECRET SERVICE DATA 1/3
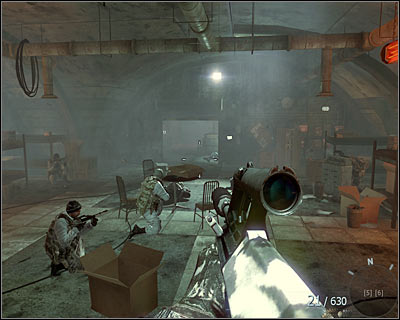
After reaching the barracks (second action with soldiers on the ground) eliminate enemies and go downstairs.
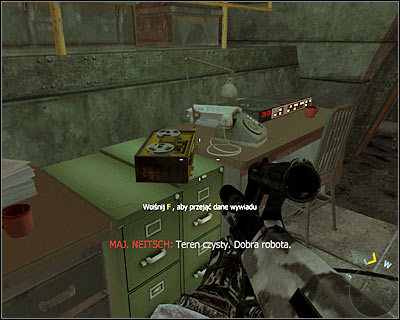
You will secret on the left, near the phone. Take it before you blow up the generator by using C4.
SECRET SERVICE DATA 2/3

After quietly eliminating all enemies on the surface, you will reach much bigger room with a radar on the wall. Go to the other side of the balcony. Enter the room from which few enemies will run out.
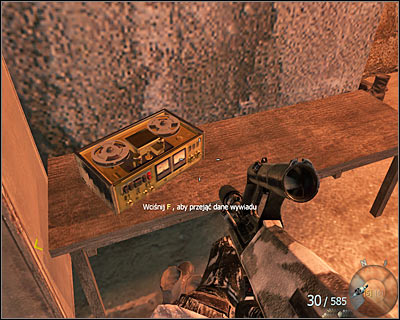
The secret is situated on a small table.
SECRET SERVICE DATA 3/3
After reaching the biggest warehouse at the end of the mission, ignore the control room which you can see on the right and go straight.
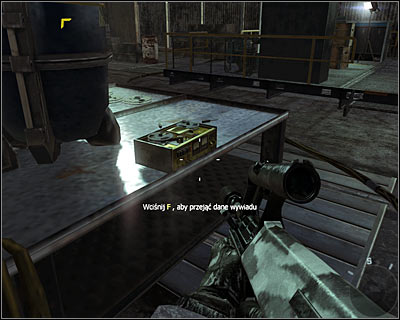
The secret is situated on one of the tables near the blue barrow.
SECRET SERVICE DATA 1/3
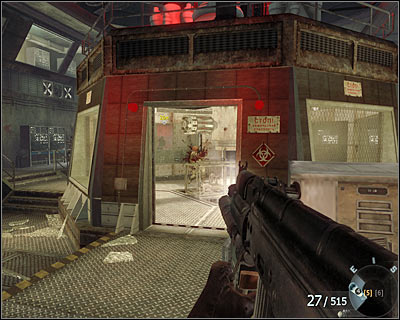
At the beginning of the mission you will reach a bigger cava - the enemies will appear from above and below.
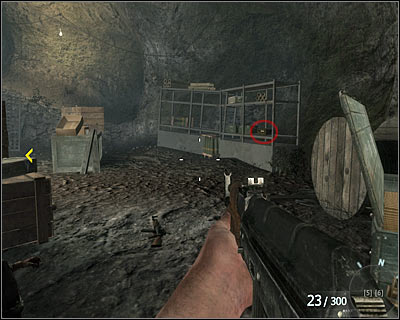
After the end of the battle, check the area on the right. The secret is situated on one of the drawers.
SECRET SERVICE DATA 2/3
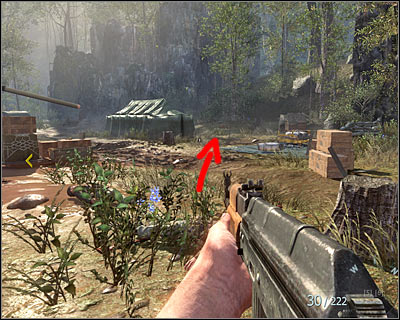
After reaching the surface and eliminating enemies standing near the Hind helicopter and start exploring the part of the camp on the right.
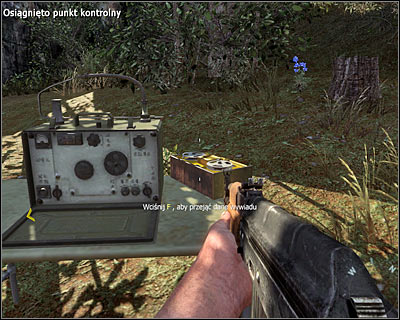
The secret is situated on the table with the radio.
SECRET SERVICE DATA 3/3
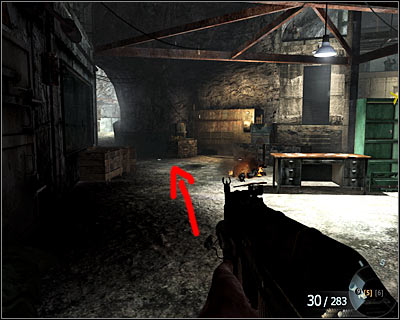
After freeing the prisoners at the end of the mission, you will reach the bigger part of the cave occupied by the enemy. After eliminating enemies, check badly lit area on the left.

The secret is situated on the planks.
SECRET SERVICE DATA 1/3
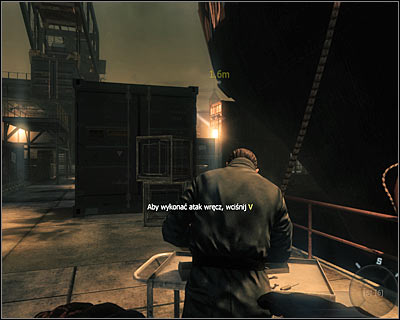
Immediately after starting the mission eliminate the first guard.

After eliminating the guard go left quickly. The secret is on the ground and you have to pick it up before the area is lit by the reflector.
SECRET SERVICE DATA 2/3
After reaching the laboratory get into the central room guard by a single soldier.
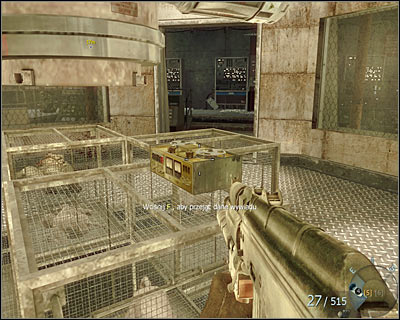
The secret is situated on one of the cages. After collecting it retreat immediately otherwise you can get trapped in here.
SECRET SERVICE DATA 3/3
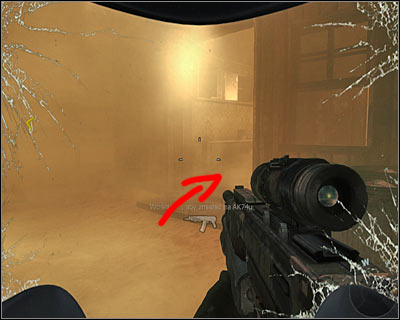
Playing as Hudson you will reach a building where there will be a bigger explosion on the first floor (it will happen while you will be using the KOMBINEZONY). Ignore this building for a while and enter another building situated on the right.
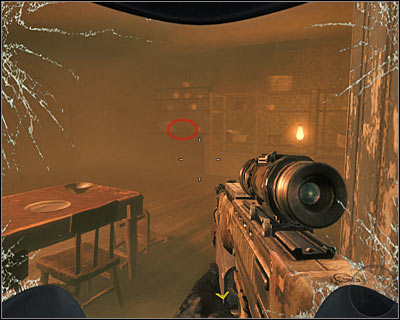
Go toward the kitchen cabinets you can see in the distance. The secret is on one of them.
SECRET SERVICE DATA 1/3
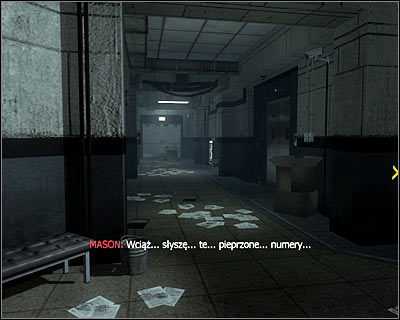
At the beginning of this mission you will reach crossroads. Choose the corridor on the left.
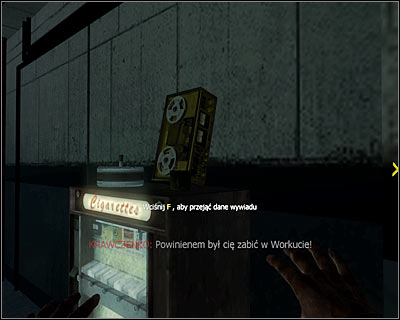
The secret is situated on the machine selling cigarettes.
SECRET SERVICE DATA 2/3
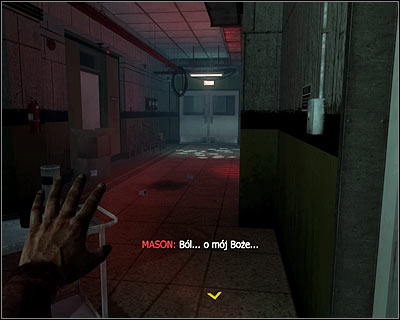
After seeing the vision with Steiner and Dragowicz leave the room and check the corridor on the right.
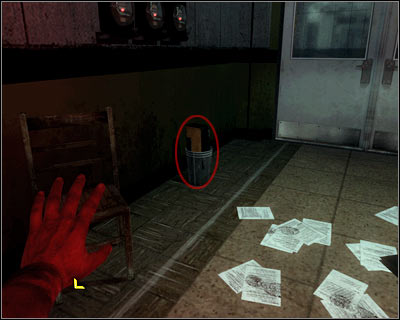
The secret is in the garbage can on the left.
SECRET SERVICE DATA 3/3

At the end of this mission you will reach a bigger control room.
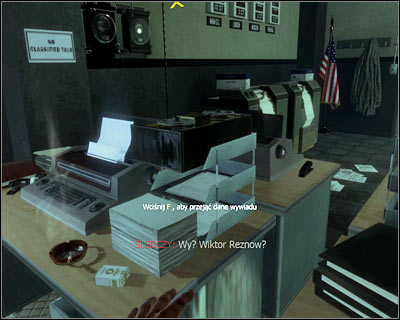
Secret is on one of the desks on the left.
SECRET SERVICE DATA 1/3

After getting on board go straight ahead. At some point go through a container on the left.
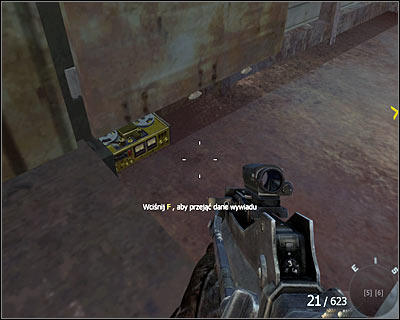
Turn left after leaving the container. Take the secret before using Walkiria rockets to shoot two helicopters belonging to the enemy.
SECRET SERVICE DATA 2/3
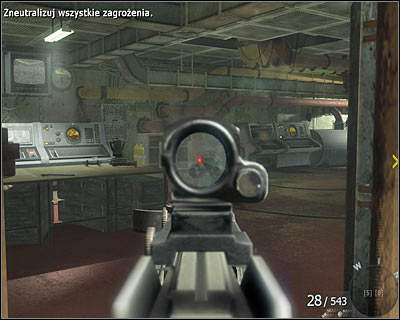
During the explosion at the bottom decks of the ship you will reach a control room guarded by your enemies.

After eliminating the enemies look under the desk situated opposite the entrance.
SECRET SERVICE DATA 3/3

At the end of this mission you will reach a control room situated upstairs guarded by two hostile soldiers.

After eliminating the enemies check the desk situated on the right. The secret is under one of them.


 Call of Duty: Black Ops Game Guide & Walkthrough
 Call of Duty: Modern Warfare 3 Game Guide & Walkthrough
 Company of Heroes: Tales of Valor Game Guide & Walkthrough
 Cube World Game Guide & Walkthrough
 Car Mechanic Simulator 2015 Game Guide & Walkthrough