The Call of Duty: Black Ops II game guide will help complete the single player campaign on Veteran difficulty, find all intel, as well as show how to pass all the 160 challenges. The guide consists of the following sections:
Author: Piotr "Ziuziek" Deja
Translation: Anna Deja
Objective: Push Forward with the convoy
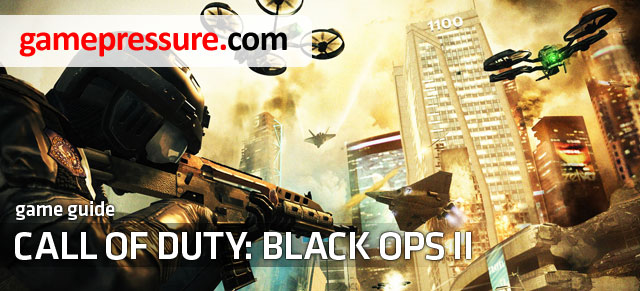
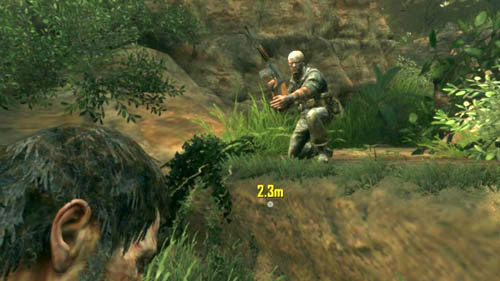
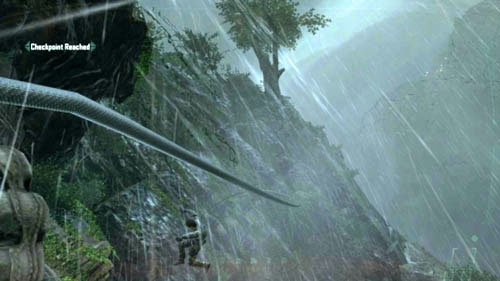
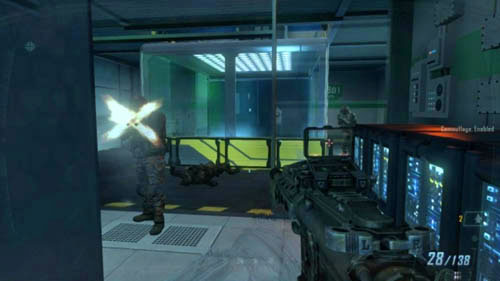
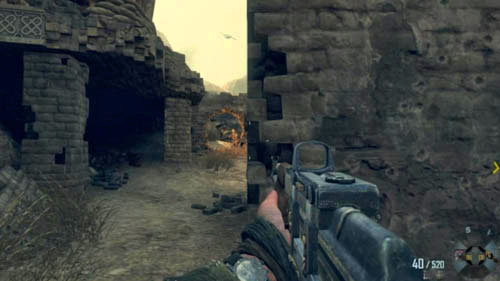
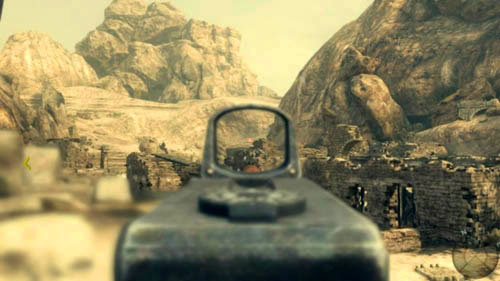
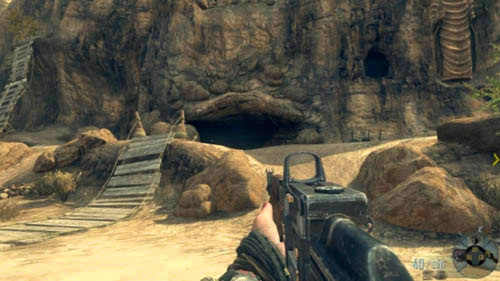
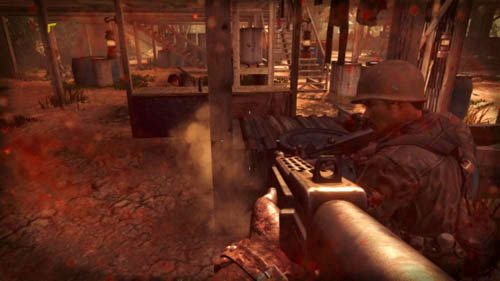
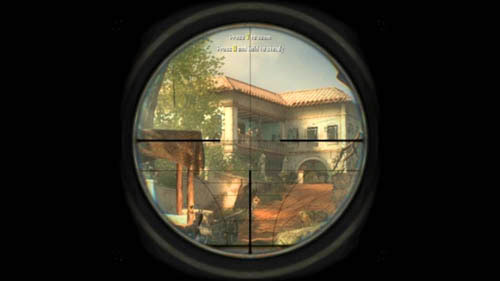
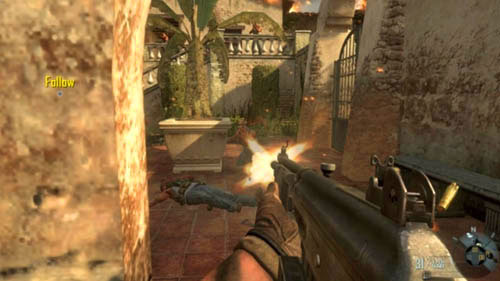
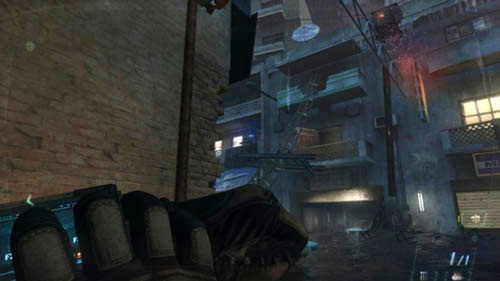
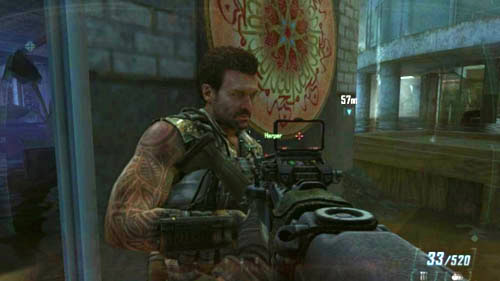
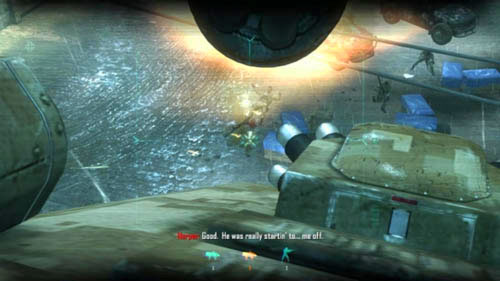
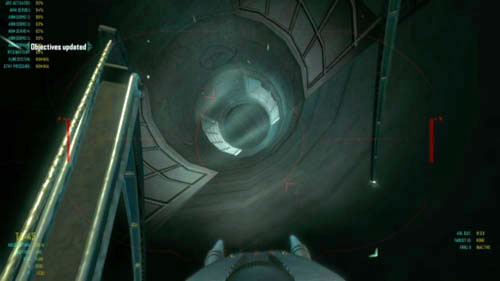
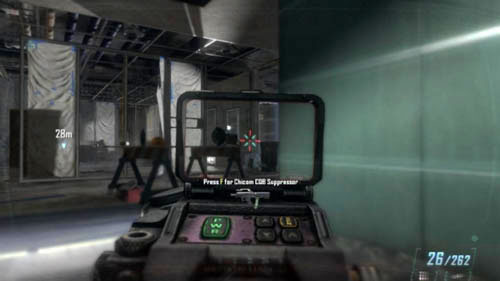
Although you will be able to look around from the beginning of the mission, the real game will begin when you jump off the ladder attached to the transporter. On the left side of the transporter you'll notice a few enemies, who will start running towards you after a while - it's easier to deal with them with the machete (picture above). In order to remain safe, keep close to the back of the vehicle until you get new mission objectives.
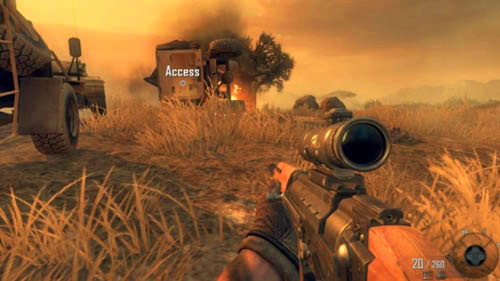
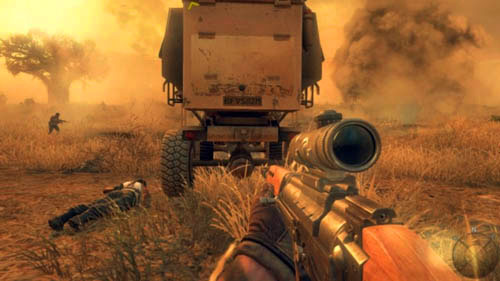
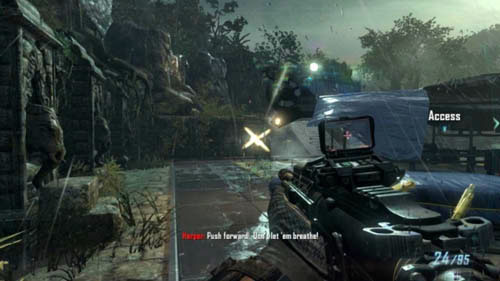
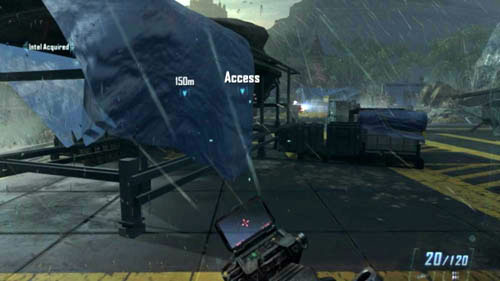
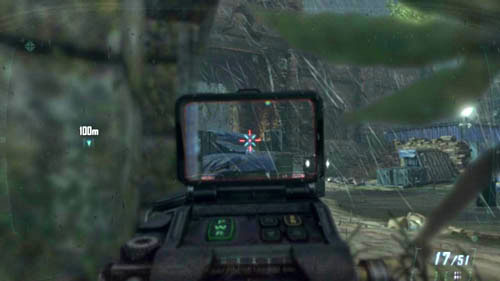
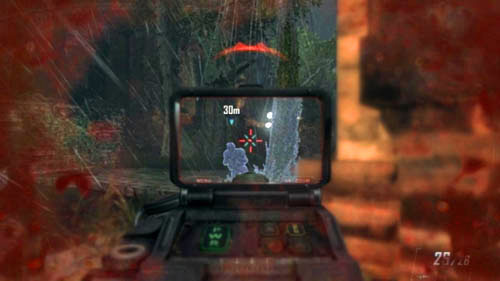
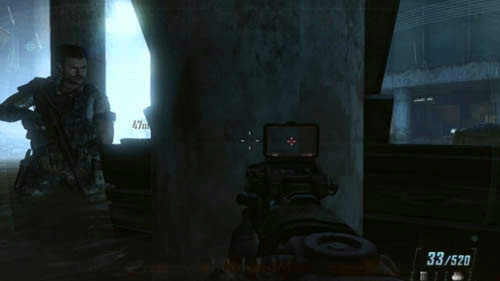
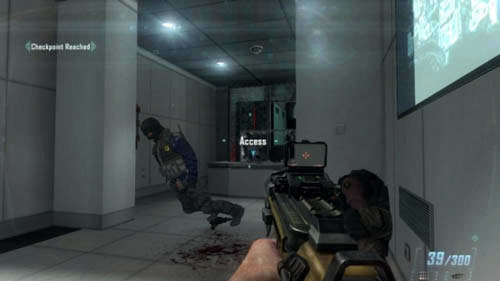
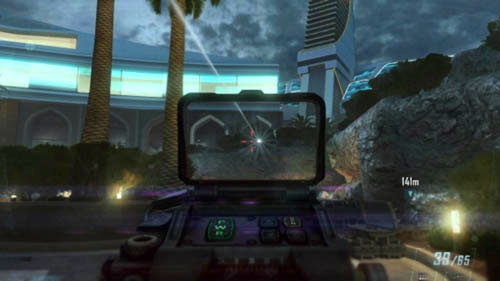
Before you start carrying them out, look at the vehicle lying on the side on the right side of the battlefield. There is a word "Access" on it (first picture above). Head over to it and open the rear of the vehicle to take mortar shells. You can use them as grenades, but do not use them just yet! Instead, look at the bomb crater on the right side of the vehicle. You will find intel (1/3) there (second picture above).
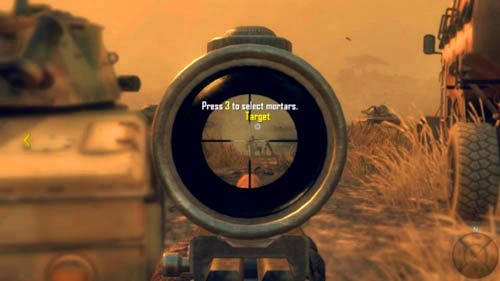
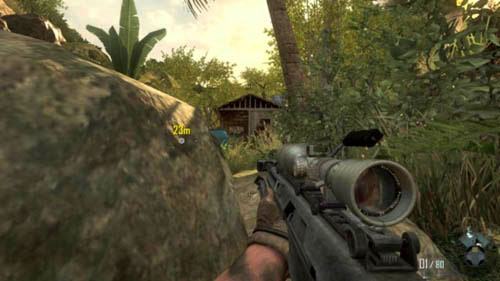
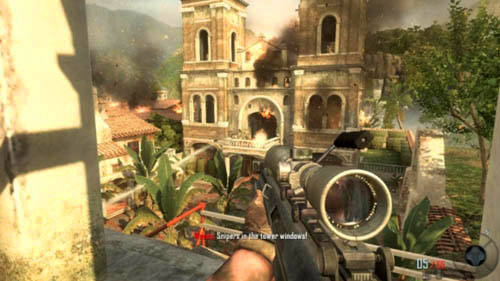
Objective: Eliminate the mortar crews
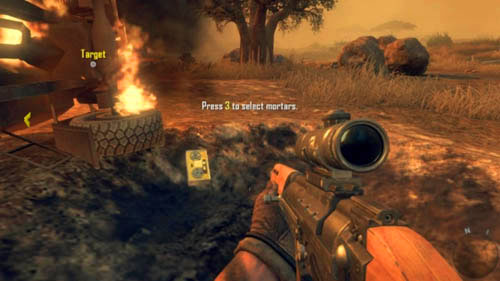
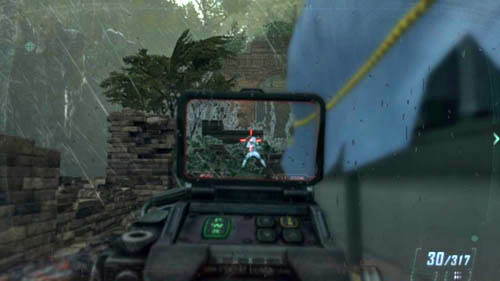
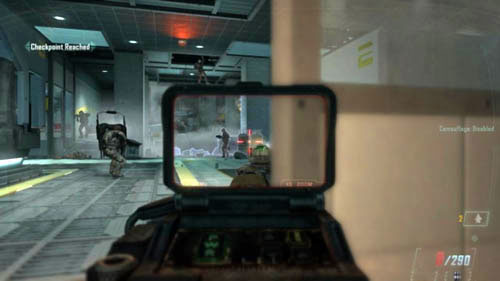
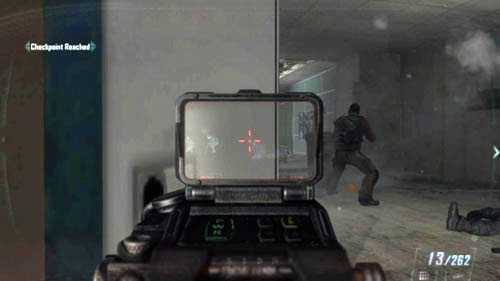
After taking the intel you should notice a single enemy by the mortar exactly opposite you. Take him out from a distance (first picture above). Afterwards run through the battlefield and go behind the allied vehicles until you get to the rocks. Three mortar crewmembers are hiding here (second picture above). You can try to kill them all with the machete, lean out and take them out one by one with a rifle, or move away and throw a mortar shell at them.

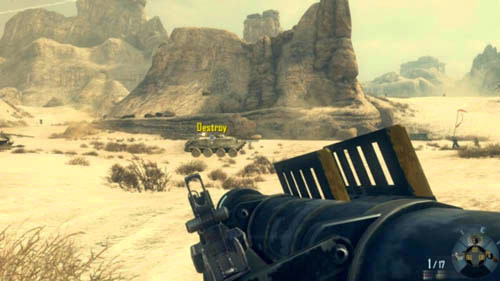
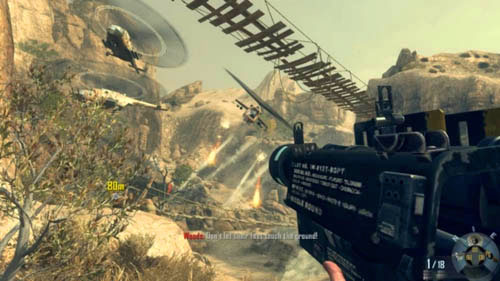
Objective: Destroy the first wave of tanks
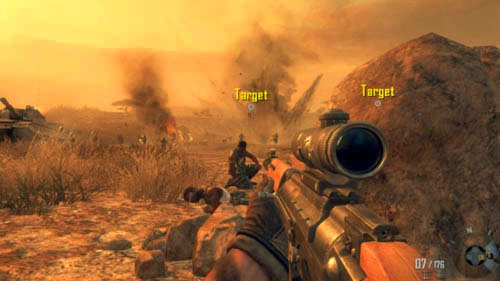
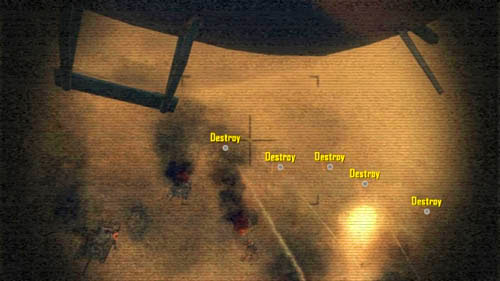
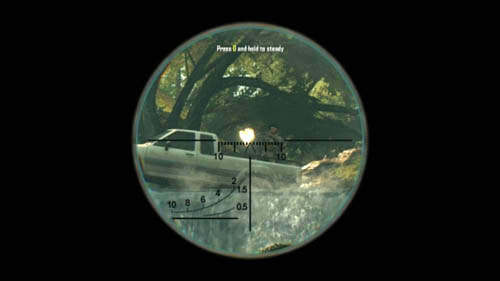
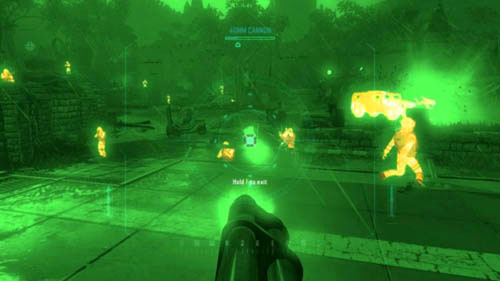
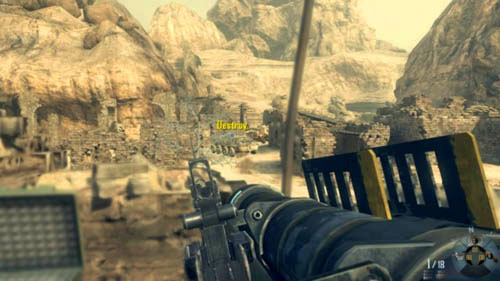
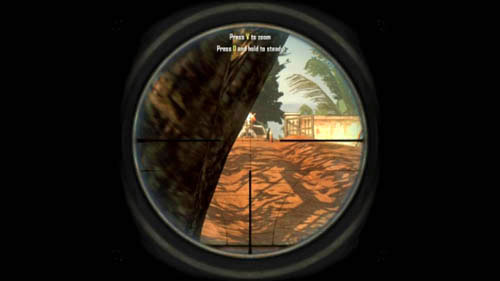
Hide behind the rocks and call the helicopter support. The first wave consists of only four tanks and it is really a warm-up before the second one. Forget the machinegun and use only rockets. Shoot the first as soon as you notice the gray dots with a word "Destroy" - aim and shoot at the dots one after another (picture above). In truth, destroying all the tanks is required only to pass a challenge. Still, try to destroy as many as you can.
Objective: Eliminate the mounted gunners
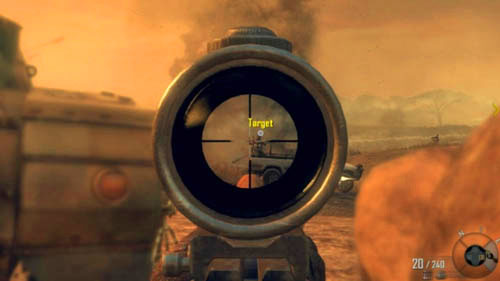
Do not run out from behind the rocks. Instead, look straight ahead. Use the scope and try to take out the first mounted gunner who's in the opposite vehicle, or - if you cannot hit it, wait until it stops (first picture above). You will not see the second mounted gunner, but from your current position you should be able to see the hood of a white vehicle that is sticking out from the rock. Keep shooting at it till the vehicle explodes (second picture above) - it's the easiest way.
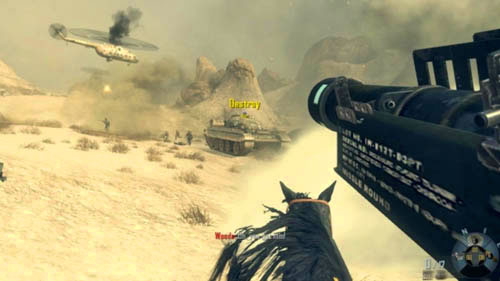
Objective: Destroy the second wave of tanks
Once again call the helicopter support. Immediately, start shooting at the gray dots - you will be able to destroy two or three tanks with shots in the dark, even before the interference disappears from the screen. You will have no trouble with the four tanks, but it won't be over yet. When the helicopter turns back, you will see the next five tanks (picture above). Be sure to destroy them from left to right, because this is the direction the helicopter you're on will fly over them.

Objective: Mount the Buffel to lead the final push
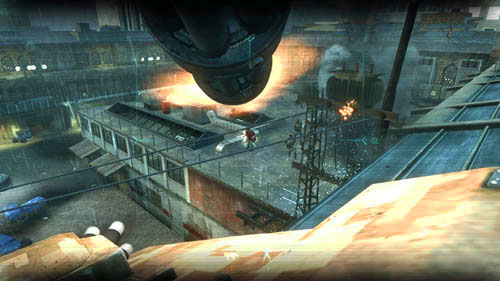
Climb the transporter ladder, on which the commander is located, and simply shoot the enemies in the distance or throw mortar shells at them (picture above). You can also do nothing. Watch the cutscene in which your character will fly away by helicopter. For a moment, you'll be taken to the hospital to get the second part of the briefing, and then you'll go back to the mission.
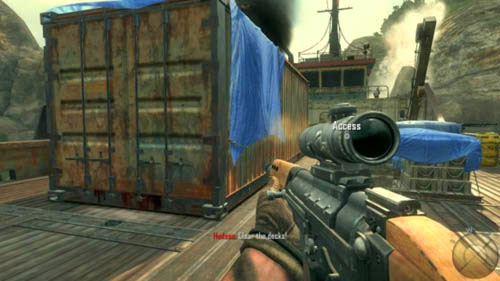
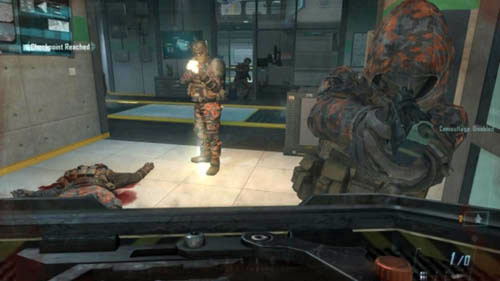
Objective: Secure the barge and rescue Woods
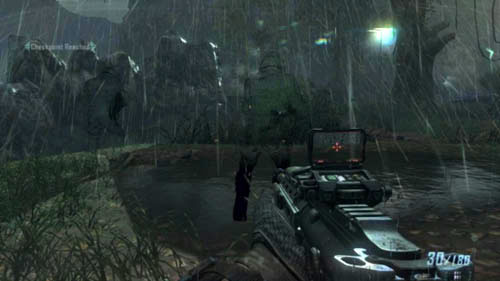
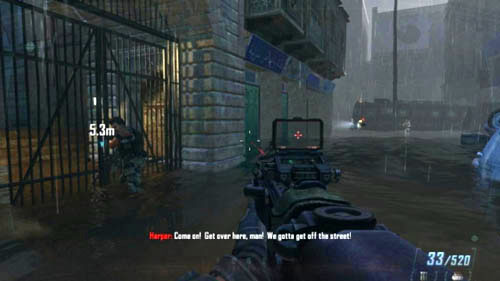
As soon as Hudson tells you to jump, do it right away! The first task is to eliminate all the enemies on the barge (picture above). You can hide behind the ammo crates or lean out from behind the big, red container on the left. A few enemies will be hiding on board and there will be three on the top of the barge, in front of you, behind the rails. Try to get rid of the enemies as soon as possible. As soon as your companion tells you that the barge has been cleared ...

... quickly go to the heavy machinegun on the right starboard, mount it and start shooting at the boat that is sailing nearby (picture above). Keep shooting until it explodes. It is pointless to wait for the next boats to sail near enough for the crosshair to turn red, because if you won't make it on time with any boat, it will come up closer and the enemies will start coming on board of the barge you're on. Therefore, try to destroy them from a distance as soon as you can (look behind the barge) - for now there will be three boats.

After sinking all four boats quickly get away from the heavy machinegun and use the left ladder to go to the upper part of the barge (be careful - it's easy to fall down if you're in a hurry). Start using the machinegun, which is mounted to the left and look out for the fifth boat - destroy it as soon as it comes up (picture above), and then immediately jump down to the lower deck, return to the first machinegun and use it to deal with the sixth boat. Go back to the second and destroy the last, seventh boat. Of course, from time to time you will be able to destroy a boat using both machineguns, especially if it is sailing in the distance. Simply be prepared to instantly change positions, should the need arise, and you will handle everything just fine.
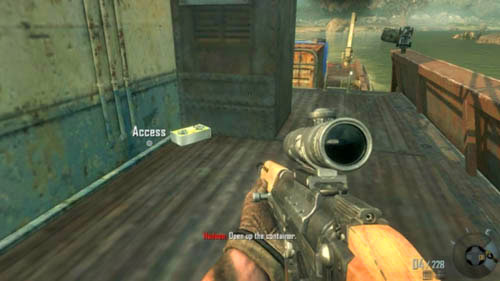
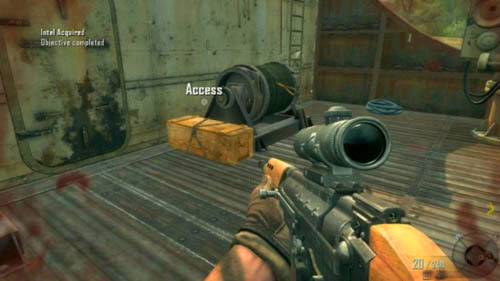
Objective: Search the container for Woods
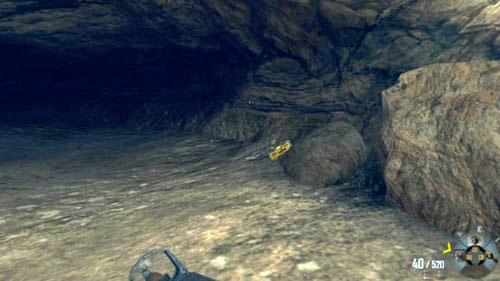
After you've destroyed all the boats (your partner will tell you about it) do not go to the container where Woods is. Instead, climb the ladder on the left. Look for intel (2/3) lying to the right in the corner behind the dark fan (picture above).
Jump down and walk up to the box with a word Access between the ladders (picture above). Pull out the clothes that will protect you from the injuries from explosions. Only now can you walk up to the container and open it.
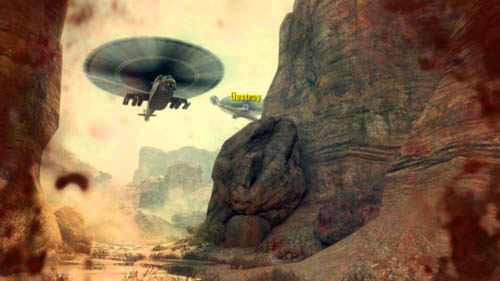
Objective: Use the Valkyrie launcher to destroy the hind
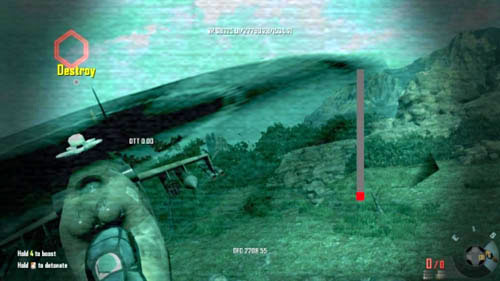
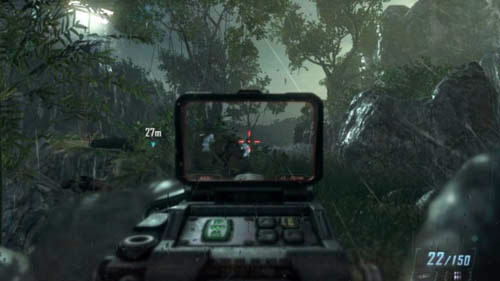
Watch the cutscene, and when you regain full control over your character, pick up the launcher on the left as soon as possible. You have three rockets, if you waste them, refill the ammo by the pile of ammo crates, where you found the launcher. Locate the helicopter, press the scope button and then fire the rocket. You control it in the same way as you look around with the character. The easiest way is to aim at the helicopter rotor as it's the biggest part (picture above), however, do not be surprised if you miss a couple of times - the Hind will often fly around rather than just hover. Remember that you can detonate the rocket in flight by using the fire button.
Objective: Escape into the jungle
Objective: Get to the village and radio Savimbi for extraction
Objective: Do not get discovered
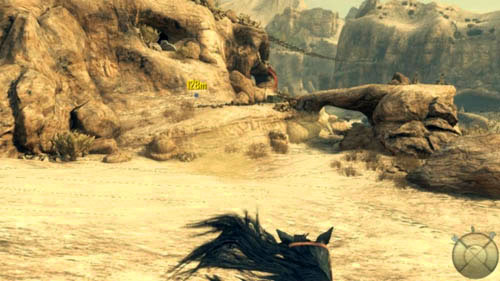
There is another cutscene waiting for you - the barge will start to sink. Once you rescue Woods begin to back away in order to swim with him to the shore. Afterwards quickly follow Hudson - if you do not do it on time, the mission will end in failure. The gray dots with yellow numbers will determine the next places you need to go (picture above). Follow Hudson and crouch under the trunk on the left. Watch the cutscene. Your next task is to alternately hide in the squatting position or getting up and running after Hudson. Your team-mate will inform you about each next move, so it is impossible for you not to know what to do. You'll be hiding in the following locations: by a big rock, inside the hut, in the high grass, until you get to a safe place where you will leave Woods with Hudson. In general, remember to always remain behind Hudson and not lean out - especially in the last hiding place, namely the high grass.

Objective: Enter village and find radio
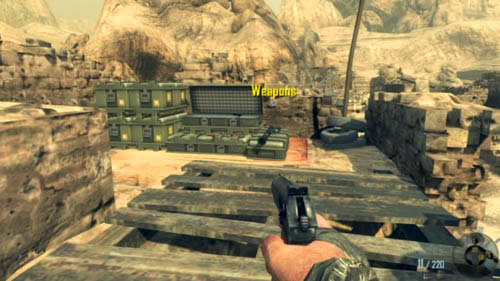
Before you can start carrying out the abovementioned mission objective, it's necessary to have a look at the wooden storage box on the right (a word Access) and a pile of ammo crates next to it (picture above). Pick the lock to open the door. You will take animal traps (necessary to pass two challenges). Also take the Dragunov sniper rifle that is next to the shed. Reload and then change the weapon and choose the gun. Replace the latter with the rifle lying by the boxes on the right. Refill your ammo here, but do not go to the village just yet. To make it easier for you to return, you can set some animal traps and place mortars inside them. If you run out of traps, simply refill the ammo the same way you did before. However, if you're not interested in the challenges, you do not need to set any traps. Go through the narrow passage among the rocks and move closer to the cottage windows.
Objective: Fall back to the river
Objective: Defend position
When you regain control over the character, rush to your team-mates and quickly go in the direction of a huge tree on the right (picture above). On the top of the tree is a sniper position. Climb the ladder, crouch and start taking out the enemies. Keep doing it until Hudson throws a smoke grenade and shouts that you must run away. Jump down and run as fast as you can to get to the next position.

This time head to the left, to the tree with a ladder to the left of the fallen trunk (first picture above). At the top you will find intel (3/3) (second picture above). Take it and then start to eliminate the opponents. Most enemies will be hiding by the fallen tree trunk on the left. Again, when Hudson throws a smoke grenade and informs you that you have to run away from here, jump down from the tree and run as fast as you can toward the waterfall and then to the right.
Locate an overturned trunk on the river and hide behind the rock next to it. There are quite a lot of ammo crates there. It is going to be very difficult here, as it is very easy to be killed and the enemies will try to get to you from behind - you need to especially watch out for these ones (first picture above). Vehicles with heavy machineguns will appear at the top of the waterfall on the right and left. Finish off the mounted gunners from the distance, but do it carefully (second picture above). In addition, watch out for the grenades - you will be literally flooded with them. Hold on as long as possible, you can even just keep lying behind the rock and do not stick your head out, but if a grenade hits the ground near you, hide somewhere else - for example, behind one of the trees. As soon as Hudson lifts Woods, follow them - sprint and hide behind the rock on the right. Next, simply walk up to the two team-mates to complete the mission.
Objective: Rendezvous with Salazar and Crosby
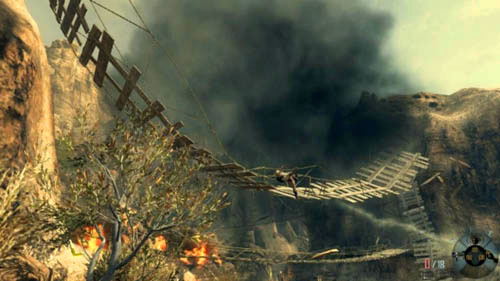
The first task is to press the buttons that appear on the screen in the objective (in turn): giving Harper the signal, casting the rope (picture above), breaking away from the rock and attaching yourself to the next one. Repeat these actions until you meet with two team-mates who will help you get out of trouble. If you don't do any of these actions on time, you will lose in the mission.
Objective: Jump from the cliff to start your descent
Objective: Reach the LZ
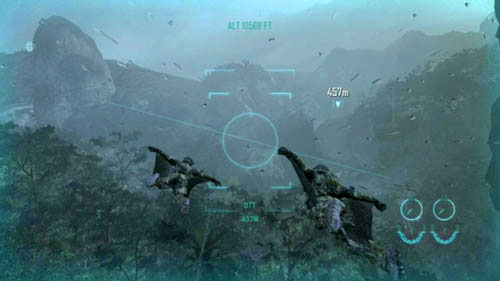
Walk up to your team-mates and press the appropriate buttons to pull out the swingsuit - a suit that will allow you to gain speed and slow the descent. You control it similarly to controlling looking around (picture above). Jump from the cliff and fly together with your team-mates towards the places shown on the screen. When you fly in the gap between the rocks and when you receive a message, press the use button to open the parachute. If you deviate from the course, or if you don't open the parachute on time, you'll die.
Objective: Investigate the base
After you've landed, steal up to the base with your team-mates. In spite of the given advice, do not use EMP grenades. Wait until the two disguised guards pass to the left. Follow them (picture above) and kill one in melee, Harper will take out the second one.

Make a 180-degree turn and you'll notice two trees growing close to one another. You went past them earlier. Hide behind the one on the right and lean out (picture above). From now, start using the scanner to locate the enemies - even those hidden behind covers. Start with two opponents standing on the top of the rock on the right. Then, finish off some opponents that are in front of you (one will run down the stairs, the others will be hiding under the rocks and among the crates). A few may be in the elevator on the left side of the place, but most likely they will be killed by your team-mates. Even though the scanner has a limited range, each time you aim and hit accurately a green cross appears on the crosshair - you can locate your enemies in the same way.
When your team-mates run up the stairs, do the same. Instantly hide behind the two boxes on the left, on which there are blue sheets tied with a yellow string. Start leaning out to the right and eliminate the enemies on the top of the rocks from right to left. Watch out! Here and in the remaining part of the mission, some enemies can have optical camouflage, which can make it harder to locate them. Once again, follow your team-mates when they run up the stone and then steel stairs on the right. Look to the left and crouch, take out the enemies in the distance (picture above) and then follow your team-mates. If you prefer, instead of running up the stairs you can use the elevator that your enemies used to come down.

Run ahead, but do not turn right as your team-mates did. Instead, jump on the low ledge opposite you (be careful - there can be an opponent hiding behind the rock). Only after that can you turn right and run up to the opposite stairs. You will receive a message about a helicopter that is about to take off. You can try to destroy it (there is a challenge for doing that) or leave it to Salazar. Anyway, jump down on the stairs and crouch to hide behind the wall next to them (picture above).

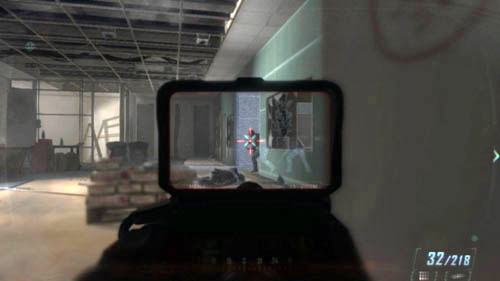
Run between the helicopter wreck on the right and the wall on the left. An opponent will run out of the room on the left (first picture above) - be ready to hide behind the boxes on the left and take him out or try to give him a blow when you're running, or don't stop and simply try to shoot at him. When you finish him off, quickly hide in the place from where he ran out - stand on the left side of the door and look around the room. At one of the tables you will find intel (1/3) (second picture above) that you should take.
Hold down the sprint button and run up to the second helicopter, covered with a blue sheet (picture above). Behind it, on the left, at the bottom of the helicopter there is a place you need to look at and press the use button to hack into the machine computer. In this way you will be able to use the turret to eliminate enemies.
Get the turret going and begin the extermination (picture above), but do not shoot all the time, because it will get overheated. On the other hand, do not wait too long and not shoot at all, as you'll have to get it going again, which will mean losing precious time you don't really have. That is why, the best you can do is to find the golden mean. Take half-second and one-second breaks and kill those enemies who are nearest to you in the first place. Keep looking around the battlefield vigorously to locate them. When the time is up and when you regain control over the character, hide in the room where you found the intel.
Run to the left, up the ramp to get to the blue house. Be careful - there might be an opponent hiding here. Hide by the second door, lean out (picture above) and take out the enemies hiding in front of the remaining part of the temple. The scope will be of little help, so locate the enemies by the flashes of their rifle shots.
After you have killed several enemies, jump down, flatten yourself against the wall on the left, hide in the corner and lean out. Slowly keep getting closer to the gate and eliminating enemies detected by the scope - first hide around the corner of the wall (picture above), then behind the boxes that are a little closer to the gate. Finally, get up on your feet and run up to the big gate, but do not go through. Instead, quickly hide among the boxes on the left.
Hide in the gate, on the right. Lean out and prepare EMP grenades. Throw one at the right turret (picture above), and then shoot at it with Titus (one accurate round will do). Do the same with the second turret on the left (it is covered by the wall), but first hide by the pile of ammo crates also on the left.
The area is very vast, there are plenty of hiding places, so be careful and do not let the enemy take you by surprise. Use the scope and carefully look at the whole area. This way, you will know where to find the next enemies. Do it to make sure that no enemy hiding behind some ruins or low walls takes you by surprise. Hide by the second, damaged turret and look to your left. You should see the third turret (picture above). You can also get rid of it by using EMP grenades and Titus. "Only" enemy soldiers will remain.
First, clear the area around the third turret. Some opponents will be hiding around it and also near the crate with blue sheet. Hide behind the abovementioned crate and eliminate those exactly opposite you, who are among the ruins - use the scope to locate your enemies (picture above). When you get rid of all those who are in front of you, sprint to the place and jump to a higher level and then quickly hide on the right.
It's almost the end of the battle. All that remains is to keep leaning out more and more to the left (there should be about 30 meters to the target) and eliminating the enemies one by one. Of course, you should locate them first using the scanner (picture above).
Objective: Destroy the temple door
Objective: Infiltrate the research facility
When the music dies away, stand about 10 meters from the temple gate and wait till your team-mates destroy it or do it yourself. Go inside and follow the only possible path. Wait until the next door stands open. You should notice a box on the right in the first room of the facility (picture above). Open it to put on optical camo, and from now on, make sure that you have it turned on all the time (remember the button you use to turn it on). The camouflage can rarely turn off by itself, but it will if there is a powerful explosion near you. It will also happen each time you press a button (e.g. when you want to open the door or use the elevator). In such cases, do not forget to turn it back on. The camouflage makes it more difficult for your enemies to aim and it will greatly facilitate carrying out the mission.
Keep going in the main corridor until there is an explosion. Back off, get up on your feet and then hide behind the box on the right. In the opposite hall there will be two ADS (small, dangerous tracked robots) and enemies who will start running down the stairs on the right and left. Remember to turn the camouflage on! You can also hide in the rooms on the right. First, take Titus out and use it to get rid of the two ADS (picture above). Then, change the weapon to the rifle and kill all the enemies that will appear on the stairs, and also those who will run out of the two doors in front of you (on the left and right).


When the hall is empty, get to the stairs and then make a 180-degree turn. On the right side you will notice an entrance to a small room (first picture above). Go there and look for intel (2/3) on one of the desks on the left (second picture above).
The further way leads to the left, but you can choose whether you want to follow the downstairs or upstairs path. It is better to choose the first option, because it is much easier to get killed upstairs. There is a vast room with several adjoining rooms. It's better to head for the door on the left side of the staircase in the hall, hide around the corner and start to exterminate the enemies in the hallway (first picture above). Remember about the camouflage! The rest of this level is a maze of corridors and rooms, but there are many more places to hide. Simply go in the direction of the next enemies, scanning the area until you reach the elevator (second picture above).
Objective: Infiltrate the lower labs
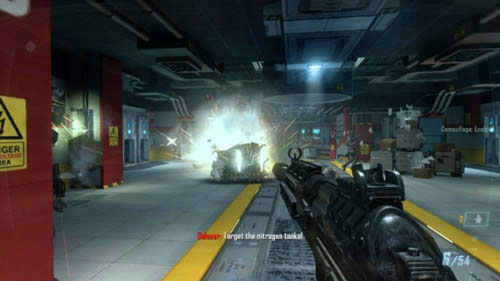
When it's over, go to the elevator and press the button. Note that this will turn off the camouflage, so turn it back on. One ASD (a small tracked robot) and several soldiers are waiting for you on the lower level. Immediately after you've found yourself on the lower level start shooting at the nitrogen tank (there are four vertical tanks slightly to the left, in front of you and there's a red horizontal bar on the upper part of each tank) (picture above). This will instantly neutralize the ASD (it should be near the tanks) and a few enemies. Use the scanner to locate the rest and kill them. In the next few places you will come across some nitrogen tanks - never stand close to them! If they blow up near you, they will freeze you, which means you'll die, of course. In case of any problems, hide next to the ammo crates on the right (as soon as you exit the elevator).
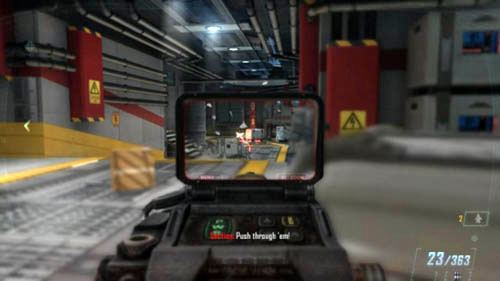
On the left there is an entrance to the room, and in front of you there is a ramp leading down. First, hide behind the boxes on the right and take out the enemy that appears in the abovementioned room entrance. Afterwards, start to lean out and take out the opponents in the remaining part of the corridor until there is no one left (picture above). Next, run into the big corridor and hide behind the first box. Exactly on the left there is an entrance to the abovementioned room. Climb the short staircase and shoot two Titus rounds at the opposite door. Thanks to that you will kill many enemies and get rid of the turret attached to the ceiling.
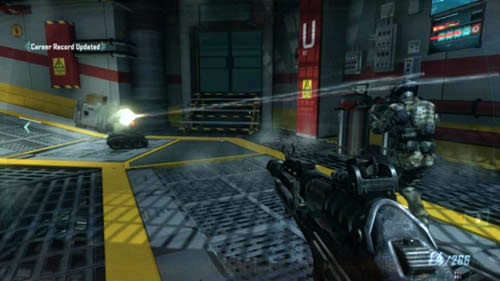
But it's not over yet! An ASD will come out of the remaining part of the corridor. You can use the nitrogen tank if the enemy robot is near it (picture above), or simply use Titus. After destroying the robot hide against the wall and lean out to the right to see the enemies in the further part of the corridor. Keep going further and eliminating the enemies who are hiding until everyone in this place is dead.

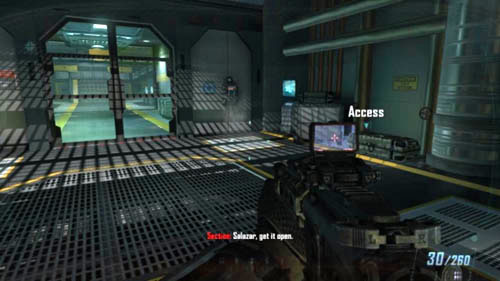
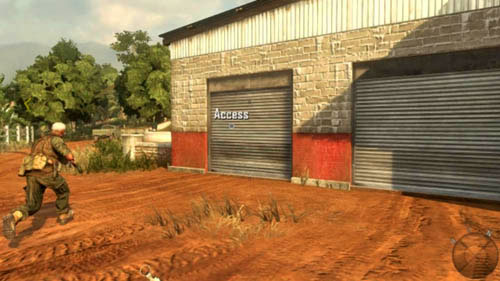
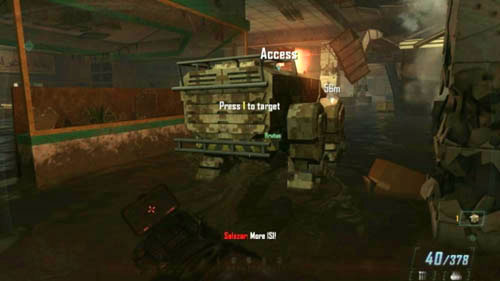
Objective: Open container
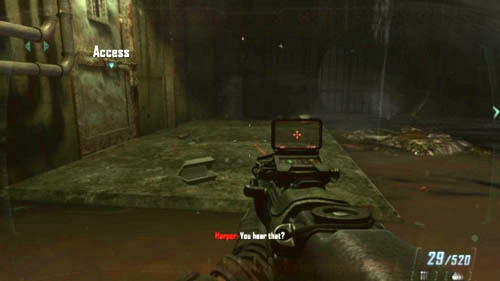
Follow the team-mates to the great warehouse. Note the word Access in front of you (picture above). Walk up to the container and press the use button to run the ASD, which will now be on your side. Any additional help will prove useful in the upcoming battles. Follow the team-mates and look at the boxes on the right, you can refill your ammo there. Only after that can you open the container, near which your team-mates are standing. Be prepared to hide immediately as soon as you get a new mission objective.
Objective: Defend the Area
Hide next to the container, out of which the scientist has crawled, and be prepared to quickly kill three enemies, who will repel down the ropes. After a while, two enemy ASDs will join the battle. More soldiers will also run out (first picture above). This is the best moment to destroy the nitrogen tanks. Two turrets that repelled down form the ceiling will be an additional impediment (second picture above). Throw an EMP grenade and then shoot a few rounds using the Titus.

Objective: Open the Vault
Objective: Obtain the Celerium Drive
If you want, you can take the shield from the machine on the right, however, it will not be necessary in this fight. Yet, make sure that you do it after the battle is over (picture above), but do not put it in the ground - keep it with you at all time. Go to the big door and press the button on the left. Follow the scientist and enter. Listen to his monologue. After a while you will have to defend yourself again.
Objective: Rendezvous with extraction team
While the shield prevents you from shooting, thanks to it you're almost totally immune to enemy fire (unless you turn your back to any of the opponents). Keeping this in mind, just stay away from the enemies and kill them by pressing the melee button (you have to do it twice). Kill the enemies in the room you already know. Keep going straight ahead and go past the four large columns. Kill a few more enemies in the next room in the same way (picture above).
By the wall opposite the entrance, through which you got here, a little to the right there is a table. You will find the last intel (3/3) (picture above) on it. Be sure to take it with you and keep going further using the exit on the left. Run up the stairs.
The last opponents are standing in a row - in the room that you will get to, in the corridor on the left and in the room in front of you (picture above). Simply walk up to them and kill them with your shield. Run further, after a while you will hear a message from Admiral Briggs. Go to him to complete the mission.
Objective: Follow Zhao to the Mujahideen base
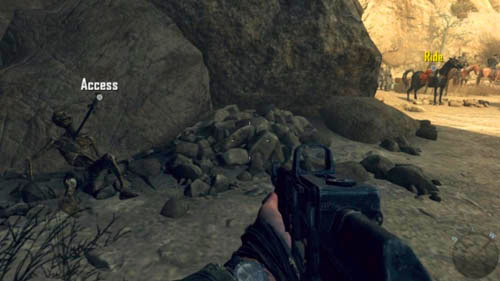
Before you start carrying out the objective, look around the place where you started the mission. Exactly behind the horse that you are about to mount, at the far end of the rocks on the right there is a skeleton that has a pulwar sword, stuck in it (picture above). Pull it out and then get on the horse. Follow your team-mates and remember to sprint. Thanks to that your horse will be moving faster. In the end, you will get to the gate of the Afghan village-base. When a message appears on the screen, hold the use button to get off the horse and go after your team-mates to the cave. For a while you will talk near the map. Then you will hear the sounds of explosions.

Objective: Defend the West Blocking Point
For now, you do not have to hurry, so take a look around the command center you are at. To the left of the three soldiers by the radio, you can find intel (1/3) on the wooden crates, which, of course, you need to pick up (picture above). Exit the room and turn right.
Right before you use the exit you will notice a wooden door on the left. Pick the lock to open it (picture above). Do this and your character will take a few mortar shells. Get back on the horse and sprint through the village to get to the gate.
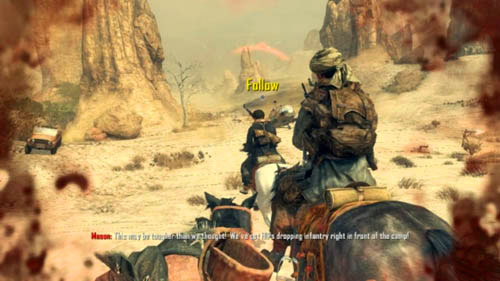
When your horse rears up, ride to the left and follow your team-mates. Do not come too close to the edge of the rock on the left, because after a while a jeep will explode in this place and you can get killed. Also, you cannot stay too long in this place, because the Russian soldiers will kill you. Simply ride to the left as quickly as you can (picture above). In the narrow pass watch out for the jeep on the right - there will be two enemies next to it. Hold the sprint button to speed up and head towards the target location. Remember that in the sprint mode you're much more resistant to arrows.
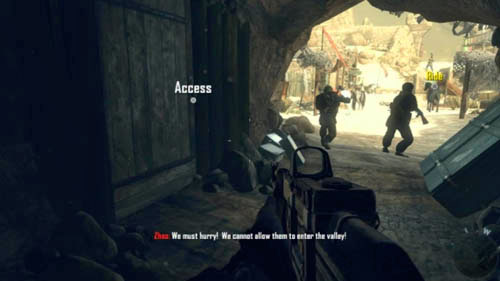
When your horse rears up, you will get off it. You will carry out the next part of the mission on foot. The right side of the ruins is occupied by enemies, so don't go there. It is also pointless to kill them, as new will be appearing in the place of the eliminated ones. Stick to the left and keep running until you see a hole in the wall in the shape of a gate. Take out the Russian soldier who is hiding in it (picture above). Run to the place where he was standing and hide by the big boulder on the right. Wait for your team-mates.
Objective: Destroy the Soviet BTRs
On the way to the weapons cache there are some soldiers. You do not need to kill them - you can just run to the right and as soon as possible hide by the damaged shelf to the right of the small wooden bridge. Wait here for a moment, but be ready to shoot a round at any soldier who will come running to you. Afterwards, carefully lean out to the right. If the road is clear, you can move on, but be careful! Almost right to the left, from around the corner a soldier will come out (picture above). Do not let him take you by surprise.
Go further, straight to the south (look at the compass) till your way gets blocked by a wall. You will reach an overturned, sloping part of the wall. Go around it and turn right. Hide on the left side of the entrance door. Wait until one of the transporters drives away to the right (a gray dot with a word "Destroy") and then run out and, holding the sprint button, head for the ruins on the left (picture above) - not to the main entrance, but to one of the holes in the wall. You should make it before you get shot. Of course, after going inside instantly hide on the left side of the exit on the right.
Here, you can wait for a while, but watch out for the grenades! If you see any icons, quickly run up the stairs and hide exactly in front of them, in the small, oval-shaped alcove. But before that happens, look up, to the southeast. You should see one of the two soldiers upstairs (picture above) - try to take out at least one.
Go up the stairs and hide in the opposite oval alcove and then crouch, lean out to the left and take out the second soldier on the right. Walk up to the wall and look precisely to the northeast. On the opposite roofs there are two soldiers hiding (though one of them or both could have been killed) (picture above). Search for any movement and eliminate its source. Once you're done, look to the right. Right next to the soldiers there is a crate with a word Access. It is necessary to check what's inside. You will find some anti-tank mines.
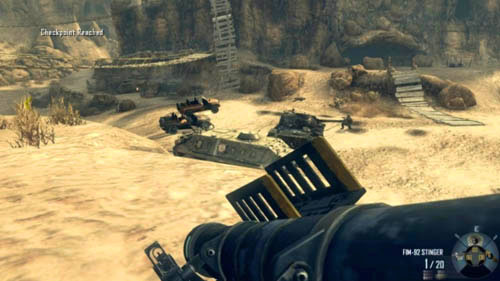
On the second part of the roof you will find a lot of ammo crates, but most of all, a rocket launcher (Stinger) - replace your gun with it, because it will not be useful to you anymore (first picture above). The Stinger will remain with you till the end of the mission, and you are about to make use of it right now. Aim through the small gap in the wall on the right at the first transporter in the distance, exactly in front of you. After it's been destroyed, wait without moving from the roof, till the next one comes to that place (second picture above). Fire a rocket at it, too. Wait for a moment until your allies deal with the rest of the Russians who remained here.
Objective: Block the entrance to the village
When there is no one left, run to the big gate, place the charge in the indicated place and back off behind the low wall in front of the gate. Wait until your team-mates also leave this place, and then press the button (picture above). Get on the horse and go towards the next targets - a tank and a transporter.
Objective: Defend the base from being destroyed
Ride exactly to the east. Enemy vehicles will come out from the left. Stay away from them, because they will run you over. Instead, take out the Stinger and try to shoot in advance at the transporter (first picture above). Contrary to appearances, it is much more dangerous, because it will be shooting at you. Afterwards deal with the tank (second picture above). It is likely that you will have to shoot twice. In fact, the enemy soldiers scattered here and there pose the greatest threat. Try to be in constant motion. It might make your aiming more difficult, but it will greatly increase your chances of survival. If you cannot aim properly, go right and position yourself directly in front of the moving vehicles.
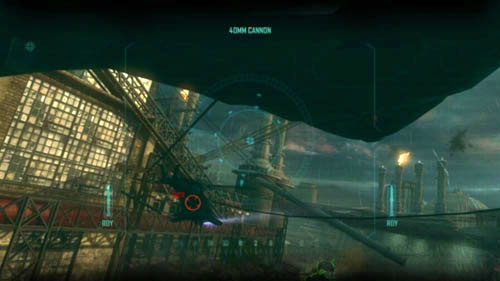
Rush to the base. Your next task is to destroy two helicopters (picture above). You will handle the first easily, as it will hover over the base - simply shoot at it. It won't be that easy with the latter - it will keep flying around and shooting at you. So press the weapon change mode button to enable automatic aiming. Aim at the enemy helicopter and wait for a distinctive sound. As soon as you hear it, fire the rocket immediately and don't worry about it - it will reach the target itself and destroy it. You can even destroy the second helicopter first (not marked with a gray dot) and then deal with the first. The third and final wave can consist of helicopters or vehicles. In the first case, wait for them and use the auto-aiming mode. In the latter case, run to the north, and you will be directly in front of the transporter and the tank. As always, remember to be in motion all the time.


Objective: Retake the weapons cache
Assuming that you're at the gate to the allies' base, run to the north. After a while, in front of you, slightly to the right, you'll notice a pointed rock (first picture above). Right next to it there are some ammo crates, as well as a red flag stuck in the tires. Intel (2/3) is lying next to it, of course, you need to pick it up (second picture above).
Afterwards start going exactly to the east and when you go up the hill, turn left. Keep looking out for the place where a rock forms a gate and where you can see a flag and ammo crates on the left (picture above). Go there along the gentle slope and look at the battlefield below. Throughout the next part of the mission you will remain in this place - it is pointless to leave it, or to go in the direction of the weapons cache. If you get hit too much, hide behind a short wall on the left.
Prepare the auto-aiming mode and keep looking out for enemy helicopters (first picture above). Some will be flying around and shooting at you (you should especially watch out for them), others will try to drop the infantry off on the left. Meanwhile, one more transporter will appear below (second picture above), fire a rocket at it and go back to destroying the helicopters. Lean out only if necessary, but if you can don't show yourself to the enemy soldiers below.
In the meantime, try to destroy the bridges, as the opponents will try to shoot at you from them (first picture above) - they are much more dangerous than the enemies below. Eventually, the helicopters will stop coming, but to remain safe don't leave your position, just shoot at the enemies on the battlefield (second picture above). You can also send rockets at the ammunition cache. But you don't need to worry, because sooner or later your allies will retake the weapons cache.
There is one more thing to do here. At the bottom of the eastern rocks there is a broad, but shallow cave (first picture above). On its right, next to the entrance, you will find the last intel (3/3) (second picture above). Get on the horse and go back to the base.

From now on until the end of the mission you will be watching a long cutscene and actually there are only two moments in which you will be able to do more than just looking around. When the explosion kills your horse, press and hold the buttons shown on the screen as quickly as you can to slip the dead animal off (picture above). If you do not do it on time, the great tank will run you over.
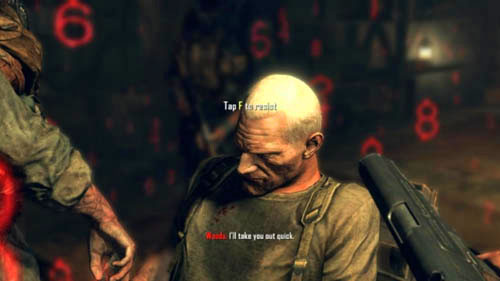
Objective: Interrogate Krevchenko
Now you must take an important decision (picture above).
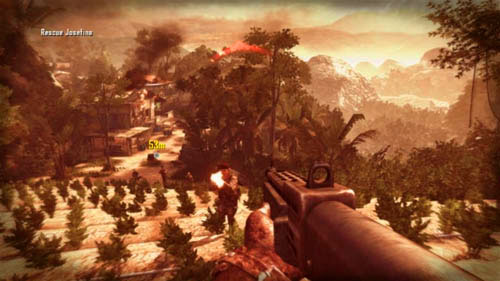
Objective: Rescue Josefina
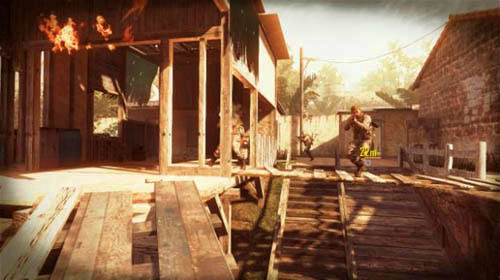
As soon as you hear Josefina's cry, it will mean that the mission has really begun. Go down the slope eliminating the enemies (picture above) - use the shotgun to take out the first and the machete to get rid of the remaining three. At this point, your character will take out the shotgun again. Rage makes you much more resistant to shots - similarly to the optical camouflage in the second mission. However, this does not mean that you are immortal.
Do not run to the opposite square, instead head for the building on the left (picture above). Your gun has unlimited ammo, so don't hesitate and start shooting at the enemies gathered here. When you take a few steps forward, look to the right - that's where a lot of enemies will be standing in line. All you need to do is to hold the fire button to kill most of them. Wait here for a moment for the next enemies, they can come running from any side, so be careful.
Kill the enemy at the door in the opposite house, go inside and up the stairs. Kill the soldier at the top of the stairs, and then another one in the room on the left. Further on the left there is a balcony entrance - use it and walk over the planks on the left to the other side. At the same time, be prepared to kill the two enemies who will run out from the right side (picture above), as well as the next two who are on the left. Go toward the word "Use" - press the use button by the axe in order to throw it at the opponent. Thanks to that you will fall in protective rage. Get between the enemies and start cutting them with the machete.
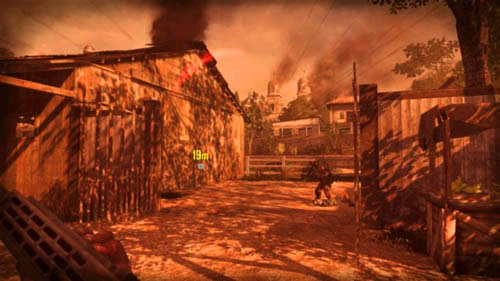
After killing all those who were nearest to you, run to the left and up. New enemies will be appearing to the left and to the right. Watch out for those who are hiding - there is one behind a small car on the right, the other ones are up, behind the covers, etc. Eliminate them, but do not hesitate to hide if you get hit too much. In the end, you will come to the place with another soldier harassing a woman (picture above) - kill him and then open the barn door on the left.

Start to sprint forward. Menendez will take out the machete - start using it - kill the soldier who's over the woman, then run ahead and cut the next enemies that come in your way. In the meantime, take a look at the car on the right (first picture above), hide behind it and wait for about two seconds until new opponents come running to you. Cut them and then run out and kill the enemies at the gate on the right. Only after clearing this place can you go back to the cart and take intel (1/3), which is lying on it (second picture above).
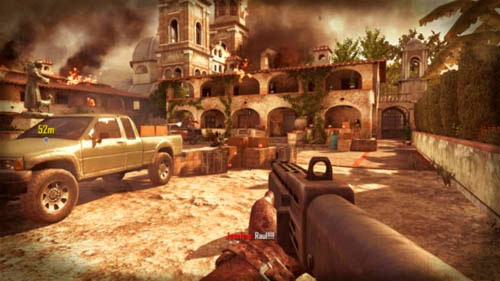
Go back to the gate and run through it. Now simply keep going forward down the main street, you don't even have to hide. Shoot the enemies you see. Virtually all of them will appear in front of you, but the last one, just before the gate to your property, will be on the right. Wait for the allied vehicle to ram the gate, so that you can enter the square (picture above). If you want to be especially careful, slowly move closer to the house eliminating enemies from concealment. Although using the heavy machinegun mounted on the car that has just rammed the gate is tempting, you should know that it is also very dangerous - enemies will be shooting at you from all sides (however, the gun is related to a challenge).
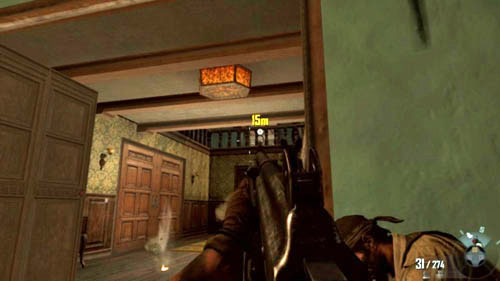
You can slowly and systematically finish off the enemies, or at random - hoping that the rage will protect you - run towards the front door. Once you're inside (picture above), kill the enemy on the left and then the next two on the stairs - run up the stairs. You'll get to the door - Menendez will open it himself. Watch all the cutscenes until you get to the second part of the mission and play as Mason.
Objective: Clear the Cartel village
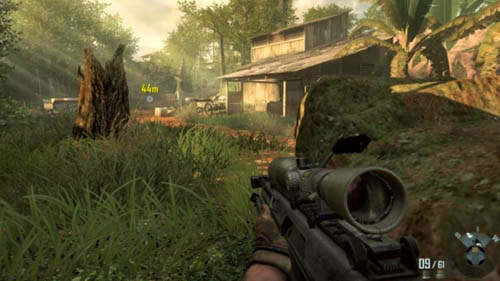
Look to the left, jump down and run behind your team-mates until you reach the river. Hide by the rocks on the left. It's a good position - thanks to it you will easily see everyone and everything, including the entrance to the village (picture above). Take out the sniper rifle, turn on the scope, use the extra zoom and start to look for and take out the opponents. Pay particular attention to the one in the window of the building on the right, keep looking out for the enemies between the buildings (they will be hiding, among other places, behind the two blue barrels), and also kill a few hiding in the building on the left. The next ones will be hiding in its further, left side (you'll need to lean out more). Remember that the wooden blinds do not prevent the bullets from your sniper rifle to go through, so if you know where an opponent is even though you can't see him - because he's hiding - shoot blindly. It is highly likely that you'll get him anyway. However, watch out for civilians! A group of them will run out after a while.
When your team-mates go to the village, do the same. Hide by the left hut, behind the back of the iron cage next to Hudson. First, concentrate on the enemies on the iron roof of the watchtower in front of you (picture above) - there will be two of them. Then look out for those who will be running up to watchtower from the left, from the adjacent building. Others will be running downstairs. Look out for them and shoot at the places where they are - even if they are hiding behind a cover, for example, some hay or a cart, or just standing in the grass.
Move to the next cover - a white barrel. Get down on the ground and look below the building on the left (picture above). You should see all the enemies in the blue building in front of you - two on the roof and several on the balcony. After killing them move a little further - behind three wooden crates on the left. Now you must look to the left and check if there is any enemy hiding there. If not, run up to the blue building and go inside. You should notice a word Access. There can be an opponent in the room on the left - kill him and then look to the right and take some Molotovs from the crate.
From now on you need to especially watch out for grenades - run as fast as you can if there's any near you. Exit through the east door and hide behind the boulder. Look over its right, lower part (first picture above) and using the sniper rifle take out the enemy in the window, and then another one who's on the porch on the left. Lean out to the left and kill a few enemies on the road in the distance, and then check the abovementioned window again. If there is someone new there, shoot him. Sprint to the hut and hide on the stairs. Lean out to the right (second picture above) - you should see the stairs leading to the top, and also an opponent on top of them. Next to him, on the left next to the tree there is another one. Shoot them both, watching out for grenades and go where they have been standing.

When you reach the top of the stairs, turn left and immediately hide behind the tree on the left side of the path. In the open building in front of you there will be a lot of opponents. This is a perfect opportunity to use all of the newly acquired Molotovs (picture above). Throw them at different places to kill all enemies. It's best to throw all of them, as there will be some ammo crates here anyway.
Throw Molotovs until you join Hudson and Woods. Then start to carefully lean out and take out the rest of the enemies in the building. Watch out for grenades! Sneak under the iron plates and go up the low stairs. Be prepared to instantly kill one enemy on the left (do not worry, at the beginning he will not be shooting at you) and then hide by one of the wooden walls on the right. Lean out to the left or right and start killing soldiers in the opposite building (picture above) - they will be on the roofs and on the balcony, as well as inside the building on the left. It is likely that your allies have already killed most of them. If you cannot see any enemies, notice the direction where your team-mates are shooting. Remember to refill your ammo!
After clearing the place, jump down on the road and run south. After a while you will reach a place with a huge boulder on the left and a well to the right. Here you can pass a challenge if you hit the driver of an oncoming car. One way or another, get rid of this threat and then hide behind the rock and lean out to the left (picture above). There are a lot of enemies, but the fight is not going to be difficult - simply eliminate them from left to right - they will be hiding in the vicinity of the cart on the left, and also around the second cart in front of you and under the roof of the building on the right.
When you eliminate this group, you will be able to move to the cart. Lean out to the left (first picture above) and start to shoot at an even bigger group of enemies. They are all gathered close to one another and they're standing virtually everywhere - in the windows on the right, on the balcony on the left, in the courtyard below, by the road to the right, and even in the hedge on the left. After killing most of them, your next hiding place should be at the beginning of the white wall on the left. Hide behind it and lean out to the right. Watch out especially for the enemy right above you, hiding in the hedge! Go around cart on the road and quickly hide behind the trunk. A vehicle with a heavy machinegun will appear on the road. Carefully lean out in such a way as not to be visible, but to see the gunner's legs (second picture above). Of course, take him out.
Keep going further along the wall on the left and eliminate enemies in front of the building. Finally, you will be able to hide behind the pots. Kill a few enemies in the hall and run into it. Watch out - an enemy with a shotgun might be hiding behind one of the corners. Run below the building and immediately stand on the left or right of the door (picture above). Lean out and shoot at the legs of the enemies standing on the floor. Afterwards, go to the second floor and into the room. When the door to the balcony stands open, jump down to the ground.
Objective: Assault the Mission
You can use the time during which Hudson and Woods will be arguing to obtain additional weapons. To do this, go right and notice the door to the garage on the right with a word Access (picture above). Lift it to take some mortar shells. Go forward and hide behind the low wall on the right.
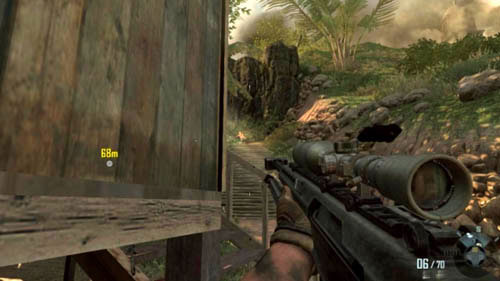
Once again, use the sniper rifle. Your first task will be to kill three snipers. Look at the left side of the property. Two are standing on the balcony, a little to the right, and the third is above them, on the left (picture above). Kill everyone and then take care of the enemies running out of the main gate. Start to crawl under the wall, so that the enemies won't be able to see you. Go further and right, to get behind the building where you the found the mortars (you can stop for a moment behind the wooden wall to the left of the building).

When you get to the end of the wall, look for the entrance to the bell tower, to the right of the main gate (picture above). Take out the rifle and start running in that direction, ready to kill anyone who gets in your way. Watch out for the enemies hiding in the hedges on the left! Throw a few mortar shells at the bell tower - they should land on the other side. Afterwards, jump on the barrels, shoot a round at the enemy who will appear here and then quickly hide behind the ladder on the left.

Start leaning out to the right and eliminate the enemies you can see and then climb the ladder to the second floor of the bell tower. Here, on three wooden boxes, you will find intel (2/3) (picture above). Go to the top of the bell tower up the other ladder and immediately hide behind any of the columns.
Your next task will be to take out five enemies in key positions in the opposite property (picture above) - there will be one sniper in the window of the left and right tower, as well as three enemies with rocket launchers on the balcony. Afterwards start to search for the heavy machinegun operators downstairs and kill them - scatter the remaining mortar shells around and then use ordinary weapons until the area is completely clear.

Objective: Clear the Cocaine Bunker
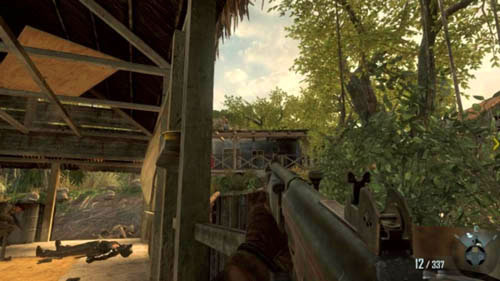
Wait until the conversation is over and until you can go down the ladder to the cocaine bunker. Do not attack yet, just have a look at the extremely valuable ammo crates (picture above) - they will be exactly in front of you, next to the window with bars. Right to the left there is a door with a word Access - pick the lock to get the machete.

There are plenty of enemies in the room, but you can make use of all the Molotovs and mortar shells, right? Keep hiding behind the boxes and start to throw what you have at the enemies. Thanks to that you will manage to eliminate most of them (picture above). But be careful when pulling back or refilling your ammo as someone might hit you through one of the barred windows in the previous room! Remember that you can use them yourself to hit a few enemies.
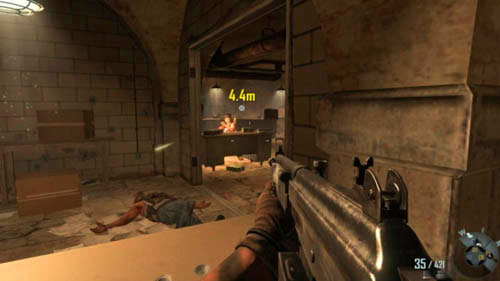
Your main task is to go further, because if you do not, enemies will be appearing endlessly. Therefore, after killing most of them, walk up to the door on the right (picture above). Eliminate the enemy who's hiding around the corner with a shotgun and then everyone in the next room (you can also throw some mortar shells at them).
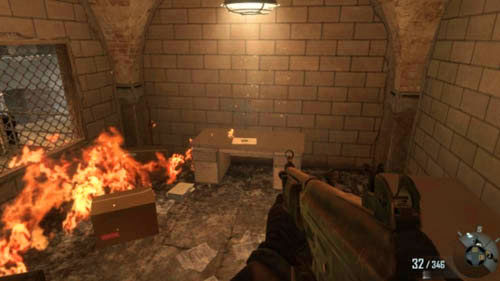
Get to the end of the room and look out to the left. Eliminate enemies you can see and then jump over the rail and quickly take out the enemy behind the desk on the right. It is also possible that there will be another one hiding in the room on the left. The desk, behind which the enemy was hiding, will be your main cover during the clearing of the next big room of enemies (picture above). Lean out in different directions and kill them. Do not forget about grenades, Molotovs and mortar shells if you still have any.

Having thinned out the big room on the right, do not go there yet. Instead, enter the room directly in front of it. You will find the last intel (3/3) on the bench (picture above). Take it and stand by the door. Again, lean out and kill enemies. Quickly finish off the two exactly opposite the entrance, who are burning the documents, and then shoot the rest hiding among the desks on the left.
After you've entered the great hall with the documents, run straight, then turn right and right again. Pick up an envelope lying on the desk to find evidence of the CIA activities (picture above). Next, get out of the dead end and head toward the desks, hide around the corner and lean out to the right. Throw a mortar shell at two enemies hiding on both sides of the next door, or if you do not have this weapon, finish them off with an ordinary rifle.
Objective: Find and capture Menendez
Simply run behind Woods, follow him, go up the ladder, and quickly kill the opposite enemies. An enraged Woods will run through the small yard, but you shouldn't do that. Instead, lean out carefully and to take out all the enemies (picture above) - one directly in front of you and the rest upstairs, behind the rail. Then run up to Woods who's standing by the door.

Objective: Gain Access to Anthem
Immediately after the mission has started, your big, four-legged robot (CLAW) will go to the left. You should look to the right, at the right shelf. On one of the lower shelves there is intel (1/3) (picture above). Take it and follow the robot, keeping to its back and right side.
The first battle will be easy, because the enemies will focus their fire on your robots (the second will come out from the left) - you only need to stand in the back and wait. However, you have one thing to do here. Immediately after taking the intel run through the door and go left to the next robot. Move closer to it (there is a word Access) (picture above) and press the use button to be able to run the flamethrower later during this level.
Get back to the right side of the room, just hide behind the walls and wait for your CLAWs to get to the other end of the hall. You can mark the targets for the robots - to do so, press an appropriate button, point at the opponent with a blue light, and then confirm the target by pressing the fire button. When you get the information about the enemy helicopter-drone, mark it (picture above) - it will be close to the room exit on the left. Be careful when pointing at the soldiers who were not killed!

When you come out in the flooded street, get ready to fight with enemies scattered around at its end, but above all, with those on the balcony on the right. Run quickly to the garage door on the left (first picture above) and press the use button on the word Access, so that the robots can go in the garage. Thanks to this they will be on the roofs and you'll be able to use their support from above. When the garage door is shut, quickly flatten yourself against it and start to shoot at enemies or mark them for CLAWs (second picture above). Get rid of those at the bottom - one on the balcony and the other below it - and then lean out to the right and look out for the enemies on the balconies. Mark them for the CLAWs, but keep in mind that they are not able to hit the left side of the street. You need to take out the opponents hiding on the left side with a rifle. Send Harper ahead - make him focus enemy fire on himself.
When the closest enemies are eliminated, run into the street and hide in one of the garages on the left, having previously killed the enemies who were hiding in it. Lean out (picture above) and go back to marking / eliminating the targets. Some opponents are so well hidden that killing will require at least 2-3 CLAW rounds. Of course, you can kill them with a rifle, but you should know that there is a challenge to pass for killing 8 enemies by marking them for CLAWs. Also, keep in mind that the flowing water current will be pushing you down. That is why, be careful not to get under water that is falling down in several places, because the screen will become very blurry for a moment.
After eliminating the targets on the balconies, hide on the right side of the street, in one of the garages, and then lean out to the left and clear the area around the big gate. Keep moving in that direction, looking out for the enemies with the scanner. When you go through the gate, head toward the small tunnel on the right and send Harper ahead. Hide at the beginning of the tunnel (first picture above) and take out the enemies in the distance, and then stand by the opposite wall and start to search for enemies using the scanner (second picture above). Simply come out from concealment further and further and be ready to hit the next opponent in the head until you get rid of them all.

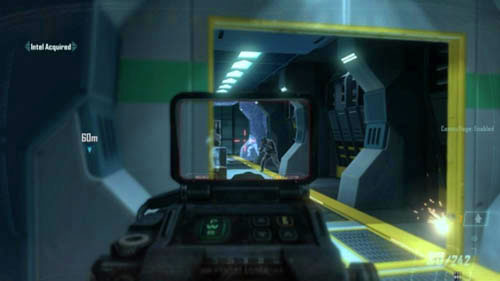
As quickly as you can run behind Harper! After a short while you will notice a big bus that will crush you if you do not do anything (first picture above). Get closer to Harper and start pressing the use button to open the gate. As soon as your character gets up, do not go ahead, but turn into the blind alley on the right. To the left there will be intel (2/3) (second picture above). Follow Harper all the time till he tells you not to move.
Objective: Avoid being spotted by MQ drones
Wait for a while behind the sandbags and then jump over them. Hide behind the wall on the left and wait till the drone starts looking the other way. Run and stand behind the next wall on the left, right next to Harper. Again, follow him and flatten yourself against the wall, to the right of Harper (picture above), but not too close - you cannot get into the drone's sight. When Harper gives the signal, go through the building to go outside, through the second exit, and then immediately hide by the wall on the right.
In the last but one hiding place it is easiest to make a mistake. When you run out, do not stand by Harper, but simply hide behind the column on the right (picture above). In a moment when Harper gives the signal, crouch down next to him behind the car wreck and then by the next wreck, this time a truck. This is the last hideout. Remember to move silently while coming out from behind the second wreck (just stay in the crouching position), because the drone can be alerted by loud sounds!
Run behind Harper, some rubble should collapse in front of you. Do not follow Harper, walk ahead - among the debris you will find the last intel (3/3) (picture above). Follow Harper and start shooting at the guards at the entrance to the canal. Nothing will happen if you do not hit, Harper will handle them.
Walk up with your team-mate to the canal entrance and enter when he opens it. Keep following him all the time. As soon as you see the word Access on the door (picture above), open it. Thanks to eavesdropping on the conversation you will get some information about SOC-T jeeps. Follow Harper till Mason contacts Briggs and you go on to the next part of the mission.
Objective: Get to observation point
Objective: Identify Menendez
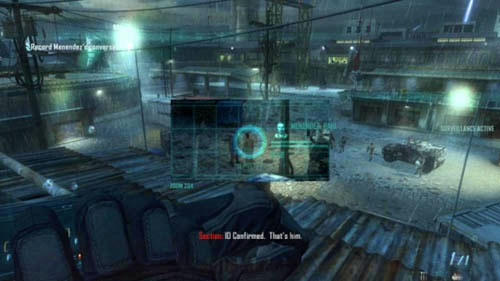
Objective: Record Mendenez's conversation
Look up and shoot the rope by using a grenade at the indicated place. Watch the cutscene and then walk up quietly to the guard on the right and press the melee button. Stand by the rail and look at the courtyard. There are three jeeps. Menendez, who's wearing a light-colored suit, will get out of one of them and after a while he will stand nearby. Your job is to keep the crosshair on him (you can zoom the screen using the scope) to identify him and then record as much data as you can (picture above). When Menendez starts to walk away, move the crosshair along with him. You should be able to record about 100 TB of data (the TB counter is next to the circle in the middle of the screen, below the two horizontal bars on the right). There are four attempts including this one. Recording 400 TB of data will reward you with a challenge.

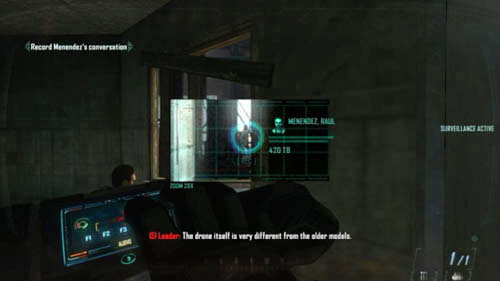
When you lose contact with Menendez, follow Harper and crouch behind him when the stands near the fan. Next, go further, jump down and prone (it's a must) - if you do not, a patrolling helicopter will detect you. Look to the right, there should be a circle indicating Menendez on the scanner (picture above). He will be passing through the corridor from right to left (for a second or two he will stop and then he will start walking further). Keep the crosshair on him all the time - when you lose contact with him, you should have a lot more than 200 TB of data. Do not worry if Harper blocks your view of Menendez, because it does not matter to the scanner.

Run behind Harper, climb up on the roof, go to the room and wait for your team-mate to kill the guard. Look out of the window on the right and locate Menendez (picture above) - he will again be coming out from the right. Then he will stop and have quite a long conversation. After that he will go left. If you sufficiently used this and the two previous attempts, at the end of the third you should have 400 TB of data. If not - don't worry, soon you will have the fourth and the last chance.
Objective: Reacquire Menendez
Objective: Record Mendenez's conversation
Run behind Harper, hide under the wall and wait for the helicopter to fly over. During the next part of the mission just do the same thing as Harper and run behind him, not sprint. You will jump down to the lower roof and run to the place where you will jump down into the street (first picture above). Approach the guard by the jeep and press melee button. Afterwards, follow Harper inside the building. You will be able to record the last Menendez's conversation through the window (second picture above). He will come out of the left side in front of you and stop. Do it and then wait until Harper unlocks the passage on the right. Swim with him to the next place and come out to the surface.
Objective: Rendezvous with Salazar
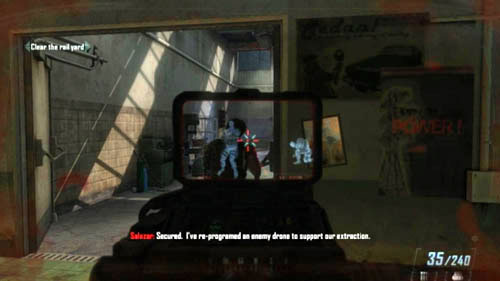
Objective: Clear the rail yard
After the cutscene, you'll find yourself back in the water. Swim behind Harper and then run behind him. You will go up the stairs. Prepare for a short battle once again using the scanner to discover your opponents (picture above). Kill the two enemies, but do not go into the room and do not stand by the window next to Harper, because you will die from the helicopter round. Just stay on the stairs. Press the button shown on the screen to take control over Brutus - the first of the two CLAWs that you have at your disposal in this mission.

You can use the grenade launcher and the turret (or a flamethrower if you made it running at the beginning of the mission). As soon as you start to look through Brutus's "eyes" immediately burn a few enemies in front of you with the flamethrower (picture above). Go forward and burn everyone on your way. The turret is more convenient, but you can pass a challenge for burning 10 enemies. Remember, however, that while the turret can be controlled freely, the flamethrower always shoots in the direction your robot is facing. Also, watch out for red explosive barrels! Next, turn right.

In fact, the only thing you have to watch out for is the soldiers with RPGs in the courtyard. They will fire rockets at you through the garage door on the left. So try to move in such a way as for there to be, for example, a column between you and the exit. On the right, between the columns, a large group of enemies will gather (picture above). This is an excellent opportunity to pass the challenge. Once you've done it, do not shoot at anyone, but retreat the CLAW to the place where you took control over it. Afterwards, press the appropriate button to operate the second CLAW. If the CLAW is destroyed, you will automatically be switched to the other one.
It is important to kill the soldiers with RPGs in the courtyard among the jeeps as soon as possible (first picture above), as well as to fire rockets at enemies with RPGs, who are on the roof on the right (second picture above). The next ones can come running from the street on the left (depending on how early or how late you switched from one CLAW to the other). Afterwards simply destroy the rest of the targets (helicopter, two jeeps) and kill all the other enemies. If both of your CLAWs have survived, you will pass an additional challenge. When there are no more enemies, you will get back to playing as Mason. Run into the courtyard and get in the car to go to the third and the last part of the mission.
Objective: Destroy the blockade
Objective: Escape Anthem
To make a good start, you will operate a helicopter. Immediately destroy the vehicle passing beneath you with rockets, and then use the same method to get rid of the blockade. You will get back to playing as Mason. Get a move on and drive the only possible way. Go past the enemy vehicle and then drive into the shop running over the enemy soldiers. After you've left it, quickly drive below two soldiers with RPG (picture above).

Keep going further, choose either left or right way when you see the two paths (the right one leads up). Soon after that you will get a choice - you can either remain in the vehicle until the end of the mission or switch to the drone (helicopter) (picture above). Both are described below.

As a drone simply shoot rockets at all targets marked with red circles on the screen. It's enough to mark the target by moving the cursor over it, then all you need to do is to press the fire button - the rocket will hit the target by itself. Blocking the target will be shown by a red circle (first picture above), you will also hear a distinctive sound. You don't have to pay any attention to the enemy soldiers. There is a challenge to pass for the jeeps, while the drones are the most dangerous (second picture above).
In fact, the only moment in which you have to be more careful is when you notice a large pane in front of you (picture above) - use the machinegun only this one time, as the explosion could damage the helicopter. Afterwards start to exterminate targets as soon as possible. You cannot afford not to pay attention and miss any of the enemy helicopters, because it will stay behind you all the time and will shoot at you, which will most likely end in failure. You will carry out the next part of the mission easily - just keep up with shooting rockets at targets.

If you stay behind the wheel, the task will be much more difficult, as it is a lot easier to lead to the vehicle's destruction. The more your car is on fire, the greater the chance for it to get destroyed (although after a few seconds it will fix itself). Remember to turn the boost on, especially if an enemy vehicle gets in your way. In addition, you must be aware that you cannot fall behind. If you hear at least 3 messages from Harper urging you to go faster, it will mean that in a moment you will lose Salazar and fail. After making the decision, go forward, through another building, and then to the left, to the left lane of the highway. As soon as you see the blue and green sign forming something similar to a ramp, drive through it with the boost turned on (picture above).
Drive through the marshes, and then to the left, to the great building and through the tunnel. After jumping out of the building, drive into the next building and turn left, and then right. Drive through the parking lot, and when you pass through the swamp, you will need to make two dodges. First drive left to avoid fire (picture above) and then to the right to avoid acid.

After a while, you will turn left, pass through the small hall and then go outside again. Cross over the broken piece of the bridge on the left and you'll find yourself in a big factory. Here, drive left and then right. Drive on the railway tracks on the right, they lead to a built driveway, in front of which you should enable the boost to jump to the other end of the building (picture above).
When the drone is destroyed (regardless of the option you chose above), you will have to make a decision while entering the great hall in front of you (picture above).
Regardless of the decision, immediately after that the mission will be over.
Attention! Make sure to take the Millimeter Scanner with you on this mission. You can choose it as an attachment to your main weapon. It will be extremely helpful when fighting enemies (you are not equipped with it by default).
Objective: Get through security checkpoint
Objective: Head to the CRC
Enter the building and wait for the guard to unlock the door. Go to the elevator through the next rooms. When Harper gets out, get ready, together with Salazar, to quickly kill the two guards-engineers (picture above) - you should take out the one on the left. Run with your team-mate to the small room, and then to move closer to the desk. Watch the cutscene.
Objective: Infiltrate the CRC room
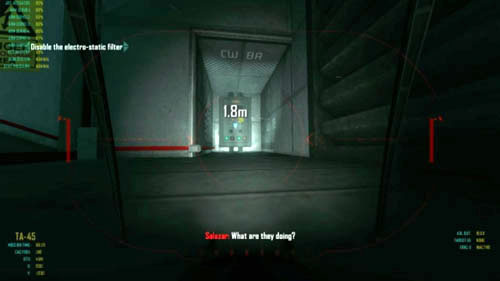
Objective: Disable the electro-static filter
You will take control over Ziggy - a small, mechanical spider that can walk on most surfaces, including walls and ceilings. It can also jump and boost with the same buttons you use to control the character. Use the following tips and do not do anything else, because, taking Ziggy's climbing skills into account, it is very easy to lose the sense of direction and get lost. Go ahead and after a while turn right. Now hold down the sprint button, and jump over the gap in the right place (first picture above). Immediately, turn left and go straight ahead. You will get to a fork. Go straight to the security box. "Shoot" with an electric charge at it (second picture above).
Go back to the fork and this time turn left. Enter the oval tunnel, and once you're in it, go between the bars on the left and right (you cannot get on the bars) (first picture above). Go down on the ceiling from the side. The letters A and B in the circles should be turned upside down (they will be at the end of the tunnel). You will enter the airshaft on the ceiling. Go right to pass through the curved grate (second picture above). Then go through the bend on the left in the next grate.

Stop and start walking sideways to the left or right. The idea is that you should come down from the ceiling to the floor. Then go further. You will get to the room with blue and red pipes. At this point, the game will be saved automatically, and if in a moment you will fall down at any time, you will just start off from that point. Go forward, on the tubes, and then move sideways to the right - horizontally, vertically, and again horizontally. Move forward carefully. You'll notice a place where you have to jump over (picture above), so do it.
You are on three pipes. If you turn left, the right one goes down and the other two go up. Climb the latter, carefully turn right and jump into the next ventilation shaft (picture above). Go further, shoot an electric charge at the red button (you have to get closer to hit it) and go down the open grate. When you fall on the man below, press the shot button again. Here, Ziggy's part will be over.
Objective: Access CRC computer and search for Karma
Run behind Salazar and get ready to fight. Immediately after regaining control over the character, move to the right and kill two enemies at the same time - one in front of the desk and one behind it (picture above). Exactly in front of you, behind one of the bookshelves, there is another opponent. Locate him with the scanner and lean out so that your crosshair is immediately placed on his head.
Treat the next two enemies hidden a bit further to the right in the same way (picture above) - the one on the left is standing in the door, the one on the right is behind the desk. It can be hard to see them through the panes, but you can break them with a few shots. Two last enemies will remain - one is hiding even further to the right, and the other will come running straight at you. Do not let him take you by surprise! After killing the pair, Salazar should say that the area is clear.
From the place where you have just been hiding with Salazar go forward and past the shelves. In the end you will get to the room on the left. Go inside (picture above) and look at the word Access on the left. Move closer and press the use button. From now on, all opponents will have a red light on them, which will help you identify them.

Exit the room and simply go to the direction of the target. When you reach the entrance to the main computer (first picture above), first look at the desk on the right. There is intel (1/3) (second picture above) on it.
Walk up to Salazar at the main computer and look at the floor on the right - there is Ziggy (picture above). Pick it up, which will result in passing a challenge, and then walk up to the main computer. Your next task will be to press the combinations of two buttons displayed on the screen. Hold the button indicated on the left and follow the movement shown on the right. Do this four times, and you will finally find out what Karma is.
Objective: Rendezvous inside Club Solar
Stand next to Salazar by the door, but as soon as you regain control over the character, quickly get back in front of the door and hide to its right, as it is the best cover. Start to search for enemies using the scanner and be careful. Some might come to you. If that happens, be prepared. The enemies will be hiding behind the opposite windows and on the right (picture above). Carefully lean out more and more to the left and eliminate enemies one by one.
When there is no one in this room, begin to go towards the door, marked by the mission objective marker. Walk up from their left and when it opens, quickly kill the enemy who will stand in them. Afterwards, hide on the left. Again, start to search for enemies with the scanner and lean out more and more to the right (picture above). Watch out for flashbang grenades! The enemies will be hiding opposite the piles of boxes and behind the shelves on the left.
Start walking along the windows on the right, but when you notice three enemies running through the corridor to the right, immediately retreat and hide behind the wall to the right of Salazar. Wait patiently, because some may come running to you. If it does not happen, look for them using the scanner (picture above), lure them out and kill.
Enter the room on the right and use the scanner to locate enemies. They can be hiding in two rooms across the hall (in the left one, under the pane on the left and in the right by the door connecting the two rooms). Most of them will be in the hallway. After locating the enemies (picture above) lean out more and more to the left in such a way as to make the enemy's head immediately appear in the crosshair and shoot. Using the same way, finish off everybody in the hallway and the rooms. However, be careful all the time, as an opponent might come running to you at any moment!
When you can no longer see any enemies, go to the opposite room and turn right into the next room. Perhaps there is an opponent there. If not, Salazar will run up to he stairs and start to shoot the last opponents in this part of the level. You should hide at the door to the room and locate enemies (picture above) - they are downstairs, one is hiding behind the column on the left and one behind the column on the right (this one is likely to be taken out by Salazar), while the last two are behind the panel in the middle of the room . After killing the enemies, go to the elevator on the left.

When you come out of it, go straight, straight (Mason will show the pass to the guard), right, and straight and up, and then right. Another guard will open the door for you. Go the only possible way to the room with a dance floor and lots of dancing guests. Go left, then step on the dance floor and find Harper and Chloe in the crowd (picture above). Watch the cutscene and be ready for a quick action.
There are four spectacular slowmos waiting here for you, during which you will have to kill enemy mercenaries. Try to kill at least two or three during each slowmo, because if you do not keep up, there will be too many at the end, which may cost you your life. Always try to aim at the enemies who are looking at you first (ignore those looking, for example, the other way). Finally, you will get to the fourth and last slowmo (picture above) - shoot out the rest of the enemies and then wait for the cutscene. You will go to the second and final part of the mission.
Objective: Stop DeFalco from escaping with Karma
Wait until Harper finishes telling the guard what the latter has to do. When he opens the armory on the right, go inside and look at the armored gate with a word Access (picture above). Open it. You will equip your character with combatant suppression knuckles, which will make enemies to instantly lose consciousness, as well as... vomit.
Go back to your team-mates and enter the shopping mall through the next room. Hotel guards will join you in the fight, which will make things easier. Another convenient thing will be that your enemies will be glowing in orange. Contrary to appearances, you do not have to rush yet, so hide somewhere - for example, behind the column on the right, and start shooting at the enemies on the opposite bridge, as well as at those running next to the destroyed, burning shop to the right (picture above).
Keep going right all the time. There will really be a lot of opponents here, but, as you will find out, they will be quite disorganized. They will be running here and there, which will only make the task easier. However, watch out for all the corners - there can be an opponent almost behind all. Keep looking out for the stairs leading down on the left (picture above). Next to them and a little further there is a huge number of enemies, but it will be enough to stand behind the column and just shoot all of them one by one.

When you clear the area around the stairs of enemies, start going down. Along the way, you will notice a shop with a word "d'Ho" (first picture above). Go inside, behind the counter and look at the left corner of the wall shining in red. There will be intel (2/3) (second picture above). Exit the shop and go right, killing enemies along the way.

Run up the wide staircase in the middle, there should no longer be any enemies here, at least for now. Run to the left and before you join Salazar, open the double doors with a word Access to the left (picture above). Only after that can you stand by your team-mate and watch the cutscene, during which you will open the door together. Go through the door and head for the stairs on the right.
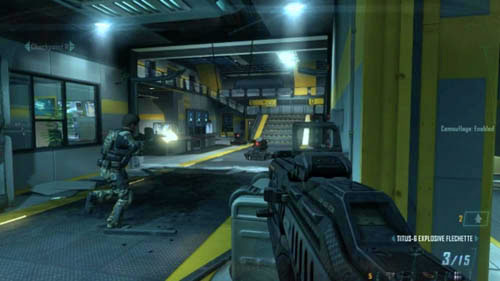
The hotel guards and DeFalco's mercenaries, who are fighting with each other, will be joined by a third party - ASD robots you already know. They will open fire at absolutely anyone holding a weapon. So, there will be even more turmoil. After going down the stairs hide on the right side of the front door and start to shoot at two ASDs, as well as at several enemies in the distance (picture above). Remember that ASDs are not as dangerous as enemies. Although they have greater firepower, they don't necessarily have to focus on you - sometimes it's better to just go past them sprinting instead of fighting them.
When you manage to clear the area a little, run to the right and look out for a big, round pot with a palm tree inside. Move in such a way as to have it to your left. The rocks should be to your right. Instantly search for the sniper on them (picture above). Locate him by the scope flash and quickly take him out, as he's a very dangerous opponent.
Cross the nearest bridge and keep shooting at the enemy in the window. At the same time look out for the stairs just next to the right side (picture above) - when you will be crossing the bridge, enemies will be going down the stairs. That is why, be prepared to quickly shoot them or throw a grenade at the stairs. Go up the stairs, kill the enemy on the right at the top, and then start to go down the second stairs to the right.
Stop halfway. It's easy to get lost in this vast area, so follow the instructions. Before you go down completely, shoot the enemies hiding, among other places, behind the silver basket in front of you and among the big pots on the left (picture above). After descending the stairs sprint exactly forward, then straight ahead along the oval rail on the right (of course, always watch out for enemies, in the meantime, you can hide behind the basket, for example). When you get to the wall, turn left and run in such a way as to have it to your right. However, watch out for the target meter counter - when it turns into a flashing red word "DeFalco", it will mean that you need to take another important decision! You have two options and each has its consequences:

Run forward, with the wall of the building to your right at all times. After a while, you should notice the stairs in the distance, slightly to the left. Head toward them but stop by one of the stalls on the right (first picture above) and quickly take intel (3/3) lying on it (second picture above). Hold down the sprint button all the time!
Run up the stairs and then sprint along the left side of the hedges. When you reach the end of the road (picture above), turn right and then immediately left behind the rectangular pot. You should see DeFalco, Karma and two enemies - it will mean that you made it. Now you only need to kill DeFalco.
Do not run to the enemies. Instead, lie down behind the pot and simply wait for them. Be ready to shoot a round at the two opponents who will come running first, and then do the same with DeFalco (picture above). Be careful - he is much more accurate than ordinary enemies, so killing him fast is necessary. Otherwise, you will die. The mission ends here and now.
Attention! If you want to make it easier to get two challenges, as the first weapon take a machinegun (e.g. an M60 of the Light Machineguns group) together with an Enhanced Clip. As the second weapon choose any rocket launcher.
Objective: Meet up with Mason and McKnight
Objective: Retrieve bag from shed
Objective: Get to Woods' vehicle
In this mission you will play as Woods. Go to the second car to meet up with Mason, then to the front door. When it turns out you can't enter, walk around the house from the left and get to the wooden door. McKnight will open it and you'll be able to walk up to the shed (picture above). Woods will take the bag himself and then join the rest. When the conversation is over, follow your team-mates.

Objective: Capture Noriega
When you get off the pontoon, go left behind Mason and get closer to the ladder. As soon as the message appears on the screen, immediately press the fire button to throw a knife at the guard on the right (picture above). Quickly hide in the watchtower, from which he came out.
You will be literally flooded with grenades. The watchtower is the safest place, but it does not mean that it completely safe - if a grenade falls inside, either throw it back or wait to die and load the game. Carefully lean out (picture above) and start to shoot at enemies. Eliminate them from right to left. On the right there is the first one hiding behind the car wreck with its front facing you. The other one will jump over the car on the left. Watch out for the one who might run through behind the low walls and stand right next to the gate. Others will be running in the courtyard closer to the gate.
When you have cleared the area of enemies a little, get on your feet and sprint behind the oval pot on the left. Get down at its left side and start to crawl along the wall, which branches from it. Against the wall, between the columns on the left there will be a lot of enemies. Carefully crawl forward trying to look for the enemies' body parts and shoot at them (picture above). Retreat if necessary.
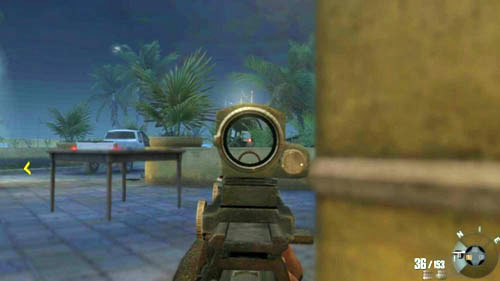
When you've crawled to the second pot (or, if a grenade lands on your side), get up and run to the left, around the corner. Lean out and look out for enemies (they may be behind the overturned table). Keep going along the building, hiding behind the next columns and watch out for the enemy that will pop out of one of the windows on the left. In the meantime, a truck full of enemies will come here, so be ready for a new fight (picture above). Only after making sure that no one will shoot you in the back can you head toward the stairs at the end of the courtyard.

Objective: Assist SEALs
Run up to the gray dot and then go with Mason to the right. On the left you will see a word Access on the box you can open (picture above). In this way you will get Nightingale smoke grenades. Run behind Mason and climb the stairs to the roof. There are several enemies standing there, but you do not even have to fight them. Some will be killed by Mason, and others taken out by McKnight - the sniper you met at the beginning of the mission. Run up to Mason and wait till he opens the skylight.

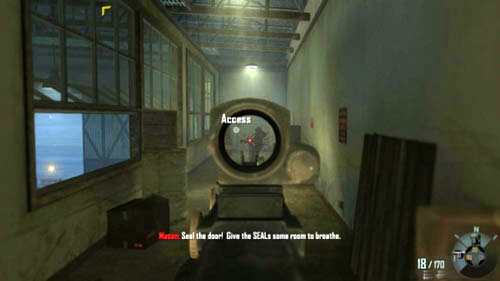
Kill the two enemies from above, and before the new ones will take their place, jump following Mason and then turn right as soon as possible and run straight ahead until you get to the corridor (first picture above). Here, quickly kill the soldier on the left and go where he was standing (second picture above). Exactly behind him is the door that you can pick. Thanks to that you will obtain a suit that will protect you against explosions.
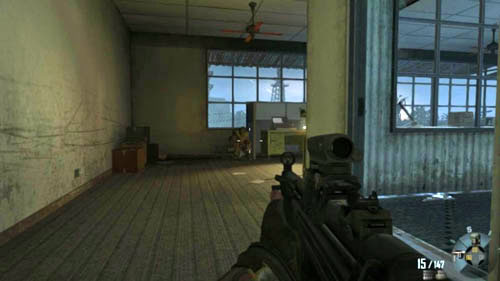
Make a 180-degree turn and move forward. On the right, on the perpendicular terrace there will be a lot of enemies, but it's better to leave them and let them fight with the allied SEALs. Go past the terrace exit to the right (picture above) and hide to its left. Now you have to lean out to the left (to kill the enemies in the hallway) and right (to kill the enemies on the terrace and in the windows on the right). Move further through the corridor eliminating the next opponents (one is hiding in the left corner of the corridor).


After you've turned right, immediately kill the enemy, who is running up the opposite stairs leading down (first picture above). Mason will use them and you, before you do that, should look for intel (1/3). It is lying on one of the shelves on the left (second picture above). Afterwards join Mason downstairs.
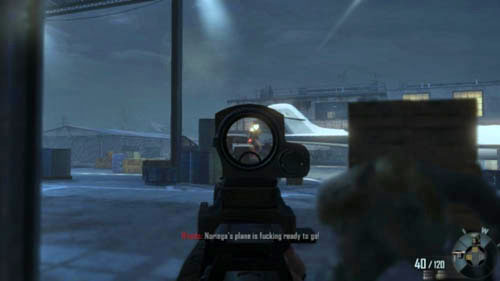
Go down the stairs and go left. Look out through the left door and quickly locate the heavy machinegun operator on the truck, which will come out from the right (picture above). Take him out. Now you can either stay here and eliminate the enemies, or try to take and use the heavy machinegun from the abovementioned truck. It's interesting to know that if you do the latter, even on Veteran level, you will be virtually untouchable, even by enemy grenades and RPG rounds. Start to do damage, eliminate enemies near the car, and then those in the windows and on the left, and also on the balcony (there is a soldier with an RPG there).
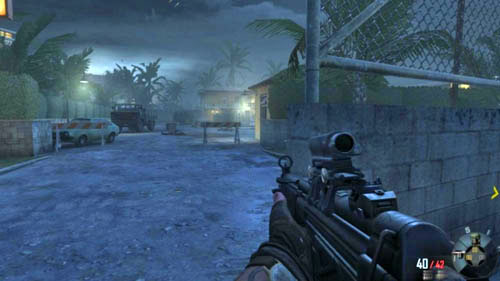
If you're using the gun and you are not able to reach any opponent, get off of the car and quickly run up to Mason, who is behind the boxes on the left. From there, take out the enemies around the corner, and behind the boxes on the right, next to the wall of the building. When Mason runs out and there are no enemies around, follow him up the stairs and go to the next building. Stop by its second door (picture above) and wait for the sniper, McKnight, to clear the motel courtyard. Only then can you move to the mission marker to capture Noriega.
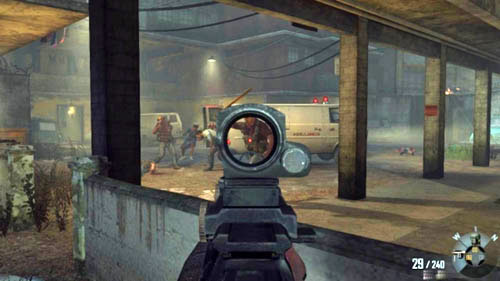
Objective: Escort Noriega to Army checkpoint
After watching the cutscene and regaining control over Woods, aim and shoot the enemy who's beating the civilians on the right. After a while, his colleagues will join the battle. Some have rifles, others will come running with baseball bats (picture above). Retreat and wait for them with your weapon. If any runs up too close, use a knife. After clearing this place go with Noriega and Mason to the opposite door. When the conversation is over, go to the indicated door to breach it.
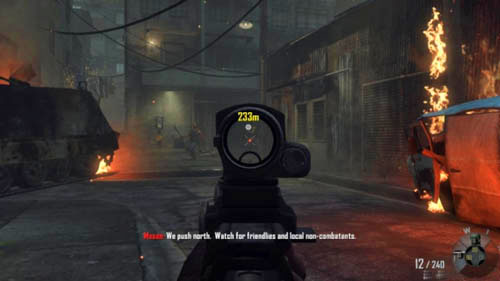
Move down the corridor and through the stairwell to get in the street. It is easy to get lost in the city and it's even easier to get killed, because enemies will often appear right behind you. You must also watch out for grenades. In general, do not worry about Mason and Noriega. Immediately after coming into the street do not go right. Instead, go left, toward the allied tank. Do not stand near it, as it will explode in a moment, which can kill you as well. However, be prepared to eliminate two or one enemy who will come running from around the corner to the right (picture above).
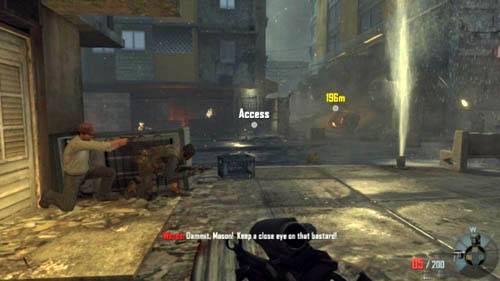
When you do that, go straight west. Another enemy with a bat will pop out from around the corner, kill him quickly and continue to sprint forward. You should notice the word Access on the metal gate, right in front of you. Mason and Noriega will hide on the left (picture above). Sprint up to the bars and press the use button to get inside. In this way, you will get some IR strobes. Along the way, watch out for the soldier with an RPG who might be lurking upstairs in the building on the right.
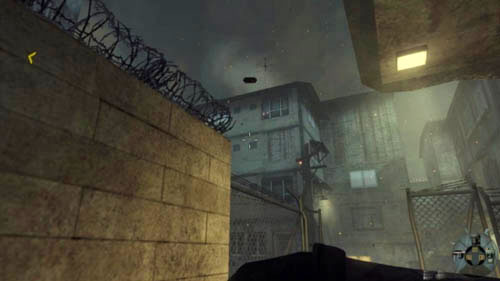
Behind the body of the soldier, whose eyes you've just closed, there is a garbage can - quickly hide near it, make a 180-degree turn and throw an IR strobe at the building on the left (first picture above). A few enemies should gather here. A round from the allied helicopter will soon quickly kill them. Even before the round is over, start to go out backwards through the gate and at the same time throw an IR strobe into the opposite street on the right (second picture above). There are a lot of enemies and also a truck with a machinegun, but after the round the street should be clear. If not, quickly hide somewhere and shoot out all the enemies.

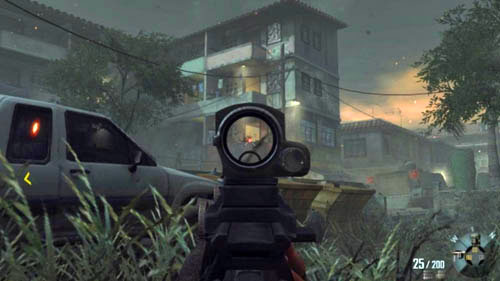
Throw the last IR strobe at the intersection. An allied vehicle will come out at it from the left (first picture above). Nothing will happen to it. Thanks to the grenade you will clear this place of all enemies. Hide on the right, behind the white truck and be careful - one opponent can run out the door right behind you. Your task will be to take out the enemy who will appear on the balcony of the building on the left as quickly as possible. Next, carefully go north.
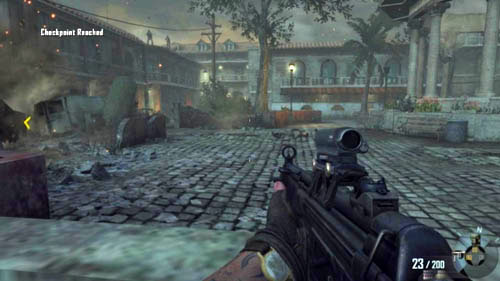
The enemies below should be eliminated. The problematic ones will be those on the upper levels - two with RPGs standing on the roof on the left (picture above) and one shooting from the opposite balcony. Remain cautious and don't lean out. You can also wait for a while, however, your allies will not, and they'll to get rid of them.
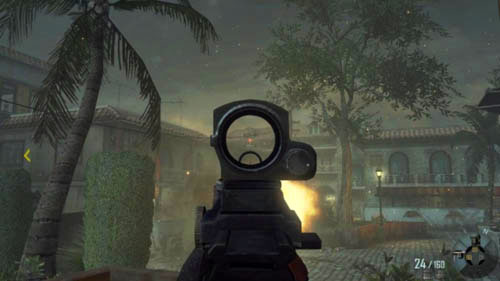
If you want to easily pass one of the challenges, climb the stairs to the right and start to shoot at the ZPU anti-aircraft turret that is on one of the roofs (picture above). It may take some time before you destroy it, but eventually you will succeed.
Soon after that, head towards the wreck of an allied tank on the left and then exactly into the street leading west. Hide behind the two barrels on the left, so that you won't be taken by surprise by the three opponents who will appear next to the green car on the right (picture above). Kill them and go further to the east between the buildings, up the steps and through the gate.

Quickly kill the enemy who is harassing a civilian (first picture above). Take out the Nightingale grenades and throw them all through the opposite gate. Throw them in different directions, in order to have some peaceful time for a while. Afterwards, walk up to the door on the left. Inside, on the counter on the left, directly opposite the hole in the wall, you will find intel (2/3) (second picture above). Remember to refill your ammo by the ammo crates, but be careful - at any time an enemy can run in through the hole or the door!
When the smoke has died out, the allies should have killed most of the enemies. Despite that, cautiously lean out through the hole and explore the courtyard, and then the church roof on the left - there can be some enemies. Stick to the left wall of the building, out of which you went. At the intersection, on the balcony on the left there is an enemy lurking (picture above) - it's necessary to kill him. Next, turn around and run to the north. Behind the church on the left there is the gate, and exactly in front of it there is an entrance to the building. Run through it to get inside.

In the next room there can be an enemy - kill him through the window on the left, then enter through the door on the right and immediately hide by the exit on the left, by the car. Lean out and take out the enemies hiding around the barricade (picture above). Then start running west and walk up to the door marked by the objective marker. Watch the cutscene and go to the last part of the mission.
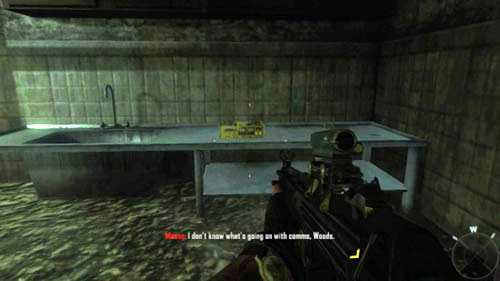
Immediately after regaining control over the character keep going forward all the time. Stop only when you see the last intel (3/3) (picture above) on the washbasin in front of you. Afterwards go to Mason and Noriega and then enter the next room and walk up to the woman with the word "Help".
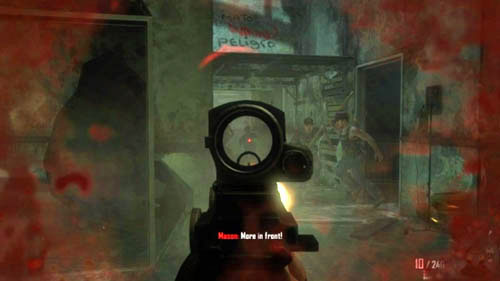
As soon as you regain control over the character, immediately start to shoot at the enemies in the opposite corridor (picture above) and at the same time keep moving left to hide. Some enemies will shoot at you, others will run up with baseball bats out of the door on the left and the right. Be careful all the time. After a while there will be no more opponents. Run the only possible way - through the corridor and upstairs.
Upstairs, walk up to the word "Help" on the left and wait for your character to pull Noriega. After a while an IR strobe will land here and you will have to run very quickly to get out. Make sure that you are not in the crouch mode, but, in spite of appearances, do not sprint. Run in an ordinary fashion and watch where you're going because you'll have to jump at the right moment (picture above) - you must do it at the right moment, not too late but also not too soon! Once you fall down on the balcony, go to the next room and jump down through the hole in the floor. Go the only possible way to the checkpoint. Wait until the conversation is over.

Objective: Kill Menendez
Exit to the balcony and use the scope. Use extra zoom (picture above). When the two guards bring your target, make a decision.
The default equipment leaves a lot to be desired. Therefore, it is necessary that you take a machinegun (one of the Light Machineguns group) and add some attachments, e.g. an Enhanced Clip. As the second weapon choose an assault rifle with the Millimeter Scanner.

Objective: Join Menendez on stage
Objective: Rendezvous with Menendez at the citadel
You begin the mission as Farid. Follow Menendez and move closer to him when he stands at the big double doors. Listen to his speech, and when you regain control over the character, quickly jump into the crowd and run to the entrance to the right of the main gate (picture above). It is pointless to stand on the stage and wait for the flying quad-drones to kill you. Use the time during which they are busy with your allies. However, watch out for them in the palace corridors.


When you get to the abovementioned entrance, quickly turn right and then immediately left, to the stairs leading to the second floor of the tower. Here, the quad-drones won't get you. What's more, there will be the first intel (1/3) (first picture above) lying on the floor. Go up to the next floor and you'll find a chest with an optical camouflage inside (second picture above). Take it and turn it on instantly.

Look out through the window and look straight ahead. A little to the right you should see the stairs leading up - start by eliminating the enemies hiding to the left and right of the top of the stairs. Be careful, because new ones will come running to these places. Afterwards jump on the scaffolding in front of the window and crouch immediately. Here you will be able to see all the enemies and moreover you can destroy the vehicles by which enemies are hiding (picture above). Clear the area, especially concentrate on the further, left part of the courtyard. Also, watch out also for the quad-drones!

When you notice that your allies are running across the courtyard it will mean that this place has been taken over. Go down to the very bottom and immediately turn right. Run along the courtyard to the fork and then again turn right. You should notice an umbrella. Run straight ahead all the time, after a while you'll see the word Access on the cabinet exactly in front of you (picture above). Open it to get the sword.
Head toward the destination, sticking to the left wall all the time. That way, you will go outside and come across the grocery store (make sure there are no enemies in front of it). Look out through the door on the right, and if no one is shooting at you, quickly run to the one on the left. Again, look out through the door on the right. Wait until the enemy soldiers start running away to the left. When your allies come running here, locate the opposite door (picture above) and sprint toward them.
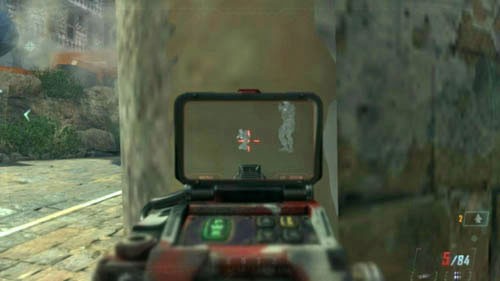
There can be an opponent inside (or he can run inside in a moment), so have the rifle or the sword ready. Besides, it is good to use the weapon with the scanner. Through the second exit door, opposite the first, you will notice a plane crash. First, scan the area to the right (picture above) and kill enemies by leaning out to the left from behind the door. Then run toward the plane and quickly go through the door on the left and then up the stairs.
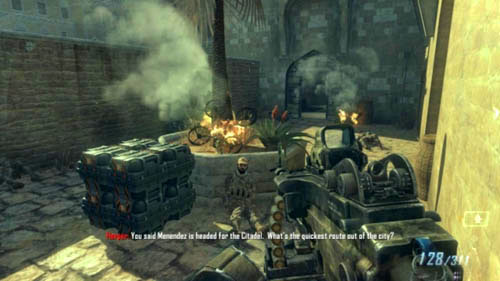
Stand by the door for a while and start shooting quad-drones down. Your allies will help you do that. When you have cleared the area, run forward and when you're on the terrace turn right. Turn left at the fork. You should get to ammo crates (picture above). Make sure to refill ammo and go in through the next door.
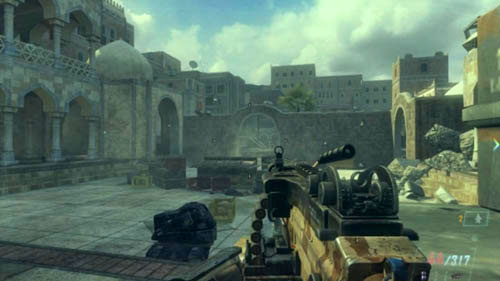
You will come out to a small courtyard that will be swarming with enemy soldiers in a moment. Throw an EMP grenade at the ASD (be careful not to throw it too close, because there will be some interference on the screen) that will come out from the left and destroy it. Keep in mind that you need to make it on time before the enemy unit repels down the two VTOLs. Quickly hide behind the boxes on the right and start to clear the courtyard of enemies (picture above). Do not spare the quad-drones. Note the two gates - the opposite one and the one on the right.
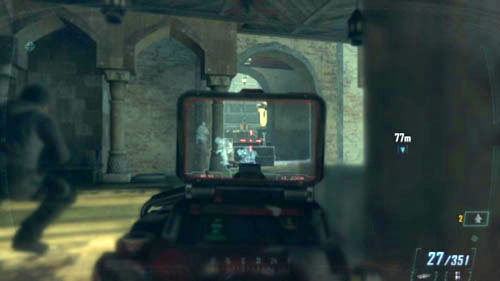
For now, however, go back to the place where you entered the courtyard. Just opposite the entrance there is another one with an overturned table, followed by a long terrace. There may be many opponents in this place, one, or none - depending on how the battle developed. Anyway, clear the place (picture above) and watch out for any opponent who might jump out from around the corner and kill you.
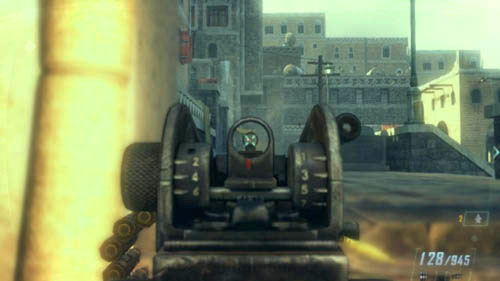
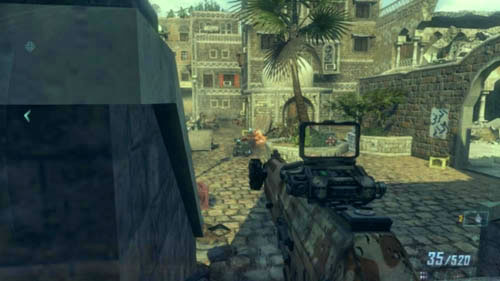
Then go behind the overturned table and hide on the left. Lean out and eliminate all the enemies in this place (first picture above). When the area is clear, you will see the allies taking positions on the terrace. Find the stairs on the right and get down on their left side. Lean out to the right, throw an EMP grenade at the enemy ASD, and then destroy it and kill the soldiers with a machinegun (second picture above). Exactly in front of you there is a balcony with a turret. You need to get up there.

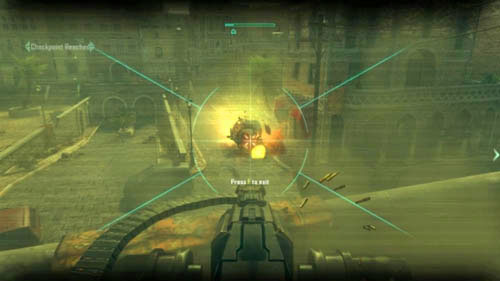
To do this, go back to the courtyard gate and exit through the right gate. Next, stick to the right wall all the time. There should be no enemies here. After a while you will get to the gate with a word Access that you should open (first picture above). After opening the gate go the only possible way to the balcony, lie down by the turret and press the use button to start shooting (second picture above). Try to take out all the remaining enemies - quad-drones, soldiers on the right side of the ramp, the ASD on the right (next to the palm trees). In the meantime, your allies should be getting closer to the right side.

Try to kill as many enemies in the street on the right - there are a few soldiers and an ASD. If you cannot see them from the turret (it has a limited field of view), stop using it and stand on the left side of the balcony. If this is not enough, go under it (picture above) and finish the job. When two allies come out of the green door at the end of the street, go to that place and open the next door.
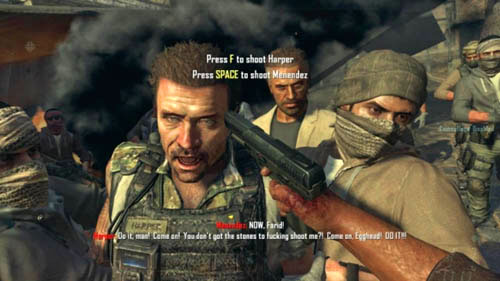
Watch the cutscene. At the end of the cutscene you will have to make a choice (picture above):
The next missions assume the more difficult choice, namely the first.
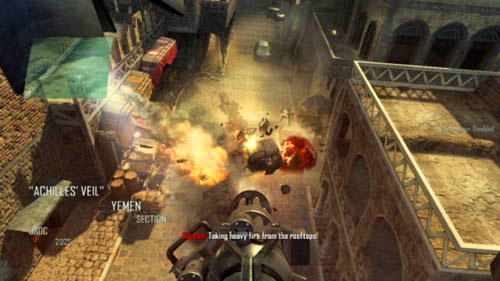
Objective: Clear the LZ
If you have tried to kill Menendez, you'll be able to play with a VTOL turret for several seconds. Shoot at everything that is moving and don't spare any cars (picture above). In both cases, you will play as Mason and you will complete the rest of the mission as him. Be sure to turn on the optical camouflage!
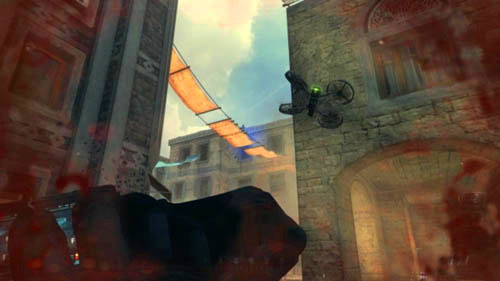
Objective: Pursue and capture Menendez
A new addition will be the support of the quad-drones - they will now be on your side. Of course, do not underestimate them, because it's better to kill some enemies with an ordinary weapon. Go to the gate on the right and follow the only possible path to a long street where the real war is taking place. Right on the left there's a window - kill the enemy in it and then wait until the next runs down from the stairs - you'll also kill him through the window. Mark the soldier with RPG on the roof as a target for the quad-drones (picture above). If you do not hit, he will come running to the corner of the roof on the left after a while.

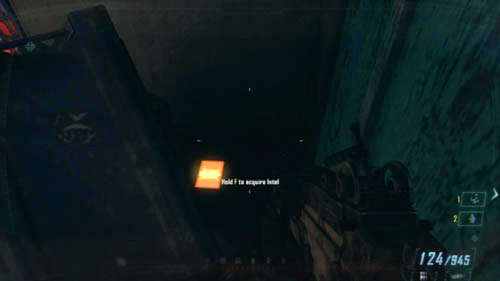
Enter the apartment where you've just killed the enemies. Behind the pile of boxes in the corner (first picture above) you will find the second intel (2/3) (second picture above). Take it and go up the stairs.
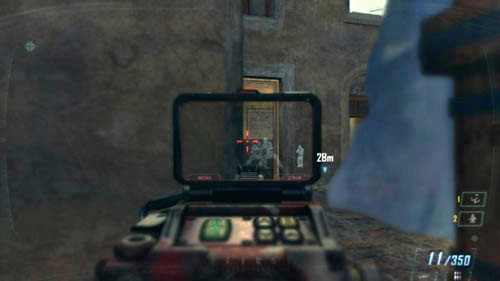
Take out the gun with the scanner and search for the opponents on the next roofs and apartments - don't let anyone take you by surprise. Watch out for grenades! In fact, there will be one opponent on every roof and in every apartment (picture above). When you get to apartment with stained-glass windows, turn right, go past the damaged turret and look out on the left.

You will see a large building - there will be soldiers with RPGs on its roof. The other enemies are hiding in the windows and also closer to you, under the building - behind the low rocks in front of you and to the left, near the small house. Alternately use quad-drones (picture above) and ordinary weapons to clear the place. Watch out for grenades! Next, head for the very building.
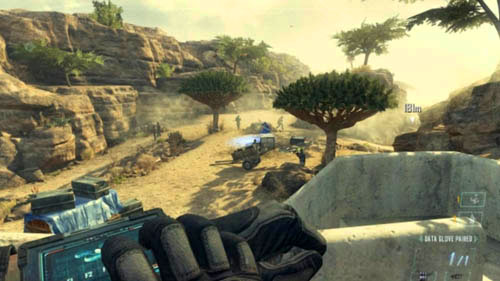
Go up the stairs and scan the interior so that you're not taken by surprise. Inside, climb the stairs to the top floor to the right and quickly look around the room to see if there is anyone there. Exit to the terrace and check it. Under the building there will be a lot of soldiers, which provides an excellent opportunity to use quad-drones (picture above). Mark the targets until the area is clear.
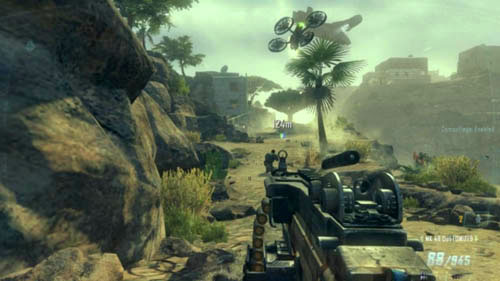
Go further with Salazar and choose the right road at the fork. Always stick to the rocks on the left. Mark the soldiers in the distance or take out all of them with a rifle. Use these two weapons alternately (picture above) and watch out for any soldier running straight at you. After a while Salazar will join you, which will make things even easier. When you get close to the building, be prepared to quickly kill the soldier on the right in the window and then go inside.
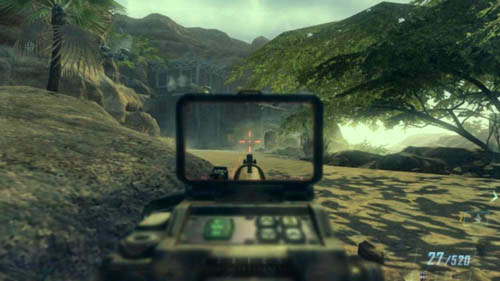
Go up the stairs and go outside. Go right, behind the building and you will find a ladder leading to the roof next to the ammo crates. There, in the corner, on the crate next to the tank on the left you will find the last intel (3/3) (picture above).
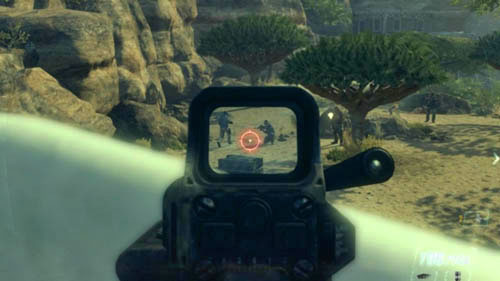
Afterwards crouch by the wall and look down. There are a lot of enemies, but from this position, you can shoot them easily (picture above). If you get hurt, just get down. Go to that place (carefully go down the ladder!) and make sure there's nobody there. It is possible that an enemy is hidden behind the rocks. Go further, kill the enemy next to the opposite tree.
Hide with Salazar at the tree next to the rocks on the left. Examine the area and kill the enemies in front of you, if there are any. You can also shoot at the quad-drones. Finally, run up to the building by the bridge, but before that, kill the enemy in the window downstairs (picture above).
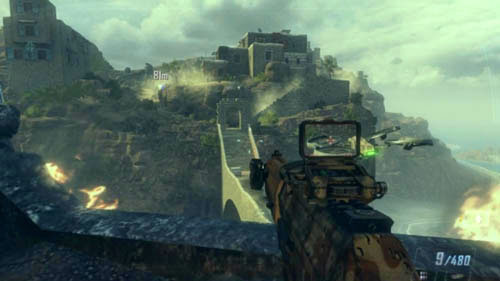
Scan the interior and then go inside. Look out through the hole in the wall and have a look at the citadel (picture above). Try to take out the enemies with RPGs from a distance, who are standing on the rocks on the other side, and the rest at the gate. Also, shoot a little at the enemy quad-drones. Do not shoot at yours! Then jump off the roof and go to the bridge. Go toward the gate and look out for the enemies who are standing by it.
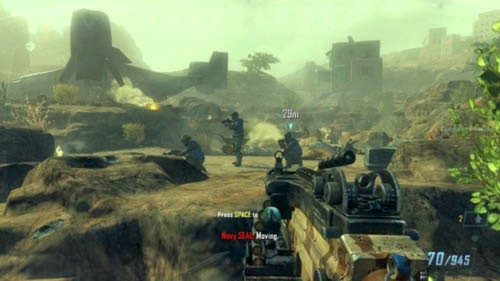
Go through the gate and flatten yourself against the rock, then climb the stairs on the left. There will be a lot of allies in the area, so the fight will be easy. Eliminate visible enemies, and then go ahead and go past the large, round boulder from the right. In front of you there is a chain of rocks and behind them a lot of enemies (picture above). Here, it's enough to go left, then right and look out for their heads. Get higher and higher as you kill the next enemies. You can also throw all the grenades you have here. When the area is clear, run to the VTOL.
Attention! Be sure to take an assault rifle with the Millimeter Scanner, a sniper rifle and EMP grenades.

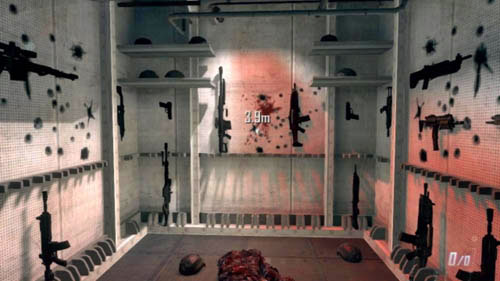
Objective: Interrogate Raul Menendez
Objective: Get your weapons
Walk up to the door and watch the cutscene. When you regain control over Mason, be sure to take the combatant suppression knuckles from the chest on the left with a word Access (first picture above). Go right, to the armory. Your weapon is hanging here, there are also a lot of other weapons, so don't confuse them (second picture above). First of all, take the assault rifle with the scanner and the sniper rifle.
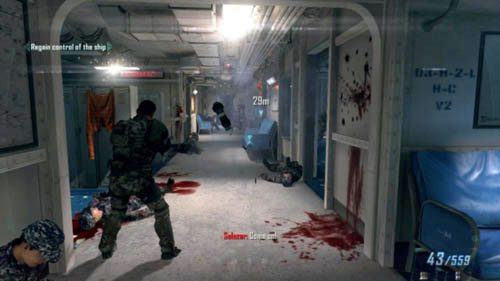
Objective: Regain control of the ship
Go to the indicated door and open it. Immediately, hide to the right or left, lean out and throw an EMP grenade (picture above). Change your weapon to the sniper rifle and with one shot take out the turret on the ceiling. Then quickly hide back.
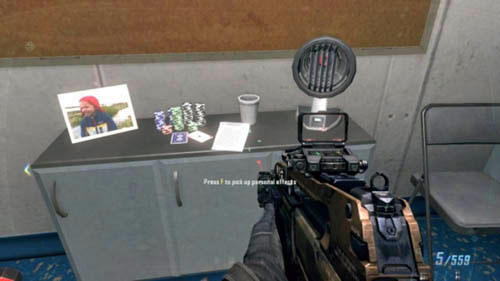
Before you go further, go into the room on the right. Exactly in front of you there will be a door that you should open (first picture above). Take a piece of paper from the chest of drawers (second picture above), which will mean passing a challenge.
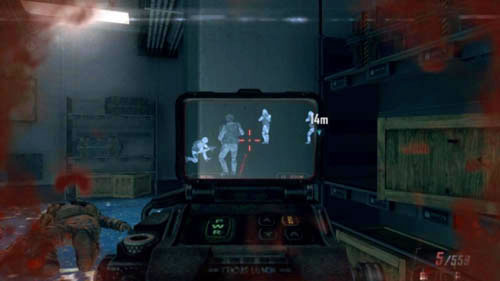
Hide between the lockers on the left and get as close as possible to the opponents. Wait for a moment and when no one is shooting at you, quickly go into the hallway and then immediately hide on the left, among the next section of lockers. Go forward - an opponent will be hiding on the left, by the door. Quickly take care of him with a blow and hide to the right side of the door. Be careful - another one might come here. Detect the enemies with the scanner (picture above).
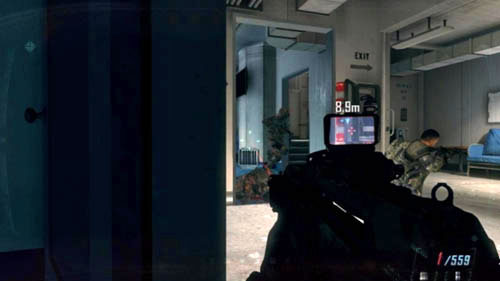
Then go to the next room and hide by the door open inwards. Lean out to the right (Salazar should run up to you) and search for enemies (picture above). They will be hiding behind the walls and the couch in the room on the left, they will also be standing on the steps on the right. When the scanner no longer detects any enemies, go to the next room.
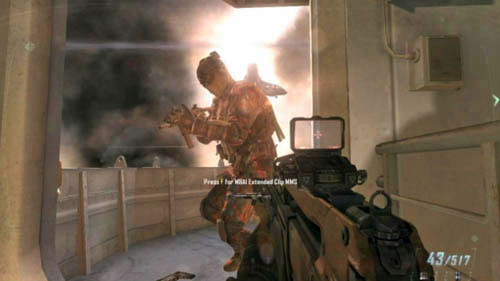
Climb the stairs to the right and wait for the door at their top to open. An allied soldier will stand in it - he is going to die or simply fall down. Have the knuckles ready, because in a moment an opponent will run through the door (picture above). Overpower him, look outside the door and check if there isn't another one.

If not, go out and stand on the right side of the corridor to the right. Lean out and start to shoot at the enemies. There are plenty of them in the corridor, they're hiding to the left and right in the doors and behind the boxes (picture above). New ones can also appear. When you've finished off most of them, run into the corridor and hide behind the boxes on the left. At this point, you can easily pass two challenges - killing 20 enemies with the Combatant Suppression Knuckles and killing 8 airborne enemies before they land (see the "Challenges" section for details).
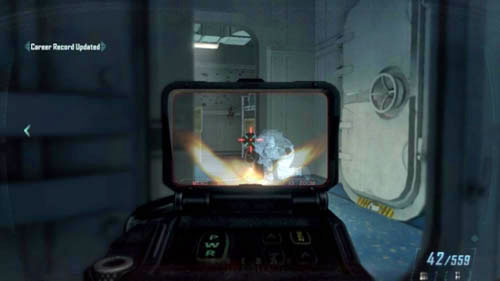
Wait until a new opponent runs inside, kill him and then quickly kill the single enemy, who remained in one of the cabins on the right (picture above). Afterwards, go to the end of the corridor and walk up to the half-open, heavy door on the left. Open it to get inside.
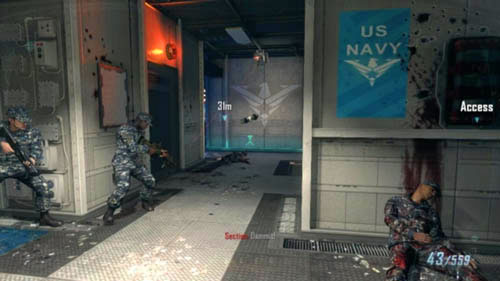
Around the corner on the right there is a second turret. A lot of enemies are running here as well. At the beginning wait patiently, because one of them may run up to you. Only after that can you throw an EMP grenade at the turret (picture above) and destroy it with one or two shots from the sniper rifle. Change your weapon to the assault rifle and start to look for enemies. One is around the corner on the right. Wait until he leans out and shoot him in the head.

Go in through the first door on the right and be ready to quickly overpower an enemy if any comes running to you here. If not, turn left. You should notice a security box with a word Access (picture above). Quickly run up to it and press the use button, but before that you should explore the area to check if there is any opponent on the left. When the cutscene showing how the security box opens begins, your character is immortal.

You will be able to use the turret hanging on the ceiling to eliminate the targets. There are really a lot of enemy soldiers, so the help of the turret will prove invaluable. But don't overheat it! Take half-second breaks between the rounds. First, kill the ones you can see (picture above). Pay particular attention to the orange-lit door on the left - that's where your character is standing, so if you see any enemy there, make sure to kill him. But do not shoot your allies!
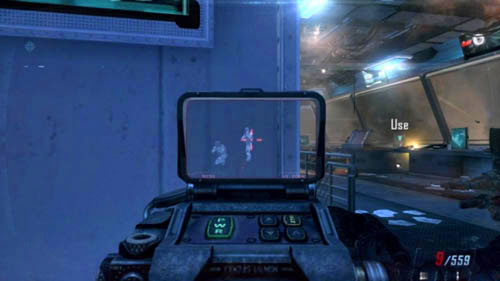
Then make the turret make a 180-degree turn. Deal with the rest of the enemies behind the tables and chairs. New ones will be running through the door on the left and right (picture above), do not spare them. When for a long time no one comes running in here, press the use button to get out of the turret.
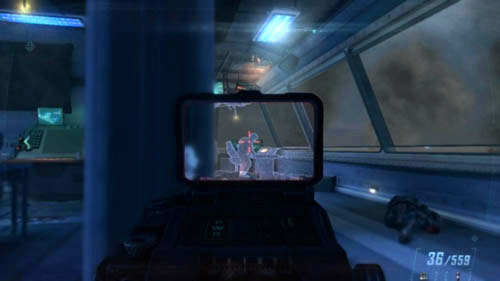
Watch out for new enemies - they can run in here through the left door! Start to carefully move to the door on the right. Stand near it, lean out and take out the two enemies (one is sitting at the desk on the right, the other is around the corner) (first picture above). Go where the latter was standing. Take out an opponent sitting at the computer with a word "Use" and then lean out to the right - on the other end of the room there are the last two enemies (second picture above). After you've killed them, an allied soldier should come running where they were standing.

There are two things you have to do in this room (picture above). First, take intel (1/3) from the desk to the right and then walk up to the computer with a word "Use" and press the use button. You will get new mission objectives. Go down the stairs to the lower floor and then go to the destination. If, despite the tips given in the guide, you did not take a sniper rifle with you, there will be one by the window.
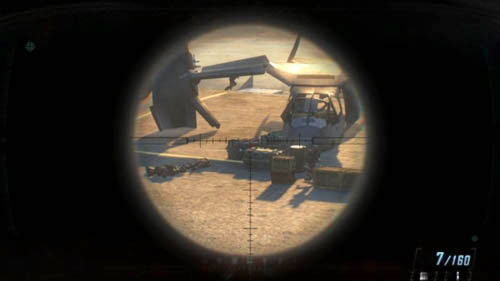

Objective: Assist the SEALs using a sniper rifle
Your task is to eliminate opponents. They will be climbing the stairs at the end of the landing deck on the left and right (first and second picture above) and hiding behind the line of crates and barrels. Bullets will fly through some of the covers, so keep that in mind. The allied SEALs will attack from your side and they are the ones you need to protect. Look around the abovementioned line and then keep looking at the stairs on the left and right. The more enemies you kill, even before they have a chance to hide, the better. Remember to hold the hold breath button before each shot, which will greatly improve your accuracy.
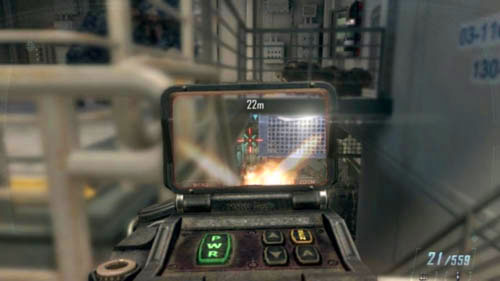
Objective: Regain control of the ship
Go to the target and then right, up the stairs. Do not go down, however, but stop and lean out to the right. Downstairs there is a large number of enemies. Try to hit those you can (picture above) - to the left and right of the lowered bars. You can see the enemies through the bars but you can't shoot through it. After eliminating at least some of them, sprint down and get down behind the boxes on the left. Immediately, look to the right to check if any opponent is coming out from the left. Next, check the other side of the boxes.

Go towards the stairs, being prepared to shoot all the time, because enemies will be running up the stairs. Go down backwards and watch where you're going. Around the corner of the wall on the right there will be an enemy lurking. Take him out and hide there. Lean out to the left - there is a long corridor and a lot of enemies there (first picture above). For now, do not go there, first throw an EMP grenade, then quickly pull out the sniper rifle and destroy the turret on the ceiling with a single shot (second picture above).
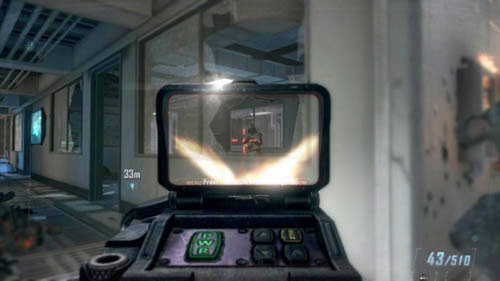
It is worth noting that even if you get rid of the visible enemies, next ones will come running in the very corridor, as well as through the rooms on the right, all the time. That's why, you can't wait - you have to move forward. Of course, don't rush, but try to gradually occupy the area along with the allied soldiers. Enter the long corridor and look to the right. Kill the enemies visible through the windows (but if you get hit too much, retreat in front of the corridor) (picture above).
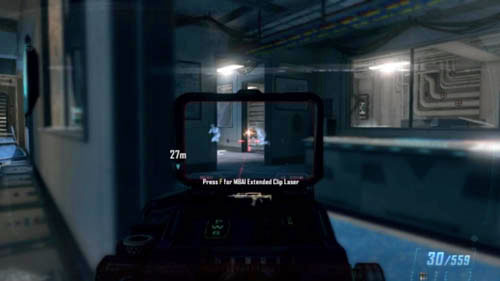
Start entering the room looking at the door leading to the next one. From here you will be able to kill the enemies in this room and in the right hallway by shooting through the windows and another door (picture above). Also, wait for the allies. Next, run to the corridor on the right and be ready to kill anyone who runs up the opposite stairs. Do not go down the stairs, but first check if someone runs out of the opposite door downstairs. Then jump to the left. Thanks to that you will avoid the opponents' fire, who are standing right in front of you.
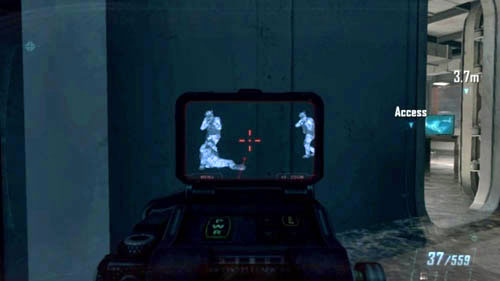
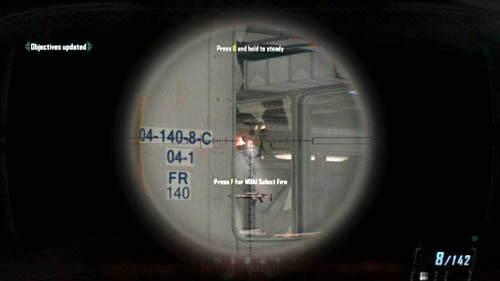
Hide on the left side of the door and detect the enemies with the scanner (first picture above). Lean out and shoot them, but most of all, focus your attention on the turret, which you will be able to see through the door and the window further - take it out with the sniper rifle (second picture above).
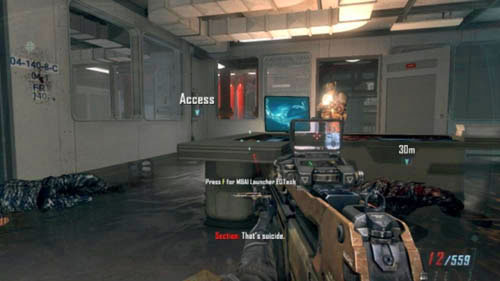
Then run into the room and immediately kill the enemy who is likely to be on the right (picture above). If he is not there, run up to the security box with a word Access as fast as you can and break into the turret. Again, start shooting at enemies and watch out not to shoot allies. Opponents will be both close and a little further, behind the windows (your character is standing behind one of them). Exit the turret when the area is clear.
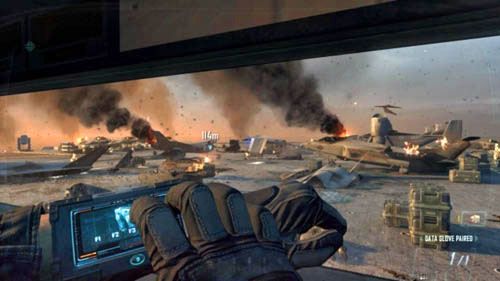
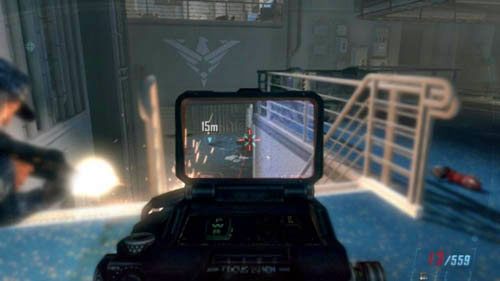
Just to the right there is a door leading to a larger room with red pipes. The ones on the right are blocking the way, so go left (here's the turret you've just been using) and look at the stairs on the right with the balcony above them. There is quite a tough fight ahead, so wait for your team-mates and use the scanner. However, you can't wait too long because new enemies will come running in place of the killed ones. At any time, a pair of opponents can appear on the balcony. Moreover, there are several enemies waiting downstairs, one is just to the right, right around the corner and the other one is nearby. Opposite the stairs there are the next ones. There will be one more opponent there and he can put you to a great deal of trouble. That is why, after eliminating the enemies from the balcony (first picture above), clear the area downstairs (second picture above) searching for the enemies with the scanner and eliminating them, and then - when there's only one left on the opposite stairs - sprint down and quickly hide somewhere on the side. Lean out and kill him, then go upstairs and walk up to the marked door. When it opens, stand next to the engineer in the corner on the left and watch the cutscene.

Objective: Kill or wound Admiral Briggs
For a moment, you'll be playing as Menendez. Go up the stairs and approach Admiral Briggs. There is another cutscene to watch and then a decision to take (picture above).
Make the decision. Then you will again play as Mason.
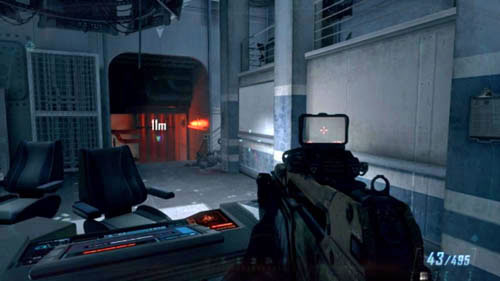

Objective: Reach the Server Room
Objective: Get to Hangar Bay
Enter the ventilation shaft when the soldier cuts a hole in the wall. The only possible way will lead you to the server room, in which there is Admiral Briggs - dead or alive. Walk up to the computer and wait until the conversation is over. Then move toward the mission markers. When you go down the stairs, turn right and go straight. However, do not go through the entrance lit in red (first picture above), instead go up the stairs on the right. You will find intel (2/3) on the table (second picture above). Only now can you go to the abovementioned entrance and go down the stairs to the hangar. Then walk up to Salazar.
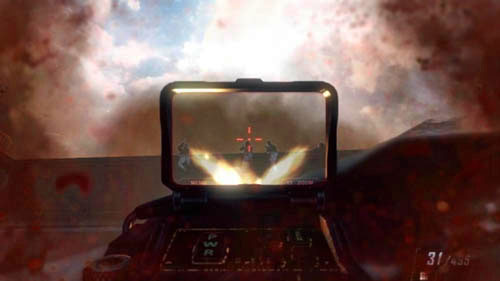
Objective: Find Menendez
Objective: Stop Menendez from taking off
Objective: Get to the VTOL for EVAC
Go right, to the big elevator. As soon as the wreckage of a plane falls down, crouch behind it so that the sea is behind you. Right above you there are a few enemies already waiting for you (picture above). As the elevator rises, quickly eliminate them and pay special attention to the one with an RPG.

When you're at the top, immediately run to the left to the small building, where after a while you should see a word Access (first picture above). Go up the stairs and move the rubble to get inside. Mason will run the CLAW, which will appear in front of you. It will be coming your way, but you can mark targets for it. Try to finish off as many enemies as you can. They are standing on the roof of the damaged plane in the distance (second picture above). When the CLAW goes there, run to it. But you need to be careful - new enemies will be appearing in the area.
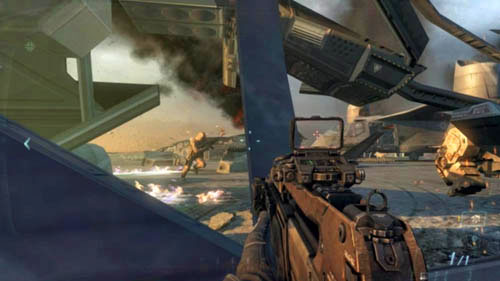
Hide by the plane door, on which the enemies were standing, and wait until new ones are running through it. While waiting for the CLAW keep looking through the cockpit to see enemies in the distance on the right and eliminate them (picture above). Only when you see the CLAW and allied soldiers nearby can you move forward.
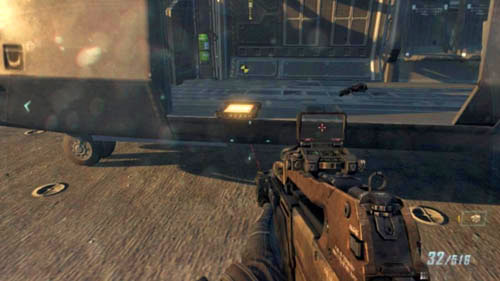
Stay on the right side of your robot. Exactly to the right of the target there is a little less damaged plane. In its door you will find the last intel (3/3) (picture above). Now you only need to hide somewhere and detect enemies around the plane you are about to use to evacuate. The opponents are behind the plane parts. If there's no one around, just sprint to the destination to complete the mission.
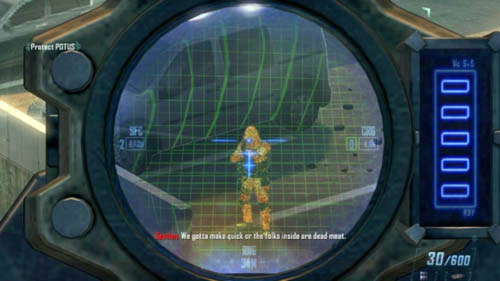
Objective: Get POTUS to the 'Prom Night' Bunker
Objective: Use the SAM turret to shoot down the drones
As soon as you are able to move, as quickly as possible rush ahead holding the sprint button. If you don't move, you'll die. Run up to the vehicle cab (picture above) and jump down on it. You'll watch a short cutscene during which your character will mount the SAM turret.
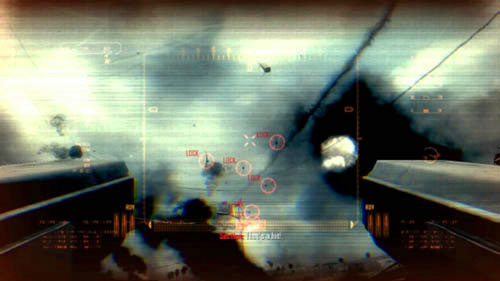
Your task is to shoot down six groups of drones and there are six in each group. Similarly to the fifth mission, all you need to do is to point the target with the cursor and after the rocket is launched it will get to the target itself. This time, you can simultaneously mark six targets (picture above) and fire the same number of rockets at one time. The explosions and drones' shots cause interference for the turret and if it gets destroyed, you will lose the mission. Mark the six targets, shoot and then search for the next group but don't wait till the rockets hit the former group. You can pass a challenge here - see the "Challenges" section.
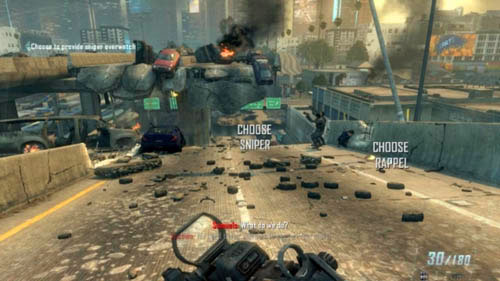
Objective: Regroup with protection detail
Objective: Choose to provide sniper overwatch
After you've destroyed the sixth group Mason will leave the turret. Watch a short cutscene and then move ahead. You can take two positions (picture above) - "CHOOSE SNIPER" means that you will stand at the end of the torn-away highway and you'll be aiming from above, while "CHOOSE REPEL" means that you will repel down with the President and her bodyguards. The first option is definitely better (all the more so because you can get another challenge here), so go to the end of the storn-away highway and wait until Mason takes out a new weapon.
Objective: Protect POTUS
Storm PSR Gun is a wonderful weapon. Not only does it highlight enemies, it also allows you to shoot through the walls - to do so, hold the fire button till five rectangles to the right will be filled. Then release the button. Sometimes you do not even have to charge the shot, you can normally shoot through thinner covers and you will hit anyway (although you'll probably need to repeat the shot). The only drawback of this weapon is too much zoom-in, but that's something to get over. Right after you've taken out the weapon look to the right, at the parking lot situated above. A sniper will run out of there, from behind the car. Take him out quickly (picture above).
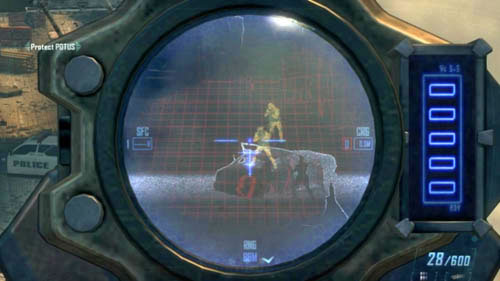
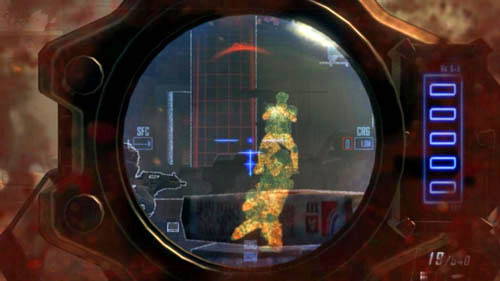
Optional objective: Save all MRAPS
Immediately, look at the opposite right upper highway exit. Three soldiers will run out of there (first picture above). Right next to them, on the left, a truck with a heavy machinegun will come out. First of all, try to take out the rifle operator (second picture above) or, after killing the previous three enemies, charge the shot to the fifth level and shoot at the truck, which will make it explode. After a while another two will go down from the right wall. Do not try to kill everyone one after the other, because your allies may have bigger problems on the left side.
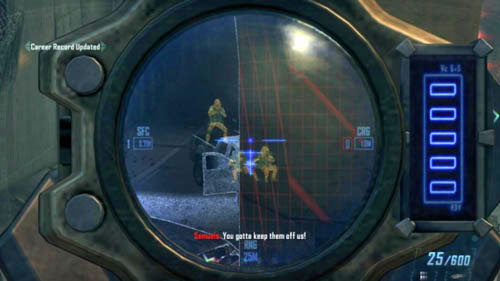

If during the fight one of the agents (MRAPs) dies, you won't carry out an optional mission objective. It is therefore important to protect them and to focus on the biggest dangers, namely on the next rifle operator on the truck, which will come out to the left road (first picture above). Also, look through the columns at a few enemies standing side by side and quickly kill them (second picture above). Remember to charge the shots. Look around again to check if you haven't missed any enemies hidden behind the vehicles on the left and right.
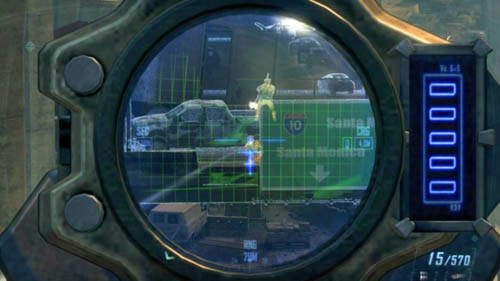
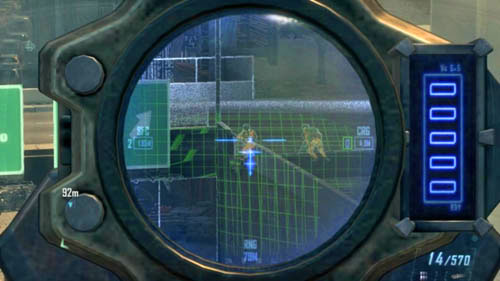
When you hear a message about the snipers, immediately look at the upper highway, perpendicular to yours (there are green signs on it). On the left side you will see a truck with three snipers and a heavy machine gun operator (first picture above). The snipers can place themselves in two spots: next to the truck (to the left of it and by the green sign) and also on the building to the right (second picture above). Kill them and watch the cutscene.

Objective: Get to the MRAP vehicles
Objective: Repel down and meet up with group
Hide to the right, by the red truck and explore the area from right to left using the Storm PSR Gun. Kill everyone you see (we hope you remember that you can shoot through any cover). Then go near the bus on the left. Behind the bus there is a motorbike, and behind it there's a car on fire. Near the driver's seat you will find intel (1/3) (picture above).
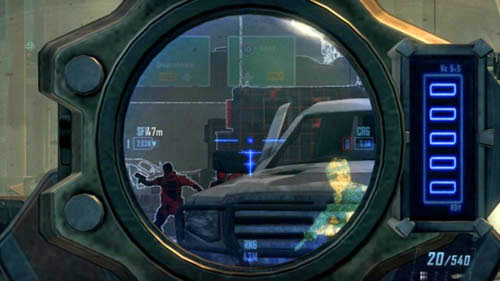
Get back on the right path and run straight ahead. You must be careful, because the fact that you haven't noticed any enemies does not mean that they can't suddenly appear. And it will be so - one soldier will run out from behind the white car (picture above). Run up to the President and her security unit.
Objective: Head for the 'Prom Night' bunker
Then, hide by the second MRAP vehicle. Again, use the Storm PSR Gun to get rid of a few enemies in front of you, including one heavy machinegun operator on the car (picture above). When you get the abovementioned mission objective, walk up to MRAP door (with a word Drive) to get in.
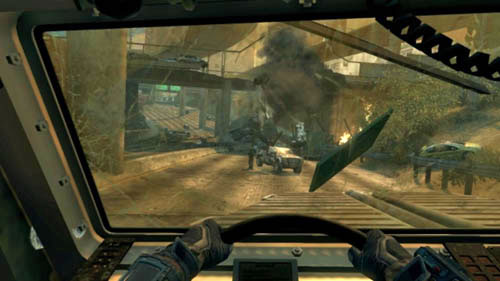
Drive forward, ramming cars and enemies. You do not have to worry about anything, your vehicle is virtually indestructible. When you see the falling rubble and signs in front of you (picture above), turn left to the opposite lane and continue driving along this path. After a while, go back to your lane and go where the plane was flying. Drive sticking to the right wall all the time. You will turn right, and then left along with police cars and you'll drive out of the network of flyovers. Drive straight ahead. You'll watch a cutscene, and then you'll move to the next part of the mission.
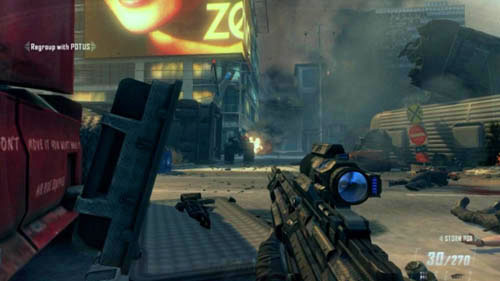
Objective: Regroup with POTUS
Objective: Destroy the C.L.A.W.s
As soon as you regain control over the character, immediately crouch, take out the Storm PSR Gun, turn on the scope, charge the shot to the fifth level and shoot at the enemy CLAW, which will be exactly in front of you (picture above). If you do not destroy it with a single shot, repeat the action. For now, ignore the word Access.
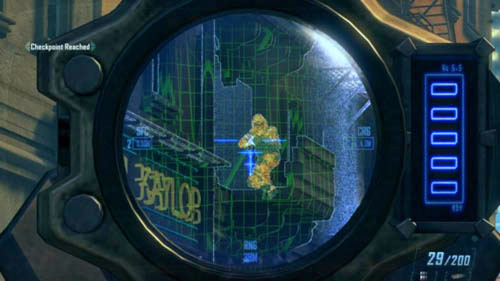
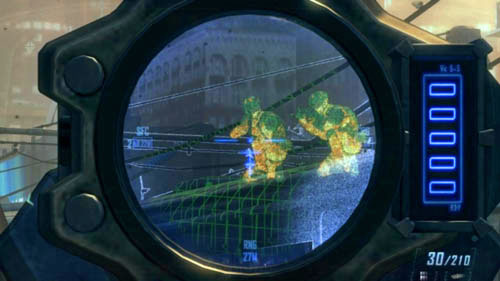
Hide by the rear wheels of the truck on the left and look at the street. It's a real war zone and perhaps the most besieged area in the whole single player campaign. Enemies are virtually everywhere. First, start by taking out the snipers. They're hiding on the balconies on the left (first picture above), as well as on the buses on the right (second picture above). Of course, you must be careful all the time and not let any opponent come running to you. It is worth noting that you will have the support of the local police.
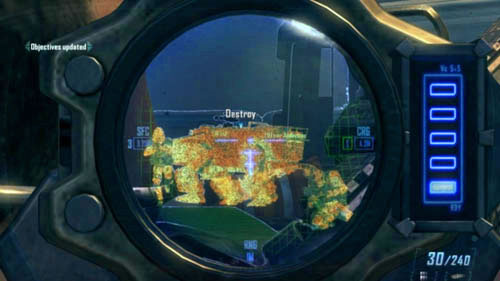
Then, locate the other CLAW, walking in the distance (picture above) and start shooting at him. Charge each shot to the fifth level. Since you'll probably be shooting through the covers, you will need more shots to destroy the robot. However, there are some ammo crates nearby, so you can shoot as much as you like. In the meantime, new enemies will come in a car from afar, but don't do anything about them for now.
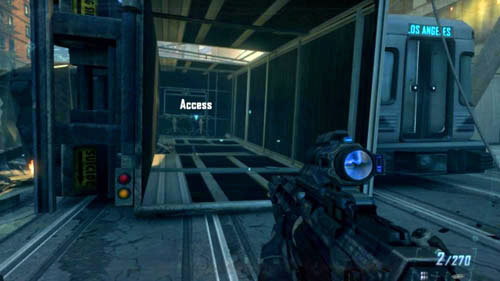
Only now can you go to the place where the first CLAW was. Right to the left there is a trailer you can enter. Do it and cut the grate at the end (picture above) to get support from one rocket firing quad-drone. Start the mark the targets with it, and when it is destroyed, just look at the road from right to left using the Storm PSR Gun scope and finish off all visible enemies - not only in the street, among the cars, but also in the building on the left.
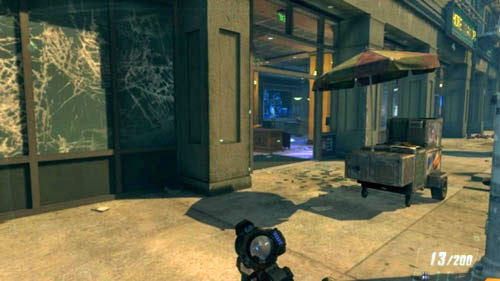

Locate the door through which you can see a wall glowing in blue (first picture above) and run inside. Be careful! There may be enemies here, so hide behind the desk and explore the area. Additionally, new enemies opposite the building, who are hiding in the buses and lying on their roofs, can fire at you. When you have a moment of peace, pick up intel (2/3) lying on the abovementioned desk (second picture above). Again, examine the next rooms and then go back to the street.
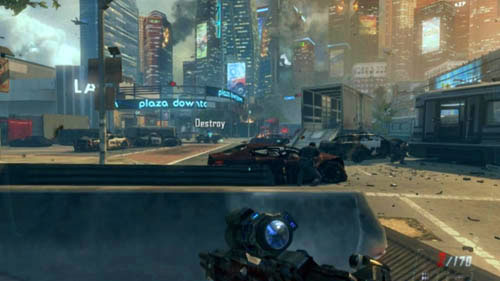
Move forward from one column to another. When you see a truck at the intersection be prepared to kill four enemies who will get off its trailer. Next, retreat and from a safe distance, behind and from behind cover kill the third and the last CLAW (picture above). The allied police officers should have moved in the vicinity of the mall.
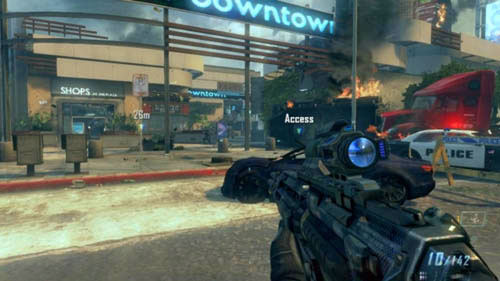
The entrance to the shopping center is on the left. It is better not to push your way towards the square on the right, as it is under enemy fire. But before you get inside, take a look even further to the right - you should notice an overturned MRAP with a word Access (picture above). Open the locked exit on the truck roof to free the two agents, who will support you from now on. You will also get the next quad-drones support. Make sure to refill your ammo - there are ammo crates in the truck trailer, out of which four enemy soldiers came.
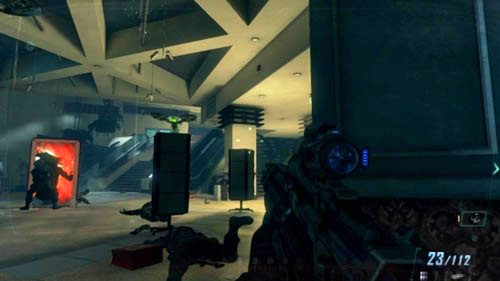
Go inside the mall and hide behind the right side, between the columns. Find the opponents using the Storm PSR Gun and be careful - you won't see all of them at once. However, with the help of the agents and quad-drones you should quickly clear the hall, just don't act recklessly. In the end, you will get to the stairs (picture above). The enemies will roll a big pot down them. Finish off the opponents at the top of the stairs and then climb them.
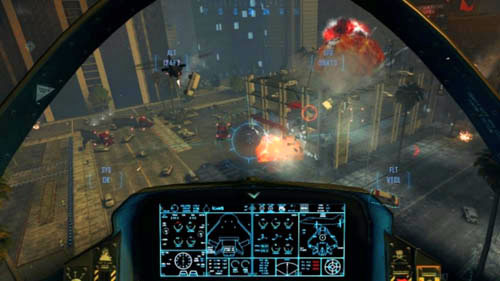
Stop right near the top of the stairs and use the Storm PSR Gun to locate the enemies in the next corridor (picture above). There will be a lot of them here. Mark one for the quad-drones to make them fly here and then go back to your own extermination. Right on the left there is a double door with a word Access, which leads to a challenge (see the "Challenges" section for a more detailed description). Scan the area after moving a few meters ahead each time. New enemies will appear on the terrace on the right and in front of you, behind the windows.

Before you go out, look for a stand with T-shirts with the words "WES-S FAVORITE T-SHIRT". Here, on the left, on the shelf near the floor, you'll find intel (3/3) (picture above).
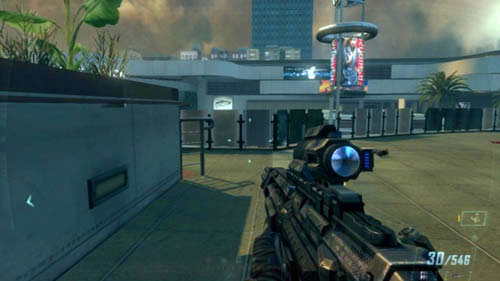
Hide behind the ads and by the walls, slowly move to the front, and eventually you'll go out to the terrace. Hide, and again, to be sure, check if there is no one who could shoot you in a moment. Finally, find the stairs leading down from the terrace (picture above), run down them and stick to the left wall. Turn left and run between the buildings to the G20 vehicle.
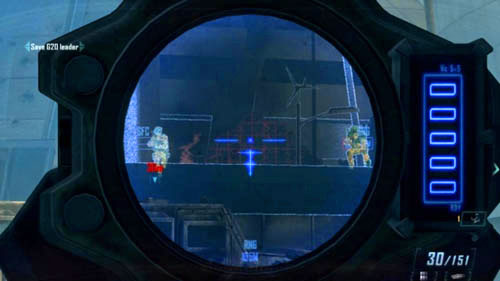
Optional objective: Save the G20 Leader
Immediately aim with the Storm PSR Gun at the roof of the building, in the background of which there's the front part of the vehicle. There will be two enemies with RPGs (picture above). Take them out and you'll carry out the objective and also pass a challenge. Then simply start hiding behind the cars on the right, search for enemies, kill them and move further. When the big building falls over, you'll go to the last part of the mission.
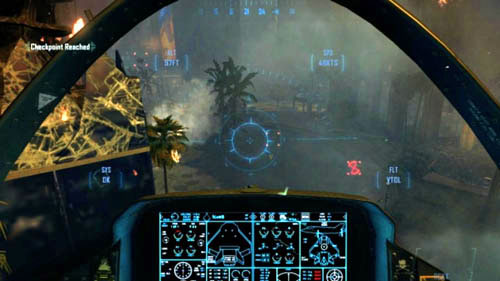
Objective: Get to the FA-38
Objective: Follow Anderson's ambulance
Objective: Protect the President's vehicle
Run to the plane, there will be no enemies here. Get on and you'll receive a new mission objective. Use both rockets and a rifle - in the case of the former, again, all you need to do is to mark the target and the rocket will hit it itself, however, you can only mark one target at one time. Fly straight ahead. When you get to the intersection, fly left and then straight ahead all the time. Keep above the vehicles all the time and simultaneously examine the area around. At the intersection, where the vehicles will turn left, two jeeps will come out from the left. In front of you, a little to the left, the next two will come out. Also, a helicopter will appear on the left (picture above).
Soon after that, at the next intersection, by the square with the palm trees enemy vehicles will come out from the right. A helicopter will fly from behind the tall building to the right. Another one will fly out from the left, behind you. Take out the helicopters and then quickly take care of the big trucks that are blocking the opposite way (picture above), there will also be new helicopters.

The vehicles will turn back and go right. Go back and, this time, destroy the cars with machineguns on the roof of the building, to the right of the abovementioned trucks. Follow the vehicles. From behind the building on the right two helicopters will come out (picture above) - deal with them but be careful not to fall into the big crane that will turn over in a moment. Follow the vehicles and wait for a while - you will get the last mission objective.
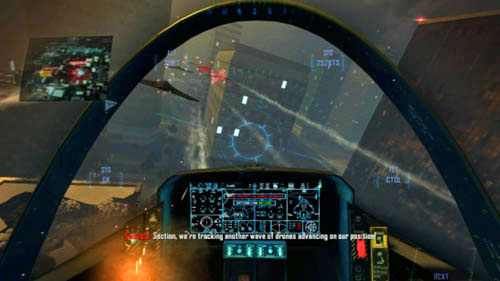
Objective: Destroy the drones
As soon as a group of drones flies past you, begin to follow them, mark them and take them out (picture above). The drones will not attack you, so you can lose in three ways - by damaging your plane if you collide with buildings, by flying out of the battlefield and by letting the drones destroy the vehicles you're supposed to protect (the least likely option of the three). You turn on the boost by pressing the sprint button, while the Skyburst rockets by the secondary grenade throw button (the bug in the game can prevent you from having them, but they are not necessary to complete the mission).
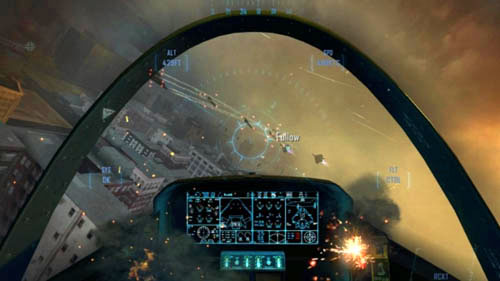
Probably the biggest problem will be the fact that is very easy to get lost here. Therefore, pay special attention to one of the two allied aircrafts, which has a word Follow on it (picture above). If you lose sight of it, look for an arrow that is pointing at it on the plane windscreen. Of course, your allies will aid you in battle. Use the boost to catch up with both enemies and allies.
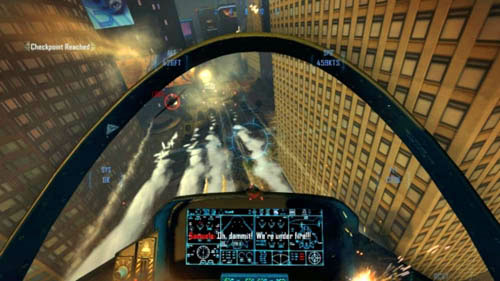
The drones will always attack the convoy in the same way - flying between the buildings and shooting at it (picture above). Taking all the above tips into consideration simply fly, search for targets and destroy them until Mason ejects from the plane.
Attention! Be sure to replace the scope with the Millimeter Scanner in the first default weapon. As the second weapon choose the Storm PSR Gun.
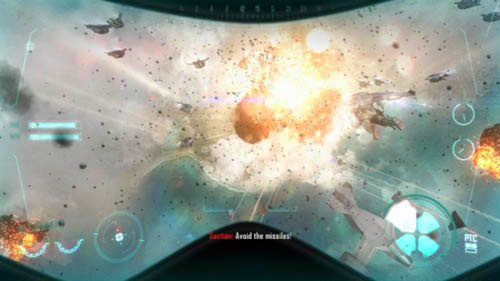
Objective: Shut down the transmission
Objective: Avoid the aircraft debris and enemy missiles
You will start the mission with a descent. When the screen flashes, and Mason shouts that everyone should watch out for the missiles, it also applies to him. Move left, right, forward and backward, to avoid the big, orange clouds of fire (picture above). The higher the difficulty level, the more damage you can sustain by flying into the cloud. The closer to the center, the damage will be greater. You can stop being careful when the screen turns gray for a moment, after the second flash.
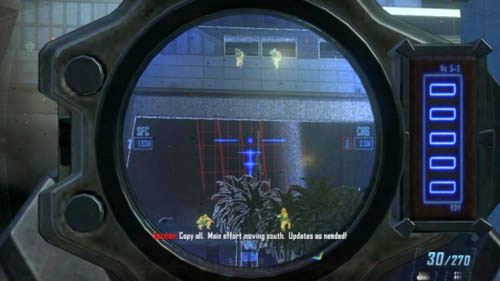
Objective: Gain entry to the military facility
Immediately after landing start to run forward, along the fence on the left. When you pass the blue-and-white building, look carefully to the right, at the military facility. There are long stairs leading there. Take out the Storm PSR Gun and locate the opposite four soldiers with RPGs - two are on the upper floor, two on the lower (picture above).

Then, look left at the parking lot. There will be a box with a word Access (picture above) - open it to get the quad-drones support. It is worth noting that there are plenty of allied troops and robots here, so some of the opponents mentioned in the guide may be not here at all, because they might have already been killed when you get to them.
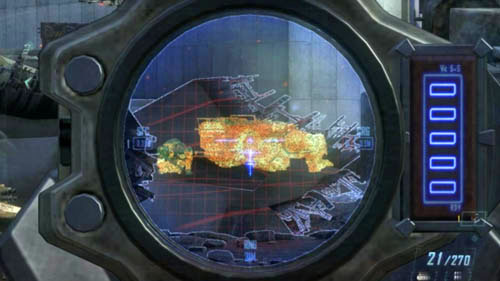
The next thing will be to eliminate the enemy CLAW. You might not see it, because it is obscured by the wrecks of vehicles, so use the Storm PSR Gun to locate the enemy robot (picture above) and shoot at it until it is destroyed. You can also look for opponents to the right of the stairs, some may be hiding there, but most likely your team-mates dealt with them already. However, watch out for the quad-drones, which are hanging around above the stairs.


To enable the arrival of an even greater number of allied troops, you have to destroy six laser turrets. If you stand a few meters in front of the long staircase and look right, you will see four turrets marked with red circles (first picture above). The remaining two are on the white building on the left (second picture above). When you do that, start to search enemies at the top of the stairs on the left with the Storm PSR Gun and take all of them out. Only then can you start to climb the right stairs.

Stick to the right wall. When you get to the top of the stairs, you'll have to use Storm PSR Gun to get rid of two targets - a heavy machinegun operator on the jeep on the right and the minigun-turret, mounted in the window of the opposite building (right at number 26) (picture above). Of course, hide before doing that.

Run to the building number 26 and hide on the left side of the door. Take out the rifle with the scanner and start looking for enemies inside - some may be on the first floor, two or one are also on the second floor. Clear the building and get out through the door on the other side (it's on the right). Turn left and run up to the aircraft wreckage with a word Access (picture above). Open the plane door. Thanks to that you will acquire a kinetic weapon, allowing you to send an extremely powerful beam of energy from the sky. You have to watch where you aim, because if you accidentally kill your allies, the mission will end in failure.
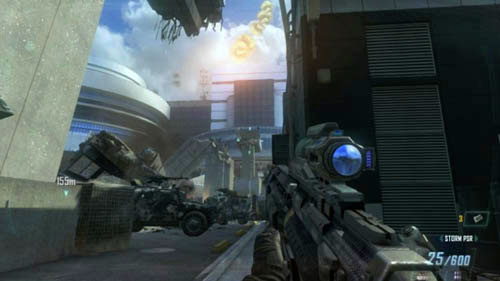
Notice the fence next to the building number 26, behind which there are a lot of building materials. Above it, in the distance, you should see a torn-away hallway. At its end there will be from 3 to 5 snipers (picture above). The next ones can be hiding a little bit lower, on the left and right. You can use the newly acquired weapon or use Storm PSR Gun from a safe hiding place. But be careful - there are cars and forklifts around that will explode when hit. Such an explosion will kill you quickly, so do not hide behind any of them, because the enemies take great pleasure in destroying them. It is therefore best to aim from behind the building number 26.
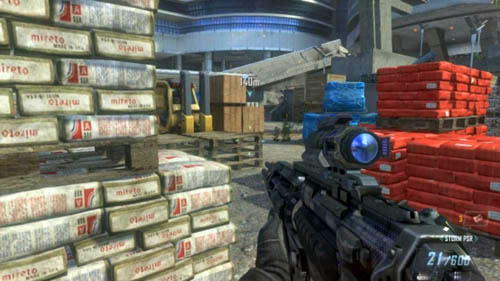
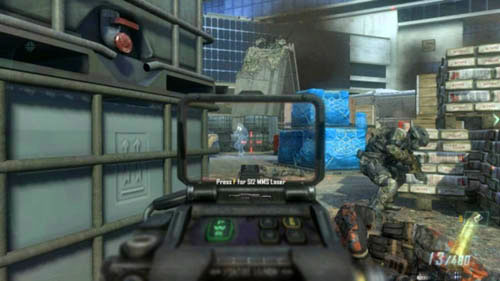
You can now choose one of the two paths that lead further - either through the fenced construction site, or up the next stairs on the right. If you choose the first option, then immediately after entering the construction site (first picture above), move back and hide behind the fence. There will be a lot of camouflaged enemies here. You'd better not hide at the construction site, because the enemies can easily take you by surprise. Search them with the scanner or the Storm PSR Gun and kill them all. Your team-mates' help will be especially useful here - have them go in front of you and support them with fire. You can also hide behind the barred boxes on the right and lean out from there to kill enemies (second picture above). You can shoot at the forklift truck on the left if there's any opponent standing by it, but you shouldn't hide in this place yourself.
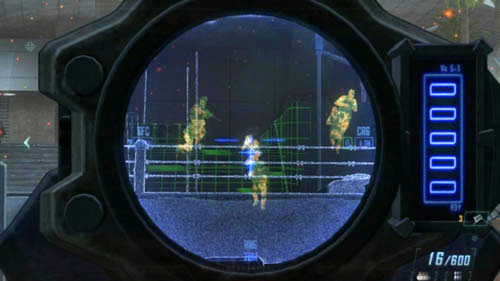
After clearing the site move closer to the other, smaller stairs on the left, which branch from it. You will be fired at by a new, large group of enemies. Watch out for grenades! It's best to escape sprinting from the construction site and hide behind the building number 26 (from where you killed the snipers in the torn-away hallway upstairs). Use the Storm PSR Gun to kill all the enemies - there will be at least ten of them (picture above).

If you chose the way on the right, namely the next, long stairs, then when you get close to them, two jeeps with heavy machineguns will appear closer to the right and further in front of you (picture above). Immediately hide and use the Storm PSR Gun to get rid of the operators and the rest of the enemies. You also do not need to shoot at the operators, but at the jeeps - one shot charged to the fifth level will instantly destroy the vehicle. Then, clear the building number 27, which is at the top of those stairs.
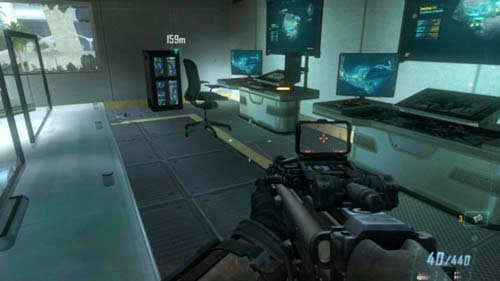
In both cases, go to the abovementioned building and watching out for enemies - if there are any - find the stairs leading to the second floor on the right. When you're up there, you will find intel (1/3) on one of the desks (picture above). Take it and go back downstairs. Go to the garage and make sure to refill your ammo in the ammo crates that you'll find there. Then, head for the mission objective marker.
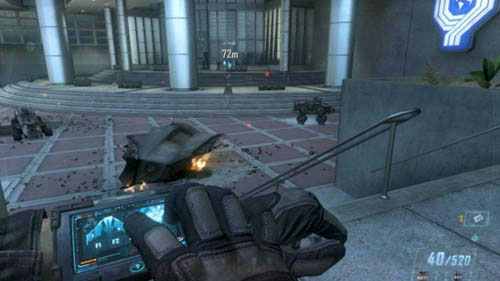
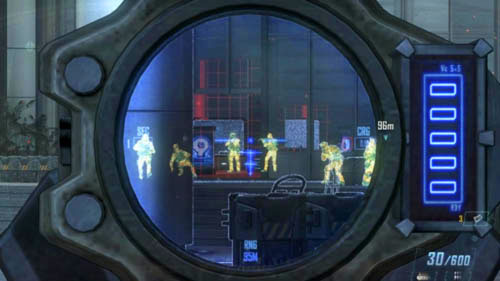
The entrance will be protected by a large number of soldiers, who, even before you get closer, will manage to throw some grenades at you. As if that were not enough, there are two CLAWs downstairs (first picture above). Move away to the other end of the place, on the stairs. Take out the Storm PSR Gun and simply take out all visible enemies (second picture above). It is possible that you will have to get closer to them first to make them appear at all. Once there's no one near the entrance to the building, go there and stand over the stairs. Hiding behind the shields lean out with a Storm PSR Gun shot charged to the fifth level and send it in the direction of one of the two CLAWs. Repeat the action with the other one.
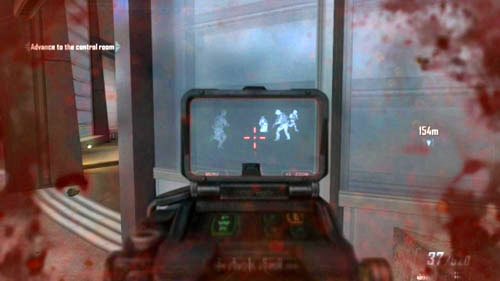
Objective: Advance to the control room
Stand on the right side of the entrance and start using the scanner to detect enemies (picture above). There are plenty in the hall, a few are also hiding on the terrace inside, in the left side of the hall, as well as in the windows of a room under the terrace. Some enemies will be hiding behind the vertical blue ads. Once you're inside do not shoot at the opposite bridge, because your team-mates will run out to its right side. Go forward, toward the target.
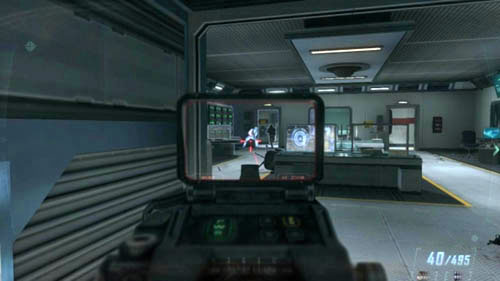
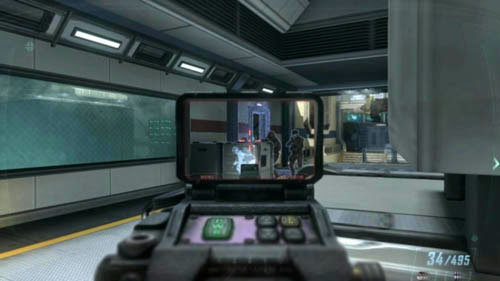
Go down the stairs and kill the two enemies on the left and right, and then the next who will run out of the opposite door. Your allies will support you. Stand at the door and kill the enemies in the two opposite entrances - on the left and right (first picture above). Behind them there's a T-shaped passage, with another room. It is worth adding that you can't shoot through the green windowpanes. Try to clear the entire corridor of enemies who are hiding behind the boxes (second picture above). At the fork, the further path leads to the left, but first make sure that no enemy is hiding behind, for example, the boxes behind you.

The next enemies will come running out of the big room, where CLAWs are being transported from one end of the room to the other. Others will be hiding on the other side. Shoot everyone, then run into the very room, and immediately turn right. Run up to the corner and turn left, and you'll get to the panel with a word Access (picture above). It will run the ASD, which will be on your side. However, if you care about passing the challenge, turn it on only AFTER you've destroyed the three enemy ASDs.
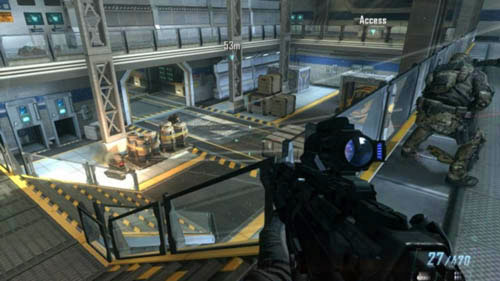
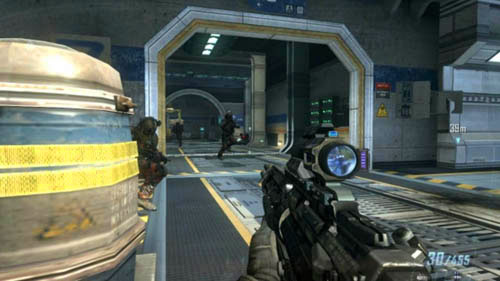
Regardless of the decision you've taken, prepare for battle. Downstairs there are a few soldiers and one ASD (first picture above). Please note that - unfortunately - the Storm PSR Gun will not light up the enemy robot when it hides behind, e.g. boxes. Nevertheless, mark it as the target in the first place and then look for enemy soldiers behind the boxes. When it's clear downstairs, your team-mates will go down there and take their positions. Join them, but immediately go back upstairs - two more ASDs will come out of the hallway (second picture above), and there will be even more soldiers. Fight from above, first deal with the ASDs and then focus on the rest.
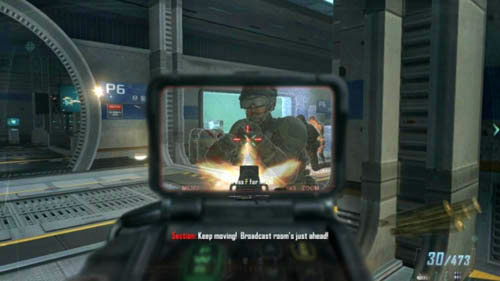
Enter the corridor, having cleared it of enemies. Opposite it there is a room from that has exits on the left (opposite the corridor) and right (there's a green windowpane between them). The next enemies will be coming out of them. Stand in the corridor and don't lean out further. Just wait for the enemies (picture above), but be ready to retreat if one of them throws a grenade at you. When the allies run into the very room, it will mean that the area is clear.
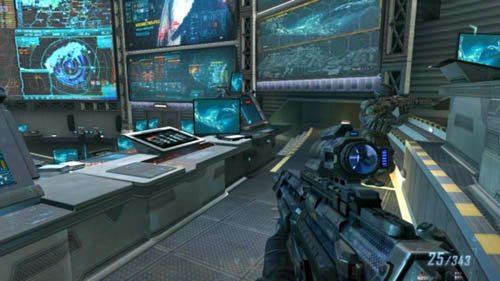
Look right, at the large open door to the conference room with lots of monitors (picture above). On the stage you'll be looking at, a lot of enemies will appear, but first you have to get closer to the door. When they start to shoot, instantly retreat and take them out from a distance with the Storm PSR Gun. When your team-mates run up on the stage, stand by the room entrance and lean out to the left.
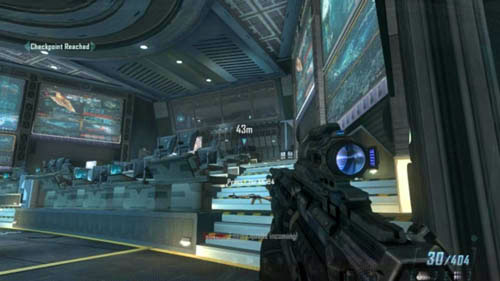
The upper part of the hall is full of enemies (picture above). Moreover, there will be quad-drones flying around the place. Do not lean out too much and let the enemies focus fire on your team-mates. Search for quad-drones and get rid of them, and then check the next levels of the room from left to right and finish the enemies of with the Storm PSR Gun. Watch out for grenades! Do not forget to kill the three standing on the second floor through the windowpane - one is sitting at the computer and he's between the remaining two. When all the enemies are dead, you will get a new mission objective. If this doesn't happen, maybe one of them is still hiding upstairs.
Objective: Shut down the drone control
But before you go there, look at the third, left row of desks. On one of them you will find intel (2/3) (picture above). Only then can you exit the room using the door on the left or right and go upstairs. Be careful - there can be an enemy on the stairs. Once you're upstairs kill any survivors, and if there is no one there, just walk up to the marked computer to watch the cutscene and move on to the next part of the mission.
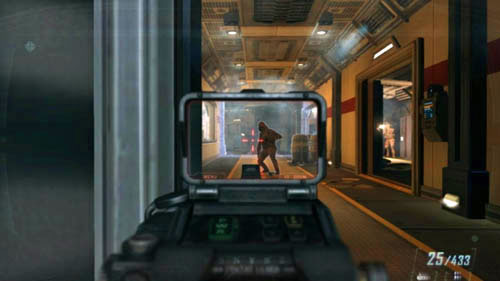
Objective: Find Menendez
Another part of the mission will be very laborious. Enter the newly opened door, but soon after that retreat in front of it. There will be a lot of enemies in front of you - at the end of the corridor (they will be hiding behind the boxes), as well as in the rooms on the left and right (you'll hit these enemies through the doors of the rooms). Also, watch out for those who will decide to come to you. Search them with the scanner or Storm PSR Gun and kill them (picture above). Watch out for grenades! When you've looked at the area with the Storm PSR Gun from left to right and there's no one else, you can move further.
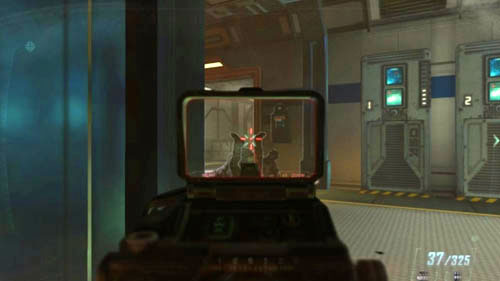
Go forward, down the corridor to the left or through the room on the right (be careful - there can be an opponent hiding inside). On the bridge above you will notice your allies. Climb the stairs on the left and have a look at two doors - one closer and the other one on the left. Your allies can be standing in the corridor, so do not shoot them by accident. Behind the first door there are again a lot of hidden enemies. Many of them will run out straight at you, so be ready to repel their attack. It's best to stand a bit on the stairs so that the door closer to you and the next one, in the background, are within your line of vision (picture above). After killing a few enemies there will be new ones, camouflaged, so do not let them take you by surprise. You also have to especially watch out for grenades in this place. When it gets quiet, examine the area again from left to right with the Storm PSR Gun.
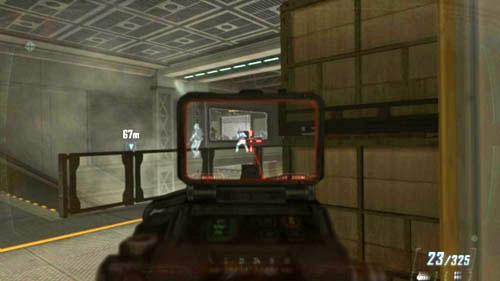
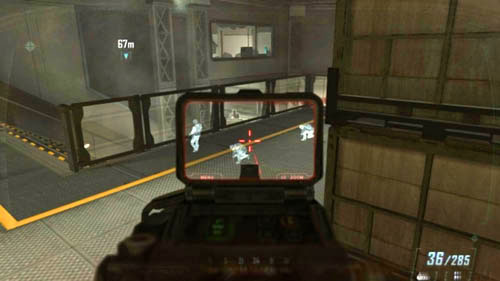
Go towards the mission marker. The corridors on the right and the left will be blocked after a while, so the further path leads through the rooms in the middle. Opposite the exit there's a door and on the right - the stairs. This is another place with an even more difficult battle. You will be flooded with grenades here. As soon as one lands next to you, immediately flee into the corridor. Slowly and systematically comb the area with the scanner or Storm PSR Gun and eliminate enemies - first take care of those in the windows (first picture above), and then get rid of a large group downstairs (second picture above). You can shoot some enemies with the Storm PSR Gun through the floor, provided you charge the shot to a maximum. While eliminating the enemies downstairs be careful because a new opponent might appear in one of the windows upstairs and shoot you.
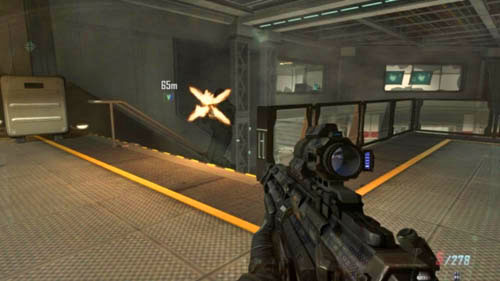
When the room is clear, go down the stairs. The opposite door will stand open. Camouflaged enemies will start running through it (picture above). The problem is that the door to the corridor in which you've been hiding from the grenades has been closed. Therefore, you will have to watch out for grenades even more. Hurry back upstairs and get down. Start to look out for the enemies among the boxes downstairs (there will be a lot of enemies hiding especially next to those on the left). Eliminate them all the time. New ones don't appear in the place of the dead ones - there is simply a really large number of enemies here.
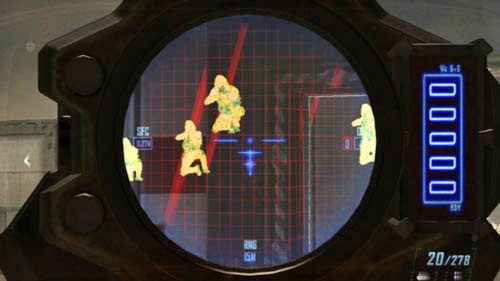
New enemies will be running through the door downstairs, and when they stop, start walking in that direction. In the next, oval room there are still several camouflaged snipers upstairs on the left. Seek them with the Storm PSR Gun (picture above) and take them out. If, despite the charged shot, you still can't kill one or another, move to the short corridor leading to the oval room.

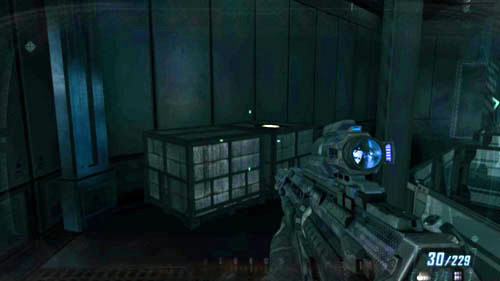
After eliminating all the enemies go to the stairs on the other side (first picture above). Go down to the lower level and move forward sticking to the left or right wall. You'll get to the crates. The last intel in the game, intel (3/3), is lying on them (second picture above). Take it and go to the very top, and then head for the door shown by the mission marker.
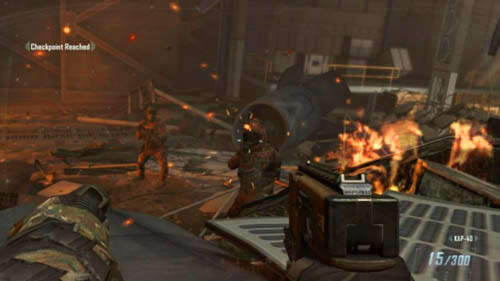
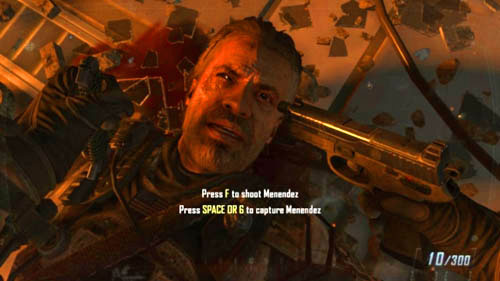
When the cutscene is over, get ready to hit the two soldiers (first picture above), when you are going down the rubble. If you miss any of them you will fail. There is really little time, so it's best not to waste time on aiming. Shoot in the chest. After a while, finally, you will get Menendez (second picture above). Decide what to do with him. Your decision (as well as many others) will have an impact on the end of the game.
Each mission has 10 challenges. Passing all of them will reward you with achievements / trophies. But before you start to hunt for them, get to know some general hints.
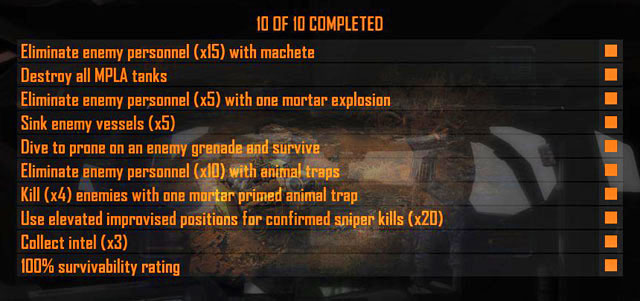
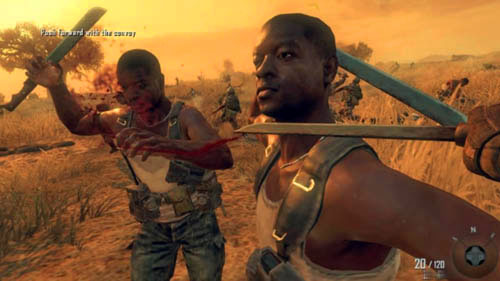
The easiest way to pass the challenge is at the beginning of the mission, as soon as you jump off the ladder attached to the transporter. Instead of shooting the enemies, begin to run up to them and use the machete to eliminate them (picture above) - the first three will run up straight to you. The chaos during the battle is so great and there are so many allies that you can safely risk and run around the allied vehicles to find the enemies and terminate their life with machete. Kill enemies in this way, moving around the transporter and hiding behind it if you get hit too much (there's a yellow word "Follow" on it). Try to pass this challenge BEFORE calling for the helicopter support for the second time.
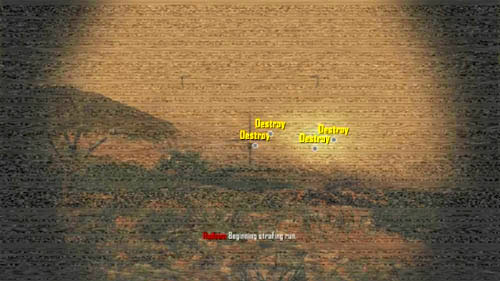
To pass the challenge, you have to be quick and not miss any tank. Therefore, first of all, don't wait until the interference on the screen disappears, because it's pointless to waste time - fire a rocket immediately. Secondly, do not wait till the first rocket hits the target - you can shoot out another before that. Although destroying all tanks in the first wave should not cause any problems (picture above), in a moment there will be another one, so remember these tips.

When you call the helicopter support for the second time, immediately start shooting at the gray dots - you will be able to destroy two or three tanks with shots in the dark, even before the interference disappears from the screen. You will have no trouble with the four tanks, but it won't be over yet. When the helicopter turns back, you will see the next five tanks (picture above). Make sure to destroy them from left to right, because this is how the helicopter you're on will fly over them. Because of the fast pace and shocks (after all, you're on the helicopter) you may not be able to destroy all tanks. In this case, immediately, after regaining control over the character, go to the menu and select the Save & Quit option. You must do this before the words "Checkpoint Reached" appear! When you exit to the menu, select to continue the campaign, and after the briefing you will start just before calling the helicopter support.

The first thing you need to do is to get mortar shells. After the mission has begun, follow the transporter until it stops. Look at the vehicle lying on the side on the right side of the battlefield. There is a message on it with a word "Access" (picture above). Head over to it and open the rear of the vehicle to take the mortar shells.
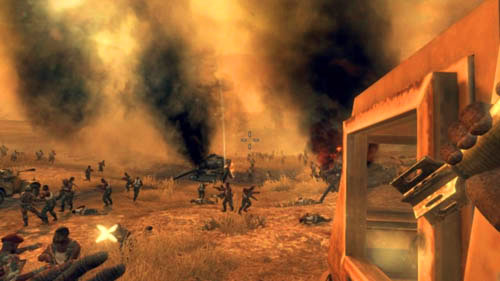
Afterwards, you have to wait for a convenient moment to kill five enemies with one throw. You will have the first opportunity after you've received the objective to grab the ladder attached to the transporter (after requesting the helicopter support for the second time). Immediately throw a mortar shell at the opposite enemies (picture above). Enemies will be here in large groups, so it will be easy to pass the next challenge.
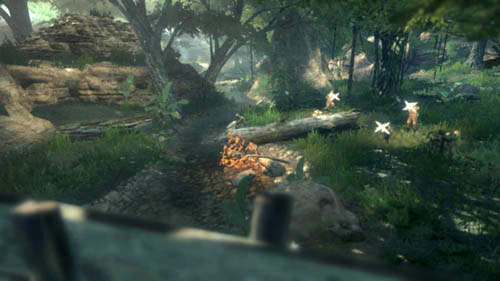
The second good opportunity will come your way when you come back from the village, retreat for the first time and climb the tree the second time (e.g. the one where the second intel is located), to protect Hudson and Woods. There will become a lot of enemies by the overturned tree, although you will have to wait for a while till they gather there (picture above). Throw a mortar shell to pass this challenge. Near the end of the mission when you have to kill two mounted gunners on the vehicles, you will have the last opportunity to pass the challenge.

After landing on the barge and killing all the enemies (Hudson will tell you about it) quickly go to the heavy machine gun on the right starboard side, mount it and start shooting at the boat that is sailing nearby (picture above). Keep shooting until it explodes. It is pointless to wait for the next boats till they sail near enough for the crosshair to turn red, because if you won't make it on time with any boat, it will come up closer and the enemies will start coming on board of the barge you're on. Therefore, try to destroy them, as soon as you can, from a distance (look behind the barge) - for now there will be three boats.
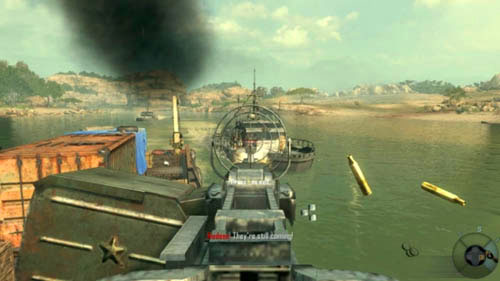
After sinking all four boats quickly get away from the heavy machinegun and use the left ladder to go to the upper part of the barge. Start using the machinegun, which is mounted to the left and look out for the fifth boat - destroy it as soon as it comes up (picture above), and then immediately jump down to the lower deck, return to the first machinegun and use it to deal with the sixth boat. Go back to the second one and destroy the last, seventh boat. Of course, from time to time you will be able to destroy a boat using both machineguns, especially if it is sailing in the distance. Simply be prepared to instantly change positions, should the need arise, and you will pass this challenge just fine.
It is one of the most onerous challenges. Since its success depends on the opponents activity, and being more specific, on how often they throw grenades, the lower the difficulty level, the less often they will throw them. Therefore, pass this challenge at least on Regular level. Secondly, practice diving to prone. To do this, you have to hold the run button and press the position change button (on consoles). In the case of PC you will only have an option called "Toggle Prone". You'll see if you made it, because your character will not simply lie down, but literally throw himself to the ground.
To even be able to pass this challenge, you will need a special outfit. When you sink all the boats (Hudson will tell you about it), look for the box with a word Access between the ladders (picture above). Pull out the clothes that will protect you from the injuries from explosions.
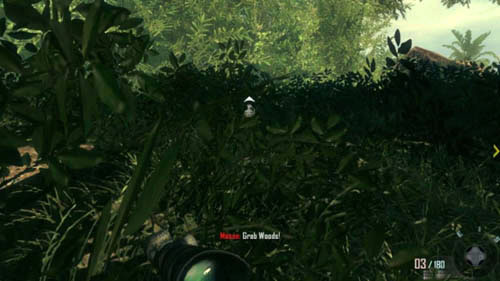
The best place to pass this challenge is the moment when you, running away with Woods and Hudson, run down next to the waterfall and hide behind a big rock next to the trunk that is lying on the stream. There will be ammo crates nearby - hide behind them (picture above). In any case, take out the heavy machine guns operators on the cars above.
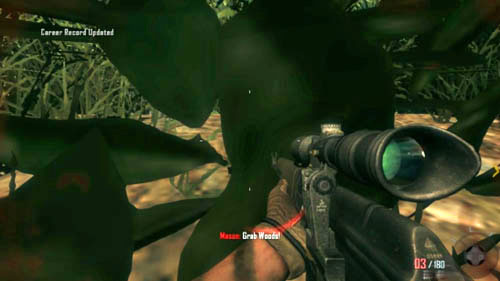
Afterwards simply look at the enemies and wait to see if any of them throws a grenade or look out for the icon informing you that a grenade has landed somewhere near you (first picture above). As soon as this happens, and when you know where the grenade is, start running toward it, and then press the position change button to prone. You should throw yourself at the grenade or in its vicinity. If you were able to throw yourself at it (and you didn't lie down normally) and you did not make it too far, the challenge should be yours (second picture above). Keep in mind that at some point Hudson will flee to the river with Woods. Then the place will swarm with the enemies and you'll die quickly - even on Recruit level. Therefore, if for a long time no one is attacking you with grenades, use one to kill yourself and try again.

It's best to combine this challenge with the one below. When you put Woods on the ground and get the objective to enter the village, do not do it yet, just pay attention to the small wooden storage box to the right of the entrance leading up (picture above). Pick the lock to open the door. You will take animal traps.
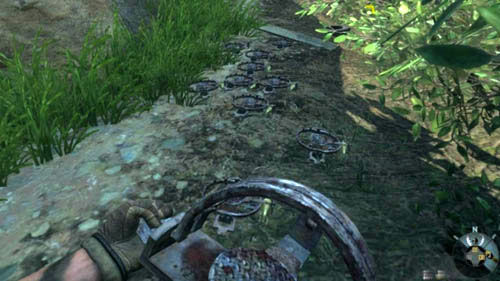
Now set them in the passage on the left (picture above) and place a mortar shell inside each of them - the soldiers killed by an explosion will also count in this challenge. When you run out of traps, simply refill your ammo and set some more. It is possible that you will not be able to set more than 10 traps (the old will disappear as the new are set), so keep that in mind. When you come back here (after a while) and take the sniper position on one of the trees, see how the situation develops and watch for a message about passing the challenge.

It's best to combine this challenge with the one above. The first thing you need to do is to get the mortar shells. After the mission has started, follow the transporter until it stops. Look at the vehicle lying on the side on the right side of the battlefield. There is a message on it with a word "Access" (picture above). Head over to it and open the rear of the vehicle to take the mortar shells.
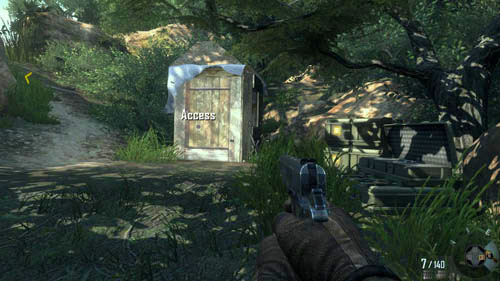
Later, when you put Woods on the ground and get the objective to enter the village, do not do it yet, just pay attention to the small wooden storage box to the right of the entrance leading up (picture above). Pick the lock to open the door. You will take animal traps.

Now set them in the passage on the left (picture above) and place a mortar shell inside each of them - the soldiers killed by an explosion will also count in this challenge. When you run out of traps, simply refill your ammo and set some more. You can also set three traps without mortar shells and do it at the beginning of the line to catch three enemies in them. When they are trapped, the fourth one will come running here after a while. He will fall into the trap with the mortar shell and the explosion will kill all four of them. When you come back here (after a while) and take the sniper position on one of the trees, see how the situation develops and watch for a message about passing the challenge.
When you put Woods on the ground, look for a sniper rifle - it's by the storage with a word Access, where you'll find animal traps. Make sure to take the weapon with you and refill its ammo. Then go to the village, and when you will be coming back, Hudson will tell you to take a sniper position on one of the trees. Run up to any position (picture above) and climb the ladder. Here and in the rest of the level there will be several such positions, and the challenge can be passed only by shooting from one of them.

Now you just have to kill 20 enemies using the scope (picture above). Before each shot hold the hold breath button. Do not hold it too long, because it will create a several-second inability to aim. On the other hand, 3 to 4 seconds should be enough to find and kill one of the enemies. Do not pay attention to whether Hudson and Woods left their position - shoot until you pass the challenge.
See the "Intel" section or the description of a mission walkthrough to discover where you can find intel in this mission.
To pass this challenge, you cannot die even once, or suffer defeat in any other way, for example, by leaving the battlefield or going in a different direction than required by the mission objectives, by not jumping out of the helicopter on time at the beginning of the second part of the mission, by getting detected by the enemies while hiding in the high grass and in this vicinity, etc. When you put Woods on the ground, do not shoot, as you will be detected as well! Especially watch out for grenades near the end of the mission.
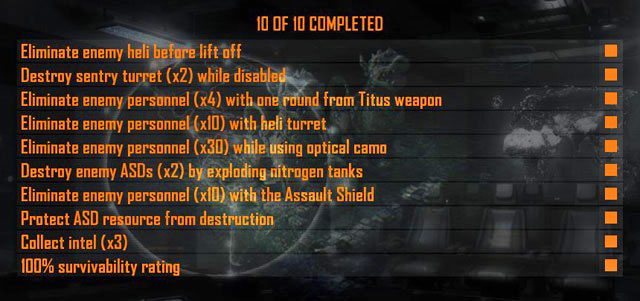

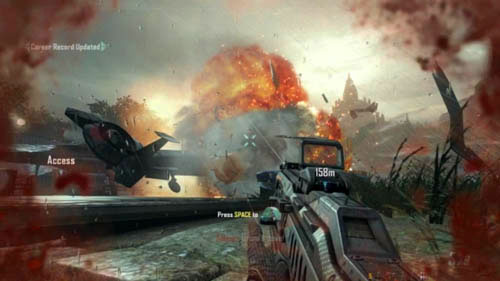
When you land at the beginning of the mission, clear the first place of opponents and get upstairs (up the stairs on the right or by the elevator on the left). You will get to an helipad with two helicopters. Immediately pull out your second weapon - the Titus - use the scope and then shoot at the helicopter. The bullets can stop at the boxes, to make sure it doesn't happen, get closer to helicopter (for example, you can hide on the stairs, under the wall) (first picture above). When the helicopter explodes (second picture above), make sure that you have received the message about the successful passing of the challenge. If this does not happen, it means that you are late and Salazar destroyed the helicopter for you. In this case, simply load the last checkpoint by exiting the mission menu and loading the mission again.

To pass this challenge you must have EMP grenades. You can't miss the three turrets, because they will be on your way - behind the gate to which you will need to go after clearing the helipad with helicopters. Hide behind the boxes to the left, in the gate. Throw an EMP grenade at the right turret (picture above) and then shoot at it with the Titus.
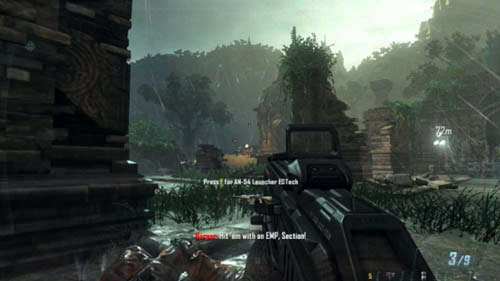
The second turret is just to the left, but just in case, it's better to get closer to it and hide next to the ammo crates (remember that you can also refill grenades in them). Throw a grenade at the turret (picture above) and get rid of it with the Titus.
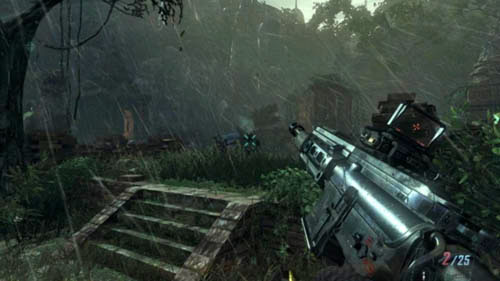
If you haven't passed the challenge yet, then the third turret is on the left, in front of the stairs leading to the remaining part of the ruins (picture above).
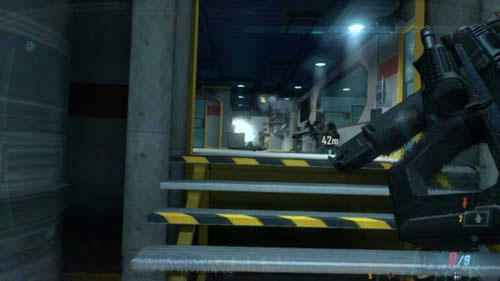
There is one certain place to pass the challenge. When you get down in the elevator in the research facility and clear the first room, destroying the first nitrogen tank, look around. On the left there's an entrance to a room, and in front of you there's a ramp leading down. Change weapon to the Titus, select the ramp and after going down the ramp look left - through the second door leading to the abovementioned room. In front of you there's a third door and that is where you should shoot with the Titus (picture above). Two to three rounds should kill enough enemies to fulfill the condition of passing the challenge. If, however, this did not happen, go to the menu and load the mission or get yourself killed.

As soon as you destroy the first helicopter (the one from the first challenge), hold down the sprint button and run up to the second helicopter, covered with a blue sheet (first picture above). Behind it on the left, at the bottom of the helicopter there is a place you need to look at and press the use button to hack into the machine computer. In this way, you will be able to use the turret to eliminate enemies, and to pass this challenge you need to kill ten.

Get the turret going and begin the extermination (picture above), but do not shoot all the time, because it will get overheated. On the other hand, do not wait too long and not shoot, as you'll have to get it going again, which will mean losing precious time you don't really have. That is why, the best you can do is to find the golden mean. Take half-second and one-second breaks and kill those enemies who are nearest to you in the first place. Keep looking around the battlefield vigorously to locate them. Do not waste your time on destroying the vehicles - focus on the soldiers.

As soon as you get to the lab, go down the stairs to the first room and notice the box on the right (picture above). Open it to put optical camouflage on, and from now on make sure that you have it turned on all the time (remember the button that turns it on). The camouflage can rarely turn off by itself, but it will if there is a powerful explosion near you. It will also happen each time you press a button (when you want to open the door or use the elevator). In such cases, do not forget to turn it back on. Each killed human will count in this challenge, so don't let your team-mates kill everyone.
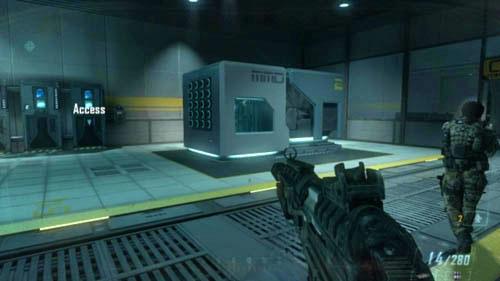
You have several opportunities to do it. The first will be just after you've gone down the elevator in the laboratory. You must, as soon as possible, destroy the opposite nitrogen tank (there are four vertical tanks slightly to the left, in front of you and there's a red horizontal bar on the upper part of each tank) (picture above). Next to it, the first ASD should be passing by.

The second opportunity will be right after that. Just opposite the elevator exit there is a corridor, which turns to the left. At the turn, in the corner, there are some nitrogen tanks. If they've been destroyed, load the last save. If not, wait for the ASD, which will go out from the left. You have to lure it somehow (e.g. by shooting at it) to make it come near the tanks or just wait for the right moment. When it comes (picture above), start shooting at the tanks and look out for the message whether you've passed the challenge.
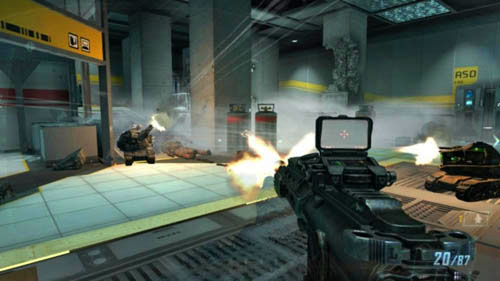
If it didn't show up, you will have one last chance soon after you've freed the scientist from the container. A lot of enemies will enter the room, along with two ASDs. There are two nitrogen tanks here (picture above), so with a bit of luck you'll pass the challenge easily.
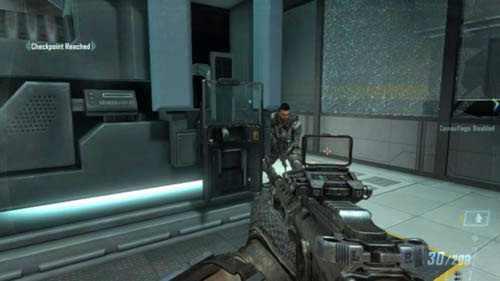
When you free the scientist from the container and when a lot of enemies enter the room, along with two ASDs, you will have to wait for a while. After a short while the Assault Shield will appear on the right device, just in front of the entrance to the place with the container (picture above) - take it. Your task is to kill ten enemies with it. To kill an enemy with it, you will need two blows.
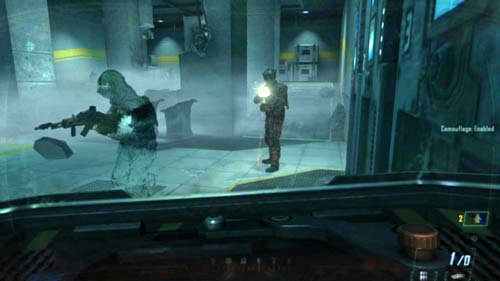
To make sure you pass the challenge, you have to start to run and kill enemies right now, because later there might not be enough of them. Moreover, your allies will not be idle, "taking away" your enemies. To ensure better security, you can first destroy both ASDs and then kill the enemies with the shield - kill at least a few (picture above).
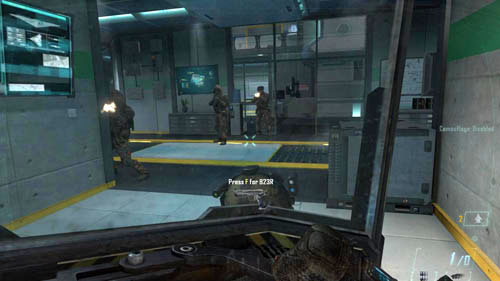
Once you obtain Celerium, use only the shield to fight with the next enemies till the end of the mission (picture above). Many of them are positioned one after the other, making it much easier for you to pass the challenge. On the other hand, your team-mates will make it more difficult, so always try to run ahead of them and get the opponents before they're shot.
Follow the team-mates to the great warehouse. Note the word Access in front of you (picture above). Walk up to the container and press the use button to run the ASD, which will now be on your side. Do not let this challenge mislead you, the only thing you really need to do to make sure the ASD isn't destroyed is to fight. Your ASD should easily make it to the end of the mission, only the nitrogen tanks explosions and EMP grenades can damage it.
See the "Intel" section or the description of a mission walkthrough to discover where you can find intel in this mission. Collect it all to pass the challenge.
During the first part of the mission, do not make any stupid mistake - don't be late when pressing the appropriate buttons, and also do not crash against the rocks during the flight. Later, watch out for grenades at the helicopter landing site and in the remaining part of the ruins, do not kill yourself with your own Titus bullets. Later, most of all, watch out for the nitrogen tanks. If they explode next to you, you'll freeze to death.
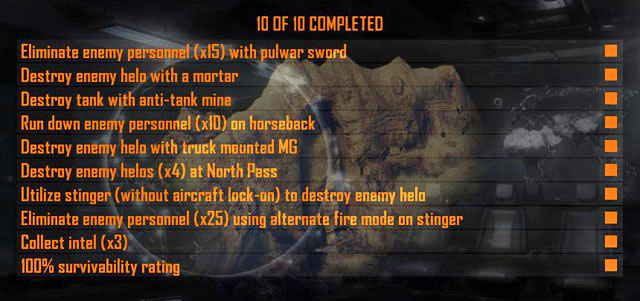

Look around the place where you started the mission. Exactly behind the horse that you are about to mount, at the far end of the rocks on the right there is a skeleton that has a pulwar sword, stuck in it (picture above). Pull out the weapon and then get on the horse.

Now you just have to kill fifteen opponents with it. It's best to perform this challenge on Recruit level. You can kill the biggest number of enemies when you are recapturing the ruins from the enemy, but you need to watch out for the Soviet BTRs. An even better moment will be the one after you've retaken the weapons cache. When you have passed the challenge connected with killing enemies with rockets, you should start doing the one that's being described right now. First, change your weapon to a rifle, jump into the battlefield and, hiding behind the jeep wrecks, search and take out the nearby enemies. The only ones who are to remain are those under the rocky wall in the northeast. After clearing the battlefield, locate the half-lit boulder to the left of one of the wrecks (picture above).
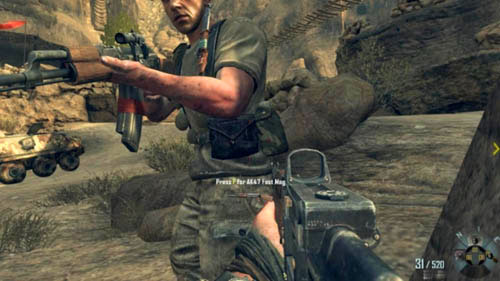
This is a perfect hiding place - as soon as any enemy runs out from the left side of the rock, immediately kill him with the sword (picture above). At the same time, do not wander off far from the rock, because you could get hit by the other enemies. And most importantly - do not use the sword too much, have a rifle ready, because it is pointless to throw yourself at the enemy barrels (this hint refers especially to the higher difficulty levels). Kill the enemies until you get the message about passing the challenge.

After the conversation with Mujahideen leader, right in front of the exit you will notice a wooden door on the left. Pick the lock to open it (picture above). Do this and your character will take a few mortar shells necessary to pass this challenge. You'll do it in a moment, so take them out immediately. Get back on the horse and sprint through the village to get to the gate.
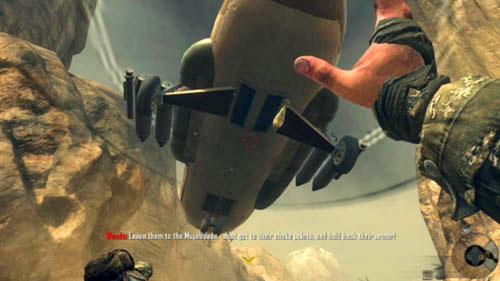
When your horse rears up, wait two seconds and then ride toward the helicopter (not the first one that will crash on the left or right, after it' gets hit). Your target-helicopter will land and then start to go left. You need to set out at the right time so as to find yourself right under it when it is flying between the rocks on the left (your team-mates will also ride there). Throw a mortar shell in the right moment (picture above) and keep riding forward, because if you stop, the enemies will kill you. At the same time look out for the message informing you if you passed the challenge. If it does not appear, or if you noticed that the helicopter flew off, exit to menu and start the mission from the last checkpoint - in the Mujahideen base (or just kill yourself).
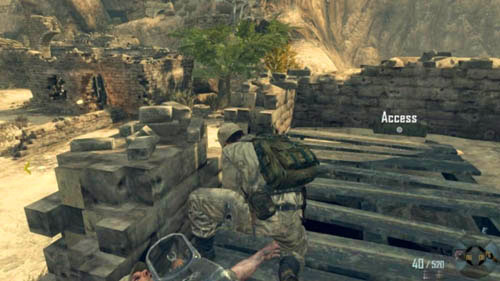
When you get to the ruins, your objective will be to locate the Stinger. You can find it on the roof of one of the buildings. The Stinger, along with some ammo crates, will be in front of you and exactly on the right, in the box with a word Access you'll find some anti-tank mines (picture above). Destroy the Soviet BTRs, blow up the gate and get on the horse.
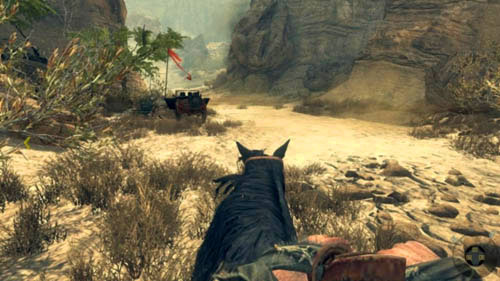
Do not go in the direction of the gray dot with a word "Destroy", but sticking to the right side, go to the same pass, where you destroyed the helicopter with a mortar shell at the beginning (look out for the jeep wreck on the left, next to which there's a red flag) (picture above).
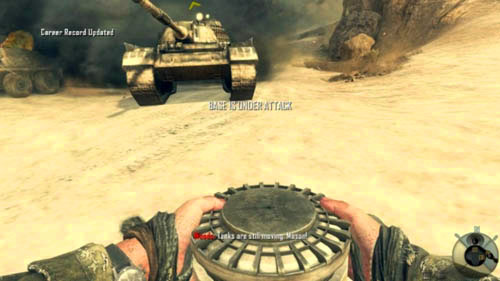
In this way, you'll get to the base before the tanks, and you can set the anti-tank mines (picture above). You have to do it in front of the tank (a transporter may not be counted as a "tank" in this challenge), but be careful and don't let enemy vehicles run you over! You also need to watch out for the mines - don't step on them, because they'll explode. Your horse can also detonate a mine. Finally, if a vehicle drives on the mine and you're too close, you'll die and won't pass the challenge. It's best to place a mine in the tank's path, when it's about 10-15 meters away from you. To make sure you pass the challenge, you can set all the mines. Look out for the message informing you about passing the challenge, and then immediately go to the one that involves destroying four helicopters at North Pass.
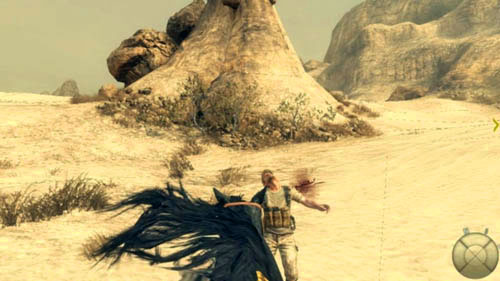
A very easy and fun challenge. Simply ride on horseback searching for the enemies and running them down (picture above). Just be careful not to fall into a group of a few opponents you won't have time to run down, as they can kill you. Look out for the message informing you about passing the challenge. You will have some free time to pass this challenge after you've received the message about retaking the weapons cache. There's no need to rush there, so do the challenge.
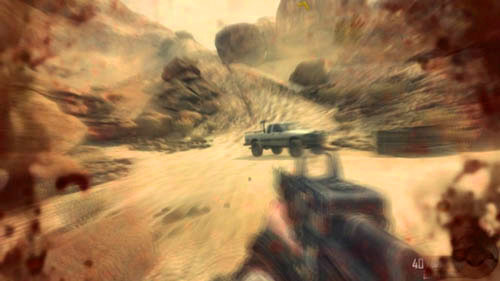

When you drive the tank and the transporter back (and possibly perform the challenge below), you will have to deal with the helicopters. Look at the gate to the base, and then left - you should see a white car with a heavy machine gun (first picture above). Go toward the vehicle, get off the horse and grab the gun. Wait until the enemy helicopter hovers over the base and use the gun to shoot it down. You will do it easily (second picture above) and pass the challenge.
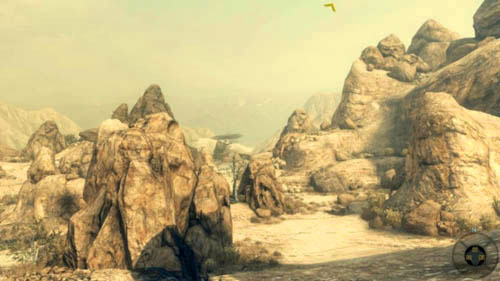
Immediately after you've destroyed the first tank and transporter, use the compass in the lower right corner of the screen to go directly north. Hold the sprint button to gallop. In the meantime, take out the RPG and turn on the auto-aim mode. To give a shot in this mode, you must press the scope button, aim at an enemy helicopter and wait 1 to 2 seconds. When you hear a distinctive sound, fire immediately (blocking the target doesn't last long). Gallop forward and when you see four helicopters flying one by one in the distance, turn right (picture above).
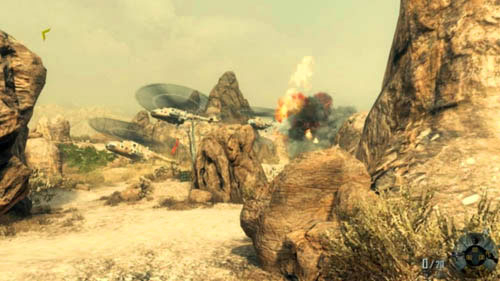
The helicopters will start landing at four different places and drop the infantry off, so you must be careful and not let anyone shoot you. Another difficulty will be the other enemy soldiers, hiding in the nearby caves. Despite this, begin to aim at enemy helicopters in turn and fire rockets with aircraft lock-on. Do not wait until the rocket hits the target, but look out for the next one (picture above). To ensure even greater safety, it's best to hide next to the rocks on the right, but do not get off the horse. The best sequence is as follows - shoot the first (the one flying at the end) before they all start to land. As the second, select the one that will fly towards you (it'll be above you). You should see the last two easily - one is on the ground, the other in the air. You will need to catch the last one when it is flying away but you should make it.

When you drive the tank and the transporter back (and possibly perform the challenge above), you will have to deal with the helicopters. Make sure to turn the aircraft lock off. Aim at the helicopter hovering over the base and fire (picture above). It's not moving, so hitting it - and passing the challenge - will be extremely easy.
Start doing the challenge when you retake the weapons cache. This challenge is not about eliminating enemies with aircraft lock-on, but the ordinary fire mode - but first you need to turn the scope on. Search for the soldiers on the battlefield below and fire rockets at them (picture above). New ones will be running in fours out of the left side of the opposite rock and taking positions by the low boulders and by the abovementioned rock.
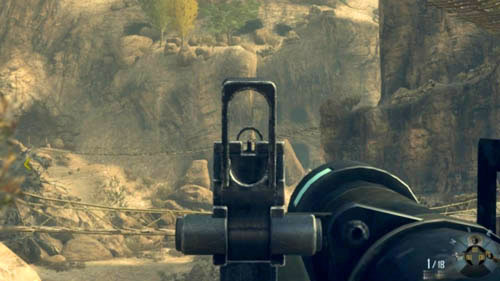
Actually, you need to watch out only for one thing here - the snipers taking positions on the wooden bridges (picture above). Once in a while look at that place and check if a new enemy has appeared in the place of the killed one. If not, go back to firing rockets at enemies below and do it until you get the message about passing the challenge. If you run out of rockets, refill your ammo by the pile of boxes nearby.
See the "Intel" section or the description of a mission walkthrough to discover where you can find intel in this mission. Collect it all to pass the challenge.
This is not going to be a difficult mission, but you have to watch out for explosions and there will plenty of them here - they're the ones that can harm you the most. When you leave the Mujahideen base for the first time, don't drive into the jeep on the left, because the explosion can kill you. Do not get too close to the tank or transporter, and do not expose yourself to the transporter fire, either. Also, watch out for grenades.
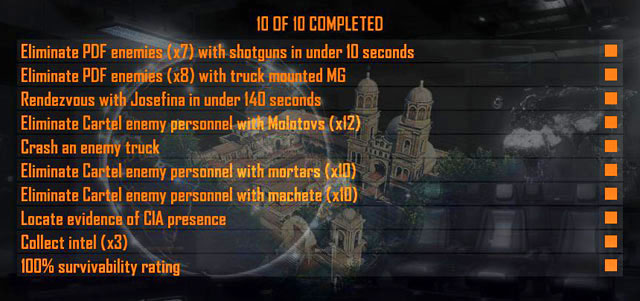

This challenge can be passed at the beginning of the mission, when you play as Menendez. Kill the first enemy, then three with machete and when your character takes out his shotgun again, start to eliminate enemies in such a way as to pass this challenge (namely, very quickly): first, the one just to the left, in front of the building (picture above), then another under the building, and the third one a little further on the left. After killing the latter instantly turn right.
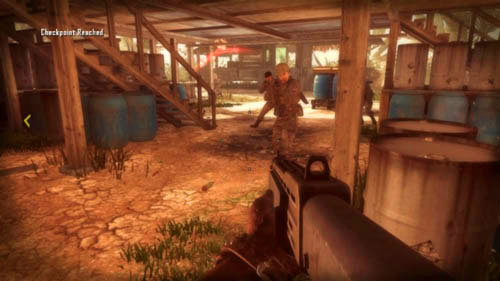
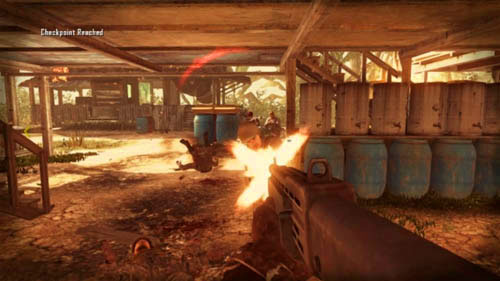
You will be able to see at least 5 to 6 enemies standing close together, almost in a line. Start to shoot at them (first picture above) and at the same time lean out more and more to the right to see the next ones (second picture above). Eliminate the enemies until you get the message, but if there is none, let yourself get killed and try again. The checkpoint should be just before the killing of the fourth opponent (the one who was harassing a woman), in front of the entrance to the building to the left.
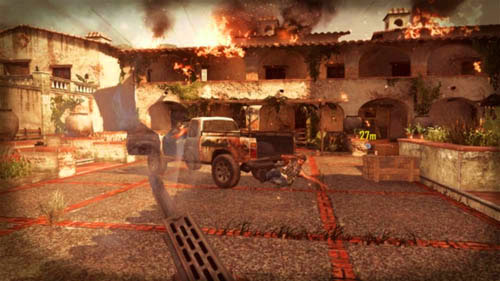
The second challenge passed as Menendez. When you reach the gate of your property, look out for a car that will ram the gate. Look where it is going, and then quickly run up to it (picture above) and mount the machine gun attached to it.
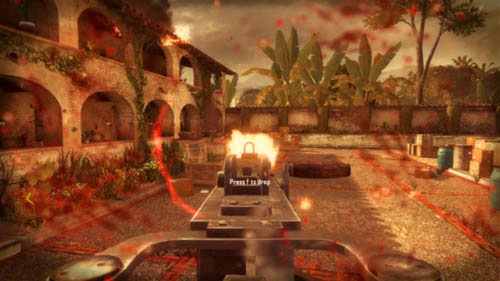
Your task is to kill eight enemies. Shooting may be difficult because of the rage and the spots on the screen (picture above). Also, if by chance you kill too many of your allies, the mission will end in failure. Keep that in mind when shooting the enemies until you get the message that you passed the challenge.
The third challenge passed as Menendez. It's best to perform this challenge on Recruit level, as the chance that you'll die is the smallest. It is also good to know the way you need to go through well. Simply run as fast as possible to the target going around the enemies. It may happen that you won't be able to pass this challenge together with the two above, and that you will need to play the mission through separately to get it. Do not worry about the lack of the message when you arrive to your destination - you will receive it only after you've watched the second cutscene in the hospital and when, after you've returned to the mission, your character puts the binoculars away.
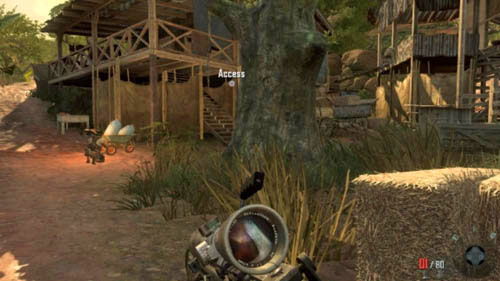
After clearing the first three buildings and the watchtower, and turning left you'll see a word Access on the house on the right (picture above). Go inside. There can be an opponent in the room on the left - kill him and then look to the right and take some Molotovs from the crate.
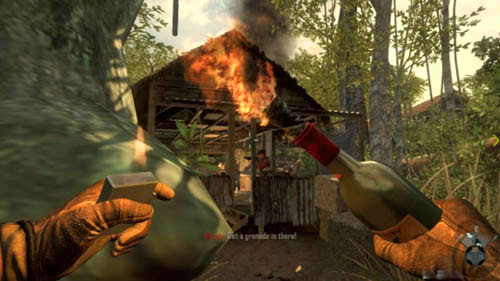
Now you need to look out for an opportunity where the enemies are in groups, so that you can kill at least a few with one throw. The first chance will be when you go up the stairs on the right (just after getting the Molotovs) and look left. At least a few enemies will be standing in a small, windowless building (picture above). Throw all Molotovs in there and do not worry if you haven't passed the challenge by doing that.

When you go down to the cocaine bunker, before you start shooting the enemies, make sure to have a look at the ammo crates (picture above). Refill your ammo and new Molotovs will appear in your inventory.
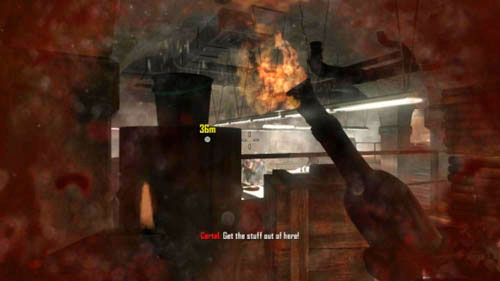
Now just go through the door on the right and hide by the wall. Throw Molotovs at the enemies (picture above) until you see the message about passing the challenge. If you lost Molotovs, simply go back to the ammo crates and refill them. Thus, you do not even have to try to kill as many enemies as possible with one Molotov - you can kill them individually in this way.
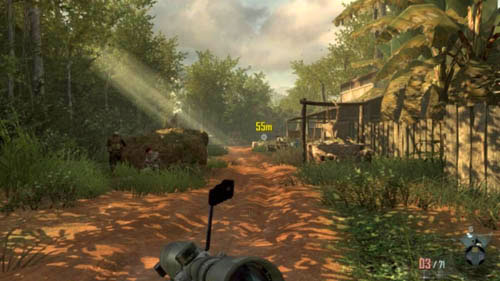
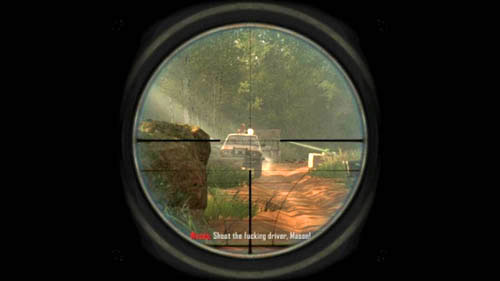
When playing as Mason you've cleared the village and driven out to the road leading south, and the area around turns green, prepare the sniper rifle. Go south and stop a little in front of the big boulder on the left and the well on the right (first picture above). Hudson will shout that you should shoot the driver of an upcoming car - use the scope, aim and shoot. It's best to do it when the car is going in your direction (for a couple of seconds) (second picture above). If you don't make it (you will hear that you were too slow), just kill yourself. The checkpoint will be just before this event.

The first thing you need to do is to get mortar shells. When you, Woods and Hudson jump down from the balcony and notice Menendez in the distance, go right and look at the garage door on the right with a word Access (picture above). Pick up the door to take the mortar shells. It's best to use them to kill enemies in front of the property and in the courtyard. A lot of enemies will be running out of the main gate, however, you have to move closer for the mortar shell to hit the target. It's much safer to throw mortar shells at the enemies in the courtyard of the property, e.g. from the top of the bell tower.

When you go down to the cocaine bunker, before you start shooting the enemies, make sure to have a look at the ammo crates (picture above). Refill your ammo and new mortar shells will appear in your inventory.
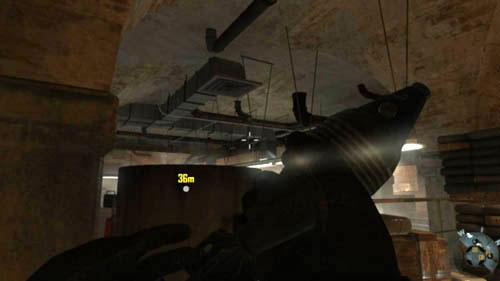
Now just go through the door on the right and hide by the wall. Throw mortar shells at the enemies (picture above) until you see the message about passing the challenge. If you lost mortar shells, simply go back to the ammo crates and refill them. Thus, you do not even have to try to kill as many enemies as possible with one mortar shell - you can kill them individually in this way.
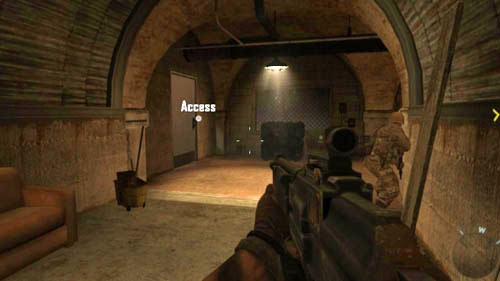
When you go down to the cocaine bunker, in the room with barred windows you'll notice the word Access on the door on the left (picture above). Pick the lock to open the door and get the machete. Your task is to use it to kill ten opponents. Go out through the right door and immediately run into the next door on the right.
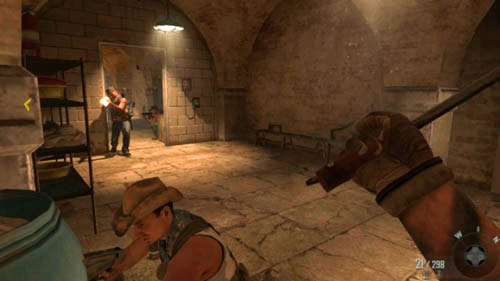
Go forward. Just behind the barrel on the left, around the corner, there's an enemy hiding, while by the room exit (also on the left) - the next two (picture above). Hide by the door, run inside, kill one and go back to recover. Repeat the action and then start hiding between the tables to safely move closer to the enemies and kill them with machete.
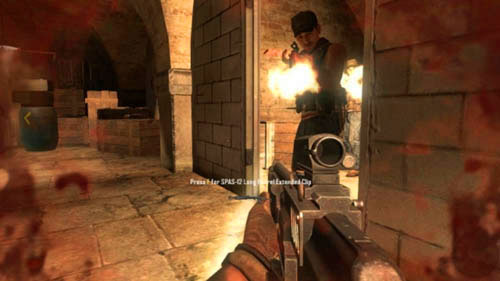
Apart from the door, through which you got in here, there are two more room exits - on the left and right. It's interesting to know that if you turn your back to the one to the right, you will see a new pair of opponents in it (picture above). Do it, and then immediately run to the new enemies with a machete.
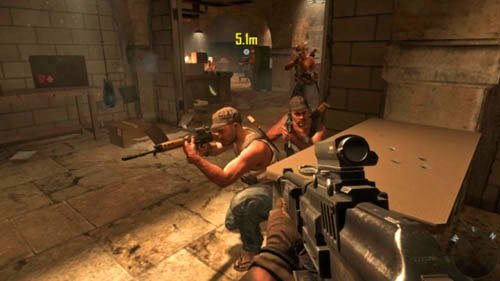
You will finish off the last two or three enemies in the further part of the mission (picture above). You'll definitely find the last several opportunities to pass the challenge.
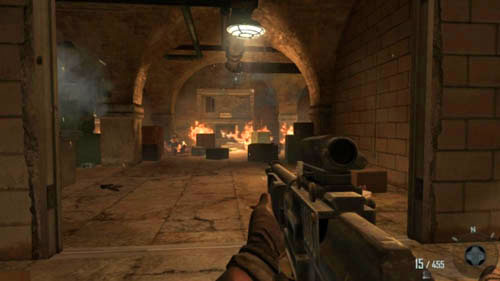
When penetrating the cocaine bunker, you will find yourself in a large hall with raging flames (first picture above). After killing all the enemies go forward, then turn right and right again. Pick up an envelope lying on the desk with a word "CIA" (second picture above) to pass the challenge. Do it quickly before the envelope will burn!
See the "Intel" section or the description of a mission walkthrough to discover where you can find intel in this mission. Collect it all to pass the challenge.
Playing as Menendez, simply run to pass the challenge about reaching Josefina in under 140 seconds. It is difficult to die at this point in the mission. Afterwards, just be careful, especially when you're in the places right after acquiring the Molotovs (the hut and stairs on the right). Here, the enemies have a tendency to throw grenades and it's easy not to pay attention and die.
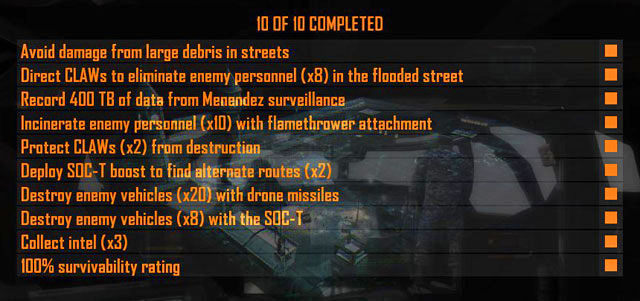
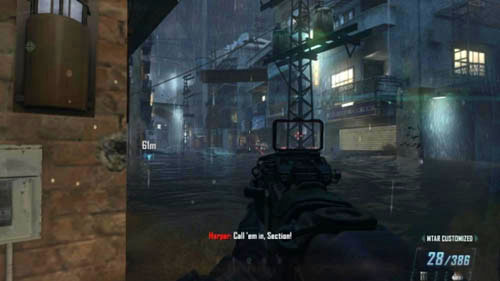
Right at the beginning of the level, after exiting the building with the CLAWs you'll find yourself at one end of a long, flooded street (picture above). When you get to its end and turn right, avoiding damage from the falling debris you'll pass the challenge. It is very easy - simply do not go headlong, just move down the street carefully, from one hiding place to another. In this way, all the debris will fall away far in front of you, and not AT you.
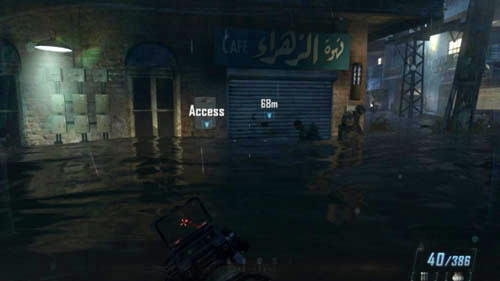
This is not a difficult challenge, but it can be a bit onerous. When you go into the flooded street, run quickly to the garage door on the left (first picture above) and press the use button by the word Access, so that the robots can go in the garage. Thanks to this they will be on the roofs and you'll be able to use their support from above.
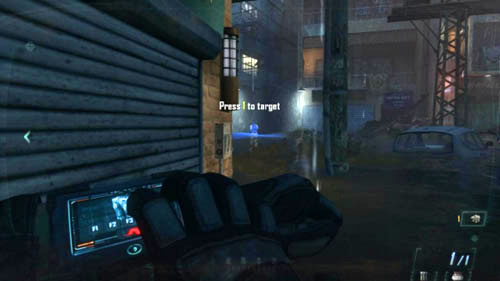
To pass this challenge, your CLAWs have to kill 8 enemies with rockets, whom you should earlier mark. To do this, press the appropriate button and point at the opponent with a blue light, and then confirm the target by pressing the fire button. Mark them for CLAWs (picture above), but keep in mind that they are not able to hit at the left side of the street. You need to take out the opponents hiding on the left side with a rifle.

Your main targets should be the enemies on the balconies - when pointing at them, try not to point at the front of a balcony, but at the interior, pointing over the rail (picture above). Thanks to this the rockets won't crash against the balcony (which would mean that the opponent comes out of it unharmed), but they will hit the windows and the entrance, which will immediately do the trick. Opponents will appear in front of the big gate at the end of the street all the time, while those on the balconies won't. If you clear all of them on the balconies, and you don't get the challenge, wait somewhere away from the big gate and mark the opponents running under it.

During the first attempt, when you are looking at the courtyard, Menendez, who's wearing a light-colored suit, will get out of one of the three jeeps and after a while he will stand nearby. Your job is to keep the crosshair on him (you can zoom the screen using the scope) to identify him and then record as much data as you can (picture above). When Menendez starts to walk away, move the crosshair along with him. You should be able to record about 100 TB of data (the TB counter is next to the circle in the middle of the screen, below the two horizontal bars on the right). There are four attempts including this one.
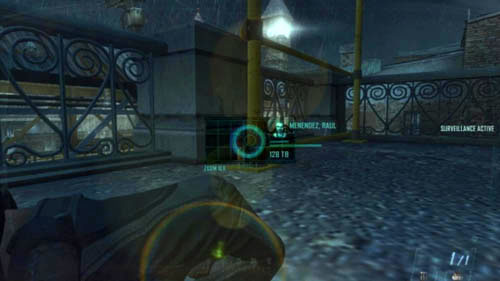
Before the second attempt it's necessary to prone - if you do not do that, a patrolling helicopter will detect you. Look to the right, there should be a circle indicating Menendez on the scanner (picture above). He will be passing through the corridor from right to left (for a second or two he will stop and then he will start walking further). Keep the crosshair on him all the time - when you lose contact with him, you should have a lot more than 200 TB of data. Do not worry if Harper blocks your view of Menendez, because it does not matter to the scanner.
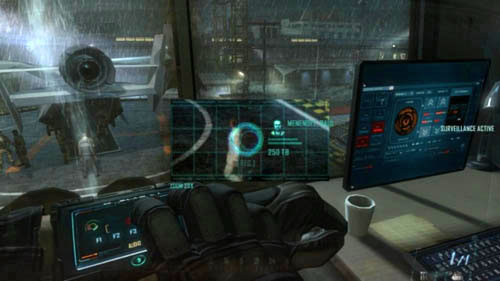
As soon as you enter the small watchtower, scan DeFalco, who is talking to the guard by the helicopter (this will speed up collecting the data) and then locate Menendez (picture above) - he will again be coming out from the right. Then he will stop and have quite a long conversation. After that he will go left. If you sufficiently used this and the two previous attempts, at the end of the third you should have 400 TB of data. If not - don't worry, soon you will have an opportunity to pass the challenge.

When you and Harper go inside the building, you will be able to record Menendez's last conversation through the window (picture above). He will come out from the left and stop. The challenge should be yours.

To even be able to pass this challenge, at the beginning of the mission - when the CLAW breaches the door and kills the enemies - go left, to the second CLAW. Move closer to it (there is a word Access on it) (picture above) and press the use button to be able to run the flamethrower later during this level.

Then, shortly after that, when you get discovered, you will take control over the very CLAW. Immediately incinerate several enemies in front of you with the flamethrower (picture above). Go forward and burn everyone on your way. Remember that the flamethrower always shoots in the direction your robot is facing. Also, watch out for red explosive barrels! After killing the enemies go right.
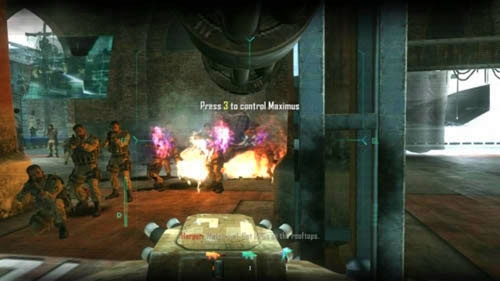
Due to the fact that the survival of your robot is necessary to pass the next challenge, you have to watch out for the soldiers with RPGs in the courtyard, who will shoot rockets at you through the garage door on the left. So try to move in such a way as for there to be, for example, a column between you and the exit. On the right, between the columns, a large group of enemies will gather (picture above). This is an excellent opportunity to pass the challenge. Instantly after that, see the description of the next challenge.


After you've passed the challenge above, don't shoot at anyone, but retreat the CLAW to the place where you took control over it - thanks to that you'll make sure that nothing will happen to it. Then, switch to the second CLAW. It is important to kill the soldiers with RPGs in the courtyard among the jeeps as soon as possible (first picture above), as well as to fire rockets at enemies with RPGs, who are on the roof on the right (second picture above). The next ones can come running from the street on the left (depending on how early or how late you switched from one CLAW to the other). Afterwards simply destroy the rest of the targets (helicopter, two jeeps) and kill all the other enemies. After a while, you should automatically go back to playing as Mason. If there wasn't a message about losing a CLAW, the challenge will be passed. At any time, if any of the CLAWs gets destroyed, immediately go to the menu and start the mission from the last checkpoint - just before you started playing with the first CLAW.

During the escape, at some point you will be able to choose - either you will operate the drone, or remain in the jeep (picture above). If you want to do this and another challenge - that is about destroying eight vehicles - select the jeep (namely, the SOC-T). If it isn't clear, you should know that you can't do all three challenges during the escape at one attempt. To pass this challenge it will be necessary to use the SOC-T boost, which you run by pressing the jump button, at appropriate times. You have to use it twice at the right moment.
The first way is as follows. When you choose the jeep, drive through the big building, then turn left into the highway and make sure to drive onto the left lane. Look out for the green and blue sign forming something similar to a ramp (picture above), and when you're in front of them, turn the boost on and jump out.
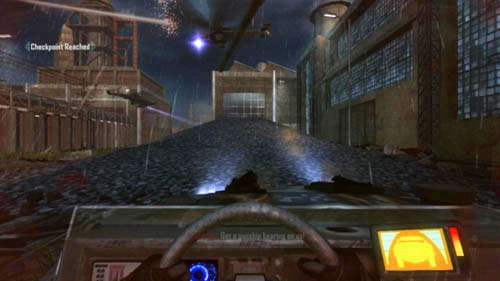
And the second optional way. When you go out of the big factory (inside you will turn left and then right, having red-hot metal on your left), drive down to the railway tracks on the right. They lead to a built driveway, in front of which you should enable the boost to fly to the other end of the building (picture above). After you've landed, the challenge should be passed.

During the escape, at some point you will be able to choose - either you will operate the drone, or remain in the jeep (picture above). If you want to do this challenge, choose the drone. If it isn't clear, you should know that you can't do all three challenges during the escape at one attempt.
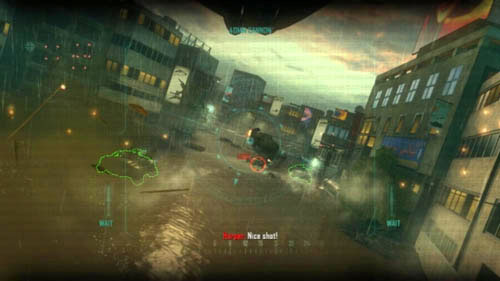
As a drone simply shoot rockets at all targets marked with red circles on the screen. It's enough to mark the target by passing the cursor over it, then all you need to do is to press the fire button - a rocket will hit the target by itself. Blocking the target will be shown by a red circle (picture above), you will also hear a distinctive sound. You don't have to pay any attention to the enemy soldiers but try to hit each jeep you see.

There are a lot of jeeps in the following place. When you fly into the big building through the hole on the right, make sure to pay attention to the opposite exit (picture above). There are several vehicles in and near it. If you have not passed the challenge yet, you will have a few jeeps to destroy in the next part of the mission.

During the escape, at some point you will be able to choose - either you will operate the drone, or remain in the jeep (picture above). If you want to do this and another challenge - that is about finding two alternate routes - select the jeep (namely, the SOC-T). If it isn't clear, you should know that you can't do all three challenges during the escape at one attempt.
Your task is to ram eight enemy jeeps. It will be enough to get closer to one of them and turn on the boost. Then you sometimes only need to give it a little nudge and it will be destroyed. The lower the difficulty level, the easier it will be, so it is best to pass this challenge on Recruit level. Do not hesitate to retreat to destroy any vehicle left behind. However, it can't last for too long. If you hear at least 3 messages from Harper urging you to go faster, it will mean that in a moment you will lose Salazar and fail. The first two jeeps will be in the big building, where you will enter shortly after taking the decision (picture above).
The next two will be on the highway on the left (first picture above). It will be easier to destroy them, as they are not moving. After jumping over to the right path, after a while, from the opposite direction another jeep will come out and turn left. You'll catch up with it in the tunnel, in which you will enter in a while (second picture above).
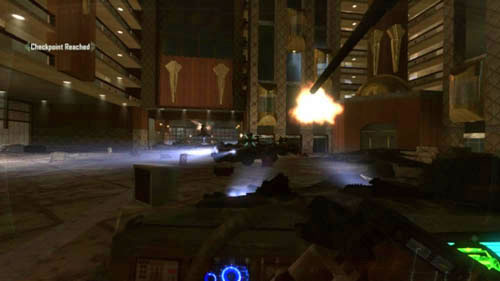
Right near the entrance to the big building, on the left, there's a fourth jeep. However, if you're inside and go right instead of turning left, then there will be four jeeps (not moving) exactly in front of you (picture above). Even right here, with a bit of luck, the challenge should be passed. If not, hunt for the jeeps later in the mission. The further road leads left, then right, across the parking lot. There is another jeep there. Further there will be no immobile vehicles, but you can always hunt for those moving around.
See the "Intel" section or the description of a mission walkthrough to discover where you can find intel in this mission. Collect it all to pass the challenge.
You'll manage to pass the first part of the mission easily, provided you don't run up into the enemies and not get burried with blows. Open the gate on time while fleeing from the bus. Later, during the sequence with the drone, you need to be especially cautious. It's extremely easy to stand in a wrong spot, make a stupid mistake and die. At the end of this scene don't sprint from behind the truck wreck. Instead, come out crouching. Otherwise, the drone will hear you. Continue to do exactly what Harper tells you - don't show yourself to the helicopters, get down when necessary, etc. During the escape, select the drone - it's a lot easier to control it than the jeep.

This challenge may require several attempts. First, you must know the way - not look for it when you're doing the challenge (that's why, it's best to leave this challenge for later and first play the whole level through - see the mission description for more elementary details). Secondly, you must sprint all the time, holding the appropriate button, and thirdly, you must know when to jump and when not. Finally, in the lower left corner of the screen there is a timer (Mission Time). It's best to press and hold the run forward and sprint buttons even before you take control over Ziggy.
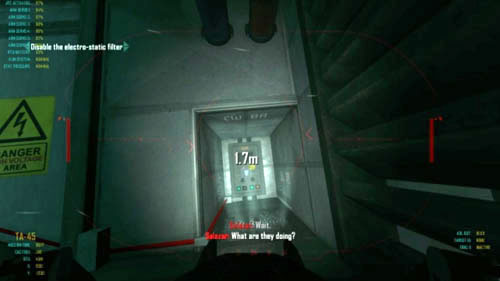
Run forward and then immediately to the right. Here, hold the sprint button until you can jump over the gap. After the jump immediately turn left and start jumping with sprinting (picture above) till you jump to the box. Shoot it with electrical charge and retreat turning left at the same time (keep the retreat button). Thanks to that you will turn like a car and the path further will be directly in front of you. Hold the sprint button and run into the oval tunnel.
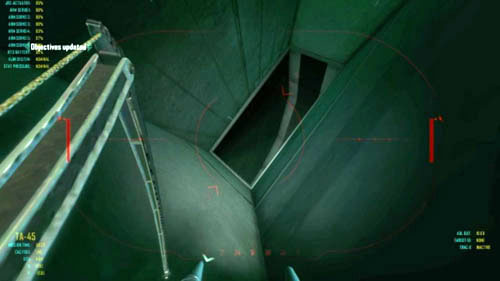
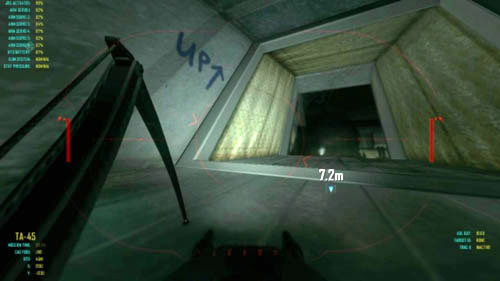
Here, for a few seconds you will have to learn to walk diagonally to the left or right to avoid the obstacles. Of course, you also have to do it quickly and not get blocked even once. Go between the grates (don't go on any of them, because you'll get stuck!) and then go diagonally to the right. After you enter the ventilation shaft go down its side to the ceiling (first picture above). This way, you will be able to immediately go through the two places with a curved grate, the first one will be on the right, the other on the left. Going through the second one, go diagonally left all the time to get from the ceiling to the wall and then on the shaft floor. This is important, because at the end of the shaft the sides and the ceiling are covered with a yellowish material, on which you can't enter (second picture above). While continuing to run as fast as possible get to the room with red and blue pipes.
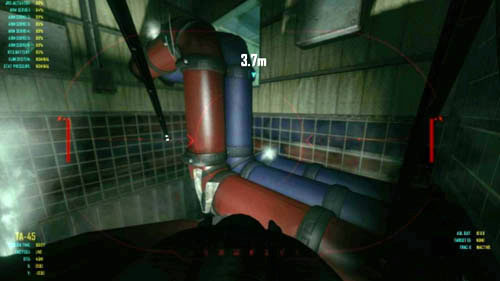
There will be a checkpoint here, so if by any chance you fall, you'll start right here. What's more, if you have had good time and not have been blocked anywhere, the results will be saved. However, you do not have the time to walk sideways. After exiting the shaft get on the pipes, but also go diagonally to the right to enter the vertical part by facing the pipes. At the top go straight, turn left and start going a little to the left - in such a way as to jump to vertical, not horizontal pipes on the left (picture above). It will save you a lot of time. Go up them, turn around to the right, jump into the next shaft and go forward. Use the electric charge on the grate and fall down on the man. Use the charge again and look out for a message about passing the challenge (it should appear before the retina scan has begun). If there wasn't any, start the mission from the beginning.

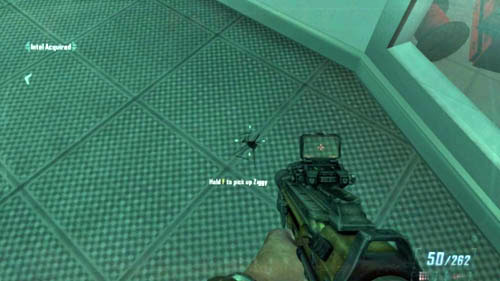
After the adventure with Ziggy is over and after you've cleared the opponents in the CRC room, follow Salazar to the main computer (first picture above). Look for Ziggy on the floor to the right and take it to pass the challenge (second picture above).
You need to kill at least five enemies of all who are standing on the dance floor. The fewer enemies you kill during any slowmo, the more will remain at the end, which can mean that there will be too many and you'll get killed. All the time, slowly, you will be moving left - keep that in mind when aiming. The enemies will be positioned more or less in the same way each time. You can give more than one shot near an opponent's head - the more shots, the better chance to hit.
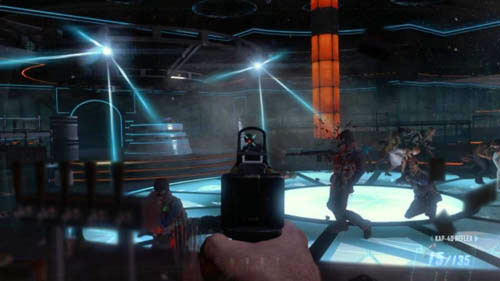
During the first slowmo immediately press the scope button - without it you have no chance of any accurate shot. The crosshair should stop on the head of an opponent crouching on the right - shoot him, aim at the one standing on the left, shoot and try to kill another one standing on the left (picture above). Try to shoot at least in two heads.
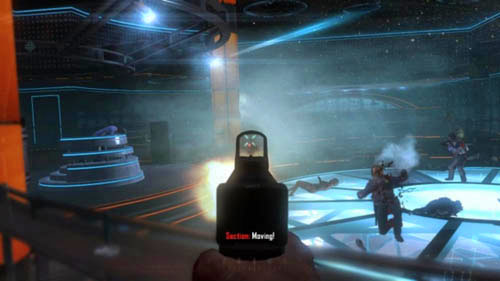
Immediately aim at the opponent's head who's crouching on the left, because he's the one who's going to shoot at you first (the one crouching on the right looks to the right, so leave him). If you get hit, you'll lose precious time. After shooting the enemy, try to also kill the one standing on the left (picture above).
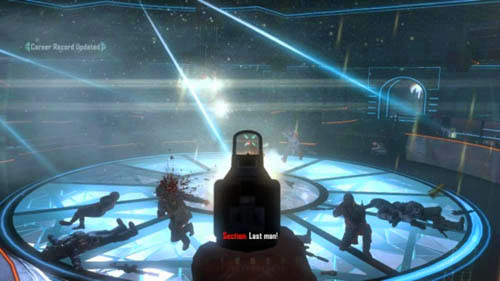
Again, choose the one crouching on the left as your target. If everything went well, then during this slowmo there should be a message that the challenge is passed (picture above).

If it doesn't happen, you'll have the last chance during the fourth slowmo (picture above). If you still didn't succeed, when the events return to the normal pace, immediately stop the game and exit to menu. After loading (or death during any of the slowmos) you will return at the beginning of the first slowdown.

After the adventure with Ziggy is over and after you've cleared the opponents in the CRC room, go exactly forward passing by the shelves. Eventually, you'll get to the room on the left. Go inside (picture above) and look at the word Access on the left. Move closer and press the use button. From now on all the opponents will have a red light on them, which will help you identify them and also pass the challenge. Now all you need to do is to make sure you don't kill any civilians yourself and the challenge will be passed.
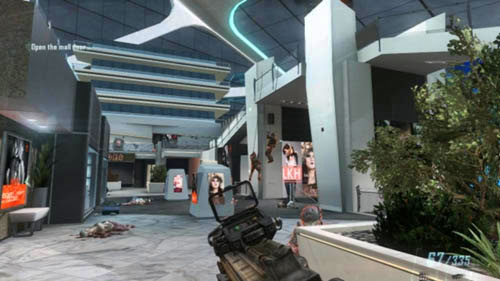
When you enter the mall, directly opposite you'll see a big sign saying CAFI. The first pair of enemies will appear exactly behind it. They will repel down the ropes (picture above), though in the heat of the battle you might not be able to kill any of them. But do not worry about it - there will soon be a second chance.
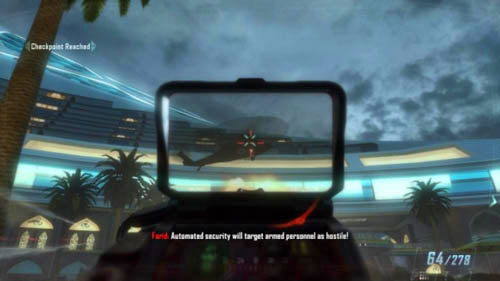
When you and Salazar open the big door, choose the left stairs (on the right there's an ASD) in the next room and run downstairs as quickly as possible. Run outside and look up - you should see an enemy transporter helicopter, which is about to drop off the soldiers. Simply start shooting with a continuous round at the helicopter door (picture above), thanks to which the bodies of the enemies will be falling down. Keep looking out for the message about passing the challenge. If there isn't any and the helicopter flew away, quickly exit to the menu and exit the mission, and then load it again. With a bit of luck, you won't get to the next checkpoint (although it's very easy to do it, which will mean that in order to pass the challenge you will have to play the entire mission through from the beginning).

The outdoor area is the last part of the level, namely, the one you'll find yourself in after going down the big stairs and exiting the shopping center. Of course, the challenge can be combined with the one below. There is a huge number of enemies in this vast area, so do not worry that you'll run out of them. If you're going according to the mission description, then after crossing the bridge and climbing the first stairs don't go down the next ones, but wait at their top. Kill the enemies downstairs. New ones will be appearing in the place of the killed ones endlessly (picture above). It's easiest to pass the challenge in this place. If there are no enemies, simply look for them, but do not get less than 102-103 meters to DeFalco, because he will start running away!
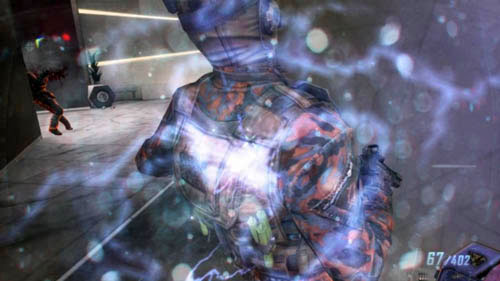
Immediately after the scene with the slowmos in the club and the cutscene are over, wait until Harper finishes telling the guard what the latter has to do. When he opens the armory on the right, go inside and look at the armored gate with a word Access (picture above). Open it. You will equip your character with combatant suppression knuckles, which are necessary to pass the challenge.
Now you must simply find and incapacitate 20 enemies in melee. Of course, it is best to do that on Recruit level. To make a good start, carefully inspect every corner of the shopping center, first the second floor, then the first floor (picture above). Having done that, you and Salazar should open the big door. It's unlikely that you'll manage to kill all the 20 enemies at the mall, but you'll definitely kill a large number of them. There are really big groups here, but watch out not to fall among several opponents who will flood you with blows - you will die quickly, even on the easiest difficulty level.
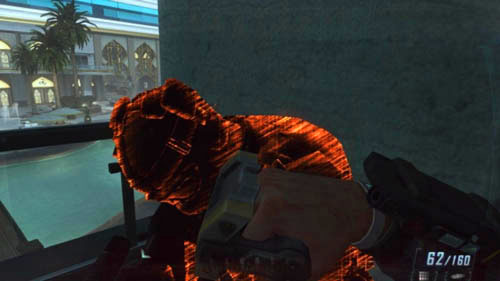
Finish the challenge outside - there's virtually no limit to the number of enemies there. Pay special attention to the interior of the buildings, balconies, etc. (picture above). If you are not going closer to the target, you'll have an unlimited amount of time to pass the challenge. Beat the enemies until you pass the challenge. It can be combined with the one above, of course.

All you have to do to pass this challenge is to find the ASD. It will be in the mall, exactly to the left of Salazar, who will stand by the big door, waiting for you. Before you walk up to him, open the door with a word Access (picture above). After a while the ASD will start to fight on your side. You do not have to worry about it - opponents have no chance of destroying it.
See the "Intel" section or the description of a mission walkthrough to discover where you can find intel in this mission. Collect it all to pass the challenge.
In this respect, it will not be a difficult mission. Enemies use only flash-bang grenades, which can't kill you. In fact, the only thing you need to do is to be careful when operating Ziggy, when you're walking and jumping on the blue and red pipes. The second thing you should watch out for are the big groups of enemies after the events at the club. While they will be shooting at you, one of them can run up and hit you. In such case it is easiest to die.
Attention! Make sure to take a machinegun (of the Light Machineguns group) as the first weapon and a rocket launcher as the second.
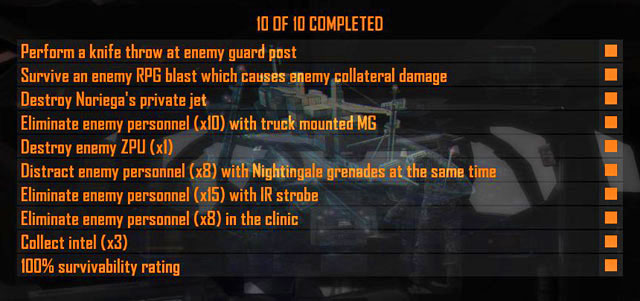
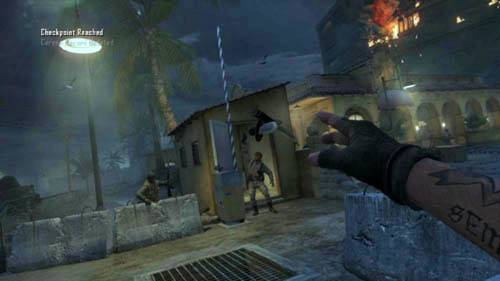
You can pass the challenge at the beginning of the mission. Just throw a knife at the opponent when the appropriate message appears (picture above).
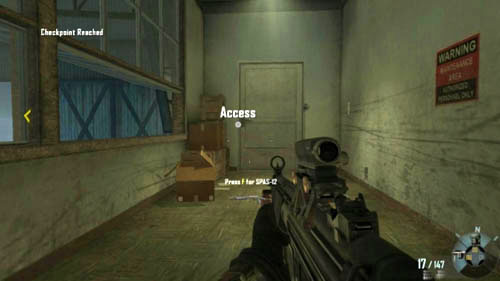
It is a very onerous challenge and rather vague. The first thing you need to do is to find a suit that will protect you against explosions. As soon as you enter the hall through the skylight in the roof and fall down into the corridor look left. Kill the soldier and then open the door behind him (with a word Access) (picture above), and you'll obtain the very suit.
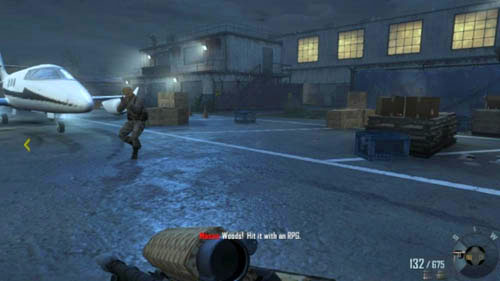
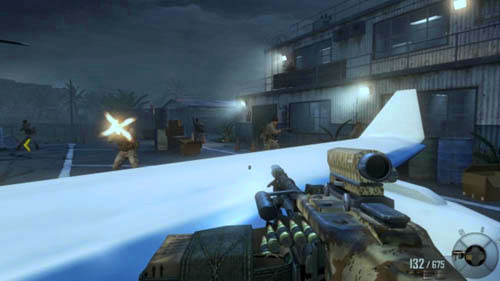
The second thing is to find a place where there's an opponent with an RPG, and positioning yourself in such as way as to make the rocket hit you, but not kill you. Instead it should kill an enemy or some enemies nearby, and possibly do some more damage. The airfield for Noriega's jet is surely one of such places. Do the challenge on Recruit level and as soon as you run down the hall stairs, go past Mason and sprint to the air-field. Go right, behind the jet, going around the enemies from a distance (so that no one will hit you) (first picture above), and then stand by the left wing of the plane (second picture above).
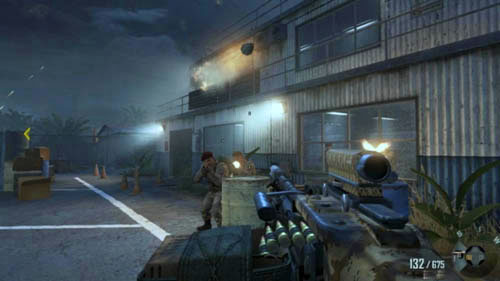
Since it is not fully clear whether the challenge is about killing enemies, or damaging some other object, it is best to provoke a situation that will result in killing two birds with one stone. When you are behind the wing, look out for the soldier with an RPG on the building across the street. He'll come down the ladder on the left from the roof to the balcony, and then he'll stand behind the rail and start preparing to take a shot. This is when you should move closer to the two soldiers by the barrels in front of the building (first picture above) and stand still. From this distance, the soldier with an RPG should easily aim and hit, wounding his comrades and damaging the jet behind you, which will result in passing the challenge (second picture above). This place is generally good for another reason. If you die or Woods kills most of the enemies, kill yourself or get killed. The checkpoint will be right in front of the stairs in the hall.
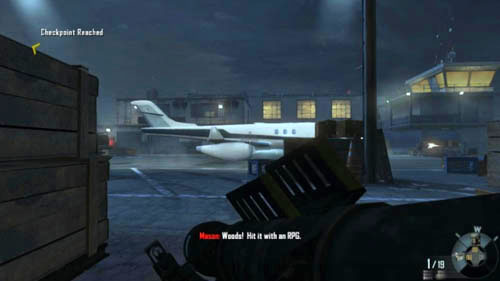

You can't miss it. And while Mason is telling you to take the RPG and destroy the jet, you will not find a rocket launcher anywhere near. So you can look for it on the platforms inside the warehouse you'll exit, or even better - simply bring any rocket launcher before starting the mission. One accurate hit will be enough to pass the challenge (first and second picture above). You can't delay, because after a while the jet will explode by itself and then you won't pass the challenge.

When you run down the stairs in the hall and notice the jet, quickly locate the heavy machinegun operator on the truck, which will come out from the right (picture above). Take him out, running towards him and shooting, but don't shoot at any other enemies. You will need them to pass this challenge. Instead, as soon as possible, run up to the truck and grab the gun.
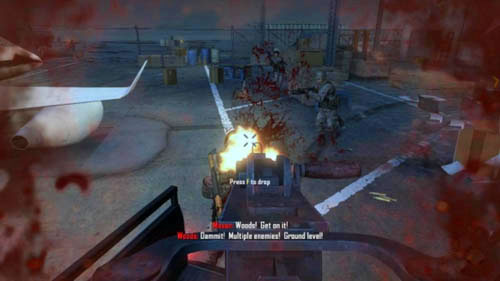
Turn to the left and start with the three nearest enemies and also the one standing in the upper left corner of the picture above, above the jet wing (picture above).
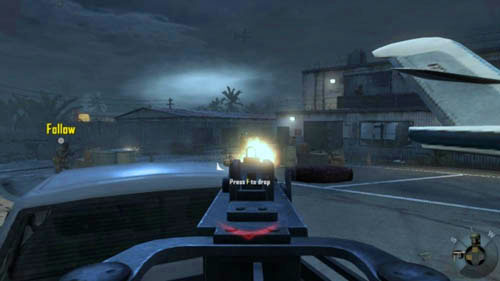
Then turn the rifle left and start shooting at the enemies or at the places where they are hiding. Shoot to the left of the building, at its balcony, door and windows (picture above). In this case, Mason will be disturbing you, because every opponent's death at his hands takes you away from the challenge.
Keep the fire button all the time, you can still get some of the enemies even if something obscures them (e.g. the jet tail, which will cover the building window after the explosion). If you can't see any enemy and you haven't passed the challenge, kill yourself or go to the menu and load the mission. The checkpoint will be just in front of the stairs.
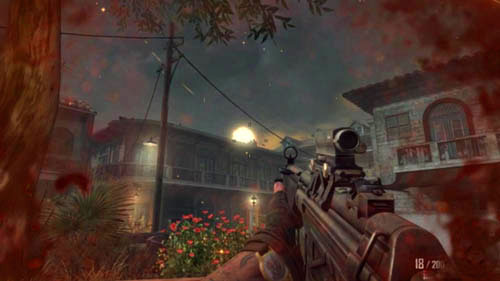
The only difficulty in this challenge is to find a suitable target. When you are passing through the streets of the slum area, you'll get to a square. Its trademark is the dome, which will be ruined in a moment by the helicopter firing at it. Moreover, an allied tank will enter from the left side of the square. It will also be destroyed in a moment. After clearing the area and the roofs of enemies, search for the turret on the roof - you will recognize it by the flash of the shots (picture above), the pair of enemies with RPGs on the roofs was standing on its left side. Shoot the turret till you destroy it. It is worth mentioning that it does not necessarily have to shoot, but it does not change anything - you'll locate it by shooting, because when you hit it, a characteristic cross will appear on the screen.
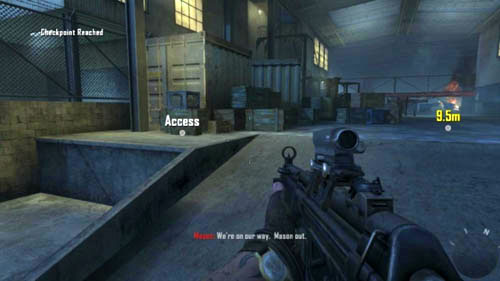
The first thing will be to obtain the Nightingale grenades. When you work your way through the courtyard at the beginning of the mission, go down the stairs and head for the building on the right. The grenades are on the left, in the box with a word Access next to the short stairs (picture above).
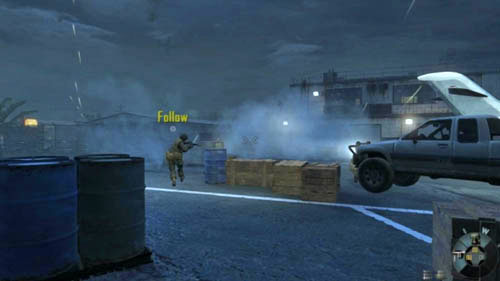
Now you need to use the grenades in a correct way. You could surely do it with the group of enemies behind the jet on the left (picture above). Unfortunately, you need these enemies to pass the challenge about killing 10 enemies with truck mounted MG, use it only after you've already passed that challenge. If not, see the paragraph below.
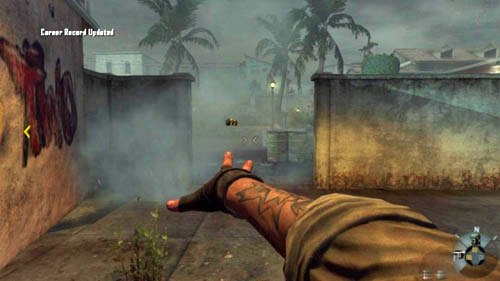
The second chance, less certain, will be when you arrive at the gate in the wall that is surrounding the park-yard in front of the church on the left (just to the left there is the entrance to the house with the second intel). First kill an opponent with a baseball bat. Next, start throwing grenades over the wall at different places (picture above). Try to throw at least one at the gate, while the other should be thrown higher, so that it lands further. If you have not received the message about passing the challenge, use a grenade to kill yourself and try again.
Attention! IR strobes cannot be refilled in ammo crates. After each use of such a grenade the game will be saved.

When after capturing Noriega you first go into the streets, go west all the time. After some time, you should notice a word Access on the metal gate, right in front of you. Mason and Noriega will hide on the left (picture above). Sprint up to the bars and press the use button to get inside. In this way you will get some IR strobes. Along the way, watch out for the soldier with an RPG who might be lurking in the building on the right.


Behind the body of the soldier, whose eyes you've just closed, there is a garbage can - quickly hide near it, make a 180-degree turn and throw an IR strobe at the building on the left (first picture above). A few enemies should gather here. A round from the allied helicopter will soon quickly kill them. Even before the round is over, start to go out backwards through the gate and at the same time throw an IR strobe into the opposite street on the right (second picture above). There are a lot of enemies and also a truck with a rifle, but after the round the street should be clear.
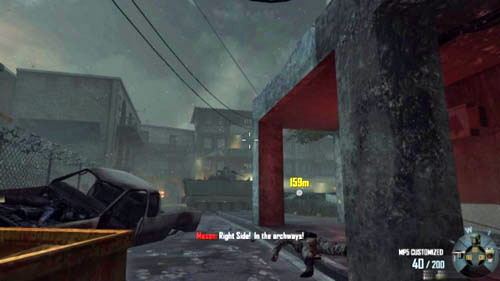
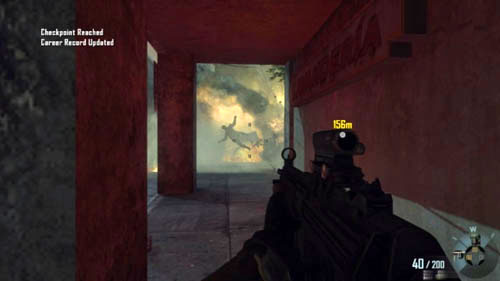
Throw the last IR strobe at the intersection. An allied vehicle will come out at it from the left (first picture above). Nothing will happen to it. Thanks to the grenade you will clear this place of all enemies. At this point you should have already got a message about passing the challenge (second picture above). If not, throw the last IR strobe at the square with a dome, which will collapse - just to the right, near the place where the abovementioned allied vehicle will stop. Another good place is the second square in front of the church, but it's better to leave it for the other challenge.
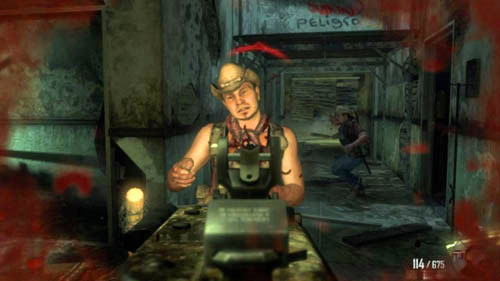
Contrary to appearances, it is a difficult, or rather onerous challenge. It's very easy not to pass it. Therefore, it's best to take a machine gun with enhanced clip and improved accuracy on the mission. When you get to the woman with the word Help, watch the cutscene ... and then immediately start shooting! The biggest obstacle here is your team-mate, who will also be killing your enemies. And this is what can deprive you of the challenge. Enemies will not only appear in front of you, but they will also be running out of the left and right doors. Be careful and don't let them kill you with blows (picture above)!
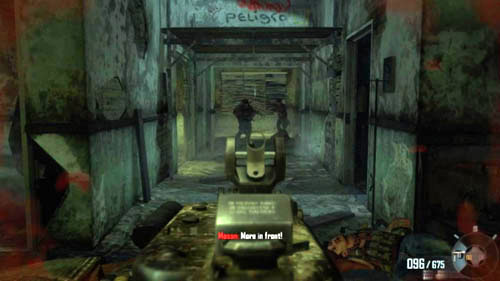
However, in the case of this challenge, death will be much better, because if you do not get it and all the enemies die, you'll need to play the mission again (the game will be saved before you can exit the mission). That's why it's a good idea to have a machine gun and the clip with 135 bullets. You'll be able to shoot endlessly and you won't have to reload (picture above).
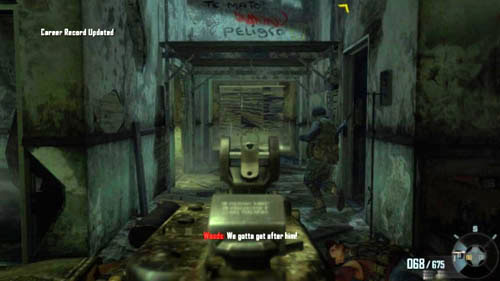
The message about passing the challenge (picture above) should appear with the death of the last opponent. If it did not show up, you need to repeat the mission.
See the "Intel" section or the description of a mission walkthrough to discover where you can find intel in this mission. Collect it all to pass the challenge.
You can simply run and not even shoot at the enemies (just watch out for those with RPGs) during the first part of the mission - on Recruit level. It's similar when it comes to the second part, however, you have to be more careful, because there are more enemies with rocket launchers. Do not kill civilians along the way, because you will fail. Everything would be fine, were it not for one of the final scenes where you have to escape from the helicopter's fire. It's extremely easy to die from it or jump in a wrong way and kill yourself in the street. Therefore, immediately after the start of the scene DO NOT SPRINT, just run normally and watch where you're going all the time. Perform the jump in the right moment and you should make it.
Attention! Make sure to take a machinegun (Light Machinegun), it will help you in a number of challenges. Take the EMP grenades as well.
Make sure to take a machine gun with some attachments (e.g., Enhanced Clip, increased rate of fire, scope). The quad-drones will be attacking in groups at several occasions, and each time try to destroy as many of them as possible.
The first opportunity will be at the very beginning of the mission. If you play on Recruit level, you do not even have to get down from the stage, because the quad-drones will not be able to kill you. Simply shoot at them as much as possible (picture above) before your allies take them out. There will be a lot of quad-drones here, about 10. Most will fly in front of the stage, and there are a few behind the gate where the first fight is taking place.
The second opportunity will be just after you've seen a plane crash and run into the door to the left of its cockpit. Hide by the next door and simply shoot at the quad-drones flying here and there (picture above). With a bit of luck, you will kill at least a few. If you play on Recruit level, then nothing stops you from getting out of concealment - thanks to that the chance of missing any quad-drone will be smaller and it will prevent your allies from destroying it.
The third opportunity is the last fight you'll have as Farid - namely, the courtyard connected to the street divided by the ramp. As soon as you run into the courtyard, destroy the ASD, then hide behind the boxes on the right and begin to eliminate the enemy quad-drones from there (picture above). Also see the description of the challenge about destroying eight quad-drones with the turret.
The last chance will be when, playing as Mason, you receive a message that the command takes away the quad-drones from you. Only then, the ones you have (with green light) will be joined by the enemy ones (with red light). It is worth to notice the two turned off quad-drones. One will be hovering (picture above) near the two soldiers on the roof of the building with the third intel. The other one is somewhere among the rocks on the left.
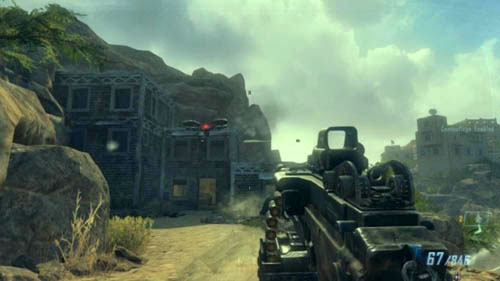
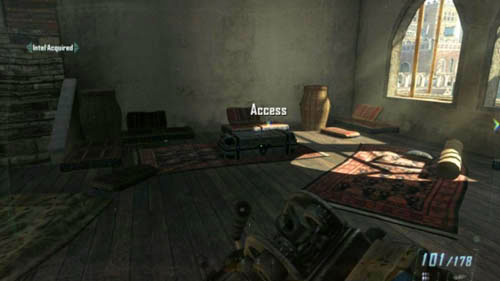
The majority of them will be by the building next to the bridge (first picture above), some will also be at the gate to the citadel (second picture above). If you are careful and accurate, you'll easily shoot 20 quad-drones on this level.
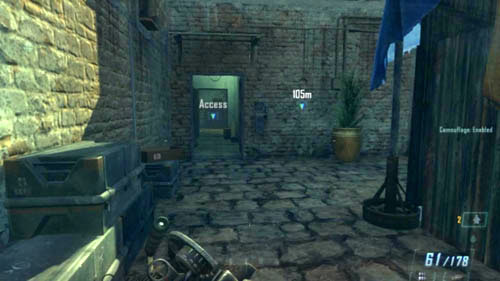
You will combine this challenge with the one below and it's best to perform both on Recruit level. First you need to get the sword. At the beginning of the mission come down from the stage and run up to the left wall, then look straight ahead - you should notice an umbrella. Run straight ahead, and finally a word Access will appear on the cabinet at a dead end (picture above). Open it to get the sword.
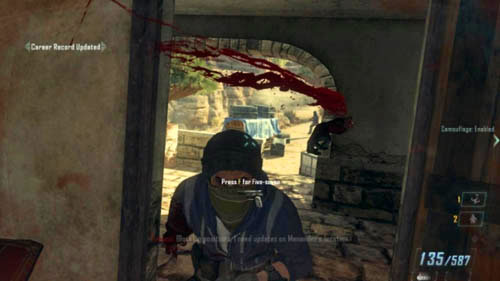
Now all you need to do is to kill enemies in melee till you get the message about passing the challenge (picture above). You have the whole mission to do it, so don't take any unnecessary risks and do not thrust yourself into the groups of many enemies. Their shots won't do much damage, however, their blows can easily knock you down even on Recruit level. All enemies count in this challenge - it doesn't matter if you kill them as Farid, or as Mason. If you are dealing with a group of enemies, it's best to run up to one and then quickly hide. The interior of the apartments will especially create favorable conditions to pass this challenge.
You will combine this challenge with the one above and it's best to perform both on Recruit level. First you need to get the optical camouflage. At the beginning of the mission, come down from the stage and run to the entrance to the right of the main gate. Turn right and then immediately left, on the stairs. Go to the very top. The optical camo will be in the box in the middle of the room (picture above).
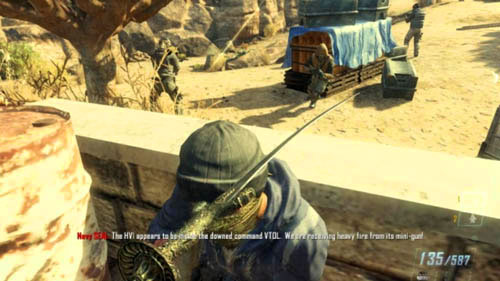
Now all you need to do is to kill enemies in melee till you get the message about passing the challenge (picture above). You have the whole mission to do it, so don't take any unnecessary risks and do not thrust yourself into the groups of many enemies. Their shots won't do much damage, however, their blows can easily knock you down even on Recruit level. All enemies count in this challenge - it doesn't matter if you kill them as Farid, or as Mason. If you are dealing with a group of enemies, it's best to run up to one and then quickly hide. The interior of the apartments will especially create favorable conditions to pass this challenge. Remember to always have optical camo on!
This challenge can be combined with the first one, which involves the destruction of 20 quad-drones by any means. Attention! Before you go to the turret, make sure that the area is mostly cleared of enemies. If it's not the case, your turret can quickly be destroyed before you can pass the challenge. Secondly, the more enemy fire, the more interference on the turret screen that makes aiming more difficult. The progress in retaking the area will be determined by the presence of your allies in specific places. They at least have to be on one side of the exit, as well as on the terrace above the ramp.
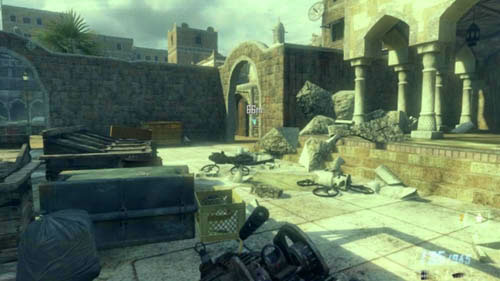

As Farid you'll get to the courtyard, where the first ASD will come. After a while the VTOLs will drop off a squad of soldiers. After clearing this area go through the right gate (first picture above) and stick to the right wall. Of course, watch out for enemies! After a while you'll get to the gate with a word Access. Open it (second picture above).
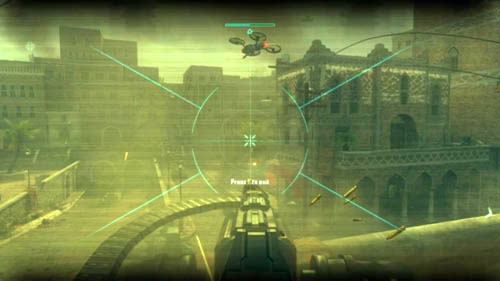
After opening the gate go the only possible way to the balcony, lie down by the turret and press the use button to start shooting. Look out for the quad-drones and take them out (picture above). If there's interference on the screen, it means that someone is shooting at you - maybe a quad-drone is flying somewhere and you can't see it. If you do not see any quad-drones, just wait for a while. They will be appearing until your allies take control of the whole place.
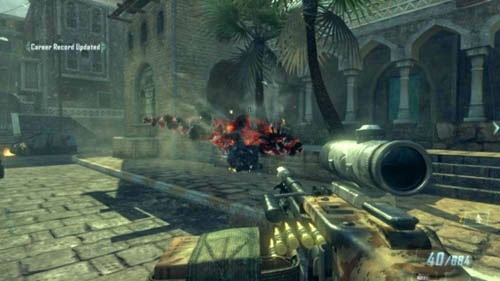
Make sure to take a machinegun with some attachments (e.g., Enhanced Clip, increased speed of fire, scope), which will make destroying the vehicles faster. At the beginning of the mission, when you get to the tower with the intel and optical camouflage, get at the scaffolding through the window. Start looking at the battlefield, and if at least one opponent stands by one of the cars, immediately destroy the vehicle (picture above).
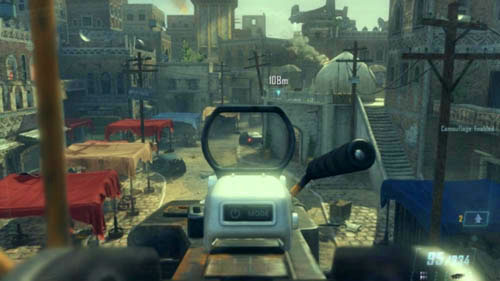
If no enemy is by the vehicle, then wait patiently until one stands there. You can destroy at least a few vehicles from the scaffolding. You will hit the ones that are further away by standing on the left side of the scaffolding (two are in one line) (picture above).
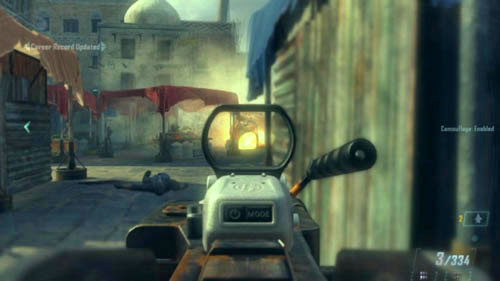
In the courtyard there is yet another vehicle but you won't be able to hit it from this position. You need to get to the left side of the courtyard, and then look exactly to the right. Stand against a wall and shoot at the vehicle facing you (picture above). At this point, with a little luck, you should have already passed this challenge.
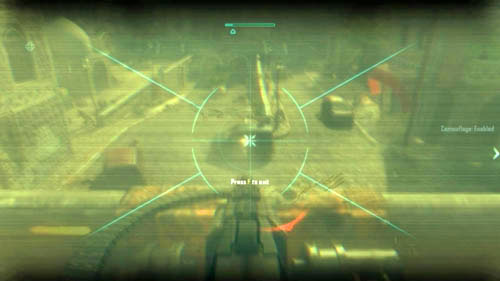
If, however, this did not happen, you will have a second place with a few vehicles. Yet, the problem is that this place is also the action area when it comes to other challenges. The vehicles are in the big square with the road leading down just in front of the door, which will end your game as Farid. It's best to destroy the vehicles with the turret (picture above). See the description of the above challenge for detailed information about how to get to it.
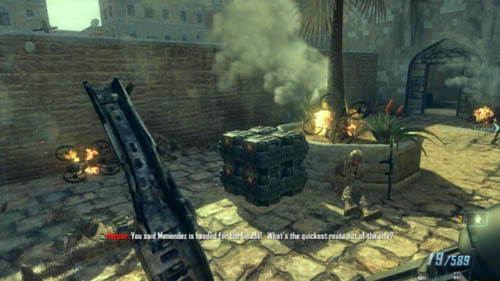
To even be able to pass this challenge, make sure to bring the EMP grenades. A machinegun will also be useful. When playing as Farid you enter the long terrace, you will have to get to its right side. At the end of the terrace, turn left. You should find some ammo crates (there will be a soldier lying on the right) (picture above). It is very important because this is where you can refill EMP grenades. Right after that you'll get to a small courtyard joined with a big street. There are about 5 to 6 ASDs.
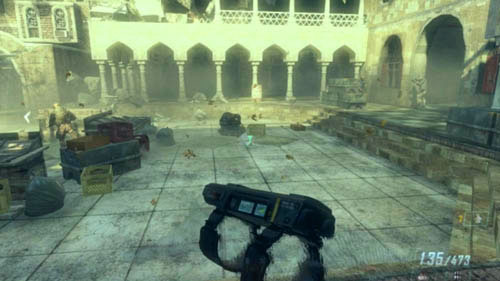
One ASD will appear just on the very small courtyard. Throw an EMP grenade at it (picture above), and then take out the machinegun and shoot the robot until it explodes. Unless you want to be tricky and try to turn off two robots with one grenade, simply go back near the ammo crates to take three EMP grenades again.
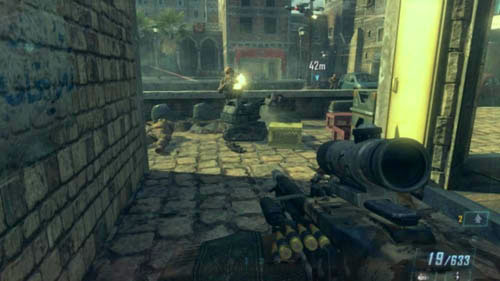
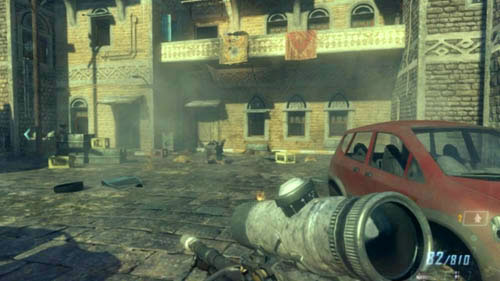
The trouble with the next ASDs is that they're surrounded by a lot of enemies, and they - even on Recruit level - can harm you not as much as with shots, but with blows. Therefore, if you see an ASD, first try to clear the area, and then get rid of the robot. At least two ASDs will be near the rails above the ramp (first picture above). You can also search for ASDs between the cars on the right side (second picture above), and downstairs - at the ramp that divides the place in two parts.
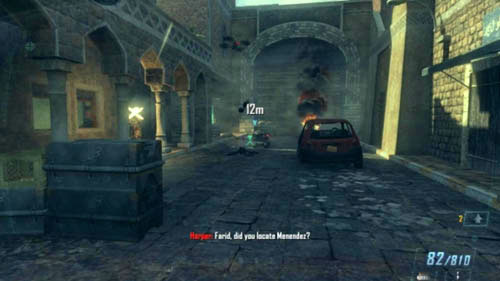
Apart from that, there are the last two sure places with ASDs. You'll find the first robot on the other side of the ramp, opposite the gate connecting the courtyard with the street. It will be hanging around near the two palm trees (first picture above). The second robot is at the end of the blind alley on the right (second picture above), by the door that you need to open to get to Menedez.
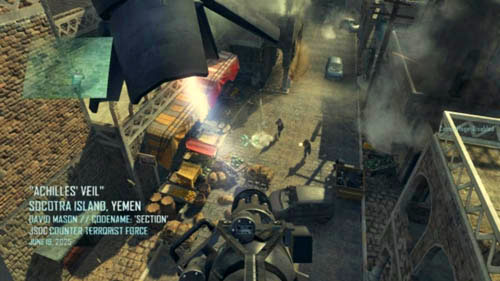
You can only pass this challenge when you choose to shoot Menendez, not Harper. After the cutscene you'll be taken on VTOL board and you'll be able to wreak havoc with the VTOL turret. Start shooting immediately. You have to finish five enemies off - some are in the street next to the car (first picture above), the rest is hiding on the roofs on the left and right. Look out for enemies and kill them until you see the message that you passed the challenge (second picture above). It is not difficult, you just need to be alert and sharp for a short while.
When you play as Mason, you will have quad-drones at your disposal. You must point and lead 25 enemies to die and you do it similarly to the way in the fifth mission when you were marking the targets for the CLAWs.
At the beginning you will not have many opportunities, but still, look out for enemies in the windows and on the roofs on the right side of the street, and also direct the quads into the buildings, through which you'll be passing on the left side of the street. It is best if you "fight" only with quad-drones during this part of the mission till the one described below (picture above). However, it will be difficult to kill some enemies this way (e.g. the one standing on the stairs in the building with intel). Use the rifle as a last resort.
When you get to the end of the street and you have a large building in front of you (picture above), make sure to use quad-drones to kill the enemies on the roof and on the balcony. Let your flying robots also kill the targets downstairs. Then clear the very building of enemies.

Right behind it, there is a quad-drone paradise - a lot of enemies in the open area (picture above). Mark the targets and hide. The challenge should be passed right here.
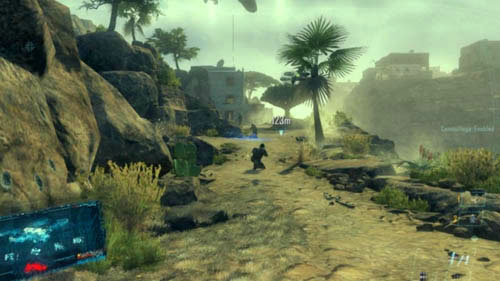
If it isn't, just continue to fight with quad-drones. There will be a lot of open areas and a lot of enemies, especially on the way to the building with the third intel (picture above). Simply keep fighting only with quad-drones until you get a message about passing the challenge. But as soon as you arrive in the vicinity of the very building, the command will make you no longer able to control the quad-drones. That's why, you need to pass the challenge before that.
See the "Intel" section or the description of a mission walkthrough to discover where you can find intel in this mission. Collect it all to pass the challenge.
This is not a difficult mission. Just be careful not to shoot at the allies, and also not fall into a group of enemies that can you beat you to death (their shots will not really harm you on Recruit level, but their blows will). Do not stand near the vehicles as you could get killed quickly when it explodes. When you play as Mason, also watch out for enemies with RPGs, as well as for grenades. However, there will not be that many of them and you will handle them - just be careful and if you see a grenade, run away as fast as possible.
Make sure to bring a sniper rifle (or the Storm PSR Gun Special of the Special section if you unlocked it) and EMP grenades.

At the beginning of the mission, when you are armed and go out into the hallway (there's a turret on the ceiling), use the first entrance on the right. Exactly in front of you there will be a door that you should open (first picture above). Take a piece of paper from the chest of drawers (second picture above), which will mean passing the challenge.
As soon as you get out of the interrogation room at the beginning of the mission and you have to arm yourself, look at the desk on the left. There is a chest there, with a word Access (picture above). Open it to take combatant suppression knuckles. Unlike in the previous missions, when you rarely used melee, here, on the ship, among the narrow corridors and alleys, it will be the other way round.
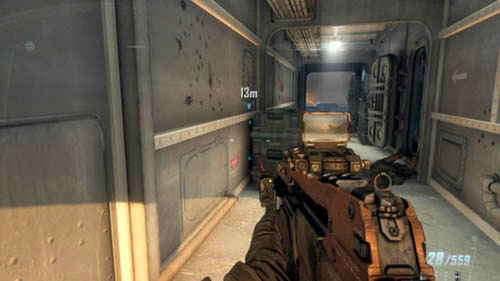
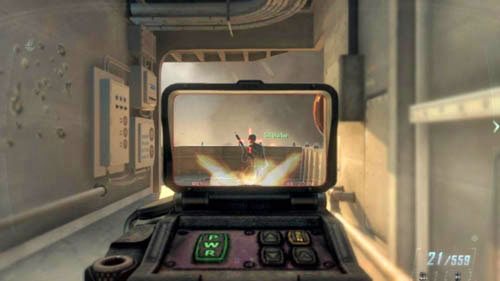
What is more - there are several places that ensure a smooth challenge passing even on Veteran difficulty level. When you split with Salazar and step outside, clear the corridor on the right, but don't kill the last enemy in one of the cabins on the right. Hide behind the boxes on the left in the corridor (first picture above) and kill your ally if there is any behind you, because he will only disturb you (second picture above).
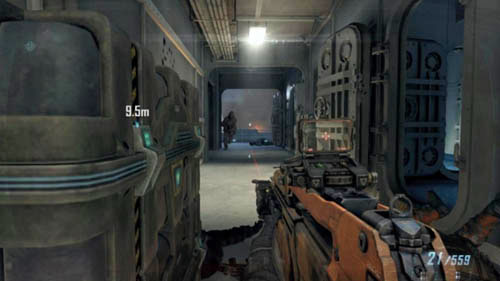
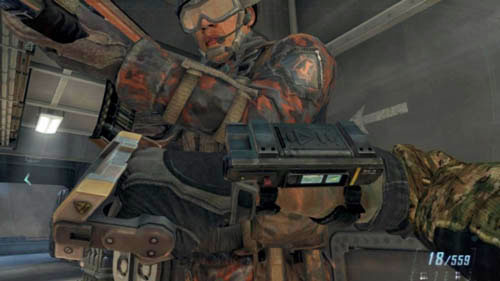
Start to walk near the abovementioned boxes. Every few seconds a single opponent will be running into the corridor (first picture above), and you only need to hide behind the boxes and wait for him to come running straight to you. Hit him to incapacitate him (second picture above). Repeat the action until you see the message about passing the challenge.

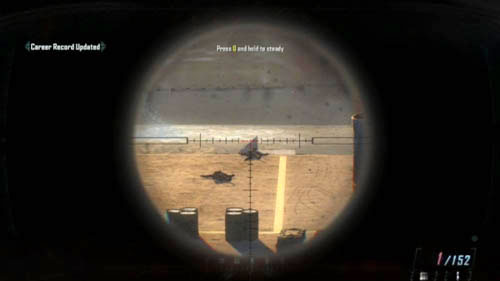
This challenge is part of the mission, so you can't miss it. Your task is to eliminate opponents, and if you want to pass the challenge, you have to do it quickly. They will be climbing the stairs at the end of the landing field on the left and right (first and second picture above) and hiding behind the line of crates and barrels. Bullets will fly through some of the covers, so keep that in mind. The allied SEALs will attack from your side and they are the ones you need to protect. Look around the abovementioned line and then keep looking at the stairs on the left and right. The more enemies you kill, even before they have a chance to hide, the better. Remember to hold the hold breath button before each shot, which will greatly improve your accuracy. If you still can't manage to do this challenge, get better weapons - a Storm PSR of the Special category will greatly facilitate passing the challenge, as it allows you to shoot through covers and also highlights the targets.
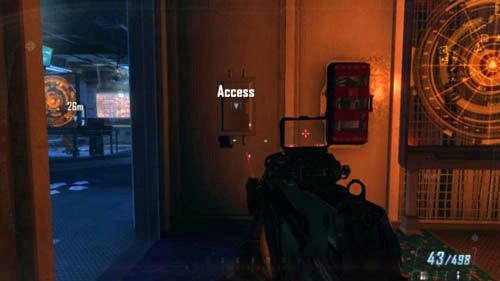
When you split with Salazar and step outside, clear the corridor on the right. Kill all the enemies and then open the half-open door on the left. Destroy the turret to the right and kill the enemies in a short hallway, then use the first entrance on the right. Go forward and look left. You should notice a security box with a word Access (picture above). Quickly run up to it and press the use button.
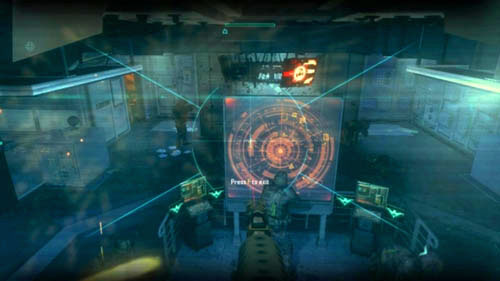
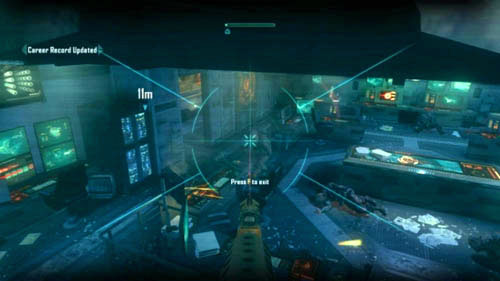
First, kill the ones you can see (picture above). Pay particular attention to the orange-lit door on the left - that's where your character is standing, so if you see any enemy there, make sure to kill him. Then make the turret make a 180-degree turn. Deal with the rest of the enemies behind the tables and chairs. New ones will be running through the door on the left and right (second picture above), so you don't need to worry that you'll run out of them. Shoot until you get the message that you passed the challenge. But don't overheat the turret! Take half-second breaks between the rounds.
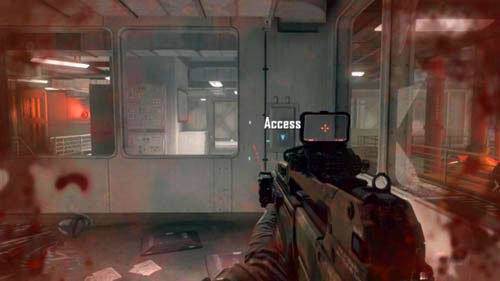
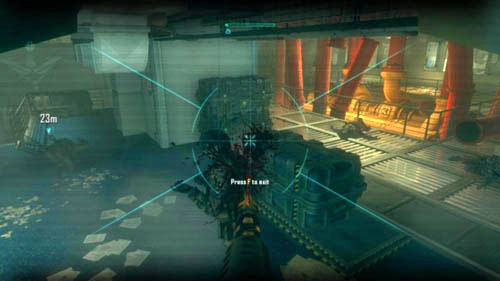
If the enemies somehow managed to destroy the first turret, there's another one. You'll access it after you've entered one of the rooms (exactly opposite the entrance to this room there are stairs you'll use to get downstairs). Use the security box with a word Access (first picture above), and then pass the challenge with the second turret (second picture above).
To even be able to pass this challenge, make sure to bring the EMP grenades. Each turret you'll come across should be treated in the same way - first throw an EMP grenade and shoot with the sniper rifle. Remember that when throwing an EMP grenade it's very easy to get hit with interference. Still, it's not that terrible. Since you have only three grenades, each of them must be used - you can't, for example, use two on one turret.

The first turret will be at the beginning of the mission, when you open the door after arming yourself (picture above).
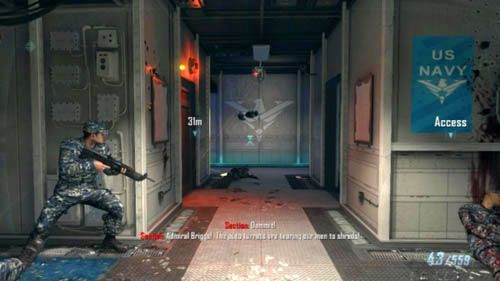
The second will be a bit further, when you split with Salazar, go outside, defeat enemies and go back inside. It will be just around the corner on the right, in the short corridor (picture above).
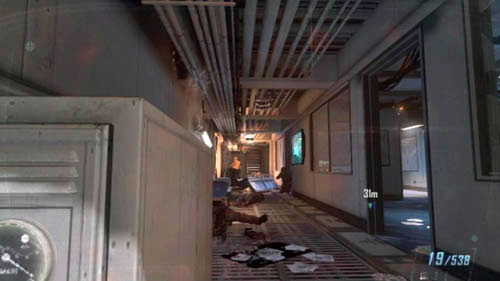
When you protect the SEALs and go down to the room below, clear it and then go down the next stairs, the third turret will be in the long hallway to the right (picture above).
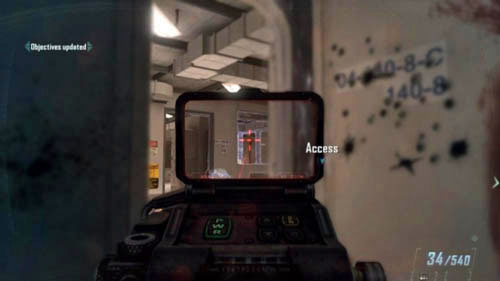
And finally, you'll find the fourth when looking through the door to the room, in front of which there are stairs leading to the top (you will go down them). In this room there's also a security box to the second turret you can use. You will see the one you need to disable and destroy through the window (picture above).
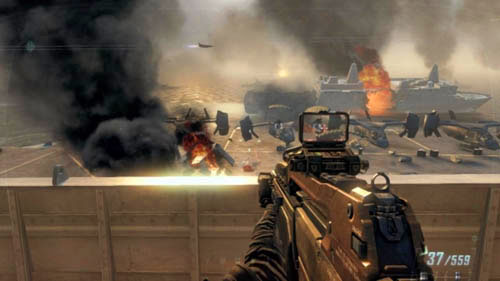
When you split with Salazar and step outside, clear the corridor on the right. Kill all the enemies so that no one disturbs you. Go back to the balcony and look at the board. You should see a few spots at which enemy soldiers are arriving in jetpacks and then opening their parachutes (picture above).
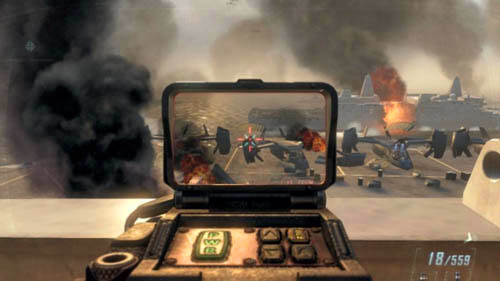
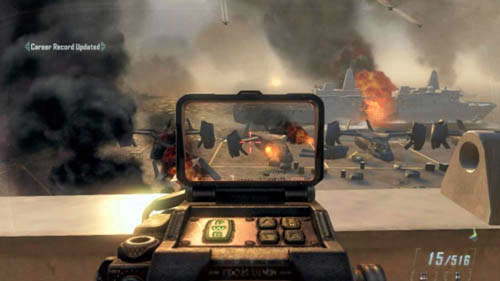
Now you have to kill eight enemies before they land. Aiming at them when they're flying can be difficult, so it's best to try to shoot them when they're opening the parachutes and during their landing (for a few seconds) (first picture above). Contrary to appearances, an ordinary assault rifle will prove much more useful here than the sniper one, simply because the targets are moving too fast. You should be able to also see if you managed to hit or not - after you've killed an airborne enemy his jetpack should explode. Kill the airborne enemies until the message about passing the challenge appears on the screen (second picture above).
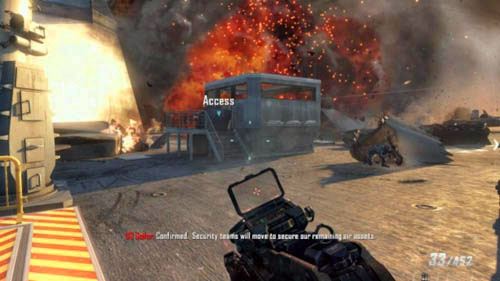
This challenge excludes the one below. When near the end of the mission you use a big elevator to get on board of the aircraft carrier, immediately go left, to the small building. After a while, there should be a word Access on it (picture above). Go up the stairs and move the rubble to get inside. Mason will run the CLAW, which will appear in front of you. It will be coming its own way, but you can mark targets for it. You have to kill five enemies this way.
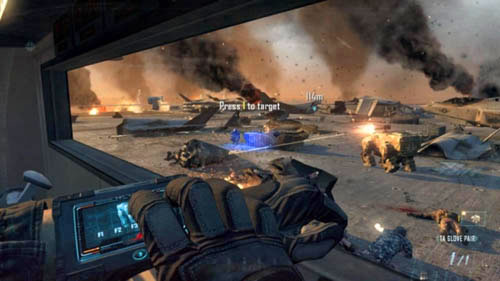
It will be easy because the enemies appear on the board endlessly - all you need to do is to be sharp. With a bit of luck, you will pass the challenge not even leaving the small building. Here, at least, you're safe and it's easy to look for targets (picture above). If it did not happen like this and the CLAW went too far, simply move along with it and look for opponents. But do not confuse them with your allies.
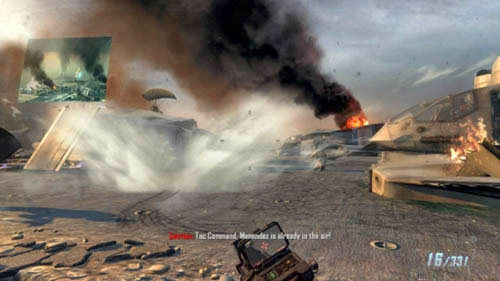
A very easy challenge, but it excludes the one above. It's best to do it, as well as any other when the time is involved, on Recruit level. The counter starts when near the end of the mission a big elevator takes you on board of the aircraft carrier. Try to immediately kill the soldiers there and then just run as fast as you can to the target. Kill only these enemies who stand in your way. If you want to make the escape even easier, use the smoke grenades (picture above).
See the "Intel" section or the description of a mission walkthrough to discover where you can find intel in this mission. Collect it all to pass the challenge.
An easy mission to play on Recruit. The enemies will rarely throw grenades at you and you do not have to worry that you'll fail if you kill any of the allied troops. The only thing you have to watch out for are the opponents' blows - taking the level design (lots of tight corners) into account it's very easy to die in this way.
It is a part of the mission, so you can't miss it. Similarly as in the fifth mission, you need to point the target with the cursor and after the rocket has been launched it will hit it by itself. This time, you can simultaneously mark six targets. However, to pass the challenge none of your rockets can miss. It can happen in two cases - when you fire at the drone flying over you and the rocket does not have time to fly to its target, and when it accidentally, when flying towards the target, crashes on the vehicle roof, where the SAM turret is mounted. You can fire six rockets at the same time, and the drones are flying in groups of six.
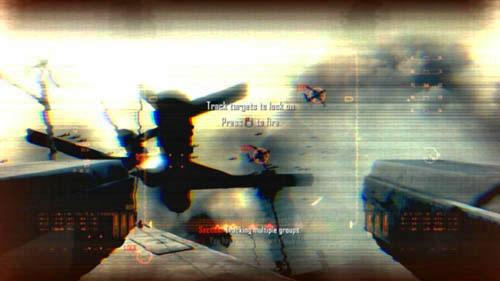

First of all, DO NOT SHOOT at the beginning. Instead make a 180-degree turn to the left. It's very easy to miss here, that is, the rocket won't get to the drone that is flying directly over you. Therefore it is better to turn around, and then all the drones flying over you will be marked automatically (first picture above). When you have selected all six, move the camera slowly to the right and fire the rockets. From the upper right corner of the screen (second picture above) there should come the next group of six drones. Select them and fire six rockets, then slowly start to turn left.
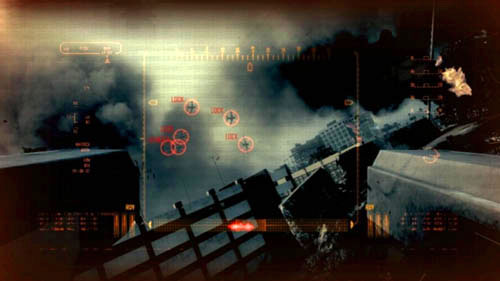
The third group will fly out of there (first picture above). Vigorously rotate the turret to the right. Right next to the back of the roof of the vehicle you're on, you should see the fourth group of drones (second picture above), coming out from the left.
Again, vigorously start to rotate the cannon to the right. The fifth group will fly out from there (first picture above). And turn right for the last time to see the sixth and the last group of drones (second picture above).
If managed to mark them and fired only when the drones were far away from you (which guarantees that you'll hit), the challenge will be passed. The message about passing the challenge will appear only when then cutscene with the plane is over and when you regain control over the character (picture above).

When you've passed the challenge above, then after the cutscene run up to two texts and select the one on the left ("CHOOSE SNIPER"). Your task is to perform 10 headshots. It is best to choose those enemies who are standing still and not shooting - such as snipers (first picture above) or heavy machine guns operators (second picture above). During the sequence there will be four snipers (the first right at the beginning and three later, on the upper highway in front of you) and three heavy machine guns operators on trucks (the first is down on the right, the second down on the left, and the third is on the opposite upper highway).
Three targets will remain and you must select these from the soldiers standing at the bottom. It will not be difficult, as many of them are standing motionless behind some covers (picture above) - remember to charge the shot when the head of one of them is completely covered.
It is worth adding that on Recruit level, the allied agents downstairs can be so efficient that they will eliminate your enemies before you manage to score 10 headshots (on the other hand, on Veteran difficulty level it will be quite the opposite). In this case, kill the heavy machine gun operators on trucks as the last ones - their fire will engage the agents long enough for you to easily pass the challenge (picture above).

When you wake up after the second truck has crashed yours and then you destroy the opposite CLAW, there will be a truck trailer you can enter just on the left. Do it and cut the grate at the end (picture above) to get support from one rocket firing quad-drone. Before you do that, however, destroy the second CLAW. Otherwise, your quad-drone will soon share the same fate.
Start the mark the targets with it (picture above). There are a lot of enemies here, you should especially try to mark groups of enemies, balconies and windows of the building on the left. The problem is that there is only one quad-drone and sooner or later, depending on the difficulty level, it will be destroyed. Of course, the sooner you are able to pass the challenge, the better - and it is possible to pass it with the help of this very quad-drone.

Do not worry, though. When a little later you get to the mall, you will have new quad-drones to use and this time you can use them indefinitely. There are enough enemies in the shopping center (picture above). Therefore, if you haven't passed the challenge yet, fight only with quad-drones until you pass it. Just in case, do the challenge below after you've passed this one - to prevent the agents from "taking away" your enemies.

When you wake up after the second truck has crashed yours and then you destroy the opposite CLAW, clear the street of all enemies and the rest of the CLAWs. Only after the allied police officers have moved in the vicinity of the shopping center, can you safely start doing this challenge. To do this, look at the center's square - on the left there is an entrance leading inside, and on the right an overturned MRAP with a word Access (picture above). Open the locked exit on the roof of the truck to free the two agents and you'll pass this challenge.
When you enter the mall up the stairs, immediately look left. You'll notice the double doors and a word Access nearby (first picture above). Open it, go up the stairs to the roof and then move closer to the SAM turret to start using it (second picture above).
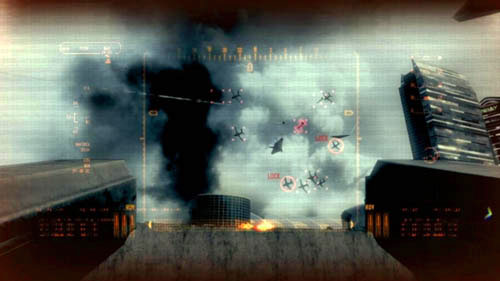

From now on, the durability of the SAM turret will depend on the difficulty level, and also - which should be obvious - on your ability to search and mark targets. While the previous groups consisted of six drones, now each new group will be bigger (first picture above). Your task is to survive long enough to destroy the thirty quad-drones. The message about passing the challenge will appear right before the exit to the roof (second picture above), after the turret gets destroyed - and it will happen, sooner or later. Mark the drones, shoot and immediately search for the next ones turning around vigorously. When the group of drones will be bigger than six units, mark and shoot, and then instantly repeat the action.

Walk through the mall and go down the stairs to get to the terrace. Then, turn left and go to the mission marker. The G20 vehicle will be in front of you (first picture above). Immediately aim at the roof of the building with the Storm PSR Gun, in the background of which is the front part of the vehicle. There will be two enemies with RPGs (second picture above). Eliminating them will mean passing the challenge.
To even be able to pass this challenge, you'll need Skyburst rockets. Unfortunately, a bug in the game makes it impossible for you to always use them (you shoot the rockets by pressing the second grenade throw button). If the message didn't appear during the first playthrough, try to replay the mission on a different difficulty level (e.g., if you played the mission through on Veteran, then replay it on Recruit). If that does not help, try to play the mission through on the same difficulty level again. If the message appears, it means that you can use the rockets (picture above).
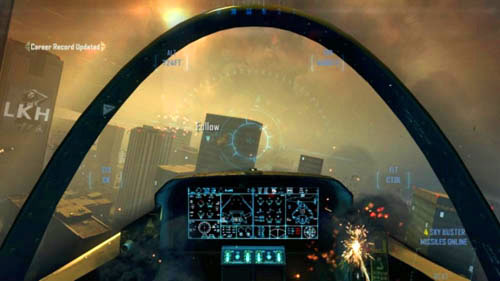
Then, the challenge will be easy to pass. From among the group of drones you just need to mark one, somewhere in the middle, especially if you are not far behind them (first picture above). An even easier way is to use the rockets always whenever they're available. If they are not, use the ordinary ones to make sure that you pass the challenge below (namely, destroy the drones before they destroy any of the G20 vehicles) (second picture above).
The durability of G20 vehicles depends on the difficulty level. Assuming the equal effectiveness in destroying enemy vehicles and helicopters, and the drones later, passing the challenge on Recruit level will be almost automatic - while on Veteran difficulty it can be extremely hard. If you play the mission on Recruit, the challenge should be passed. You will receive the message about passing it once you've ejected and landed on the ground (picture above).
See the "Intel" section or the description of a mission walkthrough to discover where you can find intel in this mission. Collect it all to pass the challenge.
You will easily perform the first part of the mission (firing at drones, sniper support and driving the truck). In the second part, however, you can easily die while working your way through the mall. Even on Recruit level, you can quickly die when many enemies are shooting at you at the same time and when they have the CLAWs. To make matters worse, there are vehicles near the mall. If they explode (and if you're too close) you'll die, and if you come closer, you'll be flooded with grenades. This is the reason you shouldn't move recklessly in the street. Instead, slowly eliminate all enemies with the Storm PSR Gun. It will be easier inside the shopping center, but later you'll need to be careful again - you can get killed by shots coming from many sides, so once more, clear the area and only afterwards move to your destination. There won't be any trouble in the case of the air jet, just don't fly away from the battlefield.
Make sure to take EMP grenades with you.
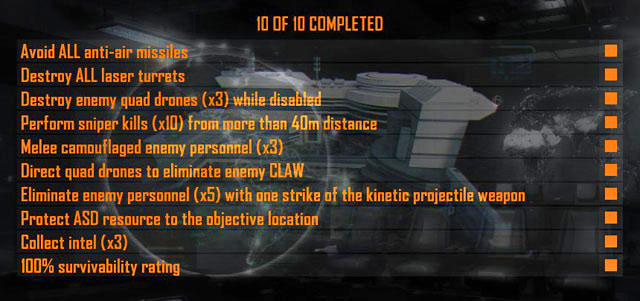

To pass this challenge, at the beginning of the mission you can't even get hurt once by the clouds of fire that are formed by the opponent's bullets (picture above). You can move left, right, forward and backward (also diagonally). The sequence begins only after the first flash of the screen - it's then that you need to avoid the clouds. They appear in different places each time, so you need some luck as well dexterity. For example, at the beginning you can move to the left and back to a maximum and then fly forward and right, this way you can avoid most of the clouds. But be prepared to change the course if you notice that you've flown into the fire.
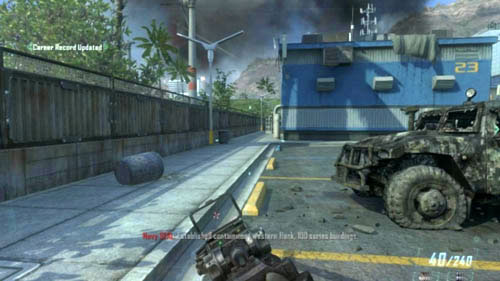
If you notice a familiar red on the screen caused by injuries, immediately start the mission all over again. On Veteran / Hardened levels there is another method - simply fly straight into the next cloud to die. The checkpoint is just after the first flash. When there's another flash and when the screen turns gray for a moment, you can stop being careful. Watch the cutscene of the landing. The message about passing the challenge will show up only when you regain control over Mason (picture above).
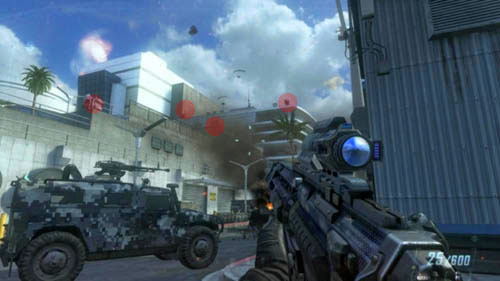
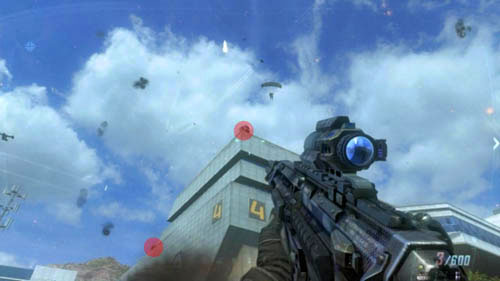
A very easy challenge. To pass it, you must destroy six laser anti-aircraft turrets. If you stand a few meters in front of the long staircase at the beginning of the mission (clear the area before that) and look right, you'll see four turrets marked with red circles (first picture above). The other two are on the white building on the left (second picture above).
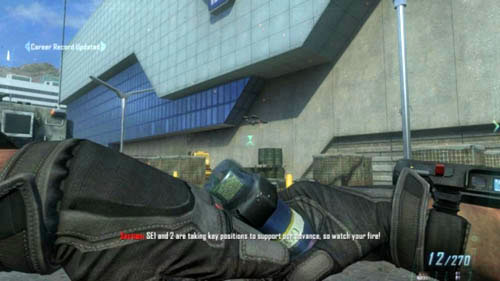
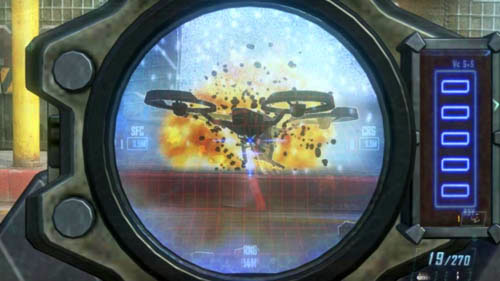
There are a total of two places with quad-drones and in both cases your allies will disturb you, as they, and not you, can destroy both the full-working enemy quad-drones as well as those already turned off. In the first case, it is best not to destroy the enemy CLAW - let your allies take care of it while you'll be throwing EMP grenades (first picture above), searching and destroying the quad-drones on the ground (second picture above). In the case of the latter, you must hurry, because the quad-drones will be turned off for just a few seconds. On the other hand, do not come too close to them, because even the explosion of a turned off quad-drone can severely injure or even kill you.
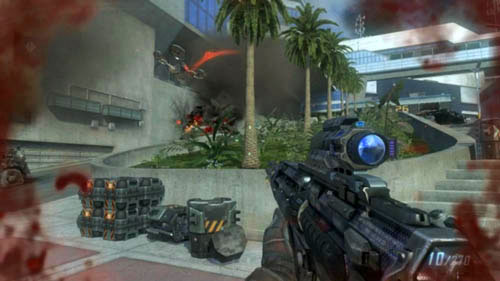
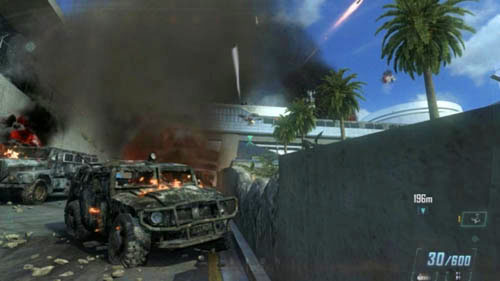
In addition, do not throw EMP grenades too close to each other, because the interference will make it more difficult for you to find and destroy the turned-off quad-drones. Near the long stairs there will be about 4 to 5 quad-drones. In front of the stairs there's an ammo crate where you can refill EMP grenades (first picture above). The first quad-drones are flying in the crate's vicinity (two will come out from the left when you are approaching the stairs), the further ones are over the strip of green with the palm trees that is dividing the stairs (second picture above). If you turn off two quad-drones with one grenade, then after the destruction of the first robot don't destroy the other - you might not make it before it's turned on - throw an EMP grenade again.
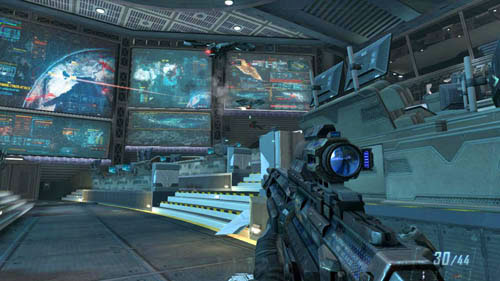
You will have the last chance at the military center, when you get to a large room with monitors on the walls (picture above). There are a few quad-drones there, but again you have to watch out and not let your allies destroy them.

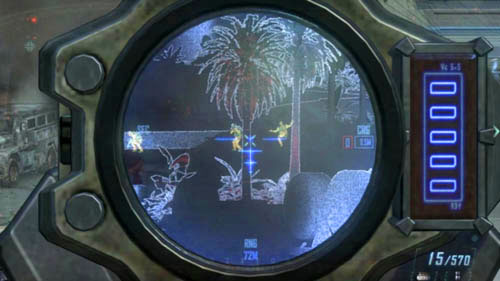
There are several opportunities to collect 10 sniper kills this way that do not interfere with other challenges. First of all, take out the four soldiers with RPGs standing on two floors behind the long stairs (first picture above). When you clear the ground floor, don't shoot at the enemies at the top of the stairs, instead, back away to a maximum - first, stand under the fence in front of the stairs and then search for the soldiers and take them out one by one (second picture above).

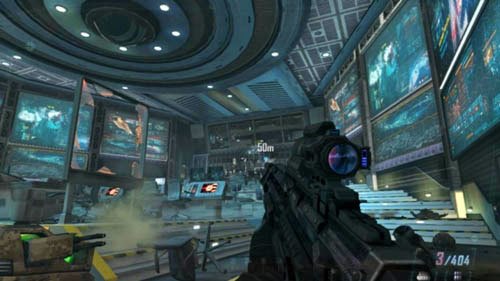
You'd better leave the other groups of enemies, larger and located away from you, for the challenge connected with killing 5 enemies with one strike of the kinetic projectile weapon. Only after you've passed it, go back to performing sniper kills. However, there are at least two occasions, which don't interfere with the aforementioned challenge - the first is right in front of the entrance to the military base (first picture above), where there will be a lot of soldiers whom you won't hit with the kinetic weapon. The second opportunity will be inside the military base, in a conference room with a lot of monitors. Go to its other end so that the mission objective marker is 50 meters (second picture above) and shoot the enemies.
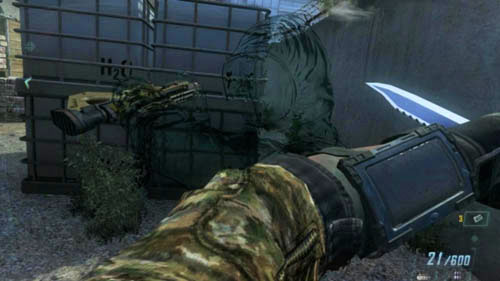
There are three opportunities to pass the challenge. The first is when you went the first long stairs and when as the next path you choose not the next stairs but the construction site on the left. There will be many camouflaged enemies there, so you'll easily kill three in melee (picture above).
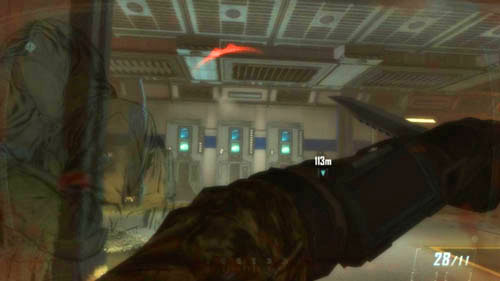
If not, the next opportunity will be after listening to Menendez's recording. When you clear the first corridor and climb the stairs to the left, there will be a network of rooms behind the next, perpendicular corridor. There is another group of camouflaged enemies hiding there (picture above).
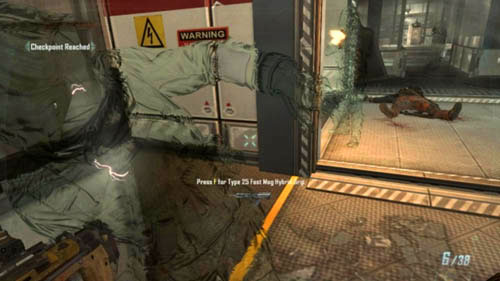
The last group is to be found after you clear the network of rooms and go in the vicinity of the stairs leading down. The first enemies won't be camouflaged, but the next ones will (picture above). The camouflaged enemies will be the last you'll kill before the final scene in the mission.
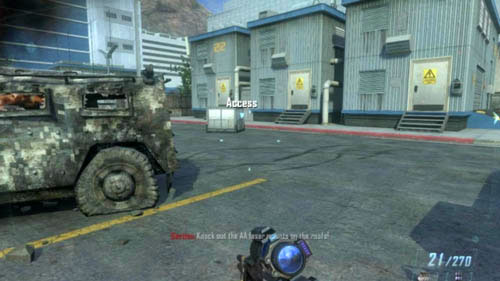
Immediately after landing start to run forward, along the fence on the left. When you pass the blue-and-white building, you'll reach the parking lot. On the right there will be a box with a word Access (picture above) - open it to get the quad-drones support, necessary to pass this challenge.
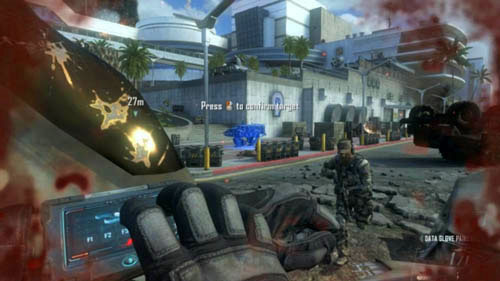
Now you just need to find a CLAW and mark it as the target. You have three attempts. The first CLAW is standing right in front of the long stairs leading to the military facility (picture above). However, it's likely that you won't manage to destroy it because your allies will do it (for example, when you will be hunting the quad-drones - see one of the challenges above). In addition, if you pass this challenge, you will lose the quad-drones support.
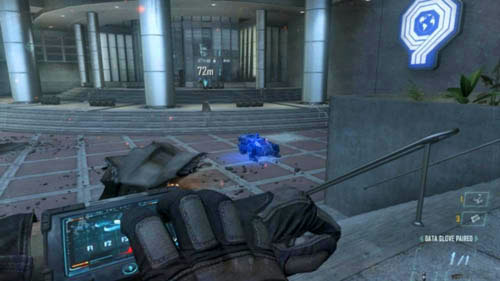
That is why, it's a slightly better idea to wait for a moment till you are right near the entrance to the military base. A lot of soldiers will be defending the entrance, as well as two CLAWs in front of them. Point at one of them (picture above) and wait, if you must, keep marking it until you succeed. The challenge should be passed.
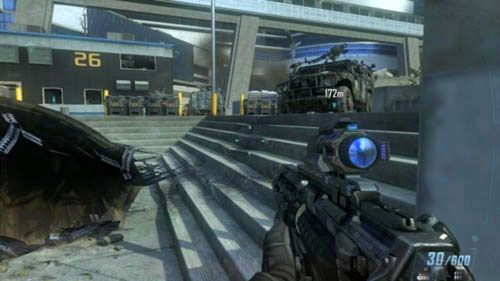
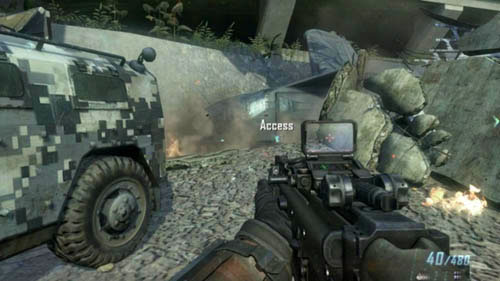
Locate the building number 26 (first picture above) (watch out for the minigun in the window on the right) and clear it of the opponents. Exit through the door on the other side. Turn left and run up to the plane wreck with a word Access (second picture above). Open the door. Thanks to that you will acquire a kinetic weapon, allowing you to send an extremely powerful beam of energy from the sky. You have to use it to kill five enemies simultaneously, but watch where you aim, because if you accidentally kill your allies, the mission will end in failure.
For this reason, the construction site will not be a good place, because if you want enemies to appear there, you need to enter it, and then your allies will enter, too. Instead, make the snipers appear on the torn-away corridor upstairs (just get closer to the construction site). If there are five, mark the end of the corridor (first picture above) and wait for the beam (second picture above). If you hit the roof of the corridor, you will not kill enemies - aim at the column. If you haven't passed the challenge, you have two more opportunities. Clear the construction site, and then go up the short stairs that branch from it. Quickly retreat and locate a group of enemies behind the construction site.
The second opportunity will come up when you make the two jeeps with machine guns appear at the entrance to the stairs on the right. Quickly retreat, go to the roof of building 26, and then aim with the beam in front of building 27 (picture above).
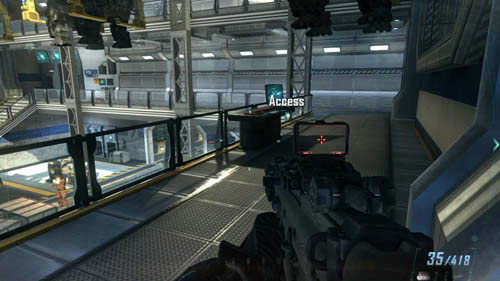
When you enter the military facility and after a while you come across a big, two-story room where the CLAWs are going from right to left, immediately turn right. Run up to the corner and turn left, and you'll get to the panel with a word Access (picture above). It will run the ASD, which will be on your side. However, do this only AFTER you've destroyed the three enemy ASDs (two more will come out if you destroy the first one and enter the corridor below). If you start the ASD too early, the enemy robots will destroy it and the challenge will be lost.
See the "Intel" section or the description of a mission walkthrough to discover where you can find intel in this mission. Collect it all to pass the challenge.
This is the only mission that is really hard to play through on Recruit level without a single death. If at the beginning you fall in the clouds of fire two times in a row, you'll die. Later, there are so many enemies that you can't just run between them (in previous missions it was possible), because they will beat you to death. Moreover, if you are within view of the heavy machine guns on the enemy jeeps or enemy CLAWs too long, you'll surely die. Later, inside the military base, there will be a little less enemy robots except for three ASDs. But the real nightmare of this mission are the grenades - there will be plenty of them here. It's extremely easy to run on a grenade, even by accident, for example when running away from the other. That is why, move very carefully, both outside and inside. Make sure to also kill the two soldiers at the end of the mission - don't waste your time on aiming, just shoot, because if you do not hit any of them, you'll fail.


When at the beginning of the mission you get off the transporter and fight a little, and later when the very vehicle stops, look at the vehicle lying on the side on the right side of the battlefield. There is a message on it with a word "Access" (first picture above). Head over there and look at the bomb crater on the right side of the vehicle. You will find intel (1/3) there (second picture above).

After you've destroyed all the boats (your partner will tell you about it) do not go to the container where Woods is. Instead climb the ladder on the left to get to the upper part of the barge. Look for intel (2/3) lying to the right in the corner behind the dark fan (picture above).
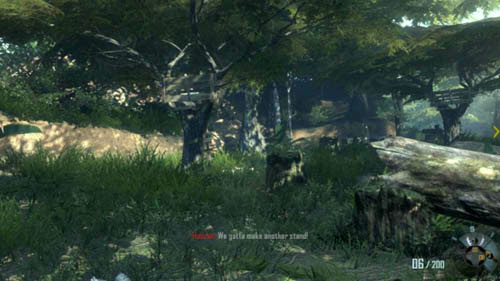
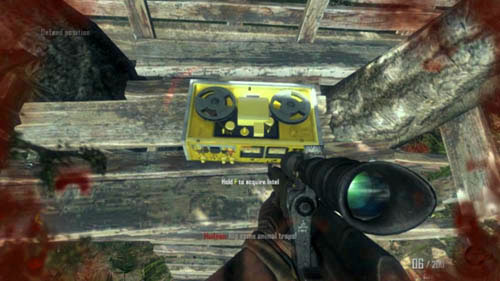
When you meet Menendez and escape to Hudson and Woods, you'll need to fight for a while until Hudson throws a smoke grenade. Leave your position and run through the stream. Go left, to the tree with a ladder to the left of a fallen trunk (first picture above). At the top you will find intel (3/3) (second picture above).

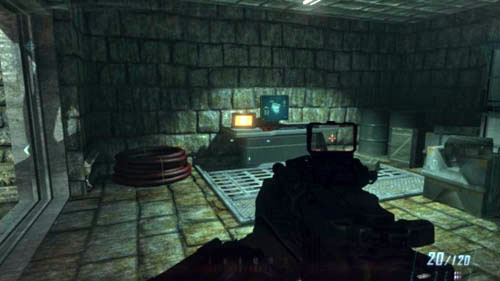
When at the beginning of the mission you get to the helicopters airfield, run between the helicopter wreck on the right and the wall on the left. An opponent will run out of the room on the left (first picture above) - once you've finished him off, quickly hide in the place from where he ran out - stand on the left side of the door and look around the room. At one of the tables you will find intel (1/3) (second picture above).
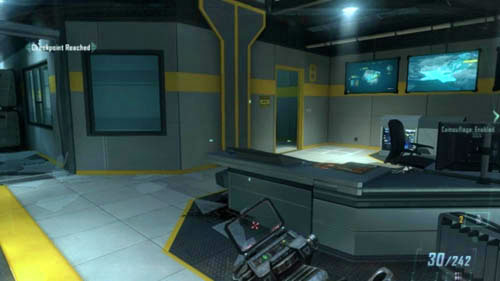
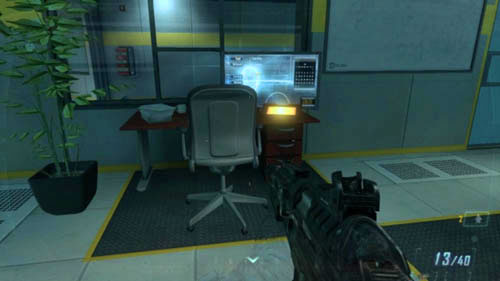
After getting to the lab, take optical camouflage and clear the opposite hall. When the hall is empty, get to the stairs and then make a 180-degree turn. On the right side you will notice an entrance to a small room (first picture above). Go there and look for intel (2/3) on one of the desks on the left (second picture above).

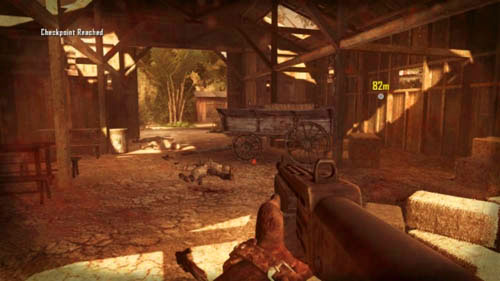
Once you obtain the Celerium, clear the room of enemies, then go through the door to the room (first picture above) behind the two turrets, which earlier repelled down the ceiling. By the wall opposite the entrance, through which you got here, a little to the right there is a table. You will find the last intel (3/3) (picture above) on it.
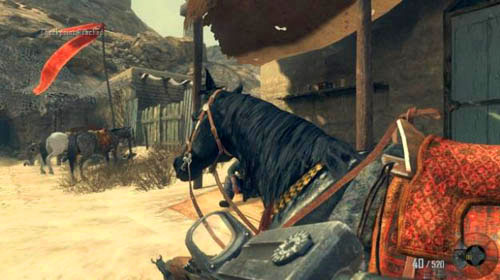
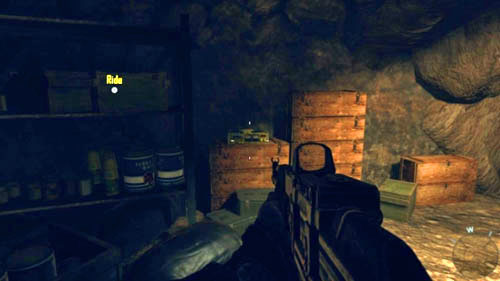
When at the beginning of the mission you get off the horse (first picture above) and go to the Mujahideen cave, wait until the conversation is over. Take a look around the command center you are at. To the left of the three soldiers by the radio, you can find intel (1/3) on the wooden crates (second picture above).
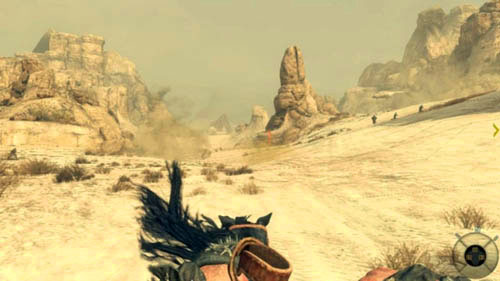
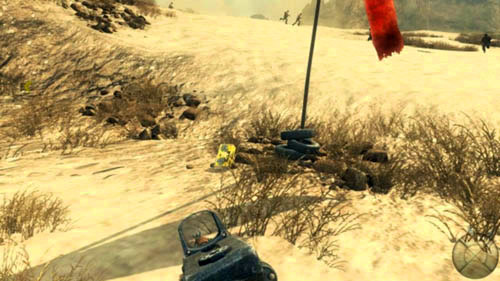
A little later, when you're defending the base, and, assuming that you're at the gate of the allies' base, run to the north. After a while in front of you, slightly to the right, you'll notice a pointed rock (first picture above). Right next to it there are some ammo crates, as well as a red flag stuck in the tires. Intel (2/3) is lying next to it (second picture above).


You will obtain the third intel after you've retaken the weapons cache near the end of the mission. At the bottom of the eastern rocks there is a broad, but shallow cave (first picture above). On its right, next to the entrance, you will find the last intel (3/3) (second picture above).
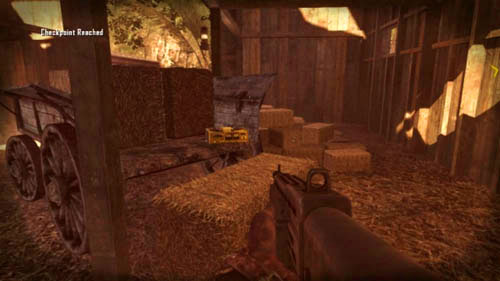
As Menendez, when you go to the stable, look at the cart on the right (first picture above) and take intel (1/3), which is lying on it (second picture above).
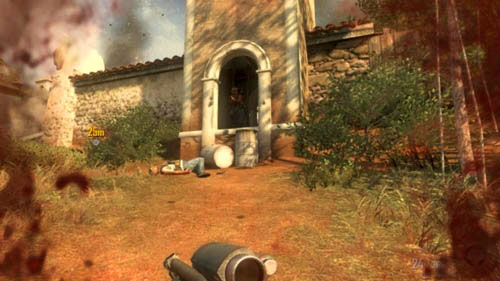
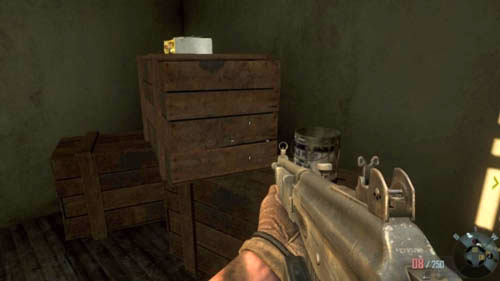
When you reach the entrance to the mission (soon after you, Hudson and Woods notice Menendez), look for the entrance to the bell tower to the right of the main gate (first picture above). Once you're inside, climb the ladder to the second floor of the bell tower. Here, on three wooden boxes there is intel (2/3) (second picture above).
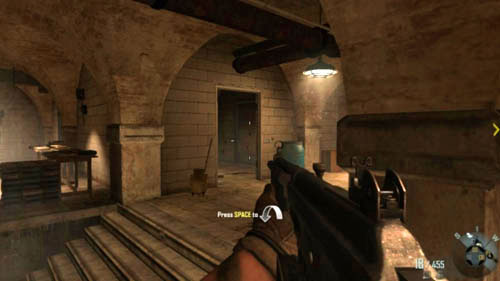
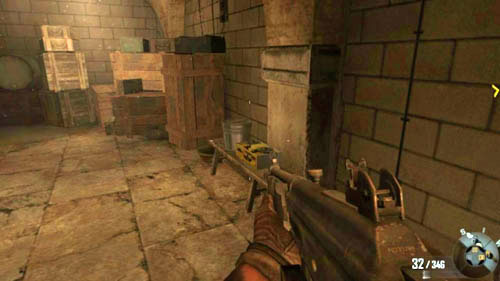
Passing through the cocaine bunker you'll get to a big hall, where the enemies are burning some documents. Exactly opposite its entrance there is another one, leading to a small room (first picture above). There, on the bench you'll find the last intel (3/3) (second picture above).

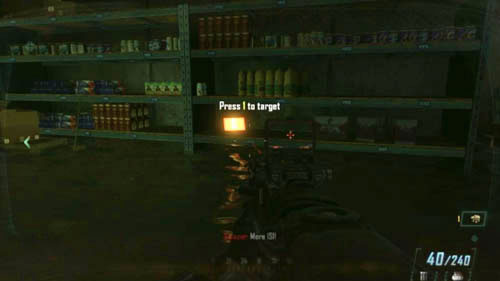
Immediately after the mission has started, when your big, four-legged robot (CLAW) goes left (first picture above), you should look right, at the right shelf. On one of the lower shelves there is intel (1/3) (second picture above).
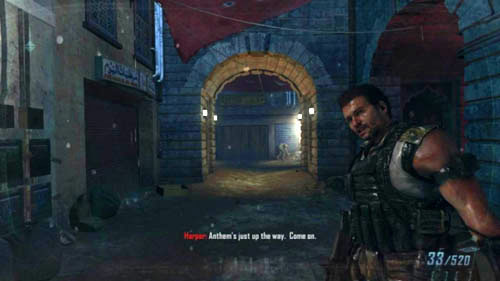
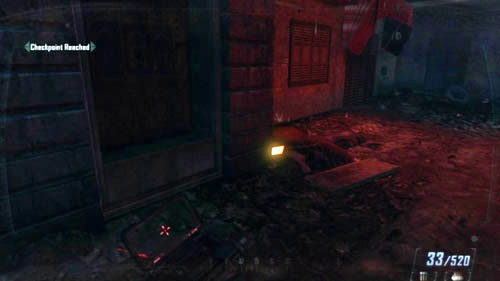
As soon as you run away from the flowing bus and regain control over the character, there will be a street in front of you (first picture above). Don't go ahead, but turn into the blind alley on the right. To the left there will be intel (2/3) (second picture above).


When you and Harper outsmart the second drone and run into the ruins, some rubble should collapse in front of you (first picture above). Do not follow Harper, walk ahead - among the debris you will find the last intel (3/3) (picture above).

When you clear the CRC room and reach the entrance to the main computer (first picture above), look at the desk on the right. There is intel (1/3) (second picture above) on it.

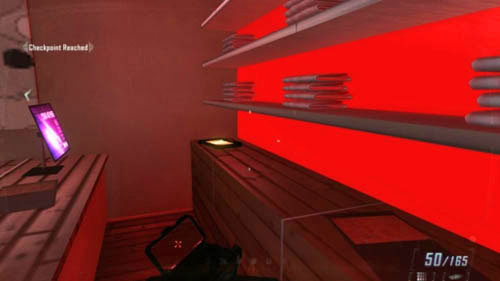
When, after the scene at the club, you get to the shopping mall, get to the ground floor and look for a shop with the word "d'Ho" on the right (first picture above). Go inside, behind the counter and look at the left corner of the wall shining in red. There will be intel (2/3) (second picture above).

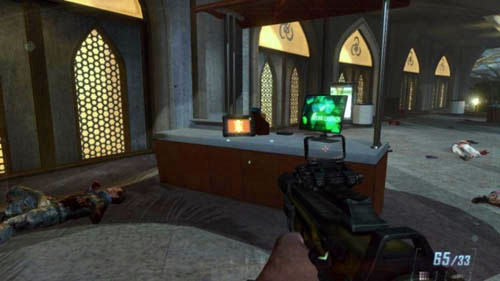
This intel is hard to find, because the area is vast. It is in front of the right, previous stairs leading to the terrace on which DeFalco is walking (see the mission description to find out how to get there). When you find the stairs, stop at one of the stalls on the right (first picture above) and take intel (3/3) lying on it (second picture above).
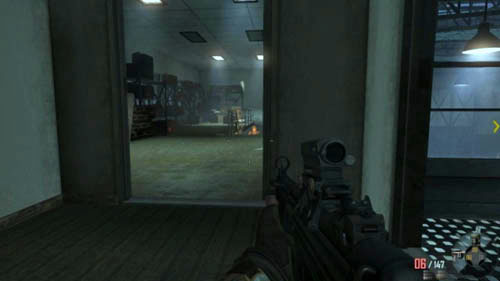
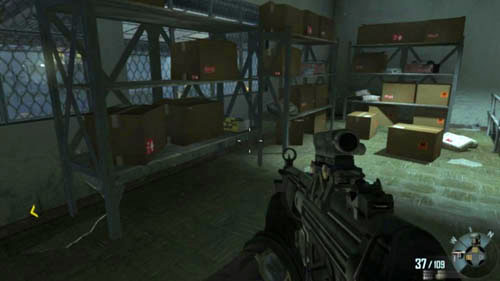
When you jump through the skylight in the roof in the great hall, clear the place of enemies and run behind Mason. When you get the room with the stairs leading down (first picture above) search for intel (1/3). It is lying on one of the shelves on the left (second picture above).


The second intel can be found in the slum area. This is a very vast area, and you can get here from many places. If you located the church, then when you look at it and then exactly to the left, you'll notice a hole in the wall. Go through it to get to the correct apartment. If you came here from the south, quickly kill the enemy harassing a civilian (first picture above) and then head for the door on the left. Inside, on the counter on the left, directly opposite the hole in the wall, you will find intel (2/3) (second picture above).

After the third cutscene, showing old Woods and young Mason's talking, immediately after regaining control over the character go forward all the time. Stop only when you see the last intel (3/3) (picture above) on the opposite sink.
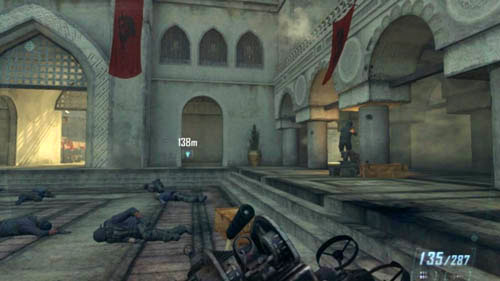
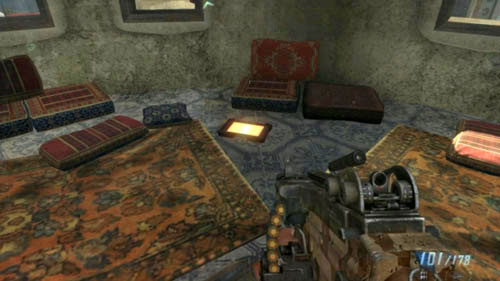
At the beginning of the mission, when you regain control over the character, quickly jump into the crowd and run to the entrance to the right of the main gate (first picture above). When you get to the abovementioned entrance, quickly turn right and then immediately left, to the stairs leading to the second floor of the tower. There will be the first intel (1/3) (first picture above) lying on the floor.
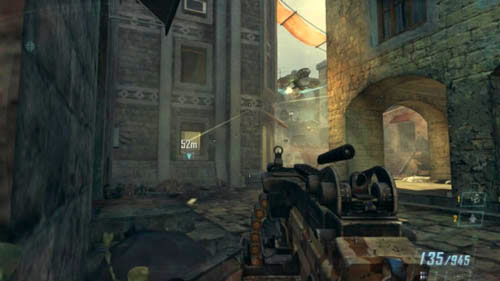
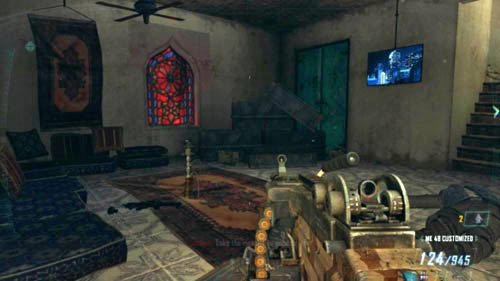

When you play as Mason, go to the gate, and then look out for the window on the left, in which there will be an opponent (first picture above). Clear the place and go inside. Behind the pile of boxes in the corner (second picture above) you will find the second intel (2/3).
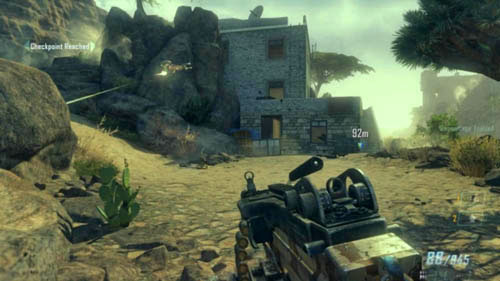
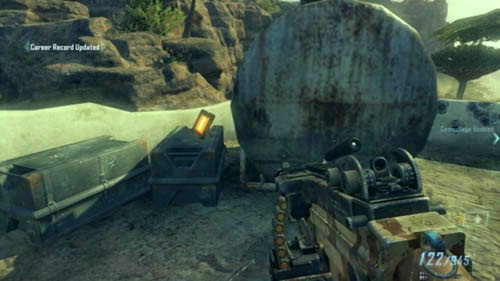
When you go out of the street, clear the building and area behind it, choose the right path at the fork. This way, you'll get to the building (first picture above). Go up the stairs and go outside. Go right, behind the building and you will find a ladder leading to the roof next to the ammo crates. There, in the corner, on the crate next to the tank on the left you will find the last intel (3/3) (second picture above).
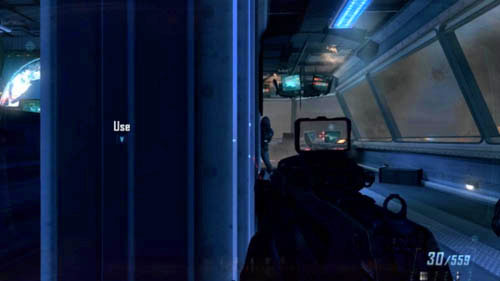
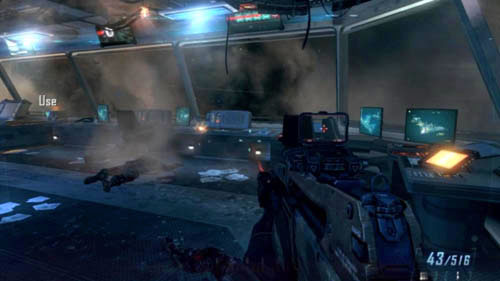
Passing through the interior of the ship, you'll get to the hall with a turret inside that you'll be able to use. Exit through the right door and go straight (first picture above). Intel (1/3) will be lying on the desk on the right (second picture above).


When as Mason you rise from the computer, by which there is Admiral Briggs (dead or alive), and you go down the stairs, go forward. To the right of the red-lit entrance (first picture above) there are stairs. Go up. At the top you will find intel (2/3) on the table (second picture above).
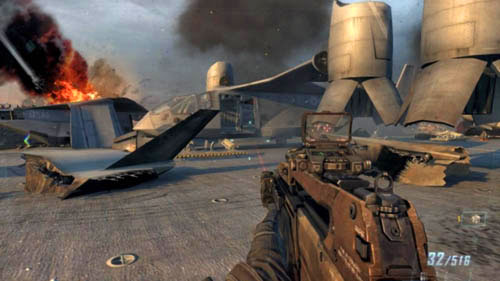

If you look at the plane, by which you're about to fly away, from a distance there will be another one, a little less damaged on the right (first picture above). In its door you will find the last intel (3/3) (second picture above).
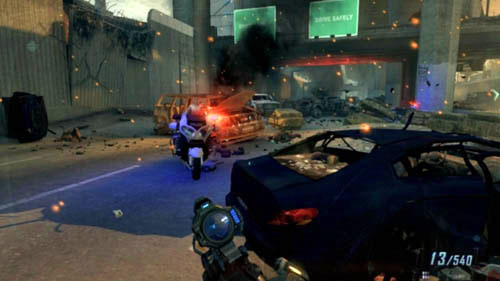

When you repel down the rope from the highway and finish off the nearby enemies (or if you already did it), go near the bus on the left. Behind the bus there is a motorbike (first picture above), and behind it there's a car wreck. You will find intel (1/3) behind the very car (second picture above).

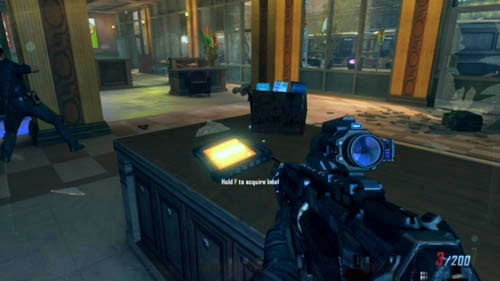
When you're done driving the truck, start fighting in the street. Locate the door on the left, through which you can see a blue-lit wall (first picture above) and run inside. Pick up intel (2/3) lying on the desk (second picture above).
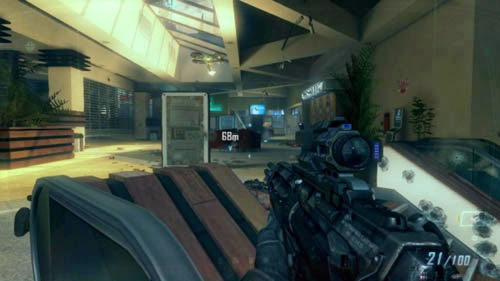
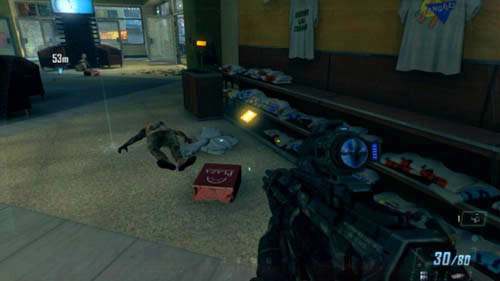
When you go up the stairs in the mall (first picture above), look for a stand with T-shirts with the words "WES-S FAVORITE T-SHIRT" on the right. Here, on the left, on the shelf near the floor, you'll find intel (3/3) (second picture above).
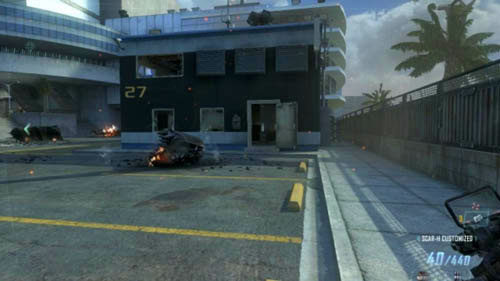

When at the beginning of the mission you will go up the long stairs, go up the next on the right. At their top there's a building number 27 (first picture above). Once you're inside you need to find the stairs leading up on the right. Up there, on one of the desks you will find intel (1/3) (second picture above).
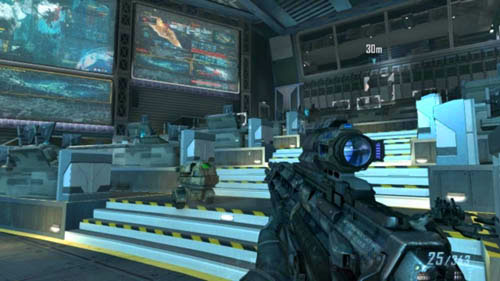

When you find yourself in the room with lots of monitors on the walls, look at the third, left row of the desks (first picture above). On one of them you will find intel (2/3) (second picture above).
At the end of the mission you will get to an oval, dark room. After eliminating all the enemies move to the stairs on the other side (first picture above). Go down to the lower level and keep going sticking to the left or right wall. You'll get to the crates. The last intel in the game, intel (3/3), is lying on them (second picture above).
Strike Force missions differ a little from the ordinary ones, and probably the biggest difference is the fact that you can't repeat them indefinitely (at least within the campaign). The number of chances you have is the same as the number of Strike Force Teams, which you get by playing the main campaign missions through. This is especially onerous on Veteran difficulty level, as some of the missions are very difficult and it's easy to lose the chance of carrying them out.
So before you start any mission, practice using the Mission Replay option - you don't have to play a strike-force mission through to gain access to it. Familiarize yourself with the equipment, get to know its possibilities and your soldiers, explore the area. Only after such training, can you proceed to the mission.
Strike-force missions have an impact on the plot. To get the best ending, you must complete all three (FOB Spectre, IED, Shipwreck) before you complete Mission 07: Suffer With Me. After mission 07 you will get access to a strike-force mission entitled Dispatch - you must play it through before you play the next mission of the campaign through, namely 08: Achilles' Veil. Moreover, if you didn't save Karma near the end of Mission 06: Karma, you need to complete a strike-force mission entitled Second Chance before you begin Mission 07: Suffer With Me.
Condition: Completing Mission 03: Old Wounds
Availability: The last mission before you can do this one is 07: Suffer With Me
You must capture three targets - (1), (2), (3) - place a hacking module near them and then protect it till the white border of the circle indicating it fills up. If the enemy destroys the module, you have to plant and protect a new one. On the other hand, once the target is secured, it can't be retaken by enemies, so you don't have to worry about it. After capturing the three targets, all you need to do is to call the air raid on the target in (4).
All the troops that you will receive during the mission will be dropped off in (5). Enemy soldiers can throw a lot of smoke grenades, but in truth it will help you more than them, as it will be harder for them to hit. New enemies will keep appearing in the place of the dead and destroyed ones - they will be dropped off by helicopters in several places (among other places, (10), (11), (12), (13)). Enemies will have soldiers, ASDs, quad-drones and CLAWs.
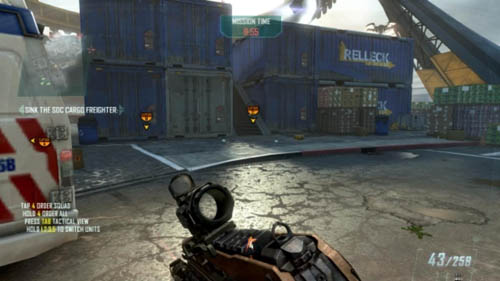
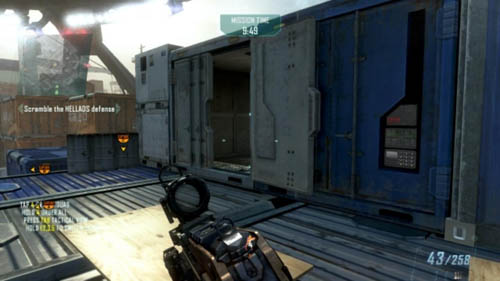
Instantly, as soon as the mission begins in (5), run as quickly as possible to (6) (exit the parking lot using the right or left exit, it doesn't matter). You should see something similar to stairs between the containers (first picture above). Go up them, turn right, then left and right again - to get to an open container on the right (second picture above). When you're running, hold the sprint button all the time.
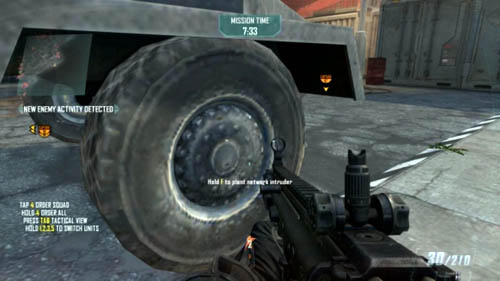
Run out of it and turn left, you'll find yourself in (7). Jump down, run forward and past the car. Just to the right, behind the crane there should be the HELLADS defense system - run behind it and place the hacking module by the launcher wheel in (1), so that the sea is behind you (picture above). The closer you place the module to the launcher, the better. Then, crouch in this spot and wait.
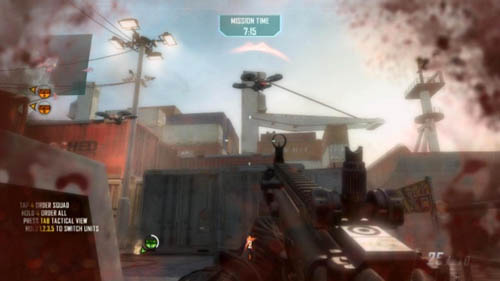
Enemies can run up to you from the left or right, but the more quiet you are, the less of them will come. However, the quad-drones can be problematic (picture above) - try to destroy them, but only when they start to shoot at you. As for the soldiers, the distance is so short that you will easily get rid of them with the combatant suppression knuckles. Hide back immediately. Even if there are a lot of soldiers on the other side of the launcher, you need to worry only about those who will come running to you. If everything goes well, the hacking module will finish its job and you should have around 6 minutes and 30 seconds left.
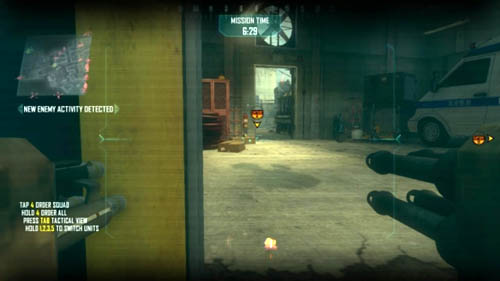
Immediately switch to ASD, which is already at your disposal, and, eliminating the enemies, get out of parking lot through the left gate. Afterwards, immediately go into the building on the left, through the entrance in (8) (picture above). There may be a few soldiers near the second launcher in (2), as well as enemy ASD. Your task is to eliminate as many enemies as you can (remember to also use the grenade launcher and keep in mind that the ASD may run soldiers down). At the same time give the order for all troops to come to this place.
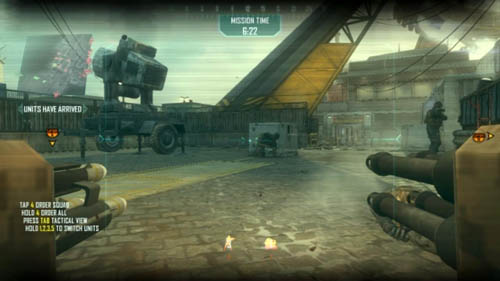
Since there are more enemies, the fight may be more challenging, but don't worry - you have about three minutes to capture this target. It's crucial to simultaneously secure this place (picture above), and come here with at least one soldier. Don't shoot at anyone, just keep sprinting. This may be the biggest problem, though, as the enemy soldiers are probably already at the parking lot, waiting till your troops land. Don't be surprised if, for example, you get a couple of soldiers who will die almost instantly.
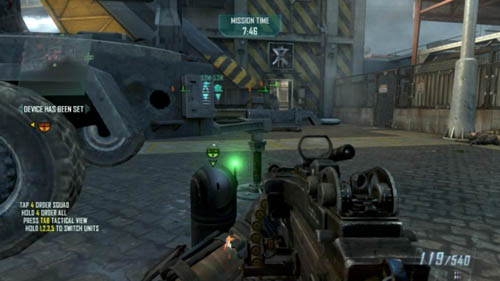
Try to use all your troops to create commotion near (8), so that the chosen soldier, whom you will control, can run to (2). Even if there are some opponents there, ignore them - place the hacking module as soon as possible. Do the same by the wheel, to the opposite side of the entrances to this place. And, as you did earlier, crouch and wait. Eliminate only those enemies who will come to you, and if they don't, all the better!
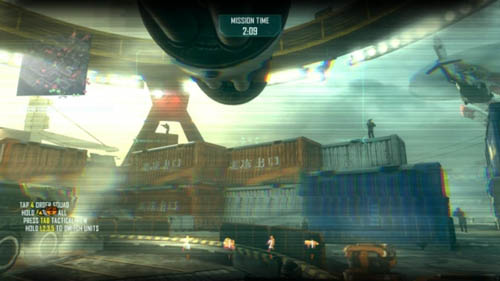
When there are about 3 minutes left till the end of the mission, you must hurry, but at this very moment you should get a CLAW. This is your chance - switch to it and start walking in the direction of (3) massacring all the soldiers and ASD on your way (picture above). Keep in mind that the CLAW is very slow and you have to get to your target as quickly as possible.
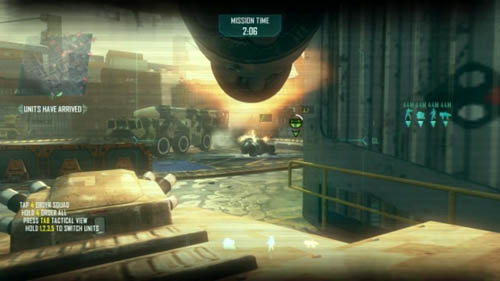
Now, there are two possibilities. Either the enemy CLAW, which has been preventing you from capturing the last target, came to you to (5) (you'll destroy it on the way), or not. In the latter case it is in (9). Point the fire in his direction at once (first picture above). In the meantime, give the order for all troops to come to (3). When you get rid of the enemy CLAW, immediately look up - there are two enemies with RPGs on the containers (second picture above), make them bite the dust as well (look at spots (13), (14), (15)). Then, position yourself near the big vehicle-launcher in such a way as to be covered from as many enemies as possible (search for them on the map). At the same time, try to eliminate as many enemy soldiers as you can before you move to the next paragraph.
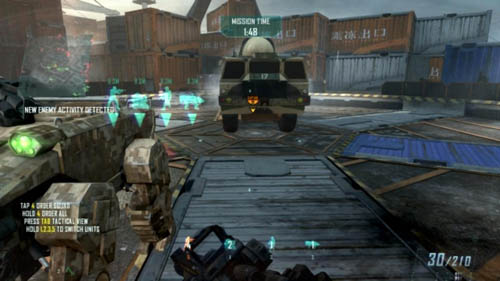
Choose any soldier and quickly put the hacking module between your CLAW and the big vehicle (picture above). Then switch to the CLAW and just stand on the module. You won't destroy it this way, but you'll be able to protect it with the robot's body. Search and eliminate enemies, but don't leave your position and wait till the hacking is over (there should be at least 20 seconds until the end).

As soon as the hacking is over, look out for the message in the upper part of the screen. When it appears, hold down the use button and then steer the rocket at the target in (4) - the ship that will be indicated by a diamond (picture above). You control it the same way as you look around. When the rocket hits the ship, the mission will be successful.
Condition: Completing Mission 04: Time and Fate
Availability: The last mission before you can do this one is 07: Suffer With Me
This is a very easy mission, even on Veteran difficulty. Your task is to escort the convoy and at least one of the four HVI transports has to reach its destination. You will be able to choose from several ASDs, kinetic weapon, and above all - two units of quad-drones. You control them directly, you don't mark the targets for them. It's best to control the flying robots, as they are the most mobile and deadly to enemy infantry, which will appear in big numbers during this mission. If you drive as ASD, don't drive under the wheels of convoy vehicles! You may get run down.
Along the way you will be destroying the mines laid by the opponents, but don't worry - the convoy won't drive on the mines, it will wait in front of them. However, if you detonate the mines too close to it, you can seriously damage the vehicles. This is especially dangerous in the case when you don't manage to eliminate the ordinary infantry on time. It may also happen that the enemy soldiers may even try to lay a mine between the vehicles in the convoy. Don't let that happen!

You start in (1). Fly behind the convoy and to the right, kill a few soldiers with RPGs in (2) and quickly the next three in (3). Immediately fly to (4). At this point the kinetic weapon should become available. Select it, point at the enemy tank in (4) (picture above) and give the order by pressing the appropriate button (the same one you hold to select all units). After a while, the rocket will destroy the tank.

Passing through (6) be ready to repel three attacks of enemies on horseback (picture above). The first attack will come from the east, and the other two from the north. Don't worry if you don't kill everyone, simply try to kill as many enemies as possible. But don't go back to those you went past - look out for new targets. In the meantime, get rid of the enemies with RPGs in two (5) spots, at the top of the hill.
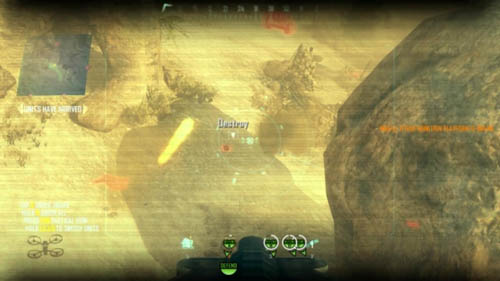
Until then your kinetic weapon should be ready. Quickly use it to point at the tank in (7) and eliminate the soldiers on the left and right, on the rocks. In (8) there is another enemy tank, so you can consider whether to first destroy mines with a word Destroy (picture above) in (9), or to wait until the kinetic weapon is charged and first destroy the tank and then the mines. If you didn't wait, switch to ASD and get rid of the tank with grenade launcher. Kill all the infantry, because if you don't, it will lay new mines. Attention! The sooner you destroy a mine, the better. Its explosion is extremely dangerous and if your vehicle is nearby it can even lose up to half the armor! When you're destroying a mine, don't get too close to it - shoot from a safe distance, if you don't, your ASD / quad-drone will be destroyed.
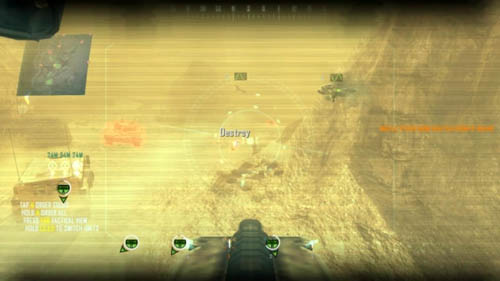
Keep looking out for the next mines - they will be in (10) and (11). At this point, it will turn out that the target extraction site has changed - you have to get to (24). In the vicinity of (13) a few soldiers will appear out of nowhere. Next, deal with the next tank in (14) with kinetic weapon, or if you don't have it, use the ASD grenade launcher. Be prepared to quickly destroy the fourth set of mines in (15) (picture above).
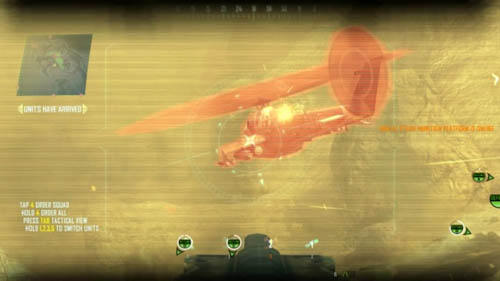
When the convoy arrives at a point (16), a helicopter will appear (picture above). You can get rid of it with any of the quad-drones - a little shooting will do. After a while, a second helicopter will come here, however, you should have already taken out the first one. The next two helicopters (also one by one) will fly out after the convoy has reached (17).
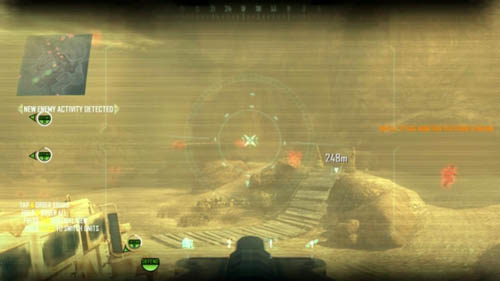
When the convoy in (18) starts turning east, be prepared for several waves of soldiers on horseback who will appear exactly in front of you. Eliminate them, looking out for the next enemies with RPGs taking positions on the nearby rocks in (20) (picture above). This will happen when you get to (19). It's best to hover over the rocks on the right and have the enemies in front of you. Then, one accurate round will kill most of them.
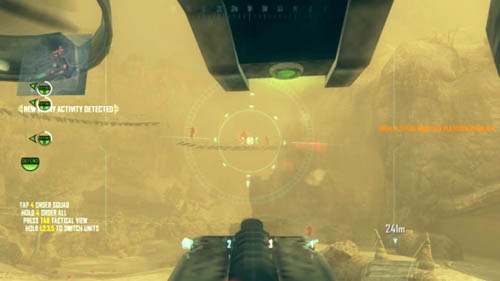
The next and the last set of mines will appear in (21), just under the lowest of the bridges. In the meantime, a lot of new enemies with RPGs will run out along the rock in (22). They are dangerous, but very weak - your quad-drone just needs to be in the right place at the right time. Remember to destroy the bridges. This will prevent the opponents from taking convenient positions (picture above). Look at the rocks up, on the right - there are a lot of soldiers with RPGs. As if that wasn't enough, after a while, three helicopters will join the battle - destroy them in the first place. Look out for survivors in the surrounding rocks. If at least two vehicles made it so far, you can consider the mission successful.

When the convoy is heading for (24), which is your final destination, be prepared to repel two waves of infantry, which will pile out of (23). Just hover and shoot with the quad-drone (picture above), allowing the allied vehicles to pass safely. After a while, the mission will be successful.
Condition: Completing Mission 03: Old Wounds
Availability: The last mission before you can do this one is 07: Suffer With Me
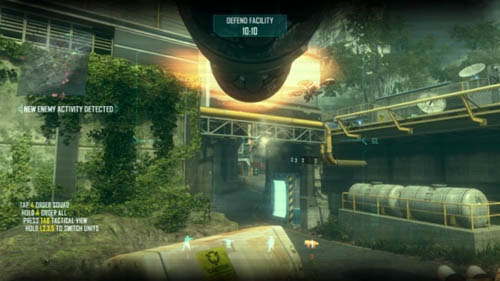
You will get the last mission objective only if any two of the three objects (1), (2), (3) are destroyed. Try not to let that happen for as long as you can. Generally speaking, it's best to focus on defending the targets in (2) and (3), leaving target (1) to be protected by your AI and intervening only when quad-drones or a CLAW appear. Of course, events can develop in different ways and much depends on luck (or rather, on how well your AI will handle the enemy AI).
You'll be attacked by groups of soldiers, ASDs, CLAWs and quad-drones. You have the same at your disposal, except, you have turrets instead of quad-drones. It is worth adding that the training mission takes place in this very place - so you can play it and explore the area more thoroughly in order to be well prepared.
Since this is a defensive mission, and the enemy troops will appear in the same places, the best ways of how to deal with them are presented in the description. Therefore, the following description is concerned with the whole mission and it is divided into roles the units in your squad will play. Naturally, the CLAW is the most important, while the turrets take the second place.
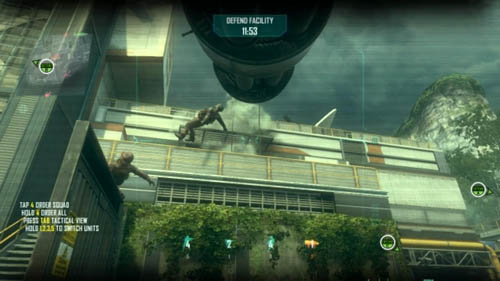
To make a good start, leave all the troops where they are, but switch to the CLAW and place it in (4). Wait for the enemies. The first two attacks will be in (5) (there, only soldiers will repel down the helicopter) and in (6). Start shooting with grenades at the place over the entrance to the building, on the balcony (picture above). Simply keep shooting at the same place all the time, and the soldiers' bodies will be falling down from above. In this simple way you will easily and instantly eliminate all the enemies without any trouble. Do this every time you notice a helicopter in this spot. If you don't make it on time, switch to the turret in (7) or go back as the CLAW.
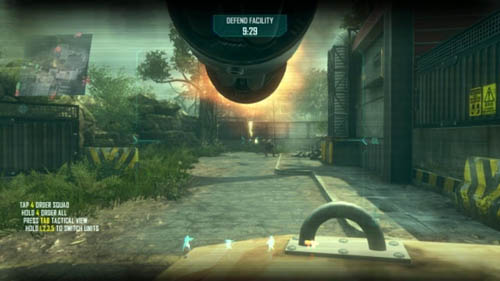
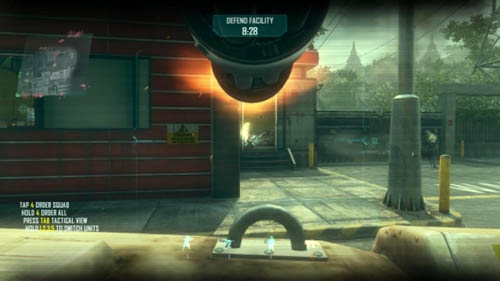
When you kill everyone there, quickly look exactly right (first picture above). The next soldiers will be coming through the fence in (6) (or they'll be dropped off a helicopter). An ASD or a CLAW can also land here. If the soldiers managed to run through, or if an ASD or a CLAW landed here, use the turret. It will be good not to let them run behind the fence visible on the left on the first picture above, because they will cause trouble for the rest of your units. The soldiers or ASD can also immediately enter the building on the right and might want to attack the target in (3) through the very building. Then, you can either go back as CLAW and shoot at the windows and the second door of the building in (11) (second picture above), or leave the enemies for the turret in (7).
The CLAW's final task in this spot will be to eliminate the enemies who weren't shot by the turret in (8) (or you didn't manage to do that when controlling it). Then, they will pass through a short tunnel and appear in (9). It is worth noting that the enemy quad-drones will be flying right there if they come to (5). It's a very good opportunity to destroy all of them - simultaneously shoot with the turret and shoot the grenades into the tunnel (picture above).
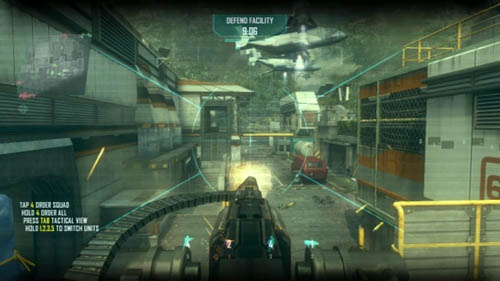
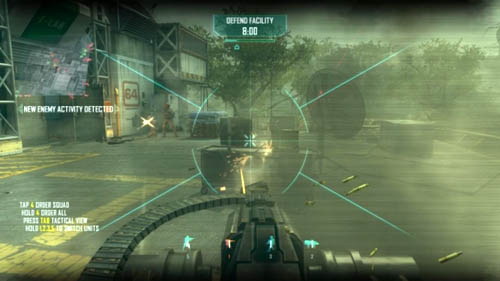
The task of the turret in (7) is to shoot the opponents who will appear in (11) and (12) (first picture above). They will be exactly in front of you. There may be soldiers, ASD, or CLAW. These enemies will either run towards you, or go to start attacking the target in (1). If you fail to kill / destroy all the enemies, then they'll go to a small tunnel in (9) (see the previous paragraph). Switch to the turret immediately after you've destroyed the first two waves that will appear in (5) and (6) with the CLAW. The second task of the turret to kill enemies around (2) - the ones who will come out of the building door or come up the stairs (second picture above). The enemy ASD can be particularly troublesome there.
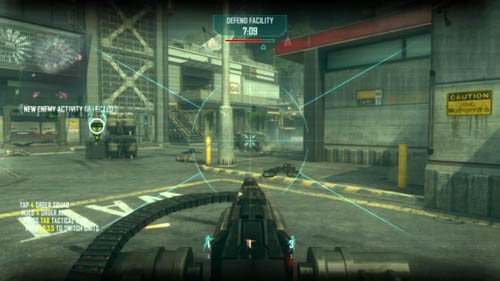
The turret in (8) will be useful to eliminate enemies coming from (10) (picture above), and (5) - the ones who weren't killed / destroyed by the CLAW (or it happened because the CLAW got destroyed itself). Furthermore, the turret should eliminate the quad-drones that are attacking (3). It is worth adding that the quad-drones should be destroyed as soon as possible - they can be very troublesome, and perhaps, they (of all types of enemy units) use your inattention best.

The soldiers will have the least to do because of the fact that one moment is enough for them to drop dead. Still, they can be useful in two situations. Every now and then you can have a look at the troops in (13), especially if an enemy CLAW is attacking the group from (15) (first picture above) or (16) (second picture above) (of course, it will be best if this unit goes towards the turret in (7) or CLAW in (4)). Use grenades and RPG to destroy the robot as soon as possible. Without your help, AI will rather not handle it. Also, eliminate the quad-drones.
When the CLAW is destroyed, the turrets will also get destroyed or they won't be able to reach the enemies, so try to use soldiers. Sooner or later, two of the three targets will be destroyed. If it happened before the fifth minute, you will rather not complete the mission. During the last minutes your main task will be to destroy the hacking modules (picture above). If the enemies place a hacking module, it will be marked with an orange circle with a timer. You must destroy the module before the white border around the circle fills up. First of all, use the turret, because your AI manages to deal with the modules using soldiers itself, provided you systematically clear the room of enemies.
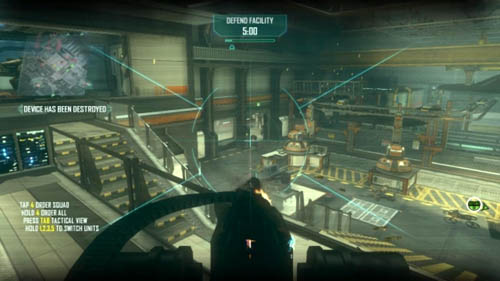
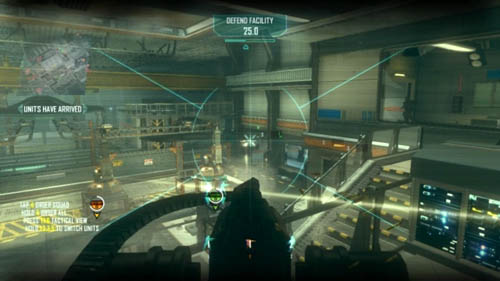
That is why, as soon as you hear the alarm, move the turret in (17). You have to use it to defend four entrances to the hall - two downstairs, on the left (18) (first picture above) and right (second picture above) (19) ...
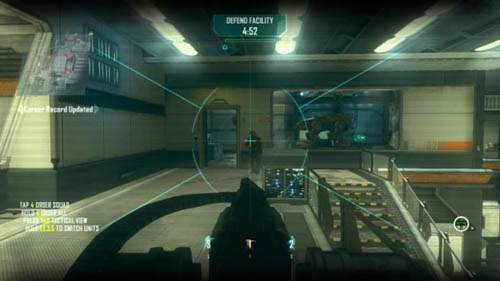
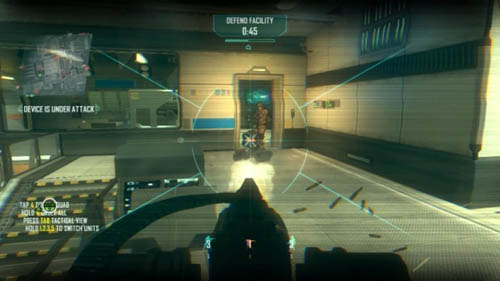
... and also two upstairs - also on the left (first picture above) (20) and right (second picture above) (21). In the case of the latter two you will have to turn the turret left or right to a maximum to reach the target. Look at the minimap all the time and be prepared to open fire on enemies who come through any door. Quad-drones are especially troublesome. Remember not to overheat the turret! Don't shoot with a continuous round, take half-second breaks - press the fire button, but don't hold it down all the time.
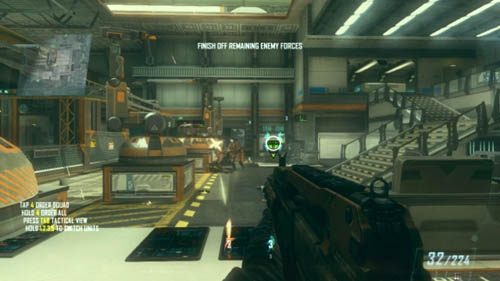
When the time runs out, all that remains is to kill all the other enemies (picture above). They won't be trying to put hacking modules and won't be receiving any backup, while you will - that is why, it will be a very easy task. After killing the last enemy you'll successfully complete the mission.
Condition: Completing strike-force missions FOB Spectre, Shipwreck, I.E.D. before the end of mission 07: Suffer With Me
Availability: The last mission before you can do this one is 08: Achilles' Veil

Even though the map is very big, in reality you will visit around 15% of it. Your task is to break through the narrow alley to the other end of the map, and then clear the VTOL area of enemy ASDs - there are at least ten. You have to do it fast enough to plant the hacking module and defend it for one minute. The mission is short and simple, but it doesn't mean it's easy.
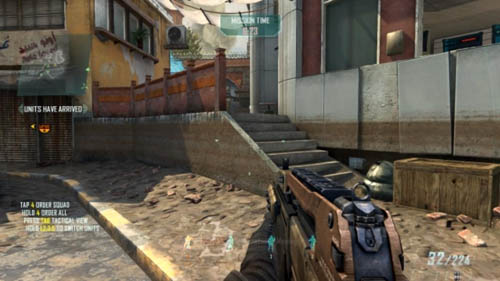
You start in (1). Immediately look to the right, you should see low stairs (picture above) (2). Go up them to get into the alley mentioned in the paragraph above. It will take you to the other end of the map. Attention! As usual, you can't delay.
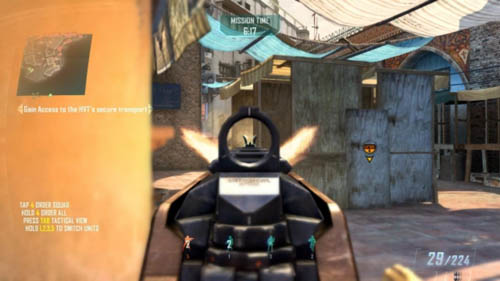
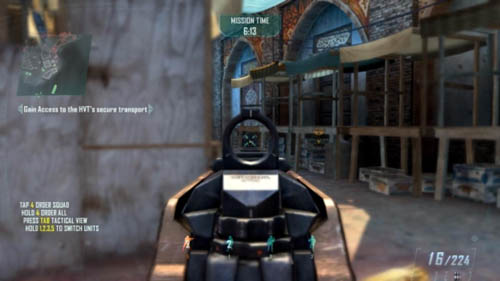
Get ready to quickly eliminate two soldiers - the first is hiding in (3), behind the stall (first picture above). You can shoot through the wall to kill him. The other one is in (4), on the right, crouching against the wall behind the last stall (second picture above). Instantly take a look at the map.
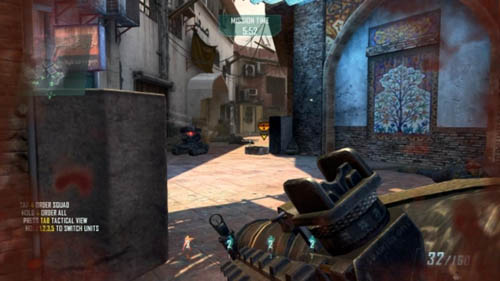
It's very likely (though not one hundred percent sure) that the enemy ASD will come there. Keep an EMP grenade ready, or simply hide somewhere at the right moment to be able to lean out and use the rocket launcher to get rid of the robot (picture above). Keep looking at the map all the time and watch enemy movement. If the robot didn't come, you'll get rid of it later - it's probably somewhere around the turret.
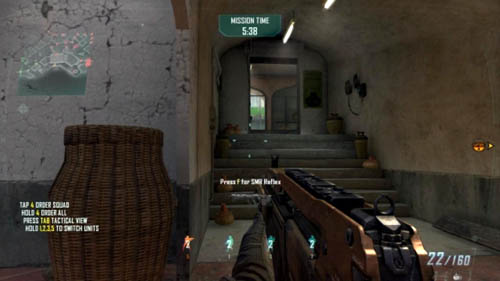
Go further, sticking to the right wall. If any enemy appears in front you, fight, of course, but don't attack, only defend yourself. If you keep looking at the map carefully, no opponent will take you by surprise. When you get in the vicinity of (5), look left. Behind the left side of the entrance there will be an enemy (picture above). Shoot him and again flatten yourself against the wall.
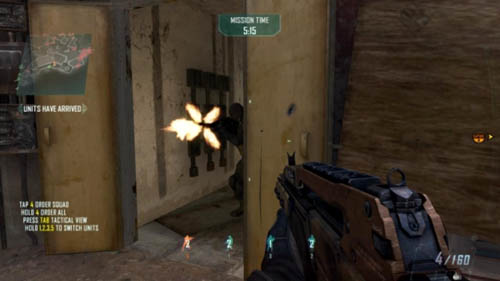
From this moment you need to be careful all the time, because a soldier might come running here out of the main street. Unfortunately, the further you go, the more such situations will come up, but in most cases you will have to count on your team-mates to repel the attack. Enemies will be passing through a narrow alley in (6), through the building in (7) (picture above) (especially watch out there) and through the gate in (8) (we will go back to it in a moment).
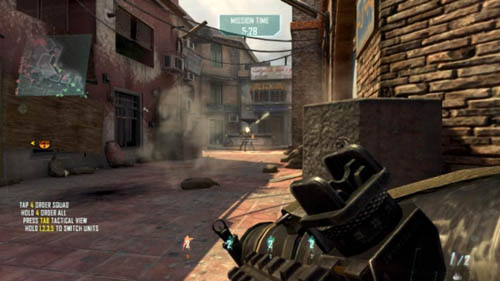
After getting rid of the opponent in (5), go further, sticking to the right wall, take out the rocket launcher and hide behind the low, concrete pillar on the right. Lean out and shoot at the turret in (9) (picture above). Naturally, you can use EMP grenades before that. This is especially advisable if there is an ASD hanging around here somewhere. You should have about five minutes left.
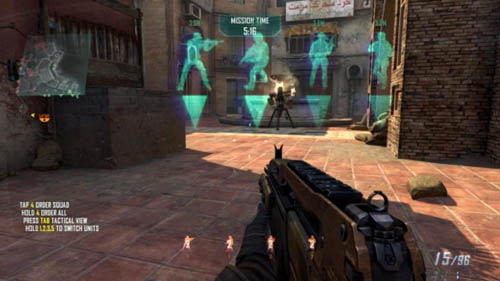
Your next task is to clear the square in (10). There are at least 10 ASDs there. You have no more than four minutes to do it. There are also turrets there, but very few soldiers. First, order all the soldiers to go to (11) (if they get killed, the new ones will come running there, too) (picture above). Now you have two options.
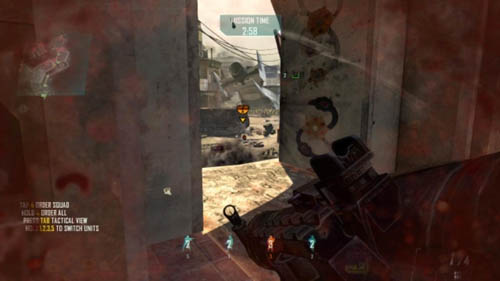
You can stand at the gate in (8) (position yourself in (12)). Take out the rocket launcher and start shooting at the ASDs (picture above). The EMP grenades will be extremely useful, as thanks to them you'll be able to take out several robots with one "lean-out". However, watch out for enemy soldiers. Just in case, quickly change your weapon in order not to accidentally kill yourself with the rocket launcher.
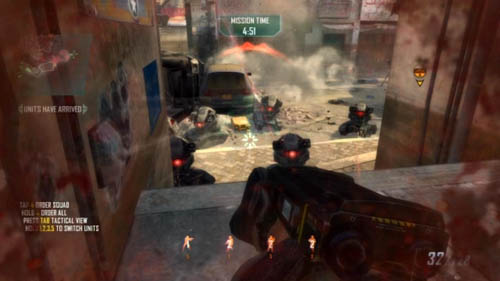
The second option is to enter (13) and clear the cafeteria (if there are any opponents there) and then lean out in (14) and shoot at the ASDs gathered downstairs (picture above). You need to very carefully keep track of what enemies are doing on the map. If any of them is coming to you, retreat in order not to kill yourself with explosion. Hide, as soon as possible, after each shot from the launcher. Again, use the grenades- ordinary and EMP.
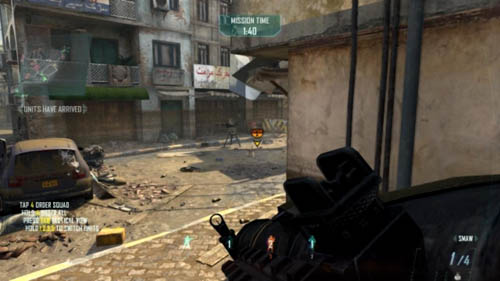

Of course, you don't have to decide on only one of those options, it is recommended to alternately use both. When there is no longer any ASD in the vicinity of (10), go to the cafeteria to get to the exit in (14). Locate the turret in (15) (first picture above) and shoot a rocket at it. Take a look at the map to check if you really got rid of it. If you did and there are no enemy soldiers nearby, lean out more to the left and destroy the second turret in (16) with a rocket (second picture above).
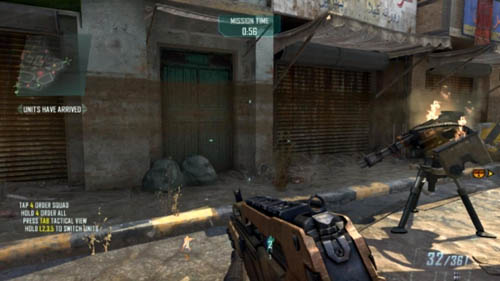
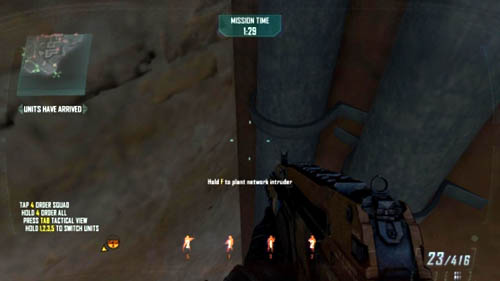
After you've disposed of the two turrets, your task is to place the hacking module. It's crucial where you'll do it. The safest place is in (17), behind the second turret, right next to the rusted garage door (first picture above). Place the module in the left corner (try to "squeeze" into it to the maximum), just below the blue, vertical pipes (second picture above).
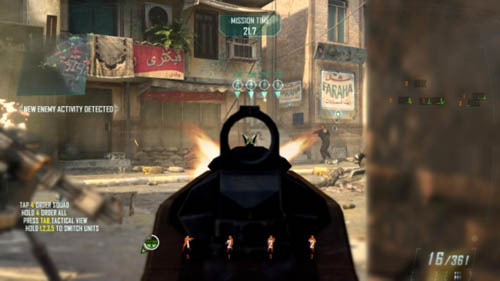
The next task is to protect the module. Crouch in the corner, in the same place where you put the hacking module, and wait till it finishes its work. Make sure to order all your men to go to (14) (picture above). Thanks to that they will attract the enemies' attention - they will be coming out of the streets and hanging out in front of the main street. You have to eliminate every enemy who breaks through. Unfortunately, enemy soldiers will start to attack the place with redoubled strength, so you must be especially careful.
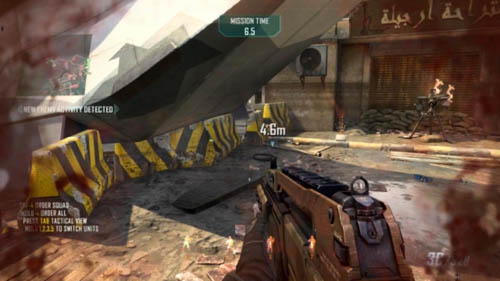
When the module has finished the work, you simply need to run up to (18), to the rear of the VTOL (picture above) to complete the mission. Make sure that no one is shooting at you, because it would be foolish to die at this point, and there is probably little time left till the end of the mission.
Condition: Not reaching DeFalco on time at the end of Mission 06: Karma
Availability: The last mission before you can do this one is 07: Suffer With Me
You have two units of soldiers and a VTOL (vertical take-off and landing aircraft) at your disposal in this mission. The VTOL can move all over the map and strike down enemies below with the mounted cannon. You need to search five safehouses, in most cases you will find your target, Karma, in the fourth one. Next, you have to escort her to the extraction site. Karma will be in the fourth house and it is the order in which you search the houses that matters not the place on the map.
Squads of soldiers will be appearing in (1) and (2). Immediately turn the tactical view on and note the houses glowing in orange, especially the three on the right. These will be the ones you will search first. Command your troops to storm the first house in (3) (picture above), and then immediately move to the VTOL and start to look for enemies.
For now, you won't find many. As soon as you hear the message that there's no one in the first safehouse, immediately turn on the tactical mode and order the troops to search the second house in (4) (first picture above). Immediately move to the VTOL. Look out for enemies, indicated by red square corners and eliminate all of them (second picture above). The enemy quad-drones won't be marked, but try to locate and destroy them as well. But don't shoot at your allies!
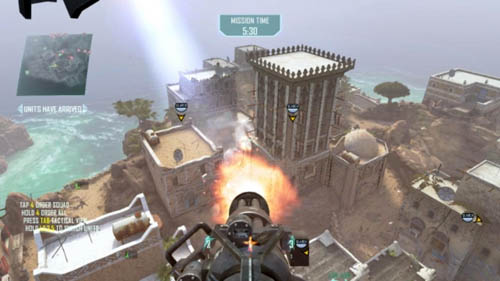
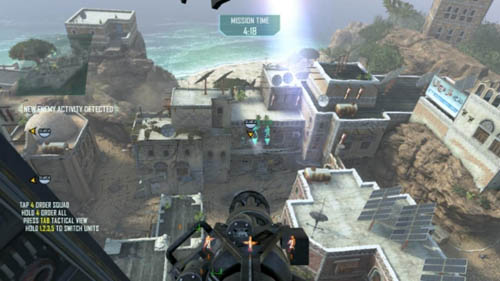
New groups of enemies will be running out of (8) and (9). Pay special attention to (8), to a large group of enemies that should appear just behind the tallest building in the area (first picture above). Moreover, explore the area around the current target in (4), and also shoot at the balcony of the building in (5), because your men will be fired at from there. When your men take control of the building (4), order them to take the one in (5) (second picture above) and wait patiently until it happens, searching for the enemies around.
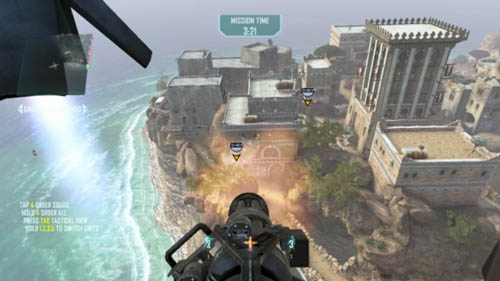
Before you go out of the VTOL, try to kill as many enemies as you can who are surrounding the building (7), in order to make the task ahead easier - shoot particularly at the windows (picture above). You can even fly a bit further and clear the area around the building (6). In the meantime, order all the soldiers to go to (10) and don't stay too long in the VTOL. You should have at least two minutes till the end of the mission. The more time you have, the more attempts to complete the upcoming action.
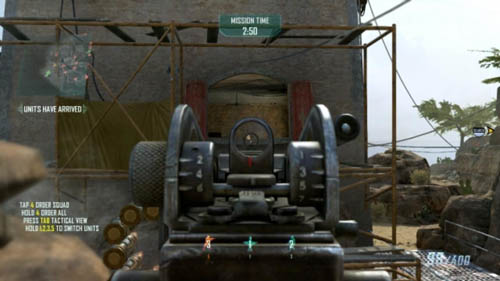
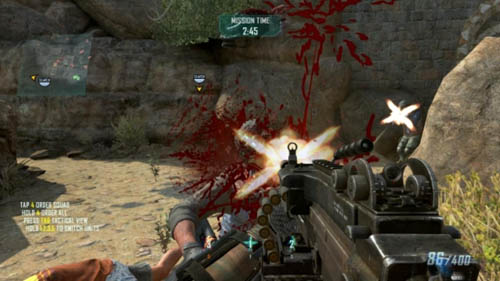
Choose one of the soldiers, and - assuming you're in the area of (1) - start running exactly to the left, to the wooden bridge. Along the way, stop and take out the soldier in the window of the building (11) (first picture above). Start to go to (7), paying attention to the map and defending yourself if any enemies run out of (12) or out of the tunnel in (13) (second picture above).
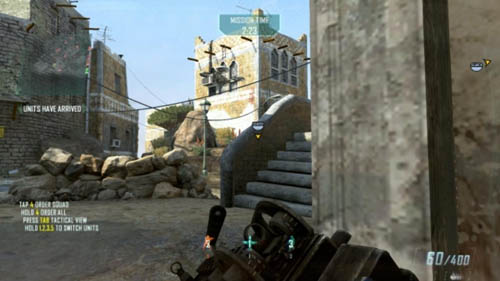
Keep going to the abovementioned tunnel in (13). Go to the other side, turn right and climb the stairs (picture above). Immediately run inside the apartment in order not to get killed by any soldiers and quad-drones that are in the street. If there are a lot of opponents here, then at least get rid of some of them. As a last resort use the VTOL, however, you should have cleared this place before arriving at it with your soldier.
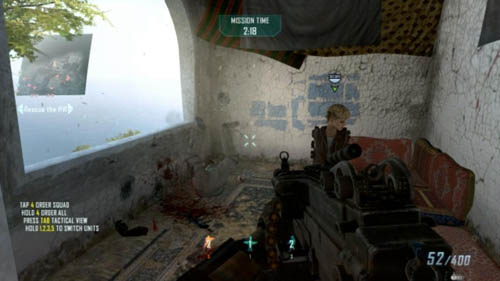
There might be two opponents in the apartment (7), one can shoot at the entrance, through which you got here. If you have an EMP grenade, throw it, if not, quickly hide on the right. Eliminate both enemies and don't let anyone take you by surprise. Afterwards come up to the tied-up Karma, who is sitting on a chair (picture above), and press the use button to free her.
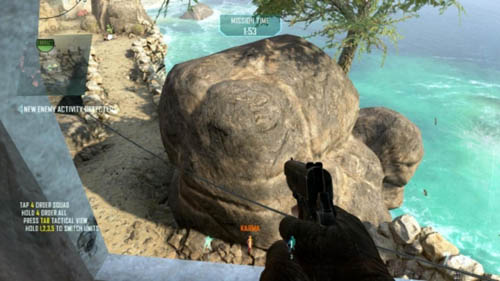
Attention! You have to run away fast, because from now on, if all your soldiers die, you won't get any more new troops. Moreover, enemies will start "freaking out" on the map, some of them may go in pursuit. Don't waste any time, just start playing as Karma, pick up a weapon of one of the enemies and have a look at your way back through the window. If you see any enemy or quad-drone, take them out. Then, jump out of the window (picture above) ...
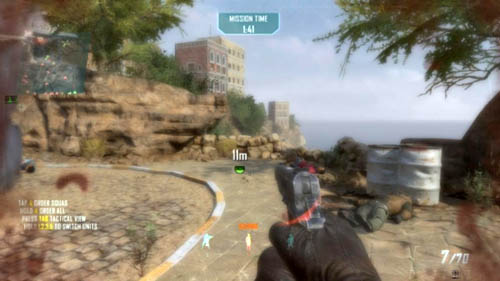
... and race as fast as you can to (1). You can only hope you'll be lucky and that no one will kill you along the way, but there should not be many such occasions. When you get at least 10 meters close to the aircraft (picture above), the mission will be successful.
Attention! You don't have to complete the mission to pass the challenge - you have to lose (Mission Failed) or win (Mission Complete), but you can't leave it by exiting it (Quit).
Not a difficult challenge. You only need to check what kind of equipment the soldier you want to use to destroy a CLAW has. If he doesn't have a heavy weapon - a heavy machine gun or a sniper rifle - switch to a different soldier. You might also use all explosives, however, good weapon is the key, and you should leave the explosives for one of the remaining challenges. Perhaps one of your men will have a rocket launcher. If he does, naturally, you should use his help.
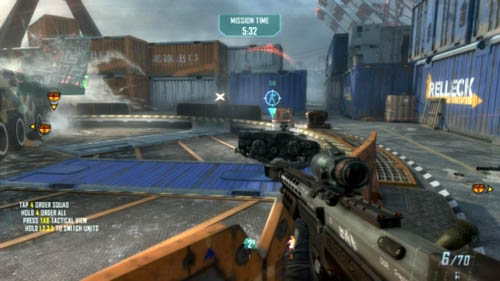
The first CLAW will most likely be standing by your main target, in the very center of the map (picture above).
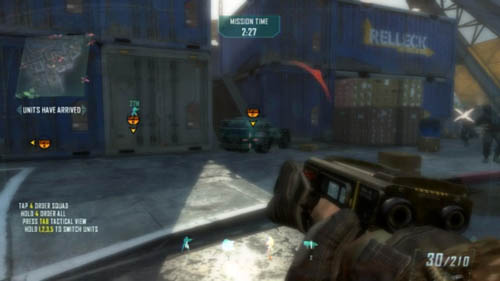
When you destroy it, the other one will appear near the place where you started the mission (picture above). This may take a while, so start passing other challenges and only after that look for the second target.
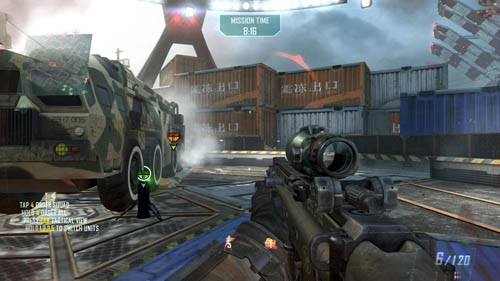
In other words, your enemies can't destroy a single hacking module (picture above). Guard it carefully with soldiers and ASD, even on Recruit level, to make sure you pass the challenge.
If you are playing the mission through on Recruit level just to play it as fast as possible, then there can be up to six minutes left till the end of the mission. This is a very easy challenge, though you'll probably have to play the mission only to pass the challenge.
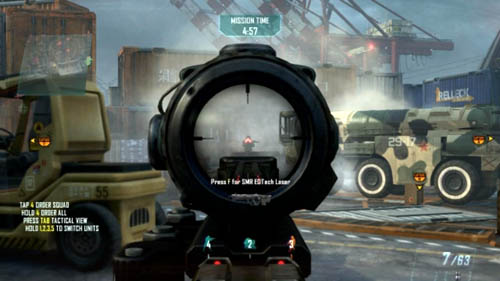
Ten accurate headshots is not much. A lot of enemies will be hiding behind various covers, so their heads will be "asking" to get hit. Several enemies are standing still on the containers surrounding the main target in the middle of the map. In addition, it's good to play as a soldier who has a gun with good zoom (picture above).
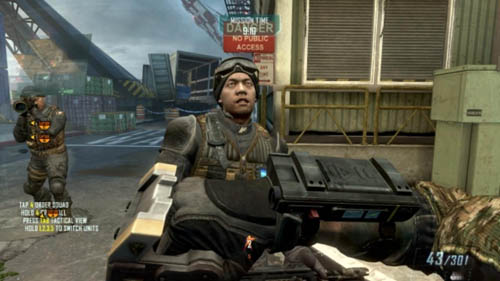
An easy challenge. Naturally, pass it on Recruit level, preferably at the beginning of the mission. Start with the soldiers dropped off by the helicopter (picture above). Run around and hit the enemies with combatant suppression knuckles.
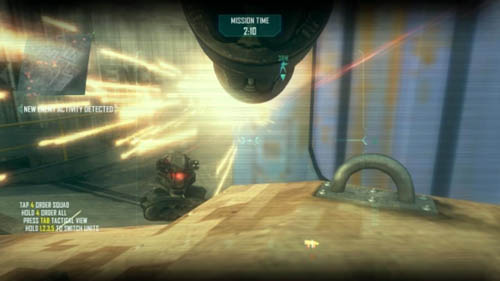
As a CLAW pay special attention to ASDs (picture above). If you can't see them, look out for the robots on the map. It's probably the best to go to the center of the map as soon as your CLAW appears. From there, it's not far to any spot. Another option is to wait at the starting point - the majority of ASDs are going there. Simply stand at the gate and wait for the robots.
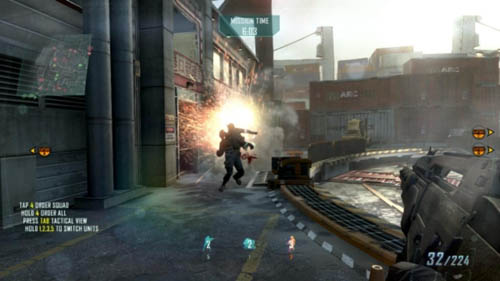
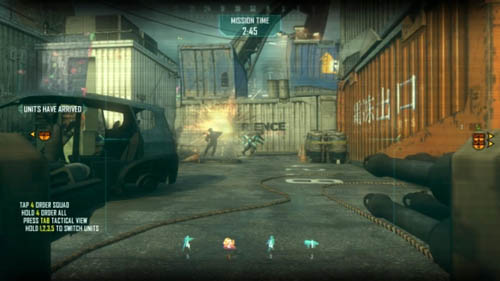
An easy challenge. Some soldiers have explosive grenades (first picture above) and you can also use ASD and CLAW grenade launchers (second picture above), although the latter is far too slow. Don't use any other weapons besides the ones just mentioned, and after a few explosions the challenge will be yours.
When throwing any grenade, try to choose the most numerous groups of enemy soldiers - at least two. Look out for helicopters on the map - there are several permanent locations where they will drop off the soldiers (groups of 4 and 5 men). It is best to lie in wait for them. Wait till all are on the ground or catch them when they're running together to any side.
It's best to switch to the next soldiers, and if they have EMP grenades, to pass the challenge below, if explosive ones - the challenge that's being described now. When there are no more grenades, switch to another soldier. In the case of ASD, just keep going on the map, search for enemy soldiers and kill them with a grenade launcher.
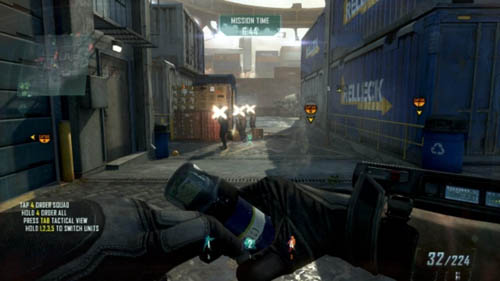
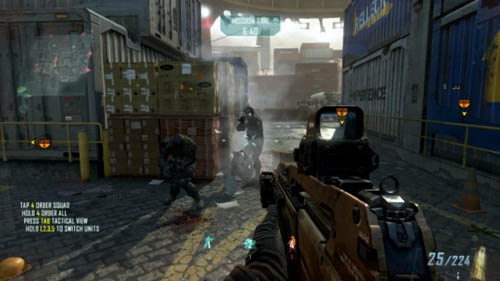
This challenge can be a little onerous. You must recognize the grenade icons in the lower right corner, and select only those soldiers who have EMP or flash-bang grenades. Throw a grenade at the enemies (first picture above) and shoot them all (second picture above) or run up to them with combatant suppression knuckles.
When throwing any grenade, try to choose the most numerous groups of enemy soldiers - at least two. Look out for helicopters on the map - there are several permanent locations where they will drop off the soldiers (groups of 4 and 5 men). It is best to lie in wait for them. Wait till all are on the ground or catch them when they're running together to any side.
It's best to switch to the next soldiers, and if they have explosive grenades, to pass the challenge above, if EMP or flash-bang grenades - the challenge that's being described now. When there are no more grenades, switch to another soldier.

This challenge can be a bit onerous and you'll probably need to dedicate one mission play-through on Recruit level to pass it. Your task is to run over twenty enemies. The problem is that, even on Recruit level, if you drive straight at a number of enemies shooting at you, your ASD can get easily destroyed (picture above).
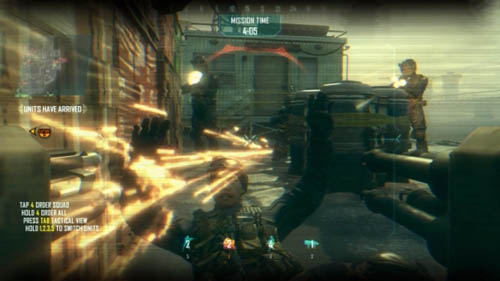
At the beginning of the mission, capture the nearest target - you must do it, as only after that will the ASD appear. Then, simply drive and search for enemy soldiers (look at the minimap, it is very useful). Avoid enemy ASDs and don't get too close to CLAWs! In order to run an opponent over (picture above), your CLAW must be speeding - it's not enough to touch the enemy with the tracks. Sometimes it happens that, instead of running an opponent over, you are just "passing through" him without killing him.
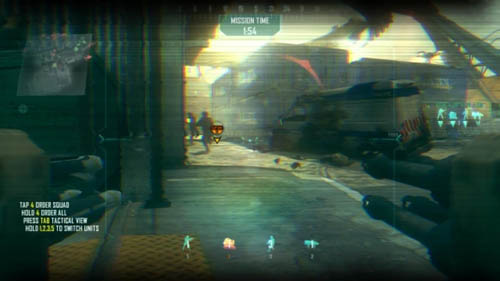
Keep all your men and all robots in the starting place, so that they don't disturb you in passing the challenge. Keep in mind that later the ASDs are dropped off in pairs. Look out for any group, easy to be run over - for example, the soldiers running in single file towards your starting position (picture above). Don't stop searching and eventually the challenge will be yours.
Immediately after the mission has begun and after you've started controlling any of the soldiers, don't do anything - don't move, don't shoot, don't look around, just press the change view button to go to tactical view. Don't turn it off till the end of the mission.
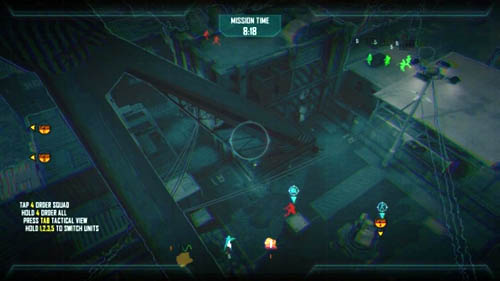
You may have some trouble when doing this mission because of the stupidity of the AI, which directs your troops and doesn't follow your orders. Remember about a few general principles. First, try to point at opponents yourself as often as possible. This will increase the survivability of your troops (especially in the first minutes of the game). Immediately after the mission has started, order everyone to capture the target in (2) (picture above). Defend yourself against the enemies, and if you don't manage to capture the target, because all of your men are dead, wait for the ASD. Clear the area around (2) with the robot, so that the next squad of soldiers can easily take and keep the target.
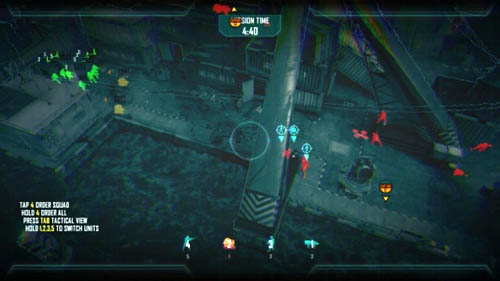
The next target you will capture will be the one next to which an enemy CLAW is standing. Don't be reckless, wait for some reinforcements - your previous ASD should have survived, after a while you'll get a second one and you should also have two squads of soldiers. If, for example, there's one soldier left in a squad, send him to die and wait for the next full squad. Go where there's no CLAW and separate the troops a little along the way so that the ASDs can go first and focus the enemy fire on themselves (picture above) (your soldiers are faster than ASD, so don't let them overtake the robots). Then, command the soldiers to capture the target and use the ASDs to drive around and point at the enemies. In the meantime, as soon as you have a CLAW, instantly have it destroy the enemy CLAW. Afterwards go back to taking the second target.
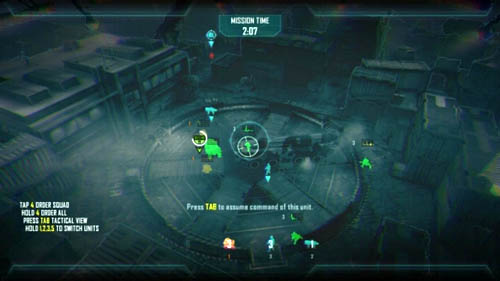
The last target remains. First destroy the CLAW with you own CLAW, if this has not yet happened, and then hit the enemy soldiers, ASD and quad-drones with all the squads. Command the soldiers to place the hacking module and protect it - put the CLAW in its place, while the ASDs should patrol the area and destroy enemies (picture above). After capturing the three targets, when an appropriate message appears on the screen, press the use button and aim the rocket at the designated ship.

Attention! You don't have to complete the mission to pass the challenge - you have to lose (Mission Failed) or win (Mission Complete), but you can't leave it by exiting it (Quit).
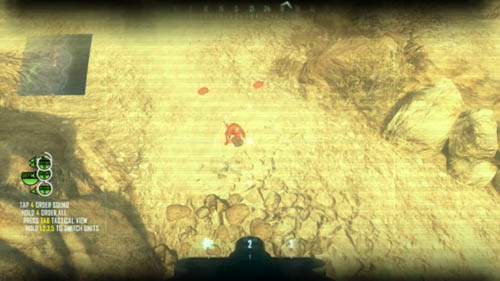
Assuming you are passing the challenge on Recruit level, immediately after the mission has started, kill three enemies on the right and destroy the tank on the left. Then, just fly as a quad-drone toward the mines. They have already been laid, but don't worry about that and destroy them. Next, look out for individual soldiers, running here and there, but don't kill them! Instead, wait until one of them begins to lay a mine (picture above) - shoot him at this moment. Don't get too close to the mines, because they can destroy your quad-drone when they explode! The soldiers always lay the mines in the same places after the old ones have been destroyed, so all you need to do is to be alert and faster than the convoy, and the challenge will be yours.
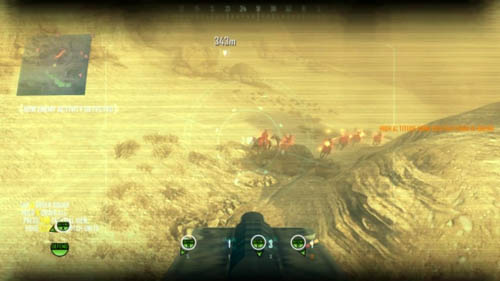
A very easy challenge. It's easiest to pass it as a quad-drone. Three waves of enemies on horseback will start appearing shortly after the first tank has been destroyed (picture above). Just a bit of accuracy will do to pass the challenge.
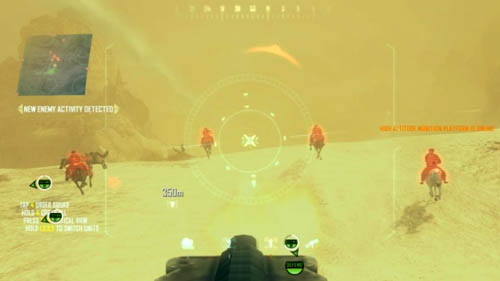
You will come across the next waves just before the entrance to the place near the weapons cache when you're riding uphill (picture above).
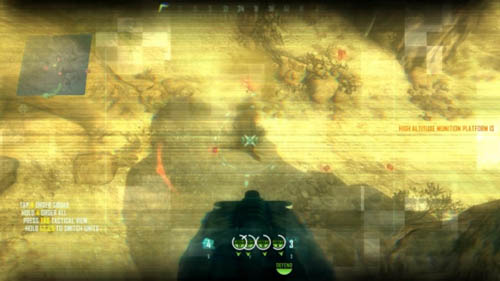
In other words, the word "Destroy", which means that the convoy has stopped and is waiting till the path is cleared of mines, mustn't appear on the screen even once. It is not a difficult challenge, you only need to be sharp. Use the map in the guide to find the sets of mines (they're marked with green dots on the guide map). First of all, get rid of the first three sets of mines, which are close to each other, as fast as you can (picture above). The first is right to the right of the second tank in the mission, the second nearby and the third to the right of the third tank.
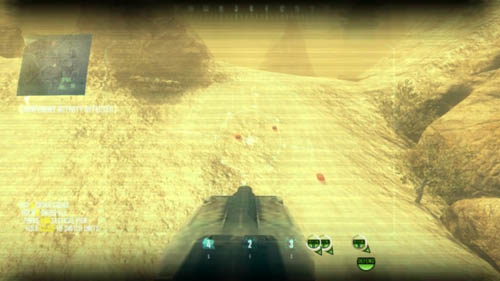
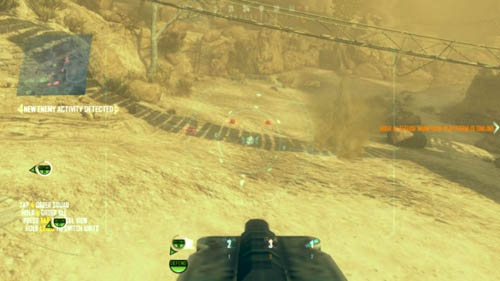
The fourth set of mines is easy to find - it's to the right of the fourth tank (first picture above). The fifth will be under the wooden bridge next to the weapons cache (second picture above).
To mark a target for the kinetic weapon, select it (preferably when controlling a quad-drone, since it is the most mobile and the fastest), point at the target, and then press the same button that you hold down to select all troops. Remember that some time must pass between the successive uses of the weapon.
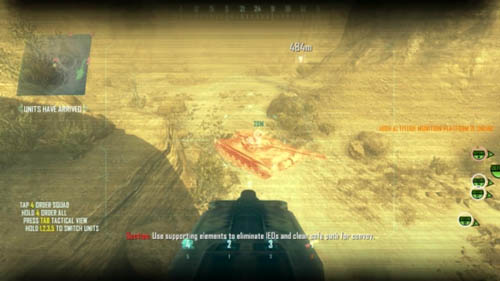
It will be easiest to look at the map in the "Walkthrough" section - there are four tanks in this mission and they are marked with blue circles on the map in the guide. Apart from that, you can also see them as big, red spots on your mission screen. The first tank will be at the beginning of the mission, on the left (picture above), mark it after killing the first several soldiers on the rocks on the right.
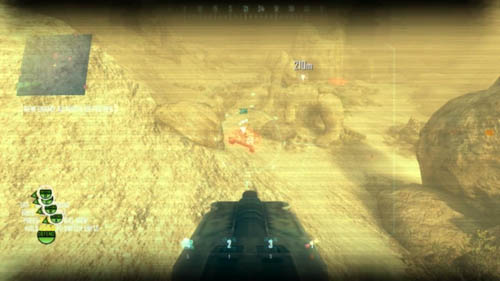
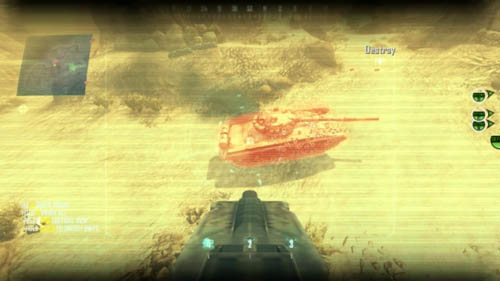
The next two tanks are near the first three sets of mines, after you've dealt with the first waves of enemies on horseback (first and second picture above). To make sure that the kinetic weapon doesn't destroy any of your vehicles (that will be passing near the tanks), destroy the mines only after you've used the kinetic weapon on the third tank.
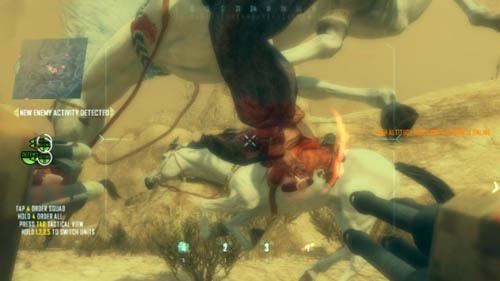
You can also leave the third tank and, to remain safe, fly to the fourth (picture above). It is possible that the kinetic weapon simply won't be ready on time, when the convoy gets closer to the place where the third tank is.
To mark a target for the kinetic weapon, select it (preferably when controlling a quad-drone, since it is the most mobile and the fastest), point at the target, and then press the same button that you hold down to select all troops. Remember that some time must pass between the successive uses of the weapon.
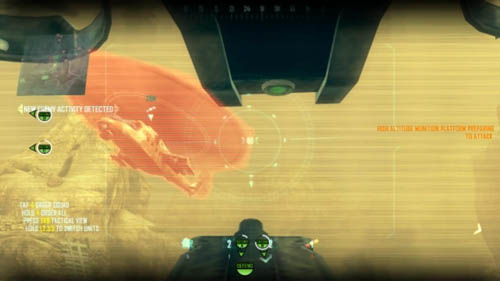
The main problem in this challenge is that your quad-drones and ASDs destroy the helicopters very quickly. There are 6 to 7 helicopters in the mission, and the first four will attack you in pairs. Try your luck, but a much better idea is to point at one of the three helicopters that will appear among the mountains surrounding the weapons cache (picture above). There are so many opponents around that your troops will have something to do instead of preventing you from passing this challenge.
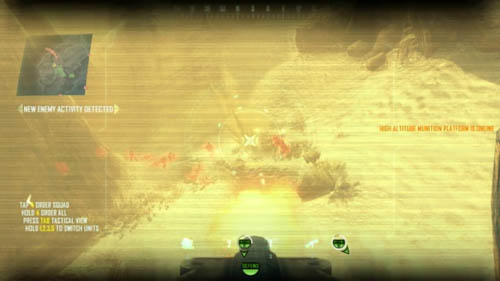
The easiest challenge to pass, all you need to do is to control the quad-drones. You should pass the challenge after the first successful mission playthrough. You will kill a lot of infantry in the vicinity of the weapons cache, through which you will have to pass. Soon after that two infantry divisions will appear at the end of the map (picture above), just hover and shoot till the challenge is yours.
A little onerous challenge. First of all, you can try to run over as many enemies on horseback as you can (picture above) - the first waves will depart shortly after the first tank has been destroyed, the next just before entering the vicinity of the weapons cache. Don't try to find opponents on high rocks, as your ASD won't get up there.
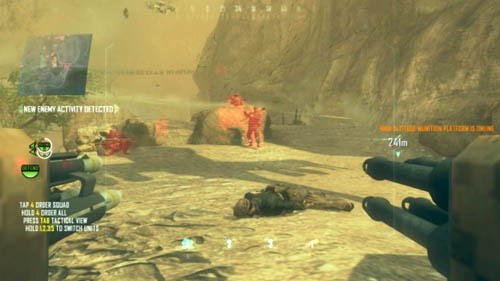
After getting to the weapons cache, a lot of enemies will run on the rocks on the right. Drive up there and run them over, heading for the place they are running out of (picture above).
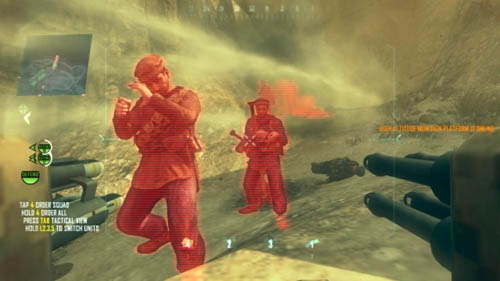
An almost sure place is at the very end of the mission, after you've driven out of the weapons cache. Two very large groups of enemy infantry will run out exactly in front of you. Drive there as quickly as possible and start to run over the enemies (picture above).
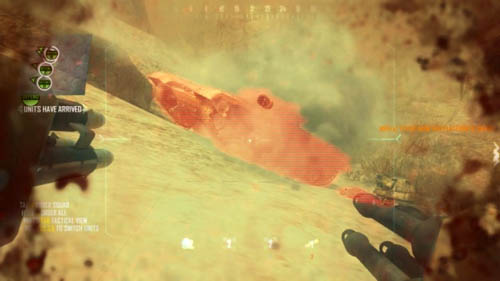
It will be easiest to look at the map in the "Walkthrough" section - there are four tanks in this mission and they are marked with blue circles on the map in the guide. Apart from that, you can also see them as big, red spots on your mission screen. All you need to do is to get on the ASD, find a tank and use grenade launcher on it (picture above). If a tank destroys the ASD, switch to another one and continue the hunt. If all ASDs get destroyed, there will be new ones, so you can try endlessly. If you want, after you've destroyed two tanks, you don't have to destroy the mines and leave the convoy behind them, so that it doesn't interrupt you when you're searching for the other two tanks.
Tanks and mines pose the greatest threat for the vehicles. Eliminate the tanks with kinetic weapon or ASD. The mines should be destroyed in advance - you mustn't do it right next to the vehicles in convoy. Eliminate the individual soldiers who are laying the mines. Helicopters and all kinds of infantry (those with RPGs and on horseback) can also be dangerous. Be careful when you are fighting near the ammo cache, as there will be a lot of enemies. Two very numerous groups of infantry will appear soon after that and they will run out from the end of the map. Bearing these tips in mind and playing on Recruit level should allow all four vehicles to successfully get to the extraction site.
Immediately after the mission has begun and after you've started controlling any of your robots, don't do anything - don't move, don't shoot, don't look around, just press the change view button to go to tactical view. Don't turn it off till the end of the mission.
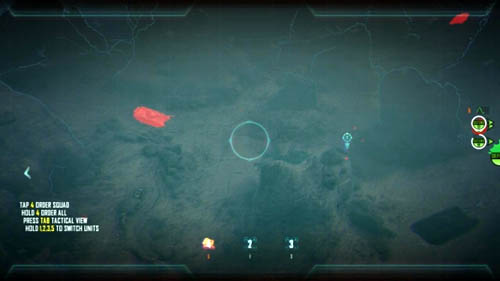
It will certainly be easier than in other missions, but you still must systematically point at the targets for your troops by yourself. Attack the soldiers on the right with the quad-drones and then immediately find the tank on the left and mark it for the kinetic weapon. Go back to the convoy and mark your opponents, and when the kinetic weapon is ready, mark the second tank. Eventually, you'll get to a place with mines (picture above), be prepared to quickly destroy them, point individual soldiers for the quad-drones, so that they can't lay new mines. Point the third tank for the ASD, and destroy the fourth with the kinetic weapon.
Use ASD to get rid of several helicopters that will appear. The canyon near the weapons cache (picture above) will be the place where you have to be especially careful and manage to point all the enemies. Immediately destroy the mines under the bridge, so that the convoy doesn't stop. Point the helicopters for ASD and infantry for quad-drones. Above the upper bridge, on the right, there is a large group of infantry - point at it for the kinetic weapon.
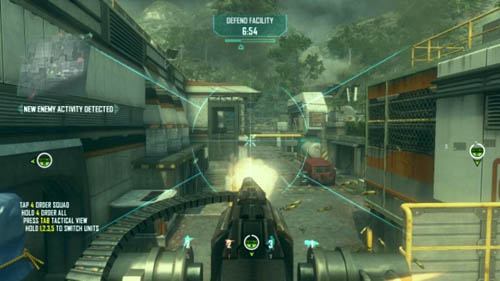
The last part of the mission can be particularly difficult (picture above). Make ASDs overtake the convoy and clash with two quite large groups of infantry, which will run out from the opposite direction (you can also use kinetic weapon). Point the rest of the infantry for the quad-drones and keep your fingers crossed for at least one vehicle to arrive at its destination.
Attention! You don't have to complete the mission to pass the challenge - you have to lose (Mission Failed) or win (Mission Complete), but you can't leave it by exiting it (Quit).
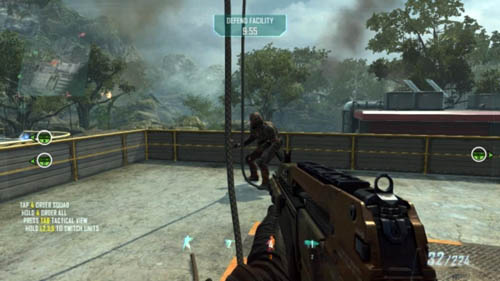
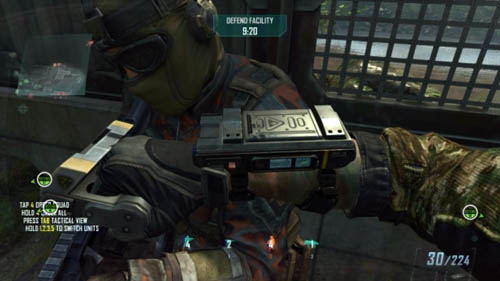
It should not be difficult. During the second mission playthrough, on Recruit level, place the soldier at the entrance to the building, on the balcony. Right in front of you the opponents will repel down the ropes - start killing them quickly (first picture above). An even better place is the fence exactly opposite the abovementioned balcony - the soldiers will be passing through it, and you need to wait for them with combatant suppression knuckles (second picture above). Count the enemies - it may happen that the message doesn't appear at once. If you are sure that you have killed at least ten, start doing a different challenge.
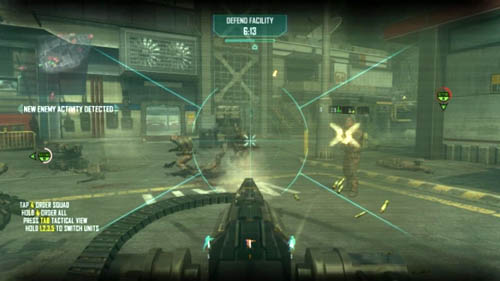
Another easy challenge. As the turret by the electrical power station, keep looking out for the soldiers going down the stairs on the left, as well as for those who have gone through the fence in front of the balcony and entered the small building just to the right. A little later, when the CLAW is destroyed, it is this very turret that will take over its duties (picture above).
The second turret (by the communications uplink) will be firing at the soldiers appearing in an opposite, long "street" (picture above). You can also turn around if any soldiers run near the communications uplink exactly from the other side or run through the nearby door.
You need to repel only three soldiers' attacks to pass the challenge. If you played the mission through in accordance with the tips given in the guide, the challenge should be passed already. Therefore, during the second playthrough (on Recruit level) it is best to immediately direct the CLAW to a place from where it will be able to kill as few enemies as possible - so that it doesn't disturb you in doing other challenges.
The force field will be turned off if you lose any two of the three objects that you are supposed to defend. Try, playing on Recruit level, not to let that happen - it won't be difficult, and the challenge will be yours.
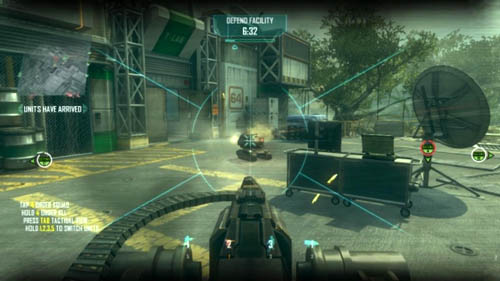
See the challenge about killing 20 enemy soldiers with turrets. The roads on which the ASDs will be going are the same as those on which the enemy soldiers get to turrets (picture above). Just look for ASDs on the minimap.
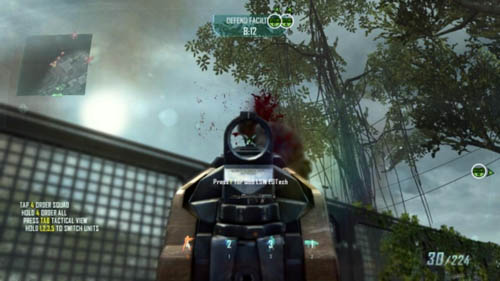
A bit more difficult challenge, as you need to have a lot more accuracy. There are two easiest ways to give accurate headshots. The first is to stand by the fence (mentioned many times) and wait for the enemies who will be passing through it (picture above). Try to shoot as soon as they are on the top of the fence. The second way is more general - don't aim from a distance, but get closer to an enemy at a distance of several meters, then it will be a lot easier for you to aim (but not too close, because then he will start to melee).
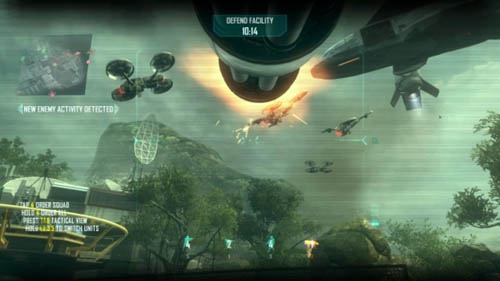
The quad-drones will be flying in groups of four (picture above). Because of the fact that they are the only ones that can fly, they'll always focus on attacking targets you must defend - and these are the places where it's easiest to find them.

You just need to pass one of the previous challenges, namely not let the enemy lower the defence field, and this challenge will also be yours. Hacking modules are small, vertical tubes that enemies place under the last of the targets (at the time when two of the three targets have been destroyed and you have to defend the fourth - the main computer in the building).
Similarly to most challenges above - playing on Recruit level and being careful a little, so that the enemies don't destroy more than one turret, is enough to pass it.
Immediately after the mission has begun and after you've started controlling any of the soldiers, don't do anything - don't move, don't shoot, don't look around, just press the change view button to go to tactical view. Don't turn it off till the end of the mission.
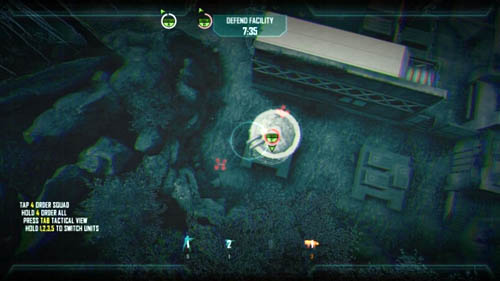
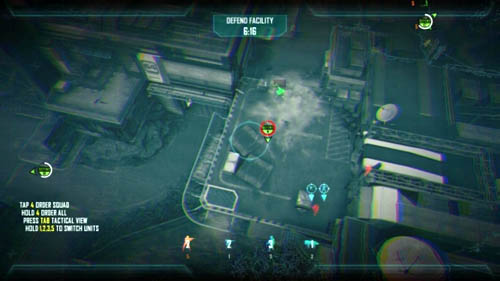
Don't change the default deployment of troops and play the mission on Recruit level. The only difficulty will be the situations when some soldiers or quad-drones attack one of the targets and there's simply no one to get rid of enemies. The CLAW is too slow, turrets were destroyed or can't reach the targets, and there's no one left in a given place (first and second picture above). That is why, in such cases your soldiers will be important, as they will be the ones to deal with such situations.
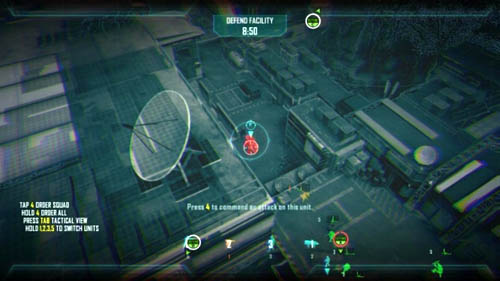
The second problem will be the CLAWs. If you send your soldiers at them, they'll die immediately. Therefore, keep your turrets or CLAW ready to repel such an attack (picture above). What's more, you need to manage to point the targets quickly - e.g. quad-drones for the turrets, to prevent enemies from taking advantage of your inattention.
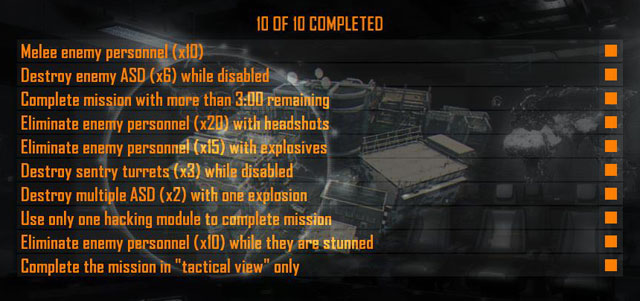
Attention! You don't have to complete the mission to pass the challenge - you have to lose (Mission Failed) or win (Mission Complete), but you can't leave it by exiting it (Quit).
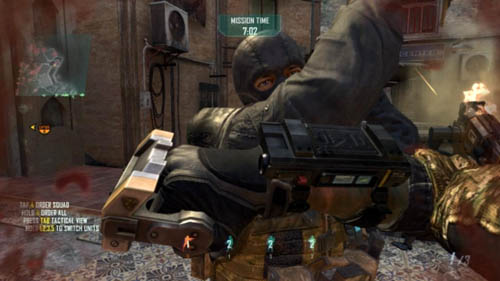
Run and dispose of enemies with combatant suppression knuckles. The challenge will be passed before you know it.
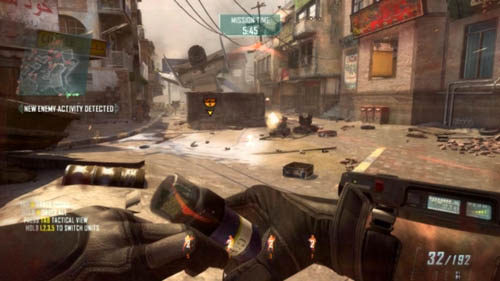
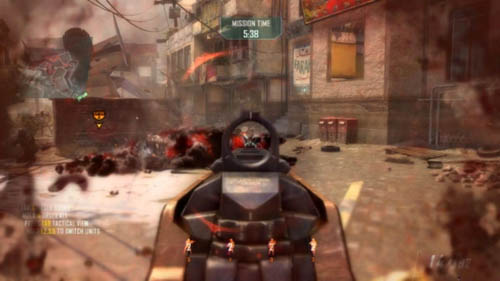
Near the target of this mission there are ten enemy ASDs, the rest is hanging around the map. You will easily find more than six targets and destroy them with EMP grenades (it's best to use rocket launcher) (the first and the second picture above). If you destroy two ASDs at the same time, you will also pass a different challenge.
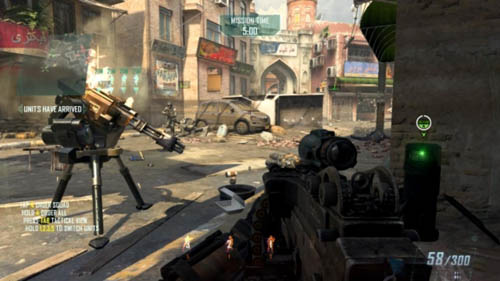
A very easy challenge - you can pass it with five minutes remaining. Simply play the mission through in the same way as it has been shown in the mission description, but on Recruit level. It's best to play as a soldier with a machine gun, thanks to whom you'll quickly get rid of many ASDs, soldiers and three turrets, which will be in your way. Place the hacking module in an appropriate spot (picture above) and defend it until it finishes its work.
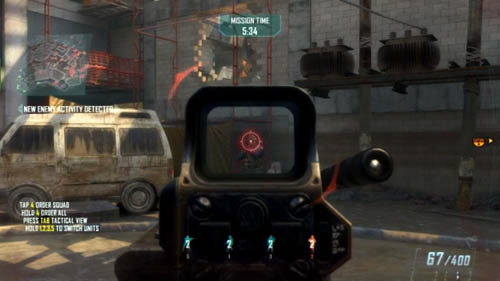
A lot of enemies, but on Recruit level you'll handle it without a problem. It is good to choose those soldiers who are armed with machine guns, not assault ones - just one shot from the former will do to kill an enemy (picture above). On Recruit level you are strong enough to easily aim at the head of an opponent standing in front of you before you die. On the map there are plenty of enemies, but don't wait for them, search for them yourself. However, don't look for ASDs unless you hunt for the challenges connected with them.

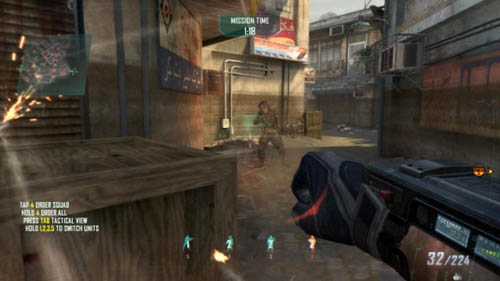
On Recruit level this challenge will be simply good fun. Each of your soldiers has a rocket launcher as a second weapon (first picture above), and most are also armed with explosive grenades (not EMP) (second picture above). Therefore, all you need to do is to look for enemies and kill them with explosions. When the soldier you're playing with runs out of explosives, switch to the next one.
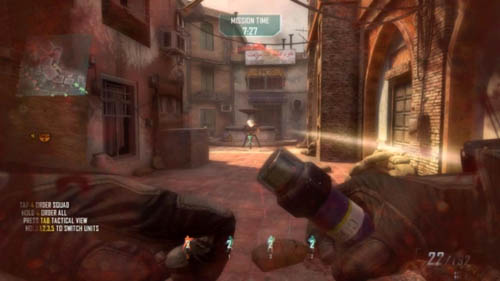
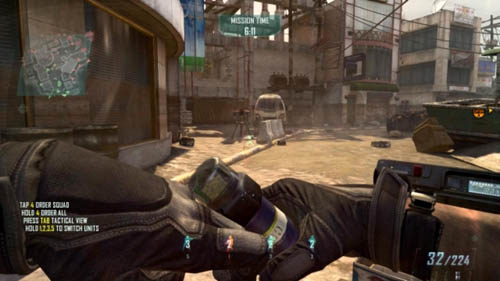
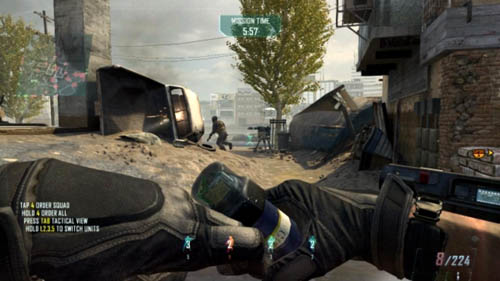
On the map there are five turrets altogether. Three are located separately in different places in the city (see the description of the mission playthrough and look at the attached map - the turrets are marked with green circles) - the first turret is at the end of the alley on the right side (first picture above), the second in the center of the map, in the main street (second picture above), and the third in the left part of the map, on the beach, near the big boat (third picture above).
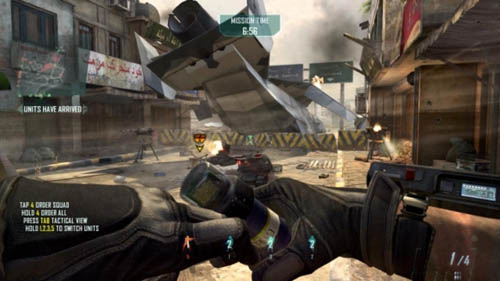
The remaining two are next to each other (picture above) and they're protecting your target. One EMP grenade (select a soldier who has these grenades) and an accurate round will be enough to get rid of the turret in the way required to pass this challenge. There should be no trouble with that on Recruit level.
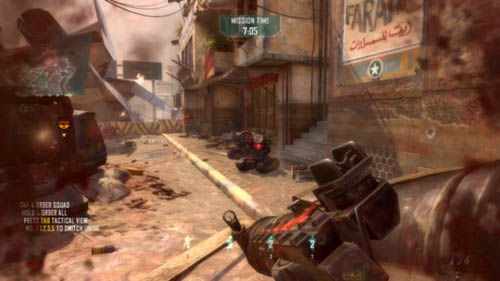
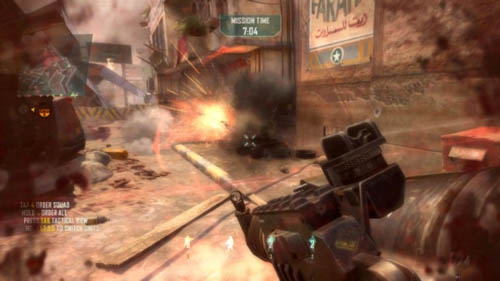
Near the target of this mission there are about ten enemy ASDs. Take out the rocket launcher and choose two that are near each other, and then shoot a rocket at them (first and second picture above). You can stop them earlier with an EMP grenade, thanks to that you can be sure they won't move, and by doing so, you will also help yourself in passing one of the previous challenges.
In other words, the enemy can't destroy a single hacking module. Put it in a reasonable place (a good place is described in more detail in the mission description) and protect it till it finishes its work. Just a bit of caution will do to pass the challenge.
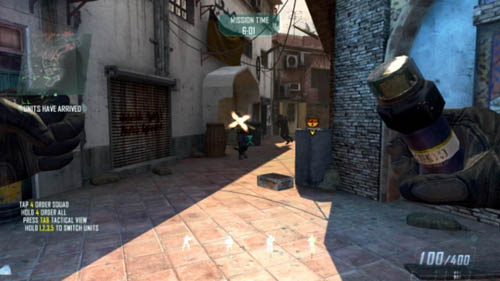
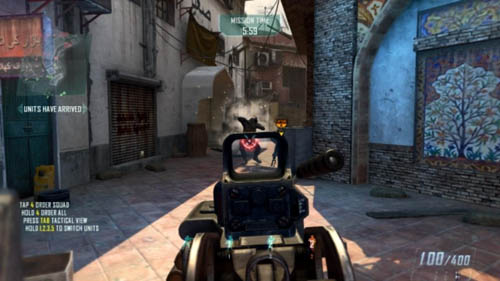
First, make sure that the soldier you control has EMP grenades. If not, switch to another one. There are a lot of enemies on the map, but rarely in groups larger than two individuals. You can combine this challenge with the one about killing 10 enemies in melee combat. Search for enemies, throw a grenade (first picture above), and then kill enemies before they can pull themselves together (second picture above). Be careful not to stand too close to an explosion, because there will be interference on the screen!
Immediately after the mission has begun and after you've started controlling any of the soldiers, don't do anything - don't move, don't shoot, don't look around, just press the change view button to go to tactical view. Don't turn it off till the end of the mission.
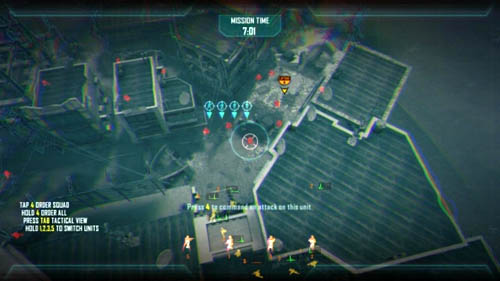
With a bit of luck, this mission can be completed in three minutes, just remember to point the targets yourself and in turn. Play the mission in the way presented in the mission description, namely, select all the soldiers and start to eliminate enemies in a side alley one by one. Defeat the enemy ASD, then the turret, and through the gate start to eliminate ASDs that are hanging out in front of your target (picture above). After clearing the area, focus on two turrets, then put the hacking module pointing at an VTOL as the target, and place all the soldiers next to it. Wait until the hacking module finishes its work, which will end the mission and result in passing the challenge.
Attention! You don't have to complete the mission to pass the challenge - you have to lose (Mission Failed) or win (Mission Complete), but you can't leave it by exiting it (Quit).
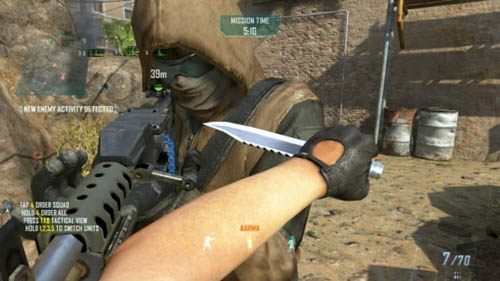
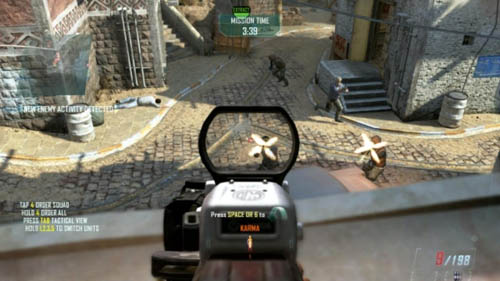
HVI is your target. When you find Karma, start playing as her and begin to kill enemies. You just have to be careful, because if you die, the mission will end in failure. This challenge can be combined with some other ones (e.g. melee or headshots). Karma is armed with a knife (first picture above) and a gun, but you can change the latter into any other weapon, which you should definitely do (second picture above).
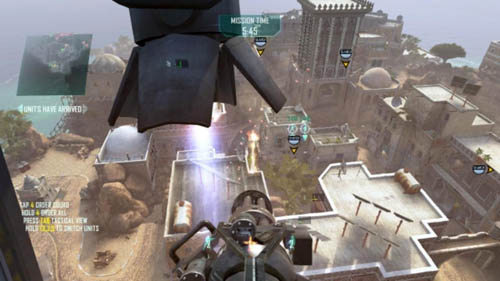
A very easy challenge. If you played the mission through in accordance with the mission description in the guide, it should be yours already. If not, then discover about three safehouses (then the enemies will start running around the map, not hide in the apartments), switch to the VTOL and start the massacre. Look out for the enemies indicated by red corners of the squares and eliminate all of them (picture above) until the message about passing the challenge appears.
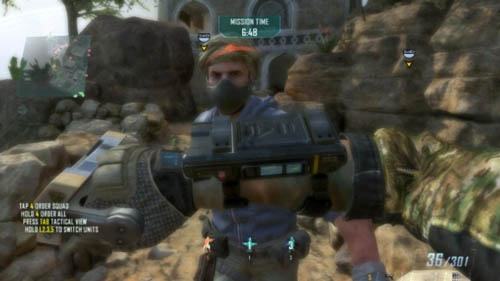
You should probably already know how to pass this type of challenge (picture above). Pass it, of course, on Recruit level.
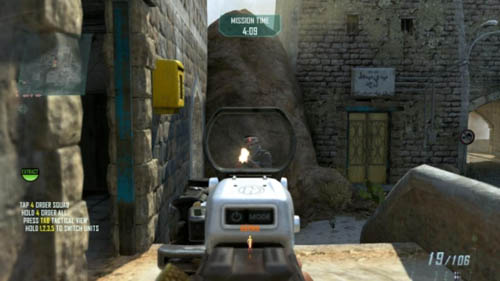
Again, there is nothing to add. Discover about three safehouses, so that more enemies appear on the map. Also, try to change the weapon (or select a soldier with an appropriate one) that can kill an enemy with a single headshot (ordinary rifle needs two shots) (picture above).
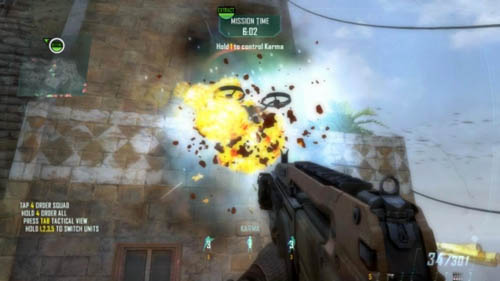
A very easy challenge, you just need some patience. The quad-drones are flying all over the map, and there are many more than 4. Just make sure that your squad-mates remained at the starting point and they are not destroying the robots. Find 4 quad-drones and destroy them (picture above).
The challenge is onerous due to the fact that you have very few explosives. It's best to leave your men at the starting point. Check if the soldier you control has explosive grenades (not EMP nor smoke). If not, switch to the next. If no one has them, then begin to throw yourself off the cliff (you must press the jump button) and after killing your men check if the new ones have the appropriate grenades.

Next, just walk around the map and kill enemies with grenades (picture above). It will be good to search three safehouses first, as after that more enemies will appear in the streets.
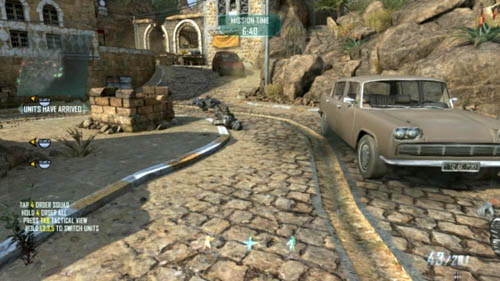
There are seven vehicles on the map. All are on its borders. At the beginning it's good to locate all the vehicles. After the mission has started, run right, in a street leading up. You'll pass the first two vehicles (picture above).
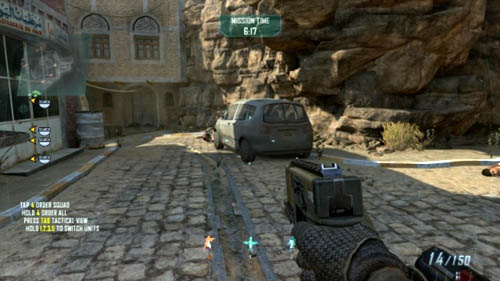
Keep running down the same street. When you stop going up, look at the vehicle parked on the right (picture above).
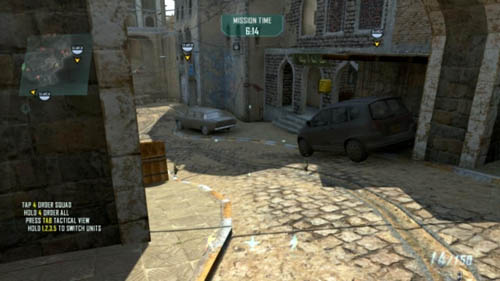
The street turns to the left, so follow this path and go through the gate. You'll notice two vehicles standing near one of the safehouses (picture above). Go inside the safehouse, but don't go upstairs. Instead, exit through the door on the left.
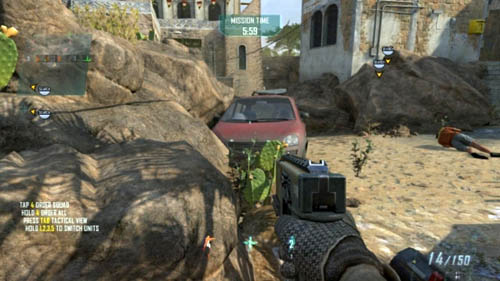
Go the only possible way. When you cross the second footbridge over the chasm, immediately look left behind the rocks. You'll notice the last but one vehicle (picture above).
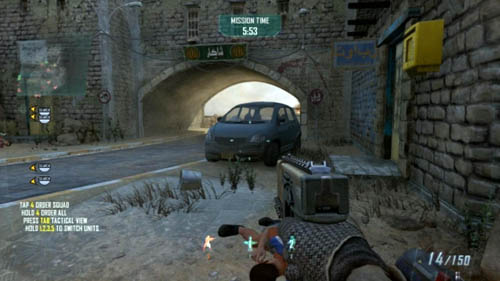
Keep going further, sticking to the right side. When you go behind the low building and look right, you'll see the last vehicle (picture above). Knowing the places where the vehicles are, search the three safehouses, so that more enemies appear in the streets. Next, when you're fighting with them, position yourself in such a way as to force them to get closer to a vehicle or go around it. When they start doing that, shoot at the vehicle until it explodes. The more soldiers you will kill with one explosion, the sooner you'll pass the challenge, but you can also kill just one enemy with one exploding vehicle. Repeat this action five times.

The closer the safehouse where you'll find Karma is to the extraction site (picture above), the smaller the chance that you won't pass the challenge. Therefore, it's good to choose an appropriate safehouse by searching three others earlier (look at the map in the mission description to discover where all of the safehouses are). Even so, you should have no problems as long as you play on Recruit level, sprint, go around opponents and don't get lost along the way.
One of the most difficult challenges in this mission, a good knowledge of the map will be useful. Try not to waste time on fighting (of course, pass the challenge on Recruit level).
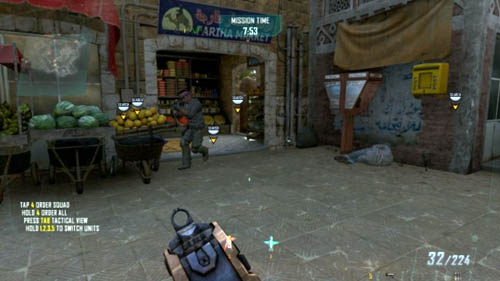
Immediately after the mission has started, order all your men to stay at the starting point. You should run right and down the street in front of you, up the hill. When you pass the red vehicle on the right, immediately turn around to the left and enter the building (picture above), and then the next room.
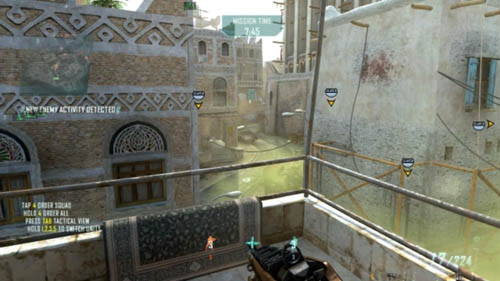
Once you've searched the place and finished off all enemies, exit to the balcony, which is exactly in front of you. You should notice a footbridge - jump out of the balcony (picture above), but don't step on it, instead turn right in front of it and start running down the street.
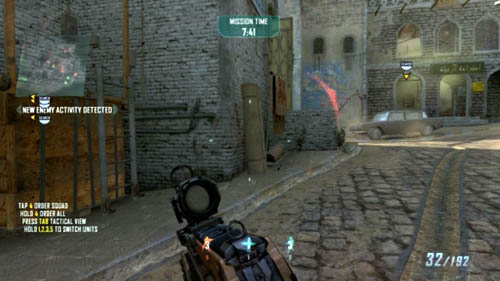
By the wall of the building on the left you should see a hanging carpet (picture above). Right behind it there are stairs leading to the door of the second safehouse filled with carpets, while in front of you, slightly to the right, there is an entrance to the third safehouse. Visit the second one (you need to go up the steps from the other side) and immediately go back to the front door. Then, go to the third safehouse and run up the stairs in front of the entrance.
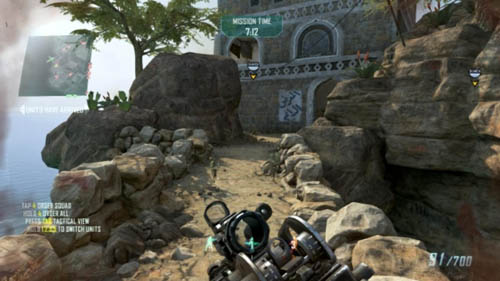
After searching the third safehouse immediately switch to any of the soldiers who are stationed at the starting point. Sprint to the left, along the rocks. Stick to the left border of the map, but when you see the fourth safehouse (picture above), enter the tunnel on the right (which is just below it). You can throw a grenade into the left window along the way.
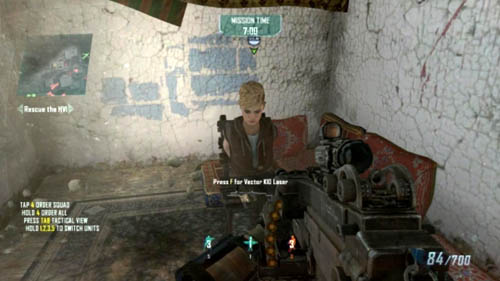
Go out of the tunnel on the other side and turn yourself to the right, go up the stairs and through the door on the right. Eliminate the enemies you can see and the next ones in the next two rooms. In the last room, on the right, you will find Karma (picture above), whom you should free as quickly as possible. If you didn't delay, the challenge will be yours.
Immediately after the mission has begun and after you've started controlling any of the soldiers, don't do anything - don't move, don't shoot, don't look around, just press the change view button to go to tactical view. Don't turn it off till the end of the mission. If your people are in any building and the safehouse the icon doesn't disappear, point at it and issue the command again.

You will be playing this mission through similarly to the way presented in the mission description in the guide. The key is to quickly search the three safehouses, before the streets start swarming with enemies. Wait until the second squad comes and have it go to the first. When they join, command them to search the first out of three safehouses close together (the one on the right) (picture above).

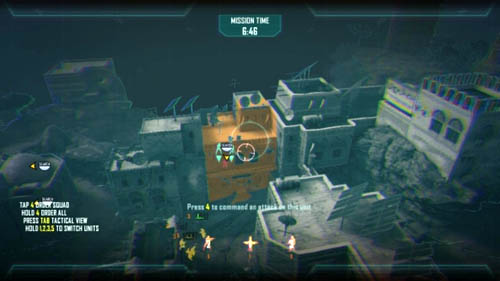
Immediately after searching the first safehouse give the order to search the second one (first picture above). As the target, point the far end of the building. Once the second safehouse is checked, have your men quickly head for the third (second picture above). You have to make it before the streets are filled with enemies, otherwise you will have a really hard time.
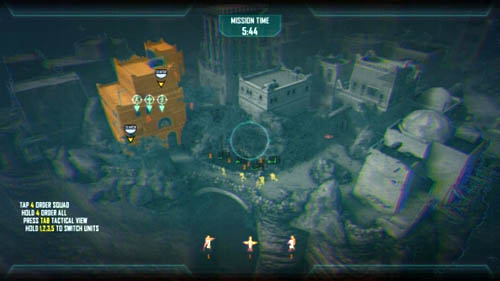
After checking all three safehouses go back to the starting point - order everyone to go there. Only after the two units are in place (it doesn't matter if new came in the place of the killed ones, or if your men came here from the other end of the city), command them to storm the fourth safehouse (picture above). If you mark the enemies standing by the windows, your soldiers will definitely search the safehouse and find Karma.
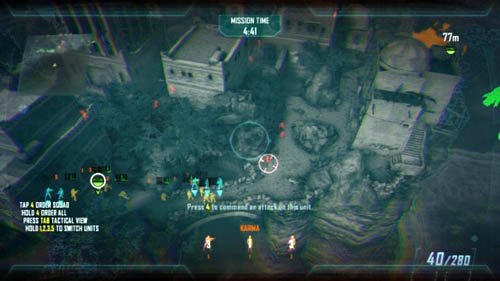
All that's left is for you to take her to the extraction site (picture above). Do it quickly and order all men to cover Karma, you can also point at their targets for them. Karma should run to the target all the time - if she doesn't stop, she'll easily reach it.

Interrogating Kravchenko
At the very end of the mission you will be interrogating Kravchenko. You can either kill him, which means not getting all information from him, or stop yourself. The decision doesn't affect the game ending, but it will have an impact on the number of dialogues in Mission 07: Suffer With Me.
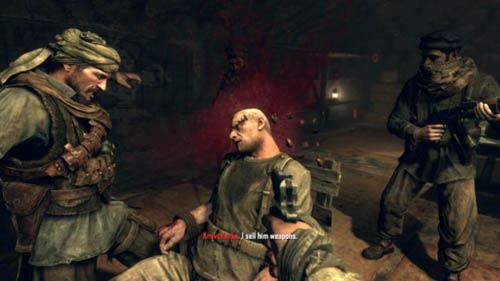
Kravchenko interrogation insufficient
If you want to kill Krevchenko, simply don't do anything and let Mason shoot him (picture above). You won't find out anything.
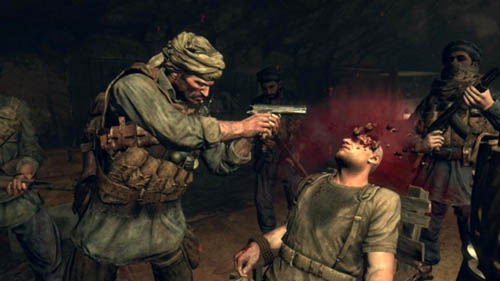
Kravchenko thoroughly interrogated - learned about potential mole in CIA
But if you want to stop yourself, press the use button as many times as possible until the message disappears. You must repeat this process three times for the interrogation to be successful. At the end of it Kravchenko will say that Menendez has his people even in the CIA. Then, Woods will kill Kravchenko (picture above).
None.
CIA memo
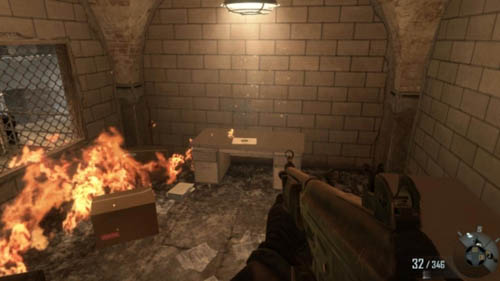
Searching the cocaine bunker, you'll eventually get to a large room, which will be set on fire. Woods will tell you to take all the documents you can find before they burn. After you enter this room, run straight, then right and right again. You'll notice the flames on the left that are going towards the desk on which the CIA letter is lying (picture above). Decide if you want pick up the letter or not. The decision doesn't affect the game ending, but it will have an impact on the number of dialogues in Mission 07: Suffer With Me.
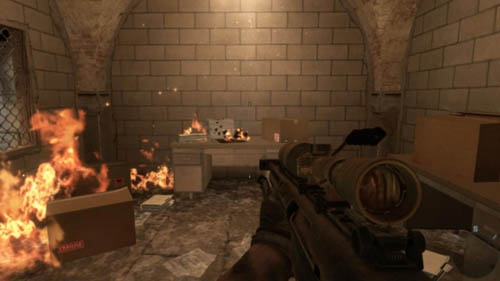
Menendez's compound search incomplete
If you don't want to pick up the letter, then don't do it. It is worth adding that if you wait too long, the letter will burn (picture above).
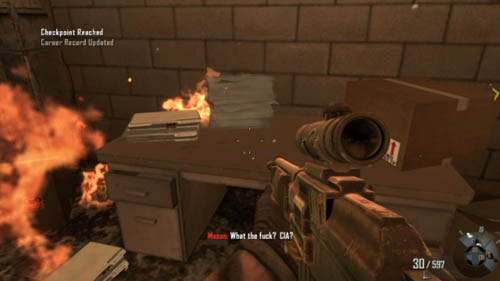
Compound thoroughly searched - learned about potential mole in CIA
If you want to pick up the letter, move closer to the desk and press the use button (picture above). Mason will be very surprised. You must do it before the letter burns!
None.
Harper's burn
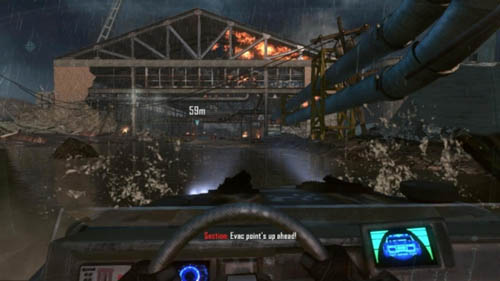
At the end of the mission, regardless of whether you were flying a helicopter-drone or driving the SOC-T jeep, the drone will be destroyed. You will move to the jeep or you'll simply continue driving it. When you see the destroyed hall in front of you (picture above), you will have to make a decision regarding Harper's health. The decision doesn't affect the campaign ending.
Harper badly wounded
If you want to burn Harper, drive on the left side. Harper's burn will remain on his face till the end of the campaign (pictures above).
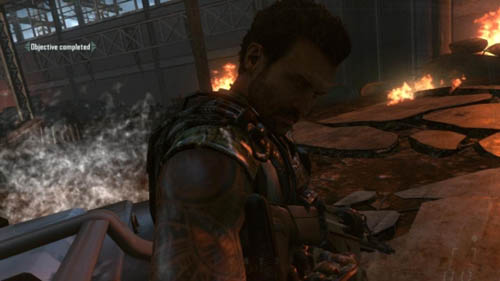
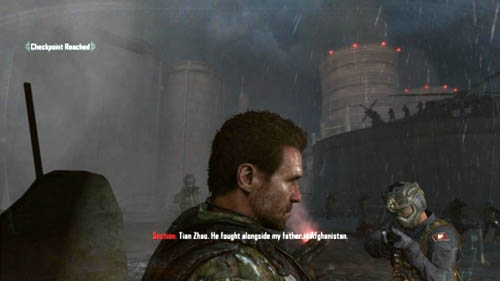
Harper successfully protected
If you don't want Harper to get burnt, stay as close to the right side as you can. Harper will escape the facial burn (pictures above).
None.
Killing DeFalco or letting him escape
Saving Karma
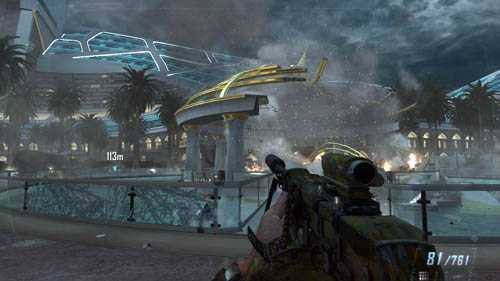
At the end of the mission when you, chasing DeFalco, go outside and get closer to your target for not less than 100 meters (picture above), it will mean taking another decision - you can catch up with DeFalco and kill him, which means saving Karma, or let him get away with her. This decision has partial impact on the end of the campaign - if you don't save Karma, you can do it during the next strike-force mission entitled Second Chance.
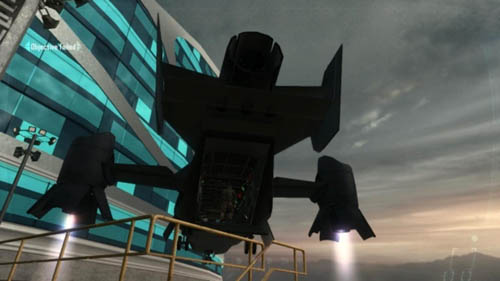
Karma kidnapped, DeFalco still alive
If you don't manage to get to DeFalco on time, in the upper left corner you will see a cutscene showing DeFalco entering the airfield. When you get there, you'll notice a departing plane (picture above). The strike-force mission entitled Second Chance will be unlocked - as the name suggests, this is the second (and the last) chance to save Karma. Obviously, DeFalco will survive and will appear in the next missions.
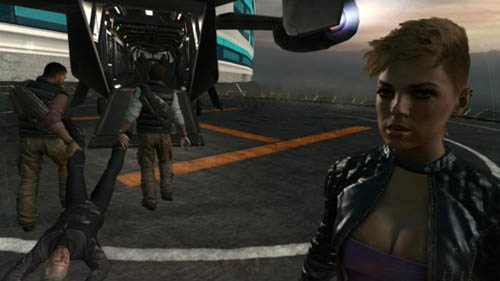
Karma secured, DeFalco dead
If you manage to run up to him, you'll have to kill him. Karma will be saved. You'll talk to her at the end of the mission, when Harper and Salazar will be bringing DeFalco's body on the plane (picture above). Mason will say that without Karma Menendez won't be able to work Celerium out. Karma will disagree, saying that it will only delay him, but he'll get what he wants anyway.
[FROM THE MISSION START TILL THE CAMPAIGN END]
Harper's burn
The result of your actions from the previous mission will be apparent during the briefing (pictures above) and in all missions except the next one (although the information about this fact will be given in the guide only at this point). In addition, at the beginning of the mission, while getting off the plane, Harper will say that if he was not on a mission, he would go and have some fun with a hot chick at the hotel. If Harper didn't get burnt, then Salazar, walking next to him, will shake his head. If Harper did get burnt, Salazar will tell him that his face doesn't look too good. Harper will reply that it's his body that will attract the attention, not the face.
Menendez's manipulation
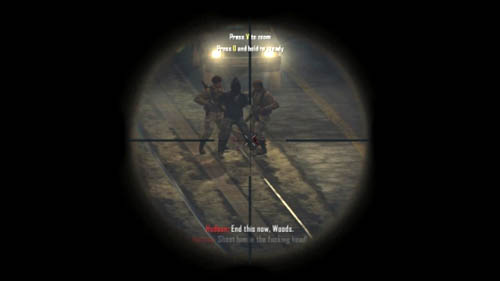
At the end of the mission you will have to make a decision that will affect the game ending. The target you're to shoot is not Menendez, but Alex Mason (picture above). The details are below.
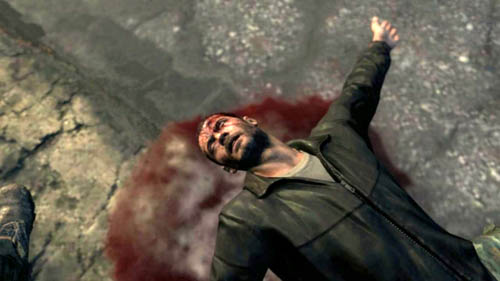
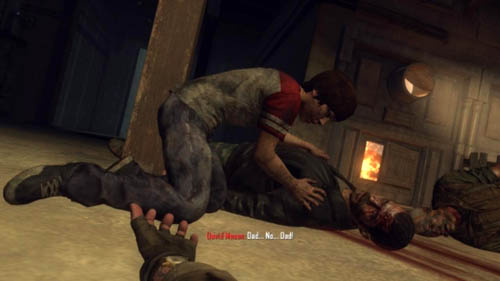
Menendez successfully manipulates Woods to kill Alex Mason
If you shoot the target in the head, it will have negative consequences for the plot. Alex Mason won't survive, which is pretty clear when you look at the hole in his head (pictures above).
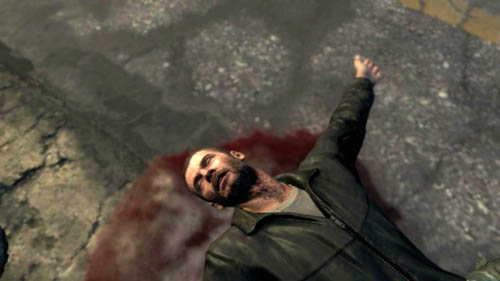
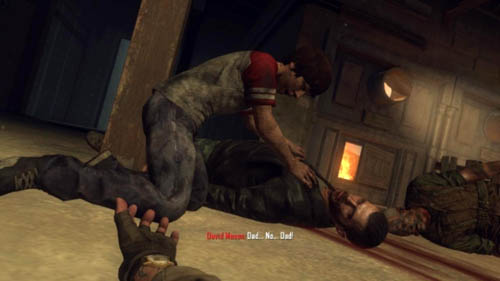
Menendez doesn't completely succeed in manipulating Woods
If you kill the target, for example, by shooting twice at the legs, it will have better consequences for the plot, as Alex Mason will survive (pictures above).
[AFTER CAPTURING NORIEGA]
Interrogating Kravchenko
CIA memo
The two decisions you took in 03: Old Wounds and 04: Time and Fate missions will be important in the middle of this mission. When Mason and Woods seize Noriega, the scene ending will differ depending on what you did in the previous missions.
If you thoroughly interrogated Kravchenko and found the CIA memo, Woods will hear Kravchenko's words in his head, namely that Menendez has people even in the CIA. He will tell Mason about that and Mason will remind you of finding the CIA memo in the cocaine bunker (picture above).
If you didn't thoroughly interrogated Kravchenko but you found the CIA memo, Woods will remind you of the letter pointing at Mason (picture above). Mason will say that something bad is going on here.
If you thoroughly interrogated Kravchenko but you didn't find the CIA letter, Woods will hear Kravchenko's words in his head, namely that Menendez has people even in the CIA. He will tell Mason about that and Mason will nod his head (picture above).
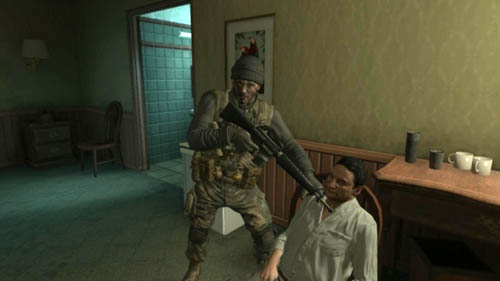
And finally, if you neither thoroughly interrogated Kravchenko, nor found the CIA letter, Mason and Woods will have no reason to suspect anything (picture above).
Farid or Harper?
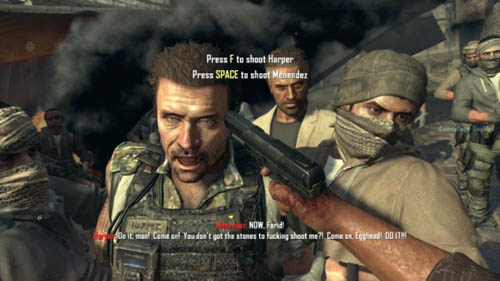
In the middle of the mission, when, as Farid you meet Menendez for the second time, after watching the cutscene you will need to make a decision (picture above). It affects the ending. The details are below.
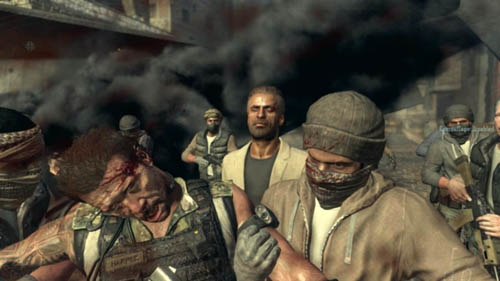
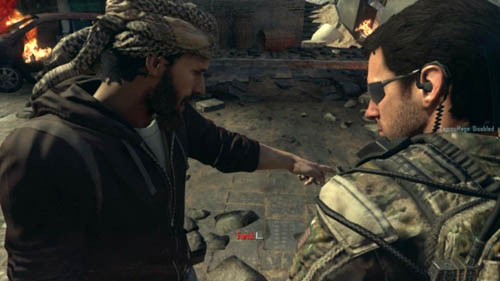
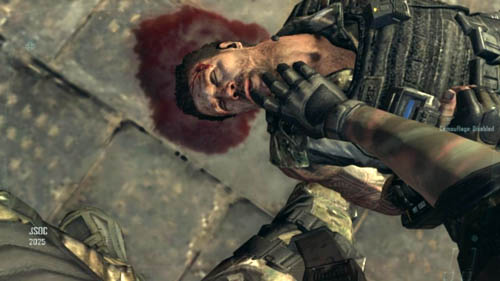
CIA undercover operative Farid survives
If you kill Harper (first picture above), Menendez will leave this place, while Farid will briefly lose consciousness after the plane explosion. When Mason arrives at the place, a depressed Farid will tell him what happened (second picture above), while Mason will close Harper's eyes (third picture above). Moreover, you'll miss a short part of the mission, during which you will be firing at the turrets from the VTOL. In the next missions you will also not have a companion to help you.
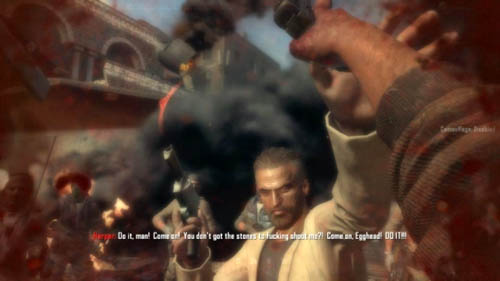
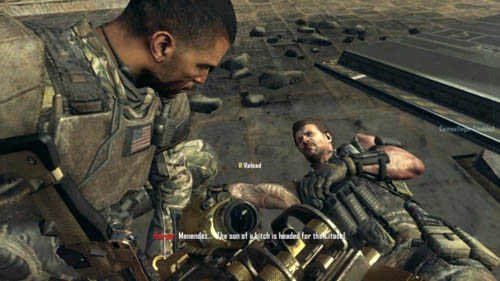
CIA undercover operative Farid is dead
If you try to kill Menendez, he will grab Farid's arm and shoot at him (first picture above). When Farid will be lying on the ground, Menendez will get upset with Farid's treason and he'll say that for those whom Farid serves his life is of no importance (second picture above). Then he'll shoot him. Now there will be a short part of the mission, during which you will be firing at the turrets from the VTOL. When Mason lands, a battered Harper will tell him where Menendez has run away (third picture above). In the next missions Harper will be helping you.
[INTRODUCTORY CUTSCENE]
Saving Karma
Until now it should be clear whether Karma has been saved (at the end of Mission 06: Karma, or through the completion of a strike-force mission Second Chance).
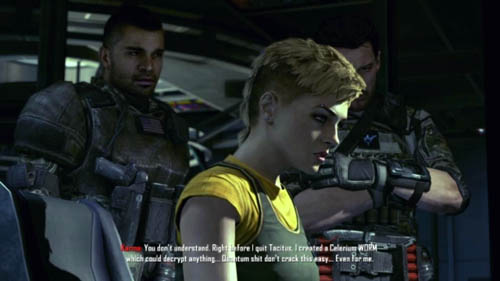
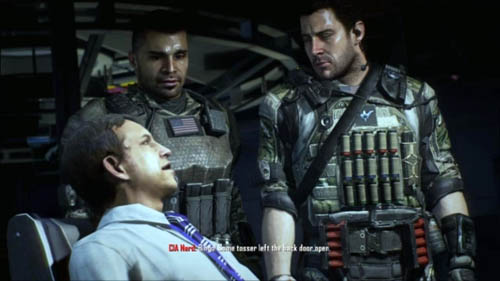
If Karma was rescued, she will be the one who will decode the intercepted data. She'll say that she earlier created the virus based on Celerium, which can decode anything (first picture above). If there's no Karma, she will be replaced by a British hacker who will say that someone left the back door open in the system so that he can break through (second picture above).
[MISSION START]
Killing DeFalco or letting him escape
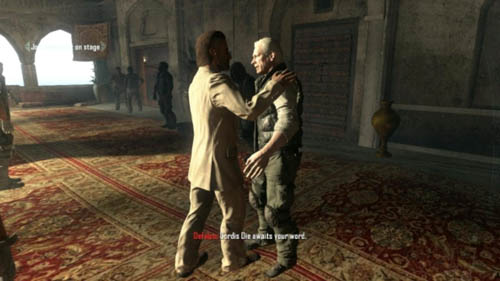
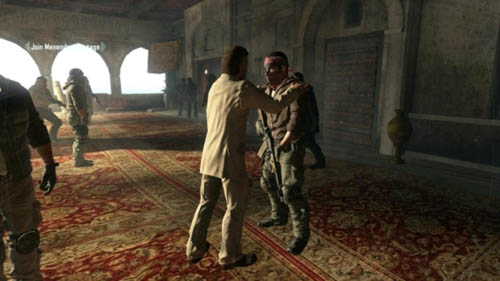
When Menendez starts going on the stage, and DeFalco is alive, Menendez will walk up to him and hug him. DeFalco will say that Cordies Die expects Menendez's words (first picture above). If DeFalco is dead, Menendez will walk up and puts his hands on a random soldier's arms (second picture above).
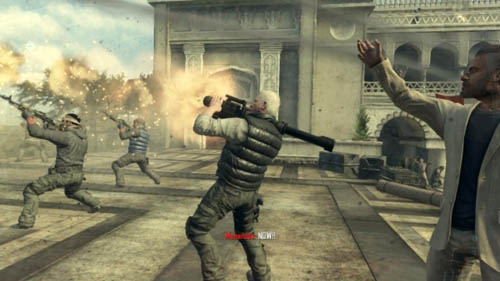
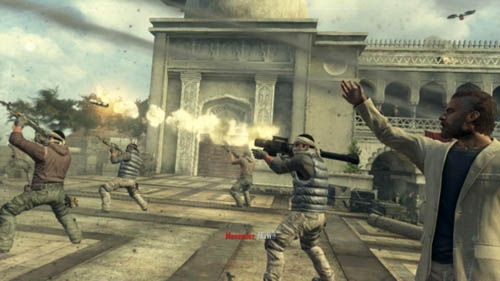
A moment later you will get on the stage, and a Yemeni plane will come from its other side. If DeFalco is alive, he will knock the aircraft down with a rocket launcher (first picture above). If he's dead, a random soldier will do it (second picture above).
[IN THE MIDDLE OF THE MISSION, WHILE TAKING THE DECISION]
Killing DeFalco or letting him escape

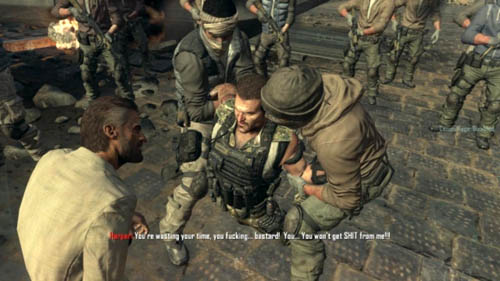
The second scene is the one during which you are taking the decision described at the beginning of this section. If DeFalco is alive, he'll be present when you're taking Harper out of the plane (first picture above). If not, DeFalco's place will be empty (second picture above).
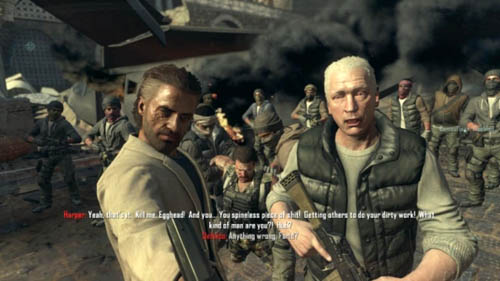
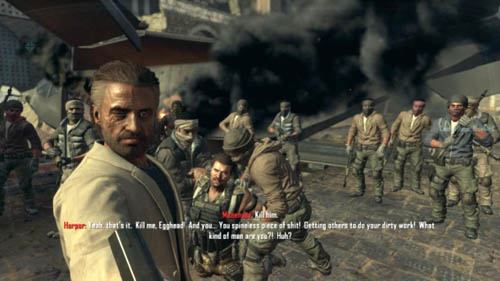
A moment later, when Menendez will give Farid the gun and tell him to shoot Harper, if DeFalco is alive, he'll ask Farid if everything is OK (first picture above). If DeFalco is dead, his place will be empty (second picture above).
Admiral Briggs
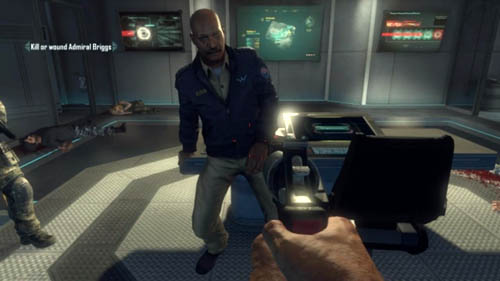
When you play as Menendez and after you've overpowered Briggs and watched the confrontation, there will be a serious decision to make (picture above). It has an impact on the game ending.
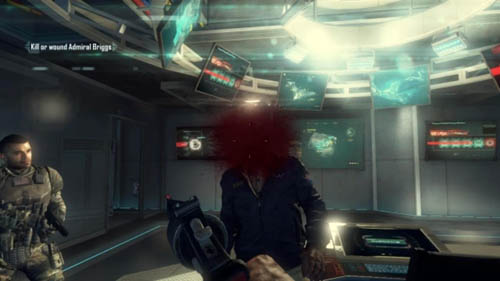
Admiral Briggs died before he could re-activate USS Obama's defenses
If you shoot Briggs in the head (picture above), the USS Barack Obama will sink. Salazar will tell Menendez that there were supposed to be no unnecessary deaths. Menendez will reply that it's him who decides what's necessary.
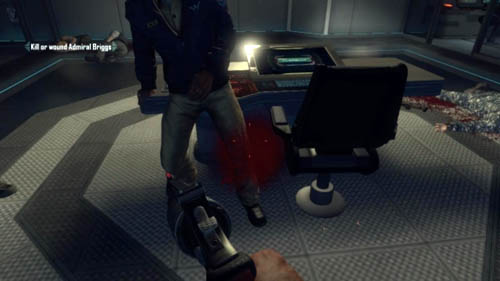
Admiral Briggs survived & re-activated USS Obama's defenses
If you shoot in the leg (picture above) or arm, there will be a chance to save the ship. It will now depend on the completion of a strike-force missions. For more details see the end of this section, "Mission summary". Salazar will thank Menendez for sparing Briggs. Menendez will reply that if his plan succeeds, Briggs will understand why he let him live.
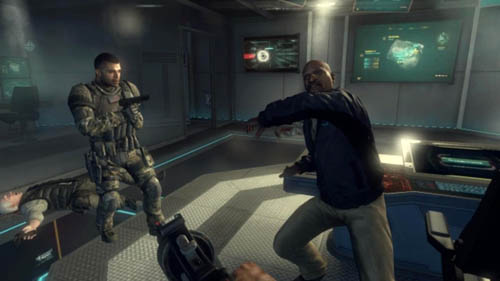
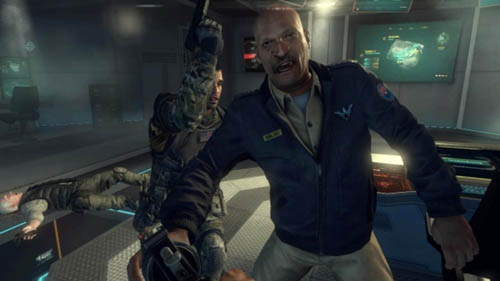
Interestingly, if you simply do nothing, the admiral will throw himself at Menendez (first picture above), but he'll be immediately overpowered by Salazar (second picture above). It will have the same effect as injuring Briggs.
This mission, unlike any other, is full of events that are the consequences of previous choices. Moreover, some are linked together in different combinations. Therefore, to keep things in order they are presented chronologically (despite the fact that a taken decision may have an impact on more than one event).
[INTRODUCTORY CUTSCENE]
Completing the strike-force mission
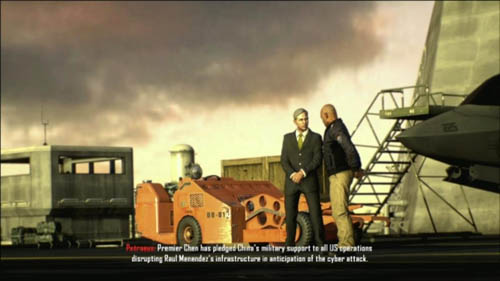
If you have successfully completed all strike-force missions, Admiral Briggs and Secretary Petraeus will talk about joining forces of the United States and China. Briggs will say that it's the end of the SDC, and that the alliance is the real beginning of a new era. Petraeus will say that Briggs can be proud of himself (picture above).
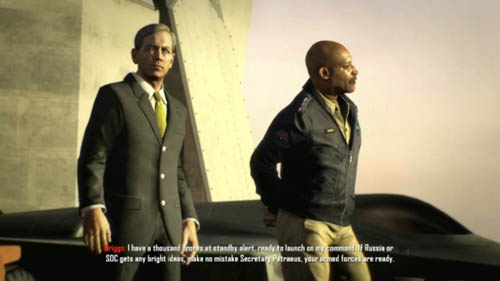
If you didn't complete the strike-force mission and the alliance between Russia and China took place, Briggs will tell Petraeus that thousands of drones are on standby (picture above). The latter will say that the last time DEFCON 3 was announced was 25 years ago, Briggs will reply that he was serving back then.
[FROM MISSION START TILL THE EVENTS ON THE BRIDGE]
Farid or Harper?
If Harper is alive, he will be informing you about what is happening on the ship - among other things, the drones' attack, opponents' optical camos, the fact that the security systems have been taken and you need to regain control of them, etc. If Harper is dead, Admiral Briggs will be giving you this information, or nobody will.
[BRIDGE, PART 1 - BRIGGS TAKEN HOSTAGE]
Killing DeFalco or letting him escape

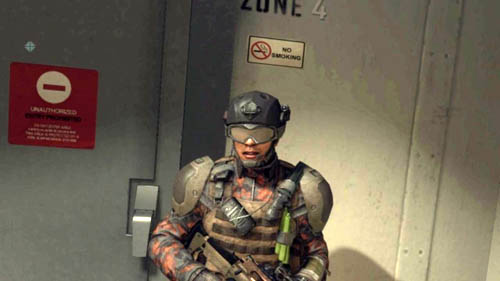
When you play as Menendez, either DeFalco (if he managed to escape in Mission 06: Karma) (first picture above) or a random soldier (if DeFalco got killed) (second picture above) will be standing in front of you. The dialogue will be the same in both cases.
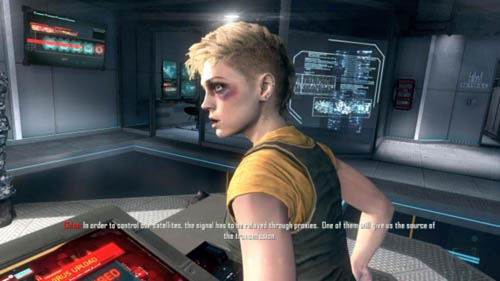
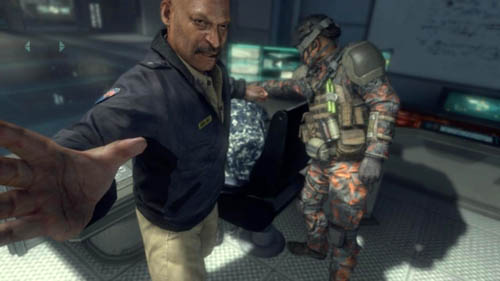
Also, in a moment, DeFalco will terrorize the technician next to Briggs (first picture above). If DeFalco is dead, a random soldier will do it (second picture above).
[BRIDGE, PART 2 - CONFRONTATION]
Killing DeFalco or letting him escape
Karma Saved
Farid or Harper?
The three decisions above, which you took in the campaign, will have an impact on what will happen on the bridge. Due to the fact that there are six possibilities, all are presented separately, in the next section of this guide. The confrontation is everything that is going on from the moment in which Salazar kills two soldiers to the point where the player must decide whether to kill Admiral Briggs or not.
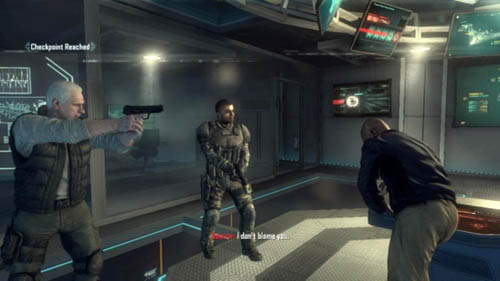
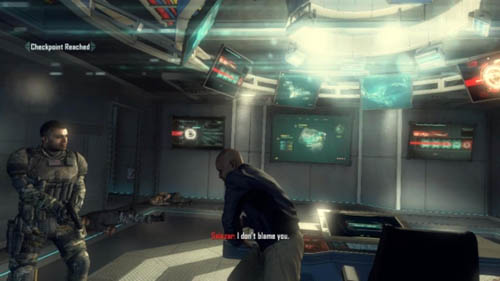
If DeFalco survived the confrontation, he will stand next to Salazar (this may happen only if only he took part in the confrontation or both he and Karma - see the details in the next section of the guide) (first picture above). If he didn't survive, his place will be empty (second picture above).
[BRIDGE, PART 3 - MASON GETS TO THE BRIDGE]
Killing DeFalco or letting him escape / Karma Saved / Farid or Harper?
Admiral Briggs
When you get to the bridge, sit at the computer and see the destruction in the system, which Menendez has made, the further situation can develop in different ways.
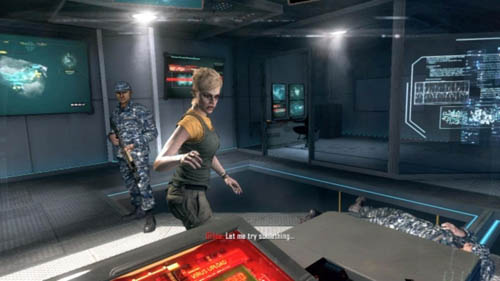
If Karma has survived so far, after a while she will run up to the computer and sit down at it, explaining that the signal that's being sent has to come from somewhere (pictures above). If Karma is dead, Mason will say you need to find out where the signal is coming from.
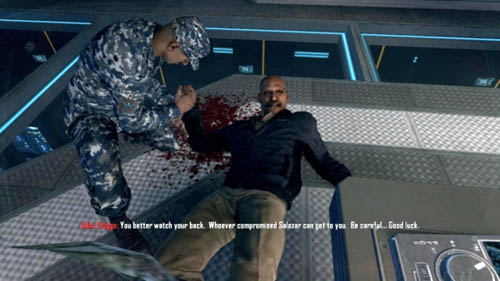
Then, if the admiral survived, he'll tell Mason to be careful. Whatever managed to spoil Salazar can get Mason as well. At the end Briggs will wish Mason good luck (picture above). If, however, you killed the Admiral as Menendez, Mason will now find out that Briggs is dead.

If Harper survived, then after a while he will come running and ask what happened (picture above). When he'll find out about Salazar's treason he'll not be able to believe it. You will both go to the lower deck.
[CONFRONTATION WITH SALAZAR]
Farid or Harper?

When you get to Salazar, he will tell you that today is a difficult day (picture above), but tomorrow you will all win.
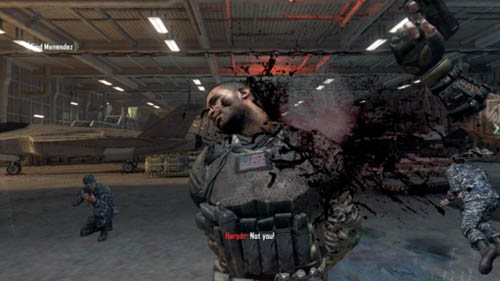
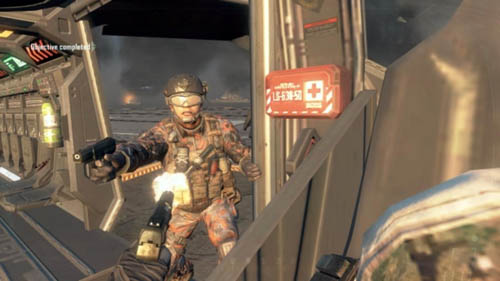
If Harper is alive, he will reply to Salazar "Not you." and shoot him (pictures above). It is worth noting that Harper will be accompanying you till the end of the mission and will fight along with you on board the ship until you both get on the plane.
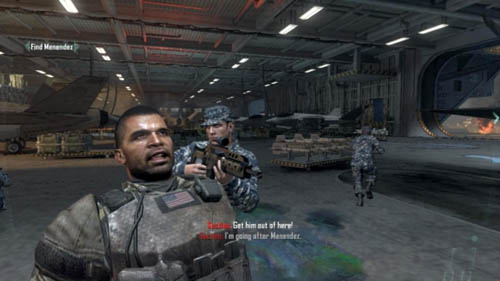
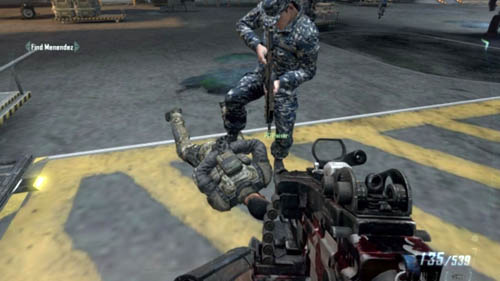
If Harper is dead, Salazar will be overpowered by an allied soldier (pictures above).
[BOARDING THE PLANE]
Farid or Harper?
The scene after reaching the plane will differ depending on whether Harper is alive or not.
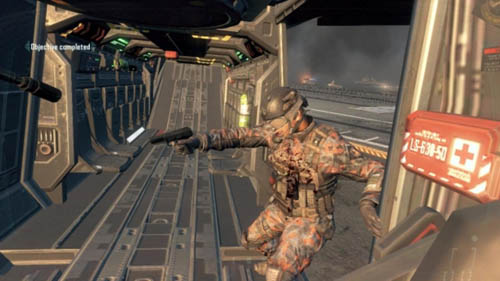
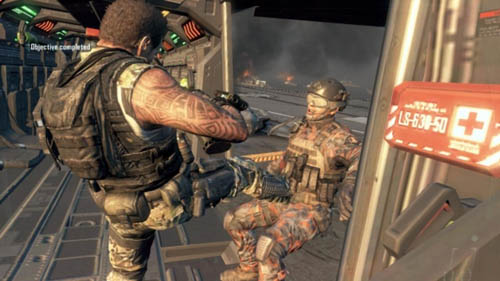
If Harper is alive, he'll get on board with you. When an enemy soldier kills the pilot, Harper will kill him and then kick him out of the plane (pictures above). After a while, he'll say that hundreds of people have died today and that he'll make sure that Menendez is brought to justice.
If Harper is dead, and an enemy soldier kills the pilot, Mason will be the one to shoot him and kick him out of the plane (pictures above).
[MISSION END]
Admiral Briggs
Karma Saved
Completing the strike-force missions
To save the ship (first picture above), along with the entire crew (including Karma, provided, of course, you saved her), you must meet all the conditions below. If even one of them is not met, the ship will sink (second picture above).
This is a very important consequence in the plot, as whether Karma survives or not ultimately depends on it. This, in turn, has a crucial impact on the ending.
[MISSION SUMMARY]
In the Story section in the career menu you can see the summary of each mission. There is usually one or two sentences that describe the most important events in the mission and at the same time the decision you took. It is these statements that are marked in the "Decisions, consequences, endings" in brown. However, Mission 09: Odysseus can end up in many different ways, that is why, all the possibilities are listed below. The mission summary will consist of 4 to 5 sentences.
1. Did you save Briggs playing as Menendez?
a) Yes - Admiral Briggs survived & re-activated USS Obama's defenses
b) No - Admiral Briggs died before he could re-activate USS Obama's defenses
2. Did you complete the strike-force campaign and make the alliance between China and the United States take place?
a) Yes - SDC sent hundreds of drones to protect the USS Obama
b) No - SDC refused to send any drones to protect the USS Obama
3. Which of the abovementioned conditions was met?
a) None - The defenseless USS Obama was destroyed by Menendez's attack
b) Briggs is alive - The Obama's defenses were not enough to repel Menendez's attack - the Obama was lost!
c) Alliance of the US with SDC - SDC drone reinforcements arrived, but the defenseless USS Obama was already destroyed
d) Both - The Obama's defenses hold in time for SDC reinforcements arrival - the Obama was saved!
4. The last sentence will present the fate of the entire crew and Karma, provided she was on board:
a) Karma & the crew of the USS Obama survived Menendez attack! - the ship didn't sink, Karma was on board and survived the confrontation on the bridge.
b) Karma was executed & could not analyze the Celerium WORM - the ship didn't sink, Karma was on board but didn't survive the confrontation on the bridge.
c) The crew of the USS Obama survived Menendez attack! - the ship didn't sink, this sentence will also appear if Karma didn't survive the confrontation on the bridge, or if she wasn't on board at all.
d) The crew of the USS Obama were lost when the carrier was destroyed - the ship sunk, everyone (including Karma) died.
All possible events on the bridge are included in this section. They depend on the three decisions below:
The following options are simply divided in terms of the presence of three characters: DeFalco, Karma, Farid. It is worth adding that if you kill DeFalco, you will automatically save Karma, so there is no possibility that only Farid is on the bridge.
DeFalco walks up to Karma and hits her (picture above).
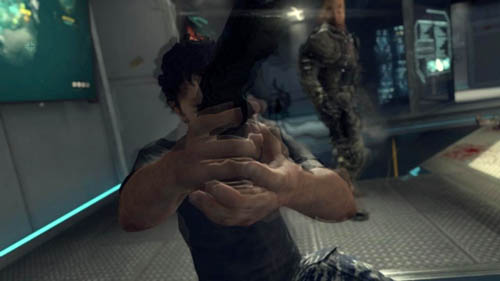
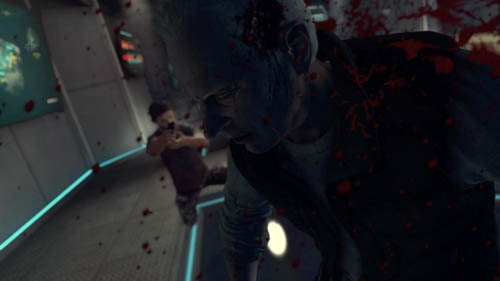
Farid, seeing that, takes out a gun and shoots DeFalco (pictures above).
Unfortunately, after a while, he gets killed by Salazar (picture above).

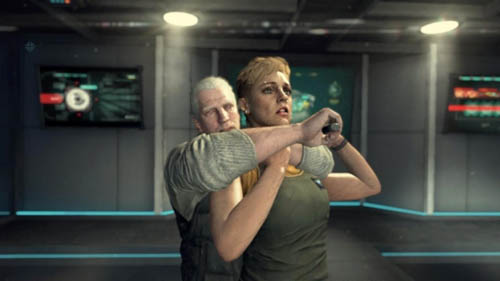
DeFalco approaches Karma from behind, grabs her (pictures above) ...
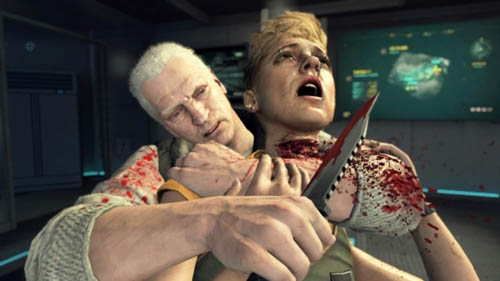
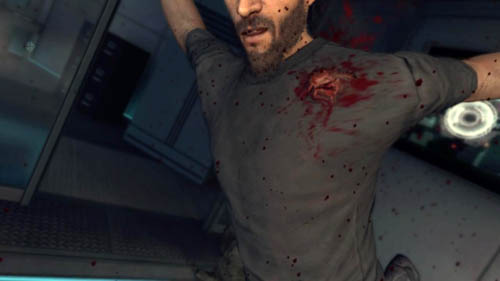
... slits her throat and puts her body on the ground (pictures above).
DeFalco starts going towards Farid. Farid takes out a gun, shoots at DeFalco (pictures above) ...

... and hits him. Unfortunately, at the same time an injured DeFalco also pulls out a gun and shoots Farid (pictures above) ...

... which means they both fall dead to the ground (picture above).
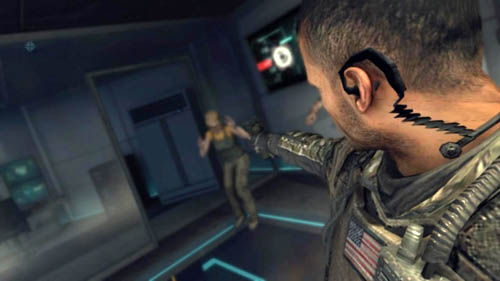
Salazar points the gun at Karma (picture above) ...
... but before he can shoot, Farid throws himself and shields Karma from the shot (picture above), thus dying.
Karma throws herself at Salazar, but hits her and pushes her aside (pictures above). He doesn't kill her, though, which will allow for "the best" ending.

Salazar walks up to Karma (pictures above) ...
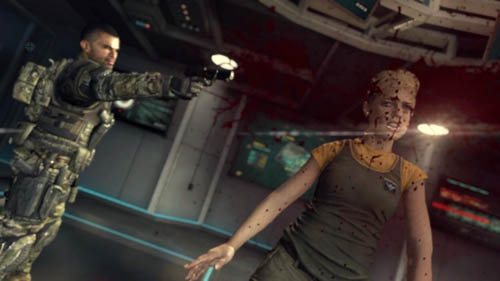
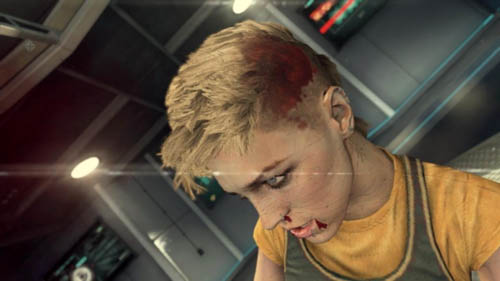
... and shoots her (pictures above).

After the two soldiers have been shot, nothing will happen. Salazar, along with DeFalco, will stand next to Briggs (picture above).
None.
[INTRODUCTORY CUTSCENE 1]
Completing the strike-force missions

If the alliance with China didn't take place, the U.S. president will try to explain to Prime Minister Chen that Menendez took over American drones that are attacking American and Chinese cities now. The Chinese Prime Minister won't believe that, which will make the President very upset (pictures above).


If the alliance with China took place, the U.S. President will say that all units have been prepared to defend Chinese cities against Menendez's attacks. Prime Minister Chen will thank her for that and say that the President's actions speak louder than her words. She will heave a sigh of relief (pictures above).
[INTRODUCTORY CUTSCENE 2]
Farid or Harper?
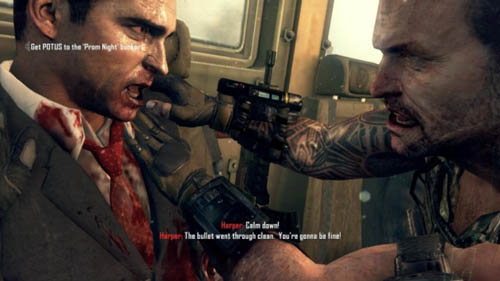
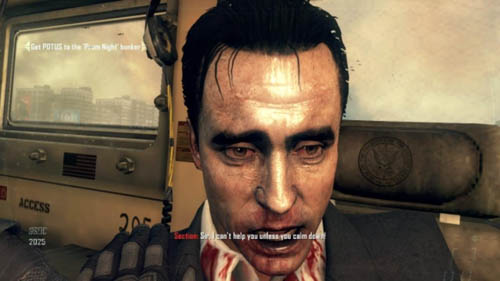
During the second introductory cutscene when you are all going in the truck, if Harper survived, he will calm the wounded agent down and give him a sedative injection (first picture above). If Harper is dead, Mason will do it (second picture above).
If Harper is alive, he'll sit down, but he won't join the conversation (first picture above). If he's dead, his place will be empty (second picture above).

After the accident, if Harper is alive, he will be the one to tell you about the situation (first picture above). If Harper is dead, you'll get that information from Samuels (second picture above). At this point, the proper mission will begin.
[HIGHWAY FIGHT]
Farid or Harper?
If Harper survived, he'll join the president's security team. He will be providing you with information when you're eliminating opponents on the highway. If he didn't survive, only two agents will protect the President, and Samuels will provide you with the information.
[TRUCK ACCIDENT]
Farid or Harper?
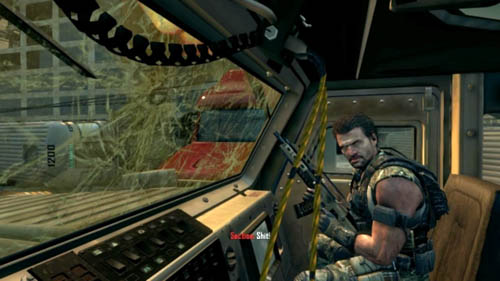
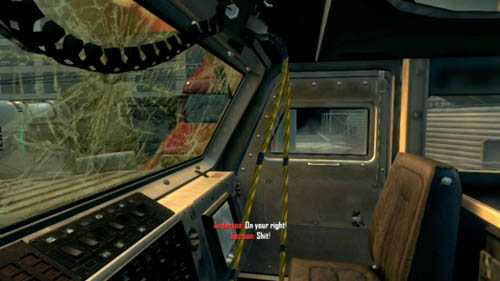
If Harper survived, he will get on the truck with you and talk to you about Menendez's plan for a while (first picture above). After the truck accident he will come out and will be helping you in the fight until the moment when a big building falls down on the street (behind the mall). He will also comment on the events in the street, and also praise you for destroying CLAWs. If Harper is dead, his place will be empty (second picture above), and the events will be commented on by Section.
[TO THE PLANE]
Farid or Harper?
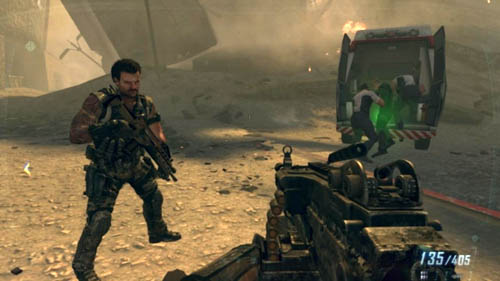
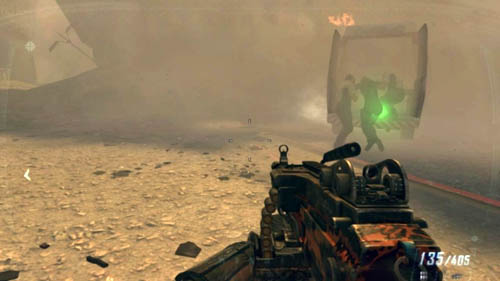
When you awake, after the building has fallen down, if Harper survived, he will appear in front of you. You will both run up to Anderson aircraft and Harper will get on the ambulance (first picture above). From now on, he will be the one who will provide you with most information, while you'll be flying the airplane. If Harper is dead, Section will escort the physicians (second picture above), and Samuels will provide him with information about what happened.
[MISSION END]
Farid or Harper?
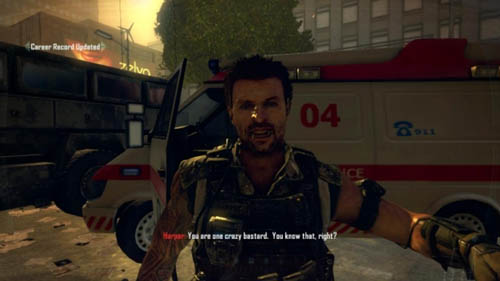
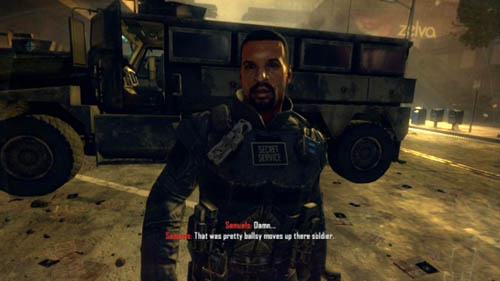
When you get up after the parachute jump and landing, if Harper is alive, he'll come to you driving the ambulance, get out and congratulate you using a strong language (first picture above). If Harper is dead, Samuels will come to you in an armored truck and his praise will be more toned down (second picture above).
Menendez alive or dead
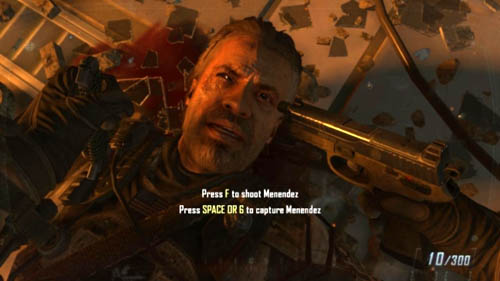
This is a decision you take at the very end of the game (picture above). Press the appropriate button to kill or save Menendez. Your decision will have an impact on the game ending.
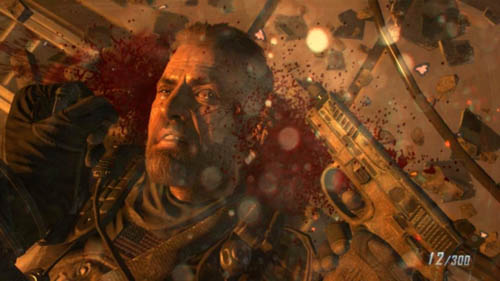
David Mason murders Menendez
There's nothing else to add (picture above). For further events, see the end of this section.
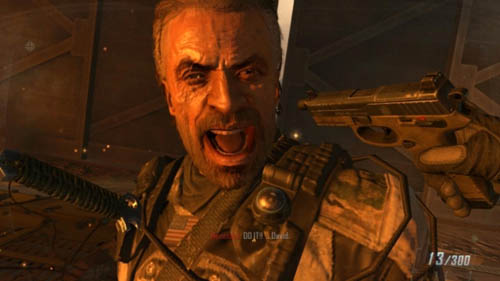
Menendez is captured
If you don't kill Menendez, he will be enraged by your decision (picture above). For further events, see the end of this section.
[INTRODUCTORY CUTSCENE 1]
Completing the strike-force mission
If the alliance with China didn't take place, then during the conversation between the U.S. president and Secretary Petraeus, when the former asks about China (first picture above), the Secretary will answer that its situation is as bad as that of the United States. If the alliance took place, the Secretary will say that they're leading a simultaneous, coordinated attack with China and that Prime Minister Chen will certainly not disappoint them (second picture above).
[INTRODUCTORY CUTSCENE 2]
Farid or Harper?
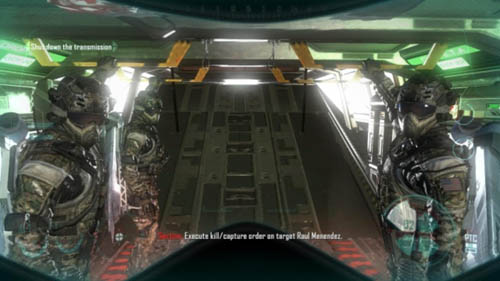
When at the beginning of the mission Section tells everyone that one of their objectives is to kill or capture Menendez, then if Harper is alive, he will answer that he votes in favor of killing - since the attempt to capture Menendez wasn't that successful last time (first picture above). If Harper is dead, an allied soldier will be standing in his place (second picture above).
[LANDING]
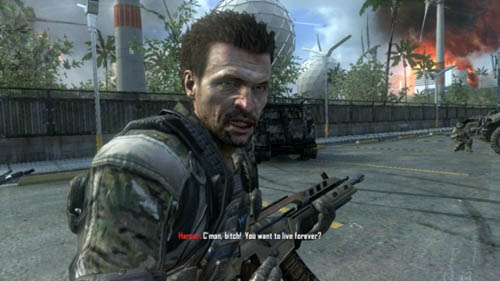
In addition, after landing, if Harper is alive, he will utter some words encouraging to fight (picture above). Then he will be accompanying you from the beginning till the end of the mission.
[CHINA SUPPORT DURING THE MISSION]
If you completed the strike-force missions, and the alliance with China took place, then you will get Chinese support several times during the mission. Their people will eliminate the enemies with RPGs above the first long staircase, at the beginning of the mission. Afterwards they'll take care of the snipers in a torn-away corridor upstairs. At the end they will help you with two CLAWs that are blocking the entrance to Menendez's military base.
[MENENDEZ'S TRANSMISSION]
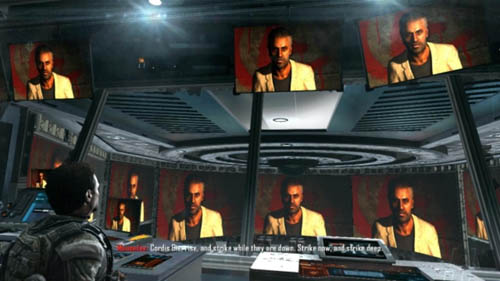
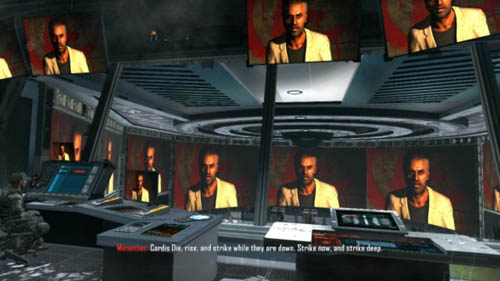
If Harper's is alive, of course, he will be there next to you when you are watching Menendez's transmission (first picture above), and he will remain with you until the end of the mission. If he's dead, his place will be empty (second picture above), and you will have to deal with the end of the mission alone.
[BEFORE TAKING THE DECISION]
Farid or Harper?
Killing DeFalco or letting him escape
This event takes place immediately after the floor has collapsed at the end of the mission.
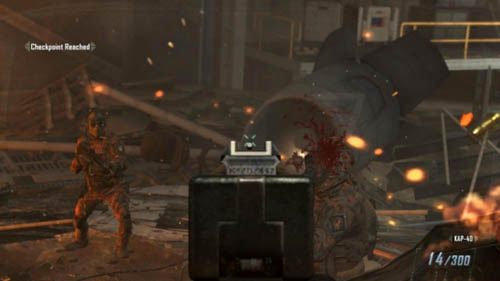
There are three possibilities. If both Harper and DeFalco are dead, you'll simply need to kill two soldiers (picture above).
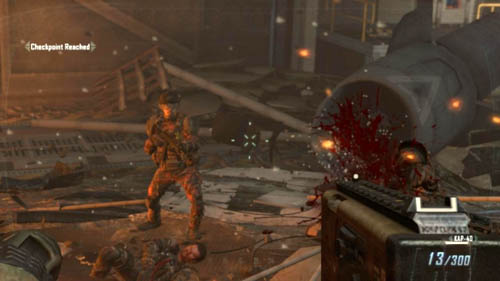
If Harper is alive, he will be lying next to the soldier on the left, who is preparing the gun to shoot (picture above).
If, DeFalco is also alive, he will replace the soldier on the left (picture above) and, of course, at this point, you will end his life. It is not possible for DeFalco to take part in this scene without Harper.
[AFTER TAKING THE DECISION]
Farid or Harper?
Menendez alive or dead
Shortly after shooting or lifting Menendez from the ground, if Harper is alive, he will comment on your decision (if he's dead, you won't hear a comment from anyone).
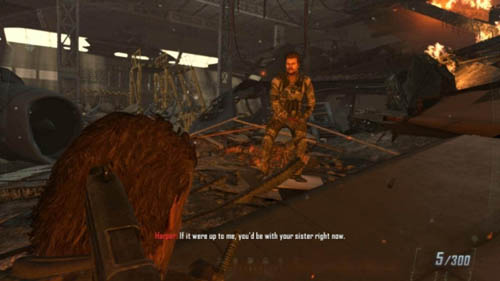
If you killed Menendez, Mason will walk up to Harper and pick him up (first picture above). Harper will say that he was worried for a moment that you intended to save Menendez. If you didn't kill Menendez, Harper will tell him that if it was up to him, Menendez would join his dead sister (second picture above). Immediately afterwards, the scene of going outside will take place and there are four possibilities.
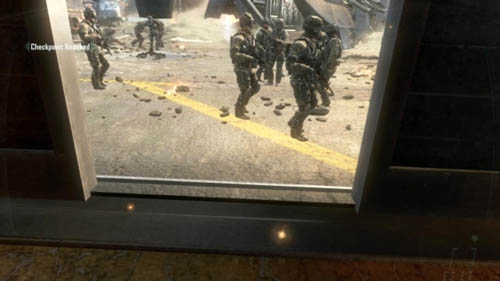
If no one survived except for you, you'll exit alone (picture above).
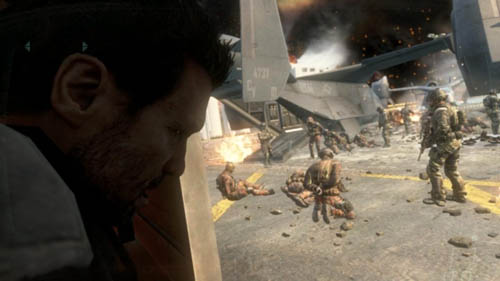
If Harper is alive, but Menendez is dead, then you'll get out supporting the former. After a while, you'll pass him into another soldier's care and Harper will tell you goodbye (picture above).
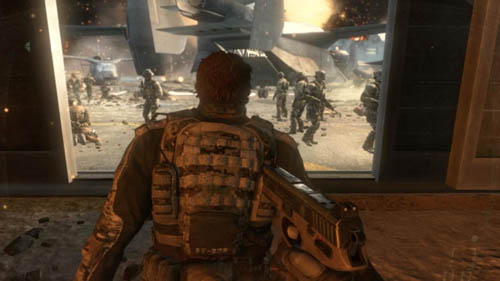
If Harper is dead, and you spared Menendez, you'll lead the latter outside (picture above).
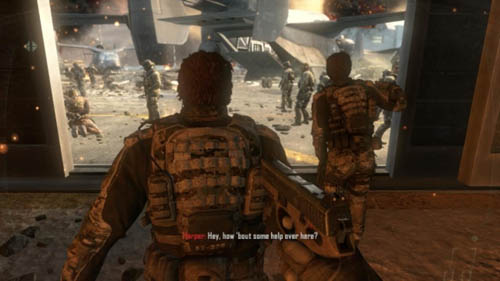
If Harper is alive, and you spared Menendez, you'll lead the latter outside. After a while, a soldier will run up to Harper and take care of him, and Harper will tell you goodbye (picture above).
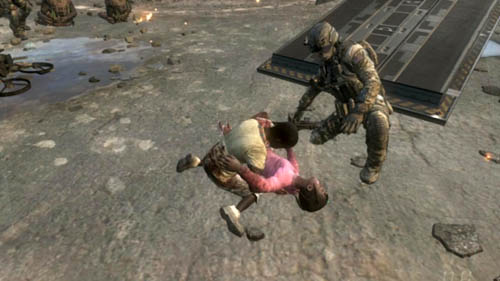
And finally, the last scene will depend on Menendez. If he is alive, he will start saying something and the soldier who is handcuffing him will want to gag him. Mason will say that there's no such need, as Menendez is just an old, sad man talking to himself (first picture above). If Menendez is dead, you'll see two children instead - a brother and a wounded sister (second picture above).
Naturally, the campaign ending will depend on the decisions taken throughout it, but not all decisions have such influence. Three events are absolutely essential, the rest doesn't matter:
It is worth keeping in mind that in order for Karma to survive, each of the conditions below has to be met:
Three of the conditions mentioned at the beginning of this section give eight different combinations altogether. Two endings are repeated, so there are six endings together. All endings are presented in the next two sections. The first section shows what can happen after you've captured Menendez and the other what happens after his death.


Woods's peace of mind is disturbed by an arrival of a guest, who as it turns out is... Alex Mason. Woods can't believe it and tells Mason that he shot him. Alex replies that it turns out that Woods is not such a good shooter after all.
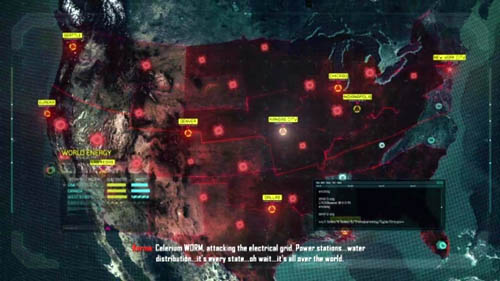

Karma, sitting at the computer, says that Menendez's virus has just infected the whole world. Kurtz, who's standing beside her, gets frightened and wants to inform the President, but Karma calms him down and says that she has already taken care of the virus.

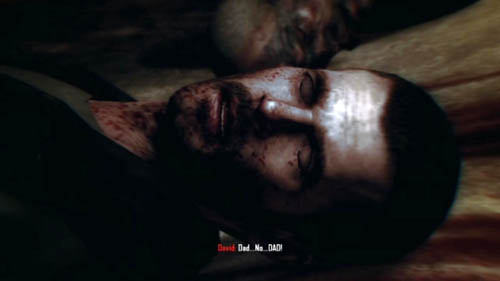
When Mason enters Woods's hospital, he hears that he's another Mason paying a visit to Woods. David gets scared, but Woods calms him down and introduces someone after a while, namely... Mason's father. Dave is very surprised, and the flashback shows that Alex survived Woods's shots.
Alex points at the scar on his son's hand, when he fell off a tree (it was shown in the first mission introductory cutscene). He adds that he was proud of David that day. David replies that he did fall down, and Alex responds, that's true - but he got up on his feet immediately.
Karma appears on television giving an interview to the presenter. He says that it must be a great day for her - she saved the world after all. Karma replies that, yes, and at the same it's a very bad day for Menendez.

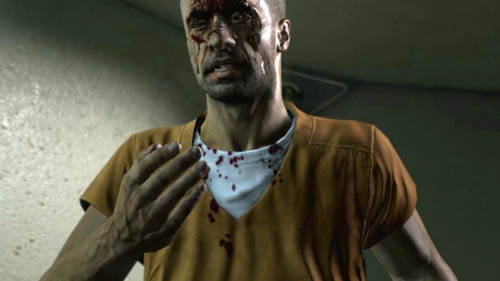
Menendez, watching the show, gets mad and starts banging his head against the screen. In a word, his plan didn't end as he wished.


Karma, sitting at the computer, says that Menendez's virus has just infected the whole world. Kurtz, who's standing beside her, gets frightened and wants to inform the President, but Karma calms him down and says that she has already taken care of the virus.

David goes with Woods to the cemetery to visit his father's grave. They talk for a while. Woods tells David that his father really loved him. David replies that he knows about it.


Then David puts away his gun and says he quits the service. Woods says that his father would be happy with this decision.

Karma appears on television giving an interview to the presenter. He says that it must be a great day for her - she saved the world after all. Karma replies that, yes, and at the same it's a very bad day for Menendez.

Menendez, watching the show, gets mad and starts banging his head against the screen. In a word, his plan didn't end as he wished.

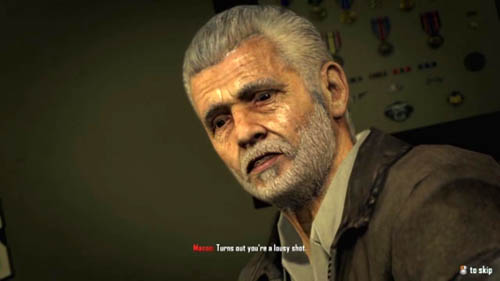
Woods's peace of mind is disturbed by an arrival of a guest, who as it turns out is... Alex Mason. Woods can't believe it and tells Mason that he shot him. Alex replies that it turns out that Woods is not such a good shooter after all.


A British hacker from the CIA, sitting at the computer, says that the virus has infected everything that could have been infected and that he can't do anything about it. The only thing he can do is to take to his heels and return to England.


Menendez, sitting in his cell, listens to the TV program. The presenter is making fun of Menendez, but after a while he gets anxious about the noises of the riots. After a while when the TV signal goes down, the worried guards enter Menendez's cell ...


... and they get overpowered and killed by Menendez, who only waited for the lights to go down. He exits the cell, impassive.

Menendez, disguised as an officer, enters Woods's room after killing the guard. A short conversation develops between him and Woods. The flashback shows what Josefina's face really looked like after the fire.


Menendez says that he hasn't left her and that it's Woods who took her away from him. He takes out the medallion, slits Woods's throat and puts his body on the bed.


Menendez goes to the cemetery, digs up his sister's grave, opens the coffin...
...pours gas all over himself and sets himself on fire.

A British hacker from the CIA, sitting at the computer, says that the virus has infected everything that could have been infected and that he can't do anything about it. The only thing he can do is to take to his heels and return to England.
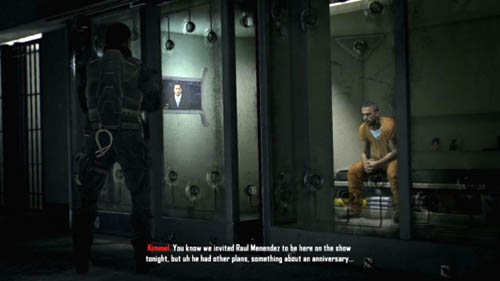

Menendez, sitting in his cell, listens to the TV program. The presenter is making fun of Menendez, but after a while he gets anxious about the noises of the riots. After a while when the TV signal goes down, the worried guards enter Menendez's cell ...
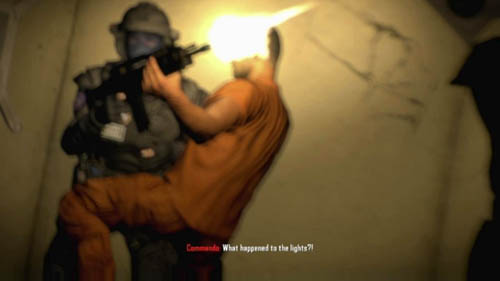
... and they get overpowered and killed by Menendez, who only waited for the lights to go down. He exits the cell, impassive.
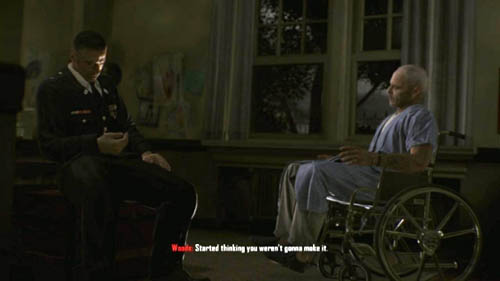

Menendez, disguised as an officer, enters Woods's room after killing the guard. A short conversation develops between him and Woods. The flashback shows what Josefina's face really looked like after the fire.
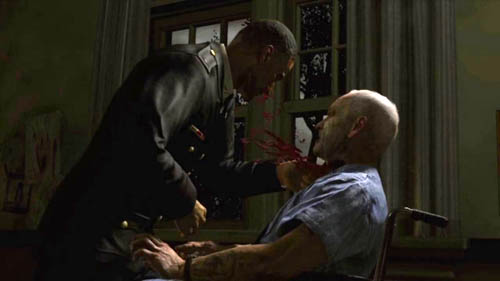
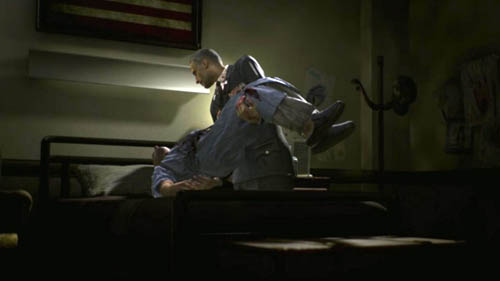
Menendez says that he hasn't left her and that it's Woods who took her away from him. He takes out the medallion, slits Woods's throat and puts his body on the bed.
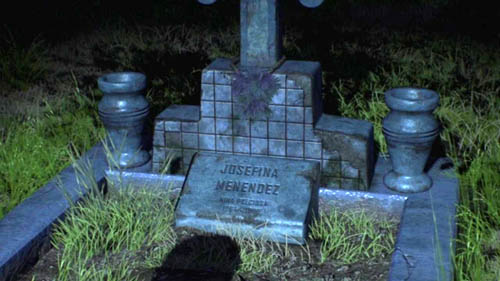
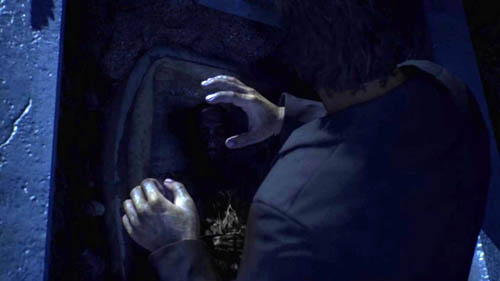
Menendez goes to the cemetery, digs up his sister's grave, opens the coffin...


...pours gas all over himself and sets himself on fire.


Woods's peace of mind is disturbed by an arrival of a guest, who as it turns out is... Alex Mason. Woods can't believe it and tells Mason that he shot him. Alex replies that it turns out that Woods is not such a good shooter after all.
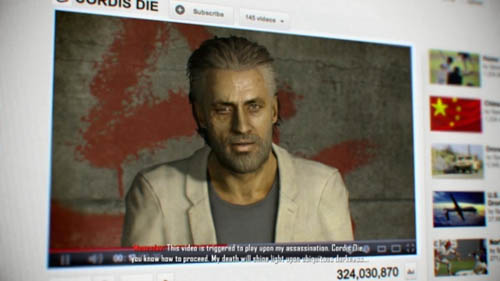
Menendez predicted his death. A video appeared on YouTube in which he is calling everyone for revolution. The video is very popular, so the whole world doesn't have to wait long for its effect.
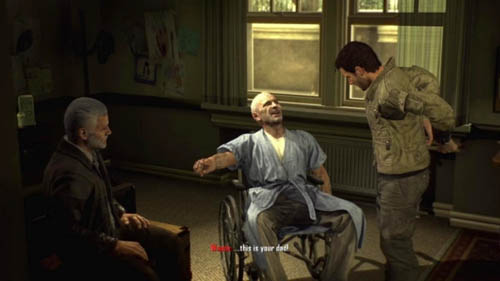

When Mason enters Woods's hospital, he hears that he's another Mason paying a visit to Woods. David gets scared, but Woods calms him down and introduces someone after a while, namely... Mason's father. Dave is very surprised, and the flashback shows that Alex survived Woods's shots.


Alex points at the scar on his son's hand, when he fell off a tree (it was shown in the first mission introductory cutscene). He adds that he was proud of David that day. David replies that he did fall down, and Alex responds, that's true - but he got up on his feet immediately.

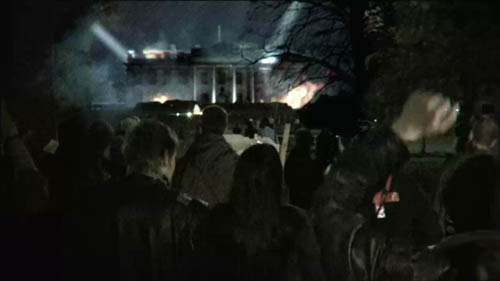
Menendez, although dead, got his own way. Millions of people have taken to streets, riots have broken out in the cities. The last scene shows the crowd walking towards the burning White House.


Menendez predicted his death. A video appeared on YouTube in which he is calling everyone for revolution. The video is very popular, so the whole world doesn't have to wait long for its effect.

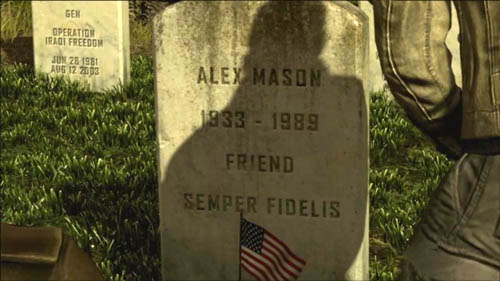
David goes with Woods to the cemetery to visit his father's grave. They talk for a while. Woods tells David that his father really loved him. David replies that he knows about it.
Then David puts away his gun and says he quits the service. Woods says that his father would be happy with this decision.


Menendez, although dead, got his own way. Millions of people have taken to streets, riots have broken out in the cities. The last scene shows the crowd walking towards the burning White House.

 Call of Duty: Modern Warfare 3 Game Guide & WalkthroughColin McRae: DIRT Game Guide & Walkthrough
 Cities XXL Game Guide & WalkthroughCall of Duty: Black Ops II Game Guide & Walkthrough
 Call of Juarez: Gunslinger Game Guide & Walkthrough