

Welcome to the guide to the third instalment in the Company of Heroes series. I have marked the mission that you have to complete while playing the scenario with adequate colours: green (main mission), orange (side missions) and blue (medal ones). Of course during the game you're only obligated to completing the main ones in order to complete the scenario, but in this guide you will find many hints that will (I hope so) help you in getting every medal and deserving the command's gratitude. There are also lots of pictures here, this time in a reasonable resolution. By the way - I would like to point out that they're not here to make the guide more colourful (that's their second role in fact) but they have some important info in them. Every screen was made in order to show as much possible of the actual action, units, important in-game moments and actions. I wouldn't be able to make most of them if not for my virtual bravery. I was playing on the high difficulty setting (one level below the highest), the polish version, patch 2.501. Have fun with the game!
Pawel "PaZur_76" Surowiec
Translated to English by Jakub "cilgan" Lasota
Main missions:
Medal missions:
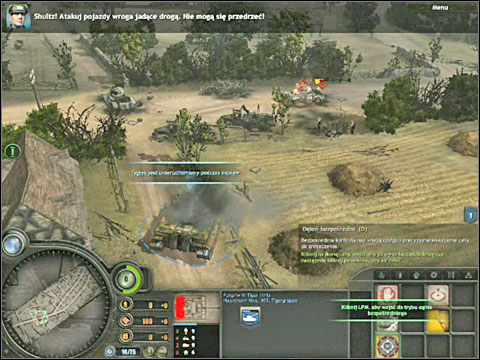
This scenario is based on a real campaign (in fact every other is also based on one) of Michael Wittmann, German tank expert who on June 13, 1944 destroyed the 4th County of London Yeomanry, British 7th Armoured Division squad, the famous "Desert Rats". Though Wittmann was commanding a while platoon of tanks and here we have only one Tiger under out command, there is no doubt that Hauptmann Voss is Wittmann's virtual alter-ego. Your first task is to stop the British convoy travelling the nearby road. Drive the Tiger near it to begin the massacre. You can shoot by successively pointing the next targets, or check out the new addition in this part of Company of Heroes, the direct fire mode. In order to use it, press the icon in the panel in the bottom right corner or press the D button (the default setting) and destroy the British vehicles while controlling the Tiger's gun. However you won't be able to use this tank for too long, because the engine will break down soon enough and your Tiger will be quite useless. The driver will take care of it and in the meantime you should concentrate on destroying the enemy vehicles. Especially look out for the Cromwell tanks and Staghounds. Destroy everything else if there aren't any around. Once the Tiger is up and running again head forward to the crossroad on the right, while still shooting the enemy vehicles and also soldiers.
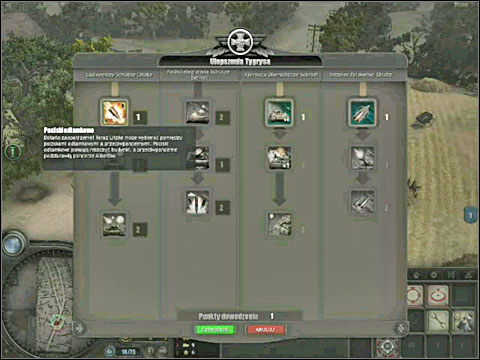
You will get some experience points fairly quickly which you can spend on upgrading your kitty, by pressing the button near the minimap. I would suggest you pick up the fragmentation ammo used to destroying buildings and annihilating the enemy troops. You can switch between different ammo types by pressing the adequate icon.
During the fight the crew in your Tiger will automatically get other updates. One of the first will be the ability to order the tank commander to open the hatch and look outside (the adequate command in the panel). Make use of this whenever it becomes available, it will increase the effectiveness with which the crew will be spotting enemies. After getting to the crossroad near Villers-Bocage you will receive a new task: destroy the enemy armoured units. Their localization is marked on the minimap and the main map with green circles - just head there with your tank. During the ride eliminate the enemies: infantry in the building (the most dangerous are the sappers equipped with grenade launchers), some more armoured vehicles (always try to face them with the front of the tank, where the armour is the thickest) and some anti-tank guns. Destroying four of those guns will earn you a medal in this mission. Of course you should use the fragmentation ammo to destroy the guns and infantry.
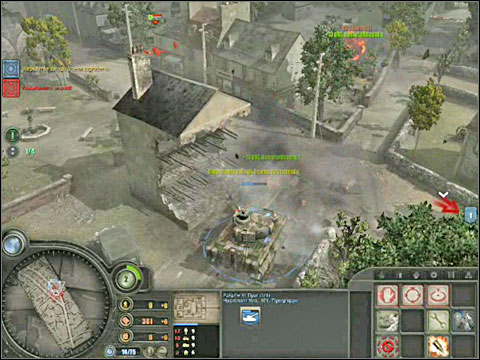
When it comes to those guns, I won't give their positions - firstly, I'm not sure if their localization isn't random and secondly, they move around quite often. That is in fact the best opportunity to destroy it - wait for the crew to dismantle it (there will be a gray bar above it) and start moving to a new location. While they're on it, quickly approach them and shoot them like ducks. Alternatively you can wait in an ambush until they approach you on their own; it all depends on where they're moving the gun.
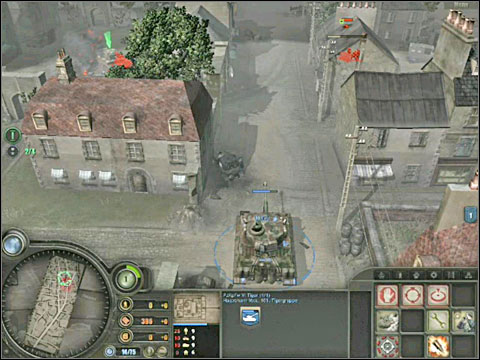
As I have mentioned before, the enemy tanks that you must destroy are marked on the maps with green circles and additionally with green arrows - so move your Tiger to those places in order to find the enemy. From time to time you will have to repair your Tiger if it gets heavily damaged. Use a smoke screen (the corresponding button on the panel), retreat a little and begin the repairs (another button). Remember that the tank will be immobilized during this time!
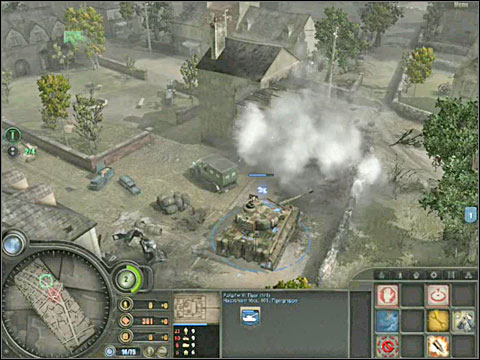
Between some buildings the German commander will detect British "cans" on the reinforcing. Try to approach them from the side or from the back if it's possible - it will be easier to eliminate them this way. Near the end of the mission (probably when the engine will break down once again) you will receive new orders - destroy the Sherman Firefly tanks. Two of those will arrive from the north. It's your worst enemy, equipped with powerful guns. Well, they appeared in the worst possible circumstances, you're quite defenceless at the moment.
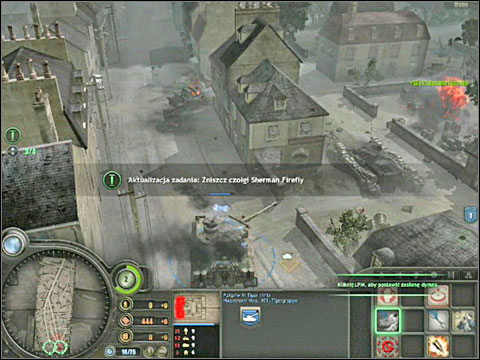
Depending on what position your tank is in, place a smoke screen and turn your kitten in the direction of the enemy (if you're standing sideways or worse, backwards to the Fireflies) or just start the fight (if you were luckier and ended up facing them). Firstly eliminate the first tank with anti-tank ammo. Once you're done with it, repair your kitten and manoeuvre in order to get the second one as well as the other enemy vehicles.
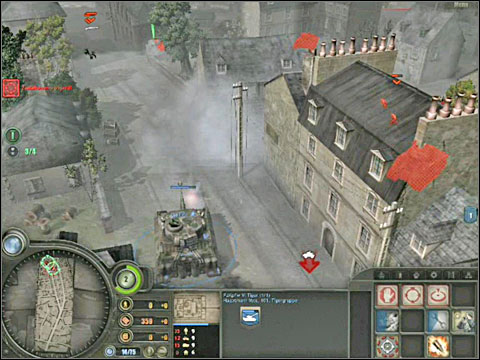
After you destroy them, the British infantry will retreat (if you haven't already killed all of them). Unfortunately, while you're leaving the village, the Tiger will be shot and the commander will order to leave the tank behind (Wittmann was also returning on foot from the first mission, after his tank got hit with a hidden anti-tank gun).
Main missions:
Medal missions:
You have to escape from Villers-Bocage. The Tiger's crew will have to continue on foot, after splitting into two groups. As soon as the mission begins, use your squads to shoot the British infantry on the street, near the abandoned Tiger. It shouldn't be hard, as the crew is quite deadly itself, even without the tank. Use a team to pick up the guns from the street. After the fight, heal a wounded partner (if it's necessary) by choosing the corresponding button from the panel. You will find some additional weapons on the squares on the right and left, in the white circles. You can command your men to change their weapons if you don't like the ones they currently have. There are also ammo boxes on the courtyards. You can take the one on the left after destroying the mortar with a grenade/explosive material. A British tank or armoured car can appear - one of your teams can shoot it with a panzerfaust after sneaking to the enemy from the side or behind. After you take care of the enemies, it's time to move forward, to the north, in the direction showed by the green circle. I suggest you follow the right side of the main road.
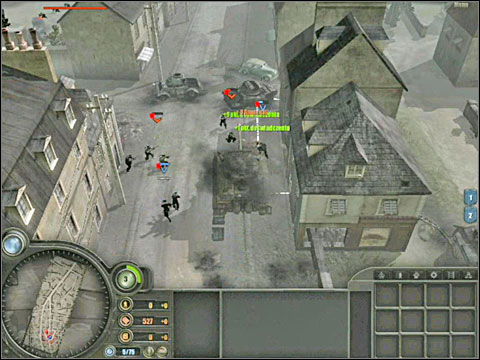
While you're going through Villers-Bocage you will bump into some British units, including an anti-tank gun on the crossroad, an armoured car a little bit further and a tank between the buildings on the left. However your teams can approach the enemy quietly and stay unnoticed until they start to shoot or get really close. Use this ability by pressing the adequate button and sneak to the wall near the anti-tank gun. You can greet the enemy with an explosive material from there. Afterwards I would suggest you retreat behind a nearby building, turn the sneaking mode back on and this time approach the armoured vehicles (each one with a different team). Use any available weapon you have to destroy them - panzerfausts, explosive materials. If you need to heal a heavily wounded mate, be sure there aren't any enemy troops nearby - healing under heavy fire isn't a great idea. Place your men behind the walls between the two (already destroyed) vehicles and throw an explosive material underneath the building occupied by the British infantry. After you deal with everyone, head forward. Stick to the left side of the main road, leave the village and head to the field with haystacks.
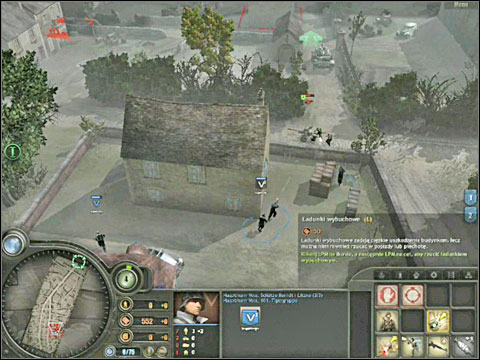
While on your way, check out the boxes nearby the building on the edge of the village. Once you're on the field, hide behind the bulletproof haystacks. Across the field there are lots of British troops, including a reinforced anti-tank gun post - first of the three that you're supposed to destroy if you want to yourself earn a medal. Fortunately your troops can use the radio to call in an artillery strike - use the proper button on the command panel. Use it now point the place where the British troops are. Try and get as many soldiers as possible into the white circle. Once the artillery finishes its job, go and kill the survivors. Afterwards go left towards the main road, in the direction of the crossroad.
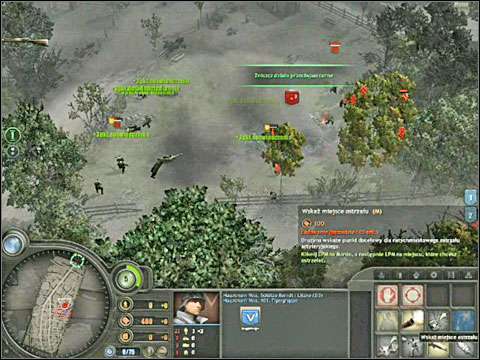
However before you reach it you will have to fight with some more British soldiers. Place your troops behind the fences. Use the first one to destroy the enemy jeep that will appear on the road on the left with a panzerfaust and using the second team destroy the post that's being built by the enemy sappers. In the end, throw some explosives underneath the building where the rifleman has hidden. Kill the survivors, pick up the weapons and ammo, heal your troops (if it's necessary) and continue towards the main road.
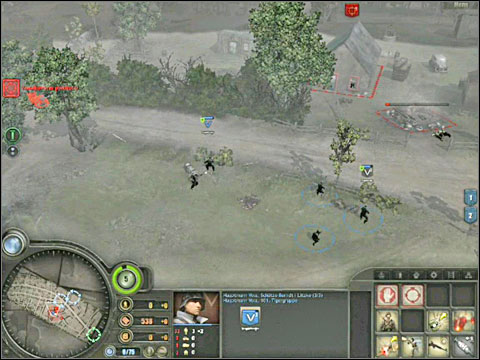
On the crossroad you will find the second anti-tank gun post, protected by a big group of British soldiers. The easiest way to get rid of them is to call an artillery strike once more and afterwards finish off the soldiers. Before you do that, your second team can take care of the mortar, which is located on the left, before the road and afterwards deal with the machinegun post on the crossroad, by throwing an explosive material from behind the hedge. The explosion will probably also destroy the hedge, so lead your men behind the nearby well. In the meantime, the second team can take care of the tank, patrolling the main road - shoot it with a panzerfaust, firstly placing your men behind a wrecked truck. Once the German artillery is done with the crossroad, go further to the west.
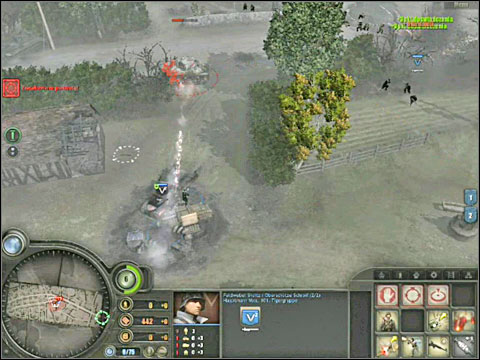
You will bump into some more enemy vehicle while crossing the road - a light tank and a jeep. Use the wrecks as cover. Use can use one of the teams to sneak up closer to the enemy and shoot a panzerfaust at the vehicles. Afterwards, run left.
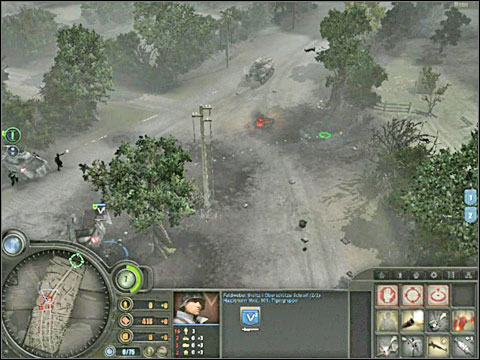
You will reach a single building, with some ammo boxes nearby, and the last British anti-tank gun behind it. This time sneak up with both teams to the walls behind the house, while picking up the ammo on their way. After getting to the walls, order them to open fire and throw explosives - especially in the direction of the gun. Shoot the remaining enemies and enjoy your new order. Afterwards head towards the field and hide behind the haystacks.
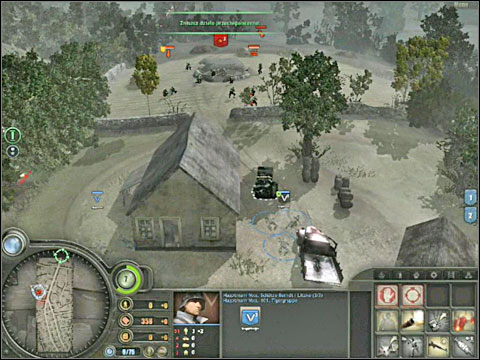
Remember that you can eliminate the enemy machinegun or mortar posts by throwing explosives at them, from behind a cover.
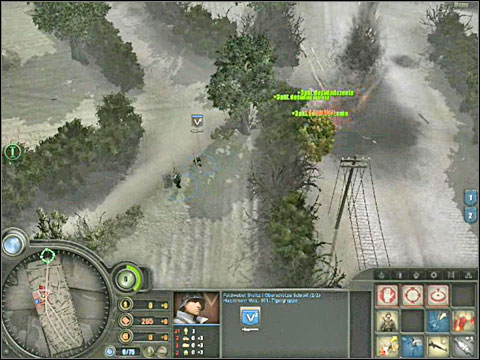
On the next field you will bump into a machinegun and mortar posts. Use one team and jump over the wooden fence surrounding the field and throw an explosive at the machinegun. Afterwards take care of the mortar. The second team should destroy the jeep patrolling the nearby road. Once you're done here, continue north.
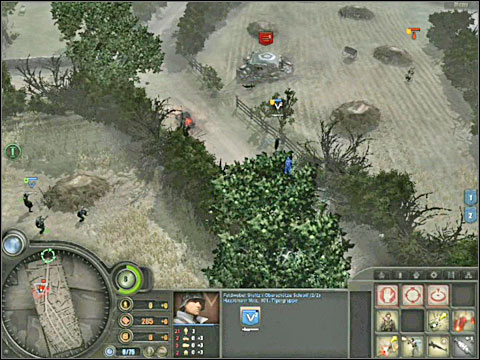
You will reach another field. On the right, behind the main road, the British have placed another mortar - destroy it with one of your teams, pick up the ammo and afterwards use the same team to jump over the nearby wall and throw an explosive at the machinegun on the crossroad.
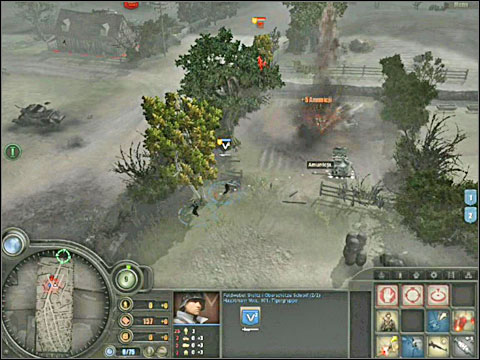
The second team should cross the field in the direction of a single building. While hiding behind a haystack or a wooden fence, throw another explosive at the building, eliminating the enemies hiding inside. Wait a moment and use the same tactic to deal with the machinegun behind the house. If the first team couldn't deal with the machinegun on the crossroad, you can now use the second one, flank it and finally destroying it. Start shooting the British troops across the road and shoot the oncoming groups of enemies. The first team should now get back near the house, quickly running through the field. Remember: if one of the teams will be overwhelmed, search for a safe spot for it in the first place, eliminate the threat with the second unit and only then cure the wounded in the first group.
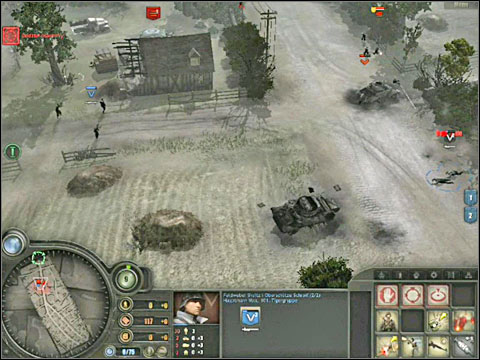
Head north with both teams, while staying on the left side of the main road. You will bump into a mortar on your way - quickly eliminate the crew. Use the camouflage on both teams and order them to crawl to the walls along the side and main road. Once your troops find themselves a suitable position, order them to open fire to the enemies in the area, including another Stuart patrolling the area - destroy it with a panzerfaust. Use explosives to kill the other enemies within reach. However after a while you will learn that the exit is blocked by more British troops and getting through is impossible.
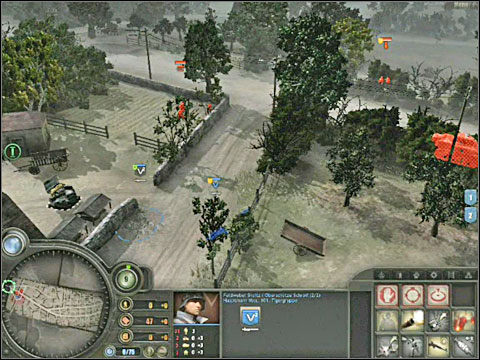
In order to get out of Villers-Bocage you have to go west, to leave the map using a side road. Place one team in the nearby building and get behind the wall near the house with the other one. Kill all the enemies on the fields or just treat them with another artillery strike, which one of your soldiers will suggest. In order to finish the mission, run to the exit showed by a green circle on the map and an arrow of the same colour on the screen.
Main missions:
Additional missions:
Medal missions:
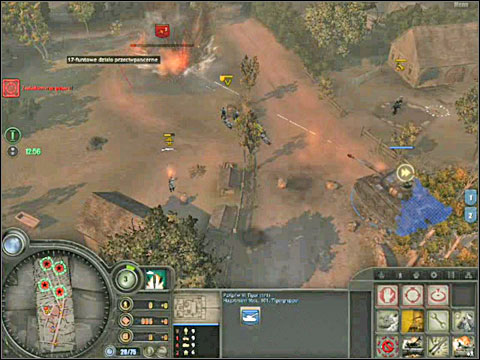
In this scenario Wittmann/Voss will return to Villers-Bocage in a new Tiger in order to complete the destruction. A second vehicle of the same type will accompany him this time. Your first task is to destroy the incoming British tanks. Quickly place your vehicles on the nearby crossroad so that they face the enemy tanks. Afterwards shoot the enemies - the task is easy enough.
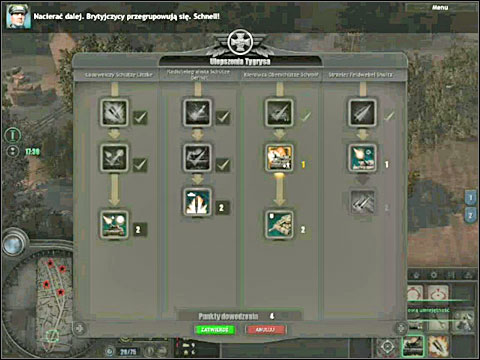
Don't forget to improve your Tiger with the experience points you gain during the battle. Sadly, the second one can't be modified.
After dealing with some British vehicles near the crossroad, it's time to take over Villers-Bocage and while you're at it, destroy the machinegun posts defending the main road. If you're willing to get a medal, you should work swiftly and take over the village in the next 18 minutes. I noticed only one machinegun post which the British have placed right before the fork in the main road, a little bit further to the north. Quickly destroy it using the fragmentation ammo and afterwards burn a Firefly with the anti-tank type. Move in the direction of the village while destroying every enemy on your way. Voss's Tiger can move along the main road and I would suggest sending the second one on the left.
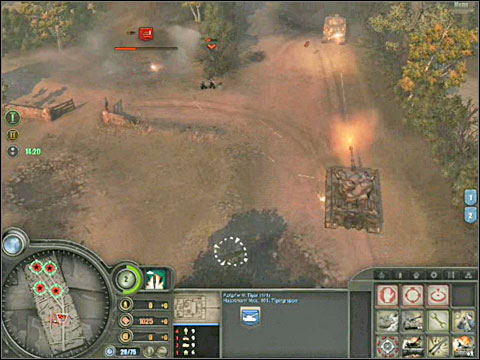
There are also some (I have counted 3-4) reinforced posts with British 17-pound anti-tank cannons. If you want to destroy them, use Voss's upgraded Tiger. Of course use the fragmentation ammo. Allied infantry will aid you during the fight (they're marked yellow on the screen).

In order to win, you must take over (in fact your yellow allies will take care of that) four strategic points located in the village and marked with green circles on the map. Those places are usually heavily defended by the enemy, so it would be nice to call in artillery support before you begin your attack. You do it by pressing the adequate button in Voss's Tiger command panel.
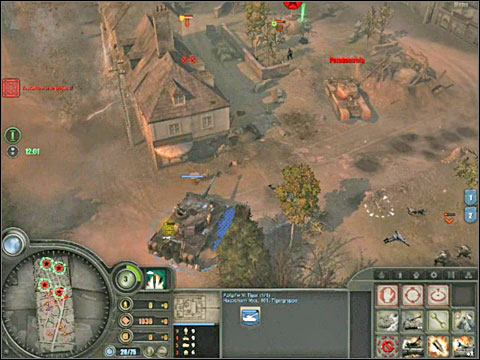
Use the fragmentation ammo to get rid of the British infantry hidden in the buildings. If your main tank gets damaged during the fight, place a smoke screen, retreat a little and repair it. The second vehicle should aid your yellow allies in taking over the strategic points.
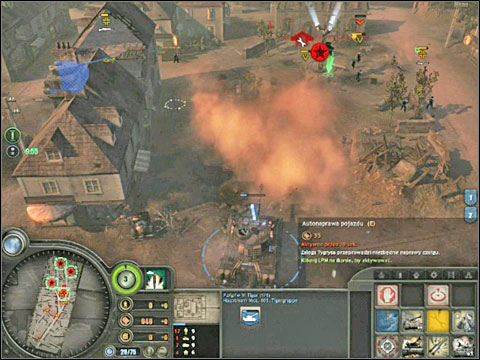
The British have came up with an idea of blocking the streets with some more 17-pounds anti-tank cannons, placing them in between the buildings. You can't flank them, and approaching head-on can end up really badly for your tanks. Once again make use of your artillery, remembering that for it to work, the cannon have to be in sight of one of your tanks. I'd suggest you try to approach the cannons with Voss's Tiger and the hatch opened, which will increase the range of vision. While the artillery is shooting at the cannon, you can also attack with your tanks without having to worry about getting damaged too much.
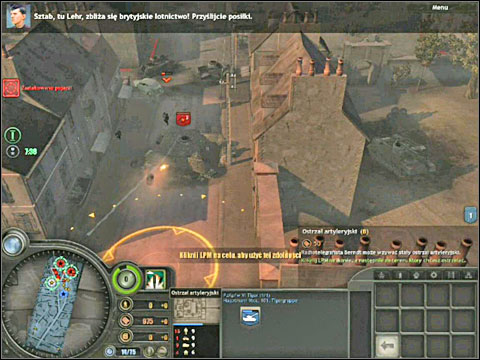
At certain places on the map you will find Priests - enemy artillery, usually supported by Firefly tanks. Try to fight one enemy at a time, although the Priests can be destroyed fairly quickly with anti-tank ammo. Kill the snipers inside the buildings with fragmentation ammo, as always. It seems that the building can also be destroyed by driving into them after you upgrade the tank's ramming ability - to be honest I haven't checked that.
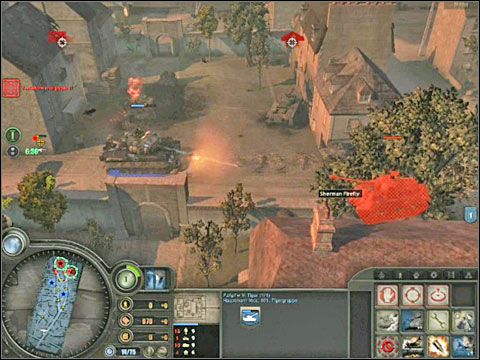
Eventually you will get to the last strategic point, located in the north side of the village. Help the allied infantry with your tanks.
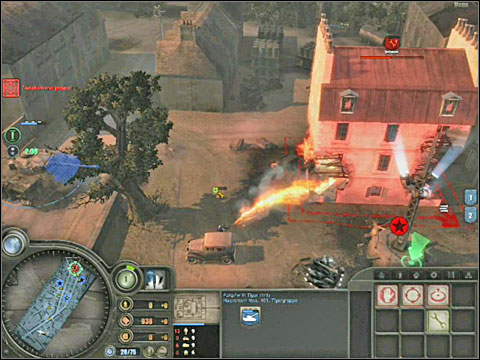
After you get rid of the enemies from the area, your yellow allies will begin to neutralise the strategic point and afterwards to take it over (a gray bar showing the progress will appear). Unfortunately, they probably won't be able to finish because the British will start a counterattack, beginning with shelling the whole area, using some artillery localized beyond the map (right before the bombardment will begin, red flares will appear in the places where the shells will fall). The infantry will probably be wiped out and British forces will appear on the north side of the map - vehicles (an armoured transporter and a tank) and additionally some infantry. Quickly get rid of them using both your Tigers.
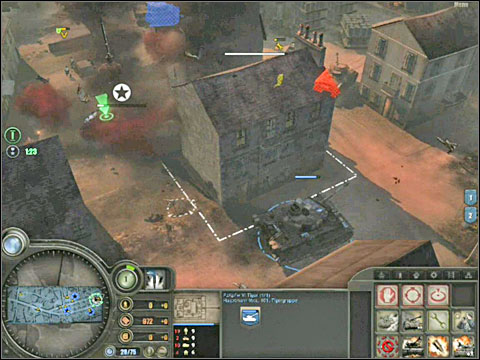
Afterwards hurry and get your Tigers to the sides, as some more enemies will appear from the west and east: on the west there will be a single Sherman Firefly tank (leave it for your second, worse tank) and from the east a tank with a flamethrower - Churchill Crocodile and some sappers with a grenade launcher. Use Voss's Tiger to get rid of them. Note that it can fire grenades (an adequate command on the panel) when the British infantry will come too close. As for the second Tiger, remember that after opening fire, you can start to repair at the same time, increasing the chances of winning.
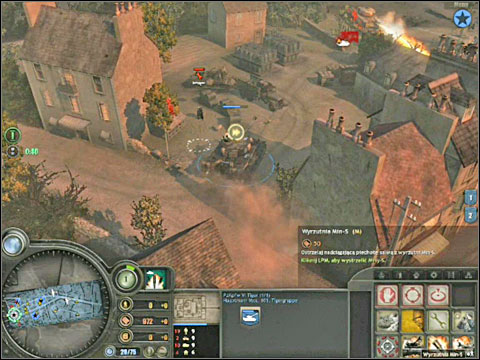
After getting rid of the enemies, get back to the strategic point, killing the remaining British soldiers on your way. Now you have to hope that one of the yellows will arrive soon enough and take over the point before the time required to get the medal runs out.
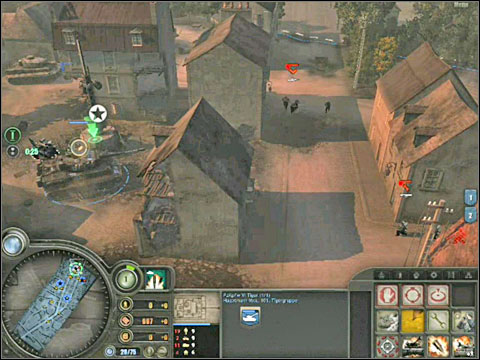
Main missions:
Medal missions:
Team Able was dropped in the wrong place once again. You have to command these guys and join the Baker team, their position is showed by the green arrow on the screen and with a circle of the same colour on the map. Move in the direction showed by the arrow and get to the first cover - a wrecked truck. From there, shoot the German vehicle that will show up and some soldiers a little bit further. You can use direct fire (as the game suggests) by choosing the right option in the commands panel. The Germans will start to retreat after a while - follow them and destroy the trucks they have left while you're at it.
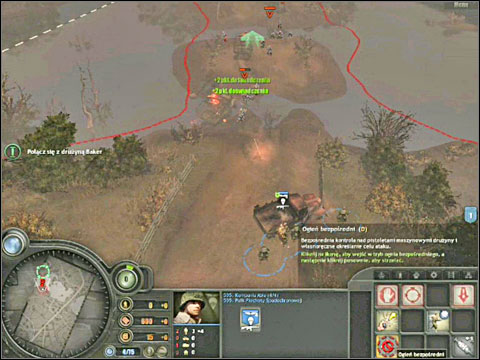
As you approach the place where the Baker team is supposed to be, the Able team will be caught in machinegun fire. Fortunately the guys from Baker are near - you will be able to control them. Run to the machinegun and open barrage fire (icon in the command panel) and throw a grenade at it. After a while both teams will join.
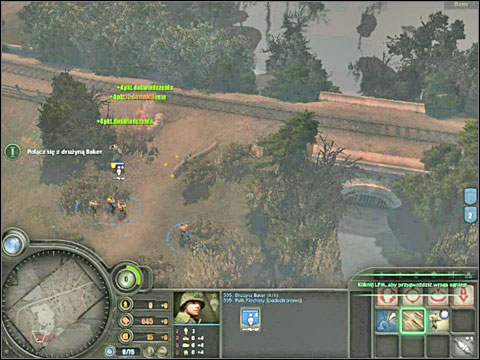
It's time to deal with the next task - clear La Fiere mansion. From now on you should remember that the Able and Baker teams must survive - you can lose one, or even several members of each, but don't let any of the teams be wiped out completely. Move both teams left, in the direction of the mansion.
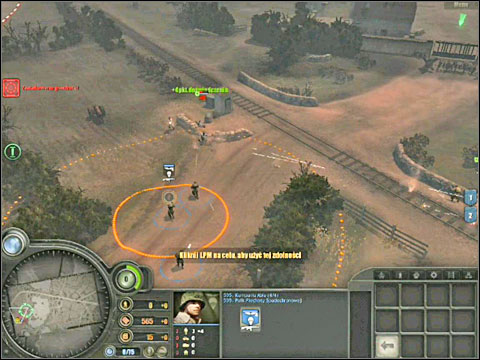
Quickly hide one team behind the wall in front of the mansion and open barrage fire in the direction of the machinegun. At the same time, using the second team, approach it from the left side and throw a grenade before the Germans can move the gun. After throwing the grenade, run behind the next wall, right after the crossroad.
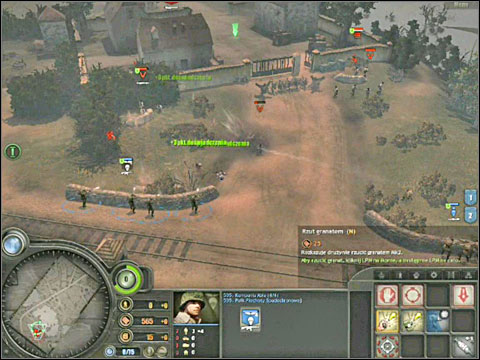
The wall will provide cover from enemy fire. Kill everyone standing in front of the gate, throwing grenades and explosives at those close enough. When you take care of them, the Germans near the wall will leave their positions and run to the mansion, hiding in the buildings.
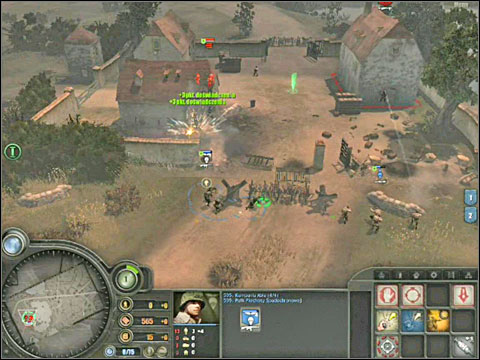
Chase them, moving both teams to the wall surrounding the mansion - hide one team behind the sand bags on the right and the second one behind the entanglements blocking the road. You can get rid of the Germans in the house on the left by getting to the wall with one of the teams and throwing an explosive there. Afterwards move this team to the mansion's courtyard (while the second team uses barrage fire on the building on the right), to the building at which you were throwing explosives a moment ago. Run around it and throw a grenade at the machinegun post behind the house. You can hide your team inside the house and command them to open fire at the next building, while the second team throws explosives at it. Pick up the weapons that the Germans left and check the white circles on the courtyard. After a while the Germans on the west, near the bridge, will start to shoot at the courtyard using a mortar. I would suggest you retreat both teams to the road.
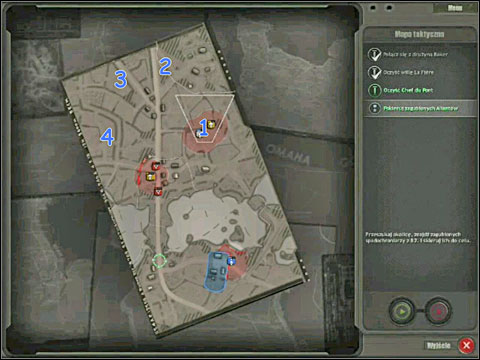
Now we will focus on the medal mission. You must find the other, lost Allied paratroopers and direct them in the right direction that is near the dyke and the bridge on the west side of the map. You can do it with one team, leave the second one near the road. Send the first unit to the place where the Able team begun the game. Afterwards go north, to the place that I marked with a blue 1 on the image above. Once you approach the small house, and arrow will appear right next to it. Get there and you will notice some American parachutists landing. After they safely land, approach them with your men and they will guide your allies (marked with a yellow sign) to the right place that is the village on the north end of the dyke (bridge). Go to every place that I have marked with blue numbers (2, 3 and 4) and you complete the medal mission. You will probably have to fight some German infantry, but they shouldn't be a threat to your men. Afterwards return to the team at the crossroad, using the same road as before (don't cross the dyke and bridge in the west!).
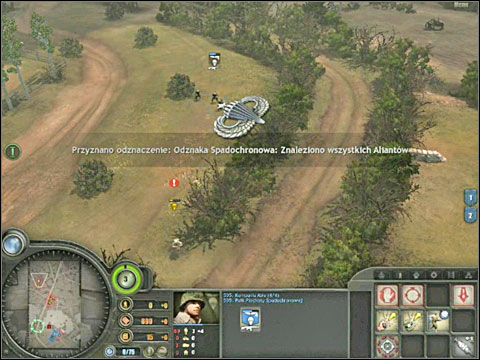
Your task is now to clear Chef du Pont, the south end of the pyre/bridge. It's located at the west side of the map - run there with both teams, through the mansion. Right after the gate, hide one team behind the entanglements blocking the road - they will shoot at the road and the field on the left. The second team can hide behind the haystack on that field for now. Kill some German units coming through that field. After that the second team can move right and kill some more Germans in the trench by the water, while the first team provides cover. If any of the soldiers falls, heal him only after the battle is over. Before you move to the bridge, heal all of your men.
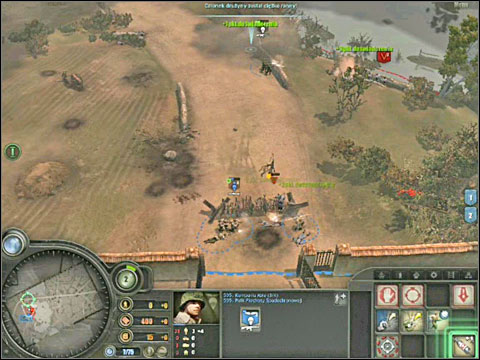
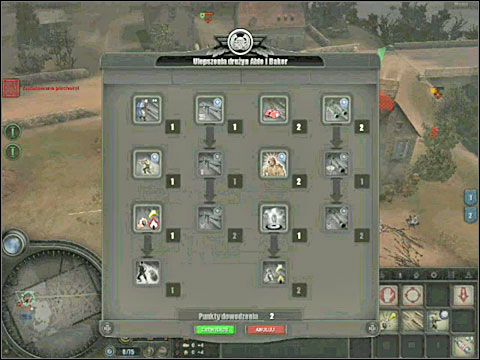
Of course don't forget to use the points you earn to upgrade your teams! Soon enough you will have to fight with some German armoured vehicles, so it would be a good idea to equip your men with adequate weapons - explosive materials that sticks to the armour of the vehicles.
The area around the crossroad is full of enemies. Fight your way through them by running with one team to the field on the left (of course use the haystacks as cover) and getting to the nearest building on the right (firstly throw an explosive there) with the second one. The first team should throw a grenade at the mortar that was shooting at the courtyard a while ago - it's next to the nearby wall. After hiding the soldiers behind the wall and in the house, let them fight. Don't bother with the German trucks heading to the bridge on the right. It's alright if you manage to destroy some of them, but the other ones will just run into the American paratroopers who you helped before. Eliminate the Germans hiding behind the wall on the other side of the road with a grenade.
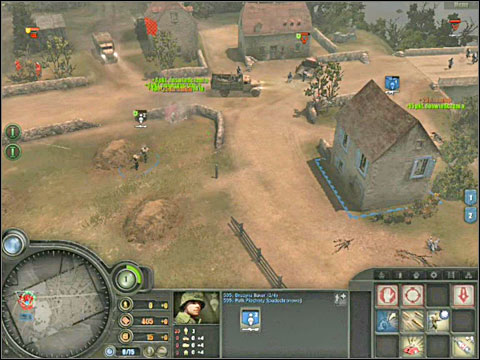
Once you get rid of the enemies, the American paratroopers will show up, saying that more German forces are coming in. You will receive a new task - organize defence and hold Chef du Pont. Place the team with Panzerschreck and the sticky explosives behind the roadside wall where the mortar post was. The German will attack from across the bridge, but some troops will also spawn on the shore, on the left side of the map, so you have to be ready for that. Your yellow allies will position themselves somewhere near your troops and help them fighting off the enemy counterattack.
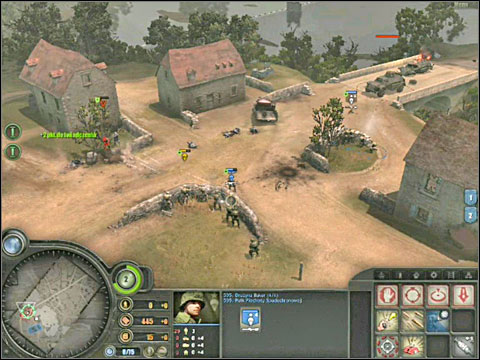
The task isn't too difficult. Destroy the armoured German cars with a Panzerschreck/bazooka using the team nearest the bridge. You can also run to the vehicles and plant explosives on them. Although right afterwards try to assure that your troops have sufficient, green cover - behind the walls or the wrecked vehicles.
Main missions:
Medal missions:
Wait for your AI-controlled men to cross the bridge and get to Cauquigny on the north. Once they get there, you will receive your first task: defend Cauquigny. You have the two parachute teams from the last mission under your command, additionally a machinegun unit, sappers and a 57mm anti-tank gun.
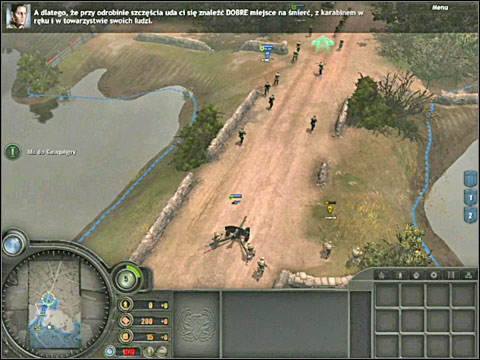
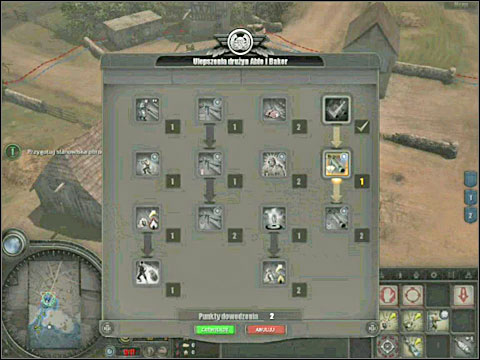
Perhaps you have some experience points left from the previous mission. You should divide them now to improve your men. I'd suggest investing them in the right side of the tree, improving the recoilless cannon's range, which one of your teams should have.
The Germans will conduct the first strike from the north. In order to get ready for it, you can place the machinegun unit in the building right next to the crossroad and the sappers in the house a little bit further to the south, behind the intersection. As for the parachute teams, place them on both sides of the road - the one on the left (they should be equipped with bazookas or recoilless cannons) should hide behind the wrecked car and the one on the right behind the wall. Don't place the anti-tank cannon in the first line - choose some place in the back, maybe a little to the left. All that's left now is to welcome the incoming Germans - infantry and some armoured vehicles. Your machinegun has the ability to shoot anti-tank bullet for a short period of time - it will pierce through the German armoured guns. Throw grenades at the enemy vehicles (the team on the left should have them) once they recklessly drive closer or you have the chance to approach them with your men. If one of the vehicles manages to break through the first line of defence, it should be destroyed by your hidden anti-tank cannon. The medal mission is not hard to complete, it just requires you to destroy the enemy armoured picket, so get rid of every German vehicle in the area.
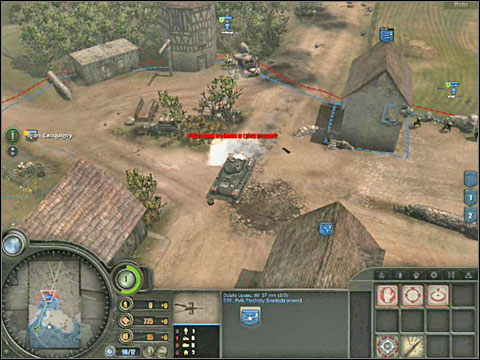
After fighting off the first wave there will be a moment of silence which you should use to get ready for the next attack. Push your anti-tank cannon to the centre of the crossroad, your machinegun to the building where the sappers were and as for them - place them in the house on the left side of the road. Those are of course just my ideas - you don't have to follow them if I think you know better. Send the first parachute team to the right wing and hide behind some wrecked car. The second one can stay on their old position. This time the Germans will strike from three directions - from north (as before) and from right and left. Your task is to hold off this second counterattack. Only some German infantry should appear on the right side, so they won't be a problem for the American soldiers. As for the left side, there will be a mortar section and a sniper - use your parachute team (the second one) nearby to dispose of them, use the sappers (if necessary) and shoot the enemy from the cannon. Use the cannon to destroy the German vehicles coming from the north as well. My main advice is to take full advantage of your two parachute units - they should move around the battlefield, going where the enemy is appearing at the moment. Don't move the cannon though; let it stay at the crossroad (behind a wrecked car, if there is one around).
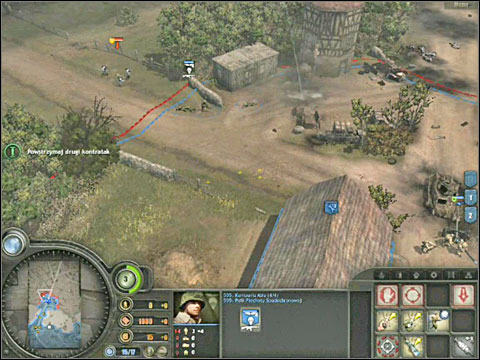
After the second wave ends, you will receive another task - yes, you have to repel another counterattack. I can tell you right now that you won't be able to fight all of them off, as the enemy attack will full force this time, shelling the American positions. However you should defend here until receiving new orders.
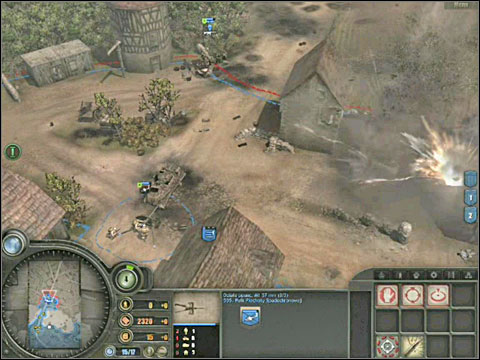
Apart from enemy vehicles, deal also with the infantry - it will probably try and take positions in the nearby buildings. Treat them with a shot from the cannon or with an explosive material.
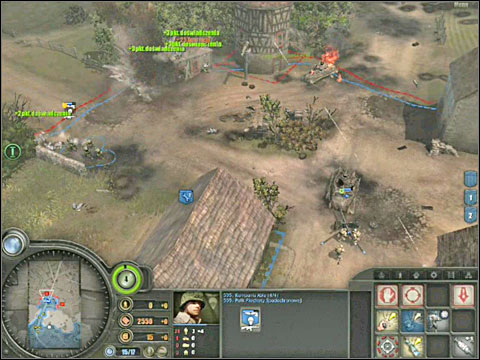
On the right wing the Germans will enter a building - one of the American teams can surprise them by planting an explosive underneath the building and detonating it by pressing the big red button that will appear in the place where the material has been planted. Eventually there will be an order to retreat to the southern part of the dike. A cutscene will play, in which a brave American soldier will try to slow down the incoming Germans and sacrifice himself. It's a pity, but remember that the Able and Baker teams must survive - they're the most important here. The other Americans will retreat south, to Chef du Pont. Don't worry if your anti-tank cannon won't make it - there's another one waiting for you in the south.
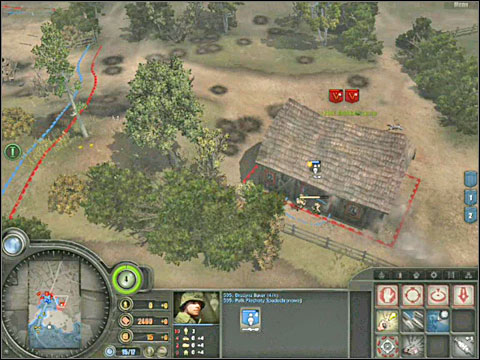
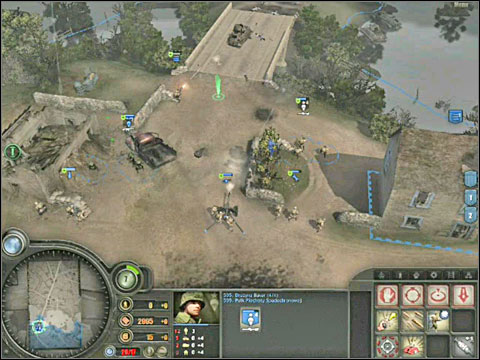
As soon as you regain control over your units, begin to organize defence in Chef du Pont - you have to hold it! The new cannon, which you will find before the bridge in the left should be moved backwards again, so it won't be in the first line. Place one machinegun in the building on the right and the second one (if you still have it) behind the wall or the sand bags near the bridge. The parachute teams should also be near the bridge - the first one should hide behind the wrecked car on the road and the second one behind the wall on the right. As for the mortar, place it behind the sand bags, a little bit in the back. You should also have a sapper team - if you have enough time, they can place mines on the bridge, at least the first one Afterwards get them behind a wall. The Germans shouldn't stand a chance against such defence.
Main missions:
Medal missions:
The Americans decide to retake the northern end of the dyke, behind the bridge. However most of them are stopped by the machinegun fire and only one soldier manages to get across - its sergeant Craft. You can't let him die and what's worse, he has to destroy the German machineguns for the other Americans to safely get to Cauquigny. Quickly hide Craft behind the nearby wall and throw grenades at the Germans in range. Shoot the rest. Afterwards the others will join up the sergeant and you will gain full control over them. Invest the unused experience points and upgrade your men - I suggest beginning with the upgrading the Thompson's clip to hold up 30 bullets at a time.
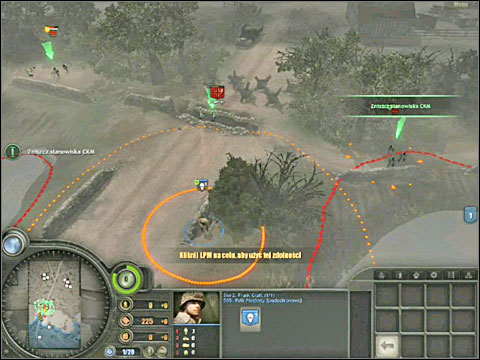
You will receive a new task - clear the road of the German anti-tank guns. There are a couple of them (at least 3), their localizations are marked with green circles on the map and same coloured arrows on the screen. There also are two types of them - field guns and self-propelled. Destroy the field ones when the crew is moving them to a new position - you have to act quickly before they ready the gun again. As for the auto-propelled guns, get rid of them using bazookas and explosives, after finding an appropriate, green cover - behind wrecked vehicles, in houses, behind walls. Your allies, marked yellow on the map, should aid you in your actions - there's some infantry and tanks. Never the less, you have to play wisely so that the Germans don't destroy too much American tanks. If one of your paratroopers falls to the ground with heavy injuries, you probably won't be able to use the first kit on him - they don't seem to work in this scenario. I once more remind you that you should find good covers for your men after each change of position.
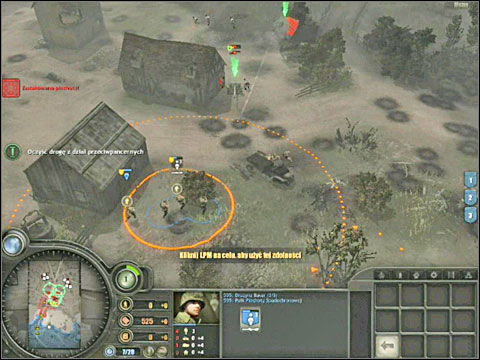
After destroying the anti-tank guns it's time to complete the other tasks - neutralize the German howitzers and clear the crossroad of enemy forces (it's a medal mission that you don't have to complete). Around this time you will receive an armoured vehicle that will appear from the south - move it closer, but don't recklessly throw it under the German fire! The vehicle will serve as support for your paratroopers, while keeping behind them. The German howitzer unit is split into two, placed on the east and west side of the main road. I wouldn't suggest splitting your men - just attack the left one with full force. In order to do that, go round the Germans eliminating some soldiers and a mortar unit. While crossing the grove, destroy the enemy vehicle hidden there. Once you approach the field from which you can see the howitzers, hide your men behind the nearby fence and let them shoot. The fence doesn't provide much cover, but your men are real killers and they will rather quickly (be patient!) deal with the German armoured vehicle, howitzer and some troops hidden in the trench. Afterwards move your men forward, placing some of them in the cleared trench. Throw grenades and explosives at anything in range, for example the next howitzer. Afterwards, clear the other trenches.
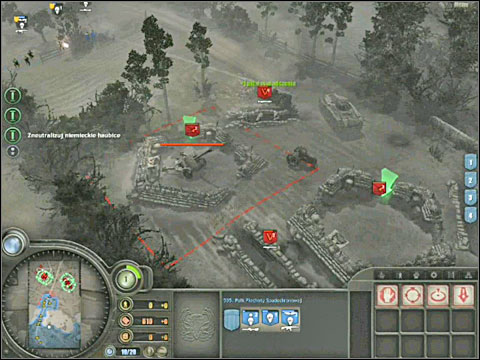
The crossroad that you have to clear is quite near now. Act quickly, as your men are probably under mortar fire. You can destroy the self-propelled gun with a bazooka or some explosives. Treat the German transporter standing behind the building in the north similarly - throw an explosive over the building. Your paratroopers can kill the anti-tank gun crew from a distance, hiding behind some fences or in the trenches. Afterwards, head further to the right.
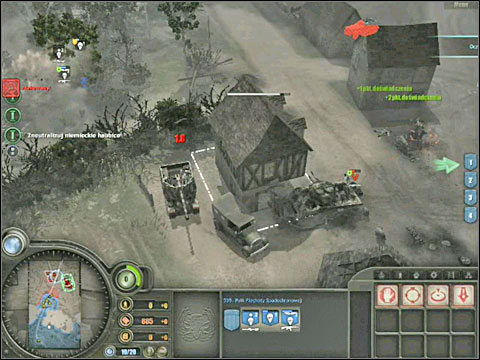
While one of your teams shoot at the enemies from the roadside building, the second one can quickly get the enemy (the "Motivation" order) and treat them with a grenade or just shoot them. Now you can enjoy your newly gained Silver Star. Gather your men, heal them if it's necessary and continue going right, to the lat German howitzer post, marked by a green arrow on the screen.
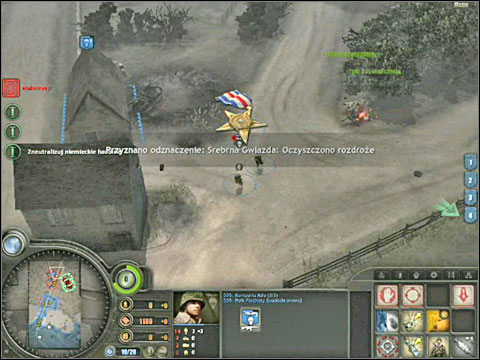
Hide your men behind the roadside fence and shoot the Germans in the nearest trench, some shed and destroy an armoured car located at the edge of the grove. You can use your own armoured vehicle as well as the Allied tanks passing through the main road. Move your infantry forward once you get rid of nearby enemies while throwing grenades and explosives at the defenders (including the first howitzer post. After clearing the trench and the shed, place some of your men inside.
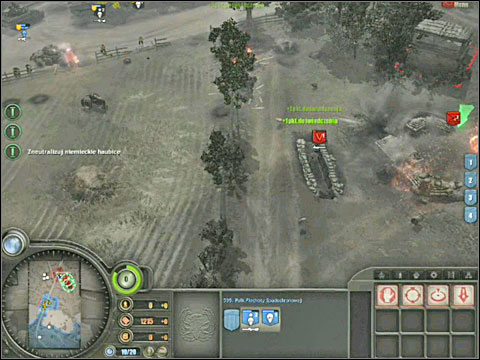
Move your paratroopers to the next trench and behind a haystack and destroy the next enemy howitzer with grenades/explosives, as well as some Germans in the trench. There may be a German anti-tank gun crossing the nearby road - destroy it with bazookas, moving the unit equipped with those closer and hiding behind the next haystack or some other cover. Move your armoured vehicle nearer and deal with the other enemy units. There's a big number of them around. Always try to be sure that your units have an advantage over the enemies and a good cover as well.
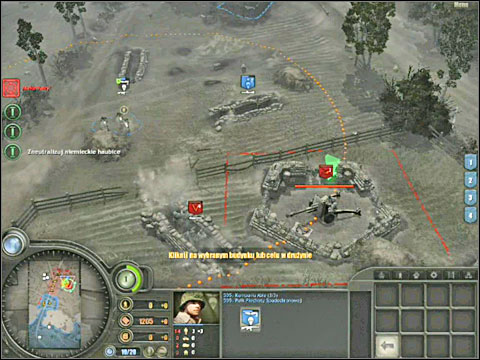
Once you deal with the last German howitzers you will receive a new task: clear the Grey castle which is located in the north-east corner of the map. Move all your forces to the road leading to the fortress. The only gate leading to it is shut tight and the entrance is additionally blocked by anti-tank barriers. However that's not a problem for your paratroopers - they can blow up the barriers and the gate using some explosive materials. Don't rush to the castle right after you do it - kill the Germans sitting in two buildings on the castle grounds. Do it from a safe distance, using the armoured car that's under your disposal. Be patient and move forward only after killing all the enemies, even if it means razing both building to the ground.
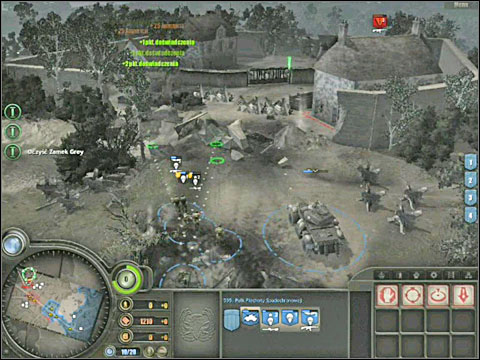
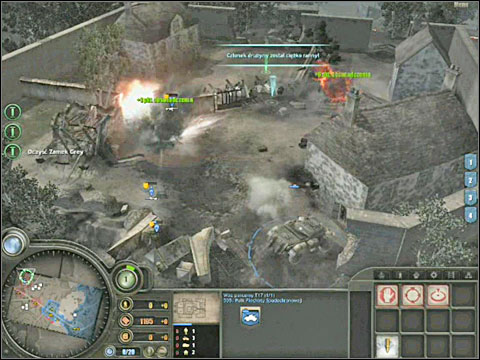
You can dispose of the barriers on the castle courtyard again by using explosives, in case they're in your vehicle's way. But maybe you shouldn't do it? Firstly, your vehicle should keep in the back so it won't get hit by the enemy tank standing where the green is pointing and secondly the barriers provide good cover for your men. Destroy the German tank using bazookas/recoilless guns or explosive materials. You can leave the next armoured car entering the courtyard to your own vehicle. After destroying those two vehicles, the Germans should run from the castle. Congratulations, you have finished the American campaign and received a new medal!
Main missions:
Additional missions:
Medal missions:
After beginning the mission, choose the volksgrenadiers that are under your command, quickly pick up the weapons located in the white circles by the nearby building (panzerschreck and MG-42) and go to report at the church located in the centre of the map, near the big bridge. When you arrive by the sanctuary, you will receive a Luftlande unit. Switch to those guys, enter the fortification building menu, choose the 88mm Flak 36 cannon and begin building this wonderful anti-tank/anti-air gun in the place suggested by the game with the green arrow before the bridge). In the same time the volksgrenadiers should go and alarm the nearby garrisons (there's 14 of them all together) - the Allies are coming!
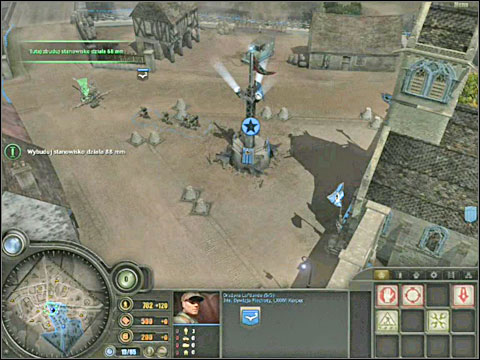
The garrisons are marked with yellow circles on the map. You're probably seeing just 3 at the moment, but even now it's quite easy to guess where the others are located. The buildings are nearby your allies marked yellow - cars and armoured transporters, sappers and machinegun units. To complete this task you have to run to each of the garrisons and place your men inside the buildings for a while.
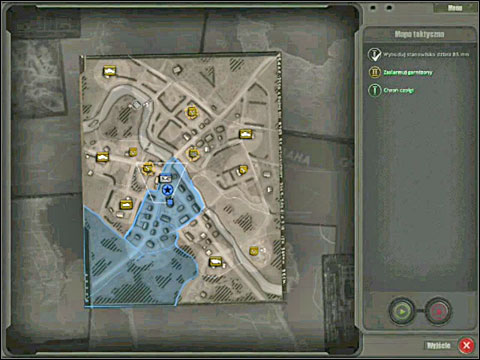
A blue icon will appear above the building and you will be given command over nearby units - the vehicles, sappers etc mentioned before. However, to make this task harder to complete, the creators came up with a sneaky plan - paratroopers will be successively landing on the map. Try to get rid of them using your newly gained armoured car and units. One team should be waking up the garrisons the whole time.
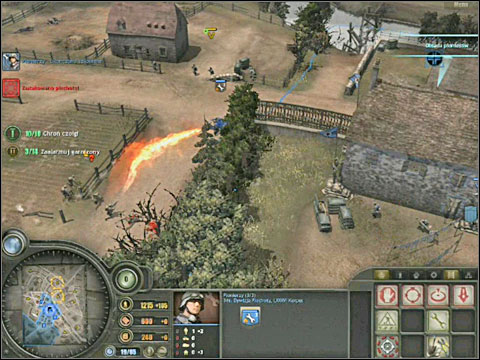
This has - apart from having more units under command - an additional advantage: as you alarm more garrisons, you receive the opportunity to recruit new units at the church ant the building behind it (at the courtyard). They're the same units that you have woken up. Make use of this and recruit some more infantry units. First of all, 1-2 Luftlande teams, as they're the only ones that can build a Flak 36 post - and they will come in handy in a while. Send the newly recruited units to the north, through the nearby bridge, equipping them with the weapons that you will find in the white circles (usually near the garrison) - you should collect panzerschrecks first of all. Let's return to the team that started building the gun post near the church at the beginning of the mission. Right after they finish, you should send them north through the bridge as well, in the direction of the crossroad where the Allies will soon appear. Don't forget to take over two strategic points located in the two opposite corners of the map. There is a massive mortar bunker near the ammo depot in the south-east - you will be able to aid your infantry with mortar fire if you take it over. I would suggest spending the experience points on the right branch of the tree - "fire storm", "V-1 rocket" and "Henschel battle planes patrol", so the ones that will come in handy while fighting off the Allied tanks. Remember not to recruit too much units as you must have some space left for the 88mm cannons. They will help you defending the German tanks located on the other shore (marked yellow on the map).
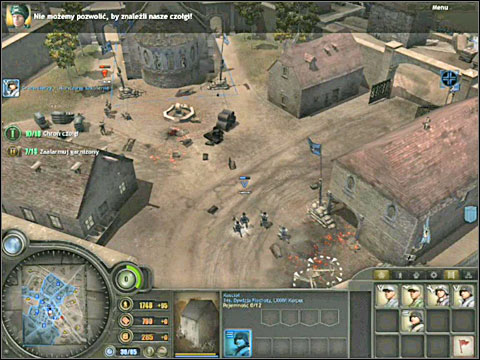
You should organize defence on this side of the river - first of all on the crossroad where the Allies will soon appear. The enemy can't find out about the German tanks! My defence looked pretty much like on the screen below:
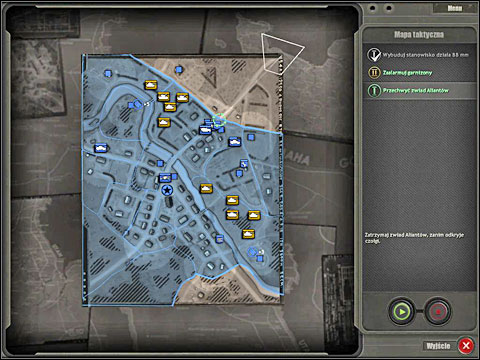
In the region of the crossroad marked with a green circle I placed a machinegun section and sappers (in the building on the right side of the road), infantry with a panzerschreck in the opposite building and a Luftwaffe unit equipped with a grenade launcher (behind some wrecked car). The last one can build an 88mm cannon post on the road between the buildings. It's very advisable, but if you won't make it in time at least have a 50mm Puma and a transporter that you can equip with a rocket launcher. You can also mine the crossroad, of course if you will have the time to do it. These forces combined with the garrison with grenade launcher equipped infantry inside and the armoured vehicle standing next to the building should be enough to hold off the Allied reconnaissance unit.
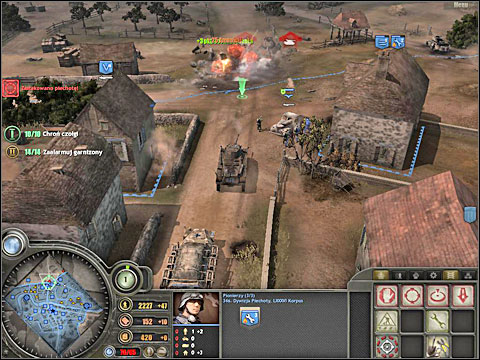
Afterwards the enemy will strike with tanks, sending dangerous Wolverine tanks into battle and... It can be quite hard. Even if the Allies will manage to get to the bridge, they will be greeted by the other Germans - infantry with grenade launchers/machineguns in the buildings and the 88mm cannon in front of the church.
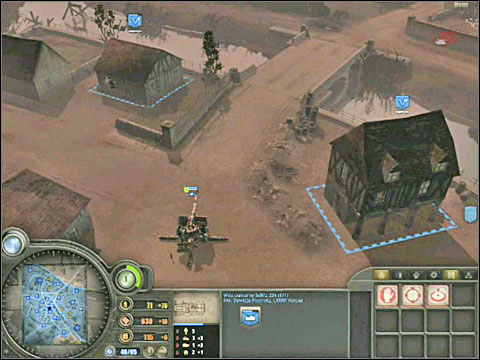
After a while the Allied tanks will also appear on the left wind. You absolutely need to have at least one, no, at least two 88mm cannons standing on the fields where the German tanks are. Your new task is to defend those tanks. There's just plain field around, so it can be hard for the infantry to find any cover. You don't have to build the cannons exactly in the spots that the games suggests - it's better to find a position for the gun behind a haystack or a wooden fence, that will provide some cover. If an Allied vehicle breaks through your defence, chase it (until it won't be destroyed) with an infantry unit equipped with an anti-tank grenade launcher. The allied "yellow" tanks should also wake up once they get attacked and answer with fire. Don't hesitate to use support - Henschel airstrike, artillery, or even V-1 rockets when you target a big group of enemy vehicles standing in one place for some time.
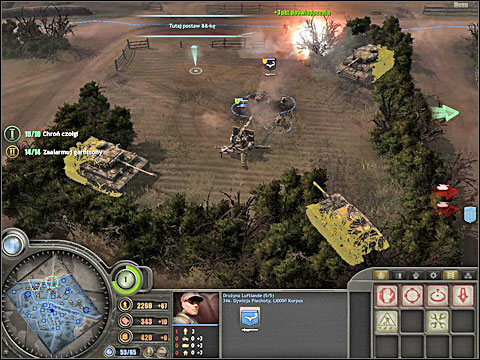
Eventually the Allies will also try to attack from the right. You should be able to hold them off with a 88mm cannon placed somewhere between the house and the roadside wall (this way the gun will be protected from the sides), sappers who can mine the road before the battle begins and later on repair the cannon and Luftlande infantry equipped with a panzerschreck and positioned inside the garrison (you can also use them to repair the gun). Luftlande can (of course after leaving the building) build another Flak 36 post, once the first one gets destroyed. Remember that you can also shoot with direct fire using them. Ultimately, the enemy will retreat. You will receive a medal if none of the allied tanks was destroyed, they are marked with yellow in the game (a pioneer unit can try to repair some of the more damaged tanks during the battle).
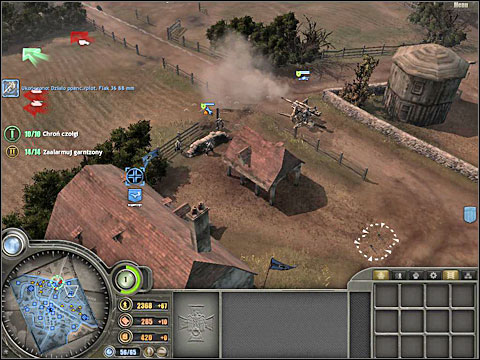
Main missions:
Additional missions:
Medal missions:
You begin the scenario will very little units placed on the south shore of the river. The mission is mainly about holding the garrisons - concentrate on those that you possess on the south, the ones across the river will be quickly taken over by the Allies and you can't really defend them. The church and the building behind it are used to recruit new infantry, support and vehicles. I'd suggest starting with two Luftlande units. As soon as they are ready to fight, equip them the weapons found on the map in the white circles (usually near the garrisons) - above all, take the panzerschrecks, they will be the most useful. Equip every unit you recruit this way (apart from those that are already upgraded and don't need to collect stuff from around the map).
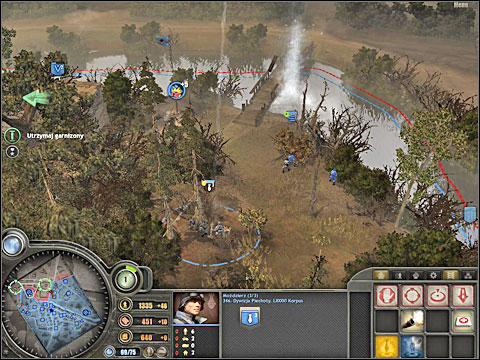
There probably is one 88mm cannon already standing in front of the bridge. The other two can be placed by the Luftlande in the area near the other two passages, on the west and south-east wing. Place also a machinegun and a mortar at each bridge, you can find them on the map (for example in the south-east ammo depot). Man the mortars with some cheap infantry. Your vehicles should also be placed near the bridges. The screen below shows my defences in this part of the mission:
Of course it would be advisable to hold both ammo depots, on the north-west and south-east. I'd suggest spending the first experience points on mining strategic points and doing so at both depots with infantry units. There are also two wooden footbridges - one next to the north-west ammo depot and the second one to the south-east of the main, concrete bridge. However both of them can be destroyed using mortar grenades, which will prevent the enemy from crossing them and attacking you (of course you won't be able to use the bridges too). This way you will be able to transfer your units to more crucial areas, for example the main bridge. The decision is up to you - I destroyed those bridges at the very beginning and made use of the free units.
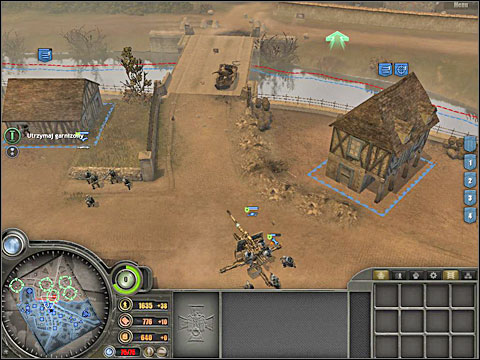
On the map above you could have seen they way in which I had deployed my units on the south shore. Because the map isn't rich in details, I will add some more screens showing the positions of my soldiers in the key places of the map. Let's begin with the main bridge in the centre. There was an 88mm Flak 36 cannon standing in front of it, which probably survived from the last mission. I the building on the right there was a sniper and a MG-42 unit, while in the left there was a machinegun section. There was a Luftlande unit equipped with panzerschrecks nearby and right behind the 88mm gun a sapper units, which has places some anti-tank barriers (on the other shore, behind the bridge) and mines on the closer end. The weak Allies attack in this area wasn't a problem.
On the south-east I decided to defend the ammo depot, transferring some of the forces across the river. The Luftlande units equipped with panzerschrecks, organized a Flak 36 post near the massive bunker with a mortar and had blocked the river crossing with some anti-tank things. I then placed the Goering boys in the bunker (together with the machinegun section), from which they can shoot the Allies with mortar grenades. The Luftlande was to repair the damaged Flak 36 or build a new one in case it would get destroyed. There was also some infantry equipped with anti-tank guns. On the other, south shore I had left some minor forces (in case the Allies would take over the ammo depot), that is a MG-42 and mortar sections (behind the walls, providing good, green cover from bullets), a 88mm cannon hidden in between the buildings and a StuG (an automatic cannon) behind a hedge, both sideway to the crossing.
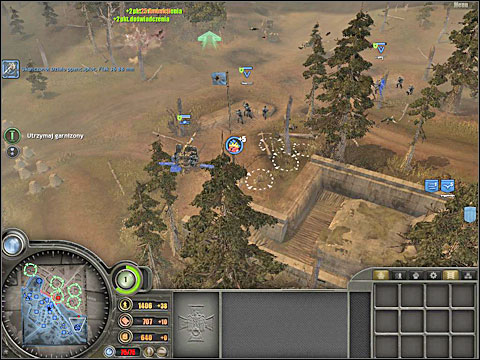
The crossing on the west was defended by another 88mm gun, two machineguns (one taken from the nearby ammo depot, after destroying the wooden bridge), a mortar section, Luftlande and some minor infantry (both equipped with panzerschrecks) and a Puma hidden behind the building, standing sideways to the Allies. While organizing my defence, I have reached the unit limit available in this scenario.
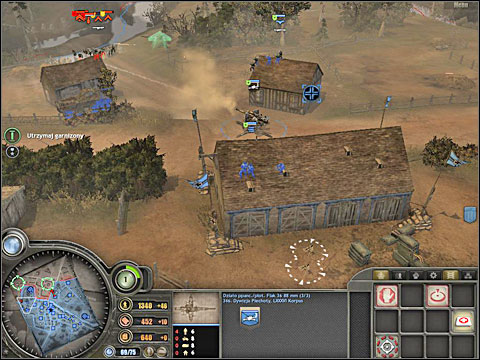
The enemy has seized almost all of the other shore, taking over the local garrisons. From time to time he tried to reach my side - of course such attempts were quickly dealt with. At some moment... silence occurred. It will probably last until you won't attack yourself, trying to take over and hold the whole terrain. How to do it? Well, you have large forces near the bridges, they will do just fine. Leave some small defence (the 88mm cannons that you can't move and one machinegun) to defend the crossings/bridge and the south-east ammo depot (leave the machinegun inside the bunker), sending everyone else across the river. Strike from both sides and in the centre of the map. You shouldn't have any problems on the sides and you will quickly regain control over the garrisons. You can run into some resistance in the centre, however the Luftlande team, sapper and machinegun sections and additionally a Puma and a Stug taken from the sides should handle it. Use the sappers and Luftlande to repair you vehicles (during the fight!), quickly place a MG-42 post. After killing every Allied soldier or after they run for it, take over the garrison and head for the other one.
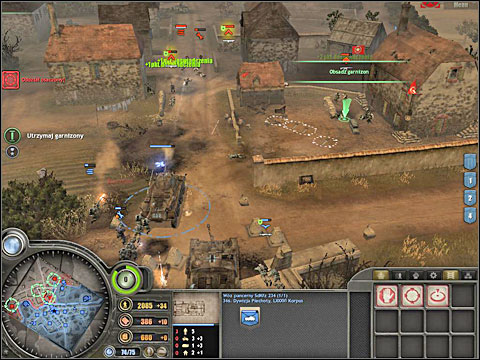
In the meantime you will be given and additional task: build fortifications in the places showed by the orange arrows (both crossing and the main bridge). I have to admit that... I have no idea how to do that. I have built 88mm cannons posts, placed mines and sandbags, built anti-tank barriers - I just couldn't complete this task. Eventually I gave up. Maybe you will have more luck and come with an idea how to complete this task? I think this is just a bug in this version of the game... Oh, in case the enemy air-force manages to bomb the main bridge (making it harder for your units to get to the other side), the Pioneers (German sappers) can fix it quite fast.
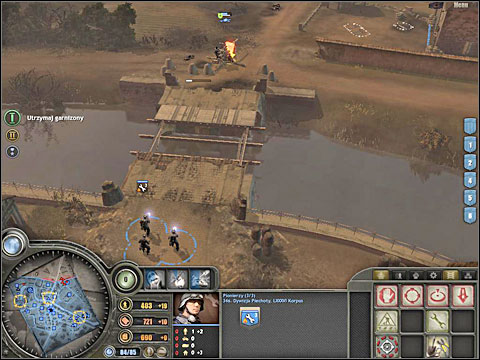
While taking over the garrisons on the north shore, I would recommend the Luftlande equipped with panzerschrecks, they can not only build the 88mm cannons (a great weapon against the enemy tanks that are your main enemy in this mission) but also take over garrisons, repair guns and vehicles and finally fight with tanks and infantry. If you also want to use them, it's worth exchanging the experience points you have gained on raising their motivation. The captured garrisons can be mines quickly (an adequate ability from the support tree), making it harder for the Allies to take them over. Oh, it's good not to place your infantry directly inside the garrisons. If it will be destroyed by the enemy tanks, you will probably lose the whole garrison, even if it was in your hands till the end. You can fill up the gaps in your infantry nearby the recovered garrisons.
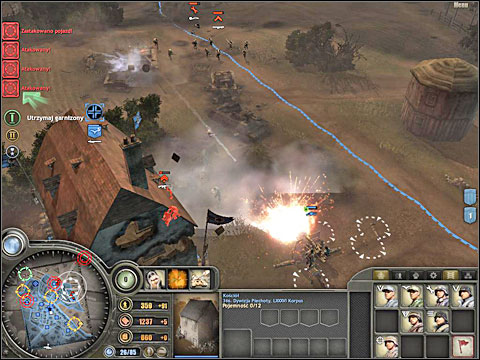
At some moment, the German command will aid you with some tanks (including a great Panther), assault troops, sappers and an armoured transporter - they reinforcement will enter the map from south. Although it has to be said - these German forces aren't much, compared to the Allied units that giving you a hard time on the north. Because of that, you should use them very carefully and additionally reach the population limit by recruiting the maximum number of units, before the reinforcements appear. You're fighting mainly with tanks (I think that apart from weak Shermans I had also seen much better Pershings as well as Hellcats and M10, both quite dangerous), so it would be wise to arrange yourself some Henschel plane support, by spending your experience points on them. The plane does a few air-strikes, damaging the enemy vehicles in the given region - don't waste this on single tanks!
Main missions:
Additional missions:
Medal missions:
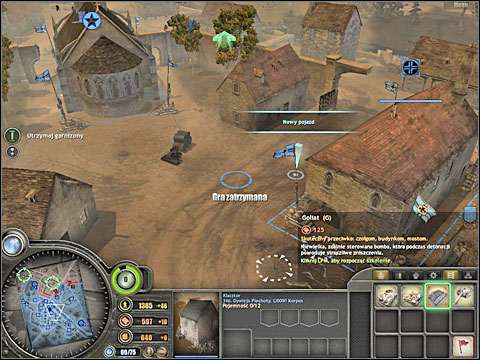
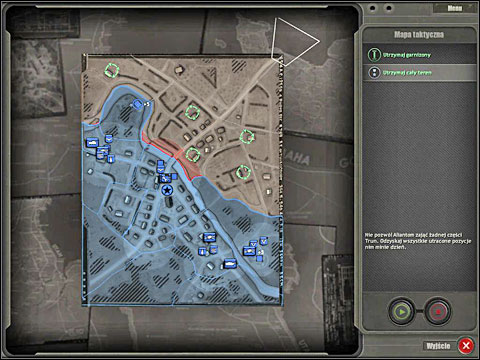
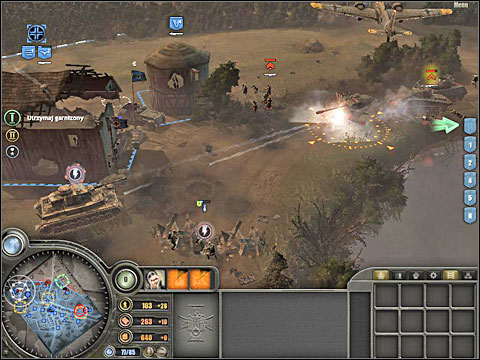
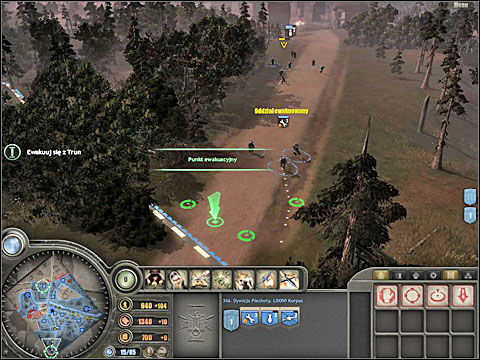
Defending Trun is the first mission in this scenario. It will be updated from time to time with new tasks. You probably have some infantry units under your disposal; there are 88mm cannons posts built in some spots of the map (on the south shore of the river, one before the main bridge, near the church and the second one before the south-east crossing). The church and the building behind it are of course bases where you can recruit more units - infantry in the temple and in the building behind: Goliath mines, SdKfz 251/1 armoured transporters and 50mm anti-tank field guns. However one of the 88mm cannons should be additionally standing near the building, next to it you will also find two 150mm rocket launchers (Nebelwerfers). Man all three with your worst infantry, recruiting more to fill up the gaps if necessary. Another 50mm gun and a Nebelwerfer can be found in the south-east corner of the map, near a garrison. Send an infantry team there (be quick about it!) to man both guns. As for your other infantry units (also the ones that you will recruit later in the game!) with the weapons lying in the white circles, usually located near the garrisons (the weapons will "respawn" after some time). I think I don't have to remind you, that the panzerschrecks are the most important? However man some MG-42 machineguns and 81mm mortars as well. Oh, do remember, that the main bridge near the church has a magic ability of self-repairing, about which the game will remind you with a blue icon on the left side of the screen. Your main task in this scenario is to make it possible for your "yellow" allies to evacuate from the area. A long column of German survivors will be crossing half of the map, showing up in the south-east corner and leaving using the road which ends far in the west/south-west. Send your men to the posts wisely.
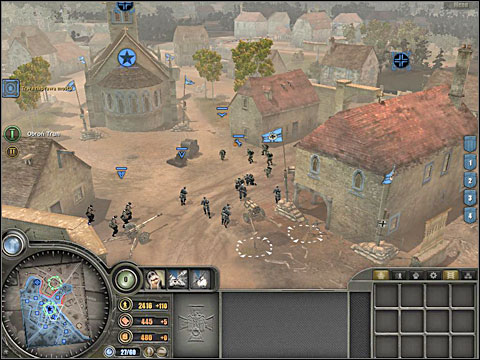
The main task will be quite quickly updated to "stop the Canadian attack", who will try to cross the river on the south-east. Send your first units there - place some infantry units in the houses before the crossing (including the garrison building), the mortar, machinegun and Nebelwerfer units behind the nearby walls (the rocket launchers a little in the back, so they won't get destroyed too fast). You should have an 88mm cannon post in between the buildings (if it's not here, quickly place one with the Luftlande). Place and camouflage a 50mm anti-tank gun or the right (behind the hedge). This way the anti-tank guns will be shooting the Canadian armoured transporters from both sides. As for which rocket launcher and cannon you should get here the answer is - the closer ones (probably the ones from the south).
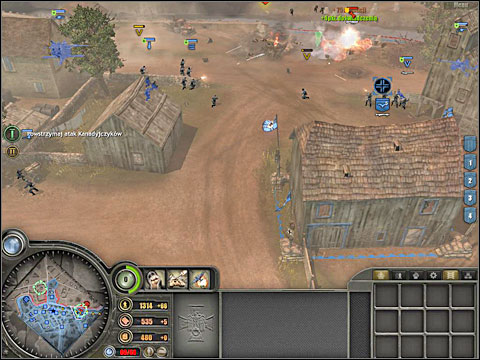
The Canadian offensive (as far as I remember, it will be divided into a couple of waves) should be quickly stopped by your units. Once the fights stop, you can try and take over the ammo depot on the north, right beyond the crossing. Just use the forces that were defending until now. Aid your attack with rocket and mortar fire, aimed at the Canadian trenches, placed near the woods. At this point it's worth having the "fire storm" support, which you can buy using your experience points. Call this artillery strike to the wide passage in between the woods, a little bit further to the north - there will be probably enemy units trying to cross it. It's also worth to motivate your own infantry, by buying the adequate improvement. The game will update the task once more - you will have to jam the crossings with anti-tank barriers. Use one of your units on the back, let's say the sappers to do it - I'd suggest building one line of fortifications directly behind the crossing. However it's wise to leave a small hole (on the right side) so that your anti-tank guns can squeeze through it to the other side. You have probably guesses, that they will aid the defence of the newly regained ammo depot. Take it over with one of your teams, place a machinegun unit in the nearby garrison with a mortar (you will be able to use it later on) and put a mortar section and a Nebelwerfer somewhere behind the bunker. The infantry units should be put right in front of the bunker, behind the best cover you can find.
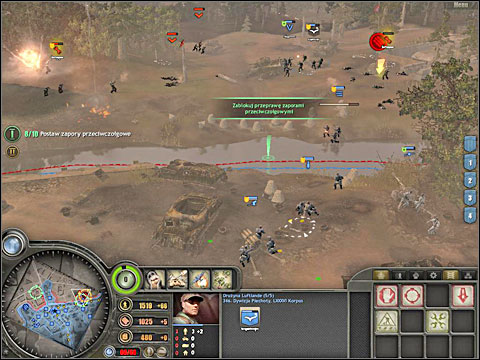
The next mission is to defend the escape route - the green circle showing the target on the map will be moved to the fork of the roads near the church. By now the Allies will probably finish repairing the bridge and will try to cross it. Before that they will most likely shell the fork behind the bridge, destroying the 88mm cannon post. It's good to have a Luftlande unit in the area, so they can build another one after the bombarding stops. As for those bombardments, it's quite easy to know where the next one will occur - right before, a red icon will appear on the left side of the screen, warning about it - clicking it will move you to the place which will be bombarded, with some flares of the same colour already there. So if you see them nearby, it's worth to retreat your units from the area for a while, for them not to get damaged. The infantry inside the buildings can stay where they are, the 88mm cannon cannot be moved (if anything is left from them after the bombardment, you can send a Luftlande unit to repair them). Generally it's not worth keeping too much units in this part of the map, but you can use one of the Nebelwerfers (kept a little in the back) to destroy the bridge after each repair, preventing the enemy from using it. Ff some enemy units will get to your side (you will be then given a task of pushing those Americans back), you can detonate a Goliath (the mine), "produced" in the building behind the church. However the Goliath materializes not by the house, but on the road in the south-west corner of the map, so it has to travel some distance to get to the spot. Note, that your allies (marked yellow on the screen) are evacuating through the fork and can aid you in your fight with the enemy.
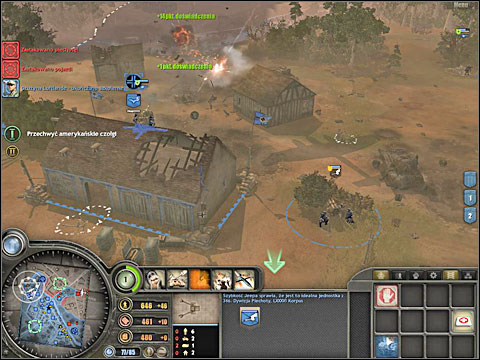
Afterwards you will have to intercept the American tanks, which will attack from the left (west) wing, crossing ford (firstly he will of course bombard your positions). A 88mm cannon opposite to the ford, near the garrison (however you can also place it a little bit to the side), another anti-tank 50mm gun hidden on the right, a Nebelwerfer and Luftlande infantry with a panzerschreck, placed in the garrison. I think that I don't have to add that you should be working on defence in this place from the very beginning of the game, repelling the attack in the other regions at the same time? At this point you should have the ability to call in attack aircrafts, striking the enemy vehicles in the given area - but them for your experience points. Call in the places as soon as you see the enemy tanks incoming - repeat it a couple of times to destroy all of them. Use the artillery and of course, the Nebelwerfer if it's necessary. Remember that the Luftlande can repair damaged guns and that you can replenish units near the garrison building.

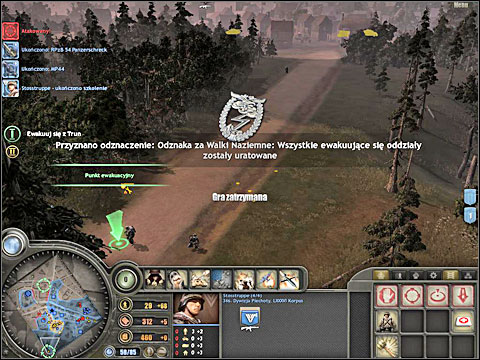
Finally it will be time to evacuate from Trun. However if you're interested in completing the additional and medal missions, you should hold off with the evacuation and defend the crossing by the ammo depot in the south-east corner of the map long enough for most of the "yellow", allied units to evacuate. You can see how much of them have already made it (149 people are required) on the left side of the screen, right next to the icon representing the medal mission. Unfortunately the evacuation takes quite some time, because, as you have probably noticed - most of the allied vehicles is damaged and moving very slowly. You can speed thing up by keeping a sapper unit by the route and repair some of the more damaged vehicles with them - that's my small suggestion. As for the Allies, constantly trying to attack and make it through the river - it's best to fight them as far from the route as possible - by the ammo depot. It's worth placing an armoured transporter equipped with a rocket launcher here, by which the German units can restock in members. The transporter can be equipped with a rocket launcher, to shoot the enemy infantry and vehicles - the button of the adequate improvement can be found next to the command panel. The Luflande unit can build a 88mm cannon post near the bunker, and as for the bunker itself - keep a machinegun section inside until you won't be able to use the mortar. Every infantry team in the area should be equipped with anti-tank weapons. Treat the incoming enemy (infantry and tanks) with artillery fire and of course mortar grenades and rockets. The Allies will at first walk through the wide pass between the forests but will grow wiser after a while and begin to cross the forest more to the left. It's a signal that you will have to get out of here quite soon. However, as for now, hold your positions. There are so many enemies moving in, that it's not hard to guess that they have a base nearby (in the north), where more units are being made. But whatever you do, don't move your units from the ammo depot (in order to attack the Allied base), because you will only weaken your defence and you probably won't be able to take over the base!
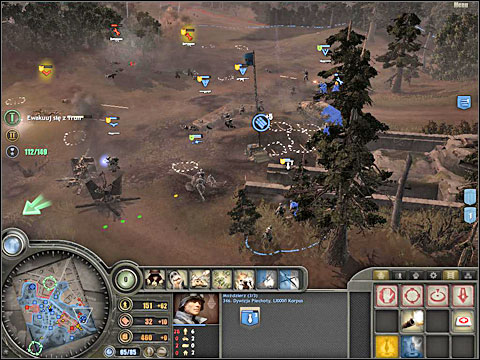
Instead I would suggest sending a single, camouflaged sniper, who has shooting out of his own will turned off. After a short walk through the forest (while avoiding the enemies!) he will surely bump into an Allied command vehicle, accompanied by a couple of tanks - in my game it was parked by the nearest garrison taken over by the Allies. Not all that's left is to approach the vehicle so that it will be in range of out sniper and... Call in a V-1 rocket strike. You can use it after buying it for your experience points and having enough ammo resources. Just look out no to get too close to the target, as the rocker really makes a big boom. If a miracle occurs and the target won't be destroyed, you can call for some artillery support or airstrikes, while eliminating the enemy sappers trying to repair the vehicle with your sniper. After destroying the target, the Allied attack should be a lot easier.
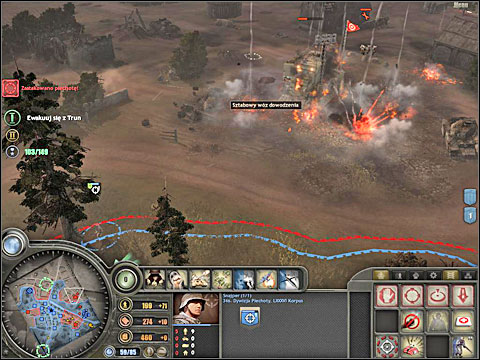
Defend both crossings (or at least the one near the ammo depot) and the fork in the roads until you are sure, that enough (149) of your allied units have been evacuated and the medal will be yours and only yours.
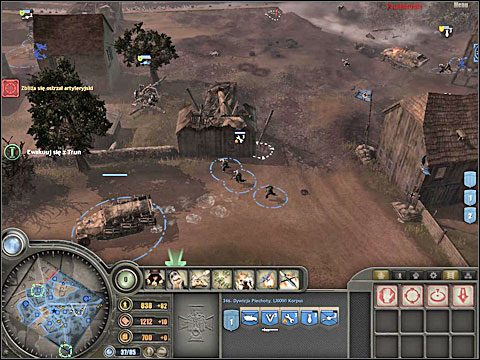
Afterwards you can think about retreating from the ammo depot area in the south-east and back to the south shore, to the old positions. Place the infantry in the buildings (also in the nearby garrison), the transporter between them (so that the houses cover its sides), do the same with the anti-tank cannons (you can build an 88mm cannon with the Luftlande, if necessary) and keep the mortar a little in the back. While retreating, you can throw some S2 bombs behind you (in fact those are mines) to make it harder for the enemy to chase you - you will get them from the support tree, using the experience points gained.
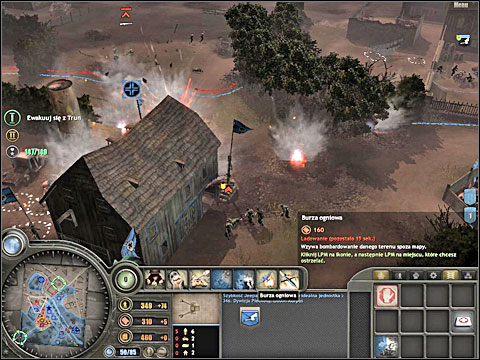
However some of the Allied forces can break through your defence lines and they will try to take over your garrisons. You can stop them in many ways - 1) calling in an artillery bombardment to the area of the garrison or even the building itself, 2) driving nearby with a Goliath and detonating it, 3) shooting them with rockets from the Nebelwerfer. Don't worry if the building won't make it - you will have fewer garrisons to take over, if you want to complete the additional task of regaining the garrisons. It's worth to take a look at who the building belonged to in the moment of destruction (to you or to the enemy) - it should be blue... That is German.
As for the additional mission mentioned before, that is regaining the garrisons, I think that it's best to complete it in the last phase of the scenario, after getting the medal and right before evacuating your forces from the map. I took over the garrisons beginning with the ones on the left (west) and by using two assault infantry units. There's probably no one inside the garrisons owned by the Allies, but sometimes you can run into some defence in the area around them. If the enemy has advantage over you, use an artillery support or use the "propaganda" bonus (the support tree once more), forcing one of the enemy squads to give up and retreat. Kill the rest of the enemies, quickly take over the garrisons and put your troops inside for a moment (for it to change colour to blue) and replenishing your men. Of course if you have some more men under your disposal, you can leave them in the garrison, for it not to fall into enemy hands again too fast. Oh, if the enemy will surprise you with an artillery bombardment, retreat your men to behind the building and take it over away from the falling shells. Similarly in case of seeing red flares and an warning icon on the left side of the screen (a mark that something will fall from the sky soon enough) while you're moving your men, quickly retreat to the nearest garrison and wait for the shelling to end, while filling up the gaps in your squad (if it's necessary). You probably won't have to take over some of the garrisons, as they were destroyed earlier - that's good, you will be done with the job faster. You can also destroy the garrisons you already own (they are blue), that are in your Nebelwerfers range - by doing so you prevent the enemy from taking them over and make your task even easier.
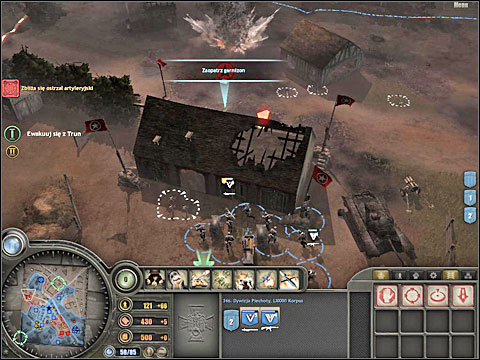
Once you take over every garrison on the north shore (I assume that you are in possession of the ones in the south) it's time to quickly evacuate from Trun, retreating your men to the end of the road in the southern part of the map. Of course retreat the ones you can - the 88mm cannons will fight until the end...


 Call of Duty: Ghosts Game Guide & Walkthrough
 Castlevania: Lords of Shadow 2 Game Guide & Walkthrough
 Call of Duty: Black Ops Game Guide & Walkthrough
 Call of Juarez: Bound in Blood Game Guide & Walkthrough
 Call of Duty: Modern Warfare 2 Game Guide & Walkthrough