
Guide to Call of Duty Ghosts contains detailed description of single player campaign walkthrough. In each mission you can find hints concerning performing missions and effective elimination of enemies. Besides, this guide contains videos with locations and activities required to get all intelligences. You can find here also a list of all in-game achievements with instruction of how get them. Besides information for single player, you can also find here hints concerning multiplayer, like description of all classes, detailed description of Extinction mode and general remarks about multiplayer.
This guide contains:
Jakub Bugielski ()

Movement

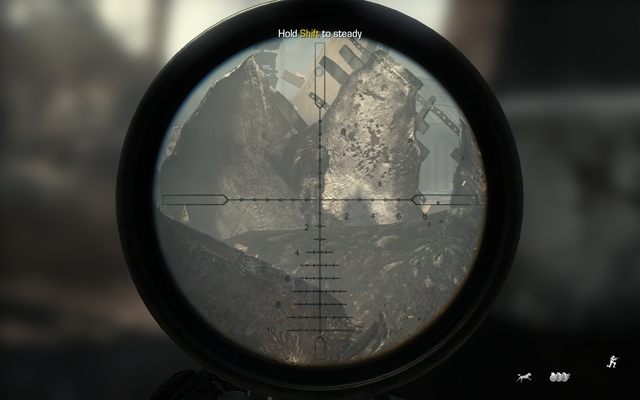
Sprint / Hold breath

Camera controls

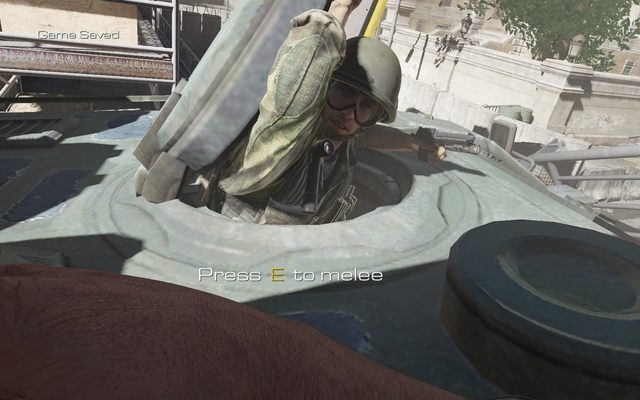
Melee attack

Jump

Duck/crawl

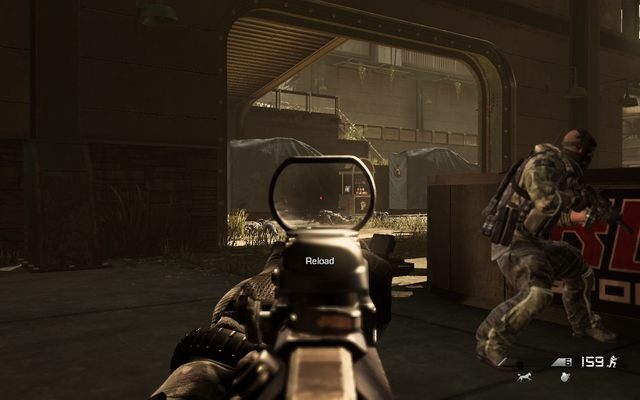
Reload

Weapon swap

Tactical equipment (e.g. thermal goggles)

Aiming

Grenade throw

Shoot

Contextual buttons ( e.g. using of items in the single player mode)

Unused

Objectives overview/options/pause

Movement

Sprint / Hold breath

Camera controls

Melee attack

Jump

Duck/crawl

Reload

Weapon swap

Tactical equipment (e.g. thermal goggles)

Aiming

Grenade throw

Shoot

Contextual buttons ( e.g. using of items in the single player mode)

Unused

Objectives overview/options/pause

Movement

Jump

Duck/ slide (while sprinting)

Crawl

Sprint / Hold breath

Shoot

Aiming


Grenade throw / use equipment

Melee attack

Reload

Interact

Primary weapon

Secondary weapon (pistol)

Additional weapon / gadget

Tactical equipment

Secondary equipment (e.g. thermal goggles, night vision)

First reward for killing streak (only in multiplayer)

The second reward for killing streak (only in multiplayer)

The third reward for killing streak (only in multiplayer)

The fourth reward for killing streak (only in multiplayer)

Score table (only in multiplayer)
At the beginning I have a several hints for you which may be useful during a single player campaign:
Game begins with animated loading screen during which narrator speaks about unit of 60 soldiers, called Tier 1, which was sent to defeat 500 hundreds enemies. Tier 1 had to defend patients of a hospital. During three days they were fighting bravely, but they had to fall against enemy number advantage. Soon, only 15 soldiers left of those 60. During the night, one of them evacuated all hospital patients while the rest of them returned to make chase impossible. When enemy returned, members of Tier 1 destroyed all of them with every weapon they found but one. The only one survivor, asked about this event, said that their power was improbable. He called this power Ghosts.
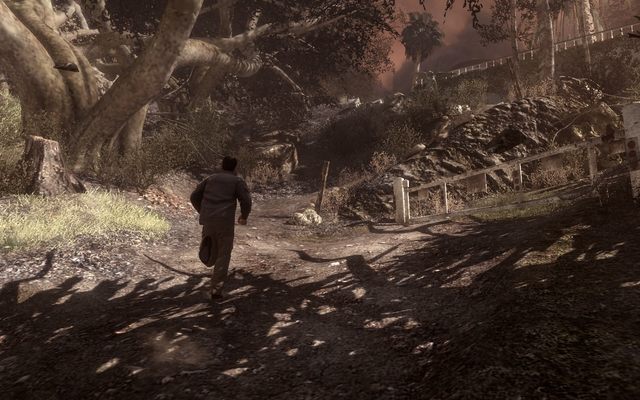
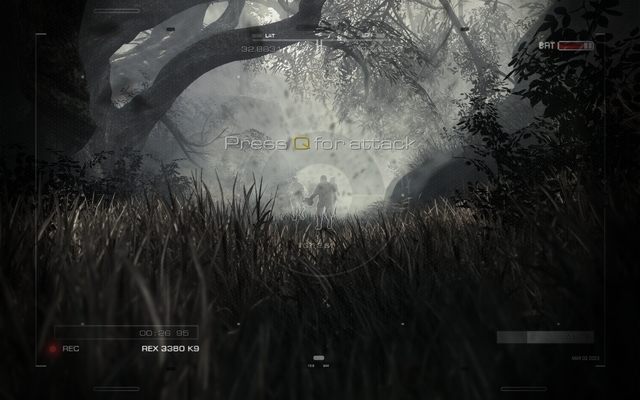
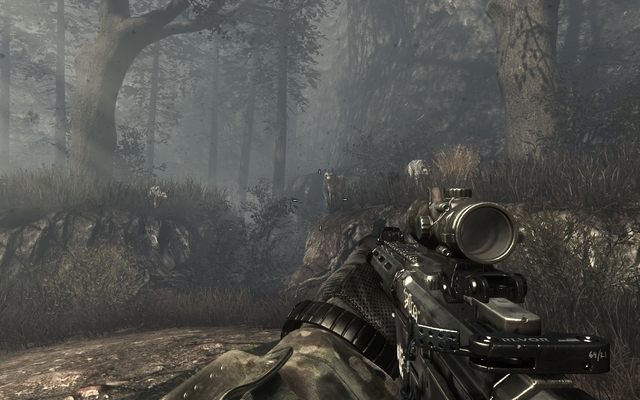
 Nice walking in the forest.
Action goes to the present times. You're Logan talking in the forest with brother Hesh and father Elias, who is a narrator. Follow your companions to the city. It turns out that city was attacked.
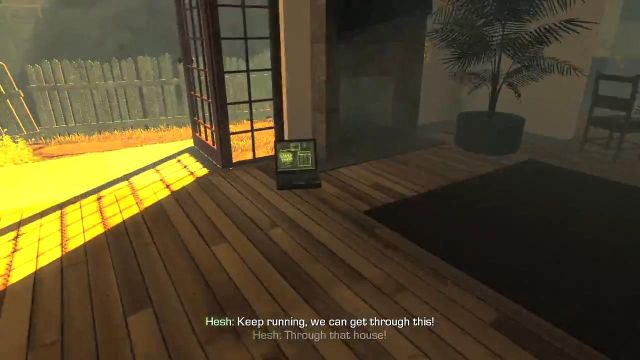
 Run Forrest, run!
Elias, dividing from you, orders you to go home. Follow your brother and don't get to away or don't fall under the car. Just before you get into the house, the scenery changes.
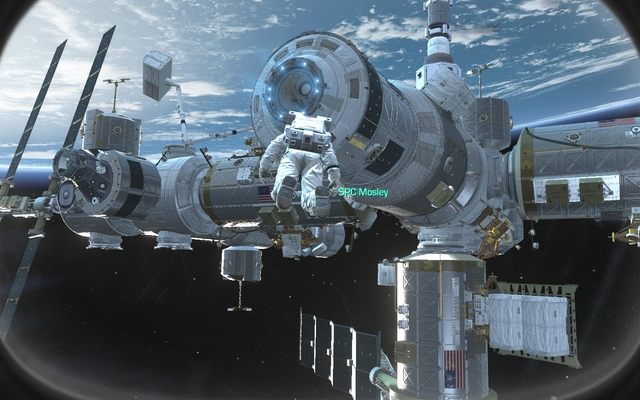
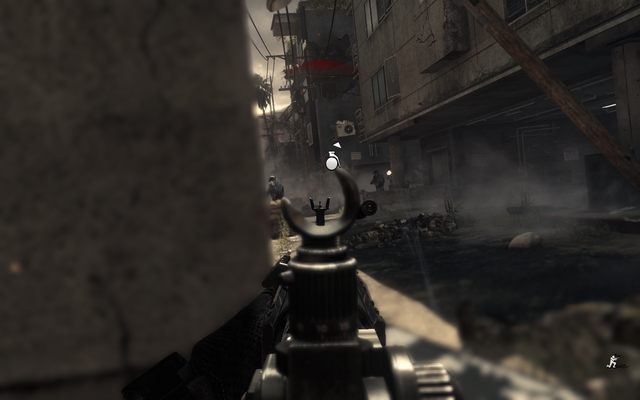
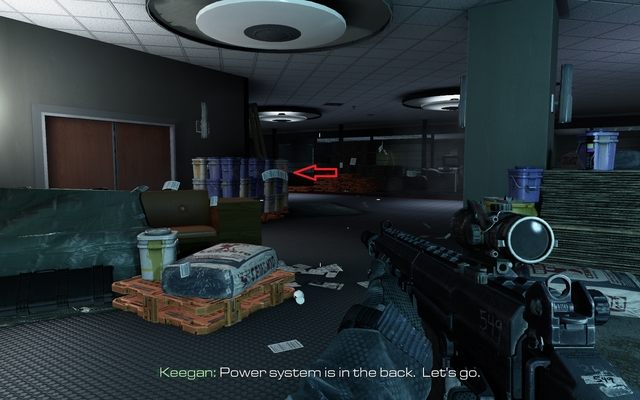
ODIN Station at its finest.Action goes back 15 minutes and moves to the ODIN Station and you play as Baker. Follow instruction of Mosely and follow him, by jumping and crouching to navigate.
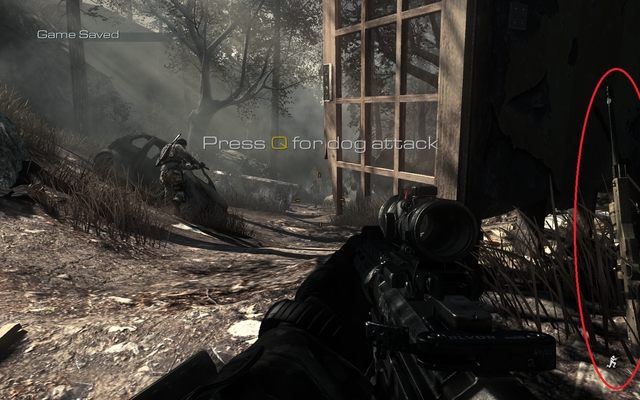
 Time to run away!
After a while, you'll see that the Station is attacked and you, with Mosley, due to the lack of weapon, decide to run away. Soon after that, you get a weapon. Fire at enemy and continue your journey into the Station, killing your enemies.
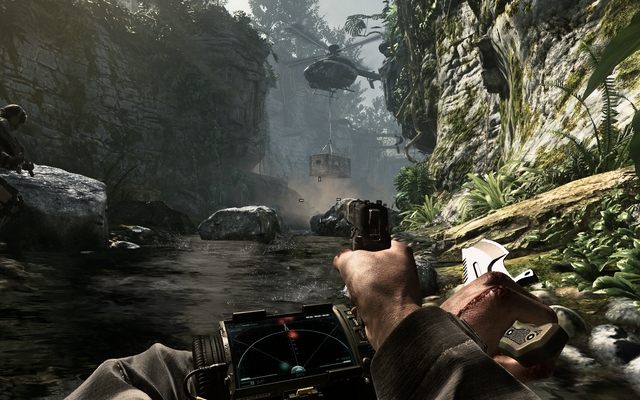
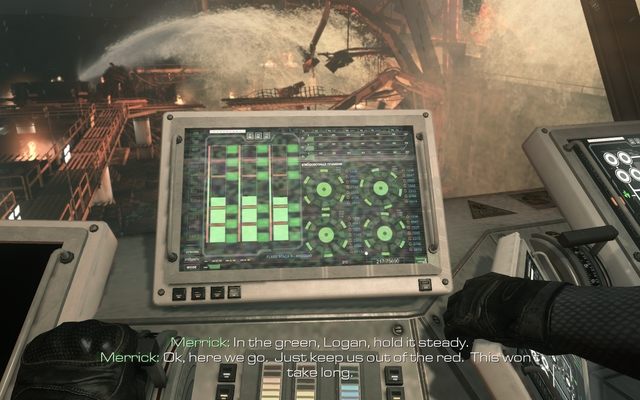
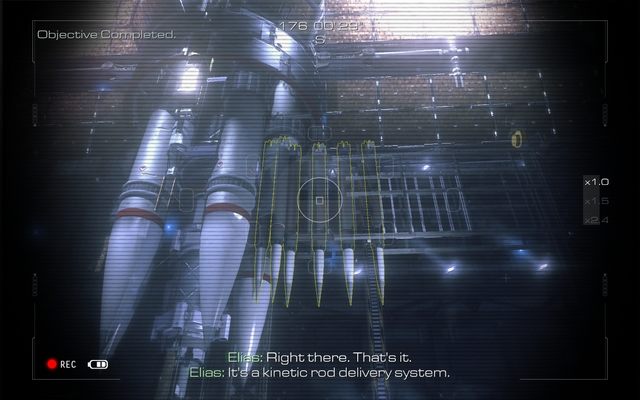
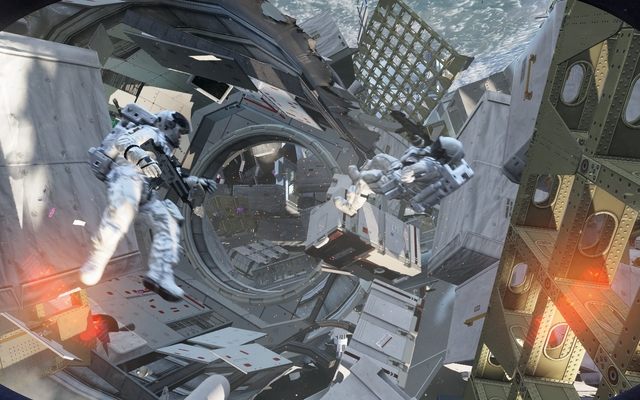
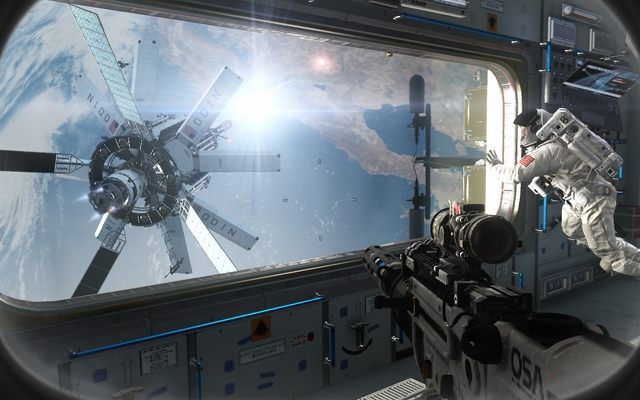 That will leave a scar...
From the radio transmission, you get to know that ODIN is occupied by enemy and someone has ordered to fire at the Earth from rockets which are on the Station. Mosley asks you to help neutralize ODIN. Follow her to the next room where the explosion happens and you get into space again.
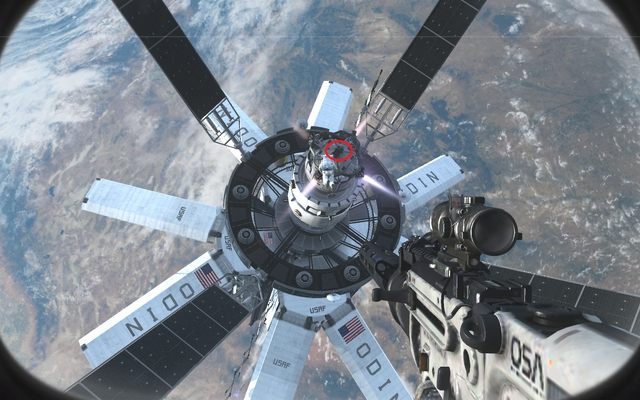
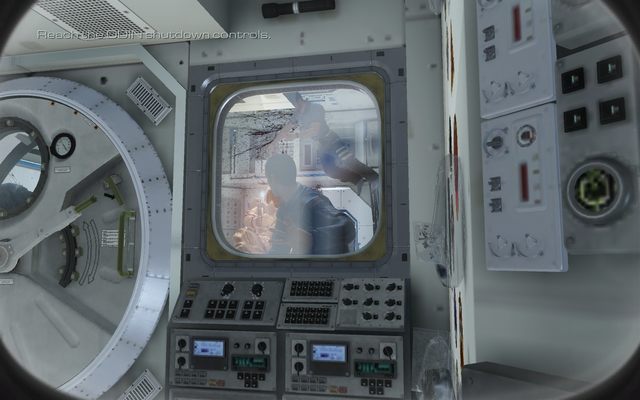
After a while, continue your journey with your companion to the controlling panel of ODIN. Fly to the black box on its surface and detach a cover with action button.
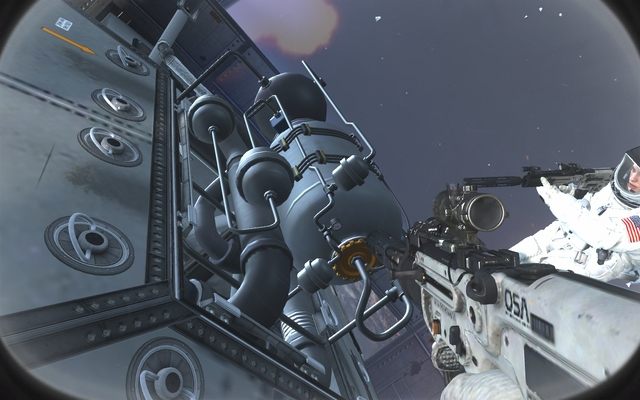 Move back maybe?
At this moment, you have to fire at the fuel tank until it explodes. When it happens, you see Mosley dead. Action skips back to the present time.

Jump outside and follow brother. Get out of the road and run into the building on right. Inside you find a laptop with intelligence data.
 It will hurt...
Run out from the building and jump down to join brother. Continue running until you get to the place where you see an explosion and you lose a consciousness.
When you regain it, it turns out that father joins you and you run away from the city what ends mission.
You're greeted with an animated loading screen from which you get to know that an organization called Federation take over ODIN and plans to invade USA. Bravely fighting Americans are pushed to defense.
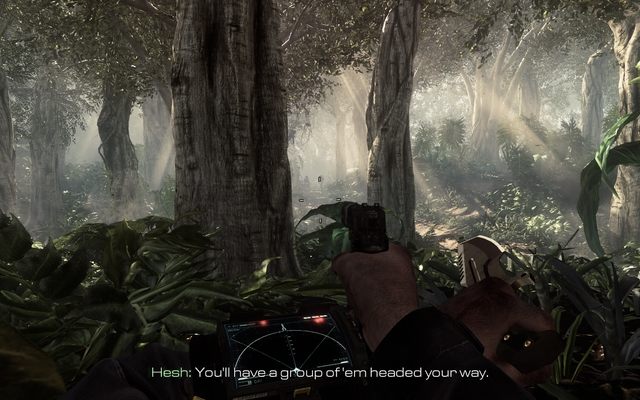
Someone is not making his job...It turns out, that 10 years has passed from the previous events. You play again as Logan, and you have Hesh and your dog, Riley, with you. After some time, Riley smells something and you have to follow him and check it. Several first minutes are calm and you don't have to expect enemies.
Climb up through the debris and continue your journey following Hesh and Riley.
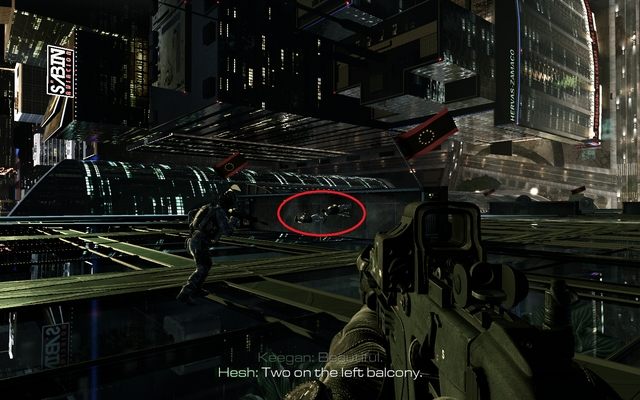
 Beautiful but scary view.
When you get to the next room, you get to know that all rumor was because of animals. Move forward, go under the big arc and follow your companions.
 Full team.
Soon, you get out on the surface where the rest of your team joins you. After a short talk, you, Hesh and Riley separate to search left side of the road.
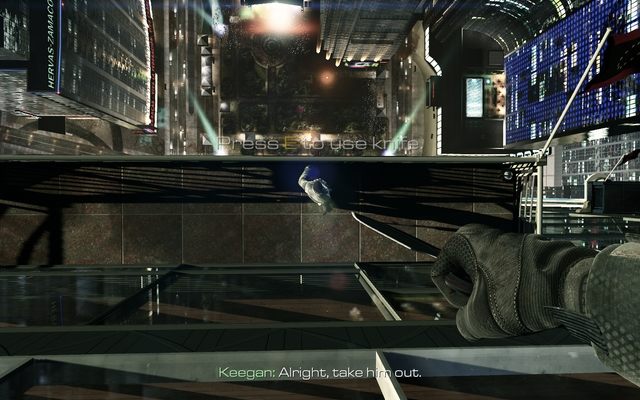
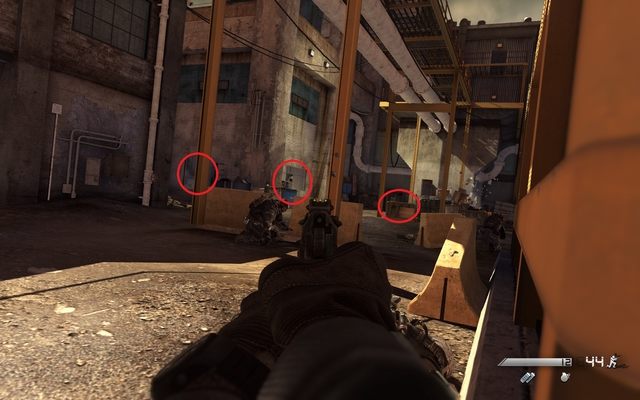
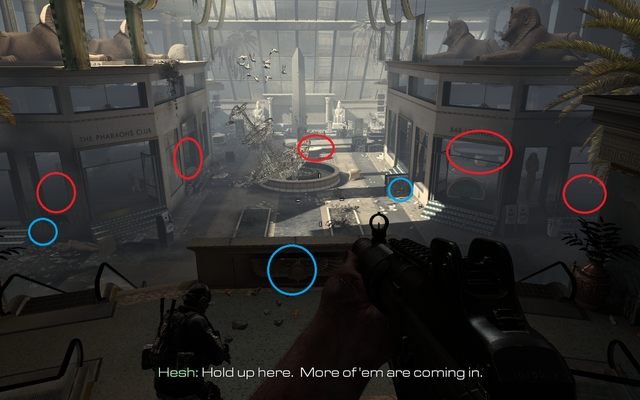
Soon after entering the closest building, you run into enemies. Due to the lack of covers on right, crouch next to the Hesh and wait for Riley to attack and then eliminate enemies running from left side and in front of you. If you can't hit an enemy behind a cover, smoke him out with a grenade.
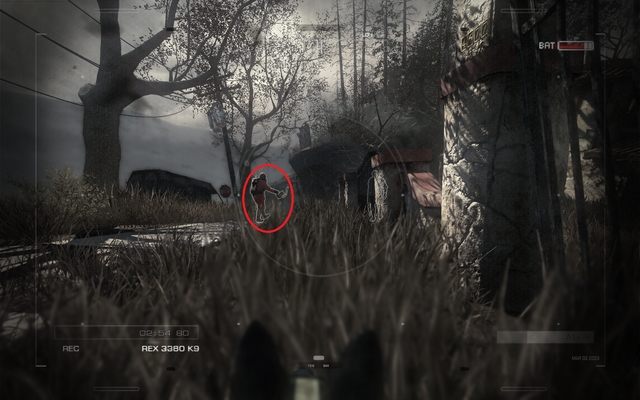
 How much for the petrol, good man?
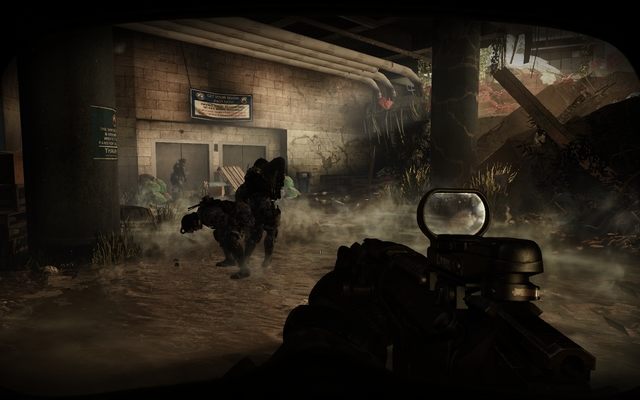
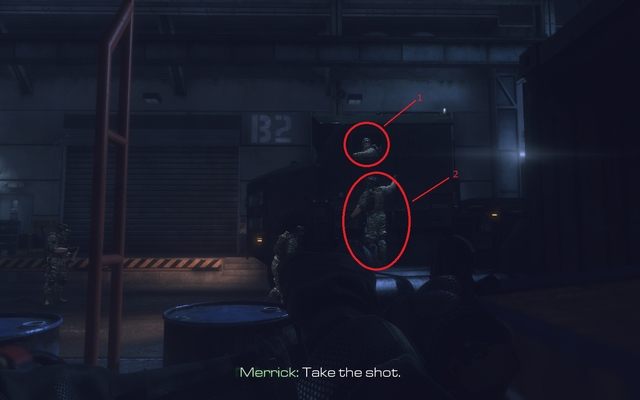
When you kill enemies, follow Hesh until you get to the view point from which you can see hostages. Whatever you do, they will die, so focus on eliminating enemies. Kill all those around dead civilians and then jump down and hide behind a car wreck. In this moment few more enemies will run out from the building in front of you.
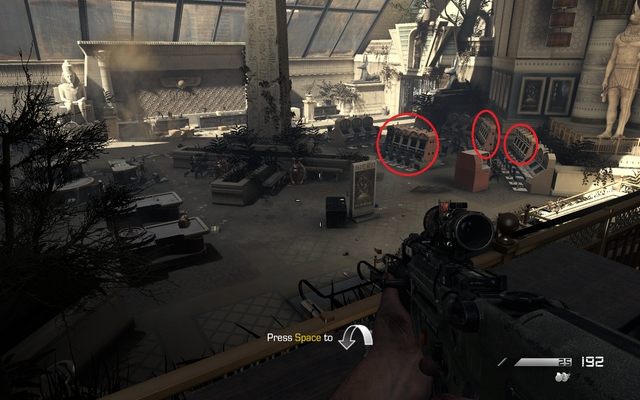
 Enemy can't hide...
After killing all of them, enter the building, hide behind a wall and eliminate a soldier who will run from right. Use grenades, if necessary.
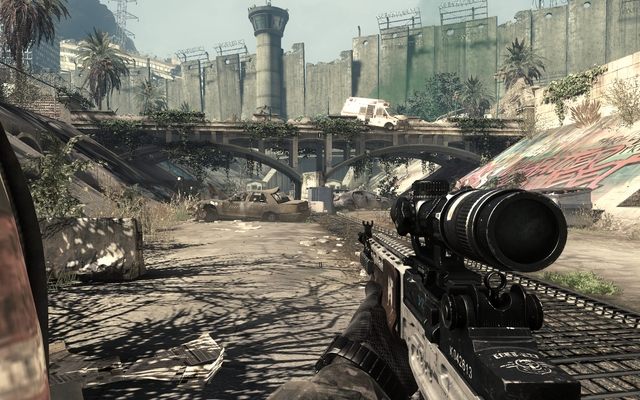
Run out from the building and go right, following your team. When you get through the tunnel, run out from it and hide behind a wall at which you can see a sniper rifle.
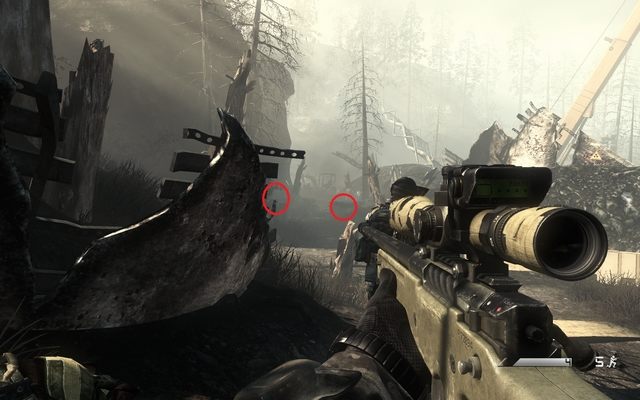
 It's a hunt time!
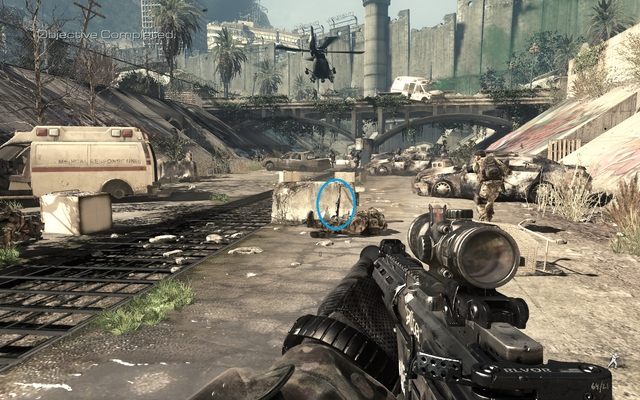
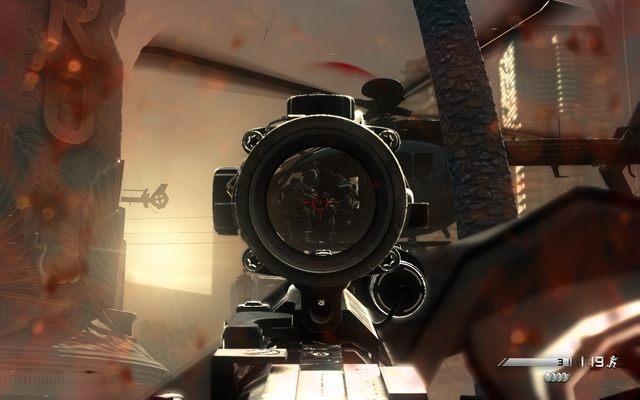
Pick it up and go left, hide behind an ambulance and fire at enemies from your new sniper rifle, beware of enemy grenades and bullets. You should also focus on the helicopter and take down enemies who are firing at you from inside of it.
When you see no more targets, run out and hide behind another cover. Move forward, jumping between covers and killing enemies.
 This should be enough for enemies...
Approaching the wall, notice a small hut on left. Next to it, you can find a rocket launcher: pick it up and throw out sniper rifle.
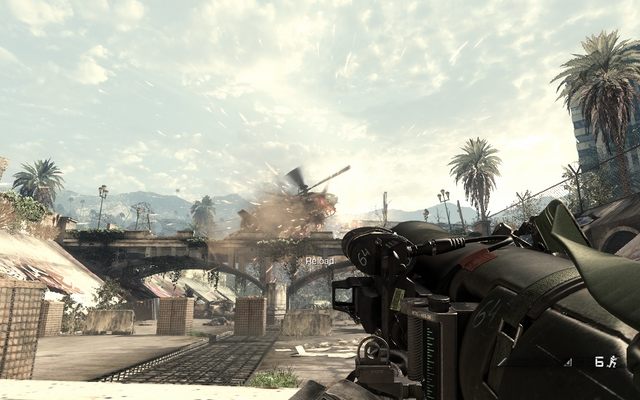 Mayday, mayday, we're falling!
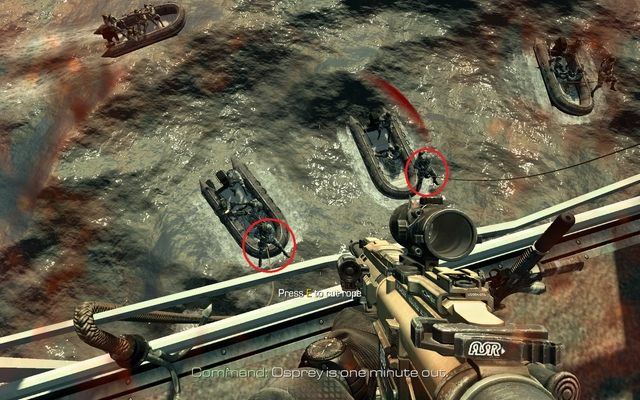
Turn into the direction from which you arrived because a helicopter will be approaching from there. Use a rocket launcher to fire two missiles: you can control them with your mouse. After destroying it, reload launcher because another helicopter will fly from the wall.
Destroy both helicopters to obtain an achievement "Liberty Wall".
When it's done, your team get rid of remaining enemies. Turn to the wall gain and enter the vehicle. Now, you will have a short ride to the military camp.
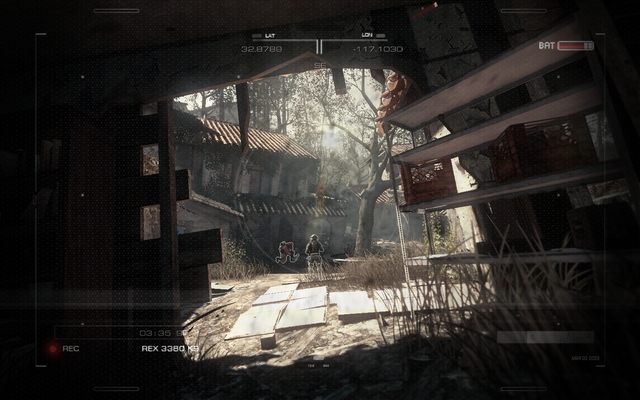
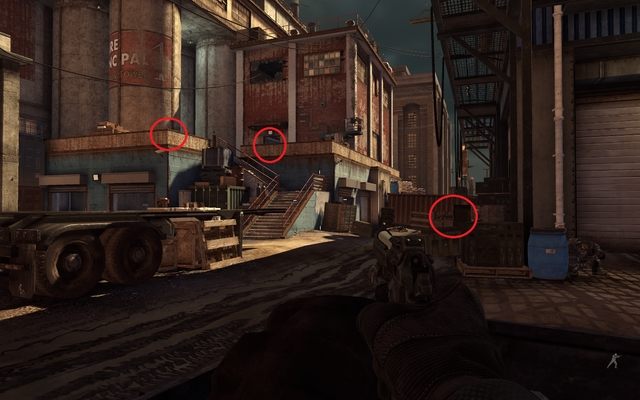
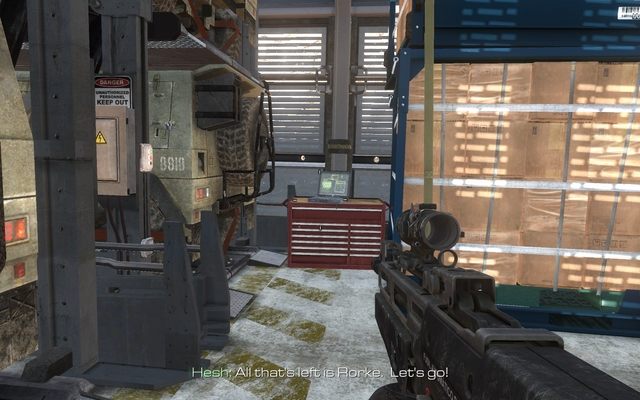
 Another intelligence.
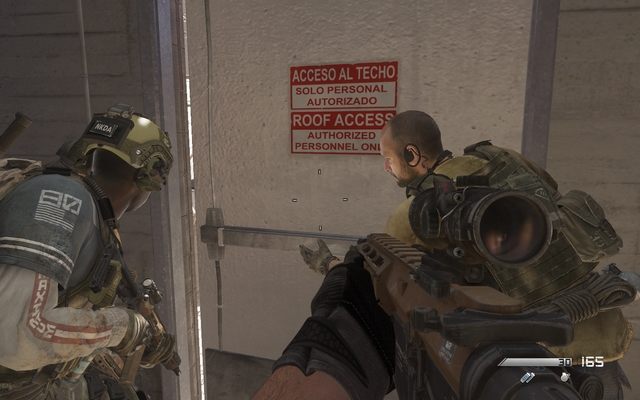
When you get there, follow your brother to meet father. He'll take you for a talk. When you get on the higher floor, turn right. On the desk you find another intelligence data.
Join your father and brother on the balcony. After a short conversation, you'll get to know about your next mission. You'll attack, you'll be returning home.
If you make Riley kill 10 enemies, in any way, you get an achievement Blimey O'Riley.
Loading screen tells you that No Man's Land is a destroyed wasteland between Los Angeles and San Diego.
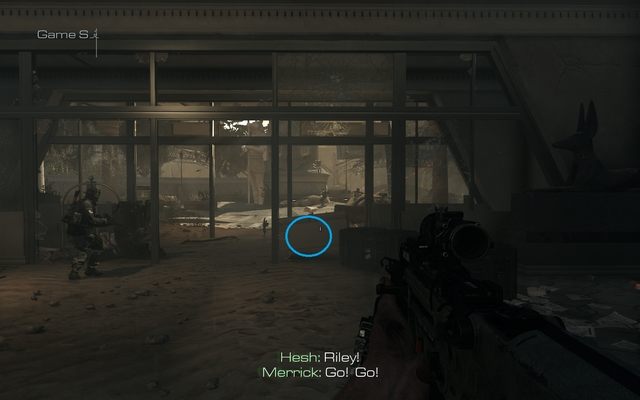
He doesn't know yet...At the beginning, you control Riley. According to the instruction, order dog to attack and finish off the remaining units while you regain control over Logan. Then, follow Hesh and Riley through ruins of what had been your home.
Soon, you run into an enemy patrol and, again, get control over your dog. Wait until enemies separate and then attack the closest one. In the same time, the other one get away. Make Riley bark to lure him. When he gets closer, Hesh will take him down.
 Take him, Riley!
Then, get into nearby building until you find another group of enemies. Wait until Hesh eliminate an enemy and then attack the closest one and his companion.
 Remember to use Riley's attacks.
When you control yourself again, follow Hesh to the door. After a while enemies will run out from inside, kill them quickly without a friendly fire.
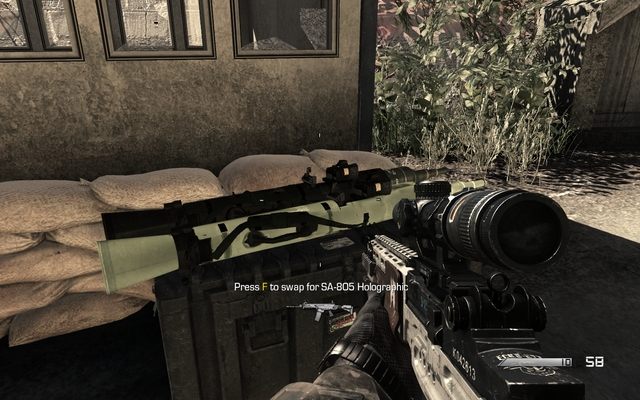
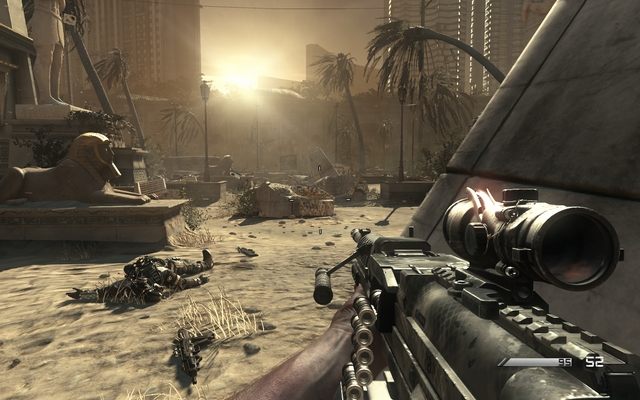
Then go to the room from where they emerged. At the exit, you can see a sniper rifle, Take it instead of pistol and eliminate an enemy hiding behind a wall. You can send Riley to attack enemies if you can see them.
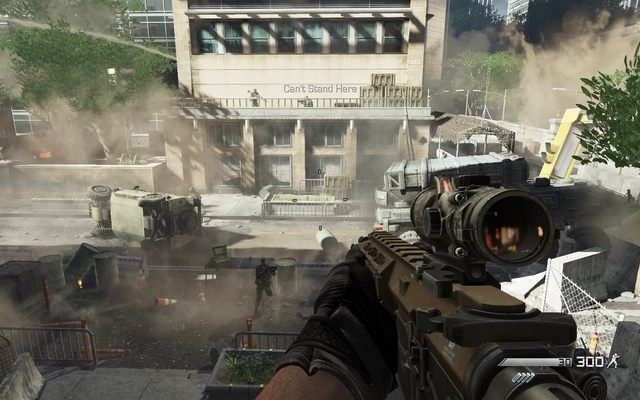
 Sniper rifle - the best friend of camp...Ghost!
Exit the building and follow the road down, eliminating enemies on your way. Moving forward you can see enemies on high terrain. Lean out and kill them one by one to avoid cumulated fire.
 Grenades, your worst enemies!
Road turns left, you find enemies also there. As you have rather weak position to fire at them, use grenades and smoke them out from behind covers, and finish off survivors.
 They will get outside eventually, right...?
Go forward up to the crossroads, where you take whichever direction, it doesn't matter. Lean out from behind covers and eliminate enemies hiding behind obstacles and vehicles. Then focus on killing enemies who run out from the building or fire at you from windows. Use your sniper rifle.
 What Hesh is looking at?
Then, go to the building. At the exit, where Hesh is waiting, you can find a desk and intelligence data on it. After collecting it, go outside and kill enemies on the bridge. Go through the bridge.
Enter the next building, kill enemies, who may have hidden in it and jump down. Follow Hesh and Riley and ride down to the tunnel.
 How they can't see you?!
Enter it and, due to the Hesh's order, hide on right, behind cars, because an enemy patrol is approaching with an armored transporter. If you get detected, Riley will die. When patrol moves away, go through the tunnel.
 You shouldn't have separate!
At the exit, you find another group of enemies. Wait for one of them to split and when he goes right, silence him with a headshot. Continue walking forward, ignore enemies on left and go through the shipwreck.
 Riley, come to the tube!
You control Riley again. Move silently, don't get out from bushes. Get to the marked target and omit the first enemy met and also the one at the entrance to the tube.
 "Quiet, please, I'm hunting humans"
When you get through the tube, kill an enemy on the way to the train and then run through it, getting out from its left side. Kill an enemy in front of you and then walk along the wall on right remembering to keep in the bush.
Kill an enemy at the tube and enter it. Wait for the patrol to pass and move away, get out of the tube and head for the target.
 Your target as you can see.
When you get at several meters to the target, point it with mouse and zoom to listen the enemy conversation.
After that, move silently to the another target to join your team. When you are back to Logan, follow Riley who runs down to the forest.
 Don't make any sudden moves!
You get into wolves ambush. After a several shots, one of wolves will approach you and a scene begins in which you have to press fire key. After a while Riley saves you and your character takes out a pistol. Aim at wolf and kill it.
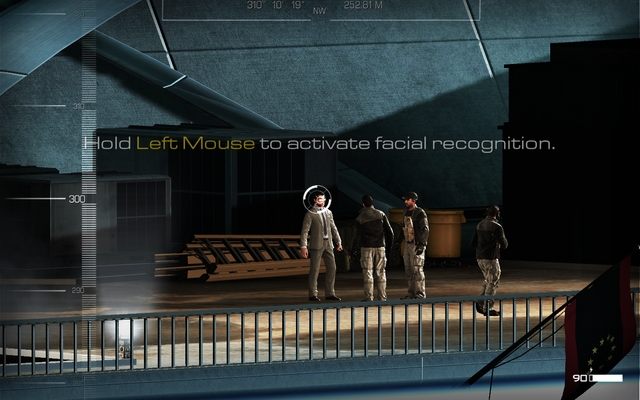
After a while, another wolf will attack you but you'll be saved. It turns out that two Ghosts come to rescue you: Merrick and Keegan. After a short conversation, follow your new companions.
Go through bushes, crouching, so enemy won't spot you. Try to localize as much enemies as you can, and attack from surprise, killing them before they can hide.
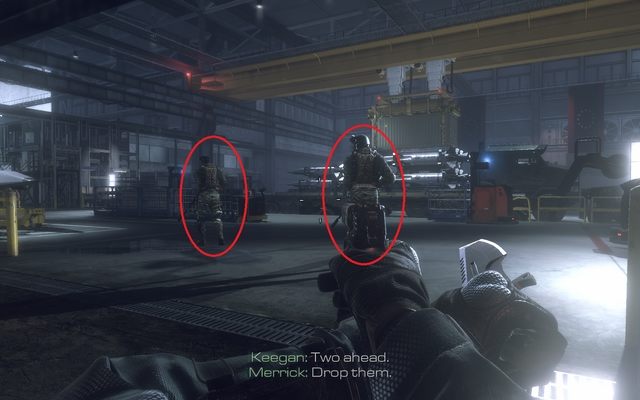
Your next step is elimination enemies on the balcony, because they can easily hit you even if you hide. When you clear the balcony, focus on eliminating enemies on the street and in front of the house, jumping between covers. Then, eliminate enemies at the entrance to the building.
Enter this building, following your team. Notice a soldier, who will run from left at you. Eliminate enemies on the street and then head up, killing enemies on your way. Continue journey, keeping close to your team and in a while you'll see a city and end mission.
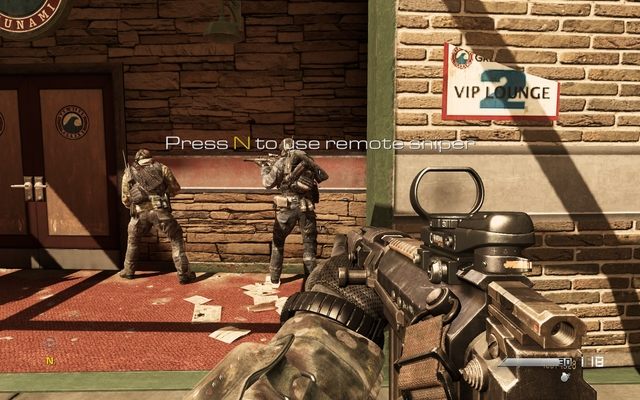
Using remote sniper rifle, make sure that every shot is hit. You get an achievement Waste Not.
During the loading screen, narrator speaks about Ghosts. It turns out, that your new allies, Merrick and Keegan, are Ghosts. They head for San Diego to save Ajax, one of Ghosts.
 What they are doing there? Let me look...
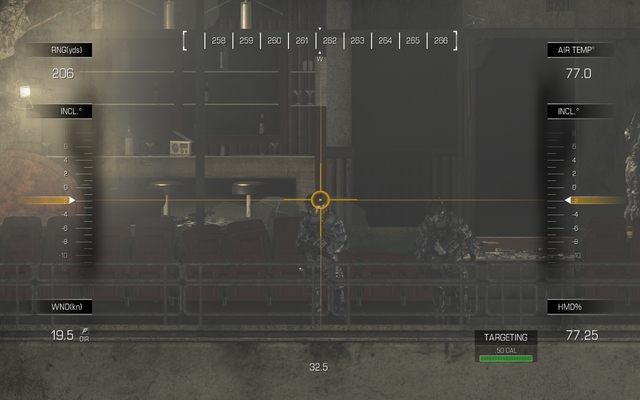
At the beginning, you use a remote sniper rifle. You have to find a captive soldier. You can zoom sniper rifle. When you find your target, zoom to make a closer look.
 Don't omit any vehicle.
Leave the view of remote sniper rifle and back to Logan. You have a grenade launcher. You have to mark all vehicles in the convoy, by firing and attacking a grenade to each of them. When it's done, turn right and follow your companions to the truck.
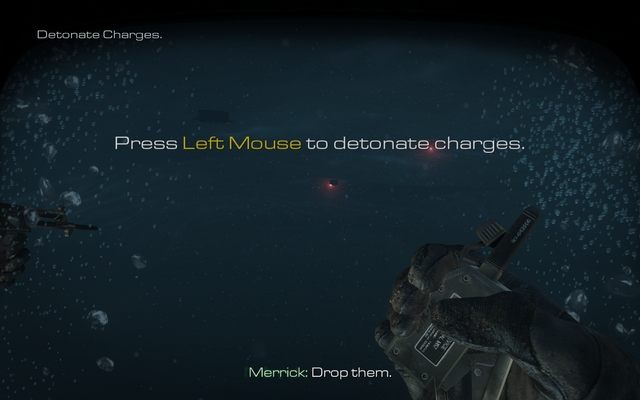
 Something's gonna blow...
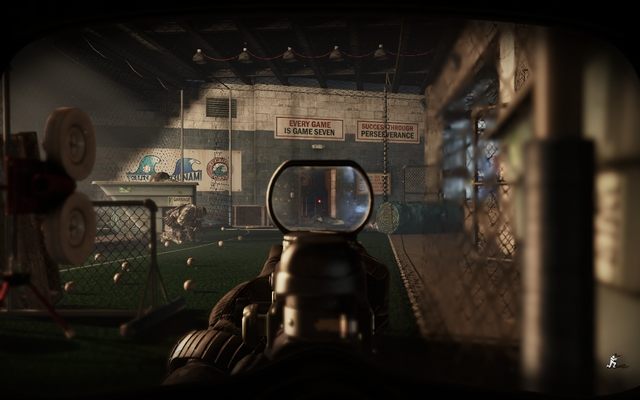
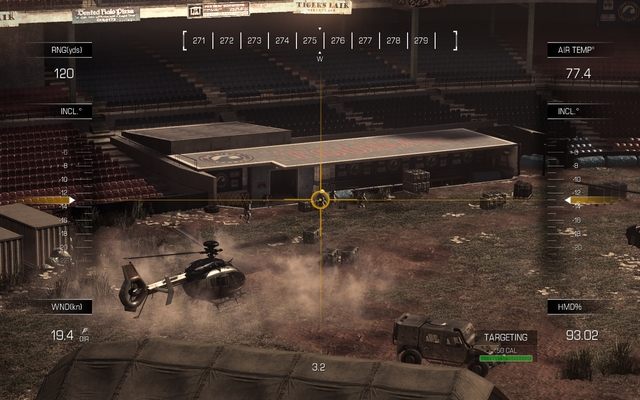
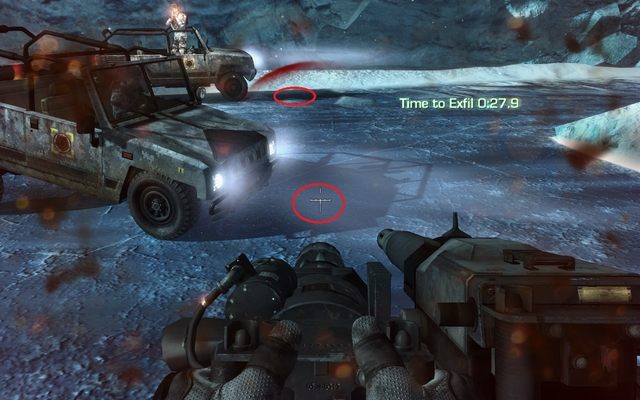
After a short voyage, you get to the stadium where you can see a lot of enemies. You get a detonator to the previously placed grenades. Detonate them when an information is displayed on the screen. After that, you have a short ride on the stadium during which you have to fire at enemies from inside a vehicle.
 Perfect conditions for a sniper rifle.
When you leave the car, hide behind a wall quickly - there is a lot of enemies and you'll die quickly if you don't hide. At the wall change your grenade launcher on a sniper rifle. Eliminate closest enemies with a rifle and the ones far away using the sniper rifle. You can also use Riley to eliminate enemies.
 You should've look better!
When you deal with enemies in range of vision, move forward, hiding behind covers. Due to the small amount of ammo for sniper rifle, you should use it only for well hidden or far away enemies, otherwise use a rifle. If you can't hit an enemy, smoke him out with a grenade. Go to the building on right, which offers a perfect flanking position at enemies on left.
 Remote sniper rifle time.
Continue assault and eliminate enemies, hiding behind covers, until you get to the stairs leading up. When you run onto it, and got closer to the team, you get an order to use a remote sniper rifle. Use it by pressing key responsible for 2nd equipment.
 I feel an incoming headache...
Eliminate all enemies there and try to hit with every shot. When they are all dead, you back to Logan. Keegan tries to squeeze an information from an enemy, but it won't work.
Follow Hesh left and when you get on the bottom, you receive another order of using remote sniper rifle. Eliminate several enemies with RPG and you get back to Logan.
 Just in time?
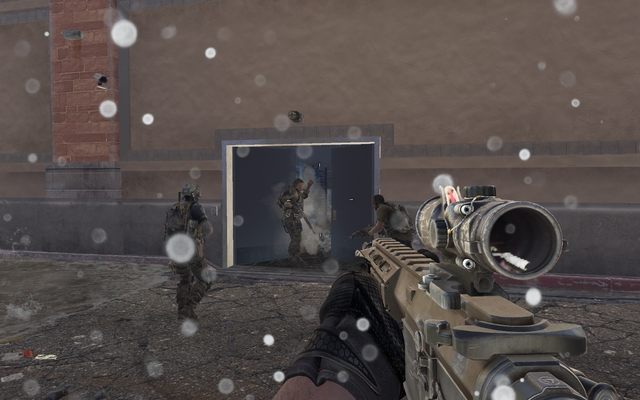
Follow your squad and when you get to the gate with an enemy patrol behind it, your character will automatically wear gas-mask and you get order to throw a tear gas grenade. Your companion will open the gate and you have to eliminate all harmless enemies. Then continue your journey.

After a while a small group of soldiers will run from right. Eliminate them easily. Moving forward, you stand against a long, straight corridor. Hide behind a cover and eliminate running enemies. Use tear gas grenades if you find a bigger group of enemies or if you want to smoke out some particular annoying ones.
 It'll be an unpleasant surprise...
When you clean the corridor, turn left and go forward next to the net. Then stand in front of door and move slowly forward. At some point several enemies run out from the door - you should eliminate them easily.
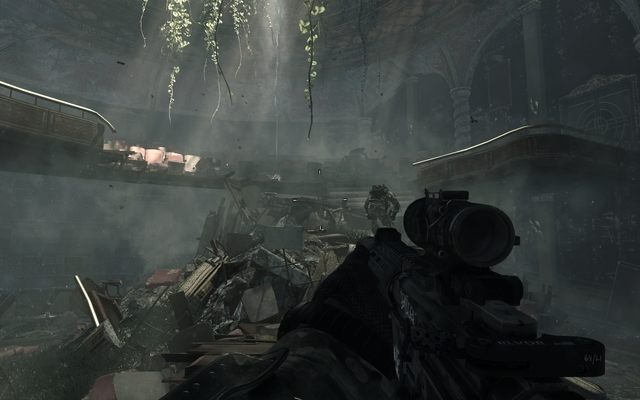
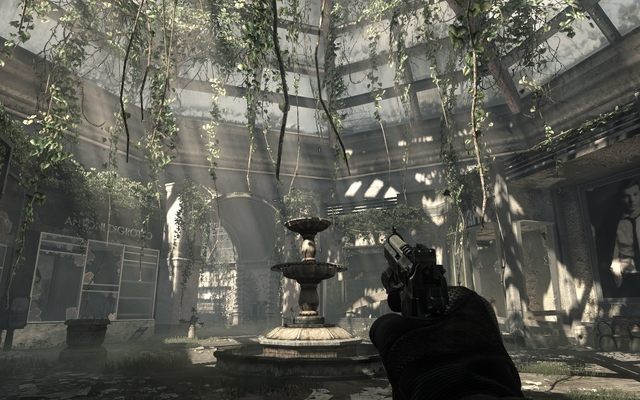
 A little dark in here...
Follow your team, running through the conference room, until you get to the door at red light, where Ajax is kept.
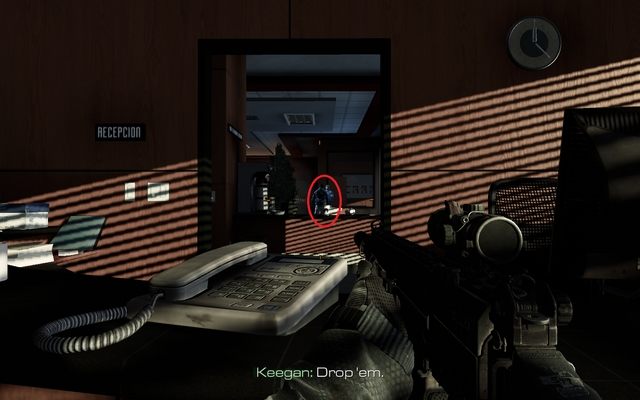
In this moment, you get an order to find another entrance. Turn right and follow Keegan. He will eliminate single enemy and after a while you get to the room with Ajax from backs.
 What a party!
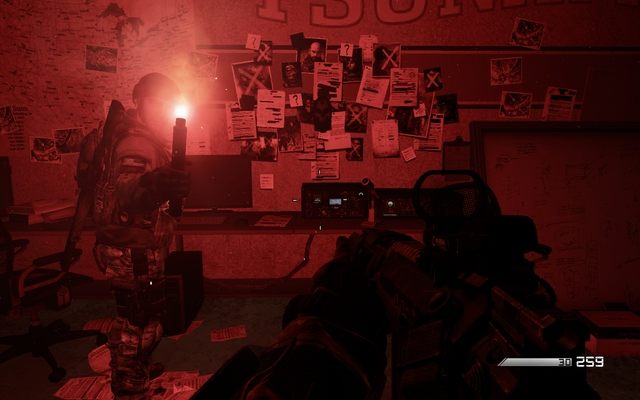
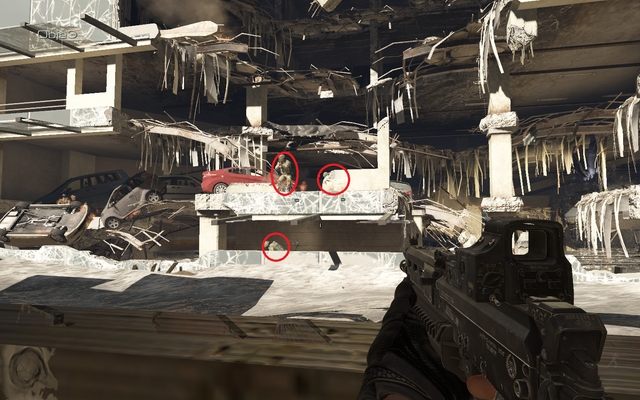
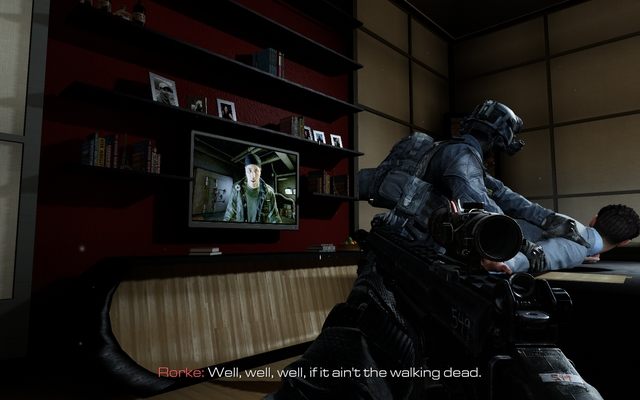
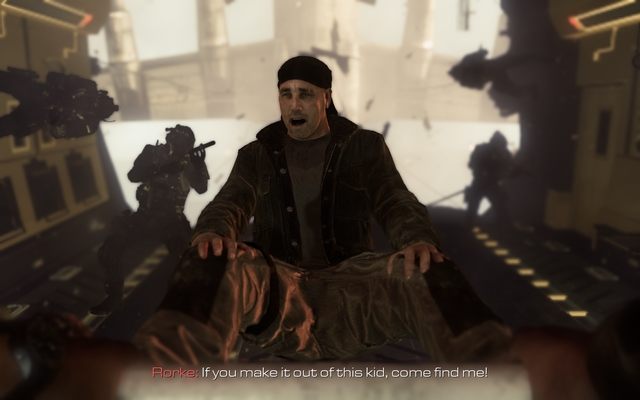
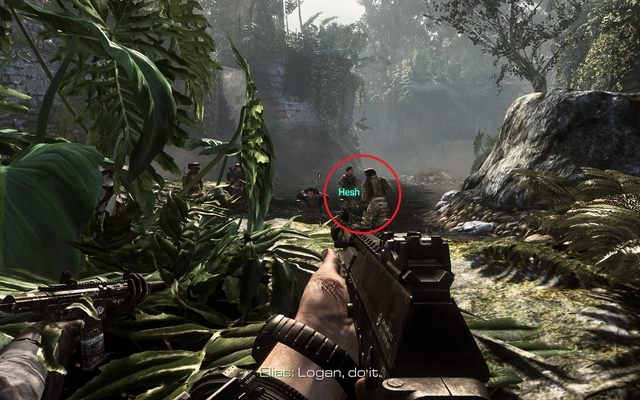
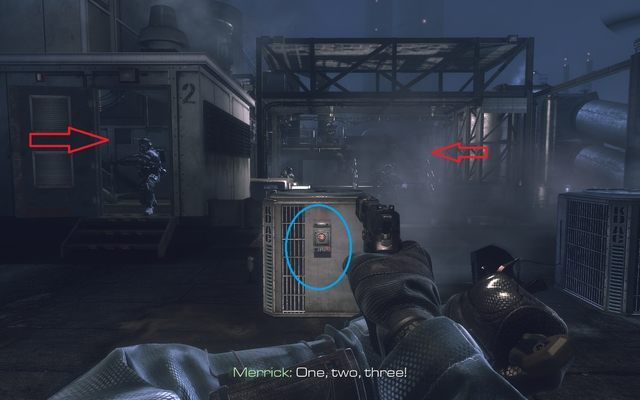
When you get to the door, you get an order to throw a tear gas grenade inside, what you should do. After a few seconds, you get inside the room full of coughing enemies; you have several seconds to eliminate them before they can defend themselves. After that, go left from your entrance. On one of cupboards you can collect another intelligence data. Join the rest of the squad.
Someone is obsessed...Ajax is hurt and a moment before he dies, he tells you that someone called Rorke wants to kill all Ghosts. Approach the wall with photos of all Rorke's targets and then follow your team.
 No one expected Spanish Inquisition...
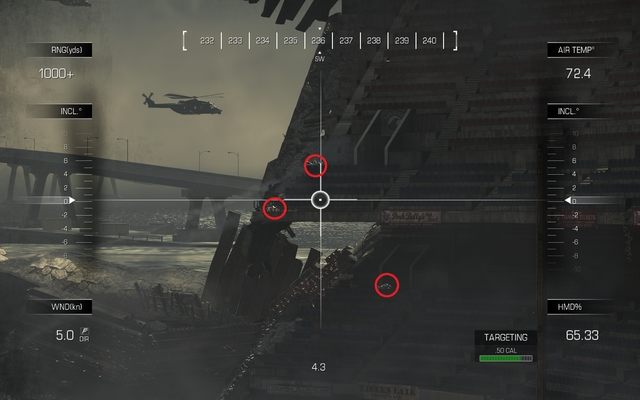
When you run towards your companions and want to enter the corridor, two enemies will jump out from behind and start firing at you. Move back to the room and switch to the remote sniper rifle. You have to take down enemies in front of the building and then all those on the stadium.
At this point, you regain control over Logan. You have to fire at enemies until you get an order to get onto the helicopter. There you start using remote sniper rifle again. Take down shooters with machine guns on jeeps and then eliminate remaining enemies. After that mission ends.
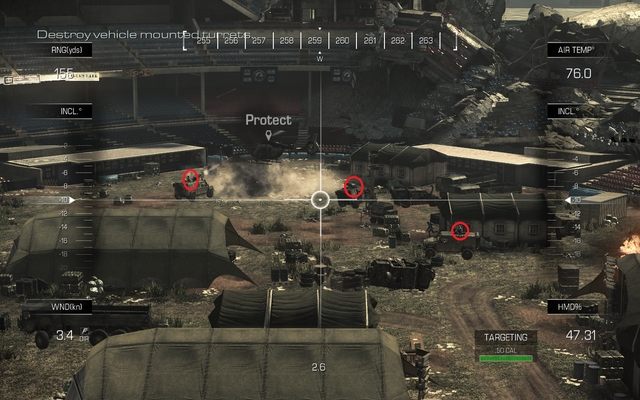
Destroy 50 targets (infantry or vehicles) with A-10 Fighter, to get an achievement Go Ugly Early.
During the loading screen, you get to know that Rorke hunts Ghosts. You return to the Santa Monica with Hesh to defend the city and find your father.
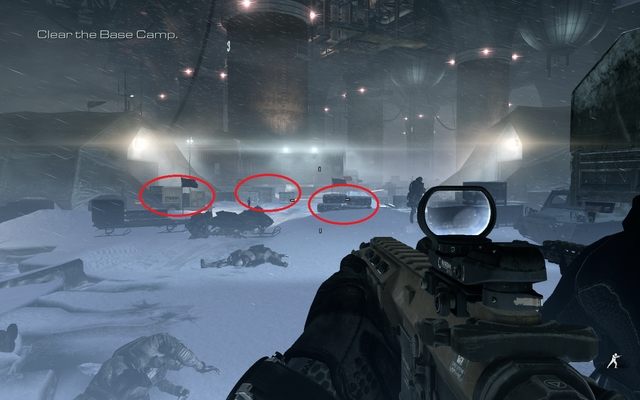
 Way to the intelligence data...
Mission begins when you and Hesh and Riley land in the military base which is under attack. Follow companions until you get to the entrance to the building.
Instead of running upstairs, turn left to get another intelligence data. Then return and go upstairs.
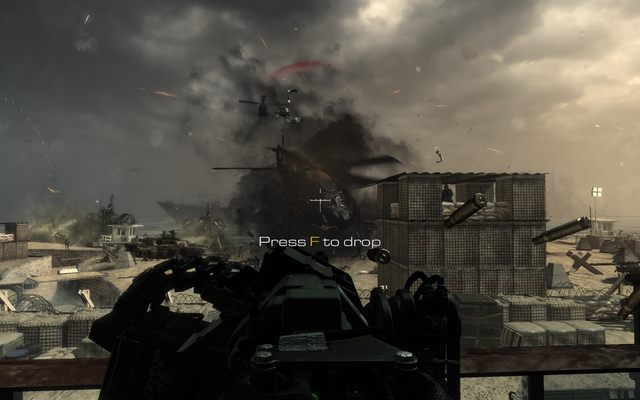 Explode damn it, explode!
At this point you should see a balcony with HMG. Approach it and start firing. You have to destroy helicopters ASAP. When you destroy one, another one should appear after several seconds. Use those intervals to eliminate infantry firing at you from beach. After destroying several helicopters, balcony will be fired at and HMG destroyed. Now you have an access to A-10 Fighters.
 Look, I'm here!
Using a key displayed on the screen, change view for A-10 and destroy targets marked on yellow. If you can't in the first try, wait few seconds and repeat. After that, you get another targets to destroy - repeat whole operation. W moment later your balcony will collapse and you land down on the beach.
 Keep out of the street.
Turn right and get out of the street quickly by hiding behind a damaged wall. Lean out and finish off enemies, but you may not find anyone to fire at due to your companions' work.
 Something is burning...
Follow your comrades and enter bunkers. Jump between covers, eliminating enemies on your way. Soon, you get an order to use A-10 again. Switch to it and fire at tank marked on yellow. After that you can still fire at the enemy infantry. The more you destroy, the less you'll have to fight in trenches.
 Refill ammo!
When you get out of the Fighter, continue walking after your companions. Soon, you should get to something similar to the boxes with black belts. here you can refill ammo and grenades. Such a crate appears several times in this level so you should look for it. You get another order to use A-10. You know what to do - just destroy all targets.
Follow companions to the burning building and eliminate all enemies on your way. In this moment, you'll fight several enemies who have better positioning than you. So you have to, for best, throw a lot of grenade at them to, at least, smoke them out from behind covers.
 Surprise!
Run through the burning hangar. After getting out of it, you'll be hammered with mortar missiles, but don't care and just run after Hesh. You get to the alley where you meet more enemies. Go to the wall on left.
Being behind a cover, eliminate several soldiers. Watch out for grenades and try to throw them back, don't run away from them as you don't have a lot of covers here and enemy will kill you quickly. After killing all soldiers, follow Hesh and enter the building.
 Go under the flaming desks? Not a problem!
Move up until you get to the blocked road. Hesh will offer help but he won't be able to follow you. Then go left and upstairs. Moment later you'll be attacked - you have to press quickly action button to not get killed.
 Good entrance!
After a while, Hesh comes and rescues you killing an aggressor. After that, all this room starts to collapsing. When all seems to be doomed, the roof is destroyed and two Ghosts come to the rescue.
 Surprise!
You're taken to the helicopter. Hesh wants to go back for father, but one of Ghosts turns out to be him. He explains you that all your missions were a test and you passed so you can join Ghosts. From this tale, you also get to know true identity of Rorke - he also was a Ghost.
Kill 6 enemies while underwater to get an achievement It Came from Below!.
Load screen shows an action from before 12 years. Conflict between Federation and South America grows. Due to Rorke's suggestion, assault team of Ghosts is sent to destroy Federation and kill its leader, General Almagro.
 Tank - your favorite cover!
Action begins with helicopter flight. You play as Elias, father of Logan and Hesh. After landing, follow your team and avoid fire, hiding behind covers or obstacles. Soon, an enemy tank will arrive from the other side. As you don't have any anti-tank weapon, you have to hide behind a wall.
Hold on for a while and follow the rest of the team to the building on the other side of the street. Continue marching with your team until you get to the view point.
 Enemies on balcony are target number one.
First of all, eliminate enemies on the balcony in the building in front of you, because they have RPGs. Then, fire down those standing on the street. Wait for Rorke's order and head for a mobile rocket launcher.
 "Get out!"
Approach the highlighted ladder and an animation begins: you have to press melee attack button to get rid of the driver and throw a grenade inside to destroy this vehicle. After jumping from it, head right and find a secure place behind a concrete wall.
 He won't make it to the cover...
Lean out carefully, as here you can find a lot of enemies. First of all, get rid of those in front of you (screen above) and then those from right and left.
 This won't be enough...
Move forward, remembering to hide behind covers. When you clean all enemies on the street next to the second mobile rocket launcher, you get an order to destroy this vehicle. Approach it carefully, because new enemies will appear. When all are dead, head for the vehicle.
 It seems like a flood...
Unfortunately, as you perhaps noticed, enemy was able to fire rockets which destroyed a dam and now the city if being flooded. Follow your team and run to the closest building.
 Slowly...
After a short walk through the flooded building and going upstairs, you have a little talk. During that, Merrick wonders if there is a sense in continuing the mission. But Rorke doesn't want to resign and orders you to stand up next to the door.
Soon after that your team gets out and you have to begin an assault: when you fire, all people around will start. Kill three enemies in front of you what causes reinforcements to arrive. Kill all enemies and after a while all building, with you on it, will collapse.
 Flood, flood everywhere...
After a cut scene, Rorke takes you out from the water. At the moment being, you have only knife and enemies are approaching. Crouch under the water and wait for the patrol. Let you boss kill one of enemies. After that resume walking.
 Almost like "Jaws".
You get to two soldiers and Rorker orders you to split up, swim under the obstacle and attack from behind. Approach an enemy being underwater and attack him; watch how Rorker brutally kills his enemy.
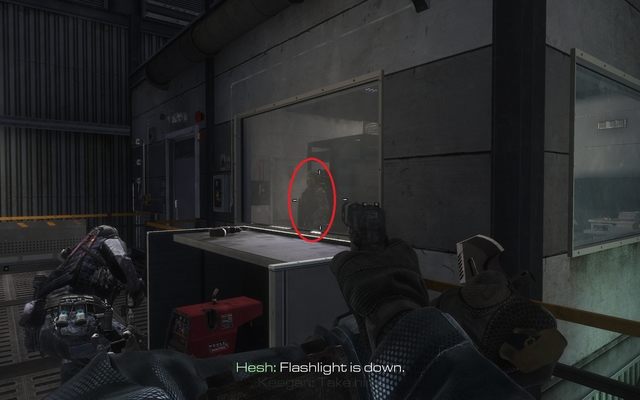
 It'll dry, I promise!
Nearby the corpses, you should find soldier's weapon (screen above). Crouch under water and pick it up and then continue walking, following your leader. Go through the bridge and march until Rorke stops. There are enemies in the next room.
 Wake up!
Rorke gives you a free hand and let you choose a moment to attack. Jump from behind a cover and kill two enemies. On the desk you can find intelligence data.
 He won't make it, will he...?
Then, go right, to the passage, and run upstairs. On the roof, crouch behind a cover and eliminate a small group of soldiers on the roof, beginning with the one on the ladder swinging from the helicopter. After all that, join Rorke.
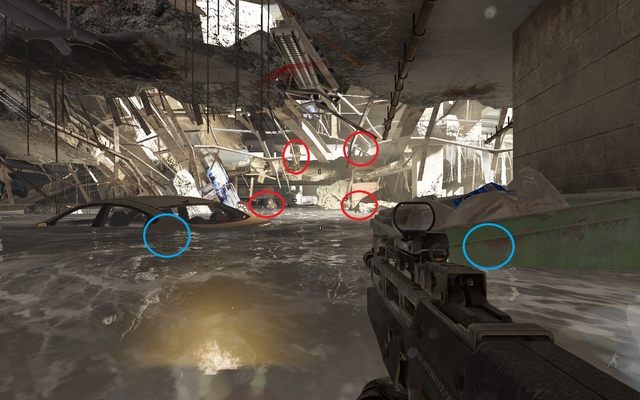
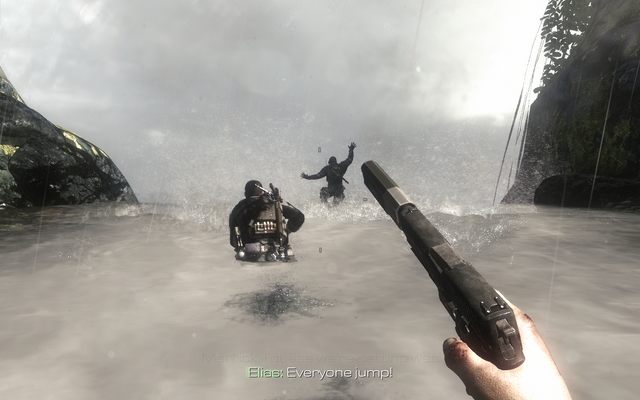
After a short walk, jump to the water and enter the open space. Here, the difficulties begin. There are a lot of enemies who jump down from all directions and change positions often. Hide behind nearby container and very slowly lean out to eliminate enemy. Begin from left and right from your position, it will make impossible to flank you. Then, focus on enemies at the exit from water and on high terrain. After that, Rorke orders you to head for the building from which enemies emerged while ago.
After a short walk, you join team. Crouch behind a cover and eliminate an enemy on the other side of building. Then, with all team, go through the footbridge and jump to the water.
You have to act quickly, because a lot of enemies is running at you. Hide behind a car or container and jump between them when you're overthrown with grenades. Eliminate enemies in front of you but be careful as they also may be in water what makes finding them more difficult.
When you do that, follow your team and hide behind containers nearby the building. You have to be careful again, because also here you find a lot of enemies. Take them down carefully and not lean out too far. Then, continue following your squad.
 Target destroyed.
When you get to the roof, your squad jumps into a helicopter where you can see General Almagro. After a short fight, he knocks you down and prepares to kill you, but Rorke interrupts him. You have to take a gun and kill Federation's leader.
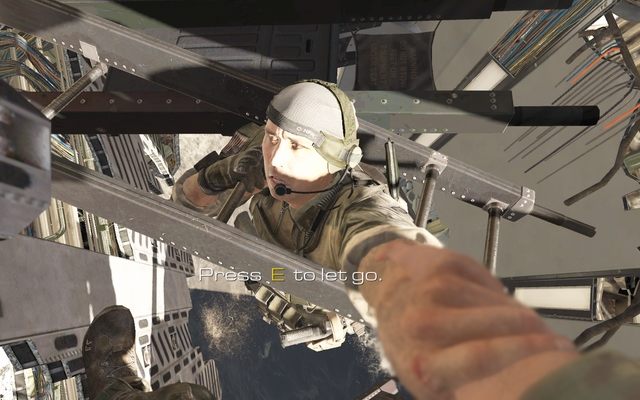
Tough decision...Soon after that, helicopter get damaged and breaks and you have to quickly click and hold, both, right and left mouse buttons to catch cables and save your team. After a while, you have to also grab Rorke by quickly pressing action key. It turns out that you won't hold all of them - you have to sacrifice Rorke or your squad. There is no choice in reality - if you won't let Rorke fall, you'll lose the mission and game restarts from the checkpoint. When Rorke falls, mission ends.
Again loading screen. You get to know that Rorke's body was never found and he was claimed to be lost in action. It seems like he joined Federation. Your squad's task is get to Caracas, where Rorke was lost.
 Paparazzi, paparazzi...
You begin mission on the roof of the skyscraper and it's night. Wait a moment for a helicopter to land next to you. Due to the order, turn on optical scanner, zoom it and then push and press fire key aim at the man in the white suit. If you won't make it and he turns around, wait a moment until he faces you again. After that, exit the optical view and jump down. Approach the black big chest and open it.
There is a Zipline Launcher in it. Aim at the building on which you've seen your target and fire a line. Then grab a hold to get to the skyscraper quickly. Your squad will detach those lines to land on the side wall of the building.
 And he only wanted to work in silence...
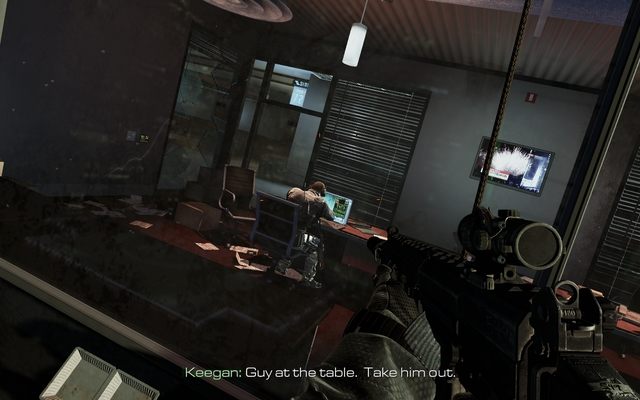
To walk on the wall, use the same keys as to normal movement, but moving forward is replaced by moving up and moving back by moving down. Go two floors down and eliminate a man at the desk.
 One, two...
Go right to the next room and kill one of enemies, Keegan will take care of the other one. But if you're fast enough, you may take down both of them.
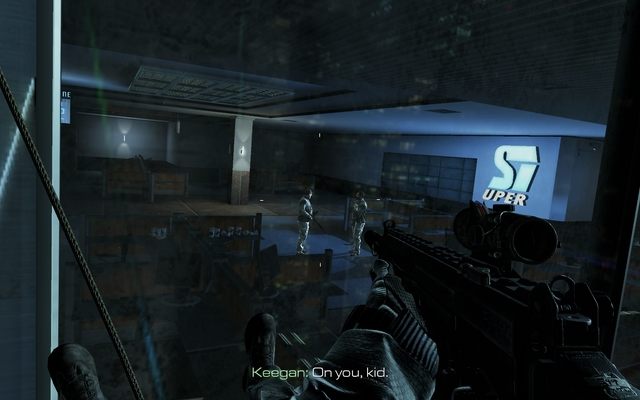
 You can't even play cards in here...
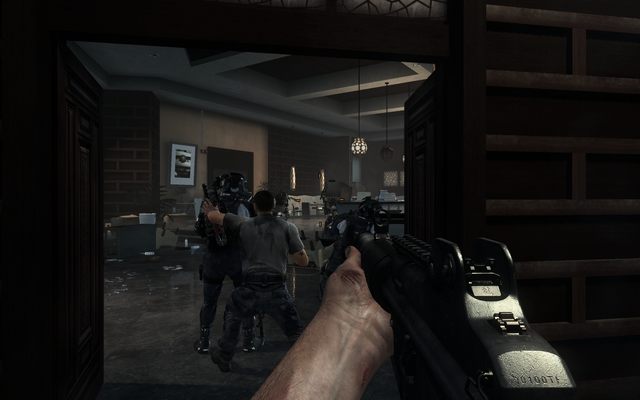
Now go down one more floor and then go left until you get to the kitchen. Wait until second enemy enter the room and kill the one who is closer to you. Hesh eliminates the other one. After that, go right, to the room with three persons at the table. Wait until they all are sitting and eliminate all three of them. Keegan will help you if necessary.
When you clean the room, head two floors down and approach Keegan. He tells you to enter the building: drill through the glass in the marked place. After a while you should be inside. Instead of following Keegan, go left.
Enter a small office and in front of you, you can find a laptop with intelligence data. Take it, exit the office and go to the room on right to join Keegan.
 Faster, faster!
Here you have to get to the computer (highlighted panel) and hack it. When you are at the computer's console, just press and hold fire button until you break the machine. After that hide quickly because patrol is coming. Wait until they're gone and follow Keegan to where you got inside the building and attack lines at the hole in the window.
You return to the side wall, but now you're upside down, so get used to it. You get a device, which allows you to turn off lights in the building. Do it by pressing fire button and start coming down. After a while, two guards will appear on the balcony on left. Take them down or leave them for your companions.
 Be ready!
Look all the floors. On one of them (2nd floor below the two guards on the balcony) you find a sleeping guard. Kill him for an achievement Sleeping Beauty.
Continue moving down to the balcony underneath you. Guard appears and you have to kill him with a knife. After that, two more enemies emerge. Throw knife at one of them, your companion kills the other one.
After you split up, follow Keegan. Kill two enemies getting into an elevator and follow Keegan. Then, crouch at the desk and eliminate two more enemies. After a while one more enemy should appear in front of you. Keegan deals with other two.
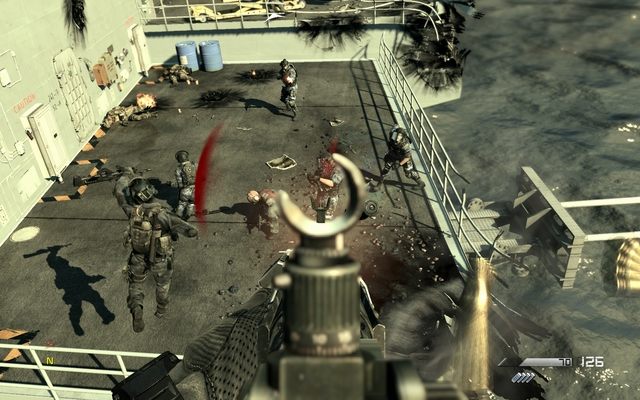
 Party is getting started!
You enter the room with a lot of enemies, but eliminating them is relatively easy. Destroy TV on left so the darkness becomes. After that, due to the information on the screen, activate a flashlight which blinds enemies. Although you can't see almost anything, enemy won't be able to do much so you can slaughter them.
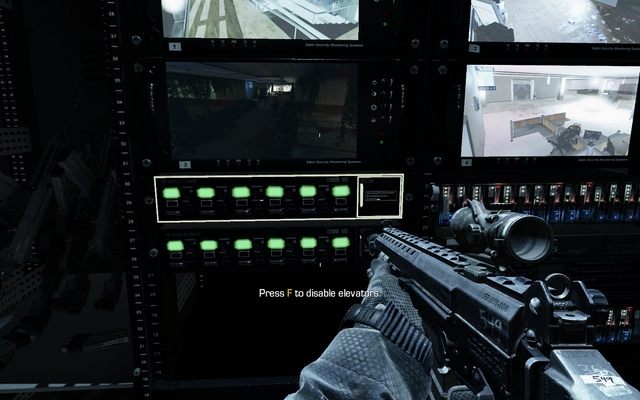 All those buttons!
Follow Keegan until you meet Hesh. You get an order to go to the security room with your brother. Turn off elevator in the chosen place and exit the room. Enemy starts chasing you, so you have to help Keegan. Hide behind a cover and eliminate enemies one by one. It shouldn't be difficult because they have no covers.
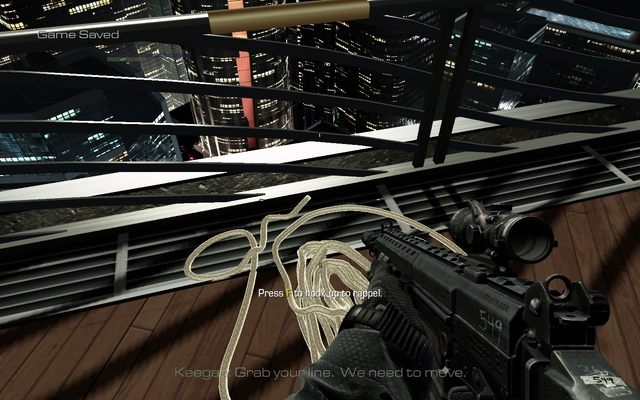 Let's play bungee!
Hesh sets up explosives and you are told to retreat. Approach the line at the barrier. Attach to it and jump down at the side wall again. Soon, your previous floor will blow up. After a while, a machine should fall off the window. Place yourself to get hit by it and you get an achievement. With a jump (hold for a while and then release) move down, eliminating enemies you can see.
When you get to the very bottom, you get an order to get inside the building. Jump in the same way you were moving down, with the jump. Quickly run to the wall with a sniper rifle and crouch. There will be a lot of enemies, so act slowly and carefully, eliminating them. Use sniper rifle for away targets and grenades to smoke them out from behind covers. You can go right from the place where you entered the building to find a high terrain. From it you can eliminate enemies easily.
 Hello, Rorke.
After eliminating an enemy, follow Hesh and Keegan. After a long walking, you get to the room where you should find your target, Ramos. It turns out, that Hesh has found hiding Ramos. Interrogation begins. Keegan asks about where Rorke is. After a while, Rorke joins the conversation through video and tells you that this is trap. Now you have to turn: follow Hesh and Keegan and ignore your enemies. When you get to the windows, jump out and open parachute to finish mission.
Loading screen tells you that you were able to regain Ramos' laptop. It tells you about the Rorke's localization, which is facility of Federation deep on the ocean.
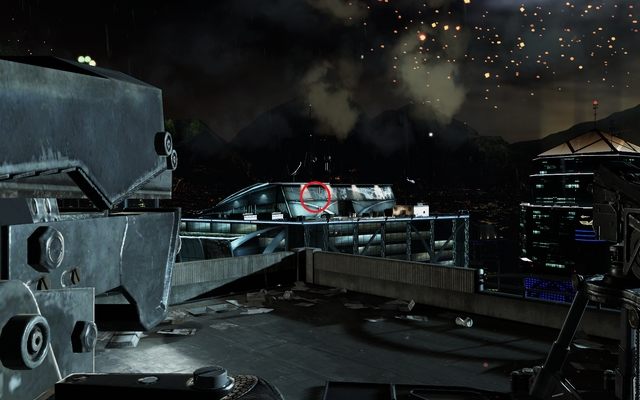
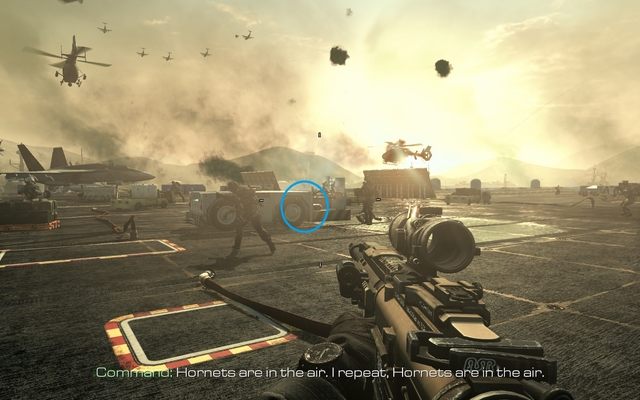
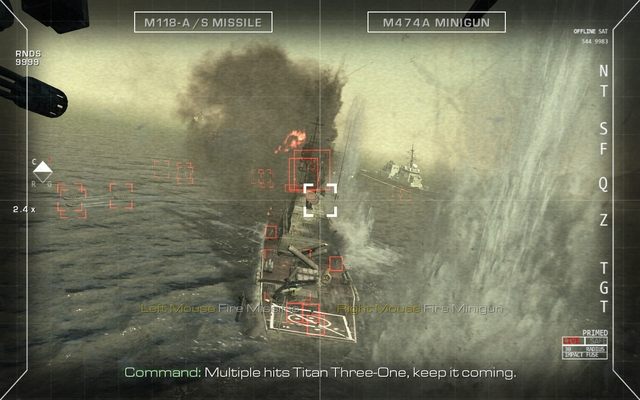
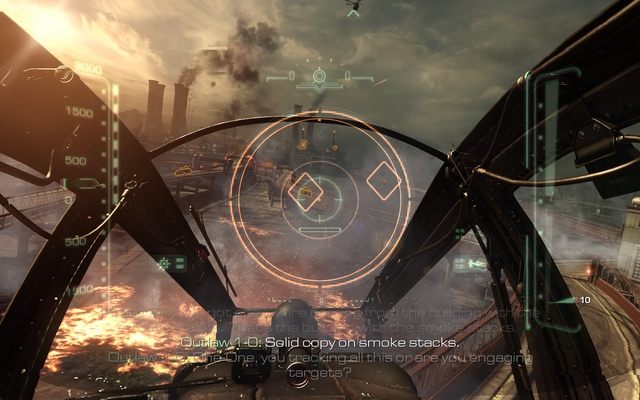 Let's play with helicopter!
This mission differs a bit, because you'll change your perspective: you'll play as a helicopter pilot and Logan on the ground. You begin in the helicopter. After a short flight, you get to the open space from where you can see the facility. You have to fight countless amount of all types of targets.
Begin from destroying cars on the street. You have a minigun and guided missiles. To aim, press and hold button responsible for grenade throw and move your sight on chosen targets. Releasing button fires rockets.
Notice also big barrels with fuel on all roofs and road. Destroy 80 of them for an achievement.
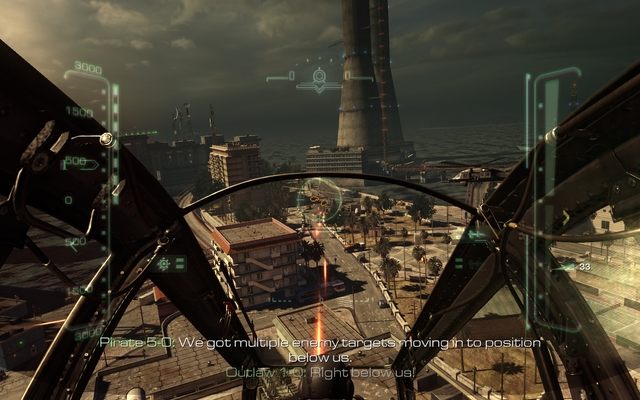 Bang! Bang!
After destroying land targets, ships and helicopters join the party. Don't care about the first ones. Eliminate helicopters from the distance so they can't use miniguns.
When you see Enemy Lock message, it means that someone has targeted you. You have few seconds for firing a flare, which will focus enemy rockets and you'll get out alive. Flares respawn quickly, so you shouldn't have problems with enemy missiles.
Try to keep a good position and have enemies in front of you and don't get surrounded. when you're in range of many enemies at once, your flares may not be sufficient and you'll get several hits. Helicopter's health isn't regenerating so there is a finite number of hits you can take until you blow up. Follow the rest of helicopters to get to the landing site which you have to clean up.
After destroying targets at the landing, actions moves to the ground. Follow rest of Ghosts and eliminate enemies on your way. When you get to the exit, the real fight begins. Hide behind a cover to eliminate enemies. Watch out for grenades. After killing few waves of enemies, get to the building in front of you.
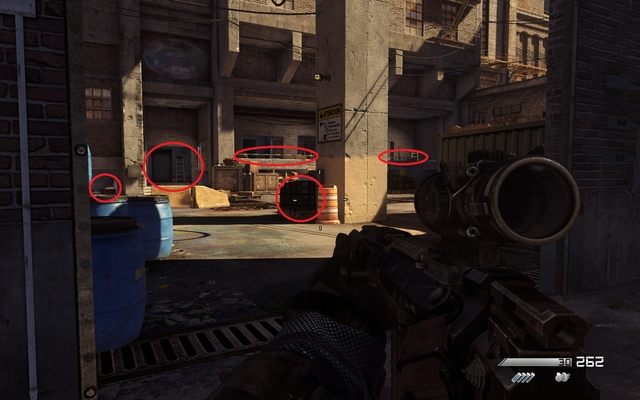
When you get to the exit, crouch behind a window and wait for enemies. Besides those on the upper footbridge, kill also those in the small building on right. When it's done, exit through window, jump down and hide behind a cover as huge wave of enemies is coming. Lean out carefully and eliminate them one by one, helping yourself with grenades. As most of them is in front of you, you shouldn't have problems.
When all enemies are down, follow your squad, but don't turn left at once but go forward to the end of corridor and wait at the exit. From here you have much better position. There is a lot of enemies nearby so don't rush running out from this place. Eliminate enemies slowly and look around, because you may easily miss someone. When there are no more, move down.
Keep with the typical scenario: lean out and eliminate enemies one by one. The one next to the container may be hardly visible, so send a grenade to lure him out and kill. When all enemies are dead, go upstairs. Be careful, because enemies will hide until the moment you get equally to them, so you have to look around. When you get upstairs, turn left and find several enemies in the corridor which you can easily take down. Actions moves for a while to the helicopter with which you have to destroy several enemy helicopters and kill infantry on the roof.
When you get upstairs, turn left and notice enemies running at you who will get upstairs in a moment. Eliminate them and stick to the cover, because more enemies will follow. Most of them will fire at you from the windows in the building in front of you, but watch out for single enemies who will try to sneak up at you. And from a short distance, they can kill you immediately. After that, run to the building and eliminate remaining with grenades as they don't have anywhere to run.
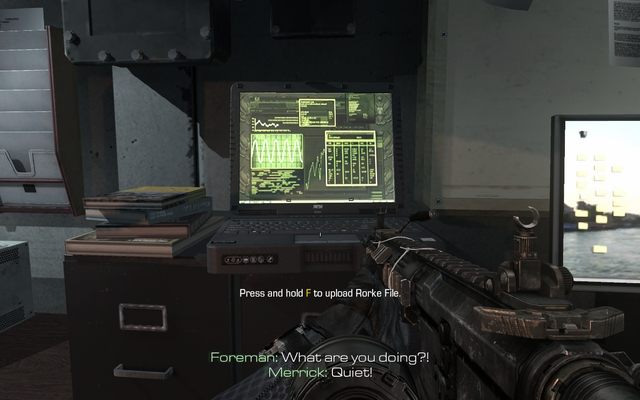
 Another intelligence data
Move forward to the room at which your squad is placed. Inside you find Rorke who you have to catch. On the desk at which he was leaning, you find another intelligence data.
Look how Merrick throws out Rorke through the window and mission ends after a short talk.
 Welcome back, Rorke.
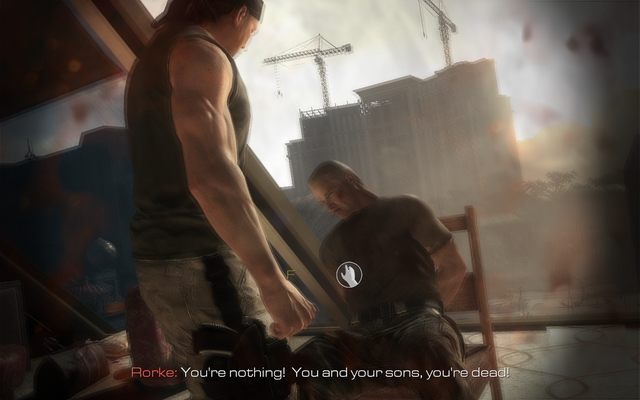
Mission begins when Elias interrogates Rorke, but it isn't going well. Your father decides to threaten him with throwing him out of the airplane, but he seems not to be bothered by that.
After a while, enemies of Rorke arrives. There is an explosion and your plane starts to collapse, Rorke runs away and says that he hopes you'll join him. You're thrown out of the plane and lose consciousness after opening the parachute. You're hanging on the tree. Cut off the parachute ASAP.
 Pulse Meter is useful while in forest.
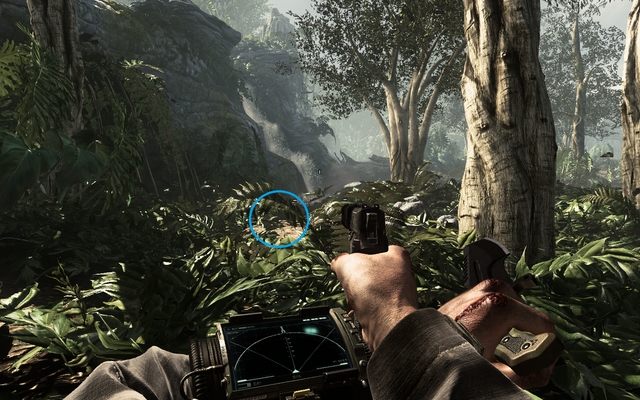
You land hard on the ground with a knife, muffled pistol and Pulse Meter, your greatest ally. As it's hard to find any reference point, keep to the left side of the map. Check Pulse Meter regularly to not get surprised by enemies. When you find one who split up from his group, kill him with a knife or pistol.
If you won't get detected at all, you get an achievement Jungle Ghosts.
 Maybe you should pass him by?
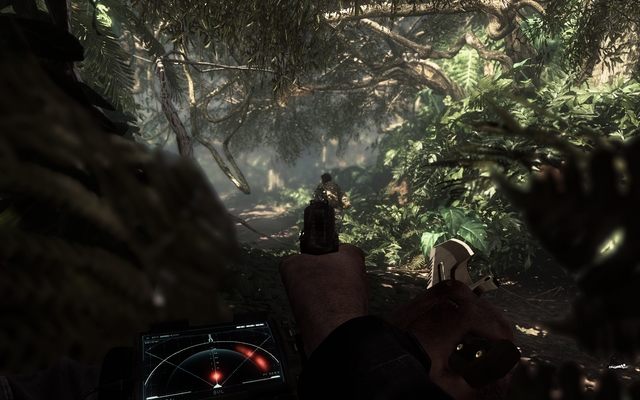
Kill enemies only if necessary to not raise an alarm and lure all enemies at you. If you find a group of enemies or when the single target is in covered place, pass on. Move through the jungle, keeping in the bush and don't walk straight. Your best option is to crawl as no one will be able to see you even if he walks next to you. While crouching, you may be spotted more easily.
 Another intelligence data.
After some time, you should get to the wreck of your plane. Your allies should be near, on its other side. But don't get near as there is a plenty of enemies. Due to the Elias hint, omit the catastrophe site, go on left from it along the map edge. Soon, you get to the small waterfall, next to it you find another intelligence data. Pick it up and head for Elias and Keegan, which should be marked as blue dots on your Pulse Meter.
When you get to the team, you have to save the rest of squad. They are to be executed, so you have to hurry. When you get to the place, lean out, crouching and wait for Elias decision. Kill two enemies next to the Hesh, the rest is in hands of your team. When you're all together, you can just follow your team.
 Wait for the helicopter to fly away.
Follow Ghosts upstream until you get to the enemy supply zone. Hide behind a rock and wait until the helicopter fly away and enemies spread out. Continue walking until you get to the forest. Now you can't fire at all, until you're not spotted.
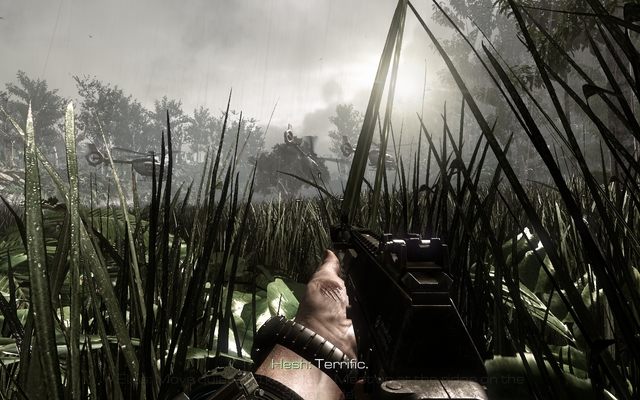 High grass, your best jungle friend!
Perform Elias orders and follow your squad, moving on right side. Watch out not to lean out from the bushes because enemy may spot you and you'll have to defend. After a while, you get to the clearing on which helicopters land. Due to the order, jump down and wait for them to fly away. Then follow your team and don't stand up, because enemy will notice you immediately.
 Jump!
Jump!At the end of clearing, you can hear an explosion. Approach the place from where the smoke is rising. After a while a helicopter will fly out and you have only seconds to jump down. Otherwise, enemies will jump out and start firing at you. Independently on the helicopter, turn around and follow your squad. When you ride down, follow your march down the waterfall (screen above) and jump down. When you emerge on the bottom, mission ends.
During the loading screen Elias explains that rocket fired at Yucatan didn't hit USA. You get to know about the next mission: you have to break into the military base in Andes and steal all information about rocket program.
 Sequence of actions...
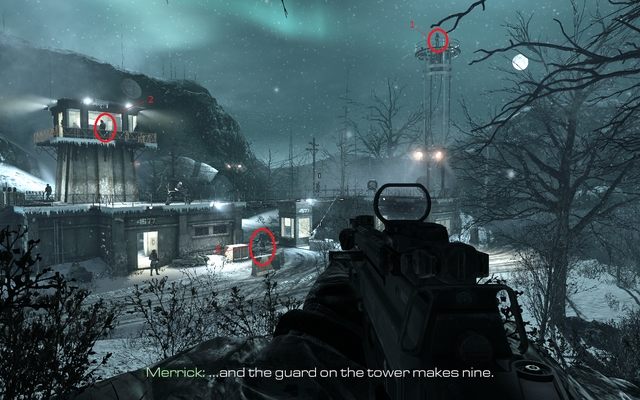
This time, action takes place in winter. For now on, you just have to follow your squad. When you get to the view point, wait for orders. First of all, take down soldier on the tower on right. After that the one on the tower on left (the one in the middle). At the end kill one of remaining two guards.
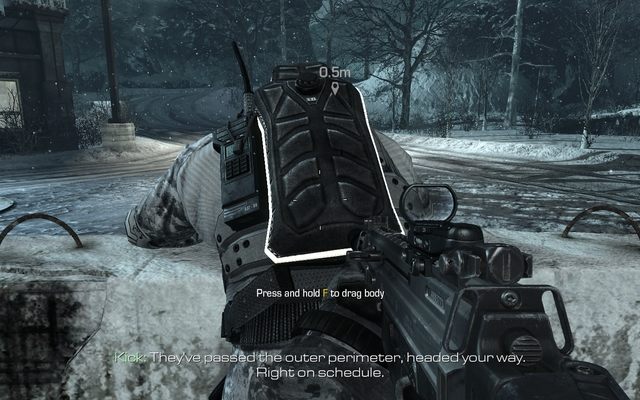 Don't hang like that, just lie on the floor!
When you eliminate all enemies, move down. Throw down the body from the wall with an action button so the patrol won't notice anything. Approach the vehicle which stopped at the post and kill the driver. After that, return to vehicle and relax, as you'll have a drive to the enemy base.
 I can see you, and you can't!
When you get to the place and exit the vehicle, follow the team. Soon, you should get to the gate with metal detector. When the light turns off, use a button for 2nd equipment to launch Night Vision and move forward to eliminate enemies.
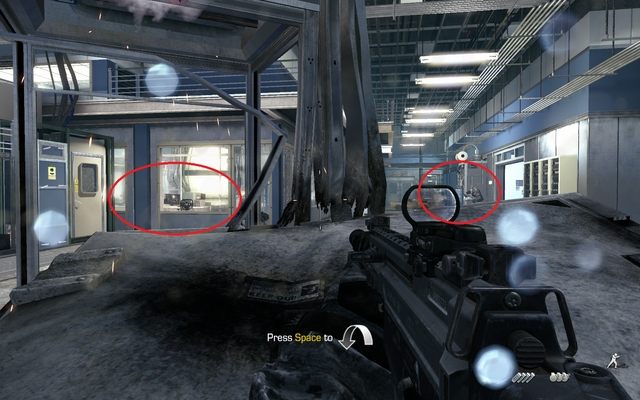
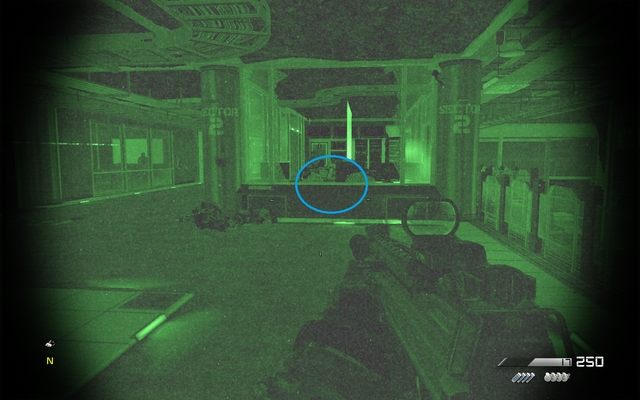 Intelligence data.
When you get to the stairs, notice a room in front of you. Inside, you find a laptop with intelligence data. Go inside and then follow your squad and eliminate enemies until you get to the armored gate.
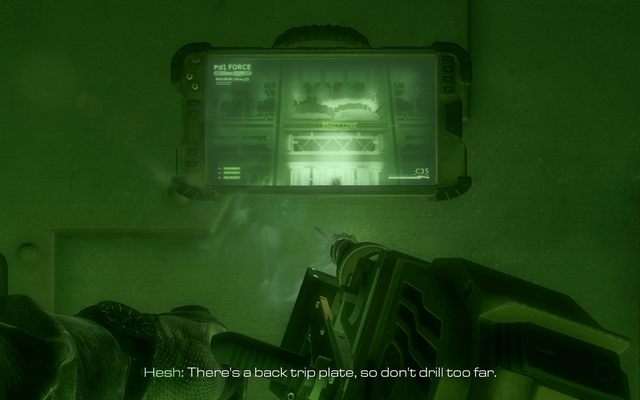 It's a drilling time!
Pick up drill from the ground and drill in the place marked with X. Drill until Hesh tells you to stop. Wait a moment and then drill another hole. After that, move away from the gate because it'll blow up.
Run through the whole and crouch among debris in front of you and take down enemies on right. More enemies will attack from two sides: from where you took down two guards and from the laboratory on left on your position. Fire at enemies you can see and follow your team as they move forward.
 Civilians everywhere!
In the next room, you have to be careful, because there is a lot of civilians among soldier which you can't hit with even single bullet. The best way is to wait several seconds before you get closer to the room, so the scientists spread out and hide. Due to the presence of civilians, don't use grenades. After cleaning up, follow your team. A short walk outside now.
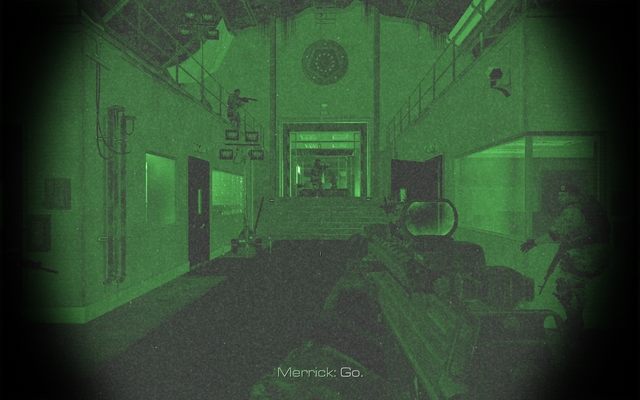
When you get inside again and to the rotund, wait until Hesh talks to two closest guards. He should stun them - at this moment take down remaining guards on right from your position. After that follow your squad until you get to the laboratory.
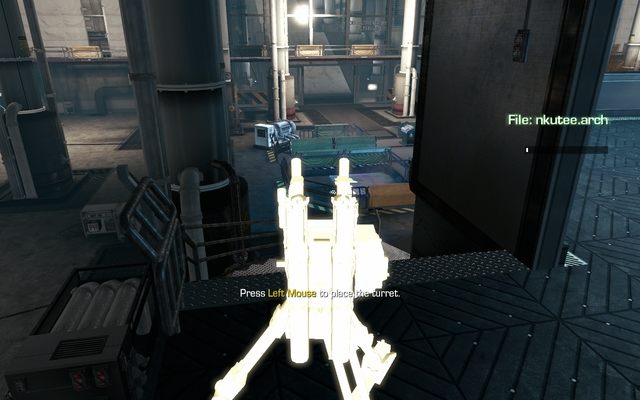 Good place for a turret.
In this place don't fire at anyone because there are only civilians. Go upstairs on right and drop your bag in the chosen place. Take out a turret and set it up on the top of stairs, so it has in range both entrance you have used and door on your left.
 Enemy is coming ...
Then return to the place where you've left the bag. You can pick up also mines, Claymore charges and tear gas grenades. First of all, pick up Claymores (you can make it several times, each time collecting few of them) go down and set them up in different places. If you run out of charges, return upstairs and repeat operation. If there is no more Claymores, take mines, which you can throw. Throw them around until they are all gone. You do this because a big group of enemies will rush into this room from random directions and you don't have a time for planning.
Soon, from the direction you've come here, enemy soldiers emerge. Crouch at the window so you can watch that entrance and eliminate enemies.
 ... from left ...
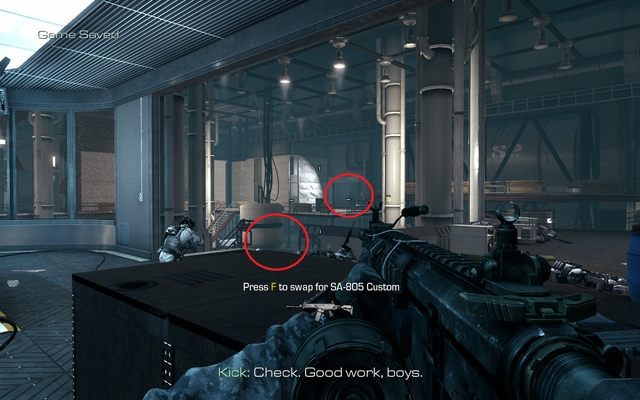 ... and also from right!
When the hacking progress gets to the half, another wave of enemies goes into from left. If you placed turret correctly, you shouldn't have problems with them. Place yourself so you can see right door and be covered, and eliminate survivors. When the hacking progress gets to 75%, door from left will open. Place behind a container and pick up M27-IAR. Enemy will try to run through the freshly opened door and through stairs. When progress bar gets to 100%, throw several grenades and head for the place marked on map to escape via an elevator.
 Fire in front of the vehicle, to break ice.
A long walk awaits for you. Follow leader's orders and move after your team. Get into the car on the parking lot to get out of the base. Soon, the situation will complicate a bit and you'll be compromised. You have to fire at enemies from the rocket launcher mounted on the vehicle. When you ride onto ice, remember to fire in front of the vehicle to make it fall into the water. Destroy 8 vehicles in a way like that to get an achievement Deep Freeze. Continue destroying targets and you should get to the place where submarine emerges, what ends this mission.
Loading screen tells you that data you've collected are very precious. Rocket program is developed nearby port in Rio and you have to make a distraction by attacking oil-rig Atlas.
 It's time for cold bath!
After a short reconnaissance with camera, mission begins under water. Soon after that, you get a detonator. Use it to explode ice and take down enemies standing on it and then fire them down. After that swim after your team and emerge.
When you get on the surface, hide behind something, because you'll fight a big group of enemies here. Between enemy covers there is a lot of space - use it to smoke out enemies with grenades. When it happens, you have a lot of time to take them down, before they hide again. Repeat it and follow your squad until it stops at the containers. Hold action button and then fire and pull up (both actions with fire button).
 When rifle isn't enough, use a grenade.
When you get upstairs, crouch behind a crate and star firing at enemy. There is a whole lot of places where he can hide, so be very careful if you want to lean out. Again, use grenades if you have any, so enemy becomes easier target. When it's done, run upstairs when all this process must be repeated. After eliminating all enemies, join your squad and go to the next room.
 Why open door when you can blow it up?
When you get to the canteen, you'll need to set up explosives on the door by pressing action button. After that, Merrick will push you away saving your life, because enemy starts firing at you through the door. After an explosion, stick to the wall and begin firing. Lean out from the cover carefully, because there is a lot of enemies. Use grenades if necessary.
If you kill enemies in canteen without getting any damage, you get an achievement Piece of Cake!
 More intelligence data.
After cleaning up canteen, continue walking to the control panel of oil-rig. When you get inside, turn right and then forward. You get to the room with intelligence data. Pick it up and return to Merrick.
 Everything is burning, guess why?
Activate console to blow up the platform and then follow your squad. Soon, you should get outside and see effects of your actions. Hide behind a cover, because a big group of enemies is approaching. Clean up the small room on right first, by throwing a grenade inside. When you are sure that there is nobody there, deal with remaining enemies. Move forward and try to keep head low. When all enemies are dead, follow your squad.
 Crouch to avoid smoke.
A short run after Merrick you must make. In the next room, full of smoke, you have to crouch to survive. Follow Merrick and eliminate enemies on your way until you get outside. Here you find a big group of enemies, but you can slaughter them easily as they don't expect you.
 Again, eliminate an RPG operator first.
After a while you get to the next location, where enemy is a defender this time. Again, you have a whole lot of places where enemy can hide, so look around. You can use flash grenades if you have any, because enemies are close to each other. When you clean up this place, follow Merrick to the next location.
Here your task is much more difficult. Besides infantry, enemy has two HMG stations and a soldier with RPG. Firstly, eliminate the latter one and then focus on HMG stations. If you can't lean out for long enough to take him down, try to flank. After that, run after Merrick to the tower.
 Hold indicators in the middle.
Here you have to control a console of water pressure. Try to keep all three indicators so they are green. You change them moving forward and backward.
If you blow up pressure valves in the first attempt, you get an achievement Grindin'.
After a while the whole station is burning and you have to run away. Follow your squad and don't care about anything happening around. You should get to the helicopter where you only need to jump to the ladder to get away and end mission.
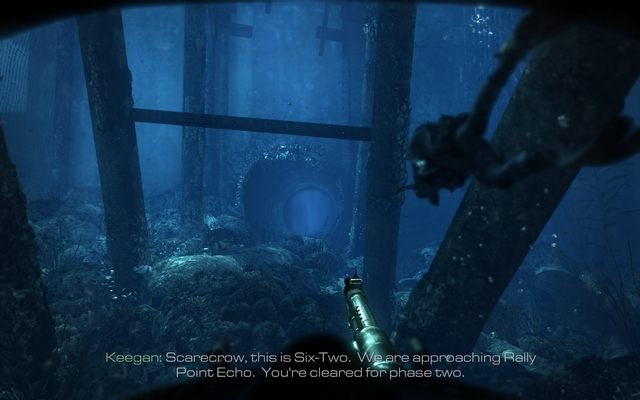
During the loading screen, Elias tells you that diversion from the previous mission was a success and now most of Federation's forces, besides one destroyer, is heading towards Atlas. You and Keegan have to sink the only one ship which remains to defend rocket factory.
 Underwater no one hears your screams!
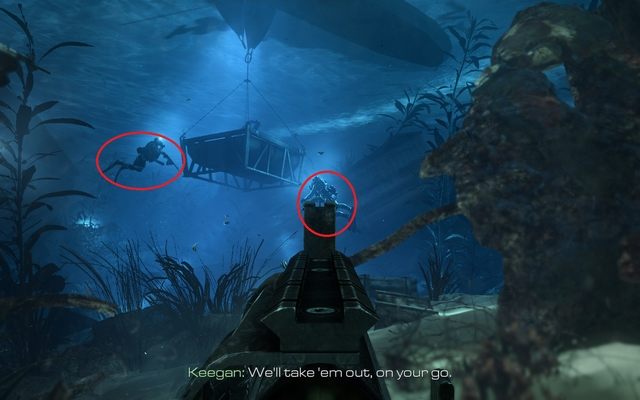
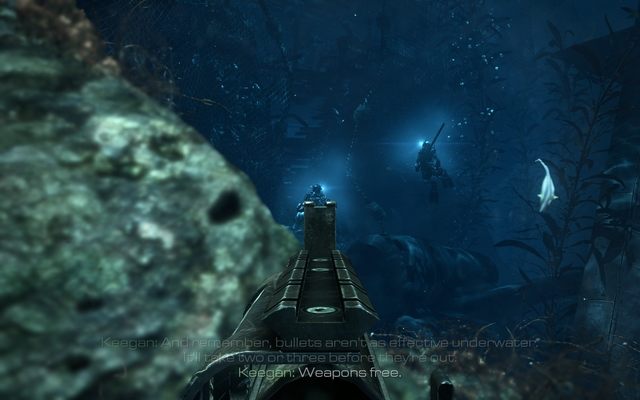
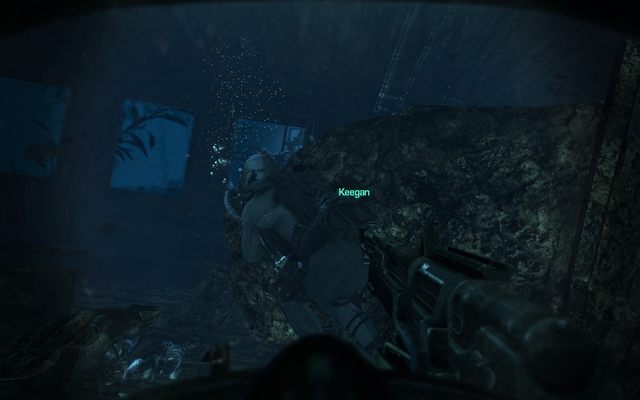
Mission begins underwater. First few moments are calm, so you can look around freely. But avoid sharks while moving, as they can eat you if you get too close to them. Follow Keegan until you run into enemy patrol. Wait until they split up and take down one enemy, while Keegan kills the other one. But if you want, you can kill both of them. Remember, that bullets are weaker underwater so you need more bullets to kill someone.
 Beware of the patrol.
After that, swim into a shipwreck. Another patrol is coming, so hide behind a rock where Keegan is and don't get spotted. Follow Keegan and stop at the window and wait until the diver swims by. Follow Keegan until you get to the next enemy group.
Hide behind a cover and wait until all divers swim by. Open fire when order comes and try to kill them ASAP, because you have only several seconds before they open fire. After killing them, follow Keegan until you get to the another group.
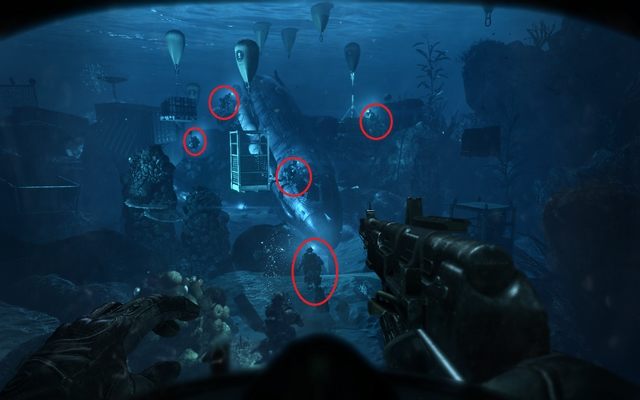
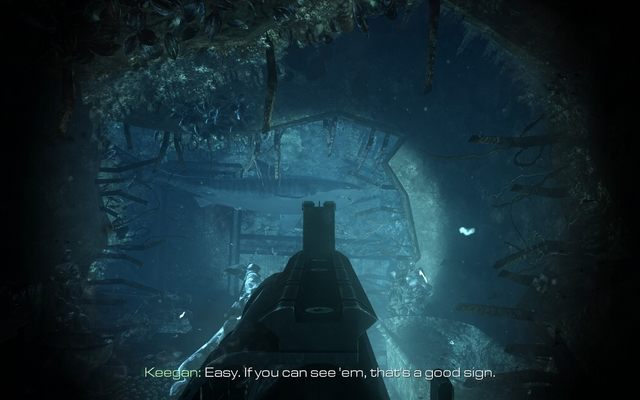
This time, there is a lot more divers. Keegan leaves you free hand and let you begin the attack. So find a good place from where you can see all enemies and you're safe. As in the previous case, you have several seconds before they open the fire. Use this time to kill as many as you can. Remember that you can't use grenades underwater and don't let enemy get too close to you. In the latter case, you'll have to play a cut scene in which you have to press particular button to not die. When you eliminate all of them, follow Keegan until you get to the hatch which you have to burn through. Approach it and press button displayed on the screen.
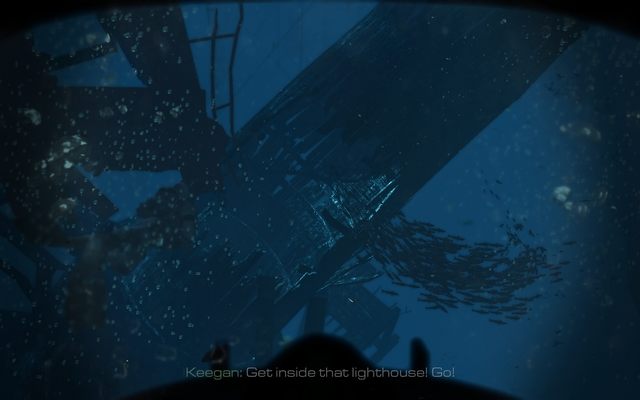 Quickly, to the flooded lighthouse!
When you swim through the gate, it turns out that you have be careful not only about sharks. A ship over you produces powerful sound waves which will kill you if you're not covered against. Follow Keegan and hide inside containers. Soon, you'll see a flooded lighthouse: swim inside to avoid sound waves.
 Red dot is a weak spot.
After a little talk, Keegan tells you to prepare Protheus rocket. Take it out with a button displayed on the screen and activate. It opens a control panel. Use a mouse to aim rocket to hit in the red dot on the ship - it will destroy it with a single missile.
If you destroy ship with a single shot, you get an achievement David and Goliath.
After that, lighthouse starts collapsing and you lose consciousness.
 Debris are falling!
When you regain consciousness, press button displayed on the screen quickly so you won't suffocate. After a while Keegan gives you oxygen and takes you out. You don't have time for rest, you have to run away as the ship is falling at you. Follow Keegan and don't stay behind. After a while you should get onto an open space where there is a lot of divers. As they will approach from every direction, lean out carefully and make sure that the one you're firing at is dead (his flashlight is down). Soon, more divers jump to the water, but after getting into water they are helpless during several seconds, so use it wisely.
 Location of another intelligence data.
Maybe you noticed that when you get here, a laptop dropped from the ship. If you didn't catch it during the fight, don't worry, it's on the bottom. Search it carefully, it should lie on the rock. Pick it up and follow Keegan.
 Hide inside the wreck.
Soon, it turns out that enemy is dropping bombs at you so you have to run away quickly. According to the onscreen instruction, use sprint to swim faster. Keep close to Keegan until you get to the shipwreck. Swim inside and have a little time of relax.
Look at those teeth!After getting through the wreck, you get into room with a single shark. Due to the Keegan's order wait until he swims right and then follow your ally. Moment later you reach another room, with 3 sharks inside.
Wait until Keegan swims between sharks and do the same. You have to move very slowly and don't get too close to any shark. Don't try to fire them down, because you'll probably fail and some of them will get you. You'll need probably several attempts, but checkpoint is close.
 Desired exit.
When you pass sharks, swim through the wreck and keep away from windows to not get hit. After a while you get out of the ship and you only need to follow Keegan to finish the mission.
Kill five enemies without being detected to get an achievement Cog in the Machine.
As usual, you see a loading screen. You get to know that, although you have destroyed an oil-rig and the destroyer, Rorke didn't show up. You get to know also, that now you'll attack a factory where is something that Federation wants to hide.
 Surprise!
You begin mission on a small high terrain and see two enemies in front of you. Approach the edge, press melee attack button to jump onto an enemy. The other one is eliminated by Merrick. Follow your squad until you get to a single guard at the train. Take him down however you like.
 Quickly eliminate two enemies.
After a while you should get to the post where you see several enemies. You can attack first in here. Wait until one of patrolling man approach the truck and eliminate two enemies with one move. After cleaning up the area, Merrick will open the gate.
 Take them down before your companions will!
You have two enemies showing their backs. If you don't eliminate them within several seconds, your squad will take care of them. Kill them and follow your squad. After a while you split up; follow Keegan on right.
After a while you get to a small building. Eliminate two enemies inside. If you didn't screw up and kill all pointed out enemies, you should get an achievement Cog in the Machine. Try to make it until now, because later on killing without detection won't be that easy.
Here is your last chance, if you haven't get that achievement yet. When you get to the gate, you have a little of time to eliminate three enemies before they target you. Begin from the one on left and move while killing next ones. After that, go through the gate and clean up another enemy post on left. Remember to hide and use grenades if needed.
 Intelligence data under the stairs.
After that, follow your squad. When you get through the tunnel and gate, you get to a big hangar full of rockets. Go downstairs and turn left instead of following your squad. In front of you should be a laptop with intelligence data. Pick it up and join the rest of the squad.
 So many rockets!
Follow onscreen hints to turn on a camera. Then aim for rockets moving on the conveyor belt. Watch them until they all are highlighted and then follow your squad to the next room.
 Hide behind the desk.
After a short run, you get to the control room. Approach the highlighted computer and hack in, following the onscreen instructions. After a while, door next to you explodes and a group of enemies get inside. Crouch behind the desk and start an extermination. Use grenades which are deathly here due to the small area while you're safe behind the cover.
 Enemies are served.
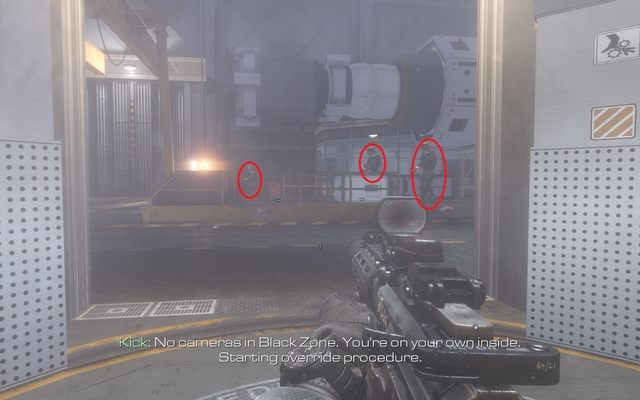
After a while you get an order to use smoke grenades - throw all you've got. In a short time, room will be filled with thick smoke and you get a thermal vision. You can see all enemies now, so start eliminating them and don't care about anything.
When one of allies warns you about flash grenades, take off a thermal mask for a while, so it won't get burned. When the grenade is gone, return to the thermal vision.
Watch out for enemies hiding behind shields. Try to hit a part of his body which sticks out, take them from behind or use grenades.
 Two ways to choose.
After killing all enemies, follow squad up to the closed door. When it opens, run quickly through it and hide as you find here a lot of enemies and they can kill you very easily. Now you have two paths to choose: you can go through the building on left, to get upstairs or go forward and stick to the lower level. The safer option is to moving upstairs due to the advantage of height over an enemy. Use thermal vision to make this task even easier.
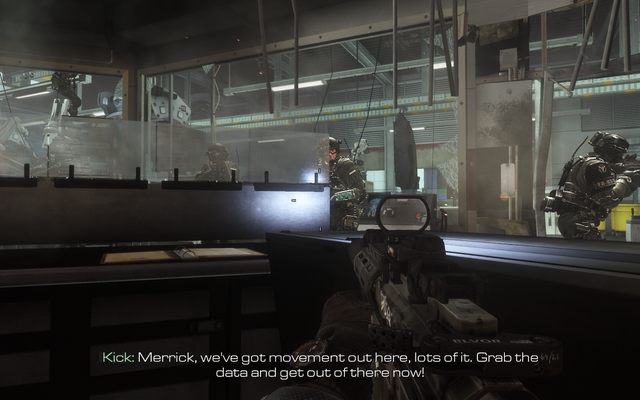
When you get through enemies, jump down and hide because you're against an enemy with HMG mounted on the vehicle. Eliminate him quickly. After a while, Kick arrives - follow the squad and get to the vehicle. Now you will be escaping among explosions and enemies. Firing at them, due to the chaos, is very difficult and not required, because you can't die here. After a while this mission ends.
Destroy 21 slot machines to get an achievement Jack-Pot.
From the very short introduction you get to know that Keegan is sent to Colorado Springs.
 Roles have changed?
In a moment, your team got into ambush and you lose consciousness. You wake up seeing Rorke torturing Elias. There is a long scene ahead but be patient: in a particular moment, you will see an information to press button very quickly, so you can get free. If you do it too slowly, Rorke will kill you and you'll have to repeat this long scene. After that follow your squad while Keegan saves you.
 What a sweaty backs!
You get to the closed door behind which a small group of enemies is located. Kill them and search their bodies for any better weapon. Follow Keegan's orders and hide in a small room on left as a lot of enemies is coming. When patrol passes you and Keegan takes down single enemy, follow your squad until you go through the glass door and reach a big, open room.
Here you will have a very long battle with a whole bunch of infantry. Run downstairs and hide behind a wall cause the first wave is coming. Wait until Hesh throws a grenade at enemies and join the fight. Watch out for enemies who will try to flank you from buildings on sides and those hiding behind a fountain. When you can't see anyone else from your position, you can go left or right, it doesn't make a difference.
 Shall we play?
When you clean this floor, go ahead and hide at the barrier from where you have a good perspective on the lower floor. There is a lot of open space so you should smoke enemies out from behind covers with grenades. When they are all dead, notice slot machines. If you destroy 21 of them, you get an achievement Jack-Pot You have 20 of those here, so you need to find one more.
 The last one slot machine.
Go through the gate which Keegan hold for you and go left. There you find a laptop with intelligence data. Pick it up and go to the other side. When you get to the escalator, look forward. You should see four slot machines. Destroy them to get the mentioned above achievement. Then go down and run into another ambush. Run after your squad and jump through the window.
When you are on the bottom, hide behind a wall. After a short fight, Riley gets hurt. Now you have to transport him to the end of the mission. Remember, that while carrying Riley, you can't fire so put him back at every encounter in safe place, eliminate enemies and move him a bit further.
 Get out of the helicopter!
Search the bodies to find LMG, which will be very useful against helicopters full of infantry. When you see one, fire at its trunk until it burns and the machine crushes killing all people on the board. Repeat it for every encountered helicopter.
 Sunrise among Sphinxes and skyscrapers.
This battlefield offers a whole lot of hideouts; it's good for you, but also for enemies who have various places to hide. The best way is to use grenades whenever you can. Remember that sometimes you can find them at the enemy body. Continue walking forward, jump between covers and remember to protect Riley. Soon, you should get to the ally helicopter which will take you and finish the mission.
Cut off the rope used by enemy to get an achievement End of Your Rope.
Loading screen makes you aware about what happens to the Ghost after his death. His corpses are switched on the belly and head towards home, with his weapon next to him. It may let the Ghost to watch over even after death.
 More intelligence data.
Mission begins from receiving your father's mask from Keegan. After a short talks, this scene ends and actions jumps 3 days forward. When you regain control, turn around - on one of beds you find intelligence data. Pick it up and leave the room to join Hesh.
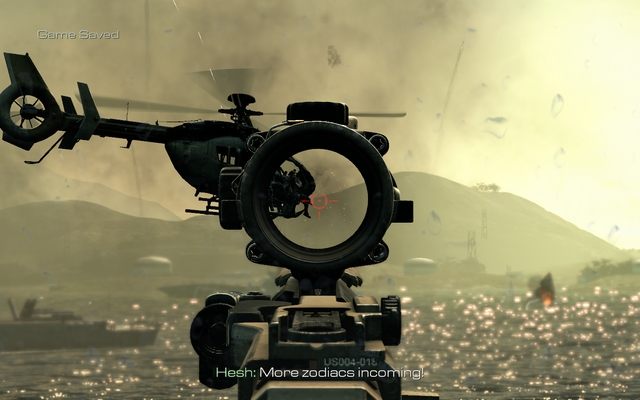
Run out with your brother and find a hideout because enemies are attacking from all directions. Fight until Hesh tells you to follow him. After a while you should get to the place where you find device for controlling the Osprey helicopter. Pick it up and run after Hesh.
 Man out of the board!
After a short encounter, you get an information that enemies are trying to get on the board using ropes. So go to defend the ship. When you get to the chosen place wait until enemy starts climbing. When it happens, cut off the rope by pressing the button displayed on the screen. This gives you the achievement mentioned above. After that keep firing at enemy.
 A lot of targets to destroy.
After a while you should get an order to use Osprey helicopter. Press button displayed on the screen to get control over it. You need to destroy targets marked with red squares. Using Osprey you have two weapons: rockets (fired with fire button) and machine gun (fired with zoom button). Destroy as many targets as you can before you lose control over the machine and return to the ship.
 Another helicopter bites the dust!
When you play as Logan again, take down helicopters flying around because infantry inside may easily destroy you. You can use a machine gun to kill them inside or use a LMG to destroy the vey helicopter. After a while you get another order to use Osprey. When it's done, follow Hesh.
 Surprise attack!
It turns out that you have to get on the lower deck. Follow your brother until jump animation triggers. Use a slow motion and kill all enemies, as they start firing at you only after you land. After that, follow Hesh and go upstairs to use a computer and take control over Sparrow rockets.
 Big fish.
Your main task is to destroy enemy plane with a target marker. Hold your sight on it for a while to target it and then fire rockets. After a hit, plane will get out of your vision. Use this time to destroy helicopters attacking you from all directions. One shot is enough for a helicopter. After several seconds, plane is back: repeat your action to hit it. It disappears again and you can focus on helicopters. When the plane shows up the third time, third shot takes it finally down.
 Why is everything on fire?!
An enemy begins bombarding and you have to evacuate. Follow Hesh and don't fall back and get hit with any falling object. When you get to the target, jump into the helicopter to fly away and end this mission.
Destroy 3 helicopters with your remote controlled rockets to get an achievement Fly-by-Wire.
Loading screen notices you that Federation was able to finish rocket program and now it has fully operational satellites and missiles. Your team is send to destroy the orbital station transmitter.
 Let's play with a tank!
Action begins in a plane carrying tanks. After a short flight you get attacked and you join rest of your forces on the ground. You have to destroy enemy tanks and keep close to your team.
 Helicopter has an advantage over a tank? No way!
After a while, enemy helicopters appear. Following the instructions on the screen, change your weapon to remote controlled rockets. Find a helicopter, fire rocket and move her so it hits the helicopter. When you destroy three machines like that, you obtain mentioned above achievement. But you have to hurry as your enemies also can destroy tanks. If they are faster, load the last checkpoint.
 Anti-aircraft awaits!
Continue following your group until you get to the military base. There, you're ordered to destroy anti-air installation. So head for the particular targets and destroy them. After a while, you're inside the helicopter.
 Perspective is very changeable!
Using a onboard minigun, clean up the building at which the helicopter hangs. When it's done, press button displayed on the screen to jump in. Kill enemies and follow Hesh.
 Fire-extinguisher kills.
You get to the closed door. Hesh grabs extinguisher and wait for you to open door. When you open it, Hesh throws an extinguisher in the middle of crowd. Fire at it to blow the thing and kill enemies around. Then finish off the remaining. Wait for Hesh to finish his work at the computer and approach the console and go to the next room.
 Intelligence data location.
When you get out of the room, don't follow Hesh. Besides, turn left and find a small room at the end of corridor. Search it for another intelligence data. Pick it up and join Hesh in the next room. A lot of enemies awaits here, but due to the LMG you got, you should easily eliminate them. Keep to the covers and fire at enemies. Then, follow Hesh to the elevator.
 Use a height advantage of elevator.
When you slide down, you can use the fact that enemy doesn't expect you here. Locate enemies and start firing at them. When elevator gets downstairs, get out of it and hide behind crates to continue fire. Clean the way to the train and approach it.
 Back to the tank!
Now you return to the tank. After getting through the bridge and destroying everything on your way, you have to eliminate anti-air installations once again. Choose the route and demolish enemy base. When you destroy 4 of 5 anti-air stations, you won't be able to fire smoke grenades and use an infrared. Don't worry and head for your destination. After that you get another scene displayed.
It turns out that your tank is destroyed. When you get outside and control your character again, head for the nearest ally tank to control the cannon. You have several dozen of seconds for firing the missile and you have to run away. Your task is to clear the way by destroying enemy infantry and vehicles. When counter drops to 0, missile hits the base what ends mission.
Destroy all enemy target with an orbital launcher to get an achievement They look like Ants.
After destroying the transmitter, actions goes to the space and you control sergeant Thomas, known as Icarus 1-2.
 You have to walk forward!
Mission begins from the transporter flight in the space. After that, you get a control and begin an action. Due to the fact, that this mission takes place in zero gravity, you may have difficulties with getting used to it. Your only task is to move forward and eliminate enemies.
 Watch out for flying wastes!
When you kill all enemies, you have to join the rest of the time. Unfortunately, everything blows up when you want to enter through the hatch, pushing you aside. When you regain control, move up to get out of debris and widen your field of vision.
Author remark : somewhere here you can find intelligence data. But due to the chaos in this location there is no sense in describing its position with screens and text, because it won't help you get it. On the beginning of this guide we'll place a video about getting all intelligence data and there you will have shown how to get it.
 What's happening in here?!
Your task is get to the station responsible for the orbital launcher and get inside by blowing its upper hatch. Don't hurry, because there is a lot of enemies nearby and there are flying debris around. Find some good point with a wide field of vision and hide. Avoid covers of solar panels, because they are destroyed with single shot.
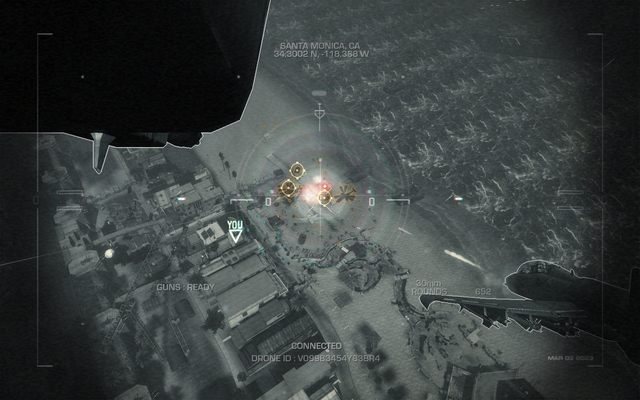
 It's time to play!
When you eliminate all enemies, you get an order to get closer to the station. Place an explosive on the chosen place and eliminate the crew inside of it. You have several seconds with the slow motion to get rid of them. After that approach the laptop to get a control over the rocket launcher.
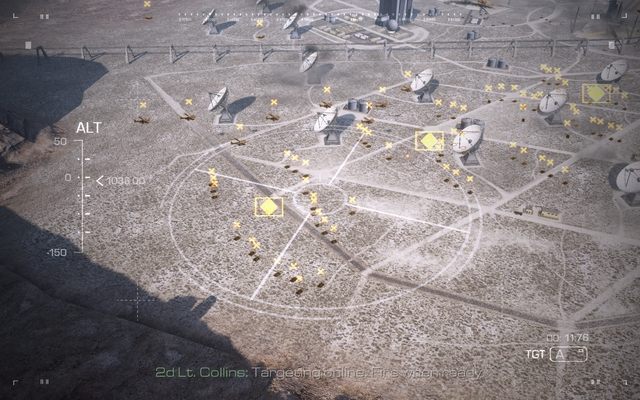 How many targets!
After an animation, you can control the orbital launcher with which you can bombard on-surface targets. You have to bombard those marked on orange and don't hit yourself units (blue ones). If you eliminate all targets without hurting allies, you get an achievement mentioned above. Fire until all enemy units disappear.
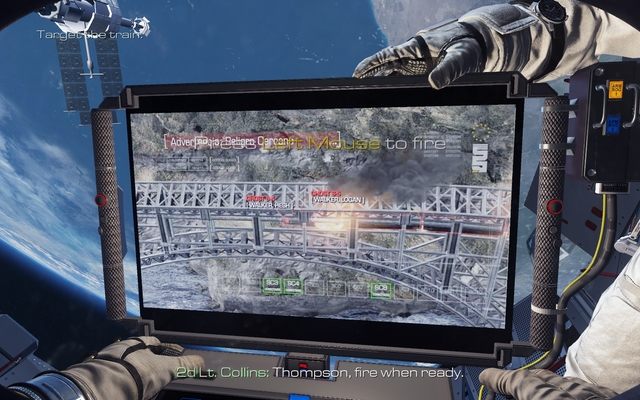 Train passengers don't know yet...
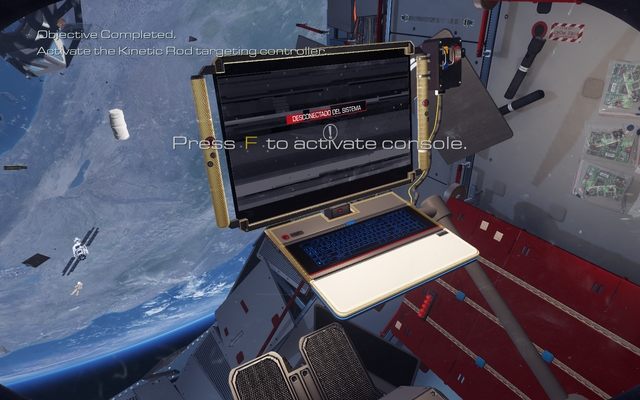
After destroying the enemy, action returns to the laptop controlling the launcher. You obtain an order to fire a rocket at the train with Logan and Hesh. As you don't have a choice, press the button and watch the missile. Mission ends.
Mission begins 15 minutes before rocket aimed at the train is fired. You play as Logan with Hesh at your side and you have to kill Rorke.
 The last data intelligence.
Mission begins in the train. After a talk with Rorke, you get outside to get on the other side of the train where he is waiting for you. But before you leave the room, turn around and pick up the last intelligence data from the crate. Now you have all 18 and gets an achievement Audiophile. Get outside and catch up with Hesh.
 Why it's so shaky?!
Soon, you should run into the first group of enemies. They are not dangerous, but as the train shakes a lot, you have problems with aiming. So, if you an opportunity, get closer to the enemy and kill him from a short distance.
 Helicopters again!
Continue walking through the bridge until you get to the closed passage. You have to lower the bridge to move on. Go through. Soon, you should get to the place where you see helicopters coming from right. As they are close, you can fire at them. Do it until they explode. After that resume moving forward.
 Baaad passengers!
Next to the place where you've destroyed helicopters, notice enemies climbing on the side walls of the train. If you kill three of them before they got on the train, you get an achievement. If you don't, load the last checkpoint and try once again. After that follow Hesh.
 But what's wrong?!
Soon, you should get to the door where Hesh stops to talk with Merrick. It's turns out that sergeant Thompson is obliged to fire a rocket at your train (what you've done in the previous mission). When Hesh ends talking, follow onscreen instructions to open the door. You get inside and have to eliminate two enemies.
After a while another enemy will run out and you have to quickly kill him, or he'll fire a RPG missile at you and kill you two. If everything's alright, you should just run into Rorke. Kill soldiers standing behind him.
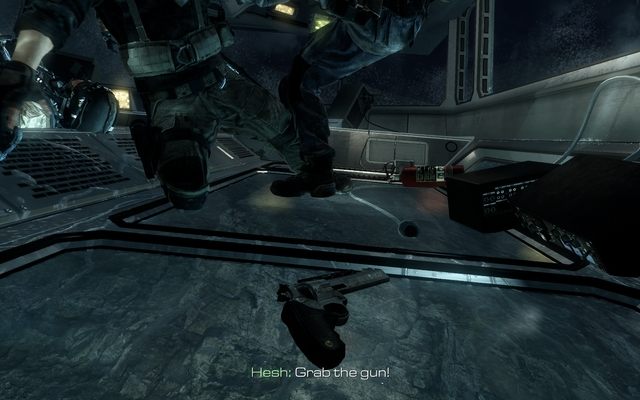 I grab the gun, maybe no one is looking...
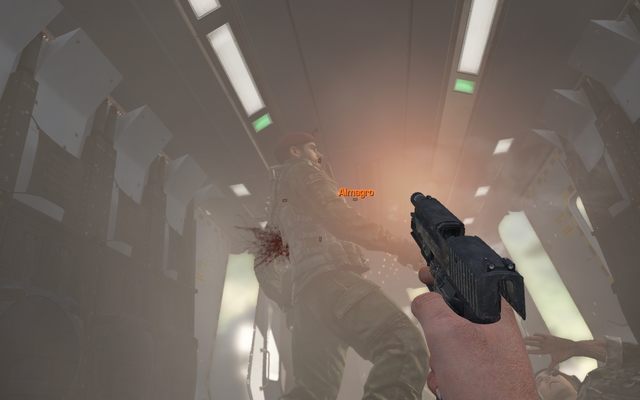
Now a long scene in front of you, where Rorke starts controlling the situation and Hesh got shot. Your brother tells the password and the train is hit by the rocket. After a short cut scene you have to crawl to the pistol (screen above) and kill Rorke. But there are no bullets. Hesh throws one at you which you have to grab by pushing the chosen button. After loading the gun, aim at Rorke and fire.
 Light in the tunnel?
Your target falls dead and water breaches into the wagon. When the animation ends and you regain control, you have swim up ASAP. Just swim forward. After a while you should get at the beach, press buttons to crawl out and drag out Hesh. At this point you can observe destruction spread by the orbital station and listen to Hesh and Merrick.
You've finished the last mission of single player campaign and if you did it on Veteran, you get an achievement You've earned it
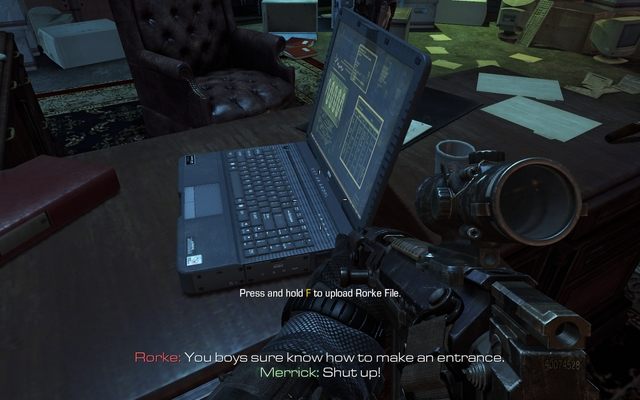
In the game, there is a total of 18 laptops with intelligence data, after the collection of which you receive the Audiophile achievement. In each mission, there is one laptop - below you can find a description with screenshots, which will help you find them.

 Rorke File 1/18
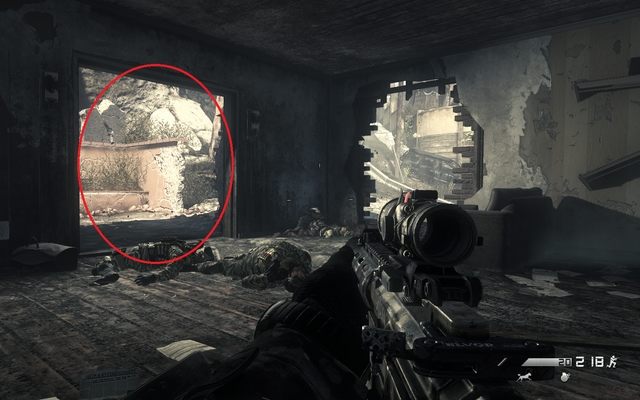
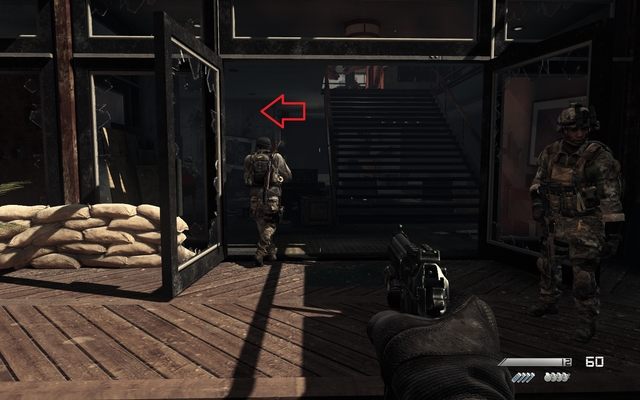
Right after you return onto the ground and dash out of the house with Hesh, turn your attention to the house on the right of the street. Dash into it - inside there is the laptop with the intel data.
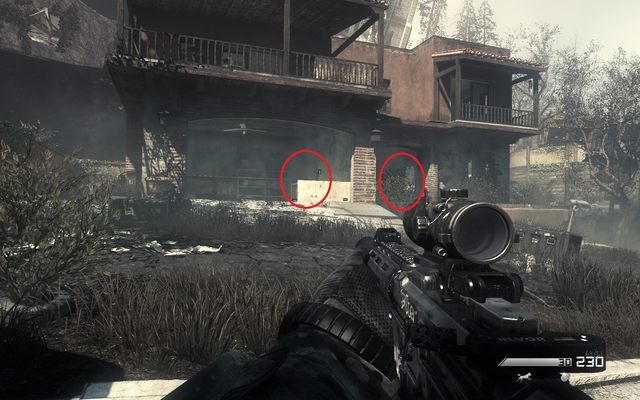
 Rorke File on the desk.
After you reach the base, follow your brother to meet up with your father. He will invite you over for a talk, onto the upper floor. Once you get behind him, turn right - on the desk, right in front of you, there is another laptop.
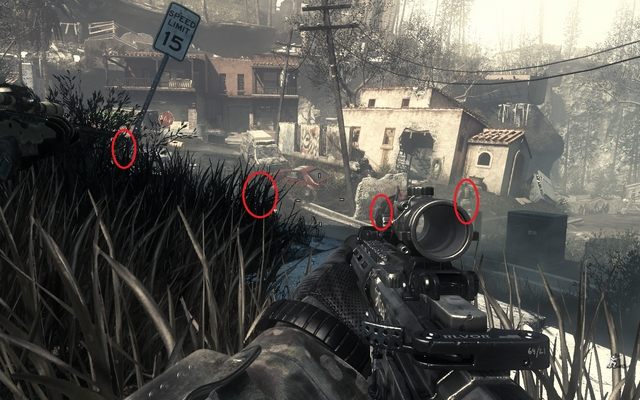
 The laptop with the intel data is inside this building
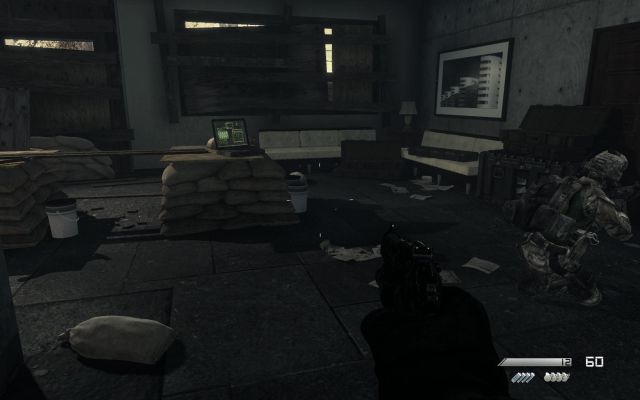
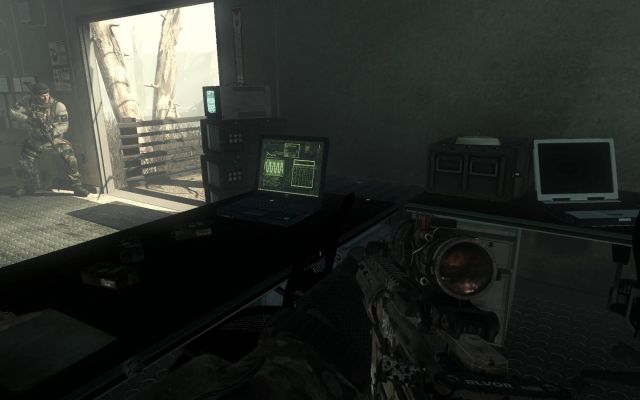 Here it is.
As a matter of fact, you cannot miss this one. While following Hesh, enter the building where you receive, over the radio, warning of the approaching enemy forces. The laptop is on the desk, next to the exit that you will soon take to leave.
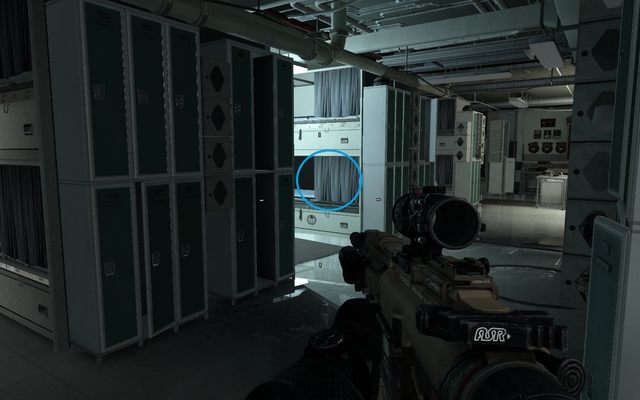
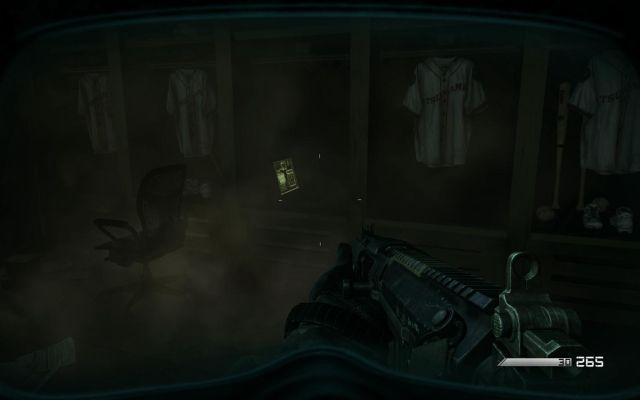 The fourth laptop is inside one of the wardrobes.
Together with your squad, you will enter a room that you will throw a grenades with tear gas into (A moment before you reach the Ajax). After you storm inside and deal with the enemy, turn left - the laptop should be inside one of the wardrobes.

 There is this laptop.
The laptop is right at the beginning of this mission. Follow Hesh until you reach the house with your father inside. Instead of climbing up the stairs, turn left of the stairs - the fifth laptop with the Rorke File is in there.
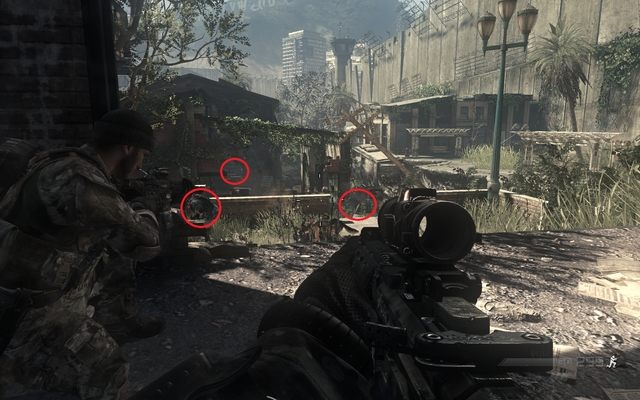
 The two enemies.
 And here's the promised laptop.
After you and Rorke, deal silently with the two enemies, pick up the weapon under the water and continue following your companion. You will reach a room where there are another two enemies - Rorke will give you carte blanche to deal with them. After you do, approach the spot where the enemies used to stand - on the desk, there is the laptop with the data.
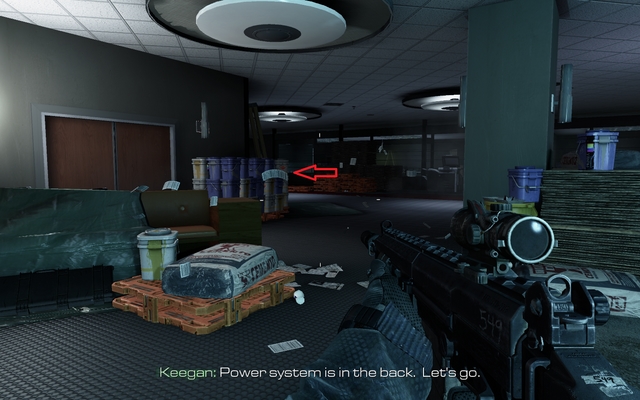 After you enter the building, go left.
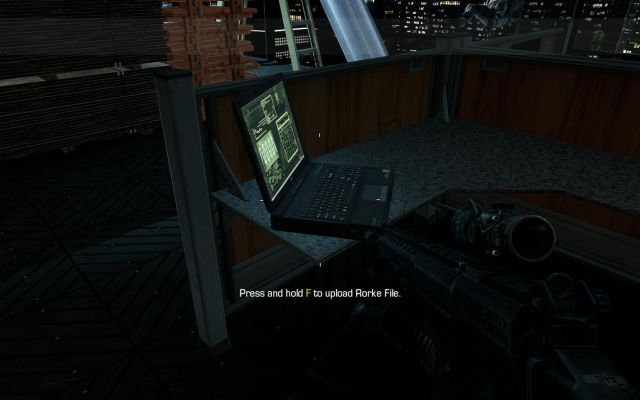 The laptop is opposite the room's entrance.
After you cut a hole in the glass pane and enter the building, instead of following Keegan into the server room, go left into a small office. On one of the desks, there should be the laptop with the data.
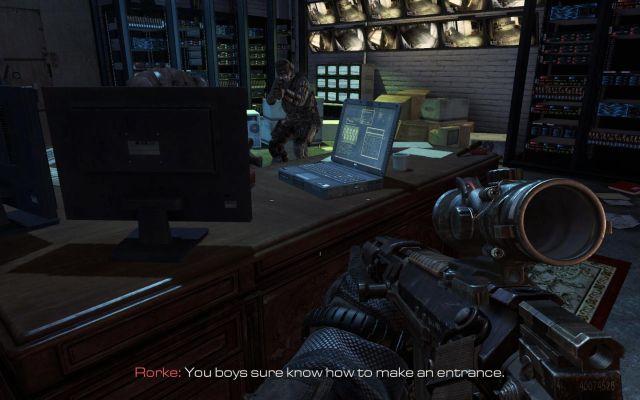 The desk that Rorke leaned against.
In this mission, the laptop with the data is at the very end of the stage, in the room where your squad catches Rorke. It is on the desk against which Rorke was leaning at the moment that you entered.
 The waterfall with the laptop marked in blue.
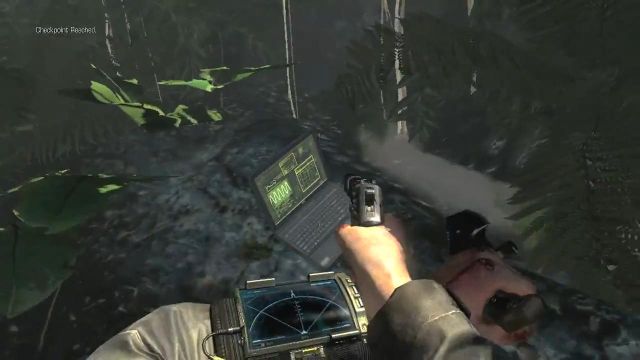 And here is the second laptop.
To reach the intel data here, you need to keep to the left side of the map right from the beginning of the mission. After a while, you should notice a small waterfall in the distance - follow the water current to reach the laptop with the data.
 Rorke Files is in the marked room.
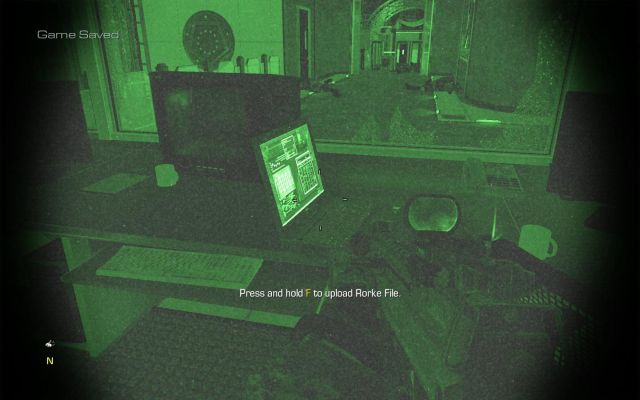 The tenth Rorke File.
Right after power supply goes off and you will receive an order to activate night vision, climb up the stairs opposite to your current position. In front of you, there is a small room, inside of which there is the laptop with the intel data. Walk around the room to find entrance and collect the data.
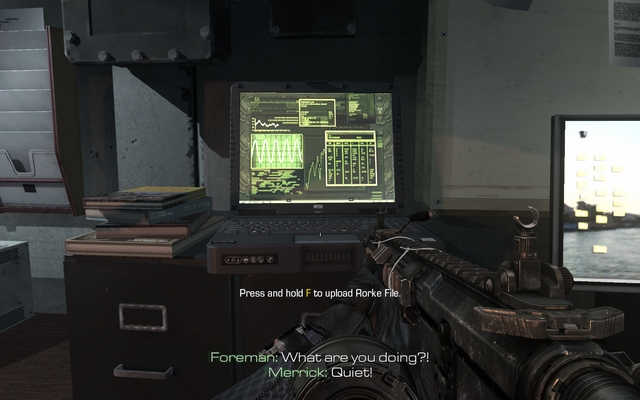 Here is the laptop.
A moment after you have cleared the cantina, you will reach the control room, where Keegan will try to make the enemy cooperate. Right after you enter the control room, turn right and go ahead - in a small room there is the laptop with the intel data.
 The laptop with the intel data is on this rock.
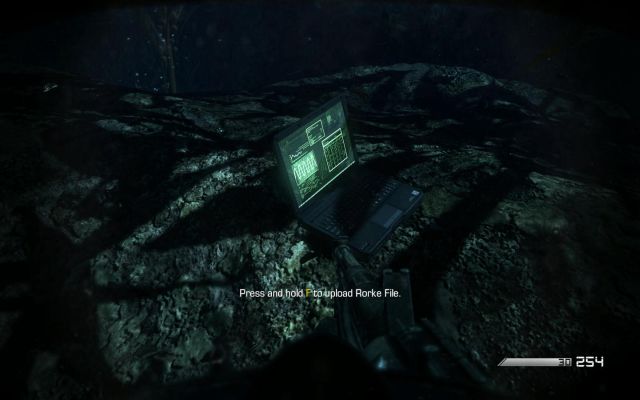 And a close-up view here.
After you sink the enemy's destroyer, you will have to escape from the falling ship fragments, while following your companion. After a while, you will reach an open area where there are many enemies. Deal with the enemy and take a look at the bottom, on one of the rocks, there is a laptop with the intel data, which fell out of the sinking enemy ship.
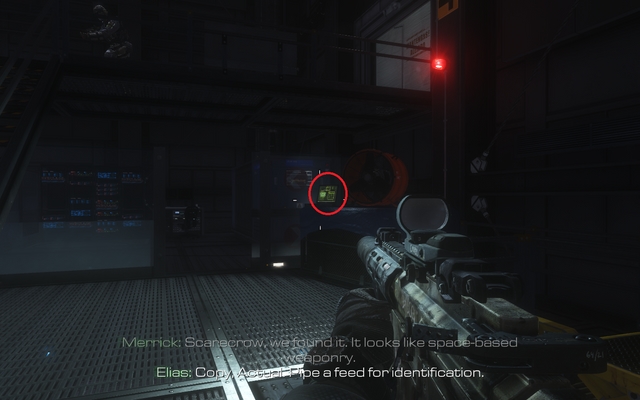 The laptop is right under the stairs over which you climbed down.
Once you and your squad reach a large hangar, where there are kinetic projectiles stored (you will receive instructions to pan the camera onto them), climb down the stairs and turn back - the laptop is right under the stairs.
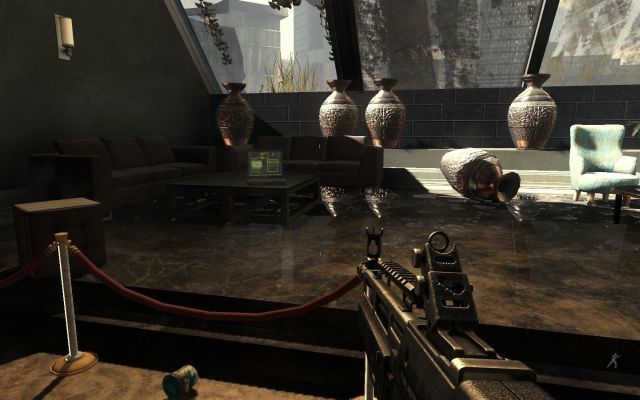 Closer and closer to collecting all 18!
Right after you crouch under the gate, which Hesh is holding up for you, go left - on the table there is the fourteenth of the laptops.
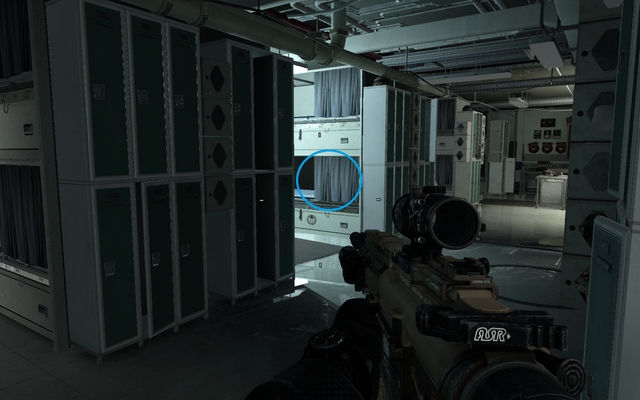 The laptop is at the beginning of this mission.
In this mission, you will find the laptop in the first room that you start this level in. Once you regain control of your character, ransack all of the beds in here - the laptop with the data is on one of them.
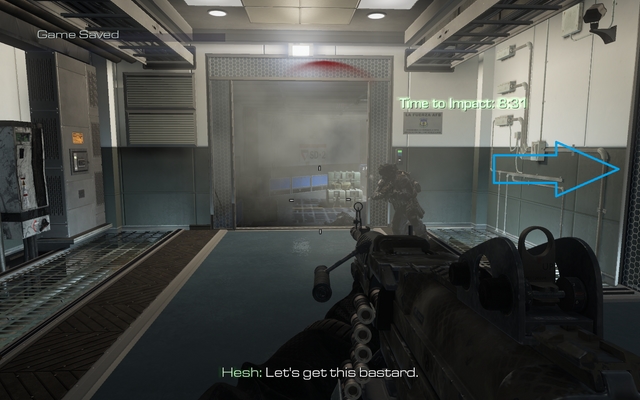 Instead of following Hesh, turn right.
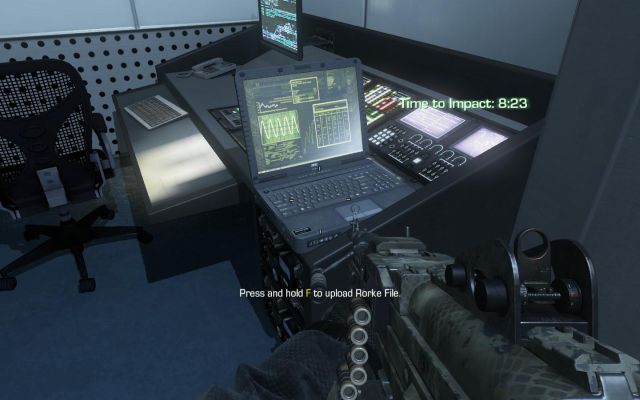 Here's the laptop.
Right after you launch the rocket, Hesh will tell you to follow him. Exit the room where you have just launched the rocket and, instead of following Hesh, go right and then left, into a small rom. Inside, you will find the sixteenth laptop.
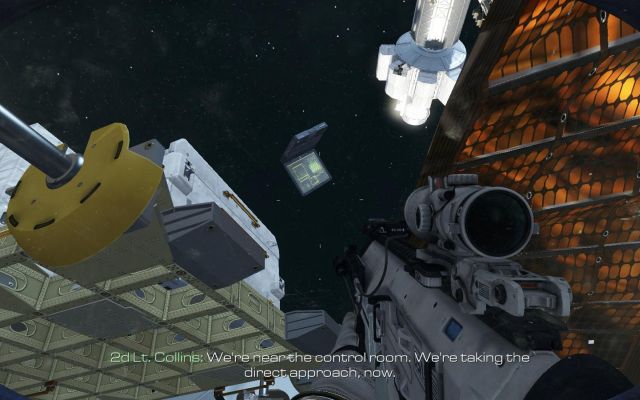 The last-but-one laptop at hand's reach.
After the station, which you were supposed to enter with your squad, explodes, you will be tossed aside. Once you regain control of your character, fly up a bit to have a better view of the situation. Watch out for the enemies who will soon attack your character. After you deal with them, look for the remains of the satellite - right in front of them, there will be the laptop hovering in front of I them. If you cannot find it, take some time and take a careful look for it - finding it among all the parts and bits is not easy.
 You only need to turn round to find the last laptop.
The last bit of data, and the easiest one to find, at the same time, is at the beginning of the mission. After Hesh opens the door of the railway car, turn around - on the chest there is the last laptop with the data. Find it and you will receive the Audiophile achievement.
The multiplayer mode in Call of Duty Ghosts focuses on quick intense action where realism is nowhere to be found. A player who is alien to the Call of Duty series, may feel lost, tossed in the midst of fast-paced events, where all players, apart from him, seem to know what to do and how to play to avoid frustration. This part of the guide aims at explaining all of the issues connected with the multiplayer mode.
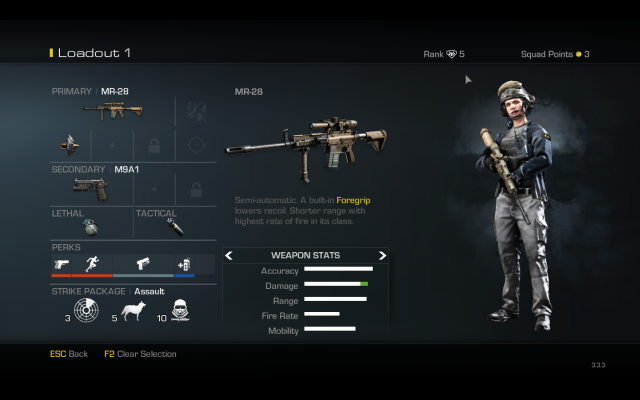 The equipment selection screen.
During the gameplay, you will be rewarded with experience points which you receive for eliminating your targets, i.e. for the completion of your objectives. After you have collected enough experience points, you get promoted to the higher rank, which unlocks some of the equipment available in the game and earns you Squad Points. You can spend those points later on, on new weapons, attachments to these weapons, perks, strike packages as well as new characters (there are 10 of them, as for now) each time you rise through the ranks , you receive 2 points + you can review their number in the upper right corner of the equipment selection screen.
The most important element, before you actually start to play, is to create your own unique soldier by selecting his weaponry (the primary and secondary weapon with attachments and additional equipment like grenades), his perks and strike packages. The choice should be done, of course, in accordance with your preferences, as well as to the experience gained in battle but, in this guide, there have been included hints, concerning the selection of gear, which will help new players join the multiplayer games.
While on a map, you cannot change your equipment - you need to define it before you join a game and save that as one of three loadouts. During the game, you can jump between schemata freely - but you receive the chosen one only after you die. Initially, you can assign gear to three loadouts, at most, but with the abovementioned points, you can buy additional three - which gives you a maximum of 6 loadouts available throughout the game.
Available modes for multiplayer:
Apart from the abovementioned modes, there also are their Hardcore counterparts available which are, in fact, no different than the regular ones - the only difference being the lack of the minimap and automatic health regeneration.
Below, you will find a handful of hints concerning the multiplayer mode:
Properly selected weaponry is the most important thing that will determine your effectiveness in the battlefield. The best gear does not consist of the weapons of the greatest firepower, or the most advanced ones, but of those that you can operate easily, which is best suited for a given map and the most universal one.
Assault rifles (effective at medium and long range):
SMG (effective at short distance) :
Marksman rifles (effective over medium and long range) :
Sniper rifles (effective over long distance) :
Shoguns (lethal over short distance) :
Other:
Pistols:
Launchers:
It includes:
It includes:
The selection of equipment is entirely up to you. The best way is to select them by trial-and-error, where you try out every available piece of equipment. Still, this may take some time, especially that you first need to unlock it, using the Squad Points. Below, you will find two sets of equipment that may prove useful for rookies.
The first one (for stealthy elimination) :
The second one (for free exchange of fire) :
Each perk requires a number of slots (1 to 5) to accommodate it. By default, there are 8 slots available for perks. You can increase their number by disposing of the equipment that you do not want - if you get rid of the secondary weapon (pistol) from your equipment, this will give you 2 additional slots. In the case of grenades or tactical equipment, you increase the amount of available slots by 1.
The perks available in the multiplayer mode, are divided into 7 groups: speed, handling, stealth, awareness, resistance, equipment, elite.
Icon
Name
Description
Requirements

Ready Up
Weapon ready faster after sprint.
1 level
1 slot

Sleight of Hand
Faster reload.
8 level
1 slot

Agility
Increased mobility.
22 level
2 slots

Marathon
Unlimited sprint.
1 level
2 slots

Stalker
Faster movement while in the aiming mode.
50 level
3 slots
Icon
Name
Description
Requirements

Strong Arm
Further grenade throw
Faster grenade "boiling"
1 level
1 slot

On The Go
Ability to reload during sprint.
10 level
1 slot

Reflex
Quick equipment swap .
24 level
2 slots

Steady Aim
Increased accuracy win the aiming mode.
38 level
2 slots

Quickdraw
Faster aiming.
1 level
3 slots
Icon
Name
Description
Requirements

Takedown
Killing enemies without enemy death indication
1 level
1 slot

Blind Eye
You become undetectable for enemy detection systems.
12 level
1 slot

Dead Silence
Stealthy movement.
26 level
2 slots

Incog
You become resistant to enemy targeting systems.
40 level
2 slots

Off The Grid
Undetectable on the minimap with SAT COM and the radar.
54 level
3 slots
Icon
Name
Description
Requirements

Recon
Enemies hit with explosives are tagged and become visible through objects.
1 level
1 slot

Scavenger
Resupply ammo from dead players.
14 level
1 slot

Sitrep
Ability to detect enemy explosives and tactical equipment.
28 level
2 slots

Amplify
Enemies footsteps make them easy to detect. Alleviates the "Dead Silence" perk.
42 level
2 slots

Wiretap
Use the friendly and enemy SAT COMson the field.
56 level
3 slots
Icon
Name
Description
Requirements
Resilience
Falling from heights does not cause damage.
1 level
1 slot

ICU
Faster health regeneration.
16 level
1 slot

Focus
Reduces weapon sway while in the aiming mode and reduces sway while taking damage.
30 level
2 slots

Tac Resist
Resistance to flash grenades, concussion grenades and the EMP.
44 level
2 slots

Blast Shield
Increased resistance to explosions.
58 level
2 slots
Icon
Name
Description
Requirements

Extra Tactical
Additional tactical equipment.
1 level
1 slot

Extra Lethal
Additional lethal equipment (explosives).
18 level
2 slot
Fully Loaded
You start with maximum ammo.
1 level
2 slots

Extra Attachment
Possibility of mounting additional attachment onto the weapon.
46 level
3 slots

Danger Close
You inflict more damage with explosives.
59 level
4 slots
Icon
Name
Description
Requirements

Gambler
You start with a random perk.
7 level
1 slot

Hardline
Rewards for numbers of kills require one less kill to be awarded. For each 2 assistance instances, you receive a kill to your kill counter.
20 level
1 slot

Ping
After you kill an enemy, you detect the nearby enemies.
34 level
2 slots

Overkill
You can carry two primary weapons.
48 level
3 slots

Deadeye
Streaks of kills increase damage dealt by you. .
60 level
3 slots
The selection of perks is, as a matter of fact, a matter of one's own preferences. You cannot say that some are best and some are useless. When it comes to novices, one of the below combinations may be useful.
The first one (if you prefer stealth) :
The second one (if you prefer direct exchange of fire) :
While defining your equipment, you can also choose strike packages that become active after you perform streaks kills. The streaks of kills consist in killing the required number of enemies before you die yourself - the required number is determined by the packages that you select.
Packages for streaks of kills are divided into three groups:
Icon
Name
Description
SAT COM
Allows you to track the enemy.
The more SAT COMs at a time the higher the effectiveness.
I.M.S.
Intelligent Munitions System detects and eliminates enemies with explosives.

Watch Dog
Summons a dog that follows you around and attacks automatically the nearby enemies.
Sentry Gun
The possibility of deploying automatic guard cannon, which tags and attacks the nearby enemies automatically.
Trinity Rocket
Gives you ability to use the Trinity missile shooting intelligent drones.
Battle Hind
You summon an assault helicopter, which shoots at the enemies from above.
Vulture
You summon a Vulture Drone that automatically tags and fires at the enemies.
Gryphon
You summon a remotely-controlled drone that tags enemies for detonation.
Maniac
You drop your firearms and become a melee expert of increased mobility and damage inflicted with knife.
Juggernaut
You receive armor and Minigun.
Helo Pilot
You summon helicopter and take the gunner's position and fly into the battle.

Loki
You summon air raid using the Loki satellite.
Icon
Name
Description

SAT COM
Allows you to track the enemy.
The more SAT COMs at a time the higher the effectiveness.
Ammo Crate
You deploy the ammo box that supplies allies with ammo.
Ballistic Vests
You deploy a box that supplies your squad with bulletproof vests.
MAAWS
A rocket launcher with remotely-controlled missiles.
Night Owl
You summon a drone detects the enemies and protects you from explosives.
Support Squadmate
You receive a riot shield that you can use to protect yourself and your allies from fire.
Ground Jammer
Deactivates the enemy's electronic systems and communication.
Air Superiority
You summon jets to destroy the enemy helicopters.
Helo Scout
You summon a helicopter with a marksman onboard.
Oracle
Allows you to use GPS to detect enemies.

Juggernaut Recon
You receive an advanced armor equipped with detection instruments.
Odin
You receive supply drop from the Odin station.
Just like in the case of perks, the choice of packages for kills in streaks is determined on the basis of your own preferences. Below, you can find two sets that may be found useful by beginners.
The first one (combat oriented) :
The second one (support oriented) :
Call of Duty Ghosts introduces a new game mode, called Extinction. It is a mode with four players in mind, although there is nothing to prevent you from playing it solo - if you want to have any chances of surviving it, it is recommended that you play it in a four-player squad.
In Extinction, your squad's aim is to, apart from decimating the waves of aliens (unlike in the previous installments of the Ghost series you fight aliens instead of zombies), is to destroy alien hives spread around the map, using a drill which is available for your team from the very beginning of the game. After you deploy the drill, the fight for survival begins - there are waves of dozens of aliens, and your squad's aim is to defend the drill for a pre-defined period of time (longer and longer with each swarm that you destroy). After some time, the hive is destroyed and your task is to take on another one.
The map at which this takes place is divided into several stages. During each of these stages, your objective is to destroy the abovementioned swarms and, after enough of them have been destroyed, you will reach a place blocked by the Barricade Hive . This obstacle is too big to be destroyed with the drill and you need to use the helicopter's support , which needs to be protected against the enemy attacks until the hive is destroyed.
Apart from the completing of the main objective, i.e. destroying the hives, it is very important to complete Challenges that appear each time after you deploy the drill (they usually last until the hive is destroyed), for the completion of which your squad receives an additional skill point. Their difficulty level varies from easy ones (e.g. killing a given number of aliens with a given weapon) to very hard (e.g. keeping your weapon's accuracy at the level higher than 75%).
Just like in the multiplayer mode, in Extinction you can predetermine your sets of perks and skills that you are going to utilize in combat. There are for classes to choose from: Weapon Specialist, Tank, Medic and Engineer. Each class has is strong and weak points so, before you start the game, each squad should discuss their selection - there is no point in having four medics in a squad.
Apart from class selection, you can also choose appropriate perks from five categories. These are: Pistol Type, Ammo Type, Team Support, Strike Package and Equalizer. Additionally, during the play, you will be rewarded with skill points that you can use to improve of the effectiveness of a class or perks.
There are 6 types of aliens in the Extinction mode :
Type of alien
Description
Reward
Scout
The type of enemy that you meet at the very beginning. The scouts are the weakest of the lot and they do not have any special abilities, apart from high mobility.
60$
Hunter
This alien type looks much like the Scout but is much bulkier. Its head is armored so, there is no point in shooting at it with ammo different than the FMJ. It is much tougher and inflicts more damage than the Scout but, is not as mobile.
200$
Scorpion
The only alien that attacks at a distance and which can threaten a helicopter. The Scorpion attacks with a corrosive that spreads poison gas which deals damage to any player within reach.
Scorpions usually attack from buildings or walls, and their routes are always the same - remembering them will make it much easier for you to exterminate them.
200$
Seeker
They walk out of meteorites that fall onto the ground every now and then. They are not too tough - it literally takes several shots to kill a Seeker. In case in which they are killed, or they come close to a player, they explode and wound everybody around them. That is why it is recommended that they are killed at a long distance.
100$
Rhino
The toughest of all aliens, and the rarest at that. They appear only at the pre-determined moments . they are very tough and, additionally, are very well armored so, using the FMJ ammo is strongly recommended.
Whenever a rhino appears, summon the entire squad and focus your fire on it, because Rhinos deal a lot of damage - it only takes several attacks to knock the player down.
1000$
Leper
A type of alien that appears only when the squad receives an objective to eliminate it within 30 seconds. It is similar to the Scout in its looks but, it is a bit bigger, and its head glows in red. Apart from that, it is no different from a regular Scout.
If you receive an objective to kill it, use the Feral instincts to make the task easier for yourselves - you only need to locate an alien whose head is glowing.
60$
Below, you can find a handful of tips that may prove useful in the Extinction mode:
Below, you can find a list of all the challenges available in the Extinction mode:
As it has been mentioned in the previous chapter, during a game in the Extinction mode, you can adjust your equipment by selecting the perks and skills from among 6 groups: Character Class, Pistol type, Ammo Type, Squad Support and Equalizer. Below, you can find a list, presenting the description of individual items and the way in which they influence the development.
Weapon Specialist : The fired guns deal 20% more damage.
Level Two
Faster Weapon swap, movement in the targeting mode and secondary weapon use .
Level Three
Faster Aiming.
Level Four
Faster Reload.
Level Five
50% larger damage + lower recoil.

Tank : more health by 25%.
Level Two
Melee attacks inflict 25% more damage.
Level Three
50% more health.
Level Four
75% more health + melee attacks deal 50% more damage.
Level Five
100% more health + melee attacks deal 100% more damage.
Engineer: increased drill protection + more cash for destroying an alien hive.
Level Two
Faster drill repair.
Level Three
Using traps earns cash back.
Level Four
Increased protection during drill repair + traps stay effective for longer.
Level Five
Increased damage from traps and explosives + bigger wallet.

Medic: Faster regeneration of allies.
Level Two
Move faster + increased protection while reviving an ally.
Level Three
Sprint longer + allies near you regenerate faster.
Level Four
Immunity to gas clouds (fired by Scorpions).
Level Five
Very fast movement + unlimited ally regeneration distance.
The best solution is that in squad of four, each has a different character class. But, usually it is not possible (unless the players in a squad complement each other and select the class of their liking)
In each squad, there needs to be one medic. If it is you who plays as one, you should upgrade him to, at least, level 3, to increase regeneration, both your own and of the teammates. To the extent it is possible, try to max out on the medic - the increase in speed is really noticeable and unlimited ally regeneration distance is often also very useful.
If there already is a medic in your squad, go for the Tank. With maximum character upgrades, your health and damage you deal in combat double. This will allow you to eliminate most targets without problems, even in melee. Additionally, thanks to the increased health, you are virtually invincible.
Of course, you can select any other class, but the bonuses that you receive by playing as the Engineer or the Weapons Specialist classes, are much inferior to those offered by the Medic and the Tank.
P226 : long range, medium damage, large ammo capacity.
Level Two
Increased damage over long distance, faster movement with the pistol.
Level Three
50% more ammo in the magazine.
Level Four
The ability to carry a handgun and two primary weapons.
Level Five
Dual-handgun hip-shooting. Doubled firepower and ammo capacity.
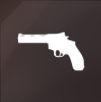
Magnum .44 : 6-shooter of large caliber.
Level Two
Larger damage over long distance and faster movement with the handgun.
Level Three
50% more ammo in the magazine.
Level Four
The ability to carry a handgun and two primary weapons.
Level Five
Dual-handgun hip-shooting. Doubled firepower and ammo capacity.
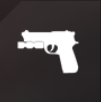
M9A1 : shoots in bursts of 3 rounds.
Level Two
Larger damage over long distance and faster movement with pistol.
Level Three
50% more ammo in the magazine.
Level Four
The ability to carry a handgun and two primary weapons.
Level Five
Dual-handgun hip-shooting. Doubled firepower and ammo capacity.
MP443 : automatic handgun of short range.
Level Two
Larger damage over long distance and faster movement with pistol.
Level Three
50% more ammo in the magazine.
Level Four
The ability to carry a handgun and two primary weapons.
Level Five
Dual-handgun hip-shooting. Doubled firepower and ammo capacity.
As you can see above, all of the handguns in this mode have the same upgrades. Your best choice is Magnum .44, due to the large damage and accuracy. Unfortunately, good accuracy connects with low fire rate and long reload times.
There is not much point in using a handgun other than Magnum .44 because, in spite of higher fire rate and ammo capacity, they inflict low damage - it may turn out that somewhere in the middle of a map, you will have to fire the entire magazine (on condition that all bullets connect) into a Scout, i.e. the weakest of the aliens.

Standard issue: replenishes 40% of the ammo inventory amount.
Level Two
Replenishes 70% of the ammo inventory amount.
Level Three
Replenishes full ammo inventory amount.
Level Four
Replenishes full ammo inventory amount and fills up the current magazine.
Level Five
Regenerates ammo in all players within 20 feet.
Stun ammo : adds 30% of stun ammo maximum inventory.
Level Two
Adds 40% of stun ammo.
Level Three
Adds 50% of stun ammo.
Level Four
Adds 60% of stun ammo.
Level Five
Adds 70% of stun ammo.

Incendiary ammo: adds 30 % of incendiary ammo maximum inventory.
Level Two
Adds 40% of incendiary ammo.
Level Three
Adds 50% of incendiary ammo.
Level Four
Adds 60% of incendiary ammo.
Level Five
Adds 70% of incendiary ammo
Explosive ammo: adds 30 % of explosive ammo maximum inventory.
Level Two
Adds 40% of explosive ammo.
Level Three
Adds 50% of explosive ammo
Level Four
Adds 60% of explosive ammo
Level Five
Adds 70% of explosive ammo
Full Metal Jacketed Ammo: adds 30 % of FMJ maximum inventory.
Level Two
adds 40 % of FMJ maximum inventory.
Level Three
adds 40 % of FMJ maximum inventory
Level Four
adds 60 % of FMJ maximum inventory
Level Five
adds 70 % of FMJ maximum inventory
The most important thing, which many players forget about - extermination of aliens without ammo is very difficult. The best type of ammo is the explosive, or the FMJ (armor piercing) one
An ideal solution is to have on your squad a player who buys explosive ammo and a player with large amounts of FMJ ammo, and using these depending on the situation - explosive ammo against small targets and FMJ ammo whenever a Rhino comes by.

Team's explosives : 2 semtex grenades + 1 launcher projectile.
Level Two
2 bombs + 2 launcher projectiles.
Level Three
2 mines + 3 launcher projectiles
Level Four
4 Claymores + 4 launcher projectiles.
Level Five
4 mines + 5 launcher projectiles.

Feral Instincts: squad upgrades that improve vision and hearing. Allows for seeing the enemy through walls.
Level Two
Speed of movement increased by 20%.
Level Three
Increased health regeneration.
Level Four
2x increased action time.
Level Five
3x increased action time+ longer sprint.
Armor: Light armor available for the entire squad.
Level Two
Light armor of double effectiveness.
Level Three
Medium armor absorbing more damage.
Level Four
Maximum armor for the entire squad.
Level Five
Additional, armor allowing for extra protection.
Team Boosters : shortens the reload times for 15 seconds.
Level Two
Shortens the reload times for 30 seconds.
Level Three
Shortens the reload times for and speeds up drill repair for 30 seconds.
Level Four
Shortens the reload times for and speeds up drill repair for 45 seconds.
Level Five
Shortens the reload times for and speeds up drill repair for 60 seconds.

Random Supplies : random supply of explosives, feral instincts, armor and team boosters.
Level Two
A random mix of +1 level support items and various rare items.
Level Three
A random mix of +2 level support items and various rare items.
Level Four
A random mix of +3 level support items and various rare items.
Level Five
A random mix of +2 level support items. Rare items are much more common.
A group of extremely important items that make life easier. Three skills of this group should be present in each squad:
Team explosives and team boosters are less effective and they should yield the way to the skills mentioned above - both of them are quite often drawn after Random Supply is used, and the explosives are useful only at the beginning of the game, because from the middle on, the numbers in which aliens attack are so great, that eliminating a few with a mine or a grenade makes no real difference.
I.M.S. : Intelligent Munitions System detects and eliminates the enemy.
Level Two
4 explosives of larger blast radius.
Level Three
Improved detection system that makes for faster launching of explosives.
Level Four
Improved explosives of larger blast radius.
Level Five
6 explosives.

Mortar Strike: mortar barrage with three projectiles, medium damage, low range.
Level Two
Mortar barrage of four projectiles, medium damage, low range.
Level Three
Mortar barrage of four projectiles, high damage, medium range.
Level Four
Mortar barrage of five projectiles, high damage, high range.
Level Five
Mortar barrage of six projectiles, very high damage, high range.
Trinity Rocket : Remote controlled missile system with controllable thrust.
Level Two
Improved targeting outlines enemies.
Level Three
Fire a smart drone projectile while controlling the Trinity missile.
Level Four
Fire two drone projectiles while controlling the Trinity missile.
Level Five
Fire four drone projectiles while controlling the Trinity missile.
Sentry Gun : places a sentry gun.
Level Two
Improved targeting, a wider firing arc and double the range.
Level Three
Dramatically increases the firing rate of the gun.
Level Four
Armor piercing ammo + 30% more ammo
Level Five
Place two turrets at once with less chance of either of them overheating.
Vulture : Assisting drone that covers your back.
Level Two
Larger damage dealt by the Vulture's gun.
Level Three
Increases of the Vulture's tracking range.
Level Four
Longer operating time.
Level Five
Occasionally, the Vulture launches an incendiary rocket.
The best items of this group are:
Completing the Extinction mode, without these two, is virtually impossible. Using the other items from this group is an option, but they are not as effective as the sentry gun or the Vulture and, they are also not as cheap to use.
The best solution is to withhold with using items of this group until the sentry dun and/or the Vulture are unlocked.

Portable Minigun turret : place the minigun on the map.
Level Two
Larger ammo capacity + faster spin-up time.
Level Three
Maximum damage dealt at any distance+ slightly larger ammo capacity.
Level Four
Armor piercing ammo.
Level Five
Maximum ammo capacity + explosive ammo.

Grenade turret : portable turret with 10 grenades.
Level Two
Faster grenade launch + increased ammo capacity.
Level Three
Increased radius of damage and range of the grenades.
Level Four
Increased ammo capacity.
Level Five
Equips the turret with incendiary grenades.

Crowd Control : Riot shield with 10 health.
Level Two
Riot shield with medium speed and 15 health.
Level Three
Riot shield with medium speed and 20 health.
Level Four
Riot shield melee with 20 shield health
Level Five
Riot shield melee with 20 shield health

MK32 Grenade Launcher : a powerful grenade launcher with 6 grenades.
Level Two
A blast shield protecting the player from blast damage.
Level Three
Faster Movement + increased grenade damage radius.
Level Four
Grenades deal more damage.
Level Five
Increases the grenade capacity to 12.
Death Machine: a portable minigun with 100 rounds.
Level Two
Decreased recoil.
Level Three
Faster Movement + armor piercing ammo.
Level Four
The fired rounds deal more damage
Level Five
Ammo capacity increased to 200.
Out of the items in the last group, three of them are useful:
Due to their cost and low ammo capacity, the Mk32 Grenade Launcher and the Death Machine are pretty much useless.
Apart from the regular equipment, there also are, the so called, relics. The relics are, simply, for making the game more difficult for you by, e.g. increasing the alien attacks in strength, or by weakening own attacks. Using them results in being rewarded with more points for killing the enemy and completing objectives, which translates into better score at the end of the game.
Relics become available for the first time after you reach the 30th experience level - this unlocks one slot in which you can choose one of five relics. After you attain the 30th level, your experience resets and you return to the 1st experience level, while retaining the perks and skills that you have unlocked earlier and you are decorated. After you reach level 30, the situation repeats and you unlock the next relic slot. The entire process can be repeated five times to unlock all relic slots.
There are the following relics available:

Take more damage : the relic makes the enemies deal more damage to you.

Pistols only : after you unlock this one, you will be unable to buy any of the weapons available on the map.

Smaller wallet : the artifact makes you receive less cash for killing aliens and completing objectives, and decreases the amount of cash that you can have on you.

Mortal : after you activate this relic, you will be unable to select the character class, and you will lose all of the bonuses that follow the choice.

Do Less Damage : this relic makes your attacks less damaging.
It is the only map available, as for now, in the Extinction mode. With the exception of the mission onboard the helicopter, the map has been divided into 3 parts: the Motel, The City and the Cabin. Your task, in each of the map parts is to destroy the alien hives, after which you deal with the barricade hive. After you have destroyed the last barricade hive, you have to arm the nuclear charge and escape to the helicopter at the beginning of the map.
The easiest of all the map parts. The main objective of your squad is to score as many skill points as possible, by completing the tasks assigned to you. This should not be difficult, given the fact that you will be fighting the Scouts nearly for the entire time. After you have completed this part (i.e. destroyed the barricade hive) you should have, at least one skill fully developed - if it is the case, then things will be easier for you in the next part.
If your character class is the Weapon Specialist, you should be investing your points into your skill tree, to max out on the damage that you deal.
If you play with any other class, you should focus on upgrading your automatic Sentry Gun and, if you still have not unlocked it, focus on the minigun turret or the Grenade Turret -upgrading either to maximum is going to be very useful in the next part of the map.
Probably the most difficult of the stages, where you will fight all of the aliens available in the game.
Unlike at the previous stage, while in the city, you will have to move along the narrow streets full of buildings over which the aliens can move without any problems. That is why, you can expect to be attacked at any side.
At this stage, every squad member should focus on the development of the Team Support or of the Ammo tree and invest, at least, 2 points into the character class. A good idea is to obtain the LMG (Light Machine Gun), which is available right after you enter the city (it is on a small wooden plank). It is quite costly, with the price of 3000$, but both the ammo capacity and the firepower more than make up for that. The LMG's only downside is that it reloads long and that is why this should be done when there are no aliens around.
Right after you enter the City, and after you destroy the barricade hive, there will appear a Rhino. You should not have any problems with this one, though, is the entire squad focuses their fire on it. You need to watch out for the falling meteorites with the Seekers crawling out of them - deal with them from as far as possible, to prevent exposing yourself to damage from them.
As much as possible, you should attempt to complete the challenges because the additional skill points will always come in handy - this may turn out to be problematic, though, given the sheer numbers of the attacking aliens.
Once you reach the stage where you are supposed to destroy the barricade hive, you should prepare yourselves properly. Have one squad member watch the buildings with the barricade hive between - often, there is a Scorpion lurking there, and it will be obstructing the helicopter operation. Activating the high-voltage fence and deployment of Sentry Guns should effectively blow most aliens away - at the same time you and your squad should be focused on the elimination of the Scorpions attacking the helicopter.
The final stage, is easier than the one in the City. The area over which you move is an open one, and full of elevations, which makes for ideal opportunity to deploy Sentry Guns.
Up until now, you should already have 2 skills fully developed. After you have deployed the drills at the hives, you should focus on deploying sentry guns, using the skills from the Support tree and deploying the ammo, best if explosive and armor piercing.
This stage is not too different from the one in The City - the only difference is the numbers of aliens that attack you. There will be dozens, upon dozens coming from everywhere, which is why it is important that, at least, one squad member (or better, two) deploys sentry guns (or the Vulture drone, if he is using one) - it may prove very difficult to fight the aliens back without them.
After you have destroyed the barricade hive, there is one more task for you to take up - the delivery of the nuclear charge and escape into the extraction point located at the beginning of the map. You can use Sentry Guns to make this easier for you - deploy them at various points on the map and direct them towards the direction opposite to your marching direction, so that they fire at the aliens behind you. As you progress deploy new guns to decrease the numbers of aliens. Due to the large numbers in which they come, while you are escaping, getting involved in any sort of combat makes no sense - the best idea is to simply run headlong and ignore all of the enemies. After the entire squad reaches the helicopter, the Extinction mode concludes.
Requirements: Kill the first enemy in the campaign mode of Call of Duty Ghosts.
Description: As a matter of fact, you cannot miss this achievement - you receive it right after you kill the first enemy in the campaign mode.
Requirements: Escape. (Complete the "Ghost Stories" at any difficulty level).
Description: To receive this achievement, complete the first mission in the campaign mode ," Ghost Stories ", at any difficulty level.
Requirements: Rendez-vous at the Santa Monica fort. (complete "Brave New World" at any difficulty level)
Description: To receive this achievement, complete the second mission of the campaign mode, "Brave New World ", at any difficulty level.
Requirements: Destroy both choppers in "Brave New World".
Description: Towards the end of the second mission of the campaign mode, you will be attacked by two enemy choppers - destroy both of them with the rocket launcher, to receive the achievement. Remember that, to destroy each, you need to launch two rockets from the MAAWS launcher, and that you can guide them after they are launched, using the mouse. You also need to hurry because the first one of the choppers leaves after a moment - if this happens and you fail to destroy it, load the checkpoint and try again.
Requirements: Reach San Diego. (complete "No Man's Land" at any difficulty level)
Description: to receive this achievement, you need to complete the third mission in the campaign mode, " No Man's Land ", at any difficulty level.
Requirements: While controlling Riley, have him attack 10 enemies.
Description: During the third mission in the campaign mode, use Riley to kill 10 enemies - either by ordering him to do that, if you are playing as Logan, or by launching on them if you are controlling the dog.
Requirements: Find AJax. (complete "Struck Down" at any difficulty level)
Description: To receive this achievement, complete the fourth mission ,"Struck Down", at any difficulty level.
Requirements: Kill a person or destroy a vehicle with the remote sniper's each shot (the "Struck Down" mission)
Description: In the fourth mission, you will have access to the remote sniper for four times. Receiving this achievement is easy - you need to make sure that each bullet fired by you connects (with infantry or a vehicle). If, on any of the occasions you missed, or you are not sure about the hit in 100% - load the checkpoint again and try again.
Requirements: Defend L.A. (complete "Homecoming" at any difficulty level)
Description: To receive this achievement, complete the fifth campaign mission, "Homecoming", at any difficulty level.
Requirements: Attack 50 enemies using the A-10. ( the "Go Ugly Early" mission)
Description: During the fifth mission, you will gain access to the A-10 fighter plane, to destroy the required targets. To achieve the achievement, you need to destroy 50 enemies (vehicles or infantry) using the A-10.
Requirements: Eliminate Almagro. (complete "Legend Never Die" at any difficulty level)
Description: To receive this achievement, complete the sixth campaign mission, "Legends Never Die", at any difficulty level.
Requirements: Kill 6 enemies by attacking them underwater with the knife, in the "Legends Never Die" mission.
Description: one of the most difficult achievements to obtain. . In the sixth mission, you will be crossing the flooded areas several times. In such situations, approach an enemy standing in water, duck (you need to be underwater and not only up to your waist in water) and kill the enemy by attacking him with the knife. Since you are exposed to the enemy attack at this point, it is best to play at the lowest difficulty level.
Remember: It is not enough to kill the enemy while standing on water, your enemy must be standing in water also.
Requirements: Collect the data about Rorke. (complete "Homecoming" at any difficulty level)
Description: To receive this achievement, complete the seventh campaign mission, "Federation's Day", at any difficulty level.
Requirements: Kill the sleeping enemy while abseiling head-down. (The "Federation's Day" mission)
Description: After you upload the virus in the server room, you need to return to the abseiling rope on the building's side. After you kill the two enemies on the balcony on the left, slide two levels down below the balcony level. Ransack this level and look out through all the windows. In one of the rooms, there is a sleeping enemy on the chair - send him a bullet to receive the achievement.
Requirements: Catch the photocopier with your face. (The "Federation's Day" mission)
Description: After Hesh blows up the entire level, and you will be back on the abseiling rope, wait for several seconds and look out for the photocopier that falls out of the building. Position yourself in its way to receive it onto your face and receive the achievement. In case that the machine flies by, load the checkpoint again and try again.
Requirements: Catch Rorke. (complete "Birds of Prey" at any difficulty level)
Description: To receive this achievement, complete the eight campaign mission, " Birds of Prey ", at any difficulty level.
Requirements: destroy 80 fuel tanks. (The "Birds of Prey" mission)
Description: Right at the beginning of the mission, when you take control of the chopper, and fly out into the open, take a careful look around. On the rooftops, there should be large fuel tanks. Destroy 80 using the chopper, to receive the achievement.
Requirements: Survive. (complete "Hunted" at any difficulty level)
Description: To receive this achievement, complete the ninth campaign mission, "Hunted", at any difficulty level.
Requirements: Complete mission, without setting off the alarm. (the ""Birds of Prey" mission)
Description: This mission has been divided into two different stages - the journey alone and in team. While wandering solo, through the jungle, (before you reach the rest of the squad) you had better keep to the left side of the map and keep pushing (at least crouching, at best crawling) through the thickets. Keep controlling the pulse detector readings to get around the enemy patrols and stay out of combat, even with a single enemy.
After you reach the rest of the squad, simply follow Elias's instructions and follow the routes delineated by the squad. If you are detected and fire exchange ensues - load the checkpoint.
Requirements: Hack into the system. (complete "Clockwork" at any difficulty level)
Description: To receive this achievement, complete the tenth campaign mission, "Clockwork", at any difficulty level.
Requirements: Throw 8 vehicles into the blowhole. (the "Clockwork" mission)
Description: This achievement is very easy to receive. Towards the end of the mission, when you take control over the mounted gun. Shoot in front of the enemy vehicles that follow you - this way you will open a blowhole in the ice. Destroy 8 enemy vehicles this way to enjoy the achievement.
Requirements: Direct the Federation fleet to the false target. (complete "Atlas Falls" at any difficulty level)
Description: To receive this achievement, complete the eleventh campaign mission, " Atlas Falls", at any difficulty level.
Requirements: Blow up the pressure valve at the first take. (the " Atlas Falls" mission )
Description: An achievement that is relatively easy to receive. Towards the end of the mission, you will receive an objective to blow up the pressure valves by completing a simple minigame. Keep the gauges in the middle, so that they are green at all times. You control the readings by moving forward and moving backwards. If the gauge turns to red, load the checkpoint and try again. After a while, the valves will explode and you will receive the achievement.
Requirements: Attack the canteen and kill everyone without taking damage, at the Veteran difficulty level. (the "Atlas Falling" mission)
Description: Arguably, the most difficult achievement to attain. Towards the end of the mission, you will have to blow up the pressure valve. While completing this mission, you will reach a room where you are to blow up the door. After your companion pushes you away, to save you from enemy fire, your mission will start. You need to exterminate all of the enemies in the room without taking any damage, from a bullet or from an explosion. Additionally, you need to complete this mission at the Veteran difficulty level, which does not make your task easier.
The best solution is to pepper the room with frag grenades to exterminate the most of the enemies without exposing yourself to their fire. If you run out of frag grenades, use the flashbang grenades - throw one in, lean from behind the door and kill everyone within sight. After you run out of grenades, you need to count on your luck - lean out from behind your cover to kill an enemy and hope that he cannot hit you.
If you are packing an LMG (Light Machine Gun) you can simply lean from behind the door slightly and shoot all around the room. After you have emptied 2-3 magazines in this way, there is very little possibility that anyone survived. You will learn about whether the room is clear by means of the notification of saving the game. If you are hit, you need to load the checkpoint.
Requirements: destroy the enemy ship. (complete "Into the Deep" at any difficulty level)
Description: To receive this achievement, complete the twelfth campaign mission, " Into the Deep ", at any difficulty level.
Requirements: destroy the LCS destroyer at first take. (the " Into the Deep " mission).
Description: You cannot miss this achievement because you need to sink the ship anyways. After you have launched the Proteus rocket, you will gain control over it. Target the red dot on the ship's hull to destroy it at first take and receive the achievement. If you fail to direct the projectile properly, load the checkpoint and try again.
Requirements: Attack the factory . (complete "End of Line" at any difficulty level)
Description: To receive this achievement, complete the thirteenth campaign mission, " End of Line", at any difficulty level.
Requirements: Stealth kill 5 enemies, before you reach the Black Zone. (the " End of Line " mission)
Description: You need to do that during the first several minutes of the mission, because it will become impossible to kill them stealthily. The best method is to kill the enemies with a suppressed pistol.
You kill the first enemy automatically, at the beginning of the mission. You encounter the second enemy while marching with your squad - it is going to be a single guard standing at the train, with his back turned at you. Then, you will reach an outpost where one of the enemies is sitting in the truck, with several others walking around nearby. Wait for a soldier to approach the driver and shoot them both. A moment later, the gate opens and there will be two soldiers to appear in front of you - kill them quickly, because your squad mates will do it if you don't, after several seconds (which does not count). If you fail to get any of them, or you set off the alarm at some point - load the checkpoint and try again.
Requirements: Plan the next move. (complete "Sin City" at any difficulty level)
Description: To receive this achievement, complete the fourteenth campaign mission, " Sin City ", at any difficulty level.
Requirements: Destroy 21 arcades. (the "Sin City" mission)
Description: An easy achievement. While exploring with your companions, you will pass a place where there are arcades. Destroy the arcades that seem to be bigger than the others (if you are unsure, destroy all of them) - there are 20 of them in here. Then, walk through the gate that Hesh holds up for you. Once you reach the escalator, look ahead, over to the other side of the building. There are 4 arcades there - destroy, at least, one of them and you will receive the achievement.
Requirements: Collect the soldiers. (complete "All Or Nothing" at any difficulty level)
Description: To receive this achievement, complete the fifteenth campaign mission, " All Or Nothing", at any difficulty level.
Requirements: Cut through your enemy's abseiling rope. (the "All Or Nothing" mission)
Description: Another achievement that is easy to attain, because you will reach the place, where you need to eliminate the enemies trying to get aboard. Once you get here, wait for any of the enemies in the pontoon to attach the rope and starts climbing. At this moment, cut through the rope with the melee attack, to make the enemy fall into water, and receive the achievement.
Requirements: Destroy the satellite communications center. (complete "Severed Ties" at any difficulty level)
Description: To receive this achievement, complete the sixteenth campaign mission, "Severed Ties", at any difficulty level.
Requirements: Destroy 3 choppers with guided missiles. (the "Severed Ties" mission)
Description: An achievement that attains itself, as a matter of fact. At the beginning of the mission, your squad will be attacked by the enemy choppers. Switch to the guided missiles and use them to destroy 3 choppers. The only problem is time here - if you are not fast enough, some of your companions may beat you to it. If this happens, load the checkpoint and try again.
Requirements: Take control of the enemy space station. (complete "Loki" at any difficulty level)
Description: To receive this achievement, complete the seventeenth campaign mission, "Loki", at any difficulty level.
Requirements: Use the kinetic projectiles and destroy all of the enemy targets. Do not kill the allies. (the "Loki" mission)
Description: towards the end of the seventeenth mission, you will take control over kinetic cannon. Your objective is to destroy all of the enemy targets, every single one of them, while avoiding destructing the ally units. Note the blast radius of the kinetic projectiles and try to take your aim in such a way, so as not to damage any friendlies. Remember that the projectiles explode with delay so, you need to predict both the enemy and the ally movement. If you do not manage to eliminate all of the enemies, or hit a friendly, load the checkpoint and try again.
Requirements: Face Rorke. (complete "Ghost Killer" at any difficulty level)
Description: To receive this achievement, complete the eighteenth campaign mission, "The Ghost Killer", at any difficulty level.
Requirements: Shoot at the enemies climbing over the sides of the train. (The " Ghost Killer" mission)
Description: After you have taken out the enemy choppers, you will reach a place where there are enemies climbing over the train's sides - two on the left and two on the right. Your task is to hit each enemy and make them fall, before they manage to mount the train. This is not an easy task, because you need to be very quick. If you fail, load the checkpoint, which is very close to this place, and start over.
Requirements: Obtain the mask. Complete the game at the Veteran difficulty level.
Description: To attain it, complete all of the single player campaign missions at the Veteran difficulty level. You do not need to complete them at this level in the order they appear -it is enough that you complete all of them at this level.
Requirements: Collect all of the Rorke Files.
Description: Collect all 18 laptops with the intel data, scattered all around the single player campaign's missions. In each mission, there is one laptop. The precise whereabouts of the laptops have been provided in the descriptions of individual missions in this guide and in the video clip.
Requirements: Escape for the first time.
Description: To attain this achievement, you need to escape to the chopper after your squad arms the nuclear device - i.e. you need to complete the Extinction mode on the Point of Contact map, at least once.
Requirements: escape with all four players.
Description: To receive this achievement, all four players must reach the extraction point. The point is that no player bleeds to death - if someone falls over and you pick him up, it is still possible to receive the achievement.
Requirements: reach the evacuation helicopter with, at least, 1m 30s. left on the countdown timer.
Description: to receive this achievement, the entire squad needs to reach the helicopter no later than 1 minute and 30 seconds before the timer reaches 0. This achievement is quite difficult to receive, because the entire squad must cooperate, sprint at the breakneck speed to the extraction point, and ignore the aliens - first of all, no one can lag behind or let himself be knocked down.
A good way to do that is deploy sentry guns along the escape route. This way, you will not have to bother about the swarm on your back.
Requirements: Complete all challenges and escape.
Description: to receive this achievement, your squad must complete all of the challenges that you receive, and evacuate to the extraction point. Probably the most difficult achievement to attain, since some of the challenges (e.g. keeping the accuracy level above 50 or 75%) are very difficult to obtain and require maintaining good communications within the squad.
Requirements: Reach the city.
Description: to attain this achievement, your squad needs to reach the city, i.e. simply make it through the first barricade hive.
Requirements: Reach the cabin.
Description: A situation similar to the one with the above achievement, with the exception that your squad needs to make it through the second barricade hive and enter the area called the Cabin.
Requirements: Kill 50 aliens, during one game, with the high-voltage fences or fire traps.
Description: to receive this achievement, you need to use the traps spread all around the map - the high voltage fences and barrels which, after activation, create a wall of fire. Use them to kill 50 aliens and you will receive the achievement.
Requirements: Find 40 items in one game.
Description: to receive this achievement, you need to find and collect 40 items in one game. They are hidden all around the map. - you can, for example, find an item in a tire in the grass. The achievement is easy to attain, but you need to comb through the map - the upside is that the items are always in the same spots during each game.
Requirements: Escape using a relic.
Description: to receive an achievement, you simply need to run to the extraction point with, at least, one active relic. The information about the effects of using each relic is available in this guide, in the chapter concerning the Extinction mode.


 Crysis Game Guide & Walkthrough
 Colin McRae: DIRT Game Guide & Walkthrough
 Call of Juarez Game Guide & Walkthrough
 Call of Juarez: Bound in Blood Game Guide & Walkthrough
 Call of Duty: Black Ops III Game Guide & Walkthrough