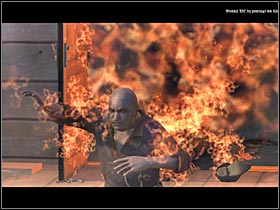
Welcome to the unofficial guide to "Call of Juarez". This guide consists mainly of a detailed walkthrough of the singleplayer campaign of the game. You will have to finish 15 chapters. They are long and very challenging. In most cases, there will be only one path leading to your current destination. One of the few exceptions are the towns. Here you will be presented with a few different paths. I've tried my best to show you a best possible strategy. Thanks to that, you won't have to worry about anything else. You should also remember that Billy and Ray don't have much in common. If you're playing as a Reverend, you will take part in a lot of interesting fights. Billy, on the other hand, will have to sneak a lot. You can read more about some of these differences in the final chapter of this game guide. You will also find some hints there. Most of them will come in handy, especially if you're trying to finish some of the more challenging maps. Most of these hints will tell you about some of the unique skills of both Billy and Ray. It's very important that you use them. Otherwise you'd have some serious problems with most of the missions. I would also like to remind you that the game offers a possibility of saving your progress. You can do this anytime you want to. It's very wise to use this feature, especially if you decided to play on a highest difficulty level. It's very easy to make a huge mistake that can even kill your character. This is even more important if you're playing as Billy, mostly because for the most of the time he's not armed very well. As a result, you will have to avoid most of your enemies. There are also several other things for you to remember. For example, you will be given a time limit during some of the missions. Make sure that you're ready for all of this.
Good luck with the game. I'm sure that you're going to enjoy it. Hopefully my walkthrough will provide a much needed assistance.
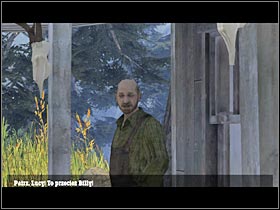
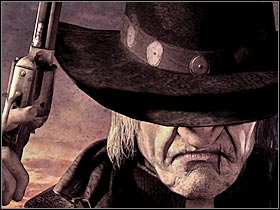
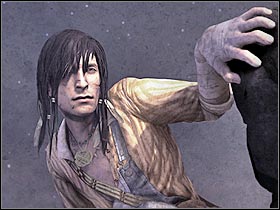
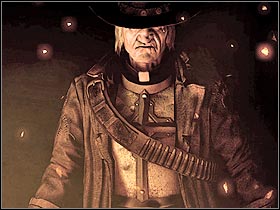
Stranger
You are: Billy Candle
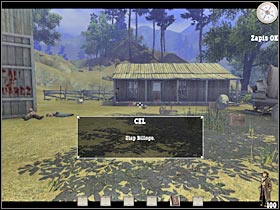
Main mission objective: You must reach a nearby town, called Hope. Once you're there, you will have to find a small farm that belongs to Thomas and Marisa
Difficult moments: I'm sure that you're going to have a huge problem with most of the enemies. You will have to escape from the main part of the town. You will be unarmed, so you won't have an opportunity to kill your adversaries. This is a first lesson that will teach you on how to sneak properly. Make sure that you understand this whole concept, as you will also have to stay in the shadows later during the game.

Complete walkthrough:
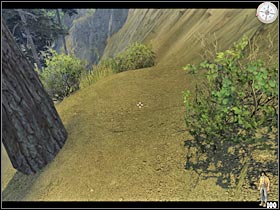
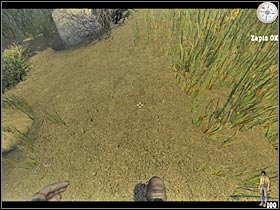
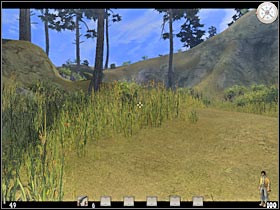
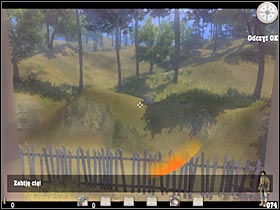
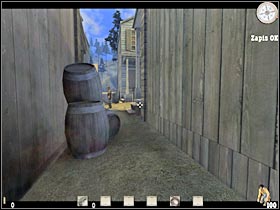
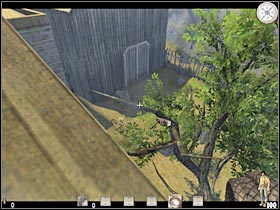
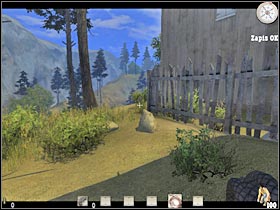
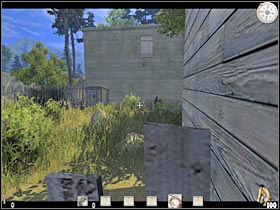
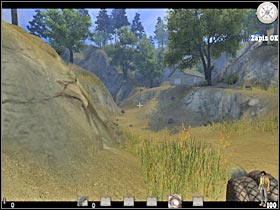
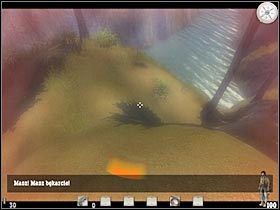
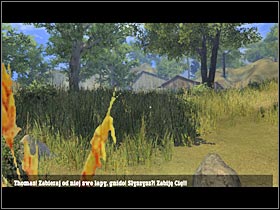
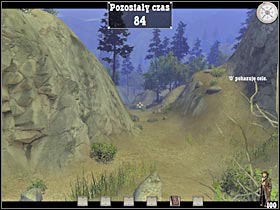
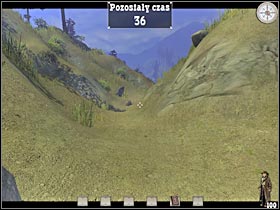
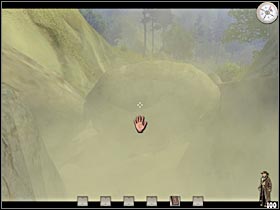
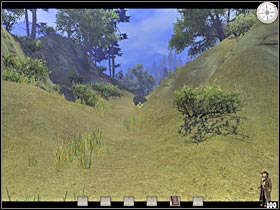
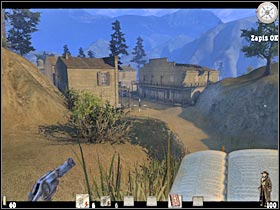
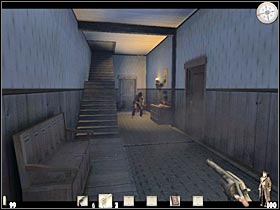
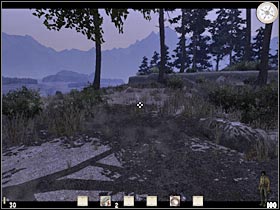
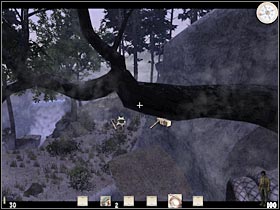
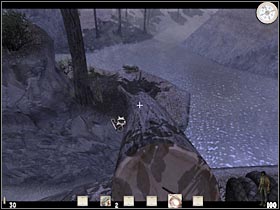
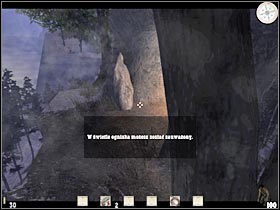
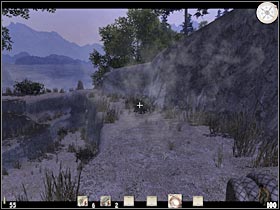
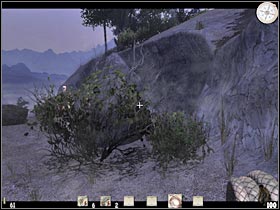
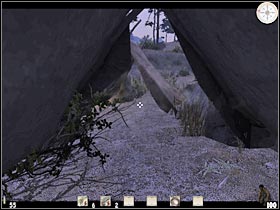
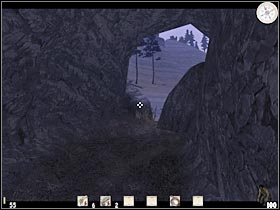
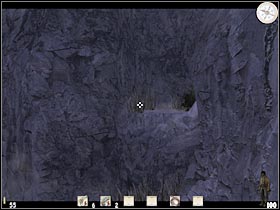
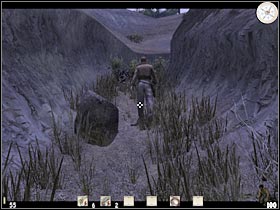
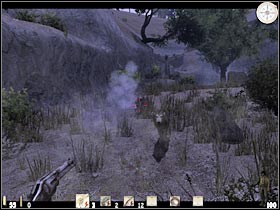
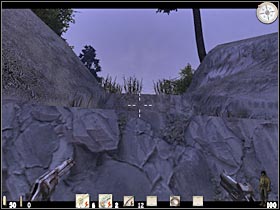
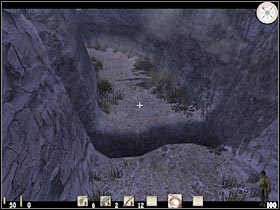
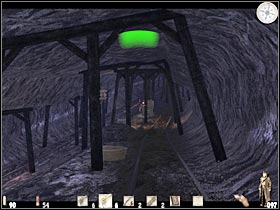
You start off in a small valley (#1). The game will display a lot of useful hints during most of these missions. Make sure that you read them all, as they will tell you a lot about moving your character of dealing with different kinds of problems. I will also explain all of this in this chapter of the guide. Start moving forward (#2). The game will suggest that you take a closer look at your compass. In most cases, it will be pointing your current destination, however you should know that for the most of the time you won't be able to reach it by moving in a straight line.
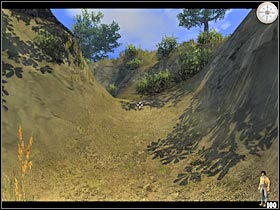
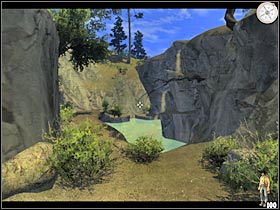
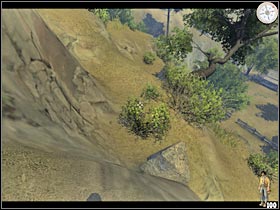
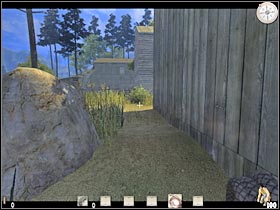
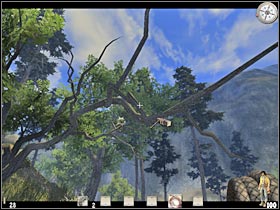
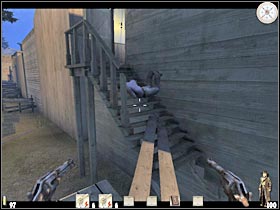
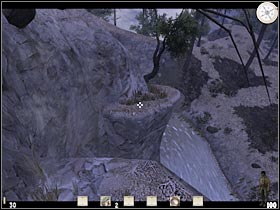
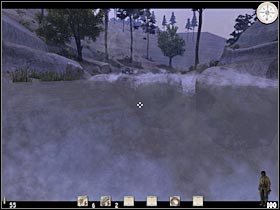
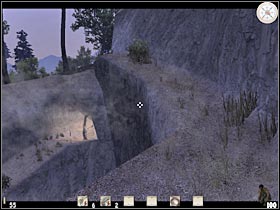
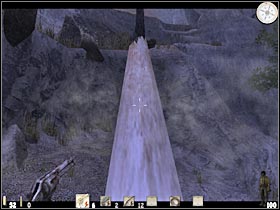
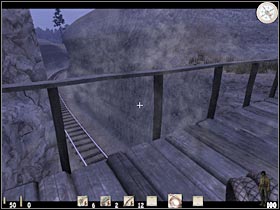
Once you've reached a small waterfall, head on to several small ledges. They will be located on your left. Make sure that you don't end up in the water, however it won't do you any harm. You will have to perform several small jumps along the way (#1). Make sure that you use the SPACE key. Turn left and head on to the new passageway. There's only one path here (#2), so you can't get lost.
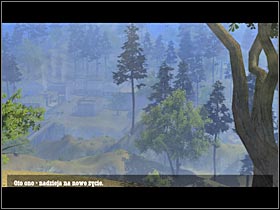
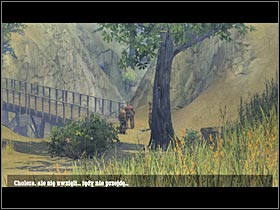
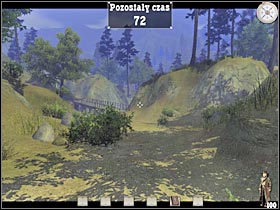
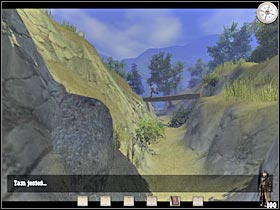
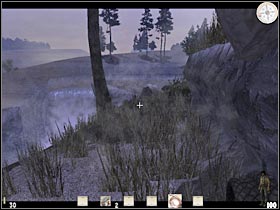
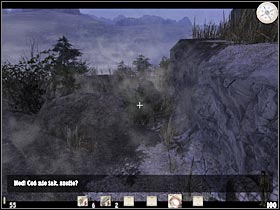
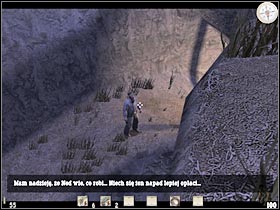
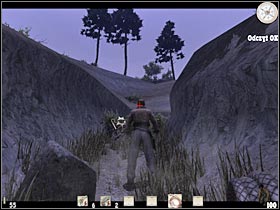
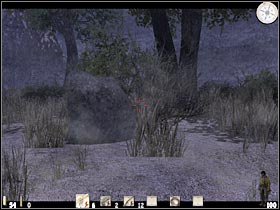
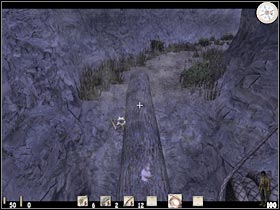
You should make a few steps forward. Once you're there, an interesting cut-scene will appear on your screen (#1). You will have an opportunity to take a first look at the town of Hope. As you've probably suspected, you will have to slide down in order to reach it. DON'T make any sudden moves just yet. Wait for the game to display a new hint. You will have to use the S key while trying to perform these types of actions. At first, you should try and reach one of the platforms located on your right (#2).
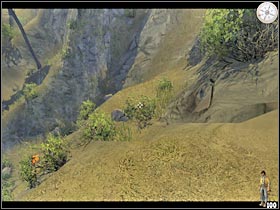
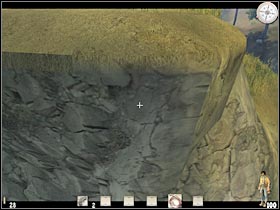
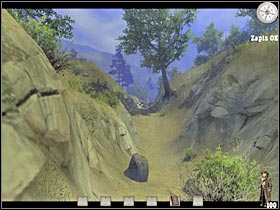
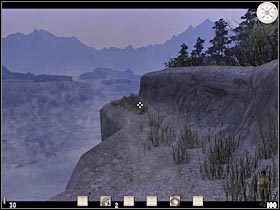
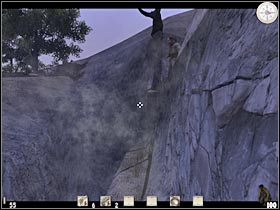
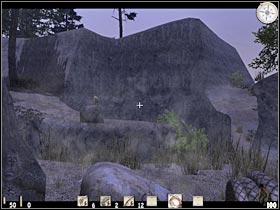
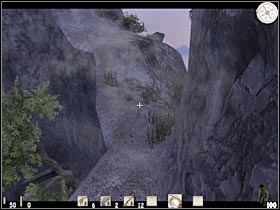
Make sure that you observe your surrounding carefully. You will have be using the S key in order to reach most of the visible platforms. Additionally, you might want to consider saving your progress frequently. You will have to turn left at some point (#1). Make a small jump in order to get past a huge stone. Step up to the edge (#2) and start sliding down. Don't hit any of the nearby rocks!

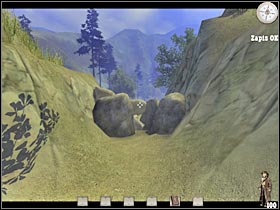
Once again, you will have to get to the right side of this hill. Choose your platforms very carefully (#1). You will also have to watch out for all other objects. Hitting them will result in a loss of health. You will have to deal with several difficult slides here (#2). Make sure that you're using the S key all the time and you should be just fine.
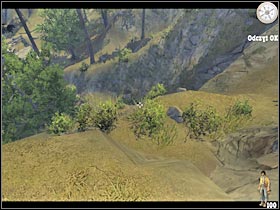
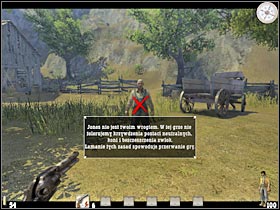
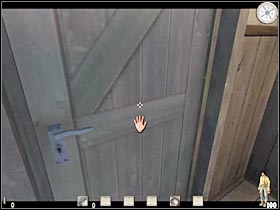
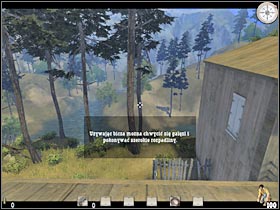
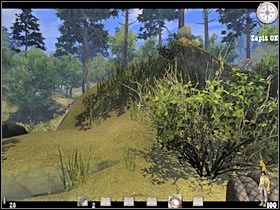
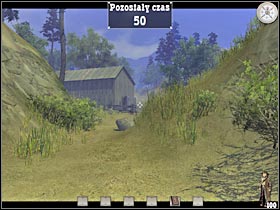
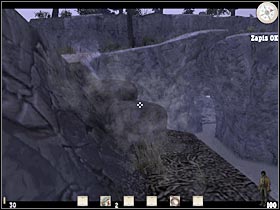
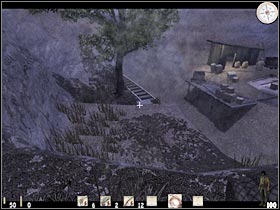
You should be able to reach the ground level very soon (#1). I'd strongly recommend that you save your progress here, as you will be presented with a lot of new actions in a short while. Turn left and start moving towards a nearby farm (#2). A short cut-scene should appear on the screen very shortly. For the first time during the time, you will have to sneak in. Before you decide to proceed to your new destination, make sure that you read all hints that you've been provided with.
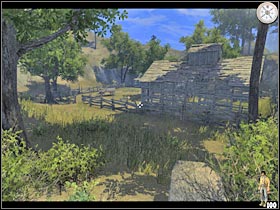
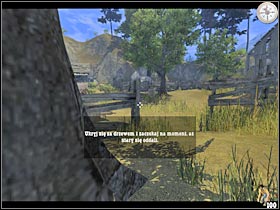
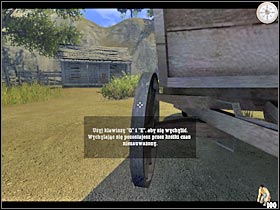
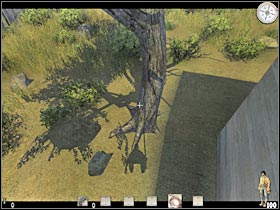
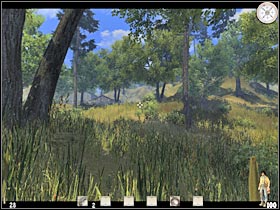
This time you will have to stick closely to what the game has to say to you. Thankfully, later during the game you will have more options. Start off by moving to a nearby tree (#1). It will be located on your left. You should try and learn some of the new moves. Make sure that you're using the CTRL key in order to move slowly. Additionally, you will be able to peek by using the Q and E keys. Finally, there's a very useful zoom feature. Press the X key in order to familiarize yourself with it. You will have to wait for a few seconds to make a move. Don't worry, the game will inform you about it (#2). Start moving towards the entrance of the farm.
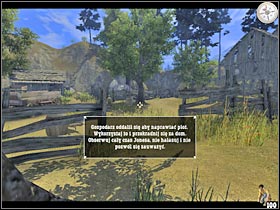
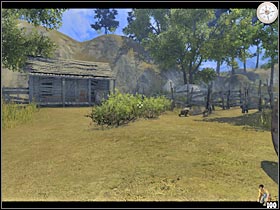
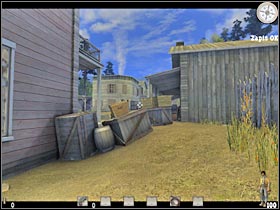
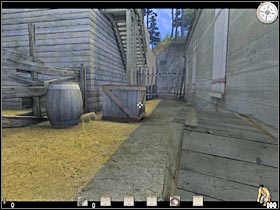
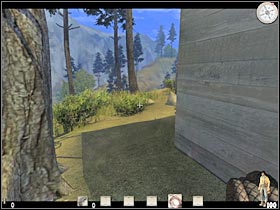
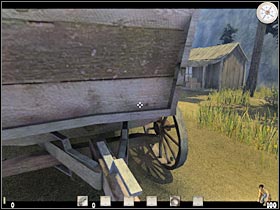
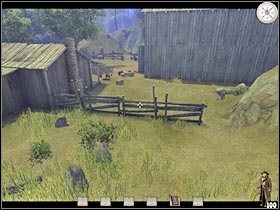
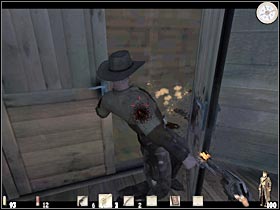
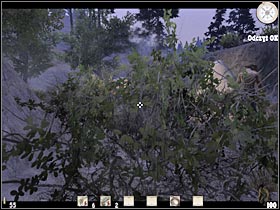
Enter the farm. Make sure that you're crouching all the time. The most important thing here is to stay quiet. You also can't be seen by the farmer. Move closer to a small wagon (#1). This is very important because you will be able to observe a whole farm from here. You should be peeking a lot. Make sure that you read all additional hints. Once again, you will have to wait for the farmer to move to a correct spot. Start moving towards a small hut (#2). You could use the bushes, however this is not necessary at this point of the game.
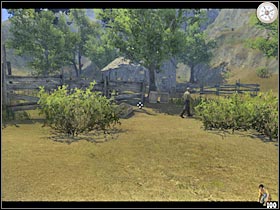
Try moving closer to the small hut. You should be crouching all the time, so your steps won't be heard by anyone. Once you're there, turn right and wait for the farmer to make a move. He should start walking towards the entrance (#1). Turn left. You will have to reach the back of the hut (#2). Keep quiet, as this is not over yet!
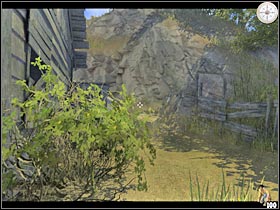
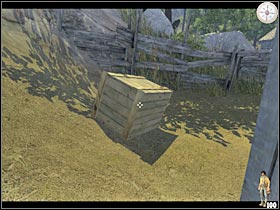
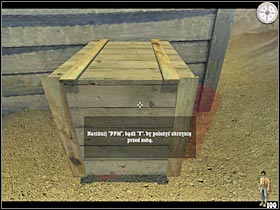
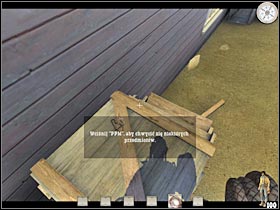
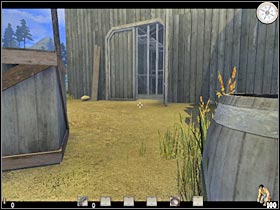
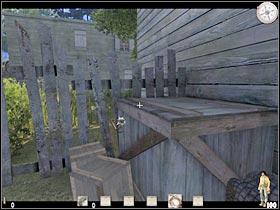
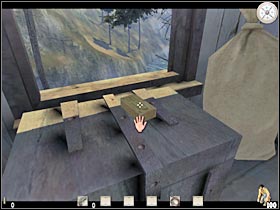
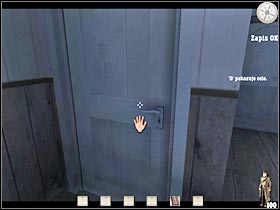
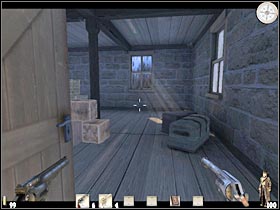
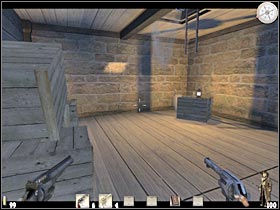
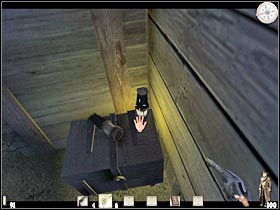
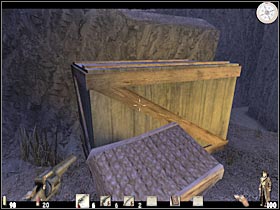
Once again, you should be following most of the displayed instructions. You will have to pick up a large crate that's located by the wooden fence (#1). Press the F key. Be careful, though. The crate can't hit any other objects! This is very important!! Turn around SLOWLY. Now you will have to place the crate in a designated spot (#2).
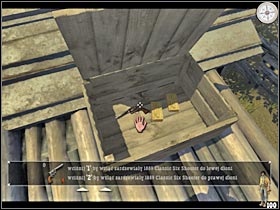
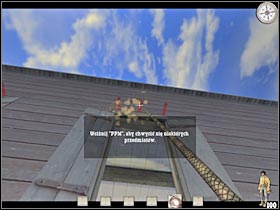
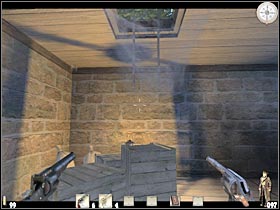
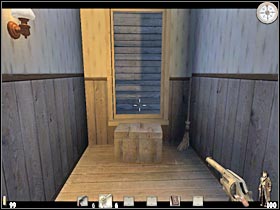
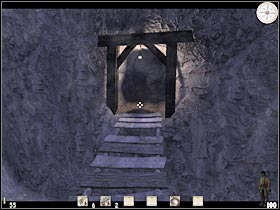
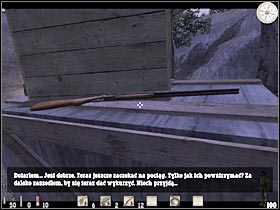
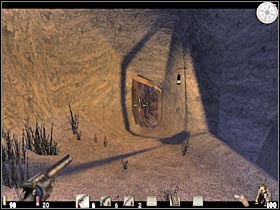
Now you will have to press the SPACE key. Press this button again. You will have to reach the roof of the hut (#1). Additionally, you will have to press and hold the W (movement) key. You will be using these actions in the future. As a result, make sure that you read all hints very carefully. Once you've reached your destination, make a few steps forward. You will find a chest here (#2).
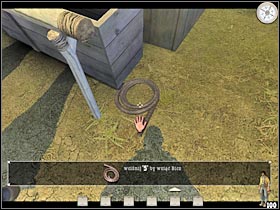
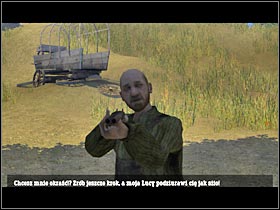
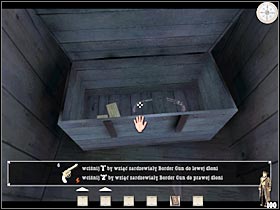
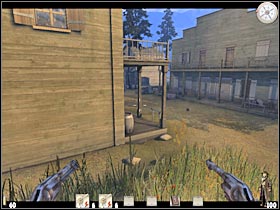
Open the chest. You will find a revolver inside (#1). Pick it up. You should also take some ammunition with you. Wait for the game to display some of the new hints. You should start off by reloading your weapon (press the R key). You may go back to the central part of the farm. Don't worry about the farmer (#2), as he won't be able to harm you in any way. You should also remember that you won't be allowed to take out any civilians.
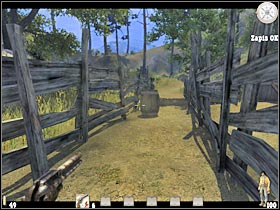
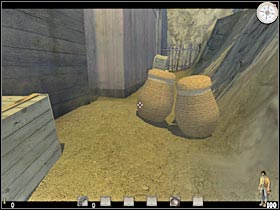
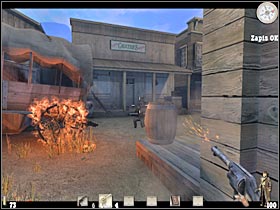
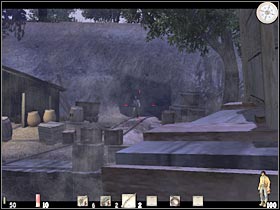
The game will suggest that you practice a few shots here. You should be standing by a large barrel. Try and destroy all bottles (#1). I would recommend that you zoom in the view. This will help you to destroy all of these targets. Don't worry about the ammunition. You've got plenty of it, however you should leave at least 3-4 bullets for later. Once you've finished the training, head on to a small passageway (#2) that's located between wooden parts of the fence.
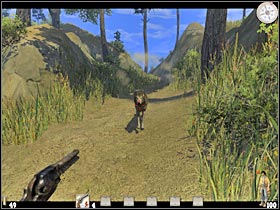
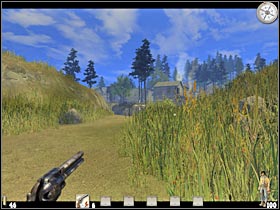
As you've probably noticed, you won't be able to move in a straight line. Thankfully, there's only one road here, so you can't get lost. Keep moving forward (#1). I would recommend that you ready your weapon. You are going to be attacked by a wolf in just a few seconds (#2). Start shooting at it. You should be moving backwards at the same time. Holster your weapon and proceed to the next section. Head on to the lower platform. The game should begin loading a new map very shortly.
Complete walkthrough:
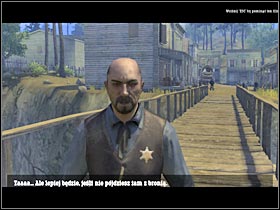
Keep moving forward (#1). You won't encounter any other wolves here, so you don't have to worry about having to use your gun. You should be getting close to your destination. Head on to a large bridge. A new cut-scene will appear on your screen (#2). Billy will have an encounter with a local sheriff. As a result, you will have to drop your gun from the inventory. You can do this by pressing the BACKSPACE key. As you've probably suspected, you will have to obtain a new gun. We'll deal with this problem in a few minutes.
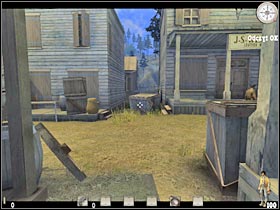
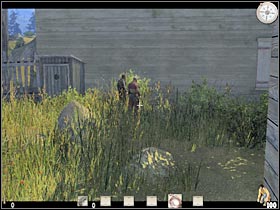
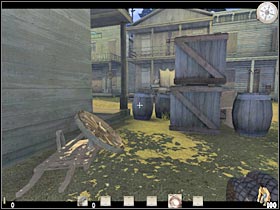
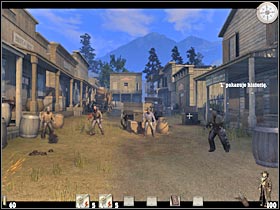
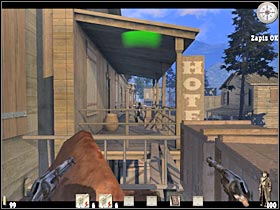
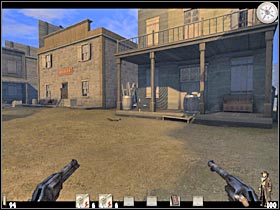
Start moving towards the main part of the town (#1). You can take a closer look at the surrounding buildings if you want to. I will concentrate only on your current objectives. You will meet a few people along the way, including the undertaker. Billy will also notice that there are a lot of bandits in the city (#2). Keep moving towards a large square.
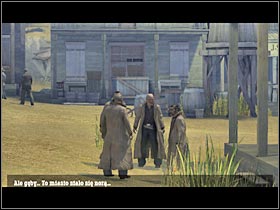
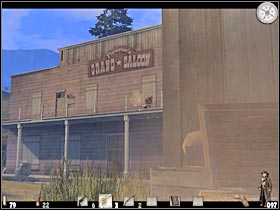
Once you've reached your destination, turn right. A new cut-scene should appear on the screen (#1). Billy decides to visit his old... friend. ;-) Suzy definately has a weapon. You will have to steal it from her. Start off by heading towards the large entrance of the Grand Saloon. Enter the building.

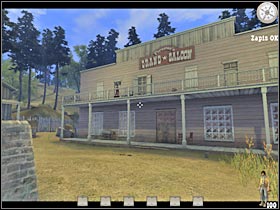
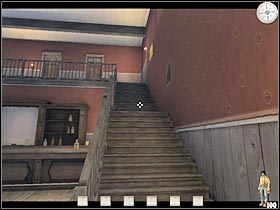
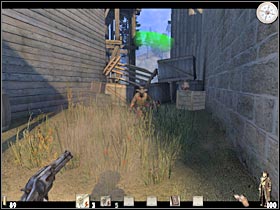
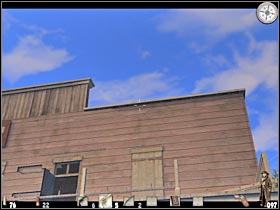
Head on to the opposite end of the saloon. You will have to try and reach Suzy's room from the upper floor (#1). Sadly, Billy is going to be stopped by one of the bandits. As a result, you will have to find some other way in. Exit the saloon and turn right. You will find a small alley here (#2).
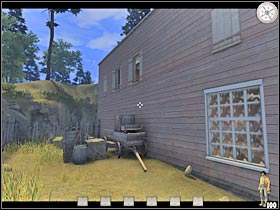
Wait for the new cut-scene to show up (#1). In order to reach Suzy's room, you will have to find some kind of a rope. Turn around and make a few steps forward. They game should make a small suggestion on where you will have to go. Start moving towards the stables area. Leave the horses for now. You will find a whip here (#2). Pick it up and get back to the alley. You might want to consider using this object, however this is not necessary.

First of all, you will have to climb up to the top of the largest crate (#1). You shouldn't have any problems with that. Now you must use the whip. Choose it from your inventory. Take a look at Suzy's window. You will have to aim at one of the red objects (#2). Press the right mouse button. Make sure that the whip has been properly attached.
Once again, you will have to press AND HOLD the right mouse button. Thanks to that, you should be moving towards the window. Once you're there, use the SPACE key in order to enter the room without any other problems. A short cut-scene will appear on the screen (#2). Suzy will try and hold off the bandits. As a result, you will have 60 seconds to find her weapon. Don't worry, it's plenty of time.

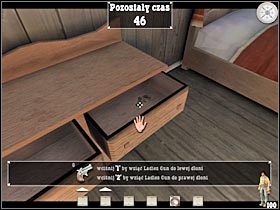
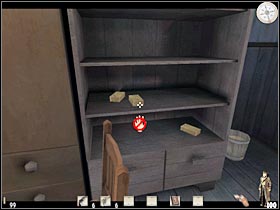
You might want to consider opening all of the nearby crates, cabinets and drawers, however this is not necessary. You will find the gun in the right drawer that's located by the large bed (#1). Pick it up. A very "intimate" cut-scene will pop up on the screen (#2). ;-)

Sadly, you won't be able to spend much time with Suzy, as some of the bandits will break in (#1). This is the first difficult moment of this mission. As you've probably noticed, Suzy's gun doesn't have any bullets in it. As a result, you will have to escape from her room. Start running towards the left window (#2). You can also use the CAPS LOCK key, however you should be just fine. Make a single jump. Don't worry, Billy won't lose any health. Save your progress here!

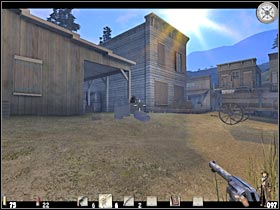
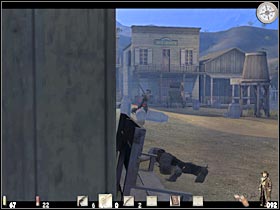
Try getting closer to the main square of the town (#1). A short cut-scene should appear on your screen. You will have to avoid ALL of the nearby bandits from now on, as they will be rewarded if they manage to catch you. This is the most challenging part of this entire chapter. You will be sneaking a lot. As a result, make sure that you're crouching all the time. You shouldn't get too close to the main square, as there are a lot of bandits there. Instead, choose a small passageway that should be located on your right. You won't encounter any hostile units here, so you may as well start moving forward.
You will come across several interactive objects along the way. Climb up in order to reach the next section. You shouldn't have any problems with these types of actions. Keep moving forward (#1). Once you've reached a small wooden fence, turn left. You should notice that there's a small passageway in front of you (#2). Go there now.
There's a challenging manoeuvre ahead of you, so I'd strongly recommend that you save your current progress. Get closer to the main street. Wait for the bandits to leave this area (they are on your right). After that, start RUNNING towards a second alley that's located in front of you (#1). Once you're there, turn right and hide by the large crate (#2). If you're lucky, no one should see you here. Wait for the bandits to return to their previous posts.
Turn right and start moving forward. Make sure that you're crouching! No one can see or hear your movements. There are some bandits in this area, so you will have to avoid them. You should be able to reach a new building very soon. Use a large window to enter it (#1). Keep moving forward. Just as before, you may decide to take a closer look at the surrounding rooms, however this is optional. You will have to reach a small door, though (#2). It's located on the opposite end of this corridor. Open the door. Make sure you're hiding here.
Wait for the bandits to leave this area. I guess I don't have to remind you that you should be peeking a lot. Exit the building and turn right. You should be able to reach a large fence very soon (#1). Hide here and wait for the guards to complete a new round. Now you will have to climb up in order to get past the fence (#2).
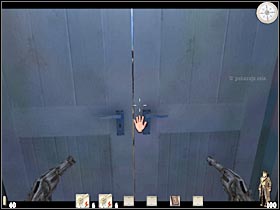
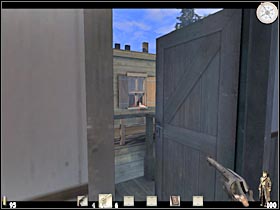
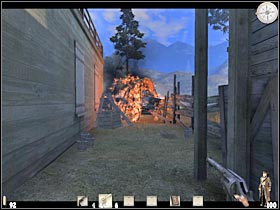
You're getting close to the end of this level. Forget about having to crouch here. Turn left. You should notice a large gate that leads to the shed (#1). Proceed to this location. Once you're there, you will have to wait for a short while. The gate is going to be closed (#2). Don't worry about that because the game will load a new area very shortly.
Complete walkthrough:
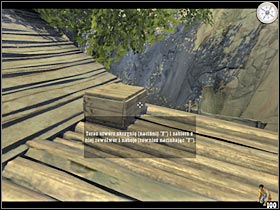
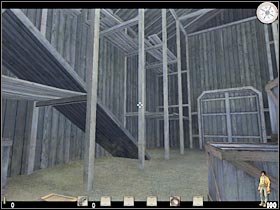
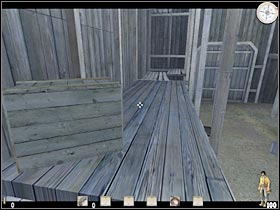
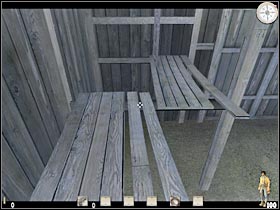
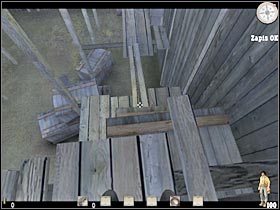
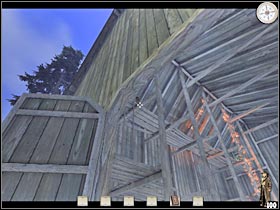
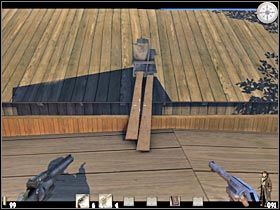
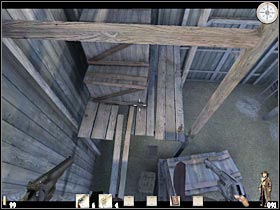
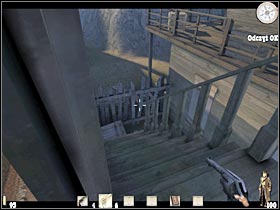
There are two shorter levels ahead of you. You start off inside the barn. As you've probably noticed, all of the nearby gates are locked. You will have to find some other way. Thankfully, that won't be much of a problem. You will have to reach the highest level of the barn. Head on to a large, wooden platform (#1). You will have to pick up one of the largest crates first. Start moving upwards. Once you're there, place the crate on this platform (#2). As a result, it should know be in a horizontal position.
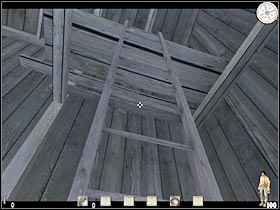
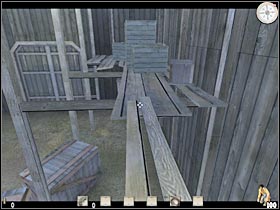
Start running forward. You might consider performing a single jump at the other end of the platform. Keep moving forward (#1). You will find a ladder here (#2). Use it to reach one of the higher platforms.
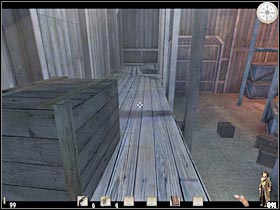
Turn left and start moving forward. You won't have to perform any other actions here. Furthermore, there aren't any enemies in the vicinity, so you may as well concentrate only on reaching the exit. Now you will have to get to the opposite end of the barn (#1). Once you're there, climb down to the lower platform (#2).
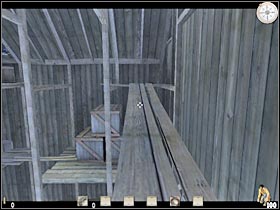
There are a few large crates in front of you (#1). You've got two options. You can either pick them up or climb up to one of them. The choice is yours. You will have to reach a second ladder (#2). Make sure that you use it, so you'll be able to get to the highest level of the barn.
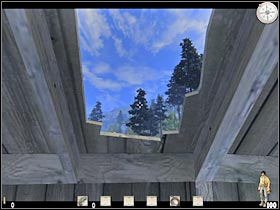
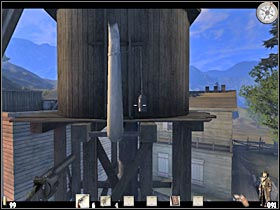
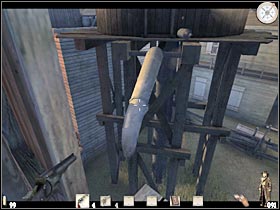
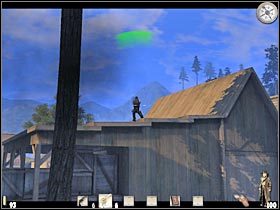
Make a few steps forward. You should be on a look out for a small hole (#1). You will have to use it in order to leave the barn. You will find yourself on a large roof. Once again, you won't be able to expose your current position. Start moving towards a nearby building (#2). You should have any problems getting there. Head on to the new roof.
Make sure that you get closer to the second part of the roof. Otherwise some of the bandits would have seen you. Wait for the new hint to pop up on the screen (#1). You will have an opportunity to use the whip with some of the nearby trees or other large objects. I would recommend that you turn left and aim at one of the branches. A small icon should appear on your screen (#2). It means that you can perform this action here.
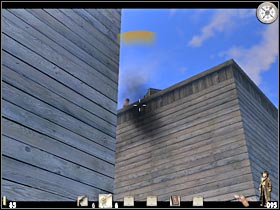
Make sure that you press right mouse button. You may leave the roof of the building. You should find yourself hanging in the air. Thankfully, you won't have to worry about anything else (#1). Now you must press a left mouse button, so you'll get closer to the ground. Press the SPACE key. As a result, you will land safely on the ground (#2). Proceed to the next section. Make sure that you're crouching!
Turn right. You have to make sure that there aren't any enemies in this area. Start moving forward (#1). You will find a small passageway here (#2). Keep moving straight. I would recommend that you stay quiet. Don't forget that there a lot of bandits here.
You should be able to reach a large group of crates (#1). You will have to reach the top of the largest crate. Make sure that you aren't heard by anyone, as there are at least two bandits here (#2). Thankfully, even if you're standing on a crate they shouldn't be able to spot you. Wait for them to leave this area. It may take a few seconds...
The bandits will start moving towards one of the main areas of the city (#1). I would recommend that you follow them. Perform a small jump across the fence. Remember that you should be crouching all the time. Start moving forward. You will get closer to the street very shortly (#2). Thankfully, you won't have to do anything in particular here, mostly because there aren't any new units in this area.
Once you've reached your destination, you will have to turn left. Make sure that you're moving close to the buildings that are located on your left side (#1). Get closer to a nearby road. Stand up and start running towards it (#2).
Keep running forward. You shouldn't have any problems locating this road (#1). I would recommend that you don't stop at anything. You will notice a small chapel along the way. Ignore it (#2). The game will begin loading a new map in a short while.

Complete walkthrough:
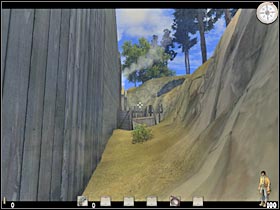
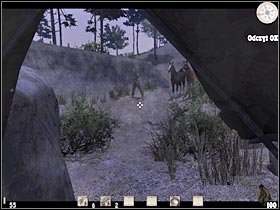
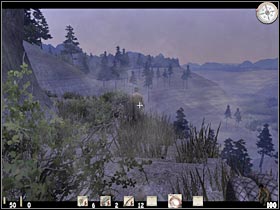
You start off in a similar place. Try making a few steps forward (use the compass if you want to). A short cut-scene should appear on your screen (#1). It looks like a nearby bridge is being guarded by a small group of bandits. As a result, you will have to find some other way to reach the farm. Turn right and head on to a nearby hill (#2).
Start moving forward. I would recommend that you stick close to the mountains. Thanks to that, you won't be spotted by any of the bandits. You should notice a small hut in a distance (#1). Go there now, as you will need to acquire some ammunition. Try getting closer to the hut. As a result, another cut-scene should appear on your screen (#2).
Sadly, you won't be able to enter Frank's home just yet (#1). You will have to sneak past him. It's not that hard as you think, mostly because he won't be patrolling this entire area. Start off by getting closer to a large wagon. You will have to wait here for a few seconds (#2).
Start leaning out carefully. You will have to wait for Frank to get closer to the wagon. This will allow you to get past him (from the right side). Get closer to the hut (#1). I wouldn't recommend running to it, however Frank shouldn't react to these types of actions. Once you're inside, you could take a closer look at all the drawers and chests. This is not necessary. Head on to a small room that's located on your right. You will find some ammunition on the table (#2). Go ahead and try to pick it up.

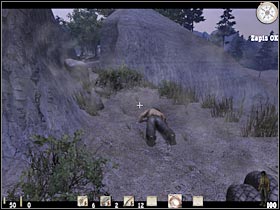
You are going to be caught by Frank (#1). Sadly, you couldn't prevent this from happening. You will have to escape him because Frank wants to kill you. Once you've regained full control over Billy, make a single jump in order to leave the hut (#2). If you're lucky, you shoudln't lose any health here, mostly because Frank won't be shooting at you right away.

Now you will have to find a good cover. You must be quick about it. One of the nearby trees should be enough. Wait for a few seconds, however you should know that Frank is still going to be waiting for you by the window. Start off by reloading your only gun (#1), however you won't be using it during this mission (you can't kill Frank). Once you're ready, start RUNNING forward. Make sure that you're moving by the water (#2). I'm sure that Frank won't be able to hit you, however you can't make any stops here.
Keep moving towards your current destination (#1). Thankfully, you won't have to worry about any new enemies at the moment. You should be able to reach the opposite end of this ledge very soon. Turn right. The game will suggest that you use the whip. You will have to aim at one of the nearby branches (#2).
Once you've attached the whip, make a few steps forward. You will find yourself hanging in the air. Now you will have to start swinging. The objective is to reach a new ledge (#1). I'm sure that you won't have any problems with this action. Turn left and start moving towards your last objective (#2).
You will have to get closer to the large farm. Keep moving forward. This is a large forest, however you won't encounter any hostile units here (#1). You should be able to reach your destination (#2) within just a few seconds. A new cut-scene will appear on your screen. That's all. You've just finished the first chapter of the campaign. It's time to meet Reverend Ray!
You are: Reverend Ray
Main mission objective: You will have to reach a farm that belongs to Billy's parents. Once you're there, you will have to try and catch the killer.
Difficult moments: This is one of the easier chapters of the game, however you may have some problems with the chase sequences. You will have to perform all necessary actions within a designated time limit. As a result, you won't be allowed to make any mistakes. Thankfully, you'll have plenty of time. Nevertheless, you should be saving your progress very often.

Complete walkthrough:
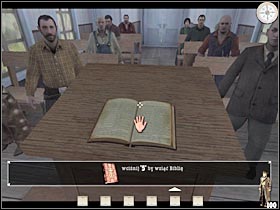
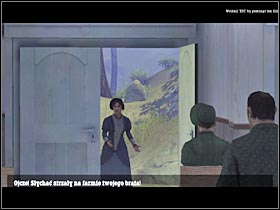
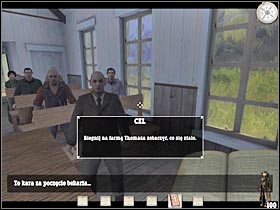
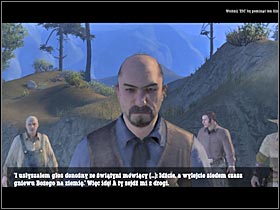
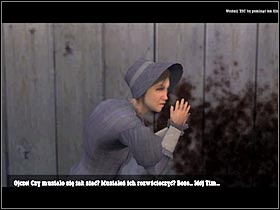
You start off inside a chapel. Head on to a small altar. You will have to pick up a Bible (#1). Thanks to that, you will start preaching. This is a rather long cut-scene. A few interesting things will happen here. One of the bandits will try and interrupt this ceremony. After that, a villager will enter the chapel (#2). It seems like that something strange is happening on a nearby farm. You will have to check it out.
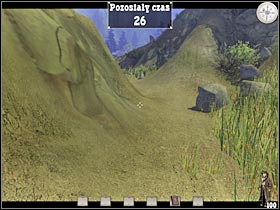
For the first time during the game you will have to reach your new objective within a designated time limit. You don't have to be worried about that. You'll have plenty of time to get to the farm. Start off by exiting the chapel (#1). Now you will have to head on to a small road that's located in front of you (#2). You should remember this forest from the previous chapter of the campaign.
You should be heading towards a large bridge (#1). You couldn't use it before... now's your chance. Keep moving forward. There's only one path here, so you really can't get lost (#2). Just make sure that you don't stop at anything. You should also be using your compass, as it will come in handy during these types of missions.

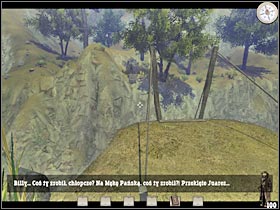
You should be getting close to the farm (#1). This is your current objective. Once you're there, an interesting cut-scene will appear on your screen (#2). It turns out that Billy's trying to escape. As you've probably noticed by now, Ray thinks he is the killer. Get ready for a new chase sequence. It's going to more difficult than the previous one.
Start running after Billy. He will try to hide in a nearby hut (#1). It's located on your right. You will have to go there now. Try to open the door. Sadly, it turns out it's locked. Thankfully, you will be able to bash your way in. You will have to press the C key in order to do that. Bear in mind, however, that this will only work with certain types of doors, so don't get used to it.
You will have to reach a second door. Perform this action once again. You DON'T have to visit ANY of the surrounding rooms. You won't find anything of interest there. Instead, step up to a large cabinet (#1). You will have to press the F key in order to place it in a correct spot. Head on to a new door (#2). Open it. This time you won't have use your boot.

I would recommend that you create a savegame here. Turn left. Billy is trying to escape to the barn. You will have to try to catch him. I would recommend that you choose a small passageway that's located by the wooden fence (#1). Head on to the barn. Once you're there, enter it (#2). You will notice that Billy is already on the highest level. You won't be able to catch him from here, so exit the barn quickly.
You must go back to the wooden fence. Once again, choose a path that's going to be located on your left. After that, head on to a small passageway. You should find a small road here (#1). Keep running forward. You will have to turn right in a few seconds (#2).
Keep going straight. You will probably notice that Billy's already here (#1). Keep chasing him. You don't have to be in a lot of hurry, however I wouldn't recommend stopping. Once you've reached a larger area, choose a path that's located on your left (#2). The other road is blocked, so you wouldn't be able to use it.
Keep running. There's only one road here, so you can't get lost. You will have an opportunity to see Billy again. Sadly, you won't be able to catch him here (#1). Keep moving forward. Make sure that you don't stop. Billy can be seen of the left side of the screen (#2).
You will come across several rocks in a few seconds (#1). Sadly, you will have to make a stop here. Don't worry about the time limit, though. You won't be rushed here, so take your time and do what needs to be done. Pick up one of the largest boulders (#2). You will have to drop it somewhere else. You may proceed to the next section.
Keep running forward. You should be able to spot Billy very soon (#1). He will be using a large bridge. This is a last timed sequence of this mission. Turn left. There's a small passageway here (#2). This road leads to the bridge area, so you will have to choose it.
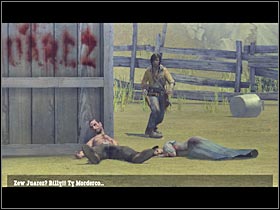
Sadly, it turns out that Billy has sabotaged the bridge (#1). As a result, you won't be able to catch him at this moment. Ray decides to go back to the town and inform sheriff about what's going on. Turn around and start moving forward. Use your compass if you don't know where you need to go (#2).
You will have to go back to previously explored farm area. Ray will notice that there are a few thieves here. They are stealing from the dead (#1). You will have to deal with this small problem. Choose a road that leads directly to the farmhouse (#2). I would recommend that you save your progress here.
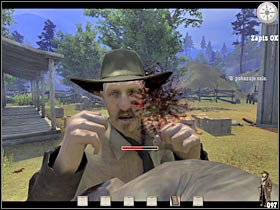
Once you're close enough, a new cut-scene should appear on your screen (#1). It appears that one of the robbers doesn't want to leave the farmhouse. As a result, you will have to confront him and his friends in a direct battle. Wait for the game to display some new instructions (#2). You don't have a gun with you, so you will have to use your fists instead. Thankfully, this isn't a difficult task. In order to proceed with this sequence, you will have to press the 0 key.
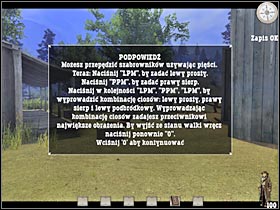
It would be best if you had used some kind of a combination to take down your opponent. The game will suggest to press LMB, RMB and LMB once again (#2). I would recommend that you stick close to these instructions, however you should also remember about taking a step back. Thanks to that, you will avoid being hit. You shouldn't have any problems during this fight (#2).
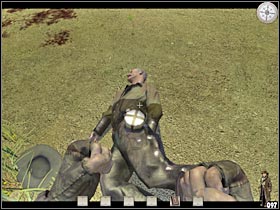
This isn't over yet. Now you will have to deal with two other bandits (#1). Thankfully, you won't have to fight with both of them at the same time, so you don't have to be worried about anything in particular. Nevertheless, make sure that you save your progress often. You should be using one of the few possible combinations (#2). Once you've defeated your final opponent, this mission will come to an end. I should also inform you that you'll still be playing as Ray.
You are: Reverend Ray
Main mission objective: You will have to deal with bandits that have taken control over the town of Hope. They are responsible for the death of a local sheriff.
Difficult moments: You will have to be very careful here. This is a first chapter that's concentrated mostly on gunfights. Some of the bandits will be well equipped. Furthermore, they may be hiding. As a result, you will have to observe your surrounding very carefully. Make sure that you check roofs and windows. You mustn't forget about the possibility of saving your current progress, especially in the second part of this chapter.
Complete walkthrough:
You start off inside a well known chapel (you've been here during the previous chapter of the campaign mode). This time it'll be a lot different, though. Before you'll be able to proceed to the main part of the mission, there are a few things for you to take care of. First of all, you will have to collect Ray's guns. Head on to a small room that's located on your left (#1). Open a door. You will find a chest here (#2). Take a look inside. You will find two guns here, as well as some ammunition.
You may proceed to the exit (#1). I'm sure that you won't have any problems finding it. Open the door. This will trigger a new cut-scene (#1). Ray meets up with a local sheriff (#2). He wants to convince our character to let him handle this problem. The most interesting thing here is that the sheriff is going to be killed in a few seconds. As a result, you will have to deal with bandits who are responsible for this death.
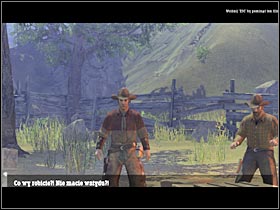
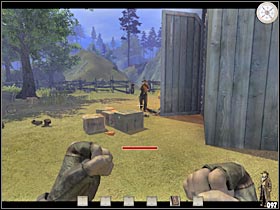
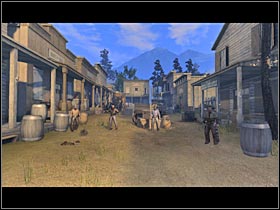
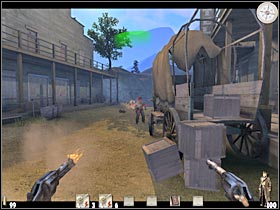
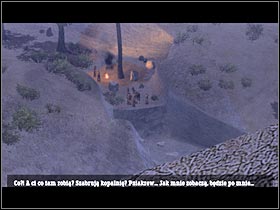
Start moving towards the main part of the town (#1). You should also get ready for some of the upcoming fights. You will be given an important choice. You could be using only one revolver, along with the Bible. This object would allow you to stun your opponents for a short period of time. I wouldn't recommend this combination. Two revolvers are much more interesting, mostly because you'll be given more firepower and you wouldn't have to worry about reloading the weapons so much. You will probably notice that one of the bandits is standing here (#2). He'll get back to his colleagues eventually. This is an obvious trap, however you don't have any other choice...
Go ahead and try to enter this part of the town. A short cut-scene should appear on your screen (#1). You will have an opportunity to take out FOUR bandits. It's not that hard as it seems, mostly because we will use a new feature of the game. It's very similar to classic bullet-time. Make sure that you read everything that's been displayed on your screen. In order to activate this mode, you will have to holster your weapons. Once you've activated this feature, go ahead and place the cross-hairs over your opponents (#2). If you're lucky, you should be able to kill at least two of them (probably those in the middle).
Once you've finished with this sequence, make sure that you take a few steps back. I would recommend that you take cover by a large wagon (#1). Also, make sure that you've reloaded both weapons. Start leaning out. You have to be very careful here. I would also recommend that you zoom in the view. This will help you to take out most of these bandits (#2). Make sure you're aiming at their heads, so they will die quickly.
Once you've disposed of all hostile units (make sure that you don't expose your position too much), check their bodies. You will find a lot of interesting things here. First of all, you should be on a look out for small bottles (#1). They will replenish your current health. Additionally, you will have to pick up ammunition (#2). You should also know that some of your weapons will jam during the fights. You can predict this by taking look at the icons. If one them turns red, it means that you should find a new weapon... and fast. As a result, make sure that you've replaced your guns every time you've completed a larger part of the mission.
You may proceed to the next section of the town. You will hear a woman screaming. The noise appears to be coming from one of the buildings (#1). Ray will say that it's probably sheriff's wife. You will have to rescue her. Before you decide to do that, make sure that you turn around. You should be facing the chapel. A single enemy unit has appeared in this area (#2). You will have to deal with this problem swiftly.

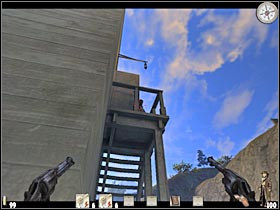
Now you will have to choose a small passageway that should be located between two buildings (#1). You must go there now. Once you've reached a new area, make sure that you look up and turn left. One of the bandits is hiding on a wooden staircase (#2). Kill him!
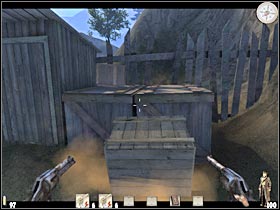
Now you will have to find your way into the building. As you've probably noticed, the lower part of the staircase has been destroyed. As a result, you will have to find some other way in. Start off by picking up one of the larger crates. Next, you will have to place it in a designated spot (#1). Perform two jumps in order to reach the top of the largest crate. You should be able to reach the staircase from here (#2).
You will have to use the staircase in order to reach the upper level. Enter this new room. You could spend some time searching through the drawers, although this is not necessary. Head on to a small door. You will have to use your boot in order to clear the way (#1). Enter a small balcony and turn left. Be careful, though. There's a single opponent here (#2). You must take care of him right now.

You should also know that several other bandits have appeared on the ground level. You should try and kill them from here. Make sure that you've taken care of this small problem. There are some suitcases ahead of you (#1). Pick up a few of them. Otherwise you'd have some problems reaching the next balcony. Get closer to the hotel building. Keep moving forward. Step up to a wooden balustrade and destroy it (#2). You will have to use the C key once again.
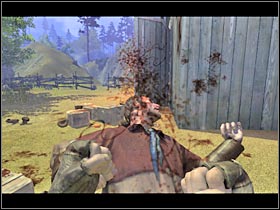
There's a quite challenging fight ahead of you. The game will suggest that you holster your weapons, so you'll be able to used the slo-mo feature. Wait for the right moment and head on to a large window (#1). Enter this room and turn left. You will have to do this quickly. Press one of the mouse buttons in order to activate bullet-time. You shouldn't have any problems taking down both bandits (#2). I would recommend that you press each mouse button at least three times. Thanks to that, you'll make sure that they won't survive this attack.
Step up to the rescued woman. She was the wife of a recently killed sheriff. A new cut-scene should appear on your screen (#1). You'll find out that some of the bandits are trying to take control over a nearby prison. You will have to take care of this problem. Go back to the balcony. Jump down to the ground. I would recommend that you find a good cover. You don't have to search for anything in particular. Larger crates will do just fine. Some new bandits have appeared in this area. You will have to kill them all. Make sure you're zooming in your view. Aim at their heads. You should also try to maintain a large distance.
You will have to be very careful here. Make sure that you've secured this entire area. Some of the bandits may be hiding by the crates (#1). You will have to be ready for that. Kill them quickly, so they won't be able to surprise you in the future. There's a stagecoach here. Make sure you use it for much needed cover. There are still some enemies on your right (#2). Kill them. After that, make sure that you have checked the bodies for health bottles and ammunition.
Once you'll get closer to the prison building, a short cut-scene should appear on your screen (#1). Some of the bandits will try and blow up the entrance. Like I've said before, you will have to kill them. Start off by taking out those enemies who haven't entered the building (#2). Make sure you're using pillars and crates for cover. I should also warn you that some of the bandits may decide to leave the prison. You will also have to kill them, as they won't be using any cover.
You will have to get closer to the prison building. I would recommend that you approach it from the right side (#1). There aren't any new enemies outside the building, so you don't have to be worried about that. Holster your weapons. You should be facing the wall. Start moving towards the door. Once you're closer to the right window (#2), press one of the mouse buttons in order to activate bullet-time. Kill some of the visible bandits. Take cover and repeat this action. This time you should choose the front door or the left window.
There are also a few other bandits in this area. They are standing by the LEFT wall of the prison building (#1). It would be wise to take them out right now, so they wouldn't surprise you in the near future. Head on to the main door. Activate the bullet-time once again or try entering the prison without using this feature. There are probably a few other enemies here. They should be standing by the stairs (#2). Kill them.
Once you've taken care of all enemy units, head on to the central part of this building. Turn around. As you've probably noticed, some of the remaining bandits will try to burn down this building (#1). It would be wise if you didn't wait for this to happen. Use the stairs. You should be able to reach the attic (#2).
You will have to use a small ladder that leads to the roof (#1). Sadly, you won't be able to reach it from here. As a result, go ahead and start picking up some of the surrounding crates. You will have to create a small tower. 2-3 crates should do the trick (#2). You have to be quick about it, as you'll start losing health points very soon. Climb up and perform a single jump in order to reach the ladder.
You'll find yourself on the roof of the prison. There should be a small passageway in front of you. It'll allow you to reach the barn (#1). You won't have to hurry anymore. Step up to the hole and enter the barn. You probably remember it from one of the previous levels of the campaign. First of all, you will have to reach a lower platform (#2). Make sure that you don't fall all the way to the ground, as it would cost you a lot of health points.
Once again, you will have to use a large wooden platform. I'm sure that you remember what has to be done here - place one of the larger crates in a designated spot (#1). Start moving forward. You will have to use the ladder in order to reach the upper level. Now you will have to go to the opposite end of the barn. Turn right and start shooting at the small handle (#2).
There are a few challenging stunts ahead of you, so I'd strongly recommend that you save your progress here. You will have to make a jump towards a large pipe (#1). You can't miss it. Otherwise your character would have ended up dead. Once you're there, turn left and try to reach a new roof (#2). If there are still some enemies in the area - ignore them.
This is almost the end of the first part. You will have to find a small hole in the roof (#1). Use it to enter a new building. Now you will have to wait for the game to load a new map.
Complete walkthrough:
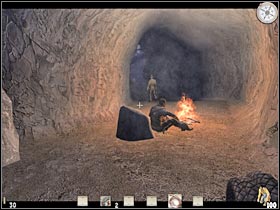
You start off in a very small room. I wouldn't recommend standing close to the windows, as you would have become an easy target. You could, on the other hand, check most of the chests and shelves. You will find at least one bottle here (#1). Once you're ready, head on to a small door (#2). You will find in the second room.
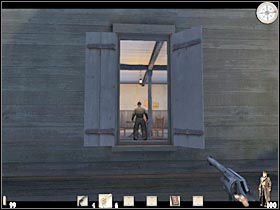
Open the door. You will have to deal with at least two enemies. Start off by killing a guy that's standing on your left (#1). You shouldn't have any major problems locating him. I would recommend that you use only one gun. You should also lean out a lot. There's also a second enemy in the area. You will have to wait for him to stand by one of the windows (#2). Thanks to that, you'll be able to kill him.
Use the stairs to reach the ground level (#1). Turn around and start running towards a small alcove. It will be located on your right. It's very important, because there is a large group of enemies in this area. They would try to kill you. Wait for the game to display some new hints. For the first time during the game, you will have an opportunity to use an oil lamp to your advantage. Start off by picking it up (#2).
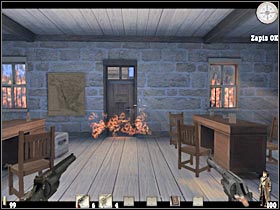
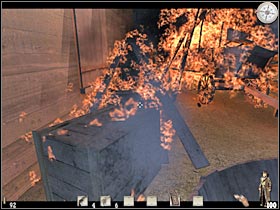
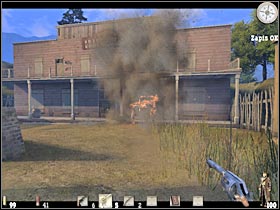
Make sure that you have a lamp with you. Lean out only for a short while. The objective will be to throw the lamp at a large wagon. You can do this by pressing the left mouse button (#1). Use the alcove once again. Wait for a few seconds. The wagon will catch on fire. As a result, you will deal with all enemy units (#2), however you should know that later during the game these actions doesn't necessarily have to work that way. In most cases, they will only force your opponents to move to another area.
Destroying the wagon allowed you to take out a large group of bandits. Unfortunately, it also blocked your only passageway. As a result, you will have to do something about this. Wait for the new hint window to pop up. Start off by picking up a bucket (#1). Make a few steps forward and press the left mouse button (#2). You won't solve the entire problem, however you should be able to clear a small path. Go ahead and use it. You won't have to do anything else with the burning wagon.
Keep moving forward. There are some crates on your right. You'll find some health here, as well as the ammunition. Head on to a nearby window. There is a single opponent inside. You will have an opportunity to organize a surprise attack (#1). Make sure that you're aiming at his head. One bullet should be enough to kill him. Enter the new building. You could explore this entire area, however it won't be necessary. You have to be careful, though. There are a lot of bandits in the area. I would recommend that you choose a small door. It's located in front of you. Additionally, you will find a lot of ammunition here (#2).
Be careful! At least two bandits will be guarding a nearby corridor. It would be best to activate the slow-motion feature in order to get rid of them safely (#1). Additionally, make sure that you check a small area on your right (by the stairs). There's an enemy soldier here (#2). Kill him. Get back to the main corridor.

You will have to reach a small window (#1). It's located by the main corridor, so I guess you won't have any problems finding it. Exit the building. Turn right and make a few steps forward. The game will suggest that you activate a fast shooting mode. You can do this by pressing the Z key. You are going to be attacked by one of the bandits. He's only carrying a cleaver, so don't worry about him. This new mode will allow you to kill him without any other problems (#2). I would recommend that you deactivate the newly acquired feature, as you won't need it during the upcoming fights.
Make sure that you have saved your game. Lean out CAREFULLY. One of the bandits will be standing on the roof of a large building (#1). Make sure that you zoomed in the view. You will have to kill him. If you're injured, pick up one of the nearby bottles. There are plenty of them on this map. Keep moving forward. You will come across an oil lamp along the way (#2). Ignore it for the time being.
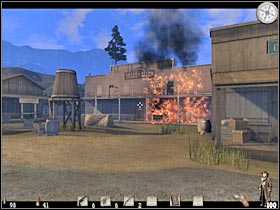
Try standing by the roof of the left building (there's a large tree here). You will have to deal with one more sniper (#1). He will be standing on a roof of the right building. Once he's gone, go back to the oil lamp (you'll also find this objects by the crates). Pick up the lamp. Lean out. You will have to make sure that the lamp lands near the wagon (#2).
Once again, you should wait at least a few seconds. The wagon will eventually catch on fire. This will allow you to take out some of the enemy soldiers (#1). Make sure you're leaning out. Don't stay in the open for too long. Once you've dealt with the first group, try moving a little bit closer to the burning wagon. There are some new bandits here (#2). Most of them will appear on your right. Make sure you've killed them all.
Step up closer to the right wall. Go ahead and try to lean out. First of all, you will have to take care of a single bandit that's standing on a nearby balcony (#1). You would have some serious problems with him in the future. Turn right and hide by the barrels. There are a few other enemies for you to take care of. Make sure you're using one of the nearby objects for cover.
At least one of the enemies will leave a shotgun behind. You have to pick it up, as you'll need a second weapon during most of the missions. You don't have to use it right away. Head on to a nearby alley. Be careful, though. You are going to be attacked by one of the bandits (#1). Dispose of him quickly. Turn right and start moving forward. There's one more enemy for you to kill. I would recommend that you use the shotgun to take him down.

I wouldn't recommend leaving this area just yet. You should head on to some of the nearby crates. You will find a health bottle here (#1), as well as some ammunition (for both types of weapons). Now you will have to choose one of the nearby alleys, so you'll be able to get closer to the big saloon. Be careful, though. There are more enemies in this area (#2). It would be best to hide by one of the barrels. Try to take them out from a larger distance.
The cost is clear, so go ahead and get closer to the main square. I had to eliminate one more bandit here. He left a large building that was located on the left side of the square (#1). It would be wise to use the shotgun here. A new cut-scene should appear on the screen (#2). Sadly, you won't be able to kill the leader of the bandits just yet.
This is a very challenging section of the mission. First of all, you will have to dispose three snipers. They are guarding the entrance to the saloon. Once you've regained full control over Ray's movements, turn right and start RUNNING forward. You will use one of the smaller buildings for cover (#1). You should also save your progress here. Now for the hard part. Start leaning out (CAREFULLY!!). Try and take out a bandit who is standing on the left side of the saloon (#2). You should also know that some of the enemies will be using dynamite against you. Thankfully, you should be safe here.
The second bandit is standing on an upper balcony (#1), so you shouldn't have any problems killing him. There's only one more enemy left. Sadly, it'll be a lot harder to dispose of him. He is standing on the right side of the saloon (the roof area). I would recommend that you get closer to the building (#2). Make a few steps back. You will have to aim at his head.
That's not all. More enemies will arrive here. Ignore the wagon that's heading towards the saloon. I would recommend that you go back to one of the darker alleys(#1). You should be able to kill most of your enemies from here (#2). Just make sure that it doesn't take too long, as you would become an easy target.
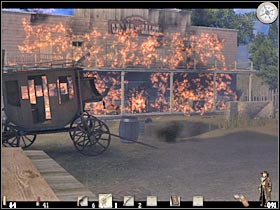
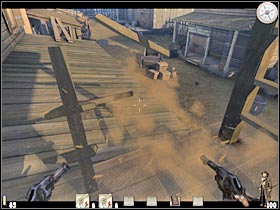
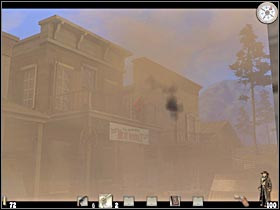
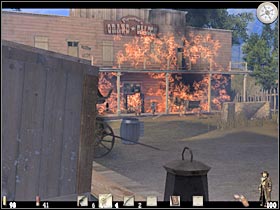
You will have to kill all enemies. Most of them will decide to enter the main square area, so you won't have any major problems locating them (#1). There aren't any other alleys here, so none of the bandits would have an opportunity to surprise you. Once you've dealt with all enemy units, the game will inform you about the possibility of destroying the saloon. Head on to the main square. You will have to shoot at some of the crates. The wagon will explode (#2).
Now you will have to wait at least 10-20 seconds for the fire to spread all over the saloon (#1). I wouldn't recommend wasting that time, though. Head on to one of the previously explored passageways. They are located on your left. Position yourself correctly and wait for the bandits to show up. They will be exiting the saloon through the main door (#2). Thankfully, most of them won't be able to respond to your attacks.
Make sure that you've taken care of all enemy units (#1). If you're lucky, you won't lose any health points here. A new cut-scene should appear on your screen (#2). Get ready for the first duel. The game will display some new hints in a short while. Read these instructions.
The whole duel thing is a standard minigame, however you will have to be quick and precise in order to become victorious. The first part of the duel will require you to wait for about 6-7 seconds. Make sure that you check the top of the screen (#1). Now you will have to perform two separate moves. Pull the mouse towards you. After that, start pushing it. The objective is to reach for a gun. A small cross-hair should appear on the screen. You will have to start moving it. It has to be located over your opponent. Fire 2-3 times, so you'll be sure that he's dead (#2).
Winning this duel will also end this chapter of the campaign code. A final cut-scene will appear on your screen (#1). Sadly, you won't be following Ray's movements in the next chapter. It's time to go back to Billy.
You are: Billy Candle
Main mission objective: You will have to reach a train, so you'll be able to organize an escape. These lands are occupied by bandits. You will have to avoid being seen.
Difficult moments: This is another stealth mission. You will have to stay in the shadows for the most of the time, mostly because revealing your mission would be equal to an instant failure. As a result, you will have to be very careful, especially since you will also have to watch out for several aggravations. Check the entire walkthrough section for details.
Complete walkthrough:
The first mission of this chapter is very short. You shouldn't have any problems finishing it. You start off on a small field (#1). Start moving forward. Sadly, you won't be able to reach any of the upper platforms. Instead, go left. There's a narrow path here (#2). You will have to choose it. Just make sure that you don't fall down. It's very easy to make a mistake here.
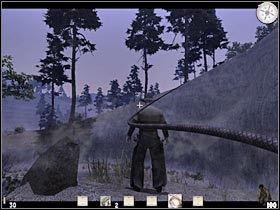
A new cut-scene will appear on your screen (#1). Billy will notice that the train is already heading towards its destination. You will be able to use it to escape. Thankfully, you won't have to be in a lot of hurry. Keep moving forward. You should reach a new area very soon. Turn right and keep going straight. You will have to use the whip in order to reach a new ledge. Make sure you're aiming at a large branch (#2).
I guess you probably know what has to be done here. You will have to start swinging in order to be able to reach a new platform (#1). Make sure that you're saving your progress frequently, as it's very easy to make a mistake during one of these jumps. Now you will be able to reach the ground (#2). Billy won't lose any health here, although you should remember to use the S key.
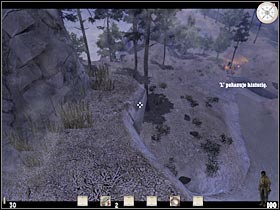
You may proceed to the next section. There's only one road leading to your new destination, so you can't get lost. You will come across a large waterfall in just a few seconds (#1). Make a few steps forward. Be careful, though. One of the trees will fall to the other side. You will have to get close to it. Perform a single jump. You'll be able to reach a new ledge from here (#2).
Keep moving forward. You will come across a small group of rocks (#1). Use them to climb up to the upper level. Make sure you don't end up in the water, as it would probably result in a mission failure. Keep going. There are two holes here (#2). You will have to avoid them.
You should be able to reach a large cliff area very soon. A longer cut-scene will be displayed on your screen (#1). Billy decides to go to one of the nearby caverns. Sadly, there are a lot of bandits in this area. You will have to avoid them in order to reach your new destination. Thankfully, you won't encounter any enemies here, however make sure that you've read all hints. Proceed to the lower platforms (#2). I'm sure you won't have any problems reaching them.
You will come across a much larger chasm. You will have to perform a jump here (#1), however you should start off by saving your game. Thanks to that, you won't have to repeat larger sections of this level. Once you're on the other side, start moving forward. Get your whip ready. You will have to use it here (#2).
You will have to be moving upwards, so make sure that you've pressed the left mouse button (#1). Start swinging in order to reach the upper platform. Keep moving forward. There's a lot of climbing to do here (#2). Make sure that you've chosen a smaller rock first. You should be able to reach a new platform from here. Thankfully, this whole area is quite safe, so you probably won't make any mistakes.

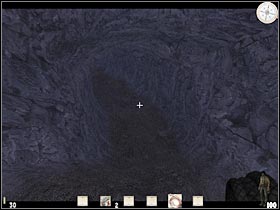
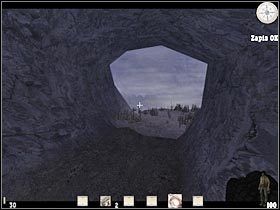
Now you will have to locate a small entrance that leads to one of the nearby caverns (#1). It will be located on your left side. Enter the cavern (#2). There's a short walk ahead of you. Wait for the game to load a new map.
Complete walkthrough:
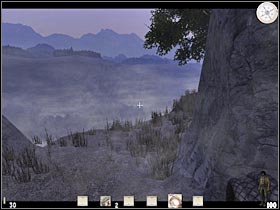
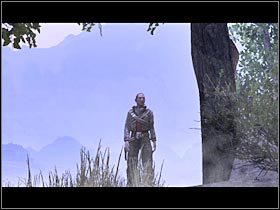
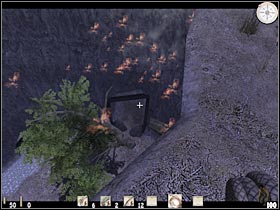
This is by far the most difficult part of this entire chapter. You will have to avoid a lot of bandits, especially when you reach the main camp area. Start off by moving forward. You will have to reach the exit of this small cavern (#1). Keep going straight (#2). I should warn you that this road is quite narrow, so it's easy to make a huge mistake.
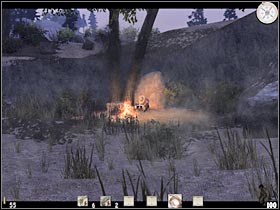
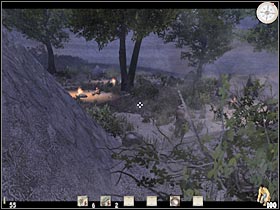
You are getting close to a small group of enemies. Wait for a short cut-scene to pop up on your screen (#1). You will have to be crouching from now on. Thankfully, you are far away from the main area of the map, so you won't have be worried too much. Just make sure that no one sees you. Start moving forward. You are getting closer to a small camp fire (#2). The game will display a new hint for you. Read it.
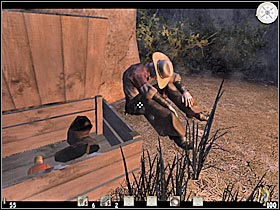
You will have to sneak closer to the camp fire. Lean out carefully. You must wait for one of the bandits to turn around. He will start walking towards the cave (#1). Now's your chance to make a move, especially since the other bandit (he is sitting by the fire) is looking the other way. The game should display a new hint window. This time the information will be connected to the storm. First of all, you should know that you will have an opportunity to take advantage of this. Once you hear the thunder, you will be able to use your whip, without having to worry about the bandits. Sadly, you won't be using the whip too often. The second important thing is that the lightning strike will reveal your position for a short period of time. As a result, you will be moving very carefully. It's also very important that you take cover before the lightning strikes.
You will encounter your first opponent very shortly. Be careful, though. He is standing by the bushes, so you may not notice him at first glance. Wait for the bandit to turn around and start following him. You should also choose the whip from your inventory, as you're going to need it here. Use the whip the moment you hear the thunder (#1). Make sure that you're aiming at the neck. Thanks to that, you should be able to kill the bandit. Also, take his revolver and some ammunition (#2).
As you've probably suspected, you will have to reach the ground. There are a lot of different paths that would allow you to get there. I would recommend that you stay here and continue moving forward. Thanks to that, you won't have any problems (#1). Once you're there, make a few steps forward and listen to what the other bandits are talking about (#2). You will have to wait here. The conversation will end in just a few seconds.
Lean out carefully. I would recommend that you take your time and observe your surroundings. There are three bandits standing by the cliff. Additionally, one of the enemies is currently sleeping (#1). You could try and get closer to him, however you CAN'T KILL HIM. Taking him out would result in a mission failure, as his body would be discovered very soon. Instead, take a look at the small chest. You'll find some interesting objects inside (#2), including the health bottle.
Start moving towards the other bandits. I would recommend that you stick close to some of the rocks that are located on your right. There are also some bushes here (#1). This will allow you to sneak past unnoticed. You can't stay here for too long. Wait for the lightning strike to appear. After that, start moving towards a large tunnel (#2). Make sure that no one sees you!!
You will get closer to the main part of the camp. Don't be too excited, as there are some new enemies in this area (#1). The guards are currently talking, however you can't stay in the open for too long. One of the bandits will decide to check this area very soon. As a result, you will have to hide by a large rock. It's located on your left (#2). You should be safe here.
There are some very challenging stealth segments ahead of you. First of all, you will have to wait for one of the guards to turn around. Exit the cover and start moving forward (#1). Make sure that you're hiding in the bushes. Turn left. You should be able to get past the second guard. Eventually you will have to reach the end of this platform (#2). Slide down, however you should also make sure that a nearby opponent is looking the other way.
Start moving towards the left side of the screen. You can't stay here for too long. The objective is to walk round the camp from the left side. Make sure that you're close enough to a large boulder (#1). A lightning will strike any second now and you can't be in the open when that happens. Keep moving forward. You should be able to reach one of the nearby trees (#2). It's not a perfect cover, but you won't find anything better here.
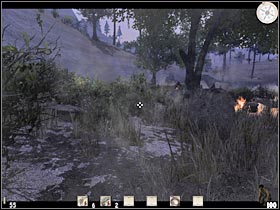
This is the most difficult moment of this entire mission. First of all, you will have to reach a small camp fire. Make sure that you're using the bushes to cover your position. There are two bandits here (#1). Wait for one of them to turn right. Now you will have to start moving (#2). Use your compass if you don't know where to go. Also, watch out for the lightning strikes. Remember that you can't be seen by anyone. Get closer to the second camp fire. You will also have to make sure that you're standing too close to it.

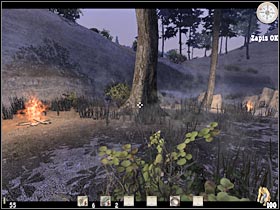
You will have to reach one of the small tents (#1). Enter it as soon as possible. Otherwise some of the enemy soldiers would have located you. Proceed to the second tent that's located nearby. Make sure that you're not spotted! Now you will have to wait for one of the guards to show up. He should start walking towards the left side of the screen (#2).
Once the guard has left this area, try to get closer to the horses (#1). You will be able to scare the animal by pressing the correct key. As you've probably noticed, this will create a little panic in the main camp. Make sure that you remain hidden. Wait for a few seconds. After that, start running towards a small entrance (#2). Enter the cavern.
You will have to reach the opposite end of this tunnel. It shouldn't be too hard (#1), however you will have to be crouching at all times. There are a few enemies in the area. Your first task will be to get out of their way, because they will decide to enter the cavern. Turn right. You can hide by a large boulder. Alternatively, head on to some of the lower platforms without any other delays (#2).

Once you're on the ground, turn around and start moving forward. Remember that there are still two enemies here, so you will have to remain quiet. Additionally, it would be best to wait for the lightning strike before moving any further. Keep going straight (#1). Use your compass if you don't where do you have to go. You should get closer to a small bridge (#2). Before you decide to move any further, MAKE SURE that you have saved your game! This is very important!
The bridge will collapse the moment you decide to use it. As a result, you'll end up in the water (#1). Your character won't die here, however you will have to be very careful. Make sure that you're using the S key, so you won't be swimming too fast. You will have to avoid some rocks along the way. There are more boulders in this area. Try "aiming" at one of them (#2). Again, this is important. You can't get past these boulders. This would be equal to a quick death.
You should find yourself on top of a large boulder (#1). Now you will have to perform several jumps in order to reach the shore safely. Be careful, though. These rocks are very slippery, so it's easy to make a mistake and end up in the water. The last jump will allow you to continue your journey (#2). Make sure that you have saved your game here.
Turn left and start running forward (#1). You won't have be quiet here, as there are no enemies in the vicinity. Make sure that you don't get too close to the water. It's very easy to make a mistake here and you should remember about that all the time. There are a few gaps for you to avoid (#2). You will have to be very careful from now on. Keep a crouching position. You will also have to watch out for occasional lightning strikes.
I would recommend that you take a closer look at your surroundings. There's a small cavern on your right (#1). You will have to climb up there. Make sure that you're moving forward. There are a few additional jumps ahead of you, although you probably won't have any problems with them. There's a single bandit on an opposite ledge (#2). Ignore him, as you won't have to go there. Just make sure he doesn't see you.
Try getting closer to your destination. There is one more opponent here. He is standing on an upper ledge. Wait for the bandits to finish their conversation (#1). One of them is standing nearby, so you will have to be very quiet. Once they're finished, lean out carefully and wait for the bandit (#2) to turn around.
As you've probably suspected, you will have to climb up to the upper platform. Start off by following your enemy (#1). You should also get your whip ready. Wait for him to stop. Just as before, make sure you're aiming at his head (#2). Thankfully, you won't have to wait for the thunder to perform this action. There aren't any other bandits in this area (no alarm would be raised).
This is almost the end. The only thing left to do is to proceed forward. Head on to the lower platform (#1). The game should load a new map.
Complete walkthrough:
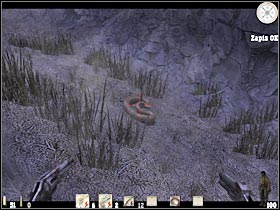
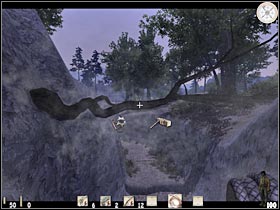
Two of the upcoming levels will be much shorter. They are also quite easy. This doesn't mean, however, that you won't have any problems finishing them. You will have to be careful... as always. This time you'll be climbing a lot. Start off by moving forward (#1). There's only road here, so you can't get lost. Be careful, though. There's a rattlesnake here (#2). You will have to be very careful.


The easiest way to deal with this kind of problem would be to use the whip (#1). Thanks to that, you will have an opportunity to keep a safe distance. One successful hit should be enough. Proceed to the next section. Get your guns ready. There are THREE wolves in this area. Once you've crossed an invisible line, they will attack you (#2). Start shooting at them. Make sure you're moving backwards at the same time. You could also activate the fast shooting mode, although this won't be necessary.
Some of the wolves may also be standing near the bushes (#1). This will make your job a lot easier, mostly because you'll have plenty of time to aim at them. Once the wolves are gone, start moving towards larger rocks (#2). They will be located on your left. Start climbing up.
You will have to reach the top ledge. It'll take you at least 10-15 seconds. Turn right and start moving forward (#1). Make sure you don't fall or you would lost a lot of health. Billy will hear some gunshots coming from a distance. Ignore them. Step up to the large object and press the F key in order to place it in a correct spot (#2). Thanks to that, you will be able to reach the upper platform.
There's a lot of climbing ahead of you (#1). Thankfully, it shouldn't be much of a problem. Be careful, though. You will have to kill a second rattlesnake along the way. It's located on one of the upper ledges. Make sure that you've killed the rattlesnake before you decide to do anything (#2). The easiest way would be to perform a single jump. Use the gun at the same time (in the air). Climb up to the new platform and proceed to the next section.

There are some new ledges on your left (#1). Once again, you will have to climb up to the top. This will allow you to reach a new section of the map. The road on your right would be a dead end. You have to be careful here. Make sure that you avoid being hit by the boulders (#2). You will have to move to the right side of the ledge.

Keep moving forward. There's a third rattlesnake here (#1). You should know exactly what has to be done. You could use the revolver (no one would hear the shots), although I would recommend that you choose the whip. Keep going upwards. There are some new ledges waiting for you here (#2). Once you're at the top, make sure that you have saved your current progress.
Make a few steps forward. A new cut-scene should appear on your screen in a short while (#1). You will come across two bandits. As you've probably suspected, you will have to choose a crouching stance. You won't be able to take out the left guy. He is standing on a higher platform, so it would be best to ignore him. Wait for the bandit to start moving towards the left side of the screen (#2).
Start moving forward. There's a narrow road here that you'll be able to use (#1). I guess I don't have to remind you to be very careful. A lightning will hit one of the nearby trees (#2). Ignore it, as this event won't make your mission any harder.
Remember that you can't reveal your current position! Try and get closer to the bandit. You've seen him before, so it won't be any surprise to meet him here (#1). I would recommend that you use your whip. You will have to coordinate your action with the sound of thunder (#2). After that, proceed to the next section of the map.
You should be able to reach a tree very soon. You will have to use your whip once again (#1). This is the only watch to get across to the other side. Make sure that you're swinging. Otherwise you'd have some serious problem reaching your destination. There are a few other holes in this area (#2). Thankfully, you won't have any problems with them. This is where the game will load a final map of this chapter.
Complete walkthrough:
Start off by moving forward. You will reach a first hole in a short while (#1). Don't even think about using your whip here. You will have to make a successful jump. This is quite challenging, so you might consider saving your game first. There's also a second hole here. Thankfully, it's easier to avoid. You will reach a new location very soon (#2). Don't worry, we'll find a way to get to the other side.
Turn left. You will have to use a gun or a whip here. Aim at the small wooden object (it's a small stone; #1). You should also take a few steps back, so you don't get hit by anything. You may proceed to the new passageway (#2).

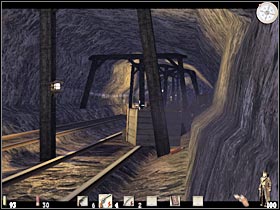
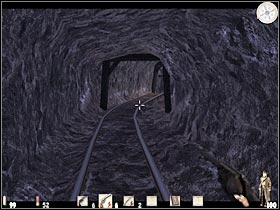
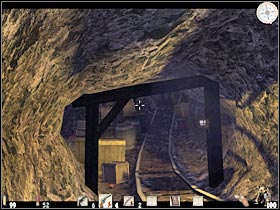
There's a much larger bridge here (#1). You will have to use it to get to the other side of the tracks. Turn left and jump down to one of the lower platforms (#2). You will have to find a cover by a small group of crates. There are also a few interesting objects here. Listen to what the Billy has to say before you decide to pick them up.
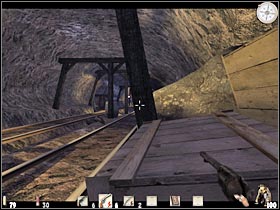
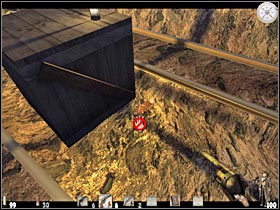
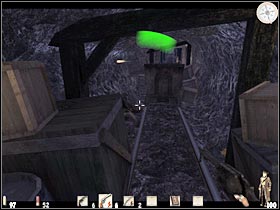
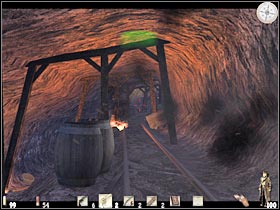
You probably thought that waiting for the train would do the trick. Sadly, you won't be able to choose this strategy. The only way to finish up with this mission would be to kill ALL enemy units. Only then you'll be able to proceed to the next chapter of the campaign mode. Start off by picking up a shotgun (#1). There's also a lot of ammunition here. I would recommend that you start using your newly acquired weapon. It's quite powerful, so you won't have any major problems with most of the bandits. Lean out carefully and kill some of the visible enemies (#2).
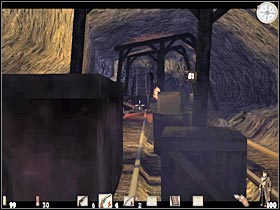
Keep shooting at the bad guys. They will be leaving a nearby mine, so you won't have to worry that they'll surprise you. If you're lucky, you should also be able to blow up a nearby building (#1). This would help to kill a few additional bandits. More of them will arrive here shortly (#2). Make sure that you save your progress frequently, as it is very likely that you'll be hit (more than once).
Bear in mind that you have a limited ammo supply for the shotgun. Thankfully, you can also use the revolver (#1). The only difference is that you'll have to aim at heads of your opponents. An interesting cut-scene will appear on your screen in just a few seconds (#2). You will see Ray as he is exiting the mine (#2). Thankfully, you won't have to fight him here. Billy will use the train to escape. This is the end of this chapter.
You are: Reverend Ray
Main mission objective: You will have to explore some of the nearby mines. The objective will be to catch Billy. He's probably using the train to escape you.
Difficult moments: I'm sure that you'll have some problems in the mines. There are a lot of difficult fights waiting for you there. The most important thing is that you'll have to deal with a very limited visibility. As a result, you will have to be very careful, as many of the bandits will surely be hiding. Furthermore, some of them are well equipped.
Complete walkthrough:
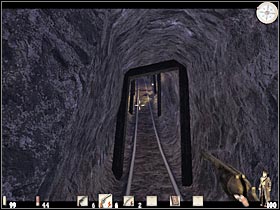
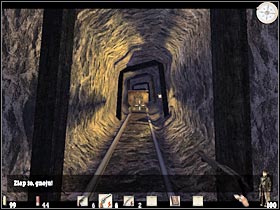
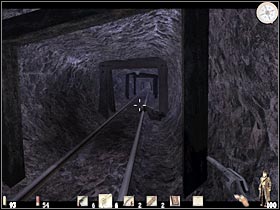
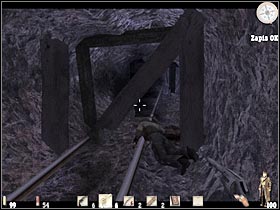
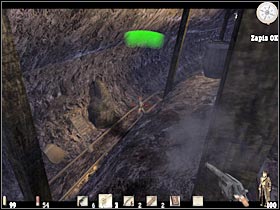
Start off by moving forward (#1). You're using a narrow path, so I'd recommend to be very careful. Ending up in the water would mean a failure. You should get close to some of the areas that were explored in the previous chapter of the campaign mode. Thankfully, you'll visit different mines this time. As you've probably suspected, you will have to get to the other side (#2). Make sure that each jump is very precise. You should also save your game here.
You will have to deal with several large gaps here (#1). Make sure you're running before you decide to perform an actual jump. You will also have to deal with a nearby bandit. He'll hear you coming, so you will have to use your gun to kill him (#2). Thankfully, there aren't any new bandits in this area. Make sure that you check his body for health bottles and ammunition.

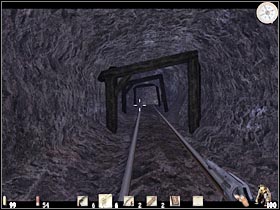
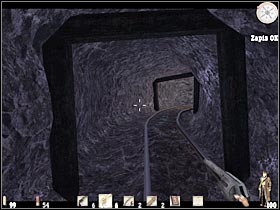
Check your compass. As you've probably suspected, you will have to reach an upper ledge. Sadly, Ray won't be able to use any of the climbing features. As a result, you will have to pick up a small basket. Place it in a correct spot (#1). Thanks to that, you will be able to continue your journey. Start moving forward. You should be able to reach a small entrance very soon (#2). It leads to one of the largest mines of this entire area.
I guess I should tell you about something. You will have to spend a lot of time in the mines. Unfortunately, it's not an easy journey. You'll probably want to leave this area as soon as possible. Start off by choosing a crouching stance. You should notice your first opponent in a distance (#1). I would recommend that you kill him from here. Be careful, though. There's also a second bandit here. You will have to watch out for him. After that, enter this small cave. You will find a health bottle here, as well as some ammunition. Proceed to the next corridor (it's located on your right).

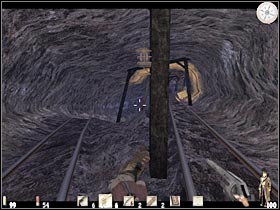
You should be able to reach a larger tunnel very soon. There's a small wagon here, however you should ignore it for now. Wait for one of the bandits to show up (#1). I would recommend that you organize a surprise attack. Make a few steps forward and lean out carefully. There are more enemies on your right (#2). Go ahead and kill some of them.
I would recommend that you stay in this tunnel, however you should also go back to one of the larger crates. They can be used for cover (#1). It's very important, because some of the bandits will be using shotguns. You could also take an advantage of the wagon (#2). Start off by reading anew hint. I WOULDN'T recommend using the wagon for transportation. Instead, start pushing it. You will have to be moving forward.

Make sure that you don't stay in the open for too long. Keep moving forward. You could also consider destroying some of the oil lamps (#1). It would help you to take out a few bandits. Make sure that you check their bodies. You will find a lot of ammunition here, however concentrate mostly on finding health bottles (#2). You should also pick up one of the better shotguns.
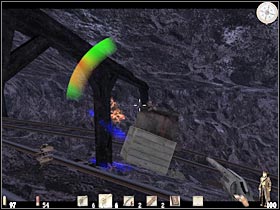
You should get closer to a large tunnel that leads to the upper part of this level (#1). Before you decide to move any further, MAKE SURE that you have saved your current progress. This a very challenging section of the map. Start moving upwards. You'll hear one of the bandits. I guess you've noticed that a wagon is coming your way (#2). You won't have enough time to go back. Instead, stand by one of the walls. You will have to do this very quickly.
Now you will have to eliminate your opponent (#1). He is standing on the top level of the tunnel, so you'll have to try and aim at his head. Wait for the cross-hair to turn red. It's very important that you kill him as soon as possible. Also, make sure that you remain by one of the walls. Once he's gone, start moving towards his position (#2).
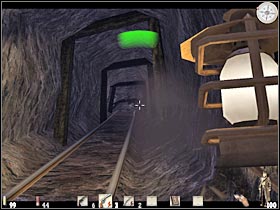
You will find a new wagon here (#1). Once again, I wouldn't recommend using it, mostly because it would crash very soon. Instead, start pushing it. This will allow you to attack the new part of the tunnels. That's where more bandits are hiding. Make sure that you take them out from a safe distance (#2). You should also use pillars and other large objects for much needed cover.
There's one more bandit for you to take care of. Just as before, make sure that you kill him from a larger distance. Make sure that the area is clear. Head on to the new part of the tunnel. You'll find some interesting objects here (#1). You won't be able to use the right tunnel. Instead, keep going straight (#2). You will have to avoid a few crates, however it shouldn't be much of a problem.
You should be able to reach a second wagon here. Thankfully, you won't have to do anything with it, as it wouldn't be able to hurt any of your opponents. Once you've reached a junction, head on to the right tunnel (#1). There is a new wagon in this area. Push it and start moving towards a small cave. One of the opponents should be hiding on your left (#2). Make sure that you take him out quickly. He's hiding, so you probably won't notice him at first glance.
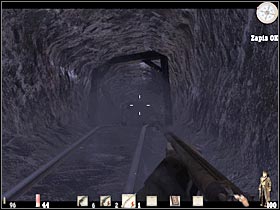
There are more enemies in this area. Most of them will be standing in front of you (#1). Make sure that you take them out from a large distance. Thankfully, you should be able to find a health bottle nearby. Head on to a darker tunnel. I have to warn you. The roof is very unstable (#2), so you must be very careful if you don't want to lose any health here.
There are two things for you to watch out for. At first, one of the pillars will come crashing down (#1). If you were moving slowly, you should be just fine. After that, you will notice some larger boulders (#2). You could save your progress, however this won't be necessary. This is where this mission will end. It's time for the second map of this chapter.
Complete walkthrough:
This is a much more challenging level, so will have to be very careful. Start off by moving forward (#1). You should be able to reach a new wagon very soon. You can push it or head on to a new tunnel without moving it. You will reach a large cave very soon (#2). I would recommend that you choose a path that's located on your right. Start moving forward. Make sure that you're using pillars and other large objects for cover.
You will come across one of the bandits (#1). Make sure that you take him out from a larger distance. You could also start shooting at the oil lamps and other flammable objects. One of the bandits will be hiding on your left (#2). I'm afraid that you won't be able to get past him. Once he's gone, proceed to the next section of the tunnel.
There's one more bandit for you to kill (#1). He will be hiding near the crates, so you should use some of the nearby pillars for cover. Make sure that this whole area has been secured. I would recommend that you take a closer look at your surroundings. There's a lot of ammunition here, as well as some health bottles. Proceed to the smaller tunnels. There are some new enemies waiting for you here (#2). You should be leaning out. Additionally, make sure that you have saved your current progress.
Be careful! The moment you enter a new cavern you will have to deal with one of the opponents. He will be using a wagon (#1), so I guess you'll have a lot of problems killing him. You could also hide by one of the pillars and wait for a few seconds. After that, start shooting at the remaining enemies (#2). I would recommend that you choose a path that's located on your right (the upper one).
You will have to keep pushing forward. As always, you should be using most of the nearby pillars for cover. There's a larger construction ahead of you (#1). You will have to get closer to it. Make sure that you're very careful here. This area is being guarded by two enemy soldiers. One of them is using a shotgun, so you will have to lean out a lot. You've got two options here. You can use one of your guns or throw a dynamite at your opponents (#2). Just make sure that they're dead. Otherwise you wouldn't be able to explore this part of the map.
Make sure that the area is clear. There is a narrow path on your way. I would recommend that you use it (#1). You will come across a ladder in a few seconds. Use it to get to the upper level. I have to warn you'll be doing this quite frequently. Keep moving forward. You will have an opportunity to use a second ladder (#2). Thankfully, you won't have any problems finding it.
Keep moving upwards. Be careful, though. One of the side corridors is being occupied by one of the bandits. He will probably surprise you (#1), so you should be careful here. It would be best to use the shotgun during these fights. Head on to the new corridor. You will encounter at least two other bandits here (#2).
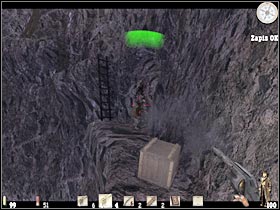
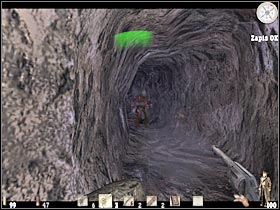
You should be able to reach a much larger cavern very soon. Start off by eliminating nearby enemies (#1). There's a large distance separating you from them, so you should be using your revolvers instead of the shotgun. Once they're gone, turn left and use a small ladder (#2). Make sure that you're moving upwards. The exit will be located at the highest level of the mine.

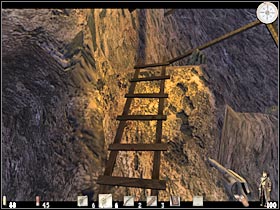
Keep moving forward. You will come across several interesting objects along the way, including the health bottles. You will have to be careful here. Some of the enemies may be hiding on the upper levels (#1). You will have to be ready for that. Use the ladder once again. Head on to a new tunnel. You will come across several other bandits here (#2). Make sure that you're using the shotgun to kill them.
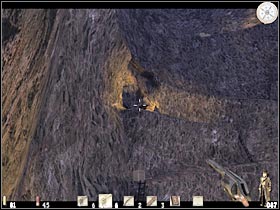
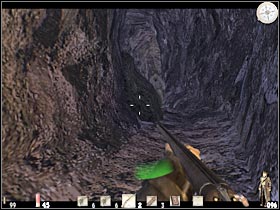
You will have to keep moving forward. I would like to remind you to use the shotgun (#1). There are a lot of difficult fights ahead of you. Thankfully, you will have enough time to look around. You should be able to find a lot of ammunition in one of the smaller rooms (#2). Be careful, though. This area is being guarded by one of the bandits.
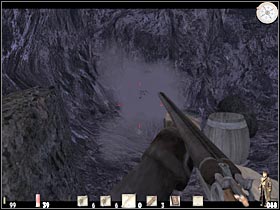
Head on to the next part of the tunnel. You will have to deal with several other bandits. Make sure that you take your time. You aren't rushed by anything. You should be getting closer to a large cavern (#1). Don't enter this new area just yet. Start off by taking out some of the visible enemy units (#2). Make sure you're using walls and crates for cover. You should also be leaning out a lot. You will have to use one of the revolvers here.
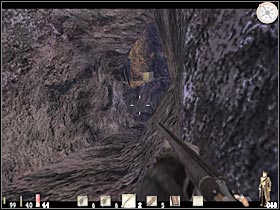
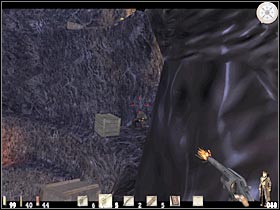
You should know exactly what has to be done here. Keep moving towards the highest level of the mine. Be careful. One of the bandits will probably try to surprise you. He is hiding on the upper level (#1). Kill him quickly, before he manages to throw a crate at you. There are a lot of ladders here for you to use. There's only one path leading to your destination, so you can't get lost. Get ready. There's a new group of enemies in the area (#2). Thankfully, this area is much clearer, so you won't have any problems locating them.
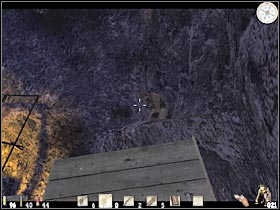
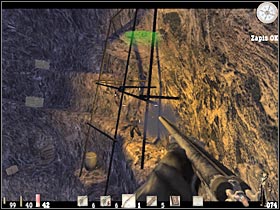
Some of the enemies will be standing in a larger distance (#1). I would recommend that you take care of this problem, however this is not one of your priorities. You should be able to reach a new tunnel very soon (#2). Make sure that you go there now. You will have to use a shotgun here. I would also recommend that you save your current progress.
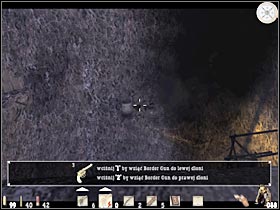
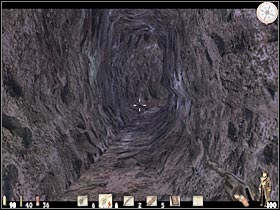
I guess I should warn you about something. There are a lot of different tunnels here, so you will have to choose the correct one. It should be located on your right and it leads to an upper level (#1). There are also a few bandits in this area. Take care of this small problem. Once you've reached a new cave, head on to one of the nearby ladders. There are even more enemies for you to kill (#2). Most of them will be standing in front of you, so you shouldn't have any major problems finding them.
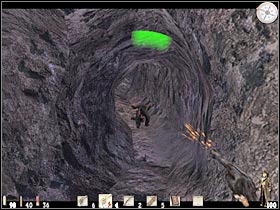
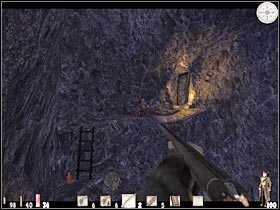
Start moving towards the light. Be careful, though. This passageway is being guarded by a lot of bandits (#1). As a result, you will have to be very careful here. In my case, most of the bandits were standing in the right tunnel (#2). It would be best to use the shotgun here.
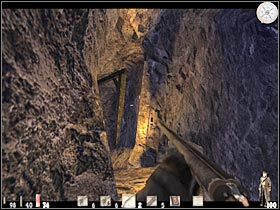
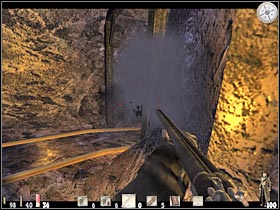
Turn around and start moving upwards (#1). There's a large tunnel here, so you shouldn't have any problems finding it. This is the end of this level. Wait for the game to load a new map.
Complete walkthrough:
This is a very short mission, however it can be quite challenging. Make sure you're not moving too fast, so you won't miss anything important. Start off by moving forward (#1). You won't encounter any bandits here, so you could speed up a little. A lightning will destroy one of the trees. You should remember this from one of the previous missions. As a result, you won't be able to use the main entrance (#2).
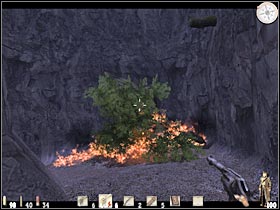
You will have to turn left. There's a flooded tunnel here. You will have to go there now (#1), as this corridor will lead you to the next mine. Keep moving forward. Once you've left the water, start crouching. One of the bandits is guarding the entrance. He's carrying a torch (#2), so you shouldn't have any problems finding him. Organize a surprise attack.

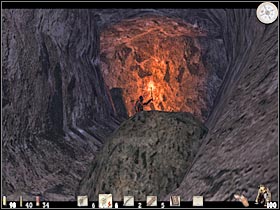
Once you've reached a much larger junction, turn left. Start moving forward. A short cut-scene should appear on your screen (#1). You will meet one of your main opponents. Sadly, you won't be able to kill him just yet. Instead, head on to the wooden construction (#2). It appears that it was a trap. As a result, you will end up on a lower level. Thankfully, Ray shouldn't lose any health. Wait for him to stand up. I'd strongly recommend that you save your game here. There are a lot of challenging battles ahead of you.
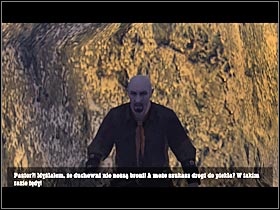
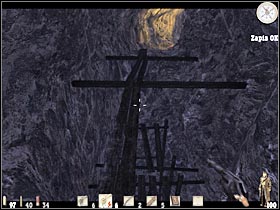
As you've probably suspected, most of the bandits will appear on the surrounding ledges. There are only a few cover points here, so you will have to eliminate them as soon as they start shooting you. One of the first groups will appear above you (#1). Make sure that you kill them right away. You could be using a shotgun, however I'd personally recommend having both revolvers. You should also zoom in the view. A second group will be standing on the other end of this tunnel (#2).

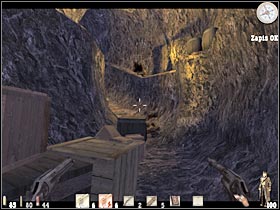
Start moving towards the new part of the tunnel. You will have to be careful. Additionally, make sure that you're using crates and walls for cover. There are some new enemies on your right (#1). You could try aiming at their heads, however this won't be necessary. Keep going straight. Make sure that you have picked up health bottles and ammunition along the way. Use the crates and barrels for cover (#2), as there are more bandits in this area. You could also throw a dynamite at them.
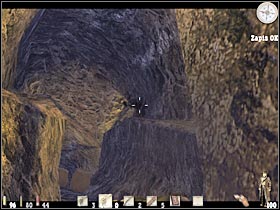
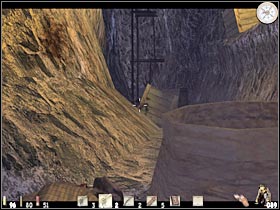
You should be able to get closer to a large, wooden construction (#1). I would recommend that you turn left and make a few steps forward. You should hear one of the bandits. Move back to a safe distance. You will have to prepare yourself for this battle. Your enemy is equipped with a very powerful rifle. As a result, make sure that you take him down with a single shot (#2). I guess I don't have to remind you that you'll have to aim at his head.

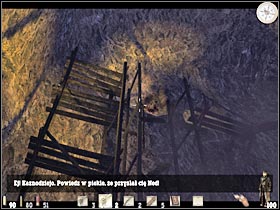
There's also a second bandit in this area. He should be standing on a small ledge that's located on your left (#1). You should also that even more enemies will appear there later during this mission. You will also have to turn around. One of the bandits is standing on an upper platform (#2). Kill him quickly.
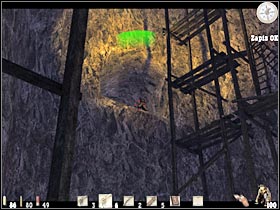
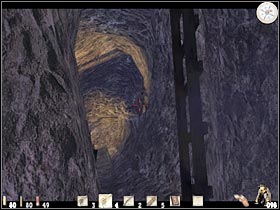
Sadly, you won't be able to use the larger construction, because it was damaged during the fights. Instead, you will have to turn around and head on to the smaller one (#1). Start using the ladders. Be careful, though. You are going to be attacked in a few seconds (#2). Kill the bandit and use a new ladder.
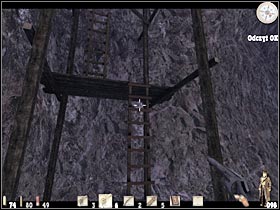
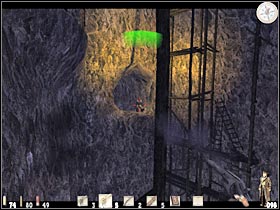
Once again, you will have to deal with a well armed bandit. Make sure that he's dead before you decide to proceed any further. You should be able to reach a new ledge from here (#1). Thanks to that, you will come across a new tunnel (#2). You could proceed to the next section right away, however I'd recommend that you check your surroundings first. You should be able to find a lot of ammunition here.
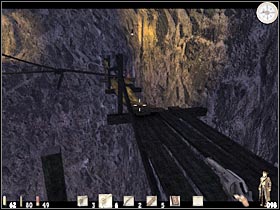
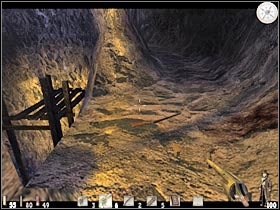
Head on to a new tunnel. You should get closer to the exit very soon (#1). It looks like the bandits are fighting with someone. Do your remember one of the previous missions? You should know that you're getting closer to Billy. Position yourself by one of the wagons and start shooting at the visible enemy units (#2). Additionally, make sure that you have saved your progress.
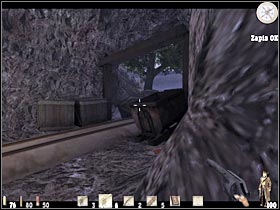
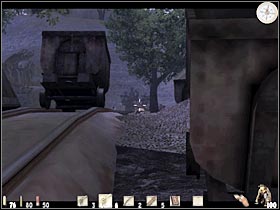
You could also pick up an oil lamp. You would find one of these objects in a nearby tunnels that's located on your left. It would make your job a lot easier (#1). Once you've secured the entrance, make a few steps forward. Some of the enemies will be standing by the building. Make sure that you killed them first (#2). You will have use your shotgun.
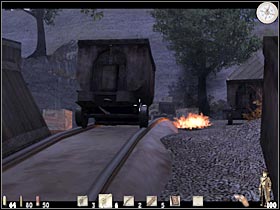
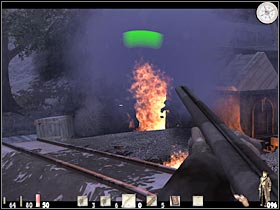
Once you've secured this entire area, an interesting cut-scene should appear on your screen (#1). You probably remember this confrontation from the previous chapter of the campaign mode. Save your game here! The game will suggest that you should start a chase. Head down to the tracks (#2). Thankfully, you'll have plenty of time to do that.

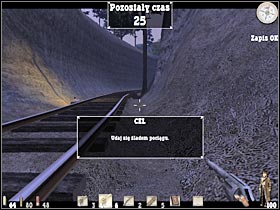
Sadly, this chase sequence is going to interrupted very soon. Ray will encounter of the bandit leaders here (#1). As you've probably suspected, you will have to kill him in a standard duel. You should know exactly what has to be done here. Eliminating your opponent (#2) will also end this chapter of the game. Thankfully, you'll still be playing as Ray.
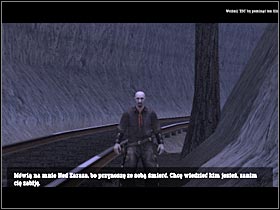
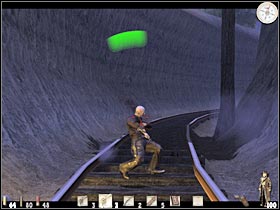
You are: Reverend Ray
Main mission objective: You will have to track down Billy. Additionally, you must deal with some of the bandits that were trying to steal the valuables from the train.
Difficult moments: I'm sure that you won't have any major problems with the first part of this chapter. The second mission is going to be much more difficult. There are a lot of well armed bandits for you to kill. Additionally, some of them will be hiding. You will have to be very careful, especially while trying to explore some of the inhabited areas. Remember that you won't be rushed by anything. Choose your targets carefully. Also, make sure that you have checked your surroundings for better weapons and ammunition.

Complete walkthrough:
You start off inside a large tunnel. Head on towards the exit. A short cut-scene should appear on your screen (#1). A dying man will inform you that there's been an attack on the train. Ray decides to deal with this problem. Keep going straight (#2). I would recommend that you choose one of the carried guns, as you're going to need it.
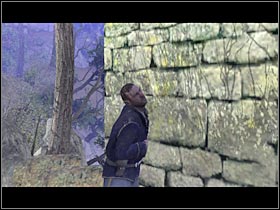
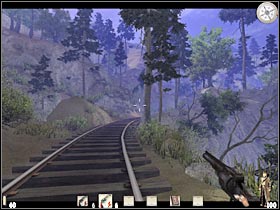
I guess I should warn you that the bandits will be ready for your attack. One of them will even try to convince you to surrender. Get ready (#1). You should also zoom in your view. As always, aim at the heads of your opponents. Once the first group is gone, try and move closer to your current destination. One of the bandits will be standing by a large boulder (#2). Make sure that you take him out as soon as possible. Go there now. This object could be used for cover.
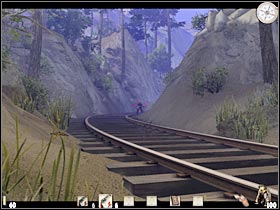
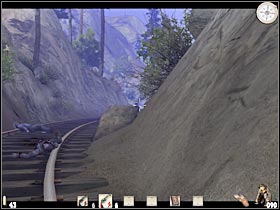
Keep moving towards the train. You should be able to get closer to one of the carriage. I'd strongly recommend that you save your game here. There are some new enemies for you to take care of. Most of them will be standing on the right (#1). Once they're gone, head on to a small road that's located on your left. Choose one of the nearby rocks and start shooting at the visible enemy units (#2).
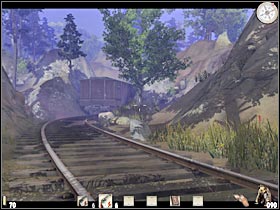
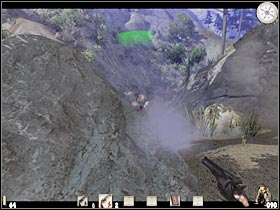
I would recommend that you stay here for a few more seconds. There are a lot of enemies in this area. You will have to make sure that you've killed all of them. Start moving forward (#1). Make sure you're moving from one cover to another. Observe your surroundings, as some of the bandits may still be hiding. You will be getting close to the new carriages (#2). Make sure that you have reloaded your weapon. You should also save your current progress.
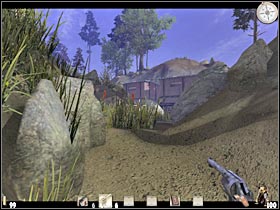
Most of your enemies will be hiding in the right carriage. If you position yourself correctly (#1), you should be able to eliminate them without having to worry about Ray's health. Be careful, though. Some of the bandits may try to get closer to your position (#2). You will have to be ready for that, because they pose a very serious threat. Make sure that the whole carriage has been secured before moving closer to it.
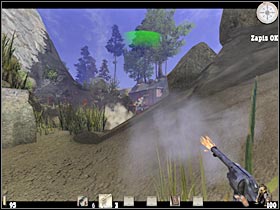
You can check the carriage (#1) and its surroundings if you want to. You'll find a lot of ammunition here, as well as several health bottles. I would recommend that you save your progress here. Exit the carriage and continue moving forward. You will encounter at least two bandits here. Be careful. One of them will be standing on a roof of the carriage, so you will have to take care of him quickly.
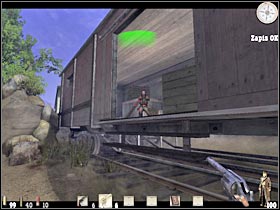
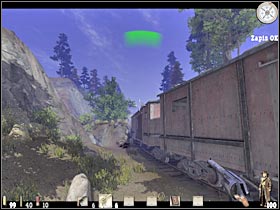
There should be one more bandit waiting for you here (#1). He will probably be hiding on your right, so you must be very careful. You could activate the slow-motion feature to take him out, although it won't be necessary. The only road leads to the nearby forest, however I wouldn't recommend using it just yet (#2). This area is being heavily guarded, so you will have to take out several enemies first.
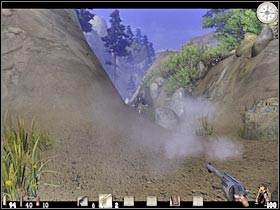
It would be best if you had entered a nearby carriage. Make sure that you check your surroundings. The most important thing is that you'll be able to see the whole path from here. Start shooting at the visible enemy units (#1). Make sure that the area has been secured. Exit the carriage and start moving forward (#2).
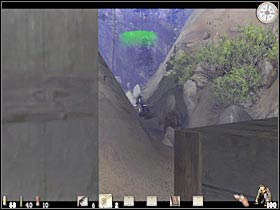

You will come across several other enemies along the way (#1). There are a lot of boulders and trees in the area, so you will be able to use them to your advantage. Make sure that you're not moving too fast. You should be able to reach a larger area very soon (#2). I'd strongly recommend that you save your game here. This is a very obvious trap, however you won't have any other choice but to enter this area.
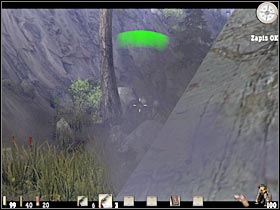
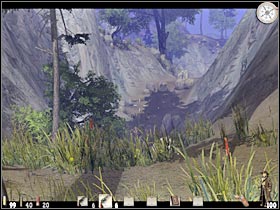
Start moving forward. You will have to be very careful here. Some of the bandits will push a few boulders towards you (#1). Thankfully, you shouldn't have any problems avoiding these objects. Just make sure that you position yourself on the right side. Lean out and start shooting at the bandits (#2).
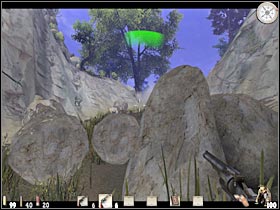
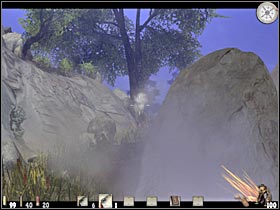
You may proceed to the next section, however you should also be on a look out for ammunition, better guns and health bottles. It's very important for you to have a maximum number of health points. You're going to need them very soon. Head on to the lower ledge (#1). Keep moving forward (#2). This is the end of this map. Get ready for the second part of this chapter.
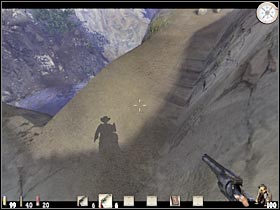
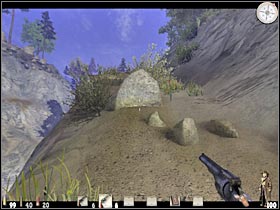
Complete walkthrough:
This is one of the most difficult levels of the entire game. You're going have to be very careful if you want to make it to the finish. Once you've reached a large waterfall, head on to a small path that's going to be located on your right. An interesting cut-scene will appear on the screen (#2). You will have an opportunity to take a closer look at your surroundings. That's where you'll have to go.
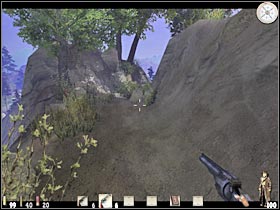
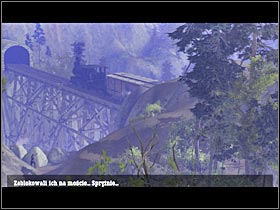
Sadly, you won't be able use any shortcuts to reach the train. Instead, you will have to choose a small passageway that's located on your right (#1). There's a small road here. Keep moving forward. You will encounter one of the bandits in a short while. He will escape to his colleagues, so you won't be able to kill him at this time. Once you've reached the lower part of the hill (#2), reload your weapon and save the game!
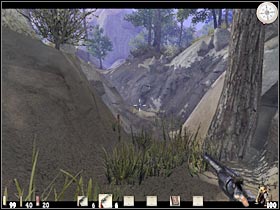
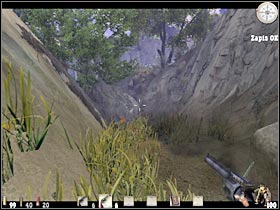
Try getting closer to one of the boulders. Lean out CAREFULLY. One of the bandits is standing by a machine gun post (#1). You won't be able to stay in the open for too long. Otherwise you would have ended up dead. You've got two choices. You can either start running towards a next area or kill him. If you decide to fight this guy, make sure to go to a new cover point that should be located on your right (#2). It'll be easy to get him from here.
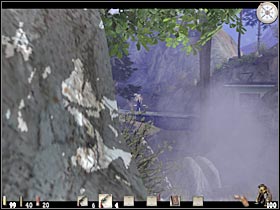
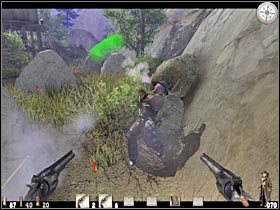
Once this problem has been solved, save your current progress once again. There are a lot of challenging battles ahead of you. Go to the next section. You will come across several new bandits. Sadly, due to poor visibility you won't be able to spot them right away. As a result, I would recommend that you use one of the nearby boulders for cover (#1). Make sure that you're crouching here. You should also take a closer look at your cross-hair. Wait for it to turn red. You could also organize a full scale attack (#2), however this would be very risky. Once the enemies are gone, get back to the rocks and reload your weapons.
I would recommend that you start off by taking out a single sniper. He is standing on a nearby water tower (#1). Thanks to that, you will be able to reach one of the carriages on your left. Start RUNNING towards it. Hide by one of the rocks. Lean out carefully and take out several other opponents (#2). Sadly, you won't have an opportunity to pick up their ammo.
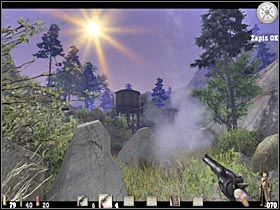
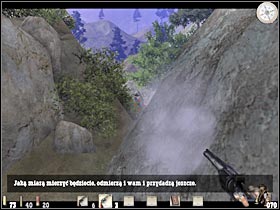
You will have to turn around and look up. If you position yourself correctly, you should be able to kill one of the bandits. He is hiding inside the wagon (#1). Proceed to the next section. There may still be some bandits in this area, so you will have to be careful (#2). Make sure that you kill them all. Now's your chance to pick up health bottles and ammunition. Additionally, create a new savegame.
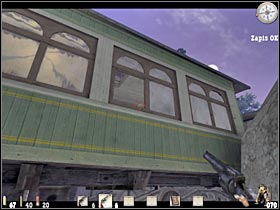
You will have to get closer to the water tower. There's a road here. It leads to another set of carriages. Be careful, though. One of these wagons is being occupied by a single enemy unit (#1). Make sure that you take care of this problem. Head on to a new path. You won't encounter any new bandits here. Once again, some opponents will be hiding inside the wagon (#2). Make sure that you killed them.
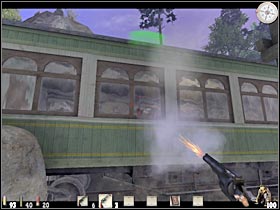
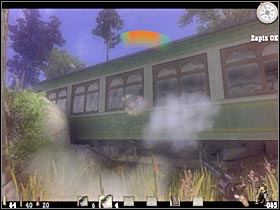
Get closer to the carriage (#1). Use the stairs to reach the upper platform. Turn left and open a single door. I would recommend that you choose both revolvers from the inventory. Keep moving forward. One of the bandits will attack you. Kill him quickly. You should also watch out for innocent civilians (#2). Thankfully, the game will prevent you from shooting them. You should also be on a look out for additional ammunition.
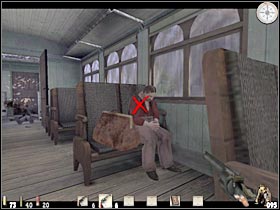
You will have to reach a new compartment. Before you do that, it would be best to holster your guns. This will allow you to activate slow-motion. Open the door and dispose of the bandits (#1). Once they're gone, start moving towards a small door. You should also pick up one of the health bottles. Open the door and kill a new bandit. You shouldn't have any problems with that (#2). Holster your weapons once again.
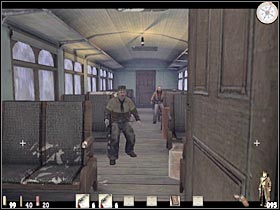
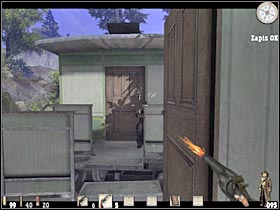
You will have to repeat this entire sequence (#1), however you probably won't be able to kill all enemies during a single attack. You could hide and repeat your entrance or kill them by using the usual methods. The choice is yours. Go ahead and enter a new compartment. There's a new group of bandits waiting here for you (#2). Make sure that you have killed all of them. You should also pick up a health bottle and some ammunition.
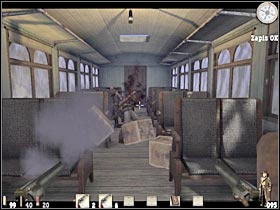
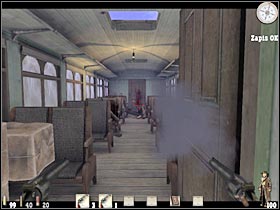
Step up to a small door and try to open it. An important cut-scene should pop up on your screen (#1). It appears that one of the bandits has regained control over the machine gun post. Once you've regained full control over Ray's actions, you will have to hide. It's very important that you don't get hit. Start leaning out. You will have to kill this bandit (#2). Make sure that you don't lose too much health here.
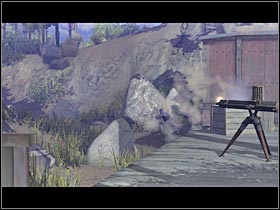
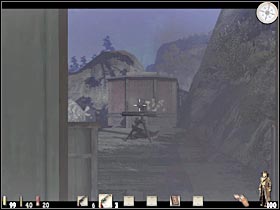
Leave this carriage and start moving towards the gun (#1). You will have to press the F key in order to be able to use it. Start shooting at the bandits (#2). They will be coming from two different directions. Most of them will appear on the top of the hill that's located in front of you. Some of them will also use a small path. It's on your right. Once they're gone, make sure that you check this area for health bottles and ammunition.
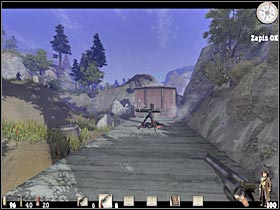
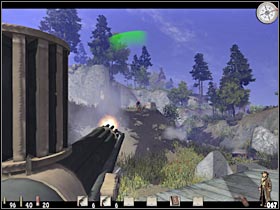
You haven't killed all bandits. Try leaving the train. You should be moving towards your current targets. You should be able to spot at least two enemy soldiers in a distance. One of them is carrying a shotgun, so you have to be careful. Make sure that the area is clear. Head on to the new carriage (#2). Thankfully, you won't find any hostiles here.
Enter the wagon. A short cut-scene should appear on your screen (#1). You will come across a small group of allied soldiers, so you won't have to worry about being killed. Head on to the other end of this carriage and talk to their leader. He will tell you what's going on here. You will also receive a new task. You will have to blow up a barricade that leads to a nearby camp.

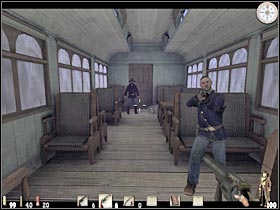
You will have to wait for the cut-scene to end. After that, turn right and pick up one of the TNT barrels (#1). You will have to start carrying it. Leave the carriage. Keep heading towards a nearby road. You shouldn't encounter any other bandits here. You will also receive a small escort. Start moving towards the baricade. You will have to place the TNT barrel by the large crates (#2).
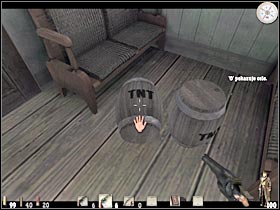
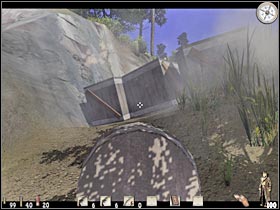
Now you will have to move back to a safe distance. As you've probably suspected, you will have to destroy the barrel. As a result, a huge explosion will destroy the barricade (#1). You will have to proceed to this location (#2). I would also recommend that you take a closer look at your surroundings. One of your killed allies was carrying a very useful rifle.
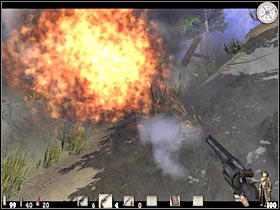
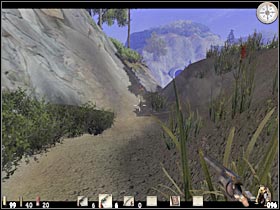
Try making a few steps forward. You should notice that one of the bandits is standing here (#1). Kill him. Now you've got two choices. You could try a safer approach that would require you to use rocks and trees for cover. Sadly, it would be quite challenging, due to poor visibility. I'd personally recommend attacking your opponents right away (#2). Make sure that you're using rifle, shotgun or double pistols to kill them.
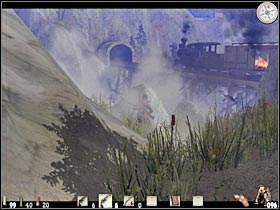
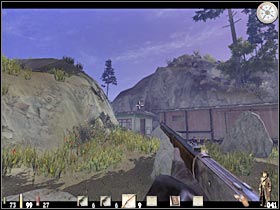
You will have to make sure that this whole area has been secured. Now you must go back to your allies. Be careful, though. You will encounter at least one additional enemy unit along the way. The bandit will be standing on the roof of the carriage (#1), so you'll have to be very careful. Go ahead and proceed to your destination. Sadly, there are a lot of bandits waiting here for you (#2). It would be best to use the slow-motion feature to kill them. Head on to the next compartment.
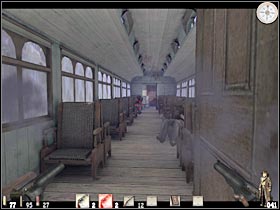
You will have your first encounter with one of the leaders of this group (#1). Sadly, you won't be able to kill him here. Start off by taking out nearby bandits. It shouldn't be much of a problem. After that, make a few steps forward. A short cut-scene will appear on your screen (#2). One of the soldiers will tell you that these doors have been barricaded from the other side. As a result, you will have to find a way to solve this problem. You should also take a rifle, however you should already be using a similar weapon.

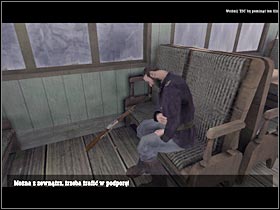
I guess you should already know what has to be done. You will have to find a ledge that will allow you to make a successful shot. You probably will have some problems locating it. Start off by going back to the stationery machine gun. There's a small road on your left (#1). You will have to go there now. Watch out for a single bandit. He is standing on a nearby hill (#2). Make sure that he's been eliminated.
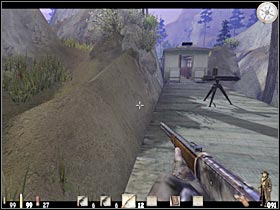
You will come across a second bandit very soon (#1). Make sure that you had eliminated him from a larger distance. Sadly, there aren't many cover points here, so will have to be careful. Keep moving forward. There are only two more bandits for you to take care of (#2). If you have a rifle with you, consider taking them out in an open battle. Also, make sure that you've taken the ammunition.
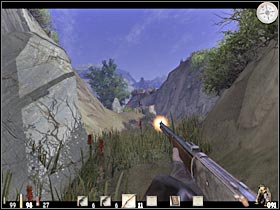

You will have to get closer to the bridge area. Zoom in the view. You must destroy a small wooden plank (#1). This will allow you to reach some new sections of the train. As you've probably suspected, you will have to go back to a small door. Thankfully, you won't encounter any new bandits along the way. Open the door and use the ladder in order to reach the top of the wagon.
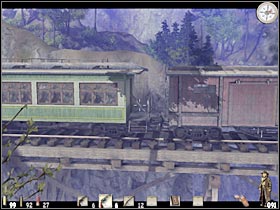
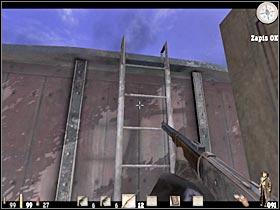
I would recommend that you choose your rifle from the inventory. A short cut-scene will appear on your screen (#1). Start off by killing your opponent. You will have to be quick about it, as you'll only have a few seconds to save the hostage. Step up to the designated area and press the F key (#2). This is VERY important! Otherwise you would have failed the whole mission.
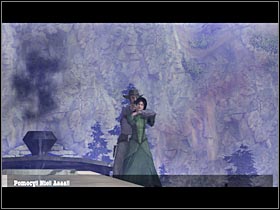
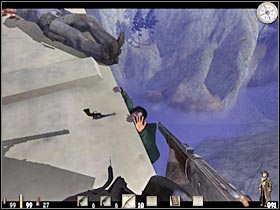
Now you will have to get closer to a locomotive (#1). This will trigger a new cut-scene. You will find out more about Billy. Ray suspects that he's going to hide in one of the nearby farms. This conversation is going to be interrupted very soon (#2). There's a new duel ahead of you.
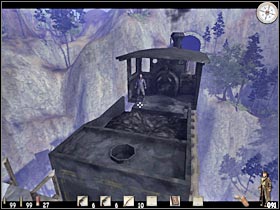
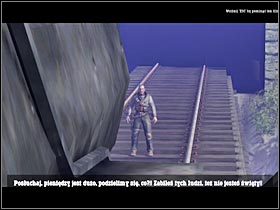
I guess I don't have to tell you to wait for the signal (#1), however I should also warn you about a few things. This duel is much more challenging than the previous ones. Your opponent is very agile, so you'll have to be very quick with your weapon. He will also try to bend down, so you'll have to aim lower (#2). Once he's gone, a final cut-scene will appear on the screen. This is the end of this chapter. I'm sure you'll be thrilled to hear that you'll be playing as Billy in the next mission.
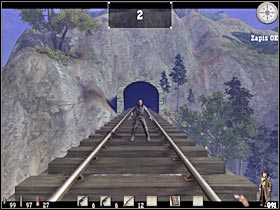

You are: Billy Candle
Main mission objective: You will have to reach one of the nearby farms. Molly lives there and she'll be able to help Billy. The road leads through an Indian territory.
Difficult moments: This is not a very difficult chapter, however there are a few things you should know about. First of all, you will have to conserve your ammunition. This is very important, because you will have to kill a lot of Indians along the way. You could use the whip, however this would be much more difficult, mostly because you'd have to surprise most of your opponents. As a result, choose your targets carefully. Aim at the heads of your enemies. You should always check their bodies for new weapons and ammunition.
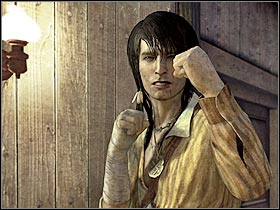
Complete walkthrough:
The first level of this chapter is going to be very simple. Furthermore, you should be able to finish it within 5-6 minutes. Start off by moving forward (#1). You will have to turn right in a few seconds. You won't encounter any enemies or wolves here. Get closer to a small creek (#2). I would recommend that you save your game here.
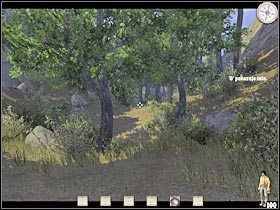
Head on to the water and start swimming forward. You will have to avoid several large rocks along the way (#1). It shouldn't be too difficult, although you should be using the S key all the time. You will reach a small island very soon (#2). Use it to get back to the forest area.
Keep going straight (#1). Once again, you won't have to worry about anything. You really can't make any mistakes here. Make a left turn as soon as possible. Once again, there's a lot of swimming ahead of you (#2). Thankfully, there aren't any rocks in this area, so you should be just fine.
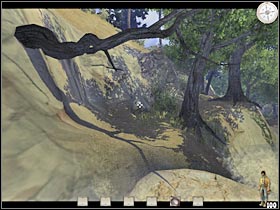
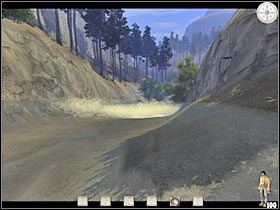
Don't worry about the smaller waterfall. You won't have to do anything here. You should be getting closer to a much larger waterfall. Be on a look out for boulders (#1). You will have to reach one of them. Start moving towards your destination. Also, make sure that you don't end up in the water. You will have to perform several jumps here (#2).

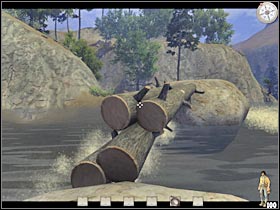
Head on to a large tree (#1). You will have to use it to reach a new part of the map. Make sure that you take your time while doing this. Once you're there, start moving forward. I would recommend that you choose a whip from your inventory. You are going to be attacked by several wolves here (#2). Use the whip to kill them. You should also be moving backwards, so you won't get hurt.
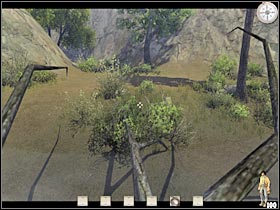
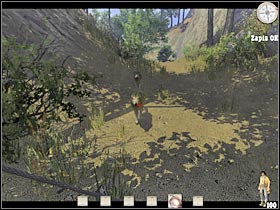
You may proceed to the next section. You should be able to reach a new location very soon (#1). There's a short climb ahead of you. Head on to one of the upper ledges. Be careful, though. There's a rattlesnake here (#2). You will have to kill it with your whip. Make sure that you keep a safe distance. Once you've handled this problem, climb up to a new platform.
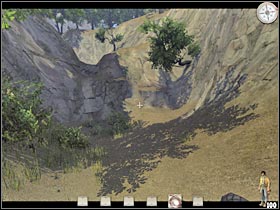
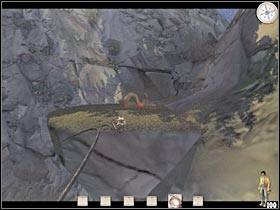
There's only road leading to your current destination (#1), so you won't be able to get lost. Wait for the game to load a new part of the map. There's a much longer mission ahead of you. It'll also be more interesting.
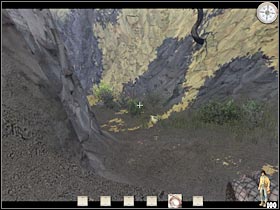
Complete walkthrough:
You start off in a forest. I would recommend that you choose your whip right away. You'll going to need it very soon. Make a few steps forward. You are going to be attacked by several wolves (#1). Make sure that none of the animal is able to bite you. Once you've disposed of the first group, head on to the next one (#2). Be careful here, as there are going to be more wolves in the vicinity.
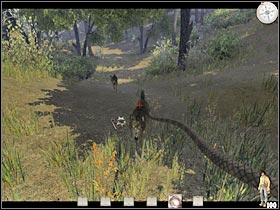
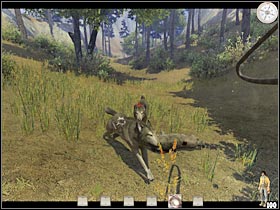
There's a longer journey ahead of you (#1), so you'll have to be patient and enjoy your surroundings. You will have to leave the forest area. Billy should say that he's going to need a horse. Turn left and start moving towards a nearby farm (#2). You shouldn't have any problems locating it, especially if you'll be using your compass.
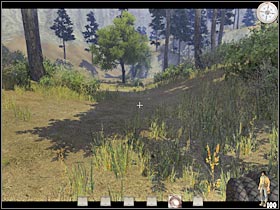
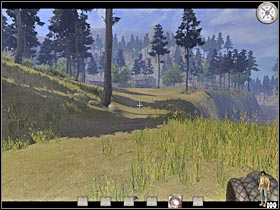
Try and get closer to the large entrance (#1). Enter the farm. Sadly, this will trigger a new cut-scene. As a result, you will have to sneak past the owner in order to steal a horse. Thankfully, you won't have any major problems with this quest. Start off by moving towards the stables area. You will have to wait for the right moment to make a move. Get closer to large wagon. You should be able to reach the stables from here (#2).
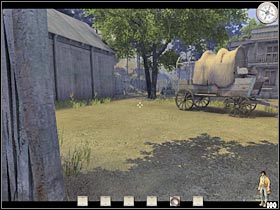
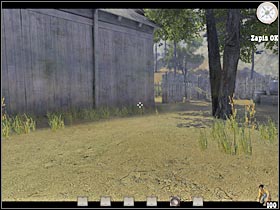
Enter this new building. You should be able to find a horse here (#1). Sadly, in order to steal it, you will have to find a saddle first. Exit the stables area. Once again, you will have to wait for the right moment to make a move. Try and get closer to the wall of the house (#2). You should save your current game here.
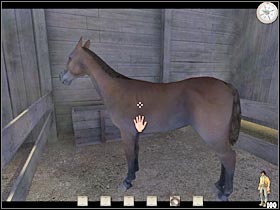
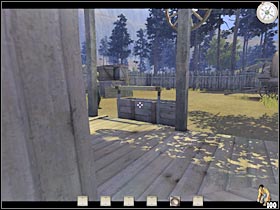
Wait for the farmer to start moving towards a large gate. Thanks to that, you will be able to enter his house (#1). You should be able to find a saddle inside a small room that's located on your right (#2). I wouldn't recommend picking it up just yet. You should do a couple of other things first. Go ahead and use the stairs to reach the first floor.
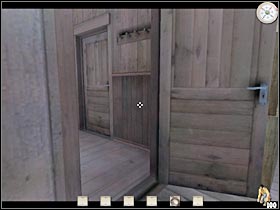
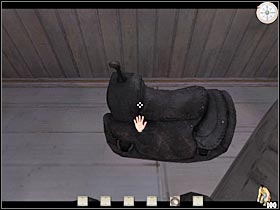
Once you're there, turn left and start moving forward. You will have to reach an opposite end of this corridor. You should be able to find a revolver here (#1), as well as some ammunition. Pick it up. Go back to the ground level. You should save your game here. Now you will have to pick up the saddle and start carrying it. Once again, wait for the right moment (#2). If you're lucky, you should be able to reach the stables area without making any additional stops.
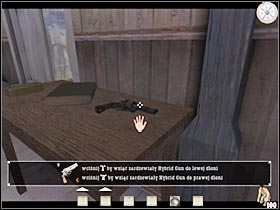
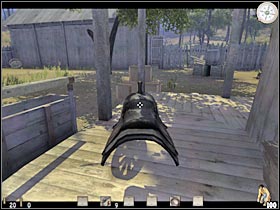
I guess it's fairly obvious that you'll have to return to the horse. Make sure that you're carrying the saddle with you. Press a correct key in order to place it (#1). You may use the horse now. Take your time and familiarize yourself with the controls. You will be using the movement keys. Additionally, you can look around with the mouse. Your first objective will be to leave the stables (#2).
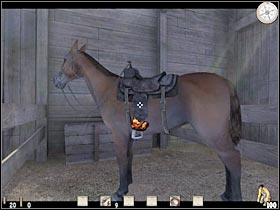
Bear in mind that you won't be allowed to stop, because the owner of this arm will start shooting at your hero (you can't fight back). Press the SPACE key in order to perform a successful jump (#1). Turn right and repeat the jump. You shouldn't have any problems finding a correct spot. Once you've escaped, start moving towards a small road (#2). It leads to your current destination.
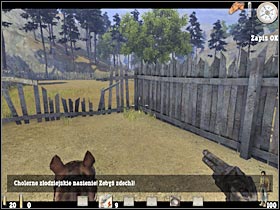
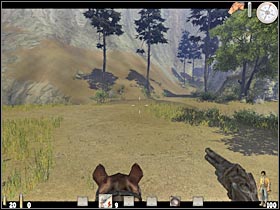
Thankfully, you won't be attacked by any bandits along the way, so take your time and practice using the horse. There's only one road here (#1). Sadly, you will come across a large gap. As a result, you will have to leave the horse. Start off by moving to a lower platform (#2). You won't have problems finding it.
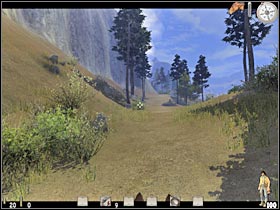
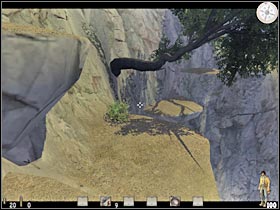
There's a very challenging jump ahead. You will have to reach a nearby platform (#1). Make sure that you're running. Otherwise you would have ended up dead. Once you're there, make a few steps forward. There's a branch here. You will have to use your whip (#2). Pull yourself up and start swinging in order to be able to reach a new platform. Proceed to the next section.
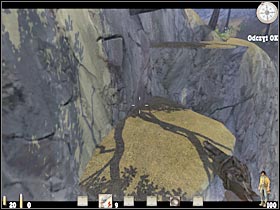
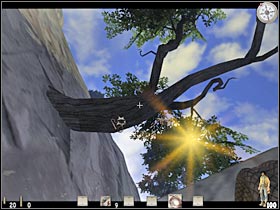
There's only one more gap waiting for you here (#1). You shouldn't have any major problems with this jump. Make sure that you have saved your game. You probably noticed by now that there's something going on in this area. Try moving closer to the burning object (#2). It turns out that some of the redneck Indians attacked it. You will have to get closer to one of the nearby rocks. This will allow you to surprise them.
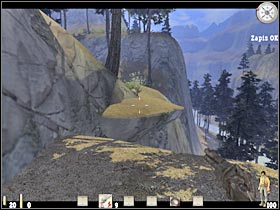
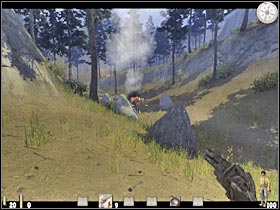
As I've said before, you will have some serious problems acquiring the ammunition. As a result, make sure that you're aiming at the heads of your enemies (#1). Be careful, though. One of the Indians will be using a shotgun! Make sure that the area has been secured. Get closer to the burning wagon (#2). I would recommend that you search the whole area for valuable objects. You will find a shotgun here, as well as a second revolver. It's hidden in one of the chests.
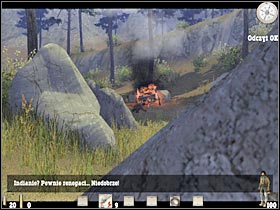
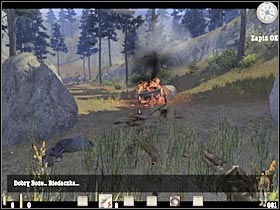
You should also notice that there's a horse here. You will have to use it (#1), as there's a long distance separating you from the next objective. Start moving forward. Make sure that you have reached the other end of this valley. Billy will notice that there are some Indians here. Leave the horse and start moving towards them (#2). You will have to be crouching, so they won't see you coming.
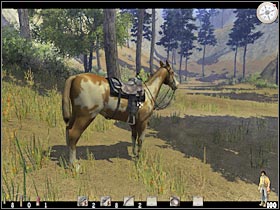
I would recommend that you take out both Indians from a large distance (#1). Make sure you're using rocks and trees for cover. Once they're gone, check their bodies for ammunition. Also, one of them was carrying a rifle. Pick it up. You won't have to get back to "your" horse. You'll find a new animal here. Keep moving forward. Once you've reached a junction, turn right (#2).

You should be able to reach a huge gap very soon (#1). You will have to make a jump here. Thankfully, this is a simple task, however you aren't allowed to make any mistakes here. Keep moving in a straight line. A new cut-scene should appear on your screen. It means that you're getting closer to a new Indian camp. Leave the horse and start moving towards it (#2). I'd strongly recommend that you choose one of the revolvers for this battle.
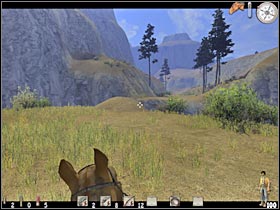

If you position yourself correctly (#1), you should be able to eliminate one of the Indians, without alarming the rest of your enemies. They are standing by the fire. Start moving towards them. You will have to be very quiet in order to be able to perform a stealth attack. I would recommend that you stop by the large hill (#2). Turn left and aim at the head of your opponent. You will also have to kill the third Indian.
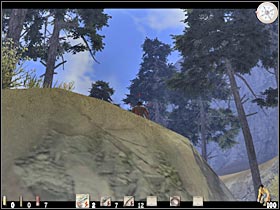
Make sure that this area has been secured. You should take a closer look at the camp, as you'll find a lot of ammunition here. Head on to the new horse (#1) and start moving towards your next objective. You will come across several rocks, however this shouldn't be much of a problem (#2). Keep moving towards the mountain areas.
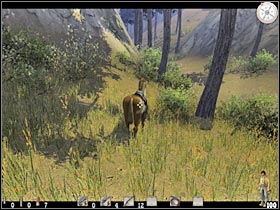
You will have to leave your horse here. One of the Indians will be standing in front of you (#1). If you're lucky, you should be able to surprise him. I'd strongly recommend that you use the whip, so you won't have to waste your ammunition. Make a few steps forward. Sadly, you won't be able to use the main road, because a large boulder is blocking your way. Instead, head on to the nearby ledges (#2).
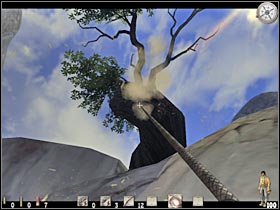
This is a challenging sequence, so you should consider saving your game first. Start off by using the whip (#1). This will allow you to reach the upper ledge. Once you're there, start swinging. You will have to do this quickly, as there are two more Indians here (#2). You must kill them as soon as possible. You should be using a shotgun or a rifle during these fights. Additionally, make sure that you checked the bodies for better guns and extra ammunition.
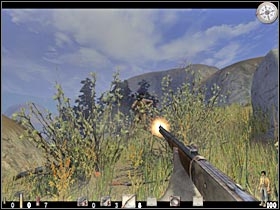
Slide down carefully (#1) and keep moving forward. Sadly, you won't be able to use any horses here. Furthermore, there are several wolves in this area (#2). I'd recommend that you use the whip to take care of this small problem. Keep moving towards your current destination.
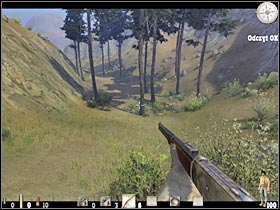
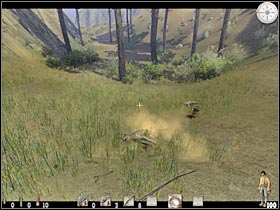
You should be able to leave the forest very soon. A short cut-scene will appear on your screen (#1). Billy notices that one of the Indians. You will have to kill them. Turn left and start moving towards your target. You should be careful not to make too much noise. Once you're there, use the whip to get rid of him (#2). Proceed to the next section. It would be wise to save your current progress here, as there are a lot of difficult fights ahead.
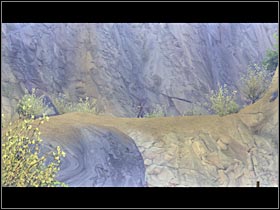
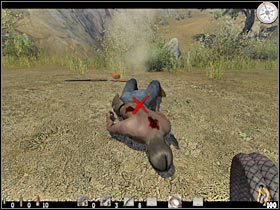
Keep going upwards. You should be able to spot one of the Indians very soon (#1). I'd strongly recommend that you use the rocks for cover. You will also be leaning out a lot. Alternatively, you could try a direct approach (#1), however this would be very risky. Either way, you will have to secure this area and check all corpses for ammunition.
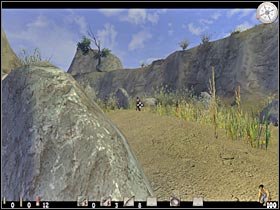
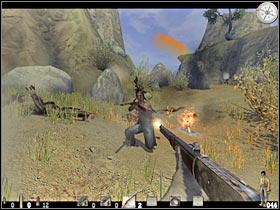
You may proceed to the next section of the map. I would recommend choosing a path that's located on your left. You should be able to reach a small campsite very soon (#1). Start shooting at the visible enemies. After that, use some of the nearby objects for cover. You should be leaning out a lot (#2) in order to take out the rest of the Indians. Make sure that you have picked up health bottles and ammunition. You should also exchange your shotgun for one of the better rifles.
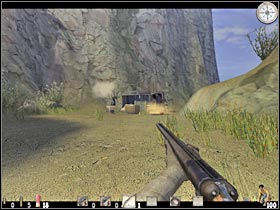
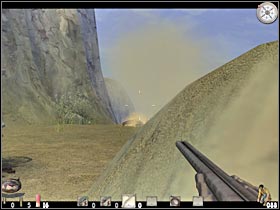
Keep moving forward. You should have any problems within this road (#1). You won't encounter any new units here, however you should be able to spot a few Indians in the distance. Sadly, you will have to get closer to be able to kill them. I would recommend that you keep a crouching stance. Use nearby rocks for cover. Position yourself by one of these objects (#2). You should also save your progress here.
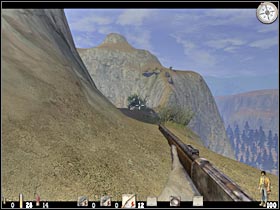
There are at least two Indians in your area, so you will have to take them out first (#1). Additionally, kill an enemy sniper. He will be standing on an upper ledge. Once they're gone, collect all ammunition. You will have to choose a path that's located on your right (#2). It doesn't lead straight to your objective, but you have no other choice.
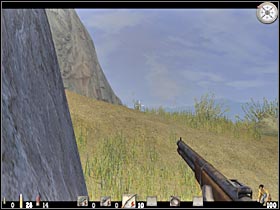
Keep moving forward. You shouldn't encounter any other bandits here. You will have to slide down to a new platform along the way (#1). It shouldn't be much of a problem. You won't even have to use the S key. Turn left and choose a narrow passageway (#2). The game will begin loading a new map here.
Complete walkthrough:
You start off in a forest area. Keep going straight. I would recommend that you choose a whip from your inventory, however you won't need any weapons during this mission. You will have to take out a large group of wolves (#1). Be careful! They are much stronger than the previous ones. As a result, you will have to perform several successful hits (#2).
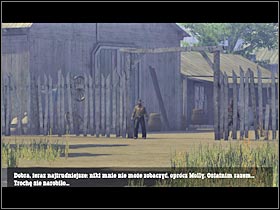
There are three wolves for you to kill. Keep moving towards your destination (#1). Make sure that you're using the compass. A new cut-scene should appear on your screen (#2). Sadly, you won't be able to use the front entrance to reach Molly, because Billy isn't welcome here. Instead, you will have to sneak your way into the complex.
Turn left. You should notice that there's a new path here (#1). You will have to go there now. Thankfully, there aren't any bandits in this area, so you won't have to be quiet here. You should be getting closer to the ranch (#2). Start moving towards the cliff area, because it will be your only way in.
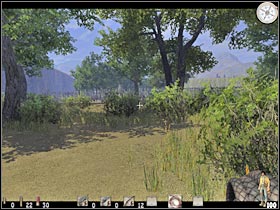
Notice that there's a hole in the fence (#1). You will be able to take advantage of this, however you must wait for the nearby guards to split up. The game previously suggested that you should be using the bushes to hide your position... now's your chance to test this (#2). Start moving towards the stables area. It'll be located in front of you.
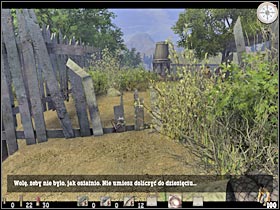
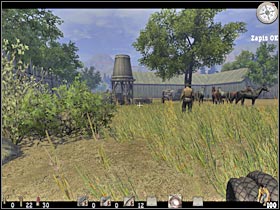
Keep going towards your current target (#1). One of the guards will be located on your right. Thankfully, he won't be able to see you. Once you're closer to the stables, head on to the nearby bushes (#2). You will have to save your game here, as there are some risky manoeuvres ahead of you.
Turn right. You've probably noticed some bushes in this area. You will have to go there now (#1). Once you've reached your destination, wait for both guards to start moving towards different directions. One of the bandits will be standing by the stables wall, so you have to be very careful. Head on to the crates (#2). You will be able to use them to enter the new building.

Enter the stables SLOWLY (#1). It's very important that you keep quiet here, mostly because there are some bandits below you. As a result, they would hear you coming. Also, make sure that you don't hit any barrels. Wait for one of the guards to start moving. Follow him. You will have to stay on the upper level (#2).
Make sure that you check your surroundings frequently (#1). Thankfully, you will have to avoid only several guards here. Make sure that you don't move too quickly. You should be able to reach the opposite end of this platform (#2). Before you decide to move any further, MAKE SURE that you have saved your game!!

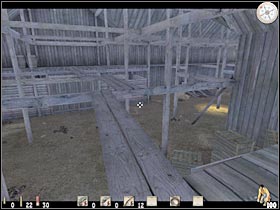
Start moving forward. You will have to be crouching, HOWEVER you can't stop at anything, as this would result in a mission failure. A floor will collapse at some point. As a result, you will have to avoid being hit by a horse (#1). Once you've regained a full control over Billy's movements, start RUNNING towards nearby crates. They will be located on your LEFT (#2). You will have to hide here quickly, because some of the bandits will show up here very soon.
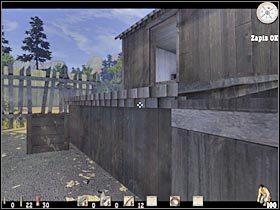
You will have to wait here for a few seconds. The bandits will decide to return to their posts (#1). You could follow them, however you won't be able to enter a new warehouse. Instead, pick up one of the smaller crates. You will have to place it by the fence (#2). Climb up and perform a single jump in order to get past the fence. This will allow you to reach a new section of the map. Save your game once again.

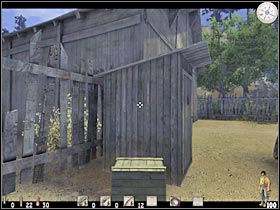
You will have to keep quiet here, mostly because there are a lot of bandits guarding this area. Head on to a nearby window (#1). This will allow you to enter the new building. Now you will have to reach a second room. Make sure that you don't get too close to the windows, or you would have been spotted. You will find a door here. Open it (#2).
You should be getting closer to Molly's house. Wait for one of the guards to start moving towards the left side of the screen (#1). Keep going straight. Sadly, you won't be able to use the front door to enter the building. Instead, turn right. You will have to reach the back of the house (#2). Thankfully, there aren't any other guards in the vicinity, so you shouldn't have any major problems with that.
You should be able to reach your current destination very soon. Start off by hiding. You will have to be crouching by a large wagon (#1). This will allow you to lean out a few times. Wait for the guards to leave this area. Now you will have to start RUNNING towards an open door (#2). Once you're inside, hide on your right. You will have to wait here for a few seconds.

There's a bandit in the next room. You will have to wait for him to start moving towards a main entrance. Follow him (#1). Sadly, you won't be able to kill him. Instead, turn right and use the stairs to reach the first floor (#2). You won't encounter any other bandits here. Once you're there, turn left.
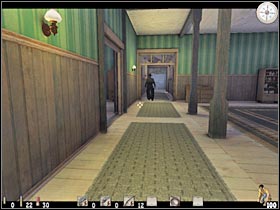
Head on to the opposite end of this corridor. Use the compass if you don't where to go (#1). Try to open the door that leads to Molly's room. Sadly, you won't be able to talk to her just yet. Billy encounters a large group of bandits (#2). One of them will challenge him to a fist duel. You've been using this feature before, however you should that your new opponent is going to more difficult to beat.
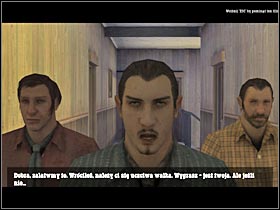
The rules haven't changed since the last time. Try getting closer to the bandit in order to throw a few punches at him (#1). Once you've done that, get back (#2) in order to avoid his moves. You should also remember that this is a rather small corridor, so you can't let him corner you. I'd strongly recommend that you keep using a standard combo (LMB, RMB, LMB). Additionally, you should be saving your game quite often.
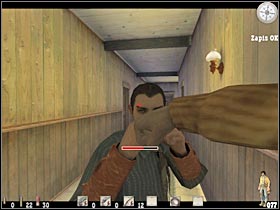
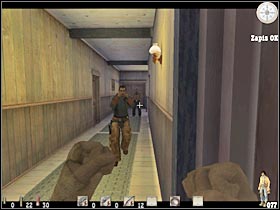
There are two interesting cut-scenes for you to watch. Sadly, Billy won't be able to receive any help from Molly. Additionally, he's going to be chased out of the farm (#1). The final part of this chapter is even more interesting. Reverend Ray will show up on the ranch (#2). This is where this mission will end. To be continued? ;-)
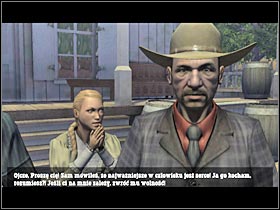
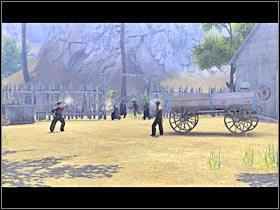
You are: Reverend Ray
Main mission objective: You will have to hunt down Billy, before he manages to receive any help from the farmers. You will also have to get past an Indian territory.
Difficult moments: This is one of the easier chapters of the campaign mode, however that are a few challenging fights waiting here for you. You've dealt with similar problems before, so you should be just fine. You must also know that there will be several timed sequences here, however they aren't too complicated. Nevertheless, you won't be allowed to make any major mistakes.
Complete walkthrough:
The first part of the mission will require you to get past an Indian territory. You should know these lands from one of the previous levels. Sadly, you won't be able to explore any new areas here. You start off in a small valley (#1). Bear in mind that there are a lot of difficult fights ahead of you. Most of the Indians will try to surprise you and you have to be ready for that. A short cut-scene should appear on your screen (#2).
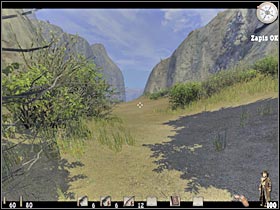
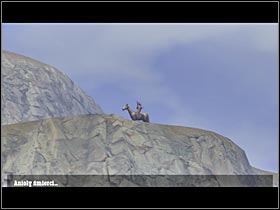
Keep moving forward. You probably know this area very well, so I guess I'll only concentrate on the fighting aspects. You won't have to wait too long for the first Indians to show up (#1). Make sure that you use one of the nearby boulders for cover. Additionally, you will have to aim at their heads (#2). Be careful, though. Some of your enemies will try to flank you from the left side. Once they're gone, check the bodies for ammunition and better guns.
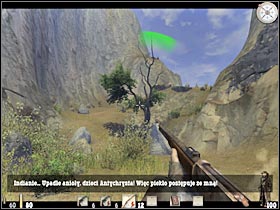
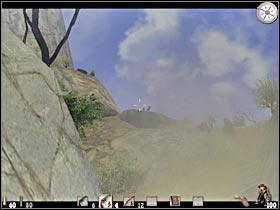
One of the Indians will be hiding on your left, by the huge rocks (#1). You probably won't notice him at first glance, so you have to be very careful, because he won't have any problems killing you. Most of the Indians will appear on the upper ledges (#2). They are located on your right, so you will have to find a suitable cover. You should be using the nearby boulders for that. Additionally, it would be wise to use a rifle during these fights. Additionally, you will be able to predict new attacks. Just make sure that you're on a look out for falling rocks. If this happens, you will have about 2-3 seconds to find a good cover and prepare for the upcoming attack.
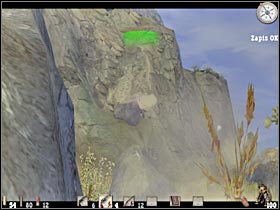
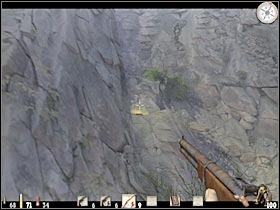
Keep heading towards your new destination. Be careful, as some of the Indians will try a frontal approach (#1). You will have to use your rifle in order to get rid of them quickly. You should also check all of the nearby ledges. Some of your enemies may still be hiding here (#2). Make sure you're using larger objects for cover. Additionally, make sure that your save your progress frequently.
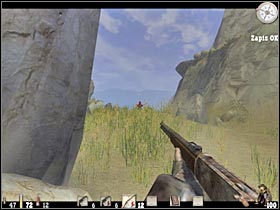
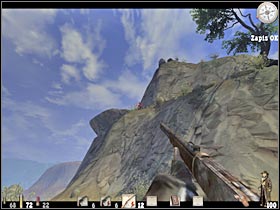
There are some more difficult fights waiting for you near the campsite. Start off by taking out an enemy sniper. He will be hiding on an upper ledge that's located on your left (#1). Furthermore, one of the Indians will try to attack with his tomahawk (#2). He will be standing by a large rock. I would recommend that you use this object for cover. You should be able to take out the rest of the Indians from here.
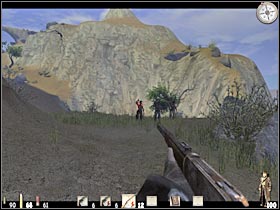
Try to make a few steps forward. You are going to be attacked by three Indians (#1). Thankfully, you won't have to worry about that. They're carrying only tomahawks, so you won't have any problems killing them. Head on to the new canyon (#2). This is the final part of the mission, so you should save your game first.
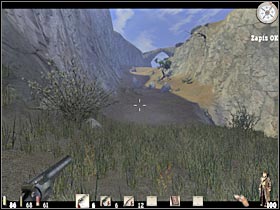
As always, you'll have some serious problems with those Indians who are hiding on the upper ledges (#1). I would recommend that you find a good cover point here. This will allow you to eliminate them without having to worry about anything else. Keep moving forward. Make sure that you're using nearby boulders for cover. You can't stay in the open for too long. You should also know that some of the Indians are equipped quite well (#2), so they will have to die first.
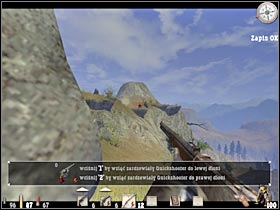
Once you've reached the junction, choose the same road as before. You will have to get down from this hill (#1). Be careful, though. You are going to be attacked by two other Indians (#2). They will be using guns, so you have to kill them quickly. Once they're gone, search the area for health bottles.

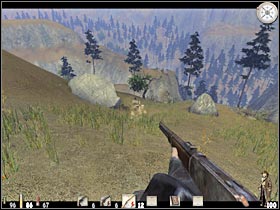
You should now exactly where you need to go. Make sure that you're careful while sliding down to a lower ledge (#1). Turn left and choose a narrow passageway. You won't have any problems here (#2). This is where the game will begin loading a second level of this chapter.
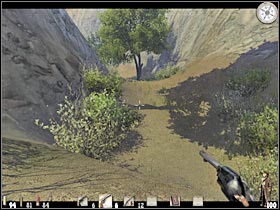
Complete walkthrough:
Start off by moving towards the ranch. I would recommend that you ready your guns here. You are going to be attacked by a small bunch of wolves (#10. You will have to deal with the animals without losing any health. If you're lucky, a shot to the head should be enough (#2). Thankfully, you won't have to worry about the ammunition too much.
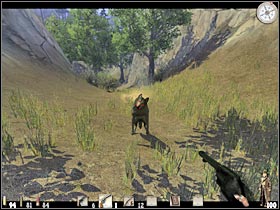
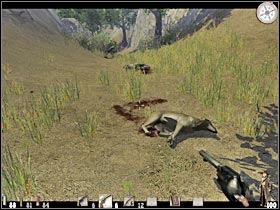
Try getting closer to the ranch. An interesting cut-scene should appear on your screen (#1). Ray will come across a large group of men. It turns out that they are also looking for Ray. As a result, you will help them to attack the ranch. Start running forward (#2). Make sure that you have your reloaded your current weapon.
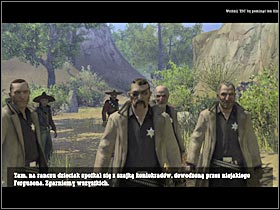
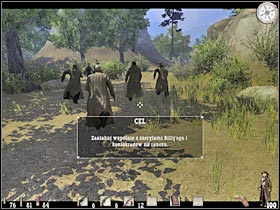
These fights are going to be very simple, mostly because you will receive a lot of help from your new allies. I would recommend that you start off by the main gate (#1). Once you've taken out several people, head on to a small building that's located on your left. You should be able to kill several other enemies from here (#2). There are also a lot of crates and other large objects in this area, so you would be able to use them for cover.
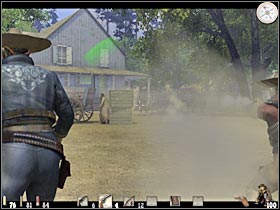
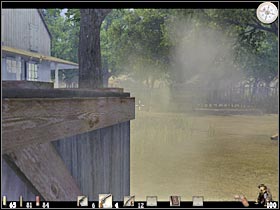
You should also try getting closer to a large wagon (#1). Make sure that you don't stay in the open. I'm sure that you wouldn't want to lose any health here. A new group of enemies will appear near the front entrance (#2), however you won't have to kill them on your own. Your allies will suggest that you try to get inside the main building.
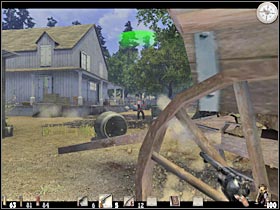
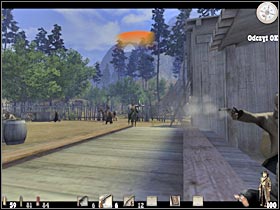
Once again, you will have to go to the back entrance (#1). There aren't any new enemies in this area, however your next objective is going to be well defended. Make sure that you have taken out all hostiles (#2). You should be using a rifle during these fights. Thanks to it, you won't have any problems killing your opponents. Make sure that you use pillars and walls for much needed cover.
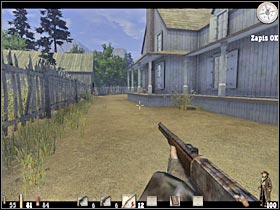
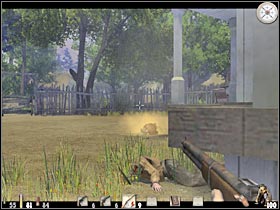
Now you will have to get closer to the back door. Sadly, you won't be able to open it. As a result, press a correct key in order to use your boot (#1). Enter the building and head on to the second room. You won't have to talk to any of the civilians. Instead, proceed to the upper floor (#2). You shouldn't have any problems locating the staircase. I would recommend that you save your game here.
You will have to go to Molly's room. I guess you'll probably remember where it is (#1). Enter the room and get closer to the left window. A short cut-scene should appear on your screen. Ray notices that Billy's trying to escape. He's running towards the stables. You will have to try and catch him. Head on to the roof (#2). Don't worry, you won't lose any health while jumping down to the ground.
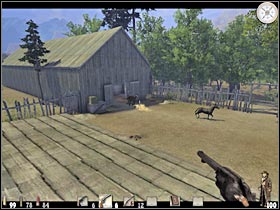
You will have to enter the stables (#1). As you've probably noticed, it's on fire. Ray will come across several new opponents. Once you've regained full control over his actions, make sure that you find a cover. You will have to be quick about it. Use the rifle to get rid of your opponents (#2). It shouldn't be too hard. You may proceed to the exit.

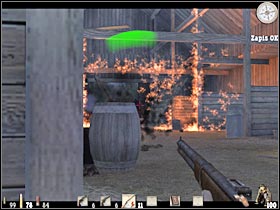
Keep going straight (#1). There's only one road leading to your destination, so you really can't get lost. You should be able to spot Billy in a few seconds. Once the cut-scene has ended, head on to a nearby field (#2). Thankfully, you won't have to do use your gun here. This doesn't mean, however, that you shouldn't save your game.
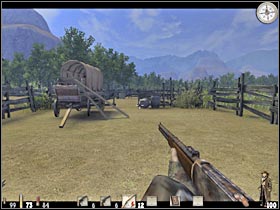
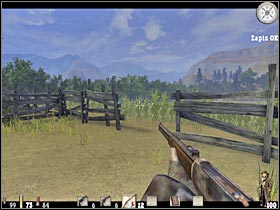
The easiest way to reach the next area of the map would be to move in a straight line (#1). You should be able to notice a small road at the other end of the field. That's where you'll need to go. Billy will try to say something during this chase sequence. Once you're close enough (#2), you'll probably notice that he used the horse to escape. Save the game!!
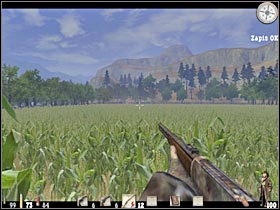
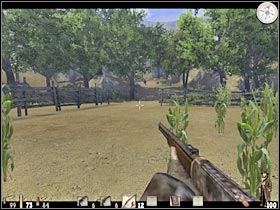
For the first time during this mission you will be given a time limit. As a result, you will have to hurry. Start off by killing two bandits (#1). They should be standing in front of you. Choose the rifle, because you don't have much the time. Use the horse and start moving forward. You should save your game once again. Be careful. The road can be quite narrow here (#2).
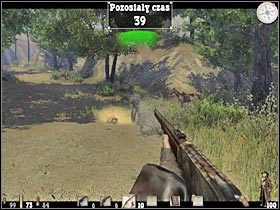
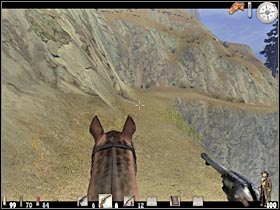
Once you've reached a small junction, choose a path that's located on your left (#1). You will also come across several shortcuts along the way. You could use them to your advantage, however that would be risky. Thankfully, you were given a lot of time. You should be able to reach your destination very soon (#2). That's where Billy is hiding. Leave the horse and save your game.
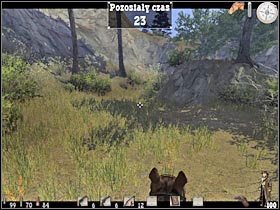
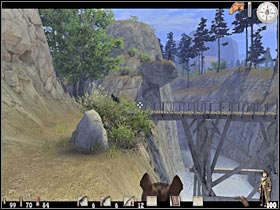
Billy will be hiding on an upper ledge that's located by the bridge. As a result, you probably won't even notice him at first glance. You should try and aim at his head (#1). Thankfully, this won't kill him, but we'll get back to that problem in the next chapter. Now you will have to return to the ranch. It seems that something strange is going on there. You will have to use the bridge to get there (#2).
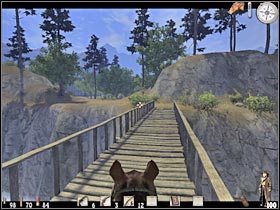
Once you're there (#1), leave the horse and head on to the main building (Molly's house). You will have to get to a large room that's located near the back entrance. You will encounter two bandits here (#2). It turns out that they were only looking for Billy and it was the only reason to kill everyone else. As a result, you will have to fight them in a duel. Bear in mind, though, that it's going to be a much more difficult task.
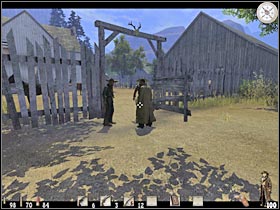
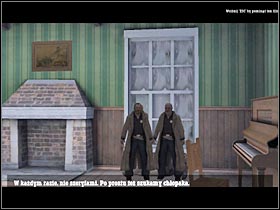
The most important thing for you to know is that you'll have to kill two bandits instead of only one (#1). Thankfully, you will be given plenty of time. I would recommend that you fire three times at each of the bandits (#2). Thanks to that, they won't even fight back.

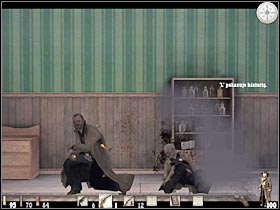
A short cut-scene should appear on your screen (#1). You will be given a new task. Ray will make a promise that he's going to try and save Molly from the bandits. Sadly, you won't be able to do anything here. As a result, you will have to leave the building. Bear in mind that you will have only two minutes to reach your final objective. Start off by choosing one of the nearby horses (#2).
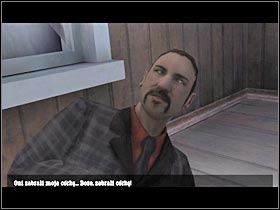
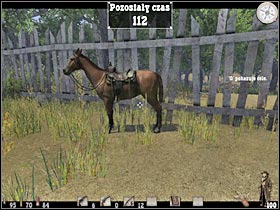
Don't even think about taking out any of the bandits, as you will have to concentrate only on reaching your objective. First of all, you will have to return to the bridge area (#1). That's where you defeated Billy. There's a small road that leads to your new target (#2). I would recommend that you save your progress here.
Don't worry that this road doesn't lead directly to your objective. You will come across several bandits along the way (#1). I'd strongly recommend that you ignore them and keep moving forward (#2). You could lose some health here, however this is the final part of this chapter, so you won't have to worry about that. Just make sure that you stay on the track.
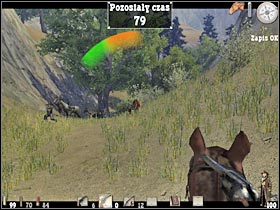
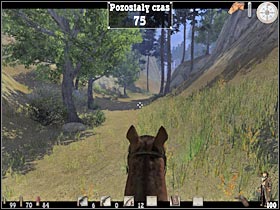
You should be able to reach a small pier very soon (#1). Sadly, the bandits are already gone. You will be able to see this (#2). This is the end of this chapter.
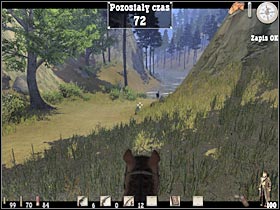
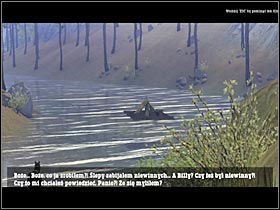
You are: Billy Candle
Main mission objective: You will have to perform several trials for a friendly Indian, known as Calm Water.
Difficult moments: I guess you will have some serious problems reaching the top of the mountain. You will have to choose your platforms carefully. There are also other difficulties, including the eagle and several rattlesnakes.
Complete walkthrough:
This is a very long mission, however I'm sure that you'll find it to be quite entertaining. You will have to spend a lot of time exploring new areas and dealing with different types of obstacles. We'll start off with a short cut-scene (#1). Once you've regained a full control over Billy, head on to the Indian (he is sitting by the camp fire) in order to talk to him (#2).
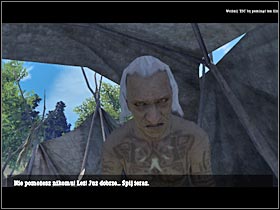
You must perform several different tasks in order to prove to the Indian that you're worthy. Calm Water will ask you to hunt down several hares (#1). Sadly, you won't be able to use any of your standard weapons, including the whip. Including, you will be given a bow. This object should appear in your inventory. You will have to one of the nearby clearings, because that's where you will find your prey. I'd strongly recommend that you use the horse (#2).

Head on to the nearest clearing (#1). You shouldn't encounter any wolves on the map, so you don't have be worried about anything else. Once you're there, leave the horse and take a while to observe the hares. You should notice that they will be using bushes (#2). Thankfully, none of the hares will leave this area. Choose the bow from your inventory. You will have to press and hold the right mouse button to zoom in the view. You've probably noticed that it will also slow down the game a little.

You shouldn't have any problems with these actions. There are only few important things for you to remember. First of all, you can't aim directly at you prey, mostly because aren't fast enough (#1). It would be best if you had practiced using the bow. You will be able to find two hares here. Make sure that you pick them up afterwards!
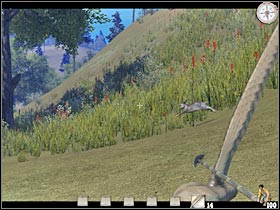
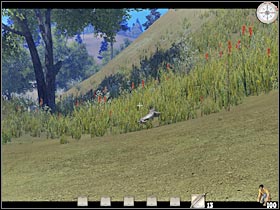
In order to be able to hunt down the third animal you will have to go to one of the more distant clearings. There's a very long journey ahead of you (#1). I would recommend that you choose the clearing that's located straight ahead. You will have to cross a river along the way. There's also a large mountain here (#2).
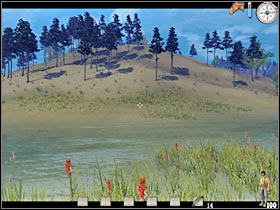
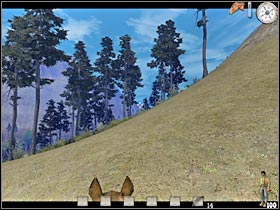
Once you've reached this new area, leave the horse and hunt down the third bunny (#1). Now you will have to return to Calm Water. The game will suggest that you use the smoke for directions (#2), however taking a look at your compass is equally important. You shouldn't have any problems with that. Just make sure that you don't leave the horse, as you'll need it in the future.
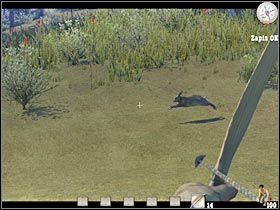
Once you've reached the camp site, leave the horse and listen to what the Indian has to say (#1). You will have to put down the fire before the flames reach a nearby tent. As you've probably suspected, you'll need a bucket for that. Thankfully, you shouldn't have any problems finding it (#2). Pick it up and start running towards the river.
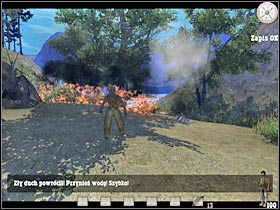
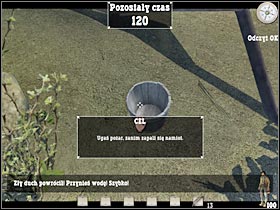
Once you're in the water, you will have to press the left mouse button (#1). You will have to use the same button to put down the fire (#2). I would recommend that you start off with the bushes located on your right. You will have to repeat these actions about 3-4 times.
There's much longer cut-scene ahead of you (#1), so sit back and listen to what the Indian has to say. Calm Water will grant you with a final challenge. You will have to reach the top of a nearby mountain in order to find a feather of the eagle. As you've probably suspected, you should use a horse to get there (#2).

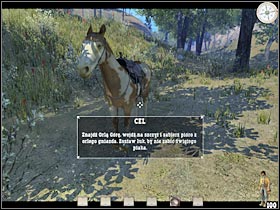
There are a lot of different paths leading to your current destination. Thankfully, you shouldn't have any problems locating the mountain (#1). I would recommend that you avoid going through other hills, because there are a lot of gaps here. You should get closer to the river (#2) and proceed from here. Thanks to that, you won't have any problems getting closer to your objective.
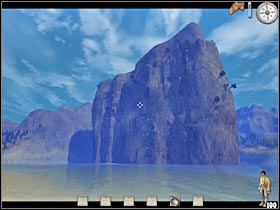
You will have to locate two small islands (#1). They will allow you to get closer to the mountain. Make sure that you stay on the horse for a few more seconds. Get closer to the mountain. Leave the horse on the nearby island and start moving towards nearby ledges (#2). There's A LOT of climbing ahead of you, so I'll only concentrate on more important tasks. I'm sure that you won't have any problems with most of the platforms.
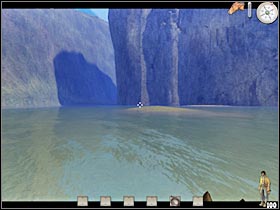
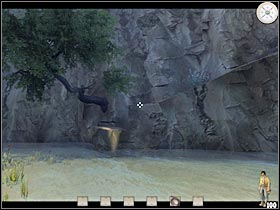
The first part is quite easy. You will have a lot of different platforms ahead of you (#1). Just make sure you're moving upwards and you should be just fine. Additionally, you will have to save your progress from time to time. Be careful, though. There's a rattlesnake on a nearby ledge (#2). You probably won't notice him at first glance. Make sure that you use the whip (you don't have any other weapons) in order to solve this problem.
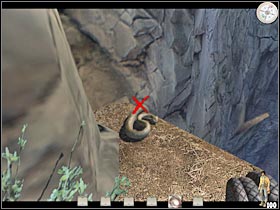
Once again, you will have to use your whip. This time you will have to be aiming at one of the nearby branches (#1). Start swinging. You will have to reach a new platform (#2). There's even more climbing ahead. Make sure that you have saved your current progress.
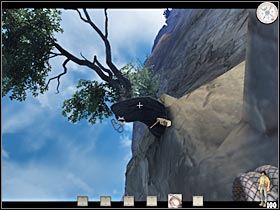
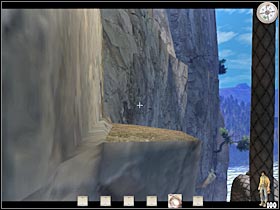
Keep moving towards the top of the hill (#1). You will have to avoid being attacked by the eagle. Thankfully, you'll know exactly when these types of attacks will occur. Just make sure that you have your speakers turned on. ;-) This time you will have to perform in order to avoid this attack. It'll be a lot easier later during this level, because you will have to crouch for a few seconds. There are some very easy jumps ahead of you (#2). Just make sure that you don't stop here, because one of the platforms will collapse.
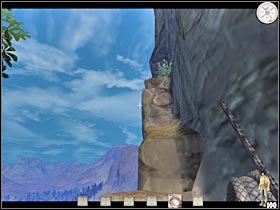
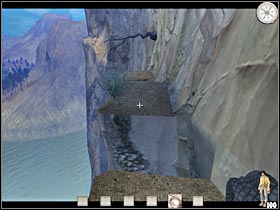
Once again, you will have to use the whip to reach the upper level (#1). This will allow you to get to a new platform. Keep moving straight. Be careful, though. There's a rattlesnake in this area (#2). You will have to use the whip in order to solve this problem. I would recommend that you save your progress here.
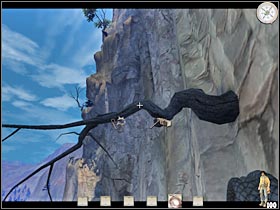
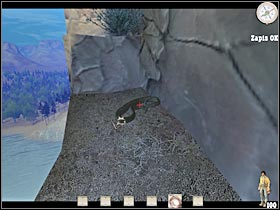
There are a lot of ledges ahead of you. Thankfully, you won't have any problems finding them. Remember that only one path leads to the top of the hill. You will have to perform several jumps along the way (#1). You will also reach a new branch. Make sure that you use your whip to get to the upper level (#2). Start swinging. You will have to choose a ledge that's located on your right.
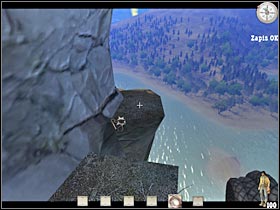
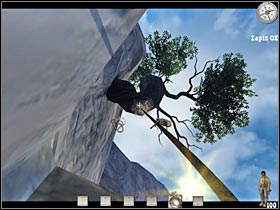
Keep moving straight. I'm sure that you won't have any major problems here. You will have to reach a small tunnel (#1) that will lead you to an upper level. Don't worry, because you won't encounter any traps here. You will come across several new platforms. Slide down to the first one (#2). Once you've dealt with these puzzles, head on to the second tunnel.
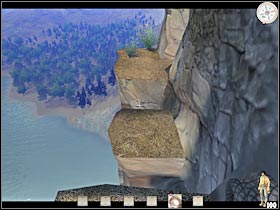
Remember that you will have to reach the top of the mountain. The eagle will try to attack you at least two more times. Thankfully, you won't have any problems avoiding these attacks. You will have to use your whip in order to be able to reach a higher ledge (#2). Make sure that you save your game often.
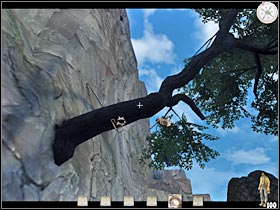
You will have to get down to a lower ledge at some point (#1). Don't worry about this, because you're on the right track. Now you will have to perform several complicated stunts (#2). These jumps must be very precise. You aren't allowed to make any mistakes here. Otherwise Billy would have died.
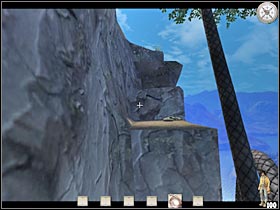
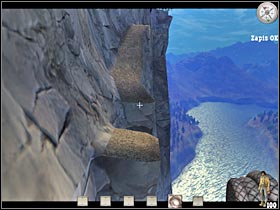
Once again, you will have to use your whip, however there's also one more thing for you to worry about. You will be trying to reach a ledge that's being occupied by a rattlesnake (#1). Make sure that you don't land too close to it. Once you're there, use the whip to kill the snake. Make sure that you're doing this from a safe distance (#2). Keep heading towards your goal.
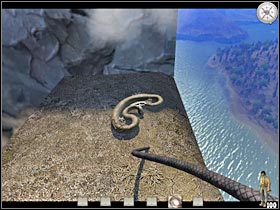
You're almost at the top. Once you've reached a small path (#1), I'd strongly recommend that you save your game. It's very easy to die here, so you should be prepared for this. Head on to the top of the hill. You will have to be quick about it. Head on to the nest and pick up one of the feathers (#2). You can't stay here for too long, because the eagle would have attacked you. This could result in falling down the cliff.
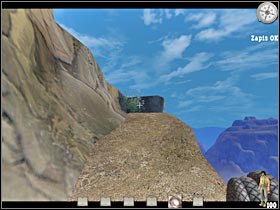
Now you will have to return to your horse. Thankfully, we'll be using a different path. Some of the first platforms are located to your right (#1). Make sure that you use them. You mustn't hurry, especially since you'll be making a lot of jumps here. You will also find a health bottle in this area. It would be wise to pick it up. You will also have to use your whip (#2).
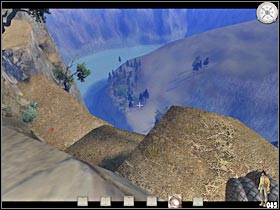
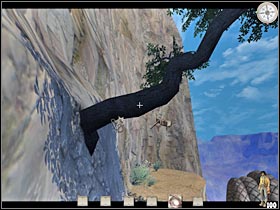
Keep heading towards lower platforms. You will be using your whip from time to time, however this time you will have to hold the left mouse button, instead of the right one. This will allow you to slide down a little (#1). It's very important near the end. Also, one of the paths is going to be very slippery (#2), so you should be extra careful there.
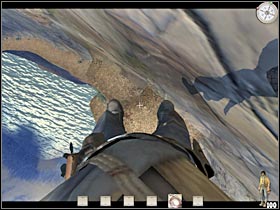
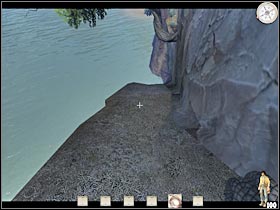
You shouldn't have any more problems here. You will to have to reach the water (#1). Start moving towards your horse. Once you're there, start heading towards the camp site. Once again, you will be able to use smoke for directions (#2). Just as before, try staying close to the water.
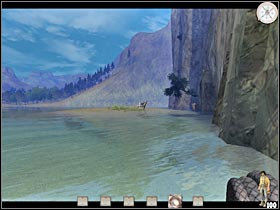
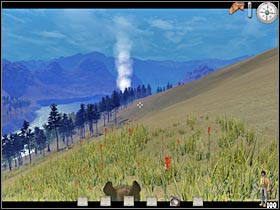
Once you've reached your destination (#1), leave the horse and make a few steps forward. An interesting cut-scene will appear on the screen. It turns out that the bandits have found Billy (#2). They also killed Calm Water. This is it for this mission of the campaign. It's time to go back to Ray... at least for a short while.
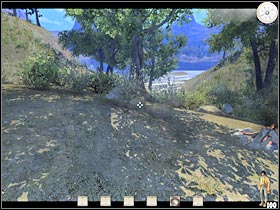
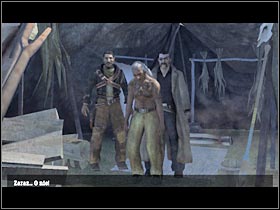
You are: Reverend Ray
Main mission objective: You will have to reach a nearby camp, because that's were Molly was being held. Next, you will have to pursue a stagecoach.
Most difficult moments: You'll probably have some problems with the whole chase sequence. This is the most important element of this mission. The chase is going to be quite long. Furthermore, you must be very careful, because there will be some obstacles for you to avoid. As a result, you will have to save your game quite often. There also two machine gun posts in the area.
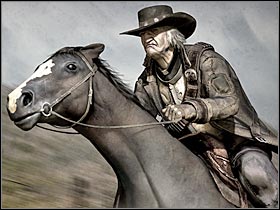
Complete walkthrough:
Keep moving forward. You should be able to get closer to the camp very soon (#1). That's where you'll need to go. Sadly, you will have to choose a path that's located on your right (#2) to get there. Make sure that you're using the horse, so it won't take too long. You should also know that there aren't any bandits in this area.
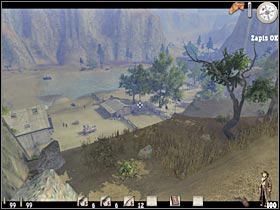
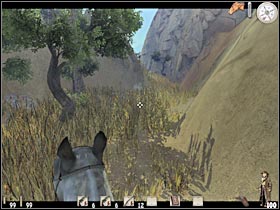
Once you've reached the forest area, you will have to turn left. You can use your compass here. You should be able to get closer to the camp. I would recommend that you leave the horse and start crouching (#1). You will have to reach one of the nearby trees. It would be best to use this object for cover. Start leaning out (#2). It would be best if you had used the rifle all the time, especially since most of the bandits are also equipped with this weapon.
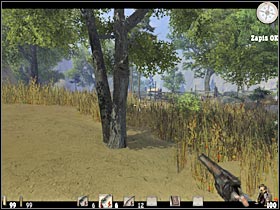

You will have to make sure that the entrance to the camp has been secured. You could check the bodies for extra ammunition. After that, start moving towards a small buildings (#1). You probably won't encounter any other hostiles here. Pick up a small crate. You will have to place it by a small brick wall (#2). This will allow you to enter this building.
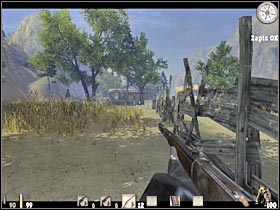
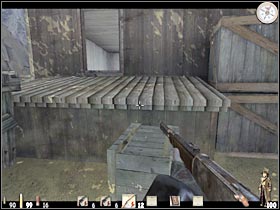
You could check all of the surrounding shelves, chests and drawers for health bottles and other valuables, however this is not necessary. Eventually you will have to reach a small door (#1). Open it. You should be able to take out a guy who's standing by the machine gun post (#2). Be careful, though. He might get replaced by one of his colleagues. You will have to prevent that from happening.
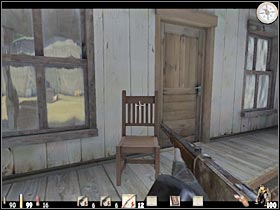
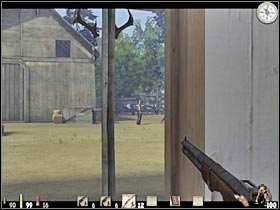
As you've probably noticed by now, all hell has broken loose. You are going to be attacked from many different directions. Most of the bandits will be standing by the river (#1). Try leaning out carefully in order to take them out. The second group will be located by the barn. You will have to watch out for an enemy sniper. He will be hiding in a small window (#2).
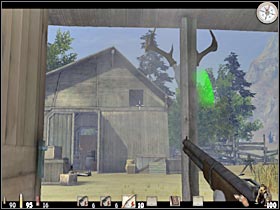
Try exiting the house. You will have to get closer to the barn. As always, you will have to be very careful. Some of the bandits may still be guarding this area (#1). Additionally, one of them may decide to use the machine gun post (#2). You could kill him, however this is not necessary. You won't have to explore this entire area.
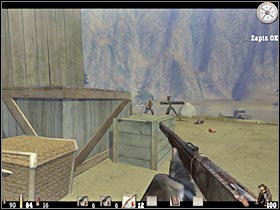
Make sure that you have plenty of ammunition (especially for the rifle). Enter the barn (#1) and try making a few steps forward. You will be able to proceed with the main part of the mission. The objective will be to pursue a stagecoach. Start off by taking out a single opponent (#2). He will be standing by a large gate. Now you will have to use the horse. Leave the barn area. I guess I should tell you something. You won't have to worry about the lime limit too much. It will only pop up when the stagecoach manages to escape. This means that you will have to speed up a little. As a result, you should be focused only on maintaining a proper distance.
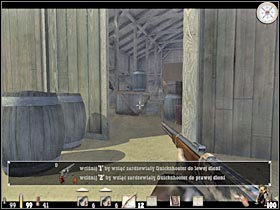
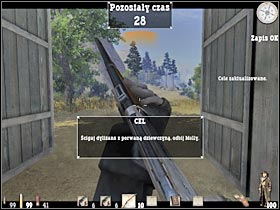
Keep moving forward (#1). There's only one path here, so you really couldn't get lost, even if you had wanted to. Just make sure that you don't stop at nothing, because you will have to get closer to the stagecoach. Wait for the game to display a new hint (#1). Pressing the CAPS LOCK key will allow you to force your horse to gallop. It's very useful, especially if you want to catch your target. Sadly, you won't be using this feature all the time, because it would decrease a health bar that's located near the compass. As a result, you should keep holding this key for no more than two seconds.
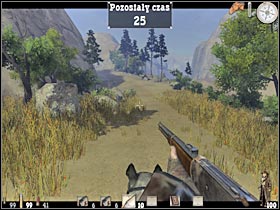
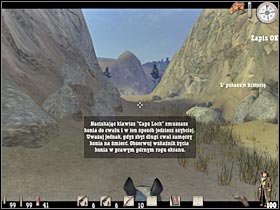
Keep going straight. The first part of the chase sequence will require you to avoid dynamite explosions (#1). Thankfully, you won't have any problems with this, especially since the explosions will occur in a safe distance. Concentrate all of your efforts on getting closer to the stagecoach. You should also remember that there are a lot of narrow passageways in the area (#2).
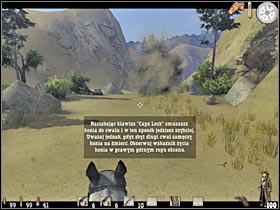
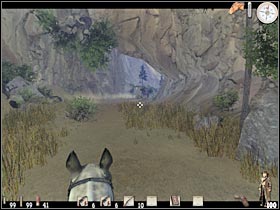
A few bandits will join the chase very soon. They will also be using horses (#1), so you must deal with them right now. I would recommend that you use the rifle (#2), mostly because you won't be able to activate the slow-motion feature. Additionally, you should be able to kill all of them without having to reload your weapon.
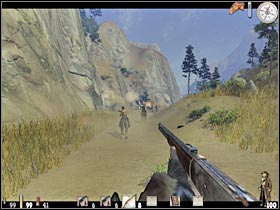
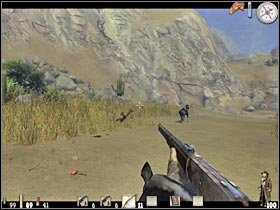
The main mission objective hasn't changed (#1). Make sure that you have the stagecoach in your sight. Sadly, you won't be able to get too close to it. The game will prevent this from happening. You will come across a well known bridge in a few seconds (#2). You've been here in one of the previous missions of the game. Thankfully, you won't have to do anything in particular here.
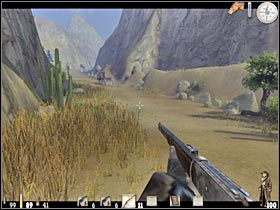
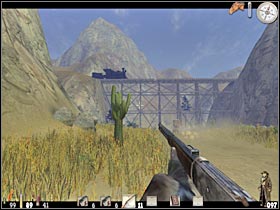
You'll have more problems with the second bridge area. Escaping bandits will decide to blow it up (#1). Make sure that you have saved your game here. Head on to the left side of the screen. You will have to find an untouched fragment. This will allow you to get to the other side (#2). I would recommend that you speed up a little, so you won't lose the stagecoach.
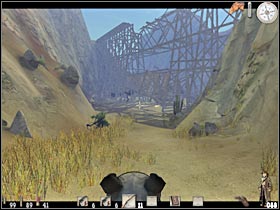
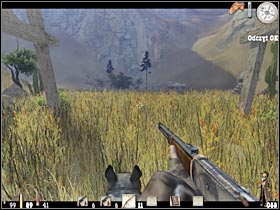
Once again, you will have to avoid the dynamite (#1). This time it's going to be much more difficult, because most of the explosions will occur near your position. As a result, you won't be able to move in a straight line. Make sure that the stagecoach doesn't escape you. There are also new bandits for you to kill (#2). I'd strongly recommend that you use the rifle once the again. You won't have to aim at the heads of your opponents, because this is a quite powerful weapon.
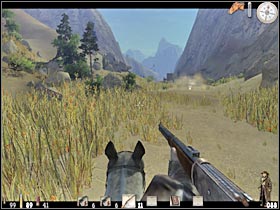
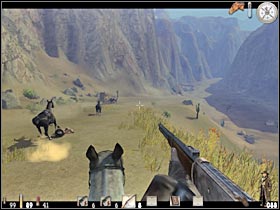
You will come across the third bridge very soon (#1). Thankfully, you don't have to worry about any other surprises. You must avoid the dynamite explosions, though. Keep moving. You should get closer to a river (#2). I'd STRONGLY recommend that you save your game here. This is one of the most difficult parts of this entire chase sequence.
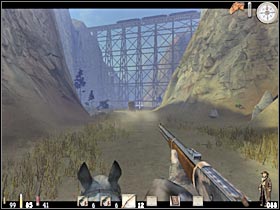
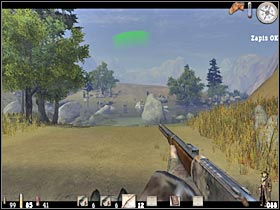
As you've probably noticed, some of the bandits are waiting for you on the other side of the river. Sadly, you won't be able to avoid this trap. You might as well start shooting at them (#1). Sadly, you will have to ignore the rest and pray that you won't get hit. Speed up once again. You will have to get closer to the stagecoach. Thankfully, there are a few shortcuts here (nearby fields).
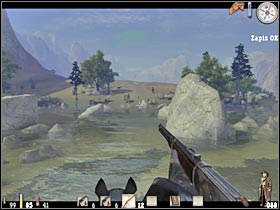
You will be heading towards the mountain areas (#1). I wouldn't recommend cutting through corners here, because they could slow you down a little. Thankfully, there aren't any other enemies in the area, so you won't be bothered by anyone (#2). Nevertheless, you should be saving your progress from time to time. Thanks to that, you won't have to repeat any larger portions of this chase sequence.
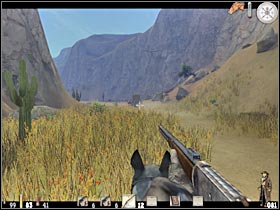
You should be able to reach a small junction very soon (#1). Sadly, you won't be able to choose the left path because it's going to be blocked. Instead, turn right (#2). Don't worry about the stagecoach, because you won't be able to fail your mission here. Keep moving forward.
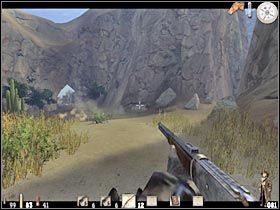
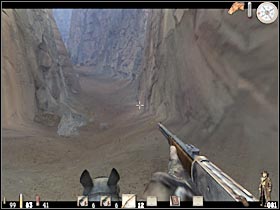
You should be able to reach the opposite end of this road very soon. As a result, you will have to slide down (#1). The game will suggest that you should use the S key here. This is VERY important. Additionally, you will have to avoid hitting rocks (#2). You will have to be careful here, because your horse could lose a lot of health points.
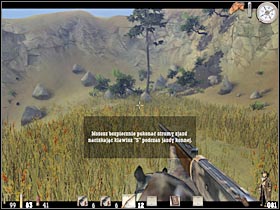
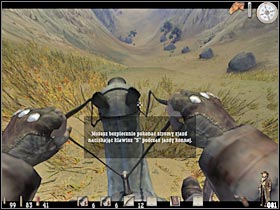
Once you're on the lower level, keep moving forward. You should be able to catch up to the stagecoach (#1). Don't worry, this was all planned. Sadly, you won't be able to enjoy this for too long. More bandits will appear near your position (#2). Just as before, they will try to interrupt your chase. Use the rifle to get rid of them, however you should leave at least 20 bullets for later.
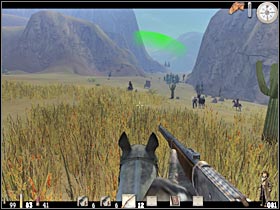
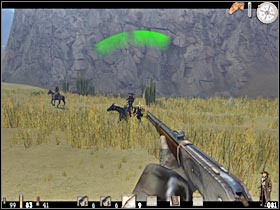
The stagecoach is heading towards a nearby ranch (#1). This is a good thing, because this is where this chase sequence will end. Start moving upwards. A short cut-scene should appear on your screen (#2). It turns out that the main entrance to the farm is being protected by a Gatling gun. As a result, you will have to find another way into the complex. SAVE the game!
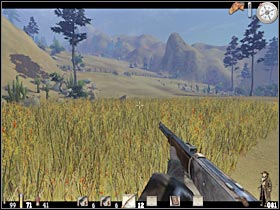
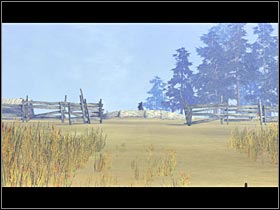
There is a way for you to enter the farm safely. You will have to turn right. As you've probably noticed by now, part of the wooden fence has been destroyed. This will allow you to get past the machine gun post (#1). Leave the horse and get closer to one of the huge boulders. They will be used for cover (#2). Make sure that you have reloaded your weapon.
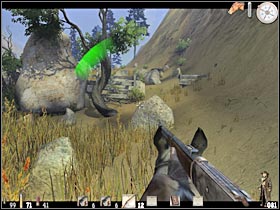
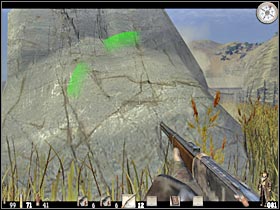
You will have to start off by taking out a single bandit that's standing by the Gatling gun (#1). There are also few other enemy units in this area. Some of them will be located on your left, so you will have to eliminate them quickly (#2). I would recommend that you don't stay in one place for too long. You should also be using larger objects for much needed cover.
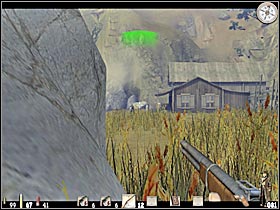
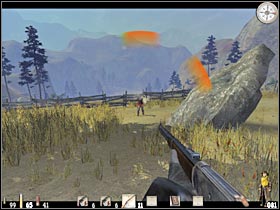
Now you will have to get closer to the main building. It's not going to be easy, because it's being occupied by at least two bandits. One of them is already shooting at you (#1). I would recommend that you eliminate him from a larger distance. Get closer to the right wall. I was able to shoot through a window in order to take down the second opponent (#2). It's a little bit risky, but you should be just fine.
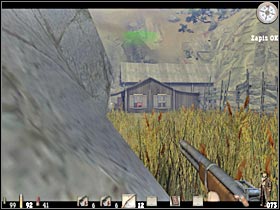
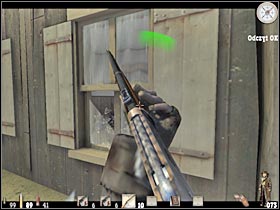
You could spend some time here, picking up better weapons and gathering ammunition. This is not necessary, because you're close to the end. As a result, you should only take a health bottle. Head on to a small cottage (#1). Once you're there, you will have go to the second room (#2). Save your game here. This is VERY important! Open a nearby door.

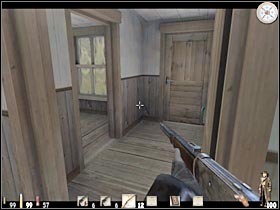
A short cut-scene should appear on your screen (#1). As you've probably suspected, this is a new duel. I should warn you that this opponent is even more skilled. As a result, you will have to be very fast in order to kill him (#2). Wait for the new cut-scene to show up. You'll learn several IMPORTANT things from the bandit, so I wouldn't recommend skipping this movie. After that, this chapter will come to an end. You'll also get back to playing as Billy.
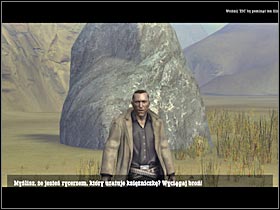
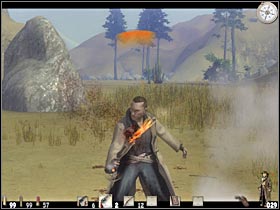
You are: Billy Candle
Main mission objective: You must find a secret entrance that will lead you to the treasure. You have only until sundown, because otherwise you wouldn't be able to save Molly.
Difficult moments: This is by far the easiest mission of the entire game. Despite what you might think, you won't have to be in a lot of hurry. There aren't any enemies in this area. The same goes with animals, such as wolves. There are only a few challenging stunts ahead of you. They must be performed without making any huge mistakes.
Complete walkthrough:
You won't be able to proceed with the main mission right away. The game will start this chapter with a very long cut-scene (#1). I'd strongly recommend that you watch it, because you'll find out more about the treasure and the mysterious death of Billy's parents. The main objective of this mission will be to find an entrance to an underground cave. You will have to wait for the game to load the new map.
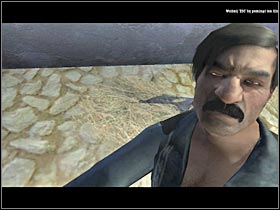
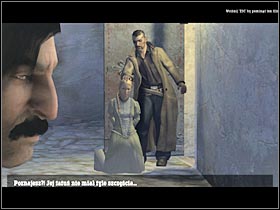
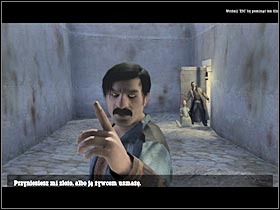
Listen to what the other bandits have to say (#1). Don't worry about your compass. This is a small map, so you probably won't get lost. Start off by using the horse. You will have to leave the fort and proceed to a nearby path. Keep moving forward. A sign (#2) will inform you that there's a cemetery nearby. You will have to go there now.
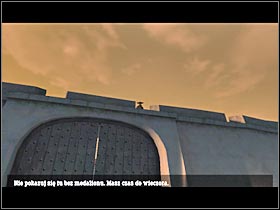
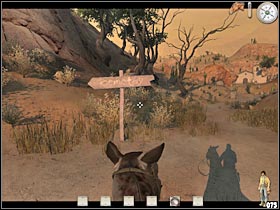
Once you've reached your destination, leave the horse and get closer to a civilian (#1). A new cut-scene will appear on your screen. Press the F key in order to help the young man to bury a member of his family. As a result, you will be rewarded with a key. You'll need in the future. Use the horse once again. Get back to the sign. You will have to choose a new path that's located on your left (#2).
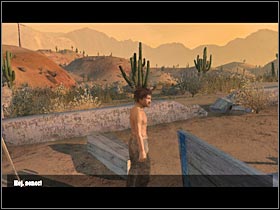
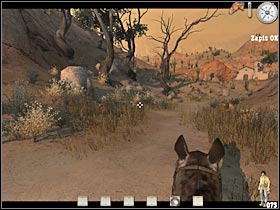
You should be getting close to an abandoned church (#1). You will have to leave the horse here, as you won't need it anymore. Enter the church and turn right. You will have to use a newly acquired key in order to open the door (#2).

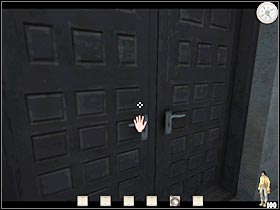
A short cut-scene should appear on your screen (#1). You will have to solve a very simple riddle. I'm sure that you'll be able to do this on your own. There are three graves here. You will have to examine them all, starting with the left one. Stop by the right grave. You will have to get closer to the cross. Press the F key (#2).
Billy decides to use the medallion in order to solve this problem. Thanks to it, you'll know which boulder is the right one (#1). Start moving forward. You will have to get closer to this boulder. Try pushing it (#1). Sadly, you're not powerful enough to do that. Thankfully, the game will display a few objects that you will be able to use here.
Start off by going back to the destroyed church (#1). Notice that there are some rocks on your left (#2). You will have to use them to climb up to the upper platform. Turn right and head on to the roof of the church. Keep moving forward. Perform a single jump in order to reach a nearby ledge.
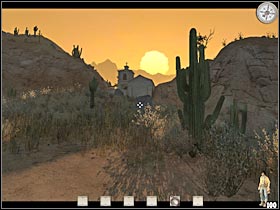
Keep going straight (#1). There's only one road leading to your destination. You will have to climb up a little. Ignore a large wooden cross that should be located on your right. Instead, start moving towards a large bridge (#2). You will be able to use it to get to the other side. Remember that there aren't any enemies here.
Once you've made your way to the other side, turn right and keep moving forward. Your objective will be to reach a large boulder. You've seen it during the cut-scene. Head on to the upper ledge. You will have to use your whip here (#1). There are a few platforms in front of you (#2). You will have to climb up. That shouldn't be much of a problem.

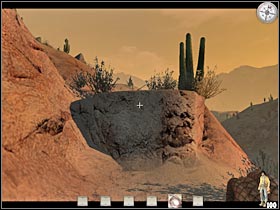
Now you will have to deal with several jumps (#1). They are very simple, so you won't even have to save your current progress. Use the whip once again. You should be able to get past the boulder. Ignore it for now. You must concentrate only on reaching one of the nearby ledges (#2). Thankfully, there's only one road here, so you can't get lost.
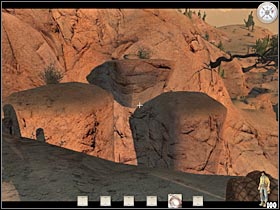
You will have to position yourself in front of the stone (#1). Use the whip. You will have to aim at a nearby branch. Start swinging. The objective will be to land near the boulder (#2). This will trigger a new cut-scene. As you've probably noticed, there's a small hole in the ground. You will have to get there.
Slide down to the ground (#1). Make sure that you use the S key, so you won't get hurt. You could also save your current progress, however this won't be necessary. The only thing left to do here would be to get closer to the hole (#2). Thanks to that, you will be able to end this chapter.
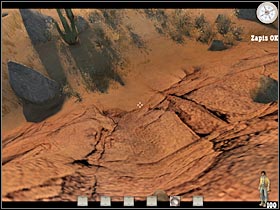
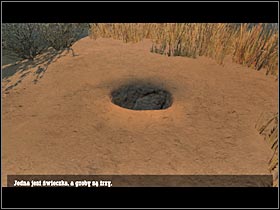
You are: Billy Candle
Main mission objective: Your main mission objective is quite obvious. You will have to enter the caves in order to find the treasure.
Most difficult moments: This is a much more difficult chapter. First of all, there are a lot of spiders in these caverns. You will have to avoid most of them in order to be able to reach new platforms. You should also know that the visibility is going to be quite poor. Thankfully, the main treasure will be protected by few simple traps, so you won't have any major problems reaching it, especially if you have played some of the "Tomb Raider" games in the past.

Complete walkthrough:
You start off in a large cave (#1). I would recommend that you go to the options screen and tweak the brightness feature a little. This will help you a lot during your journey, mostly because some of the passageways are very dark. You are going to be attacked by a first group of spiders. I would recommend that you take your time and use the whip to deal with this problem (#2). Make sure that none of the spiders gets closer to Billy.
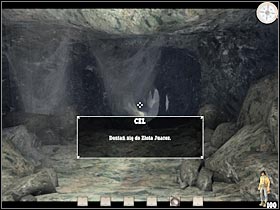
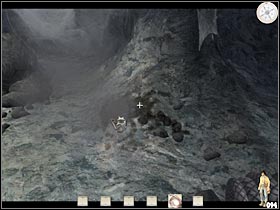
Save your game here! I'd strongly recommend that you avoid any other spiders (#1). You will have to perform a lot of jumps in order to do that. There's also a much larger group waiting for you in one of the larger tunnels (#2). Keep moving forward and you should be just fine. You should also be saving your progress frequently.
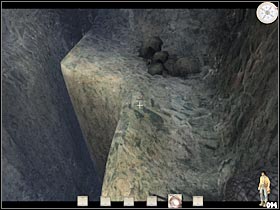
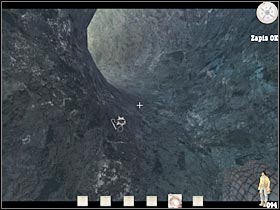
You should come across a much larger gap. You will have to perform a single jump in order to reach the new tunnel (#1). You will also notice that some men are having a conversation, however you can ignore this. Once you've reached the other side of the pit, start moving forward. Thankfully, there aren't any new spiders here (#2). If you've suffered any injuries, make sure that you pick a health bottle along the way.
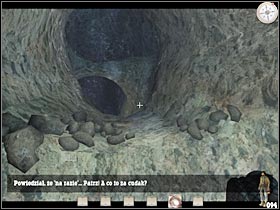
You should be able to reach a much larger cavern very soon (#1). Sadly, you won't find anything of interest here. As a result, head on to a small path that's located on your left. You should be able to get closer to an underground river (#2). Head on to the water. You should also save your current mission progress here.
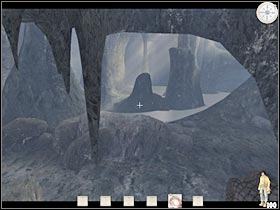
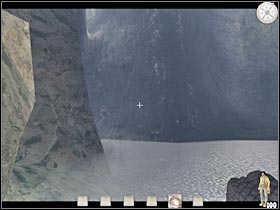
Start swimming forward. You will have to be careful here. There are some rocks ahead of you (#1). You will have to do your best to avoid them. Try aiming at a small platform that's going to be located on your left (#2). Head on to the upper level.
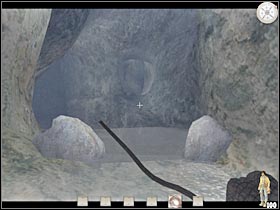
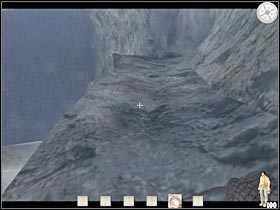
Keep heading towards your destination. You should be able to reach a large tunnel very soon (#1). Use the stairs to reach the upper level. Thankfully, you won't find any traps or enemies here. You must climb up to the upper platform (#2), however I'm sure that you won't have any problems with this action.
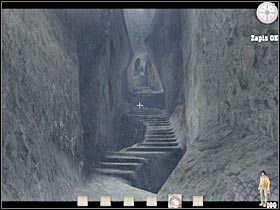
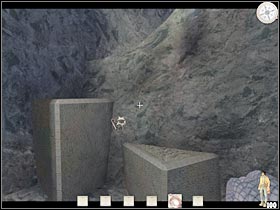
You may proceed to the largest cavern of this entire area (#1). As you've probably suspected, there are a few traps waiting for you here. Thankfully, you won't have any major problems with them. Start off by moving forward. You will have to kill a small bunch of spiders (#2). Make sure that you have used the whip to take care of this small problem.
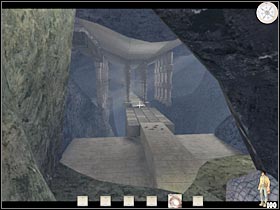

Step up to the first trap. The objective will be to land only on brighter plates (#1). You won't have any problems finding them. I would recommend that you take a closer look at the first screen, especially if you don't know which plates you will have to choose. Just make sure that you won't land on any of the other objects, as this would be equal to an instant death. Once you've reached a new platform (#2), make a stop and save the game. This is VERY important!

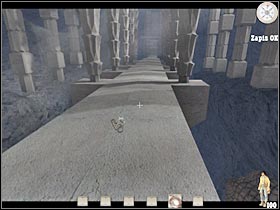
Try making a few steps forward. A large stone will crash here (#1). As you've probably noticed, this is not a difficult puzzles. The same will go with the res of this tunnel. You could be careful here and wait for each of the stones to drop (#2), however I would recommend running towards the opposite end of this corridor. You should be just fine, so don't worry about the stones.
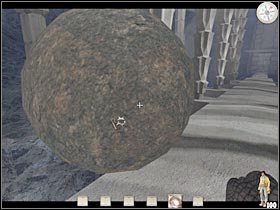
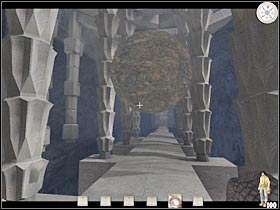
The last trap will require you to perform several simple jumps (#1). There are a lot of postuments here. Thankfully, none of them will move, so you won't have to be in a lot of hurry. Once you're close enough to a huge gate, a new cut-scene should appear on your screen. Billy will find the treasure (#2). Sadly, he won't be able to enjoy this moment for too long.
You will have to wait for the second cut-scene to pop up (#1). It turns out the bandits had followed Billy to this chamber. As a result, they will try to kill you. The only way to solve this problem would be to make a run for it. Start off by choosing a small tunnel that should be located on your left (#2). If you're lucky, you shouldn't lose any health points here.
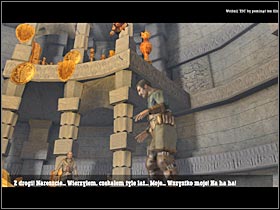
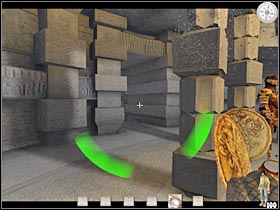
Thankfully, you won't have to worry about the enemies here. Just make sure that you don't return to the main chamber. Instead, you will have to pull a large lever (#1). This will allow you to use a block (#2). Make a jump in order to reach it. You should also save your game here.
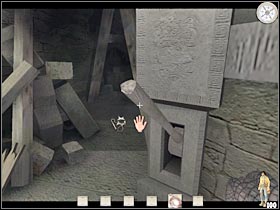
You will have to repeat these actions a few more times (#1). Start off by pulling a lever. Next, head on to the new stone block. Once you're close to the finish, you will have to speed up a little. Some of the bandits will reach this room and you have to avoid them. Start moving towards a nearby corridor (#2).
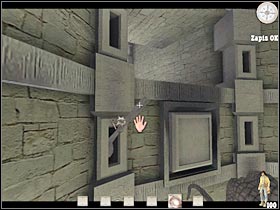
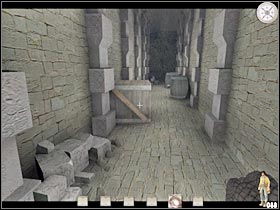
You will have to choose a small tunnel that will be located nearby (#1). Thankfully, you won't have to worry about anything in particular. Just make sure that you keep moving. Ignore the bandits, as they won't be able to harm you. Once you've reached a small room, a final cut-scene will appear on your screen (#2). Your character is going to be saved by... Ray!
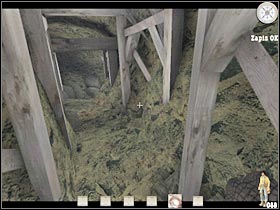
You are: Reverend Ray
Main mission objective: First of all, you will have to deal with the bandits who were chasing Billy. Next, you will have to try to take out their leader, a man named Juarez.
Most difficult moments: You shouldn't have any major problems with most of the fights, however defeating Juarez is going to be much more difficult. The most important thing for you to know is that you won't be able to kill him. Nevertheless, this battle is going to be quite long. You will have to avoid getting hit by him or one of the bandits. Juarez will also be using dynamite.
Complete walkthrough:
This is a very short mission. Furthermore, you won't be exploring any new tunnels, so you should know the area quite well. The mission will start with an interesting cut-scene (#1). Ray decides to go after Juarez in order to save Molly. After that, you'll end up in the same tunnel, however this time you'll be moving in an opposite direction. As you've probably suspected, there are a lot of bandits here (#2). Use your rifle in order to take them out. You should also be saving your game quite often.
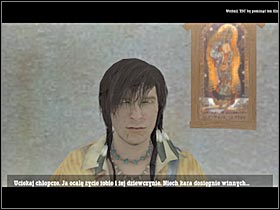
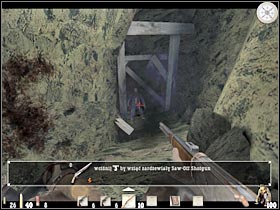
I would recommend that you spend some time checking bodies of fallen enemies. Most of them will leave health bottles and ammunition behind. Remember that you won't have to be in a lot of hurry here. Choose your targets wisely (#1). You should also watch out for oil lamps. Some of them will be thrown at you. If you're lucky, they won't land near your position. You will also have an opportunity to blow up several TNT barrels (#2). Thanks to that, you will be able to kill new bandits.
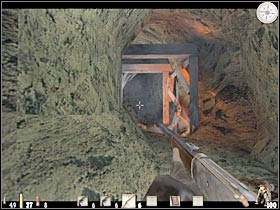
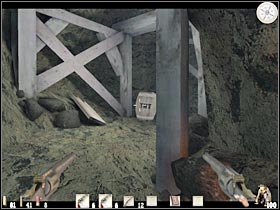
Keep pushing towards your current destination. You will have to be very careful here. Once again, it's very important that you avoid being hit by oil lamps (#1). Thankfully, most of the bandits are equipped only with one pistol, so they aren't a serious threat. You should be able to reach the exit very soon (#2).
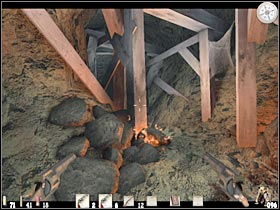
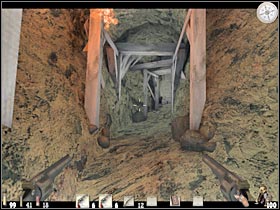
You could use the slow-motion feature here. It would allow you to take out at least two other bandits (#1). They are standing in the new corridor. This is not necessary. You could also try leaning out. Make sure that you aim at their heads. Once they're gone, pick up the ammunition and head on to the next chamber (#2).
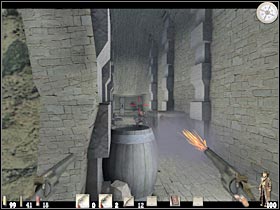
As you've probably suspected, you will have to reach the ground level of this construction (#1). I would recommend that you go ahead and perform series of small jumps. This will make landing a lot easier. Once you're there, you will have to deal with a single opponent (#2). It shouldn't be much of a problem. Make sure that you have saved your game here!! This is VERY important!
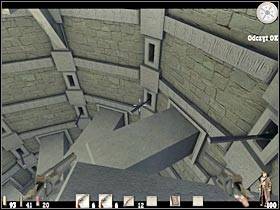
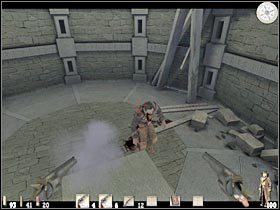
Try leaning out. At least one bandit should be standing at the other end of this corridor (#1). Take him out. After that, head on to the treasure room. A new cut-scene should appear on your screen (#2). You will have to deal with Juarez. Be careful, though. There are also a lot of other bandits in this chamber. You must take them out as well.
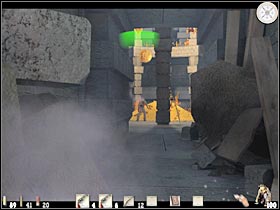
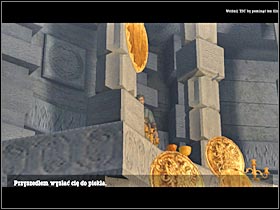
I would recommend that you start off by going back to the small corridor. You've used it before, so you should remember where it its. You will have to watch out for the dynamite, however you should be safe here. Before you'll be able to attack Juarez, you should take out some of his guards (#2). They will be standing on the upper level. Once they're gone, make a few steps forward. The next group will be located on your left (#2).
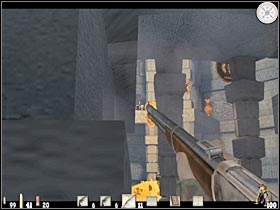
Make sure that this area is clear. Start running forward. You will have to stop beneath a small balcony (#1). That's where Juarez is standing. Sadly, you can't stay here for too long. Take your time and eliminate a few bandits (#2). You shouldn't have any problems finding them. I would also recommend that you save your progress here.
There's only one more group for you to kill. Head on to the upper balcony and eliminate all of the remaining bandits (#1). Now you will have to start using the pillars. Keep shooting at Juarez (#1). If you're lucky, he won't even fight back. Furthermore, you won't have to worry about the dynamite anymore.
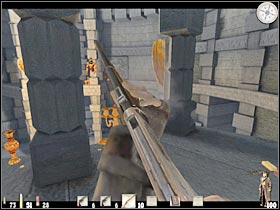
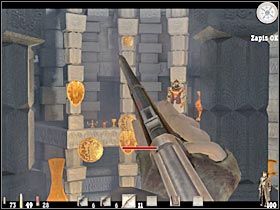
You should be using the rifle during this battle (#1). Juarez has a massive health bar, so you will have to hit him at least 15-20 times to end this fight. Once you've succeeded, a short cut-scene should appear on your screen (#2). Juarez will tell you to bring the gold to the fort. Otherwise he's going to kill Molly. We'll get back to this in the next chapter of the campaign mode.
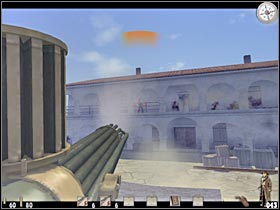
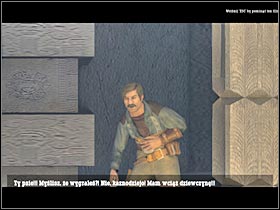
You are: Reverend Ray
Main mission objective: You will have to deal with all of the remaining bandits. Once they're gone, you will have to locate Molly. She's being held inside the main building.
Most difficult moments: I'm sure that you're going to have some problems with the final part of the mission. A very difficult boss fight awaits you there. As a result, you will have to be very careful to become victorious. You will also have to defend Molly by destroying the dynamite. This is quite challenging, so you should be saving your progress frequently.
Complete walkthrough:
We'll start off with a short, but very interesting scene (#1). Once again, I'd strongly recommend that you don't skip it. Ray has a surprise for the bandits. Once you've regained a full control over his actions, press the F key in order to be able to use the Gatling gun (#2). It's very important that you start shooting right away, mostly because this whole area is swarming with enemy troops.
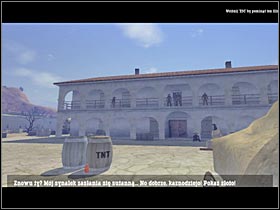
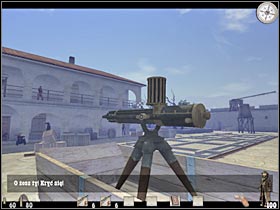
This is a rather challenging sequence, so you should be saving your progress quite often. The most important thing is that you'll have to stay in the open, so you'll be losing your health points. Start off by eliminating all nearby bandits. Most of them will be standing in front of you (#1). Be careful, though. Some of your enemies will get here in a few seconds. You will have to be ready for them (#2).
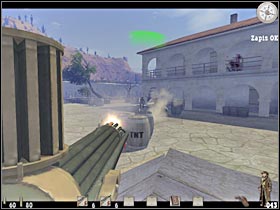
You should also watch out for enemy snipers. They will appear on the roof of the central building (#1). Make sure that you take care of them right away, as they pose a very serious threat. It's not easy to shoot them, so you'll have to be very precise. Keep shooting at the rest of the bandits (#2). You've probably noticed that there are some TNT barrels in this area. Use them to your advantage.
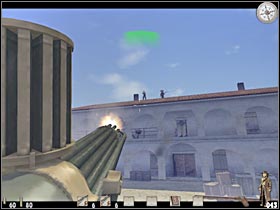
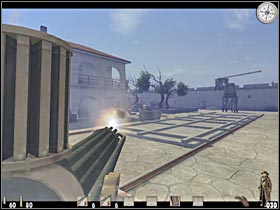
Sadly, you will have to leave the Gatling gun after a short while (#1). The whole wagon is going to be destroyed. As a result, I'd strongly recommend that you move back to the front gate. You will have to keep shooting at your enemies from here (#2). If you're standing near the large gate, you won't have to worry about most of them. You should also pick up a health bottle. You can find one of these objects by the destroyed wagon.
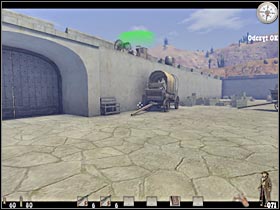

You will be granted with a new mission objective. Start off by going to the back of the large building. Sadly, some of the bandits will appear from thin air, so you will have to check your surroundings all the time. Start off by killing those bandits who are standing in front of you (#1). There are also a few enemies on the wall (#2).
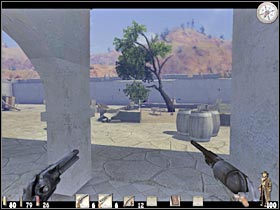
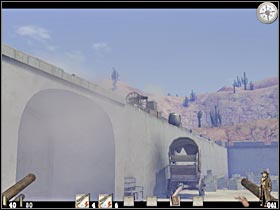
I'd strongly recommend that you choose a passageway that's located to your left. Start moving towards your new destination (#1). Remember to use larger objects (such as pillars, barrels or trees) for much needed cover (#2). As for the weapon, you could be using any of the available guns, however I'd think that the rifle is a wise choice. You will also find a lot of valuable objects in this area.
Be careful! Some of the bandits will be hiding by the large wall. There are also a lot of rooms here, so you will have to check your surroundings all the time. Some of the bandits will try to attack you (#1), while others should stay inside (#2). Go ahead and kill all of them. Thanks to that, they wouldn't be able to surprise you in the future.
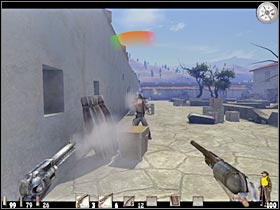
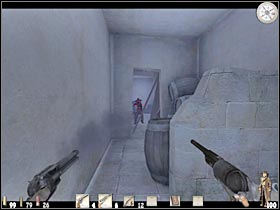
Keep moving towards the unexplored part of the fort (#1). Make sure that you kill everyone you meet. Remember that some of the bandits could respawn on the map, so you will have to be extra careful here. You should be able to reach a couple of ladders (#2). Use one of them in get to the upper level.
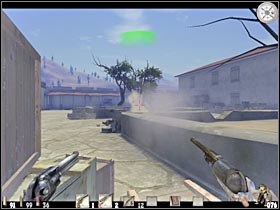
Now you will have to go back to the main gate. Make sure that you're using this balcony. I would recommend that you choose a path that's located on your left (#1). You will have to find a cover in a short while. A large group of bandits has appeared near the main building. I'd strongly recommend that you take cover by the nearby crates (#2). You should also save your game.
Start leaning out. You will have to be very careful here. Try and take out all nearby opponents (#1). Some of them will have a clean shot position, so make sure that you take them out first. Once they're gone, use the rifle to get rid of the rest of the bandits (#2). Most of them will be standing on the walls. Keep moving towards your current objective.
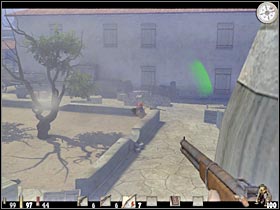
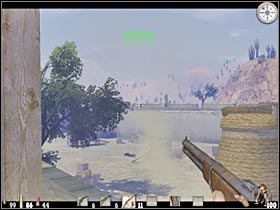
You should be able to locate a cannon here (#1). You will have to use this object. Start off by destroying the entrance of the large building (#2). You could also take out some of the visible enemy units, however this won't be necessary. Now you will have to return to the ground level. Thankfully, there's a wagon here, so you won't have to go back to the ladder.

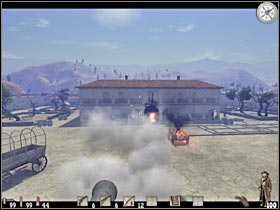
Make sure that you have secured this entire area (#1). Thankfully, most of the bandits should already be dead. I'd strongly recommend that you take your time here. Make sure that you have collected enough ammunition to move on. Enter the building and head on to the upper level. You could check out some of the nearby chests. After that, open a small door (#2). Save your game.
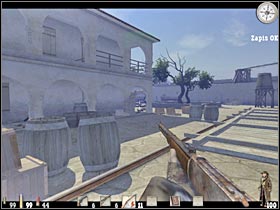
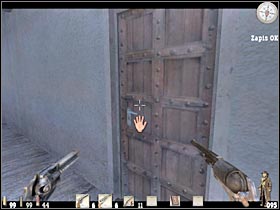
You will find yourself in a small courtyard. Start off by using some of the nearby pillars. This should allow you to take out most of your enemies (#1). Once they're gone, check the lower level of the courtyard (#2). You will also find a lot of bandits there. Make sure that you have secured this entire area. Head on to the lower level.

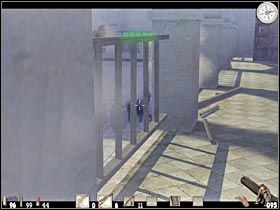
Now you will have to deal with several new waves of enemy units. Most of them will appear on the balcony (#1). Make sure that you're using pillars for cover, however you will also find a lot of other large objects here (crates, barrels etc.). Be careful, though. A nearby door will open (#2). As a result, you will have to take out a small group of bandits. That's where you'll need to go.
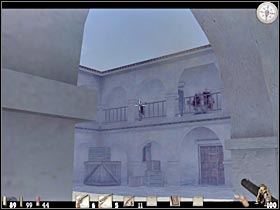
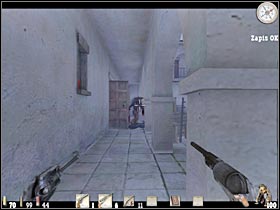
Enter the new corridor. Start off by taking a closer look at a nearby cabinet. You will find a health bottle here (#1). Make sure that you have picked it up. Open the door that's located on your left. You will find some stairs here. They lead to the basement (#2). Kill a single bandit and proceed to the next section. You should save your game here, as you will have to deal with more enemies very soon.
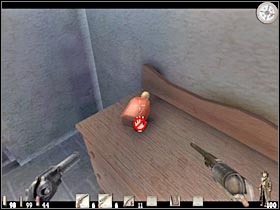
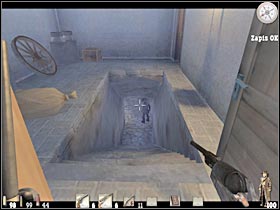
Use the stairs to get down to the basement. You should consider using the slow-motion feature here. You won't have any problems locating the bandits (#1). Most of them are occupying the main corridor. Once they're gone, start moving forward. Make sure that you're using crates for cover. More enemies will arrive here very soon (#2). They will appear at the other end of this tunnel. Thankfully, you won't have to explore any of the side rooms.
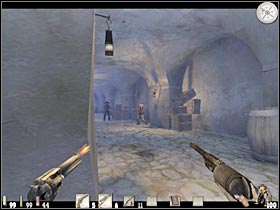
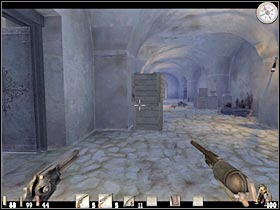
Try getting closer to the opposite end of this corridor. You will encounter at least one bandit here (#1). Make sure that you have killed him. Head on to the staircase. Be careful, though. There's a second bandit here (#2). He will be hiding behind the corner, so you will have to take him out quickly.
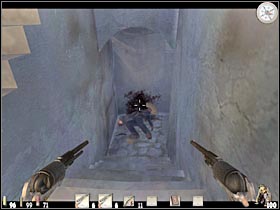
You will encounter several other bandits along the way (#1). The staircase will be blocked, so you will have to head on to a nearby corridor. It should be located in front of you, so you won't have to waste any time looking for it. A new cut-scene will appear on your screen (#2). Ray will meet Manson here. He's the boss of this chapter of the campaign mode. As you've probably suspected, you will have to kill him. I would recommend that you save your game here.
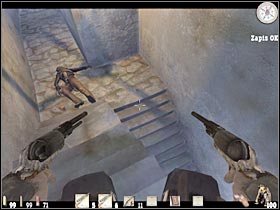
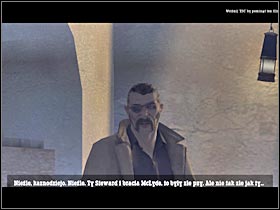
This boss battle is going to be very difficult. You will be using two different rooms. I'd strongly recommend that you familiarize yourself with each room. You will have to be using the rifle here. Try aiming at the head of Manson (#1). Be careful, though. You can't stay in the open for too long. He's a great shooter and you'll lose a lot of health here. Once you've performed a successful hit, Manson will escape to the second room. You could follow him (#2) however I think that you should return to the main corridor and wait for him to come back.
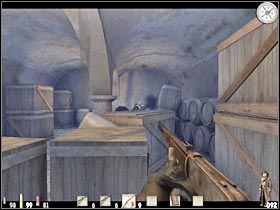
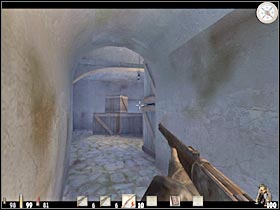
It would be best if you wouldn't lose too much health during this battle. You could pick up a health bottle (main corridor), but I would recommend saving it for later. Just make sure that you're using the rifle (#1) and you should be able to win this fight. Once you've killed Manson, go ahead and check his body (#2). You will find a cell door key here. Pick it up and return to the main corridor. You should also take a health bottle.
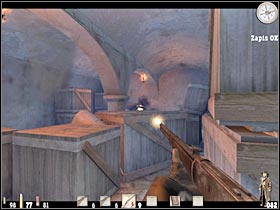
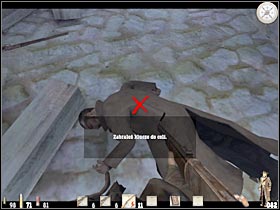
Head on to the unexplored room. You shouldn't have any problems locating it. Head on to the second door. You will have to use the newly acquired key in order to open it (#1). You will find yourself inside a large cell. BEFORE you decide to move closer to Molly (#2) MAKE SURE that you have saved your game! This is EXTREMELY important!!
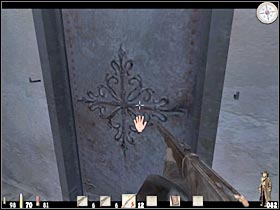
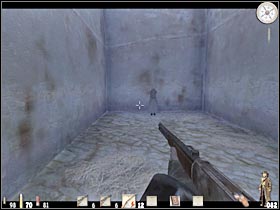
A short cut-scene should appear on your screen (#1). As a result, you will have to deal with several bandits (#2). This is a VERY difficult fight. You can't use any objects for cover and you can't exit the room. As a result, make sure that you stick close to one of the nearby walls. You will have to use your rifle to dispose of their bandits. Try aiming at their heads. You will probably lose a lot of health points here. Thankfully, the final part of the mission won't involve shooting any of the bad guys.
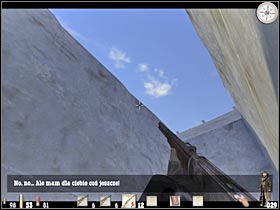

Once you've taken care of the bandits, a new cut-scene should appear on the screen (#1). Juarez decides to have a little fun. The objective is quite simple. Juarez will be throwing some dynamite at you. Make sure that you destroy it (#2) BEFORE it reaches the ground. I would recommend that you use a rifle or dual revolvers here. Additionally, make sure that you save your game often, because you won't be allowed to make any mistakes here.
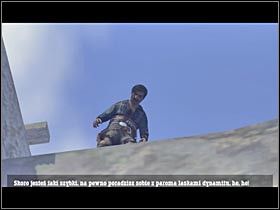
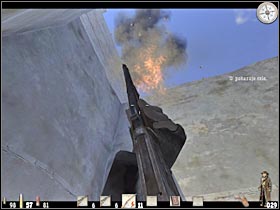
Keep shooting at the dynamite (#1). You should be standing in the central part of this room. This will allow you to target all of these objects quite easily. You will have to destroy several objects in order to proceed to the next part of the mission. Juarez will tell you that he's got some kind of a surprise. As a result, he will throw an oil lamp (#2). Sadly, you won't be able to destroy it.
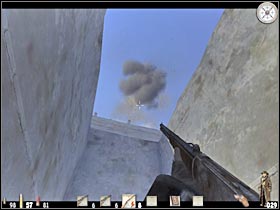
There's not much to do here. You will have to be standing near Molly. Don't worry about the flames (#1), because you won't be able to stop the flames from spreading (#1). This is where the mission will come to an end. You'll get back to Billy in a short while. It's time from the big finale!
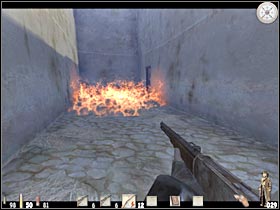
You are: Billy Candle
Main mission objective: You will have to enter a nearby fort in order to assist Ray in saving Molly.
Most difficult moments: As you've probably noticed, you'll be using your bow during the first part of the mission. As a result, you won't have to worry about your opponents, because it's going to be very easy to kill them. I'm sure that you'll have some problems with Juarez. You're going to have to defeat him THREE times. Two of these sequence are very difficult, so I'd recommend that you save your progress from time to time.

Complete walkthrough:
Start off by watching a short, but important cut-scene. You will receive a bow from a young boy (#1). Once you've regained full control over Billy, start moving towards the fort (#2). You shouldn't have any major problems finding it, especially since you'll be using the compass. Also, don't worry about the gunshots. You won't encounter any bandits outside the fort. The same goes with animals.

Keep heading towards the central part of the fort (#1). Remember that there aren't any hostiles here, so you should take your time. I would also recommend that you practice using the bow. Once you're close enough, you will have to locate a partially destroyed wall (#2). Climb up to the higher platform.
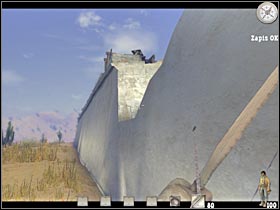
Once you're on the wall, a second cut-scene should appear on your screen (#1). As you've probably suspected, you will have to rescue Molly and Ray. Thankfully, you will have more than three minutes to solve this problem. Start off by eliminating all nearby units. You should be using the bow during these fights (#2). Try to aim at the heads of your opponents. You should also perform a lot of dodge moves, so you won't get hurt.
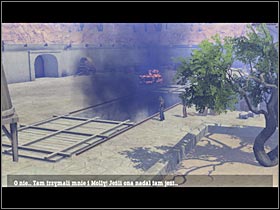
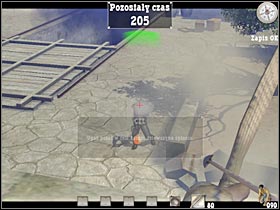
I would recommend that you slide down to the ground level. Thanks to that, you will be able to take out several other bandits. Make sure that none of them surprises you (#1). Once you've cleared out this area, try and take out the snipers (#2). Most of them will be standing on higher platforms. You don't have to use any guns during these fights. As you've probably noticed by now, your bow is a very powerful and precise weapon.
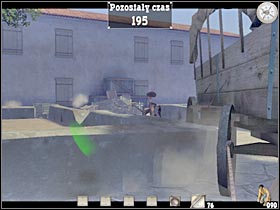

The most important thing here is to maintain a safe distance. I'd strongly recommend that you secure this entire area. After that, turn left and head on to the large crates (#1). This will allow you to get back to the brick wall. Turn around and start moving towards a wooden crane (#2). You will have to approach it from the left side.
Turn left. You will have to choose the whip from your inventory. You will have to be aiming at the wooden part of the construction (#1). Start swinging. The objective will be to land near the large tank. This will allow you to push it (#2). As a result, you won't have to worry about the time limit anymore. Proceed to the ground level.
Step up closer to the large hole and listen to what Ray has to say (#1). Sadly, he won't be able to escape the cell. You will have to open the door from the other side. I'd strongly recommend that you take your time here. Make sure that you have picked up better weapons and some ammunition. Once you've done that, head on to the destroyed entrance (#2). I'm sure that you'll remember where it is.
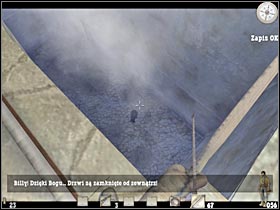
Enter the building. You should be able to find a health bottle (#1). It would be wise if you had picked it up. Now you will head on to the nearby door (#2). SAVE YOUR GAME here! This is very important, because you will have to enter a duel.
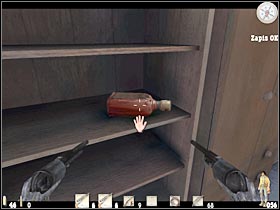
Once you've entered the courtyard, a new cut-scene should appear on your screen (#1). Sadly, you won't be able to skip this conversation. As a result, listen to what Juarez has to say. Furthermore, this duel is going to be different. You will be using the same weapons. Additionally, each gun will be loaded with only three bullets. Juarez is also very quick, but I'm sure that eventually you'll be able to beat him (#2).
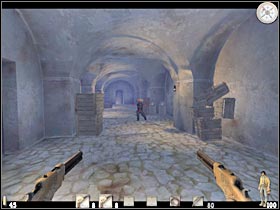
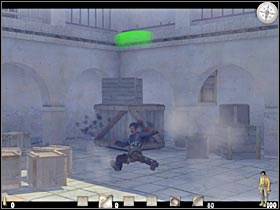
As you've probably noticed, you will be rewarded with TWO powerful revolvers. I'd strongly recommend that you start using them right away. Head on to the new corridor and open the door that leads to the cellar (#1). Use the stairs to get down there. You will encounter two bandits along the way (#2). One of them will be guarding this corridor, so make sure that he dies first. The second bandit will appear at the other end of this corridor. Thankfully, your revolvers are very powerful, so you won't have to waste a lot of ammunition here.
Use the stairs to get down to the lower level. The last bandit will come out from the right room (#1). That's where you'll need to go. Head on to a small door. You will have to pick up a wooden object (#2). Turn around in order to able to drop it. After that, try opening the door.
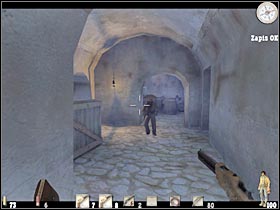
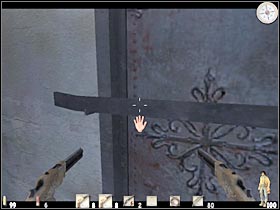
A new cut-scene should appear on your screen (#1). It turns out that Juarez doesn't want to die. ;-) As a result, you will have to fight him once again. This time you'll be using your fists (#2). Once you've regained a full control over Billy, make sure that you have saved your game!
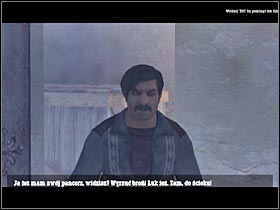
This is a much easier battle, however you should know about a few important things. You will have to be using ONLY one type of an attack. Keep pressing the RIGHT mouse button (#1). Any other combos won't have an effect on Juarez. Make sure that you avoid being hit by taking a step back after each successful hit. You should be able to defeat Juarez without any other problems (#2).
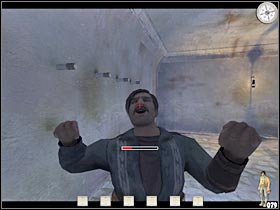
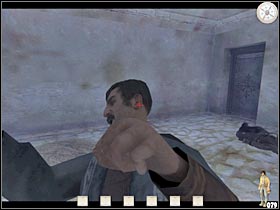
That's not all. There is one more thing for you to do. You will take control over dying ray. He will notice that Juarez hasn't been defeated (#1). Furthermore, he's planning on stabbing Billy and Molly. Once you've regained full control over Ray, choose the revolver from the inventory and use it to kill Juarez (#2). This is a very challenging sequence, as you will have about two seconds to perform this action.
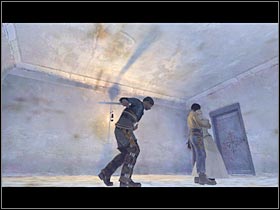
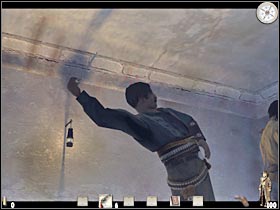
Congratulations! You've just finished the game. You will be rewarded with a final cut-scene (#1; #2).
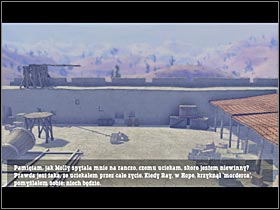
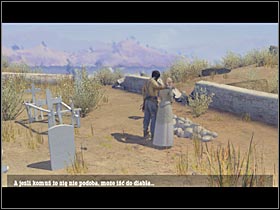
Staying in the shadows. When you're playing as Billy, you will be staying in the shadows for the most of the time. Sadly, most of the missions will require you to remain hidden. In most cases, revealing your position would be equal to an instant failure, because of the alarm that would be raised. The same goes with leaving any bodies behind. Thankfully, "Call of Juarez" isn't as complicated as most of the stealth games. As a result, you won't be eliminating your opponents during stealth missions. The most important thing would be to remain unseen. As you've probably suspected, you will have to spend a lot of time observing movements of the enemy units. You won't be able to activate their range of view, so you will have to be very careful. Make sure that you're not moving too fast. You should also be leaning out a lot in order to check your surroundings. Bear in mind, however, that you won't be able to stay in the open for too long, because this would reveal your current position. The next important thing will involve your enemies. Most of them are using programmed routes, so you won't have any problems with that, because you'll know exactly where they will go next. Furthermore, most of the bandits will make longer stops along the way. This will allow you to sneak past them in order to be able to reach a new section of the map. You will also have to remember about a few other things. Like I've said before, I wouldn't recommend killing any of the bandits, unless this is necessary to reach a new location. You should also be looking at your HUD. One of the options will tell you exactly how stealth you are. "Call of Juarez" is very forgiving for the most of the time, so you will be able to perform more dangerous manoeuvres. Bushes are the last important thing I wanted to tell you about. You will be able to use them to your advantage during most of the stealth missions. They provide a full cover, even if it's a day mission. As a result, you will have to be on a look out for these types of objects. I guess I don't have to remind you that you should also be using crates and larger barrels for cover. Also, make sure that you're crouching all the time, however most of the bandits won't respond to your footsteps. The same goes with most of the other sounds.
Useful equipment. Your whip is by far the most useful item of the entire game. I'm sure that you'll be using it all the time when playing as Billy. First of all, your whip can be used to avoid different types of obstacles. In most cases, you wouldn't be able to solve this puzzles in any other way. This item can also be used during some of the fights, however you'd have to surprise your enemy in order to perform a successful action. Also, you would have to kill him with a single hit, so make sure that you aim at the neck area. You can't make any mistakes here or you could end up dead. As for the rest of the weapons, bow also seems like a good idea. Sadly, you will be using in only two missions of the campaign mode. You will also have an opportunity to use some of the guns, however most of Billy's missions will force you to remain unseen, instead of fighting your enemies in open battles. I would recommend that you choose some of the better shotguns or rifles if you must to kill some of the nearby bandits.
Fighting enemies. There are two types of battles during the game. You will be dealing with typical gunfights for the most of the time. If you've played a more realistic shooter game in the past, you will know exactly what to do. I have to warn you, though. Most of the battles in "Call of Juarez" are quite challenging, so you won't be able to perform risky stunts or stay in the open for too long. I'm sure that less experienced players may have some problems with this approach. Start off by slowing down the pace a little. You won't have to hurry. Take your time to eliminate all nearby hostiles. You will have to choose your targets carefully. Start off with these bandits who are standing close to your position, as they pose a very serious threat. You will also have to avoid being hit. Ray has an additional armor, however in most cases it wouldn't do you much good. As a result, make sure that you're using nearby objects for cover. Thankfully, you shouldn't have any serious problems finding them. You should be crouching behind crates, barrels or even pillars. You could also use some of the larger objects. Walls of the nearby buildings seem like a good idea. Additionally, you will have to be leaning out a lot. Thankfully, most of the cover objects can't be destroyed, so you should be quite safe, even if you manage to find yourself under a heavy fire. Just make sure that none of the bandits surprises you be moving closer to your position. As for the bandits, most of them will remain in their original positions, so you won't have any major problems locating them. Some of the enemies may try to perform various stunts, however these actions are very easy to predict. I'd strongly recommend that you aim at their heads. Thanks to that, you will be able to end such a battle without having to spend too much ammunition. I would recommend that you use one of the more precise weapons. Revolvers seem like a good idea and there's always plenty of ammunition for you to pick up. The second type of a battle involves activating the slow-motion feature. You can divide this category to two different groups. First of all, you will be able to use the slow-motion during standard gunfights. I'd strongly recommend that you activate each time when you enter a small room that's being occupied by at least two bandits. Thanks to that, you will be able to eliminate them without losing any health. You will also have to take part in several duels. Each of these fights is quite unique, so it would be best if you had read the main walkthrough section for any additional instructions. The only thing for you to remember is to be very quick. This is your key to success.
Useful equipment. Ray will be using his weapons for the most of the game. There are several types of guns for you to find. You start off with revolvers, however later during the game you'll be able to find shotguns and rifles. I'm sure that you're going to have some favourite weapons, however you will have to remember about a few important things. Early in the game, a standard Colt should be enough. Make sure that you use both revolvers to activate the slow-motion feature. Some of the later missions will require you to use more powerful weapons. Some of the shotguns seem like a good idea, however you won't be able to eliminate snipers or more distant enemies with these weapons. I'd strongly recommend that you exchange these weapons for one of the available rifles. They are very powerful. One successful hit will kill most of your enemies. Sadly, you will have some problems finding the ammunition. As a result, you will be checking bodies of fallen enemies, as well as chests and drawers. The other important aspect is a durability of a weapon. Sadly, you won't be able to use the same guns during the entire game. As a result, you will have to be on a look out for similar or better guns all the time. This is very important, because you wouldn't want to end up with some of the standard pistols, especially if you're playing one of the more challenging missions. As for the rest of the equipment, you may ignore it. You won't have to use the Bible. The same goes with dynamite.

 Crysis Game Guide & Walkthrough
 Company of Heroes 2 Game Guide & WalkthroughCrackdown Game Guide & Walkthrough
 Call of Duty 3 Game Guide & Walkthrough
 Car Mechanic Simulator 2014 Game Guide & Walkthrough