Game Guides > game guides > C >  

Car Mechanic Simulator 2014 Game Guide & Walkthrough

Game guide for Car Mechanic Simulator 2014 will allow you to discover all secrets of car mechanic's work in the virtual garage - Car Mechanic Simulator 2014 - Game Guide and Walkthrough

Game guide for Car Mechanic Simulator 2014 will allow you to discover all secrets of car mechanic's work in the virtual garage. It contains complete walkthrough for every mission in single-player campaign, with information about car parts designed for repair or change, precise pictures and list of challenges and tasks, that makes full image of job given to player, including financial reward for completing orders. The guide also offers general advices about functioning of the garage and service for various vehicles. It contains description for test drives, service books and virtual garage walks where you can find important points that make jobs easier. Advices section has been enhanced with fragments mentioning repair of used parts and methods of moving to various points in the car as well. The final part of guide is the list of all parts available in the shop including their prices and car's elements they are designed for.

Contents of game guide for Car Mechanic Simulator 2014:

  • Detailed walkthrough for every mission in single-player campaign
  • Advices mentioning the functionality of the garage - test drives, diagnostics, shop service or actions like change of oil or tires
  • Virtual walks in all three garages that reveal the most important parts of their equipment
  • Description of test drive, diagnostics and chip tuning

Amadeusz "ElMundo" Cyganek ()

1. Before buying a part, you should precisely diagnose the problem and establish which element should be changed. Especially in the beginning of the game mistakes made with wrong choice of parts can seriously harm your budget.

2. If you believe you have completely assembled the car and the game still does not let you end the mission showing message that car is incomplete, you should look into your equipment in order to find missing part. Elements that have high level of condition are usually those you have forgot.

3. It is always wise to go for test drive or make diagnostics test, even if it is not mentioned in the mission's targets. It allows us to check technical condition of all parts of the car.

4. There are no time limits and game does not allow to end the mission if you have made any mistake during the car's repair. Plan your actions with caution then and do not hurry.

5. Try not to do all targets in the same time - take care of each part separately instead. In that way you will avoid problems with repeating of the assembling of particular car's elements.

Moving around the garage

Movement - Controls - Basics of gameplay - Car Mechanic Simulator 2014 - Game Guide and Walkthrough

Movement

Perform an action - Controls - Basics of gameplay - Car Mechanic Simulator 2014 - Game Guide and Walkthrough

Perform an action

Show the menu - Controls - Basics of gameplay - Car Mechanic Simulator 2014 - Game Guide and Walkthrough

Show the menu

Actions inside the car

Camera rotation - Controls - Basics of gameplay - Car Mechanic Simulator 2014 - Game Guide and Walkthrough

Camera rotation

1 - Controls - Basics of gameplay - Car Mechanic Simulator 2014 - Game Guide and Walkthrough, 2 - Controls - Basics of gameplay - Car Mechanic Simulator 2014 - Game Guide and Walkthrough, Zoom - Controls - Basics of gameplay - Car Mechanic Simulator 2014 - Game Guide and Walkthrough

Zoom

Action - Controls - Basics of gameplay - Car Mechanic Simulator 2014 - Game Guide and Walkthrough

Action

Show the menu - Controls - Basics of gameplay - Car Mechanic Simulator 2014 - Game Guide and Walkthrough

Show the menu

Unscrew - Controls - Basics of gameplay - Car Mechanic Simulator 2014 - Game Guide and Walkthrough (hold)

Unscrew

Test drive

Car controls - Controls - Basics of gameplay - Car Mechanic Simulator 2014 - Game Guide and Walkthrough

Car controls

Camera change - Controls - Basics of gameplay - Car Mechanic Simulator 2014 - Game Guide and Walkthrough

Camera change

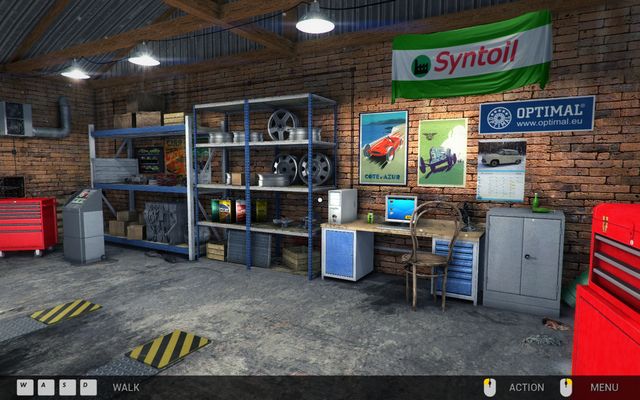
It is what you will see in the first garage. - Navigation in the garage - Basics of gameplay - Car Mechanic Simulator 2014 - Game Guide and WalkthroughIt is what you will see in the first garage.

Moving around the interior of the garage should not be problematic. All items and mechanisms necessary to functioning of the garage are at your fingertips.
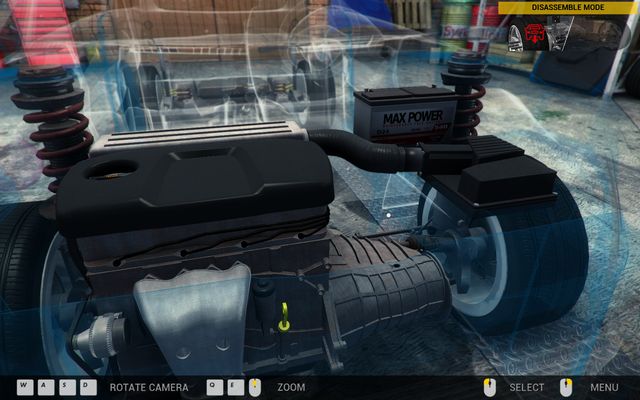
View inside the car - a little different from what drivers see every day. - Navigation in the garage - Basics of gameplay - Car Mechanic Simulator 2014 - Game Guide and WalkthroughView inside the car - a little different from what drivers see every day.

There is a couple of ways to get to particular elements of the car:

  • by opening Hood you can choose ENGINE inspect option to look on elements around the engine and gearbox;
  • by opening Car door we get into car's Interior where we can perform OBD Test;
  • removing of the Wheel allows us to get to the suspension's elements put close to the shock absorbers;

To reach another parts of the car you can use Car Lifter controlled with the machine in the garage. Using it you can move under the car and check various parts connected mainly with drivetrain and suspension.
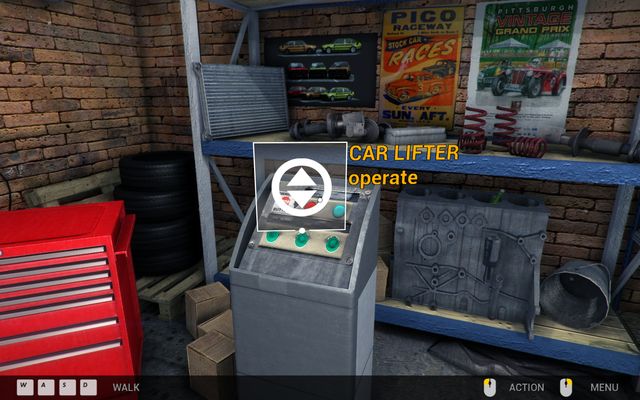
Machine designed for controlling the car lifter is in every garage. - Navigation in the garage - Basics of gameplay - Car Mechanic Simulator 2014 - Game Guide and WalkthroughMachine designed for controlling the car lifter is in every garage.

After lifting car with the Car Lifter you will gain access to:

  • front Engine where you can check Oil Pan and suspension;
  • rear Undercarriage where you can check condition of Fuel Tank, Exhaust and suspension.

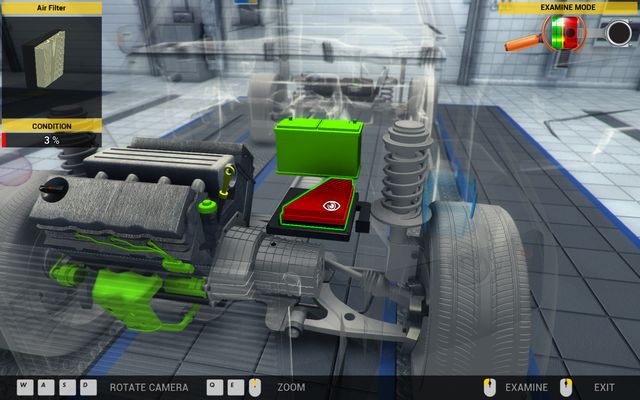
Process of testing parts comes with two ways. First of them is option of checking condition of chosen car's element individually - to do that show the menu with right mouse button and then choose Examine Conditions option. By clicking with magnifying glass cursor on chosen part you will see (if it is possible) it's proportional condition and the part will get colour appropriate to it's actual condition.

ADVICE: Each item with less than 15% of condition has to be changed - otherwise game will not complete targets of your mission with success!
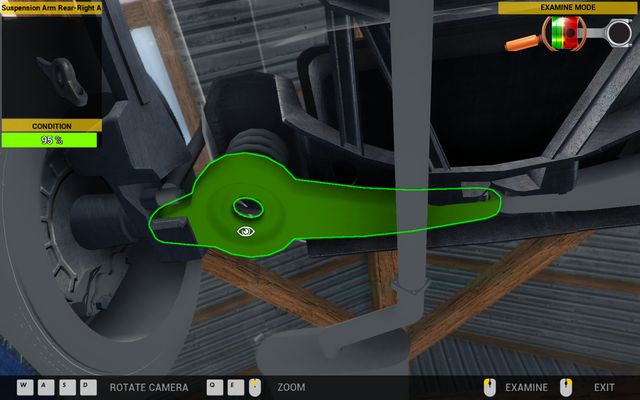
Checking condition of car's element is hard but necessary work. - Testing parts - Basics of gameplay - Car Mechanic Simulator 2014 - Game Guide and WalkthroughChecking condition of car's element is hard but necessary work.

Other way to check condition of particular components is going for test drive or performing diagnostics test - they show mainly problems with drivetrain, suspension and gearbox.

Shop is one of the most important parts of the repairing process where you often start the operation of doing the job. You will find all parts for particular vehicles types there. To check it's offer chose "Access" option from the computer on the desk and then "Car Parts Shop". You will see complete list of over one hundred parts which you can buy anytime. After choosing fitting element and buying it you will find it in your inventory ("Menu" - "View Inventory") - you can see your property there.
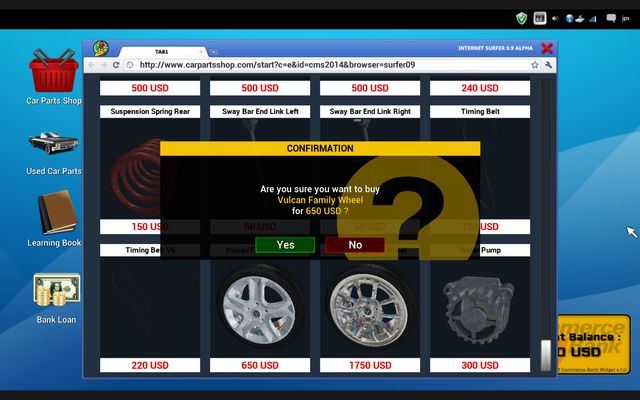
Tires are one of the most expensive parts - but all depends on car's model. - Shop service - Basics of gameplay - Car Mechanic Simulator 2014 - Game Guide and WalkthroughTires are one of the most expensive parts - but all depends on car's model.

Used parts section

There is also option of buying used parts but it comes with some limitations. First of all, this section has limited assortment - you will not find all parts available in the game there and the offer is changing regularly. Moreover, we must repair bought parts before putting them into the car and that comes with additional costs. So purchase of the used part is not always profitable because summary cost of buying and repairing can exceed price of a new part.
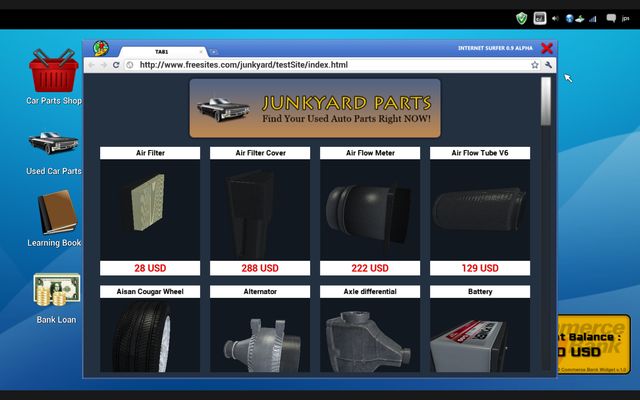
Purchase of used parts is sometimes a good way to save money. - Shop service - Basics of gameplay - Car Mechanic Simulator 2014 - Game Guide and WalkthroughPurchase of used parts is sometimes a good way to save money.

Repair of worn-out parts is a good way to save some amount of money, it also let us put worn-out parts in another repaired cars. We can repair both parts bought in the shop and taken out of the cars but that second kind of parts can be repaired only if it's condition is above 15%.
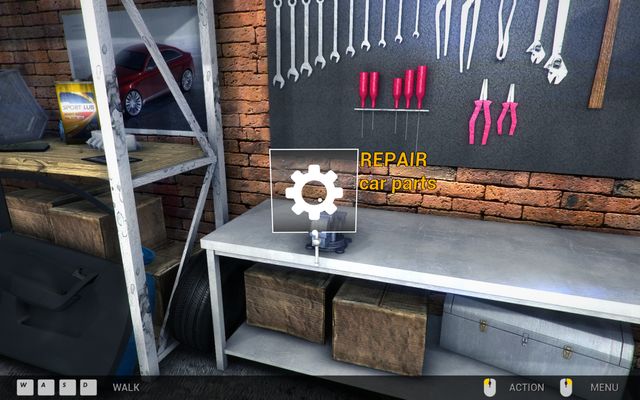
To repair the part we go to the tools table and choose Repair Car Parts option - Repair of worn-out parts - Basics of gameplay - Car Mechanic Simulator 2014 - Game Guide and Walkthrough

To repair the part we go to the tools table and choose Repair Car Parts option. Then on the screen appears the list of parts we can repair - after clicking the chosen item, a dialog window is shown where we can see planned cost of service. It is wise to check earlier whether purchase of a new part is not a better option.

If you have some free cash to spend you could be interested in looking on service books which help you get better statistics and make the process of tasks' realization faster. You can find them in Learning Books section, after getting to the computer.
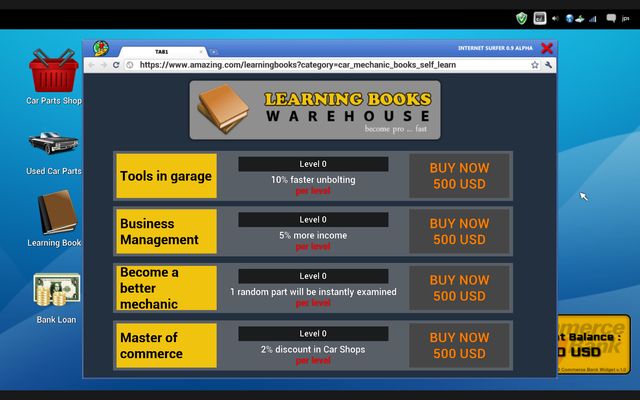
There are following titles in the offer - Service books - Basics of gameplay - Car Mechanic Simulator 2014 - Game Guide and Walkthrough

There are following titles in the offer:

Book's title

Price

Effects

Tools in garage

500 dollars

10% faster twisting off

Business Management

500 dollars

5% more income from missions

Become a better mechanic

500 dollars

1 chosen part will be automatically tested

Master of commerce

500 dollars

2% discount for goods bought in the shop
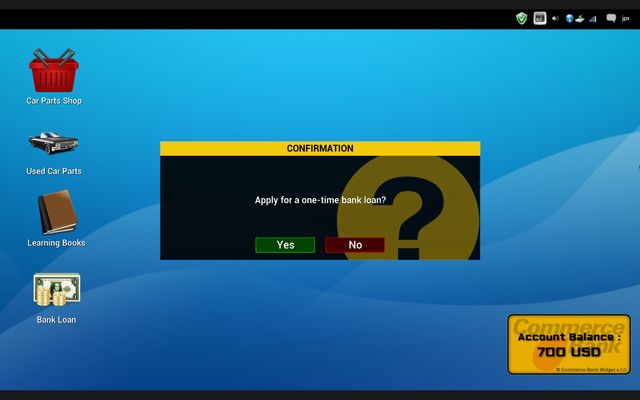
Loan gives you quick and large cash injection. - Lending money - Basics of gameplay - Car Mechanic Simulator 2014 - Game Guide and WalkthroughLoan gives you quick and large cash injection.

Lending money is a good way to avoid mistakes with wrong diagnostics and purchase of wrong elements. To get a loan you have to use your computer - by choosing Bank Loan option you can get 5000 dollars. But remember - you can use that kind of help only once so do it only if you really need it.

In the first few missions you will perform car's diagnostics by test drive that takes place on the maneuver square by the garage. It is composed of four parts.
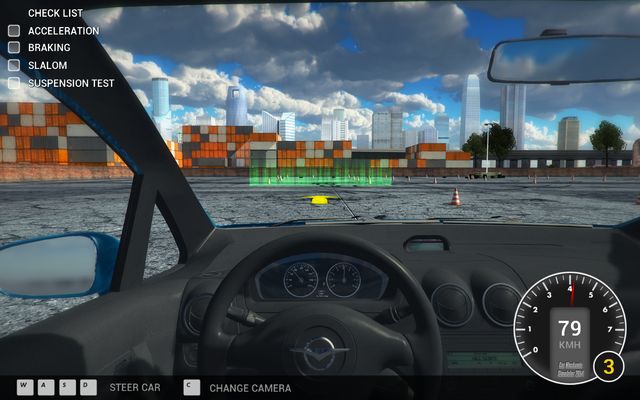
It's time to begin test drive! - Test drive - Basics of gameplay - Car Mechanic Simulator 2014 - Game Guide and WalkthroughIt's time to begin test drive!

First of them requires you to test the acceleration - you have to drive through the field with green border as fast as you can. After finishing the stage you turn right and go back.
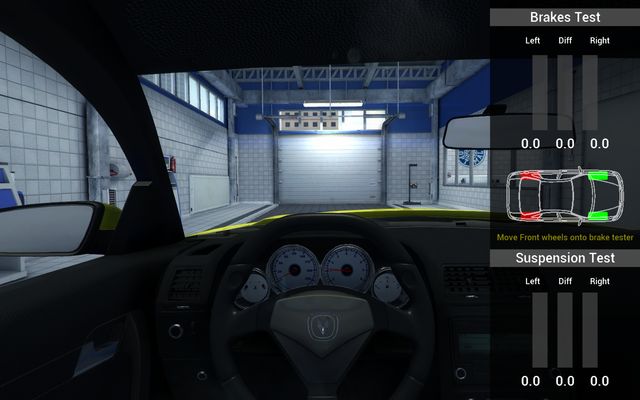
That is the right moment to start braking. - Test drive - Basics of gameplay - Car Mechanic Simulator 2014 - Game Guide and WalkthroughThat is the right moment to start braking.

Next fragment is brakes' test - to accomplish it you have to stop the car inside the chessboard marked with red border.
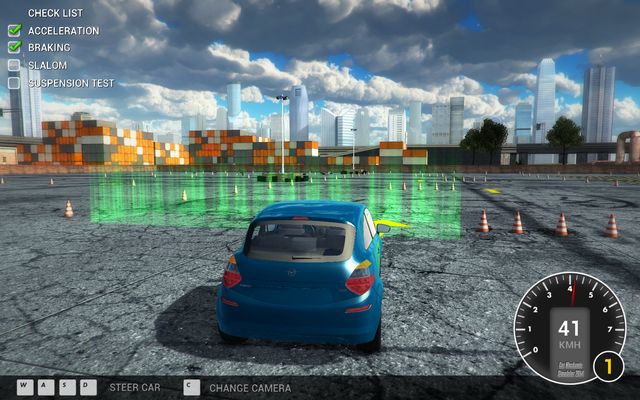
During the slalom it is worth slowing down and perform all the maneuvers precisely. - Test drive - Basics of gameplay - Car Mechanic Simulator 2014 - Game Guide and WalkthroughDuring the slalom it is worth slowing down and perform all the maneuvers precisely.

The third part is for performing a slalom and checking condition of the drivetrain - you have to handle a sequence of several quick turns so you should slow down and try to perform these maneuvers accurately by driving through all marked green fields one after the another.
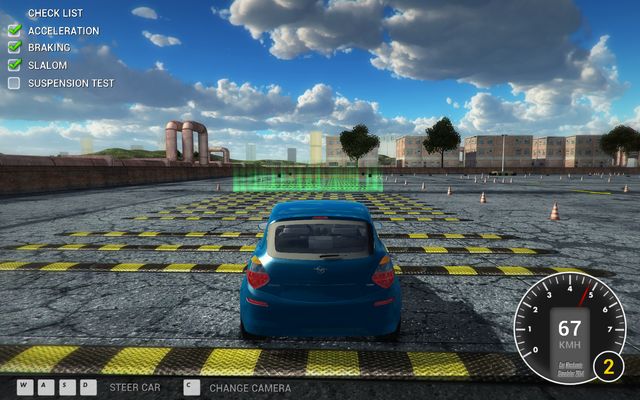
Speed bumps will be certainly a good test for the suspension. - Test drive - Basics of gameplay - Car Mechanic Simulator 2014 - Game Guide and WalkthroughSpeed bumps will be certainly a good test for the suspension.

The last part of test drive is designed for testing the suspension - in that order you have to get through the stage filled with speed bumps and stop in the end of the track to finish the drive.

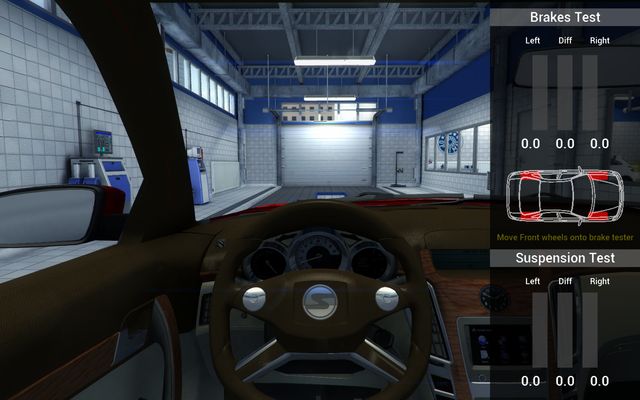
When you receive your second garage, test drive is replaced with shorter and definitely more professional diagnostics station which allow you to check condition of brakes and suspension.

In the first place test is for the front brakes. - Diagnostics - Basics of gameplay - Car Mechanic Simulator 2014 - Game Guide and WalkthroughIn the first place test is for the front brakes.

First stage of the diagnostics test is examination of proficiency of the front brakes. In that order drive with the front wheels on the appointed position and press continuously and later hold the braking button, until you receive result of the measurement.
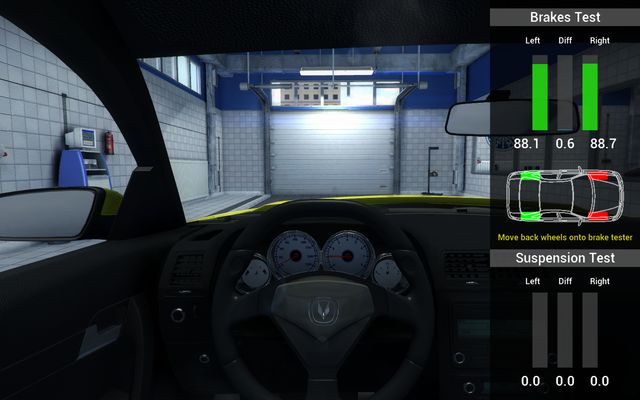
In the second place you will test the rear brakes. - Diagnostics - Basics of gameplay - Car Mechanic Simulator 2014 - Game Guide and WalkthroughIn the second place you will test the rear brakes.

In the second part of the test you will check brakes in the rear of the car - analogically to the previous operation.
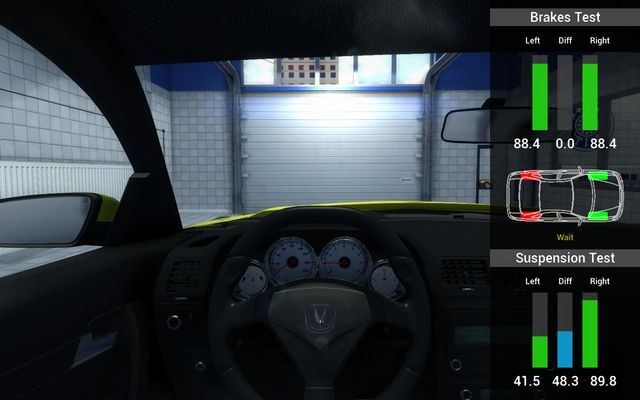
Now we are going to test the front suspension... - Diagnostics - Basics of gameplay - Car Mechanic Simulator 2014 - Game Guide and WalkthroughNow we are going to test the front suspension...

The third stage is the test of the front suspension. Do test it you drive on the position and watch the car going through the durability tests.
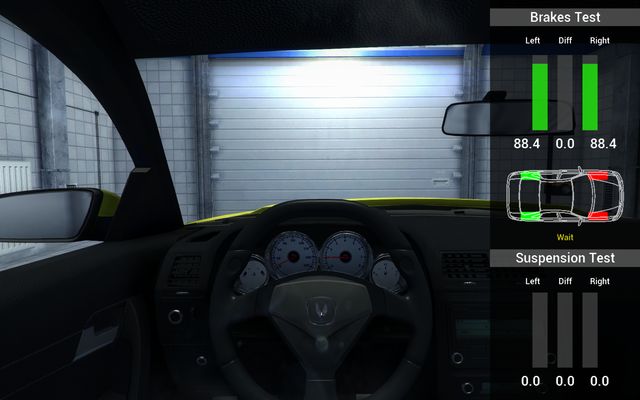
...and the rear one. - Diagnostics - Basics of gameplay - Car Mechanic Simulator 2014 - Game Guide and Walkthrough...and the rear one.

Perform an analogical operation also with the rear suspension driving a few meters further.

Chip tuning is a possibility unlocked only after achieving the third garage (Order 44). You can then access a special room where you can increase power of the repaired car with the special program.
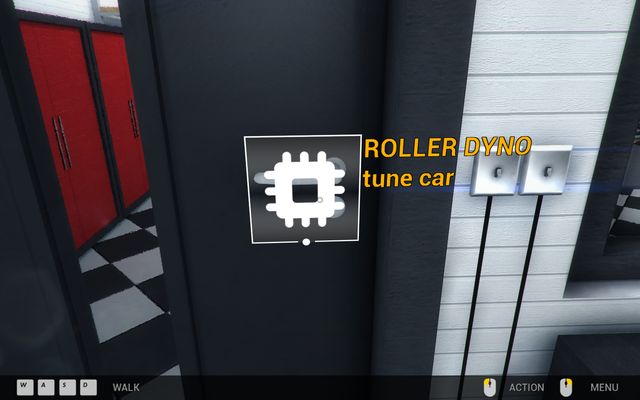
To enter the chip tuning room choose Roller Dyno - tune car option - Chip tuning - Basics of gameplay - Car Mechanic Simulator 2014 - Game Guide and Walkthrough

To enter the chip tuning room choose Roller Dyno - tune car option.
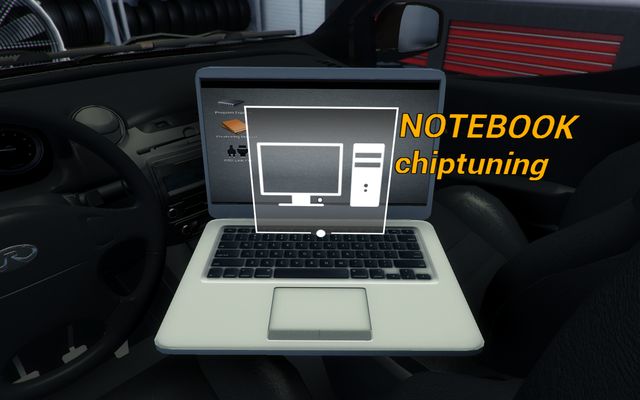
You will be moved immediately into the car - Chip tuning - Basics of gameplay - Car Mechanic Simulator 2014 - Game Guide and Walkthrough

You will be moved immediately into the car. Use the laptop which you will see (Notebook - chiptuning).
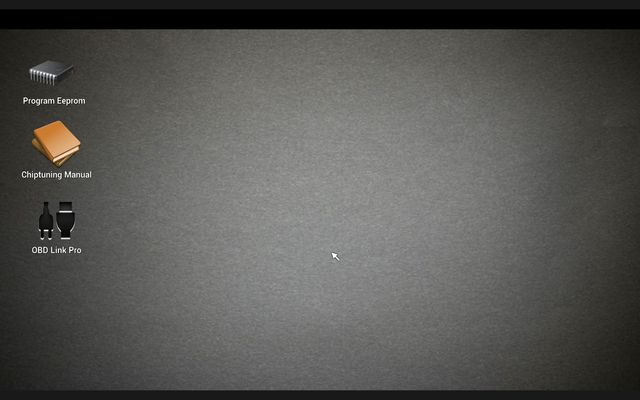
That is the notebook's main menu - Chip tuning - Basics of gameplay - Car Mechanic Simulator 2014 - Game Guide and Walkthrough

That is the notebook's main menu. You gain access to three various options but only the first and the third one are useful in tuning the car. Second option is a small manual that explains how the chip tuning works.
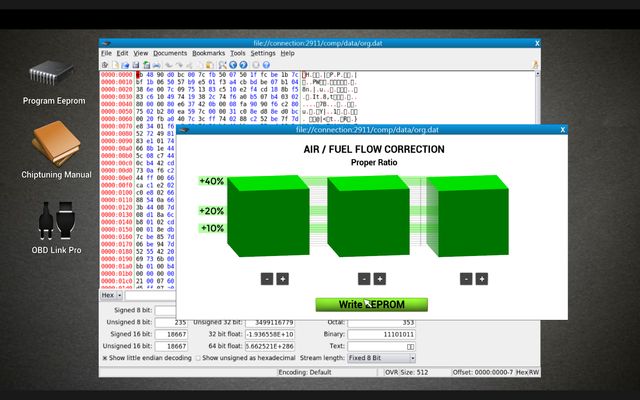
Program Eeprom is an application you perform the actual tuning with - Chip tuning - Basics of gameplay - Car Mechanic Simulator 2014 - Game Guide and Walkthrough

Program Eeprom is an application you perform the actual tuning with. Task is not too much complicated - by using plus and minus icons below each column you are trying to set all three of them on an equal level. Additional impediment is fact that by moving one column you affect also another one so planning the subsequent moves is a bit complicated. Percentage numbers at a side indicate what level columns have to reach to increase car's performance by that value. After finding a fitting setting press Write Eeprom.
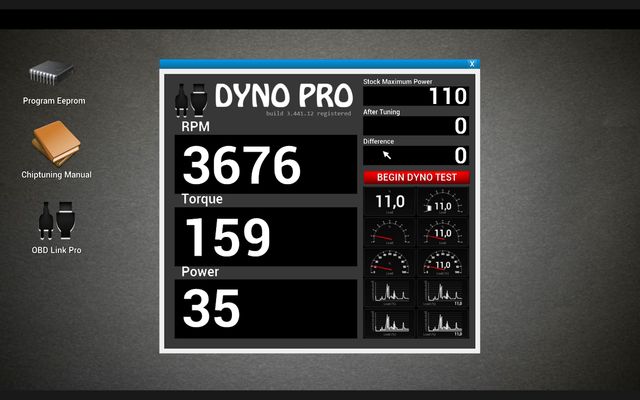
OBD Link Pro is a program that confirms values achieved during the tuning and change them into additional power delivered to the car - Chip tuning - Basics of gameplay - Car Mechanic Simulator 2014 - Game Guide and Walkthrough

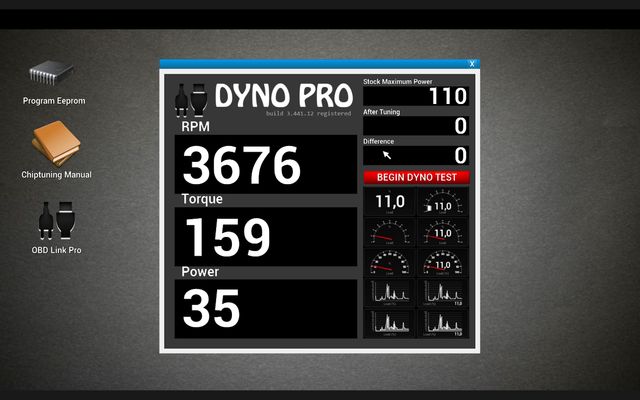
OBD Link Pro is a program that confirms values achieved during the tuning and change them into additional power delivered to the car. Using it you can assure how much car's performance has been actually increased.

First garage looks like most of the buildings that are work place for amateur mechanics. Nevertheless, it does not mean you will not find anything you need to comfortable work with various cars and orders. Apart form car on the lifter in the middle of the room (which is hard to be missed), you will handle also a couple of other tools.
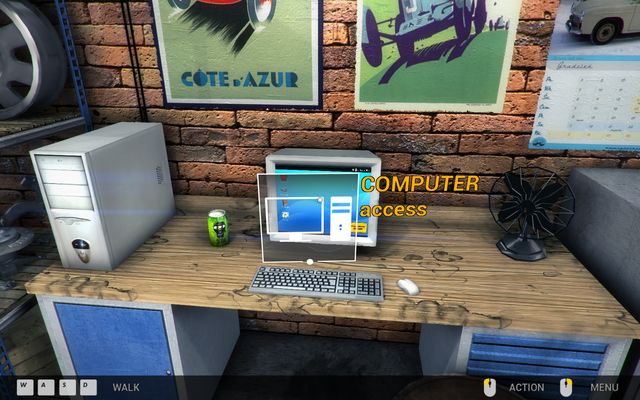
If we are speaking about orders, the most important thing is computer which allows you to buy every part necessary to do the repair and check the offer of used car elements - First garage - Garage walks - Car Mechanic Simulator 2014 - Game Guide and Walkthrough

If we are speaking about orders, the most important thing is computer which allows you to buy every part necessary to do the repair and check the offer of used car elements.
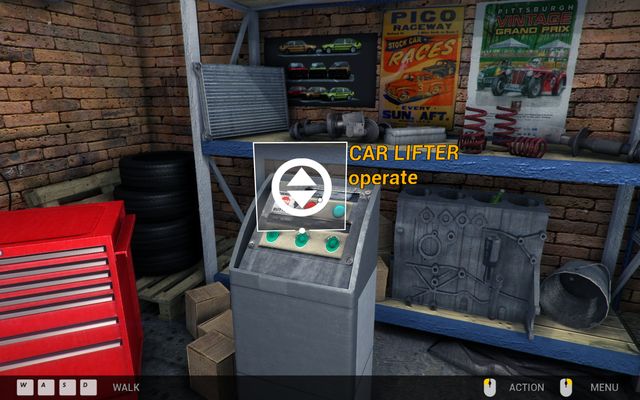
Another important thing is the panel which allows you to control the car lifter - by using it you can quickly get to the car's chassis in order to repair defects connected to the suspension or drivetrain - First garage - Garage walks - Car Mechanic Simulator 2014 - Game Guide and Walkthrough

Another important thing is the panel which allows you to control the car lifter - by using it you can quickly get to the car's chassis in order to repair defects connected to the suspension or drivetrain.
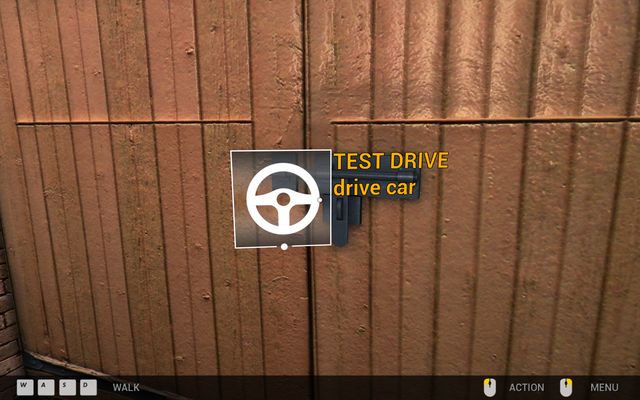
Garage's exit door gives you access to the maneuver square - you can perform the test drive there which allows you check condition of various car's components - First garage - Garage walks - Car Mechanic Simulator 2014 - Game Guide and Walkthrough

Garage's exit door gives you access to the maneuver square - you can perform the test drive there which allows you check condition of various car's components.
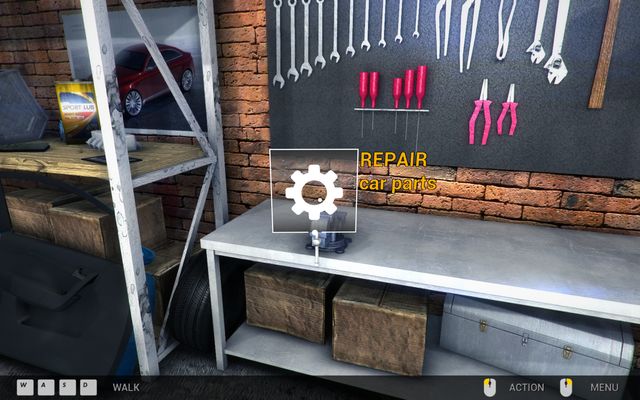
Table with tools and vise gives you access to the repair panel where you bring chosen parts to the state of usability and use during the another orders - First garage - Garage walks - Car Mechanic Simulator 2014 - Game Guide and Walkthrough

Table with tools and vise gives you access to the repair panel where you bring chosen parts to the state of usability and use during the another orders.
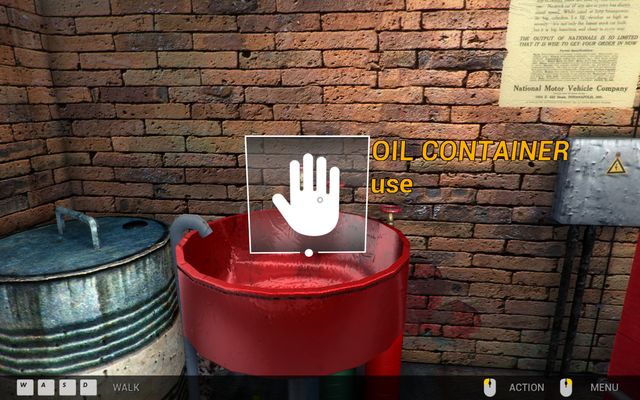
Oil Container is for filling resources in the jerrycans - First garage - Garage walks - Car Mechanic Simulator 2014 - Game Guide and Walkthrough

Oil Container is for filling resources in the jerrycans.
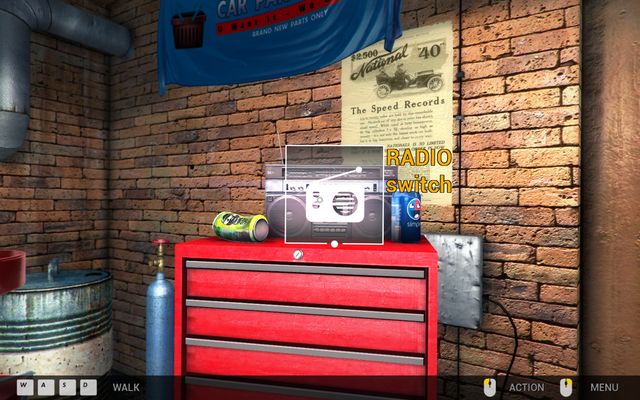
The last thing worth mentioning - even if the least useful actually - is radio which allows us to change the type of music played in the background anytime - First garage - Garage walks - Car Mechanic Simulator 2014 - Game Guide and Walkthrough

The last thing worth mentioning - even if the least useful actually - is radio which allows us to change the type of music played in the background anytime.

Although the second garage has bigger surface, you will find here the same set of tools as in the first garage.
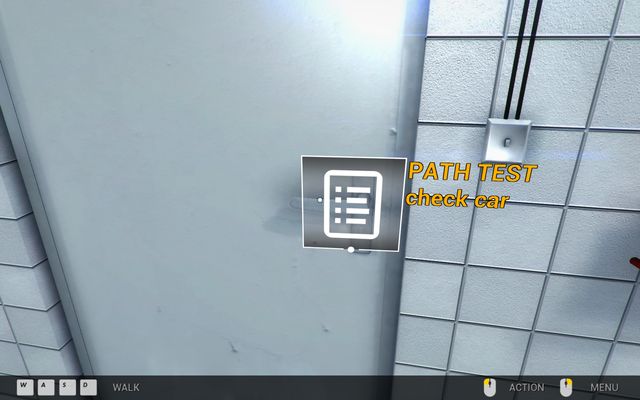
Door put in the middle of the glass wall lead us to the diagnostics path where we can test every repaired car - Second garage - Garage walks - Car Mechanic Simulator 2014 - Game Guide and Walkthrough

Door put in the middle of the glass wall lead us to the diagnostics path where we can test every repaired car.
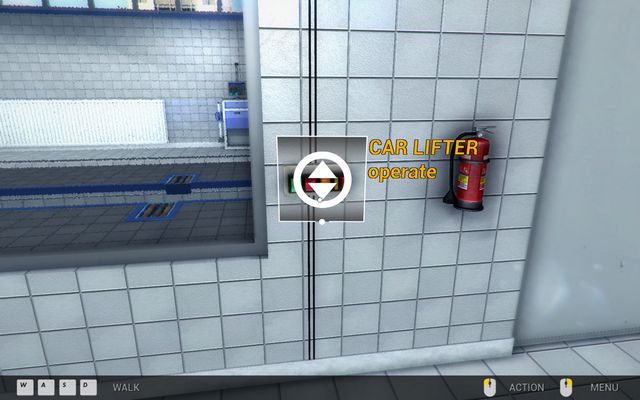
Right by door there is car lifter's operator which allows you to get to the car's chassis - Second garage - Garage walks - Car Mechanic Simulator 2014 - Game Guide and Walkthrough

Right by door there is car lifter's operator which allows you to get to the car's chassis.
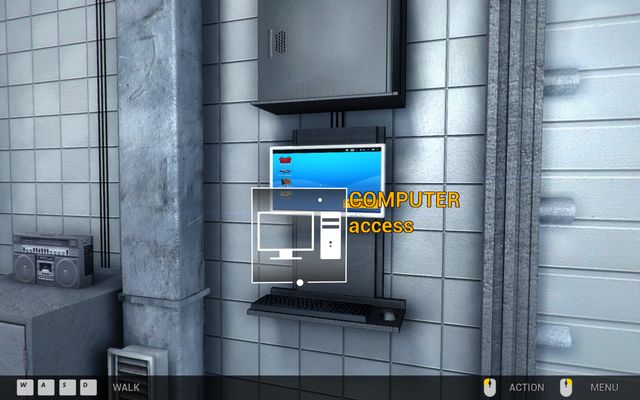
On the opposite wall there is computer which gives you access to the shop and service books... - Second garage - Garage walks - Car Mechanic Simulator 2014 - Game Guide and Walkthrough
On the opposite wall there is computer which gives you access to the shop and service books...

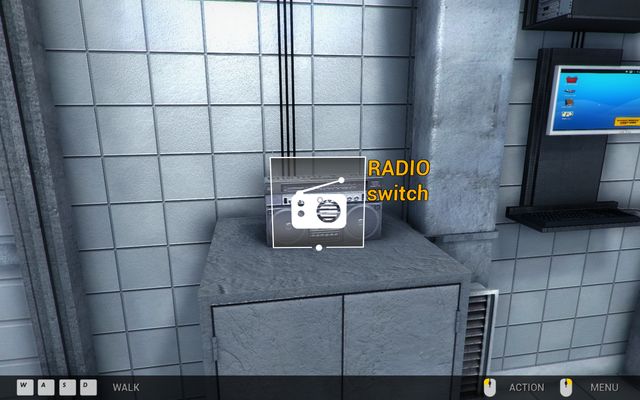
...and right next to it there is radio - Second garage - Garage walks - Car Mechanic Simulator 2014 - Game Guide and Walkthrough

...and right next to it there is radio.
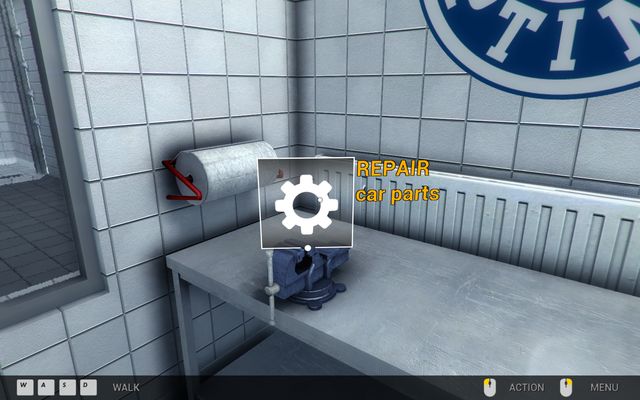
The last important element of the garage is a place for repairing the worn-out parts - Second garage - Garage walks - Car Mechanic Simulator 2014 - Game Guide and Walkthrough

The last important element of the garage is a place for repairing the worn-out parts.

The third garage is definitely the most modern garage which clearly marks your progress in the art of repairing cars.
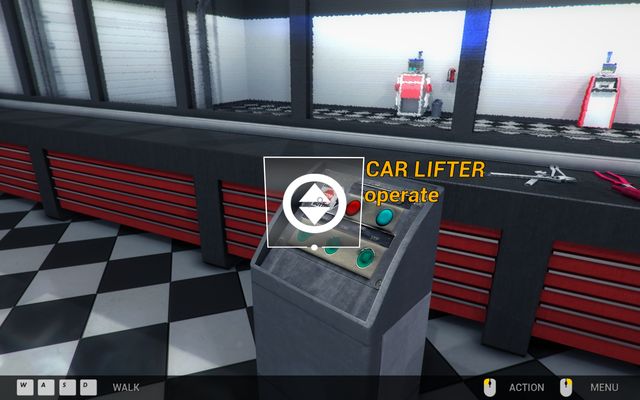
The most important innovation is chip tuning room where you can increase the performance of the repaired car - Third garage - Garage walks - Car Mechanic Simulator 2014 - Game Guide and Walkthrough

The most important innovation is chip tuning room where you can increase the performance of the repaired car.
Gate allows you to perform the test drive - Third garage - Garage walks - Car Mechanic Simulator 2014 - Game Guide and Walkthrough

Gate allows you to perform the test drive.
Next room is the well known already diagnostics path - Third garage - Garage walks - Car Mechanic Simulator 2014 - Game Guide and Walkthrough

Next room is the well known already diagnostics path.
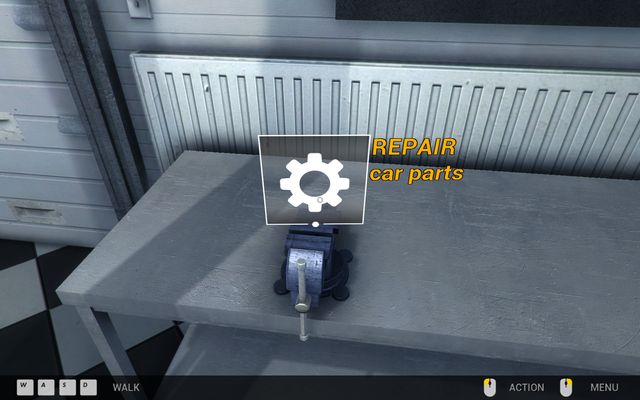
In this place you will repair some of the destroyed parts - Third garage - Garage walks - Car Mechanic Simulator 2014 - Game Guide and Walkthrough

In this place you will repair some of the destroyed parts.

Thanks to the car lifter you will get to the chassises of the repaired cars - Third garage - Garage walks - Car Mechanic Simulator 2014 - Game Guide and Walkthrough

Thanks to the car lifter you will get to the chassises of the repaired cars.
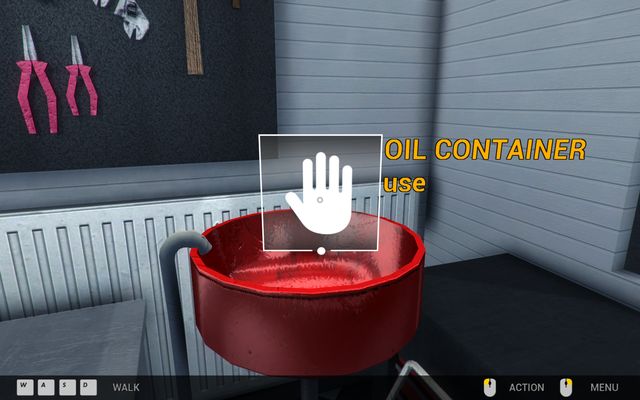
Oil container will allow you to fill reserves of that liquid - Third garage - Garage walks - Car Mechanic Simulator 2014 - Game Guide and Walkthrough

Oil container will allow you to fill reserves of that liquid.
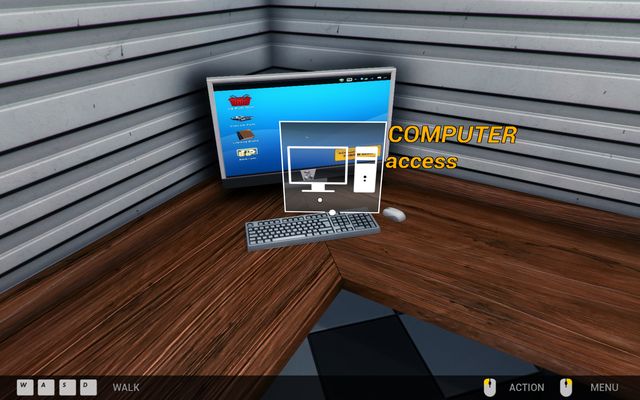
Computer gives you access to the shop's offer, resale shop, bank loan and service books - Third garage - Garage walks - Car Mechanic Simulator 2014 - Game Guide and Walkthrough

Computer gives you access to the shop's offer, resale shop, bank loan and service books.
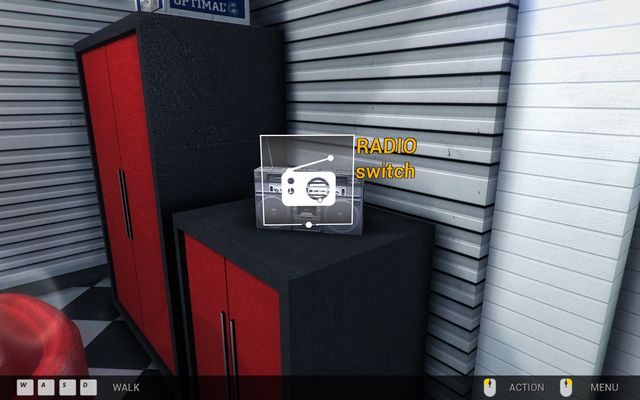
And there is also radio which allows you to turn the music on and off - Third garage - Garage walks - Car Mechanic Simulator 2014 - Game Guide and Walkthrough

And there is also radio which allows you to turn the music on and off.

CAR: Genesis Town

TARGETS:

  • Replace front brake pads
  • Check front brake discs

REWARD: 500 USD

PARTS:

  • 2x Brake Pad - 100 USD

You have to do the routine control of condition of the car's brakes. Client wants you to replace front brake pads and check front brake discs. First step on completing task is going to the computer and buying two Brake Pads for 50 dollars each.
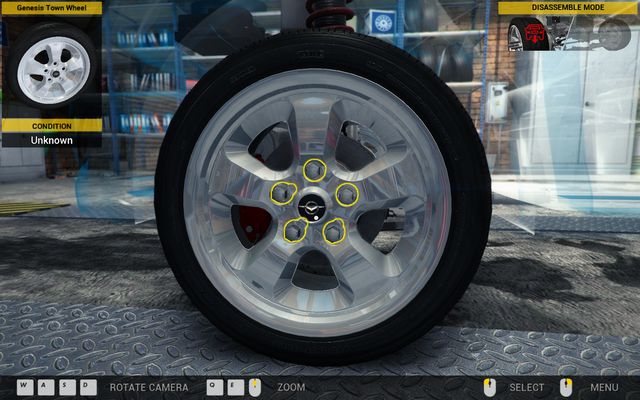
Twisting off the wheels is quick and easy operation. - Order 1 - Genesis Town - Orders - First garage - Car Mechanic Simulator 2014 - Game Guide and WalkthroughTwisting off the wheels is quick and easy operation.

After doing that go back to the car and start realization of the task in the following order:
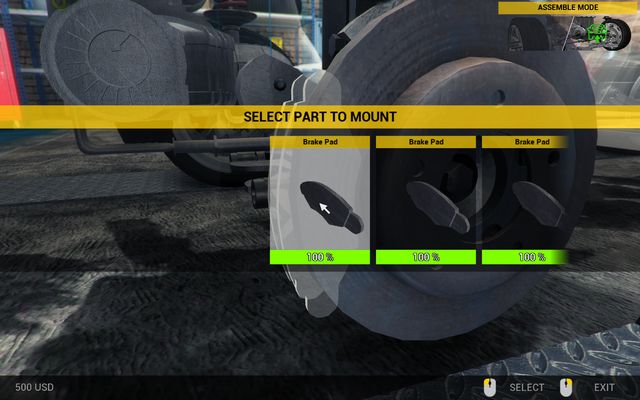
  1. Go to the Wheel - inspect view mode.
  2. Turn on the Disassemble Mode.
  3. Twist off Genesis Town Left Wheel.
  4. Remove Brake Caliper.
  5. Remove both Brake Pads.
  6. Turn on the Examine Conditions mode.
  7. Test the condition of Brake Disc.
  8. Turn on the Assemble Mode.
  9. Assemble two new Brake Pads.
  10. Assemble Brake Caliper.
  11. Assemble Genesis Town Wheel.
Replace of the brake pads goes with the equipment menu. - Order 1 - Genesis Town - Orders - First garage - Car Mechanic Simulator 2014 - Game Guide and WalkthroughReplace of the brake pads goes with the equipment menu.

Do exactly the same with the second front wheel. After you end realization of the order show the Repair Order/Invoice document from the menu and press the Repaired button. You have just completed your first mission.
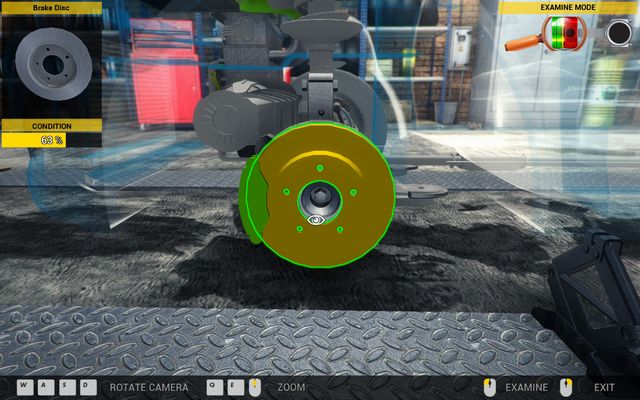
In this case brake disc still can be exploited. - Order 1 - Genesis Town - Orders - First garage - Car Mechanic Simulator 2014 - Game Guide and WalkthroughIn this case brake disc still can be exploited.

CAR: Aisan Cougar

TARGETS:

  • Replace air filter
  • Replace oil filter
  • Replace fuel filter

REWARD: 300 USD

PARTS:

  • Air Filter - 35 USD
  • Oil Filter - 80 USD
  • Fuel Filter - 50 USD

In this task you will have to replace three filters - air, oil and fuel - after one-year exploitation. Order begin with changing the oil filter by doing the following actions:
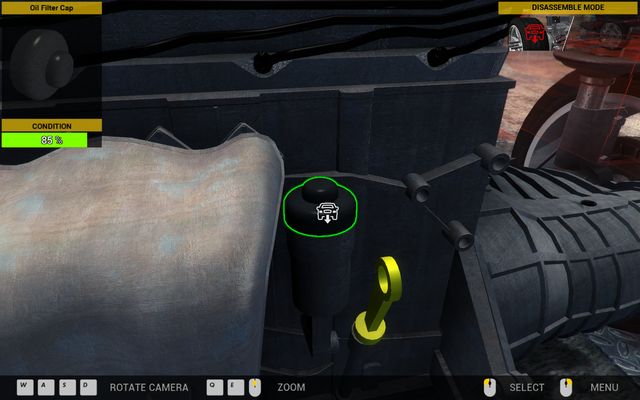
  • Raise Hood and go to the Engine - inspect view mode.
  • Turn on the Disassemble Mode.
  • Remove Oil Filter Cap.
  • Remove Oil Filter.
  • Turn on the Assemble Mode.
  • Put in the new Oil Filter.
  • Put on Oil Filter Cap.
Oil filter is on the left from the gearbox. - Order 2 - Aisan Cougar - Orders - First garage - Car Mechanic Simulator 2014 - Game Guide and WalkthroughOil filter is on the left from the gearbox.

Air filter is the closest to the oil filter so take care of it in next order:
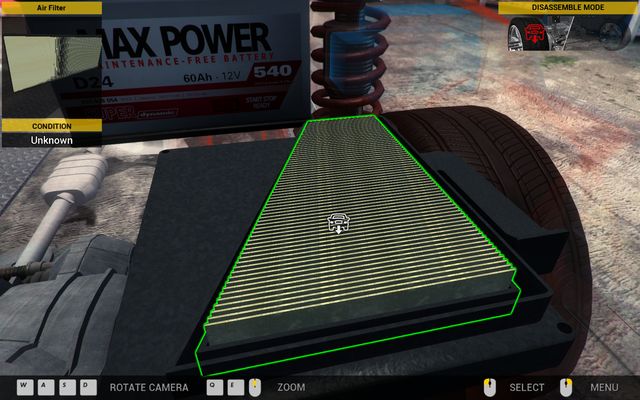
  1. Turn on the Disassemble Mode.
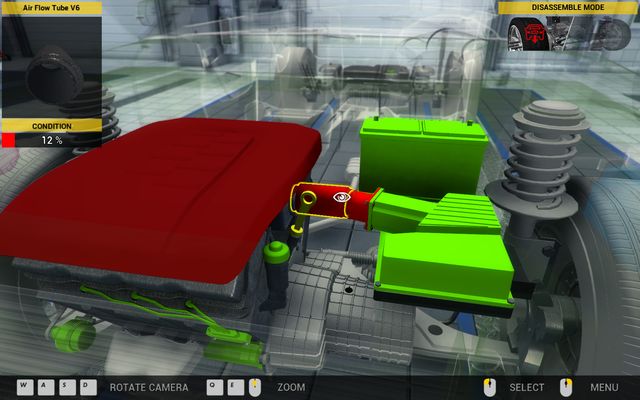
  2. Remove Air Flow Tube.
  3. Remove Air Flow Meter.
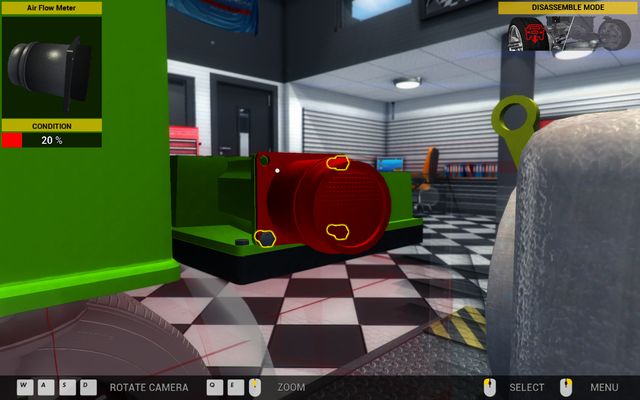
  4. Remove Air Filter Cover.
  5. Remove the worn-out Air Filter.
  6. Turn on the Assemble Mode.
  7. Assemble the new Air Filter.
  8. Assemble Air Filter Cover.
  9. Assemble Air Flow Meter.
  10. Assemble Air Flow Tube.
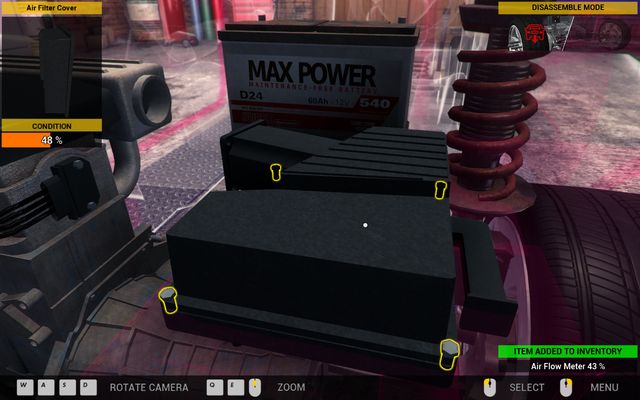
You will find the air filter right next to the battery. - Order 2 - Aisan Cougar - Orders - First garage - Car Mechanic Simulator 2014 - Game Guide and WalkthroughYou will find the air filter right next to the battery.

The last thing we need to replace is the air filter:
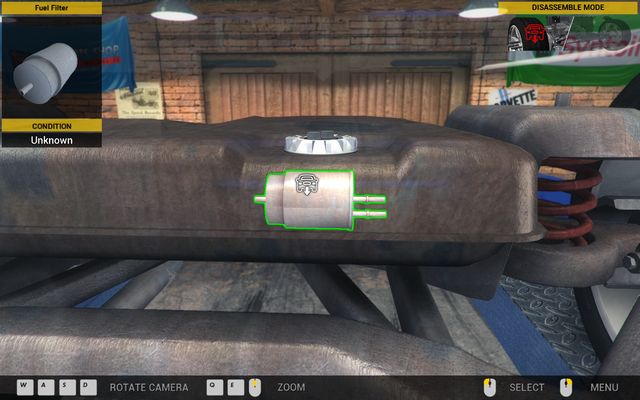
  • Raise the car by using Car Lifter and go to the Undercarriage - inspect view mode.
  • Turn on the Disassemble Mode.
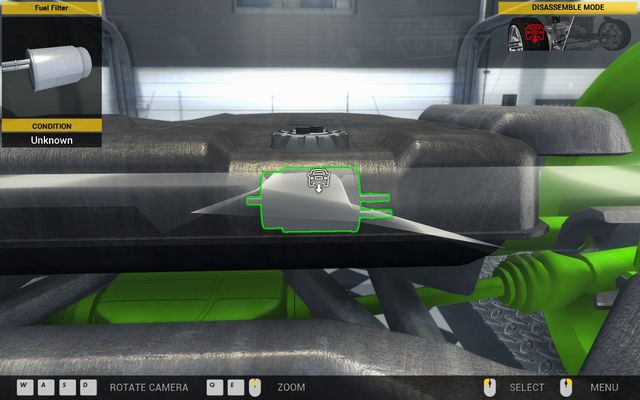
  • Find the Fuel Filter on the fuel tank and remove it.
  • Turn on the Assemble Mode.
  • Assemble the new Fuel Filter.
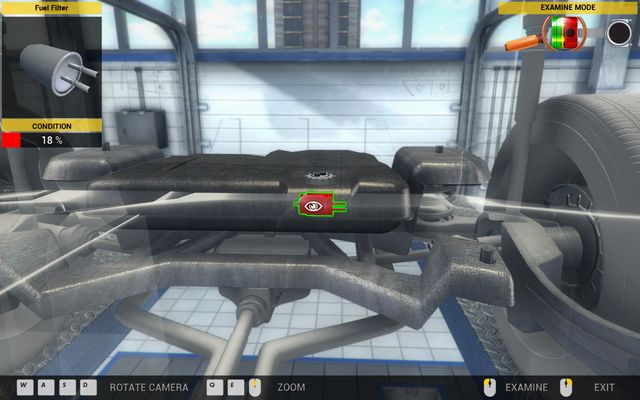
The fuel filter has been placed on the front side of the fuel tank. - Order 2 - Aisan Cougar - Orders - First garage - Car Mechanic Simulator 2014 - Game Guide and WalkthroughThe fuel filter has been placed on the front side of the fuel tank.

CAR: Revton Van

TARGETS:

  • Perform a test drive
  • Replace all worn out parts

REWARD: 300 USD

PARTS:

  • Sway Bar End Link Left - 50 USD
  • Sway Bar End Link Right - 50 USD
  • Outer Tie Rod - 100 USD

During drive on a bumpy road your client suddenly heard a strange knocking sound from the front wheels - your job is to remove the cause of that sound. Accordingly to the guidelines, begin with the test drive. After doing that three problems will be marked - with sway bar end link left and right and with outer tie rod.
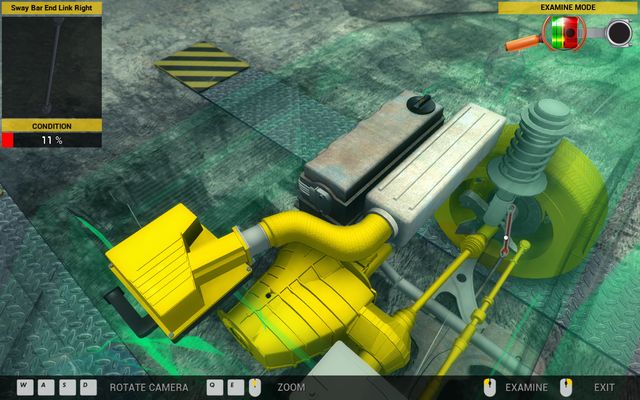
Sway bars are placed near the shock absorbers. - Order 3 - Revton Van - Orders - First garage - Car Mechanic Simulator 2014 - Game Guide and WalkthroughSway bars are placed near the shock absorbers.

Take care of sway bar end link left and outer tie rod placed by the left wheel:
  1. Go to the Wheel - inspect view mode.
  2. Turn on the Disassemble Mode.
  3. Twist off Revton Van Left Wheel.
  4. Remove Brake Caliper.
  5. Remove both Brake Pads.
  6. Remove Sway Bar End Link Left.
  7. Remove Outer Tie Rod.
  8. Turn on the Assemble Mode.
  9. Assemble new Outer Tie Rod.
  10. Assemble new Sway Bar End Link Left.
  11. Assemble Brake Pads.
  12. Assemble Brake Caliper.
  13. Assemble Revton Van Wheel.
Replace of the sway bar end link requires disassembling a few wheel elements. - Order 3 - Revton Van - Orders - First garage - Car Mechanic Simulator 2014 - Game Guide and WalkthroughReplace of the sway bar end link requires disassembling a few wheel elements.

Do exactly the same with the front right wheel (except of replacing the outer tie rod).

CAR: Vulcan Family

TARGETS:

  1. Perform an OBD scan

REWARD: 300 USD

PARTS: none

Your client requires information whether his car deck computer has any defects. In that order perform the full scan of that element:
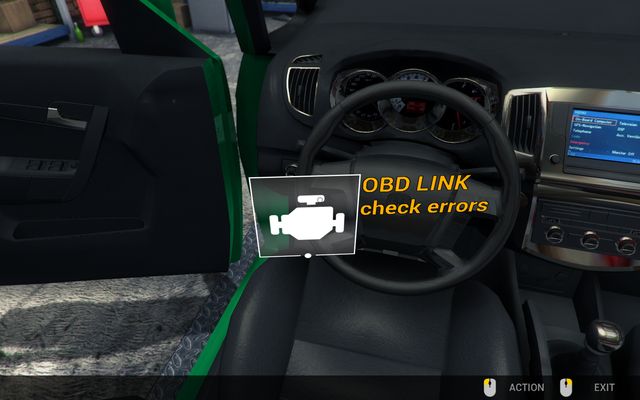
  1. Open the car door with Car door - use option and get to the vehicle's Interior.
  2. Perform the scan with OBD Link - check errors option and wait until the process is over.
  3. Get out from the car.
OBD is one of the easiest and the most enjoyable operations. - Order 4 - Vulcan Family - Orders - First garage - Car Mechanic Simulator 2014 - Game Guide and WalkthroughOBD is one of the easiest and the most enjoyable operations.

CAR: Revton Wind

ORDER'S ELEMENTS:

  1. Repair the starter

TARGETS: 100 USD

PARTS: none

Your client does not have money to buy a new starter so he asks you to repair the old one and put it back to the car. Begin with disassembling the starter from the car:
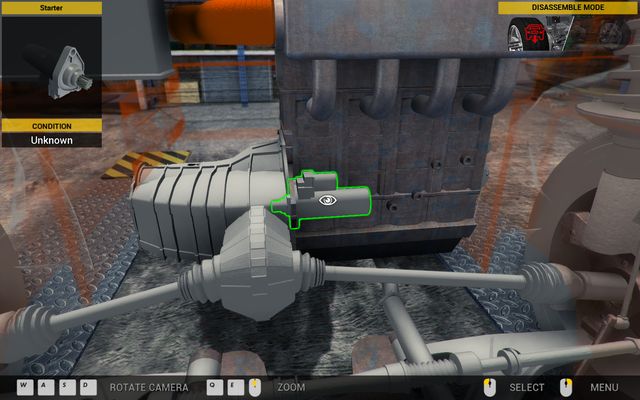
  1. Raise Hood and go to the Engine - inspect view mode
  2. Turn on the Disassemble Mode.
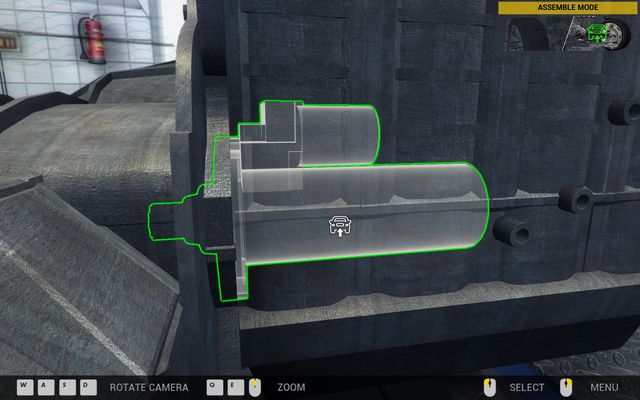
  3. Remove Starter placed in the rear part of the engine.
Starter is located right next to the gearbox. - Order 5 - Revton Wind - Orders - First garage - Car Mechanic Simulator 2014 - Game Guide and WalkthroughStarter is located right next to the gearbox.

Then go to the repairing table and repair the removed starter for 92 dollars. After finishing that process go back to the car and assemble the starter in the same place.
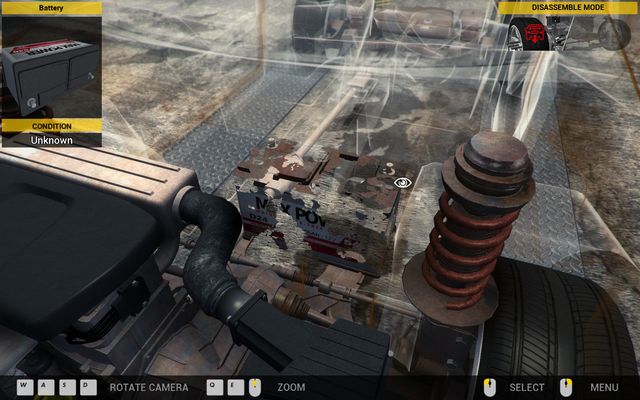
Repair of that component is not very expensive. - Order 5 - Revton Wind - Orders - First garage - Car Mechanic Simulator 2014 - Game Guide and WalkthroughRepair of that component is not very expensive.

CAR: Aisan Cougar

TARGETS:

  1. Perform a test drive
  2. Replace all damaged parts

REWARD: 1000 USD

PARTS:

  • Clutch Release Bearing - 500 USD
  • Clutch Friction Plate - 100 USD

Client is complaining about straitened work of the gearbox - it is definitely harder to change gears than it was before. Unfortunately, it is not known which elements have been damaged but your client suspects that problems with the clutch are guilty.
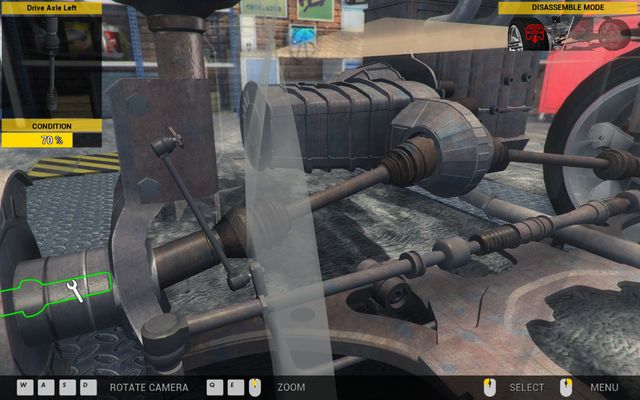
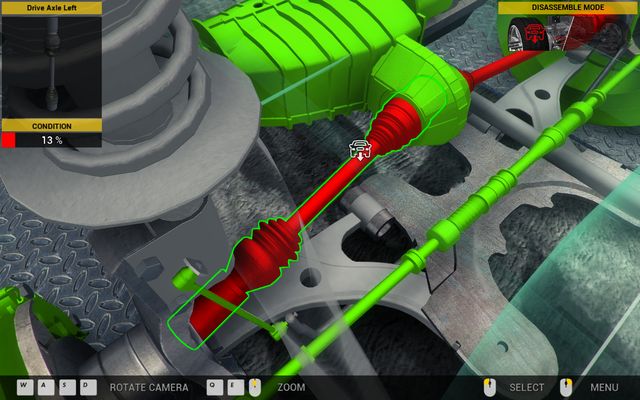
To gain access to the gearbox you need to twist off both drive axles. - Order 6 - Aisan Cougar - Orders - First garage - Car Mechanic Simulator 2014 - Game Guide and WalkthroughTo gain access to the gearbox you need to twist off both drive axles.

Solving the problem begin with performing the test drive - after doing that pick the Examine Conditions mode and take a look under the hood. If client has mentioned the clutch it is time to check it's elements - but before you will be able do to that you need to remove also the gearbox. It's disassemble is a little bit more complicated:
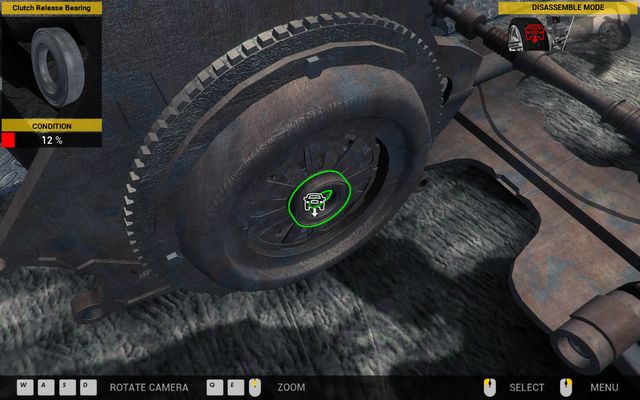
  • Go to the Wheel - inspect view mode.
  • Turn on the Disassemble Mode.
  • Twist off Aisan Cougar Left Wheel.
  • Twist off and remove Brake Caliper.
  • Remove both Brake Pads.
  • Remove Brake Disc.
  • Twist off Drive Axle Left.
Clutch release bearing is one of the two problematic elements. - Order 6 - Aisan Cougar - Orders - First garage - Car Mechanic Simulator 2014 - Game Guide and WalkthroughClutch release bearing is one of the two problematic elements.

Repeat the same actions with the right wheel. Then make another steps:

  1. Raise Hood and go to Engine - inspect view mode.
  2. Turn on the Disassemble Mode.
  3. Twist off and remove Starter placed in the rear part of the engine.
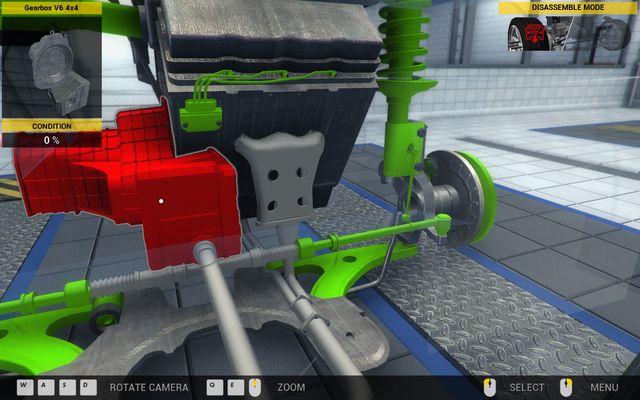
  4. Twist off and remove Gearbox.
As you can see, replace with the new item is necessity. - Order 6 - Aisan Cougar - Orders - First garage - Car Mechanic Simulator 2014 - Game Guide and WalkthroughAs you can see, replace with the new item is necessity.

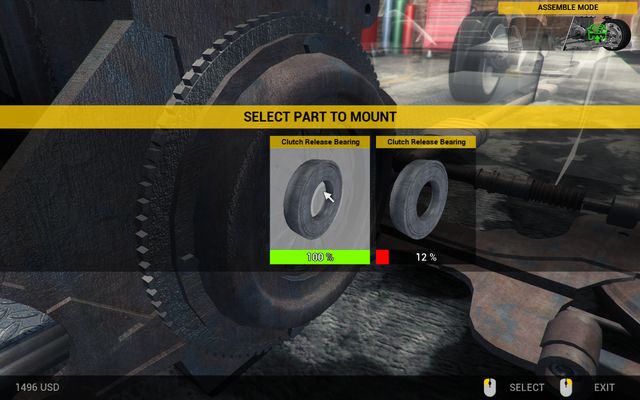
Below we can see clutch elements - we remove damaged Clutch Release Bearing and broken Clutch Friction Plate. Go to the computer in order to buy new parts and put them into the car by turning on the Assemble Mode. Then screw and assemble Gearbox, Starter and the rest of the removed suspension's elements.

CAR: Genesis Town

TARGETS:

  1. Replace a battery
  2. Check the alternator

REWARD: 1000 USD

PARTS:

  • Battery - 350 USD
  • Alternator - 500 USD

Your client has replaced the battery four days earlier - unfortunately, problems with the ignition appeared again. Apart from another replacement of the battery he asks you for checking condition of the alternator which could be reason of that problem.

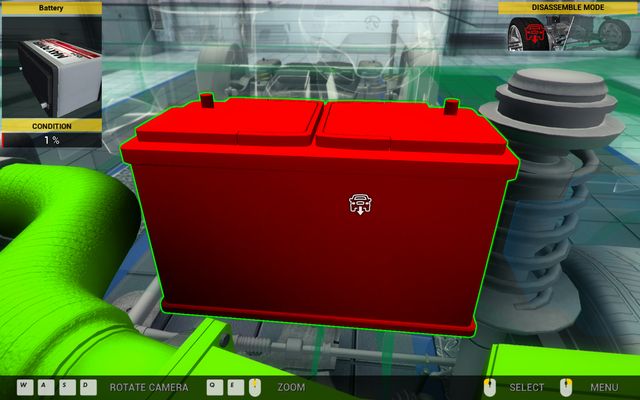
Disappearing battery! - Order 7 - Genesis Town - Orders - First garage - Car Mechanic Simulator 2014 - Game Guide and WalkthroughDisappearing battery!

Nevertheless, take care of the battery problem in the first place. In that order go to the computer and buy a new battery, then replace the old one using the following plan:
  1. Raise Hood and go to Engine - inspect view mode.
  2. Remove Battery and replace it with a new one.
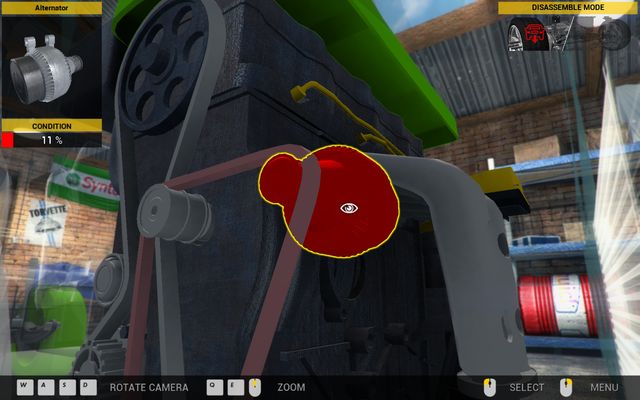
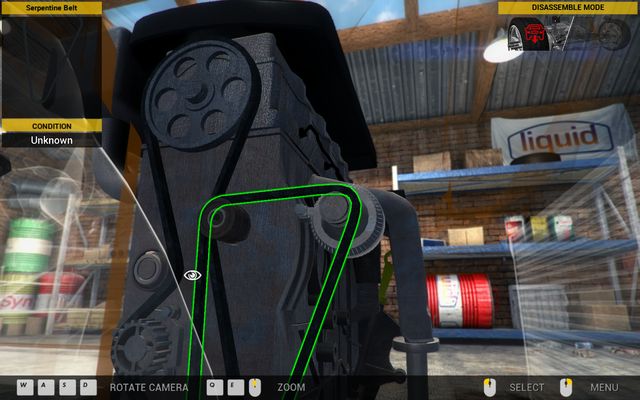
Alternator is right under the serpentine belt. - Order 7 - Genesis Town - Orders - First garage - Car Mechanic Simulator 2014 - Game Guide and WalkthroughAlternator is right under the serpentine belt.

Alternator is located in the valvetrain which is placed on the right side of the engine (if you look from the driver's point of view). To take care of it act with the following plan:

  • Turn on the Disassemble Mode.
  • Remove Serpentine Belt.
  • Twist off and remove Alternator.

As it turns out, alternator is seriously damaged - it has only 6% of condition. Only reasonable option here is buying and assembling a new alternator. In that order go to the computer, use shop's offer and then put the new part in place of the old one and assemble Serpentine Belt again.

CAR: Revton Van

TARGETS:

  • Repair exhaust

REWARD: 1000 USD

PARTS:

  • Muffler Middle - 350 USD
  • Muffler Rear - 250 USD

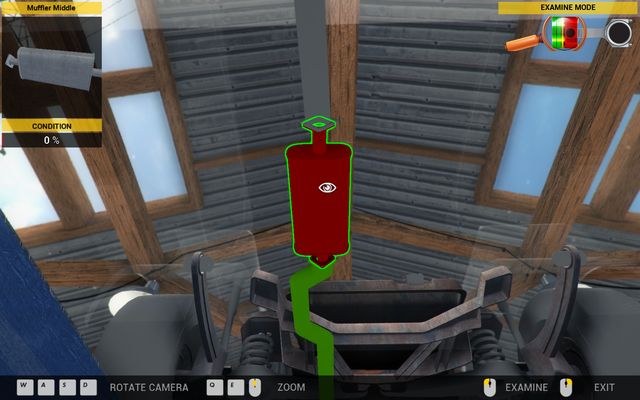
Client complains about too loud sounds coming out from the exhaust. Your job is to check particular parts of that element. In that order use Car Lifter and then look at the chassis with Undercarriage - inspect option. Turn the Examine conditions mode and test following parts:
  • Muffler Rear
  • Exhaust Pipe Rear
  • Muffler Middle
  • Exhaust Pipe Middle
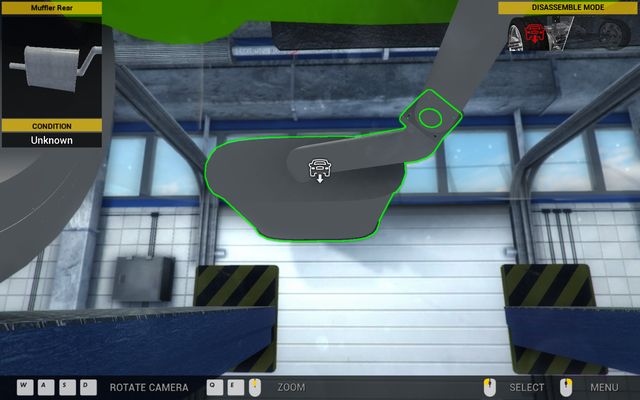
Tests show problems with both mufflers. - Order 8 - Revton Van - Orders - First garage - Car Mechanic Simulator 2014 - Game Guide and WalkthroughTests show problems with both mufflers.

After doing tests it turns out that both mufflers should be changed. Purchase new ones in the web shop and then go back to the Undercarriage - inspect view:
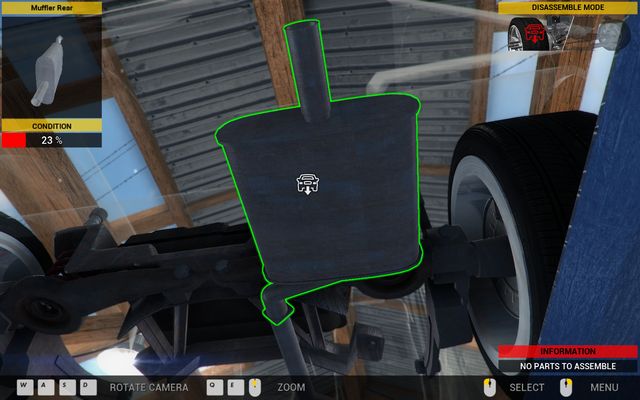
  • Twist off and remove Muffler Rear.
  • Twist off and remove Exhaust Pipe Rear.
  • Twist off and remove Muffler Middle.
  • Go to the Assemble Mode.
Their replace will guarantee an end of problems with too much noise. - Order 8 - Revton Van - Orders - First garage - Car Mechanic Simulator 2014 - Game Guide and WalkthroughTheir replace will guarantee an end of problems with too much noise.

Then assemble new mufflers and screw the exhaust pipe on it's place.

CAR: Aisan Cougar

TARGETS:

  • Perform a test drive
  • Repair the steering

REWARD: 3000 USD

PARTS:

  • Power Rack Steering - 1500 USD

In another order you have to take care of problems with the drivetrain. To find their cause perform a test drive and then check particular elements with Examine conditions module. Only part lit with red colour is Power Rack Steering - but to get to it you need to twist off a few another parts. To do that:
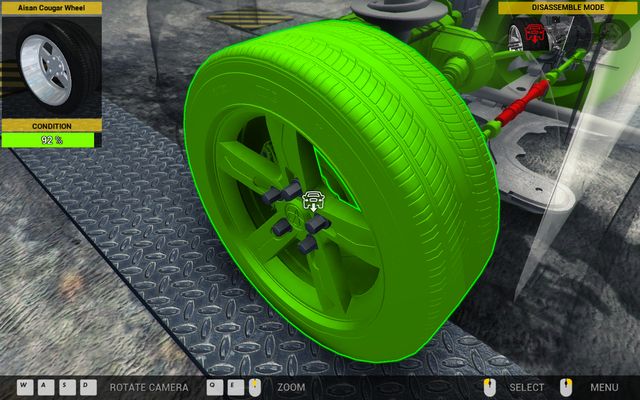
  • Go to the Wheel - inspect view mode.
  • Turn on Disassemble Mode.
  • Twist off Aisan Cougar Left Wheel.
  • Twist off Outer Tie Rod.
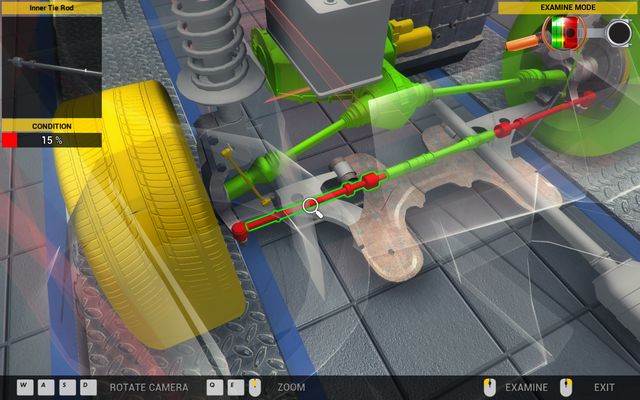
  • Twist off Inner Tie Rod.
To get to the power rack steering you need to twist off a wheel and an axle. - Order 9 - Aisan Cougar - Orders - First garage - Car Mechanic Simulator 2014 - Game Guide and WalkthroughTo get to the power rack steering you need to twist off a wheel and an axle.

Do the same with the right wheel. Then use Car Lifter and go to the Engine - inspect mode with view from below. Remove the worn-out power rack steering and replace it with a new part, bought earlier. Start assembling tie rods and wheels and make the car complete.
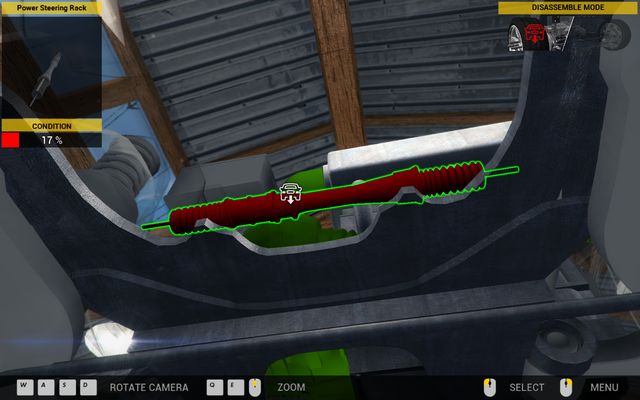
Disassembling of the power rack steering perform from the below of the car. - Order 9 - Aisan Cougar - Orders - First garage - Car Mechanic Simulator 2014 - Game Guide and WalkthroughDisassembling of the power rack steering perform from the below of the car.

CAR: Genesis Town

TARGETS:

  1. Replace fuel pump

REWARD: 600 USD

PARTS:

  • Fuel Pump - 320 USD

Another client turned out to be a little unwise - he was driving on a fuel reserve and he probably overheated the fuel pump. Your task is to replace it. Process begin with buying a new part in the web shop. Then:
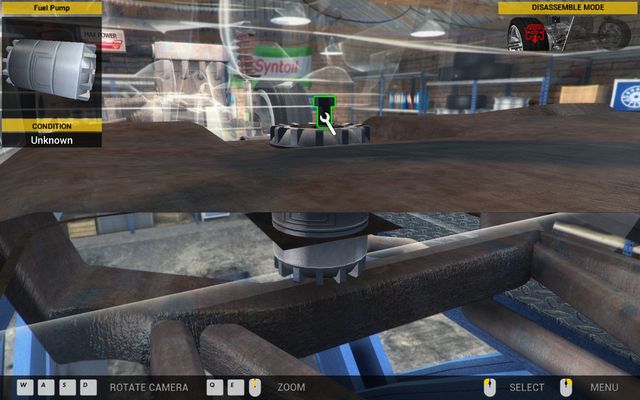
  1. Use the Car Lifter.
  2. Go to the Undercarriage - inspect view mode.
  3. Find Fuel Pump on Fuel Tank and remove it.
  4. Assemble new Fuel Pump.
You will find the fuel pump on the tank's top. - Order 10 - Genesis Town - Orders - First garage - Car Mechanic Simulator 2014 - Game Guide and WalkthroughYou will find the fuel pump on the tank's top.

That's it - mission success!

CAR: Revton Van

TARGETS:

  1. Replace gearbox

REWARD: 2500 USD

PARTS:

  • Gearbox - 2000 USD

This time you have true-life situation - your client has given the car to his wife and it returned to him with broken gearbox. Your task is to replace it. To get to the gearbox we heed to disassemble a few other parts.
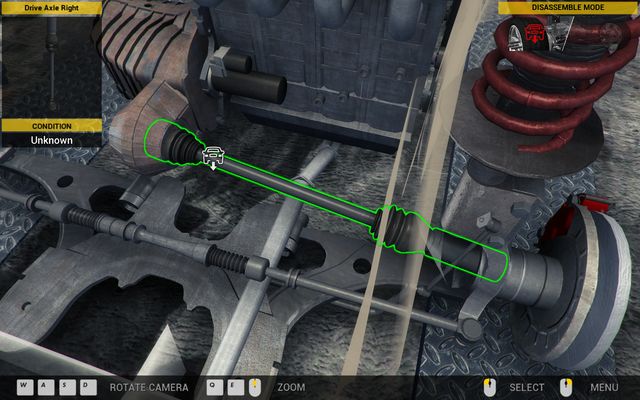
  • Go to the Wheel - inspect view mode.
  • Turn on the Disassemble Mode.
  • Twist off Revton Van Left Wheel.
  • Twist off Drive Axle Left.
Twisting off the axle is not a big problem. - Order 11 - Revton Van - Orders - First garage - Car Mechanic Simulator 2014 - Game Guide and WalkthroughTwisting off the axle is not a big problem.

Do the same also with the right wheel. Then go to the Engine - inspect view mode and perform following actions:
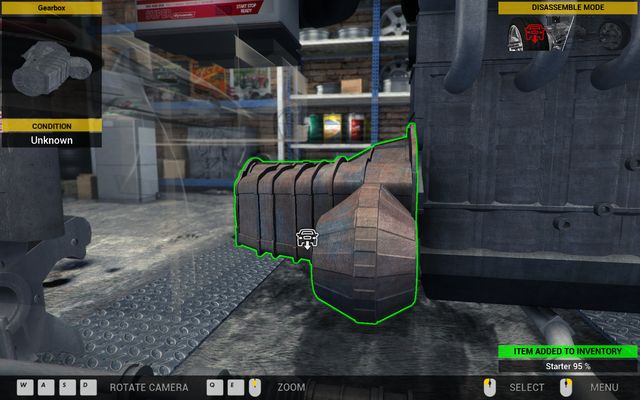
  1. Turn on Disassemble Mode view mode.
  2. Twist off and remove Starter placed in the rear part of the engine.
  3. Twist off and remove Gearbox.
Disassembling the gearbox is a time-consuming operation. - Order 11 - Revton Van - Orders - First garage - Car Mechanic Simulator 2014 - Game Guide and WalkthroughDisassembling the gearbox is a time-consuming operation.

Buy the new gearbox and place it in place of the old one, screw the disassembled starter too. Then assemble removed axles and wheels.

CAR: Revton Van

TARGETS:

  • Change oil filter
  • Change the oil

REWARD: 200 USD

PARTS:

  • Oil filter - 50 USD
  • Oil change - 100 USD + cost of the new oil: ca. 10 USD

Your client orders replacement of the oil filter and pouring a new oil to the oil pan - that is very quick order. Begin with change of the oil filter:
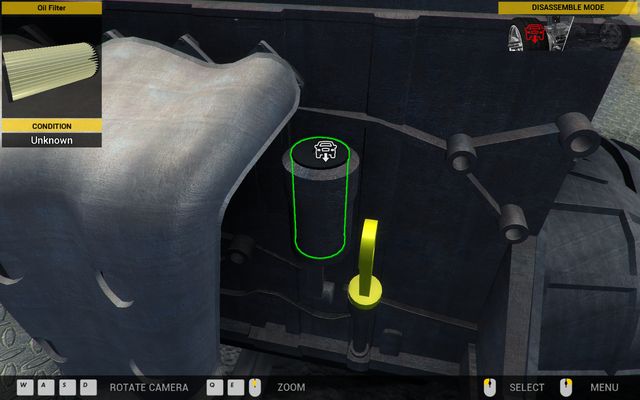
  • Raise Hood and go to Engine - inspect view mode.
  • Turn on the Disassemble Mode.
  • Remove Oil Filter Cap.
  • Remove Oil Filter.
  • Turn on the Assemble Mode.
  • Put in the new Oil Filter.
  • Put on Oil Filter Cap.
Oil filter is not big but very important element of car. - Order 12 - Revton Van - Orders - First garage - Car Mechanic Simulator 2014 - Game Guide and WalkthroughOil filter is not big but very important element of car.

Oil change is a little more complicated operation. Use Car Lifter and go to Engine - inspect mode with view from below. Then:
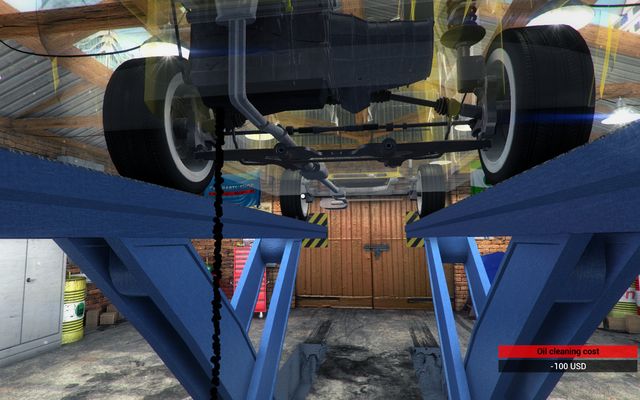
  1. Find Oil Pan at the bottom of the engine.
  2. Find Oil Drain Plug, twist off and flush the old oil.
  3. Lower the car with Car Lifter and go to Engine - inspect view mode.
  4. Twist off Engine Oil Fill Plug.
  5. Click on the oil jerrycan and pour the oil to the engine for a few seconds.
  6. Put out Oil Dipstick and check level of oil - point that connects gold and silver field should be as close to the scale's middle as possible.
Until you pour the new oil you must first flush the old liquid. - Order 12 - Revton Van - Orders - First garage - Car Mechanic Simulator 2014 - Game Guide and WalkthroughUntil you pour the new oil you must first flush the old liquid.

CAR: Aisan Cougar

TARGETS:

  1. Replace timing
  2. Replace water pump

REWARD: 1400 USD

PARTS:

  • Belt Tensioner - 150 USD
  • Idler Pulley - 100 USD
  • Serpentine Belt - 100 USD
  • Timing Belt - 120 USD
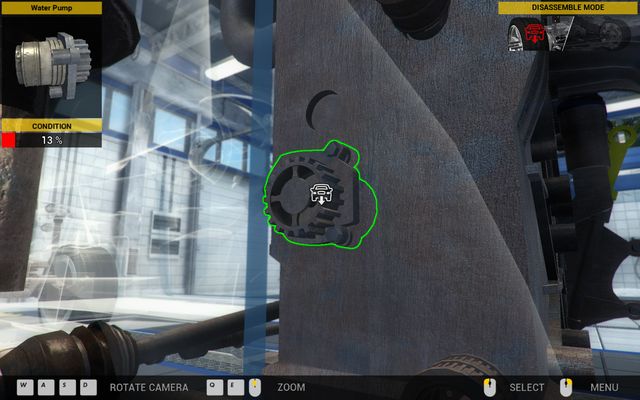
  • Water Pump - 300 USD

Your client has decided that it is time for complex repair of the timing. He also listens to his friend's idea and decides to change the water pump. Before we begin with replacing these parts we need to examine condition of particular elements - in that order pick the Examine Conditions mode and test all elements of timing which are located on the left side of the engine's cover.

Tests shows that almost entire timing should be replaced. Purchase following parts:
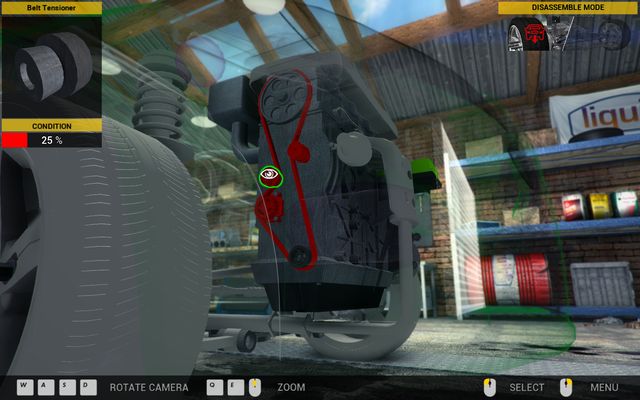
  • Belt Tensioner
  • Idler Pulley
  • Serpentine Belt
  • Timing Belt
Everything here should be replaced... - Order 13 - Aisan Cougar - Orders - First garage - Car Mechanic Simulator 2014 - Game Guide and WalkthroughEverything here should be replaced...

Buy also Water Pump. Then go back to the Engine - inspect view and remove all elements of the timing in the following order:

  • Serpentine Belt
  • Belt Tensioner
  • Timing Belt
  • Idler Pulley
  • Water Pump

After removing all elements of timing go to Assemble Mode and assemble bought items in order opposite to presented earlier order of disassembling (from water pump to serpentine belt).

CAR: Vulcan Family

TARGETS:

  • Find and eliminate the problem

REWARD: 200 USD

PARTS:

  • Sway Bar End Link Right - 50 USD

Your client is complaining about a loud knocking sound during drive on bumpy roads. Your task is to find and eliminate the problem. In that order begin taking care of the order with the test drive. After that check conditions of particular elements with the Show Conditions mode and look under the hood. You will see there that sway bar end link right is responsible for the noise. Buy new item and replace the old one:
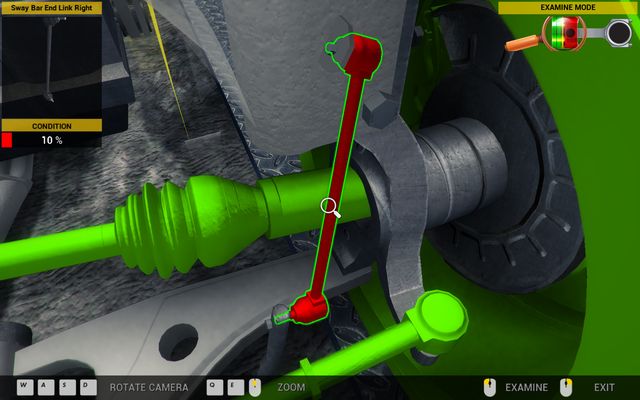
  1. Twist off and remove Vulcan Family Right Wheel.
  2. Twist off the broken Sway Bar End Link Right and assemble a new part.
  3. Screw the Vulcan Family Wheel.
The problematic part is located right behind the wheel. - Order 14 - Vulcan Family - Orders - First garage - Car Mechanic Simulator 2014 - Game Guide and WalkthroughThe problematic part is located right behind the wheel.

CAR: Genesis Town

TARGETS:

  1. Replace oil and air filters
  2. Change oil
  3. Check the timing

REWARD: 500 USD

PARTS:

  • Oil filter - 50 USD
  • Air filter - 35 USD
  • Oil change - 100 USD + cost of the new oil: ca. 10 USD
  • Timing Belt - 120 USD

Client plans to do complex repair of the car he bought recently - in that order he wants you to do some basic repairing operations. First of them is a change of the oil and air filters. Buy new parts and replace them - in the first place assemble the new oil filter:

  • Raise Hood and go to Engine - inspect view mode.
  • Turn on the Disassemble Mode.
  • Remove Oil Filter Cap.
  • Remove Oil Filter.
  • Turn on the Assemble Mode.
  • Put in the new Oil Filter.
  • Put on Oil Filter Cap.

Then replace the air filter:

  • Turn on the Disassemble Mode.
  • Remove Air Flow Tube.
  • Remove Air Flow Meter.
  • Remove Air Filter Cover.
  • Remove worn-out Air Filter.
  • Turn on the Assemble Mode.
  • Assemble new Air Filter.
  • Assemble Air Filter Cover.
  • Assemble Air Flow Meter.
  • Assemble Air Flow Tube.
Getting to the air filter requires you to twist off three elements responsible for cooling car. - Order 15 - Genesis Town - Orders - First garage - Car Mechanic Simulator 2014 - Game Guide and WalkthroughGetting to the air filter requires you to twist off three elements responsible for cooling car.

Another step is the oil change:

  1. Use Car Lifter.
  2. Go to Engine - inspect view mode.
  3. Find Oil Pan at the bottom of the engine.
  4. Find Oil Drain Plug, twist off and flush the old oil.
  5. Lower the car with Car Lifter and go to Engine - inspect view mode.
  6. Twist off Engine Oil Fill Plug.
  7. Click on the oil jerrycan and pour the oil to the engine for a few seconds.
  8. Put out Oil Dipstick and check level of oil - point that connects gold and silver field should be as close to the scale's middle as possible.

Checking the timing becomes the last step. Go to the Examine conditions mode and check conditions of particular parts of that element. As it turns out, only part designed for replace is Timing Belt:
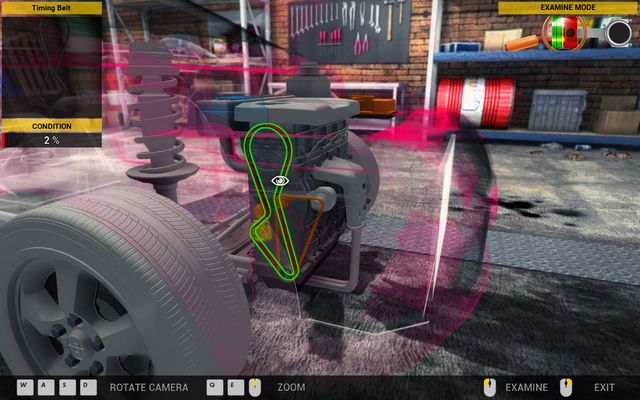
  1. Remove Serpentine Belt
  2. Remove Belt Tensioner
  3. Remove Timing Belt and replace it with the new one.
  4. Assemble Belt Tensioner.
  5. Assemble Serpentine Belt.
New timing belt guarantees overall good condition of car. - Order 15 - Genesis Town - Orders - First garage - Car Mechanic Simulator 2014 - Game Guide and WalkthroughNew timing belt guarantees overall good condition of car.

CAR: Revton Wind

TARGETS:

  1. Find and eliminate the problem

REWARD: 1400 USD

PARTS:

  • Drive Axle Left - 400 USD
  • Drive Axle Right - 350 USD
Disassembling of the axle is just matter of single unscrewing. - Order 16 - Revton Wind - Orders - First garage - Car Mechanic Simulator 2014 - Game Guide and WalkthroughDisassembling of the axle is just matter of single unscrewing.

Client wants you to repair the car that has big mileage already. He noticed problems with making turns. Your task is to find cause - solving problem begin with performing test drive. Then check condition of particular elements with the Show part conditions option and look under the hood - it turns out that left and right drive axles are responsible for the problems. Buy new axles and begin replacing parts:

  • Go to Wheel - inspect view mode.
  • Turn on the Disassemble Mode.
  • Twist off Revton Wind Left Wheel.
  • Twist off Drive Axle Left and assemble the new part.

Do exactly the same with the right wheel and right drive axle.

CAR: Revton Van

TARGETS:

  1. Check the exhaust

REWARD: 200 USD

PARTS:

  • Exhaust Pipe Middle - 100 USD

Your client has struck some unidentified object by driving on bumpy road and he suspects he has probably damaged one of the exhaust pipes. Your task is to check which part of the exhaust has the defect and replace it with the new element. To examine these parts use Car Lifter and then go to Undercarriage - inspect view mode. Then inspect every element of the exhaust with the Examine conditions module. In result you will find out that Exhaust Pipe Middle has been damaged. Buy the new part and begin the replace:
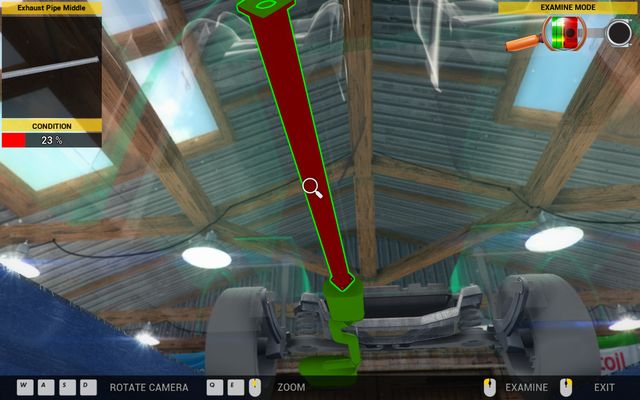
  • Go to the Disassemble Mode.
  • Remove Muffler Rear.
  • Remove Exhaust Pipe Rear.
  • Twist off Muffler Middle.
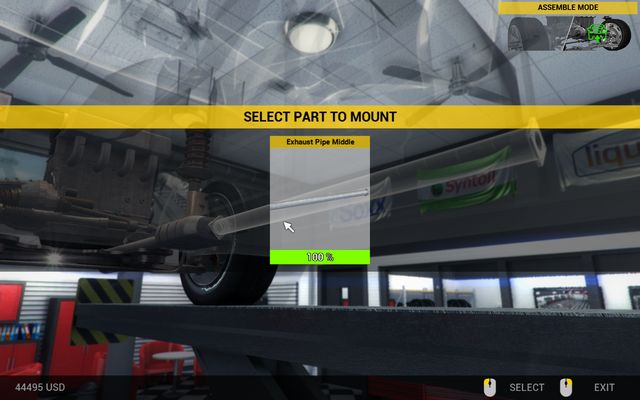
  • Remove the damaged Exhaust Pipe Middle and assemble the new part by choosing the Assemble Mode.
  • Assemble the rest of elements of the exhaust you have twisted before.
Damaged pipe can cause several another defects. - Order 17 - Revton Van - Orders - First garage - Car Mechanic Simulator 2014 - Game Guide and WalkthroughDamaged pipe can cause several another defects.

CAR: Vulcan Family

TARGETS:

  1. Find and eliminate the cause

REWARD: 550 USD

PARTS:

  • Alternator - 500 USD
Broken alternator is cause of problems with timing and ignition. - Order 18 - Vulcan Family - Orders - First garage - Car Mechanic Simulator 2014 - Game Guide and WalkthroughBroken alternator is cause of problems with timing and ignition.

Client is complaining about more and more noise when he accelerates with the car. Another factor influencing the comfort of driving is too dark light on elements of the dashboard. Your job is to find cause of that problem. An answer can bring performing the OBD Scan. Get into the car with the Interior - Get in option and then perform test with the OBD Link - check errors option. Once you performed the test choose the Show part conditions option and look under the hood by choosing the Engine - inspect option. As it turns, responsibility for all problems has the alternator located in the valvetrain. Buy a new part and begin replacing parts:

  1. Turn on the Disassemble Mode.
  2. Remove Serpentine Belt.
  3. Twist off and remove Alternator and assemble the new one by turning on the Assemble Mode.
  4. Assemble Serpentine Belt.

CAR: Aisan Cougar

TARGETS:

  • Find the solution

REWARD: 300 USD

PARTS:

  • Ignition Wires - 150 USD
  • 4x Spark Plug - 120 USD

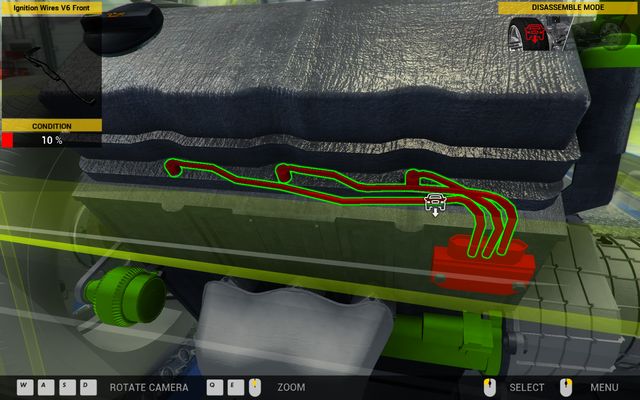
Your client has bought a new car but he has already serious problem, in the very beginning of owning the vehicle - the client is unable to start the car's engine while he wants to present his new possession to his parents fully functional. Your task is to find the solution to the problem. For the problem with ignition the OBD Scan will be certainly helpful. Perform it and then choose the Show part conditions option. Next, look under the car's hood by choosing the Engine - inspect option. First problem can be clearly seen - Ignition Wires are in the terrific condition:
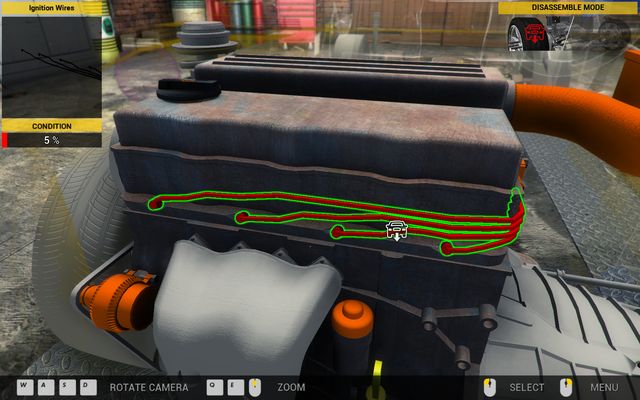
  • Remove Plastic Engine Cover.
  • Remove Ignition Wires.
Replacement of the ignition wires is only the half way to success. - Order 19 - Aisan Cougar - Orders - First garage - Car Mechanic Simulator 2014 - Game Guide and WalkthroughReplacement of the ignition wires is only the half way to success.

Removing of the wires reveals another problem - influence on the car's ignition have also four totally worn-out Spark Plugs - buy four new plugs and begin replacing all these elements:
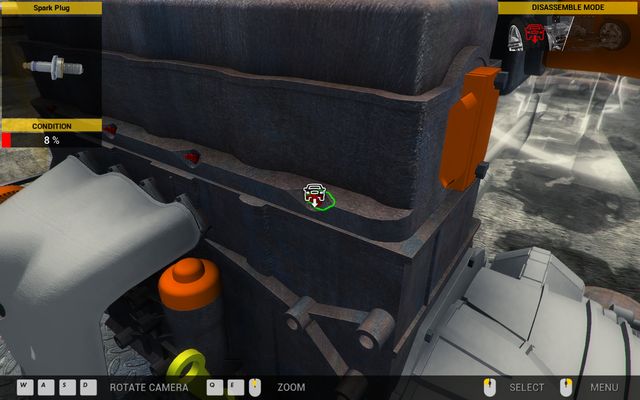
  1. Twist off all four Spark Plugs and replace them with new ones.
  2. Assemble new Ignition Wires.
  3. Assemble Plastic Engine Cover.
Replacement of the spark plugs requires the precision. - Order 19 - Aisan Cougar - Orders - First garage - Car Mechanic Simulator 2014 - Game Guide and WalkthroughReplacement of the spark plugs requires the precision.

CAR: Genesis Town

TARGETS:

  • Replace rubber bushings

REWARD: 700 USD

PARTS:

  • 4x Rubber Bushing - 440 USD

Client wants you to replace all Rubber Bushings in the car. Buy four new bushings in the shop and begin their replacement:

  • Use the Car Lifter and go to Engine - inspect view mode.

FIRST BUSHING: You will find it in the hole that ends the left part of Suspension Arm Front-Left.
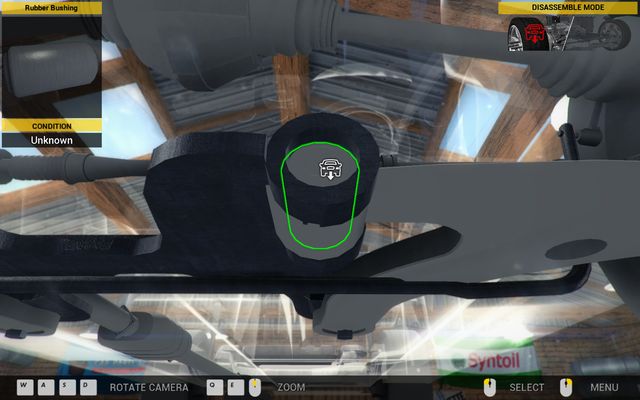
You will find front bushings in holes on the left side of the right suspension arm and on the right side of the left arm. - Order 20 - Genesis Town - Orders - First garage - Car Mechanic Simulator 2014 - Game Guide and WalkthroughYou will find front bushings in holes on the left side of the right suspension arm and on the right side of the left arm.

SECOND BUSHING: You will find it in the same place of the Suspension Arm Front-Right.

Replace both bushings and go to Undercarriage - inspect view. You will find last two bushings in holes located in both rear wheel hubs. Remove worn-out elements and assemble new parts.
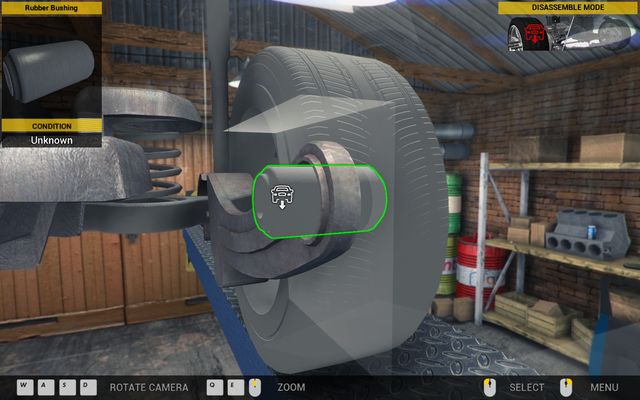
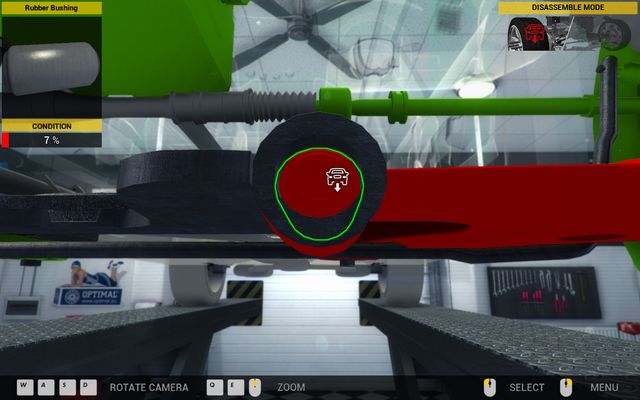
Rear bushings are located in wheel hubs of both wheels. - Order 20 - Genesis Town - Orders - First garage - Car Mechanic Simulator 2014 - Game Guide and WalkthroughRear bushings are located in wheel hubs of both wheels.

CAR: Revton Van

TARGETS:

  1. Replace leaking pump
  2. Check timing belt

REWARD: 800 USD

PARTS:

  • Timing Belt - 120 USD
  • Water Pump - 300 USD

After replacing all spark plugs your client has another problems with his car - the water pump started leaking and draining fluids could have damaged one of elements of the timing. Switch to the Engine - inspect view mode, choose the Examine Conditions mode and then check all parts of the timing. You will see that the timing belt has been damaged. Buy new water pump and new timing belt and begin the realization of the task:
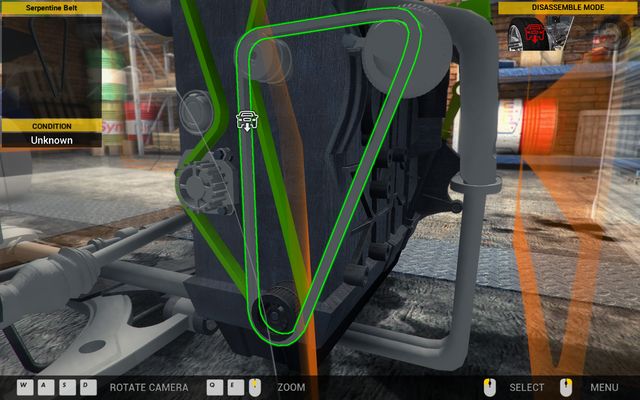
  • Remove Serpentine Belt.
  • Remove Belt Tensioner.
  • Remove Timing Belt.
  • Remove Water Pump and go to the Assemble Mode.
  • Assemble new Water Pump.
  • Assemble new Timing Belt.
  • Assemble Belt Tensioner.
  • Assemble Serpentine Belt.
Replace of the timing is a very complex operation. - Order 21 - Revton Van - Orders - First garage - Car Mechanic Simulator 2014 - Game Guide and WalkthroughReplace of the timing is a very complex operation.

CAR: Sceo LC500

TARGETS:

  • Test car on diagnostic path

REWARD: 300 USD

Fitness trail for cars. - Order 22 - Sceo LC500 - Orders - Second garage - Car Mechanic Simulator 2014 - Game Guide and WalkthroughFitness trail for cars.

First order in the new garage does not require too much effort from you - you have only to perform a test on the diagnostics path with the Path Test - check car option. You will find the detailed description for this simple task in the "Diagnostics path" chapter in the "Basics of gameplay" section.

CAR: Vulcan Family

TARGETS:

  1. Check the engine and find a solution

REWARD: 300 USD

PARTS:

  • 4x Spark Plug - 120 USD

Your client's car does not want to start while it is required functional on the following morning - you have to find and eliminate the cause of that problem. Begin accomplishing the task with the OBD Scan. Perform it, then choose the Show part conditions option and look under the car's Hood by choosing the Engine - inspect option. Perform following steps:
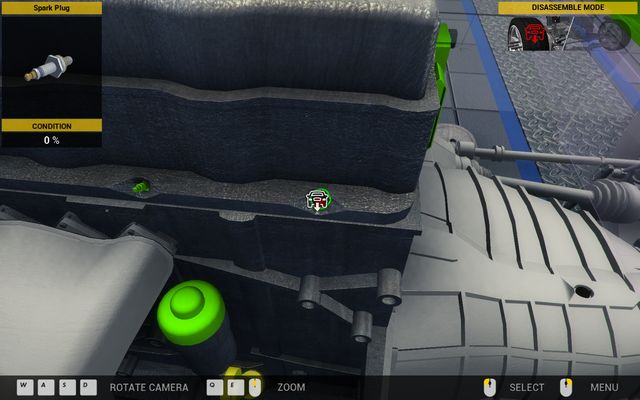
  1. Remove Plastic Engine Cover.
  2. Detach Ignition Wires.
  3. Examine conditions of all four Spark Plugs - although only two of them are useless, the game requires us to replace all of them. Remove worn-out plugs, buy new ones and assemble them on their place.
  4. Assemble Ignition Wires.
  5. Assemble Plastic Engine Cover.
Replacement of the spark plugs is a precise operation. - Order 23 - Vulcan Family - Orders - Second garage - Car Mechanic Simulator 2014 - Game Guide and WalkthroughReplacement of the spark plugs is a precise operation.

CAR: Vulcan Spectre

TARGETS:

  1. Replace all worn out parts

REWARD: 3000 USD

PARTS:

  • Vulcan Spectre Wheel - 1750 USD
  • Outer Tie Rod - 100 USD
  • Inner Tie Rod - 150 USD
  • Shock Abs. C Front-Left - 150 USD
  • Rubber Bushing - 110 USD
  • Suspension Arm Front-Left - 300 USD

Client has driven through a huge hole in a road and he has damaged the left side of the suspension. Your job is to check and then replace particular parts of that element. Begin the realization of the order with performing the test on diagnostics path with the Path Test - check car option - then turn on the Show part conditions mode and go to the Engine - inspect view mode. You will see the true art of destruction - doubtlessly, replaced should be:
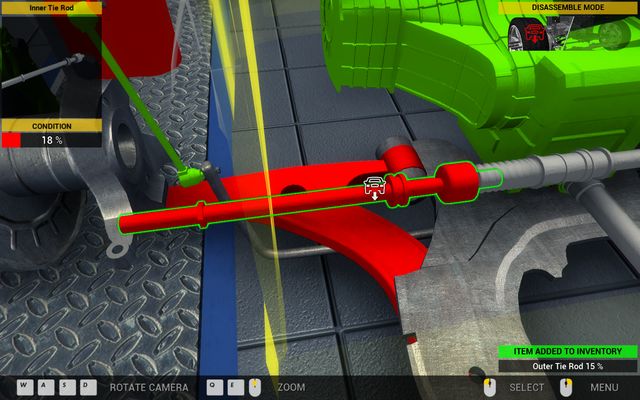
  • Outer Tie Rod
  • Inner Tie Rod
  • Shock Abs. C Front-Left - 150 USD
  • Suspension Arm Front-Left - 300 USD
There is a lot of red - a half of the left suspension for replacement! - Order 24 - Vulcan Spectre - Orders - Second garage - Car Mechanic Simulator 2014 - Game Guide and WalkthroughThere is a lot of red - a half of the left suspension for replacement!

Begin completing the order:

  1. Go to the Wheel - inspect view mode.
  2. Turn on the Disassemble Mode.
  3. Twist off Vulcan Spectre Left Wheel.
  4. Twist off Outer Tie Rod.
  5. Twist off Inner Tie Rod.
  6. Twist off Sway Bar End Link Left.
  7. Twist off Shock Abs. C Front-Left
  8. Use the Car Lifter and go the view of the front chassis with the Engine - inspect view.
  9. As it turns out, the Rubber Bushing located in the Suspension Arm Front-Left should be also replaced - remove it.
  10. Remove Suspension Arm Front-Left.

A quick look to the inventory reveals another very expensive trifle - Vulcan Spectre Front Left Wheel should be changed as well. Buy following new parts:
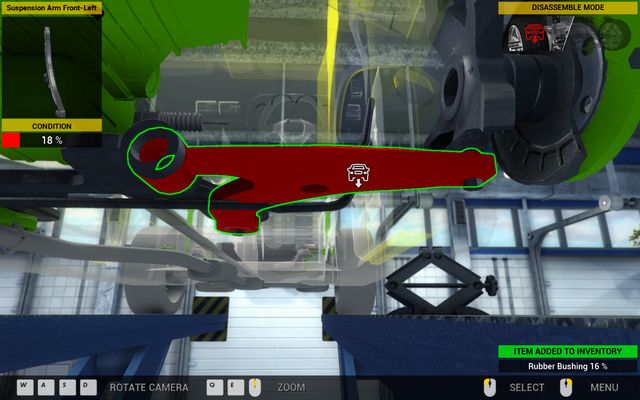
  • Vulcan Spectre Wheel
  • Outer Tie Rod
  • Inner Tie Rod
  • Shock Abs. C Front-Left
  • Rubber Bushing
  • Suspension Arm Front-Left
Disassemble of the suspension arm perform after you lift the car. - Order 24 - Vulcan Spectre - Orders - Second garage - Car Mechanic Simulator 2014 - Game Guide and WalkthroughDisassemble of the suspension arm perform after you lift the car.

Assemble all bought elements - start with the Rubber Bushing and Suspension Arm Front-Left, then lower the car with the Car Lifter, go to the Wheel - inspect view mode and assemble the rest of new parts.

CAR: Aisan Cougar

TARGETS:

  • Replace all brake pads

REWARD: 600 USD

PARTS:

  • 8x Brake Pad

Another client orders you to replace all brake pads in the car - it is one the most standard repairing procedures for the car. Buy eight new parts and start the process of replacing them:
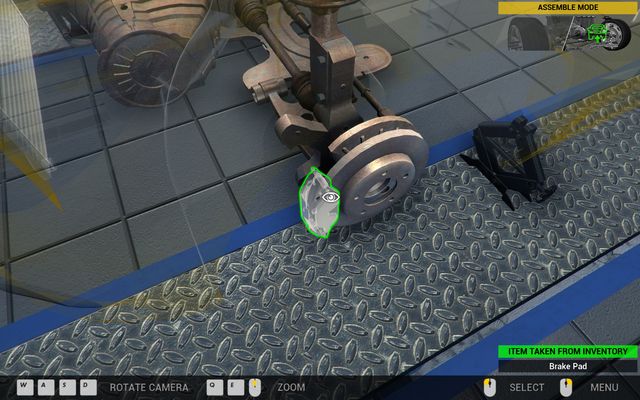
  • Go to the Wheel - inspect view mode.
  • Turn on the Disassemble Mode.
  • Twist off Aisan Cougar Left Wheel.
  • Remove Brake Caliper.
  • Remove both Brake Pads.
  • Turn on the Assemble Mode.
  • Assemble two new Brake Pads.
  • Assemble Brake Caliper.
  • Assemble Aisan Cougar Wheel.
Replacement of brake pads is a very simple operation. - Order 25 - Aisan Cougar - Orders - Second garage - Car Mechanic Simulator 2014 - Game Guide and WalkthroughReplacement of brake pads is a very simple operation.

Do the same with remaining three wheels.

CAR: Revton Wind

TARGETS:

  1. Perform a test drive
  2. Replace all damaged parts

REWARD: 800 USD

PARTS:

  • Exhaust Manifold - 600 USD

Your client is complaining about a loud knocking sound that disappears after fifteen minutes of driving. Your task is to check where lies the problem and then to eliminate it. Realization of the order begin with the test drive, then turn on the Show parts conditions mode.
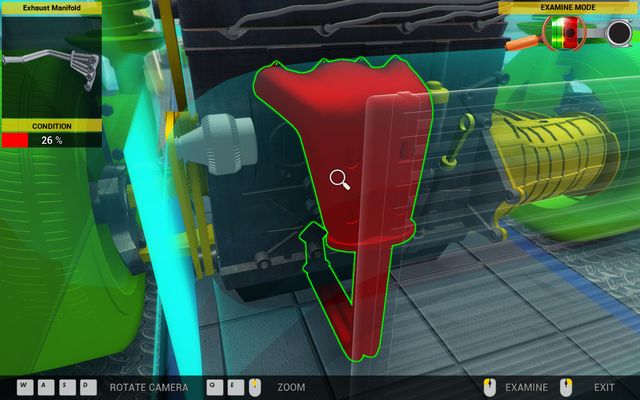
Exhaust manifold is almost destroyed! - Order 26 - Revton Wind - Orders - Second garage - Car Mechanic Simulator 2014 - Game Guide and WalkthroughExhaust manifold is almost destroyed!

Look under the car's hood with the Hood - Engine-suspect option - problem we have to handle with, is the broken Exhaust Manifold. Use the Car Lifter, buy a new manifold, go to the Undercarriage - inspect view mode and then replace that element:
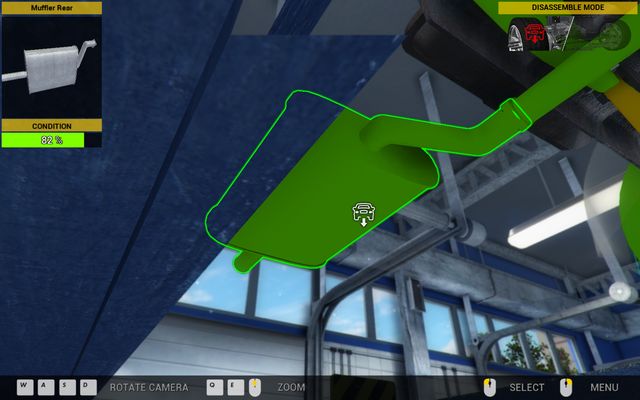
  • Twist off and remove Muffler Rear.
  • Twist off and remove Exhaust Pipe Rear.
  • Twist off and remove Muffler Middle.
  • Twist off and remove Exhaust Pipe Middle.
  • Twist off and remove Catalytic Converter.
  • Twist off and remove Exhaust Pipe Rear.
  • Lower the car with the Car Lifter and go to the Engine - inspect view mode.
  • Twist off Exhaust Manifold and place the new one.
To reach the manifold we need to disassemble the entire exhaust. - Order 26 - Revton Wind - Orders - Second garage - Car Mechanic Simulator 2014 - Game Guide and WalkthroughTo reach the manifold we need to disassemble the entire exhaust.

After you have assembled the new manifold, screw all removed elements back with the Assemble Mode.

CAR: Genesis Town

TARGETS:

  1. Repair Suspension

REWARD: 2000 USD

PARTS:

  • Sway Bar End Link Left - 50 USD
  • Shock Abs. A Front-Left and Shock Abs. A Front-Right - 150 USD + 150 USD
  • Suspension Arm Front-Right - 300 USD
  • Shock Absorber Rear - 100 USD
  • Suspension Arm Rear-Left A - 500 USD
  • Suspension Spring Rear - 150 USD
  • Rubber Bushing - 110 USD

Your regular customer has another order for you - this time defects are caused by his wife who trusted the satellite navigation and was guided to damaged bumpy roads. It caused serious harms to the car's suspension - so you have to perform the complex maintenance and repair of that subsystem. The order begin with performing the Diagnostic Path test and then turn on the Show parts conditions mode. You will see many parts that must be immediately replaced:

FRONT OF THE CAR:
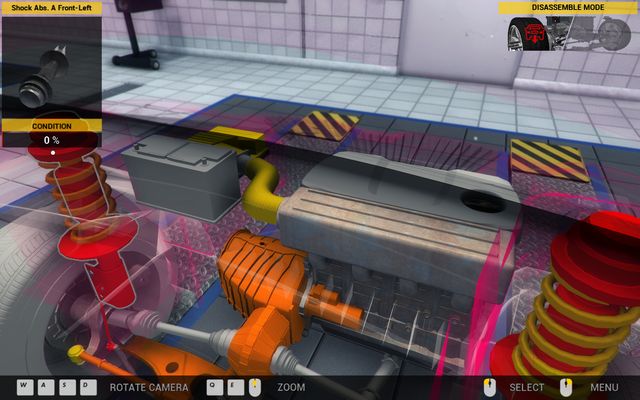
  • Sway Bar End Link Left
  • Shock Abs. A Front-Left and Shock Abs. A Front-Right
  • Suspension Arm Front-Right
Image of desolation... - Order 27 - Genesis Town - Orders - Second garage - Car Mechanic Simulator 2014 - Game Guide and WalkthroughImage of desolation...

BACK OF THE CAR:

  • Shock Absorber Rear
  • Suspension Arm Rear-Left A
  • Suspension Spring Rear
  • Rubber Bushing

As you can see, there is a lot of work for you to do - buy all necessary parts and begin from the front of the car:

Sway Bar End Link Left + Shock Abs. A Front-Left:
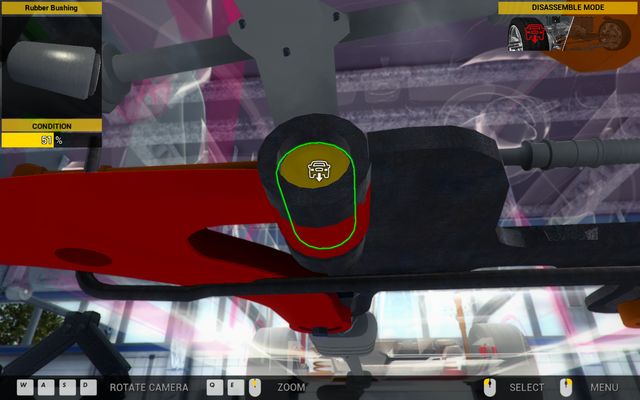
  1. Twist off and remove Genesis Town Left Wheel.
  2. Twist off broken Sway Bar End Link Left.
  3. Remove broken Shock Abs. A Front-Left and assemble the new one.
  4. Assemble new Sway Bar End Link Left.
  5. Screw Genesis Town Left Wheel.
The rubber bushing is often ignored - but very important - part of the car's suspension. - Order 27 - Genesis Town - Orders - Second garage - Car Mechanic Simulator 2014 - Game Guide and WalkthroughThe rubber bushing is often ignored - but very important - part of the car's suspension.

Shock Abs. A Front-Right:

  • Twist off and remove Genesis Town Right Wheel.
  • Twist off Sway Bar End Link Right.
  • Remove broken Shock Abs. A Front-Right and assemble the new one.
  • Assemble new Sway Bar End Link Right.
  • Screw Genesis Town Right Wheel.

Suspension Arm Front-Right:

  1. Use the Car Lifter and go to the view of the front chassis with the Engine - inspect option.
  2. Remove Rubber Bushing located in the suspension arm.
  3. Remove Suspension Arm Front-Right and assemble the new one.
  4. Put Rubber Bushing on it's place.

Now use the Car Lifter go to the back of the car with the Undercarriage - inspect option:

Shock Absorber, Suspension Arm Rear-Left A, Suspension Spring Rear:
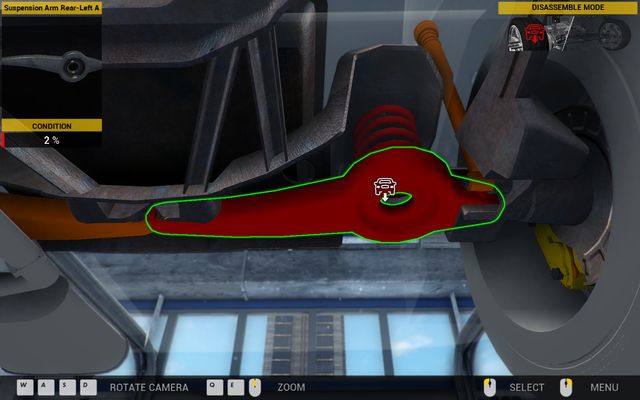
  1. Remove Shock Absorber Rear located by the right wheel of the car.
  2. Remove Suspension Arm Rear-Left A.
  3. Remove worn-out Suspension Spring Rear and assemble the new one.
  4. Put new Suspension Arm Rear-Left A.
  5. Assemble new Shock Absorber Rear.
Removing of the suspension spring is connected also with removing of the suspension arm. - Order 27 - Genesis Town - Orders - Second garage - Car Mechanic Simulator 2014 - Game Guide and WalkthroughRemoving of the suspension spring is connected also with removing of the suspension arm.

Rubber bushing:

  1. Find Wheel Hub located by the left wheel of the car.
  2. Remove worn-out Rubber Bushing and assemble the new one.

CAR: Olsen Grand

TARGETS:

  1. Find the solution

REWARD: 1000 USD

PARTS:

  • Air Filter - 35 USD
There is green everywhere - except of that miserable air filter... - Order 28 - Olsen Grand - Orders - Second garage - Car Mechanic Simulator 2014 - Game Guide and WalkthroughThere is green everywhere - except of that miserable air filter...

Customer is complaining about problems with starting the engine - even in the situation when he is driving the car every day. Your job is to check parts and replace the damaged ones. In that order perform the OBD Link Test - then turn on the Show parts conditions mode. After a bit longer parts checking it will turn out that the broken Air Filter is the answer to the problems - buy the new one and make the replacement:

  1. Turn on the Disassemble Mode.
  2. Remove Plastic Engine Cover V6.
  3. Remove Air Flow Tube V6.
  4. Remove Air Flow Meter.
  5. Remove Air Filter Cover.
  6. Put out worn-out Air Filter.
  7. Turn on the Assemble Mode.
  8. Assemble new Air Filter.
  9. Assemble Air Filter Cover.
  10. Assemble Air Flow Meter.
  11. Assemble Air Flow Tube V6.
  12. Assemble Plastic Engine Cover V6.

CAR: Revton Wind

TARGETS:

  • Examine shock absorbers and springs

REWARD: 1000 USD

PARTS:

  • 2x Suspension Spring Rear - 300 USD
  • 2x Suspension Spring Front - 480 USD

Your client has bought a new car recently but he is complaining about the too hard suspension. He is not certain whether the suspension is in the good condition. Your task is to check which car's elements should be replaced. In the first step examine the car with the Diagnostic Path Test and then turn on the Show parts conditions mode. You will see an unusual thing - all four Suspension Springs should be changed. Purchase two front and two rear springs and start working:

Front suspension springs:

  • Twist off and remove Revton Wind Left Wheel.
  • Twist off Sway Bar End Link Left.
  • Twist off Shock Abs. B Front-Left.
  • Remove Suspension Spring Front and assemble a new one.
  • Assemble the removed Shock Abs. B Front-Left, Sway Bar End Link Left and screw Revton Wind Left Wheel.

Do exactly the same with the right wheel.
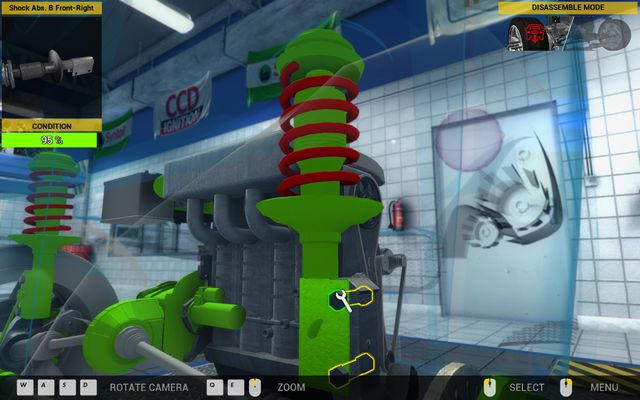
Getting to springs requires you to disassemble almost entire suspension. - Order 29 - Revton Wind - Orders - Second garage - Car Mechanic Simulator 2014 - Game Guide and WalkthroughGetting to springs requires you to disassemble almost entire suspension.

Rear suspension springs - right:

  1. Twist off Muffler Rear.
  2. Twist off Suspension Arm Rear-Right A.
  3. Remove broken Suspension Spring Rear and replace it with a new one.
  4. Assemble removed Muffler Rear and Suspension Arm Rear-Right A.

Rear suspension springs (left):

  1. Twist off Suspension Arm Rear-Left A.
  2. Remove broken Suspension Spring Rear and replace it with a new one.
  3. Assemble removed Suspension Arm Rear-Left A.
Disassembling of the rear-right suspension spring comes with twisting off the rear muffler. - Order 29 - Revton Wind - Orders - Second garage - Car Mechanic Simulator 2014 - Game Guide and WalkthroughDisassembling of the rear-right suspension spring comes with twisting off the rear muffler.

CAR: Aisan Cougar

TARGETS:

  • Find the solution

REWARD: 600 USD

PARTS:

  • Battery - 350 USD
You won't drive far without the battery... - Order 30 - Aisan Cougar - Orders - Second garage - Car Mechanic Simulator 2014 - Game Guide and WalkthroughYou won't drive far without the battery...

The car designed for repair was not used for the last two months and it did not start when client attempted to drive again. Your job is to examine what should be repaired or replaced. Perform the OBD Link Test - then turn on the Show parts conditions mode. Take a look on the engine with the Engine - inspect option - as you can clearly see, the empty Battery is to be blamed here. Buy a new part, remove the old one and assemble the working Battery.

CAR: Olsen Grand

TAGRETS:

  • Find the solution

REWARD: 5000 USD

PARTS:

  • 2x Ignition Module - 1500 USD
  • 6x Spark Plug - 180 USD
  • Fuel Filter - 80 USD

Customer is complaining about problems with the engine - it sometimes happens to turn off for a split second. He was looking for an advice in other garages already but no one has found any defect. You need to examine what is wrong. As always in cases like this, begin with the OBD Link Test - then turn on the Show parts conditions mode. Take a look on the engine. The first problem are broken Ignition Modules in the front and the rear of the engine - purchase two such modules and begin the replacement:
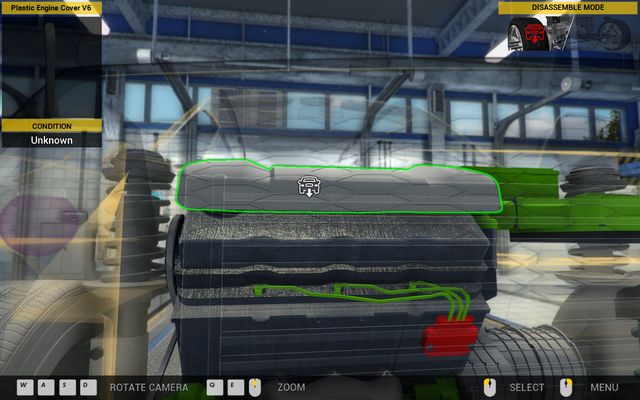
  • Remove Plastic Engine Cover V6.
  • Remove Ignition Wires V6 Front.
  • Twist off Ignition Module and assemble a new one.
Ignition module definitely outstands with it's condition. - Order 31 - Olsen Grand - Orders - Second garage - Car Mechanic Simulator 2014 - Game Guide and WalkthroughIgnition module definitely outstands with it's condition.

By the chance we find also a problem with Spark Plugs. Remove all three of them and buy new ones - screw them in the place of their predecessors. Assemble removed Ignition Wires V6 Front. Repeat the operation in the rear of the engine.
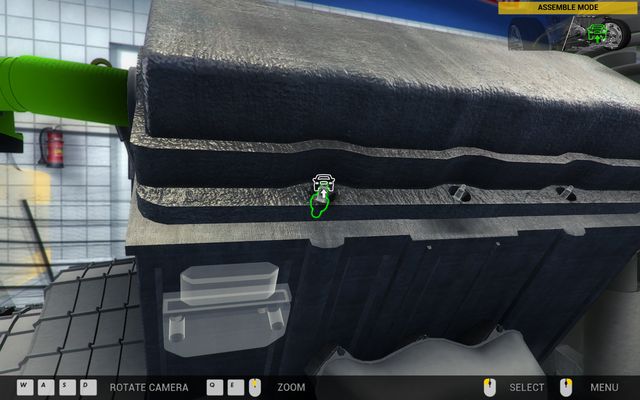
Change of spark plugs is a bit backbreaking operation. - Order 31 - Olsen Grand - Orders - Second garage - Car Mechanic Simulator 2014 - Game Guide and WalkthroughChange of spark plugs is a bit backbreaking operation.

The second part of the order is the broken Fuel Filter - use the Car Lifter and go to the Undercarriage - inspect view mode. Remove the broken Filter located on the fuel tank and assemble a new one.
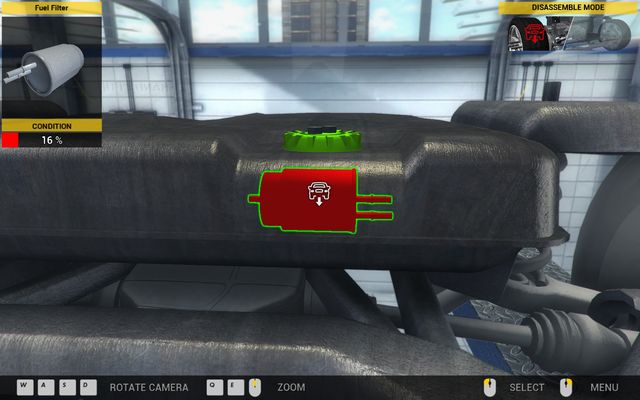
In the end there is the fuel filter remaining. - Order 31 - Olsen Grand - Orders - Second garage - Car Mechanic Simulator 2014 - Game Guide and WalkthroughIn the end there is the fuel filter remaining.

CAR: Genesis Town

TARGETS:

  1. Find the solution

REWARD: 600 USD

PARTS:

  • Timing Belt - 120 USD
  • Idler Pulley - 100 USD
  • Serpentine Belt - 100 USD

You client has bought a new car and it turned out that Timing Belt is hooking against edges of the Idler Pulley. Your task is to repair that. We are taking a look to engine with the Engine - suspect option and then we check the valvetrain with the Examine Conditions tool. For immediate replacement there are:
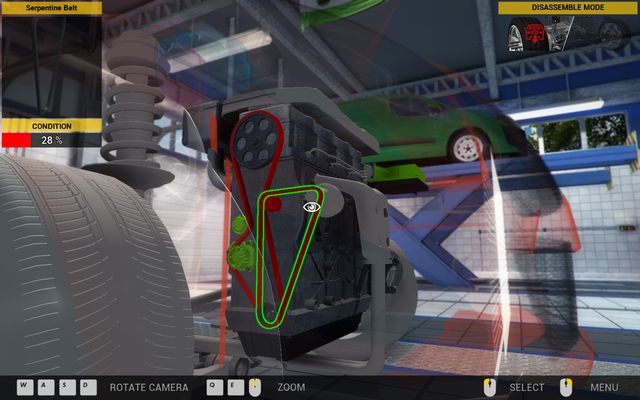
  • Timing Belt
  • Idler Pulley
  • Serpentine Belt
A half of the timing to change! - Order 32 - Genesis Town - Orders - Second garage - Car Mechanic Simulator 2014 - Game Guide and WalkthroughA half of the timing to change!

Purchase new copies of these parts and begin the replacement. Remove elements of the timing in the following order:

  1. Serpentine Belt
  2. Belt Tensioner
  3. Timing Belt
  4. Idler Pulley

Then replace parts indicated earlier and assemble them in the opposite order by using the Assemble Mode.

CAR: Vulcan Family

TARGETS:

  1. Find and eliminate the cause

REWARD: 2000 USD

PARTS:

  • 2x Suspension Spring Front - 480 USD
  • Shock Abs. B Front-Left - 150 USD
  • Shock Abs. B Front-Right - 150 USD

There comes a specific knocking sound from the car during accelerating and braking, which indicates a problem with the drivetrain. Your task is to check and inspect that case. Begin normally - in the first step examine the car with the Diagnostic Path Test and then turn on the Show parts conditions mode. As it turns out, both front shock absorbers and suspension springs have been damaged - purchase new copies and start accomplishing the task:
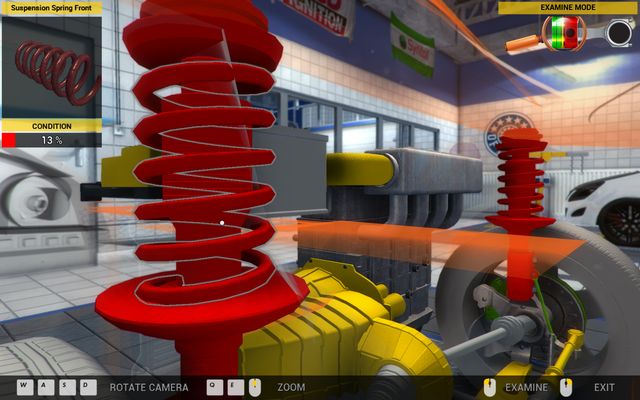
  • Twist off and remove Vulcan Family Left Wheel.
  • Twist off broken Sway Bar End Link Left.
  • Remove broken Shock Abs. B Front-Left.
  • Remove Suspension Spring Front and assemble a new one.
  • Assemble new copy of Shock Abs. B Front-Left.
  • Assemble Sway Bar End Link Left.
  • Screw Vulcan Family Left Wheel.
It's a miracle that driver has avoided any serious harm... - Order 33 - Vulcan Family - Orders - Second garage - Car Mechanic Simulator 2014 - Game Guide and WalkthroughIt's a miracle that driver has avoided any serious harm...

Do the exactly the same with parts in the front-right side of the car.

CAR: Vulcan Spectre

TARGETS:

  • Find the solution

REWARD: 700 USD

PARTS:

  • Fuel Filter - 80 USD
  • Fuel Pump - 320 USD
Replacement of the fuel pump and fuel filter requires us to lift the car. - Order 34 - Vulcan Spectre - Orders - Second garage - Car Mechanic Simulator 2014 - Game Guide and WalkthroughReplacement of the fuel pump and fuel filter requires us to lift the car.

Customer is complaining about sudden breaks in the engine's work which can be very dangerous while driving on city streets. Of course, you have to take care of this task and find the cause. It is located around the fuel tank - Fuel Filter and Fuel Pump should be replaced. Buy new copies of these parts and begin completing the order:

  1. Lift the car by using Car Lifter and go to view of the rear chassis with the Undercarriage - inspect mode.
  2. Turn on the Disassemble Mode.
  3. Find Fuel Filter on the fuel tank and remove it.
  4. Find Fuel Pump on the fuel tank and twist it off.
  5. Turn on the Assemble Mode.
  6. Assemble new Fuel Filter.
  7. Assemble new Fuel Pump.

CAR: Vulcan Spectre

TARGETS:

  • Perform a test drive
  • Find and eliminate the cause

REWARD: 500 USD

PARTS:

  • Rubber Bushing - 110 USD

The driver who orders you to do the repair noticed that his car has tendency to slide on the right side. You have to diagnose that problem and repair the defect. Begin with performing the Test drive and then turn on the Show parts conditions mode. You should be looking for problems right by the wheels and in the drivetrain - the problem is the defective Rubber Bushing in the Suspension Arm Front-Right. Buy a new part and begin accomplishing the task:

  • Use the Car Lifter and go to the view of the front chassis with the Engine - inspect option.
  • Remove Rubber Bushing located in Suspension Arm Front-Right and assemble a new one.

CAR: Sceo LC500

TARGETS:

  1. Find and eliminate the cause

REWARD: 1200 USD

PARTS:

  • Air Flow Meter - 450 USD
  • Air Flow Tube V6 - 150 USD
  • Oil change - 100 USD + cost of the new oil: ca. 10 USD
Change of the air elements in cars with V6 engines requires disassembling of the engine cover. - Order 36 - Sceo LC500 - Orders - Second garage - Car Mechanic Simulator 2014 - Game Guide and WalkthroughChange of the air elements in cars with V6 engines requires disassembling of the engine cover.

Driver has noticed significant decrease of the engine's power - find the cause and possible solution for that problem. In that order perform the OBD Link Test and then turn on the Show parts conditions mode. Take a look under the hood with the Engine - inspect option - you should replace Air Flow Meter and Air Flow Tube V6. Purchase new copies and begin the replacement:

  1. Remove Plastic Engine Cover V6.
  2. Remove Air Flow Tube V6.
  3. Remove Air Flow Meter and assemble a new copy.
  4. Assemble new Air Flow Tube V6.

Leave Plastic Cover Engine V6 removed for now - as it turns out, you have problem with the oil as well and you have to change it as quick as you can:
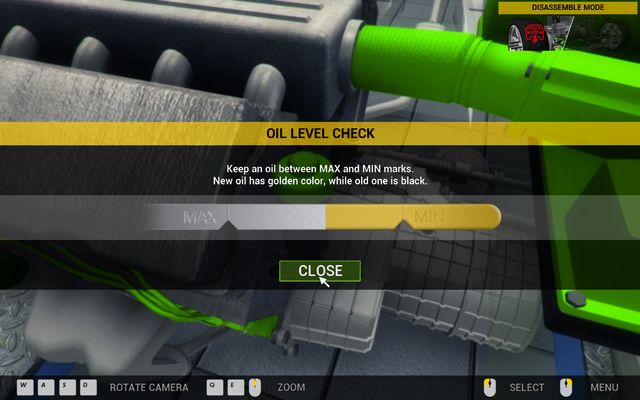
  • Use the Car Lifter and go to the view of the engine from below with the Engine - inspect option.
  • Find Oil Pan located at the bottom of the engine.
  • Find Oil Drain Plug, twist it off and flush the old oil.
  • Lower the car with the Car Lifter and go to the Engine - inspect view mode.
  • Twist off Engine Oil Fill Plug.
  • Click on the oil jerrycan and pour the oil to the engine for a few seconds.
  • Put out Oil Dipstick and check level of oil - point that connects gold and silver field should be as close to the scale's middle as possible.
  • Assemble Plastic Cover Engine V6.
There couldn't be better oil change! - Order 36 - Sceo LC500 - Orders - Second garage - Car Mechanic Simulator 2014 - Game Guide and WalkthroughThere couldn't be better oil change!

CAR: Revton Van

TARGETS:

  1. Perform a test drive
  2. Replace all damaged parts

REWARD: 1100 USD

PARTS:

  • 2x Outer Tie Rod - 200 USD
  • 2x Inner Tie Rod - 300 USD
The steering wheel won't help us driving well without well working tie rods. - Order 37 - Revton Van - Orders - Second garage - Car Mechanic Simulator 2014 - Game Guide and WalkthroughThe steering wheel won't help us driving well without well working tie rods.

Client is complaining about delayed wheels' reaction after turning with the steering wheel - initial diagnosis suggests that we are dealing with the drivetrain problems. Examine what exactly is this order for and solve that case. Begin with the Test drive and then turn on the Show parts conditions mode. Look for the problems by the drivetrain and suspension - in result you will find out that Inner Tie Rods and Outer Tie Rods on both sides of the axle are broken. Purchase new copies and begin accomplishing the task:

  • Go to the Wheel - inspect view mode.
  • Turn on the Disassemble Mode.
  • Twist off Revton Van Left Wheel.
  • Twist off Outer Tie Rod.
  • Twist off Inner Tie Rod and replace it with the new one.
  • Put in new Outer Tie Rod.
  • Assemble Revton Van Left Wheel.

Do exactly the same with the right wheel and tie rods.

CAR: Olsen Grand

TARGETS:

  1. Check the gearbox

REWARD: 7000 USD

PARTS:

  • Gearbox V6 - repair ca. 2500 USD, new model - 4000 USD
  • Clutch Friction Plate - 500 USD
Change of the totally wasted gearbox is a expensive thing. - Order 38 - Olsen Grand - Orders - Second garage - Car Mechanic Simulator 2014 - Game Guide and WalkthroughChange of the totally wasted gearbox is a expensive thing.

As it turns out, a car is not the best idea for a present for the teenager - he has been driving just for a while and he has managed to damage the gearbox already. Repair the broken part and bring the car to the former condition. In that order begin removing elements connected to the gearbox:

  • Go to the Wheel - inspect view mode.
  • Turn on the Disassemble Mode.
  • Twist off Olsen Grand Rear Left Wheel.
  • Twist off Drive Axle Left.

Do the same with the rear right wheel and both front wheels. Then:

  1. Use the Car Lifter and go to the view of the rear chassis with the Undercarriage - inspect option.
  2. Remove Axle Differential.
  3. Remove Drive Shaft.
  4. Lower the car with the Car Lifter and go to the Engine - inspect view mode.
  5. Twist off Starter V6.
  6. Remove Gearbox V6.
  7. Remove Clutch Release Bearing.
  8. Remove Clutch Pressure Plate.
  9. As it turns out, Clutch Friction Plate has been damaged as well - buy a new one and assemble it.
  10. Assemble Clutch Release Bearing.
  11. Assemble Clutch Pressure Plate.

You can now repair the gearbox (which is the cheaper option) or purchase a new part (a more expensive way) - the choice is yours. Assemble the gearbox on it's place and complete the car by assembling the rest of removed parts in chosen order.
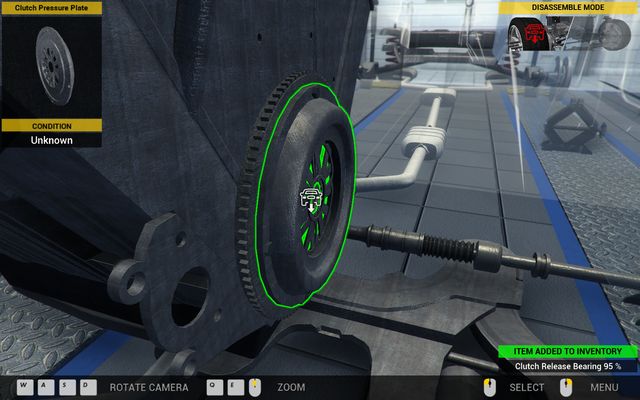
Elements of the clutch are difficult to reach. - Order 38 - Olsen Grand - Orders - Second garage - Car Mechanic Simulator 2014 - Game Guide and WalkthroughElements of the clutch are difficult to reach.

CAR: Genesis Town

TARGETS:

  • Find and eliminate the cause

REWARD: 700 USD

PARTS:

  • Water Pump - repair ca. 150 USD, new pump - 300 USD
To get to the water pump you need to disassemble the entire valvetrain. - Order 39 - Genesis Town - Orders - Second garage - Car Mechanic Simulator 2014 - Game Guide and WalkthroughTo get to the water pump you need to disassemble the entire valvetrain.

Customer has noticed a leakage from around the engine and, although he has very slim knowledge about cars, he recognized it as a enough reason to call you for help. Your task is to localize the leakage and stop it. The Water Pump is responsible for that problem. Replace it with a new copy or do the repair:

  • Remove Serpentine Belt.
  • Remove Belt Tensioner.
  • Remove Timing Belt.
  • Remove Water Pump and go to the Assemble Mode.
  • Assemble new Water Pump.
  • Assemble new Timing Belt.
  • Assemble Belt Tensioner.
  • Assemble Serpentine Belt.

CAR: Revton Wind

TARGETS:

  • Perform a test drive
  • Replace all worn parts

REWARD: 700 USD

PARTS:

  • 2x Shock Absorber Rear - 200 USD
  • 2x Suspension Spring Rear - 300 USD

In another order your client complains about low driving comfort and he indicates the suspension as the cause. Check whether he made a right diagnosis. Perform the Path Test and then go to the Show parts conditions mode. Results of the test will show that you have to deal with the rear suspension - take a look on it then. Indeed - both Shock Absorbers Rear and two Suspension Springs Rear should be changed. Buy new copies and begin the replacement:
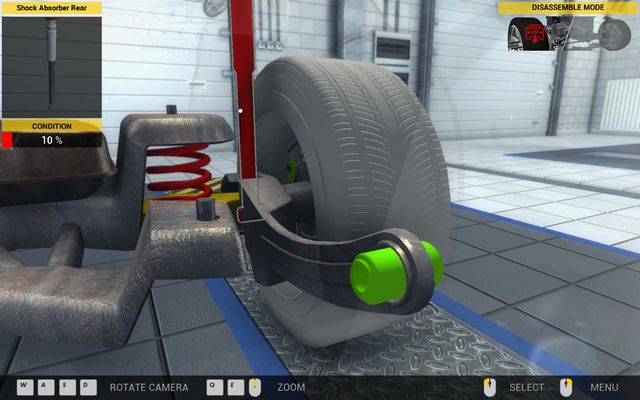
  • Use the Car Lifter and go to the car's rear with the Undercarriage - inspect option.
  • Remove Shock Absorber Rear located by the Revton Wind Left Wheel.
  • Remove Suspension Arm Rear-Left A.
  • Put out worn Suspension Spring Rear and assemble a new copy.
  • Assemble Suspension Arm Rear-Left A.
This time all broken parts are located in one place. - Order 40 - Revton Wind - Orders - Second garage - Car Mechanic Simulator 2014 - Game Guide and WalkthroughThis time all broken parts are located in one place.

Repeat the operation with the rear right wheel - in this case before you disassemble Suspension Arm Rear-Right A you have to remove also Muffler Rear.

CAR: Vulcan Spectre

TARGETS:

  • Find and eliminate the cause

REWARD: 2000 USD

PARTS:

  • Ignition Module - 750 USD
  • Ignition Wires V6 Front - 300 USD
  • Ignition Wires V6 Rear - 300 USD
With damaged ignition wires the engine wont start. - Order 41 - Vulcan Spectre - Orders - Second garage - Car Mechanic Simulator 2014 - Game Guide and WalkthroughWith damaged ignition wires the engine won't start.

In another task you have to face the problem of the engine that happens to stop working suddenly or works very problematically. Perform the OBD Scan and then choose the Show part conditions option. Take a look under the Hood by choosing the Engine - inspect option. Overall, you have to deal with three parts - Ignition Wires V6 Front, Ignition Wires V6 Rear and Ignition Module located in front of the engine. Buy new elements and begin the replacement:

  1. Remove Plastic Engine Cover V6.
  2. Remove Ignition Wires V6 Front.
  3. Twist off Ignition Module and assemble a new one.
  4. Assemble new Ignition Wires V6 Front.
  5. Remove broken Ignition Wires V6 Rear and assemble a new copy.
  6. Assemble Plastic Engine Cover V6.

CAR: Vulcan Family

TARGETS:

  • Make car driveable
  • Test Car on a Diagnostic Path

REWARD: 5000 USD

PARTS:

  • Air Flow Tube - 100 USD
  • Serpentine Belt - 100 USD
  • Alternator - 500 USD
  • 3x Spark Plug - 120 USD
  • Starter - 200 USD
  • Battery - 350 USD
  • Ignition Wires - 150 USD
The starter is located next to the gearbox. - Order 42 - Vulcan Family - Orders - Second garage - Car Mechanic Simulator 2014 - Game Guide and WalkthroughThe starter is located next to the gearbox.

Customer has bought a car with incomplete engine - your task is to fill it with missing parts and bring the car back to the state of full usability. The list of missing elements is very large - it contains following parts:

  • Air Flow Tube
  • Serpentine Belt
  • Alternator
  • 3x Spark Plug
  • Starter
  • Battery
  • Ignition Wires

Purchase all these parts and assemble them by the engine. Then perform the Path Test.
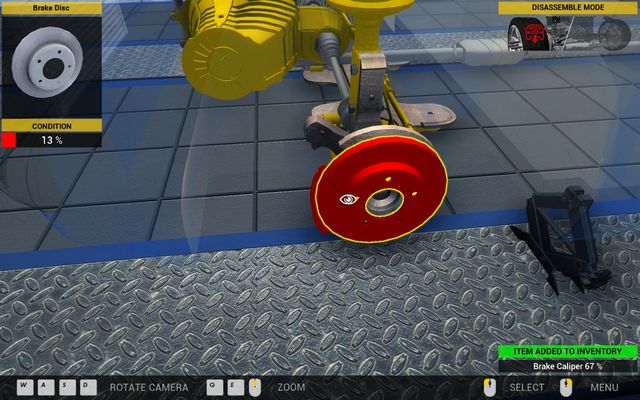
You can reach the alternator after you will partially disassemble the timing. - Order 42 - Vulcan Family - Orders - Second garage - Car Mechanic Simulator 2014 - Game Guide and WalkthroughYou can reach the alternator after you will partially disassemble the timing.

CAR: Revton Van

TARGETS:

  1. Check the brakes

REWARD: 2800 USD

PARTS:

  • 4x Brake Disc - 800 USD
  • 4x Brake Pad - 200 USD
  • Brake Caliper - 400 USD

As it turns out, in this car brakes almost does not exist already - an immediate and general repair is necessary and it is your task to perform it, naturally. In that order perform Path Test and then turn on the Show parts conditions option. Begin playing with the brakes then:

Front left wheel:

We have both Brake Pads and Brake Disc to replace here. Purchase these parts and perform the replacement:

  • Twist off Revton Van Left Wheel.
  • Remove Brake Caliper.
  • Remove both Brake Pad.
  • Remove Brake Disc and assemble a new one.
  • Assemble two new Brake Pads.
  • Assemble Brake Caliper.
  • Assemble Revton Van Wheel.
So heavily damaged brake disc causes faster wearing of brake pads. - Order 43 - Revton Van - Orders - Second garage - Car Mechanic Simulator 2014 - Game Guide and WalkthroughSo heavily damaged brake disc causes faster wearing of brake pads.

Front right wheel:

Only Brake Disc is designed for replacement here - buy a new copy and replace:

  • Twist off Revton Van Right Wheel.
  • Remove Brake Caliper.
  • Remove both Brake Pads.
  • Remove Brake Disc and assemble a new one.
  • Assemble Brake Pads.
  • Assemble Brake Caliper.
  • Assemble Revton Van Wheel.

Rear left wheel:

You will change Brake Caliper and Brake Disc here. Buy new elements and assemble:

  1. Twist off Revton Van Left Wheel.
  2. Remove Brake Caliper.
  3. Remove both Brake Pads.
  4. Remove Brake Disc and assemble a new one.
  5. Assemble Brake Pads.
  6. Assemble new Brake Caliper.
  7. Assemble Revton Van Wheel.

Rear right wheel:

Changed should be: Brake Disc and both Brake Pads. Buy these elements and close the order:

  • Twist off Revton Van Right Wheel.
  • Remove Brake Caliper.
  • Remove both Brake Pads.
  • Remove Brake Disc and assemble a new one.
  • Assemble two new Brake Pads.
  • Assemble Brake Caliper.
  • Assemble Revton Van Wheel.

CAR: Revton Van

TARGETS:

  1. Perform Chip Tuning min. 10%

REWARD: 1000 USD

PARTS: none

Client is complaining about too small amount of power in the car - it is especially noticable when the car is fully loaded and it has to drive upward. In order to fix that perform the chip tuning. You will find it's complete course in the "Chip Tuning" chapter in the "Basics of gameplay" section.
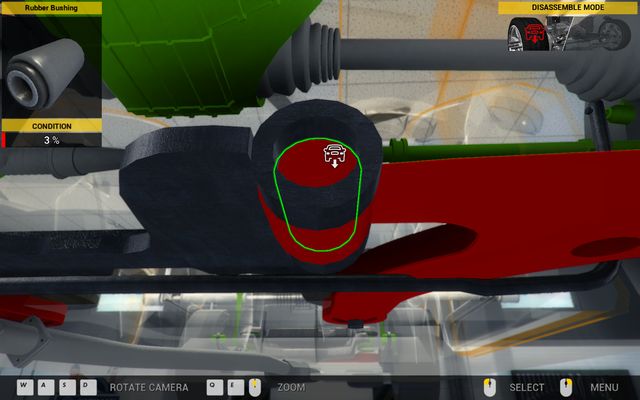
We perform the chip tuning with that laptop. - Order 44 - Revton Van - Orders - Third garage - Car Mechanic Simulator 2014 - Game Guide and WalkthroughWe perform the chip tuning with that laptop.

CAR: Sceo LC500

TARGETS:

  • Find and eliminate the cause

REWARD: 3000 USD

PARTS:

  • Suspension Arm Front-Left - 300 USD
  • Suspension Arm Front-Right - 300 USD
  • 2x Rubber Bushing - 220 USD
  • Suspension Arm Rear-Left A - 500 USD
The rubber bushing keeps in check the front suspension. - Order 45 - Sceo LC500 - Orders - Third garage - Car Mechanic Simulator 2014 - Game Guide and WalkthroughThe rubber bushing keeps in check the front suspension.

Customer is complaining about too quick wearing of the tires - find the cause of that troublesome situation. Perform the Path Test and then turn on the Show parts conditions mode. Use the Car Lifter and take a look on the chassis. Following parts should be changed:

FRONT CHASSIS:

  • Suspension Arm Front-Left
  • Suspension Arm Front-Right
  • 2x Rubber Bushing

REAR CHASSIS:

  • Suspension Arm Rear-Left A

Buy all elements that was indicated. Go to view of the engine from below with the Engine - inspect view mode and disassemble and then replace all parts from the "FRONT CHASSIS" list.

Go to the rear chassis with Undercarriage - inspect option. Before you replace the suspension arm you have to disassemble Muffler V6 Rear-Left - only then you can replace the defective suspension arm with a new one.

CAR: Vulcan Family

TARGETS:

  • Find the solution

REWARD: 1200 USD

PARTS:

  • Air Filter - 35 USD
  • Air Flow Meter - repair ca. 175 USD, new part 450 USD
  • Fuel Pump - 320 USD

Customer is complaining about increasing costs of the car exploitation - but he emphasises that he does not mean the increasing fuel price but constantly increasing fuel consumption of the car. Find the causes and eliminate them. In the beginning perform the OBD Scan and then turn on the Show part conditions option and take a look under the car's Hood by choosing the Engine - inspect option. Two first culprits are Air Filter and Air Flow Meter - buy new parts (or repair the air flow meter) and replace them:
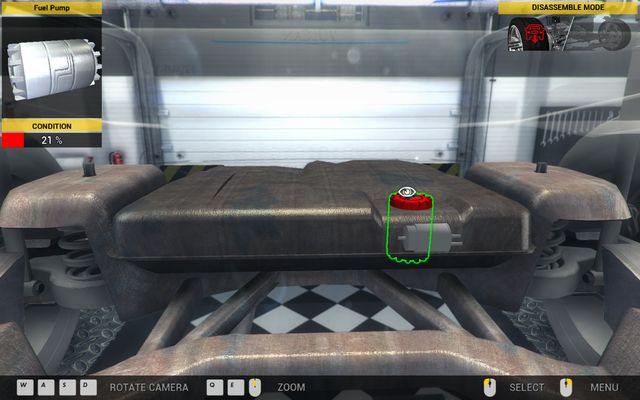
  • Remove Air Flow Tube.
  • Remove Air Flow Meter.
  • Remove Air Filter Cover.
  • Put out worn-out Air Filter and assemble a new part.
  • Assemble Air Filter Cover.
  • Assemble new Air Flow Meter.
  • Assemble Air Flow Tube.
The fuel pump is hidden behind the fuel filter. - Order 46 - Vulcan Family - Orders - Third garage - Car Mechanic Simulator 2014 - Game Guide and WalkthroughThe fuel pump is hidden behind the fuel filter.

The last element designed for change is the Fuel Pump. Buy a new part and replace:

  1. Use the Car Lifter.
  2. Go to the Undercarriage - inspect view mode.
  3. Find Fuel Pump on the Fuel Tank and disassemble it.
  4. Assemble new Fuel Pump.

CAR: Vulcan Spectre

TARGETS:

  1. Find and remove the cause of whining
  2. Replace all filters
  3. Change oil

REWARD: 3000 USD

PARTS:

  • Axle differentia - 2000 USD
  • Air Filter - 35 USD
  • Oil Filter - 50 USD
  • Fuel Filter - 80 USD
  • Oil change - 100 USD + cost of new oil ca. 10 USD

Client is complaining about the whining coming from the rear part of the car. Except of solving that problem, he also asks you to replace all filters and to change oil. First of these problems is connected to the Axle differential - buy a new one and perform its replacement:

  1. Go to the Wheel - inspect view mode.
  2. Turn on the Disassemble Mode.
  3. Twist off Vulcan Spectre Rear Left Wheel.
  4. Twist off Drive Axle Left.

Do the same with the rear right wheel. Then:
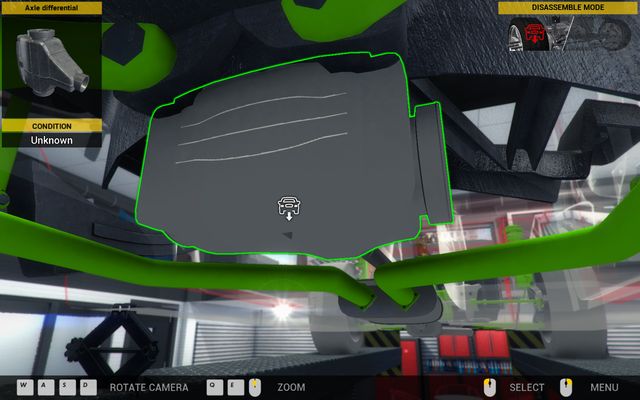
  1. Use the Car Lifter and go the car's rear with the Undercarriage - inspect view.
  2. Disassemble broken Axle differential and assemble a new one.
  3. Lower the car with the Car Lifter and assemble both removed Drive Axles and Wheels.
The axle differential is hidden under the rear suspension. - Order 47 - Vulcan Spectre - Orders - Third garage - Car Mechanic Simulator 2014 - Game Guide and WalkthroughThe axle differential is hidden under the rear suspension.

Now take care of filters - begin with the Oil Filter:

  • Raise Hood and go to the Engine - inspect view mode.
  • Turn on the Disassemble Mode.
  • Remove Oil Filter Cap.
  • Put out Oil Filter.
  • Turn on the Assemble Mode.
  • Put in new Oil Filter.
  • Assemble Oil Filter Cap.

The next one -Air Filter:

  1. Remove Plastic Engine Cover V6.
  2. Remove Air Flow Tube V6.
  3. Remove Air Flow Meter.
  4. Remove Air Filter Cover.
  5. Put out worn-out Air Filter and assemble a new one.
  6. Assemble Air Filter Cover.
  7. Assemble new Air Flow Meter.
  8. Assemble Air Flow Tube V6.
  9. Assemble Plastic Engine Cover V6.

In the end the Fuel Filter:

  1. Raise the car with the Car Lifter and go to the view of the rear chassis with the Undercarriage - inspect view mode.
  2. Turn on the Disassemble Mode.
  3. Find Fuel Filter on the Fuel Tank and remove it.
  4. Turn on the Assemble Mode.
  5. Assemble new Fuel Filter.
The fuel filter is very easy to find. - Order 47 - Vulcan Spectre - Orders - Third garage - Car Mechanic Simulator 2014 - Game Guide and WalkthroughThe fuel filter is very easy to find.

Your last task is the oil change:

  • Use the Car Lifter and go to the view of the engine from below with the Engine - inspect option.
  • Find Oil Pan located on the bottom of the engine.
  • Find Oil Drain Plug, twist it off and flush the old oil.
  • Lower the car with the Car Lifter and go to the Engine - inspect view mode.
  • Remove Plastic Engine Cover V6.
  • Twist off Engine Oil Fill Plug.
  • Click on the oil jerrycan and pour the oil to the engine for a few seconds.
  • Put out Oil Dipstick and check level of oil - point that connects gold and silver field should be as close to the scale's middle as possible.
  • Assemble Plastic Engine Cover V6.

CAR: Revton Van

TARGETS:

  1. Perform general inspection of an engine
  2. Replace all worn parts
  3. Check the oil

REWARD: 1000 USD

PARTS:

  • Idler Pulley - 100 USD
  • Timing Belt - 120 USD
  • Serpentine Belt - 100 USD
  • Belt Tensioner - 150 USD
  • Oil change - 100 USD + cost of new oil ca. 10 USD

You have to do a typical, routine car maintenance - check condition of the engine and replace worn parts, check the oil as well. Go to the Engine - inspect view and check condition of all elements located by the engine (valvetrain, air subsystem, oil filter) by using the Examine conditions tool. Use the OBD Link to test the ignition subsystem. In result - replaced should be:
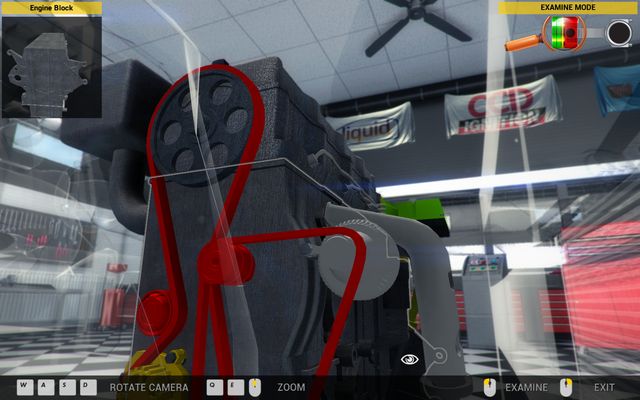
  • Idler Pulley
  • Timing Belt
  • Serpentine Belt
  • Belt Tensioner
Entire valvetrain to the trashcan... - Order 48 - Revton Van - Orders - Third garage - Car Mechanic Simulator 2014 - Game Guide and WalkthroughEntire valvetrain to the trashcan...

Buy new models of these parts and start replacing:

  • Remove Serpentine Belt.
  • Remove Belt Tensioner.
  • Remove Timing Belt.
  • Remove Idler Pulley and go to the Assemble Mode.
  • Assemble new Idler Pulley.
  • Assemble new Timing Belt.
  • Assemble new Belt Tensioner.
  • Assemble new Serpentine Belt.

Also the oil should be changed:

  1. Use the Car Lifter and go to the view of the engine from below with the Engine - inspect option.
  2. Find Oil Pan located on the bottom of the engine.
  3. Find Oil Drain Plug, twist it off and flush the old oil.
  4. Lower the car with the Car Lifter and go to the Engine - inspect view mode.
  5. Twist off Engine Oil Fill Plug.
  6. Click on the oil jerrycan and pour the oil to the engine for a few seconds.
  7. Put out Oil Dipstick and check level of oil - point that connects gold and silver field should be as close to the scale's middle as possible.

CAR: Olsen Grand

TARGETS:

  1. Check and repair any defects of the car
  2. Perform Chip Tuning min. 10%

REWARD: 2500 USD

PARTS:

  • Air Flow Meter - repair ca. 180 USD, new part 450 USD

The car is too heavy - the customer is complaining about problems with outrunning theoretically slower vehicles. Tune the car with the chip tuning and repair all worn parts. The only element that requires the repair is Air Flow Meter. Buy a new part or repair the old one and replace it:
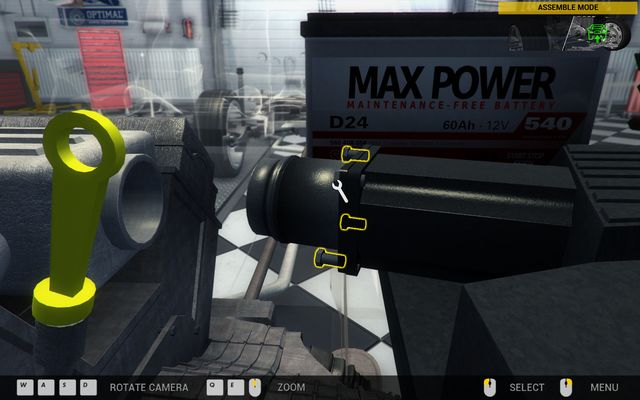
  1. Remove Plastic Engine Cover V6.
  2. Remove Air Flow Tube V6.
  3. Remove Air Flow Meter and assemble a new one.
  4. Assemble Air Flow Tube V6.
  5. Assemble Plastic Engine Cover V6.
Air flow meter is a basis of the well functioning air filter. - Order 49 - Olsen Grand - Orders - Third garage - Car Mechanic Simulator 2014 - Game Guide and WalkthroughAir flow meter is a basis of the well functioning air filter.

The second part of the order is a chip tuning in which you have to achieve at least 10% power increase. Go to the appropriate room (with the Roller Dyno - tune car option) and start the tuning application - Program Eeprom.

CAR: Revton Wind

TARGETS:

  • Find the solution
  • Perform Chip Tuning min. 10%

REWARD: 2000 USD

PARTS:

  • Fuel Filter - 80 USD
  • Fuel Pump - 320 USD
  • Air Filter - 35 USD
  • Water Pump - repair ca. 130 USD, new part 300 USD

Customer is complaining about too high fuel consumption - as probably reasons he indicates a problem with some part or insufficient optimization which you can improve through the chip tuning. So, if we have problem with the consumption, we need to replace the Fuel Filter and the Fuel Pump. Buy new parts and take care of their replacement:
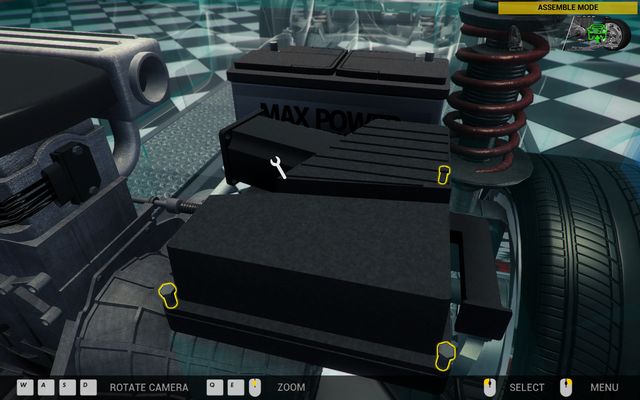
  1. Raise the car with the Car Lifter and go to the view of the rear chassis with the Undercarriage - inspect option.
  2. Turn on the Disassemble Mode.
  3. Find Fuel Filter on the Fuel Tank and remove it.
  4. Find Fuel Pump on the Fuel Tank and twist it off.
  5. Turn on the Assemble Mode.
  6. Assemble new Fuel Filter.
  7. Assemble new Fuel Pump.
The air filter is well protected by the solid cover. - Order 50 - Revton Wind - Orders - Third garage - Car Mechanic Simulator 2014 - Game Guide and WalkthroughThe air filter is well protected by the solid cover.

Another thing that should be replaced becomes Air Filter:

  1. Remove Air Flow Tube.
  2. Remove Air Flow Meter.
  3. Remove Air Filter Cover.
  4. Put out worn-out Air Filter and assemble a new one.
  5. Assemble Air Filter Cover.
  6. Assemble Air Flow Meter.
  7. Assemble Air Flow Tube.

Also Water Pump should be changed - you can repair it or buy a new part:

  1. Remove Serpentine Belt.
  2. Remove Belt Tensioner.
  3. Remove Timing Belt.
  4. Remove Water Pump and go to the Assemble Mode.
  5. Assemble new Water Pump.
  6. Assemble Timing Belt.
  7. Assemble Belt Tensioner.
  8. Assemble Serpentine Belt.

Second part of the order is the chip tuning - you have to achieve at least 10% power increase. Go to the appropriate room (with the Roller Dyno - tune car option) and start the tuning application - Program Eeprom.

CAR: Vulcan Spectre

TARGETS:

  1. Replace or repair all broken parts

REWARD: 1700 USD

PARTS:

  • 4x Brake Pad - 200 USD
  • Drive Axle Left - 400 USD
  • Drive Axle Right - 350 USD

After hot night spent on drifts, the driver orders you to perform a general maintenance before the tomorrow's show. Check and change all worn-out elements of the car. Perform the Path Test and then go to the Show parts conditions mode. Following parts should be replaced:

FRONT OF THE CAR:

Damages are small - you need to change only Brake Pads by both wheels. Buy new pads and take care of their replacement:

  • Go to the Wheel - inspect view mode.
  • Turn on the Disassemble Mode.
  • Twist off Vulcan Spectre Left Wheel.
  • Remove Brake Caliper.
  • Remove both Brake Pad.
  • Turn on the Assemble Mode.
  • Assemble two new Brake Pads.
  • Assemble Brake Caliper.
  • Assemble Vulcan Spectre Wheel.

Do exactly the same with the right wheel.
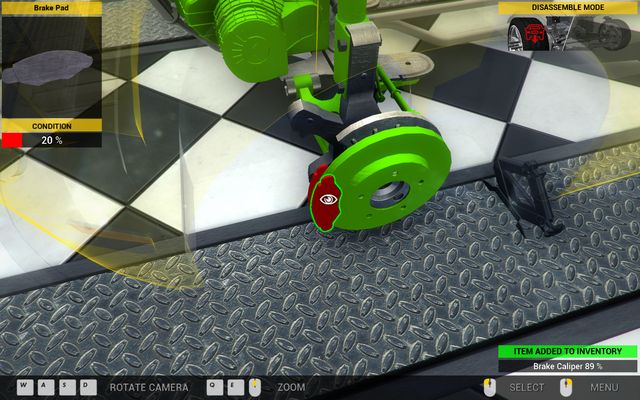
Brake pads change is one of the easiest actions in the game. - Order 51 - Vulcan Spectre - Orders - Third garage - Car Mechanic Simulator 2014 - Game Guide and WalkthroughBrake pads change is one of the easiest actions in the game.

BACK OF THE CAR:

Drive Axle Left and Drive Axle Right remain for replacement here. Buy new parts and change them:

  1. Go to the Wheel - inspect view mode.
  2. Twist off Vulcan Spectre Left Wheel.
  3. Twist off Drive Axle Left and assemble a new one.
  4. Screw Vulcan Spectre Wheel.

Repeat the same maneuver with the rear right wheel.

CAR: Sceo LC500

TARGETS:

  • Replace or repair all damaged parts
  • Change oil

REWARD: 7500 USD

PARTS:

  • Drive Axle Left - 400 USD
  • Sway Bar End Link Right - 50 USD
  • Outer Tie Rod - 100 USD
  • 2x Rubber Bushing - 220 USD
  • Suspension Arm Front-Right - 300 USD
  • Catalytic Converter V6 - 1400 USD
  • Sceo LX500 Wheel - 2000 USD
  • Suspension Arm Rear-Left A - 500 USD
  • Suspension Spring Rear - 150 USD
  • Shock Absorber Rear - 100 USD

This time your garage has been visited by the company car - by order from his employer, the employee asks you to perform the complex maintenance of the vehicle: the car needs to exit the garage in the perfect condition. As you can see, the price does not matter here. Perform the Path Test then the OBD Link and then turn on the Show parts conditions mode. Let's take a look on particular elements that need to be replaced:

LEFT FRONT WHEEL:

We are dealing with broken Drive Axle Left here. Buy a new part and assemble it:
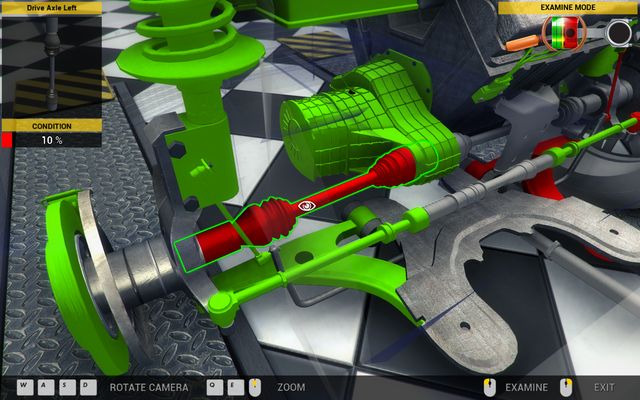
  • Go to the Wheel - inspect view mode.
  • Twist off Sceo LX500 Left Wheel.
  • Twist off Drive Axle Left and assemble a new one.
  • Screw Sceo LX500 Wheel.
Getting rid of the drive axle gives you access to the gearbox. - Order 52 - Sceo LC500 - Orders - Third garage - Car Mechanic Simulator 2014 - Game Guide and WalkthroughGetting rid of the drive axle gives you access to the gearbox.

FRONT RIGHT WHEEL:

Sway Bar End Link Right and Outer Tie Rod qualify for replacement here. Buy new parts and replace them:

  1. Go to the Wheel - inspect view mode.
  2. Twist off Sceo LX500 Right Wheel.
  3. Remove Sway Bar End Link Right.
  4. Remove Outer Tie Rod and assemble a new one.
  5. Assemble new Outer Tie Rod.
  6. Assemble new Sway Bar End Link Left.
  7. Assemble Sceo LX500 Wheel.

CHASSIS - FRONT:

For replacement designed are: Rubber Bushing with Suspension Arm Front-Right. Buy new elements and assemble them:

  1. Use the Car Lifter and go to the view of the front chassis with the Engine - inspect mode.
  2. Put out Rubber Bushing located in the Suspension Arm.
  3. Remove Suspension Arm Front-Right and assemble a new one.
  4. Put in new Rubber Bushing on it's place.

CHASSIS - MIDDLE:

We have Catalytic Converter V6 for replacement - buy a new one and change:
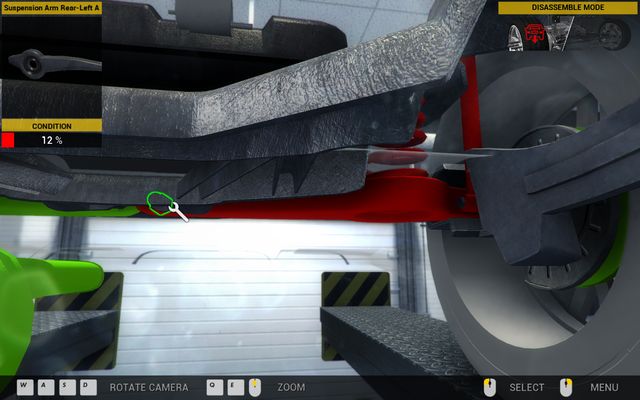
  1. Remove Muffler V6 Rear Left and Muffler V6 Rear-Right.
  2. Remove Muffler V6 Middle.
  3. Twist off Exhaust Pipe V6 A.
  4. Remove Catalytic Converter V6 and assemble a new one.
  5. Screw Exhaust Pipe V6 A.
  6. Assemble Muffler V6 Middle.
  7. Assemble Muffler V6 Rear Left and Muffler V6 Rear-Right.
One accidental drive through a hole could bring big troubles with such condition of the suspension arm and the shock absorber. - Order 52 - Sceo LC500 - Orders - Third garage - Car Mechanic Simulator 2014 - Game Guide and WalkthroughOne accidental drive through a hole could bring big troubles with such condition of the suspension arm and the shock absorber.

CHASSIS - REAR:

The finale of the big repair is the replacement of Sceo LX500 Rear Right Wheel, Rubber Bushing, Suspension Arm Rear-Left A, Suspension Spring Rear and Shock Absorber Rear. Buy all these parts and start assembling:

  1. Use the Car Lifter and go to the back of the car with the Undercarriage - inspect turned on.
  2. Remove Shock Absorber Rear located by the Sceo LX500 Left Wheel of the car and assemble a new part.
  3. Remove Suspension Arm Rear-Left A.
  4. Put out worn-out Suspension Spring Rear and assemble a new one.
  5. Assemble Suspension Arm Rear-Left A.
  6. Put out Rubber Bushing located in Wheel Hub Right and put in a new one.
  7. Lower the car with the Car Lifter and replace Sceo LX500 Rear Right Wheel with a new one.

Oil change:

  1. Use the Car Lifter and go to the view of the engine from below with the Engine - inspect option.
  2. Find Oil Pan located on the bottom of the engine.
  3. Find Oil Drain Plug, twist it off and flush the old oil.
  4. Lower the car with the Car Lifter and go to the Engine - inspect view mode.
  5. Twist off Engine Oil Fill Plug.
  6. Click on the oil jerrycan and pour the oil to the engine for a few seconds.
  7. Put out Oil Dipstick and check level of oil - point that connects gold and silver field should be as close to the scale's middle as possible.

CAR: Grand Olsen

TARGETS:

  • Check and replace all damaged parts

REWARD: 4500 USD

PARTS:

  • Shock Absorber Rear - 100 USD
  • Suspension Arm Rear-Left B - 500 USD
  • Muffler V6 Rear-Right - 450 USD
  • Muffler V6 Middle - 600 USD
  • Grand Olsen Wheel - 1500 USD

Client was driving a bit too fast on bumpy roads and it resulted with a visit in your garage. Perform the complex maintenance of the vehicle and replace damaged parts. Perform the Path Test and then turn on the Show parts conditions mode. Use the Car Lifter and look under the chassis with the Undercarriage - inspect option. One look on the situation - and you will see that following parts should be changed:
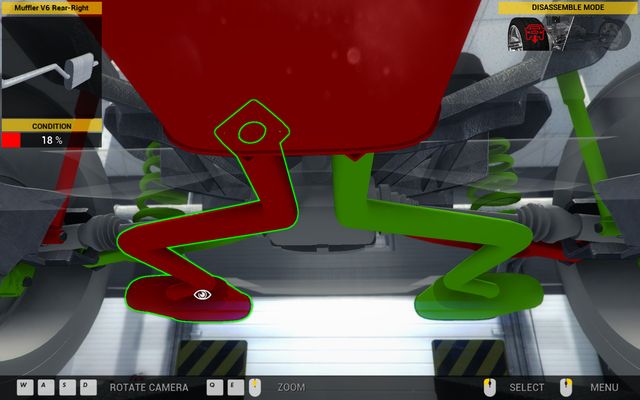
  • Shock Absorber Rear
  • Suspension Arm Rear-Left B
  • Muffler V6 Rear-Right
  • Muffler V6 Middle
  • Grand Olsen Rear Left Wheel
V6 cars have two mufflers. - Order 53 - Grand Olsen - Orders - Third garage - Car Mechanic Simulator 2014 - Game Guide and WalkthroughV6 cars have two mufflers.

Purchase all indicated parts and start replacing:

  • Use Car Lifter and go the view of the rear chassis with the Undercarriage - inspect mode.
  • Remove Muffler V6 Rear Left and Muffler V6 Rear-Right.
  • Remove Muffler V6 Middle.
  • Remove Shock Absorber Rear located by the Grand Olsen Right Wheel and assemble a new shock absorber.
  • Remove Suspension Arm Rear-Left B and assemble a new one.
  • Assemble new Muffler V6 Middle.
  • Assemble new Muffler V6 Rear-Right.
  • Assemble Muffler V6 Rear-Left.
  • Lower the car with the Car Lifter and replace Grand Olsen Rear Left Wheel with a new one.

CAR: Genesis Town

TARGETS:

  1. Perform Chip Tuning min. 40%

REWARD: 1000 USD

PARTS: none

One of your former customer's wife took a few lessons in a rally school and now she wants to take part in true rally. Therefore you have to achieve at least 40% power increase. In that order perform the chip tuning - go to the appropriate room with the Roller Dyno - tune car option and start the tuning application - Program Eeprom.
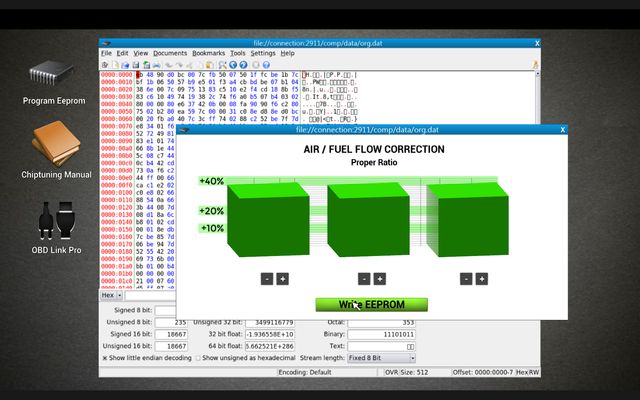
Perfect tuning! - Order 54 - Genesis Town - Orders - Third garage - Car Mechanic Simulator 2014 - Game Guide and WalkthroughPerfect tuning!

CAR: Vulcan Family

TARGETS:

  1. Mount new exhaust

REWARD: 1500 USD

PARTS:

  • Exhaust Pipe Middle - 100 USD
  • Muffler Middle - 350 USD
  • Exhaust Pipe Rear - 150 USD
  • Muffler Rear - 250 USD
Only fully working parts can be placed in the car! - Order 55 - Vulcan Family - Orders - Third garage - Car Mechanic Simulator 2014 - Game Guide and WalkthroughOnly fully working parts can be placed in the car!

During the drive yesterday your client's car has dropped the exhaust - your task is to assemble a new one. Use the Car Lifter and go to the car's rear with the Undercarriage - inspect option. As you will see there, several elements of the exhaust are missing:

  • Muffler Rear
  • Exhaust Pipe Rear
  • Muffler Middle
  • Exhaust Pipe Middle

Purchase all necessary elements and assemble them in the following order:

  1. Exhaust Pipe Middle
  2. Muffler Middle
  3. Exhaust Pipe Rear
  4. Muffler Rear

CAR: Revton Wind

TARGETS:

  1. Solve starting problem
  2. Solve noising problem

REWARD: 600 USD

PARTS:

  • Starter - repair ca. 85 USD, new part 200 USD
  • 2x Rubber Bushing - 220 USD

Your customer has two problems - first of them is connected to the ignition: the client has to take a dozen or so attempts before he manages to start the car. The second problem is about too much noise coming from the car's rear when driving through bumps. Perform the electronics test with the OBD Link option and then turn on the Show parts conditions mode. Look on the engine with the Engine - inspect option - the starting problem is caused by the damaged Starter - twist if off and repair it or buy a new part. Then assemble it.
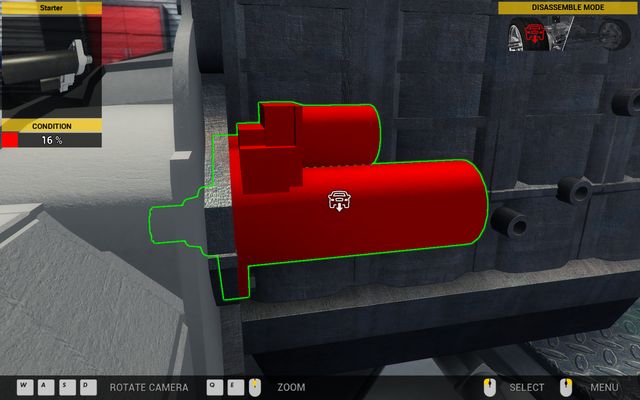
A quick replacement of the starter can easily fix starting problems. - Order 56 - Revton Wind - Orders - Third garage - Car Mechanic Simulator 2014 - Game Guide and WalkthroughA quick replacement of the starter can easily fix starting problems.

The second problem are broken Rubber Bushings located in Wheel Hubs Rear - buy two bushings, use the Car Lifter, go to the view of the rear chassis with the Undercarriage - inspect option and then replace these damaged Rubber Bushings.

CAR: Vulcan Family

TARGETS:

  1. Perform Chip Tuning min. 10%

REWARD: 1000 USD

PARTS: none

One of your customers is very pleased about your reducing the fuel consumption services - now he comes back to you for increasing the power of his engine. In that order perform the chip tuning - go to the appropriate room with the Roller Dyno - tune car option and start the tuning application - Program Eeprom.

CAR: Vulcan Spectre

TARGETS:

  1. Repair or replace all damaged parts

REWARD: 4500 USD

PARTS:

  • Vulcan Spectre Wheel - 1750 USD
  • Sway Bar End Link Right - 50 USD
  • Shock Abs. C Front-Right - 150 USD
  • Suspension Arm Front-Left - 300 USD
  • Rubber Bushing - 100 USD

One of wheels in your customer's car has been blocked during the turn. Your task is to repair that - perform the Path Test, then the Test drive and then turn on the Show parts conditions mode. As it turns out, the right wheel is the main culprit - you have to replace the wheel itself (Vulcan Spectre Wheel), Sway Bar End Link Right and Shock Abs. C Front-Right. Buy all these elements and start realizing the order:
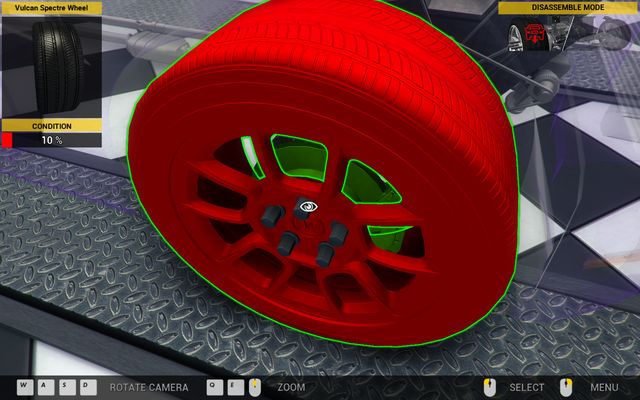
  • Go to the Wheel - inspect view mode.
  • Turn on the Disassemble Mode.
  • Twist off Vulcan Spectre Right Wheel.
  • Twist off Sway Bar End Link Right.
  • Twist off Shock Abs. C Front-Right and assemble a new part.
  • Assemble new Sway Bar End Link Right.
  • Screw new Vulcan Spectre Wheel.
Wheel is the easiest element for replace. - Order 58 - Vulcan Spectre - Orders - Third garage - Car Mechanic Simulator 2014 - Game Guide and WalkthroughWheel is the easiest element for replace.

Additional problem is Suspension Arm Front-Left and Rubber Bushing placed within - these elements are also designed for replace:

  1. Use the Car Lifter and go the view of the front chassis with the Engine - inspect.
  2. Put out Rubber Bushing located in the suspension arm.
  3. Disassemble Suspension Arm Front-Right and assemble a new part.
  4. Put in new Rubber Bushing on it's place.

CAR: Olsen Grand

TARGETS:

  1. Make car driveable

REWARD: 3000 USD

PARTS:

  • Battery - 350 USD
  • Starter V6 - repair ca. 270 USD, new part 550 USD
  • Ignition Module - 750 USD
  • Alternator - 500 USD
  • Fuel Filter - 80 USD

Your client has flooded the engine with water when he was driving through the river during the offroad ride. Perform the electronics test with the OBD Link option and then turn on the Show parts conditions mode. The test will indicate problems with following parts:
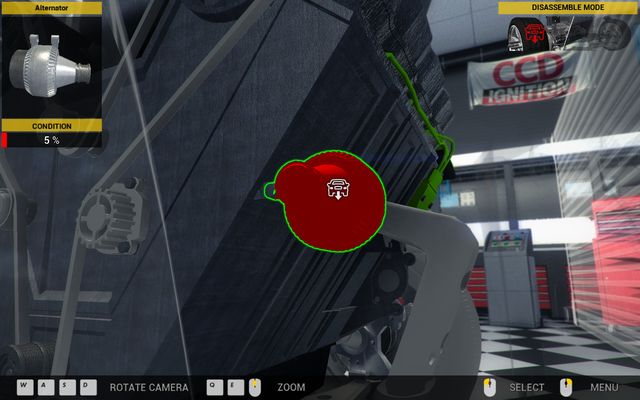
  • Battery
  • Starter V6
  • Ignition Module
  • Alternator
  • Fuel Filter
Working alternator is the basis of the correct work of the valvetrain. - Order 59 - Olsen Grand - Orders - Third garage - Car Mechanic Simulator 2014 - Game Guide and WalkthroughWorking alternator is the basis of the correct work of the valvetrain.

Purchase all mentioned parts and start realizing the order:

Battery:

  1. Raise Hood and go the Engine - inspect view mode.
  2. Put out Battery and replace it with a new one.

Starter:

  • Raise Hood and go to the Engine - inspect.
  • Turn on the Disassemble Mode.
  • Disassemble Starter V6 located in the front of the engine - now you can repair it or assemble a new part.

Ignite module:

  1. Remove Plastic Engine Cover V6.
  2. Remove Ignition Wires V6 Front.
  3. Twist off Ignition Module and assemble a new one.
  4. Assemble Ignition Wires V6 Front.
  5. Assemble Plastic Engine Cover V6.

Alternator:

  1. Turn on the Disassemble Mode.
  2. Remove Serpentine Belt V6.
  3. Twist off and remove Alternator and then assemble a new one.
  4. Assemble Serpentine Belt V6.

Fuel filter:

  • Lift the car with the Car Lifter and go to the view of the rear chassis with the Undercarriage - inspect option.
  • Turn on the Disassemble Mode.
  • Find Fuel Filter on the Fuel Tank and remove it.
  • Turn on the Assemble Mode.
  • Assemble new Fuel Filter.

CAR: Aisan Cougar

TARGETS:

  1. Perform Chip Tuning min. 40%

REWARD: 1000 USD

PARTS: none

Your customer has received some money for his birthday - he wants to spend it on improving the performance of his car. Therefore you need to increase car's power by at least 40%. In that order perform the chip tuning - go to the appropriate room with the Roller Dyno - tune car option and start the tuning application - Program Eeprom.
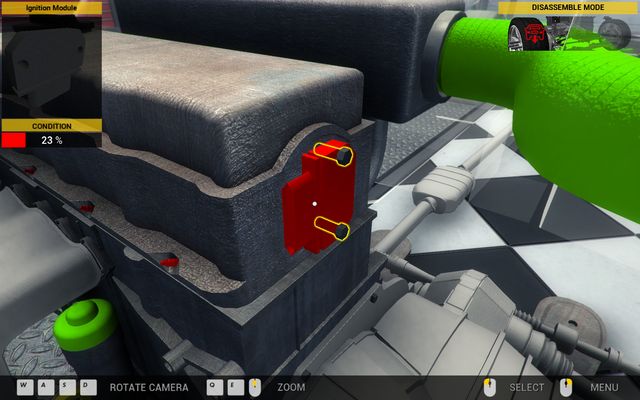
Only a setting like this in the chip tuning guarantees you a success in this mission. - Order 60 - Aisan Cougar - Orders - Third garage - Car Mechanic Simulator 2014 - Game Guide and WalkthroughOnly a setting like this in the chip tuning guarantees you a success in this mission.

CAR: Sceo LC500

TARGETS:

  1. Repair or replace worn out parts

REWARD: 6500 USD

PARTS:

  • 2x Rubber Bushing - 220 USD
  • Suspension Arm Front-Left - 300 USD
  • 2x Outer Tie Rod - 200 USD
  • Shock Absorber Rear - 100 USD
  • Suspension Arm Rear-Right A - 500 USD
  • Suspension Spring Rear - 150 USD
  • 2x Brake Disc - 400 USD
  • 2x Brake Pad - 100 USD
  • Brake Caliper - 400 USD
  • Exhaust Manifold V6 - 1300 USD
  • Muffler V6 Rear-Left - 450 USD
  • Timing Belt V6 - 220 USD
  • Oil change - 100 USD + cost of new oil ca. 10 USD

After few attempts of independent repair, your client came to a conclusion that the best solution is to hand over the car to the professional mechanic - especially if car's condition is getting worse and worse. The driver has ruined his vehicle - we are going to spend an unusually long afternoon in the garage. Perform all necessary tests (OBD Test, Test Drive, Diagnostic Path Test) and turn on the Show parts conditions mode. It's time to start working:

FRONT SUSPENSION:

For repair we have:

  • Rubber Bushing (left and right)
  • Suspension Arm Front-Left
  • Outer Tie Rod (left and right)

Buy all these parts and begin the replacement:

Tie rods:

  • Go to the Wheel - inspect view mode.
  • Turn on the Disassemble Mode.
  • Twist off Sceo LX500 Left Wheel.
  • Remove Outer Tie Rod.
  • Go to the Assemble Mode.
  • Assemble new Outer Tie Rod.
  • Assemble Sceo LX500 Wheel.

Repeat the operation with the right wheel.
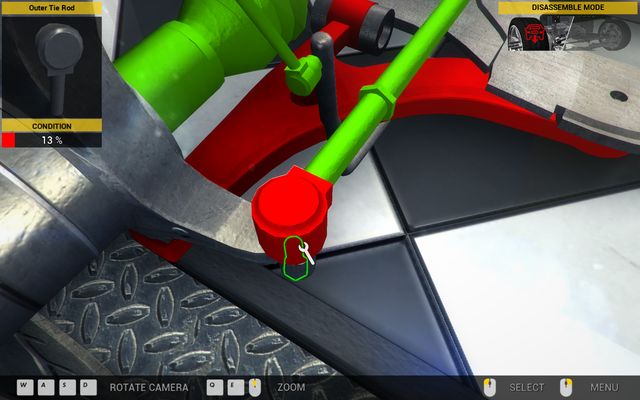
The outer tie rod is responsible for turning precision. - Order 61 - Sceo LC500 - Orders - Third garage - Car Mechanic Simulator 2014 - Game Guide and WalkthroughThe outer tie rod is responsible for turning precision.

Suspension arm and rubber bushings:

  • Use the Car Lifter and go to the view of the front chassis with the Engine - inspect option.
  • Put out Rubber Bushing located in the Suspension Arm Front-Left.
  • Remove Suspension Arm Front-Left and assemble a new one.
  • Put in Rubber Bushing on it's place.
  • Put out Rubber Bushing located in the Suspension Arm Front-Right and replace it with a new part.

REAR SUSPENSION:

For repair we have:

  • Shock Absorber Rear-Right
  • Suspension Arm Rear-Right
  • Suspension Spring Rear-Right
  • Rubber Bushing Right
  • Brake Disc Right and Left
  • Brake Pad Right
  • Brake Caliper Left

Buy all these parts and begin the replacement:

Shock absorber, suspension arm rear-right, suspension spring:

  1. Remove Shock Absorber Rear located by rear right wheel of the car.
  2. Remove Muffler V6 Rear-Right.
  3. Remove Suspension Arm Rear-Right A.
  4. Put out worn Suspension Spring Rear and assemble a new one.
  5. Put in new Suspension Arm Rear-Right A.
  6. Assemble new Shock Absorber Rear.

Rubber bushing:

  1. Find Wheel Hub located by rear right wheel of the car.
  2. Put out worn Rubber Bushing and assemble a new one.

Rear right wheel (brake disc, brake pads):

  1. Twist off Sceo LX500 Rear Right Wheel.
  2. Remove Brake Caliper.
  3. Remove both Brake Pads.
  4. Remove Brake Disc and assemble a new one.
  5. Assemble two new Brake Pads.
  6. Assemble Brake Caliper.
  7. Assemble Sceo LX500 Wheel.

Rear right wheel (brake disc, brake calliper):

  • Twist off Sceo LX500 Wheel.
  • Remove Brake Caliper.
  • Remove both Brake Pads.
  • Remove Brake Disc and assemble a new one.
  • Assemble Brake Pads.
  • Assemble new Brake Caliper.
  • Assemble Sceo LX500 Wheel.
If spark plugs and ignite module are broken, you won't start the engine. - Order 61 - Sceo LC500 - Orders - Third garage - Car Mechanic Simulator 2014 - Game Guide and WalkthroughIf spark plugs and ignite module are broken, you won't start the engine.

EXHAUST:

You have to replace following parts here:

  • Exhaust Manifold V6
  • Muffler V6 Rear-Left

Buy these parts and start replacing:

Exhaust manifold, left muffler:

  • Remove Muffler V6 Rear-Left and Muffler V6 Rear-Right.
  • Remove Muffler V6 Middle.
  • Twist off Exhaust Pipe V6 A.
  • Remove Catalytic Converter V6.
  • Twist off Exhaust Pipe V6 B.
  • Lower the car with the Car Lifter and go to the Engine - inspect view mode.
  • Twist off Exhaust Manifold V6 and assemble a new one.
  • Screw Exhaust Pipe V6 B.
  • Assemble Catalytic Converter V6.
  • Assemble Exhaust Pipe V6 A.
  • Assemble Muffler V6 Middle.
  • Assemble new Muffler V6 Rear-Left and old Muffler V6 Rear-Right.

VALVETRAIN:

You have to replace:

  • Timing Belt V6

Buy that element and perform it's replacement:

  • Remove Serpentine Belt V6.
  • Remove Belt Tensioner.
  • Remove Timing Belt V6 and replace it with a new part.
  • Assemble Belt Tensioner.
  • Assemble Serpentine Belt V6.

The last step of the repair is the oil change:

  1. Use the Car Lifter and go to the view of the engine from below with the Engine - inspect option.
  2. Find Oil Pan V6 located on the bottom of the engine.
  3. Find Oil Drain Plug, twist it off and flush the old oil.
  4. Lower the car with the Car Lifter and go to the Engine - inspect view mode.
  5. Remove Plastic engine Cover V6.
  6. Twist off Engine Oil Fill Plug.
  7. Click on the oil jerrycan and pour the oil to the engine for a few seconds.
  8. Put out Oil Dipstick and check level of oil - point that connects gold and silver field should be as close to the scale's middle as possible.
  9. Assemble Plastic engine Cover V6.

CAR: Vulcan Spectre

TARGETS:

  • Repair or replace worn out parts
  • Change oil
  • Perform Chip Tuning min. 20%

REWARD: 2000 USD

PARTS:

  • Shock Absorber Rear - 100 USD
  • Timing Belt V6 - 220 USD
  • Serpentine Belt V6 - 140 USD
  • Belt Tensioner - 150 USD
  • Fuel Pump - 320 USD
  • Oil change - 100 USD + cost of new oil ca. 10 USD

Your customer is taking part in a rally at the next weekend - therefore he asks you to check the condition of the suspension and the engine, to perform the chip tuning and to increase engine's power by at least 20%. Perform all necessary tests (OBD Test, Test Drive, Diagnostic Path Test) and turn on the Show parts conditions mode. After you did a bit longer analysis, you will see that following parts qualifies for change:

  • Shock Absorber Rear
  • Timing Belt V6
  • Serpentine Belt V6
  • Belt Tensioner
  • Fuel Pump

Purchase all parts and start replacing them:

Shock absorber rear:

  1. Use the Car Lifter and go to the car's rear with the Undercarriage - inspect option:
  2. Remove Shock Absorber Rear located by the left wheel of the car and assemble a new part.

Fuel pump:

  • Go to the Undercarriage - inspect view mode.
  • Find Fuel Pump on Fuel Tank and remove it.
  • Assemble new Fuel Pump.

Timing belt, serpentine belt, belt tensioner:

  • Go to the Engine - inspect view mode when the car stands on the ground.
  • Remove Serpentine Belt V6.
  • Remove Belt Tensioner.
  • Remove Timing Belt V6 and replace it with a new part.
  • Assemble new Belt Tensioner.
  • Assemble new Serpentine Belt V6.

Another step is the oil change:

  1. Use the Car Lifter and go to the view of the engine from below with the Engine - inspect option.
  2. Find Oil Pan V6 located on the bottom of the engine.
  3. Find Oil Drain Plug, twist it off and flush the old oil.
  4. Lower the car with the Car Lifter and go to the Engine - inspect view mode.
  5. Remove Plastic engine Cover V6.
  6. Twist off Engine Oil Fill Plug.
  7. Click on the oil jerrycan and pour the oil to the engine for a few seconds.
  8. Put out Oil Dipstick and check level of oil - point that connects gold and silver field should be as close to the scale's middle as possible.
  9. Assemble Plastic engine Cover V6.
Chip tuning allows you to quickly acquire an additional charge of car's power. - Order 62 - Vulcan Spectre - Orders - Third garage - Car Mechanic Simulator 2014 - Game Guide and WalkthroughChip tuning allows you to quickly acquire an additional charge of car's power.

The last task is to increase car's power by at least 20% - in that order perform the chip tuning. Go to the proper room with the Roller Dyno - tune car option and start the tuning application - Program Eeprom.

CAR: Genesis Town

TARGETS:

  1. Repair or replace worn out parts
  2. Perform Chip Tuning min. 10%

REWARD: 3000 USD

PARTS:

  • Alternator - repair ca. 240 USD, new part 500 USD
  • 4x Spark Plug - 120 USD
  • Ignition Wires - 150 USD
  • Ignition Module - 750 USD
  • Starter - repair ca. 90 USD, new part 200 USD
  • Timing Belt - 120 USD
  • Serpentine Belt - 100 USD
  • Belt Tensioner - 150 USD

Your client has tried the engine tuning in special offer but instead of saving money, he will lose it - many components located around the engine has been damaged during the process. Perform all necessary tests (OBD Test, Test Drive) and turn on the Show parts conditions mode. Following parts require a quick service:

  • Alternator
  • 4x Spark Plug
  • Ignition Wires
  • Ignition Module
  • Starter
  • Timing Belt
  • Serpentine Belt
  • Belt Tensioner

Purchase (or repair - that applies to Alternator and Starter) all elements and start the realization of the order:

Alternator, timing belt, serpentine belt, belt tensioner:
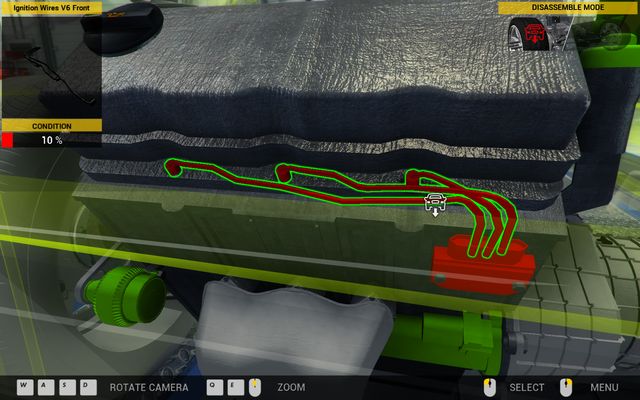
  1. Go to the Engine - inspect view mode when the car stands on the ground.
  2. Remove Serpentine Belt.
  3. Twist off and remove Alternator and then assemble a new one.
  4. Remove Belt Tensioner.
  5. Remove Timing Belt and replace it with a new one.
  6. Assemble new Belt Tensioner.
  7. Assemble new Serpentine Belt.
With conditions like this, it's hard for car to function correctly. - Order 63 - Genesis Town - Orders - Third garage - Car Mechanic Simulator 2014 - Game Guide and WalkthroughWith conditions like this, it's hard for car to function correctly.

Ignition wires, ignition module, spark plugs:

  • Remove Plastic Engine Cover.
  • Unplug Ignition Wires.
  • Twist off Ignition Module and replace it with a new part.
  • Twist off all four Spark Plugs and replace them with new parts.
  • Assemble new Ignition Wires.
  • Assemble Plastic Engine Cover.

Starter:

  • Raise Hood and go to the Engine - inspect view mode.
  • Turn on the Disassemble Mode.
  • Disassemble Starter located in the engine's rear and place a new one.

The last step is to increase car's power by at least 10% - in that order perform the chip tuning. Go to the proper room with the Roller Dyno - tune car option and start the tuning application - Program Eeprom.

CAR: Revton Van

TARGETS:

  1. Find and install missing part

REWARD: 800 USD

PARTS:

  • Battery - 350 USD

Someone broke into your customer's car last night and stole a part without which the vehicle can not drive. Searching will not take too long - missing Battery is responsible for such situation. Buy a new battery, go to the Engine - inspect view and assemble the new part.
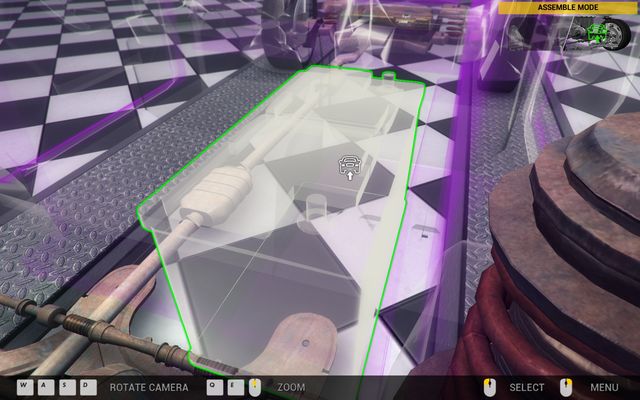
The missing link! - Order 64 - Revton Van - Orders - Third garage - Car Mechanic Simulator 2014 - Game Guide and WalkthroughThe missing link!

CAR: Vulcan Spectre

TARGETS:

  1. Check the entire undercarriage

REWARD: 1100 USD

PARTS:

  • Drive Axle Right - 350 USD
  • Shock Absorber Rear - 100 USD
  • Suspension Spring Rear - 150 USD

Client was driving through wilderness recently and that careless jollity ended with problems with the suspension. Your task is to examine the condition of the entire chassis. Perform all necessary tests (Diagnostic Path Test, Test Drive) and turn on the Show parts conditions mode. Following parts should be replaced:
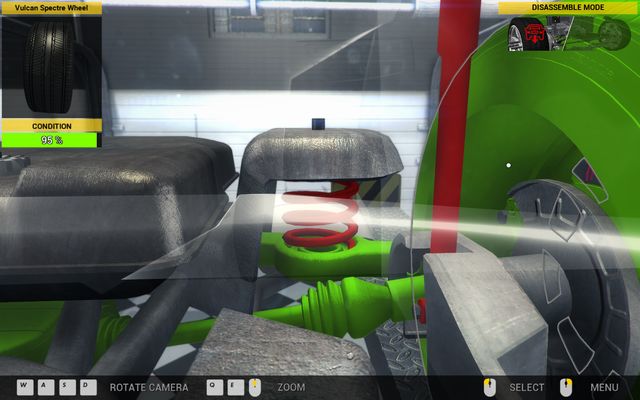
  • Drive Axle Right
  • Shock Absorber Rear
  • Suspension Spring Rear
Spring change is connected with disassembling of the muffler. - Order 65 - Vulcan Spectre - Orders - Third garage - Car Mechanic Simulator 2014 - Game Guide and WalkthroughSpring change is connected with disassembling of the muffler.

Purchase all necessary parts and replace:

  • Use Car Lifter and go to the car's rear with the Undercarriage - inspect option.
  • Remove Shock Absorber Rear located by the left wheel of the car and assemble a new part.
  • Remove Muffler V6 Rear-Left.
  • Remove Suspension Arm Rear-Left B.
  • Put out worn Suspension Spring Rear and assemble a new part.
  • Assemble Suspension Arm Rear-Left B.
  • Remove Muffler V6 Rear-Left.
  • Lower the car with the Car Lifter.
  • Twist off Vulcan Spectre Right Wheel.
  • Twist off Drive Axle Right and assemble a new part.
  • Screw Vulcan Spectre Wheel.

CAR: Sceo LC500

TARGETS:

  1. Find and eliminate the cause

REWARD: 4000 USD

PARTS:

  • Timing Belt V6 - 220 USD
  • Serpentine Belt V6 - 140 USD
  • Belt Tensioner - 150 USD
  • Exhaust Manifold V6 - 1300 USD
  • Muffler V6 Rear-Left - 450 USD

Your customer was late so he was driving very fast to the airport - unfortunately, he paid for it with problems with the exhaust. Your job is to examine, find and eliminate the cause. Perform the Test Drive and turn on the Show parts conditions mode. After quick analysis you will find out that following parts are designed for change:

  • Timing Belt V6
  • Serpentine Belt V6
  • Belt Tensioner
  • Exhaust Manifold V6
  • Muffler V6 Rear-Left

Purchase all necessary parts and perform the repair:

Timing belt, serpentine belt, belt tensioner:
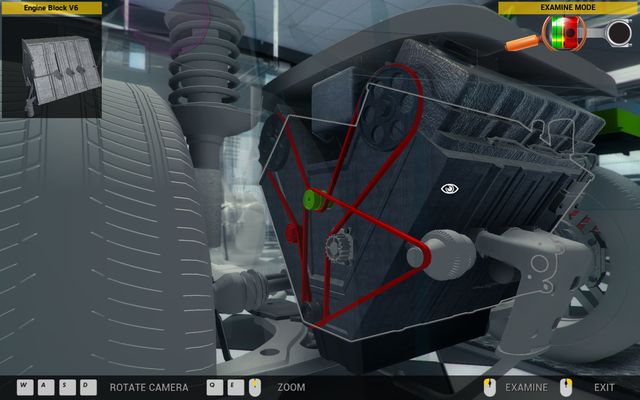
  1. Go to the Engine - inspect view mode after you lowered the car to the ground.
  2. Remove Serpentine Belt V6.
  3. Remove Belt Tensioner.
  4. Remove Timing Belt V6 and replace it with new part.
  5. Assemble new Belt Tensioner.
  6. Assemble new Serpentine Belt V6.
V6 engines have a bit different setup but they still have the same problems with the timing. - Order 66 - Sceo LC500 - Orders - Third garage - Car Mechanic Simulator 2014 - Game Guide and WalkthroughV6 engines have a bit different setup but they still have the same problems with the timing.

Exhaust manifold, muffler rear-left:

  1. Remove Muffler V6 Rear-Left and Muffler V6 Rear-Right.
  2. Remove Muffler V6 Middle.
  3. Twist off Exhaust Pipe V6 A.
  4. Remove Catalytic Converter V6.
  5. Twist off Exhaust Pipe V6 B.
  6. Lower the car with the Car Lifter and go to the Engine - inspect view mode.
  7. Twist off Exhaust Manifold V6 and assemble a new one.
  8. Screw Exhaust Pipe V6 B.
  9. Assemble Catalytic Converter V6.
  10. Screw Exhaust Pipe V6 A.
  11. Assemble Muffler V6 Middle.
  12. Assemble new Muffler V6 Rear-Left and old Muffler V6 Rear-Right.

CAR: Olsen Grand

TARGETS:

  • Repair or replace all broken parts
  • Perform Chip Tuning min. 20%

REWARD: 4000 USD

PARTS:

  • Timing Belt V6 - 220 USD
  • Serpentine Belt V6 - 140 USD
  • Belt Tensioner - 150 USD
  • Idler Pulley - 100 USD
  • 6x Spark Plug - 180 USD
  • 2x Ignition Module - 1500 USD
  • Air Flow Meter - repair ca. 180 USD, new part 450 USD

Your customer has tried to tune the engine on his own and his toying ended badly - an unendurable noise comes from the car and the engine do not want to start. Your task is to repair all broken parts. Perform the electronics test with the OBD Link option and turn on the Show parts conditions mode. Results of tests are very unpleasant - following parts qualifies for change:

  • Timing Belt V6
  • Serpentine Belt V6
  • Belt Tensioner
  • Idler Pulley
  • 6x Spark Plug
  • 2x Ignition Module
  • Air Flow Meter

Purchase (or repair if we are talking about air flow meter) all necessary parts and replace:

Timing belt, serpentine belt, belt tensioner, idler pulley:

  • Go to the Engine - inspect view mode when the car stands on the ground.
  • Remove Serpentine Belt V6.
  • Remove Belt Tensioner.
  • Remove Timing Belt V6.
  • Remove Idler Pulley and assemble a new one.
  • Assemble new Timing Belt V6.
  • Assemble new Belt Tensioner.
  • Assemble new Serpentine Belt V6.

Spark plugs, ignition module:

  1. Remove Plastic Engine Cover V6.
  2. Unplug Ignition Wires V6 Front and Ignition Wires V6 Rear.
  3. Twist off front and rear Ignition Modules and replace them with new parts.
  4. Twist off all six Spark Plugs and replace them with new parts.
  5. Assemble Ignition Wires V6 Front and Ignition Wires V6 Rear.
  6. Assemble Plastic Engine Cover V6.
You need to remove the engine cover in order to reach the flow meter. - Order 67 - Olsen Grand - Orders - Third garage - Car Mechanic Simulator 2014 - Game Guide and WalkthroughYou need to remove the engine cover in order to reach the flow meter.

Air flow meter:

  1. Remove Plastic Engine Cover V6.
  2. Remove Air Flow Tube V6.
  3. Remove Air Flow Meter and assemble a new one.
  4. Assemble Air Flow Tube V6.
  5. Assemble Plastic Engine Cover V6.

The last step is to increase car's power by at least 20% - in that order perform the chip tuning. Go to the proper room with the Roller Dyno - tune car option and start the tuning application - Program Eeprom.

CAR: Revton Wind

TARGETS:

  1. Renovate the engine

REWARD: 4000 USD

PARTS:

  • Timing Belt - 120 USD
  • Serpentine Belt - 100 USD
  • Belt Tensioner - 150 USD
  • 4x Spark Plug - 120 USD
  • Air Flow Meter - repair ca. 210 USD, new part 450 USD
  • Ignition Wires - 150 USD
  • Air Filter - 35 USD
  • Oil Filter - 50 USD
  • Battery - 350 USD
  • Oil change - 100 USD + cost of new oil ca. 10 USD

Client comes to you in car with very old engine - your task is to completely renovate it. In addition to that you have also to change oil. Perform the electronics test with the OBD Link option and then turn on the Show parts conditions mode. After tests following parts qualify for replace:

  • Timing Belt
  • Serpentine Belt
  • Belt Tensioner
  • 4x Spark Plug
  • Air Flow Meter
  • Ignition Wires
  • Air Filter
  • Oil Filter
  • Battery

Prepare new models of mentioned parts (or repair them - that applies to air flow meter) and begin the great renovation of the engine:

Timing belt, serpentine belt, belt tensioner:
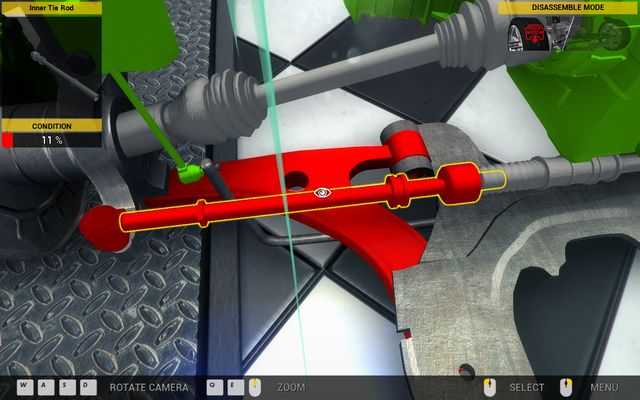
  • Go to the Engine - inspect view mode when the car stands on the ground.
  • Remove Serpentine Belt V6.
  • Remove Belt Tensioner.
  • Remove Timing Belt and assemble a new part.
  • Assemble new Belt Tensioner.
  • Assemble new Serpentine Belt V6.
There's red everywhere! - Order 68 - Revton Wind - Orders - Third garage - Car Mechanic Simulator 2014 - Game Guide and WalkthroughThere's red everywhere!

Spark plugs, ignition wires:

  • Remove Plastic Engine Cover.
  • Unplug Ignition Wires.
  • Twist off all four Spark Plugs and replace them with new parts.
  • Assemble new Ignition Wires.
  • Assemble Plastic Engine Cover.

Air flow meter, air filter

  1. Remove Air Flow Tube.
  2. Remove Air Flow Meter.
  3. Twist off Air Filter Cover.
  4. Put out worn Air Filter and assemble a new part.
  5. Assemble new Air Flow Meter.
  6. Assemble Air Flow Tube.

Oil filter:

  • Raise Hood and go to the Engine - inspect view mode.
  • Turn on the Disassemble Mode.
  • Remove Oil Filter Cap.
  • Put out Oil Filter.
  • Turn on the Assemble Mode.
  • Put in new Oil Filter.
  • Assemble Oil Filter Cap.

Battery:

  1. Raise Hood and go to the Engine - inspect view mode.
  2. Put out Battery and replace it with a new one.'

You have to change oil in the end:

  1. Use the Car Lifter
  2. Go to the view of the engine from below with the Engine - inspect option.
  3. Find Oil Pan located on the bottom of the engine.
  4. Find Oil Drain Plug, twist it off and flush the old oil.
  5. Lower the car with the Car Lifter and go to the Engine - inspect view mode.
  6. Twist off Engine Oil Fill Plug.
  7. Click on the oil jerrycan and pour the oil to the engine for a few seconds.
  8. Put out Oil Dipstick and check level of oil - point that connects gold and silver field should be as close to the scale's middle as possible.

CAR: Olsen Grand

TARGETS:

  • Replace or repair all damaged parts

REWARD: 800 USD

PARTS:

  • Suspension Arm Front-Left - 300 USD
  • Rubber Bushing - 110 USD
  • Inner Tie Rod - 150 USD
  • Outer Tie Rod - 100 USD
We need to lift the car to change the suspension arm. - Order 69 - Olsen Grand - Orders - Third garage - Car Mechanic Simulator 2014 - Game Guide and WalkthroughWe need to lift the car to change the suspension arm.

Your customer hit a curb strongly yesterday - the suspension was harmed in the accident. Your task is to find and repair damaged elements of the suspension. Perform the Diagnostic Path Test and then turn on the Show parts conditions mode. The test has indicated problems connected mainly to elements by the left front wheel - you have to change:

  • Suspension Arm Front-Left and Rubber Bushing placed within
  • Front left Inner Tie Rod
  • Front left Outer Tie Rod

Prepare new models of these parts and start replacing:

Tie rods:

  1. Go to the Wheel - inspect view mode.
  2. Turn on the Disassemble Mode.
  3. Twist off Grand Olsen Left Wheel.
  4. Remove Outer Tie Rod.
  5. Remove Inner Tie Rod and assemble a new one.
  6. Assemble new Outer Tie Rod.
  7. Assemble Grand Olsen Wheel.

Suspension arm, rubber bushing:

  • Use the Car Lifter and go to the view of the front chassis with the Engine - inspect.
  • Put out Rubber Bushing located in the suspension arm.
  • Remove Suspension Arm Front-Left and assemble a new part.
  • Put Rubber Bushing on it's place.

CAR: Aisan Cougar

TARGETS:

  • Replace gearbox and clutch
  • Replace axles
  • Mount new starter

REWARD: 5700 USD

PARTS:

  • Drive Axle Left - 350 USD
  • Drive Axle Right - 400 USD
  • Starter - repair ca. 75 USD, new part 200 USD
  • Gearbox - repair ca. 900 USD, new part 2000 USD
  • Clutch Friction Plate - 500 USD
  • Clutch Pressure Plate - 300 USD
  • Clutch Release Bearing - 100 USD

A serious customer comes with a serious list - your another task is to replace gearbox, clutch, drive axles and starter. Purchase following elements (you can repair gearbox and starter):
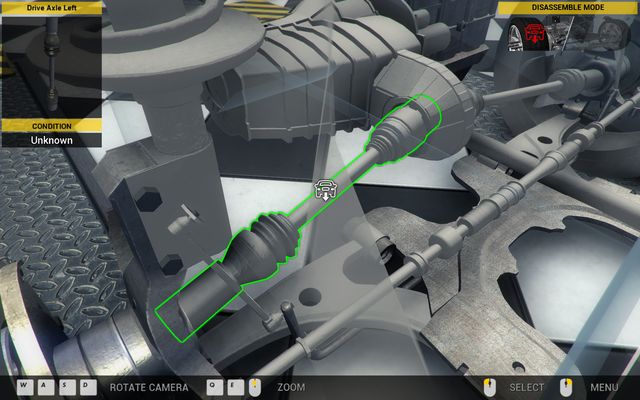
  • Drive Axle Left
  • Drive Axle Right
  • Starter
  • Gearbox
  • Clutch Friction Plate
  • Clutch Pressure Plate
  • Clutch Release Bearing
Removing the axles gives you the possibility to disassemble the gearbox. - Order 70 - Aisan Cougar - Orders - Third garage - Car Mechanic Simulator 2014 - Game Guide and WalkthroughRemoving the axles gives you the possibility to disassemble the gearbox.

So let's begin the replacement with removing the axle:

  1. Go to the Wheel - inspect view mode.
  2. Turn on the Disassemble Mode.
  3. Twist off Aisan Cougar Front Left Wheel.
  4. Twist off Drive Axle Left.

Do exactly the same with the front right wheel. Now it's time to take care of the gearbox:

  • Raise Hood and go to the Engine - inspect view mode.
  • Turn on the Disassemble Mode.
  • Twist off and remove Starter located in the rear of the engine.
  • Twist off and remove Gearbox.
  • Remove Clutch Release Bearing.
  • Remove Clutch Pressure Plate.
  • Remove Clutch Friction Plate and assemble a new one.
  • Assemble new Clutch Release Bearing.
  • Assemble new Clutch Pressure Plate.
  • Assemble new Gearbox.
  • Assemble new Starter.

In the end assemble new axles:

  • Go to the Wheel - inspect view mode.
  • Turn on the Disassemble Mode.
  • Assemble new Drive Axle Left.
  • Screw Olsen Grand Left Wheel.

Repeat that operation also with the right wheel.

CAR: Sceo LC500

TARGETS:

  1. Examine all parts of the suspension
  2. Replace or repair all worn out parts

REWARD: 4000 USD

PARTS:

  • Suspension Arm Front-Left - 300 USD
  • Suspension Spring Front - 240 USD
  • Suspension Arm Front-Right - 300 USD
  • Shock Abs. C Front-Right - 150 USD
  • Suspension Arm Rear-Left A - 500 USD
  • 2x Rubber Bushing - 110 USD
  • Shock Absorber Rear - 100 USD
  • 2x Suspension Spring Rear - 300 USD
  • Suspension Arm Rear-Right A - 500 USD

This time the customer orders you to perform the general maintenance and the renovation of the entire suspension. The first step will be to perform the Diagnostic Path Test - then turn on the Show parts conditions mode. Moreover, test manually each unexamined element of the suspension - by each of four wheels you need to check the condition of:

  • Shock Absorber
  • Suspension Arm
  • Rubber Bushing
  • Suspension Spring

It's time to start changing defective parts:

FRONT LEFT WHEEL:

You have to replace here:

  • Suspension Arm Front-Left
  • Suspension Spring Front

Purchase these parts and replace:

Spring:

  1. Twist off and remove Sceo LX500 Left Wheel.
  2. Twist off Sway Bar End Link Left.
  3. Twist off Shock Abs. B Front-Left.
  4. Remove Suspension Spring Front and assemble a new one.
  5. Assemble removed Shock Abs. B Front-Left, Sway Bar End Link Left and screw Sceo LX500 Left Wheel.

Suspension arm:

  • Use Car Lifter and go to the view of the front chassis with the Engine - inspect option.
  • Put out Rubber Bushing within the suspension arm.
  • Remove Suspension Arm Front-Left and assemble a new part.
  • Put Rubber Bushing on it's place.
Almost entire suspension is designed for change in this mission. - Order 71 - Sceo LC500 - Orders - Third garage - Car Mechanic Simulator 2014 - Game Guide and WalkthroughAlmost entire suspension is designed for change in this mission.

FRONT RIGHT WHEEL:

You have to replace:

  • Suspension Arm Front-Right
  • Rubber Bushing
  • Shock Abs. C Front-Right

Acquire all parts and start realizing that part of the order:

Suspension arm, rubber bushing:

  1. Use the Car Lifter and go to the view of the front chassis with the Engine - inspect view mode.
  2. Put out Rubber Bushing within the suspension arm.
  3. Remove Suspension Arm Front-Right and assemble a new part.
  4. Put new Rubber Bushing on it's place.

Shock absorber:

  • Go to the Wheel - inspect view mode.
  • Turn on the Disassemble Mode.
  • Twist off Sceo LX500 Right Wheel.
  • Twist off Sway Bar End Link Right.
  • Twist off Shock Abs. C Front-Right and place a new part.
  • Place Sway Bar End Link Right.
  • Screw Sceo LX500 Wheel.

REAR LEFT WHEEL:

In this case you have to replace:

  • Suspension Arm Rear Left A
  • Rubber Bushing
  • Shock Absorber Rear
  • Suspension Spring Rear

Prepare parts and start the operation:

Shock absorber, suspension spring, suspension arm:

  • Use the Car Lifter and go to the rear of the car with the Undercarriage - inspect option.
  • Remove Shock Absorber Rear located by the left wheel of the car and assemble a new one.
  • Remove Muffler V6 Rear-Left.
  • Remove Suspension Arm Rear-Left A.
  • Put out worn Suspension Spring Rear and assemble a new one.
  • Assemble new Suspension Arm Rear-Left A.
  • Assemble Muffler V6 Rear-Left.

Rubber bushing:

  • Find Wheel Hub located by the left wheel of the car.
  • Put out worn Rubber Bushing and assemble a new one.

REAR RIGHT WHEEL:

The last part of the task is to change:

  • Suspension Spring Rear
  • Suspension Arm Rear-Right A

Gather parts and work:

Suspension spring, suspension arm:

  • Use the Car Lifter and go to the car's rear with the Undercarriage - inspect option.
  • Remove Muffler V6 Rear-Right.
  • Remove Suspension Arm Rear-Right A.
  • Put out worn Suspension Spring Rear and assemble a new one.
  • Assemble new Suspension Arm Rear-Right A.
  • Assemble Muffler V6 Rear-Right.

CAR: Vulcan Spectre

TARGETS:

  1. Check all four wheels and brakes
  2. Check the gearbox and the clutch
  3. Check the engine and exhaust

REWARD: 6500 USD

PARTS:

  • 2x Vulcan Spectre Wheel - 3500 USD
  • 2x Brake Disc - 400 USD
  • Clutch Pressure Plate - 300 USD
  • Timing Belt V6 - 600 USD
  • Muffler V6 Middle - 220 USD

There is another complex maintenance ahead - this time you have to examine almost all subsystems of the car. Perform all necessary tests (Diagnostic Path Test and Test Drive) and turn on the Show parts conditions mode.
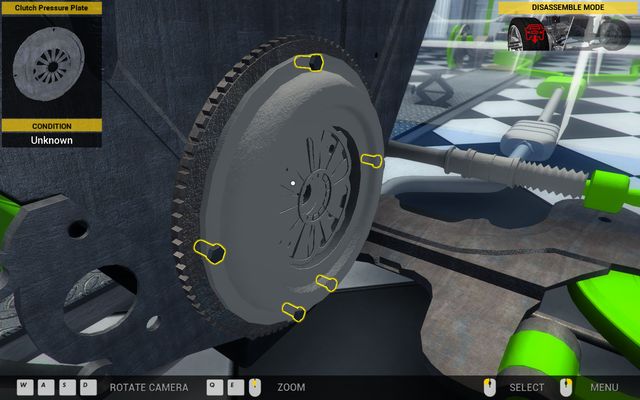
Change of the clutch pressure plate is connected with disassembling the gearbox. - Order 72 - Vulcan Spectre - Orders - Third garage - Car Mechanic Simulator 2014 - Game Guide and WalkthroughChange of the clutch pressure plate is connected with disassembling the gearbox.

Step 1 - wheels and brakes

In this step you have to replace:

  • Vulcan Spectre Front Left Wheel
  • Vulcan Spectre Rear Right Wheel
  • Brake Disc Front Left
  • Brake Disc Front Right

Buy these parts and replace defective elements:

  1. Twist off Vulcan Spectre Left Wheel.
  2. Remove Brake Caliper.
  3. Remove both Brake Pads.
  4. Remove Brake Disc and assemble a new part.
  5. Assemble Brake Pads.
  6. Assemble Brake Caliper.
  7. Assemble new Vulcan Spectre Wheel.

Repeat the operation with the front right wheel (except of replacing the wheel) and with the rear right wheel (except of replacing the brake disc).

Step 2 - gearbox and clutch

You have to replace only one thing here:

  • Clutch Pressure Plate

Purchase it and begin a bit complicated process of disassembling the gearbox and replacing the plate:

  1. Go to the Wheel - inspect view mode.
  2. Turn on the Disassemble Mode.
  3. Twist off Vulcan Spectre Wheel.
  4. Twist off Drive Axle Left.

Repeat that operation with the rear right wheel. Then:

  • Use the Car Lifter and go to the view of the rear chassis with the Undercarriage - inspect option.
  • Remove Axle Differential.
  • Remove Drive Shaft.
  • Lower the car with the Car Lifter and go to the Engine - inspect view mode.
  • Twist off Starter V6.
  • Disassemble Gearbox V6.
  • Remove Clutch Release Bearing.
  • Remove Clutch Pressure Plate and assemble a new part.
  • Assemble Clutch Release Bearing.
  • Assemble Gearbox V6, Starter V6, Drive Shaft, Axle Differential and assemble all twisted off Drive Axles with Vulcan Spectre Wheels.

Step 3 - engine and exhaust

In this case you have to replace:

  • Timing Belt V6
  • Muffler V6 Middle

Purchase these parts and replace:

Muffler:

  1. Use the Car Lifter and go to the view of the rear chassis with the Undercarriage - inspect option.
  2. Remove Muffler V6 Rear Left and Muffler V6 Rear-Right.
  3. Remove Muffler V6 Middle and assemble a new one.
  4. Assemble Muffler V6 Rear Left and Muffler V6 Rear-Right.

Timing belt:

  1. Remove Serpentine Belt V6.
  2. Remove Belt Tensioner.
  3. Remove Timing Belt V6 and replace it with a new part.
  4. Assemble Belt Tensioner.
  5. Assemble Serpentine Belt V6.

CAR: Genesis Town

TARGETS:

  • Make car driveable
  • Change oil

REWARD: 2500 USD

PARTS:

  • Air Flow Meter - 450 USD
  • 2x Spark Plug - 60 USD
  • Ignition Module - 750 USD
  • Fuel Pump - 320 USD
  • Muffler Rear - 250 USD
  • Oil change - 100 USD + cost of new oil ca. 10 USD

Taking part in race is not always a good idea, especially if you drive a city car - the car has broken down after one special stage and now you have to make it fully functional again. Perform all necessary tests (Diagnostic Path Test, Test Drive) and turn on the Show parts conditions mode. Tests have shown that following elements should be changed:

  • Air Flow Meter
  • 2x Spark Plugs
  • Ignition Module
  • Fuel Pump
  • Muffler Rear

Gather listed parts and start replacing them with new models:

Air flow meter:

  • Remove Air Flow Tube.
  • Remove Air Flow Meter and assemble a new part.
  • Assemble Air Flow Tube.

Spark plugs, ignition module:

  1. Unplug Ignition Wires.
  2. Twist off Ignition Module and replace it with new one.
  3. Twist off two Spark Plugs and replace them with new parts.
  4. Assemble Ignition Wires.

Fuel pump:

  1. Use the Car Lifter.
  2. Go to the Undercarriage - inspect view mode.
  3. Find Fuel Pump on Fuel Tank and remove it.
  4. Assemble new Fuel Pump.
The rear muffler is one of the missing elements. - Order 73 - Genesis Town - Orders - Third garage - Car Mechanic Simulator 2014 - Game Guide and WalkthroughThe rear muffler is one of the missing elements.

Muffler rear:

  • Use the Car Lifter and go to the view of the rear chassis with the Undercarriage - inspect option.
  • Assemble Muffler Rear.

You have to change oil in the end:

  1. Use the Car Lifter and go to the view of the engine from below with the Engine - inspect option.
  2. Find Oil Pan located on the bottom of the engine.
  3. Find Oil Drain Plug, twist it off and flush the old oil.
  4. Lower the car with the Car Lifter and go to the Engine - inspect view mode.
  5. Remove Plastic Engine Cover.
  6. Twist off Engine Oil Fill Plug.
  7. Click on the oil jerrycan and pour the oil to the engine for a few seconds.
  8. Put out Oil Dipstick and check level of oil - point that connects gold and silver field should be as close to the scale's middle as possible.
  9. Assemble Plastic Engine Cover.

CAR: Olsen Grand

TARGETS:

  • Replace or repair all worn out parts

REWARD: 7000 USD

PARTS:

  • Exhaust Mainfold V6 - 1300 USD
  • Catalytic Converter V6 - 1400 USD
  • Exhaust Pipe A V6 - 100 USD
  • Muffler V6 Middle - 600 USD
  • Muffler V6 Rear-Left - 450 USD
  • Clutch Friction Plate - 500 USD
  • Clutch Pressure Plate - 300 USD
  • Clutch Release Bearing - 100 USD

Customer orders you to repair two subsystems - clutch and exhaust - and to change oil. Perform all necessary tests (Diagnostic Path Test, Test Drive) and turn on the Show parts conditions mode. Use the car lifter and take a look on the exhaust. These parts are designed for replace:

  • Exhaust Mainfold V6
  • Catalytic Converter V6
  • Exhaust Pipe V6 A
  • Muffler V6 Middle
  • Muffler V6 Rear-Left

Prepare new parts and start replacing:
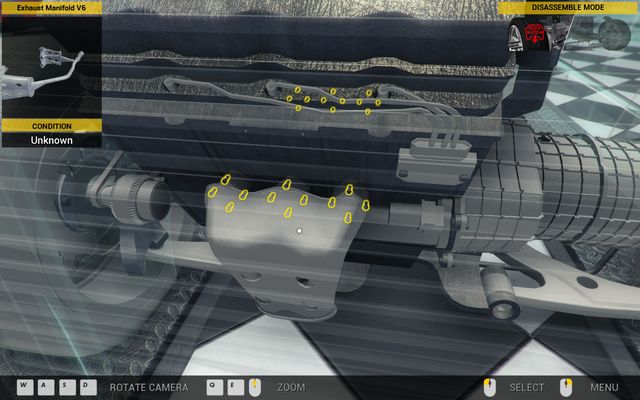
  • Remove Muffler V6 Rear-Left and Muffler V6 Rear-Right.
  • Remove Muffler V6 Middle.
  • Twist off Exhaust Pipe V6 A.
  • Remove Catalytic Converter V6.
  • Twist off Exhaust Pipe V6 B.
  • Lower the car with the Car Lifter and go to the Engine - inspect view mode.
  • Twist off Exhaust Manifold V6 and assemble a new model.
  • Screw Exhaust Pipe V6 B.
  • Assemble new Catalytic Converter V6.
  • Screw new Exhaust Pipe V6 A.
  • Assemble new Muffler V6 Middle.
  • Assemble new Muffler V6 Rear-Left and old Muffler V6 Rear-Right.
You need to disassemble the entire exhaust in order to change the exhaust manifold. - Order 74 - Olsen Grand - Orders - Third garage - Car Mechanic Simulator 2014 - Game Guide and WalkthroughYou need to disassemble the entire exhaust in order to change the exhaust manifold.

In the second part of the order you will take care of the clutch. Following parts are designed for change:

  • Clutch Friction Plate
  • Clutch Pressure Plate
  • Clutch Release Bearing

Prepare new elements and perform the replacement:
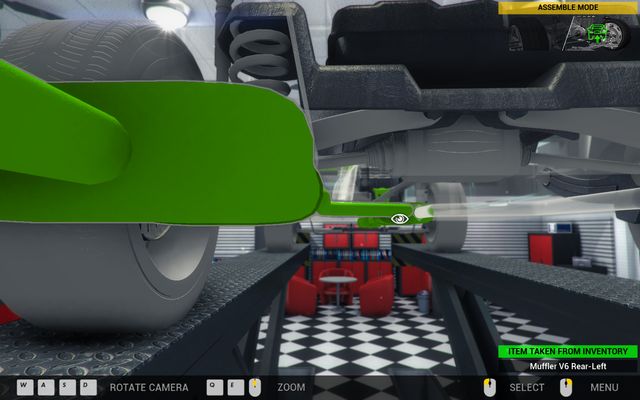
  • Go to the Wheel - inspect view mode.
  • Turn on the Disassemble Mode.
  • Twist off Olsen Grand Rear Left Wheel.
  • Twist off Drive Axle Left.
Work with mufflers isn't very comfortable. - Order 74 - Olsen Grand - Orders - Third garage - Car Mechanic Simulator 2014 - Game Guide and WalkthroughWork with mufflers isn't very comfortable.

Do the same with the rear right wheel and both front wheels. Then:

  • Use the Car Lifter and go to the view of the rear chassis with the Undercarriage - inspect option.
  • Remove Axle Differential.
  • Remove Drive Shaft.
  • Lower the car with the Car Lifter and go to the Engine - inspect view mode.
  • Twist off Starter V6.
  • Disassemble Gearbox V6.
  • Remove Clutch Release Bearing.
  • Remove Clutch Pressure Plate.
  • Remove Clutch Friction Plate and assemble a new part.
  • Assemble new Clutch Release Bearing.
  • Assemble new Clutch Pressure Plate.
  • Assemble Gearbox V6, Starter V6, Drive Shaft, Axle Differential and assemble all twisted off Drive Axles with Vulcan Spectre Wheels.

In the end you have to change oil. Use the Car Lifter and go to the view of the engine from below with the Engine - inspect option. Then:

  1. Find Oil Pan located on the bottom of the engine.
  2. Find Oil Drain Plug, twist it off and flush the old oil.
  3. Lower the car with the Car Lifter and go to the Engine - inspect view mode.
  4. Twist off Engine Oil Fill Plug.
  5. Click on the oil jerrycan and pour the oil to the engine for a few seconds.
  6. Put out Oil Dipstick and check level of oil - point that connects gold and silver field should be as close to the scale's middle as possible.

CAR: Sceo LC500

TARGETS:

  • Repair the brakes
  • Perform Chip Tuning min. 20%

REWARD: 3500 USD

PARTS:

  • 8x Brake Pad - 400 USD
  • 4x Brake Disc - 800 USD
  • 4x Brake Caliper - 1600 USD

Client asks you to increase the power through the chip tuning by 20%. Moreover, he orders you to change brakes. Perform the Diagnostic Path Test and turn on the Show parts conditions mode. As it turns out, almost all elements of the brakes are responsible for this situation - all Brake Pads, Brake Discs and Brake Calipers should be changed. Purchase the proper amount of these parts and perform the replacement:
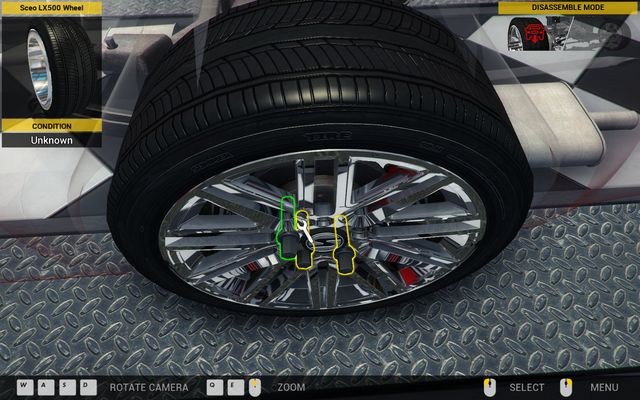
  1. Twist off Sceo LX500 Left Wheel.
  2. Remove Brake Caliper.
  3. Remove both Brake Pads.
  4. Remove Brake Disc and assemble a new model.
  5. Assemble two new Brake Pads.
  6. Assemble new Brake Caliper.
  7. Assemble Sceo LX500 Wheel.
Disassembling the wheel and changing elements of the brake isn't a big problem. - Order 75 - Sceo LC500 - Orders - Third garage - Car Mechanic Simulator 2014 - Game Guide and WalkthroughDisassembling the wheel and changing elements of the brake isn't a big problem.

Repeat that operation with remaining three wheels. The last step is to increase car's power by at least 20% - in that order perform the chip tuning. Go to the proper room with the Roller Dyno - tune car option and start the tuning application - Program Eeprom.

CAR: Reddot Town

TARGETS:
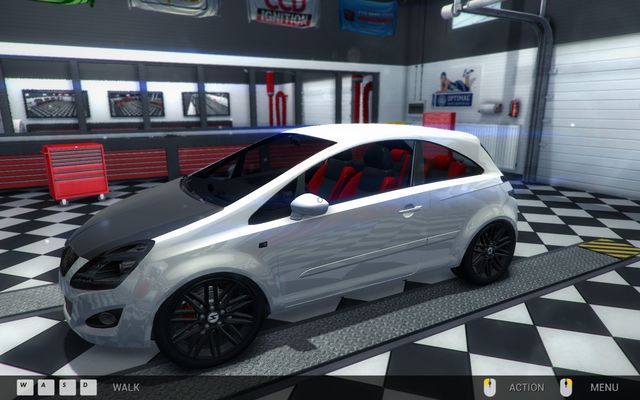
  1. Have fun driving this special car!
And that is Reddot Town! - Order 76 - Reddot Town - Orders - Third garage - Car Mechanic Simulator 2014 - Game Guide and WalkthroughAnd that is Reddot Town!

It is over of the adventure with Car Mechanic Simulator 2014 - only thing you have to do now is to play with random missions in "Infinite" mode. In return for time spent with their game, developers offer you a ride in city car V6 4x4 which was named after the developer from Rzeszow - Reddot Town.

Car Mechanic Simulator in PC version is a game that has relatively small system requirements. It doesn't have great visuals - in comparison to other titles it looks average but it adapts to level of graphics in the sims genre. The game guide has been created with PC version, on computer with Intel Core i5-4570, 4 GB RAM and MSI Radeon HD7770. That specification entirely fulfills the recommended configuration and I didn't have any problems while playing in the single-player campaign. The game requires activating on Steam.

Game modes

Single-player: Yes

Offline cooperation (split screen / hot seat): No

Online cooperation: No

Multiplayer: No

Our computer

The guide was created with PC version, on computer with following specification:

  • Operational system: Windows 7 Professional
  • Processor: Intel Core i5-4570
  • RAM memory: 4 GB
  • Graphic card: MSI Radeon HD7770
  • Graphic card's memory: 1 GB

The game worked without bigger problems on the computer with that configuration - there were no FPS rate drops during the play.

PC - overall information

  • Operational systems: Windows XP SP3, Windows Vista, Windows 7, Windows 8 - 32-bit and 64-bit versions
  • Windows XP: Yes, in SP3 version
  • Internet connection during the game: Not required
  • Necessity of the online activation: Yes, through Steam
  • Controllers: Keyboard, mouse
  • Achievements: None

Car Mechanic Simulator 2014 - PC system requirements

Car Mechanic Simulator 2014 PC minimum requirements

  • Operational system: Windows Vista XP SP3 / Vista / 7 / 8
  • Processor: Core 2 Duo 1.8 GHz or similar AMD
  • RAM memory: 2 GB
  • Graphic card: AMD Radeon 4850 / Nvidia GeForce 9800 GT
  • Free space on HDD: 1,2 GB
  • Graphic card's memory: 512 MB

Car Mechanic Simulator 2014 PC recommended requirements

  • Operational system: Windows Vista XP SP3 / Vista / 7 / 8
  • Processor: Core i5 or similar AMD
  • RAM memory: 4 GB
  • Graphic card: AMD Radeon 7790 / Nvidia GeForce GTX 650 Ti
  • Free space on HDD: 1,2 GB
  • Graphic card's memory: 1 GB

Playing Car Mechanic Simulator 2014 on laptop

Yes, it is possible to play Car Mechanic Simulator 2014 on laptop.