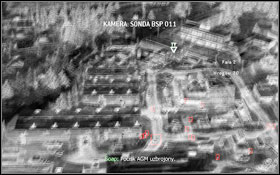
This guide to Call of Duty: Modern Warfare 2 contains a complete single player campaign walkthrough. You'll also find the localizations of all the Intel (laptops) which you can find in the game. The last section of the guide contains a description of the Special Ops missions together with hints on how to complete them on the highest difficulty setting.
Screens are marked brown: #1 - left one, #2 - right one.
Important moments during the game are marked blue.
Artur "Arxel" Justynski
Translated to English by Jakub "cilgan" Lasota
Thanks to:
sinbad - for help with completing the Spec Ops in co-op.
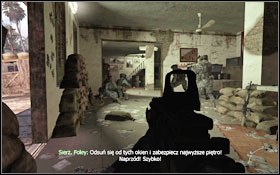
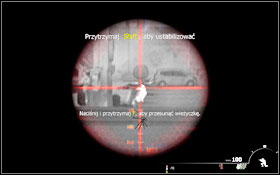
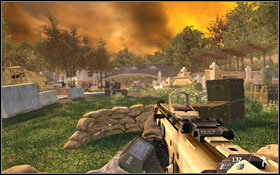
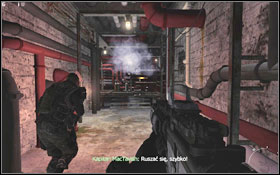
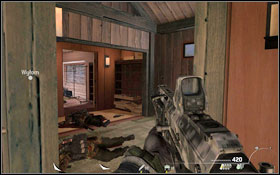
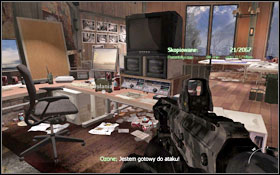
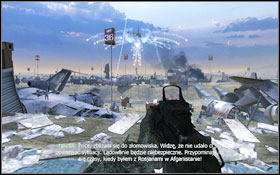
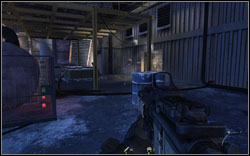
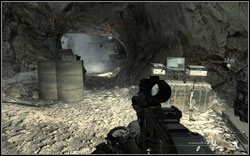
The first mission is a tutorial during which you will learn the basics on how to use the weapons. Carry out the orders given by sergeant Foley.
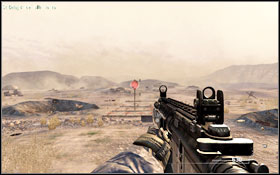
Shooting from the hip
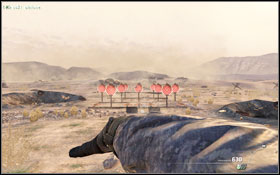
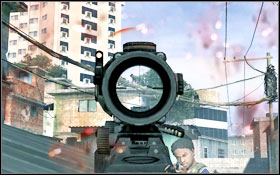
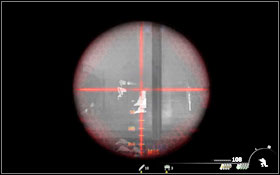
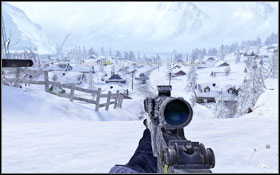
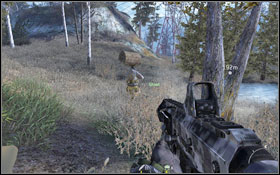
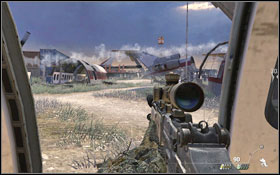
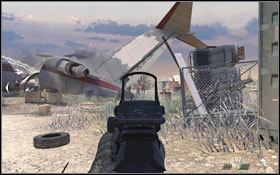
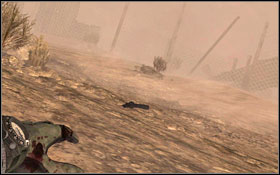
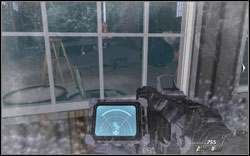
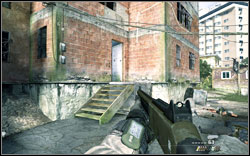
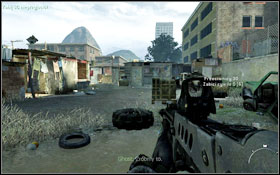
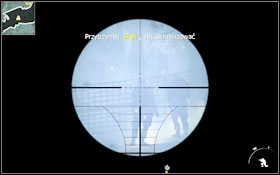
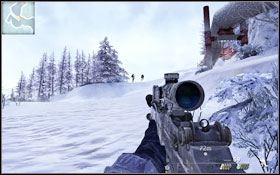
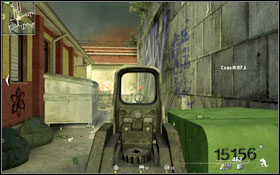
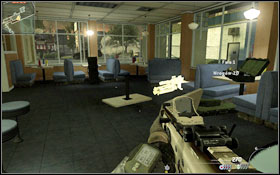
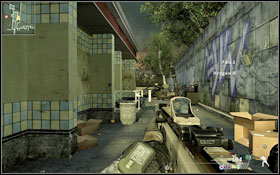
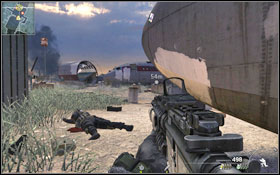
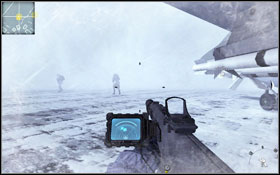
After picking up the M4A1 from the table in front of you, turn around and shoot down some of the targets #1 while not zooming or going into crouch mode.
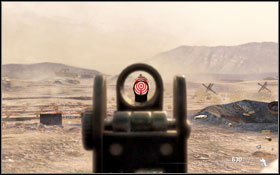
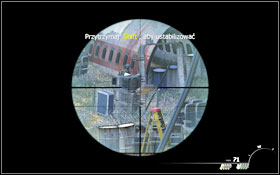
Precise shooting
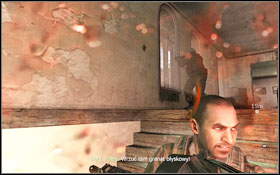
It's definitely easier to shoot targets after crouching and zooming in #2. Shoot down some of the targets like this.
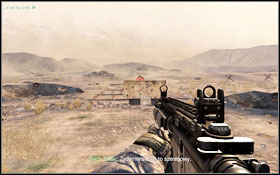
Shooting through covers
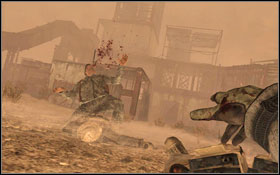
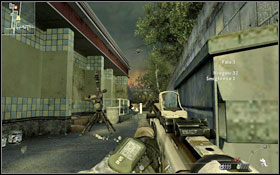
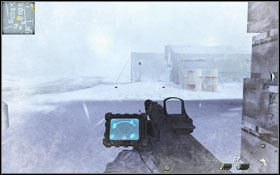
You will learn that some materials which can be used as cover are thin enough (doors, wooden stuff etc.) that you can kill an enemy on the other side. Shoot down the target behind the wooden board #1.
Grenades
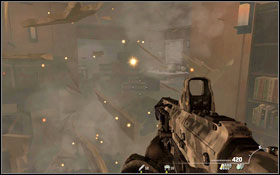
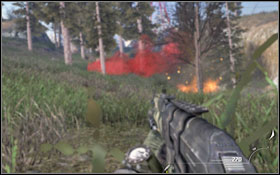
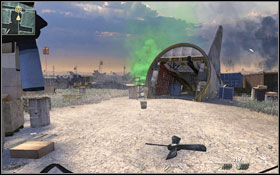
It's widely known that grenades are great against a large group of enemies. Turn around and take some from the box. Once the targets show up #2, throw a grenade between them.
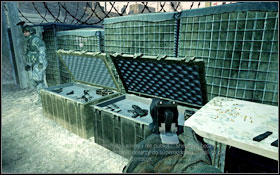
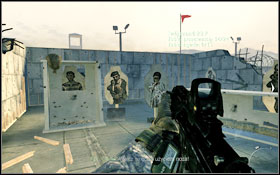
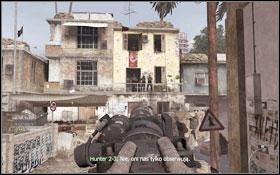
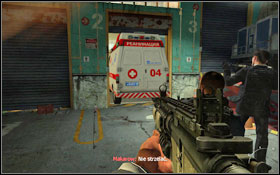
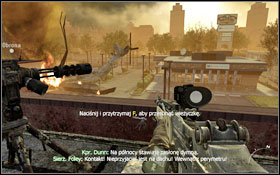
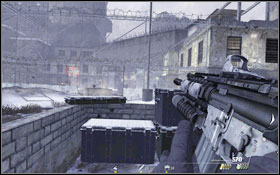
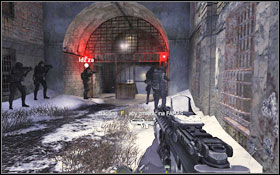
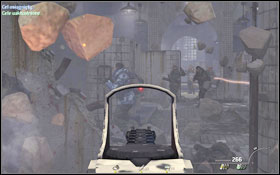
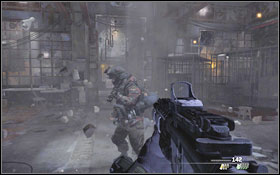
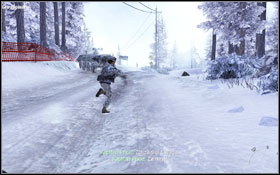
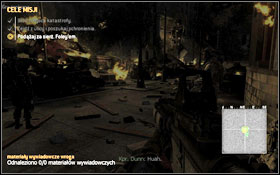
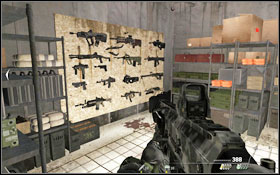
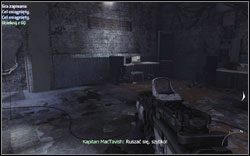
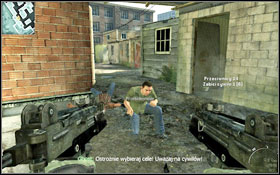
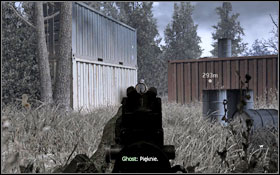
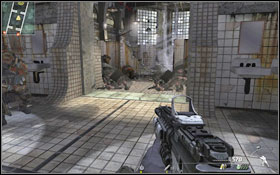
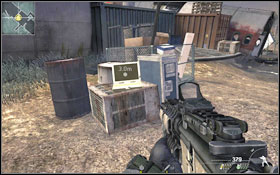
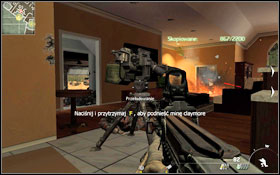
After learning the basics, it's time to test your shooting skills. Head to the Pit. Pick up the pistol - you will learn that changing the basic weapon to the additional one is definitely quicker than reloading. This can save your life on the battlefield quite often. Once the corporal opens the weapon boxes #1, choose one of them and head to the training zone, where you will have to eliminate the enemy targets while looking out for any representing civilians #2. Depending on how quick you complete it, a suggested difficulty setting will be chosen to match your skills. You will find more advice on the pit in the further part of the guide. After choosing your difficulty setting, head to the meeting.
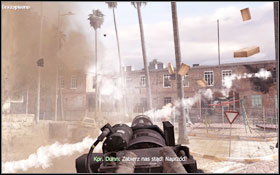
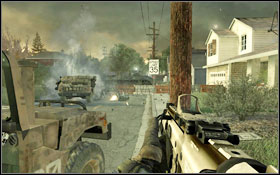
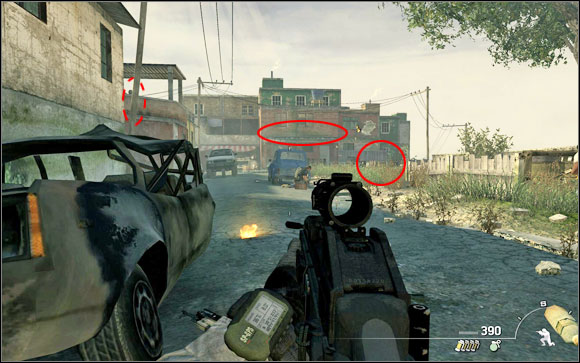
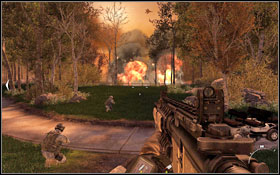
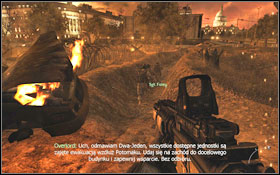
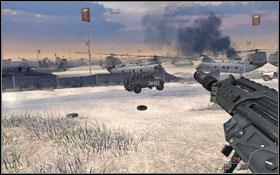
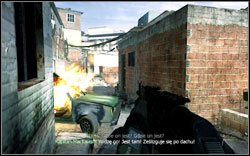
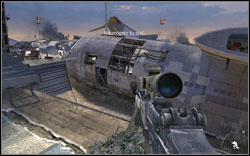
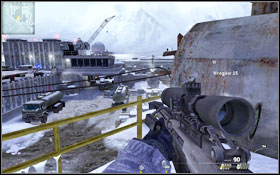
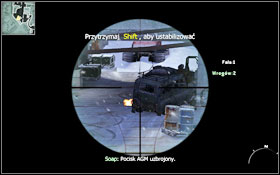
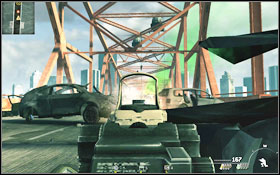
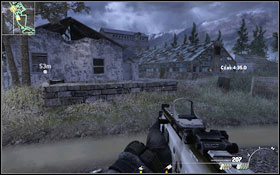
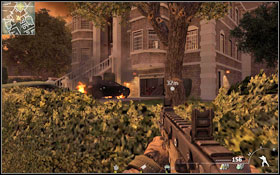
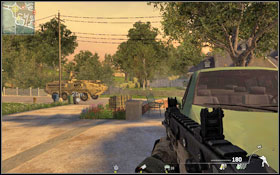
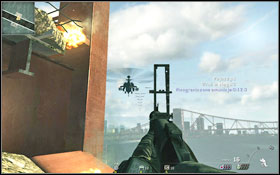
Quickly stand up and run to the cover (for example a car). Your task is to eliminate the enemy troops and defend the tank which has to connect the broken bridge. The best choice here is the grenade launcher, which will allow you to eliminate a large group of enemies with one shot. On the other side of the river, most enemies are around the stairs, so try to shoot there. After a while, enemy reinforcement will arrive so keep an eye on the other side of the broken bridge - try not to let your tank be destroyed.
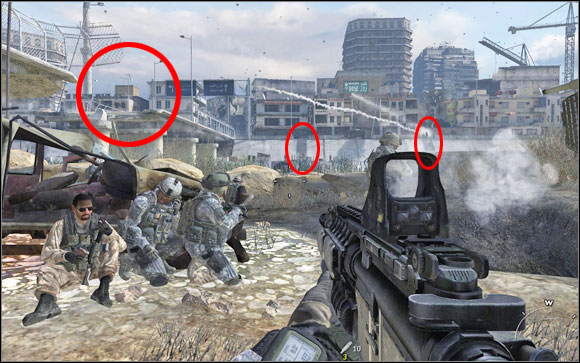
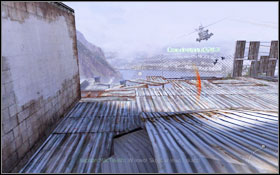
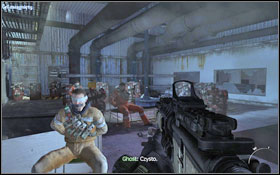
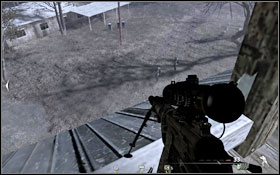
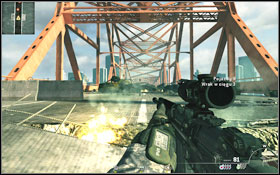
Once the bridge is ready, jump into one of the Humvees and mount the gun #1. Don't shoot anyone until the enemy doesn't open fire himself. You will see enemy trails after getting near the school, they will mainly attack from the roofs of the nearby building #2 and their main weapons will be rocket launchers.

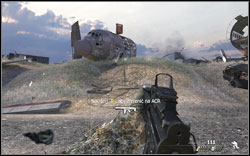
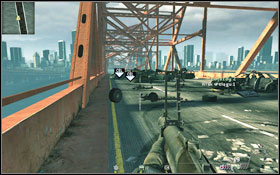
After clearing the school's roof, the action will speed up a little - the vehicle will start to move quicker and shooting can be harder. Concentrate on buildings and shooting down enemies with rocket launchers #1. At some point, another vehicle will block your way - get rid of the guy behind the gun and the driver - your driver will do the rest #2.
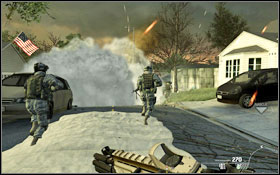
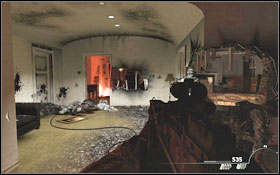
After a while, you vehicle will be damaged #1. Quickly get on your feet and hide in the nearby house on the right, just like the rest of your squad #2. Trying to kill everybody while lying isn't a good idea. Inside, you can collect some ammo and change your gun.
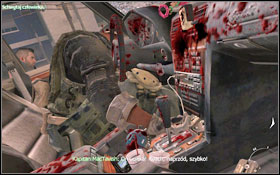
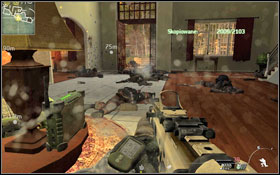
Go to the upper floor on the building #1. While slowly going up the stairs, throw a flash grenade and afterwards run to the top and eliminate a couple of enemies. Before going further, throw another flash grenade to the next room #2. Inside there will be two more enemies (depending on how much you've killed while on the stairs), including one just right from the entrance.

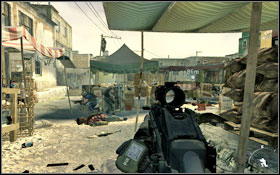
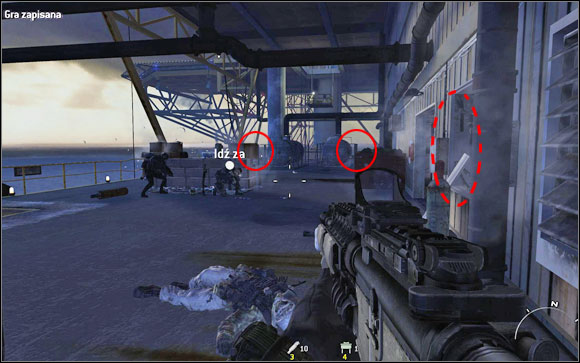
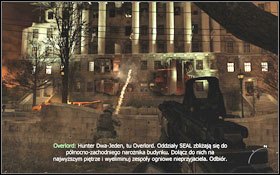
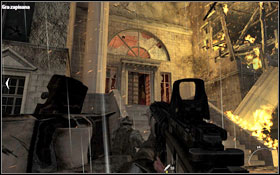
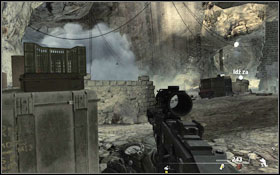
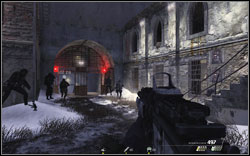
Approach the window and you will see the occupied school in front of you #1. Clear out the main square and follow you teammates as they go inside. Once there, move very slowly, as there's an enemy behind every corner. While going up the stairs, stop at the floor landing. There's one enemy on the next floor #2.
Follow your comrades. Once you reach the school exit, you will face a couple of enemies on the other side of the corridor with desks on the right side #1, which aren't a great cover, considering the material they're made out of. After clearing the school, it's time to go back to General Shepherd. In the net alley you will notice enemies coming from the right #2 - shoot as many as you can while they don't see you.
If someone survived, slowly advance forward. One of the doors on the left is opened; use it to get rid of some enemies #1. If you don't do this, there's a high probability that you'll get a nasty surprise. A little further a lonely enemy will appear at the end of the passage. Head to the spot where the general's waiting #2.
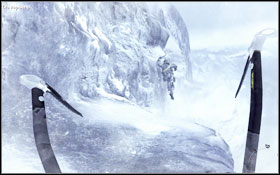
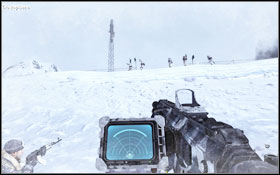
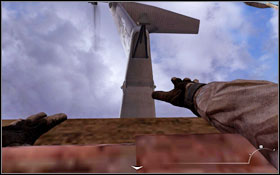
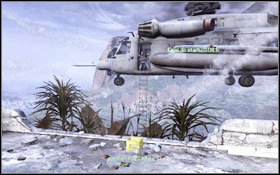
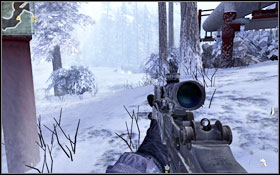
Captain MacTavish will accompany you on this mission. Follow him to the spot where you'll begin to climb #1. You use the ice axes by holding down the right/left mouse button. Once on the top, take a run-up and jump to the other side #2. You will almost fall, but the captain will save you. Climb up higher.
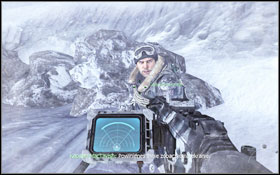
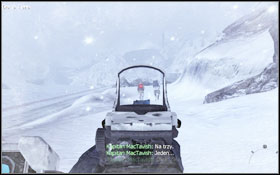
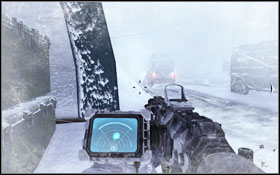
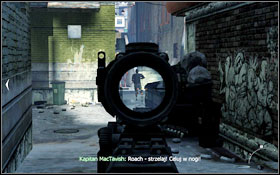
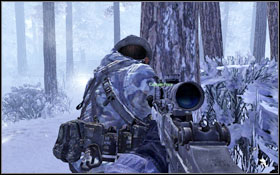
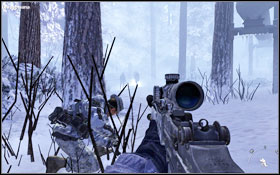
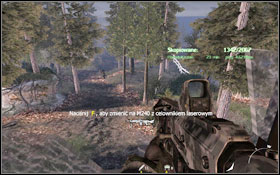
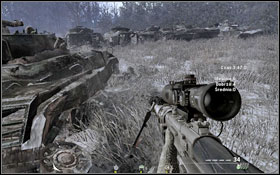
Run forward and you'll learn about an interesting function of your weapon - a pulse sensor #1. When it's active it will display the enemy location as white dots. You will encounter two enemies #2, your target will be the one on the left - try to shoot together with the captain, so that you will eliminate both enemies at the same time.
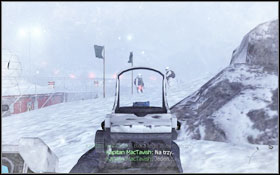
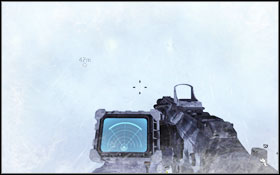
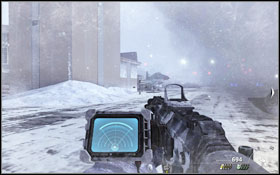
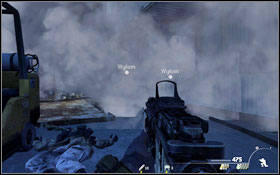
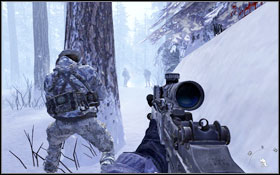
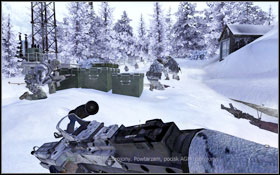
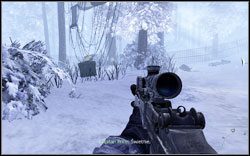
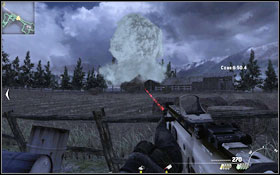
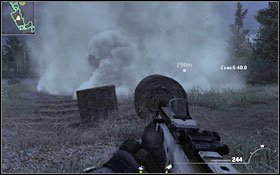
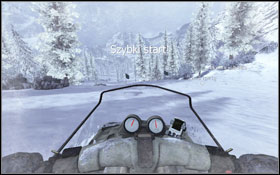
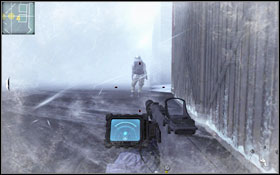
A little further the situation will repeat - once more take care of the enemy on the left #1. Once you get into the blizzard, you will have to move alone. Your companion will help you from time to time, eliminating some of the enemies. The blizzard will allow you to stay invisible #2, try not to get too close to the enemies. Head towards the fuel station, where you will mount the charges.
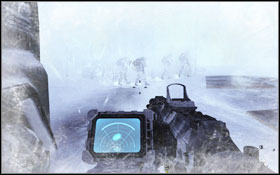
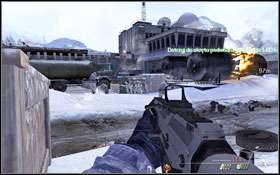
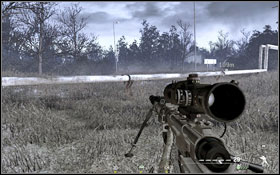
Try to stay invisible, you don't have to eliminate all of the enemies - in fact you don't have to worry about it at all, captain MacTavish will take some down for you. Remember to have the pulse sensor active. On your way you will encounter a truck #1, hide somewhere for a while. Right before the landing zone there is a patrol formed by four enemies #2.
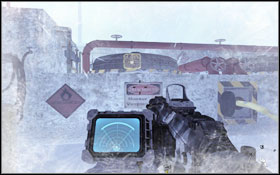
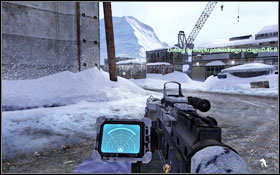
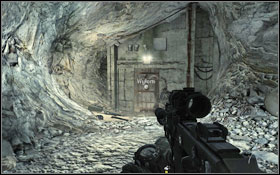
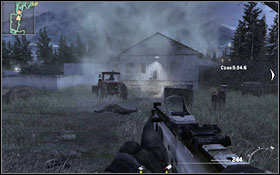
Stop for a while by the plane, you will be warned about a high activity by the runway. Run to the fuel station and set the charges #1. Quickly go to the hangar, where the satellite is. You can run all the way, just look out just before the hangar, where the blizzard is stopping. Go to the side of the hangar and you'll meet with the captain #2.
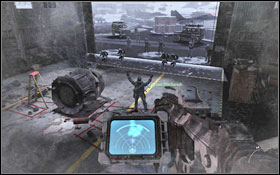
There will be no surprise inside, head upstairs where your man objective is #1. While going back, your partner will be surrounded #2. Don't get out of the cover! It's time for plan B - detonate the charges by the fuel station before major Petrov ends the countdown - hell will break loose.
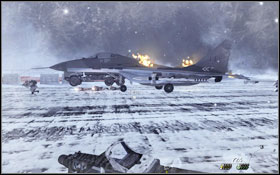
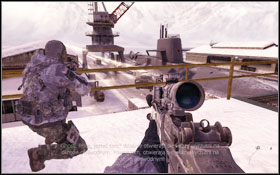
Shoot some enemies and follow the captain. After getting to the cover, run to the MIG #1 - don't worry about the opponents, those nearby the plane will die of its explosion and MacTavish will take care of the rest. The enemies on the left, hiding by the car, can pose a threat #2.
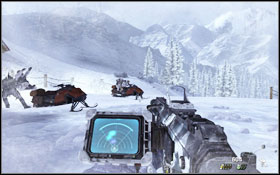
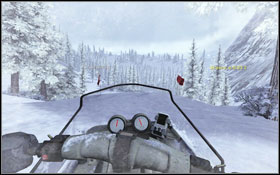
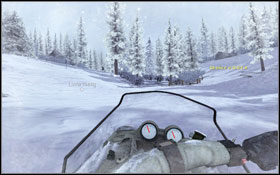
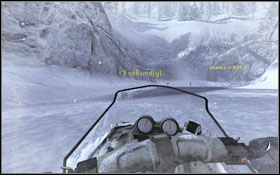
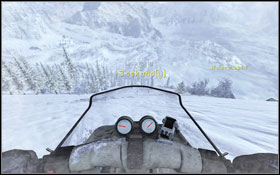
Run to the fault marked on the screen. Try to shoot some enemies on snow scooters. If you don't - nothing will happen really. After getting down, turn around and eliminate some enemies above #1. After a while more scooters will appear - eliminate the drivers and get on one of them #2.
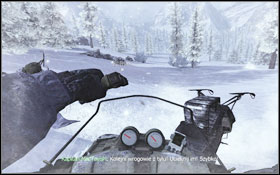
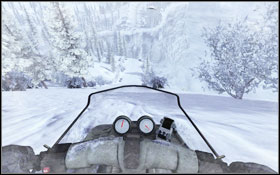
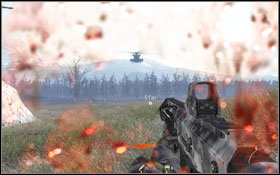
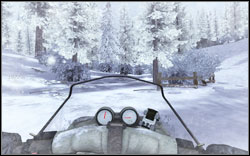
You will have a crazy ride between trees and a whole lot of enemies chasing you #1. You will have a semi-automatic pistol, which will deal with the enemies quickly. Look out for the helicopter, while driving through the frozen lake. In the end you will have to make a jump over a gap #2 and join the rest of the team.
Warning: this mission contains scenes inappropriate for some people. If during the beginning of the game, you chose not to participate in it, it will be skipped.
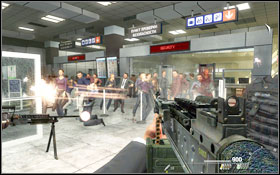
Wait for the elevator door to open. Head with the others to the group of people. Your companions will open fire - apart from the guards, all of the civilians will die #1. It's up to you if you want to shoot or not (the mission won't end with failure). Above all, try to eliminate the guards as they are armed and can damage you #2.
Follow Makarov, you will reach the basement #1. Once you're on the airstrip, the Federal Security Service will show up #2. Don't waste normal ammo, their shields protect them very well. The grenade launcher will get the job done nicely.
Use the jet bridges supports and everything else as cover. Don't rush, move forward very slowly. Look out for one of the higher rooms #1. After getting rid of the enemies, follow Makarov until you reach an ambulance #2.
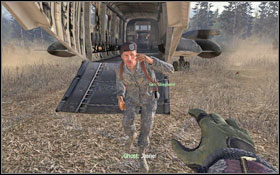
Your task is to capture the man, thanks to which you will get to Rojas. Once the vehicle you're following stops, shooting will begin - quickly duck #1 to avoid being shot. The man will start to run, so leave the can and follow MacTavish - if you aren't fast enough, the mission will end with failure. You will catch up with the target in one of the alleys - aim and shoot him in the leg #2.
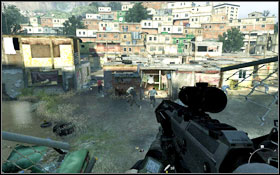

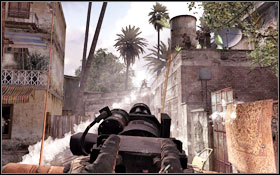
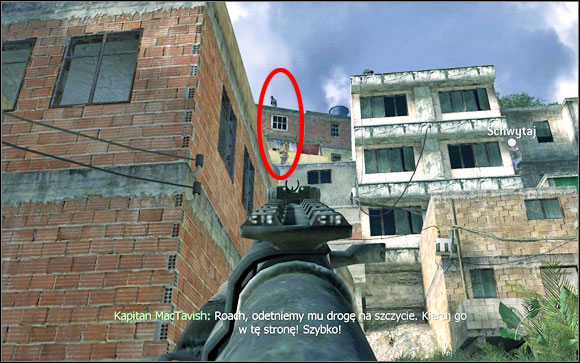
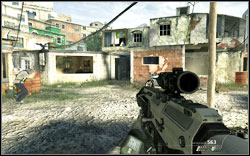
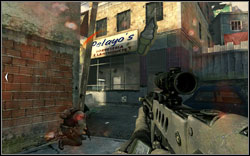
You will be sent on a mission to find Rojas. After entering the favella #1 you have to remember that apart from enemies, there are also running civilians there. Don't rush and shoot whoever you see. Head left and look out for one of the first enemies waiting behind the corner #2.
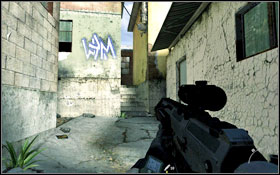
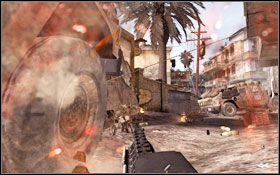
Move on. After crossing a quiet street (there's a dog behind a fence on the right) ready yourself, because some enemies will appear on the roofs of the buildings in front of you #1. One of the enemies will jump out to face you directly - he's on the left, just behind the last dumpster. A little further there will be some surprises waiting for you. One enemy is waiting for you in the alley right next to the building with a white sign with a blue outline #2.
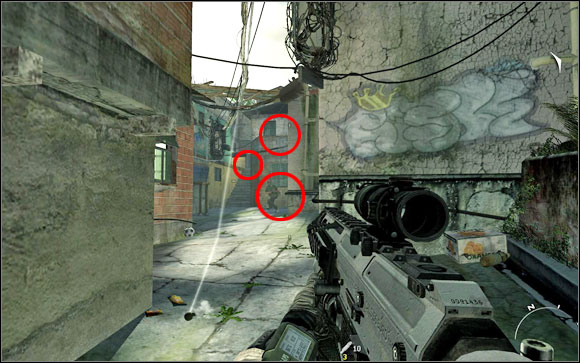
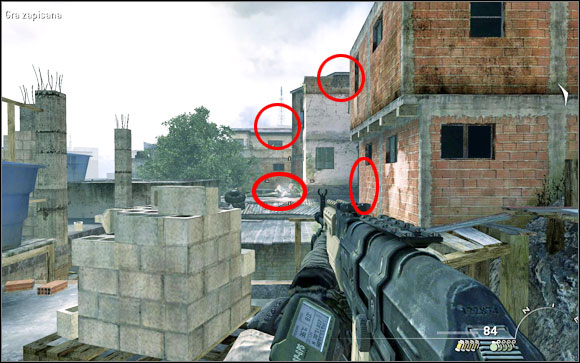
Move on, you will be surprises again after reaching a space between some buildings. Keep an eye on the balcony in front and the stairs.
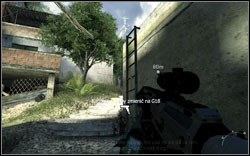
You will pass a building with a ladder #1, if you decide to go up, kill the hidden enemy through the door. There are two-three more inside. On the other hand if you decide to follow the path, there's a big welcoming party waiting you at the top. Enemies will attack from the right (they're hidden behind the building and inside of it) and left (in the building's window) #2. Additionally there are two enemies in the building on the left.
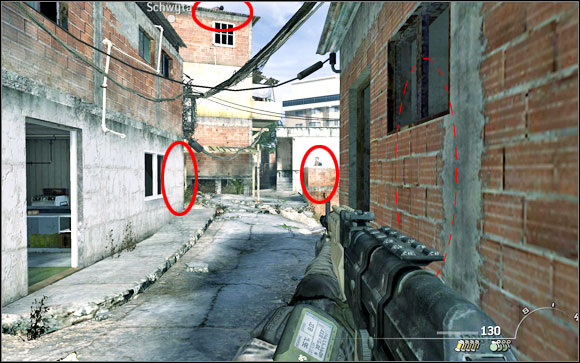
You will notice Rojas running across the rooftops. Don't rush, lots of enemies are waiting for you to lean out. Firstly get rid of the two that are standing on the roof, right after the left turn behind the building.
Go up the next pair of stairs carefully too. The enemies are on the roof, between the destroyed walls, one of them is hidden on the right in the small alcove between the buildings and two are across from there. As you approach, two more will jump down from roof of the building across.
After going up the next set of stairs, you will be surprised for the last time. While at the end of the stairs, aim at the roof, where the first enemy will appear. Afterwards one will lean out of the corner of the building on the left and there's another one on the right, behind the cover. Also pay attention to the room on the right, inside of which there's one enemy waiting for you to show up. Move on and you will reach a spot, where Rojas will be caught by your teammates.
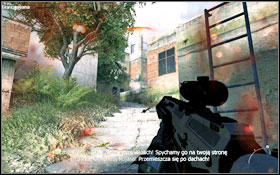
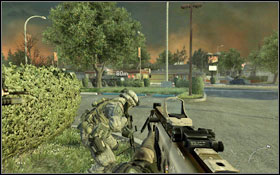
You will leave the vehicle right after noticing the BTR #1. Quickly go to the alley on the right. The rest of your team will soon join you. Follow sergeant Foley. Don't even think about attacking the armoured vehicle or you'll die very fast. You'll be spotted on one of the streets, so use smoke grenades to pass #2.
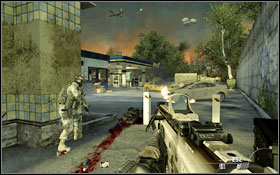
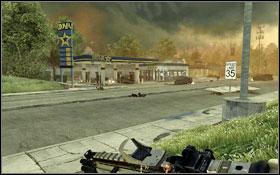
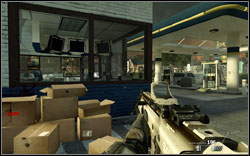
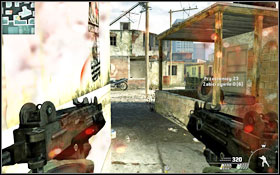
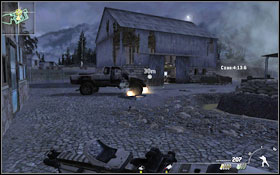
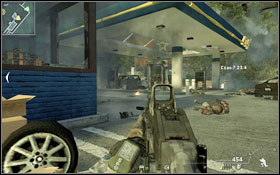
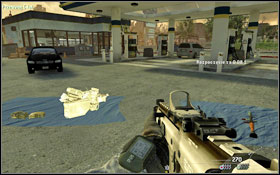
Go into the next alley and eliminate some enemies in front of you. You will reach a gas station #1. There will be a welcoming committee waiting for you there - a truck full of enemy soldiers. After clearing the area, follow the sergeant. You will get to Nate's restaurant. In the kitchen you will find a ladder leading to the roof, where the M-5 turret is waiting for you #2.
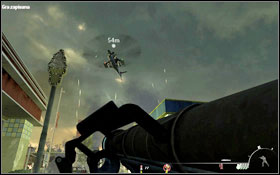
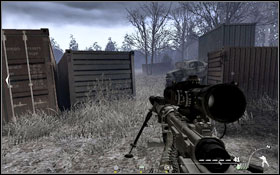
Pick up the sniper rifle with a thermal vision sight, it will be useful in eliminating the enemies in the fog #1. You can count on the M-5, which will eliminate the enemies very effectively. Try to listen to what your companions are saying - enemies will appear on the building's roof from time to time, so don't let them surprise you. After clearing one side, you will get attacked from the north. Pick up the turret and carry it to the other side #2.
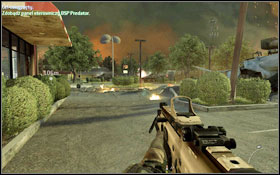
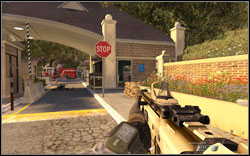
An air strike aimed at the roof on which you are will begin, so leave it quickly. You will be assigned to take over the BSP Predator control panel. It's located on the other side of the street in another restaurant. The main threat are the BTR vehicles. The fasters and safest way will be to go around this whole commotion from the right #1. Keep behind the armoured vehicle and don't let the enemy see you #2.
Right before entering the bar, throw some grenades through the windows #1 to clear the room a bit and gain advantage. Look out for the back door, some enemy soldiers will enter the bar through it. Pick up the panel lying on the table and use it to destroy both BTR vehicles #2.
It's time to regroup. As you get closer to the marked spot, the command will redirect you to Burger Town. Head in the direction of the restaurant, the best entrance will be the back of the building #1, it will let you get inside safely and clear the area quickly and efficiently #2.
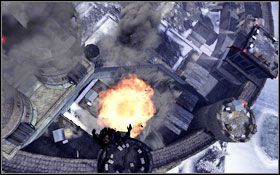
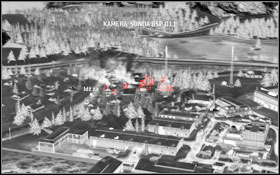
As the Raptor is being moves, you have to protect your squad. The best way to do it is the Predator. Launch the panel and aim the rocket at the enemies attacking your men #1. You will now have to defend the Raptor with the Predator missiles. The enemies are moving in big groups #2, so you won't have any problems with exterminating them all at once.
After a couple of waves, you will lose contact with the Predator. Quickly retreat back to Burger Town. Keep shooting until you will be informed about an incoming helicopter. Quickly run to the restaurant by the gas station #1, where you will find the Stinger missiles #2. Aim at the helicopter and fire once you hear a constant sound.
Afterwards you will receive information about another helicopter moving to your position. You will find more Stinger missiles on Nate's restaurant roof. The safest way is to get there is to go round the battlefield from the right. Firstly go to Burger Town #1, from which head to Taco Togo. Go to the back of the building, from where you will have a straight path to the restaurant with Stinger missiles on the roof #2.
Go up the ladder, quickly pick up the missiles and get rid of the second helicopter #1. Nearby you will find an ammo box - you can restock on ammunition. It's time to get out of here, your convoy has arrived. Get to it following the same path that you used to get here - go round Taco Togo to avoid enemy fire #2. Hop into the vehicle.
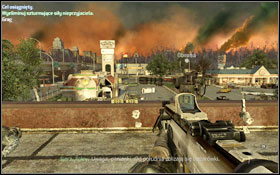
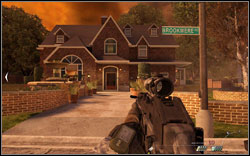
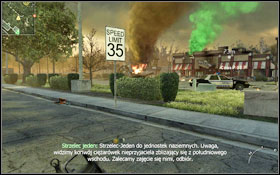
Your main task here is to protect captain MacTavish. Try not to let him get killed. Go forward. You will come across a big open area with many buildings in the distance. Your enemies will appear on roofs and balconies. Keep an eye on the buildings on the left. If you will eliminate the enemies fast enough, you can pretty much stand in the centre of the road and not get killed.

The first vehicle will arrive after a short while - shoot the soldier behind the gun quickly. If you won't manage to shoot the driver, look out not to get hit by it. The second vehicle will stop in the middle of the intersection #1, don't rush and kill everyone. Move on and once you get to the end of the street, notice enemy soldiers running at the top the building #2.
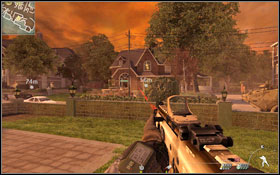
Turn left at the end of the road, you will find yourself on at a big opened area #1. Keep an eye on the balcony on the right and the door below. Use the cars as cover. After eliminating the threat, move on. Choose the left path and you will get to the ice-cream shop #2. At the opposite side of the road there's a small balcony with enemies on it. Slowly move further.
Go along the road and turn left - in front of you there will be a building with some enemies on it. Shoot the enemy lurking on the left. After a while a car will arrive.
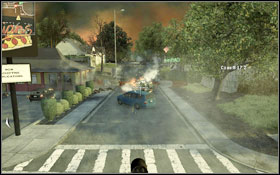
You will end up on at a marketplace full of enemy soldiers #1. Keep an eye especially on the upper part of this area - quite a lot of enemies will attack you from the roofs. This time you don't have to worry about civilians - fortunately there's none of them around. Advance gradually, killing the enemies and hiding behind new covers. After fighting your way through the marketplace, follow your companions to the helicopter. However the helicopter won't be able to land on the small area #2.
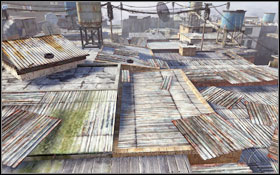
After clearing the whole area, move to the roofs which you will use to get to the evacuation point. Unfortunately your last jump won't go too well #1 and you'll fall to the ground. As you come back to your senses, there won't be any time for shooting. Quickly begin to run, you have to find a way onto the roof #2. The task isn't too difficult, basically you just have to run forward for the most time, there aren't many dead ends here.
At some a timer will be displayed and you must really hurry up. As you come near the gap #1, turn left and then jump, jumping anywhere else will result in death. Run forward, slide down right onto the next building. Now you just have to run to the edge and make a jump #2.
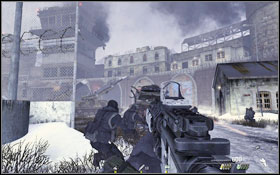
Follow the Stryker (an armoured vehicle in front of you). You can point the location at which the vehicle should fire with 4 (default). Firstly, following the orders, fire at the yellow house #1. Try not to stand in an open area, you're an easy target for the enemies then. Follow sergeant Foley. You have to move on through the buildings #2. If you can't handle exterminating the enemies occupying a building, order the Stryker fire at the area.
Under no circumstances should you walk along the centre on the road, move from one house to another. After getting to the apartments, helicopter will arrive and enemies will lower themselves from them #1. Shoot and clear the house placed by the fork of two roads #2.
Gradually move forward. Once you get to the fire truck #1, neutralise the turret in the distance (it's hard to miss - it has a laser sight). Go right #2, from where you will be able to attack the enemy from the side.
On the field in front of you, you will see a lot of boxes and concrete blocks #1, use them as cover from the enemies. Clear out the field before the checkpoint #2 (remember that you can still use the Stryker, which can wreak havoc among the enemy.

Move on and you'll arrive at a bridge. Cross it and go left, where you will be able to hide behind a wall #1. Use the Stryker once more, thanks to which you will clear a part of the house. Move forward very slowly, hiding behind covers all the time. Once you get to the residence #2, enter it through the garage. Clear the whole house, searching each corner.
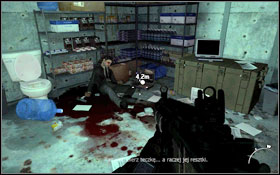
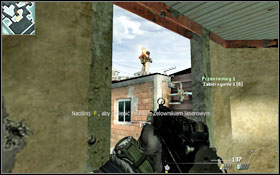
Follow the sergeant all the time. After getting out of the building, you will notice anti-air guns in the distance #1. Use the laser to show the artillery where it should aim. You will find the second gun on the left. Shepherd will give you an address where you should go. Nothing should disturb you on your way. As you arrive at the house, head to the hideout on the second floor, where an important person is hiding. Unfortunately, he's dead #2 - pick up the suitcase.
After getting to the surface, quietly eliminate the guard standing on the platform #1, MacTavish will take care of the second one. Follow the captain and you'll get to a room with one enemy - shoot him in the head. Approach whichever door where you have to make a breach. After placing the charge, time will slow down and as the dust falls enough for you to distinguish enemies from hostages - kill the evil guys #2.
Go up in search of more hostages. Once you're outside, hide from the incoming helicopter. You will arrive at the next place where hostages are being held #1. Place the charge and once more kill all the enemies inside - there are six of them. Quickly place the C4 under the dead body and retreat to the marked spot. Once the enemies will be close enough, detonate the charge #2.
Eliminate the other enemies in the passage and take the stairs up. Change your gun to one with a thermal vision sight. Shoot the containers in the distance. Your sight will allow you to localize enemies in the smoke. Keep an eye on the door on the right - enemies like to come out of it.
Pick up the rocket launcher approach your comrades. A helicopter should show up after a while #1. Destroy it before it start shooting. Go into the room on the right - you will get near the containers. Kill the other enemies from cover. A bit further stop by the columns #2, from where you'll have a good view on incoming enemies.
Follow Ghost. Destroy the next container in the distance #1; look out for the enemy on the bridge above. Once again use the thermal vision sight to localize and eliminate enemy soldiers #2.
Hell will break loose. The enemies will use smoke grenades and are equipped with thermal vision sights, thanks to which they will be able to localize you and your companions. There are many weapons around, so you don't have to worry about ammo. Head right to the fence and go behind one of the containers. Apart from the running enemies, try to keep an eye on the windows, because smoke grenades are being thrown from there.
After getting to the door #1 use the C4 once more and clear the area of enemy soldiers #2. Now you can head to the landing zone, where you will enter the chopper.

After a rather short helicopter flight, once you're above the Gulag, you will grab a sniper rifle. Clear the towers #1 and don't let the enemy get to the anti-air rockets. Eventually you will land in the middle of the square. Follow captain MacTavish. You will get attacked from above - get rid of all the soldiers on the wall #2.
The chopper will take care of the next building. Go to the wall, from where you can shoot the enemies waiting behind the fence #1. A little further you will bump into some more enemy troops. Eventually you will reach the Gulag's entrance #2.
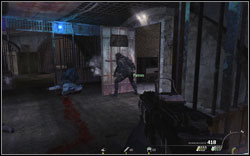
Go down and some soldiers will greet you in the corridor. At the very end there's a control room #1. Ghost will look for the proper cell, while you should go down and also search the cells. Head to the closed passage #2, which will become unlocked after a while.
Once you check each cell, you will learn that the prisoner you're searching for has been moved. Go to the armoury #1. The enemy will attack from each side - quickly grab the riot shield, which will protect you from the bullets until your companion opens the door. Keeping the shield in front of you, head onto the enemies, attracting the fire #2 - the rest of your squad will get rid of the enemies. If someone runs too close to you, hit him with the shield (the button used to attack with the knife).
Keep going straight, while still holding the shield - your friends will take care of the rest. Lower yourself with the rope to skip a few floors. Once down, turn on the night-vision before going into the dark corridor #1. While in the very narrow passage with a big group of enemies at its end, keep an eye on the cells #2, because some of them aren't empty!

Turn off the night-vision after leaving the corridor. Kill some enemies hiding between the pipes #1. You'll get to a place where you will have to make a breach #2.
The hardest part of the missions begins. Place the charges and wait for them to explode. As soon as time slows down and you'll be inside the bath house, shoot anyone who's moving #1. Try to kill as many as you can before the game's speed returns to normal. Quickly move to one side of the bath house and deal with the enemies in the further part of the room. Backup will arrive from the balconies #2.
Your target, a hole in the floor, is at the end of the dressing room. Getting won't be so easy, because when you'll be halfway through the room, enemies with riot shields will appear #1. If you haven't used up the grenade launcher ammo, now's the right moment. Remember that your shots must be precise. You can also use normal grenades. What's important is to not let the enemies with shields get near you. However if they do, try to quickly go around them and shoot the unprotected body parts. You can also follow MacTavish's plan who want to go round the enemy and flank them. The task is quite difficult, so I'd suggest eliminating each soldier individually. Don't forget to watch the balconies (however the laser sights will immediately tell you that there's someone upstairs). Once you're done with everyone and safely make it to the end of the room, jump down the hole in the floor #2.
This time the path will be safe, so you don't have to worry about anyone. You will get to a spot where another explosion is needed. Right behind the wall you will find the prisoner you're searching for. Once you break through the wall, try to shoot the enemy soldier #1. It's time to evacuate. Follow your comrades #2 and try not to lose them or it'll end quite badly for you.
You will end in a dead end and will be hit by falling rubble. Once wake up, approach the line lowered from the chopper and attach yourself to it #1. You will manage to escape in the last moment #2.
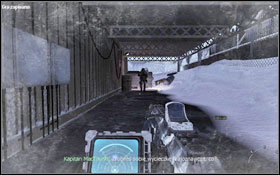
You will find yourself in a bunker #1, head to the exit. Don't worry about the enemy fire and run after sergeant Foley #2.
Once you get to the wall #1, wait a bit for the signal and then quickly run after your companions to the entrance. Clear the main hall #2 while keeping an eye on the enemies on the upper floor.
Follow the sergeant and you will arrive at another room #1. Watch both entrances. On the left there is a box from which you can restock on ammo. The enemies won't run in your direction but hide on the other side. Gradually move forward and notice the door at the end - there's an enemy behind it. Go up the stairs and you will arrive at the demolished part of the building, from where you'll go to the upper floor #2.
Find the anti-air gun #1, eliminate the enemy soldiers and plant some C4. Walk away and detonate it. Go up the stairs again and you will reach the 5th floor. Your target is the south-west corner of the building, where the enemy has set up a nice nest. Clear out the rooms separating you from your target. You can use the hole in one of the walls to eliminate the enemies in the "eagle's nest" #2 or just enter through the door.
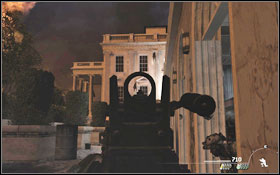
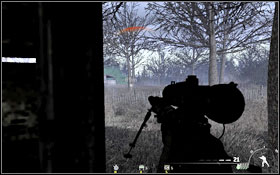
Your next task will be to eliminate the enemies by Washington's monument with the help of the sniper rifle set on the ground #1. Your task is easier because of the thermal vision sight in the gun #2 thanks to which you will find the troops with no problems.
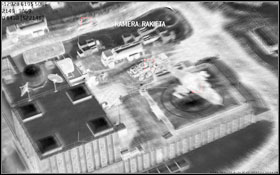
Once you're done with the soldiers by the monument, you will receive a warning about enemy soldier in the building. Don't go out o the "eagle's nest" and defend this position until you get rid of all the enemies #1. Keep an eye on the door and the hole in the wall through which some grenades may fall in. Once you're finished, grab the Javelin to destroy the ground vehicles closing in on the monument #2. Also avoid the helicopters which will attack your position with everything they've got.
After a successful action you will have to go back to the roof and jump into the helicopter. You have a time limit of 1:30.00 minutes which is quite enough. Run all the time (the checkpoints are very close to each other so you won't have any problems with choosing the path) #1. Once you're in the helicopter, start shooting the enemy troops on the ground. After a while the chopper will get shot down. After you regain consciousness, begin shooting the enemy soldiers attacking your position #2.
Follow Price. During this mission you will have to act carefully and follow the captain's orders. Allow the first patrol to pass, you will neutralise them once they split up. A convoy will arrive #1, hide in the bushes next to Price. Choose one of the nearby soldiers #2, your companion will take care of the other one.
Run to the barrier, you targets are the guard and his dog #1, Price will get rid of the other two. Cross the bridge and after a while you will bump into an armoured vehicle #2. Heedless of the fact that there are bullets flying everywhere, follow the captain. You will eventually reach a place that the vehicle can't reach.
You will see another patrol #1 - let them pass, and under no circumstances, don't attack them. Near the pipes you will notice a three man patrol #2. It's up to you if you want to kill them or spare their lives. If you decide to eliminate them, try to hit two of them with one shot, after which kill the third one before he alarms his pals.
Another big patrol. Take care of the two soldiers on the right #1 and leave the one with the dog to the captain. Move on and you'll see another patrol with dogs. Don't attack them and let them pass. You will eventually arrive at the slope #2 and slide down.
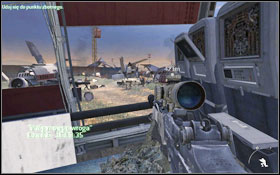
Try to launch the Predator; however it'll get destroyed after a while. Head to meet the rest of the team. On your way you will find some boxes and will be able to change your weapons. Shoot everyone you can and run to the house which will provide you with cover. Once you gain access to a new Predator, quickly eliminate the big group of enemy troops heading your way #1. If someone manages to survive, take care of him using a more conventional weapon. When another rocket will be available, use it to eliminate the rest of enemy soldiers. Run to the woods and you will be attacked near the entrance #2.
You will stop before a big complex, the submarine is quite near, Use the Predator to destroy the armoured vehicle and the chopper at the same time #1 - they're right next to each other. If you miss, you can have problems in the further part of the mission. Go down and the group which was standing by the gate will split up - you can use the next rocket to get rid of most of them. Run right, there's an enemy behind one of the boxes #2.
Head right after getting through the gate. You will receive an order to get rid of the incoming truck - quickly use a rocket. You can also try and hit the containers, the explosion will kill a couple of enemies. Follow your comrades to the left side #1 and then head forward to the containers #2.
You will find additional weaponry on the boxes on the right. When another truck shows up, quickly use the Predator to blow it up, together with some enemies nearby. The hardest part of this mission begins now. Run between the containers in the direction of the car #1. Look out for the enemies on the roof of the opposite building. Your task will be to protect Captain Price. Go to the guardroom #2, from where you will be able to take out enemies with the sniper rifle. Also don't forget about the Predator.
As you receive a gun, don't waste the ammo #1! Wait a bit and the action will move onto a space station #2. Afterwards one of your comrades will help you get out of the wrecked chopper.
Follow sergeant Foley and look out for choppers falling from the sky. Notice that all electronic devices no longer work - there's no minimap #1 and you can't use your the gun sight. You will meet one of your men and will be sent to Whiskey Hotel. Go into the nearby house #2.
After breaking open the door, you will enter a dark room #1, in which you can have problems with localizing the enemies. The situation will repeat in another dark room. After clearing the room, head to the destroyed wall. Jump down and move on. You will notice three enemies in the distance #2 - don't attack them until you hear a proper order.
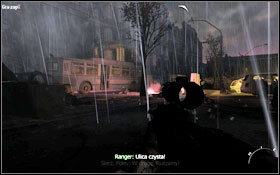
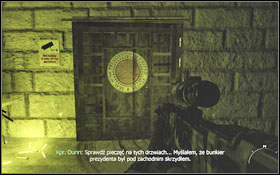
You will encounter more soldiers by the bus #1, unfortunately they won't be your allies. Follow the sergeant and you will find the president's bunker #2.
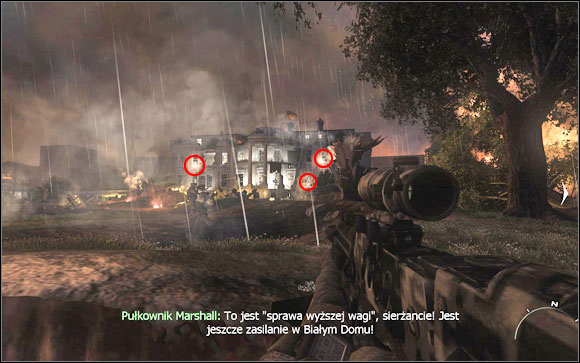
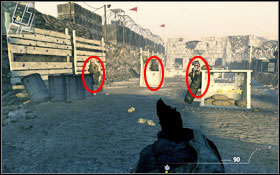
Follow Foley, you will leave the bunker. You will see the White House in the distance. Run to the nearest hole where you will have cover from the bullets. Eliminate three machine-gun posts hidden behind sand bags in the windows (marked on the screen above). Look out for the enemies on the roof.
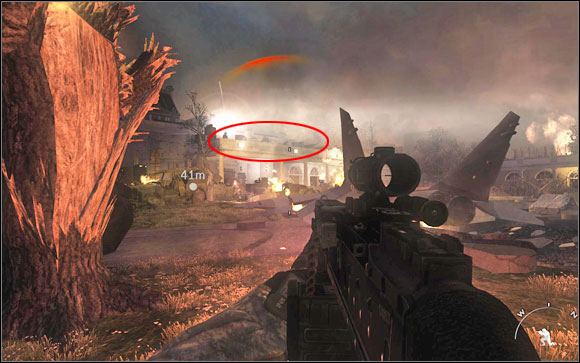
Once you get to the wreck, head in the direction of the building on the left, where you will have to deal with some more enemies on the roof. Try to eliminate them one by one, slowly leaning out of your cover.

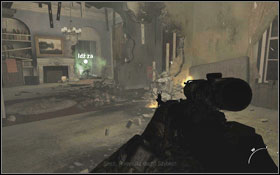
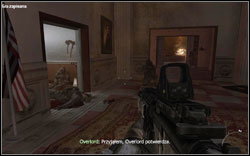
Once inside, after leaving the Oval Office, you will encounter some enemies #1. The following rooms won't be much different. Eventually you will reach the conference hall #2. The enemies will appear from the wide corridor and from the outside, as there are no doors left.

Look outside and you will see enemies lowering themselves down #1, who will start running in your direction after a while. They're an easy target. Move on pass the kitchen and you will reach a collapsed entrance. You will also see some stairs - there are some enemies on the left #2.
Go up the stairs with sergeant Foley #1 and once on the top, quickly fire a flare (left mouse button) #2 to signalise that the White House has been recaptured. You have to hurry, or else the building will be bombed.
Follow Ghost and join up the rest of you comrades. While going through the forest, you will fall into a trap - an anti-personnel mine will get tripped #1. Prone to avoid it. You will be attacked instantly. The enemy is on the hill on the left and in the front, where he will use smoke grenades. Move forward quickly, go through the fog to the left, next to some tree boughs #2.
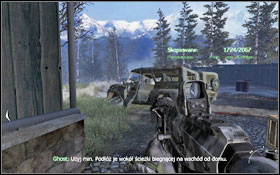
It's a great spot to eliminate the other enemies. Head in the direction of the solar batteries #1. Two trucks will show up - one of your companions will make sues they don't go anywhere. Clear the square in front of the house and approach a door to place explosives #2.
Kill as many enemies as you can during the bullet time. If you have chosen the main entrance, keep an eye on the stairs in front of you, there are a couple of hidden enemies on the top #1. Your task is to clear the whole building on search of Makarov. Breach into the room on the upper floor. There are two enemies hidden behind the desks #2.
Afterwards move to the basement. You have to clear two rooms there; two enemies are stationed in the corridor. You will find a massive amount of weapons and ammo in the right room #1 - however there are two enemy soldiers inside. The second door will lead you out of the house #2 - there will be three enemies running away. Some more weapons are lying on the ground.
Return to the ground floor. Approach Makarov's computer to copy all the data #1. The file transfer won't be constant and the time left is unknown. Plant some mines at the main and side entrances. Your task is to protect the device. The task isn't easy, but on the other hand you have a big amount of weapons to help you. You can choose to stay in one place and attack from there #2 (the terrace on the upper floor is also a good point) or move all the time.
At some point enemy soldiers will start to appear from the boat hangar's side #1. Approach the back window and shoot as many enemies as you can. The situation will change after a while - you will be attacked from the front again #2.
As the data copy is finished, quickly take the device and follow Ghost #1. The enemies will fire at you from every side. Keep very close to your companion. At some point the enemy will start to use mortars. Don't look behind you, just run in the direction of the landing chopper #2.
You will get hurt but Ghost will start to drag you. Attack the enemies while at that position #1, until help doesn't arrive. Eventually you will reach Shepherd #2.
You're in the middle of the war between Makarov's and Shepherd's troops. The best tactic here will be to stay neutral and let them kill each other. Eliminate as many enemies as you can from your current position #1. Head right, following the road all the time. Price will contact Makarov and will learn about his position. After getting to the containers turn left, in the direction of the car visible in the distance. Hide by one of the wrecks, below which there is another jeep #2.

After the situation settles down a bit, move on right #1, while avoiding unnecessary fights. Move very slowly, eliminating single enemies hidden between the plane parts #2.
You will reach spot where a chopper is firing at a Humvee #1. One enemy will appear from behind the container on the left. Don't lean out of the cover too much because the chopper can start shooting at you. Eventually another vehicle will appear and destroy the first one. Some enemy soldiers will appear from the opposite side #2.
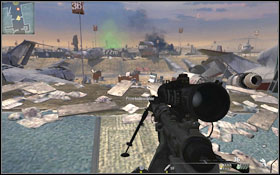
Take care of them and head to the half destroyed plane. Enter the next one and on its end you will see a nice air support from Nikolai #1. Use the sniper rifle to get rid of the enemies in the valley #2.
Jump down and slowly move on. More enemies will appear once you're halfway through #1. Eliminate each silently. Try not to reveal yourself, as things will get harder then. Head up, while hiding behind containers. The road right is the good choice again; there are many covers there, from where you will be able to eliminate the enemies #2.
Around 50 meters from the target, Price will show up with a jeep #1. Quickly hop inside. Shoot the other vehicles following you. Right before the starting plane, your driver will be shot and you will take the wheel #2. The steering will be a little difficult, but you shouldn't have problems with hitting the ramp.

Follow Price, you will come across a patrol #1. Wait a bit for the soldiers to split. Firstly you'll take care of the four soldiers by the car and the dog. Take care of the two enemies on the right, shoot once the captain orders you to. Go down, move forward a bit and shoot any of the two walking enemies and don't forget about the dog. Use the barrier #2 and lower yourself.
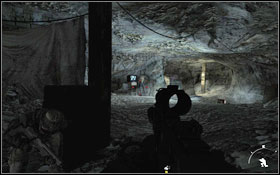
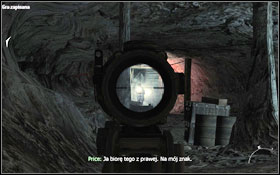
Below you will come across two enemies, eliminate them with a knife together with Price. Enter the cave and wait for one of the soldiers to approach the TV - quickly hide on the left and wait for the patrol to move. Get rid of the guy by the TV #1 and quickly move on. Pass by a big group of enemies and notice two soldiers with flashlights going down the stairs - your target is the one on the left #2, shoot on your partner's sign.
Leave the next opponent to the captain. You will find yourself in a room where light will be turned on and a big group of enemies will soon breach it. Head right and hide behind the rock #1. Keep this position and you will have a good chance of surviving the attack. Remember about using grenades. You can also notice the enemies by lasers mounted on their guns. After the fight is over, leave the cage #2.

Grab the shield, your task will be to draw the enemy fire #1. Move forward while holding the shield all the time so that Price can take a clear shot #2.
You will enter another cave, turn left - a couple of enemies with shields will lower themselves #1. Use a fragmentation grenade to neutralise them (standard weapons are useless). Move on to the further part of the cave. The enemies here are using guns with thermal vision sights and hide behind smoke #2.
Follow the captain's advice and flank the enemy. Head right - in this part of the cave you will find a small armoury #1. Restock on ammo and attack the enemy by surprise. Head to the door and plant some explosives #2.

Ready our weapon. Once you're inside, look out for explosives planted all over the room #1 - a small mistake can cost you your life. Try to shoot the enemies with maximum accuracy. You will receive information that everything will soon explode. Quickly approach the keyboard on the right #2, thanks to which you will open the door - exit the room.
Use the covers and slowly move forward #1. The barrels are also useful here, an explosion can eliminate a few enemies at once. After a while a chopper will arrive and more enemies will lower themselves from it. After killing everyone, follow Price to another cave, from which four enemies will appear #2.
Quickly go down to the dinghy #1. Start chasing Shepherd and don't let him get away. Move forward with [W] (default). You can also reverse with [S] (default). From time to time you will have to fight off some enemy reinforcements using the semiautomatic pistol #2.
After getting out, a chopper will appear #1. Listen to Price's advices, quickly turn right or left when it's needed. At some point the river will get sharper and afterwards Shepherd will jump into his chopper. Keep a steady course so that the captain can take a shot #2.
You won't be able to avoid the waterfall. After a while you will wake up, dazed. Head towards the wreck to finish off your target. On your way you will come across a crawling enemy and afterwards another one, who will be trying to get his pistol - be quicker and stab him with the knife #1. Follow Shepherd and attack him once he stops by the car #2.
After waking up once more, Price will save your life. After a short struggle, begin to crawl towards the pistol on the ground #1, by using the left and right mouse buttons alternately. In the end your last resort will be the knife in you chest. Keep pressing [F] to get it out. Aim at Shepherd and throw the knife #2.

After finishing the single player campaign and watching the end credits, a bonus mission will be unlocked - The Museum. You can take a look round two rooms filled with characters from the game #1. Additionally the weapons from the game are all placed in display cases #2.
The mission itself doesn't have a real objective. However if you do press the red button on the desk #1, all the characters will come to life and start shooting at you #2. Eliminating them is quite challenge, despite the amount of weapons on your disposal. Each room has a separate button used to activate the characters, so at least you can be sure you won't be attacked from behind.
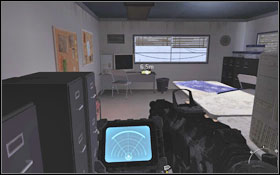
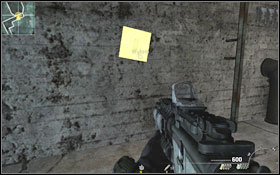
After the weapons presentation, on the way to the Pit. The laptop is right next to the tower on the left.
Before you exit the school, one of you companions will warn that someone might be inside one of the rooms. Inside you will find the laptop lying on the table on the right, behind some barrels.
Right after leaving the school, next to a taxi.
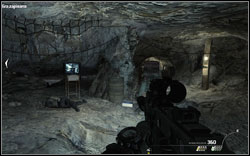
After captain MacTavish tells you go alone through the blizzard, go straight. There's a tower near the vehicle - climb up and you'll find the laptop at the top.
After getting to the hangar, before you go inside with the captain, head to the second hangar where two mechanics are repairing a plan. Smash the window and take the laptop from the barrel.
During the snow scooter fragment, around 1820 meters from the target. You will reach a small cluster of trees with a fence before it them. The laptop is in the middle, a little to the right (drive over it to collect it).
Right after entering the favella, take the left street and you will reach some huts with a motorcycle inside. The laptop is on a table in the room to the left from the one against which the vehicle is leaned.
While getting up the stairs, you will pass a building with a ladder - take it up. The laptop is in the next room.
Not far from the last laptop. In a building with little wooden stairs by the entrance. In the second room, near the bed.
At the end of the chase sequence, in the building next to the burning car. Go down to the lower floor and you will find the laptop between the beds.
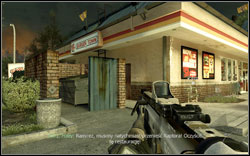
After leaving the alley (beginning of the mission), you will arrive at a small gas station. The laptop is inside, by the cash registers (there are monitors above).
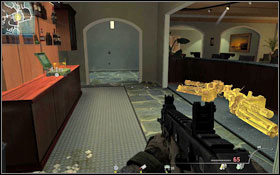
CRB Financial building, head left from the entrance, the laptop is on the table.
Taco Togo restaurant, enter through the demolished part, the laptop is inside.
Burger Town's back, in a garbage can.
Red building to the right of the main road. There's a blue car in the garage. The laptop is on a table.
At the next open area, as you start to move forward, the laptop will be right before the stairs on the right, on some barrels.
In the ice-cream shop on the last floor.
In the room behind the gate on a small court, right behind a window.
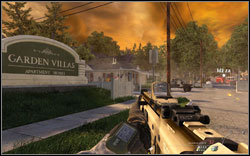
In an apartment by the intersection next to Garden Villas. The laptop is on a desk.
The laptop is next to a checkpoint, in the room on the left.
A building right before the residence, the laptop is on a couch on the 1st floor, right next to the stairs.
After saving the first hostages, as you move on, you will find the laptop on a shelf in the room before the exit onto the platform.

After rescuing the next group of hostages and clearing the road, before you go up the stairs, go to the room on the right. The laptop is on one of the shelves.
Before you take the stairs to the very top of the platform, you will find the laptop in a fenced passage on the right, under the stairs.
Right before the entrance to the Gulag, there is a staircase - the laptop is in the room upstairs, at the end.
In the control room, the laptop is in the back, behind the monitors.
While repelling the attacks with the shield, once you get to the first passage (blue lights), the laptop is in an opened cell on the right.
After planting explosives for the second time, once you find your prisoner, the laptop is right behind you on a desk.
The laptop is in the elevator on the left which you will pass by, the door doesn't close because of a dead body.

Once you get to the anti-air gun, there will be an entrance to the men's toilet nearby. The laptop is on a shelf in the vestibule.
After escaping the armoured vehicle, when you will have to decide to kill the three enemy soldiers or not. The laptop is on a chest on the left, at the spot where a parachute is hanging from a tree.
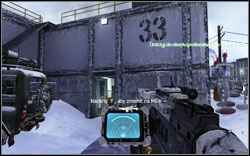
On your way to the submarine, get off the road and on the left you will see a building marked with the number 33. The laptop is inside, in the room on the left.
As you travel to the submarine, in the corner of the landing zone.
After going out of the oval room, the laptop is a little further, on the couch by the wall on the left.
When you're at the last floor, after going up the stairs but before you go on the roof, the laptop is in the first room on the right.
Before you plant the explosives to get into the building, go round it. You will see a small hangar with a boat inside. The laptop is right before the entrance.
After breaching the room on the upper floor. The laptop is on a desk in the corner of the room.
After planting the explosives in the basement (door on the right), the laptop is in the armoury.
Right at the beginning of the mission, in the cockpit of the plane on the right.
After sliding down and going to the other side, around 90 metres from the target. Laptop is nearby the cockpit of one of the planes.
After entering the first cave, right after killing the enemy by the TV. The laptop is in the branch of the right cave on the right.
Right before leaving the first cave, on the table on the left.
In the second cave, while repelling the attack of enemy soldiers in the smoke, when you will have to flank the enemy. Laptop is near the armoury.
In the room which you breached earlier, full of explosives. The laptop in on one of the desks, there's lots of cans around it.
Right before entering the dinghy, on the box on the left.
Spec Ops is a series of 23 missions divided into 5 groups - Alpha, Bravo, Charlie, Delta and Echo. The difficulty goes up with every group and there's a big diversity in them. You can complete nearly all mission alone, without the help of a second player. Two missions can be completed ONLY with the help on another player. Those missions are: Overwatch (Bravo) and Big Brother (Bravo).
However if you do decide to play in co-op, be sure to use voice communication. It's really useful in many cases. Additionally playing with a friend extend your life - if you get injured, the second player has a limited time (depending on the difficulty setting) to heal you. You can still shoot while on the ground with a pistol. Getting shot another time will result in not being able to use the pistol anymore and another bullet will kill you.
You can earn stars in each mission - in total there's 69 (three for each mission). The amount you receive depends on the difficulty setting (sometimes the time in which you finish the mission also counts). The stars will let you unlock more mission groups and achievements.
To unlock more missions, you have to earn a given number of stars:
In the further part of the guide you will find a description of each Spec Ops mission and some hints on how to pass it on Veteran. Some solutions are quite unconventional.
Difficulty setting (stars)
Requirements
Normal (*)
Complete the course.
Experienced (**)
Complete the course in 45 seconds.
Veteran (***)
Complete the course in 35 seconds.
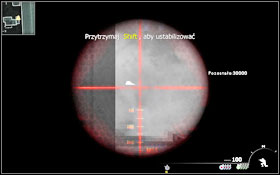
What matters in this mission is time, you don't choose a difficulty. You just have to complete the course while shooting every target showing an enemy to complete the mission and get one star. Shooting a target with a civilian automatically blocks the possibility of earning three stars.
Target localizations:
Green - civilians
Red - enemies
 First three targets are static.
 Two moving targets - a civilian and an enemy.
 Four moving targets show up in different spots.
 One moving target - an enemy.
 You can only use the knife on this target, after running up the stairs.
 Two moving targets, you can shoot two at the same time.
 A big amount of targets, moving civilian and enemy.
 Last two moving targets and sprint do the finish.
Difficulty setting (stars)
Requirements
Normal (*)
3 infantry waves, 1 jeep and 1 truck.
Experienced (**)
4 infantry waves, 2 jeeps and 1 truck.
Veteran (***)
5 infantry waves, 3 jeeps and 2 trucks.
Depending on the difficulty setting, you will have to face a specific amount of enemy forces while defending you position. You're on one of the buildings and have a couple of weapons on your disposal. The best choice is the sniper rifle (you'll eliminate most enemies using it) and something to fight at a closer distance, in case someone gets too close to you. You'll also find some mines - place them by the ladder and on the stairs at the back. Additionally, from the second wave you'll gain access to the Predator missiles. Use it at the beginning of a wave and aim it at the enemy truck - you'll get rid of a big group of enemies at once this way.
A good spot is the barrier by the ladder, in the distance you will find a passage through which most of the enemies will be passing - aim there. You can eliminate the rest using the secondary weapon and with the Predator's help (hide on the left while it's active). Also keep an eye on the roof of the opposite building - if someone gets up there, he will gain a good position.
Difficulty setting (stars)
Requirements
Normal (*)
30 enemies, maximally 6 killed civilians.
Experienced (**)
40 enemies and dogs, 4 killed civilians.
Veteran (***)
50 enemies and dogs, 3 killed civilians.
Your task is to eliminate a given amount of enemies in the favella. Apart from the enemies, you will also bump into civilians, who you should try not to kill (there's a limit on each difficulty setting). After beginning the mission, you will find a box on the right, thanks to which you can replenish your ammo.
Above all - don't hurry. If you're playing on a higher difficulty setting where dogs join the action, you have to be especially careful. You will hear barking when they get near (there are always two dogs for each ten killed soldiers). Try to eliminate them from a distance, because once they attack you, you're pretty much as good as dead. You can break their necks with the button responsible for using the knife, but you have to be really quick. Double UZIs can handle the dogs quite well, you can find them in one of the alleys (go straight from the starting point).
Also keep an eye on the roofs, as some enemies will appear on them, as well as behind some of the doors (bullets will penetrate the wood with no problems). You can't stand in once place and hope that the enemy will come to you. You have to walk round the whole terrain and eliminate everyone yourself.
The difficulty levels change the amount of enemies that you will meet on your way.
This description is for the Veteran setting.
Your task is to get to the camp, while quietly eliminating (or staying unseen) the enemy troops. If your presence will be discovered the mission won't end and you can still finish it, but all the enemies will attack you which will make things more difficult.
Go straight and you will see the first patrol - don't kill anyone, hid in the bushed on the right. Once you reach some pipes running above you, there will be three enemies and one with a dog (he'll be moving, but leave him alone) in front of you. Approach them from the left and try to take down two soldiers at the same time #1. Once they're down, quickly take care of the third one. Move on and you'll meet two more enemies #2. Eliminate them quickly so they don't alarm the others.
Take a right on the intersection. Firstly you have to take care of the soldiers on the right #1 and afterwards deal with the enemy with a dog (otherwise you will draw the other two soldier's attention). Once you reach another patrol #2, wait for one of the soldiers to move away from the others. Also eliminate one watchman with a dog.
Move on very slowly. Wait for one of the enemies to walk away. Firstly eliminate the two soldiers and a dog standing by the rocks #1. Afterwards kill two enemies standing on the road to the hill. In the end eliminate two opponents on the top #2.
Difficulty levels change the enemy soldiers' abilities.

The strategy for each difficulty setting is pretty much the same. In case of Veteran, the main difference is a slower pace of moving forward. After beginning the mission, head to one of the sides - right or left. Once you move close enough, enemies will lower themselves on lines #1. Use your position to eliminate as many of them as you can. Move on very slowly.
WARNING: Cars provide a very decent cover #2, however they can also explode and hurt you!
At some point the bridge will be and its upper part will collapse. Above will find another set of weapons to choose from - change one that you currently have for a rocket launcher #1, because a chopper will appear in a bit. Return to the collapsed part of the bridge #2 and under no circumstances - don' lean out! Destroy the chopper from this position.

This time you'll have definitely more enemies to eliminate. Two choppers will appear in the distance and a big group of enemies will lower themselves #1. The enemy soldiers will quickly approach you and attack from both sides. Don't hurry, time doesn't matter. You can destroy the vehicles to use them later as cover (it will eliminate the possibility of dying from explosion). Your target is the spot marked with green smoke, right behind the truck #2.
Difficulty setting (stars)
Requirements
Normal (*)
Reach the basement of the farm house.
Experienced (**)
Reach the western edge of the workshops.
Veteran (***)
Reach the barn near the greenhouse.
You can only play this mission in co-op with another player!
One of the players is onboard the AC-130 and is provides support to the one on the ground. Good cooperation is required.
Time: 7 minutes (Veteran)
While playing this mission on the ground, you can pretty much depend only on the second player, who will clear the path for you in nearly 100%. Naturally you will have to eliminate a couple of enemies, however you'll just need to keep running for the most part.
![By pressing [4] you can use the laser sight #1, thanks to which you can mark targets for your friend in the plane - Bravo - Overwatch - Spec Ops - Call of Duty: Modern Warfare 2 - Game Guide and Walkthrough](https://game.lhg100.com/Article/UploadFiles/201512/2015121410172714.jpg)
By pressing [4] you can use the laser sight #1, thanks to which you can mark targets for your friend in the plane. Additionally you can use night vision to see the enemy units better. Move forward, turn left after crossing the bridge and head to the barn #2. Kill every enemy that your friend didn't manage to.
After going out of the barn turn right and quickly run through the field #1 to the next house, into which you will get through the basement #2. You have to have faith in your friend above, who has to protect you (enemy units will appear behind you).
Clear the house of the remaining soldiers. Try going from one house to another, as there are enemies everywhere. Another safe spot is the greenhouse #1, where you can wait for your friend to clear the area. It's not far to the destination point from there. Go to the next barn #2.
This player has definitely a lot more responsibility. If you don't provide your friend with enough air support, he'll probably die because of too many enemies around. You have three different weapons at your disposal:
25mm - useful when dealing with single enemies - I wouldn't recommend using it at all;
40mm - a good and quite fast weapon, it allows you to shoot near your partner. Great against enemy helicopters, it eliminates multiple enemies at once;
105mm - causes a very big explosion and takes a long time to reload. Great for a big concentration of enemies far away from the other player.
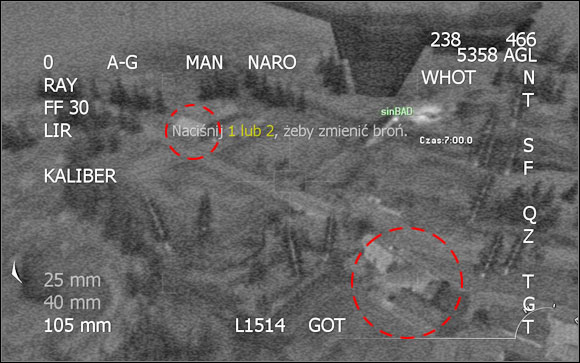
Shoot the hoses before the other player enters them. Choppers are an important target, they appear several times during the mission and enemy soldiers lower themselves from them. Use the medium calibre gun for most of the time, changing to the biggest one sometimes (to eliminate a big group of soldiers or to have a wider view). Keep an eye on the road - a couple of vehicles with enemy soldiers will show up. The important targets are: a couple of buildings by the field (another goal of the other player, after crossing the bridge), the fields (choppers will appear above it and the second player will be attacked from behind). Once the second player gets to the basement and will be inside the hose, quickly clear the area in front of him. Enemy units in the back won't matter anymore.
Difficulty levels change the enemy soldiers' abilities.
In each case you have to gain 30000 points.
Solid kill - 1000 points
Easy kill - 500 points
BTR - 4000 points
Truck - 10000 points
You get a bonus for killing enemies quickly.
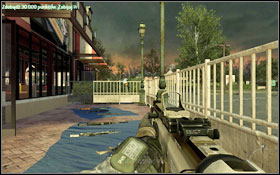
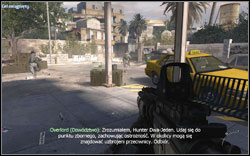
You begin in front of a restaurant and can choose weapons #1. If you plan on destroying the BTR, take the rocket launcher with you. Weapons with a thermal vision sight are also useful, as some enemies will hide behind smoke #2.
The mission won't begin until you enter the restaurant. A good way is to hide and wait for the enemies to enter the room you're in #1. You can use Burger Town, from which you'll easily destroy both BTRs #2.
Difficulty levels change the time you have to disarm the bombs.
Your task is to disarm three bombs in a given time. To disarm the bombs, you have to hold [F].
Veteran: 5 minutes

Enter the marketplace #1. After eliminating all the enemies you'll find the bomb just next to the bike #2.
Go back and to the other side. Look out for enemies in the windows. Slowly move to the next building #1. Inside you'll find a couple of guys to eliminate. After disarming the bomb, the hardest part begins. Enemies hide behind multiple covers found in the area #2. If you have enough time, try not to hurry and eliminate all of them slowly. You will find the last bomb by the wall.
Difficulty setting (stars)
Requirements
Normal (*)
Complete the race below 2:00 minutes.
Experienced (**)
Complete the race below 1:30 minutes.
Veteran (***)
Complete the race below 1:10 minutes.
Your task is to ride a snow scooter through a track found in one of the missions. Enemy soldiers firing at you make this task a little harder. You can receive an extra boost at the start if you press the acceleration button just as the countdown ends.
The route is pretty simple. Try to stay at the right side - you won't run into so many trees, especially in the first phase. You have unlimited ammo, so you can shoot the enemies as much as you like.
After reaching the freezer lake, under no circumstances should you drive up the hill - it will slow you down and the fall will additionally reduce your speed. Eventually there will be downward slope - no enemies here. The best way to make it in the time required on Veteran is to learn the whole route, which basically isn't very hard.
Difficulty setting (stars)
Requirements
Normal (*)
Reach the evacuation point in 6 minutes.
Experienced (**)
Reach the evacuation point in 7 minutes.
Veteran (***)
Reach the evacuation point in 10 minutes.
You can play this mission only in co-op mode!
Your tactic is to run from one cover to another. The goal is to get to the roof of Nate's restaurant and evacuate by a chopper.
Quickly head left. Jump over to wall and hide behind the stone #1. Shoot the enemies that your partner won't manage to kill. Once the street is clear, run to the garage on the left side #2.
After receiving information that the road is clear, move on to the next garage #1 while still sticking to the left side. After you reach the barricade, the chopper will fly away for a while, once it comes back and clears the way, move to the alley #2.
Go to the gas station and wait for your partner to clear the area #1. Once things settle down, run to Nate's restaurant #2. The second player should get rid of the trucks which will arrive - don't bother yourself with them. Once you get to the roof, get into the chopper. Once onboard, shoot the remaining enemies together with the second player.
Your task is to eliminate the enemies attacking the first player and allow him to safely get to Nate's restaurant.
Use [F] to lower the chopper's speed and keep it in a steady position for a bit longer.
Try to shoot as many enemies as you can, so that your partner has a clear route. Once you reach the barricade #1, eliminate everyone behind it. You will also notice a rocket launcher - once you approach again, kill the escaping enemies #2.
You will hover above the gas station #1. Shoot the truck which will appear after a while. Once your partner starts to run towards the restaurant, protect him by destroying the incoming trucks. Take him from the roof and don't forget about the enemies that were following him #2.
Difficulty levels change the number of snipers on the map.
This one is taken from one of the missions in Call of Duty 4: Modern Warfare. The action is taking place near Chernobyl and your task is to reach the evacuation point, while eliminating or cleverly avoiding the enemies.
Enemy soldiers localizations:
 It's wise to choose a quite weapon, like the MP5 with a silencer.
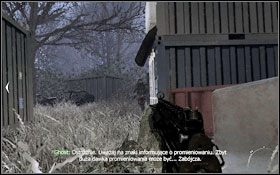 Right after leaving the first container, on the right.
 On the left, eliminate him quickly before other enemies have a chance of seeing him.
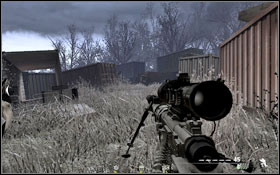 Two enemies talking in the distance.
 Right by a container in the distance (next to two trees).
 To the right from the last one, by the tank in the distance.
 On the left, right behind a tank.
 By a tree with a radiation warning.
 On the hill right next to a tree.
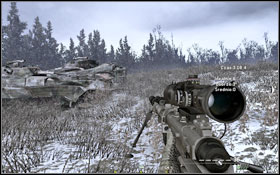 On the glade, a bit in the front.
 Right behind the tank - use the MP5.
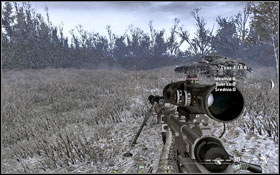 On the glade, this time next to a tank (back part).
 Three moving enemies, eliminate starting from the last one.
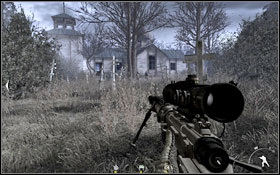 Sniper on the tower, three enemies in the front - wait for one of them to enter the building.
 After getting on the tower - firstly take care of the two (one shot) by the entrance, then the other two walking right below you (the third one will walk inside the building).
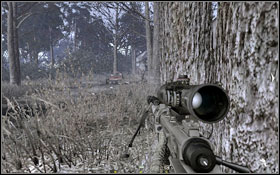 One will start to walk along the road, kill him once he's by the car. You will find two more in a house on the right.
 Two snipers on the right side of the barn in the distance.
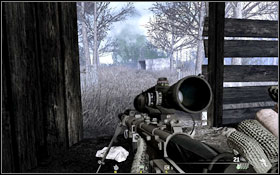 One sniper on the left side of the barn.
Difficulty levels change the amount and skills of the enemies.
Your task surely isn't easy - after breaching the wall, you must quickly get through the bathhouse and into the hole in the floor.
The time limit is present only on Veteran - 3:00 minutes. You can complete this mission in two ways. Before you breach the wall, you can choose your weapons from the pile on the left.
The first, traditional way - slowly moving forward and eliminating nearly all the enemies. In this case the weapons choice is entirely up to you. Once you're ready, plant the charge at the wall #1 and after a while you'll be in the bathhouse #2. Eliminate as much enemies as you can during the bullet time.
The whole thing is divided into three parts. In the first and second once you deal with normal soldiers. Additionally you will be attacked from above; there are lots of enemies on the balconies on both sides. You'll easily notice them because of the laser sights #1. In the end you will have to face soldiers with shields #2. The best way to get rid of them is use grenades and try not to fight them directly. You can also use flash grenades, thank to which you will kill them easily.
Actually, you can finish this mission in less than 15 seconds. Choose the G18 pistol and Striker as your weapons. As soon as you breach the wall, start shooting the enemies and hold the forward button - you will eliminate almost every enemy in the first part of the bathhouse. After using up the ammo, change your weapon. Once you're in the second part, throw a flash grenade above the lockers in the middle. This way you will blind the enemies at the end - you will have a clear path to the hole. Additionally you can use the Striker, its power is enough to deal with several enemies standing close to each other. Below you will find a movie showing this method in action on Veteran (naturally you can complete this mission even faster!).
Difficulty setting (stars)
Time at start
Time added for each checkpoint
Normal (*)
15 seconds
+4 seconds
Experienced (**)
10 seconds
+4 seconds
Veteran (***)
8 seconds
+3 seconds
In this mission you have to finish a race on a track identical to the one in Race (Bravo) while going through the checkpoints. Each gives you some additional time. You can get an extra boost at the start if you press the acceleration button just as the countdown ends.
The first checkpoint is right in front of you #1. Go straight, go through the red gate and turn right. Keep to the right mainly. You will have another two to choose from. After going through another one, there will be a jump #2. The gate below is a little to the right.
You will find the first gates on the right side. Turn left at the next intersection - there will be black gates #1. Try to drive through every gate at the frozen lake #2 - use the hill.
After a sharp turn right #1 there will be a sharp downward slope #2. The gates here are close to the trees, try not to go too fast and go through each checkpoint, if you have enough time. Eventually there will be another jump.
Difficulty levels change the enemy soldiers' abilities.
Wave
Type/number of enemies
Wave 1
20 enemies
Wave 2
30 enemies
BSP Predator
Wave 3
40 enemies
One chopper
BSP Predator
Wave 4
30 trained enemies
BTR80
BSP Predator
Wave 5
40 trained enemies
BTR80
Two choppers
BSP Predator
Your task is to survive five waves. There are four M-5 turrets on the map which you can use.
The turrets play a big role here, because they can turn 180 degrees.
After the mission begins, set the first turret #1 in a convenient position, so that the enemy won't be able to get to it easily - otherwise it will get destroyed. Pick up the explosive materials as well. Choose the AK-47 with a grenade launcher as your weapon (it will be useful for eliminating chopper, an alternative is the RPG, which you will find in the building on the left) #2, a machinegun with a thermal vision sight is also useful, you can find it by the second turret and the RPG, in the building to the left from the starting place.
Once the Predator joins the action, the safest hiding place will be the buildings - remember to always hide inside one if you get noticed by the enemy. There are several tactics that you can use to finish this mission.
You can run from one building to another after reach wave, set the turret in each and protecting your position. You can also collect all the turrets - I would suggest doing this during the first wave - set them in one place and defend your position. Staying in one place works best here #1. You cut and minimise the possible ways of getting near you and have to worry about one/two passages.
However in both cases you have to look out for missiles fired from the Predator and for choppers. You can destroy the BTR using the rocket launcher or semtex. The second option is more effective but also more dangerous - once you get out to open space, you will become an easy target for the infantry and air units. The best way to get rid of choppers #2 is to use a rocket launcher. You can also try to damage them with a grenade launcher.
Difficulty levels change the enemy soldiers' abilities and the number of Juggernauts.
You will have to deal with a new enemy - the Juggernaut. It's an armoured soldier equipped with a heavy machine gun that doesn't stop no matter what and runs in your direction. Use a rocket launcher or one of the sniper rifles to get rid of him. If he gets too close to you, you're in some big trouble - use a flash grenade or shoot him with the sniper rifle so that he stops shooting at you and quickly head to a safer place. The first Juggernaut will appear tight in front of you at the very beginning of the mission. More of them will keep appearing at random places - you can even get attacked from behind.
Your task is to gather the Intel (in the middle of the map) and then get to the evacuation point.
On Veteran there are more Juggernauts. Additionally they don't stop shooting at you no matter what. As for the normal soldiers - they aim better here and can be quite troublesome at bigger distances.
After the mission begins, your priority is the Juggernaut in front of you - on the right or left side. Be sure to have a sniper rifle equipped. A couple shoots should be enough to kill him. Take any weapon with a sight that will let you fight on a small and bigger distance. What's important - staying in one place for too long isn't a good idea. Keep moving all the time and kill only those enemies who are a direct threat to you. Keep to the right side all the time and no matter what, don't move long the centre of the map.
Once you get to an open space, firstly shoot everyone you have in sight and then quickly run to the other side. Head to the laptop, from which you will collect the required materials. It will take a while so make sure that all the enemies around are eliminated.
Go to the destroyed plane, from which you can eliminate all the enemies in the valley. However remember that you can get attacked from behind by a Juggernaut! After going down, keep an eye for a Juggernaut on the opposite side, on a hill. Slowly move forward. Once you're around the middle on the valley, another wave of soldiers will appear. Get rid of them and go up the hill.
No matter what, don't go through the middle - keep to one side, behind the covers. Once you're close to the evacuation point, forget shooting - run to the designed spot.
Difficulty levels change the enemy soldiers' abilities.
Your task is to collect data from three laptops placed in three different houses. You have a Stryker to help you - you can point him the position it should fire at. You will find turrets in the houses on the right - one in the first one and two in the second.
Instead of beginning with the first house, head to the last one. There aren't many enemies on the streets and by the houses - the real attack starts after you begin to copy the data. You have two turrets at your disposal in the last building. Before you begin to copy the data, place them in front of the entrances - it will make things a lot easier. Additionally, place mines wherever you can. Once the enemy gets too close, the data copy will be paused - you have to approach the laptop and restart it to continue the copying.
Once the copying ends, leave the house and go to another - nothing can stop you from taking the turrets with you! Altogether, you will have three turrets at your disposal. Place them in good spots and they will make your life much easier - Stryker isn't very useful inside buildings.
In the end you will have to copy the data from the first (according to the start point) house. Just like before, place the turrets in front of the entrances. The data copy is just formality now. If you don't have enough ammo, there is a box near the bridge, where you can restock. Eventually return to near the Stryker to end the mission.
Difficulty levels change the enemy soldiers' abilities.


Another take on the Suspension mission (Alpha) - this time you have to destroy every vehicle (36) on the bridge. You will also receive turrets #1 that will help you in eliminating the enemies lowering themselves down. Place them far from the starting point on the left and right side of the bridge. Choose a fast weapon with a big amount of ammo #2.
Infinite ammo activates for each 5 destroyed vehicles and lasts for 30 seconds.
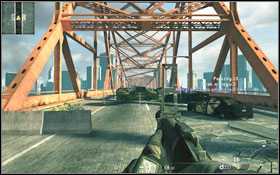
At some point the bridge will be bombed and the top part will collapse. Above you will find a turret #1, set it so that it takes care of incoming enemies. After a while a chopper will appear. Return to the collapsed part of the bridge #2 and no matter what - don't lean out! Destroy the chopper from this position.
This time you will have definitely more enemies to eliminate. Two choppers will appear in the distance and deploy a big amount of enemy soldiers #1. They will quickly approach you and attack from both sides. If you miss a vehicle, an adequate icon #2 will be displayed, showing the place to which you should return.
Difficulty levels change the enemy soldiers' abilities.
You have to plant three explosive charges and get out of the area. You are equipped with a gun with a thermal vision sight, which will make moving around easier.
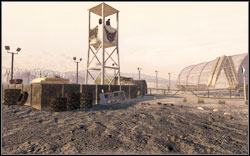
On Veteran, the enemies have better sight and might spot you from faraway. MacTavish is helpful, as he will inform you about any incoming patrols and the truck - you should avoid it at all costs. After the mission begins, go round the hangar and get rid of the enemy with a pistol or knife #1. You will be able to plant one charge before the truck appears. Head towards the plane #2 and approach it from the tail, this way you will stay unnoticed by the nearby two guards.
Return following the same path. Your next target is a small room, with two enemies walking round it #1. Inside there is an enemy sitting on a chair - get rid of him with a good shot to in head - and another one, leaned against the wall right next to the spot where you need to place the charge #2. Sneak to him and kill him before he has the chance to notice you.
Leave the building through the same door through which you entered. Go up and turn left. Go in the direction of the last target. You will bump into another patrol - let the soldiers pass. There are two enemies by the plane #1. Wait for the nearby patrol to pass and take them out. Quickly run to the plane and plant the charge #2.
It's time to head to the evacuation point. Look out for the car moving through the area. Use the sensor on your gun to avoid the patrols #1. If you get spotted the mission doesn't end, it just gets harder. If you do get noticed #2, the best thing you can probably do is just run to the gate, where the mission will end.
Difficulty levels change the enemy soldiers' abilities.
Your task is to get to the end of the terminal and kill the enemies on your way. Apart from normal ones, you will also encounter foes with shields. The best way to get rid of them is using a grenade or a grenade launcher. You should approach this mission very defensively. The walkthrough below is quite unconventional, but it will allow you to complete the mission on the highest difficulty setting.
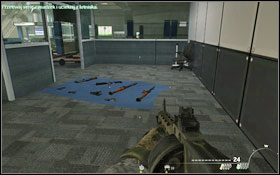
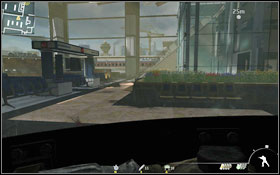
In front of you there are a couple of weapon types from which you can choose #1 - grab anything you like. The first and most important thing you must do is getting a shield from one of the enemies #2. After leaving the small room, you will get attacked by a soldier wielding one (and by two without shields). Try to get behind the one with the shield, however don't get too close because you'll get hit.
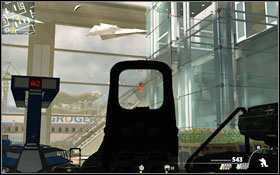
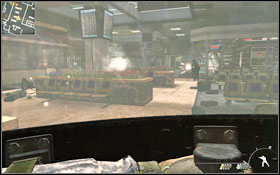
The tactic is quite simple. Once you get near the stairs, a smoke grenade will be thrown. Retreat a little and eliminate the enemies. If any of them gets close, you can hit him with the shield. Once you go up the stairs and go pass an elevator, another wave will show up. Quickly run back down to near the starting point - it's a very good position for taking out the enemies that going down the stairs #1. Those who manage to get down should be welcomed with the shield. Try not to fight on the upper floor #2, as you can easily get killed.
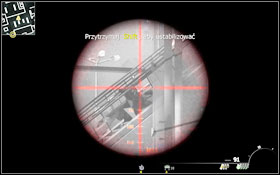
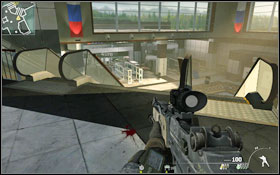
Do the same with the last wave - retreat to the starting point and eliminate the enemies going down the stairs #1. After clearing the whole terminal go to the other side and down the stairs to the marked spot #2.
Difficulty levels change the enemy soldiers' abilities. In each case you have to eliminate 40 enemies.
This time your task is not to defend the house where Makarov was suspected to be hiding (one of the campaign missions) but killing quite a big group of enemy soldiers. There will be normal soldiers as well as snipers here. Juggernauts will also have their share of time. Use a rocket launcher or one of the sniper rifles to kill them. If a Juggernaut gets too close to you, you're in some big trouble - use a flash grenade or shoot him with the sniper rifle so that he stops shooting at you and quickly head to a safer place.
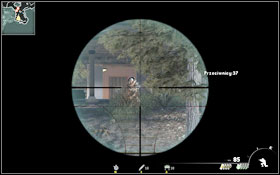
The first Juggernaut appears at the very beginning of the mission in front of you, but quite far away. The rest of the enemies show up randomly on the map, so you have to stay focused. The priority is to clear a path to the building, in which you will find almost every weapon available.
It's hard to define a tactic here. The whole area it rather opened, so you can be an easy target for the snipers. You can notice them by using a with a thermal vision sight or by sun reflecting in the sights of their rifles. Once in the house, place mines everywhere the enemy can appear. If you decide to stay inside till the end, you have to look out for the Juggernauts - if one gets too close to you, you can very easily die. Use flash grenades at critical moments and shoot from the snipe rifle without zooming - the bullets will hit the target with no problems at a small distance.
Difficulty levels change the enemy soldiers' abilities.
Your mission is to rescue two groups of hostages that are being kept on the platforms.
In front of you there's the first room. Once you breach it, take out the enemies inside #1. After a while the gate will open and you will be able to move on. Stand in a convenient position #2, from which you will be able to easily eliminate the incoming enemies.

Go straight. Once you get up, use the grenade launcher to destroy the containers in the distance #1. You will eliminate a couple of enemies this way. Once you're around the middle, a chopper will show up. Try to eliminate it as fast as you can #2 by using the grenade launcher. There's a rocket launcher on the ground, but you'll do it faster with your primary weapon.
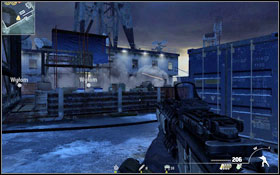
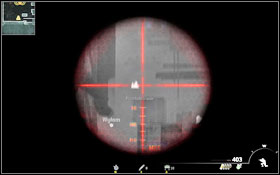
Move on. Before you get to the stairs, some more enemies will appear. On the highest difficulty setting you will have to deal with them in the smoke coming out of the smoke grenades they throw #1. You will find a weapon with a thermal vision sight by the container. Move to the right. Your first task is to eliminate the enemies in the windows on the upper floor #2. Look out - they're equipped with rocket launchers.
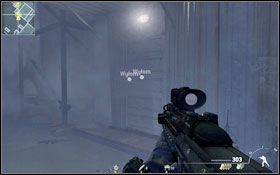
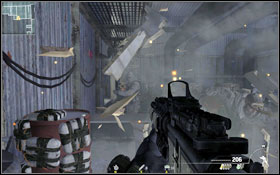
Once you get the spot where the hostages are being held #1, change your weapon - don't breach in with a thermal vision no matter what. Inside you have to deal with some enemies #2 - take them out during the bullet time.
Difficulty levels change the enemy soldiers' abilities.
Your task is to eliminate 10 Juggernauts in the favella. The map is very small and there will be three boxes at which you can restock on ammo. The mission isn't easy, especially on Veteran.
The Juggernauts appear at random spots, however always in the same number (after killing one, another will appear somewhere else on the map instantly):
You only have an RPG, grenades launcher, grenades (fragmentation and flash), mines and a knife. The tactic is quite simple, nevertheless taking out all ten the first time you try this mission can be quite troublesome.
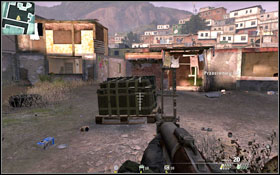
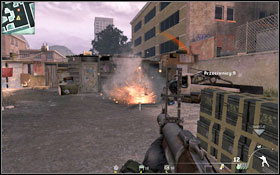
Juggernauts run from fragmentation grenades and when they see a mine - they shoot it. You can set mines right behind the corners of buildings, but you won't always make it in time. Focus on using flash grenades and the grenade launcher. Above all, you have to keep moving - it will only take a short while for the enemy to kill you and doing the opposite if far more difficult. Hide behind a corner and once you notice a Juggernaut - throw a flash grenade at him to blind him. Use this moment to shoot him with your weapon. Repeat this tactic until he falls. As you can have only four grenades at a time, you will have to quite often go to ammo boxes to get more. When more than one Juggernaut will appear, you have to make sure they run next to each other. The enemies aren't too intelligent and you don't have to worry about getting flanked - they just run straight at you. If you manage to make them get close to each other and blind them - the grenade explosion will hurt all of them.
Difficulty levels change the enemy soldiers' abilities.
In this mission you will have to face 15 Juggernauts, appearing at random spots on the platform. The area is very big and provides lots of cover. Additionally you have more weapons to choose from. The most useful are the sniper rifles, thanks to which you will be able to eliminate the Juggernauts from afar as well as from a smaller distance. The tactic is quite simple, nevertheless taking out all fifteen the first time you try this mission can be quite troublesome.
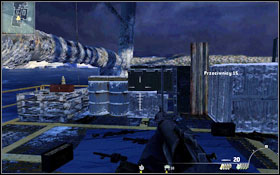
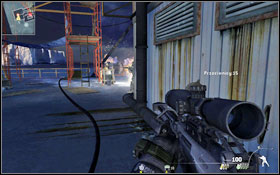
Focus mainly on using flash grenades and the sniper rifle. Once you see a Juggernaut, throw a flash grenade and blind him. Afterwards start shooting at him with the sniper rifle. Repeat this tactic until he falls. As you can have only four grenades at a time, you will have to quite often go to ammo boxes to get more.
 Crysis 3 Game Guide & Walkthrough
 Company of Heroes Game Guide & Walkthrough
 Call of Duty: Black Ops Game Guide & Walkthrough
 Crysis Game Guide & Walkthrough
 Company of Heroes: Tales of Valor Game Guide & Walkthrough