Introduction
This is a guide to all the collectible Signs in the PS Vita version of
Rocketbirds: Hardboiled Chicken.
There are a few things to note:
- Some of the Signs appear in different locations in the PS3 and PS Vita versions of the game. These are the Signs located in Chapters 1, 2 and 13. This collectible guide is for the Vita version, although it should assist you with the PS3 version for all the other chapters.
- The naming convention "Sign [Chapter Number] - [Sign Number]" has been used throughout this guide. For example, "Sign 8-3" refers to the third sign found in Chapter 8.
- There are three Signs per Chapter. Before they are collected, they will appear as a red square on a stick. Once they have been collected they will turn around to reveal a yellow "sad-smiley" face on the other side of the red square.
- To collect a Sign either Hardboiled or a penguin has to touch it.
- Some can be reached quite easily, simply by finding the correct path to reach it or by jumping up to it.
- Others will require you to get a bit more creative. For example, if a Sign is out of reach, you may need to find a crate and bring it to where the Sign is, stand on it, then jump up to it. Others, such as the very first one in the game, will require you to air juggle an enemy's corpse into the Sign by repeatedly shooting him until his corpse touches and collects it.
- Some of the Signs require some setup. For instance, you may have to leave an enemy alive so that you can use him later, or to leave some doors open so that you can backtrack. Any necessary setup has been detailed in the below.
- One convenient thing about the Signs - convenient with respect to the ease of following a collectible guide to find them at least - is that the Signs appear in a specific order. Within each chapter, you must collect the first Sign to make the second Sign appear in the chapter, and then collect the second Sign in order to make the third Sign appear. For example, the order will always be Sign X-1, Sign X-2, Sign X-3.
- However, the inconvenient thing about this system is that you will have to do a lot of backtracking within each chapter as the second or third signs usually appear further back from wherever the last one appeared.
- If you miss a Sign and come back via Chapter Select you will need to collect any preceding Signs before the Sign you are missing reappears. So if you missed, say, Sign 7-3 on your first playthrough, you will need to collect Signs 7-1 and 7-2 again before Sign 7-3 reappears in the Chapter for collection.
For information on the other trophies, please see the main trophy guide for
Rocketbirds PS Vita which is linked below.
Linked: Rocketbirds PS Vita Trophy Guide
Are you hard enough to take on the fascist Penguin Army and it's brutal leaders? Become harder than hard: become Hardboiled! He's the cock who can rock, the rooster with a rocket-booster, the poultry... you can't... fault... ry?
Guide Rating
1,021
Views
Chapter 1 Signs
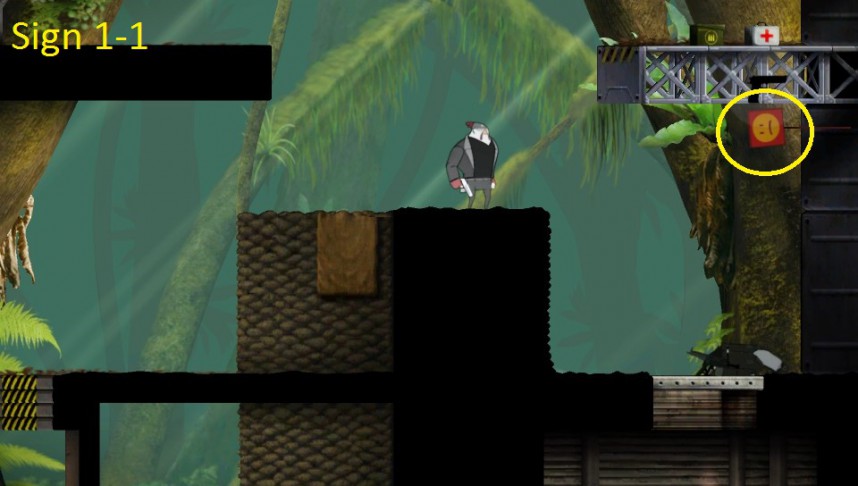
In order to collect this Sign you will have to air juggle the soldier into it with gunfire. The soldier will be where Hardboiled is shown in this image when you enter this screen. Climb up onto the platform from the left and shoot him repeatedly to bounce him into the Sign.
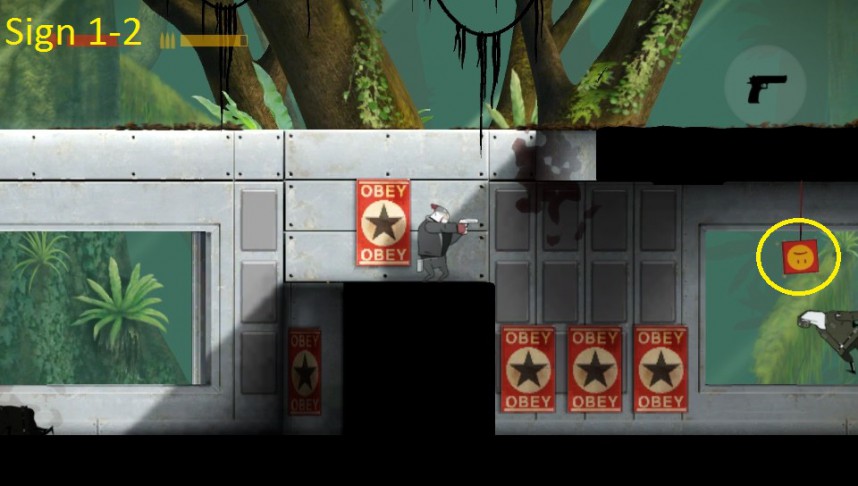
This Sign is collected in a similar manner to Sign 1-1. Climb onto this platform from the left, then shoot the penguin into it with gunfire to collect the Sign.
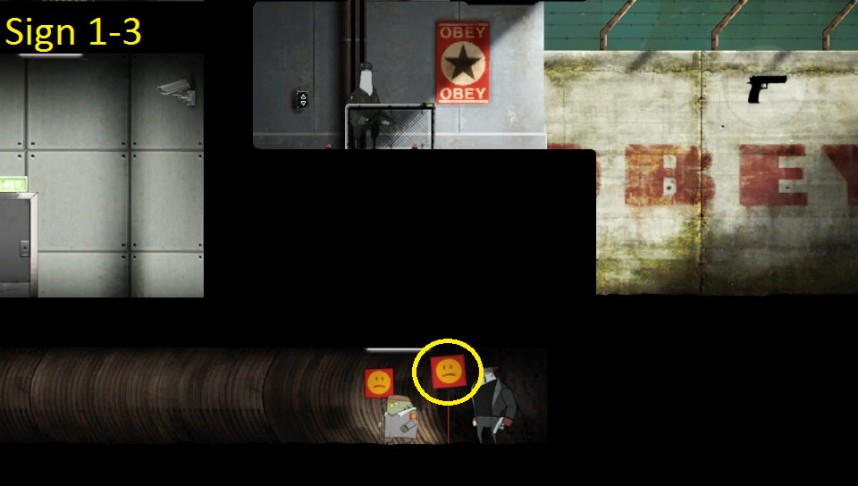
The last Sign in Chapter 1 is located next to the resistance fighter who explains Signs to you when you approach him. You will approach this screen from the left. Just keep on the lowest level possible as you progress through Chapter 1 and you will find it.
Chapter 2 Signs
The first Sign in Chapter 2 is located in a tunnel. You will need to climb over this screen from left to right, then double back on yourself once you find the tunnel entrance and enter this tunnel from the right.
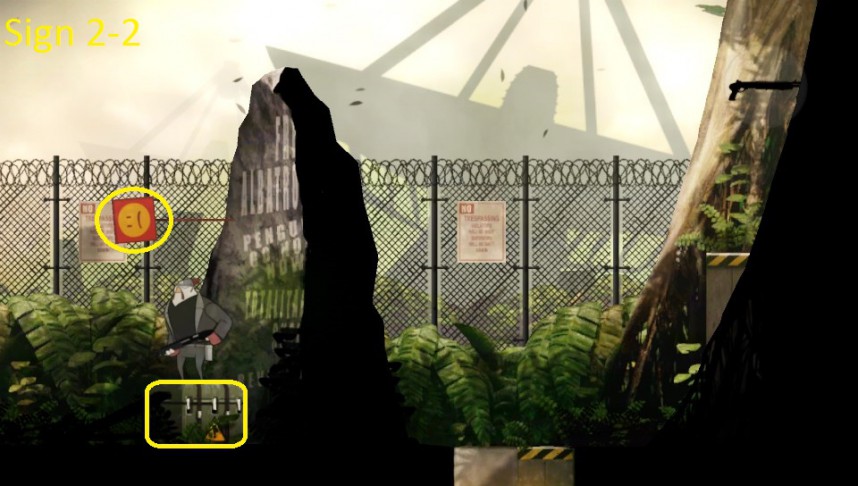
After collecting the first Sign, take the crate back up the elevator to where you found it. Stand on the crate and jump to collect the second Sign.
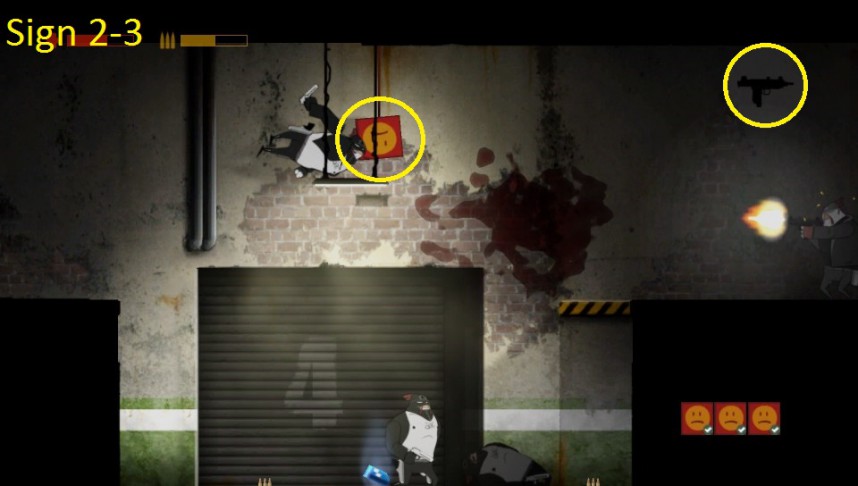
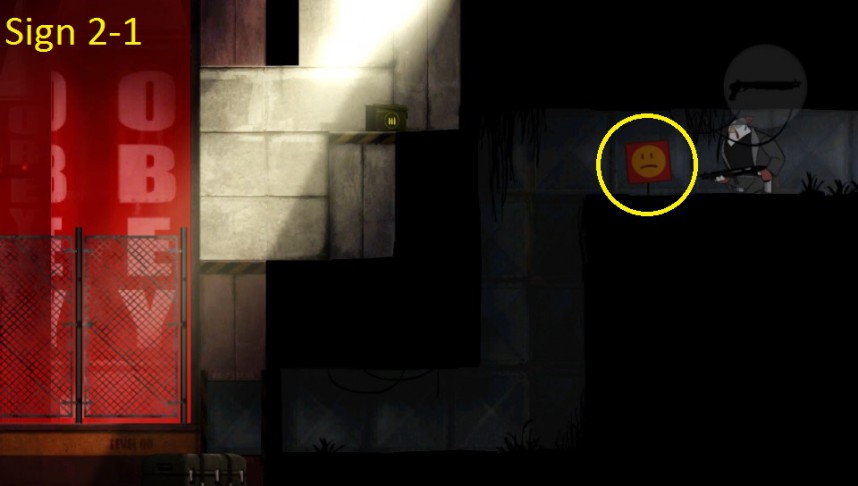
Near the end of Chapter 2, you will encounter a number of clones. You will eventually reach this area, in front of the door with the number 4 on it. Quickly deal with the clone who is in the pit with you, then climb up onto the platform to the right. Two more clones will enter the screen, one from each side. Shoot the clone who has just entered on the same platform as you are standing on with your Uzi. Keep the trigger held down and you will knock him into the Sign and collect it.
If you mess up, you will get a second chance when the second clone climbs up onto the platform with you.
Chapter 3 Signs
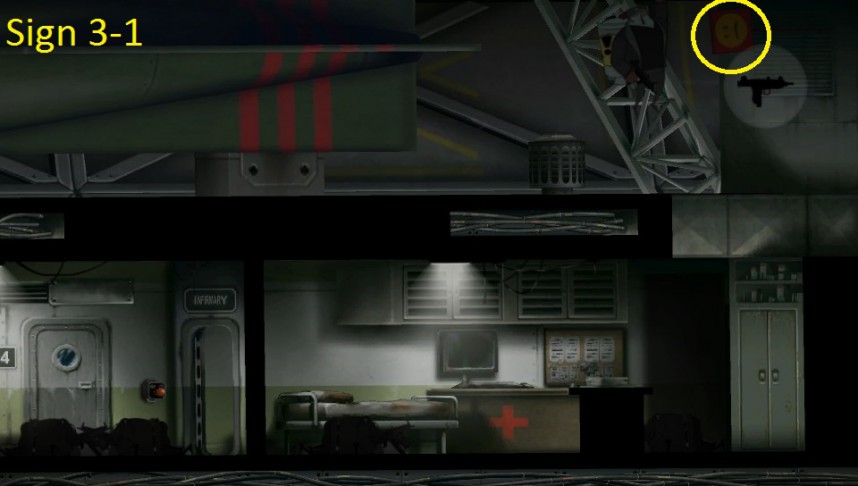
Once you are on the zeppelin, head all the way to the right, climb up onto the false ceiling, then jump to collect the first Sign.
After collecting Sign 3-1, backtrack and use the elevator to get back onto the exterior of the zeppelin. Head all the way to the right to collect this Sign.
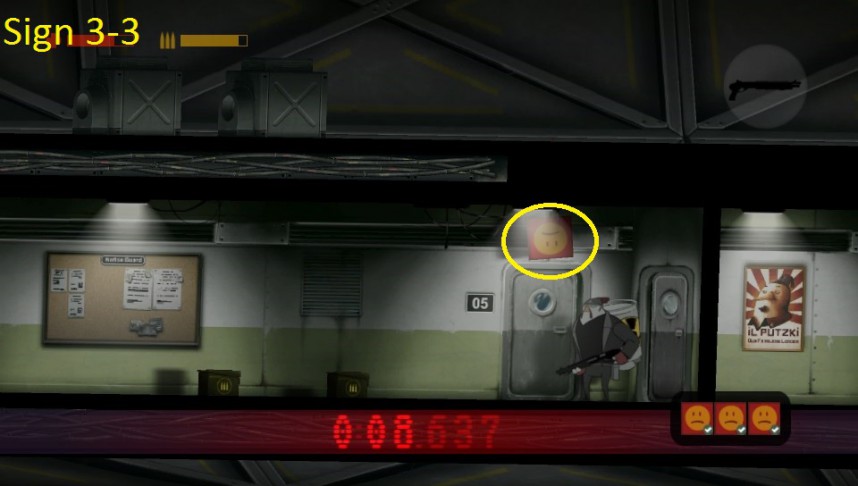
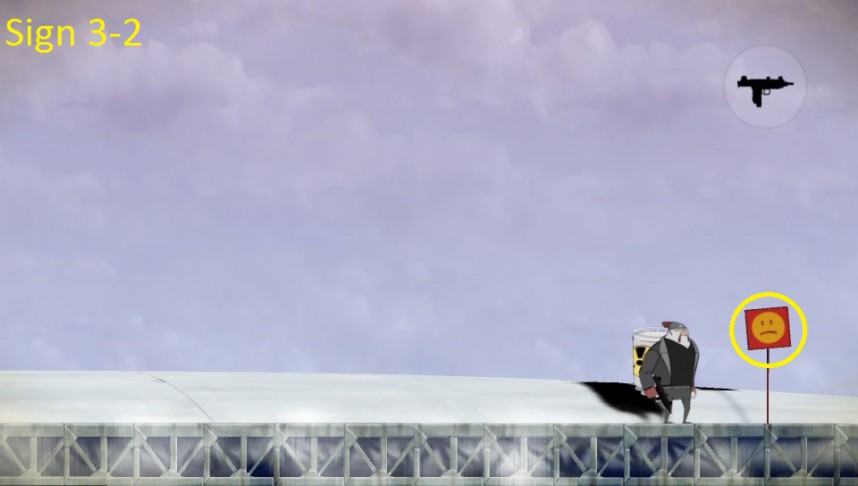
Once you have started the self-destruct sequence on the zeppelin, head all the way to the right. Don't take too long! Once you have collected it jump down the escape chute which is slightly to the left of this image.
Chapter 4 Signs
NOTE: Do not kill the clones sniping at you from the windows when you descend the cliff at the beginning of Chapter 4. You will not be able to obtain Sign 4-3 if you do so.
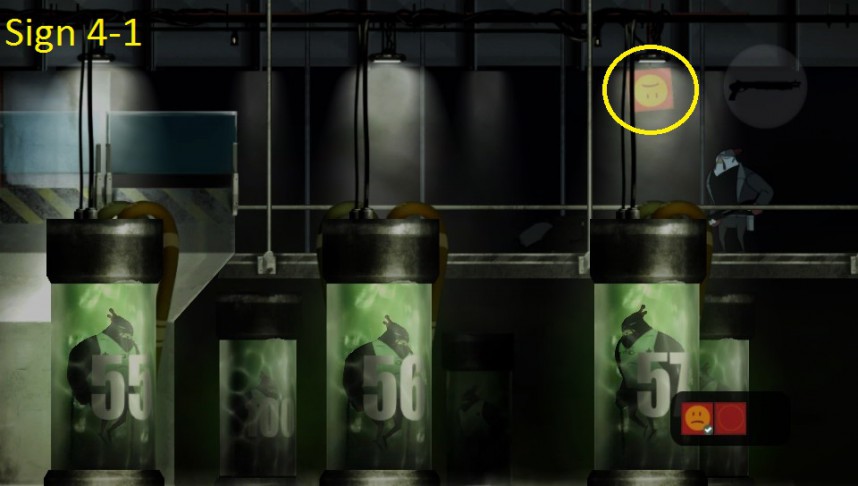
During Chapter 4 you will come across an area with a load of clones growing in tanks. The first Sign is located above tank number 57. Jump to collect it.
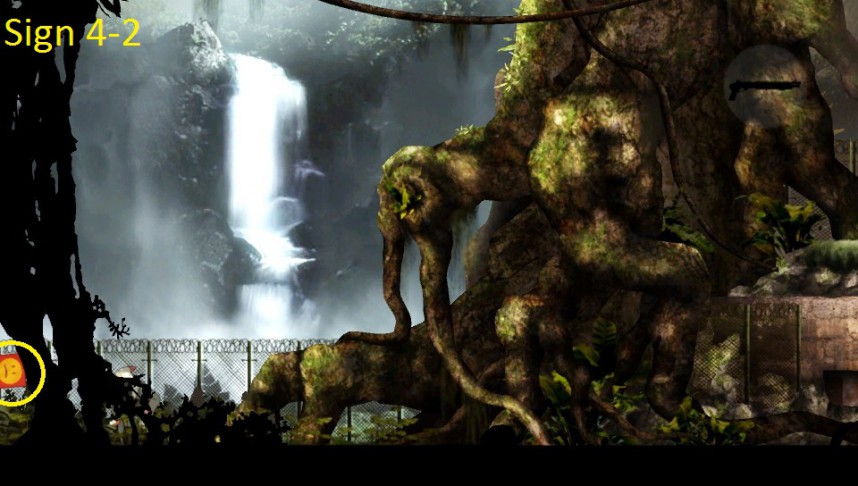
Backtrack to the very beginning of Chapter 4 to find the second Sign nestled in the corner of the screen. You may have to tilt the Vita in order to see it.
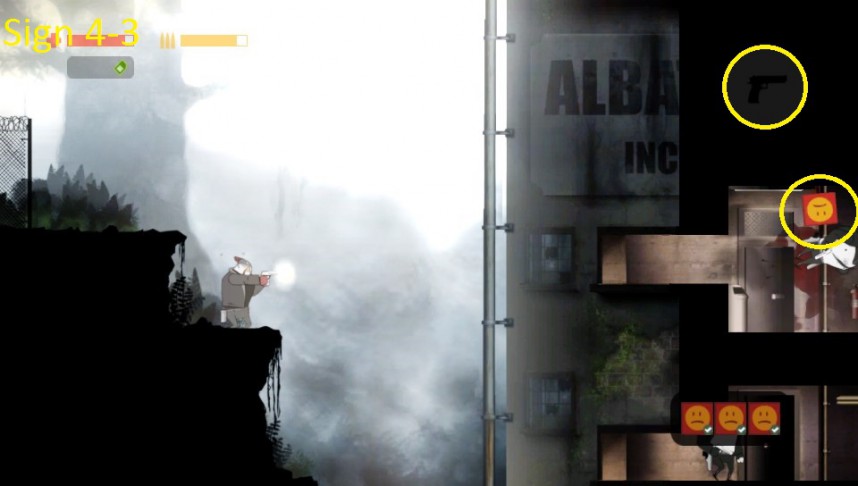
After collecting Sign 4-2, head back to the cliff. Stand where Hardboiled is in the image above and shoot the clone through the window into the Sign to collect it.
Chapter 5 Signs
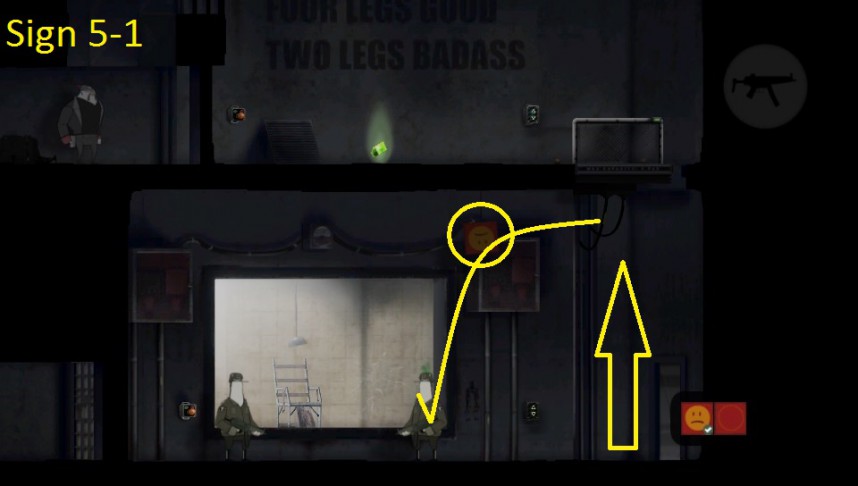
During Chapter 5, you will come across the screen shown above. Take control of a penguin with a brainbug and ride the elevator shown. When it is near the top, jump off to collect Sign 5-1.
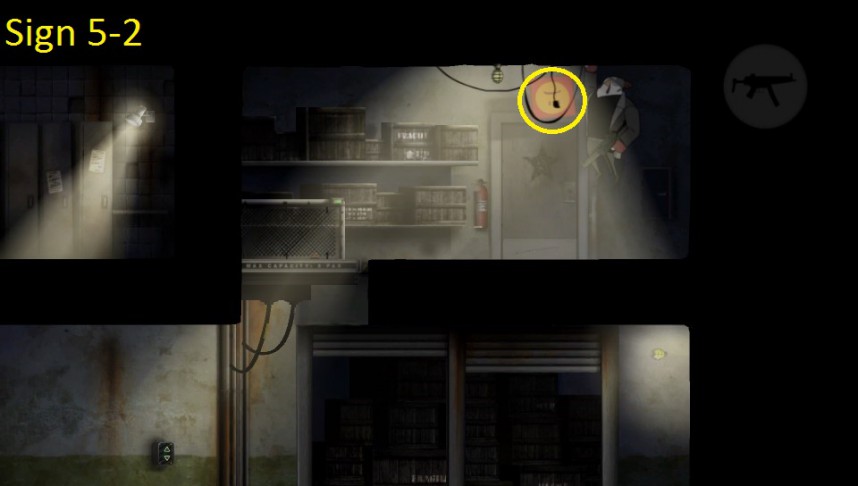
Backtrack to Hardboiled's cell, then head right to find this screen. Ride the elevator up to this alcove and jump up to collect Sign 5-2.
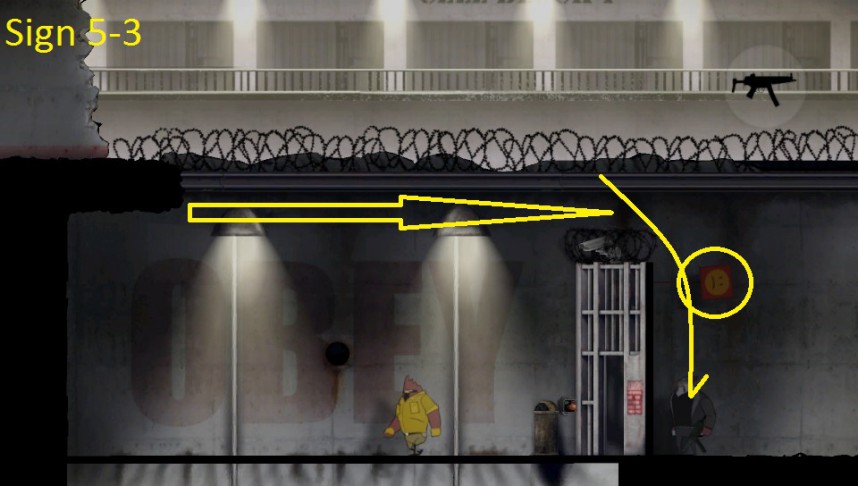
Head back to the area with the elevator which moves from side to side. While it is travelling over Sign 5-3, jump off to collect it.
Chapter 6 Signs
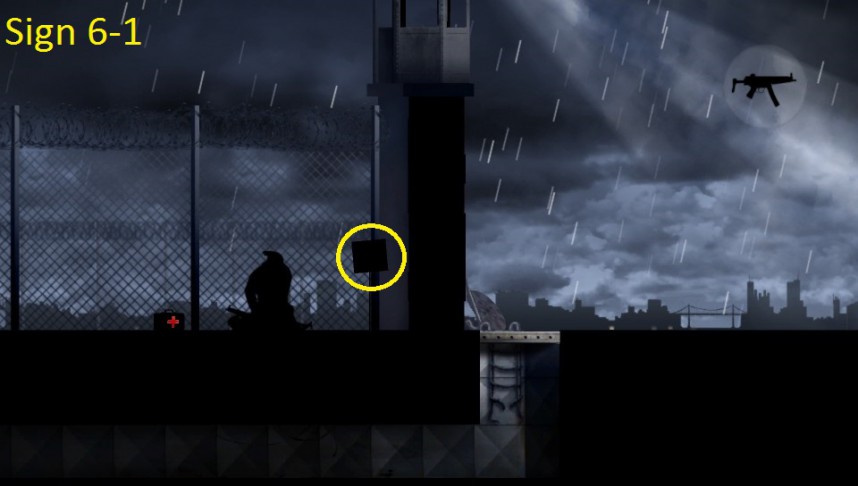
Once you get outside, stay above ground and head as far to the right as you can. You will see the silhouette of Sign 6-1 right in front of you.
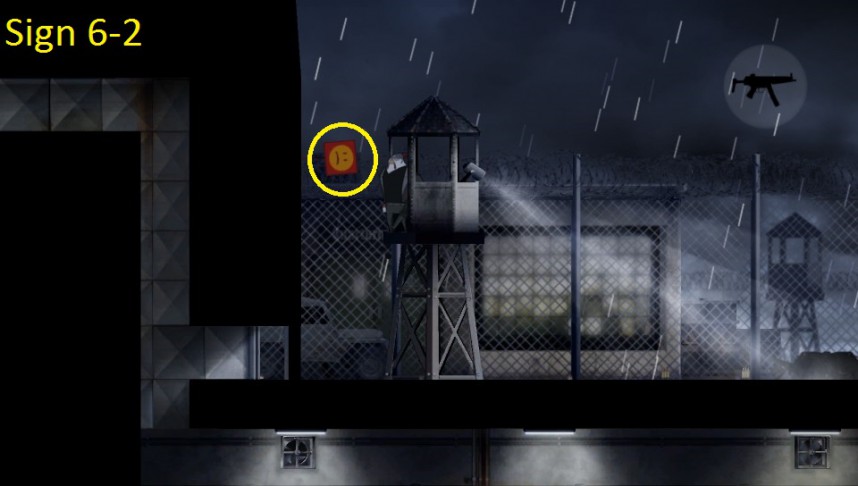
From Sign 6-1, head all the way back to the left. Climb into the guard tower shown in the image above, then jump to the left to collect Sign 6-2.
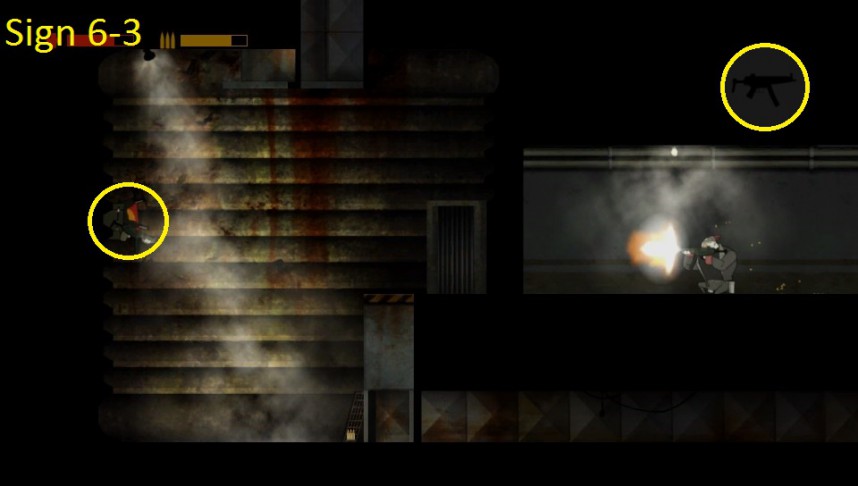
Towards the end of Chapter 6, you will come across the screen shown above. You will drop down from the top left corner of the screen. The soldier will be standing where Hardboiled is standing in the image.
Climb onto the platform and roll past the soldier. Then turn around and shoot him back towards the left with your SMG. Keep holding down

and you will shoot him into Sign 6-3 and collect it.
Chapter 7 Signs
NOTE: Make sure that you do not kill the soldier shown in the image for Sign 7-3 until you have collected that Sign. You will not be able to collect Sign 7-3 if you kill him before collecting it.
You will eventually come across a soldier who comes out of a toilet. Brainbug him and jump to collect the Sign.
Make sure you do not press the button next to the toilet door or else you will ascend on the elevator and will not be able to return to Signs 7-2 or 7-3.
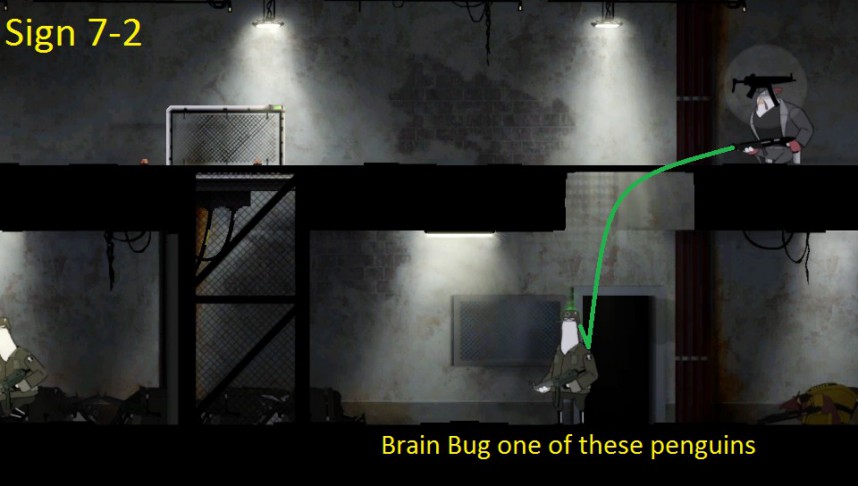
Firstly, return to the lowest possible floor and brainbug one of the penguins patrolling the area. You may have to get lucky as they will be in a rolling battle with the resistance fighters.
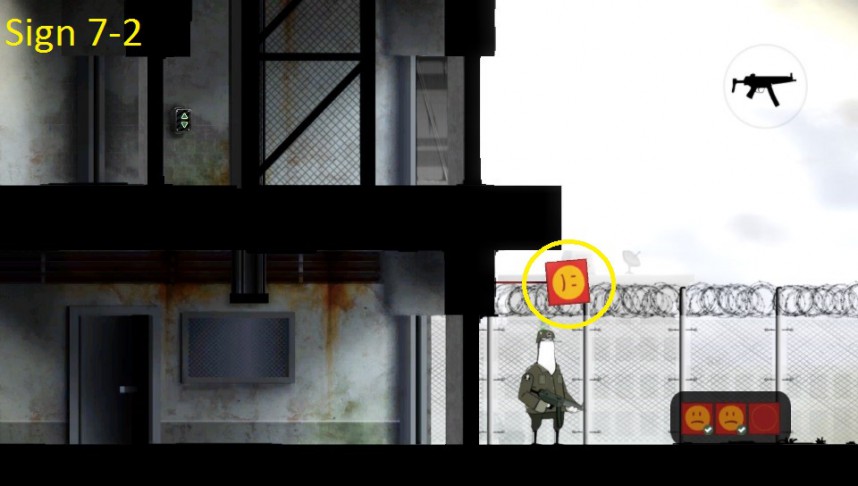
Then take your brainbugged soldier as far to the right as you can. Eventually you will find yourself outside, and Sign 7-2 will be right above you.
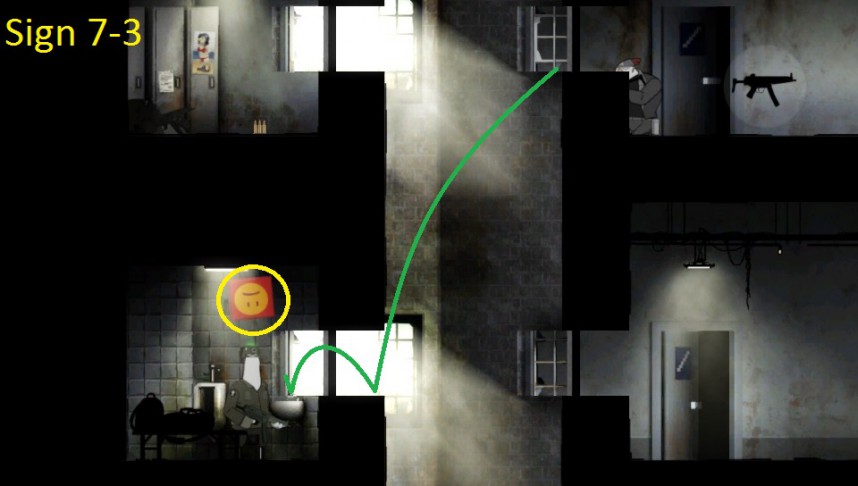
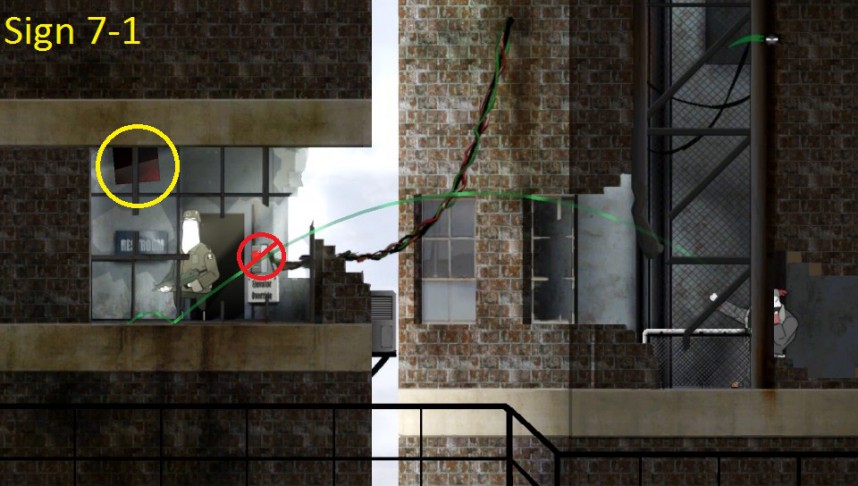
Go back up one level and use the crate to climb up onto the upper half of the screen. Then head to the left onto the screen shown above. Kill the soldier directly opposite you, then bounce a brainbug into the toilet on the lower left corner of the screen. If you get the angle right, you should be able to control the penguin in this room. Once you have control simply jump to collect Sign 7-3.
Chapter 8 Signs
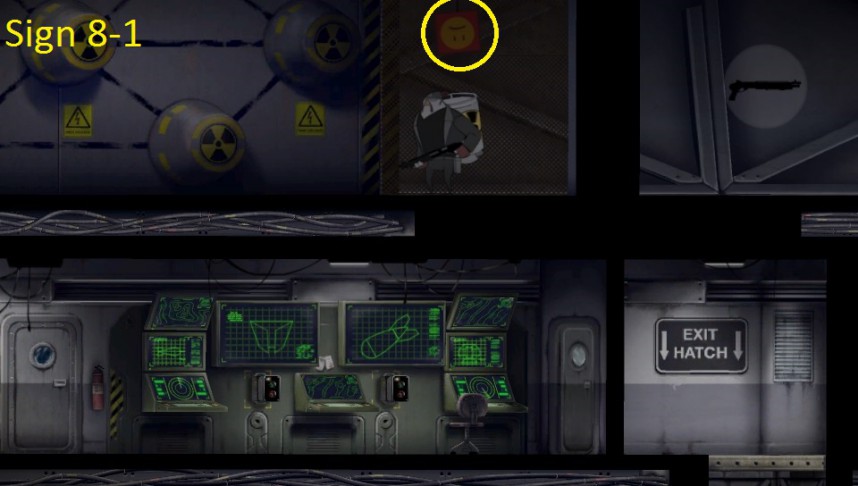
As soon as you enter the second zeppelin head to the screen on the right. Jump to collect Sign 8-1. If you dropped down into the cockpit, then you've missed it.
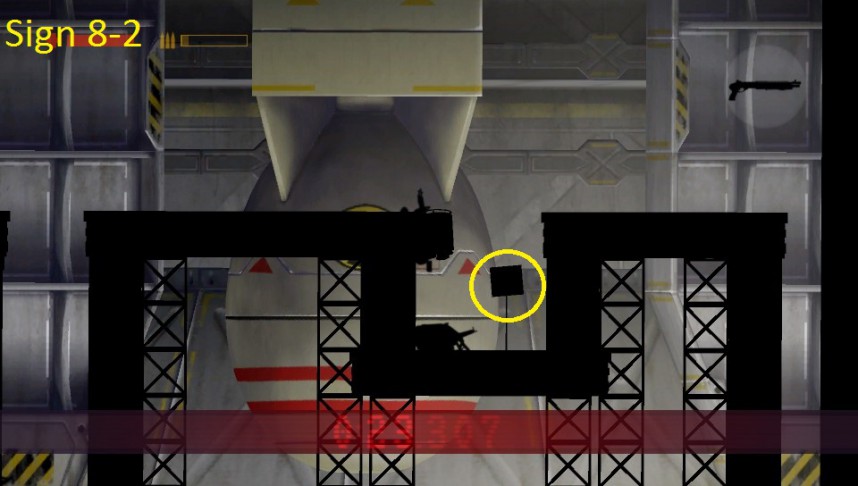
During the self-destruct escape sequence you will find Sign 8-2 in the very last pit before the escape chute.
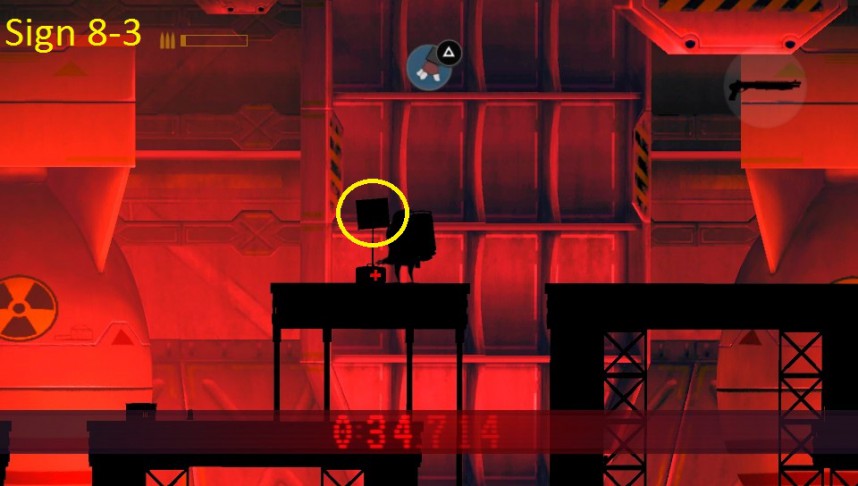
Backtrack very slightly from Sign 8-2 to find Sign 8-3 on this floating platform. Now get to the escape chute!
Chapter 9 Signs
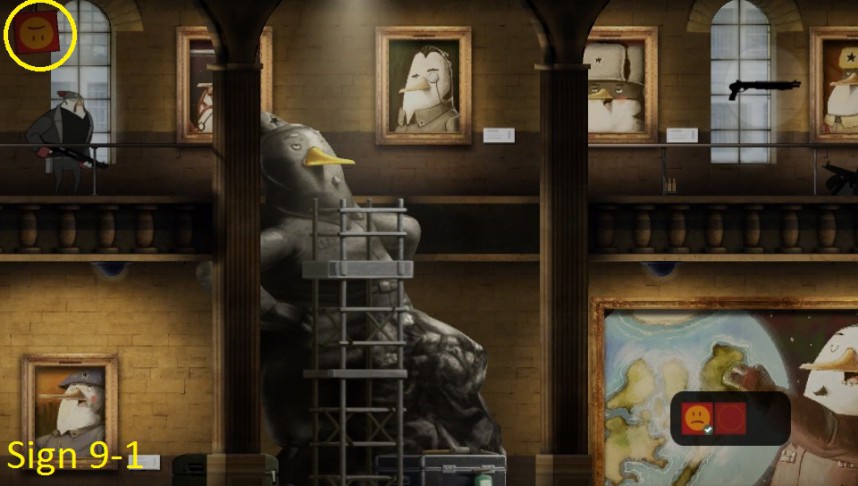
Sign 9-1 is in the room with the large penguin statue. Climb the scaffolding then go onto the balcony on the left and jump to collect it.
Sign 9-2 is in the room with the globe and the penguin hologram. Go around the museum then climb up onto the speakers to collect it. Chapter 9 loops on itself so you can keep heading right to get back here.
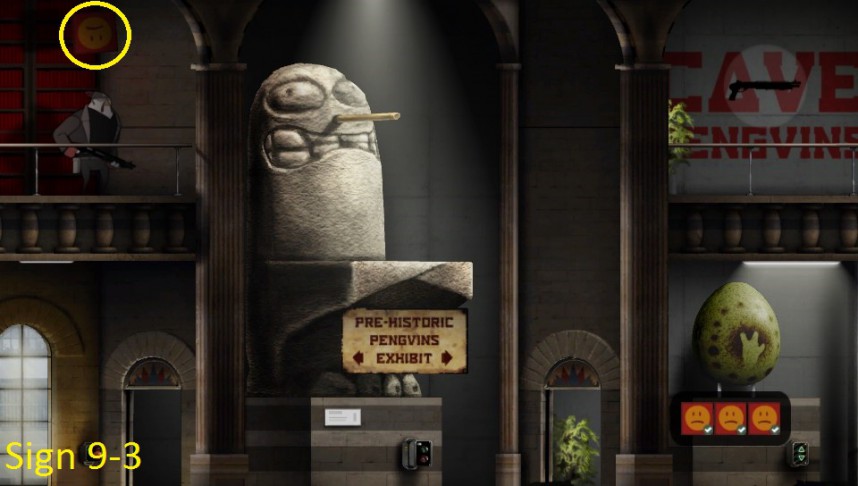
Sign 9-3 is in the room with the pre-historic penguin statue. To get here, go to the room with the penguin statue and Sign 9-1 and exit that screen in the top right hand corner. Once you're here, jump to collect Sign 9-3.
Chapter 10 Signs
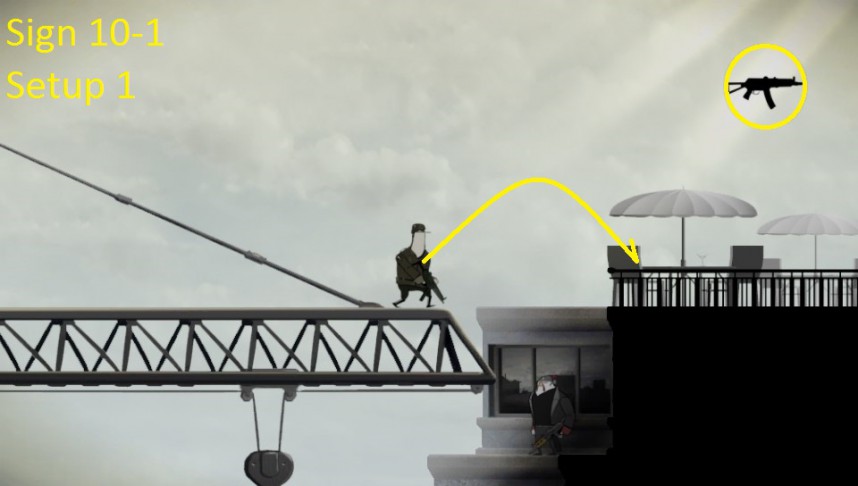
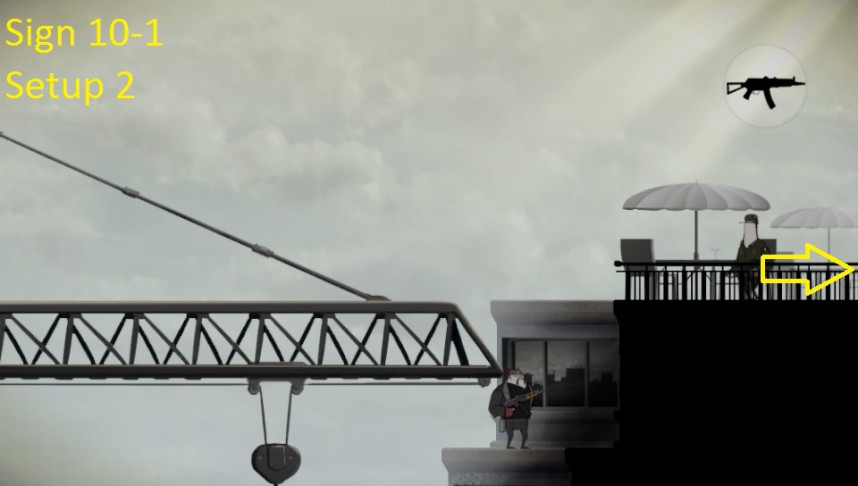
Collecting Sign 10-1 can be a little tricky and may require multiple attempts.
The first thing you need to do is to get the soldier walking on the crane onto the rooftop on the other side of the gap. To do this jump up onto the crane with him, roll around and stay close to him until he is at the edge of the crane, then punch him into the air and give him a short burst of fire from your SMG to push him across the gap. Do not shoot him so much that he dies or you will not be able to collect Sign 10-1 and you will need to restart from the last checkpoint.
Next, wait for him to regain his composure and follow him when he walks across into the next screen.
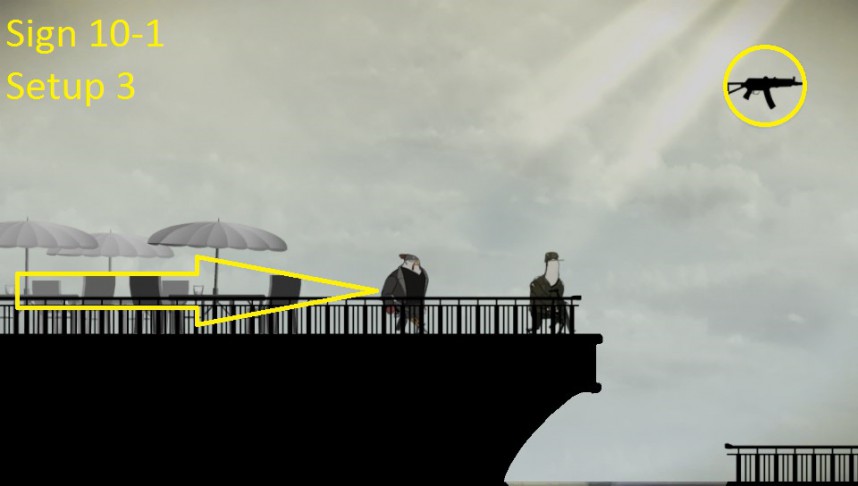
Carefully follow him to the edge of the rooftop on the next screen. You will need to get him and yourself as close to the edge as possible. Ensure that you still have your SMG equipped.
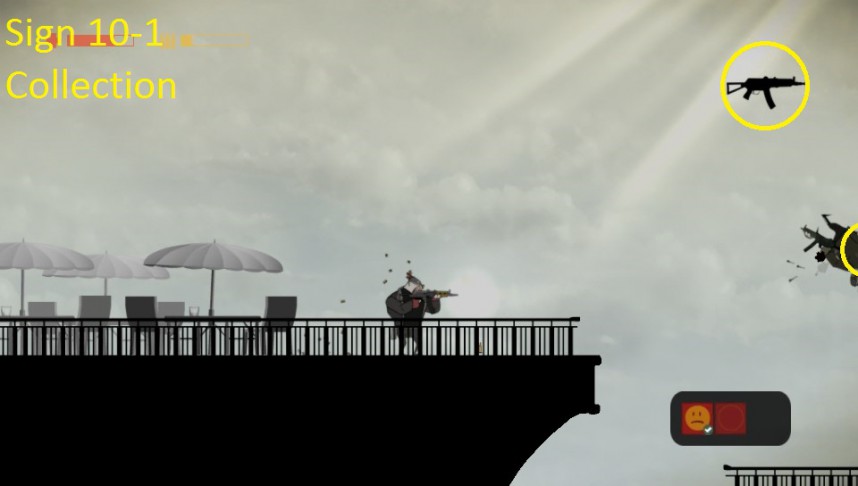
Once everything is in position shoot him with your SMG until he is touching the edge of the screen. Sign 10-1 is right up against the edge of the screen and so, if you are not close enough to the edge of the rooftop yourself, the penguin may not collect Sign 10-1 for you.
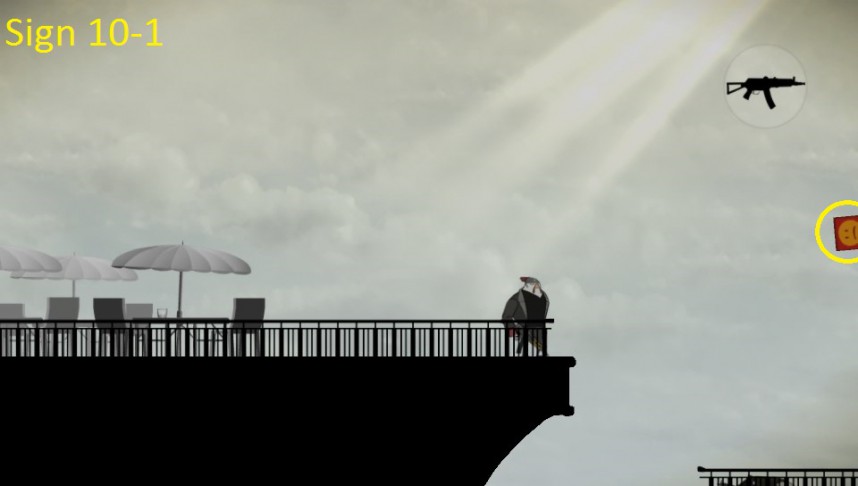
Here is an image of where Sign 10-1 is located, which is now visible because Hardboiled is standing on the very end of the rooftop.
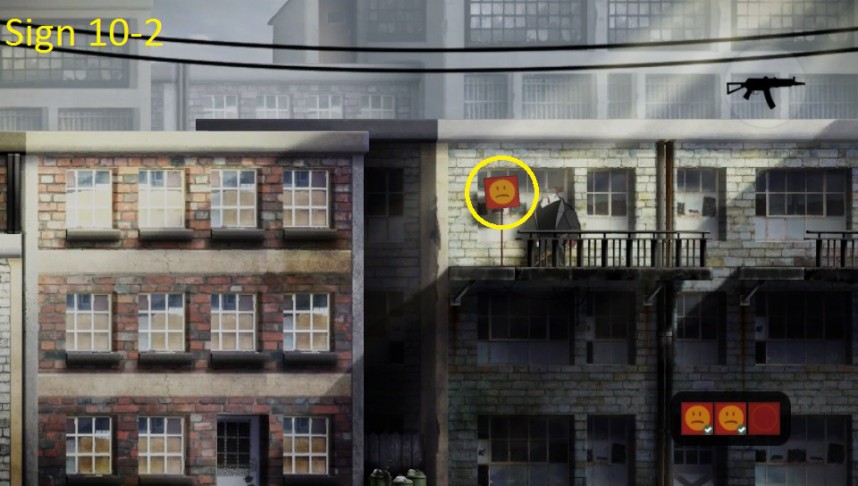
Backtrack all the way to the very start of Chapter 10 to find Sign 10-2 on a balcony.
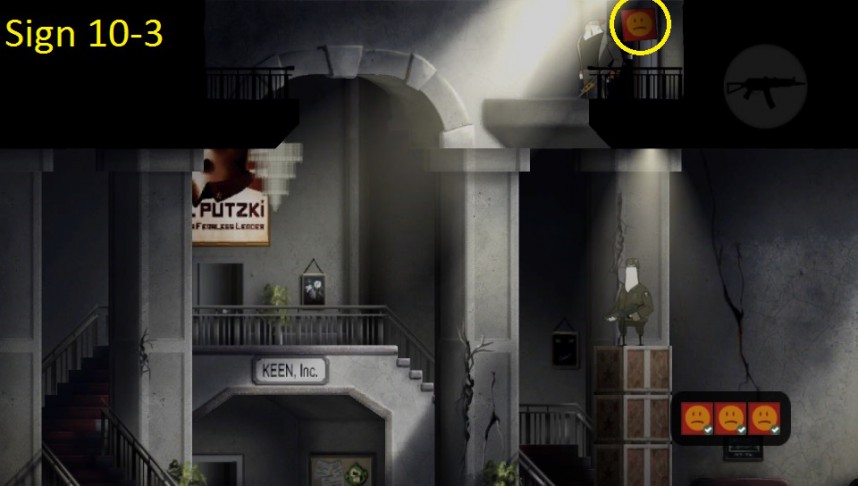
Sign 10-3 is located on the small balcony on the screen below Sign 10-1. Make sure that you drop down into this screen from the rooftop on the right hand side to avoid any chance of falling directly into the room below and missing the Sign.
Chapter 11 Signs
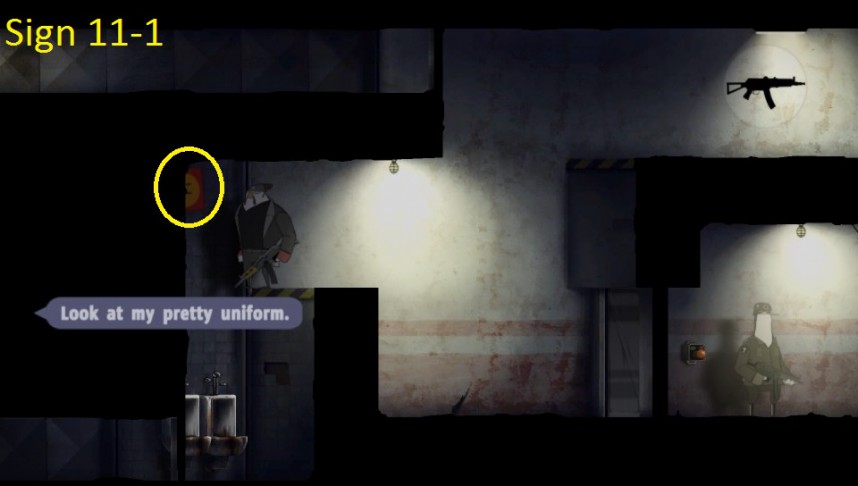
Sign 11-1 is located above the urinals. This screen is found by taking the elevator down from the subway train platform then taking the ventilation shaft to the right.

After collecting Sign 11-1, keep heading left until you can take the elevator back up to the ventilation shaft which took you to the subway train platform. Sign 11-2 is located in that ventilation shaft.
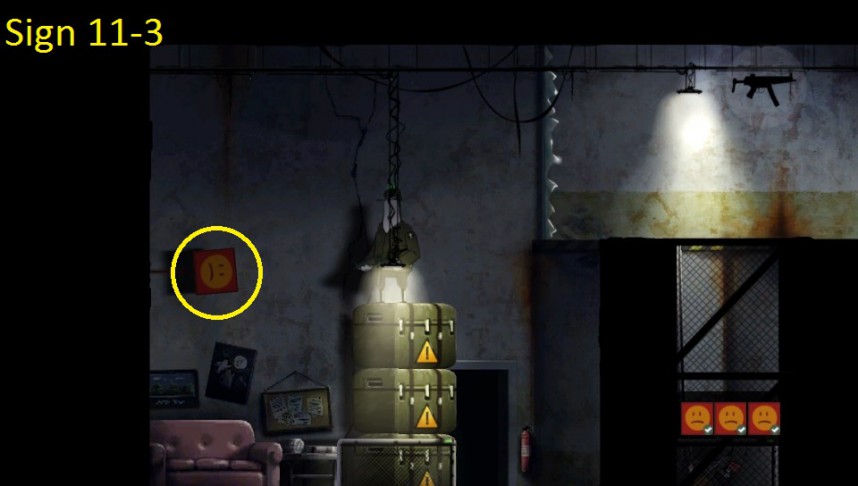
Make sure that you stack all three crates onto the elevators at the end of Chapter 11. (See

Excessive Stacking in the main guide for details on how to do this.) Near the very end of the level you will need to brainbug the soldier on this screen in order to raise the elevator that you are standing on. The crates that you stacked earlier should also be here. While controlling the brainbugged soldier simply climb the stacked crates and jump to the left to collect Sign 11-3.
Chapter 12 Signs
Right off the bat, there are a couple of things that you need to avoid doing if you want to be able to collect Sign 12-2.
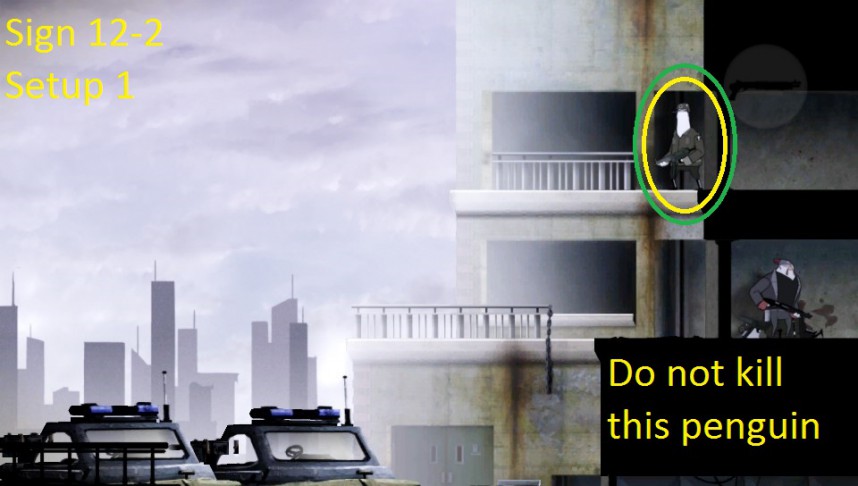
Firstly, make sure that you do not interefere with this penguin, found at the very beginning of the chapter. He must be patrolling this hallway to collect Sign 12-2 later.
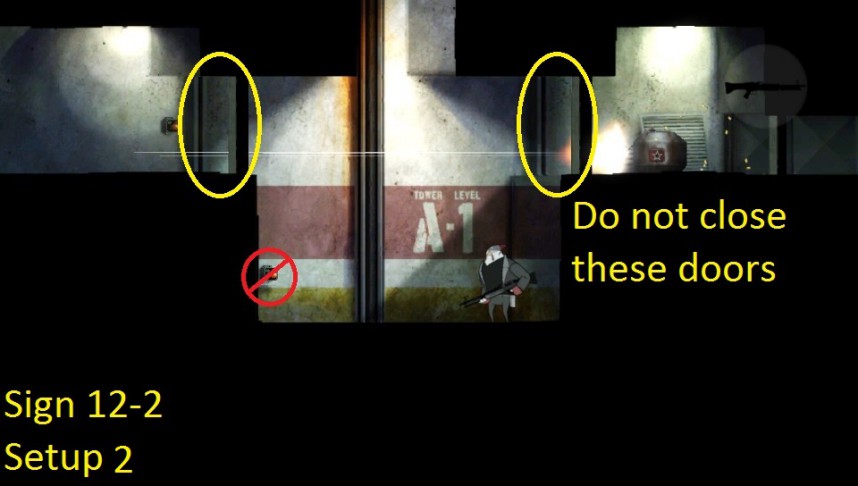
Secondly, when you first reach this room, do not close the doors before you take the elevator up. You will not be able to collect Signs 12-2 or 12-3 if these doors are closed. You will be able to ascend on the elevator safely by waiting for the turret to stop firing before activating the elevator.
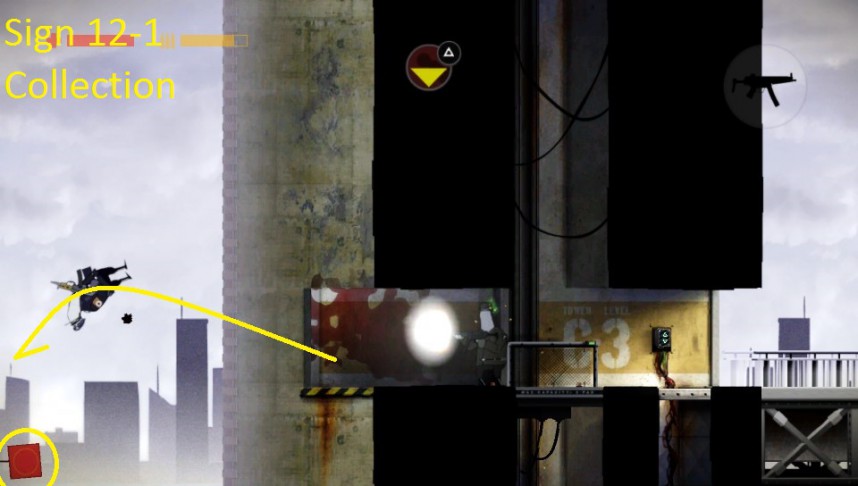
After collecting the green keycard, you will have the opportunity to brainbug a soldier. Do so, and use him to ascend to level 3 of the tower. (Note the markings on the wall tell you which level and tower you are at.) Once you're on level 3, walk all the way to the left to tower C. You should see an officer penguin patrolling this screen. Wait for him to reach the left hand side of the walkway and then shoot him to the left hand edge of the screen with your SMG.
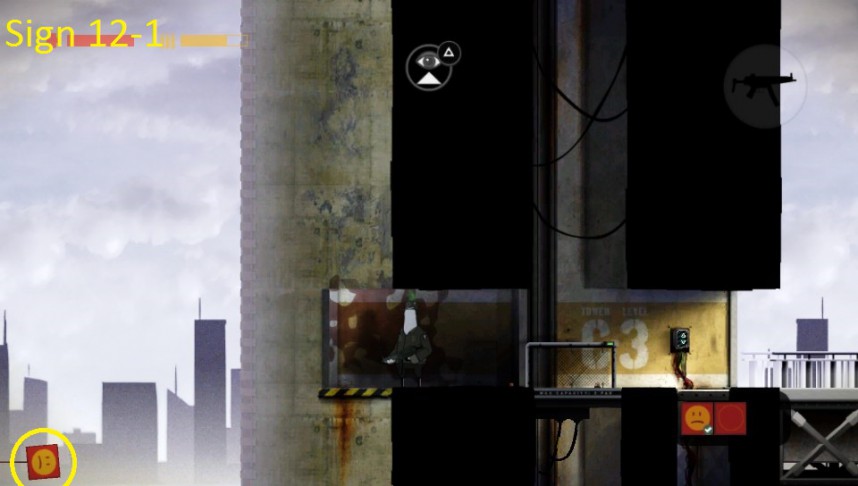
When you stop shooting and let him fall he will collect Sign 12-1.
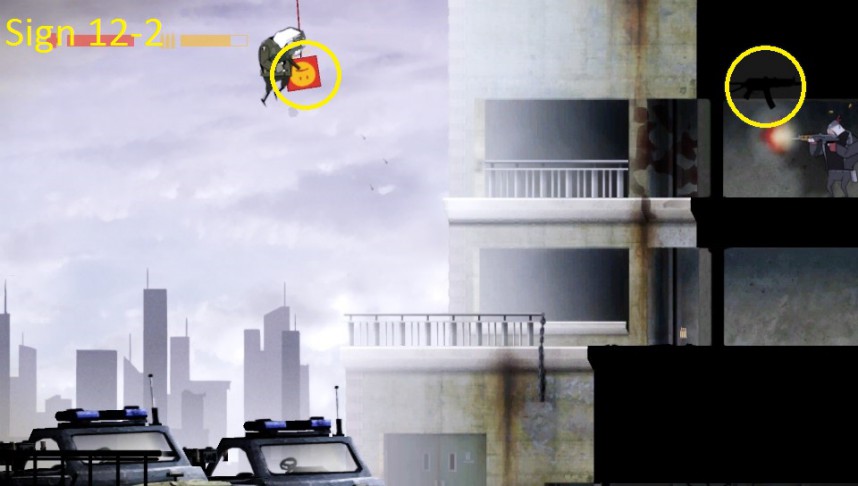
Once you reach the basement again head left, avoiding the turrets as you do so. Provided you left the doors open earlier you will be able to make it all the way back to the first screen. Sneak up behind the penguin you left alive at the beginning of the Chapter and blast him to the left to collect Sign 12-2. Mage sure you're using your assault rifle!
You may have to make a number of attempts at collecting Sign 12-2. The soldier can be a little twitchy and will roll off the edge if you mis-time your transition between screens as you follow him.
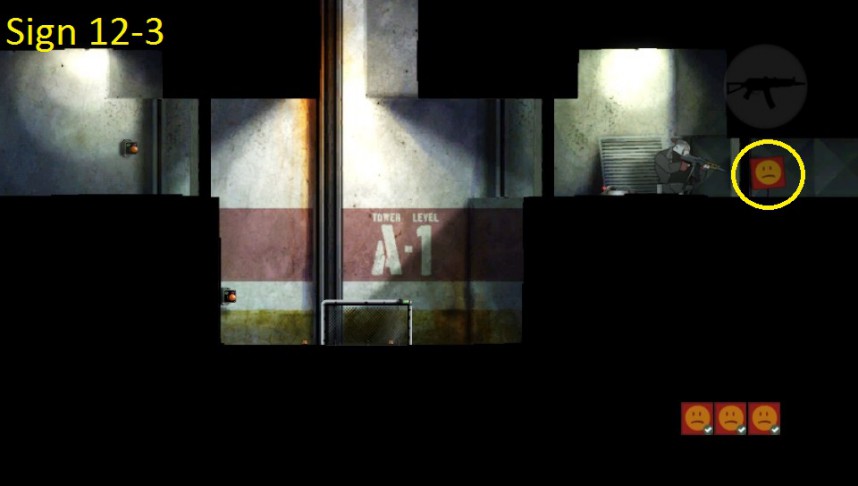
After collecting Sign 12-3 simply travel to the right while remaining in the basement. You will come across Sign 12-3 in the room with the two doors, just inside a ventilation shaft behind the turret.
Chapter 13 Signs
The Signs in Chapter 13 are all found in order and will all be in rooms which you will need to enter as you progress through the Chapter.
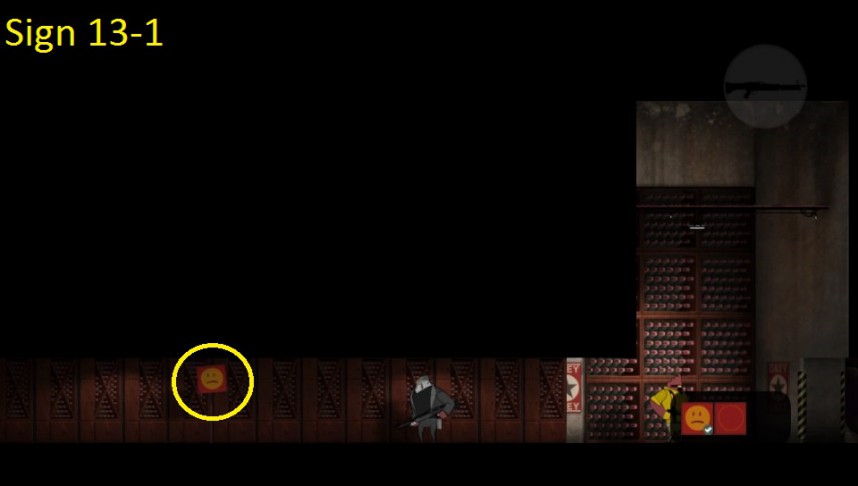
Sign 13-1 is located in the wine cellar where one of the canaries asks you to disable the turrents in the rest of the palace. Simply walk into the tunnel to collect it.
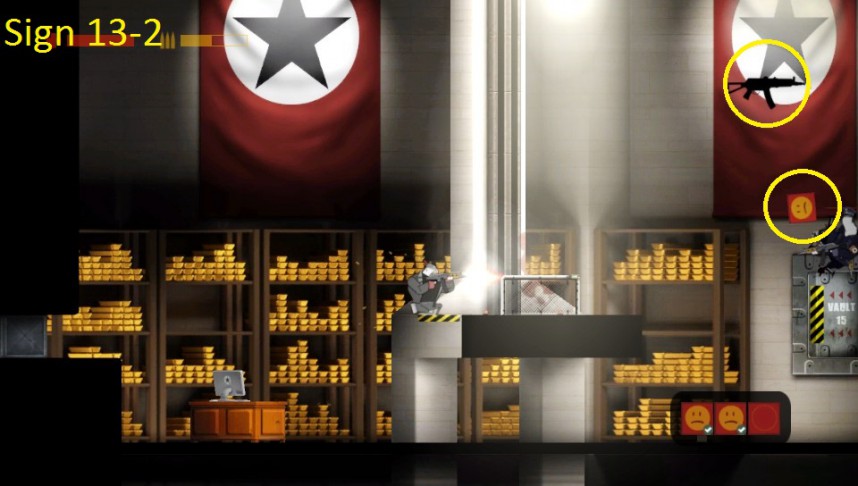
You will enter this treasury room from the right hand side. Quickly run underneath the platform and climb up on the left hand side. Wait for the two officers to descend on the elevator then blast them towards the right hand side of the screen with your assault rifle to collect Sign 13-2.
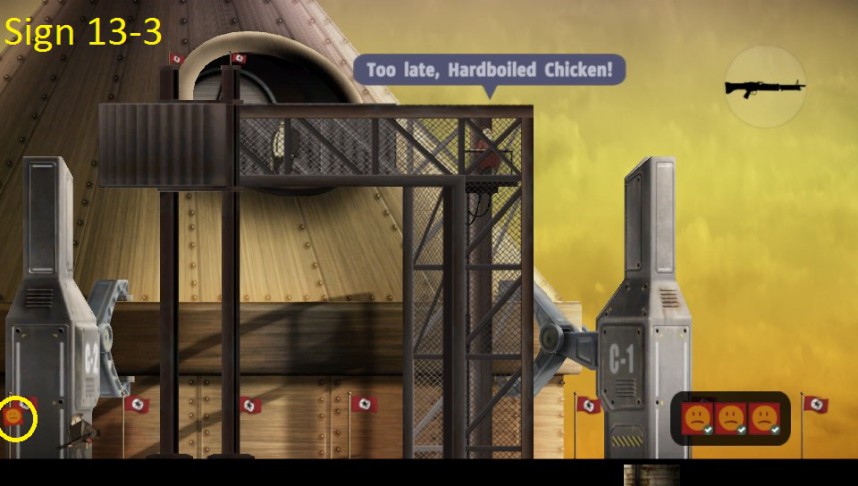
Once you reach the palace roof head all the way to the left hand side of the screen to collect Sign 13-3.
Chapter 14 Signs
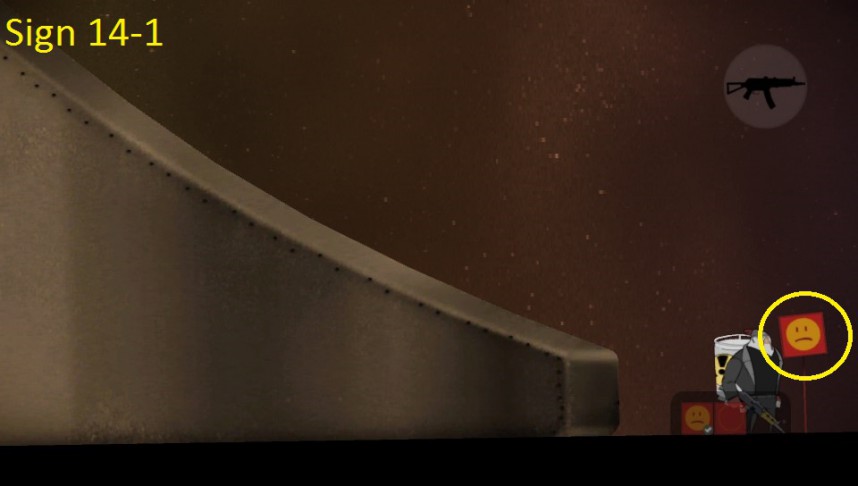
After the dogfighting sequence you will land on the outside of the rocket. First, walk all the way to the right to collect Sign 14-1.
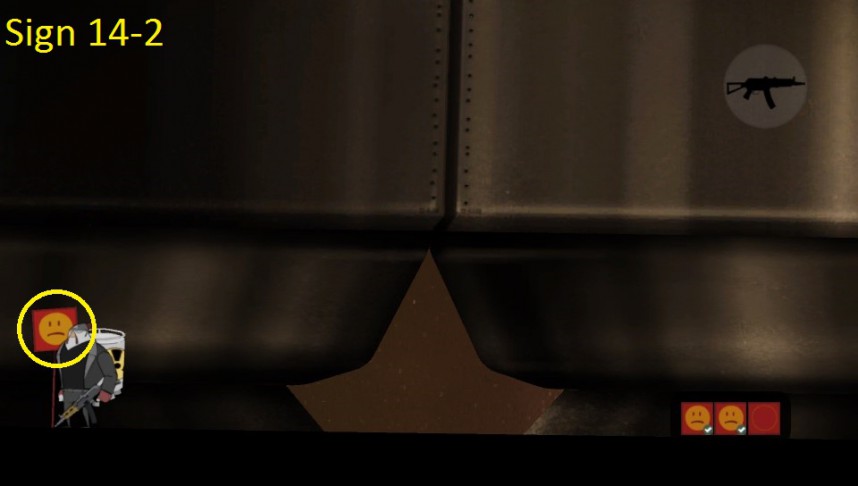
While still on the outside of the rocket and immediately after collecting Sign 14-1, walk all the way to the left to collect Sign 14-2.
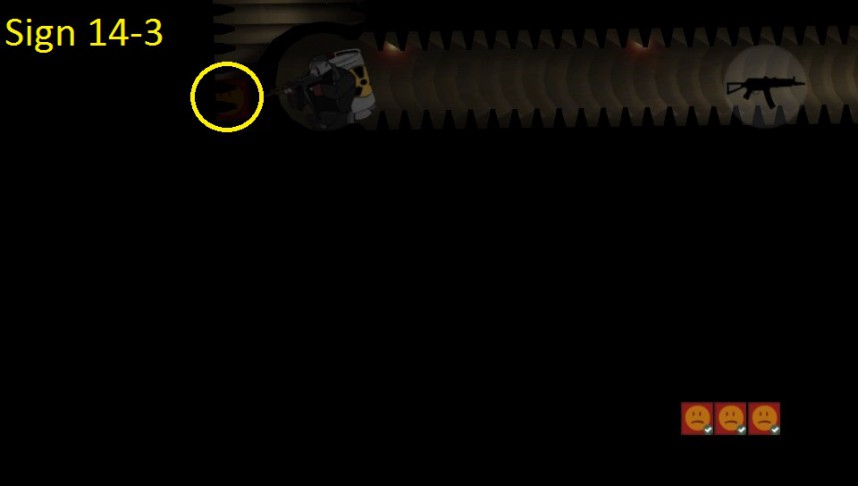
After you open the trapdoor on the outside of the rocket you will fall into this tunnel. Sign 14-3 is hidden in the darkness here. Simply take a step or two to the left to collect it.
Chapter 15 Signs
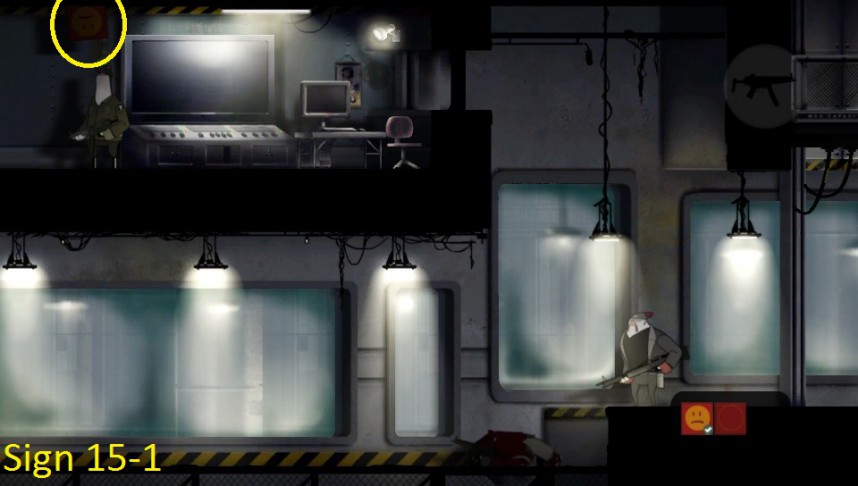
Sign 15-1 is located in this control room. After the fight with Brno you will have to brainbug this enemy soldier in order to progress. While you have control of him, make sure you jump up and collect Sign 15-1.
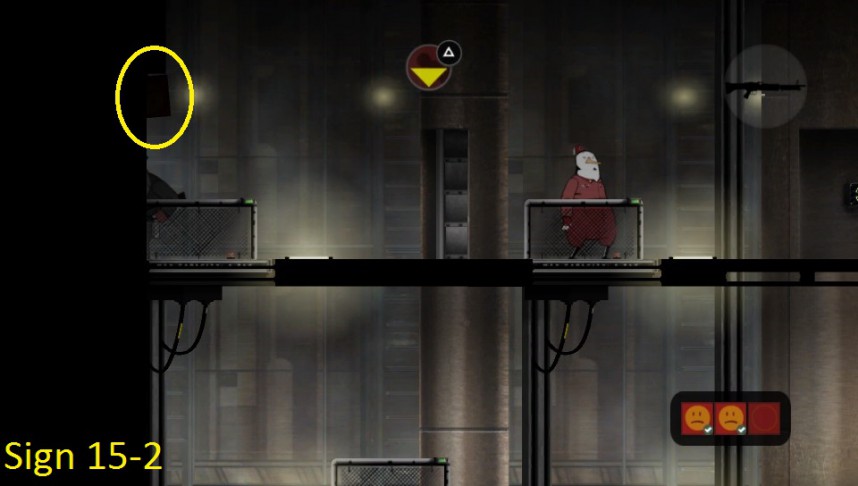
Sign 15-2 is located at the top of the first set of elevators, on the left hand side. It's well hidden in the shadows. Make sure you jump up and collect it before continuing.
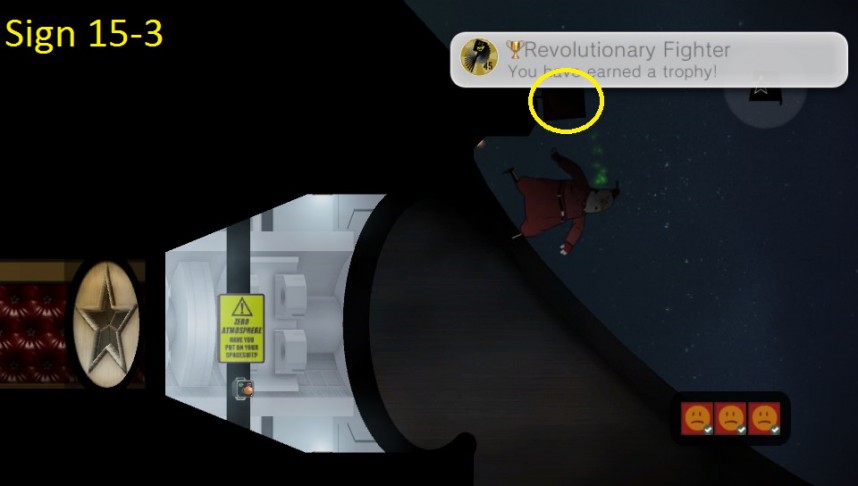
At the very end of the game you will have to brainbug Putzki and walk him out of the airlock. Make sure that you push up on

once you are in outer space and collect Sign 15-3, which is hanging above the airlock door. If you get too close to the edge of the screen the final cutscene will start so make sure you hug the top of the airlock as you exit.


