

Welcome to the unofficial guide to "S.T.A.L.K.E.R.: Shadow of Chernobyl". This guide consists of three large and separate chapters. Each of these chapters is going to be very important, so I would recommend that you read the entire guide, not only the walkthrough section. The first chapter of my guide is by far the largest one. Here you'll find a complete walkthrough of the singleplayer campaign of the game. There are more then 10 main levels (+a few underground missions) for you to explore. I've prepared three maps for each location. The first map shows exits to other zones. The second map will tell you where to find NPC characters. You will also find out about important locations and secrets. The third map is tied directly to quest descriptions, so you'll know exactly where to go in order to fulfill them. The second chapter of my game guide will allow you to find quests quickly, because you will be given a complete and alphabetically ordered list of all main quests of the game. The descriptions are very similar to those near the quest maps. As a result, you should be able to find your quest locations without any major problems. This chapter will also come in handy for those of you who don't want to know anything else, so you won't have to waste your time searching for quest descriptions. The final third chapter of my game guide was being prepared mostly for less experienced players, however you will also find a large list of common weapons, armors and artifacts here. You will be able to use these objects during the course of the game. I've also shown their advantages and disadvantages, so you'll know exactly what you're getting into. You will also find some basic hints in this chapter of the guide. These clues should help you out to survive in the game world (yes... it's not going to be that simple ;)). You will find out how to explore your surroundings and deal with different kinds of threats. I've displayed some of the monsters and anomalies, so make sure that you read these hints. I hope that my guide will become helpful to you and will allow you to safely reach one of the possible endings. Have fun playing the game!
Stranger
Before we'll proceed with the main part of the game, you will have an opportunity to learn a few basic things about some of the important aspects of the gameplay. The tutorial section will allow you to learn more about your PDA. This is by far one of the most important tools of the game and you'll be using it all the time. You will be told how to do different kinds of things, including using your map, checking out statistics or reading encyclopedia. You will also be given other hints during the course of the game. They will pop up on your screen. Most of these hints will allow you to find out more about some of the basic actions - crouching, jumping over obstacles or talking to other characters. I'd strongly recommend that you read them, especially if you have some problems understanding what's going on. You should also read your instruction manual and memorize some of the key bindings. Also, remember about the third chapter of my game guide. You will find out a lot about monster encounters and anomalies there, so make sure to check it out.
If you want to proceed with the tutorial section, you will have to choose "Treat me like a rookie..." dialog option while talking to Sidorivich. The tutorial is very short and you won't have to do anything in particular, so I wouldn't recommend skipping it. If you want to start the game without having a tutorial, choose "Just give me a mission" dialog option.

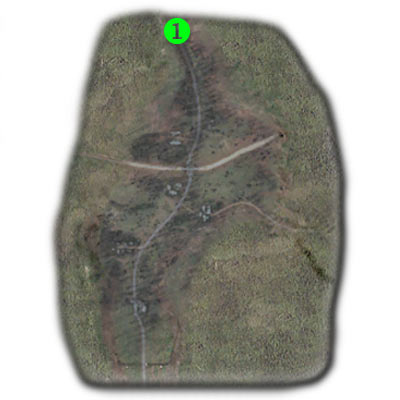
MAIN MAP OF THIS ZONE:
Green point on the map:
1 - exit to: Garbage
DETAILED MAP OF THIS ZONE - NPC's & IMPORTANT PLACES:
Important NPC characters (red color):
1 - Sidorivich - He's one of the three traders of the game. This means that you will be able to sell him all of your things (including weapons, armors and ammunition), not only medikits or artifacts. Sidorivich will also grant you with several very important tasks, as well as a large number of sidequests. You won't have to finish these minimissions in order to succeed. Furthermore, some of these quests will be broken, so you won't be able to reach the ending. I would recommend going back to Sidorivich once you've gathered enough objects. Sadly, he won't be selling anything interesting, so save up your money for later.
2 - Wolf - You're going to have to talk to Wolf in order to proceed with the first main mission of the game. Wolf will also give you several side missions, however some of them may vanish from his list later during the game. Wolf is a commander of this camp and this is very you've started your game.
3 - Tolik - You will encounter Tolik near the starting camp. He will be severely wounded, so you will have to treat him by giving him a med-kit. Once you've saved him, Tolik will return to the camp and that's where you'll have to search for him.
4 - Petruha - You will encounter this Stalker while trying to fulfill one of your first tasks. He will accompany you while you'll be trying to take over the bandit camp.
5 - Nimble - Nimble will be hiding in the bandit camp. You will have to approach him once you've secured the area. It's very important that you kill all bandits. Otherwise he wouldn't even talk to you. Nimble will leave this area in order to return to the camp. You will be able to receive simple side quests from him.
6 - Fox - You will have to meet this Stalker in order to finish up with one of the main quests of this map. After that, he will probably remain in that location. Furthermore, Fox may die later during the game (there are a lot of aggressive animals and soldiers in the area), however it won't affect the outcome of the game.
Guide character will also be standing here later during the game. You're going have to talk to him in order to end Meet the Guide quest. You will also receive a second mission from him.
Important places (green color):
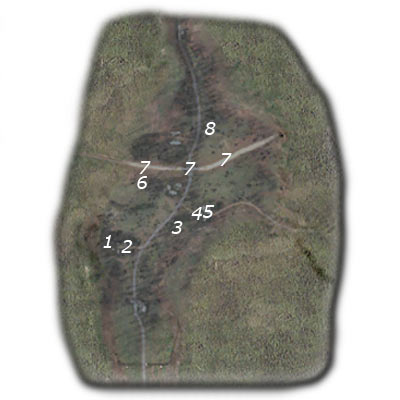
1 - This is a small camp and it's where you'll begin your journey (Sidorivich's bunker is nearby). You will come across several important NPC characters here, including Wolf, Sidorivich and many other Stalkers. You might want to consider exploring all of the surrounding buildings, especially since you'll be able to find interesting objects there (mostly artifacts).
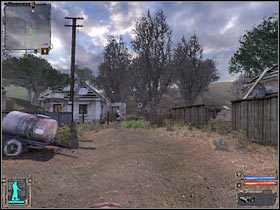
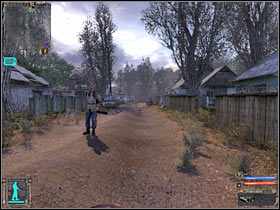
2 - This is where the bandit camp has been located. Nimble can be found inside. Once you've rescued him and secured this area, you will come across several friendly Stalkers here, however bandits will try to retake this place from time to time, so you must be careful.

3 - Army base. I wouldn't recommend going near it, especially in the early part of the game, mostly because there are A LOT of soldiers in the area. Even if you manage to enter the base, you won't be able to stay here for too long, mostly because reinforcements will show up very soon. You will also find a closed gate here. Sadly, you won't be able to open it.
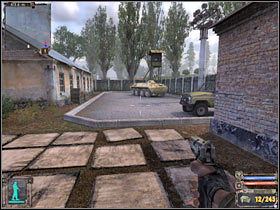
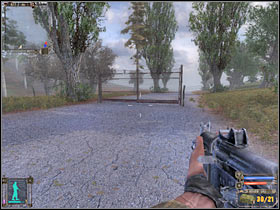
4 - You will come across a destroyed bridge here, as well as a military checkpoint. As a result, you will have to be very careful. Thankfully, you should be fine, as long as you don't attack any of the soldiers. You will be able to get to the other side of the bridge by finding a hole in the fence. You will also come across several interesting objects at the top of the bridge, including ammunition for your current guns.
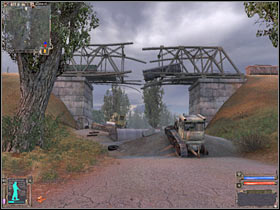
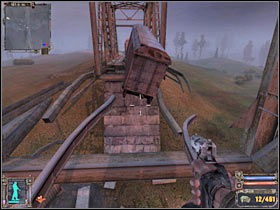
5 - You should be able to find a collapsed tunnel here. As a result, you won't be able to use it. You will also begin your exploration here once you've return from The Dark Valley district. Sadly, you won't be able to use this passageway earlier during the course of the game.
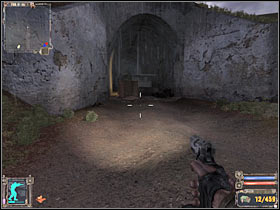
6 - There are a few small building in this area. You should be able to find several friendly Stalkers here. Consider talking or trading with them. You will also come across some new mutants, however it's going to be very easy to kill those things.
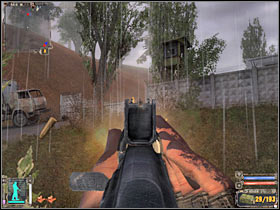
7 - There are a few buildings here. I would recommend checking them out, because you should be able to find several stashes in this area.
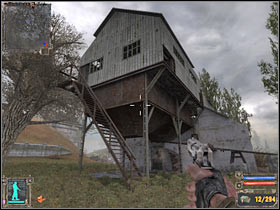
8 - This is one of the most dangerous area of this sector, so you will have to be VERY careful. If you want to explore the wreckage, you will have to enter this area from the north-west. Make sure that you're moving very slowly, so you won't end up too close to one of the anomalies.
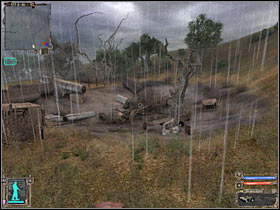
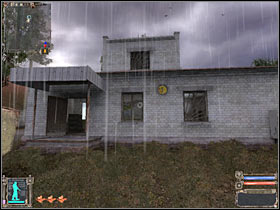
9 - This is a second military checkpoint. This road leads straight to Garbage, so you will have to secure it. You will probably encounter a small group of thugs here. I would recommend going to your right and hiding behind the trees. You should be able to take out several enemies from here. After that, move up closer to the brick wall and kill the rest of them. You could also consider using grenades here. Also, this area may be already secured. If this happened, you shouldn't kill any of the friendly Stalkers. You will have to enter the building and head on to an open door in order to proceed to the Garbage zone.

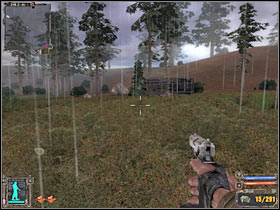
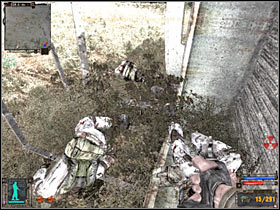
10 - There's a destroyed vehicle here, as well as a few bodies. I WOULDN'T recommend going there, because this is a radioactive area. The same goes with many other locations on this map, including Nimble's stash. As a result, maintain a safe distance and focus your attention on other things.

QUESTS:
1. Get information from the scout
Received from: Sidorivich (Cordon)
Starting point: 1 on the map
What needs to be done:
a) talk to Wolf (2 on the map)
b) meet with Wolf's men (3 on the map)
c) assist Wolf's men and clear out the bandit camp (4 on the map)
d) pick up flash disk from Nimble (5 on the map)
e) return with the disk to Sidorivich (1 on the map)
Complete quest walkthrough:
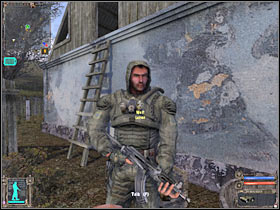
Once you've ended the conversation with Sidorivich, you will have to exit his bunker. Go and talk to Wolf (#1). You should be able to receive new intel from him. I wouldn't recommend picking up any side missions at this time, because you would only have 24 hours (game time) in order to finish them. You will have to exit the camp (#2). Head on towards the main road and turn left. I wouldn't recommend leaving this road, especially if you don't want to get lost or get into trouble. You should also choose PMm pistol from your inventory. You have received this weapon from Wolf. Don't waste any bullets on practice shots, as you'll need this weapon very soon.
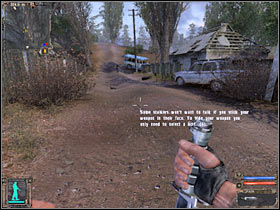
Like I've said before, you shouldn't leave the main road leading to the camp area (#1). Keep moving towards Wolf's men. You should be able to notice several larger objects on your left. Go there now. You will come across several bodies (#2). Try moving closer. It looks like that one of the Stalker soldiers is still alive. You will have to rescue him.
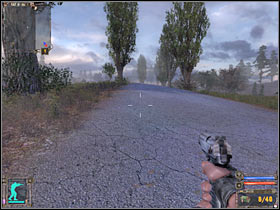
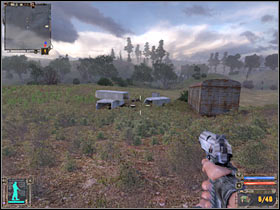
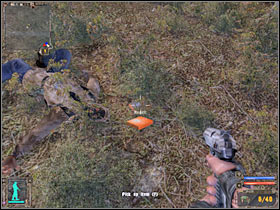
If you don't have any med-kits in your inventory, you will have to pick up one of these objects. You should be able to find a med-kit near a dead Stalker (#1). Head on to the dying man. It's going to be Tolik. Talk to him and choose a correct dialog option in order to grant him with a medical kit (#2). Tolik will thank you for your help. He will also go back to the main camp.
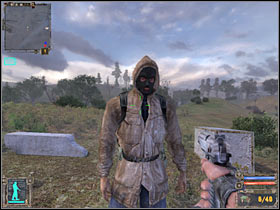
Now you will have to return to your main goal. Head on towards Wolf's men. You will have to talk to Petruha (#1). Get ready for the assault. I would recommend saving your progress here, especially if you're playing on one of the higher difficulty levels. Start moving towards the camp. Notice that two other friendly Stalker soldiers are taking part in this assault (#2). You will be able to use this to your advantage.
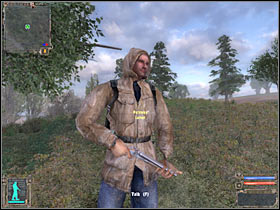
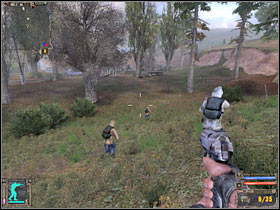
Once you've reached the camp, your allies will automatically start shooting at the bandits. It would be wise to not interfere in this fight. Don't worry about the outcome. The bandits are going to be killed very soon. Head on towards the buildings (#1). You could also try and kill some of the bandits on your own (#2), however this is considered to be risky, mostly because some of the enemy soldiers will be carrying powerful shotguns.
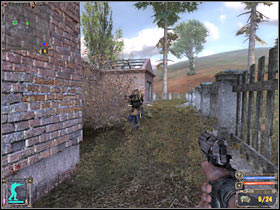
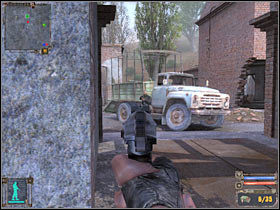
Make sure that you have used your minimap in order to locate all enemy soldiers. You will have to secure this entire area before proceeding with the next part of this mission. Additionally, you should consider looting bodies for ammunition and better weapons (#1). You will also be given locations of several stashes. They are going to be marked on your main map. Head on to Nimble (#2). You will have to talk to him in order to receive the flash disk.
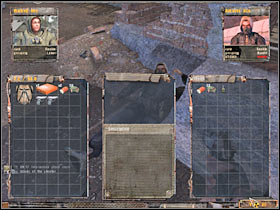
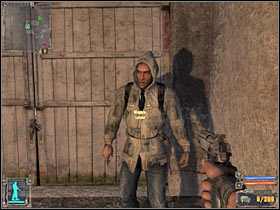
Now you will have to return to the main camp. I would recommend taking the same path, so you won't encounter any enemy soldiers or stronger monsters. Start off by talking to Wolf. You will receive a Jellyfish artifact from him (#1). Now you will have to return to the bunker. Talk to Sidorivich (#2). He will give you some money and you'll be able to proceed with new main quests, as well as a few side missions.
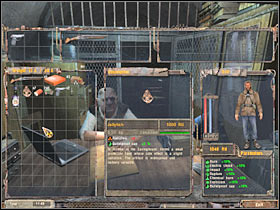
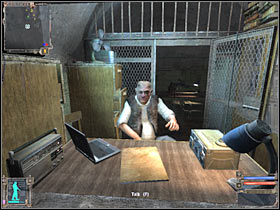
2. Kill Strelok
Received from: Sidorivich (Cordon)
Starting point: 1 on the map
What needs to be done:
a) find Strelok
b) kill Strelok
You won't be able to fulfill this task in this sector of the map. This quest has been activated at the start of the game, so you may as well ignore it for the time being.
3. Get to the railroad embankment
Received from: Sidorivich (Cordon)
Starting point: 1 on the map
What needs to be done:
a) head on to a designated area of the map and find the journeyman (6 on the map)
b) reach the other side of the railroad embankment (7 on the map)
Complete quest walkthrough:
I would recommend acquiring a good gun before proceeding with this mission of the game. If you didn't kill any of the army soldiers, you will probably have to purchase one of the better pistols from Sidorivich. I wouldn't recommend spending your money on a silenced pistol, because you won't have to act stealthy here. If you have a shotgun or Akm 74/2U machine gun at your disposal, you won't have anything to be worried about. Just remember about low ammo supplies for these weapons.
First of all, you will have to go to the northern part of the map. That's where the meeting was supposed to take place (#1). Once again, I wouldn't recommend leaving the main road. Do this once you've reached the destroyed bridge. Nevertheless, you will have to be very careful. There are some wild boars in the area and you would have to kill them in order to survive. Sadly, it turns out that the journeyman is already dead (#2). Check his body, so you'll be able to finish up with the first part of this mission.
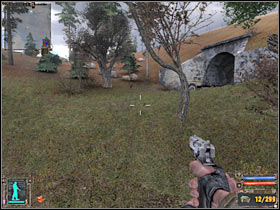
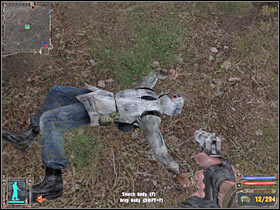
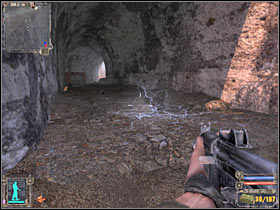
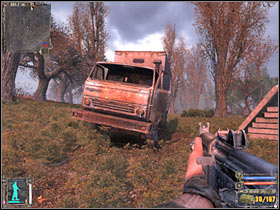
Now you will have to reach the other side of the railroad embankment. You can do this by choosing one of three available routes. The most difficult passageway, at least in my personal opinion, leads through a nearby tunnel (#1). You would have to avoid very powerful anomalies here. Notice that they're constantly moving. You would have to start moving very slowly. Additionally, there's a separate anomaly near the end of the tunnel. You would have to wait for it to disappear. This would allow you to exit the tunnel without receiving any damage (#2).
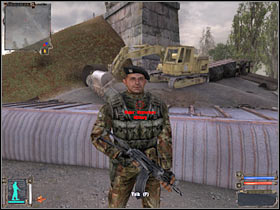
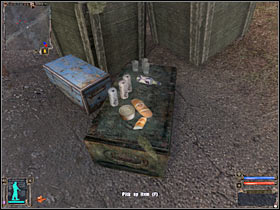
The second option would require you to head on to a military checkpoint that's located beneath the destroyed part of the bridge. You would have to locate one of the officers. Talk to him (#1). If you behave correctly, you shouldn't be attacked by anyone. You will have to bribe the soldier by giving him some of your money (500 RU). As a result, you will be allowed to go through. Don't leave this area just yet, because you'll find some interesting supplies nearby (#2). You could also kill these soldiers or wait for them to engage other friendly Stalker's.
The third route is going to be the easiest one. You will have to locate a hole in the fence. I wouldn't recommend choosing a passageway that's located near the military checkpoint. Instead, keep moving to your right and you will come across the second hole (#1). Once you've gone past it, you should be able to receive a new message (#2). Furthermore, you will be allowed to take on a new main quest.
4. Find the militaries' documents
Received from: Sidorivich (Cordon)
Starting point: 1 on the map
What needs to be done:
a) steal the documents
b) deliver the documents to Barkeep
You won't be able to take on this mission here. Instead, you will have to wait. We'll get back to this task once you've reached the Agroprom Research Institute zone (the road leads through the Garbage sector).
5. Learn something about Strelok from Fox
Received from: this quest will start automatically once you've completed Get to the railroad embankment task
Starting point: 7 on the map (depends on which route you've decided to take)
What needs to be done:
a) save dying Fox (8 on the map)
b) ask Fox about Strelok (8 on the map)
Complete quest walkthrough:
This is a very short mission and you shouldn't have any major problems finishing it. The first thing that needs to be done is to reach a certain building on the map (#1). You will find a dying Stalker here (#2). It's Fox and you will have to rescue him. Once again, you will have to activate a dialog window. Give him one of your med-kits. If you don't have any, you must buy or find one.
You will have to wait for a few seconds. Fox will get up and you'll be able to talk to him (#1). This will allow you to end this quest. I guess I should also warn you about wild animals. You may be attacked by these creatures (#2), however you shouldn't have any problems killing them.
6. Meet with Gray
Received from: Fox (Cordon)
Starting point: 8 on the map
What needs to be done:
a) find out something about Strelok from Seriy
You won't be able to proceed with this mission right away. You will have to reach a certain warehouse in the Garbage district that's leads to the north of the Cordon zone.
7. Meet the guide - part 2
Received from: this mission automatically begins while exploring X16 laboratory
Starting point: X16 sector
What needs to be done:
a) talk to the Guide, you can find him in the Cordon sector (8 on the map)
Complete quest walkthrough:
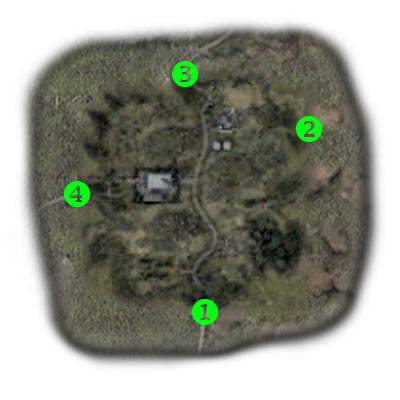
You will be finishing this task later during the game, once you've safely returned from the X16 laboratory. You will have to return to the Cordon area. You shouldn't have any problems finding the Guide character, mostly because he's occupied a well-known building (#1). It's the exact same spot where Fox was standing. You will have to talk to Guide (#2). He will grant you with a new task. As a result, you will have to return to Agroprom Research Institute Sewers. I would recommend choosing this quest as your default one, especially if you forgot the localization of the entrance to the sewers area.
8. Meet with Doctor
Received from: Guide (Cordon)
Starting point: 8 on the map
What needs to be done:
a) talk to Doctor; he can be found in Strelok's hideout
Once again, you won't be allowed to take on this mission right away. You will have to reach the sewers in the first place. They are located beneath Agroprom Research Institute district.

MAIN MAP OF THIS ZONE:
Green points on the map:
1 - exit to: Cordon (this is where you've started the game)
2 - exit to: Dark Valley (it's a highly radioactive area!!)
3 - exit to: Bar (you won't be able to go there right away; you will have to visit the Agroprom Research Institute sector in the first place)
4 - exit to: Agroprom Research Institute

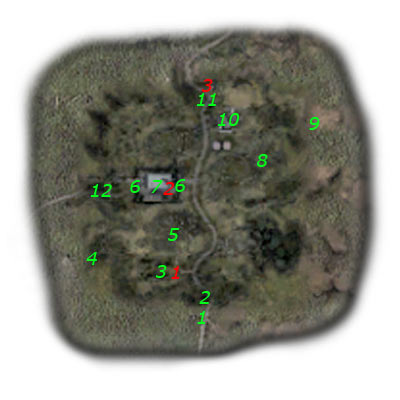
DETAILED MAP OF THIS ZONE - NPC's & IMPORTANT PLACES:
Important NPC characters (red color):
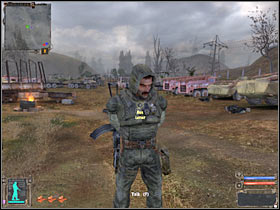
1 - Bes - He's in charge of protection of a local junkyard. You will have an opportunity to finish one of his missions that will require you to repel a bandit raid. If Bes survives this attack, you will be able to meet him later on during the game.
2 - Seriy - He is hiding inside one of the largest warehouse buildings of this map. You will have to help him and his colleagues in defending this building. As a result, you will fulfill one of the more important quests. Make sure that you end this task in the first place. Otherwise Seriy won't even talk to you.
3 - Warrant officer - He's one of the soldiers of the Duty organization. Sadly, you won't be able to get past him right away, especially since there are a lot of Duty soldiers nearby and you wouldn't have any chance fighting against all of them. You will be able to get past the checkpoint once you've safely returned from Agroprom Research Institute (with the military documents in your possession). This will allow you to reach the northern Bar sector.
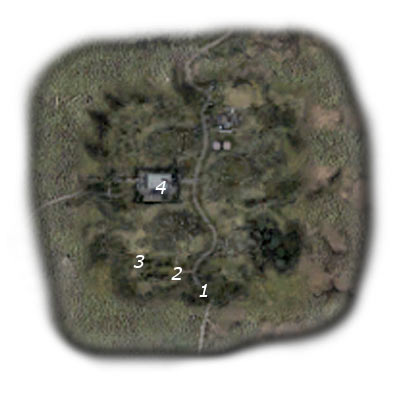
Important places (green color):
1 - This is where you will begin your exploration of this map (once you've used the Cordon-Garbage connection). Sadly, this doesn't mean that you'll be safe here. Once you've killed some of the nearby bandits (most of them can be found near the junkyard) MORE enemy units will appear in this area without any warnings. As a result, I wouldn't recommend planning your moves from here. Instead, consider choosing more abandoned part of the map.
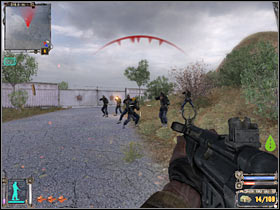
2 - This road leads directly to the junkyard. You will witness an interesting scene here. One of the friendly Stalkers is surrounded by bandits. I would recommend helping him out, especially since you'll have to use this road to reach the junkyard. Make sure to loot the bodies of fallen enemies.
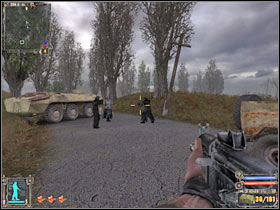
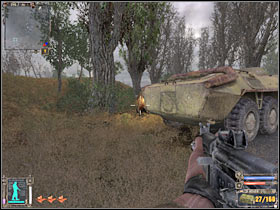
3 - This is where the junkyard has been located. You will have an opportunity to help Bes and few other Stalker soldiers to protect this area from enemy attacks. Sadly, this won't solve the problem. Even if you manage to end the mission, more enemy units will come from the east. As a result, Bes will probably die and you should consider leaving this area as soon as possible.
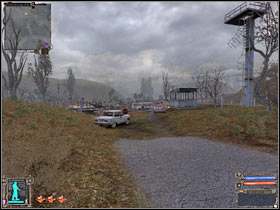
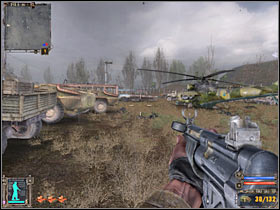
4 - Dangerous anomalies. Despite what you might think, you should take a closer look at this section of the map, mostly because you will have an opportunity to pick up several precious artifacts here. You will have to watch out for vortex anomalies, however. Make sure that you aren't caught, because it would have been very difficult to escape. Consider pushing the sprint button rapidly and MAYBE you'll get lucky.
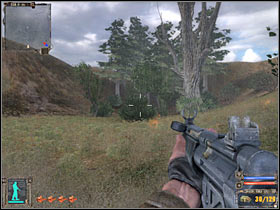
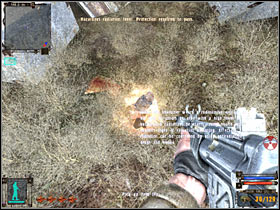
5 - Piles of junk. Sadly, this is a highly radioactive zone, so if you don't have a decent suit at your disposal or a large number of anti-rad medicines, you should stay away from these spots. The same goes with most of the other piles.
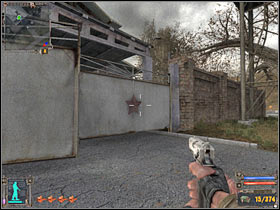
6 - These gates will lead you straight to the main warehouse that's one of the most important buildings of this map. Additionally, you will come across destroyed parts of the brick wall. You may also use them to your advantage.
7 - The main warehouse. First of all, you should be able to find Seriy and few other Stalker soldiers here. You will have to defend this warehouse in order to fulfill one of the main missions of the game. Additionally, you may receive side quests from time to time that will require you to repel other bandit raids. It's not necessary to participate in these actions, though.
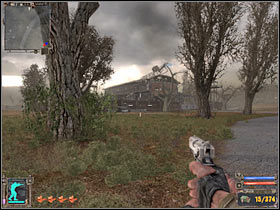
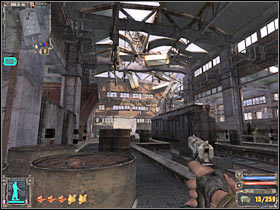
8 - You will probably encounter a very large pack of wild dogs here. I would recommend killing the animals, especially since you'll be able to find a lot of artifacts and stashes in this area. You could also wait for the dogs to kill some of the nearby bandits.
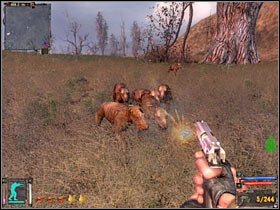
9 - This is a highly radioactive zone. The road leads straight to The Dark Valley sector. I wouldn't recommend going there if this is your first visit to Garbage zone. You will have to wait for the main character to receive a better armor.
Once you've returned from Bar:
You will probably have a decent suit at your disposal. As a result, you won't be exposed to radiation too much. Nevertheless, you should have at least 10 anti-radiation medicines in your inventory. Also, try running (instead of walking) towards the exit.
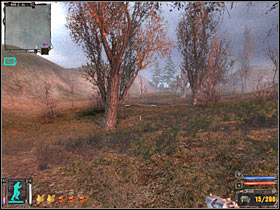
10 - You will encounter a destroyed building here. Watch out for a single sniper. He's covering the eastern part of the map, so be careful. Try killing him as soon as possible. Once this is done, secure the entire area and search for objects of any value.
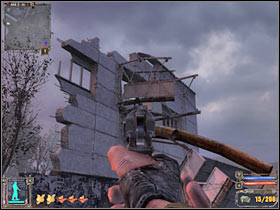
11 - You'll find a DUTY campsite here. You will have an opportunity to talk to the Warrant Officer. If this is your first visit, you won't be able to get past the gate. Also, make sure that you DON'T attack any of the nearby soldiers.
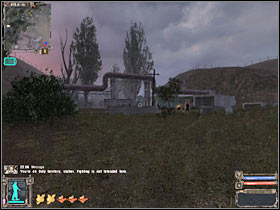
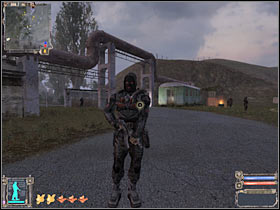
Once you've returned from Agroprom Research Institute:
The camp site is going to be attacked by a large group of wild boars. You will find out about this once you've returned to the campsite. The animals will be coming from north-east. I would recommend that you start off with the grenade, so you'll be able to kill at least one boar. After that, start using your current machine gun. You should be able to get rid of at least 3-4 wild boars. Thankfully, your actions won't affect the outcome, because you'll receive a passage to the Bar area, however you will have to talk to Warrant Officer in order to get the clearance. Head on to that sector, but watch out for a vortex that's located in the middle of the asphalt road.
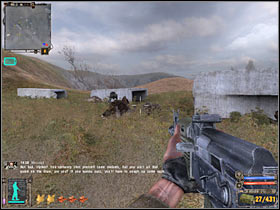
12 - This road leads to Agroprom Research Institute sector. Sadly, you will come across A LOT of enemy soldiers here. You will have to kill them all before proceeding to the exit. Also, be on a look out for precious artifacts. There's only one road leading to your destination. You will also encounter several wild dogs, however killing these creatures is going to be very easy.
QUESTS:
1. Respond to the call for help
Received from: Bes (Garbage), however this quest will begin automatically (you will have to get closer to the junkyard area)
Starting point: 1 on the map (this is an example, because you may as well reach the junkyard from any other direction)
What needs to be done:
a) offer help dealing with the bandit threat (2 on the map)
Complete quest walkthrough:
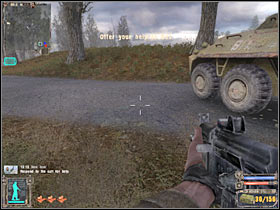
This quest is going to be activated once you've dealt with the first group of bandits. I'm sure that you've encountered them near one of the friendly soldiers (#1). Once this problems is out of your way, start moving towards a nearby junkyard. You will have to help in dealing with a more serious threat. You shouldn't have any problems finding Bes (#2). He's the one who called for help. Talk to him and you'll receive a new task.
2. Repel the bandit raid
Received from: Bes (Garbage)
Starting point: 2 on the map
What needs to be done:
a) repel bandit raid (3 on the map - this is where the bandits will appear)
b) once you've dealt with all bandits, talk to Bes (2 on the map)
Complete quest walkthrough:
This is going to be a slightly more difficult task, mostly because you won't have much time to deal with all bandits. This fight will have to end in about two minutes. Otherwise you will fail and you won't be able to retry it. Thankfully, your loss won't affect the ending of the game, however this doesn't mean that you shouldn't try protecting the junkyard. Don't forget about your fellow team members. You will be able to heal them by using med-kits during a conversation.
Start off by running towards the western end of the junkyard (#1). That's where the attack will take place. You will have to wait for Bes and his teammates to reach their shooting spots. I would also recommend choosing grenades and a decent machine gun (if you have one) for this battle. You should notice the first group in just a few seconds (#2).
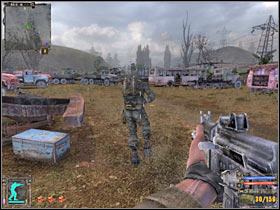
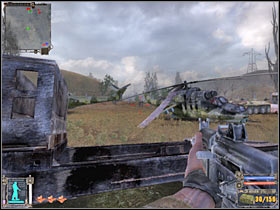
Try killing at least two enemy soldiers from a larger distance (#1). I would recommend hiding behind one of the destroyed vehicles, so you will have a decent cover. You should also throw a couple of grenades at them, however try aiming at larger groups of enemy units. If you're lucky, you should also take out their leader (#2). This will allow you to fulfill one of the side quests. Sadly, you would have to go back to the previous zone for reward.
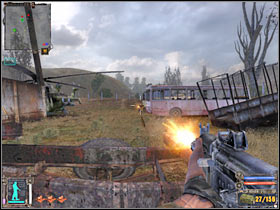
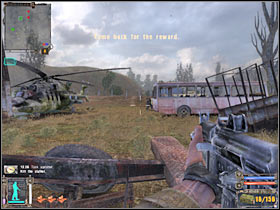
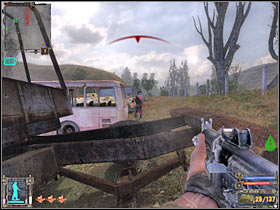
Once you've dealt with the first group, try moving forward a little. Remember that you will have to take out all bandits (#1) AND you must do this quickly, especially if you don't want to fail this mission. Watch out, because some of the bandits are carrying shotguns. You will be informed once you've killed all enemy soldiers. Now you will have to return to Bes (#2). Talk to him in order to receive a proper reward. I would also recommend searching bodies for grenades, med-kits and ammunition. You have to do this before reinforcements show up.
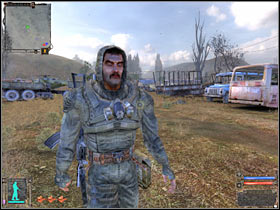
3. Meet with Gray - part 2
Received from: Fox (Cordon)
Starting point: Cordon sector
What needs to be done:
a) find out something about Strelok from Seriy (4 on the map)
Complete quest walkthrough:
Start off by heading towards the main warehouse building (#1). You should receive a distress call very soon. It'll be very similar to the junkyard situation. It looks like that other bandits are planning on attacking the warehouse. Start running towards a nearby gate. You will have to enter the warehouse area (#2). Make sure that you do this quickly. You should also choose a machine gun from your inventory, because you'll need it very soon.
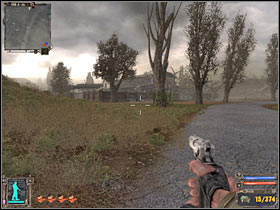
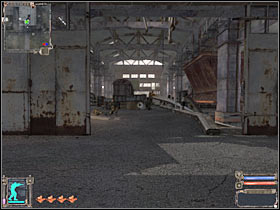
Once you've entered the warehouse, you won't have much time to locate your teammates. Get ready for the assault. Enemy soldiers will be coming from the western side of the map (#1). Try using nearby objects for much needed cover. Also, maintain a large distance. You should consider throwing a couple of grenades. Once you've taken out all bandits, talk to Seriy (#2). You will receive a reward from him. Additionally, he will tell you about Mole. You will have to go to the Agroprom Research Institute in order to find this Stalker.
Important! You will probably receive other defend missions in the near future. This tasks are optional, so you may as well ignore them. If you decide to participate in these challenges, you would have to return to the warehouse in order to kill all bandits.
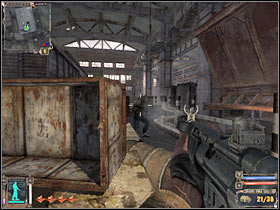
4. Get information about Strelok
Received from: Seriy (Garbage)
Starting point: 4 on the map
What needs to be done:
a) meet Mole's group
b) talk to Mole in order to receive information about Strelok
I think it's fairly obvious that you won't be able to proceed with this mission in this sector of the map. You will have to go to a nearby zone that's located to the west of Garbage. This is a very important mission, so you won't be allowed to skip it.

MAIN MAP OF THIS ZONE:
Green points on the map:
1 - exit to: Garbage
2 - exits to: Agroprom Research Institute - Sewers
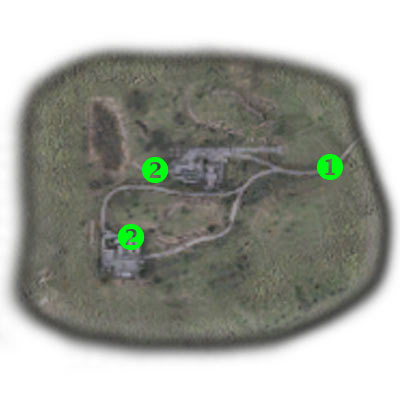
DETAILED MAP OF THIS ZONE - NPC's & IMPORTANT PLACES:
Important NPC characters (red color):
1 - Mole - To be completely honest, this is the only important NPC character of this entire map. You will also encounter other friendly Stalker's, however they won't have anything useful to say to you. Mole will be hiding in one of the largest buildings of the main compound. You will have to kill all bandits in order to be able to talk to him. Once this happens, he will stand up and allow you to ask questions.
2 - Babich - This Stalker will probably tell you the locations of sewer entrances, however you will receive the exact same intel from Mole. As a result, you won't have to pay him a visit, however it is possible. Babich is hiding in the central part of a large polluted lake.
Important places (green color):
1 - You will encounter a single Stalker here. This happens only the first time you enter this zone. The soldier will tell you that someone's attacking the main compound. Enemy soldiers are trying to hunt down Mole. You will have to help them to defend Mole's life. I would recommend that you start following this soldier, so you'll be able to reach one of the entrances.
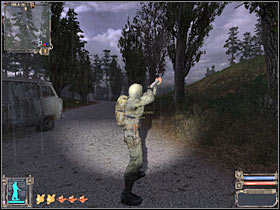
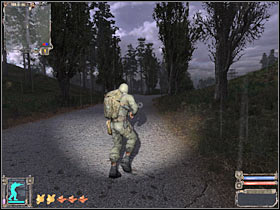
2 - This is the main entrance which leads to the factory. Once again, important things will occur only the first time you visit this spot. You will have an opportunity to watch a short cut-scene. I wouldn't recommend entering the factory from here. It's going to be easier to choose one of the northern or western entrances. You will also find A LOT of interesting artifacts in this area. I think it's fairly obvious that you should pick them up, especially since there aren't many anomalies in this area.

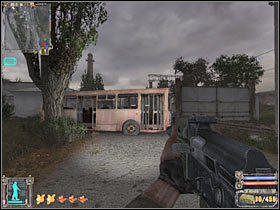
3 - This is the largest compound of this map. Mole and his men are stationed here. You can't kill them, but that should be quite obvious. The factory will be attacked from time to time, however you won't have to take part in these battles. I would recommend exploring all rooms.


4 - This is the large entrance which leads to a short tunnel. I guess you won't be surprised if I tell you that there are a lot of dangerous and well hidden anomalies inside. You will be dealing mostly with vortex traps. I wouldn't recommend going past this location, because you will find some very precious artifacts here. Pick them up, even if you plan on selling them to the trader.
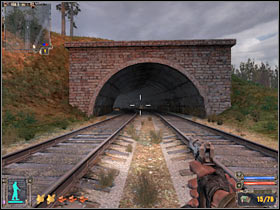
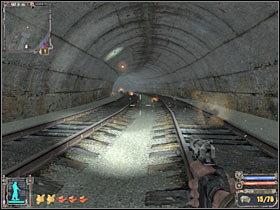
5 - This is where one of the stashes has been hidden. It's very easy to locate this spot, however you must have a good armor at your disposal, because this is a radioactive area.
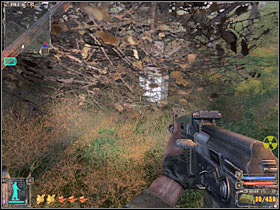
6 - These roads lead straight to an army base. As a result, you will have to be extremely careful here. Some of the soldiers are patrolling these roads. Additionally, there are snipers in the towers. Thankfully, you will be able to reach the facility by using the sewers. It's all been described in the quest section of this map.
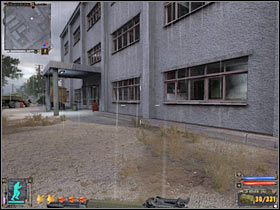
7 - Army base. I guess I don't have to remind you to be VERY careful here. Sadly, it's going to be difficult to remain hidden, so you will probably have to secure this area by killing all enemy units. You will also have to remember about reinforcements.
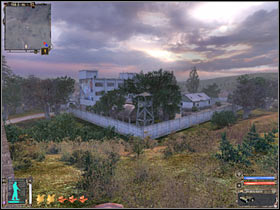

8 - This is a very large and highly radioactive lake. Thankfully, you won't have to go explore these regions of this map, however it is possible. You will have to avoid some of the mutants. Radioactive zones are a bigger problems. You should be able to find some artifacts here. Additionally, one of the Stalkers is hiding inside a small building. You might consider talking to him, so you'll receive sewer entrances locations.
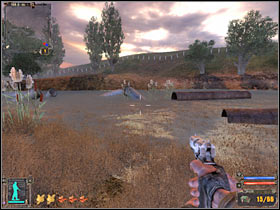
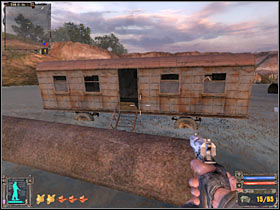
9 - There's not much to do here, however you will have an opportunity to take a look at the army base. Remember that you won't be hidden here, so you will probably raise the alarm in the base.

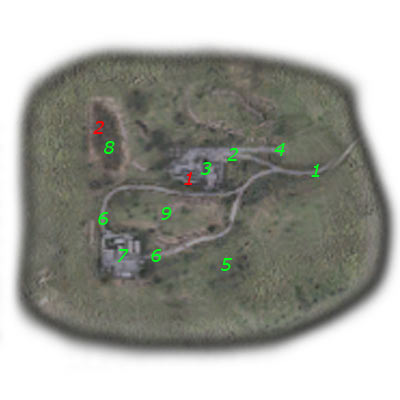
DETAILED MAP OF THIS ZONE - QUESTS:
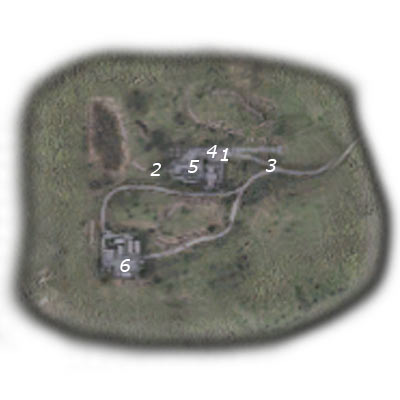
QUESTS:
1. Get information about Strelok - part 2
Received from: Seriy (Garbage)
Starting point: Garbage sector
What needs to be done:
a) meet Mole's group (1 on the map)
b) talk to Mole in order to receive information about Strelok (2 on the map)
Complete quest walkthrough:
You should know that you will be able to fulfill other important tasks at the same time and that's where you'll find more hints on how to reach and save Mole. The first thing that has to be done is to reach the nearest entrance leading to the factory (#1). You will have to get closer to the main gate in order to communicate with Mole's men (#2).
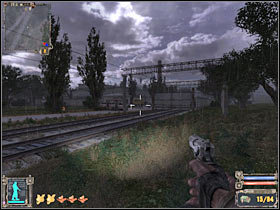
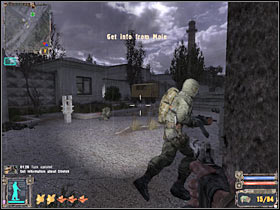
Once you've taken care of ALL enemy soldiers, you will have an opportunity to talk to Mole. You will have to go to the main building in order to meet him (#1). Remember that Mole won't even consider talking to you if the area is not safe. Now you will have to follow him to your next destination (#2).
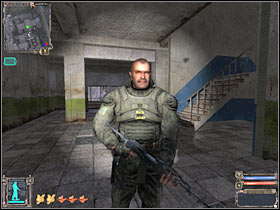
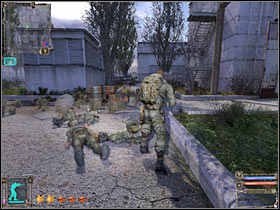
You should be able to reach a small entrance very soon (#1). It leads to the catacombs. BEFORE you decide to use it, you will have to talk to Mole who should be standing on your left. You will find out more about Strelok and his stash. Now you will have to use the ladder in order to reach the sewers (#2). You will find the description of this location in the following section of the guide.
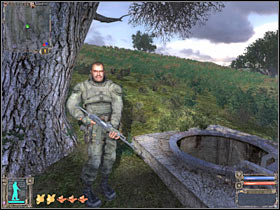
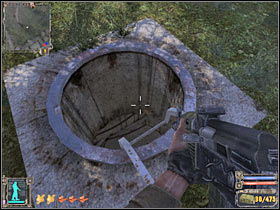
2. Help the stalkers
Received from: this quest will begin automatically once you've gone closer to the factory
Starting point: 3 on the map
What needs to be done:
a) kill all enemy soldiers, they are located near the main entrance to the factory (4 on the map)
Complete quest walkthrough:
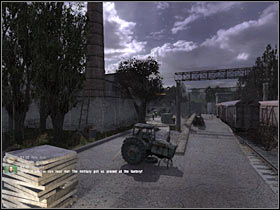
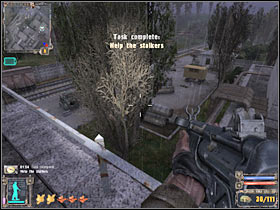
You shouldn't have ANY problems finishing up with this mission of the game. Like I've said before, you will have to reach the main gate leading to the factory in order to take care of several other quests. A short cut-scene should appear on your screen (#1). As you've probably noticed, you will have to secure the main square, however I didn't have to do anything in particular. Friendly Stalker's took care of all bandits and I was only informed about it (#2). You could help them if you wanted to. I would recommend surprising enemy units by moving on from the west.
3. Save Mole
Received from: this quest will begin automatically once you're near Mole (he will probably be hiding inside the largest building of the compound)
Starting point: 5 on the map
What needs to be done:
a) kill all nearby soldiers (5 on the map)
b) once the soldiers are gone, talk to Mole (5 on the map)
Complete quest walkthrough:
This is a third main quest of this location. Once again, you will be dealing with the factory problem. You will find most of the informations here, mostly because you will have to reach Mole's building in order to proceed with this objective. Start off near the main gate (#1). Don't use it. Instead, turn right and start moving near the northern wall (#2).
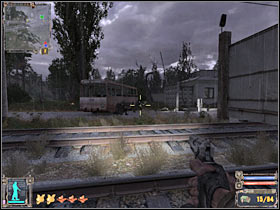
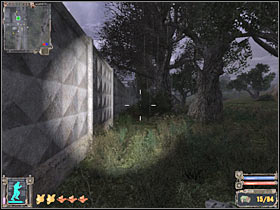
Keep going straight. You should be able to turn left at some point (#1). Head on to that location. You shouldn't encounter any hostiles units here, however you must remain careful. Try reaching a ladder (#2). This will allow you to head on to the top of the largest building (#2). You will have to jump in order to reach this ladder, but that shouldn't be a problem.
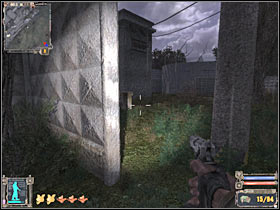
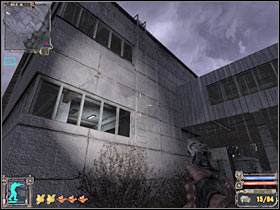
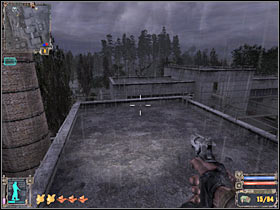
Once you're on the large roof, start moving towards the smaller one (#1). You will have to jump down or you can use the second ladder. This is where this particular quest should start. As you've probably noticed, you will be able to kill most of the enemy soldiers from here. Start shooting at them (#2). I wouldn't recommend exposing yourself too much, however you should be quite safe here. Once you've killed all enemy soldiers, go back to the lowest level and go to Mole's building. Read the first quest if you want to know what should be done next.
4. Find the militaries' documents - part 2
Received from: Sidorivich (Cordon)
Starting point: Cordon sector
What needs to be done:
a) steal the documents (6 on the map)
b) deliver the documents to Barkeep (you will have to reach the Bar sector, so you won't be able to fulfill this mission objective here)
Complete quest walkthrough:
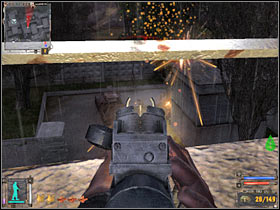
You will be able to return to this mission once you've returned from Agroprom Research Institute Sewers area. As you've probably noticed, you're already inside the base (#1), so you won't have to fight your way in. Sadly, this doesn't mean that you will have an easy job reaching the designated building. You were probably spotted leaving the sewers. As a result, avoid nearby sniper towers. I would recommend hiding inside one of the nearby buildings (#2). Ignore the alarm. Instead, try killing at least 3-4 soldiers from here.
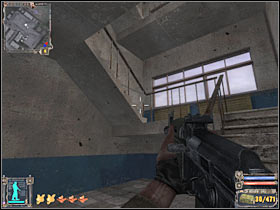
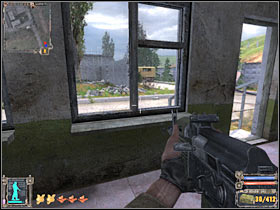
Try leaning out carefully. You should be able to take out even more enemy soldiers (#1). I wouldn't recommend hiding near the windows. Instead, choose the door. Once you've taken care of the first group, start moving towards your current destination (#2). Remember that you shouldn't stay in the open for too long, because you could be shot by enemy snipers.
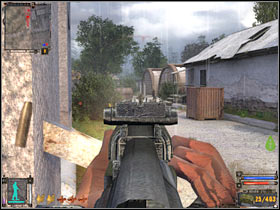
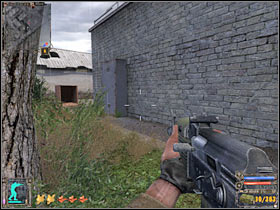
Once again, try heading towards one of the nearby buildings. One of these objects should be located to the north of your position. You will be able to kill at least 6-7 soldiers from here (#1). It would be wise to check all directions, so you won't be surprised by anyone. Once the area has been secured, head on to the main building of the army base (#2).
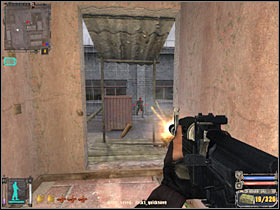
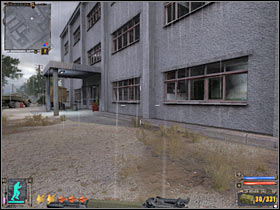
Once you're ready, enter this building. You shouldn't have any problems finding a staircase (#1). Use the stairs to get to the second floor (not the roof area). Keep moving forward. You will come across two enemy soldiers just around the corner (#2). Lean out and take them out. You could also use the grenade to kill the second soldier.

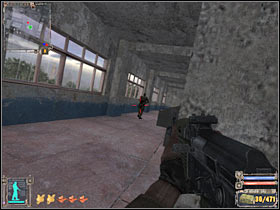
Now you will have to reach a much larger room. It should be located on your right. You will have to find a white briefcase (#1). Pick it up. Once this is done, go back to the ground floor. I'd strongly recommend that you save your current progress here, mostly because new enemy soldiers have appeared in this area (#2). I would also recommend that you take out all of the remaining snipers. Most of the enemy soldiers are standing near the exits (north & west).
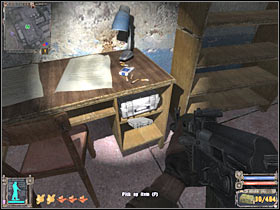
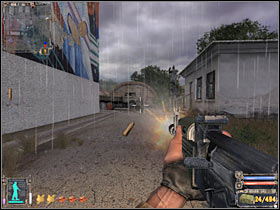
As you've probably noticed, collecting the briefcase concluded the first part of this mission. Sadly, you will also have to escape from this zone in order to reach the Bar sector. As a result, I will tell you what should be done here. You could go and search for a hole in the wall, however I would recommend using one of the standard exits (#1). Try killing a few soldiers from a larger distance. You could also throw a couple of grenades at them. Once they're confused, start RUNNING towards the factory compound (#2). If you're lucky, you won't be attacked by anyone. You could also take out all nearby soldiers, however this would take at least a few minutes of your time.
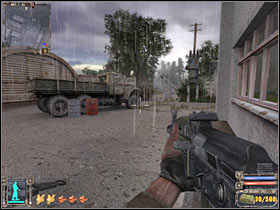
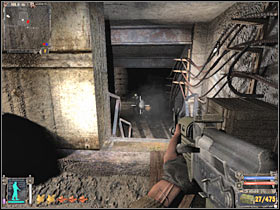
Keep heading towards the exit. I'm sure that you remember where it is. The objective will be to go back to Garbage sector. You will probably encounter a small group of thugs here (#1). I was able to take them out quickly by using one of the carried grenades. Once they're gone, head on towards the exit (#2). We'll continue with this mission once you've reached the Bar. This is a new zone that's located to the north of Garbage.
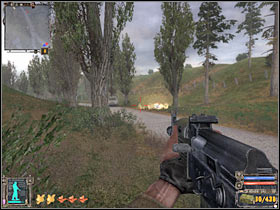
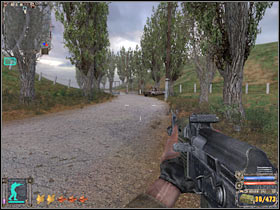
MAIN MAP OF THIS ZONE:
Green points on the map:
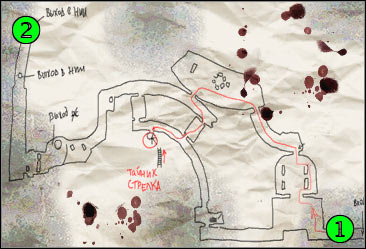
1 - exit to: Agroprom Research Institute (starting point)
2 - exit to: Agroprom Research Institute (finish - leads to an army base)
I guess there are a few important things that you should know about. Catacombs sector is a small map that's located beneath the main one - Agroprom Research Institute. This means you won't be able to reach any other sectors from here. Additionally, you won't be using a standard map, because this is an underground level. Thankfully, if you take a closer look at your quest notes, you will be given a secondary map. You can use it to reach Strelok's stash, however there's only one path leading to your destination, so you can't get lost.
DETAILED MAP OF THIS ZONE - QUESTS:
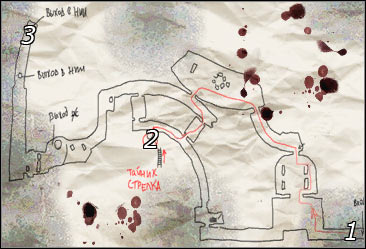
QUESTS:
1. Find Strelok's group's stash
Received from: Mole (Agroprom)
Starting point: 1 on the map, however if we want to be more specific - once you've talked to Mole in the Agroprom Research Institute sector (near the entrance to the sewers area)
What needs to be done:
a) find Strelok's stash (2 on the map)
b) find out what's inside the stash (2 on the map)
c) head on to the second exit from the sewers (3 on the map)
Complete quest walkthrough:
Once you've reached the sewers area, you will have an opportunity to score one of many side missions. You will have to take out all surrounding bandits. It's going to be very easy, especially since you're going to have to through them in order to reach Strelok's stash. Don't forget to use your flashlight in the sewers, especially since it's very dark here. You should also save your progress as often as possible. Don't forget about acid anomalies. You will have to avoid them at all costs.
You start off inside a small, dark tunnel. Head on to the next section. You could also check one of the nearby bodies for valuable objects (#1). You will come across some of the first bandits just around the corners (#2). Don't use the stairs. Instead, take them out from a distance.
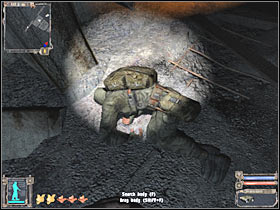

The second group of thugs can be found on your right (#1). You won't have to avoid them, because that's where you'll have to go. Be careful, though. Some of the bandits are carrying shotguns, so try maintaining a safe distance. You won't have to go to the left corridor, because you would encounter very serious anomalies here (#2).
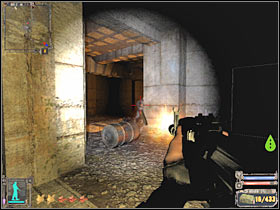
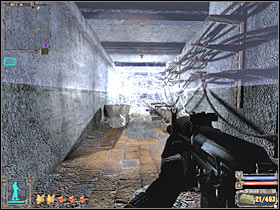
Make sure to use your secondary map if you don't where to go. Like I've said before, there's only one path here, so you shouldn't have any major problems. You will come across a spiral staircase (#1). Use it to get down to a lower level. Be careful for acid traps. Move slowly or use the jump button in order to avoid them (#2). SAVE the game once you've reached the exit. You should also choose one of the better guns from your inventory.
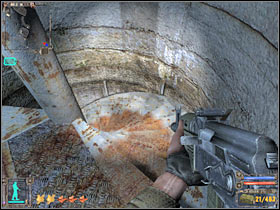
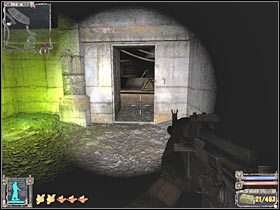
Head on to your left. As you've probably suspected, there's a very powerful mutant in this room. Additionally, it's partially invisible, so you might have some problems spotting it. The mutant will reveal itself once it's ready for an attack (#1). Keep going backwards. You will have to be shooting at the thing at the same time. You will also have to reload your machine gun, however if you're using a shotgun, you should be able to kill this monster quickly (#2). Check the body and collect a valuable object.
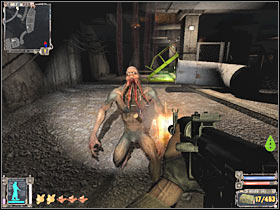
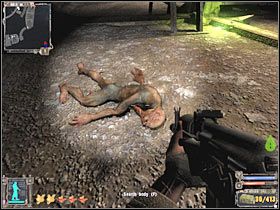
Don't leave this area just yet. Head on to the stairs. They should be located on your right. Keep going straight. You will come across a very powerful artifact here - Urchin (#1). I'd strongly recommend that you pick it up. Leave this area and head on to a nearby door. You will come across a small passageway (#2). Save your game once again, because the area is crawling with enemy units.
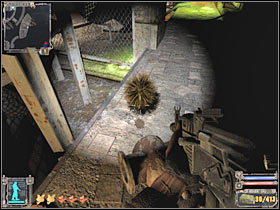
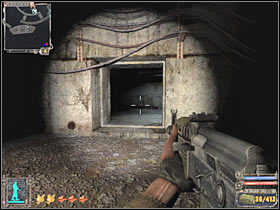
I would recommend that you start off by SECURING this entire tunnel area (#1). You will have to deal with at least 8-10 well armed soldiers, so be careful. Most of the enemy soldiers will appear on your right (#2). There's a small exit there, however don't use it just yet. The most important thing here is to take care of all bandits. Also, make sure that you've checked their bodies for grenades and extra ammo.
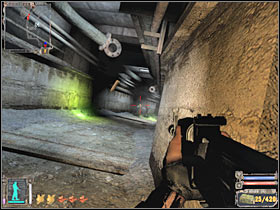
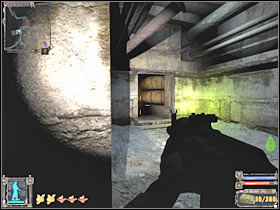
Now you will have to use one of the smaller passageways in order to reach your current destination. Once you're there, turn left (#1) and use the jump button to find yourself on top of the crates. You will have to press the crouch key in order to enter this small tunnel. After that, climb the ladder (#2).
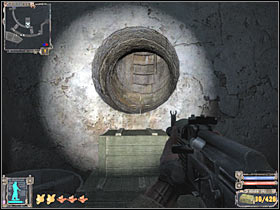
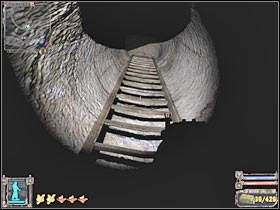
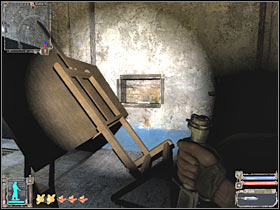
The first thing that should be done here is to pick up a nearby artifact - Fireball (#1). You will also find an upgraded machine gun - Fast-shooting Akm 74/2. This is a VERY powerful weapon and I'm sure that you have a lot of ammunition at your disposal, so start using it. Strelok's stash is hidden behind a large map (#2). You will have to pick up a small flash disk. Once this is done, a second main quest will begin, however you won't be able to finish it right away.
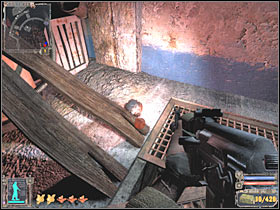
Now you will have to go back to the lower level. Head on to the small exit. I was talking about it much earlier (#1). You will probably encounter 1-2 additional soldiers. Keep heading towards the exit. You will have to deal with a new soldier near a large staircase (#2). Head on to the highest level.
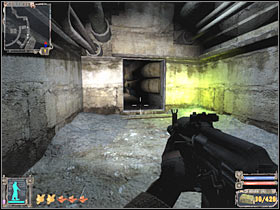
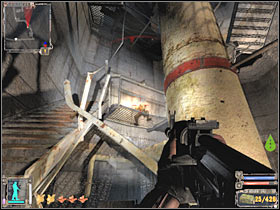
Once you've reached the top, I'd strongly recommend that you save your current progress. Head on to a large tunnel. You will receive a confirmation that you've successfully completed this quest, however you are also going to be attacked by a second mutant. This monster will be using psi-powers on you (#1). You can fight this creature or escape. If you decide to fight, shoot at it from a smaller distance (#2).
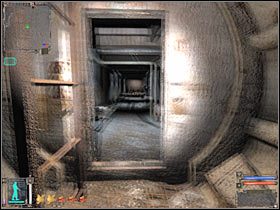
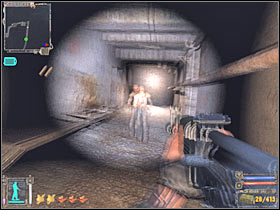
Sadly, you won't be able to pick up any valuable objects from the corpse (#1). As a result, you should consider skipping this fight. You would have to reach the exit (#2). Use the ladder and wait for the game to load a new map. You'll end up inside an army base.
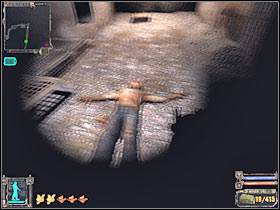
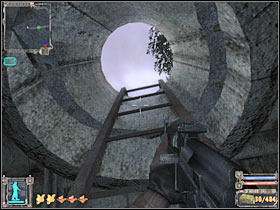
2. Find out what happened to Ghost
Received from: this quest will begin automatically once you've collected a flash disk from Strelok's stash
Starting point: 2 on the map
What needs to be done:
a) find out what happened to Ghost
I think it's fairly obvious that you won't be able to fulfill this task right away. We'll get back to this mission later during the game. For now, focus your attention on leaving the sewers safely.
3. Meet with Doctor - part 2
Received from: Guide (Cordon)
Starting point: Cordon sector
What needs to be done:
a) talk to Doctor; he can be found in Strelok's hideout (2 on the map)
Complete quest walkthrough:
You won't be able to fulfill this task during your first visit in the sewers area. You will have to talk to Guide (Cordon) in the first place. He will order you to go back to the catacombs. Once again, you will have to reach Strelok's stash. Sadly, you will have to deal with new problems along the way. You will encounter bandits in the exact same spot as before (#1). Instead of fighting only one mutant, this time you will have to kill two monsters (#2). You will also come across several soldiers.
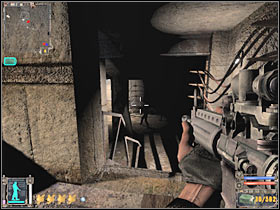
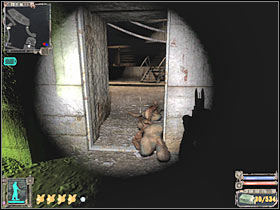
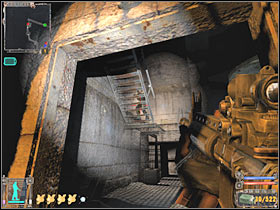
Once you've reached the ladder, try reaching the stash. Our main character will once again lose consciousness. After that, a longer cut-scene will be displayed on your screen. Listen to what the Doctor has to say to you (#1). It's very important, because you will find out something INTERESTING about our main character. I won't spoil the fun. You will have to find out on your own. :-) The Doctor will grant you with a new task, however we'll get back to this mission once we've reached Pripyat. You may exit the sewers. Watch out for other soldiers (#2). You will also have to escape from an army base, however it's going to be much easier this time, mostly because you have better equipment at your disposal.
4. Secret stash at Pripyat
Received from: Doctor (Agroprom Research Institute Sewers)
Starting point: 2 on the map
What needs to be done:
a) reach one of the hotels in the Pripyat district
b) find the room with a secret stash
c) discover what's inside the stash
Obviously, you won't be able to proceed with this mission right away. We'll get back to these objectives once you've reached the city of Pripyat.
MAIN MAP OF THIS ZONE:
Green points on the map:
1 - exit to: Garbage (that's where you came from)
2 - exit to: Army Warehouses
3 - exit to: The Wild Territory

DETAILED MAP OF THIS ZONE - NPC's & IMPORTANT PLACES:
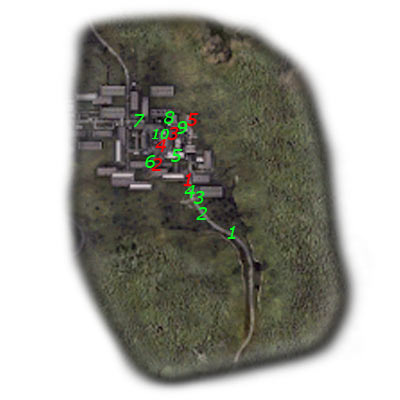
Important NPC characters (red color):
1 - Sergeant Kitsenko - He is one of the soldiers for the Duty military organization. Kitsenko guards the entrance to the main part of the facility. He will be able to tell you a few interesting things. Kitsenko will also grant you with some side missions.
2 - You will come across several important NPC characters here:
Barkeep - This is one of the most important characters of the entire game. Barkeep is one of three traders of "S.T.A.L.K.E.R.". As a result, you will be allowed to sell all kinds of objects to him, not only artifacts and medical supplies. It would be wise to go back here in order to sell unwanted things. Barkeep will also be involved in some of the main missions, as well as a lot of side quests. Obviously, you won't have to finish these tasks in order to succeed.
Baldy - You could try talking to him. Baldy will grant with a few additional tasks.
Snitch - Talking to Snitch would allow you to find out more about the surroundings. Sadly, each hint will cost you a lot of money. As a result, it would be wise to save your progress before talking to him, so you won't have to lose any cash. Snitch will also give you a few side missions.
Hunter - Once again, you will have an opportunity to receive new tasks from this Stalker. They are optional.
Brome - Brome will grant you with a few simple tasks. You will also have an opportunity to talk to him, however you won't find out anything of high importance.
3 - Sergeant Plichko - He is one of the Duty soldiers. When you meet him for the first time, he will be guarding the entrance to a Duty base. Sadly, you won't be able to talk to him about anything else.
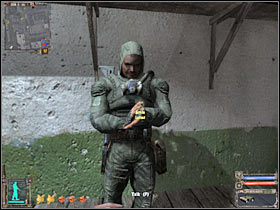
4 - Arnie - He's in charge of the Arena fights. As a result, you must talk to him if you plan on earning some extra cash.
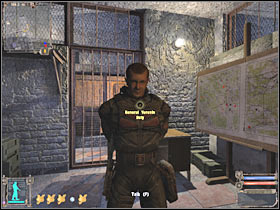
5 - General Voronin - He is the leader of the Duty organization. Voronin will grant you with a few additional quests, however you won't be allowed to talk to him early during the game. You will have to gain Duty's trust in the first place.
Important places (green color):
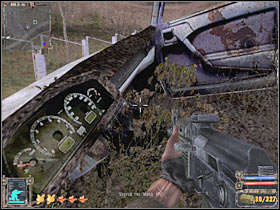
1 - A destroyed car. You can find it near the entrance to this sector. If you look hard enough, you will be able to find a stash here. Open it and pick up some of the most valuable objects.
2 - This road leads straight to the main compound, however you won't be safe here. You are going to be attacked by a large pack of dogs AND wolves. These creatures are very powerful and extremely fast, so you must plan your actions very carefully. I would recommend using grenades or shooting from a larger distance. If you have one of the standard machine guns, you will have to waste a lot of ammunition. More animals will appear here later during the game.
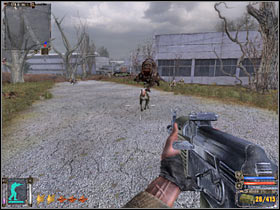
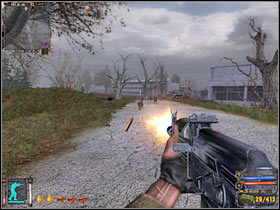
3 - It would be wise to check the rear of the truck. You should be able to find a couple of crates here. Destroy them and pick up the Crystal Thorn artifact.
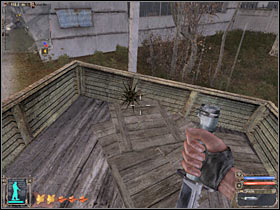
4 - This is the first military checkpoint. Make sure that you have holstered your gun, so you won't be attacked by any of the nearby soldiers. Once you've gone past this checkpoint, you won't be attacked by any mutants or enemy units.
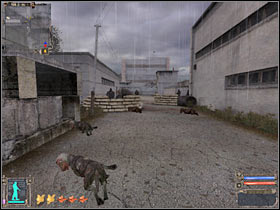
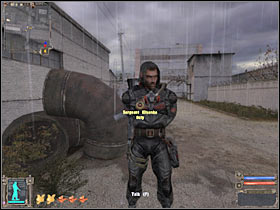
5 - This is a large warehouse that's being guarded by Duty soldiers. Once again, remember that you won't be allowed to kill any of them. Don't worry about them trying to kick you out of the warehouse. You should be able to find at least one interesting stash here.
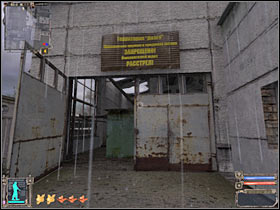
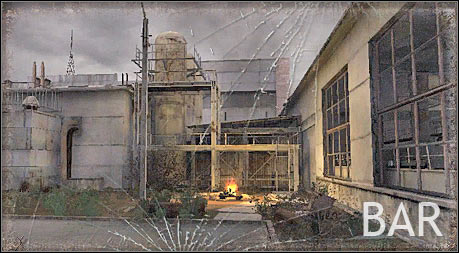
6 - This is the most important building of the entire map - the bar. Thankfully, you won't have to worry about the gun, because it'll be automatically holstered. The entrance is a little hard to find, but only for the first time. You will find a lot of important NPC characters inside, including the Barkeep (trader).
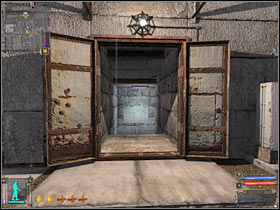
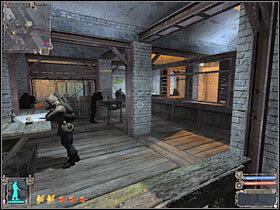
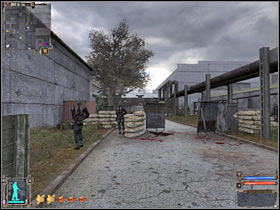
7 - This is a second military checkpoint. You will also find a third one in this area. Thankfully, you won't encounter any other animals in the vicinity. You will only have to watch out for several dangerous anomalies.
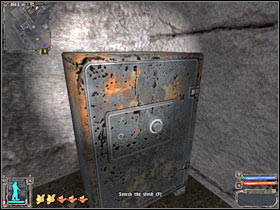
8 - It's going to be quite difficult to actually reach this stash (a large safe), mostly because you will have to avoid anomalies.
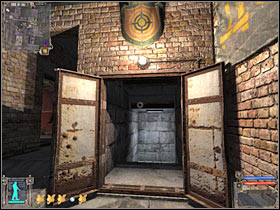
9 - This is the main base of the Duty organization. You won't be allowed inside during your first visits to the Bar sector. You will be given full clearance later during the game. There's a checkpoint here. Don't even think about going past the soldiers, because you would have been shot on sight.
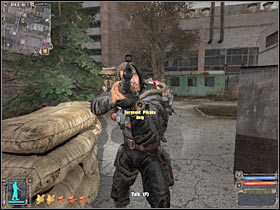
Once you've returned from X16:
You will have to talk to one of the soldiers. Choose "Barkeep told me..." from the dialog window. As a result, you will be able to enter the base without any other interruptions. You can enter the main bunker in order to talk to the general. He will grant you with several less important quests and you will find out more about the situation in Army Warehouses district.
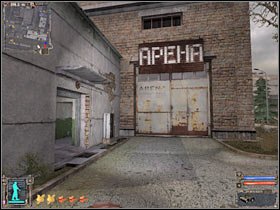
10 - This is a fighting arena. As you've probably suspected, you will have an opportunity to participate in several matches. If you plan on doing this, you will have to talk to Arnie. Each match will be different. You will be given various armors and weapons and you will be dealing with different opponents. Remember to take your belongings from a nearby stash after each match Here's a full list of available fights:
FIRST FIGHT - single bandit, he's not well trained; you will be using a pistol - reward: 1000
SECOND FIGHT - single bandit, he's not well trained; you will be using a machine gun - reward: 2000
THIRD FIGHT - two bandits, they're not well trained; you will be using a shotgun - reward: 3000
FOURTH FIGHT - 3 vs. 3 fight, however you will have rookies on your side; you will be using a machine gun and you will have to conserve your ammo - reward: 4000
FIFTH FIGHT - two experienced and well equipped Stalkers (aim at their heads!); you will be using a machine gun - reward: 6000
SIXTH FIGHT - six (!) bandits, they're not well trained; you will be using a machine gun - reward: 8000
SEVENTH FIGHT - single experienced opponent; you will only be using a knife and grenades (you will have to use these objects to kill the soldier) - reward: 10000
FINAL FIGHT - This is a very easy challenge, so I guess it'll surprise you a little bit. You'll be dealing with a Deathmatch. As a result, it would be best to wait for the opponents to kill each other. Once this is done, deal with the only remaining soldier. You will have the best fighting suit at your disposal (exoskeleton), as well as an excellent machine gun. Sadly, you aren't allowed to use medical supplies. Reward: 10000
DETAILED MAP OF THIS ZONE - QUESTS:
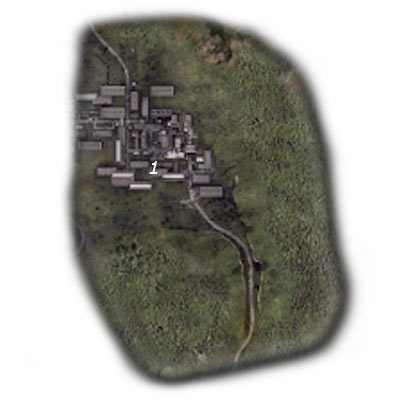
QUESTS:
1. Find the militaries' documents - part 3
Received from: Sidorivich (Cordon)
Starting point: Cordon sector
What needs to be done:
a) steal the documents (Agroprom Research Institute zone!)
b) deliver the documents to Barkeep (Barkeep; 1 on the map)
Complete quest walkthrough:
I hope that you've already been to Agroprom Research Institute. As a result, you will have the documents at your possession. Otherwise you wouldn't be able to end this quest. The only thing that has to be done here is to go to the Bar (#1). Next, you will have to talk to Barkeep (#2), so you'll be able to fulfill the second mission objective. You will also receive a new mission from Barkeep. Also, you will have an opportunity to take care of other errands. These side are optional.
Important! You won't receive any money for finishing this mission, HOWEVER you are going to be rewarded with a Stalker Suit. I'd strongly recommend that you put it on. Stalker suit offers better protection in highly radioactive zones, so you'll be able to venture to The Dark Valley sector.
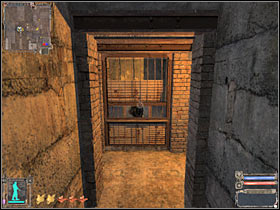

2. Find the documents in the underground lab
Received from: Barkeep (Bar)
Starting point: 1 on the map
What needs to be done:
a) enter the enemy base
b) acquire a key from the leader of the bandits (Borova)
c) exit the camp
d) find the entrance leading to X18 laboratory
You won't be able to proceed with this mission here, but it'll be next on your list after the first quest. You will have to go to The Dark Valley. That's where all of your objectives are located.
3. Find the documents in X18 - part 3
Received from: this quest begins automatically during the exploration of X18 laboratory
Starting point: X18 sector
What needs to be done:
a) find the documents
b) deliver the documents to Barkeep (1 on the map)
Complete quest walkthrough:
This is where you will be able to end this quest (it started during the exploration of the X18 complex). The only thing that has to be done is to give the documents to Barkeep (#1). This time you will receive a reward and you'll be able to proceed with the next important mission.
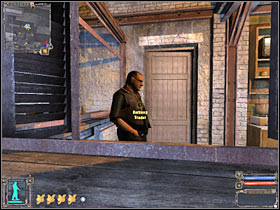
4. Find the documents in X16 lab
Received from: Barkeep (Bar), however you must finish the third task in order to receive this new mission
Starting point: 1 on the map
What needs to be done:
a) find the documents in the X16 laboratory
b) deliver the documents to Barkeep (1 on the map)
Complete quest walkthrough:
Sadly, you won't be able to fulfill the most important part of the task right away. You will have to reach the X16 laboratory in the first place. The laboratory is hidden beneath Yantar. Once you've acquired the documents you will have to return to Barkeep and give the documents to him. You will be rewarded and you will also receive a new challenge.
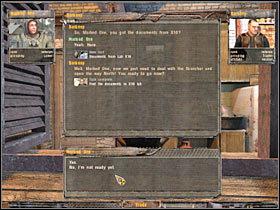
5. Turn off the scorcher
Received from: Barkeep (Bar), however you must finish the fourth task in order to receive this new mission
Starting point: 1 on the map
What needs to be done:
a) reach the antenna
b) find the entrance leading to the control bunker
c) disable the device (scorcher)
Just as before, you will have to be patient, because you will only receive this mission here. You won't be able to do anything else. You must reach the Red Forest sector by going through Army Warehouses.
MAIN MAP OF THIS ZONE:
Green points on the map:
1 - exit to: Garbage
2 - exit to: X18 (this is a small door, you must also have two keys in your possession in order to open it)
3 - exit to: Cordon (you won't be able to use it right away; this passageway is going to be unlocked once you've returned from the X18 laboratory)
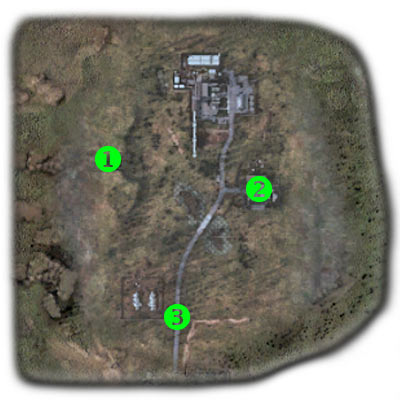
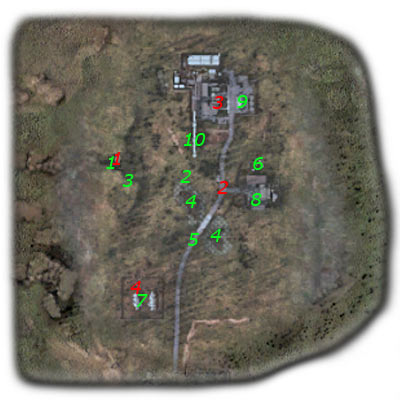
DETAILED MAP OF THIS ZONE - NPC's & IMPORTANT PLACES:
Important NPC characters (red color):
1 - Bullet - He is one of the Duty organization soldiers. You will have an opportunity to help him in saving one of his friends. Once this is done, Bullet will go back to the main campsite, however it will take him some time to get there.
2 - Roma Death - He is also working for Duty and he's the man you will have to rescue from the bandits. This is tied to one of the main quests of this location. This quest has been described in my guide. Roma will also head back to Bullet's campsite.
3 - Dutyer - You would have to rescue this man from the main base of the bandits, however there's an annoying bug concerning this quest. As a result, he will probably kill the bandits on his own, so you won't have to worry about saving him.
4 - Edik Operator - Edik can be found near the southern farm. There are also other soldiers in that area. You will have an opportunity to talk to him in order to purchase gun. Sadly, he will trick you. As a result, you may as well ignore exploring this particular area of the map.
Important places (green color):
1 - There's a small campsite here. You will come across Bullet. You're going to need to cooperate with this soldier if you plan on finishing one of the main quests of The Dark Valley sector. As a result, don't even think about killing him.
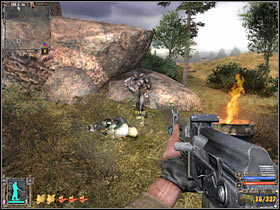
2 - You will come across a destroyed SUV. The vehicle is surrounded by dangerous anomalies, however you could consider getting closer to it. You will find one of the stashes here, however if you don't have it on your map, don't even bother going here.
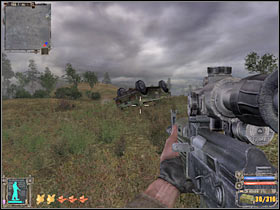
3 - There are a lot of precious artefacts in this area and it's going to be very easy to pick them up. You will also find other valuable objects in the area.
4 - This is a large and highly polluted lake. I wouldn't recommend going towards the northern side, because that's a highly radioactive zone. Instead, stick close to the southern part of the lake. You should be able to find several artifacts here. Pick them up.
5 - This road leads straight to the southern farm. Sadly, you are going to be attacked by dangerous wild animals here, so you will have to be extremely careful. If you plan on going to the farm, choosing the western road (near the edge of the map) is going to be much safer.
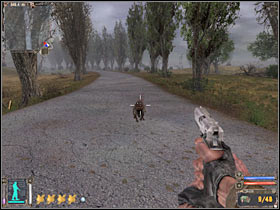
6 - You can find these buildings to the north of the lab complex. There are some artifacts here, however you must be very careful. You will come across a lot of radioactive zones and anomalies here. You could try and climb to a large construction. You will find a guitar there (among other things). :-)
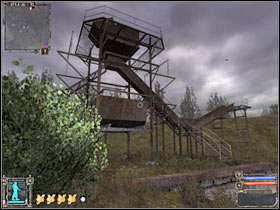
7 - The southern farm. You will come across a group of Stalker soldiers. Start off by talking to Edik. He will offer you a Gauss Gun for a very interesting price. Sadly, it turns out that he was only kidding and he will take your money. It won't be a huge financial disaster, however you might consider killing him and his colleagues, especially if you have more grenades or a gun with a scope at your disposal. Once the battle is over, make sure to check bodies of fallen enemy soldiers. You will collect ammo and medical supplies.
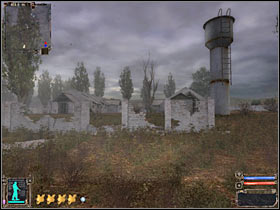
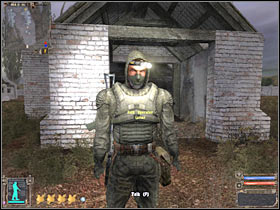
8 - This is the destroyed lab complex. You will have to enter this area if you plan on going to X18 laboratory, however you could also clear out this base much earlier. You would have to enter the complex and turn left. There's a large warehouse there and you must enter it. There are at least ten enemy soldiers in the vicinity, so be careful and take them out one at a time. You should also consider exploring all rooms. You will find a rocket launcher in one of the upper rooms. I would recommend taking this object to Cordon or Bar in order to sell it. Remember, though, that the rocket launcher is quite heavy.
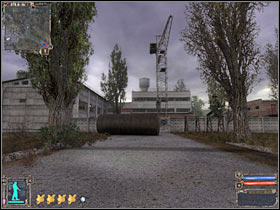
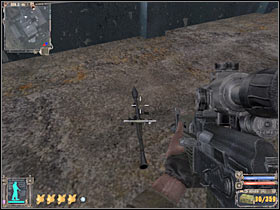
9 - This is the main base of the bandits. You will have to explore it in order to finish up with one of the most important quests of this map. You should also consider taking a closer look at the surrounding areas of the base, especially since these regions aren't guarded by anyone. Be careful, though. There are some wild animals in the eastern part of the map.
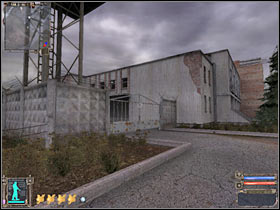
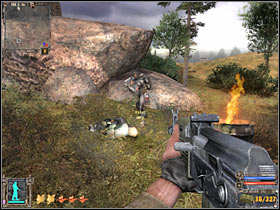
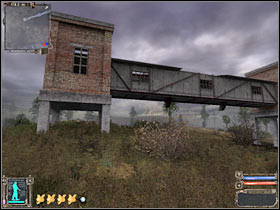
10 - This is a very interesting tunnel. You will be able to use this construction in order to escape from the base.
DETAILED MAP OF THIS ZONE - QUESTS:
QUESTS:
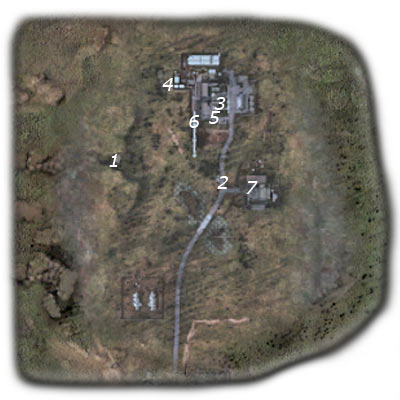
1. Free the Dutyer
Received from: Bullet (The Dark Valley)
Starting point: 1 on the map
What needs to be done
a) follow Bullet to the ambush point (2 on the map)
b) surprise the bandits and rescue the Duty soldier (2 on the map)
Complete quest walkthrough:
You will be able to proceed with this mission as soon as you've reached The Dark Valley. You shouldn't have any problems finding Bullet, because his campsite is located near the exit. Talk to him. It turns out that one of his colleagues is being held hostage by the bandits. You will have to rescue him. Kill the bandit and search his body. Once this is done, start following Bullet (#2).

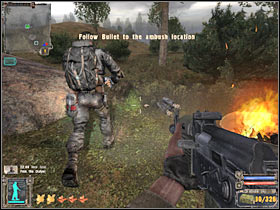
You will come across several anomalies along the way (#1), however if you're following Bullet's footsteps, you should be fine. Also, you won't have to worry about encountering any wild animals. Once you've reached your destination, you will have to prepare for an attack. Head on to the left building and hide behind the wall (#2). Now you will have to wait for the bandits to show up. It's going to take about 30 seconds, so be patient. You can observe their movements on the minimap.
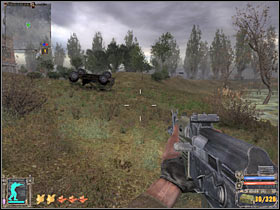
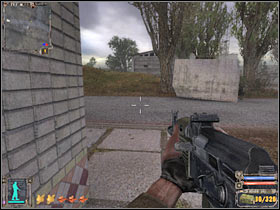
Not only you will have to wait for the bandits to show up (#1), but also for Bullet to give you signal for an attack. Once he starts shooting at the bandits, surprise them by doing the same thing (#2). If you're lucky, they're going to be killed in about two seconds. Additionally, you won't lose any health here. Make sure that you have checked their bodies!
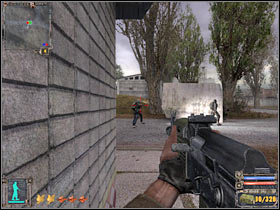
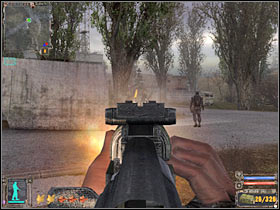
Once the fighting is over, you will have to talk to both Stalker soldiers. Important! If none of them responds to your actions, you've probably encountered a bug and you will have to reload the entire assault. Start off by talking to Roma Death (#1). You will receive a new quest from him. Bullet, on the other hand, will give a very precious reward. It's going to be a scope (PSO-1 Scope) for your machine gun. Attach it to your weapon right away (#2).
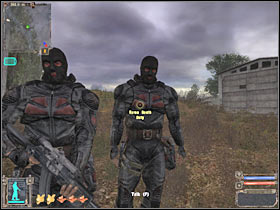
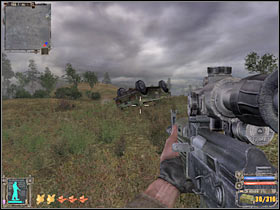
2. Free the Dutyer from prison
Received: Roma Death (The Dark Valley)
Starting point: 2 on the map
What needs to be done:
a) reach the prison area and free one of the Duty soldiers (3 on the map)
Complete quest walkthrough:
Sadly, I wasn't able to actually finish this quest on my own, because it was broken. As a result, the Duty soldier escaped the camp and killed the bandits without my help. This was a good thing, because I didn't have to rescue him on my own. If this doesn't happen, you would have to locate the prison (it's visible on your map) in order to free him. Thankfully, you will be completing a second quest at the same time, so you won't have to go there only to rescue him.
3. Find the documents in the underground lab - part 2
Received from: Barkeep (Bar)
Starting point: Bar sector
What needs to be done:
a) enter the enemy base (4 on the map)
b) acquire a key from the leader of the bandits (Borova; 5 on the map)
c) exit the camp (6 on the map)
d) find the entrance leading to X18 laboratory (7 on the map)
Complete quest walkthrough:
The first thing that has to be done here is to locate a secret entrance which would allow you to enter the base without raising any suspicion. You will have to open your minimap and locate a Pipe (#1). Once you're there, enter the tunnel. You can't stay in the open for too long, because this is a radioactive zone. Keep moving forward (#2). Once you've reached the end of this tunnel, turn left and head on to the second one.
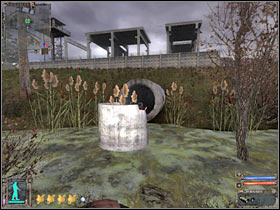
Once you've exited the second tunnel, you should be inside the main base of the bandits (#1). You will be quite safe here, so you will have a lot of time to plan your next moves. Start moving towards your current destination. You will come across a first warehouse area. You will have to make a stop (#2), because enemy soldiers will arrive here in just a few seconds.
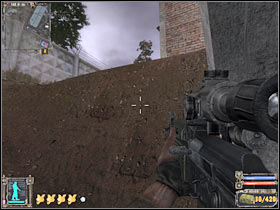
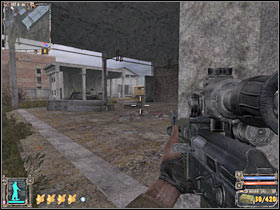
It would be wise to take out some of the bandits from a larger distance (#1), however you should also consider using a nearby sniper tower. This would allow you to spot their movements. Go there now (#2). You will have to use the ladder.
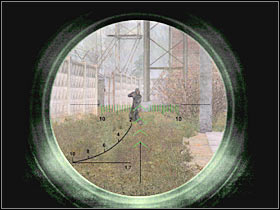
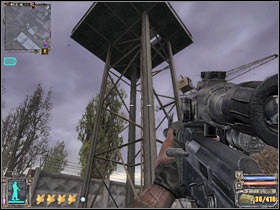
Once you're at the top of the tower, turn around, so you'll be able to see the whole base in front of you. Kill at least 3-4 soldiers from here (#1). You will have to use your scope. Thankfully, their deaths won't alarm any of the surrounding enemy units. Once you've secured that area, head back to the ground level. Keep moving towards your current target (bandit leader). You should be able to reach a second large warehouse (#2).
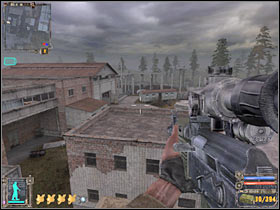
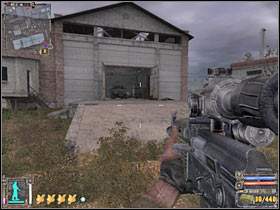
There are many different routes which you could take to reach your target area. I will do my best to explain you what should be done inside the camp. Once you've reached this warehouse, you will have to deal with a new group of enemy soldiers (#1). Make sure that you're using the flashlight. You should also check bodies for ammo and medical supplies. You will be able to reach a small tunnel very soon (#2). This passageway leads to the main building.
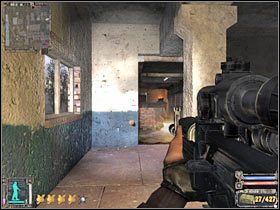
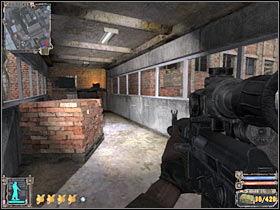
You will have to clear out some of the nearby rooms, however make sure that none of the enemy soldier manages to surprise you. You will have to reach a new staircase (#1). Head on to the highest level. You are currently to the north of Borova's location. Make a jump, so you'll be able to reach a new roof area (#2). There are a lot of bandits here!
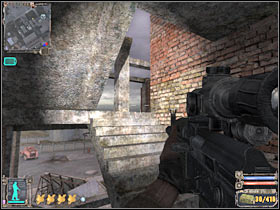
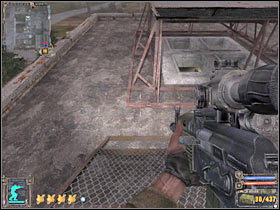
Now you will have to locate a small ladder (#1). Use it, so you'll be able to return to the main part of the building. You're near your target, however you must be very careful. Thankfully, Borov isn't going anywhere. Start off by securing this entire floor. You will have to reach a larger room (#2). Enemy soldiers will be coming from two different directions, however if you're cautious enough, you should be fine.
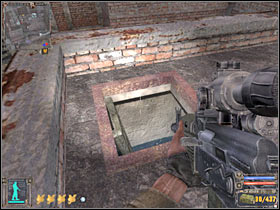
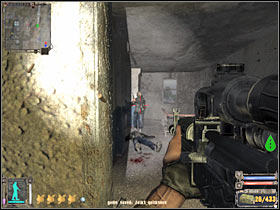
Borov is hiding in a small room that should be located on your right (#1). It would be wise to take him out from a larger distance (#2). Additionally, make sure that you're aiming at his head. You could also throw a couple of grenades at him, however this won't be necessary.
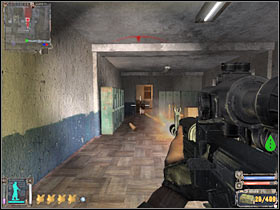
Head on to the main office and take a closer look at Borov's body. You will have to check it in order to fulfill this mission objective (#1). You will automatically receive a second key. Now you will have to exit the base. The easiest way to do this would be to head down to the ground floor (#2). Next, try moving closer to a long tunnel. I'm sure that you know which one it is.
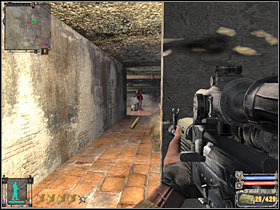
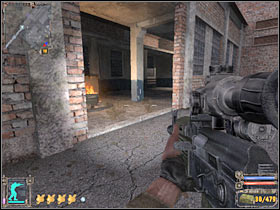
Head to the nearest building. I would recommend that you ignore the rest of the bandits. You will have to locate a small ladder (#1). Use it. As a result, you will be able to reach the large tunnel (#2). Keep running forward. You won't encounter any hostiles in this area.
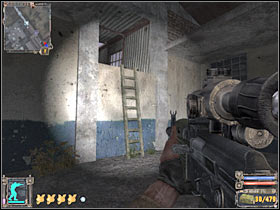
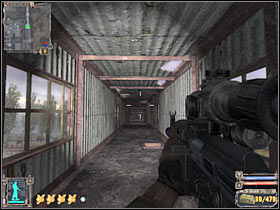
Once you've left the tunnel, you will also have to reach the entrance to the laboratory. As a result, you must return to the lamb complex which is located in the eastern section of the map (#1). Be careful, though. More enemy soldiers have appeared there. Once again, head on to the left warehouse (#2). Keep moving slowly, so you won't miss anyone along the way.
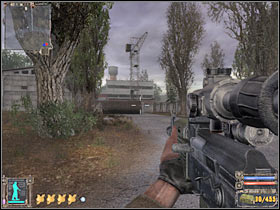
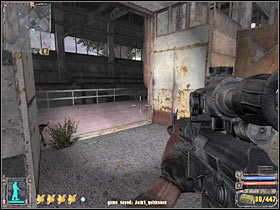
Now you will have to secure a second large room (#1). Just as before, you will encounter new bandits here, even if you had managed to secure this area before. Now you will have to locate the stairs. This passageway leads to the underground laboratory (#2).
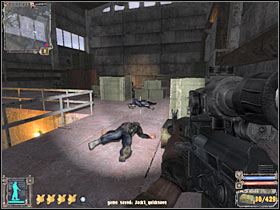
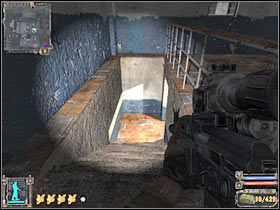
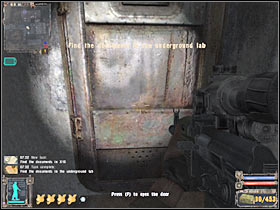
You will have to deal with a few remaining soldiers (#1). Once this is done, enter this room and turn right. Head on to a steel door (#2). You weren't able to use it before. Now's your chance. Once you've open the door, head on to the new corridor. You will be able to end this quest. You will also have to wait for the game to load a new map (X18 laboratory).

4. Find the documents in X18 - part 2
Received from: this quest begins automatically during the exploration of X18 laboratory
Starting point: X18 sector
What needs to be done:
a) find the documents
b) deliver the documents to Barkeep
Complete quest walkthrough:
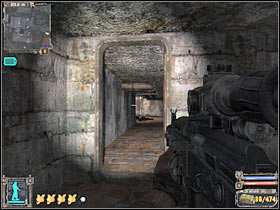
Obviously, this is what you will have to do once you've successfully returned from the X18 laboratory. As a result, you should already have the required documents in your possession. There are A LOT of new enemy soldiers in the area, however they will be fighting the bandits, so you'll have an opportunity to slip past some of them unnoticed. I wouldn't recommend fighting any of these thugs, especially since they're well armed.
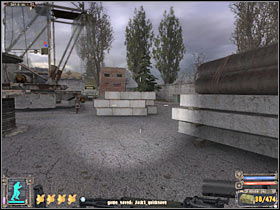
Start moving towards the exit. There are a few soldiers in the area and you will have to take care of that problem. Once you've left the building, start moving towards the main exit (#2). You will have to be quick about it, so you aren't noticed by anyone.
5. Get out of the Dark Valley
Received from: this quest begins automatically once you've returned from the X18 laboratory
Starting point: 7 on the map
What needs to be done:
a) escape from The Dark Valley
Complete quest walkthrough:
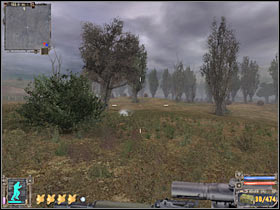
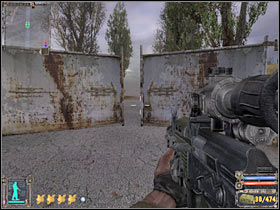
This is a very simple quest, however you must know exactly what has to be done here. Once you've left the lab complex, start RUNNING towards SOUTHERN exit (#1). This road leads straight to Cordon. You weren't able to use it before, however not it's possible. Watch out for wild dogs and anomalies along the way. Click on the large gate in order to open it (#2). Head on to Cordon. That's where this quest will come to an end. Now you will have to go through Garbage sector in order to return to Bar.
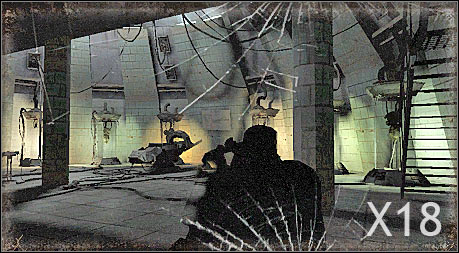
This is a very unusual place. X18 laboratory is a small underground map, very similiar to Agroprom Sewers level. Sadly, you won't be able to use any minimaps, however there is only one path leading to your final destination, so it's going to be very hard to get lost. I will also do my best to explain which places you need to visit. You won't spend too much time here, however you must be very careful. You will encounter a few very dangerous mutants. Thankfully, there are also some interesting objects to be found, including better armors and precious artifacts. The map has been divided into three zones. You will have to acquire a combination for the lock in order to reach the next zone. Remember to save your game from time to time, especially if you're playing on one of the higher difficulty levels.
QUESTS:
1. Find the documents in X18
Received from: this quest begins automatically once you've completed Find the documents in the underground lab task
Starting point: X18 laboratory - right after you start exploring this map
What needs to be done:
a) find the documents
b) deliver the documents to Barkeep
Complete quest walkthrough:
There's nothing interesting near the start area, so you may as well use the stairs to reach the lower level of the underground complex (#1). Don't be scared, because crates and other smaller objects will be flying your way (#2). This is connected to the boss character of this location. You shouldn't receive any major damage from this, so you may as well ignore these attacks. Otherwise you would have to keep moving and not in a straight line.
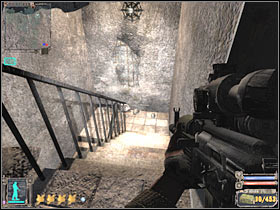
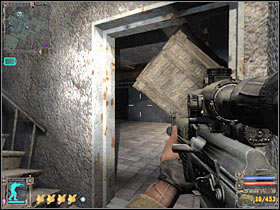
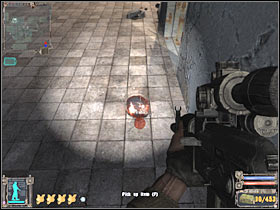
You will come across a steel door, however you may ignore it for the time being. Instead, focus all of your attention on exploring the surrounding rooms. You must have a machine gun ready, because the area is not safe. Be on a look out for artifacts. There are a lot of these objects here (#1), however you would have sell most of them. One of the artifacts is inside a radioactive zone (#2), but thankfully you won't have to pick it up, especially if you don't have any medicines at your disposal.
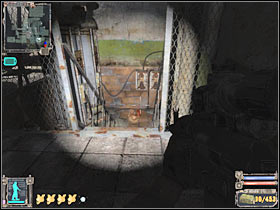
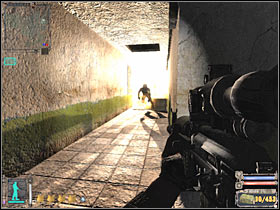
There's a small corridor to your right. You must be EXTREMELY careful there. This area is being guarded by TWO mutants (#1). I'd strongly recommend that you take them out from a larger distance. Try aiming at their heads. Allowing them to make a jump is very often equal to a quick death, however you could also try dodging their attack (#2). You won't have to explore this tunnel from here. The most important thing is that the mutants are dead.
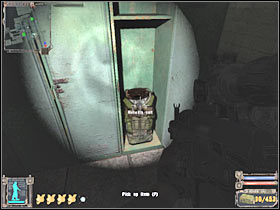
I'd strongly recommend that you check all of the surrounding rooms. Once of them is going to be filled with a lot of cabinets (#1). MAKE SURE that you've opened all cabinets. You will find a lot of grenades and med-kits. There's also a gun with a grenade launcher. Dismount it, so you'll be able to use it with your weapon. You will also come across a Monolith Suit (#2). Don't be fooled by a lower price. This is a much better armor, so exchange it for your Stalker Suit.
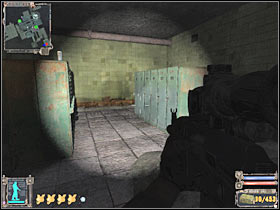

Now you will have to locate a small corridor which leads to the unexplored area of the map (#1). That's where the mutants have appeared, however this time we're moving from a different direction. Keep going straight. You will have to turn right at some point. You will come across a room filled with fire traps (#2). I would recommend exploring it, because you will find a few precious artifacts here. Also, check the body for additional supplies.
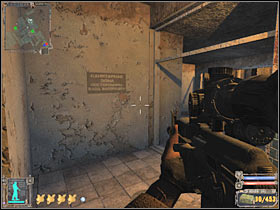
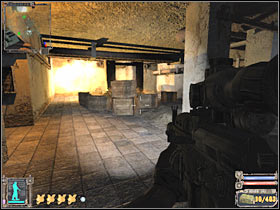
You may proceed to the next section. You should be able to locate a room with a dead scientist (#1). Check his body. Once you've acquired the combination for the door, return to the main room (it's been described in the second quest of this location). Once you've opened the door, use the stairs to get down to the lower floor (#2). I would recommend that you save your game here.
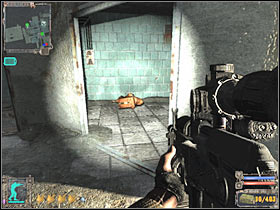
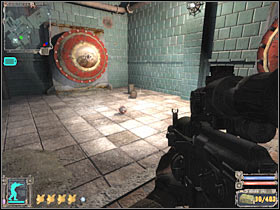
Don't worry about other objects which will be flying towards your character. Focus all of your attention on avoiding dangerous anomalies, especially since some of them will be moving. You should be able to locate a room with a lot of interesting artifacts (#1). After that, use the nearby stairs to go down to a lower level (#2). Save your game once again, because there's another mutant nearby and you're going to have to kill this creature.

The mutant should be standing at the other end of this large room. You could try and kill it with your machine gun. If you decide to choose this approach method, you will have to aim at the head of the creature (#1). There's a simple way to kill it, though. Be on a look out for a locket launcher. You will find it on your left. Pick up the rocket launcher and use it to get rid of the monster. Once this is done, check the body of a scientist in order to acquire the code. You may also check the rest of the room. You should be able to find a few interesting things here (#2).
Once you've opened the second door (check quest 3 description) you will find yourself inside the final room of this complex. That's where the boss creature is hiding. Before we'll proceed with the fight, you will have to pick up the documents, because that's why you're here. Use the stairs (#1). You will find the documents on your right (#2). SAVE the game!
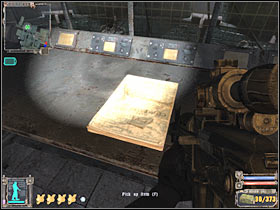
It's going to be a very easy fight, however you must remember about a few important things. The boss is a small and partially invisible creature. Once you hit it, you should notice a blood appearing on nearby walls and floors. This creature can be found near the stairs and that's where you should kill it (#1). Ignore the main room, because you would have to deal with a lot of flame traps. Once you've killed this creature, an interesting cut-scene will appear on the screen (#2).
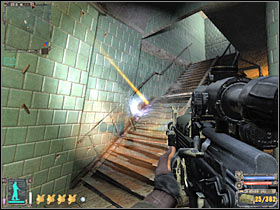

Now you will have to exit the lab. Sadly, this means that you will be required to choose the exact same passageways to reach the lab complex. Additionally, enemy soldiers will arrive here. Remember that you aren't rushed by anything, so take your time. You should be able to find a large stash nearby (#1). There are some medicines here. The first soldier is guarding a staircase (#2) and there's more of them in that area.
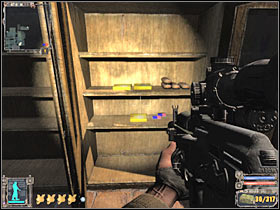
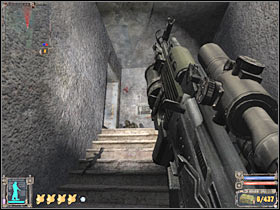
Most of the enemy soldiers (#1) will leave Obokan rifles behind, however you shouldn't pick up these weapons, mostly because your current gun is more effective. You will have to reach the exit from the lab (#2). This will allow you to return to The Dark Valley sector.
2. Find the codelocked door
Received from: quest begins automatically once you've reached the first steel door
Starting point: first locked door
What needs to be done:
a) find the code that's needed to open the door
b) type in the code in order to open the door
Complete quest walkthrough:
Like I've said before, you will come across a steel door and that's where this quest will begin (#1). You shouldn't have any problems finding the door. It's in the biggest room of this part of the complex. Once you've found the dead scientist, you will have to check his body in order to receive a note with the code (#2).
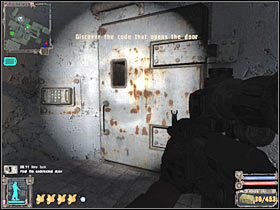
Make sure that you have checked the body. You won't find any items here, but you will receive a code - 1243 (#1). Now you may go back to the main room of the complex. There's a small panel on your left (#2). Type in the code in order to open the door. SAVE your game here.
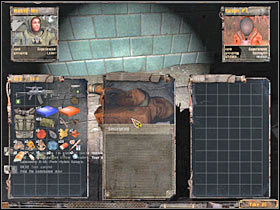
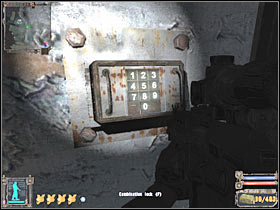
3. Open the door to the control center
Received from: quest begins automatically once you've reached the second steel door
Starting point: second locked door
What needs to be done:
a) find the code that's needed to open the door
b) type in the code in order to open the door
Complete quest walkthrough:
You will have to do the same thing here. Once you've reached a locked door, you will probably notice that some kind of a creatures is trying to open it (#1). Thankfully, you won't have to worry about it. Locate the scientist (#2) and check his body in order to receive a note with the code 9524. If you want to know how to reach him, read the description of the first quest. The scientist will also have a decent machine gun on him - IL 86. I would recommend picking up this weapon and saving it for later, mostly because you won't find any ammunition for it.
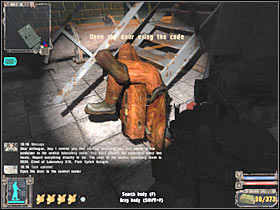
MAIN MAP OF THIS ZONE:
Green points on the map:
1 - exit to: Bar
2 - exit to: Yantar
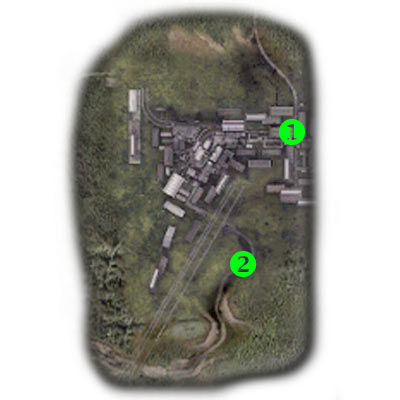
DETAILED MAP OF THIS ZONE - NPC's & IMPORTANT PLACES:
Important NPC characters (red color):
1 - Professor Kruglov - This is the only important NPC character of this map. You will also encounter other friendly Stalker's in this area, however you won't be able to talk to them. Kruglove will ask you to escort him to Yantar.
Important places (green color):
1 - You are going to be attacked by a group of snipers here. As a result, you must be very careful. Move slowly. You will also have to use nearby trees, cars and buildings for much needed cover.
2 - This is where the snipers are currently hiding. You will have to enter this building, not only to get rid of them but also to proceed to the next section of the map. One of the bandits is in front of you. The rest of the soldiers are occupying the upper floor. You could shoot them or use a grenade. Important! The soldier who was guarding the ground floor was carrying an excellent machine gun - TRs 301. Make sure that you have picked it up, however don't use it just yet. You will have to find more ammo in the first place.
3 - You will encounter the second group of bandits here. I would recommend hiding behind a large truck or jumping on top of it. You should consider using the scope. Additionally, watch out for an enemy sniper. He is occupying a large tower. Make sure that you don't expose yourself too much. You will also find a lot of artifacts in this area.
4 - This is where the military helicopter has crashed. A small group of scientists is fighting with the villains. You will have to help them to kill all bandits.
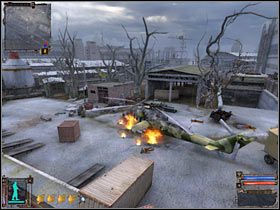
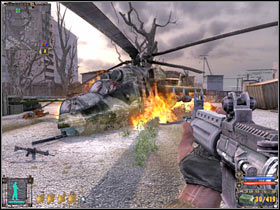
5 - You could consider taking a closer look at these buildings, however this won't be necessary. Try using your minimap, instead. Look for additional stashes, as they may contain valuable objects.

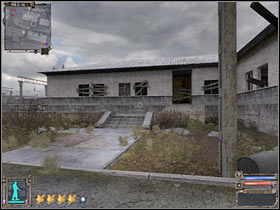
6 - Some of the bandits are hiding in these spots. I'd strongly recommend securing these areas earlier, because you will have to perform an escort mission here. Watch out for a large destroyed building. That's where most of the bandits are hiding. You should also be on a look out for artifacts and other valuable things.
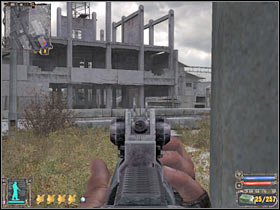
Once you've returned from Yantar and X16:
Once again, you will have to secure a large destroyed building, mostly because you will encounter new bandits there. It's very important because they're going to be equipped with excellent rifles. Furthermore, if you pick up one of these weapons, you will be able to take a scope (SUSAT) for your current gun.
7 - This road leads to a destroyed tunnel area. You won't find any interesting objects there, however I would recommend taking a closer look at the surroundings. I'm sure that you'll recognize one of the dead scientist. It's going to be Gordon... you know who. ;-) Watch out for deadly anomalies, though.
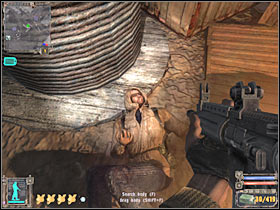
8 - This large tunnel leads directly to Yantar sector. Sadly, you will have to secure this entire area, mostly because you'll be protecting one of the scientists and it's the only road to the new sector. You will have to avoid several dangerous anomalies. Try using the sprint button here. Once you're at the other side, you will also have to kill several zombies. These creatures are using primitive weapons, however try taking them out from a large distance. There are also a lot of artifacts in the tunnel. Try taking some of them to the Barkeep (if you want to sell them).
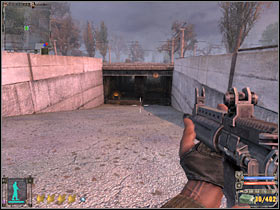
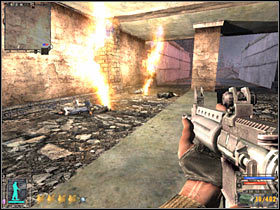
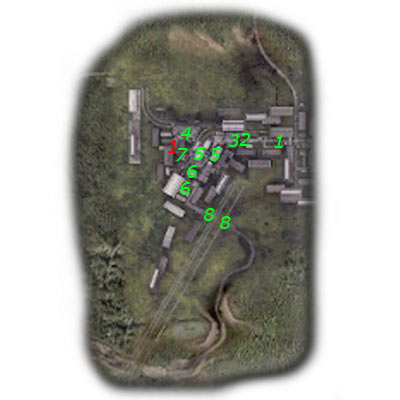
DETAILED MAP OF THIS ZONE - QUESTS:
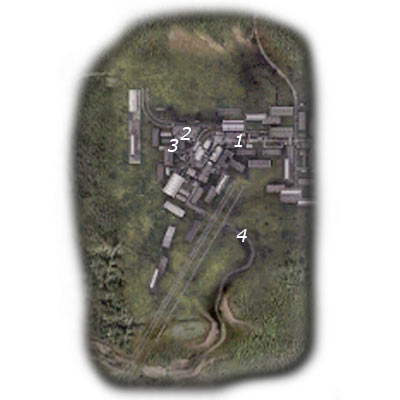
QUESTS:
1. Meet Kruglov
Received from: this quest will begin automatically once you've gone closer to the crash site
Starting point: 1 on the map
What needs to be done:
a) reach the crash site (2 on the map)
b) find professor Kruglov and talk to him (3 on the map)
Complete quest walkthrough:
This quest will activate soon after you've dealt with the snipers and the second group of bandits. You will have to get closer to the northern part of the map. Like I've said before, you will come across some new thugs (#1). You will also receive a distress call from the scientists. It looks like that they have crashed nearby. The scientists are currently being attacked by enemy units and you will have to help them. Start running towards the crash site. Ignore the artifacts, because you will be allowed to return here very soon. You will have to locate a small passageway which leads to your destination (#2).
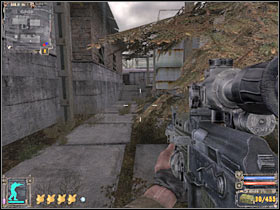

Once you've reached the northern section of this map, a short cut-scene should appear on your screen (#1). You will have an opportunity to take a closer look at the crash site and surrounding areas. Keep moving straight. You will have to reach professor Kruglov as soon as possible, because he's in danger. You will encounter at least 3-4 soldiers along the way (#2).
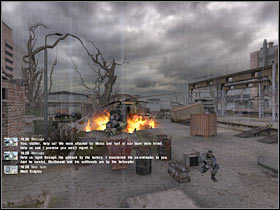
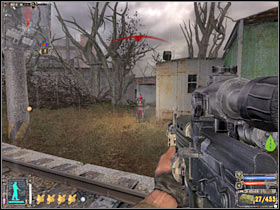
You should be able to reach the crash site and some of the scientists very soon (#1). You could try and help them, however it would be better to focus all attention on saving Kruglov. You shouldn't have any problems finding him. Kruglov is going to be attacked by one of the bandits (#2). You will have to kill this thug, because Kruglov wouldn't be able to defend himself, because he's not even carrying a gun.
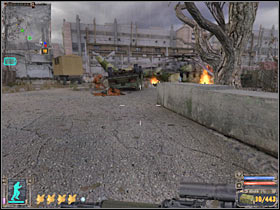
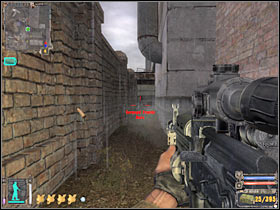
Don't talk to Kruglov just yet. Instead, try saving other scientists. You should be able to secure this entire area in about a minute. Most of the enemy soldiers are standing near the destroyed helicopter (#1). Be careful, though. Some of the bandits may be hiding (#2). You will have to locate them as well, so you won't get surprised in the future. Once the battle is over, make sure that you have checked bodies of fallen enemies. Search for medical supplies and ammunition for your newly acquired weapon (don't worry about the scope, you'll get one later).
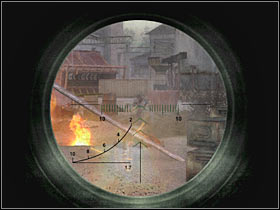
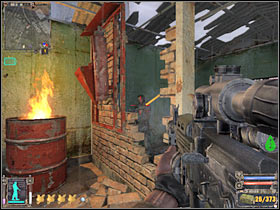
I would also recommend that you use one of the nearby constructions in order to scout the area from higher ground (#1). You will probably notice a few other bandits. You will have to kill them. Once the area is safe, go back to Kruglov and talk to him (#2). You should also secure a passageway which leads to the southern tunnel.
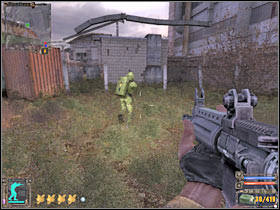

2. Lead Kruglov to Yantar
Received from: Professor Kruglov (Wild Territory)
Starting point: 3 on the map
What needs to be done:
a) escort Professor Kruglov to the southern exit (4 on the map)
b) once you've reached the exit, talk to Professor (4 on the map)
Complete quest walkthrough:
Professor will ask you to escort him to Yantar sector. I wouldn't recommend refusing his offer, because that's where you'll need to go anyway and if you choose finishing this quest you will also be able to receive an additional reward. Start following Kruglov (#1). He will probably make at least one stop (it depends on how many bandits you've actually killed). After that, he will hide (#2). This means you have to prepare for a bandit attack.

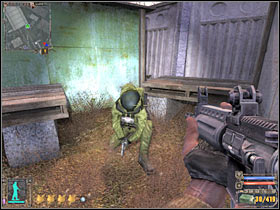
You shouldn't have any problems killing the bandits (#1). They will probably appear nearby, so you won't have to search for them. Try killing them from a larger distance, without giving them opportunity to surround you. Try to reach the entrance to the tunnel (#2). Kruglov will ask you to secure this area. He will wait for you here. Save the game!
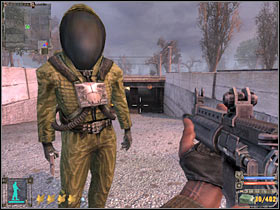
You will have to avoid a large number of fire anomalies in the tunnel (#1). You've dealt with similar problems in the past, so you should know how to react. The easiest way would be to use the key responsible for running, however you could also try and pick up a few artifacts (#2). This is not necessary.
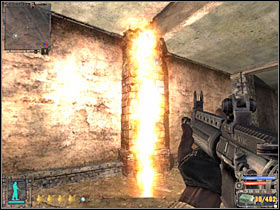
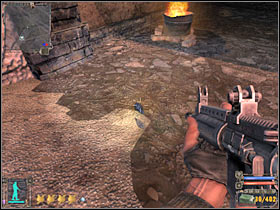
Once you've reached the exit, you should make a stop. As you've probably noticed, there are some... zombies in this area (#1)! Despite what you might think, they can actually hurt you. Zombie characters use different kinds of weapons, mostly pistols and light machine guns. I would recommending killing those monsters from a larger distance. You will have to kill three zombies. Now you must wait for the Professor to join you (#2). Once he's here, talk to him. Important! If you can't start the conversation, you've probably encountered a bug and you would have to reload this entire section of the map. Kruglov will thank you for your help. He will also invite you to Yantar sector. I wouldn't recommend going there right away. Try visiting Barkeep, so you'll be able to give him a flash disk. Be careful, though. More enemies may appear on this map (including mutants) later during the game.
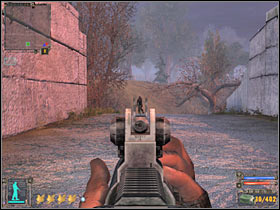
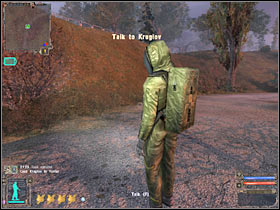
MAIN MAP OF THIS ZONE:
Green points on the map:
1 - exit to: The Wild Territory
2 - exit to: X16 (you will have to find it on your own by finishing one of the main quests)
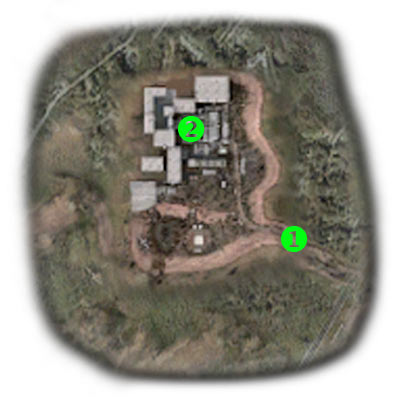
DETAILED MAP OF THIS ZONE - NPC's & IMPORTANT PLACES:
Important NPC characters (red color):
1 - This is a large bunker and you will encounter two friendly NPC characters. You will have to talk to these men, especially if you plan on finishing main quests.
Professor Kruglov - You've already met him in The Wild Territory. Kruglov will once more ask you for protection, however this time it's going to be a little more difficult to do it.
Professor Sakharov - He is one of three main traders of the game. As a result, you will be allowed to sell him all kinds of things. Sadly, Sakharov won't have anything interesting in stock the first time you meet him. This is going to change, however, once you've returned from the X16 laboratory. Sakharov will also grant you with a few important tasks. You should also consider buying some ammunition from him.
Important places (green color):
1 - This is where you will find the large bunker. It's going to be safe inside, however there are a lot of monsters near the bunker, including mutants and zombies. You will have to kill most of those creatures. Thankfully, you won't have any problems spotting them.
2 - You will come across a destroyed military helicopter here. It would be wise to secure this entire area before proceeding with main quests. The helicopter is being protected by a large number of zombie characters. Be careful. Some of these creatures are carrying shotguns.
3 - You will encounter mutants in these spots. You've dealt with these creatures while exploring the X18 laboratory. Try killing them from a larger distance. Just as before, you should aim at the head, so you won't waste too much ammunition.
4 - You will come across an abandoned campsite here. You will have to explore this area in order to fulfill one of the main quests of the game. Sadly, you won't find anything interesting here, especially when it comes to artifacts. Nevertheless, you should secure this area.
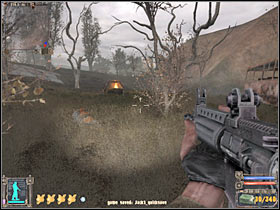
5 - This is the entrance to the lab complex. You will have to go there in order to proceed with the X16 laboratory mission.
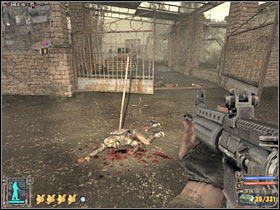
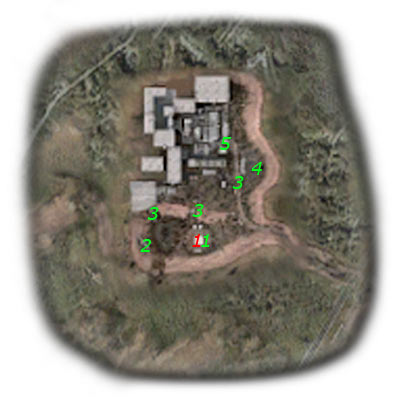
DETAILED MAP OF THIS ZONE - QUESTS:
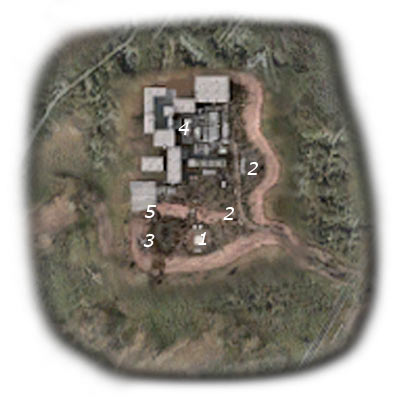
QUESTS:
1. Take radiation measurements
Quest giver: Professor Sakharov (Yantar)
Starting point: 1 on the map
What needs to be done:
a) talk to Professor Kruglov (1 on the map)
b) escort Professor Kruglov to the measurement sites (2 on the map)
c) return with the results to Sakharov (1 on the map)
Complete quest walkthrough:
First of all, you will have to talk to Kruglov. He should be standing on your left (#1). Once this is done, exit the bunker and start following him (#2). Be careful. Once you've left the compound, you will probably notice some new zombies in the area. I would recommend that you take care of this small problem quickly.
You will come across a new tunnel (#1). You will have to use it in order to reach the final destination. I would recommend that you stay in the front in order to protect the scientist. He will take measurements, however he will decide to enter the tunnel very soon. There are some zombie creatures inside (#2). Kill them from a larger distance.
The second group of zombie soldiers is standing near the exit from the tunnel (#1). Once you've dealt with this problem, start running towards your goal area (#2). I'm sure that you have already secured this campsite before, so you won't have to worry about Kruglov. Once again, he will take measurements.
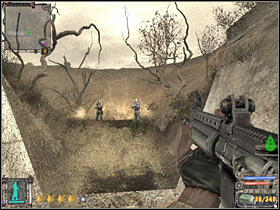
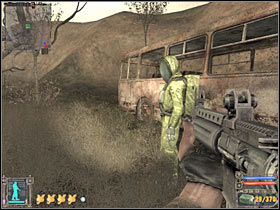
Something rather unexpected is going to happen in just a few seconds. Our main character will lose consciousness. After that, a very interesting cut-scene should appear on your screen. You will have to wait for our hero to regain consciousness. Exit the bus and rejoin with Kruglov (#1). Now you will have to escort him back to the bunker (#2). You will be able to end this quest once he's inside. Kruglov will also talk to Sakharov. Wait for this conversation to end. Sakharov will grant with a psi-helmet. This object will allow you to enter X16 laboratory.
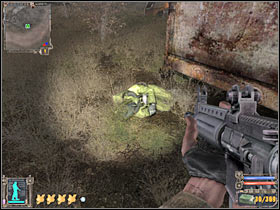
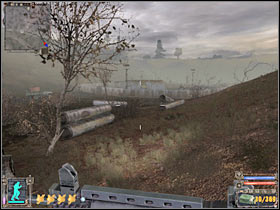
2. Get inside the lab
Received from: Profesor Sakharov (Yantar)
Starting point: 1 on the map
What needs to be done:
a) find and check Ghost's body (3 on the map)
b) find the entrance leading to X16 laboratory (4 on the map)
Complete quest walkthrough:
In order to locate Vasiliev's body, you will have to return to a destroyed helicopter (#1). Once again, you've probably secured this area before, so you won't have to worry about zombie characters. Vasiliev had an orange suit, so you shouldn't have any problems finding his corpse (#2). It's located to the right of the helicopter. Check it. As a result, you will be able to proceed with the second part of this mission.
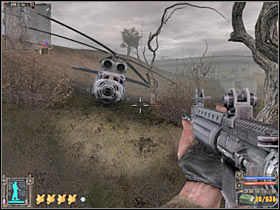
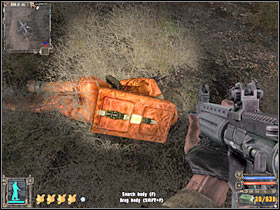
Now you will have to go to the northern part of the map. Locate a large entrance which leads to the lab complex (#1). I'd strongly recommend that you save your current progress here, because the area is crawling with zombies and mutants (#2). It would be easy to kill them with a shotgun, however I wouldn't recommend exploring the entire area. Focus only on finding the entrance to the underground lab.
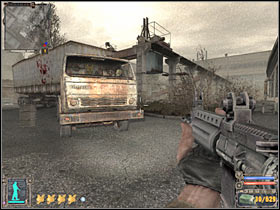
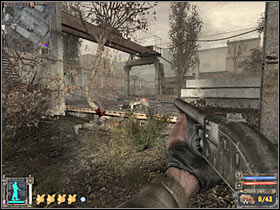
You will be able to reach the entrance if you'll be walking in a straight line (#1). Remember that you don't have to kill all monsters in order to succeed. Instead, try avoiding them, especially mutants. You will be able to reach your destination very soon (#2). Be careful, though. There are a few mutants here and you must kill them. Use the shotgun (if you have this weapon) to take them down.

Now you will have to enter a designated building. Head on to the staircase area. You will have to use the stairs to reach the lower level (#1). You will receive an information about a possibility of going to the laboratory. You won't have to explore the rest of this building, however you would be able to take an artifact from the upper floor (#2). This quest is going to end once you're at the laboratory (you will have to use the stairs to reach the ground floor).
3. Find out what happened to Ghost - part 2
Received from: this quest will begin automatically once you've collected a flash disk from Strelok's stash
Starting point: Agroprom Research Institute Sewers sector
What needs to be done:
a) find out what happened to Ghost (1 on the map)
Complete quest walkthrough:
You will be able to finish this mission once you've talked to Sakharov. He will grant with a second quest that involves getting inside the underground laboratory. Ghost's body can be found inside X16 lab. It's been described in the next section of my guide.
4. Get out of the lab - part 2
Received from: this quest started automatically during the exploration of X16 laboratory
Starting point: X16 sector
What needs to be done:
a) escape from the laboratory using a secret tunnel (5 on the map - this is the exit from the tunnel)
b) talk to Professor Sakharov once again (1 on the map)
Complete quest walkthrough:
This is the second part of the quest which started in the last room of the X16 sector. You will have to go through a very long tunnel. I'd strongly recommend that you choose a shotgun from your inventory, mostly because you're going to have to kill several mutants (#1). You will be encountering these creatures quite regularly. There are also zombie soldiers in the area. Make sure to check all bodies for ammo and medical supplies. Additionally, you will have to avoid a fire trap (#2). Once this is done, turn left and keep heading forward.
You will encounter more zombie creatures very soon. Once you've reached a small junction, choose a tunnel which is located on your right (#1). There are more mutants here for you to take care of (#2). Make sure to save your game after each fight. Once you've wasted all shotgun shells, switch to a machine gun. Remember to kill those monsters from a larger distance.
You will come across a long tunnel very soon. Be careful, because there's a huge mutant here (#1). You've already dealt with this type of a creature while exploring the X18 laboratory, so you should know that you will have to take it out from a larger distance. Using grenades is also a good idea. Once the monster is dead, locate a destroyed part of the grate (#2). You will have to make a jump to the other side. Use the ladder to exit the sewers. I'd strongly recommend that you save your progress here.

Ignore a military helicopter that will be flying over this entire sector. It won't attack you. Use the nearby stairs (#1). The objective here will be to jump over the fence. Once this is done, start running towards the bunker. You will have to talk to Professor Sakharov. As a result, you will end this quest. You should also consider trading with Sakharov. As you've probably noticed, new type of armor has appeared in his inventory - SEVA Suit (#2). This is a very powerful armor, so try buying it. You should have a lot of money, so it shouldn't be a problem. Sakharov will also grant you with a side mission, however you don't have to finish this task.
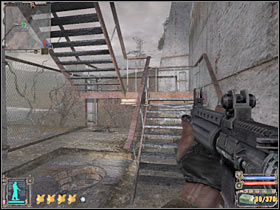
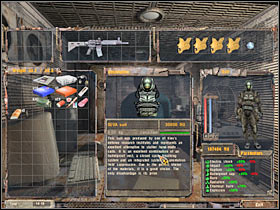
X16 laboratory level is very similar to the X18 map. Just as before, you will be dealing with a fairly small underground level. You won't have the opportunity to reach the ground, so you'll be dealing with different types of closed rooms. There aren't any maps, however this is not a huge problem, mostly because there's going to be only one path leading to your current destination. You will have to be very careful while exploring X16. There are some zombie characters in the lab, as well as very dangerous mutants. Also, make sure that you're using a nightvision or a flashlight. Save your game each time you've cleared out a larger section of the map. You will also be facing a time based objective later on, however it's going to be very simple.
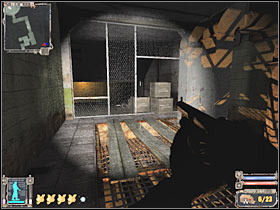
QUESTS:
1. Turn off psi-emission
Received from: this quest begins automatically once you've entered the X16 laboratory
Starting point: staircase (that's where you've started your journey)
What needs to be done:
a) turn off the first console
b) turn off the second console
c) turn off the third console
d) disable the entire mechanism, so you'll be able to explore the rest of the lab
Complete quest walkthrough:
You won't be able to proceed with this mission right away. You will have to reach the largest area of the map in the first place. You don't have any maps at your disposal, so i'll do my best to tell you what has to be done and which corridors must be chosen. Thankfully, you won't have an opportunity to get lost. Get ready for some action. You should also know that is one of the scariest levels of the game, however "Doom" fans have nothing they should be worried about. :-)
You will have to start off by using the stairs. Head on to the lowest level. Keep moving forward. You will encounter a first group of zombie characters near a small entrance (#1). Conserve your ammo by shooting at the heads of those monsters. You should also be on a look out for artifacts and dead bodies. Loot them for objects of any value. You should be able to reach an elevator shaft. The elevator is not working, so start using the nearby ladders (#2). Once again, you will have to reach the lowest level. Save your game there.
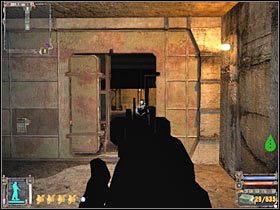
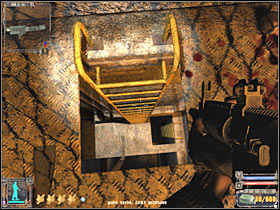
Once you've reached a much larger room (#1), you will have to kill several mutants. Be careful and try to take them out from a larger distance. Once those monsters are gone, zombie creatures will advance towards your position. Those monsters are occupying nearby balconies, especially the one to the right. Don't forget to check bodies of fallen enemies and scientists. You should also take a closer look at some of the side rooms. You will encounter a new mutant here (#2). Kill it.
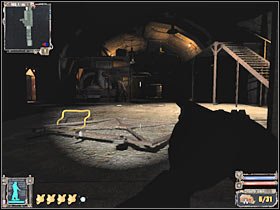
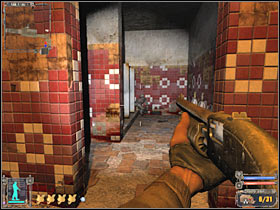
Keep heading towards your current destination. You will encounter new zombies very soon (#1), however you must be careful, because there are other mutants in this area as well. You should consider using some of the carried grenades to kill them. Don't forget about the possibility of destroying nearby crates. You will find ammunition and artifacts. A second group of mutants is going to attack you very soon (#2). Try killing them as soon as possible, so the creatures won't be able to reach your position.
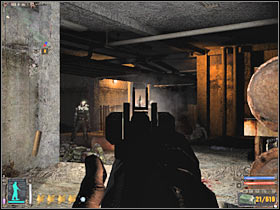

You are getting closer to the main room of this entire complex (#1). DON'T go there right away. MAKE SURE that you have SAVED your current progress here. Try killing at least 3-4 zombie characters from here (#2). You should wait for those monsters to show up. This will make your life a lot easier. Get ready for the main objective!
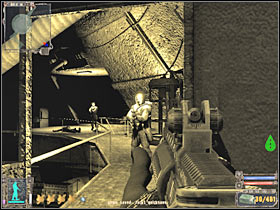
First of all, choose automatic fire mode in your machine gun, so you won't have to waste more time killing zombies. Use the ramp to reach the main room. As you've probably noticed, a timer has appear on the screen. Turn left and start running towards the first console (#1). You can pick up artifacts right now or go back for them later during the game. Once you've reached the console, use the switch to turn it off (#2).
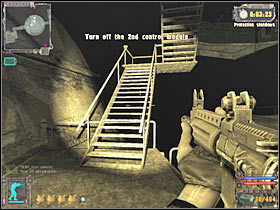
Now you will have to turn right. Head on to the stairs. You will have to reach the upper level (#1). You shouldn't have any major problems getting closer to the second console (#2). Once again, use the switch. Be careful, though. There's a fire trap nearby and you won't be able to avoid. As a result, consider running through it. Head on to the upper level.

I'm sure that you know exactly what has to be done here. Reach the third console and turn it off. Now you will have to reach the highest level. Use the stairs. Be careful, though. There's a zombie here (#2). Kill it and turn left. Head on to the main console (#2). Disable it in order to end this quest. Now you will have to wait for a new cut-scene to be displayed on your screen. You will also receive a new task.
2. Take the documents
Received from: this quest begins automatically once you've completed the Turn off psi-emission task
Starting point: disabled device in the largest room of the X16 laboratory
What needs to be done:
a) head on to the main area of the X16 lab
b) find Ghost's body and pick up the documents
Complete quest walkthrough:
You shouldn't have any problems fulfilling the first part of this mission, because you're already in the main part of the laboratory. As a result, you will have to focus all of your attention on finding Ghost's body. As you've probably noticed, more zombies have appeared in the area (#1). You could fight these creatures, however I would recommend ignoring them. Head on to an unexplored area of the base (#2). SAVE your current progress here!

You should be able to reach a new room very soon. There's a new mutant here (#1). Once again, you've fought this type of a creature before, so you should know how to react. The easiest way to kill it would be to aim at its head from a smaller distance. You won't have to explore the surroundings and it would even be dangerous. Instead, head on to Ghost's body (#2). You will have to check it in order to pick up the documents.
3. Find the documents in X16 lab - part 2
Received from: Barkeep (Bar)
Starting point: Bar sector
What needs to be done:
a) find the documents in the X16 laboratory
b) deliver the documents to Barkeep
Complete quest walkthrough:
You will have an opportunity to begin completing this quest at the same time. All you have to do is to check Ghost's body (#1). You will notice that there are some documents in his inventory. Drag this object to your inventory. Once this is done, you will receive a proper confirmation (#2). You should also consider listening to a radio message. Ghosts was also carrying a very decent armor, however you should stick close to the SEVA suit. Take Ghost's armor only if you plan on selling it in the near future.

4. Meet the guide
Received from: this quest begins automatically once you've taken the documents from Ghost's body and received a radio transmission
Starting point: Ghost's body
What needs to be done:
a) talk to the Guide, you can find him in the Cordon sector
Obviously, you won't be able to take on this mission right away. Sadly, you will have to return to Cordon later during the game. For now, focus all of your attention on leaving the laboratory. Once this is done, head on to Yantar, The Wild Territory and Bar.
5. Get out of the lab
Received from: this quest begins automatically once you've taken the documents from Ghost's body
Starting point: Ghost's body
What needs to be done:
a) escape from the laboratory using a secret tunnel
b) talk to Professor Sakharov once again
Complete quest walkthrough:
You will only have to begin this quest here. Reaching the exit is going to be very simple. All you have to do is to locate a large hole (#1). Use it. Once you're lower, you will have to move forward a little (#2). The game will load a Yantar map here.

MAIN MAP OF THIS ZONE:
Green points on the map:
1 - exit to: Bar
2 - exit to: Red Forest (it's not marked on your personal map; also - depending on which side you've decided to choose - you may encounter a large group of enemy units here)
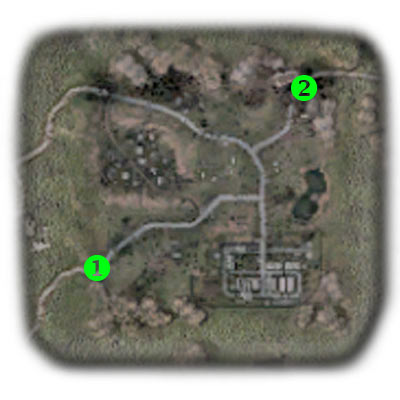
DETAILED MAP OF THIS ZONE - NPC's & IMPORTANT PLACES:
Important NPC characters (red color):
1 - Skull (Duty) - He is the most important person of the Duty organization (on this map). Skull will grant with two main quests for this organization. These tasks have been described in my game guide. Skull could also die later during the game, however it won't affect your gameplay, so you won't have to worry about him.
2 - Venya Axe (Freedom) - Sadly, he won't tell you anything interesting. Venya will only try to encourage you to join Freedom's ranks.
3 - Chef (Freedom) - He's also one of the less important members of Freedom, however you will have an opportunity to ask him a few interesting questions, regarding this base and some of the surrounding areas.
4 - You will come across several important characters here:
Egorka Tails (Freedom) - This soldier is guarding the entrance to Freedom's base. You will have an opportunity to talk to him, however this won't be necessary. Once this conversation is over, you will be granted a passage to the base.
Lukash (Freedom) - He is the leader of the Freedom organization. As you've probably suspected, you will be able to receive main Freedom quests from him. Also, killing him will be one of the main goals of the Duty organization.
5 - Cap (Freedom) - He is the commanding officer for a blockade which is located near one of the exits. You will have to talk to this soldier in order to finish the third quest for the Freedom organization. If you're allied with Duty, you must kill him at some point of the game.
Important places (green color):
1 - This is where you'll start exploration of this map. I wouldn't recommend standing here for too long, mostly because wild boars may appear in this area and you would have to kill these creatures in order to survive. It would be wise to make a few steps forward. As you've probably noticed, some of the soldiers are fighting each other. Wait for this battle to end and check bodies of fallen soldiers for better weapons, ammunition and medical supplies.
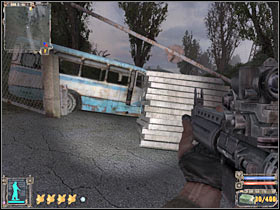
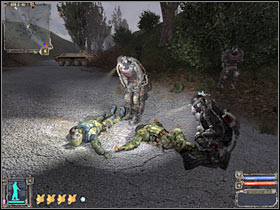
2 - This is a fairly small Duty campsite. Obviously, it is one of the most important locations of the map. It doesn't really matter which organization you've decided to choose, you will have to visit this campsite anyway. Sadly, you won't find any interesting objects in this area.
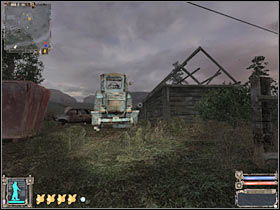
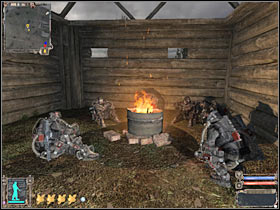
3 - This entrance leads to the main base of the Freedom organization. The base itself is much bigger. You will also encounter a lot of NPC characters here. You may talk to these soldiers, however this is not necessary. There are also a few sniper towers nearby.
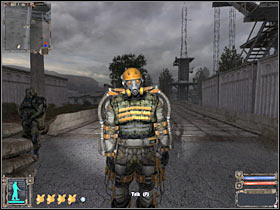
4 - This is a small kitchen. Despite what you might think, you should consider exploring this building of the base, especially if you don't have any food in your inventory. Pick up some of the visible objects, so you won't have to buy them later during the game.
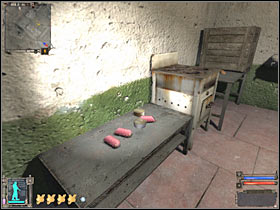
5 - This entrance leads to another collapsed tunnel. Obviously, you would have to deal with A LOT of dangerous anomalies here, however you don't have to explore this area, mostly because you won't find any valuable artifacts there.
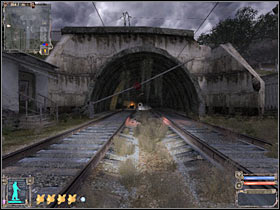
6 - I'd strongly recommend checking this building. You will encounter a few crates. Destroy them in order to obtain new artifacts.
7 - This is the main building of this base. Lukash can be found on the upper floor, in one of the rooms to your left. As you've probably noticed, he's got two bodyguards, so don't even think about killing him.
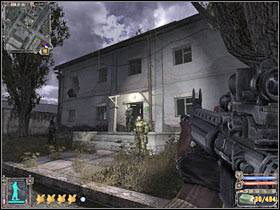
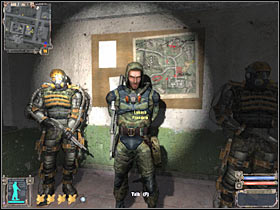
8 - You will find an abandoned farm here. You will have to visit this place in order to fulfill one of the Freedom's main missions. If you decide to check this area on your own, you will probably encounter a lot of dangerous wild animals.
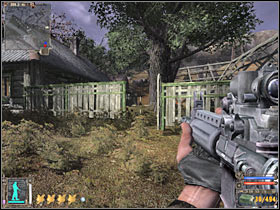
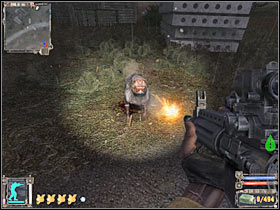
9 - This is a larger village, however I wouldn't recommend going near these areas. The village is crawling with dangerous mutants and you would have to be very skilled in order to kill all these creatures. As a result, choose main roads instead of moving through the village.
10 - This small hut can be found near the eastern end of the map. There are some swamps nearby. The hut is being protected by a mad Stalker. You would have to kill him from a larger distance. Watch out for mines! They won't kill you, but you shouldn't trip any of the wires. Once you've entered the hut, you will be able to pick up a decent armor - Wind of Freedom Suit.
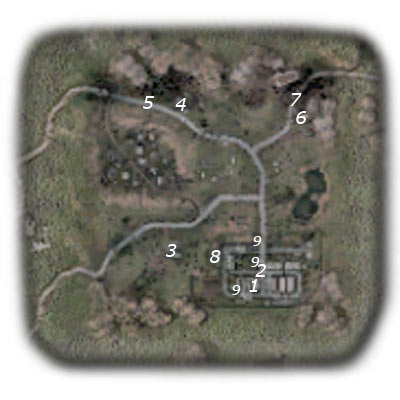
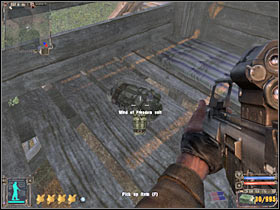
11 - This road lead straight to one of the exits. You will have to use it in order to reach Red Forest sector. If you've decided to join Freedom and completed all quests, you won't have any problems reaching the exit. If Duty soldiers are your allies, you would have to deal with TWO waves of soldiers. Start off by killing Freedom units. Once they're gone, take care of Monolith thugs. Sadly, you won't be able to avoid them.
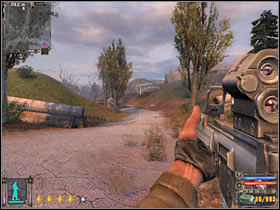
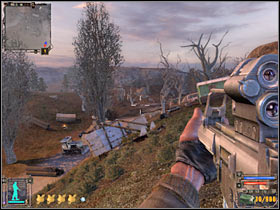
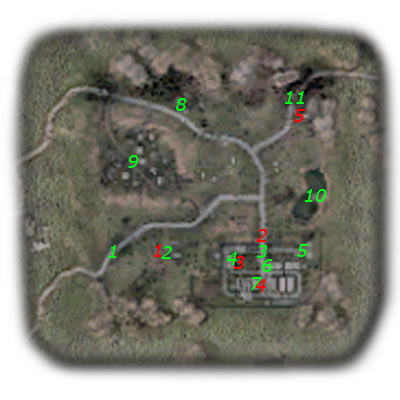
DETAILED MAP OF THIS ZONE - QUESTS:

QUESTS:
Important! This is a very unique map and there are a few very important things for you to know about. Two different organizations have set up their camps in this area. If you decide to join one of these organizations, you will become an enemy of the second one. Thankfully, this choice won't affect the outcome of the game, however you should know that Freedom organization offers easier quests. You will have to complete three missions in order to become their ally, however these tasks aren't going to be a huge problem. If you decide to join Duty, you will have to solve two problems, however the second mission is going to be extremely difficult. Furthermore, you would have to deal with a lot of enemy soldiers (Freedom & Monolith) near the eastern exit. The choice is yours. I guess I should also tell you that killed soldiers will leave valuable weapons behind. Freedom soldiers have better guns, so you should consider joining Duty in order to acquire one of these weapons (and a lot of ammunition). The same goes with the snipers in the Freedom's base. Obviously I've described all quests, so you will be able to make a choice of your own. We'll start with Freedom tasks.
1. Destroy the Duty company [Freedom]
Received from: Lukash (Army Warehouses)
Starting point: 1 on the map
What needs to be done:
a) talk to Max (2 on the map)
b) clear out the Duty encampment of all Duty soldiers (3 on the map)
c) return to Lukash for further instructions (1 on the map)
Complete quest walkthrough:
You shouldn't have any problems finding Max and talking to him. He should be standing near the main building of the base. After that, he will move to a nearby crossroads. You will have to wait for Max to end his speech (#1). Once this is done, start following him (#2). You will be moving towards Duty's campsite, so you shouldn't get lost. You've probably noticed this is a large group of Freedom soldiers, so you won't have to worry about finishing this mission.
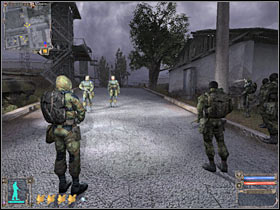
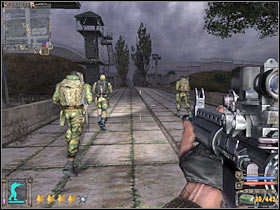
The most important thing here for you to know about is that you won't be attacked by any of the Duty soldiers unless you open fire on them. This also includes the main battle that is going to take place between Freedom and Duty soldiers. Once you've reached the campsite (#1), head on to the main area. You will have to locate a destroyed barn that should be located on your right (#2). Use the ladder. You should have Skull and other duty soldiers in your sight.
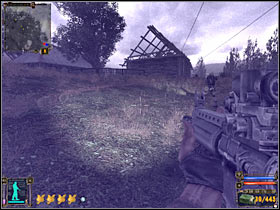
Try aiming at Skull. You will have to make the first shot in order to proceed with this battle (#1). Sadly, you won't be able to stay here for too long, however you should kill at least 2-3 Duty soldiers. Return to the ground and start leaning out carefully (#2). You could also use some of the carried grenades. Either way, you will have to kill all Duty soldiers.
Once the battle is over, make sure to check bodies of Duty soldiers. As you've probably noticed, they were carrying excellent guns - Tunder S14 rifles (#1). I would recommend that you take one of these weapons. There's nothing more for you to do here. As a result, go back to the main base and talk to Lukash (#2). He will have another assignment for you.
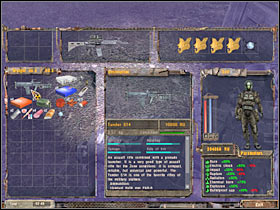
2. Deal with the snitch [Freedom]
Received from: Lukash (Army Warehouses)
Starting point: 1 on the map
What needs to be done:
a) head on to the farm (4 on the map)
b) wait for the snitch to contact his agent (4 on the map)
c) kill the snitch (4 on the map)
d) kill the agent (5 on the map)
e) report to Lukash for further instructions (1 on the map)
Complete quest walkthrough:
You shouldn't have any problems completing this mission, however you will have to know about a few important things. I would also recommend taking this task during the night, so it's going to be much easier to sneak to the farm area. That's where you'll need to go (#1). Once you're closer to the farm, press a crouch key and start moving slowly. You will have to hide behind one of larger objects (#2). DON'T move. Just wait for the snitch to get in contact with the agent. He can't see you. Otherwise you would have failed the mission.
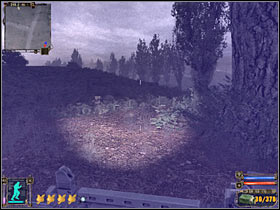
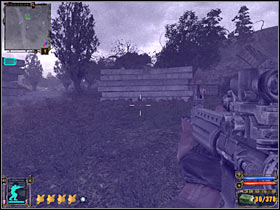
You must be very patient. Remain here (#1). The snitch will probably scout the area, but eventually he should return to the farm. Wait for him to contact his agent. You should receive a confirmation on your screen (#2). Ready your gun and proceed to the farm.
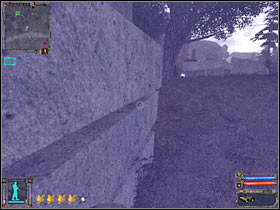
You will have to kill the snitch (#1). Be careful, though. He's well armed and he's carrying a powerful shotgun. Try aiming at his head. Now you will have to deal with the agent. He is coming from the west and that's where you'll need to go (#2). Be careful. There are some wild animals in the northern forest.
I'd strongly recommend that you hide behind some of the nearby rocks. This is an excellent spot to organize an ambush (#1). Once the agent is gone, take care of his bodyguards (#2). You shouldn't have any problems killing them. Go back to Lukash. He will give you a reward. Lukash will also grant you with a final quest.
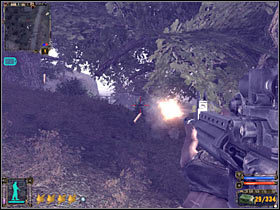
3. Assist at Freedom's Barrier outpost [Freedom]
Received from: Lukash (Army Warehouses)
Starting point: 1 on the map
What needs to be done:
a) talk to Freedom's outpost commander (6 on the map)
b) repel Monolith soldiers raid (6 on the map)
c) once the battle is over, talk to outpost commander once again (6 on the map)
Complete quest walkthrough:
This isn't going to be a difficult mission, however there's at least of shooting and killing ahead, so make sure that you have enough ammo at your disposal. Start off by talking to the outpost commander. It's going to be Cap (#1). Get ready, because Monolith forces are coming from the north-east (#2).
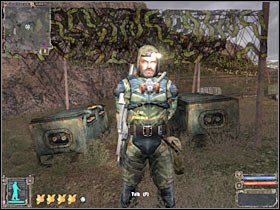
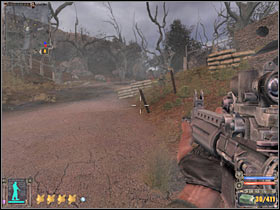
The battle itself is quite simple, however it's going to take you at least 2-3 minutes to kill all Monolith soldiers. Choosing a good place to shoot from is an important thing. I would recommend heading on to a nearby sniper tower (#1), however you would be exposed a little. If you don't want any problems, hide behind one of the fortifications (#2).

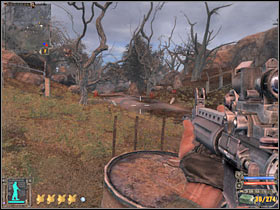
Once you've dealt with all visible enemy soldiers, you will have to move forward and deal with the rest of the Monolith units (#1). Some of these soldiers will be hiding, so you must be careful. Once the battle is over, go back to Cap. You could always check bodies of fallen soldiers for ammo and medical supplies. You may now proceed to Red Forest sector (#2).
4. Kill the tower sniper [Duty]
Received from: Skull (Army Warehouses)
Starting point: 3 on the map
What needs to be done:
a) kill an enemy sniper (8 on the map)
b) return to Skull for further instructions (3 on the map)
Complete quest walkthrough:
This is a very simple quest and I'm sure that you won't have any problems ending this task. You will be able to do this in about 30-40 seconds. All you have to do this is to kill an enemy sniper, however you can't enter Freedom's base. I would recommend that you head north-west. You should be able to locate a few vehicles here (#1). Make a stop and ready your weapon. You shouldn't have any problems killing the sniper from here (#2). Once this is done, go back to Skull. He will give you a reward. You will also receive a second (main) quest.

5. Kill Lukash [Duty]
Received from: Skull (Army Warehouses)
Starting point: 3 on the map
What needs to be done:
a) kill three enemy snipers (9 on the map - there are 3 snipers for you to kill)
b) kill Lukash (1 on the map)
c) go back to Duty's camp in order to receive a reward (3 on the map)
Complete quest walkthrough:
This is going to be a very difficult mission and I'm sure that you'll have a lot of problems reaching your goals and receiving a final reward. You will be dealing with A LOT of enemy soldiers (~30 units). Additionally, you will have to take care of several snipers, as well as Lukash's bodyguards. As a result, I would recommend that you save your game often. You will also have to plan your next movements very carefully, depending on the situation on the battlefield.
Start off by listening to a short briefing. Obviously you won't be attacking the base from the front. Instead, Duty soldiers plan on blowing up a part of the wall. Go there now. You should be able to kill a second sniper (#1). One of your teammates will set up the bomb (#2). If he dies now, the mission is over and you're going to have to reload it. Thankfully, there's a small chance of him actually dying (due to a bug in the game).
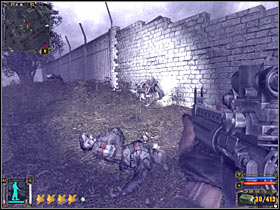
Now you will have to wait for the explosion to occur (#1). Head on to a destroyed part of the wall. Start off by killing designated snipers (#2). You should be able to take them out from here, without having to enter the main base. Your teammates should enter this area in the meantime. You can't stay here for too long, because your colleagues won't be able to kill Lukash without your immediate assistance.
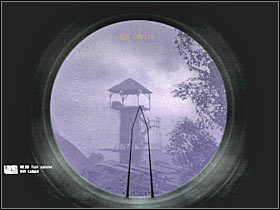
The base is quite large, so there are a few different ways to reach your destination. The safer way would be to stick close to the southern road, however you could also keep moving forward (#1). If you decide to choose this path, you will have to kill at least 6-8 Freedom soldiers along the way (#2). You must be careful, so you aren't surprised by anyone.
Obviously, you will have to fight your way to the main building of the base, because that's where Lukash is hiding (#1). Be careful, though. He is protected by at least two bodyguards. I've mentioned them before, so it shouldn't come to you as a surprise (#2). Kill all enemy soldiers before you decide to enter the building.
Lukash will probably be hiding near the stairs (#1). It doesn't really matter who kills him. If one of your teammates manages to do this, this mission will also be successful. You will also receive a proper confirmation. Now you will have to go back to Duty's campsite, however I would recommend that you take your time to deal with the remaining enemy units. Use the same passageway to go back to starting point (#2).
If Skull died during the attack, you will have to receive the reward from someone else (#1). It shouldn't be a big problem. You will also end this quest. Before you decide to go Red Forest, I'd strongly recommend that you head back to Freedom's base. Check bodies for ammunition and medical supplies, however it's even more important to pick up one of the GP 37 machine guns (#2). Get rid of your current weapon and start using this new one. It's very powerful and precise.
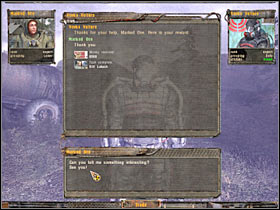
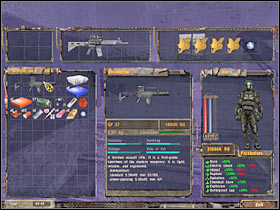
As you've probably noticed, more Freedom soldiers are heading towards your position (#1). These are the reinforcements. I'd strongly recommend that you deal with this problem. Try hiding in Lukash's building. You should be able to kill most of the soldier from a large distance. Afterwards check their bodies for ammunition and medical supplies. Start moving towards the eastern exit. You will probably encounter a second group at about half way through (#2). You could also check the sniper towers. Soldiers here were using SVUmk2 rifles, however you don't necessarily need to have this weapon in your possession.
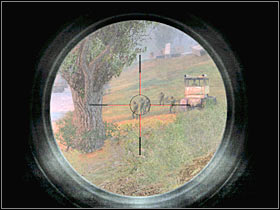
Once you've reached the barricade area, you will have to eliminate even more soldiers. The first group of Freedom units is easy to locate (#1). Once they're gone, start shooting at Monolith soldiers (#2). You should consider using some of the carried grenades. Don't forget about the possibility of taking ammunition from bodies of fallen enemies. Head on to Red Forest district.
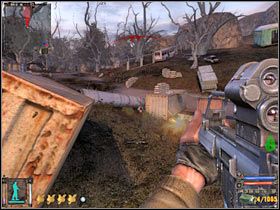
MAIN MAP OF THIS ZONE:
Green points on the map:
1 - exit to: Army Warehouses
2 - exit to: Pripyat
3 - exit to: Red Forest Control Bunker (this is a small underground level; you will have to explore it in order to fulfill one of the main goals)
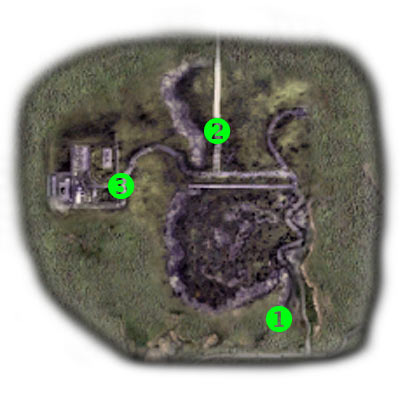
DETAILED MAP OF THIS ZONE - NPC's & IMPORTANT PLACES:
Important NPC characters (red color):
You won't encounter any interactive NPC characters on this map. There are going to be some friendly soldiers, however you won't be allowed to talk to them. Obviously this is going to be a difficult map, mostly because you'll be dealing with massive enemy forces. There are also a few mutants in the area.
Important places (green color):
Important! There are some very dangerous radioactive zones scattered throughout the entire sector. Sadly, you won't be able to avoid all of these spots. As a result, I would recommend that you take your time in order to plan a safest route to the control bunker.
1 - You will come across a fairly small military checkpoint here. You shouldn't have ANY problems killing all enemy soldiers, however you must have a gun with a scope in your possession. Once the enemies are gone, secure this area. Watch out for radioactive zones.
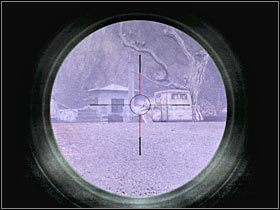
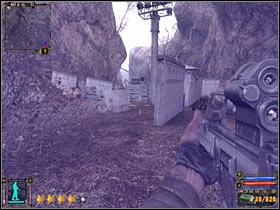
2 - Enemy snipers are hiding in these spots. As you've probably noticed, there's quite many of them, so you must be careful. I'd strongly recommend that you take them down with a similar weapon. You will be able to acquire such a rifle from one of the nearest snipers. Sadly, many of the sniper spots are radiated, so it'll be difficult to acquire additional ammunition for the rifle. I've only displayed sniper spots outside the main base, mostly because it'll be easy to find these guys once you're near the control bunker. Just be on a look out for sniper towers. Good luck and keep your head down! ;-)
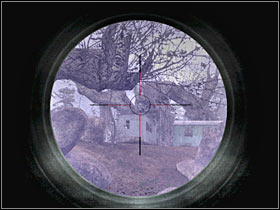
3 - This is a main road leading to the base. It's easier to reach the control bunker if you decide to choose it, however there are a few things you should know about. You will be encountering enemy soldiers quite regularly. Watch out for deadly radiation spots. It's going to be difficult to avoid them. There's also an alternate route to the base. Check 5 for more instructions.
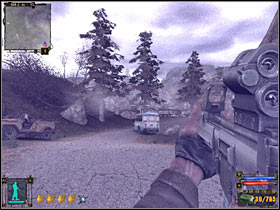
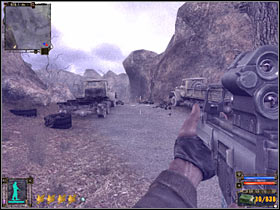
4 - You will encounter a single opponent who's carrying a rocket launcher. I guess I don't have to tell you to take him out as soon as possible AND from a larger distance. You should consider hiding behind a good cover.
5 - This is an alternate route leading to the control bunker. You would have to go through a large forest. I wouldn't recommend choosing it, especially if you want to collect additional ammunition. You would encounter zombies and mutants here.
6 - There's a destroyed helicopter here. I wouldn't recommend going near it, because this is a highly radioactive zone. Don't worry about image distortions. It's a part of the game. :-)
7 - There's a hole in the fence here. You would be able to use it to get closer to the base, however you would have to kill an enemy sniper in the first place. There are also other enemy soldiers in this area and you would have to deal with all of them at once.
8 - You will come across a second (larger) military checkpoint here. You don't necessarily have to go here, because this area isn't tied to any of your main missions, however you would be able to find some medical supplies here. There are also about 8 soldiers for you to take care of.
9 - This is a road which leads directly to the main compound. You will encounter a few larger groups of enemy soldiers. Watch out for flaming barrels! Start running in an opposite direction or use the gun to destroy these objects.
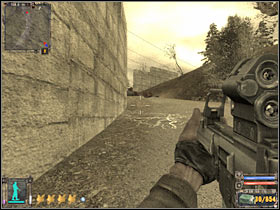
10 - This is the main compound. You won't have to explore this entire area. Watch out for enemy snipers, however there are only a few of them here. Once again, ignore image and color distortions. Once you've shot down the emitter, it'll all be normal.
Once you've returned from Red Forest Control Bunker:
As you've probably noticed, some fights are taking place in this area. As a result, I'd strongly recommend that you leave this area as soon as possible. You will only have to kill several soldiers, mostly because they'll be standing in your way. You will also find out about a planned meeting in Pripyat.
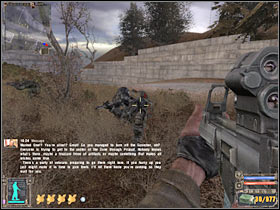
11 - This road leads straight to Pripyat sector. You will probably have to kill about 6-7 soldiers here. Sadly, there's no way to avoid them. Also, you shouldn't explore this area if you haven't been to the bunker, mostly because more soldiers would have appeared in that area. You will have to use this road to reach Pripyat and some of the allied Stalkers.
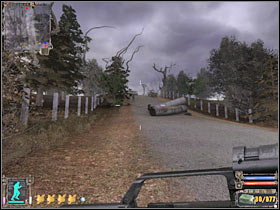
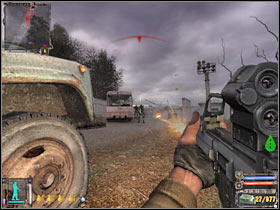
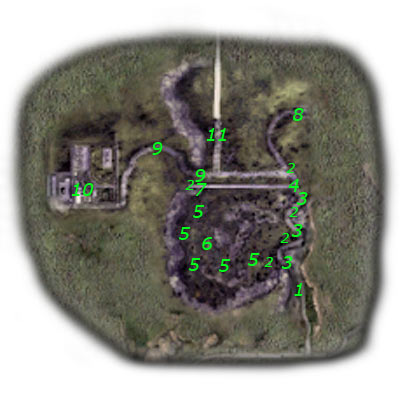
DETAILED MAP OF THIS ZONE - QUESTS:
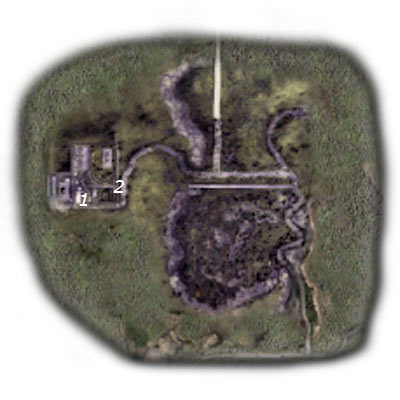
QUESTS:
1. Turn off the scorcher - part 2
Received from: Barkeep (Bar)
Starting point: Bar sector
What needs to be done:
a) reach the antenna (1 on the map)
b) find the entrance leading to the control bunker (2 on the map)
c) disable the device (scorcher; you will be able to proceed with this task once you've safely reached the Control Bunker map)
Complete quest walkthrough:
I'm sure that you will be able to go through the first part of the map without any major interruptions. You should also take a look at the previous section of the guide. I'll start with road leading straight to the main compound (#1). You will have to take out all enemy units from a very large distance, however you can't allowed any of these guys to surprise you. Additionally, take out a single sniper. He should be standing on your left (#2).
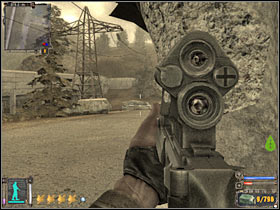
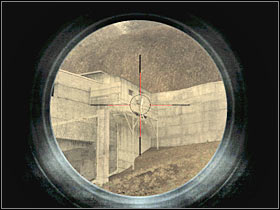
Once you've secured the area, proceed to the main road (#1). I would also recommend that you stick close to the left wall, so you won't be exposed to enemy fire. Thankfully, there are only a few soldiers in this area. Ignore the yellow filter, as well as ghosts (#2). They can't hurt you, so you may as well ignore them.
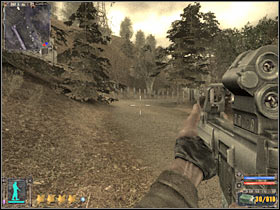
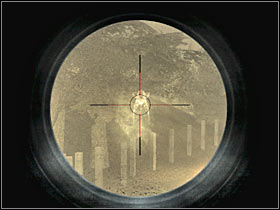
You will encounter a smaller blockade very soon. As you've probably noticed, there are some explosive barrels here. Move backwards or use the gun to destroy them (#1). Next, you will have to take care of the enemy units. Keep heading towards the base. Once you're close enough, try taking down at least one sniper (#2). It's very important that the snipers are killed. Don't forget about the possibility of saving your current progress!
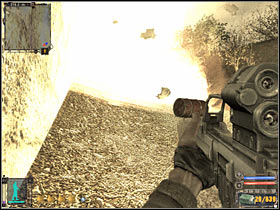
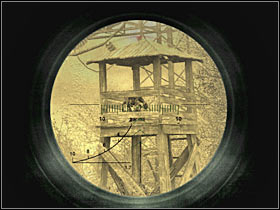
Now it would be best to move to your right, so you'll be standing near a large wall (#1). This will allow you to avoid several other snipers, however you will have to deal with them sooner or later. Also, be on a look out for standard enemy soldiers (#2). There's a larger group just around the corner. Take care of that small problem. Keep going straight.
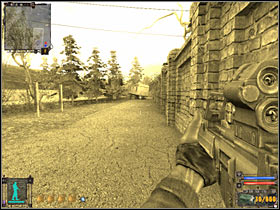
You should be able to reach the main entrance to the base (#1). Try moving to the left side. Take out several other thugs from here. Some of these guys may actually move closer to your position (#2). You have to be ready for these types of attacks.
Now you will have to reach the entrance to the underground control bunker. As a result, head on to your right (#1). It would be best if you started running towards your current objectives, so you will avoid all remaining sniper units. Locate a small carriage (#2). You will have to enter it. Turn right and head on to a long tunnel. There are a few soldiers here. Kill them and reach the end of this zone. You will have to wait for the game to load a new map.
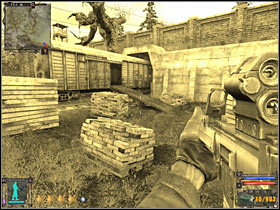
This is a fourth underground level of this game. Once again, you won't have an opportunity to use a minimap. Thankfully, there's only one passageway leading to your destination. You should also know that the first part of the mission is going to be very simple.
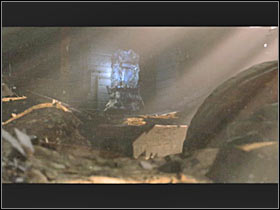
QUESTS:
1. Turn off the scorcher - part 3
Received from: Barkeep (Bar)
Starting point: Bar sector
What needs to be done:
a) reach the antenna
b) find the entrance leading to the control bunker
c) disable the device (scorcher - this is your main objective for this level; the rest has already been completed)
Complete quest walkthrough:
Like I've said many times before, you can't get lost in the bunker, because there's only one passageway leading to the scorcher. You will come across THREE mutants along the way. Check the screens (#1; #2) if you want to know where you're going to be attacked. Other than that, you shouldn't have any problems reaching the device, however you will have to watch out for several radioactive areas, including the elevator shaft.
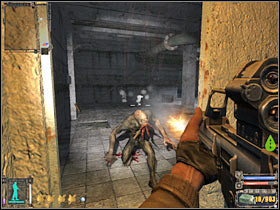
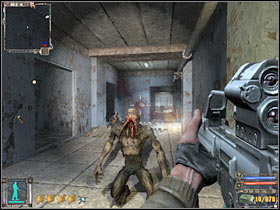
Once you've reached the console, you will have to use a lever (#1) in order to disable this device. You will receive new orders, however you won't be able to look at them right away. A new cut-scene is going to be displayed on your screen (#2). Now you must go back to the exit. The problem is that A LOT of enemy soldiers have entered the bunker.


You will be encountering enemy soldiers in each room, so I won't tell you exactly how to win each of these fights. You should be fine without my immediate help. Remember about the possibility of using grenades. Also, consider shooting at explosive barrels. The first soldier will appear near your current position and it may surprise you a little bit (#1). You will probably encounter a closed door on your way to the exit (#2). Enter 342089 (check your PDA) in order to open a steel door. You will find medical supplies, ammunition and grenades inside.
2. Wish granter
Received from: this quest begins automatically once you've disabled a scorcher device inside the Red Forest Control Bunker
Starting point: Red Forest Control Bunker sector
What needs to be done:
a) reach the sacrophagus
b) find the monolith and use it
Obviously you won't be able to proceed with this mission right away. There are also other things you should know about. This quest is tied directly to a group of ENDINGS of the game. As a result, it's going to be optional and we'll return to it later during the game.
MAIN MAP OF THIS ZONE:
Green points on the map:
1 - exit to: Red Forest
2 - exit to: Chernobyl NPP (you will only have to reach a large stadium area; that's where the game will begin loading a new map)
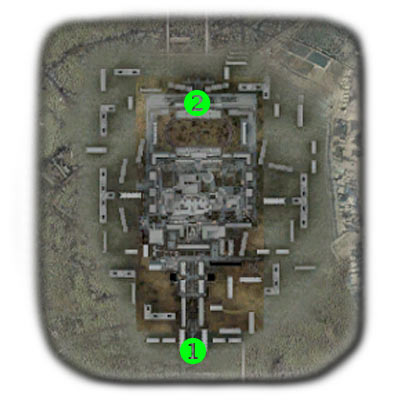
DETAILED MAP OF THIS ZONE - NPC's & IMPORTANT PLACES:
Important NPC characters (red color):
1 - Vadik Conman - This is the only important person here. You will have an opportunity to talk to Vadik, however you can do this only once you've reached a safer area of the map. Sadly, he won't be of any help to you, so you may as well ignore him. Focus your attention on finishing main missions.
Important places (green color):
1 - You will encounter a large group of friendly Stalker soldiers here. You will have to join them in order to reach the central part of the map.
2 - Sniper spots. As you've probably noticed, there are A LOT of them and it's going to be very difficult to find some of these guys. Additionally, most of the snipers will be using deadly Gauss guns. As a result, you will have to avoid them. You could also try taking them down as soon as possible.
3 - An underground parking lot. This is where one of the main quests is going to end. You will have an opportunity to rest here, mostly because you'll be surrounded by friendly units.
4 - Hotel. There are a few large buildings here, however you will only have to visit the main one. Nevertheless, you could consider exploring all rooms, especially since there aren't many enemies in that area.
5 - This building is surrounded by a very large group of hypnotised enemy soldiers. You would have to kill most of them in order to explore this area without any major interruptions. There are about 20 thugs for you to take care of. You will find a weird object inside the biggest room. Check the surroundings for very precious artifacts.
6 - Stadium area. Sadly, you won't be able to enter the stadium in order to explore it, because the game will automatically load a new map. As a result, this is the main exit from Pripyat.
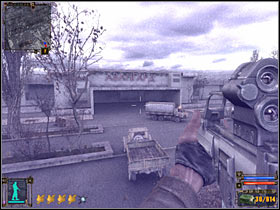
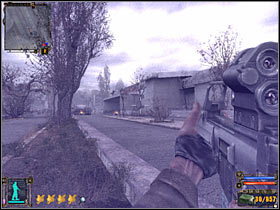
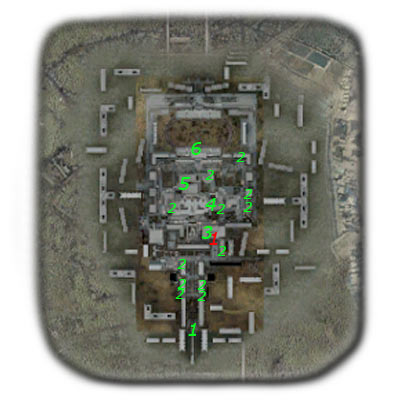
DETAILED MAP OF THIS ZONE - QUESTS:
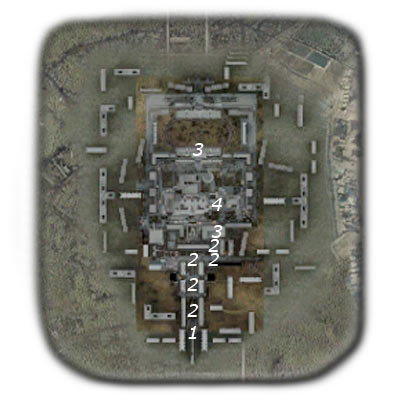
QUESTS:
1. Reach the power plant
Received from: this quest begins automatically once you've entered Pripyat
Starting point: 1 on the map
What needs to be done:
a) talk to other soldiers (1 on the map)
b) follow the leader (2 on the map - this is the route to the underground parking lot)
c) find a passageway leading to Chernobyl NPP sector (3 on the map)
d) find the entrance leading to the sarcophagus
Complete quest walkthrough:
You will be able to complete three out of four objectives here. The only exception is going to be the sacrophagus task. We'll get back to it later during the game. This isn't a difficult mission, however you must save your game quite often. You will be dealing with a lot of sniper units, so try using various objects for much needed cover. Check the previous section of the guide if you want to know where to find all snipers.
Make a few steps forward in order to meet other Stalkers. Now you will have to wait for the briefing to end. Start running forward (#1). I'd strongly recommend that you listen to the leader of the squad. He will tell you exactly where to shoot. The most important thing here will be to eliminate snipers quickly (#2). Your teammates will be able to deal with the rest of enemy units.
You will have to repeat all of these actions in order to reach the opposite end of this street. Now you will be turning right. There are more enemy soldiers here for you to take care of (#1). Watch out, because most of them will be hiding inside buildings. You should eventually reach the entrance leading to the parking lot (#2).
Head on to the underground parking lot. You will have to kill a few enemy soldiers here (#1), however you could also wait for your squad members to deal with this problem. Don't forget about the possibility of checking bodies of fallen enemies. Also, try talking to the leader of the squad (#2). Now it would be a good time to proceed with the hotel mission.
Once you've taken a device from the hotel (read the description of the second quest), you will be allowed to move on to the northern exit. I wouldn't recommend moving in a straight line, because you would have been exposed to enemy fire. Instead, try choosing the eastern side of the map. Sadly, you will have to kill a sniper here (#1), as well as a small group of enemy soldiers (#2).
You should be able to reach the entrance to the stadium in about a minute. Try using a front gate (#1). You will also have to make sure that the area has been secured. Once you've entered the stadium, a short cut-scene should appear on your screen (#2). After that, the game will automatically load a new map, so if you want to explore the rest of Pripyat, don't go anywhere near the stadium.
2. Secret stash at Pripyat - part 2
Received from: Doctor (Agroprom Research Institute Sewers)
Starting point: Agroprom Research Institute Sewers sector
What needs to be done:
a) reach one of the hotels in the Pripyat district (4 on the map)
b) find the room with a secret stash (4 on the map)
c) discover what's inside the stash (4 on the map)
Complete quest walkthrough:
Don't even think about taking on this mission unless you've secured this entire area. You will have to kill all enemy snipers. Most of them are standing on top of the large buildings. Hotel is one of the biggest buildings here, so you can't miss it (#1). I would recommend that you choose a front entrance (#2).
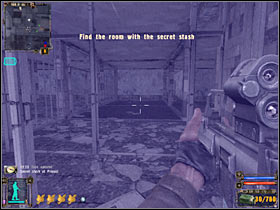
The entrance is probably going to be guarded by a single opponent. As a result, you will have to kill him quickly (#1). Now you must locate a small staircase. This will allow you to reach one of the upper floors (#2).
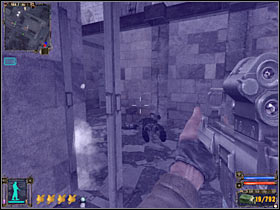
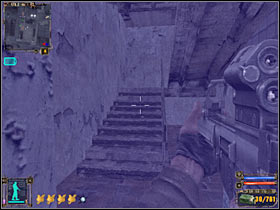
You should be able to jump through a window very soon (#1). Repeat this action in order to get closer to a designated area of the map. Now you will only have to go to a correct hotel room (#2). Once you're inside, head on to a small room that's located on your left.
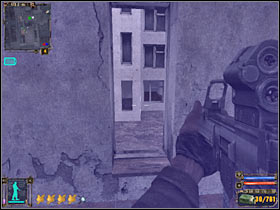
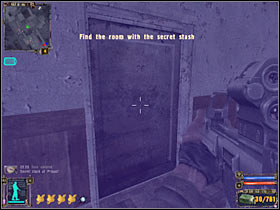
You will have to find two objects here (#1) - some new documents and a decoder. You will be able to use this tool near the end of the game. Doing this should allow you to end this quest. You will also receive further instructions.
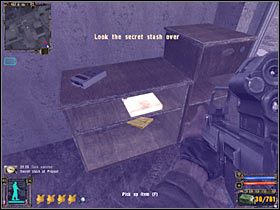
3. Secret lab
Received from: this quest begins automatically once you've finished Secret stash at Pripyat task
Starting point: 4 on the map
What needs to be done:
a) find a secret entrance
b) use the decoder to open a steel door
c) find out what's inside the secret lab
Just as before, you won't be able to proceed with this mission right away. You will have to be patient. We'll get back to this mission once you've reached a certain area inside Chernobyl NPP.

MAIN MAP OF THIS ZONE:
This is the final main map of the game, however you won't be able to spend much time here, mostly because you'll only want to reach the Sacrophagus area. Additionally, due to interference you won't actually be able to see your character on the minimap. As a result, I would recommend that you focus only on reaching the available exit. You should also remember that once you've reached this sector, you won't be allowed to return to Pripyat or any other previous zones. Make sure that you have a lot of supplies in your inventory, especially when it comes to anti-radiation medicines. You're going to need A LOT of them in order to survive inside the power plant.
Green point on the map:
1 - exit to: Sarcophagus
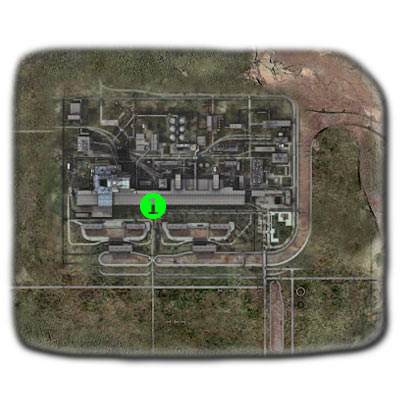
DETAILED MAP OF THIS ZONE - NPC's (there aren't any) & IMPORTANT PLACES:
Important places (green color):
1 - This is where you will begin your exploration of this map. You will be able to see your character icon here, however if you decide to move north, the icon is going to disappear. Sadly, this means that you won't know exactly where you're standing.
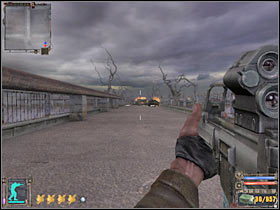
2 - This is the main entrance leading to the power plant area. You will be able to choose between a large gate and a destroyed part of the wall.
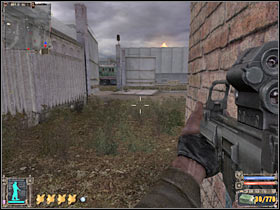
3 - This is the main entrance to the power plant building. You will have to reach it in order to fulfill one of the main quests. There's a small ladder on your left. You must use it. As a result, you will move on to Sacrophagus zone.
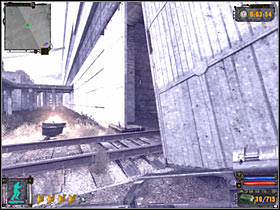
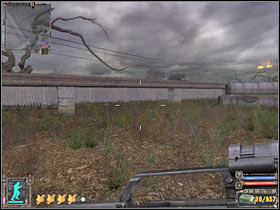
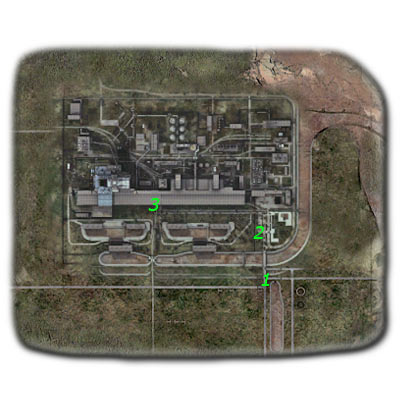
DETAILED MAP OF THIS ZONE - QUESTS:
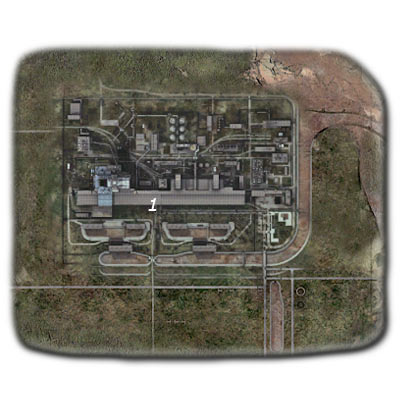
QUESTS:
1. Reach the power plant - part 2
Received from: this quest started automatically once you've entered Pripyat sector
Starting point: Pripyat sector
What needs to be done:
a) talk to other soldiers
b) follow the leader
c) find a passageway leading to Chernobyl NPP sector
d) find the entrance leading to the sarcophagus (1 on the map)
Complete quest walkthrough:
Like I've said before, you won't have to spend much time on this map, especially since you won't see where you're going. Your main goal here will be to reach the main entrance to the power plant. There's a sarcophagus entrance nearby and you will have to use it in order to proceed to the next map. The area is not safe, but I'm sure that it doesn't surprise you, especially since we're near the end. You will have to deal with several enemy snipers. You are also going to be attacked by enemy helicopters, however you could try and avoid them. It's also possible to shoot down the helicopters, however more units would have appeared on the map. Once you've reached a certain area of the map, you will have a few minutes to escape this zone.
Obviously you are going to start outside the main compound. You will have an opportunity to choose between several different approach methods. If you want to explore this area, you would have to deal with at least 3-4 snipers (#1). One of these guys will be standing on your right. The rest is in front of you or to the left. Sooner or later, you would also have to shoot down at least two helicopters (#2). As a result, it would be better to avoid these fights and that's exactly what I'm going to explain.
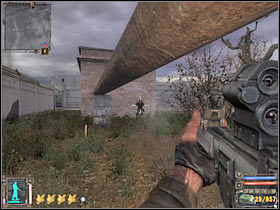
Once you've reached the first large area of the map, turn left and start running towards a concrete wall (#1). You will have to use it for cover. This wall will protect you against helicopter attacks. You will also avoid most of the enemy soldiers, however one of the Monolith thugs is going to be standing on your right (#2). Kill him quickly.


Try making a few steps forward. A small explosion will occur in this area. You won't have to worry about losing any health points. Turn left. As you've probably noticed, there's a small hole in the wall (#1). Use it to enter the main compound. After that, start running towards a small building (#2). You will be quite safe here. Consider saving your current progress.
Don't leave the house just yet. Instead, start leaning out carefully. There are at least two enemy snipers in the area and you will have to kill them before moving on. One of these soldiers is standing on top of the power plant (#1). The rest is to your left, near the southern buildings. Once you've secured the area, start running towards the power plant (#2). It's going to be a safest route to your current destination.
You will come across new enemy soldiers very soon (#1). As you've probably noticed, they're well armored, so you must aim at their heads in order to take them out quickly. Watch out for a single opponent. He will be hiding to your right, near the main wall of the power plant. You shouldn't make any unnecessary stops, because you would have become an easy target. There may be still some snipers in the area. Once you're close enough to the main entrance, a time meter will appear on your screen (#2). This means that you will have to reach the exit in less than six minutes. Thankfully, it's plenty of time.
Keep heading towards your current destination. You will have to turn left at some point (#1). This will allow you to avoid a very dangerous vortex anomaly. Once you've gone past it, go back to the wall of the power plant. Before proceeding any further, you should consider killing at least 2-3 enemy soldiers (#2).
You should be getting closer to the main entrance to the power plant. This area is being patrolled by large groups of enemy soldiers, however you should be able to kill all opponents from a safe distance (#1). You could also hide near the power plant wall (#2). This will allow you to surprise a new group of enemy units. Save your game each time you secure a larger section of the map.
Keep moving towards the main gate (#1). It's not that far, however you must be very careful, so you aren't surprised by any soldiers. The gate is going to be guarded by at least one Monolith soldier. Kill him and enter a large warehouse area. You will have to proceed to the ladder (#2). This will allow you to proceed to the next map. Also, you won't have to worry about the time limit anymore.
I'll start off by explaining how to reach the location required to fulfill Wish Granter's quest. You will have to remember, though, that if you choose these endings, you won't be able to unlock the best possible ending of the game. This same road leads to an alternative area - Secret Lab. As a result, even if you plan on getting there, you should still take a look at the description of the first quest. As for this location, Sarcophagus is a highly radioactive area, so you must have a lot of anti-radiation medicines in your inventory. You should also be using a SEVA suit. This armor offers a huge protection against the radiation. Sadly, you won't be able to end the game by running towards one of the available exits. A lot of soldiers will be standing in your way. They're equipped with excellent armors and very powerful guns, so you must be EXTREMELY careful. Save your game often!
QUESTS:
1. Wish granter - part 2
Received from: this quest begins automatically while exploring Red Forest Control Bunker
Starting point: Red Forest Control Bunker sector
What needs to be done:
a) reach the sarcophagus
b) find the monolith and use it
Complete quest walkthrough:
I'd strongly recommend that you turn on your nightvision. You could also consider using a flashlight, however enemy soldiers would have seen you coming. Keep heading forward. Once you've reached a new corridor, you will have to deal with a single sniper unit (#1). Eliminate this soldier quickly, so you won't lose any health points. You could pick up his weapon if you wanted to (#2). The sniper was carrying the most powerful weapon of the game - a Gauss gun. Sadly, this weapons reloads very slowly, so you can't use it against multiple targets.
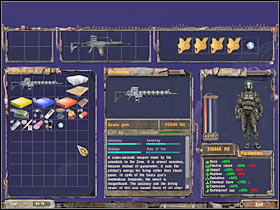

You may proceed to the next section. Stop your character once you've reached a small junction (#1). This is going to be the most difficult part of this mission. A larger group of enemy soldiers is stationed to your left. You could start leaning out in order to take out a few targets (#2). Go for headshots, because enemy soldiers are wearing very powerful armors and you would waste a lot of time and energy trying to kill them by shooting them in the chest.
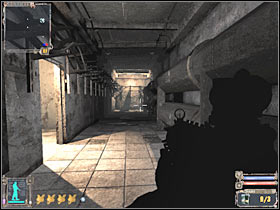
I would recommend that you ignore this area for now. Keep going forward. There's a smaller group of enemy soldiers just around the corner (#1). It would be wise to use a grenade in order to get rid of them. You will come across a room filled with large pipes. Turn left and use the ladder (#2) to get down to a lower level.
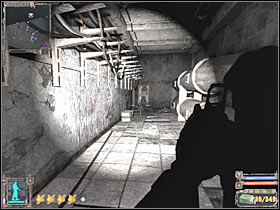
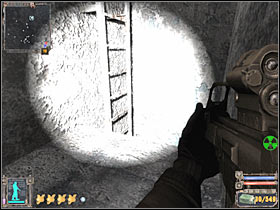
You should be able to find two interesting objects here - a crate with artifacts (#1) and a stash (#2). Open the stash. As you've probably noticed, there's an Exoskeleton inside. This is the best armor for those of you who plan on having a suit with excellent bullet protection. I wouldn't recommend taking it, because you would have been exposed to the radiation. Instead, take the ammunition. Go back to the junction and save the game.
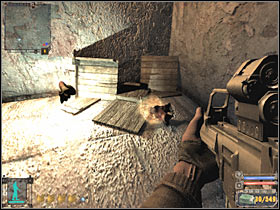
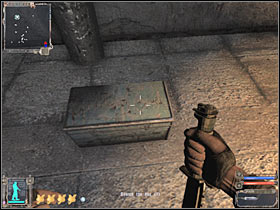
You've got two choices here. It would be much easier to remain in this corridor. You would have to wait for the enemy soldiers to get here. There's also a risky solution. You would have to get closer to a destroyed part of the wall (#1). Remember, though, that you can be attacked from various angles. Once you've secured most of the room, use the grenades and storm the place (#2). Deal with the remaining enemy units. Save the game once again!
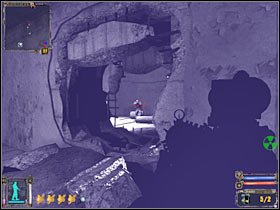
Proceed to the next section. You will come across a staircase. You will have to kill at least two enemy soldiers here (#1). Thankfully, you should be able to surprise them. You could also check their bodies for useful objects. You will come across several new guns, however you don't have to pick them up. Your character will reach a much larger room (#2). Secure this entire area.
Important! This is where you will have to make your final decision. If you plan on going to the secret lab, head on to the description of the second quest. If you want to meet the Wish Granter, keep reading.
If this is your default quest, you shouldn't have any problems reaching a correct entrance. You just have to use your minimap. There's a narrow passageway here (#1). Use it. You are getting closer to a much larger room. Start going upwards (#2). You won't encounter any enemy units here, so you may as well holster your weapon. You will only have to watch out for radiation. I would also recommend that you save your progress at least once, because it's very easy to fall down.
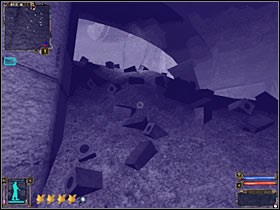
Head on to the first ladder. Use the nightvision goggles if you think it's too dark here. The second ladder is going to be located on your left (#1). You will have to reach the upper platform. Your main goal here is to step through a teleporting device (#2).
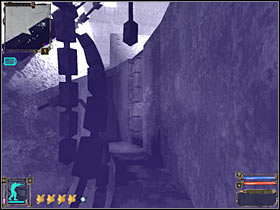
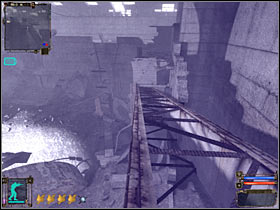
You are going to be teleported to one of the highest platforms. As a result, you must be very careful, because it's going to be very easy to make some kind of a mistake. Head on to a metal construction (#1). Use it to reach a lower level. Once you're there, keep heading towards your current destination. There are a few others platforms here (#2). You shouldn't have any problems reaching them and there's only one path leading to your final goal.

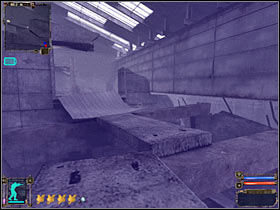
You will have to jump down twice near the end (#1). Watch out during the second jump, because it's very easy to fall down. You will finally reach the monolith (#2). Approach it and press the action key. Now you will only have to sit back and enjoy one of the available endings of the game. Check the next chapter of the guide if you want to find out more.
2. Secret lab - part 2
Received from: this quest begins automatically once you've finished Secret stash at Pripyat task
Starting point: Pripyat sector
What needs to be done:
a) find a secret entrance
b) use the decoder to open a steel door
c) find out what's inside the secret lab
Complete quest walkthrough:
If you want to finish this task, you will have to ignore the second final quest - Wish Granter. Thankfully, choosing this quest will allow you to reach the best possible ending of the game. We start off inside a large room. You will have to locate a second passageway (#1). Use the ladder (#2). You shouldn't have any problems finding it.
You will eventually come across a large steel door (#1). Try opening it. Sadly, you will have to wait for the decoder (the one from the Pripyat hotel) to unlock the door. It's going to take about 30 seconds. In the meantime, you will have to deal with several new soldiers. The enemy units will appear near the ladder (#2). You could try crouching (they probably won't see you right away) or throwing a couple of grenades. Once the door is opened, head on to the new corridor. You will have to wait for the game to load a new map. Once this is done, this mission will come to an end and you'll be able to proceed with the next quest.
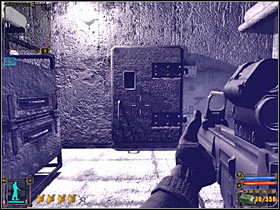
This location is tied directly to one of the main quests of the game. If you've already visited the Wish Granter, you won't even be allowed to visit this area. Once again, you will be dealing with a lot of well equipped enemy soldiers. Don't forget about the possibility of saving your current progress. Also, check bodies of fallen enemy units for ammo and better guns.
QUESTS:
1. The Monolith's secret
Received from: this quest begins automatically once you've finished Secret lab task
Starting point: Secret Lab sector
What needs to be done:
a) solve Monolith's secret
Complete quest walkthrough:
This is the only main quest for this location, so you won't have to worry about anything else. Start off by moving forward. You will have to stop once you've reached a small junction (#1). This is a very challenging section of the map, mostly because you are going to be attacked from THREE different directions. Thankfully, there are some bars in front of you and to the right, so you won't have to worry about enemy soldiers moving closer to your position. Start leaning out carefully. Take out a few soldiers from a larger distance (#2).
Try moving towards the right wall, so you'll be able to attack a few other enemy soldiers. They will be standing to your left (#1). You could also throw a couple of grenades at them. Keep shooting at the soldiers who should be standing in front of the junction. Once they're gone, turn right and deal with the last group of Monolith units (#2).
You will have to make sure that the area has been secured. Head on to the left corridor. There's a smaller room to your right (#1). Go there now. Thankfully, you shouldn't encounter any additional soldiers here. Go back to the main corridor and start moving forward. Try staying close to the left wall. Be careful. There are more enemy units just around the corner (#2).
You will have to be careful while moving forward. There are several small rooms to your left. Most of them will be occupied by enemy soldiers (#1). Kill them, so you won't get shot in the back or surprised later during the game. You will have to stick close to the main corridor. A second sniper is hiding just around the corner (#2). Kill him before moving on any further.
Keep heading towards your current destination. You will be encountering enemy units quite regularly. Don't forget to check their bodies for additional supplies. You could also pick a new weapon - FT 200M (#1). You shouldn't have any problems finding additional ammunition for it. You're getting closer to a larger room (#2). Save your game here, because the area is not safe.
I would recommend that you position yourself correctly (#1) in order to throw a couple of grenades inside. Once this is done, start leaning out carefully. There are probably 2-3 soldiers inside. Take them out quickly (#2). Remember that you should be aiming at their heads. Don't enter the room if you're not sure that all enemy soldiers have been killed.
Enter the room. It's very important that you save your current game here. Get closer to a large door. It should be located on your right (#1). DON'T enter this room, because you would have been trapped in there. Instead, move up closer to the left wall and start shooting at the generators from here (#2). Don't worry about the shaking screen or the flames. Once you've destroyed all generators, a dialog window will appear on the screen. This is where you will decide which ending would you like to witness.
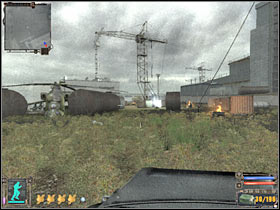
FIRST ENDING - I want the zone to disappear.
Requirements: You must have an excellent reputation value (+1000 points), however you can't have a lot of money with you (less than 50000 RU).
Additional info: If you want to get rid of the extra cash, try buying unwanted objects from one of the traders. Once this is done, throw these objects out of your inventory. It's much easier to score a high reputation value.
SECOND ENDING - I want to be rich.
Requirements: You must have a lot of money - more than 50000 RU.
Additional info: This is a most common ending, at least in my personal opinion. You shouldn't have any problems gathering 50000 RU, especially if you've checked bodies of fallen enemies and sold a lot of valuable objects to all three traders.
THIRD ENDING - I want to rule the world.
Requirements: You must kill leaders of both organizations - Freedom and Duty. It's going to be much easier with Freedom. Lukash can be found in the army base (Army Warehouse sector). It's much more difficult with General Voronin. He's stationed inside a military bunker in the Bar sector. Once he's dead, you would have to kill all of the remaining Duty soldiers as well.
Additional info: This is one of the possible endings for bad characters. You will probably have some problems achieving it, especially when it comes to killing the general.
FOURTH ENDING - Humanity is corrupt, mankind must be controlled.
Requirements: You must have a bad reputation (less than -1000 points).
Additional info: I guess it's fairly obvious what has to be done here, however you could have some problems gathering 1000 negative points. You will have to kill everything that stands in your way, including friendly characters.
FIFTH ENDING - I want immortality.
Requirements: You will only be able to unlock this ending if you didn't manage to fulfill the requirements for four other endings of the Wish Granter. Here's what you have to do:
1) you must have a reputation between -1000 and +1000 points
2) general Voronin and Lukash must survive
3) you must have less than 50000 RU in your inventory
Additional information: I guess I won't surprise you by telling that it's going to be very difficult to see this ending, mostly because you would have to know what to do with your main character from the start. It's an interesting option, but only if you plan on playing the game from the start.
SIXTH ENDING - Main character agrees to join the C-Consciousness project.
Requirements: Once you've talked to C-Consciousness representative, you will have to choose the first dialog option - "I agree to join the C-Consciousness project".
Additional info: ...is not needed, mostly because you won't have to do anything else. Wait for the game to display one of the "bad" endings. I'd strongly recommend that you save your game before destroying the last generator, so you'll be able to watch the seventh ending as well.
SEVENTH ENDING (BEST POSSIBLE ENDING) - Main character refuses to cooperate with the C-Consciousness project.
Requirements: Once you've talked to C-Consciousness representative, you will have to choose the second dialog option - "I'm not going to help you in this deception".
Additional info: If you decide to choose this dialog option, you will unlock a possibility of watching the best ending of the game. Before this happens, you will have to complete one more level. You are going to be transported back to Chernobyl NPP territory. Your objective will be to reach fifteen teleporting devices. The most important thing here is that each time you use the device you will have to deal with several enemy units before proceeding to the next one. Thankfully, you won't have any major problems finding the teleporters. If you want to find out what will happen next then I recommend you keep reading. :-)
First device
This is going to be a very simple task. Start off by running forward. The teleporting device should be located to your right (#1). You will have to go there now.

Second device
Head to on to the nearest ladder. You will probably notice a few enemy soldiers in the distance, including the sniper (#1). You will have to kill them right now. Additionally, use a grenade to clear out an upper platform. Use the second to ladder to reach it (#2).
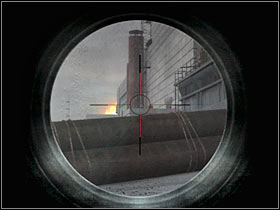
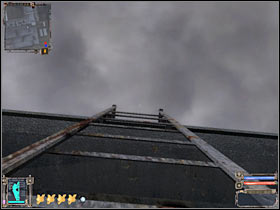
Once you're at the top, try killing all of the remaining enemy soldiers (#1). It shouldn't be a problem. Use the third ladder to go down. I'm sure that you'll have some problems finding the fourth ladder, so check the screen to find out where it is (#2). Use it.
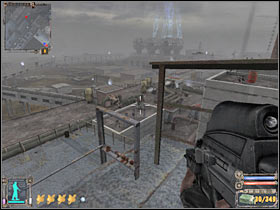
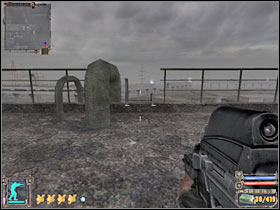
Start running forward. You will come across several opponents along the way. One of the enemy soldiers will use his own teleporting device (#1), so you must be ready for his attack. Once you've checked the bodies, head on to the teleport.
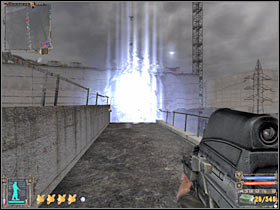
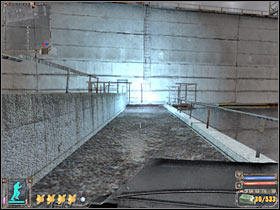
Third device
You start off on top of a small building (#1). You could consider killing some of the nearby enemy units, however this won't be necessary. Start moving towards the device, killing only those soldiers which will actually stand in your way (#2).
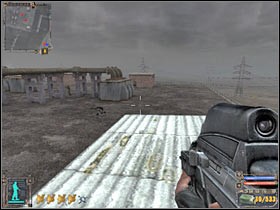
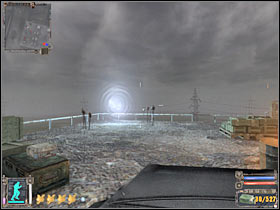
Fourth device
Start off by using a nearby ladder. Keep running forward (#1). Ignore the radioactive zone, because you won't be able to choose any other passageways. Once you've reached a new roof, you will have to kill two Monolith soldiers (#2). Head on to the teleport.
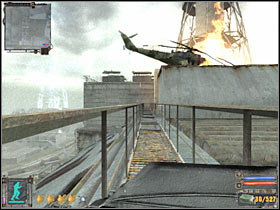
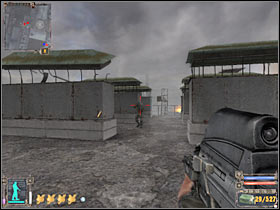
Fifth device
Keep going straight. You will have to use a ladder in just a few seconds (#1). Be careful, because you are going to be attacked by a mutant here. Kill the creature. Once it's gone, head on to the nearby device (#2).
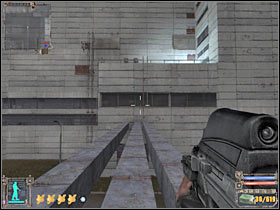
Sixth device
You will probably encounter a guy with a rocket launcher (#1), however if you're lucky, he won't even notice you coming. Surprise him. You won't have to pick up the rocket launcher (#2), so use a nearby teleporting device.
Seventh device
This time you will have to kill two mutants (#1), however you will be dealing with one creature at a time. Reaching the teleporting device is going to be a little bit more difficult. You will have to jump from the top of the building (#2). You can't miss it or you're dead!
Eighth device
This is one of the easiest challenges. You won't have to fight any hostile units. Keep moving forward in order to reach a new device (#1).
Ninth device
Start moving forward. You will have to take care of all surrounding enemy units. Watch out for an enemy sniper. He will be hiding to your left (#1). The second group will appear to your right (#2). You will have to secure this area before proceeding with the next part of the mission.
Reaching the teleporting device is going to be a little tricky, because you will have to perform several difficult jumps. You must be standing on the top of the right pipe (#1). There are some metal platforms to your right (#2). Try reaching them. Like I've said before, you can't make any mistakes here, so make sure you've saved your current progress.

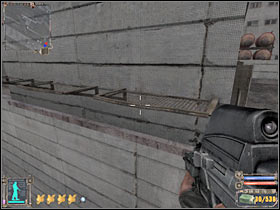
You will have to make several other jumps here in order to reach a larger metal platform (#1). I'm sure that you won't have any problems reaching the second set of pipes from here. Keep moving forward. The teleporting device is going to be located on your right (#2).
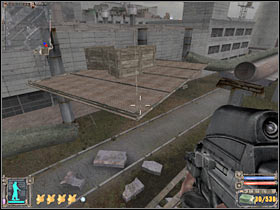
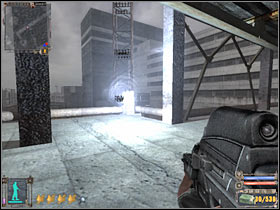
Tenth device
Once you've exited the teleporter, you will have to deal with two enemy soldiers (#1). You must kill them as soon as possible. As a result, try aiming at their heads, however you should also keep moving. Once they're gone, head on to a nearby teleporter.
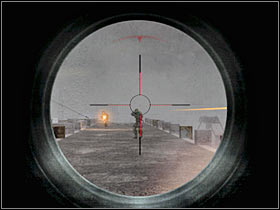
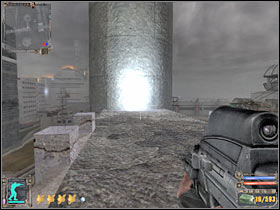
Eleventh device
This is a very simple fragment. All you have to do is to reach a new teleporting device which should be located in front of you (#1).
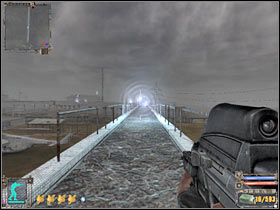
Twelfth device
You should be able to surprise one of the enemy soldiers (#1). He will be standing in front of you. Be careful, though. There are more enemy units in the area. Don't let them surprise you. Kill them in order to be able to proceed to a nearby device (#2).
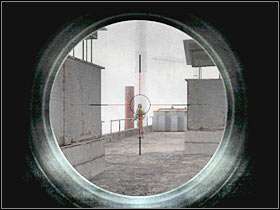
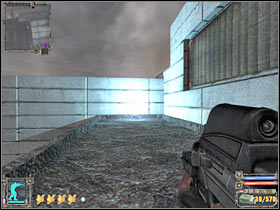
Thirteenth device
You are going to be teleported to an enemy camp (#1). As a result, you must be very careful. You could try and kill all enemy soldiers, however I would recommend running towards a nearby teleporting device (#2). Before you reach your next spot, you will also be teleported to Sidorivich's bunker. He's will be quite surprised to see you. ;-)
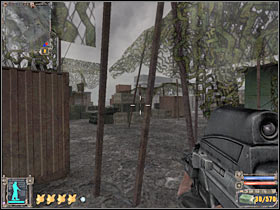
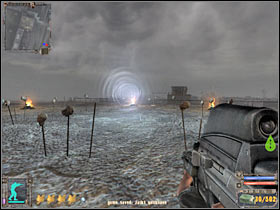
Fourteenth device
You're very close to the end. Sadly, this means that you will be dealing with even more enemy units from now on. There are large groups of enemy soldiers in front of you and to the left. Also, some of the Monolith units will be standing on nearby balconies (#1). That's where you'll need to go, because this would allow you to reach the device (#2). Remember to save your game each time you've killed a large group of soldiers.
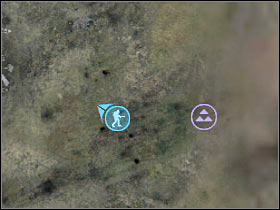
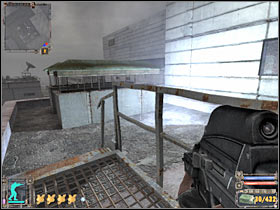
Fifteenth (final) device
It's time for the big final to commence. First of all, you shouldn't be moving too fast. Some of the soldiers will use teleporting devices (#1). You have to be ready for these types of attacks. Try eliminating the rest of them from a larger distance. Once again, you should consider choosing the balconies (#2), because you'll be able to cover larger area from here.
Keep heading towards your final target. Check the screen if you want to know where it is (#1). If you have plenty of energy and a good armor, you could consider running towards the teleporter (#2). Otherwise you would have to kill all enemy soldiers.
Congratulations! You've just unlocked the best ending of the game!
I've promised before that you will have an opportunity to find descriptions of all quests in one place. This chapter of my game guide should provide assistance for more experienced players, especially since it can be quite difficult to understand some of the given tasks. Here's how the quests will be displayed:
NAME OF THE QUEST (it's the same as in the game)
Starting point: name of the sector where it'll start (it doesn't matter whether it's a NPC character or the quest begins automatically, once you've reached a certain area of the map)
What needs to be done:
a) description of an objective (name of the zone where you will be finishing it)
As you've probably noticed, most of the main quests require you to visit more than one area of the map. Thankfully, you shouldn't have any problems finding a correct zone, especially if you decide to read my guide. I guess this is all you should know.
A
Assist at Freedom's Barrier outpost
Starting point: Army Warehouses
What needs to be done:
a) talk to Freedom's outpost commander (Army Warehouses)
b) repel Monolith soldiers raid (Army Warehouses)
c) once the battle is over, talk to outpost commander once again (Army Warehouses)
D
>>Deal with the snitch
Starting point: Army Warehouses
What needs to be done:
a) head on to the farm (Army Warehouses)
b) wait for the snitch to contact his agent (Army Warehouses)
c) kill the snitch (Army Warehouses)
d) kill the agent (Army Warehouses)
e) report to Lukash for further instructions (Army Warehouses)
>>Destroy the Duty company
Starting point: Army Warehouses
What needs to be done:
a) talk to Max (Army Warehouses)
b) clear out the Duty encampment of all Duty soldiers (Army Warehouses)
c) return to Lukash for further instructions (Army Warehouses)
F
>>Find out what happened to Ghost
Starting point: Agroprom Research Institute Sewers
What needs to be done:
a) find out what happened to Ghost (Yantar)
>>Find Strelok's group's stash
Starting point: Agroprom Research Institute
What needs to be done:
a) find Strelok's stash (Agroprom Research Institute Sewers)
b) find out what's inside the stash (Agroprom Research Institute Sewers)
c) head on to the second exit from the sewers (Agroprom Research Institute Sewers)
>>Find the codelocked door
Starting point: X18
What needs to be done:
a) find the code that's needed to open the door (X18)
b) type in the code in order to open the door (X18)
>>Find the documents in the underground lab
Starting point: Bar
What needs to be done:
a) enter the enemy base (The Dark Valley)
b) acquire a key from the leader of the bandits (Borova)(The Dark Valley)
c) exit the camp (The Dark Valley)
d) find the entrance leading to X18 laboratory (The Dark Valley)
>>Find the documents in X16 lab
Starting point: Bar
What needs to be done:
a) find the documents in the X16 laboratory (X16)
b) deliver the documents to Barkeep (Bar)
>>Find the documents in X18
Starting point: X18
What needs to be done:
a) find the documents (X18)
b) deliver the documents to Barkeep (Bar)
>>Find the militaries' documents
Starting point: Cordon
What needs to be done:
a) steal the documents (Agroprom Research Institute)
b) deliver the documents to Barkeep (Bar)
>>Free the Dutyer
Starting point: The Dark Valley
What needs to be done:
a) follow Bullet to the ambush point (The Dark Valley)
b) surprise the bandits and rescue the Duty soldier (The Dark Valley)
>>Free the Dutyer from prison
Starting point: The Dark Valley
What needs to be done:
a) reach the prison area and free one of the Duty soldiers (The Dark Valley)
G
>>Get information about Strelok
Starting point: Garbage
What needs to be done:
a) meet Mole's group (Agroprom Research Institute)
b) talk to Mole in order to receive information about Strelok (Agroprom Research Institute)
>>Get information from the scout
Starting point: Cordon
What needs to be done:
a) talk to Wolf (Cordon)
b) meet with Wolf's men (Cordon)
c) assist Wolf's men and clear out the bandit camp (Cordon)
d) pick up flash disk from Nimble (Cordon)
e) return with the disk to Sidorivich (Cordon)
>>Get inside the lab
Starting point: Yantar
What needs to be done:
a) find and check Ghost's body (Yantar)
b) find the entrance leading to X16 laboratory (Yantar)
>>Get out of the lab
Starting point: X16
What needs to be done:
a) escape from the laboratory using a secret tunnel (Yantar)
b) talk to Professor Sakharov once again (Yantar)
>>Get out of the Dark Valley
Starting point: The Dark Valley
What needs to be done:
a) escape from The Dark Valley (The Dark Valley)
>>Get to the railroad embankment
Starting point: Cordon
What needs to be done:
a) head on to a designated area of the map and find the journeyman (Cordon)
b) reach the other side of the railroad embankment (Cordon)
H
>>Help the stalkers
Starting point: Agroprom Research Institute
What needs to be done:
a) kill all enemy soldiers, they are located near the main entrance to the factory (Agroprom Research Institute)
K
>>Kill Lukash
Starting point: Army Warehouses
What needs to be done:
a) kill three enemy snipers (Army Warehouses)
b) kill Lukash (Army Warehouses)
c) go back to Duty's camp in order to receive a reward (Army Warehouses)
>>Kill Strelok
Starting point: Cordon
What needs to be done:
a) find Strelok (X)
b) kill Strelok (X)
Important! This quest has appeared in your PDA at the start of the game and it will stay there until the end. You won't be able to finish it on your own. Sadly, I can't tell you why, because it's tied directly to one of the main plots of the game. Check other quests (including Meet with guide and Meet with doctor) if you want to find out more about this.
>>Kill the tower sniper
Starting point: Army Warehouses
What needs to be done:
a) kill an enemy sniper (Army Warehouses)
b) return to Skull for further instructions (Army Warehouses)
L
>>Lead Kruglov to Yantar
Starting point: The Wild Territory
What needs to be done:
a) escort Professor Kruglov to the southern exit (The Wild Territory)
b) once you've reached the exit, talk to Professor (The Wild Territory)
>>Learn something about Strelok from Fox
Starting point: Cordon
What needs to be done:
a) save dying Fox (Cordon)
b) ask Fox about Strelok (Cordon)
M
>>Meet Kruglov
Starting point: The Wild Territory
What needs to be done:
a) reach the crash site (The Wild Territory)
b) find professor Kruglov and talk to him (The Wild Territory)
>>Meet the guide
Starting point: X16
What needs to be done:
a) talk to the Guide, you can find him in the Cordon sector (Cordon)
>>Meet with Doctor
Starting point: Cordon
What needs to be done:
a) talk to Doctor; he can be found in Strelok's hideout (Agroprom Research Institute Sewers)
>>Meet with Gray
Starting point: Cordon
What needs to be done:
a) find out something about Strelok from Seriy (Garbage)
O
>>Open the door to the control center
Starting point: X18
What needs to be done:
a) find the code that's needed to open the door (X18)
b) type in the code in order to open the door (X18)
R
>>Reach the power plant
Starting point: Pripyat
What needs to be done:
a) talk to other soldiers (Pripyat)
b) follow the leader (Pripyat)
c) find a passageway leading to Chernobyl NPP sector (Pripyat)
d) find the entrance leading to the sarcophagus (Chernobyl NPP)
>>Repel the bandit raid
Starting point: Garbage
What needs to be done:
a) repel bandit raid (Garbage)
b) once you've dealt with all bandits, talk to Bes (Garbage)
>>Respond to the call for help
Starting point: Garbage
What needs to be done:
a) offer help dealing with the bandit threat (Garbage)
S
>>Save Mole
Starting point: Agroprom Research Institute
What needs to be done:
a) kill all nearby soldiers (Agroprom Research Institute)
b) once the soldiers are gone, talk to Mole e'a (Agroprom Research Institute)
>>Secret lab
Starting point: Pripyat
What needs to be done:
a) find a secret entrance (Sarcophagus)
b) use the decoder to open a steel door (Sarcophagus)
c) find out what's inside the secret lab (Secret Lab)
>>Secret stash at Pripyat
Starting point: Agroprom Research Institute Sewers
What needs to be done:
a) reach one of the hotels in the Pripyat district (Pripyat)
b) find the room with a secret stash (Pripyat)
c) discover what's inside the stash (Pripyat)
T
>>Take radiation measurements
Starting point: Yantar
What needs to be done:
a) talk to Professor Kruglov (Yantar)
b) escort Professor Kruglov to the measurement sites (Yantar)
c) return with the results to Sakharov (Yantar)
>>Take the documents
Starting point: X16
What needs to be done:
a) head on to the main area of the X16 lab (X16)
b) find Ghost's body and pick up the documents (X16)
>>The Monolith's secret
Starting point: Secret Lab
What needs to be done:
a) solve Monolith's secret (Secret Lab)
>>Turn off psi-emission
Starting point: X16
What needs to be done:
a) turn off the first console (X16)
b) turn off the second console (X16)
c) turn off the third console (X16)
d) disable the entire mechanism, so you'll be able to explore the rest of the lab (X16)
>>Turn off the scorcher
Starting point: Bar
What needs to be done:
a) reach the antenna (Red Forest)
b) find the entrance leading to the control bunker (Red Forest)
c) disable the device (scorcher)(Red Forest Control Bunker)
W
>>Wish granter
Starting point: Red Forest Control Bunker
What needs to be done:
a) reach the sarcophagus (Sarcophagus)
b) find the monolith and use it (Sarcophagus)
"S.T.A.L.K.E.R." is a very tough game to beat, even if you're playing on lower difficulty levels. I will do my best to tell you about a lot of important things. Some of these hints will probably seem to be quite obvious, however the game offers a more realistic approach. You will also find out about new things and you wouldn't find them in popular FPP titles. First of all, you will have to remember that your main character isn't immortal. It's very easy to die during the game, even if you've chosen a lower difficulty level. You won't be able to take on more than a few bullets, even if you're carrying a powerful armor. Additionally, you will witness deadly headshots. If one of the enemies manages to shoot you in the head, you will probably die right away. The same goes with melee battles. Most of the mutants are going to kill you with only one swing. The first part of the game is by far the most difficult one, mostly because you won't have any real armors at your disposal. The same goes with artifacts. You will be able to find some artifacts in Cordon and Garbage, however only a few of them will prove to be useful (for example - they will extend your life meter). The next important thing is planning your moves. You will have to observe your surroundings, so you won't end up near a large group of enemy soldiers or wild animals. As for the smaller distances, you must watch out for deadly anomalies and radioactive zones. As a result, I wouldn't recommend moving too fast, even if you think you know the surrounding areas quite well. Remember to use the binoculars to spot enemy soldiers and different types of monsters. You will also have an opportunity to attach scopes to some of your weapons. This is a very useful tool, even if you don't plan on using the weapon at the same time. Also, remember that you won't have to kill all enemy units in order to succeed. Sometimes it's better to avoid them, especially if you're wounded. You should also know that you won't receive any rewards for winning most of these fights.
 If you come across a larger group of soldiers or monsters, consider avoiding it. Attack your enemies only if you plan on picking up additional equipment or if you have to explore this particular area of the map.
If you decide to start a battle, don't forget about the possibility of taking additional supplies. Each body (including the monsters) can be searched. In most cases, you will find ammunition, food, grenades, first aid kids, anti-radiation tools, pistols and artifacts. You should also know that you won't find any bigger guns in the inventory. You will have to look for them near the bodies. Performing these action will allow you not only to resupply but you will also acquire new things to sell to the traders. You can also be informed (after opening the inventory window) that you've discovered a personal stash of a killed Stalker. You would have to open your map in order to find these stashes. They are going to be small purple points. I'm sure that you won't have any problems finding them (#1). Once you've located a stash, you will have to reach that location (#2) in order to be able to open it. You will be able to find precious objects inside - rare artifacts, better guns and grenades or even unique armors. Sadly, it's going to be very difficult to reach most of the stashes, so you must have that in mind. The most common problems are: buildings (in order to reach a stash you will probably have to go to a roof of a certain structure or into the sewers), radiation (you will probably have to enter a radioactive zone in order to open the stash), anomalies (you should be able to avoid them, however more traps may still be around) and monsters (mostly wild dogs, boars and wolves). You should also know that once you've collected all objects from the stash, it may be refilled later during the game (after you've killed another Stalker). As a result, you should consider going back to these objects once you've returned to a previously explored sector of the map.

Stashes aren't the only places where you will be able to find precious or unique objects. You should also be on a look out for crates, lockers, chests and well hidden rooms. If you plan on exploring the entire map, make sure that you have checked all bushes, lakes and buildings (especially roofs and other areas which are hard to get to). This will allow you to acquire valuable and/or useful equipment. Sadly, all of these objects have a certain weight and you will have to remember about this specific parameter. You will have to open your inventory in order to find out what's the current weight of all of these objects (including personal armor). It will be displayed in the left side of the screen. I'd strongly recommend that you NEVER exceed 50 kilogrammes. Otherwise you would have some serious problems exploring your surroundings, mostly because the endurance bar would have been depleted very quickly. As a result, you wouldn't be able to run and in some rare cases even moving would be a huge problem. You can get rid of unwanted objects by throwing them out of your inventory, however I wouldn't recommend doing that, because you wouldn't make any profits out of it. It's much better to go to one of three main traders of the game. Sadly, this sometimes means that you would have to go back to a previous zone. Nevertheless, I would recommend that you do this, especially if you plan on buying new objects. It's very wise to sell artifacts. They don't weigh too much and you'll receive a lot of money for each artifact (1000-5000 RU). You could also sell guns and armors, however each of these objects weighs at least 10-20kg. You will be able to buy certain things from the traders, however you won't find many interesting objects in their stock. You will probably want to buy some ammunition and you should be able to find all needed objects directly on the battlefield.
 It's very important that you don't carry too many objects in the inventory. Otherwise you wouldn't be able to use the sprint button too often.
There are also some obvious things and I guess I should remind you about their importance. Due to the fact that the game is very difficult (even in the first sector of the map) you should be thinking about saving a lot. I wouldn't recommend using only the quicksave key, mostly because you will probably save the game in a dangerous area more than once. Additionally, your new savegames may become corrupted. As a result, try using at least 8-10 different slots. Save your game each time you've finished exploring a larger section of the map and you plan on going to the next one. The same goes with more difficult fights. If you open the minimap window, you may find out the exact time of the day. You will be able to explore maps both during the day and night. It doesn't really has a huge affect on the gameplay, however it's going to be easier to ambush enemy units or to avoid them once it's dark outside, mostly because some of the enemies will only be using small flashlights. I should also remind you about your PDA. You were instructed how to use it during the tutorial session. The PDA offers a very useful minimap. You will also find a quest diary here, various statistics and an encyclopedia. Be sure to check the first chapter of my guide if you want to find out more about some of the basics of the game.
I've already mentioned that this is a very difficult game, especially for less experienced players. It's mostly because enemy units are VERY smart. You will have to remember about it from the beginning. First of all, I wouldn't recommend going after larger groups of enemy units (more than 3-4 soldiers or 2-3 monsters). The only exception is when you have a huge technological advantage over your enemies. It may happen later during the game, once you've collected better guns and armors and you're instructed to go back to Cordon, Garbage or Agroprom. Other than that, you shouldn't change anything in your approach. It's also very important to surprise your enemies. This will allow you to win most of the difficult fights, especially if you have a lot of grenades and powerful weapons at your disposal. Doing this is especially effective during the night. Most of the enemy soldiers won't be using nightvision goggles. They will only have simple flashlights. This will allow you to plan your moves more carefully. When you try to kill enemy soldiers, you must be aiming at their heads, especially if it's a larger distance. Try choosing single shots, instead of longer bursts. One accurate shot will be more than enough to take down an opponent. If it's a smaller distance, you won't have to aim at the head, mostly because it's very important to take down such an opponent as soon as possible. You should consider using shotguns during these fights. Most of the enemy soldiers will be carrying machine guns and shotguns, however you will also come across some snipers (screen). Sadly, it's very difficult to spot and eliminate them without receiving any major injuries. It's very important that you're using a decent gun, so you won't have to worry about the accuracy too much. A scope will also provide a much needed help. You should be using nearby objects for cover, especially if you haven't located all enemy units. I guess I should also tell you about the importance of using grenades, especially while trying to explore buildings or underground structures. If you throw the grenade correctly, you will be able to take down several opponents without having to worry about anything else. Grenade are also very useful to take down soldiers who are standing just around the corner. That way you won't have to lean out. You will be dealing with well-armed units later during the game. Make sure that you go only for headshots here, even if there's a smaller distance separating you from each other.
 It's very difficult to detect most of the snipers. You can't ignore them by running to your current destination, because you would have probably ended up dead.
You will be dealing with Stalkers, thugs and soldiers for the most of your time spent in the Zone, however you will also come across other creatures from time to time. I guess it would be wise to explain more how to deal with these problems. I've decided to focus only on those creatures which appear more often. Some of the monsters (invisible ones or with psi powers) will appear only a few times. If you want to find out how to kill them, make sure that you've read quest descriptions (especially for Sewers, X18 & X16 maps).
The most common encounters will include wild animals and other smaller creatures. Early during the game you will be dealing mostly with wild dogs. It's very easy to get rid of these creatures. You just have to aim at the head. One successful hit should be more than enough to take them down and even if you miss, the creature will probably leave you alone (scared by the gunshot). Killing wild boars is going to be more challenging, mostly because these animals aren't going to be scared of anything. Even if you manage to wound them, they will probably still be coming after you. Additionally, if you don't hit the head area, you'll probably have to sacrifice more bullets to be victorious. Dealing with stronger dogs and mutated wolves is going to be much more difficult, mostly because they're very fast and they can attack you by performing huge jumps. You will encounter these creatures for the first time once you've entered the Bar sector. As a result, try taking those monsters from a larger distance, however I would recommend going the other way or running. Eventually the wolves will head back to their original locations. I wouldn't recommend choosing close encounters, because only a few bites can kill your main character, even if you have a powerful suit at your disposal.
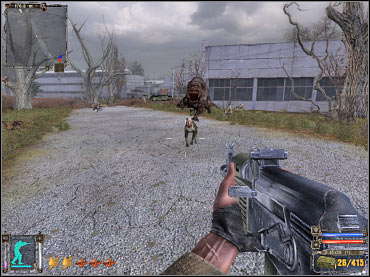 Watch out for stronger types of wild animals. It's best to avoid them. Don't let these creatures bite you!
You will also be dealing with mutated people. You will encounter these creatures for the first time ever once you're inside the X18 laboratory (under The Dark Valley sector). It's going to be much more difficult to kill them AND to stay alive. If you've played "Far Cry" PC game before, you should be quite familiar with behaviours of these creatures. Their main attack is a powerful jump in order to use the claws on your main character. This action takes only about a second, so don't be fooled if you see on these creatures in a larger distance. You will have to avoid these types of attack at all costs, because they're deadly and even if you survive, the mutant is even more deadlier during close encounter combats. If you've chosen a higher difficulty level, one successful attack by this monster will probably kill your character. You will also encounter larger groups of these creatures, mostly in the Yantar area. Try avoiding them or shooting from a very large distance. You should also know that the mutants won't quit and they will pursue you for quite some time. Try aiming at their heads, however this is quite difficult, because they're always on the move. Nevertheless, if you're lucky, a single shot could do the trick. Remember to NOT attack more creatures at the same time. You should also consider using shotguns against them, especially if this is an underground level of the game. Bear in mind, though, that a single hit may only wound the creature, instead of killing it right away.
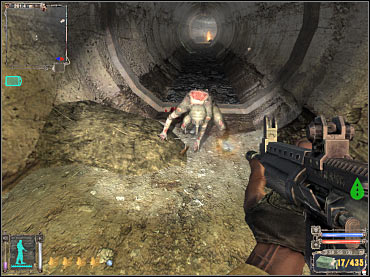 Some of the mutated creatures are VERY difficult to kill. Eliminate them from a larger distance or use the shotgun weapon.
Last, but not least, we have the zombies. :-) These creatures will appear later during the game. You will come across some of your first zombies in The Wild Territory district. There are more of them in Yantar, X16 and Red Forest. Thankfully, there's nothing you should be worried about, however you can't underestimate their capabilities. Nevertheless, you can move quite freely around them. Zombie creatures are very similar to normal soldiers, however they're much slower. Nevertheless, zombies know how to use shotguns, rifles and other weapons. As a result, it's best to take them down from a larger distance, preferably with a help from the scope. Once again, you will have to aim at the head. Don't try aiming at other parts of the body, because it won't do you much good. You'd have to waste more bullets than on standard soldiers.
 Zombies are slow and dumb (like they should be ;-)), however you must be careful, because they'll be using weapons.
Anomalies are something common in the game world and I'm sure that you're going witness it very soon. There are A LOT of them everywhere, even in some of the first areas of the game. I think it's fairly obvious that you will encounter more of these "traps" later during the game, especially in The Dark Valley, Agroprom and Chernobyl NPP sectors. Most of the anomalies are well hidden, so you may not notice them at first glance. It's very important that you move slowly, so you don't end up flying the air which can kill you almost instantly. Thankfully, most of the anomalies will only wound your character. Electricity anomalies are a great example here. You will come across them for the first time in the tunnel in Cordon sector. I guess I should also tell you about some very useful ways to discover anomalies. First of all, one of your devices will emit certain sounds once you're close enough to an anomaly. Second of all, you have some bolts in your inventory (press the 6 key) and you may use them to find anomalies. Finally, you can try and find them on your own. Just be on a look out for something that looks like "hot air". I'm sure that you'll know exactly what I was talking about when you encounter an anomaly during the game. Additionally, some of the more powerful anomalies are connected to the wind, however I'm sure that you won't have any problems spotting them. As for the types of anomalies, vortexes are the ones you should avoid at all costs. If you're caught in the vortex, there's a very good chance that you die, especially since escaping it can prove to be quite difficult. You can try and tap the sprint key several times, however this works only if you're not near to the center of the vortex. A large group of these anomalies can be found in the western side of the Garbage district. You will also encounter these traps later during the game, especially while exploring closed tunnels. Fire anomalies are very difficult to avoid, however if you have a decent armor at your disposal, you will lose only a small portion of your health. There are also a few acid anomalies in the game world, especially in the Sewers area of Agroprom. Thankfully, you shouldn't have any problems finding them. It's also very easy to get past these traps. Just make sure that you don't touch the acid with your feet and you should be fine.
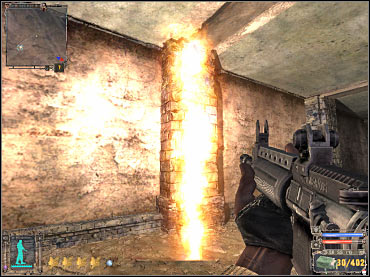 Fire anomalies are very difficult to avoid, however they won't kill your character right away.
This is the final section of my guide. I've decided to show you some of the more common equipment, including guns, armors and artifacts. I don't think that telling you about some rare pistols or machine guns would be a good thing, because you would probably have some serious problems finding these items. Even if you manage to do this, you won't have enough ammunition to use such a weapon for a longer period of time. As for the displayed objects, you shouldn't have any problems finding them in the game world. Additionally, it's been described in the walkthrough section of the game guide. This is when you will find a such an object for the first time. After that, you should be fine, because you will encounter these weapons and armors more often. I guess I should also tell you about the existence of a durability meter. This only includes the weapons, because armors and artifacts can't be worn down. If you're using a gun frequently, you will notice that durability bar has changed. You can't destroy a weapon entirely, however a gun with a lower durability rating is more likely to jam during a fight. As a result, you would have to spend at least a few seconds reloading it. Make sure that you change your main weapons every two maps, so you won't witness any problems.
MOST COMMON WEAPONS
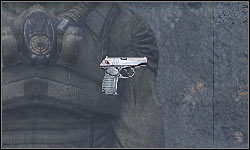
PMm (280 RU)
This is one of the most primitive pistols. Sadly, you won't be allowed to choose anything more powerful at the start of the game. This weapon will only serve you to kill bandits and wild animals. You will have to remember about the poor accuracy and firepower. As a result, try aiming at the heads of your opponents, because otherwise you'll only slightly wound them.
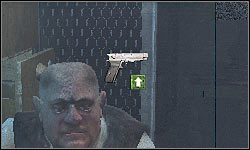
Fort-15 (350 RU)
This is a slightly better gun and you'll be able to kill more creatures with it. It's very effective if you plan on exploring some of the first maps of the game. You could also use it to kill other Stalkers, however it can prove to be quite difficult. I wouldn't recommend using it against larger groups of enemy units. Nevertheless, consider using this weapon if you don't have enough ammo for the machine guns.
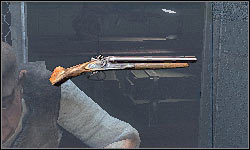
Sawn-off dbl-barrel (400 RU)
This is a very interesting weapon and it may come in handy early during the game, however you must remember about a few very important things. First of all, you will only be able to take two shots. After that, you must reload the weapon. It also takes a lot of time. Additionally, this gun is useful only indoors. Don't use it to kill enemies from larger distances, because you'll miss or you'll only wound them.
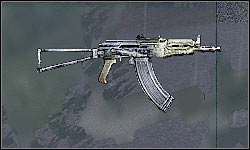
Akm 74/2U (1000 RU)
This is one the more interesting light machine guns. You won't have any problems finding ammunition for it. Other than that, this isn't a good weapon. You could use it early during the game, however don't expect to kill soldiers or animals without any major problems. Use it only if you don't have anything better in your inventory.
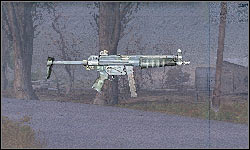
Viper 5 (1100 RU)
Viper 5 is one of the most common light machine guns. You will find a lot of these objects in Cordon and Garbage, mostly because bandits are using them. Sadly, you won't find this weapon to be useful, mostly because it's not powerful and the accuracy is very poor. The only advantage of having it is that you won't have any problems finding more ammunition.
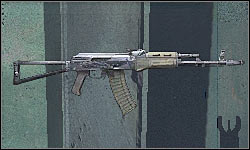
Akm 74/2 (2000 RU)
The standard version of Akm 74/2 is much more interesting and you will probably use it in Garbage and Agroprom. Sadly, you will have some problems finding more ammunition, so don't use it against less powerful bandits or wild animals. Once you've acquired a Fast-shooting version, you may get rid of this weapon, because you won't need it anymore.
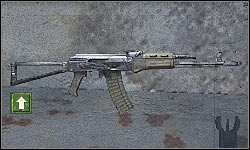
Fast-shooting Akm 74/2 (2000 RU)
You will probably come across this weapon for the first time ever while exploring Strelok's stash. I'd strongly recommend that you take it with you, because it's much more powerful than a standard version, especially if you prefer choosing longer bursts (instead of single shots). This weapon will allow you to take on several opponents at once, without having to worry about losing your life.
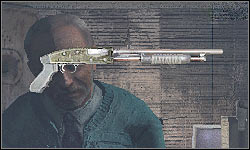
Chaser 13 (2150 RU)
An excellent shotgun. It's much more interesting than Sawn-off dbl-barrel, mostly because you won't have to reload it that often. This weapon is most effective while fighting indoors. It also takes down mutants very easily, allowing you to finish them off. You will find more powerful machine guns (even for smaller distances) later during the game, so you won't have to use this weapon anymore.
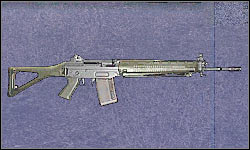
Obokan (2500 RU)
This is a slightly better weapon than the Fast-shooting Akm 74/2. Nevertheless, I wouldn't recommend exchanging it for that weapon, because you would have to be on a look out for a very rare ammunition type. You would also have do deal with smaller firepower while using longer bursts, instead of single shots. Leave a place in the inventory for something better...
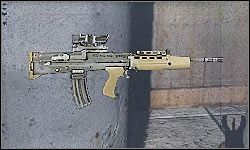
IL 86 (4000 RU)
Interesting and quite useful machine gun. Obviously it's better than the Akm74/2. The problem is that you won't be able to gather enough ammunition in order to use it all the time. You could check local traders for additional supplies, however it's best to wait for the main character to find something better and more common in the game world. This weapon has a built-in scope, so you wouldn't have to search for it on your own.
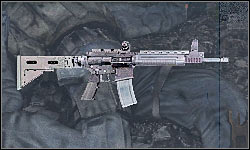
TRs 301 (5000 RU)
A VERY useful gun and I'm sure that it's going to be one of your favourite ones. First of all, TRs 301 is much more powerful than the previous guns from this list. As a result, you will be killing enemy soldiers more efficiently. TRs 301 is also very accurate, so you may use it as a sniper rifle, however you would have to find a new scope for it (Susat Scope), because the standard one won't fit. Check the guide if you want to know where it is.

SGI 5k (6500 RU)
Some of the Freedom soldiers will be carrying this machine gun. Sadly, there's nothing good I could say about it. If you're already in Army Warehouses district, I'm almost certain that you'll be able to find something more powerful. Additionally, SGI 5k doesn't have a scope, so you wouldn't be able to use it to kill enemies from larger distances.
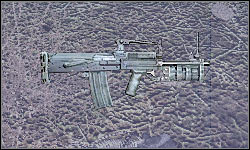
Tunder S14 (10000 RU)
Just as before, you will probably come across this weapon for the first time while trying to explore Army Warehouses. This is a standard weapon of all Duty soldier, so if you're fighting for Freedom, you shouldn't have any problems acquiring it. Tunder S14 is a powerful weapon, however I would recommend that you take the GP37 instead of this gun.
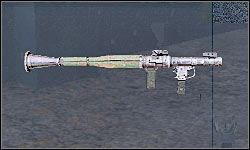
RPG-7u (10000 RU)
Rocket launcher looks cool and fires missiles, however you won't find it to be very useful. The only advantage is a high price, so you'll be able to sell it in Bar or Cordon. I wouldn't recommend carrying it in your inventory, because it would have only slown you down. I'm sure that you're going to take down all hostiles without having to use this weapon on them.
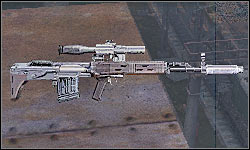
SVUmk2 (10000 RU)
This is one of the few available sniper rifles. I'm sure that you'll know exactly how to use it against distant enemies or monsters. Other than that, you won't find it to be very useful. Additionally, it's very hard to find more ammunition for this weapon, so it's best that you stick with the GP37 rifle, especially since the sniper rifle weighs a lot more and you would have to get rid of other objects in order to have it in your inventory.
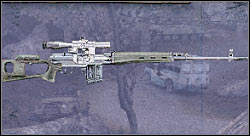
Sniper rifle (SVDm 2) (15000 RU)
This is a much more powerful sniper rifle. You will be able to find this weapon in Red Forest (check sniper locations). I guess there's nothing more I could say about this weapon. You could take it with you, however you would have to deal with its weight. You would also have to be on a look out for a very rare ammunition type.
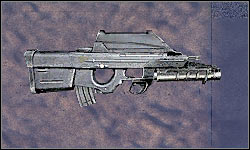
FT 200M (17000 RU)
This is a very interesting weapon, however you will probably find it near the end of the game. FT 200M offers huge firepower. This weapon is even deadlier than GP 37, especially while fighting indoors. It's also quite accurate. You shouldn't have any problems finding more ammunition for it. Most of the enemy soldiers will also be using it, so you will be able to exchange your current weapon for a model with a higher durability bar.
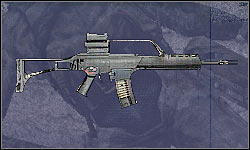
GP 37 (18000 RU)
This is by far the most useful weapon of the game, at least in my personal opinion. You will probably come across this gun for the first time ever while clearing out Freedom's base in Army Warehouses. The main advantages of having this weapon are: firepower (both single shots and longer bursts) and accuracy (it could replace your sniper rifle). Additionally, you won't have any problems finding more ammunition. Acquire this gun as soon as possible.
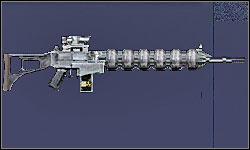
Gauss gun (25000 RU)
This is the most powerful weapon of the entire game. Sadly, you won't be able to find it earlier. Gauss Gun is a very unusual sniper weapon. You can only go for single shots and after you've fired the weapon, you will have to wait a few seconds for it to recharge. As a result, use it to take down single foes (you can't miss!). Don't even consider trying to kill larger groups of enemy soldiers. Thankfully, you won't have any problems finding more ammunition.
MOST COMMON ARMORS

Leather Jacket (1000 RU)
You will be using this armor at the start of the game. Obviously you shouldn't expect too much from the leather jacket, however it will do just fine while trying to explore Garbage or Cordon districts. Nevertheless, you should consider acquiring better artifacts, especially those which will allow you to extend your life meter. Stay away from anomalies since you won't be protected from their effects. Thankfully, you won't find too many of them early during the game. The same goes with radioactive zones.
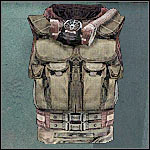
Monolith suit (10000 RU)
You will probably come across this armor for the first time ever while going through some of the cabinets in the X18 laboratory. The Monolith Suit theoretically is weaker than the Stalker Suit, however I found it to be more useful. First of all, Monolith suit offers a much better protections from gunshot wounds. The only disadvantage of having is that you would have to pay more attention on avoiding the anomalies and chemical substances. Nevertheless, you should consider taking it, especially since you'll be taking part in a lot of difficult fights.
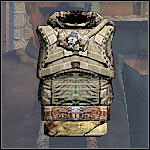
Stalker suit (15000 RU)
This is probably going to be your first armor, so you will be able to see the difference once you're wearing it and you're in a middle of a fight. Stalker suit offers better protection from all different types of threats, including gunshot wounds. You will be able to use a bulletproof vest in order to survive some of the tougher fights. Don't worry about the rest of the parameters, because you will find better armors later during the game.
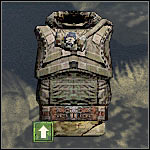
Ghost suit (15000 RU)
You will be able to find this suit only in one specific location (Ghost's body in the final section of the X16 laboratory map), however I've decided to display it here, mostly because it's very interesting. Ghost Suit doesn't offer a better protection than the Monolith suit, however it allows you to regenerate your health without having to use medical supplies. If you wind this feature to be useful, you should consider exchanging it for the Monolith suit. Otherwise leave it with Ghost, because you'll find better armors anyway.
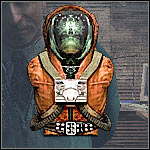
Ecologist suit (15000 RU)
This is an interesting proposition, however only if you're not taking part in a lot of difficult fights. You would have to avoid most of the enemy units, because this suit doesn't offer a proper protection against these types of attacks. Instead, you will be protected against different types of threats - chemical, electrical, fire... It also offers better protection from the radiation, so you'll be able to explore some of the well hidden stashes. You will be able to buy an upgraded version of this suit later during the game and I think that's exactly what you should consider doing.
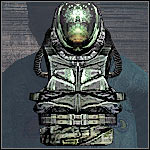
SEVA suit (30000 RU)
This is without a doubt the best armor of the entire game. You will be able to purchase this suit from Professor Sakharov, however you will have to explore the X16 laboratory in the first place. I'm sure that you won't have any problems using this armor until the end. First of all, SEVA suit offers similar protection to the Ecologist suit, however it also has a much better bulletproof vest, so you won't have to avoid any fights. Just make sure that you have enough money in your possession in order to be able to buy it!
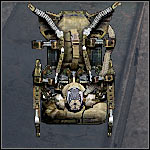
Exoskeleton (50000 RU)
You will find this armor near the end of the game. Despite what you might think, this is NOT the best armor you could possibly find, mostly because it doesn't offer a proper protection against radiation. You should also know that some of the final locations are highly radioactive... As for the main advantages of having it, exoskeleton offers best possible protection against standard enemy attacks.
You will be finding new artifacts very often during your time spent in the Zone. They're not everywhere, however you will come across these objects in most of the available districts. You shouldn't have any major problems finding the artifacts. Most of them can be found on the ground. Additionally, you should be able to spot them from larger distances, especially during the night. Sadly, some of the rare artifacts are usually well hidden. I've displayed some of these locations in my walkthrough. You will have to be on a look out for secret passages, stashes, crates, lockers and other closed objects. It's also going to be difficult to reach some of the artifacts, especially when they can be found on rooftops or inside rooms accessible only from the roof area. You should also check bodies of fallen enemies. Some of them were carrying precious artifacts, especially well equipped soldiers. Sadly, you won't be allowed to carry too many artifacts with you, because each of these objects has a certain weight. It's not much, however it's going to be a large number if you have 20-30 artifacts in your inventory. I wouldn't recommend just throwing them away. Instead, try carrying all artifacts to the nearest trading point, mostly because you're going to earn A LOT of money by selling them to the trader. You won't have to sell all artifacts, because you will have an opportunity to use up to five different objects. Sadly, some of the more common artifacts have side effects and you will have to remember about that while trying to attach them to your belt. I wouldn't recommend choosing artifacts which will expose you to small doses of radiation. The same goes with the endurance bar. You will need as much Endurance points as possible. Thankfully, some of the better artifacts will grant you with these points. I'd strongly recommend having at least one of these Artifacts on your belt. As for the rest of the slots, having artifacts which will extend your life meter is also very important. I will display you some of the most common artifacts. You shouldn't have any major problems finding these objects. Read my description before you decide to put them on your belt.
MOST COMMON ARTIFACTS

Jellyfish (1000 RU)
You will find A LOT of these objects. Sell them, because they won't be useful to you.
Bulletproof Cap +2%
Radiation +5

Stone Blood (1000 RU)
This is one of the best artifacts of the early stages of the game. I would recommend that you have at least 2-3 of them on your belt.
Health +200%
Impact -10%
Rupture -10%
Bulletproof Cap -10%

Wrenched (1000 RU)
This is also a totally useless artifact. As a result, consider selling it to the trader.
Rupture +2%
Radiation +5

Droplets (1000 RU)
This object is not recommended, especially since it will lower your Endurance bar. It's best to look for something else.
Radiation -10
Endurance -18

Sparkler (1000 RU)
Excellent artifact. You should be using at least one of these objects (this one or Flash). Don't worry about the side effects.
Endurance +36
Electric shock -10%

Flash (2500 RU)
This is an upgraded version of the Sparkler artifact. Make sure that you're using at least one such an object.
Endurance +73
Electric shock -10%

Gravi (2500 RU)
It's an upgraded Wrenched artifact. I wouldn't recommend using it. Instead, keep it in your inventory to sell it to the trader.
Rupture +3%
Radiation +5

Meat chunk (2500 RU)
This is definitely the most useful artifact of the entire game. Your life meter is going to be hugely extended. Start using at least 3 Meat chunks!
Health +400%
Impact -10%
Rupture -10%
Bulletproof Cap -10%

Fireball (2500 RU)
This artifact may prove to be quite useful, especially while going through radioactive zones. Sadly, it will lower your Endurance bar.
Radiation -20
Endurance -18

Stone flower (2500 RU)
This artifact is going to be completely useless to you. I wouldn't recommend using it. Instead, consider selling it as soon as possible.
Bulletproof Cap +3%
Radiation +5

Crystal Thorn (2500 RU)
Crystal Thorn is a weaker version of the Urchin artifact. You could use it to increase your radiation resistance.
Radiation -20
Bleeding +100%

Urchin (5000 RU)
Like I've mentioned before, you could use this artifact, however it's not necessary, especially if you're using a decent armor.
Radiation -30
Bleeding +100%

Mama's Beads (5000 RU)
To be honest, I didn't find this artifact to be helpful. If you're carrying a good armor, you can forget about putting it on your belt.
Bulletproof Cap +5%
-

Goldfish (5000 RU)
Useless artifact, however you must remember about its high value. Keep it in your inventory, so you may be able to sell it later during the game.
Rupture +5%
Radiation +5

Night star (5000 RU)
This is a very similar artifact to Mama's Beads. Sadly, you will have to remember about some nasty side effects. For sale! ;-)
Bulletproof Cap +5%
Radiation +5

Spring (5000 RU)
You could consider using this artifact, however only if you don't have anything better in your inventory.
Impact +30%
-



 Secret Files 3: The Archimedes Code Game Guide & Walkthrough
 S.T.A.L.K.E.R.: Call of Pripyat Game Guide & Walkthrough
 Star Wars: The Force Unleashed Game Guide & Walkthrough
 Shadowrun: Hong Kong Game Guide & Walkthrough
 Sniper Elite III: Afrika Game Guide & Walkthrough