


This guide for Shadowrun: Hong Kong is a comprehensive source of knowledge both for players for whom this is the first time with the game, as well as for the ones for whom it is a continuation of the game. Apart from the basic information on character creation, you can also find lots of hints and general tips, as well as answers to key questions like What is Smartlink? or What is Cyberware for?. Also, you can find here descriptions of activities, such as hacking Matrix terminals, or lists of codes and passwords that frequently appear as security measures for secret passages and treasures. However, the most important part of this guide is the description of the storyline and a walkthrough for each of the individual main and side missions, as well as curiosities about hidden items. The focus of the walkthrough is not only to complete a quest, but also to provide various ways of completing them, as well as consequences that may come as a result. Description of each of the mission has been provided with a map, where you can find key places, stashes and hidden passages. This has been rounded up with descriptions of possible endings to the story presented in the game.
Shadowrun: Hong Kong is the next installment in the popular RPG game presented in a top-down view, with a turn-based combat system. It presents a steampunk world of magic and technology, which presents the player with a number of options on how to develop the character and the party. The rich dialogue system immerses you in the game's story and lets you make decisions that are beneficial both for your character and the presented world.
Patrick "YxU" Homa ()
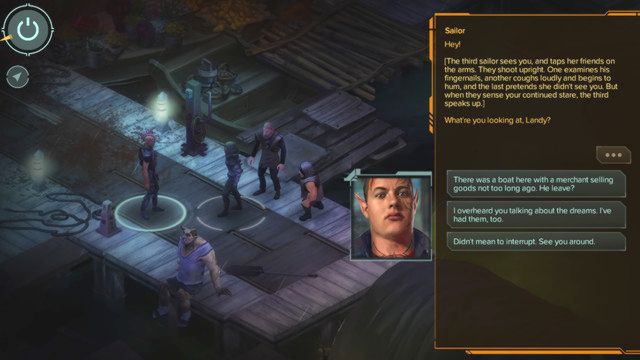 Determines your approach to the game - aggressive or diplomatic
This guide includes a detailed walkthrough for the game and the possible ways of solving problems and getting out of trouble. To highlight the importance of specific aspects and make it easier to find information, this walkthrough has been color-coded in the following manner:
red - NPCs and protagonists,
orange - rewards for main and side missions,
green - important and useful items,
blue - names of locations.
bold - mission objectives and important information (e.g. passwords).
Each location description, apart from a map, provides you with objectives and descriptions of places of interest. Under the mission description, you can find details on side missions, if any, and if they are longer. Linear side missions (e.g. Find the nearby key) have been included in the description of the main storyline.
Under the description of each quest, you can find objectives (primary objective, the successive steps to take have been provided in bold), difficulty level (easy, medium, hard) and the useful skills - this affects the option to solve the mission in a number of ways, finding additional valuable items and the optimal Karma distribution, as well as the choice of party members. Not all the skills in the individual mission have been listed, but only those that may be significant from the point of view of the mission completion/events.
You can play Shadowrun: Hong Kong using the mouse only. Still, there are a number of hotkeys that will make playing faster and easier.

Move/ Attack/ Interact

Camera controls

Zoom in/out

Camera controls

Reload

Switch between camera distances

Open spellbook (in the combat mode)

Access inventory (in the combat mode)

Activate the totem (skills, in the combat mode)

Switch between party members (in the combat mode)

Display descriptions of the game world elements

Quick save

Quick load

Access the PDA

Access the PDA in the Character tab

Access the PDA in the Gear tab


Dialogue options selection/ Switch between weapons (in the combat mode)


End your turn


Debug console
 After each mission you complete, you receive several Karma points that you can immediately distribute
Character creation: it is a good idea to allot the last Karma point to weapon proficiency if you have not done that before. This way, you are better off in the beginning, because you start off with a specific weapon type, instead of bare-handed.
Karma points. You can use these for character development. Unlike in the case of other RPG games, here you get only one type of points that you can distribute among attributes and skills of your character. Also, in this game, there is nothing like "experience points". You receive Karma points for your progression into the storyline and for completing missions that are not listed in your log ("good deeds").
Finding hidden objects. It suffices if, during the exploration of an open area, you hold the camera over a given fragment - you can see markers of collectable objects and interactive ones from afar.
It is often beneficial to complete side missions - check the individual missions in your PDA for rewards that you can obtain from them. Most frequently, these are Karma points; sometimes, you receive a piece of equipment. In other cases, you receive a bonus to the final reward for the quest, and also sometimes elements that make completing the mission easier.
Do not replace your equipment too often. It is expensive and with your progression you will gain access to better and slightly more expensive equipment. If you want, e.g. a particular weapon, and you are short on cash, consult the guide for missions that do not involve too much fighting.
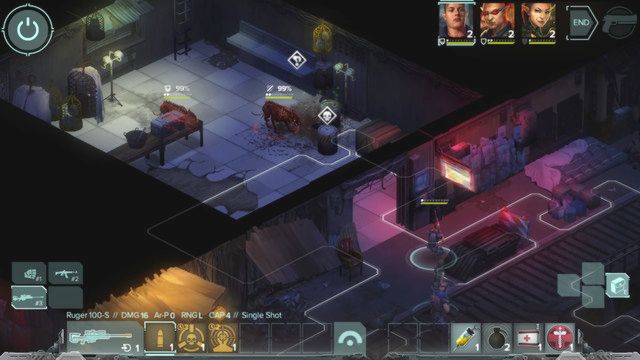 Combat screen
It is not always necessary to start a fight. If you are short on health or you see that you may have difficulties defeating the opponents (and if they do not attack you), it is not necessary to step into the battle. The only thing that you can obtain from an unnecessary fight (outside of a quest), is a hidden object, if there is one nearby. The game does not add the experience points that you would receive for the fight and you cannot search the bodies of the defeated opponents.
Both you and the rest of the party members can carry around more than one weapon. It is a good idea to have a secondary, special weapon on you, be it a melee weapon or an AoD grenade launcher.
Ammo - sooner or later, you will notice that your firearms use up ammo. However, you do not need to replenish it in any way. This is only an indicator of the weapon - if you use up ammo in the clip, you need to sacrifice one action point to reload it, which may be frequently a requirement, in the case of some (e.g. the grenade launcher - you can fire it twice, before you need to reload the weapon).
First of all, eliminate the opponents that may pose the greatest threat, not necessarily the easiest targets. What we mean here is mainly opponents with shotguns and grenades, who may deal damage to multiple targets. It is a good idea to leave the leader of the group for the very end - they have the most health points and often, a first-aid kit or the ability to heal themselves.
If your chance of hitting the opponent is below 65%, come closer. It makes no sense to waste ammo, and the turn, on ill-aimed shots. You can always come closer or change the angle at which you shoot.
Do not let yourself be surrounded. In the game, there is a flanking system, i.e. you can attack the opponents from several sides simultaneously (preferably front-back). Do not let the opponents change their positions when they are going to flank you. This is why it is a good idea to spread your party members over a larger area, close to the boundaries of the area in which you are fighting.
Do not let units fighting with melee weapons attack the ranged enemies. If you see that one of the opponents is heading towards one of the ranged party members, have them eliminated in the first place. In a 1 on 1 encounter, he is defenseless against tough melee opponents that have a high melee statistic.
Remember to distribute your party members properly. If it requires you to spend one, or two, turns to distribute them properly, do so. It is key to maintain the distance between each other (in case of an AoD attack, such as a grenade/shotgun), but not in a straight line - if the opponent approaches you from the side, he may have no problems eliminating you. At the same time, use all covers as much as you can (columns, crates).
If an enemy mage summons a creature, eliminate him in the first place. The reason is that as soon as the mage dies, all of the creatures summoned by him die as well. You should keep your wits about yourself here, because the same applies to you. This also goes for the characters that control drones.
Dying. There is no concept of death as such for your party members. If one of them is lethally wounded, you can revive them using the, so called, "trauma-kit". If this fails, up until the moment of leaving the area (until the end of the quest) you will have to do without him, but he is then transported to the "intensive care unit" and he will be fit and ready for the next mission. Still, it is a good idea to have at least one trauma-kit with you, in the case of a critical situation.
When you realize that a conversation has taken a wrong turn, even though you wanted to resolve the conflict at hand in an amicable way - try to soothe things down. There is a chance that although you fail to reach your goal (e.g. walk around guards without fighting them), they will not attack you - thanks to this, it is possible for you to take initiative and strike first, or even to distribute your party members around convenient spots.
After each fight ends, those of the party that have not died, receive their health back to the extent to which they lost it from the opponent's last attack (partial regeneration). This is why, in the case of the last fight of a quest, it makes no sense to lose your first-aid kit to heal a companion that is at the brink of dying. It is way better to hide that character away from the heat of the fight and wait until it ends.
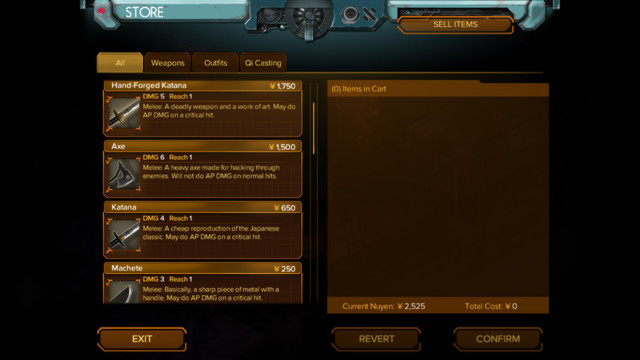 An example store with melee weapons
You are housed in the city of Heoi, where you get access to stores of each type, after the prologue ends (you can find the whereabouts and descriptions on the map of Heoi). Also, you can meet merchants in various locations - often, they offer better equipment than your local stores, which is why it is a good idea to go on missions with a little bit of cash on you. Prices of equipment are uniform everywhere, both in the case of buying and selling. Therefore, you do not need to make sure to sell a weapon to a weapons dealer. In each store, you get just as much money.
It is rare to find items, so your main source of income are the missions that you complete. If you are bent on increasing your income, take interest in side missions and in finding unique items([Paydata]), which you are most likely to find in the Matrix.
As you make progress into the storyline, stores start offering more and more interesting items. At the same time, they become more and more expensive. Sometimes, however, it is a good idea to complete a side mission before you decide to buy a new weapon or a piece of armor.
Trading. In some of the locations, you can find regular traders. Each one of them offers various items for sale, depending on their specialization. Also, you can sell the items that you do not need anymore there. Each of the traders has an unlimited amount of cash. It is a good idea to manage your equipment properly, because prices are low, if you wish to sell.
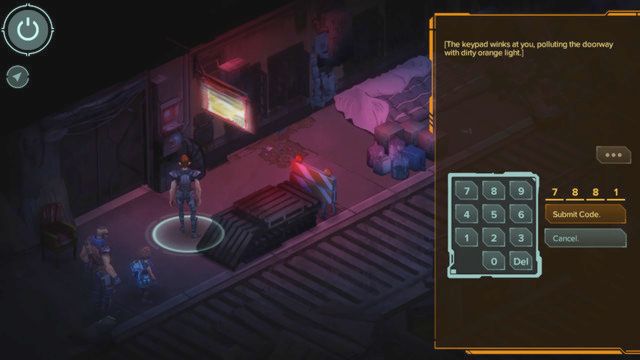 To enter the code on the panel, you can use the numeric pad on your keyboard
This chapter is a type of a "crib". It names passwords and access codes that you may need to open many locks, safes or to use in the Matrix for faster hacking and removing some of the system blockades.
2580 - the terminal at the bottom level. It allows you to access the room with the Matrix access and to open the manhole, to the Strangler Bao's secret passage.
7881 - password to Strangler Bao's room.
5465 - password to the secret room, that you can use to get to Bao's building.
Tennyson - you need to enter this password in the museum's curator's room to gain access to the secret stash with museum exhibits.
1635 - the number to Neville Ma's apartment.
8484 - this password allows you to access the server at the upper floor of the building. Destroying it causes several percent of Qi interference.
8484 - the same password opens the safe in the small office on the upper floor of the building.
98144 - password to dr. Taylor's room.
23847 - password to dr. Hardingham's room.
ZH4NGf3i - security code for the Security Scheduling data Matrix.
gu4nYU - security code for the Security Datastore data Matrix.
c0rt3xFRZ - security code for the gas valve Matrix number 3.
Scion - password to "Communications Data Store" data.
Prodigal - password to "Device Operations" data.
44526 - first password to the Laboratory number 12.
25301 - second password to the Laboratory number 12.
4990 - the code to hospital room.
2627 - the code to the locker in the changing room.
1915 - the code to the "Containment Room" in laboratory level 48.
8974 - the code to the equipment room (laboratory level 48).
Dusk, Dawn, Night, Noon - the codes in order from 1 to 4 to be used in the Matrix when freeing Raymond Black.
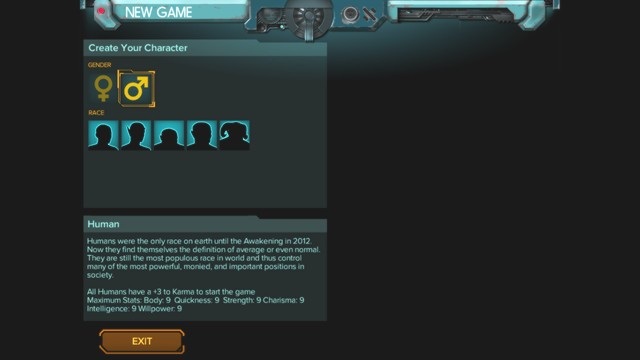 The first step is to select gender and race of the character
In first order you must select gender. Except for the look of your character, it doesn't add any new dialogue lines nor affect character behavior or physical attributes.
Race has key importance because of two reasons: it determines the maximum level of attributes development (however, you usually won't develop them to the maximum anyway) and it gives you additional bonus. Humans have 3 karma points to distribute, other races have +1 to the attributes describing them (which is much more valuable - you pay much more for each attribute point). You can select from five races, below you will find their attributes and bonuses, where: S - strength, B -body, Ch - charisma, I - intelligence, W -willpower, Q -quickness.
Race
Maximum attribute level
Race bonus
Human
Each statistic has 9 points
3 Karma points to distribute
Elves
S:9, B:9, Ch:12, I:9, W:9, Q:11
+1 Charisma
Dwarves
S:12, B:11, Ch:9, I:9, W:11, Q:9
+1 Willpower
Orcs
S:12, B:14, Ch:8, I:8, W:9, Q:9
+1 Body
Trolls
S:16, B:17, Ch:6, I:6, W:9, Q:8
+1 Body, Strength
Finally you can customize the look of your character - select the portrait, clothes, hair color and beard.
New player can use the so called Archetypes, some character development schematics prepared by the game developers. The specialization of each character (as it was designed) has been marked in them, it makes the Karma points distribution much easier. If you decide that none of the schematics suits you, you can create your own - by doing so you will receive more Karma points for the first distribution. If you need help with distributing the points for a character not related to any archetype, check the next chapter called Attributes and skills, where the possible character development parts have been described. If you pick an archetype, most of the points will be distributed automatically, you will have only 5 of them to spend (or, in case of human race - 8).
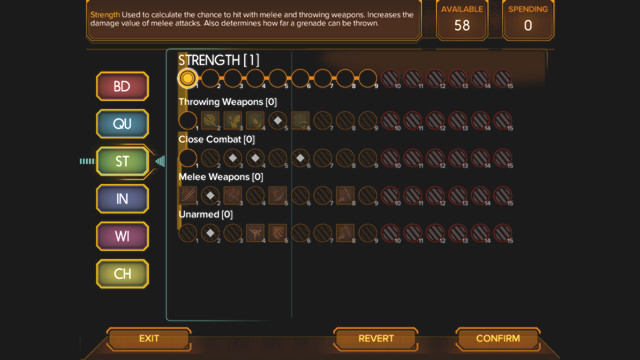 Karma points distribution window
In this chapter you will read about the available attributes and skills. Both of them are developed with the Karma points and are related to each other. You can't develop some attributes or skills until you develop the basic attribute (for example, you can't develop using the handgun until you increase your ranged weapons attribute, which depends on the quickness attribute). Some attributes intertwines each other: after distributing few points to an attribute you will be able to buy a skill related to that attribute in the next development field.
Important: As in each turn based game, there are the so called Action Points (AP). Quickness or any other attribute doesn't affect the amount of the AP! They can be increased only by using active skills/spells, and after completing 9 quests you and all your companions will automatically receive +1 AP permanently.
Each body point adds 10 health points. Because of that, it is wise to distribute here at least a few redundant points. Additionally, the body development affects the Cyberware Affinity skill - you can develop it as much as the body attribute. The mentioned skill determines which Cyberware class you can "install in yourself".
Quickness defines two skills: Dodge and Ranged Weapons. The attribute itself also affects your accuracy and is making it harder for the enemy to hit you. Ranged weapons affect the weapon accuracy. Other skills related to specific weapon types also spreads from it: rifles, shotguns, handguns, SMG. Developing them might also increase accuracy, but mostly it will add active skills used when shooting from a weapon during a turn.
Strength is an attribute opposite to the quickness. If you don't intend to fight from close distance - ignore it. You can, if need be, spend some points on Throwing Weapons, it will increase your effectiveness in using, for example, grenades. As mentioned above: strength determines the accuracy in close combat. Two skills spread from it: Throwing Weapons, including grenades and throwing knives; and Close Combat. This one determines the accuracy when fighting with a melee weapon or bare hands. Developing these two skills will improve the active skills used during battle.
Obviously, willpower is related to magic. It determines the development of two sub attributes: Spellcasting and Qi Casting, which differ slightly in the type of casted spells. Additionally, willpower increases your resistance to enemy spells and increases the chance of hitting the enemy with a spell.
Intelligence is a pretty specific group. Developing it only increases attack accuracy in the Matrix. It is required for developing the following skills: Decking, Drone Control, Biotech and ESP Control. Decking allows buying new Cyberdecks and gives and improves the targeting skill. Drone Control allows buying your own drone and controlling him so that he fights instead of you. Linked to that is the Drone Combat that permanently increases the statistics of all your drones. Biotech is useful during many conversations. Developing it too much is not recommended - it allows to slightly increase your combat parameters with the first aid kids - but on second level you will receive a very useful skill that allows you to see the health of your enemies. The last skill, ESP Control, improves the expert programs in the Matrix (in other words, it improves the summoning of programs-companions that help you in combat).
Charisma is a negotiating ability. Each two points you can select an etiquette which allows you to use various dialogue option and often obtain interesting ways of solving a quest. Main character should have at least 2-3 etiquettes. Additionally, it determines the development of two skills: Conjuring, which is another type of magic, based more on the surroundings, and Spirit Summoning - during almost every harder battle there are special points placed on the arena from which you can summon spirits of the elementals. Develop this skill and they will help you in combat. You can also, after obtaining the third development point, summon totems which, depending on your choice, have various effects on a specific territory (buffs/debuffs). After learning Spirit Summoning you can also invest points in Spirit Control which increases the ability of capturing spirits.
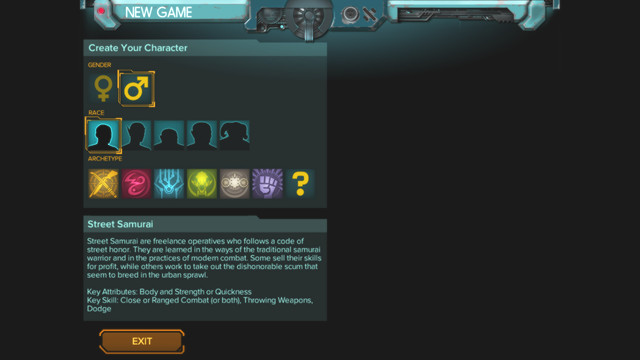 If you can't create a character that suits you by your own, use one of the prepared archetypes
Most of all, your character should suit your game style. There are so much character development possibilities that everyone should find something for themselves. Each quest can be completed in many ways: usually its diplomacy (character and etiquettes), combat (using weapons and melee combat/magic) or hacking (decking). It is a good idea to connect any combat ability (your character should be able to do something productive on the battlefield) with a specialized character skill. For example, developing deck skill will reward you with a special skill that increases your party members' accuracy. You can't be a specialist in everything, but sometimes it is unwise to waste points on skills you don't need. Check which companions you can add to your party - maybe you shouldn't give your character the same attributes and skills as the ones possessed by another party member?
Hacking is a part of each installment of the Shadowrun series. By using terminals you can hack into the net (Matrix) where the character performs independent turns. Hacking is usually one of the ways of completing quests, from inside the Matrix you can unlock various passages, bypass security, and collect valuable intelligence, which can later be sold on the market. After hacking, the character (or companion) has different attributes and skills (computer programs) and he must reach marked locations undetected. Active guards can be found in some rooms (they will always see and attack you), you will have to defeat them. Later in the game enemy hackers will be fighting you as well.
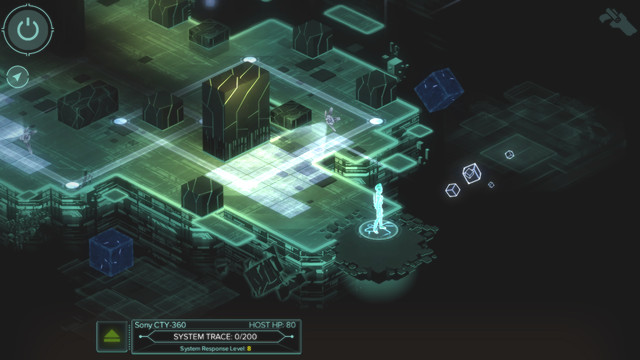 Matrix
A person that hacks into the Matrix is called a Decker in the game world. The attribute with the same name determines many things related to hacking, mostly whether you will be able to hack through a specific terminal. Additionally, that skill allows you to buy better equipment (Cyberdeck).
When you're inside the Matrix, you can leave it anytime you want (if the alarm isn't active) by pressing the green arrow button on the HUD. The basic objective is reaching the places with data while not being seen by patrolling programs. If such application detects you, you must kill it quickly (luckily, they can't retaliate). If you defeat it before another one sees you, you can quickly hide behind a pillar or outside the enemy sight radius.
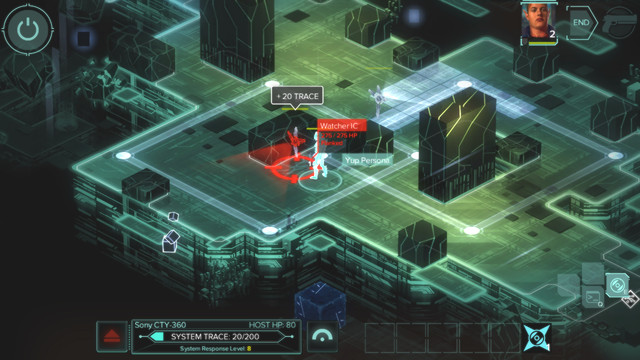 Being spotted doesn't activate the alarm immediately, it only increases the "System trace" indicator
Each time you are detected by the enemy the "system tracking" indicator in the bottom left corner of the screen increases. If it's full, "special forces" will arrive and you can't leave the Matrix anymore - not until either you or they die. In some quests in which the alarm can be activated, if it is turned on in the Matrix, it will also be active in the reality.
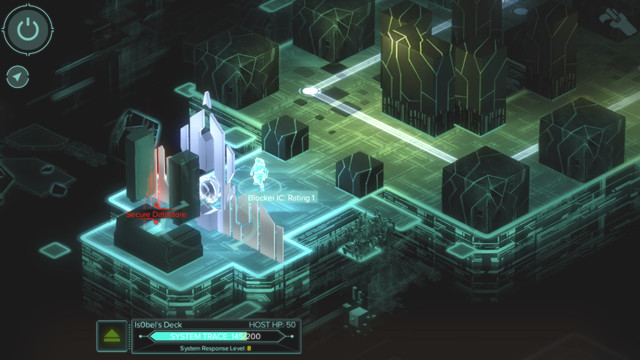 The barrier - data is located behind it
Once you reach the data in the system, you will see that it is protected by a gate with varying security difficulty level - the better the Decker is, the easier it should be for him to handle it. In the end, however, it all depends on the player. The whole minigame starts with repeating the sequence of digits appearing on the screen. If you succeed, you will increase the amount of available time for the next phase of the task. Once you ready, press "next" - in the next phase characters will appear in the upper part of the screen.
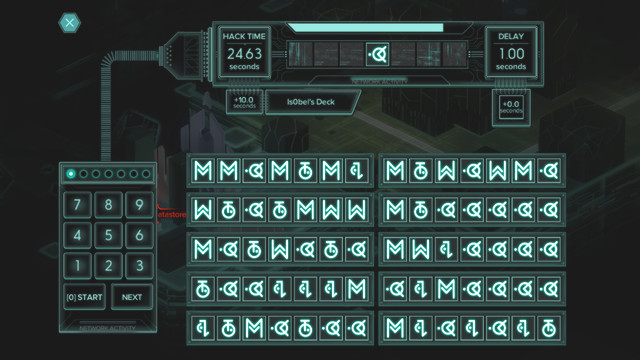 In the upper part you will notice elements that must be found in one of the sequences shown below
In the sequences below you must find the pattern that consists of the same signs as above, placed in the same spots. If you find the proper pattern, you win. If you select a wrong one - you lose. It mostly depends on the time limit, which can be increased by buying a better Cyberdeck.
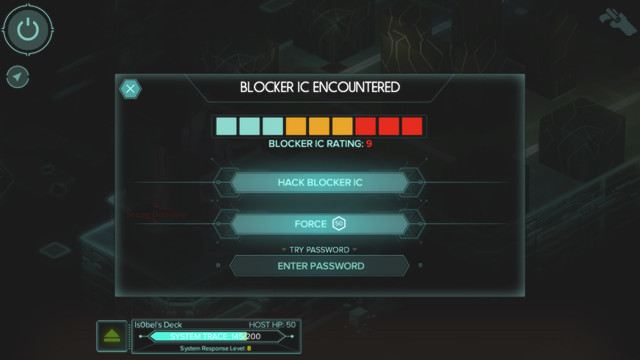 Security breaking method selecting screen
You can get through the barriers in another way as well (the so called "force" way) - in that case you don't have to solve the minigame. However, the "tracking" indicator will greatly increase (usually by around 50, the amount is always shown on the screen). In some cases you will also have a chance to enter the password and thus bypass the security.
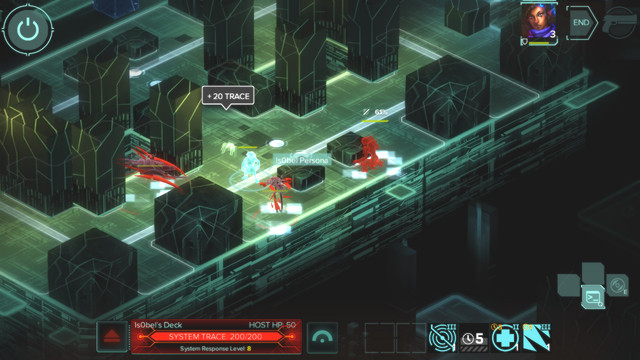 Active alarm will summon reinforcements
In case of failure in the Matrix, you lose part of your health and your character might be stunned for a while. If you try to enter the Matrix again (with the same or another character), the alarm will remain active, and all the undestroyed programs will remain on their positions.
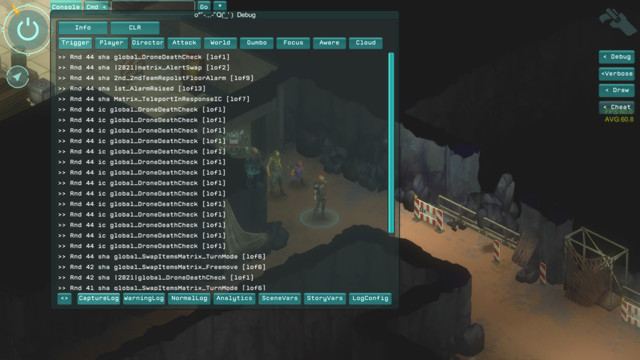 The Debug Mode Console
While playing the game you may activate the Debug Mode Console by pressing Alt+~. This Console allows you to enter a lot of cheats which will make your adventure easier. Some cheats require you to insert a specific quantity where we inserted the <x> marks. To do so just write a desired amount after the space.
Commend
Effect
setHP <x>
Set <x> amount of Hit Points for your hero.
addAP <x>
Set <x> amount of Action Points for your hero.
addKarma <x>
Set <x> amount of Karma for your hero.
restoreAP
Restore your basic Action Points.
slaughter <x>
Kill all enemies in a circle with <x> radius.
deathray
Kill every enemy in sight.
stunray
Stun every enemy in sight.
suicide
Your hero dies.
endturn
Your team's turn comes to an end.
refreshHiring
Regenerates random mercenaries.
toggleGodMode
Your hero becomes superfast, deals more damage and can't be killed.
toggleNeverMiss
Your every melee or range attack will hit it's target.
There are three companion quests available in this game and you may unlock them during the conversations made with them. These questions are related to Gobbet, Is0bel and - if you haven't killed him during the Outsider quest - Gaichu. You may begin these quests after the prologue as well as before the last series of main quests, in other words - you need to complete them before the Prosperity Tower quest. If you want to talk to your allies after some mission you may not find them in the places on the ship they should be. In this case speak to Kindly Cheng first and after that you will find your crew in right spots.
Kai Tak hosts the trade fairs. You may visit a big hall in which you may talk with a lot of people well oriented in new technologies. You may also try to pickpocket some Deckers or buy some nice decking equipment from a local dealer. Your main task is to find Rhombus who has been seen on the second floor of this area. Beside this main quest which you may complete in various ways there are no additional quests or any interesting or valuable items to find.
Tasks: Find a disguise. Find Rhombus. Is0bel must survive
Useful abilities: label Corporate/Socialite
Difficulty: Easy
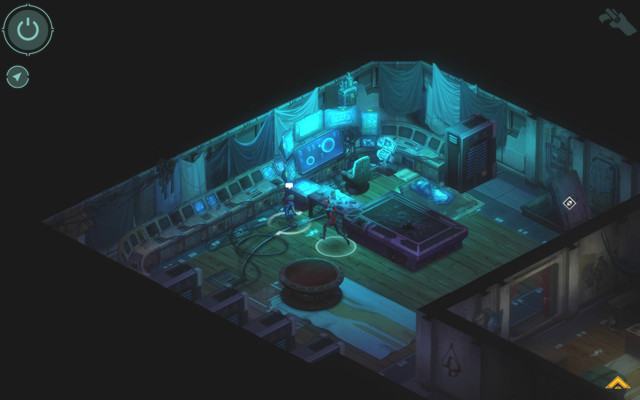 Is0bel on the ship
To unlock this quest you need to speak to Is0bel on the ship in Heoi when you have some spare time between the main missions. She is on the upper deck of the ship. Keep selecting the first dialogue option and she will send you an e-mail which will begin the quest. Once you'll take it you may go to a metro station and select a new area. Remember that you may take only two people with you and one of them has to be Is0bel.
The first thing to do is to find a disguise (M13,3). There are few ways to accomplish that:
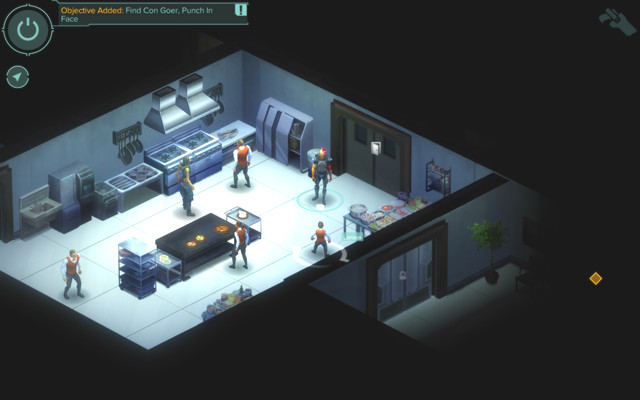 One of the cooks, Larrisa
The fourth option is very easy. Go to the exit door in the kitchen. One of the cooks, Larissa, will speak to you and offer you a disguise if you will punch a guy from her in the face. She will open the door right now and you have to find this guy in the western part of the hall of the Convention Goer.
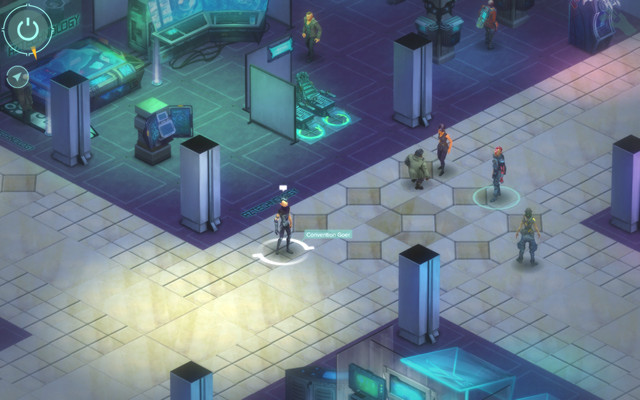 Convention Gorn
If you want to be nice you may talk with him and convince him to pretend that you have really punched or may just do it. Larissa will believe beside of what you will choose and she will unlock the door for you where you will find a locker (M13,3) with the disguise for Is0bel.
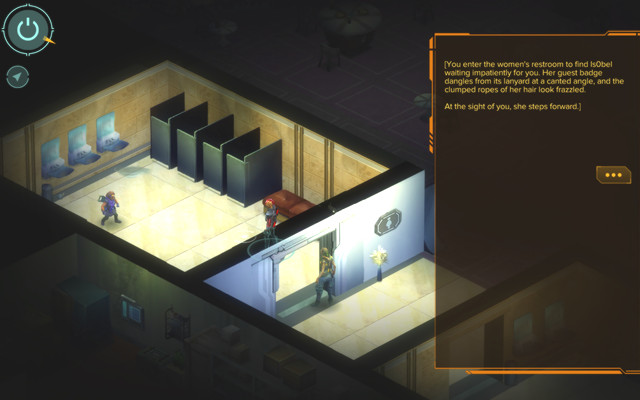 During the quest you may find Is0bel in this toilet
You may find Is0bel in the ladies room in the western part of the hall, next to the entrance to the kitchen. She will order you to wait some time. To kill some time just walk around and talk with some people until your ally will contact you.
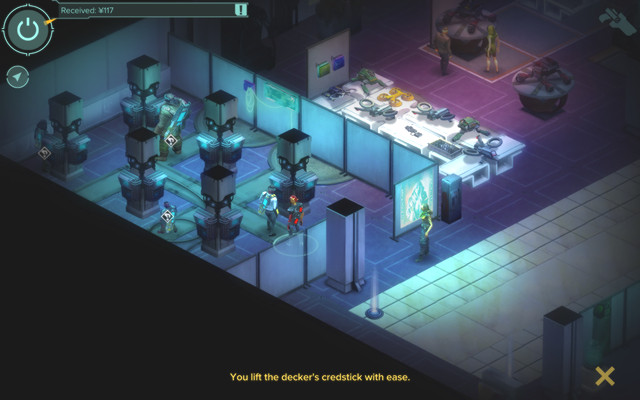 Nobody will notice if you will try to pickpocket any Decker
You may use this time to get to the north-western corner where you may find a guard. You may talk with him and use Body [7], Decking [6] label Gang, Shadowruner, Socialite, Security or Corporate to get inside. You may pickpocket the Deckers there for about 300 yens.
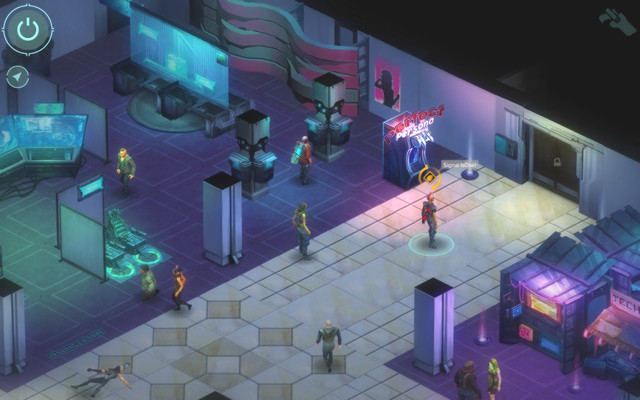 You may contact with Is0bel from kiosk
Talk with about three people and you will receive a signal from Is0bel. You may head to the kiosk (M13,4) from where you can contact her. You will hear the process of capturing Is0bel by security (M13,6) no matter which dialogue option you are going to select. Go to the marked area through a corridor and get to the elevator (M13,7). Every locked door are impenetrable so you may basically ignore them. A man in the elevator will also not be a thread however you are going to have a long talk.
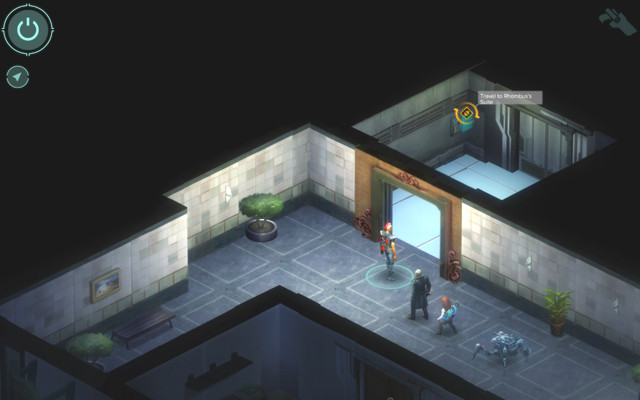 The elevator to the highest floor
You will find now a little obstacle called security. You may try to make chill them down if you will keep choosing the first dialogue option. Choosing the last dialogue options will allow you to help a troll female however you will be forced to fight few guards. Is0bel and troll will defeat two guards and you need to take care of the other two. Releasing the troll will not result in any sign of her gratitude. After all this action you may head toward the elevator (M13,5) at the end of the road.
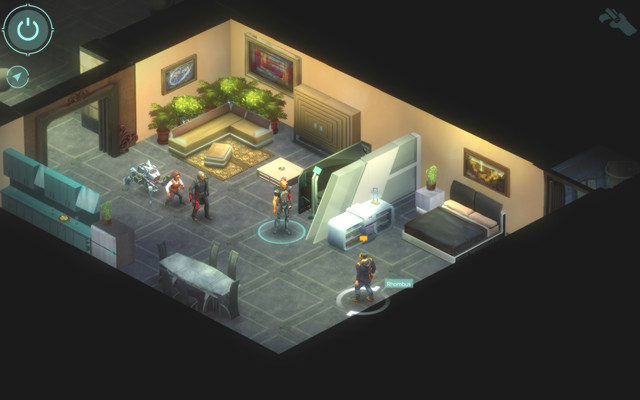 Rhombus in his room
In the last room you will find your target named Rhombus. You will complete your task after a small dialogue. Go to the elevator (M13,8) where you will find four hostile guards. You are forced to fight them no matter what. After the fight go to the elevator which will take you to Heoi. You will receive 8 Karma but no money to that.
Tolo Harbour is a small area with a construction site and a laboratory. Your task is to steal the robot prototype and to defeat the red ninjas. It is fairly easy quest and you are not going to find any interesting equipment beside medications. However you may both steal some precious data from Matrix and prepare an ambush on the second floor to make your job easier if your character level will be really low.
Task: Find a drone prototype. Gaichu must survive
Useful abilities: combat; optional Decking [1], Drone Control [4], a drone
Difficulty level: Easy
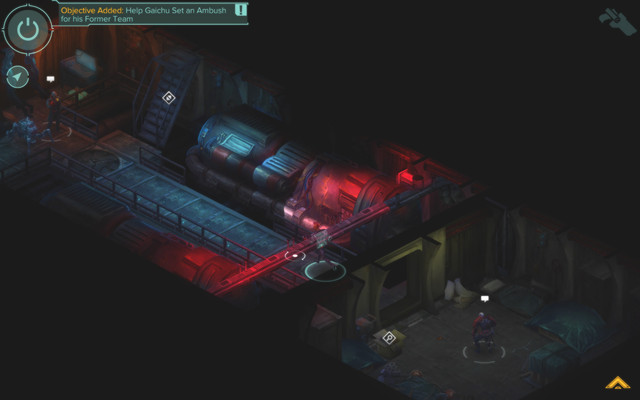 You will find Gaichu on the bottom of your ship
The next companion quest is related to Gaichu but only if you will invite him to your team during the Outsider mission in Whampoa Garden. He is on the bottom of your ship. If you want to unlock his quest you have to talk with him about his past three times. Fortunately you may do this during one long run just initiating new conversation once you'll be finished with other one. For this mission you have to team up with Gaichu and you may also invite two other allies.
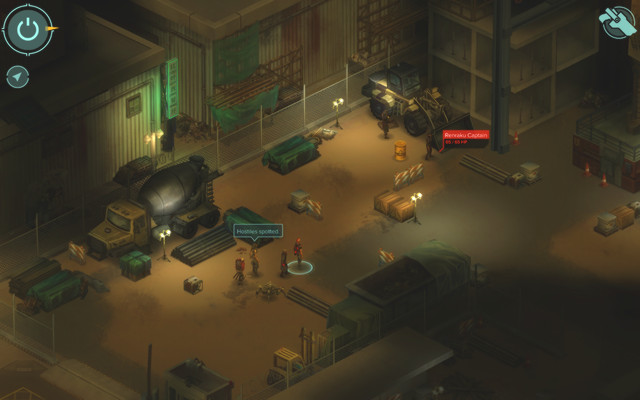 You can't avoid a battle with the guards
Go to the metro station and take a ride to Tolo Harbour. Enter the construction site where you will find four enemies which you have to take care of. It will also turn on the alarm however there is no other way. After the battle go to the entrance to the building (M14,2).
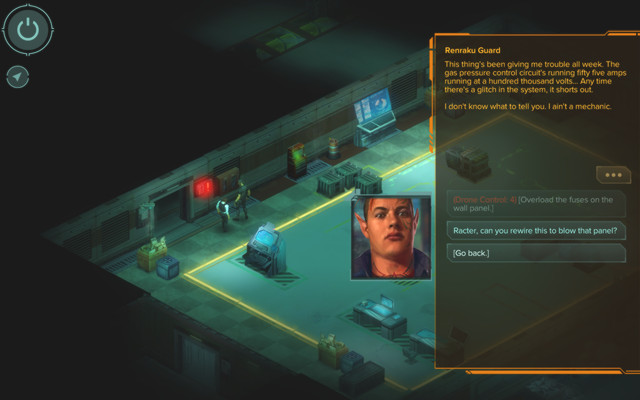 Use the terminal outside to hurt the two guards from the lab
Before entering the building you may use the terminal (M14,3) left of the door. It will allow you to see the building's interior and two guards. You may "damage them" a little bit if you have Drone Control [4] or Racter in your squad. It will detonate an electrical box. Enter the building and finish the guards off. Another two guards are behind the wall on your left and on your right.
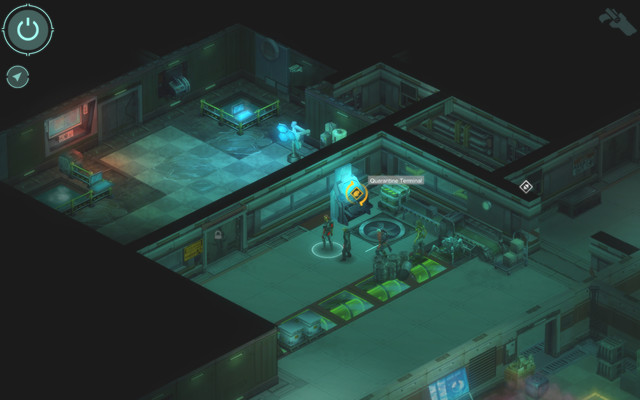 A quarantine terminal
Go through the double door ahead of you. You will find the drone prototype (M14,5) and a doctor. You may listen to Gaichu and let him go or kill him where he stands. Your second target is to prepare an ambush in the quarantine room. You need to just focus on the terminal (M14,8) in the north-west of the hall and just activate it. However it will turn on yet another alarm and you will have only two turns before the appearance of the reinforcements.
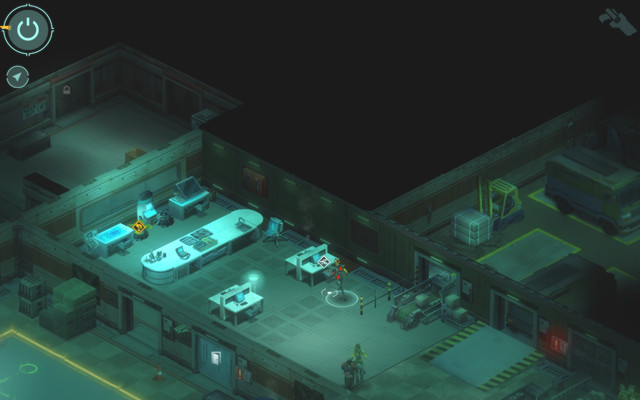 Terminal with the Matrix access
You may also make your job easier by hacking the terminal (M14,6) in the doctor's room (Decking [1]) to download some valuable data and to activate an elevator (M14,7) to bring the explosive barrels on the second floor. During your two free turns you may spread your team in a way that will allow you to hide yourself during the attack behind the covers. If you will both defend yourself and use the elevator you will receive 1 Karma.
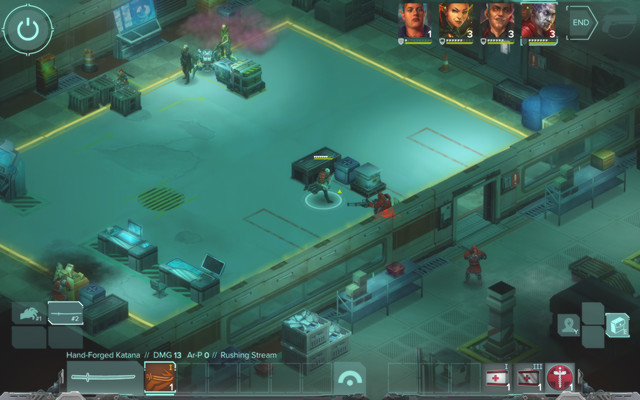 Defeat the rest of the samurais
Three samurais will appear. One of them will be next to the main entrance and another two will come from the south however these two do not like the melee combat. One of them has a hand cannon and he should be your first target. After defeating the samurais you may speak to their injured captain. You may finish him off if you want. Return to the elevator and which will send you back to Heoi.
For completing this quest you will receive 8 Karma however if you have also took a prototype drone with yourself you will get 1500 yens as well.
Hung Hom Bay is a forgotten area where a half-sunken ship is a shelter for the homeless. Since Gobbet has friends here, he will take you here during his companion quest. The ruler of this place is the Rat King whom you need to defeat. During this mission you will mostly fight and talk and you are not going to find any valuable items. You may see on the map above mostly names of the important NPCs you may talk with to complete your job and the side quests.
Tasks: Find Gobbet. Get to the lower deck.
Useful abilities: combat; optional: etiquette Shadowruner/Biotech [5], Decking [1]
Difficulty: Medium
Beginning this quest is pretty difficult. First you have to talk with Gobbet about four times collecting as many information from her as you can. You will find her on the upper deck of the ship in Heoi. After that take her with you for your next mission and after completing it go to her room when you will be called by Is0bel who will tell you that Gobbet is not around. Go to the port where you may find captain Jomo who will take you to another area. Only Is0bel may go with you.
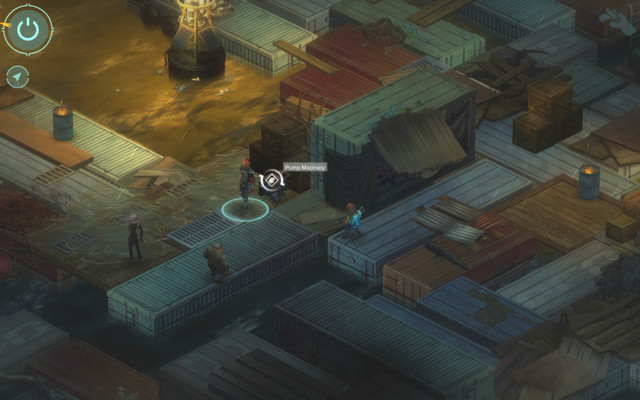 The pump machinery
At the beginning you will face five rats; however, during the fight you will be supported by the people from the ship. After a short conversation, follow two strangers toward the South. You will be able to use the pump (to repair it you need to use Intelligence [7] or Is0bel's skill). Five new rats will appear. Go under the deck (M15,2).
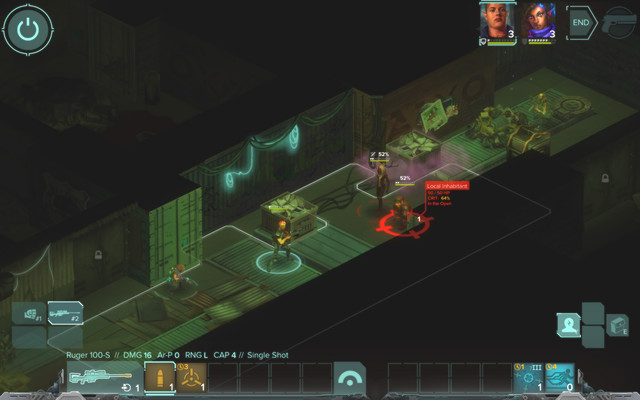 Your new allies are traitors
Follow your two new friends. You don't need to talk with them since the conversation will give you completely nothing. At the end of the corridor you will find out that they want to betray you. Gobbet will also show up and together you need to kill just one of the traitors since the second one will surrender right after this (yet you still may kill him during the dialogue).
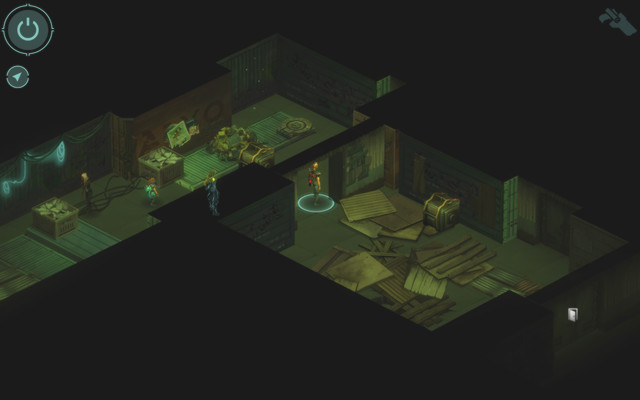 The trapped room
Warning - Gobbet will stop you behind the next door and will ask you to never go further since the floor will surely collapse and kill you all (M15,4). Go only as deep into the room as you need to be stopped by the dialogue. It is important since it gives you new dialogue options later on.
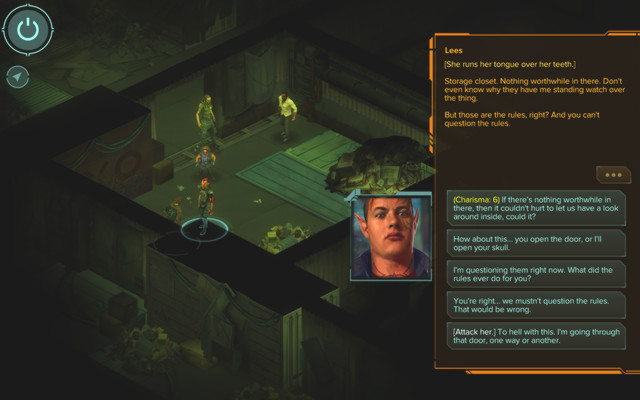 One of your dialogue options will allow you to convince Lees to cooperate
Now you need to get to Cadmus. Even though it is an optional quest, you need to take care of it if you want to find out about how to disarm the trap blocking the path to the lower level. He is behind the door in the South-West corner. To find him you may choose between:
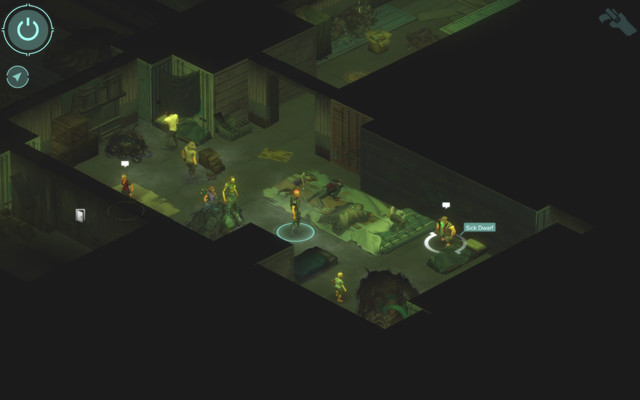 Cadmus
Speaking with Cadmusa will allow you to unlock two side quests: sink the ship and organize a rebellion. Return to Yasmin who was responsible for making the ship's defense system. You will receive the instructions needed to disarm the trap. Go to the trapped room and interact with the only machine in your range (M15,4). The path to the lower deck (M15,5) is now clear.
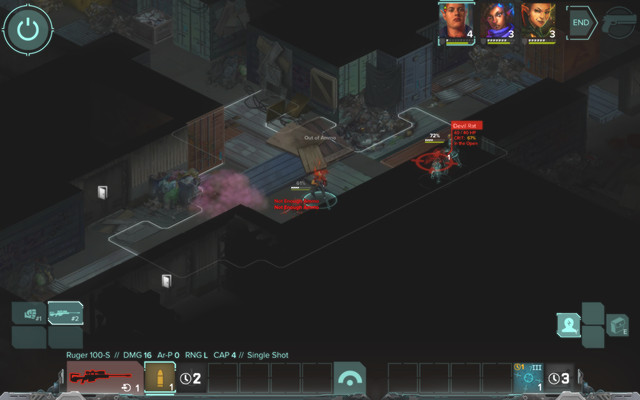 Start with defeating few rats in the corridor
Get on the lower deck and go to the room in the north-eastern room (M15,6). You will find Malvina who is the Rat King. On your way you will also find 5 rats.
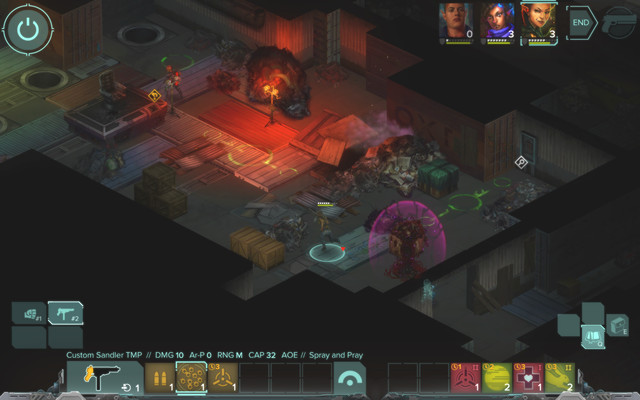
You have to kill her; however, if you take half of her health bar down, she will summon the reinforcements (three mutated rats) and Rat King will hid herself behind a magic barrier which makes her immune to your attacks. Take Gobbet to the desk and take an item (M15,10) from it. One turn later you will be able to destroy the barrier and defeat the boss. After the fight you will return to Heoi and receive 8 Karma.
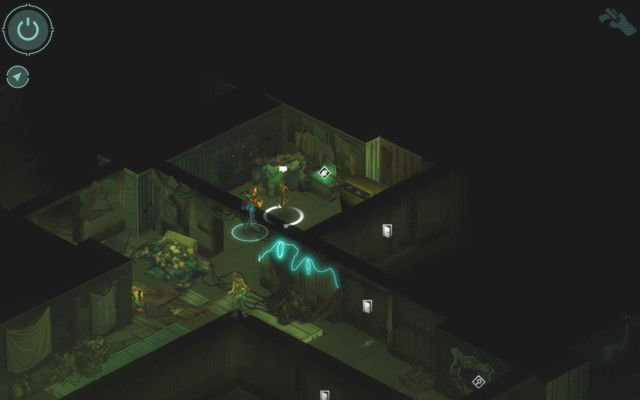 Yasmin
You may unlock this quest during the conversation with Cadmus. You have to speak and convince three inhabitants of this area to organize a rebellion. The first person you may speak to is Yasmin who you need to find anyway to talk about a trap.
The second person may be Sparrow who lives right next to Yasmin. He needs to be healed first (you may use Gobbet's magic to save your equipment) but after that he also needs something more powerful like an Advanced Medpack or a Shamanic Salve. In return he will join the rebellion.
The next person is Mercurio. You need to use etiquette Socialite or Strength [6] or 500 yens. However, if you talked to Cadmus about sinking the ship, you may use the last dialogue option that will also convince Mercurio. You may also talk to Ivan Fu in the northern corridor. Melee Weapon [6] or etiquette Shadowruner/Biotech [5] will convince him as well.
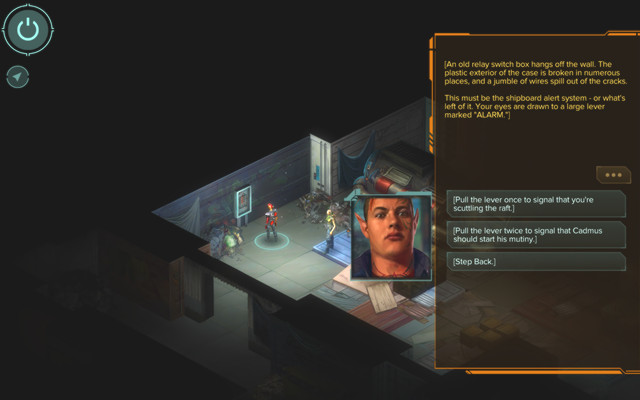 One of the communicators
The last thing you need to do is to use the communicator (M15,7) to give everyone an order to begin. As a reward you will receive 1 Karma.
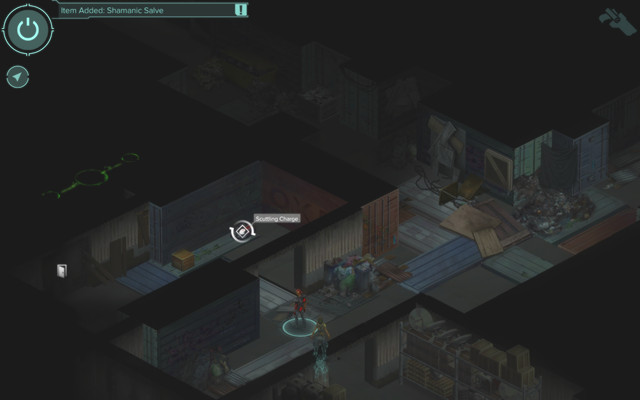 Interact with the explosives to arm them
You may unlock this quest during the conversation with Cadmus. When you will get downstairs you will see the explosives (M15,8) located in four rooms. The last of them is in the room of the Rat King.
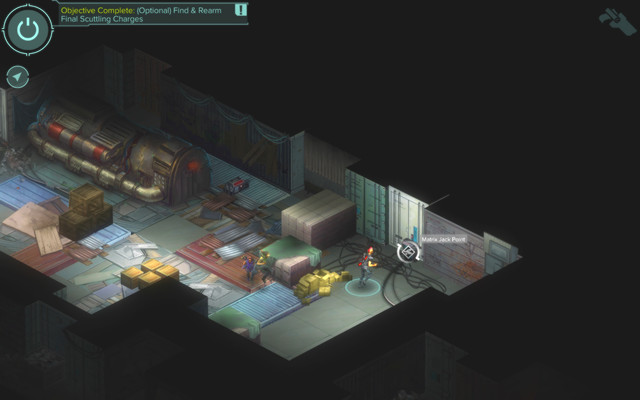 The terminal in the last room
After activating all of them you may get to the room in the north-east. You will find here a terminal (M15,11) which you may activate in the Matrix to arm the explosives. Three rats will attack you assisted by the Rat King who will be undefeatable at the moment. Use simultaneously the newly opened path to escape.
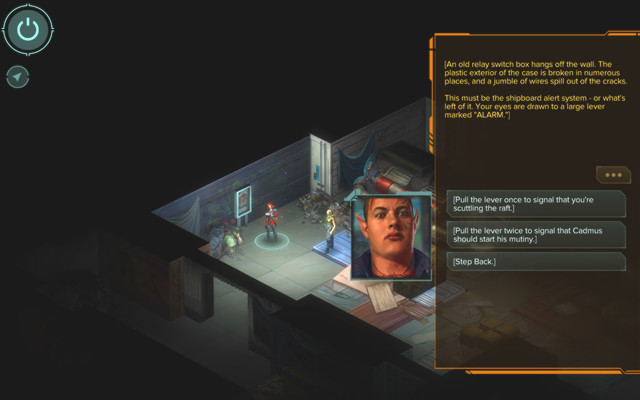 Use the communicator to inform the residents about your actions
Before leaving the ship you may use the communicator (M15,7) to tell people about the explosive or order them to initiate the rebellion what will kill them all. It will not influence the quest but informing people will result in 1 Karma.
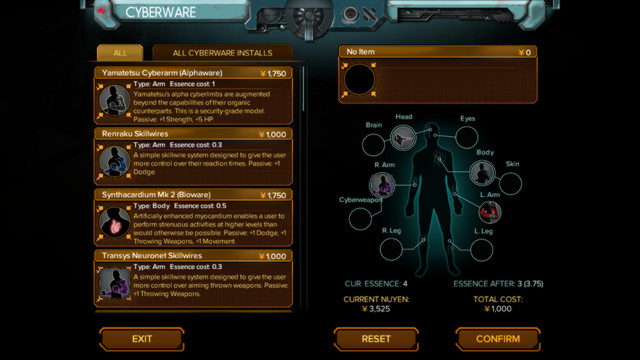 Purchase window and the current Cyberware state
Cyberware is the name of the special equipment that you can buy after you complete the prologue. Regardless of the character that you have created, thanks to cyberware you can upgrade him with the sufficient amount of Yens. Upgrades can be applied, removed and replaced, buy you will not be refunded, then. Limb elements are independent of the actual limbs, i.e. an arm or a leg upgrade can be used on either the left or the right limb. Using better upgrades, apart from more cash, also requires preparations of the character - by increasing Cyberware Affinity. Cyberware may be both passive and activated (e.g. laser targeting). There are some limitations to the gear - the, so-called, Essence is limited by the level of your Cyberware Affinity. It decreases magic abilities, which is why characters with magical affinity should keep the limit of mechanical add-ons down to a reasonable level. Each element uses up a certain amount of the Essence, depending on the advancement of the part, and it cannot drop below 1. In some forms, Cyberware may have some special functions (e.g. automatic deflection of the enemy grenades), where the basic ones are Smartlink and Datajack, described below.
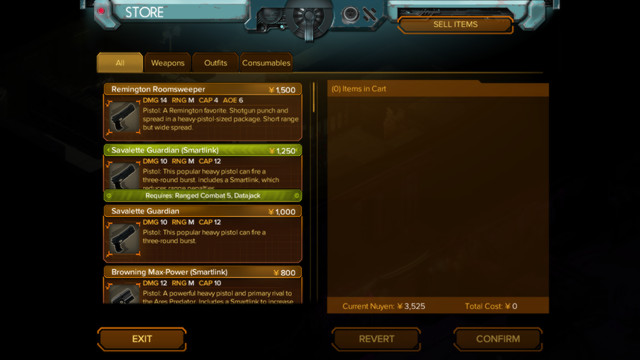 Weapons that use the Smartlink system
Smartlink is a special system that binds the weapon to its user. This requires special Cyberware and the weapon that supports such a technology (the name of the weapon is supplied with the "Smartlink" note provided in parentheses). Why is it a good idea to use this system? Because it improves the weapon's effectiveness - chances of a hit and a critical hit.
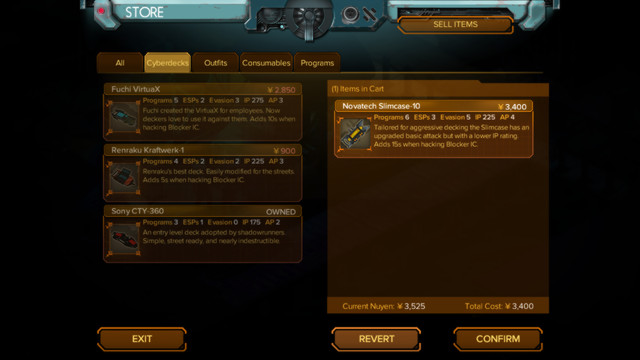 Cyberdeck is available from the shop - the price depends on the model
Cyberdeck. Is a device that requires a Datajack to be equipped, which makes it possible to hack into the Matrix. Each individual version provides a different number of seconds for hacking. However, to buy better equipment, you need to develop your Decking. You can buy it from the Maximum Law merchant in Heoi, after you have completed the prologue.
Datajack - this is the compulsory Cyberware for each Decker. Without this, you cannot use the Cyberdeck and thus, you cannot hack into the system. Fortunately, this piece of equipment is affordable and you only need to buy it once. Also, it does not use up, nor can it be destroyed.
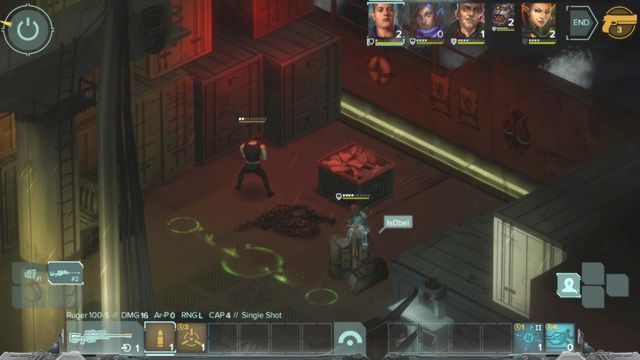 In spite of close proximity, the guard has remained oblivious to your presence...
In the game, there is no individual sneaking skill that you would develop or activate. In spite of that, there is a certain mechanics that has been implemented, which affects the opponent's ability to spot you - if he is turned away from you, you can easily walk past without raising any suspicion.
Yes, it is. And it is neither difficult nor time consuming. You simply need to access the game folder and find the "portraits" subfolder, which includes portraits for all the characters. You simply need to swap the file, while retaining the name and the parameters of the picture itself (extension and resolution). The default path is:
C:\Program Files (x86)\Steam\steamapps\common\Shadowrun Hong Kong\SRHK_Data\StreamingAssets\ContentPacks\HongKong\art\portraits
After you complete the linear prologue, you will be allowed to access the "freelancer" mode. Thanks to this, you can pick your mission, basing on the information in the guide (skills, difficulty level, reward). You download missions onto your computer in any order that you want. Each time, you start in a different location, which is why you cannot start multiple missions at a time. You need to watch out and read e-mails, not only messages on your missions - often, messages include hints and they can start individual missions (especially the ones that are more relevant to the plot).
It is recommended that each time you complete a mission, you consider the distribution of skill points for your character. If you are not going to use the guide too often, it is a good idea to leave several points out, if there is no pressure on you to allot them to a specific skill. You can distribute them only after you have gotten yourself into a specific situation that requires a specific skill (e.g. Decking or higher Strength). However, this method is not 100% proof because, when it comes to dialogues, you usually can use a specific skill (Etiquette or Charisma) only by handling the conversation in a specific way and you cannot return there during another conversation.
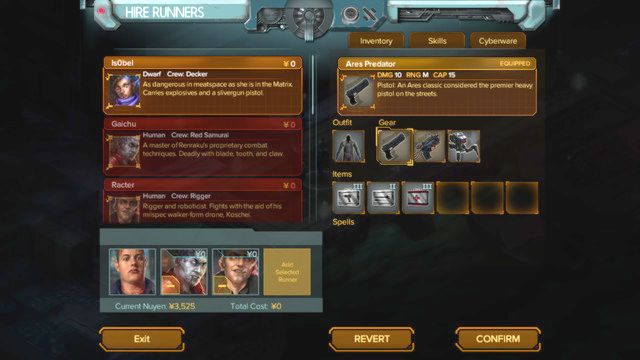 Each time before you start a mission, you can select your party members (up to 3)
After you have completed the prologue, you can pick your company. The ones that you already know (Duncan, Is0bel, Gobbet, Racter) are available for free, but their parameters are much lower, and they have inferior equipment, if compared to the paid mercenaries. Paying someone to go on a job with you ensures more variety when it comes to specializations. However, you need to be careful here - an average pay of a mercenary is 450 Yen, which is quite steep a price.
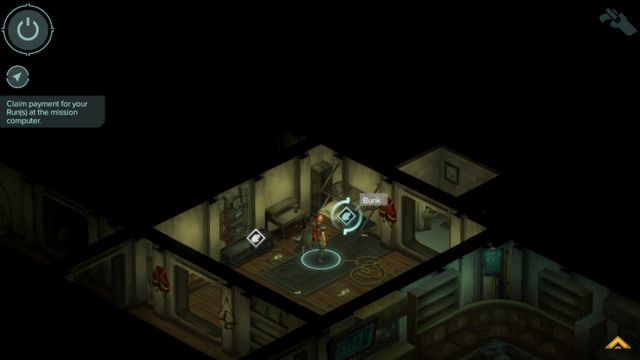 There is a "comfortable" bed in your HQ
Each time you complete a mission, you receive your reward and Karma points. The number of Karma points is always the same, regardless of the actions that you have taken to complete the mission. Only if it says in the guide that after you complete a mission, you receive Karma points - they are assigned immediately and they do not affect the amount of points that you receive after you complete the mission. Rewards may always vary. Most frequently, it is not affected by the decision that you have taken on completing the mission, but rather has to do with completing the side missions.
Each time you complete a mission, you can enter certain interactions in Hanoi, with NPCs that appear occasionally. Usually, these are simple conversations only or information about the storyline (they do not affect the storyline itself). What affects the events is the number of missions that you have completed, instead of the order in which you did that. Always after you complete a mission and return to your HQ, you can go to sleep - this is quite important because it affects your ability to choose the ending and unlock achievements, at the same time.
Docks is the starting location of the game. There are no special ways to complete this level - there is only one way for you to follow. However, you are going to have initial encounters here, so it would be good if your character had, at least, a one-point specialization in a weapon, thanks to which you receive it into your inventory. In total, there are three groups of opponents to fight here. Also, this is where you learn the basic mechanics of the game. You do not take any key decisions here and your main objective is to fight your way through the final wave of police units, up to the end of the map. There are three useful items that you may find here, which you can use later during the game.
Objectives: keep your party members alive, go to the randezvous point
Useful skills: Drone Control [2] / Decking [2]
Difficulty: Easy
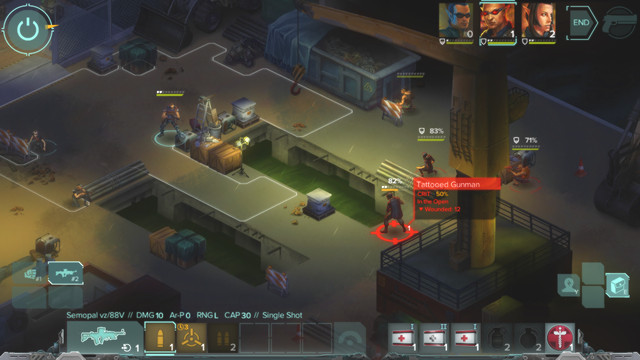 The mission screen - here, you can view your objectives, mission description and the current amount of cash
You start the mission with the conversation at the Docks (M1,1) with your party members, i.e. orc Duncan and elf Carter. Here, you receive a short introduction into the storyline. Your starting weapon has been assigned to you, based on your specialization, which you determined during the character creation process. Also, you receive 1200 yens to make a good start.
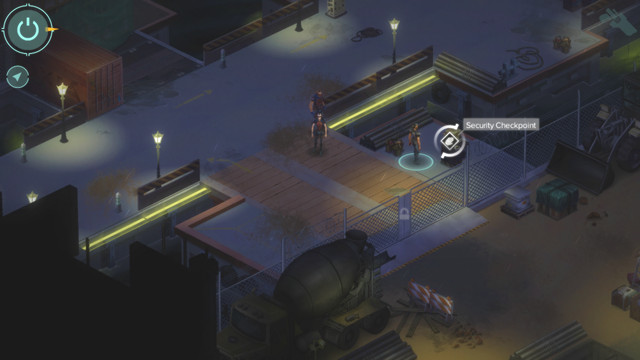 Use the terminal (Security Checkpoint)
Head towards the road end (M1,2), where there is a locked gate and the orange marker of (key) interactions. You need to backtrack a little and use the panel (M1,3), which opens the smaller gate Southwards, along a circular path. To use the terminal, you require Intelligence [3] or higher - this time around, you can do this as Carter.
 Your first fight - remember to take cover as every party member
Right past the passage, you are going to fight four opponents. You can learn how to fight in the chapter entitled Tips and hints. The things you should keep in mind here: there are four opponents, a machine gun, a melee fighter, a shotgun and a mage. It is recommended that you first eliminate the man with the shotgun, which prevents him from wounding several party members in one take. Apart from that, there is no way for you to distribute them properly.
Close to the second gate switch (M1,4) (Northwards, under the light bulb) there is a crate (M1,8) that you can open. Inside, there is Tokko - a substance that temporarily raises Strength.
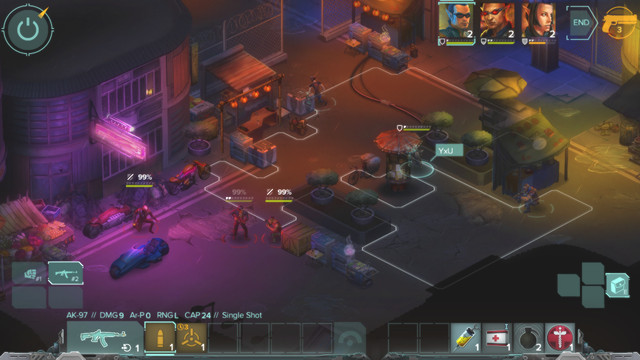 The second fight is optional, but you can come out of it unscathed
Past the gate, you can start another street fight, or ignore it altogether. If you want to mete out justice, plan the arrangement of your party members around the map and attack - if you come too close, you will be spotted and the opponents will attack first. After you have dealt with the opponents you can collect the basic medkit (M1,9) from the red bike that one of the goons stood by.
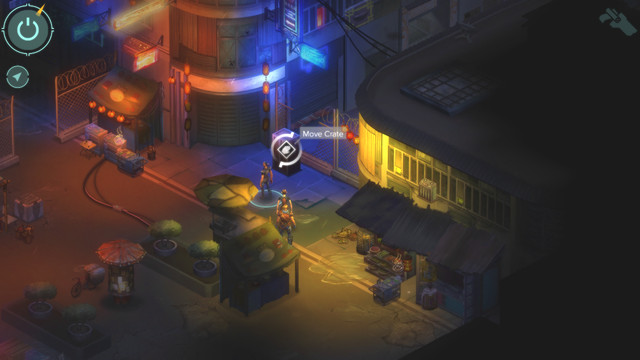 Move the crate in the way
Regardless of whether you have fought or not -continue to move the crate (M1,5) on the right, between buildings. Also, you receive now a Karma point, which you can allot at any moment. If you go right, towards the water, you find ropes there and among them several dozen yens (M1,10).
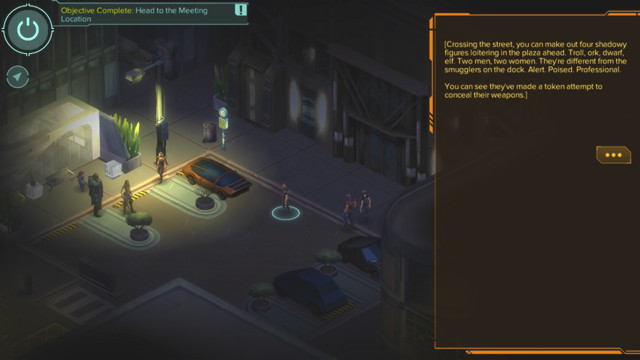 The meeting point- the conversation has no effect on what happens next
Your next objective is to keep everyone alive and make it into the side alley. Go up, where the meeting point (M1,6) - after the conversation, you will have to evacuate with the surviving party members, after the police attack. You should expect two opponents behind the bikes in the street, and also two more from the South.
![The dwarf party member (Is0bel) can interact with the bike (unless you have Decking [2] or Drone Control [2]), to activate two drones, behind the police car with two guards - Hard Landing - main mission - Docks M1 - Shadowrun: Hong Kong - Game Guide and Walkthrough](https://game.lhg100.com/Article/UploadFiles/201512/2015121709324070.jpg)
The dwarf party member (Is0bel) can interact with the bike (unless you have Decking [2] or Drone Control [2]), to activate two drones, behind the police car with two guards. If you use Drone Control, you direct the drones against their operators. Then, continue your chase among covers.
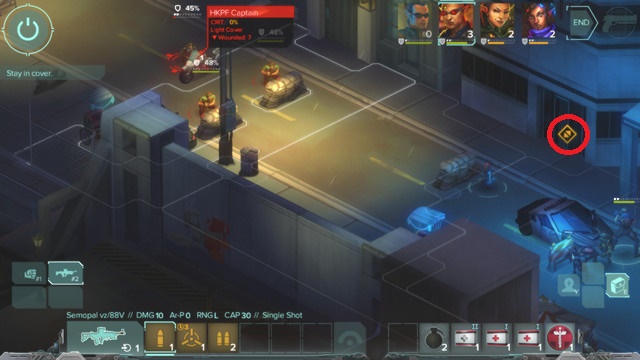 Level exit - it needs to be crossed by every party member
Your objective is to escape the streets (M1,7) as quickly as possible, which is why you can leave out the next three opponents (one of them is a sniper). You need to lead every one of the party members to the exit. Go to the sewers, where you enter a new location, after a short conversation. As of now, you are all on your own with Duncan, because the rest leave.
Objectives: Go to Mahjong Parlor
Useful skills: None
Difficulty: Easy
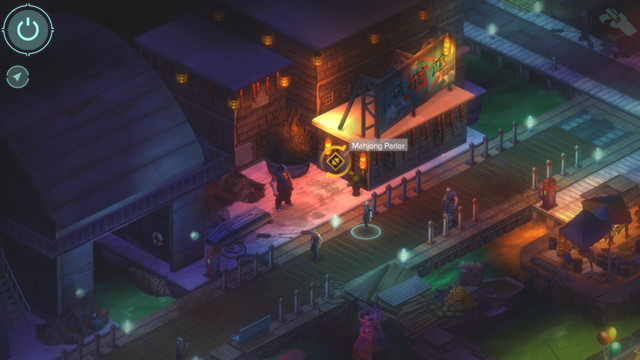 Mahjongg Parlor
Here, you have more objectives to complete. To start with, you receive 5 Karma points for completing the previous location. You can first meet up with the smuggler in the docks. Then, lose no time and go to Mahjong Parlor.
There, you meet Kindly Cheng. She gives you the assignment to locate Strangler Bao in the Walled City. After you accept the mission, you receive 3 Karma points. Go there immediately. After the conversation, head Northwards, close to the spot where you came from (metro station).
 Location exit - the next time around you will use the subway
Before each mission, you can decide who you want to take along. Also, you can manage their equipment and replace the items in their inventory. For this mission, you can only pick one of the girls: Gobbet or Is0bel (Duncan is a compulsory member).
Walled City is the first location, where you complete a mission off your own bat. Still, it is a part of the prologue. For the first time, you can make your decision here, as to the approach to the main mission - aggressive, diplomatic or stealthy. Also, you can take up side missions marked on the map above. It has been marked for interesting objects, hidden passages and NPCs.
Objectives: Deliver the data to Strangler Bao, the party members must survive, kill no Yellow Lotus member (optional)
Useful skills: Charisma [3] and Gang Etiquette; optionally - Decking [3] and Cyberdeck, Shadowrun Etiquette/ Strength [4]. Is0bel recommended as a party member.
Difficulty: Easy
There are three approaches available:
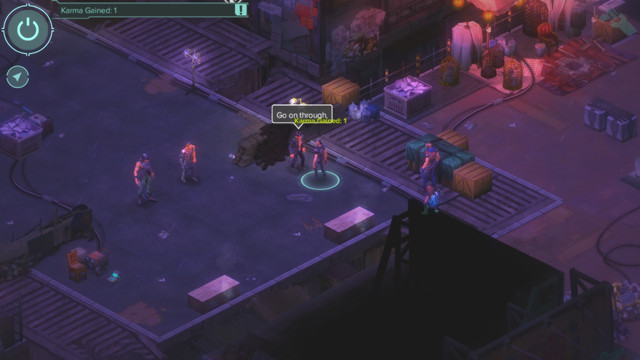 Yellow Lotus Captain
Go North and left, where you spot the Yellow Lotus leader(M2,2). Watch out during the conversation, because if you want to solve the problem of entering the building in an amicable way, you only have one attempt. First, tell him that you are here with a message, then use a special dialogue option that requires Charisma [3], and finally Gang Etiquette. Without these two, you cannot pass without putting up a fight (see below). After the conversation, if you have avoided the fight, you receive 1 Karma point.
Still, if you start a fight, you need to defeat four opponents: one of them is a mage (he can summon a creature), two mobsters and the captain, who is the tougher and has a medkit - deal with him as the last one. Also, keep in mind that they pack grenades, so try to scatter your party members as far away from each other as possible. This is not the end yet, because there are two more guards at Bao's room.
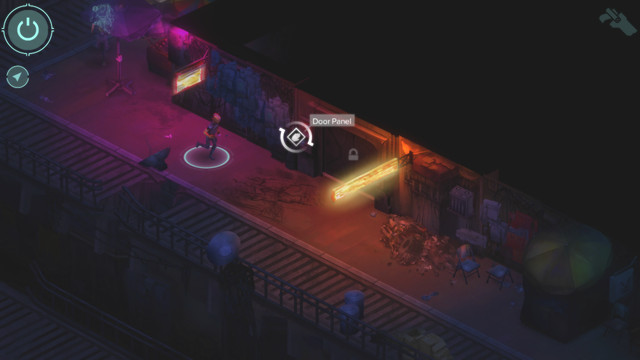 The passage to the terminal and the hidden passage
If you want to get inside without being noticed, you need Decking [3] and Cyberdeck (or have Is0bel on the team). Walk through the door on the lower level (Decking [3] or enter password: 2580) (M2,6) and hack into the terminal - to open the manhole, in the Matrix, head Northwards, past the first passage. To the South, there is the code to Bao's room 7881, and data (Exotic Animal Dealer Contract), which you can sell in the Shadowland BBS market (you soon gain access to the computer) for 270 yens. After you open the manhole, you can use the ladder to get to Bao without being seen.
There is nothing in your way, if you want to hack into the system, regardless of your approach, just for the sake of harvesting data.
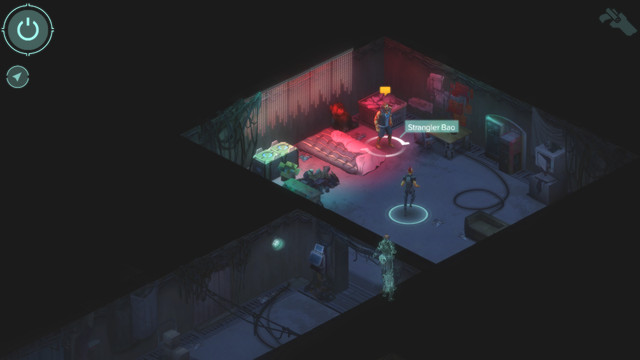 Strangler Bao's room
Enter Bao's room (M2,4) using the code: 7881. If you take an aggressive stance while talking, two more guards will arrive. Return to Heoi using the metro station (M2,5) on the lower level, or where you came from.
After you are back to Heoi, you receive 6 Karma points and after you talk to Kindly - 750 yens.
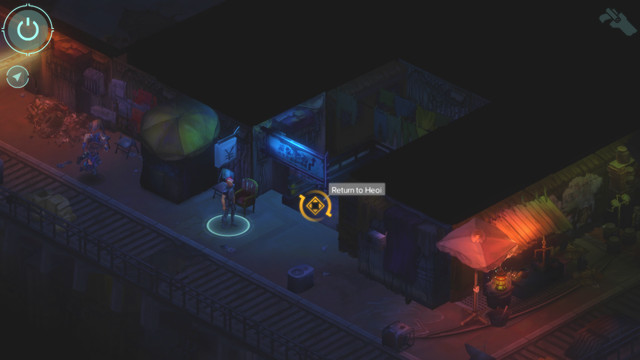 An alternative escape route
After a short conversation in Heoi, you need to board the ship and go to sleep. At this point, several more NPCs appear, but you cannot interact with them. Once the night has passed, return to Kindly. From now on, you can explore the city and trade with local merchants. Return to the ship, where you gain access to the computer, where you pick your missions in the order that you want.
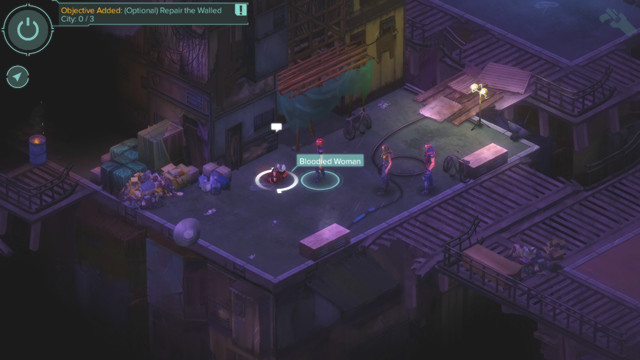 Bloodied Woman
Along your path to Strangler Bao, you notice a woman (Bloodied Woman) (M2,7). If you talk to her, she tasks you with several repairs in Walled City....
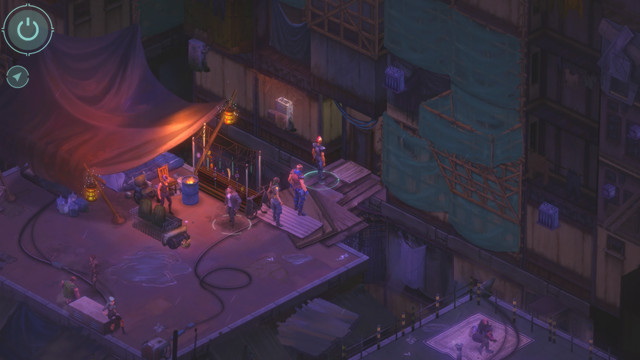 Cables sticking out of the wall
Head Northwards and go right. Past the merchant, you notice sparking cables (M2,8). You can fix that (rip them off the wall), unless you have Intelligence [2] - in which case you can repair this yourself, or ask Is0bel to do that (if she is on your party).
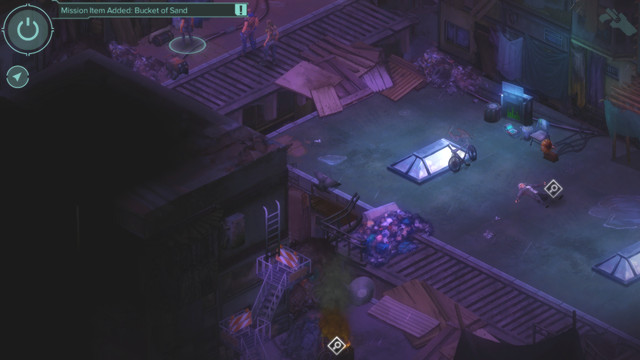 There is sand in the upper part and blazing tires at the bottom
After you go left of the spot where you have spoken to Bao's guards' captain, you notice blazing tires (M2,9). You can put them out with the Bucket of Sand (M2,10) a bit to the North of here.
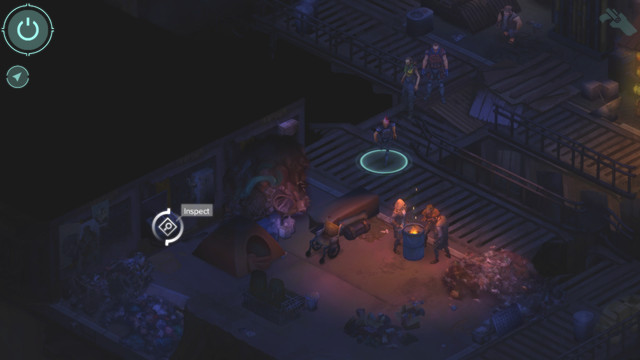 End by closing the valve
The last place of interest is at the bottom level (in the sewers) where, in the Southern corner, you find a valve (M2,11), which you need to turn - this requires Strength [3], but you can just as well ask Duncan to help you out.
For taking all of the actions, you receive 1 Karma point.
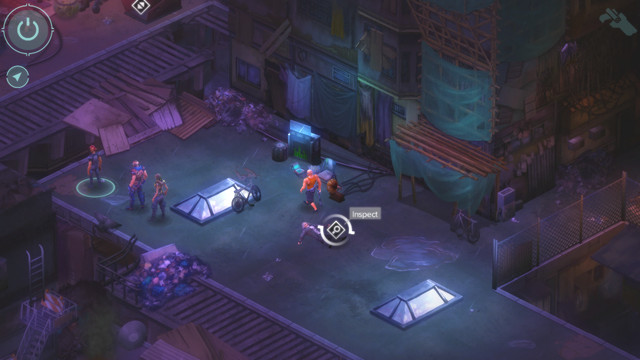 The mugged man - as of now, there is not much talking to him
To the left of the entrance to the Yellow Lotus HQ, at the first approach, you notice a gang member mugging and robbing a citizen (M2,12). You can follow him into the underground .
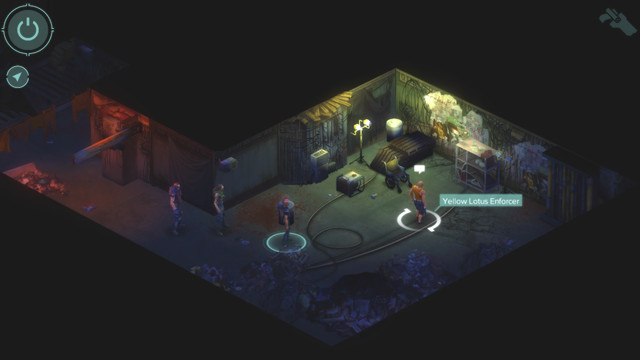 The man is a member of the Yellow Lotus gang
As soon as you find him (M2,13), you can simply kill him and retrieve the stolen item, as a result you, unfortunately, fail the side objective (do not kill any of the Yellow Lotus gang members). To coerce the man into returning the goods, you need to have: Strength [4], Unarmed [4] or Shadowrunner Etiquette. If you use any of the above, you receive 1 Karma point.
As soon as you retrieve the item, you can either keep it (the value is 63 yens) or give it back to the man - apart from his gratitude, you receive no rewards.
 The secret entrance to Bao's hideout
You may have noticed that at the lower level, there is a locked door (M2,14) with a code lock. After you enter 5465 you open it. For unlocking the door, you receive 1 Karma point. Inside, you will have to fight two monsters. This is also the alternative way to Bao's building, if you do not want to be spotted. You can open the door at any moment, even towards the end of the mission, just for the sake of receiving a Karma point.
After completing the prologue (second mission in Walled City) Heoi becomes your main base of operations. Here you will find your hideout from which you will start all the missions. You can also talk with your companions here, buy new equipment and upgrade the one already possessed. From time to time you can also meet NPCs with whom you can talk. The map above shows the most important characters, places and merchants in this territory.
Emperor's Museum is a two-floor location with a museum part and undergrounds. You're relatively safe in the upper level until you reach the last steps of the mission. In the underground you will face gargoyles and dead corpses, they can be quite challenging opponents. There is one side mission in the location, you can also use the terminal for obtaining valuable data from the Matrix. Except for the battles in the underground, the quest isn't hard.
Objectives: find two ancient books, don't let the alarm activate, steal artifacts worth 5000 yens (optional), steal artifacts worth 10000 yens (optional)
Useful skills: combat, Decking [1]
Difficulty: Medium
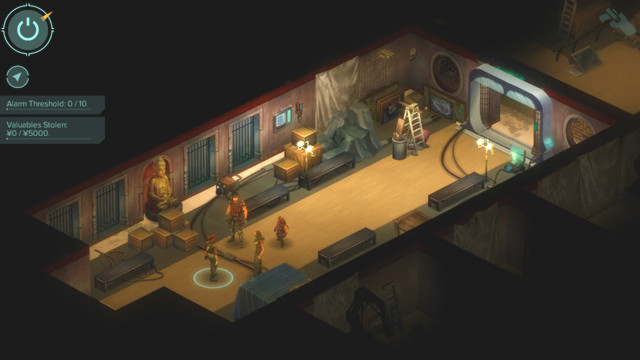 Entrance corridor to the museum
The quest is quite unusual. Don't expect much fighting, you will only need a security specialist (for example, Is0bel). Go to the underground (M4,2). On the left you will find the first book (M4,3).
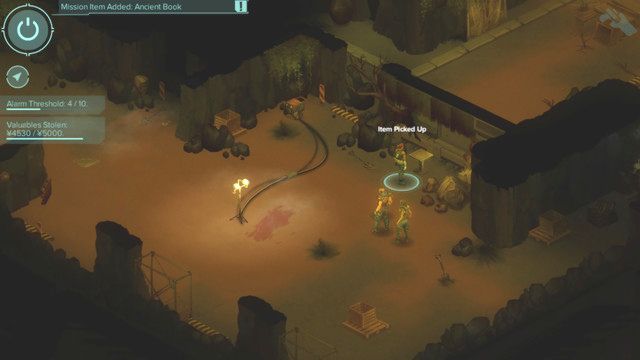 The first book
By breaking to the terminal (M4,9) in the northern part of the underground, you can find the data (Shipping Manifest). It can be sold through the computer for more than 400 yens (you will also receive 1 Karma point for that) and a spell - Wild Aim II.
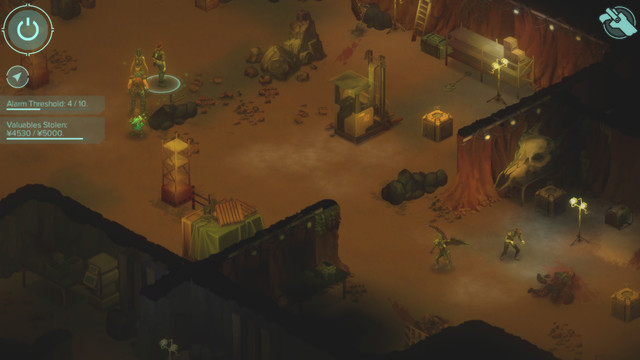 Surprise the enemy by positioning yourself earlier in tactic mode and starting the attack
In the southern part of the underground you will find some enemies - mummified corpses (2x) and a gargoyle. Same set enemies will join from the other side during the battle. Walk slowly and you will be able to prepare an ambush. Gargoyles can cast spells and the corpses can temporary move one of your companions outside the battlefield, where he will be forced to fight the enemy alone. Only after he defeats the opponent he will return to the underground. The corpses have twice less health that the Gargoyles. Corpses are fighting from close, so try to keep distance since the beginning of the battle. Gargoyles explode with poison after defeating them.
Once you take care of the enemies, collect the second book (M4,3) which can be found in the southern room.
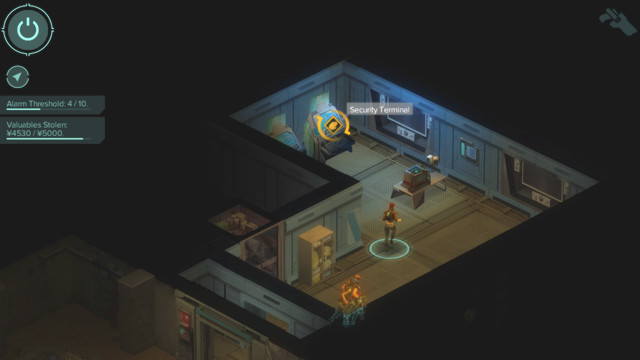 An ancient sword
Once you decide to leave the territory (M4,4), an undead (M4,11) will appear and ask you to take his talisman and leave the excavation site with it - it will set him free. You can, but don't have to help him. You can also attack the monster - if you destroy him, you can pick his sword (with no sell value), "Emperor's Sword". However, the talisman is quite valuable (400 yens) and can be used for summoning the undead that will help you in battle.
 North terminal
To finish the quest you must walk towards the terminal (M4,6) in the room above the excavation site and use it. Watch out, as after doing it and walking to the main corridor, all the doors will close and three guards will run towards you (you won't be able anymore to enter any room nor complete side quests).
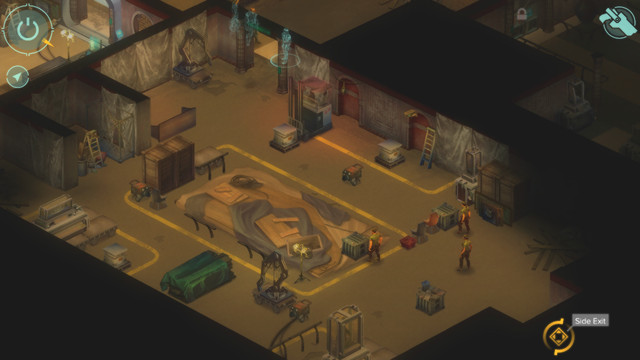 Use the side exit with guard's key
After eliminating them you will be instructed to use the side exit (M4,5). First you must pick up the key lying next to one of the guards. The exit is once again protected by three guards with the same statistics - this time they will make the first move, so make sure that you have enough health to survive their hit and hide behind cover as quickly as possible. For completing the quest you will receive 8 Karma points and from 1300 to 1900 yens (depending on whether you have stolen items and completed the side objective).
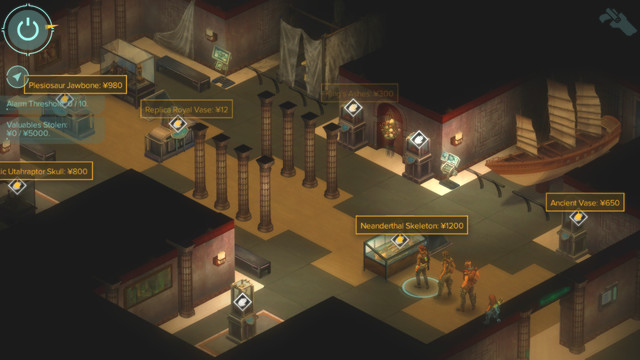
 Steal the most valuable museum items from two rooms
You must wisely decide which artifacts you want to steal from two rooms (M4,7) - once you exceed the limit of 10 (which means you can't take more than 9 items) you will activate the alarm and the main mission will end in failure. Of course, you must take only the most valuable items, ignore the ones that are worth less than 600 yens - take not more than 7 of them.
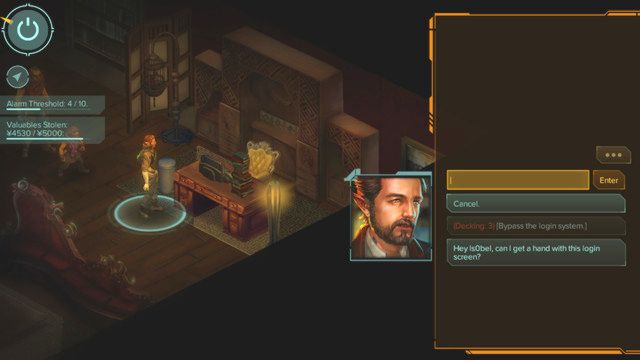 Director's computer in the office
Two most valuable items (together worth almost 5 thousand) can be obtained in the director's office (in front of the underground entrance). There you will find a drawer which can be destroyed (Strength [5]. Destroying it will add +1 to the alarming factors. You can also use the terminal (M4,8) and select the RESTRICTED ACCESS: LAO ZHENG option. The password is Tennyson.
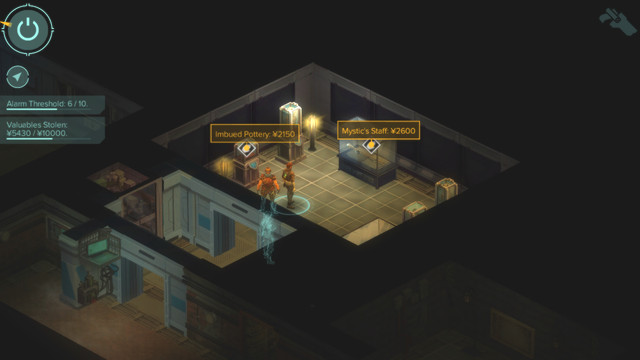 Additional antiques hidden from the wrong hands
Behind a hidden passage (M4,10) you will find items worth almost 5 thousands. For completing each of the objectives you will receive one Karma point.
If you fancy a small location with short mission, you will find it in Repulse Bay. There is one main mission and one side mission to complete here. The latter is strongly connected to the main mission and one of the paths of completing it. The location has two floors, the restaurant one with a party behind the closed door and apartment level where you must enter Neville's apartment. Sadly, you won't find any powerful enemies here nor interesting or valuable items. It is wise to use the terminal and download some valuable data from the system.
Objectives: Find the data incriminating Neville Ma, reach Neville's apartment, get to the party (optional), find valuable data (optional)
Useful skills: combat, Decking [1] + Cyberdeck, Charisma [4]; optionally Security etiquette
Difficulty: Easy
There are three approaches available:
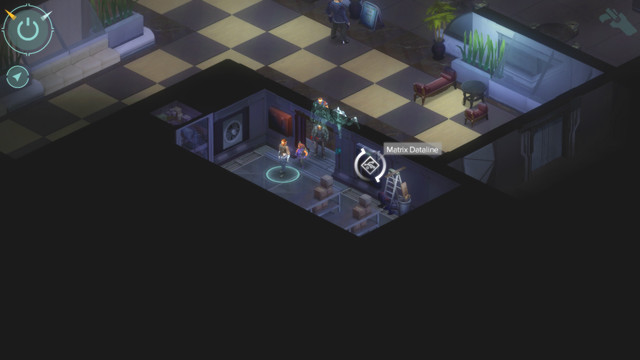 Terminal in the small room near the entrance
It is wise to take someone who knows how to hack for the mission. Additionally, you should take some fighting characters. The mission is easy. You start it behind the hotel door on the restaurant level (M5,1). First, turn right to walk through the closed door behind which you will find a terminal (M5,2) (Decking [1]). After hacking it you will receive valuable data (Repulse Bay Hotel Expansion Plan) - sell them on BBS market for 350 yens; party pass and access code to the door (1635).
 Talk with the waiter if you have well developed charisma
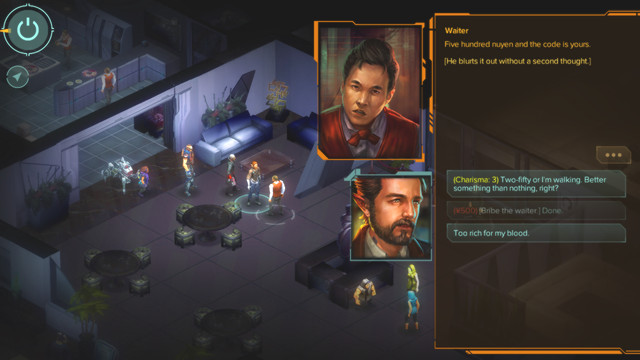
If you decided not to hack, you can obtain the code with some trickery - talk to the waiter standing in the restaurant. He will offer you the code for 500 yens if you start the conversation with talking about it (first dialogue option). If you have charisma [3], you can reduce the price by half.
 Mages can load the used numbers from the keyboard
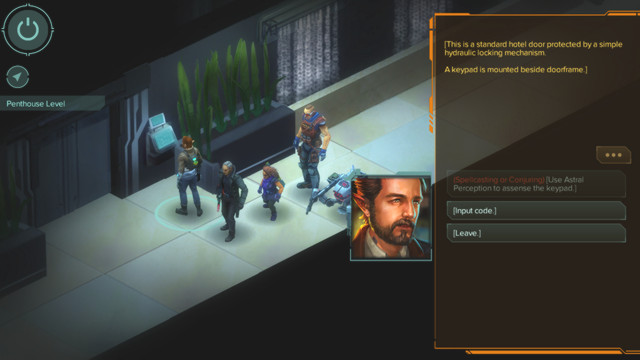
You can also obtain the code if you have any Spellcasting or Conjuring skill developed that allows reading the used numbers from the keyboard. In that case you will only obtain the numbers, not the proper combination.
 If you want to obtain the RFID key to the second door, talk with, for example, Penelope Wong
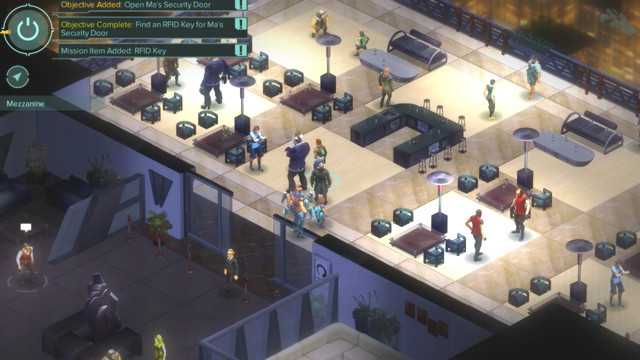
Once you reach the apartment floor, examine the closed door (M5,4). You can obtain the key by talking to Penelope Wong and selecting the first dialogue line or by talking with Neville (security etiquette is required) (see: side missions). If you don't intent to walk into the party, all you need to do is simply talk again with the waiter. He will tell you that the cook has the key. Now you can talk with the cook. You don't need any special skills to receive a pass from him. Now go back to the apartment, behind the door you will find another lock to open - this time you must use the terminal at the window (M5,5).
 You won't avoid the battle. Attack quickly, but not recklessly
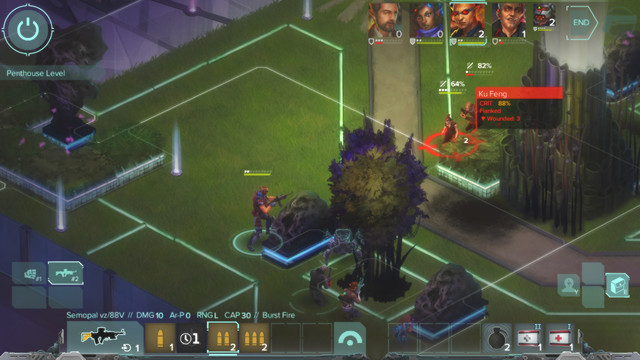
Behind the door you will be attacked by Ku Feng and his seven-person team. Whether you like it or not, you must fight them. The battle takes place in the garden. You won't have many options of positioning your men, but try to place them as far away as possible - half of your enemies are melee fighters. You don't have to worry about being surprised - they don't have powerful weapons or equipment (grenades, first aid kits). Ku Feng has the most health points, so you should eliminate him in the last order. However, if you take around 75% of his health, he will stop the battle... Once that happens, you can keep attacking (not recommended, it will impact the game ending) or interrogate her (you will finish the learn more about Neville friends mission). Then you can decide what to do with her.
Go back to the ground floor and leave the hotel. Then, go back to your employer in Heoi. For completing the quest you will receive 4 Karma points and 1100 yens.
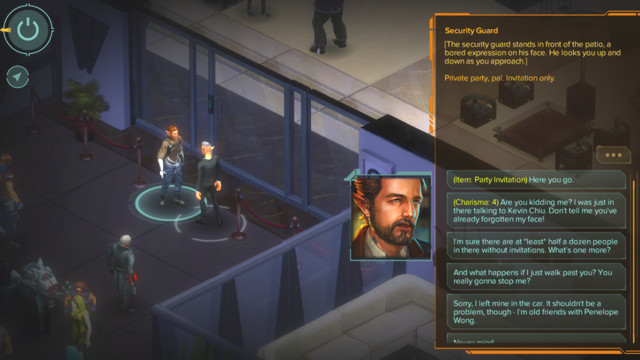 The bodyguard won't let you through
To get to the party behind the door with the bodyguard, you must show him the pass if you obtained it when hacking into the system, or you must have Charisma [4]. This will give you 1 Karma point (for completing the side quest).
If you get to the party, you can talk with Penelope Wong - you will receive another phase of the mission to complete - learn more about Neville's friends.
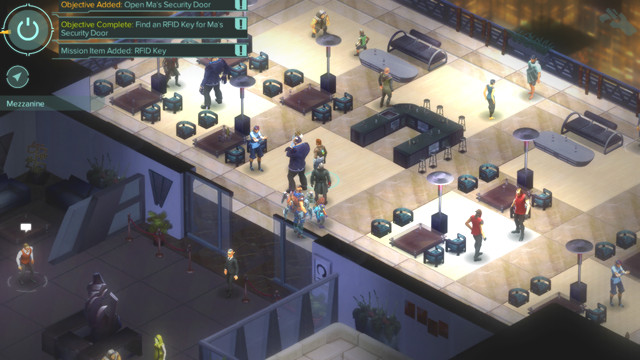 Penelope expands the mission by one phase and she has a key to the second apartment door
Penelope Wong has the RFID key to the second door in Neville's apartment - examine the door and talk to her and you will receive it. You can also talk with Neville himself and receive the RFID key from him - but for that you will need Security etiquette.
Whampoa Garden is a small city where you must conduct an investigation. During the first approach the quest might seem to be too long - there are many people with whom you can talk to complete the investigation. You will also find many small locations here - buildings' insides and shopping mall where you can obtain new equipment. It is possible to avoid fighting during the mission. It's also the only mission during which you can obtain a new recruit - Gaichu the ghoul.
Objectives: Meet with the elders in Whampoa
Useful skills: Decking [4] / Charisma [3]; Optional: Gang etiquette/Socialite, Spellcasting/Conjuring [1], Biotech [3], combat (not necessary)
Difficulty: Easy
There are two approaches available:
Worth knowing before starting the mission: it's n investigation mission. It can be completed without having to fight. If you want to obtain the best ending, you must collect as many clues as possible (optional useful skills are important for that). If you pick the fast way, you will have to fight one of the gangs - it's a quite hard battle. You will also find less clues proving the guilt of Whampoa Elders, so after eliminating the gang you must examine all the clues thoroughly.
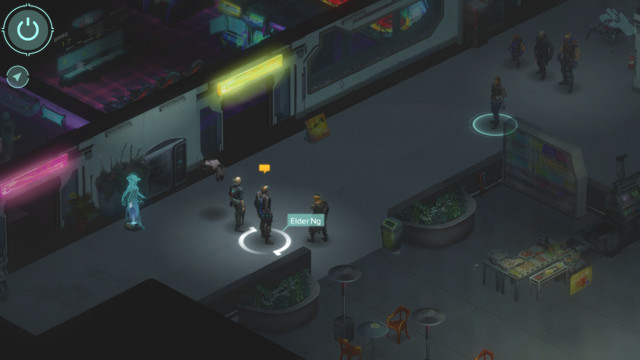 Elder Ng in the shopping mall
Immediately after arriving in the location (M6,1) go to the shopping mall (M6,2) at the end of the road on the left (there is nothing interesting to take or visit in the city). After the short conversation go visit two places...
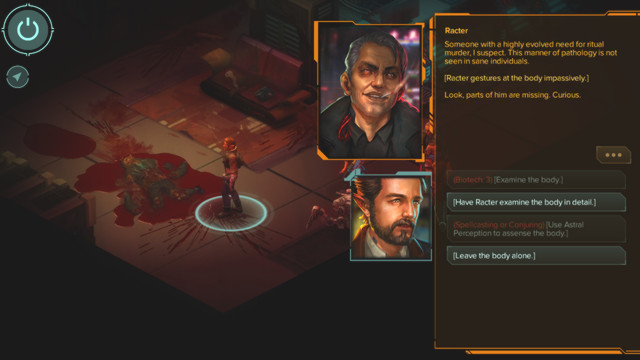 Tong's Sensory Carnival looks like a butchery
On the same street you will find Tong's Sensory Carnival (M6,3). Inside you will find a body that must be examined - Spelling/Conjuring skill is required (level 1 will be enough) or Biotech skill on level 3. Someone else, like Racter, can do it for you.
 Zippy standing at the crossroad
At the crossroad you will find Zippy. After talking with him you will receive side mission: Obtain the key to Magpie shop. The item can be obtained when going back to Elder Ng and using one of the attributes: Charisma 3 or Decking 4. It will add another mission objective: Examine the Jackpot. The building (M6,4) can be found left from the crossroad, investigate the computer in the second room. After you finish checking the computer you will receive another objective: Obtain the key to Magpie shop.
If you didn't obtain the key, you will have to select the aggressive way (see: faster approach).
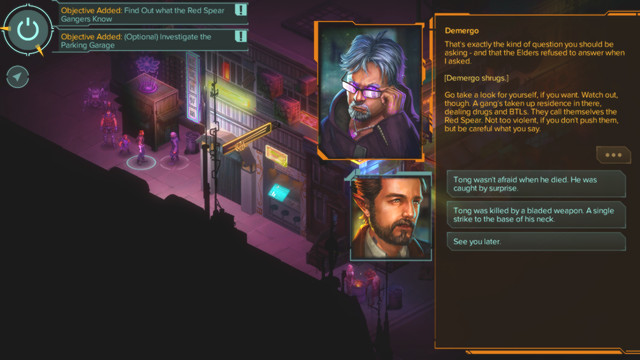 Demergo - one could say that he is one of the more important characters (additional mission objective)
Between the buildings you will find Demergo. After talking with him you will receive side mission: Examine the Parking Garage and main objective: Learn what the Red Spear Gangers knows. Now go to the place (M6,5) in the left corner of the map.
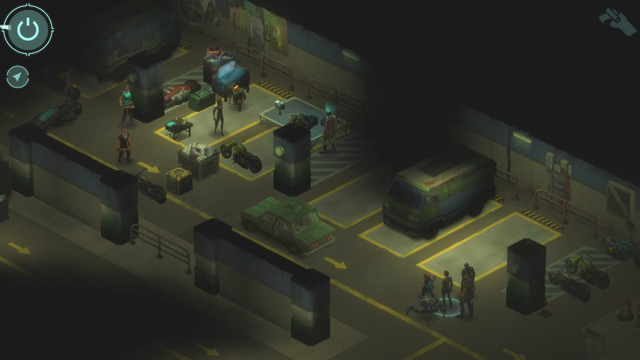 Red Spear Gangers - if you attack them during the conversation, they will make the move as first
The gang members (M6,8) aren't friendly, but you can make a little shopping at them ("medicaments")... They will let you explore the parking if you bribe them (Gang/Socialite etiquette is required). Otherwise, you will have to kill them. After talking with the gang boss you will also receive main objective Obtain the key to Storm Drains and you will learn what they know, thus ending this phase of the mission.
Faster way of solving the riddle doesn't require all the actions described above. Go behind the building where the murder took place and talk with Demergo until you receive the Learn what the Red Spear Gangers knows objective. Now simply attack (M6,8) and kill them (the battle won't be easy). After that you can pick up their PDA - after reading it you will receive the instruction to go straight to Storm Drains. Rest of the mission will be the same.
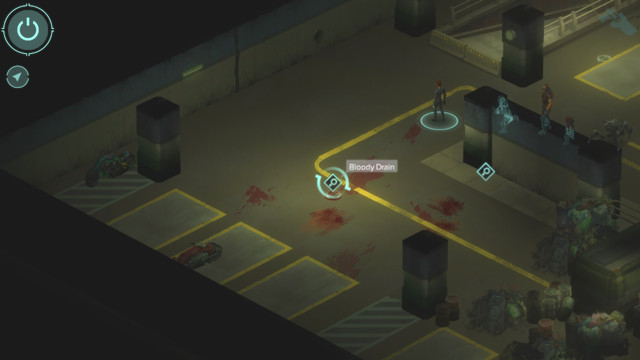 Check the marks at the back of the parking to obtain more evidence
Go to the back and examine the attack marks on the parking. From the drain (M6,11) you can fish armor part which can be analyzed (side mission) if you have Academic etiquette. If you don't have it, Keita, who sells food at the parking entrance, will give you more information. On the wall you will notice blood marks to examine (M6,9).
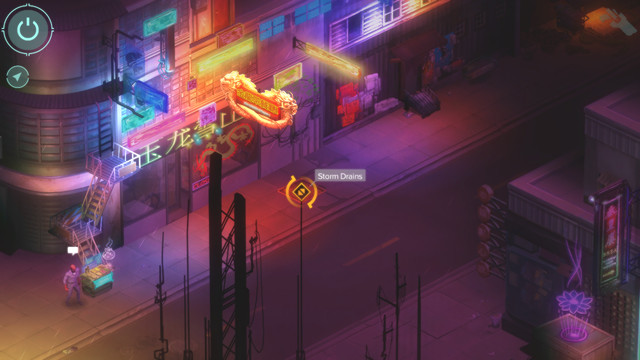 Entrance to the Storm Drains
Porter Lam has the key to Storm Drains. He is standing in front of the building in which the murder took place - near the crossroad (Tong's Sensory Carnival (M6,3)). He will give you without the need of convincing him. Next you must search the Storm Drains (M6,6). In the northern parts of the sewers you will find a silver necklace (M6,12) and in front of it a pile of bodies (M16,13) which you can examine.
 You can walk safely by the enemy gang...
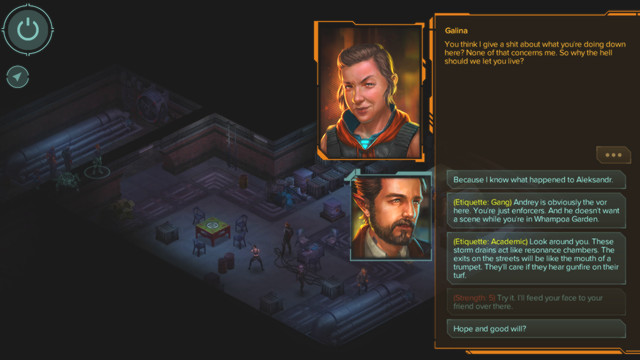
At the end of the eastern part you will find a small gang (M6,10) - you can talk with them cautiously (or use Strength [5], Gang/Academy etiquette) or attack them (watch out, they are eager to use many grenades). Whatever you choose, you will finish the phase of searching through the sewers and finding the key to Magpie warehouse - the latter you will receive from the criminals.
 Ghul Gaichu, potential party member
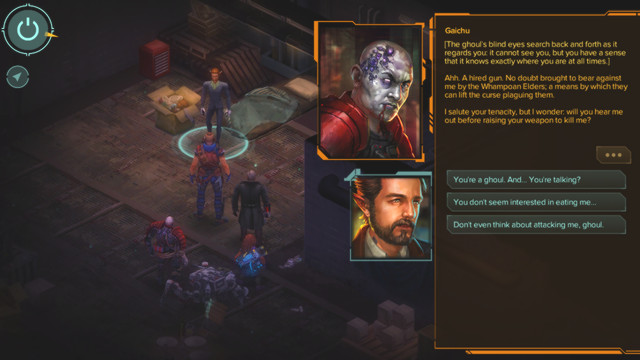
Go to that warehouse (M6,7) (western part of the city, near the parking) and search it (food and cardboard box). A ghoul will appear from nowhere - Gaichu. You can attack him at any moment you want, you can also convince him to join you...
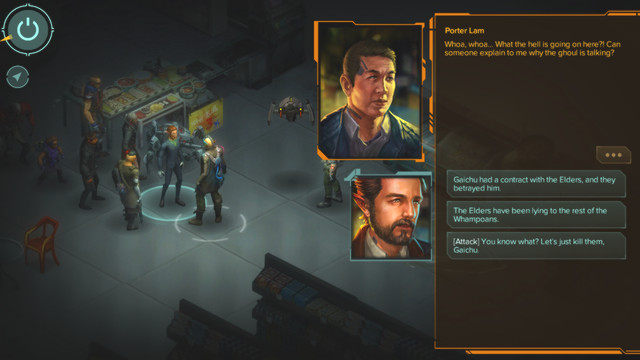 Go back to Elder Ng - there are three ways to finish this plot...
Last phase is proving the guilt. If you have enough evidence (thorough exploration, examining the body, collecting the armor part from the parking and the necklace from Storm Drains), you can accuse the Elders and prove that they are guilty. After that, go back to Heoi.
For completing the mission (proving the guilt) you will receive 2 Karma points and a companion - Gaichu the ghoul. After going back to Heoi you will receive additional 8 Karma points. Another way to complete the quest is killing Gaichu and the third way is attacking the Elders after saving Gaichu (if you don't have enough evidence, they will attack you themselves). From Kindly you will receive 1000-1400 yens, depending on the amount of solved side missions.
Three levels are available in Wuxing Skytower: the ground floor, where you must prepare a plan of getting to the elevator and reaching upper floor. On the floor you can complete part of the side mission (interfering Qi) and find a unique pistol. With the pass from director's office you will reach the last, temple level. It's the only place where you can't avoid fighting with elementals and mages. Sadly, after completing the mission phases on the last floor you can't get back to the previous ones, so make sure that you completed all the actions there.
Task: Gain an access to the manager's office
Usefull Skills: Label: Security, Decking +[3], combat; optional: Charisma [4], Body [4], Intelligence [6]/Weapon: Pistol [5].
Difficulty: Medium
 At the beginning of this quest you will talk with the guard. Don't be cocky
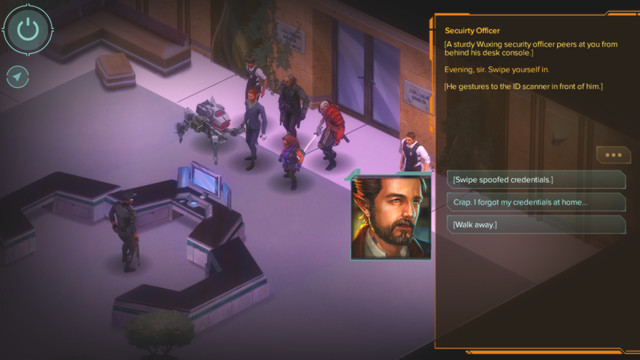
From the very beginning you have to avoid being impolite or waggish if you want to get to the end of this quest with your entire group (however you will not have any problem if you have Charisma at least on level [4]). You will get Fake ID which unfortunately doesn't allow you to do a lot.
To get to the higher level you have to take care of one of these things:
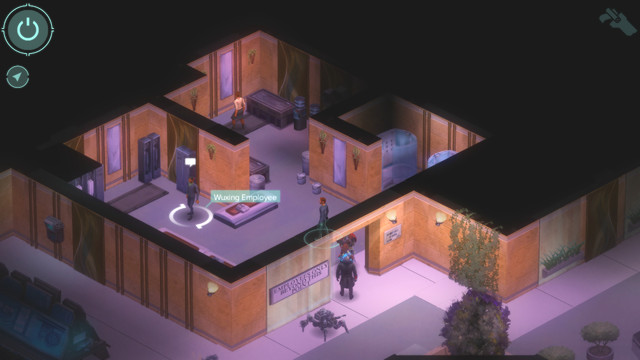 Inside the room you will find a nice office employee
Let's put the open attack option aside and look closely on the next way. You may convince the employee (in the room on your left) to open the elevator (M7,5) (employee will die) although you may also convince him to report a burglary on the 27-th floor (you will receive 2 Karma). If he will report a burglary you may take a piece of paper from the security office (M7,4) when they will get inside the elevator and you will be able to join them and to activate the elevator with the button (M7,5).
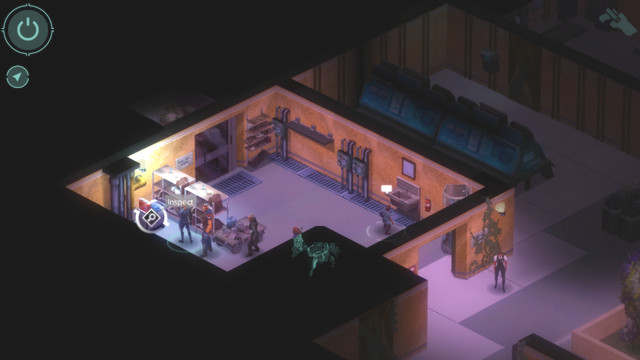 You will find a device needed to circumvent security in the technical room
Alternatively you may foul out the ID Card from the employee and show it to the guard who stands in front of the room on the left, however you may talk to the guard only once so you have to remember to never talk with him without the Card. You also have to lie to him about your profession or have at least 3 points in Charisma. You will be able to enter the room and find the device (M7,9) in the corner. If you will use this device connected to the terminal (M7,3) your Card will circumvent the security and will give your Card a superior rank which will allow you to ignore the group of guards standing in front of the elevator.
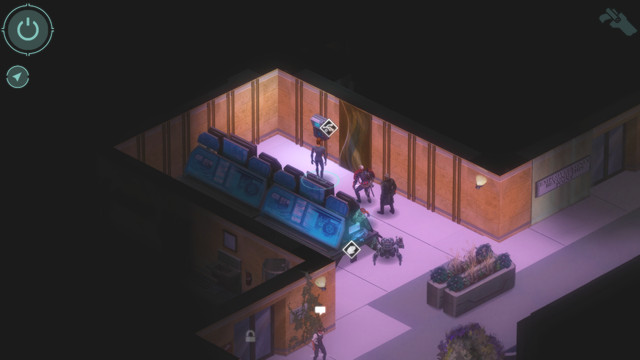 Terminal with an access to the Matrix
The third option is to hack the system through the Matrix terminal (M7,2). It will give you an administrator's access (although you may have to also use another terminal (M7,3) to make a Card for you) and will allow you to find the data Wuxing Delivery Data which are worth 150 yens. However because of the great firewall it is not an easy path since you need level 3 Decking and good software.
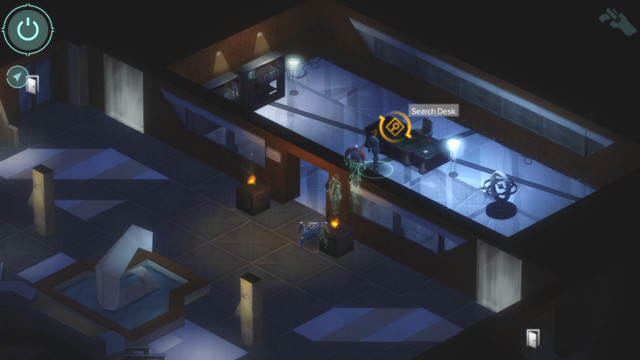 The Card form the chairman's desk
Go to the next floor (M7,7) and receive the following tasks: destroy the temple from the top floor, unable Qi to flow in either 35%, 50% or 100%. If you want to ignore any side quests you don't have to spend a lot of time here. Just destroying the temple will provide you 15% of required disruption percentage. You may find the other places where you may go to disrupt the Qi flow in the chapter focused on side quests.
The next thing you need to do is to get to the chairman's office (M7,6) located in the last room of the corridor on this floor. Take the page (M7,13) from the desk. It will allow you to get to the temple by using the second elevator. When you will get there you are going to have to take care of five elementals (at first you will contact three of them, and after that: another two on the opposite site). They shouldn't be much of a problem for you.
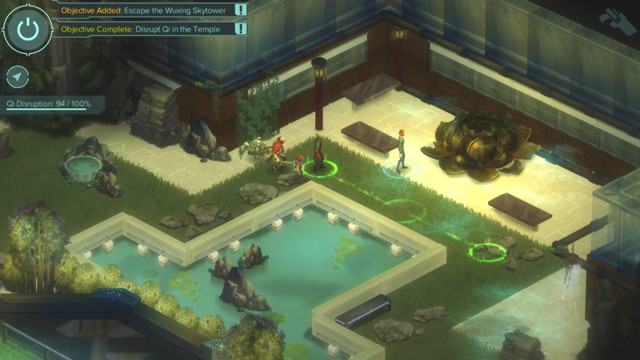 Destroy the altar. You don't need any visual fireworks
When you will get to the opposite end of the temple you will see the golden altar (M7,8) which you have to destroy. Go back to the elevator however take your time. During your path the elevator will open and five mages will attack you. Since they are not very durable and have bad accuracy you may be able to take care of them from a distance. If you have any mages in your group you may decide to use some of the Dragon Lines which may be found around here.
Finally you may return to the elevator although you will be unable to get back to any of the levels from below. For completing this quest you will receive 8 Karma and, as usual, 1700 yens. If you will complete the side quest, you will get another 500 yens.
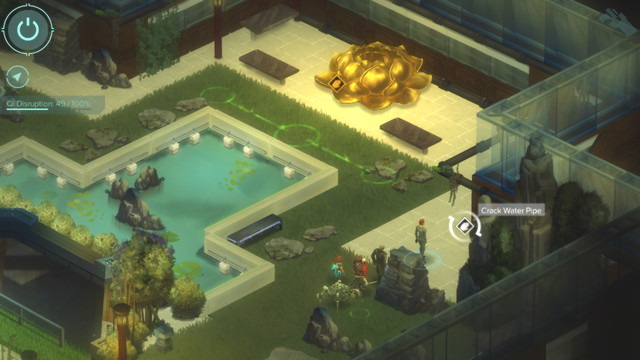 You will see the white hand next to some of the objects. It shows which of them you may destroy to disrupt the flow of the Qi
During this side quest you have to disrupt the Qi flow by destroying and moving some objects.
Second floor (M7,10):
1. In the first room on the left you will see the server you need to hack with the Drone Control [3] or with the 8484 password. You may also destroy this unit (5%).
2. In the second room to the left of the elevator you may move the partition, and then the next one and the next one. After all this you may move the desk (8% in total).
3. The third room is the office. You may destroy the desk (5%) and open the safe (M7,11) with the 8484 password or the Security / Quickness [5]. Inside the safe you will find 150 yens.
4. The flame in front of the entrance to the main office at the end of the corridor (2%).
5. Smash the window in the president's office at the end of the corridor (10%).
6. Smash the windows in the toilet to the right of the president's office (5%).
7. Damage the fountain next to the elevator (on the right) (10%).
8. The last thing you can do is to interact with the armchairs to the right of the elevator (5%).
Temple on the roof (M7,10/8):
9. Destroy the golden altar (15%).
10. Destroy the water pipe to the right of the altar (15%).
11. Ignite the garden next to the left of the middle bridge (15%).
12. Kill five elementals defending the temple (5%).
For disrupting the 100% of the Qi flow you will receive 1 Karma.
On the right wall of the central room you will find a small laboratory (M7,12). Look into the pistol wrack and go to the terminal. If you have Pistols [4] or Intelligence [5] you may unlock and take the "The Bloody End" pistol (which is worth 550 yens).
Shangri-La restaurant is a small location divided into three parts: the restaurant, its first floor where you will find your target, and outside. In the restaurant you will prepare a bait thanks to which you will get through the closed door to Rooster's room - the guy that you must kidnap. On the floor you can obtain a valuable fish. Outside a battle will take place when you or one of your companions will be trying to open the hangar door. There are no side missions here.
Task: Find and kidnap a man called Cheung-Sing "Rooster"
Usefull Skills: Biotech [3] / label: Corporate, Charisma [3], Decking [1], combat; optional: label Academic
Difficulty: Medium
Possible solutions:
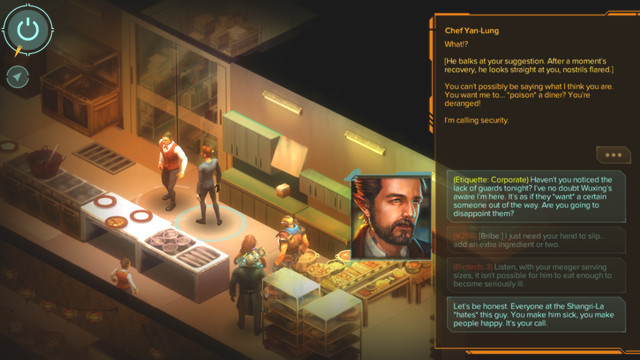 You will be unable to talk with the cook if you will not clarify few details with the waitress
The best way is to poison the Talos's meal. He is the personal Rooster guardian. To do so you need to speak with the waitress (you need Charisma [3]). Just keep selecting the first dialogue option and if you will receive the required information you may speak with the cook. You have to buy his cooperation (250 yens) and have Biotech [3] or label: Corporate.
 Stairways
If you will succeed the angry guardian Talos and his comrades will come to the kitchen and will leave the doors (M8,2) towards the lower level where you will find your target.
 An empty sit in front of the bar
The second option is to wait next to the bar. After some time a waiter will run in and will leave the door open. If you want to make your job easier you may decide to complete the side quest and organize a diversion to lure out the guards. To do so talk to the Henry who stands next to the bar. He will tell you that he just got fired and believes that's because of the guy who celebrates nearby. Talk to him and return to Henry. Lie and both of them will leave. After that Rooster's guards will follow them and also leave the doors open (M8,2).
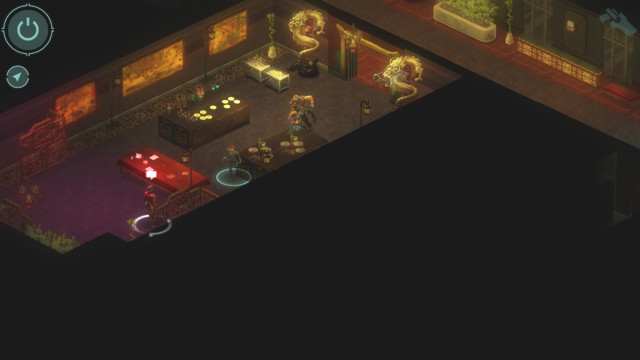 Rooster's room
After a short conversation with Rooster you will force him to follow you. You will receive a key to the door and some tips about getting to the evacuation exit (M8,3) which you have to escape by. You will unlock the side quest which is protect Rooster from taking damage.
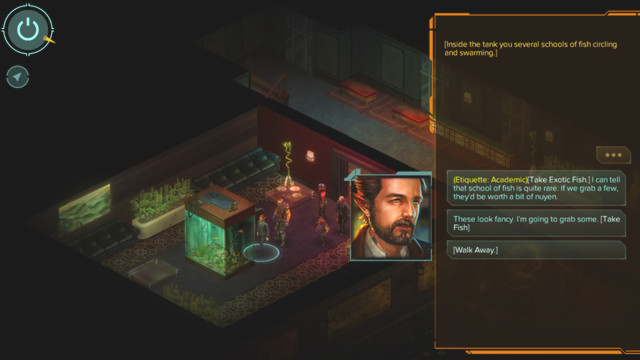 Who said that fishing in the aquarium is forbidden?
The door on the left are now open. Behind them you may find the aquarium (M8,8). If you have the Academic label you may get a precious fish (250 yens). Without this label your fish will have much lesser value (only 50 yens).
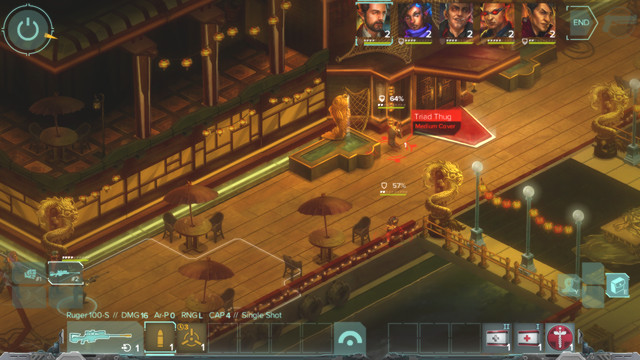 Two members of Triad are just a funny competition
Exit the building (M8,4) and take care of two Triad members. You will find the warehouse which, at the moment, has locked door (M8,5). You may use the terminal (M8,6) to enter the Matrix and both unlock the door and steal the Restaurant Reservations data. Another option is to break down the door (Strength [5]) or with the Spellcasting/Conjuring skill find out the correct sequence. You may also try to use your allies' skills. You will not have an option to enter the password.
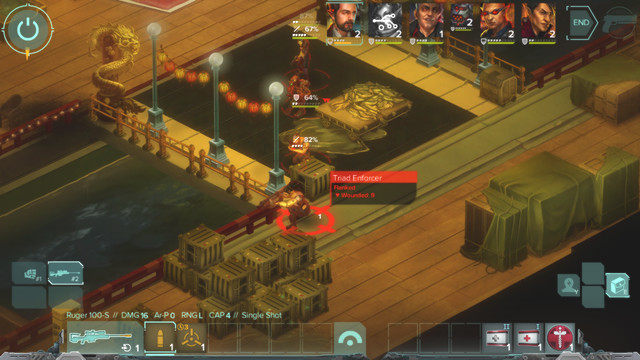 Take care of the last with the grenade launcher
In the meantime you will be attacked by Talos and his five comrades. Your first target should be the woman with the grenade launcher since you will not have a lot of space to spread your team like you could want. Your second target should be the sniper who will approach from your side since he will have good way to shoot even your hidden team members. For completing the Defeat Talon side quest you will receive 2 Karma.
 The boat in the warehouse is already waiting for you
Go to the warehouse and get on the boat (M8,7) which will take you to your home where you will receive 6 Karma and your wages: 1300 yens or even 1600 if the Rooster will not take any damage.
MV Nalchi is a large military ship, full of guards and soldiers. You will have to steal valuable data from it. If you manage to sneak up to the upper floor undetected, you will avoid most combat. On the lower deck you will find twice as many enemies. You can easily fool them. However, if you decide to attack them, you can expect reinforcements coming from the enemy side. It's not the only location that is part of this mission - there is another, smaller one as well, which is actually a battle arena...
Task: Find the samples and still the data
Usefull Skills: Decking [4] + Cyberdeck, combat; optional: Intelligence [4]
Difficulty: Hard
 Terminal responsible for cameras
Talk to the Captain Jomo in the southern part of Heoi town. You will go to the battle ship (M10,1) where you have to turn off the cameras with the terminal on the wall (M10,2) with Decking [4]. You may also go under the deck (M10,3). The entrance is on the other side of the ship so you may decide to either sneak your way or to defeat the group of eight your enemies.
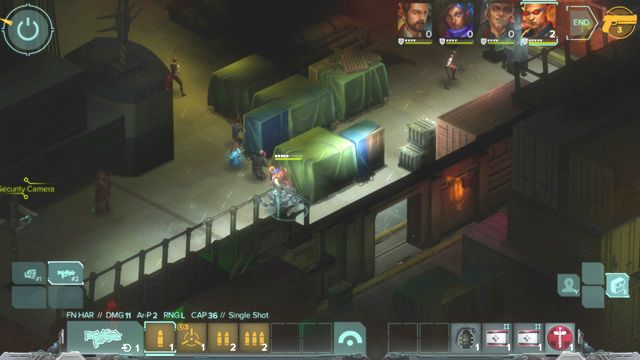 It is essential to use the planning mode to get through without drawing any attention
If you want to pass the guards undetected you have to enter the planning mode. Only three enemies will change their position so you may easy get to the other side, especially since the enemies turned towards you with their backs will basically ignore you. You have to avoid being detected or the entire plan will fail and you will have to fight no matter what. Sneaking by will provide you 1 Karma.
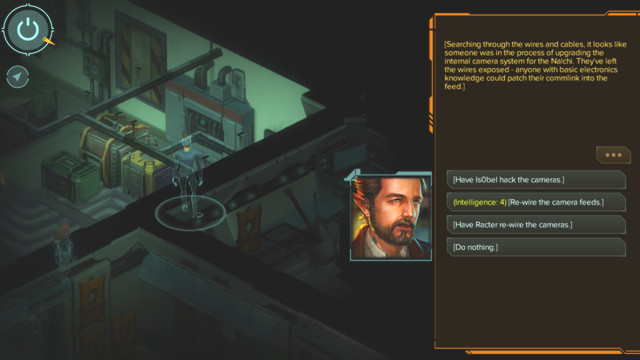 The terminal with the camera access
Once you will be under the board (M10,4) you need to enter the second room on the left (M10,5). Intelligence [4] will provide you an access to the cameras. In other rooms you may also find something interesting if you have not activated the alarm. You will find two first aid kits, a hand grenade and a sphere of summoning fire elemental (M10,11-13). If you want to keep being undetected you have to go to the first room to the left of the entrance where you will find the terminal (M10,6) which will allow you to get rid off the enemies in the end of the corridor. You may safely download the data (M10,8) required in your mission. You may also pick another first aid kit from the wall.
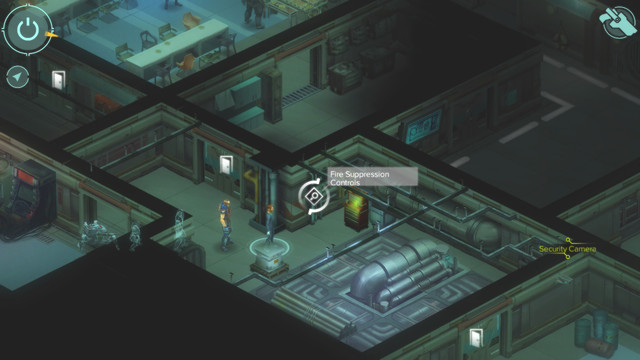 Pressure control valve
However if you have turned on the alarm the enemies will be waiting for you in the next room. You may get to them only through the southern door. You can't lure them out with the fake terminal alarm since the door will also be closed. You will also not avoid the reinforcements (M10,10) after the fifth turn. You may use the valve on the wall in the southern part of this area to flood the lower levels and to postpone their arrival.
Tip: if you have a drone you may also make an ambush and get to your enemies from behind through the ventilation tunnel.
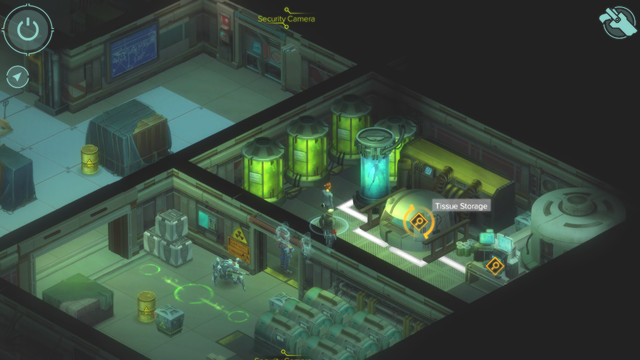 Download the data and the samples
When you will get the data you will be contacted by Hwang who wants to attack your employer and wants to ask for your help. Allegedly he may prove his betrayal. If you will hang up on him you will be unable to contact him later on. You have to choose who do you want to support from now on (although you may also decide to ignore both of them).
 An optional hacking target
Use the ladder to exit the ship with the now open passage (M10,9). When you will get to the deck also go to the exit. You will be moved to a small residential. You don't need to pay anyone for information - people here don't have a lot to tell you. You may use the terminal on one of the building's walls to hack the cameras. It will give you an access to a recording which will show you how Tigath makes a deal with a group of mercenaries. When you will meet him you may mention it.
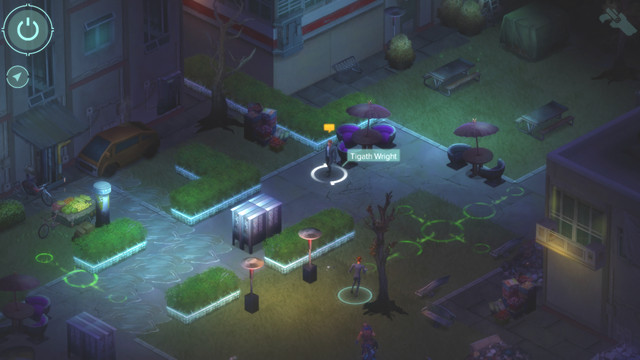 You will find Tigath in the upper part of the residential
If you have made a deal with Hwang you will find him in the middle of this area (you may also betray him in any second). Go north to meet Tigath. In any moment you may call Hwang with a dialogue option to begin an assault. If you haven't talk to Hwang yet he will attack you as well. Both sides will call the reinforcements. With your allies you are basically already on winning side however you should beware of Tigath/Hwang, mages/drones.
Tip 1: If you want to kill both enemies and their teams you should start from fighting only one of them and later on attack the other one. This way you may avoid fighting both of them at the same time.
Tip 2: You surely have noticed the electric cables on both sides of this area. Your decker may hack the terminal among the cables on the western wall to turn on the electricity which will damage people who stand in the water. You may choose in the Matrix which puddles you want to electrify.
Tip 3: If you feel to weak to fight you may go toward south and wait for the gangs to shoot each other down.
Tip 4: You don't have to destroy drones. If you will find out who controls them (Rigger) and kill him his drones will explode.
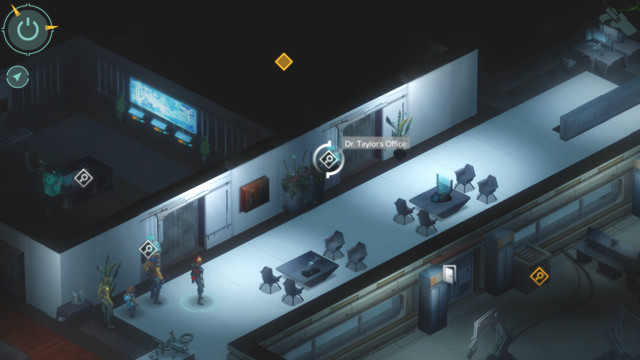 An optional terminal which will turn on the electricity and damage everyone who stands in the water
After the won fight you may take the "Sandblaster" gun (worth 200 yens) from the Tigath's body or the "Wild One" SMG [worth 1200 yens] from the Hwang's body. Use metro to get back to Heoi. After completing this quest you will receive 8 Karma and money:
Ares Asia Holdings is a company focused on weapon-related technologies. Three floors are available. The first floor is used only for reaching the second one. Above you will find the main mission objectives - infiltration and stealing. You will be able to focus on them until you meet new shadowrunners and will be forced to leave the location and face many enemies. You won't find many interesting things here, only some data in Matrix that can be sold for nice amount of cash on the BBS market.
Objectives: Obtain the prototype of the laser cannon, sabotage the company
Useful skills: Security etiquette, Decking [5], Intelligence [5], combat; optional: Strength/Charisma [6]
Difficulty: Hard
 Entrance to the company
Before starting the mission, Racter will talk to you (if you have him on your team), asking to be taken for the job. You should take him, for the reasons explained later in this chapter. Once you reach the company, first you must talk with the secretary (M10,1) - it's the first place where Racter will prove to be useful: if you don't have Socialite/Corporation etiquette, he will provide you with an entrance pass.
Go to the computer (M10,3) in the nearby room. Examine all the data, thus completing some phases of the quest. Now you can get to the floor through the elevator (M10,4). Things get tricky at this point... you have five ways of reaching upper floors:
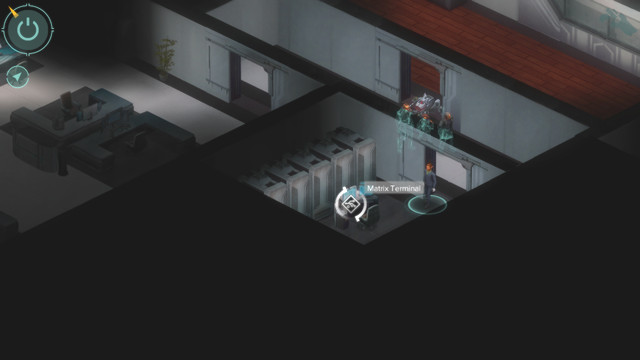 Matrix access terminal
If you intend to hack into the Matrix (M10,6), you need a very good Decker - it's easy to activate high level security on this level and thus have to deal with strong virtual enemy offensive. Important - if you activate the alarm in the Matrix, you will be attacked by the guards in the reality as well. They will keep harassing you until the end of the quest. In the system you will also find some data that can be sold for 792 yens.
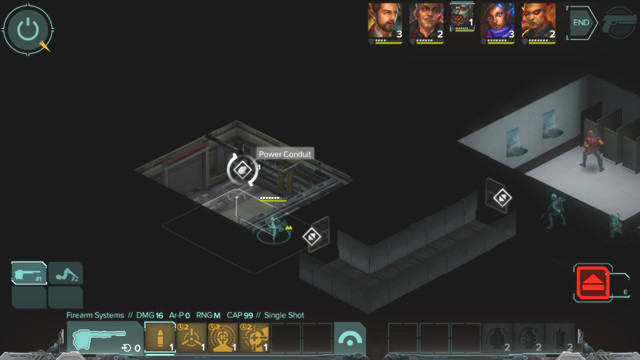
If you have Racter or your own drone, go from the secretary to the toilets (M10,2) behind the door north from the desk. There you will find a ventilation shaft which can be used for deactivating the elevator. Once that is done, go towards the robot and he will tell you to use the stairs (M10,6) that are on the other side of the floor.
If you have Gaichu in your party, you can tell the guard at the elevator that you have come to collect the bounty for him - he will let you through.
 Dr. Taylor's room
Once you get to the floor, first go to dr. Taylor's room (M10,8) (second door from the left). You will open it with 98144 code which can be found in the computer in the middle of the room, behind the glass. Replace the data in Taylor's computer - the first mission objective will be completed.
 Server room
Go east until you reach the server room (M10,10) where you must complete the second part of the mission. So far it all goes smoothly...
However, the next objective - entering the guarded laboratory (M10,11) - might prove to be difficult. Two guards behind the glass won't let you through easily. You must go back to the room with the safe and use the button on the wall. It will close the shields in the windows, including the ones on the corridor.
 Laser is lying on the desk in the northern part of the laboratory
Once you pick up the laser from the laboratory, whether you like it or not you will have to let other shadowrunners to the room (for releasing them you will receive 1 Karma point). They might follow you and help you in fighting the upcoming waves of enemies. Four guards will come from the stairs, and after around 5 turns another four will come from the elevator. After eliminating them you will receive a card from the freed colleagues and you will be able to open the safe (M10,9).
 You can trick the new friends and thus save your own life
If you prefer to avoid fighting, during the conversation with the shadowrunners you can ask them to give you the card earlier - you will be able to open the safe (M10,9) immediately and run straight to the elevator. To do it, you will require Charisma [3] or you will have to pay 500 yens.
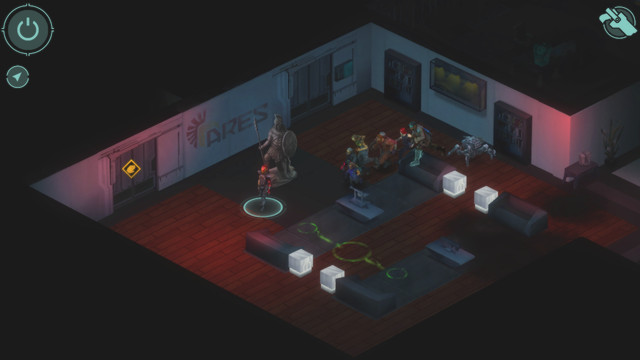 Quickly leave the building by using the elevator
Now you must escape through the elevator (M10,7). However, you must wait 3 turns until it opens. During that time, the reinforcements will come - you can ignore fighting them and instead walk into the elevator.
As part of the side mission, you can close the ducts with the gas. It can be done only through the Matrix (every terminal on the floor allows that).
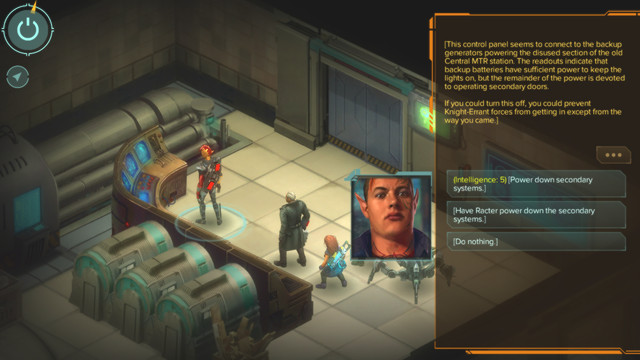 Generators in the working room
In the second phase you ride down the elevator. Your colleagues might go different way or you can ask them to run away with you. From the excavation site you will enter the subway station. Don't go right - walk through the door on the left. You will find the first aid kit in the drawer and generators in the next room. If you have Intelligence [5] (or you have, for example, Racter), you can turn the generator off (1 Karma point) and get through behind the wall without having to fight. Leave the room and go north.
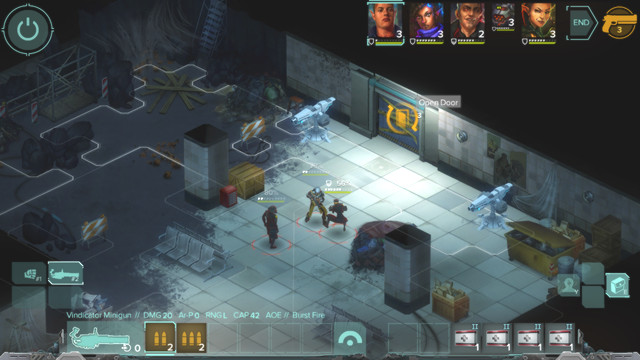 Even if you deactivate the guns, you will still have to face three remaining enemies on the floor
The generators will deactivate two guns near the door where you will also find three opponents. Without the electricity the reinforcements will be unable to come (three opponents behind the closed elevator door).
After reaching the station you will also have to face one four-person group. If you have separated from the second group of the shadowrunners freed from the building, they will come to your aid now. If you have Strength/Charisma [6], you will be able to lie that you are chased and the laser (which they want) has a tracking device. You can also simply get rid of them and enter the subway.
You will receive 8 Karma points. The quest has only one financial outcome - the payout will be always around 2000 yens not including the side missions. Unexpectedly, you will also receive the laser cannon (weapon).
You can do few things for this mission in the Matrix: you can deactivate the elevators (by doing so you gain access to the floor via the stairs), deactivate the gas that reaches the floor, and you can download some data without hacking the virtual terminals... Two data sets can be found there: Security Scheduling and Secure Datastore. The passwords to them are: ZH4NGf3i and gu4nYU.
You can do it only from the Matrix. Luckily, if you hack into any of the terminals on the floor, you will appear in the "room" with valve controls. In doctor Hardingham's room you will find the code to one of the secured valves (number 3). The code is c0rt3xFRZ.
Objectives: Reach Plastic-Faced Man and kidnap him
Useful skills: combat, optional: Charisma [3]
Difficulty: Easy
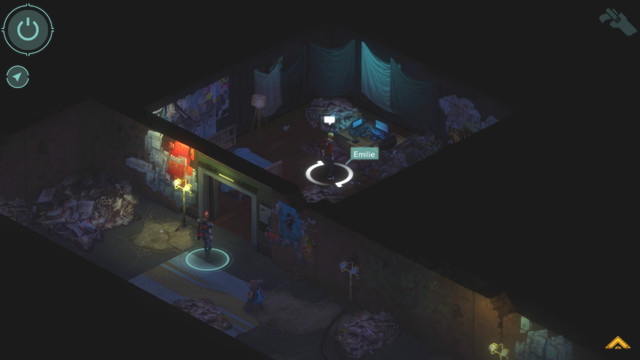 Emillie
Before starting the mission you will go on the meeting with Emillie. If you talk nicely to her, you will receive a taser. Then go back to Heoi and enter the subway station again. This time you will go to Shek Kip Mei. It's a small city in which you have few things to do.
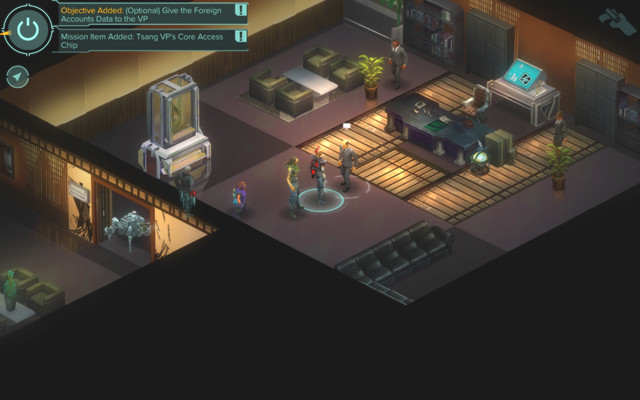 Xiaozhi's room
First you should go meet with Xiaozhi. There's nothing interesting on the way. When you reach him and start talking, you will find yourself in an ambush. Six enemies will attack you. Xiaozhi has a code to the locked door - the code is 00006. It is possible that you won't manage to kill him as he will start running away the moment the battle starts and will be inaccessible later. Behind the door you will find Cram medicine, advanced first aid kit and around 300 yens. For opening it you will also receive 2 Karma points.
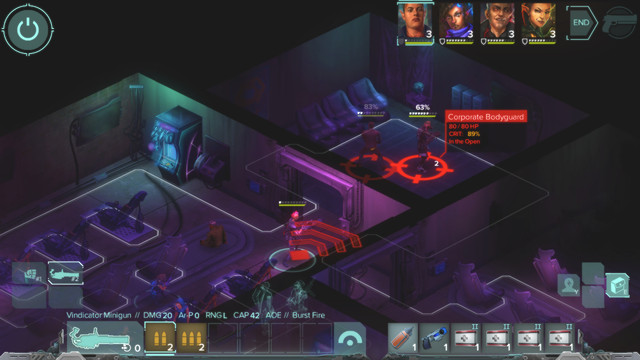 Plastic-Faced Man and his bodyguards
You will enter a small room. Open the door - you will face two enemies. One of them - the Plastic-Faced Man - must survive! Because of that, kill only his bodyguard (the one on the right side) and use the previously received taser on the second enemy. It will take three turns for the Plastic-Faced Man to faint (since the hit) and after two turns reinforcements (four guards) will arrive, so prepare yourself. Watch out if you're using overwatch skill to avoid hitting the unconscious mission target.
After defeating the opponents you will move to another place where you will interrogate the Plastic-Faced Man. After that you can kill him or let him go - it will impact the game ending. Go back to Heoi and talk to Kindy. For completing the quest you will receive 10 Karma points.
The second part of this mission will start after going back to Heoi and talking with Kindly. In the meantime a scene similar to a text game will start - your actions during it will have little consequence. Once the scene ends, you will receive 3 Karma points. Go to your employer. You can lie or tell the truth about the fate of Plastic-Faced Man. After receiving information about the next mission you will receive additional 4 Karma points.
Prosperity Tower is a unique location. It has four floors, each with some attractions. Two main and many side missions are available here. Since the side missions are very easy and short, their walkthrough has been woven into the description of the main quests. You will find some strong opponents here (Tsang's bodyguards), and if you decide to finish the mission by fighting - a huge amount of them. Additionally, you will be able to talk with many people in order to learn something interesting or unlock side missions. In a special warehouse you will also find some medicaments and valuable weapons.
Objectives: Learn where Raymond is held and get into the laboratory 12.
Useful skills: Charisma [7], Security etiquette, Decking [5]; optional: Shadowrunner etiquette, Academic, Spellcasting/Conjuring [6], combat.
Difficulty: Medium
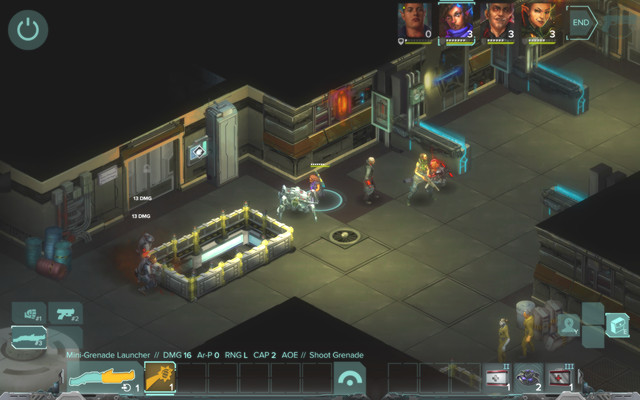 You can immediately attack the first guard, but this will force you to fight through the entire mission
The mission takes place on four different levels. The final floor - the laboratory - is related to a specific objective. After arriving at the location, talk with the bodyguard who let you in the building. Your task will be to obtain access to the room with the terminal. Access card is required there, the bodyguard standing near the elevator (M11,2) has it. It doesn't mean that he will want to give it to you, nor does it mean that you must use force to get it...
As usually, the quest can be completed in more than one way:
Despite the fact that mission marker is on current floor, go to floor 26. The guard at the elevator will stop you and ask about the pass, show him the "basic" pass (first dialogue option).
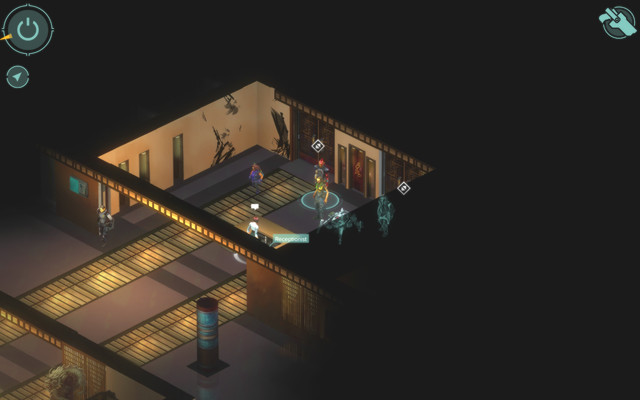 Floor 26 reception
To get through the reception (M11,8) on floor 26, you will need Shadowrunner/Security etiquette. You will receive meet with Mr. Johnson side mission. If you do meet with him (M11,4), you can make a deal - he will give you access to the terminal, and in return you will steal data and over 2000 yens for him.
 Mr. Johnson
Making the deal will help you as well, as the second data hidden there is related to the find evidence against Josephine Tang side mission. If you want to keep the money, the only option is fighting everyone in the building.
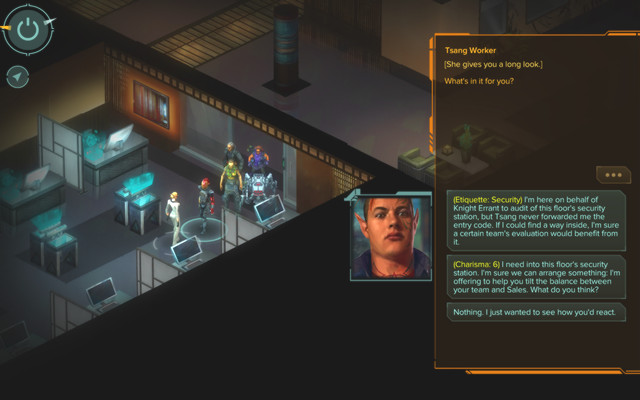 Talk with the company employee
While having the Security etiquette/Charisma [7], go to the southwestern corner where you will find company employee (M11,2). She will ask you to obtain data held in the other corner of the building - talk with the manager (M11,3) and with the same charisma or etiquette "run them away" from the building. After that, steal the data from the terminal (Decking[5] required). For that, you will receive 1 Karma point and access card to the terminal on floor 26 (the one you're currently on).
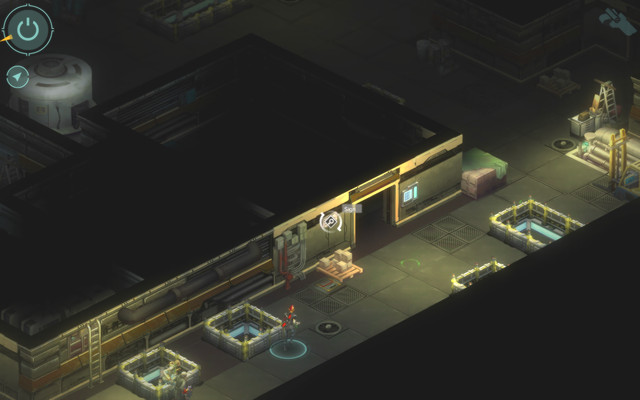
The card will let you enter the room with the terminal (M11,5) (the button at the wall that leads to the room is hard to notice). However, if you don't have the Security etiquette, don't go there or you will be immediately attacked. If you have the mentioned etiquette, after using it in the conversation select third dialogue option.
Once you reach the terminal, you will receive the explore all the Matrix areas in this location side mission. Explore both territories, not only the one marked in the quest, to learn where Black is held and to find two codes to special projects and one code to the laboratory number 12 (44526).
 After the conversation with the woman the door will be open - the guards inside won't attack you
Once you complete all the actions described above, go back to level B3 (the entrance to the location). Go to the only opened room in the middle and talk to the woman (M11,1) about some package. After the conversation the door behind the wall will open. They will lead to a terminal (M11,6) which you must hack. This will give you three codes: to hospital room (4990), to the locker in the cloakroom (2627) and the second code to the laboratory (25301).
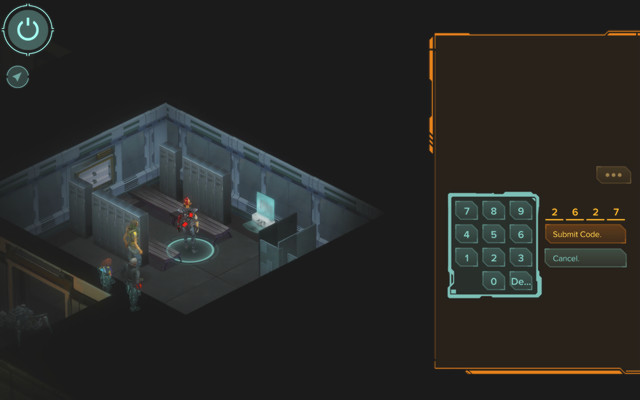 Open the locker to change the clothes
Putting the clothes from the drawer in the changing room (M11,4) on will help you in dialogues (and you will receive 1 Karma point for that). Now, having two codes, you can go to laboratory number 12. On the way there you can explore the laboratory number 48. You must use the Security etiquette or Charisma again for the guard in the laboratory to let you through.
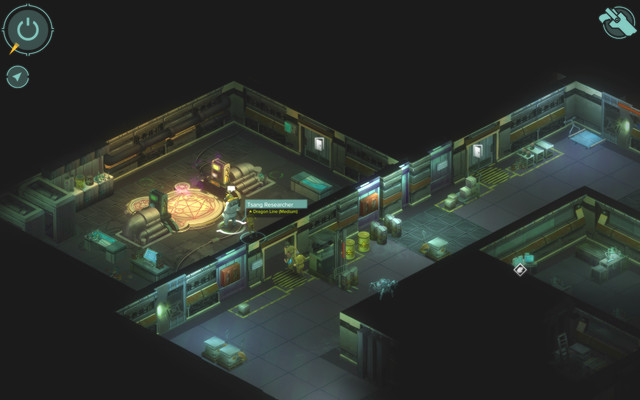 Talk with the orc in the upper room of the laboratory
Walk to the second door on the northern wall. Start the conversation with the orc (M11,6). In the second dialogue you must select the option with Charisma [6] and in the next one the option with Academic etiquette/Spellcasting [6]/Conjuring [6] - if you pass these two steps, during the rest of the conversation you must click the first dialogue option until the talk is over.
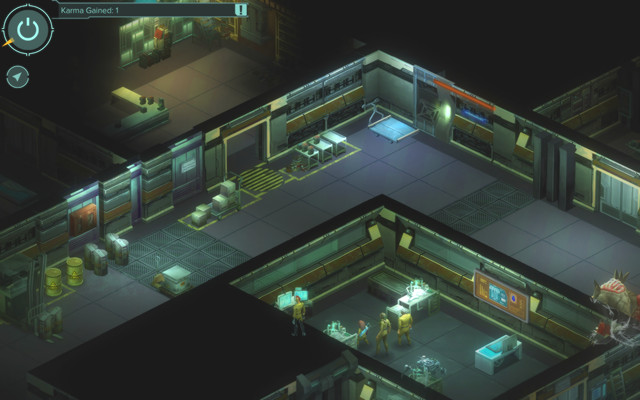 The released demon is going to the magician room
You will receive a code to the "Containment Room" - 1915. Inside (M11,9) you will find a console through which you can free the demon. Don't go back to the talky guy as he will call for security. You can send the demon to the magician (M11,5) in the upper room - he will go to the door north, on the right, where the magician will kill him. During the conversation with her you can convince her to leave the room - you will be able to collect 2 spells from the shelf and hack into the terminal. For releasing the beast you will receive 1 Karma point. Inside the Matrix you will find two data: password to the ones on the left is Scion, and on the right you will find special codes to laboratory number 12 (described in the part of this guide focusing on laboratory number 12).
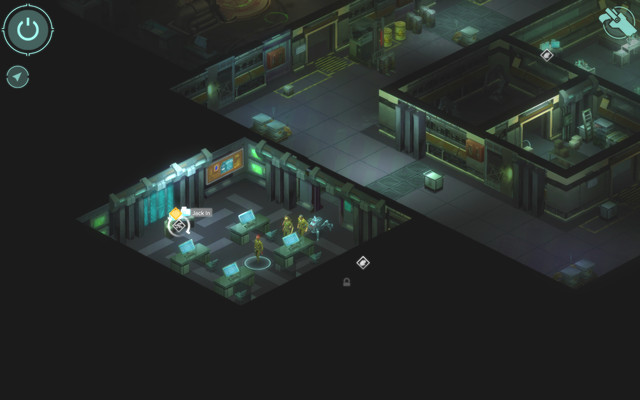 The open door to the room with the terminal.
You can also send the demon to the guy from the laboratory, where the security will come. In the room opened by the guard a terminal (M11,10) can be found. Inside the Matrix you will again find the code to the laboratory number 12 and the code to the room with equipment (8974) under the one you're currently in. It's a better option than sending the demon to the magician.
Important - there is no option to use both rooms without having to fight.
 When leaving to laboratory number 12, you will be warned that you can't go back
Now go to the elevator (M11,2) and reach laboratory 12. You must enter two previously obtained passwords in any order (the password are 44526 and 25301). It is worth mentioning that once you go there you won't be able to return to any of the floors.
Mission objectives: Free Raymond
Useful skills: combat, Decking and good programs
Difficulty: Hard
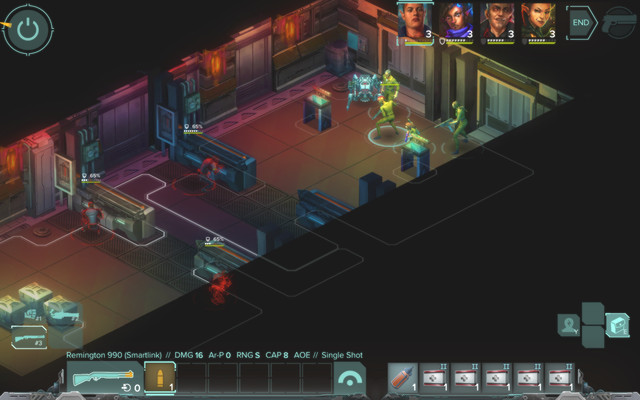 Immediately after arriving via the elevator the guards will talk to you - you will have no time to prepare
The mission will start when you will ride through the elevator down to laboratory 12. There is no way to avoid the guards, which means the whole mission is about fighting new waves of enemies. First you will take care of these three guards. Then you must take the access card that will drop from one of the enemies and use it to open another door.
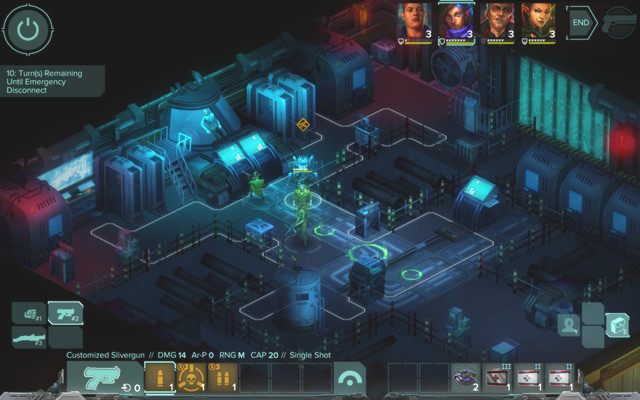 Terminal near the container in which Black is imprisoned
Behind the door you will find imprisoned Raymond (M11,11). You will have to hack the terminal in 10 turns - after that the power will be turned off and the mission will fail. During the hack, the rest of the party must position themselves in front of the entrance, from where waves of enemies will approach. Using mines, grenades, spells with area of effect and traps is recommended.
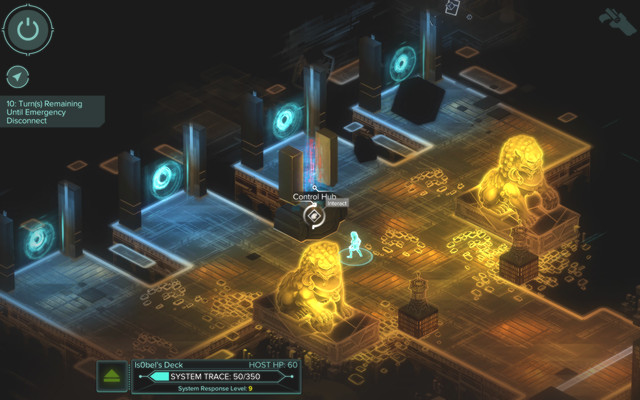 The console in the Matrix
You will have an unusual task in the Matrix. You will see a terminal and four passages. Your task is to enter each of them and steal data. Behind each passage there are enemies. The gates can be opened if you know the password, which can be obtained from the computer in magician room in laboratory 48. From the left, the codes to the gates in the passages are: Dusk, Dawn, Night, Noon.
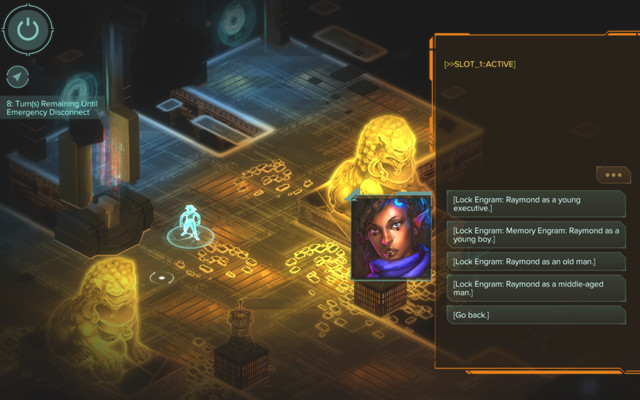 The event selection screen - the order is very important
During the next step you must return to the terminal before the passages and assign a chronological event-memory (data downloaded behind the passages) to each Slot (1-4). The order is:
Luckily, nothing bad will happen if you make a mistake, you will be able to retry. Once that is done, free Raymond from the capsule and go towards the elevator. Three more enemies will stand in your way, but you don't have to fight them - run straight to the elevator and leave the building, thus ending the mission.
Kwoloon Walled City is the very last available area. Beside the landscape it does not have a lot in common with the Walled City you have seen before since it is a separate district. You will face here a lot of enemies and neutral characters. To be fair you will not be rewarded in any way for completing the so called side quests here so you may just as well follow the main quest. In the end of the road, or actually in the center of the city, you are going to fight with the main boss so you shall come here well equipped.
Tasks: Get to the center of Kowloon Walled City
Useful abilities: combat, label Security; optional Drone Control/Decking [6], Speed [6]
Difficulty: Hard
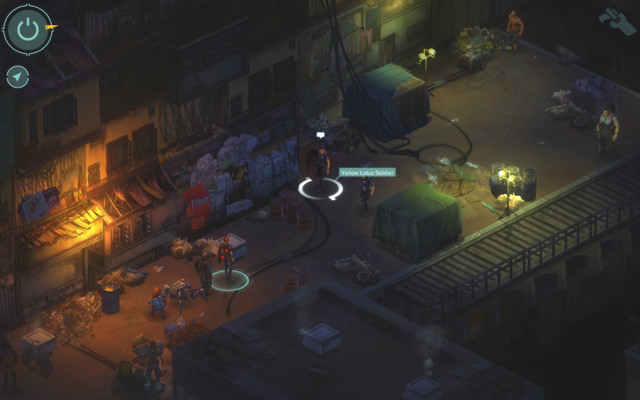 Yellow Lotus forces which you have already seen during the first visit in Walled City
Basically it is the last mission of the game. You are in a new part of Walled City (M12,1). Your new task is to enter a specific building in which you will face the game's boss. Remember to buy all the upgrades and items you may need, especially medications. At the very beginning of this mission you will face a Yellow Lotus squad which you are forced to fight with without a possibility to talk your way out of this. Thankfully there is only four of them and you don't have to worry about the sniping lady since she is not very accurate.
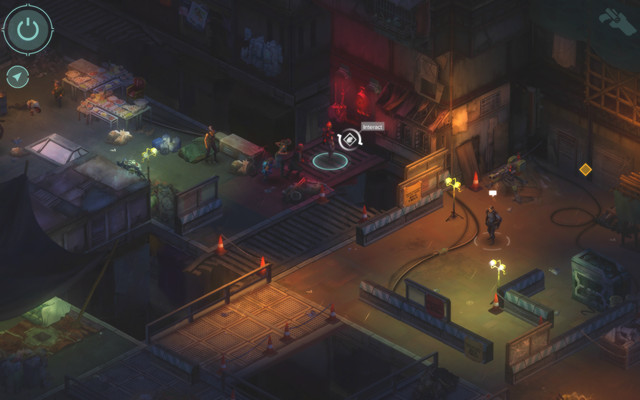 The terminal from the wall will disable the turret defense
A bit further you will see a terminal (M12,3) on a northern wall. It will allow you to turn off (Decking [6]) or to capture (Drone Control [6]) an enemy turret. In the southern part of this place you will find two merchants (a medic and an arms dealer) who may help you if you have forgot to buy something in Heoi. If you don't have Shadowrunner or Gang label you need to pay this arms dealer 100 yens.
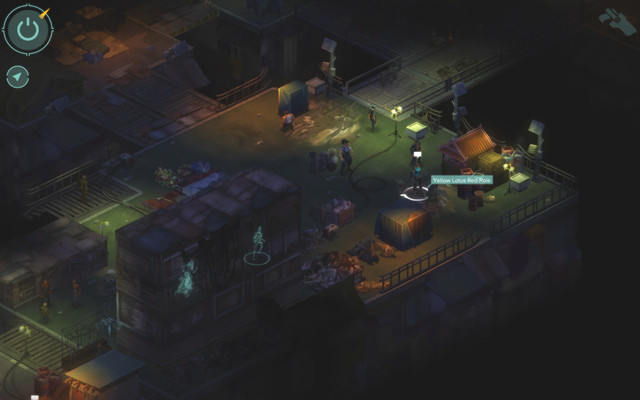 Even though there are some side activities on this level you are not going to be rewarded for them
To the south of the entrance you may find another Yellow Lotus squad which bullies some man (M12,2). You may either ignore this fact, attack this unit or use a Body [7] or a Shadowrunner ability. This man may sell you some medications and a nice armor (defense: 9).
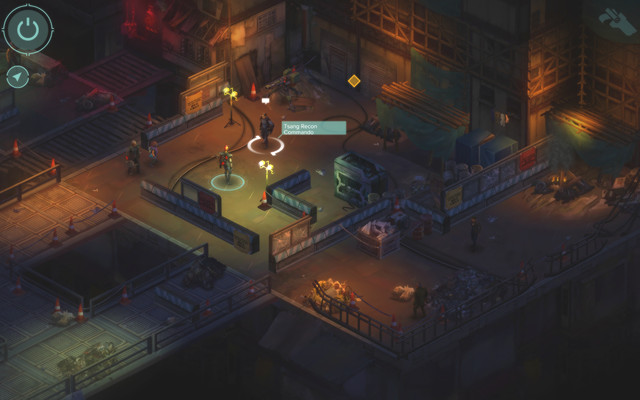 You have to pass the guard to enter the building
Before the entrance to the building (M12,4) you will see the guard. You need a Security label to pass him undisturbed. If you don't have this label you have to fight him and his two allies and even their turret if you haven't turn it off earlier on.
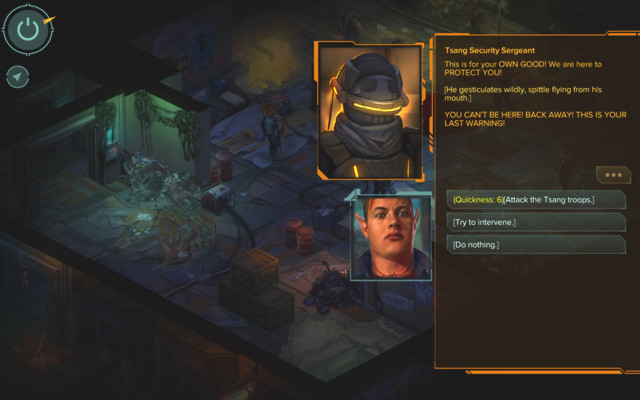 Interfering the Tsang's security actions will provide you the element of surprise
In the next building you need to turn left (M12,6) and to take care of a demon which you may attack from surprise. Defeating him will give you 1 Karma. In the next room you will find Tsang's security which tries to get rid of some locals. You may ignore them (however you will still be considered their enemy) or if you have the Speed [6] ability you may decide to make the first move. With a bit of luck it will allow you to defend every resident. One of the enemies will have a detonator which will help you to get to the middle of the city center with an alternate path (which is described later on). Right now you may just go forward.
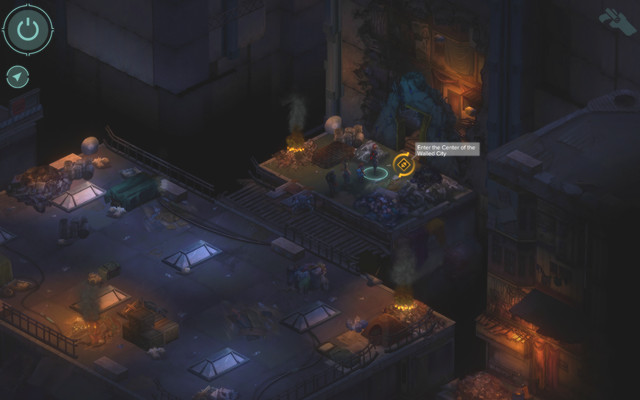 Path to the next part of the city
In the next area (M12,9) you will see three enemies who are going to fight you as well as each other. If you will pass the bridge you will also find five Tsang's people and three demons and these two groups obviously don't love each other so you may just watch their fight from distance. Demons came from a side where you may find the exit from this area where you will also complete this quest (M12,10).
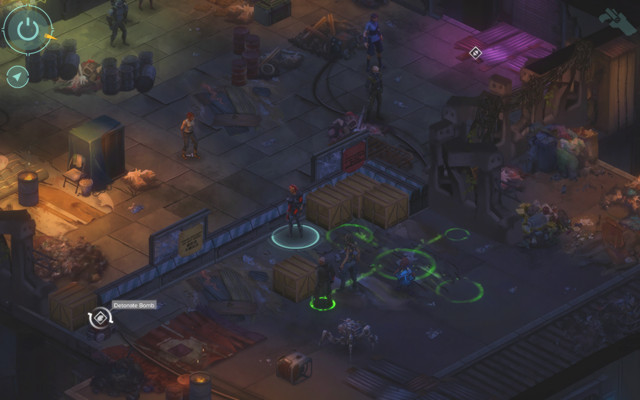 The place to detonate
After taking the detonator from one of the five Tsang's security man body you may use it to your advantage. Pass the door and turn left where you will see a blockade and few citizens. Waiting for a short moment will allow you to see that three hostiles have come here as well. During a dialogue you may use a detonator activation option to open your path (M12,7). However you need to remember that citizens are going to fight you as well as the Security. They can use magic buffs however they use only their bare fists so they are not a great danger. After the fight you may go towards the end. After all it is not the best way to choose since it gives you more difficult obstacles and will not give you any rewards or any plot changes.
After completing this quest and leaving this area you will receive 8 Karma.
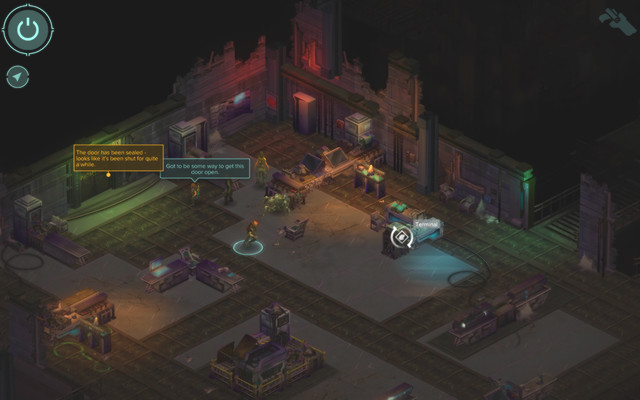 You may open the door with the terminal what is also the way to summon the boss
The very final part of the game. You are going to face demons and the main boss - 'Qian Ya', Queen With a Thousand Teeth. The battle will begin when you will try to open the door with the terminal in the middle of the area (M12,12). Take your time to look around and set up your strategy. Spread your team, find the Dragon Lines and places where you can summon elementals if you have any mages in your group.
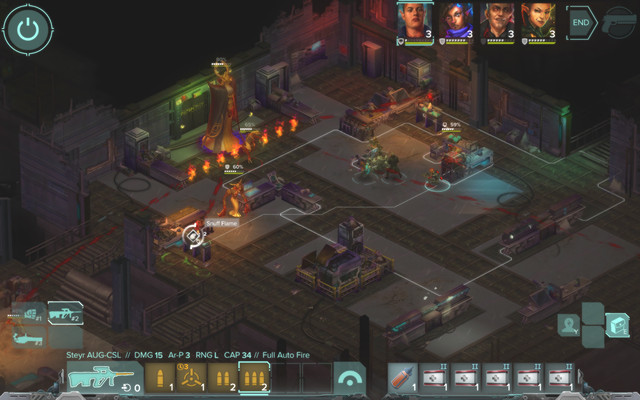 Queen is the most challenging encounter in the game
After the beginning of the fight four demons will appear next to the "power sources" (and one more next to the queen). They are candles which you have to snuff off or the queen will be immortal. You have to be ready to kill the demons and to snuff off the candles as fast as you can.
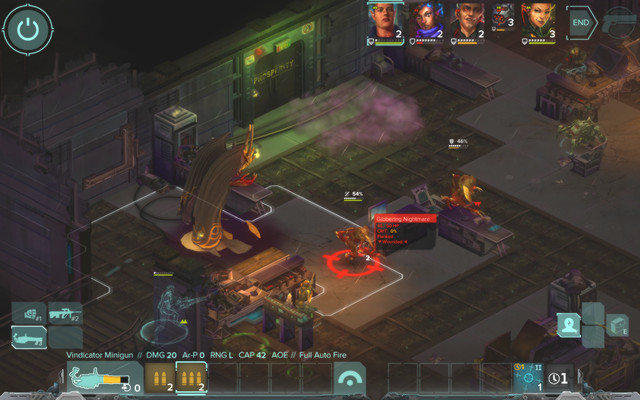 Once you will knock the queen down she will not trouble you in the later part of the battle
The best strategy is to turn your main sources of damage against the queen and the demons near her right after deactivating her defense field. The demons near the edges will have rather bad accuracy from their distance. Right now queen has just 120 hit points so you may defeat her quickly. However you have to save your first aid kits since it's just the first part of the battle. After defeating the queen you have to still get rid of the demons however you need to remember that undefeated queen heals herself for 10 hit points per turn so once you attack her you better focus on her entirely. Some spells, such as the poison of Gobbet, are especially powerful against her.
 The blue portal to another world
After the fight your enemy will run away. Behind the door you will see a blue portal on the ground. Before you will stand on it heal your group and prepare yourself although don't use any buffs yet since every one of them are going to vanish once you will pass the portal.
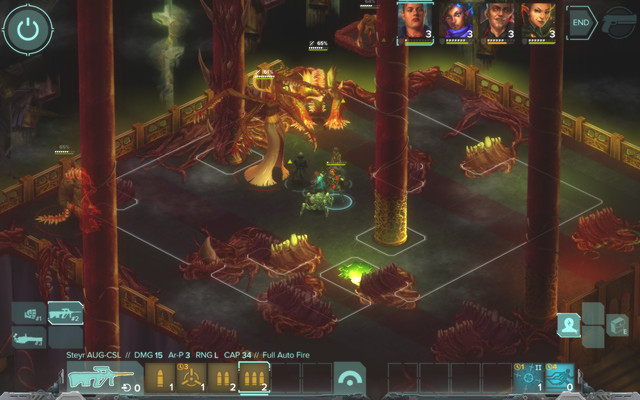 The Queen's new form is even more dangerous than the previous one
You will be moved to another world where you will face three minions and the Queen herself in a new form (170HP). She is now more durable and can randomly block the incoming attacks. You may keep using magic attacks like poison since they are just as effective as they were before. You may also try to ignite her. Defeating her will also destroy demons however you may decide to focus them first since they can powerfully heal her by even third of her health bar at a time. Find some good cover and use one teammate as a bait. When the demons will jump on him try to defeat them with range attacks.
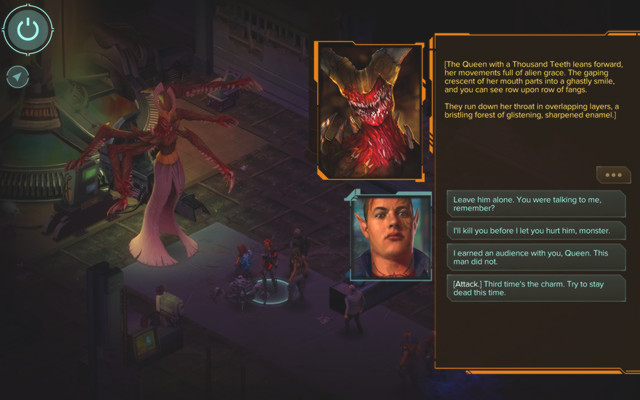 The last thing to do. Choose the ending you desire
Finishing this fight will allow you to choose the ending of the game during a conversation with the queen. Some of these endings will depend on your decisions from earlier parts of the game. The precise description of this part of the game you will find in the Endings chapter. Finally you will return to Heoi, talk to Kindly Cheng and go to sleep, which will also finish the game.
 Obtaining a queen's audience after your battle is the key that will allow you to choose the city's and your allies' future
Shadowrun: Hong Kong has four possible endings which are described before. Some of them require specific decisions and actions made thorough entire game and each one of these endings will reward you with an Achievement named as well as we called the endings. However you may save your game right after the won battle what will allow you to easily find out how the other endings look like.
It's the easiest ending to unlock and some can call it even "the bad ending". You will make a deal with Qian Ya. The city will be happy for 14 years. In exchange you have to kill Raymond Black however if you have taken with yourself Gobbet, Is0bel or Duncan they will stay against you and you are going to be forced to kill them with some help of Racter and Gaichu (if they are also part of your squad).
This ending allows you to initiate a quick fight with the queen. You may attack her on your own or just disagree on her proposal. In this form queen is really weak and you should be able to destroy her even in the first turn of the battle since you will have your entire squad with yourself.
This ending is similar to the second one however it allows you to save Raymond as well. During the conversation with the queen you have to deny her proposal and also choose the first dialogue option which will be available only if you will do as follows:
The best way to do this all is to go to bed and to speak with every listed character after every mission.
You need to face the same requirements as in the previous ending however you have to make a change during the conversation with the queen. You have to convince her to take Raymond with her.
Below, you can find a list of 44 Steam achievements for Shadowrun: Hong Kong.
Complete the City of Darkness mission (the Prologue - Walled City) without killing any of the Yellow Lotus gang members.
Kill a Yellow Lotus gang member in the City of Darkness mission.
Invite Gaichu into your party - the Outsider mission.
Kill Gaichu instead of inviting him into your party.
In the Exit, Stage Left mission, in Neville's apartment, take a sip of the "wine" (blood) from the drinks cabinet, and in the Outsider mission, in the last room, where you find Gaichu, eat the meat bit from the table.
Poison Talon's food in the Uninvited Guests mission.
Complete the Is0bel's side quest.
Complete the Gobbet's side quest.
Complete the Gobbet's side quest and join him to your team.
Kill the Plastic-Face Man.
Let Plastic-Faced Man live.
Strike a deal with Quian Ya.
Convince the last several guards to flee instead of fighting you, in the Prosperity Tower mission.
Harvest all the terminals for data in the Prosperity Tower mission.
During the last mission, have Gaichu and Ku Feng on the party (you need to let her live in the Exit, Stage Left mission).
Punch the last boss.
Watch Raymond Black sacrifice himself to activate the Fortune Engine.
Chase merchant Maximum Law out of the city or kill him.
Steal any Paydata from the Matrix.
Deal damage to four, or more, opponents with a single explosion.
Hit an opponent with 30% hit chance, or less.
Kill an opponent with damage over time (e.g. a poison).
While hacking the IC in the Matrix, complete all of the "stages" on your numeric pad - to have all of the bulbs above lit.
Hit three or more opponents with rebounding spells.
Kill 15 opponents by using drones.
Summon five elemental spirits in spots of locations - with the Summoning ability, you can conjure spirits in spots, where you can see green "bubbles" over specific objects.
Kill five opponents with grenades.
Kill 20 opponents with spells.
You need to get the Shiawase Loader Arm (Cyberware) and toss back 3 grenades with it (this happens automatically, when someone tosses a grenade at you).
Use the Spray&Pray skill (with the SMG), to hit more than two opponents at a time.
Kill 15 opponents using the AUTOMATIC rifle (does not need autofire) or the minigun.
Use "medicine" five times (you can buy them in Club 88 in Heoi).
Fill every free slot of Cyberware with a piece of gear.
With Auto-Loader Cyber-Arm skip 10 instances of reloading.
Kill 10 opponents with a Cyber-weapon (Cyberware applied to your hand).
Stun five opponents using the Shock Hand or the Shock Glove Cyber-weapon.
Make an opponent bleed, be poisoned and on fire.
Lock on 10 opponents with the lock-on skill (the artificial eye, by Decking)
Die during the first mission.
Use the Duncan's "Subdue" skill which allows you to eliminate an unconscious enemy.
Allow a member of your team to take 30 damage and heal it up with one spell.
Complete the Racter mission. Take him with you to Areas Asia Holdings and talk with him after the game's ending.
Make a deal with Quian Ya during the first ending. Details are described in the Endings chapter.
Watch the Raymond Black's sacrifice during the second ending. Details are described in the Endings chapter.
Convince the queen to return to her world during the third ending. Details are described in the Endings chapter.
Convince the queen to return to her world and to take Raymond with herself during the fourth ending. Details are described in the Endings chapter.
Shadowrun: Hong Kong is a classic top-down RPG. However, the engine also processes some of the more advanced graphic processes. In spite of that, minimum system requirements are not too high and there are no problems launching it on a bit older PC, or even on a laptop computer. As a matter of fact, a single-core x86 CPU unit will do. In the majority of cases, this can even work on an Integrated Graphics Unit. The game can also be played by Linux and Mac OS X users.
Singleplayer: Yes
Offline co-op (split screen/hot seat): No
Co-op over the Internet: No
Multiplayer: No
This guide has been prepared on a PC of the specifications listed below:
OS: Windows 8.1 64-bit
CPU: Intel Core i5-3450S
RAM: 8 GB
GPU: Radeon HD 7970
VRAM: 3 GB
With the above specifications, the game maintained 60 FPS at the FHD resolution and with the highest graphic details (active post-processing).
Operating systems: Windows XP SP3, Windows Vista, Windows 7, Windows 8.
Internet connection during the game: Not required
Internet activation: required
Control inputs: Keyboard and mouse
Achievements: Yes (Steam Achievements)
CPU: 32/64 bit, 1.8 GHz or more
RAM: 2 GB
GPU: 256mb VRAM or more, DirectX 9.0 compatible
OS: Windows XP / Vista / 7 / 8 / 8.1 32 or 64-bit
HDD space: 10 GB
Yes, playing Shadowrun: Hong Kong is possible.



 Star Wars: The Force Unleashed II Game Guide & Walkthrough
 Sacred 3 Game Guide & Walkthrough
 Spellforce 2: Shadow Wars Game Guide & Walkthrough
 Sherlock Holmes: Crimes and Punishments Game Guide & Walkthrough
 Silent Hill: Homecoming Game Guide & Walkthrough