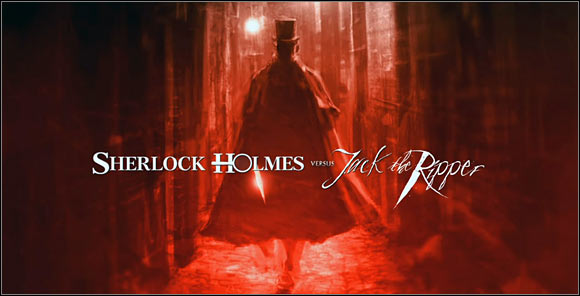
A famous detective Sherlock Holmes and his companion Doctor Watson will face the cruel murder called Jack the Ripper. Of course, they are pretty useless without your support. So read this guide and just help them.
The game is, as always, in full 3D. The new thing is that now you have the ability to choose the perspective. I have played in TPP so all descriptions are based on that point of view. In other words: when I am writing "right" that means that players who are playing in FPP should read it as a "left".
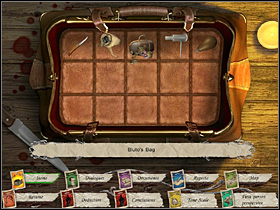
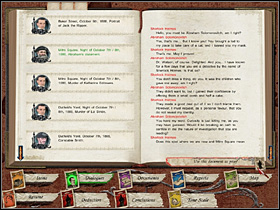
The equipment (Items, Dialogues, Documents, Reports, Map) has couple of new boards: Resume, Deduction, Conclusions and ability to change from FPP to TPP (use do it with mouse and keyboard).
All items that you can find in the game was marked with red, important documents with blue, solutions with green or they were just written in bold.
This time you can use hint (space) to highlight all active objects. In contrast, all reports written by Holmes are useful but not necessary for the further development of the story.
So go and get him... The London dark and full of secrets streets are waiting for you. Beware...
Katarzyna "Kayleigh" Michalowska
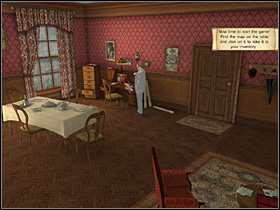
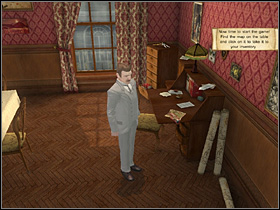
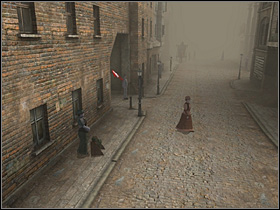
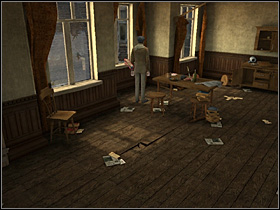
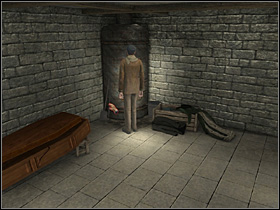
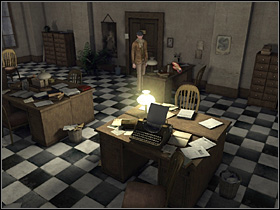
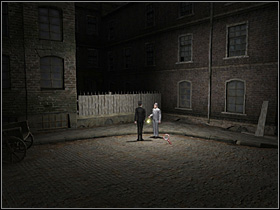
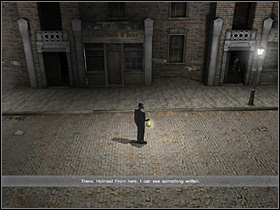
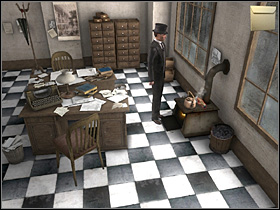
This is a fast course of how to move in the game. You will control Watson who has to find a map, and locate the Whitechapel district - that is the place where the savage prostitute killer has done his another crime.
Follow the commands that are appearing on the screen. First, take few steps by clicking the LPM button when the cursor is in the shape of knife (movement) or feet (changing camera shots). Double-click will cause Watson to run.
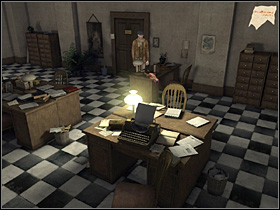
Then press the mouse roll the R key on the keyboard to change the perspective from TPP to FPP. Move in the character in FPP by pressing LPM or by using WSAD keys. The run when you will hit Caps Lock or left shift.
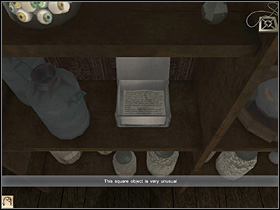
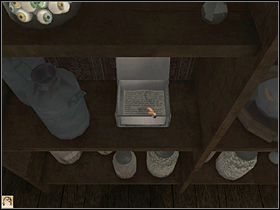
Return to the TPP (press roll or R) and locate all active items (press space bar). After examination of the particular object loupe will change its color to green.
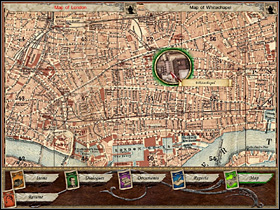
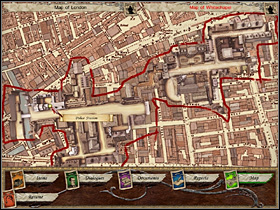
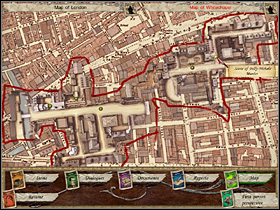
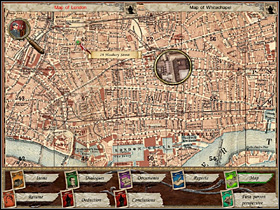
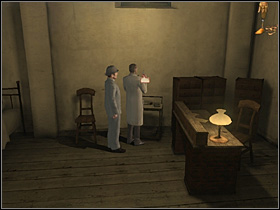
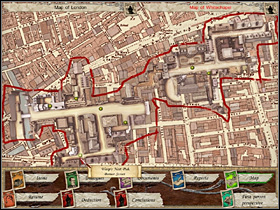
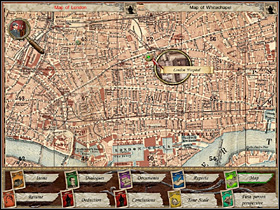
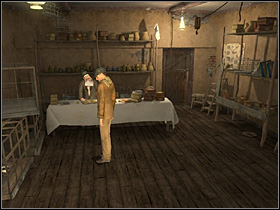
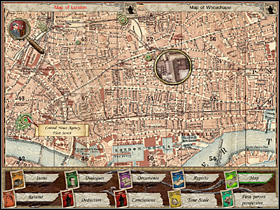
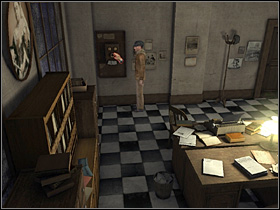
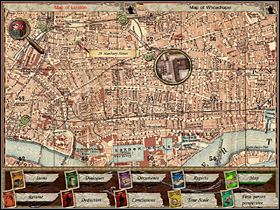
Finally, you can use the map (it is located on the desk on the left), which will automatically appear in your inventory (in the appropriate tab called Map). Click on the highlighted Whitechapel district to zoom. Now, just click on the Police Station and you will be automatically moved to that location.
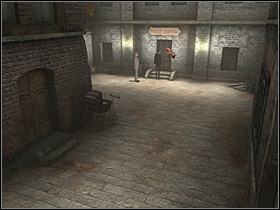
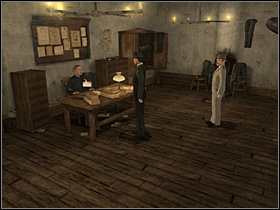
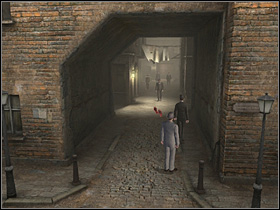
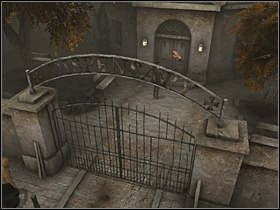
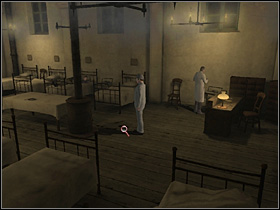
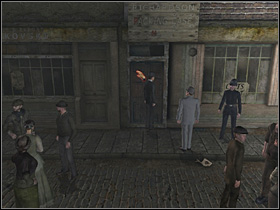
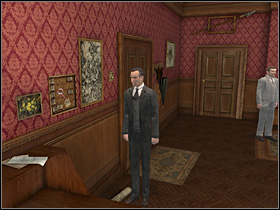
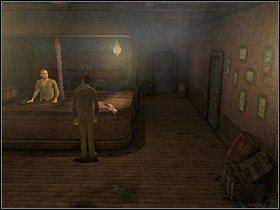
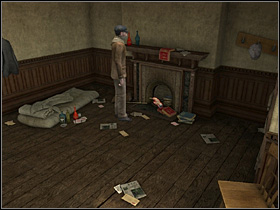
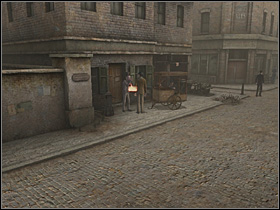
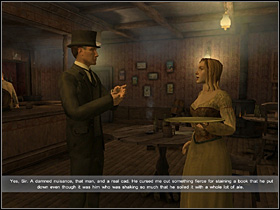
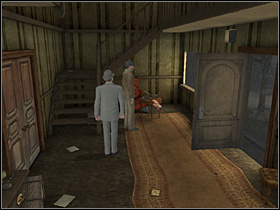
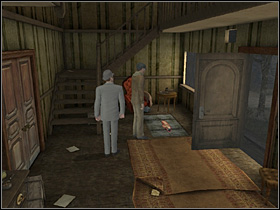
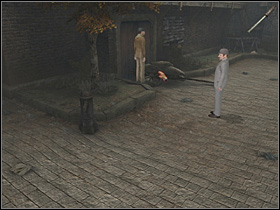
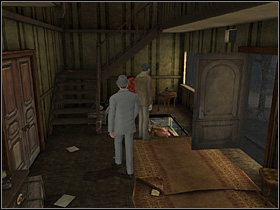
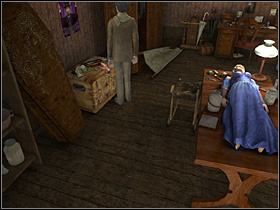
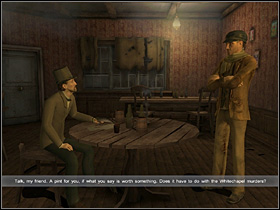
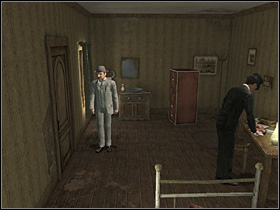
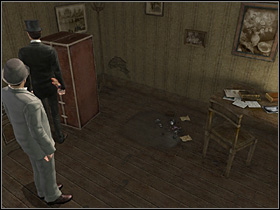
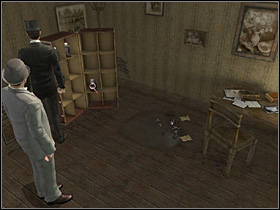
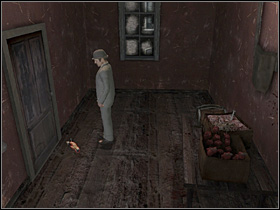
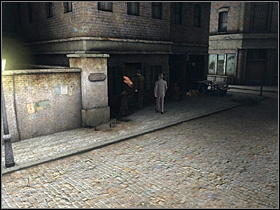
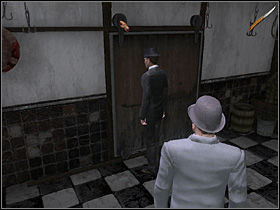
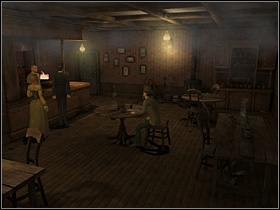
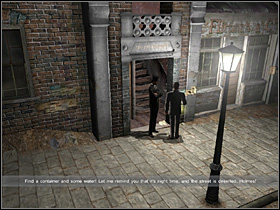
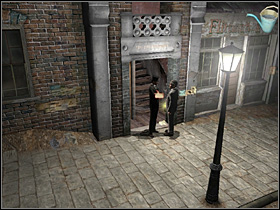
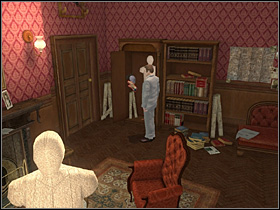
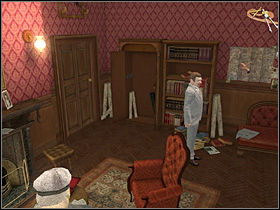
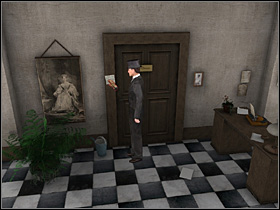
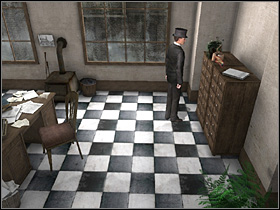
You are now at the entrance to the police station (signboard on the door). Go there as Holmes and Watson will follow you. When inside the go to the desk (on the left) where you will find constable Humphries. Speak with him about a copy of report of the last prostitute murder (click dialog option and it will be displayed in the upper right corner of the screen). You will learn that the constable has lost his leather bag full of documents somewhere near the very bad looking pension. He will help you if you will find this bag. After finishing the conversation you will find yourself outside of the station.
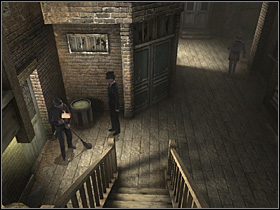
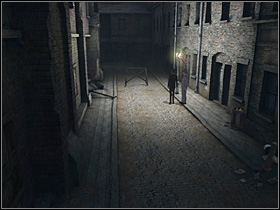
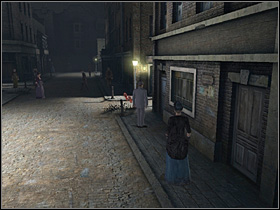
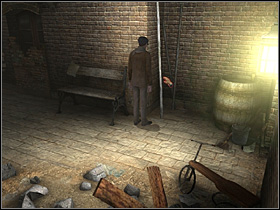
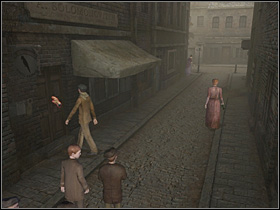
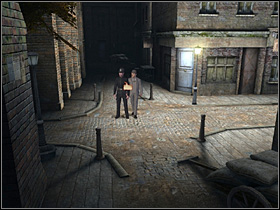
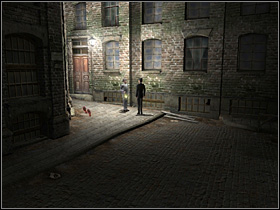
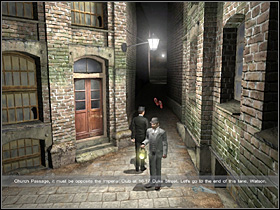
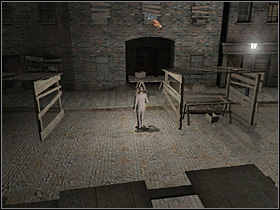
Go to the bottom of the screen until you will leave the main street (Commercial Street - street names can be checked by clicking on the plates located on the corners of every building). Now turn right and then turn left after the first arcade.
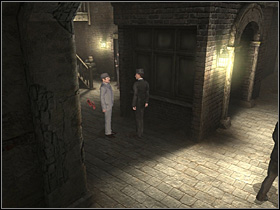
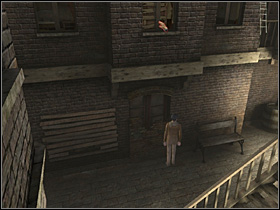
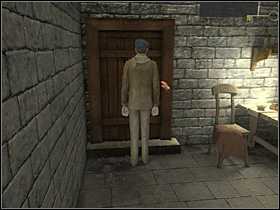
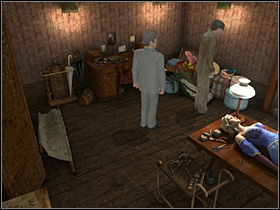
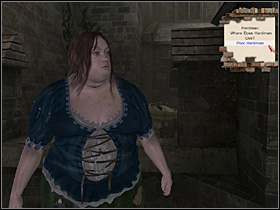
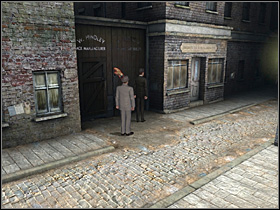
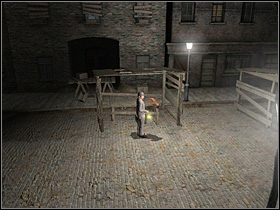
Make two steps and go to the small courtyard (on the left) to reach the pension. Talk to the owner named Finley, who is clearing the pavement. He can help you but first you have to do something for him. A ramble named Captain is sleeping under his house and that scares his clients. Finley would be grateful if Holmes will be able to solve this problem.
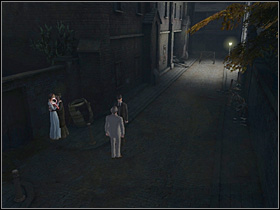
If you want to obtain some information about the Captain's return to the police station (use map). Constable will inform you about the Captain's niece, who is living somewhere on the Commercial Street. So go back to the main street and go right. Holmes will automatically notice a women looking out of the window - this is a Captain's niece, Lucy. Talk to her. You will learn that her uncle is in a very poor condition, and his constant cough were too annoying for the pension owner and he decided to throw him away. In addition a cure was too expensive.
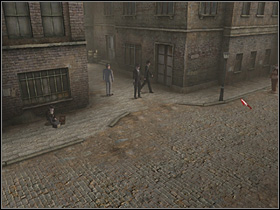
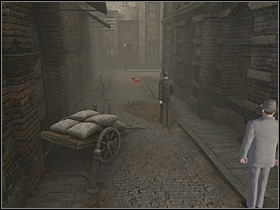
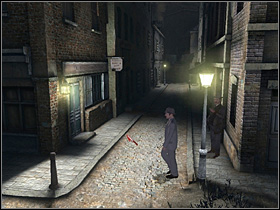
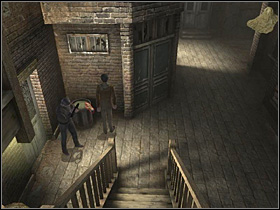
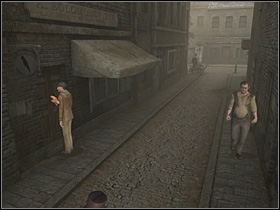
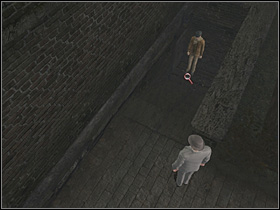
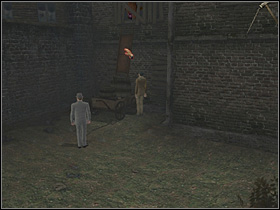
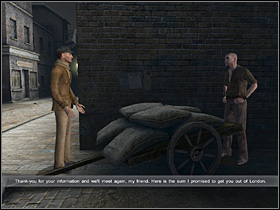
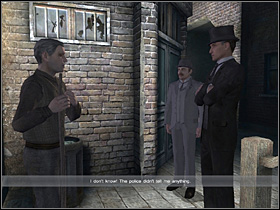
After the talk go away. On the opposite side of the street (at the corner) you will find your informer. Talk to him and you'll find that the Captain is at the end of Batty Street.

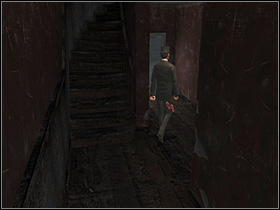
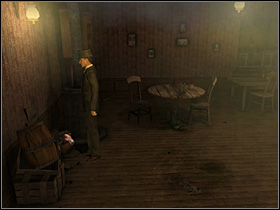
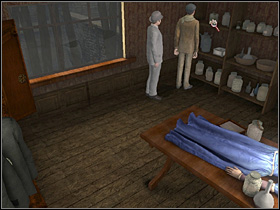
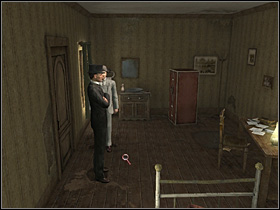
Run to the alley, where under the wall you will find a sick man. You cannot talk to him but click on him. Watson and Holmes will examine his condition. Conclusion can be only one: this man needs some medical attention. You must go to the clinic (in the right part of the map).
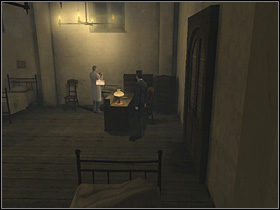
Go through the iron gate to the clinic. Inside talk to the doctor. You will get a medicine which will help Captain to survive few days more. Come back to the alley, Watson is waiting for you there (Map - Dead End, in the bottom of the map). Give a cure to Captain (click a cure icon in the inventory and then click on the patient).
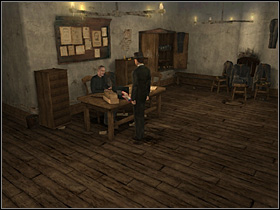
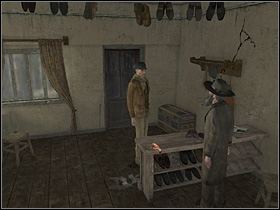
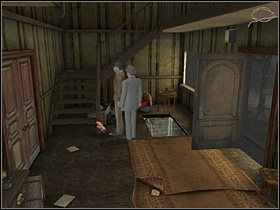
Now you can return to Finley (Map - Low-class boarding house) and tell him that Captain's problem has been resolved. As a result he will give you a Police Bag. Now go to the police station (use map) and give bag to constable. Bag will automatically land on his desk. Police officer will tell you that you have to unlock the bag.
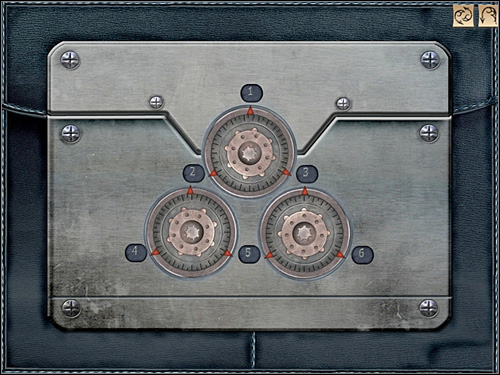
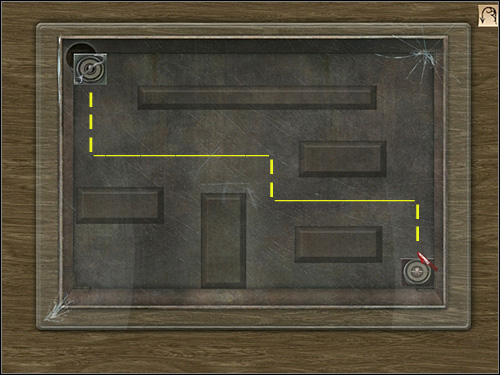
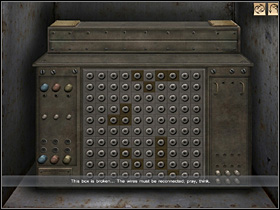
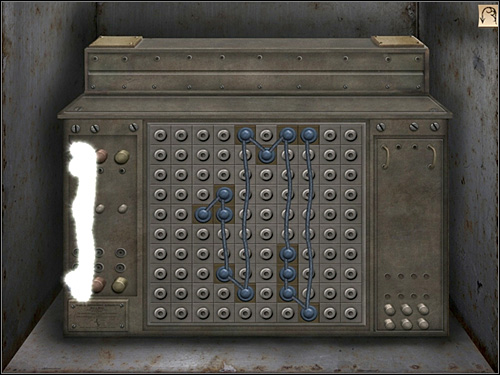
This is a riddle, in which you have you have to change numbers to put them in order from 1 to 6. So move knobs like this: bottom right x2, bottom left x2, bottom right x1, bottom left x2, upper one x2. Now talk to the constable about the report and you will receive item called: Documents - Preliminary Reports in the death of Polly Nichols.
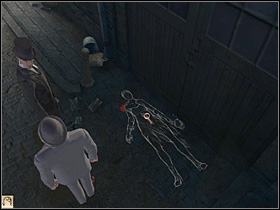
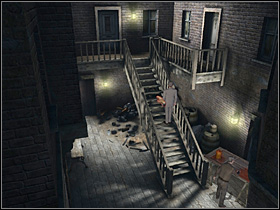
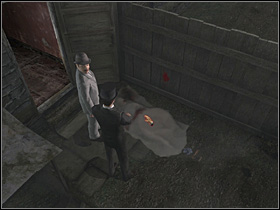
After leaving the police station gentlemen will decide to go to the scene of Polly Nichols 'Murder. It will automatically appear in the right part of the map. Click on the new location and you will be moved there. Detectives will decide to investigate this area later.
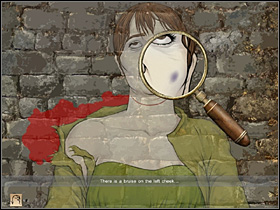
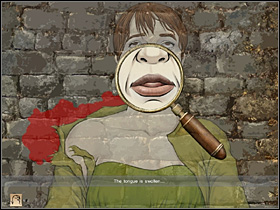
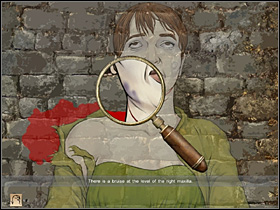
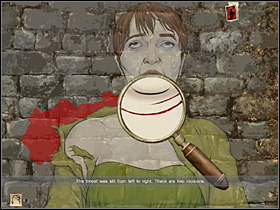
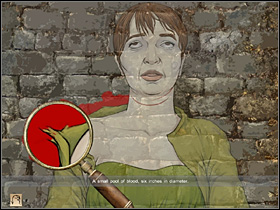
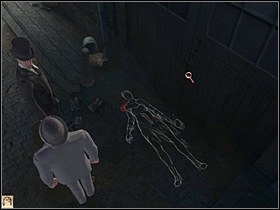
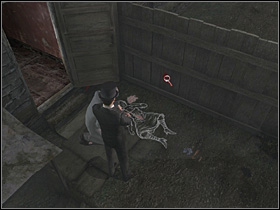
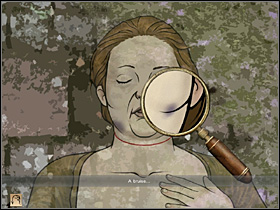
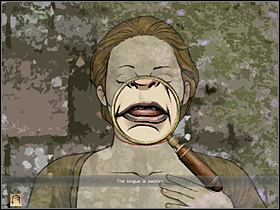
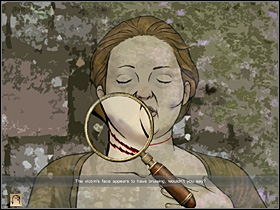
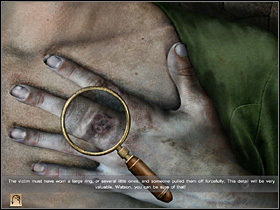
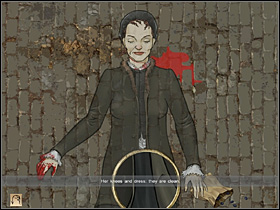
Holmes and Watson are going to make their own local vision and see all the possible evidences left at the place the crime. Click on the contour of the body to zoom. Now click on the victim's head to zoom once again. Now you will be able to see the following evidences:
Bruise on the left cheek (right side from the players point of view);
Swollen tongue;
Bruises on the right jaw (left side from the players point of view);
Cut on the neck;
Blood on the right hand (left side from the players point of view).
When you will find each of these injuries, click LPM on it to hear Holmes comments. Deduction Board will appear now for the first time but close it for now (upper right corner of the screen). You must collect all evidences. Cancel the zoom.
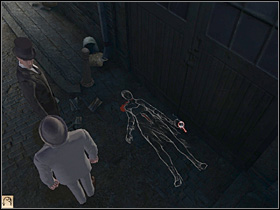
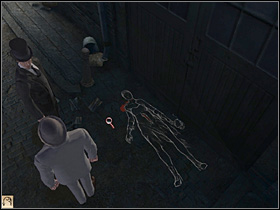
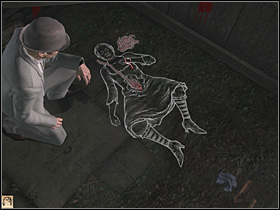
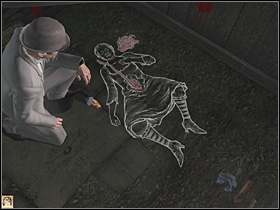
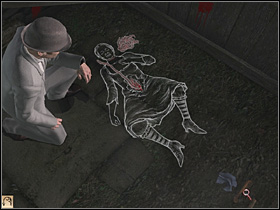
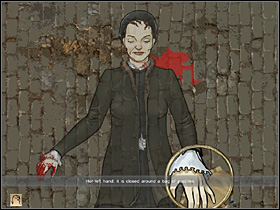
Now click on the victims trunk and Holmes will describe the position of the body. Check the victim's left hand (right-hand side from the player's point of view), and you will find that woman is holding a black cap. At the end look at the ground near the body (you will find nothing) and the door (you will find nothing). Cancel the zoom option.
Go left to the lantern standing there and click on it. Holmes will say something about the poor lighting. Then go back to the place of crime and go right. Look at the kissing pair.
When you will collect all evidences, Holmes will want to act this scene of the crime. You will act as a murderer, ask Watson to be a victim. Your task in this part is to determine the correct series of events by selecting an appropriate image (in the bottom of the screen). You have to decide if the victim was stabbed with a knife, choked or if the killer left or right-handed, etc. When you will be ready click on the Play button. The correct choice will be confirmed by Holmes. In addition a deduction icon will appear on the screen. When you will make mistake, simply click the red square (Stop) and correct what you have to correct.
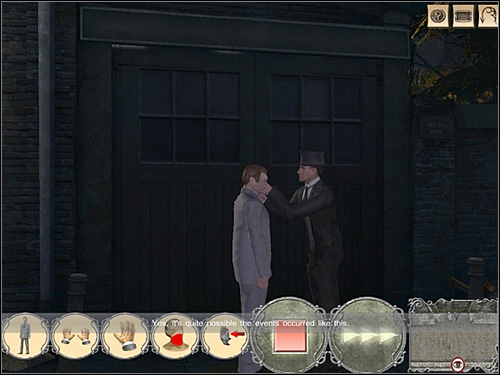
The first series of events: Victim is standing - hands - right hand - neck - murderer in front of the victim.
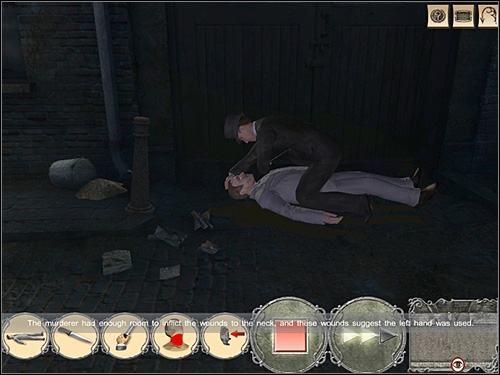
A second series of events: victim is lying - knife - left hand - neck - murderer in front of the victim.
After the scene Deduction Board will appear. That means you have found all evidences and now you have to move them from the left part of the board to the center. The most important thing is that evidences without frames has to moved to the boxes without frames, these with orange frames to boxes with orange frames, etc. The choice of specific field is not important.
When all evidences will be in the correct places, an additional conclusion windows will appear. Click on the arrow to display three different versions (one is correct). At the end conclusion boxes will be moved to right side of the board. If the selected conclusions will be correct, the frame will turn green. If you make a mistake - red.
Now you have two deduction boards (switch between them in the right lower corner of the screen).
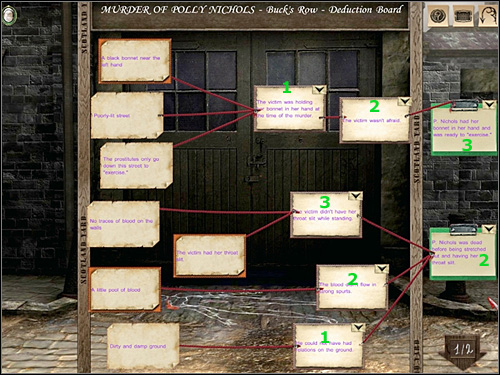
Deduction Board (murder of Polly Nichols - Buck's Row) 1/2:
Evidence 1: The victim was holding a cap in her hand (version 1).
Evidence 2: The victim was scared (version 2).
Conclusion I: P. Nichols was ready to do some exercises (version 3).
Evidence 3: The victim throat was untouched when she was standing (version 3).
Evidence 4: Blood stream was Rather small (version 2).
Evidence 5: The murder didn't touch the ground (version 1).
Conclusion II: P. Nichols was dead when the murderer has cut her throat (version 2).
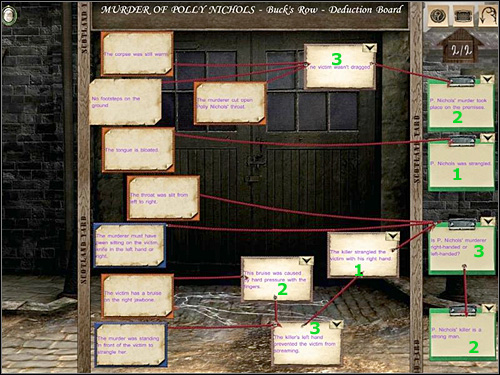
Deduction Board (murder of Polly Nichols - Buck's Row) 2/2:
Evidence 1: The victim was not pulled (version 3).
Conclusion I: P. Nichols was murdered in her house (version 2).
Conclusion II: P. Nichols was choked (version 1).
Evidence 2: Bruiser was made because of the strong pressure of the fingers (version 2).
Evidence 3: The murderer was holding Her left hand on the victims mouth (version 3).
Evidence 4: The murderer was choking with his right hand (version 1).
Conclusion III: The murderer of P. Nichols is right or left-handed? (version 3).
Conclusion IV: The murderer of P. Nichols is a very strong man (version 2).

Holmes and Watson will now summarize their thoughts- if for some reason you have canceled the zoom of the board, you can find it on the wall on the left. You should match motives with the descriptions now (simply drag them to the appropriate boxes - correct choice will be confirmed by Sherlock). Then choose these that are very possible (mark them with YES).
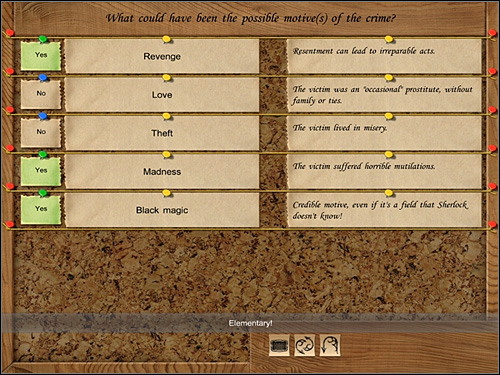
Motives of the crime:
Yes - Revenge - Resentment can lead to irreparable acts.
No - Love - The victim was an "occasional prostitute", without family or ties.
No - Theft - The victim live In misery.
Yes - Madness - The victim suffered horrible mutilations.
Yes - Black Magic - Credible motive, even if it's a field that Sherlock doesn't know!
As a result of reading Wednesday's issue of journal called "The Star" (Documents - The Star) and visit of inspector Abberline, Watson will have to go to the police station (use map). Your task is to obtain information about the suspected man nicknamed Leather Apron. Watson will learn that the man has not been imprisoned yet and that Finley was asking about him. If you want to find leather aprons constable suggests you to ask some prostitutes and people who are wearing aprons.
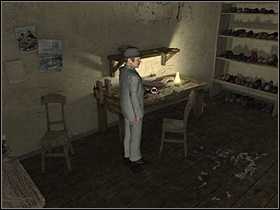
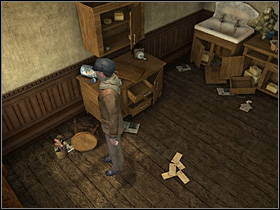
Now, Watson has to go to Finley's Bed & Breakfast (use map). You will learn from him that he has a new tenant. The most important thing is that the man is very strange. He goes out every night and returns close to the dawn. In addition he has broken a jar, and after this incident it was stinking almost for two days. About people wearing leather aprons Finley will tell you to go to the town and speak with the butchers and shoemakers. He will mention about one - Isaac Solomonovitch, who has a workshop in the Jewish neighborhood.

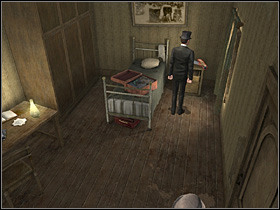
After the talk go to the stairs and take some glass shards. Watson will ask once again about a new tenant. You will find that it is a doctor named Tumblety.
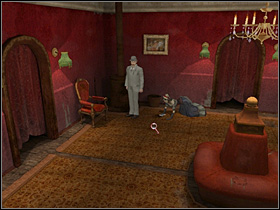
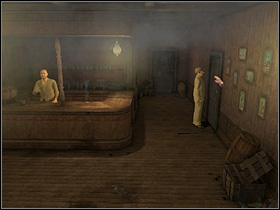
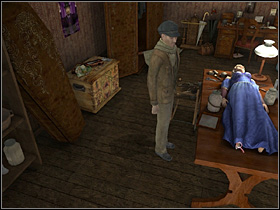
Now go Lucy 's Lodgings. Ask her about Leather Aprons. The girl does not know anything, but she will tell Watson that he can go to the brothel and speak with Bella Poolman. Open the door where Lucy will leave you and go to the bottom of the screen and then to the door on the right.
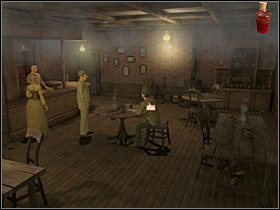
When you will be in a living room talk to Bell about the Leather Apron. You will learn that he is attacking street prostitutes to rob them and his name is Pizer. Recently he has attacked Margie, who noted that he has a knife, deformed face and small eyes. Unfortunately, Margie is not at the brothel, because she is ill. You can try to find her in hospital. She knows something about Dr Tumblety, but... Watson has to help her first. You will have to recover a staff that was left by a client - an artist painter. Unfortunately someone has stolen it and as a matter of fact she will be forced to offer one prostitute free of charge to this client.
After the talk go to Mara (she is on the left). She will inform Watson that the whole incident took place yesterday. One worker, with very large feet, has soiled the floor.
At the end speak with the artist. You'll get an exact description of the staff: ebony, 35 inches long, covered with round silver knob, etc.
Your next objective will be the Clinic (Map - Clinic). Before you will talk to Dr. Gibbons, go few steps forward and look at the floor. You will see that it is soiled in the same way as in brothel.
Ask physician about Margie, her attacker, the traces on the floor and the stolen staff. He will tell you that this is the last payment for a leg prosthesis. Gibbons knows that it is stolen but he won't give it to you... for now. He must be sure that it is indeed the same staff that you are looking for. Go to the end of the hall and open the cabinet on the wall. Click the left side and you will see many canes (click to zoom).
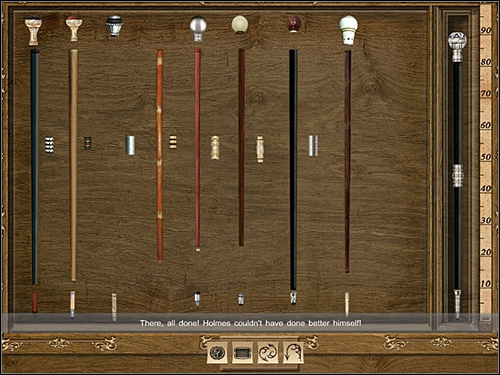
Now you have to compose the staff from these elements. Choose a third stick from the left (black) and move it to the box on the right. Add the fourth knob, last ring and fourth cusp.

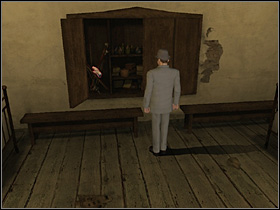
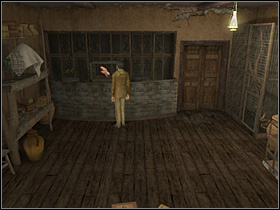
During a brief conversation with Gibbons, Watson will learn that he can take the cane, if he will give him a harness for prosthesis. Leave the clinic and go to the other side of the street. Go to the bottom section of the screen and, when the camera view will change, turn right. At the corner you will find Isaac Solomonovitch's workshop.
The room will be empty, go deeper and look at the table on the left (you will see a harness there). After few second Isaac will come. Tell him that Finley has sent you. Watson will learn that, the leather apron called John Pizer and hiding from the police (because he is a suspect in that murder case). Watson will tell Finley that he has a evidence that Pizer is innocent. Issac will tell you that he will speak with Pizer and he will force him to go to the police station.
Now ask about the harness - you will find that shoemaker will make one for you and it will be ready in a few days. Now go back to the police station (use map). You meet Holmes there, he will inform you about the next murder, this time on Hanbury Street. Sherlock will decide that you should go there so click the new location on the map (it is somewhere between Baker Street and Whitechapel).
Go left to the policeman standing on the sidewalk. Speak with him and you'll find that nobody has seen the body yet. Open the door and go straight to the courtyard, located at the end of the corridor.
Uncover the body. Holmes will ask Watson to estimate the time of the death (it was before 4.30). Click on the blood on the hence (twice because the first click will only zoom). Sherlock will notice the second evidence - on the wall.

Look at the victims head. Try to find:
Bruise on the left cheek (right side from the players point of view);
Swollen tongue;
Bruise on the right jaw (left side from the players point of view);
Double cut on the neck.
Look at the left (right from the players point of view) victims hand (zoom). You will see a mark made by a ring(or rings) on the middle finger.
Try to find an envelope (on the left side of the victim). It will contain 3 white pills (A Chapman 's White Pill) and Holmes will take a one. Take a look at the ground next to the victim (you will find nothing there). Finally, examine prostitute stomach. Holmes will surprise Watson with the news that woman has a removed uterus. Everything was done in a very professional way.
Now it is time to fill all Deduction Boards. You have three of them:
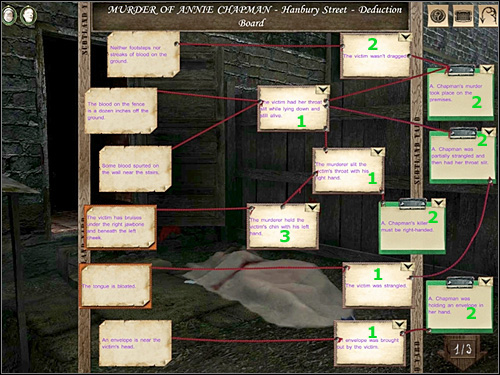
Deduction Board (murder of Annie Chapman - Hanbury Street) 1/3:
Evidence 1: There is no blood Or footsteps on the ground (version 2).
Evidence 2: The Victim has a cut throat when she was lying on the ground and she was alive (version 1).
Conclusion I: The murder of A. Chapman had taken place in her house (version 2).
Evidence 3: The murderer Has holding a victim's head with his left hand (version 3).
Evidence 4: The murderer Has cut victim's throat with his right hand (version 1).
Conclusion II: The murderer is right-handed (version 2).
Evidence 5: The victim was choked (version 1).
Conclusion III: The victim was almost chocked and then murderer has cut Her throat (version 2).
Evidence 6: The envelope was dropped by the victim (version 1).
Conclusion IV: A. Chapman was holding an envelope in her hand (version 2).
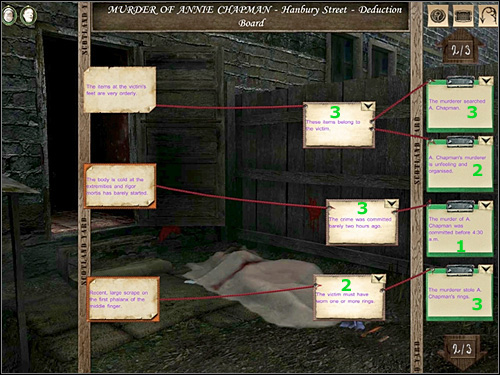
Deduction Board (murder of Annie Chapman - Hanbury Street) 2/3:
Evidence 1: These items belonged to the victim (version 3).
Conclusion I: The murderer has searched the body of A. Chapman (version 3).
Conclusion II: The murderer of A. Chapman is a very well organized and dispassionate person (version 2).
Evidence 2: The crime has taken place Orly two hours before (version 3).
Conclusion III: The murder of A. Chapman was done before 4.30 (version 1).
Evidence 3: The victim was wearing on or more rings (version 2).
Conclusion IV: The murderer has stolen a ring from A. Chapman (version 3).
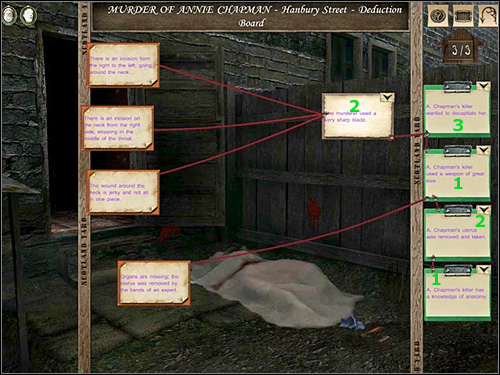
Deduction Board (murder of Annie Chapman - Hanbury Street) 3/3:
Evidence 1: The murderer has used a very sharp knife (version 2).
Conclusion I: The murderer of A. Chapman has used a very large weapon (version 1).
Conclusion II: The murderer of A. Chapman wanted to cut the victim's head off (version 3).
Conclusion III: The uterus of A. Chapman was removed and taken (version 2).
Conclusion IV: The murderer of A. Chapman has a very good knowledge of human anatomy (version 1).
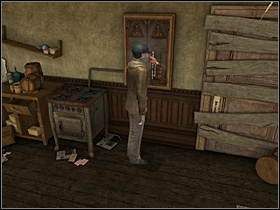
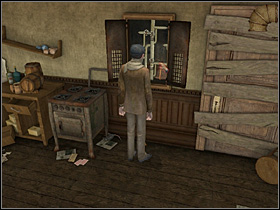
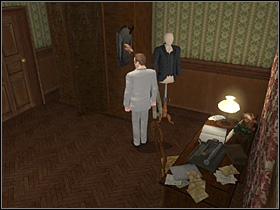
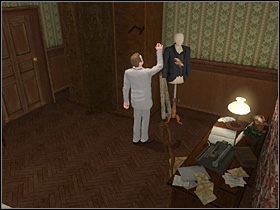
As a Watson go to the desk on the left (where Holmes is usually doing his research) and look at the remains of the green jar taken from the stairs. Watson will ask about the smell. Sherlock, will tell him that it is a formalin. Now you get some more information, so use the map and go to the Whitechapel.
At the beginning go to the shoemaker Solomonovitch (Map - Cobbler). Go to the table on the left and speak with Isaac. You will learn that Pizer has gone to the police station and now he is free (Documents - Daily News). You'll get Harness for Prothesis too.
Now go to the clinic (use map) and give the harness to Dr. Gibbons (click the harness icon in the inventory equipment and then click on Gibbons). In return you will receive a Cane. Talk to him about the formalin (he don't have it now) and show him the pill found near the Annie's corpse. You will learn that the girl received these pills from him because of the tuberculosis. They have nothing to do with the murder.

Now go to the brothel (Map - brothel). Give the staff to Bella Poolman and she will tell you some interesting things about Dr. Tumblety. He is Canadian or American, he hates women (maybe he is homosexual) and he visits Wasp Nest 's Pub on Berner Street (the new location on the map). Bella will explain Watson the differences in the prostitutes hierarchy. For example Black Annie and Lucy was the least important in this job. After the conversation go to that pub (light blue door).
When you will be inside talk to the journalist Tom Bulling. Someone has stolen his red ink and until he won't get it back - he doesn't want to pay or leave. Speak with the painter too. You will learn some interesting things about Dr Tumblety. For example: he's doing something behind the closed doors in the nearby room. Try to go there - barman will stop you. But you are close enough to the red ink so simply steal it.
Of course give it to the journalists. Speak with the barman about the doctor and the mysterious room. You will find what you have to say to get inside. With this knowledge, go there but unfortunately Bluto doesn't like the strangers and he will decide not to let you in. In addition, he is expecting some workers.
It is time to visit Finley (use map) and ask couple of questions about the strange tenant. He will give you an exact description of the doctor: high, older than 50 years and he is wearing an American hat). Watson notice a smell of gas in the air.
No you have to go to the police station (use map). Talk to the constable (tell him the description of the doctor). Then speak with Richardson. He has a problem, because two witnesses told him the different hour when the crime could occur. As a matter of fact his colleague has destroyed the report.
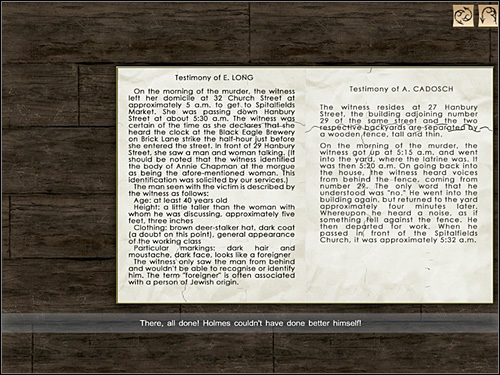
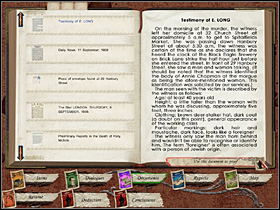
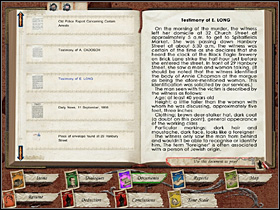
The pieces of this report are near the bin (on the left of the desk). Take them. Now you have to restore the document. With LPM you can move the scraps to the window in the center of the screen. With PPM you can rotate the scraps. I recommend to start with the corners and edges. You have to reconstruct two documents: Testimony of E. Long and Testimony of A. Cadosch. As a result they will appear in the inventory along with one more document: old police report concerning certain arrests.
Now it is time to go home. Click on the map to move to the Baker Street.
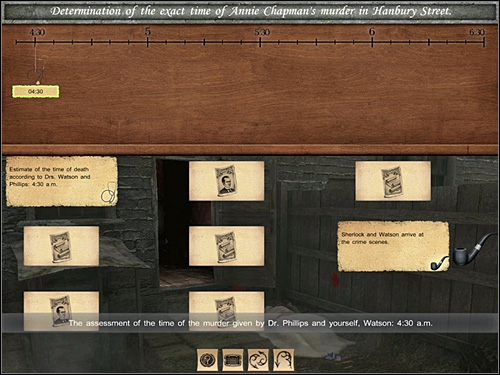
Based on the information gathered so far Sherlock and Watson will try to guess the exact time of Annie Chapman murder. After the discussion go to the board on the left (as a Holmes). When you will click on it you will have to match witnesses with hours. Correct answers will be marked with green.
The first icon is the stethoscope - a symbol of Watson. Click on this stethoscope and move it up to the hour: 4:30 - this is the hour guessed by the Watson and Philips (police medic).
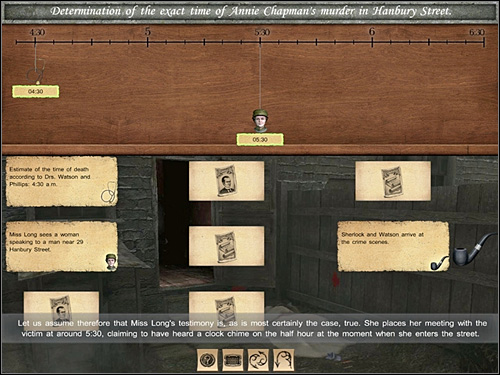
Now click the icon with document (the second one from the left), and you will be moved to the E. Long testimony. Note that there is a command: Use this document as proof. Click this text. Now you can click PPM to leave the inventory - in the note on the board (on the left) the icons with women's head should appear should (that's E. Long). According to the testimony, match it with 5.30.
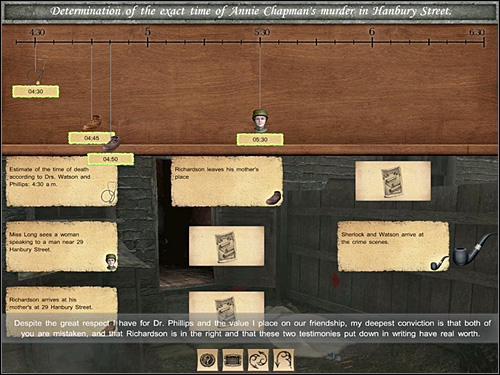
Do the same thing with the last icon. You will be moved to the another board with the conversation with Richardson (on the left, second from the top). Find option called "Use this document as a proof", click on it and cancel the inventory tab. Now you will see two shoes: bright one with the hour when he came to his mother and the dark one - with the hour when the has exited his mother's home. Pin them to hours: 4.45 and 4.50.
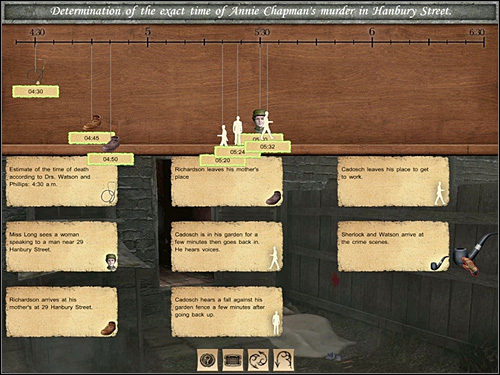
Finally, click the second, middle icon with documents. You will open the testimony of A. Cadosch. Click the option "Use as a proof" and return to the board. You should receive three icons which represents: Cadosch leaving the garden and hearing the call (figure facing left), Cadosch hearing the fall (standing figure) and Cadosch leaving the apartment (figure facing right). Pin them to hours: 5.20, 5.24, 5.32.
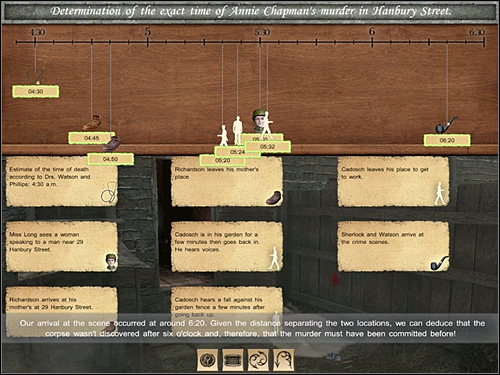
The last icon is the pipe - this is the time when Watson and Sherlock had arrived. It was 6.30.
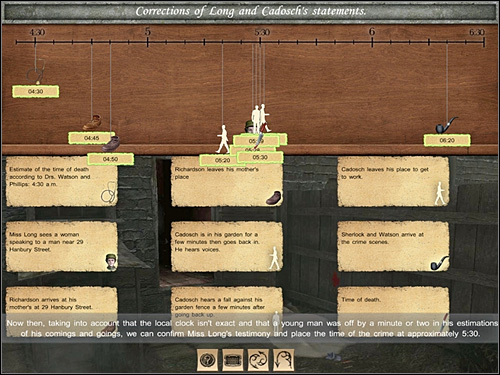
With all clues Holmes and Watson will make a conclusion that this whole confusion with the time is because of the clock located on the church tower, which displays an inaccurate time. As a result you must change the position of icons on the board. The head of the woman should be at 5.28 (Mrs. Long saw the victim speaking with the murderer), the figure facing left at 5.29 (Cadosch heard the victim speaking with the murderer), the standing figure at 5.31 (Cadosch heard the sound of the falling body), which means that the crime was done at 5.30. Now place the knife icon near this hour.
After a brief conversation as Holmes go to the opposite wall. Click on the board hanging there. Now you have to find possible motives of the second crime. You have to do it in the same as previously.

CREDIBLE MOTIVES:
No - Specimen for the sole purpose of study - In the medical university environment, students easily have Access to a number of specimens.
No - Black Magic - No indication can suggest Any type of ritual.
Yes - Cannibalism - Dementia can push men to commit incredibly vile acts.
No - Trophy - For this motive it would have been easy to quickly remove something from the Buck's Row victim, Polly Nichols.
Yes - Money - To supply human organ trafficking.

After a brief conversation Watson decides to go to the hospital, where his former colleague is working (Map - London Hospital).
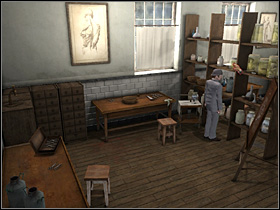
Speak with Andrew about human organ trafficking and you will find some information about the disappearance of some bodies from the morgue. Go right and open the suitcase with surgical instrument that is lying on the table. Take one of the instruments. Get close to the trolley and use the tool to unscrew one of its wheels. Watson will find an old prescription covered with some notes.
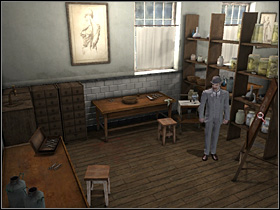
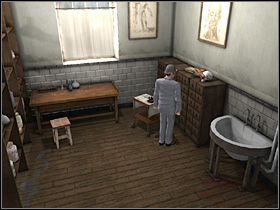
Now take a look at a heart drawing. Then take Encyclopedia of Anatomy. Get close to the cabinet and click on the jar.
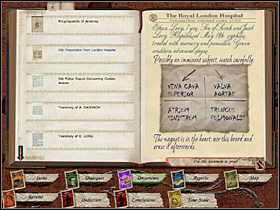
You will see a chart with a puzzle. Click on the icons of two documents - it will move you to the appropriate board where you will have to open encyclopedia and prescription. In the right bottom corner of each of them is the icon called "use as a proof". Click on it, and evidences will appear on the board. The point is to move pointers of the clock on the correct number.
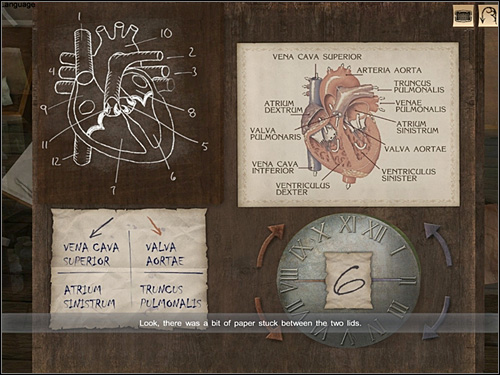
Near the blue pointer you have description: VENA CAVA SUPERIOR. Find this part of the heart in encyclopedia and check what number it is (on the drawing) - 1. Now move the pointer to I (you can choose the direction.
Near the red pointer you have description: VALVA AORTAE. It is marked with number 5. So move clock pointer to V. As a result you will see a message with the number 6 (Documents - Heart's Message).
The second description near the blue pointer is: ATRIUM SINISTRUM. This part of the heart is marked with 8, so you have to move pointer to VIII.
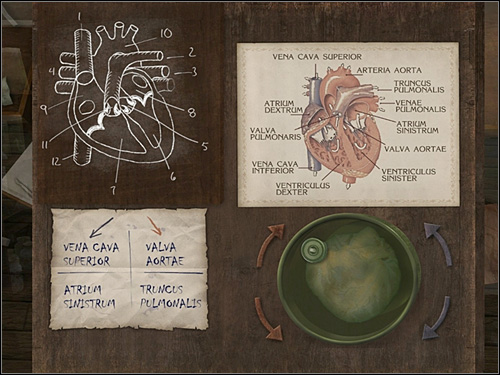
The second description near the red pointer is: TRUNKUS PULMONALIS. This part of the heart is marked with 2, so move the clock pointer to II. The hiding place will be open now. You can take a magnet.
Now go to the second part of the room, this one with student desks. Go to the desk marked with 6. Open it and use the magnet.
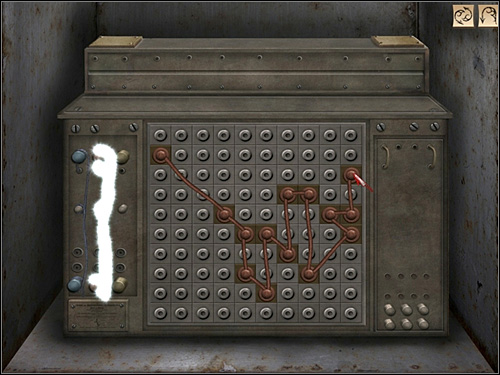
The next puzzle board will appear. You must change the position of all magnets. When you are moving one of them, the other moves automatically, and its path is a reflection of the route of the first magnet. You have to try not to hit iron any bar. The easiest way to find a solution is shown above. As a matter of fact Watson will get the second magnet and a hook, which was attached to it.

Go to the other side of the desk, move it with the hook and take the card that is hidden there. This is the Encoded Message which must be decrypted by Holmes. At this moment Andrew will come with the list of stolen bodies.
Meanwhile, Holmes has decided to dress himself like a mudlark and visit the Wasp Nest's Pub Os to offer his services to Bluto. Go to the Sherlock to the bedroom and take your new clothes. Then select Whitechapel district and the Wasp Nest's Pub.
When you will be inside try to go to the Bluto (right of the bar). On the way there Holmes will notice a hole in the ground. First of all, you have to move the plank and take tongs. Then you will have to solve another puzzle. You have to move items. But some of them can be moved only vertically and others - horizontally. The point is to get the jewel with the Hebrew character on it.
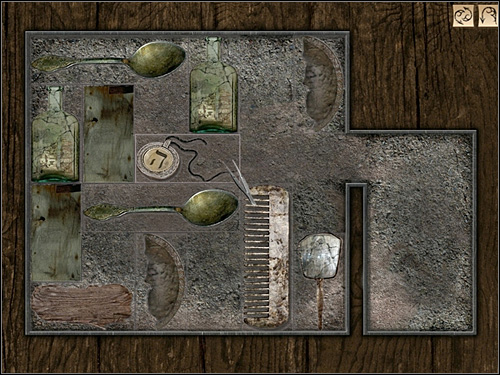
One of the possible solution:
Upper spoon to the left;
Right half of the plate goes up;
Mirror goes up;
Wood to the right;
Left plant to the right;
Bottom spoon to the left;
Right bottle goes down;
Bottom spoon to the right;
Jewel to the right;
Upper plant goes down;
Upper spoon to the left;
Comb goes up;
Bottom spoon to the right;
Upper plank goes down;
Bottom spoon to the left;
Jewel to the left;
Bottom bottle goes up;
Wood to the left;
Mirror goes down;
Bottom spoon to the right;
Jewel goes right;
Both planks goes up;
Bottom part of the plate goes up;
Wood to the left;
Bottom part of the plate goes down;
Bottom spoon to the left;
Comb goes down;
Jewel to the right.
When you will get the Jewel Holmes will knock to the door on the right. Bluto will order you to recover a heavy bag from the abandoned building located opposite to the Finley guest house. Then he will tell Holmes some interesting things about Dr Tumblety.
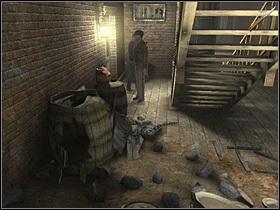
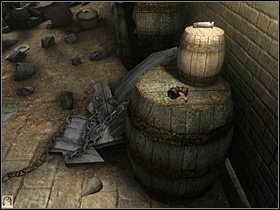
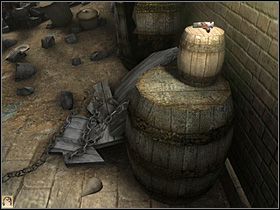

Go to the Finley's Bed & Breakfast (use map). You will smell a gas there. The gas goes out of the window of the abandoned building mentioned by Bluto. To get there you will need a ladder. Finley will tell you that you can find broken ladder under the stairs. You just have to fix it. Go to the courtyard located left of Finney (on the right side of the stairs). Take Elbow Pipe located on the barrels: Hammer Head and perfume puffer that is lying on the ground.
Cancel the zoom option and go to the another part of the courtyard and look at some garbage under the stairs. You will find two lead pipe from a gas system, small planks, rusted iron dishes, little stick and a nozzle from a perfume atomizer.
Take a wooden pole, two sticks and nails located near the bench. Don't forget about some rags too. Go to the inventory and combine hammer head with small stick. As a matter of fact you will get a hammer. Combine two sticks together, then attach wooden pole to them, add small planks, nails and a hammer - you will get a ladder.
Now try to get to the building. Bring the ladder to the windows from which gas is leaking. You will need something like mask, which will protect Holmes from the gas. Go to the barrel with water and use rags on it. Now you can use wet rags on Holmes face (just click it in the inventory). Now you can go inside.
Take a look at the table with the dead rat, and go to the upper left corner of the room. You will find a blowtorch there, which will be very useful. Then go to the opposite wall and take iron bar.
Return to the center of the room and go to the wall in front of the window. On the left of the door with boards you will find a gas installation. Use your rod to open it. Note that there is a bag hidden by the pipes. Try to get it out. As a result Holmes will decide that his first step will be to eliminate the leaking gas. But there is a problem, he need a better mask to do it. Leave the room through the window and talk about the mask with Finley. He will suggest you to go to the shoemaker.
Go to the Isaac (use map), he is very suspicious of strangers but when you will show him the gem, he will change his attitude to Holmes. This item was stolen from the neighbor child and Isaac is grateful that you had found it. Tell him about your trouble. The Jew will tell you to go to his cousin Abraham, who has pet store located at the same street. After you will Isaac home, go to the shop of another Solomonovitch. Go deeper into the room and talk with Abraham. You will learn that the man has a good mask, but now it is in the cage with a big snake. You have to take it from there.


Before you will do that look at some things in the shop. Remove piece of hook for snake that is located on the regale board on the right. Go near the door and take a cage with a tight mesh.

Now you have to go to the shoemaker (use map). Ask him if you can borrow tongs. Take metal shrank and iron thread too.
Now return to the pet shop. Use metal thread and tongs to connect hook with the shank to form a snake pole. Go to the large cage with the snake (right of the door). Put a smaller cage in front of it and take it out (click on the large snake with activated pole). Now you can take your tanner's mask.
Go into Finley Bed & Breakfast (use map) and go to the abandoned building. Put on your mask (click it in inventory). Walk to the gas installation and click on the hidden bag (zoom).

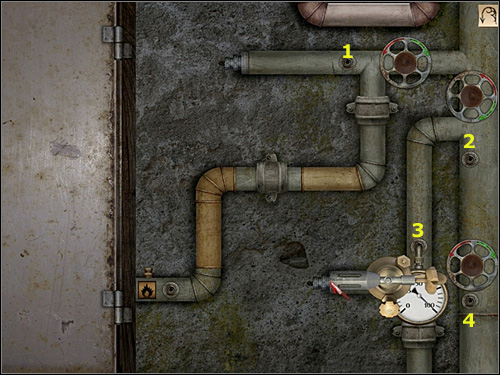
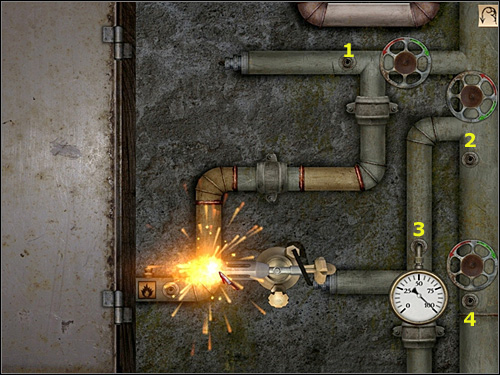
You can see a board, where you have to restore missing pipe and switch some gas knobs.
Now you have to connect the pipes and weld them. It is necessary to bring gas from a main pipe (the thicker) to the lower pipe (on the left). You will find a manometer there so put it to hole with number 3. However manometer that was put there shows zero. You must close and open (with three knobs) a gas stream in other pipes. The pressure gauge in hole No 3 must show 100.

So go for it. The upper knob (at hole No. 1) shows 50 - to turn to the left (PPM) to decrease it to zero. Move pressure gauge to the hole No. 2 (shows zero) and turn the middle wheel to the right (LPM) - it will rise the gas pressure to 50. Now you have to close down the gas stream in the main pipe. Move the manometer to the hole No. 4 (it will show 50) and turn the lower knob to left (PPM. Now it will show zero. Make sure that the pressure gauge at the hole No 3 shows 100 - if so, you can start working.

Point the flame to each of the five connections. When you will do it in the right way you will see sparks. When the work will be done (installation will change color to dark red) click left mouse button.

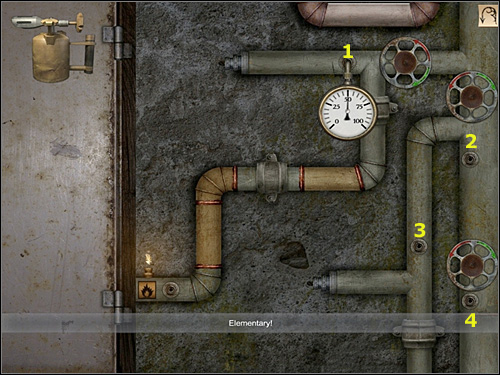
Now you have to supply the main pipe with the gas to finally repair the installation. To do this, turn off the middle wheel (near the hole No. 2), so that the pressure gauge will show zero. Take manometer to the hole No. 1 and open the gas (LPM) by turning the upper wheel - pressure gauge should show 50.
Of course, pull out the Bluto's Bag from the pipes. Holmes will not honor the promise given to Bluto and he will check the bag. You find some stolen jewels there. Replace them with some rusty pots. When you will be going down, take the kitten, remove the mask and go to the pub.

Give the bag to Bluto (click it in inventory and then click on the door). Talk to him about Squibby. You will learn that sitting in custody. When you will give the bag to Bluto it will be good to just go away very quickly. Holmes will now go to the zoo shop (use map). It is time to resolve the issue of the cat. In front of the shop Holmes will find his informers. You will learn that one of them has lost the cat scared by Big Danny. Of course, this is the kitten found by Sherlock. After finishing the conversation, go to the shop. Bertie and Pounce will go with you.


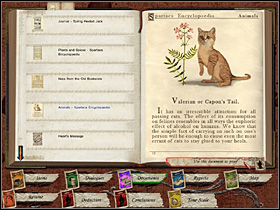
Bertie is injured, so ask Abraham for help. The Jew will ask Holmes to bring the Spartaca Encyclopedia, where Holmes will read that cats like the smell valerian. Leave the kitten in the care of Solomonovitch and go to the police station (use map).


When you will click on the door Holmes will find that he must be sure whether Squibby is actually inside and then scare of the policemen. Go to Commercial Street, where you will find Big Danny. Woman does not want to give Holmes any information. Go to the brothel (use map). Ask Lucy whether police officers are the customers of this place, and the ask Bella about some bottles. You will find that these are the Paris perfumes, which was left by one client in the form of the payment, but the woman does not know which of these are actually real perfumes and she fears that they ma badly affect girl's skin. Sherlock will decide to examine the content of the bottles. As a payment he will receive some information about Squibby. Take the case of perfumes.

Before you will do that look at some things in the shop. Remove piece of hook for snake that is located on the regale board on the right. Go near the door and take a cage with a tight mesh.
Now you have to go to the shoemaker (use map). Ask him if you can borrow tongs. Take metal shrank and iron thread too.

Now return to the pet shop. Use metal thread and tongs to connect hook with the shank to form a snake pole. Go to the large cage with the snake (right of the door). Put a smaller cage in front of it and take it out (click on the large snake with activated pole). Now you can take your tanner's mask.
Go into Finley Bed & Breakfast (use map) and go to the abandoned building. Put on your mask (click it in inventory). Walk to the gas installation and click on the hidden bag (zoom).
You can see a board, where you have to restore missing pipe and switch some gas knobs.
Now you have to connect the pipes and weld them. It is necessary to bring gas from a main pipe (the thicker) to the lower pipe (on the left). You will find a manometer there so put it to hole with number 3. However manometer that was put there shows zero. You must close and open (with three knobs) a gas stream in other pipes. The pressure gauge in hole No 3 must show 100.
So go for it. The upper knob (at hole No. 1) shows 50 - to turn to the left (PPM) to decrease it to zero. Move pressure gauge to the hole No. 2 (shows zero) and turn the middle wheel to the right (LPM) - it will rise the gas pressure to 50. Now you have to close down the gas stream in the main pipe. Move the manometer to the hole No. 4 (it will show 50) and turn the lower knob to left (PPM. Now it will show zero. Make sure that the pressure gauge at the hole No 3 shows 100 - if so, you can start working.
Point the flame to each of the five connections. When you will do it in the right way you will see sparks. When the work will be done (installation will change color to dark red) click left mouse button.
Now you have to supply the main pipe with the gas to finally repair the installation. To do this, turn off the middle wheel (near the hole No. 2), so that the pressure gauge will show zero. Take manometer to the hole No. 1 and open the gas (LPM) by turning the upper wheel - pressure gauge should show 50.


Of course, pull out the Bluto's Bag from the pipes. Holmes will not honor the promise given to Bluto and he will check the bag. You find some stolen jewels there. Replace them with some rusty pots. When you will be going down, take the kitten, remove the mask and go to the pub.

Give the bag to Bluto (click it in inventory and then click on the door). Talk to him about Squibby. You will learn that sitting in custody. When you will give the bag to Bluto it will be good to just go away very quickly. Holmes will now go to the zoo shop (use map). It is time to resolve the issue of the cat. In front of the shop Holmes will find his informers. You will learn that one of them has lost the cat scared by Big Danny. Of course, this is the kitten found by Sherlock. After finishing the conversation, go to the shop. Bertie and Pounce will go with you.
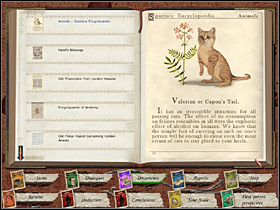
Bertie is injured, so ask Abraham for help. The Jew will ask Holmes to bring the Spartaca Encyclopedia, where Holmes will read that cats like the smell valerian. Leave the kitten in the care of Solomonovitch and go to the police station (use map).
When you will click on the door Holmes will find that he must be sure whether Squibby is actually inside and then scare of the policemen. Go to Commercial Street, where you will find Big Danny. Woman does not want to give Holmes any information. Go to the brothel (use map). Ask Lucy whether police officers are the customers of this place, and the ask Bella about some bottles. You will find that these are the Paris perfumes, which was left by one client in the form of the payment, but the woman does not know which of these are actually real perfumes and she fears that they ma badly affect girl's skin. Sherlock will decide to examine the content of the bottles. As a payment he will receive some information about Squibby. Take the case of perfumes.
After the evaluation of all perfumes, Holmes is going to the brothel (use map). He will talk with Bella about the Big Danny and he will receive some valerian. He will learn that Squibby is at the police station and he is not going to leave the building.
Now Holmes has to go to the police station, but again he won't come into the building, but he will talk to the Big Danny. He will offer her a bottle of valerian "perfumes", but Danny wants a nice vial with atomizer. Simply install it on the bottle. This time, Danny is happy with the gift, and she immediately uses it. Detective will learn that only one policeman is at the police station at the moment.

To scare policeman out of the building, Holmes will have to go to the zoo shop, where he will learn that Hardiman is offering cat food. And indeed - just after leaving the shop go towards the main street and there you will see a vendor on the opposite side of the street. He will be shouting: "beep, beep." Holmes will all kebabs from him. Then tell your informers to lure as many cats as possible. Boys will release those kittens on Big Danny and as a matter of fact, policeman will run out from the police station. Holmes will take his chance and he will go to the building.
Inside go the door that leads to the cells (left of the desk). Try to open it, but you will find that there is a nail inside the lock.
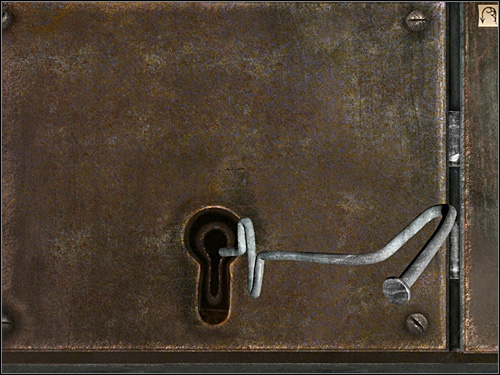
You have to move the nail: to the right.
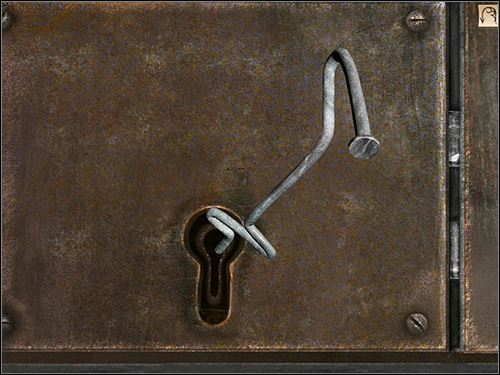
Return to starting position and then try to move it to the right.
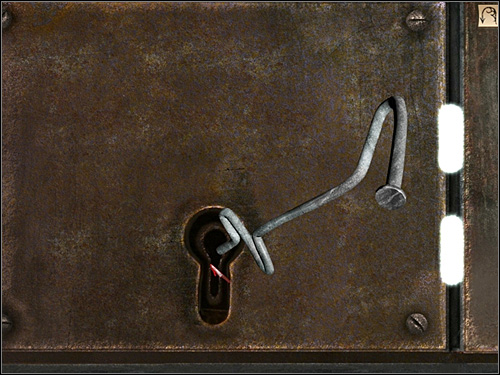
Move it down (and right).
The main thing is that when you want to move the nail in one direction you have to move it to the opposite side. So, if you want to move it to the right the you have to move it to the left.
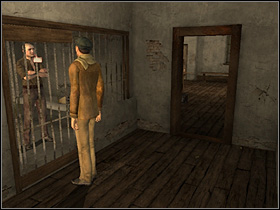
Go into the room. You will find Squibby in the first cell. Holmes will learn that journalist named Tom Bulling is responsible for this that he is arrested now. He had attacked the writer and in revenge Bulling has accused Squibby that he is the prostitute murderer. Now, everyone in the town want to kill him. The journalist is threatening that he will describe the whole story in the press and that's why the Squibby want to stay in the cell now. If Holmes will speak with the journalist then Squibby will tell him some interesting things about Tumblety. Leave the station but first leave the Bluto's treasure at the policeman desk.
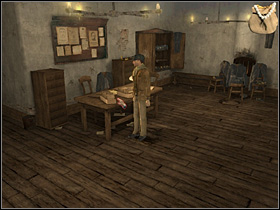
Go to the pub now (use map) where Sherlock will automatically notice that it will be good to wear some normal clothes now (so Bluto couldn't recognize you). So, looking, as the classic Sherlock Holmes, go to the pub and talk about Bulling with the waitress. Girl will tell you that she has soiled his book and has thrown it away. Of course take it, it is a journal (documents - Journal - Spring Heeled Jack). Ask the bartender about the journalist, but he won't tell you too much. Go to the Baker Street.

Holmes and Watson are talking about all things that they had learn separately. Watson will give the encoded message to Holmes. Now you have to decrypt it. Go to the laboratory desk and click it to activate the message.
A special board will appear, so click on the document icons. You will be sent to a appropriate tab in your equipment. Open two pages of the Spartaca Encyclopedia (these about cats and valerian). For each of them click "use as a proof". Leave the equipment and note that a special code has appeared on the board. Now you have to decipher some roman numbers.
So, the real numbers are:
XIV - V - XXIII
III - XV - XIII - XIII - I - XIV - IV
XIX - XXI - II - X - V - III - XX
XXIII - XV - XIII - I - XIV
IV - V - XII - IX - XXII - V - XVIII - XXV
XXIII - VIII - I - XVIII - VI - IV - I - XII - V
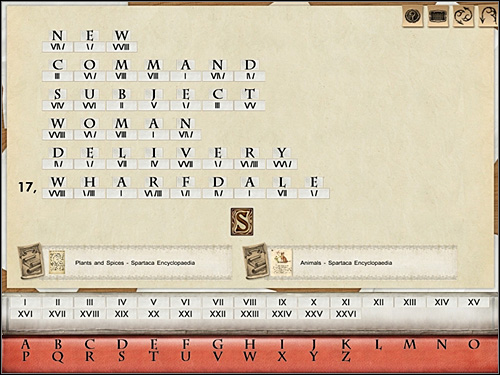
Now assign letters to the digits (use the hint given at the bottom of the screen). If in the column you will find two the same digits, simply assign appropriate letters to them. Click on the letters guessed on the basis of the hint and drag them to appropriate blank boxes on the top of the message.
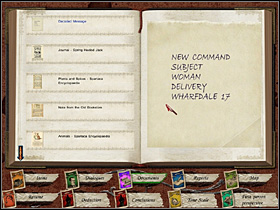
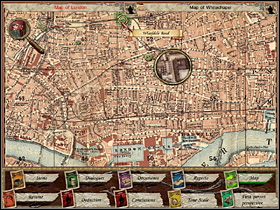
Deciphered message: NEW COMMAND. SUBJECT. WOMAN. DELIVERY. WHARFDALE 17. So now you have the next location (use map to locate - Wharfdale Road; in the upper side of the map).
You are in the courtyard of an abandoned house. As a Holmes go right to the laundry (in the corner). With the help of your pocketknife cut some clothes line. Now walk along the wall to and you will get to the small courtyard on the other side of the building.
Look at the garbage under the wall (right of the entrance) and cut a piece of tarred tarpaulin. Go to the opposite wall, the wheelchair is standing there but it doesn't have its front wheels. Finally, look at a window and you will see a light. Holmes will decide that you can get inside to the building through it.
Return to the courtyard and get into the main door - of course, closed. There is a lot of dust on the stairs so they haven't been used for a long time. The lock is very old, but solid. Use tarpaulin to open the door. Holmes and Watson will get inside.
At the entrance go right. Take a look at the bottle of chemicals (left of the fireplace) and open the casket lying on the commode (right of the fireplace). Take metal stick from it.
Go to the second part of the room. The door leading to of the house are closed, but Holmes will notice a strange rug. Something is hidden under it (just click on the carpet to zoom). Move the table and you will see a trapdoor. Open the passage to the hidden room located below.
To get there, tie a rope to the stairs and go down with its help (click on the end of the line lying on the floor).
Go into the room and take the poker. Get back to the entrance and use the stretcher.
Try to use the electric mechanism that can lift the stretcher. But you will be able to reach it only with the poker. Click on it once again - now you will have to solve another puzzle..
You have to reconstruct the broken link (re-connect the wires). There are three of them. For each one a special board will be shown board after you will solve the previous one. Click on the buttons in the order in which you want to lead the wire. Buttons can be linked vertically, horizontally and diagonally (in this case line must be made exactly on the empty field. Of course you can connect empty buttons not separated by any field.
After you will repair the mechanism, turn it on - it will come up. Unfortunately, the elevator at the end will break once again and Holmes will be forced to find another way out. Note that on the ground a bent key is lying. Go to the table where you will find some tools (zoom).
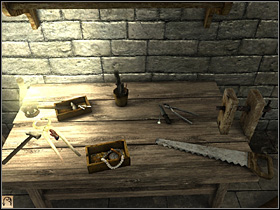
Take pincers and a hammer. Then turn attached to the right holder. Now put the key on the vice (click on the vice not on the right space near it) and use pincers. You can take the straight key.
Of course, open the exit door (Watson will be waiting for you). By the way look on the floor and you will see many footsteps there.
Get to the stairs and go to the main entrance of the building. When you will be there, go near the trapdoor and take the piece of stretcher from the elevator (two parts). Now go to the exit (left). With the help of a metal stick detach a wheel of a small cart.

Go to a small courtyard on the left side of the building and install two wheels to the cart that is without wheels. Remove the stone that is blocking the front wheel and push the cart. It will move near the window.
Put wooden stretcher near the wall after combining together two separated parts in your inventory. With the hammer and poker (combine them) cut some holes in the stretcher - they will allow you to climb. So climb now, remove the plank in the window and get into the room.
Inside you will see a dead, young woman lying on the table. Look at her feet. You will see a label attached to her - that is the evidence that this body was taken from the London Hospital. Look at the bottle with zinc chloride and women face, which is in makeup. The body is well preserved. On
Take a photograph located on chest. It was taken in the Liverpool (Documents - Photography) and you can see a young male worker on it. Remove the leaflet from the wall (Documents - Leaflet) that is advertising some spiritualistic prince Raskalnikov show. Prince Raskalnikov (you will find it in your inventory - Prince Raskalnikov's Leaflet). Holmes will decide that it is the same person.
Go to the desk located opposite to the window and look at a picture of dead Ethel Broomstreet. Sherlock will note that the woman on the table is similar to her. Look at the dress located on the right side and take a red ribbon. Search the jacket and take the triangular-shaped jewel.
Finally, go to the shelf standing right of the window. Look at the jar full of glass eyes, and a puzzle box.
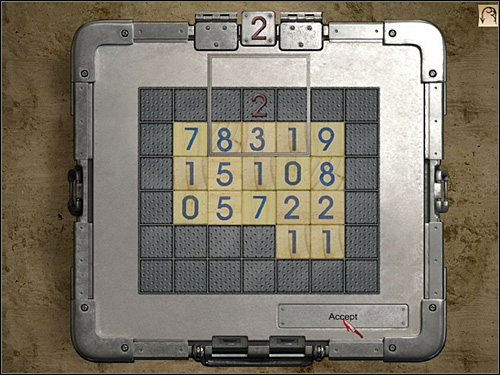
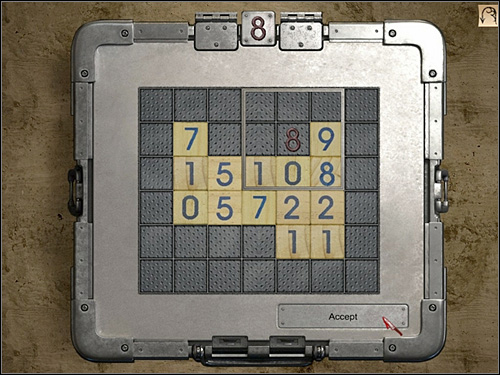
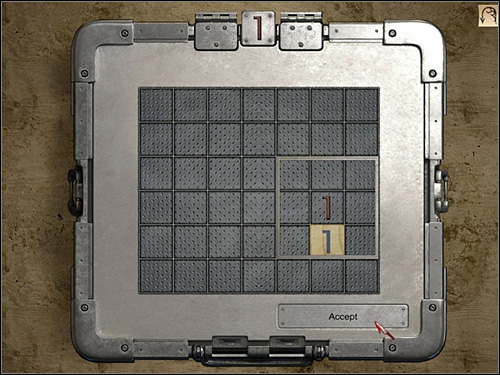
This is another puzzle. By clicking on the empty boxes and by moving the metal frame, you have to erase all numbers that you can see in the center. Numbers are disappearing if the last digit in the sum of the numbers in the frame will be identical to the red digit displayed on the top. For example on the top you have 8, the frame should be on digits 8-8-2 or 1-0-8-9 giving a total of 18 or 8-0-0, giving a total of 8. Above you have an example of one of possible solutions.
When you will open the box (zoom) take the metal square and the letter (Documents - Letter Found in the House at 17 Wharfdale Road), that will explain you what is happening here.
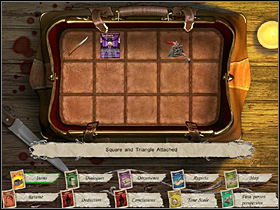
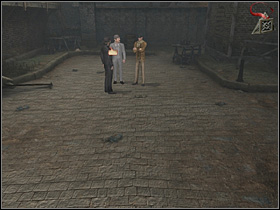
As it was written in the letter, connect triangle and square ornament. Click on the window - you will hear a car and some footsteps. Holmes will decide to see the man. Go outside to the courtyard. A men will want to talk to you but show him the square and triangle attached. Talk to him about the client and you will find out many interesting things. Unfortunately, you will see that these disappearances have nothing to do with the murderers.
With new informations, Holmes will decide to sniff around at Tom Bullings work, the Central News Agency. Click on the new location (Map of London - Central News Agency, Fleet Street). When you will be there, go left and speak with a man standing near the window. You have to tell him to go, so Sherlock would be able to penetrate Bullings desk. Give him a story about prince Raskalnikov as an interesting history (activate the leaflet in your inventory). As a result of this conversation the man will leave the room and he will give you a note: "I Owe You". Detective will learn that Bulling desk is near the oven.
Go right to the end of the room and get close to the second desk from the left (where the lamp is on). This is the Bullings desk. Search the recycle bin and take the crumpled letter (Documents - Crumpled Letter).
Take a look at the desk (zoom). Take all coins lying on the right, rags and some Bulling's notes. Check if the oven is hot and open its door using rags. Holmes will automatically take a blutting piece of paper. Unfortunately, the note is a mirror reflection.
Now go to the boss desk (right of the door). Take a letter to Mr. Moore. With the mirror standing on a desk, look at a blutting piece of paper (Documents - Blutting Piece of Paper). You will read: The information about the murderer from Whitechapel, call WA ...
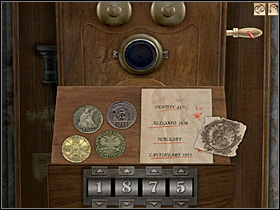
Go to the phone and call ... you don't now who. Another puzzle is the board with the list of phone numbers. One number is missing - that near the name WALESBY. Instead of the number there is a stamp made with a coin. You have 4 coins and on each of them you can see the year when it was made. The stamp was made with the first one. So you have to call number 1875 and then pull the handle.
Holmes will speak with Bullings informer. These two men are giving some informations to each other. If Sherlock wants to know something interesting then he should tell something that will interest his interlocutor.
This is another puzzle where you have to reply in a proper way.
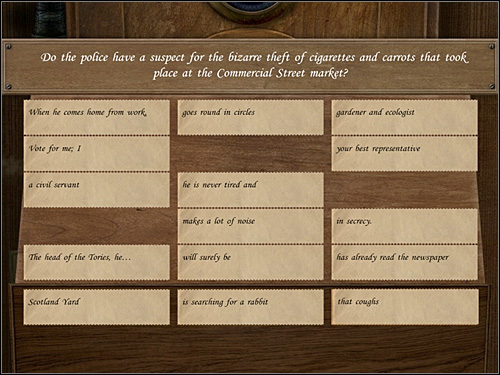
1. Do the police have suspect for the bizarre theft of cigarettes and carrots that took place at the Commercial Street market?
Scotland Yard - is searching for a rabbit - that coughs.

2. With regards to the parliamentary scandal, what did the head of the Wing party respond to the Tories who are treating him as a "great incompetent"?
Vote on me, I - will surely be - your best representative.
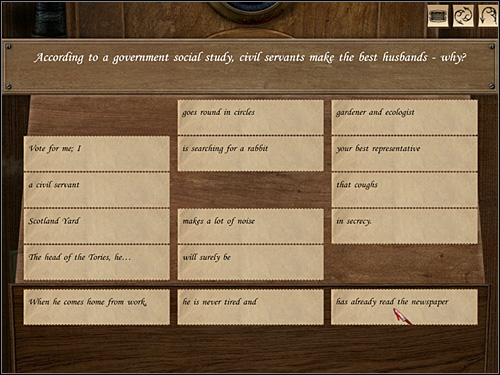
3. According to a government social study, civil servants make the best husbands - why?
When he comes home from work - he is never tired and - has already read the newspaper.

As a result of this call, Sherlock will be told to search for some envelopes lying on a regale. These are information about the prostitutes killer. Click on these three envelopes, and you will receive: notes on spring heeled Jack, list in pencil and Abberline's telegram. You will see that Bulling is fascinated with a person of Jack the Ripper and that police is with the close cooperation with the agency. So now, go to the police station (use map).

It will turn out that Holmes in his dirty clothes is expected at the police station. The inspector is interested in the Bloto's treasure. Sherlock will tell him the true story and he will reveal his real name. In response he will receive letter signed "Jack the Ripper". It is written with red ink and Holmes immediately will try to figure out a real sender - journalist Tom Bulling. He is trying to keep the interest about the murderer on a very high level. Holmes will decide to catch him in the pub, so go there (use map).
At the Sherlock will meet Watson. Leave him outside and go inside. Speak with Bulling and use all informations that you have about the journalist to resolve the Squibby case. When you will leave the pub you will meet him too. Holmes will finally get some news about Tumblety and his mysterious chest full of jars with human organs. The next thing will be to go to the Finley's Bed and Breakfast (use map).
Here you will learn that police officers were asking about Tumblety but he has escaped with the key to his room. Finley is concerned, that he could not see him anymore. After finishing the conversation go to the upper floor and go right. Examine all visible traces.
With the aid of the magnifying glass look at the footprints (right foot, the man was running) and the liquid (formalin). With measuring tape measure the size of the foot (size 13).
Similar traces can be found inside the room (just behind the door). The man has broken one of his famous jars (pieces of glass and poured liquid can be found left of the table). Go to the table and look at the correspondence (Documents - Letter Found at Tumblety's), signed with the name: Henry.
Another letter can be found in the bedside table (Documents - Letter Found at Tumblety's). You will find that Tumblety is a Civil War veteran (an important sentence: Vicksburg is the key). Finally, approach to the mysterious cabinet standing on the left side of the room. You have to solve another puzzle if you want to open it.
In this puzzle you will have to assign dates, flags and headgears to some particular Civil War battles. In the case of dates the thing is really simple: 4 of them are written in the bottom of the board, you only have to match them with specific battles. Dates are arranged chronologically. The Civil War was in between 1861 and 1865 so you have to throw away two dates: 1771 and 1868. Here is the solution:
12.04.61 Fort Sumter
17.09.62 Antietam
02.05.63 Chancellorsville
03.07.63 Gettysburg
04.07.63 Vicksburg
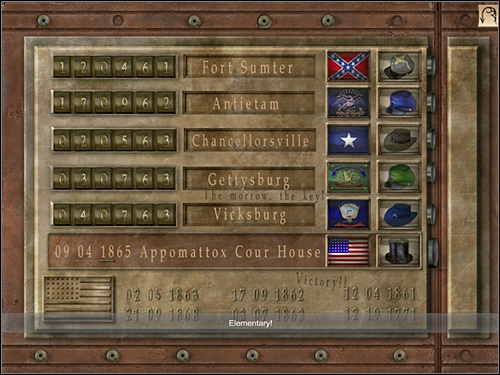
Vicksburg was the last battle and this is the key to solve this puzzles. The is no date near this battle but it is obvious because of the text that is above the name of this town: The morrow, the key!. You have to assign flags and headgears too (look at the image above). The correct selection of each of the three battles will be confirmed by a locking bars.
When you will open the wardrobe, you will see a macabre content (click on the jars). In addition, Finley has a rather bad news for you. The killer attacked again. Twice.
Holmes will tell Watson to find a butcher and 12 fresh pig heads. Watson will start his mission in the brothel (use map).
Lucy will recommend Watson to meet a man named Fletcher (new location on the map - Fletcher's Butcher Shop). However you will find that it is closed - the owner is sick. Go down the street (left) and get to the clinic. Doctor Gibbons may know something about Fletcher. He will confirm that the butcher is sick and, as a matter of fact, he went to the village. The second person, who have the key to the slaughterhouse, is Hardiman, street kebab vendor. After leaving the clinic Watson will automatically speak with Big Danny. He will learn that Hardiman lives on the Hanbury Street (where the second murder was done, this is the location between Whitechapel and Baker Street).
You will immediately find Hardiman because of his strange voice. Talk to him and you will find that there is a problem with getting into the slaughterhouse: the man has broke and lost his key. You need to find it and fix it. Go to the shop located in the yard where Annie Chapman was murdered.
This time, go upstairs to the first floor. Go to the end of the corridor, where you will find a key. Get out to the courtyard. Open the door on the left, you will find a basic key there. Give it to Hardiman and talk to him about these pig heads.
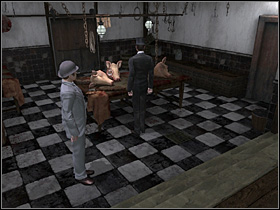
As a result, Holmes and Watson are again in front of the slaughterhouse door. Click on the door to open it. You will find some pig heads there. To be able to do the experiment, Holmes must have access to the another room, which door are closed.
With the knife, remove upper left small wheel. Now move the hook to the door and connect it with the hinge. Then, again use your knife, to remove the damaged lower wheel and insert in this space previously removed wheel from the top.
When you will open the door Holmes will ask Watson to bring him two knives. One small, quite bigger than a pocket knife and another with 13 inches long blade. As a Watson go to the another room and find these knives
With your measure tape check all knifes and take the last one.
Take your magnifying glass and look at shorter blades. Take the first one.
Wrongly selected knifes can be changed. If you will bring Holmes the wrong knife, you will be informed about this.
When you will complete his order, talk to Sherlock and he will explain his friend what you will be doing now. With the aid of 4 knives (a short knife, pocket knife, scalpel, and the long knife) you have to hit each of the three pig heads (just smash the head with the mouse cursor to hear the Sherlock comment).
Holmes wants to see how each of these blades will behave in all type of cuts, which was performed by the assassin. Click on the table to start the task.
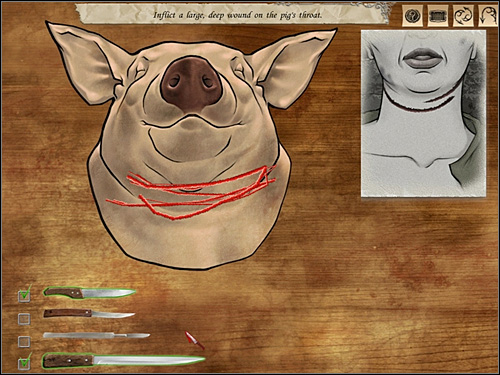
Experiment 1 (click this text). The first hit should cut the victim's throat. Do it with every knives, and Holmes will evaluate everything. Mark the first and the last blade.
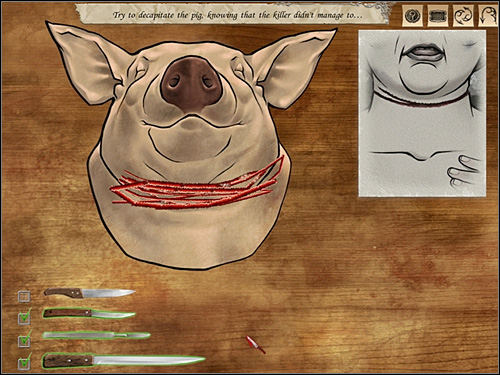
Experiment 2. This strike have to cut off the victim's head. Do it with every knife and mark blades: 2, 3 and 4.
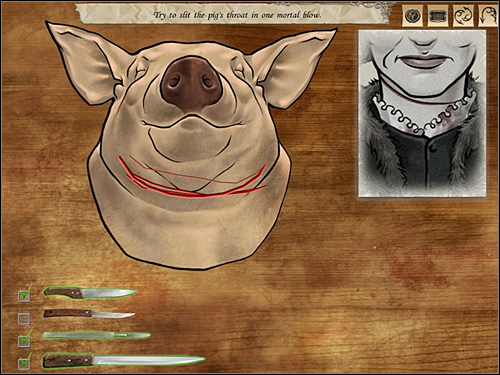
Experiment 3. This time the strike should be more delicate but also deadly. Do it with every knife and mark blades: 1, 3 and 4.
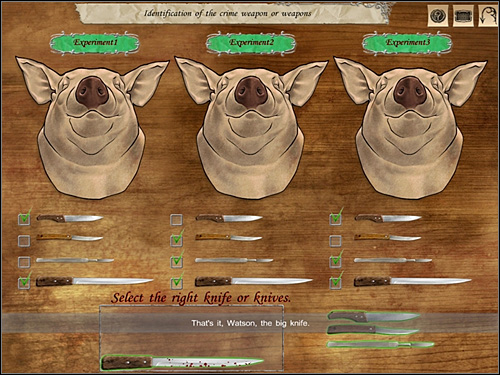
Now, on the basis of the experiments you have to choose a knife that would be able to perform each of these three strikes presented. This is, of course, a knife number 4. Drag it to the empty box at the bottom of the screen.
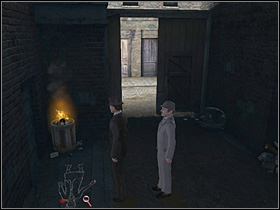
The next step is to visit the pub (use map). As a Sherlock go inside and talk about the third crime with barman and the journalist. As a Watson speak with the police officer, who has just appeared on the street. You will learn some facts about the murder.
After leaving the pub go right towards the gate leading to the International Working Men's Club garden, where the murder of Liz Stride was made. Go inside. A timeline will automatically appear on the screen. It will be much simpler than the previous one because now you know the exact time of the every event (based on Watson's interview with police, conversation with barman and note on the murder of Liz Stride at Dunfield's Yard. All you have to do is to move symbols to the proper places on the timeline.
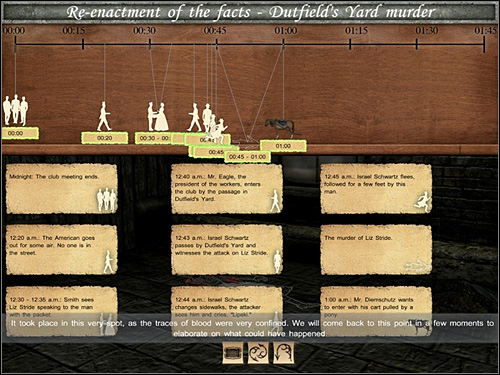
So:
midnight - the club meeting ends (move icon with three men to 0.00).
0.20 - the American goes out for some air. No one is in the street (move icon with one man to a proper hour).
0.30 - 0.35 - Smith sees Liz Stride speaking to the man with the package (move icon with man and woman to that hour).
0.40 - Mr. Eagle enters the club by the passage in Dunfield's Yard (icon with a man walking left).
0.43 - Schwartz changes sidewalks and sees the attacker (move icon with man to that hour).
0.44 - The attacker is yielding to his helper to scare Schwartz (move icon with escaping man to this hour).
0.45 - Schwartz is fleeing (move the icon with running man to this hour).
1.00 - Mr. Diemschutz wants to enter with his cart pulled by a pony (move icon with a horse to this hour).
After deploying all icons at the appropriate places (the frame will turn green), a new icon will appear - with the symbol of the body. Drag it to the time between 0.45 and 1.00.
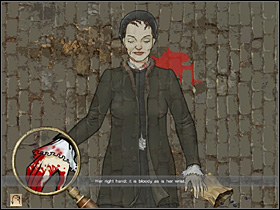

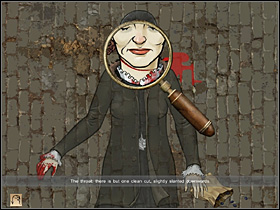
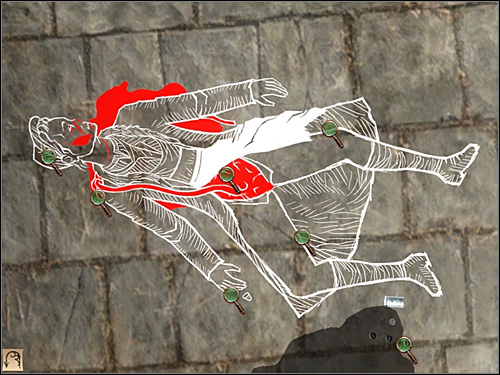
Now it is time to examine the body, so click the magnifying glass near it to zoom. Look at these parts of the body:
right hand of the victim covered with blood (left side from the players point of view);
mud left of the victims head;
wound on the neck (one cut);
unsoiled knees and dress;
left hand holding some pills (right side from the players point of view).
Cancel the zoom and click PPM to open the Deduction Board. As always, move evidences drag to the center and remember to pay attention to the presence and color of the frames. Click on the arrows to open new options and select the correct answers.
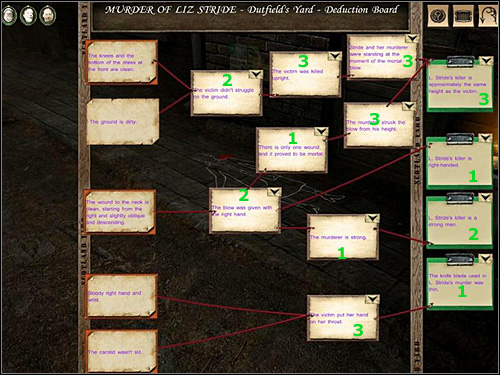
Deduction Board (murder of Liz Stride - Dutfield's Yard):
Evidence 1: The victim wasn't fighting on the ground (version 2).
Evidence 2: The victim was killed while standing (version 3).
Evidence 3: The victim and the attacker was standing during the crime (version 3).
Evidence 4: The final cut was made with the right hand (version 2).
Evidence 5: The is only one would, but a deadly one (version 1).
Evidence 6: The murderer stroke from his level (version 3).
Conclusion I: The murderer of L. Stride has the same high as his victim (version 3).
Conclusion II: The murderer of L. Stride is right-handed (version 1).
Evidence7: The murderer is strong (version 1).
Conclusion III: The murderer of L. Stride is strong (version 2).
Evidence 8: The victim has touched her throat with her hand (version 3).
Conclusion IV: The knife was very thin (version 1).

When you will examine all evidences, Holmes will conclude that you are missing one, important thing - common to murders of Liz Stride and Annie Chapman. He will ask Watson about it. So look at the body once again and zoom the pills. This is the point - both women held something in their hands. They should drop it, if they wish to defend.

Holmes and Watson are going to Miter Square, the place where the second crime was done. Take a few steps to the left and pass a large chest. Go to the another one and you will find a lantern there. Use some matches on it. Watson will take it and, as a matter of fact, the whole are will be more visible.
Go left, to the dark corner of the street. Now, you are in the place when the second murder was done.
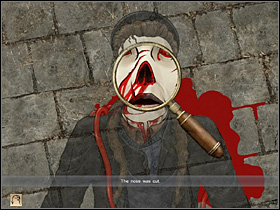

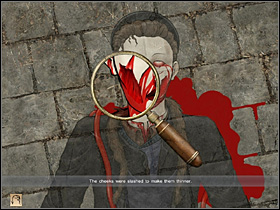
Click the magnifying glass on the body to zoom. The click on the head and try to find:
cut off eyelids;
cut off nose;
one cut on the throat;
cut cheeks.
Cancel the zoom and make some further inspections: intestine on the right arm, open stomach, missing uterus and kidney, a piece of white apron and few other things.
Holmes will decide that they should check all 3 streets leading to the Miter Square. Go along the fence until you will reach the Church Passage, leading to Duke Street. Go to the end, to Duke Street. There Holmes will meet Abraham Solomonovitch, who will tell him what his cousin and his two friends saw.
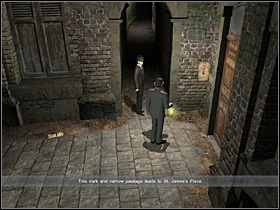
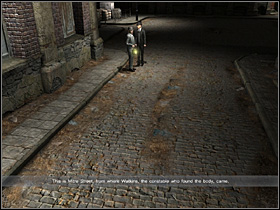
After finishing the conversation go back to the Miter Square and go left. You will get to the next dark and narrow passage leading to the St. James Place. Then go left, pass a huge chest and go straight ahead until you will reach the exit of the street. Holmes will realize that from this direction constable Watkins came (he has found the body).
Now detective will decide that you have to complete the timetable that you have started at the Dutfield Yard. Open the appropriate board with well known icons and try to assign them to proper hours,
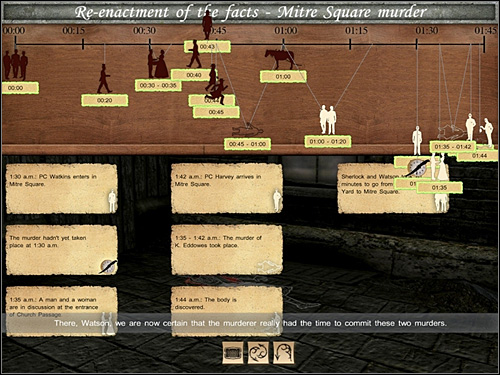
So:
1.30 - Police officer Watkins enters Mitre Square (move the icon of standing man to this hour).
At this point, Holmes will ask Watson to play a role of the police officer to see when he was able to see the body. As a Watson return to the dark corner where the Katherine body was found. When you will get to Holmes, he will ask Watson to do the same thing again but this time with the light. The conclusion can be only one: he couldn't miss the victim so the murder was done later.
1.30 - The murder wasn't done yet (move the icon with crossed clock to this hour).
1.35 - A man and a woman are talking on the Church Passage (move the icon with man and woman to that ).
1.42 - Police officer Harvey enters Mitre Square (move the man turned left to this hour).
At this point, Holmes will ask Watson to act once again. This time he will be another police officer. And once again Watson will have to get to the place of the crime. Holmes will conclude that the constable may have not seen the lying body, but rather he should see standing murderer.
1.44 - The body was found (move the icon of the man with the lamp to this hour).
1.35 - 1.42 - The time when the murder was done (move the icon with the body to this period of time).
1.00 - 1.20 - Sherlock and Watson are coming from Dutfield's Yard to Mitre Square (move the icon with detectives to a time between 1.00 and 1.30).
Now this is time to complete two deduction boards.
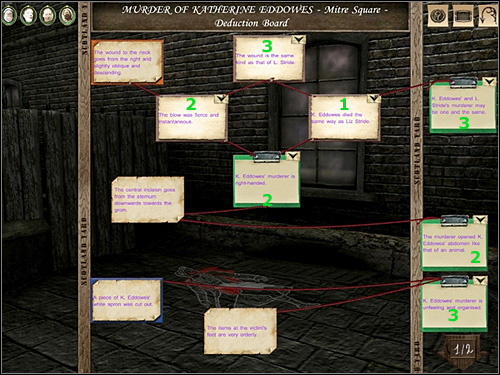
Deduction Board (murder of Katherine Eddowes - Mitre Square) 1/2:
Evidence 1: The cut was rapid and brutal (version 2).
Evidence 2: The wound is very similar to the wound found on L. Stride (version 3).
Conclusion I: The murderer of K. Eddowes is right-handed (version 2).
Evidence 3: K. Eddowes was killed in the same way as L. Stride (version 1).
Conclusion II: The murderer of K. Eddowes and L. Stride is probably the same person (version 3).
Conclusion III: The murderer of K. Eddowes has cut her stomach in a very brutal way (version 2).
Conclusion IV: The murderer of K. Eddowes is brutal and disorganized (version 3).
Deduction Board (murder of Katherine Eddowes - Mitre Square) 2/2:
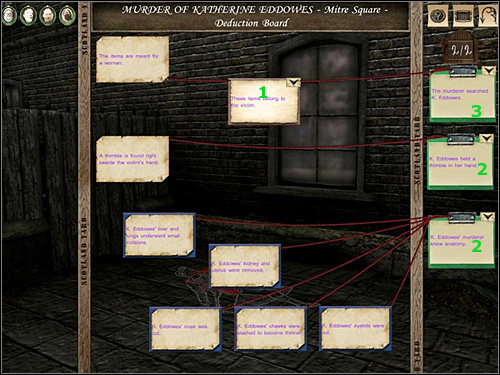
Evidence 1: These items belong to the victim (version1).
Conclusion I: The murderer of K. Eddowes has searched the body (version 3).
Conclusion II: K. Eddowes was holding a thimble in her hand (version 2).
Conclusion III: The murderer of K. Eddowes has got a very good knowledge of anatomy (version 2).
The next step is to go to the next street (Map of London - Goulston Street), where a piece of K. Eddowes apron was found. When you will be there, do a few steps to the left. Look for the entrance to the building. However, it is not marked with any icon. Pay attention to the shop signs, you're looking for the shop called Flittman & Co. The gate behind it is open, so go as close as possible. Holmes will recognize the place. On the wall you will see a text: The Jews are not human beings, who are can be accused of anything.
Holmes wants to see how long the text is able to survive in the rainy night (that kind of night was when the murder was done). So he is writing the text on the wall he is asking Watson to find the water to wash the wall. As Watson go to the center of the road. Go right and you will get to the first stall, from which you can take a rope.
Go straight ahead and find a pole. Go to the opposite side of the street and you will find a watering can there.
On the stall in front of that watering can you will find a pole with a hook. Take it. Go near the window and move the box to the table (click on it three times).
Combine hook and a pole with a rope and you will receive large pole with a hook. Activate it in the inventory and take the watering can. Then go back to the center of the road and run to the right. After a while you will get to the barrel with water that will be hidden behind the table (near the shop with the banner: I. Solomonovitch).
With the watering can full of water get back to Holmes. Activate it in the inventory and speak with him. Now you will play as Holmes and use the watering can on the wall. Detective will find that the text would not be able to survive throughout the whole night. It was probably at the same time when the apron was dropped. In other words: they was made by a killer.
Then Holmes will ask Watson to play the role of the police officer with the lamp. Doctor has to inform Sherlock when he will see apron and the text written on the wall. Now, as a Watson once again go to the dark corner of the street until he will see something in the gate. After a short conversation will Holmes get closer to him. Now use the map to return to the Baker Street.
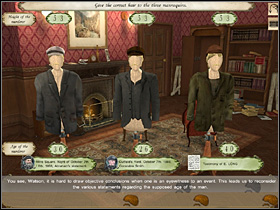
Holmes and Watson are talking about the murderer and testimonies made by witnesses. Despite the fact that they differ from each other, Sherlock believes that he can guess the presence of the killer. Now you need three dummies and three different men's clothing. Watson will deliver all of these items.
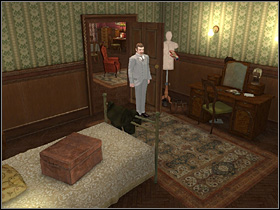
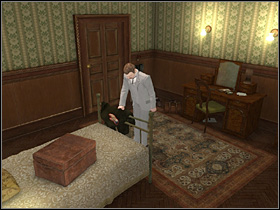
Go to the Watson's room and open the wardrobe. Take worker's disguise. The second costume take from the manikin standing nearby. Take the mannequin too. Exit the room.
Now take the cap. Go to the door leading to Holmes room (right of the fireplace) and the open wardrobe. Take the gray hat and the second mannequin.
Take the third mannequin from the Sherlock room (behind the door) and the worker's clothes. Try to find a deerstalker and a blond wigs too.
Now go to the chest lying on the bed. Open it and take wigs dark brown. Go to the other side of the bed and open the bedside. Take ginger wigs.
Return to the living room (two other dummies will land next to the first one). Click on one of them - Holmes will explain that the goal is to create imitations of murderer described by the three witnesses. You will see a special board, so click on the icons of the first evidence. As always, a dialog board will be open so select the conversation with Abraham Solomonovitch. Click on the symbol of proof and go back to the main board. Now click on the icon with evidence below the second dummy and select a conversation with the constable. Click on the symbol of proof and go back to the main board. Finally, click on the icon with the third evidence under the third dummy and select the testimony of E. Long. Click on the symbol of proof and go back to the main board.
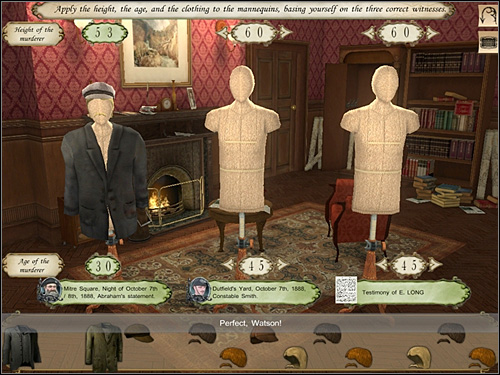
Now it is time to determine height, age and appearance of the murderer. According to that what Abraham said specify height (by clicking the left arrow above the mannequin head) of the first dummy (5.3 feet) and its age (30 years). Dress him with the gray jacket, blond wig and a gray cap. If you will do it in a right way, Holmes will say something.
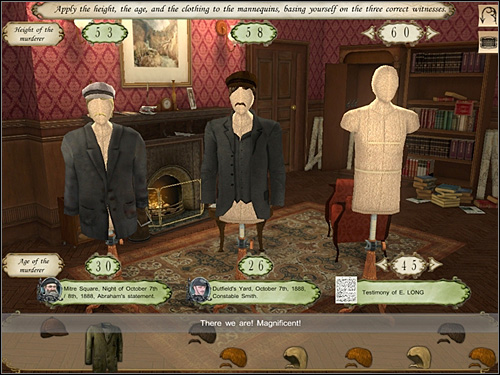
The second dummy (according to the constable) must have a gray jacket with a vest, brown wig and a brown hat. Set its height to 5.8 feet, and age to 26 years. Holmes will accept this but after a while he will change a height to 5.3 feet.
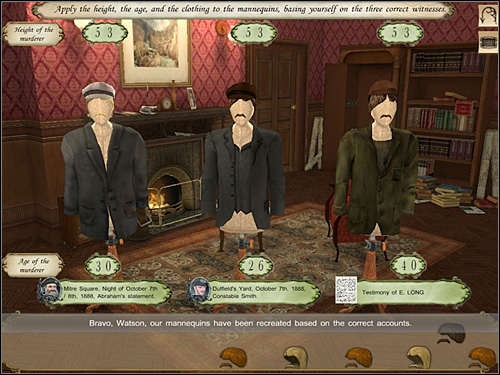
The third mannequin (according to testimony of E. Long) should wear a green suit, brown wig and a deerstalker. Set its height to 5.3 and the age to 40 years.

Now, Holmes will try to unify the appearance of all mannequins. Turn off the light. In the dark you will see that all wigs looks identical. Only Joseph saw the face of the murderer, so Sherlock will decide that his testimony is closest to the truth. That means that the murderer is blond. No you have to change wigs of other two dummies to the blond.
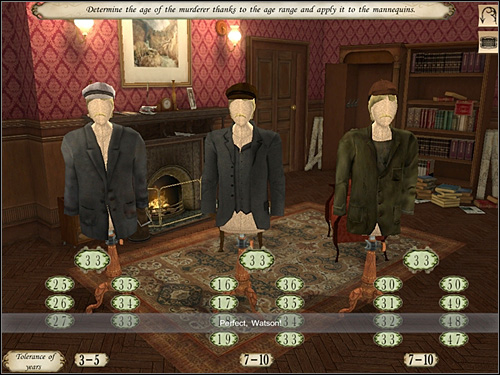
Now Sherlock will try to determine the age of murderer. In the case of the butcher's testimony you will have to accept the tolerance of 3-5 years, 7-10 for other witnesses. For each mannequin you have to set ages between:
Abraham testimony:
25 - 35
26 - 34
27 - 33
Smith testimony:
16 - 36
17 - 35
18 - 34
19 - 33
E. Long testimony:
30 - 50
31 - 49
32 - 48
33 - 47
In all cases you have the age of 33. Holmes will decide that it is the most probable one. Set this age near all dummies.
Now you have to choose a correct answer. After the third crime the murder should do something. What exactly?
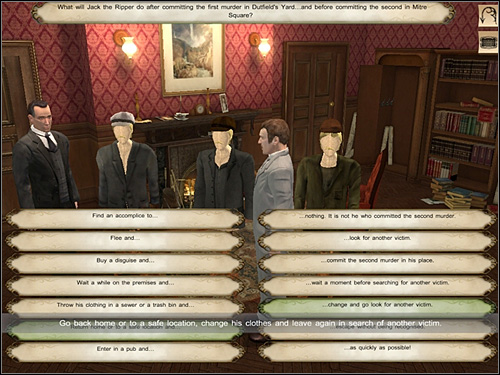
The new board will be shown. You have to choose correct answers:
Go back home or to a safe location... (second from the bottom)
... change his clothes and leave again in search of another victim (third from the bottom).
That's why the murderer has a different clothes.
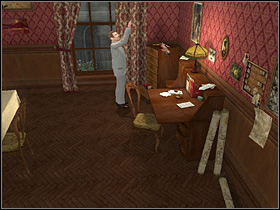
The next step is to guess where could be a hideout of the killer. As a Watson go to the cabinet standing near the window and take pencil, ruler and compass. Then go to the opposite wall and look at a map. Activate your new items and click on the map.
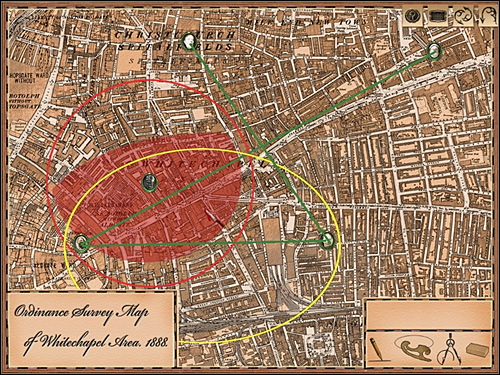
First of all place the appropriate symbol of female heads on the street where the murders was done and the symbol of the message left by the killer on the wall:
Annie Chapman - 29 Hanbury Street;
Elizabeth Stride - Dutfield's Yard;
Mary-Ann Nichols - Buck's Row;
Katherine Eddowes - Mitre Square;
Graffiti - Goulston Street.
Now, take a pencil and draw a green lines from Miter Square to Buck's Row, from Dutfield Yard's to 29 Hanbury Street (click on the pencil and then on a woman head. When you will decide that you want to end the line, click LPM) and from Dutfield Yard's to the Miter Square.
Now will have to draw some ellipses, click in the middle of the third line and move the cursor to draw yellow ellipse on streets Dutfield Yard's and Miter Square. Then click at the place with graffiti and move the cursor to reach the Miter Square. And finally, click on the area where two ellipses are drawn to guess where the murderer is hiding.
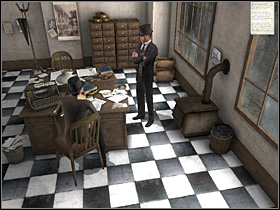
Holmes will decide to find some information about other crimes made by Jack the Ripper. As a matter of fact he is going to the Central News Agency. Select it on the map (map of London - Central News Agency, the lower left corner of the screen). Speak with Tom Bulling who is at the work now. He doesn't want to talk to much until you will show him a note (I Owe You). Then you will learn that all information he will find in the tab Police and Law. Go to the shelves and loot at the documents.
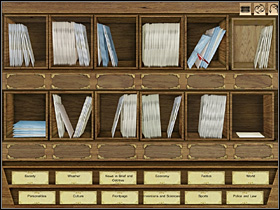
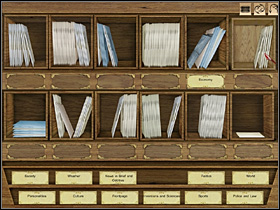
Unfortunately, there are no labels on them. Holmes has to match the labels with the proper documents. Click the second from the right barrier in the top row. One envelope is torn and Sherlock will see that it contains some economic information. Last barrier in this row appears to be repaired recently. Now you have to look in the office.
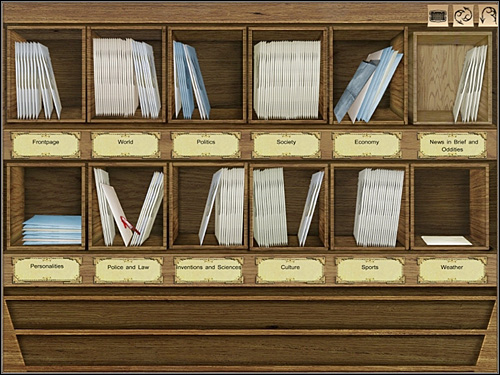
Go to the desk right of the shelf. Take a letter to Fernard (Documents - Letter to Fernand). According to this, barriers with labels Discoveries and Policy are located one above the other and that the Policy is right of the Society, which is near the Economy.
Now go to the next desk (right of the previous one) and take a note in pencil (Documents - Note in pencil) and from the nearby desk take a journalist's letter (A Journalist 's Letter). In the first document you will read that the news in brief can be found at the top and the Police and Law at the bottom. In contrast the barrier with Weather is almost always empty. In the second document you will read that Sport is under Economy, Personalities are on the edge and the best news are in the first barrier.
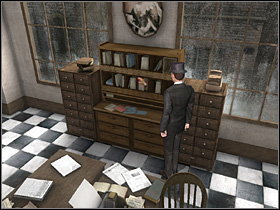
Now go to the door opposite of the entrance and get into the cabinet. Take note administrative (documents - Note Administrative) notifying that the blue envelopes are the confidential informations about the policies, personalities and economics. Finally, in the writing machine you will find a director's letter (Documents - Director's Letter) in witch you will read that barriers World and Society are too small and the envelopes are falling to the barriers located below them - Police and Law and Culture. On that desk you will find a repair bill (Documents - Repair Bill) for the barrier News in Brief.
Now you have enough information to put labels to the appropriate places. Return to the shelf and click on it. Pin Economy to the second barrier from the right in the upper row. Next to it (repaired one) will be the label News in Brief an Oddities. Under the Economy you should pin Sports and in the first barrier in the upper row place the Frontpage. Below there should be Personalities.
There is only one more barrier with blue envelopes so you should place there a label Politics. On the right put Society. In addition, the barrier is full and envelopes are falling to the barrier located a bit lower - Culture.
According to the letter to Fernand, put a label Discoveries and Science in the appropriate place. Weather is almost always empty so the choice is obvious. The only barrier with a single envelope is last on the bottom row. The next full barrier should be a World so place the label on the second barrier from the left in the upper row. So you have only one more - Police and Law. Put it in appropriate place. The correct solution will be confirmed by a flashing large, close envelope. Click on it and it will land in your inventory.
The envelope is closed, you must open it discreetly. To do this find a full watering can. Then go to the left. In the cabinet you will find a tea pot. Now fill the pot with the water.

Now go to the oven situated near the Bullings desk. Open the door, set a fire in it and put the kettle there. After a while you will see a steam, use it to open the envelope. You will find two statements there: testimony in the Smith Affair and a testimony in the Tabram case. The first murder is not connected with the Jack the Ripper but the second one was probably his job.
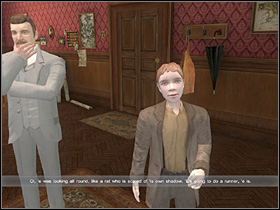
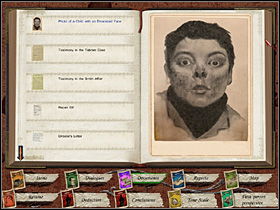
Exit the agency and go to the zoo shop (use map). It will be closed (click on the door). Holmes will speak about this with Hardiman but he don't now what happened. He will inform you that the police took animals. Gentlemen will talk about a death of Hardiman daughter. For some information about this event Sherlock will go to the Doctor Gibbons (use map). The child could catch syphilis from one of the parents. It is common in this district. The visible symptoms of this disease are: no eyelids, no nose and cheeks that are looking like they were cut with a knife. Holmes will receive a photo of a child with an emaciated face (documents - Photo of a Child with an emaciated Face).
Finally, Sherlock is going to the shoemaker (use map). He will learns that the pet shop was closed because of him - a man saw Abraham talking with the detective. Isaac will not promise you that you will be able to meet with the Joseph. Time to return to the Baker Street (use map).
Watson receives a letter from the London Hospitals Miliou in which you will read that some American doctor was looking for female uterus in large quantities and he was offering a decent amount of money. However, no one was willing to meet his request. Of course it was Doctor Tumblety.
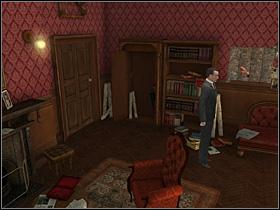
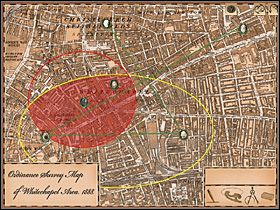
Holmes will decide to mark on the map the murder of Martha Tabram. So go to the hanging board and pin the icon with women's head on near George Yard Buildings. Sherlock thinks that the murderer is a coward so he is killing next to his hideout. Also, the large distance to the place of the next crime (Polly Nichols) confirms the supposition that the killer didn't wanted to associate these two murders.
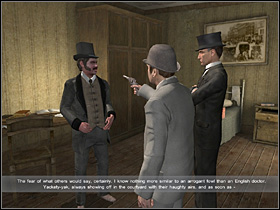
An informer will come to the Baker Street. He has some news about Tumblety. He was arrested and released. Now he is at the Finley's Bed and Breakfast and he wants to escape. Of course, detectives will decide to go there immediately. After a short talk with the owner, they will go upstairs to the Tumbelty's room. Indeed, he wants to leave. Now you have to ask him couple of questions. Doctor will confirm that he was trying to purchase women's organs but he is not a killer. Holmes and Watson will leave his room but they will tell informers to watch the doctor.
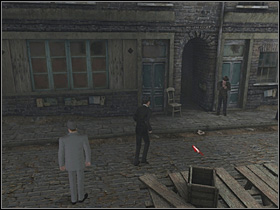
Sherlock will receive an address and he want to check it. You will be automatically moved to the Dorset Street. When you will be there try to find a crying man. Speak with him and you will find that something terrible has just happened. Holmes will decide to investigate this. Go into the yard and enter the door on the left. The view will be awful. Holmes will decide to return to the Baker Street. He will ask for some clay and wine.
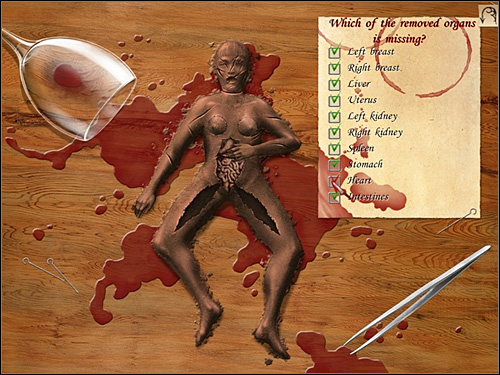
At home Holmes will try to match all organs to the visible holes in clay figure. Click on the table to zoom. Now take a tweezers:
right kidney (right of the head) - put it in the left (from the players point of view) part of stomach;
right breast (left of the head) - put it in the left (from the players point of view) hole in the torso;
uterus (left of the right arm) - put it in the lower section of the stomach;
left kidney (right of the head) - put it in the right (from the players point of view) part of the stomach;
spleen (near the left leg) - put it in the center of the stomach;
liver (between legs) - put it in the upper part of the stomach;
stomach (near the right knee) - put it in the center of the stomach;
left breast (near the right foot) - put it in the right (from the players point of view) hole in the torso.
Each organ will turn green when it will be on the proper place. You will find that there is no heart. Click the appropriate box and cancel the zoom. Now, Holmes will decide to visit the shoemaker (use map).
First, you will have to talk with Hardiman. According to him, Jews don't like the blood so any of them can be a murder from the Whitechapel. After finishing the conversation go to the shoemaker. Holmes will force him to tell the real name of the Aldgate butcher (Joseph Hyam Levy), the one who saw the murderer.

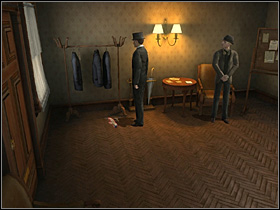
Now Sherlock will go to the Imperial Club (Map of London - Imperial Club, Miter Square). Ask the bodyguard about Joseph Levy. Unfortunately, he is not in the club and he cannot give you the address. This means that Holmes should find a different way to get to the club. But first look at a poster for the Imperial Club meeting (Documents - Poster for the Imperial Club Meeting) and at the chief rabbi's message (Documents - Chief Rabbi 's Message) lying on the table. Take the broken hanger.
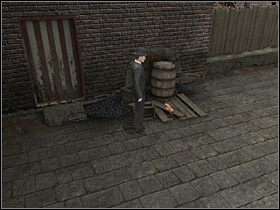
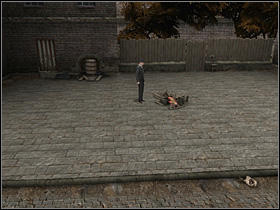
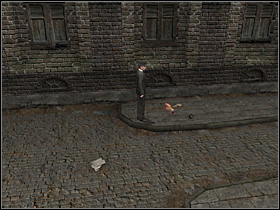
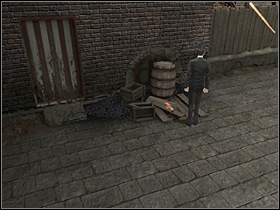
Exit the club. Look at the door leading to the facilities and the windows with a barrel. Barrel is too heavy to remove it. Go to the planks and take the axle. Go back to the main entrance and take piece of wood. Go back under the window with barrel. Try to remove it with the items collected in last few minutes.
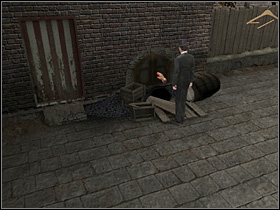
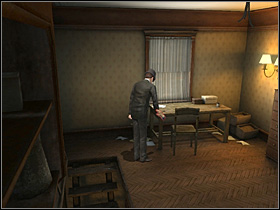
Now click on the window, but unfortunately it is closed . Use the broken hanger to open it. When you will be inside go to the wooden stairs to get out of the basement cellar and take administration key.
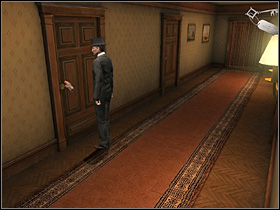
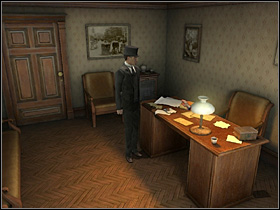
Leave the room and go to the next door. Open it with the key. Take the dictionary lying on the table and some proceedings judgment.
Now you have to open the box. Take all the metal draughts. You will find a butcher's letter there (Documents - A Butcher 's Letter). Jacob Levy was trying to get to the club. Unfortunately, Joseph wrote him a negative opinion.
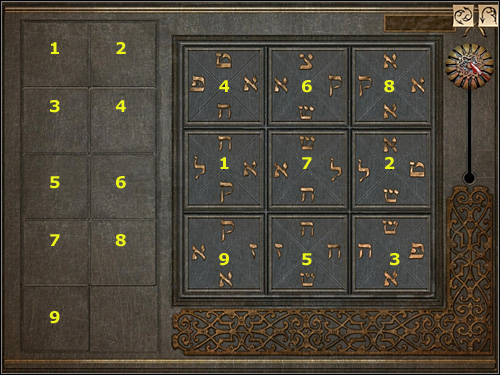
Now it is time to take care of the safe. You must use metal plates to open it(just activate them in the inventory). The main thing is to deploy plates on the on the board. In addition they have to stick with each other with the same marks. Start with the plate No. 7. The correct solution is shown on the picture above.
You will find some documents in the safe. Unfortunately they are in Yiddish. To be able to read it Holmes have to use the dictionary. You have to match letters from the Latin alphabet to books. Then you will know in which of them you have to search for some information about the butcher.
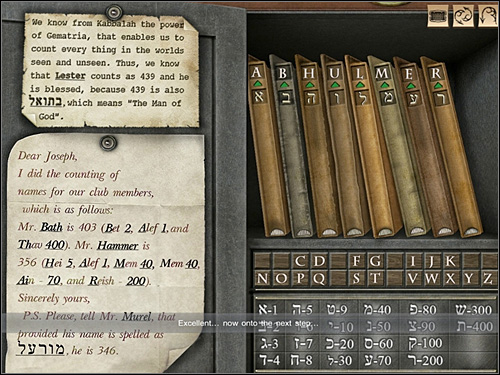
So: the letter on the first file is worth 1 (it is shown on the bottom of the screen) and this is A. Click the correct letter and pin it to the proper file.
The letter on the second file is worth 2. It is B.
The letter on the third file is worth 5. It is H.
The letter on the fourth file looks like a penultimate letter in the Hebrew word Murel. Remember that in Yiddish we are writing from the right to the left so it will be U.
The same rule will apply to the fifth file. This is a letter L.
The letter on the sixth file is worth 40 and it looks like the last letter in the word Murel. In Yiddish we are writing from right so it will be M.
The same rule will apply to the fifth file. This is a letter - E (this letter is worth 70).
The same rule will apply to the fifth file. This is a letter - R (this letter is worth 200).
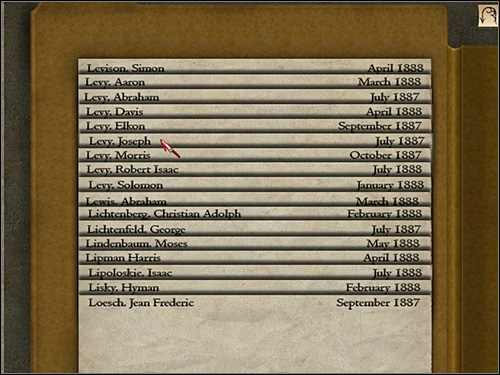
When you will assign a correct letter to the file then a green triangle will be shown. As a matter of fact, you will be able to find the address of Levy, Joseph. Holmes will find file on Joseph LEVY.
At the end take the candlestick and leave the administrative room. Go to the basement and open the window. Holmes cannot leave the club in this way. You have to find another exit.

Go to the other side of the basement, and take a clothes line. Take a bucket and a hook too.
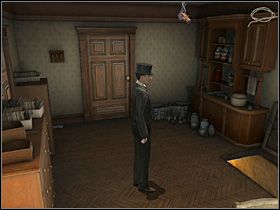
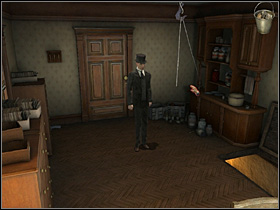
Go to the magazine and connect the hook with the wires. Go to the corner of the room and leave the candlestick on a regale. Take few empty cans and put them into the bucket. The second end of the line connect to the candlestick. Install the bucket full of cans and click on the table. Light on the candle and run to the administrative room.
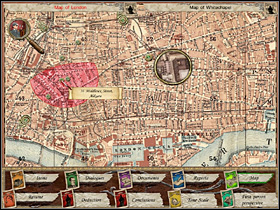
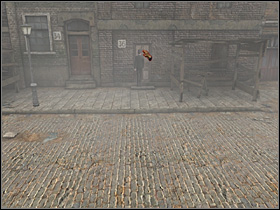
After leaving the club Holmes will decide to go to this address (Map of London - 36 Middlesex Street). When you will be there go right. Knock to the doors with a number 36. Holmes will speak with Sarah Levy, the wife of Jacob Levy. During the conversation their children will come, one of them is evidently infected with syphilis. Now go to the Baker Street.
Sherlock knows who is Jack the Ripper. He want be sure so you will have to look at the General Deduction Boads. Click on the board to zoom it. As always you have to choose correct answers (they will be marked with green). This time will have to complete 5 boards.
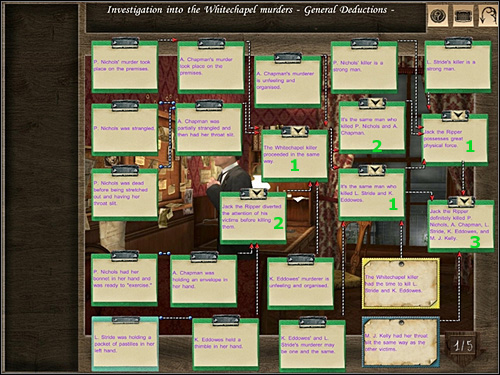
General Deductions 1/5:
Conclusion I: Jack the Ripper was distracting their victim's before the crime (version 2).
Conclusion II: The murderer from Whitechapel is doing the same(version 1).
Conclusion III: This is the same man that have killed P. Nichols i A. Chapman (version 2).
Conclusion IV: This is the same man that have killed L. Stride i K. Eddowes (version 1).
Conclusion V: Jack the Ripper is very strong (version 1).
Conclusion VI: Jack the Ripper killed have killed P. Nichols, A. Chapman, L. Stride, K. Eddowes i M. J. Kelly (version 3).
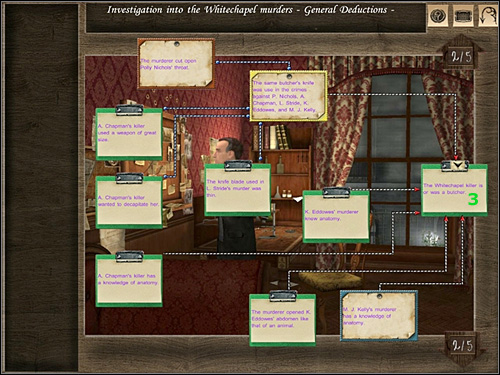
General Deductions 2/5:
Conclusion I: The murderer from Whitechapel is (or was) a butcher (option 3).
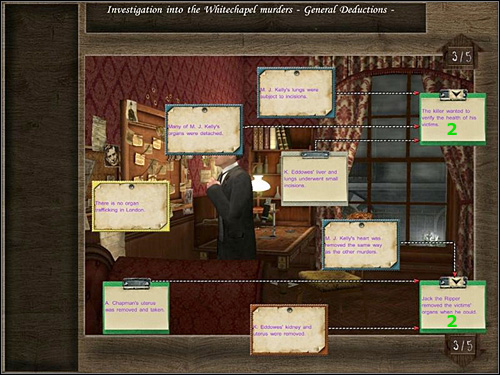
General Deductions 3/5:
Conclusion I: The murder was looking for ill victims (version 2).
Conclusion II: Jack the Ripper was removing organs from the bodies when he was able to do this (version 2).
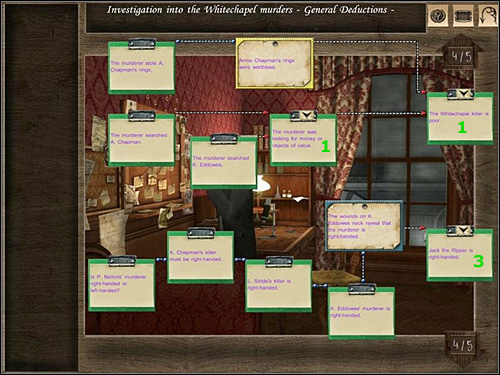
General Deductions 4/5:
Conclusion I: The murderer was looking for some valuable items (version 1).
Conclusion I: The murderer from Whitechapel is poor (version 1).
Conclusion III: Jack the Ripper is right-handed (version 3).
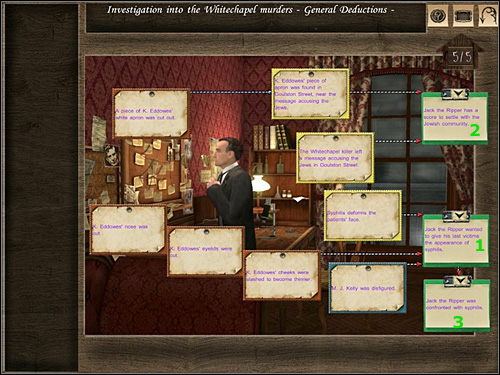
General Deductions 5/5:
Conclusion I: Jack the Ripper is connected with the Jewish community (version2).
Conclusion II: Jack the Ripper wanted to deform the bodies of his victim. They should look like a children infected with syphilis (version1).
Conclusion III: Jack the Ripper was infected with syphilis (version 3).
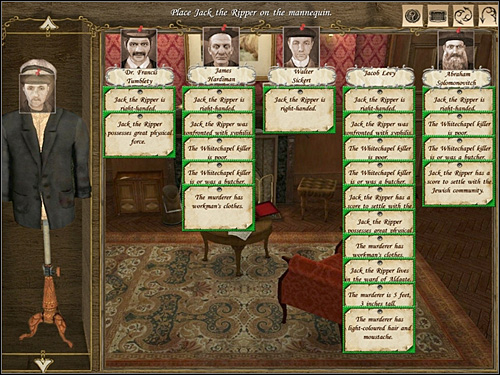
Now you have to decide who is Jack the Ripper. Click on the board to zoom it. Now you have to match conclusions with the name. The first one is done for you:
1. Jack the Ripper is right-handed- all.
2. Jack the Ripper was infected with syphilis - James Hardiman, Jacob Levy.
3. The murderer from Whitechapel is poor - James Hardiman, Jacob Levy, Abraham Solomonovitch.
4. The murderer from Whitechapel is (or was) a butcher - James Hardiman, Jacob Levy, Abraham Solomonovitch.
5. Jack the Ripper is connected with the Jewish community - Jacob Levy, Abraham Solomonovitch.
6. Jack the Ripper is very strong - doctor Francis Tumblety, Jacob Levy.
7. The murderer is wearing some worker's clothes - James Hardiman, Jacob Levy.
8. Jack the Ripper lives in the Aldgate district - Jacob Levy.
9. The murderer is 5.3 feet heigh - Jacob Levy.
10. The murderer is blond - Jacob Levy.
When you will make a good conclusion it will be marked with green. Now you have to move the portrait of the killer to the appropriate place.
In the final scene you have to come to the Levy's house. And that will be the end of your adventure in this history.


 Shadowrun: Hong Kong Game Guide & Walkthrough
 Sid Meiers Civilization V - Gods & Kings Game Guide & Walkthrough
 Scarface: The World is Yours Game Guide & Walkthrough
 Slender: The Arrival Game Guide & Walkthrough
 Smite Game Guide & Walkthrough