
This guide to do Slender: The Arrival contains hints useful while playing this survival horror adventure game. The gameplay focuses around manipulating items, finding documents and constantly running away from the terrifying Slender Man. You will take control of a certain Lauren and also her friend Kate during retrospections. You're armed with only a flashlight and camera and have to discover what has really happened with Kate. Look out - danger is out there waiting for you.
The game offers two difficulty settings: normal and hardcore. The second one is however available only after completing the game. Slender is more likely to attack you and additionally the battery of your flashlight has limited power and you never know when it will run out. Therefore it's best to grope in the darkness and turn the flashlight on only when necessary - for example to blind The Proxy. The hardcore mode also features a reward at the end - a slightly longer ending which explains more of the plot.
In the main menu you will find an scrapbook will all documents that you've collected. There is a total of 26 of them, divided into 13 letters and other documents (notes, leaflets and posters). Their locations have been marked in the corresponding chapters, letters in brown and other documents in orange. Apart from items land in the scrapbook, you don't collect any other items apart from flashlights (marked in green). Achievements are marked in blue.
If you want, you can use cheats. Amongst others, you can activate the god and master mode (offering the same things as the god mode, i.e. immortality, and additionally endless stamina and increased running speed). Using the code, you can also unlock all the scenes. More on that can be found in the chests chapters.
The Proxy, mentioned above, is a creature controlled by Slender Man. A description of both characters and how to act when faced with one of them can be found in proper parts of the guide.
Daniela "Sybi" Nowopolska ()
Translated to English by Jakub "cilgan" Lasota

Move the camera round, pick up objects, open/close doors and windows

Enter the cheat console

Move

Duck

Run

Camera zoom
Flashlight

Intense flashlight
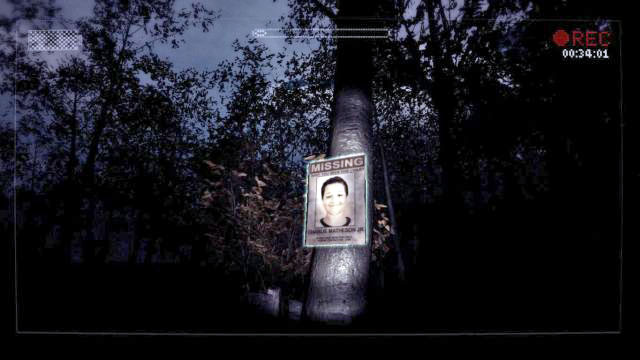 Where are you, Charlie?
You begin in the woods. Turn left, avoid the trunk and go down onto the path. Follow it down and further to the left. You will pass by a car and the closer you will be to Kate's house, the darker it will get. Before entering the house, note the Missing Child Poster for a boy named Charlie Matheson Jr (1) handing on the wall (opposite to the garage door). The poster will be moved to your scrapbook. Head towards the house and approach the swings in the darkness - Lauren will remember how she used to play on them with Kate. Push the open front door, enter the building and close the door behind you. On the shelf, to the left of the stairs, you will find letter number 1. Read it and it will end up in your inventory.
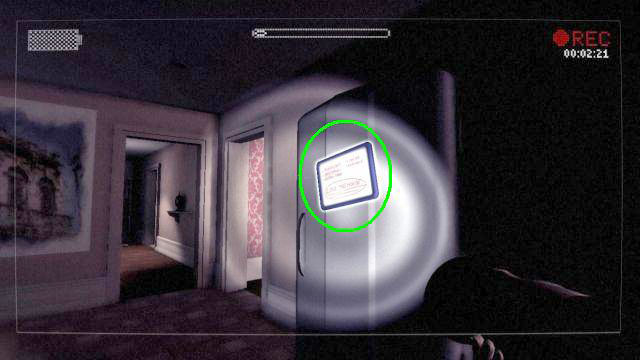
Go through the door on the left leading into the living room. Look for a flashlight - its location is random, but usually it appears on the ground floor, for example by the cigar package in the music room, by the phone in the kitchen or by letter number 2 in the bathroom. In the living room you will find a note (2) lying on the table. The next room is a music room and the next one a kitchen. There's another note (3) on the fridge and a pamphlet informing of (4) Beth Hayes' funeral.
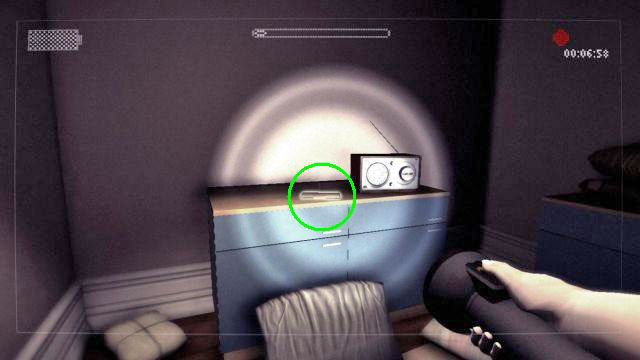
Go through the corridor and enter the bathroom through the half-open door on the left. On the chest of drawers by the radio (which you can turn on if you want) you will find letter number 2. While walking around the house, you have probably already noticed Slender Man behind the windows. His presence is marked with camera disturbance and change of music. I'd recommend you stay away from the windows and not look at the monster, through the danger during this part of the game is rather small.
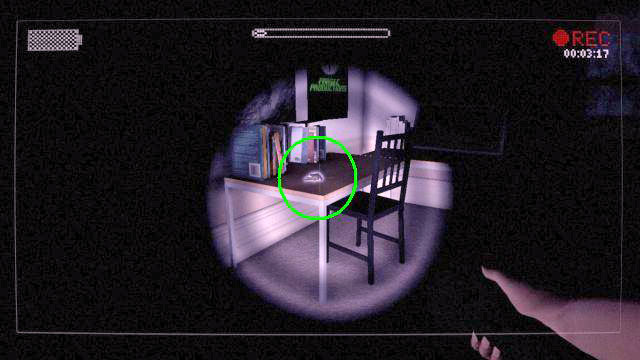
Return to the stairs and go to the upper floor. The last room in the corridor on the right is Kate's room and it's locked. You need the keys which can be found in one of the other rooms - they appear randomly; most often they can be found on the desk in the first room of the corridor on the right or on the bed in the room to the left of the stairs. Open Kate's room and take a look around. Note the writings on the walls and pages on the floor. Approach the desk and take the note. You will head a scream - look out through the window to see a gate leading to the woods. Leave the house, but before heading to the gate, stop by the playground. By the slide you will find letter number 3. Climb the platform and use the slide (just try going down and you will automatically slide down) to receive an Easter egg (achievement - Playing on a slide in a horror game).
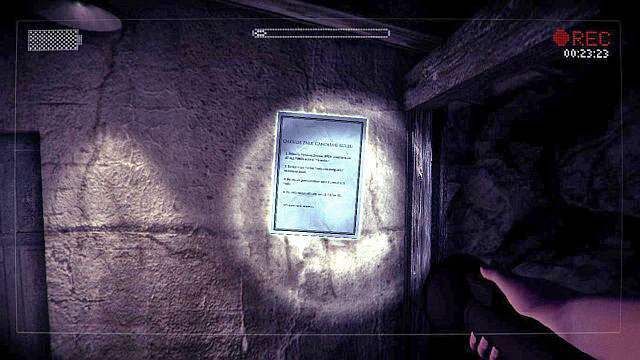 Rules must be followed...
This part of the gameplay largely depends on how calm the player is. You will land in one of four random starting locations, each one a bit different from the others. Examine the walls and shed entrance. You will find a sign (5) regarding canoes for rent, a pamphlet about the park (6) and the rules of the park (7).
You will have to explore the whole park in search of 8 notes lost by Kate. The shape of the area stays the same, however the landmarks are divided randomly. The notes themselves can also be found in various places. Your task is finding the 8 notes before Slender Man catches you. His presence is indicated by disruptions in the camera, a change of music and also strange, unrecognisable noises as well as a distinct, heavy breathing. Sometimes his steps can also be heard.
If you face Slender, you have to immediately run away. Don't look at him, as you're risking drawing his attention and death. Just run away as fast as you can - Lauren can not only walk but also run, however her stamina isn't without limits and therefore you should keep it for such occasions. Slender Man can all of a sudden teleport nearby Lauren or appear without any warning, however most of the times he's just wandering somewhere nearby, following you. Therefore you shouldn't look behind at all. The danger level rises as you're collecting the notes - the more you have, the more often Slender will attack.
10 locations where you can find randomly placed notes are:
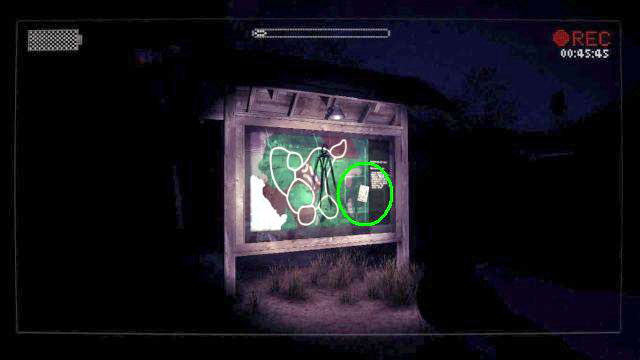
You should try to remember the places you've already visited and how are they placed in relation with each other - it will make navigating easier. Also keep in mind that the shape of the area doesn't change - in accordance with what can be seen on the park map. On the left there's always the river, above on the right there's tall grass and in the middle there are some rocks. You might also find it helpful to turn off your flashlight and search for sources of light - by the toiler and the canoe there's a flare, by the tent there's a campfire, the visitor centre, tower and warehouse are lit and there' also light in the cars. After collecting 8 notes, Slender will appear and Lauren will automatically start running away. Eventually the whole screen will turn black and you will be moved to the next chapter.
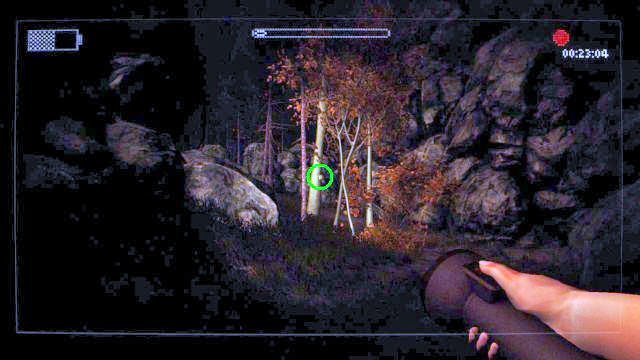
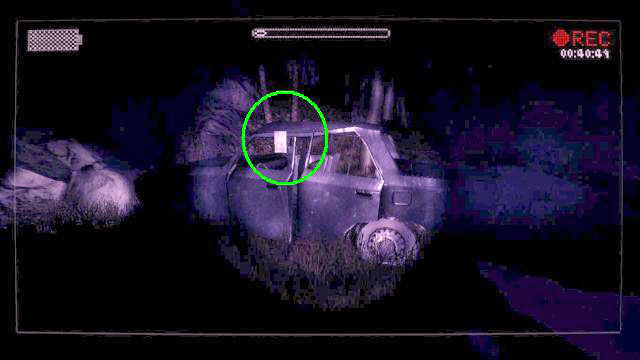
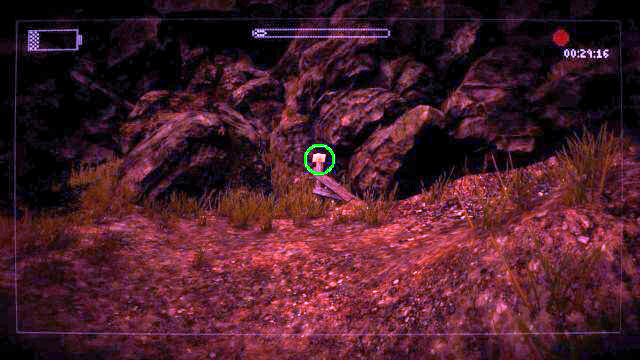
Lauren wakes up beside the entrance to an abandoned mine. Before heading there, take a look around. Go to the back of the small building, afterwards straight and slightly right, towards the rocks, looking for a tree with red leaves. On its trunk you will find letter number 4. Letter number 5, on the other hand, is lying on a barrel by the stairs of the house on stilts. Approach the mine entrance. On the right, on the bulletin board, you will find note (8) and letter number 6.
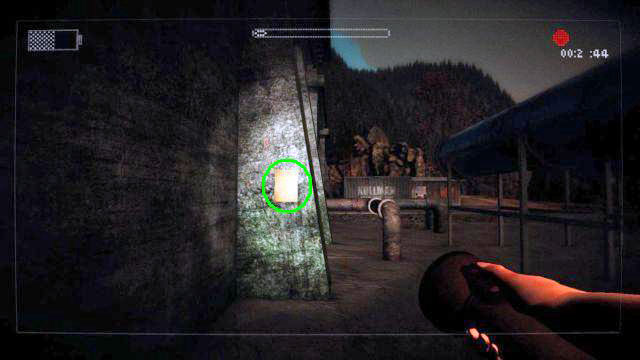
To the left of the entrance, on the wall of the building (behind the pipes) there's a message from a certain Charles M (9). Enter the mine and follow the passage at the end of the corridor on the right. The grated door features a warning sign (10), while to the left of it there's letter number 7. At the very end of the room there's a newspaper (11) hanging from the wall.
 The Proxy himself
Go through the door on the left into the main corridor. You will reach an elevator and the first of six generators. Click on the elevator to learn that it's shut down. Turn on the generator to learn that you have to do the same with five more. The fun starts at this precise moment. Until the generator is off, you're safe. Turning it will cause The Proxy - Slender Man's subordinate, once a human being, now following the orders of Slender (willingly or not) - to start hunting you. You can however defend yourself - the best method is stunning him with the amplified flashlight mode - aim at the monster while holding down RMB). The Proxy has to be considerably close for the trick to work, but not too close as then he will ignore the flashlight and try killing you either way.
While The Proxy is helplessly covering his face, run away as fast as you can. Most of the time you can survive two of his attacks and be killed with the third one, however each encounter weakens Lauren, making her a perfect target for Slender Man. Yes, you will also have to look out for Slender, probably making it the most difficult part of the game. Luckily Slender usually only starts appearing after you activate the fourth generator, however when he does, he's usually much closer to Lauren and therefore harder to run away from.
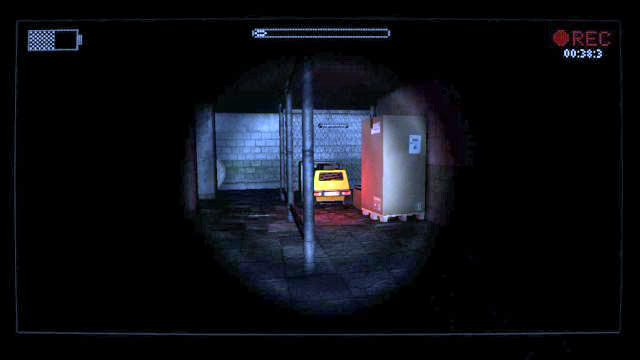 A sample generator location.
The generators, as you have probably guessed, are placed in random location. It's best to develop a system of navigating through the corridors of the mine - stick to one side, e.g. left. The idea here is to avoid visiting the same places and instead go around the whole area. Additionally there's a red light by each generator, so they're quite easy to notice. Starting from the room with the first generator, you should note that it's connected with four corridors. The one to the left of the elevator can contain a generator behind a fence. The next one leads to three rooms, each of them is a potential generator location. However the corridor on the right also leads to three rooms which might contain the machines, as well as many other locations.
It's a good idea to head from left to right: begin with the door in the bottom part of the room on the left, afterwards check all room to the left of the elevator until you reach the stairs leading to the upper floor (you should also check behind the stairs). Climb them, head back down to search the backrooms and continue to the right. Save some energy for the last run; after finding all the generators and activating them, you won't yet be safe. Run to the elevator and have the flashlight ready, as The Proxy might attack even after you activate the elevator. The chapter will end as you reach the top of the mine.
Notice: the hardcore difficulty setting, apart from activating the generators, also requires you to find gas canisters required to turn them on. There are six of them, just like the generators.
The locations of the canisters are completely random, some sample places where you can find them are: the first corridor on the left (behind the fence), the eastern corridor (on the corner), the corridor on the right (nearby the lockers), downstairs beside the cement bags, the corridor on the left (nearby the forklift), downstairs by the machines, the room with the road signs, nearby one of the generators etc.
Follow the corridor towards the exit. Collect letter number 8 lying on the crates on the right and leave the mine. Go along the path and keep an eye on the fence - you should find letter number 9. Go further until you reach a fork in the road - take the road leading up and you should come across two stakes thrust into the ground, letter number 10 it attached to one of them. Turn around back to the fork and continue onwards - you will reach a cave with a flare by the entrance. Cross the cave to arrive at a building with a note (12) on the door. Head inside and look left - on the wall there's letter number 11. Click on the TV - watch a scene during which Kate writes down her notes. The woman, foreseeing the arrival of Slander Man, grabs the camera and flashlight...
 Closing windows
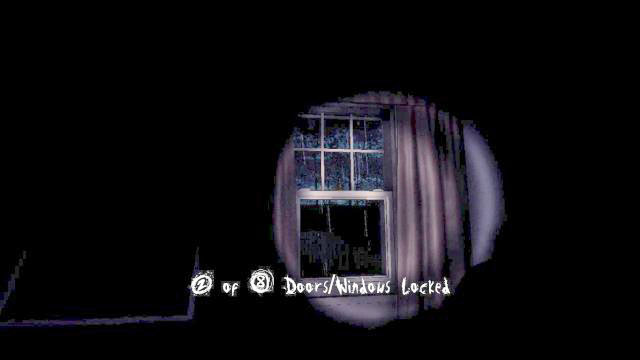
As Kate, your task is to lock all windows and three doors as fast as possible. There are 8 of them in total - however which of them turn out to be open is purely random. You move in complete darkness with only your flashlight to help you. Start with the sleeping room and afterwards check all rooms upstairs as well as the corridor. Run down to the ground floor and close the front door. There are two rooms in the dining room, one in the kitchen as well as the back door. Close the garage door (by the bathroom). Two rooms with windows left - the living room and the music room.
At this point Slender will probably appear inside the house, coming in through an open window in one of those rooms. When you try to close it and get informed that there's no point as the monster is already inside, run through the dining room (to avoid running into him) upstairs. It's possible that Slender will get inside even faster and you will note him - then you will just be informed that you have to hide in your room. Rush to Kate's sleeping room and don't close the door behind you - it usually causes the game to crash. Instead, run to the window. If you've managed to close enough windows and were fast enough, you will be moved to the next chapter. If you close fewer windows, Slender Man will just keep lurking outside, your flashlight will eventually die, you will get lost and eventually die of boredom as you wait for the monster.
Notice: this part of the game lets you obtain another easter egg, which I'd recommend doing at the very beginning as it will force you to restart the chapter. Run out of the house and keep heading left until you reach the edge of the map. You will obtain an achievement - Not even a bug in this game will save you from me.
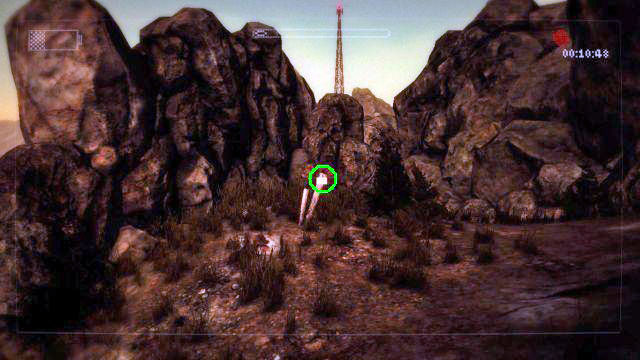
This is the last chapter in the game. You still play as Lauren. Leave the building and start climbing towards the tower. As the path bends to the right you will find letter number 12 on a stake in the ground. Keep going onwards until you reach a cave. On the crate you will find letter number 13. Follow the corridor and by the wall covered with signs you will find note (13) - the last document for your scrapbook. Leave the cave.
The forest is on fire. You will have to run through it, of course avoiding Slender Man while you're at it. He's in a horrible mood and wants to get you in his hands, which in this chapter he can extend. Your task is reaching the radio tower. Keep going onwards while keeping the tower is sight so that you don't get lost and keep going in the right direction. Avoid anything that's on fire so that Lauren doesn't get damaged and of course run away when only you see Slender Man. Look out for leafless black trunks which will gall down as you pass by them.
When you reach the tower, quickly search some of the open rooms - you need keys. Usually they're in the main room or the one on the right. Use the keys to open the door and keep running without stopping at all - you have to save up some energy for this last sprint. Don't mind the dying flashlight or all the noises and images. All you have to do is reach the room. That's the end of the game - turn on the camera and play the recording.
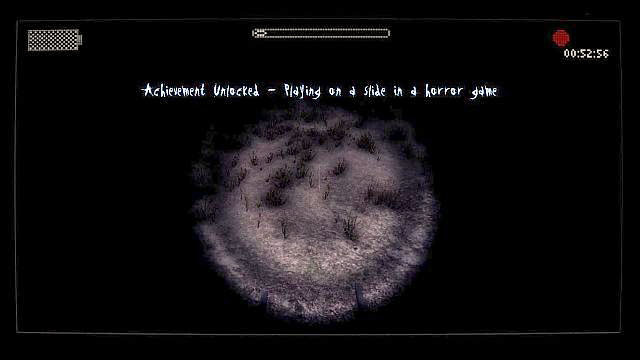 Nothing like some fun to calm your nerves.
During the prologue, climb and slide down the slide (just try walking down) to obtain the easter egg (achievement - Playing on a slide in a horror game).
In the "Flashback" chapter, run out of the house and keep heading left until you reach the edge of the map. You will die and will have to begin the chapter from the beginning, but will also be rewarded with an achievement - Not even a bug in this game will save you from me.
In the last chapter you should note one of the signs on the wall of the cave "Don't give him twenty dollars" - it's a reference to a series of YouTube movies created by one of the fans of the game in which he used the song "Gimmie Twenty Dollars".
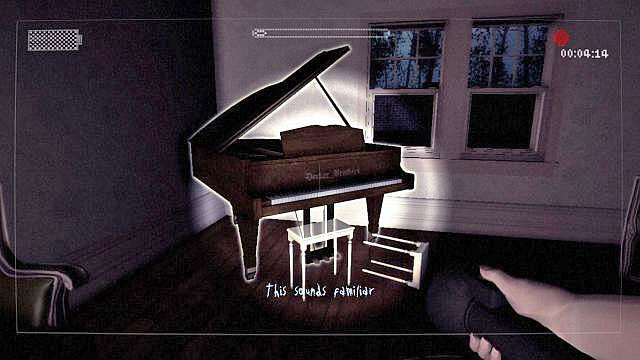 Play a note for Slender Man.
Slender: The Arrival features a hidden level which can be reached from the prologue, as long as you have an updates version of the game (at least 1.2). Approach the swings on the playground by the house so that Lauren remembers how she used to play there with Kate when they were both young. Afterwards enter the building and keep playing the piano until the woman state that the melody brings back memories. Take the flashlight and turn on the radio.
Head outside and head to the tree with the poster regarding Charlie. The game will return to the main menu. Choose the "start game" option, but don't choose a scene. You will a message saying "I'm lost. Can you find me?". You will play hide and seek with Slender Man, running around the house. The game will once again return to the main menu, choose "start game" again. The hide and seek continues. This time Slender Man is looking for you. Wander around the house and when the monster reaches you, the scenery will change. You will see the last moments of one of the heroes. After the "You are dead" sign appears once again, choose "start game" and watch the final scene.
Additionally version 1.3 includes an additional chapter called "Genesis" in which you control Kate in a forest. It's a remake of the free version of Slender: The Eight Pages which required you to collect the title 8 pages.
There are 10 locations where you can find them:
All of you who have played Slender: The Eight Pages will clearly see that it's the same map, just with nicer graphics. The locations stay the same: the latrines are in the middle of the map, to the right of them there are the tanks. To the left of the starting point there's a tree and to the right a silos.
Turn left and move onwards to come across a tree, afterwards a barrack and a car. Now turn right and head to the bathrooms or go straight to reach the cistern. To the right of the cistern there's a tunnel and behind it some pillars. The cross-walls can be found between the pillars and rocks. The easiest way is moving clockwise or counter-clockwise and sticking to it. The more pages you have, the more likely Slender Man will be to appear. However it doesn't matter if you're able to collect all of them - the level always ends identically, with Slender Man catching you at some moment.
The console can be activated by pressing ~. Below you can find a list of cheats.
Name
Effect
master
God mode + unlimited stamina + quicker running
god
You're immortal, however if Slender catches you, the game will freeze!
sprint
Run faster
stamina
Unlimited stamina
unlockscenes
Unlock all scenes
unlockscrapbook
Unlock all documents in the scrapbook
lockscenes
Locks all scenes
resetpref
Resets all settings to default
addprogress
Completes the next part of a mission in a given chapter (e.g. +1 note, +1 window)
progress
Receive all objects you're currently looking for
reload
Reset the current chapter
load
Restart the game and turn on the main menu
showfps
Shows frames per second


 Spellforce 2: Shadow Wars Game Guide & Walkthrough
 Secret Files 3: The Archimedes Code Game Guide & Walkthrough
 Sniper: Ghost Warrior Game Guide & Walkthrough
 Shadowrun: Hong Kong Game Guide & Walkthrough
 Stronghold: Crusader II Game Guide & Walkthrough