
This unofficial game guide to Sniper: Ghost Warrior contains a complete single player campaign walkthrough. Succeeding tasks in individual missions are marked with bold orange text. The consecutive pictures are marked red in the text. In the second part of this guide I've described the locations of intel data (laptops), which you can find in this game. And this description is backed up with maps which should help you to find the individual laptops easier.
Pawel "PaZur76" Surowiec
This mission is, in some way, a continuation of the tutorial. On the cut-scene (#1) you can see your sniper-spotter pair spreading out - spotter stays on the rocks, where he has a better overview of the situation, and you walk downhill with a task of going through the ruins. Your spotter will direct you via the radio.
![[1] - Chapter 1 - One Shot, One Kill - p. 1 - Walkthrough - Sniper: Ghost Warrior - Game Guide and Walkthrough](https://game.lhg100.com/Article/UploadFiles/201512/2015121709392040.jpg) [1]
[1]![[2] - Chapter 1 - One Shot, One Kill - p. 1 - Walkthrough - Sniper: Ghost Warrior - Game Guide and Walkthrough](https://game.lhg100.com/Article/UploadFiles/201512/2015121709392011.jpg) [2]
[2]
Move forward along the road marked with successive, white dots displayed on your screen (#2). You can change your weapon to silenced pistol. Move silently and with caution, go crouch if needed and have your eyes in the back of your head.
After a while your spotter contacts you again and orders you to take down one of two bad guys standing on the scaffold to the left (#3). Namely, you have to kill on spotter's signal this dude on the left - in this case use your sniper rifle. At the same moment your spotter will shoot dead the second man.
![[3] - Chapter 1 - One Shot, One Kill - p. 1 - Walkthrough - Sniper: Ghost Warrior - Game Guide and Walkthrough](https://game.lhg100.com/Article/UploadFiles/201512/2015121709392004.jpg) [3]
[3]![[4] - Chapter 1 - One Shot, One Kill - p. 1 - Walkthrough - Sniper: Ghost Warrior - Game Guide and Walkthrough](https://game.lhg100.com/Article/UploadFiles/201512/2015121709392068.jpg) [4]
[4]
Proceed further through the ruins, go prone on your spotter's sign and crawl a little bit ahead (#4). Shoot the guy who may appear in front of you when you're standing up again.
After a moment your spotter orders you to take cover in the bushes near the road. Stay silent and let these three guys who are running by this sandy road pass you. As a matter of fact you can kill these scamps when they passed your position, by throwing a hand grenade in their direction (#5).
![[5] - Chapter 1 - One Shot, One Kill - p. 1 - Walkthrough - Sniper: Ghost Warrior - Game Guide and Walkthrough](https://game.lhg100.com/Article/UploadFiles/201512/2015121709392032.jpg) [5]
[5]![[6] - Chapter 1 - One Shot, One Kill - p. 1 - Walkthrough - Sniper: Ghost Warrior - Game Guide and Walkthrough](https://game.lhg100.com/Article/UploadFiles/201512/2015121709392159.jpg) [6]
[6]
After a while your spotter orders you to take a position behind the wall located a few meters further, on the left roadside. You can see several muggers standing near the bonfire on the road behind that wall. You have to wait till they spread out, and then sneak - on your spotter's mark - to the right, across the road to some ruins. However, you can also quickly kill these guys near the bonfire with a 2nd frag grenade (#6).
After doing this, shoot dead some more thugs running towards the bonfire along the road leading from the ruins on the left (#7). However, try to take down all of these slayers of local military junta fairly quickly, in order to avoid raising the alarm by them.
![[7] - Chapter 1 - One Shot, One Kill - p. 1 - Walkthrough - Sniper: Ghost Warrior - Game Guide and Walkthrough](https://game.lhg100.com/Article/UploadFiles/201512/2015121709392163.jpg) [7]
[7]![[8] - Chapter 1 - One Shot, One Kill - p. 1 - Walkthrough - Sniper: Ghost Warrior - Game Guide and Walkthrough](https://game.lhg100.com/Article/UploadFiles/201512/2015121709392127.jpg) [8]
[8]
Obviously, you can also listen to your spotter's tip: don't start a gunfire and sneak on his sign across the road to the ruins located to the right from the wall you're hiding behind. A moment later silently kill a dude you'll see between the columns (#8).
Sneak through these Maya's ruins, all the time move silently and with caution. Generally, you should avoid making a noise, becoming involved in open firefights, but nothing bad should happen to you, if you raise Cain with killing loudly several enemies. When you're wounded, heal yourself by mainlining a hype of medicine into your vein (#9).
![[9] - Chapter 1 - One Shot, One Kill - p. 1 - Walkthrough - Sniper: Ghost Warrior - Game Guide and Walkthrough](https://game.lhg100.com/Article/UploadFiles/201512/2015121709392132.jpg) [9]
[9]![[10] - Chapter 1 - One Shot, One Kill - p. 1 - Walkthrough - Sniper: Ghost Warrior - Game Guide and Walkthrough](https://game.lhg100.com/Article/UploadFiles/201512/2015121709392169.jpg) [10]
[10]
Proceed along the road displayed on your screen with white dots, passing some factory or refinery installations (#10). You can take a look at these installations using your optic sight, and take out all the bad guys you're able to see on buildings' rooftops/containers and on silos. However, don't kill the scums who are standing near some laborers on this sandy road leading through the refinery. Now you have to meet with O'Neill (your spotter) on his sniping position.
When you go to this meeting you have to take out one more enemy standing in the grass and presenting to you his back. It's a superb occasion to train close combat skills using your knife (#11). Sneak behind that rock in front of you, aim at the enemy's torso or head and throw your knife at him. Obviously, you can also sneak a few meters further, in order to hammer a blade of your fighting knife in a soft body of your victim.
![[11] - Chapter 1 - One Shot, One Kill - p. 1 - Walkthrough - Sniper: Ghost Warrior - Game Guide and Walkthrough](https://game.lhg100.com/Article/UploadFiles/201512/2015121709392153.jpg) [11]
[11]![[12] - Chapter 1 - One Shot, One Kill - p. 1 - Walkthrough - Sniper: Ghost Warrior - Game Guide and Walkthrough](https://game.lhg100.com/Article/UploadFiles/201512/2015121709392107.jpg) [12]
[12]
After a moment you'll have to familiarize yourself with the next element of your equipment - a rope ended with an anchor. Use this rope to climb higher, on some rocky edges, for example, or to rappel yourself to the ground, or to get over the chasms. So press 6 to equip yourself with this rope now, take a look upward and press LMB (Left Mouse Button), in order to throw an anchor towards the red circle being visible on one of the boughs (#12). If you don't see such a circle, just take a walk around with your eyes pointed upward and the circle should finally appear on the bough. After hooking a rope to the bough, climb up on it, by holding the buttons used by you when you're controlling your character's movement. Rappel down a little and press Space to jump down to the ground, when you're on the other side of the chasm.
Finally you're on the sniping post where your spotter O'Neill waits for you (#13).
![[13] - Chapter 1 - One Shot, One Kill - p. 2 - Walkthrough - Sniper: Ghost Warrior - Game Guide and Walkthrough](https://game.lhg100.com/Article/UploadFiles/201512/2015121709392168.jpg) [13]
[13]![[14] - Chapter 1 - One Shot, One Kill - p. 2 - Walkthrough - Sniper: Ghost Warrior - Game Guide and Walkthrough](https://game.lhg100.com/Article/UploadFiles/201512/2015121709392178.jpg) [14]
[14]
From this position you have a nice overview on the refinery's installations located below (#14) - a meeting of several important bad guys is taking place there right now: general Vasquez from a local military regime meets with an American agent named Rodriguez. Your next task is to kill General Vasquez when you have a permission from your HQ to do this.
When you wait for this signal (which will be given via the radio by a voice of some nice lady), there shouldn't be any obstructions to start taking down silently these muggers who protect the meeting. However, shoot dead only these of them, who are taking positions on silos (#15), on wooden watch towers, or are patrolling the perimeter alone, off the beaten track and out of sight of others. Kill these individuals one after one, using your silenced sniper rifle. It's important to do this when the target is out of sight of others, as I said above, otherwise the rest of muggers will raise the alarm!
[15]![[16] - Chapter 1 - One Shot, One Kill - p. 2 - Walkthrough - Sniper: Ghost Warrior - Game Guide and Walkthrough](https://game.lhg100.com/Article/UploadFiles/201512/2015121709392247.jpg) [16]
[16]
When you finally have a "green light" for killing General Vasquez, take a look through your optic sight at the building with walls painted yellow. You'll see a figure of Vasquez in the window - aim at it (#16). You don't have to aim too precisely, at his head, for example.
A moment later pull a trigger (#17).
![[17] - Chapter 1 - One Shot, One Kill - p. 2 - Walkthrough - Sniper: Ghost Warrior - Game Guide and Walkthrough](https://game.lhg100.com/Article/UploadFiles/201512/2015121709392231.jpg) [17]
[17]![[18] - Chapter 1 - One Shot, One Kill - p. 2 - Walkthrough - Sniper: Ghost Warrior - Game Guide and Walkthrough](https://game.lhg100.com/Article/UploadFiles/201512/2015121709392221.jpg) [18]
[18]
When he's hit, he falls backwards because of the impetus of the bullet (#18). Unfortunately he'll survive by some miracle.
And then starts a cannonade - but not so fierce, if you've managed to kill most of the guards earlier. Now kill the rest of them, but pay attention and try not to hurt the civilians (workers) (#19).
![[19] - Chapter 1 - One Shot, One Kill - p. 2 - Walkthrough - Sniper: Ghost Warrior - Game Guide and Walkthrough](https://game.lhg100.com/Article/UploadFiles/201512/2015121709392209.jpg) [19]
[19]![[20] - Chapter 1 - One Shot, One Kill - p. 2 - Walkthrough - Sniper: Ghost Warrior - Game Guide and Walkthrough](https://game.lhg100.com/Article/UploadFiles/201512/2015121709392290.jpg) [20]
[20]
When the shootout dies down and the situation seems to be under your control, you have to use your rope ended with an anchor once again. Take a look upwards and hook the rope to the bough hanging over your head (marked with a red circle, of course) (#20).
Then rappel to the ground, to the refinery. There you can eventually pick up an assault rifle with ammunition of one of the dead enemy soldiers (#21) - this weapon should prove its usefulness in close combat situations which you'll encounter in these refinery installations. It seems that Vasquez has managed to escape from the meeting in his vehicle. He also took with him a hostage in the shape of agent Rodriguez whose cover was blown. You have to follow the fugitive's Hummer now, though there's no rush and you aren't able to catch him for the moment.
![[21] - Chapter 1 - One Shot, One Kill - p. 2 - Walkthrough - Sniper: Ghost Warrior - Game Guide and Walkthrough](https://game.lhg100.com/Article/UploadFiles/201512/2015121709392249.jpg) [21]
[21]![[22] - Chapter 1 - One Shot, One Kill - p. 2 - Walkthrough - Sniper: Ghost Warrior - Game Guide and Walkthrough](https://game.lhg100.com/Article/UploadFiles/201512/2015121709392274.jpg) [22]
[22]
So search the refinery if you want, eliminate the enemy remnants and collect the forfeits such as additional medkits. Then proceed towards the main gate (#22), the exit from this location.
Move towards the direction marked on your screen with white dots - after all you'll reach some fishing village (#23). Make your way through this village by finishing off all the bad guys who are trying to stop you. All that counts here is a good reflex and accuracy. In other words: the skills which you have to demonstrate in many other shooters and you surely already acquired when playing this type of games. There are some barrels in the village - you can shoot at them to cause the explosions and the death of the opponents running around them.
![[23] - Chapter 1 - One Shot, One Kill - p. 2 - Walkthrough - Sniper: Ghost Warrior - Game Guide and Walkthrough](https://game.lhg100.com/Article/UploadFiles/201512/2015121709392266.jpg) [23]
[23]![[24] - Chapter 1 - One Shot, One Kill - p. 2 - Walkthrough - Sniper: Ghost Warrior - Game Guide and Walkthrough](https://game.lhg100.com/Article/UploadFiles/201512/2015121709392271.jpg) [24]
[24]
If these thick shrubs, which are growing here, hinder you from perceiving the enemies, you can walk higher, onto the veranda of one of the local huts built on wooden stilts (#24).
Head for the pier, these wooden jetties located over the water - when you make your step on them you'll see a motor boat used by the last survivor (general Vasquez) for his escaping purposes (#25). He tries to escape with kidnapped Rodriguez, of course.
![[25] - Chapter 1 - One Shot, One Kill - p. 2 - Walkthrough - Sniper: Ghost Warrior - Game Guide and Walkthrough](https://game.lhg100.com/Article/UploadFiles/201512/2015121709392252.jpg) [25]
[25]![[26] - Chapter 1 - One Shot, One Kill - p. 2 - Walkthrough - Sniper: Ghost Warrior - Game Guide and Walkthrough](https://game.lhg100.com/Article/UploadFiles/201512/2015121709392354.jpg) [26]
[26]
You have no chances to stop this boat, even after shooting out at it the whole clip of your assault rifle (#26).
You have to follow your spotter O'Neil. First run down from the road following this man and hide in the roadside bushes. From there observe the enemy patrol passing your position (#1), do not engage it.
![[1] - Chapter 2 - No Man Left Behind - p. 1 - Walkthrough - Sniper: Ghost Warrior - Game Guide and Walkthrough](https://game.lhg100.com/Article/UploadFiles/201512/2015121709392331.jpg) [1]
[1]![[2] - Chapter 2 - No Man Left Behind - p. 1 - Walkthrough - Sniper: Ghost Warrior - Game Guide and Walkthrough](https://game.lhg100.com/Article/UploadFiles/201512/2015121709392380.jpg) [2]
[2]
Follow O'Neil and run after him in the direction of some wooden huts situated over the water. At one point your spotter will stop and give you a "green light" to take out an individual standing further off, ahead of huts (#2). Eliminate this guy using your silenced sniper rifle. If you don't do this, O'Neil will after a while.
You have to secure the landing zone for Stingray now. Stingray is a boat that will come for both of you soon. Take a look (using your optic sight) at the hut in front of you and kill soldiers on hut's veranda (#3).
![[3] - Chapter 2 - No Man Left Behind - p. 1 - Walkthrough - Sniper: Ghost Warrior - Game Guide and Walkthrough](https://game.lhg100.com/Article/UploadFiles/201512/2015121709392304.jpg) [3]
[3]![[4] - Chapter 2 - No Man Left Behind - p. 1 - Walkthrough - Sniper: Ghost Warrior - Game Guide and Walkthrough](https://game.lhg100.com/Article/UploadFiles/201512/2015121709392363.jpg) [4]
[4]
Further to the left there's another hut and amongst its crates may be hidden a next mug. Hold your breath, focus on aiming at the target by holding the Shift key and try to hit the visible part of this mugger's body (#4).
Certainly, the enemies will make out what is going on and they'll open fire. Try to take them out from a distance, don't let 'em get closer, otherwise they may use hand grenades against you and it's very painful to be hit with a shrapnel (#5). Your spotter O'Neil should help you in this gunfight, but you better don't count specially on his skills.
![[5] - Chapter 2 - No Man Left Behind - p. 1 - Walkthrough - Sniper: Ghost Warrior - Game Guide and Walkthrough](https://game.lhg100.com/Article/UploadFiles/201512/2015121709392352.jpg) [5]
[5]![[6] - Chapter 2 - No Man Left Behind - p. 1 - Walkthrough - Sniper: Ghost Warrior - Game Guide and Walkthrough](https://game.lhg100.com/Article/UploadFiles/201512/2015121709392318.jpg) [6]
[6]
Even further to the left there's one more hut hidden in the jungle and you can see the HMG emplacement arranged behind the sandbags on hut's veranda. Fortunately, none of the bad guys there should be smart enough to use this deadly weapon against you. Nevertheless, try to kill these three dudes near the HMG fairly quickly (#6) - you can aim at the red canister that is visible in your optic sight when you're pointing it at them, to cause a little explosion.
You can also sneak to this hut from left, along the sandy road, on which you saw on foot patrol of the enemies in the beginning of a gameplay. After annihilating the crew of the HMG emplacement you can use this deadly weapon against the rest of the opponents, if someone has managed to survive to this moment. On the veranda of the hut located vis a vis there's also some red, explosive barrel or canister (#7).
![[7] - Chapter 2 - No Man Left Behind - p. 1 - Walkthrough - Sniper: Ghost Warrior - Game Guide and Walkthrough](https://game.lhg100.com/Article/UploadFiles/201512/2015121709392370.jpg) [7]
[7]![[8] - Chapter 2 - No Man Left Behind - p. 1 - Walkthrough - Sniper: Ghost Warrior - Game Guide and Walkthrough](https://game.lhg100.com/Article/UploadFiles/201512/2015121709392305.jpg) [8]
[8]
The next task is to make your way to the landing zone where the boat will come to, in order to take on board both of you. It's quite near - follow O'Neil (#8) and you shouldn't have problems with finding the way.
Unfortunately your companion will be wounded right before getting on board of this marvelous vessel (a... pontoon) and you'll stay alone on the shore, covering the evacuation of the wounded comrade (#9).
![[9] - Chapter 2 - No Man Left Behind - p. 1 - Walkthrough - Sniper: Ghost Warrior - Game Guide and Walkthrough](https://game.lhg100.com/Article/UploadFiles/201512/2015121709392360.jpg) [9]
[9]![[10] - Chapter 2 - No Man Left Behind - p. 1 - Walkthrough - Sniper: Ghost Warrior - Game Guide and Walkthrough](https://game.lhg100.com/Article/UploadFiles/201512/2015121709392463.jpg) [10]
[10]
Now you must go to the nearby village. But you're still among the huts you've just cleared of the enemies (#10).
In a nearby hut you'll find Dragunov sniper rifle (but I suggest to stay with your current sniper rifle), a medkit and the satchel charges (#11). Similar items are located in the hut with HMG emplacement on the veranda.
![[11] - Chapter 2 - No Man Left Behind - p. 2 - Walkthrough - Sniper: Ghost Warrior - Game Guide and Walkthrough](https://game.lhg100.com/Article/UploadFiles/201512/2015121709392491.jpg) [11]
[11]![[12] - Chapter 2 - No Man Left Behind - p. 2 - Walkthrough - Sniper: Ghost Warrior - Game Guide and Walkthrough](https://game.lhg100.com/Article/UploadFiles/201512/2015121709392485.jpg) [12]
[12]
When going to the edge of the veranda of the first of these huts, you should be able to notice two soldiers having a chat on a sandy road leading to the village you have to get to (#12). Take them out from your current position - there's no need to get closer and to risk a detection or a gunshot wound. Then move to their dead bodies.
When you're close to these corpses (#13), the HQ contacts with you saying via the radio, that the convoy of enemy vehicles is going to depart from the village soon, in order to get to the place where Rodriguez is being held. That's also a great occasion for you to get to Rodriguez! You have to get to one of these trucks, in order to hide on its board and get to the kidnapped agent in this smart way.
![[13] - Chapter 2 - No Man Left Behind - p. 2 - Walkthrough - Sniper: Ghost Warrior - Game Guide and Walkthrough](https://game.lhg100.com/Article/UploadFiles/201512/2015121709392426.jpg) [13]
[13]![[14] - Chapter 2 - No Man Left Behind - p. 2 - Walkthrough - Sniper: Ghost Warrior - Game Guide and Walkthrough](https://game.lhg100.com/Article/UploadFiles/201512/2015121709392420.jpg) [14]
[14]
The position of the truck (in the village) is indicated on the screen with a white dot - move along this sandy road towards this direction. You won't go too far though, because after a while you'll see in the distance on this road a checkpoint with a toll-bar. There's one or two soldiers patroling along this toll-bar (#14). Go prone on the road and kill both, one by one.
Then proceed towards this checkpoint, but don't go in the middle of the road - instead of this, use the left roadside to avoid detection. When closing to the village it's worth to press the F5 function key to quickly save your game status. This village is full of the enemies (#15) and I wouldn't recommend starting an open fight with them.
![[15] - Chapter 2 - No Man Left Behind - p. 2 - Walkthrough - Sniper: Ghost Warrior - Game Guide and Walkthrough](https://game.lhg100.com/Article/UploadFiles/201512/2015121709392469.jpg) [15]
[15]![[16] - Chapter 2 - No Man Left Behind - p. 2 - Walkthrough - Sniper: Ghost Warrior - Game Guide and Walkthrough](https://game.lhg100.com/Article/UploadFiles/201512/2015121709392462.jpg) [16]
[16]
Instead of doing this, try to move along the village peripheries and stay close to the left roadside of this sandy road leading through the settlement. Eliminate (using your silenced pistol) only these single bad guys that may wander into your path on short distance (#16). Go crouch to avoid detection.
On the road, near the parked truck you have to get to, kill two soldiers (the second is located closer to the vehicle). (#17) Afterward, if you don't see anyone else in the nearest vicinity, sneak to the truck and jump on its board (at the rear of the vehicle).
![[17] - Chapter 2 - No Man Left Behind - p. 2 - Walkthrough - Sniper: Ghost Warrior - Game Guide and Walkthrough](https://game.lhg100.com/Article/UploadFiles/201512/2015121709392416.jpg) [17]
[17]![[18] - Chapter 2 - No Man Left Behind - p. 2 - Walkthrough - Sniper: Ghost Warrior - Game Guide and Walkthrough](https://game.lhg100.com/Article/UploadFiles/201512/2015121709392433.jpg) [18]
[18]
The truck will transport you to your destination, passing the enemy patrols remained unaware of your presence. After several hours this truck will stop and you'll find yourself outside the vehicle, on another sandy road leading to one more fishing village (#18). Shoot dead a guy standing between other vehicles parked on this road and presenting to you his back. You have to run to the valley - you didn't expect that the truck will bring you right under Rodriguez's nose, did you?
You may sneak to the left in order to go around this fishing village - go crouch or even prone, if needed, and sneak along the shore (along the beach). (#19) You don't have to attack the enemies patrolling the village (two guys stand also on the veranda of one of the huts built on stilts), although it is possible to kill'em all without raising the alarm. But such an action demands a lot of sneaking, so let's not include here this unnecessary description. Eliminate only these opponents you aren't able to by-pass.
![[19] - Chapter 2 - No Man Left Behind - p. 2 - Walkthrough - Sniper: Ghost Warrior - Game Guide and Walkthrough](https://game.lhg100.com/Article/UploadFiles/201512/2015121709392431.jpg) [19]
[19]![[20] - Chapter 2 - No Man Left Behind - p. 2 - Walkthrough - Sniper: Ghost Warrior - Game Guide and Walkthrough](https://game.lhg100.com/Article/UploadFiles/201512/2015121709392555.jpg) [20]
[20]
Go round this settlement and head for succeeding white dots displayed on your screen till you get to another fishing village (#20).
You start this mission on the peripheries of some fishing village, near one of the huts - you can see a bad guy walking there and back on its veranda. Don't attack him yet. You have to sneak to the lighthouse. Go crouch or even better - go prone, and crawl under these stilts this hut is built on (#1). I'd suggest going to your right, to the water, when you're under these piles.
![[1] - Chapter 3 - Dangerous Grounds - p. 1 - Walkthrough - Sniper: Ghost Warrior - Game Guide and Walkthrough](https://game.lhg100.com/Article/UploadFiles/201512/2015121709392593.jpg) [1]
[1]![[2] - Chapter 3 - Dangerous Grounds - p. 1 - Walkthrough - Sniper: Ghost Warrior - Game Guide and Walkthrough](https://game.lhg100.com/Article/UploadFiles/201512/2015121709392528.jpg) [2]
[2]
When crawling or paddling in the squatting position in the water, carefully sneak to a sandy road (#2). Don't let the enemies to detect you, because this ends the mission! You should see one or two soldiers patrolling this road - you can quickly kill them with your silenced pistol, but be careful and don't let the enemies in the village located to the left see their dead bodies! Then you should go to the right and listen to the radio message from the HQ, which is informing you that an enemy convoy is expected to pass.
But if you don't like to leave behind your back the alive enemies, you can try to eliminate all of them in the village. However, remain silent all the time. In this case, instead of going to the right, turn to your left in the direction of the lighthouse which you should see in the distance and take out 1-2 soldiers of the junta patrolling the road near some Humvee. This time I'd recommend using your silenced sniper rifle (#3). Afterward crouch and go to their corpses, stay on the right roadside of this sandy road.
![[3] - Chapter 3 - Dangerous Grounds - p. 1 - Walkthrough - Sniper: Ghost Warrior - Game Guide and Walkthrough](https://game.lhg100.com/Article/UploadFiles/201512/2015121709392574.jpg) [3]
[3]![[4] - Chapter 3 - Dangerous Grounds - p. 1 - Walkthrough - Sniper: Ghost Warrior - Game Guide and Walkthrough](https://game.lhg100.com/Article/UploadFiles/201512/2015121709392502.jpg) [4]
[4]
It can be hard to take out multiple enemies in the village and to avoid detection simultaneously, while you're shooting from a position near a Humvee (even if you're lying on the ground). So instead of doing this, I'd propose to go further more to the right, towards the ocean. Go crouch, paddle in the water again and sneak to the rock to the right from huts (#4).
When you're behind this rock stand up for a while, quickly take one individual using your sniper rifle, squat again to let the stealth indicator return to its default state, and repeat the whole procedure killing in this way all the enemies one by one (#5). At the end of this action you can carefully sneak under the stilts of the closest hut (or even climb higher by a jetty leading from the ocean to the interior of this hut). Quick save your game before you do this. Hunt for the last nincompoops in this fishing village and search the huts if you wish.
![[5] - Chapter 3 - Dangerous Grounds - p. 1 - Walkthrough - Sniper: Ghost Warrior - Game Guide and Walkthrough](https://game.lhg100.com/Article/UploadFiles/201512/2015121709392552.jpg) [5]
[5]![[6] - Chapter 3 - Dangerous Grounds - p. 1 - Walkthrough - Sniper: Ghost Warrior - Game Guide and Walkthrough](https://game.lhg100.com/Article/UploadFiles/201512/2015121709392597.jpg) [6]
[6]
Then return to the correct route marked on your screen with a white dot. When you're closing along this sandy road to the nearest, wooden hut located to the right from the path (you can see a radio tower behind this shack), starts a cut-scene.
On this cutscene your character silently kills (using the knife) an individual standing under the mentioned above hut (#7).
![[7] - Chapter 3 - Dangerous Grounds - p. 1 - Walkthrough - Sniper: Ghost Warrior - Game Guide and Walkthrough](https://game.lhg100.com/Article/UploadFiles/201512/2015121709392566.jpg) [7][8]
[7][8]
In the latter part of this cut-scene you'll see the enemy convoy passing the checkpoint located nearby (#8).
After watching the cutscene move ahead - your task is still to sneak to the lighthouse. Admittedly, you should avoid contact with the enemies, but it doesn't mean that you can't shoot dead some of them, if they're close and incidentally get in your sight. Waylay in the shrubberies growing under the piles of the hut built near a sandy road, and lie in wait for the enemy on foot patrol, which is entering your field of fire (#9). Quickly shoot dead all of these soldiers, change your clip and wait there for the next patrol. These bad guys who are coming closer are so stupid and blind, that they shouldn't even see the dead bodies of their comrades lying on the ground - when they're close enough, quickly kill'em too.
![[9] - Chapter 3 - Dangerous Grounds - p. 1 - Walkthrough - Sniper: Ghost Warrior - Game Guide and Walkthrough](https://game.lhg100.com/Article/UploadFiles/201512/2015121709392511.jpg) [9]
[9]![[10] - Chapter 3 - Dangerous Grounds - p. 1 - Walkthrough - Sniper: Ghost Warrior - Game Guide and Walkthrough](https://game.lhg100.com/Article/UploadFiles/201512/2015121709392681.jpg) [10]
[10]
Then you can scramble up the hut's veranda and take out from there two more muggers standing near a vehicle (Hummer) you can see in the distance. Use your sniper rifle (#10).
To the left, behind your hut, there should be one more individual (#11). Shoot him and move towards the rocks and the lighthouse built on this rocky slope. Jump from one rock to another, if needed, and climb higher.
![[11] - Chapter 3 - Dangerous Grounds - p. 2 - Walkthrough - Sniper: Ghost Warrior - Game Guide and Walkthrough](https://game.lhg100.com/Article/UploadFiles/201512/2015121709392692.jpg) [11]
[11]![[12] - Chapter 3 - Dangerous Grounds - p. 2 - Walkthrough - Sniper: Ghost Warrior - Game Guide and Walkthrough](https://game.lhg100.com/Article/UploadFiles/201512/2015121709392635.jpg) [12]
[12]
Be careful though, because you'll encounter on your way another mugger standing under some big tree or palm! (#12) Kill him using your silenced pistol, or your knife (by throwing it at him or stabbing him after sneaking to his back) and proceed further by climbing uphill laboriously.
Stay silent when closing to the lighthouse and be cautious - you'll see another thug standing at the base of the lighthouse and presenting to you his back (#13). Stab him with your knife (or throw it at him), or shoot him at his back with your silenced pistol. Walk up the stony stairway you'll see to the right.
![[13] - Chapter 3 - Dangerous Grounds - p. 2 - Walkthrough - Sniper: Ghost Warrior - Game Guide and Walkthrough](https://game.lhg100.com/Article/UploadFiles/201512/2015121709392675.jpg) [13]
[13]![[14] - Chapter 3 - Dangerous Grounds - p. 2 - Walkthrough - Sniper: Ghost Warrior - Game Guide and Walkthrough](https://game.lhg100.com/Article/UploadFiles/201512/2015121709392661.jpg) [14]
[14]
Behind the entrance to the lighthouse you'll see one more bandit - he's also presenting you his back and having a chat by phone with somebody (#14). Silently enter the lighthouse and kill him using your knife or pistol. Then climb higher using the stairs you'll find inside the lighthouse.
Another cut-scene starts when your character manages to get to the upper level of the lighthouse (#15). You'll see on it your sniper cutting the throat of the enemy and trying to teach him to fly.
![[15] - Chapter 3 - Dangerous Grounds - p. 2 - Walkthrough - Sniper: Ghost Warrior - Game Guide and Walkthrough](https://game.lhg100.com/Article/UploadFiles/201512/2015121709392648.jpg) [15]
[15]![[16] - Chapter 3 - Dangerous Grounds - p. 2 - Walkthrough - Sniper: Ghost Warrior - Game Guide and Walkthrough](https://game.lhg100.com/Article/UploadFiles/201512/2015121709392663.jpg) [16]
[16]
Once the cut-scene ends you'll be given an antimaterial rifle (without the silencer, of course), though, you'll have to use it soon against the enemy infantry. The game gives you a new task: locate enemy snipers. For the moment there are two snipers and they both are pointed with white dots on your screen. One of them is located on the church tower narrowly to your left (#16) - take a look at him using your optic sight and after a while the position of this first enemy sniper will be confirmed.
The second sniper stands on the upper level of white-red radio tower located to your right - also have a peek at him through your scope to confirm his location (#17).
![[17] - Chapter 3 - Dangerous Grounds - p. 2 - Walkthrough - Sniper: Ghost Warrior - Game Guide and Walkthrough](https://game.lhg100.com/Article/UploadFiles/201512/2015121709392696.jpg) [17][18]
[17][18]
Now you'll be given a new order - to eliminate both enemy snipers. You have to shoot at them while there are jets (sent by HQ) flying above your head and this area - to mask the sound of the gunshot. These jets will fly above the lighthouse two times - when you're given the first command to shoot, take out the bad guy on the church tower to the left first (#18).
When jets are making the noise a second time, aim through the scope and kill the mugger on the radio tower to your right (#19).
![[19] - Chapter 3 - Dangerous Grounds - p. 2 - Walkthrough - Sniper: Ghost Warrior - Game Guide and Walkthrough](https://game.lhg100.com/Article/UploadFiles/201512/2015121709392608.jpg) [19]
[19]![[20] - Chapter 3 - Dangerous Grounds - p. 2 - Walkthrough - Sniper: Ghost Warrior - Game Guide and Walkthrough](https://game.lhg100.com/Article/UploadFiles/201512/2015121709392706.jpg) [20]
[20]
The last cutscene starts when both snipers are dead (#20). This cut-scene presents the meeting of some important bad guys, which takes place in the harbor village located under the lighthouse. Current task is to kill the drug dealer, but de facto you have to eliminate both VIPs: a man wearing civilian clothes (drug dealer, I think) and the military guy, some officer. At the same time Delta-3, a squad of elite allied commandos will attack the village.
But you won't be able to shoot dead both wrongdoers, because after a while Delta-3 will find themselves under the enemy's fire - there's one more sniper spawning on the edge of the precipice (your character turns his head to this direction right before the end of the cut-scene). (#21) You have to kill this sniper very quickly, otherwise this mission ends in failure. It also ends in failure earlier (before the cut-scene), if you decided to attack the bad guys in the village, even if you managed to eliminate both VIPs (the officer and the drug dealer). Well...
![[21] - Chapter 3 - Dangerous Grounds - p. 2 - Walkthrough - Sniper: Ghost Warrior - Game Guide and Walkthrough](https://game.lhg100.com/Article/UploadFiles/201512/2015121709392725.jpg) [21]
[21]![[22] - Chapter 3 - Dangerous Grounds - p. 2 - Walkthrough - Sniper: Ghost Warrior - Game Guide and Walkthrough](https://game.lhg100.com/Article/UploadFiles/201512/2015121709392744.jpg) [22]
[22]
After killing the sniper threatening Delta-3 you won't be able to shoot at both VIPs from your antimaterial rifle, because they'll get to the vehicles parked nearby and escape from the village (#22). This scenario ends after a moment.
In this mission you'll cooperate with two commandos. Your 3-man squad sails towards the first oil rig (#1). You're armed with assault rifle M4 - this scenario is an open fight with the enemy.
![[1] - Chapter 4 - Take Down The Rigs - p. 1 - Walkthrough - Sniper: Ghost Warrior - Game Guide and Walkthrough](https://game.lhg100.com/Article/UploadFiles/201512/2015121709392703.jpg) [1]
[1]![[2] - Chapter 4 - Take Down The Rigs - p. 1 - Walkthrough - Sniper: Ghost Warrior - Game Guide and Walkthrough](https://game.lhg100.com/Article/UploadFiles/201512/2015121709392759.jpg) [2]
[2]
After arriving at the rig and abandoning your Zodiac you should follow your two comrades to the elevator painted red, which will transport you to the upper level (#2). Inside the elevator prepare yourself for the fight by turning yourself towards the exit from the elevator.
Along with your companions treat with bullets the enemies hanging around the elevator (#3), then move to the left, to the doors of some yellow painted quarter-deck.
![[3] - Chapter 4 - Take Down The Rigs - p. 1 - Walkthrough - Sniper: Ghost Warrior - Game Guide and Walkthrough](https://game.lhg100.com/Article/UploadFiles/201512/2015121709392782.jpg) [3]
[3]![[4] - Chapter 4 - Take Down The Rigs - p. 1 - Walkthrough - Sniper: Ghost Warrior - Game Guide and Walkthrough](https://game.lhg100.com/Article/UploadFiles/201512/2015121709392720.jpg) [4]
[4]
Once the area is cleared you should stand in this blue circle near the doors. Before you do this you can grab a medkit from the wall cupboard hanging near these doors (#4).
When you're on position in this blue circle the game will take over the control of your character for a while and break open the locked doors. Then you have a control over your character again, time slows down for few seconds and you have to kill a pair of bad guys hiding inside the quarter-deck (#5). Inside this quarter-deck you'll find an automatic shotgun (great weapon for close combat on this oil rig!) with some ammo and... something more :-). Exit the quarter-deck through the doors on the right.
![[5] - Chapter 4 - Take Down The Rigs - p. 1 - Walkthrough - Sniper: Ghost Warrior - Game Guide and Walkthrough](https://game.lhg100.com/Article/UploadFiles/201512/2015121709392732.jpg) [5]
[5]![[6] - Chapter 4 - Take Down The Rigs - p. 1 - Walkthrough - Sniper: Ghost Warrior - Game Guide and Walkthrough](https://game.lhg100.com/Article/UploadFiles/201512/2015121709392763.jpg) [6]
[6]
Turn left while exiting and help your comrades to finish off several more thugs hiding behind some pipes or something similar lying horizontally in the centre of the screen, behind this yellow painted rail (#6). Watch out for the mug in the depth of this location and to the left. Don't forget about quick saving your game status (it's a good idea to do this after killing every opponent on this level) and controlling your character's health bar by using the med kits from time to time.
Return to the quarter-deck and exit it through other doors - the path is marked on your screen with white dots and there's no minimap in this mission (#7).
![[7] - Chapter 4 - Take Down The Rigs - p. 1 - Walkthrough - Sniper: Ghost Warrior - Game Guide and Walkthrough](https://game.lhg100.com/Article/UploadFiles/201512/2015121709392753.jpg) [7]
[7]![[8] - Chapter 4 - Take Down The Rigs - p. 1 - Walkthrough - Sniper: Ghost Warrior - Game Guide and Walkthrough](https://game.lhg100.com/Article/UploadFiles/201512/2015121709392890.jpg) [8]
[8]
Follow your companions running in the direction of these white dots (#8) - it's rather hard to stray here. And this is very good tactic to follow your comrades in this scenario. Let them back themselves into a corner - I mean: the enemy ambushes - and you'll have to heal yourself less often. This level is also fairly dingy and badly lit so it is also worth to increase gamma/brightness level in video settings. This last tip applies generally to the whole game and all these gamers who have problems with spotting the enemies in Sniper's universe.
Before you exit the next quarter-deck it's worth to eliminate the enemies hiding outside by shooting at them through the windows (#9). All the time keep a lookout for wall cupboards with medkits and ammo boxes often lying on some tables, for example.
![[9] - Chapter 4 - Take Down The Rigs - p. 1 - Walkthrough - Sniper: Ghost Warrior - Game Guide and Walkthrough](https://game.lhg100.com/Article/UploadFiles/201512/2015121709392871.jpg) [9]
[9]![[10] - Chapter 4 - Take Down The Rigs - p. 1 - Walkthrough - Sniper: Ghost Warrior - Game Guide and Walkthrough](https://game.lhg100.com/Article/UploadFiles/201512/2015121709392862.jpg) [10]
[10]
Run towards the stairs painted yellow leading to the upper level (#10). While running you'll see the second oil rig you'll have to pay a visit on it too later.
After climbing to the upper level you'll have to fight with multiple enemies - as usual send your two companions ahead of you (#11). To change the clips find good cover first, hide behind some pillars, for example. Do the same if you have to heal yourself. After clearing the area from enemies search the vicinity, look for medkits, among other things. Then follow your comrades to the right, towards these stairs painted yellow you can see in the distance on my picture.
![[11] - Chapter 4 - Take Down The Rigs - p. 2 - Walkthrough - Sniper: Ghost Warrior - Game Guide and Walkthrough](https://game.lhg100.com/Article/UploadFiles/201512/2015121709392831.jpg) [11]
[11]![[12] - Chapter 4 - Take Down The Rigs - p. 2 - Walkthrough - Sniper: Ghost Warrior - Game Guide and Walkthrough](https://game.lhg100.com/Article/UploadFiles/201512/2015121709392829.jpg) [12]
[12]
After walking up the stairs to the upper deck you'll see an empty helicopter (#12). Run towards it to start the cut-scene on which your squad uses this chopper to get to the next oil rig.
During the landing you'll see three bad guys standing near a helipad (#13).
![[13] - Chapter 4 - Take Down The Rigs - p. 2 - Walkthrough - Sniper: Ghost Warrior - Game Guide and Walkthrough](https://game.lhg100.com/Article/UploadFiles/201512/2015121709392813.jpg) [13]
[13]![[14] - Chapter 4 - Take Down The Rigs - p. 2 - Walkthrough - Sniper: Ghost Warrior - Game Guide and Walkthrough](https://game.lhg100.com/Article/UploadFiles/201512/2015121709392803.jpg) [14]
[14]
They'll disperse when your chopper touches the helipad. Time slows down again and you have few seconds to eliminate all three opponents (#14). After shooting them dead move towards the white dot marking on your screen the location of the transmitter you should destroy.
Destroy this blinking blue device by simply hitting it with bullets (#15). Then run after your companions in the direction of the stairs leading to the lower level and kill an individual standing on these stairs.
![[15] - Chapter 4 - Take Down The Rigs - p. 2 - Walkthrough - Sniper: Ghost Warrior - Game Guide and Walkthrough](https://game.lhg100.com/Article/UploadFiles/201512/2015121709392857.jpg) [15]
[15]![[16] - Chapter 4 - Take Down The Rigs - p. 2 - Walkthrough - Sniper: Ghost Warrior - Game Guide and Walkthrough](https://game.lhg100.com/Article/UploadFiles/201512/2015121709392872.jpg) [16]
[16]
You have to find an aqualung now. In fact you only have to get closer to the place where it should be hidden. Go downstairs, quickly find cover and clear the area of enemies (#16).
You must find the yellow painted stairs leading to the lower level. While searching for them, kill all the opponents on your way (#17).
![[17] - Chapter 4 - Take Down The Rigs - p. 2 - Walkthrough - Sniper: Ghost Warrior - Game Guide and Walkthrough](https://game.lhg100.com/Article/UploadFiles/201512/2015121709392805.jpg) [17]
[17]![[18] - Chapter 4 - Take Down The Rigs - p. 2 - Walkthrough - Sniper: Ghost Warrior - Game Guide and Walkthrough](https://game.lhg100.com/Article/UploadFiles/201512/2015121709392933.jpg) [18]
[18]
After finding and walking down the stairs (painted yellow again) make sure that your comrades are still following you (#18).
Let them pass you and run ahead of you (#19). Before you go further find a cover and treat with bullets all the enemies you have in your field of view. This time at least one of them should be smart enough to shoot at you and your squad from a window of some quarter-deck. After killing him follow your companions and grab a medkit blinking blue from a nearby wall cupboard.
![[19] - Chapter 4 - Take Down The Rigs - p. 2 - Walkthrough - Sniper: Ghost Warrior - Game Guide and Walkthrough](https://game.lhg100.com/Article/UploadFiles/201512/2015121709392924.jpg) [19]
[19]![[20] - Chapter 4 - Take Down The Rigs - p. 2 - Walkthrough - Sniper: Ghost Warrior - Game Guide and Walkthrough](https://game.lhg100.com/Article/UploadFiles/201512/2015121709392955.jpg) [20]
[20]
At one point, when you're passing a metallic rail outlining the edge of this oil rig, you'll see a motor boat leaving the rig and sailing towards the nearest harbor (#20). Well, it seems that the biggest bad guys have managed to escape again...
Advance to the place marked on your screen with white dot, where you expect to find a scuba. Let your friends run ahead of you and kill with them one more bandit who is trying to ambush you from the window of one of the quarter-decks (#21).
![[21] - Chapter 4 - Take Down The Rigs - p. 2 - Walkthrough - Sniper: Ghost Warrior - Game Guide and Walkthrough](https://game.lhg100.com/Article/UploadFiles/201512/2015121709392937.jpg) [21][22]
[21][22]
Lastly, have it out with one more dodger who hit on the same idea (#22). This scenario ends when you're close to the place pointed with white dot.
You'll reach the land along with two commandos who were accompanying you in the previous scenario. When you're on the land starts a cut-scene: an allied sniper takes out enemy marksman who stood a threat to you. When the coast is clear follow your companions towards the first harbour (#1). Your task is to penetrate the area.
![[1] - Chapter 5 - An Alliance To Save Rodriguez - Walkthrough - Sniper: Ghost Warrior - Game Guide and Walkthrough](https://game.lhg100.com/Article/UploadFiles/201512/2015121709392913.jpg) [1]
[1]![[2] - Chapter 5 - An Alliance To Save Rodriguez - Walkthrough - Sniper: Ghost Warrior - Game Guide and Walkthrough](https://game.lhg100.com/Article/UploadFiles/201512/2015121709392962.jpg) [2]
[2]
Make your way through its installations, let your two friends fight with the enemy (#2).
Follow the linear path marked on your screen with white dots. Behind one of the buildings (that's the one where the first laptop is) you'll find a sniper rifle (Dragunov) and some ammo (#3).
![[3] - Chapter 5 - An Alliance To Save Rodriguez - Walkthrough - Sniper: Ghost Warrior - Game Guide and Walkthrough](https://game.lhg100.com/Article/UploadFiles/201512/2015121709392985.jpg) [3]
[3]![[4] - Chapter 5 - An Alliance To Save Rodriguez - Walkthrough - Sniper: Ghost Warrior - Game Guide and Walkthrough](https://game.lhg100.com/Article/UploadFiles/201512/2015121709392945.jpg) [4]
[4]
You can grab this rifle and use it against the bad guys standing on the sandy road below, near some radio tower (#4).
Then run after your allies in order to get to the next harbour (#5).
![[5] - Chapter 5 - An Alliance To Save Rodriguez - Walkthrough - Sniper: Ghost Warrior - Game Guide and Walkthrough](https://game.lhg100.com/Article/UploadFiles/201512/2015121709392916.jpg) [5]
[5]![[6] - Chapter 5 - An Alliance To Save Rodriguez - Walkthrough - Sniper: Ghost Warrior - Game Guide and Walkthrough](https://game.lhg100.com/Article/UploadFiles/201512/2015121709393057.jpg) [6]
[6]
Make your way through it, but have in mind that you can kill more reckless opponents by shooting at some explosive barrels. Use these wooden stairs you see on my picture to climb up (#6).
After a fierce fight your squad will get to the shack with blue circle under the doors (#7). There's Rodriguez in this hut being held as hostage by two terrorists from the local junta.
![[7] - Chapter 5 - An Alliance To Save Rodriguez - Walkthrough - Sniper: Ghost Warrior - Game Guide and Walkthrough](https://game.lhg100.com/Article/UploadFiles/201512/2015121709393054.jpg) [7]
[7]![[8] - Chapter 5 - An Alliance To Save Rodriguez - Walkthrough - Sniper: Ghost Warrior - Game Guide and Walkthrough](https://game.lhg100.com/Article/UploadFiles/201512/2015121709393094.jpg) [8]
[8]
Change your clip on a new one (full mag) and take position in this blue circle to let the game take control over your character for a while and break down the locked doors. Time slows down and you have few seconds to shoot dead both muggers holding agent Rodriguez (that's the guy extremely to the right). First, kill the mug standing right behind the agent, then shoot at this second on the left (#8).
Afterward, you have to get to the evacuation point 1 and join Delta-3. Advance towards the hills by the path marked with white dots displayed on your screen and find a hole in the wired perimeter fence. Walk through this hole and proceed further. Watch out! At some point, when you're closing to the harbour, some thugs may spawn behind your back and they can pursue you individually, in pairs or even the whole group of them may follow you. Quickly eliminate the first ones (#9).
![[9] - Chapter 5 - An Alliance To Save Rodriguez - Walkthrough - Sniper: Ghost Warrior - Game Guide and Walkthrough](https://game.lhg100.com/Article/UploadFiles/201512/2015121709393050.jpg) [9]
[9]![[10] - Chapter 5 - An Alliance To Save Rodriguez - Walkthrough - Sniper: Ghost Warrior - Game Guide and Walkthrough](https://game.lhg100.com/Article/UploadFiles/201512/2015121709393027.jpg) [10]
[10]
Then turn around equally fast, draw your sniper rifle, go crouch or prone, take a look through the scope and search for a motor boat which is used by some moron to escape from the harbour's waters (#10). This is the guy you saw earlier during the meeting in the village located under the lighthouse. Now you have to kill him. You don't have too much time to do this, because behind your back may spawn other bad guys running from the fence.
The shooting distance is circa 350 meters and additionally the boat sails to the right which you should also take into account while aiming at the guy playing a captain of this vessel. Hold your breath, focus on your target by pressing the Shift key and shoot till you hit this moron and he's dead (#11).
![[11] - Chapter 5 - An Alliance To Save Rodriguez - Walkthrough - Sniper: Ghost Warrior - Game Guide and Walkthrough](https://game.lhg100.com/Article/UploadFiles/201512/2015121709393046.jpg) [11]
[11]![[12] - Chapter 5 - An Alliance To Save Rodriguez - Walkthrough - Sniper: Ghost Warrior - Game Guide and Walkthrough](https://game.lhg100.com/Article/UploadFiles/201512/2015121709393034.jpg) [12]
[12]
Then stand up and run towards the evacuation point, I mean towards the harbour. Shoot dead every enemy on your way. After a while starts a cut-scene on which you'll be wounded in a nearby explosion and thrown off your feet. You try to defence yourself desperately using your pistol (#12). Fortunately, one of your companions gives you a helping hand and draws you on board of some boat which will leave the harbour after a while.
Your first task is to get to the village by a pontoon - you're on a river with your two comrades (#1). You don't have a control over this Zodiac, you can only shoot from it - it's so-called rail shooter. Soon you'll see some huts built on stilts on the left riverbank.
![[1] - Chapter 6 - Weaken The Regime - p. 1 - Walkthrough - Sniper: Ghost Warrior - Game Guide and Walkthrough](https://game.lhg100.com/Article/UploadFiles/201512/2015121709393002.jpg) [1][2]
[1][2]
Quickly kill two bad guys standing on the jetty, aim using your sniper rifle scope (#2). You can shoot at the explosive barrels placed near these thugs.
Thereafter treat with bullets muggers standing on the right riverside, on jetties and between huts (#3).
![[3] - Chapter 6 - Weaken The Regime - p. 1 - Walkthrough - Sniper: Ghost Warrior - Game Guide and Walkthrough](https://game.lhg100.com/Article/UploadFiles/201512/2015121709393051.jpg) [3]
[3]![[4] - Chapter 6 - Weaken The Regime - p. 1 - Walkthrough - Sniper: Ghost Warrior - Game Guide and Walkthrough](https://game.lhg100.com/Article/UploadFiles/201512/2015121709393147.jpg) [4]
[4]
Eliminate in this way every enemy you see on both riverbanks. At some point you'll see a big alligator slipping down to the river (#4) - don't worry, he won't hurt you and additionally this reptile seems to be bullet-proof.
At one point the steersman of the Zodiac sees incoming enemy choppers, but he manages to hide the pontoon under some boughs hanging over the water (#5).
![[5] - Chapter 6 - Weaken The Regime - p. 1 - Walkthrough - Sniper: Ghost Warrior - Game Guide and Walkthrough](https://game.lhg100.com/Article/UploadFiles/201512/2015121709393199.jpg) [5]
[5]![[6] - Chapter 6 - Weaken The Regime - p. 1 - Walkthrough - Sniper: Ghost Warrior - Game Guide and Walkthrough](https://game.lhg100.com/Article/UploadFiles/201512/2015121709393111.jpg) [6]
[6]
Soon you'll come closer to the village (#6). You can start taking out from your sniper rifle all the bad guys you can see. Some of them are standing on jetties, others are hiding behind the sandbags also on these jetties.
When you reach the riverbank and both of your comrades make advancement just follow them and let them fight with the enemy on their rules (#7). You have only to support them with your sniper fire.
![[7] - Chapter 6 - Weaken The Regime - p. 1 - Walkthrough - Sniper: Ghost Warrior - Game Guide and Walkthrough](https://game.lhg100.com/Article/UploadFiles/201512/2015121709393128.jpg) [7]
[7]![[8] - Chapter 6 - Weaken The Regime - p. 1 - Walkthrough - Sniper: Ghost Warrior - Game Guide and Walkthrough](https://game.lhg100.com/Article/UploadFiles/201512/2015121709393156.jpg) [8]
[8]
By shooting at these empty conks of junta's slayers peeking from behind the sandbags (#8). Remember about the possibility of holding your breath and focusing on target (your sight doesn't "sweem" as usual in this way), in order to quickly deal with bad guys.
When the closest vicinity is cleared of enemies you can search the neighbouring huts to be able to find - among other things - some satchel charges (with detonator) in one of the shacks on the right (#9).
![[9] - Chapter 6 - Weaken The Regime - p. 1 - Walkthrough - Sniper: Ghost Warrior - Game Guide and Walkthrough](https://game.lhg100.com/Article/UploadFiles/201512/2015121709393194.jpg) [9]
[9]![[10] - Chapter 6 - Weaken The Regime - p. 1 - Walkthrough - Sniper: Ghost Warrior - Game Guide and Walkthrough](https://game.lhg100.com/Article/UploadFiles/201512/2015121709393122.jpg) [10]
[10]
Afterward follow your two comrades uphill (#10).
On top of this slope there are some more opponents again. It may be hard for you to localize them without being wounded, so I would suggest using hand grenades in order to kill them (#11).
![[11] - Chapter 6 - Weaken The Regime - p. 1 - Walkthrough - Sniper: Ghost Warrior - Game Guide and Walkthrough](https://game.lhg100.com/Article/UploadFiles/201512/2015121709393169.jpg) [11]
[11]![[12] - Chapter 6 - Weaken The Regime - p. 1 - Walkthrough - Sniper: Ghost Warrior - Game Guide and Walkthrough](https://game.lhg100.com/Article/UploadFiles/201512/2015121709393196.jpg) [12]
[12]
Follow your comrades again. After a while you'll get to the place and start a short chat (#12). Then your allies run to the right and you have to go to the left, across the bridge leading to the camp in which you should find the documents.
Though, before you cross the bridge, find a good position on your current end of this construction, go prone or crouch and start taking out using your sniper rifle the enemies you'll see on the watch towers in the distance and other muggers entering your field of view (#13).
![[13] - Chapter 6 - Weaken The Regime - p. 1 - Walkthrough - Sniper: Ghost Warrior - Game Guide and Walkthrough](https://game.lhg100.com/Article/UploadFiles/201512/2015121709393121.jpg) [13]
[13]![[14] - Chapter 6 - Weaken The Regime - p. 1 - Walkthrough - Sniper: Ghost Warrior - Game Guide and Walkthrough](https://game.lhg100.com/Article/UploadFiles/201512/2015121709393274.jpg) [14]
[14]
When it seems there's no one left visible on the other end, quickly run across the bridge to get to the camp. Cautiously search all the barracks (#14) and tents, looking for the documents mentioned above. Watch out, there's at least one terrorist hiding in one of the tents!
And behind the sandbags with HMG mounted on them located in the centre of the camp, in front of the entrance, you'll see several more enemies - one of them will try probably to open fire from this HMG. Treat him with hand grenade or quickly take him out using your sniper rifle. Then you can use this HMG, maybe you'll have a luck of killing somebody more (#15).
![[15] - Chapter 6 - Weaken The Regime - p. 1 - Walkthrough - Sniper: Ghost Warrior - Game Guide and Walkthrough](https://game.lhg100.com/Article/UploadFiles/201512/2015121709393263.jpg) [15]
[15]![[16] - Chapter 6 - Weaken The Regime - p. 1 - Walkthrough - Sniper: Ghost Warrior - Game Guide and Walkthrough](https://game.lhg100.com/Article/UploadFiles/201512/2015121709393271.jpg) [16]
[16]
Check all the tents in the camp - in one of them you'll find the documents lying on the table (#16). Take them and go back to the pontoon. Use the same route you get here - run across the bridge, then downhill through the village. There shouldn't be any more enemies on your way.
Both of your comrades should wait for you in the Zodiac - hop in (#17).
![[17] - Chapter 6 - Weaken The Regime - p. 1 - Walkthrough - Sniper: Ghost Warrior - Game Guide and Walkthrough](https://game.lhg100.com/Article/UploadFiles/201512/2015121709393280.jpg) [17]
[17]![[18] - Chapter 6 - Weaken The Regime - p. 1 - Walkthrough - Sniper: Ghost Warrior - Game Guide and Walkthrough](https://game.lhg100.com/Article/UploadFiles/201512/2015121709393249.jpg) [18]
[18]
You'll sail by the river again, this time towards the coca plantation. Take out junta's slayers near the buildings on the left riverbank (#18).
Maybe there are some hostiles on the right riverside - take a look (#19).
![[19] - Chapter 6 - Weaken The Regime - p. 2 - Walkthrough - Sniper: Ghost Warrior - Game Guide and Walkthrough](https://game.lhg100.com/Article/UploadFiles/201512/2015121709393287.jpg) [19]
[19]![[20] - Chapter 6 - Weaken The Regime - p. 2 - Walkthrough - Sniper: Ghost Warrior - Game Guide and Walkthrough](https://game.lhg100.com/Article/UploadFiles/201512/2015121709393230.jpg) [20]
[20]
At one point the steersman of the Zodiac sees again the incoming enemy choppers, but he manages to hide the pontoon under some boughs hanging over the water (#20).
Jump from the pontoon after reaching the riverbank at a point near some fishing village (#21). The next task is to reach the coca plantation and set up the markers which will direct the allied jets on this plantation. You can search this fishing village first, to see if there are some items worth to collect. You shouldn't face the enemies in this settlement.
![[21] - Chapter 6 - Weaken The Regime - p. 2 - Walkthrough - Sniper: Ghost Warrior - Game Guide and Walkthrough](https://game.lhg100.com/Article/UploadFiles/201512/2015121709393251.jpg) [21]
[21]![[22] - Chapter 6 - Weaken The Regime - p. 2 - Walkthrough - Sniper: Ghost Warrior - Game Guide and Walkthrough](https://game.lhg100.com/Article/UploadFiles/201512/2015121709393255.jpg) [22]
[22]
Afterwards, go by the path running through the jungle towards the consecutive white dots indicating the route to the plantation. Somewhere in the middle of the route you'll see a small enemy post - the hut with a veranda and a soldier standing on it (#22), also a watch tower behind the shack with second mugger.
Shoot them dead using your sniper rifle (#23).
![[23] - Chapter 6 - Weaken The Regime - p. 2 - Walkthrough - Sniper: Ghost Warrior - Game Guide and Walkthrough](https://game.lhg100.com/Article/UploadFiles/201512/2015121709393248.jpg) [23]
[23]![[24] - Chapter 6 - Weaken The Regime - p. 2 - Walkthrough - Sniper: Ghost Warrior - Game Guide and Walkthrough](https://game.lhg100.com/Article/UploadFiles/201512/2015121709393341.jpg) [24]
[24]
Proceed further by this path running through the jungle, but when you're close to the winding located in front of the entrance to the plantation go prone and cautiously strafe/lean to the right. Take out the guard on the wooden watch tower, then the bad guys in the entrance you'll have in your field of view. You can shoot at barrels to cause the explosions (#24).
In the vicinity of this gate you'll find the first place, in which you should set up the marker/transmitter - it is located on the wooden crate and blinks blue. Move to the crate and put the device on it by pressing the F key, then quickly find cover! (#25) There may spawn several soldiers on your left in this moment - draw your pistol or use hand grenades if you have few and kill them quickly.
![[25] - Chapter 6 - Weaken The Regime - p. 2 - Walkthrough - Sniper: Ghost Warrior - Game Guide and Walkthrough](https://game.lhg100.com/Article/UploadFiles/201512/2015121709393348.jpg) [25]
[25]![[26] - Chapter 6 - Weaken The Regime - p. 2 - Walkthrough - Sniper: Ghost Warrior - Game Guide and Walkthrough](https://game.lhg100.com/Article/UploadFiles/201512/2015121709393377.jpg) [26]
[26]
Somewhere in the centre of this location there is another spot blinking blue again, on which you have to put a marker - place it on barrels, then quickly fire at the opponents you'll see behind these barrels (#26).
After the fight you may - if you want - search the neighbouring huts: in one of them you should find the explosive charges with a detonator (#27).
![[27] - Chapter 6 - Weaken The Regime - p. 2 - Walkthrough - Sniper: Ghost Warrior - Game Guide and Walkthrough](https://game.lhg100.com/Article/UploadFiles/201512/2015121709393392.jpg) [27]
[27]![[28] - Chapter 6 - Weaken The Regime - p. 2 - Walkthrough - Sniper: Ghost Warrior - Game Guide and Walkthrough](https://game.lhg100.com/Article/UploadFiles/201512/2015121709393369.jpg) [28]
[28]
Then move towards the white dot visible on your screen, which indicates the 3rd location where you should place the transmitter. It again blinks blue - on this wooden crate you'll find also a sniper rifle (Dragunov) with some ammo (#28).
Place the marker here and go by the path towards the next enemy plantation. When you're closing to it, cautiously take a look at the plantation through your optic sight first, and kill all the enemies you see, including a guard on the watch tower (#29).
![[29] - Chapter 6 - Weaken The Regime - p. 2 - Walkthrough - Sniper: Ghost Warrior - Game Guide and Walkthrough](https://game.lhg100.com/Article/UploadFiles/201512/2015121709393307.jpg) [29]
[29]![[30] - Chapter 6 - Weaken The Regime - p. 2 - Walkthrough - Sniper: Ghost Warrior - Game Guide and Walkthrough](https://game.lhg100.com/Article/UploadFiles/201512/2015121709393320.jpg) [30]
[30]
Exactingly comb the plantation. You'll see a scarecrow on one of the coca fields - watch out, behind it and slightly to the right there's a sandbagged position with two terrorist hiding on it! (#30) Kill them using your pistol, or rifle, or grenades.
You can also train your knife skills on this strawman (#31), if you're bored.
![[31] - Chapter 6 - Weaken The Regime - p. 2 - Walkthrough - Sniper: Ghost Warrior - Game Guide and Walkthrough](https://game.lhg100.com/Article/UploadFiles/201512/2015121709393310.jpg) [31]
[31]![[32] - Chapter 6 - Weaken The Regime - p. 2 - Walkthrough - Sniper: Ghost Warrior - Game Guide and Walkthrough](https://game.lhg100.com/Article/UploadFiles/201512/2015121709393366.jpg) [32]
[32]
But first of all place your last transmitter in the blue blinking spot on the wooden crate located right behind the sandbagged position with two dead bodies lying on it (#32).
Then move towards the nearby village by taking a route marked with white dots on your screen. Walk on some sizeable jetty on which you'll find a Dragunov sniper rifle with ammo lying on a crate (#33). Take it, if you don't have a sniper rifle, by any chance.
![[33] - Chapter 6 - Weaken The Regime - p. 2 - Walkthrough - Sniper: Ghost Warrior - Game Guide and Walkthrough](https://game.lhg100.com/Article/UploadFiles/201512/2015121709393491.jpg) [33]
[33]![[34] - Chapter 6 - Weaken The Regime - p. 2 - Walkthrough - Sniper: Ghost Warrior - Game Guide and Walkthrough](https://game.lhg100.com/Article/UploadFiles/201512/2015121709393429.jpg) [34]
[34]
With a sniper rifle in your hands move to the further edge of this jetty, go crouch or prone and take the position between these two barrels (#34). Your two companions will rush downhill by the path running below, towards the other end of the village you can see in the distance.
This settlement is full of the enemies - start taking them out one by one with your accurate sniper fire (#35).
![[35] - Chapter 6 - Weaken The Regime - p. 2 - Walkthrough - Sniper: Ghost Warrior - Game Guide and Walkthrough](https://game.lhg100.com/Article/UploadFiles/201512/2015121709393441.jpg) [35]
[35]![[36] - Chapter 6 - Weaken The Regime - p. 2 - Walkthrough - Sniper: Ghost Warrior - Game Guide and Walkthrough](https://game.lhg100.com/Article/UploadFiles/201512/2015121709393446.jpg) [36]
[36]
When the situation is finally under your control and all the enemies are dead you can stand up. Now it's time to come down from this jetty. To do this use your rope ended with an anchor - take a look upward and hook the anchor to the tree-trunk of this slanting palm you can see on my picture (#36).
Rappel down to the ground and run downhill through the village towards the wooden bridge (#37).
![[37] - Chapter 6 - Weaken The Regime - p. 2 - Walkthrough - Sniper: Ghost Warrior - Game Guide and Walkthrough](https://game.lhg100.com/Article/UploadFiles/201512/2015121709393436.jpg) [37]
[37]![[38] - Chapter 6 - Weaken The Regime - p. 2 - Walkthrough - Sniper: Ghost Warrior - Game Guide and Walkthrough](https://game.lhg100.com/Article/UploadFiles/201512/2015121709393435.jpg) [38]
[38]
Then starts a cut-scene on which you can see a chopper that was supposed to evacuate you from the area, flying away without you. Now you must proceed on foot to the next extraction point from where this windmill will try to pick you up again. On the latter part of the cut-scene you can see allied jets bombing the coca plantation where you've placed - risking your life - the transmitters (#38).
The first task is to reach the evacuation point. Follow the white dots on your screen (#1).
![[1] - Chapter 7 - On Your Own - p. 1 - Walkthrough - Sniper: Ghost Warrior - Game Guide and Walkthrough](https://game.lhg100.com/Article/UploadFiles/201512/2015121709393496.jpg) [1]
[1]![[2] - Chapter 7 - On Your Own - p. 1 - Walkthrough - Sniper: Ghost Warrior - Game Guide and Walkthrough](https://game.lhg100.com/Article/UploadFiles/201512/2015121709393455.jpg) [2]
[2]
When walking this sandy road you'll get to the place where the road runs downhill - to your right you can see a wrack of some car and to the left there's a white dot indicating your current destination point you should get to (#2). This is an AA gun emplacement. There are three AA gun emplacements on this level and you must destroy all of them using the satchel charges which you don't have yet, if you want to be evacuated by a chopper.
For the moment walk by this sandy path in the direction of a wreck of a car. Use your silenced pistol to kill two bad guys standing on some wooden platform on the left roadside behind the wreck (#3) - they're having a chat.
![[3] - Chapter 7 - On Your Own - p. 1 - Walkthrough - Sniper: Ghost Warrior - Game Guide and Walkthrough](https://game.lhg100.com/Article/UploadFiles/201512/2015121709393457.jpg) [3]
[3]![[4] - Chapter 7 - On Your Own - p. 1 - Walkthrough - Sniper: Ghost Warrior - Game Guide and Walkthrough](https://game.lhg100.com/Article/UploadFiles/201512/2015121709393447.jpg) [4]
[4]
If you're detected by the other soldiers standing lower, on the road, then you can expect that they'll run towards you by this road. Treat them with hand grenades! (#4) Shoot dead these who survived, then walk down by the road to the wharf (this is the first wharf you visit in this scenario) where these killed ones came from. On the wharf, in the shack you'll find a wall cupboard with medkits. Move to the left, towards the whit dot visible on the screen.
The place you have to get to is located in the ruins on the hill. When by-passing this hill you'll see in the distance some village with burning huts and several junta soldiers abusing innocent villagers (#5).
![[5] - Chapter 7 - On Your Own - p. 1 - Walkthrough - Sniper: Ghost Warrior - Game Guide and Walkthrough](https://game.lhg100.com/Article/UploadFiles/201512/2015121709393559.jpg) [5]
[5]![[6] - Chapter 7 - On Your Own - p. 1 - Walkthrough - Sniper: Ghost Warrior - Game Guide and Walkthrough](https://game.lhg100.com/Article/UploadFiles/201512/2015121709393505.jpg) [6]
[6]
You can shoot the tortures right now, using your sniper rifle (#6), or you can do this later, after exploring the ruins on the hill, to your right.
Find the characteristic entrance to these ruins and get inside (#7).
![[7] - Chapter 7 - On Your Own - p. 1 - Walkthrough - Sniper: Ghost Warrior - Game Guide and Walkthrough](https://game.lhg100.com/Article/UploadFiles/201512/2015121709393591.jpg) [7]
[7]![[8] - Chapter 7 - On Your Own - p. 1 - Walkthrough - Sniper: Ghost Warrior - Game Guide and Walkthrough](https://game.lhg100.com/Article/UploadFiles/201512/2015121709393599.jpg) [8]
[8]
Clear the area with your silenced pistol, but be careful and don't step into the bonfires because they may lower your health. You'll see here the first AA gun (#8) which you should destroy with satchel charge. Unfortunately you don't have satchels yet, so you have to find them first.
But first the game suggests you to search for some good, sniping position in these ruins - a position with a nice view on the surroundings. So climb up a little. You'll find a Dragunov sniper rifle lying on the table nearby (#9) and a wall cupboard with a medkit.
![[9] - Chapter 7 - On Your Own - p. 1 - Walkthrough - Sniper: Ghost Warrior - Game Guide and Walkthrough](https://game.lhg100.com/Article/UploadFiles/201512/2015121709393533.jpg) [9]
[9]![[10] - Chapter 7 - On Your Own - p. 1 - Walkthrough - Sniper: Ghost Warrior - Game Guide and Walkthrough](https://game.lhg100.com/Article/UploadFiles/201512/2015121709393576.jpg) [10]
[10]
When you have found finally a position with a good overview take a look around. While looking towards the second wharf located to the right from this big bridge on the river (take a peep at the minimap!) you should see at least two muggers walking on the jetty (#10).
Use your sniper rifle, kill them both (#11).
![[11] - Chapter 7 - On Your Own - p. 1 - Walkthrough - Sniper: Ghost Warrior - Game Guide and Walkthrough](https://game.lhg100.com/Article/UploadFiles/201512/2015121709393549.jpg) [11]
[11]![[12] - Chapter 7 - On Your Own - p. 1 - Walkthrough - Sniper: Ghost Warrior - Game Guide and Walkthrough](https://game.lhg100.com/Article/UploadFiles/201512/2015121709393581.jpg) [12]
[12]
Then turn slightly to your left - somewhere in the jungle (more or less across the bridge on your minimap) there should be several more soldiers. Take out as many as you can, using your sniper rifle (#12).
Now turn more to the left and look at the burning village (#13). If you didn't kill earlier these slayers abusing poor villagers, then now you have an occasion to finish your job. Afterwards, examine through your optic scope the whole surroundings - maybe you'll be able to spot more enemies and kill'em by shooting from this very good sniping position in the ruins.
![[13] - Chapter 7 - On Your Own - p. 1 - Walkthrough - Sniper: Ghost Warrior - Game Guide and Walkthrough](https://game.lhg100.com/Article/UploadFiles/201512/2015121709393556.jpg) [13]
[13]![[14] - Chapter 7 - On Your Own - p. 1 - Walkthrough - Sniper: Ghost Warrior - Game Guide and Walkthrough](https://game.lhg100.com/Article/UploadFiles/201512/2015121709393536.jpg) [14]
[14]
Then go downhill and proceed towards this big, wooden bridge being visible on your map. The bridge is damaged (you can't use it to get to the opposite riverbank), but you can get there by crossing the river under this bridge, from its right side (#14).
Move in the direction of the second wharf you killed two thugs on its jetties recently. Use your silenced pistol to kill the muggers sticking around (#15).
![[15] - Chapter 7 - On Your Own - p. 1 - Walkthrough - Sniper: Ghost Warrior - Game Guide and Walkthrough](https://game.lhg100.com/Article/UploadFiles/201512/2015121709393629.jpg) [15]
[15]![[16] - Chapter 7 - On Your Own - p. 1 - Walkthrough - Sniper: Ghost Warrior - Game Guide and Walkthrough](https://game.lhg100.com/Article/UploadFiles/201512/2015121709393677.jpg) [16]
[16]
Turn left on the wharf and search the huts. Shoot dead all the enemies on your way. Be careful, don't step into the bonfire! Move to the shack marked on your screen with white dot (#16).
In this hut you'll find the satchel charges you need. There are also the medkits, Claymore mines and a sniper rifle (Dragunov) (#17). Grab what you can, but satchels are the most important, of course.
![[17] - Chapter 7 - On Your Own - p. 2 - Walkthrough - Sniper: Ghost Warrior - Game Guide and Walkthrough](https://game.lhg100.com/Article/UploadFiles/201512/2015121709393651.jpg) [17]
[17]![[18] - Chapter 7 - On Your Own - p. 2 - Walkthrough - Sniper: Ghost Warrior - Game Guide and Walkthrough](https://game.lhg100.com/Article/UploadFiles/201512/2015121709393605.jpg) [18]
[18]
Proceed further towards the white dots on the screen. Behind the wharf, on the road on which you can see some truck and a bonfire near it, there's enemy checkpoint. You can eliminate three muggers of this post with a hand grenade, or you can just shoot'em dead (#18).
Watch out, though, for other dodgers, two of them (I think), on the rocky ledge to the left - shoot them quickly (#19).
![[19] - Chapter 7 - On Your Own - p. 2 - Walkthrough - Sniper: Ghost Warrior - Game Guide and Walkthrough](https://game.lhg100.com/Article/UploadFiles/201512/2015121709393648.jpg) [19]
[19]![[20] - Chapter 7 - On Your Own - p. 2 - Walkthrough - Sniper: Ghost Warrior - Game Guide and Walkthrough](https://game.lhg100.com/Article/UploadFiles/201512/2015121709393633.jpg) [20]
[20]
Now return to the first AA gun emplacement in the ruins on the hill. Stick the first satchel charge to this gun (#20). Draw back to the safe distance of several meters at least and detonate the charge.
It's time to take care of the second AA gun emplacement. You shouldn't encounter any resistance on your way when running towards this gun, if you've cleared the area earlier. Place the charge under this second AA gun, draw back and detonate it (#21).
![[21] - Chapter 7 - On Your Own - p. 2 - Walkthrough - Sniper: Ghost Warrior - Game Guide and Walkthrough](https://game.lhg100.com/Article/UploadFiles/201512/2015121709393612.jpg) [21]
[21]![[22] - Chapter 7 - On Your Own - p. 2 - Walkthrough - Sniper: Ghost Warrior - Game Guide and Walkthrough](https://game.lhg100.com/Article/UploadFiles/201512/2015121709393645.jpg) [22]
[22]
Now you have to destroy only one AA gun emplacement. Walk towards the white dots displayed on your screen. Be careful when closing to the wooden bridge and go prone, because there's enemy checkpoint on this bridge (#22).
And you should see three bad guys near it. Quickly kill them one by one using your sniper rifle (#23).
![[23] - Chapter 7 - On Your Own - p. 2 - Walkthrough - Sniper: Ghost Warrior - Game Guide and Walkthrough](https://game.lhg100.com/Article/UploadFiles/201512/2015121709393601.jpg) [23]
[23]![[24] - Chapter 7 - On Your Own - p. 2 - Walkthrough - Sniper: Ghost Warrior - Game Guide and Walkthrough](https://game.lhg100.com/Article/UploadFiles/201512/2015121709393759.jpg) [24]
[24]
A moment later turn right and shoot dead one more thug located near the road and the vehicle (Humvee) parked on it (#24).
Then walk across the bridge and proceed further by the road, until you see such a big... "fan" (sorry, I couldn't find a proper English word ;-)) overlooking the vicinity (#25).
![[25] - Chapter 7 - On Your Own - p. 2 - Walkthrough - Sniper: Ghost Warrior - Game Guide and Walkthrough](https://game.lhg100.com/Article/UploadFiles/201512/2015121709393786.jpg) [25]
[25]![[26] - Chapter 7 - On Your Own - p. 2 - Walkthrough - Sniper: Ghost Warrior - Game Guide and Walkthrough](https://game.lhg100.com/Article/UploadFiles/201512/2015121709393799.jpg) [26]
[26]
Turn left ahead of this structure and carefully sneak towards two brick houses. Maybe you'll be able to take out these two muggers hanging around the houses with one shot - just wait till they both will be on the one line (#26).
Go back to the "fan" and proceed further by this sandy road towards the white dot on your screen. Behind the road bent you'll see another, wooden bridge with two watch towers on its other end (#27). Be careful, you've just get to the enemy camp! Try to stay undetected as long as possible, go crouch or even prone.
![[27] - Chapter 7 - On Your Own - p. 2 - Walkthrough - Sniper: Ghost Warrior - Game Guide and Walkthrough](https://game.lhg100.com/Article/UploadFiles/201512/2015121709393767.jpg) [27]
[27]![[28] - Chapter 7 - On Your Own - p. 2 - Walkthrough - Sniper: Ghost Warrior - Game Guide and Walkthrough](https://game.lhg100.com/Article/UploadFiles/201512/2015121709393734.jpg) [28]
[28]
Quickly localize as many opponents as you can and start taking them out one by one using your sniper rifle (#28). First, kill the bad guys right behind the bridge and shoot dead the guard on the watch tower.
Then deal with every mugger on the other riverbank you'll see in your field of view. Take a look through your optic sight at the AA gun emplacement visible from your position and at the next guard tower (#29).
![[29] - Chapter 7 - On Your Own - p. 2 - Walkthrough - Sniper: Ghost Warrior - Game Guide and Walkthrough](https://game.lhg100.com/Article/UploadFiles/201512/2015121709393729.jpg) [29]
[29]![[30] - Chapter 7 - On Your Own - p. 2 - Walkthrough - Sniper: Ghost Warrior - Game Guide and Walkthrough](https://game.lhg100.com/Article/UploadFiles/201512/2015121709393716.jpg) [30]
[30]
When you think that you've eliminated the most of the enemies on the other side, run across the bridge towards the white dot marking the AA gun emplacement. On the way you can grab an assault rifle from one of the killed thugs. Search the whole camp and eliminate the enemy remnants, do not leave alive even the chickens of the local junta (#30).
Finally place the satchel charge under the last AA gun, move back to a safe distance and press the red button on your detonator (#31).
![[31] - Chapter 7 - On Your Own - p. 2 - Walkthrough - Sniper: Ghost Warrior - Game Guide and Walkthrough](https://game.lhg100.com/Article/UploadFiles/201512/2015121709393742.jpg) [31][32]
[31][32]
After destroying this AA gun emplacement it's time to escape. Proceed towards the white dots. Generally, you shouldn't encounter any resistance on your way, except the last stretch, where you can bump into two morons trying to stop you (#32). I think you know exactly, what to do with them, right?
This mission starts with a cut-scene on which your character jumps from one end of the damaged bridge to other (#1). But your sniper loses his radio during that jump. Thus your first task is to find the radio to be able to call for the evacuation chopper.
![[1] - Chapter 8 - A Simple Randezvous - p. 1 - Walkthrough - Sniper: Ghost Warrior - Game Guide and Walkthrough](https://game.lhg100.com/Article/UploadFiles/201512/2015121709393758.jpg) [1]
[1]![[2] - Chapter 8 - A Simple Randezvous - p. 1 - Walkthrough - Sniper: Ghost Warrior - Game Guide and Walkthrough](https://game.lhg100.com/Article/UploadFiles/201512/2015121709393809.jpg) [2]
[2]
Move by the path transforming after a while into a wider road towards the white dot on your screen. Stay alert when closing to the road winding and look to the left to see what waits for you further (#2). You should see a wooden bridge patrolled by several bad guys - shoot'em dead using your sniper rifle. The road behind the bridge turns to the right and in the distance you'll see an enemy checkpoint with a toll-bar. There's also enemy camp over the water.
Use your sniper rifle to kill a guy walking along the toll-bar (#3).
![[3] - Chapter 8 - A Simple Randezvous - p. 1 - Walkthrough - Sniper: Ghost Warrior - Game Guide and Walkthrough](https://game.lhg100.com/Article/UploadFiles/201512/2015121709393847.jpg) [3]
[3]![[4] - Chapter 8 - A Simple Randezvous - p. 1 - Walkthrough - Sniper: Ghost Warrior - Game Guide and Walkthrough](https://game.lhg100.com/Article/UploadFiles/201512/2015121709393881.jpg) [4]
[4]
Afterward, walk by the road to the bridge, find a good position near it and take a look at the direction of the enemy camp located on the other side of this river or lake (#4).
Examine the camp through your optic scope (#5). You will surely notice at least one slayer of the local, military junta who is busy with observing the vicinity from the watch tower. Take him out.
[5]![[6] - Chapter 8 - A Simple Randezvous - p. 1 - Walkthrough - Sniper: Ghost Warrior - Game Guide and Walkthrough](https://game.lhg100.com/Article/UploadFiles/201512/2015121709393855.jpg) [6]
[6]
After this, start moving along the road towards the enemy camp. When closing to the toll-bar take a look around you, from time to time, using your optic sight. At one point you'll notice two bad guys leading some women to the building located behind the checkpoint and to the left (#6). It befits to help the civilians. Sneak to this hut.
First, shoot dead a guy standing inside the house, behind the entrance, and presenting you his back - you can also kill him using your knife. Then sneak cautiously to the room where the women are crouching on the floor and take out the mugger who is guarding them (#7). Exit this building and start combing the camp.
![[7] - Chapter 8 - A Simple Randezvous - p. 1 - Walkthrough - Sniper: Ghost Warrior - Game Guide and Walkthrough](https://game.lhg100.com/Article/UploadFiles/201512/2015121709393873.jpg) [7]
[7]![[8] - Chapter 8 - A Simple Randezvous - p. 1 - Walkthrough - Sniper: Ghost Warrior - Game Guide and Walkthrough](https://game.lhg100.com/Article/UploadFiles/201512/2015121709393825.jpg) [8]
[8]
Search every building, one by one (#8). Stay silent all the time and use your silenced pistol.
It is worth to quick save your game progress after killing each guy on this level. Some of them you can kill by shooting from the windows of the houses (#9).
![[9] - Chapter 8 - A Simple Randezvous - p. 1 - Walkthrough - Sniper: Ghost Warrior - Game Guide and Walkthrough](https://game.lhg100.com/Article/UploadFiles/201512/2015121709393839.jpg) [9]
[9]![[10] - Chapter 8 - A Simple Randezvous - p. 1 - Walkthrough - Sniper: Ghost Warrior - Game Guide and Walkthrough](https://game.lhg100.com/Article/UploadFiles/201512/2015121709393820.jpg) [10]
[10]
The others you'll take out using your sniper rifle - sometimes even two of them with one shot (#10), as in case of two bad guys standing on some bridge outside the camp (I killed them from the camp, one of its houses).
When combing the camp you can also get outside of it, by walking through the hole in a wired fence located in one of the corners (#11).
![[11] - Chapter 8 - A Simple Randezvous - p. 1 - Walkthrough - Sniper: Ghost Warrior - Game Guide and Walkthrough](https://game.lhg100.com/Article/UploadFiles/201512/2015121709393958.jpg) [11]
[11]![[12] - Chapter 8 - A Simple Randezvous - p. 1 - Walkthrough - Sniper: Ghost Warrior - Game Guide and Walkthrough](https://game.lhg100.com/Article/UploadFiles/201512/2015121709393927.jpg) [12]
[12]
Then you can crawl on some slope and use your sniper rifle to eliminate the opponents you'll see in the distance (#12).
I mean guards on wooden watch towers and other enemies walking around some constructions. You'll surely notice also a ladder leading to the roof of the one of the biggest (and also more devastated) buildings (#13). It'd be wise to climb this ladder up.
![[13] - Chapter 8 - A Simple Randezvous - p. 2 - Walkthrough - Sniper: Ghost Warrior - Game Guide and Walkthrough](https://game.lhg100.com/Article/UploadFiles/201512/2015121709393971.jpg) [13]
[13]![[14] - Chapter 8 - A Simple Randezvous - p. 2 - Walkthrough - Sniper: Ghost Warrior - Game Guide and Walkthrough](https://game.lhg100.com/Article/UploadFiles/201512/2015121709393932.jpg) [14]
[14]
Use the catwalks to get from one roof to another, look around and eliminate the opponents you'll see below and on the guard towers (#14) - there may be quite a lot of enemies and they may appear on different directions.
You can climb up on one of these wooden towers and try to take out also several enemies located outside the camp (#15).
![[15] - Chapter 8 - A Simple Randezvous - p. 2 - Walkthrough - Sniper: Ghost Warrior - Game Guide and Walkthrough](https://game.lhg100.com/Article/UploadFiles/201512/2015121709393954.jpg) [15]
[15]![[16] - Chapter 8 - A Simple Randezvous - p. 2 - Walkthrough - Sniper: Ghost Warrior - Game Guide and Walkthrough](https://game.lhg100.com/Article/UploadFiles/201512/2015121709393939.jpg) [16]
[16]
Use the roofs to get near the white dot indicating the place where you'll find the radio. Kill the guy guarding the entrance to this shack (#16), then jump down from the roof and enter the hut.
You can grab a medkit from the wall, and use the radio lying on the desk to contact with your allies (#17). Now you have to escape from the camp.
![[17] - Chapter 8 - A Simple Randezvous - p. 2 - Walkthrough - Sniper: Ghost Warrior - Game Guide and Walkthrough](https://game.lhg100.com/Article/UploadFiles/201512/2015121709393906.jpg) [17]
[17]![[18] - Chapter 8 - A Simple Randezvous - p. 2 - Walkthrough - Sniper: Ghost Warrior - Game Guide and Walkthrough](https://game.lhg100.com/Article/UploadFiles/201512/2015121709393923.jpg) [18]
[18]
Run towards the place marked with white dot - there you'll find another hole in this wired fence (#18). Walk through the hole to get outside of the camp.
Run across these fields or maybe rather building grounds with some machines towards the white dot indicating on your screen the location of the sandbagged HMG emplacement (#19). At this point of a gameplay I had to face some game bug which caused permanent wounds to my character - nobody knows why and from what. That's why you may need the medkits, many of them, to be able to heal yourself when you're in really bad condition.
![[19] - Chapter 8 - A Simple Randezvous - p. 2 - Walkthrough - Sniper: Ghost Warrior - Game Guide and Walkthrough](https://game.lhg100.com/Article/UploadFiles/201512/2015121709393930.jpg) [19]
[19]![[20] - Chapter 8 - A Simple Randezvous - p. 2 - Walkthrough - Sniper: Ghost Warrior - Game Guide and Walkthrough](https://game.lhg100.com/Article/UploadFiles/201512/2015121709393963.jpg) [20]
[20]
Don't look behind, just turn to the sandbagged HMG emplacement on the slope. When you're there turn around and use this HMG (#20). Now you'll have to defend yourself for about 2 minutes. Your pursuers will assault your sandbagged position. They'll attack from your right - from this direction only infantry: individual soldiers or in small groups.
In the latter phase of the attack the enemy will also transport some infantrymen with trucks appearing on the left (#21). Some soldiers will attack on foot also from this side. Shoot them all, one after one. If you have a problem with permanents wounds that I mentioned above, then you can stop shooting for a while and go crouch, when you're in really bad condition, to quickly heal yourself using the medkit. Afterward stand up and use the HMG again. Repeat this procedure un'til the clock under the upper edge of the screen counts the last seconds from these 2 minutes.
![[21] - Chapter 8 - A Simple Randezvous - p. 2 - Walkthrough - Sniper: Ghost Warrior - Game Guide and Walkthrough](https://game.lhg100.com/Article/UploadFiles/201512/2015121709394008.jpg) [21]
[21]![[22] - Chapter 8 - A Simple Randezvous - p. 2 - Walkthrough - Sniper: Ghost Warrior - Game Guide and Walkthrough](https://game.lhg100.com/Article/UploadFiles/201512/2015121709394078.jpg) [22]
[22]
Then leave this HMG, turn around and run as fast as you can towards the next white dot on your screen. As you see, I sprinted there when I was fagged out (#22). Zig-zag to avoid the bullets.
The cut-scene starts after getting to the destination, which presents your brave sniper running away from his numerous pursuers by the skin of his teeth (#23).
![[23] - Chapter 8 - A Simple Randezvous - p. 2 - Walkthrough - Sniper: Ghost Warrior - Game Guide and Walkthrough](https://game.lhg100.com/Article/UploadFiles/201512/2015121709394070.jpg) [23]
[23]![[24] - Chapter 8 - A Simple Randezvous - p. 2 - Walkthrough - Sniper: Ghost Warrior - Game Guide and Walkthrough](https://game.lhg100.com/Article/UploadFiles/201512/2015121709394042.jpg) [24]
[24]
The hero jumps on his last legs on board of the evacuation chopper which then flies away (#24). ...
Your first task is to reach the enemy camp. This scenario takes place during the night and you're directed via the radio by your comrade who takes his positions letting him to have a better overview than yours. Move by the path indicated on the screen by white dots. You'll get to the first bridge/catwalk. Before you cross it, do what your spotter says via the radio - take out two bad guys on the other end, using your sniper rifle (#1).
![[1] - Chapter 9 - Steal From Under Their Noses - p. 1 - Walkthrough - Sniper: Ghost Warrior - Game Guide and Walkthrough](https://game.lhg100.com/Article/UploadFiles/201512/2015121709394018.jpg) [1]
[1]![[2] - Chapter 9 - Steal From Under Their Noses - p. 1 - Walkthrough - Sniper: Ghost Warrior - Game Guide and Walkthrough](https://game.lhg100.com/Article/UploadFiles/201512/2015121709394087.jpg) [2]
[2]
After this, go across the catwalk. Just behind it turn left and kill a moron having a chat via phone in the shrubberies (#2).
Proceed further to the next catwalk (#3). Go crouch, enter the bridge and turn left.
![[3] - Chapter 9 - Steal From Under Their Noses - p. 1 - Walkthrough - Sniper: Ghost Warrior - Game Guide and Walkthrough](https://game.lhg100.com/Article/UploadFiles/201512/2015121709394065.jpg) [3]
[3]![[4] - Chapter 9 - Steal From Under Their Noses - p. 1 - Walkthrough - Sniper: Ghost Warrior - Game Guide and Walkthrough](https://game.lhg100.com/Article/UploadFiles/201512/2015121709394029.jpg) [4]
[4]
Through the optic sight of your sniper rifle you'll see two terrorists who stand on the catwalk hanging over the void (#4). Again do what your spotter says - wait 'until they split up and everyone of them goes in his own direction. Then take them out, one by one.
Proceed further to the one more catwalk hanging over the void (#5). Watch your steps when crossing it, or you'll fall down to the bottom of the void through the holes under your feet!
[5]![[6] - Chapter 9 - Steal From Under Their Noses - p. 1 - Walkthrough - Sniper: Ghost Warrior - Game Guide and Walkthrough](https://game.lhg100.com/Article/UploadFiles/201512/2015121709394174.jpg) [6]
[6]
At one point you'll see a wooden watch tower in the distance - use your sniper rifle to take out the guard (#7). Afterward, move to this tower and use the ladder to climb it up.
Your companion orders you now to hunt for the bad guys you can see below. So go crouch and start shooting at them through the gaps between planks this wooden tower is built of (#7). Bear in mind, though, that these planks aren't bullet-proof! Take out a mugger standing near the entrance to some hut, shoot dead several more thugs amongst these shacks, and kill also a guy hiding in a house on the wharf to the left.
![[7] - Chapter 9 - Steal From Under Their Noses - p. 1 - Walkthrough - Sniper: Ghost Warrior - Game Guide and Walkthrough](https://game.lhg100.com/Article/UploadFiles/201512/2015121709394163.jpg) [7]
[7]![[8] - Chapter 9 - Steal From Under Their Noses - p. 1 - Walkthrough - Sniper: Ghost Warrior - Game Guide and Walkthrough](https://game.lhg100.com/Article/UploadFiles/201512/2015121709394144.jpg) [8]
[8]
After this action you'll have to go down and get to the house visible below and on your right (#8).
You have to move through this building, but first shoot dead a guy hiding inside - you should see his head in one of the windows (I saw his head in the midmost window) (#9).
![[9] - Chapter 9 - Steal From Under Their Noses - p. 1 - Walkthrough - Sniper: Ghost Warrior - Game Guide and Walkthrough](https://game.lhg100.com/Article/UploadFiles/201512/2015121709394179.jpg) [9]
[9]![[10] - Chapter 9 - Steal From Under Their Noses - p. 1 - Walkthrough - Sniper: Ghost Warrior - Game Guide and Walkthrough](https://game.lhg100.com/Article/UploadFiles/201512/2015121709394182.jpg) [10]
[10]
Move through the house to get to the enemy camp in this way (#10). You'll receive a new order - this time you have to find some unspecified data. Head for a white dot visible on your screen.
Now you should go prone and crawl under the water-wheel in order to get to the second part of the camp. You should also try to remain undetected and avoid attacking the enemies (#11).
![[11] - Chapter 9 - Steal From Under Their Noses - p. 1 - Walkthrough - Sniper: Ghost Warrior - Game Guide and Walkthrough](https://game.lhg100.com/Article/UploadFiles/201512/2015121709394197.jpg) [11]
[11]![[12] - Chapter 9 - Steal From Under Their Noses - p. 1 - Walkthrough - Sniper: Ghost Warrior - Game Guide and Walkthrough](https://game.lhg100.com/Article/UploadFiles/201512/2015121709394162.jpg) [12]
[12]
Though, there are no hurdles on your way to eliminate some of them first, before you crawl under the water-wheel. You can try to jump higher slightly to the right of this water-wheel and use your silenced pistol to shoot dead the bad guys patrolling your vicinity (#12).
Then use your sniper rifle to kill the rest of the enemies - you can see them somewhere near the huts or even in the windows of these last (#13).
![[13] - Chapter 9 - Steal From Under Their Noses - p. 2 - Walkthrough - Sniper: Ghost Warrior - Game Guide and Walkthrough](https://game.lhg100.com/Article/UploadFiles/201512/2015121709394104.jpg) [13]
[13]![[14] - Chapter 9 - Steal From Under Their Noses - p. 2 - Walkthrough - Sniper: Ghost Warrior - Game Guide and Walkthrough](https://game.lhg100.com/Article/UploadFiles/201512/2015121709394148.jpg) [14]
[14]
When this second part of the camp seems to be cleared off of the enemies a little, crawl under the water-wheel to the other side and carefully move uphill. Get under the building marked on your screen by a white dot (#14). There's a blue circle near the doors of this hut - you have to stand in it.
After doing this starts a short cut-scene on which your character uses the computer located inside the shack and burns some data on CD (#15). When CD with data is ready it's time to run away from the enemy.
![[15] - Chapter 9 - Steal From Under Their Noses - p. 2 - Walkthrough - Sniper: Ghost Warrior - Game Guide and Walkthrough](https://game.lhg100.com/Article/UploadFiles/201512/2015121709394232.jpg) [15]
[15]![[16] - Chapter 9 - Steal From Under Their Noses - p. 2 - Walkthrough - Sniper: Ghost Warrior - Game Guide and Walkthrough](https://game.lhg100.com/Article/UploadFiles/201512/2015121709394220.jpg) [16]
[16]
Turn right, quickly grab a medkit from the cupboard hanging on the wall to the left and exit the house through the doors you can see on my picture (#16). As I said, do it quickly, because the enemies storming the house like to throw grenades inside first.
Turn around when outside the house and check if somebody is following you - shoot them dead, if they pursue you (#17).
![[17] - Chapter 9 - Steal From Under Their Noses - p. 2 - Walkthrough - Sniper: Ghost Warrior - Game Guide and Walkthrough](https://game.lhg100.com/Article/UploadFiles/201512/2015121709394297.jpg) [17]
[17]![[18] - Chapter 9 - Steal From Under Their Noses - p. 2 - Walkthrough - Sniper: Ghost Warrior - Game Guide and Walkthrough](https://game.lhg100.com/Article/UploadFiles/201512/2015121709394223.jpg) [18]
[18]
You can deal similarly with the opponents hanging around the doors you used to get inside the house - this time you'll have these doors on your right (#18).
But you won't be rather able to kill all the enemies storming the house, so when you think that you can assume this risk, turn around and run towards the white dot. Pass the scarecrow and get to the breach in a yellow rail - there's the water below this breach.
![[19] - Chapter 9 - Steal From Under Their Noses - p. 2 - Walkthrough - Sniper: Ghost Warrior - Game Guide and Walkthrough](https://game.lhg100.com/Article/UploadFiles/201512/2015121709394295.jpg) [19]
[19]![[20] - Chapter 9 - Steal From Under Their Noses - p. 2 - Walkthrough - Sniper: Ghost Warrior - Game Guide and Walkthrough](https://game.lhg100.com/Article/UploadFiles/201512/2015121709394221.jpg) [20]
[20]
You should jump into the water and swim straight on, then to the right after a while. Before you make this jump, I'd recommend healing yourself and quick saving your game progress. That's because at one point, when you're swimming towards the next white dot, there are two thugs spawning on the veranda of the hut behind your back - you can see them while looking over your right shoulder. And they start firing at you! (#20)
Though, I propose to not even look behind you, but to swim (zig-zag if you have to) towards these large rocks on the riverbank indicated by a white dot (#21). Swim as fast as you can, for dear life. It's very likely that before you reach these rocks you'll be shot several times, so quickly hide behind these rocks and heal yourself after getting to the riverbank.
![[21] - Chapter 9 - Steal From Under Their Noses - p. 2 - Walkthrough - Sniper: Ghost Warrior - Game Guide and Walkthrough](https://game.lhg100.com/Article/UploadFiles/201512/2015121709394203.jpg) [21]
[21]![[22] - Chapter 9 - Steal From Under Their Noses - p. 2 - Walkthrough - Sniper: Ghost Warrior - Game Guide and Walkthrough](https://game.lhg100.com/Article/UploadFiles/201512/2015121709394200.jpg) [22]
[22]
Afterward you can take a peep and use your sniper rifle to get revenge on both scoundrels (#22).
Then run along the stream towards the next dots displayed on your screen. Stop for a while only to take out two bandits entering the catwalk from right (#23). Now you only have to join agent Rodriguez.
![[23] - Chapter 9 - Steal From Under Their Noses - p. 2 - Walkthrough - Sniper: Ghost Warrior - Game Guide and Walkthrough](https://game.lhg100.com/Article/UploadFiles/201512/2015121709394285.jpg) [23]
[23]![[24] - Chapter 9 - Steal From Under Their Noses - p. 2 - Walkthrough - Sniper: Ghost Warrior - Game Guide and Walkthrough](https://game.lhg100.com/Article/UploadFiles/201512/2015121709394208.jpg) [24]
[24]
Pass the bonfire, run uphill, then across the bridge and you're there. Unfortunately Rodriguez is a venal traitor (#24).
Rodriguez leaves you for the slayers of the local military junta. When one of them approaches to finish you off (#1), he and his dirty companion are eliminated by the rebels who came with the helping hand. The rebels have their own business in saving your life - and it seems that their business is quite concurrent with yours. It's time to back to the fight.
![[1] - Chapter 10 - The End Is Near... - p. 1 - Walkthrough - Sniper: Ghost Warrior - Game Guide and Walkthrough](https://game.lhg100.com/Article/UploadFiles/201512/2015121709394333.jpg) [1]
[1]![[2] - Chapter 10 - The End Is Near... - p. 1 - Walkthrough - Sniper: Ghost Warrior - Game Guide and Walkthrough](https://game.lhg100.com/Article/UploadFiles/201512/2015121709394393.jpg) [2]
[2]
Your first task is to sneak to the enemy camp - you have to stay undetected, otherwise this mission ends in failure. The enemy camp is behind your back. But before you start sneaking towards it, I'd propose to crawl on the ledge to your right. All the time have an eye on this camp and eliminate the bad guys you'll see in your optic sight (#2). From time to time look through this scope when crawling, and take out the spotted enemies before they'll detect you and raise the alarm.
Shoot dead the guards on the wooden watch towers, kill the muggers walking amongst the tents and hiding behind the vehicles or near these last (#3).
![[3] - Chapter 10 - The End Is Near... - p. 1 - Walkthrough - Sniper: Ghost Warrior - Game Guide and Walkthrough](https://game.lhg100.com/Article/UploadFiles/201512/2015121709394363.jpg) [3]
[3]![[4] - Chapter 10 - The End Is Near... - p. 1 - Walkthrough - Sniper: Ghost Warrior - Game Guide and Walkthrough](https://game.lhg100.com/Article/UploadFiles/201512/2015121709394329.jpg) [4]
[4]
A small challenge may be to eliminate the bad guys hiding in the tents - shoot at their small heads being visible in the windows of these tents (#4).
When you think that you killed most of the enemies in the camp, jump down from the ledge and move towards the enemy campsite. Perhaps you'll have to take out using your silenced pistol several more enemy remnants you didn't see yet - they're still hiding in these tents, so shoot at the thin canvas of their hideout (#5).
![[5] - Chapter 10 - The End Is Near... - p. 1 - Walkthrough - Sniper: Ghost Warrior - Game Guide and Walkthrough](https://game.lhg100.com/Article/UploadFiles/201512/2015121709394327.jpg) [5]
[5]![[6] - Chapter 10 - The End Is Near... - p. 1 - Walkthrough - Sniper: Ghost Warrior - Game Guide and Walkthrough](https://game.lhg100.com/Article/UploadFiles/201512/2015121709394340.jpg) [6]
[6]
But you don't have to comb the whole camp searching for the survivors - it's even a bad idea, because this action often ends with raising the alarm. So instead of this, focus on reaching the place marked on your screen with white dot - get there through the tents located on the right edge of the campsite.
Then cautiously sneak further, towards the road on which you'll see an empty APC (#7).
![[7] - Chapter 10 - The End Is Near... - p. 1 - Walkthrough - Sniper: Ghost Warrior - Game Guide and Walkthrough](https://game.lhg100.com/Article/UploadFiles/201512/2015121709394389.jpg) [7]
[7]![[8] - Chapter 10 - The End Is Near... - p. 1 - Walkthrough - Sniper: Ghost Warrior - Game Guide and Walkthrough](https://game.lhg100.com/Article/UploadFiles/201512/2015121709394372.jpg) [8]
[8]
Be very alert when closing to this road - if you turn right on this road you'll surely see in the distance the enemy checkpoint (#8). Though, you don't have to attack these 3 or 4 muggers on the checkpoint, but you can quickly kill them all using your silenced sniper rifle. If you'll do this, wait a moment, when rotated in this direction, because after a while there may appear several more enemies running from the checkpoint - treat them with bullets too.
Afterward, hide near the abandoned APC and turn towards the other side - to the left you can see a bridge on the road and 3 or 4 thugs on its end (#9). Don't attack them! This action always culminates in raising the alarm, even if you managed to kill quickly all of these opponents.
![[9] - Chapter 10 - The End Is Near... - p. 1 - Walkthrough - Sniper: Ghost Warrior - Game Guide and Walkthrough](https://game.lhg100.com/Article/UploadFiles/201512/2015121709394319.jpg) [9]
[9]![[10] - Chapter 10 - The End Is Near... - p. 1 - Walkthrough - Sniper: Ghost Warrior - Game Guide and Walkthrough](https://game.lhg100.com/Article/UploadFiles/201512/2015121709394313.jpg) [10]
[10]
So instead of doing this, sneak to the other side of the APC, crawl through the shrubberies growing near the water, and then swim under the bridge to the opposite riverbank (#10).
Emerge from the water as noiselessly as you dipped into it, and carefully crawl to the nearby shrubberies. All the time don't attack these muggers standing on the bridge, they're anyway blind and deaf (#11). Turn around and sneak towards the white dot on your screen.
![[11] - Chapter 10 - The End Is Near... - p. 1 - Walkthrough - Sniper: Ghost Warrior - Game Guide and Walkthrough](https://game.lhg100.com/Article/UploadFiles/201512/2015121709394437.jpg) [11]
[11]![[12] - Chapter 10 - The End Is Near... - p. 1 - Walkthrough - Sniper: Ghost Warrior - Game Guide and Walkthrough](https://game.lhg100.com/Article/UploadFiles/201512/2015121709394431.jpg) [12]
[12]
After a while you'll see in the distance the guard standing in front of the gate - there's a village behind this gate. Kill this guy (#12). Proceed further along the road, stay on the right roadside.
After several meters of walking you'll see a wicket or a hole in the wall to your right, and one more terrorist behind it (#13) - take him out too. You should find the traitor Rodriguez now.
![[13] - Chapter 10 - The End Is Near... - p. 2 - Walkthrough - Sniper: Ghost Warrior - Game Guide and Walkthrough](https://game.lhg100.com/Article/UploadFiles/201512/2015121709394407.jpg) [13]
[13]![[14] - Chapter 10 - The End Is Near... - p. 2 - Walkthrough - Sniper: Ghost Warrior - Game Guide and Walkthrough](https://game.lhg100.com/Article/UploadFiles/201512/2015121709394473.jpg) [14]
[14]
Sneak towards the consecutive white dots indicating the route - you have to check three locations in which Rodriguez would hide, one after one. You won't find him in the first, small building (#14).
He won't be also in the second hut (#15).
![[15] - Chapter 10 - The End Is Near... - p. 2 - Walkthrough - Sniper: Ghost Warrior - Game Guide and Walkthrough](https://game.lhg100.com/Article/UploadFiles/201512/2015121709394420.jpg) [15][16]
[15][16]
And the 3rd of his potential hideouts is located in building on the hill. In order to reach this building you first have to find a ladder leading to the roof of a nearby hovel (#16).
Climb this ladder up. When crouching on the roof you'll see several bad guys hanging around the parked truck (#17). I'd suggest leaving them a-loin, because the fight with them may again end in raising the alarm.
![[17] - Chapter 10 - The End Is Near... - p. 2 - Walkthrough - Sniper: Ghost Warrior - Game Guide and Walkthrough](https://game.lhg100.com/Article/UploadFiles/201512/2015121709394436.jpg) [17]
[17]![[18] - Chapter 10 - The End Is Near... - p. 2 - Walkthrough - Sniper: Ghost Warrior - Game Guide and Walkthrough](https://game.lhg100.com/Article/UploadFiles/201512/2015121709394409.jpg) [18]
[18]
Instead of this, slip down from the roof to the right (#18) and by-pass these mugs also from the right. Head for the white dot on your screen.
Go crouch, turn right after a while and move uphill (#19).
![[19] - Chapter 10 - The End Is Near... - p. 2 - Walkthrough - Sniper: Ghost Warrior - Game Guide and Walkthrough](https://game.lhg100.com/Article/UploadFiles/201512/2015121709394447.jpg) [19]
[19]![[20] - Chapter 10 - The End Is Near... - p. 2 - Walkthrough - Sniper: Ghost Warrior - Game Guide and Walkthrough](https://game.lhg100.com/Article/UploadFiles/201512/2015121709394481.jpg) [20]
[20]
On the top of this hill (#20) shoot dead the guy hanging around the sandbagged HMG emplacement to the right. To the left there's an entrance to the last building where the traitor Rodriguez may hide - it's marked with white dot. Unfortunately, you won't find Rodriguez in this building too.
That's because he's right now preparing his Humvee to escape from this village through the gate you passed by earlier, when entering this settlement (#21). There are many other bad guys around this baldy and you have to clear your way first, in order to be able to start pursuing the traitor.
![[21] - Chapter 10 - The End Is Near... - p. 2 - Walkthrough - Sniper: Ghost Warrior - Game Guide and Walkthrough](https://game.lhg100.com/Article/UploadFiles/201512/2015121709394525.jpg) [21]
[21]![[22] - Chapter 10 - The End Is Near... - p. 2 - Walkthrough - Sniper: Ghost Warrior - Game Guide and Walkthrough](https://game.lhg100.com/Article/UploadFiles/201512/2015121709394507.jpg) [22]
[22]
Open fire from this HMG mounted on the sandbagged emplacement near you (#22).
Aim at this horde of terrorist you see near the village gate. Some of the bad guys are standing near the red canisters - shoot at these canisters to cause explosions (#23).
![[23] - Chapter 10 - The End Is Near... - p. 2 - Walkthrough - Sniper: Ghost Warrior - Game Guide and Walkthrough](https://game.lhg100.com/Article/UploadFiles/201512/2015121709394557.jpg) [23]
[23]![[24] - Chapter 10 - The End Is Near... - p. 2 - Walkthrough - Sniper: Ghost Warrior - Game Guide and Walkthrough](https://game.lhg100.com/Article/UploadFiles/201512/2015121709394521.jpg) [24]
[24]
When this slaughter is over, you'll take control over one of the rebels, who are still near the campsite from the beginning of this scenario. Follow your comrades assaulting this camp (#24). Your task is to support the American sniper - the character who has been controlled by you 'till this moment of a gameplay.
There shouldn't be too many enemies in the camp, so making your way through it shouldn't stand a problem for you (#25). Head for the road on which you've seen earlier an abandoned APC.
![[25] - Chapter 10 - The End Is Near... - p. 2 - Walkthrough - Sniper: Ghost Warrior - Game Guide and Walkthrough](https://game.lhg100.com/Article/UploadFiles/201512/2015121709394535.jpg) [25]
[25]![[26] - Chapter 10 - The End Is Near... - p. 2 - Walkthrough - Sniper: Ghost Warrior - Game Guide and Walkthrough](https://game.lhg100.com/Article/UploadFiles/201512/2015121709394597.jpg) [26]
[26]
When you're closing to it you'll see Rodriguez's Humvee on the road - he's escaping to the right. And behind this vehicle you'll see... an American "man-bush" chasing the Hummer on foot (#26). Quickly run to this sniper while he's stopping near the APC. The next task is to capture the traitor Rodriguez - but you'll try to complete it in the next scenario...
Here, in this mission, you must deal again with this so-called rail shooter, which takes your character, sergeant Wells, and puts him into the armoured turret of the APC stolen in the previous scenario. This APC is steered by a partisan named El Tejon - you can only traverse the barrel of the HMG mounted in the turret and shoot at the spotted targets. You've got only one task in this scenario - to capture the traitor Rodriguez. Shoot at the consecutive enemies appearing on the way of your APC. First, you have to kill two morons hiding near the parked Humvee - you can finish them off by firing a long burst of bullets into this vehicle, which then should explode (#1).
![[1] - Chapter 11 - The Hunt Is On - Walkthrough - Sniper: Ghost Warrior - Game Guide and Walkthrough](https://game.lhg100.com/Article/UploadFiles/201512/2015121709394527.jpg) [1]
[1]![[2] - Chapter 11 - The Hunt Is On - Walkthrough - Sniper: Ghost Warrior - Game Guide and Walkthrough](https://game.lhg100.com/Article/UploadFiles/201512/2015121709394595.jpg) [2]
[2]
A short distance further, when you're closing to some huts built on rocky ledges hanging over the roadsides, you'll encounter several more enemies standing on the verandas/balconies/patios of these huts. Take out the bad guys on the left first (#2).
Afterward, kill the muggers to your right (#3).
![[3] - Chapter 11 - The Hunt Is On - Walkthrough - Sniper: Ghost Warrior - Game Guide and Walkthrough](https://game.lhg100.com/Article/UploadFiles/201512/2015121709394540.jpg) [3]
[3]![[4] - Chapter 11 - The Hunt Is On - Walkthrough - Sniper: Ghost Warrior - Game Guide and Walkthrough](https://game.lhg100.com/Article/UploadFiles/201512/2015121709394582.jpg) [4]
[4]
Two or three more enemies will appear on the road ahead of you, near the bonfire, when you're passing the huts mentioned-above (#4).
When closing to the bridge, shoot dead the next two opponents appearing on the road (#5).
![[5] - Chapter 11 - The Hunt Is On - Walkthrough - Sniper: Ghost Warrior - Game Guide and Walkthrough](https://game.lhg100.com/Article/UploadFiles/201512/2015121709394619.jpg) [5]
[5]![[6] - Chapter 11 - The Hunt Is On - Walkthrough - Sniper: Ghost Warrior - Game Guide and Walkthrough](https://game.lhg100.com/Article/UploadFiles/201512/2015121709394623.jpg) [6]
[6]
Behind the winding of this road and just prior to the bridge (there are two bridges, in fact, the second right behind the first), under the wreck of a downed plane, there's a sandbagged position with few enemies in it (#6).
After shooting them dead El Tejon drives on the first of the bridges. On the opposite end of this bridge and on both roadsides there are two sandbagged enemy emplacements with several more opponents. Kill'em all (#7).
![[7] - Chapter 11 - The Hunt Is On - Walkthrough - Sniper: Ghost Warrior - Game Guide and Walkthrough](https://game.lhg100.com/Article/UploadFiles/201512/2015121709394696.jpg) [7]
[7]![[8] - Chapter 11 - The Hunt Is On - Walkthrough - Sniper: Ghost Warrior - Game Guide and Walkthrough](https://game.lhg100.com/Article/UploadFiles/201512/2015121709394638.jpg) [8]
[8]
And on the other end of the second of the bridges you'll see the bad guys again, but this time they occupy only a one sandbagged position (#8).
Then fire at the truck you'll see on the road (#8) - there may hide few morons near that vehicle. If you didn't kill all the enemies during the fight, don't even look behind you (you can't turn the turret to this direction) - just focus on the targets that are ahead of you.
![[9] - Chapter 11 - The Hunt Is On - Walkthrough - Sniper: Ghost Warrior - Game Guide and Walkthrough](https://game.lhg100.com/Article/UploadFiles/201512/2015121709394645.jpg) [9]
[9]![[10] - Chapter 11 - The Hunt Is On - Walkthrough - Sniper: Ghost Warrior - Game Guide and Walkthrough](https://game.lhg100.com/Article/UploadFiles/201512/2015121709394641.jpg) [10]
[10]
Finally you'll get to the place where the road is blocked with some trees - shoot dead two muggers hiding behind this roadblock (#10).
Watch out, another thug may run downhill on your left! (#11)
![[11] - Chapter 11 - The Hunt Is On - Walkthrough - Sniper: Ghost Warrior - Game Guide and Walkthrough](https://game.lhg100.com/Article/UploadFiles/201512/2015121709394695.jpg) [11]
[11]![[12] - Chapter 11 - The Hunt Is On - Walkthrough - Sniper: Ghost Warrior - Game Guide and Walkthrough](https://game.lhg100.com/Article/UploadFiles/201512/2015121709394672.jpg) [12]
[12]
At last you can disembark your APC - run to the place indicated on your screen by a white dot and draw your sniper rifle (#12).
You'll get to the edge of the precipice from where you'll have quite a nice view on the dam (#13). Go prone. There are several sandbagged enemy emplacements on the dam, and the perimeter is also patrolled by some guards. The Hummer with baldy Rodriguez inside the vehicle will drive on the dam at any moment. You should stop it by shooting at these explosive barrels located on the dam in the place marked with the next white dot. You have to fire an accurate shot when the vehicle is closing to these barrels.
![[13] - Chapter 11 - The Hunt Is On - Walkthrough - Sniper: Ghost Warrior - Game Guide and Walkthrough](https://game.lhg100.com/Article/UploadFiles/201512/2015121709394664.jpg) [13]
[13]![[14] - Chapter 11 - The Hunt Is On - Walkthrough - Sniper: Ghost Warrior - Game Guide and Walkthrough](https://game.lhg100.com/Article/UploadFiles/201512/2015121709394713.jpg) [14]
[14]
You've got a while before you'll see Rodriguez in his Humvee, so you can start taking out the bad guys on the dam - I'd recommend starting from its left end (#14). In this way you'll not miss the vehicle, because at one point it will speed by from left to right in the scope of your sniper rifle.
When it happens, aim at these barrels marked with a white dot and fire an accurate shot while Humvee is closing to them (#15). The explosion will flip over Rodriguez's car, thus immobilize it on the dam.
![[15] - Chapter 11 - The Hunt Is On - Walkthrough - Sniper: Ghost Warrior - Game Guide and Walkthrough](https://game.lhg100.com/Article/UploadFiles/201512/2015121709394795.jpg) [15]
[15]![[16] - Chapter 11 - The Hunt Is On - Walkthrough - Sniper: Ghost Warrior - Game Guide and Walkthrough](https://game.lhg100.com/Article/UploadFiles/201512/2015121709394727.jpg) [16]
[16]
Shoot dead the rest of the bad guys on the dam (if they're still alive), and go back to your APC parked on the road (#16). Jump over these timbers lying on the road and run downhill along the road towards the dam.
Then enter the dam (#17).
![[17] - Chapter 11 - The Hunt Is On - Walkthrough - Sniper: Ghost Warrior - Game Guide and Walkthrough](https://game.lhg100.com/Article/UploadFiles/201512/2015121709394731.jpg) [17]
[17]![[18] - Chapter 11 - The Hunt Is On - Walkthrough - Sniper: Ghost Warrior - Game Guide and Walkthrough](https://game.lhg100.com/Article/UploadFiles/201512/2015121709394788.jpg) [18]
[18]
After walking a short distance on it you'll see several last enemies running in your direction - kill them quickly (#18).
Afterward, run towards the white dot being visible on your screen and pass the burning vehicles (#19). Behind the Humvee flipped on the side you'll find bald Rodriguez.
![[19] - Chapter 11 - The Hunt Is On - Walkthrough - Sniper: Ghost Warrior - Game Guide and Walkthrough](https://game.lhg100.com/Article/UploadFiles/201512/2015121709394774.jpg) [19]
[19]![[20] - Chapter 11 - The Hunt Is On - Walkthrough - Sniper: Ghost Warrior - Game Guide and Walkthrough](https://game.lhg100.com/Article/UploadFiles/201512/2015121709394712.jpg) [20]
[20]
He'll bring back to you the CD with data that he stole from you earlier, but he'll also try to "scratch his thigh" (#20). Fortunately, you're faster than he is. And unluckily for him, he forgot to equip himself with a parachute...
This time you cooperate with O'Neill who is back in biz. Follow your spotter towards the big, red-white, metallic radio tower located on the hill (#1). Here you'll spread out - O'Neil will climb up the tower probably, and then he'll direct you through the other areas of this map. Your task is to sneak to the enemy camp which is located slightly further, in the valley.
![[1] - Chapter 12 - Steal From Under Their Noses Part II - p. 1 - Walkthrough - Sniper: Ghost Warrior - Game Guide and Walkthrough](https://game.lhg100.com/Article/UploadFiles/201512/2015121709394721.jpg) [1][2]
[1][2]
Move along the path which leads downhill, but don't run pell-mell - when you're closing to the campsite go crouch and hide for a moment in the bushes growing near the road (#2).
Before you go downhill it's worth to scout around to make out what surprises wait for you. Perhaps you'll be able to take out from your current position two bad guys on the sandbagged emplacement near the road running through the enemy campsite. You can eliminate them with only one shot (#3).
![[3] - Chapter 12 - Steal From Under Their Noses Part II - p. 1 - Walkthrough - Sniper: Ghost Warrior - Game Guide and Walkthrough](https://game.lhg100.com/Article/UploadFiles/201512/2015121709394736.jpg) [3]
[3]![[4] - Chapter 12 - Steal From Under Their Noses Part II - p. 1 - Walkthrough - Sniper: Ghost Warrior - Game Guide and Walkthrough](https://game.lhg100.com/Article/UploadFiles/201512/2015121709394830.jpg) [4]
[4]
However, eliminating the guard on the wooden watch tower is the most important (#4). This tower is located in the corner of the campsite, in the place to which the path leads.
Keep out of the mischief and don't open fire at the whole group of enemies being drilled by some officer on the square in the centre of the camp. If you do this, you'll be able to take out one or several soldiers at most, but the rest of them will immediately open fire at your position (#5) and kill you in a twinkling of an eye.
![[5] - Chapter 12 - Steal From Under Their Noses Part II - p. 1 - Walkthrough - Sniper: Ghost Warrior - Game Guide and Walkthrough](https://game.lhg100.com/Article/UploadFiles/201512/2015121709394898.jpg) [5]
[5]![[6] - Chapter 12 - Steal From Under Their Noses Part II - p. 1 - Walkthrough - Sniper: Ghost Warrior - Game Guide and Walkthrough](https://game.lhg100.com/Article/UploadFiles/201512/2015121709394815.jpg) [6]
[6]
After eliminating the guard on the wooden watch tower, sneak under this construction (#6). When you're there, you'll be given a new order - you have to find the data.
From under the tower move carefully (it's best to sneak in a squatting position) along the path marked on your screen with white dots. The first dot leads to some hut (#7) - enter this shack.
![[7] - Chapter 12 - Steal From Under Their Noses Part II - p. 1 - Walkthrough - Sniper: Ghost Warrior - Game Guide and Walkthrough](https://game.lhg100.com/Article/UploadFiles/201512/2015121709394892.jpg) [7]
[7]![[8] - Chapter 12 - Steal From Under Their Noses Part II - p. 1 - Walkthrough - Sniper: Ghost Warrior - Game Guide and Walkthrough](https://game.lhg100.com/Article/UploadFiles/201512/2015121709394864.jpg) [8]
[8]
From inside the hut, when you've sneaked to the second entrance, you'll be able to see two bad guys standing outside near the fence (#8). At this point O'Neil orders you via the radio to take out one of them, while he'll deal with the second. But you can easily and quickly kill them both by opening a rapid fire from your silenced pistol. Afterward, use a wooden ladder being visible to the left on my picture, in order to get to the roof of a nearby shack.
Then use the next ladders to get to another roof in which you can see a hole (#9).
![[9] - Chapter 12 - Steal From Under Their Noses Part II - p. 1 - Walkthrough - Sniper: Ghost Warrior - Game Guide and Walkthrough](https://game.lhg100.com/Article/UploadFiles/201512/2015121709394851.jpg) [9]
[9]![[10] - Chapter 12 - Steal From Under Their Noses Part II - p. 1 - Walkthrough - Sniper: Ghost Warrior - Game Guide and Walkthrough](https://game.lhg100.com/Article/UploadFiles/201512/2015121709394858.jpg) [10]
[10]
Sneak to this hole and kill the mugger standing inside the house and presenting to you his back (#10). Jump down through the hole to get inside this hut.
When you're inside, you can scout around - you should be able to see through the holes in the wooden walls the bad guys standing outside, for example these three thugs near a parked Hummer (#11). However, don't attack these three morons, because such an action will probably end with raising the alarm! All the time don't shoot at the soldiers being drilled on the square, even if you can see them again. But maybe you'll be able to see in the distance a pair of morons walking around the cam-net - if you can take them out quickly one after one, it is possible that the siren won't howl.
![[11] - Chapter 12 - Steal From Under Their Noses Part II - p. 1 - Walkthrough - Sniper: Ghost Warrior - Game Guide and Walkthrough](https://game.lhg100.com/Article/UploadFiles/201512/2015121709394811.jpg) [11]
[11]![[12] - Chapter 12 - Steal From Under Their Noses Part II - p. 1 - Walkthrough - Sniper: Ghost Warrior - Game Guide and Walkthrough](https://game.lhg100.com/Article/UploadFiles/201512/2015121709394836.jpg) [12]
[12]
But first of all you should go downstairs to the ground floor of this hut and turn right into a corridor. You'll see an individual at the end of this corridor (#12) - shoot him dead. Afterward, follow the O'Neill advice, go crouch and keep back of the windows in the left wall of the corridor. Sneak towards the end of the corridor, to the dead corpse.
You'll get to the exit from this building - right behind this exit you'll see another bandit and one more thug standing higher and in the distance, on some silo. Kill the first guy using your silenced pistol (#13), then use your silenced sniper rifle to take out the terrorist on the silo. Watch out for these three morons near a Humvee when exiting the building, going downstairs and heading for a white dot.
![[13] - Chapter 12 - Steal From Under Their Noses Part II - p. 1 - Walkthrough - Sniper: Ghost Warrior - Game Guide and Walkthrough](https://game.lhg100.com/Article/UploadFiles/201512/2015121709394809.jpg) [13]
[13]![[14] - Chapter 12 - Steal From Under Their Noses Part II - p. 1 - Walkthrough - Sniper: Ghost Warrior - Game Guide and Walkthrough](https://game.lhg100.com/Article/UploadFiles/201512/2015121709394935.jpg) [14]
[14]
Stick to the right edge of this campsite and move along the fence to the main gate and to the road running through this camp. There's a pipeline near the road - you have to crawl under it. But first you can eliminate the guard on a wooden watch tower - you can see a fragment of this tower in the distance, behind a pipeline (#14).
Crawl under the pipeline, then across the road and proceed towards the guard tower mentioned above. Somewhere near this construction you'll probably have to eliminate one more guy hanging around (#15). Afterward, squat and sneak carefully to the left. By-pass this yellow painted building you have on your left.
![[15] - Chapter 12 - Steal From Under Their Noses Part II - p. 2 - Walkthrough - Sniper: Ghost Warrior - Game Guide and Walkthrough](https://game.lhg100.com/Article/UploadFiles/201512/2015121709394916.jpg) [15]
[15]![[16] - Chapter 12 - Steal From Under Their Noses Part II - p. 2 - Walkthrough - Sniper: Ghost Warrior - Game Guide and Walkthrough](https://game.lhg100.com/Article/UploadFiles/201512/2015121709394922.jpg) [16]
[16]
Behind it you maybe see this pair of morons hanging around the cam-net - if you didn't kill them earlier (#16). If they're still alive, you can try to finish them off right now - shoot fast and accurately, don't let them raise the alarm. Afterward, move towards the white dot on your screen and by-pass from the right these gentlemen being drilled on the square in the middle of the camp.
You'll see three enemies when closing to another yellow-painted house - ther're standing a little further and in front of you. Don't attack them, just use this small stairs you see on my picture (#17) to sneak inside the building. Go crouch and stay away from the windows again.
![[17] - Chapter 12 - Steal From Under Their Noses Part II - p. 2 - Walkthrough - Sniper: Ghost Warrior - Game Guide and Walkthrough](https://game.lhg100.com/Article/UploadFiles/201512/2015121709394974.jpg) [17]
[17]![[18] - Chapter 12 - Steal From Under Their Noses Part II - p. 2 - Walkthrough - Sniper: Ghost Warrior - Game Guide and Walkthrough](https://game.lhg100.com/Article/UploadFiles/201512/2015121709394923.jpg) [18]
[18]
Behind the second entrance to this hut you'll approach, there's a shooting range organised among the sandbags with some dudes practising the shooting on it (#18). They use silenced weapons and that's why the sound is quite untypical. Don't attack them! Just ignore them, go crouch or even prone, exit the house and sneak to the right, towards the white dot being visible on your screen.
After a while you'll see on your right these three bad guys (#19), who you've ignored when entering the building. And now don't attack them too - they're blind and deaf and shouldn't see you even now, when they stay with their faces rotated in your direction. They won't hurt you.
![[19] - Chapter 12 - Steal From Under Their Noses Part II - p. 2 - Walkthrough - Sniper: Ghost Warrior - Game Guide and Walkthrough](https://game.lhg100.com/Article/UploadFiles/201512/2015121709394971.jpg) [19]
[19]![[20] - Chapter 12 - Steal From Under Their Noses Part II - p. 2 - Walkthrough - Sniper: Ghost Warrior - Game Guide and Walkthrough](https://game.lhg100.com/Article/UploadFiles/201512/2015121709394931.jpg) [20]
[20]
You'll get to some barrels - sneak through the hole in the fence you can see behind these barrels (#20). Afterward, sneak under the pipes to the left.
You're almost in place. Now you have to move upstairs and get to this yellow painted building which you see on my picture (#21). But there's a guard patrolling around this house and at this moment he should walk in your direction! Don't let him see you and quickly hide on the left, behind this white pillar of the silo - you can see its part on my picture. When you're hiding there, look at the minimap and observe the current position of this guard, which is marked on this map with a red dot. When this guy is walking away to your left, you can move to the stairs. Go upstairs and enter the building.
![[21] - Chapter 12 - Steal From Under Their Noses Part II - p. 2 - Walkthrough - Sniper: Ghost Warrior - Game Guide and Walkthrough](https://game.lhg100.com/Article/UploadFiles/201512/2015121709394902.jpg) [21]
[21]![[22] - Chapter 12 - Steal From Under Their Noses Part II - p. 2 - Walkthrough - Sniper: Ghost Warrior - Game Guide and Walkthrough](https://game.lhg100.com/Article/UploadFiles/201512/2015121709394961.jpg) [22]
[22]
On the table in the corner of this house you'll find the documents, the data you have searched for (#22) - take them. Now you have to get out the camp undetected. And it would be probably easiest to do this by going back on your own tracks, but it's not so easy.
While exiting the house pay attention to where is currently the opponent who was patrolling around the building! Exit the house when this guy passes the stairs - you can shoot him at his back then. You should use the ladder to climb up the silo which you see on my picture (#22).
![[23] - Chapter 12 - Steal From Under Their Noses Part II - p. 2 - Walkthrough - Sniper: Ghost Warrior - Game Guide and Walkthrough](https://game.lhg100.com/Article/UploadFiles/201512/2015121709394913.jpg) [23]
[23]![[24] - Chapter 12 - Steal From Under Their Noses Part II - p. 2 - Walkthrough - Sniper: Ghost Warrior - Game Guide and Walkthrough](https://game.lhg100.com/Article/UploadFiles/201512/2015121709395055.jpg) [24]
[24]
Go crouch when you're on this silo and turn right. You'll see a guard standing on the next silo - use your sniper rifle to take him out (#24).
If you look to the right and downwards now, then maybe you'll be able to spot another guard hiding in the lodge near the road (#25). Focus on the target, pull the trigger and he should be dead.
![[25] - Chapter 12 - Steal From Under Their Noses Part II - p. 2 - Walkthrough - Sniper: Ghost Warrior - Game Guide and Walkthrough](https://game.lhg100.com/Article/UploadFiles/201512/2015121709395024.jpg) [25]
[25]![[26] - Chapter 12 - Steal From Under Their Noses Part II - p. 2 - Walkthrough - Sniper: Ghost Warrior - Game Guide and Walkthrough](https://game.lhg100.com/Article/UploadFiles/201512/2015121709395025.jpg) [26]
[26]
Now take a walk to the place marked with a white dot on the silo, where lies the body of a guard killed a few seconds earlier - be careful, though. On your left and on the ground level you'll have the shooting range with soldiers practising the shooting and three "blind men" near it (#26). I'd suggest to leave all of them a-loin.
Go crouch, enter on these pipes you see on picture (#27) and visit all the places marked on your screen with white dots, by moving along these pipes. Be careful, don't fall down!
![[27] - Chapter 12 - Steal From Under Their Noses Part II - p. 2 - Walkthrough - Sniper: Ghost Warrior - Game Guide and Walkthrough](https://game.lhg100.com/Article/UploadFiles/201512/2015121709395046.jpg) [27]
[27]![[28] - Chapter 12 - Steal From Under Their Noses Part II - p. 2 - Walkthrough - Sniper: Ghost Warrior - Game Guide and Walkthrough](https://game.lhg100.com/Article/UploadFiles/201512/2015121709395059.jpg) [28]
[28]
Shortly after getting on these pipes you'll see a truck passing you by the road running under the tubes (#28). Don't bother about the driver, he's blind in the same degree as others are - I'm sure he'll got a car accident soon... All the time ignore completely the soldiers being drilled in the middle of the camp. Just sneak further along these pipes.
Somewhere along the line O'Neill will give you a hint via the radio to turn right and jump down these pipes onto the roof of some wooden barrack (#29). Do it, then jump down this roof to the ground.
![[29] - Chapter 12 - Steal From Under Their Noses Part II - p. 2 - Walkthrough - Sniper: Ghost Warrior - Game Guide and Walkthrough](https://game.lhg100.com/Article/UploadFiles/201512/2015121709395099.jpg) [29][30]
[29][30]
Afterward, use the wooden crates to jump over a white wall (#30), go under the watch tower and run towards the place marked with a white dot outside the camp, in order to complete this mission.
First you have to get to the observation point 52. Pass the building you have ahead of you and move along the fence. Walk through the hole in this fence (#1) and use the ladder to climb up to the roof of the building.
![[1] - Chapter 13 - A Marksman At His Best - p. 1 - Walkthrough - Sniper: Ghost Warrior - Game Guide and Walkthrough](https://game.lhg100.com/Article/UploadFiles/201512/2015121709395043.jpg) [1]
[1]![[2] - Chapter 13 - A Marksman At His Best - p. 1 - Walkthrough - Sniper: Ghost Warrior - Game Guide and Walkthrough](https://game.lhg100.com/Article/UploadFiles/201512/2015121709395018.jpg) [2]
[2]
Turn left and use the next ladders to climb higher. Watch out, to the right, on the roof of the last building there's a guy (#2) - treat him with a bullet before you'll climb up.
When you're on the roof, move towards the white dot indicating your observation point (#3).
![[3] - Chapter 13 - A Marksman At His Best - p. 1 - Walkthrough - Sniper: Ghost Warrior - Game Guide and Walkthrough](https://game.lhg100.com/Article/UploadFiles/201512/2015121709395070.jpg) [3]
[3]![[4] - Chapter 13 - A Marksman At His Best - p. 1 - Walkthrough - Sniper: Ghost Warrior - Game Guide and Walkthrough](https://game.lhg100.com/Article/UploadFiles/201512/2015121709395109.jpg) [4]
[4]
When you're there it's best to go prone and turn to the right - from there you have quite a nice view on the town (#4). Now you should use your binoculars in order to mark the targets for your sniper, Tyler.
Look through the binoculars (you can zoom in and out) at the direction of some water tower or something similar, which one built on one of the roofs (#5). You'll see two bad guys - one of them is located under the water tower, to the right from it, and the second stands a little higher. Point them out to your sniper by looking at them through your binoculars and pressing the left mouse button. Do it quickly, because they may spot you at last!
![[5] - Chapter 13 - A Marksman At His Best - p. 1 - Walkthrough - Sniper: Ghost Warrior - Game Guide and Walkthrough](https://game.lhg100.com/Article/UploadFiles/201512/2015121709395107.jpg) [5]
[5]![[6] - Chapter 13 - A Marksman At His Best - p. 1 - Walkthrough - Sniper: Ghost Warrior - Game Guide and Walkthrough](https://game.lhg100.com/Article/UploadFiles/201512/2015121709395129.jpg) [6]
[6]
After taking out the marked targets Tyler moves towards his new sniping position and you can see him running on the roofs from right to left (#6).
You also have to change your observation point. Turn left towards the wall on which you can see a cupboard with medkits and use the ladder to climb to the roof of some small quarter-deck (#7). You'll see a white dot in the distance, which marks the place you should get to, and a moron standing on the roof between you and this place. Shoot him dead and proceed towards the white dot.
![[7] - Chapter 13 - A Marksman At His Best - p. 1 - Walkthrough - Sniper: Ghost Warrior - Game Guide and Walkthrough](https://game.lhg100.com/Article/UploadFiles/201512/2015121709395167.jpg) [7]
[7]![[8] - Chapter 13 - A Marksman At His Best - p. 1 - Walkthrough - Sniper: Ghost Warrior - Game Guide and Walkthrough](https://game.lhg100.com/Article/UploadFiles/201512/2015121709395102.jpg) [8]
[8]
When you get there you'll find there a steely rope, which you can use to slide down, and get to the next roof located under this metallic, white-red radio tower (#8).
After the landing on this roof turn right and move towards your next observation position, which is located near some pipe or exhaust gas stack sticking out of the roof (#9).
[9]![[10] - Chapter 13 - A Marksman At His Best - p. 1 - Walkthrough - Sniper: Ghost Warrior - Game Guide and Walkthrough](https://game.lhg100.com/Article/UploadFiles/201512/2015121709395176.jpg) [10]
[10]
Draw out your binoculars again and look through them at the asphalted road running below (#10).
At the end of this road (#11) you'll see an enemy checkpoint. There's a guard standing on the roof of this post - point him out to your sniper as first. Under the post, near the toll-bar stands a next soldier - he's second in a line, though mark him as a target for your sniper only then, when the third guy, who is patrolling the street, goes in your direction. The moron who patrols the street is the last to be eliminated by Tyler.
![[11] - Chapter 13 - A Marksman At His Best - p. 1 - Walkthrough - Sniper: Ghost Warrior - Game Guide and Walkthrough](https://game.lhg100.com/Article/UploadFiles/201512/2015121709395120.jpg) [11]
[11]![[12] - Chapter 13 - A Marksman At His Best - p. 1 - Walkthrough - Sniper: Ghost Warrior - Game Guide and Walkthrough](https://game.lhg100.com/Article/UploadFiles/201512/2015121709395190.jpg) [12]
[12]
It's time to get again to the observation point 52 - number is the same as before, but this point is now located in a new position. Turn left and return under the metallic white-red radio tower. Afterward jump down to the roof below, and then to the linen canopy hanging over the entrance, and to the ground finally. Then move uphill along the path (#12).
You'll get to the wharf (#13). There's a boat with a supply of equipment for the local military junta mooring at this wharf. You have to steal some stuff from this boat, to be more specific - the satchel charges. Use your silenced pistol to kill a moron standing on a pier to the left (he's guarding the boat), and then a second guy walking on the jetty on the right. You can eliminate this second dude by shooting at one of the barrels located on this jetty and causing an explosion in this way. Afterward, walk downstairs in order to get to the wharf.
![[13] - Chapter 13 - A Marksman At His Best - p. 1 - Walkthrough - Sniper: Ghost Warrior - Game Guide and Walkthrough](https://game.lhg100.com/Article/UploadFiles/201512/2015121709395243.jpg) [13]
[13]![[14] - Chapter 13 - A Marksman At His Best - p. 1 - Walkthrough - Sniper: Ghost Warrior - Game Guide and Walkthrough](https://game.lhg100.com/Article/UploadFiles/201512/2015121709395232.jpg) [14]
[14]
Move towards the white dot on your screen, thus in the direction of the boat mooring at the wharf (#14). Jump on its board and grab what you can - first of all, the Claymore mines. On the wooden wall of the shack built in the centre of this wharf you'll find also a cupboard with medkits, if you need them.
You should go now to your appointed observation position - exit the wharf and proceed uphill along the path, move towards the white dot on your screen (#15).
![[15] - Chapter 13 - A Marksman At His Best - p. 1 - Walkthrough - Sniper: Ghost Warrior - Game Guide and Walkthrough](https://game.lhg100.com/Article/UploadFiles/201512/2015121709395267.jpg) [15]
[15]![[16] - Chapter 13 - A Marksman At His Best - p. 1 - Walkthrough - Sniper: Ghost Warrior - Game Guide and Walkthrough](https://game.lhg100.com/Article/UploadFiles/201512/2015121709395236.jpg) [16]
[16]
When you're on this path, the HQ will contact you via the radio - they've got an idea of mining the path, in order to invite worthily a later pursuit. As I think, you should do it after turning around, when faced towards the wharf (#16). Draw a Claymore mine out of your pocket ;-) and put it on the ground.
Afterward, turn around again and move several meters higher along the path. Use your rope ended with an anchor to climb up to the bough hanging over your head (#17).
![[17] - Chapter 13 - A Marksman At His Best - p. 1 - Walkthrough - Sniper: Ghost Warrior - Game Guide and Walkthrough](https://game.lhg100.com/Article/UploadFiles/201512/2015121709395248.jpg) [17]
[17]![[18] - Chapter 13 - A Marksman At His Best - p. 1 - Walkthrough - Sniper: Ghost Warrior - Game Guide and Walkthrough](https://game.lhg100.com/Article/UploadFiles/201512/2015121709395290.jpg) [18]
[18]
Walk along this bough to your new observation position and draw out the binoculars (#18). You have to again use your binoculars to mark the targets for Tyler.
Go crouch or prone and turn right, towards the village (#19). There are four bad guys waiting to be marked for your sniper.
![[19] - Chapter 13 - A Marksman At His Best - p. 2 - Walkthrough - Sniper: Ghost Warrior - Game Guide and Walkthrough](https://game.lhg100.com/Article/UploadFiles/201512/2015121709395212.jpg) [19]
[19]![[20] - Chapter 13 - A Marksman At His Best - p. 2 - Walkthrough - Sniper: Ghost Warrior - Game Guide and Walkthrough](https://game.lhg100.com/Article/UploadFiles/201512/2015121709395297.jpg) [20]
[20]
I'd propose to mark as first the guard standing on this big, metallic, white-red radio tower (#20).
The second in a line is a moron who should stand for a while under the chapel (there's a cross on the top of its roof) located to the left from the radio tower. You may have a little problem with marking him for Tyler, because this guy will move to the right after a while, but you should be able to see him and mark him when he's moving (#21).
![[21] - Chapter 13 - A Marksman At His Best - p. 2 - Walkthrough - Sniper: Ghost Warrior - Game Guide and Walkthrough](https://game.lhg100.com/Article/UploadFiles/201512/2015121709395210.jpg) [21]
[21]![[22] - Chapter 13 - A Marksman At His Best - p. 2 - Walkthrough - Sniper: Ghost Warrior - Game Guide and Walkthrough](https://game.lhg100.com/Article/UploadFiles/201512/2015121709395206.jpg) [22]
[22]
Lastly, you have to show your sniper the last two opponents, who will be talking each other for a while near some jeep located to the right. Don't press the left mouse button yet, wait until they spread out (#22). Then mark as first a guy walking to the right and then upstairs. A moment later point your binoculars at the last moron near the jeep and press the left mouse button. The order of marking these bad guys for your sniper is very important here, because if one of them is shot dead in the field of view of the others, then you'll be detected.
Tyler, who has been hiding to this moment on the right edge of the village, will run now towards the chapel. There he'll have a better shooting position to take an accurate shot at the most important target, which will appear soon on the arena. This target is Ernesto Salazar, a trusted advisor of general Vasquez. Your task now is to eliminate Ernesto Salazar. Tyler will enforce a judgement, you only have to mark a target for him. The HQ will inform you at any moment that Salazar, who is driving his jeep in a column of other military vehicles, is approaching the place where you both have prepared an ambush for him. When you finally see this column on the asphalted road (#23) to the left from the chapel, it's time to look through your binoculars at this highway.
![[23] - Chapter 13 - A Marksman At His Best - p. 2 - Walkthrough - Sniper: Ghost Warrior - Game Guide and Walkthrough](https://game.lhg100.com/Article/UploadFiles/201512/2015121709395239.jpg) [23]
[23]![[24] - Chapter 13 - A Marksman At His Best - p. 2 - Walkthrough - Sniper: Ghost Warrior - Game Guide and Walkthrough](https://game.lhg100.com/Article/UploadFiles/201512/2015121709395338.jpg) [24]
[24]
Ernesto Salazar, in other words - the target, is driving a jeep, that follows a Humvee, which is leading this column. Quickly show the target to your sniper (#24). When Salazar is dead it's time to flee from the area.
Turn left, get off of the bough and move towards some wooden platform. Kill two muggers standing on it - you can shoot at the explosive barrel located between them (#25). Afterward, run to their dead bodies - unfortunately you can't exchange your binoculars for an assault rifle of one of them.
![[25] - Chapter 13 - A Marksman At His Best - p. 2 - Walkthrough - Sniper: Ghost Warrior - Game Guide and Walkthrough](https://game.lhg100.com/Article/UploadFiles/201512/2015121709395353.jpg) [25]
[25]![[26] - Chapter 13 - A Marksman At His Best - p. 2 - Walkthrough - Sniper: Ghost Warrior - Game Guide and Walkthrough](https://game.lhg100.com/Article/UploadFiles/201512/2015121709395330.jpg) [26]
[26]
You can turn right on this wooden platform and take out a moron standing on the opposite platform (#26). Pay attention though, that your silenced pistol is designed for short ranges and you don't have to much ammo for your weapon too.
So instead of fighting with better armed opponents who follow you, I would suggest leaving the area as quickly as possible. Run across the wooden bridge, get to the barbed-wire entanglement located on the road and proceed uphill along the path running under the left rocky wall (#27).
![[27] - Chapter 13 - A Marksman At His Best - p. 2 - Walkthrough - Sniper: Ghost Warrior - Game Guide and Walkthrough](https://game.lhg100.com/Article/UploadFiles/201512/2015121709395349.jpg) [27]
[27]![[28] - Chapter 13 - A Marksman At His Best - p. 2 - Walkthrough - Sniper: Ghost Warrior - Game Guide and Walkthrough](https://game.lhg100.com/Article/UploadFiles/201512/2015121709395387.jpg) [28]
[28]
While you're not well equipped for carrying on an open fight here, you can do this by turning around for a while after crossing the bridge, hiding behind the nearby rocks and taking out several enemies located closer to you (#28). For example you can kill in this way a guy standing on the road and two other morons appearing on the wooden platform.
When walking along the aforementioned path you'll get to the next bridge - behind it you can see a checkpoint with wooden watch tower and several bad guys (#29). Go crouch or prone in order to remain undetected.
![[29] - Chapter 13 - A Marksman At His Best - p. 2 - Walkthrough - Sniper: Ghost Warrior - Game Guide and Walkthrough](https://game.lhg100.com/Article/UploadFiles/201512/2015121709395351.jpg) [29]
[29]![[30] - Chapter 13 - A Marksman At His Best - p. 2 - Walkthrough - Sniper: Ghost Warrior - Game Guide and Walkthrough](https://game.lhg100.com/Article/UploadFiles/201512/2015121709395309.jpg) [30]
[30]
You don't rather have a chance to win a fight against them - they present deadly accuracy and effectiveness. So instead of fighting with them I'd suggest crawling to the bridge and entering the water on its left side (#30).
Afterward, move along the route indicated by white dots displayed on your screen (#31).
![[31] - Chapter 13 - A Marksman At His Best - p. 2 - Walkthrough - Sniper: Ghost Warrior - Game Guide and Walkthrough](https://game.lhg100.com/Article/UploadFiles/201512/2015121709395313.jpg) [31]
[31]![[32] - Chapter 13 - A Marksman At His Best - p. 2 - Walkthrough - Sniper: Ghost Warrior - Game Guide and Walkthrough](https://game.lhg100.com/Article/UploadFiles/201512/2015121709395343.jpg) [32]
[32]
You'll get to the place on the other riverbank, near the checkpoint with a wooden tower spotted earlier (#32). Don't attack the guards, don't even look at their eyes ;-).
Just move further towards the white dot. After a while you'll get to the tunnel in which you have to place two satchel charges (#33), in order to block the way of those who alternatively pursue you. Quickly place two charges by pressing the F key in two points located over the white dots blinking blue on the screen.
![[33] - Chapter 13 - A Marksman At His Best - p. 2 - Walkthrough - Sniper: Ghost Warrior - Game Guide and Walkthrough](https://game.lhg100.com/Article/UploadFiles/201512/2015121709395356.jpg) [33]
[33]![[34] - Chapter 13 - A Marksman At His Best - p. 2 - Walkthrough - Sniper: Ghost Warrior - Game Guide and Walkthrough](https://game.lhg100.com/Article/UploadFiles/201512/2015121709395496.jpg) [34]
[34]
Don't wait 'until they'll explode, but proceed further and enter some caves. Walk through them by heading for the consecutive white dots. After exiting the caves and getting to the forking in the road (#34) take the left fork.
You'll get to the next cave in which you'll see the last two opponents in this mission (#35). Kill one of them and the second will be taken out by your sniper, Tyler, who is just nearby now. Alternatively you can shoot dead these two morons by yourself, if you're quick enough.
![[35] - Chapter 13 - A Marksman At His Best - p. 2 - Walkthrough - Sniper: Ghost Warrior - Game Guide and Walkthrough](https://game.lhg100.com/Article/UploadFiles/201512/2015121709395405.jpg) [35]
[35]![[36] - Chapter 13 - A Marksman At His Best - p. 2 - Walkthrough - Sniper: Ghost Warrior - Game Guide and Walkthrough](https://game.lhg100.com/Article/UploadFiles/201512/2015121709395458.jpg) [36]
[36]
Follow your companion leaving the cave and crossing the cat-walk which hangs over the chasm (#36).
Your first task is to get to the sniping position. First, you have to practice climbing a little, so draw out your rope ended with an anchor, by pressing the 6 key. Throw the anchor towards the red circle over your head and climb up using your rope (#1). You shouldn't have problems with jumping down to the ground when you're a level higher.
![[1] - Chapter 14 - Guardian Angel - p. 1 - Walkthrough - Sniper: Ghost Warrior - Game Guide and Walkthrough](https://game.lhg100.com/Article/UploadFiles/201512/2015121709395420.jpg) [1]
[1]![[2] - Chapter 14 - Guardian Angel - p. 1 - Walkthrough - Sniper: Ghost Warrior - Game Guide and Walkthrough](https://game.lhg100.com/Article/UploadFiles/201512/2015121709395449.jpg) [2]
[2]
Now throw an anchor again towards the next red circle visible over your head and climb up (#2).
Here you may have a little problem with jumping down to the ground when you're a level higher finally (#3). My tip is to strafe on the rope to your sides, until you're sure, that you won't hurt yourself and fall down, when you're letting the rope. Perhaps you'll have to jump quickly one more time after hitting the ground to make a safe landing.
![[3] - Chapter 14 - Guardian Angel - p. 1 - Walkthrough - Sniper: Ghost Warrior - Game Guide and Walkthrough](https://game.lhg100.com/Article/UploadFiles/201512/2015121709395418.jpg) [3]
[3]![[4] - Chapter 14 - Guardian Angel - p. 1 - Walkthrough - Sniper: Ghost Warrior - Game Guide and Walkthrough](https://game.lhg100.com/Article/UploadFiles/201512/2015121709395415.jpg) [4]
[4]
Afterward, look around for a brown tree-trunk lying on the ground (#4). Walk on it to get further.
Then proceed along the next tree-trunk towards the white dot indicating the route (#5).
![[5] - Chapter 14 - Guardian Angel - p. 1 - Walkthrough - Sniper: Ghost Warrior - Game Guide and Walkthrough](https://game.lhg100.com/Article/UploadFiles/201512/2015121709395498.jpg) [5]
[5]![[6] - Chapter 14 - Guardian Angel - p. 1 - Walkthrough - Sniper: Ghost Warrior - Game Guide and Walkthrough](https://game.lhg100.com/Article/UploadFiles/201512/2015121709395470.jpg) [6]
[6]
You have to again hook the anchor to the bough marked on your screen with a red circle and then climb up (#6).
You'll see a small building. Silently sneak inside it and draw your silenced pistol. Use this gun to eliminate two muggers standing in front of the house (#7). Afterward, head for the gate and exit through it, in order to get to the lighthouse that you can see in the distance. On top of this lighthouse there's your sniping position.
![[7] - Chapter 14 - Guardian Angel - p. 1 - Walkthrough - Sniper: Ghost Warrior - Game Guide and Walkthrough](https://game.lhg100.com/Article/UploadFiles/201512/2015121709395534.jpg) [7]
[7]![[8] - Chapter 14 - Guardian Angel - p. 1 - Walkthrough - Sniper: Ghost Warrior - Game Guide and Walkthrough](https://game.lhg100.com/Article/UploadFiles/201512/2015121709395567.jpg) [8]
[8]
Enter this lighthouse (#8) and kill a thug standing inside it, behind the entrance, and presenting to you his back. You can use your silenced pistol or a knife for this purpose.
Walk upstairs when you're inside the lighthouse, in order to get to the top of this building (#9). You'll find a sniper rifle (Dragunov) with ammo lying on the wooden crates to the right. Go to the edge of the lighthouse.
![[9] - Chapter 14 - Guardian Angel - p. 1 - Walkthrough - Sniper: Ghost Warrior - Game Guide and Walkthrough](https://game.lhg100.com/Article/UploadFiles/201512/2015121709395599.jpg) [9]
[9]![[10] - Chapter 14 - Guardian Angel - p. 1 - Walkthrough - Sniper: Ghost Warrior - Game Guide and Walkthrough](https://game.lhg100.com/Article/UploadFiles/201512/2015121709395519.jpg) [10]
[10]
Now you'll have to clear the way for Delta 2-man squad, which managed to get to the town located under the lighthouse (#10). These two brave commandos will try to steal a military truck and use it to get to the uranium mine. Your task is to cover them and eliminate all the bad guys on their way using your sniper rifle. This pair of commandos is marked with a white dot on your screen.
Look through your optic sight at the town. First, you have to take out two morons near a Humvee - one of them is hanging around this vehicle, and the second stands in front of the guard booth. You can eliminate both of them with a single shot, when they're standing on the one line (#11). Hold your breath for a moment, focus on the target (the guy presenting to you his back) and pull the trigger.
![[11] - Chapter 14 - Guardian Angel - p. 1 - Walkthrough - Sniper: Ghost Warrior - Game Guide and Walkthrough](https://game.lhg100.com/Article/UploadFiles/201512/2015121709395511.jpg) [11]
[11]![[12] - Chapter 14 - Guardian Angel - p. 1 - Walkthrough - Sniper: Ghost Warrior - Game Guide and Walkthrough](https://game.lhg100.com/Article/UploadFiles/201512/2015121709395536.jpg) [12]
[12]
When they're both dead, the pair of commandos runs to the Hummer and puts there a time bomb for the enemies. In the same time you have to kill a scoundrel standing a few meters further, on the top of the stairs near such a red building (#12).
Afterward, eliminate a pair of thugs which is hanging around the truck, more to the right (#13). Do it, when they spread out and they don't see each other: first, kill a guy who will stand in a front of the vehicle, then shoot dead the second one behind the truck.
![[13] - Chapter 14 - Guardian Angel - p. 1 - Walkthrough - Sniper: Ghost Warrior - Game Guide and Walkthrough](https://game.lhg100.com/Article/UploadFiles/201512/2015121709395517.jpg) [13]
[13]![[14] - Chapter 14 - Guardian Angel - p. 1 - Walkthrough - Sniper: Ghost Warrior - Game Guide and Walkthrough](https://game.lhg100.com/Article/UploadFiles/201512/2015121709395523.jpg) [14]
[14]
After this, the commandos will run to the stairs leading to the upper level of this red building, and they'll ask you to take care of two bad guys walking from behind this house to the right. Quickly kill them both and the pair of brave commandos will run to the truck parked nearby and steal it (#14).
They'll start the engine and try to get out from the town, simultaneously detonating the time bomb and making some sabotage in this way (#15). All the time you have to clear the way for these commandos in a truck. First, take care of a group of enemies which will appear on the right, behind the explosion and the truck driving away. Shoot all the enemies one by one.
![[15] - Chapter 14 - Guardian Angel - p. 1 - Walkthrough - Sniper: Ghost Warrior - Game Guide and Walkthrough](https://game.lhg100.com/Article/UploadFiles/201512/2015121709395581.jpg) [15]
[15]![[16] - Chapter 14 - Guardian Angel - p. 1 - Walkthrough - Sniper: Ghost Warrior - Game Guide and Walkthrough](https://game.lhg100.com/Article/UploadFiles/201512/2015121709395548.jpg) [16]
[16]
Afterward, look through your scope to the left - remember about the possibility of zooming in and out the view. There are some bad guys blocking the way of the stolen truck - they're hiding behind some vehicles and on the roofs of buildings (#16). Kill'em all.
You can eliminate some of these muggers by shooting at the barrels located near them and causing the deadly explosions in this way (#17).
![[17] - Chapter 14 - Guardian Angel - p. 1 - Walkthrough - Sniper: Ghost Warrior - Game Guide and Walkthrough](https://game.lhg100.com/Article/UploadFiles/201512/2015121709395674.jpg) [17]
[17]![[18] - Chapter 14 - Guardian Angel - p. 1 - Walkthrough - Sniper: Ghost Warrior - Game Guide and Walkthrough](https://game.lhg100.com/Article/UploadFiles/201512/2015121709395653.jpg) [18]
[18]
Afterward, take care of the guys standing a little further and to the left, near some truck parked on a highway running through the city (#18).
A moment later do the same with other muggers who are also shooting from the highway - they're standing near a truck located more to the right (#19).
![[19] - Chapter 14 - Guardian Angel - p. 1 - Walkthrough - Sniper: Ghost Warrior - Game Guide and Walkthrough](https://game.lhg100.com/Article/UploadFiles/201512/2015121709395617.jpg) [19]
[19]![[20] - Chapter 14 - Guardian Angel - p. 1 - Walkthrough - Sniper: Ghost Warrior - Game Guide and Walkthrough](https://game.lhg100.com/Article/UploadFiles/201512/2015121709395656.jpg) [20]
[20]
When the way through the town for the allied truck is clear, it's time to change your position. Look to your left - you should see a rope leading from the lighthouse to some radio tower (#20). Move closer to this rope and use it to slide to this metallic, white-red construction.
You'll land on the roof of the house built at the base of this tower - move towards the white dot indicating your new sniping position (#21).
![[21] - Chapter 14 - Guardian Angel - p. 1 - Walkthrough - Sniper: Ghost Warrior - Game Guide and Walkthrough](https://game.lhg100.com/Article/UploadFiles/201512/2015121709395635.jpg) [21]
[21]![[22] - Chapter 14 - Guardian Angel - p. 1 - Walkthrough - Sniper: Ghost Warrior - Game Guide and Walkthrough](https://game.lhg100.com/Article/UploadFiles/201512/2015121709395675.jpg) [22]
[22]
Jump down from the roof and look towards the road being visible in the distance. You'll see a roadblock composed of several vehicles (#22). Quickly shoot dead all the muggers you'll see near these cars.
When you hear via the radio a command to take out the bad guys preparing a rocket launcher, it's time to promptly turn left and run several meters in this direction. After this, turn right and you should see now this rocket launcher (#23).
![[23] - Chapter 14 - Guardian Angel - p. 2 - Walkthrough - Sniper: Ghost Warrior - Game Guide and Walkthrough](https://game.lhg100.com/Article/UploadFiles/201512/2015121709395643.jpg) [23]
[23]![[24] - Chapter 14 - Guardian Angel - p. 2 - Walkthrough - Sniper: Ghost Warrior - Game Guide and Walkthrough](https://game.lhg100.com/Article/UploadFiles/201512/2015121709395626.jpg) [24]
[24]
Aim well, focus on your target if you have to by pressing the Shift key and take out the gunner first, then eliminate the rest of the crew (#24).
Afterward, run to this rocket launcher and move closer to the edge (#25). Near one of the dead bodies you should find a Dragunov sniper rifle. In the distance you'll see another roadblock and a building located higher - there are several more enemies hiding in this house.
![[25] - Chapter 14 - Guardian Angel - p. 2 - Walkthrough - Sniper: Ghost Warrior - Game Guide and Walkthrough](https://game.lhg100.com/Article/UploadFiles/201512/2015121709395627.jpg) [25]
[25]![[26] - Chapter 14 - Guardian Angel - p. 2 - Walkthrough - Sniper: Ghost Warrior - Game Guide and Walkthrough](https://game.lhg100.com/Article/UploadFiles/201512/2015121709395621.jpg) [26]
[26]
But first take care of the guys on the roadblock (#26).
Then shoot dead all the morons standing on the floors of the house mentioned above (#27). You can shoot at the red explosive barrels located behind the backs of these muggers, but it's rather easier to hit these thugs (one by one), who are standing behind the sandbags - they present the bigger targets.
![[27] - Chapter 14 - Guardian Angel - p. 2 - Walkthrough - Sniper: Ghost Warrior - Game Guide and Walkthrough](https://game.lhg100.com/Article/UploadFiles/201512/2015121709395709.jpg) [27]
[27]![[28] - Chapter 14 - Guardian Angel - p. 2 - Walkthrough - Sniper: Ghost Warrior - Game Guide and Walkthrough](https://game.lhg100.com/Article/UploadFiles/201512/2015121709395710.jpg) [28]
[28]
To the left from this building you should spot another rocket launcher. Quickly kill the gunner (#28), then the last two crewmen.
After the shootout proceed to the left, towards the next white dots, and eliminate all the morons on your way. Hind behind some rocks, if you have to heal yourself (#29).
![[29] - Chapter 14 - Guardian Angel - p. 2 - Walkthrough - Sniper: Ghost Warrior - Game Guide and Walkthrough](https://game.lhg100.com/Article/UploadFiles/201512/2015121709395752.jpg) [29]
[29]![[30] - Chapter 14 - Guardian Angel - p. 2 - Walkthrough - Sniper: Ghost Warrior - Game Guide and Walkthrough](https://game.lhg100.com/Article/UploadFiles/201512/2015121709395727.jpg) [30]
[30]
You'll reach the wooden cat-walk hanging over the highway (#30).
You can move on it, turn to your left and start taking out the muggers who are hiding behind the vehicles of another roadblock on the highway (#31).
![[31] - Chapter 14 - Guardian Angel - p. 2 - Walkthrough - Sniper: Ghost Warrior - Game Guide and Walkthrough](https://game.lhg100.com/Article/UploadFiles/201512/2015121709395779.jpg) [31]
[31]![[32] - Chapter 14 - Guardian Angel - p. 2 - Walkthrough - Sniper: Ghost Warrior - Game Guide and Walkthrough](https://game.lhg100.com/Article/UploadFiles/201512/2015121709395796.jpg) [32]
[32]
Or you can also run across this cat-walk to the other side. In this case you'll have to fight against the enemies spawning in the buildings on the other side (#32). Have your eyes wide open and quickly shoot them dead.
After reaching the other end of a cat-walk turn right, and kill the muggers attacking from the building (#33). It's best to use an assault rifle taken earlier from one of the dead enemies, but the pistol should also work fine here, if you didn't want to exchange your sniper rifle for AR. After the shoot-out you can search the nearby houses and collect some medkits if founded. Your two companions in a stolen truck should be fine for some time and manage to survive until you arrive with a helping hand.
![[33] - Chapter 14 - Guardian Angel - p. 2 - Walkthrough - Sniper: Ghost Warrior - Game Guide and Walkthrough](https://game.lhg100.com/Article/UploadFiles/201512/2015121709395714.jpg) [33]
[33]![[34] - Chapter 14 - Guardian Angel - p. 2 - Walkthrough - Sniper: Ghost Warrior - Game Guide and Walkthrough](https://game.lhg100.com/Article/UploadFiles/201512/2015121709395736.jpg) [34]
[34]
After searching the houses you can walk through the gate located to the right and go downhill (#34).
The path leads towards the roadblock on the highway. On the left side of this path you'll see a shack (#35) - I'm sure you'll find some medkits inside, in the cupboard hanging on the wall.
![[35] - Chapter 14 - Guardian Angel - p. 2 - Walkthrough - Sniper: Ghost Warrior - Game Guide and Walkthrough](https://game.lhg100.com/Article/UploadFiles/201512/2015121709395774.jpg) [35][36]
[35][36]
You can shoot dead the enemies on the roadblock by taking a position near the shack, to the right from it (#36).
The distance isn't long, so you shouldn't have bigger problems with aiming at the opponents and taking them out (#37). Be careful, though, because they'll surely see you too - thus, try to eliminate them on after one, by leaning/strafing slightly to the right, in order to present to them as smallest target as possible.
![[37] - Chapter 14 - Guardian Angel - p. 2 - Walkthrough - Sniper: Ghost Warrior - Game Guide and Walkthrough](https://game.lhg100.com/Article/UploadFiles/201512/2015121709395858.jpg) [37]
[37]![[38] - Chapter 14 - Guardian Angel - p. 2 - Walkthrough - Sniper: Ghost Warrior - Game Guide and Walkthrough](https://game.lhg100.com/Article/UploadFiles/201512/2015121709395885.jpg) [38]
[38]
You can also try to use hand grenades against them, but first you have to go downhill a little. However, you're probably able to reach with your grenades only the opponents who are standing close to you (#38).
After killing all the enemies on the roadblock, walk downhill along this path, in order to get to the spans under this highway (#39). After a while you'll see on the highway a stolen truck with your companions - they'll stop and wait for you. Before you join them, you have to place two satchel charges under the highway - these charges must be installed in two places on the spans marked with white dots. You do this in order to blow up the highway, and to block the way of the pursuers of the stolen truck. While walking towards the spans, watch out for the morons who will be appearing on the other side of the highway - they'll be running downhill the slope.
![[39] - Chapter 14 - Guardian Angel - p. 2 - Walkthrough - Sniper: Ghost Warrior - Game Guide and Walkthrough](https://game.lhg100.com/Article/UploadFiles/201512/2015121709395809.jpg) [39]
[39]![[40] - Chapter 14 - Guardian Angel - p. 2 - Walkthrough - Sniper: Ghost Warrior - Game Guide and Walkthrough](https://game.lhg100.com/Article/UploadFiles/201512/2015121709395860.jpg) [40]
[40]
Take them out one by one (#40), un'til you see no more of them running downhill the slope.
Afterward place both charges on the spans by putting them in places blinking blue on your screen (#41). Now you have to join Delta squad which is waiting for you in the stolen truck on the highway. But before you use the ladder that you can see on my picture to climb up, I propose to make your way first. There's a fierce gunfight still going on above your head on the highway, the Americans are fighting back the pursuers.
![[41] - Chapter 14 - Guardian Angel - p. 2 - Walkthrough - Sniper: Ghost Warrior - Game Guide and Walkthrough](https://game.lhg100.com/Article/UploadFiles/201512/2015121709395850.jpg) [41]
[41]![[42] - Chapter 14 - Guardian Angel - p. 2 - Walkthrough - Sniper: Ghost Warrior - Game Guide and Walkthrough](https://game.lhg100.com/Article/UploadFiles/201512/2015121709395839.jpg) [42]
[42]
So instead of climbing up the ladder and taking a shot right into your head, I'd suggest running uphill the slope on which you've killed several muggers trying to stop you from placing the charges. Walk uphill a little higher and turn around towards the highway (#42).
Afterward, take out several pursuers hiding behind the vehicles parked to the right from the stolen truck (#43).
![[43] - Chapter 14 - Guardian Angel - p. 2 - Walkthrough - Sniper: Ghost Warrior - Game Guide and Walkthrough](https://game.lhg100.com/Article/UploadFiles/201512/2015121709395867.jpg) [43]
[43]![[44] - Chapter 14 - Guardian Angel - p. 2 - Walkthrough - Sniper: Ghost Warrior - Game Guide and Walkthrough](https://game.lhg100.com/Article/UploadFiles/201512/2015121709395835.jpg) [44]
[44]
When you think that the shoot-out is finished and the highway is safe for a while, quickly return to the spans and climb up the ladder in order to get to the truck. After this, you'll watch a cutscene showing a big explosion of a mined highway right behind the stolen truck, which is leaving this place (#44).
In this scenario the game switches you between the available roles: once you're a sniper who sneaks to the uranium mine and covers his attacking companions, another time you're one of these three brave commandos. You start your game as a sniper. Wait for the end of a cutscene showing the interior of a stolen truck which is closing to the uranium mine (#1). Here your sniper gets out and the truck continues moving through the mine. Your first task is to reach the observation point 72 - the route is indicated with the white dots displaying on the screen.
![[1] - Chapter 15 - The Showdown - p. 1 - Walkthrough - Sniper: Ghost Warrior - Game Guide and Walkthrough](https://game.lhg100.com/Article/UploadFiles/201512/2015121709395873.jpg) [1]
[1]![[2] - Chapter 15 - The Showdown - p. 1 - Walkthrough - Sniper: Ghost Warrior - Game Guide and Walkthrough](https://game.lhg100.com/Article/UploadFiles/201512/2015121709395816.jpg) [2]
[2]
When the proper gameplay starts, sneak to the rock being visible on the left side of a path. From behind this stone you can take out using your sniper rifle the guard on the watch tower, then shoot dead other bad guys hanging around this wooden construction (#2).
After the shoot-out you can also turn around to see in the distance the enemy checkpoint on the road (#3).
![[3] - Chapter 15 - The Showdown - p. 1 - Walkthrough - Sniper: Ghost Warrior - Game Guide and Walkthrough](https://game.lhg100.com/Article/UploadFiles/201512/2015121709395958.jpg) [3]
[3]![[4] - Chapter 15 - The Showdown - p. 1 - Walkthrough - Sniper: Ghost Warrior - Game Guide and Walkthrough](https://game.lhg100.com/Article/UploadFiles/201512/2015121709395944.jpg) [4]
[4]
Use your sniper rifle to eliminate its numerous crew (#4).
Be careful, though, because you may be surprised from behind by the attack of some individual running from the direction of the bonfire. Kill him, if you see him now (#5).
![[5] - Chapter 15 - The Showdown - p. 1 - Walkthrough - Sniper: Ghost Warrior - Game Guide and Walkthrough](https://game.lhg100.com/Article/UploadFiles/201512/2015121709395950.jpg) [5]
[5]![[6] - Chapter 15 - The Showdown - p. 1 - Walkthrough - Sniper: Ghost Warrior - Game Guide and Walkthrough](https://game.lhg100.com/Article/UploadFiles/201512/2015121709395946.jpg) [6]
[6]
But if you didn't spot him now, then you'll kill him later, when you're closing to this bonfire (#6). Afterward, enter the caves - the entrance should be pointed by one of these useful white dots.
The caves area is quite large, but I'd recommend exploring the whole net of these caves. Use your silenced pistol to eliminate all the enemies on your way. You'll encounter the first ones right behind the entrance (#7). During your exploration of the caves you'll be informed via the radio about a current location of the stolen truck with your companions onboard.
![[7] - Chapter 15 - The Showdown - p. 1 - Walkthrough - Sniper: Ghost Warrior - Game Guide and Walkthrough](https://game.lhg100.com/Article/UploadFiles/201512/2015121709395947.jpg) [7]
[7]![[8] - Chapter 15 - The Showdown - p. 1 - Walkthrough - Sniper: Ghost Warrior - Game Guide and Walkthrough](https://game.lhg100.com/Article/UploadFiles/201512/2015121709395994.jpg) [8]
[8]
Kill all the opponents you'll encounter in the caves (#8).
Take out also the guy who you'll probably see outside - he's walking on some cat-walk (#9).
![[9] - Chapter 15 - The Showdown - p. 1 - Walkthrough - Sniper: Ghost Warrior - Game Guide and Walkthrough](https://game.lhg100.com/Article/UploadFiles/201512/2015121709395904.jpg) [9]
[9]![[10] - Chapter 15 - The Showdown - p. 1 - Walkthrough - Sniper: Ghost Warrior - Game Guide and Walkthrough](https://game.lhg100.com/Article/UploadFiles/201512/2015121709395980.jpg) [10]
[10]
In fact, it's rather hard to get lost in these caves - there are no cul-de-sacs and every leg leads somewhere. Finally, you'll get outside - there's a jungle around you and to your right you can see the fence enclosing the mine site (#10). Your task now is to join Delta 3, in other words - your companions, who are waiting in a stolen truck. They've got a little problem, because their vehicle was locked in the garage - with them inside the truck. What the morons! ;-). They can't open the gate by themselves without raising the alarm, so they need your help. You have to open the gate of the garage from the outside.
Move along the fence towards the direction indicated by white dots. At one point you'll see behind the fence a wooden tower with a guard and another mugger under this construction (#11). I'd suggest leaving these bad guys a-loin. Go crouch and silently sneak in this place behind the fence.
![[11] - Chapter 15 - The Showdown - p. 1 - Walkthrough - Sniper: Ghost Warrior - Game Guide and Walkthrough](https://game.lhg100.com/Article/UploadFiles/201512/2015121709395999.jpg) [11]
[11]![[12] - Chapter 15 - The Showdown - p. 1 - Walkthrough - Sniper: Ghost Warrior - Game Guide and Walkthrough](https://game.lhg100.com/Article/UploadFiles/201512/2015121709400022.jpg) [12]
[12]
Stay silent all the time, don't let the enemy to detect you and by-pass this watch tower and all the opponents near it without attacking them! (#12)
Sneak to the right, towards the sandy road and then move downhill along it (#13).
![[13] - Chapter 15 - The Showdown - p. 1 - Walkthrough - Sniper: Ghost Warrior - Game Guide and Walkthrough](https://game.lhg100.com/Article/UploadFiles/201512/2015121709400085.jpg) [13]
[13]![[14] - Chapter 15 - The Showdown - p. 1 - Walkthrough - Sniper: Ghost Warrior - Game Guide and Walkthrough](https://game.lhg100.com/Article/UploadFiles/201512/2015121709400037.jpg) [14]
[14]
All the time walk along the roadside. At one point you'll see two bad guys standing behind the vehicle parked on the right roadside - they're are chatting near a bonfire in a front of some shack (#14). Shoot both gossipers before they see you.
Proceed further along this wide road, until you'll get to an excavator - walk through the big hole in the fence located behind the vehicle (#15).
![[15] - Chapter 15 - The Showdown - p. 1 - Walkthrough - Sniper: Ghost Warrior - Game Guide and Walkthrough](https://game.lhg100.com/Article/UploadFiles/201512/2015121709400041.jpg) [15]
[15]![[16] - Chapter 15 - The Showdown - p. 1 - Walkthrough - Sniper: Ghost Warrior - Game Guide and Walkthrough](https://game.lhg100.com/Article/UploadFiles/201512/2015121709400096.jpg) [16]
[16]
You'll again get near some road. Hide in bushes and use your silenced sniper rifle to take out the guy who is standing on this road (#16). Afterward, crawl along this footbridge located in front of you onto the roof of the shack built of corrugated sheet metal.
From this roof eliminate two muggers located between the jeep and this big, yellow-painted machine (#17).
![[17] - Chapter 15 - The Showdown - p. 2 - Walkthrough - Sniper: Ghost Warrior - Game Guide and Walkthrough](https://game.lhg100.com/Article/UploadFiles/201512/2015121709400003.jpg) [17]
[17]![[18] - Chapter 15 - The Showdown - p. 2 - Walkthrough - Sniper: Ghost Warrior - Game Guide and Walkthrough](https://game.lhg100.com/Article/UploadFiles/201512/2015121709400014.jpg) [18]
[18]
Proceed further, stick to the fence along the left roadside. At some point you'll see behind this fence a one or two thugs walking in your direction (#18) - quickly take them out using your sniper rifle.
Move further along the road. Soon you'll see a checkpoint with a toll-bar in the distance - there's an individual walking along this toll-bar. Kill him before he'll see you (#19). If you see another guard on the wooden tower to the right, then you can probably take him out using your sniper rifle. Afterward, move towards this checkpoint - the road turns right near it and then runs uphill.
[19][20]
Sneak further along this road, in order to get under the parked vehicles - by-pass them from the right. You'll see a group of enemies standing behind these vehicles and to the left, near a bonfire - all the opponents are presenting to you their backs (#20). There are two more terrorists in the building located a little further - one of them stands near a window. I would suggest not attacking all of these bad guys! It can be very hard to win a fight against them, and they'll surely raise the alarm, which then ends this mission in a failure! Instead of this, by-pass these enemies from the right by crouching and sneaking along the fence. Turn left behind the stairs leading to the building.
When sneaking behind this yellow-painted building you'll see a mugger who stands in the grass - you can shoot him dead using your silenced pistol (#21). A little further there's another thug standing behind the scaffold located to the right of this small and yellow shack - you can shoot him too. Behind the shack there's a gate and to the right from this shack there's a fence - you have to get behind it. It can be hard to sneak through the gate undetected, so I've tried with success another way. Use the ladder located to the left from the shack to climb up to the roof of this yellow painted house, which you by-passed a moment earlier.
![[21] - Chapter 15 - The Showdown - p. 2 - Walkthrough - Sniper: Ghost Warrior - Game Guide and Walkthrough](https://game.lhg100.com/Article/UploadFiles/201512/2015121709400064.jpg) [21]
[21]![[22] - Chapter 15 - The Showdown - p. 2 - Walkthrough - Sniper: Ghost Warrior - Game Guide and Walkthrough](https://game.lhg100.com/Article/UploadFiles/201512/2015121709400125.jpg) [22]
[22]
Afterward, jump down from this roof onto the roof of the shack (#22), then onto the scaffold near this shack. Go prone and crawl along this footbridge built of planks, over the fence, to the next scaffold. Afterward, jump down from this scaffold to the ground, but jump down to your right, not left (not in the direction of the gate)!
Go around this big building, stay away from the gate. When you're approaching the white dot on your screen (#23), should start a short cutscene which ends with freeing your companions from the garage they've been locked in with their stolen truck.
![[23] - Chapter 15 - The Showdown - p. 2 - Walkthrough - Sniper: Ghost Warrior - Game Guide and Walkthrough](https://game.lhg100.com/Article/UploadFiles/201512/2015121709400127.jpg) [23]
[23]![[24] - Chapter 15 - The Showdown - p. 2 - Walkthrough - Sniper: Ghost Warrior - Game Guide and Walkthrough](https://game.lhg100.com/Article/UploadFiles/201512/2015121709400117.jpg) [24]
[24]
The game switches you now to the role of one of these commandos (#24) and gives you the next order - you have to free the civilians forced by the local military junta to work in this uranium mine. Follow your two comrades to the consecutive places marked on your screen with white dots.
Let your companions to take the fight on their shoulders, you just help them. At one point you'll get to the shack with a blue blinking circle near the doors (#25). I think you know what to do - change your clip on a new one and stand in this circle.
[25]![[26] - Chapter 15 - The Showdown - p. 2 - Walkthrough - Sniper: Ghost Warrior - Game Guide and Walkthrough](https://game.lhg100.com/Article/UploadFiles/201512/2015121709400172.jpg) [26]
[26]
After breaking open the locked doors, kill these two morons inside the shack, while time slows down for a few seconds (#26).
Afterward, follow your comrades. From time to time use your hand grenades, when there's a bigger number of opponents ahead of you (#27).
![[27] - Chapter 15 - The Showdown - p. 2 - Walkthrough - Sniper: Ghost Warrior - Game Guide and Walkthrough](https://game.lhg100.com/Article/UploadFiles/201512/2015121709400153.jpg) [27]
[27]![[28] - Chapter 15 - The Showdown - p. 2 - Walkthrough - Sniper: Ghost Warrior - Game Guide and Walkthrough](https://game.lhg100.com/Article/UploadFiles/201512/2015121709400167.jpg) [28]
[28]
When running through the consecutive huts, shacks and buildings, look out for the weapons lying on the tables (an automatic shotgun is a good choice for this close combat situations), and for the wall cupboards with medkits (#28).
Watch out for grenades - the enemies like to throw them too! When approaching the place where the civilians are being held, you'll get under some wooden watch tower (#29).
![[29] - Chapter 15 - The Showdown - p. 2 - Walkthrough - Sniper: Ghost Warrior - Game Guide and Walkthrough](https://game.lhg100.com/Article/UploadFiles/201512/2015121709400100.jpg) [29]
[29]![[30] - Chapter 15 - The Showdown - p. 2 - Walkthrough - Sniper: Ghost Warrior - Game Guide and Walkthrough](https://game.lhg100.com/Article/UploadFiles/201512/2015121709400144.jpg) [30]
[30]
You can quickly climb up onto this tower, in order to eliminate from there the bad guys standing on the way of your companions (#30).
After freeing the civilians you'll be again teleported into the body of a sniper. He has a new task: to cover and support Delta squad, in other words - the soldiers whom you accompanied a moment earlier. Move through the footbridge to the roof of the shack, then to the ladder - use it to climb up onto the roof of this big building where you'll find your sniping position (#31).
[31]![[32] - Chapter 15 - The Showdown - p. 2 - Walkthrough - Sniper: Ghost Warrior - Game Guide and Walkthrough](https://game.lhg100.com/Article/UploadFiles/201512/2015121709400245.jpg) [32]
[32]
Take a look slightly to your right. The location of Delta's commandos is marked on your screen with a white dot (#32).
Help them now by taking out one by one all the enemies you'll see in your optic sight. Kill these opponents who are taking positions on scaffolds, these who are hiding behind the vehicles and any others (#33).
![[33] - Chapter 15 - The Showdown - p. 3 - Walkthrough - Sniper: Ghost Warrior - Game Guide and Walkthrough](https://game.lhg100.com/Article/UploadFiles/201512/2015121709400226.jpg) [33]
[33]![[34] - Chapter 15 - The Showdown - p. 3 - Walkthrough - Sniper: Ghost Warrior - Game Guide and Walkthrough](https://game.lhg100.com/Article/UploadFiles/201512/2015121709400218.jpg) [34]
[34]
Once the area is clear of enemies, the Delta squad will translocate to a new position a little closer to you, in order to take a test sample of the new variation of the uranium, which is extracted in this mine (#34). After a moment you'll also see some trucks loaded with enemies, which are getting closer to your friends being busy with a sample.
Kill all the opponents when they're disembarking from their vehicles (#35).
![[35] - Chapter 15 - The Showdown - p. 3 - Walkthrough - Sniper: Ghost Warrior - Game Guide and Walkthrough](https://game.lhg100.com/Article/UploadFiles/201512/2015121709400221.jpg) [35]
[35]![[36] - Chapter 15 - The Showdown - p. 3 - Walkthrough - Sniper: Ghost Warrior - Game Guide and Walkthrough](https://game.lhg100.com/Article/UploadFiles/201512/2015121709400264.jpg) [36]
[36]
After this, the game will again let you control one of the commandos from Delta squad. Your task now is to find the satchel charges. Follow your two companions along the road to the hill (#36).
There's a checkpoint with a toll-bar on this hill - hide behind the vehicles parked nearby. Strafe to the right and eliminate all the visible opponents, use your hand grenades if it's necessary (#37).
![[37] - Chapter 15 - The Showdown - p. 3 - Walkthrough - Sniper: Ghost Warrior - Game Guide and Walkthrough](https://game.lhg100.com/Article/UploadFiles/201512/2015121709400293.jpg) [37]
[37]![[38] - Chapter 15 - The Showdown - p. 3 - Walkthrough - Sniper: Ghost Warrior - Game Guide and Walkthrough](https://game.lhg100.com/Article/UploadFiles/201512/2015121709400272.jpg) [38]
[38]
Afterward, shoot at the bandits appearing on the scaffold to the left (#38).
In the shack near a toll-bar you'll find an automatic shotgun, a medkit and hand grenades (#39). Once the area is clear follow your companions along the road running uphill.
![[39] - Chapter 15 - The Showdown - p. 3 - Walkthrough - Sniper: Ghost Warrior - Game Guide and Walkthrough](https://game.lhg100.com/Article/UploadFiles/201512/2015121709400210.jpg) [39]
[39]![[40] - Chapter 15 - The Showdown - p. 3 - Walkthrough - Sniper: Ghost Warrior - Game Guide and Walkthrough](https://game.lhg100.com/Article/UploadFiles/201512/2015121709400275.jpg) [40]
[40]
You can use your hand grenades again to eliminate the enemies hiding behind the crates located between this yellow excavator and a big building in the distance (#40). Shoot the rest of the opponents.
If you have to heal yourself - and I'm pretty sure that you'll have to do this at least several times - then do it after finding out some cover. Be careful, though, of where you're hiding, because there are some enemies in the windows of some shacks! (#41) Grab every medkit you'll find nearby.
[41]![[42] - Chapter 15 - The Showdown - p. 3 - Walkthrough - Sniper: Ghost Warrior - Game Guide and Walkthrough](https://game.lhg100.com/Article/UploadFiles/201512/2015121709400315.jpg) [42]
[42]
If you didn't kill yet the opponents behind the crates, then perhaps you'll be able to flank them and fire at them from the window of the shack you saw an enemy in it (#42).
This sandy road still leads uphill. Maybe you'll be able to get to the roof of some yellow painted building located near a bulldozer - then, it should be easier for you to take out the enemies on the slope (#43).
![[43] - Chapter 15 - The Showdown - p. 3 - Walkthrough - Sniper: Ghost Warrior - Game Guide and Walkthrough](https://game.lhg100.com/Article/UploadFiles/201512/2015121709400370.jpg) [43]
[43]![[44] - Chapter 15 - The Showdown - p. 3 - Walkthrough - Sniper: Ghost Warrior - Game Guide and Walkthrough](https://game.lhg100.com/Article/UploadFiles/201512/2015121709400321.jpg) [44]
[44]
Move on this hill, towards the closest white dot (the second dot shows the current position of an allied sniper). You may use your hand grenades when walking uphill to eliminate the enemy remnants (#44).
Take a look at your right, perhaps you'll see one more opponent located lower and behind the fence (#45).
![[45] - Chapter 15 - The Showdown - p. 3 - Walkthrough - Sniper: Ghost Warrior - Game Guide and Walkthrough](https://game.lhg100.com/Article/UploadFiles/201512/2015121709400361.jpg) [45]
[45]![[46] - Chapter 15 - The Showdown - p. 3 - Walkthrough - Sniper: Ghost Warrior - Game Guide and Walkthrough](https://game.lhg100.com/Article/UploadFiles/201512/2015121709400373.jpg) [46]
[46]
Afterward, move to the yellow painted shack marked on your screen with a white dot (#46) - inside this shack you'll find the satchel charges needed to blow up this uranium mine.
A moment later you'll be again teleported into a body of a sniper who is covering the commandos of Delta 3 and making the way for them. The last task in this scenario is to cover Delta's commandos. The current location of this squad is again indicated on your screen by a white dot, which won't be moving this time. That's because the commandos are placing the charges right now (#47). There are some trucks loaded with enemies, which are driving towards the place where commandos do their job.
![[47] - Chapter 15 - The Showdown - p. 3 - Walkthrough - Sniper: Ghost Warrior - Game Guide and Walkthrough](https://game.lhg100.com/Article/UploadFiles/201512/2015121709400341.jpg) [47]
[47]![[48] - Chapter 15 - The Showdown - p. 3 - Walkthrough - Sniper: Ghost Warrior - Game Guide and Walkthrough](https://game.lhg100.com/Article/UploadFiles/201512/2015121709400309.jpg) [48]
[48]
Start shooting at these bad guys when you see them disembarking from their vehicles (#48).
Do the same with several more enemies who appear on the construction to your right and slightly higher above the current location of Delta squad (#49).
![[49] - Chapter 15 - The Showdown - p. 3 - Walkthrough - Sniper: Ghost Warrior - Game Guide and Walkthrough](https://game.lhg100.com/Article/UploadFiles/201512/2015121709400384.jpg) [49]
[49]![[50] - Chapter 15 - The Showdown - p. 3 - Walkthrough - Sniper: Ghost Warrior - Game Guide and Walkthrough](https://game.lhg100.com/Article/UploadFiles/201512/2015121709400383.jpg) [50]
[50]
When all the enemies are dead starts the last, quite spectacular cutscene presenting your elite squad which blows up to hell the whole place (#50).
Your first task in this last mission is to sneak to the sniping position - if you're detected by the enemies mission ends in failure. Draw your silenced pistol and move by a path marked on your screen with white dots. You'll get to some ruins and see one enemy standing near the entrance (#1). You can shoot him, or you can kill him using your knife.
![[1] - Chapter 16 - Seek and Destroy - Walkthrough - Sniper: Ghost Warrior - Game Guide and Walkthrough](https://game.lhg100.com/Article/UploadFiles/201512/2015121709400431.jpg) [1]
[1]![[2] - Chapter 16 - Seek and Destroy - Walkthrough - Sniper: Ghost Warrior - Game Guide and Walkthrough](https://game.lhg100.com/Article/UploadFiles/201512/2015121709400448.jpg) [2]
[2]
Proceed further as the white dots indicate. Stay alert all the time and move silently - it's best to go crouch. After a while you'll see several (3 or 4) bad guys standing in the ruins to the right (#2).
I'd suggest not attacking them when they stand close to each other - in this case often starts a shootout and a one short yelp of one of these muggers is enough to raise the alarm and to end this mission in failure. So better wait until they scatter and then hunt for them one by one (#3). Try to shoot at the head in order to quickly take out the target.
![[3] - Chapter 16 - Seek and Destroy - Walkthrough - Sniper: Ghost Warrior - Game Guide and Walkthrough](https://game.lhg100.com/Article/UploadFiles/201512/2015121709400459.jpg) [3]
[3]![[4] - Chapter 16 - Seek and Destroy - Walkthrough - Sniper: Ghost Warrior - Game Guide and Walkthrough](https://game.lhg100.com/Article/UploadFiles/201512/2015121709400414.jpg) [4]
[4]
Afterward, move cautiously to the place where they stood together and eliminate the next two morons - one wearing a helmet (he stands closer) and second wearing a red beret. The last of them can enter from left using the entrance you can see on my picture (#4) - kill him quickly.
Then move to where he came from, but stay alert. Behind this entrance you'll see another moron standing higher, on some ruins and presenting his back to you (#5). You may gun him down.
![[5] - Chapter 16 - Seek and Destroy - Walkthrough - Sniper: Ghost Warrior - Game Guide and Walkthrough](https://game.lhg100.com/Article/UploadFiles/201512/2015121709400446.jpg) [5]
[5]![[6] - Chapter 16 - Seek and Destroy - Walkthrough - Sniper: Ghost Warrior - Game Guide and Walkthrough](https://game.lhg100.com/Article/UploadFiles/201512/2015121709400480.jpg) [6]
[6]
Sneak silently to his dead body and turn right - on the scaffold you'll see another individual who seems to be a mental defective. If you were silent to this moment he shouldn't see or hear you and should still present to you his back (#6). Treat him with a bullet or throw a knife at him. Afterward go to this scaffold and turn left, in order to get to the next location.
Behind the entrance you'll see the stairs leading to another scaffold (#7).
[7]![[8] - Chapter 16 - Seek and Destroy - Walkthrough - Sniper: Ghost Warrior - Game Guide and Walkthrough](https://game.lhg100.com/Article/UploadFiles/201512/2015121709400454.jpg) [8]
[8]
Use them to get upstairs silently and gun down a guy standing near the column a level below (#8). There may be one more terrorist walking amongst the ruins more to the left.
Go downstairs and move to the corpse lying under the column. Watch out, there may be one more mugger who may rush out from behind the ruins - kill him quickly! (#9)
![[9] - Chapter 16 - Seek and Destroy - Walkthrough - Sniper: Ghost Warrior - Game Guide and Walkthrough](https://game.lhg100.com/Article/UploadFiles/201512/2015121709400472.jpg) [9]
[9]![[10] - Chapter 16 - Seek and Destroy - Walkthrough - Sniper: Ghost Warrior - Game Guide and Walkthrough](https://game.lhg100.com/Article/UploadFiles/201512/2015121709400423.jpg) [10]
[10]
When standing near the dead bodies turn left for 90 degree and check if there is another moron visible behind the column, near the wall (#10).
Afterward proceed toward the white dot on your screen - behind these ruins there may be hiding one more bandit. Shoot him before he kills you (#11). As you can notice, even when he spotted me, he didn't manage to raise the alarm and I was able to continue my mission.
![[11] - Chapter 16 - Seek and Destroy - Walkthrough - Sniper: Ghost Warrior - Game Guide and Walkthrough](https://game.lhg100.com/Article/UploadFiles/201512/2015121709400522.jpg) [11]
[11]![[12] - Chapter 16 - Seek and Destroy - Walkthrough - Sniper: Ghost Warrior - Game Guide and Walkthrough](https://game.lhg100.com/Article/UploadFiles/201512/2015121709400583.jpg) [12]
[12]
Pass the corpse of this moron and use these stony stairs marked with white dot (#12) to get a level higher.
On the stairs, near these stony sculptures on both sides, you have to be very alert and stick to the left wall when going upstairs (#13). You should see a terrorist walking from left to right - he can't see you! Don't kill him yet, because then you'll have to face several more enemies and you won't be able to handle with them all - this causes the alarm and mission ends in failure! So instead of attacking this individual, let him go further to the right and then follow him carefully.
![[13] - Chapter 16 - Seek and Destroy - Walkthrough - Sniper: Ghost Warrior - Game Guide and Walkthrough](https://game.lhg100.com/Article/UploadFiles/201512/2015121709400538.jpg) [13]
[13]![[14] - Chapter 16 - Seek and Destroy - Walkthrough - Sniper: Ghost Warrior - Game Guide and Walkthrough](https://game.lhg100.com/Article/UploadFiles/201512/2015121709400507.jpg) [14]
[14]
Kill him when you're sure that nobody sees this (#14).
You should spot at least one more mugger in these ruins - he may stand in the centre of this location, under some columns, for example (#15). Shoot him and move in the direction indicated by white dots.
![[15] - Chapter 16 - Seek and Destroy - Walkthrough - Sniper: Ghost Warrior - Game Guide and Walkthrough](https://game.lhg100.com/Article/UploadFiles/201512/2015121709400545.jpg) [15]
[15]![[16] - Chapter 16 - Seek and Destroy - Walkthrough - Sniper: Ghost Warrior - Game Guide and Walkthrough](https://game.lhg100.com/Article/UploadFiles/201512/2015121709400531.jpg) [16]
[16]
Use the next stony stairs (#16) to get a level higher again and advance carefully.
You'll get finally to your designated sniping position where you should see only a one thug hanging around. Kill him while he is moving towards the white dot and is presenting to you his back (#17). Afterward go crouch and sneak to the edge.
![[17] - Chapter 16 - Seek and Destroy - Walkthrough - Sniper: Ghost Warrior - Game Guide and Walkthrough](https://game.lhg100.com/Article/UploadFiles/201512/2015121709400546.jpg) [17]
[17]![[18] - Chapter 16 - Seek and Destroy - Walkthrough - Sniper: Ghost Warrior - Game Guide and Walkthrough](https://game.lhg100.com/Article/UploadFiles/201512/2015121709400532.jpg) [18]
[18]
Go prone and draw your sniper rifle. Below and in the distance you'll see the enemy camp full of the slayers of the local regime, there are also some choppers (1 or 2) flying above your head (#18). Don't bother about these helicopters. The last task in this scenario is to eliminate general Vasquez. He is bending over the table with maps in one of the buildings of this camp. This house is marked with white dot on your screen. You can see your target through the window of this building and the distance to it is 325 meters. You have a "green light", a permission to shoot at this target.
Focus only on your target, General Vasquez - don't fire at the enemies in the camp, because their boss will then escape! Hold your breath by pressing the Shift key, aim higher by taking the distance into account and pull a trigger when the crosswind is weakest (#19). Don't confuse your target with one of his bodyguards wearing the mustaches and sunglasses - Vasquez is bald! You can quick save your game progress before firing at him, if you're not sure if you can hit him.
![[19] - Chapter 16 - Seek and Destroy - Walkthrough - Sniper: Ghost Warrior - Game Guide and Walkthrough](https://game.lhg100.com/Article/UploadFiles/201512/2015121709400598.jpg) [19]
[19]![[20] - Chapter 16 - Seek and Destroy - Walkthrough - Sniper: Ghost Warrior - Game Guide and Walkthrough](https://game.lhg100.com/Article/UploadFiles/201512/2015121709400624.jpg) [20]
[20]
One accurate shot (#20) ends this mission and the whole singleplayer campaign.
Green ciphers on my maps denote the locations where you can find the consecutive laptops. In the tutorial (shooting range), 10th, 11th, 16th mission there are apparently no laptops hidden.
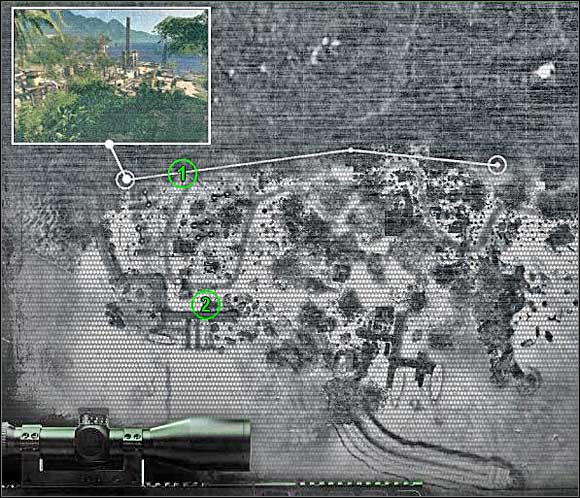
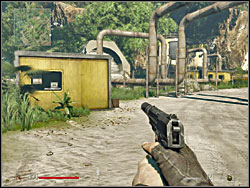
Both laptops are hidden in yellow containers located in the refinery where general Vasquez meets with agent Rodriguez. You'll find the first laptop (1) in the container located near the sandy road, under the rocky wall on which you walked, when going to the sniping position in order to eliminate Vasquez.
The second laptop (2) is located in the similar, yellow container that stands near the pier and the jeep - you kill two bad guys near this vehicle. There's also a wooden watch tower built near the fence nearby.
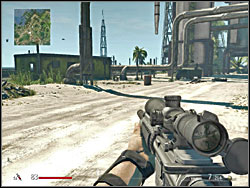
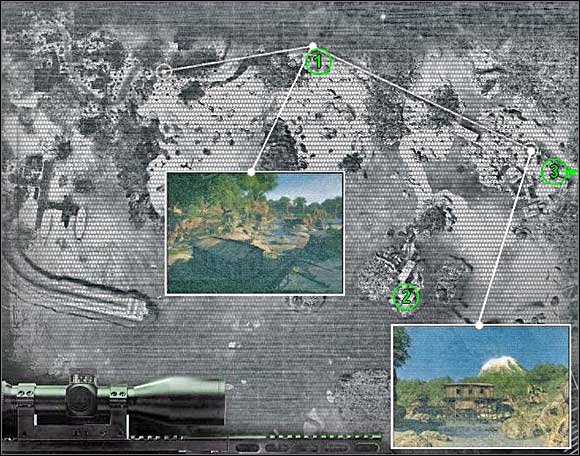
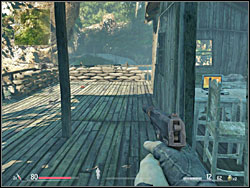
You'll find the first laptop (1) in the hut which has a veranda with the sandbagged emplacement with HMG mounted on it.
The second laptop (2) is located slightly off the beaten track you use in this mission. When you're close to the dead bodies of two bad guys lying near the Humvee ahead of bridge (picture #13 and #14 from my walkthrough to this scenario), you should get off the beaten path to the right, and move towards the huts built on stilts - you can see them in the distance, they're on the island behind the "Great Water". You can get to these huts by swimming to them, or by walking a narrow waist which connects this island with the main land. Watch out, in these huts there are three muggers you have to kill, in order to get to the laptop.
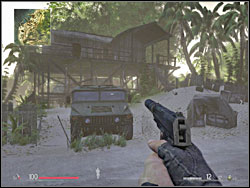
The 3rd laptop (3) is located in the last of the fishing villages you visit in this scenario (this village isn't marked on my map, couldn't fit on it). The laptop lies on the table in the shack built on piles near the parked Hummer - there are two terrorists walking on the veranda of this hut. There's also a wreck of some small ship which you can use to orientate yourself when searching the perimeter for this laptop.
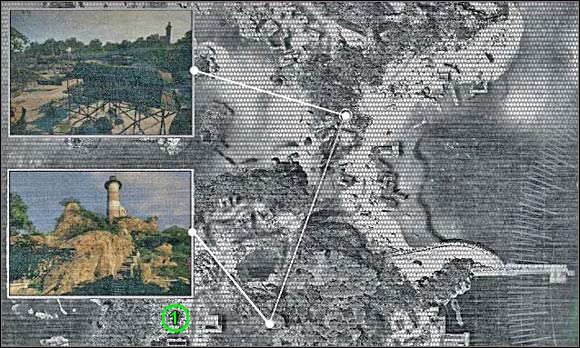
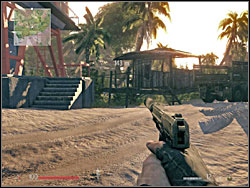
The only one laptop (1) on this level is located at a base of the radio tower standing near a Hummer where you eliminated two bad guys (picture #10 from a walkthrough for this mission). So head for the radio tower, when you're going for this laptop. Near the road on which you can see a parked truck, between this vehicle and the stairs leading to the tower, there's a small hut. The laptop lies on the table on its veranda.
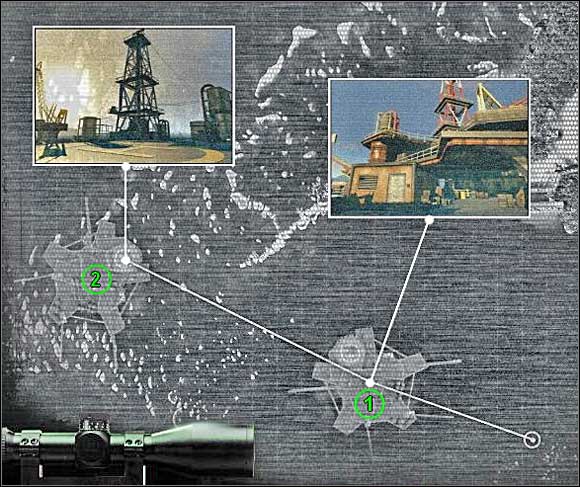
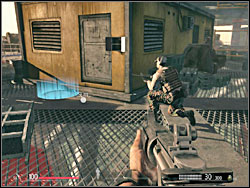
You'll find the first laptop (1) on the first oil rig, in the quarter-deck painted yellow - near the doors to this structure you can see a blue circle.
The laptop number two (2) is hidden on the second oil rig, a level under the helipad. You'll find it in one of the quarter-decks, just before the cutscene showing a motor boat escaping from the rig.
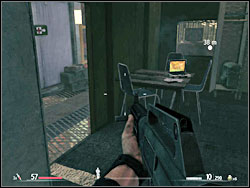
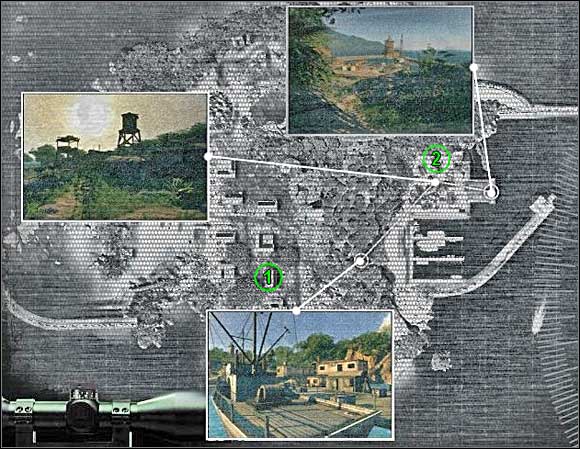

The first laptop (1) is located in the first harbour you visit in this scenario. You'll find it in one of the buildings near the road leading through this harbour. The laptop lies on the wooden table.
The second laptop (2) is hidden in the wooden hut built near a wooden watch tower of the second harbour. There's one more shack behind this one, with a blue circle near the entrance - Rodriguez is being held in this hut.
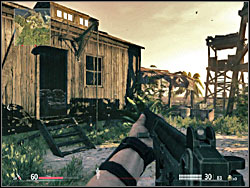
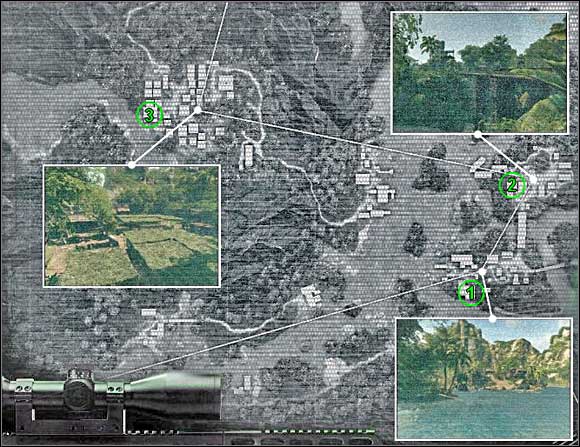

The first (1) of three laptops on this level is located in the first village you'll get to by a pontoon. One hid it in the wooden hut to the right from the jetty where your Zodiac... stays on anchor ;-). Next to the entrance to this shack there's a wall cupboard with medkits.
The second laptop (2) is located in the camp behind the bridge, in such bigger barrack or hangar with walls built of corrugated plates.
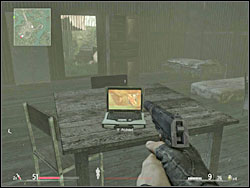
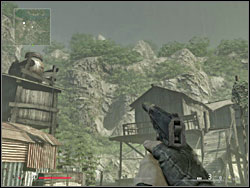
You'll find the last laptop (3) on coca plantation. It lies on the deck in such a big, wooden hut built on stilts near some water tower or something similar. There's also a wall cupboard with medkits nearby the desk.
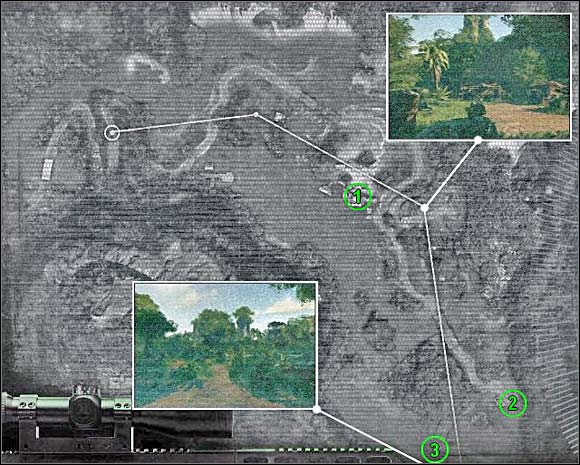
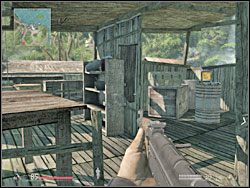
The first laptop (1) is located in one of the huts of the second wharf you visit. It's a shack where you can also find the satchel charges needed in this scenario and Claymore mines and a sniper rifle (Dragunov).
You'll obtain the second laptop (2) at the end of this mission. When closing to this... ekhm... big "fan" (sorry, I couldn't find a proper English word ;-)), don't go in the direction the game wants you to go, but instead of this move to the left, towards these two brick houses. You can kill two bad guys hanging around those buildings with one shot of your sniper rifle. You'll find a laptop lying on the wooden crates near one of the houses.
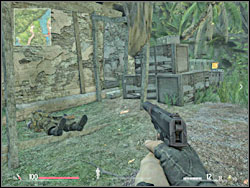
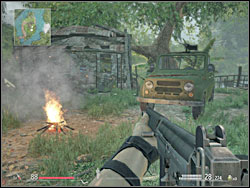
The 3rd laptop (3) is hidden near the last AA gun emplacement you have to destroy in this mission. On the top of the hill there's a brick shack nearby the bonfire. You can recognize this small house by a wall cupboard hanging near the entrance. The laptop lies on the chair inside this hut.
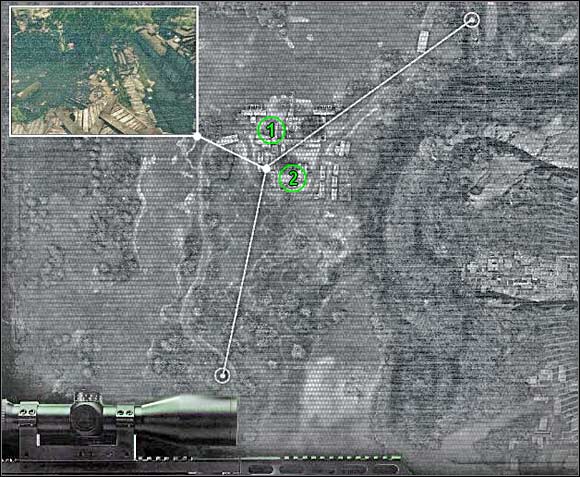

The first (1) of two laptops on this level is located in one of the smaller, wooden huts in the enemy camp. Inside this hut you'll also find the wall cupboard with medkits.
The second laptop (2) is located in a bigger and heavily devastated building (holes in the walls on the upper floor etc). Inside this building, on the middle of the floor, there's something that looks like a furnace or bowser, and the laptop lies on the wooden crate under the wall.
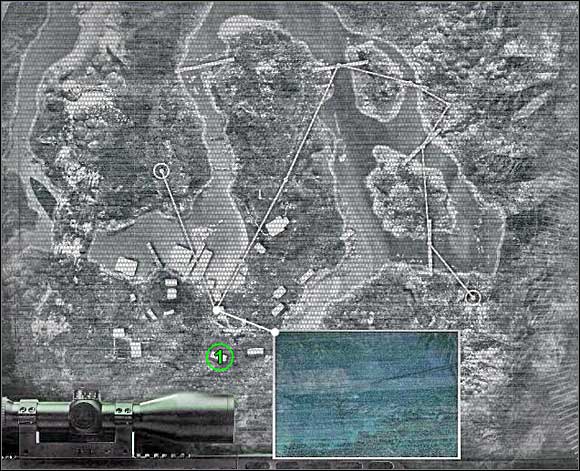
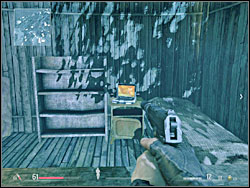
The only one laptop (1) on this level is hidden in the hut of the village located slightly off the beaten track, on the hill, to the east of the shack you have to get to at the end of this mission. The laptop lies on the cabinet standing between the bad and the bookcase.
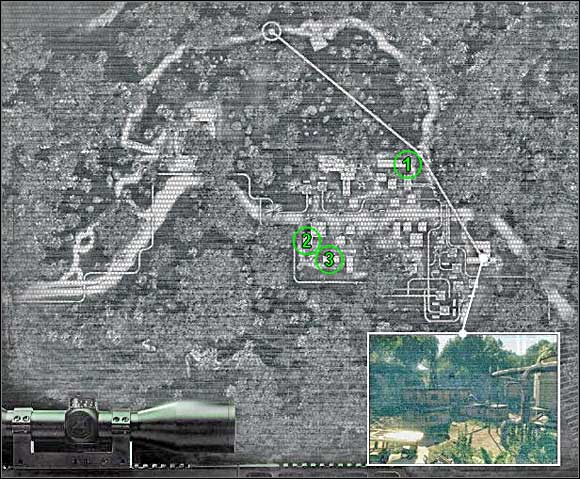
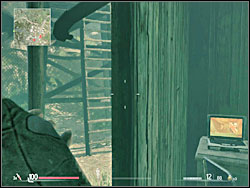
You'll find the first laptop (1) in the corner of the hut located right near the wooden watch tower - you sneak under this tower when getting to the enemy camp in the beginning of this scenario.
The second laptop (2) is located in the yellow painted house near the asphalted road running through the enemy campsite. You crawl under the pipeline, then across the above-mentioned road and then you run towards the wooden watch tower standing in the corner of the camp. And you run exactly along the wall of this yellow building - you've got it on your left side. The entrance to this building is behind the corner and the laptop is located on the ground floor. Watch out, there may be two bad guys hiding near a truck!
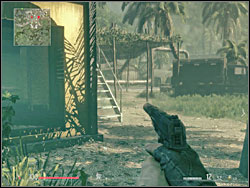
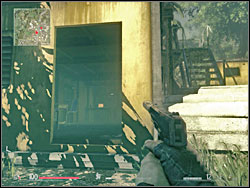
The third laptop (3) is hidden quite close to the previous one. And it is also located on the first floor of a similar, yellow building.
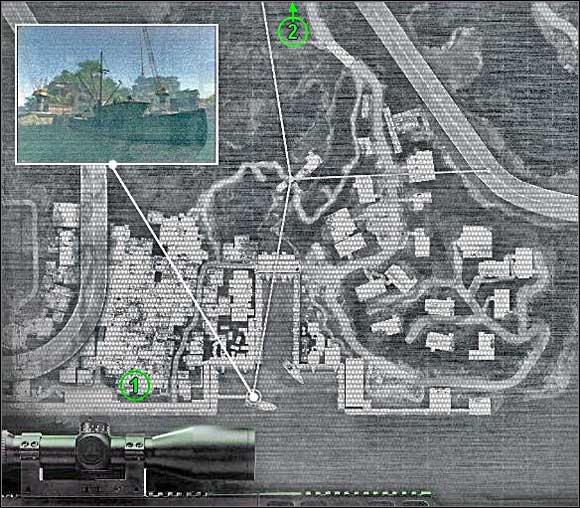
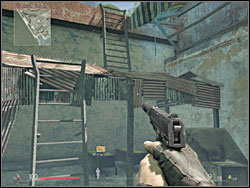
You'll obtain the first laptop (1) right in the beginning of a gameplay - it is located under the ladders, which you use to climb to the roof of the building.
The 2nd laptop (2) lies on the bonnet of the UAZ parked near the wooden watch tower on the checkpoint behind the bridge, which is located behind the river. You have to cross this river, in order to get to the tunnel, which you have to blow up with two satchel charges. Go crouch and sneak to this vehicle and the guards shouldn't see you.
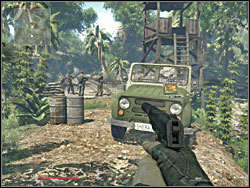

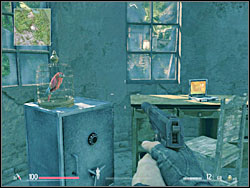
You'll find the only one laptop (1) on this level right in the beginning of a gameplay. It's located in the lighthouse - from the roof of this building you cover your companions when they steal a truck. The laptop is lying on the table near a safe on which stands a cage with a red parrot.
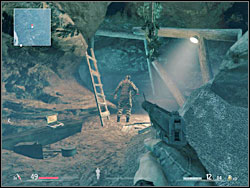
The first laptop (1) is located in the caves - you'll get to these caves shortly after starting this mission. It's best to explore the whole net of caves and you'll find this laptop finally - it is guarded by one man.
The second laptop (2) is located in the yellow painted container near the place where you have to open the gate to free your companions locked with their stolen truck in the garage. On the one side of this container there's a ladder that leads to the roof of a higher building, and on the other side there's a scaffold. You walk on the roof of this yellow container when trying to get to comrades (pictures #21 and #22 of my walkthrough for this mission).
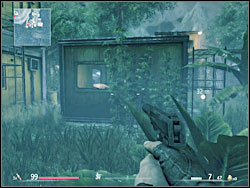
You'll find the 3rd laptop (3) by searching the yellow painted buildings/containers located near the house in which the satchel charges are hidden. There's a bulldozer parked nearby.

 StarCraft II: Wings of Liberty Game Guide & Walkthrough
 State of Decay Game Guide & Walkthrough
 Street Fighter IV Game Guide & Walkthrough
 Spore Game Guide & Walkthrough
 StarCraft II: Heart of the Swarm Game Guide & Walkthrough