This guide for Sacred 3 includes a detailed walkthrough for the main campaign - here, you will find hints concerning each of the missions and detailed descriptions of all the quests, chest locations, and hints concerning battles with main bosses. Apart from that, this guide contains descriptions of all the side quests in the game. What has been emphasized here is the exhaustive character descriptions, their abilities, fighting styles and he available weaponry. This has been rounded up with chapters, in which you can find both general hints, which refer to the gameplay in general, as well as tips concerning combat, which go into more detail. Sacred 3 is another installment of the popular RPG franchise. The game revolves around continuation of the events of the previous installments - the evil lord Zane allies himself with demons to obtain the legendary artifact that would allow him to open the gates of underworld. Against himself, he has the four heroes that combined their powers - Marak, Vajra, Claire and Alithea. Sacred 3, just like its predecessors, is a mixture of cRPG and a hack'n'slash - what is quintessential here is the fight against multiple enemies, during which the character can use a variety of abilities and launch spectacular attacks. The game was mainly developed with the co-op mode in mind, where the players can join up and complete successive missions together. In Sacred 3, in accordance with the genre's characteristics, abounds in vast locations, a bestiary rich in creatures and also a wide selection of weapons and abilities. This has been complemented with the audiovisual setting that meets the requirements of the time.
This guide for Sacred 3 includes:
Norbert "Norek" Jedrychowski ()
Button
Action

Attack

Bash

Item selection

Use item

Movement

Light combat art

Heavy combat art

Battle prayer

Defense technique

Interact

Execute

Show amount of gold
Draw attention

Settings
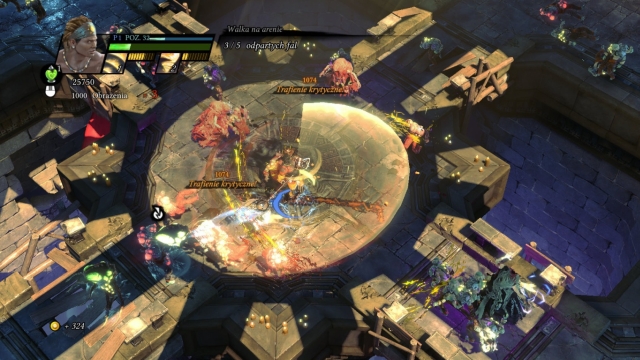
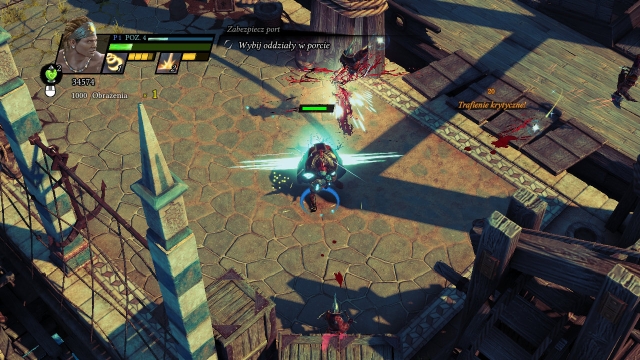
The interface in Sacred 3 is very simple and all of the necessary information can be found in the upper-left corner. The most important ones, which you definitely need to keep an eye on, are health bar [3] and the information on the selected combat arts, and the available attacks [4],[5]. What is also important is the currently selected item [6], which is available to be used immediately, information on the current quest [7]. Additionally, while playing in the co-op mode, you also should pay attention to the amount of energy that you need tor the battle prayer [7] and, for a change, the bottom-right corner of the screen, where you can learn about players present in the game, their health and the points that you have obtained in the game [9].
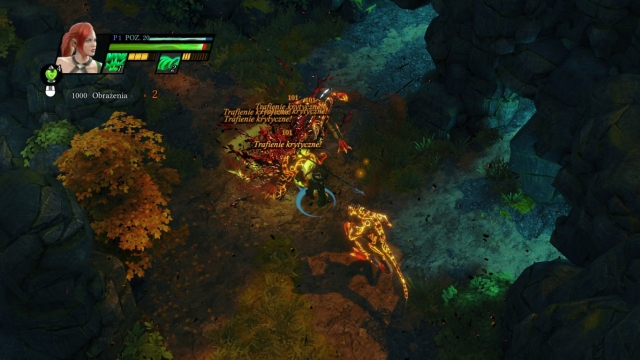
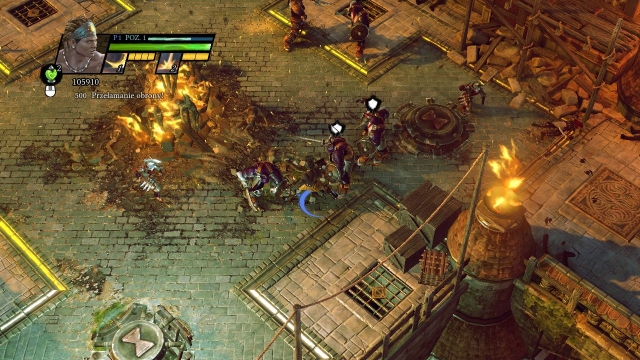
 It is easy to become completely engrossed in the battle...
1. The character attacks and dodges in the direction in which he/she is facing. You should especially remember that while dodging, to prevent launching into the incoming attacks, inadvertently.
2. Destroy various items, chests barrels, obstacles and containers with supplies, thanks to which you will regenerate your health faster (green orbs) and energy that you need for your combat art (yellow orbs).
3. Pick gold, especially the big heaps that drop in the arena, by treasure chests, or at the end of a level. Gold allows you to buy upgrades that depend only on the level of the player - with enough gold, you can invest in whatever you want.
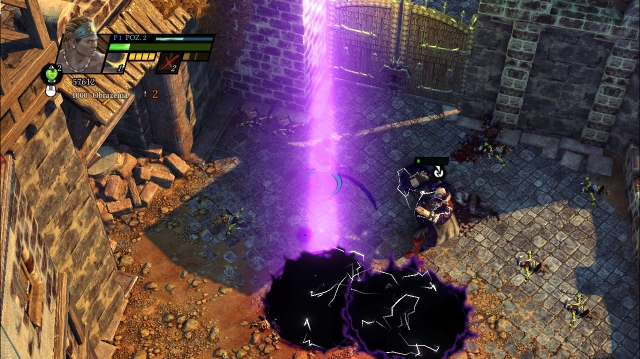
4. In combat, you can often use the bombs on the ground to your advantage, which your character can throw. Remember that they explode, also, after you attack them - make sure that you are not standing close to one, use this fact to your advantage, by destroying them at a distance, right next to the enemies.
5. By attacking a grabbed opponent, you increase your energy level - it is a good way to restore it, because you meet weak enemies, which you can grab, everywhere.
6. Remember to break the enemy attacks - the ones that have been prepared beforehand are symbolized with an appropriate icon, above the heads of the enemies and they deal more damage. To break an attack, you need to press [RMB].
7. Breaking attacks is also good against shielded enemies (the shield icon above the enemy's head). Up until you break their attack, they are virtually invulnerable to yours. .
8. Use battle arts often, because they may be helpful in many situations. After you unlock the new ones, try them out to find the one that suits your style most.
9. Try to start each battle, with a bigger wave of enemies, by killing ranged enemies - crossbowmen, spearmen or "shamans". They are often standing outside of the main area of the battle and they may pose quite a threat by nagging at you.
10. Battles with lone minibosses are not too difficult - you just need to remember to dodge the repetitive attacks. The easiest way to do that is to remain in constant motions and dodge. When the minibosses are accompanied by the other, smaller, opponents it is best to deal with the smaller ones first, and then take to the bigger opponent.
11. Each stage ends in a boss battle (or some similar creature). These battles, or quests, which consist in destroying an object are very schematic - the attacks are repetitive and easy to dodge. The most important thing is not to attack the boss for the whole time - it is a good thing to time the attack well, e.g. after a successful dodge. These battles usually consist in dodging from attacks and attacking at the right moment, and occasionally in breaking the enemy attack. If you implement this tactic, you will have no problems winning against the bosses.
12. Whenever possible, try to execute the opponents that you have knocked down. This will allow you to eliminate faster even the toughest ones.
13. The most important thing in combat is to remain in constant motion. Always pay attention to the stronger opponents, run around them and dodge frequently. Thanks to this, you will win some time to get away and launch your attacks.
14. Combine the attacks themselves into combos, use your battle art, move around the battlefield quickly and attack elsewhere. Throw enemies and bombs, and also execute opponents - the battle will then become more interesting and you will receive more points for the execution.
15. Select the difficulty level that suits you. The successive levels differ, mainly, in damage that you take from the opponents. Difficulty level can be changed each time before a mission and completing the game at any of them unlocks Deity, which is much more difficult than Legend - a level that is just below it.
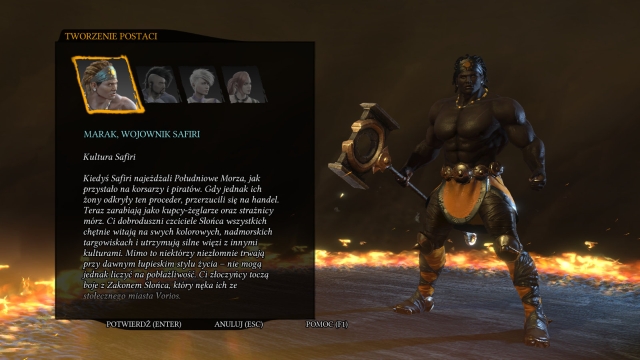 Marak is a powerful warrior.
"Marak loves the first line of the battle and handles hordes of enemies down, with his destructive two-handed weapon. Thanks to the Sun energy, he is capable of taking on tremendous damage and deal tenfold more. He is used to defending the people of his village against raiders so, he is a natural shield for his allies."
Marak's description conveys his true nature - it is an ideal choice for the players that want to fight at close quarters and attack multiple enemies with his powerful weapon. Good Weapons and interesting battle arts will surely come in handy, during the offensive playing style.
 Stampede is perfect for many tight situations
Marak is a character that is designed to fight at close range. He is ideal to dash in the midst of the enemies and chopping them with his two- handed weapon. For this reason, he is often exposed to taking lots of damage - it is a good idea to remember about dodging, which will enable you to escape from attacks. From among the battle arts, I especially recommend Stampede - it allows you to dash between spots and, if necessary, deal considerable damage to the enemy. Also, I recommend Inferno, which makes the character whirl for an extended time, which is excellent against groups of enemies. What weapon you select is not that important - their statistics are quite similar and playing itself does not change that much, regardless of what weapon you are using. Cleaver of the Sun seems to be an excellent choice at higher experience levels - the last upgrade allows you to obtain health orbs more often, or to deal much more damage to the severed enemies. All of this is going to be useful in the first line of the battle.
Light battle arts
Name
Possible upgrades
Description
Gust of fire
Arsonist (lvl 2, increases damage from fire by 50%)
Great Flame (lvl 12, increases range by 50%)
Burner (lvl 12, doubles damage but decreases range by a half)
Conflagration (lvl 20, doubles the time the enemies burn),
Flamethrower (lvl 33, increases range by 50%),
Napalm (lvl 33, doubles damage)
Attacks with a wave of heat, whose main asset is setting them on fire and breaking their attacks. Depending on the abilities selected, the flame either has a long range (useful against weak enemies) or increased damage which is, unfortunately, dealt over a small area.
Burning blade(lvl 3)
Spell (lvl 7, increases damage by 20% and the speed of attack by 50%)
Super charge (lvl 14, increases damage by 40%)
Energize (lvl 14, increases range)
Proliferation (lvl 25, increases damage by 20%, and range by a half)
Flame (lvl 37, the hit opponents burn for a moment more and take damage)
Charge (lvl 37, Damage increased by 20%, and range by a half)
throwing the burning axe at the enemies is a very good attack - it deals lots of damage and breaks the enemy defenses. An additional asset is that you can attack at some distance. Due to the good range, it is a good idea to increase damage dealt by the attack - Super charge and Energize is a choice that is worth considering.
Stampede (lvl 5)
Destructive ram (lvl 11, doubles the chance of a critical hit)
Power full (lvl 17, increases damage by 20% and pushes the enemy away)
Flame run (lvl 17, increases range by a half and damage by 10%)
Great reflect (lvl 26, increases damage by 30%)
Charged stampede (lvl 39, the attack ends in an explosion, which deals additional damage)
Scorched earth (lvl 39, the targets hit burn for a little longer and take damage)
An excellent attack that deals lots of damage. It is especially useful in passages and when monsters have just appeared in the battlefield. Its main advantage is a bit different, though - it allows you to dash between opponents, attack with a leap and also and also for a quick escape, if cornered . All of this makes it an excellent choice.
Seismic wave (lvl 8)
Shock (lvl 15, an additional explosion, increases damage by 30%)
Tear (lvl 22, increases damage by 30%)
Planetary tremors (lvl 20, increases range by 50%)
Explosive equilibrium (lvl 31, partially returns the cost of a missed attack)
Aftershock (lvl 42, explosions leave burning sparks that deal damage to the enemies within reach)
Magma (lvl 42, the targets hit burn for a little longer and take damage)
Sends out shockwaves that repel the enemies to a certain distance. The huge upside of this attack is the number of uses, with the energy bar fully charged - surpasses al of the other attacks. This allows you to make a real bloodshed and wipe out, literally, the incoming enemy groups. A small downside is that you need to position yourself appropriately, for the attack to have the intended effect and you need to have enough energy, because a single use of the wave is neither effective, nor impressive.
 The whirling Marak decimates the enemy effectively.
Name
Possible upgrades
Description
Stomp
Explosive stomp (lvl 4, the hit enemies catch on fire and receive additional damage, also, increases the range to which the enemies are repelled)
Explosion (lvl 13, increases range by 30%)
Precise blow (increases damage dealt by a half, and decreases the range of the attack by 20%)
thick skin (lvl 21, the player is temporarily invulnerable to damage, while attacking. Additionally, the attack is stringer by 30%)
Burn (lvl 32, doubles the time over which the enemies burn)
Crater (lvl 32, repels the enemies to a longer distance and increases damage by 20%)
A very good attack, with a good area of effect - damage is dealt to all the enemies around the hero. The upgrades make it possible to increases the area of effect, which makes the circle around the hero wider - it is a huge advantage of this attack, which facilitates the elimination of large groups of enemies. I recommend that you do increase range, at the cost of raising damage dealt, which can be partially made up for with the Crater.
Inferno (lvl 2)
Sun heat (lvl 10, increases range by 30%)
Red tornado (lvl 18, during the attack increases movement speed by 50%)
Crushing blows (lvl 18, the attack stuns the enemies and deals 30% more damage to bosses.)
Mastery (lvl 27, increases damage by 10% and decreases cost in energy by 20%)
Eruption (lvl 36, the targets hit burn for a little longer and take damage)
Hurricane of flames (lvl 36, increases chances of critical hits by 100%)
An excellent attack - the character starts whirling and deals damage in all directions to all within reach. During the attack, you can move in any direction. An ideal attack for elimination of groups of enemies or for changing positions quickly. Thanks to the high amount of charges, low damage deal by this attack is made up for by the duration of the attack.
Meteor storm (lvl 6)
Rain of comets (lvl 16, increases chances of a critical hit by 100%)
Strong blow (lvl 23, increases range by 50%)
Shooting stars (lvl 23, increases damage by 30%)
Starry sky (lvl 29, the duration of the attack increases by 50%)
Rain of asteroids (lvl 44, increases damage by 50%, and increases the cost in energy by 30%)
Purple skies (lvl 44, increases the amount of meteorites by 50%)
After you use the attack, meteorites start to fall around the character and deal damage to the nearby creatures. The upside of the attack is that you can move after, you launch it, and swing your sword. Thanks to this, the meteorites are a sort of reinforcement for your attacks. There is a small disadvantage, though. The meteorites do not always hit the enemies and,, additionally, you need to be standing close to them, which increases the risk of taking a strong blow. Does not work too well against single enemies but, against groups of opponents it is effective, indeed.
Name
Possible upgrades
Description
Heat of forge
Hammer time (lvl 4, increases damage by 20%)
Prospector (lvl 12, increases chances of a critical hit by 100%)
Sun alloy (lvl 12,15% an opportunity to obtain a big energy orb)
Wall crusher (lvl 20, bashing results in super shield break)
Anvil (lvl 33, increases damage by 20%)
Forge clap (lvl 33, doubles damage from bashing)
The weapon is available since the very beginning of the game. You can upgrade it after you complete: THE RESERVOIR IN KHORAD, ICECREEK SANCTUARY, AZABRAK RUINS.
Cleaver of the Sun
Grindstone (lvl 4, increases damage by 20%)
Burning blade (lvl 12, increases chance of a critical hit by 100%)
Blade of light (lvl 12, increases range by 30%)
Flame reaper (lvl 20, bashing results in super shield break)
Life-giving sun (lvl 33, every third attack ensures 20% chances of obtaining the health orb)
Executioner's sentence (lvl 33, a critical hit deals three times more damage to enemies with less than 30% of health)
The weapon becomes available after you complete VORIOS. You can upgrade it by completing the following quests: N'AQUALI, BRAVEROCK, GREY VEIL.
Starmasher
the magic of starry night (lvl 4, increases damage by 20%)
Steamer (lvl 12, increases damage by 10%, by 30% against the stunned enemies)
Beyond the horizon (lvl 12, increases the weapon's range by a half)
Strong blow (lvl 20, bashing results in super shield break)
Meteorite (lvl 33, every third attack repels enemies to a longer distance and deals 40% more damage)
Start blow (lvl 33, the duration of stun is doubled)
The weapon becomes available after the completion of: QUAY OF PELIAS. You can upgrade it after you complete: MINES OF ALKAZAB, ENIGMARA FORTRESS, ASHGAR.
You can unlock the successive weapons by completing quests in the main campaign and the upgrades depend on your experience level. The choice of weapon has no major bearing on the game itself - their statistics are similar and the effects that you obtain after upgrading do not differ from each other that much.
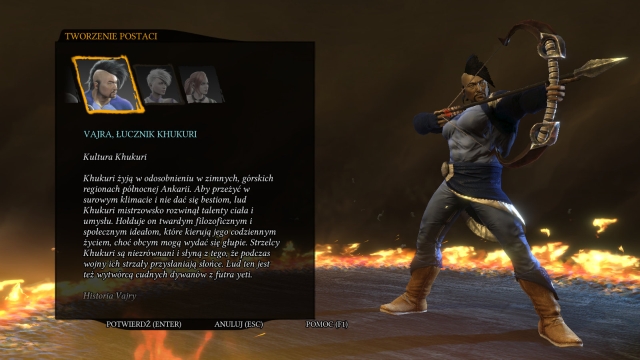 Vajra is an excellent archer.
"While attacking at a range, Vajra strikes fear into the hearts of all the lovers of melee combat. He can pierce his enemies with arrows, while avoiding damage himself. He employs many of the arts and techniques developed by Khukuri, in order to harness the icy energys of the mountain, which help limit the opponent's mobility".
The archer is the choice of players that wish to attack the enemy at a range, while not being exposed to attack. Additionally, to avoid damage, he uses his combat arts, which help him keep his enemies at bay.
 A well-aimed Piercing shot can do quite a lot of damage to the enemy.
Playing as the archer is a bit different than the standard launching yourself into the enemies and chopping them, although this type of tactics is also possible. I recommend that you stay a bit out of the way and spam the enemies from afar, and dodge if necessary. The option to perform ranged attacks is quite an advantage, because you can start attacking the opponent well before he attacks you and over the time that he takes to approach you, you are still peppering him with arrows. Also, it is easier to eliminate the enemies that attack at long distance - shamans and crossbowmen, who often harass you by standing at the edges of the battlefield and shoot at the fighting player. I recommend that, from combat arts, you choose the Piercing shot - although you can miss the target often, it is powerful enough to weaken the enemy the majority of them and its long range is an additional, unquestionable, asset. From the other set, I recommend that you choose the Freezing bomb and later on Ice explosion - both of these attacks allow you to deal with bigger groups of enemies. To round this build up, I recommend considering the Touch of the skies, which allows you to deal critical damage more often. For the players that favor quantity, i.e. more shots and projectiles that deal less damage, I recommend Hailstorm, Blizzard and the Snow projectile - the attacks and the bow are excellent at flooding the enemy with lots of shots, which is excellent against multiple enemies.
Name
Possible upgrades
Description
Piercing shot
Marksman (lvl 2, increases damage by 20% and by 50% against big enemies)
Straight in the gut (lvl 12, increases damage by 30%)
Composure (lvl 12, the energy cost necessary to perform the attack is decreased by 20%)
Harpoon (lvl 20, damage dealt by a critical hit increases by 80%)
Bloodshed (lvl 33, doubles the chances of a critical hit)
Powerful rush (lvl 33, raises the speed of the projectile by 50%, and the damage dealt by 15%)
A strong attack. An arrow can pierce several enemies at a time and deal massive damage. When you pick upgrades, it is better to pick Straight in the gut and Bloodshed, thanks to which you will considerably strengthen this attack. The only downside here is accuracy - sometimes you can simply miss the target.
Frost arrow (lvl 3)
Touch of winter (lvl 7, increases the range of the explosion by 50%)
Slipstream arrows (lvl 14, raises the speed of the projectile by 50%, and damage dealt by 20%)
Below zero (lvl 14, increases the speed of the projectile by 20%, and damage dealt by 50%)
Biting frost (lvl 25, increases damage by 30% and repels enemies to a longer distance)
Thermal shock (lvl 37, the enemies are frozen temporarily)
Yeti killer (lvl 37, doubles the chances of a critical hit)
Fires a big ice arrow that explodes after it connects to the enemies and deals additional damage. Thanks to the size of the arrow, it is easy to hit the bigger targets. You need to watch out for who you are targeting, because the fired arrow explodes at first contact with an enemy, which would prevent it from reaching the actual target.
Cry of blizzard(lvl 5)
Fearful growl (lvl 11, increases range by 30%, and damage by 15%)
Sonic blast (lvl 17, increases chance of a critical hit by 100%)
Rebellious cry (lvl 17, increases range by 30%, and damage by 15%)
Without sweat (lvl 26, the cost in energy decreased by 20%)
the word of death (lvl 39, deals twice as much damage to the enemies with less than 20% HP)
Stunning scream (lvl 39, the enemies are frozen temporarily)
Terrible cry - only seems to be. Damage is not the asset of this attack but, it is not damage that decides the value of it. The attack can stun and knock down the enemies, and additionally (after you have upgraded to Stunning scream) freezes them - allows faster extermination and a moment to catch your breath in tough situations.
Hailstorm (lvl 8)
Natural born hunter (lvl 15, decreases cost in energy by 15%)
Explosive hail (lvl 22, the fired projectiles explode and deal additional damage)
Avalanche (lvl 22, fires 3 additional shots)
Piercing shards (lvl 31, the chance of a critical hit goes up by a half)
Ghostly rain (lvl 42, each projectile hits an additional enemy + increased range)
Amazing hail (lvl 42, increases the range of projectiles by 30%)
Sprays projectiles with quite a range and damage, at the enemies, over a vast area in front of the character. The number of projectiles can additionally be increased, thanks to which one attack can affect a big group of enemies.
 Freezing enemies is an excellent way to catch your breath or launch a more aggressive attack.
Name
Possible upgrades
Description
Freezing bomb
Detonation (lvl 4, increases range by 40%)
Cold as ice (lvl 13, time to explode decreases by 75%)
Iceberg (lvl 13, increases damage by 30%)
The might of winter (lvl 21, extends time frozen to 50% and increases damage by 10%)
Ice age (lvl 32, increases damage after the critical hit by 80%)
Heat retention (lvl 32, after the target is hit, you receive 1% to your maximum energy)
A very handy attack. The character puts an ice bomb on the ground, which explodes after a while. Apart from taking damage, the enemies are often frozen, which allows you to attack them, while remaining relatively safe. During this attack, an automatic dodge is performed, which is why you should pay attention to the direction in which your character is facing.
Blizzard (lvl 2)
No shelter (lvl 10, increases damage from a critical hit, by 80%)
Storm of vengefulness (lvl 18, increases chance of a critical hit by 100%)
Downpour (lvl 18, fires three additional projectiles)
Exhausting storm (lvl 27, after the opponent is hit, you receive back 1% of your overall maximum energy)
Deafening blast (lvl 36, decreases range and increases damage by 40%)
Focused torrent (lvl 36, increases range and damage by 15%)
Fires a dozen-or-so small projectiles very fast. An excellent attack against smaller enemies that it wipes off the ground. It is also useful against stronger opponents, especially thanks to the number of attacks that you can perform with your bar fully charged
Ice explosion (lvl 6)
Launch (lvl 16, doubles the chance of a critical hit )
Sharp shards (lvl 23, increases the range of the attack)
Destructive energy (lvl 23, increases range by 30%, damage by 10%)
Short fuse (lvl 29, shortens the time to explosion by 75%)
An experienced trapper (lvl 44, decreases the energy cost by 1/4)
Conservation (lvl 44, returns 75% of the cost of bombs that did not reach their targets)
An attack that is similar to the freezing bomb. The difference is that the enemies are not frozen, as a result. Still, it is made up for with damage that the attack deals. This makes possible a swift elimination of the enemies that surrounded your character.
Name
Possible upgrades
Description
Snow projectile
Crystallized tears (lvl 4, increases damage by 20%)
the offering from the ice gal (lvl 12, increases the chance to fire to ice projectiles at once by 70%)
Chill (lvl 12, raises the chance to stun the enemies)
Ethereal arrows (lvl 20, bashing results in super shield break)
Snowstorm (lvl 33, 100% of chance of an additional projectile in every third attack)
Avalanche (lvl 33, doubles the chance of a critical hit)
the weapon is available since the beginning. You can upgrade it after you complete: RESERVOIR IN KHORAD, ICECREEK SANCTUARY, AZABRAK RUINS.
Diamond dust
Serrated arrowhead (lvl 4, increases damage by 20%)
In search of the horizon (lvl 12, the attack pierces ne additional target + increases damage)
Spell against evil (lvl 12, increases chance of a critical hit by 100%)
Blizzard (lvl 20, bashing results in super shield break)
Rift in the sky (lvl 33, increases damage of the critical hit by 80%)
Wall of sound (lvl 33, increases the speed of the projectile by 50% and pierces 1 additional target)
this weapon becomes available after you complete VORIOS. You can upgrade it after you complete: N'AQUALI, BRAVEROCK, SZARA ZASLONA.
Touch from the sky
Yeti bone arrowheads (lvl 4, increases damage by 20%)
Crystal explosion (lvl 12, increases the range of the attack)
Heart hunter (lvl 12, increases chance of a critical hit by 80%)
Frostbite (lvl 20, bashing results in super shield break)
Inhuman accuracy (lvl 33, increases chance of a critical hit by 100%)
Blasting (lvl 33, a critical hit performed against n enemy with less than 30% HP deals 300% more damage)
The weapon becomes available after the completion of: ZATOKA PELIASA. You can upgrade it after you complete: KOPALNIE ALKAZABA, FORTECA ENIGMARA, ASHGAR.
How you select your weapons, may have an effect on the game itself. Snow projectile offers an upgrade that allows you to fire more and more projectiles, faster and faster. Diamond dust allows you to raise the range of your weapon, whereas the Touch from the sky boosts considerably your chances of a critical hit. Personally, I would recommend that you use one of the last two bows - the increased range allows you to attack even the enemies out of your sight and the more frequent critical hits result in dealing more damage.
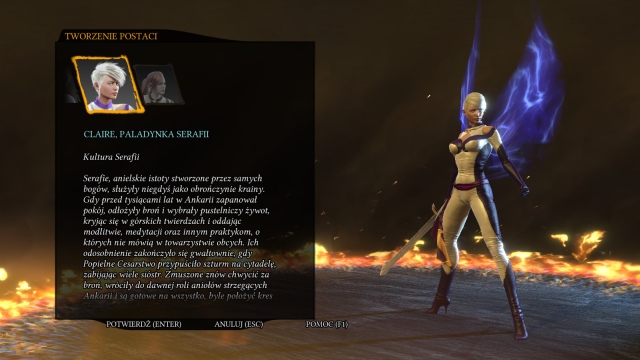 Claire is an exceptionally fast and agile fencer.
"As a divine creature, Claire is a formidable opponent for any evil. She can summon the energy of the skies that will wipe out the enemies. However, her physical skills are not something to be treated with contempt - she is a lethal fencer that whirls in the battlefield like the holy gale of punishment. The speed and agility allow her to strike at any point, thanks to which she can support an attack at one moment and defend the ranged allies at the other."
Indeed, Claire is an ideal fencer - she moves around the battlefield with unequalled grace and speed thanks to which fighting enemies is a pure pleasure. You can choose from among attack-reinforcing combat arts, which deal damage and break the attacks of multiple enemies.
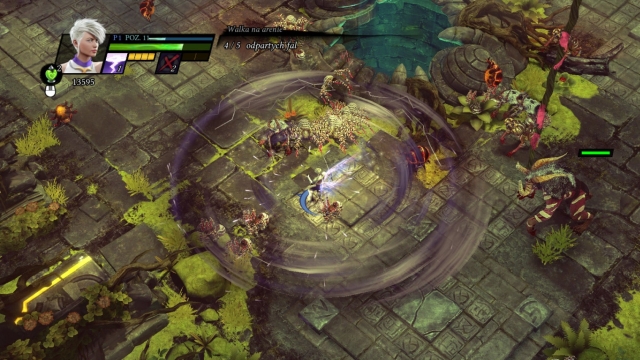
 Shooting several lightning bolts, within a short period of time eliminates threat quickly.
Claire is a mighty warrior but, her main advantages are her speed and agility. She can dash between enemies with grace and her mobility matches the playing style that this character requires - quick movement, even quicker attacks and swift dodges make playing as Claire poetry. From among the available weapons, I would recommend the Wrath of God - a high chance to score critical hit which, after you get the Holy Spirit upgrade, occur often. What makes an alternative is the Guardian of the Citadel, which deals considerable damage. From among the available skills, it is a good idea to give the selection of Light Combat arts a little consideration. Personally, I would recommend thunderbolt here or the Holy Word, but the Judgment is also worth attention, because it allows you to deal high damage to the opponents (however, the attack itself does not do that - you still need to attack the marked enemies in the conventional way). Out of the next set, the Divine Aura seems to be the best choice - the duration and high damage make this attack really worth considering. On the other hand Whirlwind is also an interesting attack - it also deals reasonable damage and, apart from that, has a good range and the option to knock down the enemies. Personally, I chose thunderbolt and Divine Aura - it allowed me to ensure quite good protection, with both attacks.
Name
Possible upgrades
Description
thunderbolt
Electrostatic charge (lvl 2, extends the bolt's dashing time by a half and increases damage by 10%)
Strong winds (lvl 12, increases damage by 20% and the speed of the projectile by 50%)
Electrify (lvl 12, increases damage after the critical hit by 80%
Unfavorable forecast (lvl 20, doubles the chance of a critical hit)
Thunderstorm (lvl 33, increases the range of projectiles by 30%)
Vestigial energy (lvl 33, provides 50% more chance to obtain a energy orb, after a critical hit)
Sends out a beam with a thunderbolt in the center, which deals damage to the enemies within the attack's reach. It is perfect against groups of enemies, especially after you dispatch several bolts at a time- this deals tremendous damage to enemies. Ideal for clear the way for yourself.
Holy Word (lvl 3)
Holy scream (lvl 7, increases range by 40%)
Echo (lvl 14, increases the width of the attack by 30%)
Drown out (lvl 14, increases damage by 30%)
Judgment (lvl 25, chance to knock down greater by a half)
Inexhaustible breath (lvl 37, the energy cost of using decreased by 20%)
Final word (lvl 37, increases damage by 30%)
An attack that can knock down enemies and break their attacks. This is often very handy - using this combat art several times in a row considerably increases your chances of knocking down several enemies at a time. Thanks to this, you can easily execute them.
Judgment (lvl 5)
No Ground (lvl 11, increases chances of critical hit by 100%)
Damage to the nerves (lvl 17, increases damage after a critical hit by 80%)
Inquisition (lvl 17, increases range by 30%)
Punishment (lvl 26, increases damage by 30%)
Attempt at revenge (lvl 39, increases range by 30%)
Responsibility (lvl 39, doubles damage dealt to larger enemies)
This is not an attack in the strictest meaning of this word - the character only marks the enemies in front of him. This action allows you to deal additional damage in the ensuing regular attack. It is very handy, but it needs to be remembered that using Judgment in itself does not harm enemies so, it does not allow you to deal immediate damage.
Chain of lightning (lvl 8)
Lethal touch (lvl 15, increases damage dealt by 15% and the distance over which the attack may jump over to the next enemy)
Arch bolt (lvl 22, adds two jumps)
High voltage (lvl 22, increases damage by 30%)
Shocking end (lvl 31, doubles damage dealt to enemies, whose HP is lower than 20%)
Overwhelming energy (lvl 42, increases damage by 30%)
Charge (lvl 42, gives 20% chance of firing another bolt)
the sparks jump over from one enemy to another. The attack is especially useful against the opponents that are standing sufficiently close to each other, because the range, over which the sparks can jump is limited. This is the greatest downside of this attack- as soon as an opponent is outside of area of its operation, the sequence is terminated.
 the whirlwind caused by the Divine aura on the rims and, occasionally inside also.
Name
Possible upgrades
Description
Whirlwind
Violent gales (lvl 4, extends the radius of the attack by 50%)
The head of the wave (lvl 13, increases the width of the attack beam o 50%)
Confusion (lvl 13, increases damage by 30%)
The strength of the oak (lvl 21, damage dealt to larger enemies increased by 375%)
The eye of the cyclone (lvl 32, increases damage by 70%, and raises the energy cost by a half)
Compression (lvl 32, increases the chance of a critical hit by 80%)
Claire uses her wings to cause a powerful wind that deals damage and repels enemies to a certain distance. Upgrades allow you to max out on damage, thanks to which it becomes a quite formidable attack, especially against the big enemies (who are usually the most difficult to defeat).
Gliding light (lvl 2)
Holy diver (lvl 10, increases damage by 10% and gives another 4% of chances of obtaining a small health orb after a hit)
Shockwave (lvl 18, increases range by 50%)
Death from above (lvl 18, increases chance of a critical hit by 100%)
Powerful blow (lvl 27, increases damage by 30%)
Chosen by the Gods (lvl 36, decreases the energy cost of the attack by 25%)
The armor of God (lvl 36, while performing the attack, the player becomes invulnerable to damage for 3 seconds.
the character dashes forward and attacks enemies from above. The attack deals damage over an area, to everyone within the circle. Unfortunately, due to the dynamics of the game, sometimes it is difficult to get the distance, covered by Claire right, to make her fall right next to the selected opponent.
Divine aura (lvl 6)
Stormy weather (lvl 16, times between the individual attacks of the bolts decreased by 30%)
Punishing whirlwind (lvl 23, increases the radius of the attack by 50%)
Rollover (lvl 23, increases damage by 30%)
Lasting storm (lvl 29, increases the operation of the attack by 50%)
Blessed soul (lvl 44, increases damage by 150% and doubles energy cost of the attack)
Omniscience (lvl 44, doubles the chance of a critical hit)
A very good, long-lasting AoE attack. It creates a whirlwind around Claire and deals damage to all the enemies around, with lightning bolts. Since the attack is weak, at first, it is a good idea to invest into Rollover and Blessed Soul, thanks to which it is going to make a lethal combination of high damage and longevity.
Name
Possible upgrades
Description
Guardian of the Citadel
On your knees! (lvl 4, increases damage by 10% and a chance to knock down the enemies by 20%)
Sister's will (lvl 12, increases damage dealt by 30%)
Many in one (lvl 12, increases range by 30%)
Nowhere for help (lvl 20, bashing results in super shield break)
Beast slayer (lvl 33, increases damage by 10%, bigger enemies may become vulnerable to stronger blows)
Among the fallen (lvl 33, chance to knock down an enemy is increased by a half)
the weapon is available since the beginning. You can upgrade it after you complete: RESERVOIR IN KHORAD, ICECREEK SANCTUARY, AZABRAK RUINS.
Remorse
Do no evil (lvl 4, increases chance of a critical hit by 100%)
Tenacity (lvl 12, the chance to obtain a energy orb increases by 100%)
the road to mercy (lvl 12, 50% chance of obtaining a medium-sized energy orb at the third blow)
In spite of all adversity (lvl 20, bashing results in super shield break)
Piercing gale (increases damage after a critical hit by 80%, and speed by 33% for 6 seconds after a successful critical)
God's forgiveness (a critical hit on an enemy with less than 30% HP deals damage increased by 300%)
this weapon becomes available after you complete VORIOS. You can upgrade it after you complete: N'AQUALI, BRAVEROCK, GREY VEIL.
God's Wrath
Smite (lvl 4, increases damage after a critical hit by 80%)
Third eye (lvl 12, the chance of a critical hit increases by 100%)
The boundary of equilibrium (lvl 12, increases damage by 20% and provides 2% of chances to obtain a small health orb, while attacking)
God's dread (lvl 20, bashing causes super shield break)
Holy spirit (lvl 33, a critical hit in every third attack guaranteed)
Rebirth (lvl 33, 10% of chances of obtaining a small health orb after a critical hit)
The weapon becomes available after the completion of: QUAY OF PELIAS. You can upgrade it after you complete: ALKAZABA MINES, ENIGMAR'S FORTRESS, ASHGAR.
The available weapons differ from each other in some aspects. Guardian of the Citadel allows you to deal high base damage, whereas the God's Wrath deals more critical damage, to which it provides you with high bonuses. Right in the middle, there is Remorse which also adds some bonuses to critical damage and increases the chance of obtaining a energy orb - mainly the players that frequently use the combat arts will find it useful.
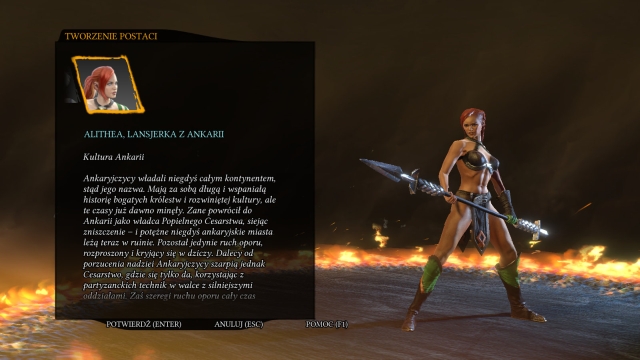 Alithea fights like a real Amazon.
"At the forge, Alithea learned detailed knowledge about arms and her combat skills during the numerous expeditions against the Grimmoks. As a pole weapons specialist, she launches attacks at a range, pierces the enemies and weakens them with poisons but, she also remembers to support her allies. As the defender of the land, she can unleash the energys of the Earth and direct it against the enemies, from below the ground, which earned her the appellation "Do not mess up with her".
Alithea is a spear woman experienced in battle - thanks to the range of her weapon, she can strike quite a considerable number of enemies, with her attacks. Her additional asset are the combat arts, which allow her to attack a specific area and allows her to eliminate groups of enemies, or to retreat from a tight situation safely.
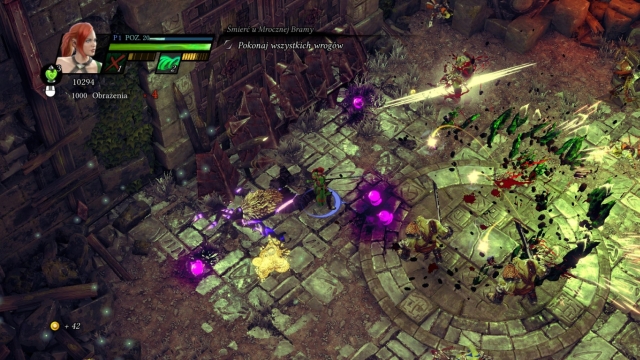 Trembling earth is perfect for eliminating the enemies in front of the character
Alithea is a character that fights at close range, among multiple enemies, which is why she is constantly exposed to damage - to the players that worry about their health points, I recommend Hunter's vigilance. This weapon allows you to obtain, frequently, resources during the battle. To the more offensive players, I recommend the Prickly Ivy - frequent critical damage is a pleasure not only to the eye. As for the combat styles, I found the ones available from the beginning most appealing: Trembling Earth and Earthquake. The former allows you to decimate the enemies in front of your character, whereas the latter sweeps them away - thanks to its swiftness, it is excellent against the stunned enemies. A good alternative may be the Poison swipe and Crystal Rift. This combination will ensure you with being ready for enemies of any kind, because the Poison swipe is ideal against strong enemies, staying in a small area and the Crystal Rift allows you to deal damage over time, over a vast area. Therefore, it is perfect against groups of enemies.
Name
Possible upgrades
Description
Trembling Earth
Till the end of the earth (lvl 2, adds an eruption and increases damage dealt by 20%)
Death from the depths (lvl 12, doubles the range of the eruptions and damage dealt by 10%)
Cataclysm (lvl 12, the speed of eruptions increased by a half and damage by 10%)
Gaia's gasp (lvl 20, decreases energy cost by 25%)
Life sharing (lvl 33, provides 6% chances of obtaining a small health orb)
Vengeance (lvl 33, doubles the chance of a critical hit)
this attack allows you to launch several eruption waves that release spikes from below the ground which may, apart from damage dealt, knock down the enemies. It is best against the opponents running in front of the player.
Leech swarm (lvl 3)
Deadly wasp (lvl 7, increases damage by 15% and range by 30%)
Poisonous stings (lvl 14, doubles the chance of a critical hit)
Vampiric locust (lvl 14, increases damage by 15% and haling by 50%)
Life leak (lvl 25, increases damage by 10% and adds 6% chances of obtaining a small health orb, after a hit)
Ancient pestilence (lvl 37, increases the range of the projectile by 30%, and damage by 10%)
Spoiled crops (lvl 37, increases the speed of the projectile by a half, and damage dealt by 20%)
the character sends out an orb that returns after a while and heals her. Along its way, the Leech Swarm deals damage to the enemies that the orb passes by but, due to the short range and duration, the attack is not too powerful and its main asset is restoring a small amount of health points to the character.
Poisonous swipe (lvl 5)
Experienced warrior (lvl 11, decreases energy cost by 25%)
No exit (lvl 17, increases range by 30% and damage by 10%)
Sense weakness (lvl 17, increases chance of a critical hit by 100%)
Swift slash (lvl 26 the first swipe that is performed, in this attack, deals 80% more damage)
Powerful execution (lvl 39, the second swipe repels the enemy and deals increased damage by 60%)
Quick regenerate (lvl 39, for the attacks that that do not connect, you receive back a half of the energy cost)
Alithea performs two powerful swings that deal considerable damage, over a relatively small area. The Powerful execution should definitely be the last upgrade that you pick - along with the preceding one, it makes your attacks even more powerful, which makes them ideal against small groups of strong enemies.
Choking fumes (lvl 8)
Curare (lvl 15, 66% chance of stunning the enemy)
Crust crack (lvl 22, the range of the attack increased by 30%, damage by 10%)
Sulfur fumes (lvl 22, decreases cost in energy by 20% and increases damage by 10%)
Chemical reaction (lvl 31, 6% chance of obtaining a small health orb after a hit)
Arsenic (lvl 42, extends duration of the stun by a half and increases damage by 10%)
Cyanide (lvl 42, increases damage after a critical hit by 80%)
In front of your character, there appears a small crack and the enemies within its reach receive damage. Because it is a short-ranged attack, it is useless against larger groups of enemies, because it will simply be unable to encompass them all with its effect. The main upside here is the chance of stunning the enemies but, in my opinion, it is too little to make this attack that much useful. Also, the fact the fact that the character leaps back, each time she uses Choking fumes, with a strange battle cry may also be irritating.
 Alithea attacks with deadly speed with the use of Earthquake.
Name
Possible upgrades
Description
Earthquake
Friend of earth (lvl 4, decreases energy cost by 20%, increases damage by 10%)
Rift (lvl 13, increases damage by 30%)
Terror from the deep (lvl 13, speed of movement of the character, during the attack, is increased by 40%)
Guardian of the earth (lvl 21, increases damage by 10% and the character receives lower damage, during the attack, by a half)
The end of time (lvl 32, increases damage by 10% and the range of the eruption by 30%)
Apocalypse (lvl 32, increases range by 30% and damage by 10%)
With your energy bar full, you can launch quite a few attacks, during which the character quickly massacres the enemies. The initially low damage can be raised, thanks to which this attack becomes deadly and will allow you to deal with hordes of enemies, in a blink of the eye.
Crystal rift (lvl 2)
Funnel (lvl 10, extends the duration of the attack by 35%)
Friend of Ankaria (lvl 18%, each spike provides a 6% chance of obtaining a small health orb, after a hit)
the knowledge of earth (lvl 18, increases chances of critical hit by 100%)
Geologic gift (lvl 27, the energy cost decreased by 35%)
Rift (lvl 36, increases the range of the spikes by 30%)
Wrath of the earth (lvl 36, times between the appearance of the successive spikes shorter by 25%)
A good attack - after you use over the area that you choose, for quite a while, there appear deadly spikes. The duration and decent range make up for low damage.
thorn trap (lvl 6)
Increased growth (lvl 16, increases the duration of the attack by 35%)
Photosynthesis (lvl 23, decreases the energy cost by 35%)
Retrieval (lvl 23, increases range by 30%)
Tearing thorns (lvl 29, damage after a critical hit higher by 80%)
Swollen stem (lvl 44, the attack ends in an explosion that deals additional damage)
Explosion (lvl 44, doubles damage and, at the same time, cuts down the duration of the attack by a half)
IN the spot pointed to, by the character, there appears a circle, within which all of the enemies take damage. This is an attack that allows to hold the enemies in a specific spot (or at least to slow them down). Still, the Crystal Rift seems to be a better choice.
Name
Possible upgrades
Description
Shadow of Ankaria
Ethereal lance (lvl 4, fires a projectile, with every third attack, which deals more damage)
Nature's fury (lvl 12, fires a projectile, with every second attack and increases damage by 15%)
Wrath of the forest (lvl 12, the projectile is bigger by a half the chance of a critical hit rises by 100%)
Great impaler (lvl 20, bashing results in a super shield break)
Crystal tomb (lvl 33, a critical hit deals 100% more damage to the enemies with less than 20% HP)
Shock (lvl 33, projectiles deal 50% more damage, the other attacks by 15%)
this weapon is available since the beginning. You can upgrade it after you complete: KHORAD RESERVOIR, ICECREEK SANCTUARY, AZABRAK RUINS.
Hunter's vigilance
Energy drain (lvl 4, each attack returns 1% of the energy maximum)
Materialization (lvl 12, 15% chance of obtaining a small energy orb after the enemy is hit)
Unity with the nature (lvl 12, 15% chance of obtaining a small health orb after the enemy is hit)
Impassable Guard (lvl 20, bashing results in super shield break)
Abundance (lvl 33, the chance of obtaining an orb increases by 100%)
Top vigilance (lvl 33, the chance of a critical hit doubles)
The weapon becomes available after you complete VORIOS. You can upgrade it after you complete: N'AQUALI, BRAVEROCK, SZARA ZASLONA.
Prickly Ivy
Tearing thorns (lvl 4, damage after a critical hit increases by 80%)
Aggressive rush (lvl 12, increases damage by 30%)
Lethal bloom (lvl 12, guaranteed critical hit at each third attack, the chance of repeating at the following ones increases by 40%)
Slumbering spores (lvl 20, bashing results in super shield break)
Swiftness of the hunter (lvl 33, after a critical hit, the speed of movement increases by 25% for 6 seconds)
Return to the earth (lvl 33, a critical hit deals damage increased by 300%, to the opponents with less than 30% HP)
The weapon becomes available after the completion of: ZATOKA PELIASA. You can upgrade it after you complete: KOPALNIE ALKAZABA, FORTECA ENIGMARA, ASHGAR.
Alithea's weapons slightly differ from each other- Thorn of Ankaria, during a series of attacks, additionally fires projectiles that wound the enemies at a longer distance from her. Hunter's Vigilance has better upgrades that allow you to use regeneration during the battle, whereas the Prickly Ivy allows you to deal considerable damage and strike with a critical hit frequently.
 Playing together is more fun.
Apart from the characteristics and the weapons mentioned here, all of the characters also have common abilities, armor, the option to buy the same items at the stores and also the option to gather the same ghosts of the weapons. Also, battle prayers have been classified as common to all the characters because, in spite of the differences between them, as a matter of fact, their function is identical for each one of the characters.
Name
Possible upgrades
Description
Dodge
Roll (lvl 7, a dodge towards a weak enemy deals damage to him, it also allows you to smash objects.
Fint (lvl 19, extends the period of invulnerability to attacks, during dodge 0,2s)
Purification (lvl 30, 50% chance of lifting a negative effect, e.g. burning, while dodging)
Retaliation (lvl 30, an attack performed right after the roll results in damage higher by 10%)
Reflect (lvl 45, increases the probability of knocking down the weaker opponents).
Dodge is a very useful ability - it allows you to dash in a given direction, which is invaluable during battles with greater numbers of enemies and various bosses. Darting into a given direction often will save you, which is why this is an ability that is more useful than the regular Block, and fits the dynamics of the game better.
Block (lvl 4)
Shield (lvl 10, reduces 90% of the damage taken)
Barrier (lvl 22, taking damage during the block ensures you with 50% more energy)
Palisade (lvl 22, the attacker takes 200% of dealt damage)
Entrenchment (lvl 24, chance of stunning the attackers)
Fortress (lvl 48, increases chances of stunning by 100%)
Blocking slows you to reduce damage and its successive upgrades allow you to regenerate energy (Barrier) or reflect some damage back to the enemy (Palisade). In spite of reduction of a large amount of potential damage, I recommend that you choose Dodge - it is better to perform a good dash and take no damage, than to take less. The advantage of Dodge is that it allows you to roll quickly around the battlefield, whereas you only Block while standing still.
Execute
Jumping execution (lvl 30, increases range by 30%)
Power absorption (lvl 10, execution regenerates energy)
Chain of executions (lvl 18, after you perform the first one, it is possible to perform another one, at a longer range)
Life absorption (lvl 28, provides you with a chance of absorbing additional health orbs after an execution)
Deadly dervish (lvl 35, increases the range of the chain of executions by 50%)
Shattering blow (lvl 46, the enemies near the executed opponent also take damage)
Storm strike (lvl 49, increases damage dealt by the Shattering blow)
Execute is an useful ability - it allows you to eliminate quickly the enemies down on the ground, who have been knocked down (the option to execute is symbolized by the red skull icon above the head of the enemy). To be able to execute, you first need to knock down the enemy - you do that with shield breaks, regular attacks and, most frequently, after you use combat arts.
Restoration
Reviver (lvl 3, the speed of resurrecting the others is faster by 30%)
Healer (lvl 9, the resurrected character receives +66% to health level)
Invigorator (lvl 9, the resurrected character receives additional 50% to the energy level)
Fallen asleep (lvl 17, it is 30% faster for someone else to resurrect the player)
Synergist (lvl 24, resurrecting another character ensures 30% HP)
Drainer (lvl 24, 24, resurrecting another character ensures 30% energy)
Sent by hell (lvl 36, resurrection causes a shockwave that deals damage to opponents)
Allows you to restore the killed party member to the party (the "interact" key).
Name
Possible upgrades
Description
Armor (lvl 5)
Balm (lvl 13, health orbs ensure 50% more points, in the case in which the player's health drops below, 20%)
Grace (lvl 19, after the player dies, health orbs are summoned, which can be used by the other players)
Equilibrium (lvl 27, the duration of negative effects and damage lower by 30%)
Vigor (lvl 41, health orbs ensure 50% more health and damage taken is lower by 30% in the case in which the player's health drops below 20%),
Armor is upgraded after you complete: SHADDAR CAGE, ALKAZAB MINES, ZHURAG
 This relationship has a chance of lasting.
It is only possible to use the battle prayer in the co-op mode - it allows you to associate with another player, which translates into a special attack/bonus that is different for each character.
Marak - summons a meteorite onto the players' position and deals considerable damage to the opponents.
Vajra - creates a freezing zone between the allies, and freezes all opponents for 5 seconds within.
Claire - the opponents that surround the allied players are immediately knocked down, which allows you to execute them
Alithea - decreases damage taken, by a half, and divides it between the allied characters and additionally doubles the effect of health orbs
The amount and the type of the item differ, depending on the completed side quests. Some of the items (also after the completion of the appropriate quests) do not need to be bought at the shops, because they regenerate spontaneously, between the individual missions.
Health potion - replenishes health immediately after being used
Energy totem - places a totem on the ground which regenerates, for some time, energy in the players within its reach.
Health totem - places a totem on the ground which regenerates, for some time, health in the players within its reach.
Protective aura - creates a shield thanks to which the player takes less damage, for a period of time.
Magical guardian - summons a creature that attacks the enemies within reach
Savvy bomb - deals lots of damage to the enemies, over a quite vast area, which makes it ideal against groups of monsters
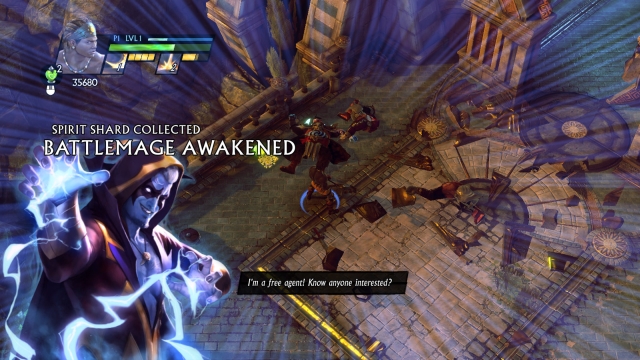 Each spirit is... unique.
Weapon spirits can be collected during the game - you receive them for killing enemies, completing quests and completing side quests. Each spirit provides with two effects - a negative and a positive one. The strength of the effect depends on the level of the spirit and each one can have five.
Battlemage - positive: attacks have the chance of causing a chain of lightning bolts that skip from one opponent onto another and deals damage to them, negative: energy orbs are less potent.
Elf - positive: health orbs provide the party members with better healing effects, negative: these same orbs provide lower healing effects for the player.
Demoness - positive: attacks set enemies on fire and deal damage, negative: the player receives more damage.
Possessed man - positive: energy orbs provide the players with more energy, negative: these same orbs provide lower effects for the player.
Dwarf - positive: attacks provide higher chance of critical hits, negative: the player takes more damage.
Dragon - positive: attacks give a chance of creating a force field that absorbs, for some time, some damage that the player takes, negative: attacks that create the force field also lower energy.
Dryad - positive: attacks weaken the enemy temporarily and lower the strength of his attacks, negative: damage dealt after a critical hit is lower.
Gladiator - positive: all of the attacks are boosted when the character is low on health, negative: sets a threshold for the character's low health, for a certain percentage of the whole.
Dark elf - positive: the shockwave after the fully charged bash [RMB] causes super shield break, and super stun, and additionally deals damage, negative: after you use the fully charged bash, you lose a certain percent of your health.
Vampire - positive: attacks against the big opponents provide additional health points, negative: health orbs are less potent.
 The fight is dynamic and exceptionally pleasurable.
Combat in Sacred 3 is easy and intuitive. The combat system consists of five buttons for attack, bash (useful for breaking the enemy attacks and breaking through defenses), light and heavy combat arts and finally, block. The battles are, usually, very dynamic and the most important , while in combat, is to use the available abilities properly and remain in movement, regardless of the enemy type. Therefore, do not shirk from dynamic fight and do not save up the energy for later. Most usually, in several points, after major battles, you can replenish it. Also, remember that you can use various items to obtain at the shop, to your advantage - health potions are the last resort but totems make the game much easier, in many points, just like the protective aura towards and, the end of the game (or before the next attempt, as the same character) savvy bombs are invaluable, which allows you do eliminate waves of enemies easily.
 You need to be especially careful with this attack.
Throughout the majority of the game, you will be fighting opponents that are much tougher than the regular boys for beating, and who are weaker than minibosses. You can encounter such opponents with every step you take, at any stage of the game. This group encompasses a wide variety of enemies that fight in melee, bulky shieldmasters, warriors that perform the lethal spins, shamans and crossbowmen. In the game, there are several variations of these opponents, e.g. the spinning warriors additionally leave a trail of fire behind, or shamans with slightly different attacks. Fighting such opponents is not much different. The most important thing is to watch out for the attacks prepared beforehand that are symbolized with appropriate icon above the head of the opponent - this means that in a moment (as long as the player does not break the preparation) he attacks with an attack that is special for a given enemy. And so, in the case of shamans, these are, e.g. big fireballs that explodes and deals considerable damage. In the case of crossbowmen it is going to be summoning special crystals that project in certain points of the ground. You need to be especially careful with this type of attacks because they are stronger than the regular ones.
 If not stopped sufficiently early, the spinning enemies deal lots of damage.
The most important thing, while fighting groups of enemies, is to stay in constant motion - you are than more difficult to hit for the slower enemies, and for ranged ones. Dodging is necessary here and it is much more reasonable to do that than to block. each attack should be combined with combat arts which, in difficult situations, may often cut through the enemy lines. Also, it is a good idea to eliminate crossbowmen, as quickly as possible, and shamans - they usually attack at long range and when the player is occupied with fighting at close quarters, they may easily fall victim to their attacks, which they will simply fail to spot. A tough nut to crack may be the warriors that perform spins, with their swords - not breaking such attack may bear a steep price to pay, if you get within the opponent's reach Also remember not to get into the very middle of the battle, among the enemies, where you are exposed to attacks from any side which, due to their numbers, are difficult to dodge. Taking as little damage as possible, in battles with groups of enemies, is key, especially at higher difficulty levels.
 The elite troll right before he strikes.
A separate type of enemy are minibosses, also called elite - single enemies that come alone or, which is more frequently the case, with a stronger or weaker group of smaller enemies. Their health bar is clearly visible, which is why they are easy to spot in the battlefield. In spite of the appearances, fighting them is not too difficult - each miniboss type (e.g. trolls or the violet shamans) has his own attacks that are marked beforehand (in the case of the troll, it is, e.g. raising the club above the head) So, pay attention to what your opponent is up to - thanks to this you will easily dodge the blow which, in the case of minibosses, usually deal lots of damage. Just like in combat with the regular opponents, remember that some of the attacks can be interrupted thanks to which you will stun the enemy temporarily. This will allow you to attack him with impunity. Often, you will also be able to perform a "strong grab" - mash then the interaction key to prevent the opponent from wriggling out and he will keep losing health points. In the case, in which the elite opponent is not alone, things may get complicated. In such a case, remember to eliminate, at least, some of the opponents in the first place (if possible, all of them) and deal with the miniboss afterwards. This rarely happens, but happens, that there are two opponents - focus then on attacking and knocking down one of them to make the fight more balanced, as quickly as possible.
 You can, and even need to, survive the attacks of some of the bosses.
The actual bosses fall into a different category- a boss battle occurs at the end of each main quest (not always are you going to fight an opponent, the boss may be a machine that you need to destroy). These battles are much tougher than the regular ones but there also are some weaker bosses. In any case, boss battles conform with a simple pattern - learn the attacks of the opponent and avoid them. The attacks of many of the bosses are quite powerful - they have been described in detail in the walkthrough for the main campaign.
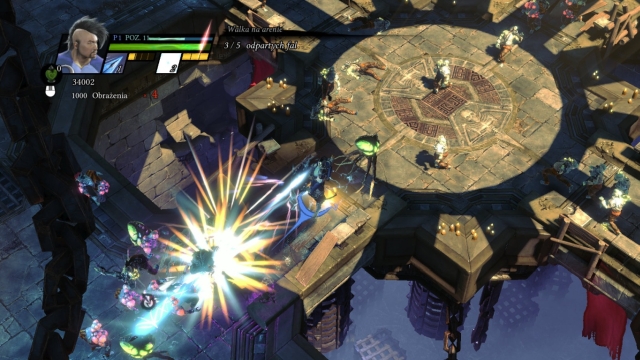
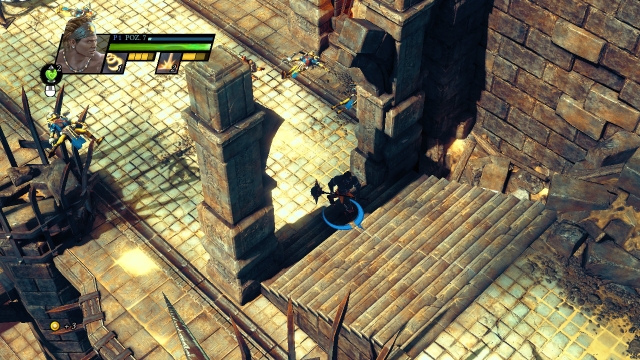
 Climb down the stairs...
OBJECTIVE: Drive the mercenaries away and free the captives
After you start the game, follow the only road - climb down the stairs. Then, destroy the barricades in your way. After you climb down again, you will see the first opponents.
The fight with them is not a problem but, it is a kind of a tutorial. You can attack the enemies in a standard way [LMB] or use the combat arts [1] and [2]. You can also dodge from the attacks [SPACE BAR], shield break [RMB] and grab them to throw them [double-tap E] or deal damage to them. Regardless of your strategy, right after a while, you will be able to continue along your path, where you encounter more enemies. After you defeat them, walk over to the glowing circle which is a checkpoint. Cross the gat and, after a while, you ill encounter shielded enemies for the first time - follow the suggestion and break their defenses first, then attack. The shield symbol above an individual enemy suggests doing this. Go right, where you will find a treasure chest. Then go left to continue the mission.
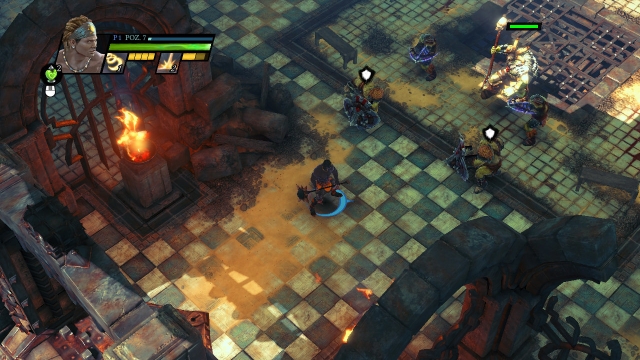
 The first, more demanding enemy
After a skirmish, you will get to the location, where there is the first miniboss. You should not have too much problem dealing with him - shield break and attack. Use your combat arts to speed up the process. Remember that you need to watch out for his attacks, whose landing is marked beforehand - dodge and attack again. Walk across the gate that has been smashed just a moment ago. The path is blocked off by debris, but that is not a problem - go to the side and down. In a narrow passage, you will encounter several enemies who are no challenge to you. Climb down again and walk into a small square, where you will be attacked for the first time.
You will reach a small crossroads (the screenshot): the road to the right leads to a treasure chest, the one to the left - to the next part of the mission. For the first time, you will find traps here, which are also marked. To deactivate them, you need to bash [hold down the RMB]. Remember that they remain inactive only temporarily.
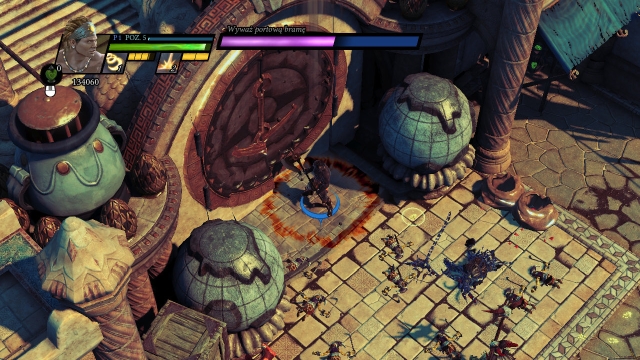
As you go ahead, you will receive a quest to free the villagers. The quest consists in smashing 4 cage doors. This is not a problem - you can smash them by attacking them. Behind the second cage, there is a small passage to a treasure chest. Then, follow the road: you will reach a room with four traps in it, which activate every now and then. As soon as you get too close to one, you will be captured by a force field, of a kind. To free yourself, keep pressing the interaction key [E]. In the small market place, with a fountain in it, you will find the last cage.
 It is going to be tough.
You should especially watch your steps at the next square, where there appear lots of enemies and the traps there activate every now and then. The way leads across the fallen gate. After a while, you will get to the location where there you will be exposed to enemy fire - the dangerous area is being symbolized with the red rim. It is these spots that the projectiles hit and which wound you, of course, which is why you should dodge from them. After you detour a bit, to the right, you will find a treasure chest. Then, among the falling charges, over the destroyed balcony, you will reach the location where you fight another miniboss.
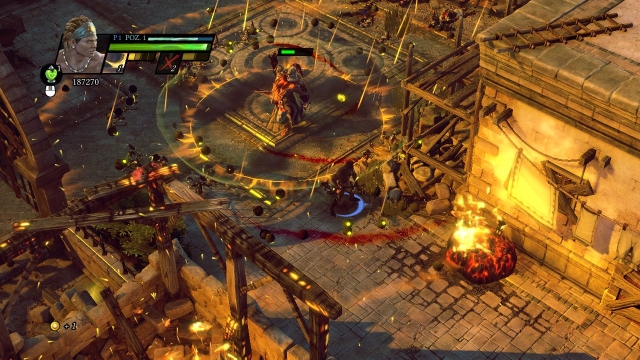 Watch out for the AoE attack in the form of the hail of projectiles.
You should especially watch out for his AoE attack, which is effective over a vast area (the dropping bombs and projectiles), because they may bring your health level down, considerably. Across the hole in the walls, head towards the enemy camp, where you fight a small fight. Watch out for the enemies that throw pikes, because they are scattered all around the area and it is difficult to dodge from several simultaneous attacks. Try to take them out as quickly as possible. After you defeat the enemies, you will walk into the location with a red skull on the ground - the way to the main boss is open for you.
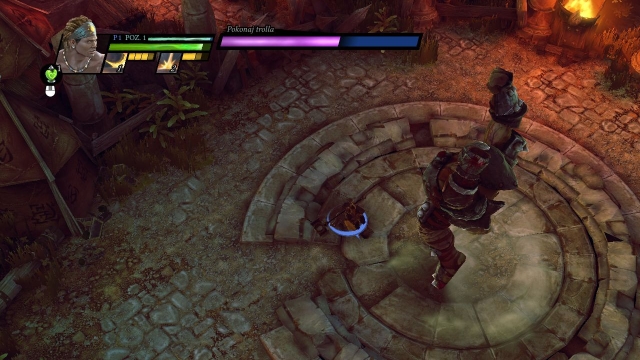 You can dodge from the troll's attacks early enough.
The fight with the troll is the final point of this chapter. The most important thing here is to stay in constant motion and use frequent dodges - the beast marks his attacks with his behavior (raising the sword hand, jump or preparation to run). First of all, he will be trying to hop onto you, from a distance, or hit you with the sword - a regular dodge is excellent here. You should especially watch out when the troll burst in rage - this will become apparent after he starts charging at you and swings the sword, at the same time. Try to dart away a bit earlier. The key to success are dodges and attacking whenever the troll turns away after his own blow - he does not pack any tricky attacks. In the arena, there also are several chests with health points, in case you need them. Defeating the troll ends this stage.
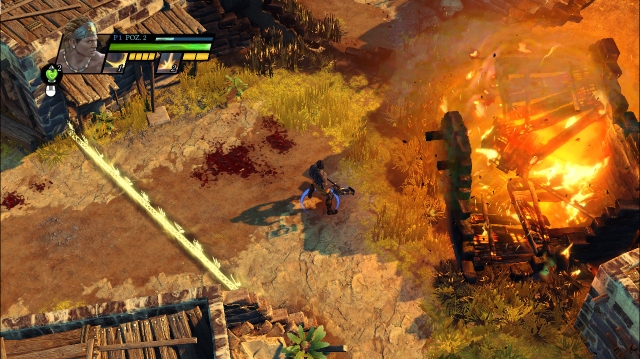
 The picturesque village is awaiting you.
OBJECTIVE: Chase Karr Tel down and put his terror in Vorios to an end
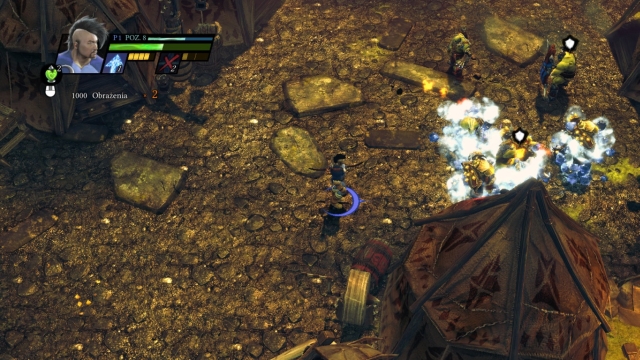
Follow the road. You will encounter several opponents and refugees - deal with the former. Then, a bit ahead, you will find a burning homestead. You can make the battle easier for you by throwing bombs that lie around here - they explode on impact with the opponent and deal damage to everyone around (also to you). After you have cleared the area, go East.
 Go up for more adventures. Go down for treasures.
Next to the checkpoint, go a bit downwards, where you find a treasure chest. Then, go up, across the picturesque orchard (if you go to the left, you will find another treasure). Watch out for the traps and, after a while, for the falling rocks (the spot where they fall is symbolized by the brown rim). You will get to a locked square, where you will there is the welcoming committee waiting for you. Watch out for the enemies that throw pikes at a distance. After you deal with them, keep on your path through the successive yards. Finally, you will get to the locked door and, after a while, there will appear a miniboss here, who is holding the key. It is best to stun him (with bash) at the moment at which he is performing his attack. Otherwise, dodge to prevent being dragged into the areas of effect of the "voids" that he is summoning. After the battle, walk through the opened door.
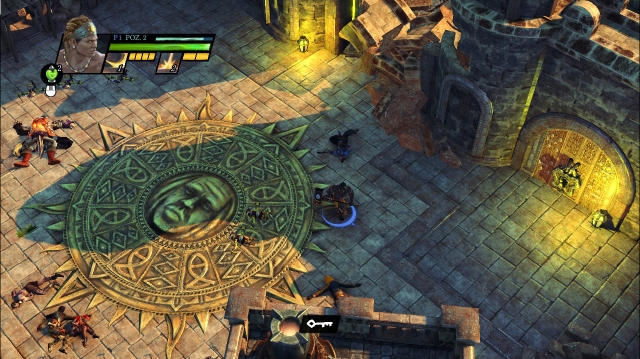 Alohomora does not work - the only way to obtain the key is defeating the stronger opponent.
After a while, you will reach a bigger yard, with a big sun in the middle. You will encounter several opponents here and, additionally, you will be under constant fire from the inaccessible, as for now, miniboss. Your task is to make him fight you. Then, you only need to execute him and the key to the gate is yours. During the battle, you should especially watch out for the rain of bombs that he is going to be willing to pepper you with - use dodges to escape them. Cross the gate and along the volcano that erupts (you should watch out both for them and for the projectiles). You will soon reach a trap consisting of...three traps and a group of opponents. An additional handicap are the projectiles that fall onto you. Keep going ahead and you will reach a bridge, where there are more opponents waiting for you.
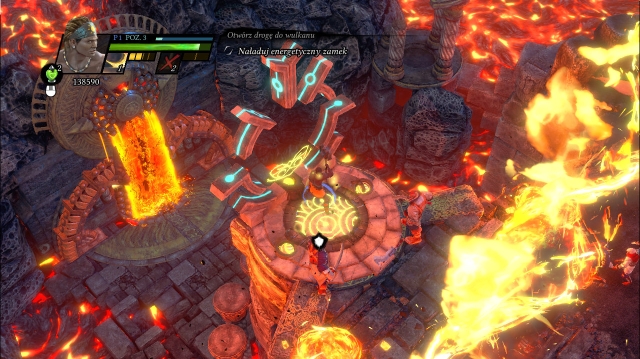
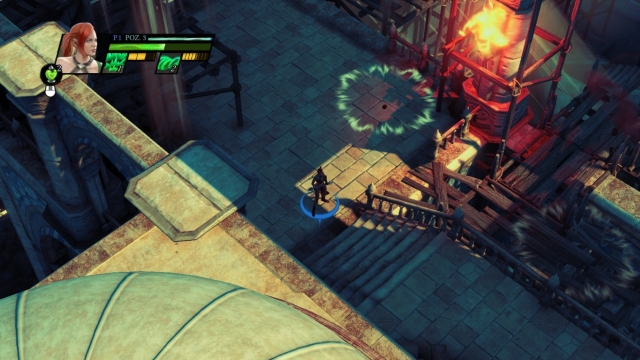
After a while, you will walk into the area shown in the screenshot. Your task is to charge the lock that will allow you to gain access to the passage ahead. You charge it with your energy, using the interaction key [E]. Up until the lock is charged, there will be opponents appearing around, thanks to which you will be able to obtain energy (it is this same that you need to use your combat arts_. Three or four attempts are enough. After you charge the lock, you will be able to climb downstairs, where the highlight of the show is waiting for you.
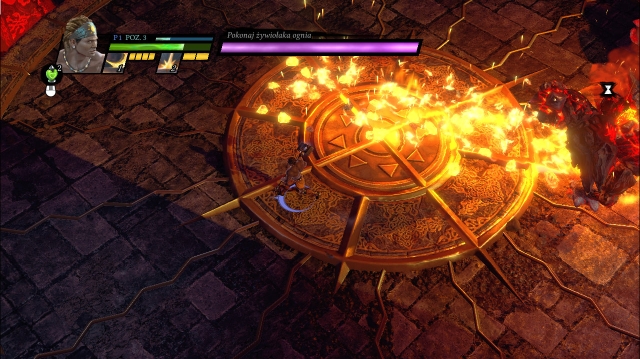 Dodge and attack - simple and effective.
Your final opponents is a fire elemental. The battle with him is similar to the one with the previous boss - the key to success is remaining in constant motion. The elemental attacks, mainly, by "clapping his hands" which causes a torrent of fire that you need to avoid. Another of his attacks is jumping into the air and peppering the battlefield with fire projectiles. Thanks to remaining in motion and running around, you will survive the attack. The final attack that you need to avoid at all costs is marked by the boss, as he charges with energy, after which an eruption, in every direction occurs. Make sure that you can break that attack and react early enough. After you complete the battle, you will be rewarded with a weapon, whose type depends on the character that you are playing. Collect the gold lying around and end this quest.
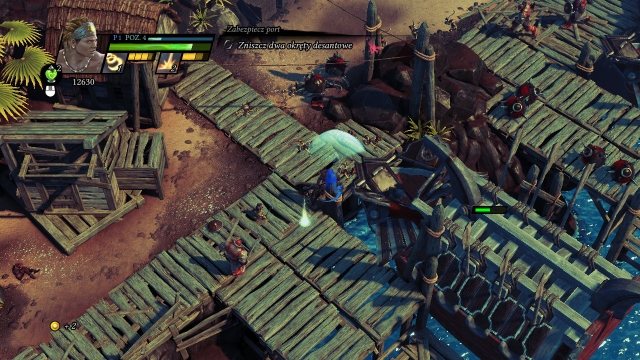 You can destroy the battleships with several attacks or with bombs.
OBJECTIVE: Cut through to the Quay of Pelias and fight back the attacking mercenaries.
You start on a picturesque beach. Go down, where you encounter the first opponents (watch out for the ones that spin with their swords - break their attacks quickly) and traps. After you defeat them, you will get to the location where you receive a small quest.
The enemies will be incoming up until you destroy the two ships. It is not a problem - you simply need to keep attacking them until their health drops to zero. You can use the bombs around to your advantage. Then, head towards the nearby stairs.
 The opponent charging his attack.
In the harbor, you encounter a group of opponents and a miniboss. Break through his attacks and attack yourself. Still, be vigilant because, after a while of standing still, he will start preparing his attack - get away from him sufficiently early. After you defeat the opponents, walk aboard the ship and over it, into the next part of the harbor. Smash the obstacles on the right and het onto the rooftop where there is the checkpoint. Right past the checkpoint, you will encounter another group of enemies. After a moment's walk, you will get to the location, where you need to avoid the falling rocks. An additional handicap here are the traps so, cross this section quickly to avoid losing health points. You will walk into a square that swarms with enemies and traps.
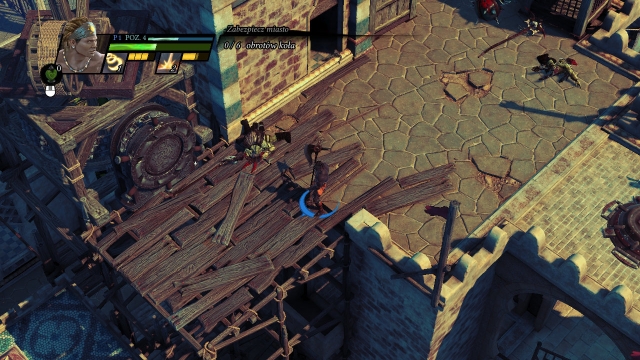 Each spin of the wheel equals a new wave of opponents.
After you defeat them, your task is to spin the wheel, in the upper part of the square, 6 times. Before that, check out the parcels on the right - you will find a treasure chest there. As you have probably guessed, each time that you spin the wheel, there appears a small group of opponents here. After the fifth spin, there will additionally appear a miniboss here. During all of the spins, you need to watch out for shamans especially, who are preparing explosive balls. Break their attack attempts, by using bash or, whenever possible keep the distance. The final spin does not surprise you anymore - you can go ahead, where you will have to watch out for dropping rocks again.
 The spot where you need to turn aside to find a treasure chest
During the escape, you can find a treasure chest and, if you go slightly to the South, a big treasure chest, guarded by two elite opponents.
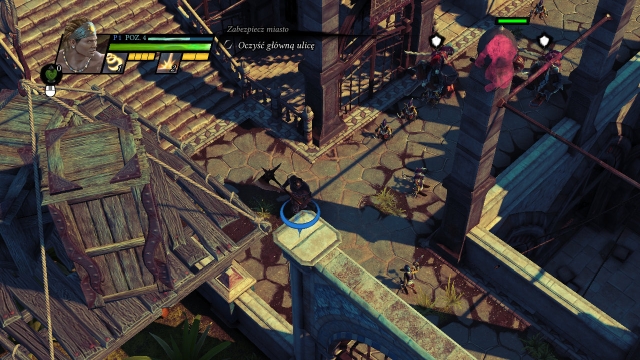 The welcoming committee coming .
The location that you reach is the town's main road. There will appear opponents here, out of which the troll miniboss is the most important one. You should especially watch out for his club blows and also for the smaller whirling opponents. Try to break these attacks sufficiently early or, simply, avoid them 0 you have plenty of room. After you have cleared the streets, walk across the gate, behind which there will get really tight.
 You need to position yourself correctly for the projectiles to deal damage to the gate
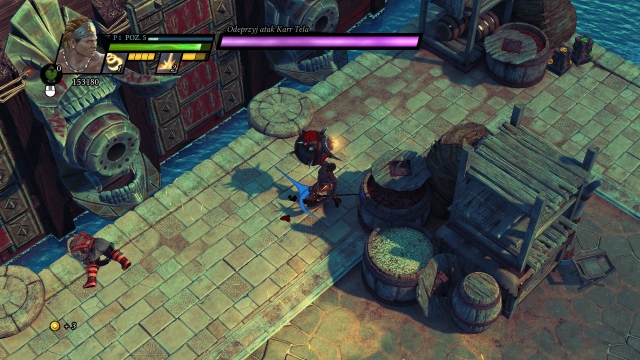
Your main task is to destroy the gate. The regular attacks are useless here. There is a different way: you need to stay close to it for the whole time, to make the trolls throw at the gate. This is the only way to make the gate's bar decline. To make thing more difficult, you will be attacked for the whole time - again - watch out for the whirling opponents and for shamans. With the gate destroyed, go across it.
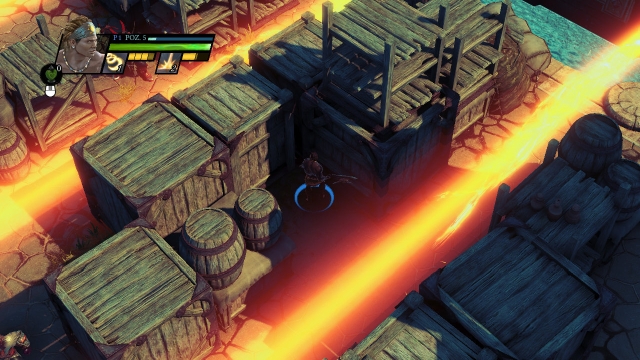
You will walk into the location shown in the screenshot. You need to watch out for projectiles fired by the ship - they are marked, first with a small, and then with a big beam of fire that deals high damage. Fortunately enough, you can take cover halfway, behind the crates, which you should do. A quick relocation, a cover and a movement again - this is the easy tactic for this part of the game, after which you will only have to fight the final battle of this mission.
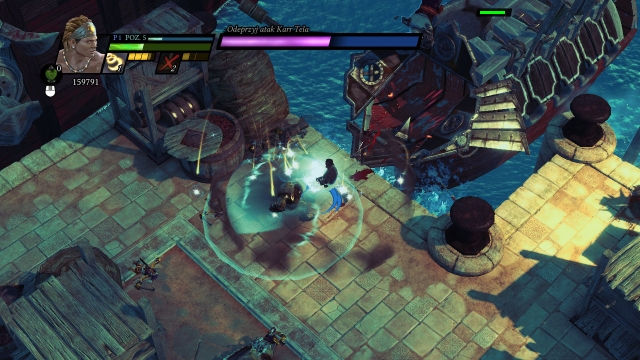
 Throw bombs at the ship to destroy it bit by bit.
Your task is to destroy the flagship of your antagonist. Of course, you cannot attack it directly - the most important thing is to stay close to the ship to be able to grab the bombs carried by the goblins, and throw them towards the boat. This is the only way to deal damage to it. Remember that you need to watch out for the enemies, for the whole time, and even more for the beams of fire shot by the ship. More or less, in the middle, when the ship stops shooting for a while, there will occur an enemy landing of the enemy troops, from the boat on the right side of the arena. Go there and destroy it the traditional way, because the opponents will keep coming up until you do that. Then, return to the main ship: dodges and bombs are the straight road to victory.
 Destroy the landing boats quickly to prevent losing health points.
The situation will occur again, when the ship's health bar drops to 1/4, this time the landing boat will arrive on the left. destroy it and take to the main ship again. When it gets tight, remember that you should first attack the opponents, and then the ship, when things calm down. You should especially watch out for the opponents that throw pikes, because they can make your life really miserable and do not forget that the bombs that you should throw towards the flagship, may explode and deal damage to you if, e.g. one is destroyed with your attack. After you have finally dealt with the flagship, you will receive new weapons and the mission will be over.
 A quick move into action.
OBJECTIVE: Reach the Shaddar Cage, free the prisoners and destroy the arms factory.
Unusually, you start in the center of the fights - deal with the opponents quickly and climb the stairs. A small side note: if you have broken an enemy attack sufficiently early, who is trying to hit the bell, the opponents do not appear. The hit to the bell that summons more opponents can also be interrupted later into this mission.
Well, there is nothing easier than that - use the marked lever to open the gate under it. Head towards the end of the way, where you will find a treasure chest and cross the small gate. Right past the gate, you will find a miniboss and some more opponents.
 In the first place, eliminate the smaller enemies
First of all, deal with the crossbowmen right next to the miniboss and then, with the rest of the party. Watch out for the attack of the main opponents - he is placing something that resembles a totem, on the ground, which soon explodes. Make sure that you are standing sufficiently far away from the center of the explosion. After the fight, keep along your path, open the next gate and walk to the bigger square , where you will be attacked by a quite big group of enemies. Try to eliminate shamans in the first place, because the orbs that they create deal quite a damage (as long as you do not interrupt that attack beforehand). Additionally, you should watch out for the ranged opponents that are targeting you - when several lines align, this means that a shot will reach the given spot.
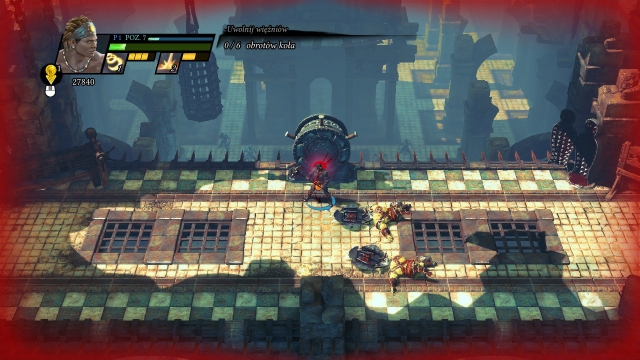 The enemies attack on both sides.
You will reach a location, where you need to spin a wheel six times. With each spin, enemies will arrive here - you especially should watch out for the ranged ones, who use crossbows, as well as for the spots where there appear the spikes summoned by them (the violet outline). An additional handicap are the shots from afar - it is a good idea to remain in movement here and, if possible, eliminate the opponents. After you spin the wheel for the sixth time, follow the newly unlocked passage. After a while, you will walk into a bigger room, which is swarming with opponents. The most demanding here are crossbowmen and shamans, which are best if eliminated in the first place. There will be a bit less opponents if you prevent one of them from hitting the bell on the right side of the hall (defeat the enemy quickly or break the attack).
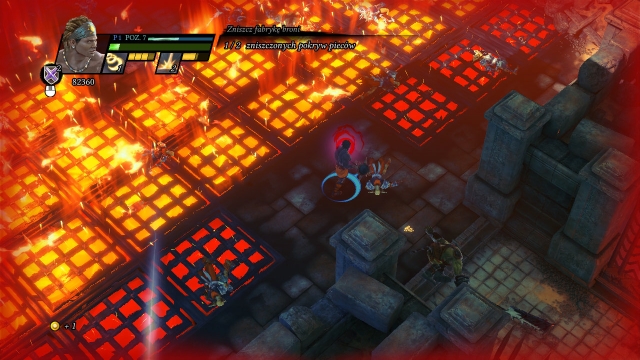 Red! Hot!
After a short walk, your task will be to destroy two furnace lids (a regular attack is enough, you can also use the bombs lying next to the furnace). After you destroy one of the lids, watch out because, occasionally, there come fire blasts from below the grate that you are walking on - make sure that you are standing in a safe spot (the stone flooring). Dart towards the second furnace, land several blows and retreat. As for the opponents, I recommend that you take out the crossbowmen out in the first place. After you have destroyed the second lit, it is going to get really difficult here - there will appear a miniboss. During the battle, remember that you should not walk over the grates at the moment at which they turn red and dodge the marked attacks. After you defeat the opponent, go right - destroy the barricades along your path and watch for fire.
After a while, you will have to spin a wheel again. Six times. With the successive waves of opponents, try to eliminate crossbowmen and shamans in the first place, because they pose the greatest threat. After the battle, walk over the wall to the next room, which is full of enemies. Again, watch out for the whirling warriors and shamans (you can also stop the weaker opponents from hitting the bell - you will have to handle less opponents). A short battle and you can go to see the boss.
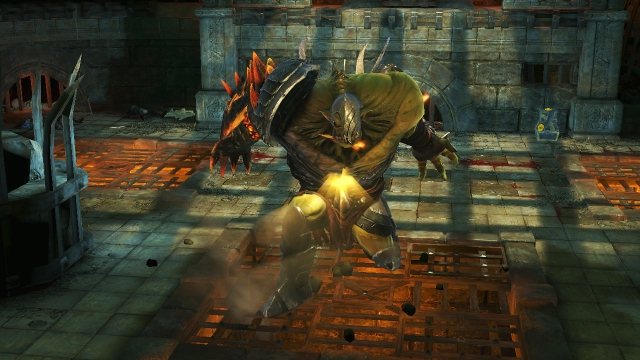 He's already waiting...
This fight is not the easiest one. Right at the very beginning, you should watch out for the opponent's charge. Also, locate the green containers on the sides - they may be very useful. The first part of the battle is nothing out of the ordinary - dodge the opponent's blows and charges, and land your own attacks at the right moments. Also, remember to watch out for the fire coming from below the grates. As soon as you weaken the opponent, he will walk into the middle of the arena to prepare a powerful attack (the orange halo around him).
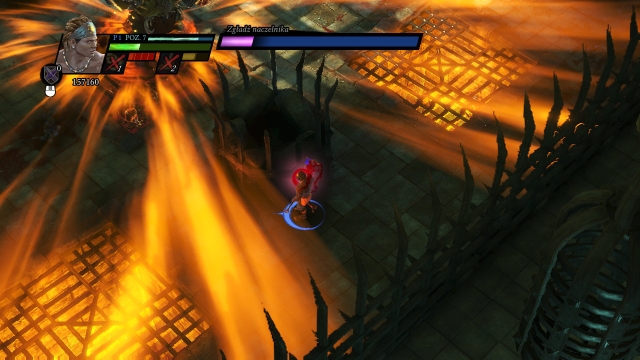
You need to hide (the screenshot), otherwise you will get hit hard. You will be protected by the sides of the arena, something like a heap of stones. Then, Shatterjak will start preparing his attack - break it and start a regular battle then. Watch out for the explosive scarabs that he summons. These attacks will be performed for three times and the entire situation will repeat again, when the health bar of your opponent drops to, around 1/4 - hide again, break the attack and execute the opponent. Note: Shatterjak also shoots fireballs from his slingshot. It is lethal but, marked sufficiently early. Therefore, go off the line of shot and stand behind the obstacle to avoid taking considerable damage.
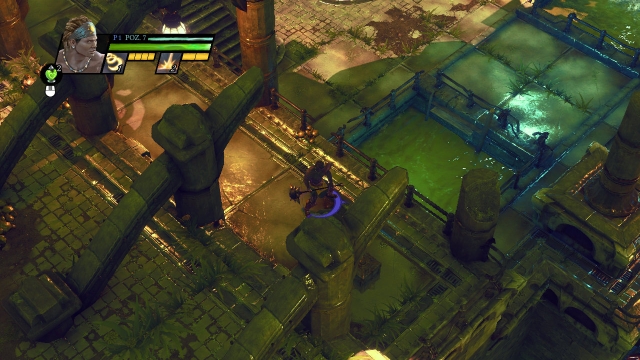 It is a good idea to open the treasure chest first.
OBJECTIVE: Stop the mercenaries that poison the water outlet.
Right after you start, go left - one the balcony there is a treasure chest. Then, follow the main road 0 along your way, you will encounter two groups of enemies. Eliminate the shamans quickly and you will have no problems dealing with the rest.
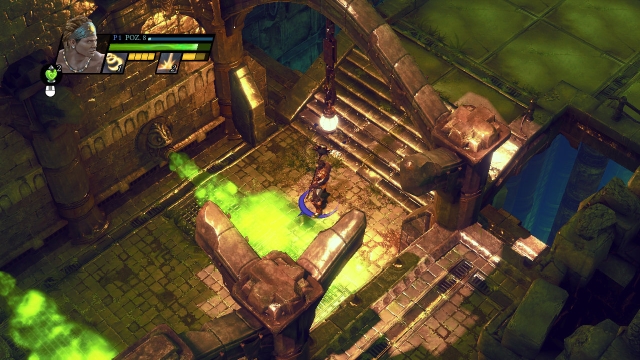
After a short walk, you will get to the location shown in the above screenshot. Of course, you need to watch out for the poison that comes out of the walls - move only when the fumes do not come out.
Your path will be crossed by a miniboss with some other opponents. Watch out for his attacks, which you should interrupt immediately (the flying black "bird). Also try to get out of his way, because this is where he will be directing his violet projectiles - this attack deals considerable damage. After you have eliminated this elite opponent, keep on your path, watch out for poison coming out of the walls.
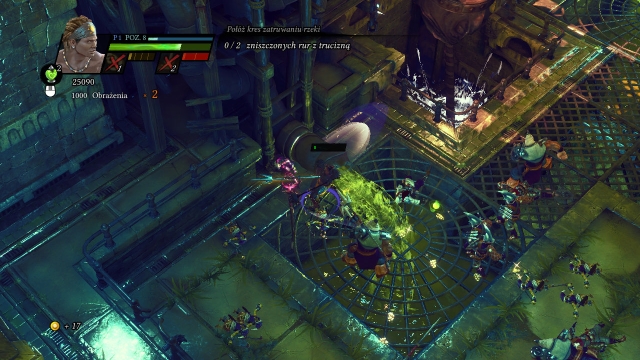 It is a piece of cake to destroy the pipes.
You will walk into a room where you will have to destroy two pipes with the stinking goo coming out of. This is not too difficult - fight the enemies right next to them, which will allow you to eliminate them quickly, and just as quickly will it allow you to destroy the pipes (just make sure that you do not get too close to the leaking substance - it is best to attack the pipes from the side). Then, go over the small bridge. Along your path, you will run into smaller groups of enemies - try to eliminate first the ones that are "spewing" the violet circles in your direction.
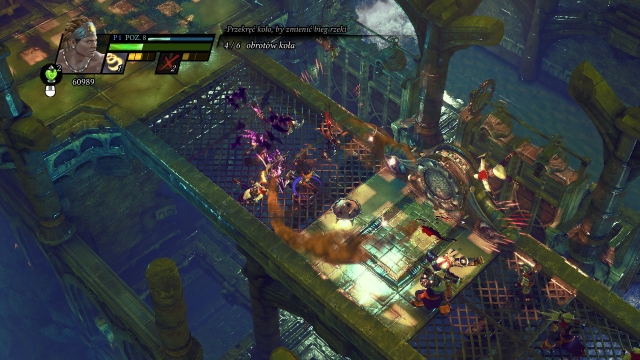 This makes me dizzy...
After you have dealt with the enemies, you will get to the next checkpoint, from which the way will take you to the bridge. There is the wheel that you need to spin, here, as usually, six times. From among the incoming opponents, eliminate the violet shamans in the first place, whose attacks you need especially to be wary of. After the spinning, keep along your path - eventually you will get to the location with another miniboss.
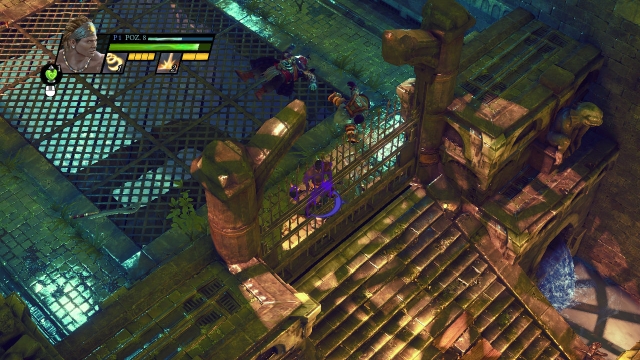 The gate that you will open with the key that you obtain in battle.
The battle is not too difficult - deal with the opponent quickly, while minding his attacks. Later on, deal with the rest. Also,, keep an eye out for the goblins with poisoned barrels - try to eliminate them before they approach you too much. For defeating the general, you will receive a key, which you need to use to open the nearby gate. Along your path, you will have to watch out for the dropping barrels - note that you take damage not only from the direct hit, but also after you enter the green goo (which you should avoid, of course). You will reach the location where there is quite a committee waiting for you - deal with the shamans in the first place and ignore the enraged troll, for now. After you have dealt with the smaller ones, it is going to be easier for you to deal with the boss himself. Do not pussyfoot around with him, because the smaller opponents will start appearing again (deal with them in the first place). After the fight, climb up the stairs, to face up against the last challenge.
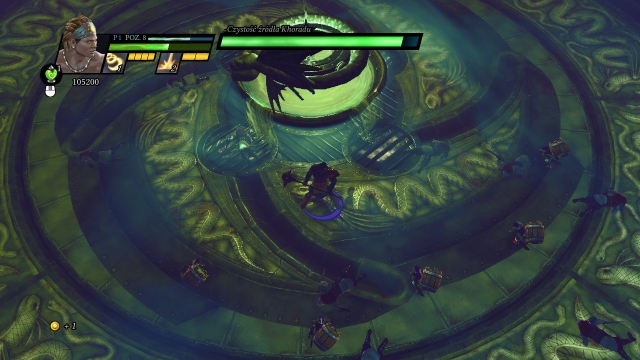 Kill the goblins as far away from the well as possible.
First of all, open the two treasure chests - some additional gold will always come in handy. The, over the bridge straight to the arena. This time around, there is no boss here - your task is to defend the well. Nothing easier than that - only the small goblins deal damage. the ones that carry the barrels with poison. They are your main target - eliminate them early enough, and make sure, at the same time, that you do not stay, for too long, where they die (you are then exposed to the poison and your health bar may go down too much). A good idea is to run around the well and kill the enemies whenever they appear near its edges. The opponents are, in fact, nothing to worry about so, you can easily bear that for three minutes.
 There are many enemies waiting for you in the camp.
OBJECTIVE: Cut through the incoming troops and obtain the N'Aquali artifact
After you start, follow the path to the gate, at which you encounter the first enemies. Watch out for the ones that attack in melee, because they deal considerable damage. After you defeat the first wave, head towards the next part of the cam[ where, apart from crossbowmen and strong opponents that fight at close quarters, there is a miniboss. Try to defeat the weaker enemies in the first place (especially the ones that throw explosives to your feet) , and the miniboss afterwards. dodging is very helpful here. After you win, you will obtain a key that you should use to open the gate in the upper part of the camp. Before you go there, you can destroy the barricades on the right next to the bombs on the ground - you will reach a location with a big treasure chest.
 Each time you destroy two catapults, there will appear new enemies.
You are now up for an ordeal - there are six catapults to destroy, two on the left and on the right and two in the middle. Destroy them using standard attacks. At first, you need to destroy the central square of the majority of opponents, and take to the catapults then. While you are destroying them, there will keep coming new opponents, which is why you should not allow a situation in which you are cornered by too many - control their numbers at any moment. After you have destroyed the catapults and defeated the opponents, exit through the gate on the right side of the camp and continue along your path.
Note: A good idea is to put the most of the weight of the battle on the top of the arena. There are many chests there, which allow you to regenerate your health and energy. Thanks to this, you will be able to eliminate the initial horde of the enemies there. Additionally, while fighting, you should make sure that you do not move too far to the right part of the camp - you will then provoke the troll that will make life too much unpleasant for you. It is best to deal the nearby opponents in the first place and deal with the miniboss afterwards.
 Watch out for traps- springing the majority of them may considerably weaken you.
You will get into a dark forest but soon, you will be "enlightened". In there, watch out for the explosive flowers that will be catching you (free yourself quickly by pressing the interaction key) and green orbs launched by the other bloodthirsty plants. At first, on the right, and then on the left, you will find treasure chests. Right after you exit the forest, there is a small group of opponents and, right past the checkpoint, there is another quest for you.
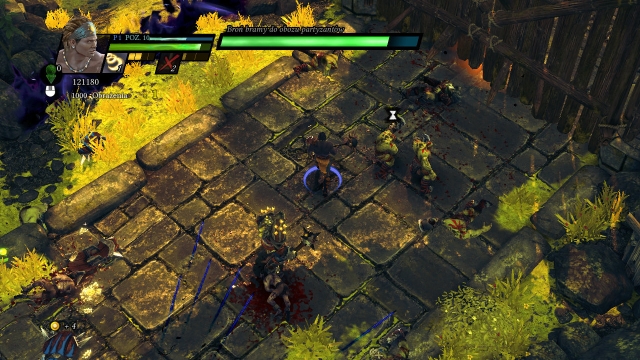 The opponents the closest to the gate are getting prepared to destroy it.
Your task is to prevent the resistance of the gate from dropping to zero/ You should especially watch out for the opponents that approach it and prepare their attacks. Eliminate them in the first place. After several waves, there will also appear a miniboss here (elite troll). Defeating him will end this part and you will be able to proceed.
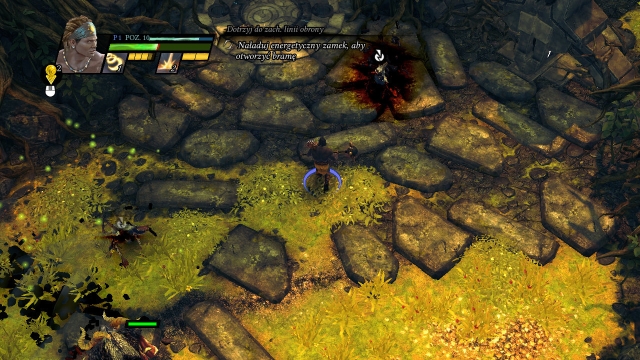
After a while, you will reach a location shown in the screenshot. Your task is to charge the lock with your own energy, thanks to which it will open a new path for you. In the first place, it is a good idea to clear the area - defeat the weaker opponents and then the elite beast itself, which may cause some problems. Thanks to this, you will get a greater freedom of movement. Charge some of the lock's energy and then, fight the enemies to regenerate it. You can also speed up this process with an appropriate totem. After you charge the lock, the monsters will cease to appear and you will be able to proceed. The most difficult part is over now. At the moment, you need to defeat two groups of opponents (watch out, because they consist mainly of the big, strong opponents), including one with a miniboss in it (and also the other ones are strong) and you will only have to reach the last opponent.
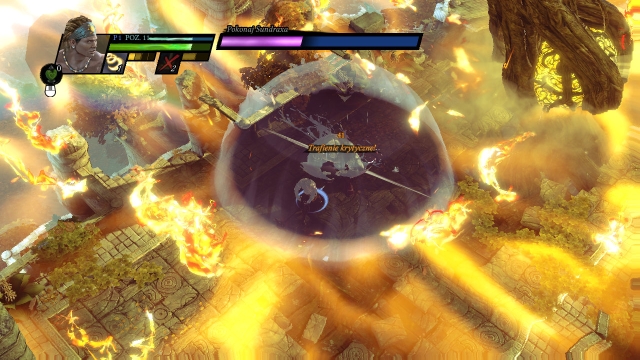
The boss battle at this stage is not too difficult. You need to remember to dodge and land your blows at the right moments. The two most powerful attacks of your opponent occur one after another - first, he jumps up into the air and the violet halo shows where he lands. After he returns to the ground, free yourself as quickly as possible (the interaction key) and dart towards him, as he is preparing the next attack (something like rain of fire bolts). You then need to get under the shield that he created, with him thanks to which you will avoid taking damage. Whenever there is an opportunity, attack with all power. At some point, Sundrax surrounds himself with a whirling "shield". and you will be unable to deal damage - take advantage of the appearing goblins with bombs and throw them in his direction, or detonate them whenever the opponent is next to them Best with combat arts, to prevent taking damage). The above situation happens twice so, repeat and knock down the opponent without major problems.
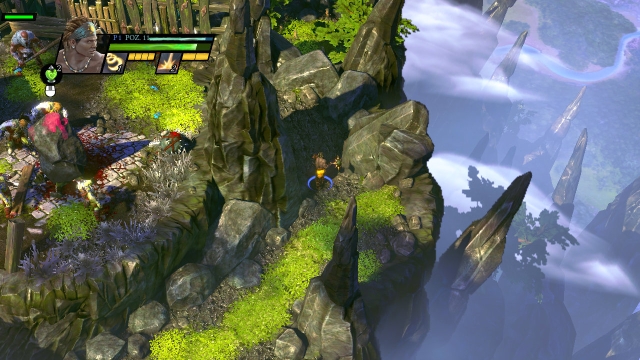 The first opponents are waiting already.
OBJECTIVE: Find the pass across the Alkazaba Mountains, reach the mines and block off the hidden passage.
Follow the path until you reach the bridge that collapses. Backtrack, watch out for the dropping rocks and cross the crack in the palisade. As you follow the path, you will reach a location where you will have to fight against several opponents, including an elite troll. Then, open the gate with the key, which you obtain after defeating the opponents. Along your path, you will encounter one more group of opponents and, right past the bridge, you will get into a small camp.
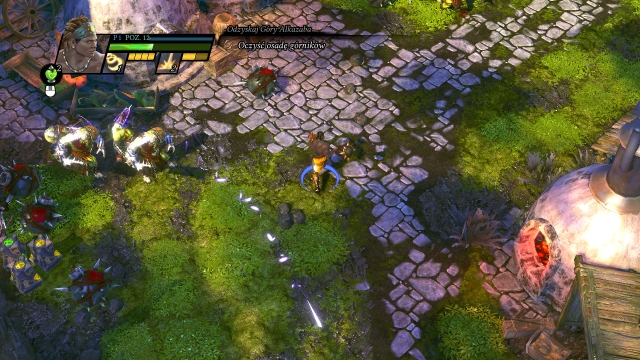
You should watch out here, mainly for the pesky crossbowmen and the bombs on the ground - do not detonate them if you are too close. As soon as possible, turn right to find a treasure chest. Return to the path, keep going and defeat a small group of enemies along the way. You will reach the location shown in the screenshot. First, eliminate the nearest opponents and deal with the miniboss (another troll) afterwards. Use the nearby bombs to your advantage, e.g. by destroying them at a distance, when the enemies are standing near them, or throw them at the enemies.
After the battle, enter the mines. You will be transferred underground. Head forward and after a moment, you will get into a smaller room. Eliminate the shamans in the first place and then, take to your next objective.
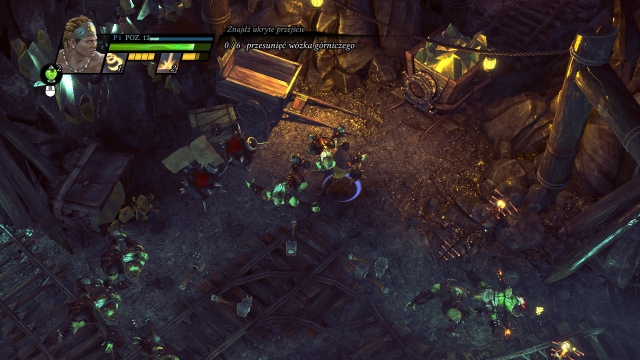 You need to move the cart to open the way for yourself.
You need to interact six times with the cart and, with each time, it will move forward and you will be attacked by more enemies. Make sure that you are not stuck in the narrow passage, between them and the cart. After you knock the cart down into the chasm, defeat one more group of enemies (watch out for the crossbowmen) and proceed.
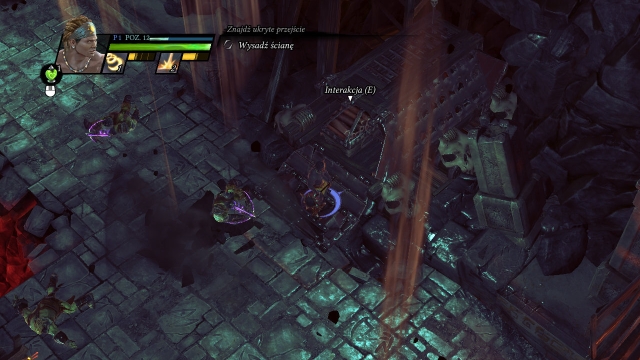 The place to obtain dynamite from.
Along your path, you will encounter more opponents but, you should watch put, mainly, for the dropping rocks. After you defeat all of the opponents, collect dynamite (the cart, more or less, in the middle; interaction key) and plant it in the marked spot. The wall will crumble and you will be allowed to proceed. You will get to a location, where some opponents get down to you from the bridge. Eliminate the crossbowmen, in the first place, and the shaman. Then, deal with the rest. You can now return to the location where the opponents descended from the bridge - at the end of the road, there is a treasure chest.
 The last stop before the final battle.
As you keep going, you will encounter an elite opponent and two shamans which you need to deal with in the first place. While fighting the miniboss, pay attention to the specter that he is summoning - break the attack, because it deals a lot of damage. After the fight, descend and cross the portal.
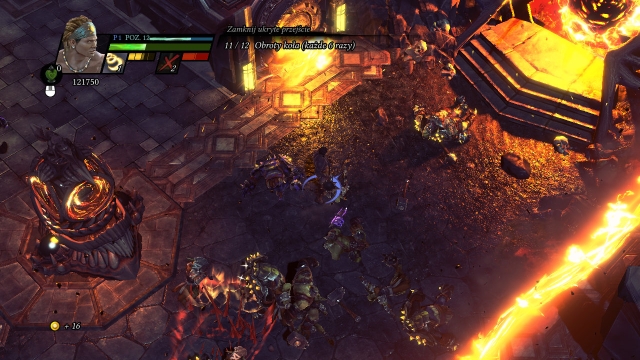 While spinning the wheels, watch out for the firebolts coming your way.
Your last task is to spin both of the wheels six times each. The wheels are right next to the portal, opposite each other. You spin them by interacting with them. The greatest handicap are the fire bolts that are launched by the nearby turrets so, you cannot simply stand at the wheel and spin it quickly - timing is the key. A good way to do that is to spin the wheels alternatively - you spin one, kill the opponents quickly, to prevent a situation in which it becomes too crowded, and run towards the other. This way, you should deal with this task quickly, to prevent being exposed to the health point loss for too long - there is no point in loafing around, just do your job. After the last spin, the opponents disappear and the mission ends in success. If necessary, you can stop running between the wheels - deeper into the cave, there are chests that allow you to regenerate your health and energy.
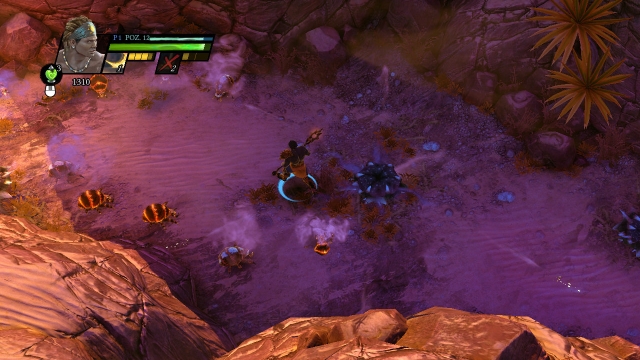 The inconspicuous worms can explode all of a sudden.
OBJECTIVE: Reach the Palambron Fortress and destroy the Heart of Darkness
Go ahead and defeat several opponents along your path. Watch out for the "beetles" because they explode after they come too close to your character and deal considerable damage. You will reach a bigger square, where you need to destroy obstacles. Right past the square, you will encounter a big group of opponents - watch out for the shaman.
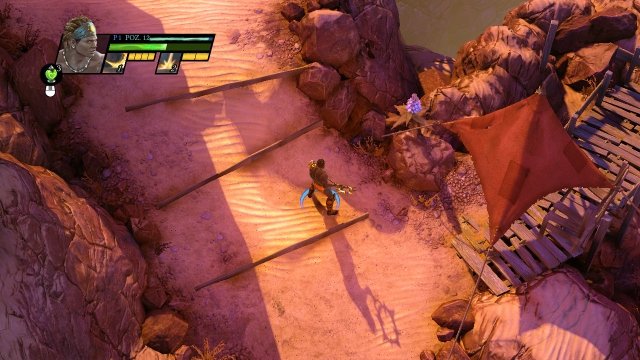
After the battle, keep along your path. In the spot shown in the screenshot, you can destroy the obstacles on the right and descend - you will find there a treasure chest and containers with health orbs.
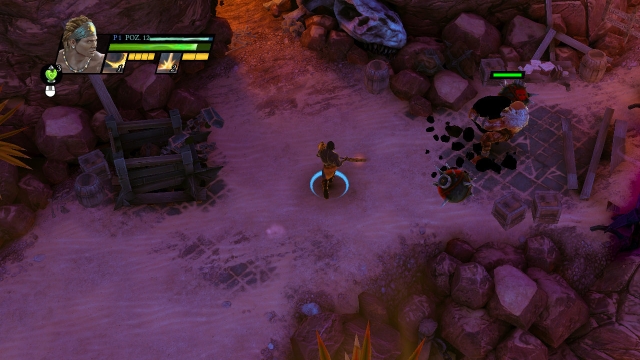 Two trolls are quite a challenge- do not let them corner you.
Return to the main road and go up, where there is quite an ordeal waiting for you. Destroy the two, or three obstacles, while minding the dropping stones. At the peak of the mountain it turns out who was throwing these stones - you will have to square up against two elite trolls and lots of smaller creatures. Use the bombs here - throw them, destroy them at a distance whenever the opponents are nearby. Try to use frequent dodges and attack the trolls when they are holding a boulder - this will win you w moment to deal damage. Still, you need to watch out for the spot, where the boulder drops. Do not worry about the smaller monsters here - they are weak and they will keep coming up until the moment at which you deal with the trolls. It is a good idea to focus on killing one of them, first, and then fight the other one, because this is going to be easier that way, of course.
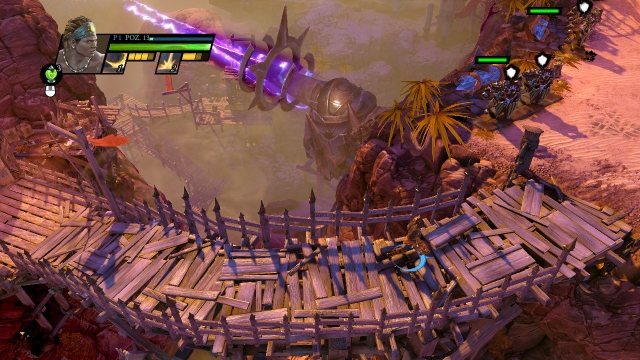 Several well-aimed blows and the antenna falls into the chasm.
Get over the bridge and you will receive a small task. You need to destroy two antenna catches. You can either do that with regular attacks or use the nearby bombs. Regardless of the way in which you do that, eliminate the monsters first, which will make life easier for you. After you have completed the task, you will still have to fight the elite shaman and his minions. Interrupt his attacks at the appropriate moments and the fight will be easy. If you still have not used up the bombs, this is the right moment to- they can considerably speed up the process.
 The yellow circle shows the range.
Go over the bridge until you reach the yard. Your task is to obtain the key to the gate - this means that you need to perform the arduous elimination of the enemies. At some point, the fight will be joined by a miniboss - you should especially watch out for his AoE attack (the yellow circle). For winning the battle, you will be rewarded with a fragment of the key and the second one will be dropped by the killed monster. Cross the gate over the stone bridge. You will get to a small arena, where there appears a tough guy.
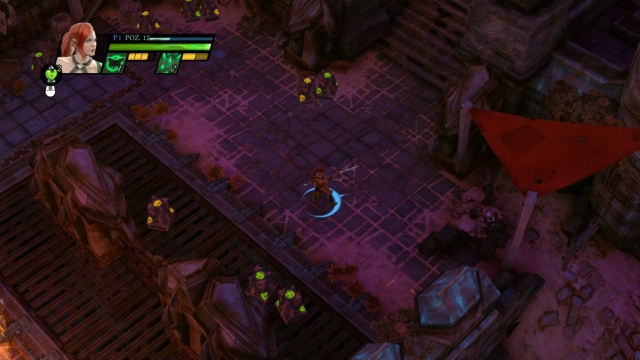 Under the "baldachin" there is an obstacle - destroying it gives you access to a big treasure chest.
Note: before you enter the arena (the big stairs and lots of supply chests at the foot) you can destroy several obstacles to the right of the spot, to which you get right after you walk off the bridge (the barricade under the red "baldachin") - down there, you will have to fight an elite shaman and quite a group of opponents. As a reward,, you will obtain a big treasure chest.
The fight is not too difficult, if you watch out for the opponent's attacks and use the bombs all over the arena. Much faster, you can deal with the opponent by throwing them at hi, instead of with the regular attacks. As for the smaller monsters, there is no point in bothering about them - deal with the butler and open the gate with the key that you obtain.

You will reach the location shown in the screenshot. You need to watch out for the spinning beam of dark energy - it is best to pass right behind it and destroy the emitter (watch out for the ensuing explosion). Later , you will also need to watch out for the bombardment with this energy (the violet halo on the ground) and for one more such device, at which you will have to fight multitudes of monsters and an elite shaman. After you deal with him, walk over to the last checkpoint and get to the arena.
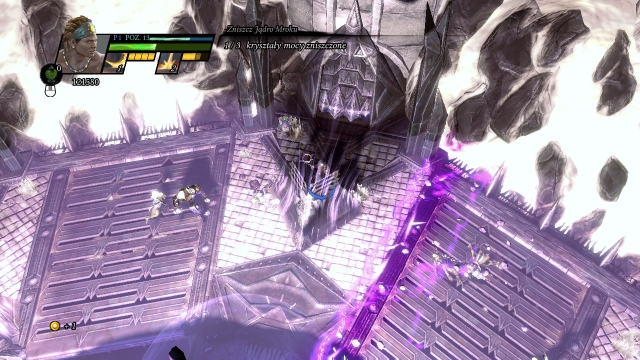 The spot in which you need to hide from the main explosion.
Your task now is to destroy three crystals. First of all, deal with the closest one. Once the heart starts gathering energy, this will mean that it soon explodes. You need then to hide, as quickly as possible, inside one of the three recesses in the arena, which will shelter you from damage. After you destroy the first crystal, additional handicap will be the energy beams, which encircle the arena, along with the heart - try to escape it and, if it is impossible, walk through them, as quickly as possible (it is best to dodge then) thanks to which you will not be affected by them for too long. After you destroy the second crystal, the next thing that you need to watch out for is the dropping charges of black energy (violet halo on the ground). All of these attacks, at a time, will make this a tough situation - try destroying the third crystal, as quickly as possible and you will complete this mission. You do not need to worry about the monsters -their role here is rather to obstruct you and their attacks deal far less damage than a beam of energy, or the explosion of the heart. Ignore these monsters and attack only if their numbers start restricting your free movements.
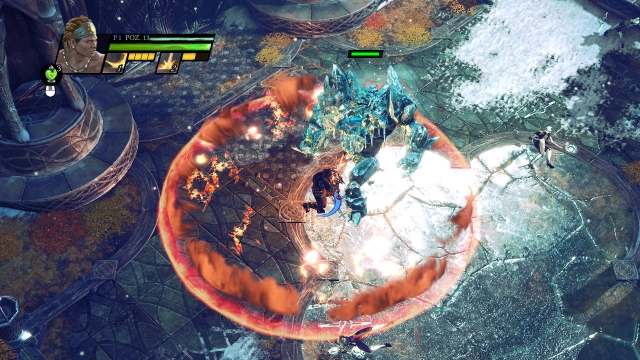 A good opponent at the very beginning - I like it.
OBJECTIVE: Repel the attack on the Icecreek Sanctuary and save Serafia Aria from Zane, and his troops.
You start off a bit unusually, with a miniboss battle. Your task is to defeat an ice monster. The basic for fighting him is constant movement and dodging. Watch out for one of his attacks, especially - he jumps up into the air and slams to the ground. Make sure that your character is not standing within the blue area of effect. After the fight, go ahead and you will walk into the location, where there will be two doors opened for you. Your task is to cross the one on the left (after you go right, you will find a treasure chest but, it is being guarded by an elite troll and two minor crossbowmen). After a short walk, you will find a bridge - while crossing it, watch out for the ice spikes, which extend in certain spots. At the end of the bridge, there is a small welcoming committee - several smaller monsters and an elite troll.
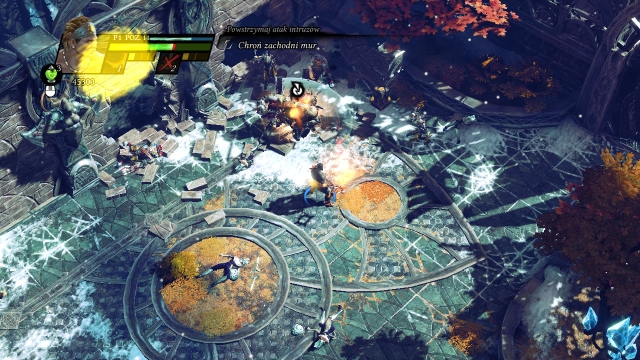 The wall defense boils down to surviving several waves of attack.
As you go ahead, you will reach a wall that you need to protect. The wall has no health bar, however - your task is to survive the successive waves of opponents. The arena is big, you will have no problems remaining in motion and swift elimination of successive waves. After the battle ends, the wall will be safe and you cross the newly-opened gate.
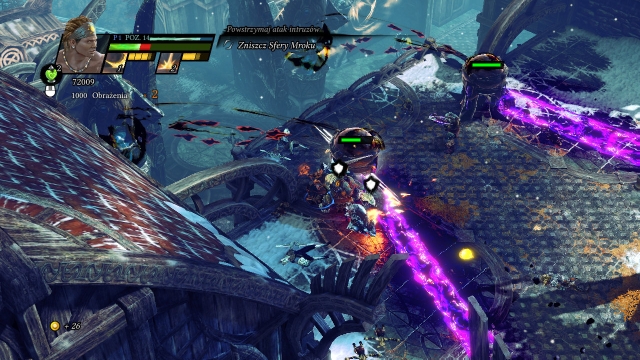
You will reach the location shown in the screenshot. Your task is to destroy two devices that emit energy beams. A good way to avoid it is run around the sphere, while attacking it and the enemies at the same time. After you destroy the devices (watch out for the explosions) be on your way and watch out for the icy spikes on the bridge. You will get to the location whose destruction you need to prevent.
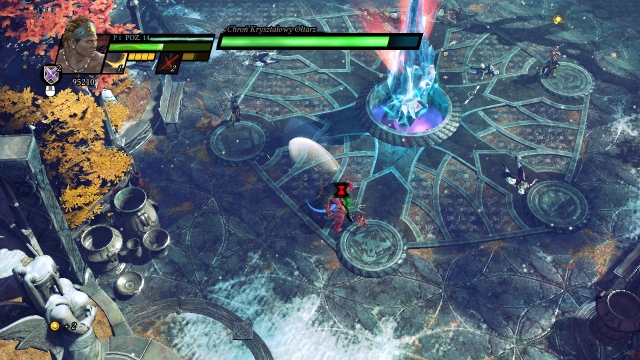 An enemy preparing the attack - you need to break them as quickly as possible .
Your task is to protect the altar in the center of the area. Try eliminating the enemies that shoot explosive projectiles at it, in the first place (interrupt their attacks) and the whirling warriors that also are damaging the altar. Remain in motion to avoid the crossbowmen - you need to withstand several waves of attacks. After the successful defense, be on your way and you will soon receive another mission.
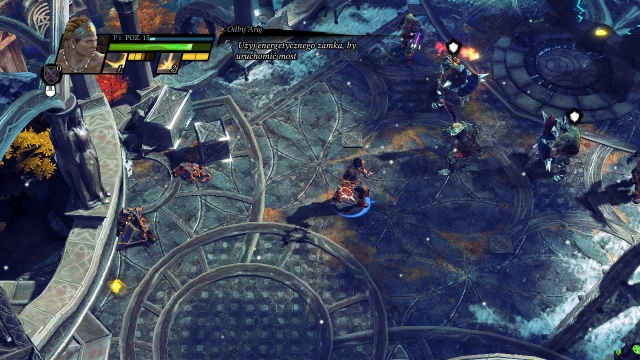 Again, charge the lock - it is a good idea to use the totem of energy.
You need to charge the energy lock with your energy, thanks to which you will open the way ahead. First of all, deal with the enemies here and, after that, take to the lock. Watch out for more enemies, especially the ones that throw bombs - try to eliminate them and then return to the lock. Two, or three attempts will get the job done. You can use the totem of energy to speed it up.
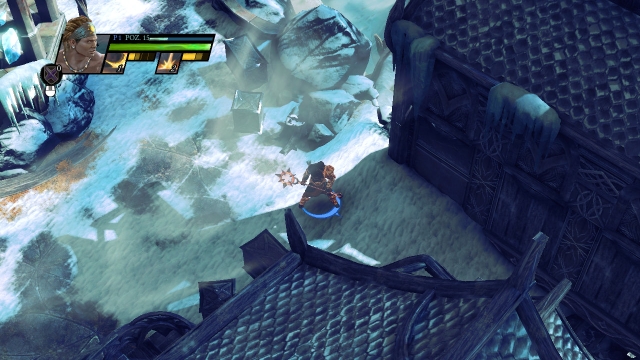
As you go ahead, you will encounter several weaker opponents. In the spot shown in the screenshot, it is a good idea to take the narrow path and go down - you will find a big treasure chest there (it is being guarded by a miniboss and two warriors with bombs). Return to the main road and go up to reach, after several moments, the final checkpoint.
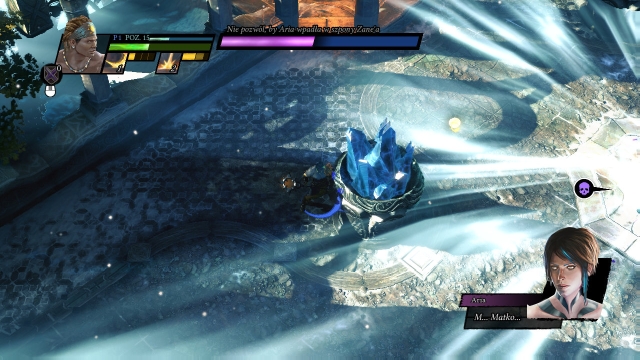 This attack scared even Aria...
The fight with the elemental may be quite a challenge. In the first phase, watch out for his regular attacks, and especially the impetus drop towards the ground (the blue shape). Once you weaken him a bit, you will have to hide behind one of the four obstacles in the arena - the elemental will move to the center and send out its attack all around the area. Additionally, you need to watch out for the next attack of the opponent - he summons lumps of ice from under the ground. Although you can see where they impact, in the heat of the battle, you may inadvertently walk into that area, which is why you should be careful. It is a good idea to conduct the battle near one of the obstacles, thanks to which it is going to be easier for you to hide and the cat and mouse play may offer measurable profits. The situation with the AoE attack from the center of the arena will happen again when the health of your opponent drops to around 1/3 of the initial value. After you survive that attack, you should be able to win without major difficulties.
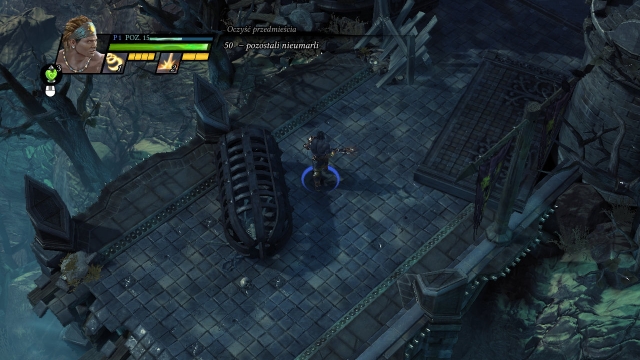 The bloodshed starts around this corner.
OBJECTIVE: Get to Braverock and put an end to the plague of the undead.
Go ahead. After a while, you will encounter the first group, which is no challenge to you. Then, you will get to the suburbs, which you need to clear off the enemies.
The task is very easy - you simply need to use the weapon for some time to kill all of the undead. They are no challenge to you so, it is a perfect opportunity to have some fun. In the street on the right, there is a treasure chest. Keep going ahead and you will find more opponents - first, deal with the airborne monsters, because the undead are no threat, even as a larger group. After a short walk, you will encounter a miniboss and the regular opponents.
Deal with the smaller monsters quickly and take to that monstrosity - his attack is very strong but, it takes long to prepare it, thanks to which you will have no problems dodging it (in the room ahead, there is a treasure chest).
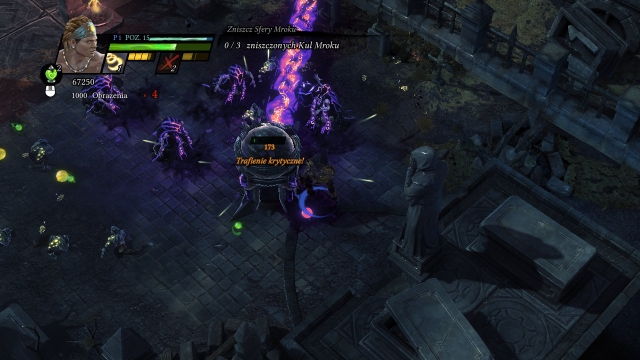 There is a small group of enemies guarding each orb
You need to destroy three devices, which you have already had experience with that send out a beam of energy. One of them can be found to the right side of the location, the second one to the left side, and to reach the last one, you need to get across the entire cemetery, because it is at its very end, also on the right (nearby, you can find a treasure chest). Destroying all of the three spheres of darkness opens a passage for you- go towards the gate, more or less, in the middle of the Eastern side of the cemetery.
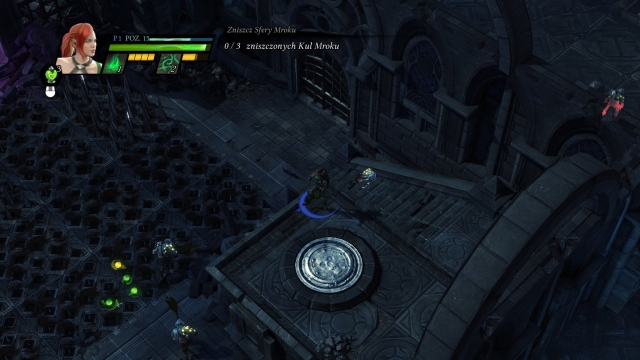 Entering the circular button stops some of the spikes, thanks to which you can pass by.
Note: above the leftmost Sphere of Darkness, you can find a location where there the passage is obstructed by spikes coming out of grates - do not try to run over them too fast, or dodge. The way to do that is different - walk over to the right over the fields, where there is nothing projecting, and climb up the stairs, where you need to walk onto the circular button on the ground. Then, walk over the safe grates, over to the left and do the same. Now you can walk into the middle, where you find a treasure chest with lots of gold inside.
 Something's in the air.
In the chapel, there is some fighting for you to do but, the opponents are not too demanding. Watch out for the small, silvery parasites that are shot out in some spots - they make you free yourself and, at the same time, they claim some health. As you go ahead, you will get to a hall, where you are attacked by specters and demons - deal with them first.
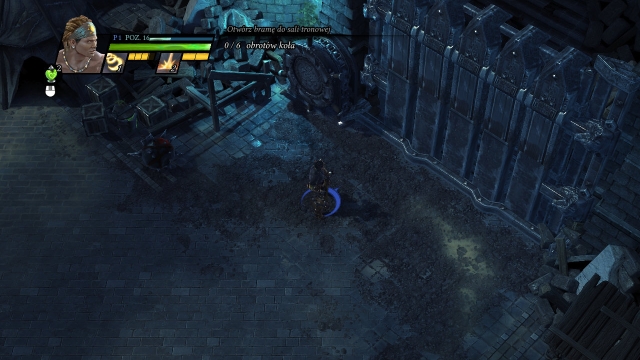
After a short walk, you will get to the gate shown in the screenshot. Your task is to open it, of course. You will do that, by spinning the wheel six times where, each time you give it a spin, there appear several opponents (nothing to worry about).
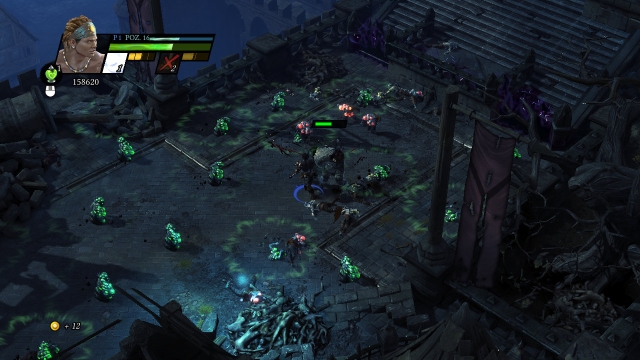 The attack deals damage over a vast area.
After you open the gate, go ahead to meet Hector v2.0 - a miniboss, that you have already had a pleasure with at this stage. He is not too difficult an opponent - you only need to watch out for his attack, because it deals serious damage over a vast area (green outlines). Try dealing with him as quickly as possible and do not bother about the undead here. After the battle, you can go for the boss.
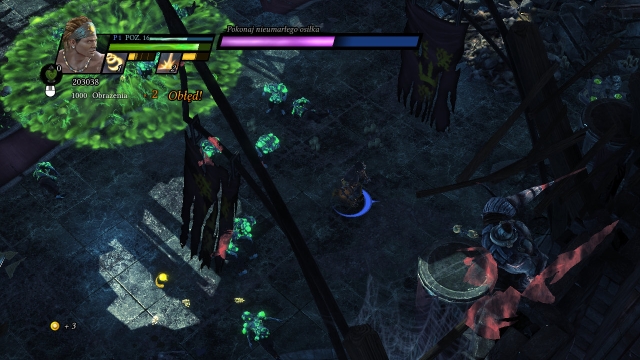 Watch out , especially for the greenish poison.
Your opponent is not a beefy kind of guy. It is not his charge that you need to watch out for, as much as it is the marked round blow, which leaves a greenish poisoned circle on the ground - try not to walk into it. Another handicap are the smaller creatures, which explode after they approach also into the puddles of poison. Try to attack them at a distance. After the big opponent charges, he becomes an easy target for you. His attacks are not too powerful so, you do not need to hide - the most important thing is to watch out for the poison (which the boss also tends to spit out), because it may potentially claim the most of your health points.
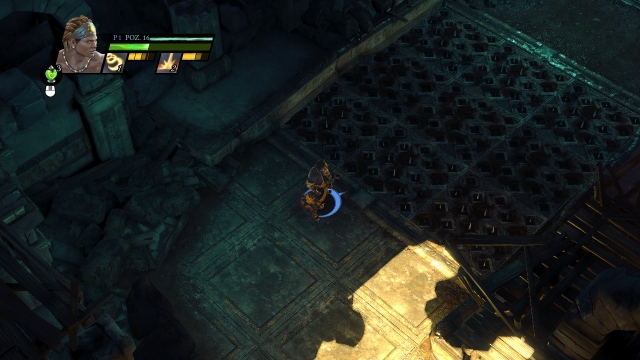 The pattern in which the spikes appear is simple - either both sides are safe, or the middle.
OBJECTIVE: Gain access to the fortress and destroy the supplies for the next batches of weaponry.
Go ahead and after a while, you will run into the first opponents. Watch out, especially, for the ones that throw the explosive projectiles at you and for the whirling warriors (they leave traces of fire on the ground, which also deal damage to you). After you deal with them, go to search for the key - first the stairs on the left. On top, watch out for the spikes because a moment's inattention may cost you your life. Note how the mechanism works and walk through carefully. (walk onto the next grate as soon as the spikes hide). Collect the half of the key from the chest and return to the gate. Then choose the second stairs. Here, you are up for a bloodshed- your worry is not only the elite troll (who has the second half of the key) but above all, opponents that throw projectiles - try to shield break, because stepping on several bombs at the same time results in drastic lowering of the health level. Try to eliminate them first and the fight with the troll will not be a problem.
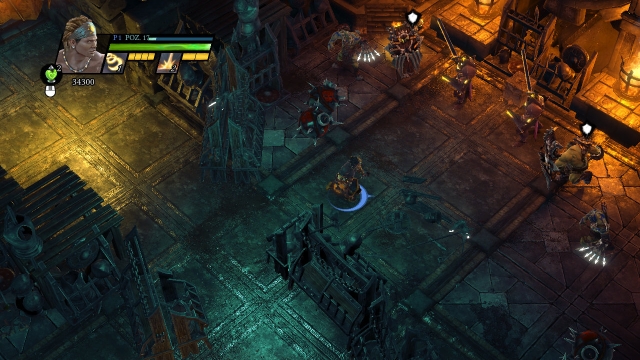 It is good idea to retreat a bit and attack the enemies in the narrow passage.
Go ahead and you will reach a location with barricades. You may not attack the enemies (they are quite strong) and go left immediately. If you decide to fight, you can retreat quickly, to the location before the barricades and throw a bomb to the enemies and attack them in the narrow passage. After you win, you can open the treasure chest. Head towards the main road, until you reach the room with a miniboss and opponents that throw bombs (try to take them out in the first place).
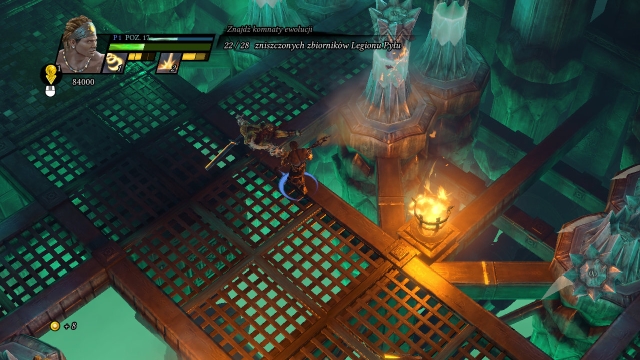 Enemies will come out of some of the reservoirs.
After the battle, go down (does not matter which stairs, you need to visit both chambers anyway). Downstairs, there are reservoirs that you need to destroy. Get busy - watch out for the ones with the enemies inside - you will have to face them and they are dangerous. After you destroy all of them, go ahead, over the bridge. After you get over the bridge, go left (a treasure chest to the right, until you find another bridge (and opponents) . Just like before, you should especially watch out for the ones that throw bombs.
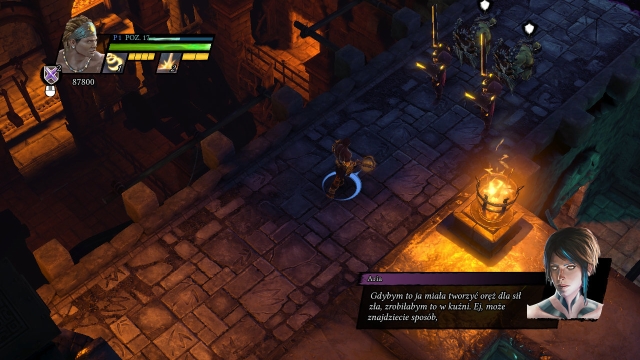 There are strong enemies on the bridge.
After a while, you will get to the location,, where your main task is to spin the wheel. Just like before, after each spin you take, there will appear a group of opponents here and, after the last one, leave this area as quickly as possible, because stones will start to drop everywhere. Sprint to the stairs (do not worry about the remaining enemies), to the checkpoint and you will be safe. Later into the mission, also watch out for the dropping stones and for opponents.
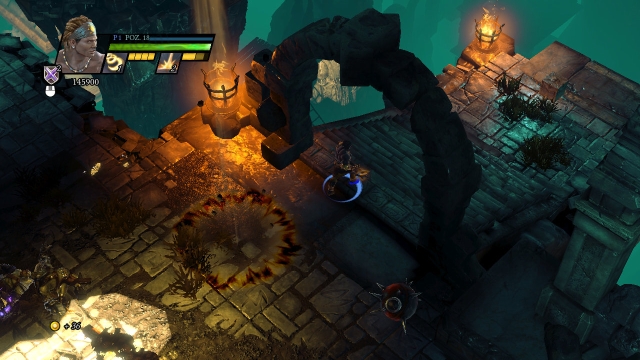
In the spot shown in the screenshot, descend to find a treasure chest. A moment later, watch out for more enemies - especially for the elite one and his company. Once a strange bird starts circling above your head, make sure that you are staying outside of the miniboss's reach. Try to eliminate his minions first, often by retreating outside of the opponents' reach/ Several attempts and the main opponent remains alone and this is easy. Then, cross the gate to the main boss and watch out for the falling stones.
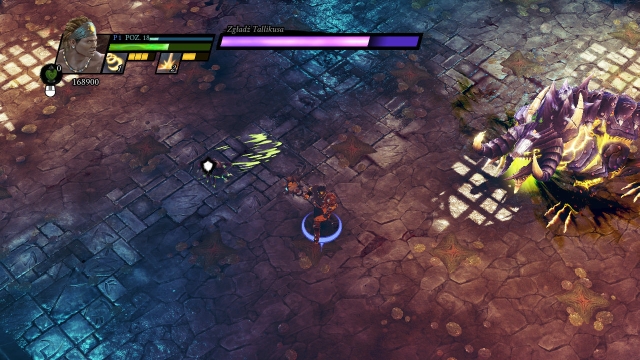 The beast, right before spitting poison.
This battle consists of three stages - first, you need to watch out for two things: poison that the monster spits and long leaps that he takes. Especially the latter can be cumbersome and unmarked. Attack only when you are sure that you will not be countered, e.g. after the monster spits poison. Try to remain in the center of the arena - there is nothing worse than being cornered. Once the boss's health bar drops to zero, the battle does not end- Tallikus sheds its armor and start fighting with his health bar full. Apart from the above, now you also need to watch out for poison that he leaves after the jumps and for the one spit by poisonous plants (their attacks can be broken). Try to deal with the monster as quickly as possible - without the armor, he is much weaker and your attack deal more damage to him.
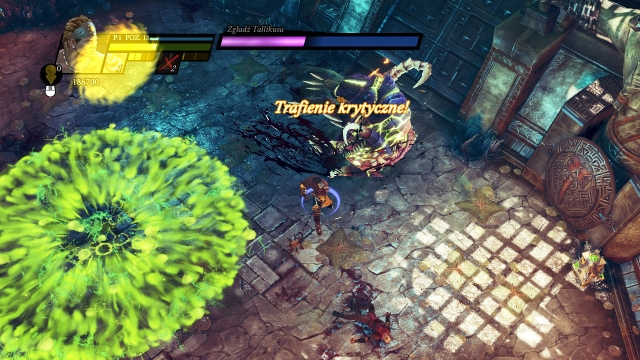 The beast lay down - an excellent moment to execute.
The final phase is a bit different - the beast starts jumping and dropping onto the marked areas, which you especially need to watch out for, because the area of attack is quite big. At some point, he will start preparing his attack, while remaining on the ground - it is an ideal moment to break the attack and launch yours. Beat the beast as much as you can and repeat the whole, depending on the effectiveness, three or four times.
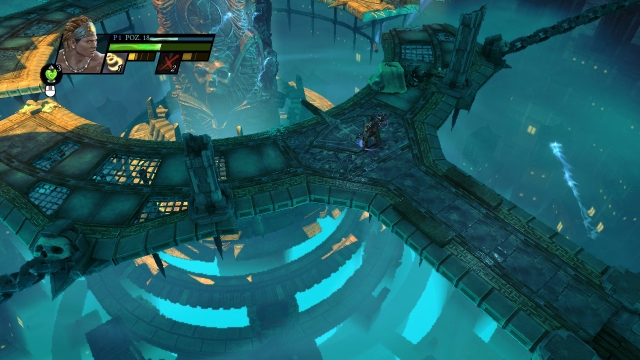 A journey into the center of the Earth?
OBJECTIVE: Help the last Dwarf protect the seal and protect Zhurag from primordial Evil.
Right at the very beginning, you can open a chest - it is on the balcony to the right of the starting point. Deal with the beasts in the first chamber and after a short walk, you will receive a new objective.
You need to destroy the central device - several attacks should do and the opponents are no threat. After the battle, walk over to the neighboring room.
 The Cinemat is in a small room next to the one with the construct in it.
Pick up the wooden wheel from the ground and go ahead.
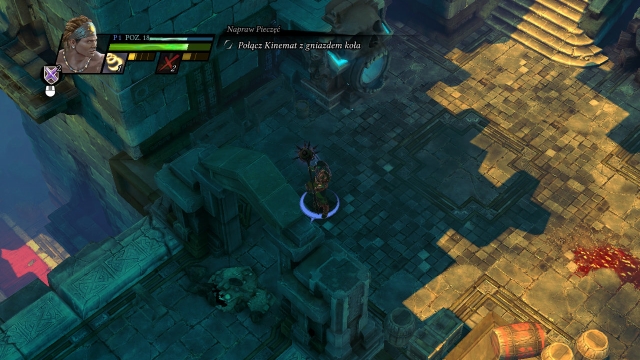
On the yard, you will be attacked by lots of weaker monsters and behind the barricade, there is a treasure chest. As you go ahead, watch out for the solver balls coming out of the openings, because they deal lots of damage. In the spot shown in the above screenshot,, go down the road - you will find several opponents there and a miniboss. Also, there is a big treasure chest. Return to the main road, past the checkpoint, there is a spot, where you need to use the wheel (interact).
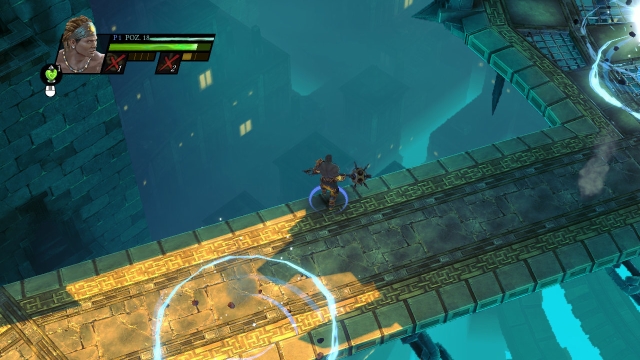 The beams of energy deal lots of damage. Remain in motion to remain safe.
Your next task is to spin the wheel a certain number of times, to start the Dwarven Seal. Just like earlier, new enemies will be coming after each spin. Watch out, especially, for the airborne beasts that drain your health - break their attacks at the right moments. After you success, go ahead - along your path, you will have to watch out for the beams coming your way. Move quickly and do not stay in one place for too long.
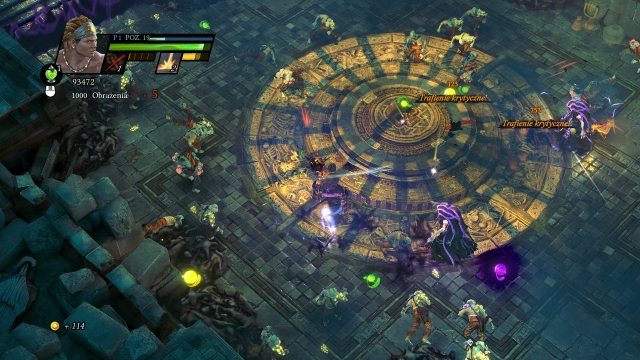 A battle with a swarm of the undead - simple and fun.
You will walk into a hall with a skull on the floor - watch out for the trap that activates. You will have to fight an exciting and easy fight with swarms of zombies and the other apparitions. If it gets too tight, you can activate the trap yourself and reap the nearby zombies - you simply need to walk onto the skull. After you are done, climb up the stairs. There is quite a challenge waiting there for you - first of all you will fight an elite monsters and, when you deplete his health bar a bit, the fight will be joined by another one. As quickly as possible, kill the first one, thanks to which you will be able to focus on the other, who is strong by himself. Watch out for two attacks - charge (marked with crossing the claws) and, especially for poison spits. After the fight, head towards the exit on the right side of the room.
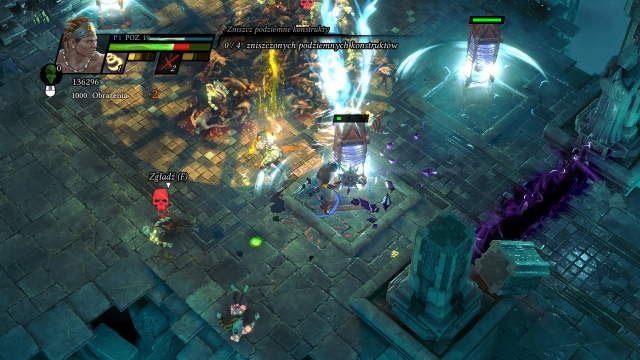 After you destroy all of the devices, evacuate.
It is time to destroy devices similar to the ones that you have destroyed earlier - this time, you need to destroy four of them. During the process, there will keep appearing new monsters here but watch out for the constructs themselves - occasionally, they emit a wave that deals considerable damage to you. Once you destroy all four of them, you can proceed on your path and defeat several more weaker monsters along the way. Right after you reach the checkpoint, run ahead quickly because you will be hit by the projectiles, otherwise - it is better not to let them overtake you.
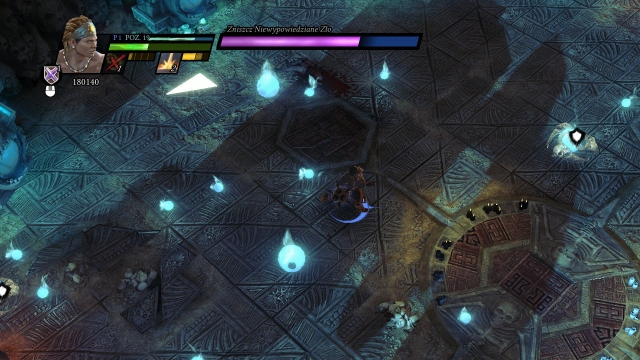 Use bash and destroy the orbs.
The fight with evil is not that difficult. First of all, right at the very beginning, dodge because there may fly a blade towards you - watch out for this type of attacks, because they are quick and deadly. You need to be even more careful around the whirling Evil itself - fortunately, this type of tricks can be easily interrupted. The last thing that you need to pay attention to are the silvery parasites released by the boss, which immobilize you temporarily, while taking some of your health. Once the boss's health goes down a bit, he will disappear from the battlefield, for a moment. To make him return, you need to destroy the orbs that he left behind.
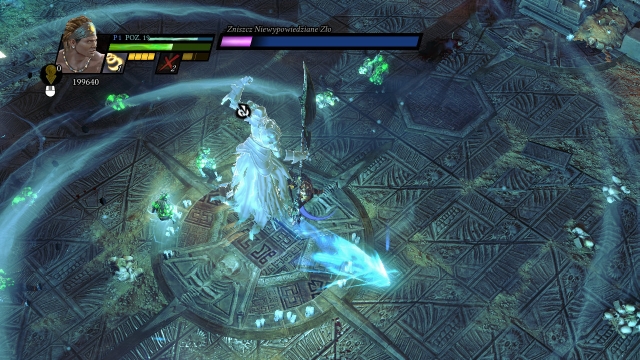 An excellent moment to break the attack and land several blows
He will then appear in the middle of the arena and start preparing another attack - an ideal moment to break it and land several blows. The situation will happen again and, additionally, you need to watch out for the orbs coming out of the holes in the sides of the arena, which cross the place, and for the beams of energy coming from above (they deal quite a damage). Finally, break the attack prepared by the Evil and show that good always prevails.
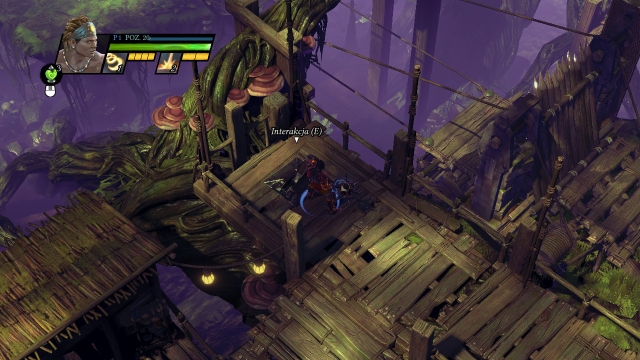 Opening the bridge is just the beginning.
OBJECTIVE: Find the chapel hidden in the swamps to strengthen the heart of Ankaria.
The beginning is calm - follow the path up to the bridge. You will find the lever that opens the bridge on the wooden platform to its left. Then, you will get to a small mead where you will be attacked by the first monsters (there is a treasure chest in its upper side). After you defeat them, go towards the temple At the entrance, you need to watch out for the spikes that appear from under the ground - enter the next platform right after they hide.
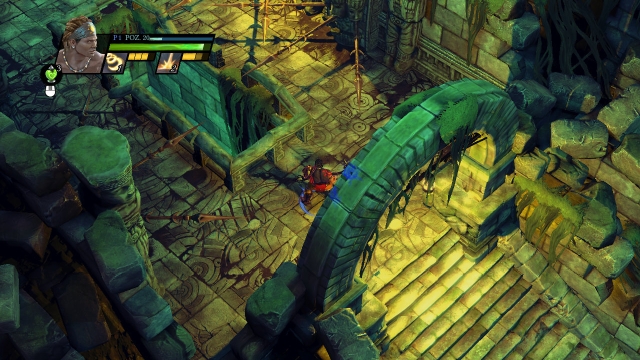 Quickly, run along the wall at the moment at which the spikes hide in the wall
You will now get to the location, where you will have to spin the wheel six times. Each time after you spin the wheel, apart from the monsters (watch out for the shaman beasts) rocks will be coming down. After the last spin, go down and follow the newly-opened passage to the room, where you need to pay attention to the spikes coming out of the walls - run along this bit quickly, at the moment at which they hide. Then, you will walk into the garden.
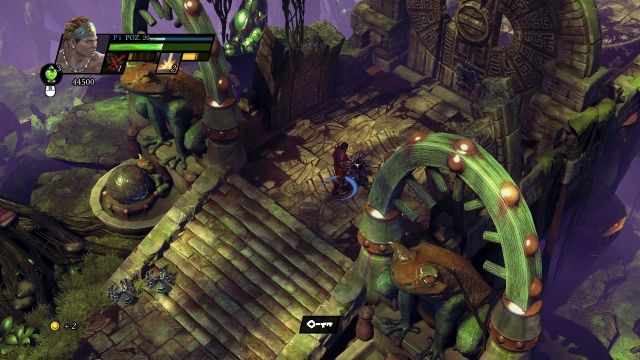 After you find the keys, go to the gate.
Here, you need to find four fragments that will allow you to assemble a key to the gate. The fragments are in treasure chests - two on the left and two on the right side of the garden. Watch out for the plants that release poisonous orbs.
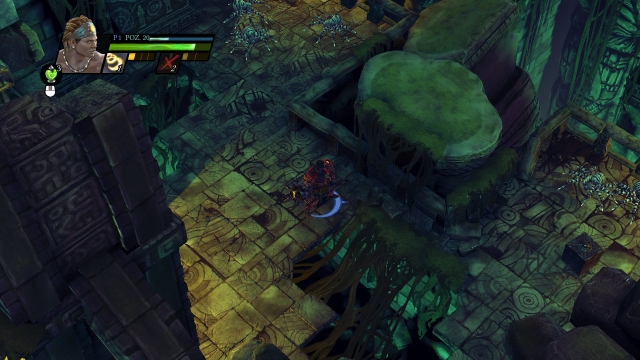
After you open the gate, go ahead until you get into the room shown in the screenshot (along your path, you will have to defeat an elite beast - in itself it is no threat). Watch out for the spikes extending from walls. On the right, you will find a treasure chest. By default, you need to get to the room with spikes coming from below the ground, where the additional handicap are dropping stones. Do not worry that much about them, because they take only some of your health points and getting stuck on the spikes means death. Fortunately, their pattern of operating is the same as before - go ahead along the trail and enter the fields directly after the spikes in front of you hide. Do not wait too long to move - do that immediately and do not let yourself be surprised. After you cross this section, you will walk into a location with the energy lock.
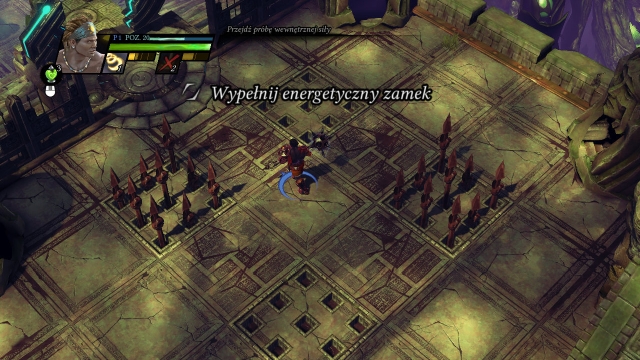 watch out for the spikes - it is easy for a slipup.
Your task is to charge the lock with your energy. The main handicap are not the monsters that appear but the spikes - in the heat of the battle, you need to watch out for them mainly, to prevent dying in a silly way.
 Meteorite storms are very dangerous- do not enter the first one.
After you charge the lock, you will finally find the checkpoint and right after that, you will walk into the swamps (watch out for the first meteorite rain). You need to go to the left side of the swamps, where you find a wooden plank. Keep minding the meteorites - their rain is marked with a single projectile. Make sure then that you are sheltered by one of the lit chapels. Finally, after you defeat several enemies, you will reach a temple, where you will fight the last battle.
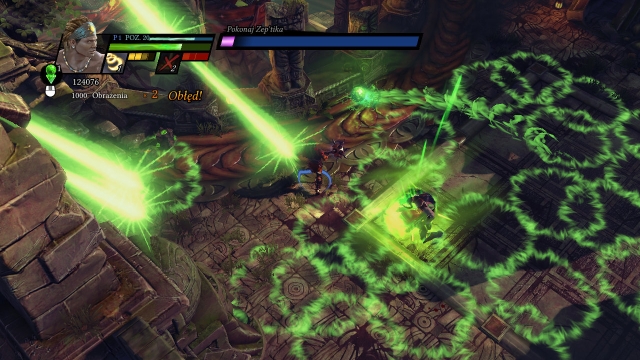 Finding the right spot saves you from damage.
It is not difficult to defeat this boss. You need to watch out, the most, for his AoE attack, where he sends poison down onto the entire area. Try to find a safe spot to prevent taking too much damage. Another thing that you need to pay attention to are the flying creatures - break their attacks and kill them sufficiently early. . The last attack used by the boss is the "clap" that makes poison leak towards the direction that the opponent is facing. Remember to dodge from the attacks and you will have no problems dealing with the boss quickly.
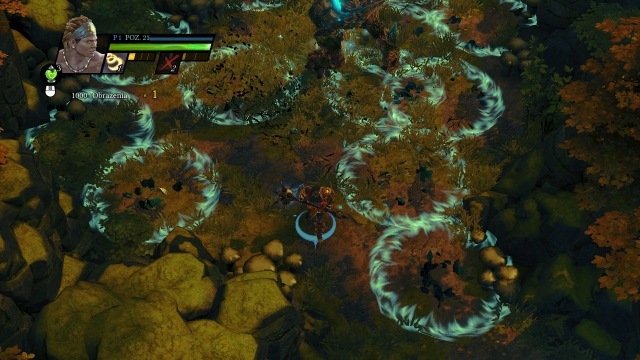 The AoE attack is not difficult to dodge.
OBJECTIVE: Make it through the Grey Veil and destroy Sundraxs's weapon, before it is too late.
Head downwards, where there is the first battle for you to fight - watch out because the beasts are quite strong. After you defeat them, you will be able to replenish your life and energy in the containers along the path. Down below, you will find a single miniboss. His main attack is fist slam - it is easy to dodge. Also, watch out for the spikes projecting from the ground = it is effective over a vast area so,, find a spot outside of the bluish circles. Along your path, you will walk into a small yard, which will swarm with enemies. Try to defeat the crossbowmen in the first place and the whirling warriors. At the end, there will appear a miniboss with a lich. After you eliminate the lich, he will be no threat. Keep going, along your path, at the gate, you will find a strong group of enemies.
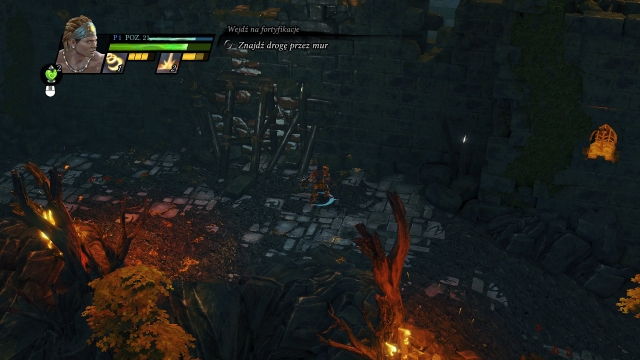
You now need to blow up the wall fragment shown in the screenshot. To do that, you need dynamite - follow down the path until you walk into an enemy camp. Defeating all of the enemies (watch out for the ones that throw explosive projectiles and the miniboss's attack) opens the device from which to take dynamite. Return to the wall and blow it up.
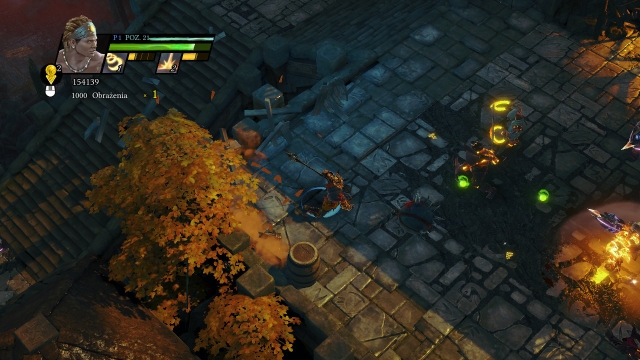 Using bombs may help you in battle.
Along your path, you are up for an ordeal - in a moment you will encounter a swarm of enemies. Try to eliminate the ones that throw bombs, first, and then the crossbowmen. Also, try to move away from the enemies a bit to get outside of the reach of some of them. After the fight, keep going ahead, the stairs lead up to a small yard, where you will fight another battle (you can destroy the obstacle o the left and open a treasure chest). Use the bombs here to your advantage and throw them at the enemies. Then, along the way, mind the firing cannon.
 Being shocked with electricity deals damage to you.
After you get past this section, you will get to a checkpoint. Here, you will face more enemies, Watch your steps - electric charges come out of the cages occasionally - a step in the wrong direction may be fatal. After the battle, you will find another checkpoint and... more enemies. Additionally, a miniboss appears - you should especially watch out not to get within his reach. On top, there are more enemies waiting for you - try to eliminate the crossbowmen in the first place. As you go left, you can destroy the obstacle with a treasure chest behind it.
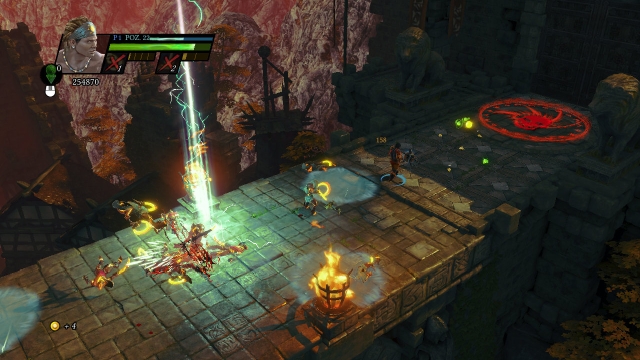 A quick sprint under the shots and you are safe.
After the tough spot, you will finally get to the location, where you only need to follow the path to get to the final boss - watch out for the projectiles coming from above and make it over to the other side quickly. This starts the final battle.
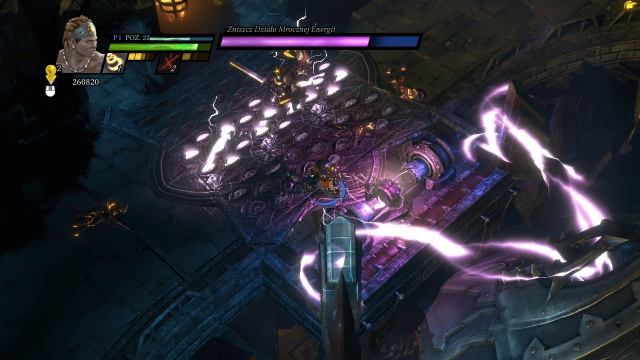 There is a pattern to the movement of the electric charge.
Destroying the cannon has been divided into four parts - they are all the same, apart from the sequence in which the electric charges appear, right before the elements that you need to destroy - this is the most important thing that you need to watch out for. Standing on the field,, and being shocked with electricity, will weaken you a bit. The monsters that appear here are not the strongest ones (apart from the few specters) which is why you do not really need to bother about them. Focus on avoiding the charges, while standing on a given field - changing positions often will allow you to destroy successive elements of the structure.
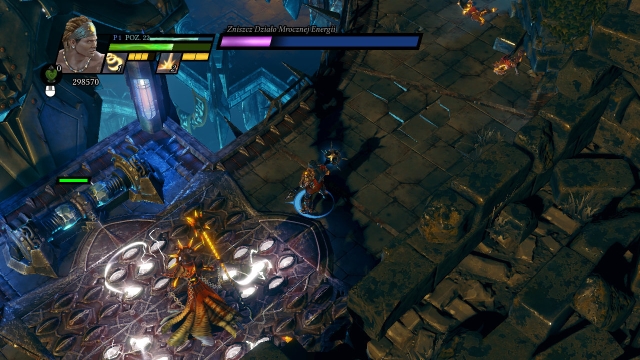 The last catch and the cannon collapses.
It is best to remain next to the dangerous grates - sticking out threatens you with considerable damage. While moving between the individual grates, try to eliminate, first, the overabundance of enemies, and then destroy the marked element. Repeat that to win the battle. In case of taking damage, it is a good idea to fight the weaker enemies for a moment - they should not deal too much damage and they sometimes drop a health orb.
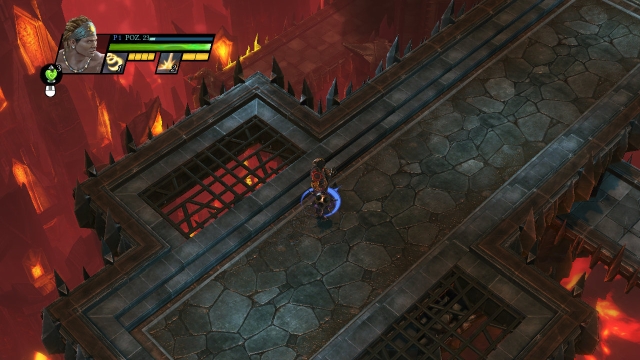 The battle in the heart of evil - must be interesting!
OBJECTIVE: Defeat the villains and fight the final battle with Zane.
The final mission of the main campaign mode - get well supplied because you will have to fight as many as four bosses here and a whole lot of strong enemies.
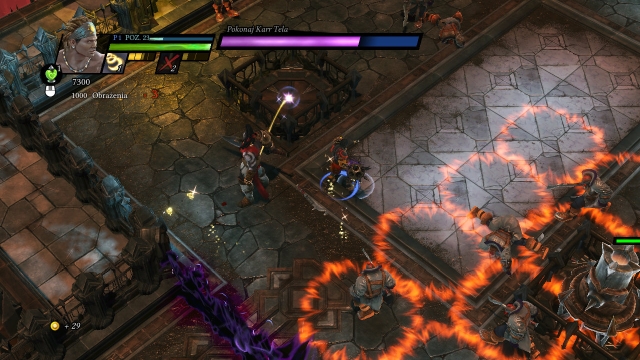 The less health points the boss has, the more mortars he starts
Karr Tell is the first one. Watch out for two of his attacks - the marked sword slash, which is easier to dodge and the deadly, difficult spin that deals gigantic damage, if you fail to escape the area of effect. At some points of the battle, the stronger enemies join in - watch out for them, because they limit your movement options and deal considerable damage. An additional handicap are the projectiles fired by mortars in the arena - it is worth considering destroying at least one to feel relatively safe in a corner of the arena. (when it comes to the mortar fire). Also do not forget to break Karr Tel's defense, to knock him out of the rhythm. After the battle, you will have to fight another opponent (along your path, you can replenish your health and energy).
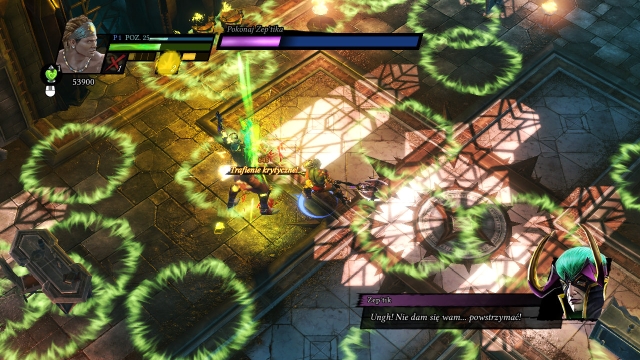 Zep'tik's attacks are not too impressive.
The battle with the next opponent is much easier - at least out of the fact that he is alone. Watch out for poison that he sends into the battlefield (a vast area of effect) and the one that he shoots out. Fortunately, it is easy to dodge these attacks, just as easy it is do destroy the airborne monsters that he summons. Make sure that you dodge his next attacks and the victory comes with time.
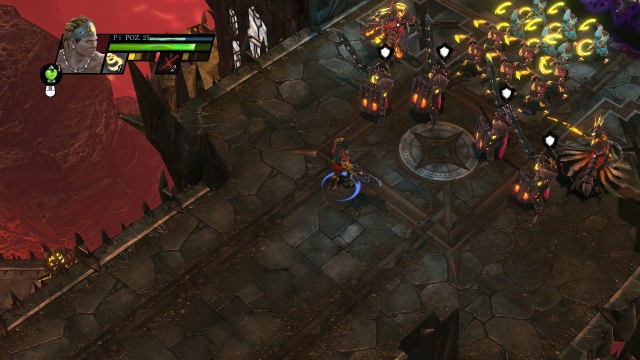 The elite legion is waiting.
As you follow the path, there is a short break between the boss battles. You will not be bored, however - you will encounter lots of enemies, most of them very strong. Fight them in installments and do not get into the middle of the group, because this may end in your death. Remember that you should break the stronger attacks and disarm the stronger enemies. After the battle, you will have to fight another monster. oops.
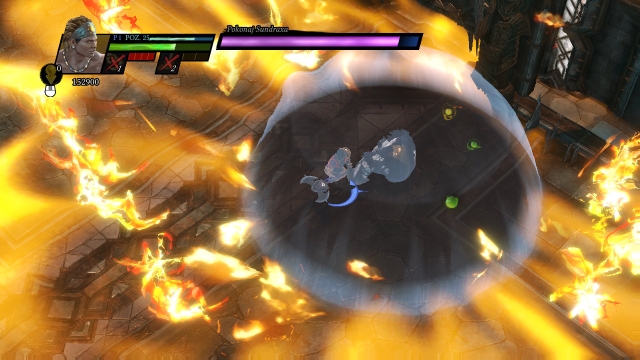
Sundrax also fights alone. His main attacks are the spikes from the ground, in the direction that he is facing, jump up into the air and slamming against the ground with impetus (it is best to stay away from the spot where he bounced off) and also a meteorite rain. You will know it by his jump into the air and by the violet area on the ground - after the boss returns to the ground, you have to free yourself from the trap and get close to the opponent - he creates a shield that protects him and you. At some point, goblins with bombs will start to appear in the arena and the whirling "armor" will appear around the boss - this means that you need to weaken him by throwing the bombs at him. Continue the battle and watch out for the same attacks, and throw explosives at the boss, or position yourself to make him wound himself with his own attacks. The situation repeats once again, after the meteorite rain. Once you deal with the enemy, go to face the final, the actual boss.
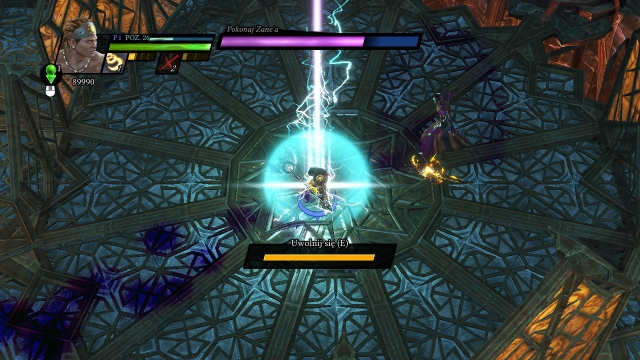 It is not difficult to free yourself from the trap- you only need to tap the interact key.
The final battle has been divided into two stages. At first, you should have no problems defeating Zane. His attacks are easy to dodge, you can note them beforehand. Additionally, you do not need too many blows to defeat him - do not worry about the smaller creatures that enter the arena and beat the boss as much as possible.
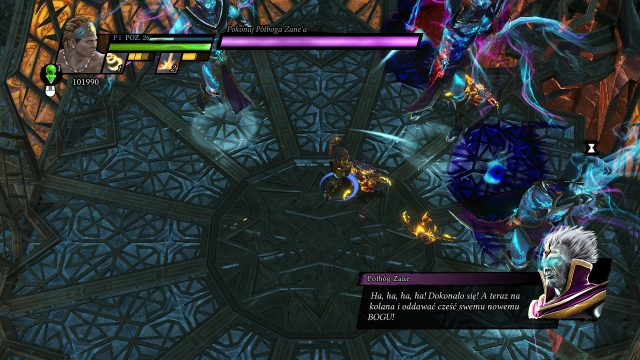 The most dangerous attack getting prepared.
The second phase is much more difficult. Zane turns into a demi-god - first, this means that you are going to need many well-aimed blows to defeat him. Fortunately, boss's attacks themselves are a piece of cake to dodge - he blows in the direction in which he is looking and it takes long enough to prepare, for you to get him from behind. You should especially watch out at the moment at which there appear Zane's copies. Do not stop their attacks, because you will then take tremendous damage (the entire health bar) - it is better to get outside of the boss's reach. This will happen twice again so, be prepared for the copies. When Zane's health will drop to around zero, the scenery changes a little (unless you bring him down earlier) and smaller opponents will enter the arena. They are nothing to bother about - at this point, you are only a step away from defeating the boss. That is why you should focus on him entirely, thanks to which you will achieve victory quickly. And so, the good prevailed...
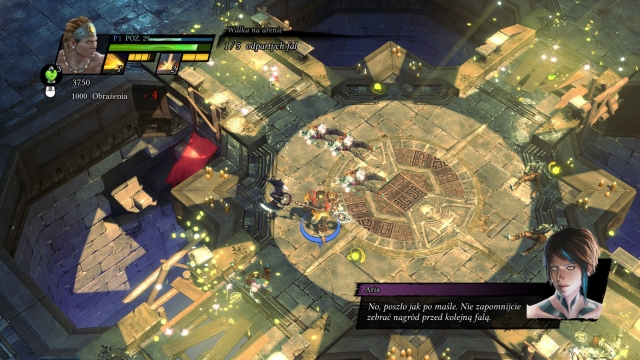 Exactly- remember about gold!
Missions of this kind consist in surviving the successive waves of opponents. Each successive wave is, theoretically, tougher to survive - there appear more enemies and they usually are stronger. The condition of success is to defeat all of them in each wave.
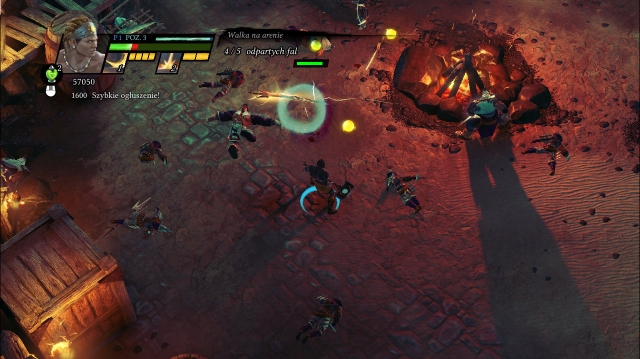 To be the master of the arena.
You need to withstand five successive enemy waves, It is not too difficult - after each successive wave, you have a moment to catch your breath, which it is best to spend collecting gold or replenishing your health and energy. When the miniboss appears with the last wave, deal with some of the smaller opponents first and then take to the miniboss. Defeating him should not be too demanding and surviving five waves ends this mission.
Unlocks: Totem of energy
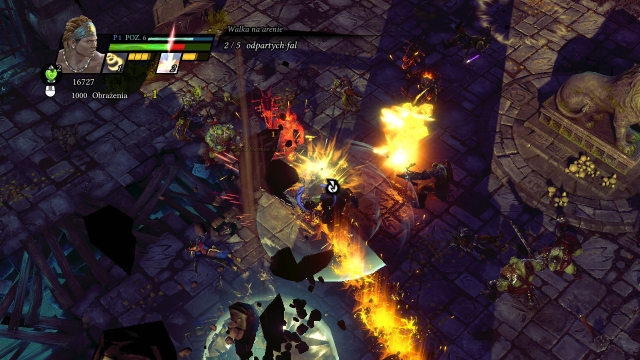 Bloodshed in the underground - yeah!
The mission consists in surviving five waves of enemies. As you progress, it is going to be more and more difficult. During the onslaughts, try to attack the shamans first and the enemies that whirl with their blades. Watch out for the ones that target you with violet crossbows - moving around will make it more difficult to get you. During the third wave, there appears another element that complicates life - dropping stones that you need to watch out for. Finally, there will appear a troll in the battlefield - keep cautious, because his attacks may stun you, which makes you temporarily exposed to a combo. Eliminate the minor enemies firs and then take to the miniboss. After victory, you will be able to ick some gold.
Unlocks: Protective aura
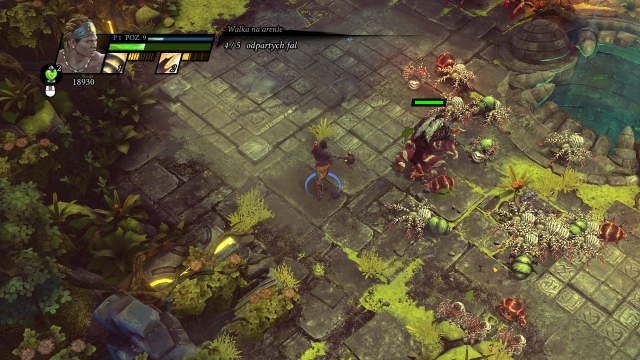 A quick dodge and the enemy is yours.
The first three waves are not a problem - there appear many weak enemies (beetles, spiders). Eliminate these waves quickly, because they may deal serious damage if you get cornered (explosive beetles). From the fourth wave on, your task should be the horned shamans, because it is them that pose major threat. With the appearance of the miniboss in the last wave, focus on the minor monsters first and then fight the elite monster. He attacks mainly with his paw and knocking jumps.
Unlocks: Totem of health
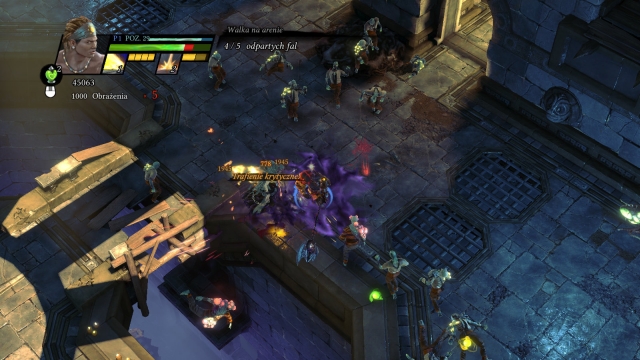 Plentitude of enemies ensure s fun.
The initial waves are nothing difficult - there are many zombies but they do not pose a major threat. In the following waves, the situation is similar - lots of undead and some other specters. Eliminate them first and the undead, kill somewhat by the way. Thanks to this, you will avoid stronger attacks and complete this task.
Unlocks: Silver guardian
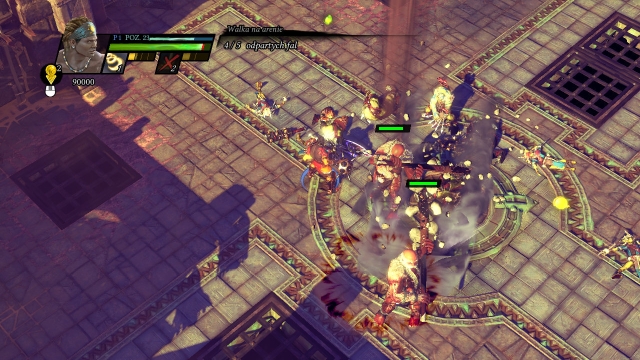 The two trolls may be a problem.
The first two waves are not a problem - first attack the crossbowmen that appear at the edges of the arena. Also, watch out for the whirling blademasters - do not allow them to gain momentum because they become lethal. With the fourth wave, there appear shamans - now they are your priority. The final wave is lots of various monsters that appeared earlier and finally, two elite trolls. Defeat their minions first, and focus on either of them - once one falls, the other is no challenge.
Unlocks: Savvy bomb
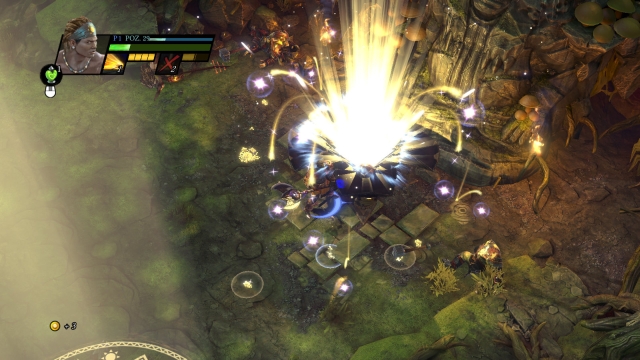 An excellent view that is a reward for completing the stage.
In this type of tasks, you will have to face several types of monsters. They do not come in waves- your freedom of movement is restricted here and you need to reach them yourself. The maps are small and the groups of opponents vary in size and strength (mainly the last group).
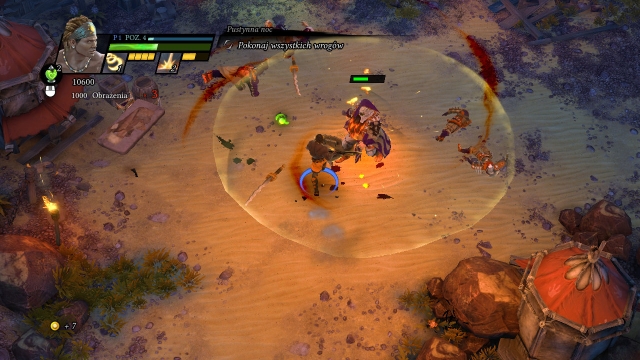 The area of attack of the opponent is well visible.
The challenge consists in defeating all of the enemies at a given stage. Cross the bridge, where you encounter the first group. Watch out for the plants on the ground, which spit spikes occasionally. After you defeat all of the opponents, follow the only road. You will get to a location, where you meet more of the monsters, assisted by a miniboss (his main attack is the AoE attack of bomb rain, you need to be careful and not get into the area of danger). After you win the battle, open the nearby chest, collect the gold and end the task.
Unlocks: Totem of energy (+1 larger supply)
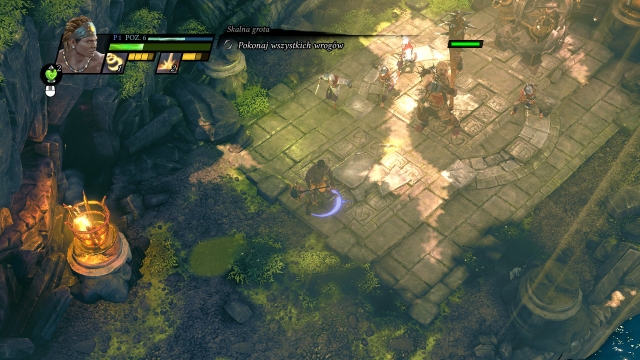 The jolly party is waiting for you - deal with the smaller opponents first.
This challenge boils down to defeating two groups of enemies - after you encounter the first one, watch out mainly for shamans and the orbs that they summon. Break their attacks and eliminate them in the first place. Then, walk ahead, where you encounter a miniboss - he is not too demanding if you remember to dodge his attacks at the right moments. Finally, open the chest and collect the gold.
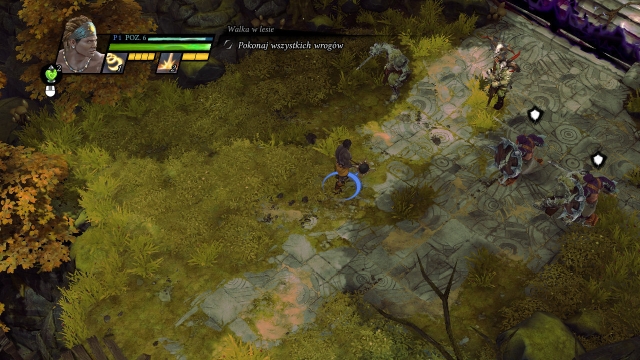 Shamans are some sort of a challenge, in a group.
Another task that consists in killing all the enemies. AS much as the first group is not too much of a challenge, the second one may be a hard nut to crack. First of all, there are many shielded opponents and shamans here, who I recommend to kill in the first place. If you get them the time to charge their attacks, they can deal huge damage and they are repeated often. After you defeat them, the rest are not a problem. Of course, open the chest, collect gold and end the task.
Unlocks: Protective aura (+1 increased supply)
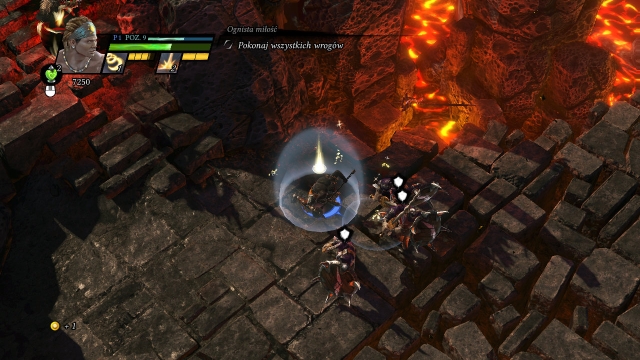 Block, and a quick attack.
There are two groups of strong, but not too numerous opponents for you to fight here. The first one is no challenge at all. In the next one, deal with shamans first and then with the rest of the crew, thanks to which you will end this task without any problems
Unlocks: Health potions (+1 increased supply)
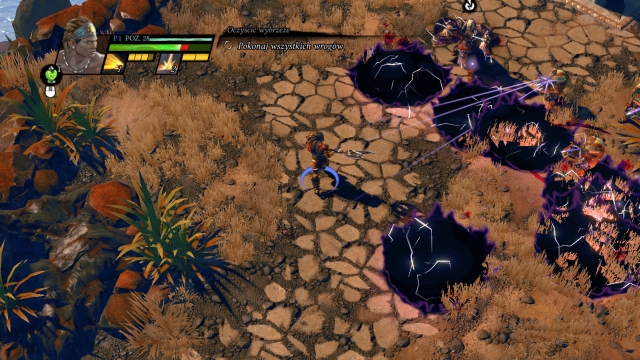 Break the miniboss's attack before it gets too tight.
The first group is nothing special - several shielded warriors and lesser rabble. The second one is not difficult either, if you eliminate the smaller monsters quickly enough. The miniboss's attacks are easy to survive, which is a perfect opportunity to stun him. If alone, he will not fight for too long.
Unlocks: Totem of health (+1 increased supply)
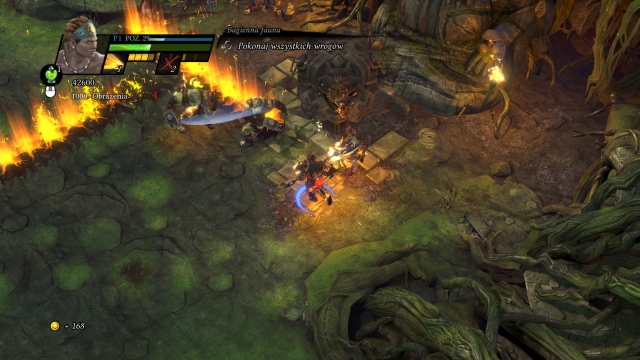 The fire stripes may set you on fire.
There are three groups of enemies here. IN the first one, apart from the crossbowmen and the strong enemies with swords, you will encounter an elite troll. During the next battle, watch out for the swirling warriors. The final group are the enemies that perform spins and shamans - avoid the stripes of fire that they attack with.
Unlocks: Protective aura (+1 increased supply)
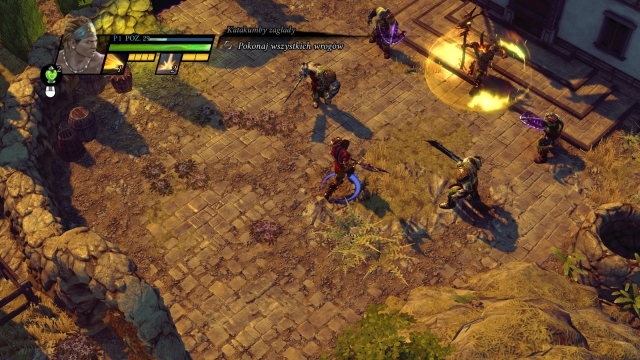 The combating party ready.
The first group are only five enemies - nothing difficult. Deal with the shaman first and then, whichever you prefer, kill them all The second group is similar - a shaman and then crossbowmen. The final enemies are finally some challenge - the place will swarm with crossbowmen and swirling warriors. An additional handicap is the elite troll. Try to deal with the lesser opponents first and then focus on him.
Unlocks: Totem of energy (+1 increased supply)
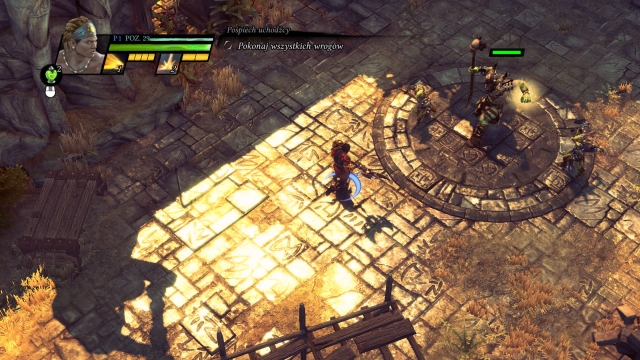 The miniboss is the only challenging opponent here.
At this stage, there are two small and easy groups. The first handicap is the miniboss, which is why you should watch out and not get within his range. The second group is even easier - eliminate the crossbowmen and watch out for the blades of the swirling opponents.
 eliminate the lesser shamans in the first place.
First, you will have to deal with a quite numerous group of weaker opponents and several stronger ones - watch out especially for the shamans. The second group are crossbowmen and, after a while, a troll miniboss, and a decent company. Deal with the crossbowmen first and eliminate the shielded opponents. Then deal with the miniboss. At the next stage, you will have to deal with an elite shaman. Deal with his guards first and, while fighting him, watch out for the "bird" above your head - you cannot get within the circle that gets determined by the boss, later on, because this will cost you lots of health points. After the battle, enjoy the gold.
Unlocks: Totem of health (+1 increased supply)
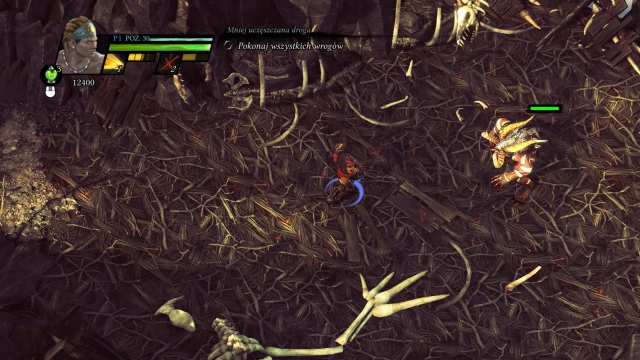 The beast in a suitable company.
The initial group is not too strong - first deal with the horned beasts. As you proceed, you will walk into the den of a much bigger creature - fortunately, the fight with the miniboss is not too difficult here and his minions are some lesser creatures. Watch out for the beast, because it may harm you.
Unlocks: Automatic regeneration of health potions between missions (+1, you do not need to buy it at shop)
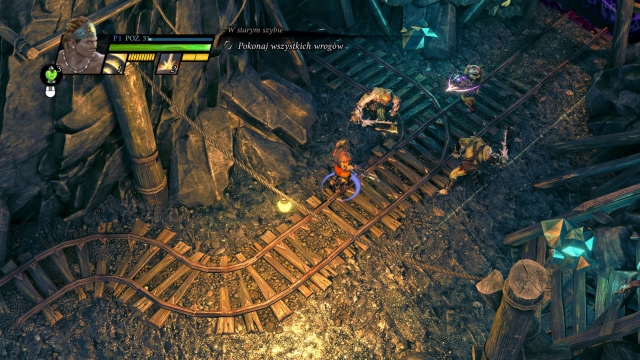 The first enemies are only the foretaste of what is going to happen.
There are three groups of monsters here. The first one is not a problem, the second one may be tougher, because of the opponents that throw explosives to your feet - watch your step and eliminate them one-by- one. Finally, you will encounter a lone elite troll. As you weaken him, there will appear smaller opponents, but not too many. Deal with them and keep battering the boss.
Unlocks: Automatic regeneration of protective aura between missions (+1, you do not need to buy it at shop)
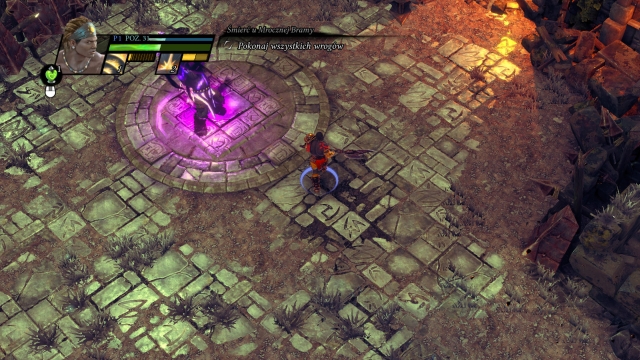 Watch out for the shaman- if effective, his attack causes serious damage.
The first group of enemies is quite strong - watch out for the shamans and the birds that they summon - break these attacks because they are very dangerous. The second group is a bit bigger shaman - a miniboss. HE uses exactly the same attacks as a regular one and fires wheels of dark energy. During the fight, there appear smaller opponents and swirling warriors - try to deal with them first and watch out for the miniboss's main attack.
Unlocks: Automatic regeneration of the totem of energy between missions (+1, you do not need to buy it at shop)
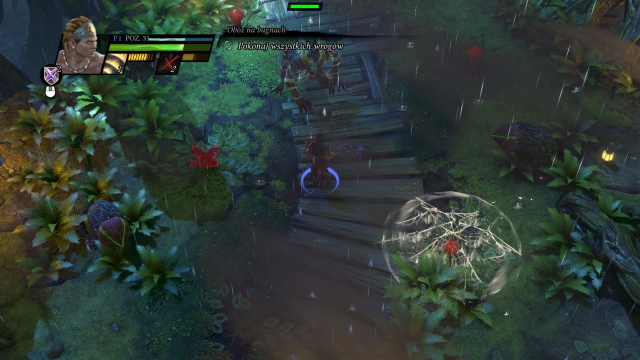 Make sure that you do not spring a trap - the beetles may take advantage of that.
At this stage, there are two, nearly identical fights with minibosses. They are difficult to defeat, especially that they summon the small explosive beetles - watch out: if several of them explode too close to you, this will considerably weaken you. An additional handicap of the fight with the second beast are the plants in the battlefield - they generate webs that you need to free yourself from (it may cost you dearly to be immobilized).
Unlocks: Magical guardian (+1 increased supply)
 During the swirls, the enemies are very dangerous.
You should be careful of the swirling enemies, first. who additionally leave the fire trace on the ground - walking over it also deals damage to you. In the case of the second group, eliminate the crossbowmen first and then the swirling ones. The last opponent is the miniboss who you can deal with because he is alone.
Unlocks: Health potion (+1 increased supply)
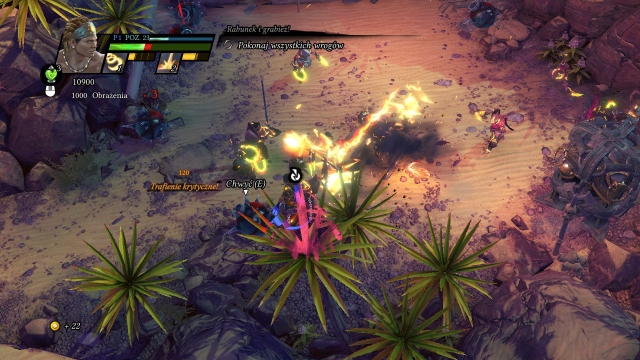 Use bombs to speed up the elimination of the monsters.
There are two groups of enemies here. While fighting against the first, use the bombs on the ground - dealing with them this way is a piece of cake. In the second group pay attention only to the stronger specters - block their attacks (chain of fire directed your way), to prevent losing health points for too long. The rest of the crew are the typical weaklings.
Unlocks: Automatic regeneration of the totem of health between missions (+1, you do not need to buy it at shop)
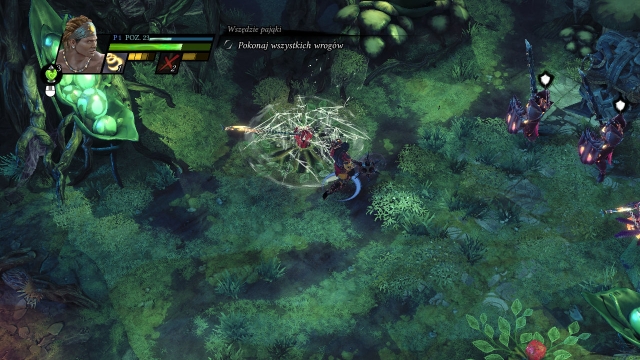 The shieldmasters are quite tough.
After you encounter the first group, try to eliminate the airborne specters and then the rest. The next group are a bit stronger - stun first the shieldmasters and nothing else is going to be a threat to you.
Unlocks: Magical guardian (+1 increased supply)
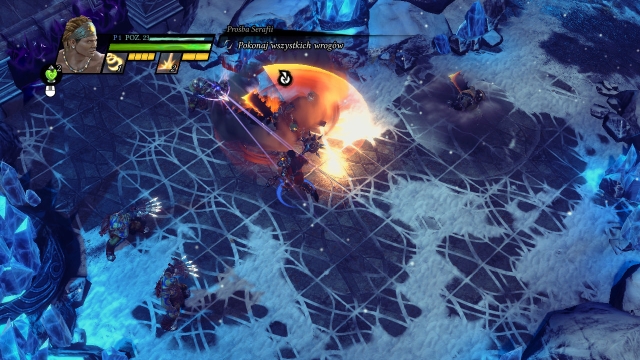 Stop the sword dance.
Uniquely, the first group are tougher than the other. It consists of crossbowmen and swirling warriors and a troll miniboss. Try to eliminate the minor opponents first and then the boss. The other group are only several specters and, again the swirling ones - do not let them get carried away with the dance and you are going to make it.
Unlocks: Automatic regeneration of the magical guardian between missions (+1, you do not need to buy it at shop)
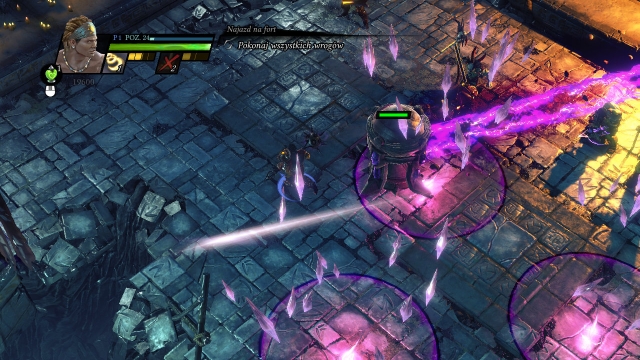 The device needs to be destroyed. Mind the beam of energy.
This time, there are three groups to defeat. In the first one, watch out for the strong attacks of the enemies that fight melee and shamans. In the second one, the shamans are replaced with crossbowmen but the swirling ones stay here. All of this will be joined by a device that you need to destroy (mind the explosion). The last group are quite strong but there are only a few of them. Break the defense and then attack them quickly. They will go as quickly as the previous ones, then.
Unlocks: Savvy bomb (+1 increased supply)
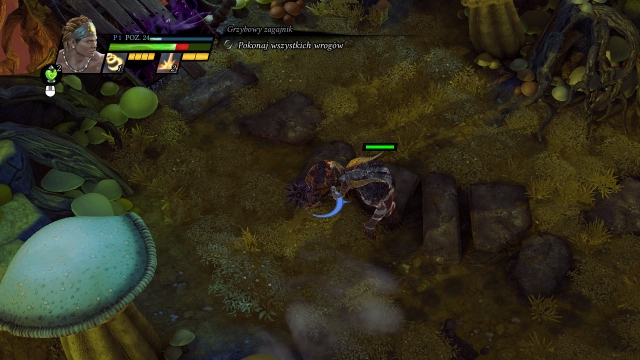 Eye to eye with the primordial beast.
First, you are going to fight the miniboss - an elite beast. It should not be too difficult to dodge its attacks. Watch out for the small beetles that explode after they approach you, and deal considerable damage. The second group of mobsters are several medium-sized creatures that you will have no problems defeating.
Unlocks: Automatic regeneration of the savvy bomb between missions (+1, you do not need to buy it at shop)
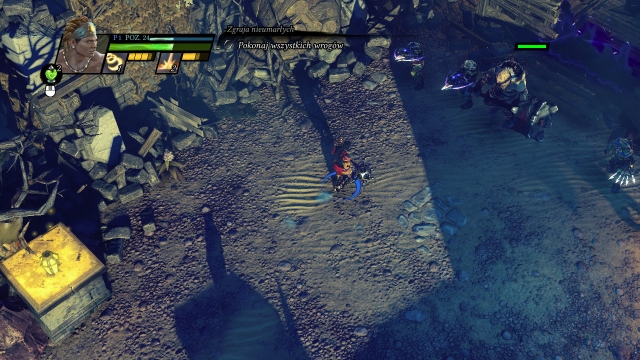 First, deal with the crossbowmen around the miniboss.
The first group of opponents are no problem - just make sure that you are not cornered by too many. The second group is a bit more difficult - try to eliminate the crossbowmen first and take to the elite troll. During the fight with him, there will appear more strong opponents. To not let yourself be cornered and eliminate them as they come to prevent getting too many on your hands. Finally, finish off the troll to complete this task
Unlocks: Savvy bomb (+1 increased supply)
Sacred 3 is a mixture of an action RPG and hack'and'slash in the fantasy world. The game allows playing solo and in the multiplayer mode. The system requirements are quite high but, you can easily play on a weaker system than the recommended one. This guide has been drawn on a medium-class computer (Intel(R) Core(TM) i5-2410M CPU @ 2.30 GHz, NVIDIA GeForce GT 520M, 4.00 GB RAM), which allowed for a smooth gameplay with medium graphics settings. The game was not choppy and the frame rate did not drop. To play the game at the maximum settings, you need a computer that meets the recommended system requirements. Sacred 3 is integrated with the Steam platform, and it requires to be registered on the platform.
Singleplayer: Yes
offline co-op (hot seat/split screen): No
Internet over the Internet: Yes
Multiplayer: Yes (co-op for 4 players).
The walkthrough has been drawn up on the system of the below specifications:
OS: Windows 7 SP1, 64 bit
CPU: Intel(R) Core(TM) i5-2410M CPU @ 2.30 GHz
RAM: 4.00 GB
GPU: NVIDIA GeForce GT 520M, 1 GB VRAM
The above specs allowed for a smooth gameplay with medium settings, high resolution. The game caused no problems with frame rate and smoothness.
OS: Windows /Vista (SP2)/7(SP1)/8
Internet connection during the game: Not required
Activation over the Internet: Yes -Steam platform
Control inputs: Keyboard + mouse/gamepad
OS: Windows XP/Vista (SP2)/7(SP1)/8
CPU: Intel Pentium D945 (Dual Core 3400 MHz)/AMD Athlon 64 X2 6000+ (Dual Core 3000 MHz)
RAM: 2GB RAM
GPU: DirectX 9.0c compatible, e.g. Nvidia GeForce GT 610 (1024 MB)/ATI Radeon 4770 (512 MB)
OS: Windows XP/Vista (SP2)/7(SP1)/8
CPU: Intel Core i5-4430 (Quad Core 3000 MHz)/AMD Phenom 9500 (Quad Core 2200 MHz)
RAM: 4 GB RAM
GPU: DirectX 9.0c compatible, e.g. Nvidia GeForce GT 640 (2048MB)/ATI Radeon HD 5570 (1024MB)


 Sherlock Holmes: Crimes and Punishments Game Guide & Walkthrough
 Scarface: The World is Yours Game Guide & Walkthrough
 Sid Meiers Civilization IV Game Guide & Walkthrough
 Sniper Elite V2 Game Guide & Walkthrough
 Sid Meiers Civilization V - Gods & Kings Game Guide & Walkthrough