Shadowrun Returns game guide contains everything needed to fully complete the game, including a detailed description of each quest, information on gameplay mechanic and character creation process shown step by step. All locations have their own maps with a detailed legend to help you quickly locate needed things.
Shadowrun Returns game guide is:
In the following walkthrough there are some color markings used. Markers connected with a location map have a specific color and their numbering is normally placed in brackets, such as Merchant [7]. In the text there are four different colors used. All enemies are marked with red, friendly/active NPCs - with green, all items which can be picked up - with blue and skills - with orange.
Patryk "Irtan" Grochala ()
"Maxim" ()
Translated by: Maciej "Elrond" Myrcha
First step after selecting a new campaign is to create your character. The game doesn't force you to follow one path from the beginning till the end. During the gameplay you'll be able to spend points on any skills. You could know a bit of everything although specializing in only few techniques is usually more profitable. Such things like gender, race or appearance are permanent of course.

You start with choosing your gender. It has no influence on character's statistics, neither on a gameplay. The only difference can be visible in phrases in dialogues.
There are 5 available races in the game. Each one differs not only in appearance but also in bonuses and statistics. This is the most important decision during creation of your character. Different races have different restrictions, as well as improvements. In addition, NPCs in the game may have different approach to your character, depending on your race.

Description: Most common race and the only one existing before Awakening in 2012. One could say that humans are symbol of normality. That can be seen mostly in their statistics - the maximum level of them is always the same.
Bonus: Additional 3 Karma points which could be spend during creation of the character.
Maximum attribute values: Body: 9, Quickness: 9, Strength: 9, Charisma: 9, Intelligence: 9, Willpower: 9.
Preferred archetypes: Each.
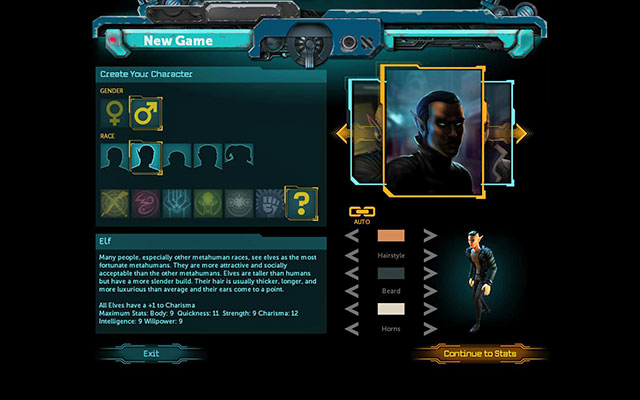
Description: Often considered to be happiest of metahumans, because of their beauty and intelligence. Elves look like humans but they are taller and slimmer. Their advantages are charisma and quickness. The rest of attributes is compared with humans.
Bonus: +1 to Charisma.
Maximum attribute values: Body: 9, Quickness: 11, Strength: 9, Charisma: 12, Intelligence: 9, Willpower: 9.
Preferred archetypes: Street Samurai, Shaman.
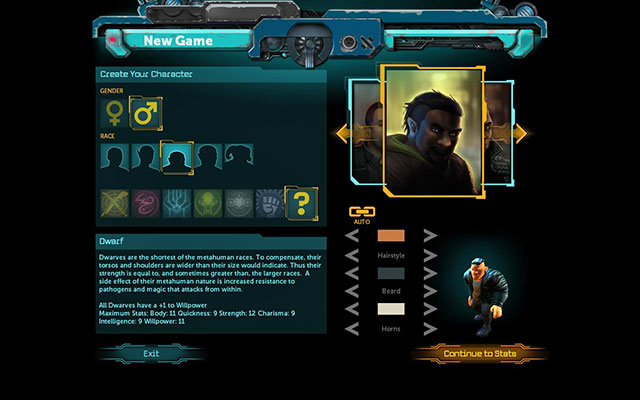
Description: The shortest of races, with quite stocky build. They are characterized with high physical strength and stronger immune system. In addition they have also quite high willpower, which makes them good mages.
Bonus: +1 to Willpower.
Maximum attribute values: Body: 11, Quickness: 9, Strength: 12, Charisma: 9, Intelligence: 9, Willpower: 11.
Preferred archetypes: Street Samurai, Mage, Physical Adept.
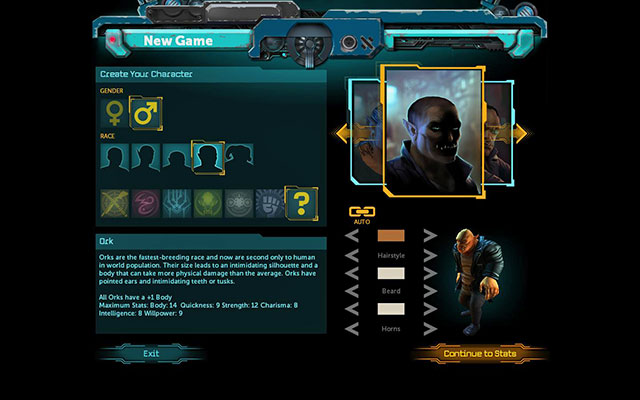
Description: Being a second race in terms of numbers, Orcs have great power and are very resistant to damage. Although it is not the most beautiful or most intelligent race, it is an example of perfect warrior.
Bonus: +1 to Body.
Maximum attribute values: Body: 14, Quickness: 9, Strength: 12, Charisma: 8, Intelligence: 8, Willpower: 9.
Preferred archetypes: Street Samurai, Physical Adept.

Description: The largest of all races, with a nasty appearance and dangerous-looking horns. Trolls make up for lack of intelligence with high resistance and strength. They are ideally suited for security guards or bodyguards.
Bonus: +1 to Body and +1 to Strength.
Maximum attribute values: Body: 17, Quickness: 8, Strength: 15, Charisma: 6, Intelligence: 6, Willpower: 9.
Preferred archetypes: Street Samurai, Physical Adept.
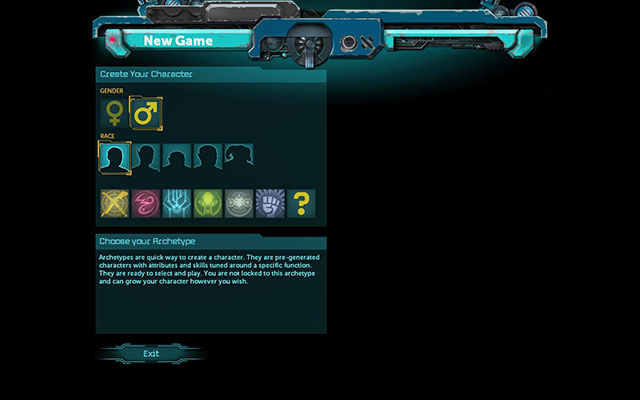
The next very important decision is choosing an archetype, which is more formal version of the class. At this point you have two possibilities:
The decision is yours. If the particular style of play suits you, for example you prefer using magic during the fight, it would be best to choose a corresponding archetype. But if you prefer a little experiment or create a character with many different skills, the second option is more appropriate.
Description: Street Samurai is something like modern warrior. This class is perfectly suitable for the first line of fight, whether it is a melee weapon or firearm. It has a high resistance to damage, accuracy (allowing eliminating enemies from a distance) and considerable strength, so they do not fear fighting in close combat). Useful in every team.
Key skills: Body and Strength or Quickness.
Starting skills: Body: 4, Quickness: 3, Strength: 3, Intelligence: 2, Willpower: 2, Charisma: 2.
Key attributes: Close/Range Combat, Throwing Weapons, Dodge.
Starting attributes: Ranged Combat: 1, Dodge: 1, Throwing Weapons: 1.
Favorite weapons: Firearms, Melee, Grenades.

Description: This is the main magic class with a very wide range of spells. It can weaken enemies and strengthen friends as well as deal damage and heal. It is very powerful archetype, but it might end up quickly on the other side, due to its low body condition.
Key skills: Willpower.
Starting skills: Body: 3, Quickness: 3, Strength: 3, Intelligence: 2, Willpower: 3, Charisma: 2.
Key attributes: Spellcasting.
Starting attributes: Ranged Combat: 1, Spellcasting: 2.
Favorite weapons: Mage spells.

Description: This is quite specific archetype as it doesn't have too many skills in real world. It shines for it in Matrix - a virtual reality that combines all the technology. Decker is able to enter the Matrix, using the right equipment and special connection points. It is ideal when you need a hacker but not really useful in a real world. It should be combined with Rigger to provide some defense.
Key skills: Intelligence.
Starting skills: Body: 3, Quickness: 3, Strength: 3, Intelligence: 3, Willpower: 2, Charisma: 2.
Key attributes: Decking.
Starting attributes: Close Combat: 1, Throwing Weapons: 1, Decking: 1, ESP Control: 1.
Favorite weapons: Any weapons, grenades.
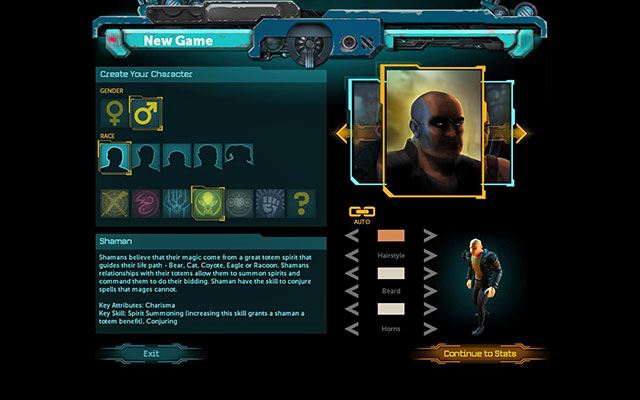
Description: Shaman is second purely magical archetype. In contrast to mage, shaman is more focused on healing and strengthening his companions than dealing damage to enemies. He can use special totems to summon spirits of different animals, producing special effects. He can also use so-called Fetishes to summon Elemental Spirits to help in the fight.
Key skills: Charisma.
Starting skills: Body: 3, Quickness: 3, Strength: 3, Intelligence: 2, Willpower: 2, Charisma: 3.
Key attributes: Summoning, Conjuring.
Starting attributes: Ranged Combat: 1, Spirit Summoning: 1, Spirit Control: 1, Conjuring: 1.
Favorite weapons: Shaman spells, Totems, Fetishes.
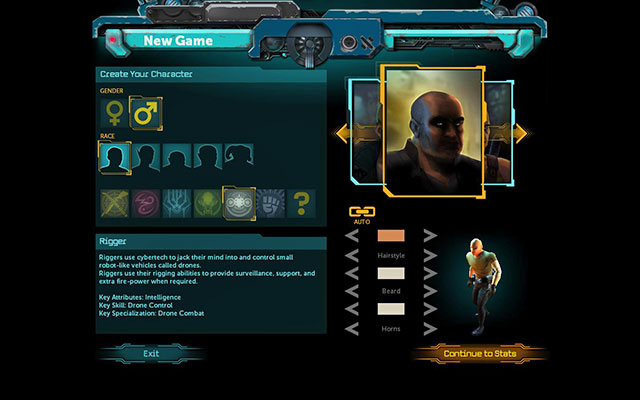
Description: Rigger is very interesting archetype, using machines in the fight - drones. When he is alone he is one more character with a weapon. But when he got his drone, the fight changes dramatically. Those little robots are like additional companions. Each of them has special abilities, depending on its class. There are purely offensive drones, flying ones or drones which uses smoke to support him. He can cooperate well with Decker's skills.
Key skills: Intelligence.
Starting skills: Body: 3, Quickness: 3, Strength: 3, Intelligence: 3, Willpower: 2, Charisma: 2.
Key attributes: Drone Control
Starting attributes: Ranged Combat: 1, Throwing Weapons: 1, Drone Control: 1, Drone Combat: 1.
Favorite weapons: Drones.
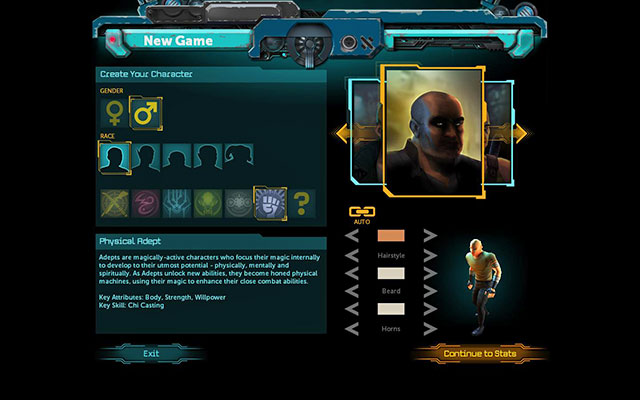
Description: Physical Adepts are magical warriors who use inner energy to enhance their attacks as well as defense. Theoretically they are combination of a Mage and a Street Samurai. Practically they are warriors focused on melee combat or bare fists. Thanks to Chi energy they can enhance their attacks, immunize to hits and even use minor buffs. It is a good alternative for a Samurai.
Key skills: Body, Strength and Willpower.
Starting skills: Body: 4, Quickness: 2, Strength: 3, Intelligence: 2, Willpower: 3, Charisma: 2.
Key attributes: Chi Casting.
Starting attributes: Dodge: 1, Close Combat: 1, Chi Casting: 1.
Favorite weapons: Melee weapons, fists.
Attributes define your virtual character. They show what you are capable to do, which skills you can use and in which situation you're doing better or worse. In most cases attributes are beautiful, numeric side of RPG game.
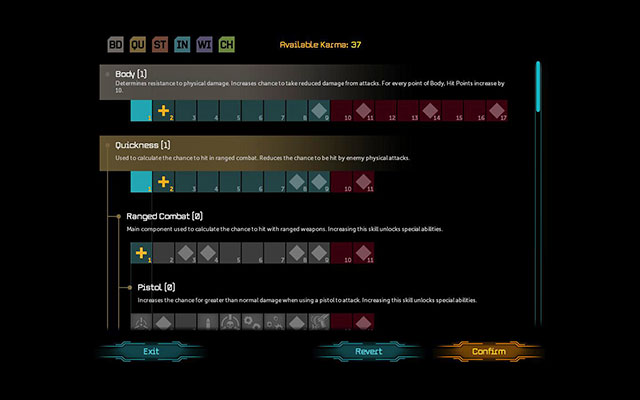
Their principle is simple. As such, they enhance relevant aspect of the character. For example a Body attribute adds 10 Hit Points which each point. Others are less direct and at the appropriate level can be even used in dialogs, for example to intimidate (Strength).
Description: This is the most important attribute in the game, useful for each archetype. It increases HP of the characters, so it doesn't die after one shot. It is especially useful for offensive archetypes such as Street Samurai or Physical Adept.
Effect: Increases HP by 10 for each additional attribute point.
Maximum value: Human/Elf: 9, Dwarf: 11, Orc: 14, Troll: 17.
Description: Also very important and universal attribute as it is responsible for using firearms. Here are the skills associated with all range weapons. Even completely magical class should be able to use a gun. Especially useful for Street Samurai.
Effect: Increases a chance to hit enemy from a distance and decreases chances to be hit by physical attacks.
Maximum value: Trolls: 8, Human/Dwarf/Orc: 9, Elf: 11.
Description: Strength is responsible for all close combat attacks as well as for range of thrown grenades and their accuracy. It is also handful when intimidating. This attribute is very important for Street Samurai and Physical Adept.
Effect: Increases chances to hit enemy with melee weapons and grenades as well as range.
Maximum value: Human/Elf: 9, Dwarf/Orc: 12, Troll: 15.
Description: It is interesting attribute of the lowest level. It is responsible for everything associated with technics and hacking. It gives little by itself but has a lot of useful skills. It is especially important for all Decker and Rigger archetypes, making it easy to combine these two roles.
Effect: Increases chances to hit the enemy with a program or a drone. Additionally increases chances to dodge in Matrix.
Maximum value: Troll: 6, Orc: 8, Human/Elf/Dwarf: 9.
Description: This attribute is responsible for magical powers so it is important to magical classes, except Shaman. Appropriate skills of this attribute also increase number of spell slots. It is very important for Mage and less important for Physical Adept.
Effect: Increases chances to hit with magical attacks and decreases chances to be hit by enemy spells.
Maximum value: Human/Elf/Orc/Troll: 9, Dwarf: 11.
Description: Useful for Shamans and diplomats. Both of them derive their powers from this attribute. Shaman needs it to contact Spirits and all other need it for Etiquette skill, useful in dialogues.
Effect: Increases chances of successful control over Spirits and effective use of Conjuration spells. Additionally with 2/4/6/8/10/12 attribute levels your character gains new types of Etiquette.
Maximum value: Troll: 6, Orc: 8, Human/Dwarf: 9, Elf: 12.
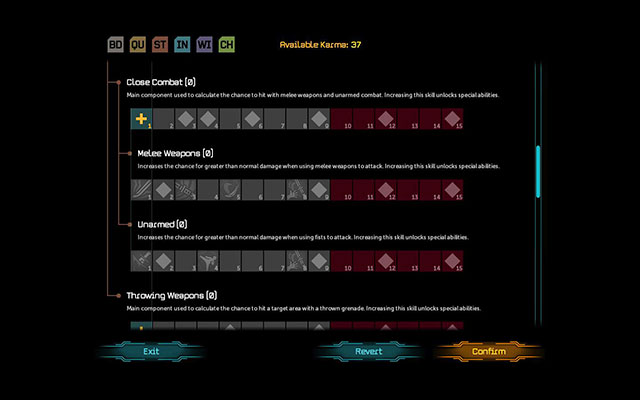
Each attribute has corresponding skills. Some of them improve only statistics and other unlock special techniques. Skills are developed the same way as attributes, but there is certain relationship. For example in order to develop Ranged Combat on level 5, you first need at least 5th level of Quickness. There are also skills which require appropriate level of another main skill. The mentioned Ranged Combat has to be on level 6 or higher if we want to improve Pistol to 6th level.
Skills are assigned to respective attributes. Please also note that skills do not have separate limitations according to races. Maximum value for the attribute is the same as maximum value for the skill.
Ranged Combat (main skill)
Description: Determines chances to hit an enemy with a ranged weapon. Unlocks access to all firearms.
Special skills: 3 - Additional weapon slot, 4 - Overwatch.
Pistol (side skill)
Description: Unlocks the ability to use pistols and increases weapon damage. It contains all skills associated with this type of firearms.
Special skills: 1 - Aimed Shot, 2 - Shows percentage of critical damage, 4 - Auto Reload, 5 - Dead-eye, 6 - Double-Tap, 7 - Chainshot, 9 - Disarm.
Smg (side skill)
Description: Unlocks the ability to use Smg and increases weapon damage. It contains all skills associated with this type of firearms.
Special skills: 1 - Spray and Pray, 2 - Shows percentage of critical damage, 3 - Aimed Shot.
Shotgun (side skill)
Description: Unlocks the ability to use shotguns and increases weapon damage. It contains all skills associated with this type of firearms.
Special skills: 1 - Kneecap, 2 - Shows percentage of critical damage, 3 - Aimed Shot, 5 - Wide Load.
Rifle (side skill)
Description: Unlocks the ability to use rifles and increases weapon damage. It contains all skills associated with this type of firearms.
Special skills: 1 - Aimed Shot, 2 - Burst Fire/Shows percentage of critical damage, 3 - Full Auto, 5 - Dead-eye, 6 - Double-Tap, 7 - Headshot.
Dodge (main skill)
Description: Increases the chances to dodge physical attacks with melee weapons, firearms or grenades. Doesn't influence magical attacks.
Special skills: None.
Close Combat (main skill)
Description: It determines accuracy of attacks with melee weapons and bare fists. It unlocks an access to the melee weapons and unarmed fight.
Special skills: 3 - Additional weapon slot, 4 - Overwatch, 6 - Defense Bonus.
Melee Weapons (side skill)
Description: Unlocks the ability to use melee weapons and increases weapon damage. It contains all skills associated with this type of firearms.
Special skills: 1 - Thrust, 2 - Shows percentage of critical damage, 3 - Pommel Strike, 5 - Cleave, 8 - Disarm.
Unarmed (side skill)
Description: Unlocks the ability to fight unarmed and increases damage. It contains all skills associated with bare fists fight.
Special skills: 1 - Wound, 2 - Shows percentage of critical damage, 4 - Roundhouse Kick, 8 - Disarm.
Throwing Weapons (main skill)
Description: Unlocks the ability to use throwing weapons and increases chances to hit particular area. It contains all skills associated with this type of firearms.
Special skills: 5 - Reduces using grenades to 1 AP.
Biotech (main skill)
Description: Gives a bonus to recovered HP while using MedKit.
Special skills: None.
Decking (main skill)
Description: Unlocks possibility to use Decking. Increases chances to hit enemy programs and enemies in Matrix.
Special skills: 1 - Can equip Sony CTY-360, 2 - Mark Target I, 3 - Can equip Renraku Kraftwork-1, 4 - Mark Target II, 5 - Can equip Fuchi VirtuaX, 6 - Mark Target III, 7 - Can equip Fairlight Excalibur.
ESP Control (side skill)
Description: Increases power of expert programs in Matrix.
Special skills: None.
Drone Control (main skill)
Description: Gives an access to different drone classes.
Special skills: 1 - Can equip Class C Drones, 3 - Can equip Class B Drones, 4 - Can equip two drones at the same time, 5 - Can equip Class A Drones, 7 - Can equip Class S Drones.
Drone Combat (side skill)
Description: Increases drones abilities in the fight.
Special skills: 1 - Drone Armor I, 2 - Drone Accuracy I, 3 - Drone Dodge I, 4 - Drone Damage I, 5 - Drone Armor II, 6 - Drone AP I, 7 - Drone Accuracy II, 8 - Drone Dodge II, 9 - Drone AP II.
Spellcasting (main skill)
Description: Increases chances to hit with particular spells.
Special skills: 2 - Additional spell slot, 3 - Shows Ley Lines during the fight, 4 - Additional spell slot, 6 - Additional spell slot, 7 - Shows Ley Lines through FOW (Fog of War).
Chi Casting (main skill)
Description: Increases chances to hit enemies with Adept powers.
Special skills: 1 - Killer Hands, 2 - Magic Resistance I, 3 - Mana Fist/Chi Focus, 4 - Stride/ Additional spell slot, 5 - Counterstrike, 6 - Magic Resistance II/Chi Onslaught/ Additional spell slot, 7 - Quick Strike, 8 - Mystic Armor, 9 - Pain Resistance, 10 - Magic Resistance III.
Spirit Summoning (main skill)
Description: Unlocks possibility to summon Spirits and increases their power. Also gives an access to new Totems.
Special skills: 1 - Shows Spirit summoning points, 2 - Additional spell slot, 3 - Totem choice available, 4 - Additional spell slot, 5 - You can summon two Spirits from the same point, 6 - Additional spell slot.
Spirit Control (side skill)
Description: Increases chances to keep control over summoned Spirits.
Special skills: None.
Conjuring (main skill)
Description: Increases chances to hit with Shaman spells - Conjuring.
Special skills: 2 - Air Barrier/Additional spell slot, 4 - Lightning Barrier/Additional spell slot, 6 - Fire Barrier/Additional spell slot, 8 - Hellstorm Barrier/Additional spell slot.
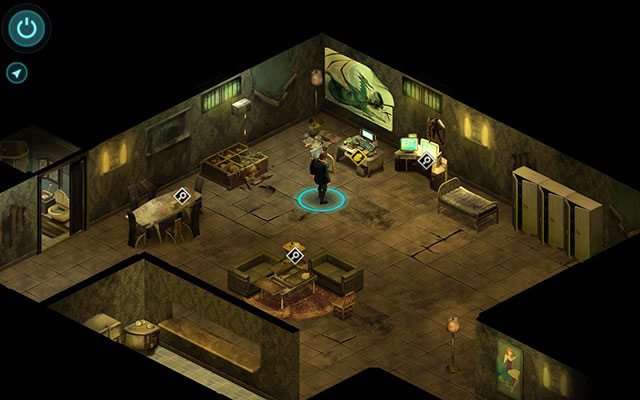
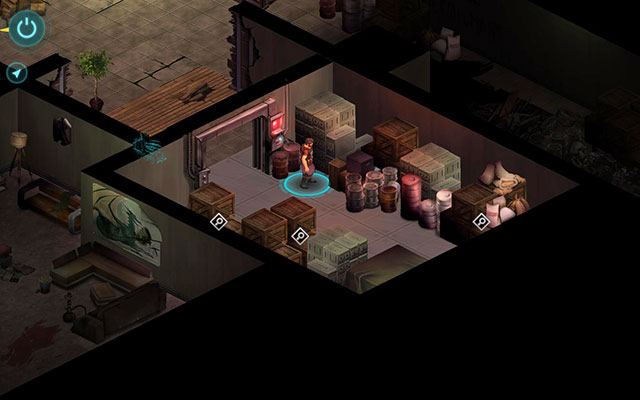
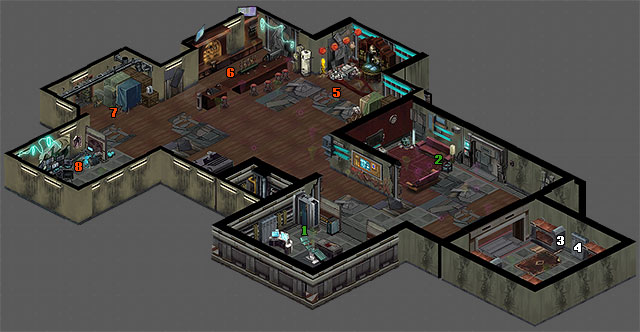
This is your luxury apartment, where, in fact, you do not have anything to do. Fortunately you stay here only for a moment.
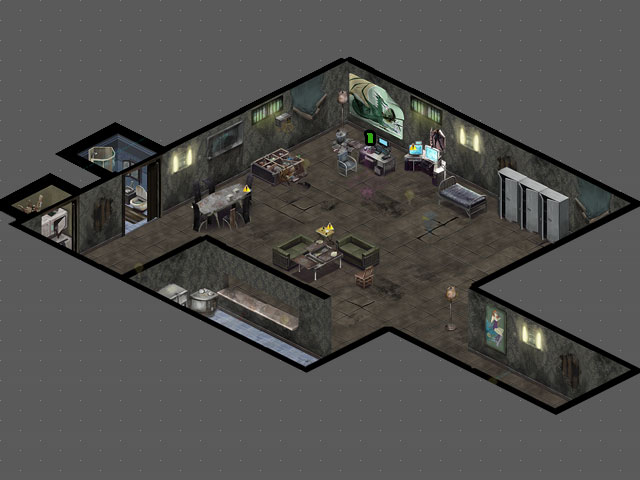
1. Vidphone - Quest: Down and Out (Main quest).
Main quest.
 Your little paradise
Objective: Find job. Any job.
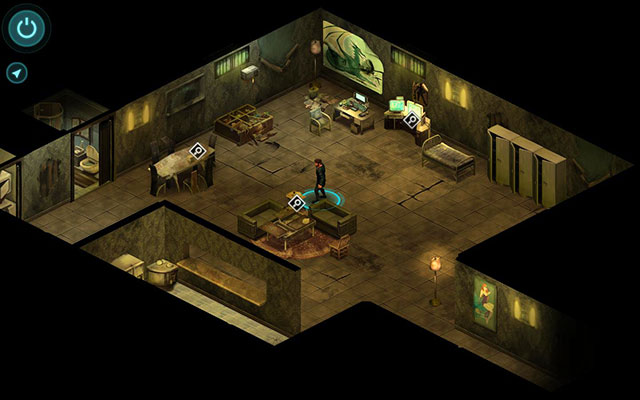
You start a game in your charming apartment. There is not much to do here. If you want, you can check the computer and a piece of paper lying on a small table. Otherwise, go to a large table located near the bathroom and pick up a Notebook lying on it. Check the contacts list and put it back.
 Who could possible call at this time?
Objective: Answer Your Vidphone.
After a moment you'll receive a message. Move to the Vidphone [1] and talk to the old friend.
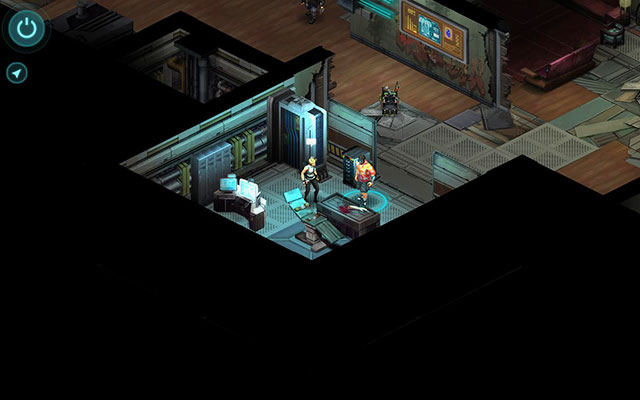
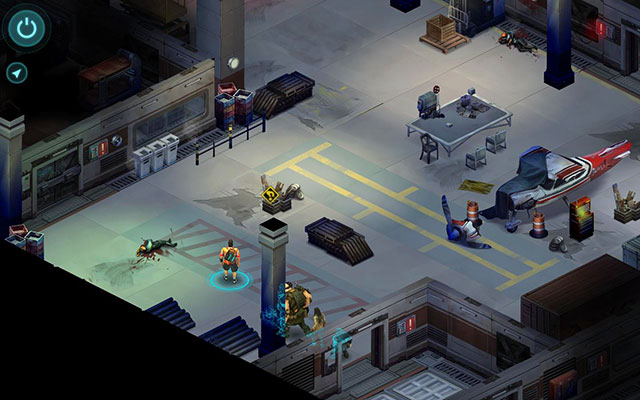
This location is just a memory and it's very short. This is an introduction to combat system.
1. Starting point - An open sky bar.
Red dots - Enemies.
Main quest.
 Perfect place for a bar
Objective: Talk to New Larry.
Welcome to memories. You start in a rather unusual bar [1]. Look at small crates near a blue container over you - you'll find there Basic Medkit. After that talk to New Larry, who stands in the center of this location.
 Bar is the best place to defend yourself
Objective: Kill Your enemies.
It turns out that someone has betrayed you. It is time for a first fight. At the beginning, focus only on the traitor - New Larry. He is an easy target, because he tries only to escape now, plus he is mage so he is not so strong. If you're lucky, you should get rid of him in a first round.
Once you deal with him, place your men behind covers and try to kill the rest of enemies. There are 7 of them in total and they appear in waves one round after another. But this is your first fight, so you shouldn't have major problems. Remember about healing spell of your Shaman - Bear Totem, as well as grenades in your inventory. Always try to end your round standing behind a cover.
After the fight you'll go back to your apartment in the present. Finish the conversation and start packing up. Seattle awaits you.
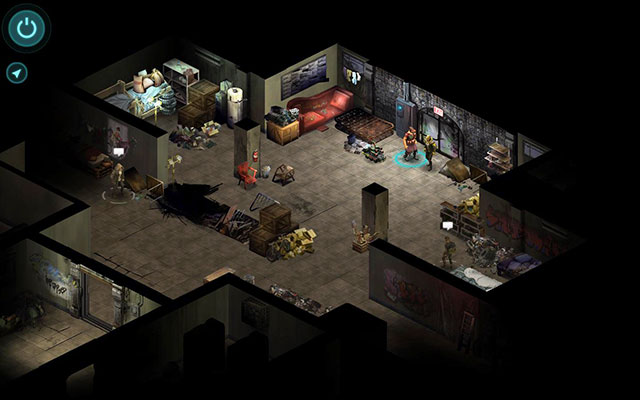
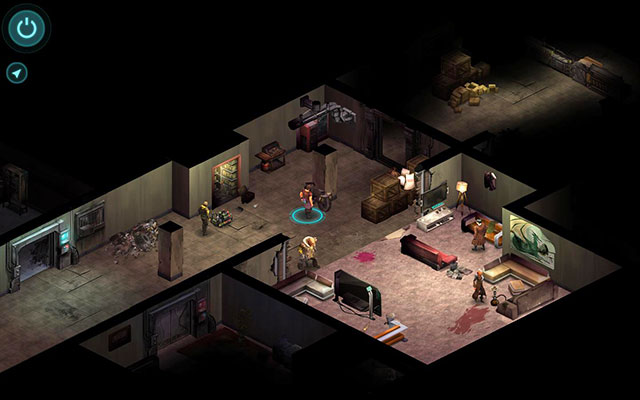
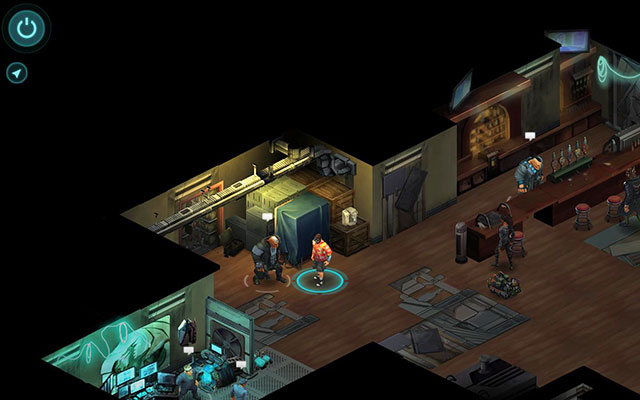
Dresden's morgue is the first place you visit in Seattle. And it contains a pretty bunch of interesting characters. But you won't stay long here.
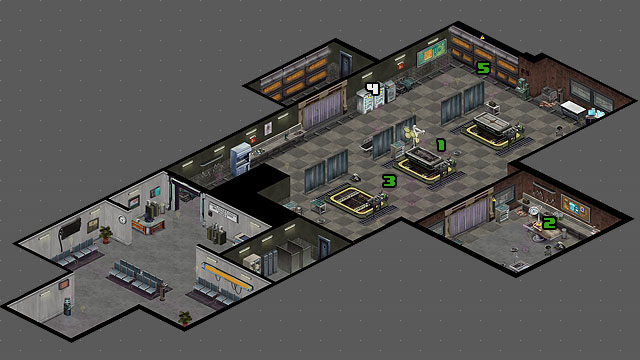
1. Coroner Dresden - Quest: The Dead Man's Switch (Main quest).
2. Sam Watts' body - Quest: The Dead Man's Switch.
3. Detective McKlusky/Coroner Dresden - Quest: The Dead Man's Switch.
4. Items - Basic Medkit/Doc Wagon Basic Trauma Kit.
5. Jake Armitage - Quest: The Dead Man's Switch.
Main quest.
 Organ grinders
Objective: Ask the Coroner about Sam Watts.
After the beginning, head to the center of the location, until you get to the Coroner Dresden [1]. Talk to him and after a moment he'll lead you to Sam's body [2].
After a short conversation you'll be left alone. Check a nearby locker - you'll find Basic Medkit inside. Examine body of your friend. If you choose credstick option, you'll be able to get an item from a bag, thus receiving 300 nuyen. Check all items and then approach detective McKlusky [3] and start a conversation.
Talk to Dresden. Examine lockers [4] to find Basic Medkit and Doc Wagon Basic Trauma Kit.
 Perfect place for a nap
Objective: Open a refrigerator.
Go to refrigerators [5] and open one of them. You'll start a conversation with an unusual character - Jake Armitage. Talk to him and at the end of the conversation you'll be able to choose one of weapons type. Leave the morgue together with Jake.
Reward: 2 KP (Karma Point) and Baseball Bat/Fichetti Security 500/Baretta Model 70/Street Sweeper/AK-97.
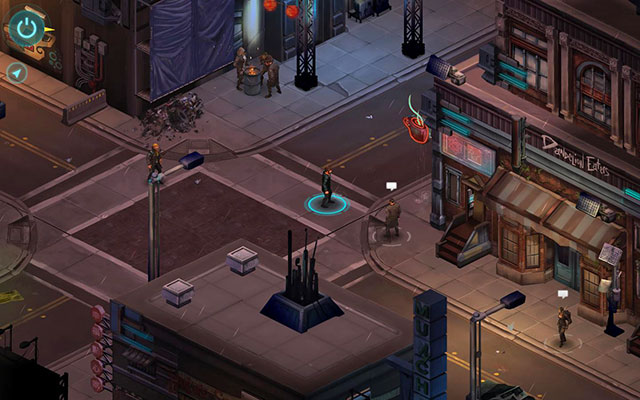
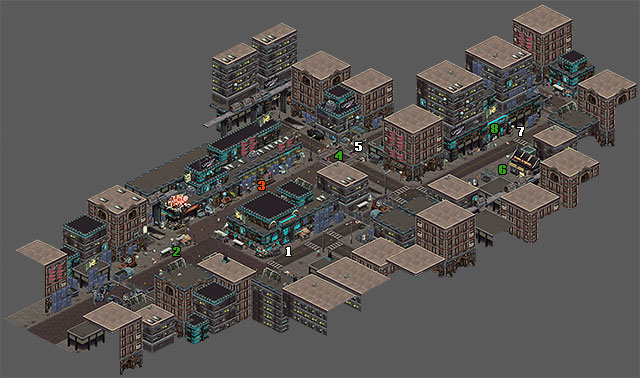
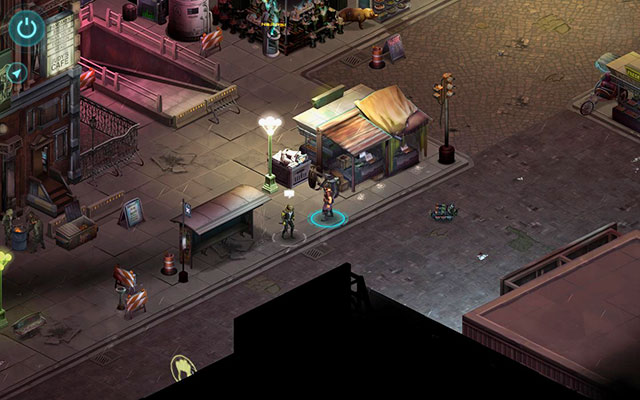
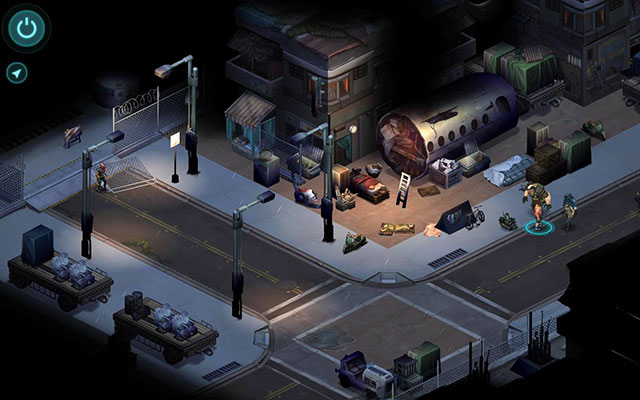
One of larger locations. Here you can find famous Seamstresses Union and first side quests.
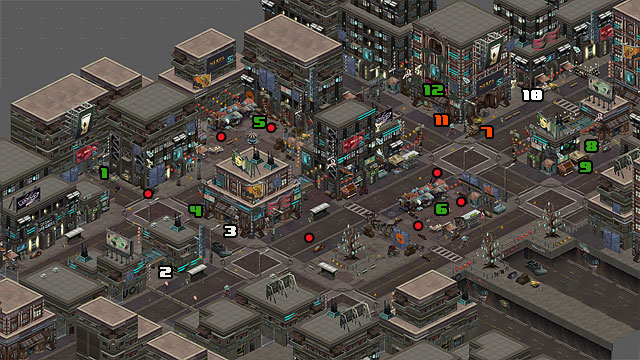
1. Jake's Stash - Quest: The Redmond Barrens (Main quest).
2. Vlad (NPC) - interesting conversation.
3. Sarah (NPC) - warns you against a gang in the square.
4. Worried Man - Gives you a quest: Help Bullied Merchant.
5. Head Thug/Bullied Merchant - Quest: Help Bullied Merchant (Side quest).
6. Halloweeners Gang - Quest: The Redmond Barrens.
7. Dan the Donut Man (NPC) - Connected with quest The Redmond Barrens.
8. Officer Kuprik/Murder Scene - Quest: The Redmond Barrens.
9. William (NPC) - You could give him back items and get some information.
10. Sally (NPC) - Has information connected to quest The Redmond Barrens.
11. Bobby (Merchant) - Sells some useful items.
12. Entrance to Seamstresses Union - Quest: The Redmond Barrens.
Red dots - Enemies.
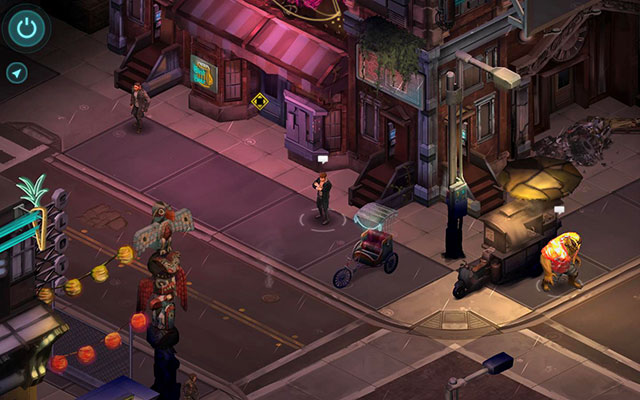 Bob, the merchant
Place: Near entrance to Seamstresses Union [11].
Description: A first merchant in the game. Unfortunately he has not many things to sell.
Items: Kamikaze, Nitro.
Main quest.
 Secret stash in secret junk
Objective: Find Jake's stash.
Right after beginning, go to the left, until you reach a small intersection. Turn left and walk to the junk pile [1]. Dig through it to find Jake's stash. Open the safe to get basic equipment and your class spells.
After a moment you'll get attacked by two enemies: Street Thug and Mugger. The best method to deal with them is to hide behind the near trash container and focus all your strength on Street Thug. He needs two rounds to get to you and attack you with a baseball bat. But that should be enough to eliminate him. After that, get rid of Mugger who hides behind a concrete cover. When it is over, leave the place.
Reward: Basic class equipment.
 Halloweeners Gang nest
Objective: Deal with the Halloweeners Gang.
Move straight ahead, until you reach a large square with a glowing tree [6]. You can choose upper or lower path, which doesn't really matter. Before you approach the main part of the location, one gang member will stop you, thus starting a fight.
The situation is more serious now. Start with eliminating the gang member who stopped you - Halloweener Sentry. Now jump behind any cover and focus on Halloweener Mage and another Halloweener Sentry, located on the other side. Try to place Jake on Lay Lines - glowing spots on the ground, which enhance his magic attacks.
Once you deal with gang members, their boss (John Paul) appears. It is a troll holding a large machete and having many AP. Of course he will try to get you in a melee fight. It doesn't make any sense to run away, because almost always he'll get one of your characters. Instead of that order your men to attack him, using all AP. He may look tough, but gives up quite soon. Once his HP drops to about 1/3, a conversation starts and you could decide whether to kill him or let him free.
Reward: 1 KP.
 At the crossroads
Objective: Visit the Murder Site.
Choose the lower path and head northeast until a short conversation starts. Unfortunately your companion has other things to do, but he leaves you with 1000 nuyen.
Move to Officer Kuprik and William [8] and start a conversation. You have to get to the crime scene. There are four options during the conversation. If you have Etiquette: Security skill, you can convince a policeman to let you in. You can also bribe him [100 nuyen] or give him a donut and soykaf coffee, which can be bought at Dan the Donut Man [7] for 10 nuyen. You can also [Lie] but unfortunately it is ineffective, as well as first option.
Reward: 1000 nuyen.
 Sam Watts murder crime scene
Objective: Investigate the Murder Site.
Once you get an access to the crime scene, you'll have to explore it. Start with a left marker, which results in obtaining Test Tube Piece. Now check out the contour of a body and destroyed light. You'll find there Bar Tab Receipt connected with a main quest and Coat and Blankets which can be given back to William [9]. You can also talk with him about the murder. Additional information can be obtained from Dan the Donut Man [7] and Sally [10].
It is time to visit a new location - Seamstresses Union [12].
Reward: 3 KP.
Side quest.
 First side quest
Objective: Help Bullied Merchants.
At the intersection you'll meet Worried Man [4]. He will order you to get rid of the gang that extorts money from the poor merchants. You can find them at the end of the road leading northeast.
 Not the best place for fighting. Fortunately there are only two enemies.
Objective: Deal with the gang.
Go to Head Thug [5] and start a conversation. You'll have several interesting options to complete this quest.
If you have Etiquette: Gang skill, you can force the gang to leave a market without a fight.
If your character has Strength of at least 4, you can intimidate them. This will give you 200 nuyen or they will give it back to merchants.
The third option from the top allows you to pay 300 nuyen of tribute, so the gang will leave without a fight.
Two upper options lead directly to a fight. In this case you'll have to defeat Head Thug and Mage Thug. This is not a difficult fight, especially that Head Thug starts it with bare fists or a baseball bat and Mage Thug dies after 1-2 shots.
 Merchant with rich offer
Objective: Speak with the Bullied Merchant.
After getting rid of the gang, talk to Mrs. James [5]. Depending on the option you choose, she can just thank you or offer 48 nuyen in addition.
Reward: 1 KP or 1 KP and 200 nuyen/48 nuyen.
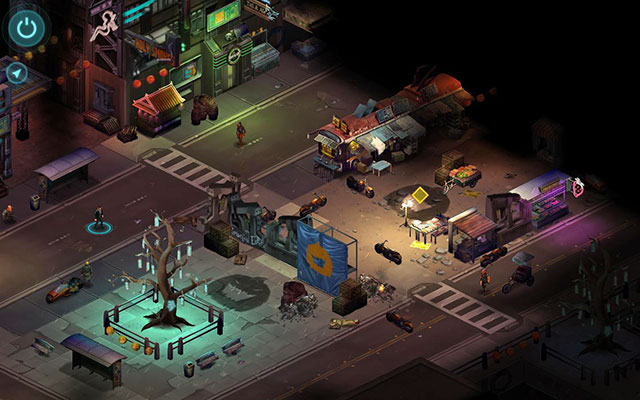
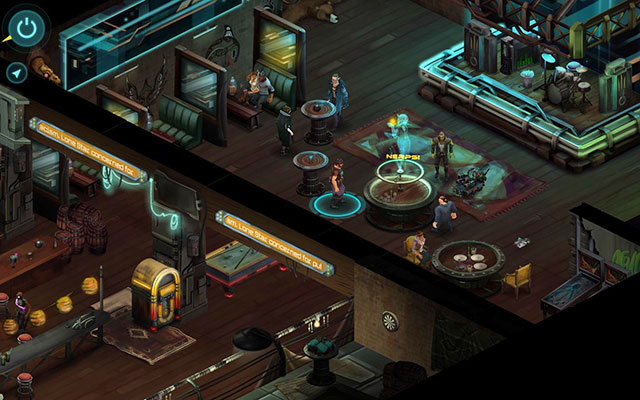
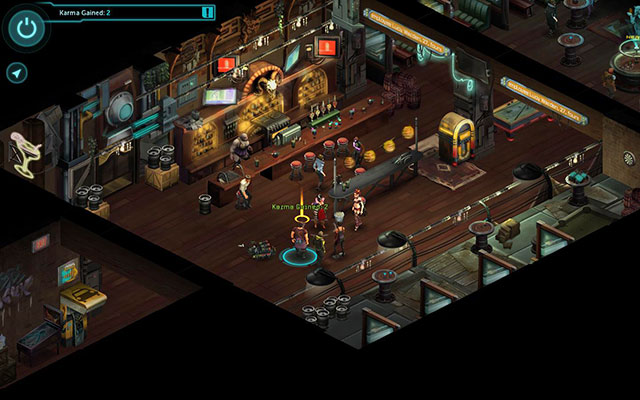
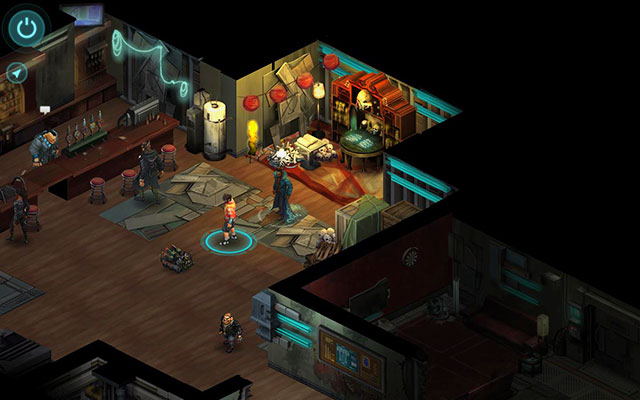
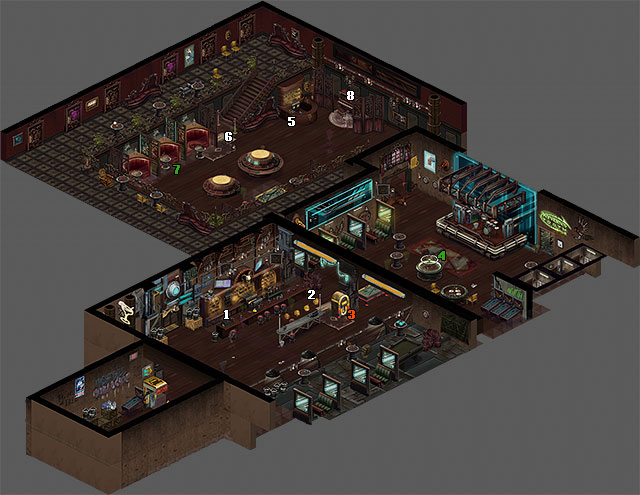
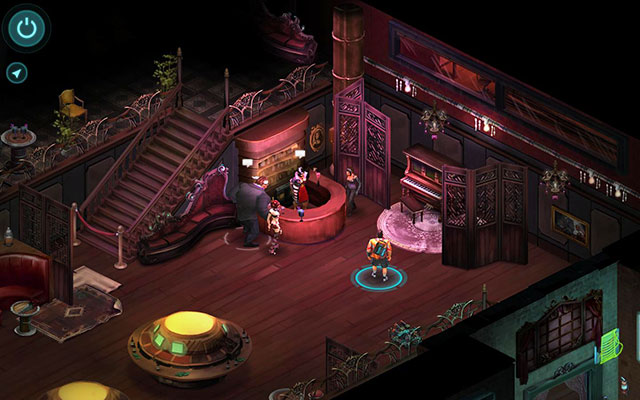
Welcome to the location, which you'll visit more than once. It is a center of dark deals, black market and shadowrunners' playground. Welcome to Seamstresses Union.
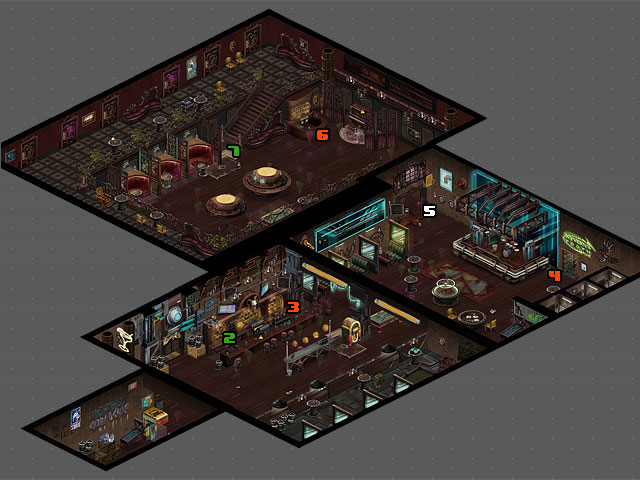
1. Location exit.
2. Cherry Bomb (NPC) - Quest: The Seamstresses Union (Main quest).
3. Eric Mersmann (Merchant) - sells clothes and armors.
4. Jin Parks (Merchant) - sells basic weapons.
5. Mr. Kluwe (NPC) - Information connected to quest The Seamstresses Union.
6. Noog (Merchant) - Deals with magic.
7. Mrs. Kubota (NPC) - Quest: The Seamstresses Union.
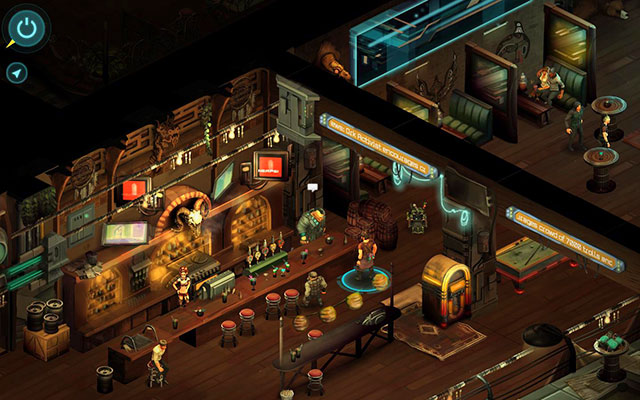 Eric sells at the bar
Place: Stand over a bar near the entrance [3].
Description: Temporary merchant. Sells basic clothing.
Items: Secure Shaman Clothing, Secure Samurai Clothing, Secure Mage Clothing, Secure Clothing, Secure Adept Clothing, Secure Decker Clothing, Secure Rigger Clothing, Secure Ninja Clothing, The Tourist Look, Thaumaturgic Armor, The Black Hat, Salish Runner, Alley Punk.
 Jin hides something
Place: Near the scene, in a right corner [4].
Description: Sells basic weapons, explosive and handful items. Additionally she has two class C drones.
Items: Fichetti Security 500, Beretta Model 70, Street Sweeper, Ak-97, Machete, Baseball Bat, Doberman Drone, Smoker Drone, Fichetti Frag Grenade, Fichetti Concussion Grenade, Smoke Grenade, Basic Medkit, Simple Drone Repair Kit.
 Noog likes to talk with ghosts. And has cool name
Place: Near piano in the second room [6].
Description: Sells basic spells for each class and shamans' fetishes.
Items: Powerbolt, Armor 1, Distraction 1, Manabolt 1, Manaball 1, Flamethrower 1, Weaken Armor 1, Heal Wound 1, Slow 1, Haste 1, Mana Fist, Killing Hands, Magic Resistance 1, Force 1 Air Elemental Fetish.
Main quest.
 The best part of Seamstresses
Objective: Find and Question Coyote.
Once you get to the location, approach pretty Elf girl behind the counter [2]. She'll tell that her name is Cherry Bomb. Talk to her using all dialog options and after that say goodbye and move to the second room.
At the stairs you'll see the owner of this club - Mrs. Kubota. Talk to her in order to gain access to the upper floor.
Reward: 2 KP.
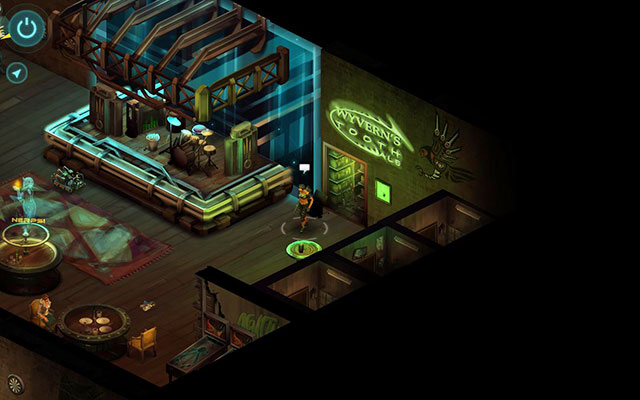
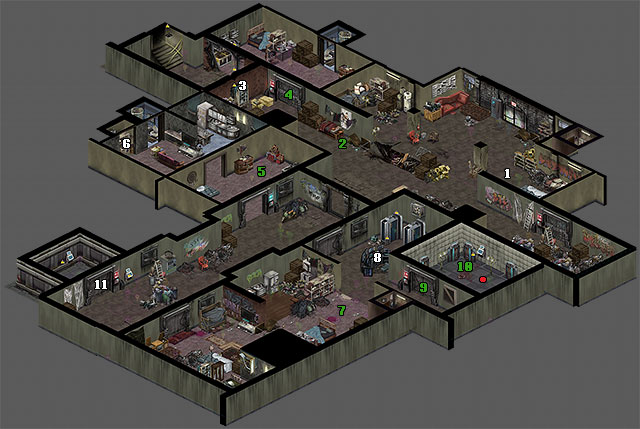
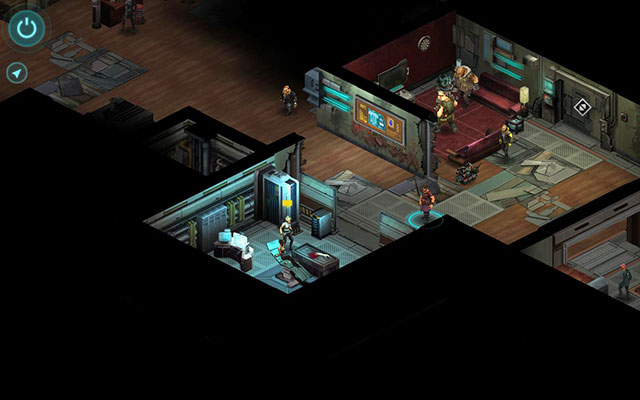
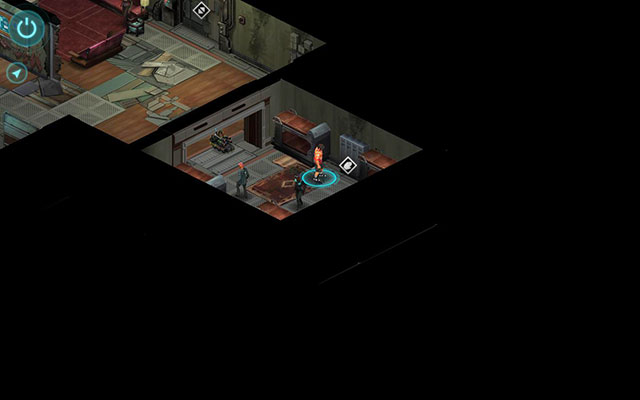
Upper floor of Seamstresses Union. You'll find here Coyote's room and plush teddy bear among others.
1. Entrance to Coyote's room - Quest: The Seamstresses Union (Main quest).
2. Notebook - Quest: The Seamstresses Union.
3. Coyote's Computer - Quest: The Seamstresses Union.
4. Safe - you need a password from a notebook to open it.
 Teddy pretending that he knows nothing
If your Decking skill is at least on 2, you can open the door in front of the location entrance. There is a large push teddy bear inside. Double click it and you'll get nice booster - Nitro.
Main quest.
 Coyote's room
Objective: Find and Question Coyote
Follow the corridor until you get to the last door on the left [1]. Open it and get inside. It is time to look for clues. There are only two items relevant to the quest: the journal on the bed and Coyote's computer. Start with picking up the journal [2] and check all pages. Now go to the computer [3] and start it. If you have a Decking skill on at least 3, you can break into a system. Otherwise you have to use password recovery option (Select "Password recover"). Answer all questions (answers can be found in the room). Correct answers are: Shadow, Starfire and Chicago. Once you get to the system, check the Calendar and log out.
Before you leave, you can check the safe on the wall [4]. A code can be found on the last page of the journal. Inside you'll find Fichetti Frag Grenade.
Return to the ground floor to Mrs. Kubota and tell her about your findings. She'll call a cab for you which will take you to the next location.
Reward: 3 KP
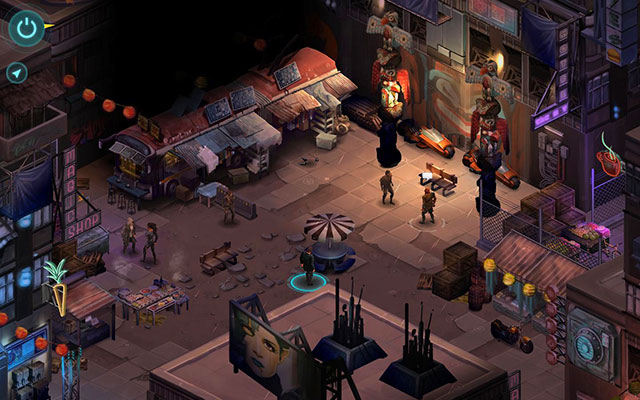
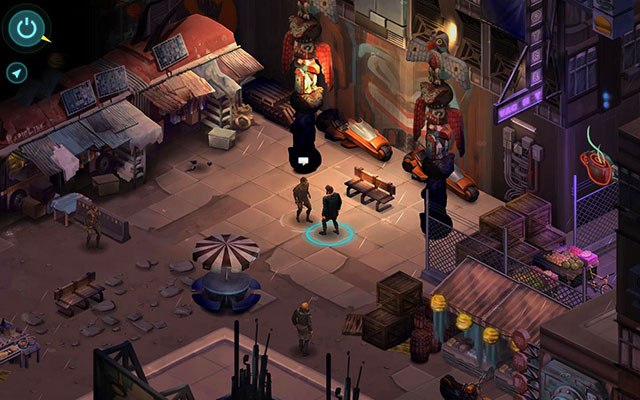
Yet another larger location. Unfortunately there is not much to do here, except two side quests and one ugly Elf.
1. Patrick (NPC) - Will show you some information about Universal Brotherhood.
2. Paco (NPC) - Quest: Pike Place Market (Main quest).
3. Manny (NPC) - Quest: Pike Place Market (Side quest).
4. Crime Scene - Quest: Pike Place Murder Site (Side quest).
5. Elf (NPC) - Quest: Pike Place Murder Site.
6. Frank (NPC) - Quest: Lucy's Necklace (Side quest).
7. Junkie (NPC) - You can give him some nuyen for "food".
8. Entrance to Royale Apartments - Quest: Pike Place Market.
Main quest.
 Paco waits at the bus stop
Target: Find Coyote's Boyfriend Paco.
Your first quest in the new location is to find Coyote's boyfriend - Paco. As you know from previously gathered information, they planned to meet somewhere in the marketplace.
Follow the only street west, until you get to the marketplace. Paco can be found at the bus [2]. Talk to him and ask about appointment with Mr. Delilah. After the conversation Paco will join the team.
Reward: 3 KP.
 Meat Emporium
Target: Look for Coyote in the Royale Apartments. (Optional) Find Maury's Meat Emporium.
With a new member in the team head northeast. After a while you'll approach a character associated with a side quest - Manny. Talk to him and show him Coyote's request. In return you'll get Zebra Meat, which will be useful later.
Go right until you get to Pike Place Crime Scene [4] associated with a side quest. Calm down scared Paco and then head southeast. Turn left and move ahead until you reach entrance to the Royale Apartments [8].
Reward: None.
Side quest.
 Another Ripper's victim
Target: Learn more about the Pike Place Murder.
You get this quest automatically, after approaching the crime scene [4]. Start with talking to Officer Landers, who blocks access to the quest. You have two options to get an access. If you have Etiquette: Security you can persuade the officer to let you to the crime scene. Otherwise choose the second or the third option. Anyway, Dresden has to step into action, thereby getting an access.
Start with examining the woman body and then talk to Dresden. Ask him about everything connected to the murder and then approach Officer Aguirre and start the conversation. At the end you'll get a possibility to pay for "Lonely Orphans Fund". It is of course payment for information in the future. If you have some free nuyen, you might want to pay him. It is not a must, but can be useful in the future. You can pay 300 nuyen right away or try to knock the price down to 200 nuyen with first dialog option.
You'll see an Elf [5] behind the railing on the right. Talk to him and then tell about him to Dresden to get some additional information. That's all. The quest is complete.
Reward: 1 KP.
Side quest.
 Frank never forgets ...
Target: Recover Lucy's Necklace from the Pike Place Crime Scene.
In front of the entrance to Royale Apartments you'll meet Frank [6]. It turns outs that he is a friend of recently murdered woman named Lucy. He'll ask you to retrieve a valuable necklace belonging to the victim, so he could give it back to her family.
Your first objective is to get to Crime Scene [4] (Check: Quest Pike Place Crime Scene). Once you get an access, click on the victim's body. There are several options to retrieve the necklace. If you have Quickness on at least 4 you can take it without problems. Another option is to talk to Officer Aguirre (3rd dialog option). Two last options can be found in the second dialog option. You can try to bribe Officer Landers (50 nuyen) or use the second option on condition that you have Spirit Summoning 2.
Once you get the necklace, you can return to Frank. If you have mentioned the payment (now or during the first conversation) you'll get 200 nuyen. Otherwise you can give back the necklace or keep it.
Reward: 1 KP or 1 KP and 200 nuyen.
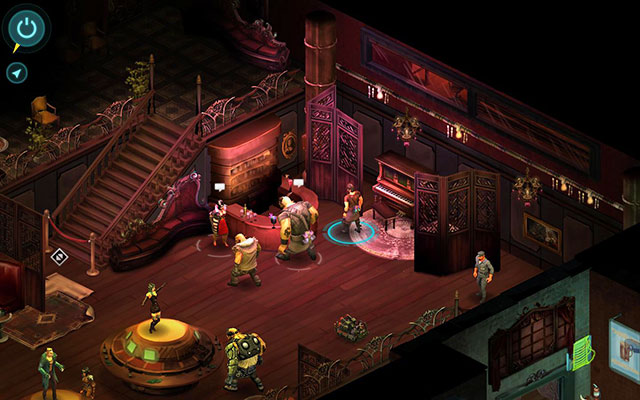
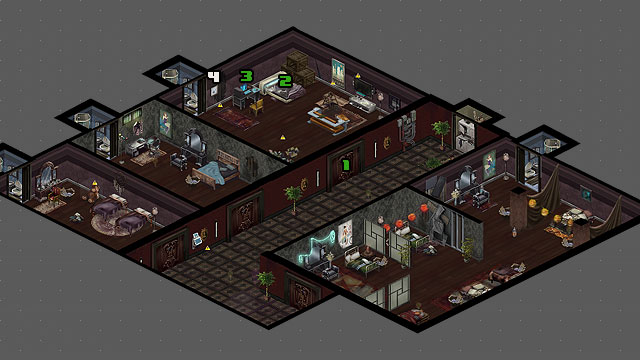
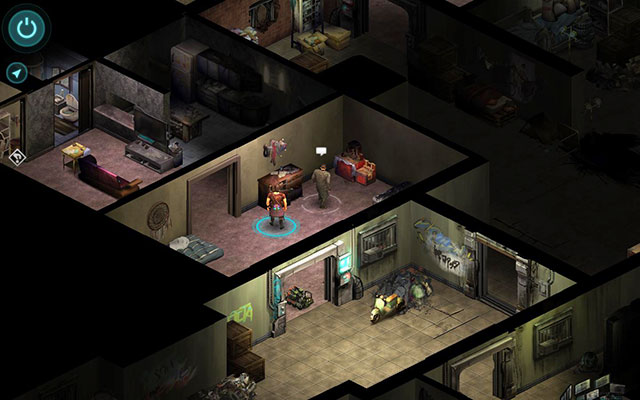
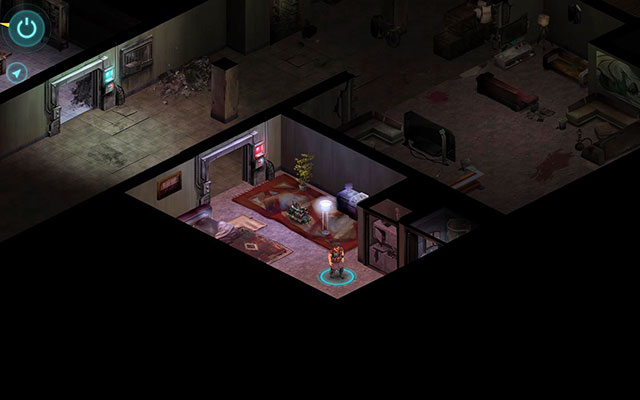
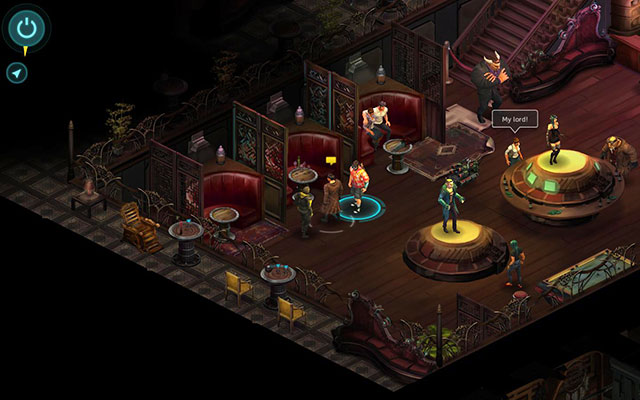
Exclusive apartments that offer top quality facilities and beautiful views ... Maybe one day it was like this. At the moment it is just a rotten place, which is a headquarters of BTL (Better Than Life) merchants. For the time being...
1. Tweaker (NPC) - Offers a bit depressing conversation.
2. Sad Old Man (NPC) - Quest: The Royale Apartments (Main quest).
3. Closet- Quest: The Royale Apartments.
4. Entrance to the rear - Quest: The Royale Apartments.
5. Symp (NPC) - Quest: Symp's Son (Side quest).
6. Item - Jazz.
7. Ryker (NPC) - Quest: The Royale Apartments/Symp's Son.
8. Computer - Quest: The Royale Apartments/Symp's Son.
9. Recording Studio - The Royale Apartments/Symp's Son.
10. Zipper (NPC) - Quest: Symp's Son.
11. Elevator - Quest: The Royale Apartments.
Red dots - Enemies.
Main quest.
 True luxury...
Objective: 1. Find Coyote. 2. Keep Paco alive.
You'll start in the main building entrance. Your first task is to get information about the current location of Coyote.
Start with nice conversation with Sad Old Man [2] located on the left. Question him and you'll learn that Coyote is being kept on the building top floor.
Reward: None
 So many options and you can choose only one
Objective: Get to the Top Floor.
At this moment you have two possible paths: Main one, leading through the central elevator and the Rear one, leading through the Sad Old Man location. If you choose the main entrance, you'll encounter enemies sooner. When you enter through the rear entrance, you'll be able to get them from the back.
If you choose the main entrance, you'll have following options:
1. Move right away to the elevator, select the first option and then provoke the guy on the other side (You filthy dogs ...). In this way you'll start the fight. There are two opponents to defeat. First of them, Ryker, will come out from behind the door opposite to the elevator. Another one, Tranq, will get down with the elevator after the second turn. Once you deal with guards, pick up Royale Elevator Pass Code, left by the second enemy. Enter the code and go up with the elevator.
2. Another method is a bit more diplomatic. Approach Ryker [7] and select the second dialogue option. If you have Etiquette: Street or Intelligence 3, you can persuade him to give you the elevator code.
3. If you're lack in appropriate skills to persuade him, you can select the first dialogue option. Thanks to that you'll be able to attack him. Although you won't get the elevator code this way, you'll be able to use a computer [8] behind you. If you have Decking 3 you can hack into a system and get the elevator code. You can also select the second option (Recording Studio) and with Decking 2 download data from BTL. In this way you'll get additional option when you approach an elevator. Choose the one with an intercom and then third one with BTL.
4. Associated with a Symp's Son side quest. You have to get to the Recording Studio [9]. You can do it by choosing appropriate option at the computer (Recording Studio->Reboot studio software) or by taking the mentioned quest and talking to Ryker (See: Symp's Son). Once you get inside, click on the panel on the wall and download BTL file. Now follow steps presented in point 3.
If you choose the back entrance:
1. At the end of the conversation with Sad Old Man [2] you can persuade him to open the door leading to the second door (if you have Strength 4 or Charisma 4).
2. You can also do it yourself if you move the closet [3] located at the mentioned door. Two new possibilities will appear. If you have Drone Control skill and any drone, you can send it through the wall to open the door for you. Another method is to summon a Spirit (skull sign) if you have Spirit Summoning skill.
Reward: 3 KP
Side quest.
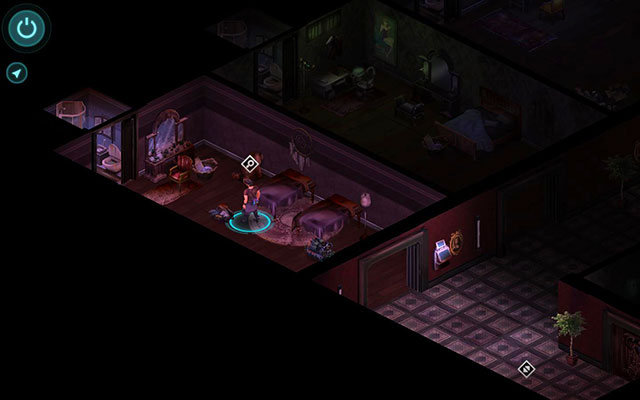
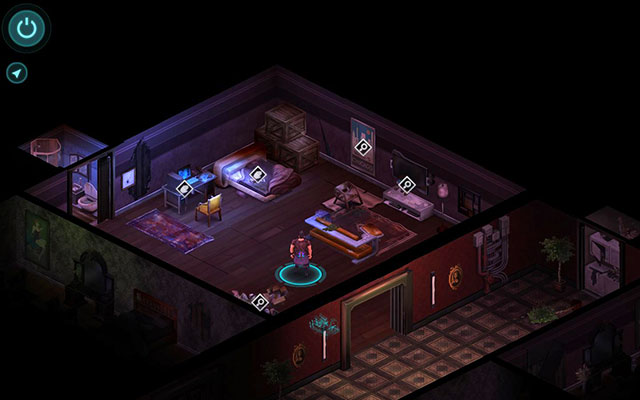
 Mr. Symp's apartment
Objective: Save the Man's Son
In order to start this quest, go to the long corridor located in front of the entrance. You'll witness a minor argument there. Go to the left, following the guy who got hit. His name is Symp [5]. Talk to him and he will tell you what happened to him and his son.
After accepting the quest you can take one small thing from the near room. There is Jazz in the room corner [6]. Pick it up and leave the apartment.
Symp's son is being kept in Recording Studio [9]. You can get there in two ways. First option - talk to Ryker [7]. Choose the third dialogue option - if you have Charisma 3, persuade him to let you inside. Then get rid of bandits. Another option is to get an access to the computer. First kill or scare off Ryker (See: The Royale Apartments) and then start the computer [8]. Choose Recording Studio option and then Reboot studio software. After a moment mad Tickler will appear. Get rid of him or let him flee and get inside. You'll encounter here tortured Zipper [10], Symp's son. Talk to him and then return to his father.
Reward: 1 KP
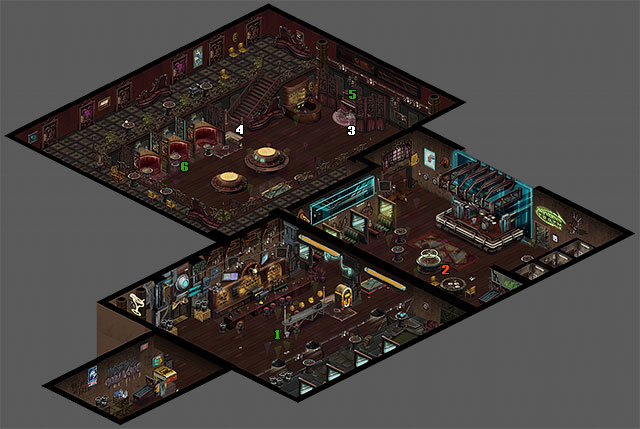
The upper floor of this exclusive building. Personal office of Stevie J until your visit. Get ready for a long fight.
1. Barricade - A good place for defending.
2. Hellhound cage - Quest: The Penthouse Suite (Main quest).
3. Coyote (NPC) - Quest: The Penthouse Suite.
4. Stevie J (Opponent) - Quest: The Penthouse Suite.
5. Interesting place - You'll find here several useful items.
6. Stevie J's Stash - Quest: Stevie's Stash (Side quest).
7. Front entrance - Quest: The Penthouse Suite.
Red dots - Enemies.
 I wonder what's in other crates...
In front of the entrance to the Hellhound cage you'll find mechanical door [5]. Open it and you'll get inside sizeable room. Explore the marked place and you'll get 100 nuyen and Advanced Medkit.
Main quest.
 Stevie J office in its entire splendor
Objective: 1. Keep Coyote Alive. 2. Keep Paco Alive. 3. Wipe out the Gang.
On this stage you couldn't do without the fight. But you can start it in three different places, depending on the previous actions.
If you got here with the elevator and without BTL file, you'll start at the front entrance [7]. Once you leave the elevator, Tranq will start the fight.
If you got here with the elevator and having BTL file, Tranq will approach you. You can show him the file and he will let you in. Go to the end of the corridor until you reach Hellhound cage [2]. If you have Zebra Meat with you (you could get it at the Pike Place Market), throw it to the creatures by choosing the first option. Open the first door and then the second one. The fight will begin. The advantage of this method is that you'll have Coyote to help you. On the other side you have to watch out for her - she must stay alive...
If you chose the rear entrance, you'll start at the other side of the floor. The fight will start only when one of enemies spots you.
Whenever you start, you have to get rid of all gang members. If you start at the main entrance, kill Tranq and move forwards. Jump into the kitchen on the left and eliminate Hacker. You can defend yourself here more easily. Eliminate enemies one by one, focusing on Stevie J and Thistle.
Starting in torture room with Coyote has one more advantage - Steve J will show up himself. Focus your attention only on him. It is not easy to eliminate him in the first round, but it is possible. Try only to deal damage or use mage spell - Weaken Armor I to decrease his resistance. With some luck you should get rid of him. If you can't manage to do this, he can start to withdraw to the main room. Do not follow him. Eliminate the guard in torture room and talk to Coyote - she will get her shotgun. Barricade yourself and eliminate all enemies showing up at the door.
If you start from the rear entrance, follow the corridor. A moment later you'll encounter the first enemy - eliminate him. It is possible that this won't alarm others. If they won't come in running to the room, you'll have to lure them in by yourself. Place your character in the passage to the main room. Once enemies spot you, jump behind the long barricade [1]. It is perfect place to defend yourself and eliminate enemies one by one.
Once you defeat all opponents, talk to Coyote. If she was fighting along your side, the conversation starts automatically. Otherwise you'll have to get to the torture room [3] first. Use the Zebra Meat trick described above. Eliminate the last enemy and start the conversation. There will be two options. The first one will allow you to leave the location immediately. If you choose the second one, you'll be able to stay here to complete the side quest and pick up some items.
Reward: 3 KP.
Side quest.
 Tragically deceased J bedroom
Objective: Find Stevie's Stash.
You'll get this quest when you select the second option during the conversation with Coyote after the fight.
Start with picking up Stevie J's Pass Codes from his body if you haven't done this yet. Now go to the room opposite to the kitchen. When you open the door, Hellhound will attack you. It is quite tough opponent especially that it jumps directly to your face. It is best to use some powerful firearms against him. If you have a shotgun or a rifle with Burst Fire or Full Auto, it would be good to use that weapon. After the fight, get inside the room.
Approach the closet with the marking [6]. Click it and you'll get Rare Stones, required to complete the quest.
Reward: 1 KP.
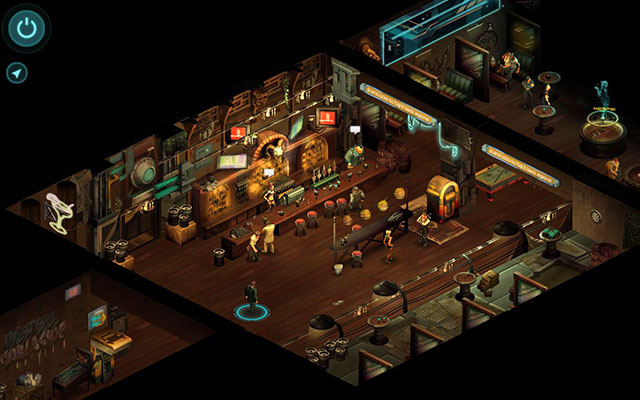
It is a return to a well-known location. This time you should get also your pajamas because you'll stay here for a while.
1. Mrs. Kubota (NPC) - Quest: Return to the Union (Main quest).
2. Van Graas (Merchant) - You can sell here some special items.
3. Johnny Clean (NPC) - Ensures a brief conversation.
4. Mr. Kluwe (NPC) - You can ask him several questions. About manicure for example.
5. Piano - Quest: Return to the Union.
6. Mr. Deliliah (NPC) - Quest: Stones for Mr. Deliliah (Side quest).
 Classy dwarf. Abstinent in addition
Place: You'll find him in the front of the scene [2].
Description: Van Graas is quite specific merchant. He is Fencer, so he sells goods from missions from example. You'll be able to sell here valuable items found during completing quests.
Buys: Remaining Stones (See: Stones for Mr. Delilah).
Main quest.
 Slight fuss with Mrs. Kubota
Objective: Find the Med-Bay in the Safehouse.
The quest will start with a short conversation. After a moment Coyote will leave you and you'll start a conversation with Mrs. Kubota. Ask her several questions and she will tell you about Shadowrunners' safehouse and how to get there.
Go to the other room and approach a piano [5] located on the right. Play on it, choosing the third option (Play G-A-F-F-C). In this way you'll get to the Seamstresses Union underground.
Reward: 2 KP and 1000 nuyen.
Side quest.
 You'll have more deals with this tough guy
Objective: Deliver the Stones to Mr. Delilah.
Your task is to deliver stones found in The Penthouse Suite.
Approach Mr. Delilah [6] and start the conversation. Three options are available. You can give away all stones right now or keep most valuable of them or keep the one with a rune on it. Frankly speaking it doesn't matter which option you choose, because the result is almost the same.
Reward: Remaining Stones.
 Bargaining with Van Graas
Objective: Find the Fence for the Remaining Stones.
After the conversation follow Paco to Van Graas [2] in order to sell stones. During the conversation you can bargain a bit, assuming that you have proper skills. You can start the conversation with two first options or choose the third one if you have Charisma 3. That doesn't matter too. Only in the second part of the conversation, when Van Graas offers you 1000 nuyen for stone, you are able to raise the price. If you have Charisma 5, Strength 6 or Etiquette: Academic, you can get 1500 nuyen. Sell stones thus completing the quest.
Reward: 1000 nuyen or 1500 nuyen.
1. Dr. Sara Castle (Merchant) - Quest: Return to the Union Part 2 (Main quest).
2. Coyote (NPC) - Quest: Return to the Union Part 2.
3. Sam's Bunk - Quest: Return to the Union Part 2.
4. Player's Locker - You can change your equipment here.
5. Aljernon (Merchant) - Sells magic items.
6. Eric Mersmann (Merchant) - Clothes.
7. T. B. Gruberman (Merchant) - Lead and explosives.
8. David Fry II (Merchant) - Electronics.
 She has a cozy workshop
Place: You'll find her in Med-Bay [1].
Description: She provides with all medication and also cybernetic implants.
Items: Basic Medkit, Doc Wagon Basic Trauma Kit, Doc Wagon Gold Trauma Kit, Doc Wagon Platinum Trauma Kit.
Cyberware: Vision Magnification Eyes (Basic), Datajack, Aztechnology Cyberleg (Basic), Silver Tech Cyberarm (Basic), Shaiwase Bone Lacing (Plastic), Ares Dermal Plating (Basic).
 The strangest persona in the club
Place: Right from the bar [5].
Description: It has a fresh supply of magic items and spells.
Items: Force I Fire Elemental Fetish, Force I Earth Elemental Fetish, Force I Air Elemental Fetish, Force II Water Elemental Fetish, Force II Earth Elemental Fetish, Force II Fire Elemental Fetish, Force II Air Elemental Fetish, Magic Resistance I, Killing Hands, Mana Fist, Stride, Counterstrike, Magic Resistance II, Quick Strike, Mystic Armor, Pain Resistance, Magic Resistance III, Slow I, Haste I, Silence, Air Barrier III, Quiet Bomb, Fog, Weaken Armor I, Manabolt I, Flamethrower I, Lightning Bolt I, Distraction I, Armor I, Acid Stream I, Stunbolt, Mind Wipe, Manaball I, Heal Wound, Dispel Magic, Aim I, Powerbolt.
 Eric got promoted to be a bartender
Place: Stands behind the bar [6].
Description: An old friend. He provides all kind of clothes and armors.
Items: Secure Shaman Clothing, Secure Samurai Clothing, Secure Rigger Clothing, Secure Mage Clothing, Secure Decker Clothing, Secure Clothing, Secure Adept Clothing, the Black Hat, Thaumaturgic Armor, Salish Runner, The Tourist Look, Secure Ninja Clothing, Alley Punk.
 Military maniac
Place: Left from the bar [7].
Description: Weapons freak and a former soldier. Orc in addition. You can look here for everything non-magical.
Items: Simple Drone Repair Kit, Basic Medkit, Smoke Grenade, Fichetti Concussion Grenade, Fichetti Frag Grenade, Smoker Drone, Doberman Drone, Baseball Bat, Machete, AK-97, Semopal vz/88V, Street Sweeper, Benelli Raffaello, Beretta Model 70, Uzi III, Fichetti Security 500, Ceska Black Scorpion.
 Dwarf with the original name
Place: Next to the T. B. Gruberman'a [8].
Description: This dwarf has everything on the newest technology and hacking.
Items: Execute Shield ESP, Execute Exploder ESP, Execute Attacker ESP, Execute Assassin ESP, Sniffer Lvl 1, Slow Lvl 1, Shield Lvl 1, Medic Lvl 1, Killer Lvl 1, Firewall Lvl 1, Erosion Lvl 1, Degrade Lvl 1, Blaster Lvl 1, Suppression Lvl 1, Killjoy Lvl 1, Sony CTY-360, Renraku Kraftwerk-1.
Main quest.
A moment before surgery of CoyoteObjective: Find the Med-Bay in the Safehouse.
Once you get down go straight ahead until you get to the Med-Bay and Dr. Sara Castle [1]. Start the conversation. After a moment the screen fades and you'll find yourself in a room with healthy Coyote [2]. Talk to her and ask her about every detail. At the end of the conversation she will give you a side quest: Stones for Mr. Delilah (See: Seamstresses Union Part 2).
Reward: None
 Your new bedroom
Objective: Investigate Sam's Bunk.
Approach Sam's Bunk [3] and examine it carefully. Check the back of the photo, choosing second option. Hide the photo in your pocket and return to Coyote [2]. Talk to her.
A moment later a policeman will call you and inform you about another murder. Take the elevator up and leave Seamstresses Union.
Reward: None
Side quest.
 Seamstresses underground in all its splendor
Objective: Meet All the Black Market Vendors in the Safehouse.
This is not quite a quest but rather a mini-quest. Your only objective is to talk to each of 5 merchants in Safehouse: Dr. Sara Castle, Aljernon, Eric Mersmann, T. B. Gruberman and David Fry II. That's all.
Reward: None
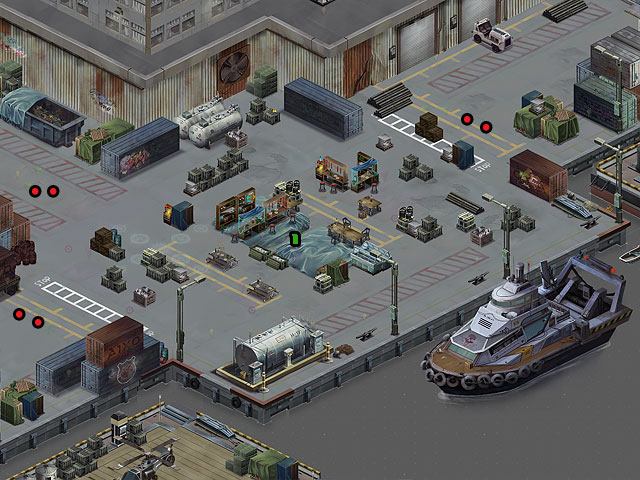
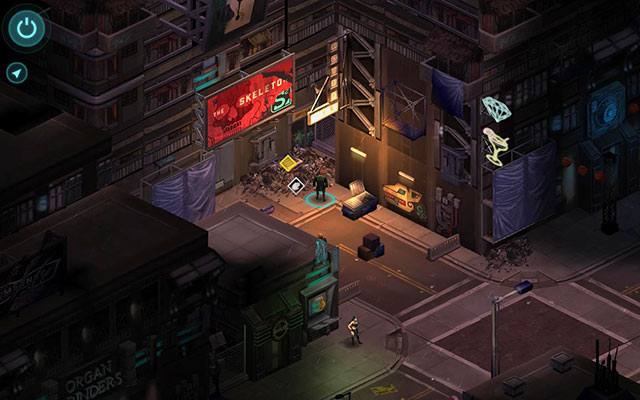
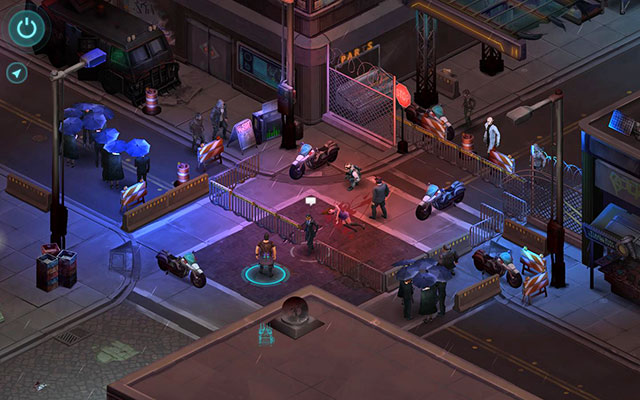
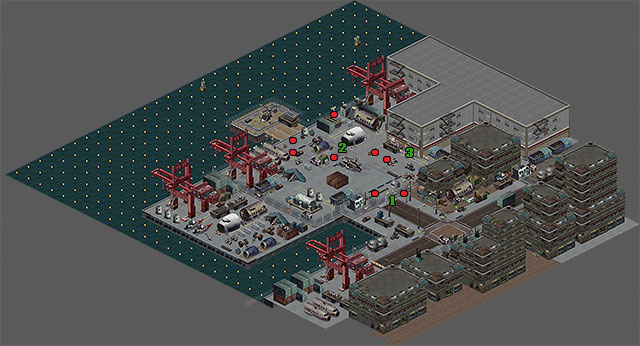
Docks of the city. Is there anything more enigmatic? Unfortunately you won't spend too much time here, at least not in this part.
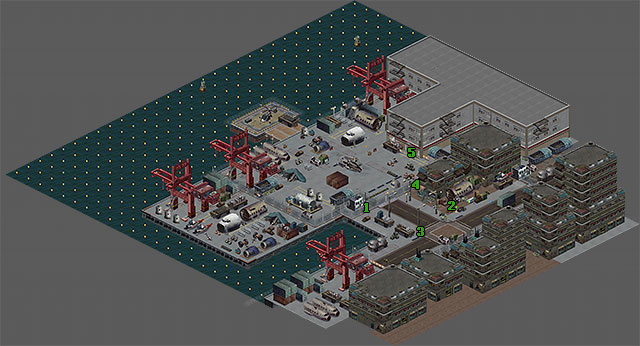
1. Lonestar Guard (NPC) - Quest: The South Seattle Docks (Main quest).
2. Ladder - Quest: The South Seattle Docks.
3. Streetwalker (NPC) - Quest: The South Seattle Docks.
4. Damaged fence - Quest: The South Seattle Docks.
5. NTSB Warehouse - Quest: The South Seattle Docks.
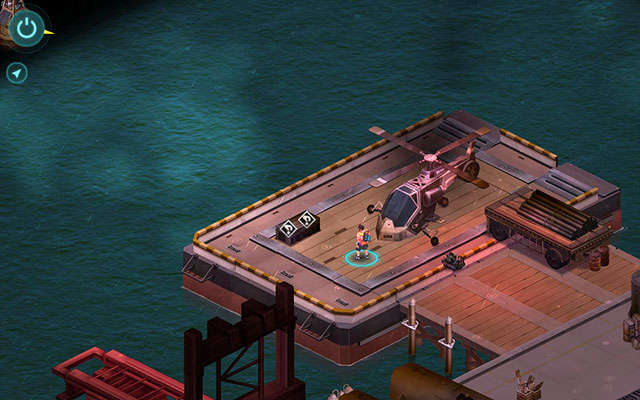 Two black crates in the junkyard
The dock junkyard is not really interesting place. There should be more items to be picked up, but there are none. An exception is two crates. When you go to the other side of the junkyard, you'll find a helicopter in front of the entrance gate and two black crates behind it. Open them and you'll get Fichetti Concussion Grenade and Phosphorus Grenade.
Main quest.
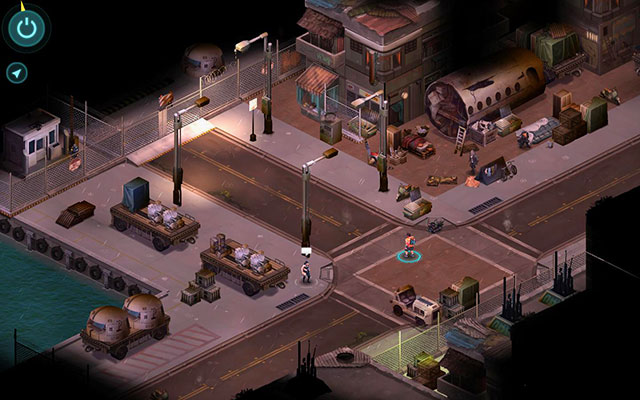 Intersection with two options
Objective: Get to the NTSB Warehouse.
Welcome to Seattle docks. Your current objective is to get behind the fence and then inside the NTSB warehouse. There are two options:
1. Approach Lonestar Guard [1] located on the other side of the fence and start the conversation. If you have Etiquette: Security skill, you can persuade him to let you in. This is the only effective dialog option. Others do not work on Lofwyr, Dragon King.
2. Take the ladder [2] based on the piece of a rusty plane. Unfortunately its owner will spot you. Each dialog option is effective and let you keep the ladder. But in order to get it worked, you need an assistant - in this case it is - Streetwalker [3]. Talk to her and pay her 20 nuyen for her ... assist. Once she distracts Lofwyr, run to the damaged fence [4] and put the ladder there. Climb it up and get to the other side.
Once you have an access, head towards the large hangar on the left and get inside [5].
Reward: 3 KP
Yet another murder scene and yet another one of Ripper's victims. This time around, instead of looking for clues, you will search around for the Haunted Items.
1.Sergeant Aguirre(NPC) - Quest: The Warehouse (Main Quest).
2.Dresden(NPC) - Quest: The Warehouse.
3.Shadnnon Half-Sky(NPC) - Quest: The Warehouse.
4.Warehouse Office - Quest: The Warehouse.
5.Locker - Quest: The Warehouse.
6.Computer- Quest: The Warehouse.
7.The second hall - Quest: The Warehouse.
8.Shoe pile - Quest: The Warehouse.
9.Pile of junk- Quest: The Warehouse.
Main quests.
 Aquirre sipping his coffee
Objective: Speak with Sergeant Aguirre.
After you get into the hangar, approach Sergeant Aguirre and initiate a conversation. Ask him about everything and, eventually, you will receive a Warehouse Office Key. This will open for you the door to the office [4] next door.
Reward: None.
 Ripper's another victim
Objective: Investigate the Murder Scene.
It is time to get down to the investigation. Start by talking to Dresden [2], standing at the corpse. Thanks to this, you will receive some useful information about the murder itself. Then, talk to Shannon Half-Sky[3], standing right next to him. She will ask you to bring her two items with strong spiritual power. This kind of items are spread all over the hangar. Start by walking into the next room [7].
There are 2 items in here. The first one can be found in the shoe pile [8], erected in the middle of the room, among the armchairs. Click on the pile and select the first, and then the second option. You have found the first one of the items that you are looking for - Sneaker.
The other one is in the pile of junk [9], in the left corner of the room. If you choose the first option, you will find the second one of the items - Steel Earring. Choosing the third option (Inspect the credstick), will result in adding 200 nuyen to your account.
At this moment, you have already performed the basic quest by finding the two items that you require. Still, you can take a look around for the remaining ones to obtain additional information in the future.
If you want to obtain the third item, you need to gain access to the room close to the corpse. For that, you require a screwdriver, though, which you can find behind the door, next to the pile of junk [9]. Still, you need to have the Spirit Summoning or Drone Control skill. Use one of the skills to summon a spirit or send the drone to the other side and open the door for yourself. Collect the Magnetic Screwdriver from the trolley and return to the room.
Equipped with a new tool, you can open for yourself the panel protecting the door. Thanks to this, you will gain access to the room. Walk inside and click on the marking on the bunk bed. This way you will find the third item- Old Diary.
The last room of your interest is the Warehouse Office [4]. Once you get inside, approach the locker [5] first. You will discover a Comb, inside, i.e. the fourth, and the last one, of the haunted items. Approach then the active computer [6], located opposite the door. Read all of the entries and you will receive the Incriminating Data after the last one.
That's it. Return to Shannon Half - Sky[3] and initiate a conversation. A moment later, there will appear McKlusky here and stop the conversation. You will be requested to leave the murder scene. Again, talk to Shannon and agree to return at night.
Once you will be taking your leave, Coyote will call. He needs reinforcements. Offer to help and leave the hangar.
Reward: 5 KP and 4000 nuyen.
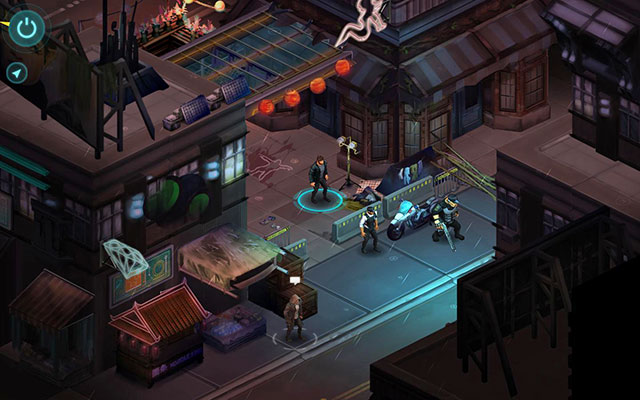
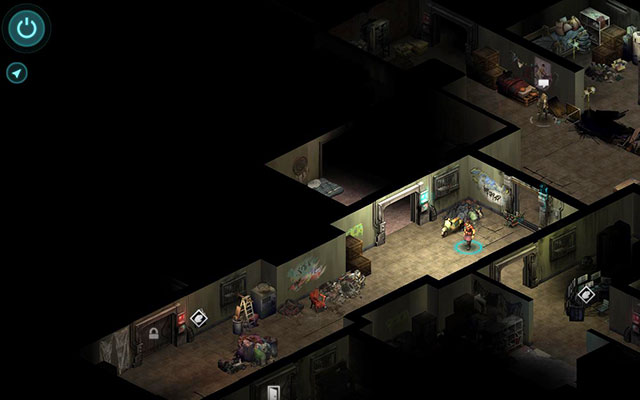
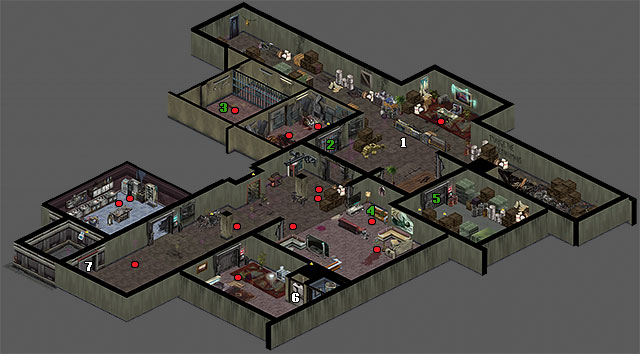
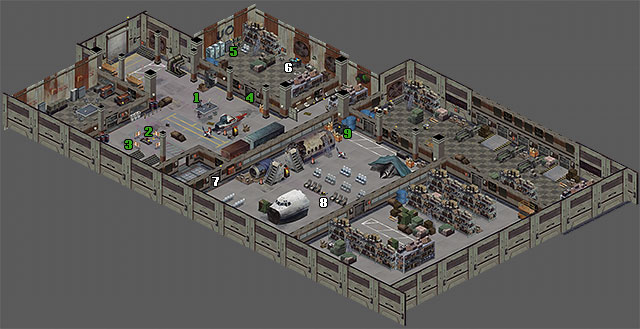
The return to the slum and one of numerous dens of the BTL pushers. This time directed by the all-famous Yakuza.
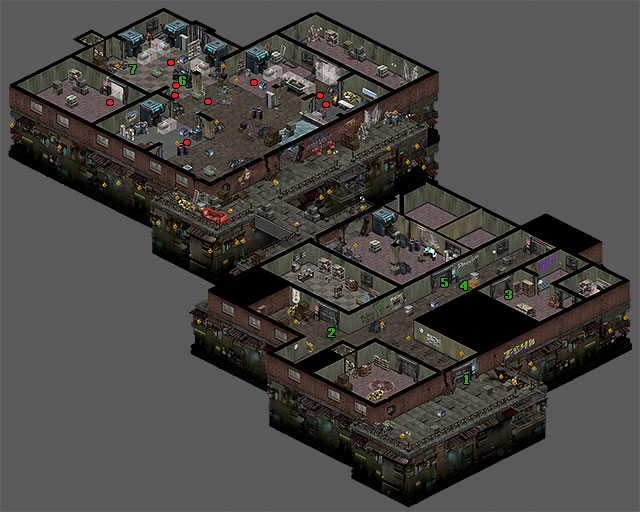
1.BTL Clocker(NPC) - Quest: Coyote's Crusade (Main Quest).
2.Concerned Woman(NPC) - Quest: Coyote's Crusade.
3.Jamal(NPC) - Quest: Coyote's Crusade.
4.Charlie(NPC) - Quest: Coyote's Crusade.
5.The door to the BTL pushers' den - Quest: Coyote's Crusade.
6.Computer- Quest: Coyote's Crusade.
7.Gino(NPC) - Quest: Coyote's Crusade.
Red Dots - enemies.
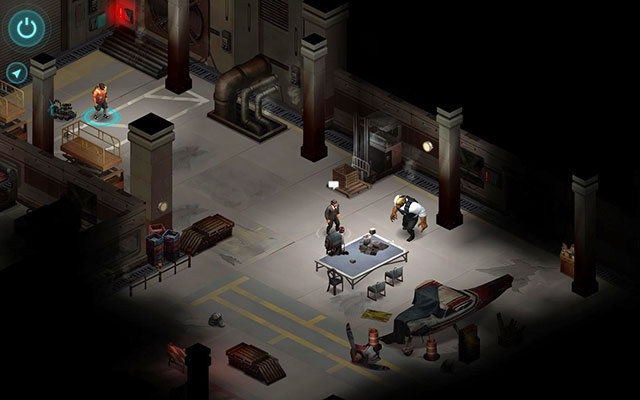
Main Quest.
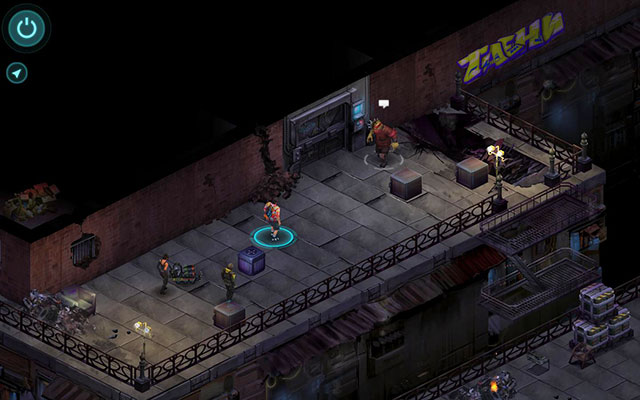 He isn't even surprised about how they got here
Objective: 1. Find and Rescue Gino From the BTL Pushers. 2. Coyote and Paco Must Survive.
Again, you are in the den of the BTL pushers, and again you have several options to get inside. Start by talking to BTL Clocker[1]. You can ask him about several, things and tell him to let you in, or accuse him of hurting the innocents and knock him down. This does not matter what you do, although it is nice to see an Orc falling to the ground.
Walk inside and follow the corridor to its end. You can talk to the Concerned Woman[2], to obtain some information. Then, follow the main corridor until you reach the main door [5[. At this moment, there are two characters that can grant you with access:.
1. Charlie[4] - the gangster next to the door [5]. He decides about who gets in and who does not. Talk to him and you will get several dialogue options. You can either pay him the full charge , which amounts to 150 nuyen, or make use of your attributes. There is also an option to hit. If you have, at least Strength 4, you can intimidate the Orc, and with Charisma 5, you can convince him to let you through without the pay. There is also a third option, where you hit Charlie on the face and knock him down, although it results in a direct fight with his companions behind the door.
2. Jamal[3]- the dwarf next door. You can purchase entry tickets from him, if you earlier learned about him from the Concerned Woman[2]. If you chose the first, or the second, dialogue option, he will offer to you three tickets at the price of 100 nuyen. There is no point in haggling and, if you intimidate him with the second option, you will bring about a fight with him and the rest of the gang.
If you have chosen the peaceful way, you will be able to walk inside without any problems, and walk into the main area. In the case of the hostile approach, you will need to cut through several goons to reach the main area. Either way, as soon as you walk over the bridge and make it into the next building, a fight will start.
Reward: None.
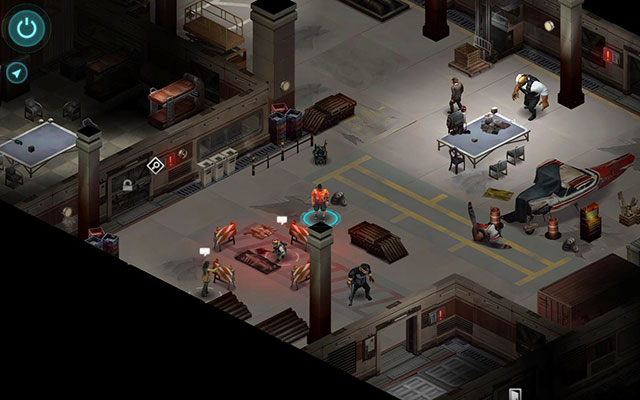
 Try not to hit the civilians
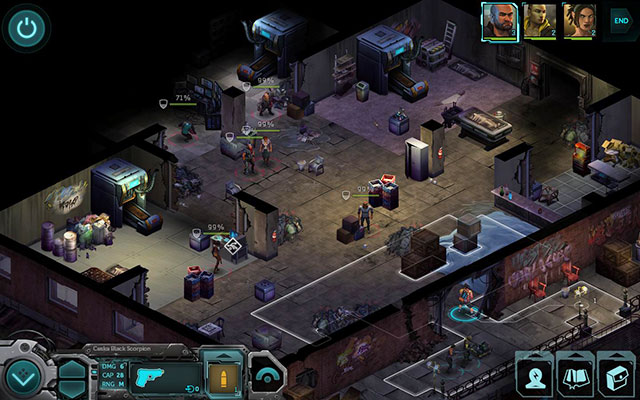
Objective: Stop the Chipheads From Attacking You. (Optional) Do Not Let Any Chip-heads Die.
This fight can be a little problematic. Apart from the enemies , coming in large numbers, you also need to watch out for the civilians. They only attack with fists, but, in combination with the rest of the gang, they pose quite a threat.
Your main objective now, should be the Yakuza Decker, at the other end of the room.. It is him that is controlling the civilians and, as soon as you eliminate him, civilians stop attacking. There is no point in charging at him directly, because there is the entire gang between him and you, and there are new ones coming from the passage on the right. If there is a good sharpshooter on your team, you can attempt taking him out from your starting position, although this is not going to be easy.
Start by commanding your team behind the crates opposite the entrance. For the time being, this is the best position, for defense, you can afford. As soon as they make it there, have them take out the BTL Security on the left. Then, focus on the two new enemies that come out of the passage on the left - BTL Bodyguard and Yakuza Shaman. Two, well aimed, shotgun shots by Coyote, should send the Yakuza Shaman into the afterlife. Have the rest deal with the BTL Bodyguard.
Once these two are done with, aim everything you have at the Yakuza Mage. He should hit the ground within 1-2 turns. Finally, deal with the second one of the BTL Security. For as long as you are hiding behind the crates, he should not pose too much threat to you, since he is using a shotgun, and is at a distance.
There is only a Yakuza Decker left. He is focusing on controlling the civilians, so he will not attack you directly. Approach him and shoot every single barrel at him. He is not too tough so he should be out in a moment.
When it comes to the mind-controlled civilians, there are several good ways to deal with them:
1. you can use Fichetti Concussion Grenades, which deal the damage of 1 AP, which should make them considerably slower. There is one in Paco's inventory and two in Coyote's.
2. Send out a decoy. If you have the Spirit Summoning, any Fetish or drone, you can dispatch one of them a bit to the front, thanks to which all of the civilians will focus on the decoy. They attack with fists so, they do not deal too much damage. As a last resort, if you are not equipped with any of the above, you can dispatch one of your team members to act as a decoy, and heal them with first-aid-kits or with magic.
3. Try to take out the Yakuza Decker at the very beginning. Just like above, if there is a good sharpshooter on your team, with a rifle, you can aim at him and use the Deadeye Shot with that. There is also an option to command your team to the other end of the room, take the Yakuza Decker out and continue fighting from here. The best idea is to use the Smoke Grenade, Smoke Drone or the Fog spell, to ensure yourself with cover.
It, still, should be mentioned that eliminating the Yakuza Decker will not disable the civilians, and only stuns them temporarily. To eliminate them once and for all, you need to activate the computer's panel [6] and select the first option or, if you have Decking 3, the second one. Only after you do that, will they stop attacking you.
Reward: 1 KP.
 So much ado for a sleeping NPC
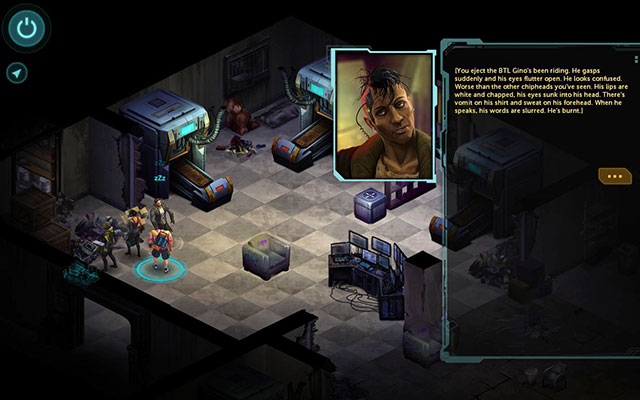
Objective: Talk to Gino.
After you have dealt with the enemies and soothed civilians down, talk to Gino[7]. If you want to help him, try being gentle. First select the first, and then the second dialogue option.
Reward: 2 KP.
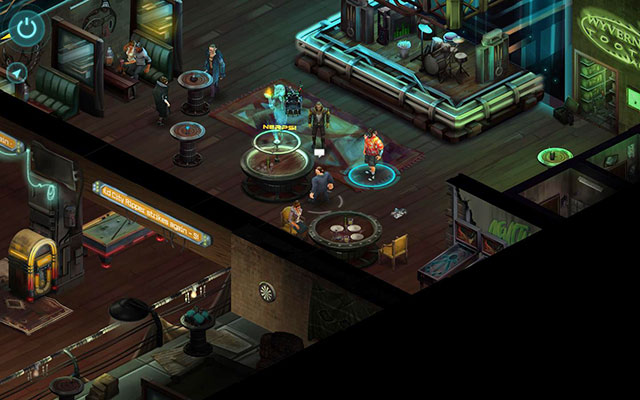
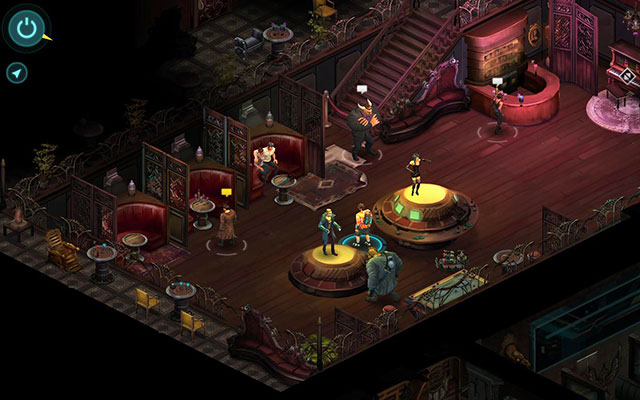
Another visit at your new home. This time to collect a new party. .
1.Cherry Bomb(NPC) - Quest: Looking for Trouble (Main Quest).
2.Jon Barlett(NPC)-you can listen to his advertisement.
3.Van Graas(Merchant) - buys unique items.
4.Jessica Watts(NPC) - Quest: Looking for Trouble.
5.Coyote(NPC) - You will learn from her about Gino's condition.
6.Mr. Kluwe(NPC) - the current information about the Seamstresses security system.
7.Mr. Delilah(NPC) - Quest: Looking for Trouble.
8. descent to The Safehouse.
 Van Graas is trying to crack the jukebox
Location: In front of the jukebox close to the bar [3].
description: This same unique Dwarven merchant as before. This time you can sell him Incriminating Data, which you have acquired in the previous mission. He will offer you 800 nuyen but, if you have Etiquette: Shadowrunner, you can haggle with him for as much as 1000 nuyen.
Buys: Incriminating Data (See: The Warehouse).
Main Quest.
 The sister of the decent Sam's. A slight difference between the two siblings
Objective: Talk to Jessica.
Right after you enter the bar, you will be accosted by Cherry Bomb[1] to inform you of a woman named Jessica. You can find Jessica in front of the main stage [4]. Talk to her about Sam, while trying to be nice to her. Eventually, she will ask you for the photo that you have found in Sam's belongings. Finish the conversation and walk over to the other room.
Reward: 2 KP.
 Time to do business. You can always talk to Mr. Delilah about that
Objective: Talk to the Fixer, Mr. Delilah, About Hiring Runners.
The next item on the list is the talk to Mr. Delilah[7]. You can find him where you have found him before, i.e. at the table in the left corner of the room. The conversation will provide you with an option to select your own party for the next mission. There are quite a few candidates and you can always find a few matching individual archetypes. The best thing to do is choose the ones that complement your character. It is always a good thing to have someone that ca hack into the Matrix, or cast a few spells.
Once you have made your choice, and confirmed your party, you will be taken to a new location automatically.
The return to the mysterious docks. More mysterious this time than previously.
1.Scrawny Guard(NPC)- Quest: Return to the Docks (Main Quest).
2.NTSB Warehouse Key(Item) - Quest: Return to the Docks.
3.The entrance to the Warehouse - Quest: Return to the Docks.
Red Dots - Enemies.
Main Quest.
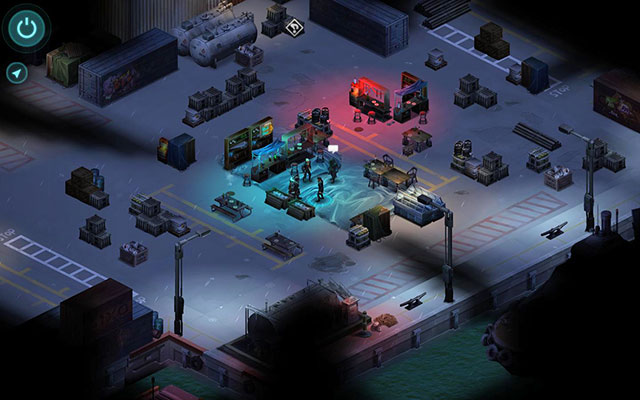
 All of the friends from your previous visit disappeared
Objective: 1. Break into the NTSB Warehouse. 2. Keep Shannon Alive.
Welcome back to the docks. This time, you will be visiting them at night, and the entrance is not guarded by Lofwyr anymore, but by more suspicious lot.
Start by approaching the gate and you will initiate a conversation with a Scrawny Guard[1]. If you select the first, or the second option, this will result in n immediate fight with the guard. But, if you have Etiquette: Shadowrunner or Etiquette: Corporate, you can convince the boy to leave the battlefield. .
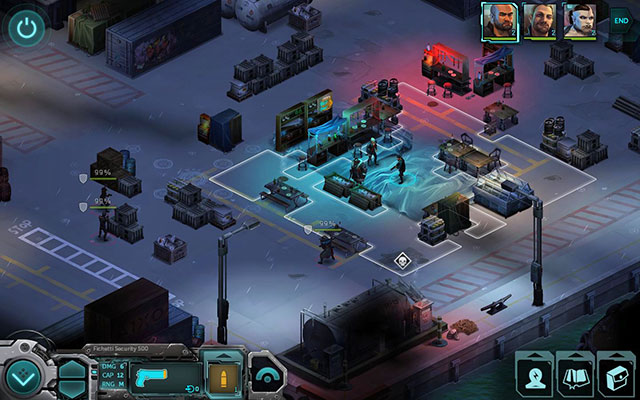
Unfortunately, this is where the path of peace ends. Once you make it through the gate and approach the entrance to the warehouse, there will appear 4 Shadowrunners, who will attack you straight away.
The fight is not of the easiest ones, especially that you are fighting your colleagues in the same line of work. Still, if you play your cards well, this should be quite easy. Start by deploying your characters behind covers. A good method is to split them into two teams. Position one of these behind the crates in front of the entrance, and the other one send behind the crates behind the helicopter. This way, the enemies will split, which will allow you more field.
First, deal with the weakest ones of the Shadowrunners, i.e. the ones whose looks does not resemble walking stones, but rather humans, judging by the silhouette. With a good party, you can engage these two in the first turn. Then, focus on the remaining giants.
The Shadowrunner Troll, has a quite considerable health pool. You will need appropriate debuffs like, e.g. Weaken Armor, Mind Wipe, or Blindness. If you can, try to approach him and take several shots from the shotgun. Combined with magic, this should do.
There is still the Shadowrunner Orc, that is, most probably dashing between your team and the helipad. Fortunately, he is equipped with a shotgun so, he should not be too much of a threat, until he comes too close. Still, he is a shaman so, you should watch out for the spirits that he summons. Deal with him and pick up the NTSB Warehouse Key[2], dropped by one of the enemies. Open the door to the hangar and walk inside. .
Reward: 4 KP.
Another visit in the warehouse, this time with your party, and well equipped. This place is swarming with enemies.
1.Ares Flight Recorder(Item) - you can sell it later on to a merchant.
2.Shannon Half-Sky(NPC) - Quest: Spirit Talk (Main Quest).
3.Forgotten Souls(NPC) - Quest: Spirit Talk.
4.Hangar's exit - Quest: Spirit Talk.
Red dots - Enemies.
Main Quest.
 A long fight is ahead
Objective:1. Defeat the Runner Crew. 2. Keep Shannon Alive.
You are going to start in the new location already in the combat mode. There are5 enemies that you need to handle: 2 Shadowrunners, an Apprentice, an Orc Shadowrunner and a Troll Shadowrunner.
Start In a standard way by deploying your party members in safety. Your best choice are the columns and crates located right next to you. Then, focus your fire on the first one of the Shadowrunners, nearest to you. The poor bastard was standing with his back turned at you, and therefore has a poor chance of survival.
As soon as your turn is over, there will be a Troll Shadowrunner dashing out of the door on the right, with an automatic rifle. He is your next target, alongside with the Apprentice on the left. A Troll is a Troll; a lot of health so, it is possible that you will lose the entire turn to eliminate this one. It is a good idea to do that, even before the remaining enemies come close.
At this point, there are 3 enemies left. The Apprentice comes equipped with a machete and should already be quite close., which is why you should deal with him next. It would be best if they didn't get the chance to come close to your characters. Use spells like Slow or Mind Wipe, to slow the Orc down and take him out when the moment is right. Finally, focus on the remaining two. They should not be too much of a problem.
Unfortunately, after you have dealt with all of the enemies in this room, you will remain in the combat mode. This will make it slower to move around. You need to go through the door to the next room. At the other side, there are more enemies for you to take on. It is a good idea to tend to wounds and strengthen your party members beforehand.
After you have entered the next location, order your characters to covers. There are two enemies in total: a Shadowrunner, an Orc Shadowrunner and an Apprentice. Two former of these start behind the armchairs in the middle of the room, with the latter one in the area on the right.
Your first target should be the Apprentice, who should have already made it close enough. He is quite weak so, he should hit the ground after two initial shotgun, or automatic rifle shots.
Then, take to the Shadowrunner, and then to the Orc Shadowrunner. This will finish the combat phase and you will be able to proceed.
Reward: None.
 The site of the ritual
Objective: Summon the Spirit.
Before you start summoning spirits, collect the Ares Flight Recorder[1], dropped by one of the enemies.
Once you obtain this valuable item, talk to Shannon[2]. Still, instead of talking to you,, she will summon spirits - Forgotten Souls[3]. Talk to them and you will learn a few interesting facts about the Ripper. If, during your last visit to the warehouse, you have collected all of the four items, you can now show them during the conversation to obtain more information. Still, for the quest itself, you only need two of them.
Reward: None
 The most important of the clues
Objective: Search the Spot Where the Victim's Body Was Found.
After the spirits are sent away, there will appear another quest. The area mentioned in it, is located in the first room. Approach the marking and click onto it. This way, you will obtain an item connected with your quest - DNA Evidence. The only thing left to do is talk to Shannon an leave this location through the Hangar's exit [4].
Reward: 8 KP
A short visit during the Seamstresses Union's worker's breakfast.

1.Mr. Kluwe(NPC) - The decent Troll. He always has something to say.
2. Mrs. Kubota(NPC) - Quest: After Hours (Main Quest).
3.Pianino - Passage into the underground.
Main Quest.
 That is how they dine in Seamstresses
Objective: Find Someone Who Can Analyze DNA Evidence.
This is a quite short quest. Walk into the next room of Seamstresses and talk to Mrs. Kubota[2]. Finally, a passage to the lower part of the club will open up for you. Activate the piano [3], to walk downstairs.
Reward: 4 KP
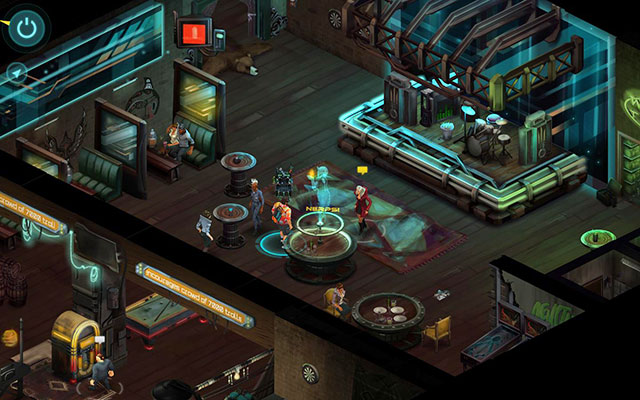
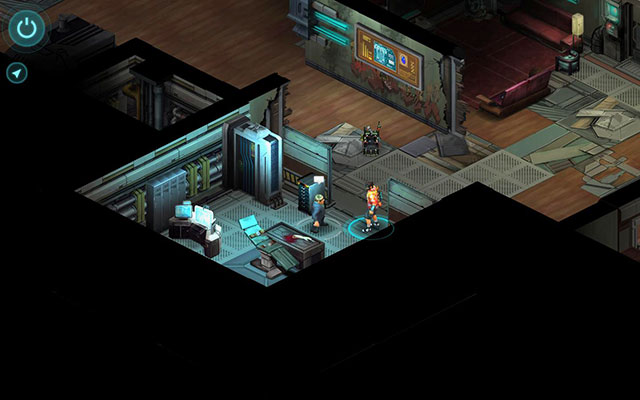
Another visit to the safehouse will ensure you with a fascinating conversation, and a visit in the Matrix.

1. Player's Locker - Your personal locker. You can swap your equipment here.
2.David Fry II (a merchant) - Quest: The Digital World (Main Quest).
3.Van Graas(a merchant) - A Dwarven businessman. Never sleeps.
4.Deck Spot - Quest: The Digital World.
5.Johnny Clean(NPC) - Quest: The Digital World.
 Van Graas is always in the right spot at the right moment
Location: Standing in front of the bar, in the main part [3].
Description: This time, you can sell him the Ares Flight Recorder, if you have collected it during the previous mission. The base offer is 2000 nuyen, but, if you have the Etiquette: Corporate, you can raise it to 2500 nuyen.
Buys: Ares Flight Recorder.
 David temporarily changed his stall
Location: You can find him in the Med-Bay, opposite the entrance to this location [2].
Description: He just received a fresh delivery. A real morsel for Deckers, in the form of a new deck and upgraded programs.
Sells: Sony CTY-360, Renraku Kraftwerk-1, Fuchi VirtuaX, Execute Shield ESP, Execute Exploder ESP, Execute Attacker ESP, Execute Assassin ESP, Sniffer Lvl 1, Slow Lvl 1, Shield Lvl 1, Medic Lvl 1, Killer Lvl 1, Firewall Lvl 1, Erosion Lvl 1, Degrade Lvl 1, Blaster Lvl 1, Suppression Lvl 1, Killjoy Lvl 1, Sniffer Lvl 2, Medic Lvl 2, Shield Lvl 2, Killer Lvl 2, Firewall Lvl 2, Erosion Lvl 2, Degrade Lvl 2, Blaster Lvl 2, Killjoy Lvl 2.
Main Quest.
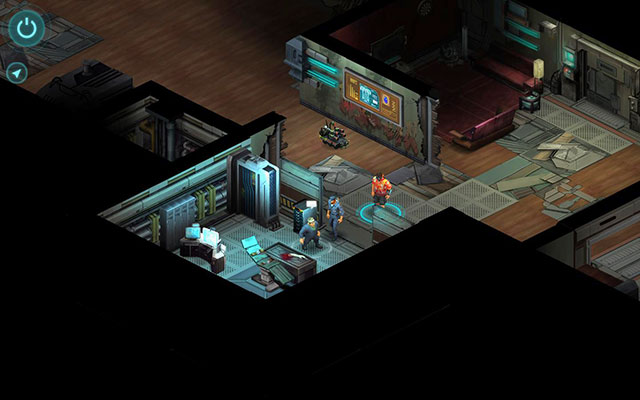 David and Johnny
Objective: Discover the Identity of the Ripper.
Once you are downstairs, go towards the Med-Bay and talk to David Fry II[2]. Then, follow Johnny Clean to his stall [5]. Initiate a conversation and, after a while, you will need to select the Decking level appropriate for you. Take it as a difficulty level limited by how good you are at this skill.
If you have never used Decking before, you do not need to worry. Everything has been prearranged for you, depending on the level that you choose. Start with selecting equipment that you are going to use in the Matrix. Confirm your selection and you will jump straight into the virtual world. Then, do the same with Johnny.
Reward: 4 KP
The first part of the obligatory trip to the Matrix. Luckily you are not alone.
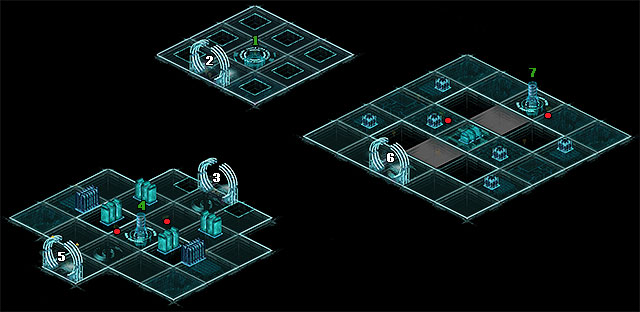
1. Matrix entrance - Quest: The Digital World Part 2 (Main quest).
2. Portal I - Leads to a central platform.
3. Portal II - Leads to a western platform.
4. Lone Star Data Store - Quest: The Digital World Part 2.
5. Portal III - Leads to a southern platform.
6. Portal IV - Leads to a central platform.
7. News Net Archive - Quest: The Digital World Part 2.
8. Portal V - Leads to an eastern platform.
9. Portal VI - Leads to a central platform.
10. Autopsy Record - Quest: The Digital World Part 2.
Red dots - Enemies.
Main quest.
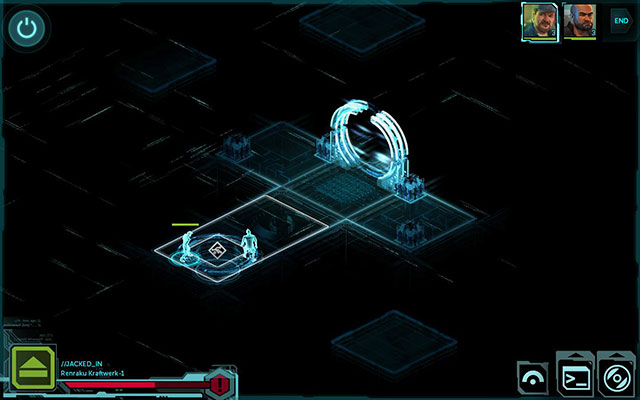
Matrix gatesObjective: Discover the Identity of the Ripper.
You start the adventure in a virtual world at the entrance to Matrix [1]. Go forward until you get to the Portal I [2] leading to a central part of the system. Once you get to the other side, go left. Remember that all the time you move in turn-based mode.
Once you approach a first core, the system will get alarmed and you'll get attacked by defense systems: 2 White IC and White Sentry IC. Get rid of them with programs and normal attacks. They work the same way as spells.
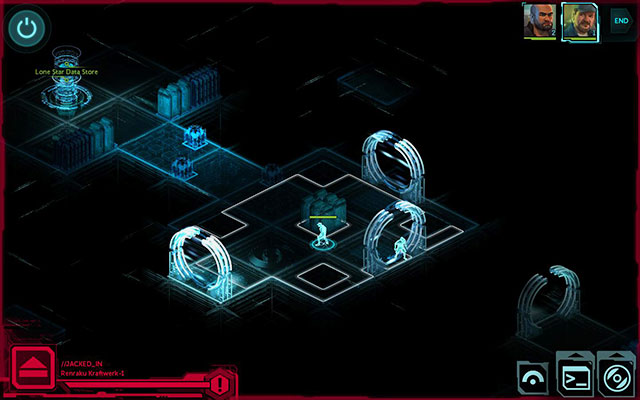
When you defeat defense system, approach Lone Star Data Store [4] and activate it. Now turn around and enter the Portal III [5] in front of you. It will move you to the southern platform with more enemies: 2 White IC and White Sentry IC. Get rid of them and activate another memory core - News Net Archive [7].
Reward: None.
 The alarmed system can be quite annoying...
Objective: Jack out of the LAN.
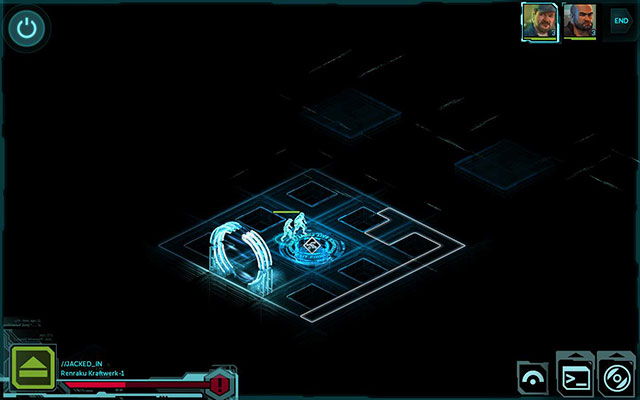
If you want, before you leave you can check the last core located on the eastern platform. In order to get there, enter the Portal V [8]. The core is defended only by 2 White IC, so you shouldn't have big problems. Activate Autopsy Record [10] and then return through the Portal VI [9] and II [3] to the Matrix entrance [1].
Reward: None.
The second part of the expedition to a cyber limbo. This time with fewer portals.
1. Matrix entrance - Quest: The Digital World Part 3 (Main quest).
2. Portal I - Leads to a western platform.
3. Portal II - Leads to a northern platform.
4. Medical Board 1 - Quest: The Digital World Part 3.
5. Portal III - Leads to an eastern platform.
6. Portal IV - Leads to a western platform.
7. Medical Board 2 - Quest: The Digital World Part 3.
Red dots - Enemies.
Main quest.
 Entrance to the second part of the system
Objective: Discover the Identity of the Ripper.
Unfortunately you won't be able to enjoy a normal world for longer time, because you'll be hooked back to the network again.
Once you find yourself in the new location, go through the nearest Portal I [2]. Prepare to fight with White IC and White Sparky IC. First take care of the second sentry and when you defeat it, activate Medical Board 1 [4]. Check all entries and then enter the Portal III [5], located left on the platform.
In the next part of the system you'll encounter Black IC - quite dangerous program with great offensive potential. It appears often, when the system changes its status to alarmed. In addition it is supported by White IC. One program Killer Lvl 2 and normal attack should be enough to eliminate Black IC. Once you clear the location, go to the last core Medical Board 2 [7] and activate it. Now check two visible entries and move away from the core.
Reward: None.
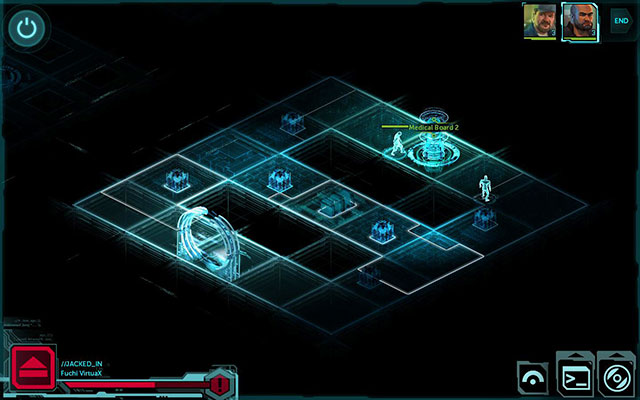 The last core awaits hackers
Objective: Jack out of the LAN.
You have now all needed information so it is time to leave the virtual world. Go through the Portal IV [6] and II [3] and then activate the Matrix entrance [1].
Reward: 6 KP.
Seamstresses had time to wake up, eat breakfast and get ready for your return from the virtual world.

1. Player's Locker - Your locker with the inventory.
2. Dr. Sara Castle (Merchant) - Sells medical supplies and upgrades.
3. Mr. Delilah (NPC) - Quest: The Digital World Part 4 (Main quest).
4. Elevator - Quest: The Digital World Part 4.
5. Aljernon (Merchant) - Has wide range of spells.
6. Eric Mersmann (Merchant) - Deals with clothing.
7. T. B. Gruberman (Merchant) - Sells weapons, explosives and drones.
8. David Fry II (Merchant) - Quest: The Digital World Part 4/ Trades programs and consoles for Deckers.
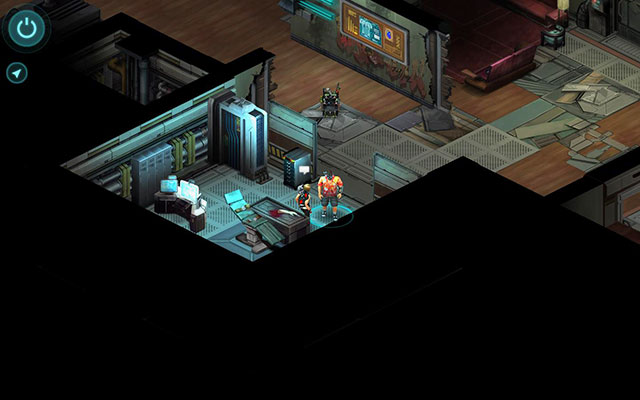 Dear Lady Doctor
Location: Hangs in her office, in front of the elevator [2].
Description: Has new kind of first-aid kit and one new cyber upgrade to sell.
Sells: Basic Medkit, Advanced Medkit, Doc Wagon Basic Trauma Kit, Doc Wagon Gold Trauma Kit, Doc Wagon Platinum Trauma Kit.
Cyberware: Vision Magnification Eyes (Basic), Datajack, Aztechnology Cyberleg (Basic), Wired Reflexes With Reflex Trigger, Silver Tech Cyberarm (Basic), Shaiwase Bone Lacing (Plastic), Ares Dermal Plating (Basic).
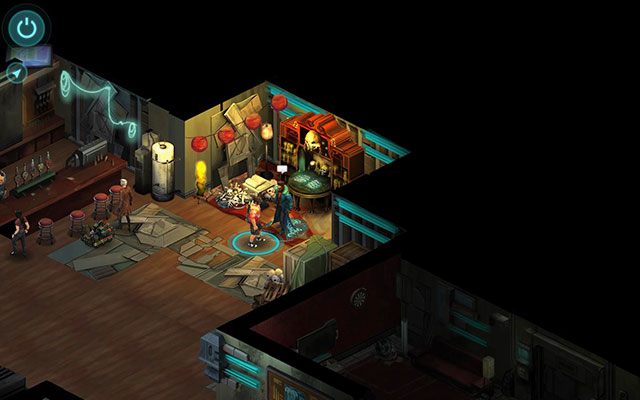 The strangest of the stands
Location: Same as the last time, that is, in the right corner [5].
Description: Just like all the other merchants, so Aljernon has new merchandise. You can get here all items and magic spells.
Sells: Force I Fire Elemental Fetish, Force I Earth Elemental Fetish, Force I Air Elemental Fetish, Force II Water Elemental Fetish, Force II Earth Elemental Fetish, Force II Fire Elemental Fetish, Force II Air Elemental Fetish, Force III Water Elemental Fetish, Force III Fire Elemental Fetish, Force III Earth Elemental Fetish, Force III Air Elemental Fetish, Force IV Water Elemental Fetish, Force IV Fire Elemental Fetish, Force IV Earth Elemental Fetish, Force IV Air Elemental Fetish, Magic Resistance I, Killing Hands, Mana Fist, Stride, Counterstrike, Magic Resistance II, Quick Strike, Mystic Armor, Pain Resistance, Magic Resistance III, Slow I, Haste I, Slow II, Silence, Air Barrier III, Quiet Bomb, Fog, Lightning Barrier III, Haste II, Shadow, Fire Barrier III, Haste III, Weaken Armor I, Manabolt I, Flamethrower I, Lightning Bolt I, Distraction I, Armor I, Acid Stream I, Stunbolt, Mind Wipe, Manaball I, Heal Wound, Dispel Magic, Aim I, Flamethrower II, Distraction II, Weaken Armor II, Manabolt II, Lightning Bolt II, Armor II, Aim II, Fireball I, Blindness, Stunball, Manaball II, Ball Lightning I, Acid Stream II, Powerbolt I, Powerbolt II.
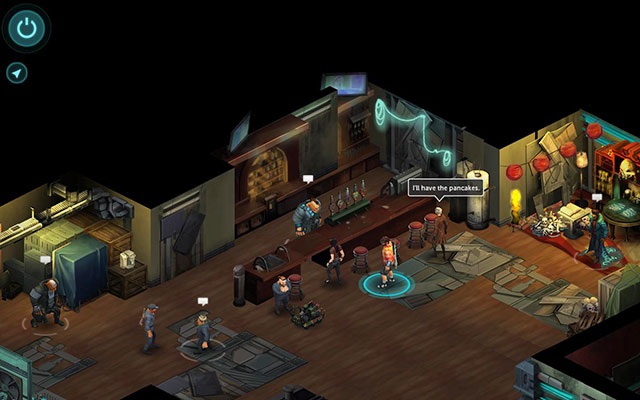 Always at his bar
Location: At his place in the bar [6].
Description: The only merchant that offers clothing and armor. At this point, he has a very wide offer.
Sells: Secure Shaman Clothing, Secure Samurai Clothing, Secure Rigger Clothing, Secure Mage Clothing, Secure Decker Clothing, Secure Clothing, Secure Adept Clothing, the Black Hat, Thaumaturgic Armor, Salish Runner, The Tourist Look, Secure Ninja Clothing, Alley Punk, Stealth Suit, Kunai Ninja Suit, Urban Mystic Outfit, Slick Decker Outfit, Salish Pendant, Milspec Flight Suit, Matrix Courier, Golden Boy, First Nation Armor, Alley Mage Outfit, Refurb UCAS Shock Gear, Ganger Mask.
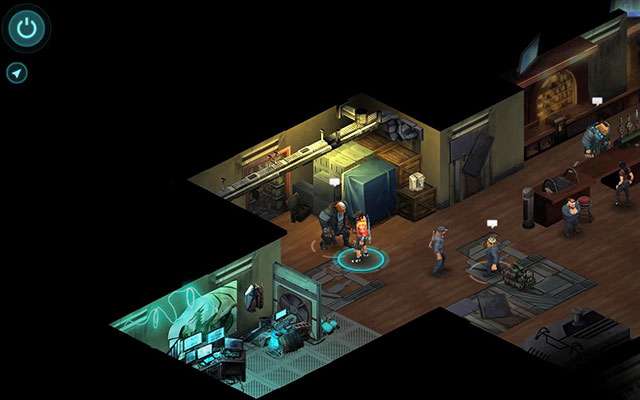 Orc Terminator with a large wardrobe
Location: You can find him in his booth, next to the bar [7].
Description: Orc veteran with the cabinet full of weapons. After delivery, he has at least two new weapons in each category.
Sells: Simple Drone Repair Kit, Advanced Drone Repair Kit, Smoke Grenade, Fichetti Concussion Grenade, Fichetti Frag Grenade, Cavalier Concussion Grenade, Cavalier Frag Grenade, Smoker Drone, Doberman Drone, RoboDoc Drone, Strato-9 Drone, Baseball Bat, Machete, Katana, Axe, AK-97, Semopal vz/88V, Heckler & Koch G12A3z, FN HAR, Street Sweeper, Benelli Raffaello, Mossberg CMDT, Remington 990, Beretta Model 70, Uzi III, Ingram Smartgun, Colt Cobra TZ-110, Fichetti Security 500, Ceska Black Scorpion, Cavalier Deputy, Ares Predator, Browning Max-Power.
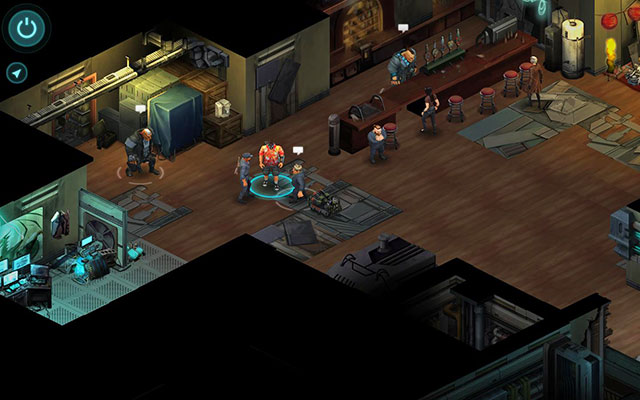 This time he moved few meters
Location: Stands between his stand and bar [8].
Description: Sells the same things as he was selling in the early morning.
Sells: Sony CTY-360, Renraku Kraftwerk-1, Fuchi VirtuaX, Execute Shield ESP, Execute Exploder ESP, Execute Attacker ESP, Execute Assassin ESP, Sniffer Lvl 1, Slow Lvl 1, Shield Lvl 1, Medic Lvl 1, Killer Lvl 1, Firewall Lvl 1, Erosion Lvl 1, Degrade Lvl 1, Blaster Lvl 1, Suppression Lvl 1, Killjoy Lvl 1, Sniffer Lvl 2, Medic Lvl 2, Shield Lvl 2, Killer Lvl 2, Firewall Lvl 2, Erosion Lvl 2, Degrade Lvl 2, Blaster Lvl 2, Killjoy Lvl 2.
Main quest.
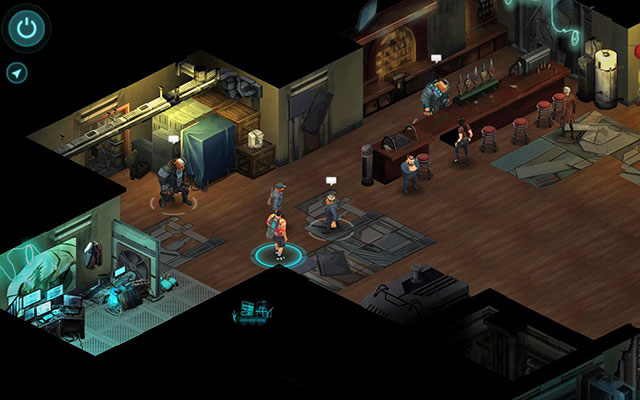 The conversation in the center of the apartment
Objective: Talk to Johnny and Fry about the Case.
Johnny and Fry [8] stand in the main hall, next to the bar. Talk to them and select suitable dialog options. After the conversation you'll get some money and order to gather a team. In order to do this, go to Mr. Delilah [3] standing next to the elevator and start the conversation. Same as previously choose the team you like and then confirm your selection to move to the next location.
Reward: 4000 nuyen.
The local hospital for the mentally ill. In such places, there is always something wrong. This is no exception.
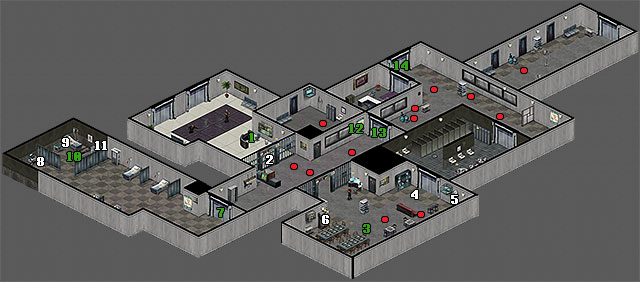
1. Receptionist (NPC) - Quest: Mercy Mental Hospital (Main quest).
2. The door to the lobby - Quest: Mercy Mental Hospital.
3. Lorraine (NPC) - Quest: Mercy Mental Hospital.
4. Donny (NPC) - One of hospital patients. Interesting person.
5. Old clock - Broken clock.
6. Pill Box - automat with pills.
7. Infirmary - Quest: Mercy Mental Hospital.
8. Computer - Quest: Mercy Mental Hospital.
9. Tool table - Quest: Mercy Mental Hospital.
10. Severed Arm - Quest: Mercy Mental Hospital.
11. Locker - Quest: Mercy Mental Hospital.
12. Intercom - Quest: Mercy Mental Hospital.
13. Main door - Quest: Mercy Mental Hospital.
14. Elevator - Quest: Mercy Mental Hospital.
Red dots - Enemies.
 The passage and the storage in one
If you have successfully activated a core Bathroom Door in Matrix (See: Quest Mercy Mental Hospital), you'll gain the access to the bathroom with entrance in the waiting room. There is an additional passage inside as well as Fichetti Concussion Grenade and Basic Medkit.
Main quest.
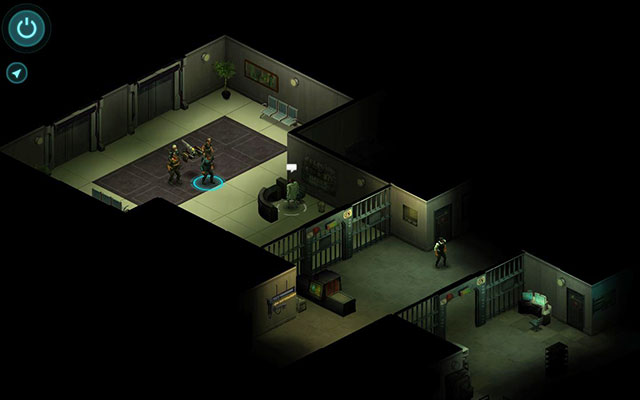 Entrance to the hell
Objective: Investigate Mercy Mental Hospital.
You start the level in the main lobby. Talk to Receptionist [1]. Choose any option to get inside the waiting room.
Reward: None.
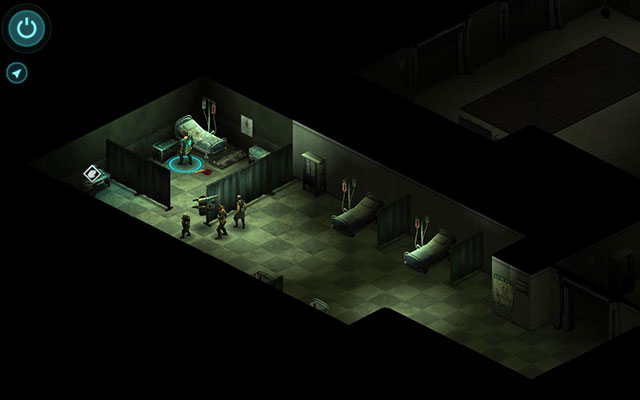 First circle...
Objective: Look Around Before Holmes Arrives.
You'll have a moment here before meeting hospital manager. Talk to Donny [4] and Lorraine [3]. She will give you an Infirmary Key. Having this pass you'll be able to get through the door [7] on the left side of the corridor. Once you get inside, go to the other side of the room and examine Severed Arm [10] lying there. Take Super Brawl Ring from it and then examine the locker [11] and the tool table [9] - you'll get Unlabeled Trivid Disc. Finally, start the computer [8] and check two entries. Once you have done that all, leave the room and return to the waiting room.
Talk to Lorraine again [3] and tell her about the death of her friend. You can also give her back the ring you found. After a moment the receptionist will call you. Dr. Holmes is expecting you.
Reward: 2 KP.
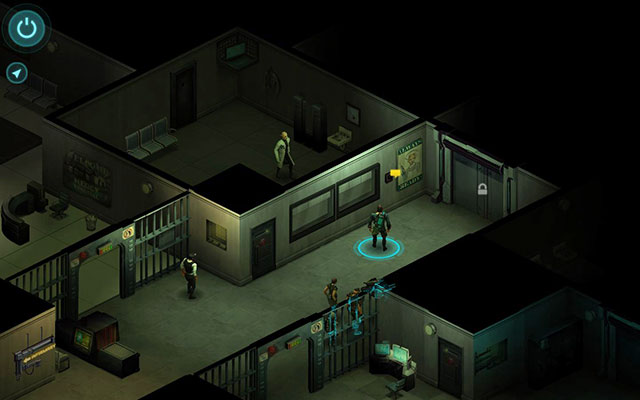 The manager knows how to protect himself
Objective: Speak to Dr. Holmes.
Once you're ready, move to the intercom [12] on the right side of the corridor. By activating it, you'll start a conversation with Dr. Holmes. Unfortunately, no matter which option you choose, you'll have to fight.
The first enemy is Hospital Security standing next to you. Eliminate him and then pick up Guard's Key left by him.
If you have Decker in your team, you can use the computer in the waiting room to get inside the Matrix. There will be a fight with 2 White IC. Get rid of them and you'll get an access to the core - Bathroom Door - which opens the door in a real world. On the second platform you can find another core - Patient Records - protected by White Sparky IC and White IC. Activate the core to get Buyer Records.
Now you have to go to the other room, where you'll encounter another Hospital Security. If you have the access to the Bathroom, you can use this path and flank your opponent, although it has not much sense. Otherwise you have to choose the main door [13] and a frontal attack.
Once you clear the level out of all opponents, activate the main elevator [14] to get to the lower floor.
Reward: None.
The mental hospital is more insane than you might think. And this is only the second level.
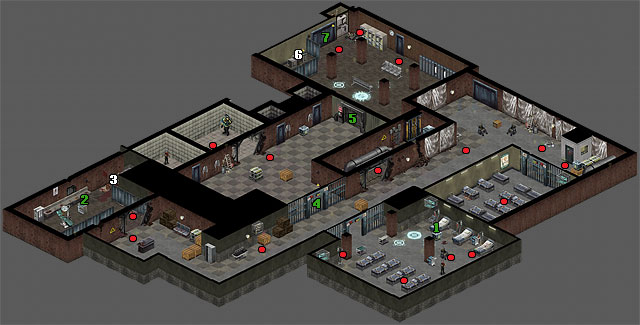
1. Waste tank - is a useful cover.
2. Locker with instruments - Quest: Halls of Disrepair (Main quest).
3. Pile of corpses - depressing view.
4. Gate - Quest: Halls of Disrepair.
5. Exit door - Quest: Halls of Disrepair.
6. Desk with record player - Quest: Halls of Disrepair.
7. Elevator - Quest: Halls of Disrepair.
Red dots - Enemies.
Main quest.
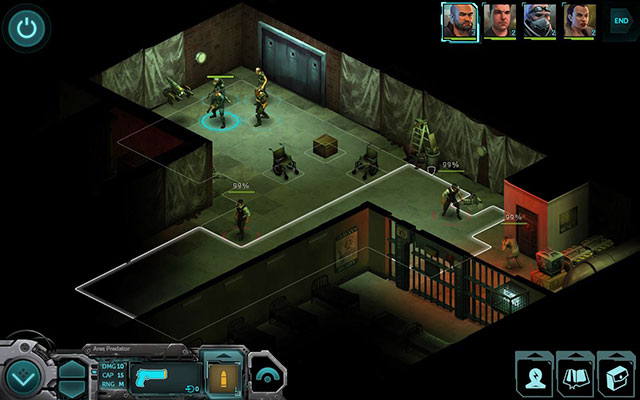 Guards are not the only problem
Objective: Find Dr. Holmes.
At the start of the new location you'll encounter 2 new Hospital Security. Eliminate them. In addition, there is Violent Patient on the other side of the room. This is a normal opponent, so there is no penalty for killing him.
Go to the main corridor. There are 2 Violent Patient in the left room. In the right room you'll encounter Unstable Mental Patient and 2 Mental Patient. First, deal with the first one, before he starts throwing grenades.
Follow the central corridor. You'll encounter Ex-Surgeon and Mental Patient behind the corner. Luckily, the second one attacks both your team, as well as hospital employees. Eliminate them and then pass the hole to get to the last room. Check the instrument cabinet [2] twice, thus receiving Gate Key and Unlabeled Trivid Disc. Leave the room and return to the second gate [4] which was closed previously. Open it with the key you found and then go to the second room.
After short speech of the Doctor and a finished round, a Troll - Crazed Patient - will jump on you. He has a shotgun, so hide behind boxes and shoot him with everything you have. After that go through the door [5] on the right.
Prepare for the last enemies in this location - Hospital Security and the Doctor with machete. Deal with them and then go to the desk [6] in the left corner to activate the record player. Go through all records and then activate the elevator [7] to get to the next location.
Reward: 4 KP.
The last level with the first real fight with a boss and in the same time one of the most difficult in the game.
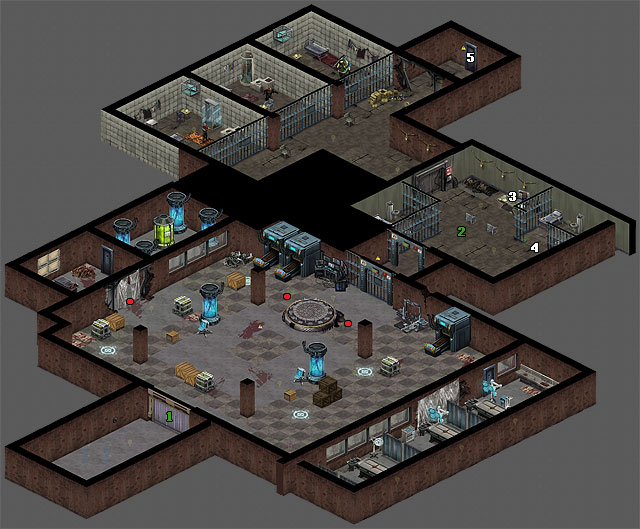
1. Curtain - The fight begins behind it.
2. Dr. Holmes office - Quest: The Emerald City Ripper (Main quest).
3. Desk - You find here Personafix Chip Wiper.
4. Male Bunraku (NPC) - You can restore his memory using the chip.
Red dots - Enemies.
Main quest.
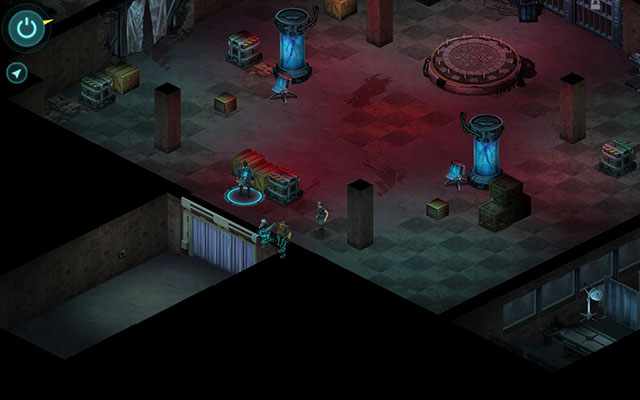 Fight arena
Objective: 1. Defeat Dr. Holmes. 2. Defeat Pitezel.
The right moment comes. After a long search, you'll finally get to deal with Sam's killer. Prepare yourself, strengthen your characters and reload weapons. The upcoming fight is not the most pleasant one.
Send all your characters behind crates in front of the entrance. The first opponents are Hired Mage and Surgeon. Unfortunately, almost at the start, Pitezel (sweet minion of the Doctor) also appears in the arena. He can deal much amount of damage in a close range, since his hits are area attacks. In addition they damage your armor. Use the skill and items you have to slow him down and weaken him. In the meantime order one of your characters to deal with Hired Mage. For now ignore the Surgeon. It is possible that he could be killed by Pitezel, who sometimes gets mad.
That's not end of the bad news - after two rounds Dr. Holmes also joins the fight. He is a mage and he is a good one. But first try to deal with Pitezel. Use on him Weaken Armor II, Cavalier Concussion Grenade or another spell, which can weaken/eliminate him for at least two rounds. Then use the most powerful stuff you have, like explosive, drones or strong offensive spells like Fireball I. You should eliminate him in 2-3 rounds. Keep controlling the health of your companions. Do not let the health bar decrease drastically.
Once you are sure that no one can kill you in a close combat, focus on Dr. Holmes (and a Hired Mage if he is still alive). The mage has few annoying buffs, but the real problem is Dr. Holmes. Send one of your characters to deal with Hired Mage, and use the rest against the Doctor. If you have any spells which decreases AP, like Lightning Bolt II or Stunbolt II - use it now. Thanks to that you'll be able to block some of his spells. He uses mostly Acid Stream, which deals damage every round, but also an area spell with Stun effect, which decreases everyone's AP with 1. But his weakness, as for all mages, is low HP.
With the above tips and smart using of your arsenal, the fight should be over soon. Once the last shot knocks the Doctor to the ground and finishes the fight, go to him and start the conversation.
Reward: 8 KP.
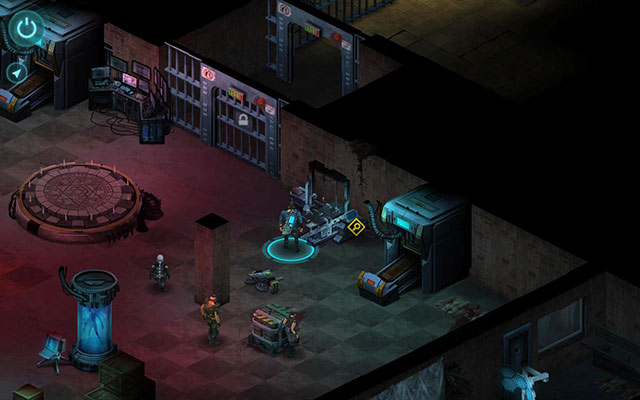 Operating or torture table?
Objective: 1. Locate an Exit. 2. Investigate Holmes' Motives.
After puzzling Holmes last words, you'll get another quest. At first, examine the operating table, located next to the gate where Dr. Holmes came from. Check all options until you get a familiar name and 4500 nuyen. Now move away from the table and go through the main gate located nearby. In the second room you'll encounter two Bunraku - effects of Dr. Holmes hard work. Talk to Male Bunraku. Finally go to the desk and pick up Personafix Chip Wiper. Now you have two options: you can keep the chip or use in on Male Bunraku to erase the preset memory and restore his old personality. Make decision and then go through the last door to leave this depressing place.
Reward: None.
One of shortest visits in Seamstresses Union. There is only one conversation and you can leave.
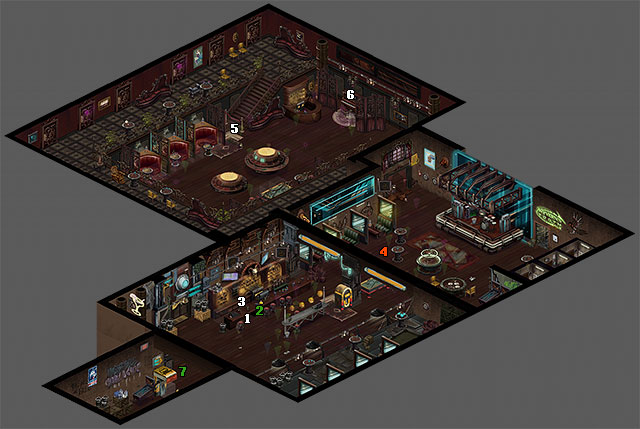
1. Johnny Clean (NPC) - Quest: Loose End (Main quest).
2. Mrs. Kubota (NPC) - Quest: Mercy Mental Data (Side quest).
3. Cherry Bomb (NPC) - Will provide small chat.
4. Van Graas (Merchant) - You can sell him Super Brawl Ring.
5. Mr. Kluwe (NPC) - New information on safety in Seamstresses.
6. Piano - Descent to Seamstresses Safehouse.
7. Location exit - Quest: Loose End.
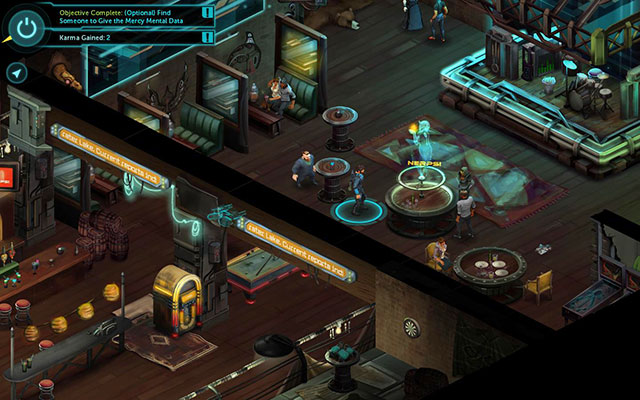 Always ready to buy something
Location: You'll find him in front of the main stage [4].
Description: Once again he'll buy from you goods gathered during the mission (including Super Brawl Ring, if you didn't give it to Lorraine). This time there is no bargaining. The dwarf offers 1200 nuyen and that's the only option.
Buys: Super Brawl Ring.
Main quest.
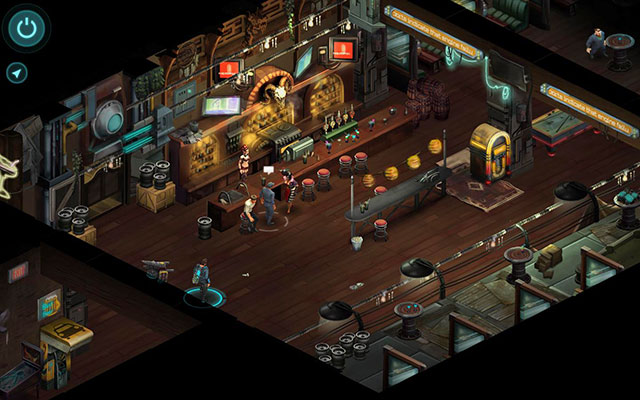 It won't be a long conversation
Objective: Plan Your Next Move.
This is very short quest - it is only about a conversation with Johnny Clean [1], who stands at the bar. After that you'll be able to leave Seamstresses in order to get to the next location. If you want, you can check merchants before you leave.
Reward: None.
Side quest.
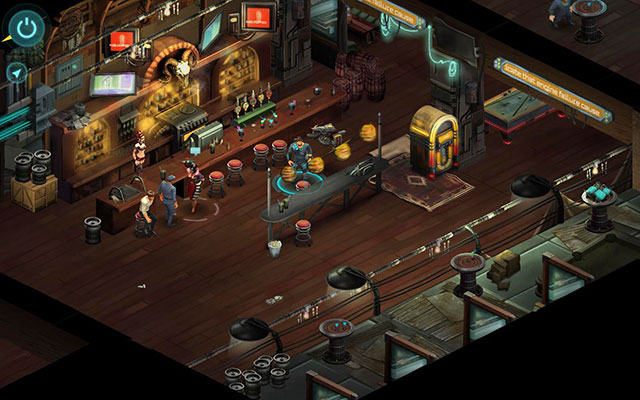 The only option is Mrs. Kubota
Objective: Find Someone to Give Mercy Mental Data.
You can complete this quest after completing Loose Ends but before leaving Seamstresses.
The only way to get rid of data is to talk to Mrs. Kubota [2]. You'll find her at the bar, next to the entrance. A conversation with her finishes the quest.
Reward: 2 KP.
Visiting Seamstresses underground. Unfortunately there is not much new here.

1. Player's Locker - You can change your gear here.
2. Mr. Delilah (NPC) - Offers a team selection. Useless at the moment.
3. Dr. Sara Castle (Merchant) - Underground doctor. Sells medical supplies and upgrades.
4. Aljernon (Merchant) - Deals with magic. You can buy spells here
5. Eric Mersmann (Merchant) - Responsible for clothes. You can buy also armors here.
6. T. B. Gruberman (Merchant) - Veteran of weapons, explosives and drones.
7. David Fry II (Merchant) - Deckers come here. He has newest technologies.
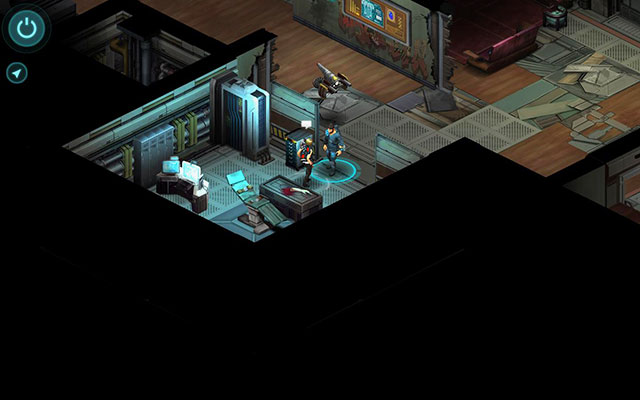 In a little better shape than the last time
Location: In her office, in front of the elevator [3].
Description: Sells different medical supplies and installs upgrades for your character. Owns same things as previously.
Sells: Basic Medkit, Advanced Medkit, Doc Wagon Basic Trauma Kit, Doc Wagon Gold Trauma Kit, Doc Wagon Platinum Trauma Kit.
Cyberware: Vision Magnification Eyes (Basic), Datajack, Aztechnology Cyberleg (Basic), Wired Reflexes With Reflex Trigger, Silver Tech Cyberarm (Basic), Shaiwase Bone Lacing (Plastic), Ares Dermal Plating (Basic).
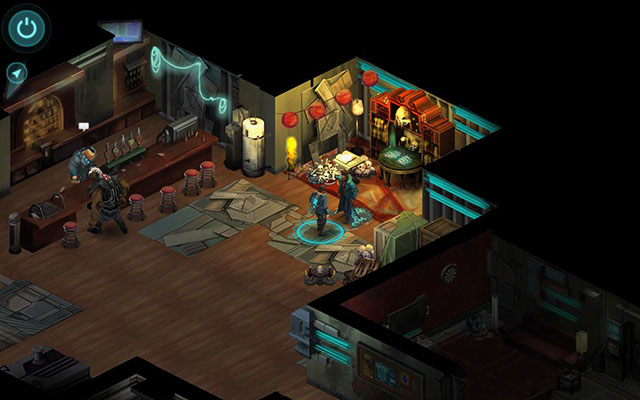 Always says something strange
Location: In his corner, next to the bar [4].
Description: As always, deals with spells and magic items. There was no new supply.
Sells: Force I Fire Elemental Fetish, Force I Earth Elemental Fetish, Force I Air Elemental Fetish, Force II Water Elemental Fetish, Force II Earth Elemental Fetish, Force II Fire Elemental Fetish, Force II Air Elemental Fetish, Force III Water Elemental Fetish, Force III Fire Elemental Fetish, Force III Earth Elemental Fetish, Force III Air Elemental Fetish, Force IV Water Elemental Fetish, Force IV Fire Elemental Fetish, Force IV Earth Elemental Fetish, Force IV Air Elemental Fetish, Magic Resistance I, Killing Hands, Mana Fist, Stride, Counterstrike, Magic Resistance II, Quick Strike, Mystic Armor, Pain Resistance, Magic Resistance III, Slow I, Haste I, Slow II, Silence, Air Barrier III, Quiet Bomb, Fog, Lightning Barrier III, Haste II, Shadow, Fire Barrier III, Haste III, Weaken Armor I, Manabolt I, Flamethrower I, Lightning Bolt I, Distraction I, Armor I, Acid Stream I, Stunbolt, Mind Wipe, Manaball I, Heal Wound, Dispel Magic, Aim I, Flamethrower II, Distraction II, Weaken Armor II, Manabolt II, Lightning Bolt II, Armor II, Aim II, Fireball I, Blindness, Stunball, Manaball II, Ball Lightning I, Acid Stream II, Powerbolt I, Powerbolt II.
 He does not move even an inch
Location: Behind his bar, in the main part of location [5].
Description: Responsible for clothes. No new supplies.
Sells: Secure Shaman Clothing, Secure Samurai Clothing, Secure Rigger Clothing, Secure Mage Clothing, Secure Decker Clothing, Secure Clothing, Secure Adept Clothing, the Black Hat, Thaumaturgic Armor, Salish Runner, The Tourist Look, Secure Ninja Clothing, Alley Punk, Stealth Suit, Kunai Ninja Suit, Urban Mystic Outfit, Slick Decker Outfit, Salish Pendant, Milspec Flight Suit, Matrix Courier, Golden Boy, First Nation Armor, Alley Mage Outfit, Refurb UCAS Shock Gear, Ganger Mask.
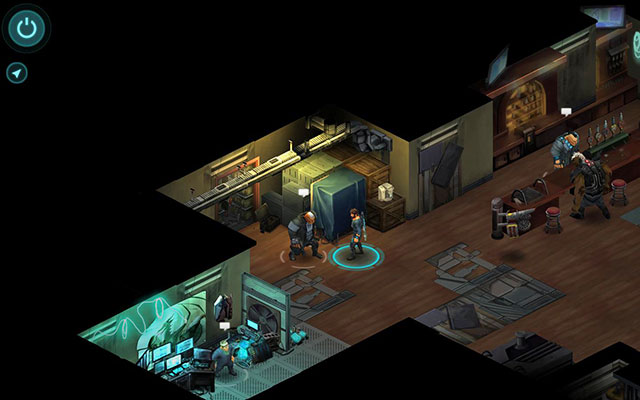 I wonder what's in those boxes ...
Location: As usual at his booth, right next to the bar [6].
Description: Beloved veteran selling everything that explodes and hurts. Unfortunately, like the rest - no new goods.
Sells: Simple Drone Repair Kit, Advanced Drone Repair Kit, Smoke Grenade, Fichetti Concussion Grenade, Fichetti Frag Grenade, Cavalier Concussion Grenade, Cavalier Frag Grenade, Smoker Drone, Doberman Drone, RoboDoc Drone, Strato-9 Drone, Baseball Bat, Machete, Katana, Axe, AK-97, Semopal vz/88V, Heckler & Koch G12A3z, FN HAR, Street Sweeper, Benelli Raffaello, Mossberg CMDT, Remington 990, Beretta Model 70, Uzi III, Ingram Smartgun, Colt Cobra TZ-110, Fichetti Security 500, Ceska Black Scorpion, Cavalier Deputy, Ares Predator, Browning Max-Power.
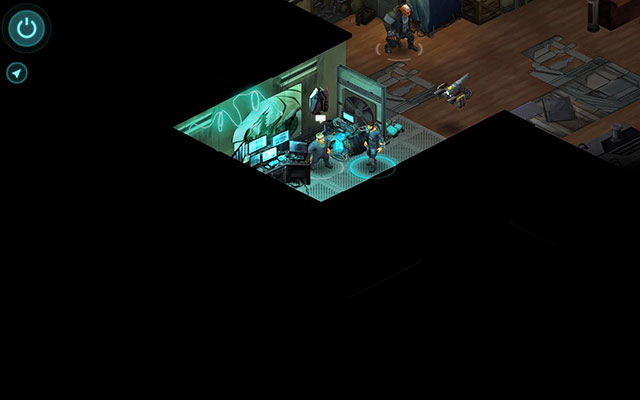 Johnny is left on the top
Location: In his technological paradise, near the bar [7].
Description: Techno dwarf. He has everything what hackers need. No new goods this time.
Sells: Sony CTY-360, Renraku Kraftwerk-1, Fuchi VirtuaX, Execute Shield ESP, Execute Exploder ESP, Execute Attacker ESP, Execute Assassin ESP, Sniffer Lvl 1, Slow Lvl 1, Shield Lvl 1, Medic Lvl 1, Killer Lvl 1, Firewall Lvl 1, Erosion Lvl 1, Degrade Lvl 1, Blaster Lvl 1, Suppression Lvl 1, Killjoy Lvl 1, Sniffer Lvl 2, Medic Lvl 2, Shield Lvl 2, Killer Lvl 2, Firewall Lvl 2, Erosion Lvl 2, Degrade Lvl 2, Blaster Lvl 2, Killjoy Lvl 2.
You came here to honor an old friend, but instead of that you'll have to play as a gravedigger. The cemetery is a bad place. Especially at night. Especially in the world of Shadowrun.

1. Jessica Watts (NPC) - Quest: Family Debts (Main quest).
2. Jessica Watts (After ceremony) (NPC) - Quest: Family Debts.
3. Mercenary Captain (NPC) - Quest: Family Debts.
4. Jake Armitage (NPC) - Quest: Family Debts.
5. Interesting place - See: Grave abomination.
6. Interesting place - See: Depths of the cemetery.
7. Interesting place - See: Depths of the cemetery.
8. Back gate - Quest: Family Debts.
Red dots - Enemies.
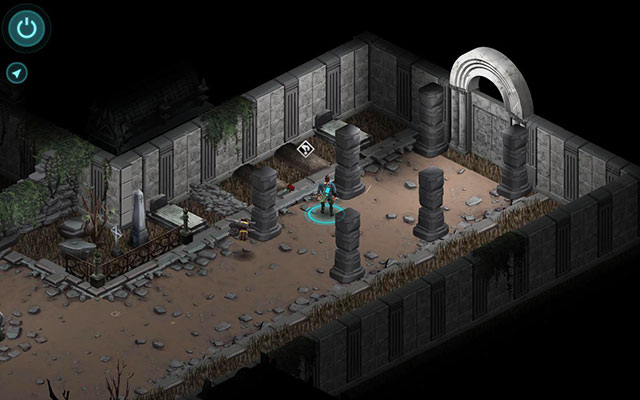 It is easy to overlook
If you go right from Sam's grave, you'll get to the small branch with few graves and closed gate. On the second grave counting from the end [5] you'll see a marking. Click it to receive Force 4 Abomination Elemental Fetish - a rare item, particularly useful for shamans.
-
 It is getting harder
In the upper part of the cemetery, looking north from the Sam's grave, you'll find rows of closed toms. In the second row you'll find a marking [6]. Click it to receive Cavalier Frag Grenade. A bit further, in front of the tomb [7] located near one of gates, you'll find another item - Jazz.
Main quest.
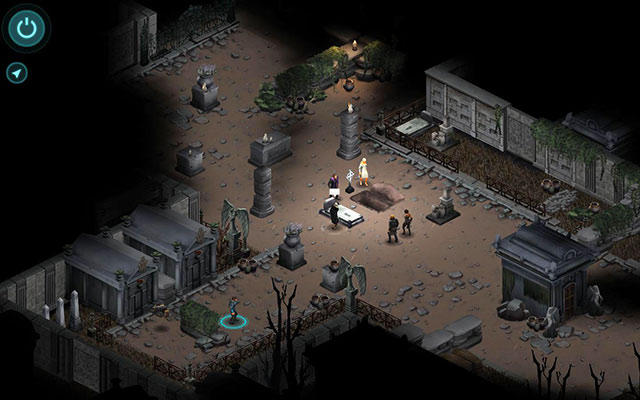 Depressing view ...
Objective: Talk to Jessica Watts.
Once you get to this location, move forwards until you get to the group gathered over the open grave. Talk to Jessica Watts [1]. After a moment the ceremony is over and you'll go aside to talk to her again [2].
Reward: None
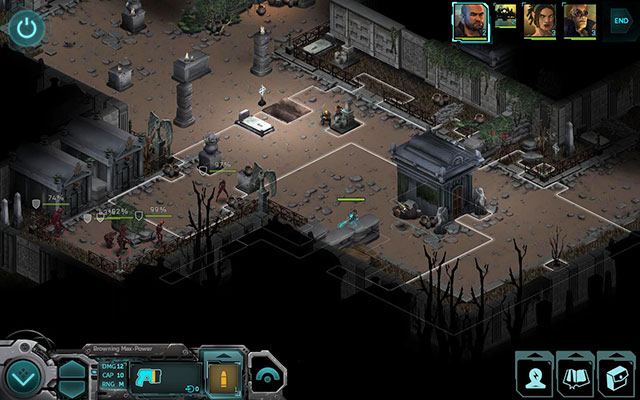 B-Team goes into action
Objective: Secure the Cemetery.
Once you finish the conversation, you'll be attacked by 3 Hired Gun and Mercenary, who run out from the branch to the right. They are not too demanding. In the first round they should gather in one place, which is a good opportunity to use an area attack.
After dealing with them, a B-Team will run out from the main entrance to the left - Mercenary Captain, 3 Mercenary and Hired Mage. This might be a little more difficult to handle.
At the start move your companions behind suitable covers. Then try to use area attacks, like Fireball I, Cavalier Frag Grenade, or Ball Lightning I. During first two rounds your enemies should be crowded in a narrow passage, which is perfect for such attacks.
As for the order of targets, Mercenary Captain and Hired Mage should be at the top. Others are quite weak as for dealt damage, so you can leave them for later or use area attack in the branch.
After 2-3 rounds after appearance of B-Team, you'll notice some messages and some strange noises. A moment later you'll encounter a nasty tomb surprise - 4 Ghouls. If you haven't dealt with mercenaries yet, you can use the situation and withdraw to the branch on the right. Wait until your enemies deal with each other and then get rid of survivors. But if you have already killed mercenaries, you'll have to face all undead.
The problem with Ghouls is their speed. They can run for a quite distance so they will get you almost always. They attack only in close range but can poison you. In addition it is difficult to hit them. It is best to use magic against them or explosives.
Try to eliminate them quickly, because after a while 3 more Ghouls will appear from the upper part of the cemetery. Try to use the distance advantage and attack them from a long range withdrawing with usage of 1 AP.
Reward: None.
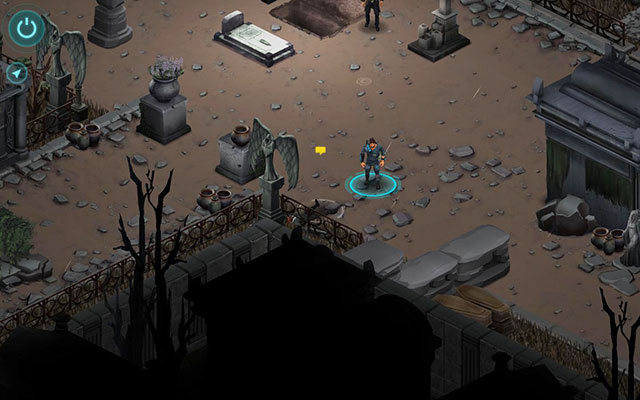 Remnants of B-Team
Objective: Interrogate the Leader.
After killing everything hostile on the cemetery, go to the defeated Mercenary Captain [3] and start the conversation. Unfortunately, you won't talk to him long. Once you regain control over you character, talk to Jack Armitage [4]. Now you can decide whether you want to go to the new location or if you return to Seamstresses Union first in order to replenish supplies. Choose one of options and leave the cemetery with the back gate [8].
Reward: 8 KP.
Optional visit to Seamstresses, but quite important. It is worth to stock up before you head off.
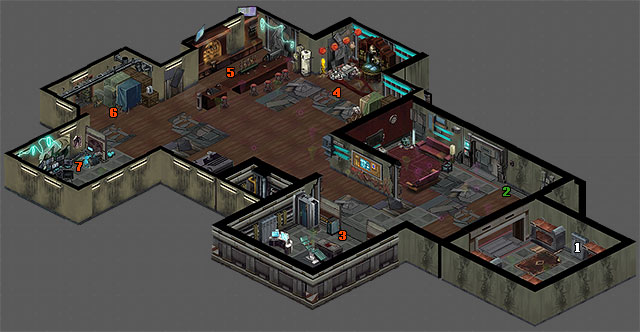
1. Player's Locker - Your gear locker.
2. Mr. Delilah (NPC) - Quest: Moving Aparts (Main quest).
3. Dr. Sara Castle (Merchant) - Deals with medical items and upgrades.
4. Aljernon (Merchant) - Deals with magic.
5. Eric Mursmann (Merchant) - Quite impressive clothing store.
6. T. B. Gruberman (Merchant) - Got everything what explodes.
7. David Fry II (Merchant) - Paradise for hackers and Deckers.
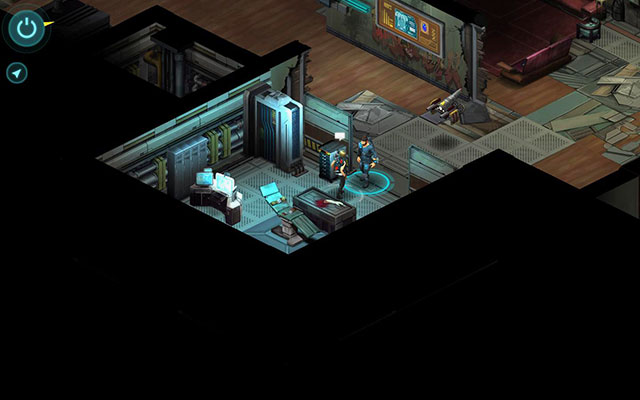 One of the nicer characters in the game
Location: Sits at her clinic, in front of the entrance [3].
Description: Cares about your health, sells med kits and upgrades. No new supplies.
Sells: Basic Medkit, Advanced Medkit, Doc Wagon Basic Trauma Kit, Doc Wagon Gold Trauma Kit, Doc Wagon Platinum Trauma Kit.
Cyberware: Vision Magnification Eyes (Basic), Datajack, Aztechnology Cyberleg (Basic), Wired Reflexes With Reflex Trigger, Silver Tech Cyberarm (Basic), Shaiwase Bone Lacing (Plastic), Ares Dermal Plating (Basic).
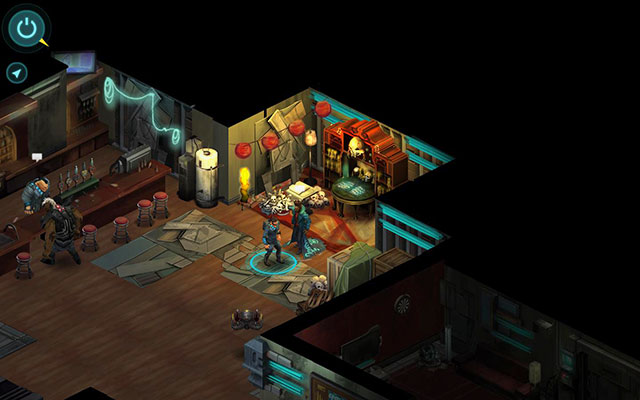 A substantial list of items does not increase
Location: On the right of the bar [4].
Description: Master of magic that will sell you all the existing spells. There are no new products.
Sells: Force I Fire Elemental Fetish, Force I Earth Elemental Fetish, Force I Air Elemental Fetish, Force II Water Elemental Fetish, Force II Earth Elemental Fetish, Force II Fire Elemental Fetish, Force II Air Elemental Fetish, Force III Water Elemental Fetish, Force III Fire Elemental Fetish, Force III Earth Elemental Fetish, Force III Air Elemental Fetish, Force IV Water Elemental Fetish, Force IV Fire Elemental Fetish, Force IV Earth Elemental Fetish, Force IV Air Elemental Fetish, Magic Resistance I, Killing Hands, Mana Fist, Stride, Counterstrike, Magic Resistance II, Quick Strike, Mystic Armor, Pain Resistance, Magic Resistance III, Slow I, Haste I, Slow II, Silence, Air Barrier III, Quiet Bomb, Fog, Lightning Barrier III, Haste II, Shadow, Fire Barrier III, Haste III, Weaken Armor I, Manabolt I, Flamethrower I, Lightning Bolt I, Distraction I, Armor I, Acid Stream I, Stunbolt, Mind Wipe, Manaball I, Heal Wound, Dispel Magic, Aim I, Flamethrower II, Distraction II, Weaken Armor II, Manabolt II, Lightning Bolt II, Armor II, Aim II, Fireball I, Blindness, Stunball, Manaball II, Ball Lightning I, Acid Stream II, Powerbolt I, Powerbolt II.
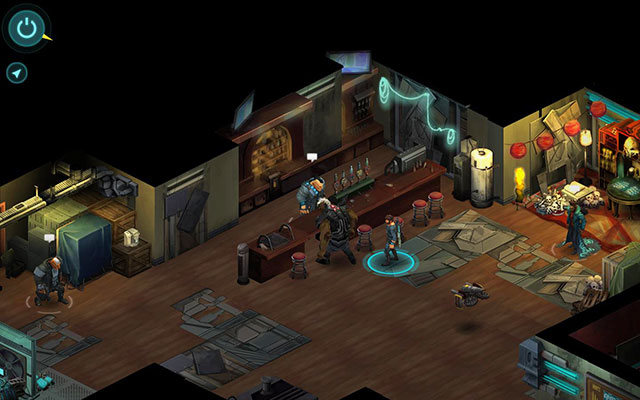 I wonder if he earns extra money as a bartender
Location: You can find him behind the bar [5].
Description: Wizard of fashion. He has everything fashionable in the world of shadows. Unfortunately, there is now nothing new.
Sells: Secure Shaman Clothing, Secure Samurai Clothing, Secure Rigger Clothing, Secure Mage Clothing, Secure Decker Clothing, Secure Clothing, Secure Adept Clothing, the Black Hat, Thaumaturgic Armor, Salish Runner, The Tourist Look, Secure Ninja Clothing, Alley Punk, Stealth Suit, Kunai Ninja Suit, Urban Mystic Outfit, Slick Decker Outfit, Salish Pendant, Milspec Flight Suit, Matrix Courier, Golden Boy, First Nation Armor, Alley Mage Outfit, Refurb UCAS Shock Gear, Ganger Mask.
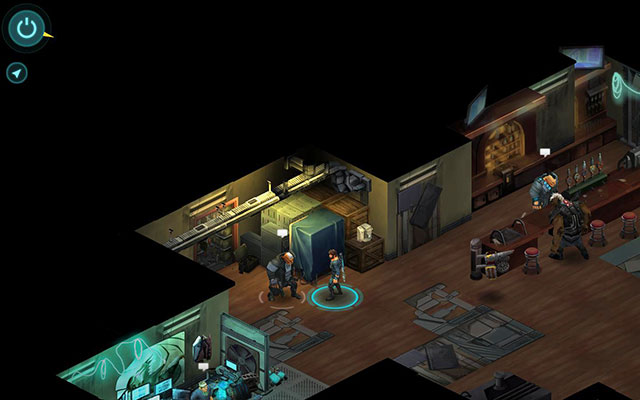 Those boxes ...
Location: In his corner, next to the bar [6].
Description: Runs underground armory. No new supplies.
Sells: Simple Drone Repair Kit, Advanced Drone Repair Kit, Smoke Grenade, Fichetti Concussion Grenade, Fichetti Frag Grenade, Cavalier Concussion Grenade, Cavalier Frag Grenade, Smoker Drone, Doberman Drone, RoboDoc Drone, Strato-9 Drone, Baseball Bat, Machete, Katana, Axe, AK-97, Semopal vz/88V, Heckler & Koch G12A3z, FN HAR, Street Sweeper, Benelli Raffaello, Mossberg CMDT, Remington 990, Beretta Model 70, Uzi III, Ingram Smartgun, Colt Cobra TZ-110, Fichetti Security 500, Ceska Black Scorpion, Cavalier Deputy, Ares Predator, Browning Max-Power.
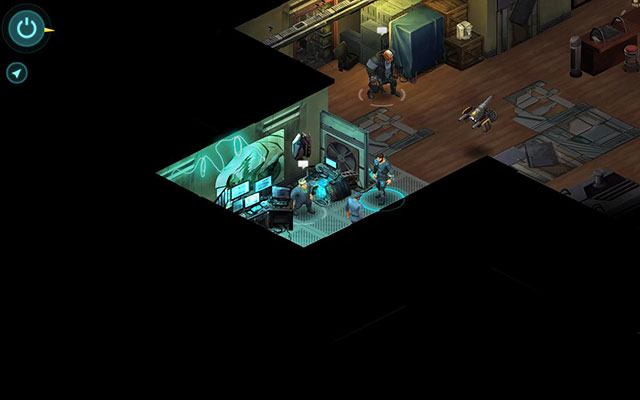 Johnny is back
Location: In the glowing booth near the bar [7].
Description: Runs technological facilities. There is nothing new on sale.
Sells: Sony CTY-360, Renraku Kraftwerk-1, Fuchi VirtuaX, Execute Shield ESP, Execute Exploder ESP, Execute Attacker ESP, Execute Assassin ESP, Sniffer Lvl 1, Slow Lvl 1, Shield Lvl 1, Medic Lvl 1, Killer Lvl 1, Firewall Lvl 1, Erosion Lvl 1, Degrade Lvl 1, Blaster Lvl 1, Suppression Lvl 1, Killjoy Lvl 1, Sniffer Lvl 2, Medic Lvl 2, Shield Lvl 2, Killer Lvl 2, Firewall Lvl 2, Erosion Lvl 2, Degrade Lvl 2, Blaster Lvl 2, Killjoy Lvl 2.
Main quest.
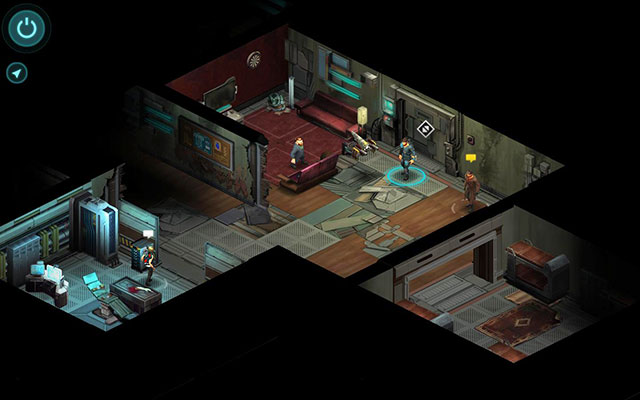 A very complex task which ends where it begins
Objective: Talk to Mr. Delilah to Hire Runners.
The whole quest is limited to the conversation with Mr. Delilah [2], who can be found next to the entrance. Your task is to hire some help for the next quest. Once you accept your choice, you'll be moved to the next location. Remember to be good prepared because you won't see next shop quickly.
Reward: None.
A transition location, with the preparations to the concert and a very interesting merchant.
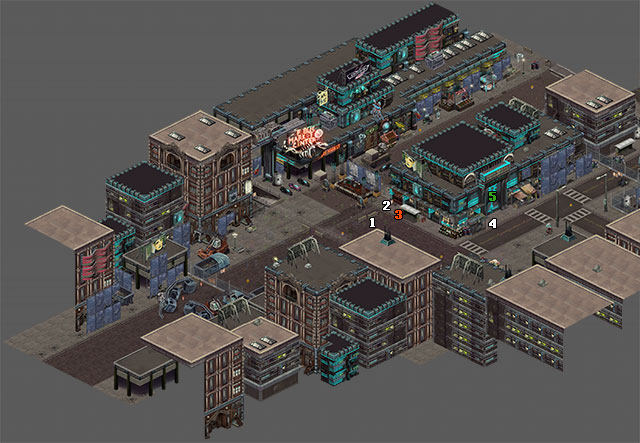
1. Maria Mercurial Fan (NPC) - One of singer's fans.
2. Slick Security Guard (NPC) - You can try to bribe him.
3. Dealer (Merchant) - Honest seller of honest goods.
4. Patrick (NPC) - Very annoying person. Has some more information on UB.
5. Main entrance - Quest: Towards Brotherhood (Main quest).
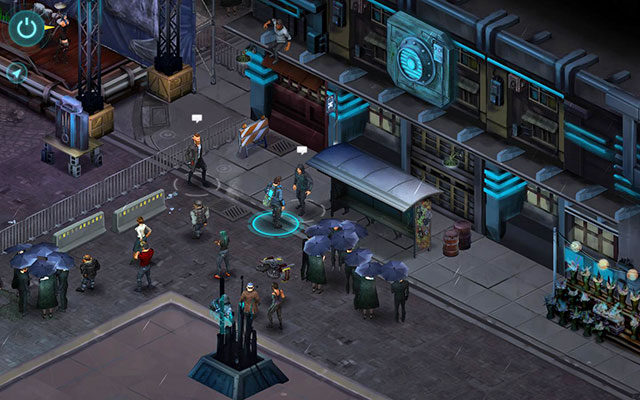 Interesting merchant
Location: Stands right next to the stage [3].
Description: A deal..., sorry, a merchant who sells useful power-ups, supporting characters in the fight.
Sells: Nitro, Kamikaze, Jazz.
Main quest.
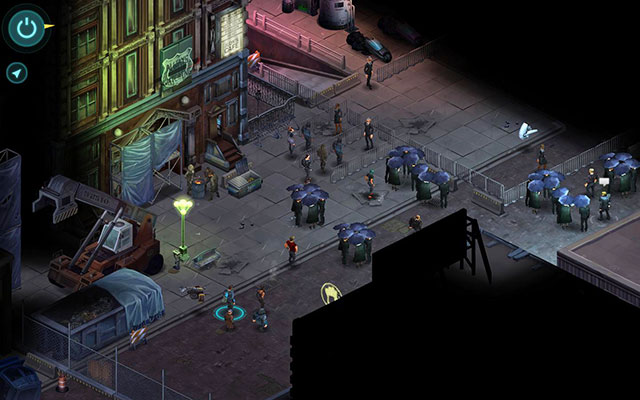 A game can afford such crowds
Objective: Get inside Universal Brotherhood building.
You start in the big crowd of people. Go right side, until you reach a turn. Along the way you can talk to Maria Mercurial Fan [1] and Slick Security Guard [2] to find out more about the concert. Either way, your target is Patrick [4] standing in front of the main entrance to brotherhood headquarters. Talk to him and you will learn some interesting things. Once you are ready, go through the main door inside the brotherhood building.
Reward: None.
Location with many paths leading to the target and with most markings in the legend.
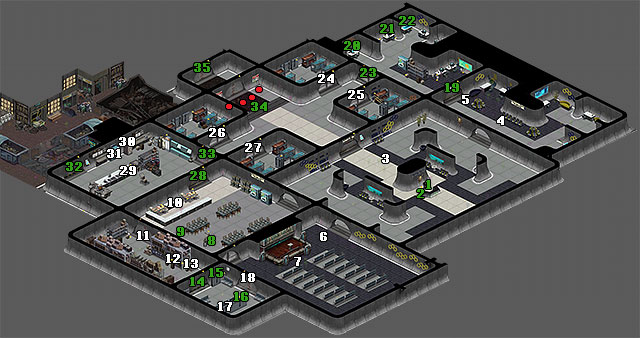
1. Sister Sally (NPC) - Quest: The Universal Brotherhood (Main quest).
2. Blank Universal Brotherhood ID Card (Item) - Quest: The Universal Brotherhood
3. Sister Wilma (NPC) - Quest: The Universal Brotherhood.
4. Sister Nancy (NPC) - Quest: The Universal Brotherhood.
5. Brother Christopher (NPC) - Quest: The Universal Brotherhood.
6. Brother Mike (NPC) - Quest: The Universal Brotherhood.
7. Father Willy Hansen (NPC) - Quest: The Universal Brotherhood.
8. Ladder - Quest: The Universal Brotherhood.
9. Janitor (NPC) - Quest: The Universal Brotherhood.
10. Cooker - Quest: The Universal Brotherhood.
11. Stash - Quest: The Universal Brotherhood.
12. Tub of Lard (Item) - Quest: The Universal Brotherhood.
13. Small Bottle of Chloroform (Item) - Quest: The Universal Brotherhood.
14. Dressing room - Quest: The Universal Brotherhood.
15. Locker no. 1 - Quest: The Universal Brotherhood.
16. Locker no. 2 - Quest: The Universal Brotherhood.
17. Locker no. 3 - Quest: The Universal Brotherhood.
18. Auditorium door - Quest: The Universal Brotherhood.
19. Office - Quest: The Universal Brotherhood.
20. Card print station - Quest: The Universal Brotherhood.
21. Computer - Quest: The Universal Brotherhood.
22. Holomap - Quest: The Universal Brotherhood.
23. Lobby door - Quest: The Universal Brotherhood.
24. Dorm B - Quest: The Universal Brotherhood.
25. Dorm A - Quest: The Universal Brotherhood.
26. Dorm D - Quest: The Universal Brotherhood.
27. Dorm C - Quest: The Universal Brotherhood.
28. Kitchen - Quest: The Universal Brotherhood.
29. Cook (NPC) - You can put her down to sleep.
30. Fridge - Contains all Brotherhood goods.
31. Drink machine/Secret passage - Quest: The Universal Brotherhood.
32. Back door - Quest: The Universal Brotherhood.
33. Kitchen door - Quest: The Universal Brotherhood.
34. Front entrance - Quest: The Universal Brotherhood.
35. Elevator - Quest: The Universal Brotherhood.
Red dots - Enemies.
Main quest.
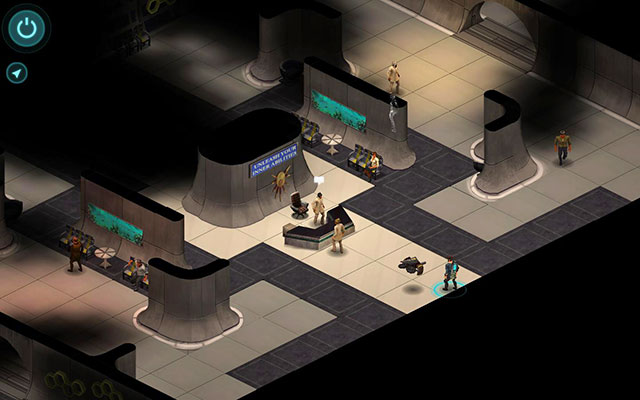 Nancy is a secret fan
Objective: 1. Find Jessica Watts. 2. Find Alley Door to Let Your Team into the UB.
You've got inside, but alone unfortunately. The rest of your team has to stay outside.
First, go to the room on the right. Talk to Sister Nancy [4] and ask about Jessica Watts (the last dialog option). Thanks to that you'll learn where you can find her and update quest status.
Reward: None.
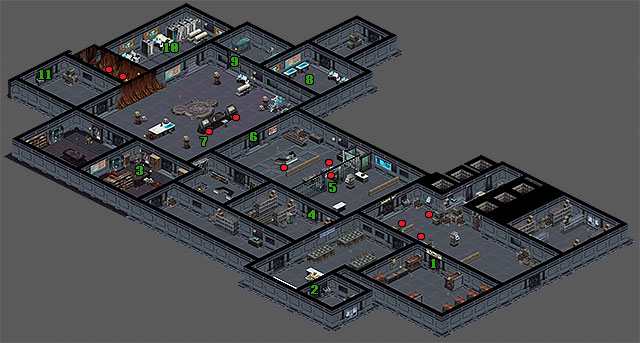 Such a great orator, and hall is empty
Objective: 1. Gain Access to Inner Sanctum. 2. Find Alley Door to Let Your Team into the UB.
There are several ways to get access to the further part of the location:
1. Talk to Sister Sally [1], which can be found in front of the location entrance. Switch to topic related to concert and autographs and she will run outside. Pick up Blank Universal Brotherhood ID Card [2] from the table and then go to the canteen on the left and click the ladder [8]. Select the second option twice to wet the blank card, thus receiving Melted Universal Brotherhood ID Card. Take this card and go to Brother Christopher [5], which can be found in the room on the other side of the building. Tell him that Sister Sally sent you and give him the damaged card. This way you'll get an access to the Inner Sanctum.
2. If you talk to Janitor [9] standing at the left wall in the canteen, you'll be able to get some information on the building and an access to the stash [11]. But first you have to pay him for the information - 200 or 100 nuyen if you have Charisma 4. After that you can offer him 500/250 nuyen to get an access to the room behind him. Inside the room you'll find Tub of Lard [12] and Small Bottle of Chloroform [13] and in the next room - Janitor ID Passcard [15], Dwarf Janitor Uniform (for Dwarf) [15], Troll Janitor Uniform (for Troll) [16], Orc Janitor Uniform (for Orc) [16] and Standard Sized Uniform (for Elf and Human) [17]. Put on the uniform suitable for your race and then leave the dressing room, getting to the room on the other side of the location. Talk to Brother Christopher [5], to get an access to Inner Sanctum.
3. Act the same as in point 2, until you receive Janitor Uniform. Make sure that you have Small Bottle of Chloroform [13] and then go to the hall next to the current room. Talk to Father Willy Hansen [7] and select the last dialog option. Once you get in the stash alone with him, use chloroform to put him down to sleep. Now take his clothes and a card - Inner Sanctum Access Keycard. Now you can use the main door to get to Inner Sanctum.
4. Most aggressive method. Click the ladder [8] in the canteen and pick up Small can of kerosene. Now go to the cooker [10] and use the can on it. This way you'll make fire and get and access to the kitchen in Inner Sanctum.
Reward: None.
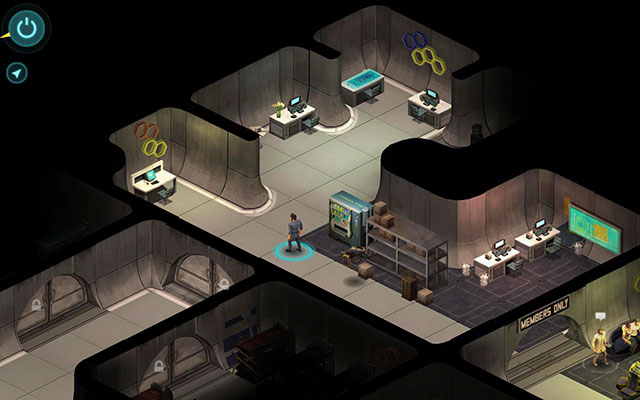 Game room
Objective: Find Alley Door to Let Your Team into the UB.
Depending on the method you chose, you'll start in different parts of Inner Sanctum. If you chose the options 1 or 2, you'll start in the office [19]. Otherwise you'll start in the main hall [34] if you chose option 3, and in the kitchen [28] by following option 4.
As for two first methods you'll have to make an access card additionally. Pick up another Blank Universal Brotherhood ID Card from the box located next to the locker in front of the entrance. Now go to the card print station [20] and start it. If you have Decking 4, you'll be able to print Home Access ID Card. Unfortunately such card grants you an access only to the outer part of the Inner Sanctum (in this location). But with Decking 6 you can print Inner Sanctum Access ID thank to which you can open the main door leading to the next level. If you do not have required level of Decking, you'll have to fill data on your own. You can gather required information by searching the office. But if you prefer faster solution, here you are: Monica Shachnoff, Home Dorm B, SEA134-647, BabyBree. After receiving the card, you can go through the door [23] leading to the corridor.
In the third method you'll enter Inner Sanctum through the main entrance, with the access card and clothes.
The fourth method is the most risky one. You do not have clothes neither the access card and in addition you start in the kitchen [28] separated from rest of Inner Sanctum.
In all cases you have to open the back door [32] to let your team in. The door can be found in the kitchen [28]. It is enough when you get close to them and click the control panel.
Now, when you are all together, the only thing left is to get an access to the main part of Inner Sanctum. If you already have Inner Sanctum Access ID Card and Universal Brotherhood clothes, you can go straight forward to the front entrance [34]. Otherwise you'll have to get both things. ID Card can be got by using one of two previously mentioned methods. If you have Intelligence 4, you can also open the locked locker located in Dorm A [25] in order to get another card. The clothes can be found in any of all four dorms.
it is worth mentioning that you might be attacked if you go along with your team in front of turrets mounted next to the front entrance [34]. The same might happen if you try to go through the mentioned door. If you do not have Inner Sanctum Access ID Card and Universal Brotherhood Uniform, you'll be forced to fight. In such scenario you'll have to fight 2 Security Turret and 2 Brotherhood Security. But if you have all required item, you can go to the next location.
There is also an alternative entrance. In the kitchen [28], behind the drink machine [31], you'll find a secret passage. In order to get there you have to move the machine blocking it. You can do it if you have Strength 5 or Tub of Lard, which can be found in the stash [11]. In addition, to open the door, you need Decking 1 or Decking 5.
Reward: 6 KP.
The part of Brotherhood which is known only to the initiated. Now also for you.
1. Dormitory - Quest: Find Shane (Side quest).
2. Secret elevator - Quest: Beneath the Brotherhood (Main quest).
3. Desk - Quest: Beneath the Brotherhood.
4. Warehouse - You'll find here Advanced Medkit.
5. Brotherhood Guard (NPC) - Quest: Beneath the Brotherhood.
6. Main Hall - Quest: Beneath the Brotherhood.
7. UB Holding Cell Key (Item) - Quest: Beneath the Brotherhood.
8. Jessica Watts (NPC) - Quest: Beneath the Brotherhood.
9. Cell - Quest: Beneath the Brotherhood.
10. Jackpoint - Quest: Beneath the Brotherhood.
11. Location exit - Quest: Beneath the Brotherhood.
Red dots - Enemies.
Main quest.
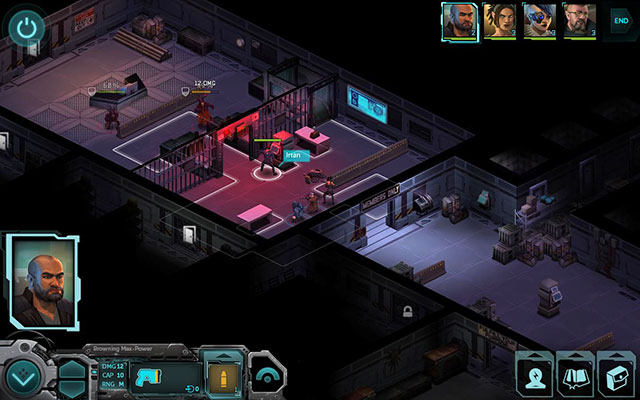 If only you could bypass them
Objective: Find Jessica Watts.
Depending on whether you chose a front entrance in the previous location, or the hidden door, you'll start in different starting points. The only difference is couple of rooms and additional fight at the main entrance.
If you got down by the elevator, you'll end up in the main lobby. Go through the door on the other side. If you entered aggressively the previous location, you'll be now attacked by 3 Brotherhood Guards right after exiting the elevator. Otherwise, once you get to the second room, go to one of Brotherhood Guard [5] and start conversation. I doesn't matter which dialog option you choose, because each one ends with the fight. Deal with 2 Brotherhood Guards and move forwards. Before entering the next hall notice two rooms located in the right. In the first one [4] you can find Advanced Medkit and in the second one - 2 Cavalier Frag Grenade.
In case of the back door you'll start in the secret elevator [2]. Keep moving forwards until you get to a small office. Click the desk [3] and you'll receive Record of Payments. Now go to the next room.
Once you get to main hall, you'll be attacked right away by 2 Brotherhood Followers. Kill them and after that pick up UB Holding Cell Key [7] left by one of opponents. Move to the cell [9] on the right and open it using they key.
Reward: 6 KP.
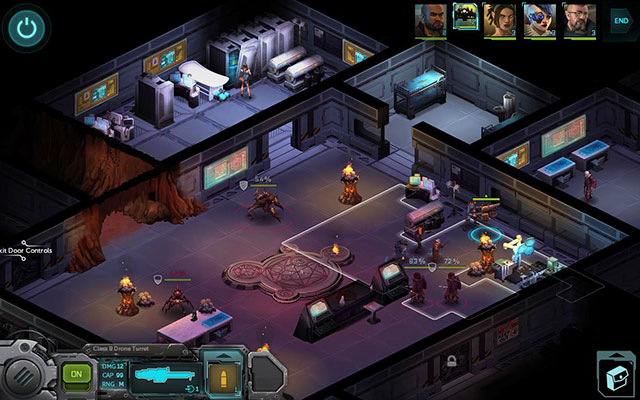 One of the most interesting battles in the game
Objective: 1. Defend Marie-Louise. 2. Use Marie-Louise to Hack the Door to Escape.
Once you end the conversation, the real fun begins. You have two targets: protect Marie-Louise against attacks and hack into Matrix while controlling her and open the exit door.
As you probably noticed, there are two new enemies on the battlefield - True Form Worker and True Form Venom. In addition there are 2 Brotherhood Followers with katanas. The last ones are not too tough, so it is best to deal with them in the first round and then fully focus on two insects. True Form Worker attacks in the close range so it would be good to slow him down with your skills or spells and then eliminate it from a distance. True Form Venom is more annoying. It shoots acid which deals normal damage and damage each round. Hide behind covers and take him from a distance.
Unfortunately there is one additional problem. When you get rid one of insects, it will be "resurrected" as a spirit and continue to fight. In such form it is invulnerable. Any kind of damage can hurt them. After the next turn they are back to their physical form. How can you get rid of them? You can't. At least not now. You have to survive until you manage to open the door with help from Marie-Louise. Use the buffing spells like Armor III and try to slow insects down or decrease their AP. If you have Decker in your team, you could send him to the Matrix to help. Here he is no good anyway.
Once you enter Matrix, you'll be welcomed by 2 White IC and White Shield IC. Get rid of them and go through the portal. You'll find yourself in the room with a core controlling the door. Unfortunately it is protected by 2 White Sparky IC and 2 White IC. It could be quite a challenge, especially if you have only Marie-Louise there. Summon Attack ESP to help you in fight and hide behind the cover. Use programs Killer Lvl 2 and Blaster Lvl 2. Remember to heal Marie-Louise with program Medic Lvl 2.
Once you defeat the defense system, activate the core Exit Door Controls. After that Baron Samedi will appear in the system. Leave the system after the conversation and move your team through the exit door located in the left corner of the room.
You'll find yourself outside. Listen to quite interesting conversation with Baron Samedi and then leave the location going through the fence located on the right.
Reward: 6 KP.
Side quest.
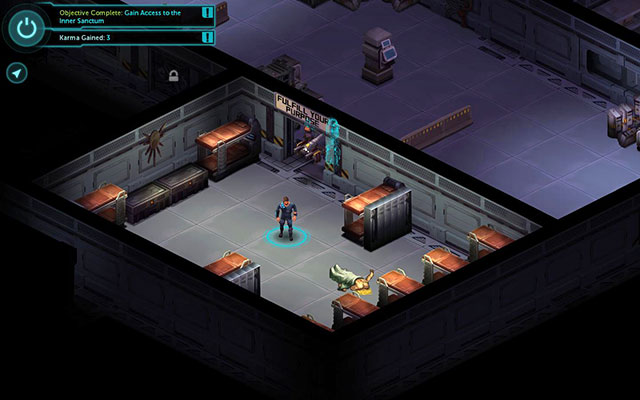 Sad end of Shane
Objective: Find Out What Happened to Shane for Cherry Bomb.
The only thing which has to be done in this quest is to find body of Shane. If you've reached the location by the main entrance, you'll find it in the dormitory [1], left from the entrance. If you got here by a secret passage, it will be lying in the corridor leading to the office. Click the marking and you'll complete the first part of the quest.
Reward: 2 KP.
The Seamstresses life is vibrant as ever. Too bad it was only a short visit.
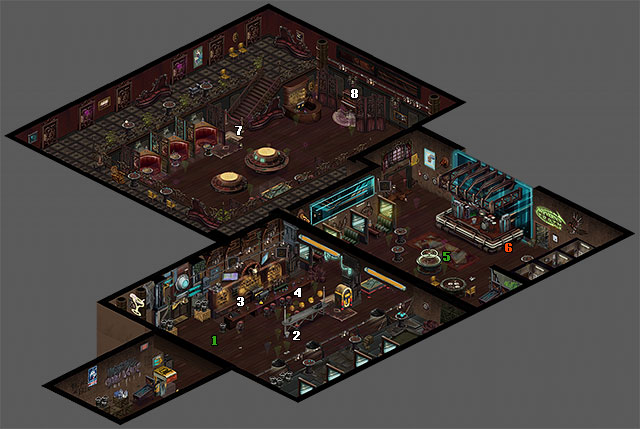
1. Mrs. Kubota (NPC) - Quest: The Union (Main quest).
2. Coyote (NPC) - Short conversation about Brotherhood events.
3. Cherry Bomb (NPC) - Quest: Find Shane Part 2 (Side quest).
4. John Barlett (NPC) - You can say hello.
5. Mr. Johnson (NPC) - Quest: Corporate Extraction (Side quest).
6. Bobby (Merchant) - Sells few boosters.
7. Mr. Kluwe (NPC) - Philosophical and socio-political chit chat.
8. Piano - Descent to Seamstresses Union Safehouse.
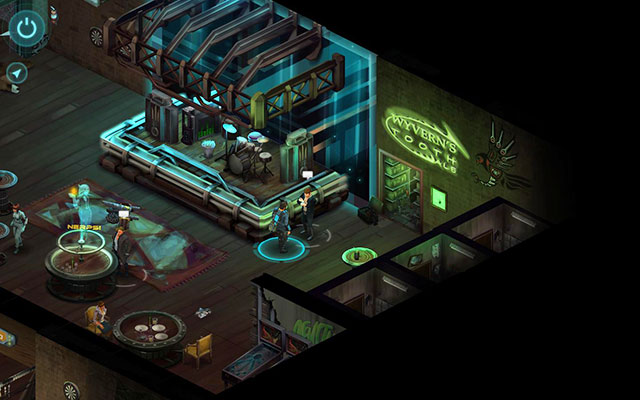 No one knows where Bobby came from
Location: Next to the main scene [6].
Description: Sells different boosters. Totally legal goods.
Sells: Nitro, Kamikaze, Jazz.
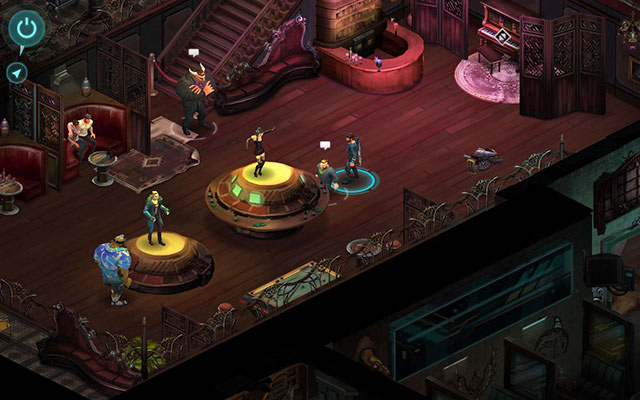 Van Graas is a party dwarf
Location: In the center of the second hall.
Description: For Van Graas Seamstresses is like home. And as always, he offers a good price for your findings. This time you can sell him Record of Payments. The base offers is 2000 nuyen but with Etiquette: Socialite or Etiquette: Shadowrunner you can get 2500 nuyen.
Buys: Record of Payments.
Main quest.
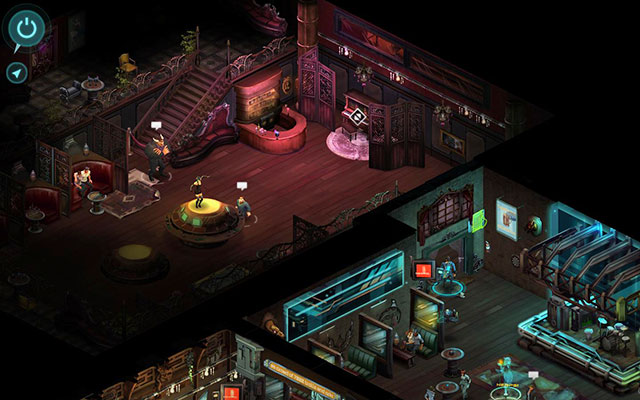 A passage behind a passage
Objective: Find Johnny in the Safehouse.
Once you return to Seamstresses, go towards the well known piano [8] in the other hall. Activate the marking and go down.
Reward: None.
Side quest.
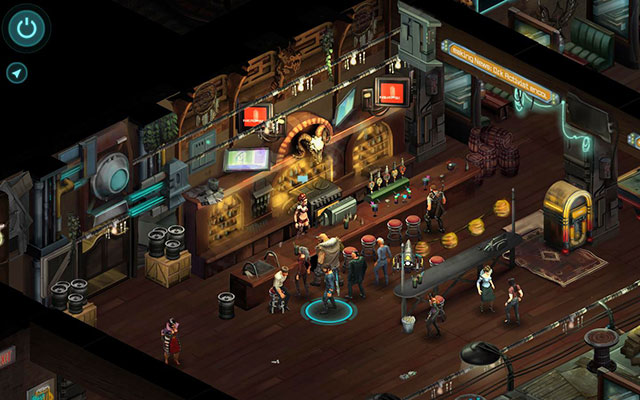 Someone needs to pass the sad news
Objective: Tell Cherry Bomb About Shane.
This is the ending of the quest from the previous location. The only thing you have to do is to talk to Cherry Bomb [3], who can be found behind the bar. Tell her about Shane's fate, thus ending the quest.
Reward: None.
Side quest.
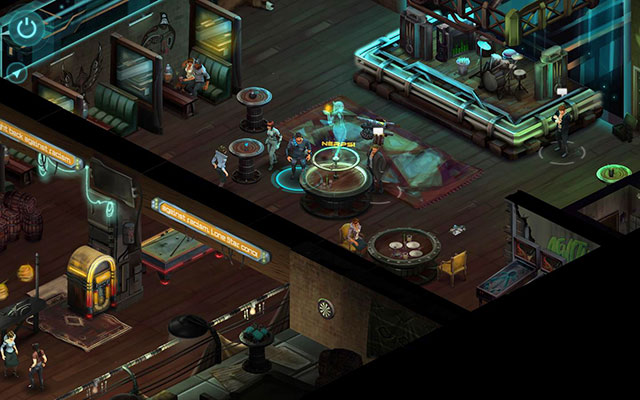 A contract on the side
Objective: Talk to Mr. Johnson
You have to complete the main quest The Union first.
This is the largest side quest. You do not have to complete it, but thanks to that you can get quite big amount of money and experience. In addition, you'll visit a separate location.
You can start the quest by talking to Mr. Johnson [6], who can be found in front of the main scene. Listen to his offer, agree and go down to Mr. Delilah to gather the team. Leave the location the same way as with the main quest.
Reward: None.
Another visit to the Seamstresses underground. This time without big news.
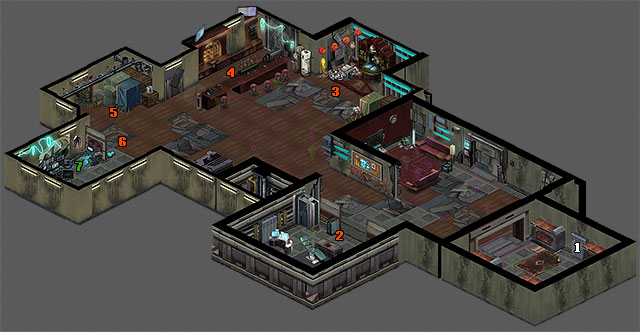
1. Player's Locker - You can change your gear here.
2. Dr. Sara Castle (Merchant) - Sells medical supplies and upgrades.
3. Aljernon (Merchant) - Responsible for magic and spirits.
4. Eric Mersmann (Merchant) - Deals with clothes.
5. T. B. Gruberman (Merchant) - Weapons, drones and everything what explodes.
6. David Fry II (Merchant) - Electronic equipment and hacker programs.
7. Johnny Clean (NPC) - Quest: The Union Part 2 (Main quest).
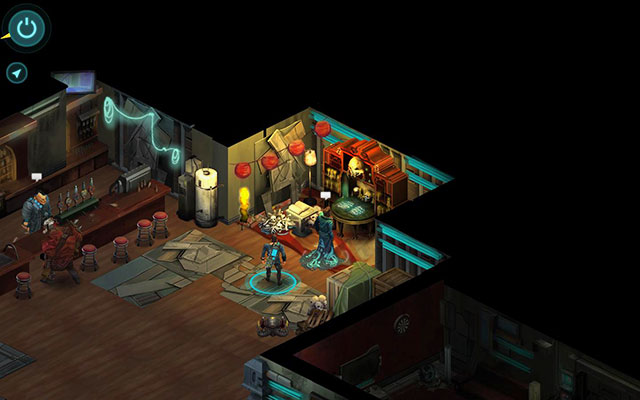 The only person who is worried about your health
Location: In her office in front of elevator [2].
Description: She will heal you and even sell part of their medicines. She has a new supply.
Sells: Basic Medkit, Advanced Medkit, Premium Medkit, Doc Wagon Basic Trauma Kit, Doc Wagon Gold Trauma Kit, Doc Wagon Platinum Trauma Kit.
Cyberware: Vision Magnification Eyes (Basic) Vision Magnification Eyes (Alpha), Datajack, Aztechnology Cyberleg (Basic) Universal Omnitech Cyberleg (Alpha), Yamatetsu Cyberarm (Alphaware), Wired Reflexes With Reflex Trigger, Silver Tech Cyberarm (Basic), Shaiwase Bone Lacing (Plastic), Shiawase Bone Lacing (Kevlar), Ares Dermal Plating (Basic), Ares Dermal Plating (Alpha).
Enigmatic fetishes sellerLocation: In the right corner of the main room [3].
Description: Chief mage and shaman. You can buy from him anything related to magic. He has new supply.
Sells: Force I Fire Elemental Fetish, Force I Earth Elemental Fetish, Force I Air Elemental Fetish, Force II Water Elemental Fetish, Force II Earth Elemental Fetish, Force II Fire Elemental Fetish, Force II Air Elemental Fetish, Force III Water Elemental Fetish, Force III Fire Elemental Fetish, Force III Earth Elemental Fetish, Force III Air Elemental Fetish, Force IV Water Elemental Fetish, Force IV Fire Elemental Fetish, Force IV Earth Elemental Fetish, Force IV Air Elemental Fetish, Force V Fire Elemental Fetish, Force V Earth Elemental Fetish, Force V Air Elemental Fetish, Force V Water Elemental Fetish, Force VI Fire Elemental Fetish, Force VI Earth Elemental Fetish, Force VI Air Elemental Fetish, Force VI Water Elemental Fetish, Magic Resistance I, Killing Hands, Mana Fist, Stride, Counterstrike, Magic Resistance II, Quick Strike, Mystic Armor, Pain Resistance, Magic Resistance III, Slow I, Haste I, Slow II, Silence, Air Barrier III, Quiet Bomb, Fog, Lightning Barrier III, Haste II, Shadow, Fire Barrier III, Haste III, Haste IV, Slo-Mo, Mana Static, Hellstorm Barrier III, Weaken Armor I, Manabolt I, Flamethrower I, Lightning Bolt I, Distraction I, Armor I, Acid Stream I, Stunbolt, Mind Wipe, Manaball I, Heal Wound, Dispel Magic, Aim I, Flamethrower II, Distraction II, Weaken Armor II, Manabolt II, Lightning Bolt II, Armor II, Aim II, Fireball I, Blindness, Stunball, Manaball II, Ball Lightning I, Acid Stream II, Manabolt III, Flamethrower III, Aim III, Lightning Bolt III, Weaken Armor III, Glue, Fireball II, Armor III, Petrify, Manaball III, Confusion, Powerbolt I, Powerbolt II, Powerbolt III.
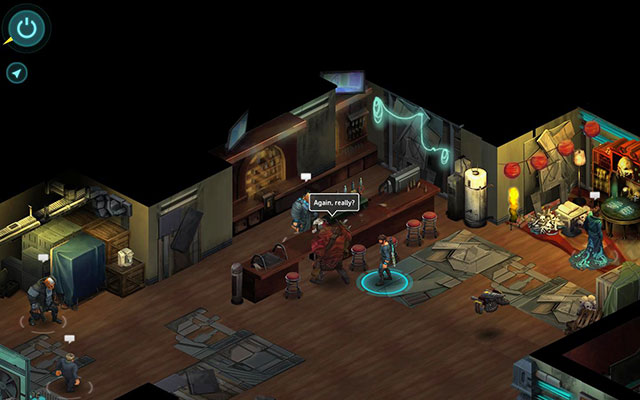 Barman with clothes
Location: Behind his bar in the main room [4].
Description: He sells a variety of clothing and armor. He has new supply.
Sells: Secure Shaman Clothing, Secure Samurai Clothing, Secure Rigger Clothing, Secure Mage Clothing, Secure Decker Clothing, Secure Clothing, Secure Adept Clothing, the Black Hat, Thaumaturgic Armor, Salish Runner, The Tourist Look, Secure Ninja Clothing, Alley Punk, Stealth Suit, Kunai Ninja Suit, Urban Mystic Outfit, Slick Decker Outfit, Salish Pendant, Milspec Flight Suit, Matrix Courier, Golden Boy, First Nation Armor, Alley Mage Outfit, Refurb UCAS Shock Gear, Ganger Mask, High Grade Street Armor, Corp Mage, The Mechanic, Street Monk Outfit, Agent Provocateur, Occult Robes, Stealth Rigger, Ocult Coat, Street Brawler Set.
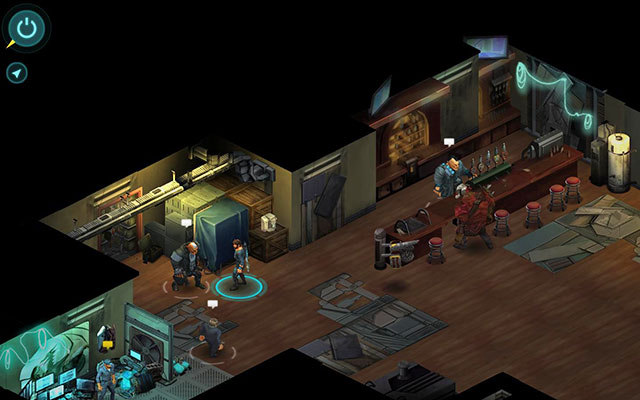 You can always count on this Orc
Location: In his explosive stand next to the bar [5].
Description: He provides all kinds of weapons and explosives. He got new delivery.
Sells: Simple Drone Repair Kit, Advanced Drone Repair Kit, Expert Drone Repair Kit, Smoke Grenade, Fichetti Concussion Grenade, Fichetti Frag Grenade, Cavalier Concussion Grenade, Cavalier Frag Grenade, Phosphorus Grenade, Ares Concussion Grenade, Ares High Explosive Grenade, HE Phosphorus Grenade, Smoker Drone, Doberman Drone, RoboDoc Drone, Strato-9 Drone, Sundowner Drone, Steel Lynx Drone, Wolfhound Drone, Guardian Drone, Baseball Bat, Machete, Katana, Axe, AK-97, Hand-Forged Katana, Dragon Sword, Semopal vz/88V, Heckler & Koch G12A3z, FN HAR, Colt M23, Ares Alpha, Street Sweeper, Benelli Raffaello, Mossberg CMDT, Remington 990, Enfield AS-7, Defiance T-250, Beretta Model 70, Uzi III, Ingram Smartgun, Colt Cobra TZ-110, SCK Model 100, Heckler & Koch HK227, Fichetti Security 500, Ceska Black Scorpion, Cavalier Deputy, Ares Predator, Browning Max-Power, Ruger Super Warhawk, Colt Manhunter, Ruger Thunderbolt.
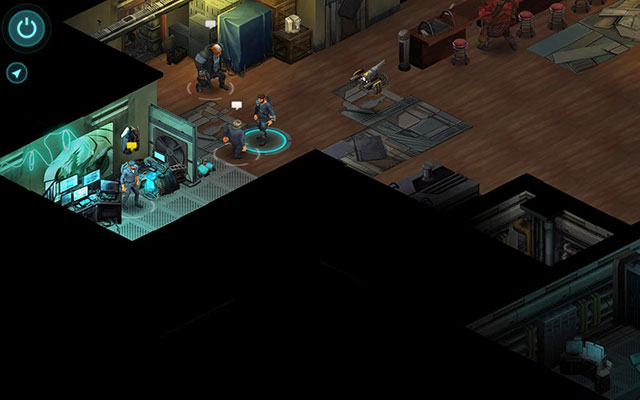 David moves around his stand
Location: In his glowing booth [6].
Description: A hacker and merchant in one. The best equipment for Deckers. He has a new supply.
Sells: Sony CTY-360, Renraku Kraftwerk-1, Fuchi VirtuaX, Fairlight Excalibur, Execute Shield ESP, Execute Exploder ESP, Execute Attacker ESP, Execute Assassin ESP, Sniffer Lvl 1, Slow Lvl 1, Shield Lvl 1, Medic Lvl 1, Killer Lvl 1, Firewall Lvl 1, Erosion Lvl 1, Degrade Lvl 1, Blaster Lvl 1, Suppression Lvl 1, Killjoy Lvl 1, Sniffer Lvl 2, Medic Lvl 2, Shield Lvl 2, Killer Lvl 2, Firewall Lvl 2, Erosion Lvl 2, Degrade Lvl 2, Blaster Lvl 2, Killjoy Lvl 2, Sniffer Lvl 3, Medic Lvl 3, Shield Lvl 3, Killer Lvl 3, Firewall Lvl 3, Erosion Lvl 3, Degrade Lvl 3, Blaster Lvl 3.
Main quest.
 Everything good as new
Objective: Find Johnny Clean in the Safehouse.
One you get down, go to David Fry's II stand [6]. You'll find here Johnny Clean [7]. Talk to him and you'll get an access to Matrix.
In the net you'll be welcomed by Baron Samedi. Talk to him and accept his offer. Leave Matrix and talk to Johnny Clean [7]. It is time to hire a team. Start conversation with Mr. Delilah standing next to the elevator. Choose a suitable team and then leave the location.
Reward: 4 KP and 8000 nuyen.
A location for the largest side quest. It even has its own location in Matrix.
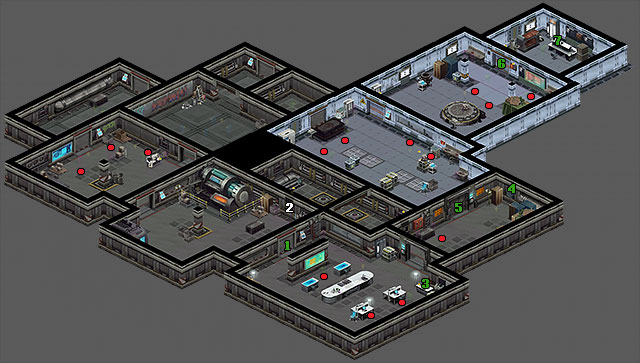
1. First door - Quest: Corporate Extraction (Main quest).
2. Ventilation shaft - Quest: Corporate Extraction.
3. Computer with data - Quest: Corporate Extraction.
4. Jackpoint - Quest: Corporate Extraction.
5. Lab door - Quest: Corporate Extraction.
6. Office door - Quest: Corporate Extraction.
7. Saada (NPC) - Quest: Corporate Extraction.
Red dots - Enemies.
Side quest.
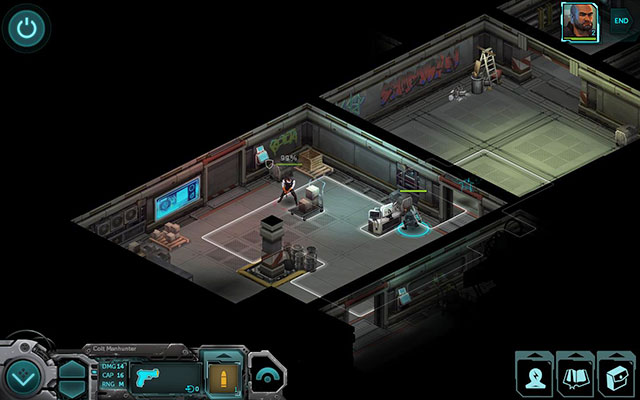 You can't bypass the guard
Objective: 1. Infiltrate the Secret Lab. 2. Destroy Lab's Research.
You'll start in a small room. Go through the lower entrance to encounter the first enemy - Lonestar Guard. After a moment Lonestar Enforcer and another Lonestar Guard will appear. Get rid of them and move forwards heading south.
After a moment you'll come across the first door [1]. If you have drone, send him through the ventilation shaft [2] to flank enemies. There are four of them - 2 Lonestar Enforcer, Lonestar Guard and Lonestar Heavy Gunner. Get rid of them and go to the computer [3] in lower part of the room. If you have Decking 6, you can get some valuable data. Otherwise, move forwards to the next door [5].
There are many enemies inside. In addition they have a gun aimed at the door. If you have Decker in your team, you can enter Matrix through Jackpoint [6] and then activate the core Turret to gain control over it. The core is guarded by White IC, White Sentry IC and White Sparky IC, so remove them before you start hacking the turret.
In the next room you'll have to defeat Corporate Mage, 2 Lonestar Enforcer, Lonestar Heavy Gunner and 3 Basilisk. The latter creatures can paralyze opponent for two rounds, so keep a safe distance from them.
Once you deal with all opponents, go through the door [7] in the next room and talk to Saada [8]. You can now decide whether to take him with you to complete the quest, let him go or make him to pay to let him go. If you take him to the corporation, you'll get 9000 nuyen. If you try to get money to let him free, you'll receive 5000 nuyen. And if you just let him go, you won't get anything except Karma. In addition, if you managed to get data from the computer, you can sell it at Mr. Johnson for 1500 nuyen.
Reward: 8 KP and 9000/5000/0 nuyen or 8 KP and 10500/6500/1500 nuyen.
A big heist on the corporation. It is almost like a death sentence. Maybe more aggressive way.
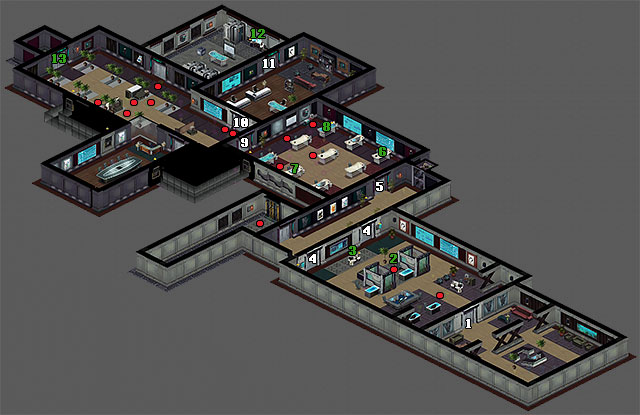
1. Main door - Quest: Telestrian Industries (Main quest).
2. Telestrian Security Access Card (Item) - Quest: Telestrian Industries.
3. Main computer - Quest: Telestrian Industries.
4. Corridor door - Quest: Telestrian Industries.
5. Offices - Quest: Telestrian Industries.
6. Computer no. 1 - Quest: Telestrian Industries.
7. Computer no. 2 - Quest: Telestrian Industries.
8. Computer no. 3 - Quest: Telestrian Industries.
9. Secured door - Quest: Telestrian Industries.
10. Main office - Quest: Telestrian Industries.
11. Server room - Quest: Telestrian Industries.
12. Computer with Jackpoint - Quest: Telestrian Industries.
13. Elevator - Quest: Telestrian Industries.
Red dots - Enemies.
Main quest.
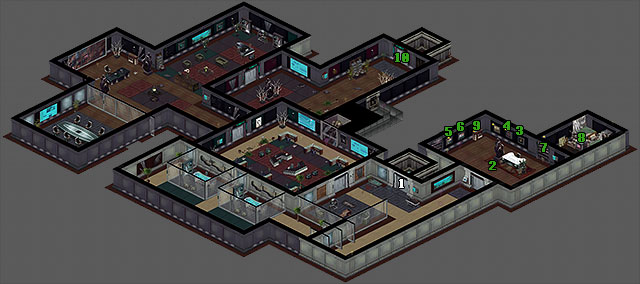 Lack of welcoming is depressing
Objective: Find the Aegis Sample. 2. Search Telestrian Accounting System for Information.
In this quest you have to keep alive at least one person who can use the net, so with Decking skill. Otherwise the mission fails.
You start in the main lobby. After short conversation with Samedi you'll regain control over the team. Go through the door in front of you. Unfortunately, here you'll come across 2 Lonestar Guards, who start the alarm. Get rid of them and pick up Telestrian Security Access Card [2] left by the second guard. Now go to the main computer [3], start it and open the next door. Go through it to a small corridor and then turn right.
You'll find yourself in office room [5]. Once you go there, enemies will come out running from the opposite room. You'll have to deal with 2 Lonestar Guards, Lonestar Enforcer and Lonestar Mage. Focus mainly on latter two.
After the fight go to the first computer [6] and start the command. Check all options. Now go to the second computer [7] and do the same, thus starting a short dialog. Go to the last computer [8] and start it. Once you log out, a paper with door code will pop out from the desk: 1915.
Reward: 8 KP.
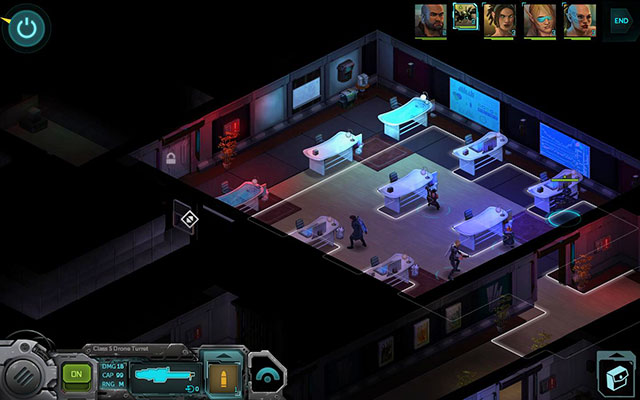 Fight in offices
Objective: 1. Hack the Elevator. 2. Search the CEO's LAN on the top floor.
Now when you have the proper code, you can go through the next door [9]. Alternatively, you can send a drone through the ventilation shaft left from the door, to open it for you. Even if you have a code, it is worth to send the drone there, so it can flank enemies standing behind the door.
On the other side a large group of enemies awaits you: 2 Turret, 2 Lonestar Guards, Lonestar Gunner, Lonestar Captain and Telestian Rigger. The frontal attack is possible but very risky. A better method is defensive way. Go to the room on the right. Of course all movable opponents will follow you, so place your companions behind proper covers and eliminate one by one enemies entering your new fortress.
Once you clear the area, send one of Deckers to Matrix. You can connect to the computer [12] in a server room. In the net you'll encounter 2 White Sparky IC and 2 White IC. Get rid of them and go to the first portal. On the next platform you'll come across 2 White IC. Erase them and deactivate two cores - Turret 1 and Turret 2. Now go to the right portal. Destroy Black IC there and activate another core - Telestrian Patent Application. In this way you'll get Telestrian pending patent applications and 2000 nuyen. Go to the next portal.
On the third platform you'll find a core controlling the elevator. When you approach it, 4 White IC and White Sentry IC will appear. If you're alone, summon one of ESP programs, jump behind the cover and let him get most of damage. In the meantime deal with opponents. After the fight go to the core and activate it. Now return to the second platform and go to the western portal, the most distant one. Activate the last core - Legal Files Data Store Node and leave Matrix.
When you return to real world, you'll notice two new enemies - Telestrian Heavy Guards. They are quite tough and are able to inflict huge amount of damage. Fortunately you have reprogrammed turrets to help you. Deal with opponents in order to get to the next location.
Reward: 4 KP.
CEO level. Prepare for the long defense. There are waves of enemies and no time to rest.
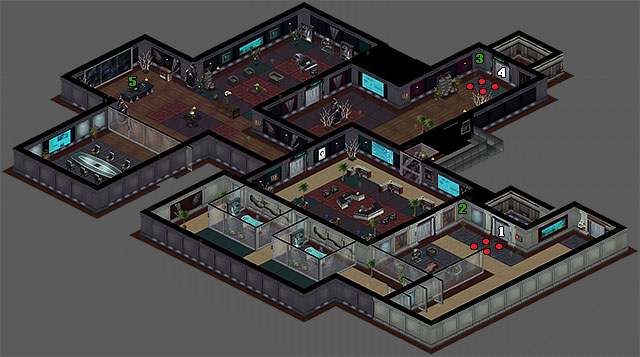
1. Elevator to a ground floor - Quest: Executive Actions (Main quest).
2. Camera 1 - Quest: Executive Actions.
3. Camera 2 - Quest: Executive Actions.
4. Elevator with enemies - Quest: Executive Actions.
5. CEO computer - Quest: Executive Actions.
Main quest.
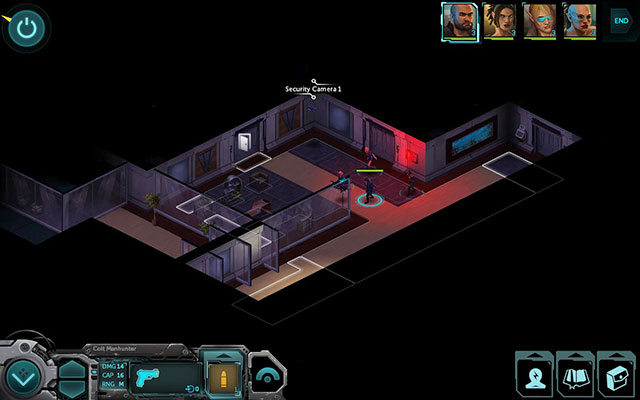 This camera only looks dangerous
Objective: 1. Find Aegis Sample. 2. Search the CEO's LAN on the top floor.
After you leave the elevator, go through the door on the right. Move forward, going through the next door, until you reach CEO office. Connect to the CEO computer [5] to enter Matrix.
While you Decker fights programs in virtual world, the rest of the team has to hold positions and cover him. Most of enemies will be coming out from the door on the right. If you have Shaman with Barrier spell, keep casting it in the passage, thus hurting a bit opponents and slowing them down. You can also summon a spirit from one of pots. Try to control the passage and eliminate opponents before they manage to get inside the office.
After Decker's return and getting information that the floor is cleared, return to the main elevator [1]. Now turn left and activate door control panel. Listen to the dialog to end the mission.
Reward: None.
One of largest location in the net. It would be good to take more than one Decker with you.
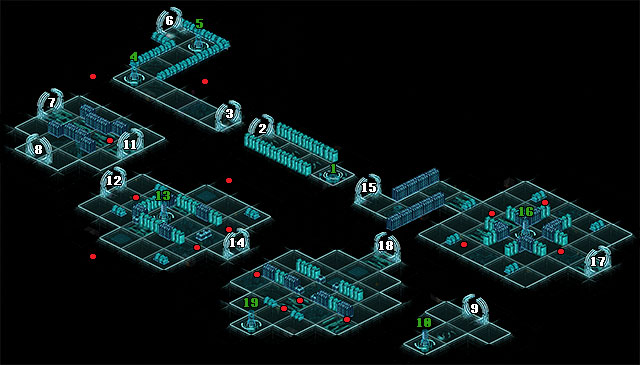
1. Matrix entrance - Quest: Executive Action - Matrix (Main quest).
2. Portal I - Quest: Executive Action - Matrix.
3. Portal II - Quest: Executive Action - Matrix.
4. Core Security Camera 1 - Quest: Executive Action - Matrix.
5. Core Security Camera 2 - Quest: Executive Action - Matrix.
6. Portal III - Quest: Executive Action - Matrix.
7. Portal IV - Quest: Executive Action - Matrix.
8. Portal V - Quest: Executive Action - Matrix.
9. Portal VI - Quest: Executive Action - Matrix.
10. Core Data Store - Quest: Executive Action - Matrix.
11. Portal VII - Quest: Executive Action - Matrix.
12. Portal VIII - Quest: Executive Action - Matrix.
13. Core Personal Comlink Logs - Quest: Executive Action - Matrix.
14. Portal IX - Quest: Executive Action - Matrix.
15. Portal X - Quest: Executive Action - Matrix.
16. Core Personal Correspondence Archive - Quest: Executive Action - Matrix.
17. Portal XI - Quest: Executive Action - Matrix.
18. Portal XII - Quest: Executive Action - Matrix.
19. Core Elevator - Quest: Executive Action - Matrix.
Main quest.
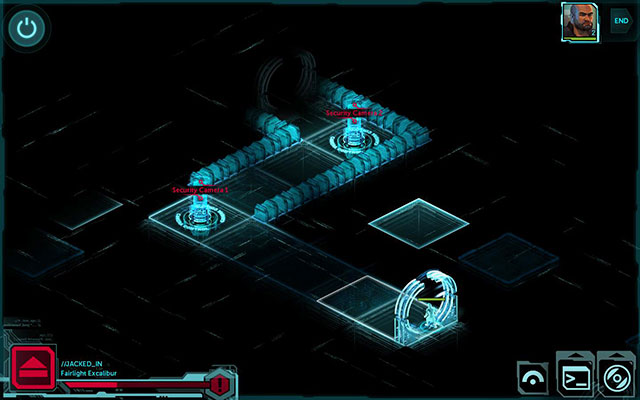 Matrix entrance
Objective: Regain Controls of the Elevator in the Matrix.
During this visit you'll have to act quite fast. In the real world you'll have to repel subsequent waves of enemies. The only way to get rid of them is to regain control over the elevator. That's the task for your Decker.
Go through the first portal [2]. On the other side you'll find two cores and 2 White IC. Get rid of them and activate cores - Security Camera 1 and Security Camera 2. Jump into another portal [6]. Deal with White IC and enter the left portal [8]. Activate core Data Store and return to the previous platform. Go to the right portal [11] and destroy 3 White IC, White Sparky IC and White Sentry IC. This is a good moment to summon ESP. Once you cleared the platform, activate core Personal Comlink Logs [13] and then go through the next portal [14].
This is not the last platform though. Defeat all hostile programs here: 2 White IC, White Sentry IC and Black IC and then activate core Personal Correspondence Archive. After a short dialog enter the next portal [17] to get to the last platform. Eliminate the last defense line here - 3 White IC and White Sentry IC. Activate the final core controlling the elevator and return to Matrix exit [1].
Reward: 14 KP.
A night in the storehouse is not the most pleasant one. Especially when there is a bunch of guards around, who try to get you.
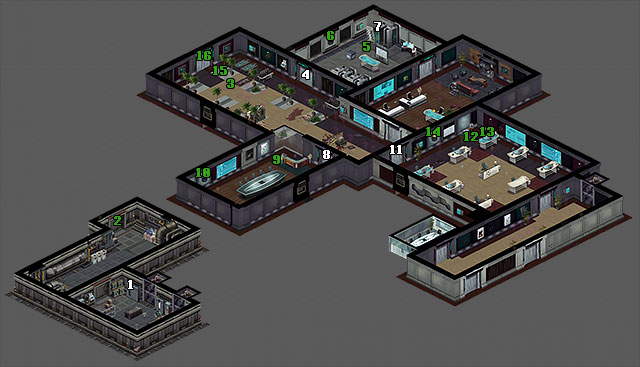
1. Janitor locker - Quest: The Morning After (Main quest).
2. Elevator - Quest: The Morning After.
3. Supervisor (NPC) - Quest: The Morning After.
4. Server room - Quest: The Morning After.
5. Telestrian Tech Worker (NPC) - Quest: The Morning After.
6. Matrix Emergency Power Junction 1 - Quest: The Morning After.
7. Server - Quest: The Morning After.
8. Conference room - Quest: The Morning After.
9. Telestrian Security Guard (NPC) - Quest: The Morning After.
10. Matrix Emergency Power Junction 2 - Quest: The Morning After.
11. Offices door - Quest: The Morning After.
12. Telestrian Worker (NPC) - Quest: The Morning After.
13. Worker's computer - Quest: The Morning After.
14. Matrix Emergency Power Junction 3 - Quest: The Morning After.
15. Telestrian Guard (NPC) - Quest: The Morning After.
16. Main elevator - Quest: The Morning After.
Main quest.
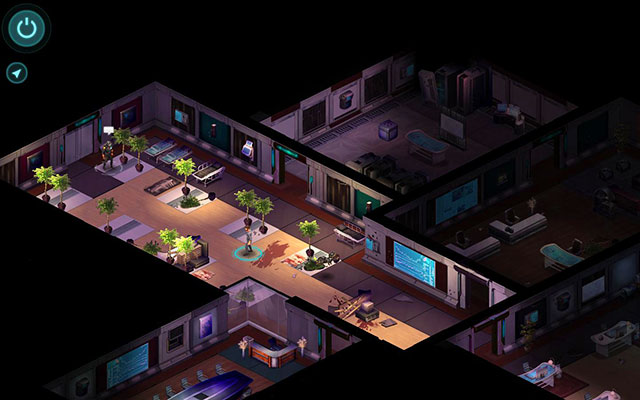 If you actually had to clean it up ...
Objective: 1. Plant the Commlink Chips to Get to Eric Silverstar's Office. 2. Don't Blow Your Cover.
After the dialog, go to the locker [1] and open it. Moment after that you'll become a janitor, or at least you're wearing his clothes. Go through the door and use the elevator [2] to get to the second part of the location.
Listen to the conversation with Supervisor [3] and then enter the conference room [8] located on his left. Talk to Telestrian Security Guard [9]. If you have Charisma 4 or Charisma 2, you can persuade him now to leave the room. Otherwise you have to go through the dialog to its end. Anyway, the guard will leave after a moment and you'll be able to install a chip. Move to the panel [10] in the wall and click the marking.
Another security panel can be found in the server room [4]. But first you have to get rid of Telestrian tech Worker [5]. Talk to him. Use Charisma attribute or use normal dialog options to make him go out. Install another chip in the panel [6]. Before leaving the room, go to the server [7] and get Matrix LAN Parts out of it.
The last panel can be found in the office room located at the end of the corridor [11]. Talk to Telestrian Worker [12] and persuade him that you can help hi, After that use Matrix LAN Parts on his computer [13] and talk to him again. Once he leaves the room, install the last chip in the panel [14] and return to the main elevator [16]. Talk to Telestrian Guards [15] and show him parts from panels to get to the next level.
Reward: 6 KP.
The last part of the heist on the corporate building. This time you have to act slightly fast.
1. Elevator - Quest: Collecting the Sample (Main quest).
2. Eric Silverstar (NPC) - Quest: Collecting the Sample.
3. Painting "Duty" - Quest: Collecting the Sample.
4. Painting "Efficiency" - Quest: Collecting the Sample.
5. Painting "Vigilance" - Quest: Collecting the Sample.
6. Painting "Independence" - Quest: Collecting the Sample.
7. Secret door - Quest: Collecting the Sample.
8. Safe - Quest: Collecting the Sample.
9. Bar - Quest: Collecting the Sample.
10. Back elevator - Quest: Collecting the Sample.
Main quest.
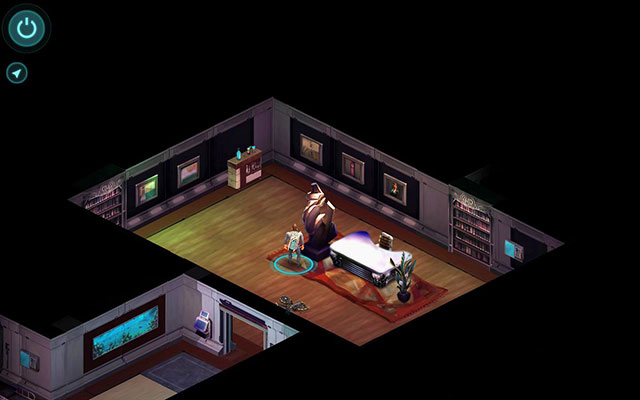 Alone in the office
Objective: 1. Find the Aegis Sample. 2. Don't Blow Your Cover.
Once you get to the last floor, turn right and go to the end of the corridor. Open the door, get inside and talk to Silverstar [2]. After a moment he will leave the room and you'll be alone in the big office.
It is time for a small riddle. It is about activating paintings in the right order. If you click on a marking of one of paintings, you'll get a short description with a key word. In order to solve the riddle and guess the order, you have to carefully read descriptions of each painting and order their key words correctly. When you click a proper painting, the closet [7] blocking the passage will move a bit. If you make the false order, paintings will reset themselves and the closet will be close again. Remember what employees and guards were talking about Silverstar - what person he is. In case of difficulty this is the correct order: Duty [3], Efficiency [4], Vigilance [5].
Once the passage gets open, enter inside and click the safe [8]. Unfortunately you need Silverstar's DNA sample. Go to the bar [9] and pick up Half Smoked Cigar. Return to the safe and use a cigar on it. Now leave the room and run to the back elevator [10] located on the other side of the location. Get inside to get out of the building. Prepare for a nasty surprise - Officer McKlusky himself. Talk to him to end the mission.
Reward: None.
Mansion of the most influential and richest elf in Seattle. Pretty impressive. Particularly library.
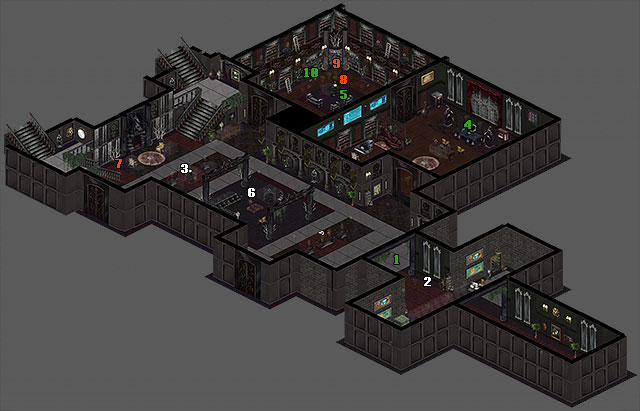
1. Mr. Quoth (NPC) - Quest: The Estate (Main quest).
2. McKlusky (NPC) - Quest: The Estate.
3. Aljernon (NPC) - He is not much of a talker at this stage.
4. James Telestrian III (NPC) - Quest: The Estate.
5. James Telestrian III (Library) (NPC) - Quest: The Estate.
6. Marie-Louise Telestrian (NPC) - Provides nice chat.
7. Mr. Quoth (Merchant) - Universal merchant.
8. Aljernon (Merchant) - Sells magic, as always.
9. Hans Brackhaus (NPC) - You can talk with him about Lofwyr.
10. Harlequin (NPC) - Quest: The Estate.
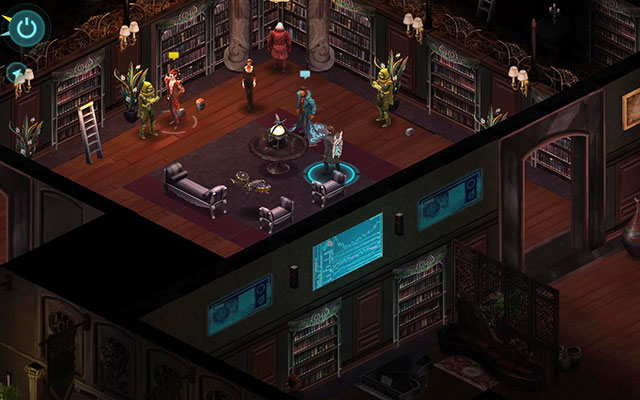 Aljernon is always there, where he is needed
Location: You'll find him in a library [8].
Description: Aljernon turns out to be not a person as you thought he was. But he is still strange. He has no new spells but he has all the old goods.
Sells: Force I Fire Elemental Fetish, Force I Earth Elemental Fetish, Force I Air Elemental Fetish, Force II Water Elemental Fetish, Force II Earth Elemental Fetish, Force II Fire Elemental Fetish, Force II Air Elemental Fetish, Force III Water Elemental Fetish, Force III Fire Elemental Fetish, Force III Earth Elemental Fetish, Force III Air Elemental Fetish, Force IV Water Elemental Fetish, Force IV Fire Elemental Fetish, Force IV Earth Elemental Fetish, Force IV Air Elemental Fetish, Force V Fire Elemental Fetish, Force V Earth Elemental Fetish, Force V Air Elemental Fetish, Force V Water Elemental Fetish, Force VI Fire Elemental Fetish, Force VI Earth Elemental Fetish, Force VI Air Elemental Fetish, Force VI Water Elemental Fetish, Magic Resistance I, Killing Hands, Mana Fist, Stride, Counterstrike, Magic Resistance II, Quick Strike, Mystic Armor, Pain Resistance, Magic Resistance III, Slow I, Haste I, Slow II, Silence, Air Barrier III, Quiet Bomb, Fog, Lightning Barrier III, Haste II, Shadow, Fire Barrier III, Haste III, Haste IV, Slo-Mo, Mana Static, Hellstorm Barrier III, Weaken Armor I, Manabolt I, Flamethrower I, Lightning Bolt I, Distraction I, Armor I, Acid Stream I, Stunbolt, Mind Wipe, Manaball I, Heal Wound, Dispel Magic, Aim I, Flamethrower II, Distraction II, Weaken Armor II, Manabolt II, Lightning Bolt II, Armor II, Aim II, Fireball I, Blindness, Stunball, Manaball II, Ball Lightning I, Acid Stream II, Manabolt III, Flamethrower III, Aim III, Lightning Bolt III, Weaken Armor III, Glue, Fireball II, Armor III, Petrify, Manaball III, Confusion, Powerbolt I, Powerbolt II, Powerbolt III.
 Last merchant in the game
Location: Next to the large fireplace in the main lobby [7].
Description: This is a new merchant. He has all items in categories: weapons, explosives, medicines, electronics and upgrades. Only new items are listed below - the list of other items can be found in description of merchants in previous locations.
Sells: Colt M23 (Smartlink), Defiance T-250 (Smartlink), Heckler & Koch HK227 (Smartlink), Ruger Super Warhawk (Smartlink).
Main quest.
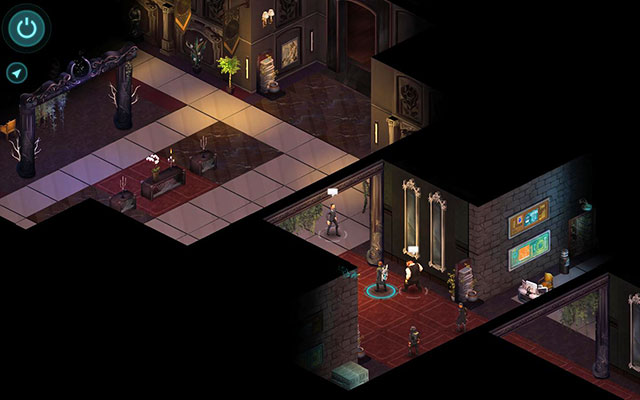 Meeting the fate
Objective: 1. Talk to James Telestrian III. 2. Take Part in the Tir Council Meeting.
Welcome in the mansion of the most powerful man in Seattle. Start with a short conversation with McKlusky [2]. After that talk to Mr. Quoth [1] and he will lead you to the Telestrian's office. Start a conversation with James [4] and after that you'll be moved to the library.
When you regain control, talk again to James Telestrian [5]. Listen to quite long dispute about threat from another plan and your next mission.
Reward: 8 KP and 10 000 nuyen.
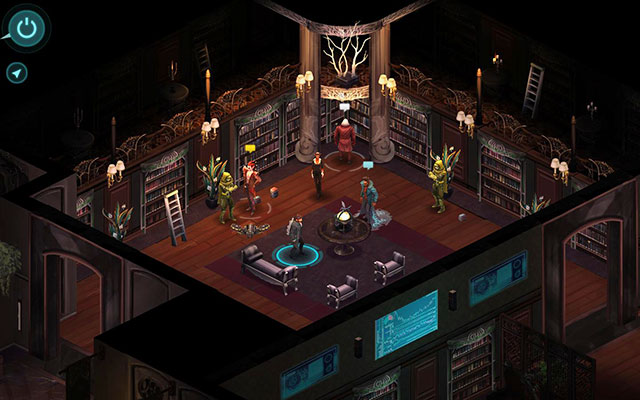 Secret meeting in a beautiful library
Objective: Talk to Harlequin.
This is a good moment to talk to all characters and equip the best gear. There won't be another opportunity to go shopping. Magic items and spells can be bought at Aljernon [8]. Other items can be found at Mr. Quoth [7].
Once you're ready, talk to Harlequin [10]. He will give you Aegis Mk. 1 Launcher. This is the only weapons, which is able to kill annoying insects, so it would be good to have at least two characters with this weapon. One is possessed by Harlequin and you can equip another one or hire Tir Tairngire Ghost, who has such weapon too. After accepting the team, leave the mansion to go for your last mission.
Reward: None.
The first floor of underground complex. You'll fight here spirit insects again. But this time you can attack them.
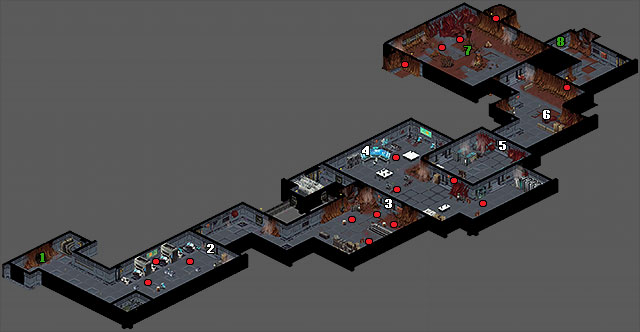
1. Location entrance - Quest: The Hunt Begins (Main quest).
2. First door - Quest: The Hunt Begins.
3. Second door - Quest: The Hunt Begins.
4. Computer - Nothing interesting inside.
5. Third door - Quest: The Hunt Begins.
6. Corpse - body of some poor guy.
7. Fighting arena- Quest: The Hunt Begins.
8. Exit door - Quest: The Hunt Begins.
Red dots - Enemies.
Main quest.
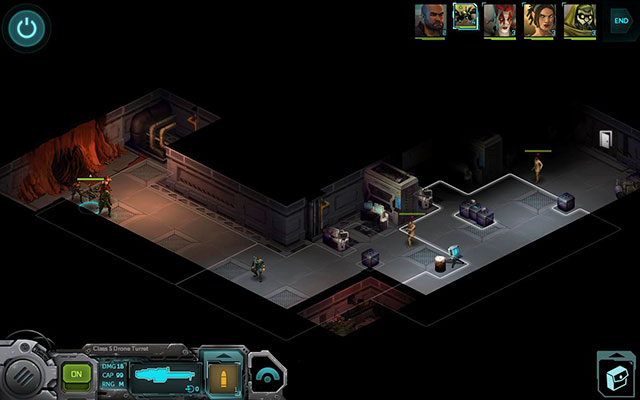 First corridor of the underground base
Objective: Stop the ceremony.
Welcome back in a slightly modified Brotherhood headquarters. Prepare for a lot of fight and make sure that all your companions have few med-kits and proper equipment. The party begins.
The first location is a ceremonial room, which you've already visited last time. You'll be attacked by 3 Brotherhood Gunner. Get rid of them and enter the cave the get to the lower location.
Right after the corner you'll encounter more enemies - 2 Brotherhood Gunner and Brotherhood Follower. Eliminate them and move forwards. Go through the door [2] leading deeper into the base. In the next room the first insect awaits you - it is True Form Worker. Do what Harlequin told you. First attack it with a normal weapons and magic and when it transforms into Pure Insect Spirit, change your weapon to Aegis Mk. 1 Launcher and focus all your firepower on it. If you do not kill it in the first round, it will return to its physic form and you'll have to repeat this all again.
After killing the first insect, go through the next door [3]. There are plenty of enemies lurking inside. If you have a drone, send it through ventilation shaft, so it can flank them while you lead the frontal attack. You have to eliminate Brotherhood Follower, Brotherhood Gunner, another True Form Worker and Spitter Bug. Try to attack only one insect in its spirit form, since taking down two of them in one round might be a bit problematic.
Once you clear the room, move forwards through destroyed barracks. Open the next door [5] and take your team inside. In the last room you'll encounter 2 Brotherhood Gunner. A moment later 2 Spitter Bugs will appear. First deal with Brotherhood Gunner, so you can later focus only on insects.
When you're done with bugs, one more True Form Worker will come out from the previous room. Eliminate it and then go through the hole he created. At the end of the room you'll find a door [8] to the next location.
Reward: 8 KP.
You have to watch out here. This location is full of insects popping up from everywhere.
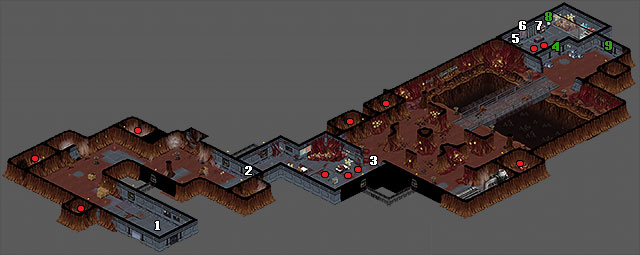
1. Location start - Quest: Into the Depths (Main quest).
2. First passage - Quest: Into the Depths.
3. Second passage - Quest: Into the Depths.
4. Warehouse - Quest: Into the Depths.
5. HE Phosphorus Grenade (Item) - In the crate in the warehouse.
6. Premium Medkit (Item) - In the med cabinet in the warehouse.
7. Safe - You'll find inside Doc Wagon Platinum Trauma Kit.
8. Control panel - Quest: Into the Depths.
9. Exit door - Quest: Into the Depths.
Red dots - Enemies.
Main quest.
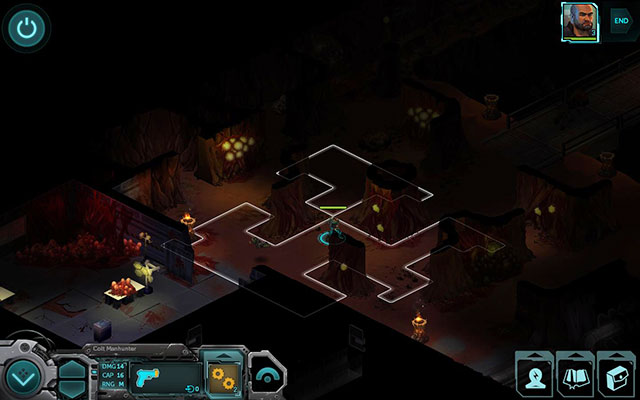 Quite annoying moment with 3 bugs
Objective: Fight Your Way to the Bottom of the Hive.
Go forwards all the time. Along the way you'll encounter 3 bugs in total - True Form Worker and 2 True Form Venom. All of them will come out from the walls on the left. Try to eliminate them one by one, not rushing forwards.
At the end of the tunnel you'll find an open room [2]. Inside it you'll encounter Brotherhood Mage, Brotherhood Gunner and Brotherhood Follower. Once you get rid of them, a new insect will jump out from the wall behind you - True Form Bombardier. As you can figure it out by the name, it attacks with acid charges with wide range area. Defeat it as fast as possible, from a long distance, and finish its spirit form. Now go through the new passage [3].
You'll find yourself in a room which resembles hive. Here you'll fight 3 more insects - True Form Bombardier, True Form Worker and True Form Venom. First focus on True Form Bombardier and its spirit. After that deal with True Form Venom and finally eliminate True Form Worker, which is at the long range and attacks only in close combat.
After the fight go through the bridge to the other side. Turn to the right passage [4] and deal with Brotherhood Follower and Brotherhood Gunner. You'll find here many useful things: Doc Wagon Gold Trauma Kit, 2 Premium Medkit and HE Phosphorus Grenade. If you have Decking 5, you can try to hack into a safe [7] to get Doc Wagon Platinum Trauma Kit. It will be useful in the last location.
Once you are ready, start the control panel [8] located next to the safe [7], to open the last door [9] leading to the big final.
Reward: None.
Location with a final battle with insects' army. Better prepare well.
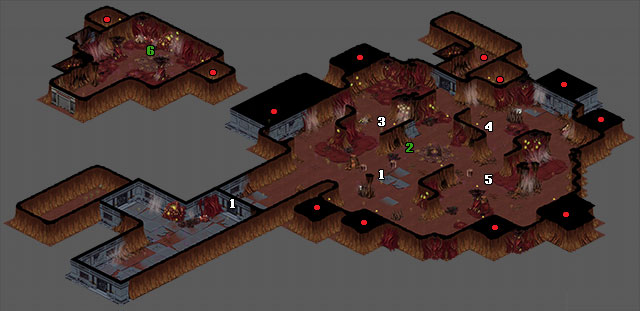
1. Pillar I - Quest: The Bug Shaman (Main quest).
2. Jessica Watts (NPC) - Quest: The Bug Shaman.
3. Pillar II - Quest: The Bug Shaman.
4. Pillar III - Quest: The Bug Shaman.
5. Pillar IV - Quest: The Bug Shaman.
6. Jessica Watts (After the fight) (NPC) - Quest: The Bug Shaman.
Red dots - Enemies.
Main quest.
 Final battle
Objective: Stop the Ceremony.
Before you go through the last door, prepare your team. Make sure that they have proper weapons and full HP. Check the inventory and maybe use some buffs one you get into battle more. The fight in the last location will be very demanding. Huge army of insects awaits you. They won't attack you at once, but you won't have much time to rest anyway. Make sure that you are ready and go through the final door [1].
A welcoming committee awaits you here. Once you get closer to them, the conversation starts. After it ends, the fight begins. Your target are Insect Pillar [1][2][3][4] which open one after another. When one of them opens, attack it to damage it. Of course your opponents won't stand still. New insects will be appearing each few seconds. In addition you'll be attacked by Jessica Watts, who derives energy from active Insect Pillars.
There are two effective ways to pass this fight:
1. Focus on Jessica Watts. This method requires fast actions and concentrate attacks. Instead of eliminating insects - ignore them. But you have to act fast, before their amount becomes problematic. The key to success is to surround Jessica Watts once she gets close to one of Insect Pillars. After that throw some debuffs on her, like Weaken Armor III, Slow III or Glue. Once you do this, start attacking her. Focus all your firepower on Jessica. It is possible, that she will manage to heal herself several times, but this shouldn't influence the fight much. If you place your characters well and focus entire firepower on her, she should be dead after opening of two pillars.
2. This method is longer but safer. Ignore Jessica Watts and focus mainly on Insect Pillars. When one of them opens, send your team there and start attacking it. Try also to eliminate True Form Bombardier, since they can deal really high damage. Pillars are located that way, that there are quite good covers. You should be able to destroy each pillar after it is activated 2-3 times. Once you done it, deal with Jessica Watts, who is weaker now and can't use the help of pillars.
Reward: 10 KP.
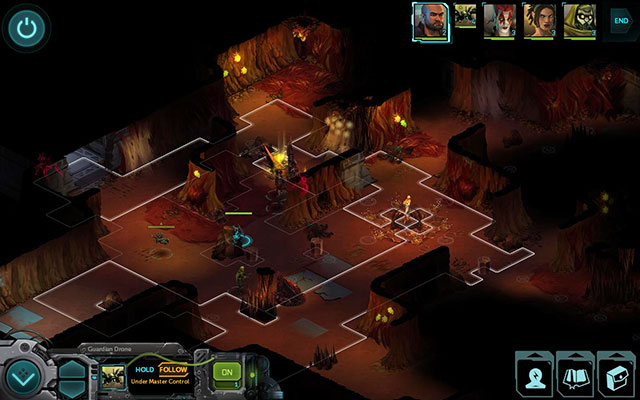 Finishing survivors
Objective: Eliminate Rest of the Insect True Forms.
Once Jessica Watts leaves the location, you'll have to deal with the rest of insects. Their amount is the same as it was when Watts ran away. Remember to focus on a single insect and kill its soul before attacking the next one.
Reward: 5 KP.
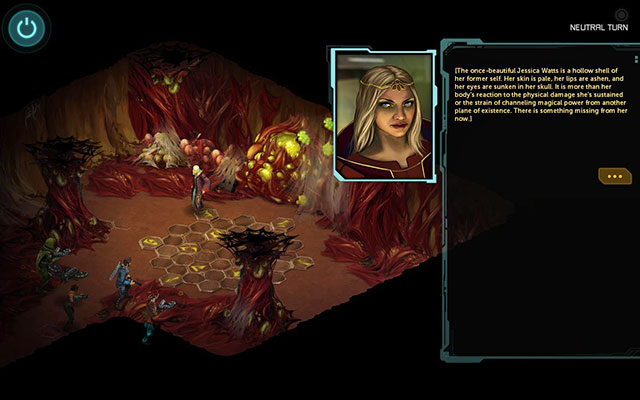 Sam's sister fate is in your hands
Objective: Decide the fate of Sam Watt's Killer.
After the fight you'll be automatically moved to the next room. A conversation with Jessica Watts starts - you have to decide about her fate. If you choose the first option, you'll leave her with insects. With the second option you'll play the role of the justice and end her suffering. With the last option, you take her with you. Make your choice to end the final quest.
Reward: 5 KP.
The final scene. A couple of friends wait for us here, as well as an Orc and a nice revenge.
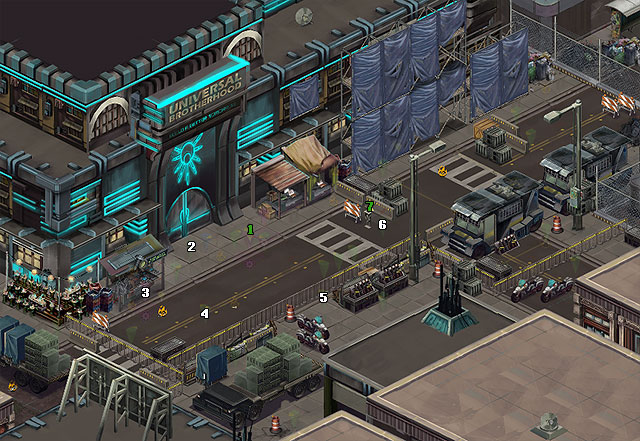
1. James Telestrian III (NPC) - Quest: Out of the Shadows (Main quest).
2. Coyote (NPC) - Quest: Out of the Shadows.
3. Harlequin (NPC) - Quest: Out of the Shadows.
4. McKlusky (NPC) - Quest: Out of the Shadows.
5. Jake Armitage (NPC) - Quest: Out of the Shadows.
6. Dresden (NPC) - Quest: Out of the Shadows.
7. Phone - Quest: Out of the Shadows.
Main quest.
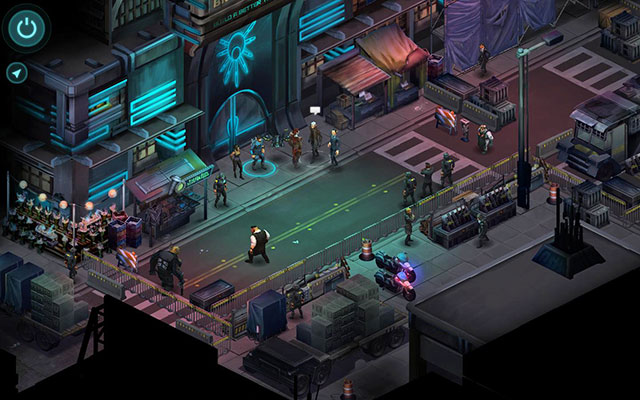 Worthy final
Objective: Speak to James Telestrian III.
It is almost the end. The entire quest is to talk to each character. Start with conversation with James Telestrian III [1] to pick up your reward. Then talk to other companions and less friendly persons. In order to finish the mission, start talking to Dresden [6]. Finally activate the phone [7] and call the law company, thus ending your work.
Congratulations! You've saved Seattle and fulfilled the last wishes of dead friend. It is time for a short break. See you at the next order.
Reward: Thanks.


 Sam & Max: Season 2 Game Guide & Walkthrough
 Sherlock Holmes: Crimes and Punishments Game Guide & Walkthrough
 StarCraft II: Heart of the Swarm Game Guide & Walkthrough
 Star Wars: Empire at War Game Guide & Walkthrough
 State of Decay Game Guide & Walkthrough