
The unofficial guide to the Sniper Elite III: Afrika Game contains a very detailed description and a walkthrough of all the missions which are part of the single player campaign. In the discussion of each individual mission of the game a heavy emphasis was put on operating from undercover and on effectively eliminating the enemies, with a particular emphasis on enemy snipers posing a serious threat to the player. As the game, in contrast to the previous installments of the franchise, allows the player a greater degree of freedom in area exploration, in some of the locations a lot of attention was paid to present different paths to the objectives of the mission. In the description of each subsequent stages there are information about acquiring each and every secrets, collectibles, as well as completing all the challenges in the game. Those optional activities were described in more detail in separate sections. Additionally, this guide contains numerous smaller sections, offering various useful tips (remain undetected, the reactions of opponents to the actions of the player, how to use the sniper rifle, etc.), as well as the collection of all the achievements / trophies in the game. Sniper Elite III: Afrika is another installment of the popular shooting franchise. The action of the game takes place, again, in the realities of the Second World War, although the sharpshooter, Karl Fishburne, known to the fans of the series, moves to the title Black Continent, visiting, among others, the famous Tobruk fortress.
The guide for Sniper Elite III: Afrika contains:
Jacek "Stranger" Halas ()

Character movement

Walk

Sprint

Crouch / Prone

Fire

Weapon reload / Picking up items

Rifle scope

Zoom-in / Zoom-out when using a rifle scope / weapon change

Holding breath when using the sniper rifle / melee attack

Aim

Interaction / drop carried body

Binoculars

Corpse search

Marking (tagging) elements of surroundings

Previous item

Next item

Use selected item

Display the drop-down inventory menu

Sniper Rifle

Secondary Weapon

Pistol

Grenades
Bandages

First Aid Kit

Land Mine

Trip Mine

S-Mine

TNT

Rock

Flint

Map

Mission objectives / Scoreboard

Chat

Team Chat

Voice Chat

Vote Yes (during multiplayer games)

Vote No (during multiplayer games)
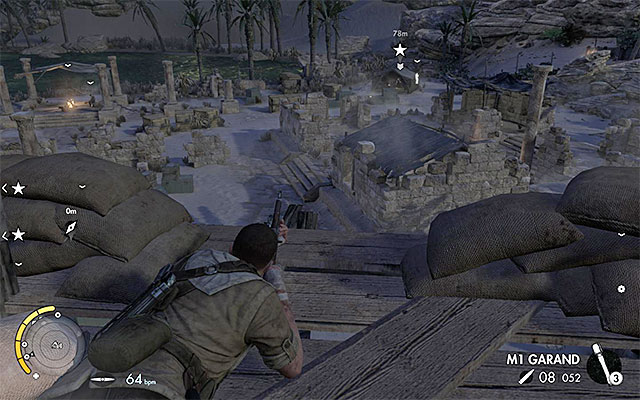
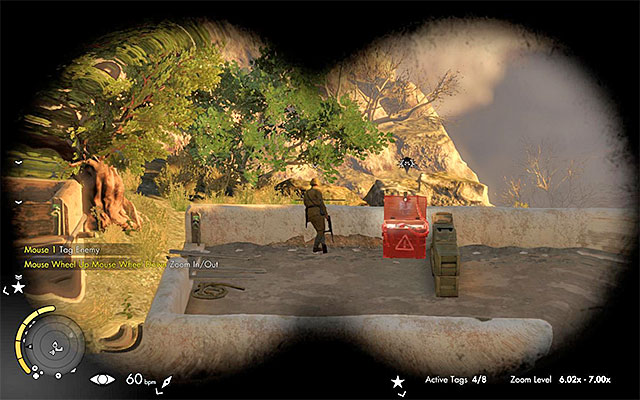
The above screenshot represents the major elements of the user interface, which are displayed during your journey through the map. A fact worth noting, is that some of the elements of interface (the mini-map, for instance), can become hidden when playing on some of the difficulty levels. Some of the information is displayed on the screen only after a specific action has been done (acquiring experience, for instance).
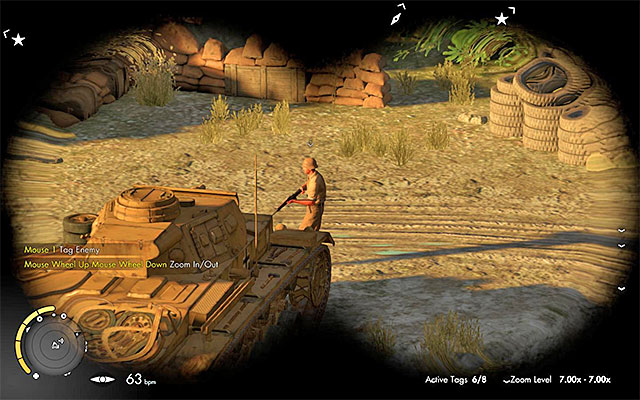
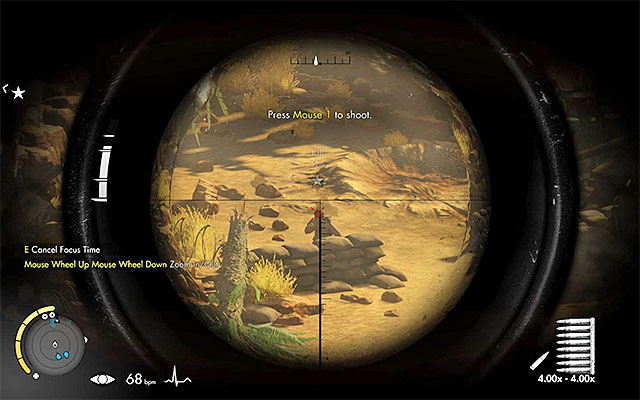
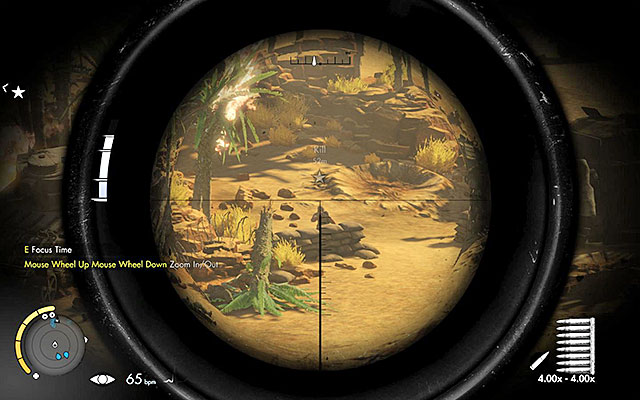
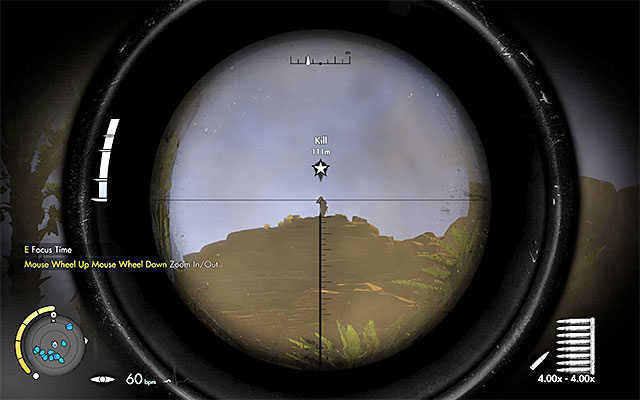
The above screenshot represents the unique elements of the user interface, which are displayed only during the usage of a weapon equipped with a scope. A fact worth noting, is that some of the elements (a red and gray diamond, which are very helpful during your shots, for instance) can become hidden when playing on some of the difficulty levels.
Note - the crosshair itself can have a different appearance and it can be changed from a menu in between missions.
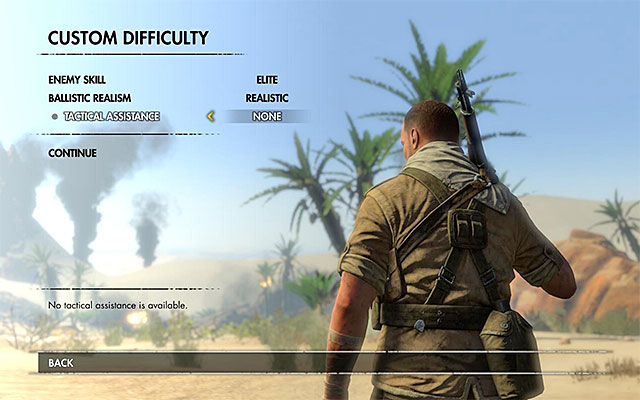 Additional options of the difficulty level screen.
In the Sniper Elite III: Afrika, there are four basic difficulty levels available to the player:
A thing worth noting - a selected difficulty level is not permanently active to the very ending of the game. You can change the difficulty level during your preparation for the next mission. You should remember, however, that changing the difficulty level to a lower one can block you the possibility to achieve some of the achievements / trophies.
If you don't like the factory settings of the difficulty levels, you can prepare your own one - the Custom option serves this purpose. The three modifiers:
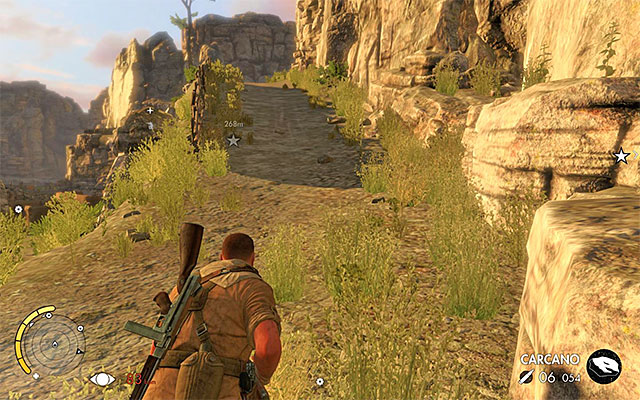
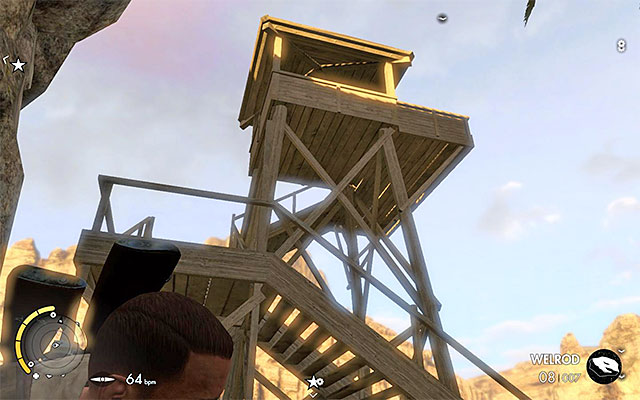
 It's worthwhile to get to the vantage points and climb up the observation towers.
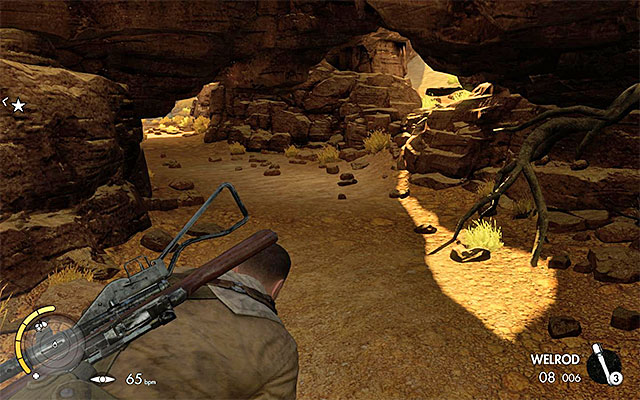
In Sniper Elite III you can deal with the enemies in a number of ways, wherein your main weapon is your sniper rifle. It's a good idea to properly prepare for each usage of your rifle, and the most important issue is to find a suitable firing position. During your exploration of the area, look around for various elevations, vantage points (the edge of the cliff, for instance), observation towers, and Sniper Nests, which are marked in a unique manner. Using those type of places will allow you to have a broader view on your surroundings, as well as eliminating the enemies from the furthest distance possible.
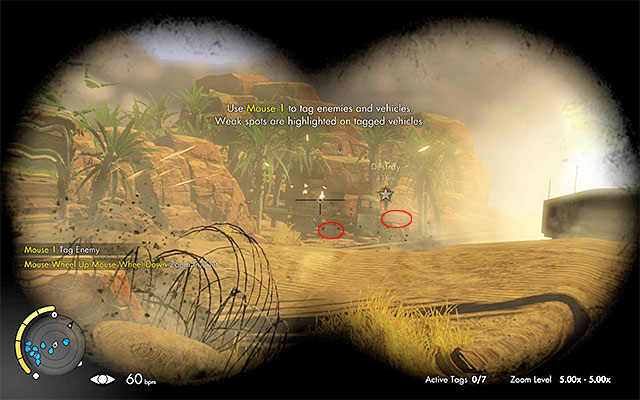
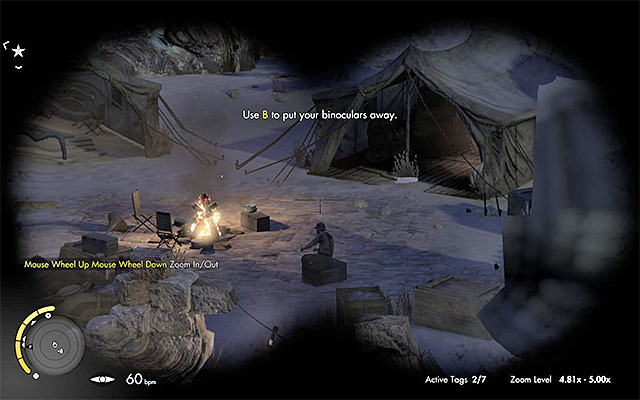
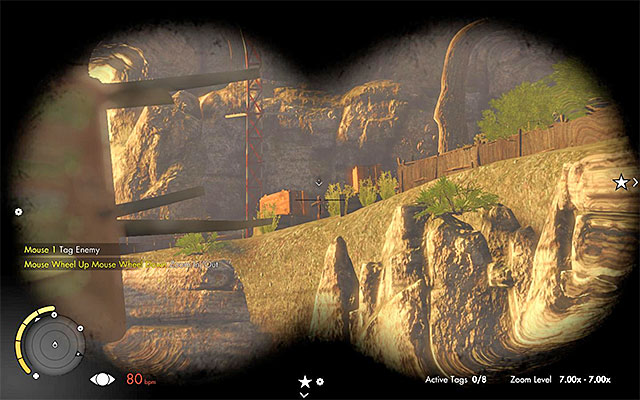
 The binoculars are useful in finding and marking the enemies.
After taking up a convenient firing place, it's a good idea to equip binoculars now. Using them will allow you an easy and quick method of locating of nearby enemies, as well as those who are several dozens or hundreds meters away from you. If you are playing on a lower difficulty level than Authentic, you can also use binoculars to mark the enemies you've previously located. It's an immensely useful function, especially when you are dealing with enemies who are well hidden, or when there are a lot of watchmen patrolling the area (you won't get surprised with an enemy coming out of nowhere).
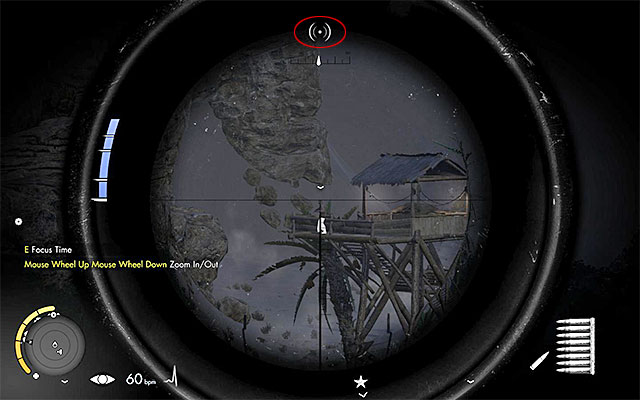
 The red diamond informs you of the place your bullet will hit.
After making the proper arrangements, you can proceed to aim your weapon at the enemy - although it's good to remember about a few key features:
Sniper Elite III does not enforce a stealthy approach. However, this playstyle is highly recommended, as getting yourself exposed will cause unnecessary and unwanted enemy focus on your character (as well as snipers!), and, in extreme cases, may lead to sudden enemy reinforcements, making your mission a lot harder.
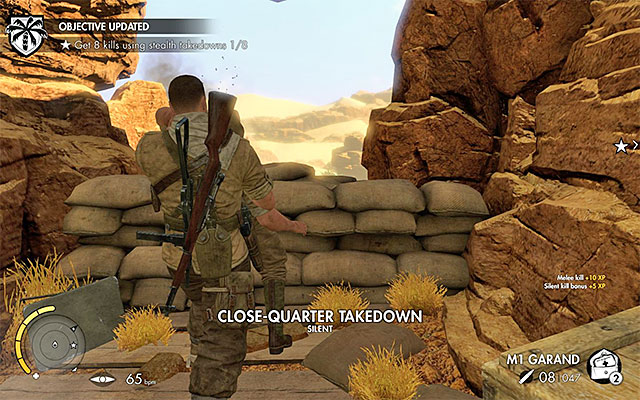
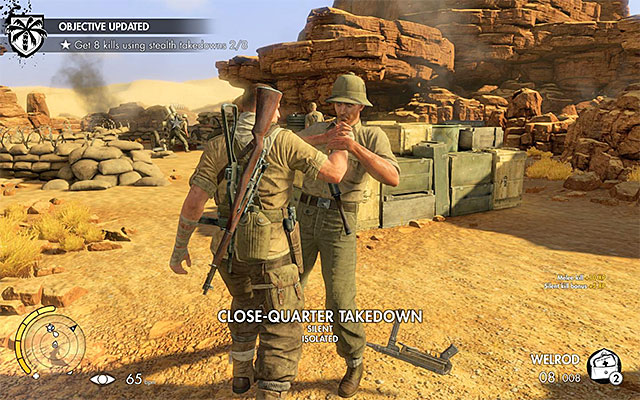
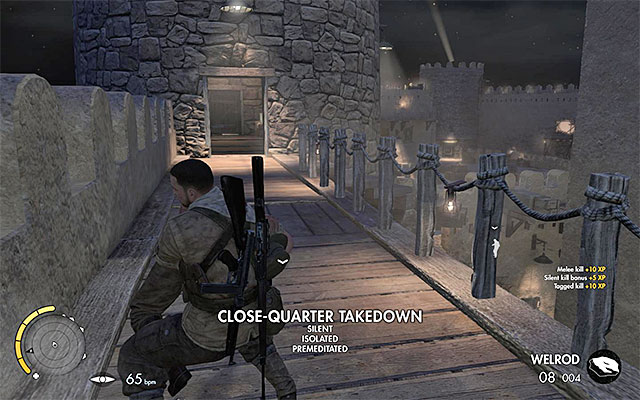
The best method to get rid of enemies silently, is to use melee combat (close-quarter takedown) after getting behind their backs. You must, however, make sure that the enemy won't notice your approach, as he may defend himself from the takedown and begin his counteroffensive. If you don't want to risk a direct contact with the enemy, it's generally safer to rely on short-ranged weapons with a silencer attached to them, like the Welrod pistol, which is available to the player from the very beginning of the game.
In the case of your sniper rifle, the matter is a lot more complicated, as a shot from it can be heard by enemies with ease. The solution to this problem, is to look around the map for various objects of the environment, which, given a special condition is met, will allow you to drown out the sounds of your shots. It can either be a generator (which can be seen on the above screenshot), loudspeakers, or an active artillery. Note - the noise generated by a given device is symbolized with an icon of a speaker, which can be seen in the top of the screen. You must make your shot before everything goes back to normal (that is, for instance, when a generator turns off).
 Hiding bodies isn't mandatory.
Eliminated enemies can be left intact in the place you've killed them, or you can try to relocate their bodies. If you choose the second option, look around for wells, empty buildings, and other places which aren't visited by the enemy soldiers. Hiding bodies isn't really mandatory in this game, because even if an enemy notices the body of his ally, he won't turn on the alarm inside of the base / encampment, but will come to analyze the situation. It can be beneficial to let an enemy discover a body, as he will disconnect from the rest of his allies, allowing you to easily eliminate him.
Note - regardless of whether you intent to hide body of a certain enemy or not, it's recommended that you at least search it (by pressing and holding the proper button). Thanks to that, you will frequently find some ammo or grenades, as well as (though very rarely) upgrades to the main character's equipment.
An alarmed enemy can either embark in the direction he saw the player, or immediately attack him.The current state of alert of nearby enemy forces can be checked by looking at the icons appearing above their heads - unless they are turned off when you are playing on a higher difficulty level. The yellow color informs you if a given watchman is nervous, and you can be pretty sure that he will start to scan the nearby area, or he will embark in the direction of a gunfire, or a dead body. The red color means, that the enemy is aware of your presence - those types of enemies should be dealt with as soon as possible.
 Moving to another place will help you to disorient the enemy.
Using elements of your surroundings to drown out the sounds of your gunfire isn't always available to you. If you want to make more use of your sniper rifle, or if you've made a mistake when timing your shot with a generator noise, you should know about a few tips that can help you to adapt to how the enemies will react on your actions. After hearing your gunshot for the first time, the enemies will jump behind cover, oblivious of where the shot came from (unless you were noticed). Each succeeding shot not only informs them of your position (the blue bar in the bottom left corner of the screen will fill up), but they can decide to attack you.
It's generally a good idea to change your position after each shot. Run away from the place in which you've made your last attack, stopping only when the yellow exclamation mark in the bottom left corner of the screen disappears. After changing your firing position, you should wait for the previously mentioned blue bar to completely dry out.
 The "common" enemies are commonly found in groups, close to each other.
The enemies you will encounter in the game differ between each other in terms of equipment (pistols, rifles, machineguns, etc.). Another important division comes from their rank - the "common" private ones, and the officers. You should be careful about the latter, as they are more sensitive to your actions, and they can detect you way more easily than a typical grunt. Another division comes from their behavior - enemies can either stay in one place, or patrol a certain area. If you have the opportunity, you should always try to mark the latter with your binoculars, so that you won't get suddenly surprised. Enemies travelling in groups, or standing close to each other are equally problematic. It's best to just avoid any contact with them - if you really have to (or want to) get rid of them, try to eliminate them from behind (by using melee takedown), by using a silenced gun, or try to look for some kind of explosive object of surroundings (the explosion, unfortunately, can be seen be others, which may lead to more problems, such as sudden reinforcements).
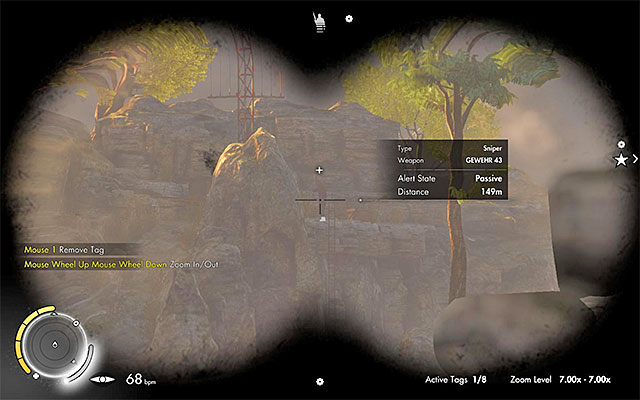 You can notice a sniper from afar by the reflection of the scope on his rifle.
"The real" snipers start to appear starting from the third mission of single player campaign. You can, as well, stumble upon several of them, equipped with sniper rifles and located on elevations / vantage points, during the first two missions of the campaign, but their behavior is very similar to a typical grunt. You can notice an enemy sniper by the reflection of the scope on his rifle. It is highly recommended to equip your binoculars and scan each new area for those troops. They can generally be found on top of elevation and / or vantage points, but they can sometimes hide between rocks, and inside of buildings, looking out through the windows.
 Armored vehicles and tanks are a serious threat.
The last group are the enemies using various types of transportation - you must be especially careful when facing armored vehicles and tanks. The best solution is to stick as far away from those machines and their routes as possible. Unfortunately, it's not always possible, and sometimes you have to take an aggressive approach towards them. You can try to ground the vehicle, by shooting at its weak point, but it's a lot more difficult, especially when dealing with tanks, as you have to aim and hit a small hole, which is visible only when the tank is coming towards you. The safer and easier solution is to set up a land mine (or a few of them) on its route, use a dynamite, or to shoot at some explosive object (a huge fuel tank, for instance).
 The game, usually, informs you about any secondary mission goals.
In each and every mission, there's from few to over a dozen primary objectives. Some of them must be done in a strict sequence, but there are those that offer a greater deal of freedom (three enemy artillery settlements distributed around the map, for instance). In those situations, it's highly recommended that you deal with them in accordance with the guide (the walkthrough part of the guide) - this way, you can take the best route to your destination and you won't have to run back to the places, you've been before, saving you a lot of time.
In addition to the main objectives of a mission, there's a number of optional goals to complete, such as sabotaging the enemy installations, or eliminating enemy "elite" troops. It's recommended to look at the mission introduction before each mission walkthrough - with that, you will learn of any additional tasks before you even start the mission, guaranteeing that you won't miss any of the optional stuff.
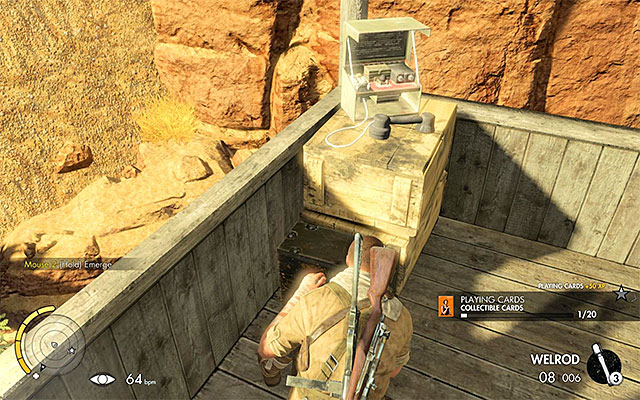
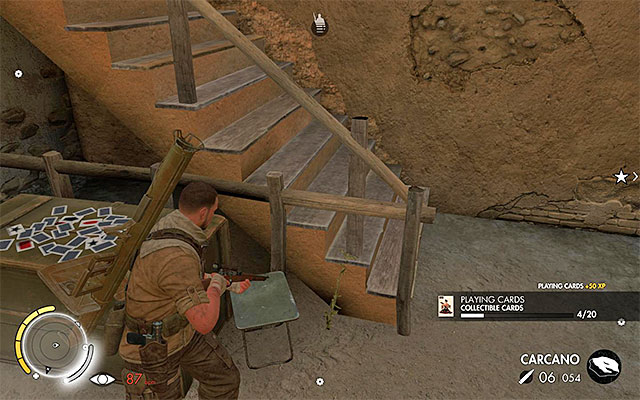
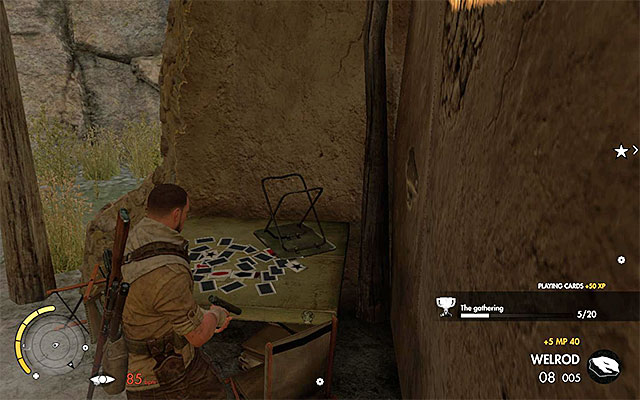 Collectible cards are one of the game's secrets.
Just as in the previous installments of the series, you can collect secrets and perform minor challenges during your playthrough. These include:
Note - information about the secrets and challenges can be found both in the walkthrough part, as well as in the separate sections of this guide.

In the Sniper Elite III: Afrika you can acquire experience points. The actual amount of points you've managed to gather is displayed on the progress bar (which can be seen on the above screenshot). Filling the bar is the equivalent of advancing to the higher military rank, awarding you with an unlock to new types of equipment (a new type of mines, or a better sniper rifle, for instance).
You can earn experience points for:
The main character in the game, besides the obvious sniper rifle, has an access to various elements of equipment. You can select them both by pressing the specific button, as well as by displaying the drop-down equipment menu (as displayed on the above screenshot). The most important parts of your equipment are:
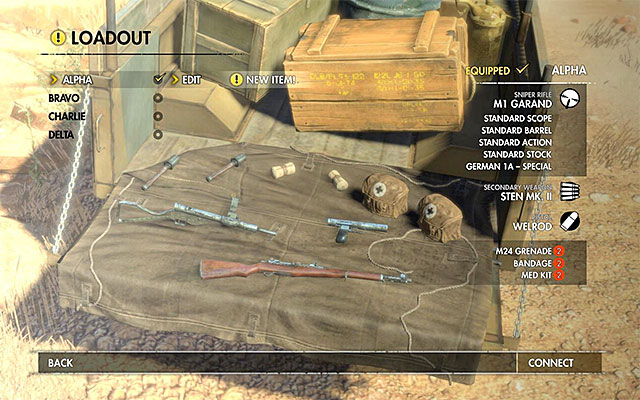 The preparation screen, allowing you to choose your loadout for the next mission.
After completing each main mission of the campaign, a detailed summary of will be displayed. From that, you can learn about things like the amount of experience you were able to gain, the number of killed troops, challenges completed, or secrets acquired. Before you begin your next mission, you can change the difficulty level (which is unadvised, as you can block yourself from obtaining some of the achievements / trophies), or modify your character's equipment (Loadout tab). This section will focus on the latter one.
In the equipment modification window, you are able to select what weapons and additional equipment you will be given during the next mission. It's highly recommended that you bring along the best sniper rifle you have, as well as a pistol equipped with a silencer. The selection of a secondary weapon is unimportant, as you will be using it very rarely. As far as the equipment goes, you should focus on getting the First-Aid Kits, so you are able to patch yourself up completely - it's important even if you avoid confrontations with the enemy (to heal yourself from a fall, for instance). Grenades and Land Mines are important as well, especially if you are certain that you will be facing enemy armored vehicles in the next mission. A separate window (Customize Rifle) allows you to modify your main weapon, the sniper rifle. The ones you should be interested are the Muzzle Velocity (improving the exit velocity of a projectile), as well as those increasing the Zoom parameter.
The first image presents a map of location, in which the first mission of the campaign takes place. It's the Tobruk Fortress and the surrounding mountain areas. There are various markers on the map, showing the most important places (goals of the mission, the main routes, etc.), as well as the location of collectibles (secrets).
In addition, there are varicolored dots visible on the map:
Optional tasks and challenges:
Secrets:
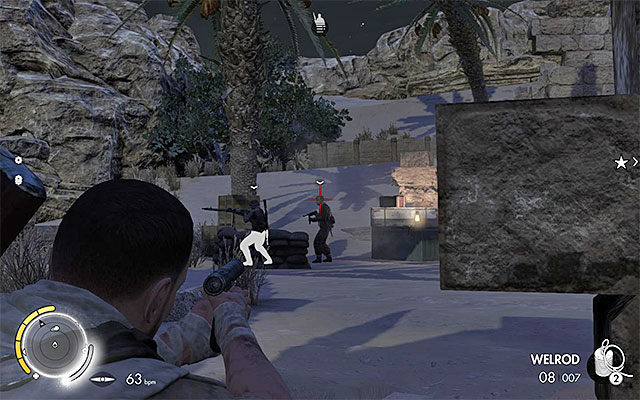
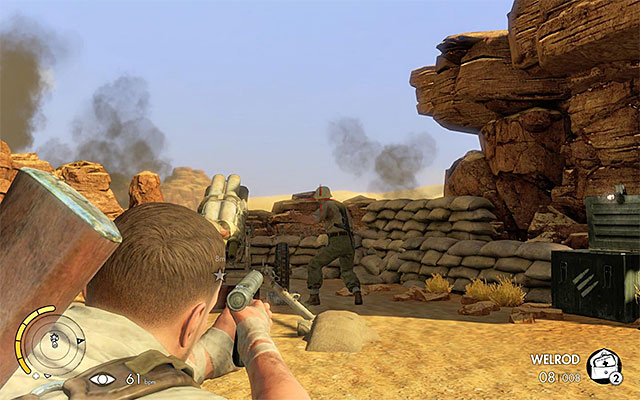
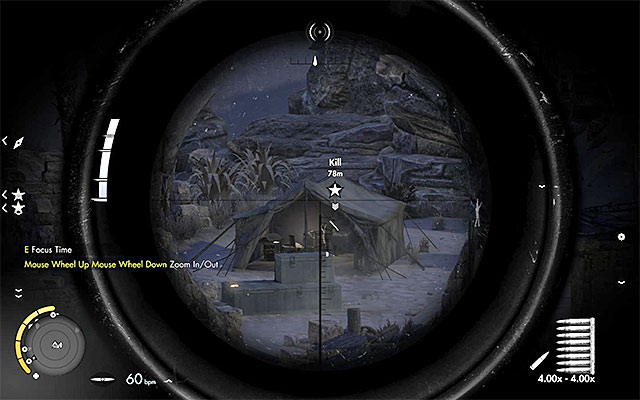
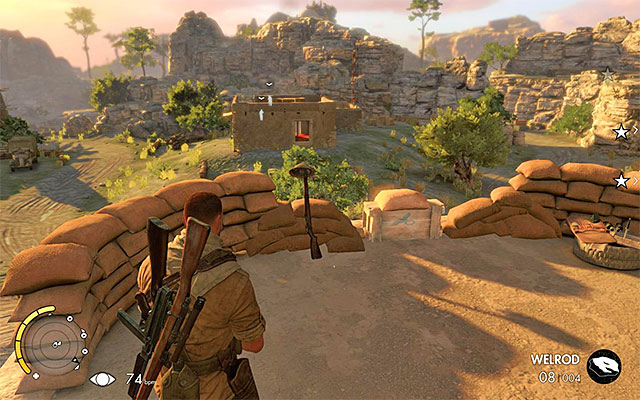
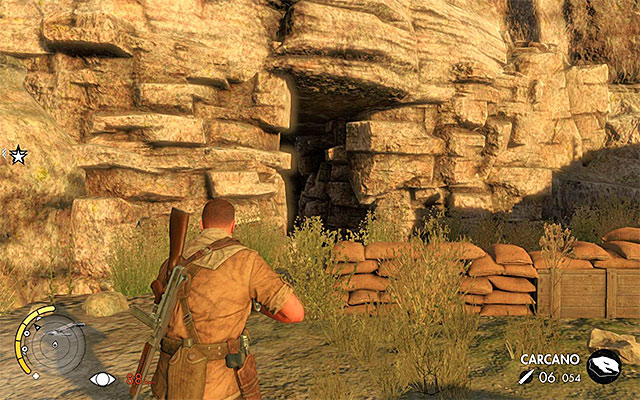
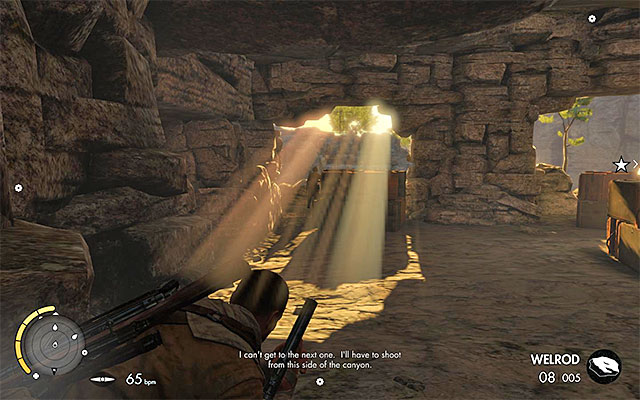
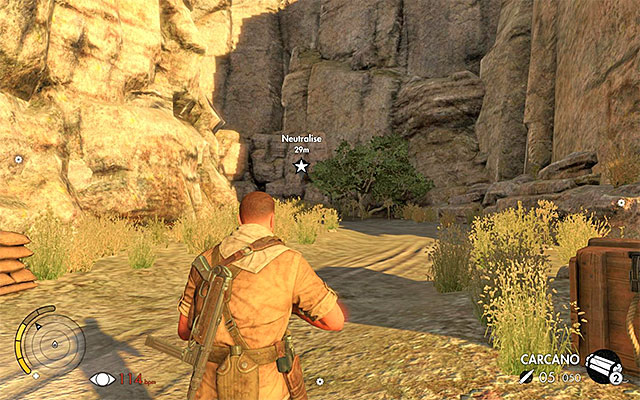
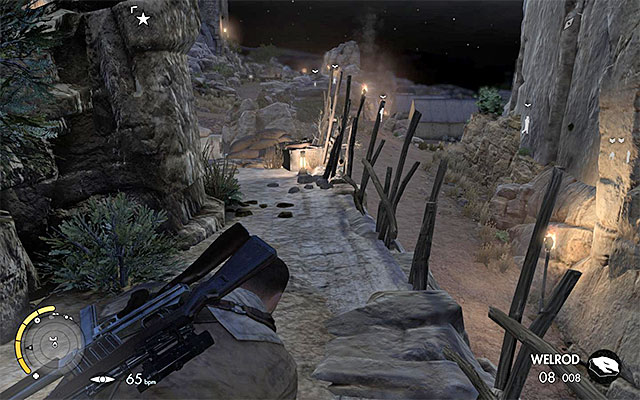
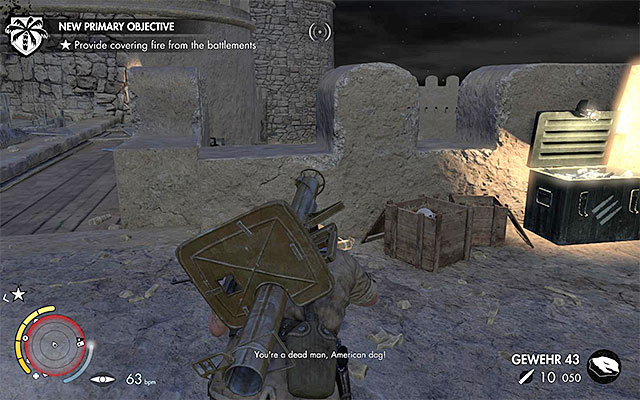
 Use your sniper rifle to get rid of the observers.
After regaining control of your character, leave the building and reach the sandbags indicated by the game (point 2 on the map). Your first assignment is to eliminate the two out of three artillery observers, located far to the north from your current position (point 3 on the map). Draw out your sniper rifle and get rid of both of them from a safe distance.
Note - if you are playing on one of the higher difficulty levels, you must take the distance and air into account when aiming (more on this matter can be found in the tip section). Fortunately, if you miss your first shot, nothing really serious happens.
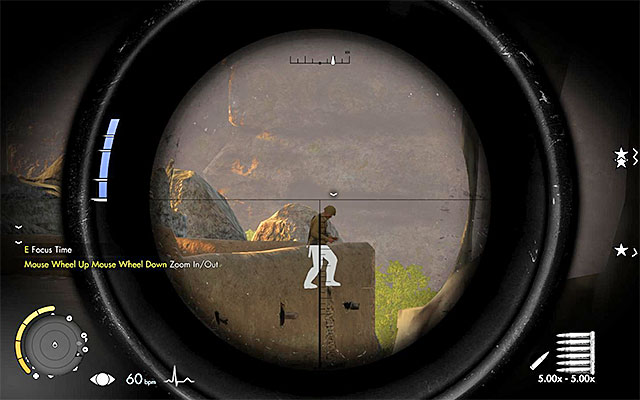
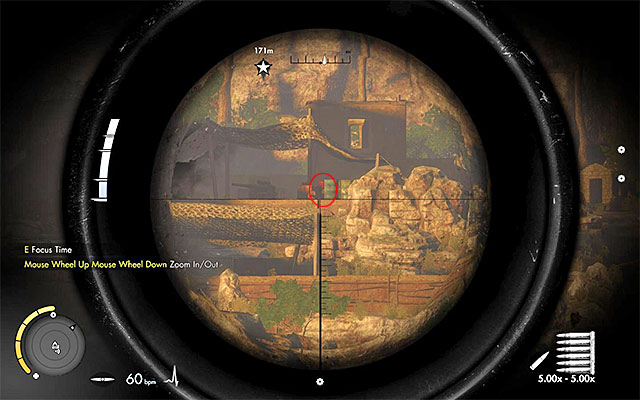
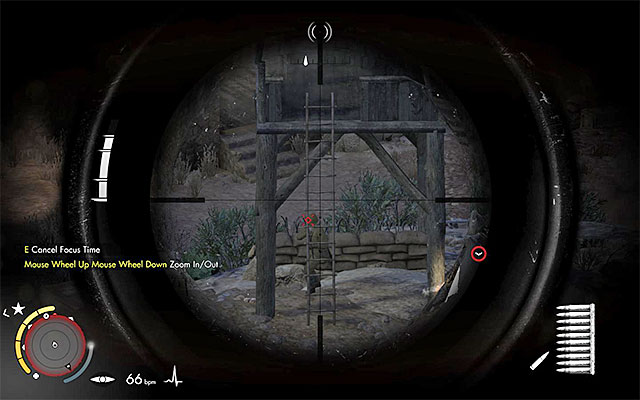
 The last observer.
After eliminating the two observers move to the north-east, leading to the appearance of the third observer (the northernmost point 3 on the map). The target is located on a hill visible in the distance, and as with the two previous observers, a sniper rifle is required to eliminate him.
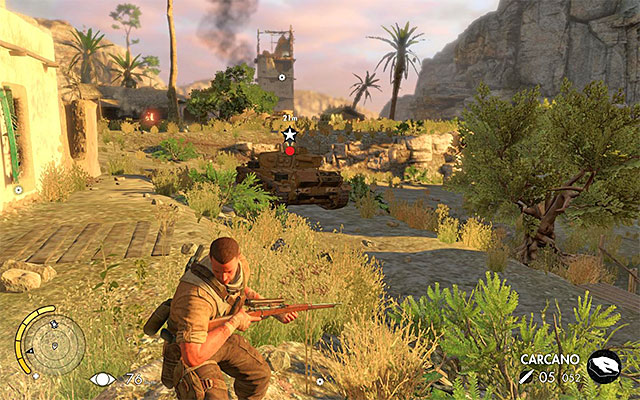
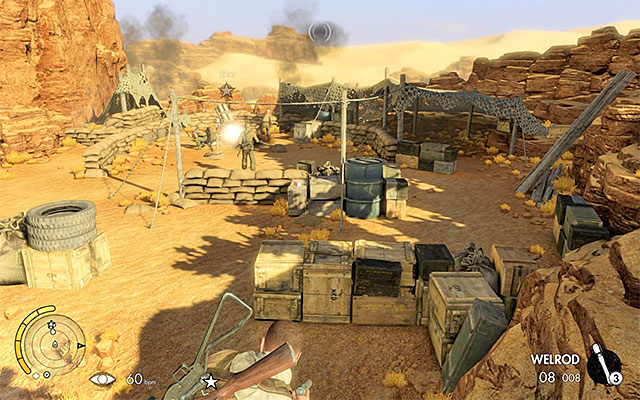
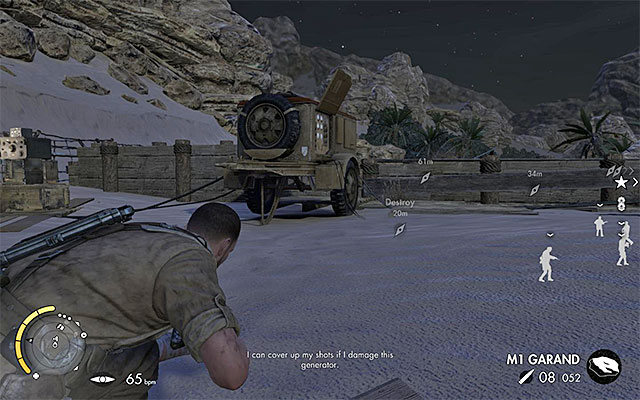
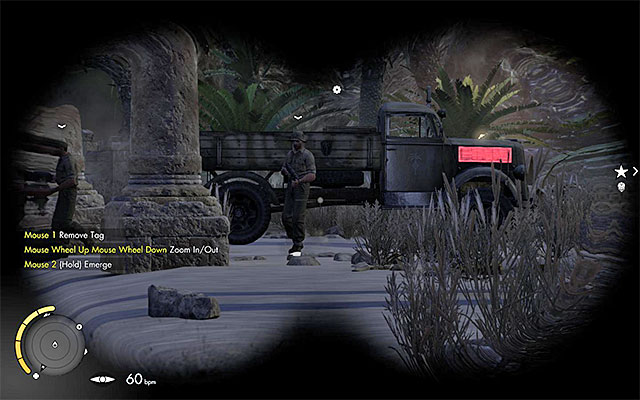
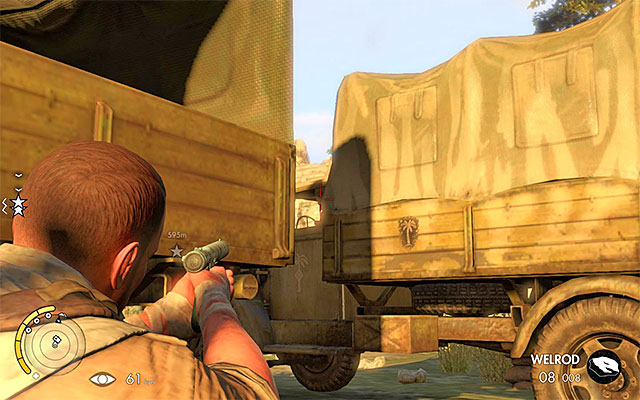
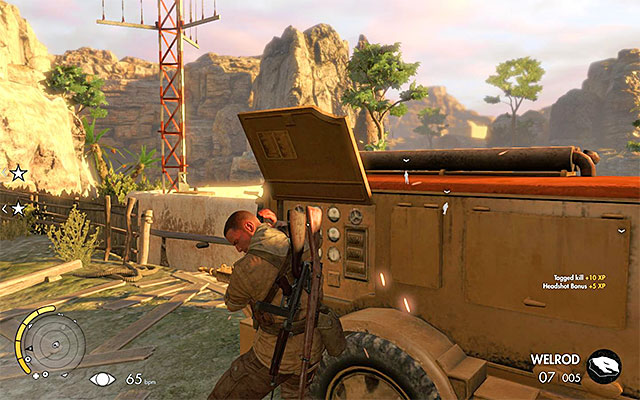
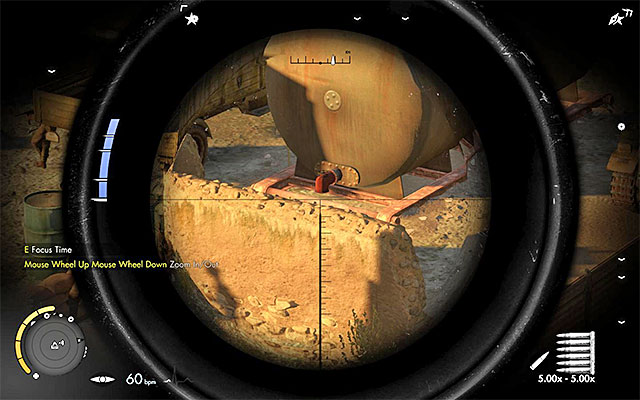
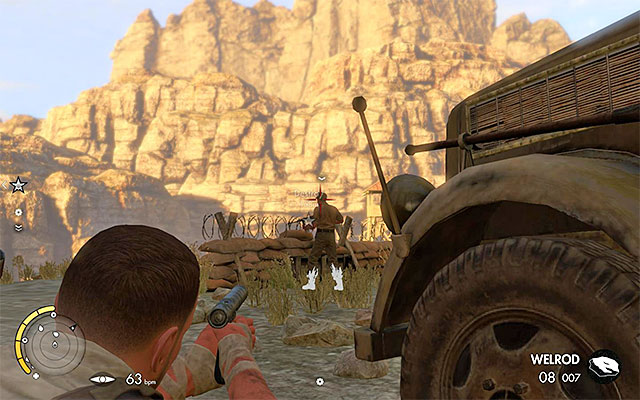
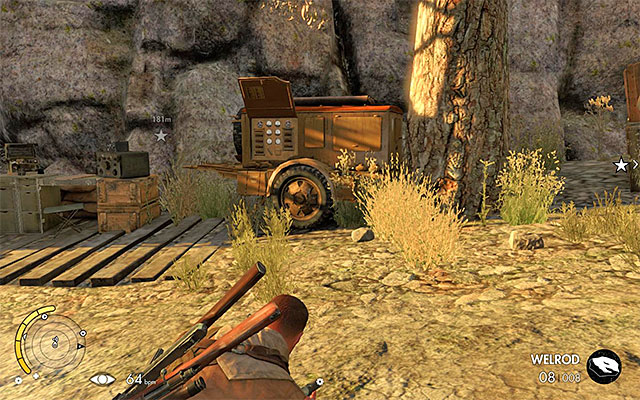
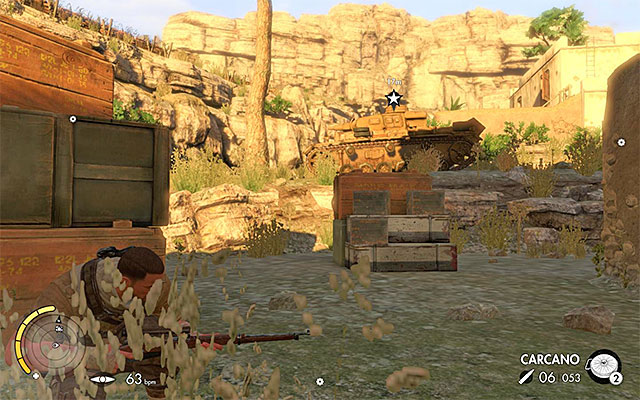
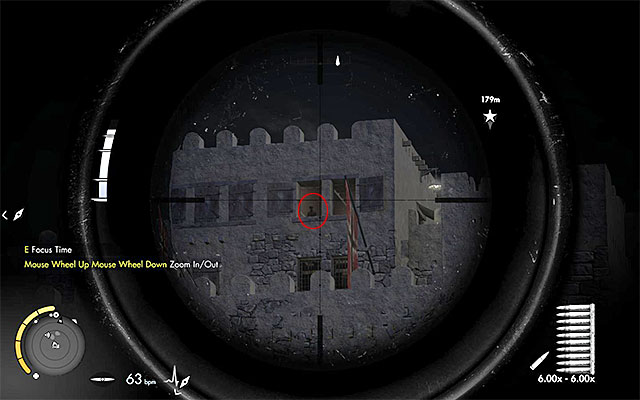
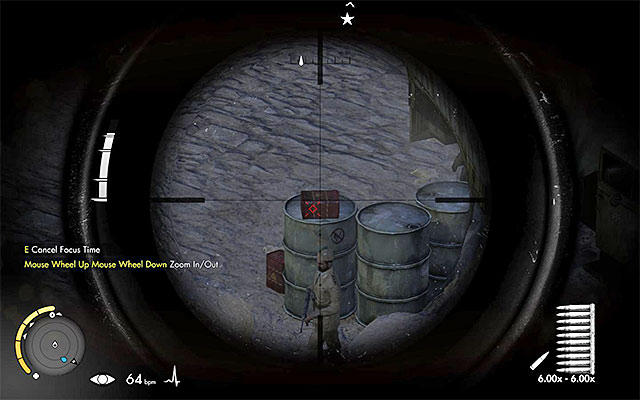
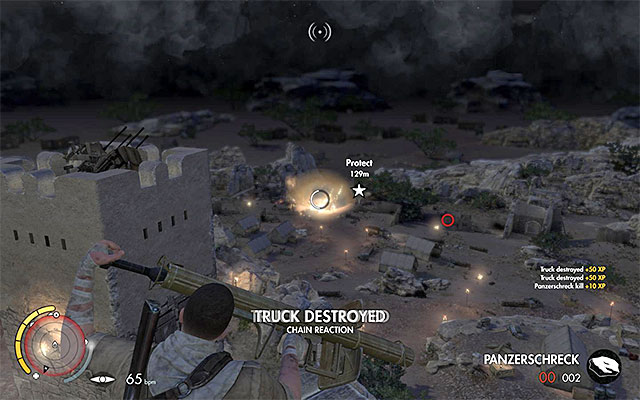
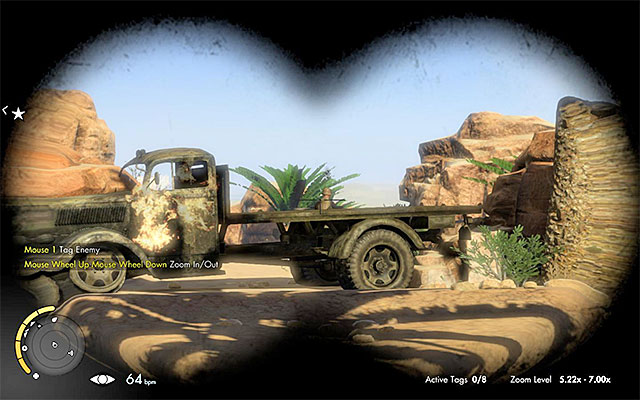
Go through the cutscene, informing you about the arrival of heavy artillery (point 4 on the map). Do not try to immediately eliminate it - first, you must reach the sandbags indicated by the game. Select your binoculars from the inventory and take a closer look at the vehicle. It will allow you to establish the weak points of the truck - the engine and the fuel tank (the above image).
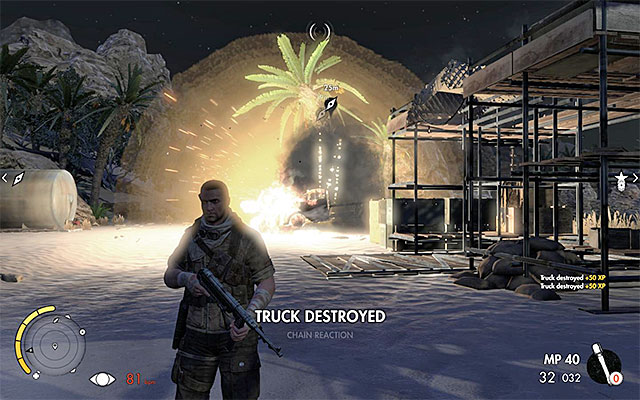
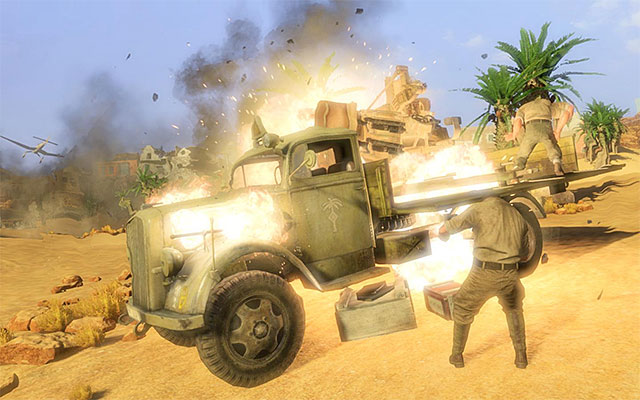 Hitting the fuel tank causes a huge explosion.
Depending on your own preference, you can either destroy the engine first, or start with aiming your gun at the fuel tank from the very beginning. The explosion of the truck will lead to its destruction, and you will advance to the next part of the mission.
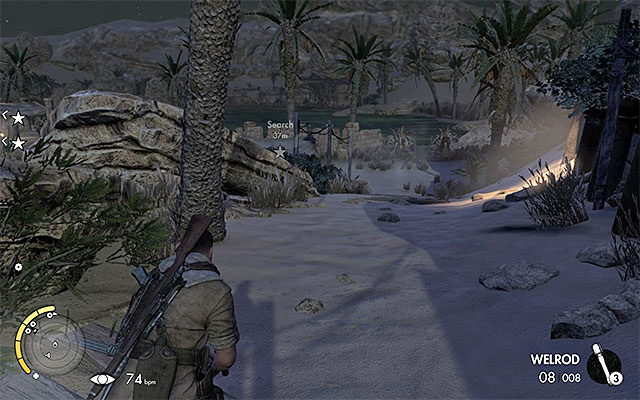
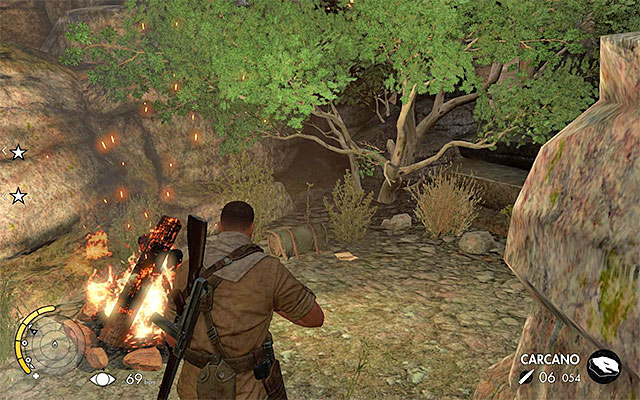
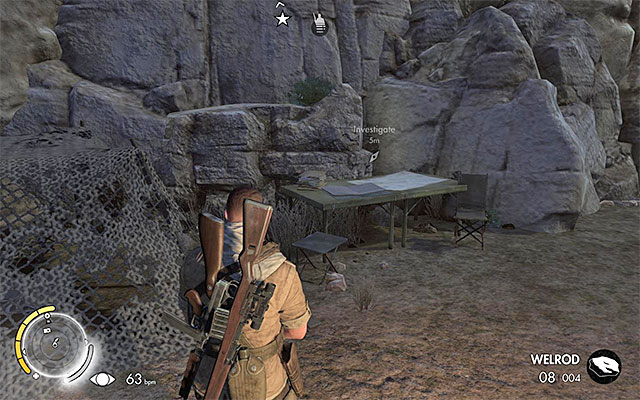
 The location of the first secret.
After regaining control over your character (point 5 on the map), press the button responsible for displaying the drop-down inventory screen, and from there select the Med Kit. Patch yourself up and travel to the east. It's worthwhile to scan through the area thoroughly, especially because you won't run into any enemies for a while. There's a secret hidden near one of the corpses of the murdered soldiers - War Diary - Letters to Martin.
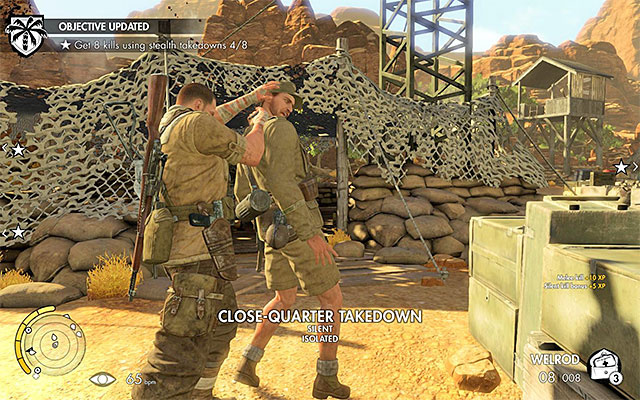
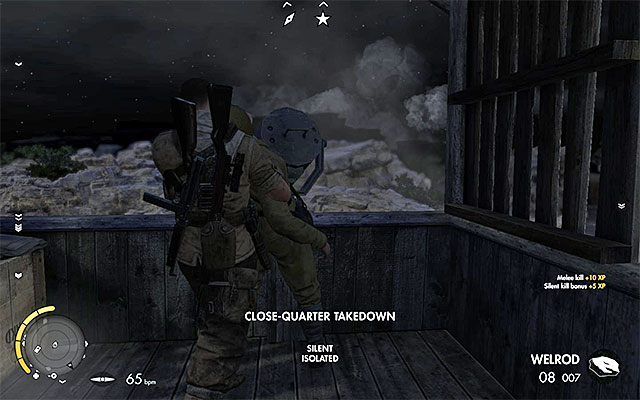
 It's worth to eliminate the enemies with stealth.
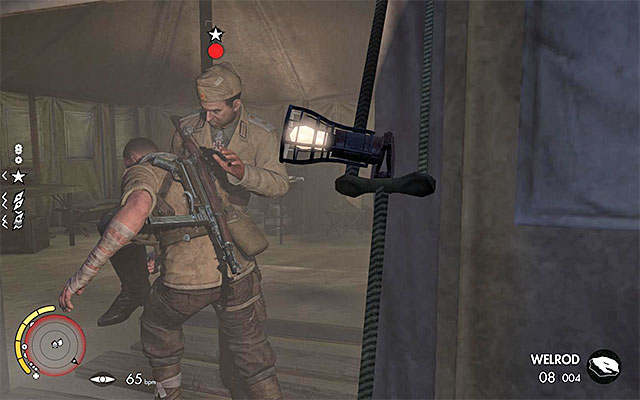
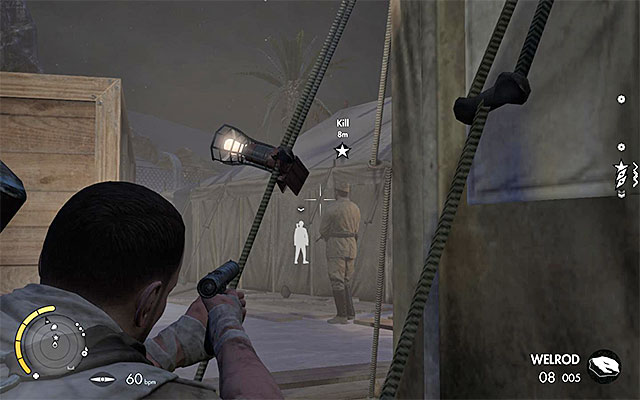
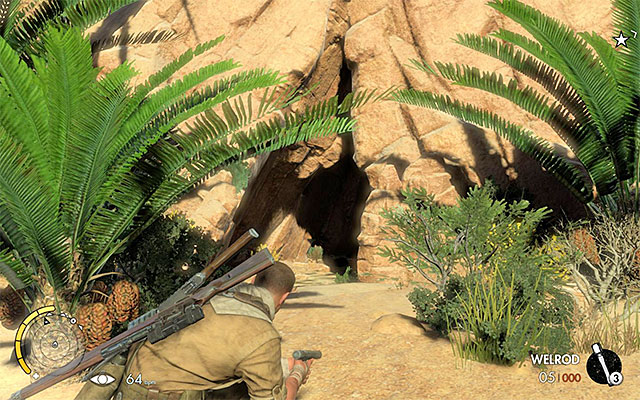
A narrow path located to the east of the place where you've started scouting the area (point 6 on the map) leads to another area. Remain vigilant, as there are two enemies near your immediate vicinity (one of them is a sniper). It would be a good idea to sneak around them (crouch button) and equip yourself with a silenced pistol (Welrod). You, however, don't need to use your firearm here, as getting behind the enemy and silently eliminating him is generally a better idea. After getting rid of both of them, examine their bodies and continue your march.
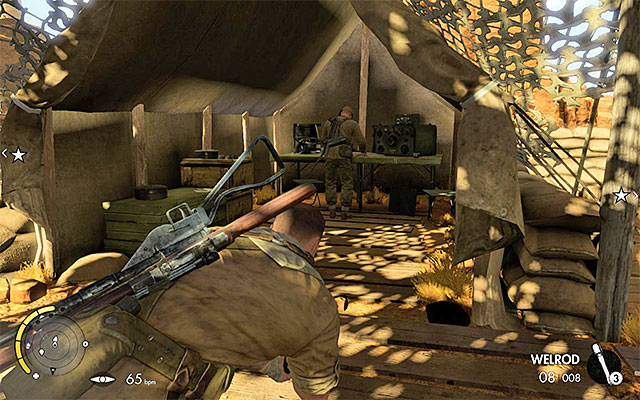
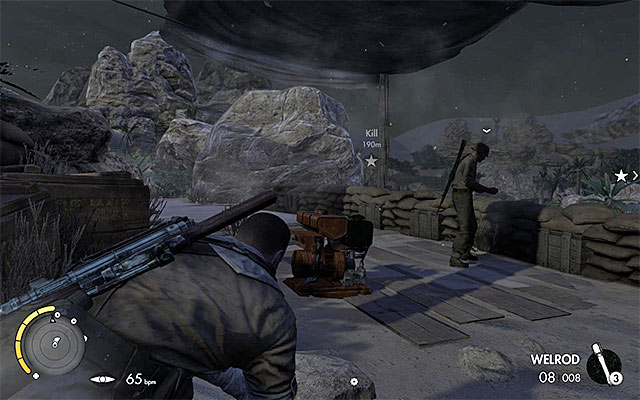
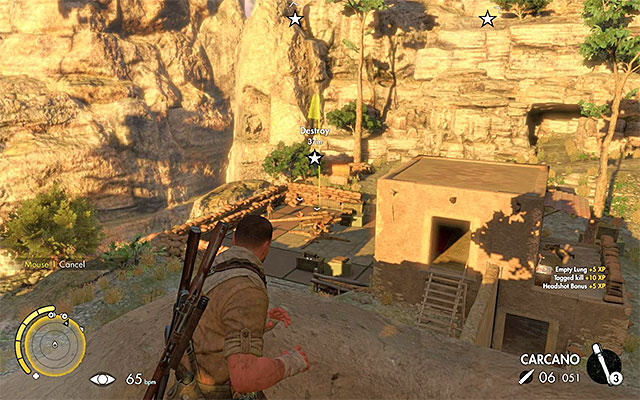
 Silently eliminate soldiers standing near the launcher.
In the next part of the mission, your task is to neutralize four Nebelwerfer rocket launchers. You can achieve it by either blowing up the rocket launcher itself (dynamite, grenades, etc.), or by getting rid of its crew. The second option is way more beneficial, as it will allow you to remain hidden. Carefully approach the first launcher (point 7 on the map). At the beginning, it is highly recommended to get behind the two soldiers looking at the launcher and kill them silently.
 The silenced pistol is perfectly suited to eliminate the rocket launcher crew.
The launcher itself is operated by two soldiers and there are several ways to approach this situation. It is recommended to use the silenced pistol the very moment the Nebelwerfer launches subsequent missiles, because the enemies split up for a short while, plugging their ears. If you don't want to risk firing two shots at different enemies in a short span of time, you can use a stone to distract one of them. Unfortunately, if you try this approach, there's a chance that the enemies will spot one of the corpses of their fallen allies and they will start scanning the area.
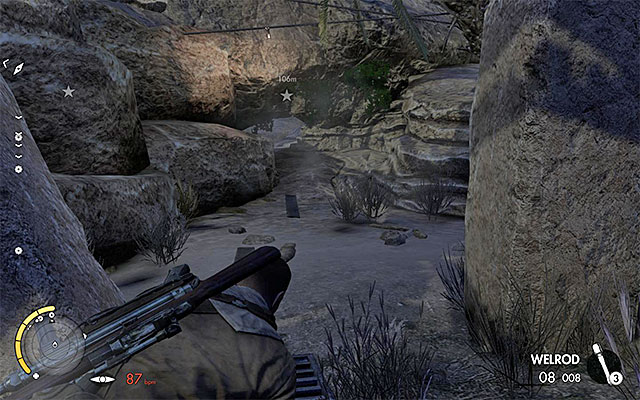
 A passageway leading to the second launcher.
After you've neutralized the first launcher, there's still three to go. You can reach them in any order, but it is recommended to start by going to the one located to the east from your current position (point 9 on the map). The easiest path to the launcher leads through the narrow passageway below the rocks (point 8 on the map).
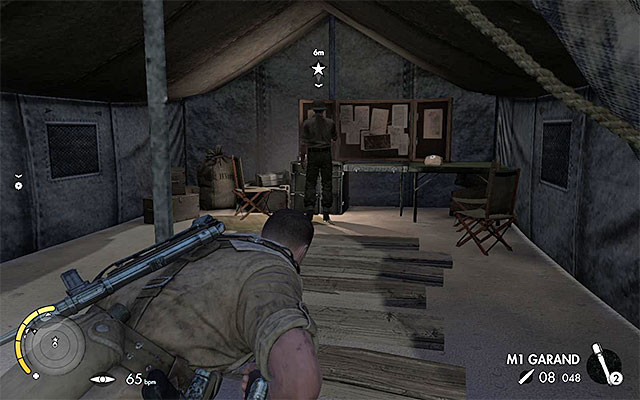
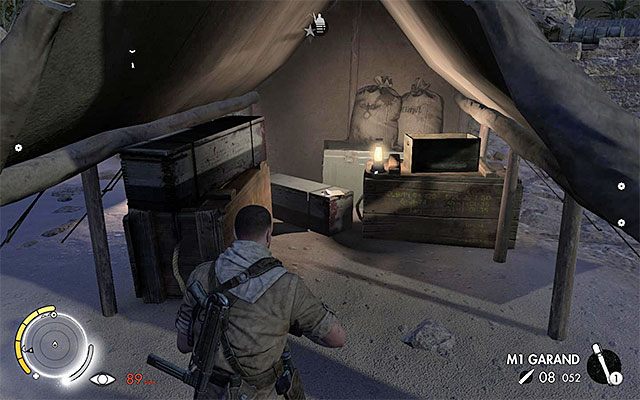
It is necessary to take care of wandering soldier.Do not rush with entering the new area, as its patrolled by a single enemy soldier. Wait for him to pass you by and neutralize him silently with a close-quarter takedown. Take advantage of the situation and eliminate the soldier located in the tent. Afterwards, continue your march to the south. Take out the lone foe (with a melee takedown), and after that eliminate the launcher crew (any approach is acceptable, but taking them out with a silenced pistol is the best one).

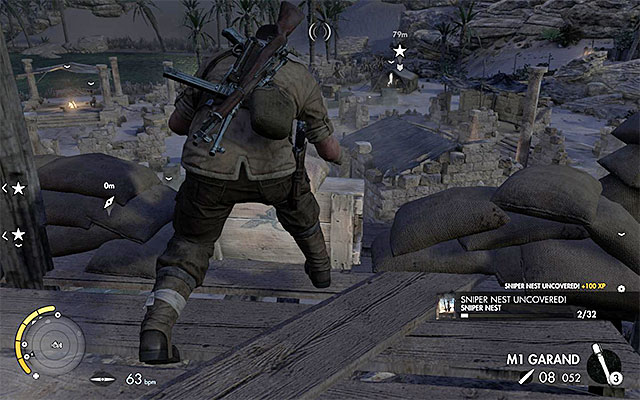
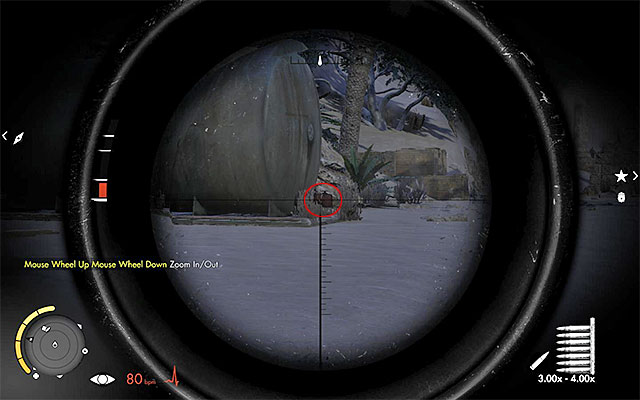
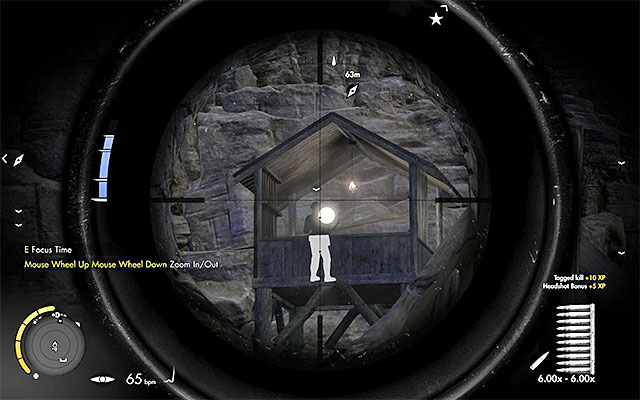
Is it recommended to stay in this region for a little longer, as there's an empty observation tower nearby. Climb the tower, stand in the right place and press the interaction button to unlock the Snipers Nest. There's more for you to do here - you can perform a Long Shot here, which is one of the optional tasks of the game. To do so, you need to aim at the enemy shown on the above image with your sniper rifle and simply eliminate him (it's best to shoot in the head, but it's not mandatory).
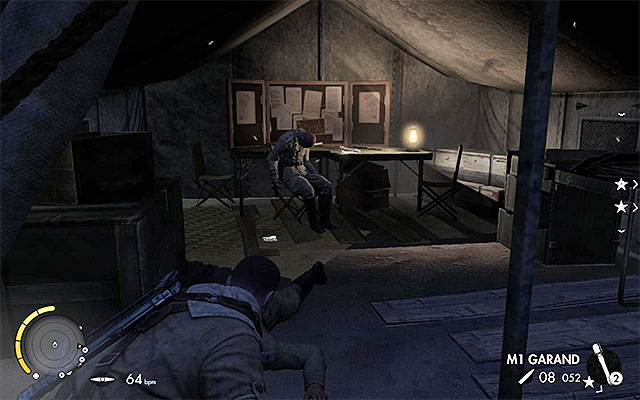
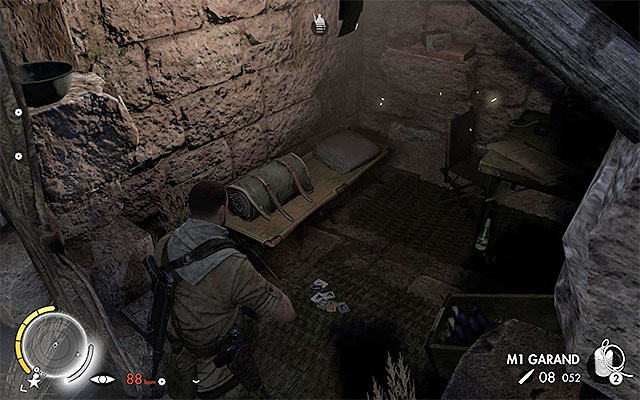
You can now leave the tower and embark on your journey to the north. You must be vigilant, as there's a lone soldier patrolling the area here as well - try to silently neutralize him. Afterwards, you should opt to examine the main encampment. Find a tent with a single soldier inside of it (the above image), take care of him in close combat and collect the War Diary - Survival Notes: Managing Heart Rate.
 Time your jump with the rocket launcher - do it when it starts firing.
The next target of your journey is the rocket launcher located on the north-west part of the location (point 11 on the map), and there's only one passage leading to it (point 10 on the map). Do not rush to jump off down to the lower ledge, because your jump can cause some racket and you can attract unwanted attention from the enemy. Time your jump with the rocket launcher - perform it when it starts firing, which should allow you to jump down without making a noise. You can now get rid of the lone watchman and the crew of the launcher.
 The tunnel leading to the last launcher.
There's one more launcher to neutralize, and it's located in the north-east part of this location (point 13 on the map). It can be approached from three different sides, but the easiest and safest one is through the tunnel to the south (point 12 on the map).
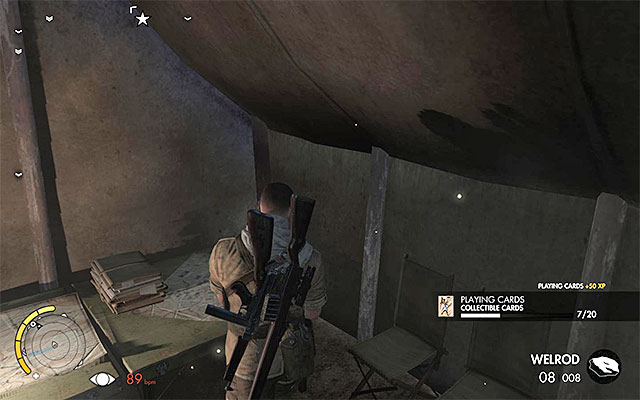
 The collectible card is in the observation tower.
Carefully approach the single soldier and take him out silently. Afterwards, take your time to scan the surroundings and examine the nearby observation tower - there's a secret hidden on top of it, a Collectible Card. Collect it and take out the launcher crew in the same way as you did before.
 A passageway leading to the vantage point.
Make sure that you've collected all the secrets in this area and head north. Use the passageway which was unlocked after the bombing, jumping above the precipice along your way. Getting to the vantage point ends the current mission - the game should soon display the mission summary.
The above image presents a map of location, in which the second mission of the campaign takes place. It's the Gaberoun oasis and the surrounding ruins, and enemy encampments. There are various markers on the map, showing the most important places (goals of the mission, the main routes, etc.), as well as the location of collectibles (secrets).
In addition, there are varicolored dots visible on the map:
In contrast to the first mission, where you couldn't prepare beforehand, this one offers you the possibility of modifying your character's equipment. You don't have to change a single thing if you want to, as you can start the mission with the exact same equipment that you have on you during your previous mission.
Optional tasks and challenges:
Secrets:
 Depending on the selected difficulty level, you can either mark your enemies or simply memorize their positions.
The mission begins in the south-west part of the map (point 1 on the map). Carefully approach the first watchman and eliminate him in close-quarter combat. Stop by the vantage point. It would be wise, as the game suggests, to take out your binoculars from your inventory and scan around the area. If the selected difficulty level allows you, it's worth to mark the nearby enemies, allowing you to easily trace their movements. Otherwise, try to memorize their approximate positions (some of the enemies aren't stationary and they move around the base).
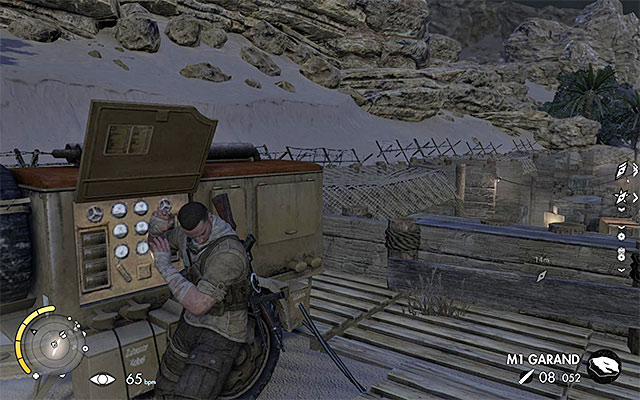
The soldier you've eliminated in the beginning of the mission worked with a damaged energy generator (point 2 on the map). In the further parts of this mission you will stumble upon several of those generators, and it's worth to sabotage them. Each damaged in this manner generator will, from time to time, cause quite a racket. The noise is symbolized by a special icon, which can be seen on the above image. You can use the noisy generators to your advantage - during those incidents, you can shoot your sniper rifle freely, without worrying about the enemy soldiers hearing your gunfire. For now, remain on the hill and eliminate nearby enemy soldiers (start with taking care of the sniper located on the nearby tower, because he has a wide range of view).
 The enemy holding a document resides in a tent.
Depending on your personal preference, you can wait for subsequent generator restarts and successively eliminate the enemy troops from afar, or after dealing with those who posed the biggest threat head towards the tent in the encampment (point 3 on the map). A single, lone soldier resides in the tent, who must be eliminated - preferably in close combat. Afterwards, examine the body, which should award you with a War Diary - Intel: Officer Assignments and a new set of goals.

 Those tents hold two new documents.
The game will add the location of three officers on your map (near the end of the mission there will be the 4th one marked on your map). It is highly suggested that you reach them in a sequence presented in this guide, so you do not have to take unnecessary risks and visit previously examined locations. First things first, you should take care of the officer located to the north-east from your current position (point 6 on the map). Travel to the north-west and watch out for lone enemies, which may be hiding inside of ruins. During your journey, you should look inside two tents (green points 2 and 3 on the map), because there are hidden War Diaries inside of them (War Diary - Axis Account: Reclaiming Tobruk and War Diary - Discipline and Obedience).
 There are two enemies guarding the mountain pass.
In the meantime, you should receive your first optional task - to eliminate the first enemy officer by using the nearby Sniper Nest. To get to the nest, you should go along the mountain pass (point 4 on the map). You should stumble upon two watchmen along your way - wait for one of them to move away a little and begin your assault, taking care of both of them in a safe and silent manner.
Stay on the mountain pass, first heading towards North-East and then turning to East. After a short while you should arrive at the vantage point (point 5 on the map). Silently kill the nearby sniper and, taking advantage of the opportunity, sabotage the new generator (point 2 on the map). Take your time and scan thoroughly the whole area by using your binoculars. Finally, unlock the Sniper Nest shown on the above screenshot ( the main character should automatically lie on the ground).
 The officer is located inside the tent.
In order to complete the previously mentioned optional task, you must shoot (by standing on the vantage point) the first enemy officer, who is located inside the tent, to the south-east from your current location. It's not recommended to attack this person directly - even if you use the noisy generator to drown out the sound of gunfire, the officer death may still be noted by the enemy soldier. You should start by eliminating all the enemies stationed around the tent, leaving the officer as an icing on the cake.
 Using the south passage is the safest approach.
Leave the sniper nest and get back to the west part of the map. During your trip to the tent in which there was an officer a second ago you must be cautious, as there should still be several enemies nearby (at least three of them are hidden in the ruins, located to the south of the sniper nest). Using the south passage is the safest approach, as there's only a single watchman stationed there. The same goes for the main encampment - there's a chance of a several soldiers to be inside of it. Either eliminate or avoid contact with the enemies and reach the tent with the officer. Examine his body to find a War Diary - Intel: Recruitment Drive.
 Vantage point.
The next officer resides in a small encampment, located to the north of your current location (point 9 on the map). You should start by examining the west mountain passageway (point 7 on the map), leading towards the actual target of your journey. After a short while you should arrive at a vantage point, with an enemy sniper inside of it. Get rid of him, sabotage the next generator (point 2 on the map) and start eliminating the soldiers deployed below you in the same method as before (wait for the generator to start making noise before making any shots).
 A narrow passage, requiring you to lie on the ground.
It's not recommended to continue along the north mountain pass, as the ruins separating you from the enemy officer are very well guarded. Instead, after clearing the area with your sniper rifle, go back to the South. During your march stick close to the water (east from the main route). The game will force you to lie down and prone. Carefully approach the smaller part of the ruins, which should be guarded by two or three enemy soldiers. Scan through the ruins thoroughly (green point 5 on the map), as there's a diary here (War Diary - Axis Account: Vahlen's Presence).
 The places in which you can find a diary and a collectible card.
The document mentioned earlier isn't the only secret awaiting you in this area. Inside of one of the tents (green point 9 on the map) there's hidden another diary (War Diary - Vahlen's Journal: Welcome to Africa). In a small room, on the lower floor of the North-West ruins (green point 10 on the map) you can in turn find the collectible card.
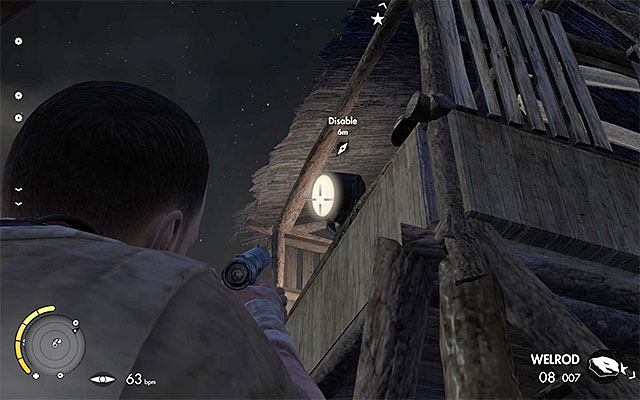 Destroy the headlight in any way you desire.
During your journey towards the second officer, you should be given a new secondary objective. It's connected with the headlight illuminating the area - you must destroy it (point 8 on the map). It can be done in two ways - you can either destroy it from a very long range, by using your sniper rifle, or it can be done from up close, by using a weapon equipped with a silencer. Regardless of the approach, you should first eliminate both soldiers guarding the area near it - the watchman stationed on top of the tower (he doesn't have a sniper rifle, fortunately) and his colleague, located to the North-West from your current position.

After destroying the headlight, unlock the second Sniper Nest (blue point 2 on the map) and prepare your sniper rifle, because it's the place in which you will perform your second Long Shot. It's a little more difficult than a similar task from the previous mission, because the target is located a few hundred meters from you. You have to shoot the enemy sniper shown on the above screenshot, located on the other side of the oasis, on an observation tower.
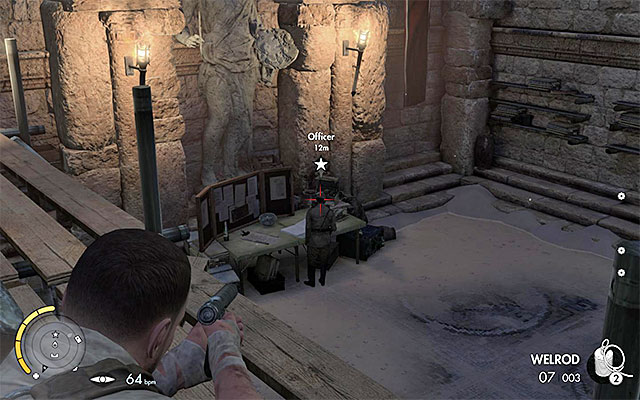
 It's best to eliminate the officer when he's on the back of the tent.
The encampment with the second officer inside should be approached from the South or South-West side. Stop behind a cover and take some time to observe the movement of the officer. You should be able to easily notice that he walks around the whole camp. It's best to eliminate him when he's on the back of the tent, so his death is unnoticed.
 The document is hidden inside the tent with the enemies.
After eliminating the second officer, it's recommended to scan through the rest of the encampment. Watch out for the enemy standing near the North gatehouse, as well as for the two soldiers hidden inside one of the tents. In the very same tent with the enemies inside there's a diary. Get rid of both of them (by using a silenced pistol, for instance) and pick up War Diary - Intel: Axis Wars Story: Tobruk's Defense). Get back to the corpse of the officer and pick up War Diary - Intel: Vahlen's Project from it.
 Sabotaging the generators will allow you to drown out the sounds of your sniper rifle.
The third officer is located in the central part of the oasis (point 14 on the map), but before you can focus yourself on him, it would be recommended to take care of the last secondary objective. It's connected with the five trucks, parked to the East from your current position (point 10 on the map) - you have to destroy all of them. Reach a small elevation neighboring the Motorpool. Sabotage the nearby generator (point 2 on the map) and start using your sniper rifle to eliminate nearby enemy soldiers. With a little bit of luck, you should be able to get rid of them without getting any attention.
 You can use grenades, dynamites or aim at shoot at detonable elements of surrounding.
Make sure, that you've cleared the area around the Motorpool. Afterwards, you can focus on destroying the trucks. There are five to get rid of. It's best to destroy them by using your grenades, or dynamites, but you can also shoot at a huge fuel tank located near them (use your binoculars to find its weak point).
Note - if you don't want to cause unnecessary attention and bring enemies onto yourself, you can do this mission later on as well. However, if you've eliminated all of the enemies in the area, you won't alarm the rest of the map even if you blow up the whole Motorpool.
 A truck holding enemy reinforcements.
After destroying the trucks, go along the main route leading to South-East. Do not rush during your march, as an enemy vehicle will stop on your way (point 11 on the map), dropping several soldiers in the process. Immediately hide yourself so you won't get spotted by the enemy reinforcements. You can go back to the elevation near the generator and take care of them from afar, kill them off with your silenced pistol, or simply bypass them, without killing anyone.
 A passageway leading towards the third officer.
Continue along the way. Another major threat are the two machinegun emplacements (point 12 on the map), blocking the access to the South-East part of the map. At the moment it's best to just ignore them. Use your surroundings and tall grass to avoid getting noticed. Get to the passageway located to the West from the machinegun emplacements (point 13 on the map). Go along this route to West, in the direction of the third officer (point 14 on the map).
There are two enemies in the close vicinity of the officer, who should be permanently stationed there (at least two more patrol other routes), so it's unadvised to charge at him from the very beginning. Instead, you should aim at the ammunition box shown on the above screenshot. The ammo box should explode upon firing at it, killing or at least severely wounding the enemy officer. Get rid of all the enemies that should be closing on the position (preferably by using the silenced pistol). Last but not least, examine the body of the officer (or finish him off, if he wasn't killed) and collect War Diary - Intel: Threat Assessment.
 You can bypass the enemy machinegun emplacements.
Get back to the machinegun emplacements located to the East from the place you've just assassinated the third enemy officer (point 12 on the map). You don't have to use your rifle or explosives to get rid of the MG crew, because you can as well bypass them from the West side. After getting behind their backs, you can either finish them off or leave them alone. If you choose an aggressive approach, note that there's a colleague standing near the MG operator, which means you must be quick in your actions.
 The last generator.
Regardless of your approach towards the machinegun emplacement crew, you must now reach the East ruins. Remain vigilant, as the ruins are patrolled by two or three enemy soldiers. Try to silently eliminate each one of them. After securing the area, locate the diary (War Diary - Survival Notes: Relocation) and the last generator which you should sabotage (point 2 on the map).
 The enemies are stationed around the building.
It is highly recommended to sabotage previously mentioned generator. Just like in the previous occasions, it will warrant you an easy way of dealing with nearby enemies, without blowing your cover. Ger rid of all the enemies located near the South building (where the fourth and the last officer is hiding - point 15 on the map) by using this method. The sniper stationed on the nearby watchtower should already be dead, but you should still make sure that you didn't miss him.
 The fourth and the last officer.
Carefully embark towards the fourth officer. There's a third and the last Sniper Nest to unlock along your way. The building holding the officer can be entered from any side - before you shot at him, make sure that all the enemies are already dead. Search the body of the officer for the last document in this mission (War Diary - Intel: Report for Reassignment).
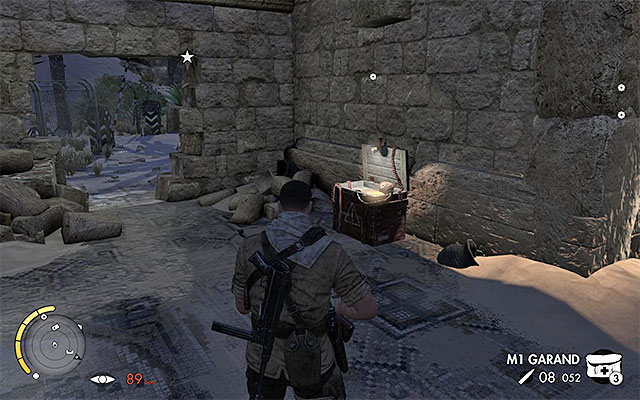
You must act quick, as the vehicle with a general inside appeared on the map and it's on its way to your position. According to your guidelines, you can't let it escape from the oasis in one piece. Select Land Mines from your drop-down inventory menu. If you don't have them at your current disposal, check the building in which the fourth officer was - the mines are located on the supply box shown on the above screenshot.
 An example place for a mine placement.
As it was already mentioned, the armored vehicle transporting the general heads towards South. Leave the building, stand on the main road (at the 16th point on the map, for instance) and place the Land Mine.
 The moment of destruction.
After setting up the mine, you should immediately hide yourself somewhere (in the ruins with the destroyed generator, for instance), so you won't get noticed and the armored vehicle won't change its course. The transporter should run into mine, destroying itself in the process, and killing the general inside of it.
 Evac zone.
The final part of the mission is a pure formality. Make sure that you've accomplished all the secondary objectives and challenges, and that you've collected all of the secret files. The evacuation zone of this mission is a small station, located to the West from the building in which the fourth officer was (point 17 on the map).
The picture above shows the map of the location, in which the third mission takes place. It consists of some mountain regions and some low-lying parts. They are connected with narrow passages and even narrower corridors. The most important places, mission objectives, main paths and secrets, are marked on the map.
You can also see some dots on the map, which are:
Before the mission starts, you should check if there are any new weapons available, due to your leveling up. You should also prepare some land mines and/or dynamite, which will be helpful in destroying the tank at the end of the mission.
Optional objectives and challenges:
Secrets:
 Use the trenches and lower paths to stay undetected
You start the mission in the southern part of the map (number 1). Head east and walk over the bridge. You have to be careful, because several enemies are standing nearby. They are facing your starting position and some of them have access to stationary machine guns, so it is best to stay unnoticed. It is advisable to use trenches and lower paths and crouch.
Go further east, but check the southern rocks during the exploration as well. Stop near the campfire shown in the picture above. Here you will find a War Diary (Axis Count: Security Concerns).
 One of the bridges
As you proceed, start to turn north and watch out for enemies patrolling the main path (the rest of them should stay on their positions). You will reach the next large location on the map by choosing one out of two available bridges (number 2). It doesn't matter which one you choose, because the paths cross behind them. You will receive objectives about destroying the artillery stations.
One of your enemies is in the truckYou have to be careful, because the new location is much bigger than the previous one and there's more enemies. The enemies can are located mainly near the buildings on the right and the left side. Some of them also guard the area from roofs and balconies. Watch out also for a lonely guard in the cabin of one of the trucks, as he is easy to overlook.
 High paths and Sniper Nests will give you a better view
If you plan to clear the area from enemies, use the sounds of the environment to your advantage and shoot after a proper icon appears on the screen. Focus on the soldiers with a large range of view. You should also look for places from where you can see better - try to reach the high paths that circle the locations from the east and from the north. Here you will also find the first Sniper Nest (number 1 on the map).

 Two War Diaries
After securing this part of the map, it is good to explore it carefully. Inside the eastern building, you will fin a War Diary (Fortifications), which is connected to the task of finding gen Hoesslein. Near the cabin in the middle, there is a next document (War Diary - Vahlen's Journal: Rommel's Success).
 One of the narrow passages - most of them are not guarded
The first artillery station is located to the west of your current position (number 5 on the map) and you can reach it using different ways. It is not advisable to use any of the main paths (number 3 on the map), as there are no places to cover on them and you can be easily spotted. Rather than that, choose the narrow corridors and caves (number 4). In this case, you can use such passages to reach your destination from the west or from the north side.
 Eliminate the enemies in the camp near the artillery station
When near the location of the artillery, use the noise to your advantage. Get rid of all the enemies, especially the soldier on the roof of one of the buildings. It is also a good opportunity to search for the War Diary (Missives from Home) that's lying nearby.
The artillery station may be destroyed in many ways, but two of them are particularly effective. You can use a M24 grenade and throw it towards the artillery (picture #1) - in this case you should throw from the roof of one of the buildings, because you will be keep a safe distance from the explosion. The other way is to find the stairs leading to the basement in the camp. After finding the underground part, you can use any weapon to destroy one of the explosive barrels (picture #2), or place a dynamite and detonate it later.
 One of the mountain paths leading north
The two remaining stations are located in a totally different part of the map. To reach them, you have to take a long walk north. Just as in the first part, it's not advisable to use the main road (number 3 on the map). Instead of that, choose one of the smaller corridors (number 4), as they are not guarded by anyone.
 Watch out for enemies on the roofs
The next location that you need to visit is a small village with a bridge (number 8 on the map) located in the central part. You should use one of the two side paths here. If you plan to choose the west path (number 6), you will have to use crouching to stay undetected, as there are a lot of soldiers on the roofs (you can eliminate or ignore them).
 The generator
One of the advantages of the west path is that you will reach a generator. Sabotaging it will allow you to start eliminating more distant enemies silently. As for leaving the path, you need to jump onto a small roof, go down the ladder and reach the entrance to the building. Unfortunately, you may encounter some soldiers that you were not able to see before.
The main flaw of choosing the west part of the village is that you will miss the chance to easily find two secrets. Thus, it is advisable for you to look around the east path later (number 7 on the map). After a short while, you will be able to turn east and reach the campfire shown in the picture above (number 5). Here you can collect a War Diary (Letters to Martin).
The document in located on the roof of one of the east buildingsThe east path will lead you to a hill where you have to be careful, as you will probably encounter a single enemy. After eliminating him, try to reach the roof of one of the buildings in the east part. You will find a War Diary (Final Inspection) there, which is connected to Gen. Hoesslein. From the document, you will learn that the general can be found near one of the remaining artillery stations.
 Going down the hill
One more advantage of the east part is that you don't have to walk through nearby buildings. You can leave the hill by going down an usual path and thus going past all the remaining enemies. If you want to, you can eliminate the soldiers in the village and explore the area around the central bridge (number 8 on the map). No matter of what you choose to do, you now have to head north-east. After reaching a fork, it is good to take the path on the right (number 4), because the left one has less covers and three enemies nearby.
 The tower with a Sniper Nest on top
You will reach a glade, which is the largest location in this mission. It is good to explore it carefully before moving to the next artillery stations, because you can find several secrets here and thus you will be able to complete two optional quests. The first thing that you should to is climbing the tower in the east part of the area (blue spot number 2 on the map), as you will find a Sniper Nest with a rifle and some ammunition on to of it (makes sure to activate the Nest).
 Investigate the area using your binoculars
Start from using your binoculars if you can and mark all the enemies that you can see. If you want to, you can start to eliminate them right away. It is very easy, because speeches from the megaphone will drown out the noise from your rifle. Just make sure that the rest of the enemies don't see you killing others.

When on top of the tower, you can perform two very important actions. The first one is the Long Shot, which will complete one of the side quests. Set your gear in the Sniper Nest and use your binoculars to locate the enemy in a bunker (number 14 on the map) several hundred meters to the west from here. The person is shown in the picture above.
The second important thing that you can do here is to destroy the vehicles in the motorpool (number 9 on the map), namely the truck and the tank. You don't need to leave the tower, because you can aim at the valve of the fuel tank creating a powerful explosion. You should do that only after clearing the area from the enemies, because the explosion would of course alarm them.
 One of the ways to the basement
You can go back down. Now, it is good to explore the buildings east of the glade. Be careful here, as you may encounter some enemies that you were not able to see from the outside. In one of the buildings, locate the stairs that lead to the basement and go down.
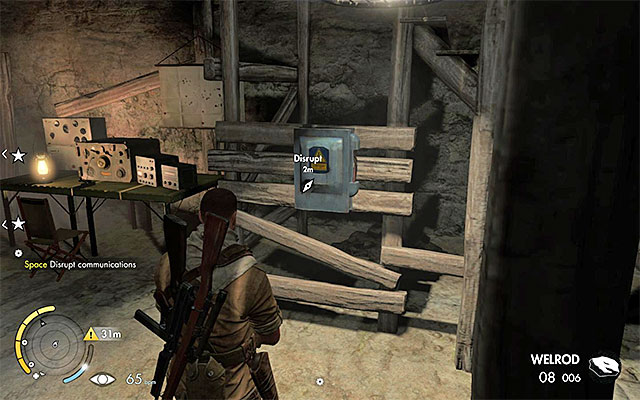 The switch
There are two guards in the basement and they are standing right next to each other, so you should eliminate them using a submachine gun or a pistol with a silencer. Search the basement carefully, because it's the opportunity of completing another side quest. Sabotaging the switch (number 10 on the map) will allow you to disrupt the communication between your enemies. What's more, there is another War Diary (Allied War Story: Delaying Tactics) here.
 A Collectible Card
Lastly, head towards a single building located to the west from the burning motorpool. Try to go there in a straight line, as the sniper (more about him on the next page) and other enemies (if you haven't killed them yet) won't be able to see you this way. Make sure that the building is not guarded by anyone and search for a Collectible Card inside.
 The path to the southern part of the map
You have two artillery stations left. The order in which you have to destroy them is not described in the task, but it is good to start with the one located in the north-western part of the map (number 13). Choose the path to the north of the building from which you've taken the Collectible Card and start making your way west.
You have to be careful in this area, because to the west of the path leading to the hill, there is an enemy sniper (the picture above). He's busy watching the area. Don't try to kill him from distance, as you will alarm other enemies. It is best to stay on the path, approach him from the east and deal with him in hand-to-hand fight or using a silencer.
 It is best to eliminate your enemies using a silenced weapon
Now, you have two paths to choose from. As always, it is not advisable to take the main road (number 3 on the map), because you would be uncovered and easy to notice. Instead of that, choose the side passage (number 4). You will end up behind three enemies, who should be dealt with using a silencer. After eliminating them, search for the next Collectible Card.
 The War Diary is behind the cases in a small cave
Now head west. After some time, you will see the entrance to a cave (number 11 on the map) that is definitely worth exploring, as there is a War Diary (Survival Notes: Enemy Snipers) inside. Watch out for the enemy patrolling the cave, because he's difficult to notice in the darkness. Try to eliminate him when he goes north and do the same with the two guards on the main path.
 Western watch tower
A large precipice separates you from the artillery station and this means that you will have to destroy it from distance. Start from climbing one of the watch towers (number 12 on the map). The best will be the one which is the closest to the cave. Eliminate the guard and consider taking his Panzerschreck, which may be useful at the end of the mission.
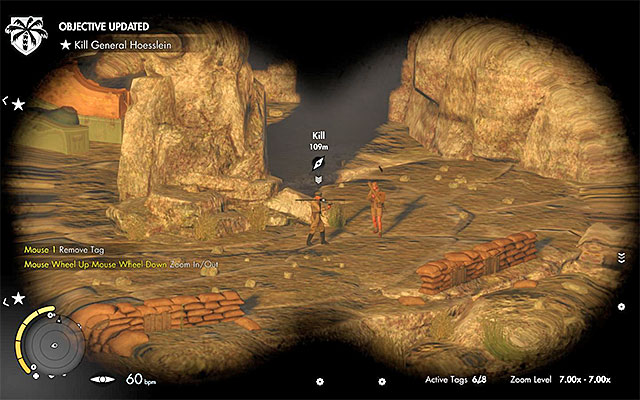
General HoessleinFace the artillery (number 13 on the map) and use your binoculars. Look at the soldiers located near the station. To the right of the artillery, you should be able to identify general Hoesslein. You can eliminate him right away (using your sniper rifle) or hope that he will die in the explosion, as you destroy the artillery.
As for the second station, you have to aim at the barrel marked in the above picture to destroy it. It is located in a cave to the left of the artillery. The explosion will cause the ceiling to collapse and destroy the machine.
Attention - before you leave this part of the map, you can also explore the area near the eastern watch tower. However, it is only optional, because you won't find any secrets there.
 The second generator
Head south and stop near the place where you've killed the enemy sniper a while ago. You should be able to notice a generator here. It is a good idea to sabotage it, as it will enable you to easily eliminate the enemies located to the south and to the north-west of here. Try to clear the area this way.
 Sniper in the Nest
The last artillery station is located in the western part of the map (number 15). Once again, you have to decide whether you will choose one of the main (number 3) or the side paths (number 4). As you make your way to the station, try to look for an opportunity to eliminate the enemy sniper with a shot from distance. You will find him in the third Sniper Nest (blue spot number 3), which you should also activate later in the mission.
 The bunker
The third artillery station also has to be destroyed from distance. You can perform the shot from a few different places and the bunker on the west (number 14 on the map) is one of the options. You can reach it using various paths and you should prepare from meeting several enemies in it. However, you can eliminate them silently with no problems.

 In the camp, you will find a Card and a War Diary
You can also shoot from the third Sniper Nest (blue spot number 3 on the map), which was previously occupied by the sniper. In this case, you should also clear the nearby camp by shooting from distance or silently eliminating the enemies, because you will find a Collectible Card and a War Diary (Survival Notes: Food) here.
 Aim at one of the barrels
No matter of what place you choose to shoot from, prepare your sniper rifle and get to know the area around the third artillery station. You have to aim at the red explosive barrel. The explosion will destroy the artillery and your task will be completed.
 Remember to avoid being seen by the crew
You will receive a new objective now, connected with meeting your allies. Unfortunately, reaching the zone (number 17 on the map) will be interrupted by an enemy Panzer 3 tank. The machine will start patrolling the glade, which you've secured earlier (number 16), and you won't be able to advance to the next mission until you destroy it.
 You can eliminate the driver
It's up to you whether you will try to destroy the tank right away or weaken it at first. In the second case, you can use your rifle to damage the engine (metal covers at the back of the machine) and immobilize it by shooting the driver through a small hole in the front. However, these actions are quite risky, because you can be spotted by the crew and the tank will start to shoot. It is best to perform them from a large distance and switch positions after each shot.
 The land mine has to be placed on the tank's route
A good way to destroy the tank is to use explosives. Try to place land mines on one of the main roads. After setting the trap, hide in a safe place. Unfortunately, a single mine may not be enough to complete the task.
 The dynamite can be very useful in completing the objective
An even better idea is to use a dynamite. Similarly as in the first case, you have to place the explosives on one of the main roads around the glade. Then, go to one of the viewpoints and wait for the right moment to detonate the dynamite with a shot from your sniper rifle. In this case, a single explosion should be enough.
The place where you end the missionOnce again, you have to set off to reach the zone (number 17 on the map). It is the path which was locked earlier, located to the north from the area where the tank was. A short cut-scene will appear and the very long mission will end.
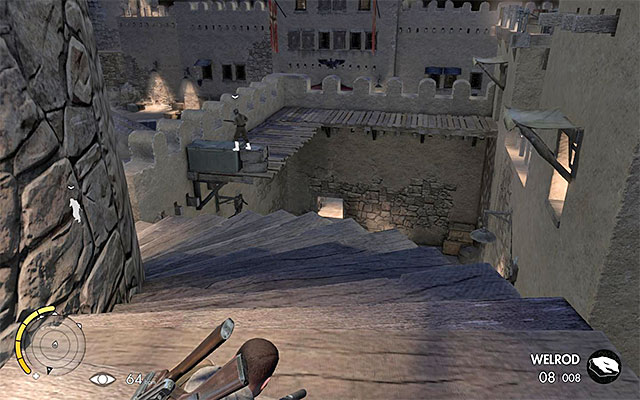
The picture above shows the map of the location, in which mission 4 takes place. It is a wide mountain region with the fort, which you have to enter (there are several paths available). The most important places, like main paths, mission objectives or secrets, are marked on the map.
You can also see different dots and a line on the map:
Mission 4 doesn't require any specific preparations. At the beginning, a sniper rifle will be enough to eliminate your enemies. Later, a silenced weapon will be useful (e.g. Welrod). In the last part, it is best to use a Panzerschreck, but the game will provide you with it, as well as with loads of ammunition.
Optional objectives and challenges:
Secrets:
 The place where you find the first War Diary
You start the mission south of the fort (number 1 on the map). Before heading to it, it would be good to spend some time exploring the area, as you will be able to find some secrets here and proceed with your side quests. First, head east. Carefully approach the first group of enemies and focus your attention on the nearby War Diary (Survival Notes: Sound-Masking).
Right next to the place from which you've collected the Diary, there is the first Sniper Nest (blue spot number 1 on the map). Head to it and sabotage the nearby generator on the way. After activating the Nest, lie down on the ground and aim at the fort. Focus on the window marked in the picture and wait until an enemy shows up in it. When he does, kill him with a Long Shot. A successful shot will complete the side quest.
Attention - if the enemy doesn't show up in the window, you may have lost your chance. Because of that, this side quest should be completed at the beginning of the mission.
 The tower on the right
Stay in the Sniper Nest or close to it ("within the reach" of the generator) and continue using your sniper rifle to eliminate nearby enemies silently. You can also complete the first part of one of the side quests, namely the one in which you have to destroy the searchlights. Aim at the tower on the right side of the map (number 2), eliminate the guard and then the searchlight (you will be dealing with the left tower later).
 Two more secrets - a Collectible Card and a War Diary
After clearing the area north of the Sniper Nest, you should explore it carefully. However, watch out for enemies on the hill (they sometimes check the region south of them) and don't stay too long on the main road (more on that later). In a tent, you will find a Collectible Card (green spot number 4 on the map) and a War Diary (Missives from Home) near the main road (green spot number 5).
 Enemy trucks patrol the main roads regularly
The main road mentioned above (number 3 on the map) is being constantly patrolled by enemy trucks (the green line on the map shows their route). You have to remember about that and get away from the road or hide somewhere when you hear a truck coming.
Attention - Don't try to destroy the tucks, because it won't earn you anything (except for some experience points). A new truck will come in the place of the destroyed one.
After collecting the secrets described above, you should head west, towards the fenced camp (number 4 on the map). The camp itself doesn't contain any secrets, but what interests you here is the wooden gate (green spot number 2). Climb onto the top of it using a ladder and collect a War Diary (Letters to Martin).
 The second Sniper Nest
You can approach the fort, which is your main objective, using many different ways. Three main paths are located in the western part of the map (number 5). If you can, you should choose the western path, located north of the camp which you've just found. There are not many guards and what's more, you will have the opportunity to reach the second Sniper Nest.
 Get to the top of the tower and sabotage the searchlight
In the area described, the second watch tower with a searchlight is located (number 2 on the map). In this case, it is advisable to climb the tower, eliminate the guard and sabotage the searchlight. After you've done that, explore also the nearby camp, as you will find a Collectible Card in it.
 The side path
You don't have to take any of the main roads to reach the fort. In the eastern part of the map, near one of them, there is a side path (number 6 on the map). However, you have to be very careful here, there is a soldier who stops near the lookout point sometimes and can easily spot you.
 A War Diary
If you plan to take the side path described above, it is also good to explore the rest of the eastern part of the map. East of the path, you will find the third Sniper Nest (blue spot number 3). Approach the tower from the west side, which will help you to stay unnoticed. There is a single enemy on top of the tower. North-east of the path, there is another War Diary (Survival Notes: Firemaking; green spot number 6).
Lastly, explore the slightly larger area located south of the fort's walls. You will find three enemies here, but with the right timing, you should be able to eliminate them one by one. Focus your attention on the document shown in the picture above. It is not counted as a secret. Reading it will tell you something about the planned visit of an Italian officer and a side quest will be activated.
 An example of a place where you can place the explosives
The vehicle with the officer will soon appear on the road where the trucks are, heading from west to east. Head south and place some explosives anywhere on the main road (for example at number 8 on the map). A land mine would be best, but if you don't have it with you, you can use a dynamite (in this case you should take the shot from the west Sniper Nest). You will complete the side quest when the truck explodes, killing all the people in it.
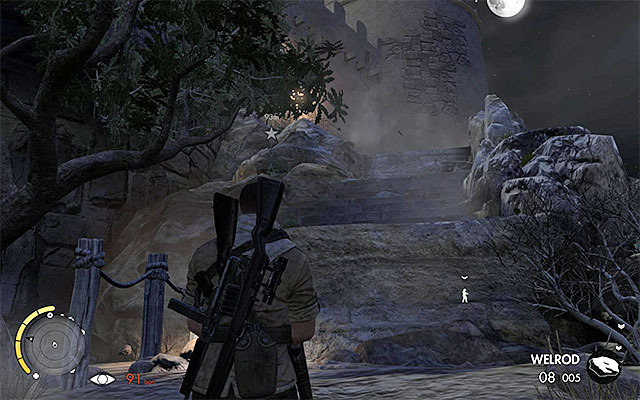 The western entrance
You can use three ways to get inside the fort. The first variant is to reach a small western passage (number 9 on the map), which is located to the west of the main gate. On your way there, you will have to climb some rocks, but the passage is not guarded by anyone. It is advisable to choose this entrance, because it's the easiest way to reach the next main objective in the mission.
 The main gate
The second variant is using the main entrance (number 10 on the map). However, this way is not so good, as the way to the fort is guarded by at least two soldiers. Two more are standing near the gate (you can try to eliminate the from for example the second Sniper Nest).
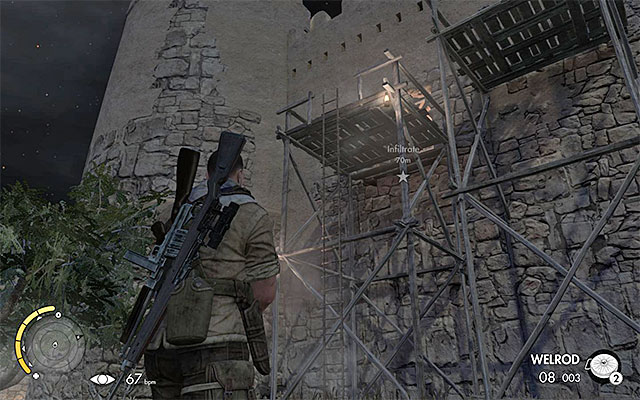 The scaffolding
The last variant available consists of exploring the eastern wall of the fort. It will allow you to find a scaffolding (number 11 on the map). By climbing it, you will reach the top of the fort's wall and you will start the exploration from the eastern part of it.
Attention - After entering the fort, you won't be able to go back to the southern part of the map. Make sure that you've collected all the secrets and completed all the side quests!
 Deal with the soldiers and collect the War Diary
The information given by the game may be misleading, because your first task after entering the fort is to find the key to the cell where the informer is. If you've chosen the western path (number 9 on the map), you will start in the western part of the fort. Ambush the enemies there and take a War Diary (Axis Count: Vahlen's Wrath), which is located near them.
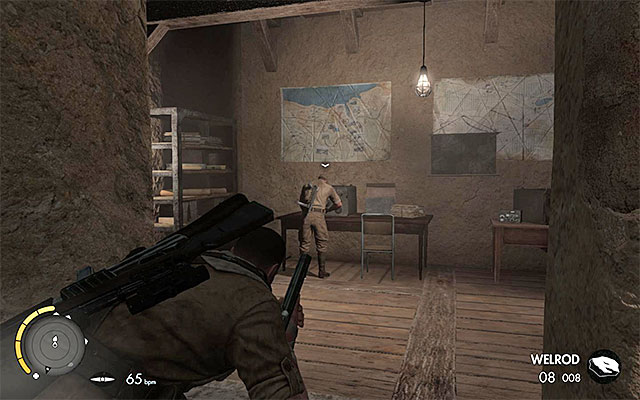
 The officer with the key
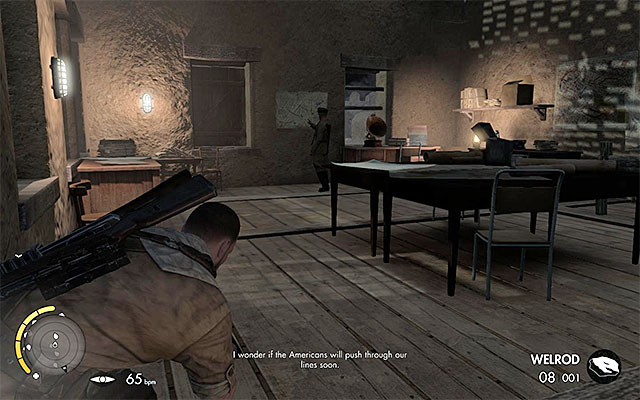
The person who has the key is the officer in the north-western part of the fort (number 12 on the map). Start exploring the area and be careful not to be seen by the guards patrolling the lower corridors. Avoid them using higher paths and covers, or eliminate them in hand-to-hand fight or using a silencer. The officer can be found in a room on the second floor. Eliminate him and search his body for the key.
 The tower with a secret
The cell is located in the north-western part of the fort (number 13 on the map). However, it is not advisable to rush straight to it, because there are three more secrets in the fort. The first one can be found in the northern tower, which you can reach using the wall. Eliminate the single enemy and explore the tower to obtain a Collectible Card.
 The stairs leading to the eastern part of the fort
You should avoid the central courtyard, unless you want to make the last part of the mission slightly easier. However, if you do not wish to get into unnecessary fight, use the stairs near the northern tower. Head east and eliminate single enemies on the way. You must be careful not to be noticed by the guards on the wall in the eastern part, so observe what they do and hide or distract them when it's necessary (you can also use the narrow underground corridors).
 The room with a soldier and a secret
The informer's cell is located on the higher level. Don't rush to reach it, but explore the area in the north-eastern part instead. Watch out for the guards and try to ambush them. In one of the rooms on the first floor, you will find a single enemy near the table. Surprise him from behind and collect a War Diary (Vahlen's Journal: Dealing with Traitors; green spot number 9 on the map).
The last secret is located on the second floor and you have to find the ladder shown in the picture above to reach it. After climbing the ladder, look for a chair with a document on it (War Diary - Letters to Martin; green spot number 10 on the map).
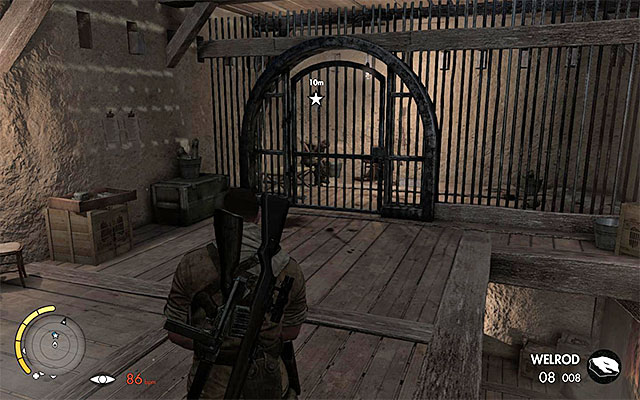 The cell
As was mentioned earlier, you have to get to the top of the fort. It is best to use the stairs, but you can also look for ladders. The higher level is guarded by 2-3 enemies, so you have to be careful. It is good to eliminate these enemies first, using a silenced weapon, so that the later part of the mission would be easier. You can set the informer free by approaching his cell.
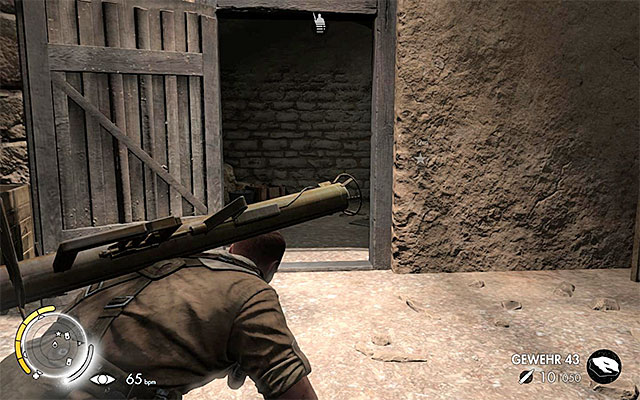
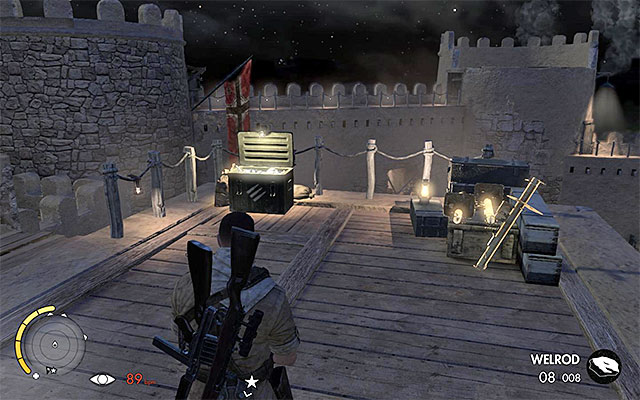 Rocket launchers
Head towards the southern wall. You should act quickly, because reinforcements will arrive soon. Explore the top of the wall and you will find several Panzerschrecks (number 14 on the map). It is good to take one with you, as it will be useful later.
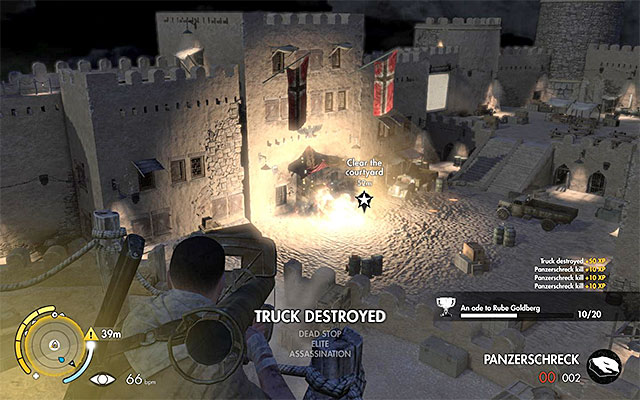 Try to destroy the truck
You have to clear the area near the main entrance to the fort (number 15 on the map). A truck will show up in the gate and it is good to fire a rocket before it stops and soldiers come out. Additionally, the explosion may kill a few enemies nearby.
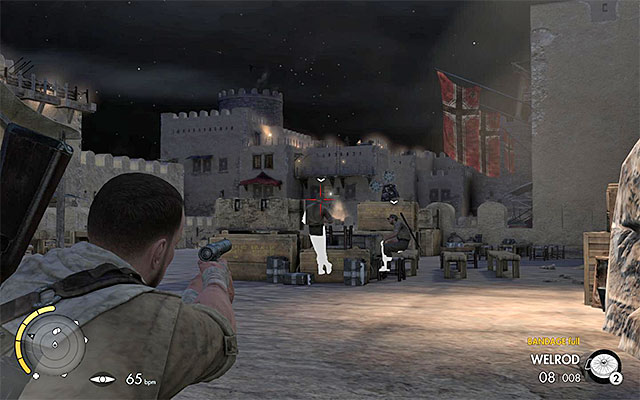
 You can use your sniper rifle or fight on short distance
You can eliminate the remaining enemies in whatever way you wish to do it. If you don't mind alarming the whole place, it is good to make use of the height and eliminate them with your sniper rifle (aim for the heads and explosive materials around). Otherwise, get close to the courtyard and use a silencer or fight hand-to-hand.
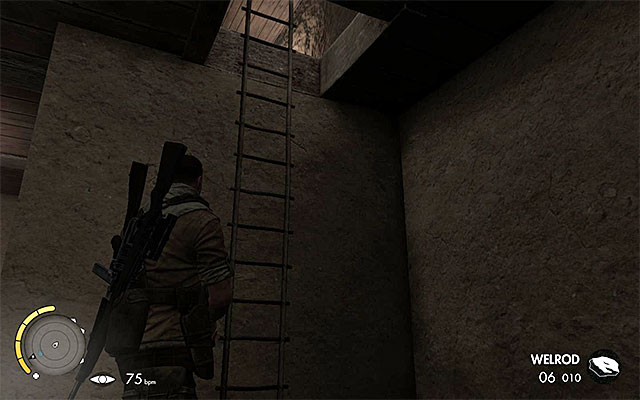
 The passage leading to the ladder
You will receive new objectives only after eliminating all the enemies on the courtyard (if you can't locate them, use your binoculars). Head towards the main gate. Explore the western part of it (number 16 on the map) and you will find a passage leading to a ladder that was locked earlier. Using this ladder will allow you to reach the defensive wall.
 More ammunition crates
After reaching the southern defensive wall, make use of the crates located there and take some ammunition to your sniper rifle and your Panzerschreck. Head to the lookout point on the west (you don't have to hide behind any covers, because the enemies are no threat anymore) and look toward the southern part of the map, which you've explored at the beginning of the mission.
 Protect the informer from enemy's attacks
Your main objective now is to escort the informer, who will stop near another covers (number 17 on the map). Use your sniper rifle and try to eliminate the enemies one right after another. Your shots don't have to be perfect (i.e. don't struggle to hit the head) and you don't have to worry about ammunition, because you can refill it at any time.
 It is good to destroy the trucks
Besides protecting the informer, check the southern part of the map regularly (number 18 on the map). Trucks will appear one after another and it is good to destroy them using your Panzerschreck, before the soldiers come out. Continue to protect the informer until he leaves the location. The mission will be completed.
The above screenshot presents the map of the location in which you play the fifth mission of the game. What is interesting, the title oasis takes up a, relatively, small portion of the map and additionally, it does not offer any special attractions. You will spend the majority of your time, while exploring the streets of the old city. First of all, on the map, there have been the key places marked (mission objectives main paths, etc.) and the whereabouts of collectibles.
Apart from that, you there are colorful lines and dots on the map:
This mission provides you with plenty opportunity for elimination of the enemies at long range. Therefore, it would be good to make sure that you arm yourself with the best sniper rifle available for you, at the moment. It is necessary that you also take M24 grenades and dynamite - they will come in handy, while blowing up the enemy AA stations and for destroying the enemy tank that appears in the city towards the end of the mission.
Optional tasks and challenges:
Collectibles:
 Slowly, push forward, hide in the grass and be on a lookout for good covers
You start the mission in the oasis (point 1 on the map), to the South-East of the old city. During the exploration of the map, try to crouch at all times, because a considerable portion of the map is an open area. Additionally, the oasis is being patrolled by a quite numerous group of guards and, you will encounter the first group right after you approach the huts. It is not compulsory to eliminate the enemies here, especially that there are no additional collectibles, nor additional challenges, until you reach the city.
 Use the sniper rifle to attack the enemies, whenever you get the opportunity to drown out the noise
Quite a facilitation, in this mission, is that more and more allied airplanes fly by above the oasis and the city. You can use this to your advantage and fire your shots, without taking the risk of being detected. Of course, this does not mean that you should not, as usually, be on a lookout for generators, especially that a flying plane only drowns out noises for a short period of time. Therefore, you need to be quick if you want to fire your shot then.
 The tunnel entrance
You can access the old city in three different ways. The first variant assumes that you reach the tunnel to the West of the mission's starting point (point 2 on the map). Unfortunately, there is only a narrow path that leads up to the tunnel and, as a result, it requires you to deal with all the enemies that you encounter here. (there are, at least, six of them here). Around there are some explosive objects but, the explosions nay be noted by the enemies in the city so, it is best to rely on the standard methods (drowned out sniper rifle shots or/or suppressed weapon).
 The collectible card in the tunnel
Taking the abovementioned tunnel would allow you to reach the Southern part of the city (point 3 on the map). Unfortunately, these are the lower ruins, where you can be easily spotted so, I recommend against this path. Exploring the tunnel itself is, still, recommended, though. It is because you can find a collectible card here (the green point 1 on the map).
Note- if you do not want to cut to the Western entrance to the city (the tunnel), you can reach the abovementioned cards, later on into the mission, from the Northern side.
 The city's main entrance
The second variant assumes that you take the main entrance into the old city. The gate (point 4 on the map) is being watched, at all times, by a single guard and the other ones, apart from that, may often stop here. I would not recommend this path too much, either because you would be especially careful, after entering the city, to prevent being spotted (e.g. by one of the snipers). You can make an exception if you are bent on completing this mission quickly.
The path to the hillThe last, third, variant is the best, in my opinion. This is so, because you will be able to start completing side tasks, connected with this mission, along your path. You should take interest in one of the paths to the Eastern hill (point 5 on the map). Along your path, however, you should keep appropriate precautions because, at least one of the opponents is frequently stopping at this path and turns in its direction.
 A grenade is an ideal way to destroy the AA cannon.
I have already mentioned that, thanks to choosing the third variant, you can complete one of the secondary targets of the mission. On the hill, there is the first one of the three AA cannons (point 6 on the map). Just like in the case of the structures that you destroyed in mission three, it is best to use the M224 grenade here and make it land right next to the cannon.
 The first sniper nest
Destroying the AA cannon may result in the arrival of one, or more, people here. Be prepared for that and eliminate them (best using a suppressed weapon). At the same time, it is a good idea to climb up the nearby tower, because there is a sniper nest there (the blue point 1 on the map).
Note - a careful exploration of the old city is not required for completion of this mission. It is not a good idea, though, to skip this step, because there are lots of collectible to be found all around the city, as well as there are secondary objectives to complete. Clearing the city of the enemy soldiers (or at least its central and Northern parts) will discernibly help you complete the secondary objectives, towards the end of the mission.
 Watch out for the enemy armed with the RPG
The best way to explore the city is by moving around its edges, in the counterclockwise direction. I recommend that you leave the central part of the city for the end but, you still can search for opportunities to eliminate the patrolling enemy soldiers at a distance. If you have followed my suggestion and taken the path over the hill to the east, you need to watch out, because you will be surrounded by several enemies, right at the very beginning. Try to eliminate them from afar and, necessarily, eliminate the one armed with a Panzerschreck (he is standing on one of the lower rooftops).
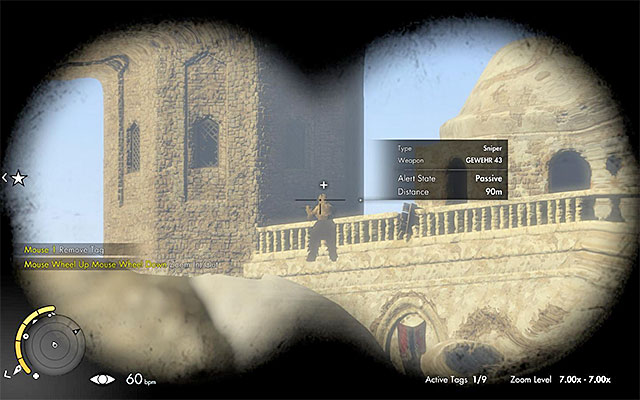
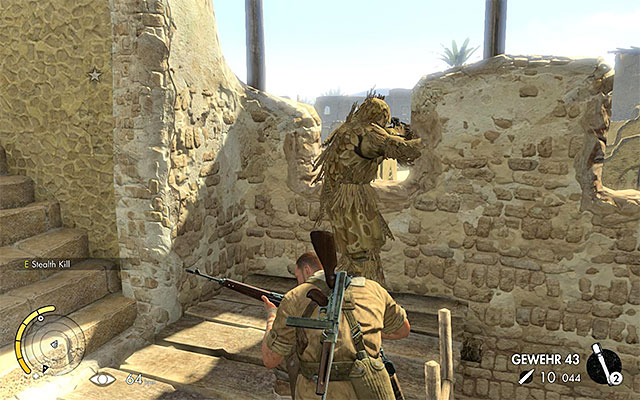
During the exploration of the city, you need to keep in mind that there are two enemy snipers here (points 7 on the map). It would be a good idea to eliminate them at the first opportune moment, to prevent being spotted by them, later on. The first sniper is standing on the rooftop of the building in the Northern part of the city (screenshot 1), close to one of the sniper nests. The other one is hiding in the city ruins, inside one of the lower buildings, in the Western part of the city (screenshot 2) - you can eliminate him at a distance, or later into the mission, get him from behind.
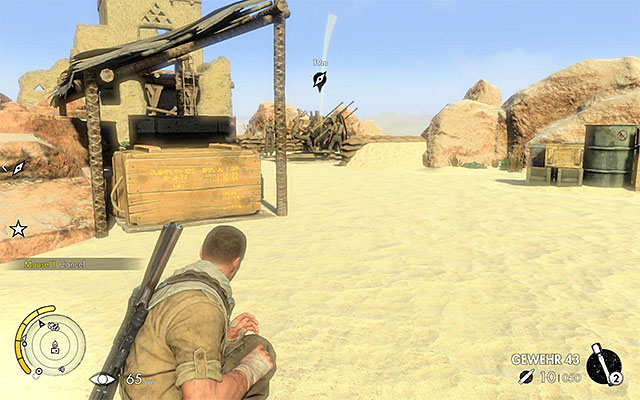 The vicinities of the second AA station
Go North and remain in the Eastern part of the city, for the whole time. Keep your eyes peeled for a narrow passage to the second AA station (point 8 on the map). Before you approach the station, eliminate the enemy with the machine gun, occupying the nearby vantage point, as well as the guard patrolling the area to the North of here. Only after you have eliminate both, throw a grenade to the AA team (note - reinforcements may arrive).
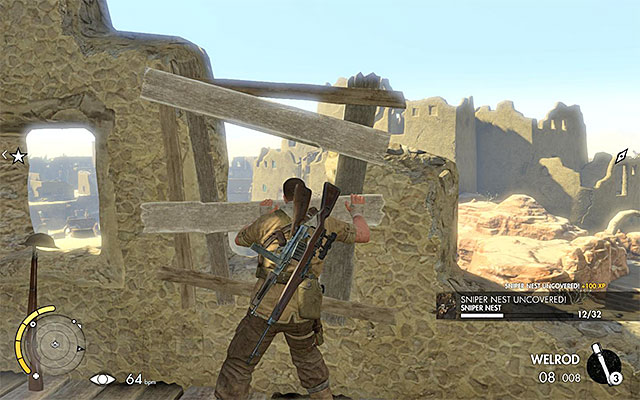 The second sniper nest
Do not walk away from here immediately, and explore the Northern tower. Next to the ladder, you should find the first War Diary - Missives from Home; (the green point 1 on the map). I recommend that you go a bit Westwards now and try to reach the second sniper nest (the blue point 2 on the map). Climb up the ladder, unlock the nest and use it immediately, to eliminate some of the enemies guarding the Northern and the central part of the city (the ruins).
 The depot entrance
After you have eliminated all of the enemies that you could see, return down the ladder and go Northwards. Take a look around one of the buildings here and you will notice a War Diary - Axis Account: Desert Ghost here. Turn North-Westwards now and reach the building, whose rooftop used to be occupied by one of the snipers (point 9 on the map). Enter the building, wait for your character's commentary (he will confirm that you have found the supplies) and collect another War Diary - Letters to Martin.
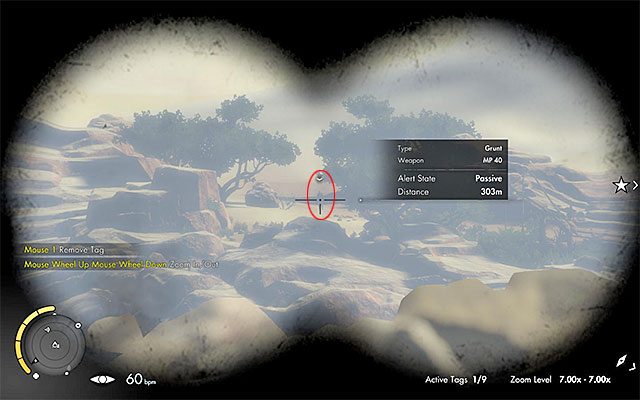
You may have noted that the last sniper nest (the blue point 3 on the map) is around. Take the ladders and reach the very top of the tower, unlock the nest and start aiming, because this is where you score the second Long Shot. The person that you need to kill has been shown in the above screenshot. It is a soldier several hundred meters away, standing on a dune, outside of the city.
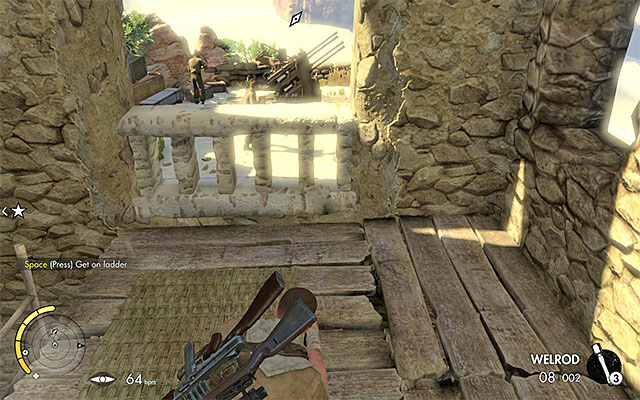 Throw a grenade through the hole in the wall
Descend from the tower and go West. Carefully, enter the North-Western part of the city - there are, at least, three enemies here and their fields of vision often overlap. I recommend that you rely on the sniper rifle here and not bother if a guard is alarmed, after he sees a corpse. Around, there also is the last AA station (point 10 on the map). Locate the ladder to the balcony Eastwards of the cannon. Stand at the balustrade and throw a grenade over it. The explosion should destroy the cannon and kill the team.

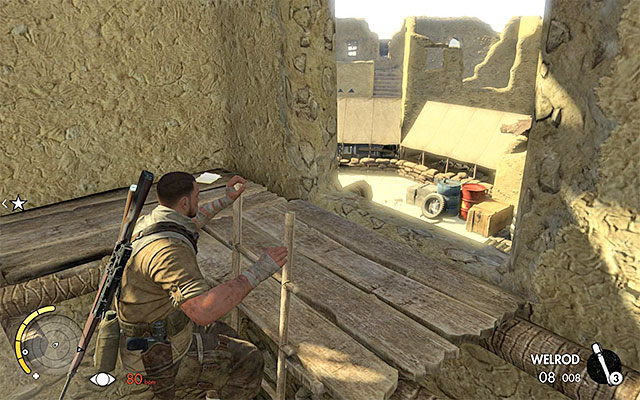 Two more War Diaries
Continue your exploration of the city. walk away from the destroyed cannon and go North-Westwards. Watch out for the enemies here, who may be patrolling the walls, as well as for the ones in the central part of the city. Around, there are two more War Diaries - Survival Notes: Desert Sniping I and Vahlen's Journal: Home Away from Home; (green point 6 and 7 on the map). Around the ruins in the center, there also is a building with the other depot inside (point 11 on the map).
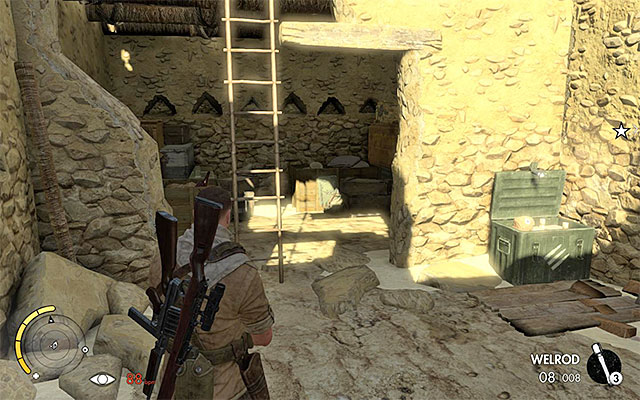 The building with a depot and a diary
Complete your journey towards the North-Western part of the city. Just like earlier, try to keep appropriate precautions, because there are exceptionally many opponents here. After you have cleared the area, try first of all to locate the last depot (point 12 on the map). Apart from completing the secondary objective of the mission, connected with the depots, you can also collect another War Diary - Survival Notes: Healing. Another War Diary - Axis War Story: Assassination Attempt is in the room next to the outer walls (the green point 8 on the map).
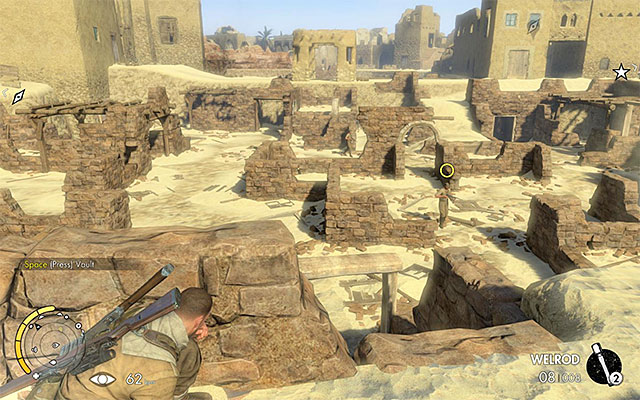 The ruins are being patrolled by many enemy soldiers
For the very end, leave the vast ruins in the central part of the old city. This area is being patrolled by, around, 6-8- enemies and it would be a good thing to eliminate all of them, because this will make the final part of this mission, discernibly easier. Search for the opportunities to use the sniper rifle, drowned out by the generators or the planes flying by. Wherever possible, use the advantage of height, to surprise the enemy.
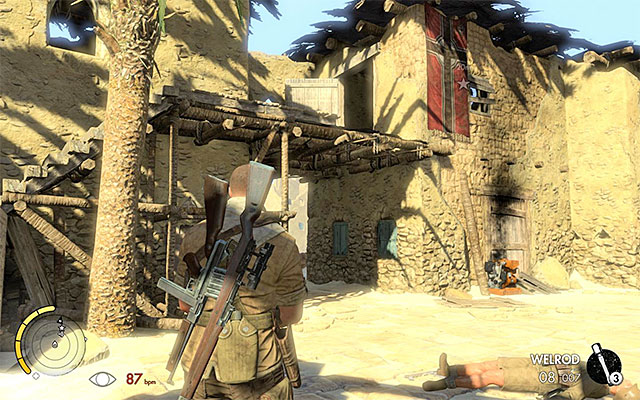
Vahlen's office is located in the South-Western part of the city (point 13 on the map) and the best way to approach is from the South (the above screenshot). Of course, you need to keep in mind that there may be, at least, several enemies around but, with appropriate precautions, all of the enemies can be eliminated with cunning attacks by surprise (a sniper rifle, a suppressed weapon, melee attacks).
 The last-but-one War Diary
Take the stairs but, BEFORE you enter the office, check out the neighboring building on the left. Here, you can find the last-but-one War Diary - Axis Account: Missing in Action. After you obtain the collectible, head towards the current destination point and see the cutscene.
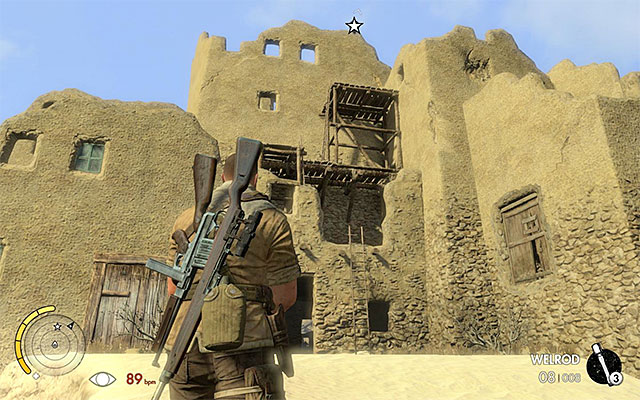 The location, where you need to start climbing
The vantage point is to the North of Vahlen's office (point 14 on the map). It is going to be a piece of cake to reach it, if you have followed my suggestion and secured the central part of the city. Otherwise, start eliminating the enemies that occupy the ruins or, try walking around them for example, from the West. You need to reach the vantage point from South and start climbing over the scaffolding and ladders here. After several moments, you will reach the current destination point.
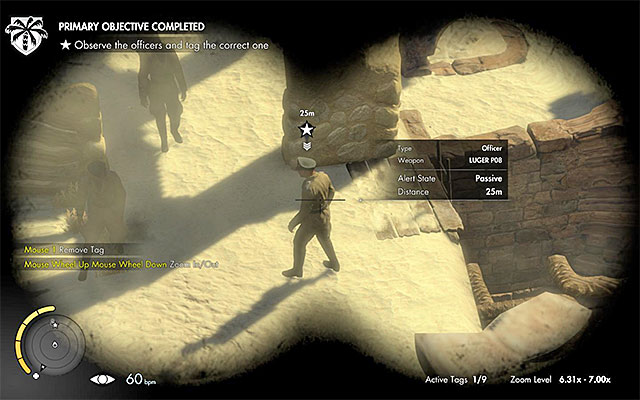
remain in the vantage point and prepare the binoculars. Start observing the enemies that stop to the South-East of you and start talking (point 15 on the map). According to the piece of information that you have received, you need to identify the appropriate officer and it is the first one on the right, marked in the above screenshot. Mark that enemy (press the appropriate key/button), thanks to which you will be able to track him.
Note - do not wait until the meeting ends, because the mission will be a failure, if you do not identify, and mark, the appropriate officer in time!
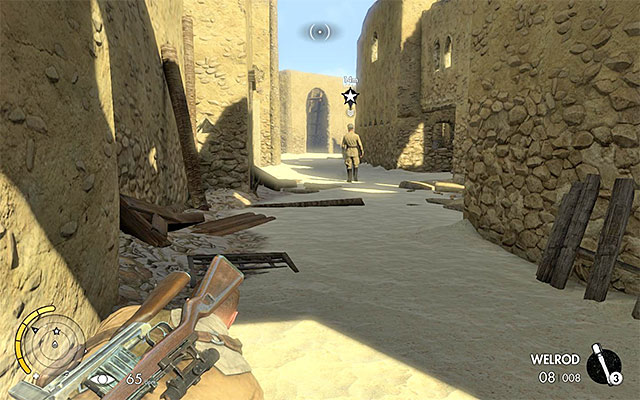 Keep within safe distance and avoid making noise
Quickly, descend from the vantage point and follow the officer. Again, you will gain a lot if you have earlier eliminated all of the soldiers in the Northern part of the city. This will allow you to follow the officer, without the necessity to walk around, or eliminate silently, the other enemies. While following the officer, keep within a safe distance. Also, do not attempt standing up, and also avoid jumping down to lower ledges, because this would alarm him unnecessarily.
Note - The officer's route has been marked on the map attached to this mission's walkthrough, with a red line!
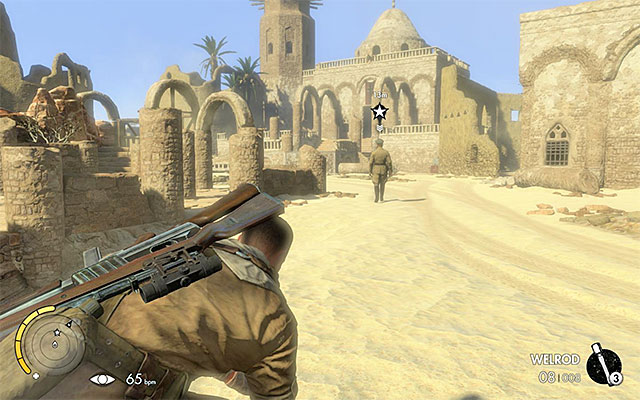 Do not kill the officer and keep following him instead
The officer that you are following, after several moments, will reach the building that he gathers intelligence data from. Although you could kill him now, and obtain the documents, I recommend against it. What speaks for keeping to follow the officer is the fact that the secondary objective of this mission can be complete only if you stage an accident happening to him.
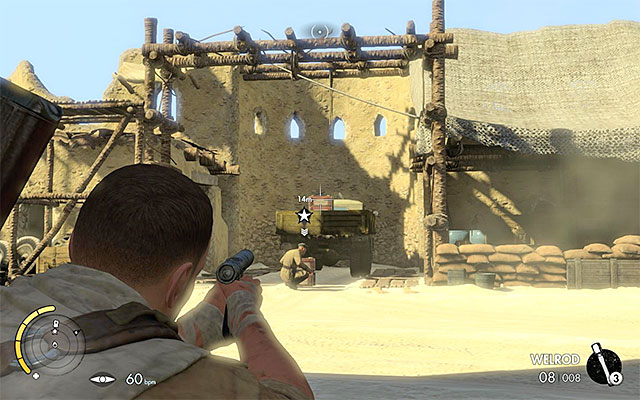 Blow up the truck, which kills the officer
Continue following the officer, until he reaches the truck parked in the North-Western part of the city (point 16 on the map). Select a suppressed weapon and target one of the crates here. The explosion should kill the officer. Take cover and eliminate the rest of the enemies that may arrive and, finally, examine the officer's corpse, in order to obtain the document War Diary - Vahlen's Journal: Smooth Progress.
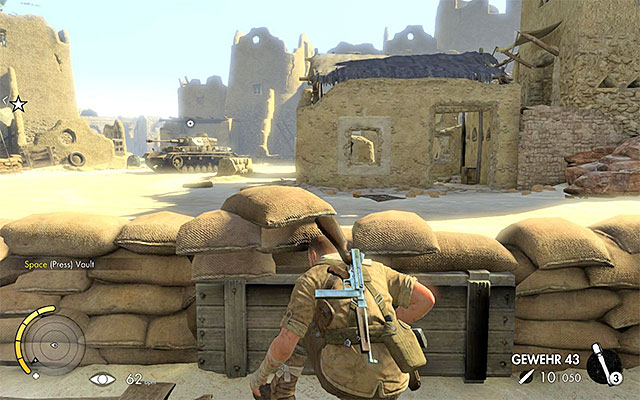 It is necessary that you take cover
AS QUICKLY AS POSSIBLE take the nearest cover because, right after you examine the officer's body, there will appear a Panzer IV tank around. If you do not hurry, you may find yourself under fire from the tank and it is easy to die here. The enemy tank starts patrolling this area (the green line on the map attached to this walkthrough) and your task is to destroy it.
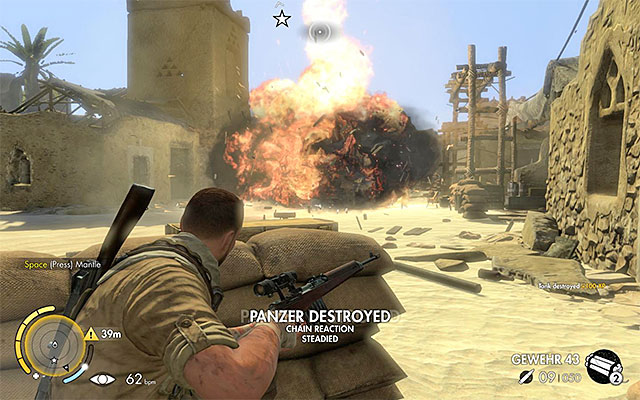 The best idea is to use dynamite to destroy the tank
Just like in the case of the tank that you had to destroy in the third mission of the campaign, the most effective here is dynamite. Throw dynamite onto the main road and wait for the tank to arrive. Aim, then, your sniper rifle at dynamite.
Note - If for some reason, you do not have dynamite on you, you can try doing that, using landmines or the Panzerschreck RPG, although one attack may not be sufficient to destroy the tank, then.
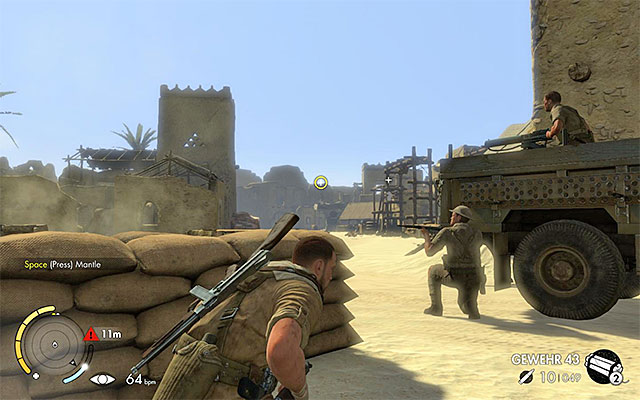 It is necessary that you use covers
After you have destroyed the tank, try taking the Northern city exit (point 17 on the map). Unfortunately, this results in a cutscene that informs you of the appearance of the enemy snipers around. After you regain control over your character, take cover, as quickly as possible, because you may become an easy target, otherwise.
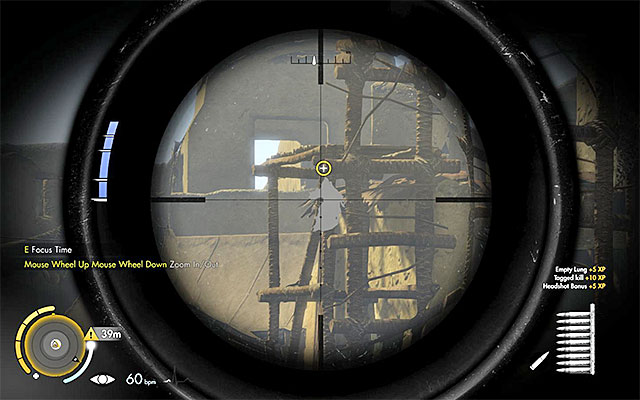 Use the sniper rifle to eliminate all of the enemy snipers
IN my case, there were three snipers to eliminate - one of them to the South of the city's exit gate and two to the West of it (points 18 on the map). Still, keep in mind that they may move away from these points, a little bit and position themselves elsewhere. Find the successive snipers and try to stick out of your covers, only for brief moments, necessary to take the shot at a range. After you have secured the area, approach the gates again and wait for the mission to end.
The above screenshot presents the map of the location, in which you play the sixth mission of the game. It is a medium-sized mountainous area and it surrounds the Vahlen's command center located in the temple. First of all, on the map, there have been the key places marked (mission objectives main paths, etc.) and the whereabouts of collectibles.
Apart from that, you there are colorful lines and dots on the map:
In this mission, there are several enemy vehicles that you need to destroy. Therefore, it is of key importance that you take explosives along. To blow up the halftracks, you only need the "regular" landmines. When it comes to the Tiger tank, it is best to destroy it with a well-aimed stick of dynamite. Also, you need to take the best available sniper rifle, because there are many opportunities to take long shots, during the mission.
Optional tasks and challenges:
Collectibles:
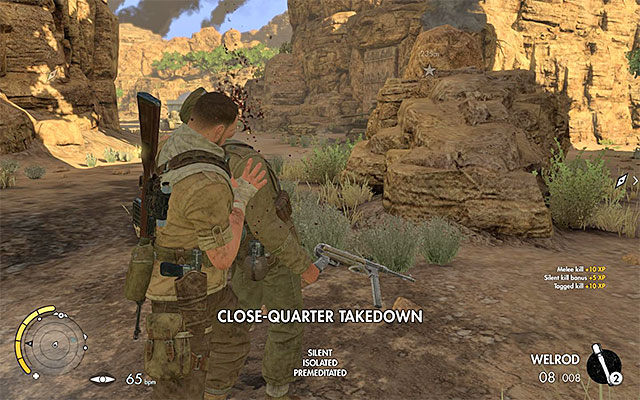 The first soldier that you encounter
You stat this mission in the North-Western part of the map (point 1 on the map). Follow the linear path, full of vehicle wreckages and eliminate, quietly, the first enemy soldier at its end. In the meantime, you should receive a new secondary objective, connected with the Nebelwerfer rocket launchers. I recommend that you deal with them before you reach the mission's main target, i.e. Vahlen's command center. The first launcher is located to the East of the mission's starting point (point 4 on the map).
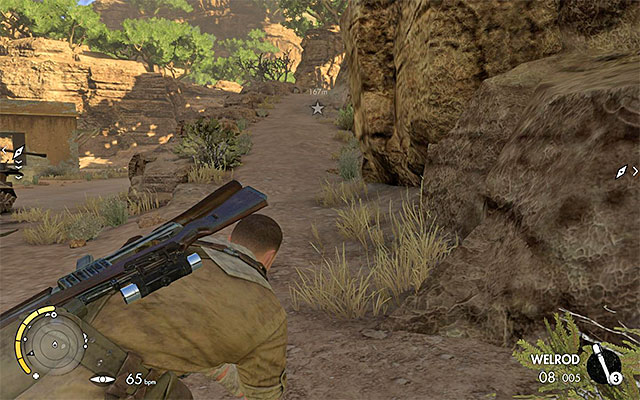 The path up the hill, to the south of the launcher
I recommend against going towards the first launcher immediately, because on the hill, to the South of it, there stops a single guard, every now and then, and he has a perfect view of the area. As a result, it would be a good thing to eliminate him in the first place. To do that, take the path to the Southern hill (points 3 on the map).
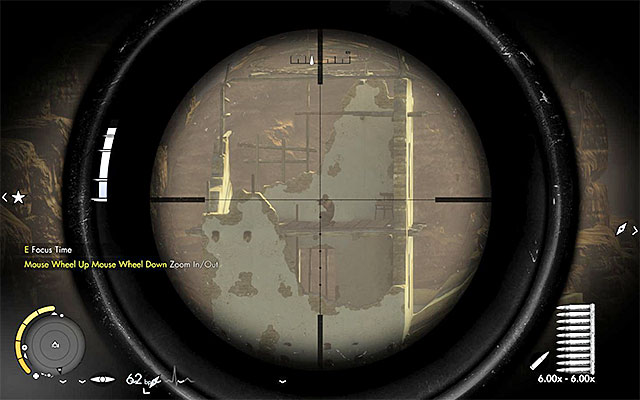
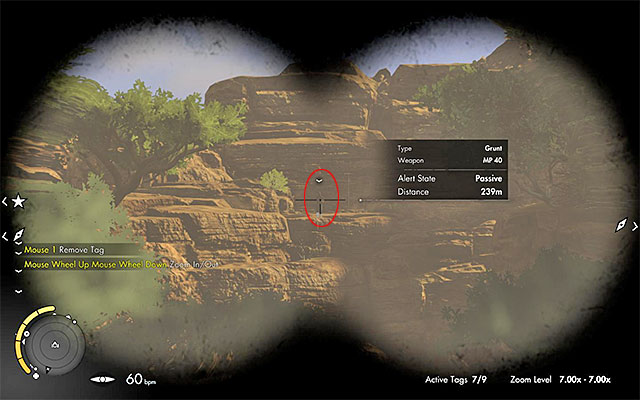
After you climb onto the abovementioned Southern hill, take a look around the area. Here, there is, at last, one opponent but, what is more important is unlocking the first sniper nest (the blue point 1 on the map). After you take your positions in the nest, take two shots. First of all, eliminate the enemy sniper that occupies the tower in the village, to the South-West of here (screenshot 1). Then, take to scoring the Long Shot - in this case, you need to target the opponents several hundred meters away, Southwards of the nest (he has been shown in screenshot 2).
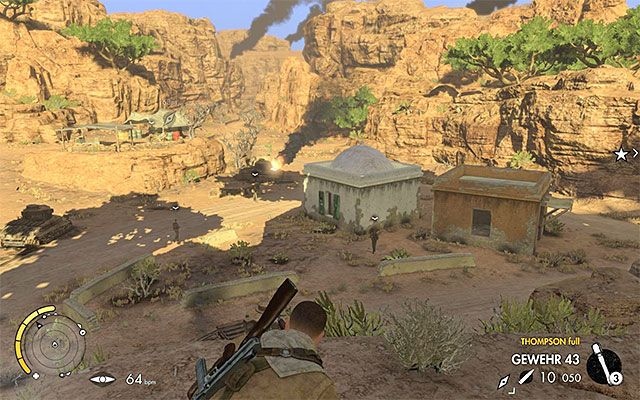 The hill provides you with a good view of the area around the launcher
After you have used the first nest, reach the Northern part of the hill. After you get to the vantage point, eliminate the abovementioned single opponent and, at the same time, collect the War Diary - Survival Notes: Water; (green point 1 on the map). Turn towards the Northern buildings, mark the targets and try to eliminate, at least, some of them. It is worth adding that, just like in the case of the previous mission, you can use the fact that there are planes flying overhead, to drown out your gunshots.
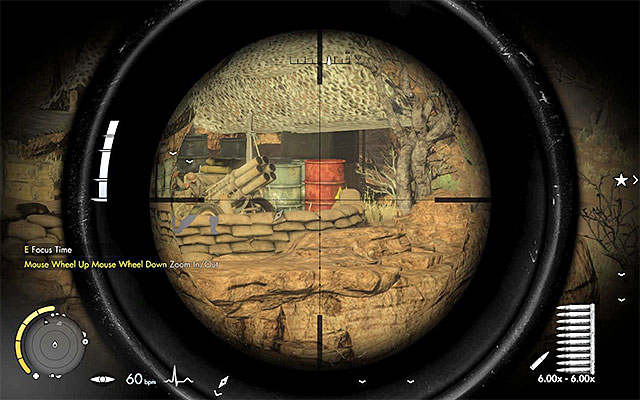 You can destroy the launcher, e.g. by shooting at the explosive barrel.
You need to destroy the first launcher (point 4 on the map), because it is not enough to eliminate its crew to complete the secondary objective of the mission. The easiest way to do that is to fire a shot, at a long distance, at the red barrel. If you do not want to use weapons, you can approach the launcher (ideally from the West, right after you climb down the hill) and throw an M24 grenade. regardless of what you did, be prepared to take on the reinforcements that may arrive in the location of the explosion. Also, explore the buildings to the South of the destroyed launcher, because there is a collectible card, inside one of them. (green point 2 on the map).
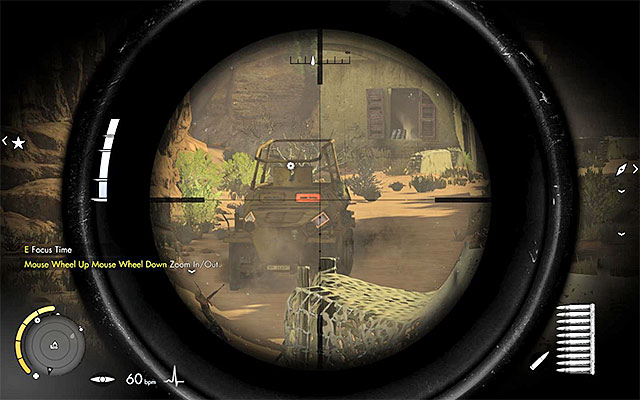 The crew of the halftrack may spot you even at a long distance
The second of the launchers is in the South-Eastern part of the map (point 7 on the map) and you are, nearly, bound to run into the patrolling enemy halftrack, along your path (green line 1 on the map). You need to be really careful here, because the crew of the halftrack has a quite good range of seeing so, you can be spotted at a long distance, and also at an angle. If it is an option, mark the enemy vehicle, with the binoculars, thanks to which you will always know where it is at any given moment.
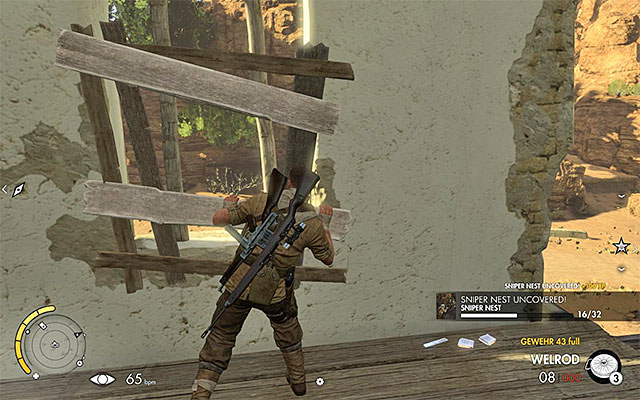 A landmine is the best method of destroying the halftrack
It is possible to walk around the enemy halftrack, but this would be burdensome. It passes by lots of important locations, which it would be good to secure, without any pressure, and explore afterwards. Therefore, I recommend that you deploy, e.g. a landmine along the vehicle's path and eliminate it this way. Another upside of this solution is that, unlike, e.g. the trucks in the fourth mission, the destroyed halftrack is not going to be replaced with another one.
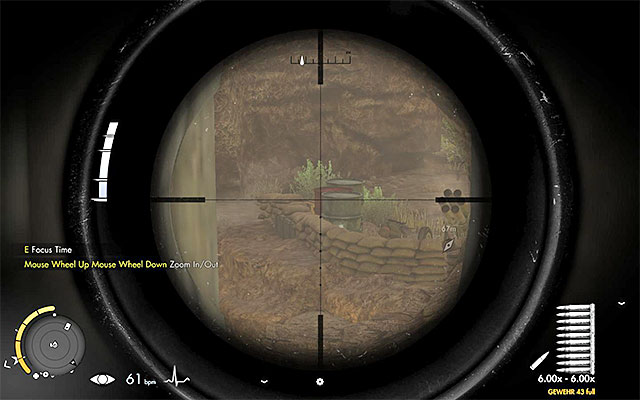 One of the possible paths is to the South of the mission's starting point
After you have disposed of the halftrack. plan on your way to reach the second launcher (point 7 on the map). You can take the main paths (e.g. the one exactly to the South of this mission's starting point), go along the tunnels (points 2 on the map) or pass through the hill that you have already visited. (points 3 on the map).
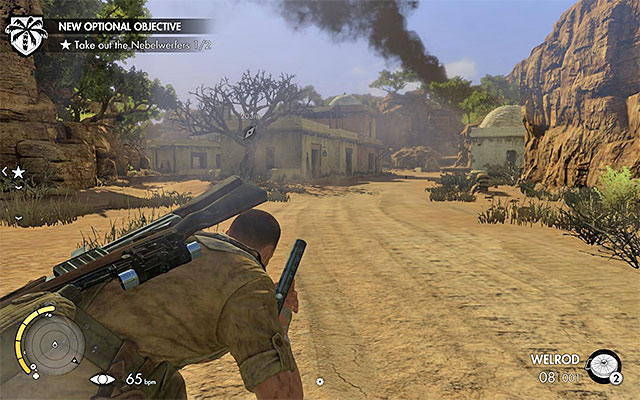 You can approach the village, e.g. from the North or from the North-East
Along your path to the second launcher, I recommend that you check out the central village (point 5 on the map). Slowly and methodically, eliminate the enemies here, avoid detection and remember about the opponents on the rooftops of some of the buildings. While here, explore the successive buildings. Thanks to this, you will obtain a new War Diary - Missives from Home; green point 3 on the map) and a collectible card (green point 4 on the map).
Unlock the nest and locate two more war diariesYour next stop, along your path to the destination point is the North-Western buildings (point 6 on the map). Here, there are smaller numbers of enemies, which does not mean that you should not keep appropriate precautions. Continue the exploration, thanks to which you will obtain two more War Diaries - Axis War Story: Remembering Emil and Vahlen's Journal: Usefulness of Rommel). Also, try to reach the top of the tower, which used to be occupied by the enemy sniper. Here, there is another sniper nest (blue point 2 on the map).
The second rocket launcherJust like in the case of the first launcher, you can decide, whether you want to destroy it at a range (by shooting at an explosive object) or approach it and throw the enemies a grenade. Regardless of what you did here, explore the building to the East of the destroyed launcher, to collect a collectible card (green point 7 on the map).
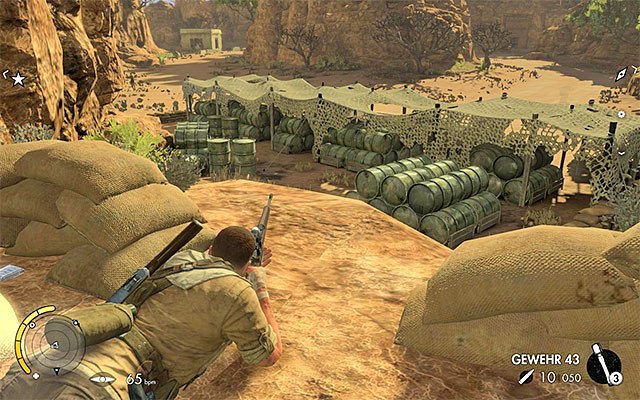 The last sniper nest
The command center is in the Eastern part of the map (point 9 on the map) and you can approach it from various sides. One of the possibilities is to reach here from the North-West, i.e. from the side of the first rocket launcher. In this case, it is a good idea to take the South-most path (at most, you will encounter here only one opponent) and unlock the last sniper nest that you find along your path (blue point 3 on the map).
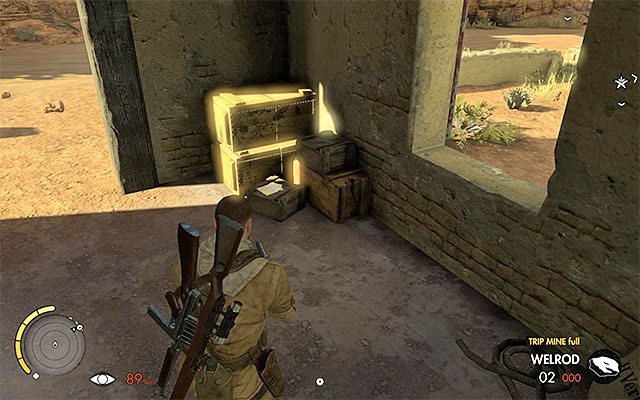 The location where you find a war diary in
Another interesting variant is to make it over across the Southern part of the map. In this case, you can either take the Southern road or follow several new tunnels (points 2 on the map). Along your path, it is a good idea to check out the single cottage, where there is another War Diary - Axis Account: Dangerous Ambitions; green point 8 on the map).
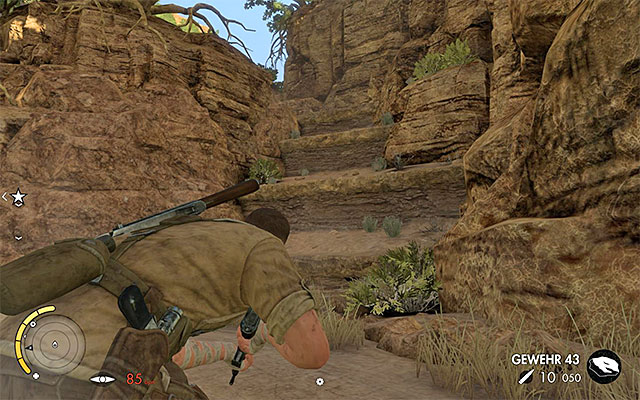
The variant that I suggest assumes that you climb the Southern hill that neighbor's Vahlen's command center. Start near the second destroyed rocket launcher. Go South and locate the climbing spot shown in the above screenshot. (point 8 on the map). Make it over onto the Southern hill and use a suppressed weapon to eliminate the three enemies staying here.
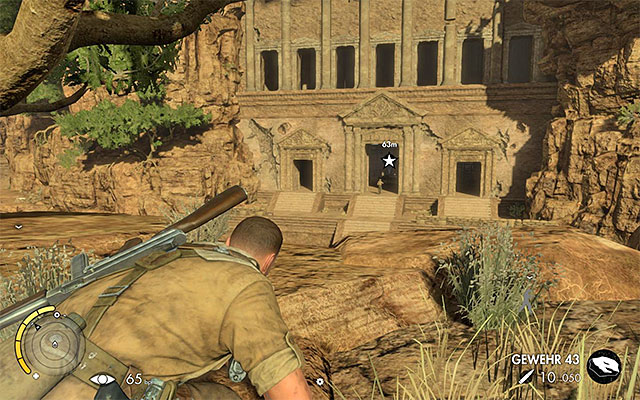 The Southern hill is a perfect spot to attack the enemies that guard the command center
Thanks to reaching the Southern hill, suggested above, you will obtain a perfect view of the entire area around the command center. You can now start eliminating successive enemies, at a distance. What is interesting, you do not need to wait for the opportunity to drown out the bang of the gunfire, at all costs, because you just need to move over to another part of the hill, if it is heard, and hide again in this way. Additionally, you can secure and mine the only "regular" path to this hill (the one that does not require climbing over ledges).
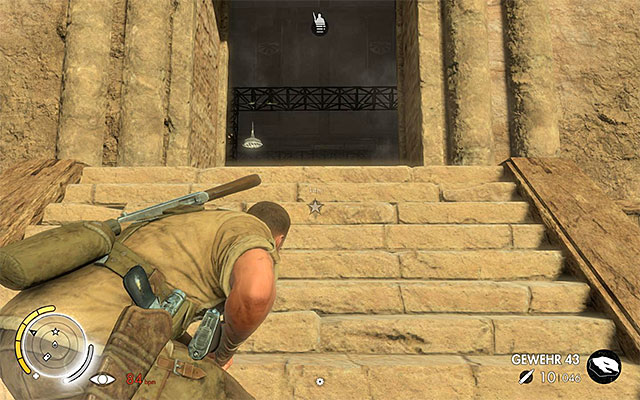 The stairs
In any way you want to, keep eliminating the enemies and remember that you also need to deal with the two enemy soldiers, who keep walking back into the command center. After you have secured the area, head towards your current target and take any stairs to enter the temple.
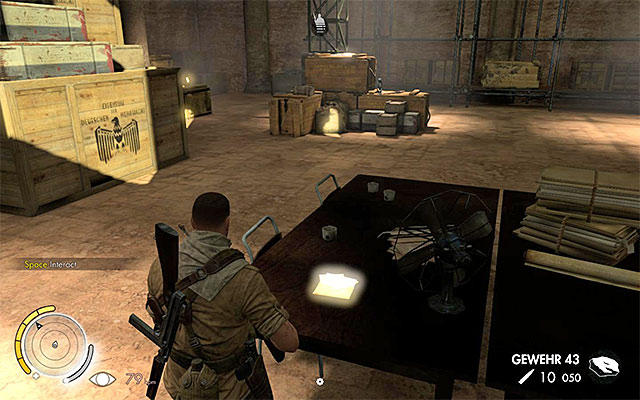 Collect the note from the command center
After you walk inside the command center, look, in the first place, for the two supply crates. Collect the valuable items and, only after that, approach the marked table, on which there is War Diary - Note from Vahlen: In My Absence. Learning its contents allows you to determine that you will have to obtain a document with the combination for the safe here.
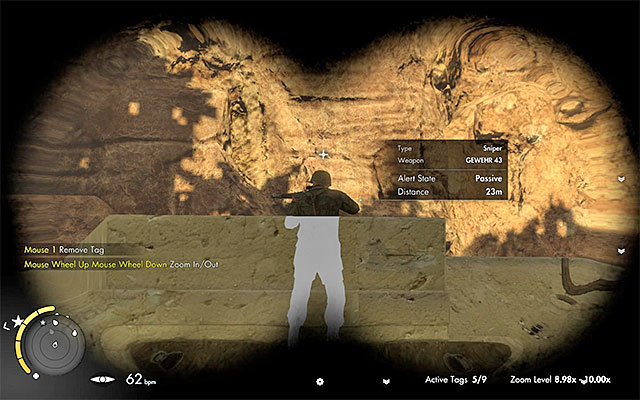 Do not allow the enemy sniper to spot you
The note with the safe combination is in possession of an enemy officer that has appeared in the smaller village, in the Southern part of the map (point 10 on the map). Do not haste to get to him, because the officer is being guarded by six soldiers, including a sniper that watches over the area, from one of the rooftops in the village. I recommend that you reach the officer from the South-West, because this path is not as well-guarded (while along your path, remember to crouch and hide in the grass and behind covers).
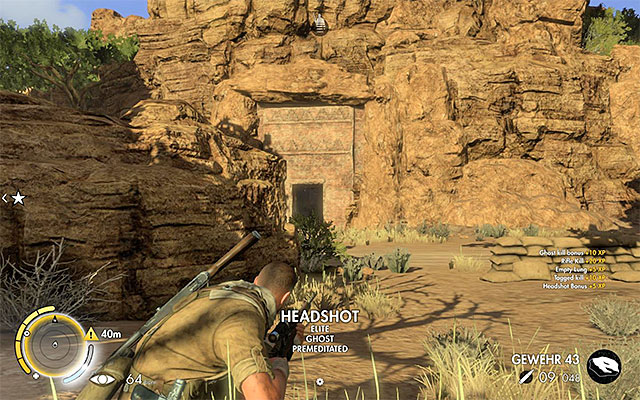 It is a good idea to eliminate all of the soldiers that accompany the officer
If you want to, you can focus on eliminating the officer, with the document, straight away. Still, I recommend that you eliminate all of the nearby enemies, in the first place. Start with the abovementioned sniper and, after that, eliminate the enemies, one by one (it is best to use a suppressed weapon and melee attacks here). While staying here, take a look into the building, on whose rooftop there used to be the sniper. Thanks to this, you will obtain a War Diary - Letters to Martin; green point 10 on the map.
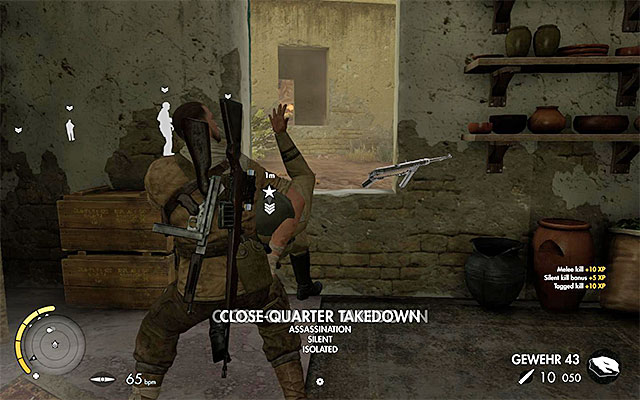 Kill the officer and search through his corpse
The enemy officer should be staying in the Western building, unless your actions scared him away. Depending on which you prefer, you can either shoot him or eliminate him with a melee takedown. After the successful attack, hold down the searching key/button to obtain the safe combination (War Diary - Note from Vahlen: Safe Combination).
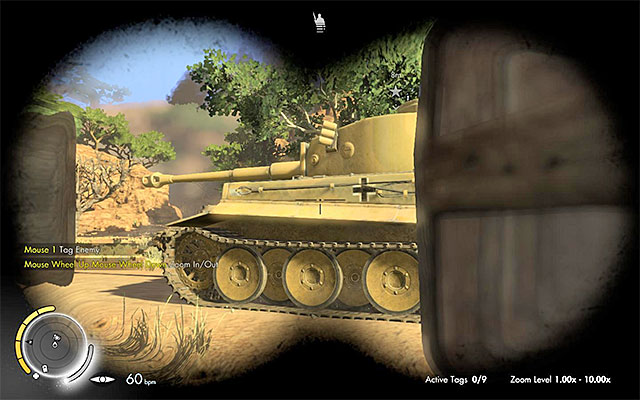 It is best to hide behind one of the buildings
Head now for the meeting with Brauer (point 11 on the map). After you get there, you will see a cutscene of the ally's death. In the South-Western part of the map (point 13 on the map), there appears an enemy tank and it started going Northwards. This means that you should, as quickly as possible, take cover behind one of the buildings, neighboring the one that Brauer died in.
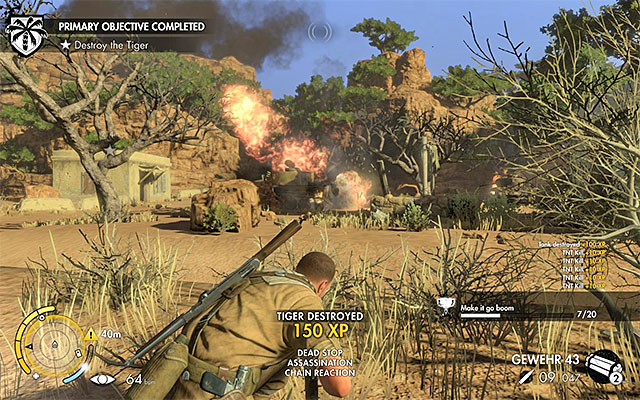 Dynamite is the easiest way to destroy the tank
In spite of the fact that you are dealing with the better model of a tank, than the one encountered in the previous missions, the tactics remains the same. Select dynamite from the inventory and throw it into one of the main roads. Find a good spot to take a shot (e.g. a rooftop, or a wall to hide behind), wait for the tank to approach and shoot at the dynamite, with the sniper rifle. The explosion should destroy the enemy vehicle.
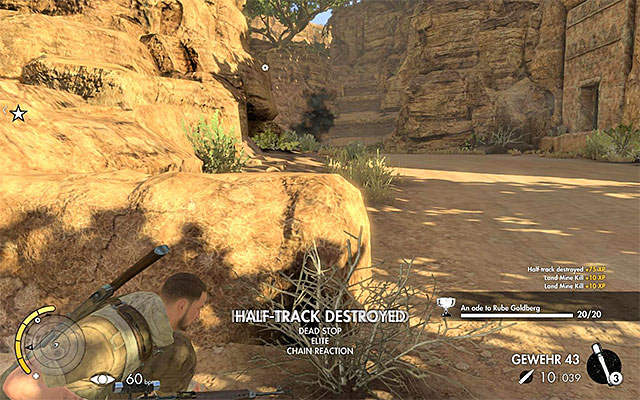 Use a mine or dynamite to destroy the second halftrack
I recommend that you hide, again, behind one of the nearby buildings, because there will appear another halftrack on the map, after a while. The vehicle starts patrolling the area marked, on the map, with green line 2. Just like in the case of the previous one, I recommend that you use a landmine, to destroy it. However, you need to hurry, because the route of the vehicle is short and you still need to take cover, after you set the trap.
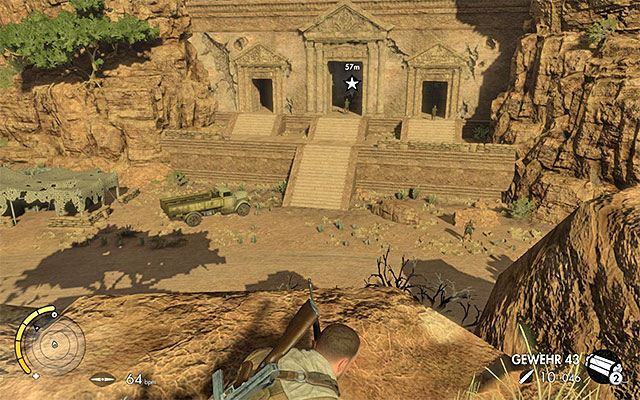 Attack the enemies from the hill
The new enemies started, in the meantime, gathering near the entrance to Vahlen's command Center (point 13 on the map) and to be promoted to the final part of the mission, you unfortunately need to kill them all. I recommend that you, again, reach the Southern hill (path is in points 8 on the map) and start sniper fire. Continue attacking, until you receive confirmation of securing the area.
Note - if you have killed all of the enemies and you do not see any more incoming, wait for a moment because, maybe, they are still on their way to the temple.
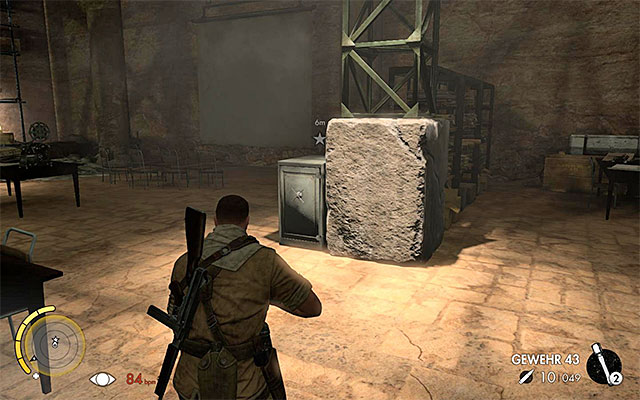 The safe
Once again, enter the temple. After you get into the command center, approach the safe marked by the game (point 14 on the map) and wait for your character to interact with it automatically. Depending on your preferences, you can see through the movie, played on the projector, or exit the temple immediately. You will see a short cutscene, which informs you of the arrival of new snipers in the area.
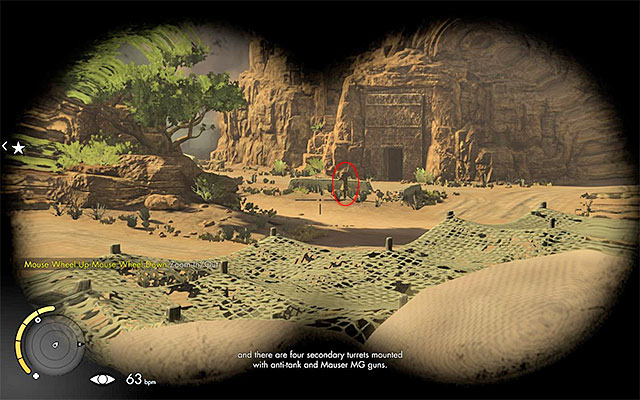
Right after you exit the temple, hide behind the nearest cover. It is very important, because you may quickly be targeted by one of the first two snipers, otherwise. The abovementioned sniper is sitting in the spot shown in the above screenshot (point 15 on the map), i.e. to the west of the command center. Stick out, from behind your cover, only for a moment, enough to take a well-aimed shot.
 The second sniper
You can now go towards Brauer's corpse (point 16 on the map). Take your time, because there is another sniper around. He is occupying the very same tower that used to be occupied by the sniper, who you killed at the beginning of the mission (the second point 15 on the map). Also here, take a shot from afar. After you have eliminated both of the snipers, reach the corpse and see the final cutscene.
The above screenshot presents the map of the location, where there seventh mission of the game takes place. It is the airfield, taken over by the enemy, which consists of the airstrip, several hangars and a number of the underground bunkers, which you access later into the mission. On the map, there have been the most important places marked (mission objectives, main paths, etc.), as well as the whereabouts of the collectibles.
Apart from that, you there are colorful lines and dots on the map:
During this mission, you will have to destroy the highest, so far, number of enemy vehicles. It is a good idea, of course, to take dynamite along, as well as landmines. Still, you do not need to overload yourself with explosives only, because there are many ammo crates all around the airfield, and just as many Panzerschreck RPGs. You definitely need to arm yourself with a sniper rifle with the best available scope, because you are going to need it, e.g. to take the Long Shot.
Optional tasks and challenges:
Collectibles:
Note - before you take to the first primary objective of this mission, it would be a good idea to explore the entire map. Later on, this is going to be more difficult, because you are up for quite a number of direct fights, towards the end of the mission. During the airfield exploration, I recommend that you move in the clockwise direction, i.e. explore the Eastern, Northern, Western and Southern portion of the map. If, however, you prefer only to reach the main target of the mission, you can stop in the Western part of the map and unlock access to the underground bunkers at that point.
 The generator will drown out the rifle shots
This mission starts in the South-Western part of the map (point 1 on the map). Try to approach the first enemy group to the East of here. Eliminate them and take a look around for a big generator, which it is a good idea to sabotage. Take advantage that the generator is making and eliminate all of the remaining enemies in the area.
Note- Just like in the previous missions, every now and then, there also are airplanes flying by, but the frequency of that is low.
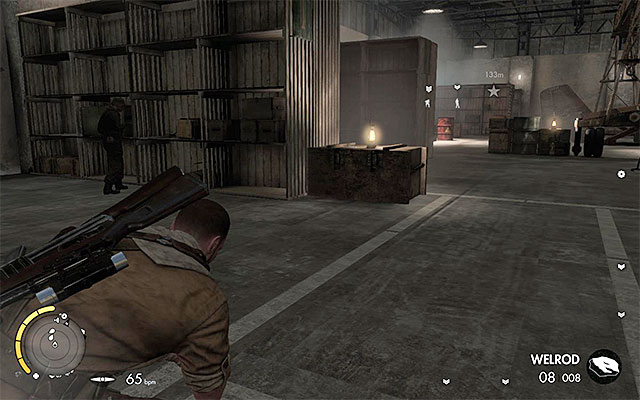 In each hangar, you will have to eliminate 2-3 enemies
After you have initially secured the South-Western part of the airfield, I recommend that you head Northwards. There are several paths to choose from, here. One of the possible variants assumes that you cross two hangars - number 4 (point 2 on the map) and number 3 (point 3 on the map). Unfortunately, in each, you will encounter, at least, two or three enemies but, thanks to reaching to these buildings, you can obtain two War Diaries - Survival Notes: Sandstorms and Letters to Martin; green points 1 and 2 on the map).
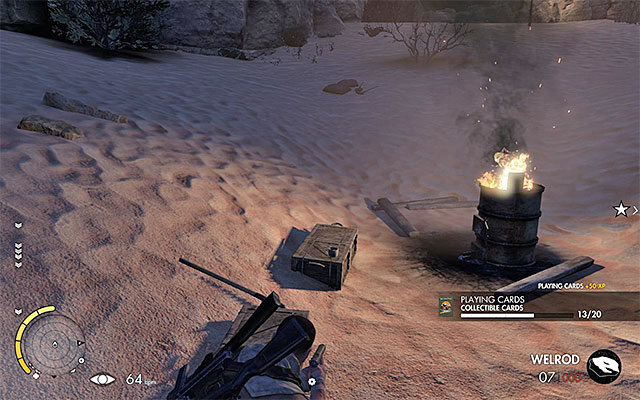 The collectible card has been placed in a secluded spot
Another good way to reach the Northern part of the map, is to move close its Western rim. An additional asset of this variant you should not, initially, encounter any enemies here. Only further into your path, you will approach two soldiers, standing side by side - you can either shoot them or attempt to walk around them. While here, explore this area, thanks to which you will find a collectible card (green point 3 on the map).
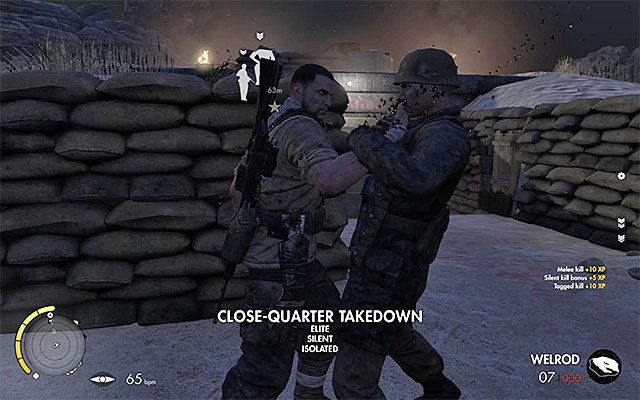 Eliminate successive enemies
In the North-Western part of the map, there are fortifications connected with the underground bunkers. As I have already mentioned, it is best to gain access to the bunkers only after you have explored the rest of the map but, there is nothing in your way to prevent you from securing the area initially. In my case, two soldiers were patrolling around one of the bunkers. Two other soldiers stood directly above them (also here, it is advisable to use a suppressed weapon).
The North-Western part of the airfield is also being watched over by two snipers, who are occupying the nearby hill (point 5 on the map). They have been shown in the above screenshot where, it is highly probable that they appear on the map only some time after you have started the mission. Try to eliminate them by attacking at a distance, as soon as they get to their positions (at best, by taking a shot drowned out by passing airplanes), in order to prevent being spotted by them, later into the mission.
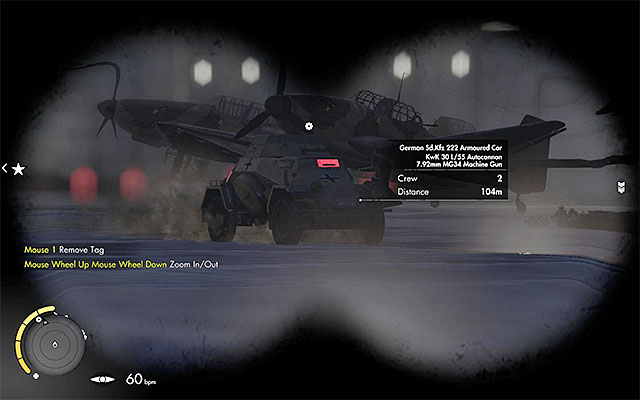 The armored vehicle
Before you move into the central part of the airfield, it is a good idea to mention a few things about the actions that the enemy are taking. The central airstrip (point 4 on the map), is being patrolled by a group of 4-5 soldiers (you can either avoid them or throw them a grenade). Additionally, around there also is an armored vehicle. The enemy vehicle is occupied with patrolling the areas marked with the green lines on the map, provided with the walkthrough for this mission.
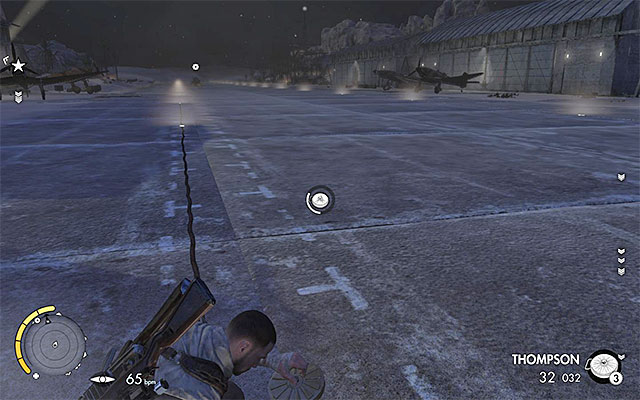 The best way to disable the enemy vehicle is to use a landmine
It is highly advisable that you eliminate the abovementioned vehicle, at the first opportunity, because this will make further exploration of the map easier. I recommend against using the sniper rifle, or the rocket launcher, because you can then be easily spotted. It is best to use landmines and place one in the path of the vehicle.
Note - if, for any reason, you do not have explosives on you, reach one of the multiple supply crates all around the map (some of them are, e.g. in the Western hangars).
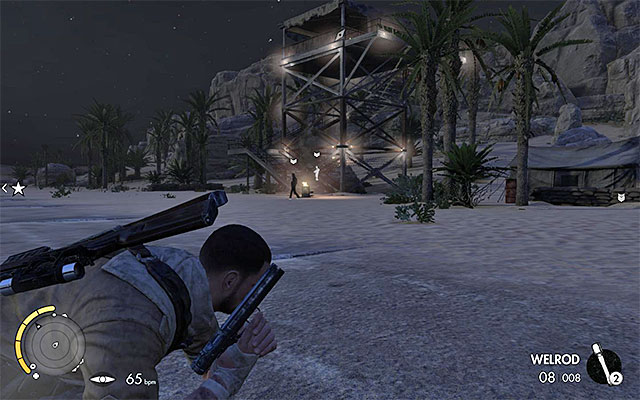 The control tower
Head towards the North-Eastern part of the map. Here, there is the control tower (point 6 on the map) and you should unlock the secondary objective connected with the tower. Start by eliminating the two guards, who are patrolling around the tower. Then, take the stairs and deal with the enemy inside the tower, thanks to which you will complete the secondary objective. Remain in the tower, for a bit longer, and collect the new War Diary - Allied War Story: Last Defense.

Climb downstairs and go Eastwards of the control tower. Locate another War Diary - Survival Notes: Desert Sniping II and unlock the first sniper nest. Lay down, on the ground, and use the binoculars, because it is here that you take the Long Shot. Your target has been shown in the above screenshot and it is, as far away from the nest, as 600 meters.
Note - if you are experiencing any problems with taking the shot (the necessity to make considerable corrections, due to the distance and wind) return here later into the game, after you have unlocked a better scope for the rifle. Also, you can play this mission at a lower difficulty level, at which the real-life ballistics is disabled.
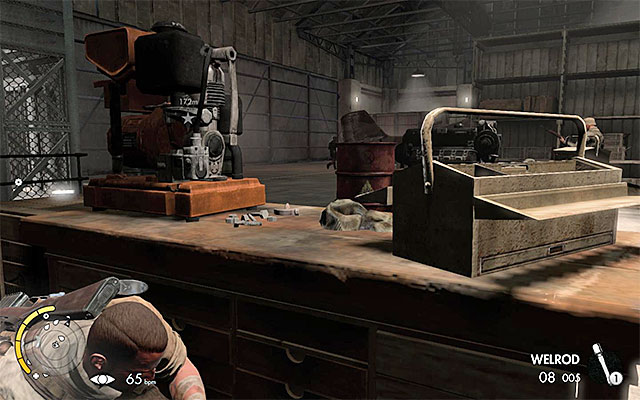 IN the eastern hangars, you will encounter ore enemies
To the South of the control tower and the first sniper nest, there are, most importantly, two hangars, numbered 1 and 2 (points 7 and 8 on the map). Also they are being guarded by single enemies but, you are not going to find any collectibles inside. Instead, there are supply crates inside and it is worthwhile returning to them, when you are close to depleting your ammo, or explosives.
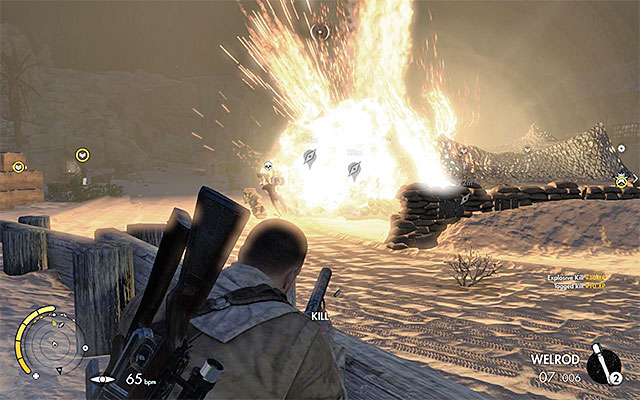 There are three depots to blow up
To the East of the hangars, there are three bomb depots (points 9 on the map) and they are connected with another secondary objective for this mission. Your task is to destroy all three depots, e.g. by shooting at the explosive barrels, with a firearm, or by throwing some grenades at them. Since the explosions of the depots may attract attention from the nearby enemies, be prepared to eliminate them, after they arrive (you can also blow up the depots after the enemies arrive in them). After you destroy the depots, check out the tents locate to the East of them - inside one, there is a collectible card (green point 6 on the map).
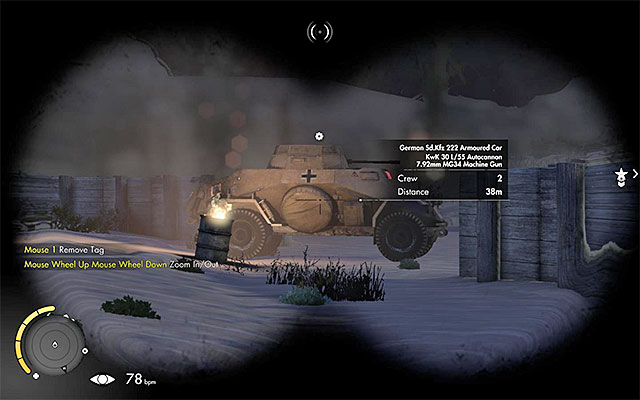 The enemy vehicle
As you continue your exploration of the Eastern parts of the airfield, you need to keep in mind that two handicaps are going to occur. The first one is the armored vehicle,, which is parked near the road. Do not let yourself be spotted by the crew of the vehicle (do not pass by right in front of it) and try not to raise the alarm, to prevent it from setting out on a patrol. I recommend that you destroy the enemy vehicle, because it may, otherwise, join in the fights, towards the end of the mission. The easiest way to do it is to throw some dynamite and detonate it by firing at it, at a distance.
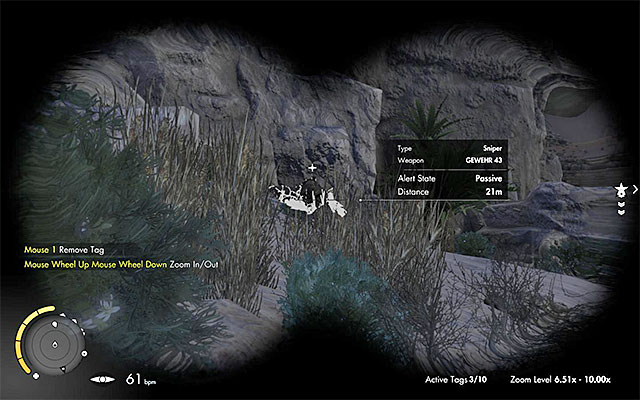
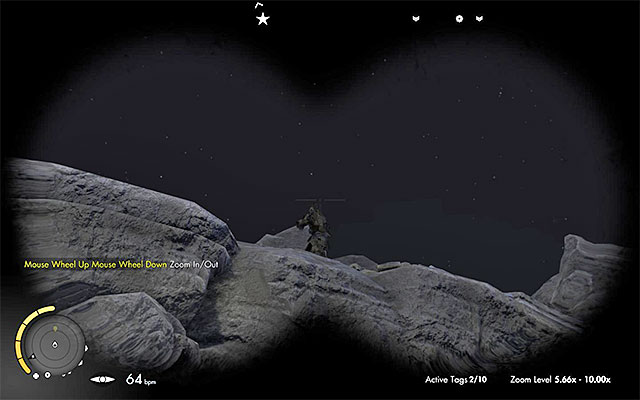
The other handicap is even more important, because it is connected with the two snipers staying around. They have taken their positions on the hills in the South-Eastern corner of the map (point 10 on the map) where, just like the snipers in the previous group, they may appear around only after some time. The first sniper is at a lower height (screenshot 1), whereas the other is occupying the upper ledge (screenshot 2). Eliminate them in any way and d try not to be targeted by them, at the same time.
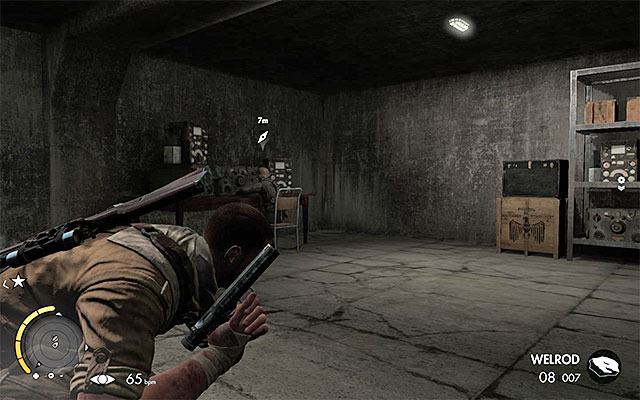 The radiotelegraph operator
Head Southwards and reach the fortifications guarded by more enemies. Here, you will have to complete another secondary objective. It is worthwhile entering the small bunker to the South (point 11 on the map). There is a radiotelegraph operator here and you need to kill him. Thanks to killing him, not only will you complete the side objective, but also stop the arrival of further reinforcements, later in the mission.
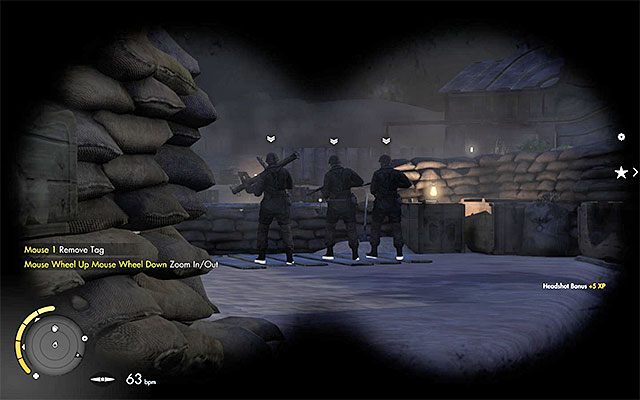 The enemies observing the airstrip
Before you leave the Eastern part of the airfield, turn your interest to the several opponents that are observing the main airstrip. It is a good idea to eliminate them e.g. by throwing them a grenade. Only after you have dealt with them, take to the rest of the soldiers patrolling the Southern part of the map (of course, this is optional, but I recommend against skipping this step).
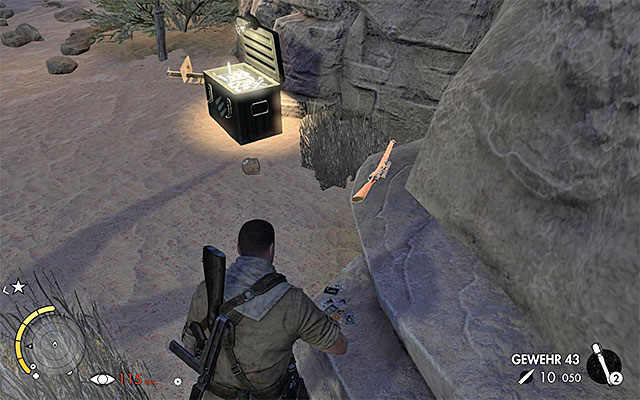
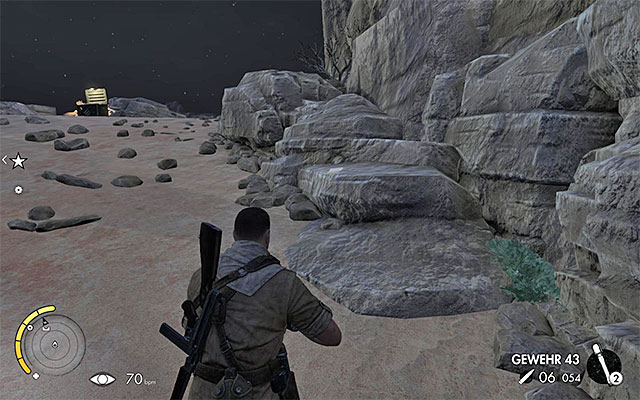 The spot where you find another collectible card and a war diary
In the South-Eastern and Southern part of the airfield, there also are several other places that it is a good idea to visit. First of all, unlock the two sniper nests - the one in the southern tower (blue point 2 on the map) and the one on the nearby hill (blue point 3 on the map). Around, there also are two collectibles - a collectible card (green point 7 on the map) and a War Diary - Axis Account: Desperation; (green point 8 on the map).
 The bunker entrance
Accessing the bunkers is the first primary objective for this mission and it is a good idea to do that only after you have sufficiently explored all of the areas on the surface. In order to be promoted to the next part of the mission, you first need to go towards the small bunker in the North-Western part of the map (point 12 on the map).
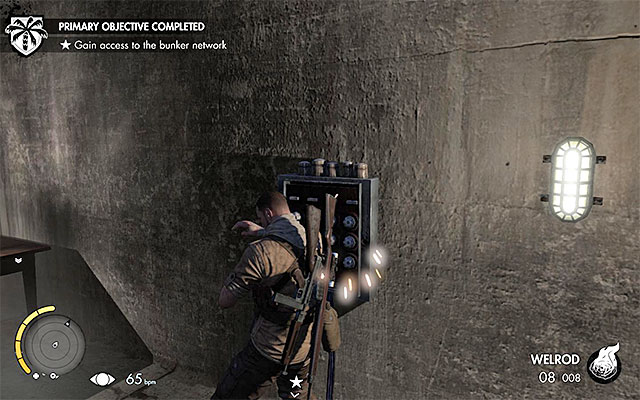 Sabotage the fuse box
Locate the bunker entrance, which should not be guarded by anyone. Enter, approach the fuse box (point 13 on the map) and sabotage it. Performing this action unlocks all of the access points to the underground bunkers.
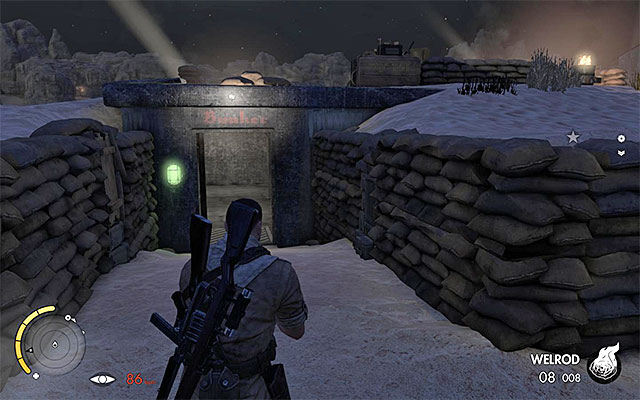 An example entrance to the bunker complex
There are many ways to access the bunkers and all of them have been marked with points 14on the map, provided with the walkthrough for this mission. You can, for example, take one of the passages in the surface fortifications or, the stairs that you can find in each of the four hangars. The selection of the path does not really matter, because none of them are guarded by the enemy, in any particular way.
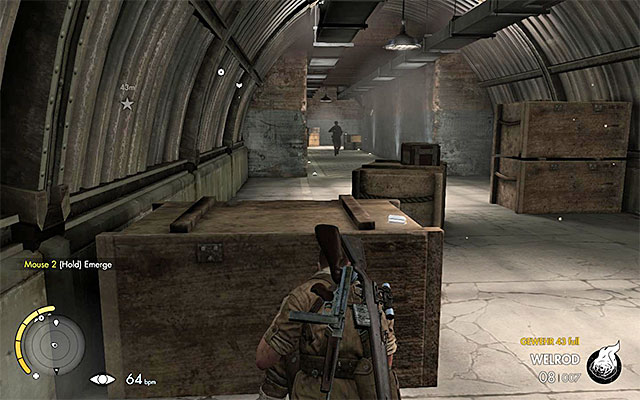 The best tool that you can use to eliminate the enemy soldiers is a suppressed weapon
Start your exploration of the corridors of the underground bunkers. You need to keep in mind that they are patrolled by, at least, four enemies. Due to the specific nature of this location, it would be very difficult to walk around them so, I recommend that you rely on a suppressed weapon and eliminate them before they raise the alarm. During the exploration, keep your eyes peeled for war journals, because there are, as many as, four such collectibles here (War Diary - Missives from Home, Axis War Story: Infantry Change, Survival Notes: Clothing and Vahlen's Journal: Threat to Completion; green points 9-12).
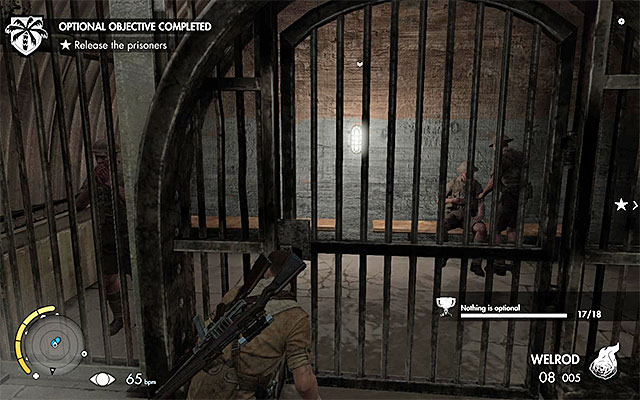 Secure the area and free the prisoners
After you reach the South-Eastern part of the bunkers, there appears an opportunity to complete a side objective of this mission. What is meant here are the prisoners that are being kept here (point 15 on the map). Deal with the enemy guards, who are patrolling these areas, approach the grate and interact with it to free the allies.
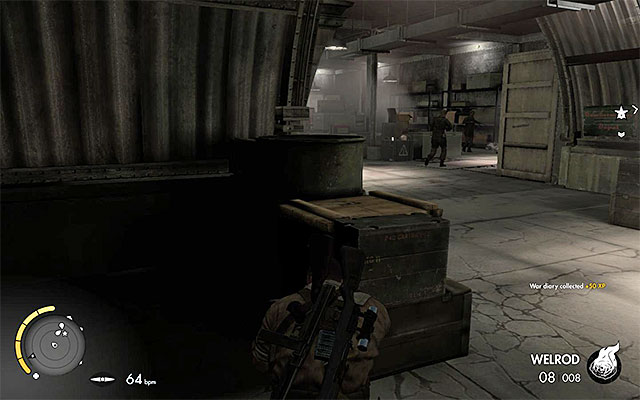 The central part of the underground bunkers
Finally, head towards the central part of the bunkers. You need to keep appropriate precautions here, because there are three more guards around. Just like earlier, try to eliminate them with well-aimed shots from a suppressed weapon. Take your shots, of course, at the moments at which you will not alarm the enemies prematurely.
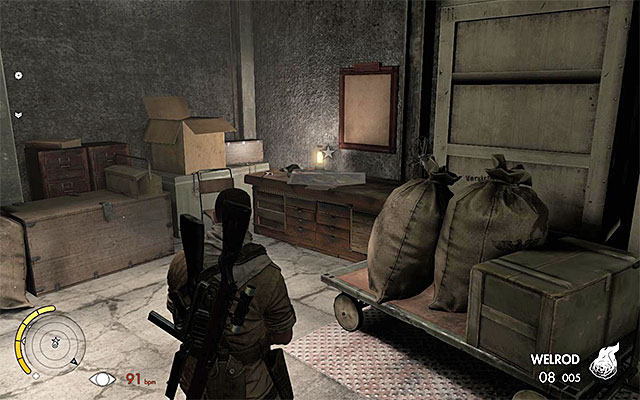 The map that you are searching for
It is very important to eliminate the three abovementioned enemies, because there is the map, which you are looking for, in the area. It would be practically impossible to reach it, without securing the area properly. Learn the map and wait for more instructions.
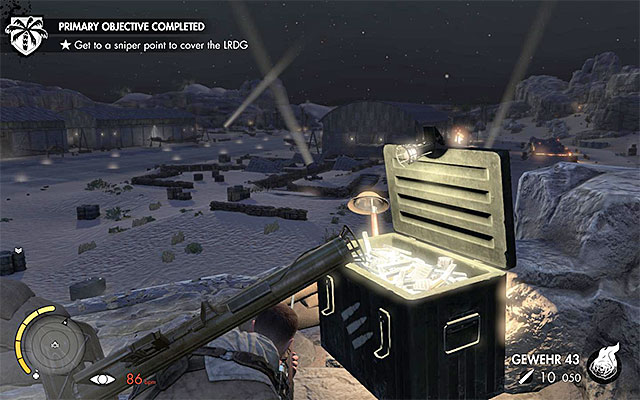 The vantage point
Leave the underground complex and head towards the third sniper nest in the South-Eastern part of the map (point 17 on the map). Along your path, make sure that you have restocked your ammo for the sniper rifle. Position yourself on the hill and wait for a vehicle, with enemies inside, arrives at the base.
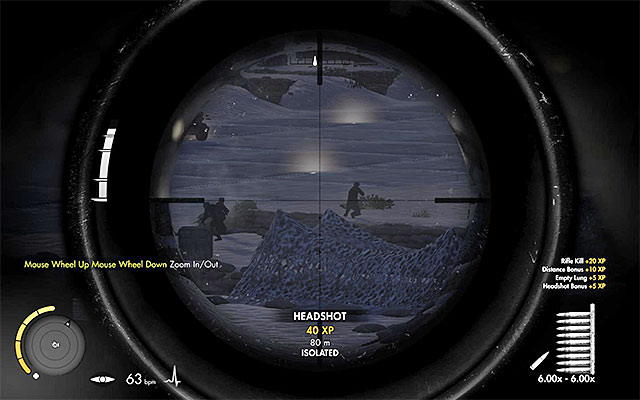 Conduct sniper fire
Start attacking the enemy soldiers, who start appearing to the left and to the right of the main airstrip (points 18 on the map). Just like in the case of the final part, of the fourth mission, try to take successive shots as quickly as possible so, do not waste your time on being too accurate. Hit any parts of the enemy bodies and, immediately after each successful attack, select another target.
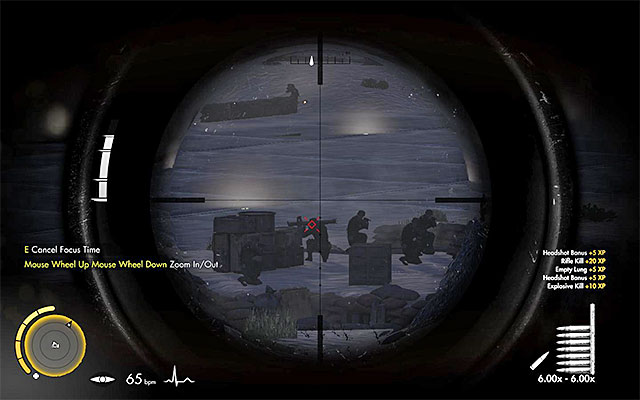
Further into the fights in the airfield, there start appearing enemies with RPGs and an example soldier of this type has been shown in the above screenshot. It is your highest priority to eliminate them, so, deal with them in the first place and, in the meantime, ignore all of the remaining enemies. Conduct your fire up until the moment in which the allied vehicle leaves the airfield.
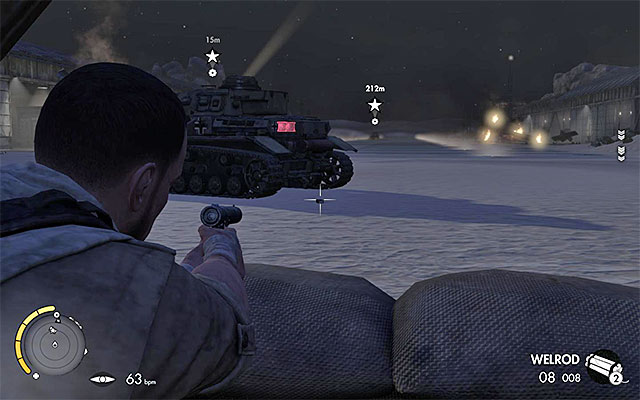 The best way to destroy an enemy tank is use dynamite
Two new enemy vehicles will roll in from the North and these are a tank and another armored vehicle. You can destroy these in any order that you want to and, you also are free to choose your position for the attack (they will be patrolling along the same routes marked on the map with a green line). Of course, I recommend that you take your position, possibly, as far from the rest of the enemy soldiers, as possible, thanks to which you will not be spotted. Traditionally, it is best to destroy the enemy tank is with dynamite, detonated with a rifle salvo.
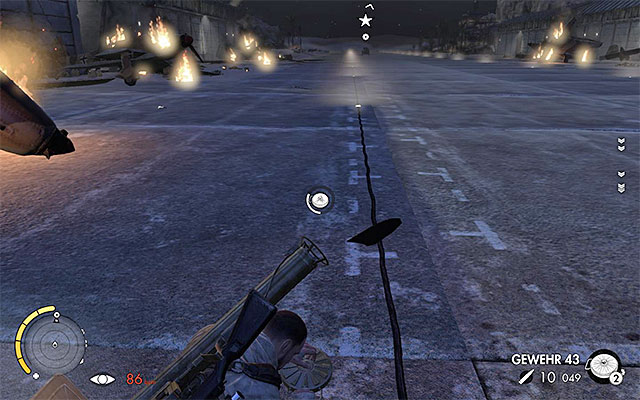 IT would be good to use a landmine, to destroy the armored vehicle
As for the armored vehicle, in this case, a regular landmine is enough. Place it in the vehicle's way. Of course you need to remember that in many spots of the map (e.g. hangars) there are supply crates.
Note - if, in spite of my recommendations, you have not destroyed the previous two enemy vehicles, it may turn out now that it is necessary to destroy them, after all!
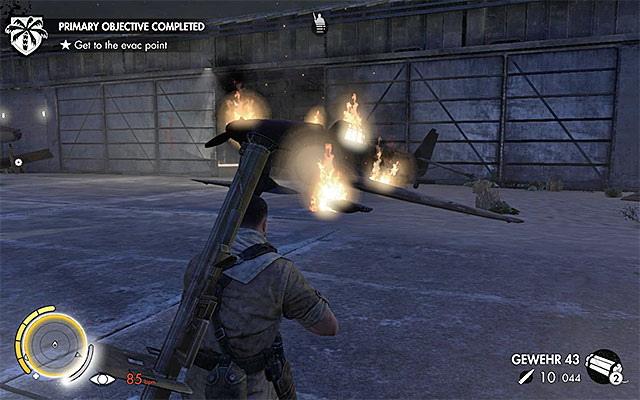 The ending point for the mission
The extraction point is in the central part of the airstrip (point 19 on the map). You can head towards it right after you have destroyed the vehicles, described above. The only exception may be the situation, in which you want to gain additional experience points for eliminating the enemies, who took part in the fights. To complete the mission, reach the marked area.
The above screenshot presents the map for the location, in which you play mission eight of the game. These are a vast canyon and the title factory, which works at manufacturing a super-heavy tank. On the map, there have been, predominantly, the most important locations marked (main objectives, main paths, etc.), as well as the whereabouts of collectibles.
Apart from that, there are colorful dots on the map:
Paradoxically, the final mission of the game, does not have you get prepared in any special way. Simply, make sure that you have taken along the best available sniper rifle. Also, make sure that you have taken a suppressed pistol with you, because you are going to need it for silent elimination of the enemies patrolling the factory.
Optional tasks and challenges:
Collectibles:
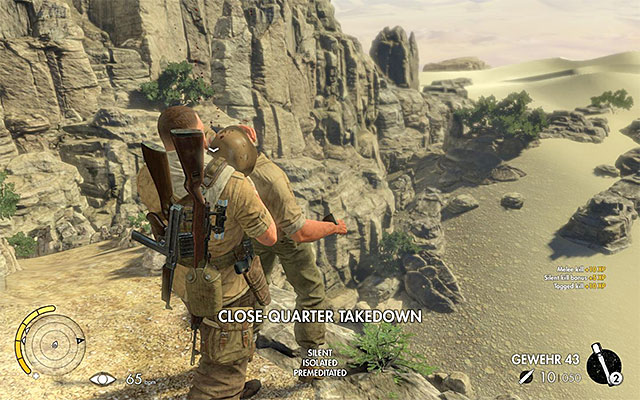 It is best to eliminate, each of the enemies that you encounter, in melee
You start this mission in the North-Eastern part of the map (point 1 on the map) and its initial part is very linear. You need to follow the only path to the South. Your character will encounter, initially, two guards, along his path. What is even more, you can easily get both from behind and eliminate them in melee.
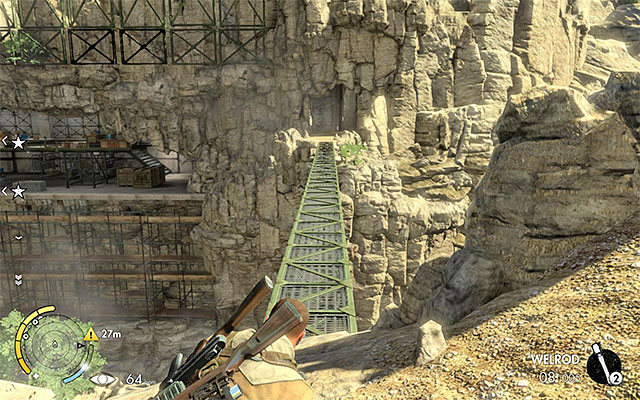 You can either shoot or walk around the enemies at the table
Carefully, approach the next enemy, at the chasm and eliminate him in the very same way, i.e. in melee. At the table, on the left, there are two more enemies. Depending on your preferences, you can either kill them (take two quick shots from the suppressed weapon, or lure away one of them first) or simply walk around them. After you approach the factory premises, (point 2 on the map) you will receive your current objectives.
Before you reach the first transformer, it would be a good idea to explore the Northern part of the map thoroughly. First of all, locate the narrow passage shown in the screenshot (the North-most point 3 on the map), which will allow you to pass through to the other side of the canyon.
 A collectible card
Carefully, walk into the new area and eliminate the two (or more) soldiers staying here. After you have secured this area, explore it thoroughly. Pick up the collectible card from the ground (green point 1 on the map) and unlock the first sniper nest (blue point 1 on the map).
 The first schematic
This is not it, because there is the first schematic of the advanced weapon, on the table, on the upper balcony (point 5 on the map). Thanks to collecting the schematic (by pressing the interaction key/button), you will unlock a side objective for the mission and, you also need to find three such schematics more. To return to the eastern part of the map, it is best to take the same route, because the main Southern bridge may be under observation.
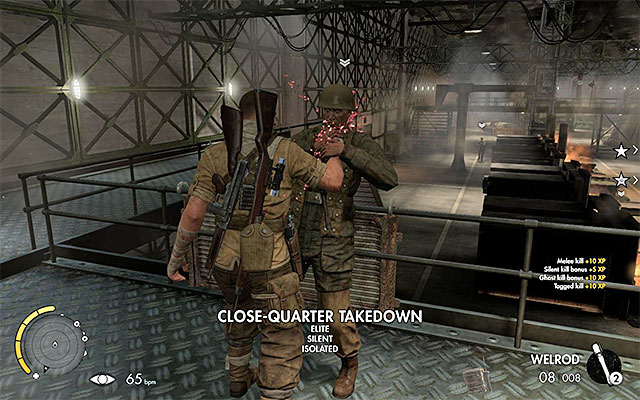 Kill the successive enemies and keep an eye out for collectibles
Your destination is to the South of here (point 6 on the map) and you can reach it in several ways. If you have nothing against eliminating enemies, take the main path. Along your way, take advantage of the working machinery to drown out your shots. Do not let yourself be spotted by the enemies farther away, and at least one enemy that is patrolling the balconies above. Also, along your way, look out for collectibles, because you can find here a collectible card and a War Diary - Axis Account: Completing Production.
 Taking side-paths allows you to avoid direct confrontation
An alternative way to reach the transformer is choosing side paths that are marked with points numbered 4 on the map provided with the walkthrough for this mission. They assume that you walk alongside the canyon. In this way, you can walk around many of the enemies, although you should watch out for the enemies that occupy the Southern bridges and the Western side of the canyon, to prevent being spotted by them.
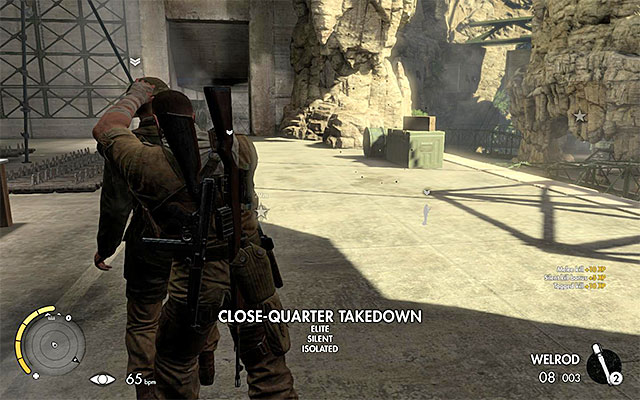 Clear the area of the enemy units
Before you actually come close to the current target, deal with the enemies that occupy two neighboring bridges (points 3 on the map). This is very important, because you may otherwise be spotted by them, still along your path to the transformer, or right after you sabotage it. Also, you should remember to crouch at all times, thanks to which you will not be noted by the enemy soldiers ahead, to the West of here.


Apart from securing the immediate vicinity, you should also explore the area to the South-West of the transformer. In the spot shown in screenshot 1, there are wooden planks (point 7 on the map), which can be removed. Thanks to this, you will unlock access to the second sniper nest (blue point 2 on the map). After you make it over to the nest, start aiming, because this is where you get the opportunity to take the Long Shot (optional challenge). Your target is standing at the chasm, above your character, to the North of you and he has been shown in screenshot 2.
Note - ignore the marker of the third sniper nest, for the time being, because you will be able to reach it as late as towards the end of this mission.
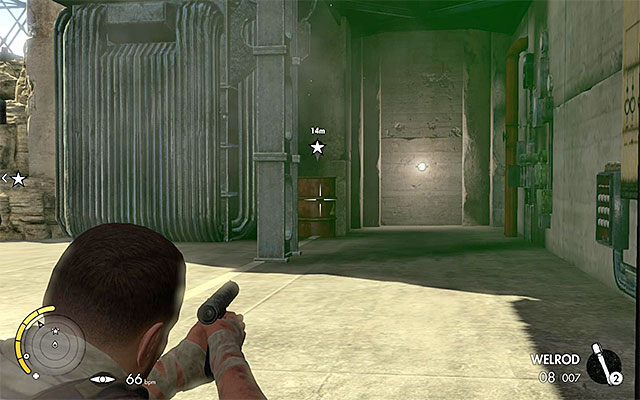 From a safe distance, aim at the explosive barrel
After you have dealt with everything, return to the transformer that you have already passed by (point 6 on the map). You do not need to use any explosives here, because you only need to take a shot at the red barrel. Of course, you should make sure that you keep a safe distance of it and, right after you destroy the transformer, take cover because several enemies may come by (kill them or wait for them to leave).
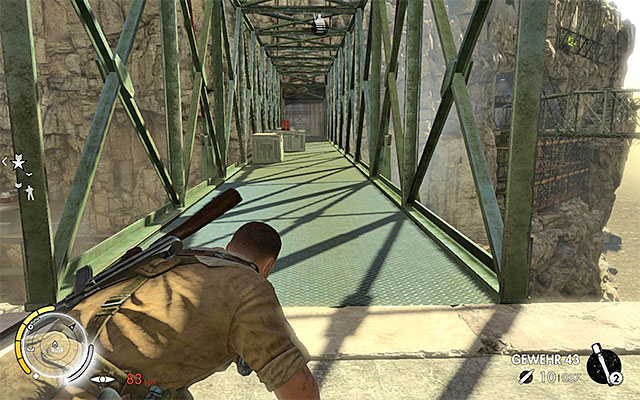 Cross one of the bridges
The second transformer is Southwards of here (point 9 on the map). Start by taking one of the bridges (points 3 on the map) that lead up to the next part of the factory. Your best choice is the East-most one. After you have reached the next location, you can resume the elimination of the enemy forces (take advantage of the fact that the machinery are working and use them to drown out the gunfires, or go for melee attacks), or avoid them. In the case of the latter, it is a good idea to use the side passages located right next to the chasm (points 4 on the map).
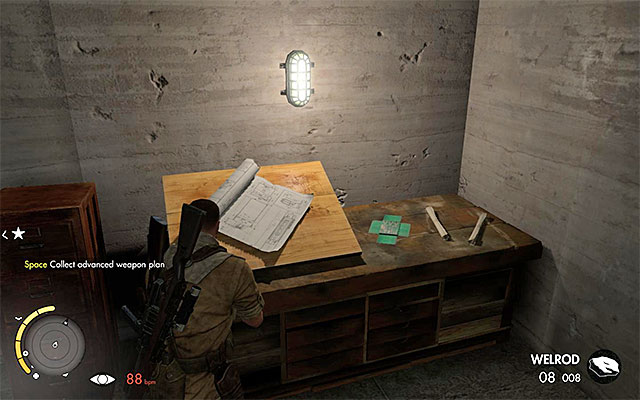 The second schematic
As you cross this location, try to reach the balconies above and make it over to the South-Western room. It is being guarded by several enemies but, if you deal with them, you will be able to explore the room and obtain the second schematic for the advanced weapon (point 8 on the map). As a matter of fact, it is not the only collectible that you can find in this part of the factory, because there also is a War Diary - Vahlen's Journal: Pointing the Blame; green point 4 on the map and a collectible card (green point 5 on the map).
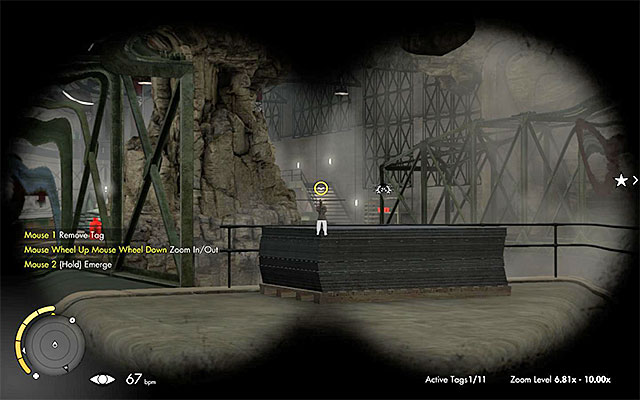 watch out for the enemies to the south of the transformer
Do not haste too much to approach the second transformer, because you may be spotted by enemies that occupy the area to the South of it. First of all, eliminate those of the enemies that patrol the nearby bridges (points 3 on the map). Just like before, remember not to sprint and move around only while crouching.
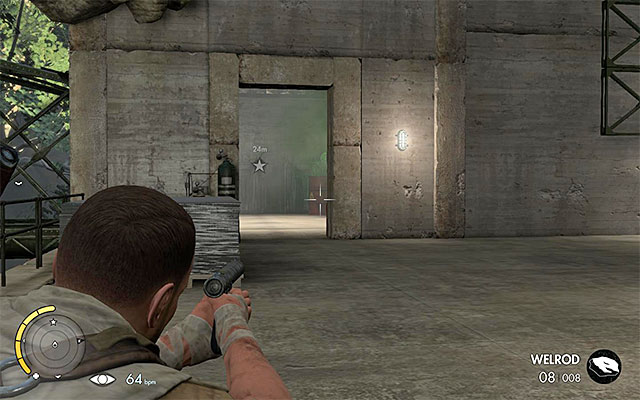 The suggested spot to take the shot
Just like in the case of the first transformer, you do not need to use any explosives. The only thing that you need to do is take a shot at the red explosive barrel, with any weapon (your best choice is the suppressed one). It is necessary that you keep a safe distance, to prevent taking unnecessary damage.
Note - right after you blow up the second transformer, take a good cover, because one, or several enemies may be lured here, by the explosion.
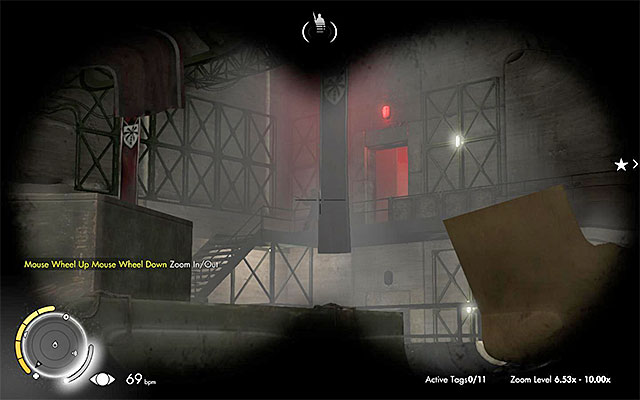 Several enemies exit the depot on the upper level
The game does not allow you, anymore, to walk around the enemies so, sooner or later, you will have to start eliminating them. Rely on the option to drown out the gunfire, use the suppressed weapon or take them down in melee. While securing this area, there will exit another group of enemies, from the depot on the upper level. It is best to throw them a grenade, as quickly as possible, although you can wait for them to disperse and take them down, one by one.
 A war diary
Secure the entire area around the ammo depot (point 10 on the map). At the same time, locate the new War Diary - Vahlen's Journal: War Machine; (green point 6 on the map) and take it.
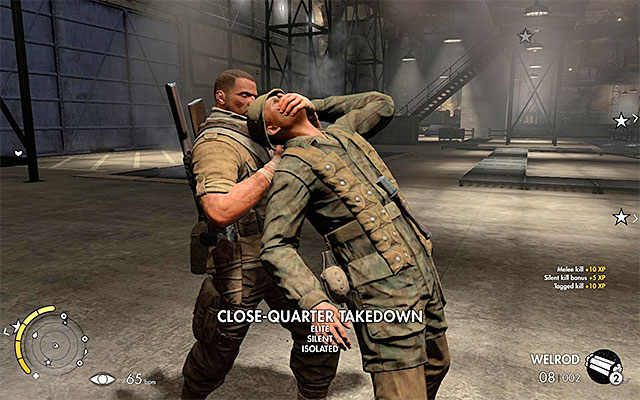 The location where you find the third schematic
After you have secured the area, reach the room on the upper floor, in the South-Western corner of this location. You can collect here, the third schematic for the advanced weapon (point 9 on the map). Note - before you take to the next main objective, make sure that you have three schematics on you, of the four available (points 5, 8 and 9), because you will be unable to backtrack later on (the same goes for the regular collectibles).
 The spot where you place the explosive
After you have sufficiently explored the area of the ammo depot, approach it (point 10 on the map) and press the appropriate key/button to plant the explosive (you do not need to escape from here, because the charge does not explode immediately).
 Attack the enemies from above
Do not delude yourself that you will reach the cargo lift (point 11 on the map) without any problems. Right after you destroy the ammo depot, there will be more enemies to arrive. Some of them, reach here on the lift and some of them take the door at the ground level. I recommend that you attack the enemies from the balconies above, whether with firearms or by throwing them a grenade, before they disperse.
 The cargo lift
Try to eliminate all of the soldiers that appeared around and, as long as possible, remain undetected. After you have eliminated all of the threat, head towards the cargo lift. See the cutscene and wait for the lift to take you to the hall with the tank.
 Exit the lift as quickly as possible
The descending lift will turn the attention of, at least, one of the enemies that patrol the main hall. Once it reaches the bottom, exit and hide, e.g. behind one of the covers on the left. I recommend that you avoid raising unnecessary alarms in this location, because it may result in the arriving of additional troops in the hall, which will make the completion of the main objectives more difficult.
Eliminate the enemies patrolling the main hall, one after anotherBefore you take to the next main objectives, it would be a good idea to clear the entire hall of the enemy units. It is not compulsory, but this will make things discernibly easier. You need to watch out, because many of the enemies are standing next to each other and a miscarried attack may be easily noted. The good news is that, around various locations in the hall, there are generators and sabotaging them will allow you to use the sniper rifle, without restraints, or any other weapon without the muffler.
 Watch out for the enemies on the balconies above
The important news, in connection with this location, is that it is a multistory one. Apart from the enemies that patrol the bottom level, you also need to be aware of the enemies staying on the balconies above, because they may spot your character at any moment. You should be most careful in the North-Western part of the hall, because there should be two groups of soldiers there. Try to eliminate them silently because, as already mentioned, raising the alarm bay bring reinforcements in.
 You can find the enemies both under the tank and behind it
I recommend that you, in the last place, deal with the enemies around the huge tank - at least one of them should be standing underneath, with two more atop it. It is a good idea to deal with them now, because you will have to climb onto the tank, in a few moments, anyways.
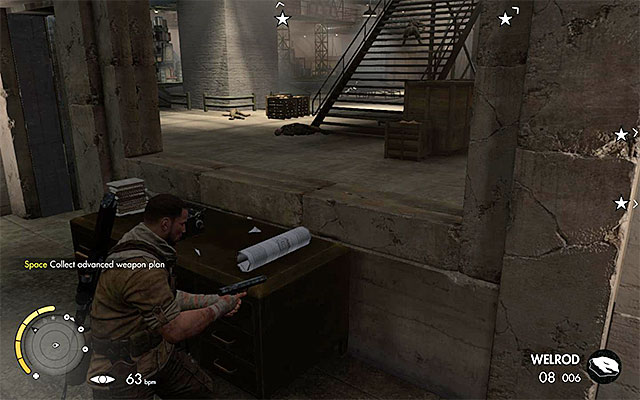 The last, fourth, schematic
After you have cleared the area of the enemy units, spend several moments on exploring it. First of all, you can find as many as four collectibles here - two War Diaries - Missives from Home and Allied War Story: Surprise Attack; green points 7 and 9 on the map) and two collectible cards (green points 8 and 10 on the map). In the areas in the Western part of the hall, there also are ammo depots and the final, fourth, schematic of the advanced weapon (point 12 on the map).
You need to plant a total of four explosives in the hall (points 13 on the map) and it is best to deal with this objective only after you have secured the entire area. It is not required to succeed but, if you do not eliminate all of the enemies, you may have problems completing the next two main objectives.
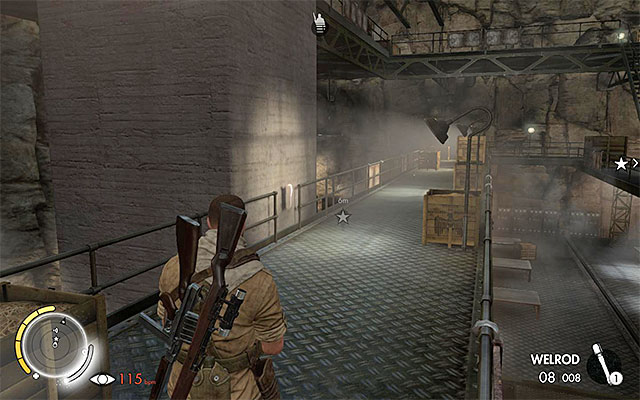 The spot to plant an explosive in the North-Western part of the hall
You can reach the pillars in any order that you want. The North-Western charge can be planted only after you reach the balconies above and, if there are any enemies here, you need to watch out for them.
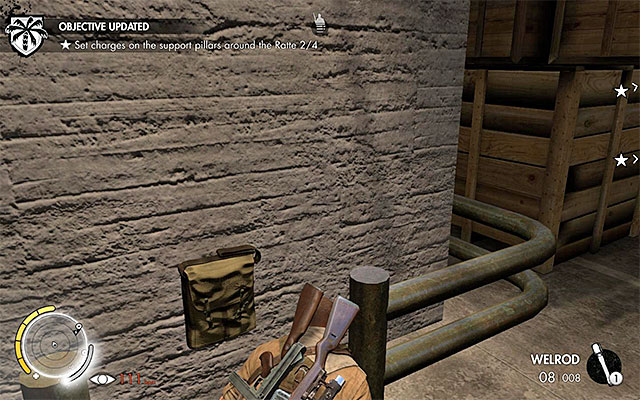 The spot to plant an explosive in the South-Western part of the hall
You need to plant the South-Western explosive at the bottom level of the hall.
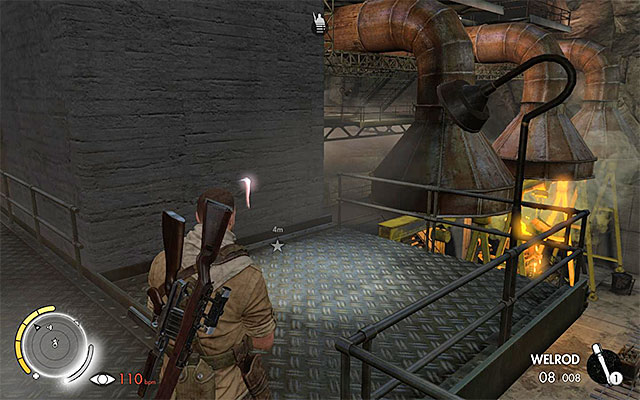 The spot to plant an explosive in the North-Eastern part of the hall
To plant an explosive in the North-Eastern part of the hall, you need to reach the balconies located under the hall's ceiling. This area, by default, is being patrolled by, at least, one guard and you make sure that this one is dead.
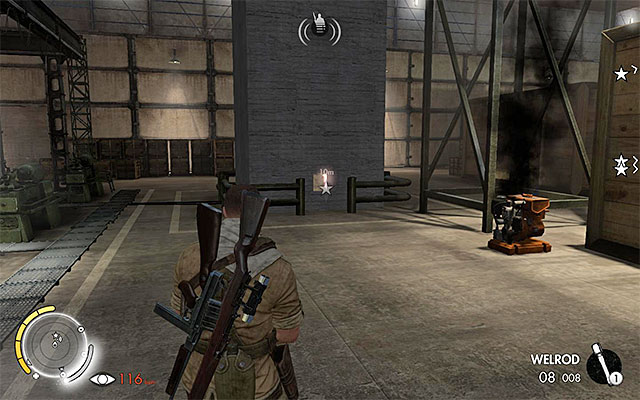 The spot to plant an explosive in the South-Eastern part of the hall
You plant the South-Eastern explosive at the bottom level of the hall, close to one of the generators.
Note - before you plant the last explosive, make sure that you have restocked your ammo for the sniper rifle (the depot in the Western part of this location, search through the corpses) and that you have, at least, one dynamite stick on you.
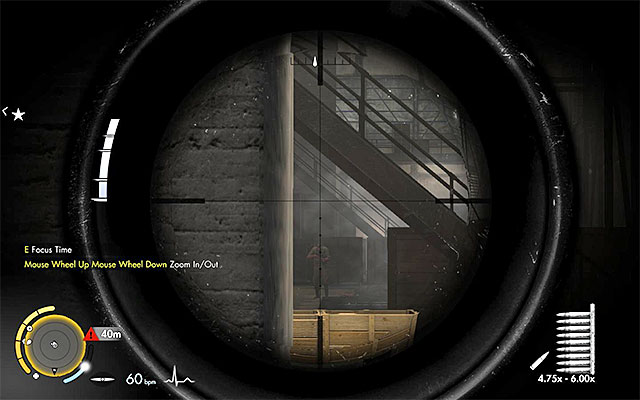 Kill the soldiers that reached here with the halftrack
Right after you have planted the fourth explosive, you will see a short cutscene, from which you will learn that there appeared new soldiers, in the Western part of the hall (point 14 on the map), who are reinforced by a halftrack. For the time being, stay away from them and allow the soldiers to disperse all around the hall. Then, try eliminating them, by using generators and suppressed weapons, to remain undetected.
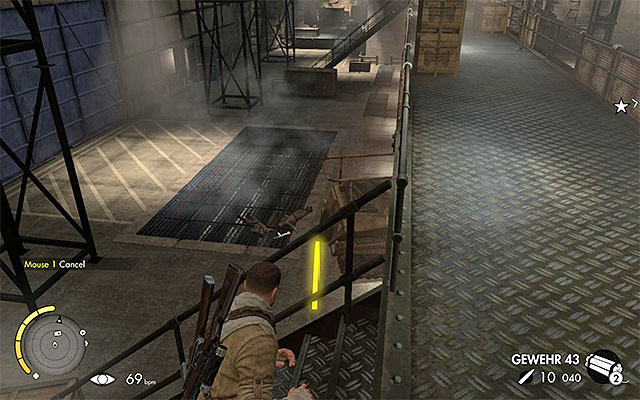
The field of vision, of the abovementioned halftrack, is vast, which means that you need to watch out to prevent being spotted. I recommend that you use the balconies above and approach the vehicle without haste. Position yourself in the spot, from which it is easy to throw the dynamite (an example in the above screenshot). After you throw the stick, stop in the spot where it will be easy to reach it with your weapon, which will destroy the vehicle, as a result.
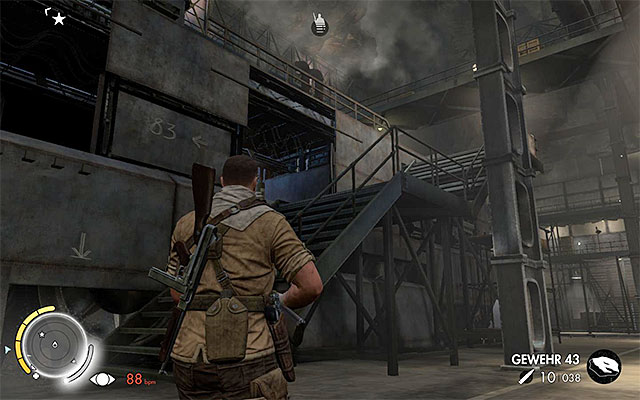 The stairs that allow you to mount the tank
As for the current main objective, turn your interest to it only after you have destroyed the halftrack. You need to climb atop the Ratte tank (point 15 on the map) and to do that, take the stairs to the North of the vehicle. Reach the very top and plant the explosive in the marked spot.
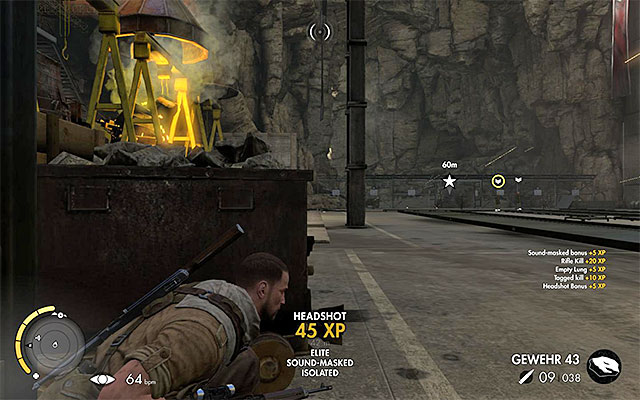 Eliminate the new opponents that enter the hall
Climb down from the tank and go a bit to the East. Do not head for the exit, yet (point 16 on the map), and wait for three new opponents to arrive here. Take advantage of the noise-making elements of the surroundings and eliminate all of the enemies before they manage to spot you and attack you.
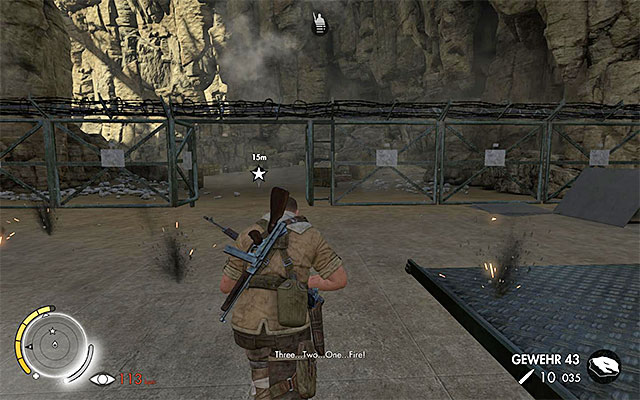 Reach the exit gate
You might have noticed that the huge tanks started, in the meantime, firing at the exit. Get up and sprint, at the right moment, and try to reach the opened gate, as quickly as possible. With a bit of luck, you will take no damage at all, or lose some health.
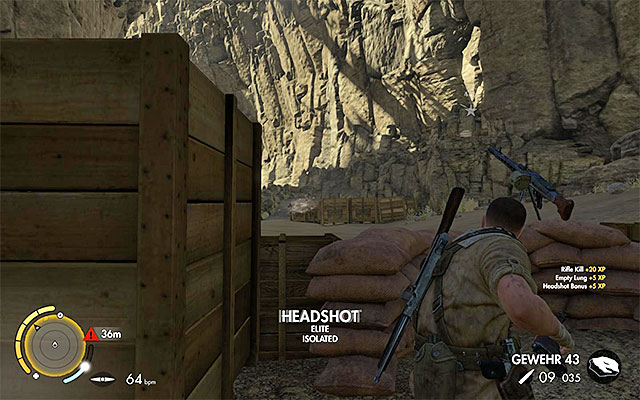 Eliminate all of the enemies
Right after you leave the factory, hide behind the nearest rocks, because there are 3-4 enemy soldiers around. Since these are the last enemies that you encounter during the game, you can use the nearby machine gun turret to eliminate them. If, however, you want to avoid detection, use a suppressed weapon, grenades and stones, to distract the enemies.
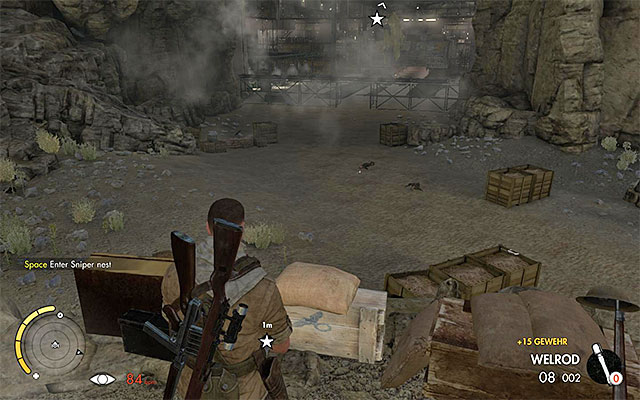 The sniper nest
Continue on your path only after you have completely secured the area. You need to reach the last, third, sniper nest (blue point 3 on the map), which is located on the hill, across the factory exit.
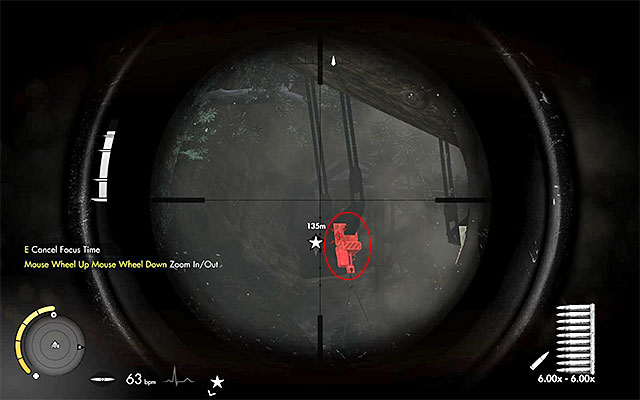
Lay down on the ground and aim your sniper rifle. You need to hit the catch shown in the above screenshot. The only thing that you need to do now, is watch a longer cutscene, which ends the game. Congratulations!
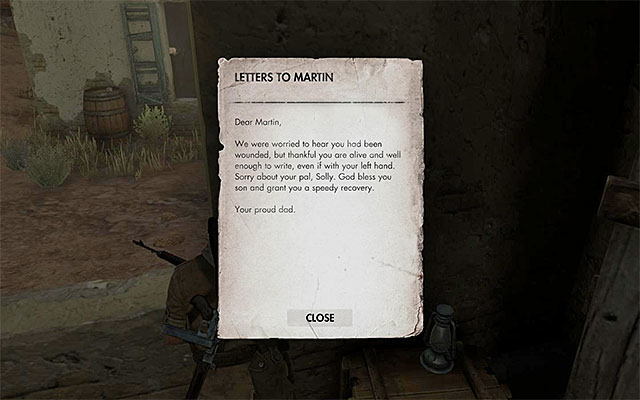 An example collectible (War Diary)
In the game Sniper Elite III: Afrika there are two main categories of collectibles. These are:
Apart from that, among collectibles, also can be counted:
All of the collectibles in the game are subject to the same rules. At the moment, at which you obtain a collectible, it is automatically added to your inventory and it is independent of your current progress. Therefore, you do not need to save the game manually, each time after you obtain a collectible. You can also return to the previous saves to include into your possessions, a collectible that you missed at the beginning of a given mission.
At the same time, it is worth adding that you receive experience points for each collectible that you obtain and this should, additionally, motivate you to search for them. The exact whereabouts of the collectibles have been provided on the successive pages of this chapter.
The above map presents all of the collectibles that you can obtain during the first mission of the game (Siege of Tobruk). These are two War Diaries, a Collectible card, a Long Shot and a weapon part.
Note -the enemy in the possession of the weapon part does not move, by default, but he may exit his tent, raise the alarm and start patrolling the area, if disturbed.
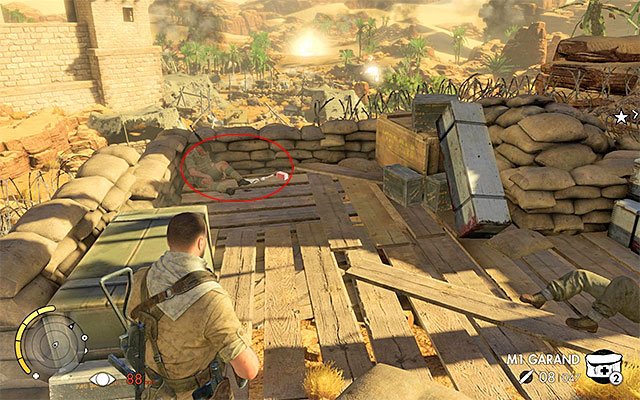 Approach the killed soldier
You can find the first diary soon after you leave Tobruk, along your path to the location, where there are the enemy launchers. Examine thoroughly the battlefield - the collectible is on one of the corpses.
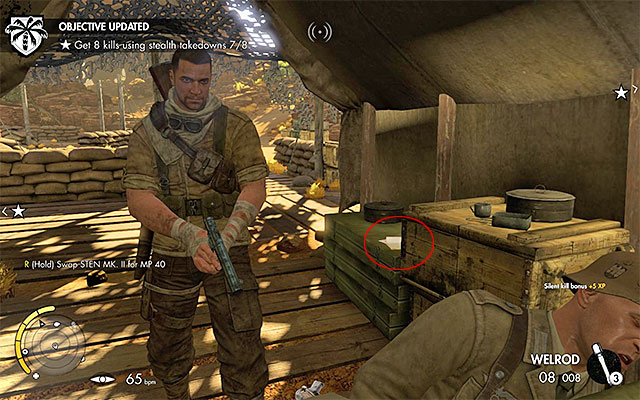 Kill the soldier and collect the collectible
The second diary is in the big tent in the North-Eastern part of the map (near the two launchers). Kill the enemy soldiers in the tent (he is turned with his back at the entrance) and take the collectible.
 You need to climb onto the empty watchtower
The Collectible Card is in the North-Eastern corner of the map, close to the enemy launchers. You need to climb the ladder to reach the unguarded watchtower and explore it carefully.
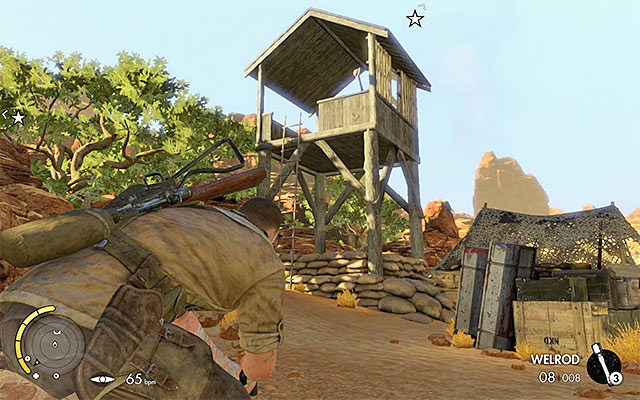 The sniper nest is in the watchtower
You need to reach the only available sniper nest. It is in the watchtower in the Eastern part of the map, close to the enemy launchers.
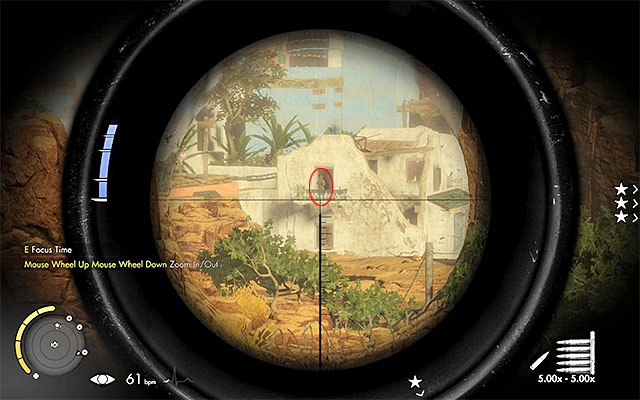
After you take your position in the nest, lay down and aim the sniper rifle at the enemy several hundred meters away. He is standing on the balcony of one of the derelict buildings (the above screenshot).
Note - if you experience problems locating the target, use binoculars to your aid (you can, additionally, mark him, if the selected difficulty level allows you to).
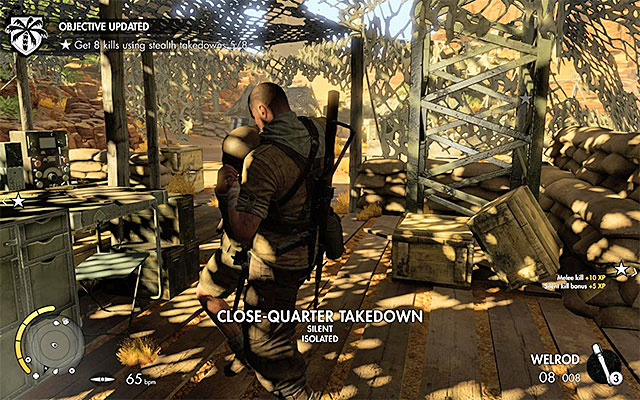 Kill the enemy in the tent and examine his corpse
The enemy in the possession of the only weapon part is, by default, in the tent, in the Eastern part of the map. It is best to sneak up from behind and eliminate him in melee. After the successful attack, examine the body.
Note - if you are not careful enough, this enemy may leave the tent and start patrolling the area.
The above map presents all of the collectibles that you can obtain during the second mission of the game (Gaberoun). It is eleven War Diaries, a Collectible Card, a Long Shot and two weapon parts.
Note - at least one of the enemies in the possession of the weapon upgrade, may be occupied with patrolling the area. This means that the markings on the map are only for the purpose of prediction and, after you have secured the area, it is always a good idea to search all of the bodies.
 Attack the enemy and examine his corpse
This Diary is in the possession of one of the enemies in the South-Western part of the map. Obtaining it is required to complete the first main objective of this mission. Therefore, you cannot skip it.
Note - if you are not careful enough, the enemy may leave the tent and start patrolling the area.
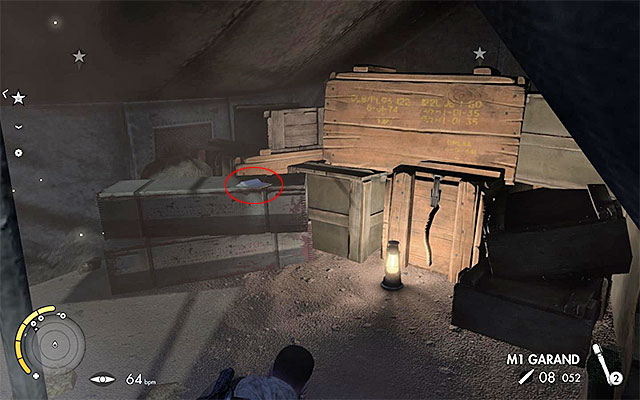 Take a look into the tent
This Diary is inside one of the tents in the South-Western part of the map. You pass by the tent along your path to the staying place of the first enemy officer and it is not guarded by anyone. Enter the tent and collect the diary from the chest.
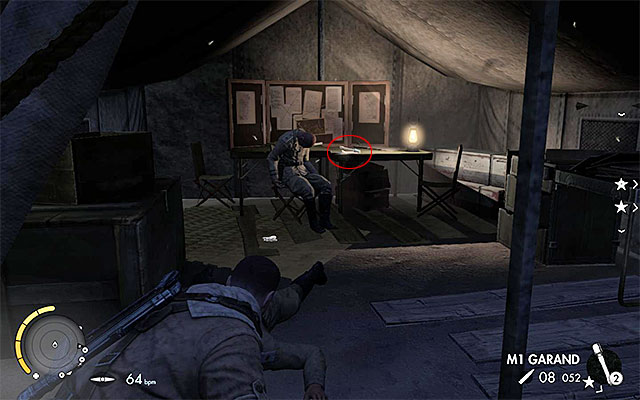 Collect the diary from the table
This Diary is inside one of the tents in the South-Western part of the map. You pass by the tent along your path to the staying place of the first enemy officer and it is not guarded by anyone. Enter the tent and collect the diary from the table.
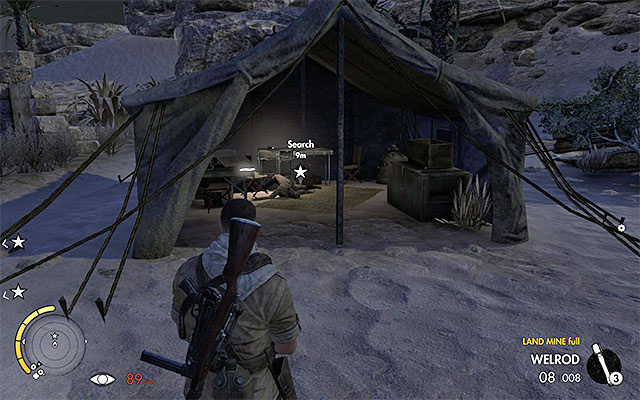 Kill the officer and search his corpse
This Diary is on one of the officers, who you eliminate as one of your main targets in the second mission. By default, he is standing in the tent to the East of the oasis.
Note - If you are not careful enough, the officer may leave the tent and start patrolling the area.
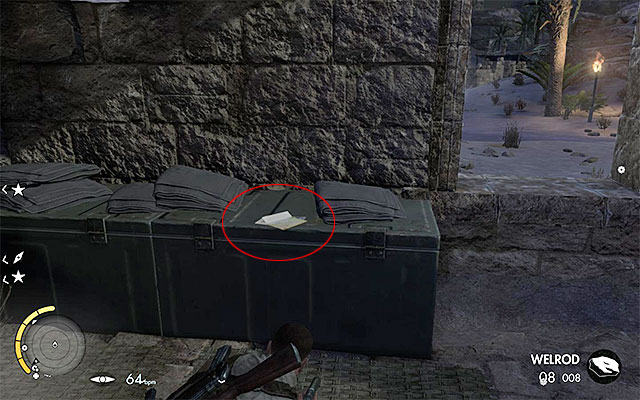 Check out the ruins
This Diary can be found in the ruins, in the central part of the map. Be careful, because you can encounter here one or two enemies and it would be a good idea to deal with them, in the first place.
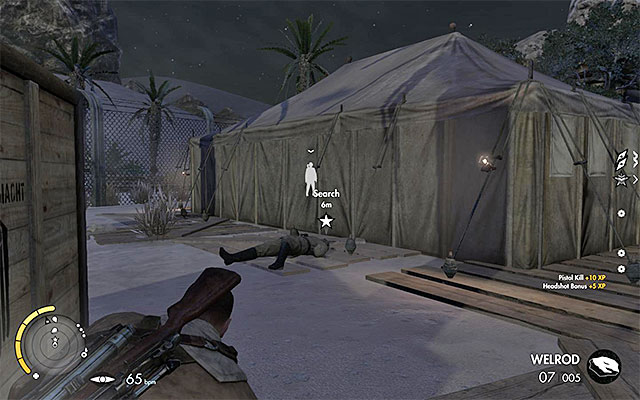 Stop the enemy patrolling the camp and run through his body
This Diary is held by one of the officers that you eliminate, while completing one of the main objectives of this mission. By default, he is patrolling the camp in the Northern part of the map - you need to attack him (anywhere) and loot the corpse.
Note - Since the officer remains in constant movement, the markings on the map for this chapter are only approximate.
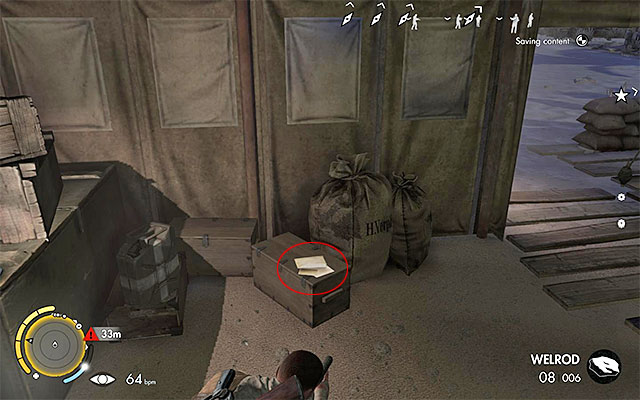 You can find this document to the right of the tent entrance
This Diary is inside the big tent in the Northern part of the map, in the location patrolled by one of the main officers. In the tent itself, there only are two "regular" soldiers - you can take them out or try to sneak past them and obtain the collectible.
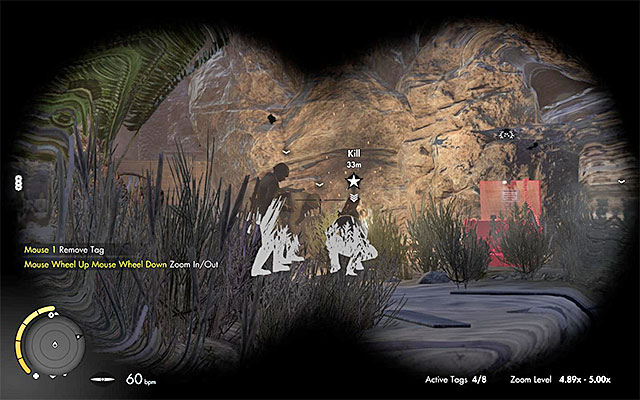 The officer is in the small encampment in the oasis
This Diary is held by one of the officers that you eliminate, while completing one of the main objectives of the second mission. By default, he is staying in a small encampment in the oasis, in the central part of the map.
Note - as a result of the attack on the enemies in the oasis, the officer may change his position. After the fights end, you will be guided to his corpse.
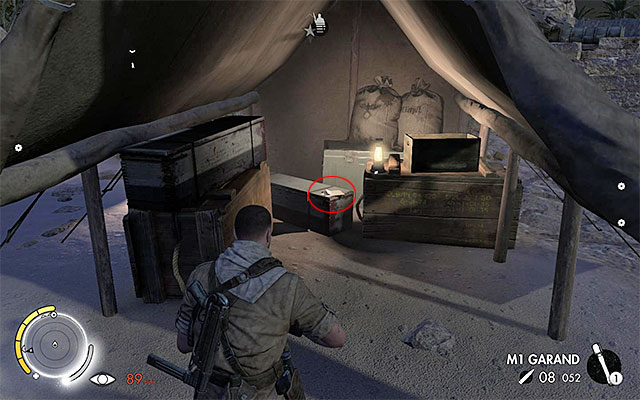 Collect the collectible from the unguarded tent
This Diary is in one of the tents in the North-Western part of the map. It should not be guarded by anyone so, you can obtain the document without any problems (it is on the crate).
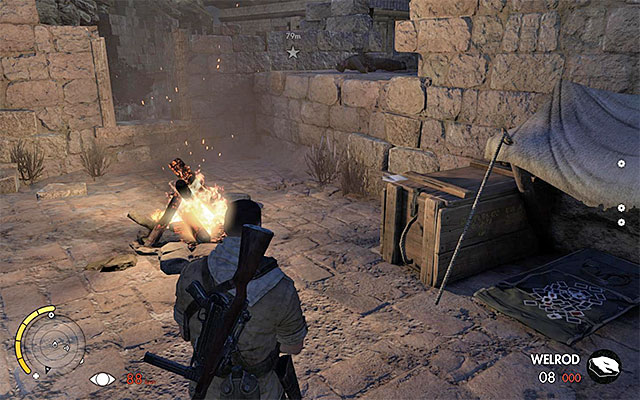 The Diary is in the ruins
This Diary can be found during the exploration of the ruins in the Eastern part of the map and which you visit along your path to the last enemy officer. It is on the crate, close to the fire.
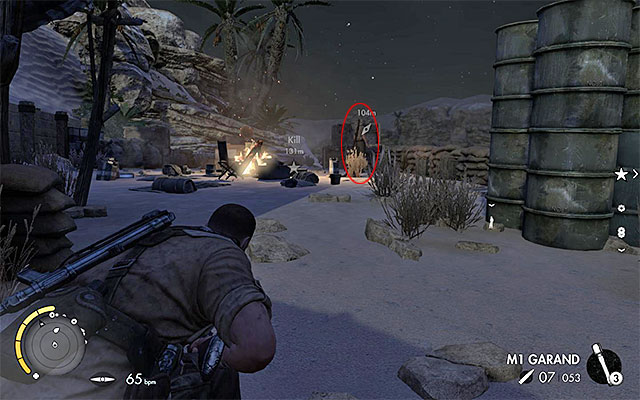 Eliminate the officer and search his corpse
This Diary is held by the last officers that you eliminate, while completing one of the main objectives of the mission. By default, he is staying in the building in the Eastern part of the map.
Note - If you are not careful enough, the officer may leave the building and start patrolling the area.
Find the card in the ruinsThe Collectible Card is on the ground in a small room in the ruins, in the North-Western part of the map. Before you reach that collectible, eliminate all of the nearby enemies - the one operating the spotlight, among others.
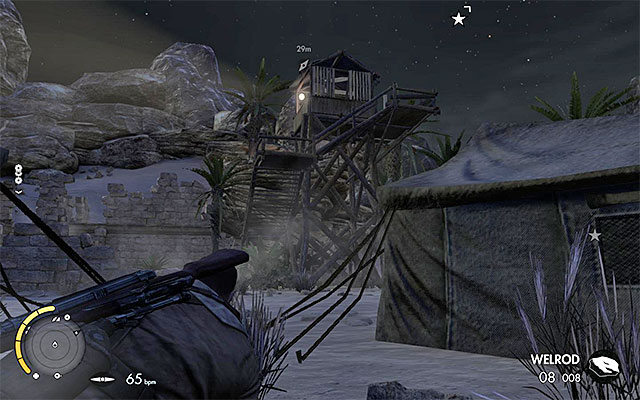 The sniper nest is in the tower with the spotlight
You need to reach the sniper nest in the Northern part of the map. It is the watchtower that the spotlight is attached to, which is connected with one of the secondary objectives of the mission.
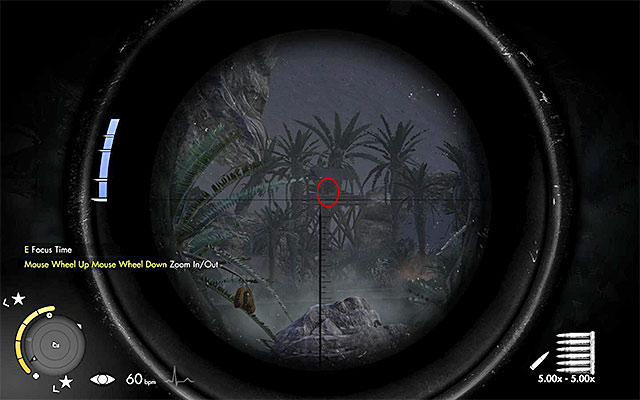
After you take your position in the nest, aim the sniper rifle at the enemy several hundred meters away, to the South-East of you. He is occupying another watchtower, which is located at the other side of the oasis, in the Eastern part of the map (the above screenshot).
Note - if you experience problems locating the target, use binoculars to your aid (you can, additionally, mark him, if the selected difficulty level allows you to).
The enemy on the hillThe enemy with the first weapon part is on a small hill in the North-Western part of the map (the one with the campfire). The target of the attach should not move so, you can easily get him from behind.
Note - If you are not careful enough, the enemy may go down the hill and start patrolling the area.

The enemy with the second weapon part is in the motorpool, in the Northern part of the map and he is connected with one of the secondary objectives of the mission. You will be able to tell him by the white t-shirt that he is wearing (the above screenshot).
Note - The soldier will, most probably, be busy patrolling the motorpool so, it is a good idea to use the binoculars, to determine his exact position.
The above map presents all of the collectibles that you can obtain during the third mission of the game (Halfaya Pass). It is nine War Diaries, three Collectible Cards, one Long Shot and two weapon parts.
Note - the enemies with the weapon parts on them are staying on the rooftops of buildings. The markings on the map, as a result, are only approximate ones, but you do not need to look around, too hard for them.
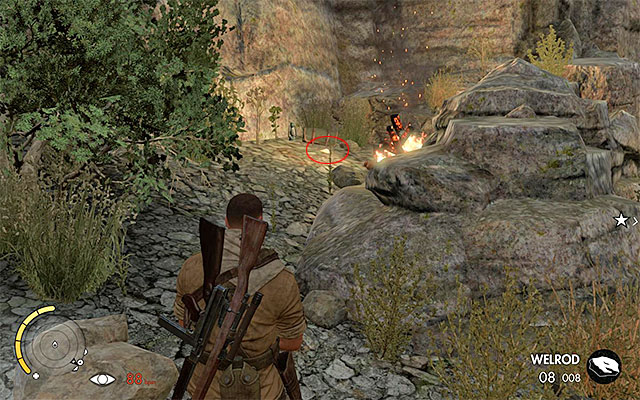 Locate the campfire
This Diary has been hidden in the Southern part of the map. While crossing the Southern encampments, at the beginning of the mission, look for a campfire near the rocks. The document is on the ground, right next to the campfire.
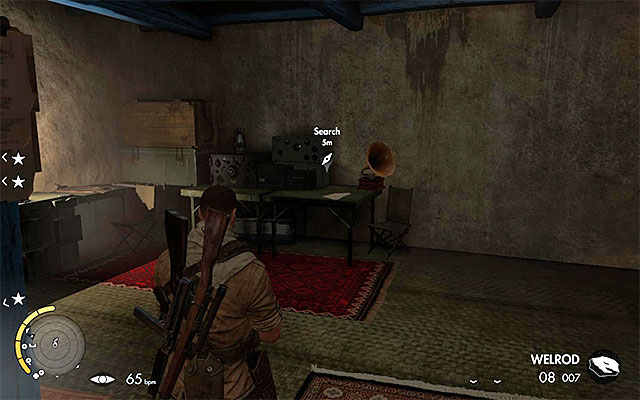 Take a look into one of the eastern buildings
This Diary is inside one of the Eastern buildings in the first village that you explore during this mission. It is easy to find it, because it is connected with a secondary objective of the mission and, as a result, it is marked by the game. However, you should watch out for the enemies that area patrolling the area and frequently enter the room with the document.
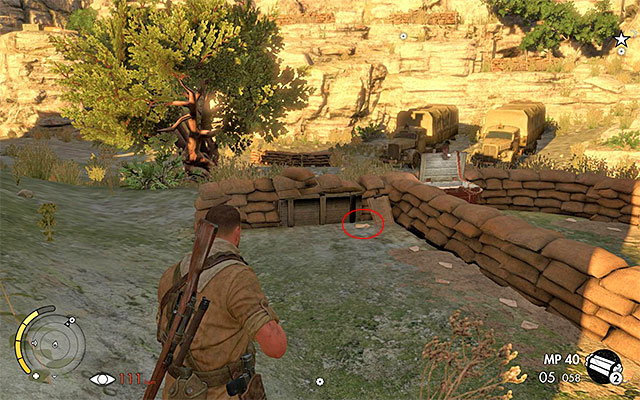 Secure the area and go for the collectible only then.
This Diary is in the Southern village that you visit at the beginning of the mission. It is lying next to the sandbags, in the middle of the village. Due to the fact that this area is being watched over by many enemies, it is a good idea to deal with all of them, beforehand.
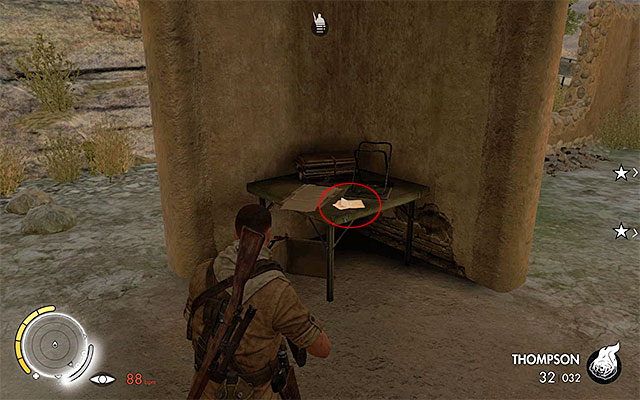 The document is on the table
This Diary is in a small Western village that neighbors the first AA station. After you have sufficiently secured the area (the enemies patrolling the village) explore the buildings and collect the collectible from he table.
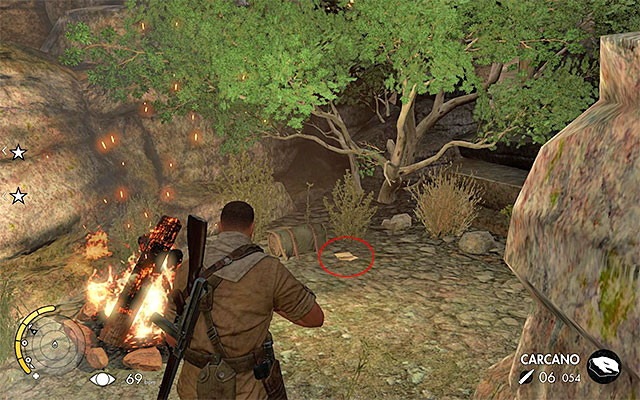 The collectible is on the ground, near the campfire
This Diary has been hidden in the village located in the central part of the map. Explore the South-Eastern part of that village and you will find a small path towards a campfire. The collectible is right next to it.
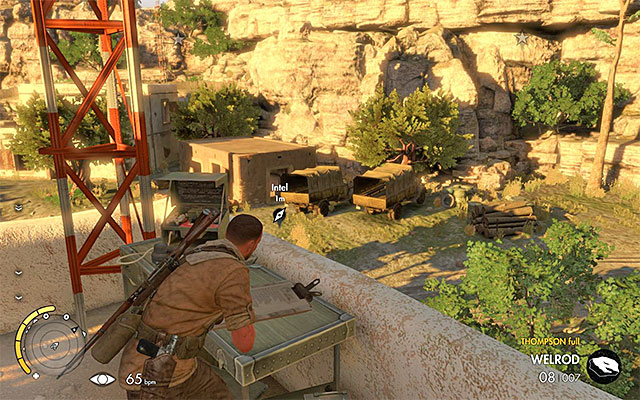 Reach the rooftop and collect the diary
This Diary is on a rooftop of an Eastern building, in the central village. It is easy to find it, because it is connected with one of the secondary objectives of the mission and, as a result, it has been marked by the game. Along your way to the document, watch out for, at least, one guard.
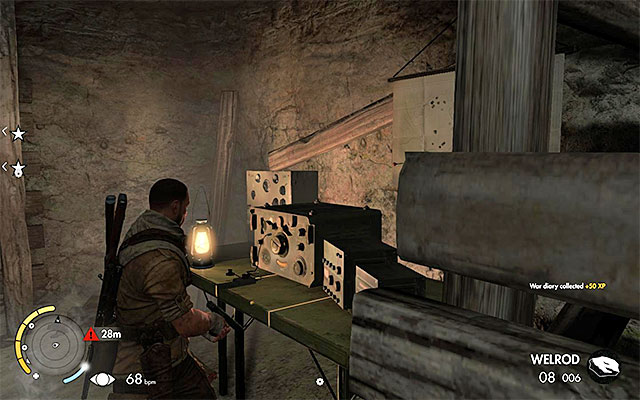 Search the entire cellar
This Diary can be found during the exploration of the village in the North-Eastern part of the map. You need to reach the cellar that you complete one of the secondary objectives in (sabotaging the box) and explore it thoroughly. Early enough, eliminate the enemies in the cellar.
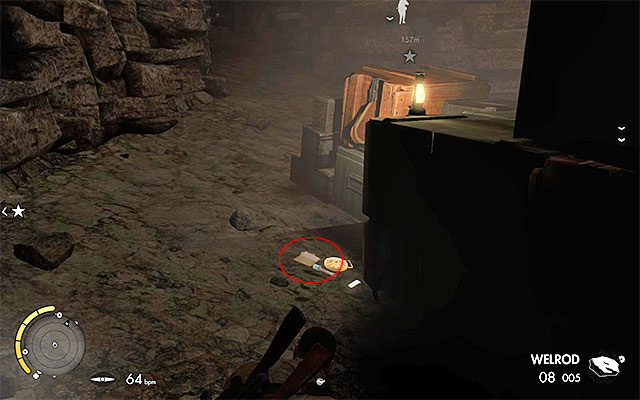 Examine the area behind the crates
This Diary has been hidden in the Northern part of the map, i.e. in the area neighboring one of the AA stations. You need to locate the entrance to the optional cave to the West and explore it (watch out for the guard patrolling the cave!). The document is on the ground, behind the crates.
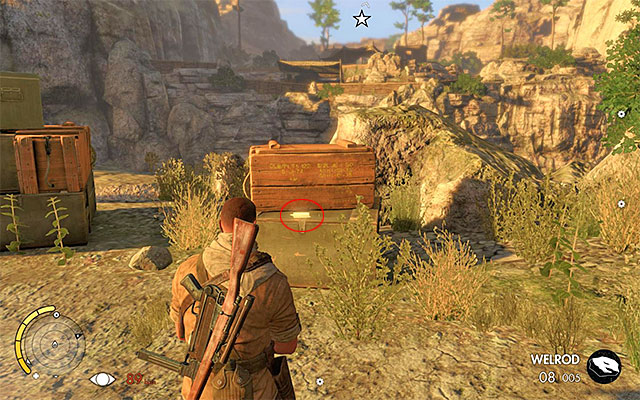 Eliminate the enemies first and go for the collectible then
This Diary can be found in the Western village that neighbors the bunker and one of the AA stations. It is on the crate in a covered area. It is necessary that you eliminate all of the enemies in the area, before you go to get it.
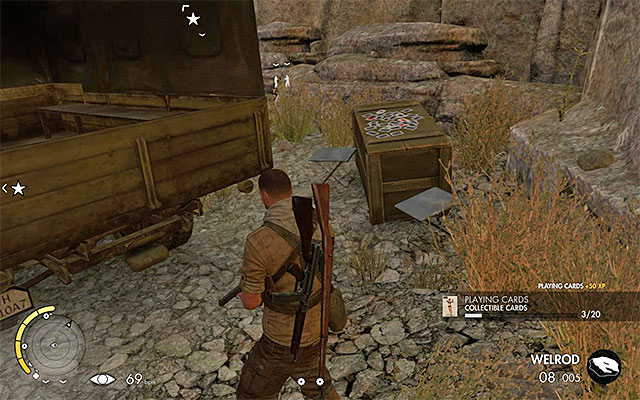 Search near the parked vehicles
The Collectible Card is in the Northern part of the map, close to the "inaccessible" AA stations. Explore the area near the parked trucks (also, eliminate the enemies here) thanks to which you will find it without major problems.
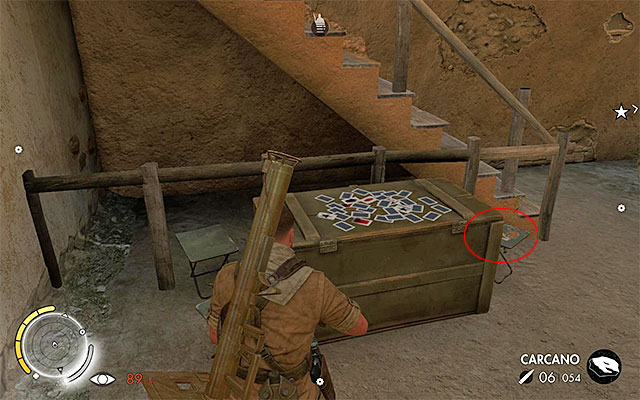 Search through the ground floor of the building
The Collectible Card is on the ground floor of one of the buildings in the central part of the map. By default, the buildings is being guarded by, at least, two soldiers so, keep appropriate precautions.
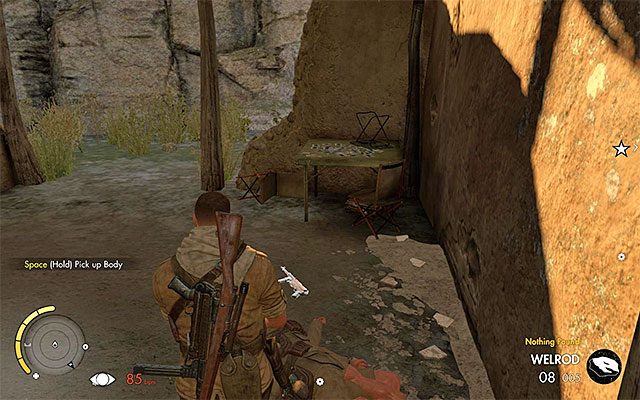 Approach the table in the ruined building
The Collectible Card is in the Western village that neighbors the bunker and one of the AA stations. After you have secured the area, explore the ruined buildings and approach the table in one of them.
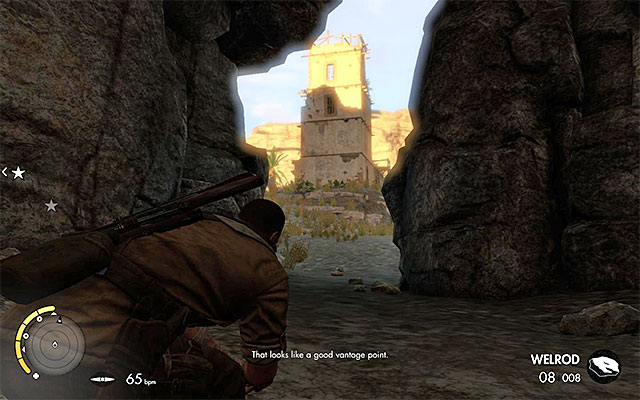 Reach the very top of the tower
You need to reach the sniper nest in the central part of the map, i.e. the tall tower near the main village and the motorpool.
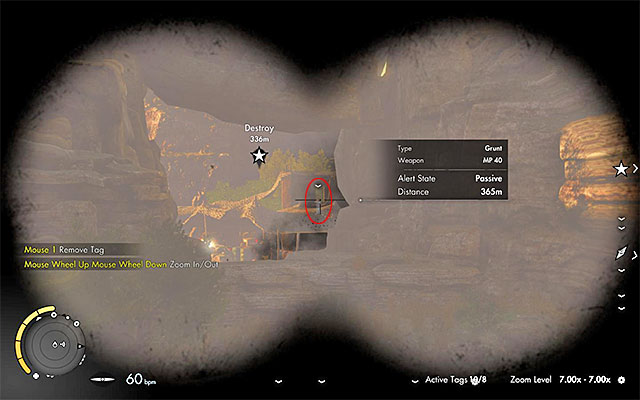
After you take your position in the nest, aim the sniper rifle at the enemy several hundred meters away from you, to the West. The target is staying in the bunker and he has been shown in the above screenshot.
Note - if you experience problems locating the target, use binoculars to your aid (you can, additionally, mark him, if the selected difficulty level allows you to).
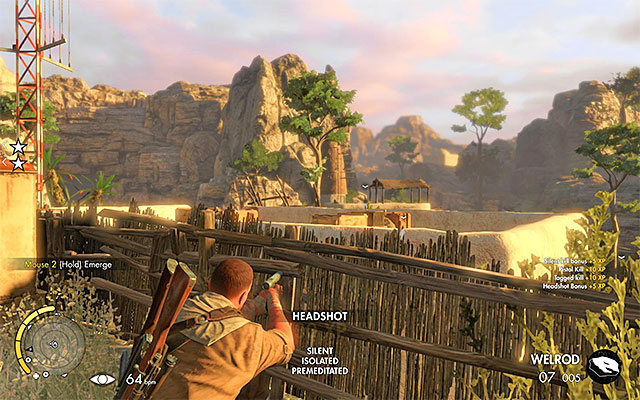 The enemy is walking around on a rooftop, close to the generator
The enemy with the first weapon part is staying in the village with the bridge, in the central part of the map. Follow the Western path in the village and approach the last rooftop (the North-most building). Eliminate the enemy on the roof and examine the corpse.
Note - If you are not careful enough, the enemy may climb down from the roof and start patrolling the area (the Western path or the lower floors of the building).
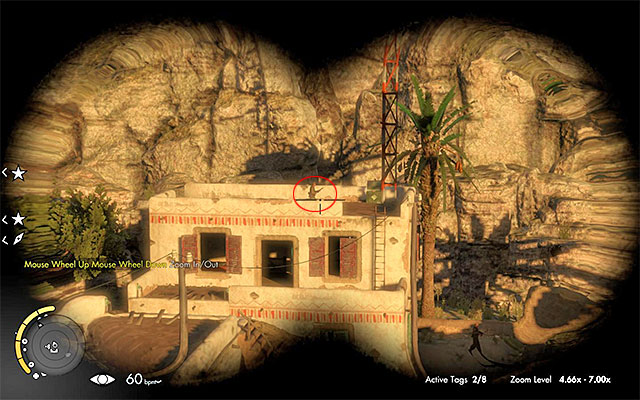
The enemy with the second weapon part is patrolling the rooftop of one of the buildings in the North-Eastern part of the map. It is the building shown in the above screenshot, with an antenna on it (the one, where you sabotage communications in the cellar).
Note - If you are not careful enough, this enemy may climb down from the roof and start patrolling the area.
The above map presents all of the collectibles that you can obtain during the fourth mission of the game (Fort Rifugio). These are seven war diaries, three collectible cards, one Long Shot and two weapon parts.
Note - at least one of the enemies that are in the possession of a better weapon, may be occupied with patrolling the area. This means that the markings on the map are only approximate and, after you clear the entire location, it is worthwhile to search all the bodies once again.
 It is possible to collect the document without disturbing the guard
This diary is on the crate in the Southern part of the map, close to the mission's starting point. Right next to the collectible, there is a single guard standing but, he should be facing away. As a result, it is possible to collect the diary without the necessity to kill him.
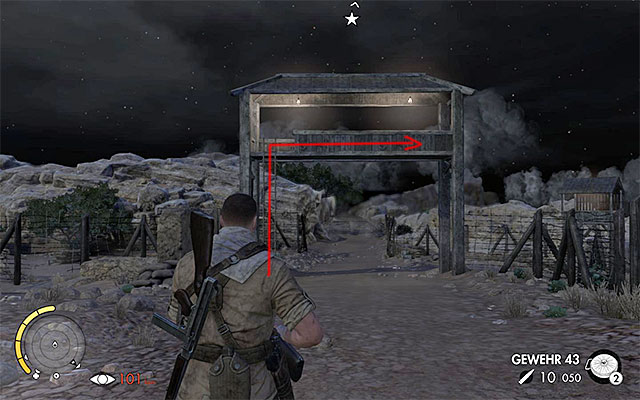
This diary is in the South-Western part of the map. You need to take the ladder to climb onto the gate shown in the above screenshot. In the meantime, you should watch our for the enemy soldiers and for the passing truck.
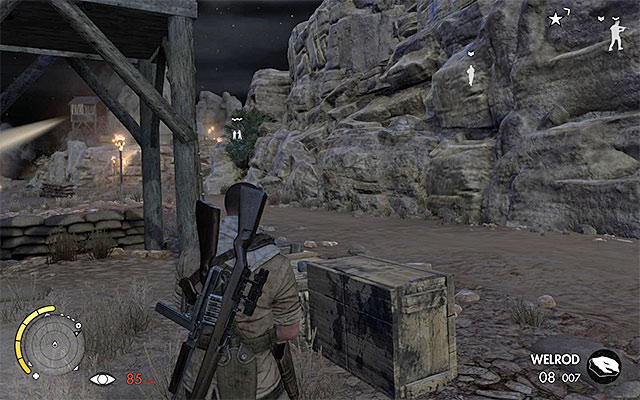 Explore the area next to the main road
This diary is on one of the crates in the central part of the map. The crate is near the road and one of the watchtowers. While searching for it, watch out for the enemy forces.
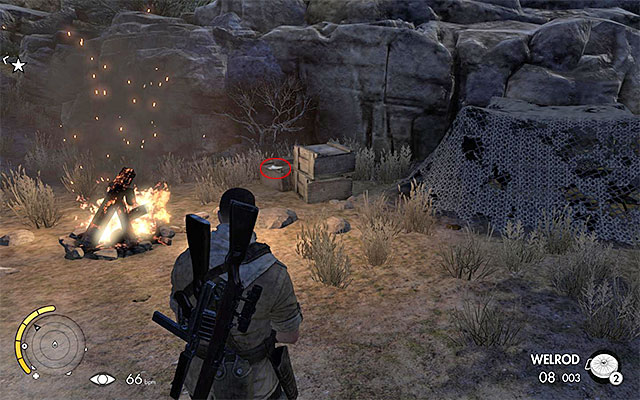 Approach the campfire and find the collectible
This diary is in the Eastern part of the map, close to the scaffolding, leading up to the fort. The collectible is on the crate, next to the campfire but, before you pick it up, make sure that you eliminate, at least, one of the enemies, who is patrolling this area.
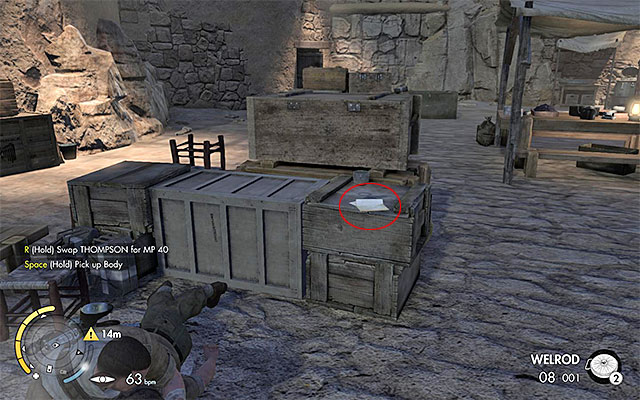 Kill the enemies and take the diary
This diary can be found in the Western part of the fort. Right next to the diary, there are two enemies standing and it is definitely a good idea to eliminate them, especially that one of them has a weapon part (another category of collectibles).
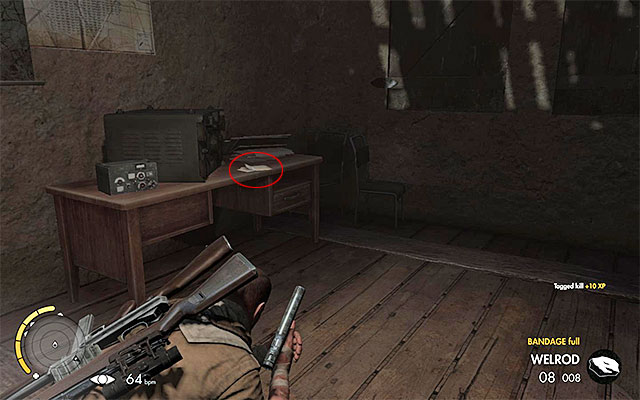 Watch out for the enemy that is staying in the room with the collectible
This diary is in the room at the ground floor, in the Eastern part of the fort (where the prisoner is being kept). You need to watch out, because there is a guard standing next to the table, in this location - you can try walking around him or, which is safer, kill him.
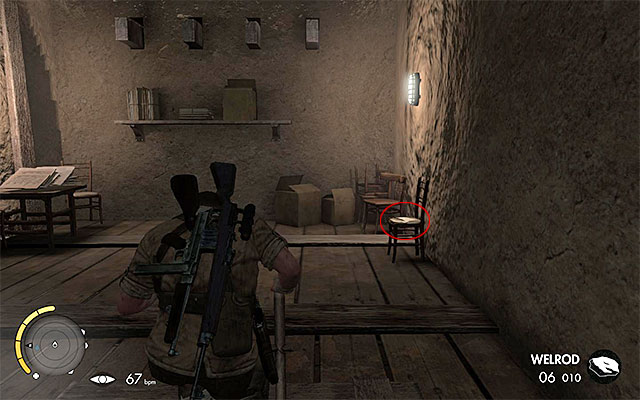 After you climb the ladder, approach the chair
This diary can be found in the Eastern part of the fort (the area where the prisoner is being kept). Locate the ladder to the higher level and climb up. Turn slightly to the right and approach the nearest chair, which there is the document on.
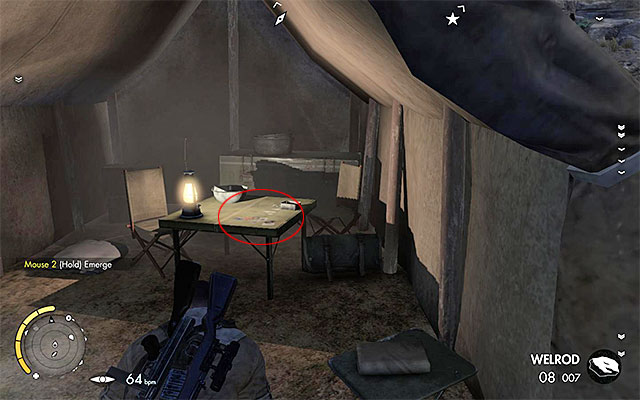 take a look into the tent next to the watchtower
The Collectible Card is in the tent in the central part of the map. The tent is right next to one of the watchtowers with the spotlight. Before you enter the tent, eliminate all of the enemies around.
 Enter the tent and collect the card
The Collectible Card is inside one of the tents to the North of the mission's starting point. You will not bump into anyone in the tent but, there are enemies patrolling the area around it so, keep appropriate precautions.
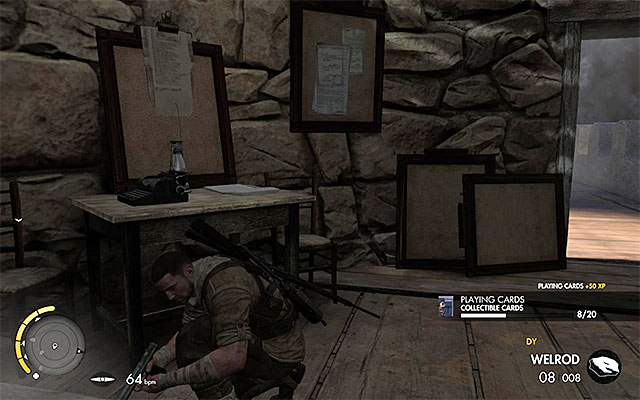 Search the northern tower of the fort
The Collectible Card is hidden inside one of the Northern towers in the fort. Inside the tower, there are no enemies but, the fort walls around are guarded by, at least, one soldier and it is a good idea to eliminate him in the first place.
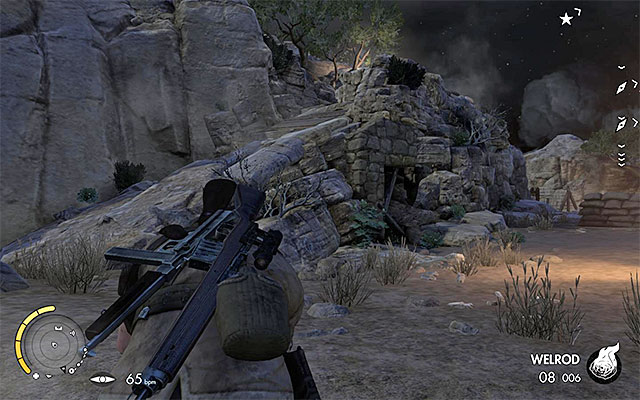 The sniper nest is on a low hill
You need to reach the sniper nest in the Southern part of the map, close to the mission's starting point.

After you take your position in the sniper nest, lay down and aim the sniper rifle at the enemy several hundred meters away, to the North of your character. He has been shown in the above screenshot and he should appear in one of the fort windows.
Note - if the target does not appear in the window, try loading the game from the very beginning of the mission and go to the sniper nest immediately. In order to locate the enemy soldier in an easier way, you could use the binoculars (you can additionally mark him, if your difficulty level allows that).
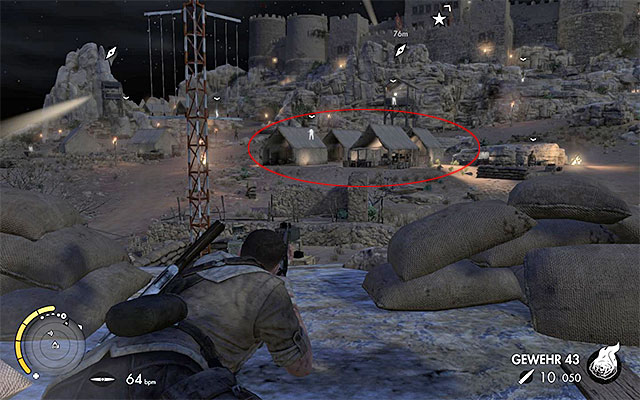 The camp
The enemy with the first part is patrolling the small encampment. It is located in the central part of the map, to the South of the tower with the spotlight. Try to get him where the attack, and searching the body will not be spotted.
Note - if you want to, you can use the binoculars to find the soldiers (e.g. after you take your position in a watchtower).
 Eliminate both of the enemies- one of them has a part on him
The enemy with the second part is staying in the Western part of the fort. By default, he is being accompanied by another soldier so, it is best to use a suppressed weapon, or a grenade, to eliminate both of them. After you do that, search both corpses to find the part on one of them.
Note - if you are not careful enough, the soldiers of that group may start patrolling the fort.
The above map presents all of the collectibles that you can obtain during the fifth mission of the game(Siwa Oasis). These are nine war diaries, one collectible card, one Long Shot and two weapon parts.
Note - the enemies with better weapons do not stay put in one place but, they only slightly change their positions. Still, the markings on the map, which relate to their positions, are to be treated as approximate.
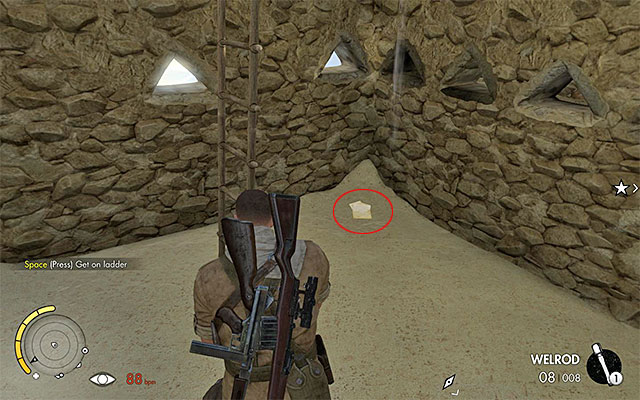 Check out the area at the foot of the tower
This diary is hidden in the Eastern part of the city, i.e. at the foot of the tower right next to one of the AA stations. Go to search for the document only after you have secured the area (apart from the AA station crew, there also is a soldier with a machine gun on the tower).
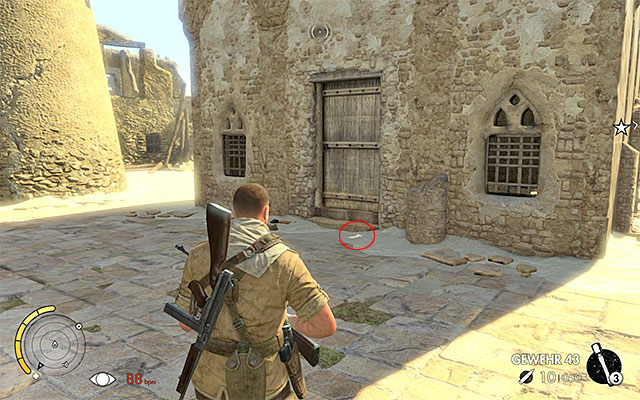 Take a look on the ground, near one of the buildings
This diary can be found while crossing the North-Eastern part of the city. It is on the ground, near the barricaded door of one of the buildings.
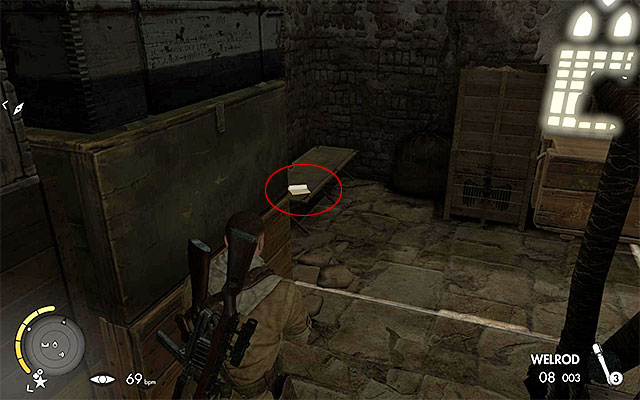 Search through the room on the ground floor
This diary is in the room on the ground floor of the building located in the Northern part of the city. It is the same building hat you visit along your path to the sniper nest and to where the enemy sniper is.
 search through the destroyed buildings
This diary is on the ground in one of the ruined buildings, in the North-Western part of the old city. Around, there are many enemies so, take precautions and clear the area, before you go for the collectible.
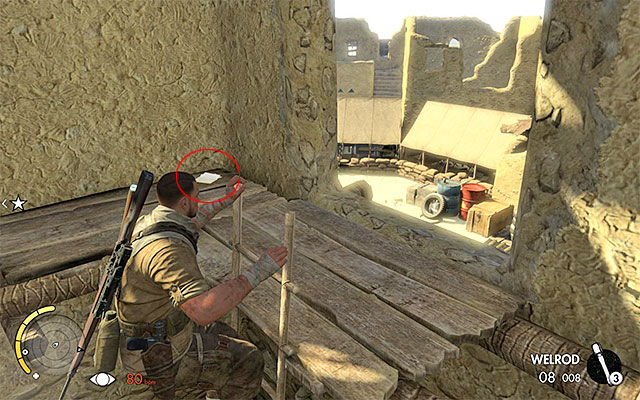 Climb the ladder to the upper floor of the building
This diary has been hidden inside one of the buildings in the North-Western part of the city. Watch out for the nearby enemies and locate the ladder, thanks to which you will reach the upper floor of the building. It is at the upper level that the diary is.
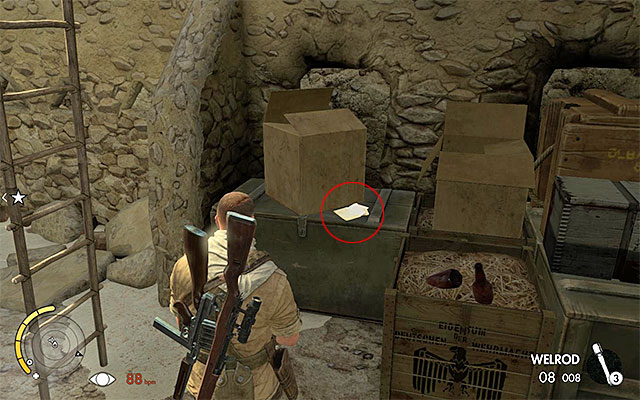 The diary is in the storage
This diary can be found after you reach the building in the Western part of the city and it is one of the storages (a secondary mission objective). Along your path to the collectible, watch out for the enemies, including the sniper around here.
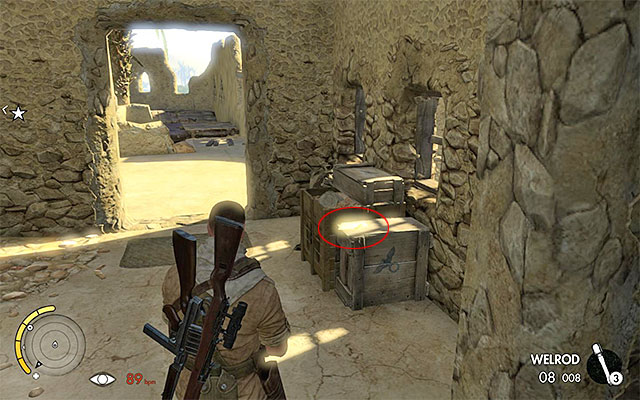 The collectible is on the crate
This diary is next to the South-Western walls of the city. During the exploration of the walls, watch out for the enemy soldiers and stop after you reach the area with several crates in it.
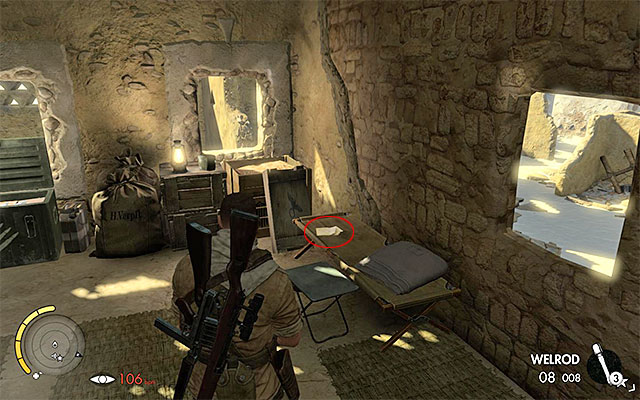 The building with the document is not being guarded by anyone
This diary is inside the building that neighbors Vahlen's office and it is in the Southern part of the city. Take the stairs and enter the building, where you meet no enemies.
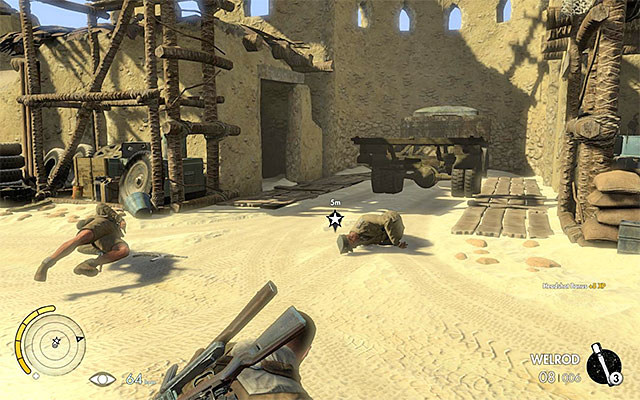 Search through the officer's corpse
This diary is on the enemy officer that you follow towards the end of the mission. This means that obtaining this document is required by the mission's objective and you cannot skip it.
Note - The marker on the map, provided with the walkthrough, marks the spot in which the officer stops(an opportunity to complete the secondary mission objective) but, you can also attack him a bit earlier.
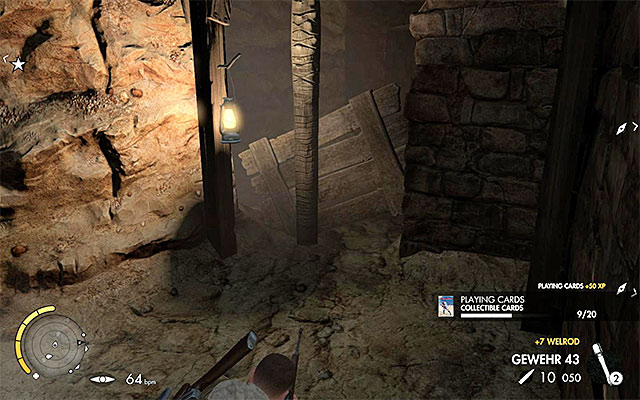 Explore the tunnels carefully
The Collectible Card is in the underground tunnels in the Eastern part of the map. The best way to reach the tunnels is through the Eastern entrance to the old city. The tunnels themselves are not being guarded but, the entrance itself, is.
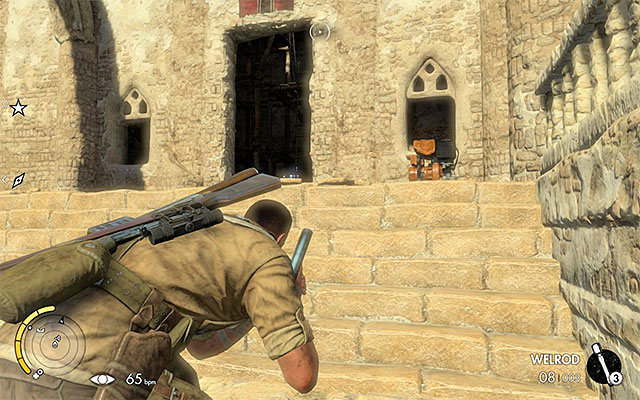 Enter the Northern building and climb to the top of the tower
You need to reach the sniper nest in the Northern part of the map, i.e. in the spot where you encountered the enemy sniper. Enter the building and climb several ladders to reach the top of the tower.

After you take your position in the nest, aim the sniper rifle at the enemy several hundred meters away. He is standing on a dune and he has been shown in the above screenshot.
Note - if you have any problems locating the enemy soldier, use the binoculars (you can additionally mark him, if your difficulty level allows that).
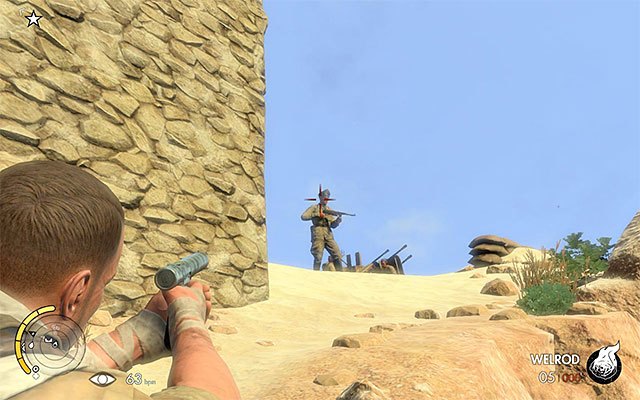 The enemy that has the part on him
The enemy with the first part is staying near the first AA station, which is at the brink of the city, in the Eastern part of the city. It is best to eliminate him when you are going for the AA station (a secondary objective).
Note - if you are not careful, the enemy may walk away from the AA station and start patrolling the area.
 The sniper
The enemy with the second part is the sniper that is on the rooftop of the building in the Northern part of the city. Eliminate the sniper, using the sniper rifle and reach his body (you need to climb onto the rooftop that he occupied).
The above map presents all of the collectibles that you can obtain during the sixth mission of the game(Kasserine Pass). These are eight war diaries, three collectible cards, one Long Shot and two weapon parts.
Note - at least, one of the enemies with a better weapon on him may be occupied with patrolling the area. Therefore, the markings on the map are only approximate and, after you secure the area, it is always a good idea to search all of the bodies.
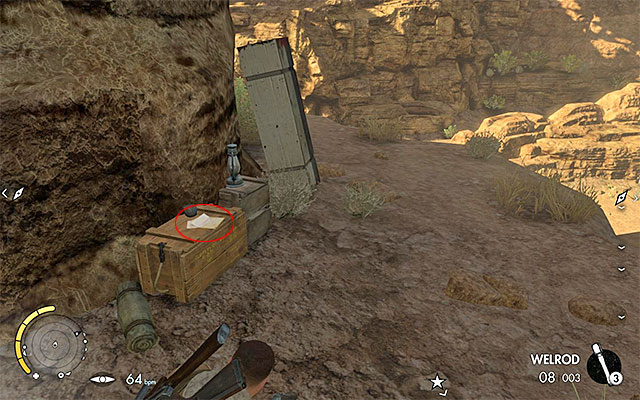 Examine the hill
This diary is on the hill in the Northern part of the map. Keep appropriate precautions, because the hill is being patrolled by, at least, one soldier.
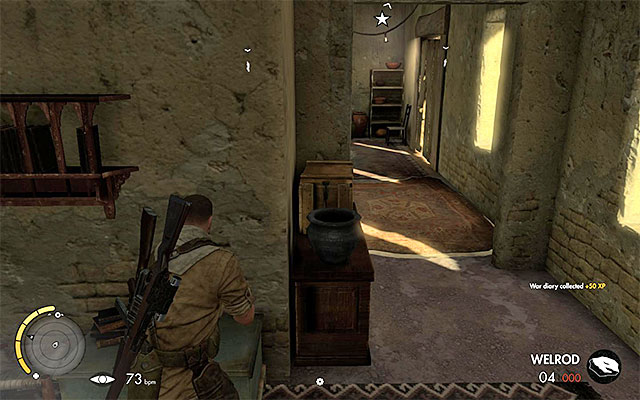 Search the building with the collectible inside
This diary is inside one of the larger buildings in the central part of the map. Since the area is being patrolled by an enemy vehicle and guarded by many enemies, it is best to start searching for it only after you have secured this part of the map.
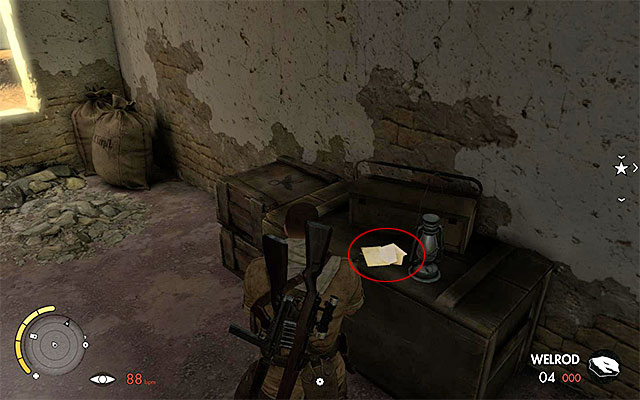 The document is on a big crate
This diary has been left in the village in the central part of the map. Go towards the building with the tower, which used to be (or still is) occupied by the enemy sniper. Explore the entire ground floor, thanks to which you will find the collectible.
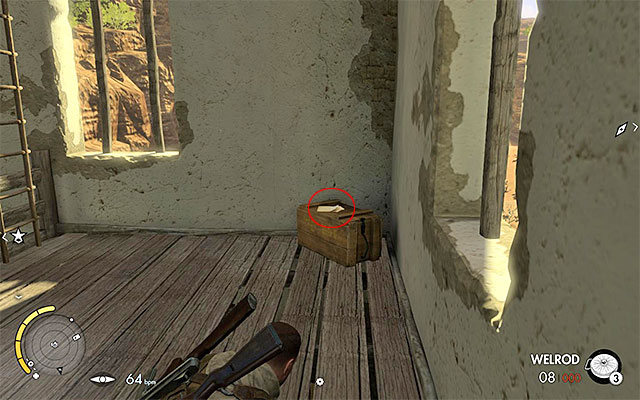 The Diary is next to the ladder to the top of the tower
This diary is in the building in the central part of the map, i.e. the one with the tower that is, initially, occupied by the enemy sniper. Take the stairs to reach the upper floor. After you reach the ladder, ignore it and take a look around for the collectible.
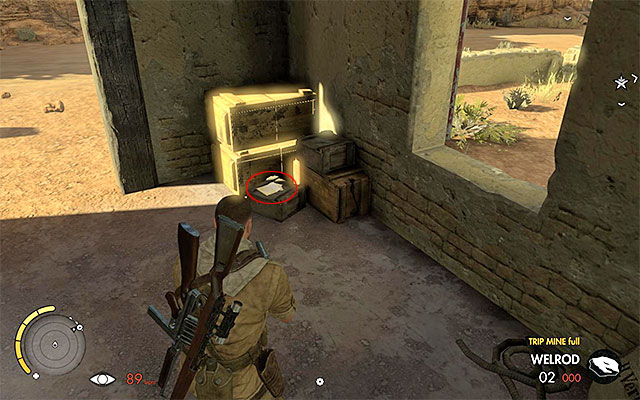 There should be no enemies, neither inside the cottage, nor around it
This diary is in the cottage in the North-Eastern part of the map. The cottage itself is not being guarded but, by default, this area is being patrolled by the enemy halftrack.
 Approach the table in the command center
This diary is on the table in Vahlen's command center. It is required to be collected, by one of the main objectives of the mission so, you cannot miss it.
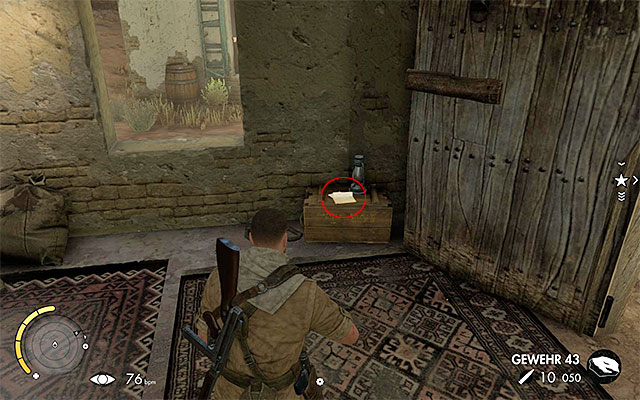 The collectible is inside one of the buildings
This diary is inside one of the cottages in the Southern part of the map. IF you do not want any additional problems, you can visit the cottage before you explore Vahlen's command center, because there will not be any enemies, yet.
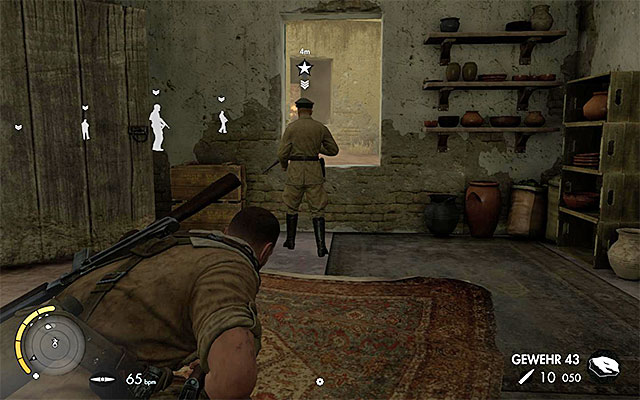 Kill the officer and examine his corpse
This diary is on the second officer that appears in the Southern village, after you visit Vahlen's command center. It is required to obtain this document to be promoted to the next part of the mission so, you cannot miss it.
Note - the marker on the map provided with this guide marks the cottage, where the officer is staying, by default. If, however, you alarm him, he may exit the cottage and start patrolling the area (in such a situation, you will find him by his marker).
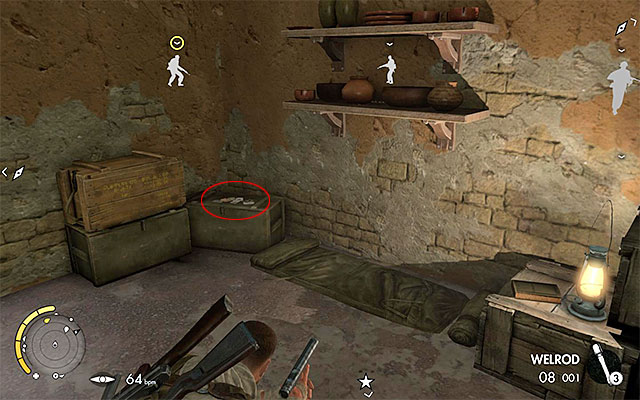 You can sneak into the cottage immediately, or clear the area beforehand
The Collectible Card is inside one of the cottages in the Northern village, i.e. the one that neighbors the first rocket launcher that you encounter. You need to watch out, because the buildings here are being guarded by several enemy soldiers.
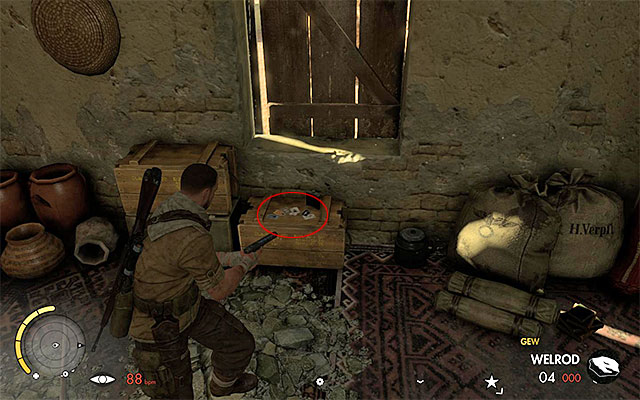 Ransack the appropriate cottage
The Collectible Card is hidden in one of the cottages in the village in the center of the map. The cottage itself is empty, but the area that is being watched, by the enemy soldiers quite well.
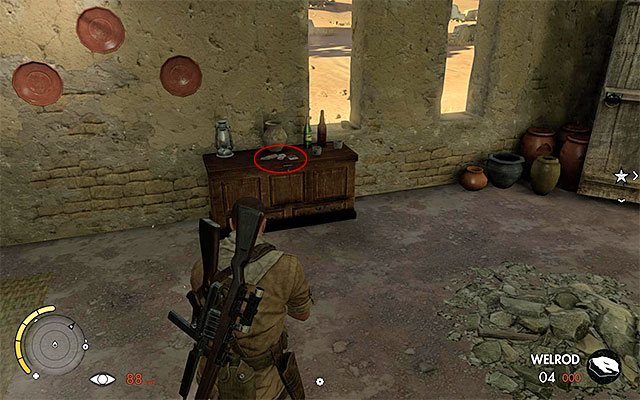 explore the building carefully to find the card
The Collectible Card is inside one of the buildings in the South-Eastern part of the map. The building is located close to the second rocket launcher and the spot, where the enemy tank originally appears.
 The sniper nest on the hill
You need to reach the sniper nest on the hill in the central part of the map. The hill is, by default, being patrolled by several soldiers so, do not haste to get there.

After you have taken your position in the nest, target the sniper rifle at the enemy several hundred meters away, to the South of your character. He is standing on one of the ledges (the above screenshot).
Note - Before you attack the target, consider eliminating the enemy sniper from the village in the center. Otherwise, you may be spotted by him and, attacked. If you have any problems locating the main target, use the binoculars (you can additionally mark the soldier if your difficulty level allows you to).
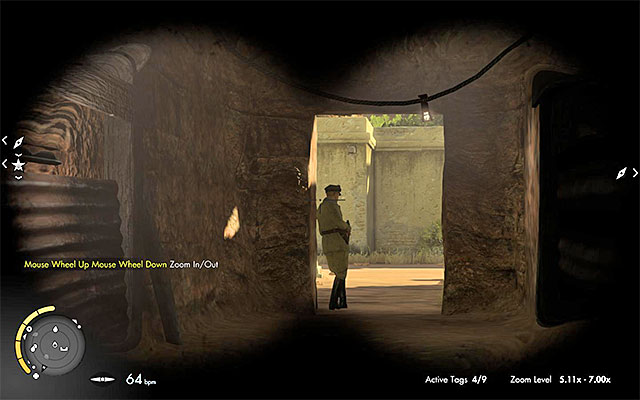 It is best to get the enemy from behind and eliminate him in melee
The enemy with the first part is standing next to the Southern exit from the tunnels in the central part of the map. By default, he is facing towards the main village so, you can get him from behind without any problems and eliminate him in melee.
Note - if you are not careful enough, this enemy may turn towards you or start patrolling the area.
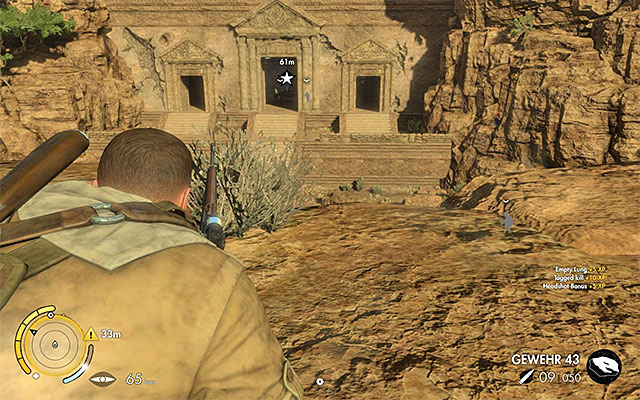 This soldier may be patrolling the area in front of the building, or occupy the interior of the temple
By default, the enemy with the second part is staying inside the temple, i.e. the enemy command center (he should be standing next to one of the tables). He may also exit the temple and start patrolling the area in front of it. In such a situation, eliminate all of the enemies and check each corpse.
The above map presents all of the collectibles that you can obtain during the seventh mission of the game(Pont Du Fahs Airfield). These are nine war diaries, three collectible cards, one Long Shot and two weapon parts.
Note - the enemies armed with better weapons should stay put in the spots marked on the map. The only exception is the situation in which they are alarmed.
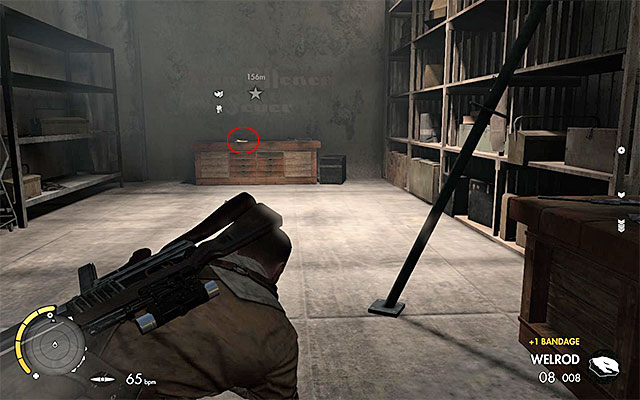 Secure the hangar and explore it thoroughly
This diary is in hangar 4, i.e. the Southern one, to the West of the airstrip. By default, the hangar is being watched by two or three enemies and it would be a good idea to eliminate them in the first place.
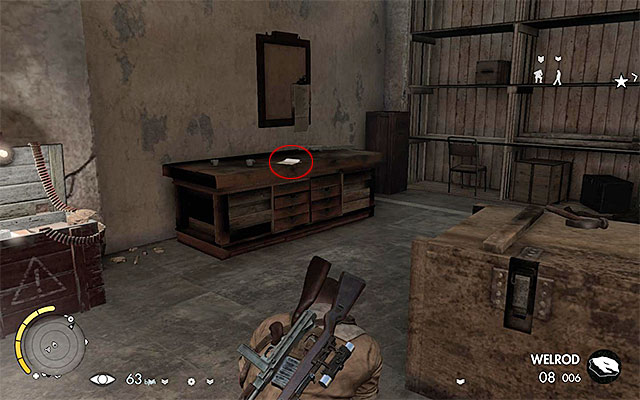 enter the hangar and find the table with the collectible.
This diary is in hangar 3, i.e. the Northern one, to the West of the airstrip. By default, the hangar is being watched by two or three enemies and it would be a good idea to eliminate them in the first place.
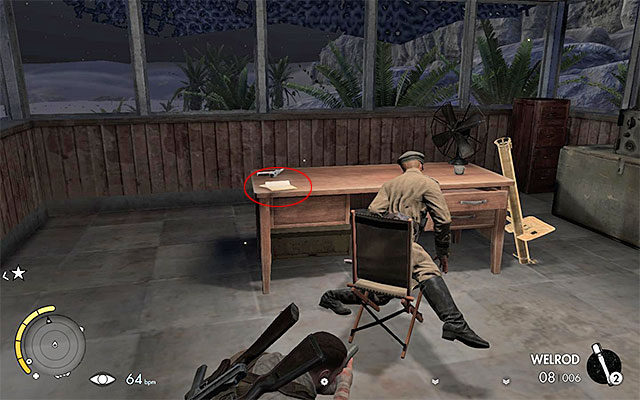 Reach the top of the tower, kill the enemy an collect the document
This diary is atop the control tower in the North-Eastern part of the map. You visit the tower while completing one of the side objectives and you need to watch out for the single enemy staying there.
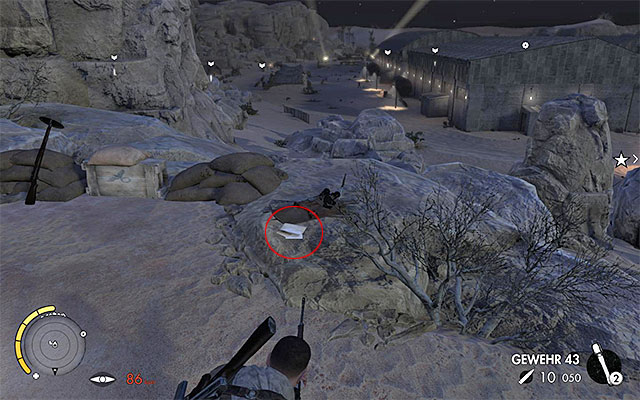 Examine the rocks to the right of the spot, where you unlock the sniper nest
This diary is on a hillock in the North-Eastern part of the airfield. It is on the rocks, right next to the spot, where you unlock the sniper nest and take the Long Shot.
 The document is poorly-visible and it is easy to miss it
This diary is hidden in the South-Eastern part of the map, It is on the rock, within a short distance of the vantage point, which you use to cover your ally, towards the end of the mission.
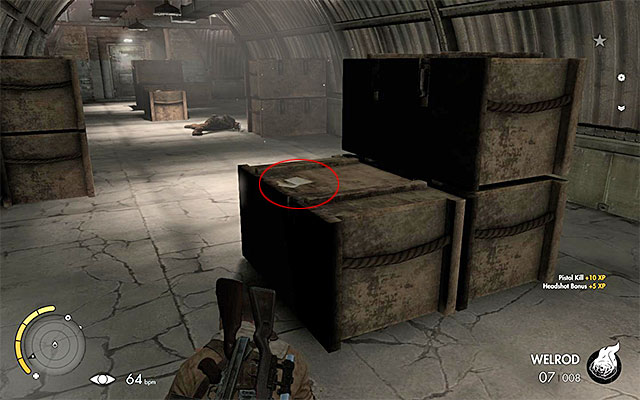 The document is on a crate in the underground bunkers
This diary is in the underground bunkers so, you first need to unlock the access to them (one of the main objectives of the mission). Explore the North-Western part of the bunkers and locate the collectible on the big crate.
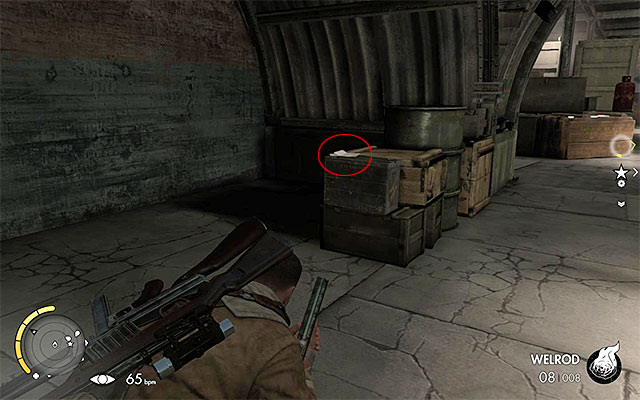 Take a good look, because the collectible is in a dimly-lit spot
This diary is in the underground bunkers so, you first need to unlock access to them (one of the main objectives of the mission). Start exploring the central part of the bunkers. The document is on one of the crates, close to the passage to hangar 3.
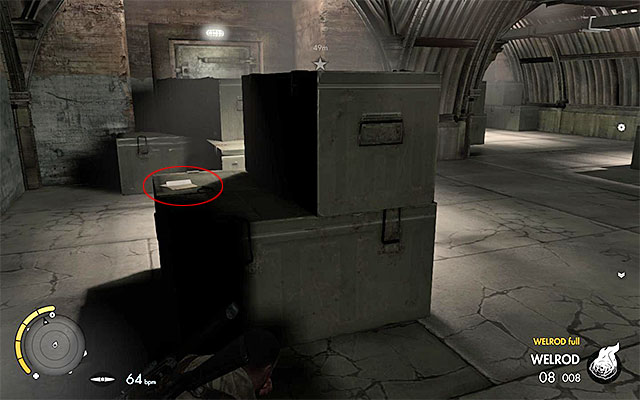 Check the vicinities of the passage to hangar 4
This diary is in the underground bunkers so, you first need to unlock access to them (one of the main objectives of the mission). You need to explore the South-Western part of the bunkers, around the passage to bunker 4.
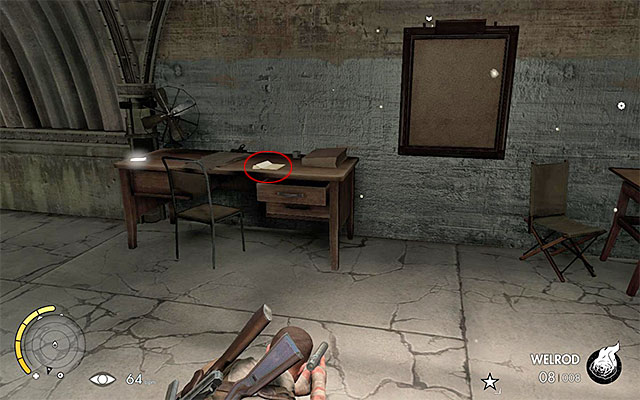 Find the desk with the collectible
This diary is in the underground bunkers so, you first need to unlock access to them (one of the main objectives of the mission). Explore the corridors in the South-Eastern part of the underground complex - the document is on the desk.
 The card is on one of the crates
The Collectible Card is in a secluded area in the Western part of the map. Along your path there, you will most probably, bump into two enemies and you can either kill them or try to avoid.
 Take a look into the tent next to the bomb depot
The Collectible Card is hidden in one of the tents in the corner, in the Eastern part of the airfield. The tents neighbor the bomb depot, which you sabotage as one of the secondary objectives of the mission.
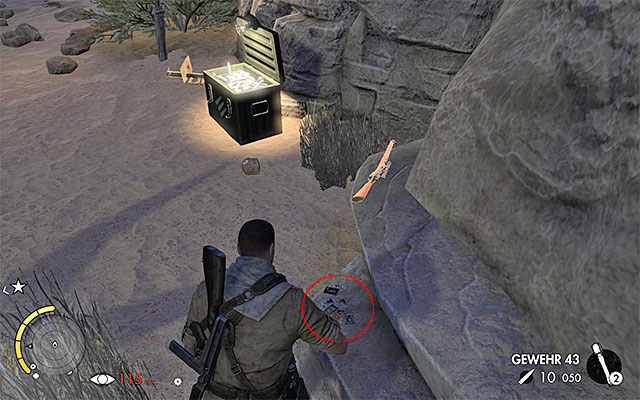 You can find the card next to ammo depot
The Collectible Card is on the rocks in the South-Eastern part of the map, close to one of the ammo depots. You need to watch out, because by default, there are two snipers around and you may be attacked by them, along your path.
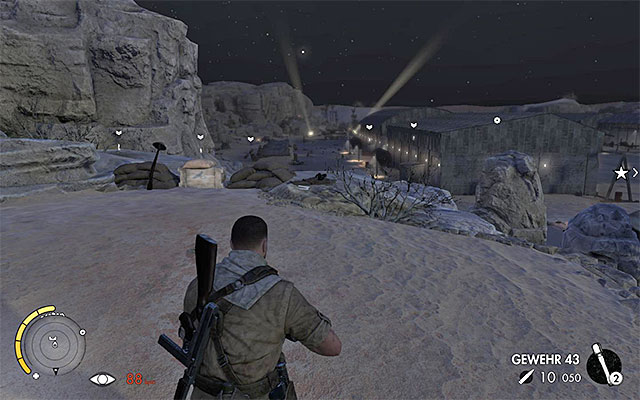 The hill with the sniper nest
You need to reach the sniper nest on a hillock in the North-Eastern part of the map, to the East of the airfield's control tower.
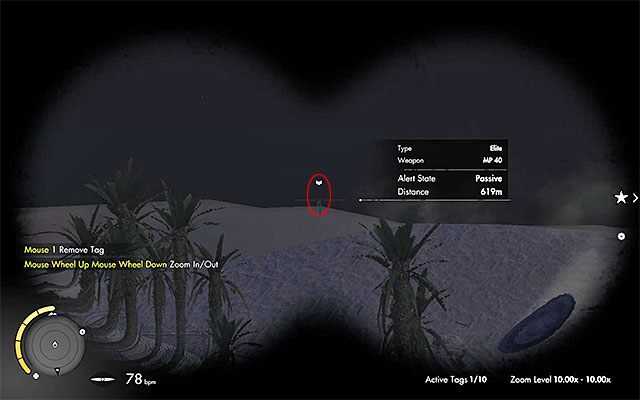
After you have taken your position in the nest, lay down on the ground and target the sniper rifle at the enemy, who is standing more than 600 meters away, to the South of you. He has been shown in the above screenshot.
Note - if you have difficulties taking the shot (the necessity to make considerable corrections, due to the wind) return to the seventh mission later into the game, after you have unlocked a rifle with a better scope. You can also try completing the mission at a lower difficulty level, at which the real-life bullet ballistics is disabled. It is best to use the binoculars to locate the enemy soldier (you can additionally mark him, if your difficulty level allows that).
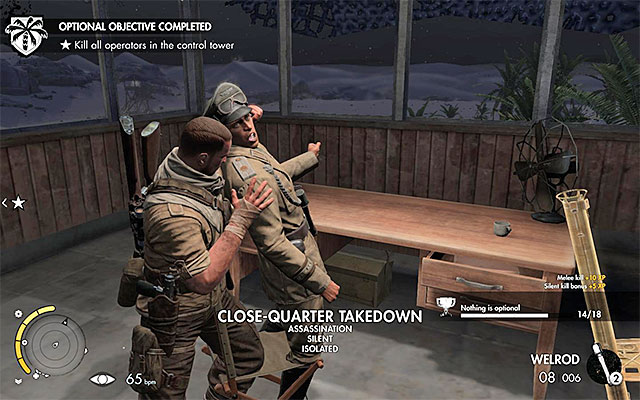 Attack the guard in the control tower
The enemy with the first part is staying inside the control tower, in the North-Eastern corner of the map. Watch out along your path there, because you will, most probably, encounter two enemies at its foot.
Note - if you are not careful enough,, this enemy may turn to face you or exit the control tower and start patrolling the area.
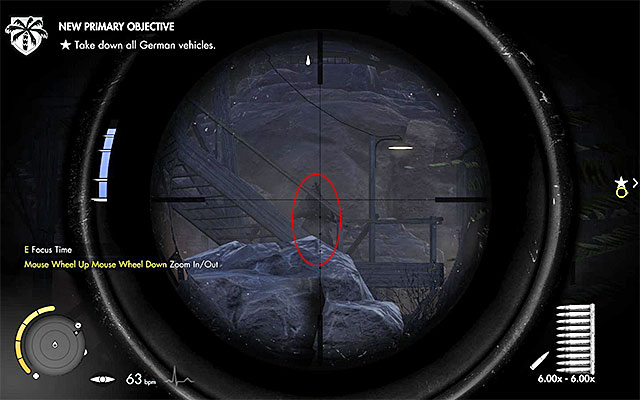 The sniper should be staying next to the Southern control tower, at all times
The enemy with the second part is the enemy sniper, who is guarding the Southern watchtower, by default (the one with the sniper nest inside). try to come close to the tower and try not to be spotted by the sniper too early. Additionally, you need to watch out for the other enemies around the tower.
Note - if you do not find the sniper at the beginning of the mission, return here later on (e.g. after you complete the objective connected with covering the ally from the vantage point).
The above map presents all of the collectibles that you can obtain during the last, eighth mission of the game(Ratte Factory). These are five war diaries, five Collectible Cards, one Long Shot and two weapon parts.
Note - at least, one of the enemies with a weapon part , may be patrolling the area. Therefore, the markings on the map are only approximate and, after you secure the area, it is always a good idea to search all of the bodies.
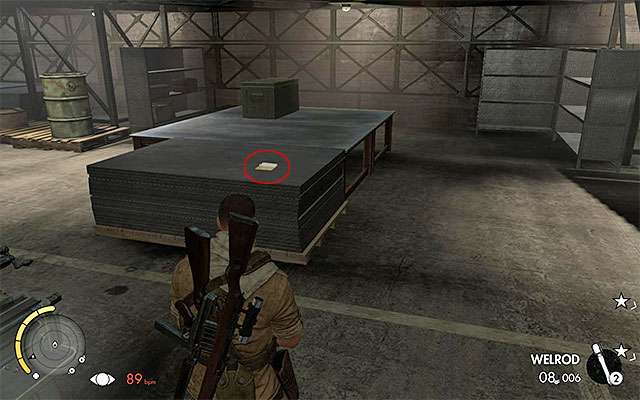 Deal with the enemies before you go for the collectible
This diary can be found while exploring the first parts of the factory, in the Eastern part of the map. The area around the collectible is being patrolled by many enemies and it would be a good idea to eliminate them first.
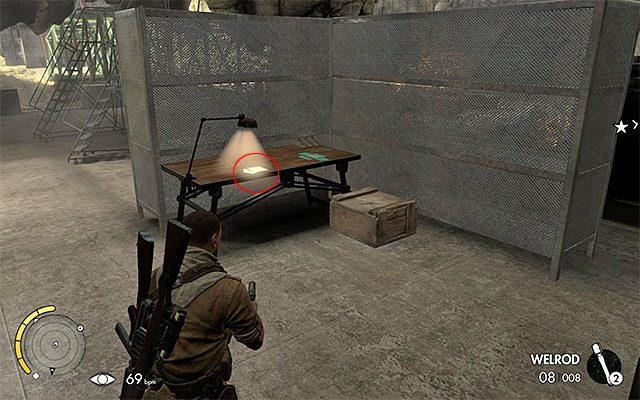 Find the desk with the lit lamp
This diary is on a small desk in the central part of the map. Just like in the case of the above, first, collectible, it is a good idea to secure the area first.
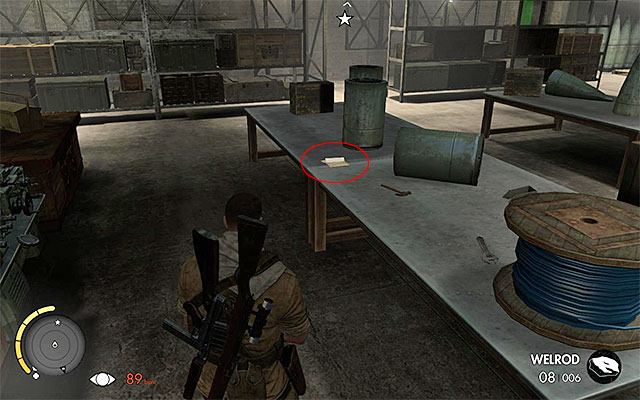 The diary is on a big table
This diary is in the last location of the first part of the factory, i.e. in the location that you explore right before you reach the hall with the huge tank. Eliminate all of the enemies in the area and explore the ground floor of the structure to find the collectible.
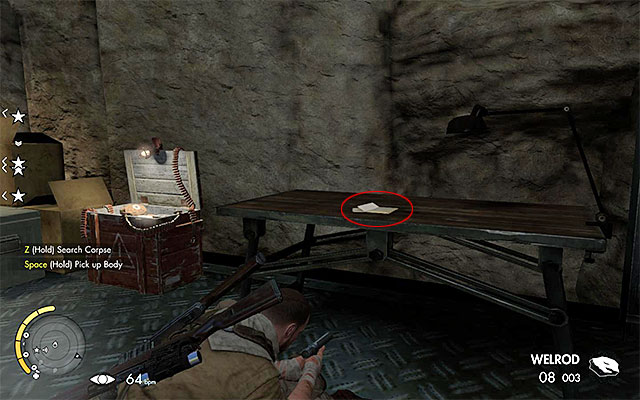 Check out the table next to the supply crate
This diary is in the North-Western part of the hall with the Ratte tank. It is at the bottom level of the hangar and, around there unfortunately are several enemies that you need to deal with.
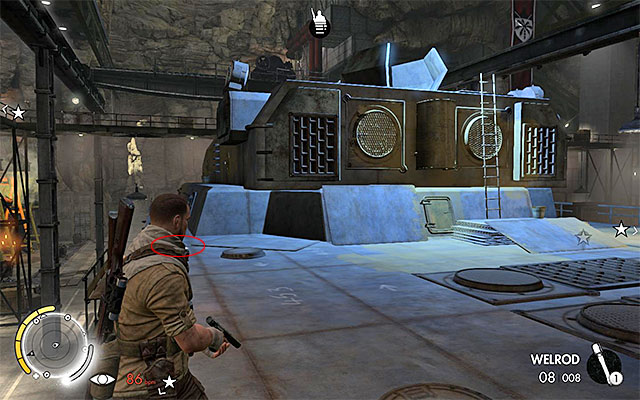 You need to climb onto the huge tank
This diary is on the Ratte tank, which is in the huge hall that you visit towards the end of the mission. You need to climb up the stairs, onto the tank and, at the same time, eliminate, at least, two soldiers that guard it.
 take a look around near one of the shelves
The Collectible Card is in the Northern part of the map, i.e. in the side part of the factory, which you can reach, e.g. by taking the catwalk. The area is being patrolled by two enemies that you need to walk around or kill.
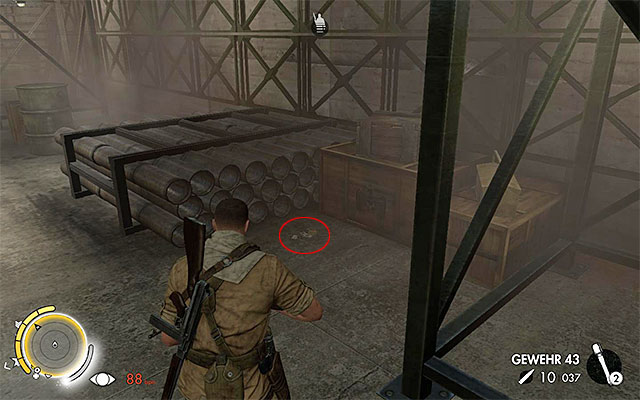 The collectible is quite well hidden
The Collectible Card is on the floor of the Northern part of the factory. Since it is difficult to spot, it is best to go look for it only after you have secured the area, because you will be able to search for it without being bothered.
 Climb onto the catwalk and collect the card
The Collectible Card is on a small catwalk located in the central part of the factory. Of course, you need to watch out because the catwalk is being patrolled and, apart from that, you can be easily spotted by the enemies below.
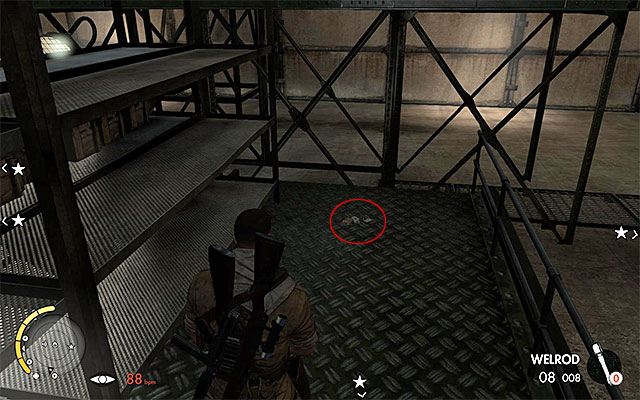 Search the dimly-lit area of the hall
The Collectible Card is hidden in the hall with the huge tank that you explore in a later part of the mission. Explore the ground floor of this part of the hall, i.e. the dimly-lit area, where the collectible is.
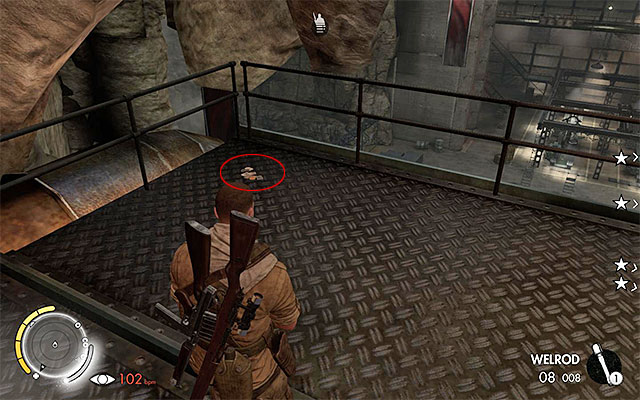 You need to reach the catwalks above
The Collectible Card is in the North-Eastern corner of the gall with the huge tank. Climb up the stairs, to the catwalks, because that is where the collectible is.
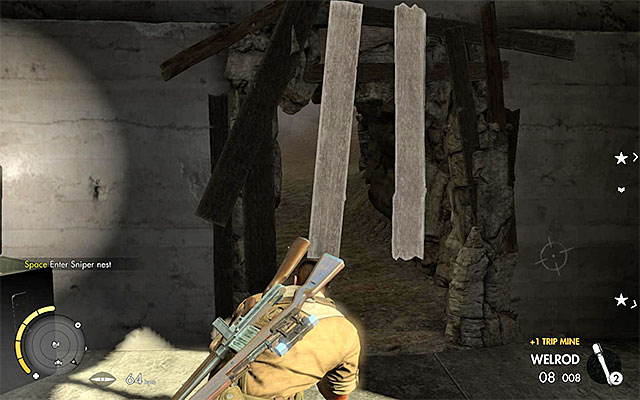 Unlock passage to the nest
You need to make it over to the sniper nest in the central part of the factory. It is not easy to locate the nest - you need to reach the first transformer (one of the main objectives of the mission), find the interactive planks and rip them off. This unlocks the passage to the nest.
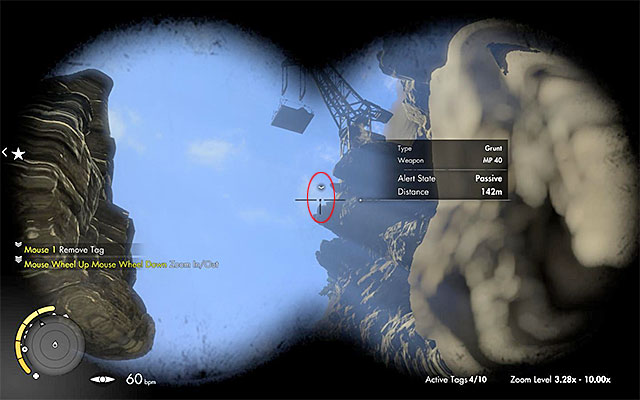
After you take your position in the nest, target the sniper rifle at the enemy standing on the edge, above your character, to the North of you. He has been shown in the above screenshot.
Note - if you have problems locating the target, use the binoculars (you can additionally mark him, if your difficulty level allows that).
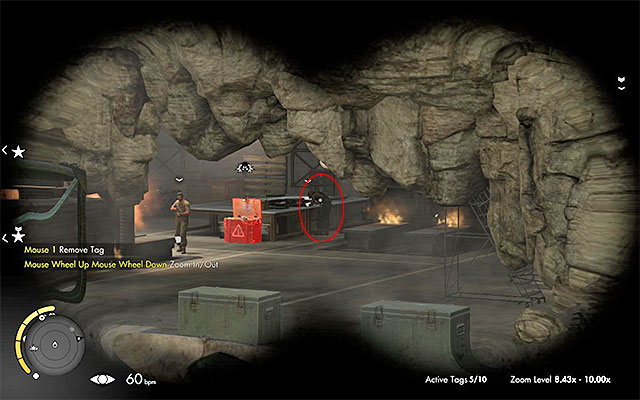
The enemy with the first part is working, by default, at one of the tables in the central part of the factory. He has been shown in the above screenshot.
Note - the enemy may, just as well, start patrolling the area and this happens in a situation, in which you have alarmed the enemies here. If this happens, after the fights end, search the killed enemies.
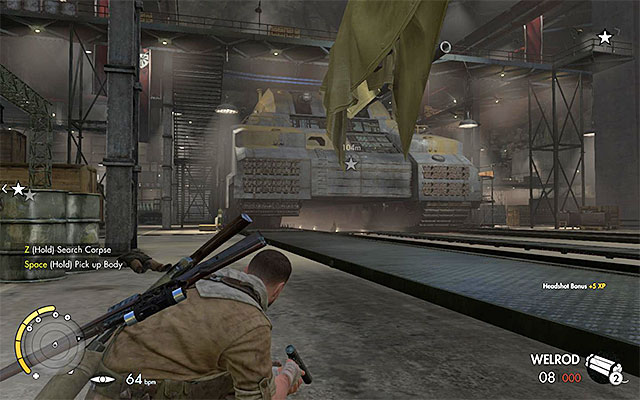 The target is patrolling around the huge tanks in the center of the hall
The enemy with the second part is patrolling the hall that you explore later into the mission. He is patrolling around the huge tanks. Wait for him to come closer to you, shoot him and search the corpse.
Note - if you have any problems locating the exact enemy, eliminate everyone at the ground level, near the tank, and search their bodies.
Below, you can find a list of achievements, provided with the descriptions of how to obtain them. On the list, you can find only those of the achievements that are connected with the basic version of the game (new achievements become available as soon as you install the DLCs) and they are common for all the platforms
(PC, PlayStation 3, PlayStation 4, Xbox 360, Xbox One).
Way to unlock: You need to find all the War Diaries.
Commentary: Information on where to find the diaries can be found in the walkthrough and in the chapter entitled Collectibles.
Way to unlock: You need to complete the fourth mission of the story mode (Fort Rifugio).
Commentary: You obtain the achievement regardless of the difficulty level that you select.
Way to unlock: You need to reach the rank of the sergeant (11th experience level).
Commentary: Hints on how to obtain experience and get promoted can be found in the chapter with hints.
Way to unlock: You need to kill a total of 20 enemies, by shooting at explosives.
Commentary: The easiest way to obtain this achievement is firing the sniper rifle at the explosive traps prepared beforehand, e.g. the dynamite.
Way to unlock: You need to kill a total of 10 enemies with detonations, using flint.
Commentary: It is best to eliminate the enemies that stay put in one position, thanks to which you do not need to time the moment of detonation.
Way to unlock: You need to complete the main campaign, at least at the Cadet difficulty level.
Commentary: -
Way to unlock: You need to complete the seventh mission of the story mode (Pont Du Fahs Airfield).
Commentary: You obtain the achievement regardless of the difficulty level that you select.
Way to unlock: You need to complete all the challenges.
Commentary: You select challenges in the main menu of the game.
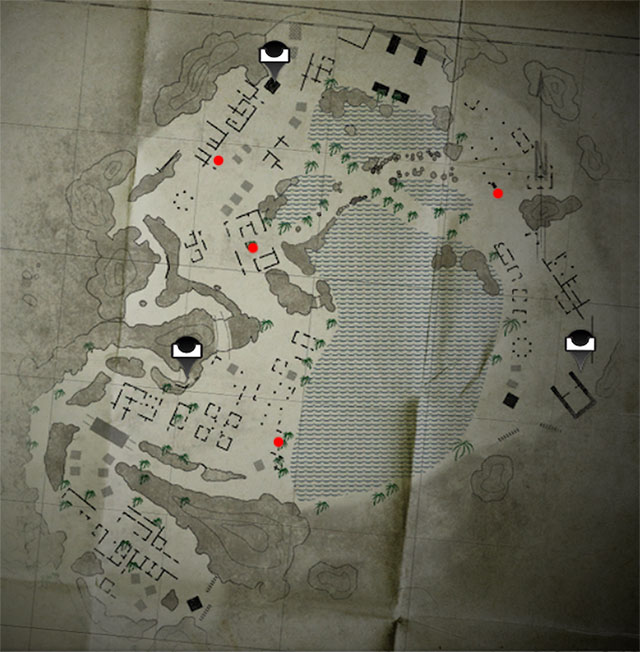
Way to unlock: During the second mission of the campaign mode (Gaberoun) you need to throw the corpses of the murdered soldiers into each one of the four wells.. The locations of the wells have been marked on the above map (the red dots).
 Approach the well and drop the corpse in
Commentary: you need to drop one corpse into each well and the choice of enemies is up to you. Try to secure the area of the well, beforehand, to prevent being caught in the act
Way to unlock: During the sixth mission of the campaign mode (Kasserine Pass) you need to immobilize two enemy vehicles, within 5 seconds.
Commentary: You get the opportunity to obtain this achievement right after the Tiger tank is destroyed. Around, there appear a halftrack and a truck then and you need to immobilize both of the vehicles, by killing the drivers, before they drive in different directions. After you have secured the area, destroy both of the vehicles quickly, e.g. by aiming at the weak points, or by throwing dynamite to each. Since it is easy to make a mistake, it is a good idea to save the game, right after you destroy the tank, so that you can repeat all of the steps.
Way to unlock: You need to complete the first mission of the story mode (Siege of Tobruk).
Commentary: You obtain the achievement regardless of the difficulty level that you select.
Way to unlock: You need to kill enemies with every killing tool available to you
Commentary: Use, at least once, each available model of rifle, each secondary weapon and each pistol. Apart from that, you also need to use all of the available types of explosives. The list of the available elements of equipment is in the window of preparation for the next mission and thanks to this, you can easily track your progress in obtaining this achievement. Note - the above tools can be used in all gameplay mode, not only the single player mode.
Way to unlock: You need to find all the Collectible Cards.
Commentary: Information on where to find the kart can be found in the walkthrough and in the chapter entitled Collectibles.
Way to unlock: You need to reach the rank of the second lieutenant (31st experience level).
Commentary: Hints on how to obtain experience and get promoted can be found in the chapter with hints.
Way to unlock: You need to unlock all of the Sniper Nests.
Commentary: Information on where to find the Sniper Nests, and the ways to reach them, can be found in the main walkthrough for the game.
Way to unlock: While completing the story mode, you need to complete all of the secondary objectives.
Commentary: Information on the secondary objectives and the way to complete them, have been provided in the walkthrough for the game.
Way to unlock: During the fourth mission of the campaign mode (Fort Rifugio) you need to reach the cell with the informer, without being spotted.
Commentary: The informer is being held inside the fort. Use the suppressed weapon, melee combat and search for the opportunities to drown out the noise of the weapon fired. More about this, you will find in the walkthrough.
Way to unlock: You need to complete a mission, after having lost, more than 500 health units.
Commentary: The easiest way to obtain this achievement is at the lower difficulty levels, because you do not need to worry, then, bout a quick, incidental death. The game does not take into account how you lose health - they may occur as a result of, e.g. an explosion or wounding.
Way to unlock: You need to kill, a total of 20 enemies, as a result of a chain reaction, after an explosion.
Commentary: The easiest way to obtain this achievement is to target barrels and the other explosive elements, with the enemies standing at.
Way to unlock: You need to complete 100% of the campaign, at any difficulty level.
Commentary: What counts for the 100% completion of the game are also secondary mission objectives (they have been described in the walkthrough for the game) and the collectibles that you find at individual levels (they have been listed in the chapter entitled Collectibles).
Way to unlock: You need to play one mission in each one of the available modes.
Commentary: To obtain this achievement, you need to complete one single player mission, one co-op mission and one mission in the challenge mode (you need to complete all of the challenges connected with a given mission). Of course, which mission you choose, in a given mode, is up to you.
Way to unlock: You need to change positions for 100 times.
Commentary: After you take a loud shot, using the sniper rifle, you will alarm the enemies (yellow color). You then need to walk away from the spot, in which you took the shot, i.e. make the information, about the distance left, disappear. Thanks to walking away from the firing spot, you will not be automatically spotted, after you use the sniper rifle again. You need to do that for 100 times.
Way to unlock: In total, you need to hold your breath for 3600 seconds (an hour).
Commentary: Of course, this achievement is very much time consuming. Remember to hold your breath each time that you want to kill someone, using the sniper rifle. This should ensure you with obtaining this achievement, before the end of the campaign mode.
Way to unlock: With the binoculars, you need to mark a total of 100 enemies.
Commentary: It is worth reminding that it is not possible to mark the enemies at the highest difficulty levels.
Way to unlock: You need to kill a total of 10 enemy snipers, before they spot and fire at you.
Commentary: Information on where to find the snipers can be found in the walkthrough for the main campaign. remember that you cannot hurry and try to eliminate them at the longest distance possible.
Way to unlock: You need to kill enemies at a range, of the combined distance of two marathons.
Commentary: OF course, it is very time consuming to obtain this achievement, because the sum of all the distances of kills needs to be equal to 84400 meters. Search for the opportunities to take shots at the longest distances possible and consider repeating them, after you load the game, because this will bring this achievement closer.
Way to unlock: You need to complete the main campaign, at least, at the Realistic difficulty level.
Commentary: Remember never to change the difficulty level, during the main campaign. Apart from that, this achievement unlocks the corresponding ones, for the lower difficulty levels.
Way to unlock: You need to kill a total of 30 enemies from sniper nests.
Commentary: It is not too difficult to achieve, especially that from a single nest, you can often kill, as many as, a dozen-or-so enemies. You simply need to visit several of them and the achievement is as good as yours.
Way to unlock: You need to complete the third mission of the story mode (Halfaya Pass).
Commentary: You obtain the achievement regardless of the difficulty level that you select.
Way to unlock: You need to complete the sixth mission of the story mode (Kasserine Pass).
Commentary: You obtain the achievement regardless of the difficulty level that you select.
Way to unlock: You need to create and save four loadouts.
Commentary: What is meant here are the Alpha, Bravo, Charlie and Delta loadouts, which you can create on the mission preparation screen (the make-up is up to you). To learn more, see the chapter with hints.
Way to unlock: During the fifth mission of the campaign mode (Siwa Oasis), you need to stage the death of the enemy officer.
Commentary: Staging the officer's accident is one of the main objectives of the fifth mission. You need to follow the officer, up until the moment at which he reaches the truck. Then, you need to blow up the vehicle- more about this, in the walkthrough.
Way to unlock: You need to take all the Long Shots correctly.
Commentary: Information about where to take the long shots and about the targets can be found in the walkthrough and in the chapter entitled Collectibles.
Way to unlock: You need to complete the campaign in the co-op mode
Commentary: To unlock this achievement, you need to complete all of the eight missions, of the campaign mode, in co-op.
Way to unlock: You need to use stones, or flint, to distract, at least, 20 enemies.
Commentary: Remember to remain undetected, while distracting the enemies.
Way to unlock: During the seventh mission of the campaign (Pont Du Fahs Airfield), you need to destroy three bomb depots, at one take.
Commentary: Bomb depots are in the Eastern part of the map and they are connected with one of the secondary objectives of the mission (more in the walkthrough). To complete this achievement, it is best to use dynamite. Plant two sticks next to two, out of three depots. Additionally, use flint on one of the sticks to start the countdown until explosion. Backtrack and aim the sniper rifle, at the third depot, the moment that the dynamite is about to explode. Since it is easy to make a mistake here, it is a good idea to save the game before you plant the explosives, so that you can attempt all of the steps again.
Way to unlock: You need to modify one rifle.
Commentary: The scope of modifications is not taken into consideration - select any upgrades.
Way to unlock: You need to play a total of 10 matches in the competition mode (multiplayer).
Commentary: -
Way to unlock: You need to complete the main campaign, at least, at the Sniper difficulty level.
Commentary: Remember never to change the difficulty level, during the main campaign. Apart from that, this achievement unlocks the corresponding ones, for the lower difficulty levels.
Way to unlock: You need to complete a mission, while staying undetected.
Commentary: Unfortunately, you cannot pick the first mission for this achievement. Personally, I recommend mission four (Fort Rifugio), because there is another achievement connected with not raising the alarm (I Fort This Would Be Difficult).
Way to unlock: You need to complete the fifth mission of the story mode (Siwa Oasis).
Commentary: You obtain the achievement regardless of the difficulty level that you select.
Way to unlock: During the first mission of the campaign mode (Siege of Tobruk), you need to clear the mountain pass, without raising the alarm.
Commentary: Use suppressed weapons, melee attacks and drown out the bangs of the shots with the launchers. More about this in the walkthrough for the first mission.
Way to unlock: You need to obtain a ribbon for each one of the multiplayer competition modes.
Commentary: In total, there are 18 different ribbons to unlock in the multiplayer mode.
Way to unlock: You need to complete the second mission of the story mode (Gaberoun).
Commentary: You obtain the achievement regardless of the difficulty level that you select.
Way to unlock: During the third mission of the campaign mode (Halfaya Pass), you need to kill General Hoesslein.
Commentary: Killing the general is one of the secondary objectives of the mission. First, you need to find the two documents and reach the staying place of Hoesslein - more about this in the walkthrough.
Way to unlock: You need to shoot an enemy with a shot fired from the distance of, at least, 100 meters.
Commentary: It is a good idea to use the binoculars beforehand, to make sure that the distance is right.
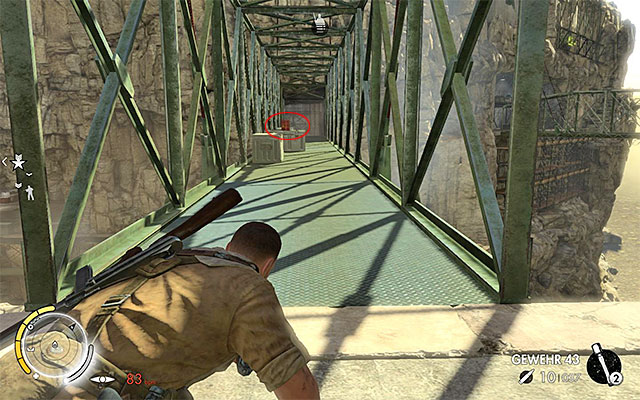
Way to unlock: During the eighth mission of the campaign mode (Ratte Factory) throw an enemy off one of the catwalks.
Commentary: It is a bit more problematic, than it may look, because you cannot obtain it, at first. Walk onto any catwalk in the central part of the map and aim at the red explosive element, like the one shown in the above screenshot. Thanks to performing this action, you will damage the structure of the bridge and reveal the side elements. Only then, pick up the corpse of any enemy, stand at the edge and throw the enemy off.
Way to unlock: You need to complete the last, eighth, mission of the story mode (Ratte Factory).
Commentary: You obtain the achievement regardless of the difficulty level that you select.
Way to unlock: You need to find, at least, a half of the total of the War Diaries.
Commentary: Information on where to find the diaries can be found in the walkthrough and in the chapter entitled Collectibles.
Way to unlock: You need to complete the main campaign, at least, at the Marksman difficulty level.
Commentary: Remember never to change the difficulty level, during the main campaign. Apart from that, this achievement unlocks the corresponding ones, for the lower difficulty levels.
Sniper Elite III in the PC version is a game of medium system requirements. They are only slightly higher than the ones of the previous installment of the game, i.e. Sniper Elite V2. What is interesting, the requirements of the game did not go up, in the case of bigger and more complex maps. Apart from that, the game does not display too high RAM memory requirements and its loading times are short. The good news is that the game does not suffer from any major glitches, apart from the occasional problems with physics of the enemy corpses. Sniper Elite III for PC does not require constant internet connection. Still, it is recommended to have the internet connection active, due to the fact that the option to complete mission in the co-op mode is a lot of fun. Apart from that, the game does not lack the more traditional types of matches in the multiplayer mode, which focus on the competitiveness of players.
Singleplayer: Yes
Offline co-op (split screen/hot seat): No
Co-op over the Internet: Yes
Multiplayer: Yes
This guide has been drawn up for the PC version, on the computer of the below specifications:
On the computer of the above specs, the game worked without major problems. Frame rate drops occurred only in very vast locations and the ones with many plants.
Yes, it is possible to play Sniper Elite III: Afrika on a laptop.


 Star Wars: Empire at War Game Guide & Walkthrough
 Sniper Elite V2 Game Guide & Walkthrough
 S.T.A.L.K.E.R.: Call of Pripyat Game Guide & Walkthrough
 Scarface: The World is Yours Game Guide & Walkthrough
 Star Wars: The Force Unleashed Game Guide & Walkthrough