This guide contains a full walkthrough of all missions in S.T.A.L.K.E.R.: Call of Pripyat, including sub missions, those from the main story line and the choices that the player can make during the game. I also prepared precise maps of each sector (including the two underground locations, maps of which aren't present in the game itself). The symbols system used in them will make navigation much easier. Additionally there's a list of artifacts, a throughout description of each location, damage and item upgrades system, hideouts with useful equipment and much more...
Lukasz "Terrag" Znojek
Translated to English by Jakub "cilgan" Lasota
Each secret described in this guide is presented with two maps. The first is a "general map", on which hideouts with equipment are marked with red dots (orange dots show "better" weapons - sometimes a rare machine gun, a sniper rifle or a suit). Hideouts lying near the main spots from the general maps are precisely described (location, contents) together with the description of the whole location. Blue dots symbolize anomalies from which you can gain artifacts (sometimes more than one, even if the description shows something else... the number is random). The coordinates from the artifacts chapter also refer to the "general maps".
The second type of maps are those included in "missions" subchapters. Mission descriptions and coordinates of characters refer to them. The symbols used to mark spots on them are explained in the missions descriptions.
There are a total of 27 artifact types (below there is a table with probable localizations, which you can find at the general maps) out of which 23 are "renewable" and can be found in anomalies. The other four can be found only while completing missions and you won't have them in your possession for too long.
The detector plays a vital role in finding the artifacts. There are four detector types in total. Echo - light and sound signals, Bear - shows the direction, Veles - accurate location, Svarog (prototype) - location and nearby anomalies. Try to gain at least the Veles at soon as possible, however the prototype Svarog would be even better (look - mission 19 (Tempting business) of Zaton sector). Searching for artifacts with it is a real pleasure.
Trading artifacts is the best way to gain money in the game. You will gain the most by selling them to the trader (point 2 at quest map) in the Stalker headquarters in Zaton. After finishing mission 2 (Strange Phenomenon) in Zaton sector, Bears will tell you to find a particular artifact type and will offer a higher than ordinary price for it.
Warning - points in which you can collect an artifact have been marked with blue point of the general maps. After each mission there is a chance that the artifacts will appear once more in those spots.
ICON
NAME
PROPERTIES
PLACE [sector] (mission)

Altered Wheel
Radiation +6
[Z - Zaton] (2. Strange Phenomenon)

Altered Insulator
Radiation +6
[J - Jupiter] (13. Intermittent psi-emissions)

Heart of the Oasis
Health Regeneration +2, Overcoming Hunger +1, Energy Regeneration +2, Wounds Healing +2, Radiation +4
[J] (12. The Oasis)

Compass
Fire resistance +3, Chemical resistance +3, PSI resistance +3, Electricity resistance +3, Energy Regeneration +2, Radiation +4
[Z] (20. Compass)

Shell
Energy Regeneration +4, Radiation +2
4 [Z], 12 [Z], 12 [P - Pripyat]

Battery
Energy Regeneration +2, Radiation +1
4 [Z]

Kolobok
Health Regeneration +4, Radiation +2
[Z] (5. Helping the Stalker); 20 [Z]

Mama's Beads
Wounds Healing +2, Radiation +1
3 [Z], 2 [J], 6 [J]

Snowflake
Energy Regeneration +6, Radiation +3
12 [Z], 12[P], 7 [P]

Firefly
Health Regeneration +6, Radiation +3
14 [J], 10 [J]
Bubble
Radiation -4
18 [Z], 14 [J], 15 [J], [P] (1. Unidentified Weapon / Gauss Rifle)
Flame
Wounds Healing +6, Radiation +3
6 [Z], 3 [J]

Eye
Wounds Healing +4, Radiation +2
17 [Z], 6 [Z], 3 [J], 6 [J], 9 [J]

Fireball
Fire resistance +6, Radiation +2
6 [Z], 6 [J]

Soul
Health Regeneration +2, Radiation +2
18 [Z], 4 [J], 14 [J]

Stone Blood
Chemical resistance +3, Radiation +1
14 [J], 15 [J]

Crystal
Fire resistance +3, Radiation +1
3 [Z], 6 [Z], 17 [Z], 2 [J], 6 [J]

Goldfish
Max load +12kg, Radiation +3
8 [P]

Gravi
Max load +8kg, Radiation +2
3 [J]

Night Star
Max load +4kg, Radiation +1
10 [Z]

Wrenched
Radiation -3
7 [Z]

Jellyfish
Radiation -2
7 [Z]

Moonlight
PSI resistance +6, Radiation +2
4 [Z], 10 [J]

Flash
Electricity resistance +6, Radiation +2
4 [Z], 12 [Z]

Sparkler
Electricity resistance +3, Radiation +1
12 [Z], 4[Z]

Meat Chunk
Chemical resistance +6, Radiation +2
7 [Z], 18 [Z], 4 [J]

Stone Flower
PSI resistance +3, Radiation +1
7 [Z], 3 [J]
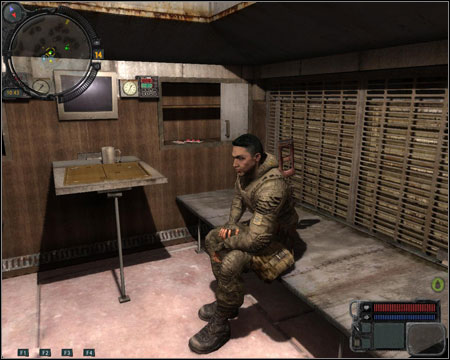
In each sector you will find a person who will take care of the condition of your equipment and (in Zaton and Jupiter) will help you improve and modify it. However first you have to bring them proper tools.
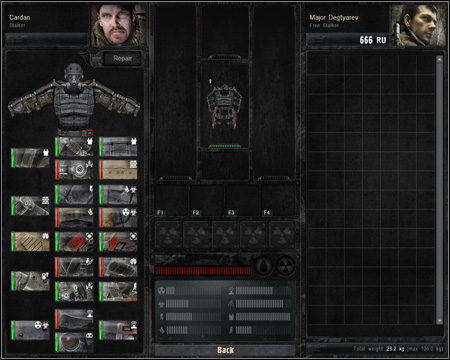
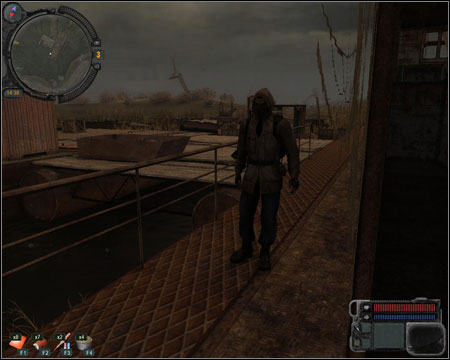
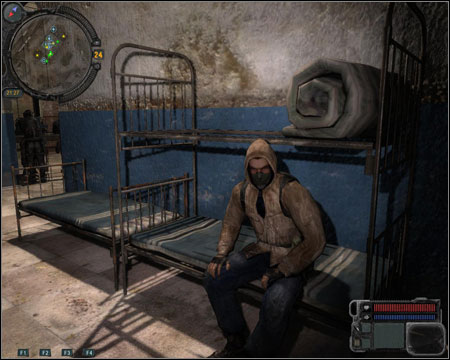
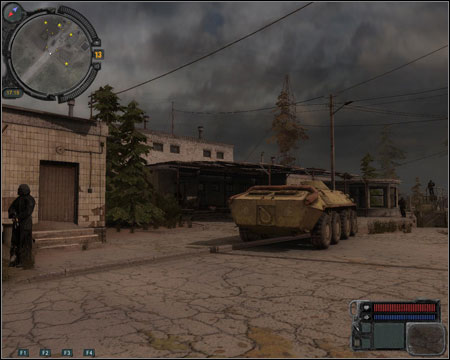
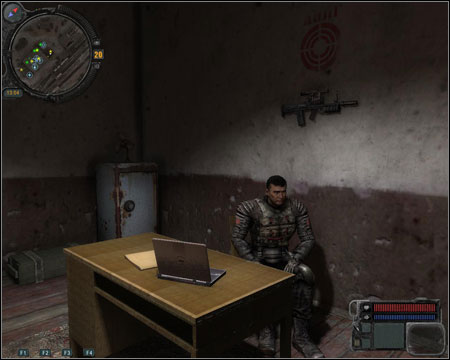
The first technician you'll meet is Cardan (point 4 on Zaton map). Apart from tools, you will have to give him two bottles of vodka each time you want him to do some more complicated improvements. Thanks to the drunkard you will also repair the Gauss and get links to it. Cardan is also the only one who can make it possible to run in the egzoszkeleton (screen), however he will need calibration tools to do it, so you must first get to the Pripyat sector.
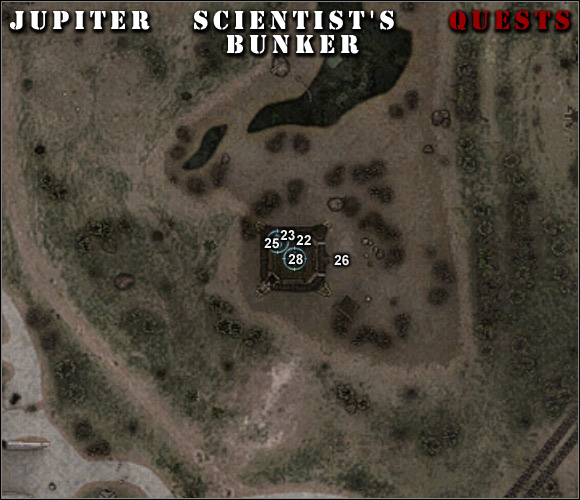
The second engineer worth mentioning is Navikov (point 28 on Jupiter map), who can be found in the scientists bunker. He's the only one who doesn't demand tools from you. Unfortunately he can perform only certain modifications to your armours and helmets and only after you complete a couple of missions for the scientists.
The last useful mechanic is Nitro (point 6 on Jupiter map). He needs tools and is the only one able to fully upgrade your tactic helmet.
As a matter of form, it's worth to mention about lieutenant Kirillov (point 3 on Pripyat map). He won't improve your equipment but will repair it for free and will give ammo and grenades from time to time.
Every weapon, armour and helmet can get damaged during the game. The border between an item that needs to be fixed and one that can be only thrown to garbage is very thin. If the condition bar is only missing two lines (look - the table below), you can keep this item and trade it later on, however if the damage is bigger, it's generally not worth to waste the inventory space for such an item, because you won't sell it either way. You can repair the item and then sell it, but it's quite possible that you will spend more on getting the item repaired than you will gain from selling it.
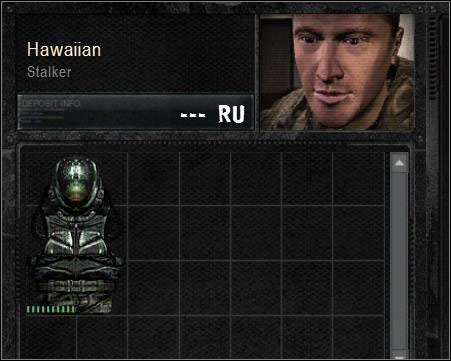
If you want to sell a weapon, armour or helmet, you should talk with Owl (point 11 on Zaton map) or Hawaiian (point 53 on Jupiter map). They're buying these kind of items and have unlimited funds. It's worth to notice that you won't find anyone who will want to trade with you in the Pripyat region.
However don't forget that in S.T.A.L.K.E.R.: Call of Pripyat, artifacts are the main source of income. They're light, don't break and you can earn a dozen times more selling than for other items.
Warning - weapons lying on the ground get damaged even when you shoot it or a grenade will explode near it.
ICON
DESCRIPTION

Item condition is at 40-60%. In case of weapons - they rarely jam.

Item condition is at 20-40%. In case of weapons - they jam quite often, repair is advised.

Item condition is at 0-20%. In case of weapons - they jam very often (almost always at 0%), repair is necessary.

The item can be sold, you can consider taking it.

If it's not a desirable item, don't bother with it. You won't sell it in this state and the repair cost can be higher than the profit from selling it.
The game offers three vast regions - Zaton, Jupiter and Pripyat. You can move between them using special characters - guides, of course after paying them for the service.
You can meet Pilot in the Stalker base in Zaton (point 25 on quest map). He can take you to Jupiter for 3000 at the very beginning of the game. After completing mission 15 (Area Maps) in Zaton sector, the price will fall to 1000. Once you get to Pripyat, Pilot will offer you transport to that sector as well.
Garry is the second guide (point 8 on Pripyat). He will play this role for the first time in Pripyat sector (you will get there by completing mission 27 (Pripyat 1) from Jupiter sector). Garry will take you from there personally, to the headquarters in Jupiter or will organise transport to Zaton.
Both guides (Garry later on in the game) will be waiting near the headquarters entrance while in Jupiter (point 46 on the map).
ROUTE
GUIDE
COST
Zaton - Jupiter
Pilot
1000 / 3000 (look - mission 15 - Zaton)
Jupiter - Zaton
Pilot
1000 / 3000 (look - mission 15 - Zaton)
Jupiter - Pripyat
Garry
5 000
Pripyat - Jupiter
Garry
-
Pripyat - Zaton
Garry and Pilot
1 000
Zaton - Pripyat
Pilot and Garry
4 000
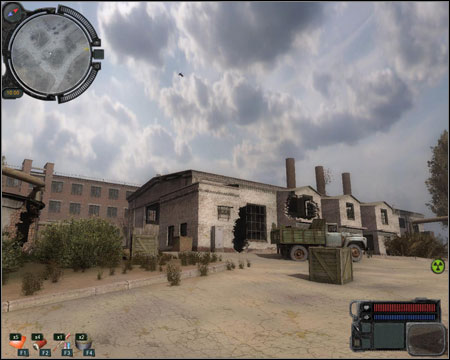
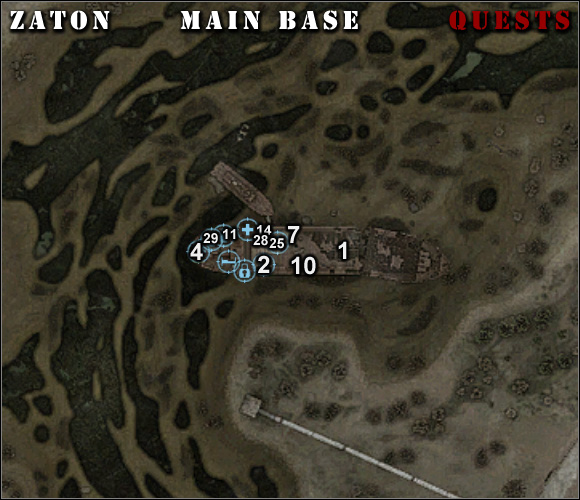
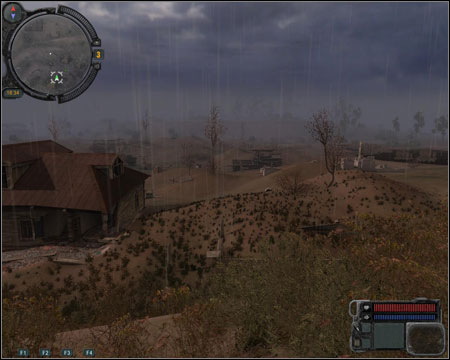
There is no denying that marshes are what you'll be seeing very often in Zaton. It's also the area of conflict between Stalkers represented by (point 2 on quest map) and the bandits represented by Sultan (point 10). Neutrality is not an option here. You have to opt for one side of the conflict during the missions. After beginning the adventure, you should head to Stalker headquarters (point 1 on quest map). It'll be a straight-forward way from there.

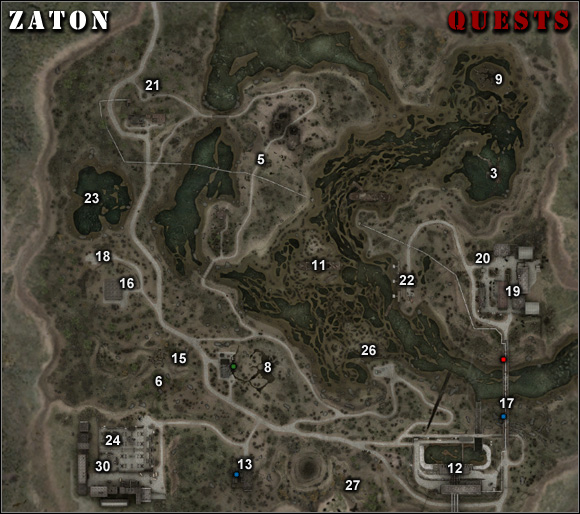
Important locations on the map:
1) Ranger Station - Location connected with mission 11 (Transaction). There's some canned food on the pickup in the north. Ammo and a machinegun in one of the machines in the big hangar. In the narrow building in the west, behind the machine - health pack and Gauss cells. On the upper floor (you can get there by going up the ladder) there's a rifle and ammo.
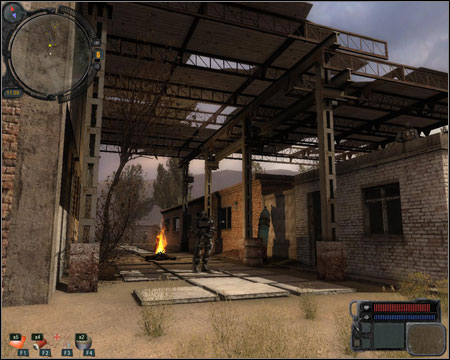
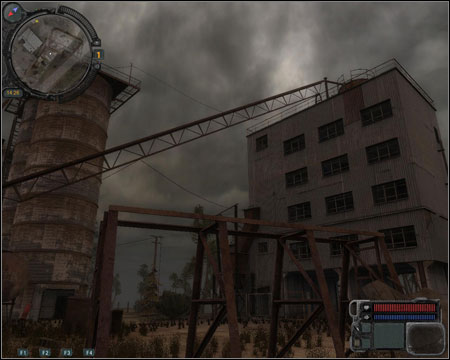
2) Waste Processing Station - a factory full of hostile mercenaries (mission 6 (Mercenary Camp)). Between the trailer and the driver's cabin in the east there's a grenade launcher with some grenades. On the construction holding the big metal pipes at the back of the building - medicine.
3) Boiler Anomaly - a fire anomaly with an artifact. Mission 5 takes place here (Helping a Stalker). There are grenades under the stone on the west.
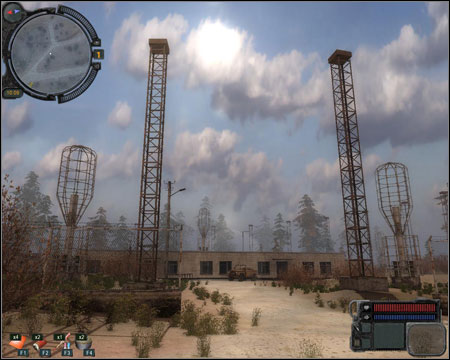
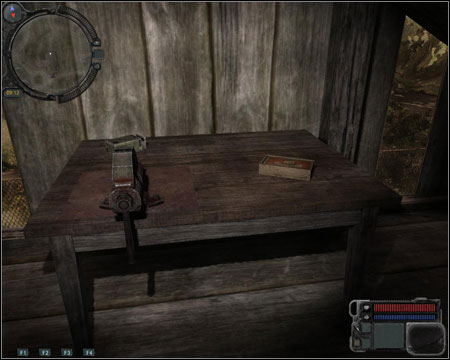
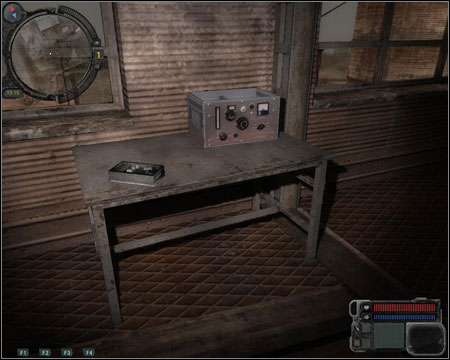
4) Iron Forest Anomaly - Electric anomaly with an artifact. Mission 14 takes place here (Stingray 2). In the underground of the laboratory into which you get during the 1 mission of the Pripyat sector. Inside the van to the north - ammo. In the desk inside a small room in the south part of the building - a pistol and ammo.
5) Skadovsk - the first Stalker headquarters you will see in the game. In here you will find not only traders (weapons and documents - Owl (point 11), artefacts and food - Bread (point 2)) but also a supplier from whom you can buy equipment (point 29). The bandit boss - Sultan - is also here (point 10 on the map) and will try to involve us in his dirty interests.
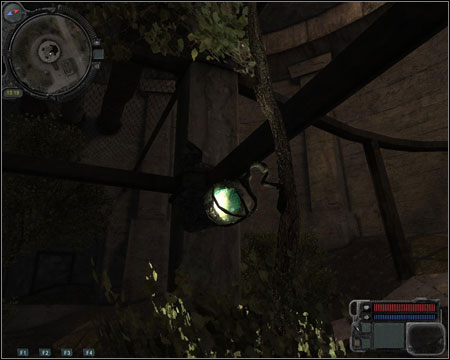
6) Circus Anomaly - Fire anomaly with an artifact. To the north-west of it, on a tree - pistol and ammo.
7) Claw Anomaly - you get to the briefcase from mission 4 through it (Unreachable Stash). Inside anomaly you can find an artifact but also humanoid jumping creatures (Snorks). On the east, by some rocks (behind a bush) - first-aid kits.
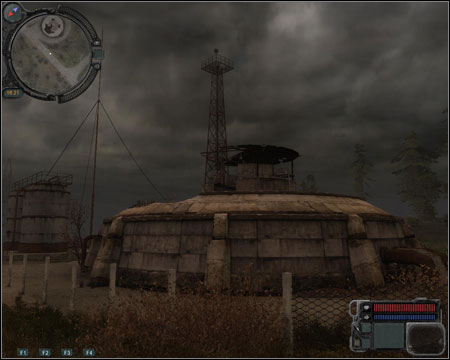
8) Krug Antenna Complex - location from mission 8 (Missing Stalkers). There's a nest of bloodsuckers in the underground.
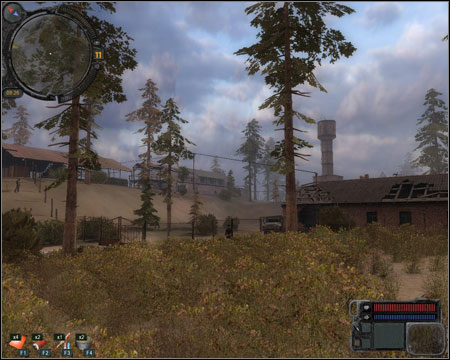
9) Sawmill - a lumber mill with a big group of armed zombies. You will find mechanic tools in one of the buildings (mission 12 (Bring Cardan tools)). Inside the tractor - medicine.
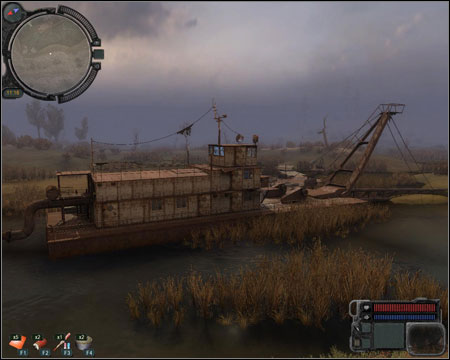
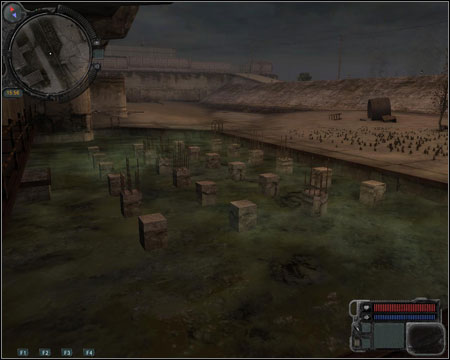
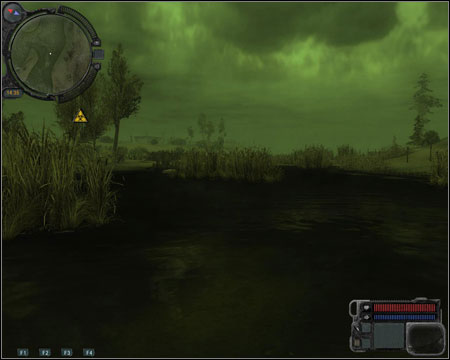
10) Dredge Station - the location in which the first mission from the Stalkers base will take place - (Strange Phenomenon). You can fish out an artifact from the nearby water with anomalies.
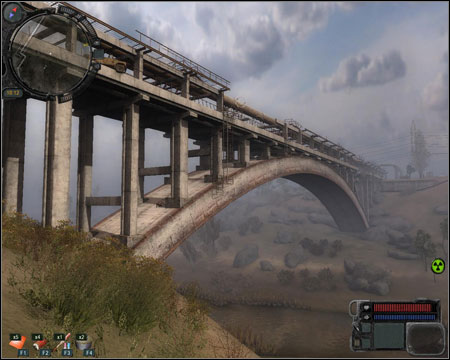
11) Preobrazhensky Bridge - a bridge full of anomalies, it's connected with mission 9 (Bloodsucker Lair). There are Snorks at its base. Various items lie inside the cars (grenades, ammo, medicine).
12) Scar Anomaly - inside this untypical anomaly you will electric discharges and an artifact.
13) Southern Plateau - you visit this location during mission 16 (Stingray 3). The nearby caves are occupied by Snorks.
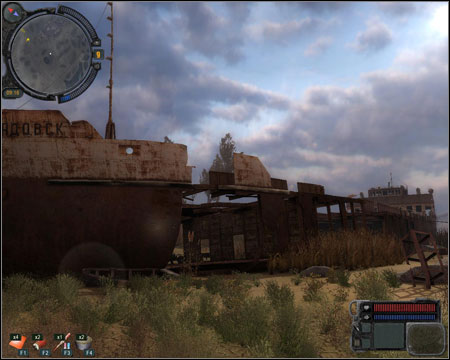
14) Old Barge - Stalker Noah's hideout. Look out at the entrance, because each time you will want to "knock on the door", Noah will shoot you with his shotgun. After this ritual, you will be able to go inside and begin the conversation. You will visit him during mission 16 (Stingray 3) and 20 (Compass).
15) Dock Cranes - you will get here during mission 22 (Reputation) if you decide to finish off the bandits that you will meet then. Inside the van - ammo. On top of the crane (between the metal parts) - ammo. In a small boat at south-west - machinegun and ammo.
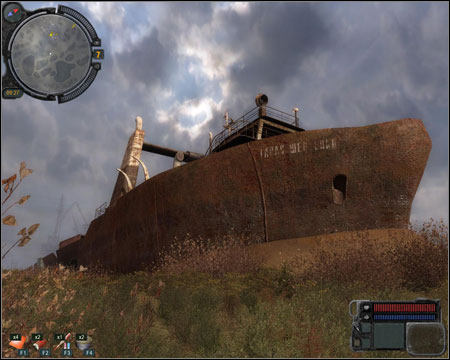
16) Shevchenko - the ship wreck in which the massacre of one of the sides in mission 10 will take place (Decide What To Do).
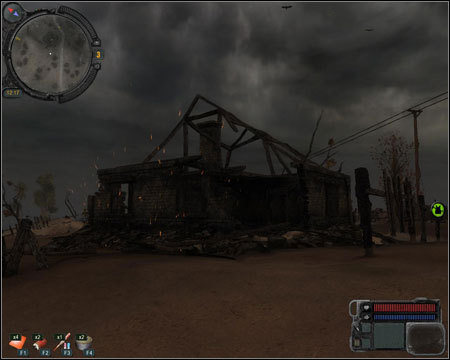
17) Burnt Farmstead - a burned farm with fire anomalies and an artifact. You will find a sniper rifle on the burning remaining of the roof of one of the buildings (orange point on the general map).
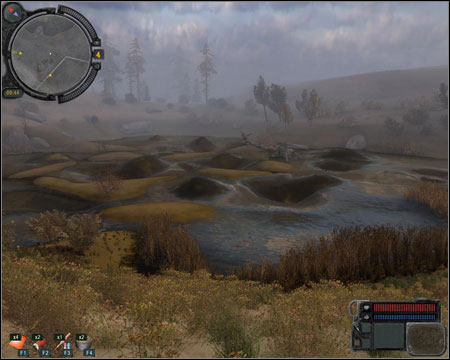
18) Swamp - a crashed helicopter (mission 13 (Stingray 5)). Chemical anomalies and an artifact at the swamps. Grenades and medicine in the bushes in the south-west.
19) Izumrudnoye - chimera's nest from mission 18 (Hunting the chimera). Under the foundations of one of the buildings - a machinegun, ammo and a first-aid kit. Under the desk in the southern building - food.
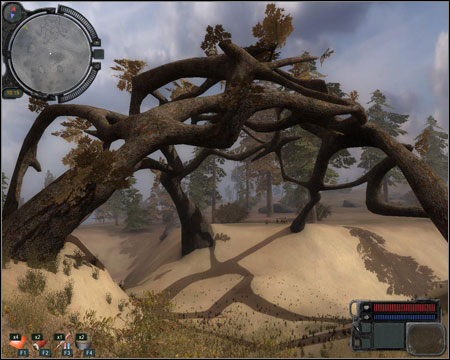
20) Oakpine Anomaly - a location with lost on chemical anomalies and an artifact at the bottom (the second during the first visit here, on the top of the connected trees). The skeleton from mission 3 (Three Comrades) is nearby.
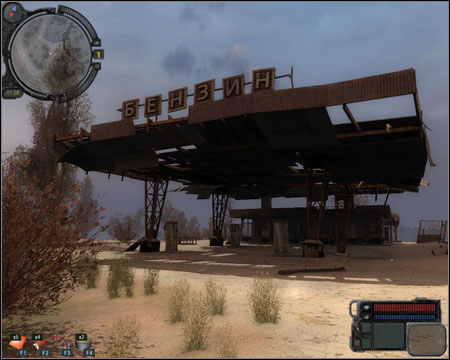
21) Fuelling Station - gas station full of fleshes. On the roof (you will get by sing the fence), on one of the small columns - Sunrise armour and a bottle of vodka. To the north of the station, under an enormous rock - a pistol, ammo and medicine.
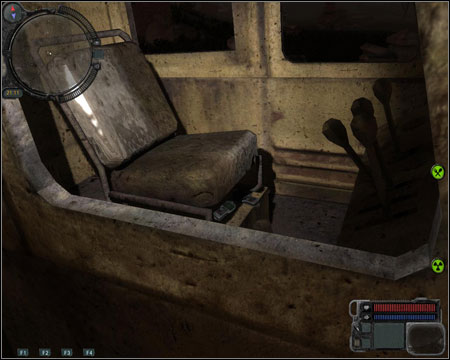
22) Substation Workshops - a group of mercenaries from mission 7 (Take the food to the mercenaries). Try not to start a fight - you can hire the soldiers during one of the later mission in Jupiter sector. There are mechanic tools at the back of the building (mission 12 Bring Cardan tools). Under the jeep's seat - first-aid kit and ammo. On the tree in the south - ammo (you have to shoot it down).
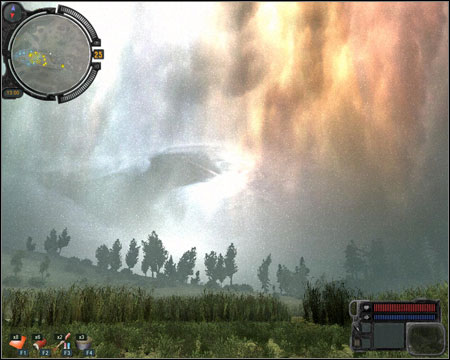
0. Emission
Received from: random event
Mission description:
After hearing the radio announcement about an incoming emission, you should quickly find a shelter. The nearest hiding place will be automatically marked on your map. It doesn't need to be a building, a cave or a big hole will do just fine. Once you're there, wait for another announcement, this time about the end of the emission. Surviving in an open area, without proper medicine (look - mission 28 [Anomalous Plant] in Jupiter sector) is impossible.
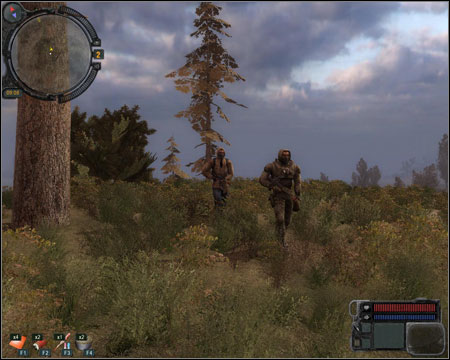
1. Reach Skadovsk
Received from: Kostik Agent
Beginning location: a little to the south of the starting point
Target location: point 1 on the map
Mission description:
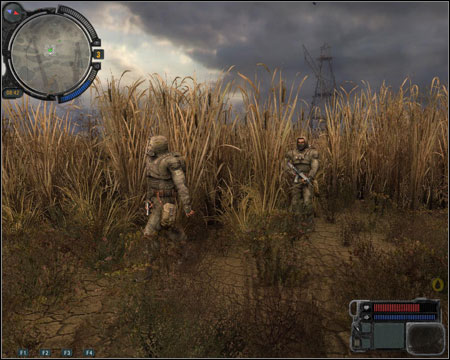
After beginning the adventure, you should meet two wandering Stalkers. Hide your weapon and ask the leader about the nearest camp and he will direct you to the ship wreck at the south. Hide your weapon and enter the ship.
2. Strange Phenomenon
Received from: Bread
Beginning location: point 2 on the map
Target location: point 3 on the map
Mission description:
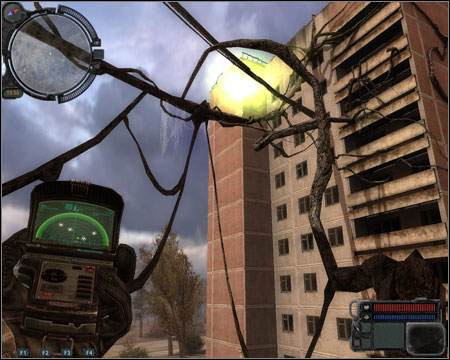
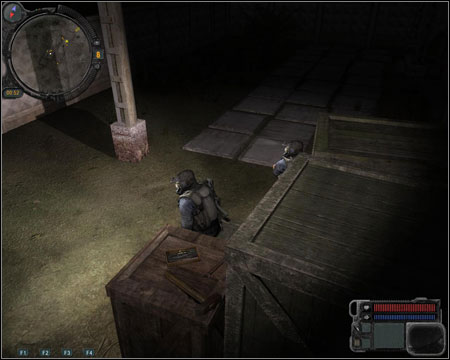
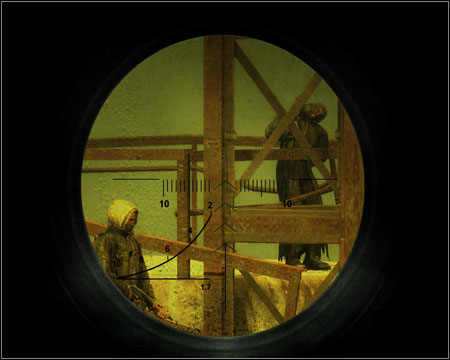
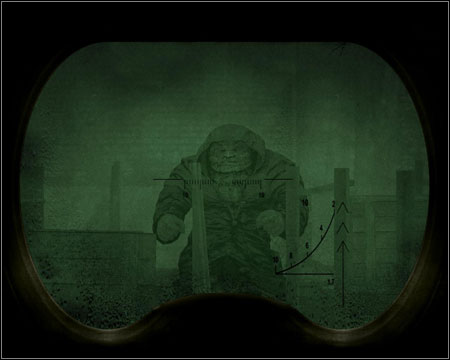
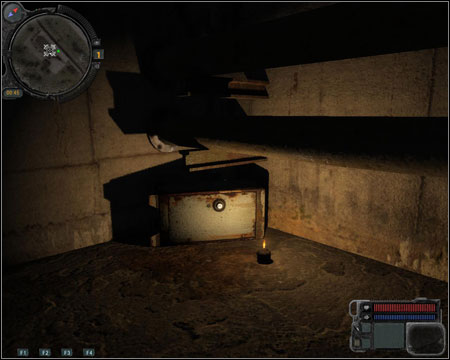
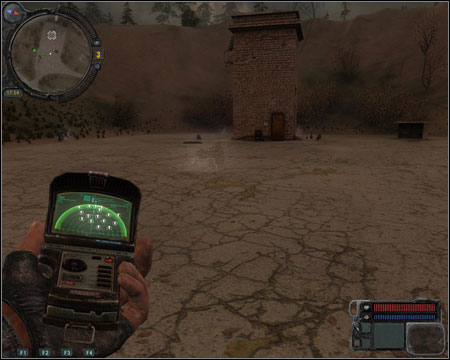
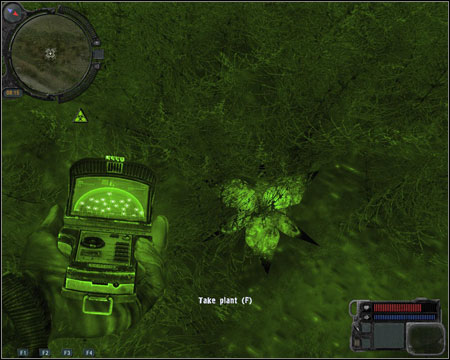
Bread will order you to check Dredge Station. Head to the marked spot from the south side. With a little luck you'll be able to find some Stalker's body and rob him. Use the detector (screen) to localize the artifact and take it out of the water.
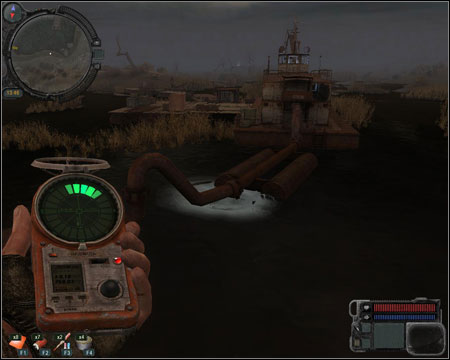
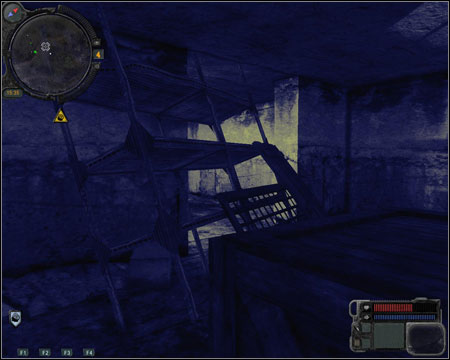
Use the ladder (on the left, near the boxes) to get to the top and further - through the hole (screen) inside. The stairs will lead you up to a radiated helm which has evolved into and artifact. A radiated corridor, parallel to the one through which you got to the stairs, will lead you outside.
There will be three Stalkers waiting for you outside (two of them are hiding at the beginning). You will be "asked" to give away the artifact. If you let him have it, he will take it to Bread and receive the prize. The fight is unavoidable. You can give the artifact away and then follow the Stalker (he'll start running) for a couple of second and kill him away from his buddies with a few god shots to the back. It's up to you if you want to come back and finish them off. Don't forget about collecting the prize.
3. Three Comrades
Received from: Cardan (after giving him 2 vodka bottles)
Beginning location: point 4 on the map
Target location: points 5, 6 on the map
Mission description:
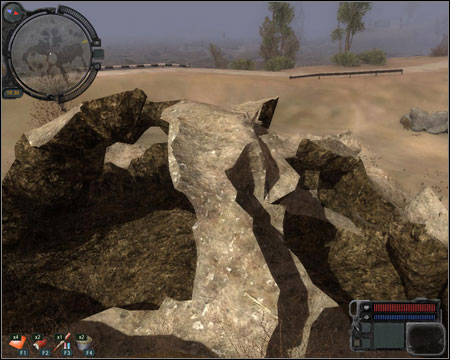
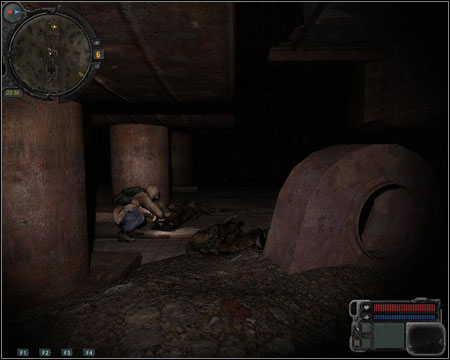
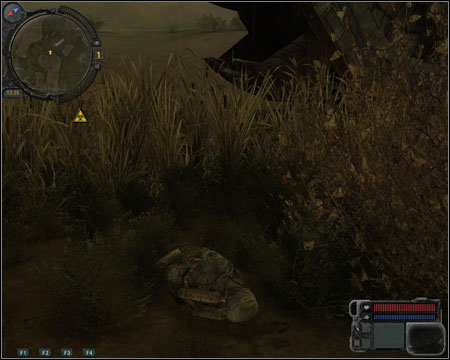
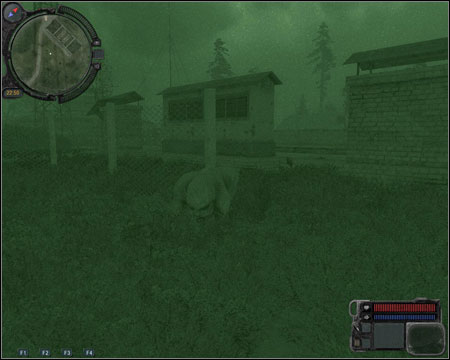
Head to point 5 and find a hole in the ground through which you will fall right into a cave. Take out the detector and head to the marked spot (you should notice a grey dot on the mini-map, showing a nearby body (screen) which you should rob). You should find two more moving artifacts in the caves. You should keep an eye on the frequent anomalies. The corridor behind the Stalker's body will lead you outside.

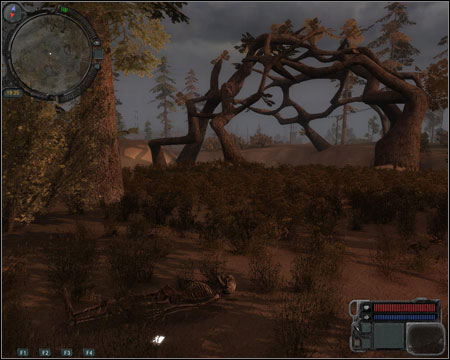
You will find the skeleton of the second mechanic's friend at point 6, to the south from Oakpine Anomaly (screen). You should be ready for nearby dogs to attack you (finish them off with short series from a machinegun). Take his PDA and mask. From the transmission, you will learn about an artifact on top of the tree anomaly.
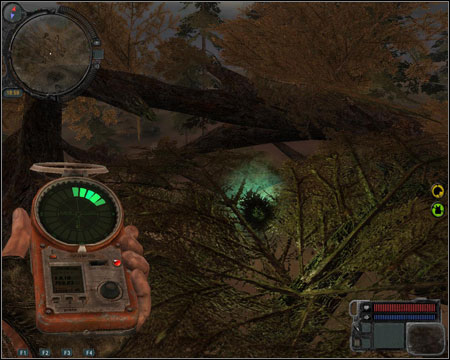
Before you go to the top, collect the artifact from the very bottom. Start climbing the tree from the branch going south, first from the left (western). Go up all the time. Eventually the detector should point towards an artifact lying at some branches (screen).
4. Unreachable Stash
Received from: Snag
Beginning location: point 7 on the map
Target location: point 8 on the map
Mission description:
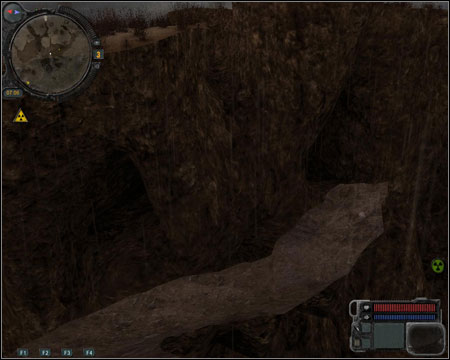
Claw Anomaly hides two artifacts inside itself. One is at the bottom; the second one can be found by climbing the twisted construction. Turn towards west and you should see two corridors (screen). They're connected, but jump (it's worth to save before doing this) to the right one, as the left one has strong anomalies by the entrance. Take out the detector and you'll find the artifact by the exit.
Now you should go and inspect the deeper corridors. To the south-west you will find an entrance placed low enough for you to use it. Take out a weapon (a rifle works well here) and head along the corridor while fighting off the jumping monsters. Reach the car at the green points (screen) and take the box from inside it. Use the corridors heading up by the exit.
Return to the Stalkers headquarters. You can give the box back or show it to the mechanic who will open it for 500 coins. You will cancel the task this time, but will gain a few interesting items (including one artifact). If you finish the mission normally and give back the box, Shag will share its content with you. You can decide which item you want to take and it pretty much should be the artifact. You can choose it together with any other item, apart from the helmet.
5. Helping a Stalker
Received from: Awl
Beginning location: point 9 on the map
Target location: point 9 on the map
Mission description:
You will find two Stalkers by the Boiler Anomaly. After s short cutscene, one of them will fall into trouble and you will be asked to help. Awl will give you a first-aid kit and ask to hand it over to his friend. Before you move on, it's worth the check the inner part of the anomaly, because there are moving artefacts to be found there. Medicine will be needed because of the burns. The Stalker will give you another artifact in the end.
6. Mercenary Camp
Received from: Owl
Beginning location: point 11 on the map
Target location: point 12 on the map
Mission description:
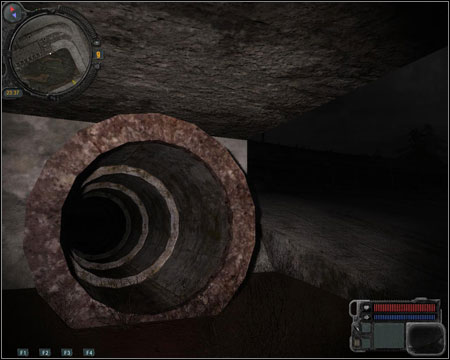
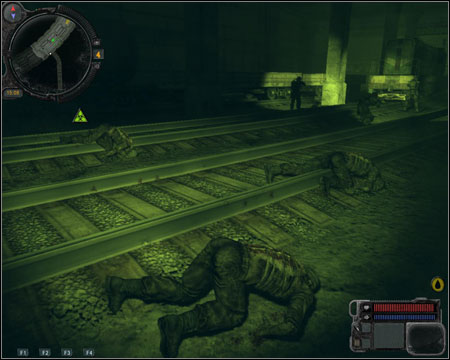
You can get to the mercenaries headquarters through the marshes. If you go there by night (you can, for example, rest till 10 p.m. in the Stalkers base), you can sneak in from the west side, where you will find a sewer entrance by the fundaments. Move high enough to not make a noise and low enough to stay unnoticed. Thanks to it you will get inside without anyone knowing (of course using the flashlight isn't a good idea).
In order to get upstairs, choose the furthest ladder. At this moment the stealth part ends, because the game doesn't allow you to silently kill the enemies in any way. Silenced weapons and a knife won't do any good, the soldiers will notice you anyway. You will have to fight a big group of enemies, so focus on staying behind covers, saving frequently and headshots.
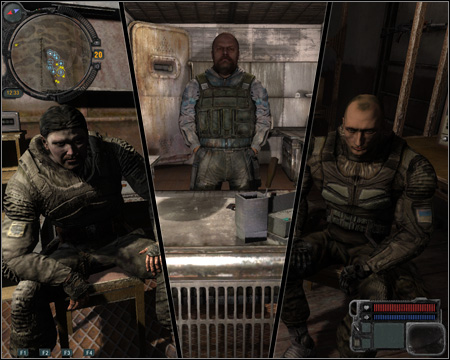
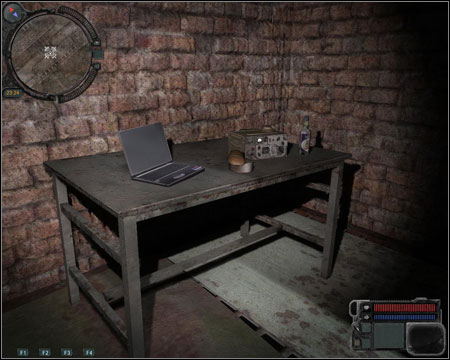
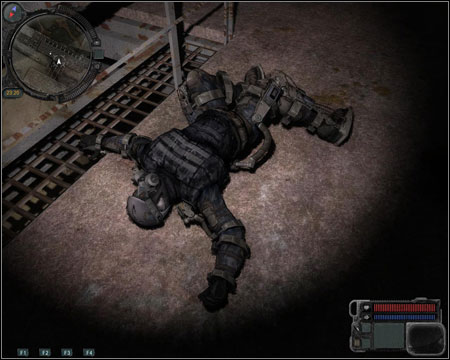
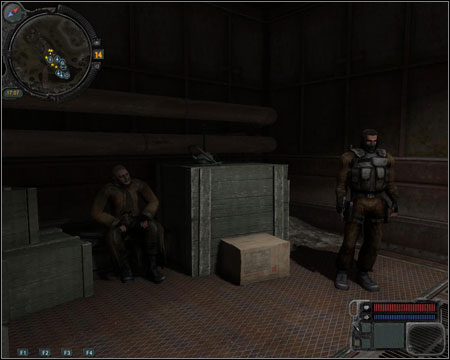
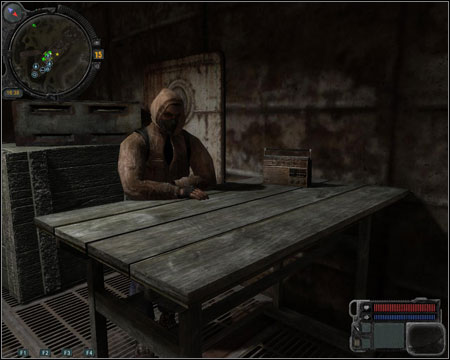
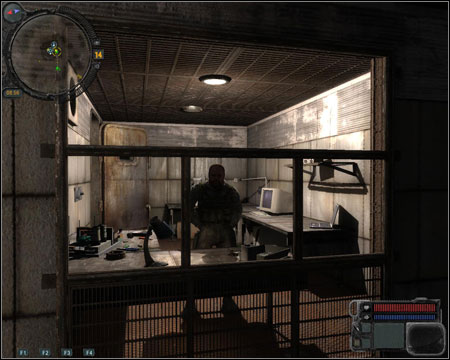
On the 3rd floor, search for a table with a laptop which you should take. Find two standing out soldiers (screen) and take two PDAs from their equipment. Now you can return to your employee and give him back the found items.
7. Take the food to the mercenaries
Received from: After (peacefully) entering the mercenaries' terrain
Beginning location: point 13 on the map
Target location: point 1 on the map
Mission description:
The mercenaries can let you in if only you bring them food. If you don't want to kill them (you should spare them, as they can be used in the later part of the game), you should bring them 6 pieces of: canned food, bread and sausage. You can buy everything from Bear in the Stalker's headquarters. Now you should go to the back of the complex (point marked on the map), where you will find a good set of tools in one of the boxes.
8. Missing Stalkers
Received from: Grouse
Beginning location: point 14 on the map
Target location: point 15 and afterwards 16 on the map
Mission description:
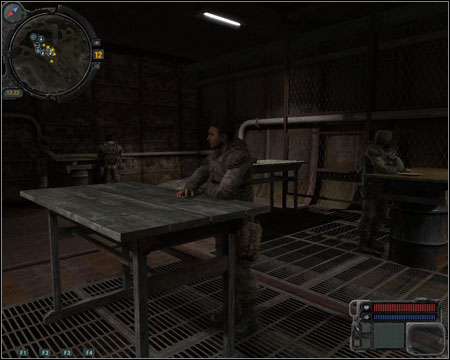
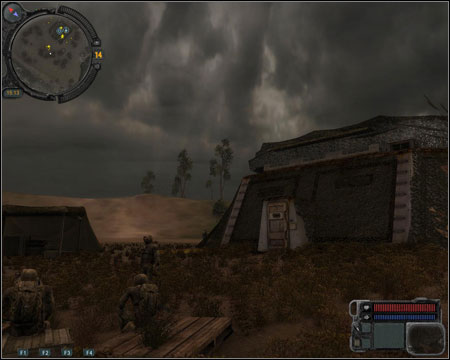
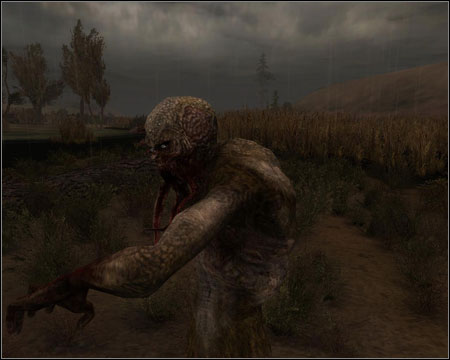
After getting to the marked spot, you will be directed to point 16 through the radio. You will meet Grouse (screen) near the marked house, who will lead us inside. Don't forget to save your game, because you will have to fight with two invisible enemies (the monsters appear a while before the attack).
Keep moving during the fight. However don't head to the unvisited parts of the building before the fight doesn't end. One enemy at a time is enough already. Don't waste ammo, shoot the enemy only when he's visible and you have a good aim at him. You can use a rifle, as you're fighting at close distance anyway. After defeating the creatures (screen), your partner will open elevator shaft, through which you will enter the basement.
Search the three Stalkers bodies and then head deeper into the monster's lair by following your employee (screen). Crouch and slow down all the time (default - ctrl + shift). Go outside and split with your partner for now.
Phase 2
Target location: points 2, 22 on the map
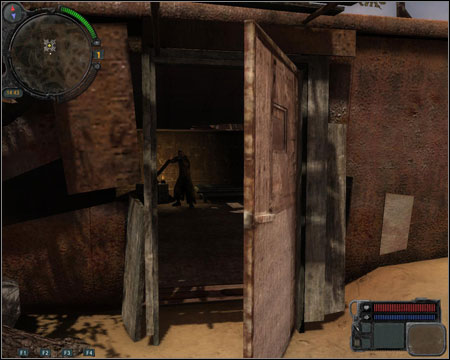
After a couple of days the mission will be updated and you will have to head to the Stalkers base and ask Bread about Grouse. You will be directed to Dock Cranes. Once there, find a body in the small building on the left and open the door on the right (screen).
Talk to the soldiers standing by the corpse. The Stalker's life will end, regardless of how the conversation's course. Search the bodies and return to headquarters and Bread. Finish the mission unlocks an achievement.
9. Bloodsucker Lair
Received from: Automatically after finishing mission 8
Beginning location: point 2, afterwards 11 on the map
Target location: point 17, afterwards 18 on the map
Mission description:
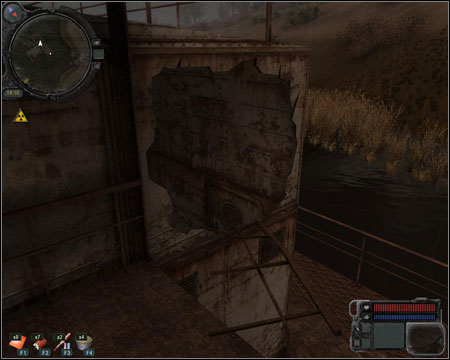
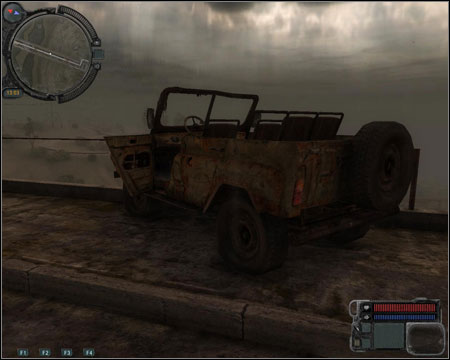
Head to the Stalkers Headquarters and inform Bread about the lair. Afterwards talk with Owl, ask him about the gas. It will cost you 2000 coins, but at least you will get another point on the map - 17 - a bridge full of unfriendly anomalies. Search for a jeep at the red point (screen) and take the box from its back.
You can search the other vehicles for supplies. However you won't be able to open the box on the truck at point 17 at this moment. Search for a burned wreck (screen) at the blue point, under the bridge (collapsed fragment). Inside of it there will be a box with a key and documents. Once you have both of the keys, return to point 17 and open the box on the truck to get the gas canister.
Head towards point 18 on the map, where you will have to connect the canister to the box to the left of the valve (screen) and let the gas into the monsters' lair. After placing the canister at the right spot, turn the valve. Take out a gun, because you will have to face incoming Bloodsuckers (there's a time counter in the upper right corner of the screen). Once the time's up, return to Bread and inform him about destroying the lair. You can also sell Owl the document.
10. Decide What To Do
Received from: Sultan
Beginning location: point 10, afterwards 2 on the map
Target location: point 11 on the map
Mission description:
Sultan will tell you about an attack planned against the Stalkers. Report to Bread about it. Afterwards talk to Knuckles, who's standing next to Sultan and tell him that you want to head out with him at night. Once you're at the destination, talk to him again and tell that you're ready to attack.
It's time to make a choice - you can either fight alongside the bandits and kill the Stalkers on the ship, or start shooting in the backs of your "friends" - the bandits. After the fight is over (screen), collect the reward from either the bandit or Stalker chief, marked on the map.
11. Transaction
Received from: Sultan (after completing mission 10 in favour of the bandits) or Bread (mission 10 in favour of the "good" ones)
Beginning location: point 10 (bandits) or 2 on the map
Target location: point 19 (bandits) or 20 on the map
Mission description:
On the same night on which you have completed mission 10, head to the marked spot. Talk with the leader and then follow the group (on the good side, you have to crouch and walk slowly to the round building). Watch a short scene and afterwards start eliminating the enemies. Use the covers and save often (preferably in different slots). Once the fight is over, search the trader's body, take the PDA and talk with the group's leader to collect your prize.
Notice - the PDA you have just found and the one from mission 17 (Duty History) of the Jupiter sector are both very important. If you hand them over to Owl, you won't be able to finish mission 21 (Monolith Survivors) [Jupiter]. In order to avoid this you should make a choice between Duty and Freedom and hand over both devices to the proper leader in the Stalker base of Jupiter sector (choosing the 1:1 option won't lead you anywhere, you still will be neutral).
Additionally, by handing over the PDAs to Owl, you will miss mission 0 from the Jupiter sector.

12. Bring Cardan tools
Received from: Cardan
Beginning location: point 4 on the map
Target location: points 13, 21 on the Zaton map;
Mission description:
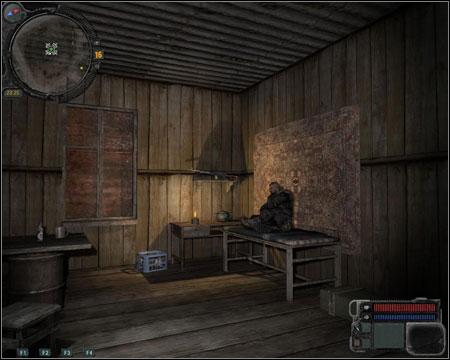
You will be searching for tools basically throughout the whole game. There are three different types of tools, two sets per region. You can find the first two in the Zaton region. You will come across the Fine Tools during mission 7 and the Basic Tools can found at the Sawmill. However you have to look out for armed zombies there. Precisely at point 21 there is a hut, with the Basic Tools at the attic (screen). After meeting them for the first time, the zombies will start showing up all around the world map.
Phase 2 - calibration tools
Target location: point 9 on the Pripyat map;
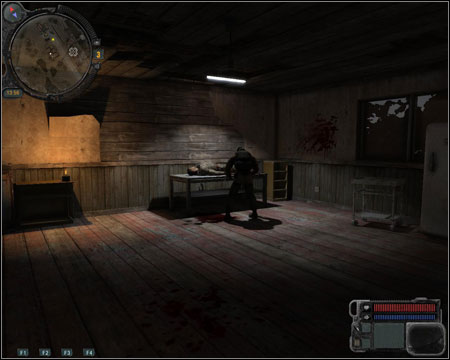
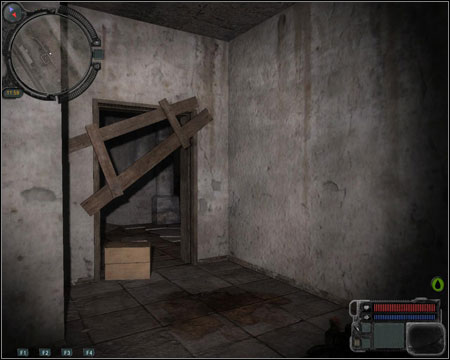
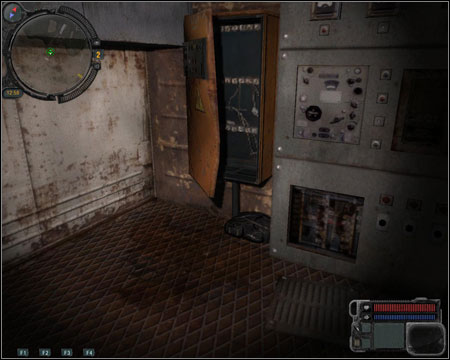
You can find these tools set only after getting to the Pripyat sector. Head to the supermarket (point 9) while keeping an eye for dogs. Go through the door blocked with furniture.
There is a real labyrinth of rooms before you. Assuming that you're standing in the entrance - open and walk through the door on the right, afterwards through the empty door frame on the left (open the door through which the dogs tried to get in), right through the corridor and then right at the intersection. To the end of the hallway and left, through the empty door frame. You should now be in a room with stairs leading to the basement in which the tools are (screen). You can go even lower and take out an artifact from a dangerous anomaly.
13. Stingray 5
Received from: from the beginning of the game
Beginning location: -
Target location: point 23 on the map
Mission description:
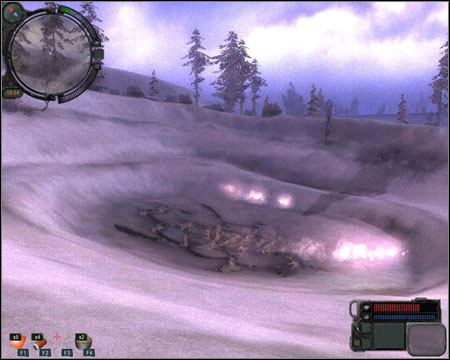
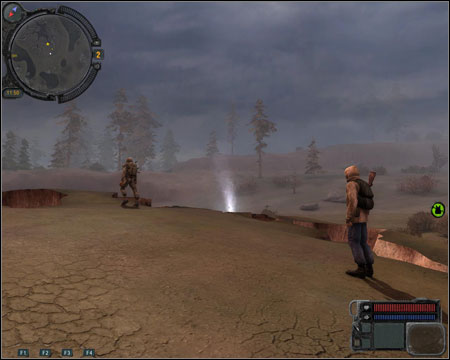
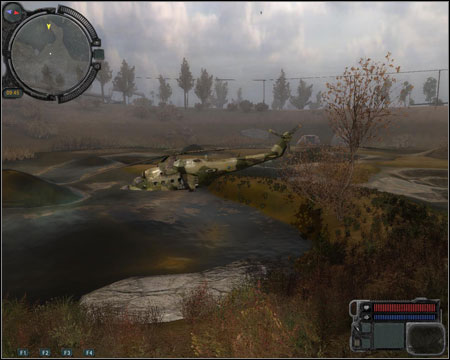
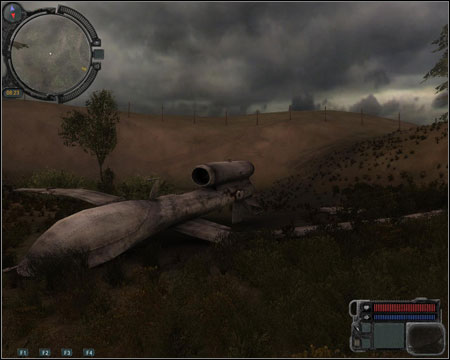
Find one of the chopper wrecks on the marshes. After getting close to the machine, you can search it. Before you go back, it's worth to check the box on the other side of the chopper and carefully search the marshes for an artifact (look out for the water "cones", those are dangerous anomalies). The mission will get updated and will end "on its own" as you advance the plot.
14. Stingray 2
Received from: from the beginning of the game
Beginning location: -
Target location: point 24 on the map
Mission description:
In the Iron Forest, search for another chopper. Electric anomalies will be quite a pain, so keep a first-aid kit close. You have to search the machine and it's also worth to check the nearby corpses. You can use the detector to find an artifact in this anomaly.
15. Area Maps
Received from: automatically after finishing mission 14
Beginning location: point 24 on the map
Target location: point 25 on the map
Mission description:
Searching the helicopter from mission 14 (Iron Forest) will result in a new mission. You have to hand over the maps to the pilot (screen) from the Stalker base. From now on the man can take you to the next sector (Jupiter) for 1000 coins, not for 3000 like before.
16. Stingray 3
Received from: from the beginning of the game
Beginning location: -
Target location: point 26, then 27 on the map
Mission description:
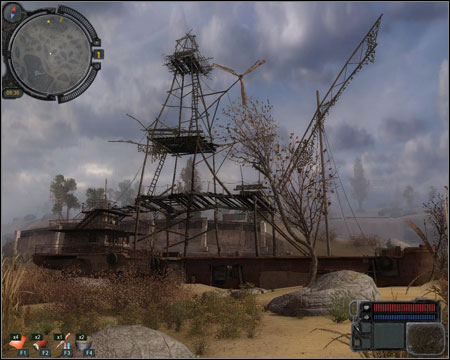
Ask any of the Stalkers about the choppers and you will be directed to Noah, who's building an ark. His ship is at point 26 on the map (screen). Open the door and quickly hide behind it, as the host will welcome you with a shotgun.
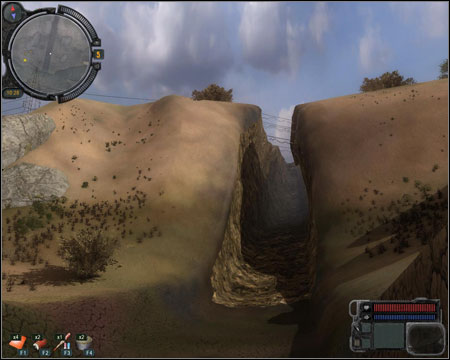
Talk with him carefully - if you don't say you're a Stalker, he won't want to talk with you at all. After asking him about the chopper, he'll agree to guide you to the Plateau. Save your game, watch a short cutscene and then follow the marked path into the "gap".
After teleporting to the Plateau, watch out no to fall to the lower "level". You can take a look around the caves, but everything you'll find are monsters and two pilot corpses. The last body lies near the machine itself, which you must search.

17. Evacuation locations - B2
Received from: automatically after completing mission 16
Beginning location: point 27 on the map
Target location: point 2 on the map
Mission description:
After searching the chopper at the Plateu, you will automatically begin a new mission. Talk about the missing soldiers with Bread (screen) and the mission will end.
17. In search of Magpie
Received from: Gonta
Beginning location: point 28 on the map
Target location: nearby point 1 on the Jupiter map, point 12 on the Jupiter map
Mission description:
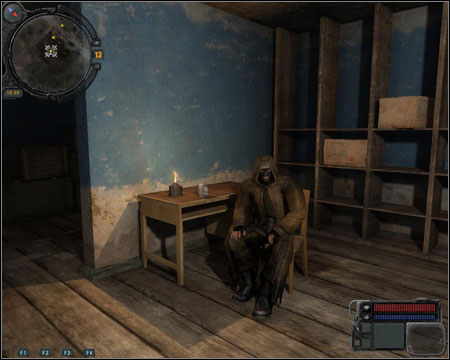
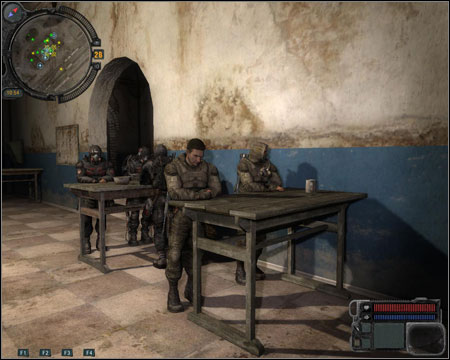
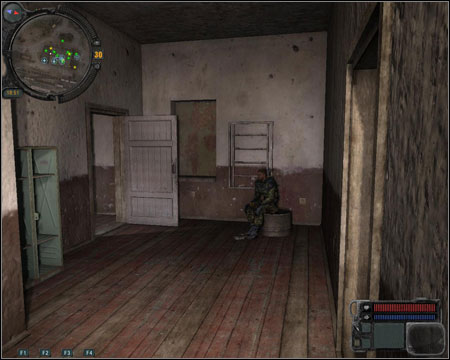
You can complete this task only after getting to the Jupiter section. After arriving at the Stalker base, notice a newcomer - Flint (screen). He's a little before point 1. You have to move around the room for a bit and after a w while the newcomer will start telling a tale. Listen to all of it and afterwards ask him for details. Head to point 12 and find the dying Splinter. Offer help and listen to another story.
Return to Flint, wait for another story and listen to it patiently. Afterwards talk to him. One last story left and you will establish Flint's real identity
Warning - as the mission alternate - you should now take a look at mission 6 (Retribution) of Jupiter sector.
Return to the Stalker base in Zaton I report about finding Magpie.
18. Hunting the chimera
Received from: Gonta, after taking on mission 17
Beginning location: point 28 on the map
Target location: near point 1 on the Jupiter map, point 12 on the Jupiter map
Mission description:
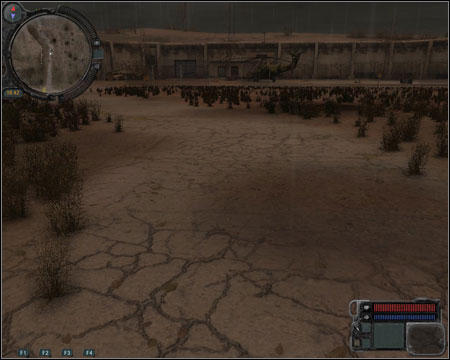
Before you head to the monster's nest, you have to sleep until 3 a.m. Once the time is right, talk with Gont and head out to hunt. Move while crouching; avoid the bushes and making unnecessary sounds. The chimera is waiting for you in the middle of the stage (screen).
After getting to the spot, your companions will tell to open fire. It's worth to shoot the beast in the head beforehand or shoot as the first one. You will have a better chance of the beast falling quickly, with no casualties on your side. Afterwards Gonta will give you a good rifle. You should talk with Trapper (screen) in the Jupiter Stalker base (point 13 on the map, in the basement). He will give you some money in reward.
19. Tempting business
Received from: Owl, after finishing mission 10
Beginning location: point 11 on the map
Target location: point 11 on the Zaton map, point 11 and 17 on the Jupiter map
Mission description:
You have to find 3 Veles type detectors. You should receive the first one after finishing mission 9. The second one is in the digger's cabin (screen) in Kopacha in the Jupiter sector (point 11). You can get the third one from Hermann in return for completing mission 14 (Anomaly Research), eventually search for it on your own. With a little luck you will find it while searching one of the bodies. On the other hand you can also collect 100000 money (collect artifacts and sell it to Bread). Such a sum of money will unlock an achievement thanks to which new items will appear in the shops and after a while Owl himself (you received the mission from him) will start selling Veles detectors for as much as 2000 each.
With at least 3 detectors, head to the scientists bunker in Jupiter sector (point 17). Inside, talk with Navokov (screen) and hand over the devices. Now you have to return to Owl and report that you have delivered them. Afterwards sleep for 24 hours and leave the Stalker base. As you get away from the ship wreck, Owl will contact you through the radio and you'll need to return to him.
You will be directed to Bears, who will give you a new generation detector. Talk with Owl and mention that the deal was different. Owl will mention Sultan, but you should finish this mission now and demand your cut (1500). Sultan's thread will appear anyway.
20. Compass
Received from: Bread, after finishing mission 19
Beginning location: point 2 on the map
Target location: point 26, 10 on the map
Mission description:
Pay Noah a visit (screen). Remember to hide behind the door. After a short talk, he will give you the artifact that Bread is searching for (if you go out of his ship and return after a few second, he will give another one in the same way). Before you hand it over, take a look at the next paragraph and eventually - the next mission. Finishing this mission will unlock an achievement which will lower the prices at Owl's.
Notice - If you would like to play the 21st mission - talk with Sultan and hand him over the artifact. However take note that after completing it, Bread won't want to hire us to search for any more artifacts. Also you have to remember that your reputation will quite drastically fall during the mission.
21. Shady Business
Received from: Sultan, during mission 20
Beginning location: point 10 on the map
Target location: point 2 on the map, anomalies with artifacts
Mission description:
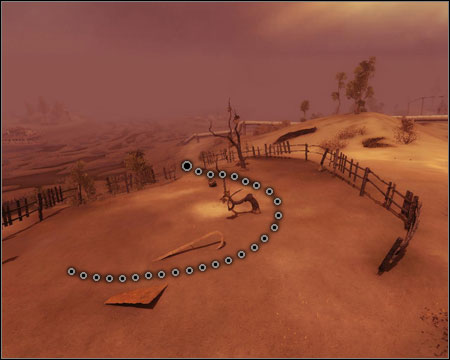
You can play this mission if you have given the artifact to Sultan during mission 20. You have to take back both detector prototypes from the Stalkers. Before you head off, you have to talk with Bread and take on finding any artifact. Now look at your PDA. The directions displayed during the mission (Shady Business) are your potential targets. Head out to hunt (screen).
You have to track down two Stalker groups - they will hand over the detectors without a fight if you give them some advanced weapons. If you don't have any, just kill them (screen). After acquiring both detectors, the mission will be updated and you will have to go back to Sultan. The bandit will tell you to talk with Bread. From now on the second one will regularly pay you money. The amount depends on the number of days from your last visit (counted in thousands). It can be some sort of income, but you can forget about selling artifacts for big sums of money.
22. Reputation
Received from: Nimble / Snag
Beginning location: point 7 / 29 on the map
Target location: point 29, 2, 22 on the Zaton map,
Mission description:
The mission will begin if you meet a couple requirements. Firstly, you have to order any weapon from Nimble. Wait one day, collect the order and equip your new weapon. Once you try to leave the base, you will be stopped by Snag (screen) who thinks that you have his weapon. Tell him that the gun is yours and you have no intentions of handing it over. Return to Nimble and ask about the situation (revealing Snag's name doesn't change anything).
Go to the place where Snag was before (the mission will be updated once you get there), but he will no longer be there. Ask Bread about him and he will direct you to the docks (point 22). If you don't want to play with the group of bandits, go to phase 2 of the mission. I'd say you should open fire as soon as you notice the group at the docks. However if you really want to talk with them, you will have to choose between giving away your weapon and money (the amount is quite random) and leaving peacefully and fighting them. If you don't want to lose anything, I'd suggest opening fire early on. Alternatively you don't need to go to the docks at all and move to phase 2.
Phase 2
Go to the Stalker base in Jupiter. Next to you, Snag will enter the building (screen). Follow him and ask about the situation. In this, quite unconventional way, you will finish the mission.

The Jupiter sector, apart from the Stalker base, is the headquarters of two hostile fractions - Duty and Freedom. If you want to have access to all the missions, you should make friends with one of the sides. You will also meet a group of scientists here and help them get to the bottom of the anomalies. Eventually you will form your own team and head out to Pripyat.
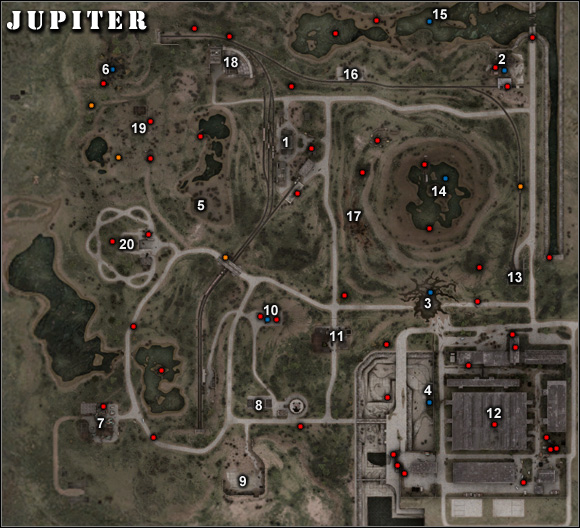
Important locations on the map:
1) Yanov - Stalker base. Inside you will find the representatives of two hostile fractions - Duty and Freedom. Generally the place is similar to the Zaton base, apart from the item supplier, who is nowhere to be found in Jupiter. The mechanic here doesn't need alcohol to work. In the east, under the house's wall, in the chest - a rifle, sight and ammo. In the metal "chest" at the junk in the south - a rifle, silencer and ammo.
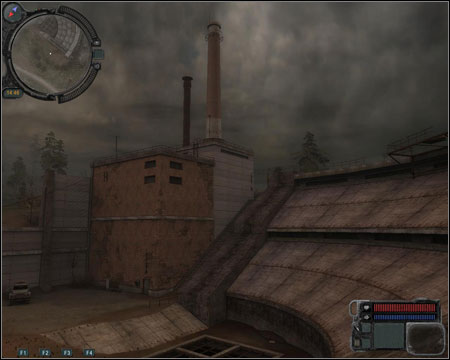
2) Cement Factory - inside a tall building (enter through the roof) you will find parts of radio from mission 4 (Radio Equipment) and an artifact. In the basement (enter from the marshes in the north) a part of mission 20 will take place (UAV). In the underground underneath the buildings - dogs and first-aid kits (under the big pipe). Under the bridge on the east - rifle with ammo.
3) Bitumen Anomaly - fire anomaly with an artifact, in which you will place the detector from mission 14 (Anomaly Research) and 15 (Hypothesis). In the bushes at the north-east - a pistol, ammo and grenades. In the concrete pipe in the east - a rifle with ammo.
4) Concrete Bath Anomaly - a chemical anomaly with an artifact, in which you will place a detector from mission 14 (Anomaly Research). You will come across Snorks here. In the scrap metal in the west - medicine and lots of ammo. In the north-west, in the bushes - a rifle with ammo.
5) Scientists' Bunker - the scientists' bunker, in which you will receive many missions. You will also find a mechanic here, who will upgrade your armour after you complete some missions for the scientists (some modifications can be performed only by him).
6) Ash Heap Anomaly - a fire anomaly with an artifact, in which you will place a detector from mission 14 (Anomaly Research). At the south-west, under some stones - a steel helmet and medicine. A little further, under a tree - a sniper rifle.
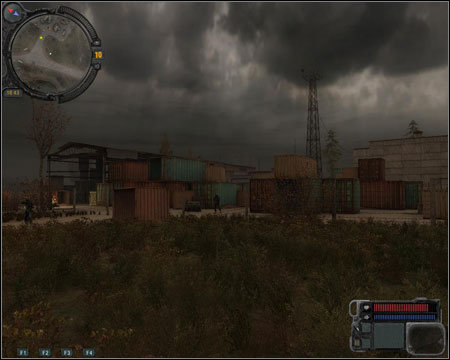
7) Container Warehouse - one of two bandits headquarters in this sector. Try not to eliminate them before getting to mission 2 (Hostage), because you can lose a valuable achievement. In the van on the northern side - a rifle, vodka and ammo.
8) Ventilation Complex - you will visit the undergrounds of this location during mission 12 (The Oasis) to get a valuable artifact. During mission 9 (Night Hunt) you will hunt a chimera here. In the concrete pipe in the south - ammo and grenades.
9) Helipads - a minefield from mission 23 (Stingray 1). Cross it while avoiding dark spots on the minimap/ground.
10) Parking Lot - an electric anomaly and zombies. You will visit it during mission 14 (Anomaly Research). You can take some grenades, pistols and medicine from one of the cars. From the chest by the "tower" - first-aid kits and Gauss' cells.
11) Checkpoint - one of two bandits headquarters in this sector. Try not to eliminate them before getting to mission 1 (Debts), because you can lose a valuable achievement. Once you receive it, you can return and take them out. The boss around here has an interesting and rare rifle.
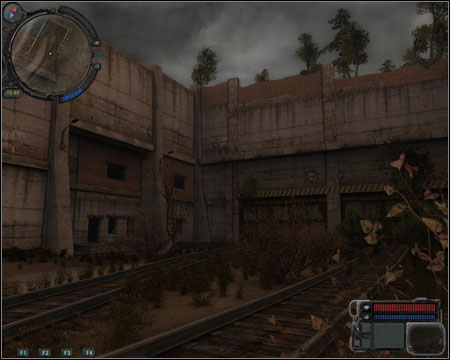
12) Jupiter Plant - the place where the chopper crashed in mission 24 (Stingray 4). Inside, apart from dogs, you will find a rifle, ammo and first-aid kits under the metal devices. Under the factory there's a passage to the Pripyat sector (see - mission 26 (Road to Pripyat)). There are lots of boxes with standard equipment inside (weapons/ammo/first-aid kits).
13) Eastern Tunnel - two Byurers await you here. You will visit this place during mission 8 (Hunting unidentified mutants). In the sewer in the east - medicine.
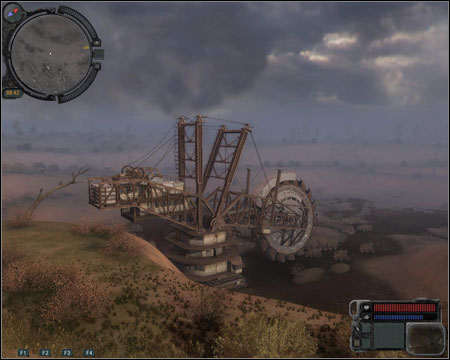
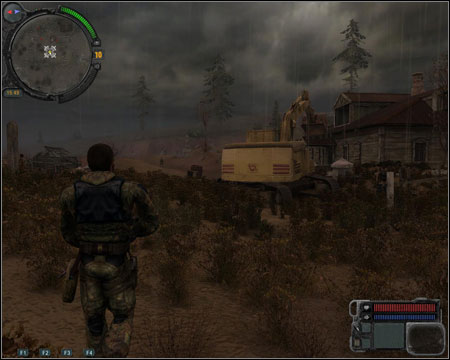
14) Quarry - an enormous machine, you will get to the top using the withered tree. You will visit this place twice - during mission 6 (Retribution) and 20 (UAV). A chemical anomaly and an artifact on the marshes. In the caravan to the south of the marshes - medicine. On the train in the east - a sniper rifle.
15) Plavni anomaly - marshes with chemical anomalies, an artifact and Bloodsuckers. You will visit this place during two missions - 7 (Hunting the Swamp Bloodsuckers) and 14 (Anomaly Research).
16) Substation - small station with a little basement (one room). The entrance is to the north, through a drain. Mission 10 (Theft) takes place here. In the north, on the marshes, between the rocks - a rifle and ammo. Another one with medicine under the crumbling, wooden pier.

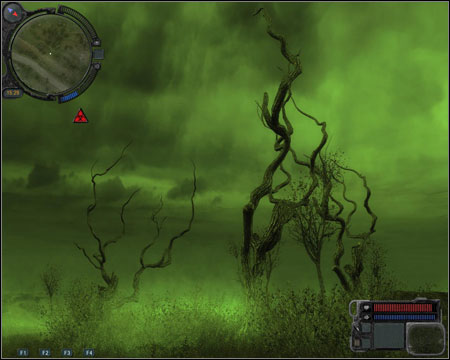
17) Anomalouse Grove - lots of chemical anomalies and a flower between them, which you will pick during mission 28 (Anomalous Plant).
18) Cooling Tower - you will hear anxious radio transmission fragments while walking near this location. The secret will be solved during mission 16 (Anomalous Activity). No the north, in the bushes behind the railway - a rifle, ammo and medicine (including a substance allowing you to survive an emission on open space).
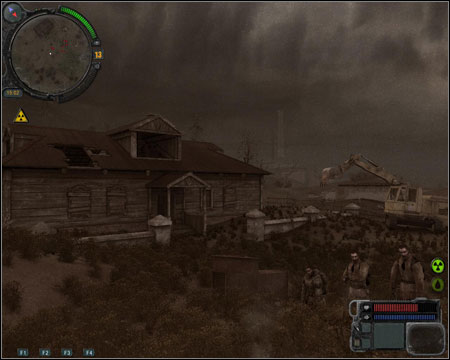
19) Kopachy - you will arrive at this abandoned, zombie-filled village during mission 5 (Kopachy) and 14 (Anomaly Research). On the terrain in front of the house, near the lake, there is a sniper rifle. On the roof of the ruins of a small building - a rifle, ammo, grenades launcher and grenades. In the cabin of the digger - medicine and a Veles detector.
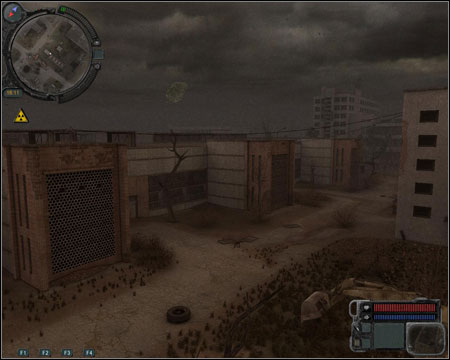
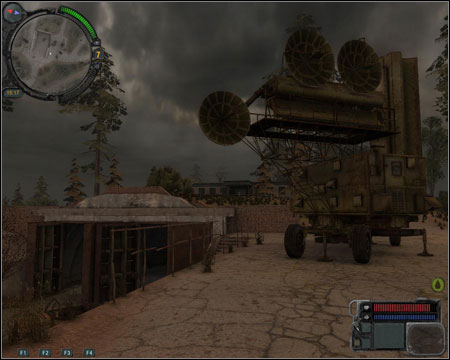
20) Volkhov AA Complex - a place full of zombies (and rat-dog mutants inside), where mission 22 (Evacuation locations - B205) takes place. On the western side of the building, there's a rifle, ammo and grenades. Another weapon's in the cabin of the van.
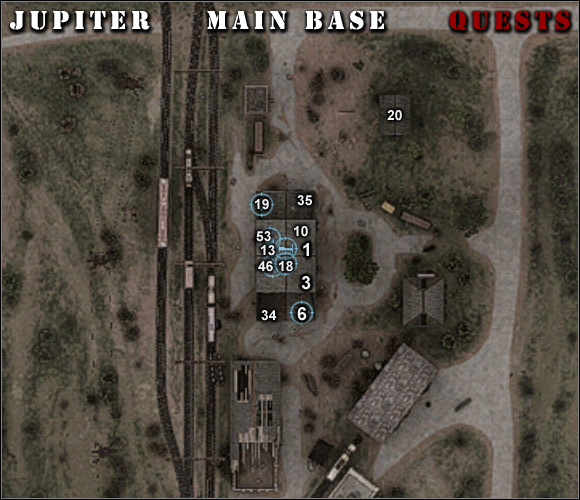

0. Duty Warehouse
Beginning location: points 34, or 35 on the map
Target location: point 42 on the map
Mission description:
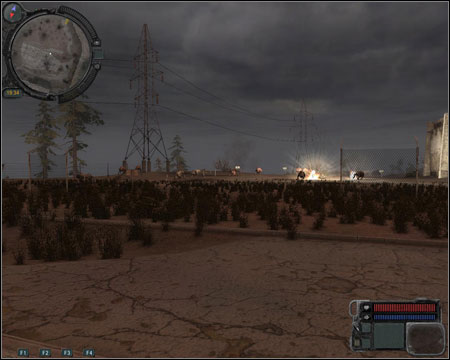
In order to receive this mission, you have to give away the PDA found in mission 11 (Transaction) of the Zaton sector to one of the fraction leaders in the Jupiter Stalker base (point 35 - Freedom, 34 - Duty). The decision is quite important, as it defines the relationship you will have with both sides (a 1:1 situation where everybody likes us is impossible). You can stay neutral, but, among others, you won't finish mission 21 (Monolith Survivors). No matter which side you have chosen, to will have to head to the warehouse (point 42) and kill the members of the opposite fraction (attackers - if you're with Freedom, or the defenders - Duty). Once the shooting ends, you should put your hands on the supplies hidden in the bunker (screen). If you're friends with Freedom, it will be the other way around - first the supplies, then shooting.
1. Debts
Received from: Vano
Beginning location: point 1 on the map
Target location: point 2 on the map
Mission description:
Vano will give you 5000 and ask to pay his debt to the bandits. You have to get to the man marked on the minimap. Pass the guard telling that you're here about the debt. Jack (screen) will increase the sum to 7000. You have three options - slaughter, bargain about the debt (you can get to 5000 if you have a good weapon with you) or add the 2000 from your money. I'd say you should choose the peaceful method. If you solve this (and the next) mission diplomatically, you will unlock an achievement thanks to which you will gain respect with the Stalkers. Of course no one said that after unlocking the achievement, you can't come back here and shoot a little... especially that Jack has a rare and good rifle with him.
2. Hostage
Received from: Grizzly
Beginning location: point 3 on the map
Target location: point 5, alternatively also 4 on the map
Mission description:
When accepting this mission, you will have to choose a way in which you will complete it. You have two options - diplomacy (preferred, because you will get an achievement - see mission 1) or strength (you can get some help [prize in money] which will be waiting for you at point 4 from 1 a.m. or without [a precious artifact - goldfish]). If you want to do it by force, fight your way to point 5 and quickly take out the gangster hoarding the Stalker (he will start shooting after a short while).
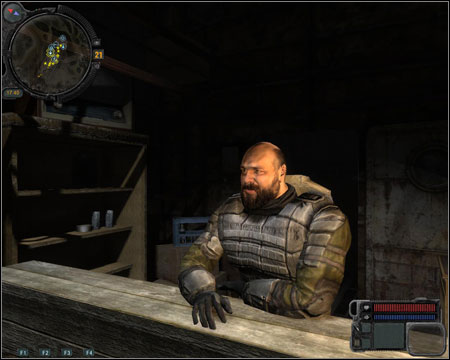
The diplomatic solution will be quite expensive. Take the artifact from Grizzly and head to the bandit camp. At the entrance, tell that you want to speak with the boss. Once in the hangar (screen), talk with the person standing in the middle.
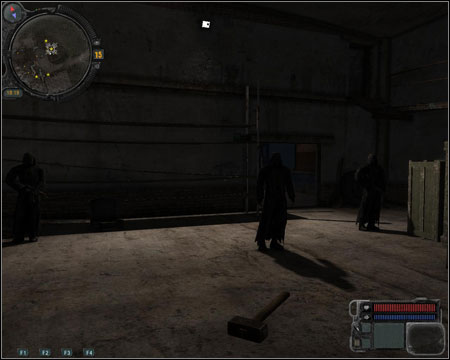
You can now choose between giving money (15000), or one of the upper shelf artifacts - goldfish or snowflake. If you want to return here and kill them after completing the mission and earning the achievement, give them the artifact (you will later get it back from the corpse). Before you can safely leave, one of them will cross you path and you'll have to pay once again. The amount is random, usually a couple thousands. Afterwards, return to the Stalker base together with the saved friend and collect your prize.
3. Bring Nitro tools
Received from: Nitro
Beginning location: point 6 on the map
Target location: points 7, 8 on the Jupiter map
Mission description:
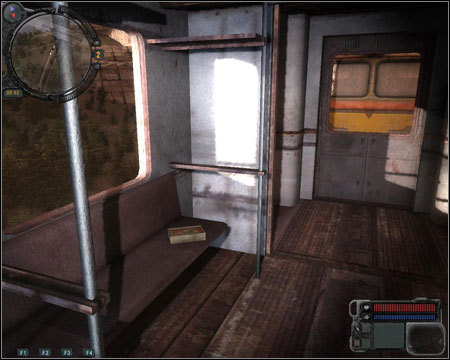
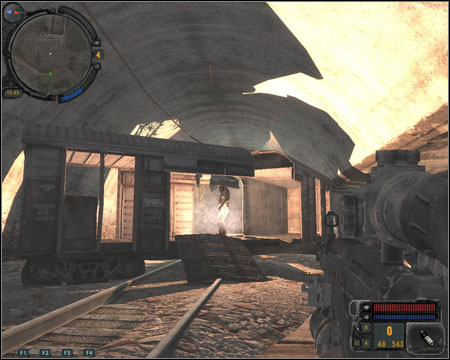
This time you have to search for tools for Nitro. Let's begin with the basic tools. Go to point 7, where you will find a train with an electric anomaly inside. Get on the roof by jumping from the nearby bridge. Find an open lid at the end of the last cart and go inside. Hide from the anomaly and head to the first cart. You will find the tools on the left side (screen). Behind the tools, on the left, there's the exit.
You will find the fine tools in the building at point 8. However before you will be able to get to them, you will have to fight your way through a group of dangerous dogs and bandits (red point on the map). At the top of the marked building there's an electric anomaly (and an artifact) waiting for you. Save often and reach the green cabinet inside of which you will find the tools (screen).

Phase 2 - calibration tools
Target location: point 10 on the Pripyat map;
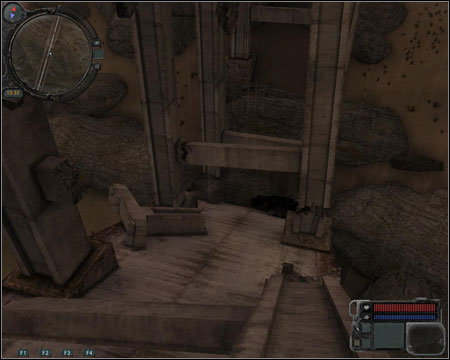
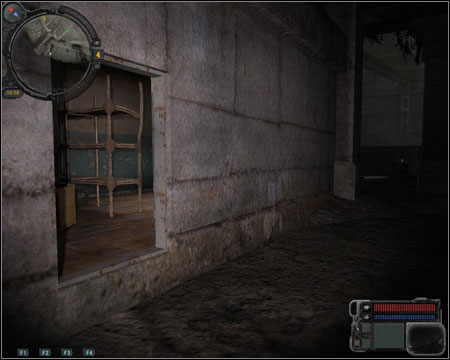
These tools can be found only after reaching the Pripyat sector. Go have to go to the building in the northern part of the sector (point 10). Inside there's a difficult to avoid electric anomaly with an artifact (or two) inside. You can take the round path (through two doors and a hole in the wall) but then it will be hard to get the artifact. However if you do manage to get through the anomaly, you should jump through a "window" (screen) in the south-west part of the building.

You will get to some stairs leading to the upper floor. Once there, go left and try to reach the centre of the building. There will be a mutant pretending to be a Byurer. If you stay silent, you should be able to take him down with one headshot from the Gauss (see - mission 1 of the Pripyat sector). In the small room in the very middle of the building, you will find the tools (green point on the map - screen).
4. Radio Equipment
Received from: Nitro
Beginning location: point 6 on the map
Target location: point 9 on the map
Mission description:
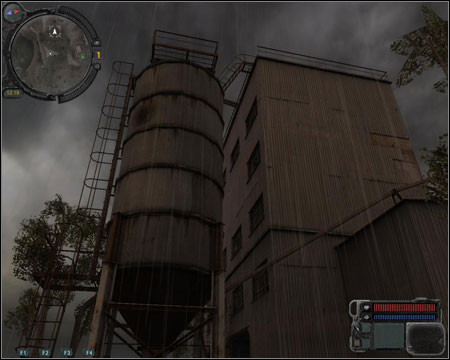
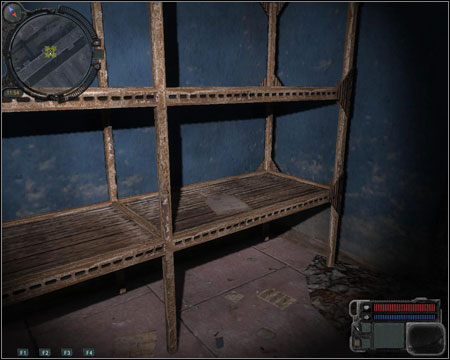
In search for the radio components, you will have to go to the factory at point 9. Use the ladders at the back of the building (screen), get to the roof and inside through the open hatch. You have to look around the rooms. On one of the desks (1st floor counting from above) you will find a wire spool. Behind the hole in the floor leading to the lower floor there's a shelf with another part on it. The 2nd floor contains an artefact and two "green plates" (on the desk and a metal shelf) and a container with rosin.
3rd floor - another spool (table) and some electronic parts on the table by the opposite wall (screen). 4th - green plates on the table and radin in the small room on the right (behind the "hair" hanging floor the ceiling). Having completed all the radio components (there will be a mission update telling you that), return to Nitro.
5. Kopachy
Received from: Uncle Yar
Beginning location: point 10 on the map
Target location: point 11 on the map
Mission description:
It's worth taking a sniper rifle for this mission (See - orange points on the maps). Head out to the zombie-filled village together with Uncle (screen). Eliminate the zombies and head inside the building. Out friend is waiting on the upper floor.
After a short cutscene, you will be attacked by a group of mercenaries (screen). The sniper rifle will come in handy now; of course aim at the heads. Eventually collect the loot and talk with Yar.
6. Retribution
Received from: Splinter
Beginning location: point 12 on the map
Target location: point 1 on the map
Mission description:
This mission boils down to finishing mission 17 (In search of Magpie) from the Zaton sector. After learning Flint's identity, you have three possibilities - improve your relations with Duty (point 34) or Freedom (point 35) by telling the proper leader about Flint. You can also ignore them and only tell Gont from Zaton. You will receive an achievement for completing this mission.
7. Hunting the Swamp Bloodsuckers
Received from: Trapper
Beginning location: point 13 on the map
Target location: point 14 on the map
Mission description:
Trapper, asked for a job, will tell you about bloodsucking monsters roaming the marshes. There are three dangerous enemies waiting for you there. I'd suggest you constantly move during the fight and use the rifle. It's worth to walk backwards and shoot just before the attack. Don't forget about collecting your prize.
8. Hunting unidentified mutants
Received from: Trapper, after mission 7
Beginning location: point 13 on the map
Target location: point 15 on the map
Mission description:
You have to get to the abandoned station. The entrance is right at the marked point. Silently go inside the building. To the left of the entrance, you will find the first of two enemies (screen). There's no sense shooting once he raises his hands, you won't damage him then. You should keep shooting from behind a wall, leaning out just enough to make a shot. It will allow you to avoid damage from the objects that the mutants will be throwing at you. After finishing both of them, return for the prize.
9. Night Hunt
Received from: Trapper, after mission 8
Beginning location: point 13 on the map
Target location: point 16 on the map
Mission description:
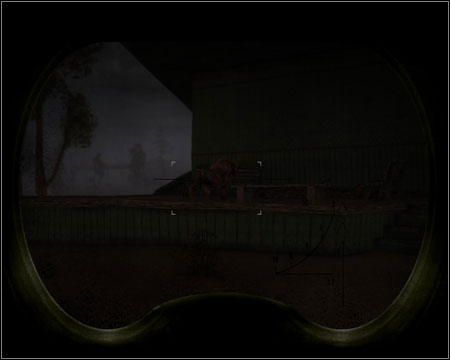
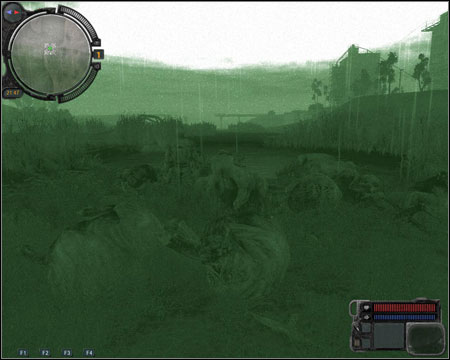
After some time after finishing the last mission, you will receive a radio message from Trapper. Visit him and he will give you a mission. You have to wait until night (10 p.m. will be alright). Night vision will be great help (screen). The chimera runs around the point marked on the map (16). You have to shoot it quite a lot before it falls (especially on higher difficulty setting). Remember that you have to move all the time and try to avoid the jumps. After the fight you will receive some money and a good rifle. You will also unlock an achievement.
10. Theft
Received from: after completing mission 23 of Zaton sector (see - the walkthrough below)
Beginning location: point 18 on the map
Target location: points 19, 20, 21 on the map
Mission description:
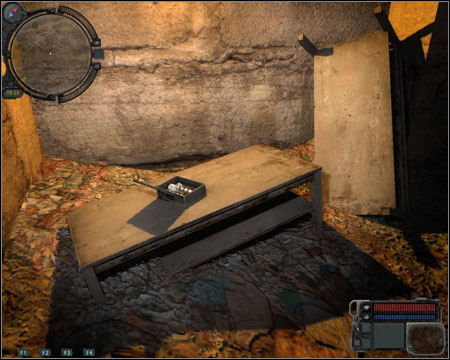
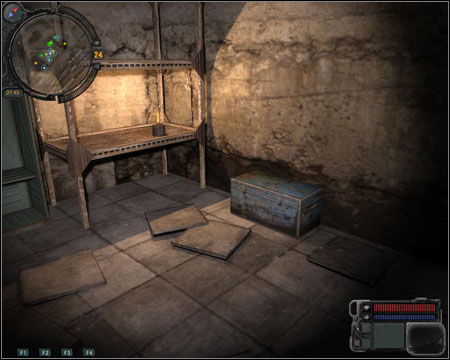
During mission 23, you meet Snag. After talking with him, go to the basement (point 18) and if there's nothing in the chest (screen) - put something inside. Now go rest for an hour and check the chest again after waking up. It turns out someone has robbed you.
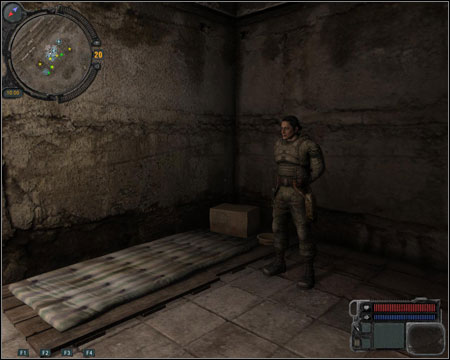
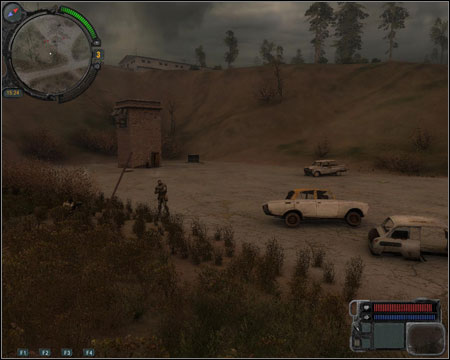
Visit the medic (point 19) and ask what happened. He will send you to Zulu's tower. He (screen) will tell you about people who he has chased away from his tower. They went towards the station (point 21). Follow the new trail. In the small building you Snag, injured, and a bandit standing next to him with a weapon. You can kill him with no regret.
It's up to you if you want give Snag a first-aid kit or finish him off and take his PDA. Enter the sewers a couple steps to the north of the rails, behind the platform. Below, in the corner of the room you will find a safe (screen) with your equipment taken from the chest. Taking them back finishes the mission.
11. A contract with the Scientists
Received from: Garry
Beginning location: point 22 on the map
Target location: points 7, 18, 20 on Zaton general map
Mission description:
One of the Stalkers staying in the scientists bunker (screen) will ask you to bring him two artifacts - Meat Chunk and Kolobok. You should find both of them in the anomalies of Zaton sector.
12. The Oasis
Received from: Professor Ozersky
Beginning location: point 23 on the map
Target location: point 24 on the map
Mission description:
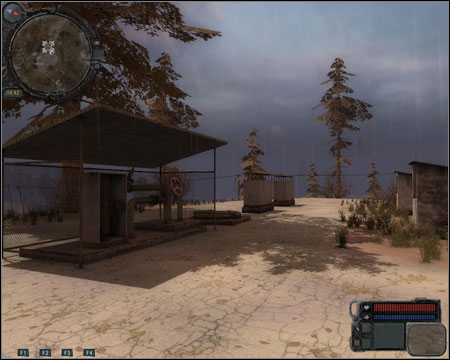
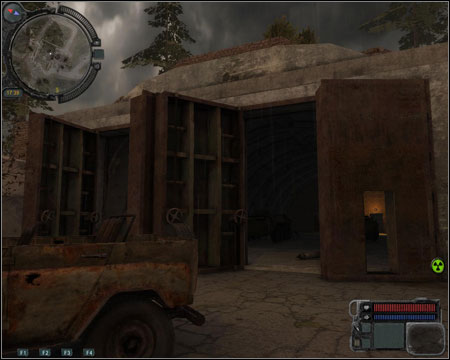
It's time to learn more about Oasis. Head to the abandoned train station (point 24) and get rid of the zombies inside. You can enter the tunnels full of dogs through the door in the southern wall. After going through the door, stop and turn right.
There's a maze of corridors before you. I will describe the path you have to follow through each "intersection". The starting point is the position in which on the right [south] there's a dead end (a few steps after going through a door and turning right). Let's go - east, south, east, south, south, and east. You should end up in a wide corridor lightened by a single lamp, which will lead you to a room with multiple columns (screen).
If you go through the columns following the marked path (upwards), you will be able to get to the room with Oasis. If you mess up or try to pass randomly, you will end up at the beginning of the room. Grab the artifact (screen) while jumping. At this moment a pack of dogs will enter the room. Kill them, or if you want to save ammo - climb the ladder on the left side and get out through the roof. Return to the scientists to get your reward.
13. Intermittent psy-emissions
Received from: Professor Hermann
Beginning location: point 25 on the map
Target location: point 26 on the map
Mission description:
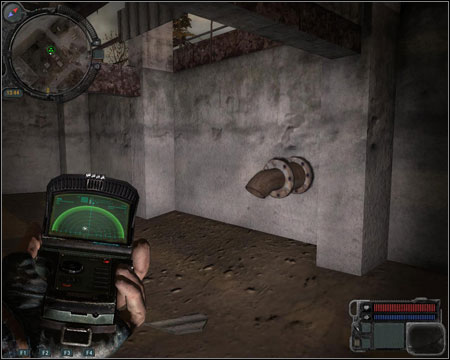
Make sure you have some grenades and psy-block tablets with you. Talk with the mercenary standing in front of the scientists bunker - Topol - and together with the party, head to the tunnel in the north (point 27). Once there, talk with him again to begin the operation. You can stay behind and watch the mercenaries get rid of the zombies. Your task is to retrieve the artifact from the room on the left. Take out the detector prototype (from mission 19 of Zaton sector), take the pills and carefully move while avoiding the electric anomalies.
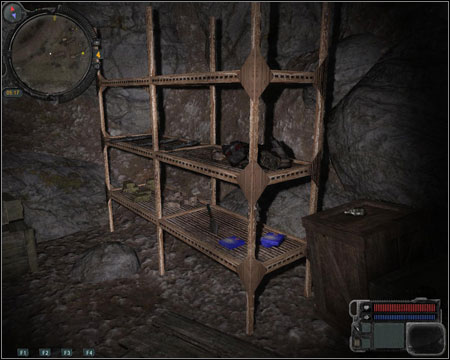
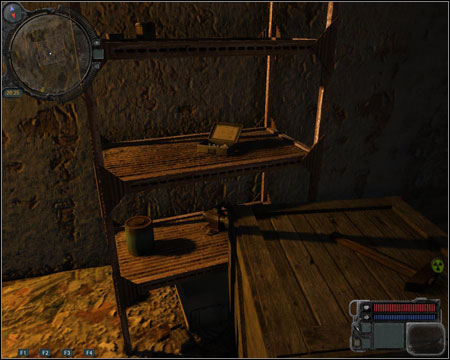
Find the entrance to the next room on the eastern wall. Before you there's a collapsed shelf (screen) and a knocked over barrel, over which you can jump. The artifact is waiting for you in the last room. There's a grenade by the wall, next to an AK47, which can come in handy. Use the metal door and enter the room with soldiers.
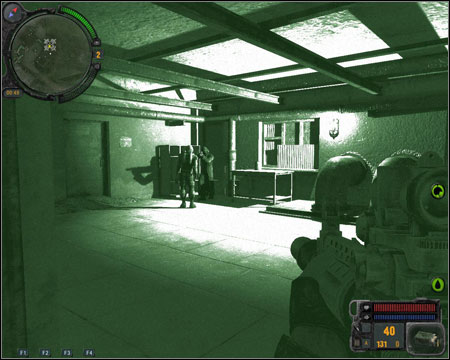
A psionic enemy will try to take over the minds of the mercenaries. You have a couple seconds to attack, before they become your enemies. The enemy should income from the tunnel entrance's side on our right. Throw grenades at him or use the grenade launcher (screen). Hide behind a wall/cover after each attack. It's important to have something between you and the enemy. It's not able to attack you without eye contact. If you acted fast enough, the mercenaries should still be alive and you'll be able to return to the scientists bunker with them.
14. Anomaly Research
Received from: Professor Hermann
Beginning location: point 25 on the map
Target location: points 28, 29, 30, 31 on the map
Mission description:
Visit the scientists' mechanic (point 28) and take 3 sensors from him. It's time to visit three anomalies with the prototype detector in hand. Avoid the detected threats (screen) and place sensor in the centre of each anomaly. At point 29 there's an electric anomaly, at 30 - a fire one and in 31 - a chemical. Once you're in the right spot, there will be information telling you that you can place the sensor. Return to the professor to collect your prize. From now on you can ask the scientist if there are any new artifacts in the area of the three anomalies he's following. You also have a direct view of this in your PDA.
Phase 2
Target location: points 14, 32 on the map
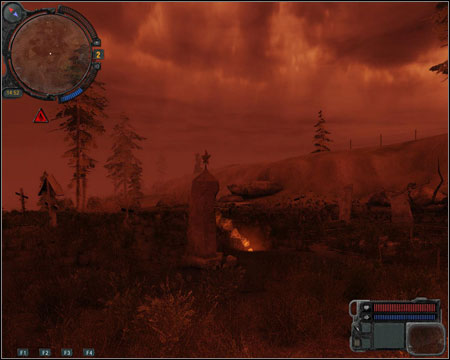
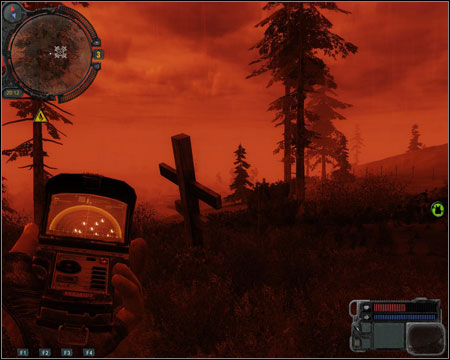
If you tell the professor that you'd like to participate in his research, you will be able to place more sensors. This time you will receive two sensors and will have to place them in the chemical anomaly at the marshes (point 14) and a fire (screen) type on the cemetery (point 32). The procedure is the same as last time.
Phase 3
Target location: point 26 on the map
Once more tell Hermann that you'd like to participate in his research. Offer your help with the measurements. Before you speak with the mercenaries (26), you should equip yourself with a sniper rifle. Topal will let you choose where to go first. Go to Kopacha and take a position on the top of the hill (screen). Take out the sniper rifle and wait. The zombies will be coming out of the house on the left and the ruins on the right. Once the measurements are complete, move to the next location together with your team - the marshes.
Begin with fighting off the zombies. Before you manage to catch a breath, pig-like mutants will appear. Try to keep close to the mercenaries and keep an eye on the surroundings. The pigs will come from east and west and the bandits and zombies from south. The mission is quite difficult and you should often save to different slots (especially on higher difficulty settings). After a while you can end up with a single Stalker and lots of corpses around. Once the measurement is over, talk with the mercenary and return to the scientists. Completing this task will unlock an achievement.
15. Hypothesis
Received from: Professor Ozersky, after finishing mission 14
Beginning location: point 23 on the map
Target location: point 30 on the map
Mission description:
Talk with the professor about your last task. He asks you to research the increased activity of mutants during the measurements. Head over to the fire anomaly and place the sensor at the spot marked on the minimap. Don't move and wait for jumping enemies (screen) to appear from the north and south. You are surrounded by anomalies that will hurt and set fire to your enemies, helping you in the fight. After some time you will be informed about the end of the experiment. Take the device and return to the scientist.
16. Anomalous Activity
Received from: Professor Hermann
Beginning location: point 25 on the map
Target location: point 33 on the map
Mission description:
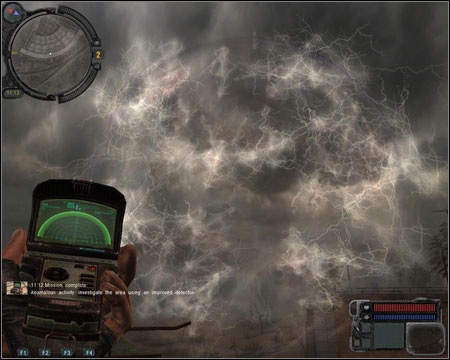
Ask Hermann about the results of the anomaly scanning (mission 14). He will send us to the tower (point 33). Get to the top of the building, stand by the destroyed barrier and take out the detector prototype. An anomaly will appear (screen) and after a few seconds corpses will start falling out of it. Cross the barrier and search the bodies. There's a PDS in one of them.
17. Duty History
Received from: automatically after obtaining the PDA from mission 16
Beginning location: point 33 on the map
Target location: point 11 on the Zaton map, or point 35 / 34 on the Jupiter map
Mission description:
You have to hand over the found PDA to the right person. Depending on who do you want to like you, you can give the PDA to Loki (Freedom) [point 35], Shulga (Duty) [point 34] (screen), or sell it to Owl [point 11] if you want to stay neutral (this way you will unlock an achievement thanks to which you will gain discounts at the mechanic and the trader at the Stalker base in Jupiter sector).
Notice - the PDA you have just found and the one from mission 11 (Transaction) of the Zaton sector are extremely important. If you give both of them to Owl and stay neutral, you won't be able to finish mission 21 (Monolith Survivors). In order to avoid it, you should make a choice between Duty and Freedom and give both devices to the proper leader in the Stalker base of Jupiter sector (giving one to each won't give you anything, you'll still stay neutral).
18. Anomalous Activity
Received from: Professor Hermann, after the previous scientists' tasks
Beginning location: point 25 on the map
Target location: point 36 on the map
Mission description:
After talking with the professor about another job, he'll ask you to search for documents on the terrain of the factory (point 36). Search for the entrance in the marked spot (on the left side of the screen). Search for the documents on the last floor, on a desk (follow the marker on the minimap). After collecting them, save the game. You will have to return to the professor, but as you try to exit the factory, it will turn out that the soldiers have set a trap for you. You have 7 enemies to eliminate. One of them will have a PDA, which you should show to Hermann.
19. Guarding the Scientists
Received from: Professor Hermann
Beginning location: point 25 on the map
Target location: point 13 on the Zaton map, or points 34 / 35 on the Jupiter map
Mission description:
Ask the scientist about the soldiers guarding the bunker and he'll tell us to find a replacement. If you want to stay neutral - ask the mercenaries (screen) from the Zaton sector (point 13). On the other hand, you can improve your relations with one of the Jupiter fractions - talk with Loki (Freedom) [point 35], or Shulga (Duty) [point 34]. Eventually you can ask Bread and his men, if you haven't killed them during mission 10 of Zaton sector.
20. UAV
Received from: after examining the wreck at the marked spot
Beginning location: point 37 on the map
Target location: point 28 on the map
Mission description:
At the point marked on the map, you will find a plane wreck. Take the memory module out of it. Take it to the scientists' mechanic and ask him to unlock it. It will cost 2000 and you will have to wait for 2 hours before he completes the work. Now you can sell the module to Owl.
Phase 2
Target location: points 38, 39, 40 on the map
This phase isn't a mission itself, but requires a description. In the previous phase of mission 20 you received the coordinates of three hiding places which you will now visit. Begin from north (point 38). Find the sewer entrance with chemical anomalies at the marshes. One of the gratings is unlocked (screen). At the end of the sewer you will find a chest with a letter.
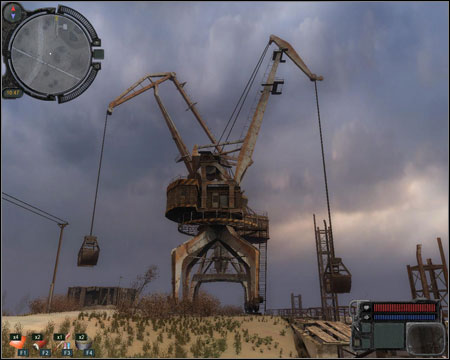
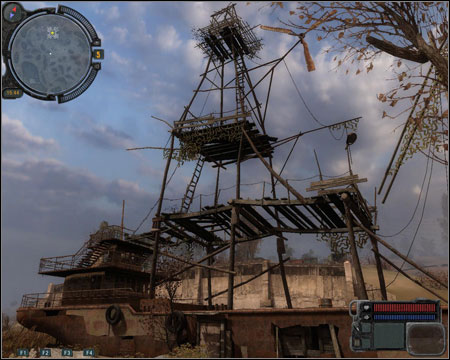
At point 39 you should find a crooked tree on a hill, growing in the direction of the big "digger". You have to carefully walk it and get to the upper part of the machine. On the right you will find the entrance to the cabin with a chemical anomaly and a backpack by the wall (screen). The next letter is inside.
The last letter, and what's more important - a rifle - is waiting for you at point 40. The order isn't important here, the weapon will just appear at the last of the 3 spots. At the marked spot you will find a structure with chemical anomalies inside (entrance from the north-west side, down the ladder). You have to check the sticking out pipe (screen). You can sell the letters to Owl for a silly amount of money.
21. Monolith Survivors
Received from: Major Degtyarev
Beginning location: point 41 on the map
Target location: points 34, 35 on the map
Mission description:
A group of soldiers (screen) will ask you for help in getting the trust of the Stalkers in the Jupiter base. You have to ask the fraction you you're sticking with (if you're neutral, look at the paragraph below). Afterwards head with your friends to the group of soldiers and watch a scene (screen). After the ceremony, you will find your own armour of the fraction you're friends with in the chest at the lower part of the Stalker base.
Notice - this mission is strictly connected with two missions - 11 (Transaction) from Zaton sector and 17 (Duty History) from Jupiter. In case of trouble, I'd say you should look at their walkthrough.

22. Evacuation locations - B205
Received from: automatically, after completing mission 16 of Zaton sector
Beginning location: point 27 on the Zaton map
Target location: point 44 on the Jupiter map
Mission description:
After reaching the base, you have to get rid of some zombies. At the house located exactly at the marked point, you will find the documents that will end the mission on the table. You can give them to Sokolov (a soldier inside the scientists' bunker - next to point 22).
Phase 2
Before you leave the terrain, it's worth to take a look around the nearby tunnel (screen).
You will have to kill some dogs. On the right there's a door lightened by a bulb above, which will lead you to a room with a sluice and an electric lock (you will be able to open it only after collecting the documents mentioned before). In the newly opened room, destroy the planks on the right side (screen). Go through the shaft and exit through its left side.

There's a Byurer in the big room. As you remember, he will raise his hands from time to time and create a force field - don't attack him then. Go through the next door and go up a ladder. You will reach a room full of weapons.
23. Stingray 1
Received from: from the beginning of the game
Beginning location: -
Target location: points 43, 6 on the map
Mission description:
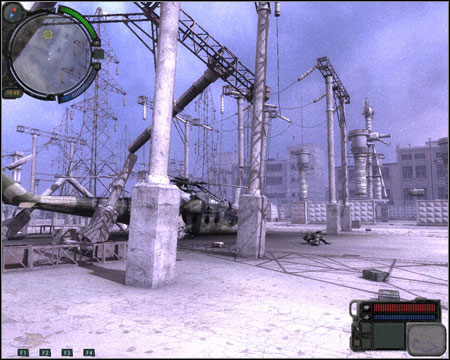
Return to the choppers. If you have arrived at the spot marked as 43, you should see a mine field in front of you. The case is not to cause an explosion. It's quite simple - you just have to follow the pavement on the left and watch the minimap for any darker spots. They're easy to spot at the light surface of the pavement (screen).
After examining the machine and taking the black box, you will see a fun scene during which a large group of mutants will run into the mine field (screen). Watch the fire show and kill the survivors. Give the box to the mechanic in the Jupiter Stalker base (point 6). Return to him after 3 hours, pay for his work and listen to the recording.
24. Stingray 4
Received from: from the beginning of the game
Beginning location: -
Target location: point 45 on the map
Mission description:
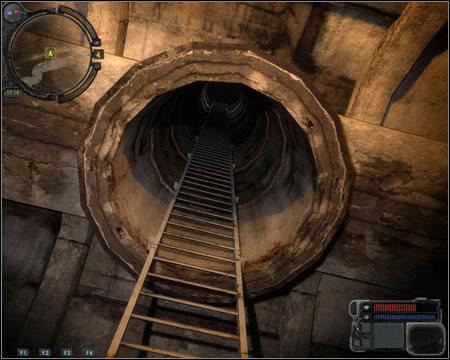
The last of the choppers in this sector has crashed on the terrain of the factory at the south-east. You will find the entrance at point 45. Go to the lower level (stairs on the right). Walk through the lightened tunnel (screen).
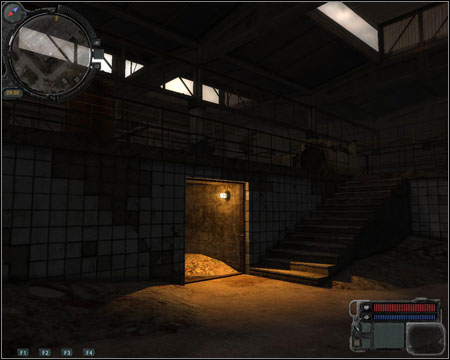
The tunnel will end with a ladder - use it to go up. Walk the metal scaffolding round the room, through a small room [*] and further - to the entrance in the wall (screen). The stairs leading down will take you to the hall with the chopper and some dog mutants. Search the machine.

25. Stingray Squad
Received from: automatically after mission 24
Beginning location: point 45 on the map
Target location: -
Mission description:
The mission will end "on its own" as you advance the plot.
26. Road to Pripyat
Received from: automatically after mission 23
Beginning location: point 6 on the map
Target location: point 46 on the map
Mission description:
Talk with the guide (point 46) about getting to Pripyat (screen). He will direct us to the recently visited factory in order to find some documents.
Phase 2 - documents
Target location: 47, 48, 49, 50, 51 on the map
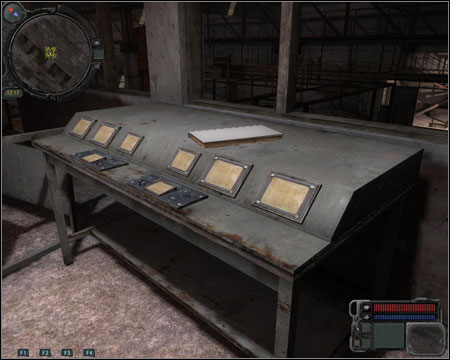
Exactly at the point marked on the map (47) you will find an entrance to the building. You have to localize the documents marked on your minimap. The folder is on a table in the room on the left, on the second floor. Another document is on a metal shelf (48). Go there (screen) using the passage between the building.
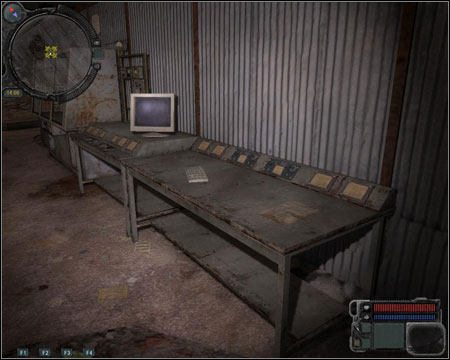
Go outside and return to the first building through the entrance at (49). The minimap will direct you to a folder lying on a wooden shelf at the ground floor. The next document is at a hall at which the helicopter crashed (see - mission 24 and the description how to get to it). On the metal table (screen) you will find the letter you need (50). The last document is a big folder on the first floor of a small building, point (51) shows the entrance from the west side.
Phase 3 - chemical lab
Take the white folder (screen) from the small room (see - mission 24 and [*]).
Phase 4 - checking the passage
Target location: 52 on the map
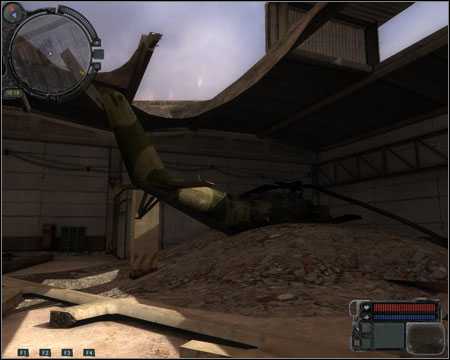
Go to the wreck once more (see - mission 24 and the description how to get to the chopper). Opposite to the machine, there's a passage behind a steel "wall" (screen).
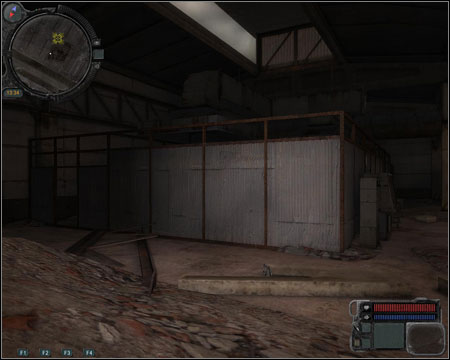
You should reach a big hall with a small steel room (screen). Take the blue folder from inside. You can out of the factory directly from this hall, through the hall in the eastern wall caused by a truck. You can sell all the documents found in this mission to Owl.

Phase 5 - talking with the mechanic
Target location: 6 on the map
In order to definitely end this mission, talk to the mechanic from the Stalker base in Jupiter sector (point 6).
27. Pripyat 1
Received from: automatically after mission 26
Beginning location: point 6 on the map
Target location: point 20 on the map
Mission description:
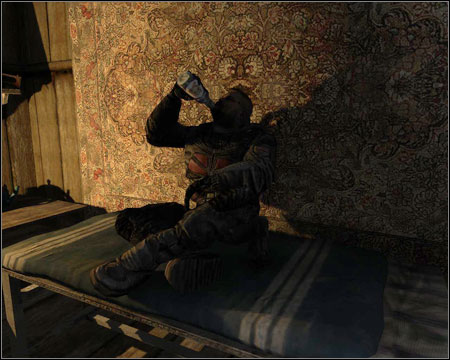
Begin from drinking with Zulu (screen) in his tower (point 20). You don't have to prolong the conversation - just keep talking about the expedition and you'll fall out after a while.
Phase 2 - SEVA
Target location: points 11 / 29 on the Zaton map, or point 53 on the Jupiter map
The next step in your preparations should be buying a proper SEVA suit (screen). If the circumstances are right (discounts, respect, a wider offer at the shops), you should find one for as much as 22 / 25 thousands (Owl - point 11 on the Zaton map) / (Hawaiian - point 53 on the Jupiter map). Alternatively you can order it at the supplier - Nimble (point 29 on the Zaton map), for a little higher price. In case you need money, sell artifacts to Breadi.
Phase 3 - the team
Target location: points 1, 35 / 34 , 22, 23 on the Jupiter map
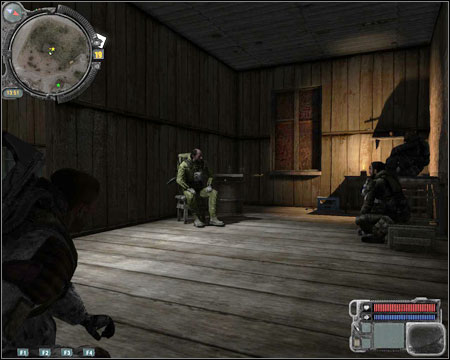
Recruiting members to your team involves some costs. Begin from Vano (point 1) who will want 5000 for his suit. After paying him, take him to Zulu. Your next target is Strider - the leader of the soldiers from mission 21 (Monolith Survivors). You can recruit him only if you have completed that mission. You will find him in front of the door (screen) leading to Freedom's leader (point 35), or Duty (point 34), depending on which fraction you're friends with. Your buddy doesn't have a problem with his suit, so just take him to Zulu.
The next lucky man is Sokolov - the soldier staying at the scientists' bunker (next to point 22). There's a problem with his suit - talk with professor Ozersky (point 23) and complete mission 28. Afterwards take Sokolov to Zulu and collect an achievement increasing the chances your team has to survive (screen).
You should start preparing for the journey. A good machine gun (with an optical sight and a grenade launcher), a rifle and lots of ammo should be enough. You can use the fact that the upgraded SEVA offers 10 kg more (+some artifacts in the slots and you may carry up to 70 kg). End the mission by telling Zulu that you have completed assembling the team (four people go in, one [Nitro - the mechanic] opens the passage). The road to Pripyat has been described in another section of the guide.
28. Anomalous Plant
Received from: Professor Ozersky
Beginning location: point 23 on the map
Target location: point 54 on the map
Mission description:
You have to get to the anomaly and find a plant for the professor (screen). It's a good moment to test you new SEVA suit, especially if you have already upgraded it at one of the mechanics. After you hand over the plant, you will be able to continue mission 27 and you should also get an achievement (Hermann will start selling a new medicine, allowing you to survive an emission while outside).
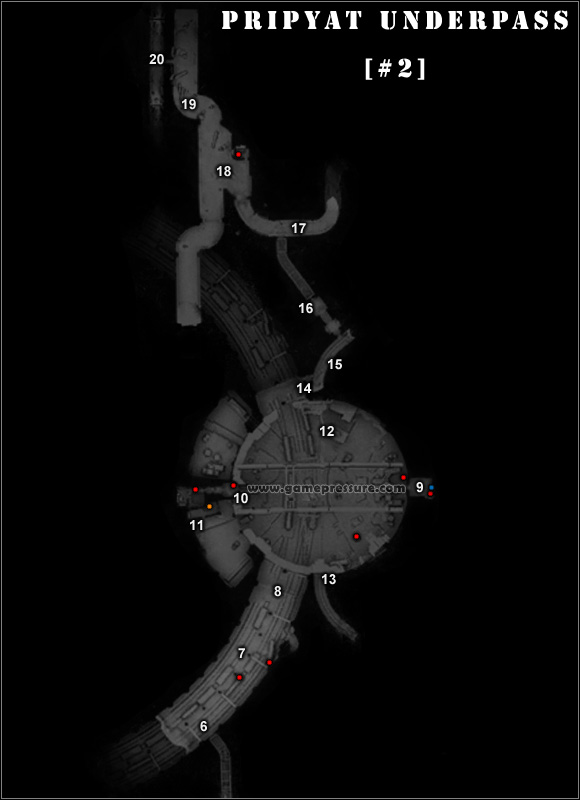
There are lots of enemies waiting for you in the sewers including Tushkans and Snorks. After arriving at the hall in the middle of the map [#2], you will be attacked by Monolith soldiers. Additionally some zombies will appear at the exit. It's worth to search the cars (and trains) along the way, you will find lots of ammo and medicine, sometimes weapons or even a SEVA suit.
![You begin (0) at the lowest part of the map [#1] - Walkthrough - The road to Pripyat - Walkthrough - S.T.A.L.K.E.R.: Call of Pripyat - Game Guide and Walkthrough](https://game.lhg100.com/Article/UploadFiles/201512/2015121709251020.jpg)
You begin (0) at the lowest part of the map [#1]. Dogs (kill them with a machinegun) and a Snork (rifle) will attack you around the first intersection (1). You will meet some more dogs near the gate (screen). Press the button (2) and prepare your rifle to fight two Snorks.
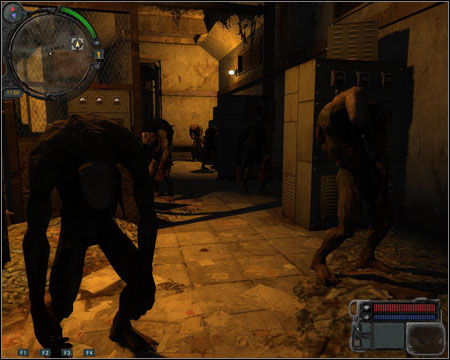
(3) is a place with an anomaly - you can pass it using the prototype detector in hand or by following your comrades, as they should find a proper path on their own. At the end of the tunnel (4), some more dogs will appear. You have to press the button and enter the corridor on the left. Two little dogs and another button (5). A narrow corridor leading north contains two dogs and one Snork that can attack you from behind. Move to map [#2]. There are three Snorks (screen) by the entrance (6).
3 more will attack you a little further (7). The button (8) will open the gate leading to a big hangar with dogs inside. A group of Snorks will attack you as the gate is opening, luckily they're weaker than the normal ones and a couple good shoots should be enough to get rid of them. You can an artifact from the small room on the right (9). To the east of (10) there's an anomaly which you can avoid with the detector. At (11) there's an entrance to a side room (screen). Inside, in a chest (orange point) there's a SEVA suit.
Go up the ladder (12), save the game and press the button on the northern panel. At this moment, heavily armed enemies will come out of the small room (9). If you have a machine gun with an optical sight or a sniper rifle, it's a great moment to use it. In case any of your companions die, you can always load the game. After the fight go down, carefully cross the anomaly and enter the building (10). Once you get to the upper floor, to the place the minimap shows, save your game and open the door. Snipers will appear on the right and left side of the main hall (screen). You can wait for your companions to take them down. A couple second later a group of enemy soldiers will enter through the corridor (13). You have to activate the button showed by the minimap.

You can continue your journey through the north, narrow corridor (14). There may be enemies waiting for you by the entrance. There's a chemical anomaly at (15). Move carefully with the detector in your hand. Use the button (16) to open the road to the part of the sewers with a big amount of zombies. Look out for dogs and 2 Snorks by (17). (18) is a zombie terrain, just like (19). At (20) you will find a long ladder that will end your journey.

The last sector of the game. This time you won't find any trader at the base, with whom you would be able to trade. On the other hand you will meet lots of Monolith soldiers and pass through a large underground laboratory. You will also gain the ability to repair your equipment and gain ammo, grenades and medicine for free.
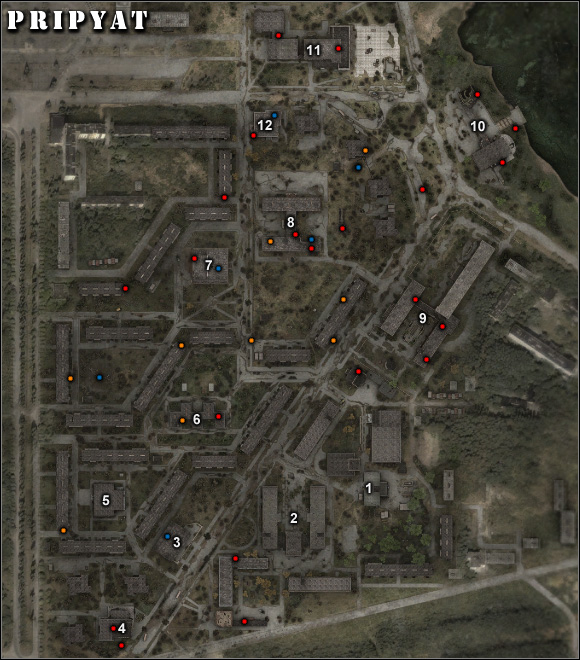
Important locations on the map:
1) Laundromat - the main base in the Pripyat sector. Inside you will find a group of soldiers under the command of Kovalsky, who is connected to every mission in this chapter. You will also be able to repair your equipment for free and receive ammo (mechanic) and medicine (medic).
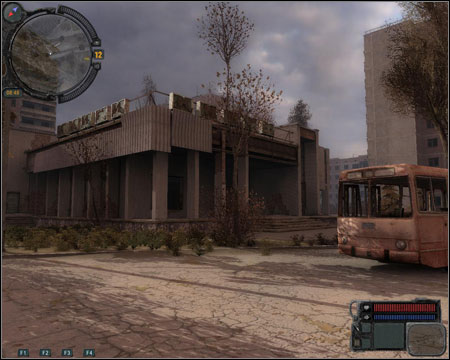
2) Apartment Complex -buildings forming an U are a part of two missions - 6 (One Shot) and 10 - (Unknown). In the first one you will meet a group of Monolith soldiers here and will use a sniper rifle to get rid of them.
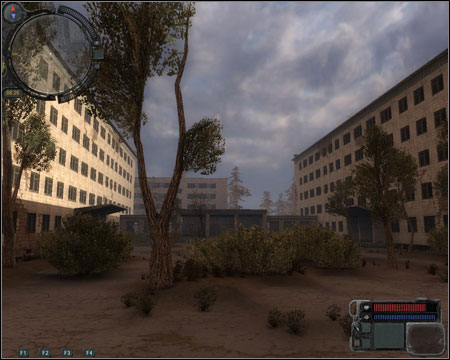
3) Department Store - a real maze of small rooms and lots of doors. Big amount of Tushkans. In the basement there are calibration tools from mission 12 (Bring Cardan tools). Lower - an anomaly with an artifact.
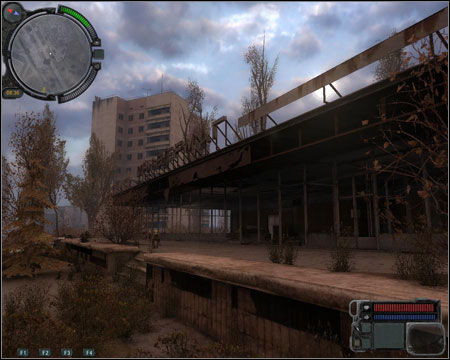
4) Book Store - a bookshop full of Monolith soldiers. The location is connected with mission 4 (Monolith Forces). Inside, on the shelves, there's some ammo and grenades.
5) Grocery Store - mission 5 (Missing Sentry) takes place here. During the mission you will have to face a Controller.
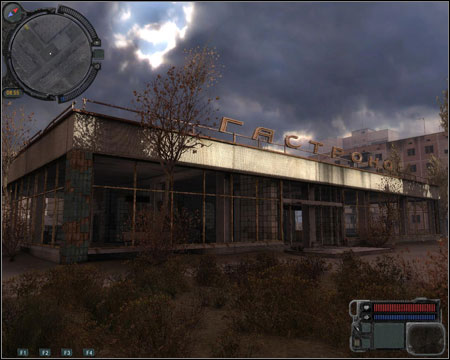
6) Kindergarten - you will get inside during mission 9 (Radio Interference). First-aid kit and a cell for the Gauss in the corner of the room on the first floor. Outside, on the ground floor, there's a sniper rifle hidden behind the sewer pipe.
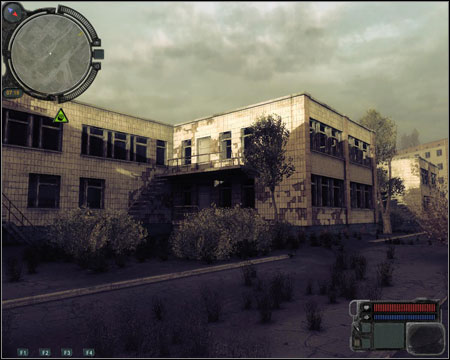
7) Yubileiny Service Center - location from mission 7 (Laboratory X8), full of zombies and Monolith soldiers. There's a laboratory full of different kinds of mutant in the underground. On the third floor, under the cooker - a first-aid kit and ammo.
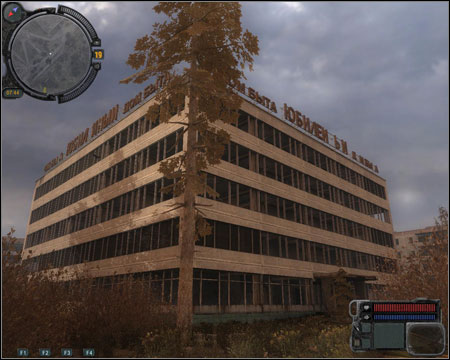
8) School - you will come across this building during mission 2 (Helping Zulu). Apart from the artifact in an anomaly on the last floor of the building, you will find quite a lot of equipment here - medicine on the ground floor, grenades, ammo and an assault rifle on the 1st floor. You can also meet some zombies.
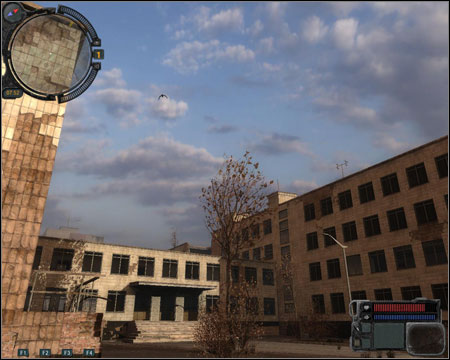
9) Hospital - the first mission of this sector takes place here - (Unidentified Weapon / Gauss Rifle). On the ground floor, behind the cabinet, there's some ammo. More ammo and a first-aid kit in the desk and on the 1st floor, in a metal box, there are grenades and a grenade launcher.
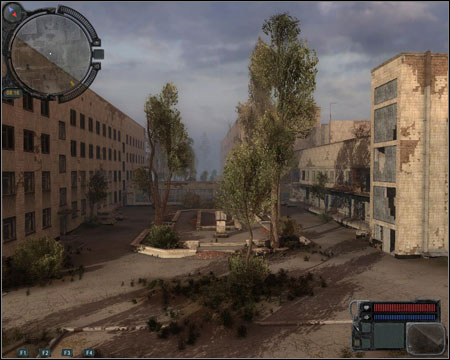
10) River Port - one of the two locations from which Monolith soldiers will be shooting at you during the last mission. Look out for the snipers. There are first-aid kits and Gauss cells hidden around.
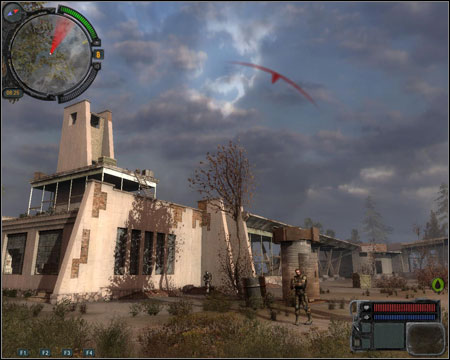
11) Prometheus Movie Theater - one of the two locations from which Monolith soldiers will be shooting at you during the last mission. Look out for the snipers. Inside there's a grenade launcher with grenades and some ammo. RPG missiles are hidden below the stairs in the building on the left.
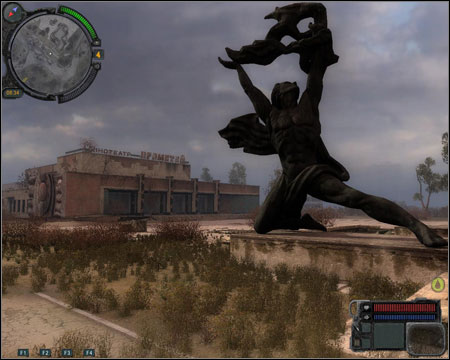
12) Old Service Center - lots of electric anomalies with artifacts inside. A Byurer on the first floor, along with calibration tools from mission 3 (Bring Nitro tools) of Zaton sector. Some grenades under the stairs in the corner.
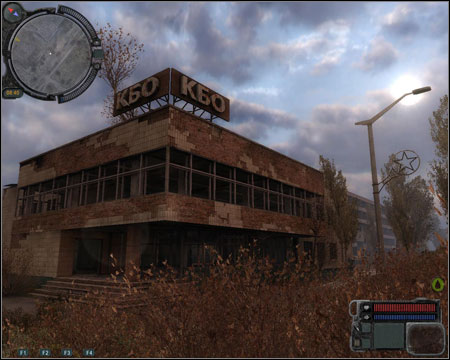
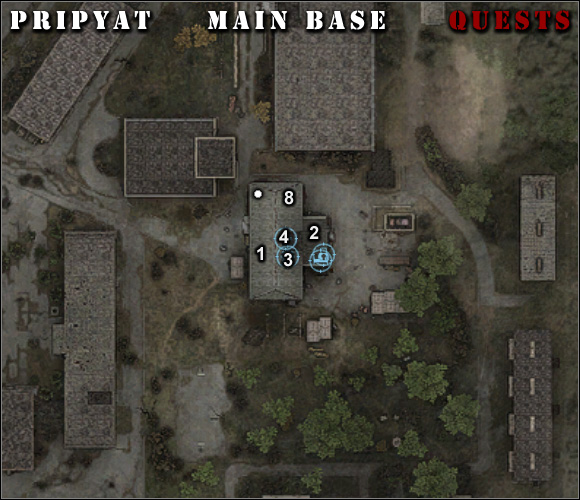
1. Unidentified Weapon / Gauss Rifle
Received from: Kovalsky, automatically upon reaching the Pripyat sector
Beginning location: point 1 on the map
Target location: point 2 on the map
Mission description:
Kovalsky will order you gain hold of an unidentified weapon. Begin from going to the ground floor (stairs leading down at the white point). In case you're in need, the mechanic (point 3 on the map) will give you ammo and repair your equipment for free (you can even ask him for armour). The medic (point 4 on the map) is also willing to serve you free of charge. Tarasov (point 2 on the map - screen) will take you and his squad to the hospital, where the mission itself will begin.
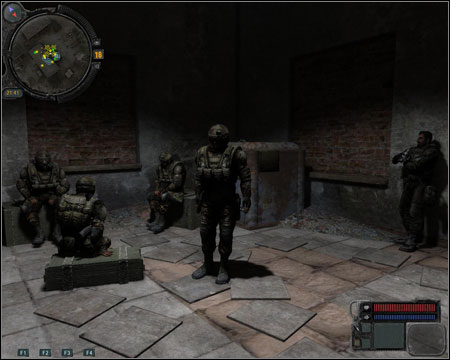
You move to point 5. Follow the soldier marked on the minimap and take a shooting position on the floor of the western wing of the hospital (point 6). Don't lean out, as the enemy can easily spot you. Once the soldiers standing next you (screen) says that the squad is ready to attack on your sign - take out one of the enemy soldiers on the square.
Wait and ignore the order to search the bodies on the square. Don't move from your position. After a while it will turn out that it's a trap and enemy soldiers will enter from the eastern wing. Concentrate on the talkative leader (shoot after he raises his hands), who has settled himself on the roof on the left (screen) with the gun you're searching for.
Kill him as fast as possible, as his attacks are incredibly accurate and effective. Afterwards you have to get rid of the rest of the soldiers and take the gun their leader has been using. At point 7 you will find a stairway which will lead you to the first floor (screen). Give the gun to your employer and watch the scene which will begin another mission.
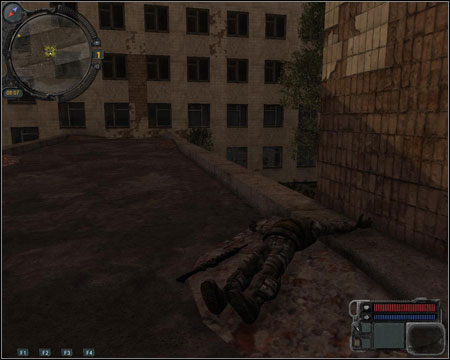
Phase 2 - repairing the gun
Target location: point 8 on the Pripyat map, points 4, 30 on the Zaton map
You have to get to Zaton. Talk with Garry - the guide who just arrived at the sector (point 8). If you have helped Garry during mission 11 (A contract with the Scientists) of the Jupiter sector, he will give you a quite rare artifact - Bubble. Show the broken gun to Cardan - the mechanic of Zaton sector (point 4). He will fall asleep, so go take a long nap yourself. Once you talk to him again, he'll give an access key to the underground laboratory (point 30 - screen).
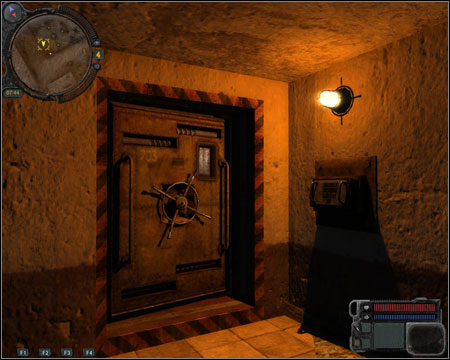
Go down the stairs, take care of the zombies in the corridor and reach more stairs going down. To the right of the stairs there's a door to the next room. Save your game, as you will have to face a powerful enemy. The two-legged mutant is luckily too wide to fit into the door, so go back each time he approaches you. Go up the stairs and then up the ladder. Go along the metal walkway to the other side of the room (south-west), find the ventilation shaft (screen) and enter it. It will lead you directly to the document you're searching for. Now return to the mechanic, who will repair the Gauss Rifle in a couple hours. You will also be able to buy ammo from him (6 bullets for 2000).
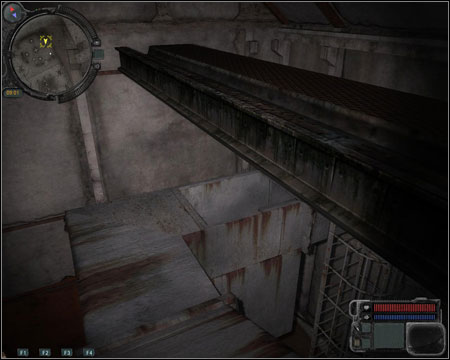
Phase 3 - Kovalsky
Return to Pripyat (the pilot in the Stalker base in Zaton can now take you there for 4000). Once you're there, Garry will tell you about the mercenaries who he has led to the sector recently. After hearing the story out, report to the Colonel and tell him about the Gauss.
2. Helping Zulu
Received from: automatically upon reaching point 11
Beginning location: -
Target location: point 11 on the map
Mission description:
This is not a mission viewable from the PDA. If Zulu survived the journey to Pripyat, you will find him at point 11, surrounded by mutants. Help him in the fight (screen) and in return he'll give you his heavy machine gun in the base.
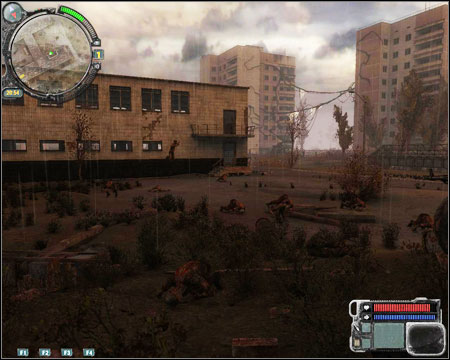
3. Missing Recon Unit
Received from: automatically after mission 1
Beginning location: point 1 on the map
Target location: point 12 on the map
Mission description:
There's a corpse at point 12 (screen). Watch the cutscene, after which the mission will be split into two separate, new tasks.
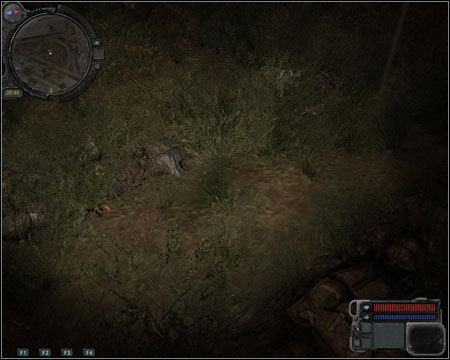
4. Monolith Forces
Received from: automatically after mission 3
Beginning location: point 12 on the map
Target location: point 13 on the map
Head to the meeting point of your team (minimap), by the bus. If Sokolov and Vano survived the journey to Pripyat, they will join us in this mission (you have to wait for them in the marked place). Your target is the library occupied by enemy soldiers (point 13). There are five enemies in the room which you will enter. One buddy with a rifle in the west corridor and the second one on the right. You should now be standing by a double door (screen).

After breaching the room, you shouldn't have problems with getting rid of the five praying enemies. Take a look at the strange construction in the middle and a cutscene will play, ending the mission.
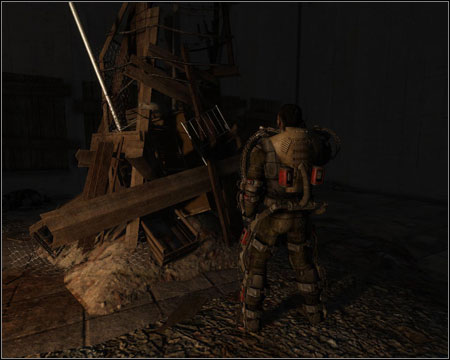
5. Missing Sentry
Received from: automatically after mission 3
Beginning location: point 12 on the map
Target location: point 14 on the map
You have to find the missing sentry. Go to the building at point 14. Watch the strange behaviour of the sentry and eventually his suicide. Prepare a grenade launcher or a powerful rifle. Soon enough a mutant will enter through the door (screen). Don't keep eye contact with him (you've met this type already, while working for the scientists in Jupiter sector). Killing the mutant will launch a cutscene which will end the mission.
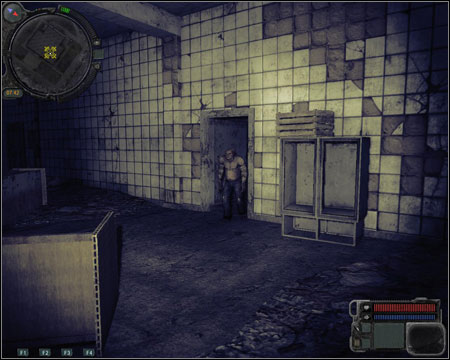
6. One Shot
Received from: Kovalsky, after finishing mission 1 and talking with Garry about the mercenaries
Beginning location: point 1 on the map
Target location: points 15, 16 on the map
Remind the Colonel about the incident with Garry. During the conversation, mention the laptop from mission 6 (Mercenary Camp) of Zaton sector and Uncle Yar from mission 5 (Kopachy) of Jupiter sector. You have to choose your target - either take down the client with whom the mercenaries are to meet or their leader. Your choice however, doesn't change much, so kill both. After the conversation, you will be automatically taken to point 15, where the mission will take place and will receive a sniper rifle with ammo (but Gauss also works fine here). Wait for the mercenary leader (egzoskeleton) to walk to the middle of the square (point 16). A client in a suit (without a weapon) will join him. Kill them both. The other mercenaries aren't important so quickly go away from the window and dodge an RPG missile. You should find a red access key in the body of the client. You can now return to the base and report.
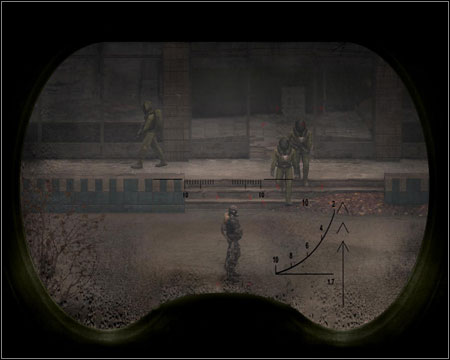
7. Laboratory X8
Received from: automatically after mission 1
Beginning location: point 1 on the map
Target location: points 17-20 on the map
Mission description:
You have to get to the underground of the building at point 17. Begin from restoring the power and starting the elevator (it will turn out that it doesn't work). You will have to use 4 staircases, marked 17 to 20 on the map. First floor - 17. Look out for zombies and enemy soldiers, who will be present at every single floor from now on. Second - 18; Third - 20. Fourth - 19. Fifth - 17. Locate the generator at the point marked on the minimap (screen) and start it up. You can also go to the roof, full of electric anomalies and collect an artifact. Return to the elevator and go down to the laboratory which has been described in a different chapter of this guide.
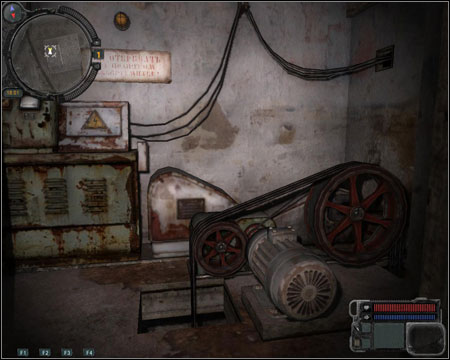
8. A Quiet Word
Received from: automatically after finishing mission 7
Beginning location: point 17 on the map
Target location: point 1 on the map
Mission description:
After leaving the laboratory, you will be called by Colonel Kovalsky. Enter his room and a cutscene will be played.
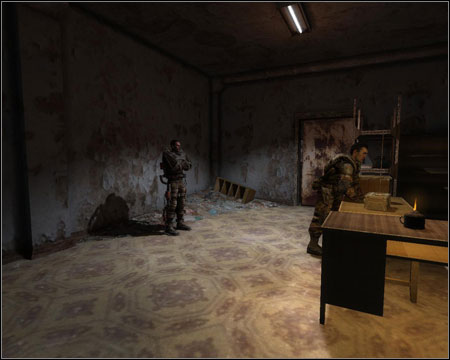
9. Radio Interference
Received from: automatically after mission 8
Beginning location: point 1 on the map
Target location: points 21, 22, 3 on the map
Mission description:
Notice - after finishing this mission, Garry will disappear and will return only after you complete mission 11 (Evacuation). Until then, you won't be able to leave Pripyat. If you have anything to take care of in the other sectors (upgrading your equipment, buying Gauss ammo), you better do it now.
Head to the marked spot and search the body. Take the explosives and watch a cutscene. Head to the building at point 22. Plant the charge on the door (screen) and move back to a safe distance. Once on the floor, a living anomaly will jump out on you from the room marked with a red point, you can kill it.
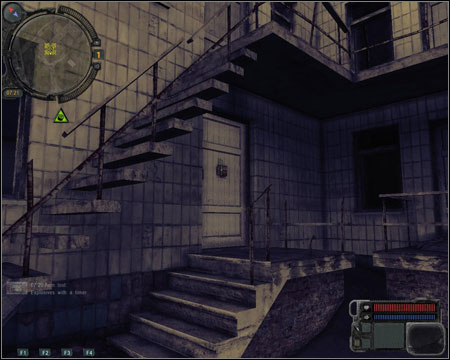
At the white point, go down the stairs. Blue marks stairs leading up. Find the source of the interference at the point marked on the map (screen) and get rid of it by destroying the planks. Jump through the hole and open the green fridge from which knocking can be heard. Return with the rescued soldier to the base. Now you have to talk with the Colonel. You will find him in the spot where the mechanic has been staying (point 3).
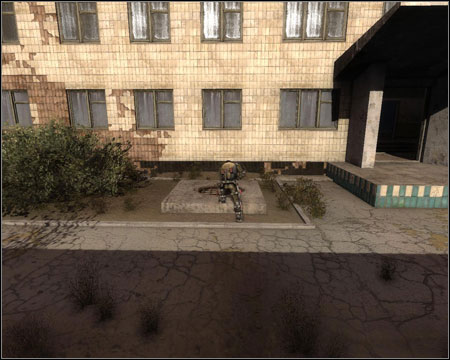
10. Unknown
Received from: automatically after mission 9
Beginning location: point 3 on the map
Target location: points 23, 16 on the map
Mission description:
Point 23 should interest you. Once you're there, the signal will move to point 16, where it will disappear. Approach the location and watch a cutscene (screen). Now you have to return to the soldiers' base, which will end the mission.
11. Evacuation
Received from: automatically after mission 10
Beginning location: point 3 on the map
Target location: points 24, 25, 26 on the map
Mission description:
Begin with waiting for the emission to end. Afterwards watch a cutscene and talk with the Colonel. He will order you to collect supplies from the mechanic and medic. Once you're ready (prepare lots and lots of ammo), talk with him again. This will begin a quite chaotic evacuation (screen) during which your task is to protect Strelok, who's marked on the map.

Your main enemies will be zombies attacking from every possible direction. From point 24 onward, your main enemies will be the jumping mutants. At point 25 you will stop for a while and experience hallucination. You have to hurry up the medic who's behind. You have to reach the choppers (point 26 - screen), while successively eliminating the enemies and then hold your position.
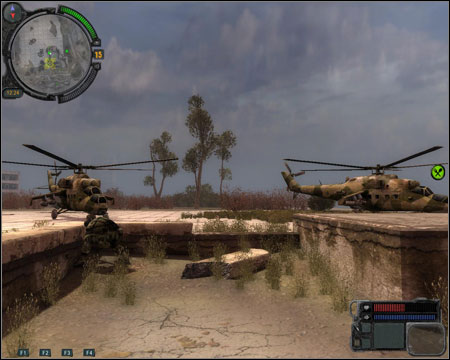
The last choice you will have to make is to leave the zone - you can stay if you want. The things you will see during the ending cutscene depend on your choices made during the game and who of your friends is still alive.
The laboratory is a quite complicated area, because of the minimap (each of the possible map versions has been presented below) and the amount of various passages, corridors and connections between the parts of the complex. I tried to mark as many passages connecting the maps as possible (the same number on both maps marks a passage). The documents have been marked with green points. The other points are described in the text below.
![You begin at point (0) of map [I] - Walkthrough - Laboratory X8 - Walkthrough - S.T.A.L.K.E.R.: Call of Pripyat - Game Guide and Walkthrough](https://game.lhg100.com/Article/UploadFiles/201512/2015121709251539.jpg)
You begin at point (0) of map [I]. Go left (not to the lifts, but the corridor). Open the door at the spot marked with a blue point (look out for a flying anomaly) and go down. Take the documents in the blue folder from the table (screen). Return to point (0).
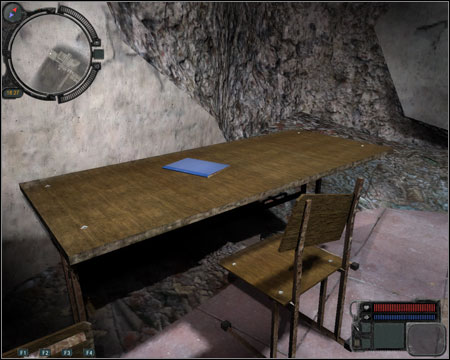
Go through the door marked with the orange point and once down, head right to the stairs at the white point. Upstairs, at (8) you will find a map leading to a small room (see - map [IV]), in which you will encounter e strange, living anomaly (red point - screen). Kill it and as a result of it, the equipment in the lab won't attack you anymore. Return to room at the white point at which you took the stairs. Dogs will attack you on your way back.
![Use the stairs (1) and go to the lower part of the laboratory (map [II]) - Walkthrough - Laboratory X8 - Walkthrough - S.T.A.L.K.E.R.: Call of Pripyat - Game Guide and Walkthrough](https://game.lhg100.com/Article/UploadFiles/201512/2015121709251597.jpg)
Use the stairs (1) and go to the lower part of the laboratory (map [II]). Jump over a chemical anomaly at the red point. Before you there's a flooded room in the middle of the hall. You will find more documents on one of the desks, next to a computer (screen). Afterwards, you will be attacked by dogs.
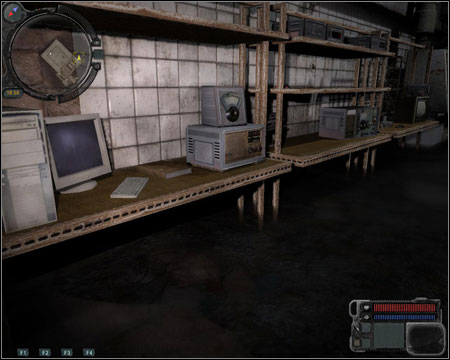
Enter the room at the white points and go down the stairs on the left (you can say they're under point (5)). Pick up the third series of documents from the machine (screen). Return up the stairs and move to the room with elevators (2), while looking out for chemical anomalies.
![Go through the elevator shaft (4), use the ladders and pass through the open cabin door (not through the elevator) to reach map [IV] - Walkthrough - Laboratory X8 - Walkthrough - S.T.A.L.K.E.R.: Call of Pripyat - Game Guide and Walkthrough](https://game.lhg100.com/Article/UploadFiles/201512/2015121709251507.jpg)
Go through the elevator shaft (4), use the ladders and pass through the open cabin door (not through the elevator) to reach map [IV]. Save your game and equip the Gauss. There are three Byuers in the room on the left. At the black point you will have to jump over a hole in the floor. Take the documents from the marked tables (screen). Return to the elevator shaft (4), go up into the cabin and you will get straight to map [I].
![Use the stairs at the red point (still map [I]) - Walkthrough - Laboratory X8 - Walkthrough - S.T.A.L.K.E.R.: Call of Pripyat - Game Guide and Walkthrough](https://game.lhg100.com/Article/UploadFiles/201512/2015121709251554.jpg)
Use the stairs at the red point (still map [I]). You will have to fight two Snorks at the black point. Use the stairs at (9) and enter the room on the left. You will end up on map [V]. Open the door at the red point and kill a Byuer. Take the last set of documents from the marked table (screen). Once you get back to (0), you will have to face a mind-controlling mutant, so don't keep eye contact with him.
![If you have completed mission 6 (One Shot), you should have a red access card, opening the door marked with a yellow point (map [I]) - Walkthrough - Laboratory X8 - Walkthrough - S.T.A.L.K.E.R.: Call of Pripyat - Game Guide and Walkthrough](https://game.lhg100.com/Article/UploadFiles/201512/2015121709251694.jpg)
If you have completed mission 6 (One Shot), you should have a red access card, opening the door marked with a yellow point (map [I]). Apart from the chemical anomaly in the middle of the room, it's a very pleasant depot (screen). You can now return to the soldiers' base, you have found everything you could.
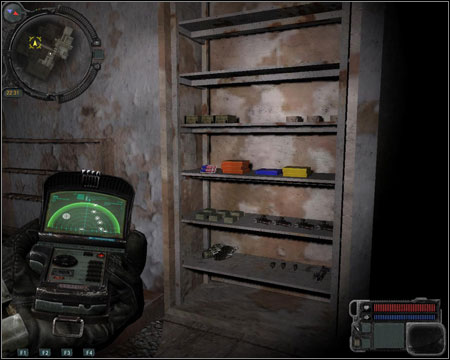


 Shadowrun: Hong Kong Game Guide & Walkthrough
 StarCraft II: Legacy of the Void Game Guide & Walkthrough
 S.T.A.L.K.E.R.: Clear Sky Game Guide & Walkthrough
 Sid Meiers Railroads! Game Guide & Walkthrough
 Sacred 2: Fallen Angel Game Guide & Walkthrough