

This unofficial Fallout 4 game guide offers a complex description of all of the game's content and a very thorough explanation of its mechanics. All of this should be very helpful in achieving a 100% completion without any unnecessary troubles. The guide has been divided into three big parts. The first part contains a strategy guide. The strategy guide chapters offer info on topics such as creating and developing a character, engaging in combat, exploring the world or interacting with other people. The second large part of the guide is a walkthrough with detailed descriptions of all main and optional quests. Each quest has descriptions of all of its available outcomes, as well info on how to unlock it and what types of rewards it has in store. The final third part of this guide is the world atlas. This enormous chapter contains primarily a high quality world map along with smaller maps of certain areas. Each map has a lot of icons informing mostly about the locations the player can unlock while exploring the world. Some of the more important locations (cities, outposts with friendly NPC's etc.) have been described in greater detail on separate pages. Another big part of the world atlas are the collectibles. The guide tells where the player should look for the bobbleheads, unique books and other items of great value. Fallout 4 is the next installment of the famous cRPG franchise set in the postapocalyptic world. This time around the players can visit the wastelands around the American city of Boston. The game is filled with tons of interesting things to do and it's also non-linear since many of the choices can lead to different outcomes.
Additionally we've used the bold font to mark the quest titles.
Jacek "Stranger" Halas, Patrick "yXu" Homa, Patryk Greniuk ()
This unofficial game guide for Fallout 4 is in fact a very big strategy guide dedicated for Bethesda's enormous RPG. Our strategy guide offfers more than a dozen different chapters. It covers both the basic elements of the game as well as more advanced topics. The initial chapters of the guide contain information on the controls for all three gaming platforms and a list of basic hints which should help out in starting out the campaign without any serious issues. A very important part of this strategy guide is a chapter on the main character. This chapter explains how the basic statistics work and it also tells how to develop your character in the game (starting builds, leveling up, best perks etc.). Chapters further in the guide are about the various mechanics of the game. You can find out more about exploring the world, engaging in combat, interacting with friendly characters, hacking terminals, opening locks, using the Pip-Boy, joining factions, doing some crafting and many other useful things. The next part of the strategy guide contains two large chapters about the companions (list of all available allies, areas where they can be recruited, their strong and weak points) and frequently asked questions (how to earn a lot of bottlecaps fast, where to find a good weapons and armor etc.). The final chapters of the strategy guide are mostly about maintaing settlements and earning achievements. Fallout 4 is a very big role-playing game published by Bethesda. Players in the game visit a postapocalyptic world where one wrong decision can lead to the quick death of the main character. Using this strategy guide should greatly reduce the risk of a sudden, unwanted end.
Additionally we've used the bold font to mark the quest titles.
Jacek "Stranger" Halas, Patrick "YxU" Homa, Patryk Greniuk ()

Move / Sprint (press the analogue stick)

Look around / Sneak (press the analogue stick)

Activate

Pip-Boy

Ready weapon / Reload the weapon

Jump

Favorite items

Favorite items

Favorite items

Favorite items

V.A.T.S.

Aim / Block

Punch / Throw a grenade / Power attack (hold the button)

Attack

Change the perspective (first or third person perspective)

Pause

Move / Sprint (press the analogue stick)

Look around / Sneak (press the analogue stick)

Activate

Pip-Boy

Ready weapon / Reload the weapon

Jump

Favorite items

Favorite items

Favorite items

Favorite items

V.A.T.S.

Aim / Block

Punch / Throw a grenade / Power attack (hold the button)

Attack

Change the perspective (first or third person perspective)

Pause

Move / Sprint

Sprint

Walk / run

Walk / run mode

Sneak up

Look around

Auto-movement

Activate

Pip-Boy

Weapon reload / hold: hide weapon

Jump

View favorites
 -
-
Favorite items #1-9

Favorite items #-

Favorite items #=

V.A.T.S.

Inventory

Journal

Statistics

Map

Radio

Perspective change (first or third person perspective view)/build (settlement)

Camera adjustment

Pause / Menu

Quick save

Quick load

Debug console
1. Thoroughly plan your character development. Think about what gameplay style you prefer and check all available perks. Later in the game it could be too late to change some decisions. If you don't have any idea how to develop your character, use one of our example builds.
2. Save your game frequently. You don't have to always remember about that, simply set the Pip-boy to automatically save the game every five minutes. This will allow you to avoid the frustrating necessity to repeat the same part of the game if you die.
3. Don't wait with distributing your skill points. Try to do it whenever you gain a new level. Even a single new skill can greatly strengthen your character.
4. Explore. Don't be afraid to walk off the main road. In Fallout 4 you will find great number of places which you can check and quests that you can complete. You will see only a small fragment of the game by completing only the main storyline.
5. Thoroughly search every place you find. Don't be afraid to collect all the items that have any value. If you cannot use them, leave them in one of the chests in your settlement or simply sell them.
6. Talk with the characters you meet. Most of them have something interesting to say. Some of them, even ones with no unique name, can give you a quest to complete.
7. Use few weapon types. The basic equipment that you will have should consist of a handgun, automatic rifle, sniper rifle and a melee weapon. Each of these weapons will be useful in different circumstances and many times will save your life.
8. Assign your favorite weapon, Stimpak, RadAway and food to keyboard shortcuts. During a critical point of the battle, when you will lose large amounts of health or you will run out of ammunition, you will be able to quickly help yourself.
9. Don't be afraid to use workshops. Despite the fact that you won't be able to fully use them at the beginning of the game, try to regularly upgrade your armor and weapon. Even small changes can make the game much easier.
10. Build yourself a house. The game allows you to build even few settlements to which you will be able to bring new citizens and where you can rest and upgrade your equipment. You should develop at least one settlement since the start of the game and change it into your main base of operations.
11. Use the V.A.T.S. system which is responsible for automatically selecting enemies' body parts at which you will aim. It is especially useful against small and quick opponents, such as bugs or dogs.
12. Don't be afraid to use mines or grenades. You will find them quite regularly and they can be very effective during battles, especially against large groups of opponents.
13. Actively use drugs and medicaments. Strengthening your character will be especially useful before harder battles. However, watch out, you can become addicted to these stimulants.
14. Collect magazines and guides. Each of them will give you a permanent bonus to specific statistics.
Character development system used in Fallout 4 is called S.P.E.C.I.A.L. This shortcut's origin is in the first letters of the names of character parameters: S - Strength, P - Perception, etc.
Your first contact with S.P.E.C.I.A.L. system will occur during the conversation with the representative of the Vault-Tec Company, who will come to your door at the start of the game. You will be tasked with distributing 21 points to various parameters describing your personality and character. You have to choose from strength, perception, endurance, charisma, intelligence, agility and luck. Each of these parameters will determine how your character will behave and how others will react to you. Some choices will also influence the possibility to make certain choices during the game. For example, a charismatic character will be able to negotiate a better reward for completing the quest. Luckily, decisions you make can be later slightly changed by distributing the points you receive when gaining new experience levels.
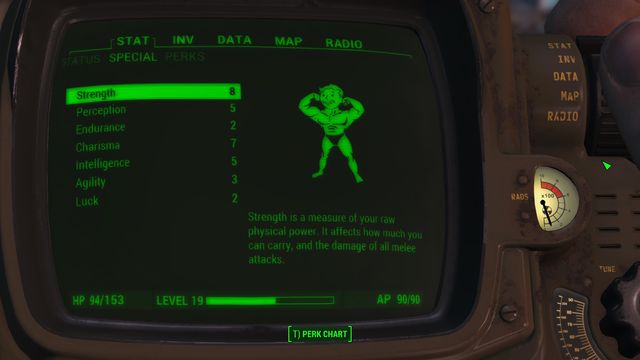 You can check your character's statistics in your Pip-Boy. This is also where you will distribute the points which you will receive after gaining new level.
You receive experience points by completing quests, killing enemies or even by opening closed chests. Thanks to experience, you gain new levels. With each new level you receive one ability point which you can spend in the "stat" tab in Pip-boy ("T" key).
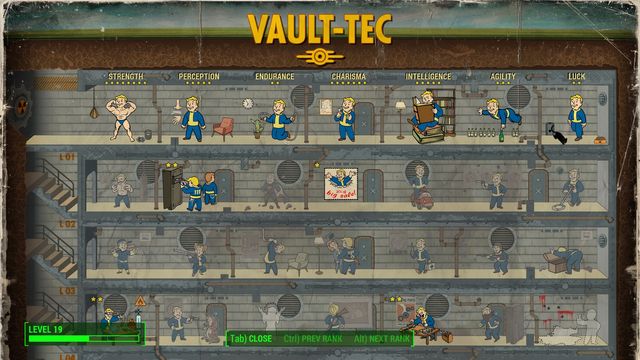 You don't need to distribute the points from the top to the bottom. Nothing stops you from setting the first ability on level 8.
You can assign ability point to one of the seventy perks which are the abilities of your character. These perks are the most important when developing the character. By selecting them you decide about the specialization of your character. In theory, there is no maximum level cap for your character, so if you are persistent enough, you can unlock all of over 200 bonuses. However, the truth is, not many players will reach level higher than 50.
Almost each perk has few levels and unlocking it requires meeting certain requirements. You will always have to have one statistic developed to a certain point and a specific experience level of your character. If your character has too little points of a specific statistic, you can spend one ability point on increasing it.
Fallout 4 offers great options to customize your character. First you must properly distribute your statistic points, later in the game you can pick from 70 different abilities every time you gain a level. But what if you don't have an idea how to develop your character or this is the first time you play a Fallout game? How to start? On what should you spend your statistic points? What perks to choose? Below you will find the basic and most versatile character build. It should be effective in most situations.
The character we present will focus on using and upgrading gunfire. It will be rarely using the V.A.T.S. system during battle and will have basic armor upgrade. Universal soldier must be able to pick the locks, at least on medium level and he should be able to hack basic terminals. You cannot forget about skills related to leadership and provide your character with perks that will allow you to manage the settlements, which are an important aspect of Fallout 4.
You will have 21 points to distribute. The character you create should have below statistics:
Strength
7
Perception
4
Endurance
5
Charisma
6
Intelligence
3
Agility
2
Luck
1
To provide versatility to your character, you must select perks from different "trees". Below you will find a list of 8 best skills for your character. The order in which you pick them has some importance, but the world won't fall if you change it slightly. When you have some spare points, you can distribute them on other abilities.
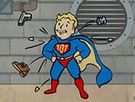 Toughness
Rank 1: You now have +10 damage resistance (Requirements: Endurance 1);
Rank 2: You now have +20 damage resistance (Requirements: Level 9, Endurance 1);
Rank 3: You now have +30 damage resistance (Requirements: Level 18, Endurance 1);
Rank 4: You now have +40 damage resistance (Requirements: Level 31, Endurance 1);
Rank 5: You now have +50 damage resistance (Requirements: Level 46, Endurance 1).
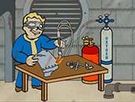 Armorer
Rank 1: Protect yourself from the dangers of the Wasteland with access to base level and Rank 1 armor mods. (Requirements: Strength 3);
Rank 2: You gain access to Rank 2 armor mods (Requirements: Level 13, Strength 3);
Rank 3: You gain access to Rank 3 armor mods (Requirements: Level 25, Strength 3);
Rank 4: You gain access to Rank 4 armor mods (Requirements: Level 39, Strength 3).
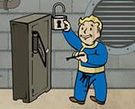
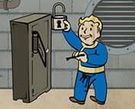 Locksmith
Rank 1: Your nimble fingers allow you to pick Advanced locks. (Requirements: Perception 4);
Rank 2: You can pick Expert locks. (Requirements: Level 7, Perception 4);
Rank 3: You can pick Master locks. (Requirements: Level 18, Perception 4);
Rank 4: Your bobby pins never break during lockpicking. (Requirements: Level 41, Perception 4).
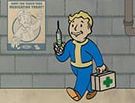 Medic
MedicRank 1: Stimpaks restore 40% of lost Health, and RadAway removes 40% of radiation. (Requirements: Intelligence 2);
Rank 2: Stimpaks restore 60% of lost Health, and RadAway removes 60% of radiation. (Requirements: Level 18, Intelligence 2);
Rank 3: Stimpaks restore 80% of lost Health, and RadAway removes 80% of radiation. (Requirements: Level 30, Intelligence 2);
Rank 4: Stimpaks and RadAway restore all lost health and radiation, and work much more quickly. (Requirements: Level 49, Intelligence 2).
 Gun Nut
Rank 1: You gain access to base level and Rank 1 gun mods. (Requirements: Intelligence 3);
Rank 2: You gain access to Rank 2 gun mods. (Requirements: Level 13, Intelligence 3);
Rank 3: You gain access to Rank 3 gun mods. (Requirements: Level 25, Intelligence 3);
Rank 4: You gain access to Rank 4 gun mods. (Requirements: Level 39, Intelligence 3).
 Stead Aim
Rank 1: Hip-fire accuracy is improved when firing any gun. (Requirements: Strength 7);
Rank 2: Hip-fire accuracy is improved even more when firing any gun. (Requirements: Level 28, Strength 7).
 Commando
Rank 1: Rigorous combat training means automatic weapons do 20% more damage (Requirements: Agility 2);
Rank 2: Attacks with automatic weapons do 40% more damage, with improved hip fire accuracy. (Requirements: Level 11, Agility 2);
Rank 3: Attacks with automatic weapons do 60% more damage. Hip fire accuracy is improved even more. (Requirements: Level 21, Agility 2);
Rank 4: Attacks with automatic weapons do 80% more damage and gain a chance to stagger opponents. (Requirements: Level 35, Agility 2);
Rank 5: Your automatic weapons now do double damage and have a greater chance to stagger opponents. (Requirements: Level 49, Agility 2).
 Local Leader
Rank 1: As the ruler everyone turns to, you are able to establish supply lines between your workshop settlements. (Requirements: Charisma 6);
Rank 2: You can build stores and workstations at workshop settlements. (Requirements: Level 14, Charisma 6).
Gunfire is important in Fallout 4. It is the basic tool used for eliminating enemies. Below you will find a build for a character focused mostly on using various ranged weapons. The character development is focused on accuracy, reload speed and the possibility to upgrade your equipment. Of course, it is wise to occasionally invest in some other useful abilities, such as lockpicking, terminal hacking on increasing your character's resistance.
You have 21 points to distribute. Your character statistics should be as follows:
Strength
7
Perception
3
Endurance
2
Charisma
1
Intelligence
6
Agility
8
Luck
1
If you have a few spare points during the game, you can use them to increase charisma or endurance of your character.
The skills you select should mostly focus on gunfire. Below you will see eight most important and interesting perks for a shooter. It's not a closed list - as you will develop your character and obtain new statistic points, you can spend them on other abilities.
 Gunslinger
Rank 1: Non-automatic pistols do 20% more damage. (Requirements: Agility 1);
Rank 2: Non-automatic pistols now do 40% more damage and have increased range. (Requirements: Level 7, Agility 1);
Rank 3: Non-automatic pistols now do 60% more damage and range is increased even further. (Requirements: Level 15, Agility 1);
Rank 4: Non-automatic pistols now do 80% more damage and their attacks can disarm opponents. (Requirements: Level 27, Agility 1);
Rank 5: Non-automatic pistols now do double damage. Their attacks have a much better chance to disarm opponents, and may even cripple a limb. (Requirements: Level 42, Agility 1)
 Rifleman
Rank 1: Keep your distance long and your kill-count high. Attacks with non-automatic rifles do 20% more damage. (Requirements: Perception 2);
Rank 2: Attacks with non-automatic rifles do 40% more damage and ignore 15% of a target's armor. (Requirements: Level 9, Perception 2);
Rank 3: Attacks with non-automatic rifles do 60% more damage and ignore 20% of a target's armor. (Requirements: Level 18, Perception 2);
Rank 4: Attacks with non-automatic rifles do 80% more damage and ignore 25% of a target's armor. They also have a slight chance of crippling a limb. (Requirements: Level 31, Perception 2);
Rank 5: Attacks with non-automatic rifles do double damage and ignore 30% of a target's armor. They also have a slightly higher chance of crippling a limb. (Requirements: Level 46, Perception 2).
 Commando
Rank 1: Rigorous combat training means automatic weapons do 20% more damage (Requirements: Agility 2);
Rank 2: Attacks with automatic weapons do 40% more damage, with improved hip fire accuracy. (Requirements: Level 11, Agility 2);
Rank 3: Attacks with automatic weapons do 60% more damage. Hip fire accuracy is improved even more. (Requirements: Level 21, Agility 2);
Rank 4: Attacks with automatic weapons do 80% more damage and gain a chance to stagger opponents. (Requirements: Level 35, Agility 2);
Rank 5: Your automatic weapons now do double damage and have a greater chance to stagger opponents. (Requirements: Level 49, Agility 2).
 Stead Aim
Rank 1: Hip-fire accuracy is improved when firing any gun. (Requirements: Strength 7);
Rank 2: Hip-fire accuracy is improved even more when firing any gun. (Requirements: Level 28, Strength 7).
 Medic
MedicRank 1: Stimpaks restore 40% of lost Health, and RadAway removes 40% of radiation. (Requirements: Intelligence 2);
Rank 2: Stimpaks restore 60% of lost Health, and RadAway removes 60% of radiation. (Requirements: Level 18, Intelligence 2);
Rank 3: Stimpaks restore 80% of lost Health, and RadAway removes 80% of radiation. (Requirements: Level 30, Intelligence 2);
Rank 4: Stimpaks and RadAway restore all lost health and radiation, and work much more quickly. (Requirements: Level 49, Intelligence 2).
 Quick Hands
Rank 1: You can reload all guns faster. (Requirements: Agility 8);
Rank 2: Reloading guns costs no Action Points in V.A.T.S. (Requirements: Level 28, Agility 8).
 Gun Nut
Rank 1: You gain access to base level and Rank 1 gun mods. (Requirements: Intelligence 3);
Rank 2: You gain access to Rank 2 gun mods. (Requirements: Level 13, Intelligence 3);
Rank 3: You gain access to Rank 3 gun mods. (Requirements: Level 25, Intelligence 3);
Rank 4: You gain access to Rank 4 gun mods. (Requirements: Level 39, Intelligence 3).
 Science!
Rank 1: Take full advantage of advanced technology with access to base level and Rank 1 high-tech mods. (Requirements: Intelligence 6);
Rank 2: You gain access to Rank 2 high-tech mods. (Requirements: Level 17, Intelligence 6);
Rank 3: You gain access to Rank 3 high-tech mods. (Requirements: Level 28, Intelligence 6);
Rank 4: You gain access to Rank 4 high-tech mods. (Requirements: Level 41, Intelligence 6).
There is a collector in all of us. But what if it is the main purpose in life of a player? Such player can build a peddler character in Fallout 4. His main objective is to collect and drag as many items as possible and successfully trade them for money.
Maximum capacity is very important for a peddler as it allows him to drag more items. You also cannot forget about trading skills, they will allow you to trade equipment you don't need for bottlecaps. Every collector should have a place where he will gather his collection. Because of that, it is wise to invest some points in skills that allow you to develop your settlement.
You have 21 points to distribute. Your character's statistics should be as follows:
Strength
8
Perception
4
Endurance
2
Charisma
6
Intelligence
5
Agility
1
Luck
2
Strength and Charisma are the most important. Use all spare statistic points to develop them further.
 Strong Back
Rank 1: What are you, part pack mule? Gain +25 to carry weight (Requirements: Strength 6);
Rank 2: You now have +50 to carry weight. (Requirements: Level 10, Strength 6);
Rank 3: When overencumbered, you can use Action Points to run. (Requirements: Level 20, Strength 6);
Rank 4: When overencumbered, you can fast travel. (Requirements: Level 30, Strength 6).
 Locksmith
Rank 1: Your nimble fingers allow you to pick Advanced locks. (Requirements: Perception 4);
Rank 2: You can pick Expert locks. (Requirements: Level 7, Perception 4);
Rank 3: You can pick Master locks. (Requirements: Level 18, Perception 4);
Rank 4: Your bobby pins never break during lockpicking. (Requirements: Level 41, Perception 4).
 Cap Collector
Rank 1: Buying and selling prices at vendors are better. (Requirements: Charisma 1);
Rank 2: Buying and selling prices of vendors are now much better. (Requirements: Level 20, Charisma 1);
Rank 3: You can now invest a total of 500 caps to raise a store's buying capacity. (Requirements: Level 41, Charisma 1);
 Scrapper
Rank 1: Waste not, want not! You can salvage uncommon components like screws, aluminum, and copper when scrapping weapons and armor. (Requirements: Intelligence 5);
Rank 2: You can salvage rare components like circuitry, nuclear material, and fiber optics when scrapping weapons and armor. Items with favorite components are highlighted. (Requirements: Level 23, Intelligence 5).
 Fortune Finder
Rank 1: You find more bottle caps in containers. (Requirements: Luck 1);
Rank 2: You find even more bottle caps in containers. (Requirements: Level 5, Luck 1);
Rank 3: You find even more bottle caps in containers. (Requirements: Level 25, Luck 1);
Rank 4: You find even more bottle caps in containers, and there is a chance of enemies exploding into a shower of caps when you kill them. (Requirements: Level 40, Luck 1);
 Scrounger
Rank 1: You find more ammunition in containers. (Requirements: Luck 2);
Rank 2: You find even more ammunition in containers. (Requirements: Level 7, Luck 2);
Rank 3: You find even more ammunition in containers. (Requirements: Level 24, Luck 2);
Rank 4: You find even more ammunition in containers. (Requirements: Level 37, Luck 2).
 Gun Nut
Rank 1: You gain access to base level and Rank 1 gun mods. (Requirements: Intelligence 3);
Rank 2: You gain access to Rank 2 gun mods. (Requirements: Level 13, Intelligence 3);
Rank 3: You gain access to Rank 3 gun mods. (Requirements: Level 25, Intelligence 3);
Rank 4: You gain access to Rank 4 gun mods. (Requirements: Level 39, Intelligence 3).
 Local Leader
Rank 1: As the ruler everyone turns to, you are able to establish supply lines between your workshop settlements. (Requirements: Charisma 6);
Rank 2: You can build stores and workstations at workshop settlements. (Requirements: Level 14, Charisma 6).

Strength is a measure of your raw physical power. It affects how much you can carry, and the damage of all melee attacks.
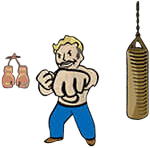
Channel your chi to unleash devastating fury! Punching attacks do 20% more damage to your opponent.
Rank
Requirements
Description
1
STR 1
Channel your chi to unleash devastating fury! Punching attacks do 20% more damage to your opponent.
2
STR 1
Punching attacks now do 40% more damage and can disarm your opponent.
3
STR 1
Punching attacks now do 60% more damage. Unarmed Power Attacks have a chance to cripple one of your opponent's limbs.
4
STR 1
Punching attacks now do 80% more damage. Unarmed Power Attacks have an increased chance to cripple one of your opponent's limbs.
5
STR 1 / LVL 46
Punching attacks now do double damage. Criticals in V.A.T.S. will paralyze your opponent.

Big Leagues - Swing for the fences! Do 20% more melee weapon damage.
Rank
Requirements
Description
1
STR 2
Swing for the fences! Do 20% more melee weapon damage.
2
STR 2
You now do 40% more melee weapon damage and gain a chance to disarm your opponent.
3
STR 2
You now do 60% more melee weapon damage and gain an increased chance to disarm your opponent.
4
STR 2
You now do 80% more melee weapon damage and hit all targets in front of you.
5
STR 2 / LVL 42
You now do double damage with a melee weapon, and gain a chance to cripple your opponent, or grand slam their head clean off!
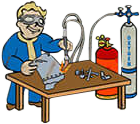
Armorer - Protect yourself from the dangers of the Wasteland with access to base level and Rank 1 armor mods.
Rank
Requirements
Description
1
STR 3 / LVL
Protect yourself from the dangers of the Wasteland with access to base level and Rank 1 armor mods.
2
STR 3 / LVL 13
You gain access to Rank 2 armor mods
3
STR 3 / LVL 25
You gain access to Rank 3 armor mods
4
STR 3 / LVL 39
You gain access to Rank 4 armor mods
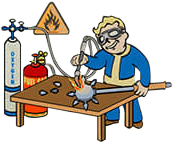
Blacksmith - Fire up the forge and gain access to base level and Rank 1 melee weapon mods. (3 Ranks)
Rank
Requirements
Description
1
STR 4
Fire up the forge and gain access to base level and Rank 1 melee weapon mods.
2
STR 4
You gain access to Rank 2 melee weapon mods
3
STR 4
You gain access to Rank 3 melee weapon mods

Heavy Gunner - Thanks to practice and conditioning, heavy guns do 20% more damage. (5 Ranks)
Rank
Requirements
Description
1
STR 5
Thanks to practice and conditioning, heavy guns do 20% more damage.
2
STR 5
Heavy guns now do 40% more damage, and have improved hip fire accuracy.
3
STR 5
Heavy guns now do 60% more damage. Hip fire accuracy is increased even more.
4
STR 5
Heavy guns now do 80% more damage and have a chance to stagger your opponent.
5
STR 5
Heavy guns now do double damage.
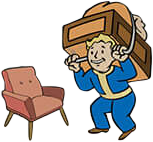
Strong Back - What are you, part pack mule? Gain +25 to carry weight. (4 Ranks)
Rank
Requirements
Description
1
STR 6
What are you, part pack mule? Gain +25 to carry weight
2
STR 6 / LVL 10
You now have +50 to carry weight.
3
STR 6 / LVL 20
When overencumbered, you can use Action Points to run.
4
STR 6 / LVL 30
When overencumbered, you can fast travel.

Stead Aim - Stay on target! Hip-fire accuracy is improved when firing any gun. (2 Ranks)
Rank
Requirements
Description
1
STR 7
Stay on target! Hip-fire accuracy is improved when firing any gun.
2
STR 7 / LVL 28
Hip-fire accuracy is improved even more when firing any gun.

Basher - Get up close and personal! Gun bashing does 25% more damage. (4 Ranks)
Rank
Requirements
Description
1
STR 8
Get up close and personal! Gun bashing does 25% more damage.
2
STR 8 / LVL 5
Gun bashing now does 50% more damage and possibly cripples your opponent.
3
STR 8 / LVL 14
Gun bashing now does 75% more damage and has an increased chance to cripple your opponent.
4
STR 8 / LVL 26
Gun bashing does double damage and has an increased chance to cripple your opponent. It may also inflict a Critical Hit.
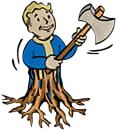
Rooted - You're part tree! While standing still, you gain +25 Damage Resistance and your melee and unarmed attacks deal 25% more damage (3 Ranks)
Rank
Requirements
Description
1
STR 9
You're part tree! While standing still, you gain +25 Damage Resistance and your melee and unarmed attacks deal 25% more damage.
2
STR 9 / LVL 22
While standing still, you now gain +50 Damage Resistance and your melee and unarmed attacks deal 50% more damage.
3
STR 9 / LVL 43
While standing still, you may automatically disarm enemies that use melee weapons against you.
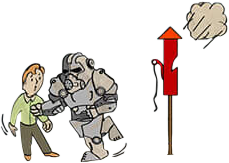
Pain Train - Choo choo! All aboard! While wearing Power Armor, sprinting into enemies hurts and staggers them. (Robots and oversized enemies are immune to stagger.) (3 Ranks)
Rank
Requirements
Description
1
STR 10
Choo Choo! All aboard! While wearing Power Armor, sprinting into enemies hurts and staggers them. (Robots and oversized enemies are immune to the stagger.)
2
STR 10 / LVL 24
Sprinting into enemies while wearing Power Armor now causes severe damage and a more powerful stagger. (Robots and oversized enemies are immune to the stagger.)
3
STR 10 / LVL 50
Sprinting into enemies while wearing Power Armor now causes massive damage and knocks them down. Impact landing near enemies inflicts even more damage.
Perception is your environmental awareness and "sixth sense," and affects weapon accuracy in V.A.T.S.
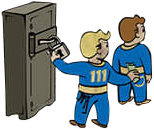
Pickpocket - Your quick hands and sticky fingers make picking pockets 25% easier.
Rank
Requirements
Description
1
PER 1
Your quick hands and sticky fingers make picking pockets 25% easier.
2
PER 1
Picking pockets is now 50% easier. You can place a live grenade in a person's inventory.
3
PER 1
Picking pockets is now 75% easier, and you can steal equipped weapons.
4
PER 1
Picking pockets is now twice as easy, and you can steal equipped items.

Rifleman - Keep your distance long and your kill-count high. Attacks with non-automatic rifles do 20% more damage.
Rank
Requirements
Description
1
PER 2
Keep your distance long and your kill-count high. Attacks with non-automatic rifles do 20% more damage
2
PER 2 / LVL 8
Attacks with non-automatic rifles do 40% more damage and ignore 15% of a target's armor.
3
PER 2 / LVL 28
Attacks with non-automatic rifles do 60% more damage and ignore 20% of a target's armor.
4
PER 2 / LVL 38
Attacks with non-automatic rifles do 80% more damage and ignore 25% of a target's armor. They also have a slight chance of crippling a limb.
5
PER 2 / LVL 46
Attacks with non-automatic rifles do double damage and ignore 30% of a target's armor. They also have a slightly higher chance of crippling a limb.
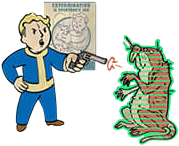
Awareness - To defeat your enemies, you know their weaknesses! You can view a targets specific damage resistances in V.A.T.S.
Rank
Requirements
Description
1
PER 3
To defeat your enemies, know their weaknesses! You can view a target's specific damage resistances in V.A.T.S.
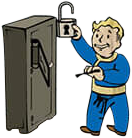
Locksmith - Your nimble fingers allow you to pick Advanced locks.
Rank
Requirements
Description
1
PER 4
Your nimble fingers allow you to pick advanced locks.
2
PER 4 / LVL 7
You can pick Expert locks.
3
PER 4 / LVL 18
You can pick Master locks.
4
PER 4 / LVL 41
Your bobby pins never break during lockpicking.

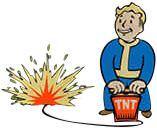
Demolition Expert - The bigger the boom, the better! Your explosives do 25% more damage, and you can craft explosives at any Chemistry Station.
Rank
Requirements
Description
1
PER 5
The bigger the boom, the better! Your explosives do 25% more damage, and you can craft explosives at any Chemistry Station.
2
PER 5
Your explosives do 50% more damage, and grenades gain a throwing arc.
3
PER 5
Your explosives do 75% more damage and affect a larger area.
4
PER 5
Your explosives now do double damage. Mines and grenades shot in V.A.T.S explode for double damage, too.

Night Person - You are a creature of the night! Gain +2 to Intelligence and Perception between the hours of 6:00 p.m. and 6:00 a.m.
Rank
Requirements
Description
1
PER 6
You are a creature of the night! Gain +2 to Intelligence and Perception between the hours of 6:00 p.m. and 6:00 a.m.
2
PER 6 / LVL 25
You now have +3 to Intelligence and Perception between the hours of 6:00 p.m. and 6:00 a.m., and night vision when sneaking.
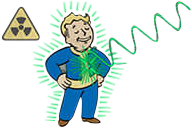
Refractor - You must be part mirror! Instantly gain +10 Energy Resistance.
Rank
Requirements
Description
1
PER 7
You must be part mirror! Instantly gain +10 Energy Resistance.
2
PER 7 / LVL 11
You now have +20 Energy Resistance.
3
PER 7 / LVL 21
You now have +30 Energy Resistance.
4
PER 7 / LVL 35
You now have +40 Energy Resistance.
5
PER 7 / LVL 42
You now have +50 Energy Resistance.
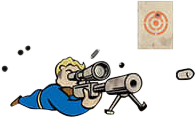
Sniper - It's all about focus. You have improved control and can hold your breath longer when aiming with scopes.
Rank
Requirements
Description
1
PER 8
It's all about focus. You have improved control and can hold your breath longer when aiming with scopes.
2
PER 8 / LVL 13
Non-automatic, scoped rifles have a chance of knocking down your target.
3
PER 8 / LVL 26
Non-automatic, scoped rifles gain +25% accuracy to head shot in V.A.T.S.
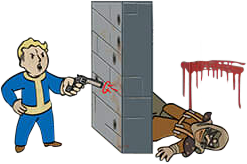
Penetrator - There's no place to hide! In V.A.T.S. you can target an enemy's body parts that are blocked by cover, with a decrease in accuracy.
Rank
Requirements
Description
1
PER 9
There's no place to hide! In V.A.T.S you can target an enemy's body parts that are blocked by cover, with a decrease in accuracy.
2
PER 9 / LVL 28
In V.A.T.S when you target an enemy's body parts that are blocked by cover, there is no decrease in accuracy.
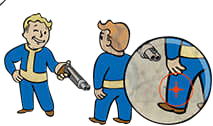
Concentrated Fire - Stay focused! In V.A.T.S. every attack on the same body part gains +10% accuracy.
Rank
Requirements
Description
1
PER 10
Stay Focused! In V.A.T.S every attack on the same body part gains +10% accuracy.
2
PER 10 / LVL 26
In V.A.T.S every attack on the same body part gains +15% accuracy.
3
PER 10 / LVL 50
In V.A.T.S every attack on the same body part gains +20% accuracy and does 20% more damage.

Endurance is a measure of your overall physical fitness. It affects your total Health and the Action Point drain from sprinting.
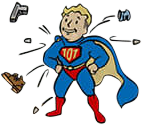
Toughness - You now have +20 Damage Resistance.
Rank
Requirements
Description
1
END 1
If nothing else, you can take a beating! Instantly gain +10 Damage Resistance
2
END 1
You now have +20 damage resistance.
3
END 1
You now have +30 damage resistance.
4
END 1
You now have +40 damage resistance.
5
END 1
You now have +50 damage resistance.
Lead Belly - Your digestive tract has adjusted to the weirdness of the Wasteland! Take less radiation from eating or drinking.
Rank
Requirements
Description
1
END 2
Your digestive tract has adjusted to the weirdness of the Wasteland! Take less radiation from eating or drinking.
2
END 2
You take even less radiation from eating or drinking.
3
END 2
You take no radiation from eating or drinking.

Life Giver - You instantly gain another +20 maximum Health.
Rank
Requirements
Description
1
END 3
You embody wellness! Instantly gain +20 maximum Health.
2
END 3 / LVL 8
You instantly gain another +20 maximum Health.
3
END 3
You instantly gain another +20 maximum Health, and slowly regenerate lost Health.
Chem Resistant - All the rush without the hassle! You're 50% less likely to get addicted when consuming chems.
Rank
Requirements
Description
1
END 4
All the rush without the hassle! You're 50% less likely to get addicted when consuming Chems
2
END 4
You gain complete immunity to chem addiction.

Aquaboy - Water is your ally. You no longer take radiation damage from swimming, and can breath underwater.
Rank
Requirements
Description
1
END 5
Water is your ally. You no longer take radiation damage from swimming, and can breathe underwater
2
END 5
You become totally undetectable while submerged.

Rad Resistant - Exposure to the Wasteland has made you more resilient, instantly granting +10 Radiation Resistance.
Rank
Requirements
Description
1
END 6
Exposure to the Wasteland has made you more resilient, instantly granting +10 Radiation Resistance.
2
END 6 / LVL 13
You now have +20 Radiation Resistance.
3
END 6 / LVL 26
You now have +30 Radiation Resistance.

Adamantium Skeleton - Your skeleton has been infused with indestructible metal, reducing limb damage by 30%.
Rank
Requirements
Description
1
END 7
Your skeleton has been infused with indestructible metal, reducing limb damage by 30%.
2
END 7 / LVL 13
Your limb damage is now reduced by 60%.
3
END 7 / LVL 26
Your limb damage is completely eliminated.
Cannibal - Feast on mortal flesh to heal your wounds! Eating human corpses restores Health.
Rank
Requirements
Description
1
END 8
Feast on mortal flesh to heal your wounds! Eating human corpses restores Health.
2
END 8 / LVL 19
Eating Ghoul or Super Mutant corpses restores Health.
3
END 8 / LVL 38
Eating human, Ghoul or Super Mutant corpses now restores a significant amount of Health.
Ghoulish - Sure, you're still human - on the outside! Radiation now regenerates your lost Health.
Rank
Requirements
Description
1
END 9
Sure, you're still human - on the outside! Radiation now regenerates your lost Health.
2
END 9 / LVL 24
Radiation now regenerates even more of your lost Health.
3
END 9 / LVL 48
Radiation now regenerates even more of your lost Health, and some Feral Ghouls will randomly become friendly.

Solar Powered - Catch some rays! Gain +2 to Strength and Endurance between the hours of 6:00 a.m. and 6:00 p.m.
Rank
Requirements
Description
1
END 10
Catch some rays! Gain +2 to Strength and Endurance between the hours of 6:00a.m. and 6:00p.m.
2
END 10 / LVL 27
Sunlight slowly heals your radiation damage.
3
END 10 / LVL 50
Sunlight slowly regenerates your lost Health.

Charisma is your ability to charm and convince others. It affects your success to persuade in dialogue and prices when you barter.
Cap Collector - Buying and selling prices at vendors are now much better.
Rank
Requirements
Description
1
CH 1
You've mastered the art of the deal! Buying and selling prices at vendors are better.
2
CH 1
Buying and selling prices of vendors are now much better.
3
CH 1
You can now invest a total of 500 caps to raise a store's buying capacity.

Lady Killer - You're charming... and dangerous. Women suffer +5% damage in combat, and are easier to persuade in dialogue.
Rank
Requirements
Description
1
CH 2
You're charming... and dangerous. Men/Women suffer +5% damage in combat, and are easier to persuade in dialogue.
2
CH 2
Men/Women now suffer +10% damage in combat, and are even easier to persuade in dialogue. They are also easier to pacify with the Intimidation perk.
3
CH 2
Men/Women now suffer +15% damage in combat, and are much easier to persuade in dialogue. They are now even easier to pacify with the Intimidation perk.

Lone Wanderer - Who needs friends, anyway? When adventuring without a companion, you take 15% less damage and carry weight increases by 50.
Rank
Requirements
Description
1
CH 3
Who needs friends, anyway? When adventuring without a companion, you take 15% less damage and carry weight increases by 50.
2
CH 3 / LVL 17
When adventuring without a companion, you take 20% less damage and carry weight increases by 100
3
CH 3 / LVL 40
When adventuring without a companion, you do 25% more damage.
Attack Dog - Your faithful canine companion can hold an enemy, giving you a greater chance to hit them in V.A.T.S.
Rank
Requirements
Description
1
CH 4
Your faithful canine companion can hold an enemy, giving you a greater chance to hit them in V.A.T.S.
2
CH 4
When your dog holds an enemy, there's a chance he'll cripple the limb he's biting.
3
CH 4
When your dog holds an enemy, there's a chance he'll cause them to bleed.

Animal Friend - Commune with beasts! With your gun, aim at any animal below your level and gain a chance to pacify it.
Rank
Requirements
Description
1
CH 5
Commune with beasts! With your gun, aim at any animal below your level and gain a chance to pacify it.
2
CH 5
When you successfully pacify an animal, you can incite it to attack
3
CH 5
When you successfully pacify an animal, you can give it specific commands

Local Leader - As the ruler everyone turns to, you are able to establish supply lines between your workshop settlements.
Rank
Requirements
Description
1
CH 6
As the ruler everyone turns to, you are able to establish supply lines between your workshop settlements.
2
CH 6 / LVL 14
You can build stores and workstations at workshop settlements.
Party Boy - Nobody has a good time like you! There's no chance you'll get addicted to alcohol.
Rank
Requirements
Description
1
CH 7
Nobody has a good time like you! There's no chance you'll get addicted to alcohol.
2
CH 7 / LVL 15
The effects of alcohol are doubled.
3
CH 7 / LVL 37
Your Luck is increased by 3 while you're under the influence of alcohol.

Traditional - Because you lead by example, your companion does more damage in combat, and cannot hurt you.
Rank
Requirements
Description
1
CH 8
Because you lead by example, your companion does more damage in combat, and cannot hurt you.
2
CH 8 / LVL 19
Your companion resists more damage in combat, and can't be harmed by your attacks.
3
CH 8 / LVL 43
Your companion can carry more items.
Wasteland Whisperer - Master the post-apocalypse! With your gain, aim at any Wasteland creature below your level and gain a chance to pacify it.
Rank
Requirements
Description
1
CH 9
Master the post-apocalypse! With your gun, aim at any Wasteland creature below your level and gain a chance to pacify it.
2
CH 9 / LVL 21
When you successfully pacify a creature, you can incite it to attack.
3
CH 9 / LVL 49
When you successfully pacify a creature, you can give it specific commands.
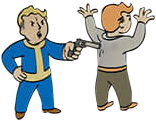
Intimidation - Time to show everyone who's boss! With your gun, aim at any human opponent below your level and gain a chance to pacify them.
Rank
Requirements
Description
1
CH 10
Time to show everyone who's boss! With your gun, aim at any human opponent below your level and gain a chance to pacify them.
2
CH 10 / LVL 23
When you successfully pacify someone, you can incite them to attack.
3
CH 10 / LVL 50
When you successfully pacify someone, you can give them specific commands.

Intelligence is a measure of your overall mental acuity, and affects the number of Experience Points earned.

V.A.N.S. - Let Vault-Tec guide you! The path to your closest quest target is displayed in V.A.T.S. (1 Ranks)
Rank
Requirements
Description
1
INT 1
Let Vault-Tec guide you! The path to your closest quest target is displayed in V.A.T.S.

Medic - Stimpaks now restore 60% of lost Health, and RadAway removes 60% of radiation. (4 Ranks)
Rank
Requirements
Description
1
INT 2
Is there a doctor in the house? Stimpaks restore 40% of lost Health, and RadAway removes 40% of radiation.
2
INT 2
Stimpaks restore 60% of lost Health, and RadAway removes 60% of radiation.
3
INT 2
Stimpaks restore 80% of lost Health, and RadAway removes 80% of radiation.
4
INT 2
Stimpaks and RadAway restore all lost health and radiation, and work much more quickly.
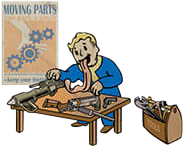
Gun Nut - Shoot first, kill first, with access to base level and Rank 1 gun mods. (4 Ranks)
Rank
Requirements
Description
1
INT 3
You gain access to base level and Rank 1 gun mods.
2
INT 3 / LVL 10
You gain access to Rank 2 gun mods.
3
INT 3 / LVL 25
You gain access to Rank 3 gun mods.
4
INT 3 / LVL 39
You gain access to Rank 4 gun mods.

Hacker - Knowledge of cutting-edge computer encryption allows you to hack Advanced terminals. (4 Ranks)
Rank
Requirements
Description
1
INT 4
Knowledge of cutting-edge computer encryption allows you to hack Advanced terminals.
2
INT 4
You can hack Expert terminals.
3
INT 4
You can hack Master terminals.
4
INT 4
When hacking, you never get locked out of a terminal when things go wrong.
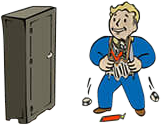
Scrapper - Waste not, want not! You can salvage uncommon components like screws, aluminum, and copper when scrapping weapons and armor. (2 Ranks)
Rank
Requirements
Description
1
INT 5
Waste not, want not! You can salvage uncommon components like screws, aluminum, and copper when scrapping weapons and armor.
2
INT 5
You can salvage rare components like circuitry, nuclear material, and fiber optics when scrapping weapons and armor. Items with favorited components are highlighted.

Science! - Take full advantage of advanced technology with access to base level and Rank 1 high-tech mods. (4 Ranks)
Rank
Requirements
Description
1
INT 6
Take full advantage of advanced technology with access to base level and Rank 1 high-tech mods.
2
INT 6 / LVL 17
You gain access to Rank 2 high-tech mods.
3
INT 6 / LVL 23
You gain access to Rank 3 high-tech mods.
4
INT 6 / LVL 41
You gain access to Rank 4 high-tech mods.
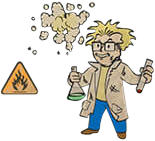
Chemist - Any chems you take last 50% longer. Far out. (4 Ranks)
Rank
Requirements
Description
1
INT 7
Any chems you take last 50% longer. Far out.
2
INT 7 / LVL 16
Any chems you take now last twice as long.
3
INT 7 / LVL 32
Any chems you take now last an additional 150% longer.
4
INT 7 / LVL 45
Any chems you take now last an additional 200% longer.
Robotics Expert - Machines will always serve humans, if you have anything to say about it. Hack a robot, and gain a chance to power it on or off, or initiate a self-destruct. (3 Ranks)
Rank
Requirements
Description
1
INT 8
Machines will always serve humans, if you have anything to say about it. Hack a robot, and gain a chance to power it on or off, or initiate a self-destruct.
2
INT 8 / LVL 19
When you successfully hack a robot, you can incite it to attack.
3
INT 8 / LVL 44
When you successfully hack a robot, you can give it specific commands.

Nuclear Physicist - You've learned to split the atom... and command it. Radiation weapons do 50% more damage and Fusion Cores last an extra 25% longer. (3 Ranks)
Rank
Requirements
Description
1
INT 9
You've learned to split the atom... and command it. Radiation weapons do 50% more damage and Fusion Cores last an extra 25% longer.
2
INT 9 / LVL 14
Radiation weapons now do double damage and Fusion Cores last an extra 50% longer.
3
INT 9 / LVL 26
Fusion Cores can be ejected from Power Armor like devastating grenades and Fusion Cores last twice as long.

Nerd Rage - Genius. Is. ANGRY! When your Health drops below 20%, time slows and you gain +20 Damage Resistance and do 20% more damage while the effect lasts. (3 Ranks)
Rank
Requirements
Description
1
INT 10
Genius. Is. ANGRY! When your Health drops below 20%, time slows and you gain +20 Damage resistance and do 20% more damage while the effect lasts.
2
INT 10 / LVL 31
You now gain 30 more Damage Resistance and do 30% more damage while Nerd Rage is in effect.
3
INT 10 / LVL 50
You now gain 40 more Damage Resistance and do 40% more damage while Nerd Rage is in effect. Kills you make while enraged restore some lost Health.
Agility is a measure of your overall finesse and reflexes. It affects the number of Action Points in V.A.T.S and your ability to sneak.

Gunslinger - Channel the spirit of the Old West! Non-automatic pistols do 20% more damage. (5 Ranks)
Rank
Requirements
Description
1
AGI 1
Channel the spirit of the old west! Non-automatic pistols do 20% more damage.
2
AGI 1
Non-automatic pistols now do 40% more damage and have increased range.
3
AGI 1
Non-automatic pistols now do 60% more damage and range is increased even further.
4
AGI 1
Non-automatic pistols now do 80% more damage and their attacks can disarm opponents.
5
AGI 1
Non-automatic pistols now do double damage. Their attacks have a much better chance to disarm opponents, and may even cripple a limb.
Commando - Your automatic weapons now do 40% more damage, and improved hip fire accuracy. (5 Ranks)
Rank
Requirements
Description
1
AGI 2
Rigorous combat training means automatic weapons do 20% more damage
2
AGI 2
Attacks with automatic weapons do 40% more damage, with improved hip fire accuracy.
3
AGI 2
Attacks with automatic weapons do 60% more damage. Hip fire accuracy is improved even more.
4
AGI 2
Attacks with automatic weapons do 80% more damage and gain a chance to stagger opponents.
5
AGI 2
Your automatic weapons now do double damage and have a greater chance to stagger opponents.
Sneak - Become whisper, become shadow. You are 20% harder to detect while sneaking. (5 Ranks)
Rank
Requirements
Description
1
AGI 3
Become whisper, become shadow. You are 20% harder to detect while sneaking.
2
AGI 3
You are now 30% harder to detect while sneaking, and no longer trigger floor-based traps.
3
AGI 3
You are now 40% harder to detect while sneaking, and no longer trigger enemy mines.
4
AGI 3
You are now 50% harder to detect while sneaking, and running no longer adversely affects stealth.
5
AGI 3
Engaging stealth causes distant enemies to lose you.
Mister Sandman - As an agent of death itself, you can instantly kill a sleeping person. Your silenced weapons do an additional 15% sneak damage. (3 Ranks)
Rank
Requirements
Description
1
AGI 4
As an agent of death, you can instantly kill a sleeping person. Your silenced weapons do an additional 15% sneak attack damage.
2
AGI 4
Your silenced weapons do an additional 30% sneak attack damage.
3
AGI 4
Your silenced weapons now do 50% more sneak attack damage.

Action Boy - There's no time to waste! Your Action Points regenerate 25% faster. (2 Ranks)
Rank
Requirements
Description
1
AGI 5
There's no time to waste! Action Points regenerate 25% faster.
2
AGI 5
Your Action Points now regenerate 50% faster.

Moving Target - They can't hurt what they can't hit! Get +25 Damage Resistance and +25 Energy Resistance when you're sprinting. (3 Ranks)
Rank
Requirements
Description
1
AGI 6
They can't hurt what they can't hit! Get 25+ Damage Resistance and 25+ Energy Resistance when you're sprinting.
2
AGI 6 / LVL 24
You now get +50 Damage Resistance and +50 Energy Resistance when you're sprinting.
3
AGI 6 / LVL 44
Sprinting costs 50% fewer Action Points.

Ninja - Trained as a shadow warrior, your ranged sneak attacks do 2.5x normal damage and your melee sneak attacks do 4x normal damage. (3 Ranks)
Rank
Requirements
Description
1
AGI 7
Trained as a shadow warrior, your ranged sneak attack do 2.5x normal damage and your melee attacks do 4x normal damage.
2
AGI 7 / LVL 16
Your ranged sneak attacks do 3x normal damage and your melee sneak attacks do 5x normal damage.
3
AGI 7 / LVL 33
Your ranged sneak attacks do 3.5x normal damage and your melee sneak attacks do 10x normal damage.
Quick Hands - In combat, there's no time to hesitate. You can reload all guns faster. (2 Ranks)
Rank
Requirements
Description
1
AGI 8
In combat, there's no time to hesitate. You can reload all guns faster.
2
AGI 8 / LVL 23
Reloading guns costs no Action Points in V.A.T.S.

Blitz - Find the gap and make the tackle! V.A.T.S. melee distance is increased significantly. (2 Ranks)
Rank
Requirements
Description
1
AGI 9
Find the gap and make the tackle! V.A.T.S. melee distance is increased significantly.
2
AGI 9 / LVL 29
V.A.T.S. melee distance is increased even more, and the farther the Blitz distance, the greater the damage.

Gun-Fu - You've learned to apply ancient martial arts to gunplay! Do 25% more damage to your second V.A.T.S. target and beyond. (3 Ranks)
Rank
Requirements
Description
1
AGI 10
You've learned to apply ancient martial arts to gunplay! Do 25% more damage to your second V.A.T.S. target and beyond.
2
AGI 10 / LVL 26
In V.A.T.S. you do 50% more damage to your third target and beyond.
3
AGI 10 / LVL 50
In V.A.T.S. you instantly do a Critical Hit against your fourth target and beyond.

Luck is a measure of your general good fortune, and affects the recharge rate of Critical Hits.

Fortune Finder - You find even more bottle caps in containers (3 Ranks)
Rank
Requirements
Description
1
LCK 1
You find more bottle caps in containers.
2
LCK 1 / LVL 5
You find even more bottle caps in containers.
3
LCK 1
You find even more bottle caps in containers.
4
LCK 1 / LVL 41
You find even more bottle caps in containers, and there is a chance of enemies exploding into a shower of caps when you kill them.
Scrounger - You find even more ammunition in containers. (4 Ranks)
Rank
Requirements
Description
1
LCK 2
You find more ammunition in containers.
2
LCK 2 / LVL 7
You find even more ammunition in containers.
3
LCK 2
You find even more ammunition in containers.
4
LCK 2
You find even more ammunition in containers.
Bloody Mess - You now inflict +10% damage in combat. (4 Ranks)
Rank
Requirements
Description
1
LCK 3
+5% bonus damage means enemies will sometimes explode into a gory red paste. Watch out for flying eyeballs!
2
LCK 3 / LVL 9
You now inflict +10% damage in combat.
3
LCK 3
You now inflict +15% damage in combat.
4
LCK 3
When an enemy explodes, nearby enemies may suffer the same fate.

Mysterious Stranger - Who is he? Why does he help? Who cares! The Mysterious Stranger will appear occasionally in V.A.T.S. to lend a hand, with deadly efficiency. (3 Ranks)
Rank
Requirements
Description
1
LCK 4
Who is he? Why does he help? Who cares! The Mysterious Stranger will appear occasionally in V.A.T.S. to lend a hand, with deadly efficiency...
2
LCK 4
The Mysterious Stranger appears more often in V.A.T.S.
3
LCK 4
The Mysterious Stranger appears more often in V.A.T.S. When he kills an opponent, there is a chance your Critical meter gets filled.

Idiot Savant - You're not stupid! Just... different. Randomly receive 3x XP from any action, and the lower your intelligence, the greater the chance. (3 Ranks)
Rank
Requirements
Description
1
LCK 5
You're not stupid! Just... different. Randomly receive 3x XP from any action, and the lower your Intelligence, the greater the chance.
2
LCK 5
You now randomly receive 5x XP from any action. The lower your Intelligence, the greater the chance.
3
LCK 5
Randomly receiving bonus XP from any action may trigger 3x XP for all kills for a short period of time. The lower your Intelligence, the greater the chance.
Better Criticals - Advanced training for enhanced combat effectiveness! Criticals do 50% more damage. (3 Ranks)
Rank
Requirements
Description
1
LCK 6
Advanced training for enhanced combat effectiveness! Criticals do 50% more extra damage.
2
LCK 6 / LVL 15
Your criticals now do twice as much extra damage.
3
LCK 6 / LVL 40
Your criticals now do 2.5x as much extra damage.
Critical Banker - You're a patient battlefield tactician, and can save a Critical Hit, to be used in V.A.T.S. when you need it most. (3 Ranks)
Rank
Requirements
Description
1
LCK 7
You're a patient battlefield tactician, and can save a Critical Hit, to be used in V.A.T.S. when you need it most.
2
LCK 7 / LVL 17
You can now save 2 Critical Hits, to be used in V.A.T.S. when you need them the most.
3
LCK 7 / LVL 40
You can now save 3 Critical Hits, to be used in V.A.T.S. when you need them the most. Banking a Critical has a chance to save an additional Critical.

Grim Reaper's Sprint - Death becomes you! Any kill in V.A.T.S. has a 15% chance to restore all Action Points. (2 Ranks)
Rank
Requirements
Description
1
LCK 8
Death becomes you! Any kill in V.A.T.S. has a 15% chance to restore all Action Points.
2
LCK 8 / LVL 19
Any kill in V.A.T.S. now has a 25% chance to restore all Action Points.
3
LCK 8 / LVL 45
Any kill in V.A.T.S. has a 35% chance to restore all Action Points and refill your Critical meter.

Four Leaf Clover - Feeling lucky? You should! Each hit in V.A.T.S. has a chance of filling your Critical meter. (5 Ranks)
Rank
Requirements
Description
1
LCK 9
Feeling Lucky? You should! Each hit in V.A.T.S. has a chance of filling your Critical meter.
2
LCK 9 / LVL 13
Each hit in V.A.T.S. now has an even better chance of filling your Critical meter.
3
LCK 9 / LVL 32
Each hit in V.A.T.S. now has a very good chance of filling your Critical meter.
4
LCK 9 / LVL 48
Each hit in V.A.T.S. now has an excellent chance of filling your Critical meter.

Ricochet - What goes around comes around! An enemy's ranged attack will sometimes ricochet back and instantly kill them. The closer you are to death, the higher the chance. (3 Ranks)
Rank
Requirements
Description
1
LCK 10
What goes around comes around! Any enemy's ranged attacks will sometimes ricochet back and instantly kill them. The closer you are to death, the higher the chance.
2
LCK 10 / LVL 29
There's an increased chance that an enemy's shot will ricochet back and kill them.
3
LCK 10 / LVL 50
When an enemy's shot ricochets back and kills them, there is a chance your Critical meter gets filled.
Hacking is a useful ability based on Intelligence. Level four is required for unlocking the ability. Further levels of the ability also have character level requirements. This ability allows you to use the computer terminals protected with passwords. Very often, unlocking them will give you many options: activation/deactivation of enemy robots, opening the locked doors, sometimes safes. Sometimes, inside them you can find holographic tapes or useful information related to quests or history of the location.
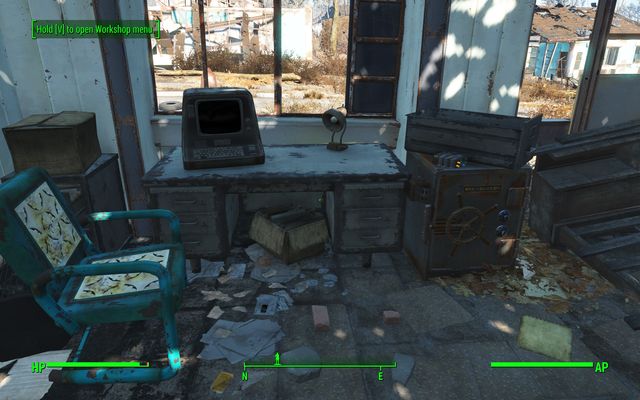 In this case, you can use the terminal to open the safe
The terminals have four-level scale of security: amateur, advanced, expert and master. With each level, the string of letters is longer and the number of available tries is smaller (more about that further in the article). After using all available tries, the computer will be temporarily locked for about 10 seconds. However, turning the terminal off and on regenerates the number of available tries. When you do it, a new password is generated. The only exception is when you gain the master level of the Hacker skill - in that case, the terminals are never blocked. Another, easier option that helps you to hack is obtaining the Science Bobblehead which will always give you one additional free attempt.
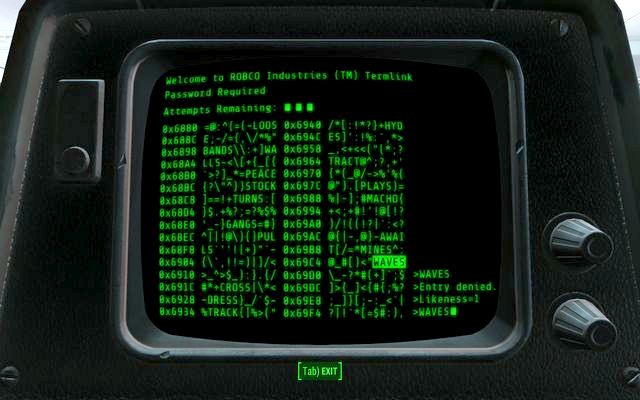 Terminal hacking window
In order to start the hacking, you will need nothing except for the terminal. In the upper bar you can see the number of available tries. You must find the words in the code with characters appearing on the main window - depending on the terminal level, the length of the words will vary. Usually, the first try is a "blind shot" - pick any word, preferably one that has elements that repeats regularly (for example, "es" or "th" ends). In the lower right corner you will see information about how many letters in the word are the same as the letter and its location in the correct password.
Example: FEEL word with probability equal to 2 might mean that words SEEK (two E on the same place) or SELL (E and L on the correct places) can fit the sequence.
If, after typing the first word, you still find it difficult to guess what the password might be, you should pick other word, preferably one that has completely different letters and their order. Once you have two strings of words, you should be able to guess the password on the basic level. After a while, once you hack enough terminals, you will be hacking much faster.
Advice: if you find brackets where, after marking one of them, the whole string inside them will be highlighted, you will receive bonus. The bonus can take one of two forms: either one of the wrong words will be removed (replaced with dots) or the number of your available tries to solve the riddle will be regenerated.
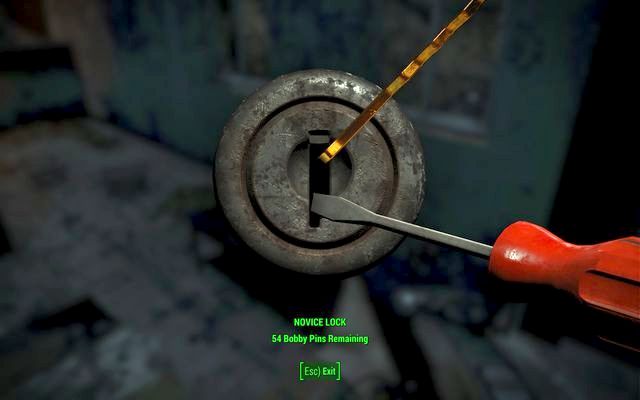
Lockpicking is an ability based on Perception. By default, you can open the simplest locks. This ability is useful when trying to get to unavailable parts of locations, where interesting items are frequently hidden. You can also open cases, chests and safes. You can also open the trailers of some trucks. When opening a lock, the time is stopped and you see a lock and a bobby pin. If you don't have high perception or you don't like to collect everything and you will decide that you don't need this ability very much, you can invest in hacking. Key points: safes, closed warehouse rooms etc. very often offer access through both methods.
 Lockpicking
In order to open locks, you need to have bobby pins. Each of them is wearing off and after some time, it breaks (very often during a single opening of a lock). Stopping the lockpicking in order to regenerate the pin will not help, its state is remembered by the game. The bobby pins are quite common in the game world, very frequently you will find them in boxes in large numbers. You can also cheaply buy them from merchants.
In order to successfully open the lock, first you must try to open the lock in "0" position by using the left or right direction button. If the pin starts vibrating, it means it is in bad position. You change the position of the bobby pin with the mouse or analog stick. You must find the perfect point in which the lock opens. You will find that point thanks to the fact that, when you're close, the lock is partially rotating - the closer you are, the more rotation. Easy and medium locks are quite easy to open with just a single bobby pin.
Sneaking up is a special ability that allows you to move undetected. It is based on Agility points, especially the Sneak perk which gives you +20% to stealth. The mechanism is quite expanded: you must keep attention to the distance to the enemies, to noise and the amount of light. Many of enemy bases have special headlights that are automatically tracking enemies (which means you) and that make it impossible to sneak up. All security turrets also notice you faster than humans and monsters. As for the light - Pip-Boy's flashlight light you up as well, making it impossible to sneak up effectively.
Sneaking mode is activated with a single button that is also responsible for crouching. In this mode you automatically move slower and quieter. Also, a bar appears in the middle of the screen. It has few states: hidden; detected - you can't steal when it is active; caution when you are detected by enemy and danger when enemies had seen you and they start the attack. Each state can slowly change into previous one if you are well hidden and wait for some time.
Attacks performed while sneaking up have two positive traits. You have greater accuracy and you receive a damage bonus for surprise attack. By default, the bonus is 2x the number of damage dealt. With the Ninja perk (requires agility) the multiplier can be increased.
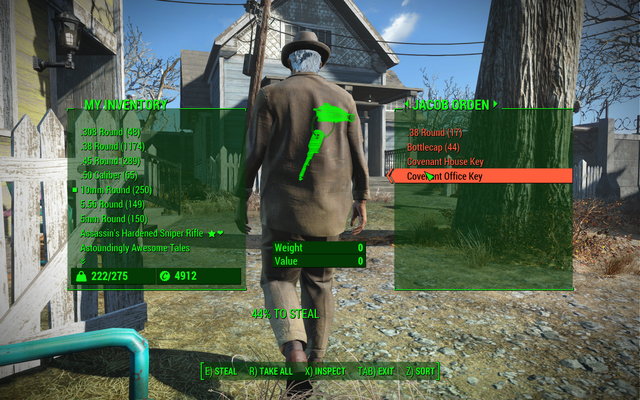 An example screen of checking someone's possession when stealing
Pickpocketing is related to sneaking up. Only in stealth mode you can use it. To do it, you must walk to any NPC. An option to steal will become available, you can activate it with action button. You must be invisible when attempting to steal, otherwise you can be attacked immediately. Simply checking the equipment of your target isn't considered as a bad behavior. Only when you will try to steal something, the game will consider it as robbery. Not every item can be stolen when having low Agility - aim at small items, such as keys and notes. At the bottom of the screen you can check your chances for a successful theft. The higher the agility, the greater the chance for success.
Stealing someone's belongings for your own profits is not the only trait of this skill. In case of enemies, you can steal their weapons or ammunition, making it impossible for them to fight (especially useful in case of mini-bosses).
Another profit of stealing is the possibility to add something to other people's inventory. It is especially useful to give them grenades or mines. Unsuspicious enemy can drag such bomb to a group of enemies and cause some damage while you remain undetected. This trick is worth using, especially since you receive a trophy/achievement for it: Prankster's Return.
In Fallout 4, you are not forced to travel through the unfriendly post apocalyptic wastelands alone. More than ten of various characters can join the party of the main character. What's important, only one character can accompany you at once, the other allies will be waiting in locations assigned to them for when it's their turn.
You can have the same companion during almost the whole game or toggle them depending on your needs. Each of them has their own unique profits (you must unlock them first!), their pros and cons. For example, you should take a companion that is good in battles for a quest during which you will participate in a large battle, and for a quest during which you must investigate something, you should take an ally that will offer you help in conversations with NPCs.
You can give simple orders to your allies or count on them to take care of their own. You can also give them the items you have, reducing the load of your protagonist. It is important to have good relations with companions. You can improve the relations with companions by making choices they agree on. Good relations unlock access to new perks related to a companion. Additionally, you can romance with some companions. Sadly, this mechanism works in both ways and a companion with whom your relations suffered might leave you.
Important! The below list of potential allies is still under construction. New characters will be added here soon.
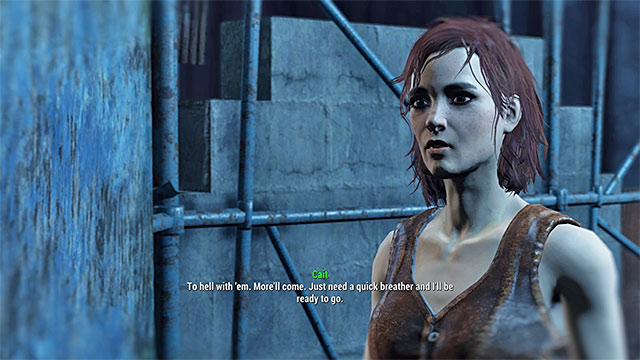 Cait
CaitCait is a female warrior that earns her living by participating in cage fights. This situation changes after she meets the main hero for the first time.
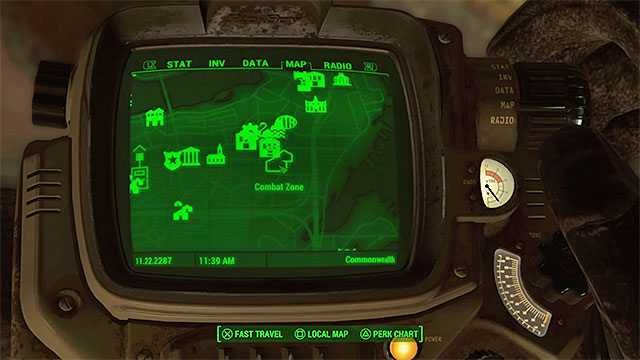
Location where you find the companion: Cait can be found in the Combat Zone located in the central part of Boston. The location is marked on the above map. Once you reach the destination, you will have to defeat a group of bandits. Eliminate them and enter the building. You will be forced to participate in some more battles after you get close to a big cage. Once all the enemies are dead, enter the large cage and talk to Tommy. He will ask you if you want to take Cait as your companion. You can ask why does he want to "get rid" of the woman, but it will not change anything.
Possible romance: yes
Companion's unique skill: When traveling with Cait, your action points will regenerate faster whenever your health drops below 1/4 of the basic value.
Companion's advantages and weaknesses: Cait is very good in combat and additionally, due to the drugs she take, she is more resistant than most other companions. Additionally, you can use her to open the hardest locks. The disadvantage of traveling with Cait is the fact that she might not like you making righteous decisions - it could make your relations with her worsen.
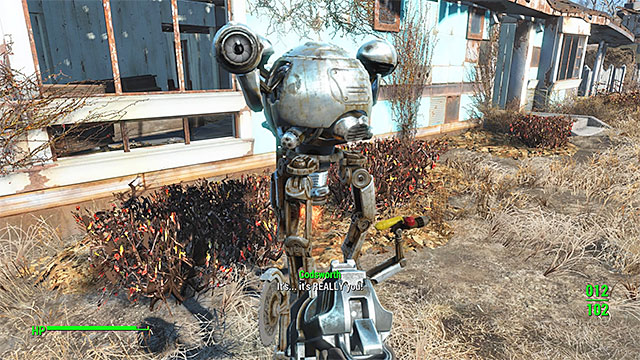 Codsworth
Codsworth is a robot that belonged to the family of the main protagonist before the apocalypse. He is one of the first companions you can add to your team.
Location where you find the companion: Codsworth can be found in the Sanctuary, the first place you visit after leaving the Vault 111. You can immediately invite him to your party, you don't need to met any additional requirements.
Possible romance: no
Companion's unique skill: Traveling with Codsworth provides increased resistance to attacks of other robots.
Companion's advantages and weaknesses: You don't need to worry about your relations with Codsworth. The robot can help you in battles, but he might be too weak to face many opponents met later in the game.
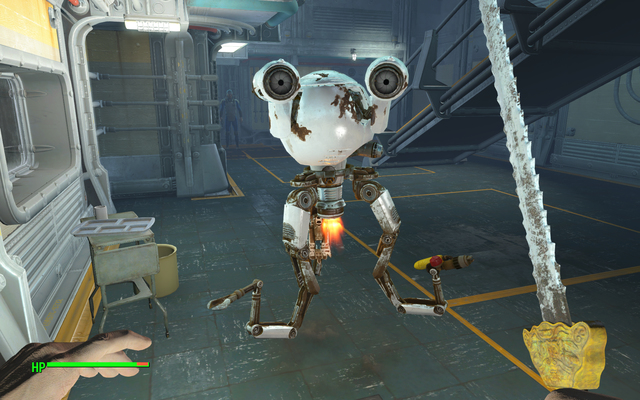 Curie
CurieCurie is a robot that can become your optional companion. You can find him after gaining access to Vault 81 and completing main quests in that location. Robot's characteristic traits are: "female gender" and a French accent.
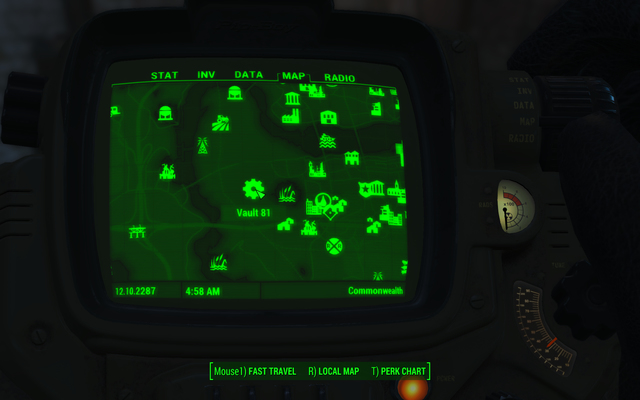
Location where you find the companion: You will find Curie in Vault 81, during the Hole in the Wall quest. She will give you the medicament that is needed to complete the quest. She will also come with you. Once the quest ends, the robot will start a dialogue during which it will automatically join you or will be sent to a selected settlement.
Possible romance: no
Companion's unique skill: Curie has unlimited number of Stimpaks which are given to the player on demand (dialogue), healing him whenever he has less than 10% of health.
Companion's advantages and weaknesses: You don't have to worry about relations with Curie. The robot is very vulnerable to damage and his attack strength is small. It is wise to protect this companion during battle, so that he will serve with additional firepower for as long as possible and that he will heal you before the next wave of enemies.
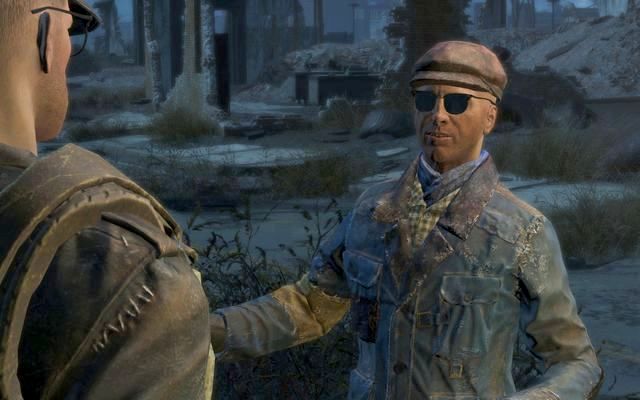 Deacon
Deacon is a companion related to the Railroad faction. It's a very charismatic and cheerful character. He is also good during battle - he uses various weapons (you don't have to give him ammunition) of his own choosing, he picks useful items from fallen enemies on his own. He very often changes his clothes, adjusting to the surrounding.
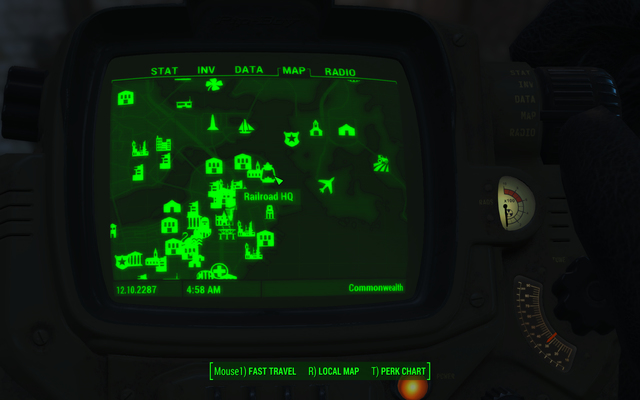
Location where you find the companion: He will join you after you will join the gang (after completing The Road to Freedom and then Tradecraft quests). You will then find him in Railroad HQ.
Possible romance: yes
Companion's unique skill: Companion's special skill will allow you to move +20% quieter and makes the Stealth Boys work 20% longer
Companion's advantages and weaknesses: By default, Deacon is using institute pistol, but he can use any weapon from his equipment. He sometimes picks them up and changes them on his own. You will gain his support by completing Faction quests, lockpicking, hacking terminals and choosing good and/or funny dialogue lines. He is also satisfied when you thoroughly ask about quests details and you decide to complete side quests.
 Dogmeat
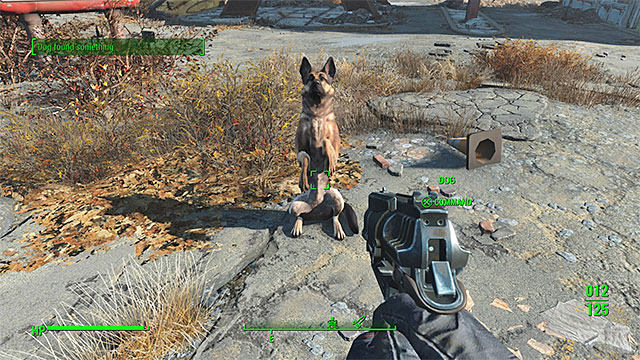
Dogmeat is a German shepherd and he can join your team as one of the first companions.
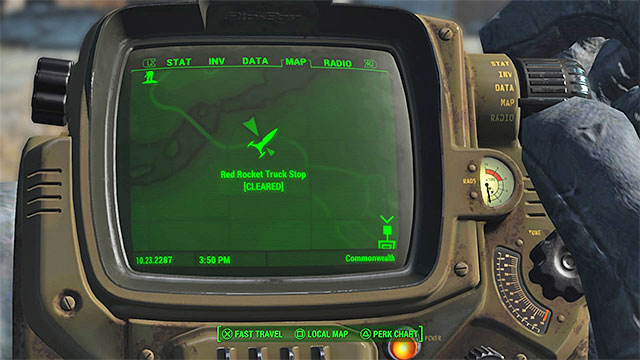
Location where you find the companion: Dogmeat can be found in the Red Rocket Truck Stop location which is shown on the picture above. It is located not far southeast from Sanctuary, the location where you start the game. Once you reach the truck stop, you don't need to look around for the dog, he should come to you on his own.
Companion's unique skill: After biting the enemies, the dog can hold them, allowing you to attack them (on higher levels this perk might also cause bleeding effect).
Companion's advantages and weaknesses: Dogmeat's unique ability is searching the surroundings for treasures. Thanks to that, you can obtain many items which it would be hard for you to find on your own. You don't need to worry about your relations with Dogmeat, he is a faithful companion and will never leave you. The dog can help you in battles and he can hold the enemies after biting them. Since you cannot equip him with new items, he loses his combat usefulness later in the game.
 Piper
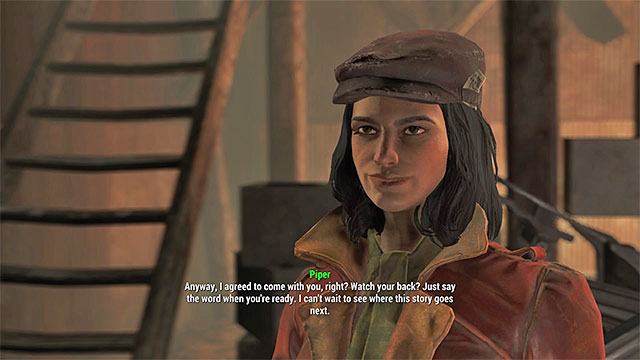
PiperPiper is a reporter from Diamond City who becomes fascinated with the story of the main protagonist. She can join you quite early in the game.
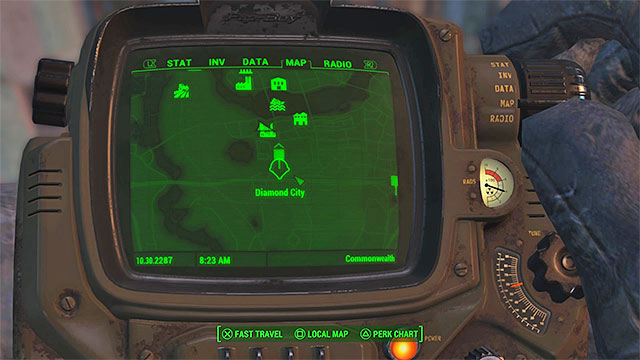
Location where you find the companion: You meet Piper for the first time at the entrance to the Diamond City. You visit it during one of the main quests - the place is marked on the picture above. You must use Piper's help to get to the Diamond City Market and then meet with her inside the local paper - Publick Occurences. There you must complete a simple quest called Story of the Century during which you give an interview to Piper. Once the conversation is over, you will be able to invite the reporter to your team.
Possible romance: yes
Companion's unique skill: Traveling with Piper provides a double bonus to the amount of experience obtained when the protagonist discovers new location or uses unique dialogue option in conversation.
Companion's advantages and weaknesses: One of the main advantages of traveling with Piper is the perk mentioned above which allows you to gather more experience. This will be useful only if you invite Piper to you early in the game, when large part of the game world is still not discovered by you. Piper is quite good in battle, but her default weapon (modified handgun) will not allow her to defeat stronger enemies.
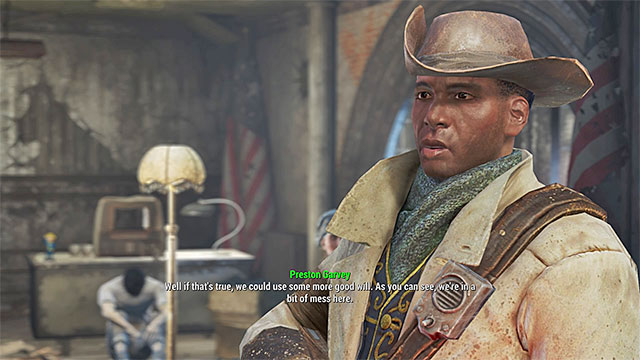 Preston Garvey
Preston Garvey is leading the Minutemen faction. You will meet him early in the game.
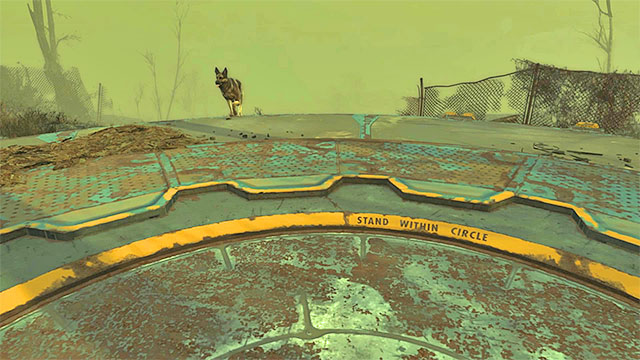
Location where you find the companion: By default, Preston Garvey can be found in the Museum of Freedom in the city of Concord. The place has been marked on the picture above. You visit that place during the first main quest, Out of time. Once you defeat the raiders and the deathclaw during the When Freedom Calls quest, you can meet with Preston in the Sanctuary. If you agree to help his faction, you will be able to recruit Preston for your further adventures.
Possible romance: yes
Companion's unique skill: When traveling with Preston, the main protagonist deals more damage and have increased damage resistance in all battles against at least three opponents.
Companion's advantages and weaknesses: Preston is equipped with a good laser weapon. Early in the game he can be of great help in battles (and his unique skill becomes useful in larger battles). You can receive the sympathy of this character by helping the Minutemen, but by helping other factions or performing bad actions you will quickly lose Preston's loyalty.
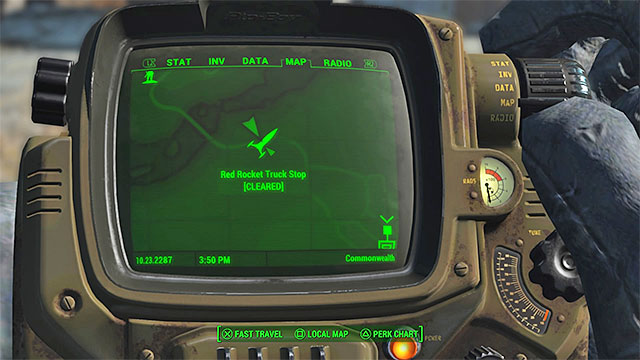
Dogmeat is the first companion you can add to your team while playing Fallout 4. You will be given opportunity to find the dog at the very beginning of the game, soon after leaving Vault 111 and arriving at Sanctuary (Out of Time main quest). Travel to the south-east from the Sanctuary and you'll soon reach the Red Rocket Truck Stop shown on the screen above.
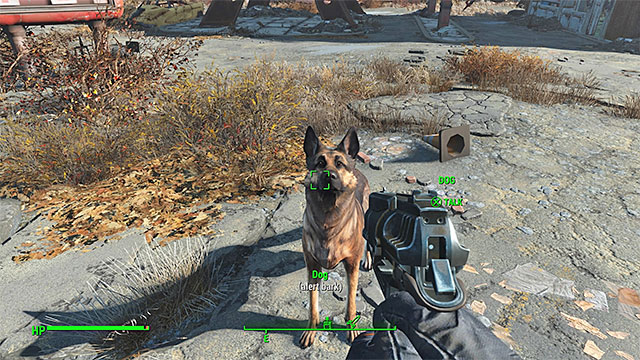 Find the dog and "talk" to the animal
Once you've arrived at the truck stop you should notice a dog in the distance. Approach the dog, pet it and allow it to follow you. Dogmeat will be your companion from now on. You can give the dog simple commands, use the animal in combat and order it to go on treasure hunts. You can send back Dogmeat to Sanctuary (or to one of other settlements) at any time.
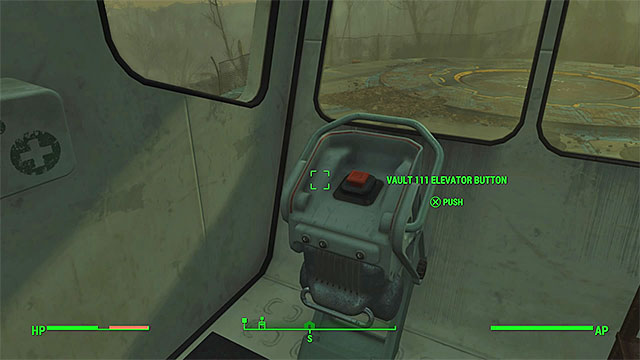
Vault 111 is the location where you begin your game and you'll have a chance to explore it during your first visit. You should still consider returning to this location later in the game and one of the motivations for that is a chance of getting a unique weapon called the Cryolator which has been described on the next page of this chapter. You can reach Vault 111 by travelling on foot or by using fast travel. Once you get there look around for a small booth seen on the screen above. Press the red button to activate the elevator.
 Stand on the round platform
You don't have to wait for the elevator to show up. As soon as you've pressed the button stand on the large round platform (the same one as in the prologue). The elevator should start moving automatically and it'll take you to the vault.
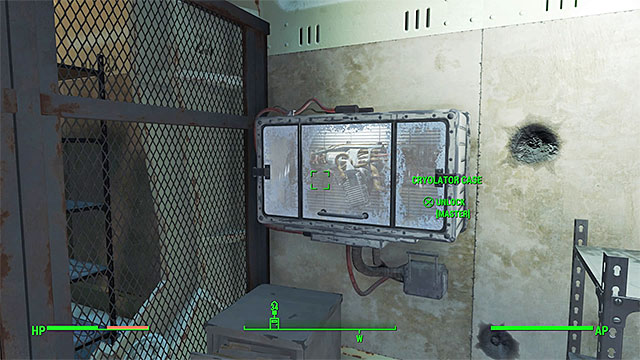
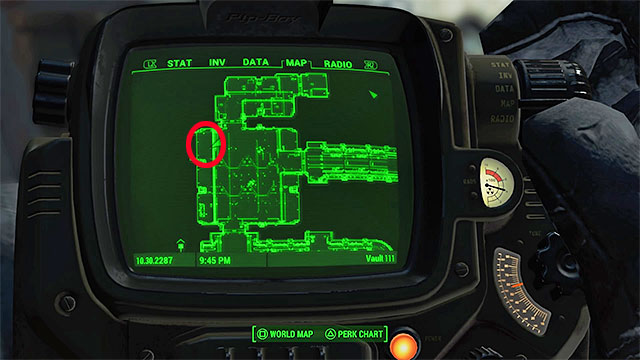
During your first hours in the world of Fallout 4 you will be forced to use mostly weaker weapons, however there's a smart way of gaining access to one of the most powerful guns very early in the campaign. The weapon we're talking about is the Cryolator and it is stored in Vault 111 (it's the location where you've started the game). Before you decide to go back to the Vault make sure that Dogmeat is following you - the first page of this chapter informs on how to find and add the dog to the team.
Use the elevator to reach Vault 111 and proceed to the Overseer's room. It's the same room where you've interacted with a terminal at the beginning of the game to open a door. Find a closed case displayed on the screens above.
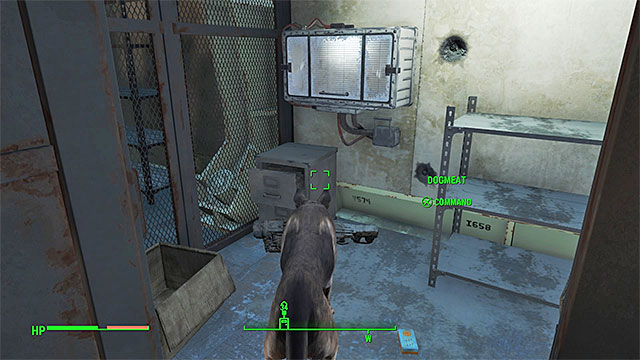 The dog should proceed towards the case with the legendary item
The case has a master lock and theoretically you would have to wait until your character is at least on the eightheenth level and that he or she has the necessary perks to break the lock. Thankfully you can cheat the game and use Dogmeat to get the weapon for you. Turn towards the dog and start giving it orders. Command the animal to search the area for interactive items. Dogmeat should start moving towards the case with the legendary weapon (if the dog went somewhere else repeat your command).
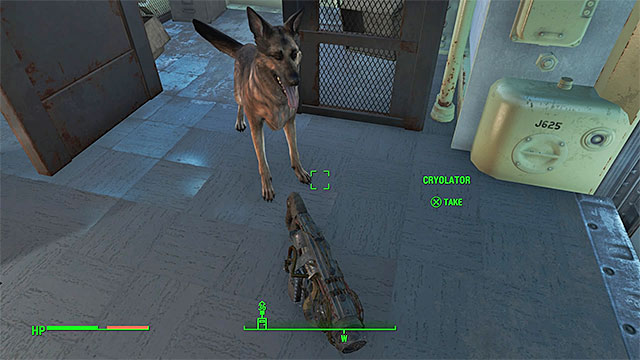 Dogmeat will bring you the weapon
Wait for Dogmeat to "remove" Cryolator from the case and to bring the weapon to you. Take the weapon from the ground. Don't worry that it doesn't have any ammunition, because ammo is in Dogmeat's "inventory" and all you have to do is transfer it to your inventory.
Important! Don't waste Cryolator's ammunition on fights with weaker enemies. Save this weapon for the most difficult battles!
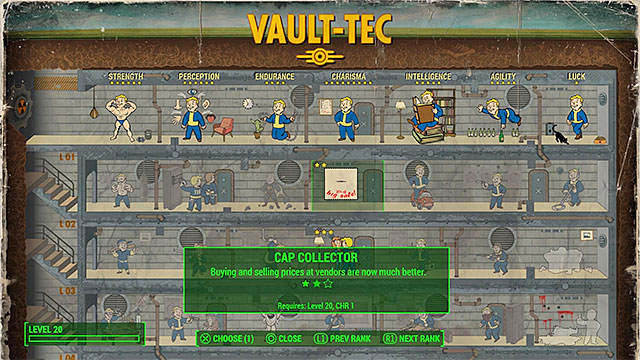 You should take interest in the Cap Collector perk
Bottlecaps are the official currency in Fallout 4 game. Similarly to most other RPGs, you will always have not enough of them. It's especially troublesome during the initial phase of the game, when you can't afford even medium quality weapon and ammunition for your weapons. On this page you will find many hints on how to earn money legally, without using any exploits which sooner or later will be removed with patches.
 Finding new location will be awarded with few dozens of experience points
Experience points in Fallout 4 are gathered rather easily and you don't have to wait very long for your character to gain a new level. Despite that, it is wise to know few ways of improving this process, especially since even some of the beginning locations require you to have a strong character due to powerful enemies residing there.
Important! If you want your character to focus on gathering as much experience as possible, then remember about developing your Intelligence.
In this chapter you will find a list of cheats for Fallout 4. This section has been greatly developed in the game. Thanks to that, the number and variety of cheats is great. In order to use them, you must press the tilde ~ key and type in selected command. Some codes, such as "god mode", can be activated and then deactivated by typing the same command again. Most commands typed in the console will return a message that confirms the command is working. In further chapters you will find various cheats divided into categories.
In this chapter you will find cheats related to general gameplay. They mostly affect the protagonist, his abilities, resistance and level. The cheats can be deactivated at any point of the game by typing the same command again. Special commands that allow you to add new items to the inventory have been grouped in the next chapter.
tgm - "god mode". You receive no damage, you have unlimited ammunition and action points
tai - activates or deactivates the intelligence of all NPCs
tcai - activates or deactivates enemies' ability to fight
tcl - you can fly in the air and through walls
tmm 1 - shows all markers on the map
tfc - unlocks free camera mode
tm - activates/deactivates user interface
killall - kills all nearby enemies
setgs fJumpHeightMin [number] - changes how high the protagonist can jump
setscale [number from 1 to 10] - scales the height of the protagonist
player.setav speedmult [number] - increases/decreases character's movement speed
sexchange - changes the gender during the game
set timescale to [number] - speeds up or slows down the time. The default value is 16, 1 is real time
tdetect - you're undetectable for enemies
caqs - immediately completes the main storyline of the game
player.setlevel [number] - sets character level
player.modav [skill name] [number] - increases selected SPECIAL skill by the amount you typed
In this chapter you will learn how to obtain any item in the game. It is done by typing a single command where you enter ID of the item and its amount. The key thing is obtaining the right ID. To do it, you must have the window with selected item opened (in inventory or a chest) and the console activated. When both requirements are met, you must click the selected item and in the middle upper edge of the console ID of the item will appear. What can you do if you don't have the ID of an item and you don't have any way to check it? A special command will help you. It moves you to a special room inside which you will find all items available in the game placed in chests.
Below you will find two commands described above and further below you will find a list of IDs of most commonly used items:
player.additem [item ID] [number] - this command adds selected quantity of an item you have chosen to your inventory
coc qasmoke - this command moves the protagonist to a special room with all items available in the game (check the description above)
ID of basic items:
0000000F - Bottlecaps
0000000a - bobbypins
00023736 - Stimpak
00023742 - AntiRad
00075FE4 - Fusion Core
In Fallout 4 you can find 50 achievements and one additional trophy for PS4. Below you will find a list of all of them with a description about how to unlock them. Most of the achievements are unlocked during the game and they do not require any special intervention from the player - most trophies are related to completing the main storyline quests, side quests and reaching certain level. Harder challenges are described more thoroughly, in some cases you will also find information about where and when it is easier to get them.
Important! The list is a work in progress.
Walk to the surface (leave the Crypt 111, the beginning of the game).
Place a grenade or a mine in the pocket of an enemy when stealing from him.
Play a game on the terminal.
The fastest way to get this achievement is during the first quest, when you are trying to get out of the Crypt 111. In the last administrator room there's a terminal on which you can play a game and unlock this achievement.
Complete the Sanctuary quest.
Complete the Unlikely Valentine quest.
Complete the Dangerous Minds quest.
Complete the Hunter/Hunted quest.
Complete the When Freedom Calls quest.
Complete the Reunions quest.
Complete The Molecular Level quest.
Complete The Nuclear Option quest.
Complete the Institutionalized quest.
Complete the Mankind-Redefined quest.
Complete the Powering Up quest.
Complete the Nuclear Family quest.
Complete the Taking Independence quest.
Complete the Old Guns quest.
Complete the Blind Betrayal quest.
Complete the Ad Victoriam quest.
Complete the Rockets' Red Glare quest.
Complete the Underground Undercover quest.
Join the Brotherhood of Steel.
Join the Minutemen.
Align yourself with three villages.
You will get this achievement by completing side quests. You must unlock two villages (first one is the Sanctuary from the main quest for Minutemen faction).
Reach maximum happiness in a large village.
Complete 10 side quests.
Complete 50 optional objectives in quests.
Collect 1000 building materials that are used to build settlements.
Open 50 locks. It doesn't matter what level are they and are they safes or doors.
Hack 50 terminals.
Craft 50 weapons.
Craft 100 items.
Reach maximum level of a relationship with a companion (look: romances).
Recruit five companions.
Build 100 objects using workshop items (settlement building objects).
Kill five large monsters (for example, Deathclaws).
Discover 100 locations on the map.
Find and read 20 magazines.
Kill 300 people.
Kill 300 various monsters.
Collect 10 Vault-Tec Figurines (check the chapter: Bobbleheads).
Collect 20 Vault-Tec Figurines (check the chapter: Bobbleheads).
Reach fifth character level.
Reach tenth character level.
Reach twenty fifth character level.
Reach fiftieth character level.
Decide the fate of the Commonwealth.
Unlock all other trophies (available only on PS4).
Fallout 4 is a very demanding game. In case of a PC version, the lack of vertical sync in the graphic settings has a negative impact on the frames dispersion. For most of the game, the framerate is constant, but in some parts - especially in the cities - the frames dropped quite drastically, usually just for a moment. Special effects, such as explosions and effects that accompany using "special" weapons (plasma cannon, laser rifle etc.) are well optimized and they do not cause performance drop. Very often a delay can be noticed when switching a weapon and the texture isn't loaded and you cannot use it - in such case, you must wait for a moment. Another irritating bug is the habit of companions getting stuck - luckily, when you walk away from them, they will teleport near you.
The PlayStation 4 version isn't perfect as well. Many times, the game slows down when exploring cities, factories or other more complex locations. Great framedrops occur very frequently when you decide to use V.A.T.S. combat system. Luckily, just like in the PC version, you can save your game anytime you want and create many save slots. This allows you to avoid complications when making wrong decisions or you find a bug that is making the rest of the game harder.
Important - The impressions from PC and PS4 version are valid for the version with the day-one patch.
Following system was used for playing the PC version of the game:
The above configuration allowed the game to work smoothly on medium settings with all additional effects and SSAO active. Usually, the game kept the 60 FPS level. Rare frame drops were temporary, it didn't have much negative impact on the game experience. The game requires a large number of free RAM memory, which means that when someone has 4 GB of it, the game will work, but no other memory consuming applications should be active in the background.

This unofficial Fallout 4 guide offers a very detailed walkthrough of the game. Using this game guide will make it much easier to find and complete available main and optional quests. The guide may also be very helpful in explaining all of the game's important choices and their consequences (both short and long-term). The entire guide is divided into several large sections. The first part of the guide is a description of all the initial quests of the main storyline which are completed in a rather linear order. The next important part is about the quests of all four main factions found in the game's world. You can find out where to look for the factions' leaders and what types of mission each faction has to offer. Guide pages on factions are followed by the second part of the main story walkthrough and we've covered all of the differences based on the faction the main character has decided to join. The final part of the main story explanation is a chapter about all of the game's endings and about instructions how to unlock them. The final big part of this game guide are the chapters on the available side quests. Many of these quests are tied to certain areas of the game's world and that's why their descriptions are divided by the locations where they're available. Each quest in this guide has a very thorough description. You can find out where you can unlock it, what you need to do to finish it, what choices you may be presented with, if you can act in a special way (like when you have high charisma) and what types of rewards are reserved for finishing it. Fallout 4 is a post-apocalyptic RPG game where the player is exploring the wasteland around the American city of Boston. There are dozens of primary and optional missions available in the game. Using this walkthrough will lower the chances of skipping out on some important assignments or not being able to move forward because of some unforeseen complications.
Additionally we've used the bold font to mark the quest titles.
Jacek "Stranger" Halas, Patrick "YxU" Homa, Patryk Greniuk ()
In this chapter of the guide you will find maps related to the walkthrough for Fallout 4. These maps should be helpful in finding important locations in which you can start main or side quests.
Above you can see a world map with most important cities, villages, camps, vaults and quarters of four main factions marked on it. Many of these locations are inhabited only by characters that are friendly towards you, but in some of them you can find enemies as well. On the next pages of this chapter you will find maps of nine main sectors of the world map. They are more detailed, informing you where specifically you can start a quest.
Important - On the pages with walkthroughs for quests you will find references to maps from this chapter. For example, reference (M1,1) means that you must open the M1 map (Sanctuary) and find point number 1 on it (it's in the bracket next to the name of the location).
The above M1 map shows the first sector of the world map in Fallout 4. It's the northwestern part of the game world in which you will find, among other places, the Sanctuary. Yellow dots on the map mark locations in which you can start some quest (main, side or faction one). Red dots symbolize other locations. You will not unlock any quests there, but they might be related to quests started in other parts of the game world.
The above M2 map shows the second sector of the world map in Fallout 4. It's the northern part of the game world in which you will find, among other places, the city of Malden. Yellow dots on the map mark locations in which you can start some quest (main, side or faction one). Red dots symbolize other locations. You will not unlock any quests there, but they might be related to quests started in other parts of the game world.
The above M3 map shows the third sector of the world map in Fallout 4. It's the northeastern part of the game world in which you will find, among other places, the city of Salem. Yellow dots on the map mark locations in which you can start some quest (main, side or faction one). Red dots symbolize other locations. You will not unlock any quests there, but they might be related to quests started in other parts of the game world.
The above M4 map shows the fourth sector of the world map in Fallout 4. It's the western part of the game world in which you will find, among other places, the Fort Hagen. Yellow dots on the map mark locations in which you can start some quest (main, side or faction one). Red dots symbolize other locations. You will not unlock any quests there, but they might be related to quests started in other parts of the game world.
The above M5 map shows the fifth sector of the world map in Fallout 4. It's the central part of the game world in which you will find, among other places, the city of Cambridge. Yellow dots on the map mark locations in which you can start some quest (main, side or faction one). Red dots symbolize other locations. You will not unlock any quests there, but they might be related to quests started in other parts of the game world.
The above M6 map shows the sixth sector of the world map in Fallout 4. It's the central part of the game world which is also the very center of Boston. Yellow dots on the map mark locations in which you can start some quest (main, side or faction one). Red dots symbolize other locations. You will not unlock any quests there, but they might be related to quests started in other parts of the game world.
The above M7 map shows the seventh sector of the world map in Fallout 4. It's the eastern part of the game world in which you will find, among other places, the Castle. Yellow dots on the map mark locations in which you can start some quest (main, side or faction one). Red dots symbolize other locations. You will not unlock any quests there, but they might be related to quests started in other parts of the game world.
The above M8 map shows the eighth sector of the world map in Fallout 4. It's the southwestern part of the game world which is highly radiating and due to that unavailable during the early phase of the game. Yellow dots on the map mark locations in which you can start some quest (main, side or faction one). Red dots symbolize other locations. You will not unlock any quests there, but they might be related to quests started in other parts of the game world.
The above M9 map shows the ninth sector of the world map in Fallout 4. It's the southern and southeastern part of the game world which is also the southern part of Boston. Yellow dots on the map mark locations in which you can start some quest (main, side or faction one). Red dots symbolize other locations. You will not unlock any quests there, but they might be related to quests started in other parts of the game world.
Below you can find the main quests path that shows you how the main plot proceeds and what choices you can make. This graph shows you how your choice of faction affects the endings.
Bethesda created its game in such a way that it leads the player linearly through all of the missions up until the quest called Institutionalized. From this moment on, we need to side with one of the factions, thus ultimately deciding with whom we want to finish the main plot. Joining the Institute happens during the quest Institutionalized, but you can contact any of the other factions (the Minutemen, the Brotherhood of Steel, the Railroad) at any point in the game. The game does not punish you for joining all of the factions at once. However, when you complete quests dedicated to a specific faction, you can worsen your relations with another group so much, that you won't be able to do any more missions for them.
This page will be updated as soon as we investigate which exact quests block the ability to complete tasks for other factions.
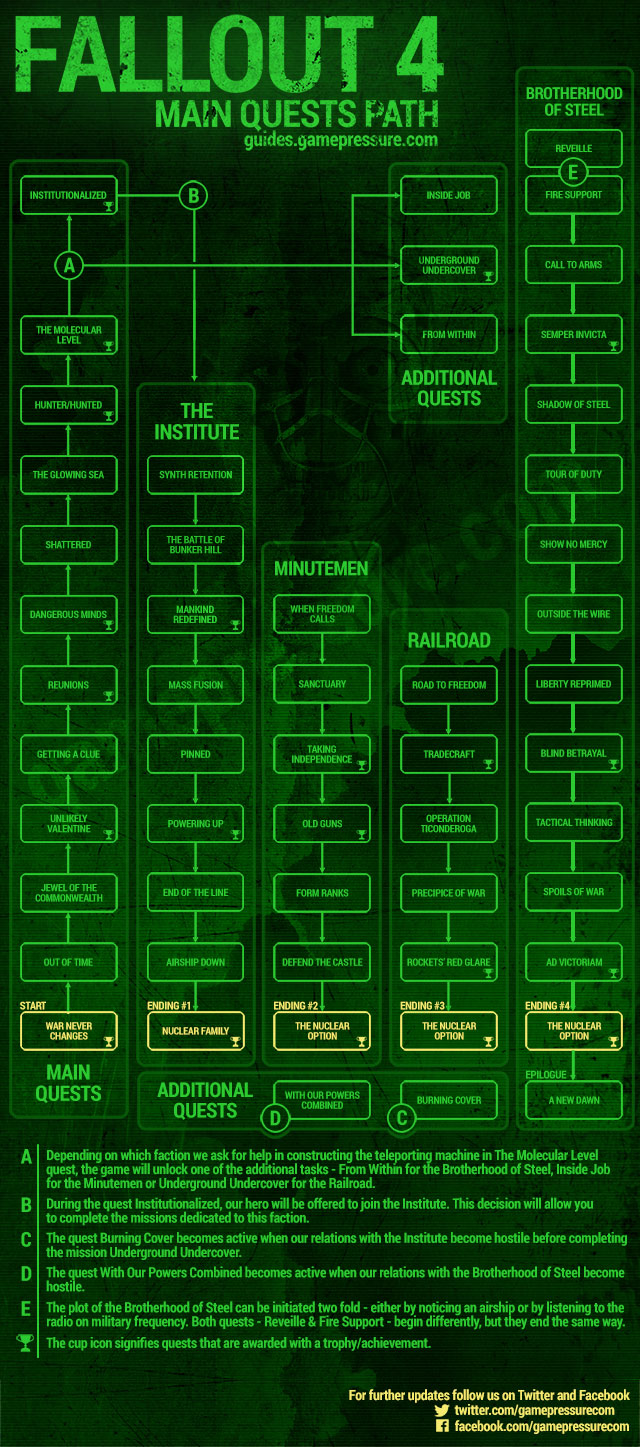
How to unlock: You don't have to unlock this quest. It will happen automatically after you've started the game.
Important - All of the major character choices you'll make during the prologue aren't final. You will be allowed to change them while completing the next main quest - Out of Time.
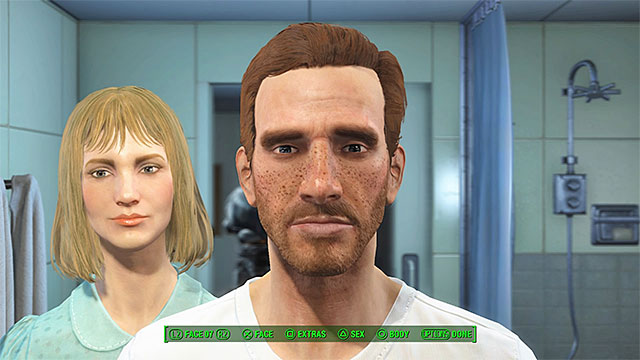 You can choose the gender and the appearance of your future character
You start off looking at the mirror in the bathroom. You can choose whether you want to play as a male or a female character and you can also modify your looks (face, body shape, distinctive marks etc.). Once you're finished playing with this unique version of a character editor confirm that you're done (push a certain key/button).
Go to the kitchen and interact with a robot named Codsworth. Once you're doing that search for a coffee cup located on the kitchen counter and drink coffee.
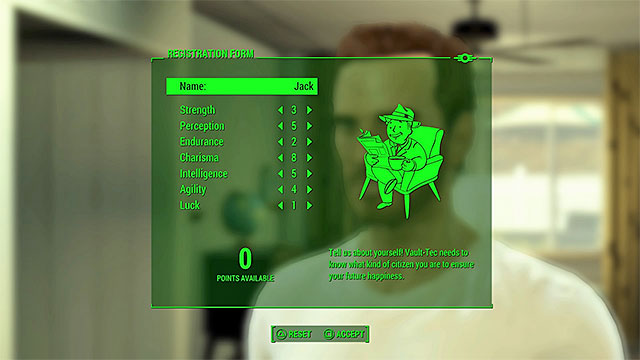 Name your character and distribute all the points between the main statistics
A salesman will soon knock on the door. Go to the door, open it and start a conversation with the Vault-Tec Rep. He will invite your family to go and stay in Vault 111 and during this meeting you will be asked to fill a registration form. This is when you must decide on your base statistics - Strength, Perception, Endurance, Charisma, Intelligence, Agility and Luck. You have 21 points to distribute between them and you can find our suggested builds in the strategy guide. Aside from setting the statistics you also have to name your character.
After the conversation has ended go to the child's bedroom. Play with your son Shaun and then interact with a crib mobile. You will soon be asked to return to the main living room. Go there and watch an emergency broadcast.
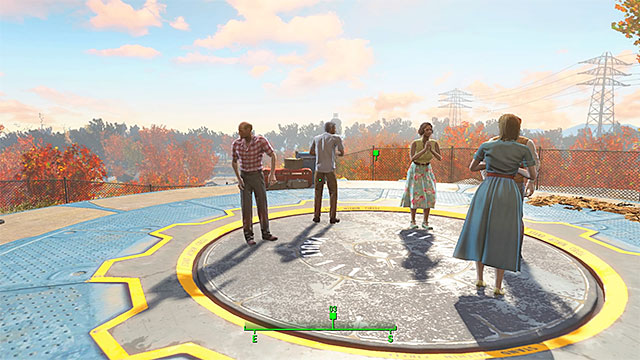 Reach the vault's platform
Exit the house via the main door and head right. Keep following a rather linear path through the neighborhood. The soldiers met along the way will be pointing where you need to go next so you shouldn't get lost. Once you've reached a small checkpoint go pass the other residents and talk to the Officer so that he'll allow your family to pass through.
Keep going up the hill. Stand on the round platform where you'll witness a nuclear blast. Wait for the elevator to descend to Vault 111.
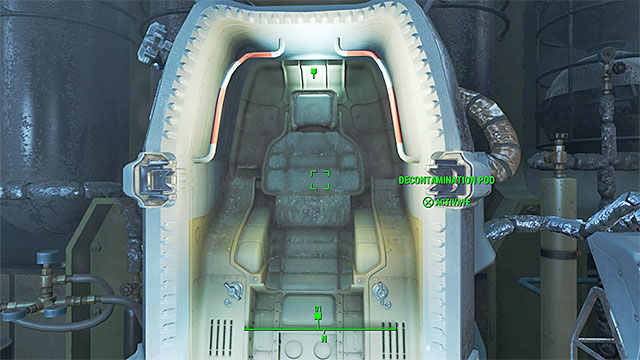 Enter one of the pods
Wait for the elevator to reach the underground vault and listen to the Overseer. Follow a near linear path. You will talk to the Vault-Tec Staff along the way and receive a Vault-111 Jumpsuit. Follow the Vault-Tec Doctor to a nearby chamber. Here you must comfort your son and then enter one of the decontamination pods. It'll soon turn out that this in fact a cryogenic chamber and you'll be put to a long sleep.
How to unlock: The quest will start in Vault 111 (M1,1) automatically after completing the Prologue.
Quest objectives:
 Keep eliminating the radroaches
Watch an important cut-scene before you're allowed to leave the cryo chamber. Your main objective is to leave Vault 111 and for most of the time you'll be following a very linear path through the vault, opening doors to gain access to new areas. A radroach is in one of the nearby rooms. Punch the little critter to get rid of it (you don't have any weapons yet). Expect to encounter more radroaches in the adjacent rooms. Keep attacking them one at a time and consume the radroach meat if your health drops too low (it shouldn't). You can also try doing power punches on some of the radroaches for better effects.
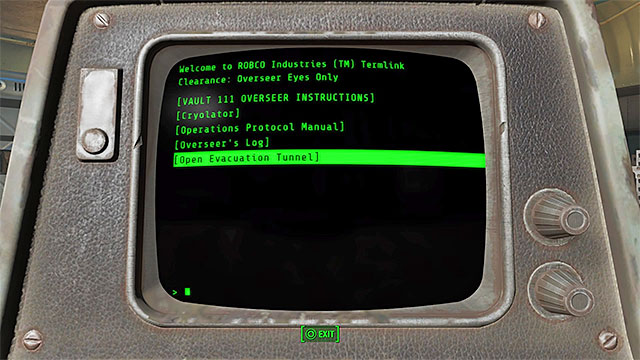 Open the door using the computer terminal
Stop after you've entered a larger room. Look around to find a 10mm Pistol with ammo, a bunch of Stimpaks (you can use them to heal yourself) and a few other items. The most important object here is the Overseer's terminal on the main desk. Interact with it. Choose the last option from the menu - Open Evacuation Tunnel. You can now proceed through a newly unlocked door.
Expect to encounter new radroaches in the next tunnel. You can keep relying on melee combat or you can use the pistol you've just found to eliminate them (consider practicing how to use the V.A.T.S. system as well).
 The Pip-Boy will be lying on the ground
You'll soon the last room of the vault. Kill the final radroaches (you can sneak up on them if you want to) and search the ground near a corpse to find a Pip-Boy. Once you've familiarized yourself with how the Pip-Boy works close it and interact with the vault door controls. Wait for the huge door to open and go to the elevator. You can decide to leave the vault right away or you can make some final changes to your character (name, SPECIAL, appearance).
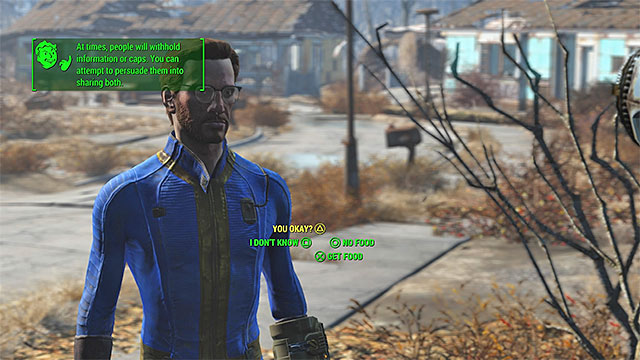 It's worth trying to use persuasion
Head east and you'll soon reach Sanctuary. It's the neighborhood where you've started the game, but obviously it's devastated now. Look around to find Codsworth and talk to the robot. You can choose a unique persuasion dialogue option (the yellow one) during the conversation if your Charisma is high enough. If you succeed you'll receive a holotape (Hi Honey!) from Codsworth. You can then search the Sanctuary together or you can do it alone. It's not too complicated - visit some of the houses (including your own), kill a few weak monsters and talk to Codsworth again once you're done. The robot will suggest that you go to a nearby town of Concord.
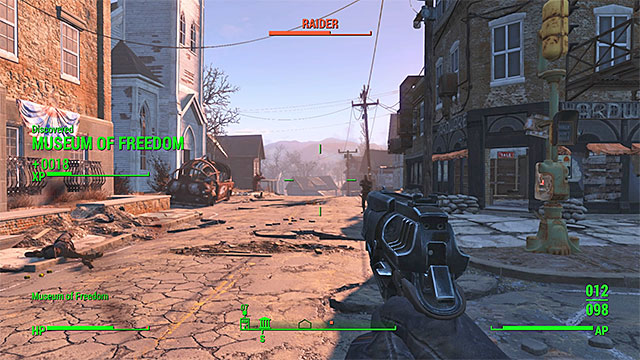 Eliminate the raiders stationed around the museum
Concord is located to the south-east from Sanctuary and you can get there by travelling in a straight line or (a safer option) by staying on a main road (make sure to visit the Red Rocket Truck Stop along the way, because you can "recruit" Dogmeat there). Watch out for bloodbug hatchlings near the entrance to Concord. They can inflict more damage than the radroaches you've fought so far so you must be more careful (you can also go around them). Follow the sounds of gunshots and you'll find the Museum of Freedom. You'll witness the local residents here engaged in a gunfight with the raiders. Help in getting rid of the (first wave) of bandits. You'll then be asked by Preston Garvey to help in securing the museum and a new main quest will begin - When Freedom Calls.
Quest rewards: Experience points, new main quest (When Freedom Calls).
How to unlock: The quest will start automatically near the Museum of Freedom (M1,2) after completing the Out of Time main quest.
Quest objectives:
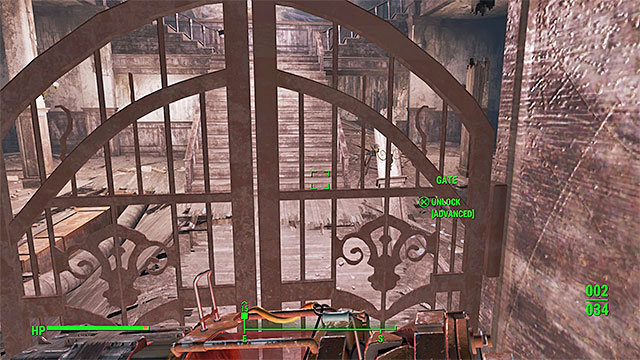 You can open the gate or go around
The quest begins near the Museum of Freedom in the town of Concord. Look around in front of the museum to find a very good short laser musket. Pick it up to complete an optional quest objective (collect ammo for this gun from a nearby Minuteman corpse) and then enter the museum via the main door.
Start exploring the main floor of the museum - you can open a gate which has an advanced lock (Locksmith perk and a bobby pin required) or you can go around through the rooms to the right. Be prepared to defeat new raiders. Some of them will be on this floor and some them will be on the upper floor (it's recommended to keep using the rifle you've collected not long ago).
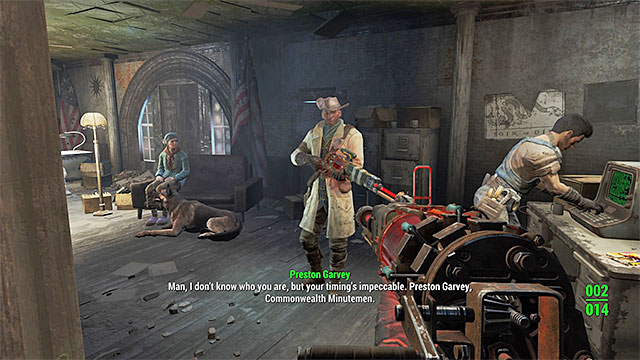 Meet with Preston Garvey and the rest of Minutemen
Head up and continue eliminating all the new raiders you encounter. You can't get lost, because there's only one path leading to the room where the settlers have barricaded themselves. Talk to Preston Garvey and then to Sturges when you get there. You'll find out about an inactive power armor on the museum's roof which you'll be able to use to deal with the remaining raiders.
Important - There's a bobblehead in the room with the settlers. Pick it up to get a permanent increase to Perception.
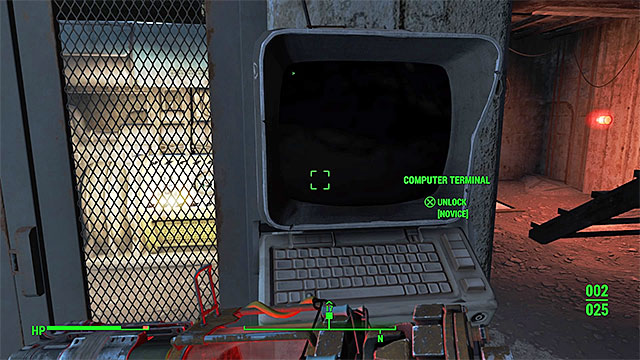 Hack the terminal in the basement
Go back the same way you came and stop near a destroyed part of the floor. Jump down to reach the basement area and find a locked gate. There's a computer terminal next to it and you must interact with it. Solve a simple mini-game in order to open the gate, enter a small room and collect the fusion core.
Alternative solution: If you have at least one bobby pin in your inventory and you don't want to hack the terminal you can try working on the lock on the gate. Save your game before you do that, because you can lose your bobby pins if you fail to open the lock.
 Activate the power armor and collect a minigun from the crashed airship
Return to the room with the Minutemen and proceed to the door on your left in order to continue your exploration of the museum. Use the door to reach the museum's roof and approach an inactive T-45 power armor in order to place the fusion core inside it. Enter the power armor and go to the crashed vertibird so that you can pick up a vertibird minigun. Get to the edge of the roof, jump down and start attacking new raiders led by Gristle using the newly acquired minigun.
 Keep firing at the deathclaw and don't allow it to get too close
Things will get complicated soon, because a deathclaw will come out of the ground near one of the street junctions. As soon as this has happened ignore the remaining raiders and focus your efforts on attacking the deathclaw. Keep firing without any interruptions and prevent the monster from getting too close, because you can quickly die even when you're hiding inside a power armor.
Move back when you'll have to reload the minigun and then resume the attacks. You can use other weaponry to weaken the deathclaw (and also blow up nearby cars), but the minigun should be enough to kill the monster. Deal with the raiders left alive so that this battle can finally end.
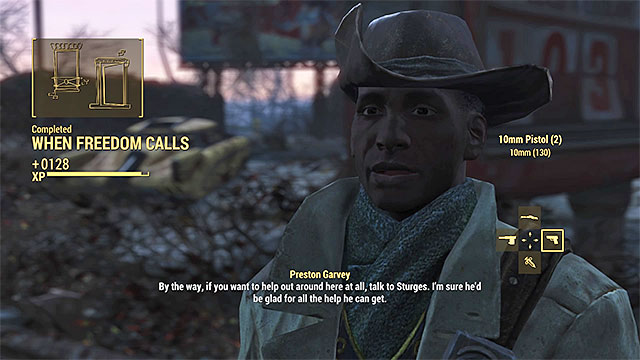 Meet with Preston Garvey in the Sanctuary
Exit the power armor and then enter the Museum of Freedom again. Talk to Preston Garvey and to Mama Murphy in the main room to find out that the Minutemen will head back to Sanctuary (you'll also receive fusion cells and bottlecaps). You will unlock a new main quest (Jewel of the Commonwealth). If you don't mind continuing the cooperation with Minutemen faction, you can first complete this quest. Use fast travel or return to Sanctuary on foot along with the Minutemen. Once the new allies are all in Sanctuary find Preston Garvey and talk to him again. You will be asked to provide help in rebuilding in the settlement (major quest Sanctuary) and in assisting another group of settlers (minor quest The First Step). They are going to be the first ones out of many side quests you will be able to perform for the Minutemen faction (there are also other factions in the wastelands).
If you plan to cooperate with one of three remaining factions (Brotherhood of Steel, Railroad or Institute), you can stop completing this quest once you unlock the Jewel of the Commonwealth main quest.
Quest rewards: Experience points, new main quest (Jewel of the Commonwealth), new Minutemen quest (Sanctuary), new Minutemen quest (The First Step).
How to unlock: The quest will start automatically in the Museum of Freedom (M1,2) during the When Freedom Calls main quest.
Quest objectives:
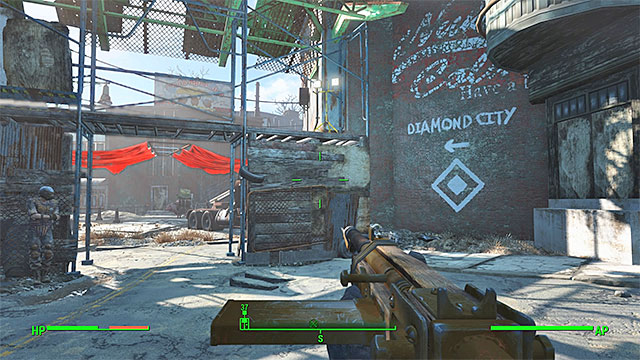 Follow the directions
You can unlock this quest during the final part of the When freedom calls main quest. After the large battle with raiders and deathclaw in the Concord city, you will have to return to the Museum of Freedom. There, talk with Preston Garvey and with Mama Murphy. You will be sent to the Diamond City in search for kidnapped son. The city is far south from your current location. On the way you can be attacked by bandits or monsters, but the city itself is protected by neutral guards and you don't need to be afraid of their attacks. Boards with directions will lead you to the entrance to the city.
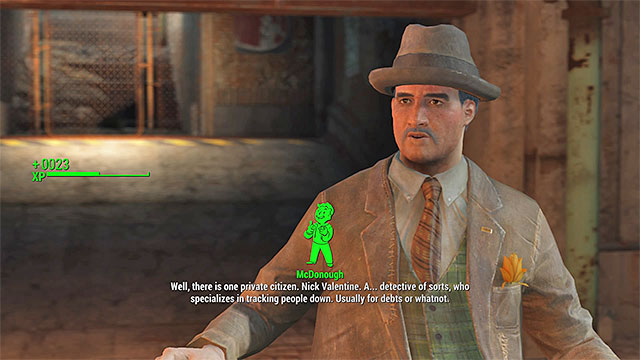 You can learn about Valentine's agency immediately or during one of the further conversations
Get close to the closed gate leading to the city and talk with the reporter named Piper who can be found here. She will help you get inside. Now, meet with mayor McDonough. If you have Charisma developed, during the conversation with the mayor you can pick a unique dialogue option and be pointed straight to Valentine's detective agency. Otherwise, talk with any person in Diamond City and you will be pointed to the agency.
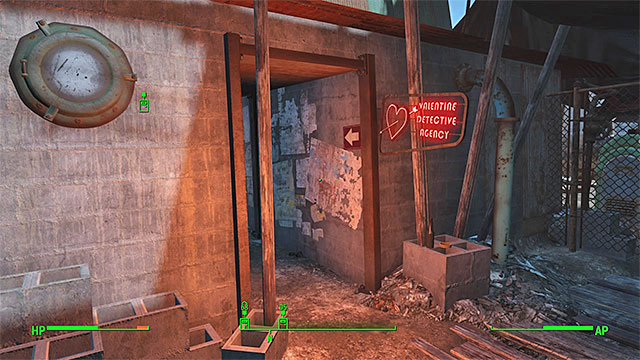 Entrance to Valentine's agency
Use the passage leading to Diamond City Market. Go to the back of the location and explore the narrow alleys. You will find the entrance to Valentine's detective agency. Talk with Ellie Perkins inside, she will tell you that Valentine has gone missing. During the conversation you can use dialogue option related to high Charisma twice, first time to tell her that you have an important business with the detective, and then to encourage the woman to put a price (125 bottlecaps) for finding him. No matter how you acted, the quest will end and another one will start, related to finding Valentine.
Quest rewards: Experience points, new main quest (Unlikely Valentine).
How to unlock: The quest will start in the Diamond City Market (M6,1) automatically after completing the Jewel of the Commonwealth main quest.
Quest objectives:
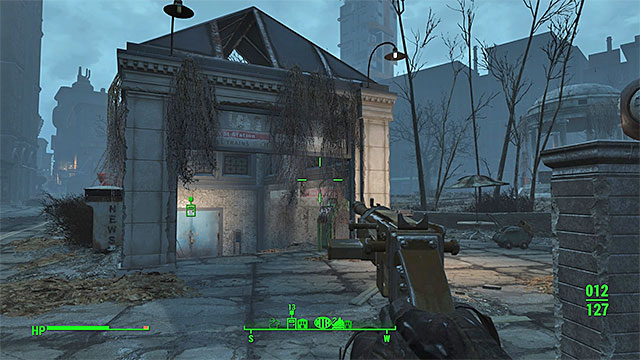 You must start exploring the metro tunnels
You will receive this quest after meeting with Ellie Perkins in Valentine detective agency in Diamond City. The woman will send you in search for the detective. You must go to the hideout of the local gang related to the investigation led by Valentine. The hideout is in the Park Street Station northeast from Diamond City. Once you reach the destination, find the entrance to the metro tunnel and use it.
 Vault 114 is located in metro tunnels
A long trip is ahead of you. During the trip you will face many groups of enemy triggermen. You should attack each group by surprise and hide behind cover once the battles start. Luckily, the enemies will be mostly using weak pistols (regular and machine ones). Keep walking, first exploring the station and then going along the tracks. They will lead you to the Vault 114 hidden in the tunnels. Press the red button in order to unlock the entrance to the vault.
 Other triggermen are in the vault
Sadly, you will be regularly attacked by the gangsters while exploring the vault. The first group will be found at the entrance to the crypt, it is a good idea to attack them from a distance, as only a narrow, uncovered metal balcony is leading to them. Further in the vault you should watch out in the larger, darkened room. You should use a rifle or other similar weapon once you get there.
 Obtain the password or hack into the terminal
The detective whom you seek is held in the last part of the vault, in the Overseer's room. He is guarded by Dino, a more important killer in the ranks of the gangsters. If it is possible, surprise attack him (for example, with a shot from long distance), not allowing him to defend himself. You can get to the room with Nick Valentine in two ways - by using the Overseer Door Password found at Dino's corpse or by hacking into the terminal on the right. Enter the office and talk to Valentine.
Important - There is a bobblehead in the room with Valentine, you will find it on one of the tables. Picking it up will increase the limit of bottlecaps that the merchants can use.
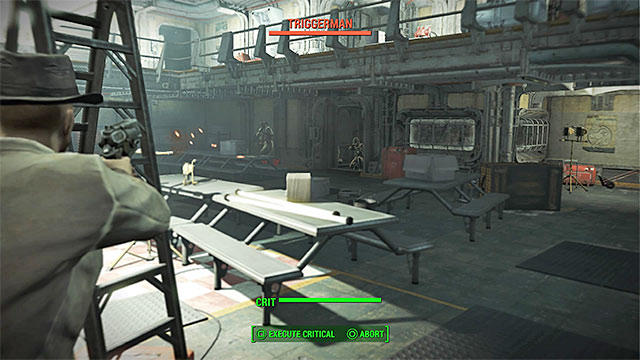 Eliminate the triggermen on your way back
Follow Nick Valentine. On your way to the surface you will meet new triggermen. Luckily, you don't have to worry that your new ally will die during the battles. However, it is wise to keep him in his full strength, thanks to that you will receive help from him.
 You can select a peaceful or brutal solution
Just after you get to Park Street Station, you will be stopped by Skinny Malone and his men. This encounter can have few outcomes. If you play as a character with high Charisma level, you can try convincing Darla who is accompanying Malone to escape or to turn against her lover.
If you have chosen a peaceful solution, there is a chance that you and Valentine will be also able to leave the location before Malone changes his mind. If the persuasion attempt failed or if you decided to fight, then the battle will start. During it, you should use shotgun or other weapon that is useful on short distance - you will have nowhere to hide. Luckily, Malone and his men aren't a great threat.
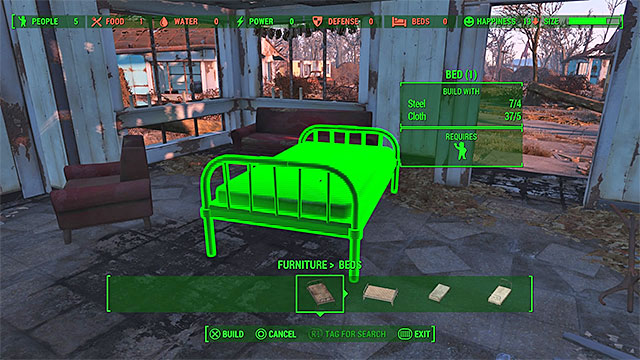 The hatch will allow you to leave the metro tunnels
No matter how you behaved, follow Nick Valentine. He will lead you to a hatch you previously bypassed in the metro tunnels. The hatch will allow you to return to the surface. Use it and talk to the detective, who will tell you to meet him in his agency in Diamond City.
Quest rewards: Experience points, new main quest (Getting a Clue).
You can finish a lot of quests tied to the Minutemen faction in Fallout 4 (it's one of four big factions occupying the game's world). The quests from this chapter of the guide are the more important ones for this faction. Completing them will allow you to greatly improve your relations with the Minutemen (be careful - it may also worsen your relations with members of other factions!). Each of these quests has a preset structure and nothing about them is random.
Important! The list of Minutemen quests doesn't include the When Freedom Calls quest. It's because it is one of the quests you'll complete at the beginning of the main storyline.
How to unlock: You must complete the When Freedom Calls main quest and meet with Sturges in Sanctuary (M1,3).
Quest objectives:
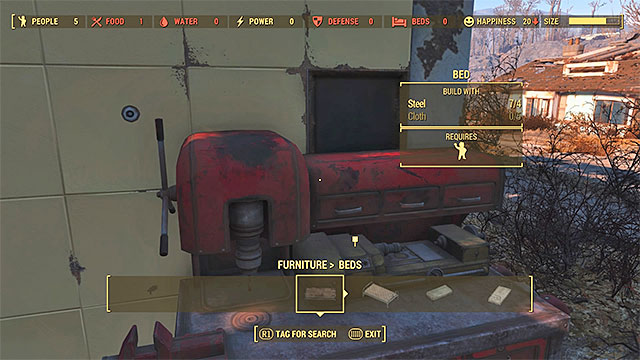 You must interact with a workshop
This quest won't appear in your journal right away. At the end of the main quest When Freedom Calls you'll be informed by Preston Garvey than you can talk to Sturges on the topic of rebuilding the Sanctuary so that it becomes a new strong settlement for the Minutemen. Find Sturges in Sanctuary and talk to him. Your first task will be to build enough beds to fulfill 100% of the current requirements. Locate a workshop in Sanctuary and interact with it. Choose Furniture and then Beds.

Each bed can be built only after you've collected 4 steel and 5 cloth (this rule will also apply to other projects described later in the text). Once you've collected all the required resources choose one of the beds and move to an area where it can be placed (screenshot above). It would be best to place all beds inside the larger rooms of the nearby houses. Build a sufficient number of beds (five unless new people have arrived) and then report back to Sturges.
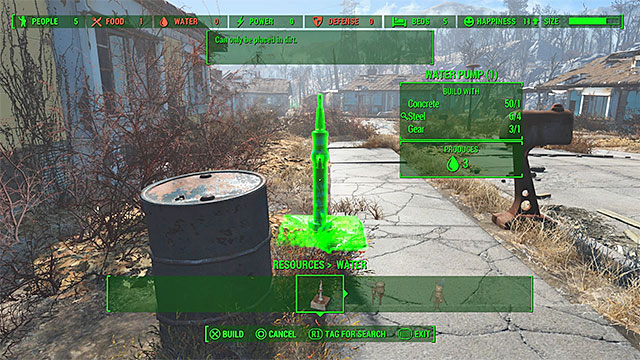 Water pumps are the most primitive source of clean water
Your next job is to provide the settlers with a source of clean water. Use the workshop, go to the Resources tab and choose Water. You can start building water pumps (they can be placed only on dirt) or better water purifiers if you've upgraded Sanctuary in the meantime (they must be placed in the water). Build enough objects so that you'll fulfill 100% of the current requirements.
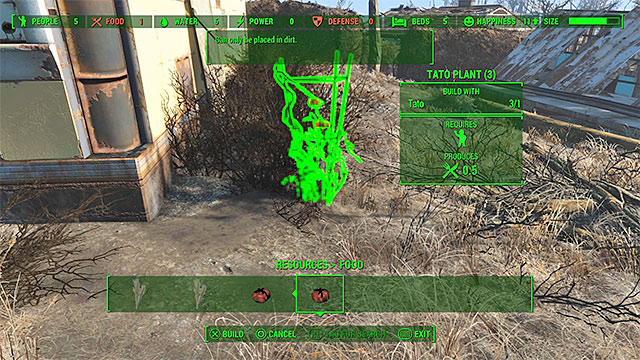 You can put plants in the ground
Check back with Sturges again. The next task will be to provide food for the settlers. Use the workshop, go to the Resources category and choose Food. Start placing objects depending on your current resources and preferences. You also have to assign one of the settlers to the task of collecting food (turn towards a settler and issue a command).
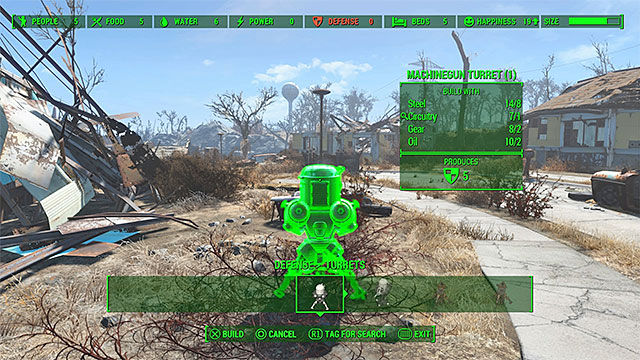 It's best to star placing machinegun turrets
Once you've placed a sufficient number of plants you can return to Sturges. The final assignment in this quest is to construct objects which will increase the settlement's defense rating. Open the workshop window and go to the Defense tab. You choose between many objects from three main categories - Guard Posts, Turrets and Traps. Guard posts require personnel and traps require energy so it's best to focus on traps. If you want to end this quest as quickly as possible you can start placing the basic Machinegun Turrets. Construct enough of them to fulfill 100% of the camp's requirements. Returns to Sturges for the last time to receive his gratitude.
Quest rewards: Experience points.
How to unlock: You must complete few quests for Minutemen and meet with Preston Garvey in the Sanctuary (M1,3).
Quest objectives:
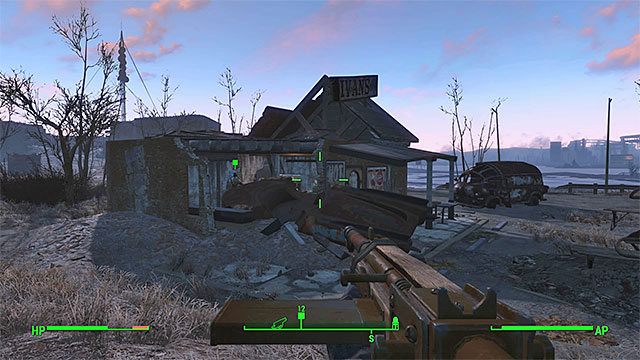 Castle's surroundings
You should receive the chance to start this quest after completing few main and minor (random) quests for Minutemen. During the conversation with Preston Garvey in the Sanctuary, he will ask for your help in reclaiming the Castle that was the main quarter of the Minutemen in the past. The location is in the eastern part of the world map. However, don't rush yourself with this quest, as on the way and in the castle itself you will face very strong enemies. Before going to the castle, make sure that you have a good companion and that you took the best weapons. Inside, among other opponents, you will have to face a powerful boss.
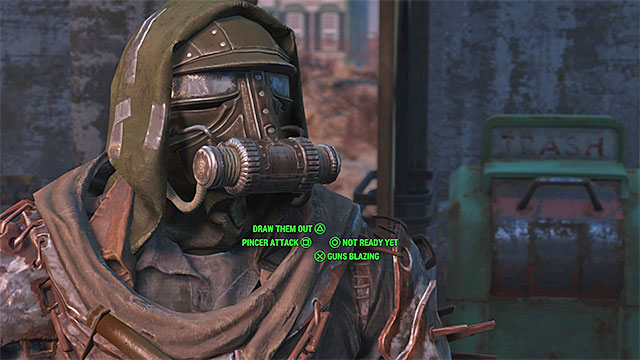 Decide what plan to use when attacking the castle
Once you reach the destination, don't go straight to the castle. First, meet with Preston Garvey and other Minutemen in order to make a plan of getting rid of the mirelurks in the ruins. You can:
Before you get to the castle, collect the ammunition lying around. If you intend to lure the monsters from the castle, you can place some mines on the path that leads there.
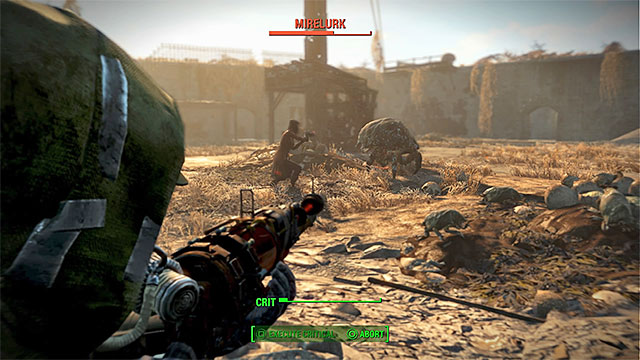 Kill mirelurks one after another
The actual battle will start sooner or later. Mirelurks prefer to attack one after another. Aim at unprotected parts of their bodies (instead of the hard shell) and don't let them get close to you. Take care of your allies during the battle. Preston will be accompanied by "unnamed" Minutemen, but losing any of them might greatly complicate the final part of this quest.
After you take care of most of the mirelurks, you will be tasked with destroying their eggs. Go to the groups of eggs marked by the game and try to destroy them (use the regular gun or melee weapon) before small creatures hatch from them. The things will soon complicate as in the water near the castle the Mirelurk Queen will appear.
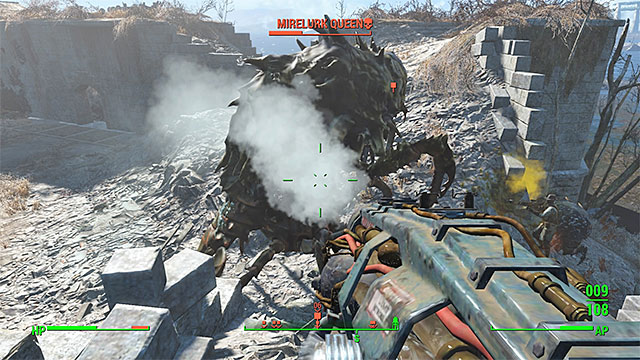 Attack the queen from safe distance and use a good weapon
Defeating the mirelurk queen isn't easy. Most of all, you must avoid her strong ranged attacks, which will not only take large amounts of your health, but its effects will additionally last for few seconds. Don't let the queen get close to your character, keep moving and, if needed, hide in narrow passages.
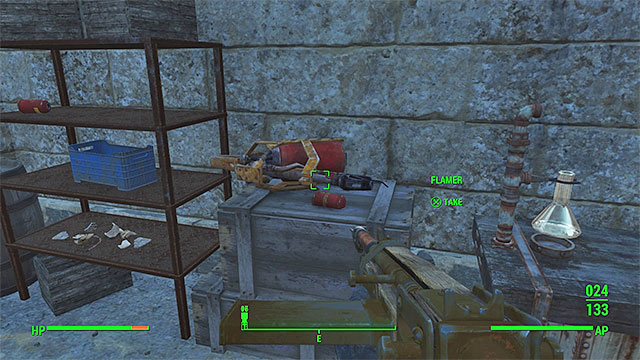 In the ruins of the castle you will find a flamer and other stuff
In order to weaken the mirelurks queen, use the best weapon you have. If, despite the warnings, you did not prepared for the battle, then look around the ruins of the castle. You will find additional ammunition, explosives and two good weapons - flamer and rocket launcher. Keep fighting until the whole long health bar of the boss is completely drained.
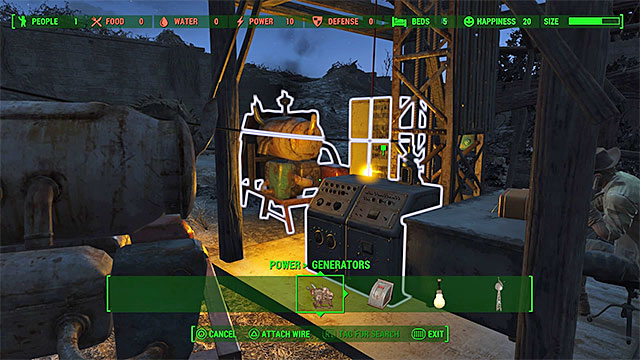 Connect the generators to the radio transmitter
The last part of the quest is much less stressful. You can immediately start taking care of the radio transmitter or first clean the ruins of all remaining mirelurks and their eggs. The transmitter is on the courtyard, examining it will lead to a discovery that you need electricity to power it up. Open the workshop window, go to the "power" tab and pick "generators". The transmitter needs nine power units. The best solution is to place two medium-sized generators nearby. Attach each of them to the transmitter.
Now you can talk for the last time with Preston Garvey in order to end this quest. Your ally should give you a new, random quest. Additionally, other random quests from the Minutemen will unlock when you listen to the radio.
Quest rewards: Experience points, new random side quest.
How to unlock: You must complete few quests for Minutemen and meet with Preston Garvey (M7,1).
Quest objectives:
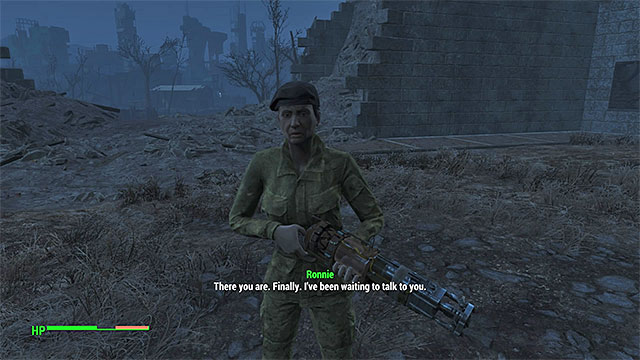 You will find Ronnie on the castle yard
In order to be able to play this quest, first you must complete the Taking Independence main quest described on the previous page. Then you must start completing new side quests for Minutemen until Preston Garvey will inform you that Ronnie Shaw wants to meet with you in the Castle. Go back to that location if you're not there right now. Find Ronnie Shaw and talk to her. The woman will need help in finding the castle armory.
Important - Don't start this quest until you developed your character enough. You should also take your best weapons for this mission, especially the tools that are effective in destroying enemy machines (you will face, among other opponents, a very strong robot).
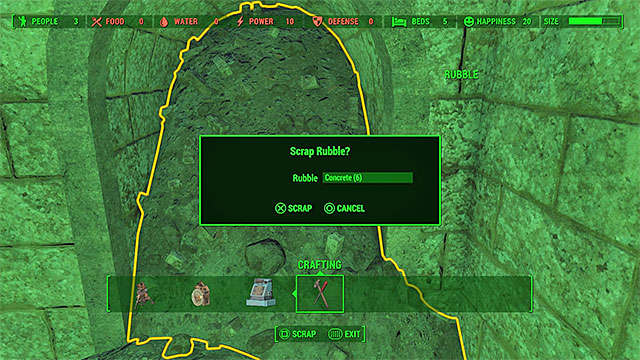 You can easily unlock the collapsed passage
Start walking with Ronnie. You will listen to a short conversation with her. After a while you will reach a collapsed passage. Walk towards the rubble, interact with it and confirm wanting to transform it into scrap (you will gain few pieces of concrete). Now you can walk forward and open the door leading to the tunnels under the Castle. When traveling through the underground tunnels, watch out for the automatic turrets placed nearby and for mines hidden in the ground. The mines will explode when you get close to them, you should avoid them or sneak up to them and disarm them.
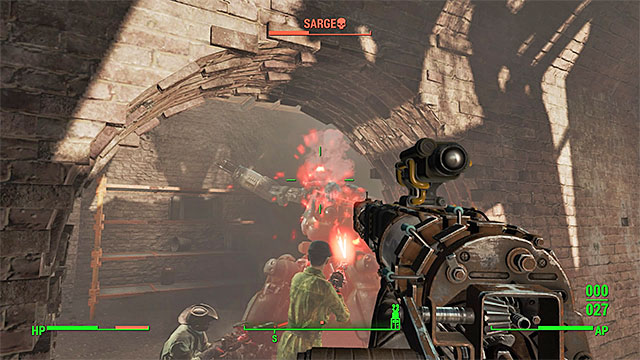 Use your best weapons to defeat Sarge
In one of the next chambers there's a very strong robot - Sarge. Start the duel with this mechanic boss, use the narrow corridors during the battle to jump to the sides whenever the robot is preparing his attacks. Use the best weapons you have and explosives to weaken your enemy. Avoid hurting your allies, they can greatly help you while they are on their full strengths. Don't stand too close to Sarge when he is destroyed because the robot will explode and you can easily die or receive serious damage. Resume the walk, in one of the further rooms you will find the body of general McGann (he has some valuable items). Open the door leading to the western part of the stronghold.
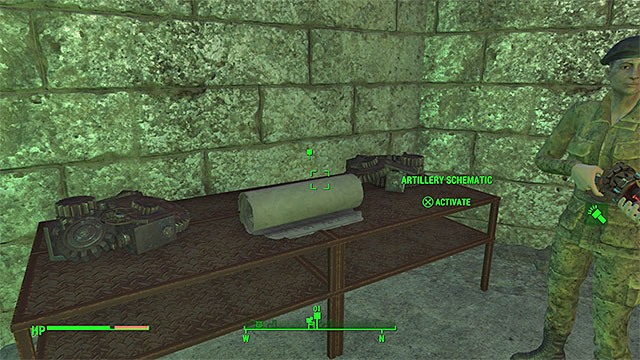 Find the artillery schematic in the armory
After a while you will reach the other side of the previously examined gate (you can pick it up now). The armory is next by and you should plunder it. You will find, among other items, an upgrade to the laser musket and a very valuable item - the Fat Man (it shoots small nuclear bombs). Your main objective is to take the artillery schematic lying on one of the tables.
 Assign the private minuteman to operate the artillery
Go back to the main court and open the workshop window after listening to the conversation with Ronnie. Open the Special projects tab and select the Artillery Piece. Put it in any place on the courtyard you want. The object requires someone to operate it. It cannot be Preston, Ronnie or the minuteman working at the radio transmitter. At least one more person should be residing in the castle, you must order it to operate the artillery.
 Location which should be shot with the artillery
Get with Ronnie Shaw slightly away from the castle and, after listening to the conversation with her, go to the place where the artillery test will be conducted. Activate Pip-Boy and activate Radio Freedom related to quest's side objective. Now, select Artillery Smoke Grenades which you received recently. Get close to the attack target, throw the grenade in its direction and retreat to a safe distance. Wait for the place to be bombed. From now on, you can use the artillery backup (while you're in its range) to eliminate groups of strong enemies.
Meet with Preston Garvey at the end of the quest. He will give you a new, random quest.
Quest rewards: Experience points, new random side quest.
The next pages of this chapter contain descriptions of smaller quests connected to the Minutemen faction. They aren't as important as the main missions of this organization. Furthermore, some of these quests have some randomness about them. This means that you may receive them in different order and/or that some of their objectives might change (you may be asked to secure location A instead of B etc.). You should keep doing them nonetheless to continue improving your relations with the Minutemen and to receive valuable experience.
How to unlock: You must complete the When Freedom Calls main quest and talk to Preston Garvey in Sanctuary (M1,3).
Quest objectives:
 Talk to a settler and offer help in getting rid of the raiders
This quest should be added to your journal at the end of the When Freedom Calls main mission. During your final conversation with Preston Garvey you'll find out that settlers from Tenpines Bluff might need your assistance as well. Leave Sanctuary and head east. Once you've located Tenpines Bluff search the small encampment and talk to one of the Settlers. You'll find out about the bandits and you'll be asked to get rid of them.
 You must kill all the raiders from the location mentioned by the settler.
The hideout of the bandits is a random location from the game's world. It may be one of the factories, a large house or an underground area. Use your Pip-Boy to learn where you need to go. Depending on the location you'll be able to start attacking the bandits as soon as you've arrived or you'll be forced to find the entrance to their base of operations first. You must eliminate all enemy units.
Go back to Tenpines Bluff and inform the Settler about your success (you will receive bottlecaps from him). There's one more thing to do - travel to Sanctuary and talk to Preston Garvey. He will give you a flare gun with some ammo. He'll also tell you about wanting you to lead the Minutemen and give you a new random task.
Quest rewards: Experience points, bottlecaps, flare gun, new random side quest.
How to unlock: You must complete The First Step side quest and talk to Preston Garvey (in the place where he can be currently found). The quest is unlocked randomly.
Quest objectives:
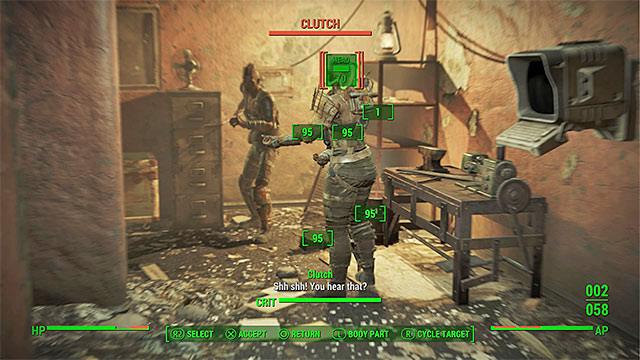 An example of a group of raiders
This quest is one of the many random ones connected to the Minutemen faction. You can receive it after you've completed The First Step side quest, talked to Preston Garvey and agreed to keep helping the Minutemen. You may be asked by Preston to help out the settlers from another, randomly chosen location. Once you get the assignment you will have to visit the settlement where you've been sent to, talk to one of the Settlers and go to the bandits' hideout which will be pointed out to you. After you've reached the hideout you will have to enter it and eliminate of the bandits present in that location. Once you're done go back to the settler to tell him about everything. He will give you bottlecaps and new members will join the ranks of the Minutemen. You will have to end this quest by returning to Preston Garvey and telling him about your success. He should have some new mission for you.
Quest rewards: Experience points, bottlecaps, new side quest.
How to unlock: You must complete The First Step side quest and talk to Preston Garvey (in the place where he can be currently found). The quest is unlocked randomly.
Quest objectives:
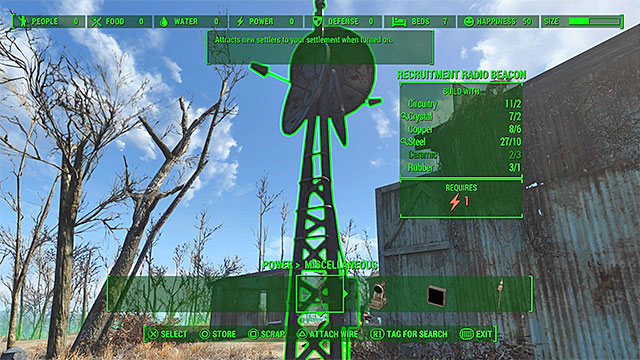 Place a radio beacon
This quest is one of the many random ones connected to the Minutemen faction. You can receive it after you've completed The First Step side quest, talked to Preston Garvey and agreed to keep helping the Minutemen. You may be asked by Preston to place a radio beacon in some random location in the game's world. Use your Pip-Boy to find out where you need to go. Once you've reached your destination eliminate all raiders or monsters which may occupy the location where you've been sent to.
Find a workshop after the fighting has ended. Choose the Power tab and then Miscellaneous tab. You must construct a Recruitment Radio Beacon - place this object somewhere in the area (the tower must turn green).
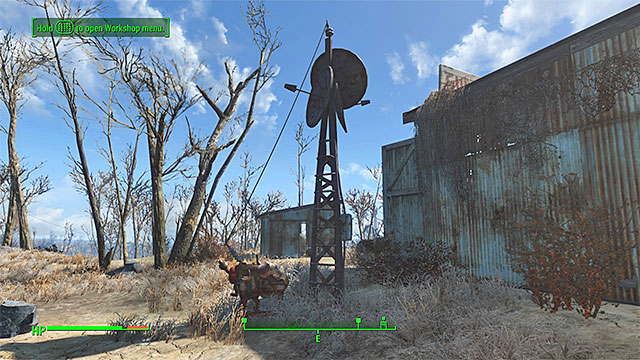
The radio beacon needs energy to function properly and this means that you must also place a generator nearby. Once again open the Power tab and then choose the Generator category. You may choose the most basic object from the list: Generator - Small. Place the generator somewhere close to the beacon, approach it and choose the Attach Wire option from the list. Face the radio beacon and finalize the connection. The screenshot shown above shows how this connection should look like. You'll automatically receive bottlecaps after activating the radio beacon.
You may now return to Preston Garvey in Sanctuary and report him on your successful mission. He should have some new mission for you.
Quest rewards: Experience points, bottlecaps, new side quest.
How to unlock: You must complete the When Freedom Calls main quest and meet with Mama Murphy in Sanctuary (M1,3).
 Mama Murphy
This quest won't appear in your journal as a normal mission, but as a series of small tasks. Wait until the Minutemen arrive in Sanctuary and meet with Mama Murphy in this location. The old lady will ask you to bring her a drug called Jet. You may agree to become her drug dealer (some of your companions will dislike that!) or you can turn her down. If you've chosen the first option then you may begin searching for Jet (it is a common object found in the world) or you can buy it from one of the merchants. Return with Jet to Mama Murphy and give it to her. She will have a new vision and you'll receive experience points.
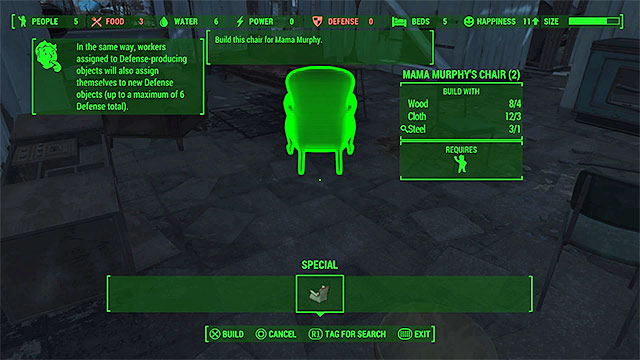 Place the chair somewhere inside the building
Wait a few hours and meet with Mama Murphy again. This time the woman will ask you to build her a unique chair. Open the workshop window, choose the Special tab and then Mama Murphy's Chair. Place the chair inside the building, somewhere in the area near the old lady. Mama Murphy will be tired so once again you'll have to wait a few hours before talking to her.
The next part of this quest has a rather simple structure. You can continue delivering Mama Murphy more drugs. She will ask for Mentats, Med-X, Buffout and Psycho. Each time you give her a new drug she will have a vision and you'll get some xp. Hold off with giving her the last drug - Psycho. The reason for that is because Psycho will turn out to be too strong for her organism and she will die immediately after taking the drug.
Quest rewards: Experience points.
How to unlock: You must complete The First Step main quest and meet with Preston Garvey (in the place where he can be currently found). This quest is one of the randomly unlocked ones.
Quest objectives:
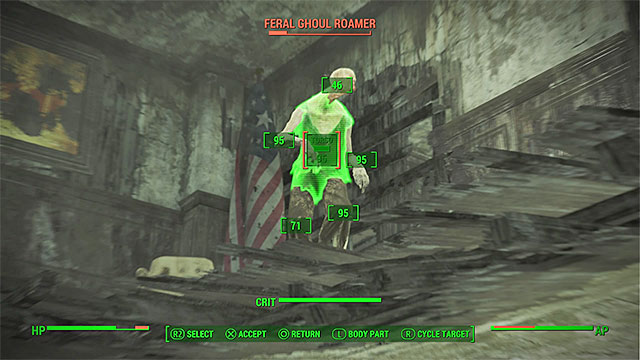 An example location with ghouls
This quest is one of many random ones related to Minutemen. The first time you can unlock it is after completing The First Steps side quest, when you talk to Preston Garvey and tell him that you intend to keep cooperating with his faction. Preston might ask you to help settlers from some other, randomly selected location. Then you must go there, talk to one of the locals and go to the place he points you at. Once you get there, you must eliminate some ghouls. You should be careful, as in addition to the basic version of the monster, you might have to face The Glowing Ones, much stronger elite ghouls. Once you secure the location, go back to the settler and tell him the good news. He will reward you with bottlecaps and new people will join the ranks of Minutemen. Once you're done, you must return to Preston Garvey and inform him about your success. He should give you some new missions.
Quest rewards: Experience points, bottlecaps, new side quest.
How to unlock: You must complete The First Step main quest and meet with Preston Garvey (in the place where he can be currently found). This quest is one of the randomly unlocked ones.
Quest objectives:
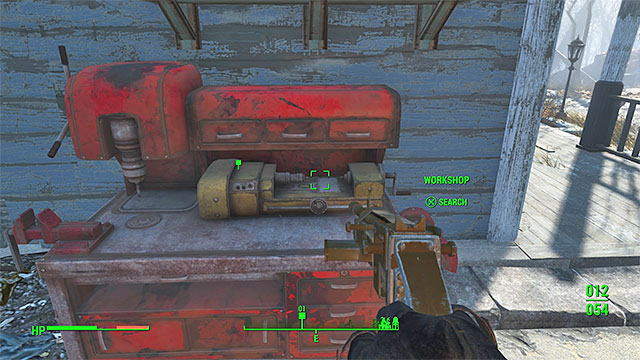 Eliminate all the enemies from near the workshop
This quest is one of many random ones related to Minutemen. The first time you can unlock it is after completing The First Steps side quest, when you talk to Preston Garvey and tell him that you intend to keep cooperating with his faction. Preston might ask you to help settlers from some other, randomly selected location. Then you must go there, talk to one of the locals and go to the place he points you at. Your objective is to secure the workshop. In order to complete it, simply clean the territory of any bandits and/or monsters. Once you're done, interact with the workshop (you don't have to construct anything), then return to the settler and tell him the good news. He will reward you with bottlecaps and new people will join the ranks of Minutemen. Once you're done, you must return to Preston Garvey and inform him about your success. He should give you some new missions.
Quest rewards: Experience points, bottlecaps, new side quest.
You can complete many quests related to the Brotherhood of Steel in Fallout 4. The brotherhood is one of four main factions living in the game world. The quests that you will find on next pages of this chapter are the most important ones for this faction. Completing them will greatly improve your relations with the Brotherhood of Steel (but it can also worsen your relations with other factions!) and each of these quests has specific requirements.
How to unlock: You must help Paladin Danse in defending the Cambridge Police Station (M5,1).
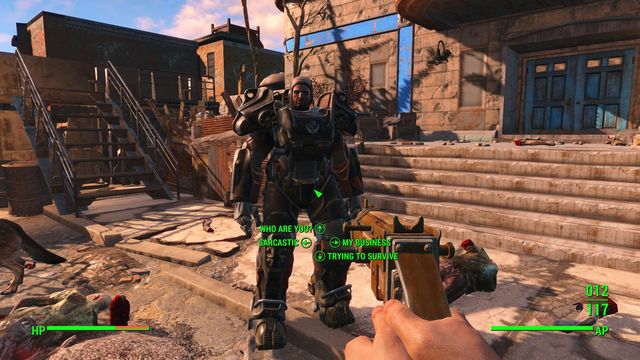 Stick close to Danse during the defense of the station so that you will not be attacked directly by the enemies.
In order to start this quest, you must go to the Cambridge Police Station and help the soldier in defending the place from waves of Ghouls. You should hear the battlefield from quite far away. The battle shouldn't be hard, even without your help the soldier should manage to win. Once the battle ends, don't forget to gather valuable items from the bodies of fallen enemies. Once you do it, talk to Paladin Danse. He will tell you that he is a member of the Brotherhood of Steel. During the conversation you can agree or not agree to help him and his organization. If you accept his offer, you will have to listen to another, very short dialogue. The quest will end and another one will start automatically - Call to Arms.
Quest reward: Experience points.
How to unlock: You must complete the Fire Support quest, agree to help Danse and then enter the Cambridge Police Station (M5,1).
 If you are ready to complete another mission for the Brotherhood of Steel, walk into the Cambridge Police Station.
The quest will start automatically after you finish the Fire Support quest and agree to help Paladin Danse and the Brotherhood of Steel. In first order you must walk into the Cambridge Police Station. Before the conversation, walk through the whole room and collect all valuable items. Once you're ready, talk with Danse. Now you must follow the soldier and help him in combat. At the end of each phase of the journey you must talk with him again.
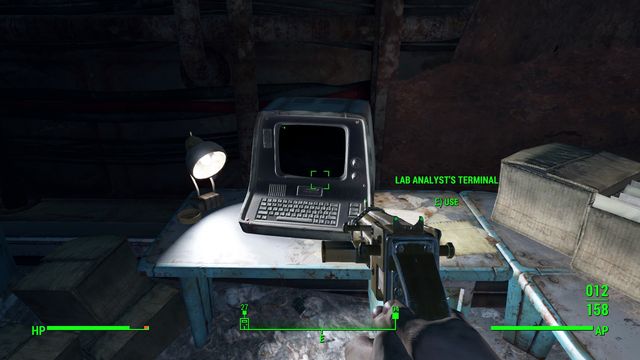 Use the terminal to change the password to another computer.
Once you reach the ArcJet Systems building, after some exploring you will find a room with closed door. In order to open it, walk to the terminal. You will be able to change the password. Once you do it, walk to the computer in front of the door that you want to open. Select the proper option and leave the system. The door will open. Watch out, immediately after that a battle with few Synths will start. Keep following Danse.
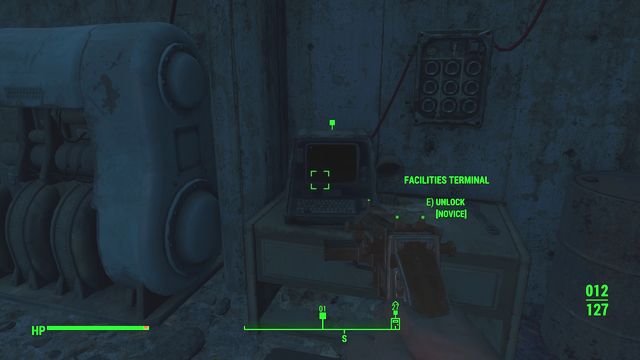 In order to restore the power you must hack into the terminal.
After a while you will walk down to the underground chamber. In order to use the elevator, you must restore the power. Go to the engine room and hack into the computer (novice level). Once you restore the power, Danse will be attacked by a large group of Synths. Leave the engine room and press the button in the room with the glass. Remain in the room until the countdown ends. Once all enemies are destroyed, go check what happened to Danse.
 The item you seek is near the body of one of the fallen enemies.
Use the elevator after the conversation. Don't worry if your companion won't enter it, after a while he will be automatically teleported to you. Go upstairs. Defeat another group of opponents and take the Deep Range transmitter from the body of one of them. Enter another elevator. Leave the building and talk to Danse. He will give you a good laser rifle. He will also ask you if you want to join the Brotherhood of Steel. If you agree, the Semper Invicta quest will start.
Quest rewards: experience, legendary rifle - Righteous Authority.
How to unlock: Complete the Call to Arms quest and after returning to Cambridge Police Station (M5,1) agree to keep helping the Brotherhood of Steel.
 This mission has no story importance, it is only supposed to increase your reputation in the Brotherhood.
Your first objective is to return to the base of operations of the Brotherhood of Steel which is located in the Cambridge Police Station. Enter inside, listen to the dialogue between the members of the brotherhood and talk to Danse. During the conversation you will officially join the organization. You will also receive order to talk with Rhys and Haylen.
Talk with the two new friends, Haylen and Rhys. The woman will give you a quest about finding an artifact while the Knight Rhys will want you to clean the marked location on the map. Both quests are random generated.
Once you complete them, return to the questgivers, talk to them, then go to Danse. The quest will end.
Quest rewards: experience and some bottlecaps which you will receive for completing the two ordered quests.
On the following pages of this chapter you will find descriptions of smaller quests related to the Brotherhood of Steel faction (it's one of the four factions that can be found in the game world). These quests aren't as important as the main quests for this faction. Additionally, some of them are random generated. It means that you can receive them in various order and/or their objectives might change (for example, you can be tasked with securing location A instead of location B). Of course, try to complete all the available Brotherhood of Steel quests in order to improve your relations with the faction and to obtain precious experience.
How to unlock: Find the body of a paladin not far East from Med-Tek Research (M2,1).
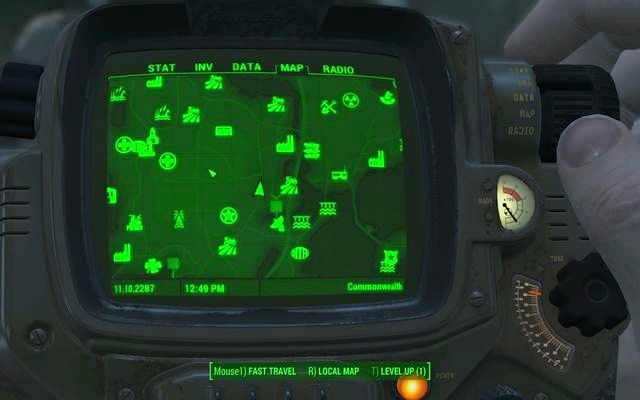
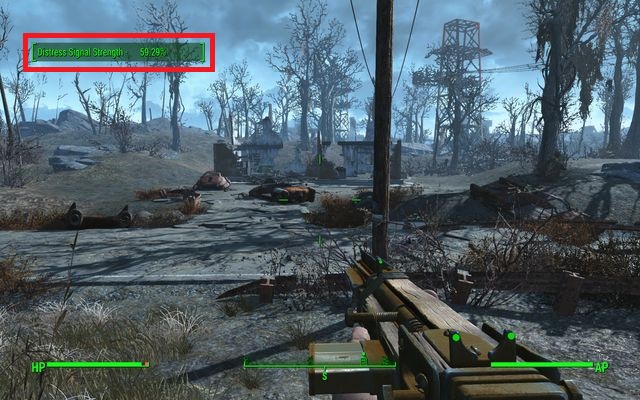
Near the Med-Tek Research location (sector II) you will receive a disturbing radio signal. After switching to it, you will hear a beeping sound - the closer to the source you get, the beeping will be more frequent. Go along the street East and you will see ruins of a house (picture 1 and 2). Inside there's a body of one of the paladins of the Brotherhood of Steel. The body will have a holographic tape - listen to it.
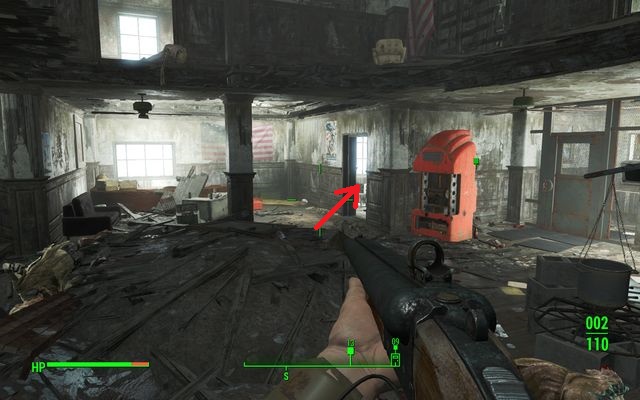 Go to the room near the Nuka Cola machine after you destroy the enemies
Now go south-west, to the National Guard Training Yard. Enter the building (watch out for mines). Inside you will have to face few ghouls (prepare for close combat). In the room on the other side of the building, on the right side you will find another body and another tape to listen to.
The next target will be in the Revere Satellite Array. Inside there are Super Mutants, it is best to eliminate as many of them as possible from far away with the sniper rifle. Important - one of them is equipped with a rocket launcher.
 Location of the armor in the convoy - you don't need any skills to get to it
Important clue - having the power armor might be vital to completing this phase. One can be found in the training facility, locked in the container on the north (hacking), in the armory with the assembly tool (lockpicking required) or by going East, where you will find a damaged convoy on the road and inside the truck you will get another armor (it might be guarded by a robot).
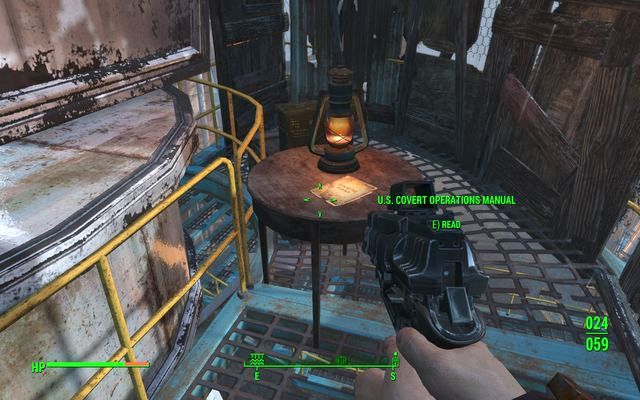 A magazine in the central tower
Once you get to the location territory, you can explore the top of the antenna tower in the middle. At the end of the chairs you will find an U.S. Cover Operations Manual that will permanently decrease the chances for you to get detected when sneaking up. On the north-eastern antenna you can find the power armor.
 Mutant house attached to the antenna construction
The objective - the last body - is on the antenna that is located on the southeast. The mutants had built a small house there and the body is inside. You can still help yourself in finding the place with the radio signal. After listening to the last tape you will obtain the location of a hidden bunker in the northern part of the map - Recon Bunker Theta. If you will get there from the western side, you will avoid fighting mutants guarding the passage.
 Entrance to the Theta Bunker
You will open the door to the bunker with the terminal. Inside you will only find Paladin Brandis. You can use Charisma to calm him down (additional experience), but you don't have to. The second answer is important: if you will tell him that the remaining brothers are dead or you will immediately give him the tapes, you will part your ways with him peacefully. Otherwise, you will have to kill the paladin - however, he is not a worthy opponent (he is very weak at shooting with his laser pistol). In both cases the reward is the same. You can take the fusion core from the room and, after optional killing of the enemy, you can search his body and pick the laser rifle (unique).
Quest rewards: experience.
Railroad is one of the four factions in the game. It's an underground, secret faction that invites only elite members. Most of the time they are working silently and have a well organized hierarchy. Completing the major quests will allow you to improve your relations with the faction if you will join it. The Institute faction is their main rival, they are fighting it whenever they can.
How to unlock: Overhear the conversation in Diamond City Market (near Nick's Valentine's quarters) (M6,1) or go to the place where the path starts.

The quest will start a chapter focusing on the Railroad faction, which are the opposite side to the Institute. It can be unlocked in a few ways. The easiest one is to overhear the conversation in Diamond City between two men located North from the main market square (the next block, near the "detective" sign that leads to Luck Valentine.
 The place where the "road to freedom" starts
You can also go directly to the park in the city center that is marked with mission objective marker. There you will find a marking on the ground and a red line leading from it. It is quite long and not always visible, so you must be cautious. You can ignore the enemies you meet: ghouls, bandits and mutants. Just follow the path.
 Entrance to the church - a white lantern painted on the wall is one of the signs of the faction
The path will end in front of the white door that leads inside the church. Turn immediately right when inside in order to avoid fighting ghouls. Walk through the door leading to the basement.
There you will notice a symbol on the last wall. It's a lock which can be turned in order to change letters. You must create a "RAILROAD" word from the letters on the face, confirming each letter by pressing the middle button. Once you do it, a secret passage will open.
 Talk to the leader and pick yourself a nickname - you will become a member of the Railroad
At the start of the conversation (if you don't have the Charisma) you should pick up the lower option twice. This will allow you to easily complete the dialogue test.
Quest rewards: experience, Tradecraft quest.
How to unlock: Talk to Deacon in Railroad HQ (M6,2) after completing The Road to Freedom quest.
Quest objectives:
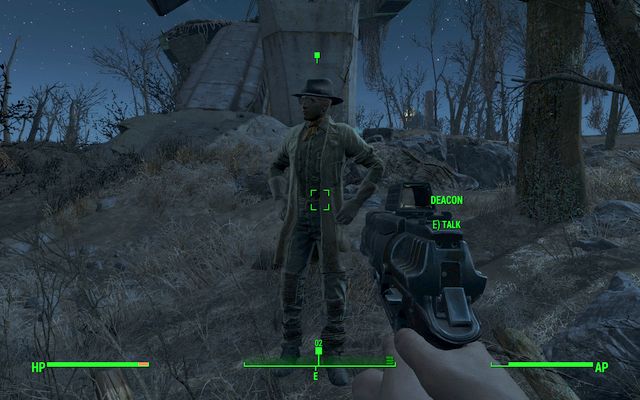 Deacon will be black now...
Talk with Deacon in Railroad HQ and then meet with him under the highway outside the city. You and he will go together to the end of the highway, facing some ghouls on the way. At the end of the road you will meet Ricky. The conversation with him has no importance. Now speak again to Deacon. He will suggest performing the action (assault on enemy base) through the tunnels, from surprise. If you want, you can suggest an open frontal attack (it will appear as a side objective in your journal), but don't do it - it always ends in failure and you must use the back entrance.
 Ricky Dalton - the "tourist"
If you have Charisma points, you can convince Ricky to help you. Low Charisma will provide you with 3 Stimpaks, Med-X and 3 food cans. It will also allow you to pick the next option. Medium Charisma will allow you to convince Ricky to eliminate enemies with sniper rifle. With high Charisma you will convince him to lure the enemies away from you.
 The power armor in the destroyed train
Walk off the highway and go towards the sewers - the back entrance. You can see a ruined train on the way - in one of the wagons you can find a power armor (II rank terminal hacking is needed). Talk to Deacon in the sewers - he will open the door. You will face a synth shortly after.
Advice: grenades and laser-based weapons are very effective against synths and turrets.
 Railroad mark pointing to a hidden treasure
A moment later Deacon will point you to a mark on the vertical pipe that informs you about a treasure hidden nearby. It isn't lying - on the second side of the pipe you will find some ammunition inside. Walk through the metal bridge after the turn and you will find a terminal that operates the turret and lights. Another terminal found not far further can be used to activate a turret that will be on your side.
 The magazine on the desk in the office before the laser traps
In the next room behind the closed door on the left side you will find a fusion core. After walking to the stairs, in the office you will obtain the U.S. Covert Operations Manual. Another trap - laser sensors - can be dismantled with no additional skills required. Just walk close to the source of the beam and use the action button (or use the terminal nearby - level II).
 Entrance to the safe opened by Deacon. Inside you will find the prototype
Turn left in the next corridor. You will face a stronger synth's leader. Deacon will open the door. On the left behind the door you will find the Hazmat Suit. Take the device - Carrington's Prototype - from the safe and escape from the location. Walk upstairs (watch out for mines) and behind the door (level II lock) you will find the second fusion core. The exit is in the elevator. If it is not active, use the nearby terminal to restore the power.
You will reach a building full of synths. You can fight your way, in that case it is best to throw grenades on both floors. You can also try to quickly run from the building, you shouldn't receive heavy damage - the synths are reacting with small delay. Then you and Deacon will split up. You will finish the quest by meeting up with him in the Old North Church. Now you can pick a nickname - one of the available ones - that will be used in the organization.
Quest rewards: experience, joining the Railroads faction, receiving new companion - Deacon, new quest Boston After Dark.
How to unlock: Unlocks automatically after completing the Tradecraft quest in the Old North Church (M6,2).
Quest objectives:
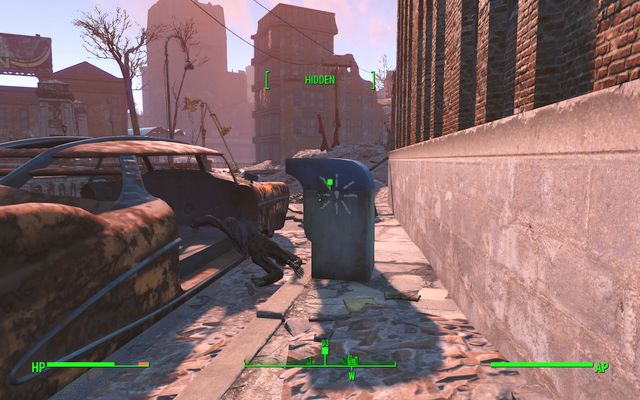 Receive the orders from the blue mail box
Talk with Carrington in Railroad HQ and go few streets further in order to receive the package from a mail box. Now go to the Bunker Hill location and find The Old Man Stockton among the men trading there.
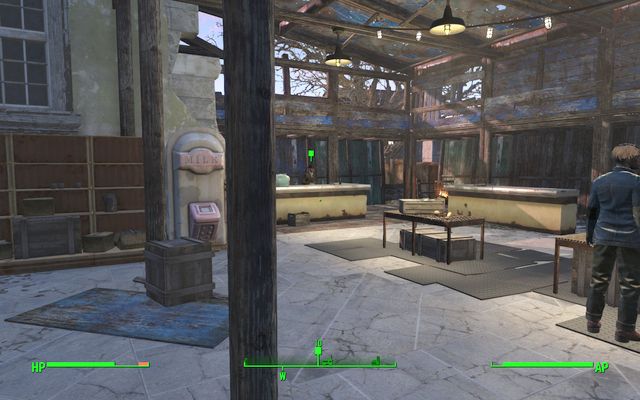 The Old Man Stockton
Give him the faction's password by selecting the "left" dialogue option. He will order you to secure the church where the further action will happen. The location is occupied by a small group of raiders. It is wise to shoot at them from far away, using the windows. Once the area is secured, wait till evening for Stockton (you can sit on the bench and wait selected amount of time).
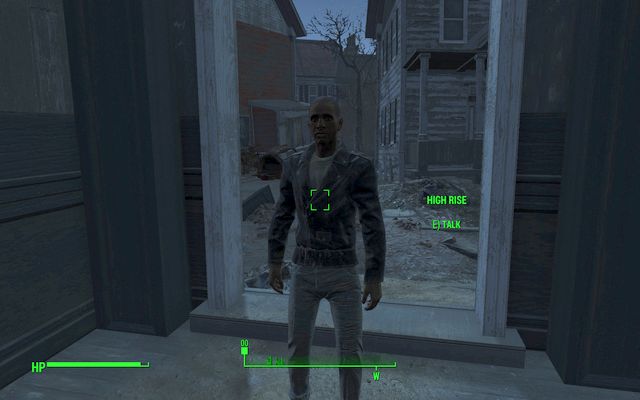 Wait for the ally to arrive after securing the location and lighting the lantern up by Stockton
After arriving, Stockton will light a lamp, giving a signal to his ally. Once the new recruit arrives, you will go in a group - your job is to protect the allies from attacks of thugs. They are not strong enemies and they will not appear in large groups, so the whole operation should go smoothly. Once it is over, return to the headquarters and talk to Dr Carrington in order to complete the quest.
Quest rewards: experience, 180 bottlecaps, upgraded sniper rifle, Butcher's Bill quest
How to unlock: Unlocks automatically after completing the Boston After Dark quest in the Old North Church (M6,2).
Quest objectives:
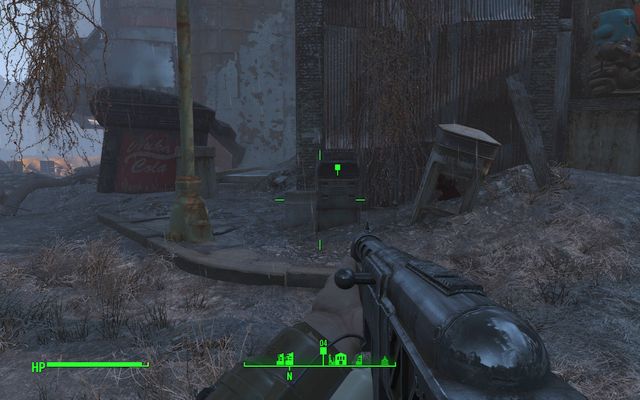
Dr Carrington will give you another quest once you report to him. Go near the Mass Fusion Building, south-east from the base. There you will receive new orders. Watch out for enemy shooters, there are many of them.
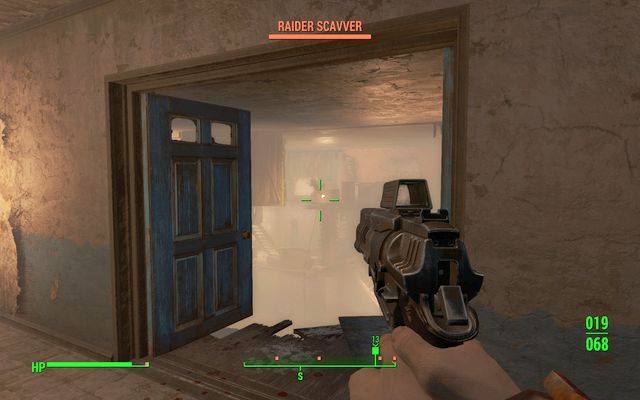
Go to the Kendall Hospital and infiltrate the building. The first part is filled with simple thugs, most of them doesn't even have any range weapons. However, once you go deeper, using the elevator on the floor, the enemies will get stronger.
Watch out especially for the double blue door. From the balcony on the other side you can be attacked with a rocket launcher. Walk down and search the marked desk. You don't need to worry about the other residents - just return to Dr Carrington with the documents through the same way you got there.
However, if you decide to walk below, be prepared to fight a deathclaw. Before the exit there is also a large field with high radiation. Because of that, try to reach the exit as quickly as possible. You will end the quest and a series of missions for the doctor after the conversation with the questgiver in the headquarters.
Quest rewards: experience, 150 bottlecaps
How to unlock: you will receive this quest after a while since you talked with Dr Carrington and completed the first Butcher's Bill quest.
Quest objectives:
 The chest might be guarded by Yao Guai
Another quest received from Carrington in Railroad HQ. You must wait some time before you can start this quest. It is a good idea to complete some minor quests for this faction in the meantime. As usually, first you must go to the city south-west from the main city in order to receive details about the quest.
At the destination you can face some Yao Guai bears. They are enemies that you mustn't ignore. The mission objectives found in the chest will point you to the East Boston Preparatory School.
This time, the bandit's level is quite high - they have better equipment and there is many of them. You are safe on the ground floor, but on the first floor you will find a large group of them. You must also watch out for mines - they are in almost every room. You will find many ammunition containers in the building. On the first floor, in the south-eastern part, you will find a safe and a container with weapon/ammunition.
 Open the closed cell and take the tape
Walk to the room where your objective is located. You must open the cell lock on your own (the lowest difficulty). Search the body in the cell and go back to Carrington with the holo tape you found in order to complete the quest.
Quest rewards: experience, 175 bottlecaps, medium leather jacket
The minor quests have lower priority and influence on the story. They have smaller impact on your relations with the faction. Usually, they are easier, shorter and you receive worse payment for them, but that is not always the case. In Railroad faction these are mostly quests related to finding someone/something, searching and sometimes securing a location. Completing these quests is sometimes possible even if you joined other faction.
How to unlock: talk to PAM robot in the Railroad HQ (M6,2)
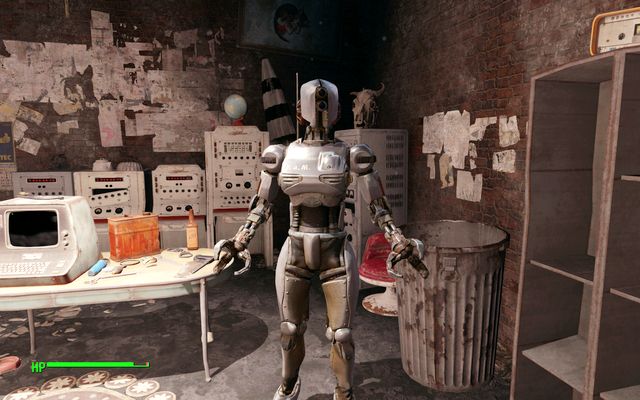 PAM robot in the Railroad HQ
During this quest, you will go to the Red Rocket Trucker Shop near Sanctuary. You must prepare the defenses of the place by constructing a defense with 10 defense points. The easiest way to do it is by building two simple cannons. You can use the materials available on the station.
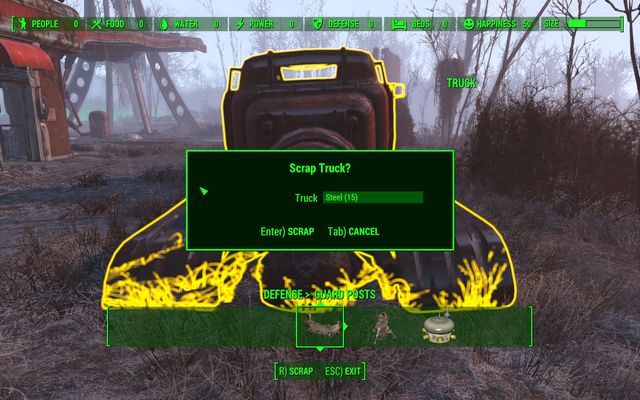 You can collect the materials by removing the decorative objects on the station
Important: until you will have settlers in any village, building the wooden outpost will not add you any defense points. Someone must be able to use it. Other defense elements, except for simple cannons, require electricity, so make sure that you have enough materials. What's interesting, after completing the mission objective you can pick up the turrets (without destroying them) and place them in any other settlement you want to improve.
 Craft two turrets, then you can pick them up
After constructing the required upgrades, go back to the questgiver. Caretaker will appear there, you can receive other minor quests from him.
Quest rewards: experience, 200 bottlecaps, quest Jackpot: Medford Memorial Hospital
How to unlock: talk to the Caretaker after completing the Mercer Safehouse quest. He will come to the Red Rocket Trucker Shop (M1,4)
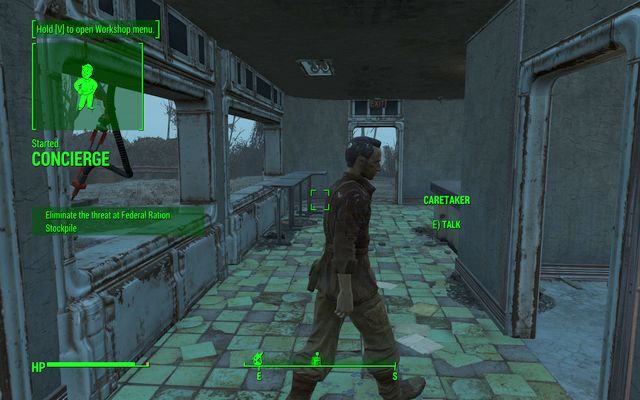 Caretaker
In order to obtain this quest, you must tell the faction password and then ask for any alarming matters when talking to the Caretaker. It's a very small quest during which you must clean a specific location. The location is the Federal Ration Stockpile - a warehouse taken over by thugs. Just get to the location and kill all enemies you find there (you will be informed about it).
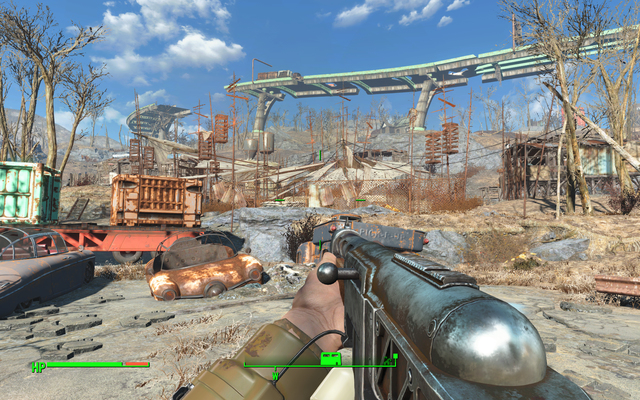 You must completely clean the enemy base of bandits in order to complete the quest
Watch out for turrets at the entrance. The main location is the bunker's underground where you will face the largest number of enemies. However, if you're in the location for the first time, you can face an enemy in a power armor at the entrance. If you have been here previously and you've cleaned the location, it will be either repopulated or you will be able to immediately report completing the quest.
Quest rewards: experience, 3 Stimpaks, 150 bottlecaps
How to unlock: automatically after completing the Mercer Safehouse quest, in Old North Church (M6,2).
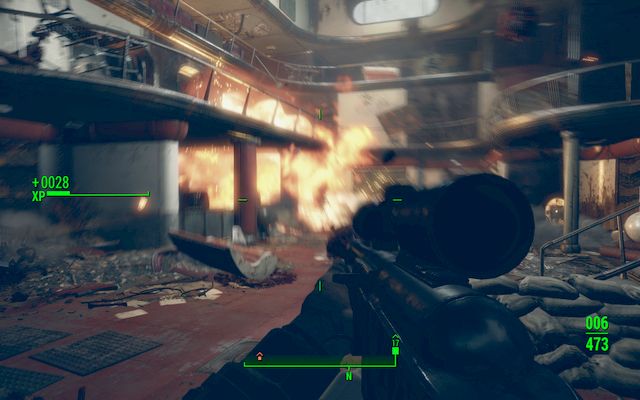 A hard battle awaits you, prepare the best possible equipment you have
Another quest which you will receive from the PAM robot in the Railroad HQ. You must secure the secret stash in the Medford Memorial Hospital. Inside you will face large numbers of Super Mutants on medium level.
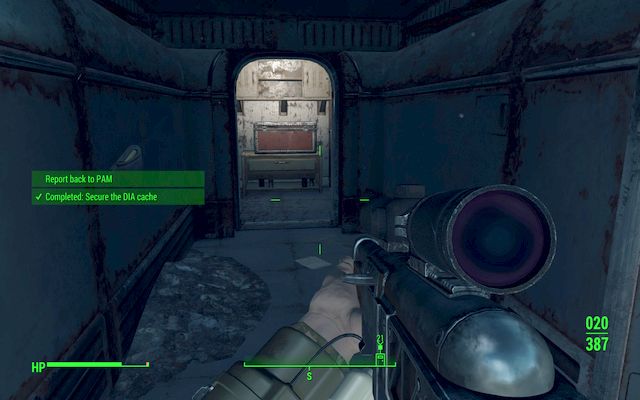
You don't need to fight everyone - simply go to the top floor and reach the hidden stash. It's hidden behind a wall, if you walk close to it, it will reveal a hidden warehouse, mostly with large amounts of ammunition. You don't need to take everything - once you enter inside, you will receive new objective. Go back to PAM.
Quest rewards: experience, 300 bottlecaps, Covert Sweater Vest
How to unlock: After completing the Butcher's Bill 2 quest and returning to Old North Church (M6,2), Carrington and Desdemona will be discussing with PAM.
Quest objectives:
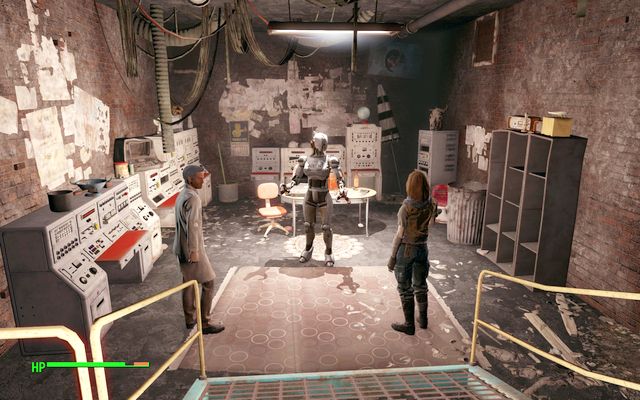 Three most important people in Railroad meeting together in the HQ
After the preliminary conversation with Carrington and Desdemona, you will go to the location called Goodneighbor. There you will find a place called Memory Den.
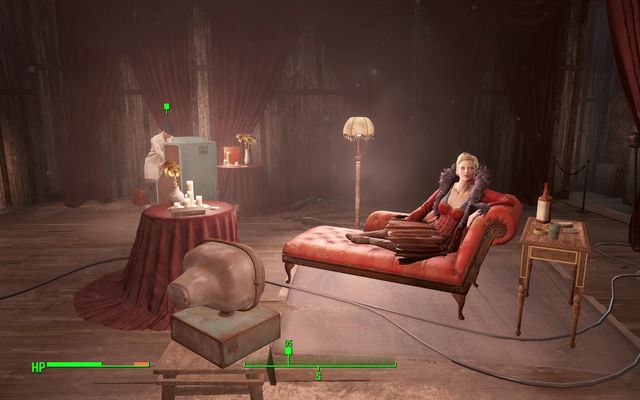 Irma - Memory Den
Irma, who is overseeing this place, will welcome you. You don't need to talk with her - however, if you will pay 100 bottlecaps or use persuasion (low Charisma level), you will be able to start a new side quest, not related with Railroad quests - The Memory Den. Walkthrough to the quest can be found in the chapter focusing on the location.
 Walk with Gloria into Malden station
The rest of the quest is simple and not complicated. You will go to the Malden Station where you can face few supermutants from the nearby hospital. Your main enemies are the synths that can be found in the underground metro station. Luckily, Gloria with a minigun is waiting for you there. You can agree on her proposition to join you for the quest and help you in battle.
Synths very easily lose her limbs, just like ghouls, so it is a good idea to shoot their legs or hands, making it impossible for them to use weapons. Grenades and laser weapons are very effective as well. Usually they have institute pistols, few pieces of ammunition and, optionally, some bottlecaps.
 The elevator will lead you to lower, inaccessible floors
Walk through the metro in the underground. You will find an elevator that will lead you further. On the lower deck you will face two slightly stronger synths that will get in your way. It's the ending of this part of the quest. Walk through another metro station into another elevator where you will find the exit. If the quest marking doesn't lead you to exit, it should mark the remaining synth that could have hidden someplace in the metro. Return to the headquarters in order to finish the quest.
Quest rewards: experience, 200 bottlecaps, 2 Stimpaks, 2 Stealth Boys, Randolph Safehouse 1 quest
How to unlock: After the conversation with Tinker Tom in the Railroad HQ (M6,2).
Quest objectives:
 Tinker Tom
Introduction note: it's a repeatable quest and the other ones from the series can be received in random order. In theory, the quest is simple - set up the MILA transmitter which you will receive from Tinker Tom when starting the quest. However, reaching the required location is very hard. Recommended character level is +20.
 Monorail - it is your destination
Despite appearances, you aren't supposed to install the transmitter on a building roof or a highway. You must get to the monorail which is partially immobilized inside a building wall. You will get up through the Haymarket Mall.
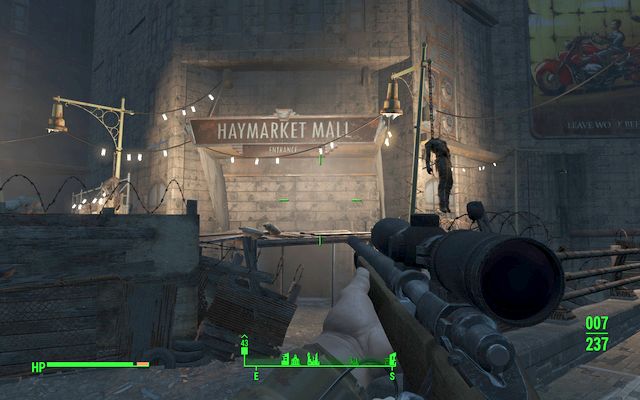 Entrance to Haymarket Mall
Entrance to the building can be found on the northwestern side. Inside you will face many bandits, one of them will have a rocket launcher. Use the stairs and turn right to reach the elevator. Turn to the corridor in the left after leaving the elevator. You will find a room from which you can use the door to walk to the roof. Watch out, you can face many robots on this floor. If you don't want to fight them, you must hurry.
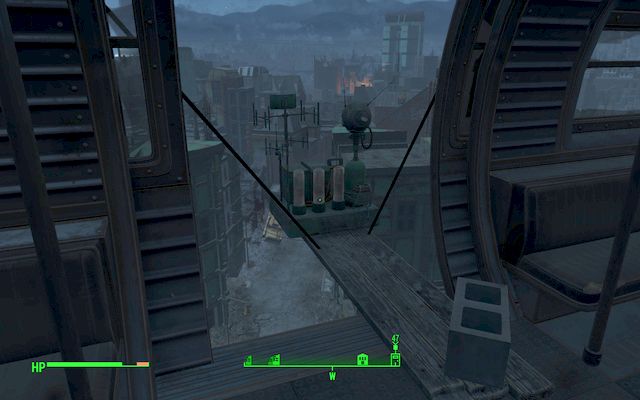 The sensor installed inside the wagon
At the roof you will face a deathclaw. If you don't feel like fighting, run quickly next to the fountain and get to the scaffolding on the northern wall. Walk two floors below and you will see a platform of the monorail. Inside you will have to face a strong Protectron robot. Now all that's left is to walk to the place pointed by the quest marker and place the transmitter there. Now, return to Tom and the quest will end.
Quest rewards: experience, 190 bottlecaps, another quest from the Weathervane series (it is a repeatable quest, you will receive the next ones in random order).
Thicket Excavations is an excavation site located in the northern part of the map, near Sanctuary. You can visit this location simply to find more loot, however you will also be given an opportunity to complete a side quest received from Sully Mathis.
How to unlock: You must meet with Sully Mathis in Thicket Excavations (M1,5).
Quest objectives:
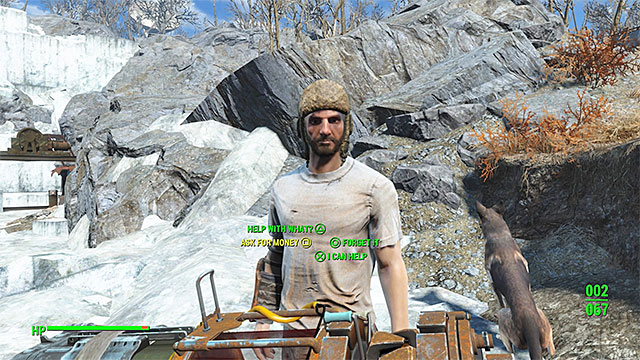 You can use persuasion to demand a bigger reward
Once you've arrived at Thicket Excavations search the area near the central pool of water to locate Sully Mathis. Talk to this person. You can agree to help Sully right away or you can use your high Charisma to demand a bigger reward - the maximum reward can be 125 bottlecaps.
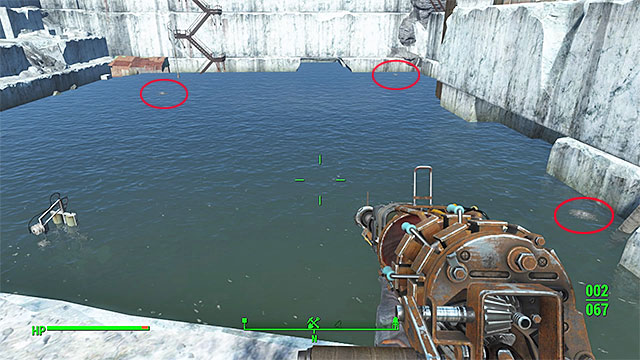
Your objective is to repair three pipes, but the problem is that they're underwater and the pool of water here is irradiated. Before you go into the water consume a Rad-X or put on an armor which will prevent you from receiving too much radiation. You can find the leaks quite easily, because there are bubbles on the surface above them. All of three areas you must inspect have been marked on the screenshot above.
 One of the underwater valves
Deal with the leaks in any order. Once you're close to the bubbles dive in and quickly find a pipe that needs repairing by turning a valve. Go back to the surface after you've succeeded and repeat this with the two remaining valves. Return to Sully once you've completed your task and activate the circuit breaker.
 Kill all the mirelurks
You can't get the reward for this mission right away, because several softshell mirelurks will appear near the excavation site. Start attacking the monsters and make sure not to wound your ally by mistake. Once the area is safe again you will finally receive bottlecaps and the quest will end.
Quest rewards: Experience points, bottlecaps.
 You can get rid of Sully and other bandits
You need more or less 24 hours of the in-game time since the pump is activated to get rid of the water. If you want, you can return here (no new quest will appear in the journal) and start exploring the large territory that was previously flooded (travel through the narrow metal balcony or use the elevator).Thugs accompanied by guard dogs will appear in the location. What's interesting, Sully, whom you have helped previously, will be aggressive towards you as well - seems that he hid his true intentions. When exploring the empty tank, in addition to killing and looting bodies of bandits (Sully will have a good sniper rifle and some other items), you can also check the containers with items.
Drumlin Diner is a small location found in the north-western part of the world map. You will witness a heated argument between Trudy and Wolfgang when you arrive here for the first time and you can resolve it as a part of a side quest. This is the only mission available in this location.
How to unlock: You must talk to Trudy or Wolfgang after arriving at Drumlin Diner (M1,6).
Quest objectives:
 Trudy
TrudyWhen you'll arrive at the Drumlin Diner for the first time you will witness a heated argument between Trudy and Wolfgang. You can allow things to play out or you can interfere to influence the outcome.
You can start the quest by talking to Trudy or Wolfgang. If you've picked Trudy start off by listening to her version - you'll find out that Wolfgang is responsible for giving drugs to her son Patrick and that he thinks they owe him. You can:
 Wolfgang
If you've picked Wolfgang you'll learn that Trudy owes him money. You can:
The quest will end no matter how you've acted, however if Wolfgang and Trudy survived you'll be able to trade with them from now on (Wolfgang sells chems, Trudy sells various goods).
Quest rewards: Experience points, bottlecaps, new traders (Wolfgang and Judy).
Vault 81 is a small location. It's a still inhabited and working vault. In order to gain access inside it, you must collect 3 fusion cores found in the game world. People inside are friendly towards you and some of them will give you few quests to complete. Here you will also find magazines and a Vault-Tec medicine bobblehead during one of the quests. After using the elevator, a boy will talk to you, giving you a tour through the crypt (you will receive some experience for that).
Additionally, Dr Penske is looking for fertilizer, you will receive 25 bottlecaps for each piece. Calvin is in a need for tools (screwdrivers, wrenches) for which you will also receive few dozens of bottlecaps. Here you will also find a healing facility, where you can get rid of addictions, heal your health and radiation. You will also find a barber who, for 15 bottlecaps, will allow you to change your head style. At the barber you will also find the Taboo Tattoos magazine. You can buy food from Maria in the canteen and trade with Alexis Combes who has great prices and some unique items. Additionally, Dr Forysthe from the healing facility will want to take a sample of your blood. For agreeing on that, you will receive (depending on your Charisma) from 50 to 150 bottlecaps.
How to unlock: after reaching the Vault 81 (M6,3).
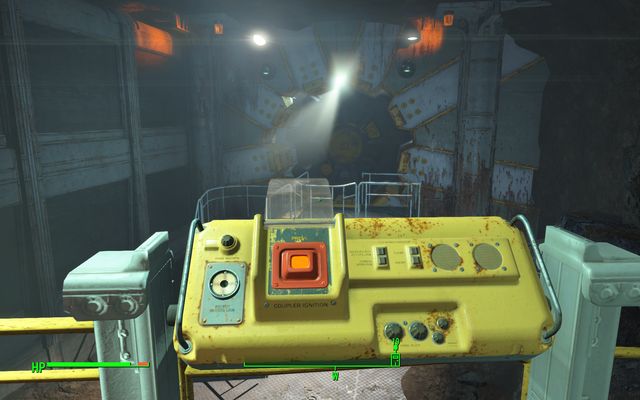 Entrance to the crypt
Once you enter inside the crypt, try to open the door by using the Pip-Boy. The security will answer and, after short negotiations, they will agree to let you in. However, first you must deliver 3 Fusion Cores.
Example locations from Sector 1, where you can find the cores without having to fight powerful enemies:
Quest rewards: Experience, 100 bottlecaps and access inside the crypt where other quests are available.
How to unlock: After entering the Vault 81 (Vault 81 quest) (M6,3)
 Katy the teacher
Inside the Vault 81 you can find a classroom. It's in the northern corner of the location, on the floor. Talk with Katy the teacher, she will give you a short quest. You must tell a story to the kids. You will be deciding what to tell by selecting various dialogue options.
Quest rewards: Some experience and Grognak the Barbarian magazine.
How to unlock: After entering the Vault 81 (Vault 81 quest) (M6,3).
 Erin Combes
A little girl named Erin Combes has lost her cat Ashes (you probably walked next to him when you entered the vault). You must find the animal. You can bargain with the girl, but it will not change the reward. You will find her in the room - the next door near the school.
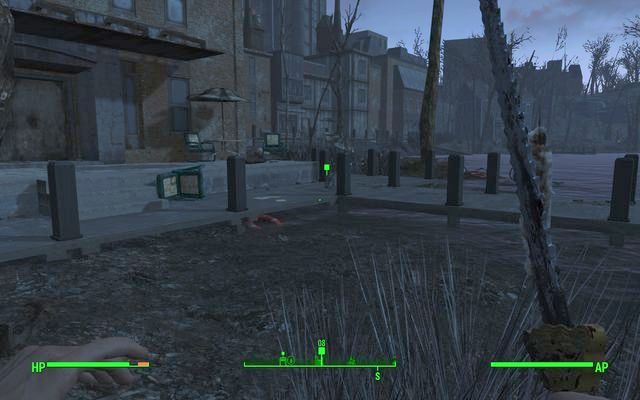 The cat near the lake
The cat can be found outside, on the sidewalk next to the pond. You must simply "talk" to the animal and it will return to the vault. Now you must return and talk to the girl.
Quest rewards: Teddy Bear, small number of experience points, the Hole in the Wall quest.
How to unlock: Complete the Here Kitty, Kitty quest (M6,3).
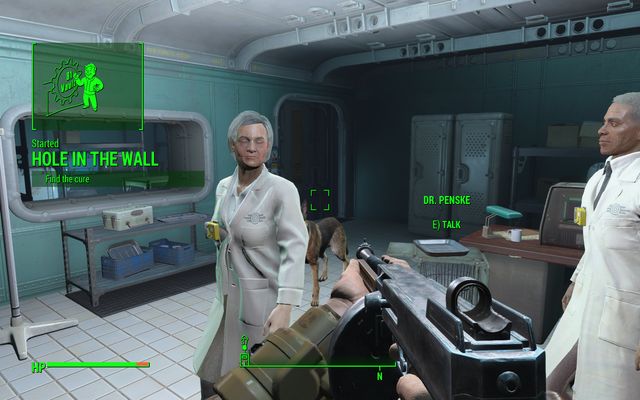 The healing facility in which you start the quest
Go to the healing facility after you finish the short quest for Erin. Wait for the quarrel between the inhabitants to end, then follow Bobby to the hidden location in the vault. The road is lineal and you must reach its end. On the first floor you will be attacked by cannons. Wait a moment after lurking out - you will be attacked by a Protectron robot.
Remember that you can collect tools for Calvin from the vault. He will pay you well for them and here you can find quite some number of them.
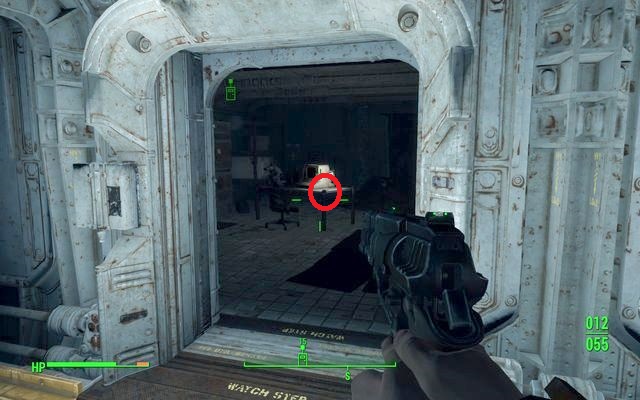 The room with the tape
On the next level you will have to fight many Mole Rats. Some of them will be in the "improved version", so don't ignore them. On the floor, just behind entering them using the stairs, you will see a terminal that opens the closed door on the right side. You don't need to hack them, at the end of the corridor you will find a room with a tape lying on the desk next to the terminal. Put it in the door terminal and you will enter inside.
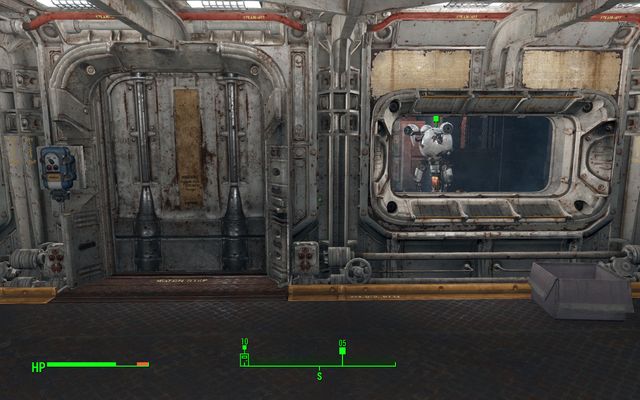 Curie the robot is guarding the entrance to the room
You will find another closed door. Talk with Curie the robot through the glass and say that you're part of the Vault-Tec crew and the door will open. The cure which you are looking for will be given to you by the robot. In the room there's a Vault-Tec medicine bobblehead on the desk. Now, leave the room and drive up the elevator. Give the cure and the quest will end.
Quest rewards: large number of experience points, the trust of the vault (you can pick up most of the items without stealing), your own room in the crypt, Short Syringer Rifle, companion - Curie the robot, Dependency quest.
How to unlock: After completing the Hole in the Wall quest (M6,3).
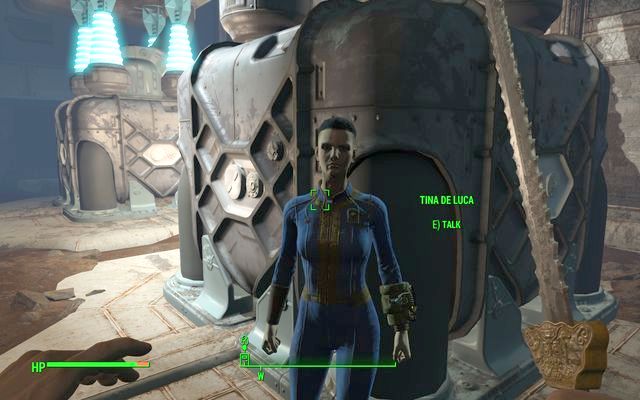 Tina De Luca
Go to the room with the generator on the first floor, near the school. There you will find Tina de Luca, sister of Bobby. She will tell you about his addiction.
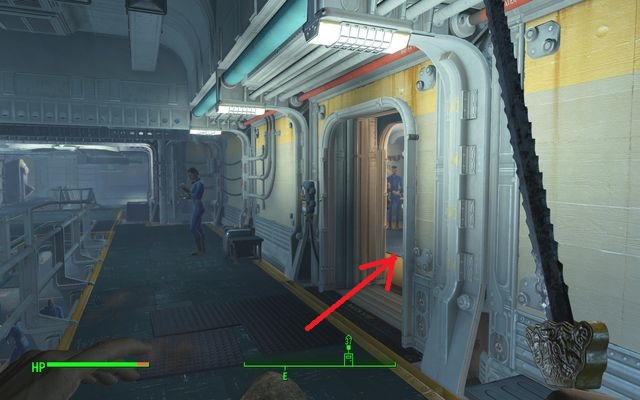 Bobby's room
You will find him in the room on the floor, in front of the entrance to the electrical plant. Watch out, as the dialogue is very important and an unwise choice of words might lead to failure. You must have high Charisma if you want to convince the boy to get clean. Pick one of the options (up/down), don't give him the drugs and don't insult him. If the conversation in simple way will fail, you can try again.
If you have convinced him, go back report to Tina. For completing the quest you will receive some experience. If the quest doesn't want to end, talk with Rachel in the healing facility as well. If you have very high Charisma, you can convince Tina to move to one of your settlements.
Alternative solution: if you don't have enough Charisma, you can try insulting Bobby. He will attack you. Killing him doesn't cancel the quest and after returning to Tina you will receive experience. None of the inhabitants will have trouble with you for doing that.
Quest rewards: experience, optional: new settler to the village (Tina).
Abernathy Farm is a small place near the Sanctuary, the starting location of the game. During the day you can meet few friendly members of the Abernathy family on the farm territory. You can trade with them. Additionally, one of them will have a simple side quest for you to complete.
How to unlock: Talk with Blake on the Abernathy Farm (M1,7).
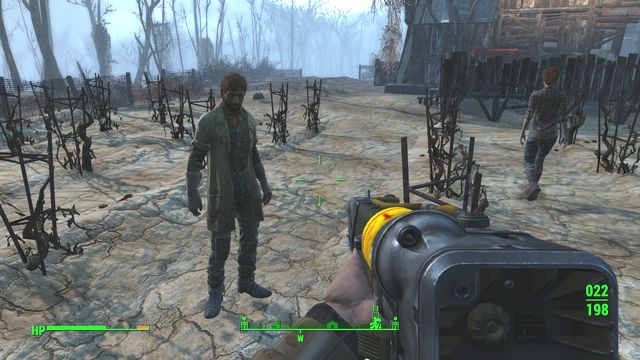 Talk with Blake on the Abernathy Farm in order to receive the quest.
You will receive the quest from Blake Abernathy who can be found on his farm. Your objective is to find the locket that belonged to the daughter of the farmer murdered by the raiders.
You must go northeast to the USAF Satellite Station Olivia. Defeat few thugs and walk inside. Watch out for the traps. You must get through few rooms filled with bandits. Eliminate the waves of enemies. The locket is hidden in a red chest in one of the last rooms. Take it and don't forget to search the whole complex.
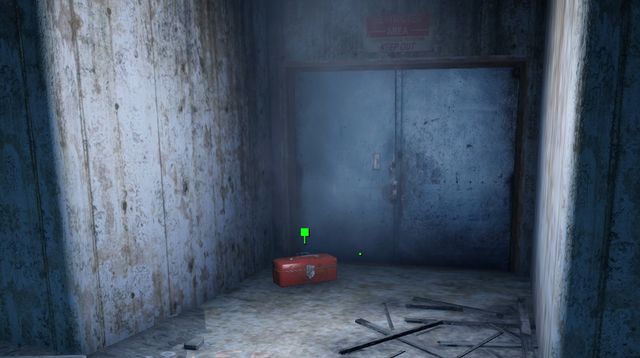 The locket is hidden in a red chest.
Now you must only return to Blake. You will receive some bottlecaps from him and the farm will become your settlement in which you can build and recruit new members.
Quest rewards: Experience points, bottlecaps, possibility to take all items from the farm.
Diamond City is one of the biggest locations filled only by friendly people. You visit this place during one of the first main quests of the game - Jewel of the Commonwealth. A giant marketplace, where you can trade with people offering various goods and services and where you can add side quests described on the further pages, is the most important part of this location.
Important - While you're in the Diamond City, you can overhear the conversations of bypassed people. This will add small entries to your journal related with, for example, other locations in the game world that are worth exploring.
How to unlock: You must talk to Piper in the Diamond City Market (M6,1).
Quest objectives:
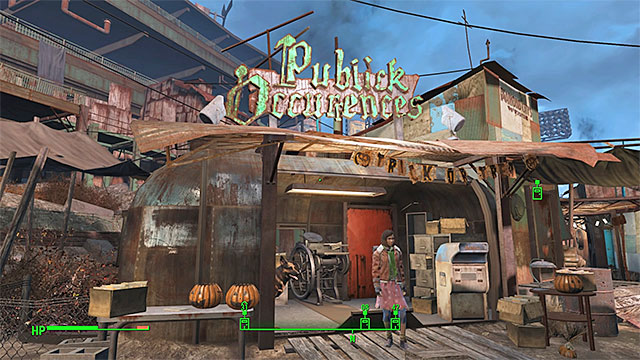 The quarter of the local press
You will meet Piper, a reporter, at the closed gate that leads to the Diamond City. She will help you get inside. She will also invite you to meet her in the quarter of her newspaper. Once you enter the Diamond City Market, listen to the conversation between Piper and Nat (you can obtain a free copy of the newspaper from her) and then enter the Publick Occurences building.
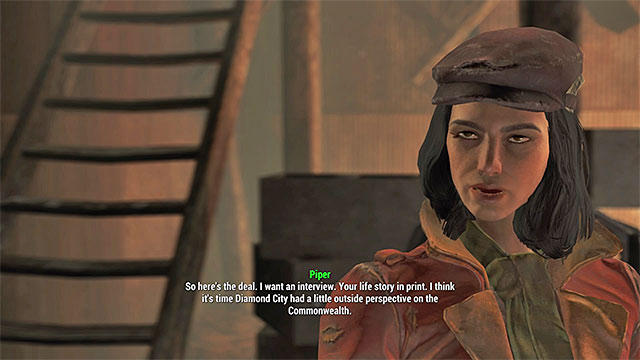 You can tell Piper your story
Talk to Piper and you will learn that the reporter is eager to make an interview with you for her newspaper. If you agree, you can start answering Piper's questions. The options you select don't have any importance and they will only slightly impact the reactions of the reporter. At the end of the meeting Piper will want to join you. You can agree, thus obtaining a new companion.
Quest rewards: Experience points, new potential companion (Piper).
How to unlock: You must talk to Abbot in Diamond City Market (M6,1).
Quest objectives:
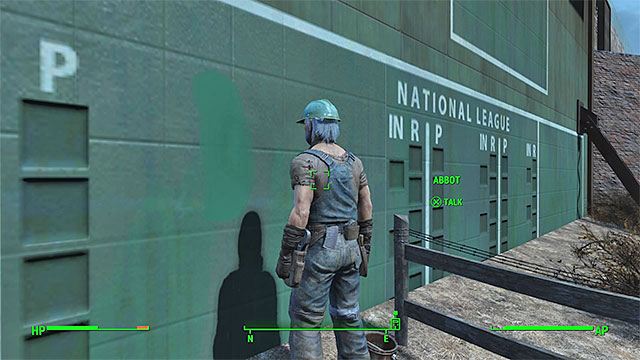 Abbot
AbbotYou will find Abbot at the rim of the Diamond City Market - he will be painting one of the walls. Talk with him and you will learn that he needs paint from the nearby shop. During the conversation you can use highly developed Charisma and ask him for a good reward. He will tell you that for delivering the paint you will receive 125 bottlecaps instead of the regular 100. Leave the market and go towards the Hardware Store that is located not far southwest from Diamond City.
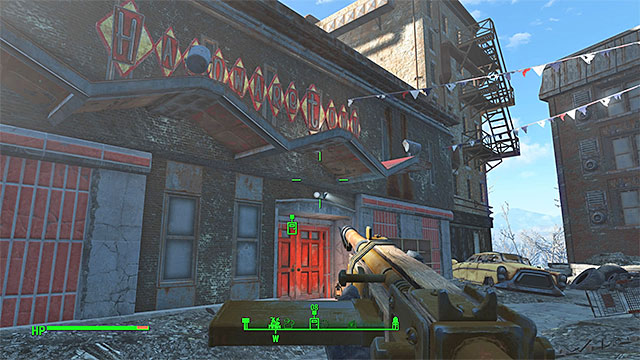 Few entrances lead to the hardware store
Once you get close to the Hardware Store, you will notice a woman begging for help who will run into the building. It's a part of an ambush orchestrated by the raiders. Despite that, you can use the main door as you won't be attacked immediately. If you don't want to use the main door, check the back of the store. However, watch out for at least two enemies positioned there.
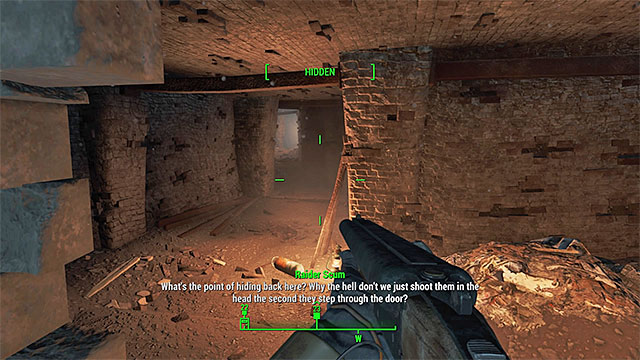 Walking through the basement or using the back door will allow you to surprise the bandits
The enemies are hiding near the corridor leading to the back of the store. If you have selected the main entrance, find the road to the basement and walk through the narrow tunnels. If you have used the back entrance to the store, you will find yourself behind them. No matter how you acted, try to sneak up on the enemies and surprise attack them. Once the battle starts, use the shelves as cover and watch out especially for the slightly stronger leader of the raiders - Demo.
 The paints you are looking for
Once the battle end, you can plunder the store. The paints you are looking for are at the back (if you are very good at sneaking up, you can steal them without fighting the raiders). Pick up the blue and yellow paint. It would be a good idea to complete the side objective of the quest and mix two paints in order to obtain the green color that Abbot wants the most. In order to do it, use the nearby Paint Mixer.
Once you get the green paint, go back to Abbot. Talk with him and paint part of the wall in green. You will receive the previously agreed amount of bottlecaps and additional bonus for bringing the green paint.
Quest rewards: Experience points, bottlecaps.
How to unlock: You must talk to Moe Cronin in the Diamond City Market (M6,1).
Quest objectives:
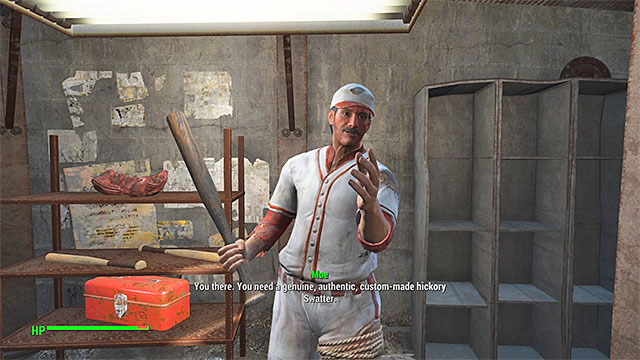 Moe
MoeMoe Cronin can be found in the central part of the Diamond City Market. He is wearing a baseball player's suit. He will give you a quest related to finding and bringing him three valuable items related to his favorite discipline - signed baseball, catcher's mitt and baseball card. You can accept the quest immediately or first use high Charisma to bargain a better payment. To find the items, you must go to Westing Estate west from Diamond City.
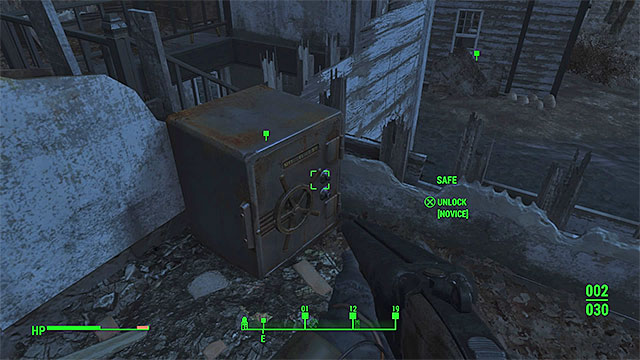 Reach the safe
Once you reach the destination, you must remain careful, as the water is radiating and there are mirelurks nearby (adult and young ones, the latter can hatch from eggs). You can partially or completely avoid the enemies by walking on the wooden platforms above the water. The Signed Baseball is hidden in the safe on the first floor of one of the buildings. You can use the bobby pin to open the safe. Luckily, it has a weak lock. In the same safe you will also find ammunition and 10mm pistol with suppressor.
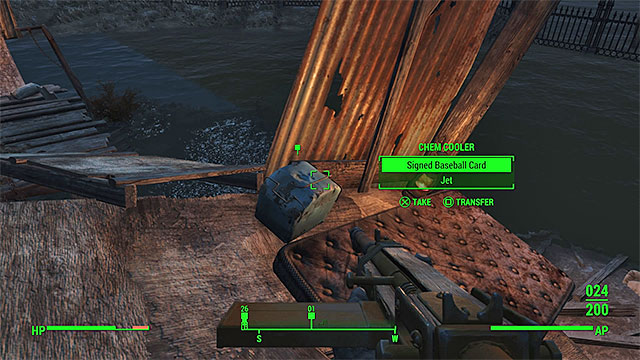 The place where you find the baseball card
Signed Baseball Card can be found in one of the more far away buildings, in a small chem cooler.
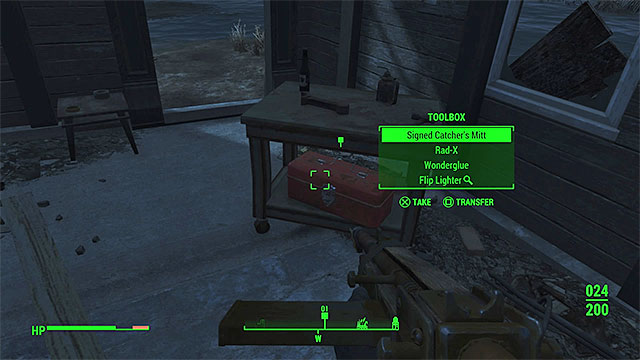 The mitt is located in a small building at the water
Signed Catcher's Mitt is hidden inside the building near the water, in a tool box.
Once you collected all objects, go back to Moe and give them to him. You will receive bottlecaps for that.
Quest rewards: Experience points, bottlecaps.
Finch Farm is a small, 3-family farm located in the sector III. You can trade with them, but they don't offer much, especially in terms of bottlecaps. You won't find anything interesting in this location. However, there is one side quest here - Out of the Fire. Completing it will give you access to this farm as a settlement. You will also be rewarded with a unique melee weapon. The surroundings of the farm and other locations are on level more or less equal to tenth experience level of the player.
How to unlock: Talk to Abraham Finch on the Finch Farm (M3,1)
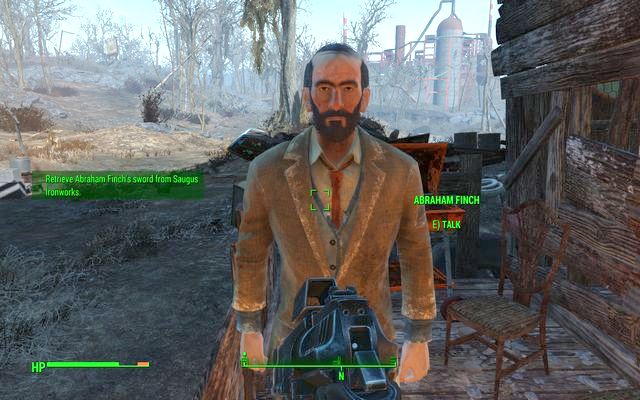 Abraham Finch
You will find a man named Abraham Finch on the Finch Farm (sector III). He will tell you about a lost sword and will ask you to reclaim it. It will not be easy, as the location of the sword is under the control of an enemy gang...
Before going for the mission, you can bargain the reward if you have Charisma points. By default you will receive 150 bottlecaps, but negotiating can increase that number to 200 and 400 bottlecaps. Ask Abraham about the quest details and you will learn that you should find his son at the destination - his name is Jake (optional objective).
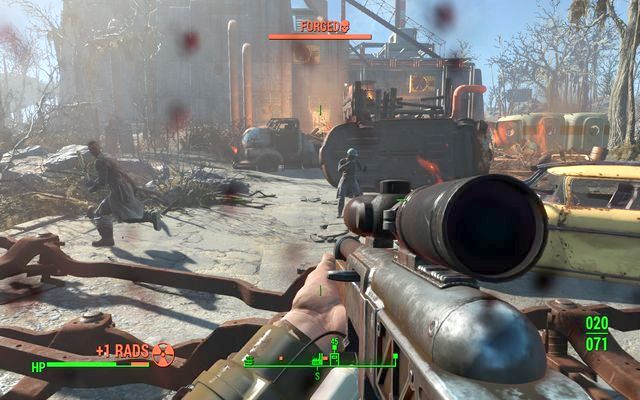 Parking in front of the ironworks
Get to the marked location - the Saugus Ironworks. A large group of enemies is standing in front of the entrance - help yourself by blowing up the cars located there. Watch out, enemies love to use fire. Flame throwers and Molotov's cocktails are their weapons of choosing. You can enter the building only through the main door to the north.
 Get to the attic of the building
Inside another battle with fire enemies will start. Many of them will also start attacking you with melee attacks. Go to the top, under the very roof and enter the neighboring room of the factory. Then go north. You will see a guard tower, your target is behind it (you should save your game now).
 If you have many Charisma points, you can decide what Jake should do
After walking through the door, you will see a group of gang members and Jake. If you have high Charisma, you can convince him to join you (or other way around - to become your enemy). If your skills don't convince him, then keep picking the "arrow up" option (the dialogue about the father caring for the son). Optionally, you can free the prisoner whom Jake should kill if he won't die in the crossfire.
 If Slag will fall to the cauldron, he will not die, and you will have trouble with gathering the items he had on himself
No matter on whose side Jake will be, you will have to face few enemies. It is best to first kill the melee fighting enemy and the woman with fire thrower. Now focus on the main enemy - Slag - who has a power armor. Try to aim at the head and keep your distance - his weapon has a small range of effectiveness.
 The Bobblehead above the cauldron. Under it there's a magazine
Once the battle is over, search the body of the enemy. You will find Abraham's sword. If Jake survived, he will return home on his own. You will find a Picket Fences magazine and Explosive Bobblehead (+15% explosives damage) in the place where Slag was standing during the cutscene. Now go back to the questgiver (you can use the key to the roof [near Slag] to be able to teleport to other location faster. However, watch out, there are few enemies on the roof.
 Jake asking for forgiveness
Alternative solution: If you think that something went wrong and Jake is against you despite the fact that you wanted him to survive, not everything is lost. If Jake will survive while the rest of the enemies will die, during the cutscene he will have a "change of hearts" and he will beg you to spare his life. This will allow you to obtain a good ending.
Quest rewards: experience, sword, access to the settlement, negotiated bottlecaps (from 150 to 400) + 100 (optionally another 100 if you have brought Jake).
On the coast in sector III there is a small, still working factory - Longneck Lukowski's Cannery. It is owned by Theodore Collins. You can get to the location almost anytime you want. You can receive an easy quest called Mystery Meat there. In the location there is also one magazine and a Barter Bobblehead to obtain. One trading woman can be found in front of the factory. Sadly, she doesn't offer anything useful or interesting.
How to unlock: Enter the Longneck Lukowski's Cannery (M3,2) and talk to Theodore Collins.
 Longneck Lukowski's Cannery
Theodore Collins whom you will meet right after entering the Longneck Lukowski's Cannery will order you to find the reason of the meat being tainted, suggesting that Mole Rats caused the trouble. You will learn that the truth is different... If you agree to help him, you will receive 50 bottlecaps in advance.
 The elevator that leads to the basement
Go to the production room and then upstairs. In the corner there is a large elevator that will lead you to the basement - now there is no return. You will fight mostly ghouls of various types and in great numbers. One of them will be unique - he will glow in light blue color. Watch out especially for him and leave some special weapon or grenade just for him. Be prepared for large numbers of melee fights. First turn right and go to the water tank. Then, use the pipe to get to another similar tank and then walk upstairs. At the end of the road you will find a fusion core.
 Don't jump down to the room with valves - this would force you to walk all the way back up
Go to the neighboring room and keep using the stairs to reach the top, the room with valves. Under no circumstances should you jump down (it's the place from which you came here). Use the last stairs. After opening the door you will be attacked by the questgiver (his robots will not harm you). He closed himself in his office above the production hall.
 Theodore will hide in his office on the first floor
The enemy can be killed with 3 shots and he has nothing interesting. However, at the end of his room you can find Tales of Junktown Jerky Vendor (permanently provides better prices at merchants) and, just above it, the Barter Bobblehead (permanently provides 5% better prices at merchants) lying near the computer. Behind the gate closed by the terminal there is also a basic assault shotgun.
Quest rewards: experience, 50 bottlecaps (received at the beginning).
General Atomics Galleria is a small location where only robots reside. Before you will complete the only quest available here, you will have to face many traps and unfriendly robots. You should avoid interacting with them until you complete this short quest. After the quest is over, you will be able to trade with the robots in the buildings, but they will not offer anything very interesting. At the back of the bowling alley there is a safe.
How to unlock: Talk with Greeter at the entrance to the General Atomics Galleria (M2,2).
 The elevator that leads to the tower where you will meet the Director
Greeter will tell you to use the elevator to get to the tower above the entrance. There you will find a robot - director - who will want to confirm your authorization as the supervisor. If you won't use Charisma during the conversation, the quest will fail. If you will, you will be able to use what the galleria has to offer (few not interesting merchants).
Quest rewards: access to attractions of the galleria
Covenant is a small residential territory. In order to gain access to it, you must pass a test of being human - if you don't know what decisions to take, start with the "upper" dialogue option, then the "bottom" one, "upper" one and keep repeating it until the test ends. In the city you will find only one quest, Human Error. You will receive it after the conversation with Honest Dan. You will also find here a medic called Patricia who has some items to sell and another merchant - Penny.
How to unlock: Talk to Honest Dan in the Covenant (M2,3). First you must complete the test that will allow you to walk inside
Quest objectives:
 Covenant village
In order to enter the village, first you must complete the test. Talk to Swanson in the entrance and if you're not sure what to answer, keep selecting alternately the "up" and "down" dialogue options. The first option you must select is "up".
 Honest Dan in the Covenant
Inside the village, you will meet Honest Dan near the tree. He isn't part of the community and he will ask you to help him find a caravan. If you have Charisma, you can convince him to pay you 50 bottlecaps in advance.
 The blue portable fridge contains lemonade
This additional objective isn't groundbreaking. You will see a marking that will lead you outside the city, near a broken caravan. You will be looking for lemonade, hidden in the blue fridge near the dead man.
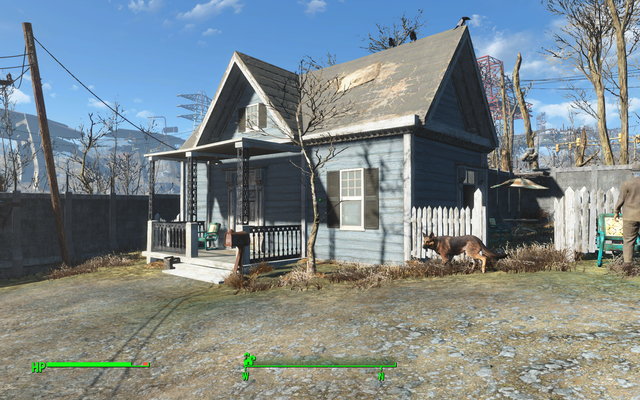 The house in which you will find password to Jacob's computer
The key information related to the investigation can be found in Jacob's computer (high security level). If you can't hack it, you must find the password.
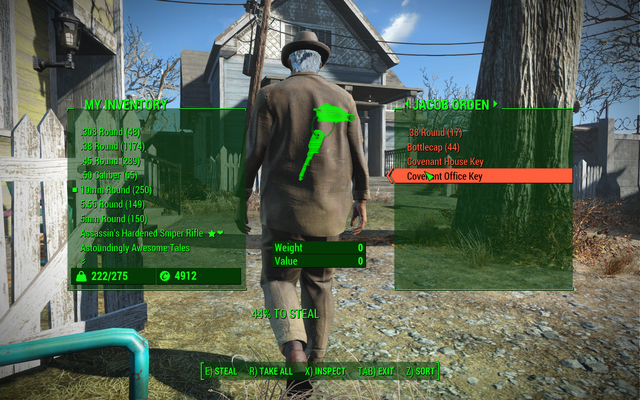 Each of the locals has a key to the closed door
The password is lying written on a note in the closed house near the gate. If you can't open the lock in the door (medium level), you must steal the key from any citizen by using the pickpocket skill. Once you obtain the proof from the computer, you can accept a bribe from Jacob and receive 100 bottlecaps. Optionally, you can also talk to Dan - this will provide his help later in the quest.
 Penny Fitzgerald
Alternative solution: If you have around 5 Charisma points, you can try to get some information from Penny the merchant. Ask her about the lost caravan, then gossip about Dan - an option requiring Charisma will appear. This option will allow you to obtain the evidence immediately and get to the next point.
 The entrance is partially flooded
Go to the lake on the west. There are door in one of the pipes - it's the entrance to the sewers. Inside you will face large numbers of weak human enemies and few turrets. The doctor will have a key to open the closed doors leading to the further part of the complex. After a while, you will reach a large room - look left and take the fusion core.
 Roslyn Chambers
You will have to face a key choice in this quest after you reach a small prison with not-unfriendly doctor Roslyn Chambers. You can spare the girl or kill her. If Dan is with you, then after deciding to kill her you will have to fight him as well. There are three possible outcomes available...
If you decide to fight Dan by accepting Roslyn's offer, Amelia - the captive girl - will be killed after the battle. You will receive 300 bottlecaps. You will keep the access to the village and you will be able to trade.
Use the terminal under the stairs to free the girl. Then, talk to Dan. You will receive reward and the quest will end. By default you will receive 300 bottlecaps, but by using Charisma you can increase the reward by 60, 60 and finally 120, which in total can give you 540 bottlecaps. However, you will no longer be able to return to the village - you will become the enemy of all the citizens.
If you will go to the complex alone or you will kill Dan but free Amelia, you will be able to collect the reward for freeing her on your own. You must find her father, he is residing in Bunker Hill. You will be an enemy of the village and you will not be able to return there. From her father - The Old Man Stockton - you will receive 300 bottlecaps.
Quest rewards: experience, 300 bottlecaps (Dan can pay you more if you convince him with Charisma).
Goodneighbor is a location in the financial district in the center of the city. There is an interesting atmosphere there, similar to mafia city of sixties. You can go there anytime during the game you want. It's a small settlement with few smaller sub-locations. You will find two merchants here who will offer various items of quite high quality. You will also find few interesting side quests here.
How to unlock: Get to the Memory Den sub-location in the Goodneighbor (M6,4). Speak to Irma.
Quest objectives:
In order to start this quest, you must use persuasion during the conversation with Irma (Charisma on low level is required) or pay her 100 bottlecaps. The quest is simple and short. It's also an introduction to the story quest related to Nick Valentine, which makes it a form of a prologue to the main story quest. No matter which memory you will select during the conversation with the woman, the quest will be the same.
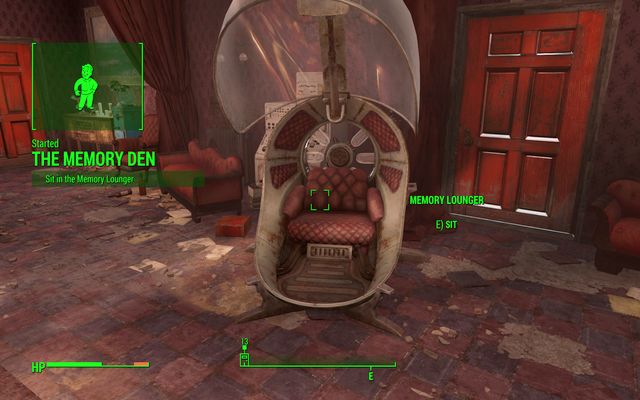 Sit on the open chair
Sit on the armchair. You will be moved to the memory - you will be just a passive observer and you will watch the scene from the beginning of the story from a different perspective. Once you watch the memory, the quest will end. However, if you have many Charisma points, you can try to receive refund. What's interesting, if previously you haven't paid Irma, you will earn cash.
Important - If you haven't unlocked the Jewel of the Commonwealth main quest yet, it will be added to the journal now.
Quest rewards: experience, (optional) 100 bottlecaps.
How to unlock: Get to the Memory Den sub-location in the Goodneighbor (M6,4). There you must talk with one of the clients (door behind Irma), Kent Connoly.
Quest objectives:
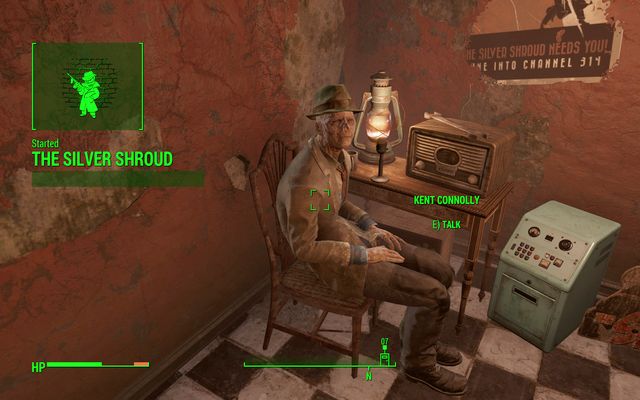 Kent Connolly - the questgiver
Behind Irma's armchair in the Memory Den you will find a red door. Behind it you will find one of her clients - Kent Connolly. If you ask him about his troubles, he will tell you about an item he seeks. You can use Charisma to obtain 75 bottlecaps from him.
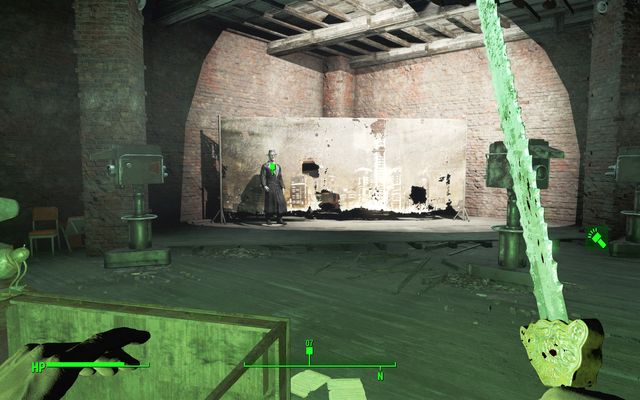 Silver Shroud costume on the movie set
Once you walk into the marked location - Hubris Comics - you can try to sneak up to the highest floor and steal the costume - your objective. However, it is not an easy task. If you will make some noise, you will be attacked by a large group of ghouls that can be found in the location.
On the third floor you will find the costume, and behind the curtain - a rifle. You can go back to the ground floor. However, before you leave the location, search the first cash register. You will find a key that will allow you to open the door and search the locker. The terminal at the cash register will allow you to open the exposition at the wall - you will find a unique Grognak's axe there. Next to the cash register there is also an Unstoppables magazine.
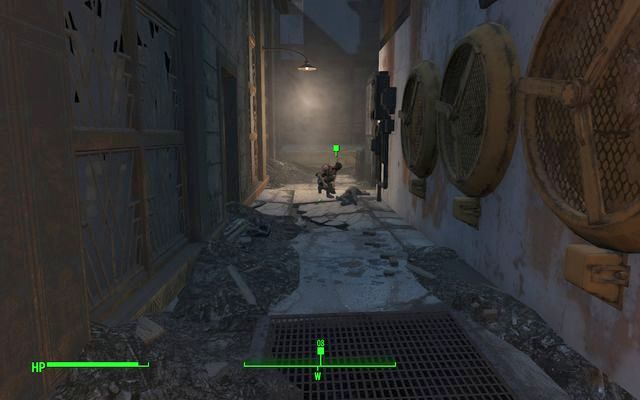 Kill Wayne in the dark alley
You can end the quest at this point by refusing to continue helping Kent. You can also play local hero by wearing the costume you found. It is best to keep wearing it all the time (you don't need to use the weapon from the "set"), this will give you some additional dialogue options. Leave the building and activate the Silver Shroud radio. After a while, the marker of the first target - Wayne - will appear. You must kill him and then drop a card into his body - in order to do it, target the dead body and you will see an additional option to choose.
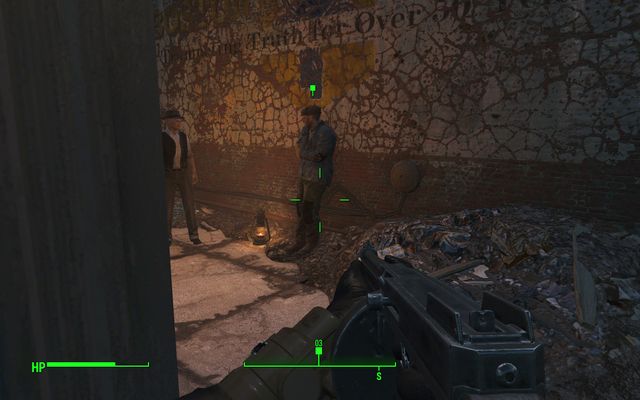 Another target - AJ the dealer
Your next target is AJ, the drug dealer. He will try to bribe you for 50 bottlecaps, you can bargain up to 200 bottlecaps. You can take it, avoid fighting, and the quest will still not end. However, your relations with good companions will greatly suffer. Once again, don't forget about placing the card in the body of the dead dealer.
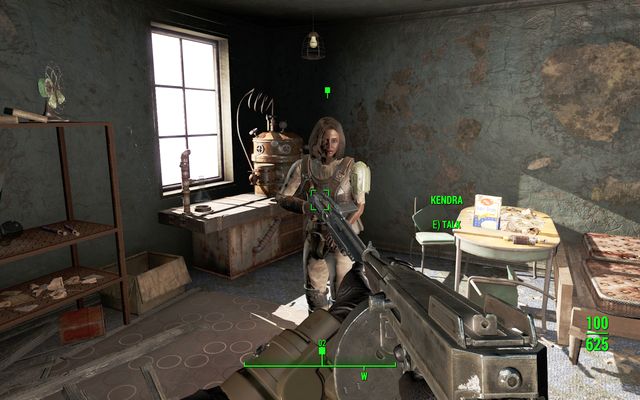 Kendra - the woman hiding in the apartments
Now go to the pub after you receive information from radio. Talk to the robot-bartender. You don't need to bribe him - if you will speak as the shroud, you will receive a simple answer for the question you ask. Now, go outside the city, to the building that isn't marked on the map: Water Street Apartments.
You must eliminate Kendra. Watch out, as mines and a turret are placed in front of her room. When putting the card on her corpse as usual, you can find a contract that after picking up will unlock additional, optional mission objective.
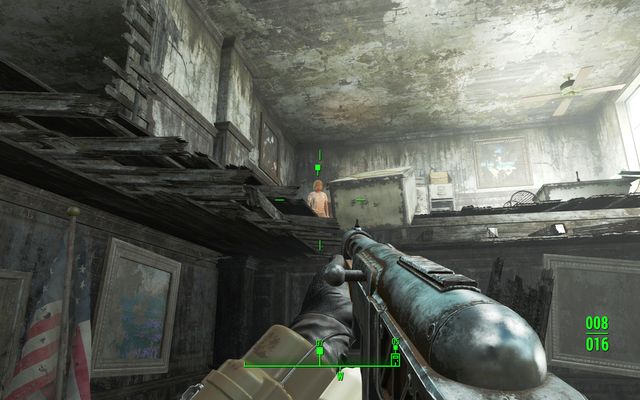 Shelly can be found in the military base, on the first floor
You can optionally get rid of Shelly Tiller. She is hiding in the National Guard Training Yard, on the first floor. She will not be defending herself, and killing her will be considered as a bad behavior. Once it is done, take the payment - 500 bottlecaps can be found in the orange toolbox, south from Mass Fusion Building.
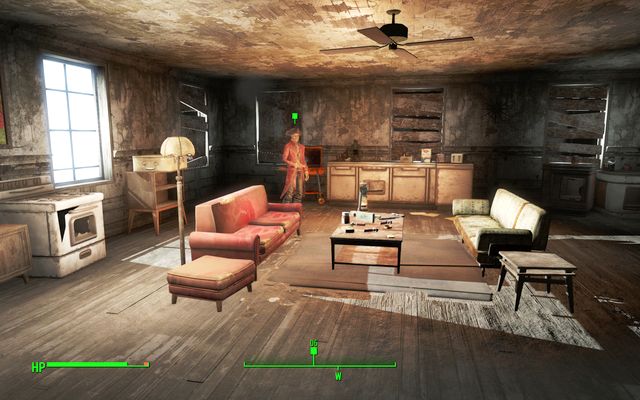 Hancock
In order to continue, return to the Goodneighbor and listen to the Silver Shroud radio. The ruler of the city, Hancock, will call you. He will want you to kill two other people. You can use Charisma to obtain 50 bottlecaps in advance.
You will find Smiling Kate in Bunker Hill. Don't walk close, don't talk to her, attack immediately. Otherwise, you will fall into a trap. Northy will be much better protected. There is a great chance that he will start running away. You will find notes at his body - return to Kent, the questgiver, after collecting them. There you will learn from Irma that Kent was kidnapped. Activate the Silver Shroud radio and listen to the recording. Now, go to the Milton General Hospital. Use the elevator to get in the middle of a squad of bandits.
 Sinjin - you can try bargain with him, but don't get too close
After walking straight through the hospital, you will reach the third elevator. It will lead you directly to a band of thugs who kidnapped Kent. Get closer, but not more than half the distance. You can try walking closer when the bandit who is speaking will stop talking, you will be able to continue the dialogue then.
High Charisma will give you a choice - you can immediately focus the shots on you or you can scare the bandits away, leaving only Sinjin - you will obtain the same effect by continuing to play the Shroud. In that case, you must be very quick - use the best equipment to avoid Kent being killed (cryogenic weapon can be useful for immobilizing the opponent. V.A.T.S. or Jets can be effective as well). You can also try shooting the hand of the enemy, there is a chance that the weapon will fall from it. Once all is over, return to Hancock. You will receive large reward from him. You can now switch the costume to your own, but keep it with yourself in order to be able to start other quests.
Quest rewards: experience, 165 bottlecaps from Kent, Silver Shroud's Costume, 750 bottlecaps from Hancock if you complete the quest fully, optional 500 bottlecaps for killing Shelly Tiller, another quest for Silver Shroud.
How to unlock: Talk with Daisy the merchant in the Goodneighbor location (M6,4).
Quest objectives:
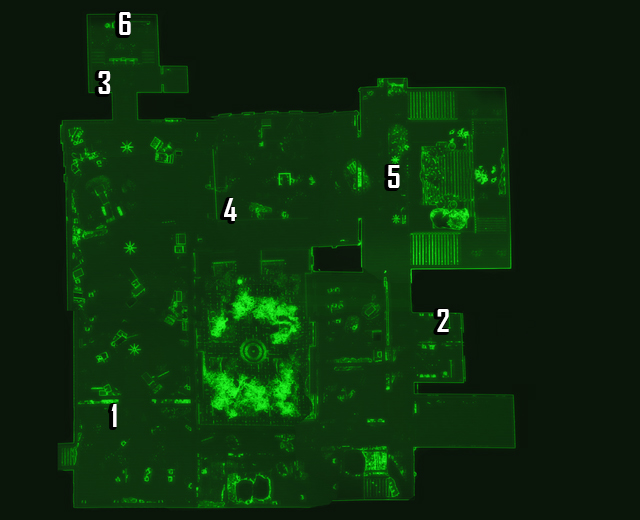
During this quest you must return the book to the Boston Public Library and clean that location of supermutants. During the dialogue you can negotiate twice the payment from Daisy if you have high Charisma. There are two roads leading inside, but both seem to be almost the same - through the station (from the side of the building opposite to quest marker) or frontally, as the quest marker shows. In both places the door is locked with a second rank lock. If you cannot open it, you can use low Charisma to use the intercom, tell that you are a worker and guess the password.
Map which you see above is related to the side quest - finding the books that weren't returned on time. It also shows the location of the Intelligence Bobblehead.
 Robots and turrets can help you in defending from mutants
Don't attack the robots inside. They aren't hostile. Go left and hide between them. After a while, supermutants will enter the building through the main entrance. Get rid of them. Robots will help you.
Behind the door at the end of the room you will find the Intelligence Bobblehead. The key to the locked container is lying on the desk next to the terminal, near the door.
 Book returning machine also allows you to trade tokens
If you want to complete the optional objective, you must return all the books that weren't returned on time. For each book you will receive 5 tokens. There are 6 books to find (+ the one from Daisy), which can give you total of 35 tokens. Other tokens can be found in bodies of dead enemies. You can also return here later when you will obtain more of them. The location of the books to return can be found on the map at the beginning of this chapter. You can obtain the Massachusetts Surgical Journal for collecting 50 tokens and using the machine's terminal.
Quest reward: experience, from 200 to 400 bottlecaps
Vault 75 is a place that is unpleasant to strangers. It is completely controlled by bandits who installed defense systems inside. Entrance can be found in the basement of the Malden Middle School. It is worth coming here to start the quest about exploring the crypt and in order to find the Grognak the Barbarian magazine and the Science Bobblehead.
How to unlock: After you get into Vault 75 located in the basement of Malden Middle School (M2,4).
Quest objectives:
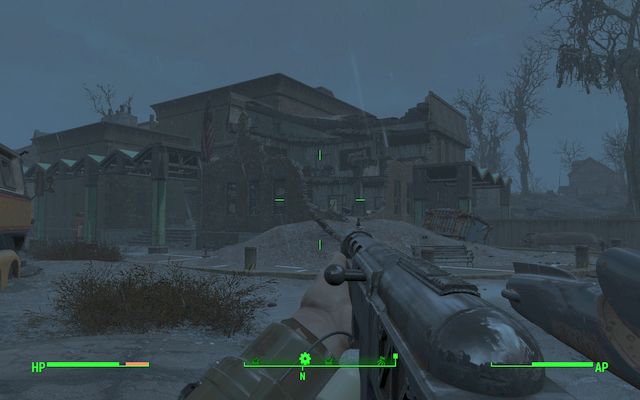 Entrance to the ruins of the school - and to the Vault 75
After entering the Malden Middle School, turn to the door behind the bars leading to the basement. There you will find a group of shooters and turrets. This is also where the quest will start.
Run to the elevator ahead. Ride down to lower floor. There you will have to face another group of opponents. Keep going through the main corridor. After a while you will reach a large dining room. Enemies are waiting for you on the balconies as well, so be careful.
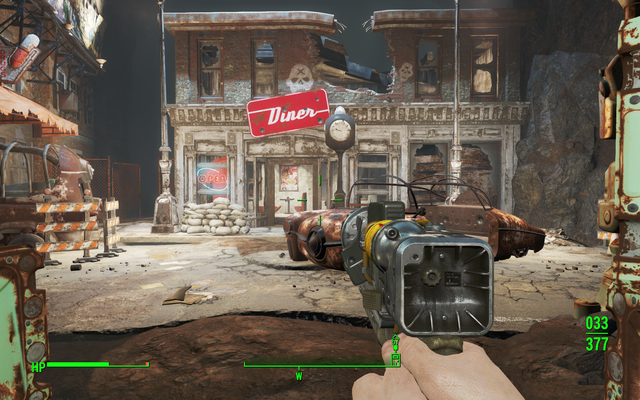 The dummy building. Inside you will find the leader with the card
Once you clean the dining room, go to the northwestern part of the ground floor, to the locker room. Walk through the door and go to the end of the corridor. Turn left there and use the stairs. Turn left once again. You should see a model of the city. Enter the building ahead and walk to the first floor - the enemy you will face there will have the laboratory access card.
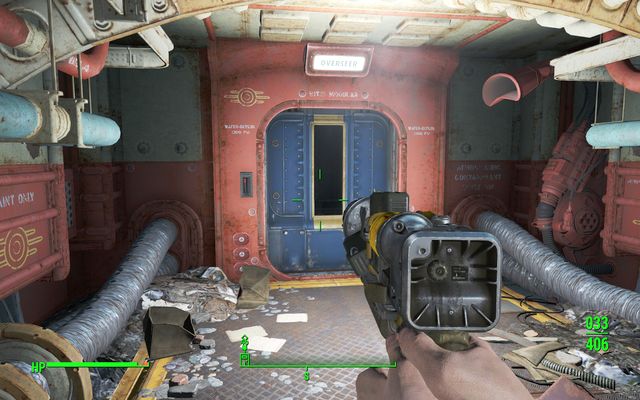 Door to overseer's office - you need second card to open it
Now go back upstairs. The closed door on the left can be opened now. You should turn right behind the door, into the door with the "overseer" sign. However, you need second card in order to get there.
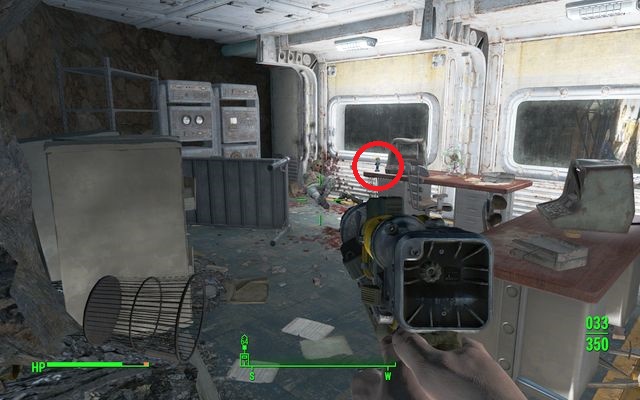 The Science Bobblehead. It can be found in the room at the end of the corridor ahead of the stairs to the overseer
Turn left behind the door and go to the end of the corridor. Enter the small room ahead. On the desk under the window you will find the Science Bobblehead which will give you one additional attempt when guessing password to hack the terminals. One of the bandits in this small room will have the overseer's access card. Go through the same road to the closed door and use the card.
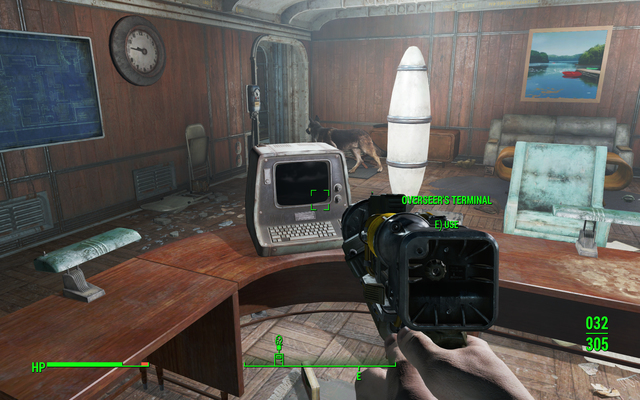 The overseer's computer - the main objective of the quest. It will also open the door to the warehouse
In the room with the "overseer" door you will find, in addition to the strongest raiders, the Grognak the barbarian magazine. The door behind which the item can be found will be opened by using the terminal on the office. Checking the terminal is also the main objective of the quest, once you do it, the task will end.
Quest rewards: experience
Museum of Witchcraft is a small place located east, in sector III. The place is used only during The Devil's Due quest which starts when you will find the body near the museum. You won't find many interesting items inside, only large number of ammunition which will be useful during the battle with the deathclaw that can be found inside.
How to unlock: Find the body on the western side of the Museum of Witchcraft (M3,3) and listen to the holotape.
Quest objectives:
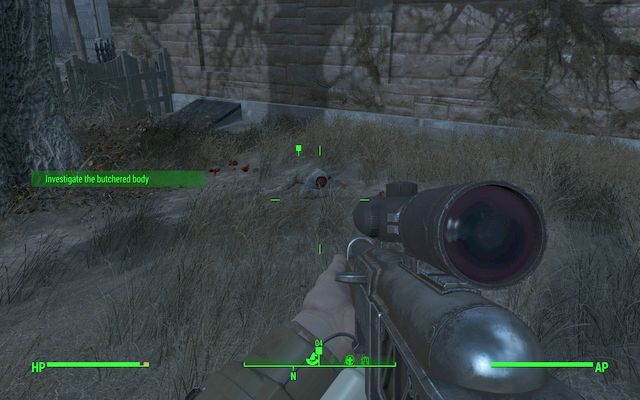
Find the body in the western side of the Museum of Witchcraft (outside the building) and listen to the holographic tape you will find near it. Then, enter the basement through the door next to the body.
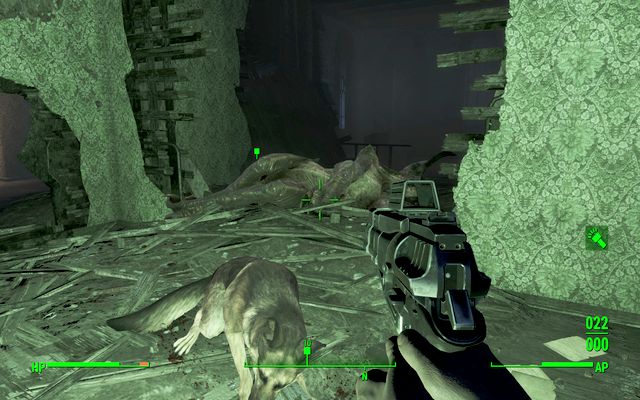 Many holes in the wall will allow you to perform large number of dodges
You are safe in the basement, but be careful when you get to the ground floor. Equip yourself with the best weapons you have, using the power armor is recommended as well. You will face a unique deathclaw. He has stronger attack and armor, so he is a hard opponent. Near the stairs to the basement you will find the Grognak the Barbarian magazine lying on the table in the corner of the building.
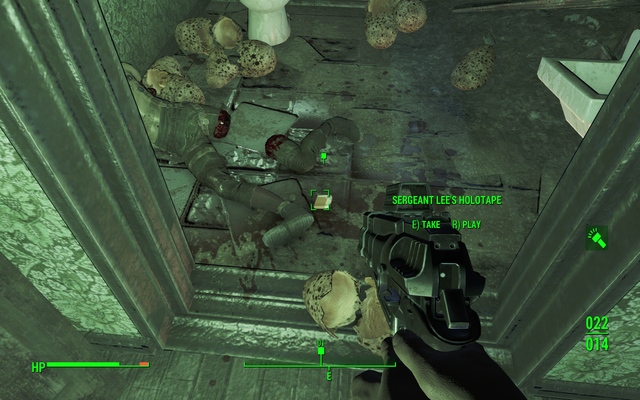 Pick up the egg in the toilet
Once the battle is over, go to the toilet. You will find a tape there. Listen to it, but don't leave the location yet. First pick up one of the eggs that are lying there and deliver it to the recipient.
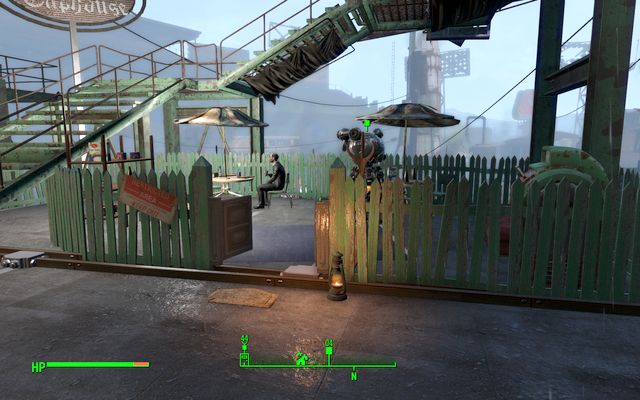 Wellingham - the recipient of the delivery
The robot Wellingham from the Diamond City is the recipient. He will pay you for the egg. You can try to negotiate the price (Charisma is required). Each negotiation (there are three of them) will increase the reward by 100 bottlecaps. You can receive a total of 500 bottlecaps.
Quest reward: experience, from 200 to 500 bottlecaps (negotiations), Wellingham's Recipe.
 Return the egg to the nest of the deathclaw
Optionally, you can return the egg to the nest. You will only see an interesting scene, during which the deathclaw will wait for you to return the egg and will not attack you. Sadly, you will receive only small number of experience for completing the quest in that way.
How to unlock: Talk to Arlen Glass in The Slog (M2,5)
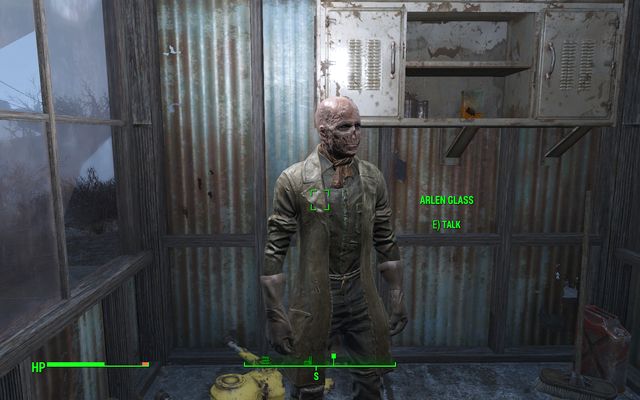 Arlen Glass
Arlen Glass will ask you to bring him parts needed for repairing the toys from the factory. If you have Charisma, you can bargain the price.
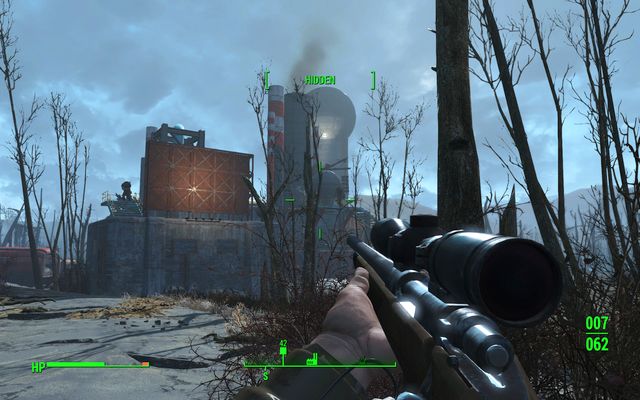 Wilson Atomatyoys Factory
Go to where he pointed you, to the Wilson Atomatyoys Factory. The location is quite uncovered, so it is a good idea to use the sniper rifle. The place is occupied by few supermutants, which means it won't be easy. One of them has a minigun, another one is equipped with laser musket. Remember where the bodies are lying - soon you will have to search them.
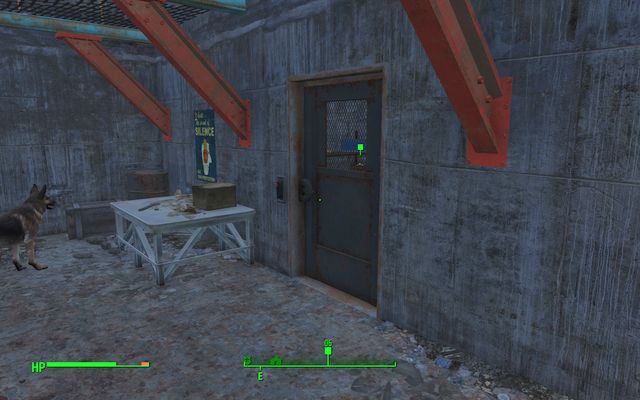 Entrance to the room with the parts
If you manage to beat them - or if you try to sneak up - walk to the ground floor where the mission marker is pointing you. There you will find door opened with access card. If you received the card from the questgiver, you can enter and collect the items you seek from the chest. Otherwise, first you must search the bodies of killed enemies. One of them will have the card.
Quest reward: experience, 150 bottlecaps (you can increase it with Charisma by: 75, 75 + ID card that gives you access to the building-objective)
This unofficial Fallout 4 game guide provides a role of a world atlas and it means that it focuses entirely on the game's environment and on all of the things you can find in the world's locations. The most important element of this guide are the chapters containing maps. The world atlas offers a high quality world map which has been divided into several smaller sectors. Maps of the sectors have icons informing about the locations which may be unlocked and visited during gameplay. Each location has been described on the map (enemies, treasures, NPC's, potential quests etc.), however more important places have additional descriptions on separates pages of this world atlas. The last part of the map chapter is a page with a world map showing enemy levels. Using this map may be very helpful in finding out where the main character can go without risking an encounter with much more powerful enemies. The next big part of this world atlas are the chapters about the available collectibles. There are two major types of secrets in the game - bobbleheads (small Vault-Tec figurines) and books. Both of them are used to permanently increase the main character's stats or to unlock new perks so knowing where they are is crucial. The final chapters of the world atlas are a little smaller. They offer insight on the locations of the legendary items and on the areas with the most interesting easter eggs. Fallout 4 is a very big role-playing game in which exploring the entire world and gaining possession of all of the best gear may take a hundred hours or even more. Thanks to the maps and the locations descriptions provided by this world atlas you will be able to save a lot of time and visit the areas with the best equipment in the early stages of the game.
Additionally we've used the bold font to mark the quest titles.
Jacek "Stranger" Halas, Patrick "YxU" Homa, Patryk Greniuk ()
The map seen above shows the entire world of Fallout 4. The map is obviously very big and that's why we've divided it into nine smaller sectors. Maps of the sectors can be found on the following pages of this chapter. You begin the game in sector 1 (Vault 111 in the upper left corner). Once you've left the vault you can theoretically go whenever you want to, however you shouldn't move away from the starting area too early in the game. You may encounter very powerful enemies and you won't be able to defeat them with a weak character (make sure to visit the page of our world atlas with a map of enemy levels).
The map seen above shows the first sector of the world map which is its north-western part. The map has icons of locations you can discover while visiting this sector. Each location has its description on the map and more important locations have their separate pages in the atlas with more info. The most important locations in this part of the world are Vault 111 (you will begin your game here), Sanctuary (it'll be your first base) and Concord town (you'll visit it while completing the first main quest).
Sanctuary - Grognak the Barbarian magazine (+5% to melee damage);
Museum of Freedom - Perception Bobblehead;
Museum of Freedom -Robco Fun magazine (Unlocks game on Pip-Boy);
Ranger Cabin - Survival Guide (You receive 5% less melee damage);
USAF Satellite Station Olivia - Covert Operations Manual (permanently increases your stealth skills);
Robot Disposal Ground - Hot Rodder Magazine (new paint job for the power armor);
Wolden Pond - Magazine (Tales of Junktown Jerky Vendor) (better prices in shops);
Thickets Excavations -Taboo Tattoos Magazine (Unlocks face tattoo).
Sunshine Tidings Co-Op - Hunter's Board. You will find it near the legendary radroach. The weapon increases damage dealt to animals by 50%.
Walden Pond -Big Jim. This weapon increases the chance to damage enemy legs by 20%. You will find it on the table in the main room of the tunnel next to the pond.
Dog - Red Rocket Truck Stop. Simply talk to the dog and it will join you.
Codsworth - Your servant robot, met before the apocalypse. You will find him in the Sanctuary. He will join you when the Minutemen will enter the settlement.
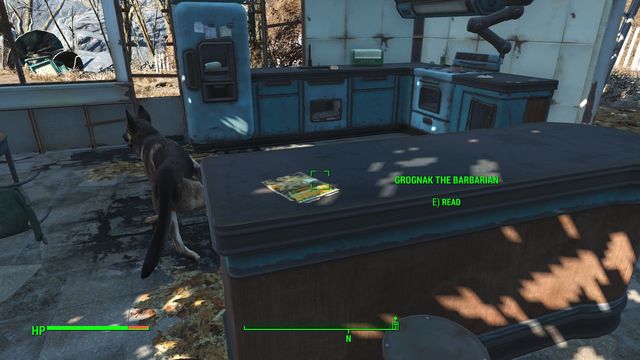 Map of Vault 111
Vault 111 is the first location where you will find yourself after awakening. You will face only weak radroaches here. The vault itself is on the northwestern edge of the map. Don't rush exploring it. Thoroughly search through each part of the complex, collect all valuable items, read their descriptions and application.
1. You will wake up in one of the two rooms with cryochambers. There is nothing interesting in any of them.
2. The computer on which you can play Fallout's version of Donkey Kong.
3. On the table there is a gun and some ammunition. It will be useful at the beginning of the game.
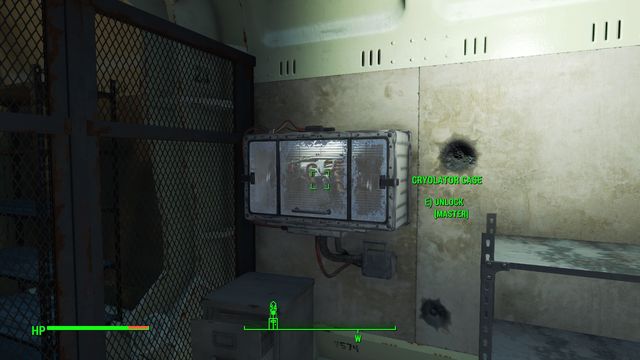 It is best to ask the dog to help you in collecting the weapon.
4. The container is secured with a master level lock. Inside there is the Cryolator, a very good weapon in the early phase of the game. You can get the item by returning there with the dog and ordering him to search for valuable items. He will walk towards the container and will take the rifle without the need of opening the chest.
5. The button that allows you to open the vault. Don't forget about searching the territory after leaving. You will find ammunition in few trailers.
Before the apocalypse, Sanctuary was the home of the main protagonist. You return to this location during the first main quest of the game - Out of time. Later in the game this place becomes the main base of operations of the Minutemen. This place becomes a settlement that you can develop and encourage new settlers to come here.
During your first visit in the settlement, try to check all buildings in search for valuable items. This will provide enough equipment for your next journey.

You can find the Grognak the Barbarian Magazine in your old house. It will add 5% to damage dealt with fists and melee weapons.
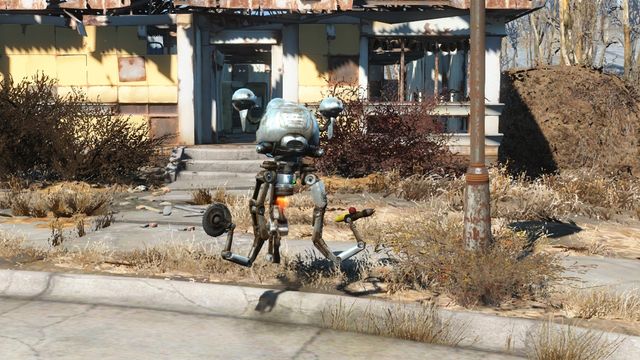 Codsworth is constantly roaming through the settlement, making it harder to find him.
You will find Codsworth in the Sanctuary. He will help you in searching through the village. When you meet him the second time, you will be able to invite him to join you.
You will find all workshops that you could need in the village.
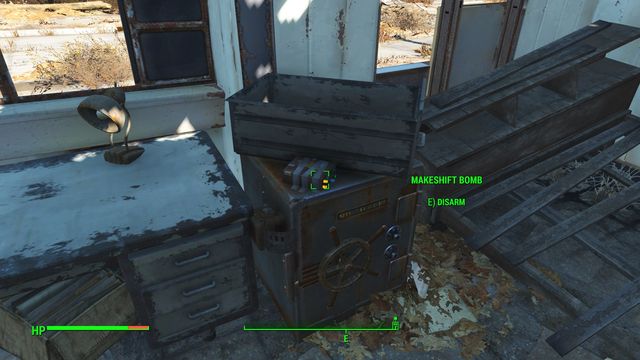 Disarming the bomb will provide you with few additional resources.
In one of the houses you will find a safe on novice level. Watch out, as it is secured with a trap that you must disarm first. Inside you will find some ammunition.
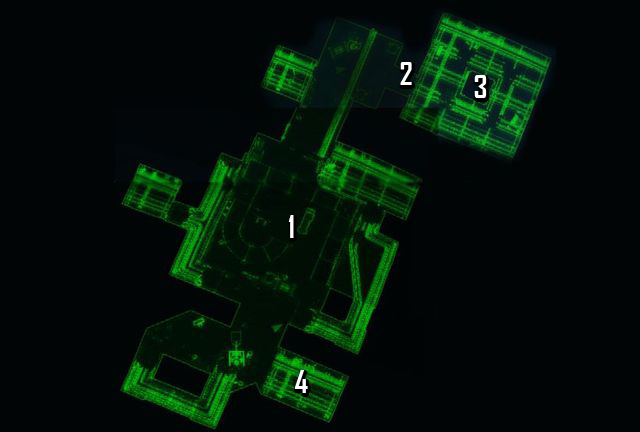 Map of the satellite station
USAF Satellite Station Olivia is a place located in the northeastern part of the Sanctuary Sector. It is made of a fenced territory on the surface and a complex of rooms underground. You can get there by using the door in the small, concrete building. The whole territory is occupied by raiders. You must watch out for them especially in the underground bunker. You can find few radcoaches here as well. At the beginning of the underground complex there is a trap, watch out for it. You will find many valuable items in the bunker, most of all ammunition and medicaments.
1. You will find a fusion core in the generator.
2. In the red chest in front of the door you will find the locket related to the Returning the favor quest.
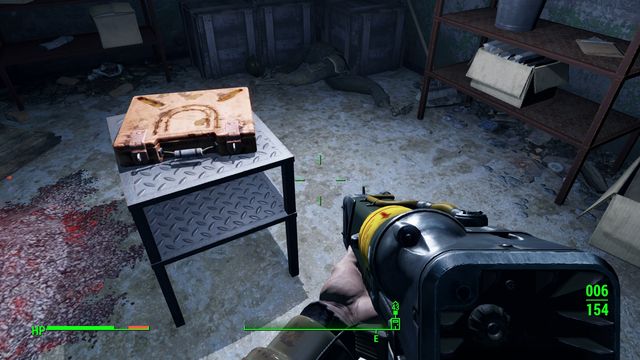 In the chest you will find the key to the locked room.
3. In the room (you must open the door with easy lock) you will find few valuable items and the key to room number 4.
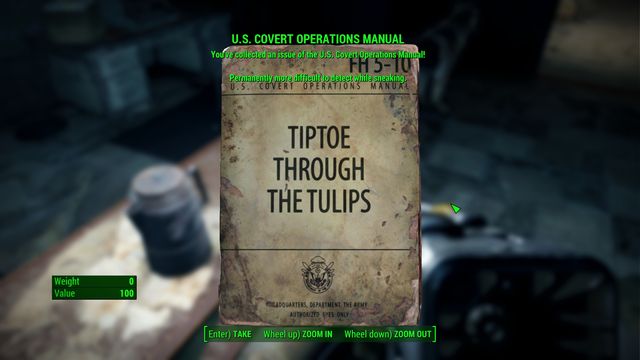
4. In order to get to that room, you must break the security of the terminal on medium level. Another option is to find the proper key. You will find it in the chest, in the last room number 3. Inside you will find few closed chests (novice level), but most of all it contains ammunition and a magazine that will permanently increase your sneaking abilities.
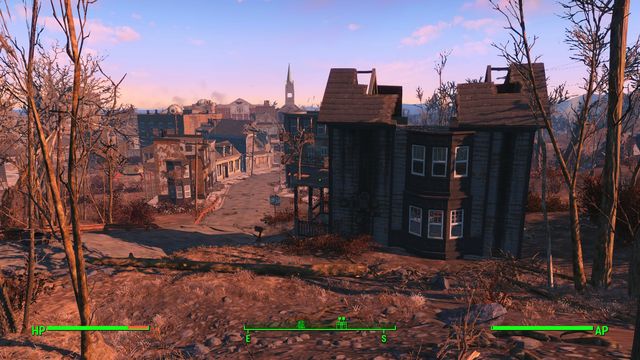
You will visit the city of Concord during the first main quest - Out of Time. There are many buildings here, but you won't be able to enter most of them. On the border of the city you will face some bloodbugs. Additionally, during the first visit to the city you will have to eliminate many bandits.
You will find a fusion core in the city's underground. However, you will be able to get there only once you defeat the Deathclaw
In the building named Concord Speakeasy you will find a safe with advanced security. Inside you will find some weaponry and the Stealth Boy that makes you temporarily invisible. In the same building you will find a door secured with advanced lock. Inside you will find some weapons.
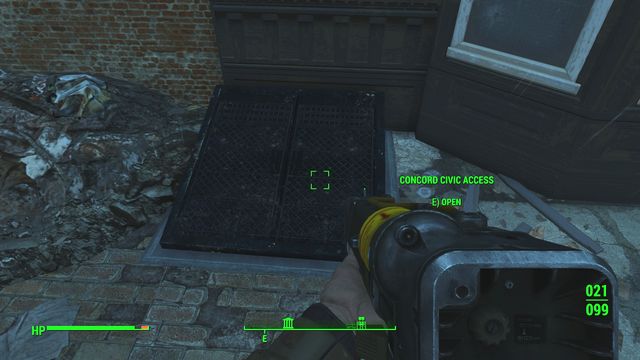 In the city you will find at least 3 entrances to the sewers.
In few points of the city you will find entrances to the sewers. In the tunnel complex you will find many interesting items, but you must watch out for enemies.
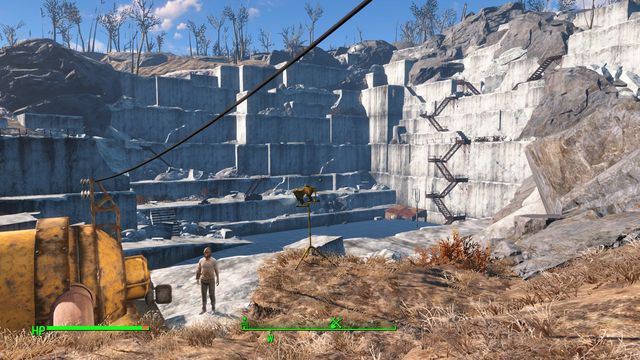
The Farm located near the Concord city is inhabited by a three-person family. They are farmers.
You can trade with Conny. However, she doesn't have many valuable items.
The owner of the farm - Blake - can give you the Returning the favor quest during which you must find the locket that belonged to her murdered daughter. For doing it you will receive some bottlecaps and lower prices when buying from Abernathys.
After completing the quest, the farm will become your new settlement. You will be able to collect all valuable items from there with no penalty.
During your first visit to the farm, you can witness an attack of the bloodbugs on the farmers. You can help them in defending, but you will not receive any payment for that.

Thicket Excavations is one of the largest locations in Sanctuary Sector. You will have to visit it at least twice to fully explore it because part of the place is flooded by water. You will pump the water out during the Pull the Plug quest. However, the water will not be pumped out immediately, it will take at least few days. It is wise to wait, as you will gain many valuable items here.
Two mirelurks will attack you after you activate the pump.
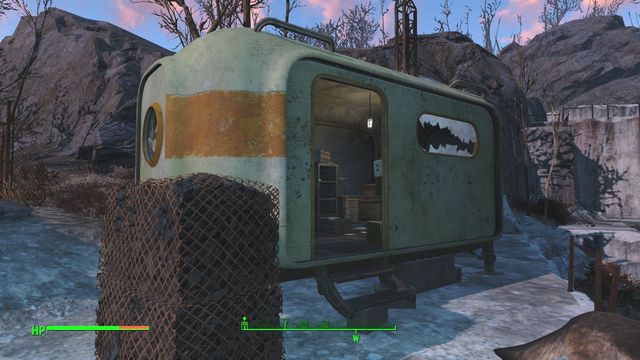 You will find the Taboo Tattoos Magazine in this trailer.
In the trailer on the left you will find the Taboo Tattoos Magazine which will unlock an additional face tattoo.
Once you return to the location few days after activating the pump, it will be occupied by a group of raiders. Keep it in mind and try to eliminate them one after another. At the bottom of the excavations you will face their leader.
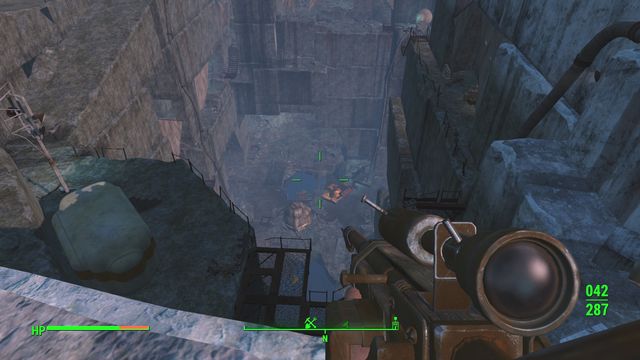
Few mirelurks can be found at the bottom of the excavations. You have almost no chance in direct combat, so it is better to kill them from above with the sniper rifle or grenades.
You can use the elevator on your way back.
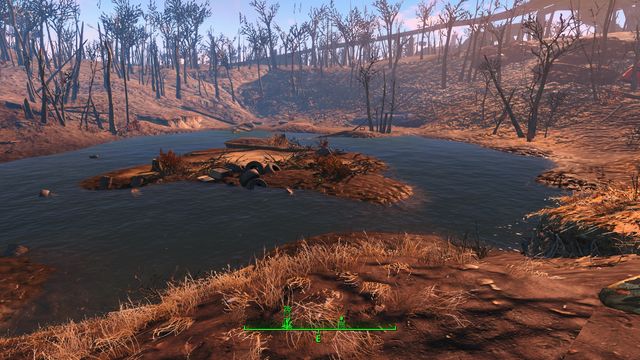 This unimpressive location hides many interesting items.
Walden Pond is a large location in the southwestern part of the Sanctuary Sector. You will find many interesting items, enemies and raiders here. Walk around the pond and you will find few buildings containing valuable items. Watch out, as some of them are protected by bandits or other monsters.
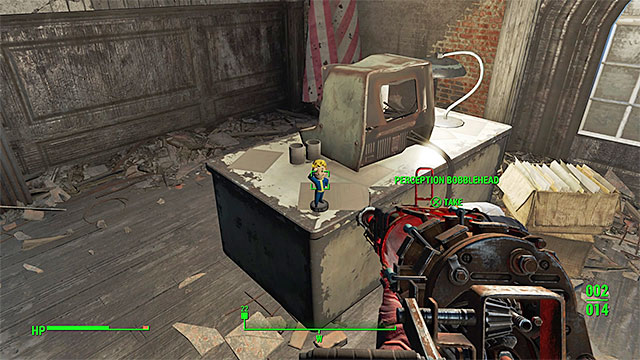
East from the pond you will meet a merchant with some ammunition, weapons and crafting materials. Watch out, you can meet a mutated bear near him - Yao Guai.
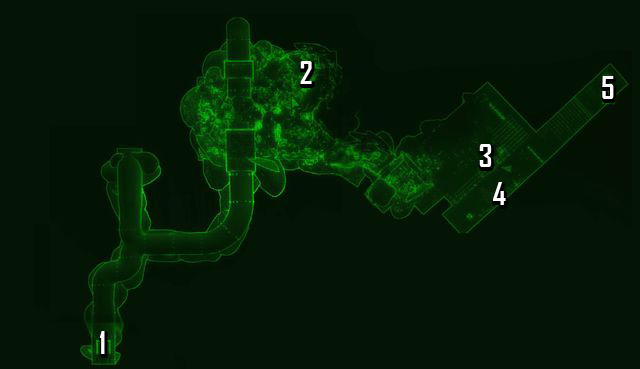 Map of the caves
1. Near the Walden Pond there are caves. You can get inside using the sewer pipe that ends in the lake.
2. You will find a magazine in the caves. It will provide you with better prices in shops.
3. In the main room you will find a safe on master level. However, nothing very valuable can be found inside, only few grenades and medicaments.
4. There is a legendary weapon on the table - Big Jim. It gives you 20% more chance to damage enemy legs.
5. Above the pond there is a Gift shop. There you will find door secured with master lock. It's an alternative way into the caves. Walter, the leader of the bandits, has the key.
The map seen above shows the second sector of the world map which is its northern part. The map has icons of locations you can discover while visiting this sector. Each location has its description on the map and more important locations have their separate pages in the atlas with more info.
The map seen above shows the third sector of the world map which is its north-eastern part. The map has icons of locations you can discover while visiting this sector. Each location has its description on the map and more important locations have their separate pages in the atlas with more info.
The map seen above shows the fourth sector of the world map which is its western part. The map has icons of locations you can discover while visiting this sector. Each location has its description on the map and more important locations have their separate pages in the atlas with more info.
The map seen above shows the fifth sector of the world map which is its central part. The map has icons of locations you can discover while visiting this sector. Each location has its description on the map and more important locations have their separate pages in the atlas with more info. One of the more important locations in this part of the world is the city of Lexington.
The map seen above shows the sixth sector of the world map which is its central part. The map has icons of locations you can discover while visiting this sector. Each location has its description on the map and more important locations have their separate pages in the atlas with more info. One of the more important locations in this part of the world is the Diamond City.
The map seen above shows the seventh sector of the world map which is its eastern part. The map has icons of locations you can discover while visiting this sector. Each location has its description on the map and more important locations have their separate pages in the atlas with more info.
The map seen above shows the eighth sector of the world map which is its south-western part. The map has icons of locations you can discover while visiting this sector. Each location has its description on the map and more important locations have their separate pages in the atlas with more info.
The map seen above shows the ninth sector of the world map which is its southern and south-eastern part. The map has icons of locations you can discover while visiting this sector. Each location has its description on the map and more important locations have their separate pages in the atlas with more info.
Bobbleheads are one of the types of collectibles in Fallout 4. They have the same purpose as in Fallout 3. It means that each time you've found a bobblehead and picked it up you'll receive a permanent increase to one of your statistics. This can make a huge difference, especially in the early pars of the game. Make sure to collect the bobbleheads which are easy to acquire as soon as possible. Some of them will require you to unlock advanced perks or to visit more dangerous locations and you can leave them for later. Below is the list of bobbleheads along with the info on where exactly you can find them.
IMPORTANT! The bobbleheads list is a work in progress. We will be adding more bobbleheads locations in the near future.
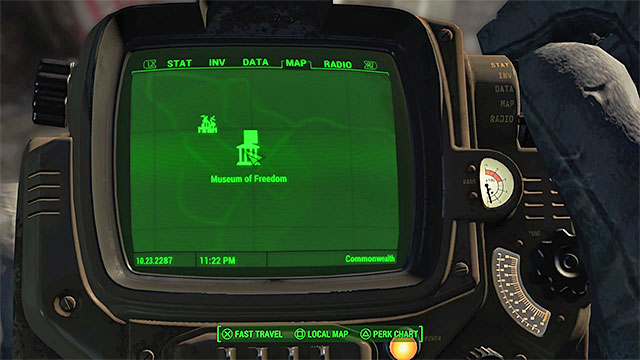

Effects: +1 to Perception
Location: This bobblehead is inside the Museum of Freedom in the city of Concord (screen 1). You visit this location while completing the second main quest of the game - When Freedom Calls. The bobblehead is in a room on the upper floor of the museum, near the spot where you meet with Preston Garvey and the rest of the Minutemen for the first time (screen 2). Don't worry if you didn't collect it right away, because you can go back to the museum later in the game.
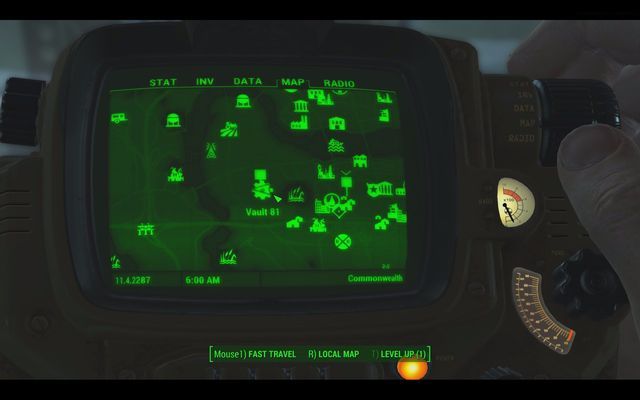
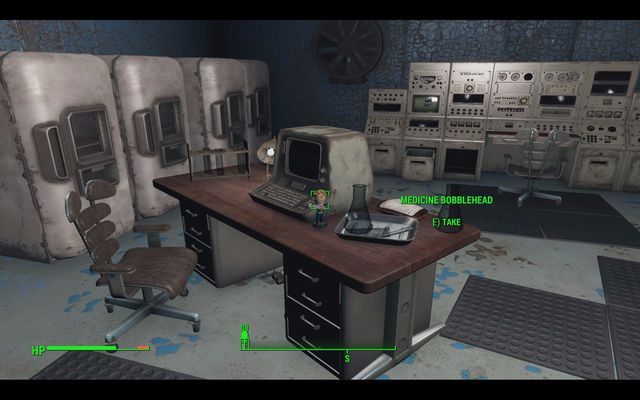
Effects: +10% to the amount of health restored by Stimpacks
Location: You will find this bobblehead in the Vault 81 (screen 1) to which you will gain access after delivering three fusion cores. Inside you must complete two quests: Here Kitty, Kitty and Hole in the Wall. The bobblehead can be found in the room of the abandoned part of the crypt (screen 2) which you will visit during the quest. It's in the room where you find Curie the robot, before the door to the elevator. It is lying on the desk next to the terminal. If you won't see it or you forget to take it, you can always go back to that place by using the now opened door behind the entrance to the vault, on the left side.
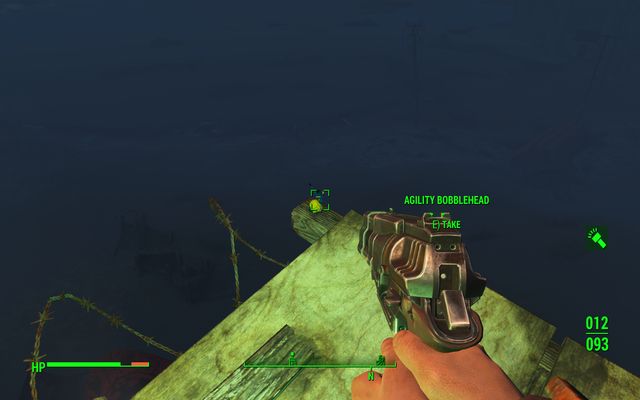
Effects: +1 to Agility
Location: The bobblehead is located near the Wreck of the FMS Northern Star (picture 1), on the coast on the southeastern part of the last sector (southwest from Spectacle Island). The level of enemies in this place is rather high - you will face few monsters and a base of invaders on the upper deck. Sadly, you must get to the very front of the ship, where you will find the bobblehead on a board (picture 2). One of the enemies is legendary, so be careful.
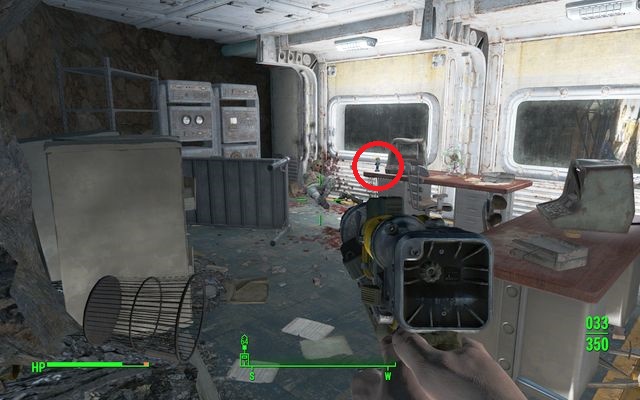
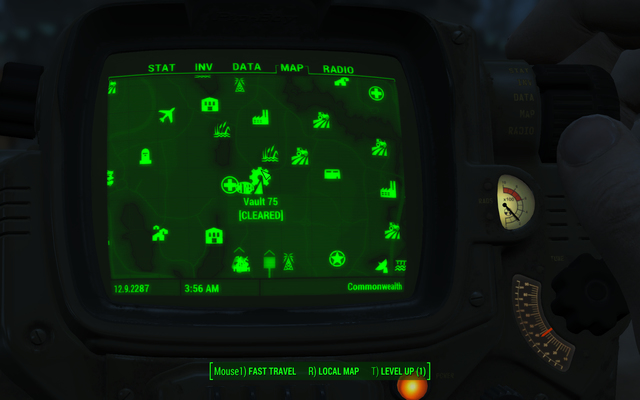
Effects: Increases the number of tries when hacking a terminal by 1
Location: The Bobblehead can be found inside Vault 75 which is located in the abandoned Malden Middle School (sector II). Inside you will start the Vault 75 quest part of which you must complete. Get to the elevator at the end of the corridor inside the vault and ride down. Now keep walking ahead until you reach the dining room. Go north-west where you will find the locker room and door - behind them turn left on the stairs, and below the stairs turn left again. In the dummy building you will get the laboratory access card. Walk on the stairs and turn left. Walk downstairs to the laboratory. Keep going ahead to the small room at the end of the corridor - there, on the desk, you will find the Bobblehead.
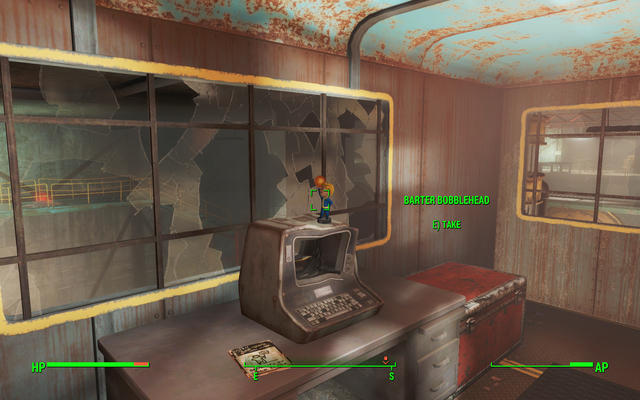
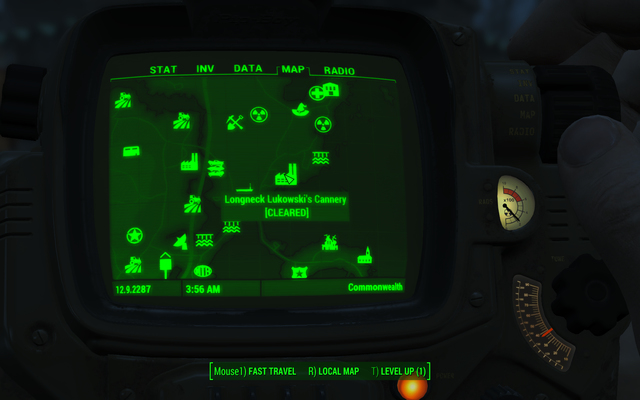
Effects: Improves merchants' prices by 5% (of buying and selling)
Location: The Bobblehead can be found in the Longneck Lukowski's Cannery (sector III). You can start the quest received from Theodore, but in order to collect the Bobblehead you don't need to do it. Walk into the production hall behind the wall. When you look up, you will see the office on the first floor. Walk there through the stairs, in the last room you will see the figurine lying on the computer.
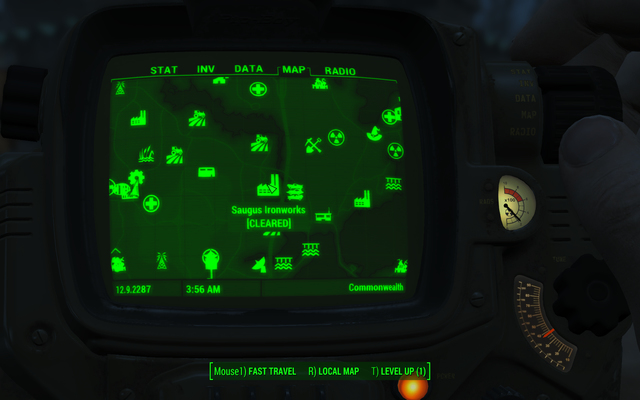
Effects: improves the damage dealt by exploding weapon by 15%
Location: The Bobblehead can be found in the Saugus Ironworks (sector II). First start the quest on the Finch Farm (sector III) received from Abraham Finch - Out of the Fire. Details about completing it can be found in the corresponding chapter of the guide. You must get to the end of the ironworks (by using the passage to the second part of the building under the roof) and face Slag in the small room with the cauldron in the middle. The Bobblehead is lying on the measuring device in the place where Slag was standing during the cutscene (above the cauldron).
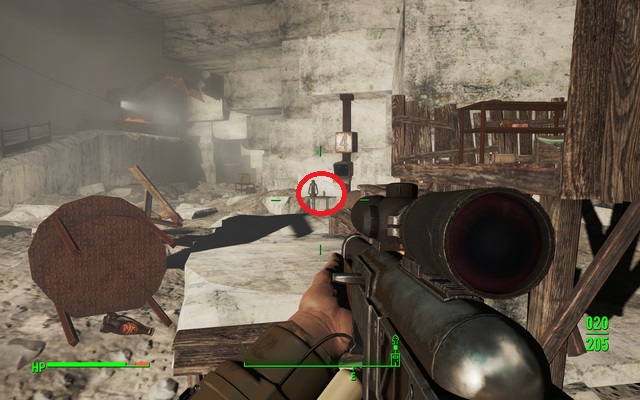
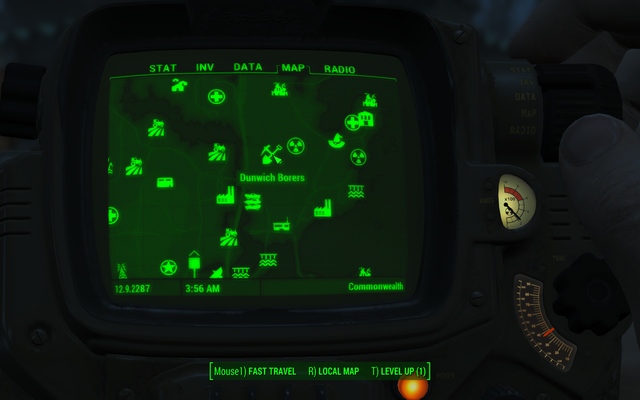
Effects: you permanently become 10% harder to detect
Location: Go to the Dunwich Borers (sector III). At the bottom you will find the entrance to the mine. The Bobblehead can be found in the fourth room (boards on the pillars) where you will have to fight a large number of ghouls. It's hard to miss it - it is lying on the desk, next to the entrance to the next tunnel.
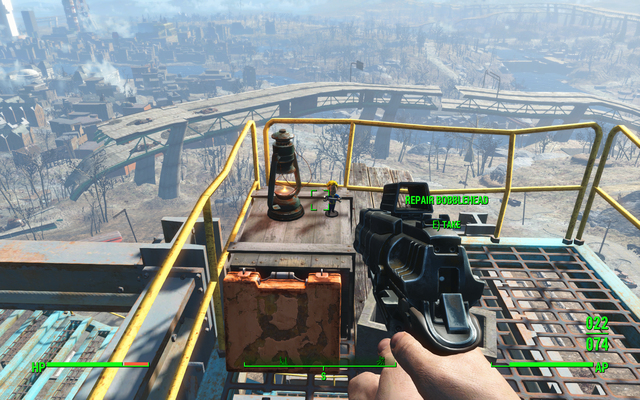
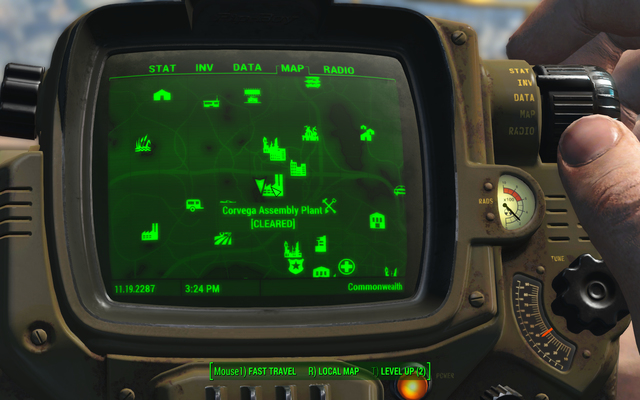
Effects: fusion cores work 10% longer
Location: The Bobblehead can be found in the Corvega Assembly Plant. When standing in front of the building, turn left and get to the roof of the building. Turn right now and walk upstairs. The Bobblehead is lying at the end of the stairs, next to the container south-west. Two roads through stairs lead there.
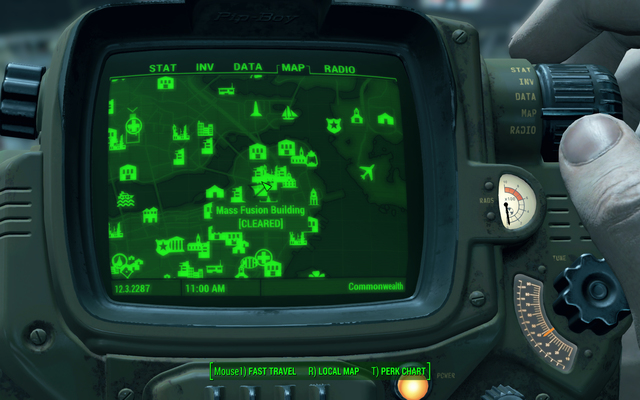
Effects: permanently adds +1 to Strength parameter
Location: You can find a location called Mass Fusion Building in Boston. It is occupied by quite strong shooters. After entering the building, you must reach the highest floor by walking through each level (the elevator isn't functioning). On the highest floor you will face a mini-boss - a shooter with power armor. Once you defeat him, you can look around. Above the reception below there is a large statue size of few floors. You must jump on its head to collect the secret.
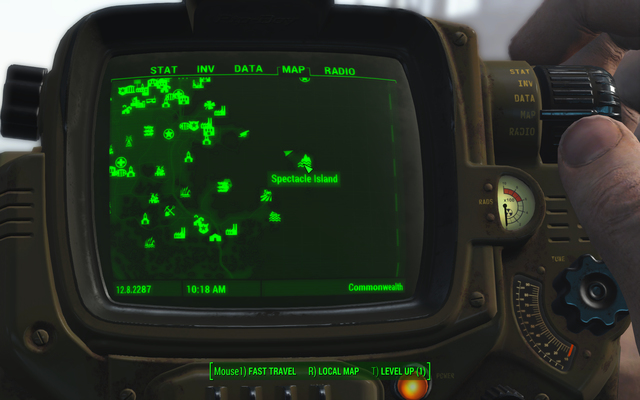
Effects: permanently adds +1 to Luck parameter
Location: The Bobblehead can be found on the Spectacle Island to which you must swim. Once you get there, go east where the electric cables lead you. A green boat can be found there. Walk on its "first floor" and right from the entrance you will see drawers. In one of them you will find the Bobblehead.
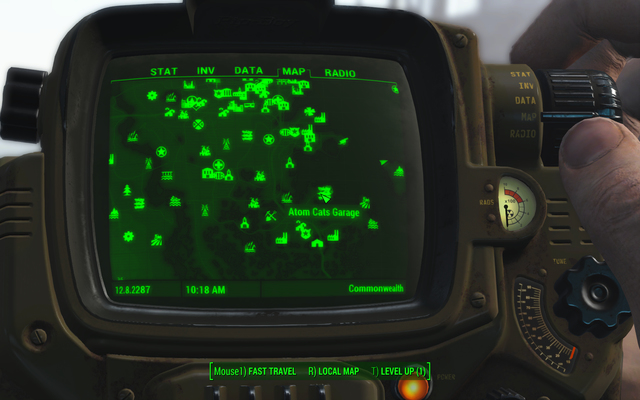
Effects: you receive +25 bonus to critical damage when attacking with no weapons
Location: Atom Cats Garage. You can enter the location anytime you want, it is a small, neutral camp. The Bobblehead is lying on the car in one of two garages.
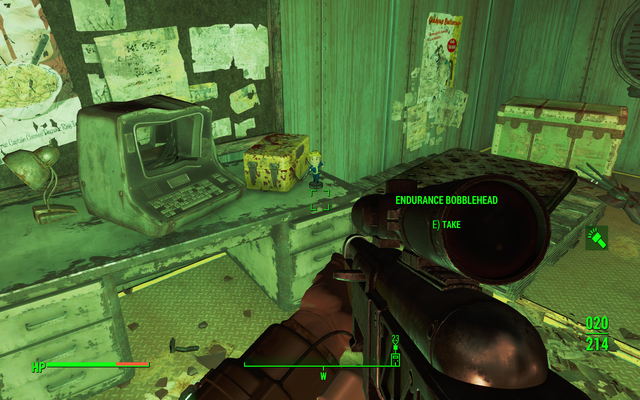
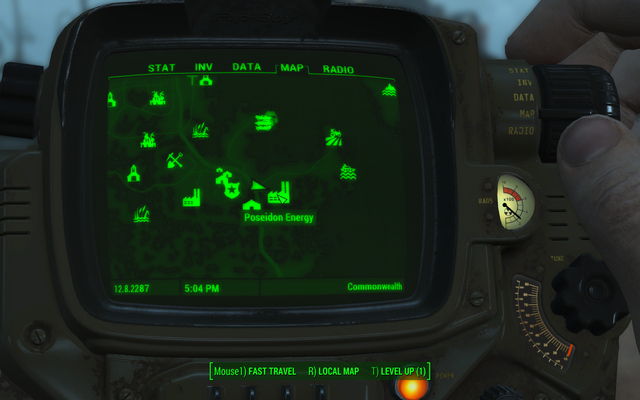
Effects: permanently adds +1 Endurance parameter
Location: The Bobblehead can be found in the Poseidon Energy building, far south. Despite appearances, it isn't easy to get it. The building is closed - in order to get inside, you must walk into the water and use the partially flooded pipe to reach lower levels. There, keep going ahead until you reach the proper building. You will notice offices high above - the Bobblehead can be found in the middle one, on the desk near the terminal.
In Fallout 4, you can look for magazines. They are one of the main categories of secrets. Each magazine guarantees some valuable price. It might be, for example, a statistic bonus, increase of the percentage chances for performing some action (like dealing critical damage in melee combat) or unlocking new objects to be placed in the settlements you manage.
The map above shows the whole game world which for this guide was divided into nine smaller sectors. Locations in which magazines can be found are marked on it. After moving the mouse cursor on a specific location, you can learn what magazines can be found there. Below you will find a table listing all magazines available in Fallout 4. Further pages of this chapter contain more detailed description of the magazines found in various sectors of the map. After reading the location of the secret from the world map, you can go to the page focusing on that sector and obtain more information.
Important - Some secrets can be found in places to which you might not be able to get at first (for example, in the secret quarter of some faction or in a location with high radiation). You can ignore them now and return to them once you obtain better equipment or after you complete the required quests.
Important - A full description of the magazines and their precise location can be found on further pages focused on specific sectors.
NAZWA CZASOPISMA
SEKTOR
NAZWA LOKACJI Z CZASOPISMEM
You're SPECIAL!
1
Sanctuary [1]
Grognak the Barbarian
1
Sanctuary [1]
Grognak the Barbarian
1
Wicked Shipping Fleet Lockup [2]
Hot Rodder
1
Robotics Disposal Ground [26]
Astoundingly Awesome Tales
2
Outpost Zimonja [3]
Astoundingly Awesome Tales
2
Skylanes Flight 1981 [4]
Grognak the Barbarian
2
Malden Middle School [5]
Massachusetts Surgical Journal
2
Medford Memorial Hospital [37]
Grognak the Barbarian
3
Museum of Witchcraft [6]
Guns and Bullets
3
Rook Family House [7]
Live & Love
3
Revere Beach Station [30]
Massachusetts Surgical Journal
3
Sandy Coves Convalescent Home [39]
Astoundingly Awesome Tales
4
Boston Mayoral Shelter [8]
Grognak the Barbarian
4
Mass Pike Interchange [9]
Live & Love
4
Fiddler's Green Trailer Estates [29]
Massachusetts Surgical Journal
4
Greater Mass Blood Clinic [38]
Picket Fences
4
Weston Water Treatment Plant [41]
Grognak the Barbarian
5
Corvega Assembly Plant [10]
Guns and Bullets
5
Fraternal Post 115 [23]
Guns and Bullets
5
BADTFL Regional Office [24]
La Coiffe
5
USS Constitution [28]
Live & Love
5
College Square [32]
Live & Love
5
Bunker Hill [33]
Massachusetts Surgical Journal
5
Cambridge Polymer Labs [40]
Astoundingly Awesome Tales
6
Coast Guard Pier [11]
Astoundingly Awesome Tales
6
Trinity Plaza [12]
Astoundingly Awesome Tales
6
Hubris Comics [13]
Astoundingly Awesome Tales
6
Pickman Gallery [14]
Astoundingly Awesome Tales
6
Vault 114 [15]
Grognak the Barbarian
6
Vault 81 [16]
Astoundingly Awesome Tales
6
Back Street Apparel [17]
Astoundingly Awesome Tales
6
Boston Common [18]
Guns and Bullets
6
South Boston Military Checkpoint [22]
Live & Love
6
Diamond City Market [34]
Live & Love
6
Faneuil Hall [35]
Live & Love
6
Goodneighbor [36]
Live & Love
6
Goodneighbor [36]
Picket Fences
6
Beantown Brewery [42]
Picket Fences
6
Hardware Town [43]
Picket Fences
6
Combat Zone [44]
Astoundingly Awesome Tales
7
East Boston Preparatory School [19]
Grognak the Barbarian
7
Andrew Station [20]
Guns and Bullets
7
Castle [25]
Live & Love
8
WRVR Broadcast Station [31]
Grognak the Barbarian
9
Hyde Park [21]
Hot Rodder
9
Atom Cats Garage [27]
The table below shows all magazines that you can find in the first sector of the world map, near the Sanctuary. More detailed information about specific secrets can be found further in the chapter.

You're SPECIAL!
Increases main statistic of your choosing by one point.
Location: Sanctuary [1]
Secret is hidden in the house of the main protagonist, in the bedroom of his son. It is lying under the drawer next to Shaun's bed.
Detailed description can be found below.

Grognak the Barbarian
Critical hits in melee combat (without weapons or with melee weapons) deal 5% more damage.
Location: Sanctuary [1]
Secret is hidden in the house of the main protagonist and can be found on the kitchen table.
Grognak the Barbarian
Critical hits in melee combat (without weapons or with melee weapons) deal 5% more damage.
Location: Wicked Shipping Fleet Lockup [2]
Secret is lying on the small desk at the end of the large warehouse, next to the computer terminal.

Hot Rodder
Unlocks new paint job for the power armor.
Location: Robotics Disposal Ground [26]
The secret is in the small building on the cemetery territory, next to the active computer terminal.
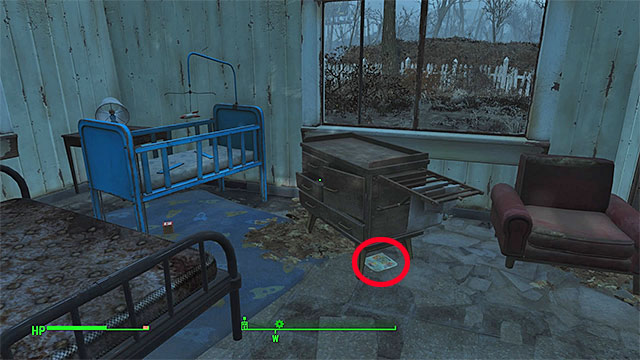
You must go to the house that belonged to the main protagonist before the apocalypse. Walk to the bedroom in which you will find Shaun's bed. Secret is lying on the ground, under the drawer next to the bed. It is shown on the picture above.
The table below shows all magazines that you can find in the second sector of the world map, near the city of Malden. More detailed information about specific secrets can be found further in the chapter.

Astoundingly Awesome Tales
You deal 5% more damage during night
Location: Outpost Zimonja [3]
The secret is lying next to the workshop in the camp. You can steal it quietly or take it after taking care of Boomer and his colleagues.

Astoundingly Awesome Tales
You deal 5% more damage to mirelurks.
Location: Skylanes Flight 1981 [4]
Secret is in the part of the plane wreck where the cockpit can be found. You will find it in the toilet.
Grognak the Barbarian
Critical hits in melee combat (without weapons or with melee weapons) deal 5% more damage.
Location: Malden Middle School[5]
Secret is in the bedroom in the Overseer's quarters in Vault 75 under the school.
A detailed description can be found below.

Massachusetts Surgical Journal
Increases damage done to limbs by 2%.
Location: Medford Memorial Hospital [37]
The secret is lying on the table in the room on the first floor of the hospital. The door to the room is closed.
Detailed description can be found below.
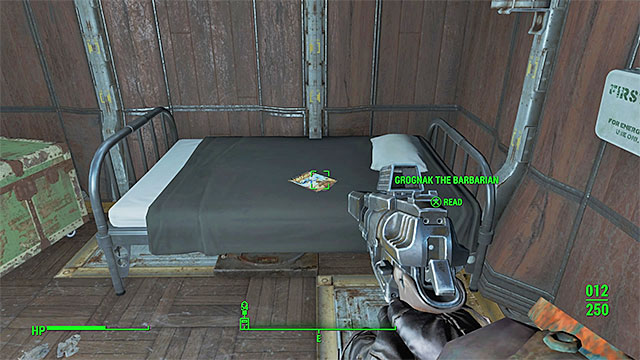
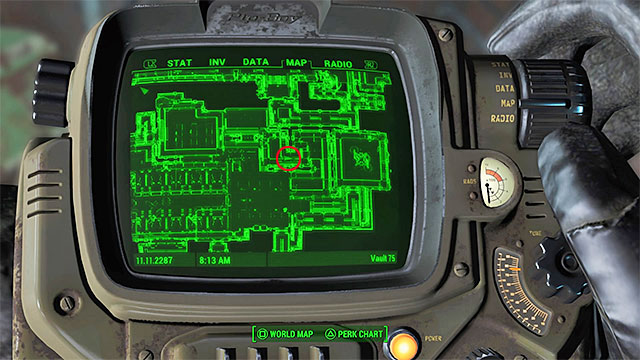
Reaching this secret is not easy, you must get through the whole Vault 75 that is located under the middle school building. Kill the raiders and find access cards that will give you access to parts of the vault available only for the Overseer. Once you reach the Overseer's office, use his terminal to open the side room. The comic book is lying on the bed in the place shown on the pictures above.
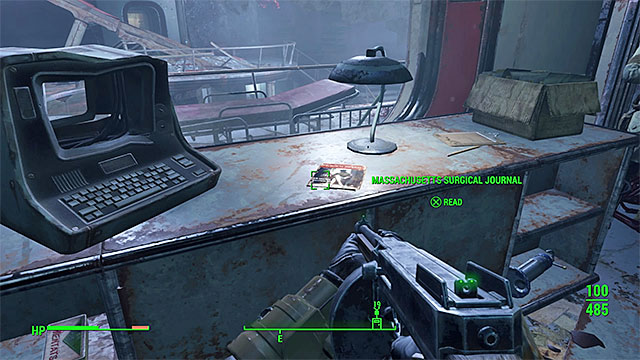
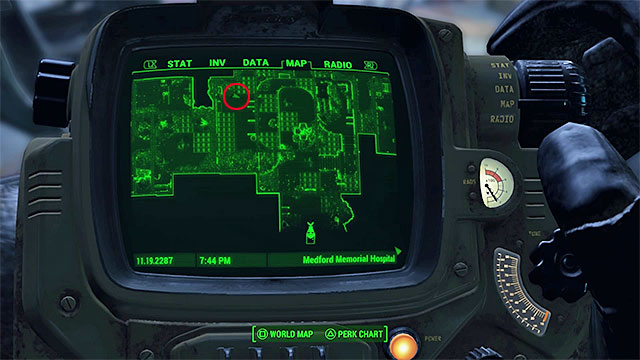
Go to the first floor of the hospital and find the closed door with advanced lock in its western part. Open the door with the bobby pin and explore the new room. The secret is lying on the table on the right side and it is shown on the pictures above.
The table below shows all magazines that you can find in the third sector of the world map, near the city of Salem. More detailed information about specific secrets can be found further in the chapter.
Grognak the Barbarian
Critical hits in melee combat (without weapons or with melee weapons) deal 5% more damage.
Location: Museum of Witchcraft [6]
Enter the museum through the basement and deal with the powerful deathclaw on the main floor. The secret is lying on one of the tables.

Guns and Bullets
Critical hits of ballistic weapons deal 5% more damage.
Location: Rook family house [7]
Help Barney Rook in getting rid of mirelurks and then open the hatch leading to his underground bunker. Secret is lying on the desk in the bunker.

Live & Love
You receive +1 to Luck when drinking alcohol (only when traveling with a companion).
Location: Revere Beach Station [30]
The secret is on the highest floor of the building at the water, near the large cauldron used for cooking. The access to the magazine is guarded by a group of bandits.

Massachusetts Surgical Journal
Increases damage dealt to limbs by 2%.
Location: Sandy Coves Convalescent Home [39]
The secret is lying on one of the shelves in the room with safes behind the closed door.
Detailed description can be found below.
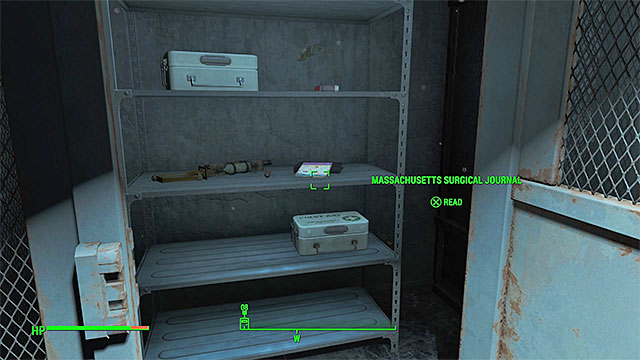
Ignore the friendly robot after entering the building and find the door that is near the entrance and requires you to unlock a simple lock. The door will lead to a room with safes. Look around the room, on one of the shelves you will find the secret. It is shown on the picture above.
The table below shows all magazines that you can find in the fourth sector of the world map, near the Fort Hagen. More detailed information about specific secrets can be found further in the chapter.

Astoundingly Awesome Tales
Regenerates 1 health point per minute.
Location: Boston Mayoral Shelter [8]
Secret is hidden in one of the living rooms in the final part of the shelter. It is lying on the desk near the large bed.
A detailed description can be found below.
Grognak the Barbarian
Critical hits in melee combat (without weapons or with melee weapons) deal 5% more damage.
Location: Mass Pike Interchange [9]
The secret is on the destroyed bypass to which you can get using the elevator. The item can be found on the toilet in the headquarters of the bandits.
Detailed description is available below.

Live & Love
You receive 25% more experience points for successfully using persuasion on women.
Location: Fiddler's Green Trailer Estates [29]
The secret is lying on the table in one of freely available trailers. Before you can get to it, you must eliminate all ghouls.
Massachusetts Surgical Journal
Increases damage dealt to limbs by 2%.
Location: Greater Mass Blood Clinic [38]
Secret is on the higher floor of the building, in the room with closed door that can be opened using a terminal.
Detailed description is available below.
Picket Fences
Unlocks new decorative elements in the settlement upgrade tabs.
Location: Weston Water Treatment Plant [41]
Secret is lying in the closet in one of the offices to which you get after using the elevator.
Detailed description is available below.
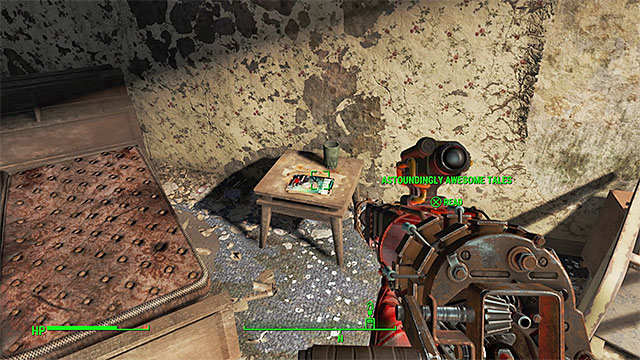
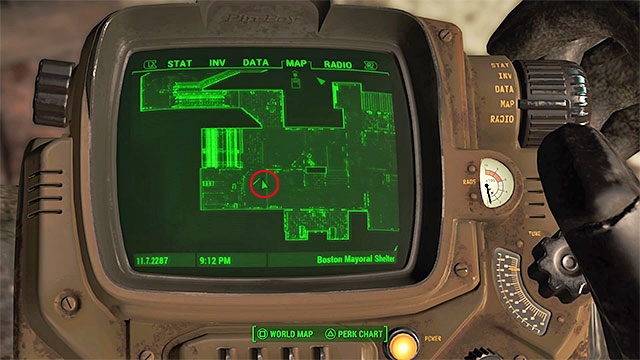
In order to get to the secret, you must walk into the mayoral shelter and then walk through the whole complex, eliminating many synths and guard towers on the way. Once you reach the living rooms, start examining the small rooms. The secret is in one of them, on the table next to the bed. The location of the item is shown on the pictures above.
You must get to the ruined bypass high above the ground. The easiest way to do it is using the small elevator. The location is occupied by enemy Gunners with whom you must deal. An Assaultron robot and stationary turrets are helping them. The collectible is hidden in the headquarters of the enemy leader (Gunner Commander - he is using a power armor). It is lying on the toilet in the place shown on the pictures above.
Get to the higher floor of the ruined clinic building. You must find the closed door shown on the picture 1. It can be opened by hacking into the left computer terminal (it has advanced security). After opening the door, you will find the secret on the desk shown on the picture number 2.
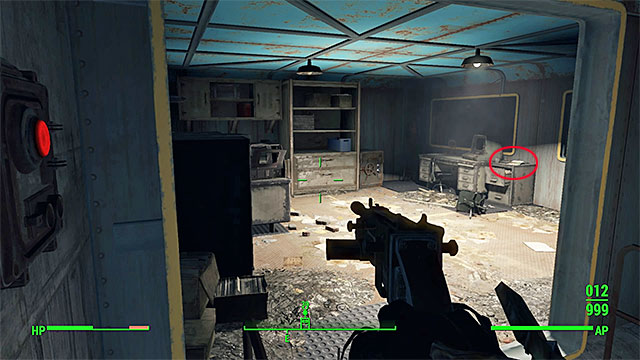
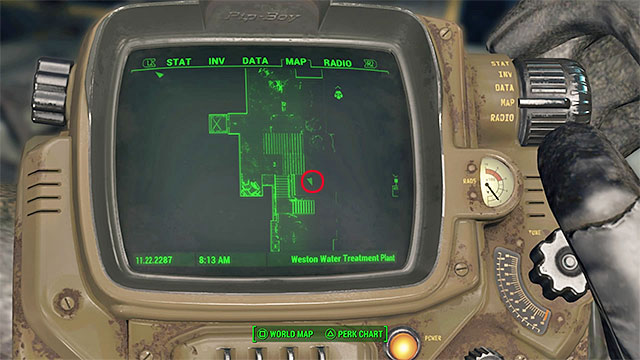
Many supermutants can be found in front of the entrance to the building. You can fight them or sneak up to the entrance door. Once you get inside the building, find the elevator and use it to ride below. After leaving the elevator, start checking the nearby rooms. You will find the magazine on the closet near the desk in the office shown on the pictures above.
The table below shows all magazines that you can find in the fifth sector of the world map, near the city of Cambridge. More detailed information about specific secrets can be found further in the chapter.

Grognak the Barbarian
Critical hits in melee combat (without weapons or with melee weapons) deal 5% more damage.
Location: Corvega Assemply Plant [10]
Secret is inside the upper part of the factory where cars are dismantled. It can be found in the small room to which you can get through the balcony.
A detailed description can be found below.

Guns and Bullets
Critical hits of ballistic weapons deal 5% more damage.
Location: Fraternal Post 115 [23]
The secret is lying on a rostrum in the main room of the building where Dead Eye was residing.
Detailed description is available below.
Guns and Bullets
Critical hits of ballistic weapons deal 5% more damage.
Location: BADTFL Regional Office [24]
The secret is lying on the desk in the room in the western part of the building, behind closed door.
Detailed description is available below.

La Coiffe
Unlocks new haircut.
Location: USS Constitution [28]
Secret is inside a laundry near the crossroads west from the USS Constitution ship.
Detailed description is available below.

Live & Love
Your companions deal 5% more damage.
Location: College Square [32]
The secret is hidden in an underground location, in a closed room found before reaching the metro station.
Detailed description is available below.

Live & Love
You receive 25% more experience points for successful persuasion attempts used on men.
Location: Bunker Hill [33]
The secret is at the very top of the monument, a spiral stairs lead to it.

Massachusetts Surgical Journal
Increases damage dealt to limbs by 2%.
Location: Cambridge Polymer Labs [40]
Secret is on the first floor of the building, in the office of the director of the facility. The office is protected by door with master lock.
Detailed description is available below.
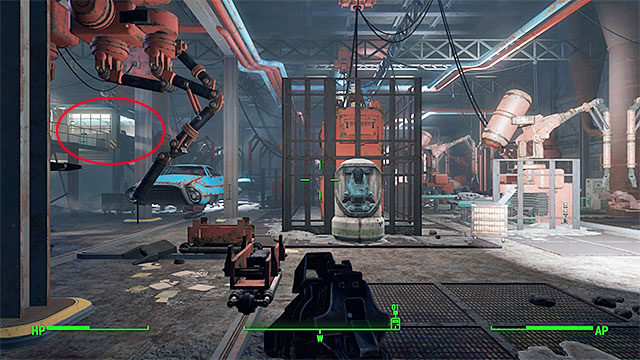
It is one of the best hidden secrets. You can easily get lost when exploring the factory. First you should try to secure the territory by getting rid of all enemies and defense turrets. Start in the main lower entrance to the factory. Don't use it, instead go left and select the small ramp leading up. Turn right there and go to the door leading to the upper part of the factory.
After using the door, you should see a large room where the cars are dismantled. Eliminate another group of opponents that can be found there. The comic you seek can be found in the upper left control room. The place has been marked on the picture above.
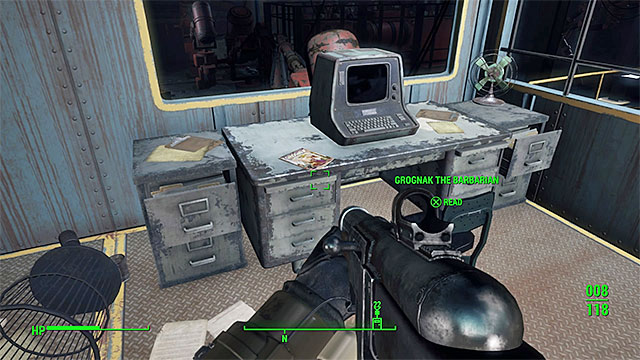
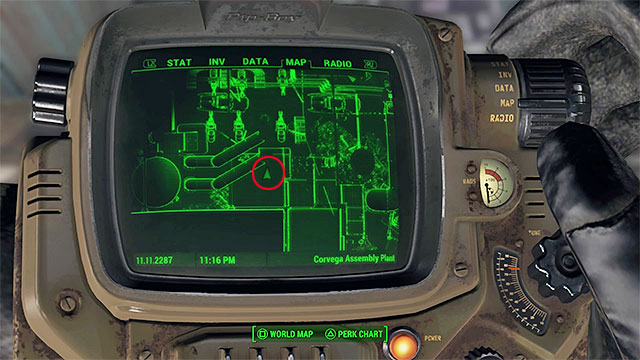
Turn left and reach the metal balcony. Go upstairs and press the button in order to extend the balcony leading to the room with the secret. Now you can go there and pick the secret (its location is shown on the pictures above).
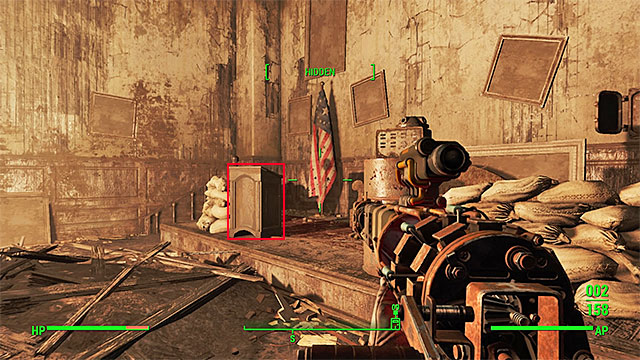
After entering the post territory, you must get to the main room on the ground floor of the building. Dead Eye, an elite supermutant, can be found there. Try to kill him before he activates the alarm, otherwise new supermutants will appear in the building. Additionally, you must watch out for mine traps. The magazine is lying on the rostrum marked on the picture above.
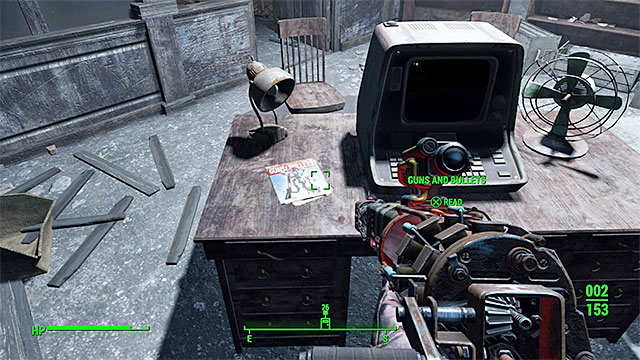
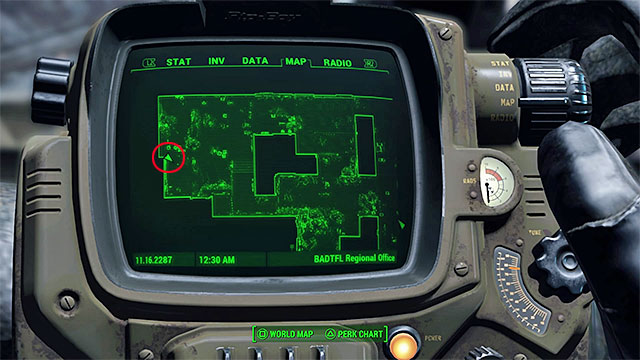
You must get to the western part of the building occupied by bandits. There is a small office there, access to it is guarded by the door with an easy-to-open lock. Once you take care of the closed door, walk towards the desk. The location of the secret has been shown on the pictures above.
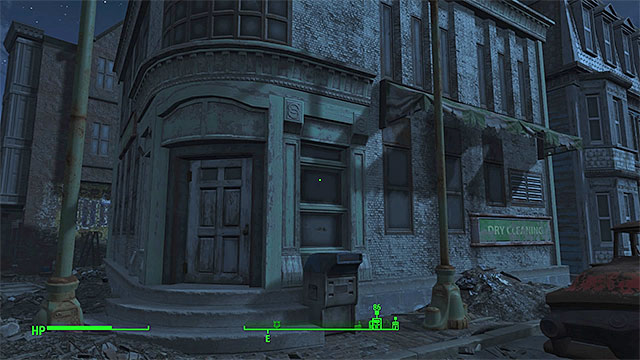
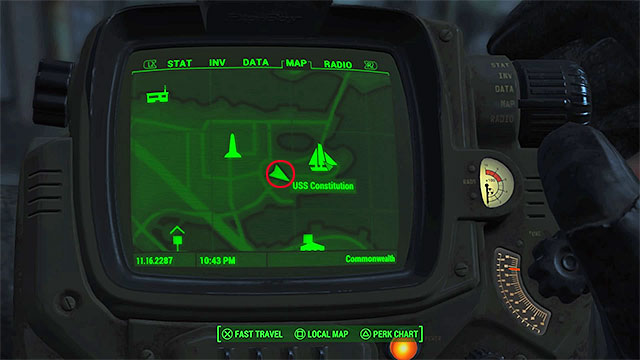
You must go west from USS Constitution ship and find the Charlestown Laundry shown on the pictures above. It is near the crossroad. The magazine is lying on the machines inside the building.
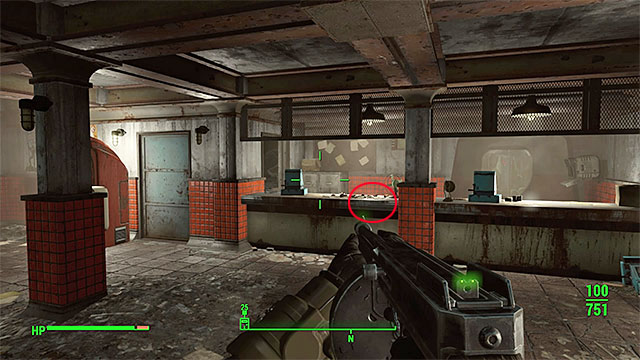
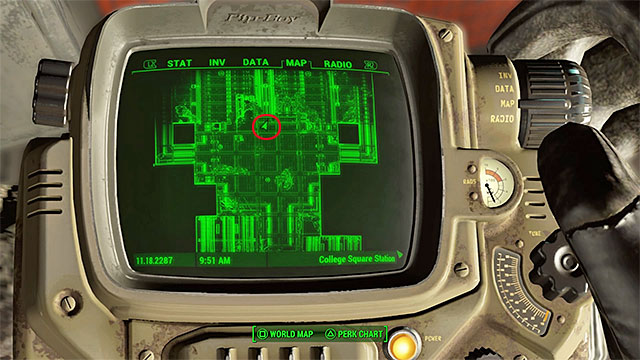
Once you get to the College Square location, you must use the door leading underground. Walk down to one of the lower levels. Before you reach the station itself, you should bypass a room with cash registers shown on the picture 1 - that's where the secret is hidden. Before you enter the room, you must open the closed door. This will require expert skills from you. Pick the lock and walk towards the secret. Precise location of the secret has been marked on the picture 2.
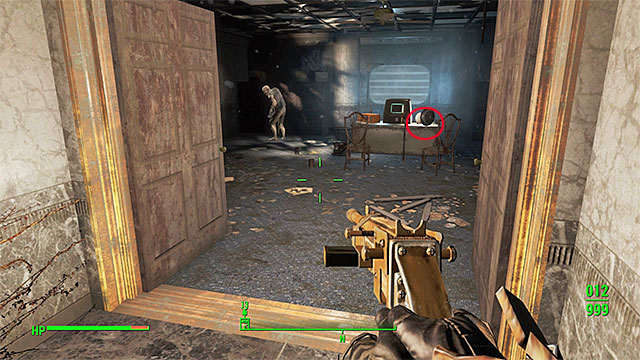
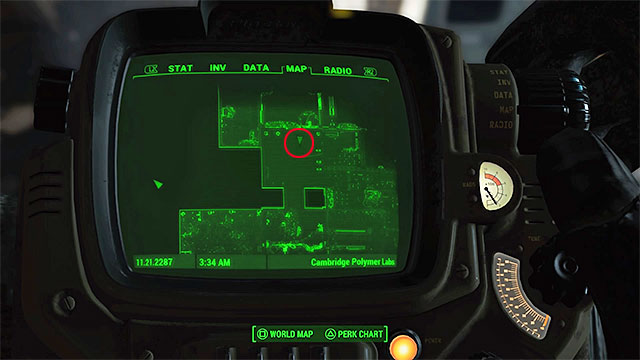
After walking into the building, you can ignore the robot in the reception and go straight to the first floor. Find the door locked with a master lock. Open it. Inside you will find the director's office shown on the picture 1. You must kill the director (he transformed into a ghoul). Once the battle is over, check the large desk. The secret can be found in the place shown on the picture number 2.
The table below shows all magazines that you can find in the sixth sector of the world map, in the central part of Boston. More detailed information about specific secrets can be found further in the chapter.

Astoundingly Awesome Tales
You deal 5% more damage when using a weapon with a scope.
Location: Coast Guard Pier [11]
The secret is lying on the toilet in the closed cell on the lowest floor of the coast guard building.
A detailed description can be found below.

Astoundingly Awesome Tales
You deal 5% more damage to supermutants.
Location: Trinity Plaza[12]
Secret is on the rostrum inside the church. It is guarded by a group of supermutants which you must first kill.

Astoundingly Awesome Tales
You deal 5% more damage with Alien Blaster.
Location: Hubris Comics [13]
The secret is on the top floor of the comic shop, in a small room behind the door with a star.
A detailed description can be found below.
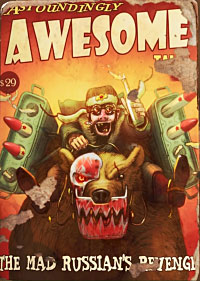
Astoundingly Awesome Tales
+5 to poison resistance
Location: Pickman Gallery [14]
The secret is lying on the ground in the last underground room in this location. It is the same place where you meet Pickman.
A detailed description can be found below.

Astoundingly Awesome Tales
+5 Action Points
Location: Vault 114 [15]
Secret is in one of the barricaded corridors in the vault, near the laundry. You visit the Vault 114 during the "Unlikely Valentine" main quest.
A detailed description can be found below.
Grognak the Barbarian
Critical hits in melee combat (without weapons or with melee weapons) deal 5% more damage.
Location: Vault 81 [16]
Secret is obtained by completing the Short stories side quest in the residential area of the vault.
Detailed description is available below.

Grognak the Barbarian
Critical hits in melee combat (without weapons or with melee weapons) deal 5% more damage.
Location: Back Street Apparel [17]
The secret is inside the building occupied by raiders. Reach the large room on the first floor. The comic can be found on the low table near the red wide sofa.

Grognak the Barbarian
Critical hits in melee combat (without weapons or with melee weapons) deal 5% more damage.
Location: Boston Common [18]
Secret is next to the skeleton in the arbor, in the place with high radioactivity.
Detailed description is available below.

Guns and Bullets
Critical hits of ballistic weapons deal 5% more damage.
Location: South Boston Military Checkpoint [22]
The secret is lying on one of the desks inside the checkpoint. It is guarded by gunners.

Live & Love
Robotic companions deal 5% more damage.
Location: Diamond City Market [34]
Secret is inside the schoolhouse. You will find it on the first floor, next to the bed and the classroom.

Live & Love
Companion's health bars are increased by 10 units.
Location: Faneuil Hall [35]
The secret is lying on the table on the attic of the building occupied by supermutants.
Detailed description is available below.

Live & Love
Companions' resistance to damage and energy attacks is increased by 5 points.
Location: Goodneighbor [36]
Secret is inside The Third Rail building. After walking into the building, go to toilets and open all the cabins. The magazine is lying on the WC.

Live & Love
When traveling with a companion, you receive 5% more experience points.
Location: Goodneighbor [36]
Secret is inside Redxford Hotel. Check behind the counter on the right side after walking into the building.

Picket Fences
Unlocks the ability to construct fences in settlements.
Location: Beantown Brewery [42]
Secret is in the main room of the brewery, in the upper room to which you can get through the metal balcony. The item is lying on the ground near the bed.
Detailed description can be found below.

Picket Fences
Unlocks the option to construct advanced lighting in settlements.
Location: Hardware Town [43]
The secret is lying on the desk in the room on the first floor of the shop (in the same place you will also find the key to the warehouse).
Picket Fences
Unlocks access to plants in settlements.
Location: Combat Zone [44]
The secret is lying on the round table near the large cage in which battles are held. You can collect it only after you take care of all bandits.
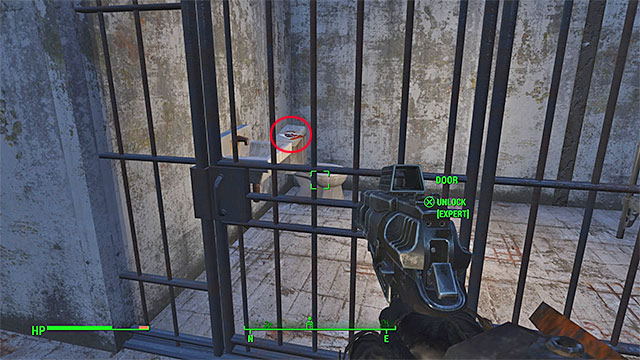
Start with securing the location by eliminating all nearby supermutants. Then, go to the bottom level of the coast guard building, the one with cells. Secret is lying on the toilet in the cell shown on the picture above. In order to get inside, you must unlock the lock (expert level).
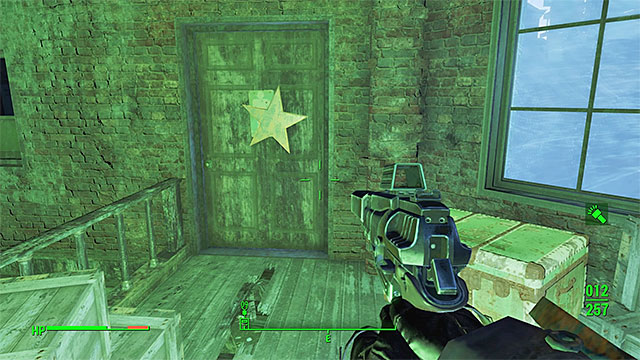
Eliminate all ghouls on your way and get to the top floor of the comic shop. Once you reach the upper floor, find the door with a star shown on the picture above. Open it and walk into the small room. The secret is lying on the small table on the left side.
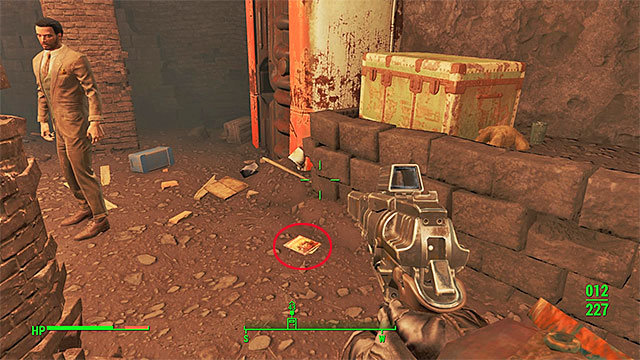
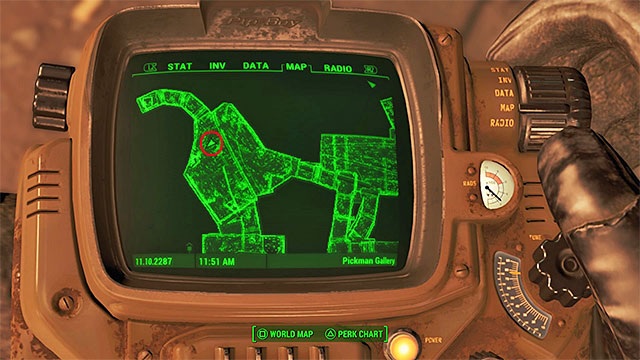
After entering Pickman Gallery, successively get through the rooms and underground tunnels, eliminating all the enemies on your way. You must reach the room where you will meet Pickman and the last group of thugs. After eliminating the opponents and talking to Pickman, find the secret shown on the pictures above. It is lying on the ground.
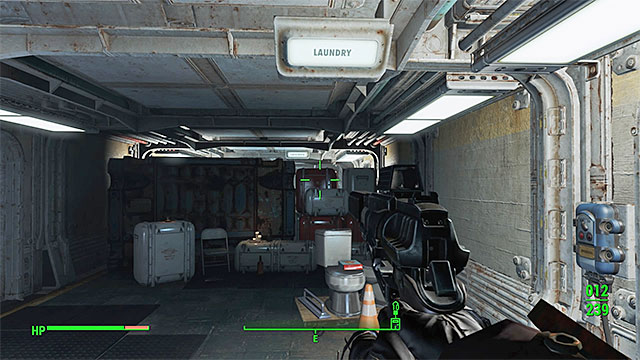
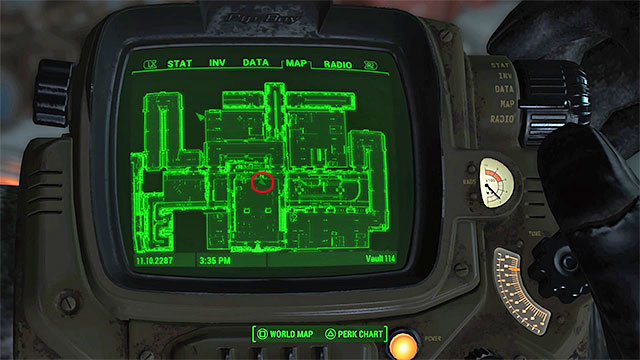
In order to gain access to Vault 114, you must walk through the Park Street Station during the Unlikely Valentine main quest. During that quest, you will be trying to find detective Valentine. The secret can be obtained either during the first visit in the vault or later. It is hidden in one of the barricaded corridors in the living rooms of the vault, near the laundry. Precise location of the item is shown on the pictures above.
 Complete the "Short Stories" quest
While exploring Vault 81, you must visit its residential area, more specifically the classroom with kids. Talk to Katy the teacher and agree to tell a story about you. It is a part of a very simple side quest called Short stories. You will receive the comic once the quest ends.
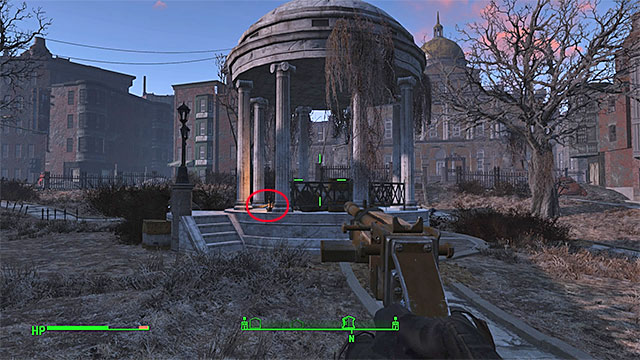
There are few gazebos at the location. Take interest in the one shown on the picture above. A very high radiation is in the target zone, so prepare yourself adequately. Quickly find the comic lying on the ground - it is near the skeleton. Important - an elite monster can appear on the plaza. You don't need to fight it, instead you can quickly take the secret and escape.
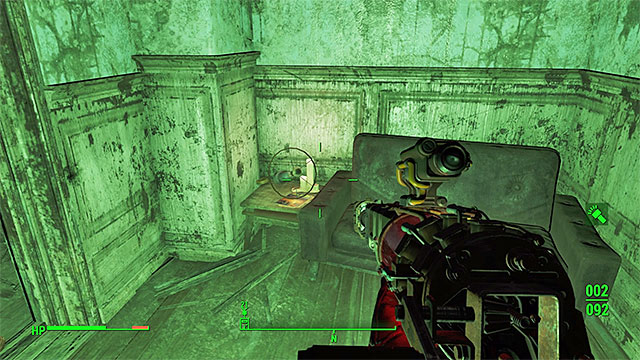
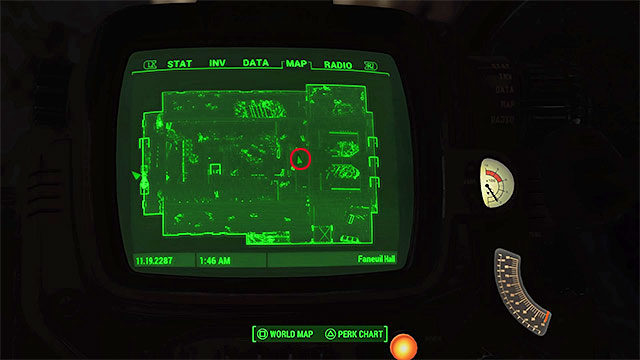
After walking into the building, you must eliminate the supermutants on your way. Keep using stairs to get higher and higher. The secret you seek is on the narrow attic. It is lying on a table near a small couch. The place has been shown on the pictures above.

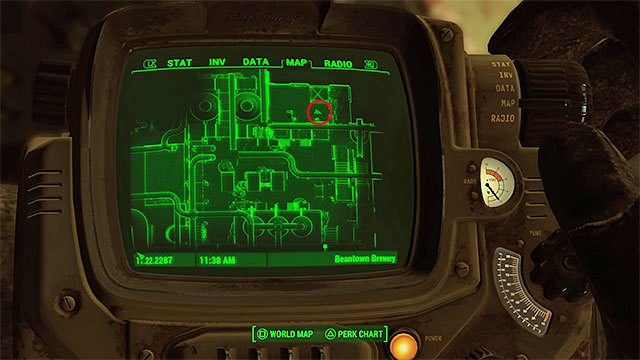
Many thugs can be found in the brewery. You must mostly eliminate the enemies in the main room of the building. They are led by Tower Tom. Once the battles end, remain on the metal balconies and use them to get to the upper room shown on the picture number 1. Thoroughly explore the room. The secret can be found on the ground, near the mattress. The precise location of the item has been marked on the picture number 2.
The table below shows all magazines that you can find in the seventh sector of the world map, near the Castle. More detailed information about specific secrets can be found further in the chapter.
Astoundingly Awesome Tales
Increases RadAway effectiveness by 5%.
Location: East Boston Preparatory School [19]
The secret is on the highest floor of the school occupied by raiders. You will find it in the computer room (southeastern corner of the building), on the desk between two damaged computers.
Grognak the Barbarian
Critical hits in melee combat (without weapons or with melee weapons) deal 5% more damage.
Location: Andrew Station [20]
The secret is inside the residential building north from the station. More specifically, the one with a bus sticking in it. Get to the highest floor of the building.
Detailed description is available below.
Guns and Bullets
Critical hits of ballistic weapons deal 5% more damage.
Location: Castle [25]
Secret can be found on the courtyard of the castle, near the radio transmitter. If it's your first visit to the location, you will face some mirelurks here.
Explore the territory north from Andrew station. You must find the residential building with a bus sticking out of it. It is shown on the picture above.
Enter the mentioned building and get to its higher floors while eliminating the enemies on your way (robots or large bugs). You must reach the top floor of the building. The comic will be lying on the mattress in the place shown on the pictures above.
The table below shows all magazines that you can find in the eighth sector of the world map, in the highly radiated wastelands. More detailed information about specific secrets can be found further in the chapter.

Live & Love
Increases the capacity limit of companions by 10 units.
Location: WRVR Broadcast Station [31]
The secret is inside the station's building in which you will meet few friendly characters. It is lying on the wide table.
The table below shows all magazines that you can find in the ninth sector of the world map, in the southern territories of Boston. More detailed information about specific secrets can be found further in the chapter.
Grognak the Barbarian
Critical hits in melee combat (without weapons or with melee weapons) deal 5% more damage.
Location: Hyde Park[21]
The secret is on the top roof of the building, behind the red chair in the quarter of Scutter, the leader of raiders.
Detailed description is available below.

Hot Rodder
Unlocks new paint job for the power armor.
Location: Atom Cats Garage[26]
The secret is inside one of the trailers found near the main garage. You can collect it from there without having to fight.
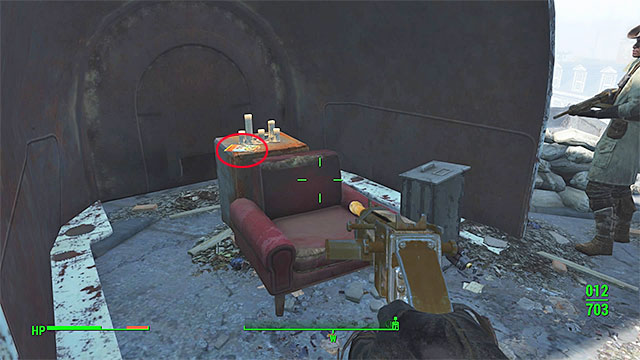
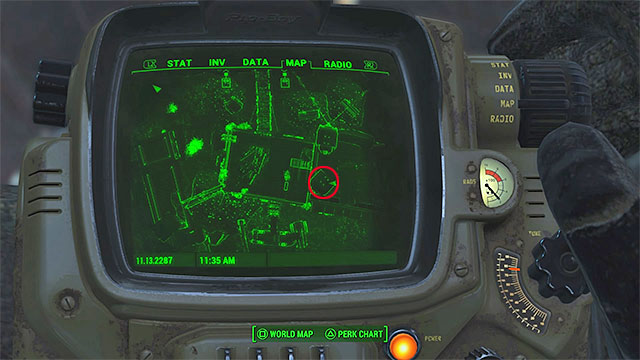
Once you reach the place, start attacking the raiders. Watch out for elite enemies and guard dogs accompanying them. Keep going up until you reach the roofs connected by small bridges. You must get to the highest roof where Scutter, the leader of the bandits, has his quarters. Once you get rid of Scutter, examine his base. The comic is hidden behind the red chair in the place shown on the pictures above.




 FIFA World Game Guide & Walkthrough
 Fallout 3: Mothership Zeta Game Guide & Walkthrough
 Far Cry 4 Game Guide & Walkthrough
 Fallout 3: Broken Steel Game Guide & Walkthrough
 Final Fantasy XII Game Guide & Walkthrough