I'm pleased to welcome all those interested in the latest part of Final Fantasy. Here I'm only going to mention that as a big fan of the whole series I just couldn't miss this part, and as a very ambitious fan I just couldn't live without getting all those ultimate weapons and killing all of the side bosses you can find in the game. So in the walkthrough to follow you'll find info about alee these things and many, many more. Enjoy.
While reading the walkthrough you may find bit strange words. They're all connected to RPG games and are pretty often used, but I assume that you didn't actually hear them and because of that I created this chapter - to explain all those things that may be not clear to everybody.
Sometimes in this guide you may encounter words like: Tank, Healer, Damage (dmg.) Dealer, Buffer etc. They are the different class's predispositions.
Tank is a person with loads of HP points and high defense, which draws attacks of enemies. The best choice for him is the heavy armor. It's also a perfect choice for a party leader.
Healer - what can I say - it's a person who keeps you're team mates alive and healthy. For this kind of heroes the best choice is robes as armor and Rods or Staves as weapons.
Damage Dealer - the main purpose of its existence is dealing lot of pain. He should be wearing light armor and wielding a katana as a weapon.
Buffer is a person who keeps its team mates in effect of variety buffs like protect or shell.
Sometimes to say which class is the most effective in given situation I use names of in-game heroes. At the beginning of the game I was developing each character in a specific direction (details in chapter "Licenses and character development") and later on speaking about those characters I meant the class they were representing. You - beating the game in your own way - may have given them different predispositions. In such situation use just the character which represents the class of the character I have used.
You may also come across an expression e.g. berserked Fomalhaut - this means that the person holding Fomalhaut is under effect of berserk.
I used sometimes also the term: mob. Non-human enemies in the RPG (mostly) games are often called this way.
Right now I also wanted to emphasize that the division used in this guide: Prologue, Parts I-III and Epilogue is used especially by me at the need of this walkthrough. Each part is separated from others by an important event that took place in the plot.
There also chapters entitled by an in-game area name and often with addiction of "II". They means the places that you're not going to see during the ordinary plot flow and the roman cypher II means that yes you were there (or going to be there) but up then you didn't have the access to the whole area.
In this walkthrough you will find many tables with informations about monsters - their levels, quantity of HP points, things they drop and those you can steal from them. Unfortunately these informations may differ a bit from the ones you'll come across. What I mean is that the monsters generated randomly and these pieces of informations are about the ones I got to meet. The same goes for the things that drop and those you're able to steal. Those marked as rare dropped rarely for me and they may drop for you more often and vice versa - those that have dropped for me quite often may drop for you very rarely. I can only assure you that those mentioned here are all verified and all you need to get them is a bit of patience.
I should also say here about the nature of monsters. There are:
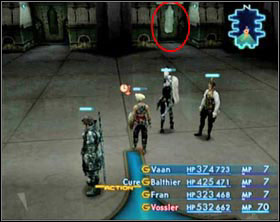
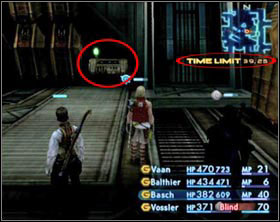
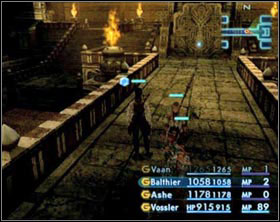
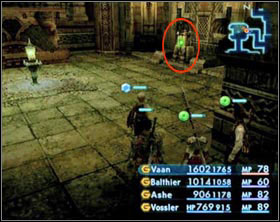
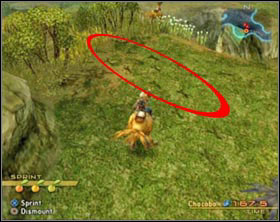
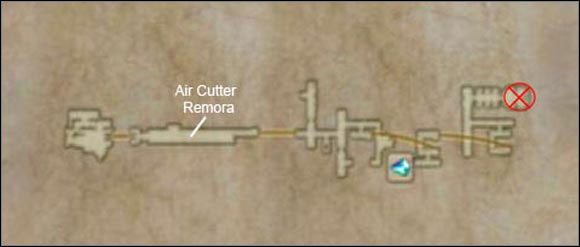 Red X is you target.
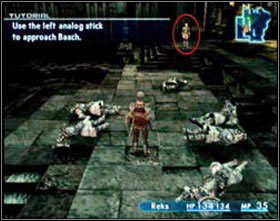
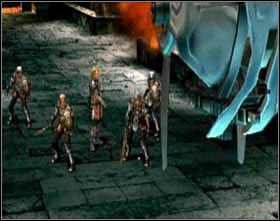
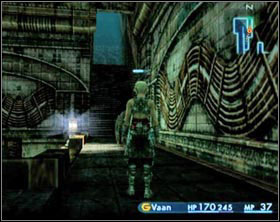
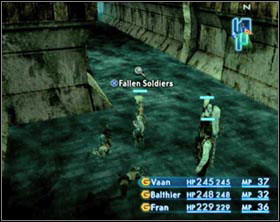
The game begins with telling you about the current situation in Ivalice. After that short introduction you take control over the action. At the beginning you're controlling a young boy called Reks. Your superior, captain Bash, will tell you how to move around and fight.
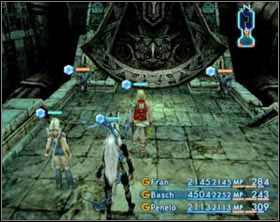
![First take a look around and run to the captain [screen 1], now go to the second soldier in this area and talk to him - Nalbina Fortress - Prologue - Final Fantasy XII - Game Guide and Walkthrough](https://game.lhg100.com/Article/UploadFiles/201512/2015121519052814.jpg)
First take a look around and run to the captain [screen 1], now go to the second soldier in this area and talk to him. After this open the iron gate an open it [screen 2].
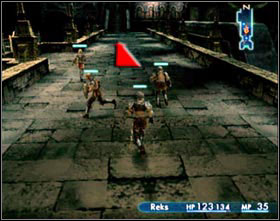
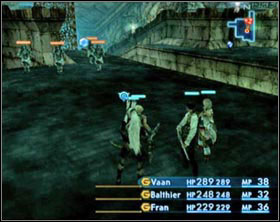
There you'll have to face a few enemies. Run straight forward [screen 1] and in the middle of the bridge you'll be attacked by the first boss in this game: Air Cutter Remora. He isn't especially though. Attack him simply with your sword, the thunder spell also works well. Pay no mind to your health level for now - other soldiers will keep you alive.
After the fight with the boss three more ordinary enemies will come forth from the passage behind him. Kill them and enter the fortress. Here enemies will keep spawn and attack you, but you don't have any reason to worry as long as your companions are nearby.
On the first crossroad go straight, on the next turn left and next pick the first alley leading right.
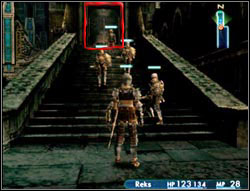
On your right side you should see a small room. Inside you'll find a Potion (you can find another one in a partially collapsed corridor). Find a staircase and go up.
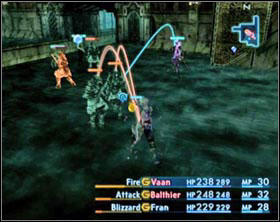
Here you'll have a chance to save your progress. Use it and run up the stairs. There you'll have to defeat three soldiers on your own. The best way to do that is to threat them first with the thunder spell and then finish them off with normal attack. While doing this keep moving so that they have hard time hitting you. After you kill all three enemies run toward the red "X" which you can see on your map.
Now you take control over Vaan. Your adventure begins with killing three Dire Rats. After leaving the sewages you'll meet Penelo and after a short conversation make your way to Migelo's Shop.
On your way to Migelo you'll see a small boy, who will let you in details of current situation in Ivalice in exchange for one gil.
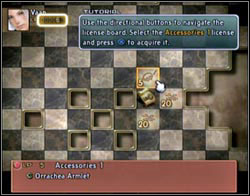
Migleo will tell you to go to Sandsea to hurry Kytes. There - except for Kytes - you'll meet Tomaj, who will tell you about the Notice Board and License Grid. You'll have an opportunity to buy Accessories 1 license. After that Tomaj will give you an Orrachea Armlet.
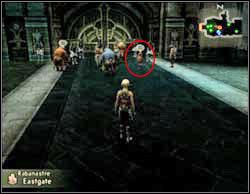
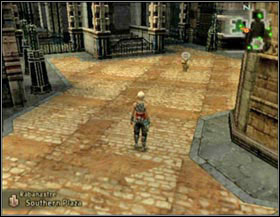
![Now go to Southern Plaza and talk with a green bangaa called the Dessert Merchant [screen] - Rabanastre - Part I - Final Fantasy XII - Game Guide and Walkthrough](https://game.lhg100.com/Article/UploadFiles/201512/2015121519052975.jpg)
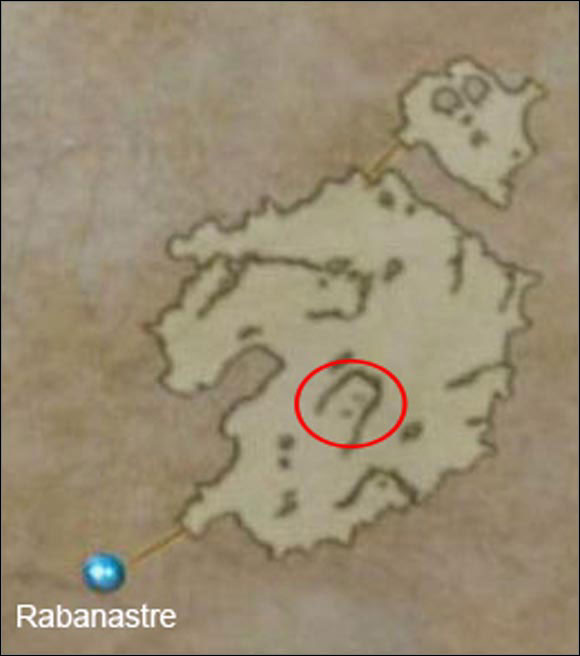
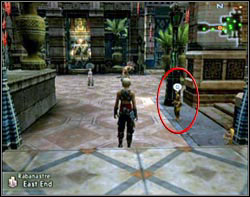
Now go to Southern Plaza and talk with a green bangaa called the Dessert Merchant [screen]. Agree to help him choosing the option: "Sure, no problem" now leave through the East Gate. Here you'll find Hapless Merchant - give him the parcel you got from Dessert Merchant. Here you'll also find a save crystal - use it. Now leave this area in the direction of Dalmasca Estersand.
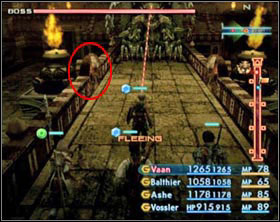
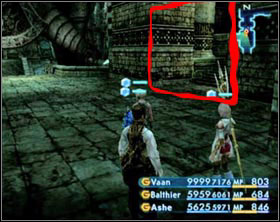
The red circle indicates the whereabouts of Rouge Tomato. The small area to the north is an outpost occupied by people of this dessert. Their village is further north.
Name
Level
HP
Weakness
Drops (price)
Steal (price)
Cactite
1-2
72-84
Wind
Cactus Fruit (59g)
Earth Stone (35g)
Cactus Fruit (59g)
Earth Stone (35g)
Wolf
1-3
72-114
Earth
Wind Stone (35g)
Wolf Pelt (41g)
Antidote* **
Wind Stone (35g)
Wolf Pelt (41g)
Pointy Hat* **
Cockatrice
3
136
Water
Small Feather (49g)
Fire Stone (35g)
Small Feather (49g)
Wild Saurian
34
6500
Wind
Tanned Hide (77g),
Tyrant Bone (1233g),
Earth Magicite (80g)
Hi-potion**,
Tanned Hide (77g)
* Rare; ** It's better not to sell this
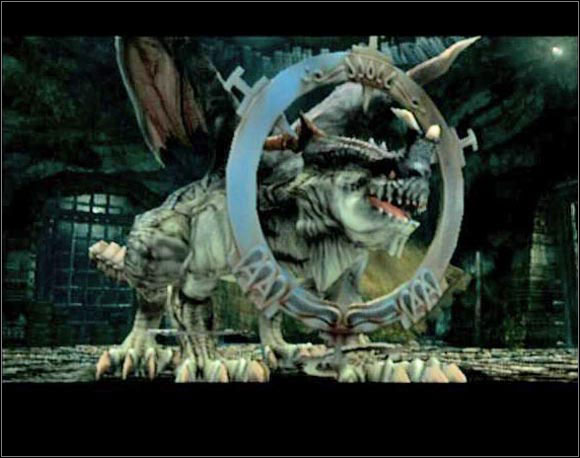
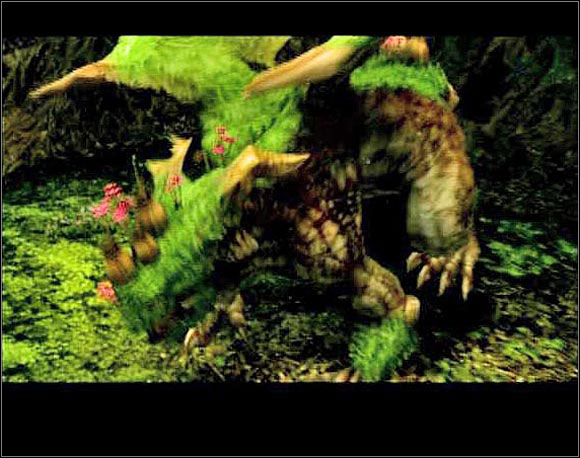
The dessert is full of monsters. They aren't especially strong so use this opportunity to raise Vaan's level. Just be careful and don't fight two cockatrices at once (at least at the beginning). Also don't even think fighting the Wild Saurian (big, green tyrannosaur) - you'll be dead before you could even act.
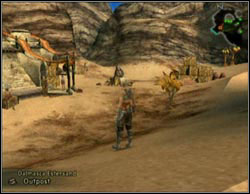
North from this area is a small outpost. It's worth to go there, because a chocobo dug some gils around the camp. Just round around the cam and search for shiny points on the ground.
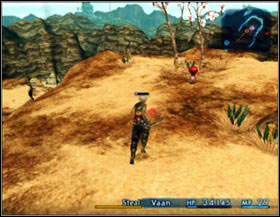
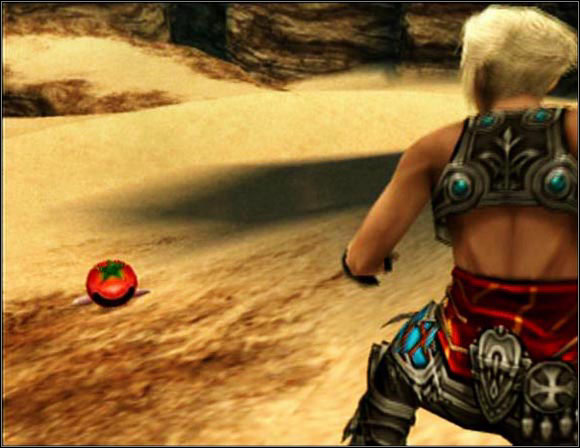
On a rocky ledge, just in front of Rabanastre's East Gate you'll find the Rouge Tomato. Go there and kill it. It's pretty strong (at least for your current level), but you should have some potions in stock and you shouldn't have any problems with the enemy (just remember to use them). After you dispose about half of its HP it'll jump down. Go after it and finish it of just look out for the wolves there. Try to lure Rouge Tomato somewhere, where aren't any other monsters.
After killing Rouge Tomato return to Rabanastre. Save your progress and go talk to Kytes standing in front of the Gate.
From now on you can freely leave and enter Rabanastre and besides you have now access to the Lowtown. There are also new services available:
 Map seller in Southern Plaza
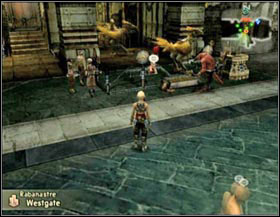 Chocobo rent stables by every exit from Rabanastre (500g)
Run to Sandsea and talk to Tomaj. He'll give you a reward for killing Rouge Tomato: 300 gil, 2x Potion, 1x Teleport Stone.
No go to Clan's Centurio HQ in the northern district (to enter you'll need to show your Clan Primer to a bangaa standing in front of the entrance) and talk to Montblanc in order to be counted as a member of the clan.
 HQ entrance
 Montblanc
Now go south and leave through the South Gate. On your left side you'll see a giant, round Gate. Use them to get to Lowtown.
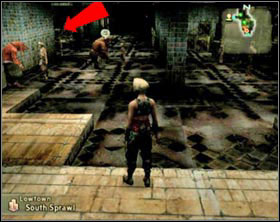
This Gate is the nearest to Old Dalan's Place. You'll just need to go around the corner [screen 1]. But before you do that it's better to "plunder" the neighborhood first. You'll find some potions and a few gil. The treasure chests appear most often in Dead ends and collapsed corridors (as you can see on [screen 2]).
After talking with Dalan leave Lowtown using the same way you got in. Now go to Giza Plain.
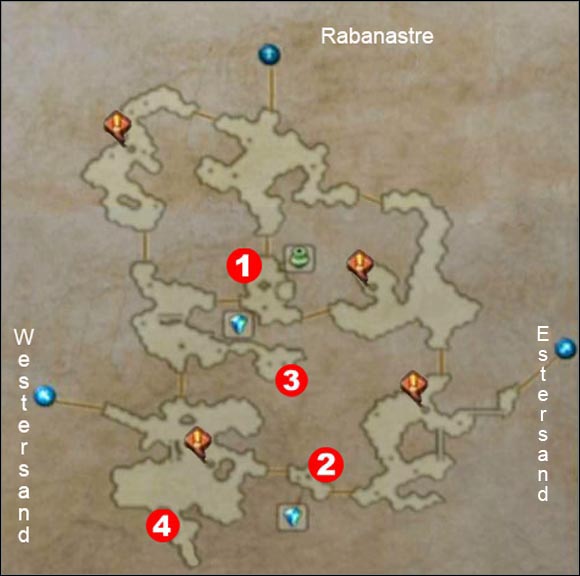 1 - Nomads Village;
2 - Jinn's Whereabouts;
3 - Alpha Hyena whereabouts;
4 - Werewolves whereabouts
Name
Level
HP
Weakness
Drops (price)
Steal (price)
Giza Rabbit
1-2
70-105
Fire
Water Stone (35g)
Water Stone (35g)
Drab Wool (63g)
Hyena
2-3
95-115
Water
Fire Stone (35g)
Wolf Pelt (41g)
Cotton Cap*
Fire Stone (35g)
Wolf Pelt (41g)
Alpha Hyena
5
220
Water
Fire Stone (35g)
Wolf Pelt (41g)
Fire Stone (35g)
Wolf Pelt (41g)
Urstrix
3-4
170-190
Wind
Large Feather (71g)
Echo Herbs* **
Earth Stone (35g)
Wild Snake
4-5
230-250
Earth
Snake Skin (53g),
Wind Stone (35g)
Snake Skin (53g)
Slaven
4-5
280-302
Wind
Tanned Hide (77g)
Tanned Hide (77g)
Earth Stone (35g)
Sleipnir
4-6
280-320
Ice
Molting (74g)
Molting (74g)
Werewolf
21
2570
Wind
Earth Stone (35g),
Quality Hide (384g)
Quality Hide (384g)
* Rare; ** It's better not to sell this
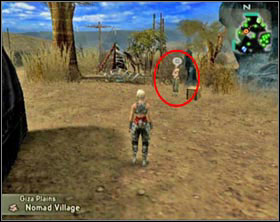

In Giza Plains run straight forward and you'll find yourself in the Nomads Village. Here talk with Masuya [screen 1] and then with Camina - kind standing near the seller [screen 2]. Now go south and save your progress. Your task is to find Jinn, who went missing. You'll find him on a small piece of land south from the village. Talk to him and pick the option "Explain Situation". The kid will tell you how to make a sunstone out of shadestone. Now save the progress and pick 3 out of 4 Dark Crystals (they're marked by exclamation marks on your map).
While hunting here look out for two Werewolves. They're pretty strong and won't give and chances to fight back (at least for now). Also if you want to kill an Alpha Hyena make sure that you've full HP - it always attacks with two ordinary hyenas.
You'd do good exploring the area for treasures, because except for ordinary ones like gil or potions you can find e.g. Ether, Hi-potion or the Escutcheon shield.
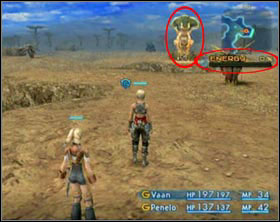
The bar under the map shows level of energy stored inside of the crystal. In order to make it 100% you'll need to find three big, glistening stones called the Dark Stones.
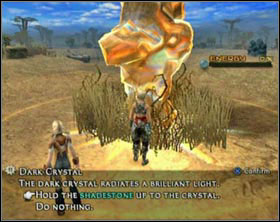
To collect energy from a dark crystal you'll need to get close to one and use a shadestone on it. Next pick the option "Hold the Shadestone up to the crystal". After you accumulate 100% of energy you'll see a cut-scene. You'll regain control again back in the Nomad Village. Now return to Rabanastre.
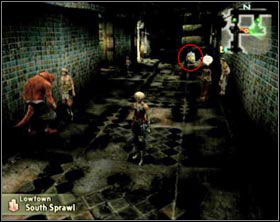
Get back to Dalan's Place and talk o him. He'll give you the Cresent Stone. Now go to the Garamsythe Waterway north from Lowtown. Talk there with Kytes. Tell him that you want to get inside. He'll open the door on the left side and give you 2x Potion and 4x Eye drops. Go downstairs.
 Stairs - it's a passage to Lowtown,
Name
Level
HP
Weakness
Drops (price)
Steal (price)
Dire Rat
2-3
77-97
Water
Fire Stone (35g)
Rat Pelt (35g)
1 gil
Steeling
2-3
94-110
Earth
Wind Stone (35g)
Antidote**
Wind Stone (35g)
Antidote**
Ichthon
4
141
Thunder
Fish Scale (151g)
Water Stone (35)
Potion**
Fish Scale (151g)
* Rare; ** It's better not to sell this
Here save your progress and run upstairs. A trip through sewages awaits you.
 In most of the dead ends you'll find treasures...
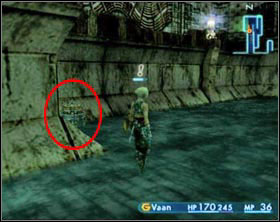 ...well... not only in dead ends.
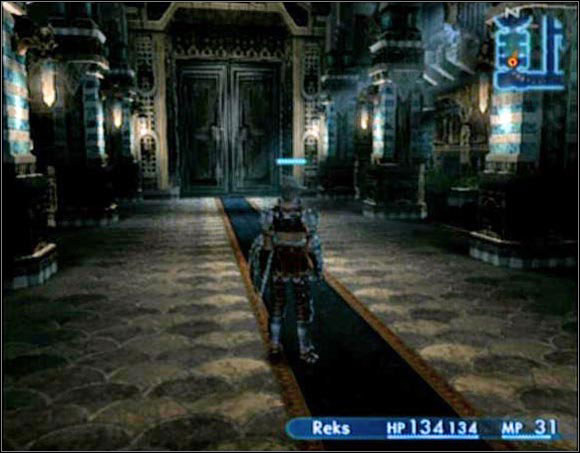
When you reach the end of the sewages the game will try to assure itself that you really are ready to continue. Go to the stairs [last screen] and pick the option: "Climb the stairs" and next pick the "It's now or never". You'll find yourself inside the palace.
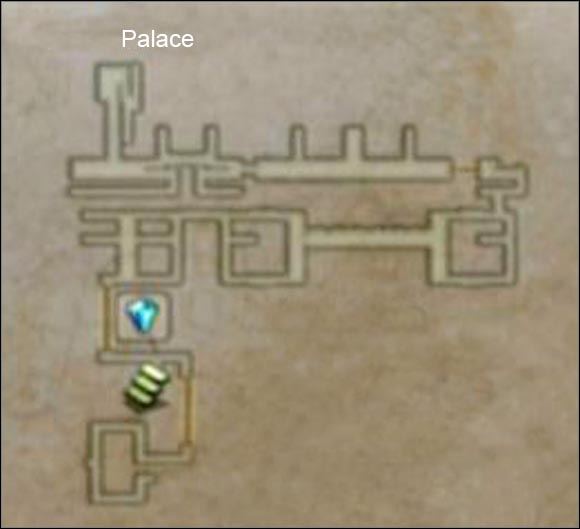
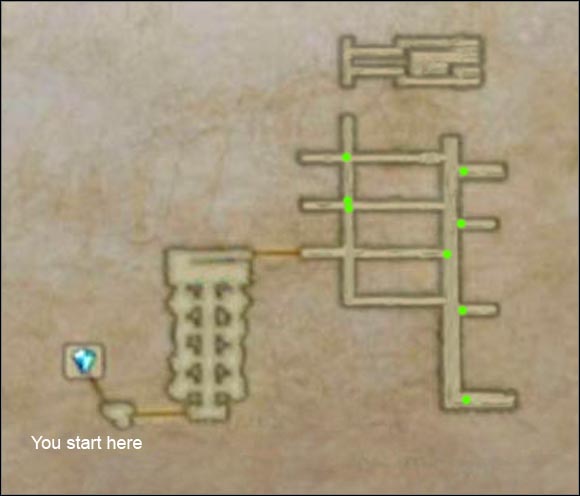 The green dots show the default position of guards on this floor
First open the urn - you'll get a map of the palace. Then save your progress - the game will suggest you to save on a new file because you won't be able to return to Rabanastre for some time.
Now go to the room for servants and run toward the stairs. On your way there pick every treasure you can find in this hall.
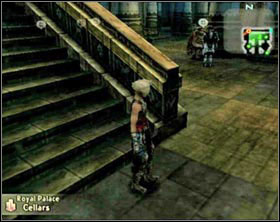
You'll get to know that servants aren't allowed to go upstairs, but after the cut-scene try even so. A brown seeq will see your attempt. Go talk to him. He'll say that he's willing to help. Use the square button to call the guard and go a bit aside [screen 1] and when the guard starts talking with the seeq slowly go upstairs [screen 2].
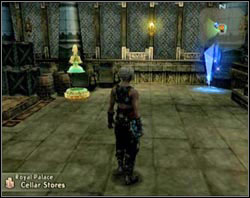
"Hawk Signet"... unfortunately isn't working... ...but the "Lion Signet" is a whole different matter.
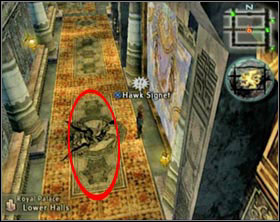
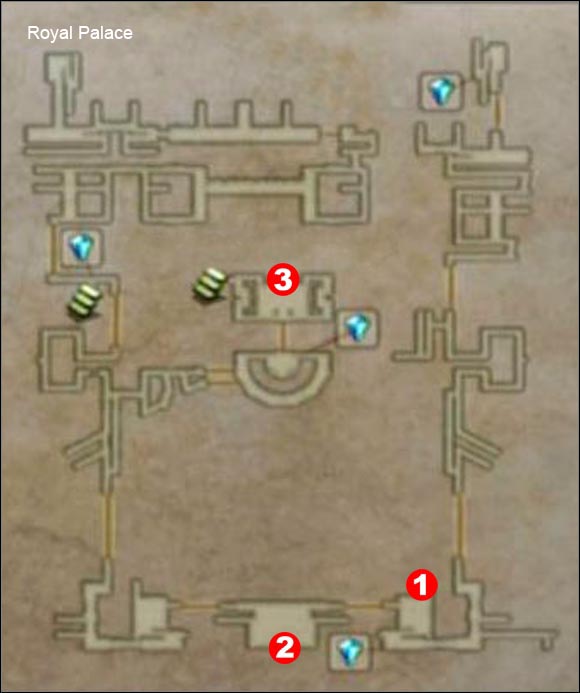
Here you'll have to use your head, but don't worry - if any of the guard spots you you'll start from this point. Here I have attributed numbers to horizontal alleys starting from the bottom. Also I refer to the left vertical alley as "A" and to the right one as "B".
So let's get down to business: Run into the second alley and call the guard from the other side (to call a guard press the square button, but don't wait for them just run). Get back to "A" alley and run to "B" alley through the first alley. The guards standing along the "B" alley won't do you any harm as long as you don't try to run into the alley they're just guarding. In the "B" alley run to the third alley and use the Cresent Stone on the Lion Signet on the floor [screen 2]. Get back to the "B" alley and run to the fourth alley, call the guards, get back to the "B" alley, run to the third alley, call the guards, get back to the "B" alley, run to the second alley, call the guard and run to the "B" alley. Now run to the "A" alley through the first alley. Now run along the "A" alley to the fourth alley but instead of turning right turn left.
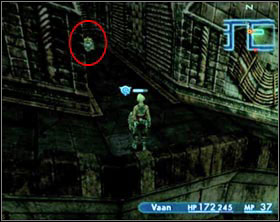
![Approach the wall at the end (you can see a greenish light behind the grating) [screen 1] - Royal Palace - Part I - Final Fantasy XII - Game Guide and Walkthrough](https://game.lhg100.com/Article/UploadFiles/201512/2015121519053379.jpg)
Approach the wall at the end (you can see a greenish light behind the grating) [screen 1]. Inside this corridor run to the end and press the switch on the left side. Move a bit back and pick the other branch of this corridor. Approach the wall at the end and pick the option: "Examine the wall" [screen 2].
After the cut-scene run upstairs.
 Stairs - passage to Lowtown,
1 - place where you are attacked by imperial soldiers,
2 - place where you fight with Flans gang,
3 - boss: Firemane
Name
Level
HP
Weakness
Drops (price)
Steal (price)
Dire Rat
2-5
92-232
Water
Fire Stone (35g)
Rat Pelt (35g)
1 gil
Steeling
~4
~218
Earth
Wind Stone (35g)
Antidote**
Wind Stone (35g)
Antidote**
Gigantoad
5-6
341-361
Fire
Horn (120g)
Water Stone (35g)
Horn (120g)
Ghost
~7
~340
Holy
Glass jewel (115g)
Teleportstone* **
Glass jewel (115g)
Garchimacera
4-5
287-302
Water
Demon Eyeball (123g)
Demon Eyeball (123g)
* Rare; ** It's better not to sell this
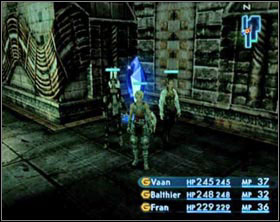
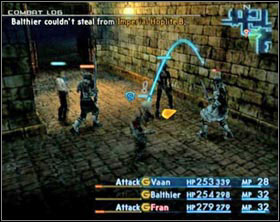
And once again you land in sewages. This time you're not alone - Balthier and Fran join you [screen 1]. Use the crystal to save your progress and go downstairs. Here Balthier will introduce you to the gambit system. After the lecture end set the gambits a bit differently if you want. Let Balthier have the First-aid and set him and Fran gambits: "Foe: party leader target; attack", and give Fran also "ally<70%; cure" and set it as the first one. Vaan as a party leader should have: "Foe: nearest visible; attack"
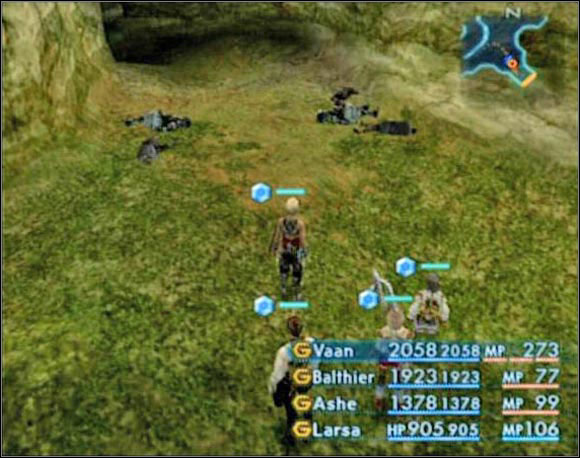
Examine the soldiers' corpses [screen 2]. Now run freely to the next save crystal and don't forget to collect the treasures along the way.
When you pass the next crystal you'll be attacked by four imperial soldiers. They're all on level 5 but their HP levels vary from 170 to 210 and the weakest will have Protect on him. They may not have any weakness but magick works well. After the fight get back to the crystal to replenish your health and MP. Amalia will join your party as a guest.
In the next chamber a fight with a Flan gang awaits you. They're also on level 5, but their HP levels vary from 360 to 420. They're all prone to fire - use it.
After you have disposed of all of the flans run to the next save crystal. I recommend using it because in the next hall you'll have to confront a boss:
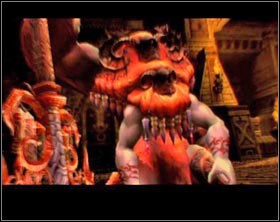
 Firemane lv.7
Firemane
Level 7
3571 HP
Weakness:
Water
Attacks:
Fire,
Kick,
Bushfire,
Rush.

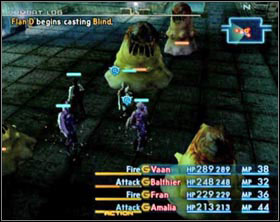
Begin with casting a lot of Blizzard spells. When your MP fall under 10 stop using them - save it for cure or use ether. In addiction when your HP will be low Amalia will help too by using some potions.
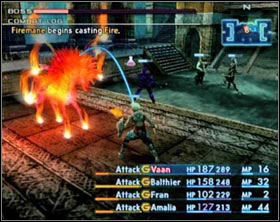
Firemane uses in fight fire and kick which are ordinary attacks - nothing special. It uses also rush which isn't exactly an attack - Firemane teleport somewhere else and in a short period of time you can't neither target him nor attack him.
The most dangerous of its attacks is the bushfire which injure everyone and may cause poison. In such situation use an antidote on all of the poisoned ones and continue the fight. During the fight focus mainly on the hero who directly takes damage, but do not neglect the rest, because the next bushfire attack may kill them.
Name
Level
HP level
Name
Level
HP level
Swordsman
8-9
229-237
Magus
6-8
197-205
Hoplite
8-9
275-283
Marksman
7
264
Every imperial soldier drops some gils and/or potions. The same you can steal from them
In the hall where you begin collect every single treasure, save you progress and continue forth.
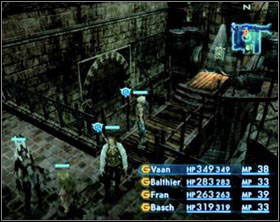
Here along with Balthier you'll have to face three Seeqs. Every seeq has a different level, and they are: lvl 6 - 158HP, lvl 7 - 142HP, lvl 8 - 232HP. The last one has also the protect status on. During this battle you don't have your weapons so you'll have to handle the enemies without them. They all vulnerable to Fire so if you taught Vaan to use it there's no problem, if not use the Knots of Rust, which you probably found in the hall earlier.
After the cut-scene you continue the game from warehouse. Here you regain your equipment and obtain the map of these dungeons. Save your progress and continue. In the next hall many battles with imperial soldiers awaits you. Watch a guard near a pillar on your radar. If he goes away from you quickly run forward on up the stairs in front of you.
Upstairs kill Imperial Marksman on your left. Now run in the opposite direction and kill Imperial Hoplite and Marksman. Now get down and kill all enemies there (if they hadn't already come for you upstairs). Collect every treasure in here and go to the other hall. Here dispose of all the soldiers in here, just be careful not to attract too many of them at the same time. When that's taken care of continue to exit [screen 2].
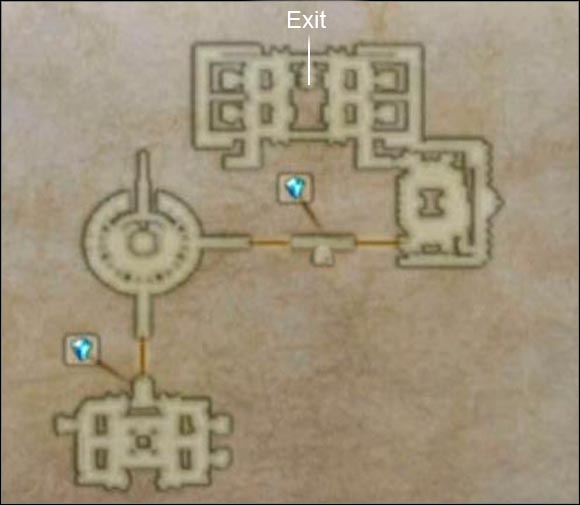
 1 - a switch opening the big gate,
2 - boss: Mimic Queen
Name
Level
HP
Weakness
Drops (price)
Steal (price)
Battery Mimic
~7
~520
Ice
Eye drops**
Alarm Clock**
Iron Scraps (185g)
Iron Scraps (185g)
Storm stone (35g)
Tiny Mimic
7-8
211-217
Wind
Iron scraps (185g)
Eye Drops**
Storm Stone (35g)
Earth Stone (35g)
Iron Scraps (185g)
Mimic
~7
~334
Wind
Earth stone (35g)
20 gil
Steeling
6-7
282-298
Earth
Eye drops**
Bat fang (105g)
Wind Stone (35g)
Seeker
~7
~551
Earth
Crooked Fang (287g)
Wind Stone (35g)
Taurus gem (150g)
Flan
~6
~280
Fire
Green Liquid (206g),
Water Stone (35g),
Caramel (276g)
Gold needle**
Water stone (35g),
Caramel (276g)
Bomb
6-7
317-332
Water
Bomb Ashes (200g)
Fire Stone (35g)
Suriander
8-9
410-430
Ice
Horn (120g)
Antidote**
Storm Stone (35g)
Zombie***
7-8
277-286
Holy
Foul Flesh (143g)
Antidote**
2 gil
Dark stone (35g)
Foul Flesh (143g)
Dark stone (35g)
Kilimweave Shirt* **
Spectre***
8-9
402-408
Holy
Dark stone (35g)
Glass Jewel (115g)
Dark stone (35g)
Dark Mote* **
*Rare; ** It's better not to sell this; *** They appear when power level is low enough
 Timeworn Device
 Starting from the left side: Gate Switchboard, Burrogh, gate.
Go straight on. In the small room on your left you'll find some treasures then use the Timeworn Device and pick: "Press the switch". Go downstairs and talk to Burrogh. He'll give you a Tube Fuse (you may make small shopping by the way, it's worth to buy a new armor and weapon). Get back to the Timeworn Device (now it's called Power Relay) and install the Tube Fuse in it. Save your progress go downstairs and open the gate by using the Gate Switchboard. Go ahead.
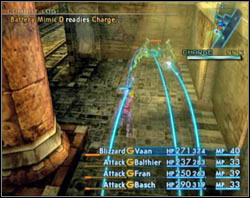
The gauge under the mini map shows the level of power. Battery mimics drain it. If the power level drops too much different monsters begin to appear quite frequently. To avoid such situation you have to destroy mimics. After killing one about 25% of energy is restored.
When energy level drops under 50% different monsters start to appear from time to time and when the power level drops under 30% you'll be attacked virtually constantly. But to say the truth it's pretty hard to let the power level drop so low.
In this room get rid of the mimic fast and then take out the zombie. Run downstairs and destroy Tiny mimics along the way. Downstairs destroy next Battery Mimic. Collect every treasure in here and continue to the next room. The places where mimics drain energy are marked on your in-game map.
Here you can see two mimics - one is already draining the energy and the other is searching for a right spot. Destroy them both. If the searching one escaped you on the first fork [screen 1] you'll have to go right, if you took him out earlier just go left. On the next fork [screen 2] first pick the path leading right. A mimic will pass you by. It may hit you once and then run away. Follow it - it will hide in the second corridor and start draining the power. Get rid of him, get back to the fork and go right once more. On the next fork go left (in the corridor leading right you'll find only a random treasure and a map). Follow the tunnel. On the station destroy a mimic and enter a chamber. There destroy two more mimics and get back on the rails.
Run to the next part of the tunnel. There run straight ahead in the direction of a big gate. Just in front of the gate will be a mimic - destroy it. Now go left and find a switch opening the gate. Press it and get back to the gate.
In the next part of the tunnel save your progress and continue forth. From now on you may encounter an ordinary mimic disguised as a treasure box. Run towards the next save crystal. Don't forget collecting the treasures along the way - beside the camouflaged mimics there are still the real treasures.
Use this crystal to save your progress and continue to the next, round hall. Next boss fight awaits you.
 Mimic Queen lv. 10
Mimic Queen
Level 10
4073 HP
Weakness:
Ice
Attacks:
Spawn,
Breath of Life,
Thunder,
Shockstorm,
Ground shaker.

This boss, to say the truth, is really weak. Two characters should know how to use blizzard (e.g. Vaan and Fran), Bash is really strong in the close range and Balthier uses a potion from time to time. First and foremost - concentrate on the boss itself. Don not care about its offspring - they do not care about you and just as they born the run to a nearest wall to drain energy. They'll start attacking you when there's no energy left for them to drain, but when it comes to that the battle will be long over.
Its attacks beside the ordinary one are:
After the fight you find yourself on Dalmasca Estersand. Save your progress and get back to Rabanastre.
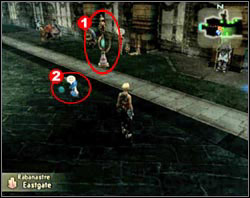
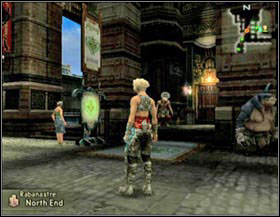
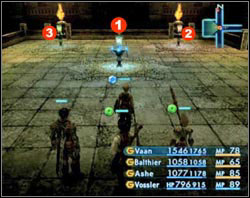
From now on you may move around Rabanastre through Moogling. All you need to do is to find a post like this one (1), talk to a moogle walking nearby (2) and pick a location where you want to move. This service is completely free.
In Rabanastre it's worth to visit the Centurio HQ first - you'll get small bonuses for defeating the flan gang (150g), Firemane (200g) and Mimic Queen (300g). Now run to Migelo's shop, then to Old Dalan's place in Lowtown and to Balzac - you'll find the last one somewhere in the middle between south entrance and the north one, on the west side of Lowtown in North sprawl.
Now run to the Sandsea, go upstairs, leave the sandsea and run to Aerodrome.
![Go inside and talk with Balthier [screen] - Barheim Passage - Part I - Final Fantasy XII - Game Guide and Walkthrough](https://game.lhg100.com/Article/UploadFiles/201512/2015121519053650.jpg)
Go inside and talk with Balthier [screen]. You won't be able to get back to Rabanastre for a long time so Balthier wants to make sure that you're really ready. Choose: "I'm ready" and "I'm really ready".

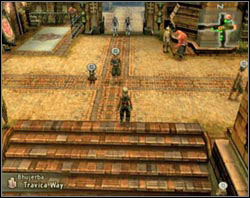
Save your progress using the gate crystal and leave the building. Now a new party member will join you as a guest - he calls himself Lamont. You can't visit the whole city now, because most of the streets are blocked by Imperial Soldiers. You may visit shops right now, but you won't find many new things. It's best to go straight to Lhusu Mines.
Along the way you'll meet many City Parijanahs. They'll tell you how to get to the mine in case you lost your way. On the first crossroads you will meet the Cartographer guild member.
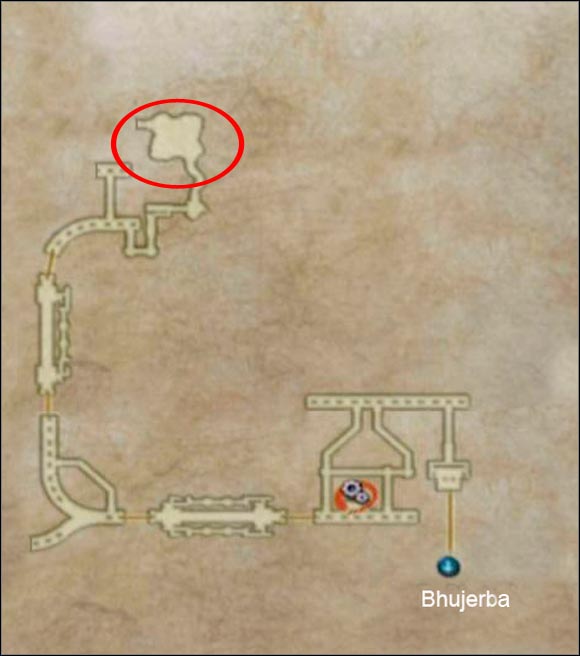 The marked area is the Site 2
Name
Level
HP
Weakness
Drops (price)
Steal (price)
Steeling
7-8
446-462
Earth
Wind stone (35g)
Antidote**
Phoenix Down* **
Bat Fang (105g)
Bat Fang (105g)
Wind stone (35g)
Skeleton
8-9
557-563
Holy
Bone fragment (193g)
Bone fragment (193g)
Skull Defender
8-9
510-516
Holy
Bone fragment (193g)
Dark Stone (35g)
Echo Herbs* **
Bone fragment (193g)
Dark mote* **
20g*
Slaven
~10
~780
Wind
Wind stone (35g)
Eye drops**
Earth stone (35g)
Tanned Hide (77g)
*Rare; ** It's better not to sell this
Just before entering the mines you'll find a save crystal. Run down the stairs and you'll find the entrance. Inside run down another set of stairs and run toward the Site 2 area. Be careful because from time to time some skeletons will come out of the ground. You'll also find first traps in here so it's best to have Libra active at all times. In the site 2 area you'll be attacked by Ba'Gamnan and his gang. They're pretty strong (at least for now) and the only reasonable choice is to run. Run all the way back to Bhujerba and don't worry for other monsters here.
Now you have more freedom than before - you can freely stroll all over town and there are new things available in shops.
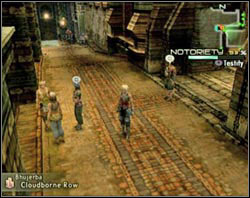
But before that you got to spread a rumor that Bash lives. Your task is to wander the city pressing square near a bigger group of people, but to say the truth it's not worth the time. The best effect is when you shout near one of the City Parinajahs - the notoriety level jumps like crazy.
When you manage to gather 100% of interest run to the pub and after the visit at the back of it go to Ondore's mansion.

Talk to one of the guards (Bhujerban Sainikah) and pick: "Take me to him" and "I'm ready". You regain control on an airship.
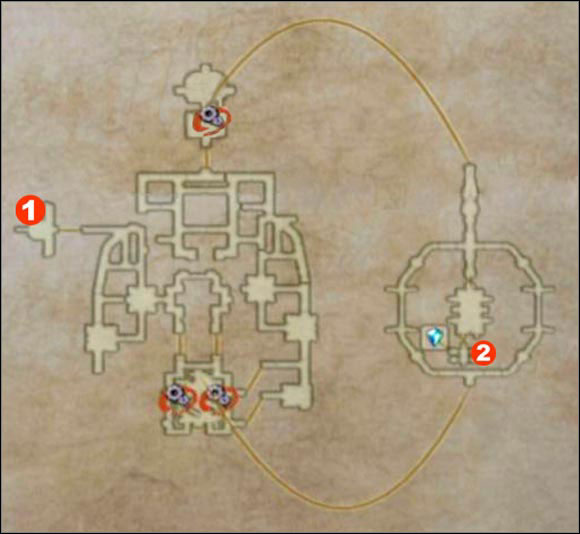 1 - the beginning end the end,
2 - prison.
Name
Level
HP
Imperial Swordsman
9-10
562-570
Imperial Magus
8-9
481-485
Imperial Gunner
9
647
Imperial Hoplite
10-12
674-690
Mastiff
11
535
All enemies drop potions and money. Sometimes Wrap Mote may drop also.
Here you'll find a save crystal - I strongly recommend using it. Here a new character will join you as a guest - it's Vossler. He's very strong and thanks to this, enemies, which often attack you here, won't cause you any troubles.
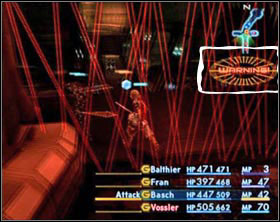
![While wandering the ship you'll encounter laser grids [screen] - Dreadnought Leviathan - Part I - Final Fantasy XII - Game Guide and Walkthrough](https://game.lhg100.com/Article/UploadFiles/201512/2015121519053609.jpg)
While wandering the ship you'll encounter laser grids [screen]. Touching one of the lasers by you or one of your comrades will raise the alarm. Soldiers in small groups will be attacking you almost constantly as long as the alarm is on. These grids have tendency to appear in different places especially when you already have raised an alarm, which means that the more alarms you rise the more grids will appear so it's best not to go into that corridor labyrinth.
 Alarm on - the screen turns red and a flickering symbol appears
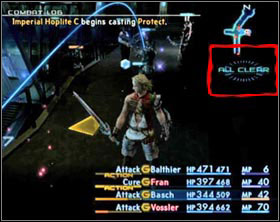 Alarm is off - a short time after the alarm is raised it turns off by itself and once again all you have to fight here are randomly appearing guards patrolling the ship.
You have to find prison in this flying fortress to free Ashe. In a big hall just before the prison entrance a fight with two judges and their henchmen awaits you.
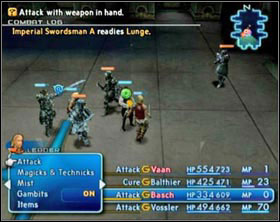
Both of them are on lvl 11 but one of them has 2245 HP and the other one has 2445 HP. Their henchmen have slightly higher levels than other soldiers on this ship but their HP levels are lower. Don't bother fighting them and concentrate on judges. Killing them will end the battle. After the battle you'll get the key to prison cells.
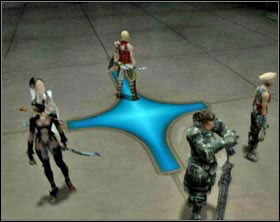
![Go through the door on the right [screen 1] - Dreadnought Leviathan - Part I - Final Fantasy XII - Game Guide and Walkthrough](https://game.lhg100.com/Article/UploadFiles/201512/2015121519053758.jpg)
Go through the door on the right [screen 1]. You'll find yourself in a room with four cells. In number one you'll find a save crystal a System Access Key - you have to take it. In cell No. 2 sits a moogle called Tetran. He runs a shop here. He has most of the equipment you could find in Bhujerba and additionally some accessories. Ashe is in cell No. 3. After freeing her walk out of the room. An alarm will rise, but this one does not turn off by itself.
Go to a big hall with two devices inside (see map above). They are called Security Stations [screen1]. Use one of them and pick: "Use System Access Key" and "Reset alarm" and once again "reset alarm". This will grant you a minute before the alarm rise again. Kill every soldier that is in this room and reset the alarm again. Now run to the area where you began [screen 2].

Here you'll have to face a boss called Judge Ghiss and three of his henchmen. It's a pretty ease opponent to defeat. He has somewhere around 3000 HP. Just attack him using quickenings. Combo of three quickenings on level 1 finished by the Inferno aimed at Ghiss will be enough to finish him of. Before entering this room make sure that every one in your party have at least one mist charge (except for Vossler of course) - this will make things a lot easier.
After the fight you get back to Bhujerba. There are new things ready to be bought in shops but don't bother buying them. It's better to visit Rabanastre - there are better things available by now. In Bhujerba visit only the shop with magick.
After you deal with everything that had to be dealt with go to Ondore's mansion. Talk to the Bhujerban Sainikah standing in front of his mansion and pick: "Take me to him". You land in Dalmasca Westersand. From here go westward.
 The exits which aren't described lead to Zertinan Caverns
Name
Level
HP
Weakness
Drops (price)
Steal (price)
Alraune
11-13
670-694
Wind
Succulent Fruit (363g),
Potion**,
Earth Stone (35g)
Succulent Fruit (363g),
Handkerchief**,
Mace
Urutan-Yensa
12-14
702-718
Wind
Earth Stone (35g),
Phoenix Down**,
Dark mote* **,
Earth Magicite* (80g)
Potion**,
Pebble* (2g)
Speartongue
11-13
1098-1738
Fire
Water Stone (35g)
Water Stone (35g)
Danbania
~11
~977
Thunder
Fish Scale (151g),
Water Stone (35g)
Water Stone (35g)
Yensa
~15
~1032
Wind
Earth Stone (35g)
Gold Needle**
Yensa Scale (319g)
Salamand Entite
45
48042
Water
Fire Crystal (160g),
Feystone (1000g),
Salamand Halcyon (1500g),
Electrum (3563g)
Fire Crystal (160g),
Feystone (1000g),
Salamand Halcyon (1500g)
*Rare; ** It's better not to sell this
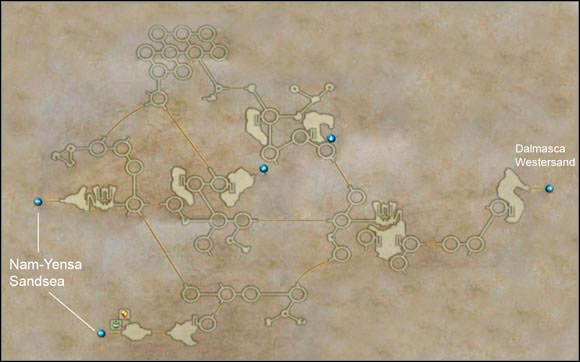
Walk over the old refinery buildings and go upstairs. There Vossler will join you again. Keep going westward, in the direction on Nam-Yensa Sandsea.
 By the south-west exit you'll find a wandering merchant called Dyce and a gate crystal.
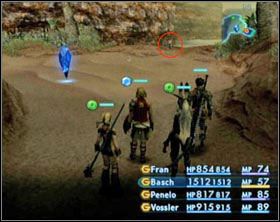 And by the North-west one a moogle awaits you. He can tell you about a side quest.
Go to the north-western exit from Ogir-Yensa Sandsea (unless you need to replenish your stock). There you'll see a moogle talking with one of the Urutans. When you get closer the Urutan will run away. Talk with moogle and ask him to repeat what the Urutan has said ("Tell me"). He'll tell you that on Nam-Yensa prowl a giant tortoise which feeds on Urutans and they aren't able to handle them. The little Urutan asked for help. Go deeper inside Nam-Yensa Sandsea.
 1 - there you'll find the Urutan Eater,
Just like the case of Ogir-Yensa - the exits that aren't described lead to Zertinan Caverns.
Name
Level
HP
Weakness
Drops (price)
Steal (price)
Alraune
13-14
682-694
Wind
Succulent Fruit (363g),
Potion**,
Earth Stone (35g)
Succulent Fruit (363g),
Handkerchief**,
Mace*
Urutan-Yensa
13-15
702-718
Wind
Earth Stone (35g),
Phoenix Down**,
Dark mote* **,
Earth Magicite* (80g).
Potion**,
Pebble* (2g)
Speartongue
11-13
1098-1738
Fire
Water Stone (35g)
Water Stone (35g)
Danbania
~11
~977
Thunder
Fish Scale (151g),
Water Stone (35g)
Water Stone (35g)
Yensa
~15
~1032
Wind
Earth Stone (35g),
Gold Needle**
Yensa Scale (319g)
Bagoly
14-16
1010-1230
Earth
Wind Stone (35g),
Large Feather (71g),
Teleport Stone**
Large Feather (71g)
Axebeak
13-15
922-954
Water
Fire Stone (35g),
Small Feather (49g),
Vega*
Dark mote**,
Fire Stone (35g)
*Rare; ** It's better not to sell this
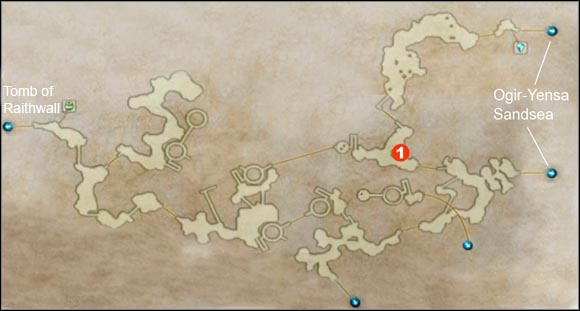
After you talk with the moogle go to the crossroads: "Withering Shores" (it's marked with "1" on the map above).
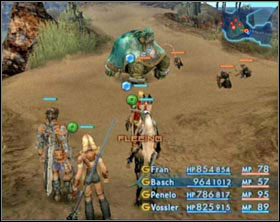
![On the crossroad's you'll find the Urutan Eater [screen 1] - Nam-Yensa Sandsea - Part I - Final Fantasy XII - Game Guide and Walkthrough](https://game.lhg100.com/Article/UploadFiles/201512/2015121519053877.jpg)
On the crossroad's you'll find the Urutan Eater [screen 1]. He's on lvl 16 and has 8015 HP, but he isn't the type of enemy you should be afraid of. Get rid of him quickly and go back to moogle. He'll tell you that he had just seen that small Urutan and that he probably went searching for treasure for you. Go to Ogir-Yensa. There run upstairs on the Old refinery. After short cut-scene get back to where the moogle was. You'll witness the assembly of Urutans.
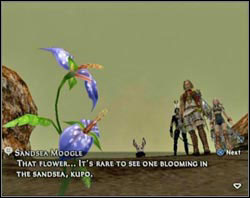
After the assembly ends go and talk with moogle. He'll show you a rare flower: Rouge Urutan Flower which has grown nearby. Approach the flower and collect its berries.
Go in the direction of Raithwall's tomb. Just in front of the entrance you'll come across Dyce again. Replenish your stock if you need to. Go towards the tomb. You'll be granted with an opportunity to save your progress.

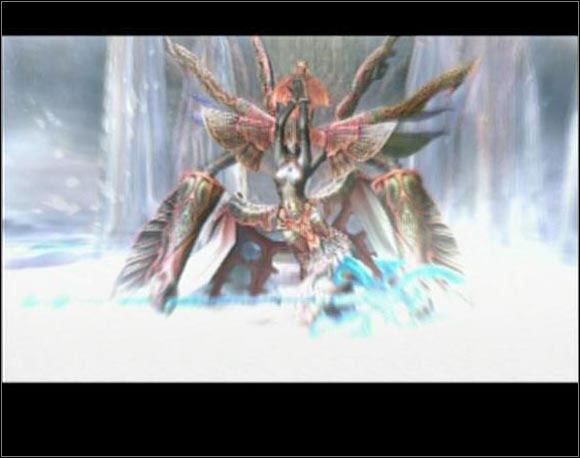
Another boss battle awaits you - now it's the legendary bird Garuda. It's a flying monster so the ordinary attacks using sword or dagger won't do you any good. The best effects give bow, gun and the Dark spell. Your party should contain a person which uses a gun, a mage using Arcane magick and Tank or White mage.
Garuda has about 7000 HP and doesn't use any special attack. His ordinary attacks are very fast and may put to sleep, but nothing more.
Tank or the white mage should go first (I personally prefer the version with white mage). Garuda will focus its attacks on this character. You have to heal tank from time to time and the white mage must be healed virtually constantly, but to heal a tank you'll have to use potions and white mage can heal himself. On the character with gun cast Berserk and set a gambit: "foe: nearest visible --> Dark" on the person who knows how to use it. They shouldn't worry about nothing except for the enemy and the party leader (tank or mage) should heal him self and his comrades.

After you defeat the boss go in the direction of tomb. Upstairs a save crystal awaits and downstairs Dyce. Now he has a pretty interesting selection of goods. Run upstairs and touch the Ancient Device. You'll find many devices like this one inside of the tomb.
 1 - switches
2 - Belias
Name
Level
HP
Weakness
Drops (price)
Steal (price)
Seeker
15-16
773-789
Earth
Wind Stone (35g),
Antidote* **
Wind Stone (35g)
Taurus gem (150g)
Tallom
~16
~1303
Water
Green Liquid (206g),
Fire Stone (35g)
Green Liquid (206g)
Rougoh
16-17
1400-1420
Wind
Solid Stone (358g)
Earth Stone (35g)
Earth stone (35g),
Hi-potion**
Lesser Chimera
15-18
1014-1062
Water
Fire Stone (35g),
Handkerchief**
Fire Stone (35g),
Gold needle**,
Taurus gem (150g)
Skull Warrior
17-18
876-882
Holy
Dark stone (35g),
Broken Spear (617g)*
Dark stone (35g)
Lost Soul
17-18
966-972
Holy
Bone Fragment (193g)
Dark stone (35g),
60 gil
Zombie
16-18
784-881
Holy
Dark stone (35g),
Eye drops**,
Foul Flesh (143g)
Dark stone (35g),
Alarm Clock**,
Foul Flesh (143g)
Zombie Mage
16-18
960-972
Holy
Dark Stone (35g),
Foul Flesh (143g)
Dark Stone (35g),
Foul Flesh (143g)
Lich
18-19
1158-1164
Holy
Dark Stone (35g)
Dark stone (35g),
Glass jewel (115g)
*Rare; ** It's better not to sell this
The first device you'll come across is out of order for now. To make it work you'll have to find the other one which is connected to this one. Run westward, on the bridge. A wall will start chasing you.
The easiest way is to run, but you can also fight. Forget however about tactics. On this phase of the game the chances to kill it before it squashes you into the wall are very low. It has about 20000 HP and quite high defense. His attacks are: Annul - it drains your MP, sleep, blind, silence, Telega - sends one of your heroes in another dimension (looks like ordinary KO).
The only way to win this battle now is to keep attacking with the highest quickening combo you can manage to do. And the benefit of this battle is the prize Montblanc will grant you for killing this demon wall: 1200gil and Electrum Nugget (3563g). You'll also gain access to a hidden part of this tomb. After the battle it's good to get back up and touch the save crystal to replenish your health and mana.
If you decide to escape press and hold R2, run to the end of the bridge and open the Ancient Door at the end.
In the place from which the wall came out is a Hidden Jewel, but it isn't any use for you at this time.
In the next hall another demon wall awaits you. Luckily this one is a lot weaker (about 10000 HP and lower defense), has longer way to go before it squashes you into the wall and this one can be stopped. To do this approach the Altar of Contemplation under one of the torches [screen 2] and pick the option "Touch the Blazier" - the wall will stop for a while.
This wall has almost the same attacks as the previous one with the difference that this one knows how to use Doom and Chain Magick. For defeating this wall you'll get 600 gil and Warp mote from Montblanc.
After dealing with the boss continue westward and into the next chamber.
Here you'll see three teleportation devices.
No.1 will take you to the exit,
No. 2 and 3 doesn't work yet, but they will after you visit appropriately north and south wing of the tomb.
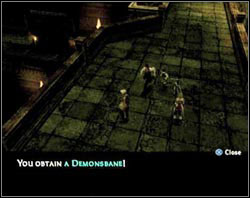
If you have defeated the first wall use the first teleportation device and in the first chamber touch the Hidden Jewel. Parallel to the main bridge two more will appear. They will lead you to a hidden part of the tomb. You'll find there lots of Talloms and one random treasure. Among this random treasures may be a Demonsbane. Save your progress and run to the treasure - if there isn't what you seek just load the game and run there once more. I warn you - Demonsbane appears really rarely.
To get deeper, to the Raithwall's biggest treasure, you have to activate two switches. One in the south wing and the other one in the north wing.
 Switch in the south wing. After activating it you'll be attacked by three liches. Use the teleportation device to get to the main hall.
 Switch in the north wing. After activating it you'll be attacked by three Zombie Mages. Use the teleportation device to get to the main hall.
 After activating one of the switches the Mystic Altar will lower half way down in the south and north wing at the same time.
 After pressing both switches the altar will hide completely opening the passage to the next hall.
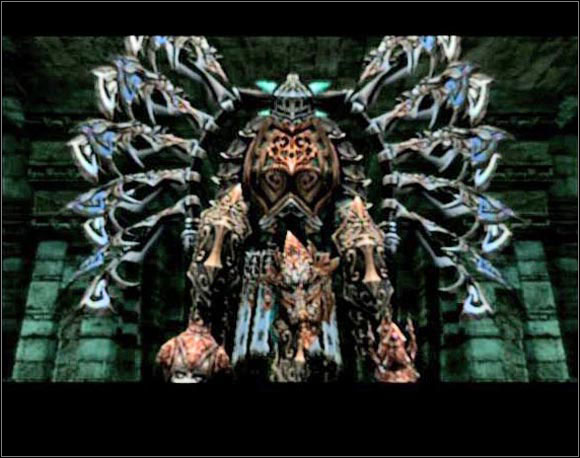
Here you'll encounter the first Esper ever - Belias. He has around 14-15000 HP. His attacks are: saber - very strong attack but it damages also the user; Greater Barrier - it cast on himself Shell and protect at the same time; Firaja - large fire damage to every one from your active party. It may also cause Oil; Fire. With a bit of luck you may steal an ether from him.
After the fight go through the door he was protecting. Go down the large set of stairs and then up a smaller set. After a cut-scene go downstairs and use the Way Stone to leave the chamber. Leave the tomb, save your progress and go downstairs.
Immediately after the cut-scene you begin the fight against Vossler and three of his henchmen (Imperial Swordsman 17-19lvl, 845 HP). Use the Warp spell to get rid the whole three at once. Fran, if you decided to use her now, is under the berserk status and you don't have any control over her actions.
Vossler has about 5300 HP. He's pretty easy at the beginning but as his HP level goes down he starts attacking like crazy - he deals a lot of strong attacks one after another. You can't weaken him using magick because he has the reflect status on. The best way out is to have a white mage in party to take care of the HP levels of party members and let Bash deal with Vossler.
From Rabanastre go to Giza Plains. It's the rainy season right now and new routes have been unblocked thanks to this.
Name
Level
HP
Weakness
Drops (price)
Steal (price)
Hyena
18-19
940-960
Water
Fire stone (35g),
Wolf Pelt (41g)
Pebble (2g)
Fire Stone (35g)
Gigantoad
19-20
1469-1489
Fire
Water stone (35g),
Horn (120g),
Potion**
Horn (120g),
50 gil
Wooly Gator
21-22
2233-2253
Earth
Braid Wool (465g),
Wind Stone (35g)
Braid Wool (465g),
Sirius*
Great Tortoise
20-21
3818-3838
Fire
Water stone (35g),
Turtle shell (447g)
Water stone (35g),
Aries Gem (150g)*
Storm Elemental
25
14 830
Ice
Storm Magicite (80g),
Storm Crystal (160g),
Feystone (1000g)*
Storm Magicite (80g),
Storm Crystal (160g),
Feystone (1000g)*
Ichthon
20-21
1315-1326
Thunder
Fish Scale (151g)
Fish Scale (151g)
Silikon Tortoise
36-37
12852-13172
Fire
Turtle Shell (447g),
Water Crystal (160g),
Aged Turtle shell (1075g),
Teleport Stone**,
Pebble (2g)
100 gil,
Aged Turtle shell (1075g)
Mardu Entite
45
48042
Ice
Storm Crystal (160g),
Feystone (1000g),
Mardu Halcyon (1500g),
Electrum (3563g)
Storm Crystal (160g),
Feystone (1000g),
Mardu Halcyon (1500g)
*Rare; ** It's better not to sell this
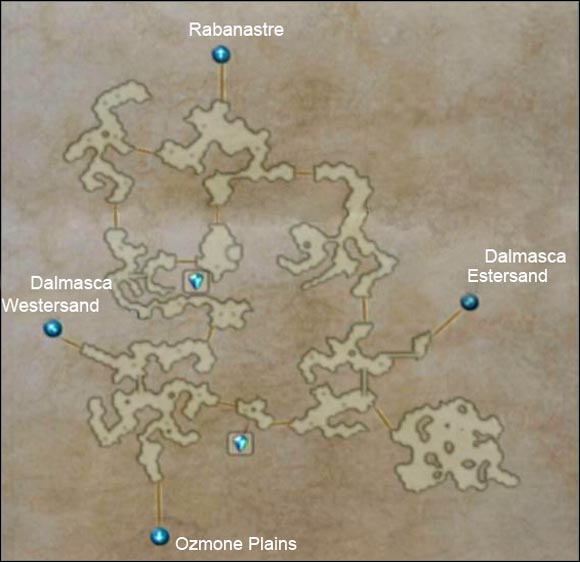
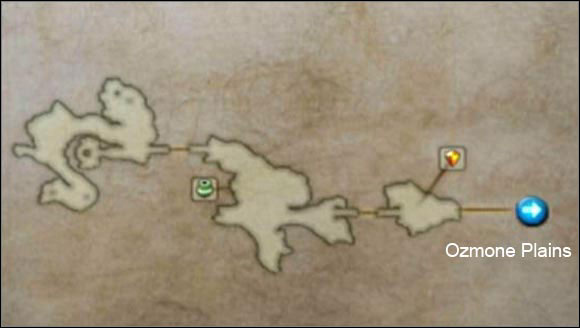
There's nothing to do around here. It's best to go to Ozmone Plains immediately. If you want you can fight here with Croakadile and/or Gil Snapper.

Name
Level
HP
Weakness
Drops (price)
Steal (price)
Ozmone Hare
~20
~834
Fire
Water Magicite (80g),
Braid Wool (465g),
Pebble (2g)
Water Magicite (80g)
Mesmenir
20-22
1528-1568
Ice
Storm Magicite (80g),
Iron Carapace (413g),
Echo herbs**,
Destrier Mane (808g)*
Iron Carapace (413g)
Zu
(Flying)
21-22
1880-1896
Earth
Wind Magicite (80g),
Rod,
Large Feather (71g)
Wind Magicite (80g)
Viper
20-21
1410-1430
Holy
Dark Magicite (80g),
Tanned hide (77g),
Quality Hide (384g),
Pebble (2g)
Dark Magicite (80g),
Alarm Clock* **
Zaghnal
23-24
3157-3179
Wind
Earth Magicite (80g),
Quality Hide (384g)
Earth Magicite (80g),
Gemini Gem (150g)*
Heavy Coat*
Wu
20-22
1689-1729
Wind
Large Feather (71g),
Earth Magicite (80g),
Eye drops**,
Kogarasumaru*
Large Feather (71g),
Earth Magicite (80g)
Black Chocobo
19-23
1116-1443
Thunder, Water, Holy
Chocobo Feather (480g),
Dark Magicite (80g),
Gyshal Greens**
Dark Magicite (80g),
Chocobo Feather (480g)
Hybrid Gator
~21
2233
Water
Fire Magicite (80g)
Bacchus's Wine**
Red Chocobo*
~21
1148
Thunder, Water, Holy
Dark Magicite (80g),
Gyshal Greens**
Dark Magicite (80g),
Chocobo Feather (480g)
Sylphi Entite
45
48042
Earth
Wind Crystal (160g),
Feystone (1000g),
Sylphi Halcyon (1500g),
Electrum (3563g)
Wind Crystal (160g),
Feystone (1000g),
Sylphi Halcyon (1500g)
*Rare; ** It's better not to sell this
Here make your way to Jahra. Just in front of entrance you'll find gate crystal and Chocobo stables (here is the lowest price for renting chocobo in whole Ivalice - 30 gil).
![Talk with a guard standing by the bridge at it left side [screen 1] - Jahra - Part II - Final Fantasy XII - Game Guide and Walkthrough](https://game.lhg100.com/Article/UploadFiles/201512/2015121519054182.jpg)
Talk with a guard standing by the bridge at it left side [screen 1]. He wouldn't let you pass but War-chief Supinelu will give you his support and thanks to that you'll be able to get inside the village. Now go talk with High-Chief Zayau [screen 2] - he'll give you Jaya stick and ask you to give it to Supinelu.

![Supinelu is standing before the bridge leading to the Elder knoll [screen 1] - Jahra - Part II - Final Fantasy XII - Game Guide and Walkthrough](https://game.lhg100.com/Article/UploadFiles/201512/2015121519054249.jpg)
Supinelu is standing before the bridge leading to the Elder knoll [screen 1]. Talk to him, give him the Jaya Stick and say that you wish to meet the Great-Chief. Pass the bridge and approach the guards that are standing exactly in front of the bridge's exit [screen 2]. After the cut-scene you'll get a Bowgun and Onion Bolts from Supinelu. He'll also let you rent a chocobo free of charge (but only this one time) from the stables in Jahra. Save your progress and go to Golmore Jungle.
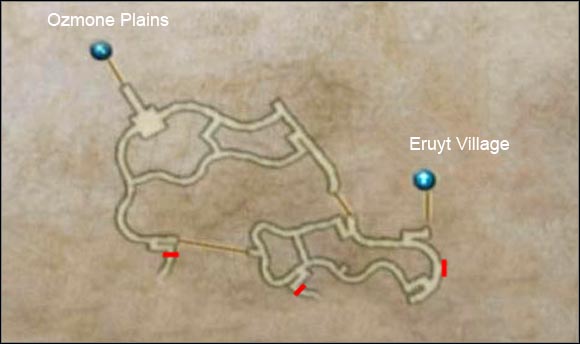 The red lines shows the positions of magic blockades which deny you access to deeper areas. You will be able to go through them but not yet.
Name
Level
HP
Weakness
Drops (price)
Steal (price)
Panther
22-23
1409-1519
Ice
Storm Magicite (80g),
Coeurl Pelt (454g),
Pebble (2g)
Storm Magicite (80g),
Coeurl Pelt (454g),
Libra Gem (150g) *
Malboro
22-23
1573-1693
Wind
Earth Magicite (80g),
Smelling Salts**
Earth Magicite (80g)
Gargoyle
23-24
1436-1494
Ice
Storm Magicite (80g),
Demon Eyeball (123g),
Hi-potion* **
Storm Magicite (80g),
Demon Eyeball (123g)
Treant
~24
~4384
Wind
Lumber (483g)
Earth Magicite (80g),
Aquarius Gem (150g)*
Hellhound
37-39
3570-3790
Water
Tanned Hide (77g),
Red Cap*
Tanned Hide (77g),
Alarm Clock**
*Rare; ** It's better not to sell this
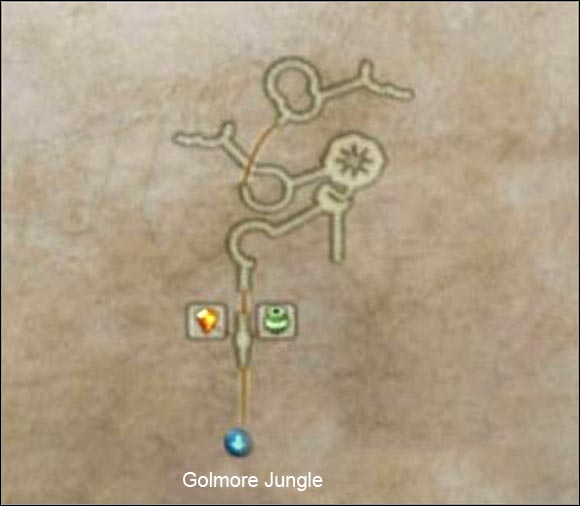
At the beginning you won't have access to the whole jungle. Some passages are blocked by magic barriers [screen 1].
Go to the Eruyt Village. There is no passage there so first thing you got to do is to approach the magic barrier near the village entrance (see the map above) - it will make Fran create a passage leading to the village [screen 2].

If you'll want to enter the village ever again (trust me - you will) you may not find the passage. Just go to the place where it is supposed to be, look at that place and the path will appear.
Near the entrance you'll find a gate crystal. Also Tetran will come here with his shop (the same you saved on the Leviathan).
You won't find anything worth of interest in here - all you have to do is to run to the end of the village and talk to it's leader. She tell you that Mjirn (you were looking for her) isn't in the village. You have to find her and bring her back. Exit the jungle using the same way you did while coming here.
In front of the jungle's entrance you'll find two imperial soldiers. Talk with one of them [screen 1] - he'll ask you for a potion for his heavily injured friend. Give him one potion and he'll lend you his chocobo out of gratitude. Use this opportunity and go to Ozmone plains. Just upon entering the next area search chocobo trails on the ground on the left side [screen 2]. When you find them follow them and you'll get to the entrance of Henne Mines.
Later on return to the place where you have helped the soldier. You'll find a small, glittering object.
It will be the gratitude for you help - two Alarm Clocks.
Approach the human bodies before the entrance to the mains and then go inside.
Name
Level
HP
Weakness
Drops (price)
Steal (price)
Seeker
22-23
1094-1110
Earth
Bat wing (647g),
Antidote**,
Wind Stone (35g)
Wind Stone (35g)
Redmaw
23-24
1134-1202
Earth
Wind magicite (80g),
Crooked fang (287g),
Ice shield*,
Red fang**,
Pebble (2g)
Crooked fang (287g),
100 gil
Nightmare
24-25
1630-1688
Holy
Dark Magicite (80g),
Grimoire Togail (475g),
Snowfly (982g)*
Dark Magicite (80g),
Grimoire Togail (475g)
Tyranorox
26-27
4073-4413
Wind
Earth Magicite (80g),
Alarm Clock**
Earth Magicite (80g),
60g
Thunderbug
24-25
2193-2303
Ice
Iron Scraps (185g),
Storm Magicite (80g),
Remedy**,
Charged Gizzard (945g)*
Iron Scraps (185g),
Storm Magicite (80g)
Jelly
(they appear after a switch is pressed)
24-25
1913-2018
Fire
Water Magicite (80g),
Yellow liquid (531g)
Water Magicite (80g)
*Rare; ** It's better not to sell this
Inside press the blue button on a pillar and run to the doors that have just opened. You'll find yourself on an intersection. It's better not to press any buttons here just exit using the blue gate - behind the red gate you'll only find urn with a map.
In this mine you'll encounter two kinds of gates: blue and red. To open the red one you'll have to press a switch highlighted in red (screen on the left) and the blue gates (screen on the right) by pressing a blue switch. After pressing the button leave immediately because Jellies start falling from the ceiling (and they won't stop!)
Run to the next intersection - you have to run around, because door leading to the crossroad from this side are red which means that they're closed right now. Press the switch there and leave using the just opened red door. Now the passage to the area with gate crystal is open and ready for you to use it. Go there, save your progress and prepare to another boss fight.
Tiamat
About 50000 HP
Resistant to Libra,
Absorbs Wind attacks
Rake,
Reflect,
Aero, Aeroga,
Breath,
Disablega
The enemy looks scary, but it's pretty easy to defeat him. Simply use the tactic: 2x Berserk and a Healer as the leader.
Cast the buffs (berserk, regen, shell, protect) near the gate crystal. After you're done buffing one character send it on the bench (disable him in menu) and continue with buffing the next character. Then touch the crystal to replenish your MP points. Go near the entrance to the round chamber, call forth the buffed characters and continue to the next area.
Send Bash as a tank. You should also give him a Black Belt (immunity to disable), but if you don't have one just cure him with Esuna. Give Balthier the Sirius and let him attack from the distance. Ashe take as the party leader. Turn off all gambits that order to cast buffs on leader and run on a longer distance. Don't chime in the direct battle, just keep Bash alive.
You should kill this monster before even the buffs expire or just after they expire. For killing this enemy you'll get 900 gil from Montblanc.
After the fight you'll find yourself in Eruyt Village again. Talk to Teteran - you'll be able to buy some new magick spells.

Name
Level
HP
Weakness
Drops (price)
Steal (price)
Great Malboro
22-23
1573-1759
Wind
Malboro Vine (433g),
Musk Stick*,
Foul Liquid (703g)
Earth Magicite (80g)
Diresaur
~28
~5621
Wind
Earth Magicite (80g),
Tyrant Hide (549g)
Tanned Hide (549g),
Tyrant Hide (549g),
Earth Magicite (80g)
Coeurl
37-38
4350-4460
Ice
Storm Magicite (80g),
Warp Mote**,
Quality Pelt (651g)
Coeurl Pelt (454g),
Storm Magicite (80g)
*Rare; ** It's better not to sell this
In the village you also got Lante's Tear - it will let you to go through the magical barriers in jungle. Leave the village and make your way eastward. Save your game as soon as you get to the area with gate crystal, because in the next area another boss waits for you.
Elder Wyrm
+2 Treants
About 70000 HP
Resistant to Libra,
Vulnerable to Wind attacks
Sporefall,
Wild charge,
Fire ball
This enemy is pretty strong. On this fight send Bash with berserk and two mages. Let Bash attack anyone he wishes. Mages should attack both treants with Aero. After dealing with treants call forth a white mage who knows how to use Esuna. He should be equipped with Bowline Sash in order to be immune to Confuse.
The boss often attacks using Sporefall - it causes many bad status effects (Blind, Confuse, Slow, Silence, Oil, Sleep, Poison, Sap) to all characters in range. Wild charge is a very strong attack aimed against one of your heroes and Fire ball inflicts fire damage to all standing in front of the wyrm.
For killing it you'll get 800 gil from Montblanc.
After the battle continue eastward to Paramina Rift.

Name
Level
HP
Weakness
Drops (price)
Steal (price)
White Wolf
24-25
1498-1608
Thunder
Ice Magicite (80g)
Phoenix Down**,
Tanned Hide (549g)
Ice stone (35g)
Wild Onion
25-27
1496-1736
Earth
Succulent Fruit (363g)
Wind Magicite (80g),
Phoenix Down**
Skull Knight
25-26
1873-1933
Holy
Strudy Bone (428g),
Dark Magicite (80g)
Strudy Bone (428g),
Capricorn Gem (150g),
Jujitsu Gi*
Lizard
~24
~2342
Water
Fire Magicite (80g),
Horn (120g)
Fire Magicite (80g)
Ice Elemental
25
14 830
Thunder
Ice Magicite (80g),
Ice Crystal (160g),
Feystone (1000g)
Ice Magicite (80g)
Ice Crystal (160g),
Feystone (1000g)
Slaven Warden
~27
~2623
Water
White Fang**,
Tanned Giantskin (672g),
Fire Magicite (80g),
Salven Harness (815g)
10 gil
Dark Skeleton
25-26
1488-1548
Holy
Teleport Stone**,
Strudy Bone (428g),
Dark Stone (35g)
Strudy Bone (428g),
Dark Stone (35g)
Yeti
28-29
4357-4477
Thunder
Ice Magicite (80g),
Tanned Giantskin (672g)
Tanned Giantskin (672g)
Twintania
~28
~5257
Thunder
Ice Magicite (80g)
Ice Magicite (80g)
Garuda- Egi
~26
~2997
Dark
Large Feather (71g),
White Incense (881),
Holy Magicite (80g)
Holy stone (35g)
Hi-potion**
Emperor Aevis
~28
~6240
Thunder
Wyrm carapace (739),
Ice Magicite (80g)
Wyrm carapace (739),
Ice Stone (35g)
Leshach Entite
45
48042
Thunder
Ice Crystal (160g),
Feystone (1000g),
Leshach Halcyon (1500g),
Electrum (3563g)
Ice Crystal (160g),
Feystone (1000g),
Leshach Halcyon (1500g)
*Rare; ** It's better not to sell this
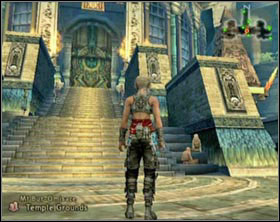
Here make your way to the North-eastern part of Mt. Bur-Omisace. Enter the Holy Circle [screen2] and talk to Anastasis.

Now go to Stilshrine of Miriam - south from Paramina Rift. It's time to acquire next esper - Mateus. Before leaving the Bur-Omisace I recommend buying the Storm Spear. It'll surely come in handy during the fight with Mateus.
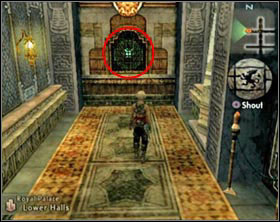
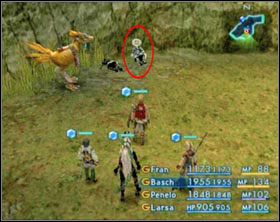
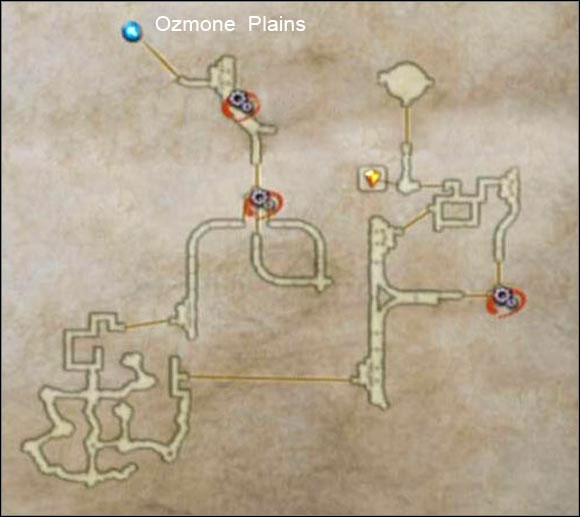
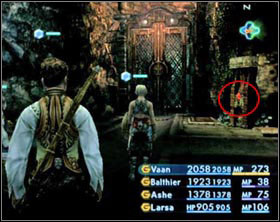
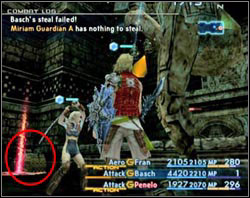
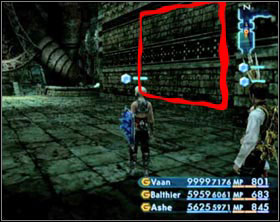
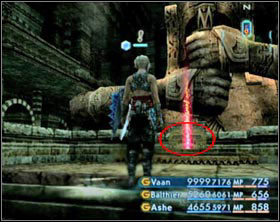
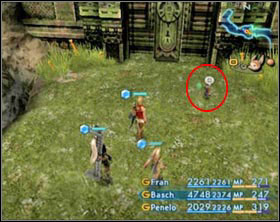
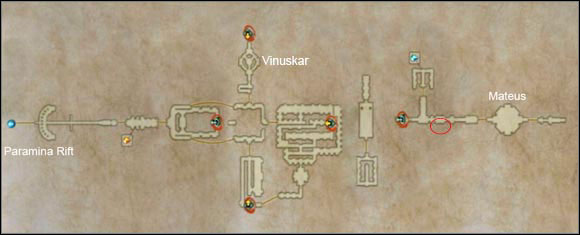 The red circle before the hall where Mateus is shows the entrance to a hidden passage.
Name
Level
HP
Weakness
Drops (price)
Steal (price)
Redmaw
26-27
1630-1738
Earth
Wind Magicite (80g),
Crooked Fang (287g),
Red Fang* **
Crooked Fang (287g),
Taurus gem (150g)
Zombie
27-28
2254-2260
Holy
Dark stone (35g),
Foul Flesh (143g)
Dark Magicite (80g)
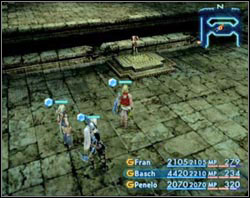
Miriam Guardian
~28
~6827
Wind
Nothing
Nothing
Miriam Facer
~29
~5540
Wind
Nothing
Nothing
Dragon Aevis
29-31
5479-6159
Ice
Wyrm Carapace (739g),
Storm Magicite (80g)
30 gil
Blood Gigas
27-29
2609-2849
Wind
Earth Magicite (80g),
Antidote**
Earth Magicite (80g)
Darkmare
~30
~14040
Holy
Grimoire Togail (475g)
Grimoire Togail (475g)
Facer
26-28
2799-3246
Wind
Solid Stone (358g),
Earth Magicite (80g),
Hi-potion**,
Potion**
Aquarius gem (150g)
Zombie Warrior
27-29
1878-2120
Holy
Dark Magicite (80g),
Festering Flesh (542),
Enchanter's Habit*,
Icebrand*
16 gil,
Handkerchief**
Ghoul
28-29
2044-2104
Holy
Dark Magicite (80g),
Festering Flesh (542),
Hi-potion**
Dark Magicite (80g),
Blue Fang**
Balloon
28-29
1878-1936
Water
Bomb Ashes (200g),
Fire Magicite (80g),
Scorpio gem* (150g)
Handkerchief**
Oiling
27-28
2818-2923
Water
Yellow Liquid (531g),
Handkerchief**
Yellow Liquid (531g),
Fire Magicite (80g),
Sagittarius Gem (150g)
*Rare; ** It's better not to sell this
When you enter the Stillshrine keep running south till you pass the Gate Crystal. From there go to the main entrance to the temple which is guarded by some Kiltiases.
In the temple you'll run across moving ornaments: Miriam Guardians (on the left side) and Miriam Facers (on the right side)
Inside go a bit south and approach the Pedestal of the Dawn. If you touch it now three zombies will appear and it won't help you. The character that is going to touch the pedestal must be equipped with the Dawn Shard. The best choice is someone who attack mainly with his weapon and doesn't use magick, because Dawn Shard drains whole mana from the one who wears it. After you touch the pedestal you'll be teleported deeper inside the temple.
Miriam Guardian will attack you as soon as you appear there. Finish him of.
Can you see that mined crate in the corner? To say the truth the crate isn't mined - it only stands on a mine. Cast float on yourself and go open the chest. It's a Megalixir. Go to the next room and kill three Dragon Aevises that are "dancing" there.
Keep running westward and up the stairs. There you'll run across some Miriam Facers and Guardians. At the end you'll find a similar pedestal to the one you found earlier. Equip the Dawn Shard once again and touch the pedestal. A passage will open in the room where Dragon Aevises were dancing. Get back there and use the door that have just appeared to get to the next chamber.
In the middle of the chamber a save crystal stands. But be careful - this is a Crystal Bug - mimic which transform into save crystals. Heal yourself, approach the crystal and touch it. It'll attack you. Kill the bug and a real crystal will appear.
Sword of Judgment (on the left) and the chamber with a Way Stone (on the right)
Save your progress and run downstairs. Enter the next area, run to the intersection and turn left. Run straight in the direction of Dakrmare, kill it and run down the stairs. Approach the Sword of Judgment and read inscription.
At the end of corridor, behind your back, door leading to a Way Stone will open. Go there and use it. You'll be teleported to the first hall. Run towards exit but do not leave. Stand before the exit and turn around so your back were facing the door. You should be able to see a stair set on your right. Run there and touch the door downstairs.
Here run to the next hall, there turn right and run along the corridor. At the end you'll see a Stone Brave. First examine it and then rotate the statue Counter Clockwise. No run down the stairs into the next chamber.
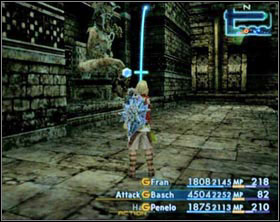
From now on Ghouls and Zombie Warriors will start to come from the ground so be careful not to be caught off guard. Enter a huge hall and go to it's center - you'll find another statue there. Turn this one also counter clockwise. And leave the hall using the other exit (the one you didn't use to get here). On your way to the third and last statue you'll be attacked by a boss called Vinuskar. He'll appear in a round chamber with three holes in the floor (look at your map).
Vinuskar
About 15000 HP
Resistant to Libra
Slow,
Sword Dance
This isn't an specially hard boss. It has somewhere around 15000 HP but it emits a strong electromagnetic field which causes all your heroes move a lot slower and especially those in heavy armors and, if it's not enough, Vinuskar cast slow on you from time to time. Beside the ordinary attack and slow Vinuskar knows how to use Sword Dance - this one deals damage to all of your characters.
For killing it you'll get 1100 gil from Montblac.
After the battle run to the third statue and turn it clockwise twice. A message should appear: "The Colossus has undergone some change". If it doesn't appear it means that you have done something incorrectly. Look at the map above - the statues should be facing the same directions as these on the map (the yellow arrows shows which direction they're facing).
If the message did appear that means that everything is all right. Go through the chamber where you fought Vinuskar and into the one with colossus. You'll see that he has risen his sword. Run right (northward) and through the door there. You'll land in the firs hall again. Make your way to the Way Stone and touch it. Now the road to Mateus is open (but before you go for it I recommend saving the game).
On your way to Mateus you pass a hidden passage leading to a random, valuable treasure (like Dark Matter or Shell Shield).
The disappearing wall can be found between Blood Gigases and the Darkmare. All you have to do to make it disappear is to get close to it and wait for a while.

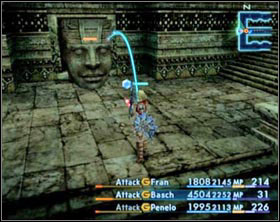
You'll find yourself in a staircase. Run to the end kill Oilings that drops from time to time from the ceiling. Just before leaving the staircase [screen 1] use float on the whole party - just at the beginning of the small area where you're supposed to enter is a mine and you can't go around it. All you can do is to fly over it. There a Rare Game can be found: Matriarch Bomb, a whole gang of Oilings and a mined treasure [screen 2]. First of all - kill all the enemies and then with float status on you simply approach the chest and open it.
Mateus
5x Ice Azer (25 lvl)
About 35000 HP
Resistant to Libra,
Weakness Thunder (Azers too)
Slow,
Sleep,
Reflect,
Chain Magick,
Blizaja,
Flash Freeze
Begin the battle with killing every single Azer - attack using thundara as often as you can. When you deal with them take Mateus on. Hit him also with thundara till the moment when he uses reflect on himself. Now you have to attack him directly. The best choice now is berserked Storm Spear. If one of your characters uses a one handed weapon equip him the Ice Shield - he'll suffer only half of damage dealt with the power of Ice and thanks to this hero will be able to support others and especially the Storm Spear.
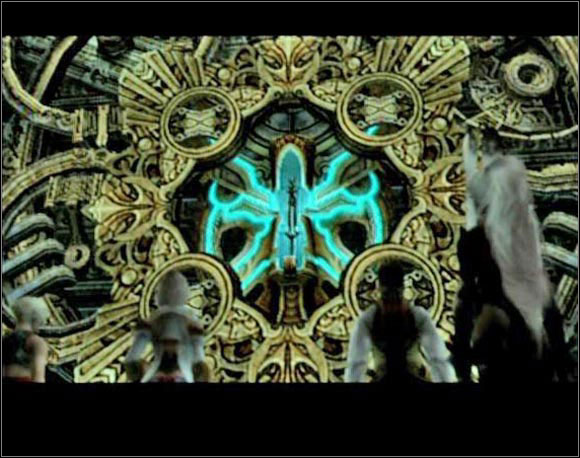
After the battle go to the end of the hall and enter a corridor full of bluish machinery. Run to the end of the corridor and watch the cut-scene.
Now leave the temple and get back to Mt Bur-Omisace. There, in the area with chocobo stables, save your progress and run to Holy Circle. Another boss fight awaits. Now it's Judge Bergan and his three henchmen.
Judge Bergan
3x Judge (28-29 lvl)
About 17000 HP
Resistant to Libra,
Battle Cry,
Water Sprout
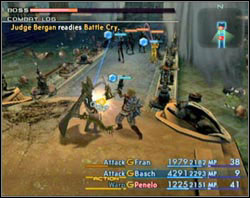
Simple matter. Send Bash on Bergan and the two let the others (mages would be best) handle the other three judges. They're resistant to Warp but not on the ordinary magick. Attack them using the spells dealing damage to all in range (e.g. Fira, Thundara and so on) to kill them all at once. When they're dealt with go and help Bash.
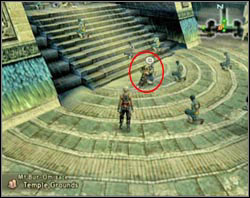
After the battle leave the Holy Circle and talk to a strolling Acolyte at the foot of the stairs. He'll give you Stone of Condemner, which grants you access to the second esper inside the Stilshrine of Miriam.
 Did you notice the areas that aren't connected to anything? There will be passages created by leafs risen by hot steam between these areas and you will have access to them, but not yet.
Name
Level
HP
Weakness
Drops (price)
Steal (price)
Worgen / Alpha Worgen
29-31 / ~31
2011-2231 / ~2523
Water
Smelling Salts**,
Fire Magicite (80g),
Libra Gem (150g),
Throat wolf blood (1360g),
Quality Pelt (651g)
Hi-potion**,
Fire Magicite (80g)
Clay Golem
~31
~6283
Wind
Earth Magicite (80g),
Solid Stone (358g),
Iron Pole*
Earth Magicite (80g)
Slaven Wilder
30-31
3510-3638
Wind
Tanned Giantskin (672g),
Earth Magicite (80g)
Tanned Giantskin (672g),
White Fang**,
Gemini gem (150g)
Python
29-32
3016-3346
Earth
Tanned Hide (77g),
Great Serpent's Fang (994g),
Wind Magicite (80g)
400 gil,
Wind Magicite (80g)
Vulture (Flying)
30-32
4022-4158
Earth
Wind Magicite (80g),
Giant Feather (686g),
Eye of the Hawk (989g)
Bundle of Feathers (833g),
Wind Magicite (80g)
Humbaba
32-33
5403-5523
Ice
Storm Magicite (80g),
Tanned Giantskin (672g),
Sledgehammer*,
Beastlord Horn (1334g)*
Teleport Stone**,
Storm Magicite (80g)
Fire Elemental
25
14830
Water
Fire Magicite (80g),
Fire Crystal (160g),
Feystone (1000g)*
Fire Magicite (80g),
Fire Crystal (160g),
Feystone (1000g)*
*Rare; ** It's better not to sell this
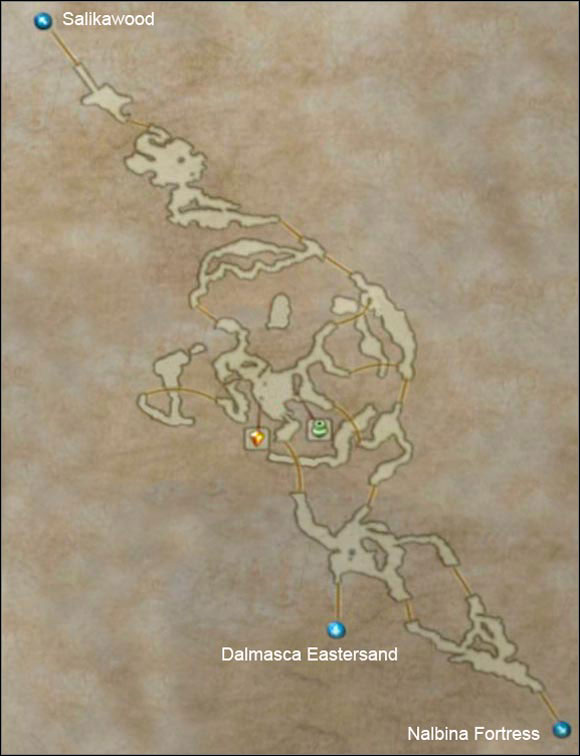
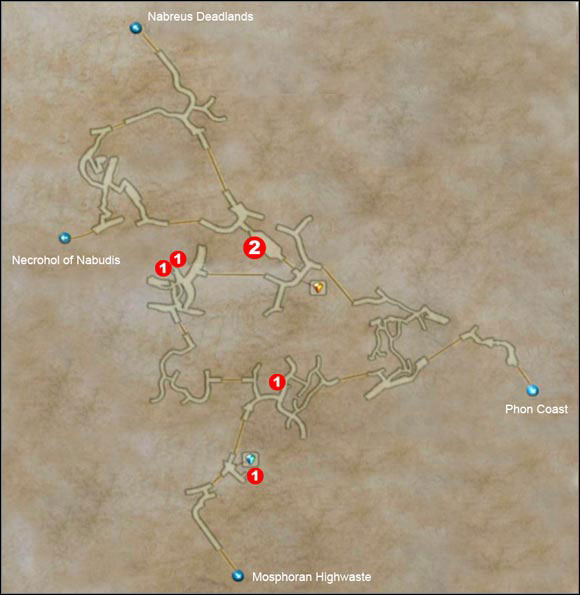
The time has come to visit the capital of the Empire - Archades. Using ship to get there would put you at risk of blowing your cover. So you decided to go there on foot. The first new location you visit is the Mosphoran Highwaste. Teleport to Nalbina using the Gate Crystal and from there run north-westward. There's nothing to do here in particular at the time so it's best to go straight to Salikawood.
 1 - Forest Bungalow - there the resting moogles can be found,
2 - Bomb King
Name
Level
HP
Weakness
Drops (price)
Steal (price)
Wyrdhare
33-35
2739-2959
Fire
Water magicite (80g),
Stardust* (1505g),
Magoroku*,
Fine Wool (619g)
Echo herbs**,
Water Magicite (80g)
Pumpkin Head
32-33
2739-2859
Ice
Storm Magicite (80g),
Succulent Fruit (363g)
Handkerchief**
Storm Magicite (80g),
Screamroot (1350g)
Sprinter
33-34
4070-4138
Water
Fire Magicite (80g),
Bundle of Feathers (833g)
Bundle of Feathers (833g),
White Fang**
Malboro King
34-35
4501-4621
Holy
Malboro Fruit (612g),
Dark Magicite (80g)
Dark Magicite (80g),
Virgo gem (150g)
Brown / Green Chocobo
33-35
3786-3922
Thunder, Water, holy
Earth Magicite (80g),
Chocobo Feather (480g),
Gyshal Greens**
Earth Magicite (80g),
Chocobo Feather (480g)
Antares
34-48
6568-8108
Wind
Molting (74g)
Earth Magicite (80g)
Baknamy
35-36
4501-4576
Ice
Storm Magicite (80g)
Antidote**,
Hi-potion**,
Alarm Clock**
*Rare; ** It's better not to sell this

Run straight to Phon Coast. There you'll find closed (and unfortunately broken) gate. You'll meet there also the Moogle Boss [screen 1]. Talk to him. He'll ask you to bring him his resting crew out of the Salikawood. In the upper right corner, under the mini-map, a found-moogle indicator appears. It shows how many moogles did you find out of 9. Return to the forest and visit every single Forest Bungalow (see map above) [screen 2] and tell moogle, that they have to get back to work. The last one will ask you whether you want to go with him back to the gate or not and answer him "Yes".
The gate will be fixed in the blink of an eye and you, beside the access to the Phon Coast, will get one pair of Quasimodo Boots. In the forest you may also face a boss called the Bomb King, but it's not necessary for you to fight him and still the plot will proceed. Details about him can be found in chapter called "Bosses not connected with the Plot".
Name
Level
HP
Weakness
Drops (price)
Steal (price)
Mandragora
35-37
2859-3099
Fire
Succulent Fruit (363g),
Water Magicite (80g)
Succulent Fruit (363g),
Water Magicite (80g),
380 gil
Silver Lobo
34-35
3131-3241
Earth
Wind Magicite (80g),
Teleport Stone* **,
Libra gem (150g),
Quality Pelt (651g)
Wind Magicite (80g),
Eye Drops**,
Libra gem (150g)
Pyrolisk
36-37
6262-6330
Ice
Storm Magicite (80g),
White fang**,
Bundle of Feathers (833g)
Bundle of Feathers (833g),
Gold Needle**
Piranha
36-37
4387-4469
Thunder
Water Magicite (80g),
Eye Drops**
Steel Mask,
Antidote,
Chronos Tear
Iguion
35-36
4892-5002
Thunder
Aries gem (150g),
Pointed Horn (706g),
Frogspawn (769g),
Ice Magicite (80g),
Eye Drops**
Phoenix Down**,
Aries gem (150g)
Bagoly
36-38
4720-4469
Earth
Wind Magicite (80g),
Bundle of Feathers (833g),
Bent Staff (1194g)
Bundle of Feathers (833g),
480 gil
Archaeozaur
~38
~12591
Ice
Storm Magicite (80g),
Gold needle**
Storm Magicite (80g),
Leo Gem (150g)*
Air Elemental
25
14830
Earth
Wind Magicite (80g),
Wind Crystal (160g),
Feystone (1000g)*
Wind Magicite (80g),
Wind Crystal (160g),
Feystone (1000g)*
*Rare; ** It's better not to sell this
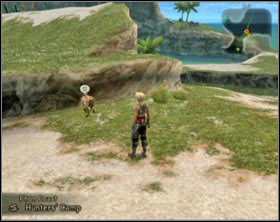
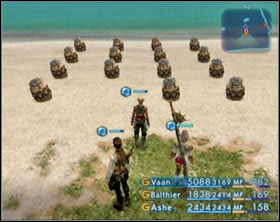
From the interesting things in Phon Coast I can mention the Hunter's Camp and the "Treasure Field" [screen 2]. As a matter of fact - they're not really valuable treasures - 200 gil and Knot of rust by turns. In the Hunter's Camp you can also meet a guy that fell from Bhujerba [screen1], but he doesn't remember anything from before the accident.
It's best to go straight to Tchita Uplands.
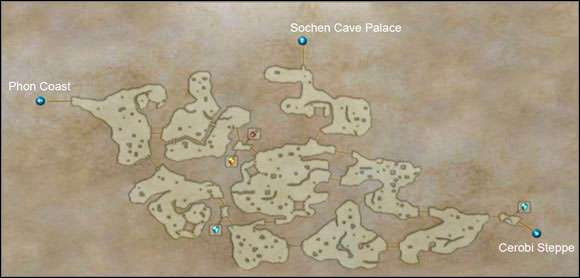
Name
Level
HP
Weakness
Drops (price)
Steal (price)
Coeurl
36-37
3944-4264
Ice
Coeurl Pelt (454g),
Quality Pelt (651g),
Storm Crystal (160g),
Hi-potion**
Storm Stone (35g),
Quality Pelt (651g),
Embroidered Tippet*
Serpent
35-36
4982-5302
Earth
Wind Magicite (80g),
Quality Hide (384g),
Bacchus's Wine**
Wind Magicite (80g),
Quality Hide (384g)
Malboro Overking
36-38
4775-5255
Holy
Dark Magicite (80g),
Malboro Fruit (612g)
Dark Magicite (80g)
Lizard
~36
~5301
Water
Fire Magicite (80g),
Fire Crystal (160g),
Pointed Horn (706g)
Fire Magicite (80g)
Bellwyrm
37-38
7587-8267
Water
Spiral Incisor (998g)
Spiral Incisor (998g),
Leo Gem (150g)
Earth Elemental
25
14830
Wind
Earth Stone (35g),
Earth Magicite (80g),
Earth Crystal (160g),
Feystone (1000g)*
Earth Magicite (80g),
Earth Crystal (160g),
Feystone (1000g)*
Feral Croc
~39
~9713
Earth
Wind Magicite (80g),
Antarctic Wind (1689g)
Blood Wool (871g)
Seeq Thief
37-39
6172-6652
Fire
Different amounts of gil
Different amounts of gil
*Rare; ** It's better not to sell this
Run straight to the area with Gate Crystal. You'll find there an Archadian Wayfarer. He'll tell you about a monster prowling inside the Sochen Cave and that no one can get rid of him. You'll get the Soul Ward Key - thanks to this you'll be able to open door inside of the Sochen Cave, but to get this key you have to accept this hunt - it's an unofficial hunt so it won't be counted as one of your victims. Now go straight to the cavern.
 1 - Boss: Mandragoras,
2 - Boss: Ahriman,
Name
Level
HP
Weakness
Drops (price)
Steal (price)
Gorgimera
~39
~4386
Water
Fire Magicite (80g),
Bundle of Feathers (833g),
Teleport Stone**
Fire Magicite (80g),
Hammerhead*
Iguion
35-37
4892-5239
Thunder
Aries gem (150g),
Pointed Horn (706g),
Frogspawn (769g),
Ice Magicite (80g),
Eye Drops**
Phoenix Down**,
Aries gem (150g)
Zombie Knight
36-38
3693-4053
Holy
Dark Magicite (80g),
Capricorn Gem (150g),
Maggot Flesh (741g),
Hypnocrown*
Maggot Flesh (741g)
Imp
37-39
4390-4710
Ice
Blue Fang**,
Scorpio Gem (150g),
Storm Magicite (80g),
Demon Feather (910g)
Antidote**
Pit Fiend
37-39
4390-4710
Earth
Demon Feather (910g),
Scorpio Gem (150g),
Remedy**,
Wind Magicite (80g)
Scorpio Gem (150g),
Wind Magicite (80g)
Striker
37-38
5129-5549
Wind
Earth Magicite (80g),
Maggoty Flesh (741g)
Earth Magicite (80g),
Maggoty Flesh (741g)
Focalor
36-37
4513-4687
Ice
Power Rod*,
Dorsal Fin (1577g)*
Ichthon Scale (1033g)
Wendigo
37-38
5458-5878
Thunder
Maggoty Flesh (741g),
Ice Magicite (80g)
Ice Magicite (80g)
*Rare; ** It's better not to sell this
Keep going northward till you reach Gate of the Soul Ward. Use the key to open them. This strange monster the kid was talking about is in the room behind these doors.
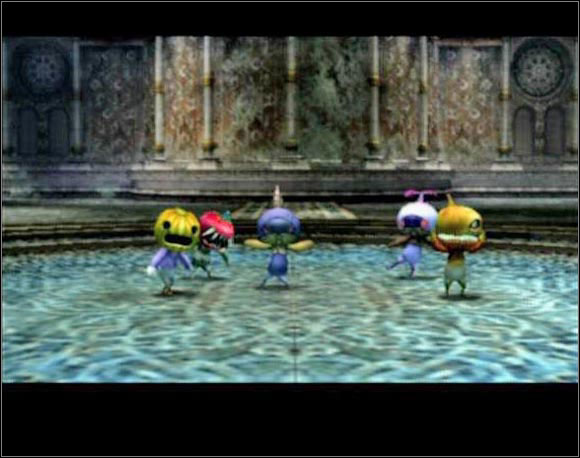
Mandragora Prince,
Alraune King,
Onion Queen,
Pumpkin Star,
Topstalk
About 9000 HP each
Resistant to Libra,
Ram,
Pollen
These are the terrifying monsters that are spreading terror in this cave. The fight with them is a bit annoying - they attack and immediately run away. Focus your attack on one foe and keep attacking him until he's dead. For this purpose use the "lowest HP" gambit - thanks to it heroes will chase the wounded enemy all by themselves. Their attacks are an ordinary Ram and Pollen which cause many bad status effects on your characters - heal them at once.
For killing them you earn 1000 gil and 3x Remedy from the kid and another 1600 gil from Montblanc.
Behind the next door you'll see a save crystal, but be careful - it's a Crystal Bug. If you're weakened after the battle with mandragoras you should rest a bit and heal yourself. After defeating this fake one a real crystal will appear.
 Ascetic's Door can be opened by entering the Destiny's March area from the east side and running around the circle clockwise.
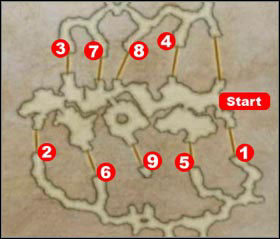 To open the Pilgrim's door you'll have to do some jogging. Begin from the "Start" position and run through the checkpoints in proper order: Leave the area through "1", reenter it through "2", leave through "3" and so on.
 Every time you enter the big, irregular area you'll see a message that the course of waterfalls have changed.
 When you successfully follow the whole path you'll see a message that a door has just opened. Make your way to No.9. There you'll find Pilgrim's door and a hidden chamber. Inside you'll find a treasure and probably one of the Rare Game - Anubys.
Actually opening the Ascetic's Door right now doesn't have sense because you don't have the key to open the door at the end of a corridor. This time it's better to open only the Pilgrim's Door.
Now run to the next boss - Ahriman.
Ahriman
About 58000 HP
Resistant to Libra,
Vulnerable to Holy,
Absorbs Dark
Toxify,
Divide,
Phantazmal gaze,
Immobilizega,
Doom
At the beginning the fight is quite easy. The stairs begin later when he starts quickly copying himself.
His clones are pretty annoying but fortunately they don't have too much HP. I'd say that you should kill them first but the main problem is to... distinct them...
His attacks beside the divide are: Toxify - one of your characters get the Sap status, Phantazmal gaze - confuses one of your heroes, Immobilizega - immobilize everyone in range and there's also Doom. Heal the statuses immediately.
For defeating the enemy you get 1600 gil from Montblanc.

After the fight collect all treasures in this hall and leave through the door leading east. A bit further you'll find an elevator [screen 1]. Use it to get upstairs. There you'll find a Gate Crystal and the exit from the cave. Just go northward, open the door [screen 2] and you'll be in Old Archades.
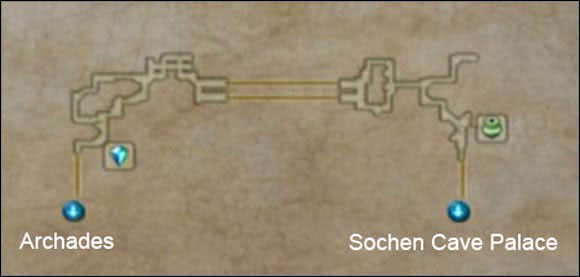
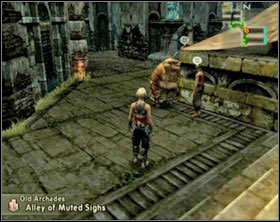
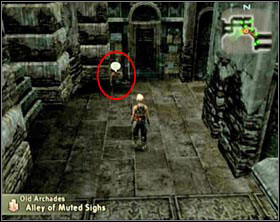
Run to the next area. Just at the beginning you'll see a Lucky Man on the right talking with a seeq [screen 1]. Talk to that man - he'll tell you in a great secret that he has found a lot of money in a barrel. Next go talk with Beasley - he's sitting a bit farther [screen 2]. He'll tell you that he has hid all of his savings in a barrel. Run towards the entrance to Archades.
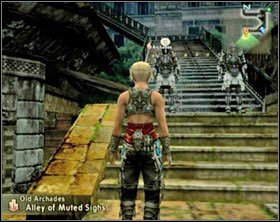
![You'll see two guards on the stairs [screen 1] - Old Archades - Part II - Final Fantasy XII - Game Guide and Walkthrough](https://game.lhg100.com/Article/UploadFiles/201512/2015121519054943.jpg)
You'll see two guards on the stairs [screen 1]. Talk with the one on the left. He'll ask you about the credentials. You don't have them so it doesn't matter what you tell him they won't let you in. Then Jules will give you a hand... well not for free obviously. He'll ask you for 1500 gil. Unfortunately you have to pay him up. After you did that run and talk to Beasley once again. Get back to Jules (now he's sitting on a crate, on an intersection [screen 2]). After the cut-scene you'll find yourself in Archades.
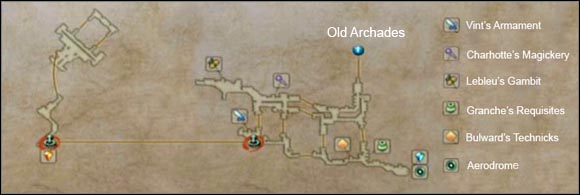

Run to the Niblasse district and talk with the taxi-driver. Standing in front of the shop with armors and weapons. He'll tell you that if you wish to use this taxi you'll have to collect 9 Pine Chops - you don't know what he's talking about but Jules does. This time he wants 2500 gil for his help and unfortunately this time you must accept his offer also. And now starts the fun part - gathering information - the most valuable thing in Archades.
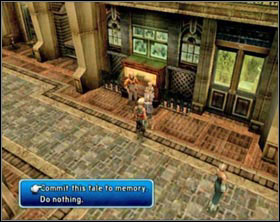
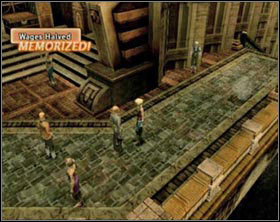
![You have to find a person who wishes to tell you something important and hear him [screen 1] - Archades - Part II - Final Fantasy XII - Game Guide and Walkthrough](https://game.lhg100.com/Article/UploadFiles/201512/2015121519055047.jpg)
You have to find a person who wishes to tell you something important and hear him [screen 1]. Commit his tale to memory to memorize it [screen2]. You may forget the tale you have heard by leaving the area, entering a shop or memorizing another story.
After you have memorized a story you have to find interested in it and you have to tell him about it [screen 3] - just start a conversation and relate the tale of [story's name]. Thanks to this you'll get a Pinewood Chop.
You have to collect at least 9 to be able to use the cab. You may collect the maximum amount of 28 Chops and then exchange them for a Sandalwood Chop by Chopmaster in any shop. It will grant you access to the Grand Arcade and Highgarden Terrace - place only for noble city dwellers. Below you'll find lists containing info about the "confessing" and the "hear-willing" people in Archades and the story names with the divination on districts. Remember that at the beginning every one will be called "Archadian Gentry". You have to talk to such person at least once to see his/hers true name.
Nilbasse:
"Confessing"
Story
"Hear-willing"
Gentleman Onlooker
"Working up a Sweat"
Eager Crier
Senior Researcher
"Words of Encouragement"
Failed Researcher
Worried Husband
"Wages Halved"
Materialistic woman
Athletic Woman
"A Grand Line of Gamesmen"
Avid Reader
Determined Researcher
"Time to Leave"
Ex-researcher
Aspiring Starlet
"The Path to Stardom"
Faded Star
Rienna:
"Confessing"
Story
"Hear-willing"
Philosopher of Cuisine
"A Revolutionary Dish"
Dangerous Chef
Good Brother
"What She Wants"
Waiting Woman
Green seller
"Out of Ears"
Vegetable seller
Tarot Reader
"The Misfortune Teller"
Happy Novelist
Lucky Man
"Epistle to Love"
Romantic Lady
Lazy Profiteer
"A Gambit for the Market"
Lady Researcher's Wife
Tour Leader
"The Aerial Garndes"
Bhujerba Lady
Trant:
"Confessing"
Story
"Hear-willing"
Historian
"A History of the Empire"
Perceptive Man
Builder
"The Artisan Architect"
Artisan Architect
Smitten Man
"Client's Woman"
Smitten Woman
Farce-Goer
"Ticket to the Farce"
Girl on an Errand
Music Appreciator
"The Lutenist"
Lutenist
Boutiquere
"The Boutique"
Moneyed Gentleman
Molberry:
"Confessing"
Story
"Hear-willing"
Proud Mother
"The Tutor"
Tutor
Avid Traveler
"The Traveler"
Traveling Gentleman
Daughter-in-law
"A Trinket From Giza"
Man from Giza
Reminiscing Lady
"The Mummer"
Family-minded Girl
Poor Husband
"The Anniversary"
Poor Wife
Ardent Woman
"The Eight & Twenty Chops"
Ardent Man
Look-alike*
"The Master of Disguises"
Look-alike
Talented Woman
"A Knack for Magick"
Academician
Would-be Judge
"To be a Judge"
Judge's Wife
*In this area you can find two men called "Look-alike" and if you talk with one of them and he won't have any story to tell you that means that you have to find the other one.
When you collect at least 9 Pine Chops go and talk with the taxi-driver once again and tell him to take you to Tsenoble. No run towards Grand Arcade. After the cut-scene get back to the cab again, talk with the driver and tell him: "You know where to go". And this is how you get to Draklor Laboratory.
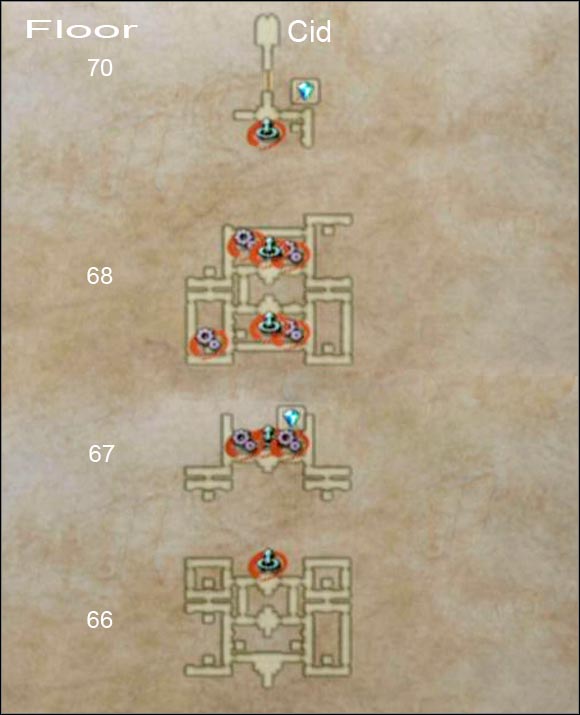 Cogs shows the position of devices used for opening the door and the arrows pointing up shows the positions of elevators.
Name
Level
HP
Weakness
Drops (price)
Steal (price)
Imperial Swordsman
36-37
3589-3829
-
Hi-potion**,
Different amounts of gil
Hi-potion**,
Different amounts of gil
Imperial Hoplite
~38
~4788
-
Hi-potion**,
Different amounts of gil
Hi-potion**,
Different amounts of gil
Imperial Pilot
37-38
4367-4127
-
Hi-potion**,
Different amounts of gil
Hi-potion**,
Different amounts of gil
Judge
~40
~5086
-
Hi-potion**
100 gil
Mastiff
~37
~3843
-
Hi-potion**,
Different amounts of gil
Hi-potion**,
Different amounts of gil
Lab Rat
37-38
3627-3647
Water
Fire Magicite (80g),
Rat Pelt (35g)
Rat Pelt (35g)
Hectyes
~37
~8515
Ice
Yellow liquid (531g),
Storm Crystal (160g)
Chronos Tear**
*Rare; ** It's better not to sell this
You begin on the 66 floor and no one interrupts you at that time. Someone was here before you and made short work of the guards. Run to the North Lift Terminal and use it to get to the 67 floor. There run to the north-eastern corner. There enter the C.D.B. room. You'll find there a Lab Access Card and a map.
You regain control back on the corridor. Now the time has come to get down to business - the backup has just been called and you have to take care of them before you can get to Cid. He has also turned on the security system of the Laboratory - it looks similar to the one in Henna Mines. Here are also bluish and reddish door opened by turn.

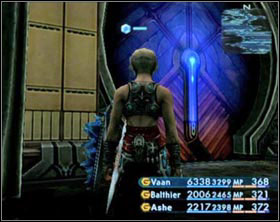
The console opening the red door (on the left) and closed blue door (on the right)
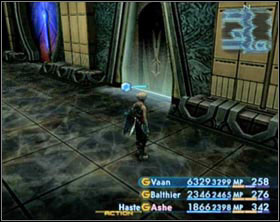
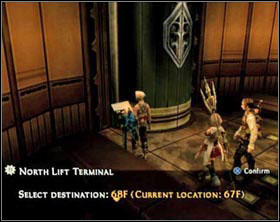
While wandering the building it's worth to visit all those small rooms (it's those small squares on the map) - you can find them treasures as well as enemies, but you can enter only these rooms from which light sift from under the door (on the left). In this building you'll also find two lifts: northern (on the right) and southern. The north one runs on the 66, 67, 68 floors and the south one on 68 and 70.
On your right you should see door (RM 6704 East) - you may enter the room and save your progress. In the room RM 6703 East a console used for opening the door can be found. Use it to get to the elevator. Use the elevator to get to the 68 floor.
There run west and on the first intersection turn left. In the room on your right (RM 6803 East) you'll find another console - switch the door. Leave the room, run northward and turn left as soon as you get the chance. Run to the end turn left and in room 6804 West you'll find another console.
Run to the south-western part of this floor to the room 6811 West and use a console there. The road to the southern elevator will be opened. Use it to get to floor No. 70. Save your progress and run upstairs. It's time to face the Cid.
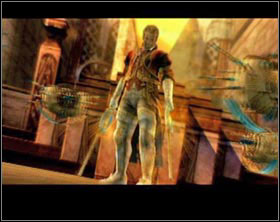
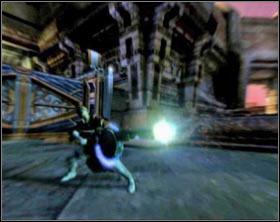
Doctor Cid
4x Rook
About 65000 HP,
8-10 000 HP each Rook
Resistant to Libra,
Rooks are vulnerable to Dark,
Cid absorbs Dark
Regen,
Curaga,
Reflect,
Drain,
Paling,
Grater barrier,
Haste,
S-27 Tokamak
Most of the attacks belong to Rooks. Regen, Curaga, Reflect, Drain, Paling (because of this one Cid becomes immune to all physical damage), they even stronger than Cid himself. Your main goal here is to dispose of them as fast as you can.
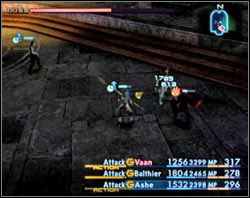
As long as the Rooks exists Cid is virtually invincible so before the battle set your gambits to "Foe: lowest HP --> Attack". Thanks to that your characters will focus on one enemy until it's destroyed.
After you deal with every Rook Cid use Greater Barrier and/ or Haste. Cast Dispel on him immediately as soon as he does that. Cast berserk on one of your characters and wait for the battle to end.
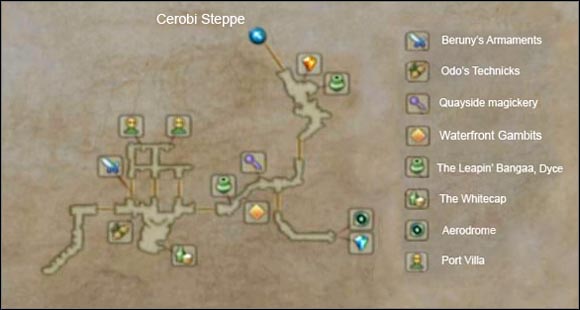
There's nothing worth of interest in this town for now. New skills and equipment are for sale in shops so take a look there. Now you can buy all rest that is needed to rise your characters to level 99 (for details see "Ways of developing characters"). You can also start the fishing mini game. If you ready to continue make your way to Giruvegan. To get there you'll have to travel through Feywood and there you can get to from Golmore Jungle or Paramina Rift.
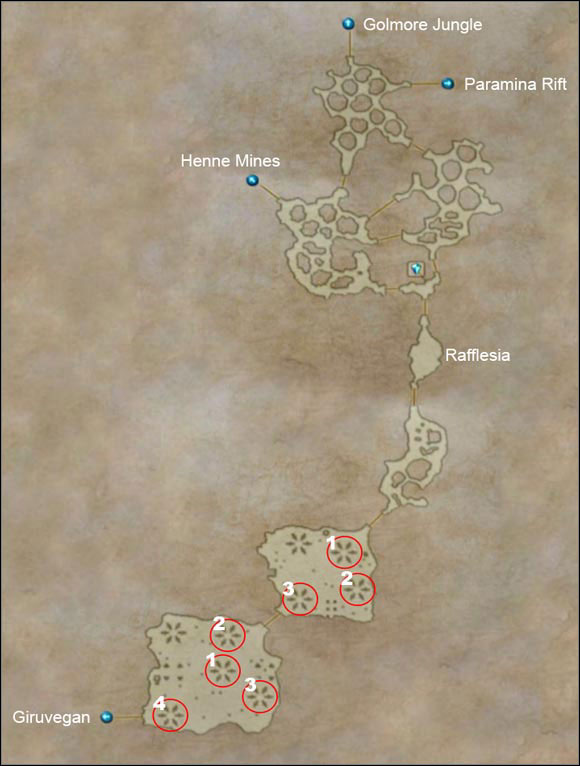 The red circles shows the locations of Feywood glyphs which you have to activate in proper order to be able to go further.
Name
Level
HP
Weakness
Drops (price)
Steal (price)
Golem
42-43
11310-11550
Wind
Quality Lumber (1127g)
Quality Lumber (1127g)
Deadly Nightshade
39-41
3167-3647
Water
Fire Crystal (160g),
Succulent Fruit (363g)
Fire Crystal (160g),
Succulent Fruit (363g)
Tartarus
38-40
3619-4259
Holy
X-potion**,
Libra gem (150g),
Chronos Tear**,
Prime Pelt (1124g),
Dark Crystal (160g)
Libra gem (150g),
Power Vest*,
Prime Pelt (1124g),
Dark Crystal (160g)
Cerberus
~39
~4739
Water
Prime Pelt (1124g),
Hell-gates Flame* (1584)
Prime Pelt (1124g),
Fire Crystal (160g)
Mirror Knight
40-42
5202-5842
Earth
Wind Crystal (160g),
Windslicer Pinion (1148g),
Mirror Scale (1952g),
Mirror Mail*,
Aries Gem (150g)
Wind Crystal (160g),
Aries Gem (150g),
X-potion**
Mu
~40
~3167
Water
Fire Crystal (160g),
Eye-drops**,
Moondust (1975g)*
Blood Wool (871g),
Aries Gem (150g)
Preying Mantis
43-44
7465-7705
Holy
Insect Husk (680g),
Dark Crystal (160g),
Cancer Gem (150g),
Sickle-Blade (1878g)*
Dark Crystal (160g),
Cancer Gem (150g),
Bowline Sash*
Basilisk
42-43
5429-5749
Thunder
Ice Crystal (160g),
Chronos Tear**,
Serpent Eye* (1440g)
Antidote**,
80 gil
Behemoth
42-44
10026-10860
Ice
Storm Crystal (160g),
Prime Tanned Hide (1372g)
Storm Crystal (160g),
Gemini Gem (150g),
Prime Tanned Hide (1372)
Giant's Helmet*
Giruveganus
46-47
13006-13686
Holy
Prime Tanned Hide (1372g),
Broken Greataxe (1762g)*
Prime Tanned Hide (1372g),
Broken Greataxe (1762g)*
Holy Elemental
25
14830
Dark
Holy Stone (35g),
Holy Magicite (80g),
Holy Crystal (160g),
Feystone (1000g)*
Holy Magicite (80g),
Holy Crystal (160g),
Feystone (1000g)*
Mandragora Prince
50-51
5879-6119
Fire
Screamroot (1350g),
Four-leaf Clover (1969g)
Screamroot (1350g),
Four-leaf Clover (1969g)
Alraune King
50-51
5879-6119
Wind
Screamroot (1350g),
Gimble Stalk (1647g)
Screamroot (1350g),
Gimble Stalk (1647g)
Onion Queen
50-51
5879-6119
Earth
Screamroot (1350g),
Onion (2010g)
Wind Crystal (160g),
Screamroot (1350g),
Onion (2010g)
Pumpkin Star
50-51
5879-6119
Ice
Traitors Bow,
Screamroot (1350g),
Jack-o'-Lantern (1888g)
Water Crystal (160g),
Screamroot (1350g),
Jack-o'-Lantern (1888g)
Topstalk
50-51
5879-6119
Water
Fire Crystal (160g),
Echo Herbs**,
Screamroot (1350g),
Tomato Stalk (966g)
Screamroot (1350g),
Tomato Stalk (966g)
*Rare; ** It's better not to sell this;
The last five mobs appear on the Ice Field of Clearsight after you defeat everything there and on The Edge of Reason as well. Also they appear after you visit Giruvegan - not earlier.
There are to ways to get to Feywood - through Golmore Jungle or through Paramina Rift. In Feywood go south to the area with save crystal. You'll see there a thick mist which blocks the path. Simply approach it to make it disappear (it's here only in case you got here before to plot).
 Mist
Mist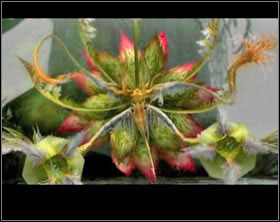 Rafflesia
In the next area you'll have to face a boss, so I recommend saving the game and get ready for the fight. Cast protect, shell and haste on your party and berserk on one of you dmg dealers. Touch the crystal to replenish you strength and run to the next area.
Rafflesia,
Malboro lvl 40-41
About 68000 HP,
Malboro: 4902-5022
Resistant to Libra,
Malboro are vulnerable to Wind
Syphon,
Nectar Volley,
Pollen Dance,
Cry for Help
During this battle your MP will be slowly drained and, if that's not enough, Rafflesia will drain it also with the help of Syphon. But it really doesn't have too diverse attacks. It uses Nectar Volley which deals damage to everyone in front, Pollen Dance which causes different bad status effects and Cry for Help, which summons malboros to it's aid. When they appear it's better to take care of them first. They are also a good source of mana - as soon as they appear use Syphon on them (because Rafflesia is immune to Syphon).
For defeating this enemy you'll get 1800 gil from Montblanc.
After the battle keep going south till you reach a quite vast area.
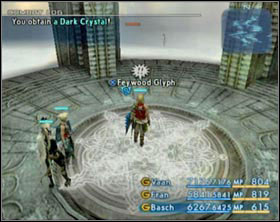
![To get to the next area you'll have to activate 3 out of 4 portals [screen 1] (see the map above) - Feywood - Part III - Final Fantasy XII - Game Guide and Walkthrough](https://game.lhg100.com/Article/UploadFiles/201512/2015121519055145.jpg)
To get to the next area you'll have to activate 3 out of 4 portals [screen 1] (see the map above). If you don't do this and still try to go to the next area you'll land in the same area again. In the next level you'll have to activate 4 out of 4 portals. Go westward from the last one till you see a giant gate [screen 2]. Approach it, read instructions, summon Belias, approach the gate again and open it.
 Open sesame... or else that big one behind me will take care of you.
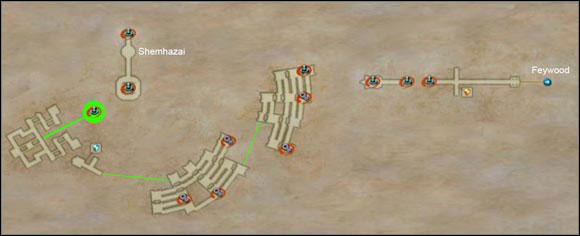 The green paths are invisible at first - you have to get walk over one of them to make it appear. They're not marked on the in-game map.
Name
Level
HP
Weakness
Drops (price)
Steal (price)
Behemoth
44-45
12199-12619
Ice
Storm Crystal (160g),
Prime Tanned Hide (1372g),
Behemoth Steak (1671g)
Storm Crystal (160g),
Gemini Gem (150g),
Prime Tanned Hide (1372),
Giant's Helmet*
Gargoyle
42-43
6071-6231
Holy
Dark Crystal (160g),
Demon Tail (1203g)
Demon Tail (1203g),
X-potion**
Mythril Golem
43-44
17733-17973
Water
Iron Ore (1043g),
Aquarius gem (150g),
Fire Crystal (160g),
Gaia Gear*
Iron Ore (1043g),
Fire Crystal (160g)
Vivian
~42
~6526
Holy
Dark Crystal (160g),
Malboro Flower (1043g)
Dark Crystal (160g),
Red Fang**
Diakon Entite
45
48042
Dark
Holy Crystal (160g),
Feystone (1000g),
Diakon Halcyon (1500g),
Electrum (3563g)
Feystone (1000g),
Holy Crystal (160g),
Diakon Halcyon (1500g)
Gargoyle Baron
(this one is not present when you're here for the first time)
~43
~6231
Holy
Dark Crystal (160g),
Demon Tail (1203g)
Demon Tail (1203g),
X-potion**
*Rare; ** It's better not to sell this
Go straight ahead till the end of the road (you'll pass a Gate Crystal on your way there). At the end of the road you'll find a Way Stone - use it. At the end of the next path you'll see a stone statue. Close in to it and it will revive - it's Deadalus.
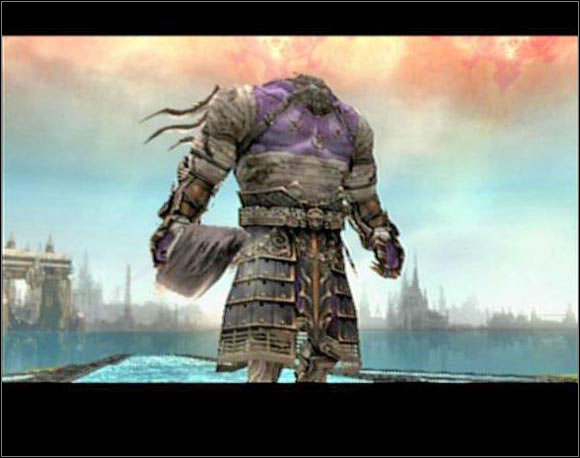
Deadalus
About 65000 HP
Resistant to Libra,
Half damage form Ice and Thunder
Haste,
Tri-attack,
Darkra,
Tremor,
Ice Break,
Rage,
Smite of Rage
He may have less HP than Rafflesia and he may not summon any henchmen but it doesn't mean that he can be underestimated. At the end of the fight his defense level will grow rapidly.
Deadalus uses during the battle:
Hopefully he doesn't use any attack that causes bad status effects (well except for Tri-attack) so you can cast berserk on two of your heroes and let the white mage handle the healing.
For defeating this one you get 1900 gil from Montblanc.
After the battle Deadalus will change into stone again and a new Way Stone will appear near him - use it.
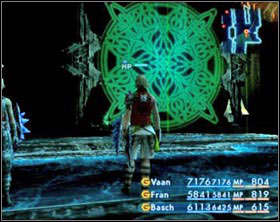
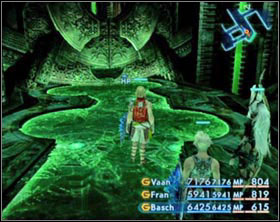
Inside you'll encounter barriers that do not allow you to go in certain direction (on the left) - in that case simply use the other way out. Sometimes you may run across giants helmets (on the right) - they're not ornaments, they're doors - just use them.
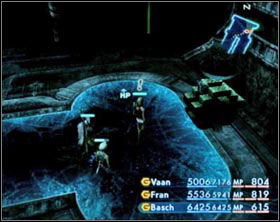 Disabled device
 Enabled device
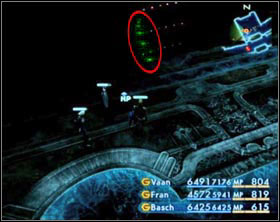
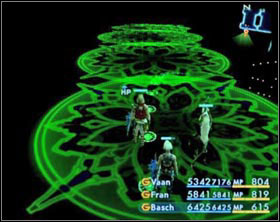
Passages between areas are inactive at first. You can see where they are by small little dots hanging in mid air (on the left), but as soon as you try to walk over them they'll turn into a bridge (on the right).
Inside just turn one every device there is and run to the next area. There also turn on every device and continue forth (see the map above). In the next area you'll find a Save Crystal. Save the game and go deeper inside.
On this area you won't encounter any enemies. Run immediately on the green platform (see the map). As soon as you reach it another boss will appear: Tyrant.
Tyrant
About 170000 HP
Resistant to Libra,
Vulnerable to Ice,
Absorbs Thunder.
Lunge, Bite,
Thundaga,
Firaga,
Fireball,
Sonic Fangs,
Darkra,
Piercing Graviga
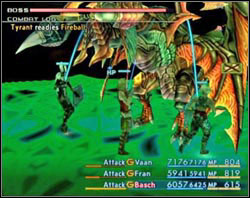
During this battle you can't use any of the technicks. The enemy himself despite his quit high amount of HP doesn't use any particular dangerous attacks. Only graviga is pretty annoying because it takes exactly 50% of max HP of all your allies in range.
Ready yourself for a long battle. Cast berserk on two of your dmg dealers, take control over a white mage and keep away from the fight (to avoid being hit by graviga and other attacks that hurt more than one character) and heal other party members when needed.
For defeating Tyrant you get 1900 gil from Montblanc.
After his death another Way Stone will appear. Use it to get inside that giant crystal.
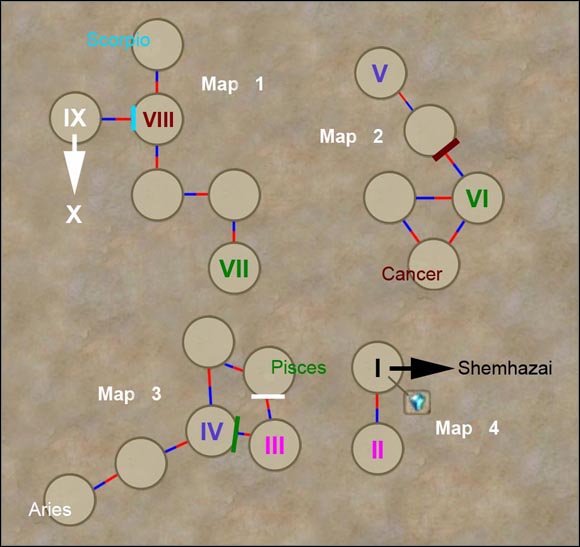
Name
Level
HP
Weakness
Drops (price)
Steal (price)
Mom Bomb
45-46
5107-6544
Water
Bomb Shell (896g),
Fire Crystal (160g)
Bomb Shell (896g),
Scorpio Gem (150g)
Ose
44-45
6739-7059
Holy
Coeurl Whisker (2076g),
Prime Pelt (1124g),
Dark Crystal (160g),
Morning Star*
Chronos Tear**,
Libra gem (150g)
Mythril Golem
45-48
17735-18453
Water
Iron Ore (1043g),
Aquarius gem (150g),
Fire Crystal (160g),
Gaia Gear*
Iron Ore (1043g),
Fire Crystal (160g),
Mythril (1531g)
Necrophobe
~46
~8511
Holy
Dark Crystal (160g),
Bacchus's Wine**
Sky Jewel (980g)
Reaper
~45
~9931
Holy
Book of Orgain-Cent (924g),
Dark Crystal (160g),
Vaccine**
Book of Orgain-Cent (924g),
Dark Crystal (160g)
*Rare; ** It's better not to sell this
Inside the crystal there's no such thing as map or directions. You'll have to know where you are just by the number of paths leading out of area. The color scheme on the map above isn't accidental. The roman numeral signify the Way Stones - notice that they are always a pair of Way Stones in the same color - it shows which Way Stone is connected to which. The colors of paths also aren't accidental. Red means that the path is going up and blue means that this one is going down. The colored lines that run crosswise through the paths show the location of barriers. Every barrier can be opened by using a device that is located somewhere on that floor - these devices are e.g. Scorpio, Aries, Cancer etc. Their font color match the color of the gate it opens. And the "Map 1", "Map 2" etc. marks shows in which order you gonna visit each floor.
On the empty platforms you can often find a valuable treasures so it's worth the trouble.
The Way Stone that appeared after the battle with Tyrant is connected to the Way Stone No. VIII. The Scorpio Gate Stone isn't working at this time so make your way to the Way Stone No. VII. You'll land on the platform with Way Stone No. VI. Here you have to disable the Cancer Gate Stone first and than go to the Portal No. V.
You land on map 3. Here you can open either Aries or Pisces or both - anyways you got to open the passage to Way Stone No. III. Run there and use it. You'll land on the lowest level of the Crystal. Run straight ahead. On the next platform you'll find a save crystal and Way Stone No. I which leads to Shemhazai.
Shemhazai
About 89000 HP
Resistant to Libra,
She's vulnerable to one element and absorbs others.
Syphon,
Shift,
Shock,
Mana Spring,
Flare,
Enrage,
Chain Magick,
Silencega
Another Esper to your collection. She may not have especially high HP level but, as in Deadalus case, at the end of the battle her defense will rapidly raise.
Her ordinary attacks may cause Disease to one of your heroes and beside of that she doesn't use the rest of her attacks too often. It's no use attacking her with magick. She's vulnerable to one element and absorbs the others and when you discover at last to which one element is it she changes it using the Shift technique. The best choice is to is to stick to the brute force. Use berserk twice and let the mage handle the healing part (as always). If you can't handle the enemy with only one mage use berserk not on two heroes just on one.

After the battle make your way to the next hall. You'll find there an Empyrean Way Stone. Approach it and read instructions and then touch it. After the cut-scene you'll get the Treaty-blade and the Empyrean Way Stone changes to Tellurian Way Stone, which will teleport you to the area with Gate Crystal.
Acquiring the Treaty-blade also lets you use the Scorpio Gate Stone to get to the Upper Levels of the Great Crystal.
Now get back to Balfonheim and run straight to Reddas's mansion. When you leave the mansion a moogle will come to you to tell that the Strahl is repaired and that you can freely use him now. From now on a new counter appears at every Aerodrome which handle the private airships.
Beside that on locations with open terrains a new anchor icon - there you can board the Strahl.
Run to Aerodrome, board your ship and fly to Ridorana Cataract.
Name
Level
HP
Weakness
Drops (price)
Steal (price)
Deathclaw
46-47
12682-12922
Ice
Charger Barding (1154g),
Storm Crystal (160g)
Charger Barding (1154g),
Vaccine**
Cassie
46-47
8840-9080
Wind
Earth Crystal (160g)
Malboro Flower (1043g)
*Rare; ** It's better not to sell this
There's nothing worth of interest in here (for now) so go straight to Pharos. Immediately, even before you can reach the lighthouse, Hydro will attack you.
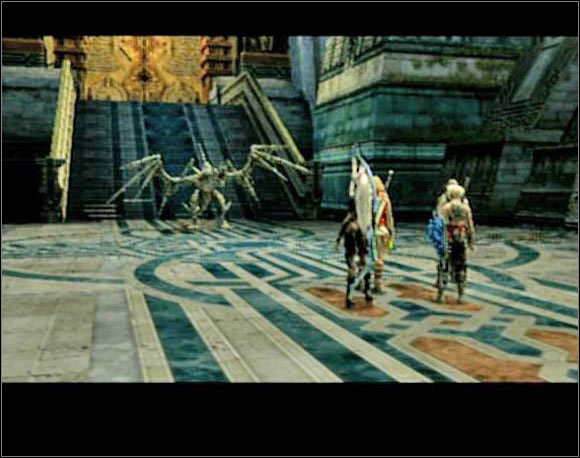
Hydro
About 210000 HP
Resistant to Libra
Lunge,
Bite,
Crushing Fangs,
Bio,
Darkra,
Fearga,
Curse
Hydro is a dead dragon. I can only imagine how awful stench he must emit - that's probably the reason why his attacks cause so many bad status effects.
His most ordinary attack may cause the poison status, his bite may cause Sap to one of your heroes and Bio may cause Sap to all heroes in the range. The worse attack from these changing statuses is Curse, which except for Sap may also cause disease, confuse and poison.
Besides these attacks he also uses darkra, crushing fangs and - the worst one - Fearga, which drains all mana points from all party members in range.
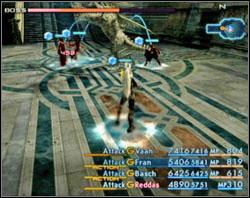
My advice is to end this battle as fast as possible. Use three berserks and keep the white mage as far from the actual battle. If you cant do this with three berserks cast two and give the one who isn't berserked a long ranged weapon.
If anyone needs the healing close in for a moment and heal, but if Hydro starts casting Fearga at that moment just go away for a sec even before you can cast your spell and get back when the enemy ends casting it.
For defeating this one you get 2000 gil from Montblanc.
After the fight go inside.
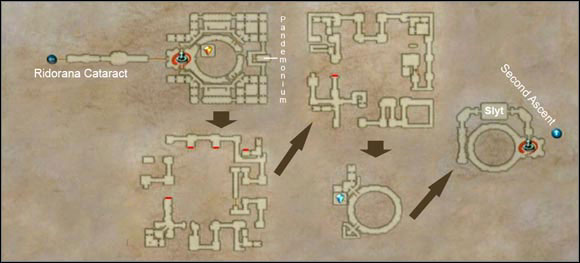 The arrows show the order of beating each floor and the red lines show locations of the fake walls.
Name
Level
HP
Weakness
Drops (price)
Steal (price)
Chimera Brain
45-46
9992-10112
Holy
Hi-potion**,
Dark Crystal (160g),
Chimera Head (2026g),
Taurus gem (150g)
60 gil
Mistmare
45-47
12180-12500
Fire
Water Crystal (160g),
Grimoire Aidhed (1005g),
Chronos Tear**,
Windslicer pinion (1148g)
Water Crystal (160g),
Grimoire Aidhed (1005g)
Mimeo
46-48
10061-10541
Holy
Dark Crystal (160g),
Iron Ore (1043g)
Iron Ore (1043g),
500 gil
Aeronite
(Flying)
49-50
18004-18684
Thunder
Wyvern Fang (1274g),
Ice Crystal (160g)
Wyvern Fang (1274g),
Hi-potion**
Brainpan
46
15358
Holy
Smelling Salts**,
Quality Stone (1425g),
Dark Crystal (160g)
Chronos Tear**,
Dark Crystal (160g)
Deidar
46
15358
Holy
Quality Stone (1425g),
Orichalcum (1777g)
Dark Crystal (160g),
Aquarius gem (150g)
*Rare; ** It's better not to sell this
Directly at the beginning you'll find a Gate Crystal - you'll spend lot of time in this tower, you'll have to face three bosses, an Esper and at the end you'll have to face three bosses one after another so you'd better be prepared.
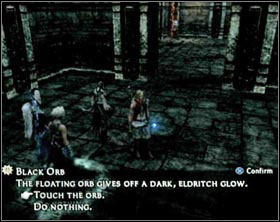

Alright so here we go: on the first floor you have to find three Black Orbs - you need only three of them and you can sell one of these orbs for 1 gil in a shop so it's not worth the trouble. They appear floating over a dead enemy's body for a short while, but you don't get them like the ordinary treasures. You must approach that orb and touch it [screen 1]. Next you have to find three Altars of Night and use one orb on each of them [screen 2]. These altars are situated around the circular shaft, in which the water flows up.
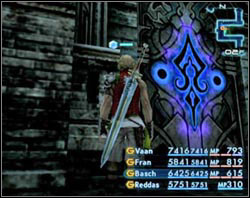
When you activate all three run to the second floor and enter the freshly unsealed room.
Inside Pandemonium awaits you.
After you touch the door you get teleported to a dessert. Take a look around - you'll see giants stones, but if you close too much to one of them you'll be teleported to the beginning. To find Pandemonium simply stick to the wall on your right and go ahead.
Pandemonium
About 110000 HP
Resistant to Libra,
Vulnerable to Wind
Flatten,
Flash,
Stone Gaze,
Perfect Defence,
Power Spin
This giant turtle attack using Flatten - it's aimed against one of the characters. Flash blinds everyone in range and Stone Gaze causes Petrify to everyone in range. The most annoying of his attacks is surely the Perfect Defence. He becomes immune to all physical and magical attacks. It can't be helped - you just have to wait it through. Also after a certain time (somewhere around 50%HP) he starts using the Power Spin, which damages everyone near him and may cause slow to them.
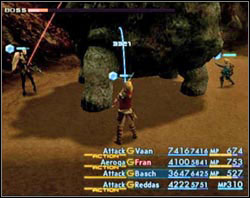
During this fight don't play with berserks (unless you already got the Windslicer shot). It's best to cast Faith on everyone and attack the enemy using Aeroga. Wait through his Perfect Defence and finish him off.
When you manage to defeat him a Way Stone near the entrance to the light house activates. Go there and use it.
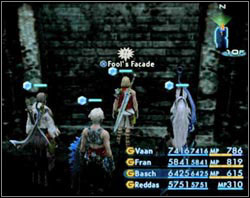
From now on you'll start running across fake walls from time to time. These are the wall's imitations which can be destroyed by simply hitting it. Now you'll only find behind them some random treasures or monsters. The fake walls will become more important in the Third Ascent.
To get to the Second Ascent from here you'll have to build bridges by killing Brainpans - they look like big heads with greenish flames on top of their heads.
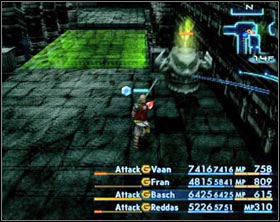
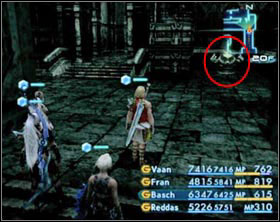
![Brainpans can be found mostly near the bridge under construction [screen 1] but not only - Pharos at Ridorana - First Ascent - Part III - Final Fantasy XII - Game Guide and Walkthrough](https://game.lhg100.com/Article/UploadFiles/201512/2015121519055493.jpg)
Brainpans can be found mostly near the bridge under construction [screen 1] but not only. Sometimes you'll have to search for them in dead ends [screen 2] or behind closed doors.
Here you'll encounter, almost identical to Brainpans, Deidars. Deidars have red flames instead of the green ones. The important difference is that when Brainpans create one segment of the bride the Deidars destroy one fragment. You'd do better leaving them alone.
On the 49 floor another boss awaits you: Slyt.
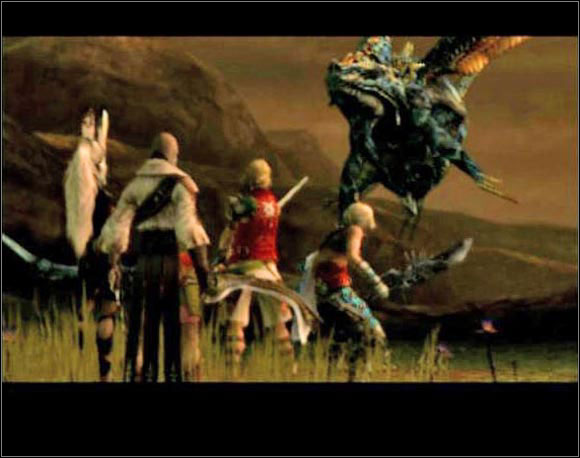
Slyt
About 100000 HP
Resistant to Libra,
Vulnerable to Fire,
He has on a permanent Regen status
Enrage
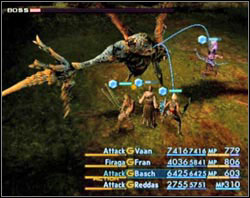
He doesn't have any special attacks. He counts on the brute force above all. If he has something else on him besides regen use dispel on him, but if he does have only Regen it doesn't have any sense, because he'll have it on without even casting it.
What can I say - bet on the brute force too. you may also use the Wyrmfire shot and Firaga for better effects. Ate the end of the fight he'll also use Enrage which will raise his speed level and amount of hit he can chain in one combo.
After the battle leave the room and use the Way Stone. Now you are on the Second Ascent.
 The arrows show the order of beating each floor and the red lines show locations of the fake walls.
Name
Level
HP
Weakness
Drops (price)
Steal (price)
Crusader
47-48
10592-10772
Holy
Blood-darkened Bone (1499g),
Dark Crystal (160g),
Capricorn Gem (150g),
Crown of Laurels*
Blood-darkened Bone (1499g),
X-potion**
Bune
48-49
13239-13659
Water
Fire Crystal (160g),
Forbidden Flesh (1397g),
Damascus Steel (2188g)*
Gold Needle**,
Forbidden Flesh (1397g)
Reaver
49-50
22771-23191
Earth
Wind Crystal (160g),
Bacchus's Wine**
Beastlord Hide (1499g),
Vaccine**
Abaddon
47-49
13239-13879
Holy
Dark Crystal (160g),
Vaccine**
Solid Horn (1288g),
Aries Gem (150g),
Teleport Stone**
Dragon Lich
49-51
22241-23601
Holy
Dark Crystal (160g)
Charger Barding (1154g),
X-potion**
Zombie Warlock
48-49
7598-7778
Holy
Dark Crystal (160g),
Forbidden Flesh (1397g),
Capricorn Gem (150g)
Capricorn Gem (150g)
Necrofiend
48-50
12709-13069
Holy
Dark Crystal (160g),
Sky Jewel (980g),
Lifewick (1740g)
Sky Jewel (980g)
Undin Entite
45
48042
Fire
Water Crystal (160g),
Feystone (1000g),
Undin Halcyon (1500g),
Electrum (3563g)
Water Crystal (160g),
Feystone (1000g),
Undin Halcyon (1500g)
*Rare; ** It's better not to sell this
![Your first task in here will be to choose one thing to disable and in order to do that you'll have to approach a proper Altar and activate it [screen 1] - Second Ascent - Part III - Final Fantasy XII - Game Guide and Walkthrough](https://game.lhg100.com/Article/UploadFiles/201512/2015121519055527.jpg)
Your first task in here will be to choose one thing to disable and in order to do that you'll have to approach a proper Altar and activate it [screen 1]. When you do that a door behind [screen 2] you will unlock.
You can choose:
I recommend disabling the mini-map. It doesn't disable the main map so you can use it at any time and there's also the map I placed here.
That's it when it comes to the tricky part now all you have to do is to get to the top.
On 65 floor you'll have to face Fenrir - the third and last boss which test whether you're ready to get to the top or not.
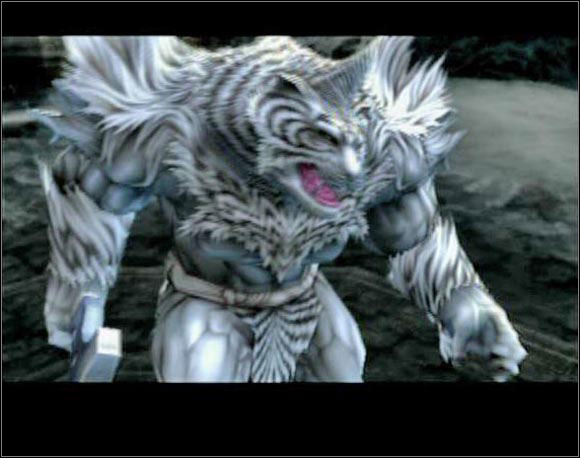
Fenrir
About 190000 HP
Resistant to Libra,
Vulnerable to Earth
Ram,
Wail,
Bravery
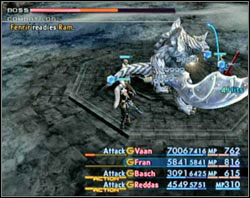
This boss also bet on the brute force. His attacks beside the standard one and Ram are: Wail, which may cause blind or silence on every one in range, Bravery (dispel him quickly when he cast that).
And that's all to it. Kill him in any way you wish.
After the battle go to the hall with shaft and turn off that restriction you had on you during this whole ascent - approach a proper altar and deactivate it.
When you ready with that a lift will appear. Use it to get to floor No. 67.
There save your progress and use a Way Stone to get to the Third Ascent.
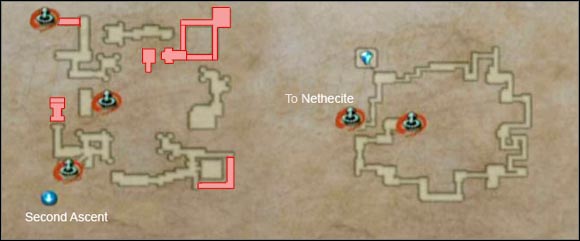 On this map the hidden terrains are marked in red.
Name
Level
HP
Weakness
Drops (price)
Steal (price)
Purobolos
49-50
9531-9691
Holy
Bomb Shell (869g),
Dark Crystal (160g),
Handkerchief**,
Scorpio Gem (150g),
Mallet (2498g)
Bomb Shell (869g),
Dark Crystal (160g)
Zombie Warlock
48-50
7598-7958
Holy
Dark Crystal (160g),
Forbidden Flesh (1397g),
Capricorn Gem (150g)
Capricorn Gem (150g)
Dead Bones
~49
~11122
Holy
Ancient Bone (2115g),
Dark Crystal (160g)
Dark Crystal (160g)
Necrofiend
48-50
12709-13069
Holy
Dark Crystal (160g),
Sky Jewel (980g),
Lifewick (1740g)
Sky Jewel (980g)
Aeronite
(Flying)
50-51
18004-18684
Thunder
Wyvern Fang (1274g),
Ice Crystal (160g)
Wyvern Fang (1274g),
Hi-potion**
Cataract Aevis
50-51
23241-23921
Thunder
Charger Barding (1154g),
Ice Crystal (160g),
Holy Mote**
Charger Barding (1154g),
50 gil
*Rare; ** It's better not to sell this
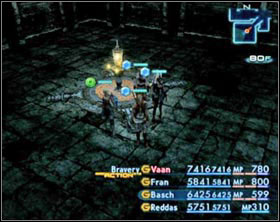
![DO NOT use the Way Stone you got here through - it'll teleport you back on the first floor and you'll have to make your way here all over again [screen 1] - Third Ascent - Part III - Final Fantasy XII - Game Guide and Walkthrough](https://game.lhg100.com/Article/UploadFiles/201512/2015121519055627.jpg)
DO NOT use the Way Stone you got here through - it'll teleport you back on the first floor and you'll have to make your way here all over again [screen 1].
To the end of this ascent leads no ordinary path. You'll have to use Way Stones here and you always will have to choose one from among few others [screen 2].
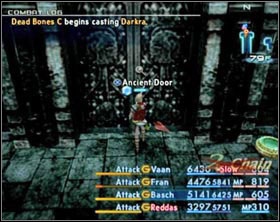
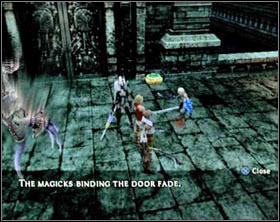
If you make one mistake while choosing a proper Way Stone you'll be teleported to the beginning of that area and if you make two you'll be teleported to floor 79 where you'll have to face hordes of enemies. There's only one way out but it's blocked by magick [screen 1]. You'll have to keep fighting the enemies till you see a message that magick has faded [screen 2].
But don't worry - I'll show you the way through this labyrinth.
The Way Stones on this ascent have different colors and to reach the end you have to use them in proper order.
There's two paths leading to the same goal - the normal one and a hidden one. I recommend the hidden one but the choice is yours.
Normal path
Hidden path
The first way stone you have to use is black. You'll land on 81 floor. Run to the end of this floor and use a green Way Stone.
The first way stone you have to use is black. You'll land on 81 floor. Go to the hidden corridor that's closed between two fake walls. Inside you'll find a treasure and there's a great chance that you'll find a Dragon Whisker. There's also a green Way Stone. Use it.
You are on the 82 floor. Run to it's end and use the red portal.
You are on the 83 floor. You'll see a lot of mines in front of you - cast float on your party. Over one of these mines you'll find a treasure. To get to the portals on this floor you'll have to destroy at least two fake walls. Use the red Way Stone.
You're on 85 floor. Run to the end and use any of the portals there.
You're on a small floating island, on 84 floor. Defeat two Aeronites there and pick the treasure. It's gonna be a circlet or a ring of renewal. Use any of the Way Stones there.
With these last portals is a bit complicated matter. I've heard that you have to pick one in the color of the altar you have chosen in the second ascent, but for me each one worked - no matter which color did I pick I always found myself at the destination.
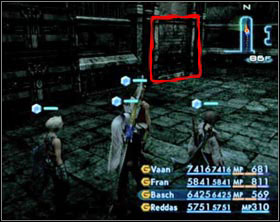

No matter which path have you chosen now you'll be on 86 floor. Run along the corridor on your right and at the end smash the wall on your left [screen 1]. Run to the end and use the Way Stone there.
You'll be teleported to the floor No. 88. If you have chosen the hidden path you will probably be attack by a rare mob - Tower. Deal with him.
You'll also find an elevator on this floor [screen 2] and a Way Stone which lead to the 79 floor, but if you use it now you won't have to fight all those monsters that usually appear there.
If you get on the Dais of Ascendance, you'll be attacked by Hashmal. So before you do that prepare yourself.
Hashmal
About 190000 HP
Resistant to Libra,
Vulnerable to Wind
Roxxor,
Battle Cry,
Quakeja
Hasmal is another esper for your collection. Just as the former enemies in Pharos he doesn't have an expanded spectrum of attacks.

At the beginning he uses almost nothing but ordinary attacks, which may cause disease on the character under attack. When the enemy loses some HP he starts using roxxor - an attack with the element of Earth aimed against one character.
Also as the time passes he starts using quakeja which deals damage with the power of Earth to all characters and may cause slow.
After the battle the elevator will take you up. In principle there's nothing interesting. After walking several meters you'll see a cut-scene and you'll move half way to the end. Don't turn back - it's no use. Go to the crystal, save your progress, run to the end of the corridor and use the Way Stone there, but before you do this make sure that you're ready for a long and exhausting battle, which awaits you upstairs.
Peak:
The fight begins with Gabranth:
Gabranth
About 65000 HP
Resistant to Libra
Kick,
Lunge,
Circle of Judgment,
Sentence,
Guilt
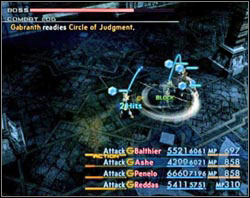
His attacks beside Kick and Lunge are Circle of Judgment which deals damage to all those standing near him and Guilt which aim in one of your heroes.
At about 50% he'll become resistant to magick.
The fight with him is short. He has about 65000 HP and you don't even have to deal him this much damage because Cid will interrupt before Gabranth dies. So don't use any berserks here because you gonna need all sober minded characters you can get.
 Recipe for a God: take a mad man, a few stones with huge power and a God that has betrayed the other Gods and is willing to help you. Oh right - it's important that the mad man was a hero in one of the Final Fantasy games.
Cid
About 80000 HP
Resistant to Libra
Gatling Gun,
Haste, Protect, Shield,
S-85 Cyclotrone
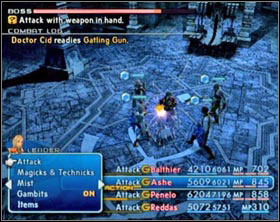
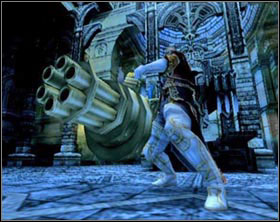
At the beginning use Dispel on Cid. In the first stage of battle he doesn't show off with a great amount of attacks. He uses only the ordinary attack and the Gatling Gun. When you get rid of about half of his life he'll summon Famfrit and becomes resistant to every attack - physical and magical. The only way to make him mortal again is to kill Famfrit.
Famfrit
About 155000 HP
Resistant to Libra,
Vulnerable to Fire
Briny Cannonade,
Waterja

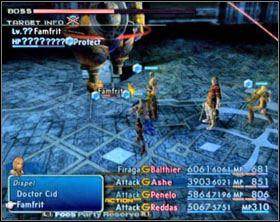
Famfrit's element is Water, so the damage he'll deal you will be based on water. He himself is vulnerable to Fire - Firaga and Wyrmfire shot will come in handy. During your fight with Famfrit Cid will cast on him protect, shell and haste. If you dispel him right away Cid will start casting the buffs all over again - it's a good way to prevent him from attacking your party.
After you deal with Famfrit the barrier protecting Cid will disappear letting you finish him off.
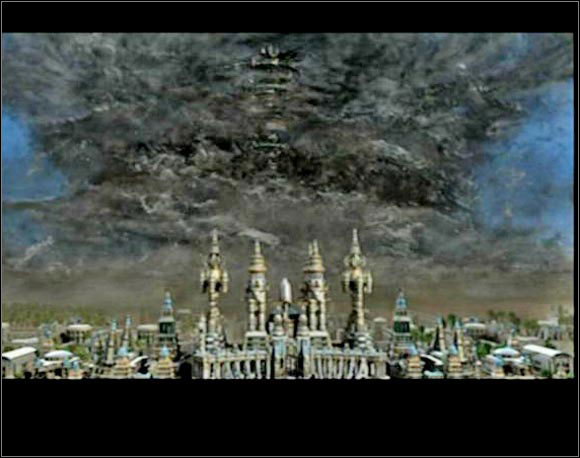
This is it. Finish what you have to finish, gain what you want to gain (don't forget that new spells are now available), board the Strahl and fly to the Bahamut fortress. From there there's no coming back.
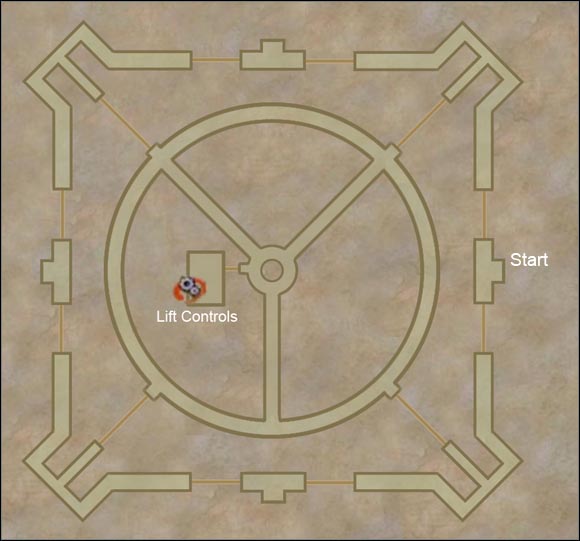
Name
Level
HP
Name
Level
HP
Imperial Swordsman
48-50
3669-4149
Judge
49-50
4953-5193
Imperial Beastmaster
49-50
3458-3698
Sphere-Rook
47
10286
Mastiff
47-48
6987-7307
Helm-Rook
47
12286
Imperial Gunner
47-48
4219-4459
Spinner-Rook
47
13286
Imperial Pilot
49-51
4459-4939
Everyone on the ship drop Phoenix Downs, different Potions and gils.
Rooks spawn only on the big ring in the middle.
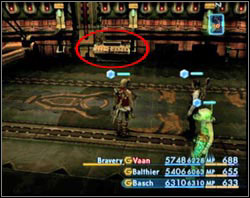
You board the Bahamut in the place marked with "Start". Make your way to the Lift Controls.
Run north from the start point and turn left at the first intersection. You'll get to the ring in the middle. From there just go straight ahead.
As soon as you touch the device Gabranth will appear.

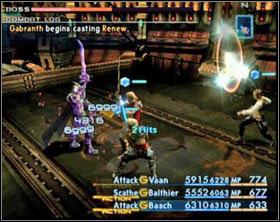
Gabranth
About 69 000 HP
Resistant to Libra
Circle of Judgment
Sentence,
Innocence,
Enrage,
Renew
Gabranth starts the fight with few Circle of Judgment. Later on he uses Innocence which deals damage to everyone. He also knows how to use Enrage thanks to which he becomes stronger and faster.
Somewhere around half of his HP he'll start casting Renew, which means that he has about 35000 HP left... Personally I managed to finish him before he could end casting it.
If you do it be on your guard because when his HP reach the critical level he can pull off long and fast combos.
After you defeat him heal your party members, buff them up and use Lift Controls once again.
Upstairs you'll face Vayne. Larsa will support you in this fight.
Vayne
About 77 000 HP
Resistant to Libra
Lunge,
Kick,
Pummel,
Mach Wave,
Force of Will
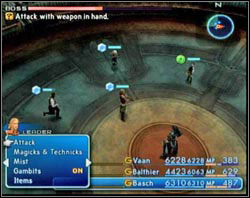
Vayne starts the fight using only Lunge and Kick. Later one he adds Pummel - a strong attack against one opponent.
After he loses about 50% HP he starts using Mach Wave and Force of Will. Both these attacks deals damage to your whole party.
When his HP reach critical level his ability to combine successive hits in a combo raise.
Kill him quickly.
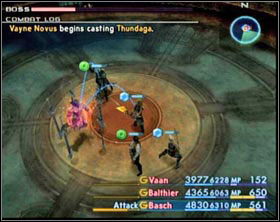
Vayne Novus
About 103 000 HP
Resistant to Libra
Blizzaga, Firaga, Thundaga, Aeroga,
Azure Vortice,
Contempt,
Invidable Will,
Greater Barrier,
Magick Barrier,
Tree of Sephire,
Limit Break
Defeated Vane transforms into this creature. He's lot stronger and swords start floating around him. You may deal with them one by one, just don't use any elemental spells because a single sword may be vulnerable to a particular element but another one absorbs this damage in other words: what weakens one strengthen the other. Personally I recommend setting a gambit "Foe: Highest Max HP -> Attack". Thanks to this your characters will focus on Vayne.
The enemy himself has changed his ways of acting. Now he depends more on magick than on brute force. From new attacks there is e.g. Contempt, which focuses only on Gabranth as I recon. There are also Invidable Will and Tree of Sephire which deals damage to everyone. At the end of the battle Vayne will use Magick Barrier on himself, but it isn't a problem - just use attacks based on physical damage.
This fight unfortunately doesn't end it yet. You'll have yet to face the ultimate form of Vayne - The Undying. Defeat him and this will be the end.
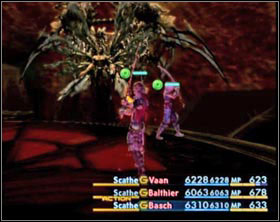
The Undying
About 237 000 HP
Resistant to Libra,
You can't see his HP level
Divine Sword,
Piercing Blizzaga,
Piercing Firaga,
Piercing Holy,
Mega Flare,
Ascension,
Gigaflare Sword,
Tera Flare,
Chain Magick, Enrage,
Faith, Bravery,
Force Barrier, Magick Barrier,
Perfect Defense
In this form Vayne uses really powerful attacks. Mostly he uses ordinary attacks and Divine Sword dealing damage to only one character. His spells starting with "piercing" work just as the normal ones but are stronger. Besides he knows four attacks that hurt your whole party and they are: Mega Flare, Ascension, Gigaflare Sword and Tera Flare.
He also strengthen himself by casting Faith and Bravery (dispel him at once) or by becoming resistant to physical and magical damage by using Force Barrier, Magick Barrier and Perfect Defense. After a certain time he starts using Force Barrier and Magick Barrier by turn so keep you eyes open and use the suitable attack. Later on he'll use Perfect Defense and there's nothing you can do about it - you have to wait it through.
When his HP reach the critical level his power raise dramatically and to be honest the stairs begin right here. Fortunately it's not long before the battle is over. Now you should equip Bubble Belts on every party member and when your companion dies use Arise and not just Raise. It will buy you some time so you could attack your enemy.
This is the last battle so don't go greedy on your items or gils. When you done with him all what is left is to watch the cut-scene.
In his part of Final Fantasy works character development system called License Board - it's a bit similar to the Sphere Grind known from FFX. While this one may give more freedom in choosing the next skill to learn it has small influence on the character development itself. What I mean is that among the licenses you won't find e.g. Strength +4 or Speed +3. Licenses apply only to skills and equipment letting you wear certain armor or use a certain spell. There are also passive skills, but they only rise e.g. chance of blocking with a shield or shorten the time needed to make an action. You buy licenses with License Points (LP) which you get along with experience (EXP) points and the Hunter Points after killing an enemy. You start with an empty board. Every time you buy a license a new licenses appear side by side to the one you just bought. This means that you cannot buy a license from any part of the board - to get somewhere you first got to build a path leading there.
Don't buy licenses on weapons, armor, accessories, technicks and magicks unless you have the thing (or you know that you'll have it soon) - those LP use to buy licenses on passive skills.
And the passive attributes like strength, defense, magick power etc. your characters gain with every level and they also are addend by a certain piece of garment. The maximum value of one factor is 99.
In the game you'll gain enough LP to fully fill the whole License Board of every character, but you won't have access to everything from the beginning. I recommend assigning a certain role to every character, which they'll play till they all master their boards.
I recommend this:
This is my recommendation. Of course you may do as you wish - I do not impose anything.
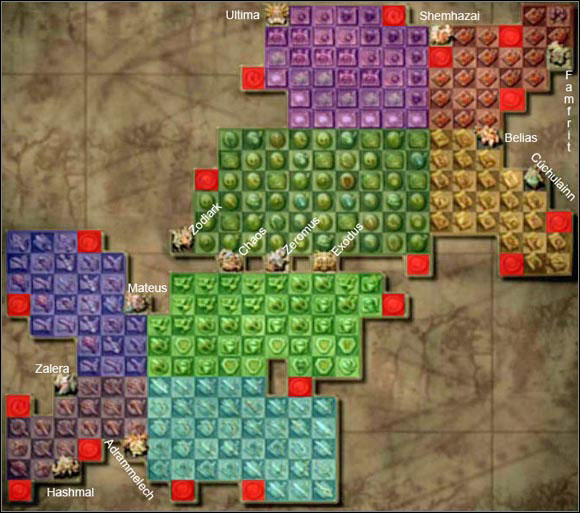
Above you can see the complete License Board.
The upper part:
The lower part:
The red point scattered on the board are quickenings. Each character may have the maximum of three and when she has all three the rest will disappear from the board.
The unpainted and labeled fields are Espers. They appear after you defeat the Esper taking the specific field.
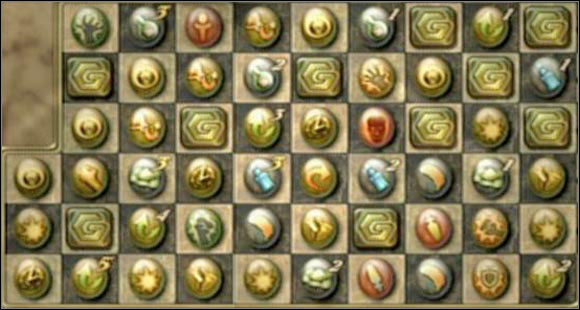

Gambit Slot x10
Adds new slot for gambit (Max of 12)
15-100 LP

Potion Lore x3
Potions restore more HP
20-70 LP

+HP x5
HP of the character rise permanently (from 50 to 500 HP)
30-155 LP

Shield Block x3
Improves the chance of blocking enemy attack (not only with shield)
25-75 LP

Battle Lore x5
Rise the power of ordinary attacks
40-120 LP

Remedy Lore x3
Level 1: Remedy cures also Sleep, Sap, Immobilize, Disable,
Level 2: Remedy cures also Petrify, Confuse, Oil,
Level 3: Remedy cures also Stop, Doom, Disease
20-70 LP

Adrenaline
Greater strength when HP is on critical level
65 LP

Last Stand
Greater defense when HP is on critical level
70 LP

Spellbreaker
Greater magic power when HP is on critical level
65 LP

Magick Lore x5
Increases magic power
25-120 LP

Phoenix Lore x3
Phoenix Down after the resurrection restore more HP
30-90 LP

Ether Lore x3
Ethers restore more MP
20-70 LP

Spellbound
Increases the duration of buffs casted on character
30 LP

Swiftness x3
Shortens the time needed to act by 10%
30-80 LP

Channeling x3
MP needed to cast a spell is decreased by 10%
30-80 LP

Focus
Rise strength when HP of the character is full
70 LP

Serenity
Rise magic power when HP of the character is full
70 LP

Brawler
Rise attack power when you fight unarmed
90 LP

Martyr
Your MP is restored every time you get hurt
30 LP

Inquisitor
You gain MP for dealing physical damage to an enemy
30 LP

Headsman
You gain MP for killing an enemy
30 LP

Warmage
You gain MP for dealing magical damage
30 LP
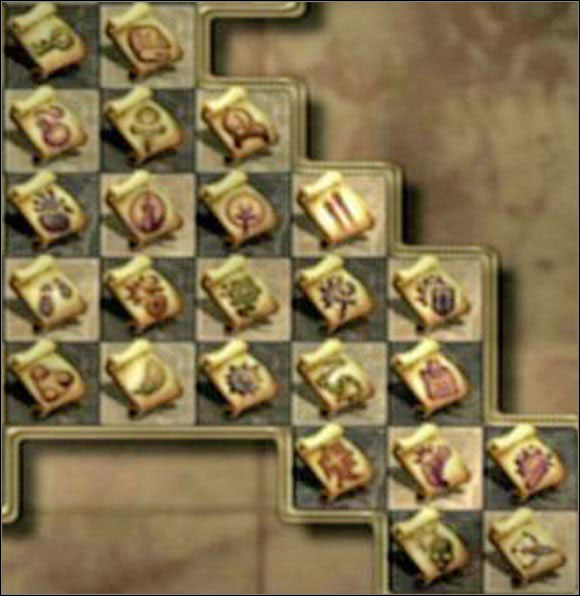

Steal
You steal from one enemy
15 LP

Libra
It displays additional info on enemies and shows the location of mines
20 LP

First Aid
Restores HP of one critically wounded ally
20 LP

Charge
Restores MP. If it misses the MP is reduced to 0
30 LP

Horology
Deals damage based on the time factor to all enemies in range
55 LP

Poach
You steal from one critically wounded enemy (because of that you don't get neither EXP nor LP)
30 LP

Souleater
It takes some HP from the character to inflict damage upon enemy.
35 LP

Infuse
It consumes whole MP to restore ally's HP 10x of it that amount
35 LP

1000 Needles
It deals exactly 1000 HP damage to one enemy
35 LP

Traveler
Deals damage based on the amount of footsteps taken to all enemies in range.
65 LP

Shear
Lowers magic defense of one enemy
35 LP

Charm
Confuses one enemy
30 LP

Addle
Lowers magic power of one enemy
30 LP

Expose
Lowers defense of one enemy
35 LP

Shades of Black
Cast a random black magick spell on enemies
40 LP

Revive
It takes whole HP to resurrect and restore 100% HP of a fallen ally
40 LP

Gill Toss
Use gils to attack all enemies in range
35 LP

Numerology
The more you use this skill in a row the more damage you deal.
40 LP

Stamp
It causes every status change under effect of which is the casting character
40 LP

Sight Unseeing
A special attack that succeeds only when the character is blinded.
40 LP

Achilles
Adds a random element to enemy's weaknesses
40 LP

Wither
Lower one foe's strength
35 LP

Bonecrusher
Take some HP point from the user to inflict death upon enemy
30 LP

Telekinesis
You deal long ranged damage using the short ranged weapons.
80 LP
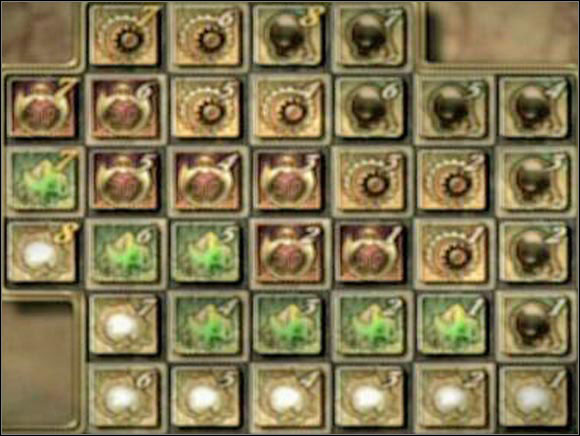

White Magick

Black Magick

Green Magick

Arcane Magick

Time Magick
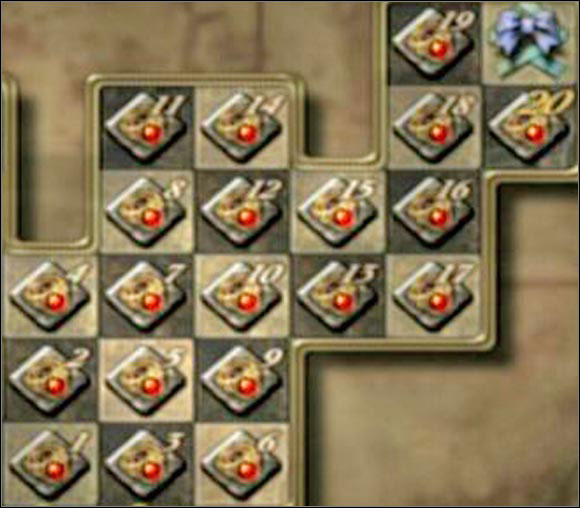

Accessories

Ribbon
It makes you immune to almost every bad status change there is - 150 LP
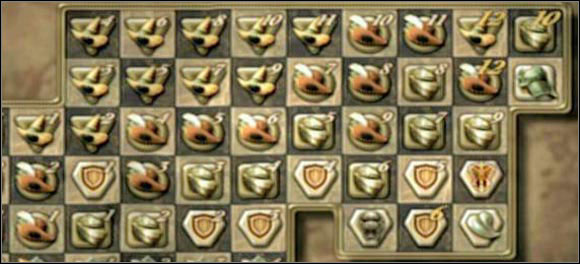

Robes

Light armor

Heavy armor

Shields

Shell Shield
Shield which gives permanent Shell status - 90 LP

Ensanguined Shield
A very good shield, but the character who holds it is permanently under the effect of Sap, Poison and Slow - 90 LP
Zodiac Escutcheon
A very good shield which is totally immune to Thunder - 200 LP

Genji Armor
Genji Shield, Genji Armor, Genji Helm, Genji Gloves - a very good set. You may obtain it only by stealing it from Gilgamesh - 150 LP


Daggers

Danjuro
The strongest dagger, doesn't have any special abilities - 110 LP

Guns

Poles

Whale Whisker
The strongest pole, doesn't have any special abilities - 125 LP

Hand Bomb

Bow Gun

Ninja Swords

Yagyu Darkblade
The strongest ninja sword, doesn't have any special abilities except for the Dark element which is typical to all weapons of it's kind - 80 LP
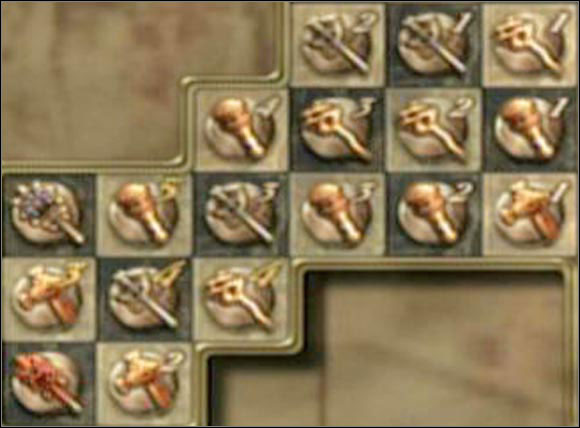

Staves

Staff of the Magi
The strongest staff, doesn't have any special abilities - 100 LP

Rod

Rod of Faith
It isn't as strong nor as magically powerful as the Staff of the Magi. It adds 35 HP, may cause faith on hit - 120 LP

Measures

Maces
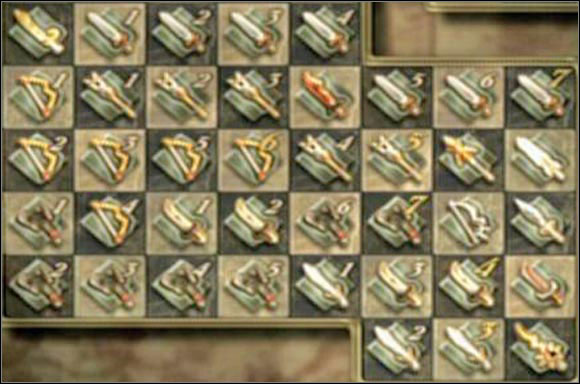

Small Swords
Mythril Sword, Mythril Blade - 5 LP

Swords

Blood Sword
Not particularly strong, may cause Sap on hit - 30 LP

Bows

Sagittarius
The strongest bow, doesn't have any special abilities - 120 LP

Spears

Dragon Whisker
Second spear in mean of strength The strongest dagger, doesn't have any special abilities - 60 LP

Zodiac Spear
The strongest weapon in the whole game. Extremely hard to get it - 235 LP

Axes and Hammers

Katanas

Masamune
The strongest katana, extremely useful especially when used with Genji Gloves - 155 LP

Great Swords

Excalibur
A strong Great Sword. It has and added element of: Holy - 160 LP

Tournesol
The strongest Great Sword, it takes the second place of the strongest weapons in the game - 225 LP
If you ever state that you lack LP point buy six Golden Amulets, equip them on every character, go to Dalmasca Estersand and kill enemies between South Bank Village and Outpost - you kill each enemy with one blow and you gain 2 LP (thanks to the Amulet). You can accumulate great amount of LP in just one hour.
Here you can find a method to level up. Maybe it's not very fast but it's certainly an easy way without the need of you spending lots of hours in front of your TV.
The whole issue is about Negalmuur - one of rare mobs (check "Rare Game" section). It appears in Stilshrine of Miriam and what so cool about him is that he keeps spawning lots and lots of mobs. All you need to do is to create a good loop using gambits so that they could do the whole work for you.
Personally I recommend using this method after reaching Port Balfonheim in the normal game plot. You ought to be also on about 37-40 level (at least).
Preparations
Weapons, Armor and Accessory:
Deathbringer - you can find details it in the "Equipment, magick and technicks" section,
Heavy armor set - it rises your defense and should rise your strength (e.g. Platinum Set),
Thief's Cap & Ninja Gear - you can buy it in Balfonheim (it rises speed),
2x Crystal shield - you can buy them in Archades,
3x Embroidered Tippet - it rises the amount of EXP you gain twice, you can buy it in Old Archades,
3x Golden Amulet - it rises the amount of LP you gain twice, you can buy it in the Mt Bur-Omisace,
Magick and technicks:
Curaga, Charge, Decoy, Haste, Esuna, Raise,
Optional: Bravery - you can buy it in the clan shop after gaining the rank of "Riskbreaker"
Gambits:
All gambits mentioned here can be bought in the Balfonheim gambit shop.
Ally: HP < 50%; Self: MP < 10%; Self: MP < 20%; Foe: HP < 3000; Foe: HP >= 5000
Items & Licenses:
You should have some Phoenix Downs in case.
You surely need 3x Swiftness license, you could also use 3x Channeling and of course you need to know how to use all of the equipment & magick mentioned above.
Configuration
Here you'll find who will bear what and what he should do with it
Party leader:
Equipment:
Heavy set, Deathbringer, Crystal shield, Embroidered Tippet
Gambits:
1
Ally: any
Raise
2
Ally: any
Esuna
3
Ally: HP < 50%
Curaga
4
Ally: [Name of the third member]
Haste
5
Ally: [Name of the third member]
Decoy
6
Self: MP < 20%
Charge
7
Foe: HP < 3000
Attack
8
Self
Haste
Second Party Member:
Equipment:
Embroidered Tippet, rest is up to you.
Gambits:
1
Self
Decoy
2
Ally: any
Raise
3
Ally: any
Esuna
4
Ally: HP < 50%
Curaga
5
Self: MP < 20%
Charge
6
Ally: [Name of the third member]
Haste
7
Self
Haste
8
Foe: HP >= 5000
Haste
9
Foe: HP < 3000
Attack
Optional
Ally: [Name of the party leader, but DO NOT insert here "party leader" gambit!]
Bravery
Third Party Member:
Equipment:
Unarmed, Crystal shield, Thief's Cap, Ninja Gear, Embroidered Tippet
Gambits:
1
Ally: party leader
Raise
2
Ally: party leader
Phoenix Down
3
Self: MP < 10% (This character must have at least 220 MP!)
Charge
Info
Neglamuur's attacks:
The greatest problem is to find him. He appears on the "T"-shaped intersection in the zone with Sword of Judgment. Once I managed to find it after I have killed all of the mobs inside this zone, next I have left the zone and reentered it and there it was, but usually you have to do the full circle around the temple, visit all of the rooms with those rotational statues and kill everything that stands on your way.
Except for this if you already have the "Stone of Condemner" and you'll be willing to use the Way Stone you'll have to choose the option "Touch the stone" twice (because if you chose the "use the stone of Condemner" option you'll be warped to a different part of the temple).
Ghasts:
How does it work
Mostly it's about your heroes killing Ghasts without your help. To make it happen you need the gambit: Foe: HP < 3000 - it's needed because Ghasts have less HP than 3000. Leader with Deathbringer deals with them with single blow and if not he still has the second party member to help him. The third party member - as you probably noticed - virtually doesn't do a thing, but it's not true. He does the most important thing of all.
Though I have said that their attacks aren't dangerous - you will surely die and I mean that you will die plenty of times. You mustn't forget that Neglamuur uses doom. Hopefully it uses it only as many times as many members have the lure status (but it doesn't mean that he won't cast it when no one in the party has the lure status). Out of your heroes the second and the third member have the lure status which keeps party leader out of reach of Neglamuur's doom. But unfortunately party leader may also die - rarely but he may. And that's when the third member comes into picture. He has to revive the party leader before the screen demanding the change of party leader appears (which would break the loop). And that is precisely why the third hasn't got any other gambits - you don't want him to be in a middle of other activity when your leader dies. And besides you don't need his strength because the other two party members can handle the Ghasts pretty well themselves.
And about the rest of negative statuses (Disable, Confuse and petrify) - Esuna will take care about them.
And no, there's no mistake - the second party member really cast haste on Neglamuur - it makes his actions faster which makes you level up faster. It would be good if you change the battle speed to maximum just to make them fight faster (also you would want to turn of the vibrations of your game pad).
And this would be all of it. I wish I could say that you can leave the game in peace and let the gambits do the rest, but unfortunately I can't. Sometimes - if you really have bad luck - your party leader may die, and the others may not be able to revive him in time. So you should check from time to time whether they still fighting or not. I personally left it on for 16 hours before it the party leader died, and later on he died after 3 hours already, so as you can see there's no rule to it. All I can say to you now is good luck.
Quickenings are special attacks, based on mana, which resemble a bit Limit Breaks or Overdrives known from former parts.
There are three levels of quickenings, the higher the level the stronger it is. In addition each level gives you another MP bar. You begin the game with one blue bar. When you get the first quickening the bar take orange color (when MP is full), when you get the second quickening you also get another orange bar which has the same capacity as the first one and after getting the third quickening you get the third MP bar.
List of quickenings of each character:
Vaan
Balthier
Fran
1)
Red Spiral
Fires of War
Feral Strike
2)
White Whorl
Tides of Fate
Whip Kick
3)
Pyroclasm
Element of Treachery
Shatterheart
Bash
Ashe
Penelo
1)
Fulminating Darkness
Northswain's Glow
Intercession
2)
Ruin Impendent
Heaven's Wrath
Evanescence
3)
Flame Purge
Maelstrom's Bolt
Resplendence
One such bar is called a Mist Charge. You need one Mist Charge to perform a level one quickening, two to perform a level two quickening and three to perform a level three quickening (Mist Charges are also used to summon Espers)
Quickenings can be combined in combinations. In the lower right corner, when one hero performs his quickening you can see names of everyone in your active party that are able to use quickenings. To make one character to perform a quickening just press the button that is shown on the left side of his/her name. If none of the characters is active press R2 button till one becomes active and then pick it.
These orange circles symbolize the quickening which will be performed after pressing the correct button. If there's nothing there and the character is still active press the button assigned to him/her twice quickly - in this way you'll fill empty Mist Charges of that character.
In addition combining quickenings in proper way has a side effect: concurrences. When quickenings deal damage only to a single character concurrences deal damage him and to everyone near him.
These re all the concurrences you can create:
The orange number in bold signify the level of the quickening (1-3) and the number earlier shows how many times quickening on that level must be performed. For example: to make the concurrence "Torrent" you have to perform a combo containing at least two quickenings on first level and three on second level. Each concurrence is different in the respect to appearance and strength but no matter how does it look like or how is it called - the damage it deals IS NOT elemental!
The power of concurrences, when looking at the list, rise while going down. I mean that "Inferno" is the weakest and the "Black Hole" is the strongest concurrence. Along with it's power rise its priority, it means that you perform a combo consisting for example of two quickenings on first level, four on second level and six on third level - from these quickenings three concurrences could arise: "Torrent", "Whiteout" and "Ark Blast", but the combo will be finished in fact by the "Ark Blast", because it's the strongest and has the highest priority of that mentioned three (it's lowest on the list).
A very important rule is: DO NOT TRY MAKING COCURRANCES BY FORCE. If there is an active character pick it immediately and don't waste your time mixing the list, because the time that's left form one round is carried to the next. The less time you waste the greater combo you will create and the higher probability that the concurrence that comes out of that will be one of the strong ones.
And now calm yourself down - it only sounds so terrible, but in fact this matter isn't half as hard as it sounds. You just need to get the hang of it.
This section contains some info about the things you need to walk over the Ivalice. Some are pretty obvious, other maybe not so much and the rest can be found in the manual enclosed to the game ;)
Save crystals:
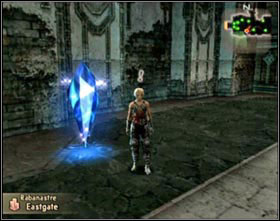 Ordinary crystal
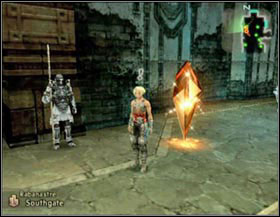 Gate crystal
In the game you'll come across two kind of save crystals: ordinary and the gate ones. Both give the same: heal whole team when touched and give the possibility of saving your progress, but the gate crystal lets you also teleport to a different gate crystal you have already touched. In order to do that you also need to have a Teleport Stone - thanks to them the teleportation is possible.
Actions:
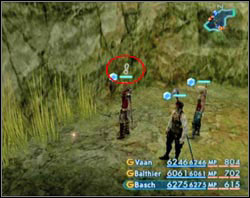
When you get close to an object, person, lever etc, with which something can be done, over head of your character an exclamation will appear. Which means that no matter how much you want it, but you can't talk to a person if that mark didn't appear.
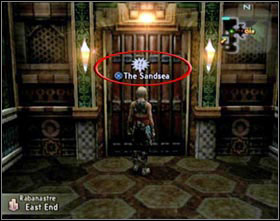
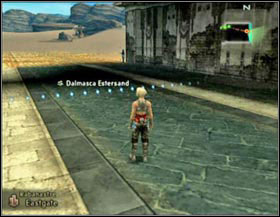
When you close in to that object the exclamation will turn into a cloud with two exclamations inside and underneath X and the name of the object appear (on screen 1 it's the entrance to the Sandsea pub in Rabanastre). While things, especially the smaller ones, may be hard to spot, you can easily recognize with which people you can talk. Such people have clouds with smiling faces floating above them [screen 2]
Passages between areas:
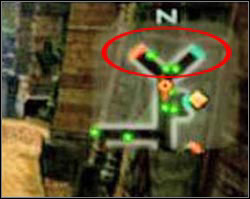
The passages on mini map are marked are marked in two ways. Open passages are marked with greenish lines and the closed one are marked with red lines.
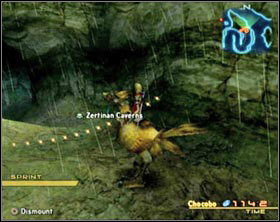
The passage to the next area is marked by glittering dots floating in air. If these dots are blue it means that the passage is open and if they're red it means that the massage is closed.
Chocobo:
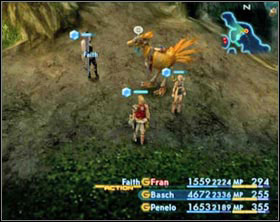

Chocobo, big, two legged birds similar to our ostriches, is a very popular way of traveling. You can rent a chocobo virtually in every city or village. You will also come across chocobos which will let you ride them for one Gyshal Green [screen 1]
In this FF part the time you can spend no chocobo's back is limited - you can see it in the lower right corner. And in the lower left corner you can see the maximum of three gyshal greens. One gyshal lets you ride in amazing speed, unfortunately its effect worn out quick and during one trip you can sprint as many times as is the amount of these Gyshal greens in lower left corner. Unfortunately you can't increase their amount.
In addiction to fast travelling the chocobo enables you to use passages to hidden areas to where it's impossible to get without a chocobo. Such path can be recognised by chocobo tracks just in front of it. Just follow these footsteps while riding the chocobo and you'll find the path [screen2].
Traps:
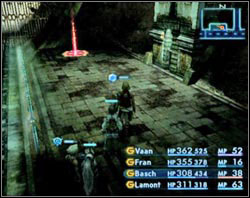
Traveling the Ivalice, starting with Lhusu Mines, you'll come across lot of mines. From those dealing small damage, trough those causing one status change to those causing a whole lot of changes.
To avoid such traps cast float on your active party and safely flow over them. There are also accessories that let you walk freely past the traps.
Things you can buy in the bazaar section in shops are made of things you sold. Just sell proper items and in the bazaar section new sets will appear.
In the tables to follow I put things by their prices. If you can afford certain thing you can probably create it. The exceptions may be items that are alone in a set e.g. arrows - they will be cheaper than weaker arrows that are in a set with a bow, but you won't be able to create them yet.
In the Bazaar section often appear new items despite that you didn't sell anything. They're called "Forgotten Grimoire" and differ from one another only in the price. In fact under these names monographs are hidden - items that increase the chance that certain mobs will drop more valuable things. Each monograph is related to different class. Here they are:
Name
Is related to:
How to unlock
Price
Hunter's Monograph
Beast and avions
Appears in shop after you have defeated Thextera
18000 gil
Knight's Monograph
Giants and bugs
Talk with weapon shop owner over 30 times
19000 gil
Warmage's Monograph
Flans and undead
Read the Notice board 20 times
20000 gil
Mage's Monograph
Demons
Talk with magick shop owner over 25 times
21000 gil
Dragoon's Monograph
Dragons and plants
Read the Notice board 400 times
22000 gil
Scholar's Monograph
Constructs
Talk with armor shop owner over 15 times
22000 gil
Sage's Monograph
Elements
Talk with any shop owner over 100 times
25000 gil
There's also one more item which changes the items dropped by enemies. It's Canopic Jar. Thanks to it Arcana may drop from every mob. To be able to buy it you got to sell Phobos Glaze (prize for Gil Snapper (rank III)), Horakhty's Flame (prize for Orthros (rank V)) and Deimos Clay (prize for Trickster (rank V)). It will then appear in bazaar section under the name of "Morbid Urn"
Name
What's this?
Made of?
Price
Life Crystal
High Arcana
Arcana x10,
Feystone,
Soul of Thamasa
9999 gil
Jewel of the Serpent
Serpentarius
Serpent Eye x2,
Snake Skin x4,
High Arcana
19998 gil
Jewel of Creation
Empyreal Soul
High Arcana,
Soul Powder,
Wargod's Band x2
29997 gil
Matchless Steel
Gemsteel
Damascus Steel x2,
Hell-Gate's Flame x2,
Scarletite
29997 gil
Name
What's this?
Made of?
Price
Potion Pack
Potion x2
Cactus Fruit x2
70 gil
Magick Shard
Holy Mote
Diakon Halcyon,
Glass Jewel x8,
Sky Jewel x8
99 gil
Antidote Set
Antidote x3
Drab Wool x2
100 gil
Eye Drop Set
Eye Drops x3
Demon Eyeball x2
100 gil
Sipping Wine
Bacchus' Wine x3
Tyrant Hide x2
240 gil
Chronos Tear Pack
Chronos Tear x10
Eye of the Hawk
333 gil
Tail of the Phoenix
Phoenix Down x2
Small Feather x3
400 gil
First-aid Kit
Phoenix Down x2,
Potion x2
Large Feather x3
450 gil
Magick Shard
Scathe Mote
Book of Orgain x8,
Book of Orgain-Cent x8,
Book of Orgain-Mille x8
499 gil
Smelling Salts
Hi-Potion x4,
Smelling Salts x2
Malboro Vine x4
540 gil
Tinctures & Tonics
Potion x5,
Handkerchief x3,
Gold Needle x3
Succulent Fruit x4
700 gil
Burning Fangs
Red Fang x5
Pointed Horn x2
980 gil
Vaccine Pack
Vaccine x10
Demon's Sight
999 gil
Memories of Yore
Pebble x99
Quality Stone x5
999 gil
Hi-Potion Pack
Hi-potion x10
Rainbow Egg
1111 gil
Eye Openers
Phoenix down x5,
Alarm Clock x5
Chocobo Feather x4
1280 gil
Magick Shards
Water Mote x5
Festering Flesh x4
1480 gil
Survival Set
Antidote x12,
Eye Drops x12,
Echo Herbs x12
Malboro Fruit x4
1500 gil
Phials & Philtres
Vaccine x8,
Smelling Salts x16
Malboro Flower x3
1980 gil
Fire-bird's Whisper
Phoenix Down x10
Jack-o'-Lantern
2222 gil
Triage Kit
Phoenix Down x12,
Hi-Potion x3
Giant Feather x3
2980 gil
Flask of Oily Liquid
Ether
Caramel x3,
Unpurified Ether x2
4000 gil
X-Potion Pack
X-Potion x10
Behemoth Steak
4444 gil
Soul of the Fire-bird
Phoenix Down x25
Bundle of Feathers x3
5980 gil
Potion Crate
Potion x30,
Hi-Potion x20,
X-potion x10
Screamroot x3
7480 gil
Phoenix Flight
Phoenix Down x50
Windslicer Pinion x5
8750 gil
Flask of Viscous Liquid
Hi-Ether
Foul Liquid x2,
Slime Oil,
Unpurified Ether x2
12000 gil
Mysterious Substance
Dark Matter
Bat Wing,
Grimoire Aidhed x3,
Grimoire Togail x3
14999 gil
Saint's Draught
Elixir
Ambrosia x3,
Demon Drink x3,
High Arcana
36000 gil
Esoteric Draught
Megalixir
High Arcana x2,
Onion x3,
Rat Tail x3
108000 gil
Name
What's this?
Made of?
Price
Iron-forged Blade
Iron Sword
/ sword
Earth Stone x3,
Foul Flesh x2,
Iron Scraps x3
1080 gil
Crimson Blade
Blood Sword
/ sword
Dark Stone x5,
Glass Jewel x2,
Solid Stone x2
4500 gil
Burning Blade
Flametongue
/ sword
Fire Stone x6,
Lumber x2,
Malboro Vine x2
4680 gil
War Axe
Francisca
/ axe
Malboro Fruit x4,
Pointed Horn x2,
Wind Magicite x6
10350 gil
Warped Blade
Diamond Sword
/ sword
Bundle of Feathers x6,
Fire Magicite x6,
Maggoty Flesh x4
11250 gil
Double-bladed Knife
Zwill Crossblade
/ dagger
Malboro Flower x7,
Wind Crystal x9,
Windslicer Pinion x5
13800 gil
The Leering Blade
Deathbringer
/ sword
Dark Crystal x10,
Demon Tail x7,
Solid Horn x4
14800 gil
Golden Battle Axe
Golden Axe
/ axe
Broken Greataxe x2,
Electrum x2,
Mardu Halcyon
16200 gil
Darksteel Blade
Stoneblade
/ sword
Chimera Head x2,
Orichalcum x2,
Taurus Gem x3
17800 gil
Well-forged Blade
Durandal
/ sword
Emperor Scale x2,
Leshach Halcyon,
Lifewick x3
21600 gil
The Scorpion
Scorpion Tail
/ hammer
Charged Gizzard x3,
Scorpio Gem x4,
Wyrm Bone x3
60000 gil
Name
What's this?
Made of?
Price
Light Spear
Javelin
/ spear
Foul Flesh x2,
Horn x2,
Wind Stone x3
1260 gil
Wooden Pole
Cypress Pole
/ pole
Bone Fragment x5,
Earth Stone x4,
Succulent Fruit x3
1800 gil
Iron-forged Pole
Iron Pole
/ pole
Demon Eyeball x3,
Fire Magicite x4,
Sturdy Bone x5
4780 gil
Mystic Staff
Cloud Staff
/ staff
Demon Feather x6,
Quality Lumber x4,
Storm Crystal x7
7200 gil
Jag-tooth Ninja Sword
Kagenui
/ ninja sword
Dark Magicite x5,
Festering Flesh x4,
Giant Feather x5
9000 gil
Forked Spear
Trident
/ spear
Maggoty Flesh x5,
Pointed Horn x4,
Wind Magicite x6
11250 gil
Elegant Pole
Ivory Pole
/ pole
Blood-darkened Bone x8,
Demon Feather x6,
Wind Crystal x7
12150 gil
Samurai's Katana
Ame-no-Murakumo
/ katana
Iron Ore x5,
Screamroot x7,
Water Crystal x9
13800 gil
Attenuated Greatsword
Save the Queen
/ great sword
Holy Crystal x10,
Quality Stone x4,
Sky Jewel x7
14000 gil
Serpent Blade
Orochi
/ ninja sword
Cancer Gem x3,
Coeurl Whisker x2,
Sickle-Blade x2
15200 gil
Engraved Spear
Gungnir
/ spear
Broken Spear x2,
Ketu Board x2,
Mystletainn x2
15300 gil
Ultimate Blade
Ultima Blade
/ great sword
Adamantite x2,
Death Powder x2,
Gnoma Halcyon
22800 gil
Whisker of the Beast
Whale Whisker
/ pole
Aquarius Gem x4,
Corpse Fly x3,
Mythril x3
60000 gil
Master-crafted Blade
Masamune
/ katana
Gemsteel x2,
Mallet x2,
Orichalcum x3
350000 gil
The Sunflower
Tournesol
/ great sword
Empyreal Soul x3,
Gemsteel x3,
Serpentarius x3
600000 gil
Dragon Crest
Wyrmhero Blade
/ great sword
Lu Shang's Badge,
Godslayer's Badge,
Omega Badge
65535 gil
Name
What's this?
Made of?
Price
Bow & Bodkin
Shortbow / bow,
Parallel Arrows / arrows
Bat Fang,
Dark Stone x2,
Rat Pelt x2
600 gil
Marksman's Delight
Capella / gun,
Silent Shot / bullets
Dark Stone x3,
Fish Scale x2,
Green Liquid
1680 gil
Rain of Tears
Vega / gun,
Aqua Shot / bullets
Green Liquid x3,
Water Stone x5,
Yensa Scale x2
2980 gil
Arrows Alight
Longbow / bow,
Fiery Arrows / arrows
Crooked Fang x2,
Fire Stone x4
3800 gil
Hollow-shaft Arrows
Loxley Bow / bow,
Bamboo Arrows / arrows
Bat Fang x5,
Water Magicite x3,
Yellow Liquid
6280 gil
Ranger's Crossbow
Crossbow / bowgun,
Long Bolts / bolts
Crooked Fang x4,
Ice Stone,
Yellow Liquid x2
6480 gil
Water-drop Munitions
Water Bombs / bombs
Book of Orgain x3,
Putrid Liquid x3,
Water Crystal x10
7800 gil
Mudslinger
Aldebaran / gun,
Mud Shot / bullets
Earth Crystal x3,
Ichthon Scale x4,
Silver Liquid x3
9080 gil
Noisome Incendiaries
Fumarole / hand bombs,
Poison Bombs / bombs
Bomb Shell,
Fire Crystal x3
9800 gil
Huntman's Crossbow
Recurve Crossbow / bowgun,
Stone Bolts / bolts
Bundle of Needles,
Festering Flesh x2,
Ice Magicite x5
9980 gil
Oil-Soaked Incendiaries
Tumulus / hand bombs,
Oil Bombs / bombs
Bomb Ashes x3,
Book of Orgain x2,
Fire Crystal x3
10625 gil
Blindfight Quarrels
Hunting Crossbow / bowgun,
Black Bolts / bolts
Dark Crystal x3,
Silver Liquid x3,
Spiral Incisor x3
11220 gil
Devastating Incendiaries
Castellanos / bombs
Aries Gem x3,
Bomb Fragment x3,
Frog Oil x2
12000 gil
Arrows of the Moon Goddess
Artemis Arrows / arrows
Dorsal Fin x2,
Gemini Gem x3,
Vampyr Fang x2
15000 gil
Piercing Bolts
Grand Bolts / bolts
Capricorn Gem x3,
Ring Wyrm Liver x2,
Wrath of the Gods x2
15000 gil
Stone Shot
Stone Shot / bullets
Libra Gem x3,
Mirror Scale x2,
Tyrant Bone x2
15000 gil
Armor-piercing Shot
Spica / gun,
Windslicer Shot / bullets
Ring Wyrm Scale x4,
Silver Liquid x5,
Wind Crystal x7
15200 gil
Bow of the Moon Goddess
Artemis Bow / bow
Great Serpent's Fang x2,
Moondust x2,
Sylphi Halcyon
15800 gil
Permafrost Bow & Quiver
Perseus Bow / bow,
Icecloud Arrows / arrows
Antarctic Wind x2,
Ice Crystal x7,
Spiral Incisor x4
17200 gil
Scout's Crossbow
Penetrator Crossbow / bowgun,
Time Bolts / bolts
Ancient Bone x3,
Holy Crystal x9,
Wyvern Fang x4
17800 gil
Befuddling Incendiaries
Caldera / hand bombs,
Chaos Bombs / bombs
Bomb Shell x4,
Book of Orgain-Cent x3,
Fire Crystal x7
17800 gil
Late-model Rifle
Arcturus / gun
Salamand Halcyon,
Wyvern Wing x2,
Yensa Fin x2
19800 gil
Silver Bow
Sagittarius / bow
Beastlord Horn x3,
Moon Ring x3,
Sagittarius Gem x4
60000 gil
Name
What's this?
Made of?
Price
Unassuming Surcoat
Chromed Leathers / light armor
Earth Stone,
Wolf Pelt x2
180 gil
Gilt Shield
Escutcheon / shield
Fire Stone,
Molting
270 gil
Assorted Leathers
Leather Headgear / light armor
Leather Breastplate / light armor
Dark Stone x2,
Tanned Hide,
Wolf Pelt x2
680 gil
Traveler's Garb
Feathered Cap / robes
Traveler's Vestment / robes
Braid Wool x2,
Tanned Hide 2,
Water Stone x5
3280 gil
Matching Reds
Red Cap / light armor
Brigandine / light armor
Coeurl Pelt x3,
Dark Magicite x3,
Quality Hide x2
4280 gil
Monk's Garb
Headband / light armor
Jujitsu Gi / light armor
Coeurl Pelt x4,
Ice Magicite x4,
Tyrant Hide x2
5480 gil
Alluring Finery
Lamia's Robes / robes
Enchanter's Habit / robes
Fine Wool x3,
Ice Magicite x4,
Tyrant Hide
5480 gil
Golden Garb
Golden Helm / heavy armor
Golden Armor / heavy armor
Golden Shield / shield
Dark Magicite x3,
Iron Carapace x3,
Tanned Hide x2
6780 gil
Ninja Garb
Black Cowl / robes
Black Garb / robes
Fine Wool x4,
Fire Magicite x5,
Tanned Tyrant Hide x2
8330 gil
Burnished Protectives
Burgonet / heavy armor
Shielded Armor / heavy armor
Ice Shield / shield
Fire Stone x6,
Quality Hide x2,
Wyrm Carapace x2
8400 gil
Forbidding Shield
Demon Shield / shield
Aged Turtle Shell x2,
Destrier Barding x8,
Leamonde Halcyon
9800 gil
Light & Sturdy Garb
Adamant Hat / light armor
Adamant Vest / light armor
Coeurl Pelt x6,
Storm Magicite x5,
Tanned Tyrant Hide x2
9800 gil
Brilliant Shield
Venetian Shield / shield
Ancient Turtle Shell x2,
Ring Wyrm Liver x2,
Undin Halcyon
12420 gil
Magepower Helm
Magepower Shishak / heavy armor
Charger Barding x5,
Chimera Head x2,
Feystone
12800 gil
Emboldening Arms
Chakra Band / light armor
Power Vest / light armor
Fire Crystal x3,
Quality Pelt x6,
Tanned Giantskin x4
13780 gil
Sturdy Battle Gear
Maximillian / heavy armor
Charger Barding x4,
Pisces Gem x3,
Split Armor x2
14800 gil
Gigas Gear
Gigas Hat / light armor
Gigas Chestplate / light armor
Dark Crystal x7,
Prime Pelt x8,
Prime Tanned Hide x7
17800 gil
Platinum Gear
Platinum Helm / heavy armor
Platinum Armor / heavy armor
Platinum Shield / shield
Insect Husk x2,
Storm Magicite x6,
Tanned Giantskin x5
19120 gil
Black Vestments
Black Mask / robes
Black Robes / robes
Blood Wool x9,
Dark Crystal x8,
Prime Tanned Hide x7
22800 gil
White Vestments
White Mask / robes
White Robes / robes
Blood Wool x9,
Beastlord Hide x7,
Holy Crystal x8
22800 gil
Nature's Armory
Crown of Laurels / light armor
Rubber Suit / light armor
Fire Crystal x8,
Forbidden Flesh x7,
Prime Pelt x9
24650 gil
Name
What's this?
Made of?
Price
Feathered Boots
Winged Boots
Arctic Wind,
Broken Sword
450 gil
Ninja Footgear
Gillie Boots
Slaven Harness x2
450 gil
Shoes of the Dead
Quasimodo Boots
Destrier Mane,
Zombie Powder
450 gil
Back Harness
Battle Harness
Throat Wolf Blood
800 gil
Gilt Phylactery
Golden Amulet
Tattered Garment
3150 gil
Wing Cord
Pheasant Netsuke
Stardust x2
3600 gil
Large Gloves
Blazer Gloves
Bent Staff x3
4500 gil
Blush of Light
Firefly
Magick Lamp,
Snowfly,
Tomato Stalk x2
4500 gil
Brawler's Fetish
Amber Armlet
Gimble Stalk x2
5940 gil
Shell-worked Collar
Turtleshell Choker
Bomb Shell x2,
Four-leaf Clover x2
8370 gil
Exquisite Ring
Opal Ring
Frogspawn x2
14400 gil
Cursed Necklace
Nihopalaoa
Blood-stained Necklace x3,
Death's-Head x2,
Leo Gem x3
15000 gil
Chain-link Belt
Bubble Belt
Adamantite,
Battlewyrm Carapace x2
17820 gil
Wind Walkers
Hermes Sandals
Arcana x15,
Gysahl Greens x33
18000 gil
Comfy Headgear
Cat-ear Hood
Einherjarium x2,
Virgo Gem x7,
White Incense x2
30000 gil
I put here only the location and moment in game when the item/technick appears, but it doesn't mean that you won't be able to buy these things later on somewhere else. You'll also find info about the place where you can get the item except for shop.
Standard, one handed swords. Pretty strong with reasonable strength.
Name
Passive and active skills
You can get it in / from the moment
Price (gil)
Mythril Sword
Attack: +13
Vaan's initial weapon
-
Mythril Blade
Attack: +22
Bash'es initial weapon
-
Broadsword
Attack: +15
Rabanastre / from the beginning
400
Longsword
Attack: +19
Barheim Passage
700
Iron Sword
Attack: +24
Rabanastre / after Barheim Passage
1200
Zwill Blade
Attack: +29
Bhujerba / after Lhusu Mines
1900
Ancient Sword
Attack: +35,
may cause petrify
Rabanastre / Part II
2400
Blood Sword
Attack: +41,
may cause Sap
Rabanastre / Part II,
Bazaar - Crimson Blade
5000
Lohengrin
Attack: +47
Jahra
4500
Flametongue
Attack: +53,
Fire element
Jahra / after Henne Mines
5200
Demonsbane
Attack: 59
Rabanastre / after Mt Bur-Omisace
Rare treasure in Tomb of Raithwall
6000
Icebrand
Attack: +65,
ice element
Rabanastre / after Mt. Bur - Omisace,
Prize for Ring Wyrm,
Rare drop from Zombie Warriors in Stilshrien of Miriam
7000
Platinum Sword
Attack: +70
Phon Coast
9000
Bastard Sword
Attack: +75
Archades
11000
Diamond Sword
Attack: +80
Balfonheim
12500
Runeblade
Attack: +85
Balfonheim / after Giruvegan
14500
Deathbringer
Attack: +90,
may cause Death
Balfonheim / Epilogue
Steal z Rare Game No 55 - Ithuno
16000
Stoneblade
Attack: +95
Bazaar - Darksteel Blade
17800
Durandal
Attack: +99
Bazaar - Well-forged Blade
21600
They aren't as strong as swords, but they very fast - they're the fastest of all weapons in the game. Also most of them give additional skills. One handed weapons.
Name
Passive and active skills
You can get it in / from the moment
Price (gil)
Dagger
Attack: +14
Rabanastre / from the beginning
200
Mage Masher
Attack: +19,
may cause Silence
Barheim Passage - Burrough
700
Assasin's Dagger
Attack: +25,
may cause Death
Rabanastre / after Barheim Passage
1400
Chopper
Attack: +31,
may cause Sap
Rabanastre / after Dreadnought Leviathan
2200
Main Gauche
Attack: 38
Rabanastre / Part II
3500
Gladius
Attack: +45,
Wind element
Jahra
4800
Avenger
Attack: +52,
may cause berserk
Mt Bur-Omisace / After the fight with Mateus
6000
Orichalcum Dirk
Attack: +59,
may cause Slow
Phon Coast
8500
Platinum Dagger
Attack: +66,
may cause Immobilize
Archdes,
You get it for finding Shurry the Cockatrice.
11500
Zwill Crossblade
Attack: +73,
Wind element
Port at Balfonheim / Epilogue,
Rare drop from Vampyres in Lhusu Mines II
15000
Danjuro
Attack: +80
Drop from Rare Game No. 65 - Larva Eater
-
Bows:
Long ranged weapon. The bows themselves doesn't have any special abilities - arrows add them. Two handed weapon.
Name
Passive and active skills
You can get it in / from the moment
Price (gil)
Shortbow
Attack: +17
Barheim Passage - Burrogh,
Fran's initial weapon
500
Silver Bow
Attack: +22
Rabanastre / after Barheim Passage
1000
Aevis Killer
Attack: +27
Bhujerba
1500
Killer Bow
Attack: +33
Rabanastre / after Dreadnought Leviathan,
2000
Longbow
Attack: +39
Dyce na Nam-Yensa / in front of the entrance to Tomb of Raithwall,
Prize for Wyvern Lord (rank II),
Bazaar - Arrows Alight
3000
Elfin Bow
Attack: +45
Rabanastre / Part II
4200
Loxley Bow
Attack: +51
Jahra / after leaving Henne Mines
5200
Giant Stonebow
Attack: +57
Mt Bur-Omisace / After the fight with Mateus
6000
Burning Bow
Attack: +63
Mosphoran Highwaste
7500
Traitor's Bow
Attack: +69
Phon Coast,
Drops from Pupmkin Star in Feywood
10000
Yoichi Bow
Attack: +75
Balfonheim Port / Part III,
Prize for White Mousse (rank V),
Quest "Lost sheeps...", for helping Chit
12500
Perseus Bow
Attack: +81
Balfonheim Port / after Giruvegan
Bazaar - Permafrost Bow & Quiver
14500
Artemis Bow
Attack: +87
Bazaar - Bow of the Moon Goddess
15800
Sagittarius
Attack: +93
Bazaar - Silver Bow
60000
Arrows:
Name
Passive and active skills
You can get it in / from the moment
Price (gil)
Onion Arrows
Attack: +1
Fran come with Fran
100
Parallel Arrows
Attack: +2
Bazaar - Bow & Bodkin
600
Fiery Arrows
Attack: +1,
Fire element
Bazaar - Arrows Alight
3800
Bamboo Arrows
Attack: +2,
May cause Poison
Bazaar - Hollow-shaft Arrows
6280
Lightning Arrows
Attack: +2,
Thunder element
Prize for Vorpal Bunny (rank III)
-
Assassin's Arrows
Attack: +3,
May cause Death
Prize for Fafnira (rank VII)
-
Icecloud Arrows
Attack: +3,
Ice element
Bazaar - Permafrost Bow & Quiver
17200
Artemis Arrows
Attack: +5,
Earth element
Bazaar - Arrows of the Moon Goddess
15000
Guns:
Don't be fooled with low attack factor. Well it's low but it ignores enemy's defense and combined with berserk and proper ammunition can work miracles. Two handed weapon.
Name
Passive and active skills
You can get it in / from the moment
Price (gil)
Altair
Attack: +6
Rabanastre / after Barheim Passage,
Balthier's initial weapon
500
Capella
Attack: +10
Rabanastre / after Barheim Passage
1400
Vega
Attack: +14
Rabanastre / after Dreadnought Leviathan,
Rare drop from Axebeak in Nam-Yensa,
Bazaar - Rain of Tears
2400
Sirius
Attack: +18
Rabanastre / Part II
Rare steal from Wooly Gator in Giza Plains during the rainy season.
4000
Betelgeuse
Attack: +22
Jahra / after Henne Mines
5400
Ras Algethi
Attack: +26
Rabanastre / After the fight with Mateus
7000
Aldebaran
Attack: +30
Phon Coast,
Bazaar - Mudslinger
10000
Spica
Attack: +34
Balfonheim / after Giruvegan
Bazaar - Armor-piercing Shot
13000
Antares
Attack: +39
Balfonheim / Epilogue
16000
Arcturus
Attack: +44
Bazaar - Late-model Rifle
19800
Fomalhaut
Attack: +50
You can find it on Cerobi Steppe. Equip Diamond Armlet and run ther north from the save crystal. After you collect every treasure here run south through the area with crystal and run back to the north area - new treasure will appear.
-
Bullets:
Name
Passive and active skills
You can get it in / from the moment
Price (gil)
Onion Shots
Attack: +1
Come with Balthier
100
Silent Shot
Attack: +1,
May cause Silence
Bazaar - Marksman's Delight
1680
Aqua Shot
Attack: +3,
Water element
Bazaar - Rain of Tears
2980
Wyrmfire Shot
Attack: +3,
Fire element
You get it after finding one of the lost cactoid in "Backdoor" / After Tomb of Raithwall
Mud Shot
Attack: +2,
May cause Blind,
Earth element
Bazaar - Mudslinger
9080
Windslicer Shot
Attack: +4,
Wind element
Bazaar - Armor-piercing Shot
15200
Dark Shot
Attack: +4,
Dark element
Prize for Piscodaemon (rank V)
-
Stone Shot
Attack: +3,
May cause Petrify
Bazaar - Stone Shot
15000
Despite the large factor of attack these weapons are very unreliable, because the damage they inflict is random e.g. at one time you can deal few thousand of damage and with the next attack he'll deal 200 of damage. One handed weapon.
Name
Passive and active skills
You can get it in / from the moment
Price (gil)
Handaxe
Attack: +47
Rabanastre / after Dreadnought Leviathan
2200
Iron Hammer
Attack: +53
Dyce on Nam-Yensa Sandsea / in front of the entrance to Tomb of Raithwall
3300
Broadaxe
Attack: +59
Jahra
4200
War Hammer
Attack: +65
Jahra / after Henne Mines
5200
Slasher
Attack: +71
Mt Bur-Omisace / After the fight with Mateus
6000
Sledgehammer
Attack: +77
Mosphoran Highwaste,
Drops from Humbaba on Mosphoran Highwaste
6000
Hammerhead
Attack: +83
Phon Coast,
Steal from Gorgimera in Sochen Cave Palace,
Drop from Bogey in Zertinan Caverns
9500
Francisca
Attack: +89
Archades
Drop from Mimeo in Barheim Passage II,
Bazaar - War Axe
11500
Morning Star
Attack: +95
Balfonheim / after Giruvegan,
Drop from Ose in Great Crystal
13500
Greataxe
Attack: +101
Balfonheim / Epilogue
15500
Golden Axe
Attack: +110
Dalmasca Estersand / after Giruvegan
18000
Scorpion Tail
Attack: +119
Bazaar - The Scorpion
60000
Two handed, white mage's weapon. They're pretty handy at the beginning of the game when their attack power doesn't differ so much from the other weapons, but later they become practically useless. The magick power of characters become enough for healing and during the fight other weapons will surely come in handy and the small amount of MP they adds is just ridiculous.
Name
Passive and active skills
You can get it in / from the moment
Price (gil)
Rod
Attack: +30,
Magick: +1,
MP: +5
Dyce on Nam-Yensa Sandsea / in front of the entrance to Tomb of Raithwall,
Drop from Zu on Ozmone Plains
1500
Serpent Rod
Attack: +34,
Magick: +2,
MP: +10,
Ice element
Jahra,
Prize for Croacadile (rank II)
2100
Healing Rod
Attack: +13,
Magick: +2,
MP: +12,
Permanent Regen
Jahra / after Henne Mines
3000
Gaia Rod
Attack: +38,
Magick: +2,
MP: +16,
Earth element
Mt Bur-Omisace / after fight with Mateus,
Prize for Atomos (rank III)
3300
Power Rod
Attack: +44,
Magick: +3,
MP: +15
Phon Coast,
Drop from Focalor in Sochen Cave Palace
4500
Empyrean Rod
Attack: +50,
Magick: +2,
MP: +20
Balfonheim / Part III
6200
Holy Rod
Attack: +53,
Magick: +2,
MP: +30,
Holy element
Treasure in Pharos at Ridorana First Ascent on 26 floor. To get there you'll have to build a bridge from Deidars (not from Brainpans).
-
Rod of Faith
Attack: +24,
Magick: +3,
MP: +35,
Permanent Faith
Prize for Behemoth King (rank VII)
Two handed black mage's weapon. They increases the damage dealt with certain elemental spells.
Name
Passive and active skills
You can get it in / from the moment
Price (gil)
Oak Staff
Attack: +18
Rabanastre / after Barheim Passage
400
Cherry Staff
Attack: +24,
Increases damage of spells with Wind Element
Bhujerba / after Lhusu Mines
800
Wizard's Staff
Attack: +30
Dyce na Nam-Yensa / in front of the entrance to Tomb of Raithwall
1500
Flame Staff
Attack: +33,
Increases damage of spells with Fire Element
Jahra
2400
Storm Staff
Attack: +33,
Increases damage of spells with Thunder Element
Jahra
2400
Glacial Staff
Attack: +33,
Increases damage of spells with Ice Element
Jahra
2400
Golden Staff
Attack: +38
Rabanastre / After the fight with Mateus
3500
Judicer's Staff
Attack: +43,
may cause Stop
Archades
5700
Cloud Staff
Attack: +48,
Increases damage of spells with Water Element
Balfonheim / Epilogue
8000
Staff of the Magi
Attack: +46
Steal from Rare Game No. 32 - Luxollid
-
Two handed, pretty long range, very strong and quite fast. Very useful.
Name
Passive and active skills
You can get it in / from the moment
Price (gil)
Javelin
Attack: +30
Rabanastre / after Barhiem Passage
Bazaar - Light Spear
1400
Spear
Attack: +36
Rabanastre / after Dreadnought Leviathan
2200
Partisan
Attack: +42
Rabanastre / Part II
3500
Heavy Lance
Attack: +48,
may cause Slow
Jahra
4800
Storm Spear
Attack: +54,
Thunder element
Mt Bur-Omisace
5800
Obelisk
Attack: +60
Mosphoran Highwaste
Prize for Braegh (rank IV)
7500
Halberd
Attack: +66
Phon Coast
Prize for Vyraal (rank V)
10000
Trident
Attack: +72,
Ice element
Balfonheim / Part III,
Bazaar - Forked spear
12500
Holy Lance
Attack: +78,
Holy element
Balfonheim / after Giruvegan,
Treasure in Great Crystalu
14500
Gungnir
Attack: +84,
Fire element
Dalmasca Westersand / after Giruvegan,
Bazaar - Engraved Spear
17000
Dragon Whisker
Attack: +91
Treasure in Pharos at Ridorana Third Ascent
-
Zodiac Spear
Attack: +150
Treasure in Henne Mines
-
Two handed, fast and pretty strong. They have greater chance of combining few hits in a combo than other weapons (besides they look cool ;))
Name
Passive and active skills
You can get it in / from the moment
Price (gil)
Kotetsu
Attack: +50
Rabanastre / Part II
3800
Osafune
Attack: +54
Jahra
4800
Kogarasumaru
Attack: +58
Mt Bur-Omisace,
Drop from Wu in Ozmone Plains
5600
Magoroku
Attack: +62
Mt Bur-Omisace / After the fight with Mateus,
Drop from Wyrdhare in Salikawood
6600
Murasame
Attack: +66,
Water element
Phon Coast
8500
Kiku-ichimonji
Attack: +70
Archades
10500
Yakei
Attack: +74
Balfonheim / Part III
12500
Ame-no-Murakumo
Attack: +78,
Wind element
Balfonheim / Epilogue,
Bazaar - Samurai's Katana
15000
Muramasa
Attack: +84
Steal z Rare Game No 78 - Avenger
-
Masamune
Attack: +93
Bazaar - Master-crafted Blade,
Prize for Ancient Man of Mystery (rank VII)
350000
Two handed (though held in one hand). Like katanas they have a greater chance of creating a combo, but they all have one common disadvantage - the Dark element, which often prevent in the game.
Name
Passive and active skills
You can get it in / from the moment
Price (gil)
Ashura
Attack: +51,
Evasion: +20,
Dark element
Mt Bur-Omisace
5600
Sakura-saezuri
Attack: +56,
Evasion: +20,
Dark element
Rabanastre / After the fight with Mateus
7000
Kagenui
Attack: +62,
May cause Slow
Evasion: +20,
Dark element
Phon Coast,
Bazaar - Jag-tooth Ninja Sword
10000
Koga Blade
Attack: +67,
Evasion: +20,
Dark element
You get during the "Lost sheep..." quest for helping Sassan,
Rare drop from Ash Wyrm in Great Crystal II
-
Iga Blade
Attack: +67,
Evasion: +20,
Dark element
Treasure in Garamsythe Waterway II, close to the place where Rare Game No 5 - Gavial prowls
-
Orochi
Attack: +72,
May cause disable
Evasion: +20,
Dark element
Bazaar - Serpent Blade
15200
Yagyu Darkblade
Attack: +80,
Evasion: +20,
Dark element
Drop z Rare Game No 49 - Bomb Shell
-
Very strong, but slower than normal swords.
Name
Passive and active skills
You can get it in / from the moment
Price (gil)
Claymore
Attack: +82,
Evasion: +10
Archades
10500
Defender
Attack: +91,
Evasion: +35
Balfonheim / after Giruvegan,
You get during the "Lost sheep..." quest for helping Moomer
13000
Save the Queen
Attack: +100,
Evasion: +10
Balfonheim / Epilogue
Bazaar - Attenuated Greatsword,
Prize for Goliath (rank VI)
15500
Ragnarok
Attack: +109,
Evasion: +10,
May cause Immobilize
Prize for Ixion (rank VI)
-
Ultima Blade
Attack: +118,
Evasion: +10
Bazaar - Ultimate Blade
22800
Excalibur
Attack: +128,
Evasion: +10,
Holy element
Treasure in Great CrystalII
-
Tournesol
Attack: +140,
Evasion: +25
Bazaar - The Sunflower
600000
Sword of Kings
Attack: +30,
Evasion: +30
You get after the fight with Mateus
-
Treaty-blade
Attack: +30,
Evasion: +30
You get after the fight with Shemhazai
-
Wyrmhero Blade
Attack: +130,
Evasion: +50,
Holy element
Bazaar - Dragon Crest
65535
Name
Passive and active skills
You can get it in / from the moment
Price (gil)
Oaken Pole
Attack: +27,
Evasion: +25
Rabanastre / after Barheim Passage
1300
Cypress Pole
Attack: +33,
Evasion: +25,
Earth element
Rabanastre / after Dreadnought Leviathan,
Bazaar - Wooden Pole
2000
Battle Bamboo
Attack: +39,
Evasion: +25
Rabanastre / Part II
3200
Musk Stick
Attack: +45,
Evasion: +25
Jahra,
Drops from Great Malboros in Golmore Jungle
4300
Iron Pole
Attack: +51,
May cause Slow,
Evasion: +25
Mt Bur-Omisace,
Bazaar - Iron-forged Pole,
Drops from Clay Golems in Mosphoran Highwaste
5300
Six- fluted Pole
Attack: +57,
Evasion: +25
Mosphoran Highwaste
6800
Gokuu Pole
Attack: +63,
Evasion: +25
Phon Coast
9000
Zephyr Pole
Attack: +69,
Wind element,
Evasion: +25
Balfonheim / Part III
11200
Ivory Pole
Attack: +75,
Evasion: +25
Balfonheim / Epilogue
13500
Sweep
Attack: +81,
Evasion: +25
Bhujerba / after Giruvegan (but not in the weapon shop just in a street bazaar)
16200
Eight-fluted Pole
Attack: +88,
Evasion: +25
Steal from Rare Game No 33 - Vargant Soul,
Steal from Rare Game No 60 - Abeliska
-
Whale Whisker
Attack: +108,
Evasion: +25
Bazaar - Whisker of the Beast
60000
Bowguns:
Name
Passive and active skills
You can get it in / from the moment
Price (gil)
Bowgun
Attack: +40,
Evasion: +5
Rabanastre / Part II
3800
Crossbow
Attack: +46,
Evasion: +5
Jahra / after Henne Mines,
Bazaar - Ranger's Crossbow
5200
Paramina Crossbow
Attack: +52,
Evasion: +5
Mt Bur-Omisace / after the fight with Mateus
6600
Recurve Crossbow
Attack: +58,
Evasion: +5
Phon Coast,
Prize for Feral Retriver (rank III)
9500
Hunting Crossbow
Attack: +64,
Evasion: +5
Balfonheim / Part III,
Bazaar - Blindfight Quarrels
12500
Penetrator Crossbow
Attack: +70,
Evasion: +5
Balfonheim Epilogue,
Bazaar - Scout's Crossbow
15500
Gastrophetes
Attack: +76,
Evasion: +5
Steal z Rare Game No 39 - Pallicant
-
Bolts:
Name
Passive and active skills
You can get it in / from the moment
Price (gil)
Onion Bolts
Attack: +1
Nalbina
100
Long Bolts
Attack: +1,
May cause Slow
Bazaar - Ranger's Crossbow
6480
Stone Bolts
Attack: +1,
May cause Disable
Bazaar - Huntman's Crossbow
9980
Lead Bolts
Attack: +2,
May cause Immobilize
Prize for Dark Steel (rank IV)
-
Black Bolts
Attack: +2,
May cause Blind
Bazaar - Blindfight Quarrels
11220
Time Bolts
Attack: +2,
May cause Doom
Bazaar - Scout's Crossbow
17800
Sapping Bolts
Attack: +3,
May cause Sap
Prize for Ixiona (rank VI)
-
Grand Bolts
Attack: +4
Bazaar - Piercing Bolts
15000
Name
Passive and active skills
You can get it in / from the moment
Price (gil)
Mace
Attack: +24,
Evasion: +4
Rabanastre / after Dreadnought Leviathan,
Drops from Alraune on Nam- and Ogir-Sandsea
1800
Bronze Mace
Attack: +30,
Evasion: +4
Dyce on Nam-Yensa Sandsea / in front of the entrance to Tomb of Raithwall
3000
Bhuj
Attack: +36,
Evasion: +4
Jahra
4100
Miter
Attack: +42,
Evasion: +4,
Water element
Mt Bur-Omisace
5000
Thorned Mace
Attack: +48,
Evasion: +4,
May cause Poison
Mosphoran Highwaste
6500
Chaos Mace
Attack: +54,
Evasion: +4,
May cause Confuse
Archades
8800
Doom Mace
Attack: +60,
Evasion: +4,
May cause Doom
Balfonheim / after Giruvegan
11800
Zeus Mace
Attack: +66,
Evasion: +4
Prize for Diabolos (rank VII)
-
Grand Mace
Attack: +72,
Evasion: +4
Prize for Pylraster (rank VII)
-
Name
Passive and active skills
You can get it in / from the moment
Price (gil)
Gilt Measure
Attack: +5,
Permament Protect
Jahra
4000
Arc Scale
Attack: +10,
Permament Shell
Mt Bur-Omisace
5500
Multiscale
Attack: +15,
Permament Brave
Mosphoran Highwaste
8000
Cross Scale
Attack: +20,
Permament Invisible
Archades
11000
Caliper
Attack: +26,
Permament Haste
Balfonheim / after Giruvegan
14000
Euclid's Sextant
Attack: +35,
Permament Bubble
Prize for Wild Malboro (rank VI)
-
Hand bombs:
Name
Passive and active skills
You can get it in / from the moment
Price (gil)
Hornito
Attack: +50
Mt Bur-Omisace
5800
Fumarole
Attack: +58
Phon Coast,
Bazaar - Noisome Incendiaries
8500
Tumulus
Attack: +66
Archades,
Bazaar - Oil-Soaked Incendiaries,
You get during "Lost sheep..." quest for helping Agytha
12000
Caldera
Attack: +75
Balfonheim / Epilogue,
Bazaar - Befuddling Incendiaries
16000
Volcano
Attack: +85
Prize for Catoblepas (rank VI)
-
Bombs:
Name
Passive and active skills
You can get it in / from the moment
Price (gil)
Onion Bombs
Attack: +1
Nalbina
100
Poison Bombs
Attack: +2
Bazaar - Noisome Incendiaries
9800
Stun Bombs
Attack: +2,
May cause Stop
Prize for Bloodwing (rank V)
-
Stink Bombs
Attack: +2,
May cause Sap
Prize for Carrot (rank VII)
-
Oil Bombs
Attack: +3,
May cause Oil
Bazaar - Oil-Soaked Incendiaries
10625
Chaos Bombs
Attack: +4,
May cause Confuse
Bazaar - Befuddling Incendiaries
17800
Water Bombs
Attack: +5,
Water element
Bazaar - Water-drop Munitions
7800
Castellanos
Attack: +6
Bazaar - Devastating Incendiaries
12000
There are three kinds of armor: heavy, light and robes.
Heavy has generally higher defense factor, often rise strength attribute, but, well, it's heavy and because of that the actions of that character are slower. It prevent especially when there's strong magnetic field in the area. Used by tanks.
Light has lower defense factor than heavy, but it adds a lot of HP to the character that wears it. The most important is that they increase the speed of actions. It works well for those using long range weapons.
Robes have very low physical defense, but high magic defense. Additionally they raise amount of MP and magic power attribute. It's better not to send these heroes in the front line.
Also all armors divide into two parts: head-gear and torso. Head-gear raises mostly the magic defense and torso the physical defense.
Heavy:
Helmets:
Name
Magick defense and...
You can get it in / from the moment
Price (gil)
Leather Helm
+5,
Strength: +2
Barheim Passage - Burrogh
500
Bronze Helm
+6,
Strength: +2
Barheim Passage - Burrogh
700
Sallet
+7,
Strength: +3
Rabanastre / after Barheim Passage
1000
Iron Helm
+9,
Strength: +3
Bhujerba / after Dreadnought Leviathan
1400
Barbut
+11,
Strength: +4
Rabanastre / after Dreadnought Leviathan
1900
Winged Helm
+13,
Strength: +5,
Speed: +3
Rabanastre / Part II
2500
Golden Helm
+15,
Strength: +5
Rabanastre / Part II,
Bazaar - Golden Garb
3200
Burgonet
+17,
Strength: +4
Jahra / after Henne Mines,
Bazaar - Burnished Protectives
4000
Close Helmet
+19,
Strength: +5
Mt Bur-Omisace / After the fight with Mateus
4900
Bone Helm
+22,
Strength: +6,
Suffer half damage from Dark,
Vulnerable to Holy
Rabanastre / After the fight with Mateus
5900
Diamond Helm
+25,
Strength: +7,
Vitality: +3
Mosphoran Highwaste
7000
Steel Mask
+28,
Strength: +7,
Swiftness: +4
Phon Coast,
Steal from Piranhy on Phon Coast
8100
Platinum Helm
+31,
Strength: +8
Archades,
Bazaar - Platinum Gear
9300
Giant's Helmet
+33,
Strength: +8,
HP: +150
Balfonheim / Part III
11000
Dragon Helm
+35,
Strength: +9,
HP: +70
Balfonheim / after Giruvegan
12500
Magepower Shishak
+39,
Strength: +11,
Magick: +5
Necrohol of Nabudis / after Giruvegan,
Bazaar - Magepower Helm
15000
Grand Helm
+40,
Strength: +12
Drops from Rare Game No 26 - Tower
-
Genji Helm
+37,
Strength: +9,
Magick: +4
Steal from Ancient Man of Mystery (rank VII), second fight, between 40%, and 20% of his max HP.
-
Torsos:
Name
Defense and...
You can get it in / from the moment
Price (gil)
Leather Armor
+6,
Strength: +2
Barheim Passage - Burrogh
500
Bronze Armor
+7,
Strength: +2
Barheim Passage - Burrogh
700
Scale Armor
+9,
Strength: +3,
Swiftness: +3
Rabanastre / after Barheim Passage
1000
Iron Armor
+11,
Strength: +3
Bhujerba / after Dreadnought Leviathan
1400
Linen Cuirass
+13,
Strength: +4
Rabanastre / after Dreadnought Leviathan
1900
Chainmail
+16,
Strength: +3
Rabanastre / Part II
2500
Golden Armor
+20,
Strength: +4
Rabanastre / Part II,
Bazaar - Golden Garb
3200
Shielded Armor
+24,
Strength: +5,
Permanent Protect
Jahra / after Henne Mines,
Bazaar - Burnished Protectives
4000
Demon Mail
+29,
Strength: +5,
Vitality: +3
Mt Bur-Omisace / After the fight with Mateus
4900
Bone Mail
+36,
Strength: +6,
Suffer half damage from Dark,
Vulnerable to Holy
Rabanastre / After the fight with Mateus
5900
Diamond Armor
+39,
Strength: +7,
Vitality: +5
Mosphoran Highwaste
7000
Mirror Mail
+43,
Strength: +6,
Permanent Reflect
Phon Coast,
Steal from Piranha on Phon Coast,
Drops from Mirror knight in Feywood
8100
Platinum Armor
+47,
Strength: +7
Archades,
Bazaar - Platinum Gear
9300
Carabineer Mail
+50,
Strength: +8,
Magick: +2
Balfonheim / Part III
11000
Dragon Mail
+53,
Strength: +8,
HP: +100
Balfonheim / after Giruvegan,
Steal from Dark Lord in Lhusu Mines II
12500
Maximillian
+58,
Strength: +9,
Swiftness: +6
Necrohol of Nabudis / after Giruvegan,
Bazaar - Sturdy Battle Gear
17000
Grand Armor
+61,
Strength: +10
Drop from Rare Game No 26 - Tower
-
Genji Armor
+56,
Strength: +9,
Magick: +3
Steal from Ancient Man of Mystery (rank VII), second fight, between 20%, and 0% of his max HP.
-
Head-gear:
Name
Magick defense and...
You can get it in / from the moment
Price (gil)
Leather Cap
+4,
HP: +10
Rabanastre / from the beginning
100
Headgear
+5,
HP: +20
Barheim Passage - Burrogh,
Prize for Thextera (rank I)
200
Headguard
+6,
HP: +30
Barheim Passage - Burrogh
300
Leather Headgear
+8,
HP: +40
Rabanastre / after Barheim Passage,
Bazaar - Assorted Leathers
500
Horned Hat
+10,
HP: +50
Bhujerba / after Lhusu Mines
700
Balaclava
+12,
HP: +90,
Strength: +1
Rabanastre / after Dreadnought Leviathan,
Prize for Nidhogg (rankI)
1000
Soldier's Cap
+14,
HP: +110
Dyce on Nam-Yensa / in front of the entrance to the Tomb of Raithwall
1400
Green Beret
+16,
HP: +130,
Swiftness: +3
Rabanastre / Part II
1900
Red Cap
+18,
HP: +150,
Vitality: +3
Jahra,
Bazaar - Matching Reds,
Drops from Hellhounda in Golmore Jungle
2500
Headband
+20,
HP: +170,
Strength: +2
Mt Bur-Omisace,
Bazaar - Monk's Garb
3200
Pirate Hat
+23,
HP: +230
Mt Bur-Omisace / After the fight with Mateus
4000
Goggle Mask
+26,
HP: +270,
Immune to Dark
Rabanastre / After the fight with Mateus
4900
Adamant Hat
+29,
HP: +310,
Immune to Ice,
Suffer half damage from Fire
Mosphoran Highwaste,
Bazaar - Light & Sturdy Garb
5900
Officer's Hat
+32,
HP: +350,
Swiftness: +3
Phon Coast
7000
Chakra Band
+34,
HP: +390,
Strength: +2
Archades,
Bazaar - Emboldening Arms
8100
Thief's Cap
+36,
HP: +460,
Swiftness: +4
Balfonheim / Part III
9300
Gigas Hat
+38,
HP: +530,
Magick: +2
Balfonheim / after Giruvegan,
Bazaar - Gigas Gear,
Steal from Killer Mantis in Lhusu Mines II
10700
Chaperon
+40,
HP: +600
Balfonheim / Epilogue
12400
Crown of Laurels
+42,
HP: +680
Balfonheim / Epilogue,
Bazaar - Nature's Armory,
Drops from Crusaders in Pharos at Ridorana - Second Ascent
14500
Renewing Morion
+44,
HP: +370,
Vitality: +4,
Permanent Regen
Lowtown South Sprawl / after Giruvegan
16000
Dueling Mask
+45,
HP: +800,
Strength: +2
Treasure in Pharos at Ridorana - Abyssal
-
Torsos:
Name
Defense and...
You can get it in / from the moment
Price (gil)
Leather Clothing
+4,
HP: +10
Rabanastre / from the beginning
100
Chromed Leathers
+5,
HP: +20
Barheim Passage - Burrogh,
Bazaar - Unassuming Surcoat
200
Leather Breastplate
+6,
HP: +30
Barheim Passage - Burrogh,
Bazaar - Assorted Leathers
300
Bronze Chestplate
+8,
HP: +40
Rabanastre / after Barheim Passage
500
Ring Mail
+10,
HP: +50,
Strength: +1
Bhujerba / after Lhusu Mines
700
Windbreaker
+12,
HP: +100,
Suffer half damage from wind
Rabanastre / after Dreadnought Leviathan
1000
Heavy Coat
+14,
HP: +120
Dyce on Nam-Yensa / in front of the entrance to the Tomb of Raithwall,
Prize for Rocktoise (rankI),
Steal from Zaghnal on Ozmone Plains
1400
Survival Vest
+16,
HP: +140,
Vitality: +5
Rabanastre / Part II
1900
Brigandine
+18,
HP: +160
Jahra,
Bazaar - Matching Reds
2500
Jujitsu Gi
+20,
HP: +180,
Strength: +2
Mt Bur-Omisace,
Bazaar - Monk's Garb,
Steal from Skull Knighta in Paramina Rift
3200
Viking Coat
+23,
HP: +240,
Immune to Water
Mt Bur-Omisace / After the fight with Mateus
4000
Metal Jerkin
+26,
HP: +280
Rabanastre / After the fight with Mateus
4900
Adamant Vest
+29,
HP: +320,
Immune to Ice,
Suffer half damage from Fire
Mosphoran Highwaste,
Bazaar - Light & Sturdy Garb
5900
Barrel Coat
+32,
HP: +360
Phon Coast,
Prize for Lindwyrm (rank V)
7000
Power Vest
+34,
HP: +400,
Strength: +2
Archades,
Bazaar - Emboldening Arms,
Steal from Tartaruses in Feywood
8100
Ninja Gear
+36,
HP: +470,
Swiftness: +3
Balfonheim / Part III,
Steal from Gespents in Garamsythe Waterway II
9300
Gigas Chestplate
+38,
HP: +540,
Magick: +2
Balfonheim / after Giruvegan,
Bazaar - Gigas Gear
10700
Minerva Bustier
+40,
HP: +610
Balfonheim / Epilogue
12400
Rubber Suit
+42,
HP: +700,
Immune to Thunder
Balfonheim / Epilogue,
Bazaar - Nature's Armory
14500
Mirage Vest
+45,
HP: +800,
Swiftness: +10,
Vitality: +10
Lowtown South Sprawl / after Giruvegan
16000
Brave Suit
+40,
HP: +10,
Permanent Bravery
Treasure in Great Crystal II
-
Tiaras:
Name
Magick defense and...
You can get it in / from the moment
Price (gil)
Cotton Cap
+4,
Magick: +2
Rabanastre / from the beginning,
Drop z Hyen na Giza Plains in the time of drought
100
Magick Curch
+5,
Magick: +5,
MP: +5
Barheim Passage - Burrogh
200
Pointy Hat
+6,
Magick: +2
Barheim Passage - Burrogh,
Steal from wolves in Estersand
300
Topkapi Hat
+8,
Magick: +3
Rabanastre / after Barheim Passage
500
Calot Hat
+10,
Magick: +3
Bhujerba / after Lhusu Mines
800
Wizard's Hat
+12,
Magick: +4
Rabanastre / after Dreadnough Leviathan
1000
Lambent Hat
+15,
Magick: +4,
Swiftness: +3
Dyce on Nam-Yensa / in front of the entrance to Tomb of Raithwall
1400
Feathered Cap
+18,
Magick: +4
Rabanastre / Part II
1900
Mage's Hat
+25,
Magick: +5,
MP: +10
Jahra / after Henne Mines
2500
Lamia's Tiara
+25,
Magick: +4,
Vitality: +7
Mt Bur-Omisace,
Alluring Finery
3200
Sorcerer's Hat
+29
Magick: +5,
MP: +20
Mt Bur-Omisace / After the fight with Mateus
4000
Black Cowl
+33,
Magick: +5,
Swiftness: +4
Rabanastre / After the fight with Mateus,
Bazaar - Ninja Garb
4900
Astrakhan Hat
+37,
Magick: +6
Mosphoran Highwaste
5900
Gaia Hat
+41,
Magick: +7,
HP: +80
Phon Coast,
Drops from Mallicant in Zertinan Caverns
7000
Hypnocrown
+44,
Magick: +7,
Strength: +2
Archades,
Drops from Zombie Knights in Sochen Cave Palace
8100
Gold Harpin
+47,
Magick: +7,
Vitality: +8
Balfonheim / Part III
9300
Celebrant's Miter
+50,
Magick: +6,
Swiftness: +5
Balfonheim / after Giruvegan
10700
Black Mask
+53,
Magick: +8,
Absorbs Dark
Balfonheim / Epilogue,
Bazaar - Black Vestments
12400
White Mask
+56
Magick: +8,
Absorbs Holy
Balfonheim / Epilogue,
Bazaar - White Vestments
14500
Golden Skullcap
+58,
Magick: +10,
Swiftness: +3
Barheim Passage - Burrogh / after Giruvegan,
Drops from Dead Bones in Pharos at Ridorana - Umbra and Abyssal
16000
Circlet
+60,
Magick: +10,
Strength: +2
Treasure in Pharos at Ridorana - Third Ascent
-
Torsos:
Name
Defense and...
You can get it in / from the moment
Price (gil)
Cotton Shirt
+4,
Magick: +1
Rabanastre / from the beginning
100
Light Woven Shirt
+5,
Magick: +1
Barheim Passage - Burrogh
200
Silken Shirt
+6,
Magick: +2
Barheim Passage - Burrogh
300
Kilimweave Shirt
+8,
Magick: +3
Rabanastre / after Barheim Passage,
You get it for helping Pilica after Rocktoise (rank I),
Steal from Zombie in Barheim Passage
500
Shepherd's Bolero
+10,
Magick: +3
Bhujerba / after Lhusu Mines,
You get it for helping Pilica after Rocktoisie (rank I)
700
Wizard's Robes
+12,
Magick: +4,
MP: +5
Rabanastre / after Dreadnough Leviathan
1000
Chanter's Djellaba
+14,
Magick: +4,
Vitality: +5
Dyce on Nam-Yensa / in front of the entrance to Tomb of Raithwall
1400
Traveller's Vestment
+16,
Magick: +5
Rabanastre / Part II
1900
Mage's Habit
+18,
Magick: +6,
MP: +10
Jahra / after Henne Mines
2500
Enchanter's Habit
+21,
Magick: +7,
Vitality: +10
Mt Bur-Omisace,
Bazaar - Alluring Finery,
Drops from Zombie Warriors in Stillshrine of Miriam
3200
Sorcerer's Habit
+24,
Magick: +8,
MP: +20
Mt Bur-Omisace / After the fight with Mateus
4000
Black Garb
+27,
Magick: +6,
Swiftness: +3
Rabanastre / After the fight with Mateus,
Bazaar - Ninja Garb
4900
Carmagnole
+29,
Magick: +7
Mosphoran Highwaste
5900
Maduin Gear
+31,
Magick: +8
Phon Coast
7000
Jade Gown
+33
Magick: +8
Archades
8100
Gaia Gear
+35,
Magick: +8,
MP: +100
Balfonheim / Part III
9300
Cleric's Robes
+37,
Magick: +9
Balfonheim / after Giruvegan
10700
Black Robes
+38,
Magick: +10
Balfonheim / Epilogue,
Bazaar - Black Vestments
13500
White Robes
+38,
Magick: +10
Balfonheim / Epilogue,
Bazaar - White Vestments
13500
Glimmering Robes
+39,
Magick: +12,
Vitality: +10
Barheim Passage - Burrogh / after Giruvegan
16000
Lordly Robes
+40,
Magick: +15,
Strength: +5
Treasure in Pharos at Ridorana - Abyssal
-
Shields raise the factor of evasion, which really means that you'll block more often. At the beginning they raise the level of physical evasion, but later some shields appear which help in blocking magic spells.
Name
Evasion / Magick evasion
and...
You can get it in / from the moment
Price (gil)
Escutcheon
6/0
Barheim Passage - Burrogh,
Bazaar - Gilt Shield
300
Leather Shield
8/0
Barheim Passage - Burrogh
600
Buckler
10/0
Rabanastre / after Barheim Passage
1000
Bronze Shield
12/0
Bhujerba / after Dreadnought Leviathan
1200
Round Shield
14/0
Rabanastre / after Dreadnought Leviathan
1600
Golden Shield
16/0
Rabanastre / Part II
2100
Ice Shield
16/0
Suffer half damage from Ice
Jahra / after Henne Mines,
Bazaar - Burnished Protectives,
Drops from Redmaws in Henne Mines
2500
Flame Shield
16/0
Suffer half damage from Fire
Mt Bur-Omisace / After the fight with Mateus
3200
Diamond Shield
18/0
Rabanastre / After the fight with Mateus,
Prize for Atomos (rank III)
3900
Platinum Shield
20/0
Mosphoran Highwaste,
Bazaar - Platinum Gear
5300
Dragon Shield
23/0
Phon Coast
6000
Crystal Shield
25/10
Archades,
Prize for Vyraal (rank V)
7200
Kaiser Shield
27/0
Balfonheim / after Giruvegan,
Steal from Forbidden in Great Crystal II
8300
Aegis Shield
13/50
Balfonheim / Epilogue
9600
Demon Shield
40/0
Absorbs Dark
Necrohol of Nabudis / after Giruvegan
11200
Venetian Shield
24/25
Vulnerable to Thunder
Bazaar - Brilliant Shield
12420
Shell Shield
5/0
Permanent Shell
Prize for Wyvern Lord (rank II)
-
Ensanguined Shield
90/0
Permanent Posion, Sap and Slow
Treasure in Feywood
-
Zodiac Escutcheon
50/0
Immune to Thunder
Treasure in Barheim Passage II
-
Genji Shield
30/5
Steal from Ancient Man of Mystery (rank VII), first fight when his HP level is between 40% and 20%
-
Name
Properties
Where to get it?
Price (gil)
Orrachea Armlet
HP: +25
Giza Plains,
You get from Tomaaj
250
Bangle
Permanent Libra
Giza Plains
500
Steel Gorget
Greater strength when the character in critically wounded
Barheim Passage - Burrogh,
Dalmasca Estersand - South Bank Village
1500
Armguard
Greater defense when the character in critically wounded
Barheim Passage - Burrogh,
Dalmasca Estersand - South Bank Village
800
Tourmaline Ring
Immune to Poison
Dalmasca Estersand - South Bank Village
300
Gauntlets
Greater chance to block when using a shield
Dalmasca Estersand - South Bank Village,
Prize for Wraith (rankI)
1200
Battle Harness
Automatic counter attack,
Strength +2
Dalmasca Estersand - South Bank Village,
Bazaar - Back Harness,
1000
Leather Gorget
Greater magick power when the character in critically wounded
Dalmasca Westersand
1500
Rose Corsage
Immune to Silence
Dalmasca Westersand,
Prize for Nidhogg (rankI)
800
Amber Armlet
Greater attack power when unarmed
Dyce on Nam-Yensa in front of the entrance to Tomb of Raithwall,
Eruyt Village,
Bazaar - Brawler's Fetish
6600
Sash
Immune to Slow
Dyce on Nam-Yensa in front of the entrance to Tomb of Raithwall,
Eruyt Village
500
Argyle Armlet
Immune to Blind
Dyce on Nam-Yensa in front of the entrance to Tomb of Raithwall,
Eruyt Village
600
Blazer Gloves
Greater strength when HP is full
Dyce on Nam-Yensa in front of the entrance to Tomb of Raithwall,
Eruyt Village,
Bazaar - Large Gloves
3200
Jade Collar
Greater chance to evade
Eruyt Village
3200
Jackboots
Immune to Immobilize
Eruyt Village,
Prize for Cluckatrice (rank I)
600
Black Belt
Immune to Disable,
Vitality +8
Eruyt Village
600
Golden Amulet
The character get twice as much LP
Mt Bur-Omisace,
Bazaar - Gilt Phylactery,
Prize for Enkelados (rank II)
4500
Magic Gloves
Greater magick power when HP is full
Eruyt Village
3200
Nishijin Belt
Immune to Sleep
Mt Bur-Omisace
800
Thief's Cuffs
Steal better things
Mt Bur-Omisace
3000
Gillie Boots
Immune to Oil
Mt Bur-Omisace,
Bazaar - Ninja Footgear,
Prize for Vorpal Bunny (rank III)
700
Quasimodo Boots
Immune to Sap
Mt Bur-Omisace / After the fight with Mateus,
Bazaar - Shoes of the Dead
800
Ruby Ring
Permanent Reflect
Mt Bur-Omisace / After the fight with Mateus
8500
Firefly
Strength: +2,
You don't get any EXP
Phon Coast
5000
Steel Poleyns
Move safely past traps,
Defense +1
Phon Coast
1000
Fuzzy Miter
Immune to Stone, Petrify
Old Archades
1200
Bowline Sash
Immune to Confuse
Old Archades,
Steal from Preying Matis in Feywood
1000
Winged Boots
Permanent Float
Old Archades,
Bazaar - Feathered Boots,
Steal from Shield Wyrm on Cerobi Steppe
500
Pheasant Netsuke
Character restores more HP while using items
Old Archades,
Bazaar - Wing Cord
4000
Embroidered Tippet
Character gains 2x experience
Old Archades,
Steal from Coeurls on Tchita Uplands
5000
Cameo Belt
Increases the chance of hitting the enemy
Old Archades / after Giruvegan
9000
Power Armlet
Strength +2,
Immune to Stop
Old Archades / after Giruvegan
5200
Opal Ring
Casted spells ignore Reflect
Old Archades / after Giruvegan,
Bazaar - Exquisite Ring
16000
Bubble Belt
Gives Bubble effect
Clas shop (since Riskbreaker),
Prize for Antlion (rankV),
Bazaar - Chain-link Belt
19800
Ring of Renewal
Defense +6,
Magick Defense +5,
Permanent Regen
Necrohol of Nabudis,
Prize for completing quest "Sky-high girls"
18000
Indigo Pendant
Increases the chance of striking the enemy with magic
Drops from, Suriander in Barheim Passage II
5000
Turtleshell Choker
Use gils instead of MP
Bhujerba / after Giruvegan,
Bazaar - Shell-worked Collar
8370
Agate Ring
Resistant to a random element - depends on the weather
Dalmasca Westersand / after Giruvegan
3000
Diamond Armlet
You get better things from treasure chest or Knot of Rust
Dalmasca Estersand - South Bank Village / after Giruvegan,
Drops from Mom Bomb in Great Crystal II
20000
Hermes Sandals
Permanent Haste
Barheim Passage / after Giruvegan,
Bazaar - Wind Walkers
20000
Sage's Ring
Half MP is needed to cast a spell
Old Archades / after Giruvegan
22000
Nihopalaoa
Reverses the effect of healing items
Clan shop (since Head-Hunter),
Bazaar - Cursed Necklace
30000
Cat-ear Hood
Swiftness +50,
Vitality +20
Clan shop (since High Guardian),
Bazaar - Comfy Headgear
30000
Genji Gloves
Increases the frequency of creating combos and the amount of blows in one combo
Magick +2
Steal from Ancient Man of Mystery (rank VII), first fight, when HP of the enemy is between 20%-0%
-
Ribbon
Immune all bad status effects except for Death
You can find it on Cerobi Steppe. Equip Diamond Armlet and run then north from the save crystal. After you collect every treasure here run south through the area with crystal and run back to the north area - new treasure will appear.
-
Name
Effect
You may buy in / from the moment
Price (gil)
Cure
Restores small amount of HP to one ally
Rabanastre
200
Blindana
Cures Blind
Barheim Passage - Burrogh
200
Vox
Cures Silence
Bhujerba
300
Poisona
Cures Poison and Sap
Barheim Passage - Burrogh
200
Cura
Restores some HP to all allies in range
Bhujerba / after Dreadnought Leviathan
1500
Raise
Revive one ally
Bhujerba / after Dreadnought Leviathan
1900
Stona
Cures Stone and Petrify
Bhujerba / after Lhusu Mines
800
Esuna
Cures one ally from most of the bad status effects
Rabanastre / Part II
2800
Regen
HP points are gradually recovered
Rabanastre / Part II
1900
Curaga
Restores large amount of HP to one ally
Eruyt Village
3200
Dispel
Removes all buffs from one enemy
Nalbina / After the fight with Mateus
4500
Cleanse
Cures Disease
Phon Coast
5800
Curaja
Restores large amount of HP to all allies in range
Balfonheim / Part III
11700
Dispelga
Removes all buff from all enemies in range
Balfonheim / Part III
8200
Arise
Revives one ally and restore his whole HP
Balfonheim / after Giruvegan
9700
Holy
Damages one enemy,
Element: Holy
Balfonheim / Epilogue
11200
Esunaga
Cures all allies in range from most of the bad status effects
Balfonheim / after Giruvegan
14900
Renew
Restores whole HP to all allies in range
Dalmasca Westersand / Epilogue
39600
Name
Effect
You may buy in / from the moment
Price (gil)
Fire
Damages one enemy,
Element: Fire
Rabanastre
200
Thunder
Damages one enemy,
Element: Thunder
Rabanastre
200
Blizzard
Damages one enemy,
Element: Ice
Rabanastre
200
Water
Damages one enemy,
Element: Water
Bhujerba / after Lhusu Mines
800
Aero
Damages all enemies in range,
Element: Wind
Dyce na Nam-Yensa
1200
Fira
Damages all enemies in range,
Element: Fire
Eruyt Village / after Henne Mines
3000
Thundara
Damages all enemies in range,
Element: Thunder
Eruyt Village / after Henne Mines
3000
Blizzara
Damages all enemies in range,
Element: Ice
Eruyt Village / after Henne Mines
3000
Bio
Deals damage and causes Sap to every one in range
Nalbina / After the fight with Mateus
4900
Aeroga
Damages all enemies in range,
Element: Wind
Archades
6800
Firaga
Damages all enemies in range,
Element: Fire
Balfonheim / Part III
8200
Thundaga
Damages all enemies in range,
Element: Thunder
Balfonheim / Part III
8200
Blizzaga
Damages all enemies in range,
Element: Ice
Balfonheim / Part III
8200
Shock
Deals large amount of damage to one enemy
Balfonheim / Epilogue
9400
Scourge
Deals large amount of damage and causes Sap to all enemies in range
Balfonheim / Epilogue
11200
Flare
Deals massive damage to one enemy,
Element: -
Balfonheim / Epilogue
11200
Ardor
Deals massive damage to all enemies in range,
Element: Fire
Barheim Passage / Epilogue
15600
Scathe
Deals massive damage to all enemies in range,
Element: -
Necrohol of Nabudis / Epilogue
18100
Name
Effect
You may buy in / from the moment
Price (gil)
Dark
Damages all enemies in range,
Element: Dark
Rabanastre / after Barheim Passage
500
Berserk
Causes Berserk
Rabanastre / after Dreadnought Leviathan
1000
Confuse
Causes Confuse
Rabanastre / Part II
1400
Gravity
Take exactly 1 of one enemy's max HP
Rabanastre / Part II
2800
Decoy
Causes Lure
Eruyt Village
2500
Drain
Drains HP from one enemy
Eruyt Village
3200
Syphon
Drains MP from one enemy
Airship
4000
Vanish
Causes Vanish
Mt Bur-Omisace
4900
Darkra
Damages all enemies in range,
Element: Dark
Phon Coast
5800
Death
Causes Death
Rabanastre / After the fight with Mateus
5200
Bubble
Causes Bubble
Clan Shop (since Ward of Justice)
3300
Vanishga
Causes Vanish on everyone in range
Rabanastre / After the fight with Mateus
8700
Reverse
Causes Reverse
Clan Shop (since Head-Hunter)
7600
Graviga
Take exactly 1 of one enemy's max HP
Archades
6800
Darkga
Damages all enemies in range,
Element: Dark
Balfonheim / after Giruvegan
9400
Name
Effect
You may buy in / from the moment
Price (gil)
Protect
Causes Protect
Barheim Passage - Burrogh
200
Blind
Causes Blind
Barheim Passage - Burrogh
200
Poison
Causes Poison
Rabanastre / after Barheim Passage
500
Shell
Causes Shell
Rabanastre / after Barheim Passage
300
Silence
Causes Silence
Bhujerba
400
Sleep
Causes Sleep
Bhujerba / after Dreadnought Leviathan
700
Oil
Causes Oil
Bhujerba / after Dreadnought Leviathan
600
Toxify
Causes Sap on everyone in range
Eruyt Village / after Henne Mines
4100
Silencega
Causes Silence on everyone in range
Archades
6800
Blindaga
Causes Blind on everyone in range
Archades
6800
Bravery
Causes Bravery
Clan shop (since Riskbreaker)
5800
Faith
Causes Faith
Clan shop (since Brave Companion)
5800
Sleepga
Causes Sleep on everyone in range
Balfonheim / Part III
7900
Shellga
Causes Shell on everyone in range
Balfonheim / after Giruvegan
9900
Protectga
Causes Protect on everyone in range
Balfonheim / after Giruvegan
9400
Name
Effect
You may buy in / from the moment
Price (gil)
Slow
Causes Slow
Barheim Passage - Burrogh
200
Immobilize
Causes Immobilize on everyone in range
Rabanastre / after Barheim Passage
600
Disable
Causes Disable on everyone in range
Rabanastre / after Barheim Passage
600
Reflect
Causes Reflect
Bhujerba / after Lhusu Mines
800
Break
Causes Break
Bhujerba / after Lhusu Mines
900
Warp
Instantly kills all enemies in range, but you don't get any EXP points for that
Rabanastre / after Dreadnought Leviathan
1700
Bleed
Causes Bleed
Rabanastre / after Dreadnought Leviathan
1100
Balance
Deals damage equal to the difference between the current and maximum HP level of the caster
Dyce on Nam-Yensa
1500
Float
Causes Float on everyone in range
Eruyt Village
2800
Haste
Causes Haste
Eruyt Village / after Henne Mines
3400
Countdown
Causes Doom
Eruyt Village / after Henne Mines
3100
Stop
Causes Stop
Mt Bur-Omisace
3700
Reflectga
Causes Reflect on everyone in range
Archades
6800
Slowga
Causes Slow on everyone in range
Balfonheim / Epilogue
10400
Hastega
Causes Haste on everyone in range
Dalmasca Estersand / Epilogue
16600
Name
Effect
You may buy in / from the moment
Price (gil)
Libra
Displays additional info about enemies and shows the location of traps
Rabanastre
500
Steal
Steals from one enemy
Rabanastre
1600
Poach
Steals extra items from one critically wounded enemy. You don't get EXP for that.
Rabanastre / after Barheim Passage
7000
Charge
Restores MP, if it fails you loose whole MP
Rabanastre / after Barheim Passage
1700
First Aid
Restores some HP to a critically wounded ally
Rabanastre / after Barheim Passage
700
Horology
Deals damage that depends on the time spend playing in the game
Bhujerba
2000
Souleater
Character uses it's own HP to attack an enemy
Bhujerba / after Lhusu Mines
6400
Numerology
Deals damage to everyone in range that raises with successive hits
Rabanastre / after Dreadnough Leviathan
2048
Traveler
Deals damage to everyone in range that depends on the amount of foot steps taken
Rabanastre / after Dreadnough Leviathan
6700
Shear
Decreases one enemy's magick defense
Rabanastre / Part II
3500
Achilles
Make one enemy vulnerable to a random element
Rabanastre / Part II
8800
Gil Toss
Toss gil to inflict damage
Jahra
2000
Charm
Causes Confuse
Jahra
5000
Infuse
Converts one's MP into HP of ten times that amount and restores it to one ally
Jahra / after Henne Mines
2000
Sight Unseeing
Special attack that may only be performed when under Blind status
Jahra / after Henne Mines
6800
Addle
Decreases one enemy's magick power
Rabanastre / After the fight with Mateus
3600
Bonecrusher
Consumes some HP points to cause Death upon one enemy
Rabanastre / After the fight with Mateus
700
1000 Needles
Deals exactly 1000 damage to one enemy
Mosphoran
7000
Stamp
Copy the bad statuses from the user to one enemy
Archades
4500
Shades of Black
Cast one random black magic spell
Archades
5000
Expose
Decreases one enemy's defense
Balfonheim / Part III
3800
Revive
Works like Arise but instead of MP uses whole HP of the user
Balfonheim / Part III
10000
Wither
Decreases one enemy's strength
Balfonheim / after Giruvegan
3500
Telekinesis
Deals ranged damage with short range weapons
Necrohol of Nabudis / after Giruvegan
7100
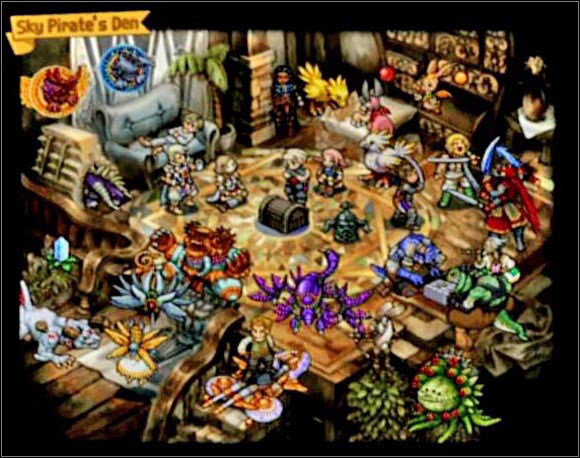
Sky Pirate's Den is a section under Clan Primer, where prizes for various achievements are stored. These prizes have form of things/people/monsters that appear in the game. Additionally with every figure you get a title. Here is the list of every prize you can get in the game in the order from the easiest to the hardest one to get (in my opinion):
Figure
Title
How to get it?
Vaan
Master Thief
Steal from enemy over 50 times
Balthier
Assault Striker
Attack over 300 times
Fran
Spellsinger
Use magick over 200 times
Bash
Blood Dancer
Defeat over 500 foes
Vayne
Premier Prestidigitator
Use technicks over 100 times
Chocobo
Wayfarer
Take over 50000 steps
Migelo
Privateer
Sell over 1000 pieces of loot
Penelo
Plunderer
Earn over 100000 gil
Montblanc
The Unrelenting
Kill over 50 enemies in a chain
Gurdy
Spendthrift
Spend over 1000000 gil
Ashe
Exemplar
Raise the average level of the party to 50
Reks
Record Breaker
Get 500000 clan points
Vossler
Jack-of-All-Trades
Get to know every techinick there is
Crystal
Runeweaver
Get to know every magick spell there is
Rasler
Conqueror
Master everyone's License Boards (including Espers and quickenings)
Gabranth
Mist Walker
Perform every concurrence (See section "Quickenings")
Mimic?
Collector
Buy Canopic Jar (see section "Bazaar / Grimoires")
Trickster
Sharpshooter
Defeat "Trickster (rank V)"
Carrot
Freshmaker
Defeat "Carrot (rank VII)"
Gilgamesh
Master Swordsman
Defeat "Ancient Man of Mystery (rank VII)"
Deathgaze
Eagle Eye
Defeat "Deathgaze (rank VII)"
Ultima
Fell Angel
Defeat Ultima Esper
Zodiark
Zodiac Knight
Defeat Zodiark Esper
Belias
High Summoner
Get every Esper
Fafnir
Wyrmslayer
Defeat "Fafnir (rank VII)"
Behemoth King
Lord of the Kings
Defeat "Behemoth King (rank VII)"
Hell Wyrm
Radiant Savior
Defeat Hell Wyrm (see section "Bosses not connected with the plot")
Old Dalan
Cartographer
Get every map and visit every location in Ivalice
Yiazmat
Hunter Extraordinaire
Defeat "Yiazmat (rank VIII)"
Ba'Gamnan
Scrivener
Defeat every monster which prowls in Ivalice the required amount of times
At the beginning of the game you get into hunters guild thanks to Tomaj. The first monster to kill - Rouge Tomato - is connected with plot, but the rest you do on your own and when you feel like doing it. To become the member of the clan you have to kill Rouge Tomato and after the talk with Tomaj go to the clan's HQ. There talk with a bangaa standing in front of the entrance, enter the building and talk with Montblanc - and that's it - you're in.
This is virtually the biggest side quest in the game. You don't have to kill these monsters if you don't want to and it won't interrupt you in the plot but only in this way you'll be able to find the strongest boss in the game - Yiazmat. Besides some hunts are needed to other side quests.
 Entrance to Centurio HQ in Rabanastre's northern district
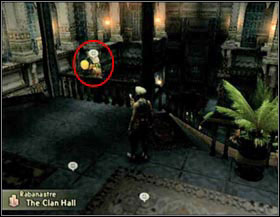 Montblanc on barrier
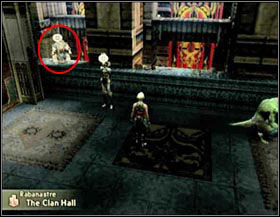 Ma'kenroh - he gives you info about the current hunt your on and about your clan level.
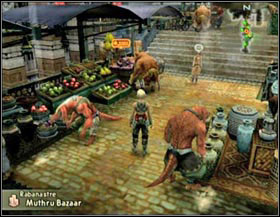 Clan shop in the Muthru Bazaar. The thing you can buy here depend on your clan level
Clan rating:
Killing wanted monsters you gain esteem, but it's not enough to climb the ladder of ratings. You still need the clan points. You get them for defeating encountered enemies. Thanks to this you're able to reach higher and higher ranks.
The assignments you take also have their ranks, but their ranks and your rank as a hunter doesn't have anything in common.
Rank
Required number of assignments
Required number of clan points
What you get from Montblanc
Moppet
-
-
3x Potion
Hedge Knight
2
700
2x Warp Motes
2x Teleport Stone
Rear Guard
4
8 000
3x Remedy
2x Teleport Stone
Vanguard
8
20 000
3x Hi-potion
2x Teleport Stone
Head-Hunter
10
30 000
2x Ether
2x Teleport Stone
Ward of Justice
12
40 000
2x X-Potion
2x Teleport Stone
Brave Companion
14
100 000
2x Hi-Ether
3x Teleport Stone
Riskbreaker
16
200000
2x Elixir
3x Teleport Stone
Paragon of Jusice
24
250 000
High Arcana,
3x Teleport Stone
High Guardian
28
300 000
Empyreal Soul (2000g),
3x Teleport Stone
Knight of the Round
32
500000
2x Megalixir,
3x Teleport Stone
Order of Ambrosia
45
1000000,
All prizes in Sky Pirate's den
Centurio Hero's Badge (1 gil),
3x Teleport Stone
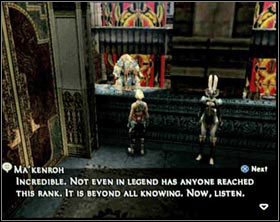
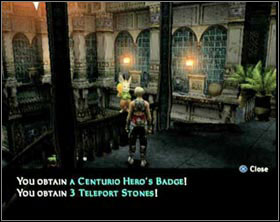
And this it the long awaited prize for reaching the status of a legend.
Muthru Bazaar:
The Clan has its own shop in the Muthru. Only clan members can buy there and the things you can get there depend on you Clan Rating.
Name
Effect
Price
Rank:
Potion*
Restore small amount of HP to the target
70
Moppet
Hi-potion*
Restore a bit more HP than ordinary Potions
210
Hedge Knight
Gyshal Greens
Thanks to them you can ride runaway chocobos
108
Rear Guard
Teleport Stone
This let's you teleport between gate crystals
200
Vanguard
Nihopalaoa
Reverses the effect of restorative items used
30 000
Head-Hunter
Reverse
Causes Reverse
7 600
Head-Hunter
Bubble
Causes Bubble
3 300
Ward of Justice
Faith
Causes Faith
5 800
Brave Companion
Bubble Belt**
Permanent Bubble
19 800
Riskbreaker
Bravery
Target's strength raise
5 800
Riskbreaker
Warp Mote
Has the power of Warp spell
100
Paragon of Justice
Cat-ear Hood
Vitality +20,
Swiftness +50
30 000
High Guardian
Knot of Rust
Damages one enemy
6
Knight of the Round
Dark Matter
Damages all enemies in range
2
Order of Ambrosia
* They disappear after gaining the next clan rank,
**disappears when you become the Paragon of Justice, and reappears when you become the High Guardian.
Notice Board and Montblanc:
On the Notice Board you can find information about available hunts.
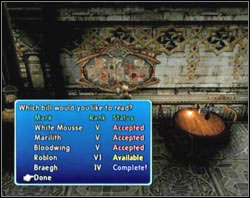
On the left side in the column labeled as "Mark" you can see the name of monsters waiting to be killed,
In the column in the middle labeled as "Rank" you can see the rank of the hunt.
And in the column on the left you can see the status of the hunt:
Montblanc gives you exclusive (read: hard) notices, but it works as the ordinary Notice board.
After accepting the hunt you have to go and talk to the petitioner and than you can go hunting. After you deal with the monster get back to the petitioner and collect your bounty.
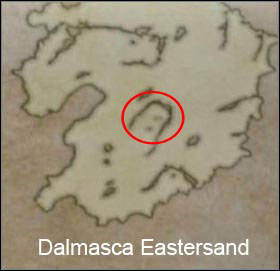

Rouge Tomato can be found on the rocky cliff just in front of the entrance to the city. Go there and kill him. He's pretty strong (as for your current level) but you should have a stock of potions on you and he shouldn't cause you any trouble. After you dispose about half of his HP he jumps down the cliff. Run after him and finish him off. Look out for the wolves prowling there. Try to lure your target to a place without enemies nearby. After the fight get back to Rabanastre, go to "Sandsea" and talk with Tomaj.
Bounty: 300 gil, 2x Potion, 1x Teleportstone
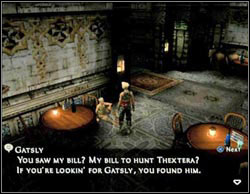
The petitioner on this hunt is Gatsly. He can be found sitting just on the right of the board. Go talk to him.

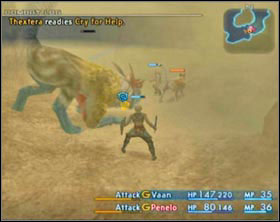
Thextera
Level 6
380 HP
Vulnerable to Wind
Cry for Help
You'll find Thextera in a small canyon south from the west exit from Rabanastre.
Its ordinary attack may cause poison and with the Cry for Help attack it summons to him more small wolves.
Attack Thextera from the beginning and don't bother killing the other wolves. It's good to use magick (e.g. Fire). If Thextera poisons one of your heroes use Antidote at once. And after you have dealt with Thextera take care of the other wolves.
Now get back to Rabanastre and talk with Gatsly in the "Sandsea".
Bounty: 500 gil, Headgear, 1x Teleportstone and possibility to buy Forgotten Grimoire in bazaar for 18 000 gil.

Confirm accepting this hunt with Dantre sitting in the Outpost near the bonfire on Dalmasca Estersand.
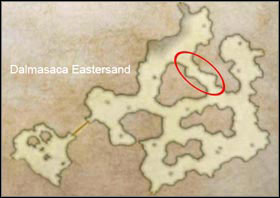
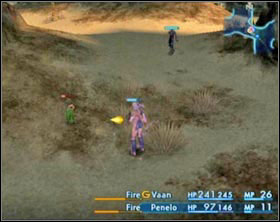
Flowering Cactoid
Level ~8
Resistant to Libra
1000 Needles
Cure
The enemy can be found in the labyrinth to the north-east from the outpost.
You'll recognize him by the dot on the mini-map - his will be bigger then others. If you decided to fight with him on ~5 level you may find it a bit difficult. Make sure that your heroes know the basics of the black magick, because physical attack won't help you much now. When you dispose most of his HP he'll start running. Chase him immediately, because if you leave him he'll start healing himself. He also knows how to use 1000 Needles, which deals you exactly 1000 damage.
When you deal with him get back to Dantro in the Outpost.
Bounty: 500 gil, 10x Potion
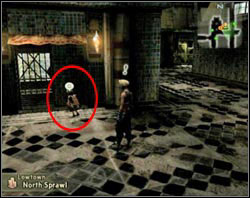
The petitioner on this hunt is Milha. You can find her in Lowtown kneeling near a closed home.
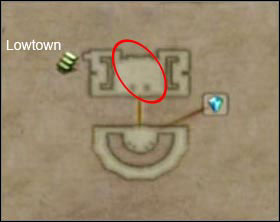

Wraith
About 4 500 HP
Resistant to Libra,
Absorbs Ice,
Vulnerable to Holy
Dark
Doom
You'll find him just nearby the entrance to Garamsythe Waterway form Lowtown. You got to run exactly on the middle of the chamber to make it appear.
His attacks are Dark and Doom. Dark deals damage to everyone in range and doom starts countdown to your death. At the beginning he uses various attacks but just before the end he uses virtually only doom. It's a good idea to perform a quickening combo if you can afford the MP. Now all you have to do is to collect your bounty.
Bounty: 500 gil, Ether, Gaunlets.
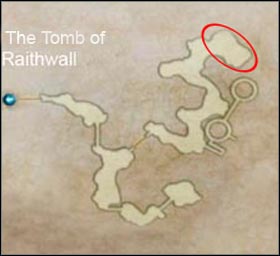
The petitioner on thins one is Seeq called Aekom. You'll find him nearby the entrance to Lhusu Mines in Bhujerba.
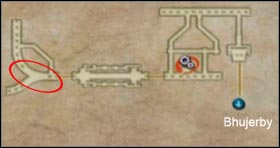
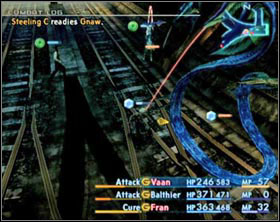
Nidhogg
About 5 500 HP
Resistant to Libra
Saber
Tail spear
Nidhogg can be found in Lhusu Mines. He doesn't have any special attack and bases mainly on the brute force. His attacks are: Saber - very strong attack which harms also the user and the Tail Spear - a very strong attack aimed against one enemy. Nidhogg can also create strong and fast combos from ordinary attacks. What else can I say - hit him as many times as you can and look out for tank's HP level.
Bounty: 600 gil, Rose Corsage, Balaclava, Great Serpent Skin (70g).
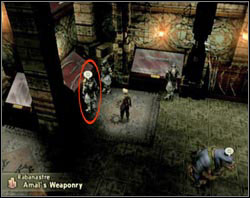
The Notice is send by an imperial Soldier which really cares after Rabanastre. He's afraid that the Wyvern may attack Rabanastre someday. He can be found in weapon shop in Rabanastre.
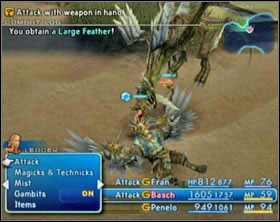
Wyvern Lord
About 24000 HP
Resistant to Libra,
Flying
Ram,
Gust,
Aero,
Breath
Wyvern Lord can be found in the north-western part of Nam-Yensa Sandsea. Unfortunately he appears very close to Bagolies's nest. If you're lucky you'll manage to kill every bagoly there before the enemy takes interest in you.
This enemy is of a flying type, so ordinary attacks with sword of dagger won't be at any use now.
You'll easily get rid of him casting twice berserk and healing the tank. You should cast berserks on Bathier and Fran and use someone with strong white magick to keep them alive. The fight will be over before you can notice.
His attacks are: ordinary ram, Gust damaging one enemy with the power of Wind, Aero damaging everyone in range with the power of Wind and Breath attack with the element of Fire damaging every one that stand exactly in front of him.
Bounty: 1000 gil, Longbow, Shell Shield
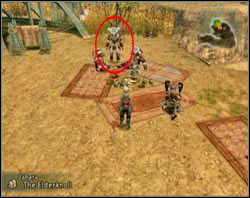
Low-chief Sugumu from Jahra is the petitioner here. He asks you to eliminate Enkelados, because he destroys rare flowers that can be found only on Ozmone Plains.
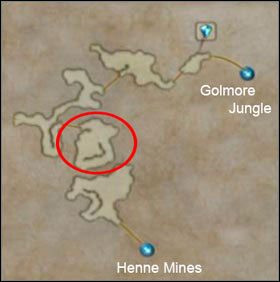
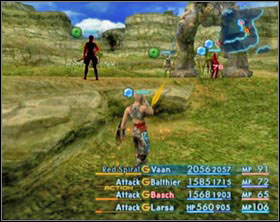
Enkelados
About 18000 HP
Resistant to Libra,
Spin kick,
Restore,
Purify,
Berserk.
You can find Enkelados on the same area where the entrance to Henne Mines is, but to make him appear you have to kill all Wus there - fortunately there's not much of them. There might be a small problem in the form of two Rare Mobs that appears on this area - Aeros and Bull Crock. If they both attack you at the same time (which is possible) don't fight - just reload the game.
Tactic: Berserks and healing.
His attacks are: Spin Kick - deals damage to all characters standing around him, Restore - recovers some HP, Purify - he becomes immune to every bad status change, Berserk - cast on himself at the end of the battle.
Bounty: 1100 gil, Ether, Golden Amulet

Defeating this mob deputes you Sadeen - one of the Nomads from Giza Plains, who stayed there when the whole village moved somewhere else during the rainy season. Big "Frogocodile" ate his precious ring and he wants you to recover it for him.
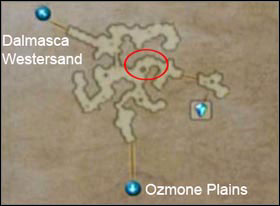
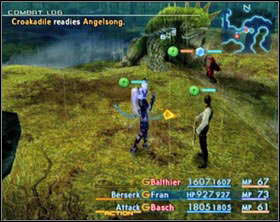
Croakadile
About 19000 HP
Resistant to Libra,
Vulnerable to Fire
Angel Song,
Aqua Bubbles,
Growing Threat
He's a very easy enemy to defeat, especially when you have the Wyrmfire Shot for Balthier. Just cast Berserk on Balthier and the enemy is dead in just few seconds and you have the ring back.
His attacks are: Angel Song - cast Regen on himself, Aqua Bubbles - Water attack aimed against nearest foe, Growing Threat - raise his level twice, he uses that skill at the end of the battle.
Bounty: 1200 gil, Serpent Rod, 1x Teleportstone.
Sadeen asks you the deliver the Ring to Norman Elder during the dry season. After you handle the ring back to Brunona get back here and during rains and talk with Sadeen again.
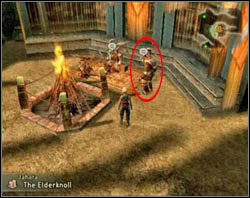
This assignment you get from High-Chief Zayalu on Elderknoll in Jahra.
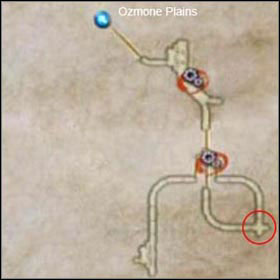
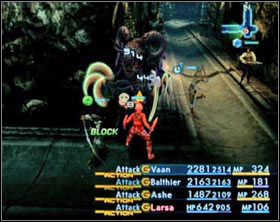
Ixtab
About 20000 HP
Resistant to Libra,
Vulnerable to Holy,
Absorbs Dark,
Slow works on him
Doom,
Aerora
You can find him in dead end in Henne Mines. At the beginning it's good to slow him down. His attacks are Doom, Aerora - a black magick spell with the element of wind damaging everyone in range. Here except for Ixtab you'll find some Redmaws - kill them first so that they didn't interrupt you in the fight.
Bounty: 1300 gil, Ether, Soul Powder (2241g)

The petitioner for this hunt is Balzac - he sits in front of the entrance to the rebel headquarters in Lowtown. He'll tell you that they're training on Dalmasca Westersand, but lately they aren't able to because of a strong monster that's prowling there. He asks you to handle him.
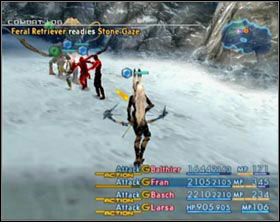
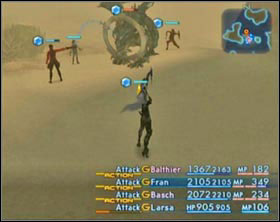
Ring Wyrm
About 150000 HP
Resistant to Libra,
Vulnerable to Fire,
Absorbs Water
Rake,
Immobilizega,
Restore,
Breath
Ring Wyrm can be found in the western part of Dalmasca Westersand (see map above), but only during the sand storm. The enemy has a lot of HP so the fight will be long, but you shouldn't worry, because the enemy himself is pretty weak. You need for this battle the Wyrmfire Shot and the knowledge of using berserk (or a stock of Bacchus's Wine). In this fight use Bash, Balthier and a healer with a long ranged weapon. With mage cast berserk on Bash and Balthier and then just look after their HP levels. Let him attack from time to time when he doesn't have anything better to do.
His attacks are Rake (ordinary attack), Immobilizega (immobilizes everyone in range), Breath - attack everyone in front and may cause Sap (heal this with Regen). Generally the enemy is pretty easy to handle. Just remember to keep distance with the mage to avoid being hit by his attacks.
Bounty: 200 gil, Moon Ring (1647g), Icebrand
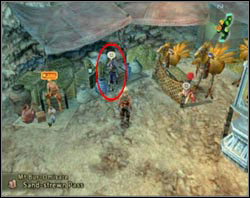
The petitioner is Hymms. He can be found in Mt Bur-Omisace between chocobo stable and one of the shops. He'll ask you to kill one overgrown Coeurl which terrorizes pilgrims.
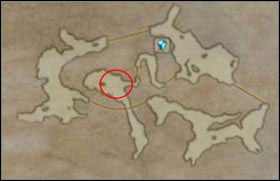
Feral Retriever
About 22000 HP
Resistant to Libra,
Absorbs Wind
Rake,
Balance,
Stone Gaze
The enemy can be found somewhere around the middle of the Paramina Rift, just behind the area with save crystal (looking from Mt Bur-Omisace).
This monster also isn't especially challenging, but you have to kill him fast, or else he'll cast Balance and you'll be done for. Use the ordinary tactic: 2x berserk and a healer.
His attacks are: Rake, Balance - it deals damage to everyone in range equal to the difference between enemy's max HP and his current HP, Stone Gaze - causes petrify to one of your heroes.
Bounty: 1500 gil, Recurve Crossbow, Teleport Stone x2.
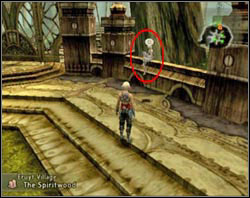
The assignment was send by Viera called Nera. She's in Eruyt Village sitting in the "centre" of the village. He'll ask you to get a tail of a hare which lives in Golmore. This creature is very fast and Nera's friend has a wounded leg and isn't able to catch it by herself. That's why you have been hired.
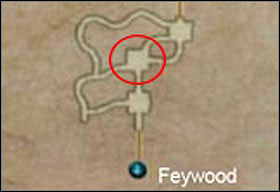
Vorpal Bunny
About 20000 HP
Resistant to Libra
Does he have any?
To find him go to the south part of Golmore Jungle. You can't see him at the first sight - you have to get in the middle of the marked square (see map above). If you don't want to fly mad attack him with the strongest quickenings you have right away. The fight with him is so annoying because of its fighting ability - he doesn't fight, he just runs and when you chase it you draw more and more mobs living there. The only situation when you can get attacked by it is when you corner it - he'll just slap you once and run away again. Unfortunately it's immune to immobilize.
Bounty: 2000 gil, Lightning Arrows, Gillie Boots.
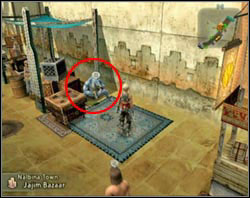
This petitioner you already know - it's Burrogh. He managed to leave Barheim Passage and now he's sitting in Nalbina by his stall. Unfortunately some kind of monster prevents caravans carrying his goods from getting to Nalbina. He asks you to get rid of him.
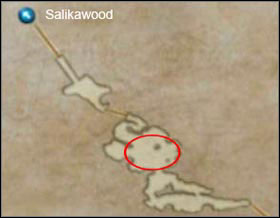
Atomos
About 37000 HP
Resistant to Libra
Gnaw,
Kick
Atomos prowls in the north-western part of Mosphoran Highwaste just before the entrance to Salikawood.
Nothing in particular - kill him as fast as you can. I don't know about any special ability of this mob. The only obstacle here ma be Vultures that are flying nearby. Just kill those closest to the enemy before you start the fight.
Bounty: 1800 gil, Gaia Rod, Diamond shield.


Another assignment from Jahra. This time from Guromu (on the left). After you take care of the Mindflyer you'll be able to talk with Geomancer in the village (the right) - he'll tell you how to get deeper inside Henne Mines, but in order to make him do that you'll have to command at least 10 espers already.
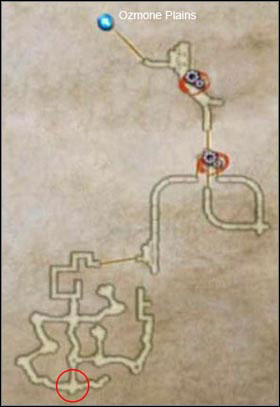
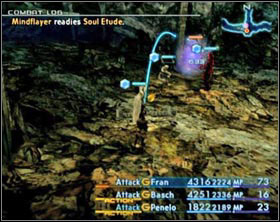 The Mindflayer can be found in south-western part of the mine. It appears only when all characters have full MP.
Mindflayer
About 32000 HP
Resistant to Libra,
Vulnerable to Holy,
Absorbs Dark
Drain,
Soul Etude,
Hero's Marsh,
Mystery Walz,
Invert,
Bio
His attacks are: Drain - drains HP from one hero, Soul Etude - it restores whole HP of the user, Hero's March - he casts on himself Shell, Protect, Haste, Bravery, Faith at the same time. There's also invert which changes your current amount of HP with your current amount of MP and Bio, which causes Sap on everyone in range.
He's not especially strong, but is good at defense, so get ready for a long fight. Cast berserk on one of your heroes and with the rest take care of every bad status that can eventually bother your party.
Bounty: 2200 gil, Carmagnole
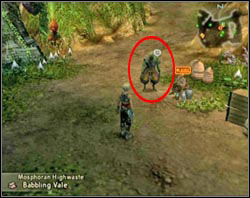
The petitioner on this one is Va'Kansa, which can be found standing near the seller in Mosphoran Highwaste. He had been attacked by a giant shining horse and his companion has disappeared. He asks you to get rid of that creature.
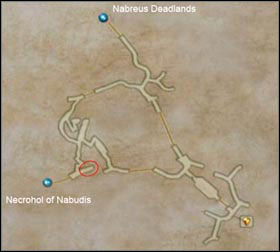
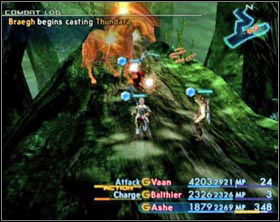
Braegh
About 45000 HP
Resistant to Libra,
Resistant to Dark, Water, Fire,
Absorbs Thunder,
Vulnerable to Ice
Snake Lash,
Invert,
Berserk,
Thundara,
Bleed
You'll find him in the north-western part of Salikawood, just before the entrance to Necrohol of Nabudis. To get there first you have to kill an additional boss: The Bomb King (see the section: "Bosses not connected with the Plot").
His attacks are: Snake Lash, which damages your every character, invert, which changes the amount of MP with the amount of HP, Berserk, Thundara and Bleed, which may cause Sap.
First send a berserked damage dealer to fight him, and forget about any weapon with the element he's resistant to, because it will cause exactly... 0 damage. Leave one hero at a distance with long ranged weapon and a healer.
Bounty: 1700 gil, Obelisk, Hi-Ether.
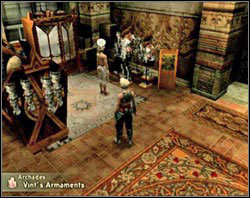
The petitioner on this assignment is Homesick man. He can be found inside the Armaments Shop in Archades.
He wants you to kill a giant Titantoise, which prowls in Sochen Cave Palace and prevents him of getting back home.
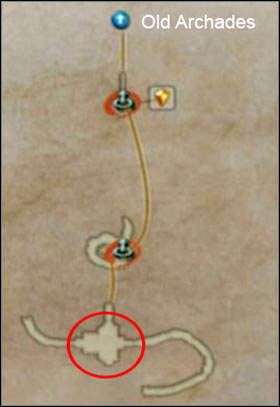

The easiest way to get there is through Old Archades or from the Sochen Cave Palace gate crystal. Use the elevator to get down and you'll find the Dark Steel just in the next chamber.
Dark Steel
About 115000 HP
Resistant to Libra,
Vulnerable to Holy
Power Spin,
Flatten,
Stone Gaze,
Darkra,
Protect
This enemy has a lot of HP (as for his rank), so get ready for a longer fight. He's vulnerable to Holy, but don't use this spell if you have it. The casting last long and it's not worth the damage it deals. You'd better use a weapon with Holy element (e.g. Holy Lance) and cast berserk on the character, which holds it.
Dark Steel uses Power Spin which damages everyone around him and may cause slow, Flatten, a very strong attack aimed against one of your heroes, Stone Gaze which may cause Petrify and Darkra which deals dark elemental damage to everyone in range.
Bounty: 3000 gil, Lead Bolts, Adamantite (1479g).
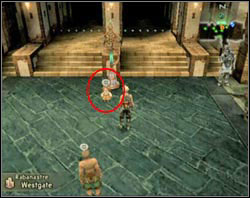
You're hired to this assignment by moogle called Sorbet. He works in moogling at the West Gate of Rabanastre. He says that Old Dalan asked his brother to repair an Old Key to sluices in Garamsythe Waterway, but it got stolen by a white flan. This hunt is pretty important because after you complete it you will get that very key.
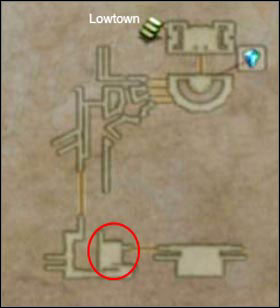
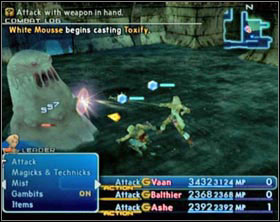
White Mousse
About 66000 HP
Resistant to Libra
Waterga,
Slowga,
Toxify
This enemy can be found in south-western part of Garamsythe Waterway (entrance through warehouse No 5 in Lowtown).
He uses Waterga, which deals water damage to everyone in range, Slowga, which slows down everybody in the range and Toxify, which poisons every one in range. He uses the ordinary attack pretty seldom - he uses mostly Waterga.
Send two characters to attack and leave one healer with long ranged weapon in the back. He'll have to handle bad statuses and healing of course. He may attack from time to time if he doesn't have anything better to do.
Bounty: 2800 gil, Yoichi Bow, Sluice Gate key.
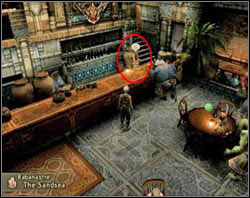
The petitioner is... Migelo! Well not directly. You accept the hunt by bartender in Sandsea in Rabanastre, but the reason you're asked to kill the enemy is to make a special wine, and it's on the commission of Migelo. Buyer personal details are restricted, but just go to Migelo's Sundries after you have taken care of the monster and talk to Migelo. He'll tell you that he has ordered a very special wine ;)
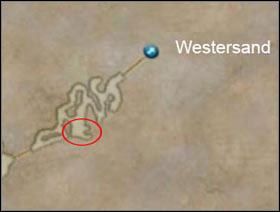
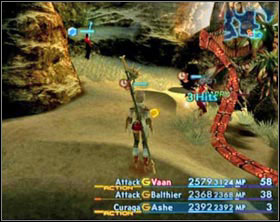
Marilith
About 51000 HP
Resistant to Libra and Dark,
Vulnerable to Water
Tail Spear
Marilith is a great snake, which can be found in Zertinan Caverns by large breaches in the cavern's wall. You won't find him immediately, and it won't appear that fast. Kill everything near these breaches, stand by them, and wait for a while.
His attack is virtually only Tail Spear, which may cause slow on the attacked character, besides he can combine ordinary attacks in long combos, so the fact that he has only one attack doesn't mean that you can underestimate him.
The easiest way to get rid of him fast is to use 2x berserk and a healer. He should also beside healing cast Haste on everyone suffering form slow. First make him cast it on himself and then on others.
Bounty: 2200 gil, Serpent Eye (1440g), Teleport Stone x3
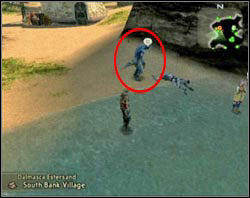
To even make this hunt to appear you have to complete the "Backdoor" quest, because Bloodwing prowls in Barheim Passage.
The petitioner is No 381 - fugitive from Nalbina dungeons. He can be found in South Bank Village - he'll be standing near the river.

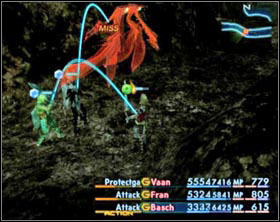
Bloodwing
About 45000 HP
Resistant to Libra,
Flying
Gnaw,
Leech,
Eerie Soundwave
The main problem is that the Bloodwing is a flying enemy and that in this area various ghost, zombies and skeletons like to come up under the ground without warning.
For this fight you'll need long ranged weapon for everyone or Telekinesis.
Enemy's attacks may cause poison (ordinary attacks) or confuse (Eerie soundwave), so be on your guard. Leech drains HP from one of your heroes.
Bounty: 2400 gil, Stun Bombs, Vampyr Fang (1684g)
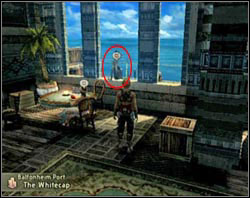
The commissioner on this one is Viera Wayfarer. She sits in the window of Whitecap in Balfonheim. She says that a giant monster has stolen whole her equipment and that she won't be able to defeat him by herself and that's why she has posted the announcement.
Vyraal can be found in the north-eastern part of Cerobi Steppe.
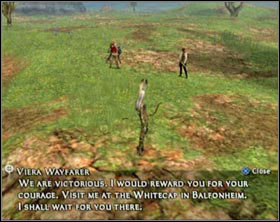
During this quest the petitioner will join you, but unfortunately she's not much of use for you. So count on your own.
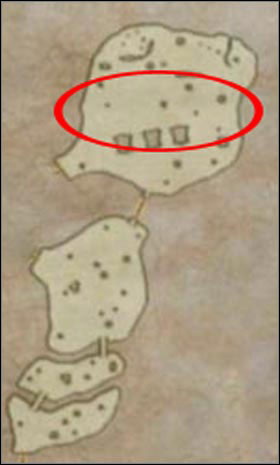
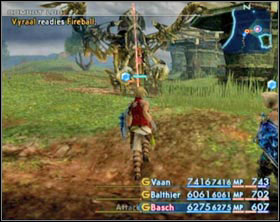
Vyraal
About 97000 HP
Resistant to Libra,
Vulnerable to Wind
Lunge,
Fireball,
Sonic Fangs,
Immobilizega,
Magick Barrier
Vyraal is huge so it won't be easy to miss it. During this fight the petitioner will join you, but unfortunately not very efficient.
At the beginning it's good to attack mainly with Aeroga, but with time, as his HP level decreases, he'll cast Magick Barrier on himself, which will make him immune to all kings of magick. You'll have to attack him with your weapons.
His attacks except for Magick Barrier are Fireball which deals damage to everyone in front of him, Sonic Fangs - a very string attack aimed against one of your party members and Immobilizega, which causes immobilize on everyone in range. Additionally the normal attack may cause confuse.
After the fight you'll recover Vierra's Rucksack. Viera won't reward you here. To collect the prize you'll have to go and talk with her back in Whitecap.
Bounty: 3500 gil, Halberd, Crystal Shield and Vyraal's Dragon Scale.
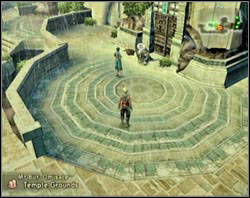
The petitioner is a brother of the victim - Ivaness. He can be found in front of the temple in Bur-Omisace.
It's said that this creature terribly demanded power and as punishment Great Anastasis has imprison him with the use of magic. Unfortunately after his death the spell fade and Piscodaemon was free once again. Ivaness asks you to put the end to this matter once and for all.
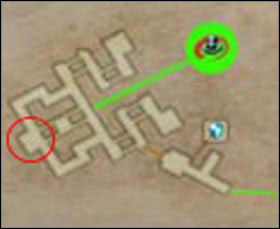
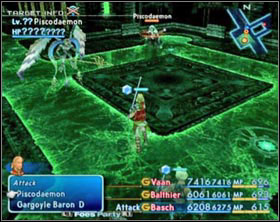
Piscodaemon
About 55000 HP
Resistant to Libra
Bio,
Invert,
Pox,
Dark Shock,
Fog,
Darkra,
Soul Etude
The enemy can be found in Giruvegan, close to the place where you have fought the Tyrant.
His attacks are:
Fight with him is not a good idea if your heroes don't have lot of MP, because Piscodaemon trifle mainly with MP. He's immune to Syphon, so in set the mana recovery gambit from Syphon to Charge. And remember - you always have to have at least a bit MP, because if he attacks you with invert you'll be done for.
Bounty: 3800 gil, Dark Shot, Scathe Mote
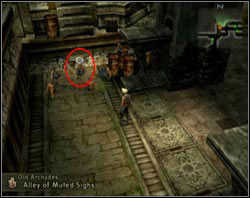
Petitioner for this hunt is bard called Fermon. He can be found in Old Archades surrounded by group of kids.
He'll tell you about a mythic monster, which is said to posses the power do destroy whole world and which has recently awaken. He asks you to deal with him.
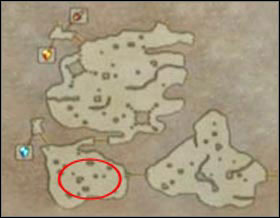
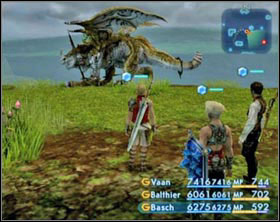
You can find the dragon in Tchita Uplands, but it only appears when it's cloudy. Here unfortunately the weather doesn't change from sunny to rainy just while passing from one area to the other. You have to leave the whole area (e.g. to Cerobi Steppe) and get back to make the weather to change. Only remember that rainy and cloudy is almost the same, because this weather change you can observe simply changing the areas.
Lindwyrm
About 210000 HP
Resistant to Libra,
Vulnerable to Wind
Rake,
Stone Breath,
Bio,
Thundara, Blizzara,
Greater Barrier,
Restore
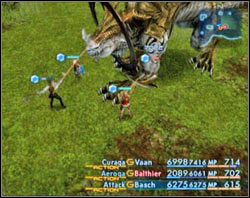
Lindwyrm's attacks are:
Besides at the end of the battle his defense raises dramatically.
Attack him using Aeroga or using a weapon with Wind element. When you dispose about half of his HP he'll use Greater Barrier - immediately cast Dispel when he does that and finish the fight.
Bounty: 4200 gil, Barrel Coat, Hi-Ether
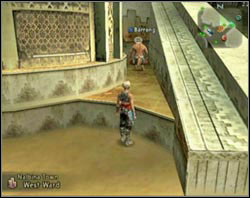
You do this hunt on the commission of Barrong - a novelist from Nalbina. He collects information on rare monsters from traveling adventurers. Unfortunately not many of them have something interesting to tell and the others simply die from the hand of those rare monsters, so Barrong decided to post assignments for them.
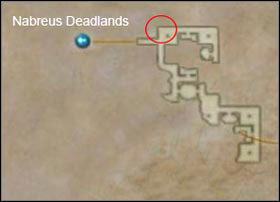
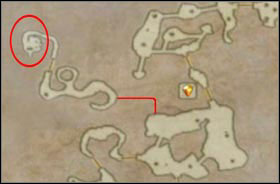
Goliath
About 93000 HP
Resistant to Libra,
Vulnerable to Dark
Aeroga,
Waterga,
Gravity,
Magick Barrier,
Smite of Rage
This golem can be found near the entrance to Necrohol of Nabudis from the Nabreus Deadlands. He may not have a considerable amount of HP, but at the end of the battle his Defense raise.
Besides he may be vulnerable to Dark but at the beginning of the battle he cast on himself the Magick Barrier which make him completely immune to any kind of magick. Here I recommend using one of the Ninja Swords, because every single one of them has the dark element. He also uses the Smite of Rage to attack, which is very slow but very strong too.
Bounty: 3000 gil, Save the Queen, Einherjarium (1682g)
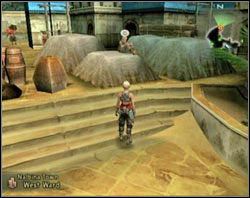
Morgen from Nalbina is the petitioner of this hunt. He wants you to destroy a giant robot created by his son, which terrorize the Nabreus Deadlands.
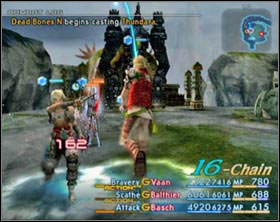
Roblon
About 180000 HP
Resistant to Libra,
Vulnerable to Water
Lunge,
Tri-attack,
Fear,
Smite of Rage,
Blizzara,
Fira,
Thundara
You can find him in seemingly inaccessible area on Nabreus Deadlands called the Overlooking Eternity.
From the very entrance you'll be attacked by lots of Dead Bones. They appear constantly and interrupt the battle. At first there's no end of them coming but with time they appear less and less often, and later (if you try to stand in one place while fighting Roblon) they doesn't appear any longer.
Mainly, only one character will fight with Roblon. Set him a "Foe: Highest Max HP ---> Attack" gambit, which will make him attack only Roblon. And as for the rest - set them a "Foe: Lowest Max HP ---> Attack" gambit, thanks to that they'll attack Dead Bones and when none of them will be seen they'll attack Roblon. The rest gambits (healing, magic etc.) leave untouched.
Roblon's attacks are: Tri-Attack - very strong attack aimed against one of your heroes which may also cause Slow and Fear - drains pretty high amount of MP from one of your characters.
Bounty: 3100 gil, Giant's Helmet, Mythril (1531g)
Insecure Seeq from Archades hires you for this hunt. You can find him in Technicks Shop there.
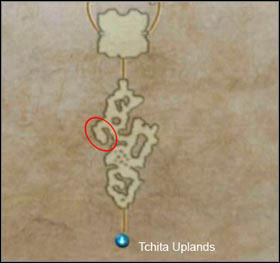
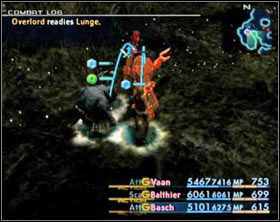
Overlord
About 65000 HP
Resistant to Libra,
Vulnerable to Water
Lunge,
Tri-attack,
Smite of Rage,
Rage,
Pyromania
You can find this enemy in the southern part of Sochen Cave Palace. Additionally in this fight you'll be supported by the petitioner, but (as always in such situation) he's not much of use in the fight and don't worry when Overlord kills him.
This enemy is pretty darn strong. Except for powerful attack like Tri-attack (strong attack aimed against single hero, which may also cause Slow), Rage (deals damage to everyone standing around Overlord), Smite of Rage (very strong attack, but very slow too against one character) and Pyromania (deals fire elemental damage to everyone in range) he can create long and fast combos out of ordinary attacks and may kill one of your party members in just a blink of an eye. Fortunately he has small amount of HP so you should be able to defeat him pretty fast.
Bounty: 3500 gil, 2x Hi-Ether, Teleport Stone
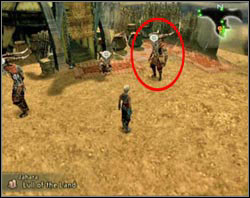
You get this assignment from War-Chief Supinelu from Jahra. He can be found in the south part of the village. He needs your help to kill an eternal enemy prowling in Zertinan Caverns.
Go to the cave. To get to Catoblepas's Lair you'll have to pass through a hidden area. After you enter the correct area you'll be greeted by Supinelu.
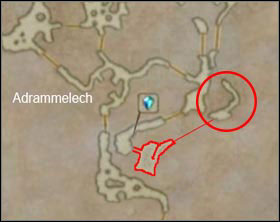
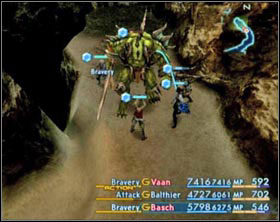
Catoblepas
About 166000 HP
Resistant to Libra,
Vulnerable to Holy
Ram,
Tail Swipe,
Smite of Rage,
Protect, Shell, Haste
During this fight the Supinelu himself will come to your aid, but, I hate to say it, Supinelu isn't as good as he's told to be.
At first the enemy uses only normal attack (which harms him also), Ram and Tail Swipe, which deals damage to everyone standing around him.
With time, when he loses about 50% of his HP, he starts using Smite of Rage and the buffs. At the whole beginning Dispel him and later on do this as soon as he casts a buff on himself. Get rid of him quickly and run to collect your bounty.
Bounty: 3200 gil, Volcano, Arctic Wind (1179g)
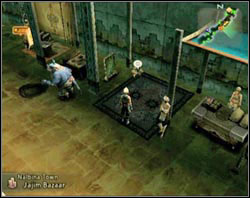
The petitioner on this one is Popol from Nalbina. He tells you that he was recently gave robbing in Necrohol of Nabudis. He has found a beautiful axe and took it with him. Doing this he had anger Deathscythe. Now he appears in his dreams and wants to collect his soul. Popol asks you to kill the specter before it kills him.
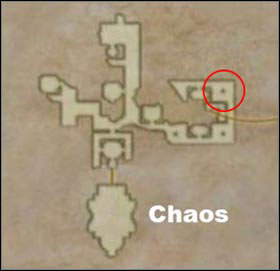
Deathscythe
About 128000 HP
Resistant to Libra,
Vulnerable to Holy
Ram,
Darkra, Darkga,
Paling,
Annul,
Death
Deathscythe can be found in Necrohol of Nabudis near the chamber where Chaos is (or were), but it will only appear when one of your heroes is within critical HP level. Use it - dispose of everyone in the neighborhood so that they didn't interrupt you in battle and if that's not enough attack yourself. You may even kill one of your heroes - all that matters is the life bar passing through the critical HP. Before the battle set mana restore to "Self: MP < 10% ----> Charge" and necessarily set "Ally: any ---> Arise" (or at least Raise or Phoenix Down).
At the beginning the fight is pretty easy. Deathscythe uses ordinary attacks, Darkra and Darkga (you can turn the last two to your advantage using Black Mask or Demon Shield). Somewhere around 50% it casts on itself Paling, which make it immune to all physical attacks, and then it starts using Annul (which drains whole MP) on your characters one by one. Wait till they restore some MP and start using magick against it. Around 30% Paling fades and the specter will start using Death. Be on your guard, because her Death has almost 100% success rating (at least it has while I was fighting). If you set your gambits properly you should deal with that no problem.
Bounty: 2800 gil, 2x Hi-Ether, Soul of Thamasa (1856g)
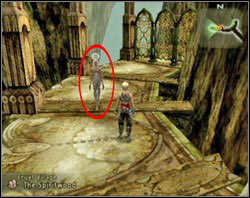
Petitioner on this one is Viera called Rena. You'll find her in Eruyt Village. She says that after "someone" killed Rafflesia in Feywood a Malboro appear that stink so terrible, that Vieras in Golmore can smell it and it their senses. She asks you to deal with that problem.
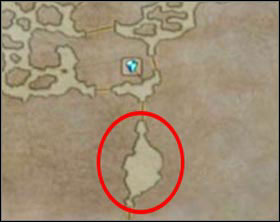
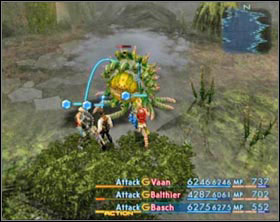
Wild Malboro,
3x Malboro
About 114000 HP
Resistant to Libra,
Vulnerable to Wind (all of them)
Cloying Breath,
Putrid Breath,
Bad Breath,
Soul Etude
This monster can be found in Feywood exactly in the same place where you fought with Rafflesia. Also ordinary Malboros appear with him, but they aren't especially strong. Just use Aeroga on them and they're gone.
The Wild Malboro himself doesn't have any typical physical attacks (except for the normal one, with which he also hurts himself). He mainly bases on various Breath attacks effectively messing up with your status. If you have Ribbon that's great and there's nothing to talk about, but if you don't get ready for intense healing, because he can cause virtually every bad status there is. It's very important to keep one character away form the battlefield so that she could react on time and heal her allies.
At the very end of the battle he'll try to use Soul Etude, which would restore his HP, but if you're quick enough you may be able to finish him off before he can stop casting it.
Bounty: 4600 gil, Euclid's Sextant

The petitioner for this hunt is a kid from Bhujerba - Miclio. He tells you a story about a monster, which lives in Lhusu Mines and kidnap kids.
You can accept this assignment when you have defeated Antlion and got the "Site 11 Key" not sooner.
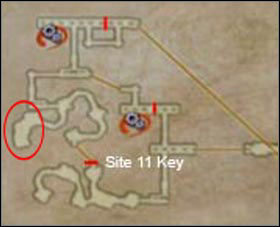
Diabolos
about 90 000 HP
Resistant to Libra,
Vulnerable to Water
Gnaw,
Scourge,
Curse,
Haste,
Pyromania,
Force Barrier
You'll find Diabolos north from the place where Antlion was.
The enemy specializes in poisoning your heroes and besides when you're attacking him you damages also yourself. Scourge besides the damage causes also Sap and Curse his may cause disease, confuse, poison, sap. I assume that I don't have to say that you must heal all that at once.
The enemy also knows how to use Pyromania dealing fire damage to everyone in range and Force Barrier - he surrounds himself with a Paling and becomes immune to physical attacks. Additionally he also knows Haste - when he uses it cast immediately Dispel on him.
When his HP reaches the critical level he starts combining ordinary attacks into combos up to six hits in one.
Bounty: 2600 gil, Demon Shield, Zeus Mace.

This is a bit complicated matter. The petitioner for this is a kid from a rich family, which is traveling by public airships just for fun. You can meet this family in every aerodrome. The boy bet with his mother that Deathgaze exist and asks you to prove it. Mother additionally asks you to take care of him.
This fight will take place aboard an airship, but before it does you'll have to visit almost every aerodrome in Ivalice and talk with this boy. To save up some money you can use Strahl. Every time you talk with him he'll tell you that the Deathgaze was even closer.
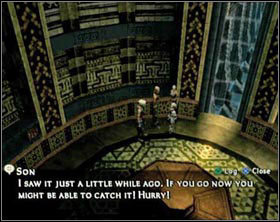
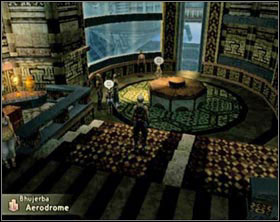
 When you hear the boy saying something like this jump in any public ship and pick the course "Leisure Craft".
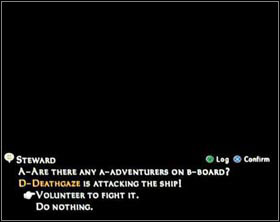 On the ship you'll hear a question for a volunteer to fight the Deathgaze. Agree and run to the upper deck.
Deathgaze
about 190 000 HP
Resistant to Libra,
Vulnerable to Earth,
Absorbs Wind
Fireball,
Crushing Fangs,
Bio,
Curse,
Reverse,
Restore,
Magick Barrier
The enemy is surrounded with Paling from the beginning, so start the fight with some spells. Now the foe is using only Fireball and Crushing Fangs (a very strong attack which may cause death) and of course the normal attack, which also deals damage to the attacking monster. With time the Paling will fades and the enemy starts casting Bio, Curse, Reverse and Restore. Now you can attack him also with your weapons. At the end of the battle he'll also cast Magick Barrier on himself so you'll have to finish him off with your weapons.
Bounty: 3400 gil, 2x Elixir, Deathgaze's figure in Sky Pirate's Den.
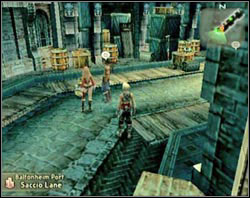
Rikken hires you for this job, because he wants to know who's the fastest in Ivalice. You'll find him in Balfonheim. He tells you a story about mythic Pylraster and asks you to find him. But before he tells you this story he'll want to race you (details in "Rikken, Elza & Raz").
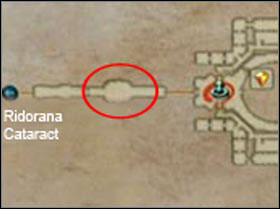
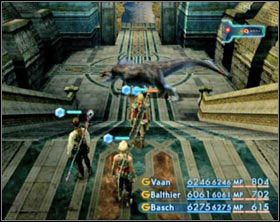
Pylraster
about 460 000 HP
Resistant to Libra,
Vulnerable to Fire
Ram,
Crushing Fangs,
Screw Tail,
Growing Threat,
Rage
This enemy can be found in Pharos at Ridorana exactly in the same place where you have fought with Hydro.
At the beginning he'll attack you using Ram, Crushing Fangs (which may cause Death) and Screw Tail (it inflict damage upon those standing in front of him). His attacks are very strong but fortunately the also damage the attacker.
Somewhere around 50% of his HP, Pylraster will use Growing Threat increasing his level twice. He'll also begin to use Rage damaging everyone around him. Additionally after that first 50% his Defense and attack speed raise.
For this fight you could use Fomalhaut and Wyrmfire Shot or Sagittatius and Fiery arrows for the healing mage, black mage should attack using Ardor and one character should wield Masamune, Genji Armor, Genji Gloves and be under effect of Bravery, Berserk and Haste. Then all you'll have to do is to look out for his HP level.
Bounty: 8000 gil, Grand Mace, 2x Scathe Mote
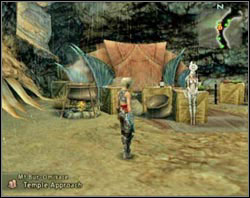
The petitioner of this hunt is Ieeha from Mt Bur-Omisace. Go there and talk to Relj. Ieeha couldn't wait for help any longer so he went to fight Fafnir by himself and he didn't come back.
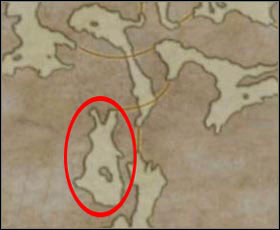
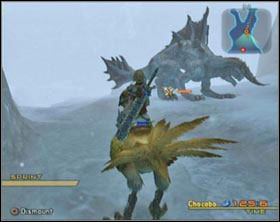
Fafnir
about 1155 000 HP
Resistant to Libra,
Vulnerable to Thunder
Rake,
White Breath,
Shock,
Silencega
The enemy can be found in north-western part of Silverflow's End in Paramina Rift, but he appears only during heavy snowfalls. Leaving the Bur-Omisace such snowfall will be lasting. Now all you have to do is to get to Fafnir, but remember - you CANNOT pass through Frozen Brook area, because this will disable the snowstorm.
Fafnir has really considerable amount of HP and his attacks despite they're not very varied, they're very strong. Except for Rake he uses White Breath which deals Ice damage to everyone in front of hi, and may cause Stop. He also knows Shock, which inflict massive damage to one hero, but he starts using it after he had lost about 50% of his HP.
For this fight use character with Masamune, Genji Gloves and Genji Armor, cast Bravery, Berserk and Haste on him and let him play. Just keep an eye on his HP level. The second character should be a white mage, which will be occupied with healing. A Rose Corsage is a must-have for him during this battle to save him from Silence. You can also give him a bow and Lightning Arrows. As for the third character - I leave the choice to you. It can be a black mage using Thundaga, or fighter using short ranged weapon.
Before the fight prepare a stock of Chronos Tears, because they'll come in handy for sure.
After you kill the enemy you'll find a Ring of the Light. Take it to Relj and collect your prize from her.
Bounty: 7000 gil, Assassin's Arrows, Teleport Stone, Fafnir's figure in Sky Pirate's Den
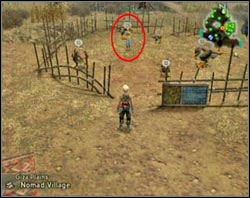
The petitioner on this hunt is Dania from the Nomad Village in Giza Plains. She stands in the Cockatrice enclosure. The Clukatrice appear west from the village, but the only way to make it appear is to kill every single mob there is in that area then leave it and re-enter. You should see a rolling yellow ball - it's a chickatrice - cluckatrice will come to you when you approach it.
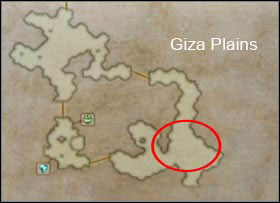
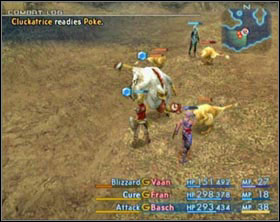
Cluckatrice
+ 4x Chickatrice
about 7000 HP
Resistant to Libra
Poke
Muscus
Stone gaze
Except for the Cluckatrice you'll have to face four of its descendants.
The Cluckatrice itself uses two attacks: Muscus which slows one of you heroes down and Stone Gaze, which petrifies one of your heroes. First focus on Cluckatrice and after you're done with him take care of the four chicks. Personally I have killed the Cluckatrice with a quickening combo and then draw all chicks in one place and attack them all at once with Dark.
Bounty: 1000 gil, Jackboots, Rainbow egg
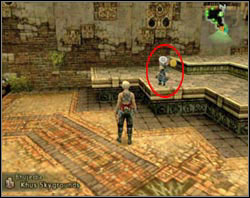
The petitioner on this one is a moogle called Pilika from Bhujerba. You'll find it her in the area with one of the street stalls. She'll ask you to find and take care of her pet. You can find Rocktoise in Site 2 area in Lhusu Mines (where Ba'Gamnan was).
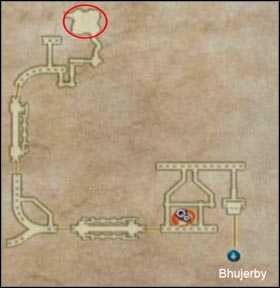
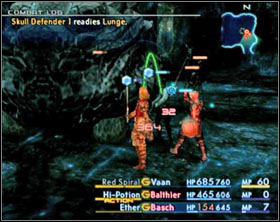
Rocktoise
about 16 000 HP
Resistant to Libra
Stone Stomp,
Sonic turn,
Flash
He's pretty hard as for the game phase he appears in. He's strong and has a pretty high defense attribute. He can't see too well - use it and kill two skeletons that appear in this area and when you're through with them continue to Rocktoise. The fight is pretty exhausting and you wouldn't want anyone to interrupt you. His attacks are: Stone Stomp - very strong attack against one character, Sonic Turn - aimed against those standing around the turtle, Flash - blinds all heroes in range.
Bounty: 1200 gil, Hi-potion x2, Heavy Coat
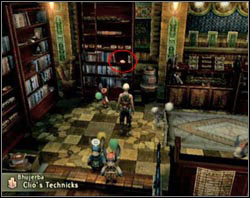
After you collect your bounty talk once again with Pilika. She'll ask you to bring her diary from the Clio's Technicks shop. Agree and go to the shop. Approach the bookshelf in the corridor for staff members only and pick the diary. You'll get to choose whether read it or not, but it doesn't matter which one you choose now. Get back to Pilika and give her the diary. Now she'll ask whether you read it or not. If you said that you did you'll get Kilimweave Shirt and if you replay that you didn't you'll get Shepherd's Bolero.
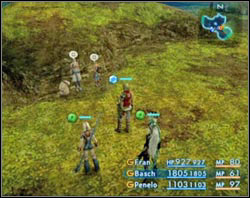
You confirm the assignment at Nanan - south from the nomad Village in Giza Plains during the rainy season. Gil Snapper is extremely strong as for the time he appears. To get to him you'll have to make an effort first.
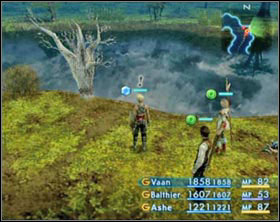 To get to the enemy, you'll have to strike six old, withered trees.
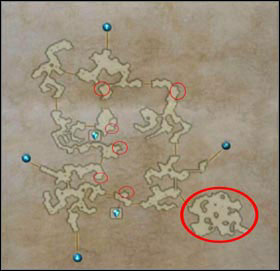 Trees are marked with the small red circles, and the place where Gil Snapper prowls is marked with the big circle.
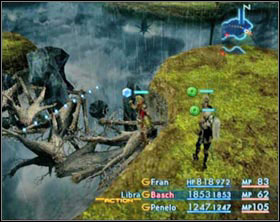 The strucked trees gonna create a passage to a hidden area.
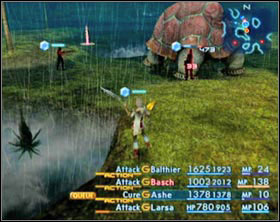 Gil Snapper appears only during a very heavy rain.
Gil Snapper
About 85000 HP
Resistant to Libra,
Absorbs Water
Flatten,
Blizzara, Blizzaga,
Flash,
Slow,
Disable.
At this point Bansat joins you - he'll help you with the Gil Snapper. The first time you enter that area he'll probably greet you with the words that the Gil Snapper is nowhere to be seen. In such situation you must leave the area and re-enter it till he says that the enemy has appeared.
As I said earlier - this monster is very strong. The tactic: Berserk and healing won't be enough. From time to time, when at least one of you characters is dead and as soon as you revives him he's dead again run a bit aside and quickly heal your whole party, do eventually changes in the active party and get back to the Gil Snapper - be quick because the enemy also uses the time of your absence and heals himself. Also keep in mind that there are aggressive Silikon Tortoises on 36 level there - be careful not to fall on one of these while running away from Gil Snapper.
His attacks are: Flatten - a very strong attack aimed against one of your characters, Flash - attack that blinds everyone in range, blizzara and Blizzaga - strong magickal spells with the Ice element, Slow and Disable.
On the same area you can find an Urn with Feather of the Flock, which lets you talk with cockatrices.
Bounty: (to collect it you have to visit Nanan in the Nomad Village during the dry season) 3000 gil, Phobos Glaze (1000 gil).
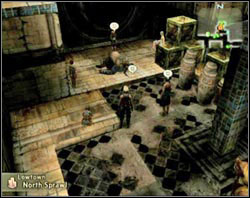
The petitioner on this one is... a thief, who in repentance (of course after he had been caught) wants to return the things she stole, but she can't, because someone else has already stolen these things from her.
You'll find her in Warehouse No. 5 in North Sprawl in Lowtown.
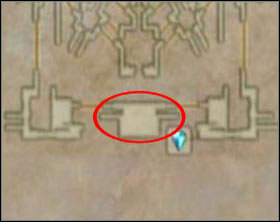
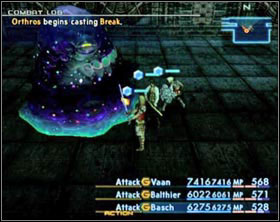
Orthros
About 87000 HP
Resistant to Libra,
Vulnerable to Fire
Lunge,
Slap,
Bleed,
Break,
Flash,
Slowga,
Phatnazmal Gaze,
Darkra,
Mythril Bubbles
This is one belongs to the flan species, it can be found in Garamsythe Waterway, but to make him appear you'll have to send there a party made of three women. If you need to you may change all of them as soon as the enemy appears.
Flan's attacks:
Here you need to know Ardor or at least Firaga. This enemy doesn't have any attack to prevent you from casting spells. Heal every status change, but don't cast berserk on anyone.
Bounty: 3800 gil, Horakhty's Flame, Unpurified Ether (1783g) and Blackened Fragment
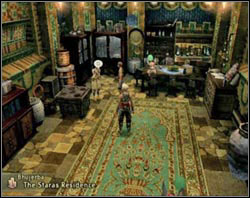
The petitioner of this hunt - Niray - can be found in the only (except for Ondore's) mansion in Bhujerba.
Her kids have runaway to Lhusu Mines. What's worse an Antlion has been seen there recently. She asks you to find her children and gives you the Site 3 Key, so you could get deeper.
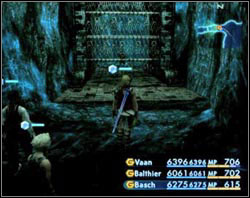
While in Lhusu Mines run to Site 2 (where Ba'Gamnan was) and at the back of this area you'll find a closed gate. Use the key to open them. Before you enter the area with gate crystal open the giant gate, which blocks the way to the main part of the mine and run to the west.
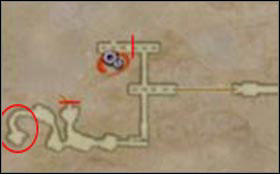
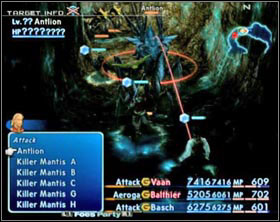
Antlion,
5x Killer Mantis
About 108000 HP
Resistant to Libra,
Vulnerable to Wind
Ram,
Gnaw,
Flatten,
Enrage
Antlion can be found in the most western part of Lhusu Mines. Along with him five other Killer Mantises wait for you. All of them, including Antlion, are vulnerable to wind, so use few Aerogas in the place where there's the biggest concentration of them and after just few seconds you'll be left alone with Antlion.
He doesn't have any special attacks. Just flatten, which deals pretty large damage to one character, but he uses it also pretty rarely. At the end of the battle he'll use enrage, which will raise his attack speed and amount of hits he can pull off in a single combo. His normal attack may cause disable, but only on the attacked character, so there will be always someone to cure the rest.
Bounty: 4300 gil, Bubble Belt, Sickle-Blade (1878g), Site 3 and Site 11 keys.
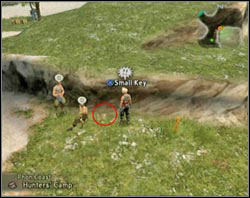
After the fight the boy will tell you that he had dropped the Site 11 key and it fallen through a breach in the floor and onto the Earth. It seems like looking for a needle in a haystack - but hey, where's the problem?
Remember the guy in Phon Coast which is said the have fallen from Bhujerba? You can find the key just right from him, on the ground.
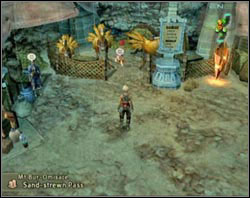
The petitioner on this one is Gurdy from Mt Bur-Omisace. Some time ago a legendary Trickser has saved his precious chocobos from choco-thieves and he decided to post him as a hunt mark (gratitude...).
Theoretically you have competed about this quest with Mondid, but after he had reached this place (before you did) he had stated that he can't do this alone so he joins you.
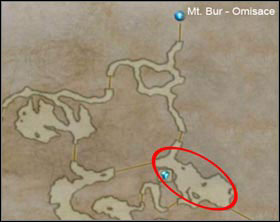
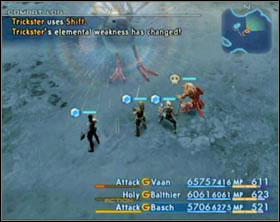
Trickster
About 62000 HP
Resistant to Libra,
He's vulnerable to one element and absorbs the other.
Lunge,
Wild Charge,
Choco-comet,
Shift,
Paling
He can be found in the area south from Bur-Omisace. When you enter the area you'll be greeted by Mondid and if he says that Trickster has appeared - everything is alright, but if he says that the enemy is nowhere to be seen leave the area and re-enter.
Mondid, as in every other hunt someone else is helping you, isn't especially useful for you.
The fight with Trickster is very dynamic. You rarely find yourself standing and facing one another while exchanging blows. Mostly the enemy runs around at high speed, you lose him out of sight and in next second he attacks you all of a sudden with Wild Charge (very strong attack against one of your characters) or Choco-comet (a another strong attack which deals damage to everyone in range). His normal attack may also cause doom.
The next thing is that it's pretty hard to say to which element he's currently vulnerable, and if you finally find out which one is it, he'll immediately use Shift. You may want to set gambits like: "Foe: lightning weak ---> Thundaga", but if you don't have them don't bother searching for the weakness. If his HP reaches the critical level he'll use Paling so you'll just have to use magick now, but it's best to use non elemental one like Flare or Scythe.
Bounty: 4800 gil, Deimos Clay (1000 gil), Trickster's figure in Sky Pirate's Den.

You get the order of killing this monster from Montblanc himself. After accepting the hunt you won't have to search for him for too long. He'll ask whether you want to hear the details or not. Mondid will help you with this assignment once again, but he doesn't seem to be happy with that fact.
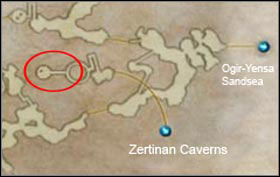
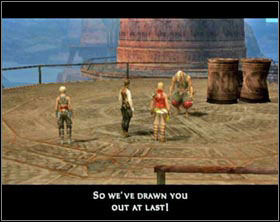
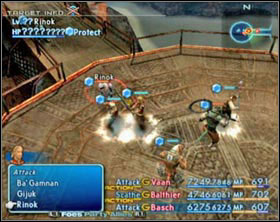
Belito should prowl in an isolated area in Nam-Yensa Sandsea. To get there you'll have to go to Zertinan Cavers from Ogir-Yensa Sandsea (using the most western entrance). When you reach Nam-Yensa go upstairs and to the most advanced platform. There Mondid will await you. It turns out that this hunt was just a provocation. The real target is Ba'Gamnan and despite all appearances Mondid doesn't work with him. His task, on Montblanc's order, was to draw you out to lure Ba'Gamnan.
Ba'Gamnan,
Bwagi,
Rinok,
Gijuck
About 118000 HP,
About 28000 HP,
About 24000 HP,
About 26000 HP
Resistant to Libra,
Vulnerable to Water (all of them)
Kick,
Lunge,
Shining Ray,
Eviscerator
At the whole beginning of the battle it's best to take care of Ba'gamnan's henchmen first. They're weak so you should deal with them fast and focus on the main dish.
He doesn't have especially varied list of attacks. Beside the normal attack, Kick and Lunge he uses Shining Ray which deals Holy damage to everyone in range, but you can deal with this easily by equipping White Mask or Sage's Ring. The enemy also knows how to use Eviscerator, which deals everyone in front of him.
Bounty (you get it from Mondid): 5100 gil, Magalixir.
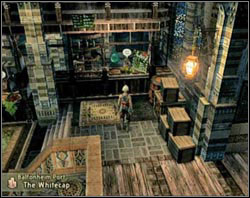
A wench from Whitecap in Balfonheim hires you for the job. She's haunted by dreams with demonic horse. She asks you to take care of the source of these dreams. To do so go to Pharos.
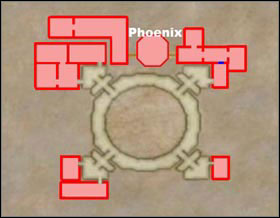
Ixion
About 276000 HP
Resistant to Libra,
Vulnerable to Holy,
Absorbs Thunder.
Kick,
Curse,
Dispelga,
Fearga,
Sleepga,
Silencega,
Thundaja
Ixion can be found in "basement" under Pharos. Teleport there, approach the Dais of Ascendance and use it to get to Penumbra. Don't move - hordes of Abaddons, Bull Abaddons and Mistmares will attack you. Kill them all till they stop appearing. Get back upstairs, touch the crystal to replenish your HP and MP and go back to Penumbra. If you can't see him run around the shaft and when you reach the elevator the Ixion should appear.
It's important to set "Ally: HP<60% ---> Curaja" for everyone and "Ally: any ---> Esunaga" for at least two characters. Don't forget also to set "Self: MP<10% ---> Charge", because Ixion is immune to Syphon. Also equip Bowline Sash on one of the characters with Esunaga set in gambits.
Attacks of this demonic horse are (except for the standard one) Curse causing on everyone in range Confuse, Disease, Poison, Sap and Fearga draining a great amount of MP from every hero in range. Additionally at the end of the fight his defense raises.
The most annoying thing about Ixion is his combination of few Dispels in a row and then Fearga leaving you without buffs and MP (or the other way around: Fearga and just after that few dispels in a row). The most important thing is to have mana to heal your party, the buffs aren't so important.
Bounty: 3000 gil, Sapping Bolts, Ragnarok

Another assignment from Montblanc.
I assume that I don't have to tell you where to find him.
The Seer can be found in the lowest floor of Pharos called Unknown and to get there you have to pass three other underground floors in Pharos (details in "Pharos at Ridorana - Origin of Darkness") and defeat an optional boss Phoenix (details in "Bosses not connected with the plot").
The Shadowseer
About 265000 HP
Resistant to Libra,
Vulnerable to Holy.
Darkness, Shining Ray
Immobilizega,
Paling, Magick Barrier, White Wind,
Invert,
Curse,
Fearga,
Dispelga,
Flare, Scathe,
Darkga, Holy,
Shock, Scourge
Pandemonium
About 110000 HP
Resistant to Libra,
Vulnerable to Wind
Flatten,
Flash,
Stone Gaze,
Perfect Defence,
Power Spin
Slyt
About 100000 HP
Resistant to Libra,
Vulnerable to Holy
Enrage
Fenrir
About 190000 HP
Resistant to Libra,
Vulnerable to Earth
Ram,
Wail,
Bravery
Phoenix
About 135000 HP
Resistant to Libra,
Vulnerable to Water
Lunge
During this fight except for Shadowseer you'll have to face three other bosses you already have defeated earlier in Pharos. They're perfect copies - have the same amount of HP, the same weaknesses and the same attacks as the original ones. The earlier strategies are still valid for those here but now you have also to look out for the loafing Shadowseer. As soon as he summons a monster Paling, Magick Barrier and White Wind surrounds him effectively protecting him from any harm.
The fight begins normally. Seer will be alone, he'll attack you using Darkness (Dark element) or Shining Ray (Holy element) which can be easily absorbed with the proper equipment. He can also cast Immobilizega on your party, but he often doesn't have to because his normal attack may cause Immobilize.
After a certain time he'll summon his servants in this order: Pandemonium, Slyt, Fenrir, Phoenix. Seer becomes immortal when one of his servants appears and the only way to make him mortal again is to kill his favorites first. From the time he summons his first pet he starts using Invert, Fearga, Curse and Dispelga. Especially dangerous combination is Fearga and Invert just after it, leaving you with few HP points or simply killing you. In such situation you may use X-potion immediately or wait till he's dead and cast Arise. I suppose that I don't have to say that his curse has to be cured right away. You'll certainly make a good use here from Ribbon or if you don't have one equip at least Bowline Sash to be immune to confuse.
Many people complain about problems when Fenrir appears - in such situation put him to sleep, heal yourself, cure every bad status, restore mana and continue the fight.
When you deal with all four servants Paling, Magick Barrier and White Wind fade making Shadowseer mortal again, but he himself becomes stronger and more resistant and besides he start using strong black magick spells.
When he's alone again send two characters at him and leave the third in a distance for support. During this phase robes with high magick defense are a better choice then heavy armor. Keep Shell on everyone and especially on those fighting in close range.
After the fight go talk to Montblanc and find out that no one expected you to return... well... to hell with it! It's the bounty that counts ;)
Bounty: 20000 gil, 2x Megalixir.
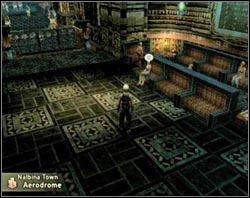
The petitioner on this one is called Zammadria, and can be found in Nalbina's Aerodrome. Carrot used to be her pet and now it prowls in Salikawood and despite his posture and terror which he spreads he's very fearful.
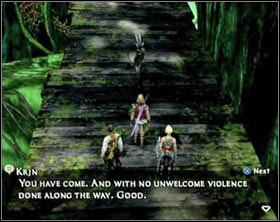
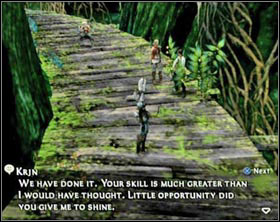
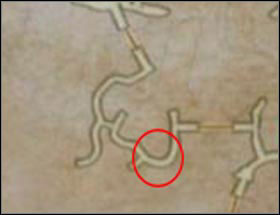
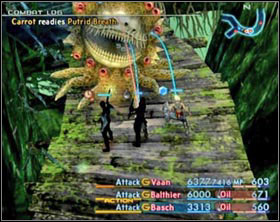
Carrot
About 105000 HP
Resistant to Libra,
Vulnerable to Holy.
Lunge,
Putrid Breath,
Time Requiem,
Growing Threat
During this fight Krjin will help you. Unfortunately the situation recurs - she really isn't much of a help...
Carrot can be found in Salikawood on a small path full of Wyrdhares, but to make him appear you cannot kill anything here. If you do that, he won't be there where he should be. To make him appear you have to leave the wood and re-enter. If everything went ok. Krjin will praise you that you didn't show any unnecessary violence.
When you finally find it kill every Wyrdhare in the neighbourhood first. They are passive and doesn't attack you, but the cast buffs on Carrot.
This creature doesn't have especially varied attacks but the one he has are pretty efficient. He loves to mess up in statuses. His Putrid Breath causes on everyone in front Petrify, Disease, Slow, Disable, Immobilize, Blind, Poison, Oil, Sap, and the Time Requiem ma cause Stop on everyone in range. You also have to leave one character at a distance with long ranged weapon to heal those fighting in close range.
Carrot also knows the Growing Threat, which doubles his level, but he uses it at the end of the battle.
Bounty: 5200 gil, Stink Bombs, Putrid Liquid (1342g), Carrot's figure in Sky Pirate's Den.

To make this announce appear you have to kill Antlion and get the Site 11 Key.
It's another hunt form Montblanc. He tells you about a being that travels between dimensions and collects legendary swords (which you can tell, because he carries weapons of heroes from former FF parts ;)), and then challenges their owners to a duel in which their weapon will be the prize. The same thing has happened to Montblanc's friend. Now he asks you to go and defeat Gilgamesh.
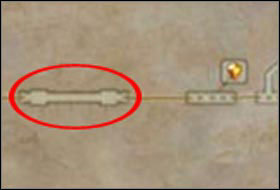
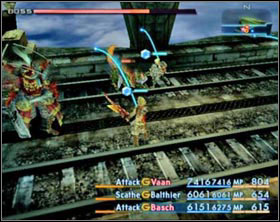
Gilgamesh & Enkidu
About 122000 HP.
Enkidu about 32000 HP
Resistant to Libra,
Gilgamesh: Suffer half damage from all elements
Slicethrice,
Perfect Defense,
Ultimate Illusion,
Sonic Fangs (Enkidu)
This enemy can be found in Lhusu mines in Tasche Span - just behind the area with gate crystal. The whole battle consists of two parts. First Gilgamesh wants to test you. After the fight on the bridge he escapes. To have this hunt completed you have to find him and finish him off.
First kill Enkidu. It shouldn't take you long (he has only 32000 HP) and after you're done with him take care of Gilgamesh.
He mostly uses normal attacks and Slicethrice - nothing special. At the end of the battle he'll use Perfect Defense making him immune to physical and magical attacks. Now he'll use Ultimate Illusion, which deals great damage to everyone standing in front of him, twice and then Paling and Magick Barrier will fade. Use this to finish him of.
During this battle you'll probably see that you may differ phases in it, namely Gilgamesh after losing about 20% of his HP will change on of the swords he wields on a stronger one (you can't miss this animation). And additionally you can steal things from him for a few times thanks to these phases. Between 100% - 40% you can steal some gil or potions, 40% - 20% Genji Shield, 20% - 0% Genji Gloves.
During the second part of the fight you will be able to steal the rest of Genji Set, which you won't get anywhere else, so I recommend getting it now.
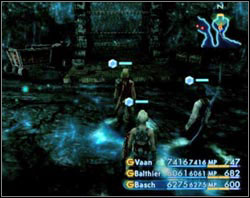
After you get rid of his whole HP he manages to escape and you see the "Congratulations" message, but it's not over yet.
Run deeper into the mine and use Site 11 Key on Wrought Iron Gate (if you hadn't been there earlier).
Gilgamesh awaits you in the furthest end of the mine. Just before that area you can find a save crystal.
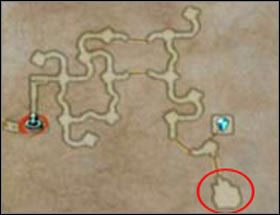
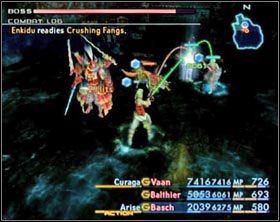
Gilgamesh & Enkidu
About 464000 HP,
Enkidu about 118000 HP
Resistant to Libra,
Gilgamesh: Suffer half damage from all elements
Gilgamesh:
Bitter End,
Fly, Enkidu,
lv. 2 sleep,
lv. 3 disable,
lv. 4 break,
Perfect Defense,
Monarch Sword
Enkidu:
Lunge,
Crushing Fangs,
Dash
This is the main part of the battle. They're both a lot stronger than before. Now as you can see Gilgamesh has attacks related to levels. Break is not that bad because it will give you time to heal it, but sleep and disable are a totally different matter. If your heroes are on a level that qualifies to these attack give them proper accessories (Black Belt - immune to disable, Nishijin Belt - immune to sleep).
First, like the last time, take care of Enkidu. His normal attacks may cause Petrify and Crushing Fangs may cause death. Additionally Gilgamesh's attack: Fly, Enkidu raises his defense and attack power. After you're done with him go for the main dish (again).
At the beginning he isn't much of a threat for you (if you have equipped the proper accessories). Only his normal attack may cause Sap and there's also Bitter End, which deals massive damage to one of your characters. This fight, just like the last one, consists of five phases. Before the last phase he draws "Sword of Legend". It bodes ill for you. Now he'll use Perfect Defense - you have to with stand it. Now he'll use Monarch Sword twice - a really strong attack aimed at one hero. After that the Perfect Defense effect will wear out. At that time he'll have lots of buffs on him and will be unfortunately immune to Dispel. His defense will also raise and he'll start combining normal attacks into long and fast combos.
Just as in the first battle you can steal from him more then once: 100%-40% potions and gils, 40%-20% Genji Helm, 20%-0% Genji Armor.
After you're through with him it's better to save your game, because on your way back you'll probably encounter Disma - a strong Rare Monster. It's strong, but not enough to defeat you, but if other mobs will interfere with the fight you may have a really hard time.
Bounty: 10 000 gil, Masamune, figure in Sky Pirate's Den
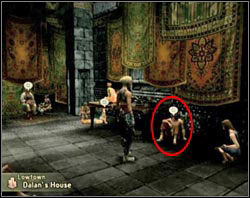
The petitioner is a fugitive from Mt Bur-Omisace named Koqmihn. Now he lives at Dalan's place in Lowtown.
He tells you a legend about Behemoth King and asks you do annihilate him.
He has told you only a fragment of the legend and will tell you the rest after you have killed him.
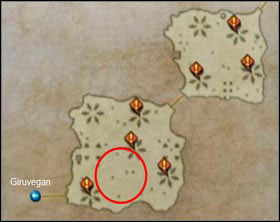
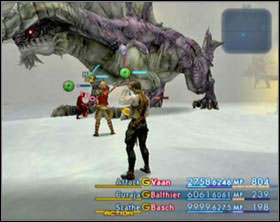
Behemoth King
About 1590000 HP
Resistant to Libra
Rake,
White Breath,
Thundaga, Firaga, Blizzaga,
Ardor, Holy, Dakrga,
Slowga,
Paling, Magick Shield,
Greater Barrier
Behemoth King appears in Feywood in the last area just before Giruvegan, but to make him appear you'll have to kill everything in this area and in the former one (Ice Field of Clearsight and the Edge of Reason).
Behemoth has a lot of HP and what's worse it that you can't attack as you please, because his status varies between Paling and Magick Shield, so be prepared to change from time to time gambits from physical attack to magical and the other war around. Do not use the elemental magick, just use Scathe.
His normal attack (which alone is very strong) may cause Disease, but fortunately he also deals damage to the attacker. White Breath deals damage to every one in front of him and may cause Stop. To avoid that give those fighting in close range Power Armlets. Mage on the distance should have Sage's Ring and should cure his comrades when needed.
From time to time the enemy will cast Greater Barrier on himself and you just Dispel him right away. Somewhere around 30% his defense will raise.
After the fight get back to Dalan's place and talk with Koqmihn.
Bounty: 250 gil, 2x Bacchus's Wine, Behemoth King's figure in Sky Pirate's Den, hearing the end of the legend told by Koqmihn.
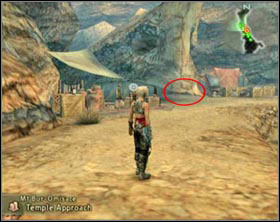
![After you have talked with Koqmihn go to Mt Bur-Omisace, approach Wyrm's Snout [screen 1], unarm Vaan and hit it - Behemoth King (rank VII) - Extraordinary hunt notices - Final Fantasy XII - Game Guide and Walkthrough](https://game.lhg100.com/Article/UploadFiles/201512/2015121519062907.jpg)
After you have talked with Koqmihn go to Mt Bur-Omisace, approach Wyrm's Snout [screen 1], unarm Vaan and hit it. A Wyrm Snout Plunder will fall on the ground. Examine it. You'll get 500000 gil and Rod of Faith.

You'll get the opportunity of fighting Yiazmat after you complete every other assignment there is and defeat Hell Wyrm (see the "Bosses not connected with the plot" section).
The petitioner is Montblanc along with his whole family. He tells you a story of the most horrifying beast that ever existed and says that if anyone can defeat it you're the one.
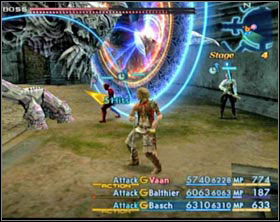
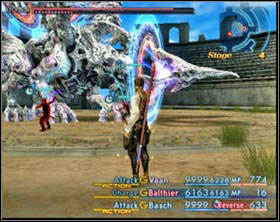
Yiazmat
About 50000000 HP
Resistant to Libra,
Vulnerable to Dark
Rake,
White Breath,
Stone Breath,
Death Strike,
Cyclone,
Growing Threat,
Protect, Shell, Haste, Bravery, Faith, Regen, Reflect
This monster, like Hell Wyrm, has two life bars, but unlike that Wyrm his life bars decrease in appalling... slow matter. He can be found in area called Colosseum at Ridorana Cataract.
His attacks are very powerful (but not as much as Omega's) and additionally may cause Death. The enemy also knows how to use White Breath, which deals Ice damage to everyone exactly in front of him and it may also cause Stop. There's also Stone Breath, which also deals damage to everyone in front, but instead of stopping may cause Petrify.
If he can't reach you he will attack with the use of Death Strike (unless you are beyond his eyeshot). He often uses this attack after Cyclone to deal with the survivors. The Cyclone itself is a very powerful attack which deals damage to everyone in Colosseum and may cause Sap on them.
After you have dealt with about half of his HP his defense raises, and when they reach the critical level he uses Growing Threat - his attacks become faster and if you move away a little bit too far he'll start to regenerate in alarming matter.
For this battle you'll need two Yagyu Darkblade (or eventually Orochi), Fomalhaut with Dark Shot, Genji Gloves, 5x Bubble Belt, Sage's Ring. During this fight you'll be using the Decoy/Reverse trick again.
Give ninja swords to two of your heroes. The one with Yagyu should also have Genji Gloves. To the second one give Bubble Belt. Fomalhout and Sage's Ring should be given to the mage. Give Bubble Belts to every one in reserve too. Before the fight make sure that you have plenty of Chronos Tears in stock because you'll surely make use of them.
Gambit setup at the beginning:
Hero I (with Yagyu)
Hero II
Hero III
Ally: Any ---> Arise
Ally: Any ---> Arise
Ally: Any ---> Arise
Self ---> Bravery
Ally: Hero I ---> Reverse
Ally: Hero I ---> Decoy
Self ---> Berserk
Ally: Any ---> Chronos Tear
Ally: Any ---> Chronos Tear
Ally: Hero I ---> Stona
Ally: Hero I ---> Stona
Ally: Hero III ---> Esuna
Ally: Hero II ---> Esuna
Ally: Hero III ---> Curaga
Ally: Hero II ---> Curaga
Self: MP < 10% ---> Charge
Self: MP < 10% ---> Charge
Foe: Nearest ---> Attack
Foe: Nearest ---> Attack
This setup will be enough at the beginning, but it won't be enough when the enemy becomes stronger and faster. Later on I recommend such setup:
Hero I
Hero II
Hero III
Ally: Any ---> Arise
Ally: Any ---> Arise
Ally: Hero I ---> Reverse
Self ---> Bravery
Self ---> Bravery
Ally: Hero II ---> Reverse
Self --> Decoy
Self ---> Decoy
Ally: Any ---> Arise
Self ---> Berserk
Self ---> Berserk
Ally: Any ---> Chronos Tear
Ally: Hero I ---> Stona
Ally: Hero II ---> Stona
Self: MP < 10% ---> Charge
Foe: Nearest ---> Attack
Additionally give a Bubble Belt to the character that had Genji Gloves.
At first, when you're hurt, you can hide in corridors around the arena - Yiazmat will start buffing himself when you do that. After you're done just cast Dispel on him.
When Yiazmat's HP reaches critical level don't even think about that solution. As soon as he loses you from his eyeshot he starts regenerating like mad. From now on you have to deal with all difficulties in the middle of Colloseum, with Yiazmat breathing down your neck.
From now on you'll also have to start using the characters in reserve. You'd do best switching their gambits off so you had better control over their actions. You'll use their help:
After you have used one of the backup team members heal him.
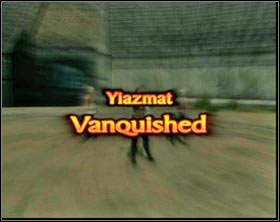
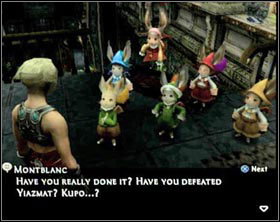
With such setup you should handle him pretty well. After annihilating him go to Montblanc for your reward.
Bounty: 30000 gil, Godslayer's Badge (1g)
Beside the ordinary monsters, that can be found almost on every step, you'll encounter their mutated versions. They're stronger, more resistant and have more HP. The main purpose of their existence is just to check them off in bestiary and get the Ba'Gamnan's figure in Sky Pirate's Den. Of course there are also different advantages like leveling up with Neglamuur or Deathbringer from Ithuno.
The ways of finding certain monsters you'll have to confront with other parts of this guide e.g. about opening door somewhere. Usually I place a footnote to that specific section.
When I say: "create a chain" I really say: "Kill these monsters till the digit showing the number of killed monsters starts blinking".
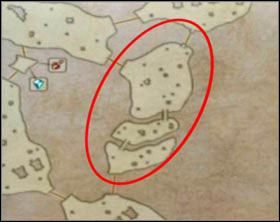 No. 1 - Aspidochelon
Cerobi Steppe - randomly replaces one of Adamantites there.
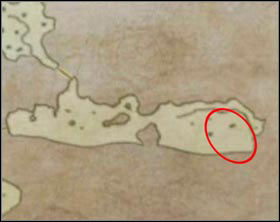 No. 2 - Thalassinon
Go up the hill in Phon Coast and wait there for a while. You'll see it below.
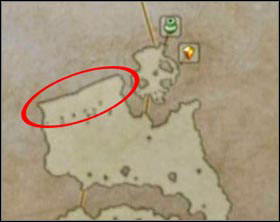 No. 3 - Greeden
You'll find him on Dalmasca Estersand, on south bank of Nebra.
Kill everything there except for the passive cactiles. After a moment he should appear on that bank.
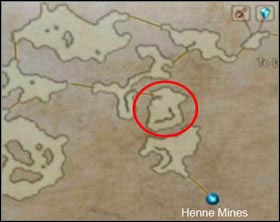 No. 4 - Bull Croc
It spawns in area on Ozmone Plains called The Shred, actually on its northern part. It appears randomly.
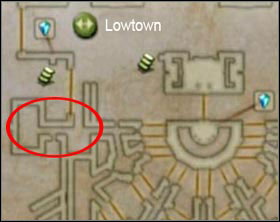 No. 5 - Gavial
He can be found in Garamsythe Waterway.
But to make him appear you have to have the Sluice Gate key (for details check the "Ordinary hunt notices" section for the "White Mousse (rank V)") and close sluices No. 4 and 10. Then go downstairs to the drained canal and go west as far as you can. You'll find some treasures there and in that moment you should be attacked by Gavial, which will jump out from the corridor behind you.
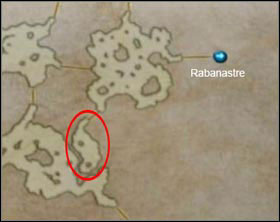 No. 6 - Wary Wolf
You'll find this one in Mosphoran Highwaste in the area called Dalmasca Estersand, but to make him appear you have to create a chain with Worgans.
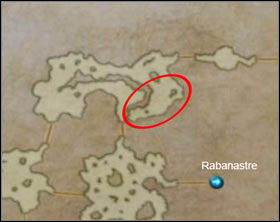 No. 7 - Kaiser Wolf
Appears in Dalmasca Westersand. To make him appear you have to kill No. 8 - Lindbur Wolf first and without leaving the Westersand come here.
No. 8 - Lindbur WolfCan be encountered in Dalmasca Westersand after making a chain from wolves.
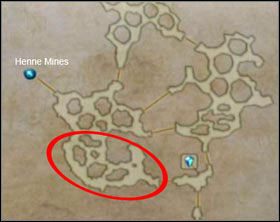 No. 9 - Dreadguard
Feywood - create a chain from Mirror Knights. If it didn't appear leave the area and re-enter.
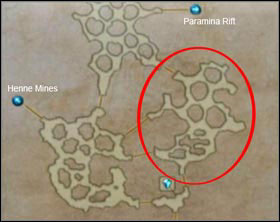 No. 10 - Crypt Bunny
Feywood - kill everything that moves in this area.
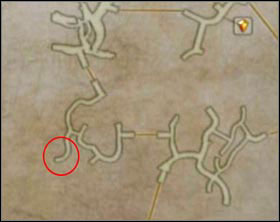 No. 11 - Spee
Salikawood - kill all Wyrdhare's in this area and go to the dead end.
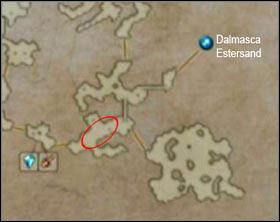 No. 12 - Rain Dancer
Giza Plains - rainy season. Sometimes jumps out of a pond west from the south save crystal.
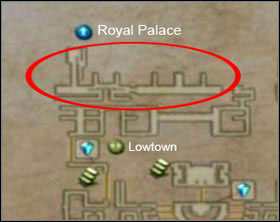 No. 13 - Razorfin
Garamsythe Waterway - kill every Ichthon there. If it doesn't appear leave the area and re-enter.
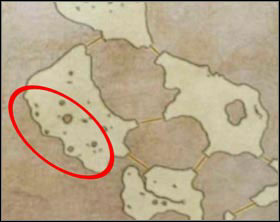 No. 14 - Apsara
Phon Coast - create a chain from Piranhas (about 10)
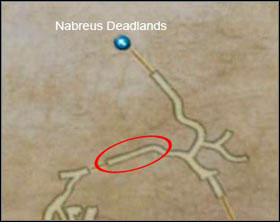 No. 15 - Rageclaw
Salikawood - appears from time to time
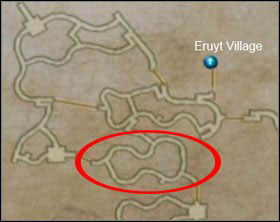 No. 16 - Binding Mantis
Golmore Jungle - appears from time to time
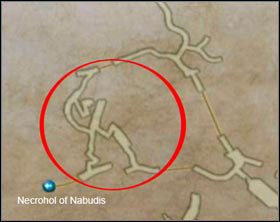 No. 17 - Wood Toad
Salikawood - appears from time to time. You can easily miss it, because it's under the effect of Vanish. When you find it and it doesn't attack you cast reflect on yourself and then cast a spell on you to destroy his camouflage (do the same thing with to every other half visible monster).
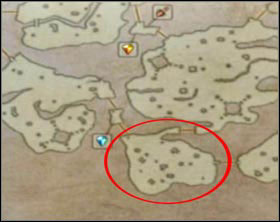 No. 18 - Tarasque
Tchita Uplands - create a chain from Serpents and it'll jump out of water.
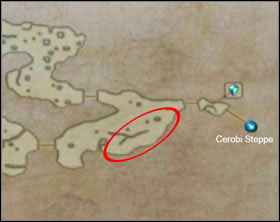 No. 19 - Grimalkin
Tchita Uplands - appears randomly, replacing one of the coeurls.
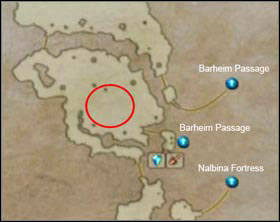 No. 20 - Nekhbet
Estersand - appears after killing some cockatrices loafing around there.
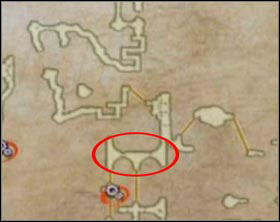 No. 21 - Glaring Eye
Henne Mines II - you have to kill at least three Hectyes
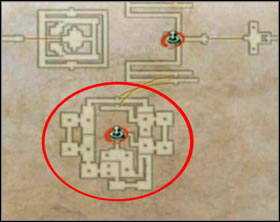 No. 22 - Clutsworn Lich
Tomb of Raithwall - after you activate the south switch Liches start appearing there. Hit them till they start using divide. One of the newly created liches will be the Clustworn Lich.
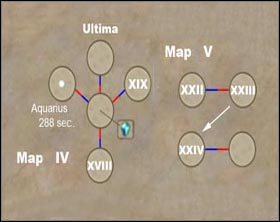 No. 23 - Evil Spirit
Great Crystal II - you'll certainly meet thin one while on your way to Ultima or Omega XII. It appears on areas with Way Stones on maps IV and V
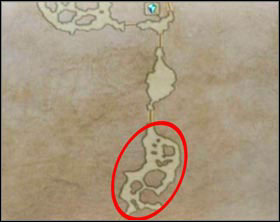 No. 24 - Juggernaut
Feywood (after the plot reaches this moment) - appears from time to time.
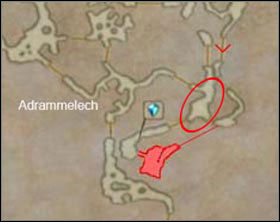 No. 25 - Molen
Zertinan Caverns - go through the hidden area to the area with Grenades. Kill all of them and watch the other bank. Molen should appear in a while.
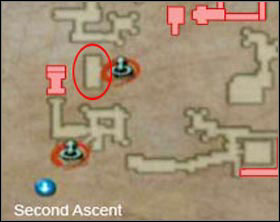 No. 26 - Tower
Pharos at Ridorana - Third Ascent. The biggest probability of him appearing is if you have chosen to follow the hidden path and killed everything on your way (details in section about that location)
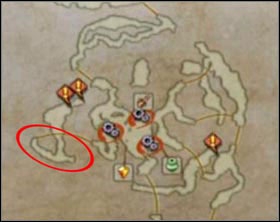 No. 27 - Grey Molter
Mosphoran Highwaste (The shrines must be working) - appears randomly.
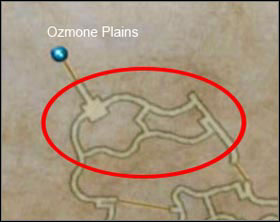 No. 28 - Midgardsormr
Golmore Jungle - appears after you have killed everything in the neighborhood. If not then leave the area and re-enter
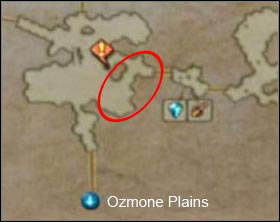 No. 29 - Nazarnir
Giza Plains - from time to time replaces a Sleipnir there.
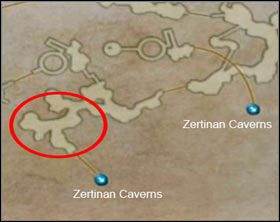 No. 30 - Victanir
Nam-Yensa Sandsea - appears from time to time. It's half visible.
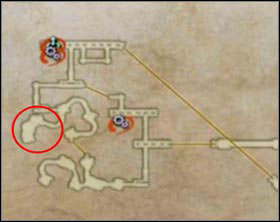 No. 31 - Gemhorn
Lhusu Mines II (Site 11 Key is needed) - kill everything in the area including the bugs. He should appear in the dead end. If not just leave the area and re-enter.
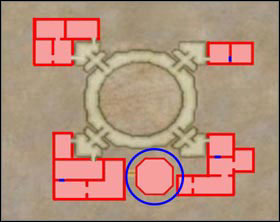 No. 32 - Luxollid
Pharos at Ridorana - Umbra. In order to make Luxollid appear you have to kill No. 33 - Vargant Soul.
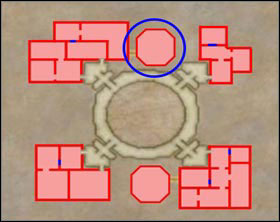 No. 33 - Vargant Soul
Pharos at Ridorana - Abyssal. He can be found in the northern part but only if you have taken care of the Shadowseer already (see "The Seer (rank VI)")
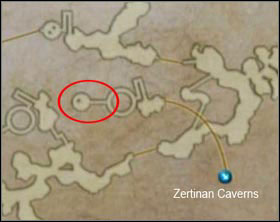 No. 34 - Imdugud
Nam-Yensa Sandsea - to this area you can get only through Zertinan Caverns. Kill everything that moves in this area, go on that platform and wait till Imdugud appears.
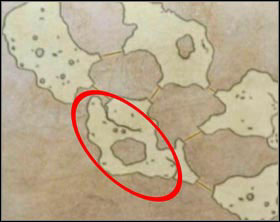 No. 35 - Bull Chocobo
Ogir-Yensa Sandsea - appears from time to time.
No. 36 - SkullashPhon Coast - appears from time to time on a cliff between Pyrolisks.
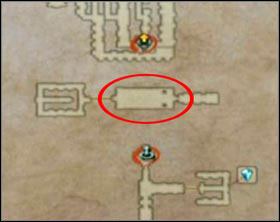 No. 37 - Myath
Stilshrine of Miriam - get to this area through the chamber with the save crystal. There you'll find three Dragon Aevises. Kill them, leave the area and re-enter. It should appear in their place.
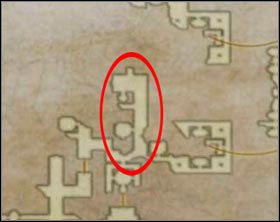 No. 38 - Helvinek
Necrohol of Nabudis - it suddenly appears while you're fighting with monsters in this area of this Necrohol.
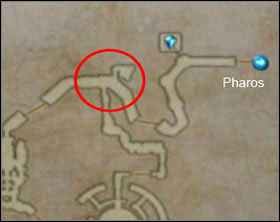 No. 39 - Pallicant
Ridorana Cataract - defeat everything in this area, exit and re-enter. It should be waiting for you there.
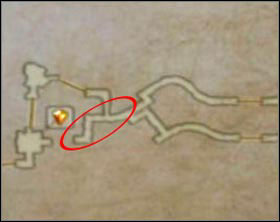 No. 40 - Phyllo
Golmore Jungle - it appears from time to time. Most often in that dead end.
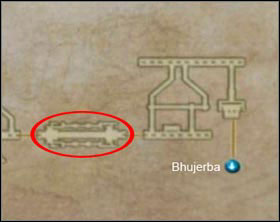 No. 41 - Aerieel
Lhusu Mines - appears from time to time out of a sudden.
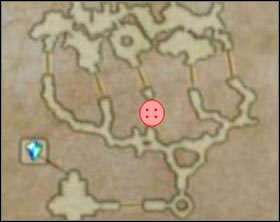 No. 42 - Anubys
Sochen Cave Palace - spawns in a hidden chamber behind the Pilgrim's Door (details in: "Sochen Cave Palace")
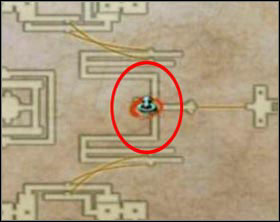 No. 43 - Barmuu
Tomb of Raithwall - create a chain from Seekers there. It should appear near the Way Stones.
 No. 44 - Vishno
Pharos at Ridorana - First Ascent. Create chain from Brainpans and Deidars and then run to the 48 floor.
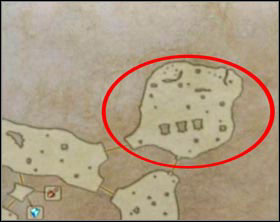 No. 45 - Etherian
Cerobi Steppe - defeat everything in that area.
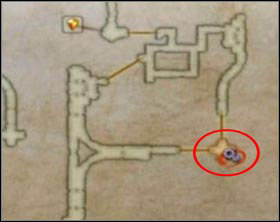 No. 46 - Melt
Henne Mines - switch the lever there. May appear instead of jellies.
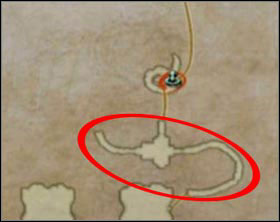 No. 47 - Cubus
Sochen Cave Palace - Kill everything in the area. If he didn't appear leave the area and re-enter.
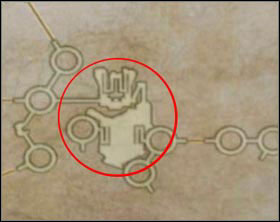 No. 48 - Pineapple
Ogir-Yensa Sandsea - appears form time to time.
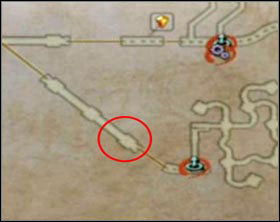 No. 49 - Bombshell
Lhusu Mines II - to get here you need "Site 11 Key", which you get after the fight with "Antlion (rank V)". Appears from time to time.
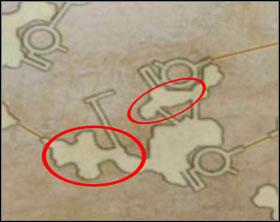 No. 50 - Megabomb
Nam-Yensa Sandsea - create a chain from about 20 Urutan-Yensa. Most often it appears in one of these places.
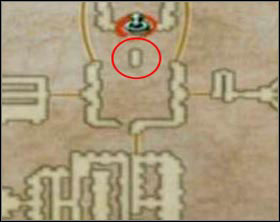 No. 51 - Matriarch Bomb
Stilshrine of Miriam - you'll get there through the hidden corridor before the hall with Mateus (details in "Stilshrine of Miriam").
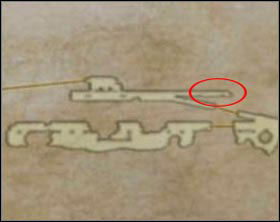 No. 52 - Ripe Rampager
Dalmasca Estersand - chain some wolves and go there.
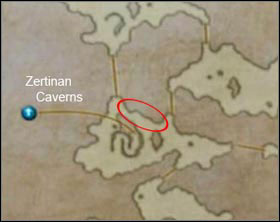 No. 53 - Kill Bug
Ozmone Plains - it look like a giant, metal treasure chest. Easily recognized.
No. 54 - MinibugBarheim Passage II - You need the key to Barheim Passage to get here (details in "Backdoor"). Appears randomly.
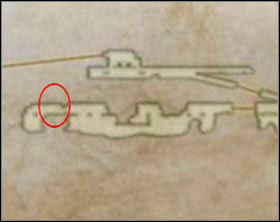 No. 55 - Ithuno
Barheim Passage II - You need the key to Barheim Passage to get here (details in "Backdoor"). Appears randomly as a silver treasure chest.
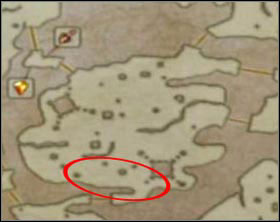 No. 56 - Kris
Tchita Uplands - appears among other Malboro Overkings. If he's not there try killing some of them.
 No. 57 - Dheed
Mosphoran Highwaste (Shrines must be working) - appears from time to time just before the entrance to the area with Exodus.
 No. 58 - Aeros
Ozmone Plains - starts spawning after you have killed No. 4 - Bull Croc.
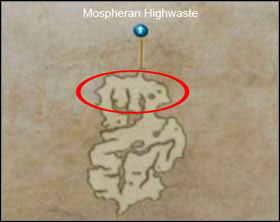 No. 59 - Terror Tyrant
Dalmasca Estersand - replaces randomly one of the Wild Saurians there.
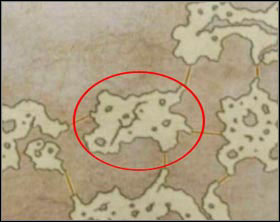 No. 60 - Abelisk
Ridorana Cataract - appears from time to time
 No. 61 - Dustia
Dalmasca Westersand - appears when HP level of one party member is critical.
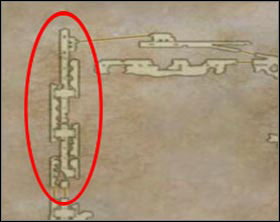 No. 62 - Ishteen
Barheim Passage II - You need the key to Barheim Passage to get here (details in "Backdoor"). Appears out of a sudden.
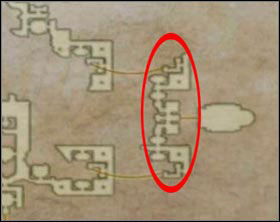 No. 63 - Vorres
Necrohol of Nabudis - may appear here when you're fighting with Dark Elements.
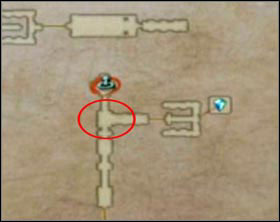 No. 64 - Negalmuur
Stilshrine of Miriam - defeat everything in the area, exit and re-enter and if he's not there take a trip around the whole temple. He may be here when you're back.
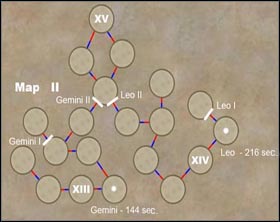 No. 65 - Larva Eater
Great Crystal II - Larva Eater appears near one of the Way Stones here. Go to one of them and kill more then 20 Necrophobes there. He should appear, if not run to another Way Stone and repeat the cycle.
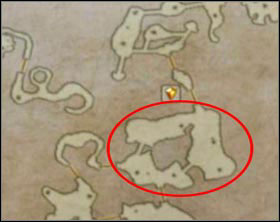 No. 66 - Arioch
Nabreus Deadlands - it should appear after you have taken care of everything in this area.
No. 67 - FideliantDalmasca Westersand - appears randomly.
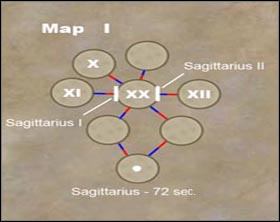 No. 68 - Crystal Knight
Great Crystal II - Activate the Sagittarius device and it should appear in the area with Way Stone No. XX
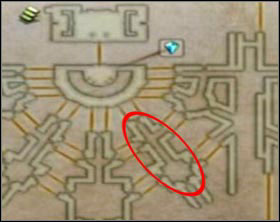 No. 69 - Grave Lord
Golmore Jungle - kill mobs here till skeletons start appears. Create a chain from them and go to the middle area. The Grave Lord should appear there
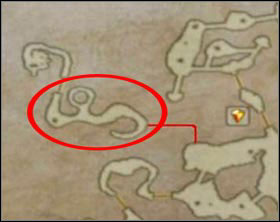 No. 70 - Zombie Lord
Tomb of Raithwall - appears from time to time among other zombies
No. 71 - DrownedGaramsythe Waterway II - you have to have the Sluice Gate key (see "White Mousse (rank V)" in "Ordinary hunt notices"). Close sluices No. 3 and 11 and defeat every monster on the marked area. As soon as it appears it starts running toward you.
No. 72 - VeleluNabreus Deadlands - appears when at least one of your characters is critically wounded.
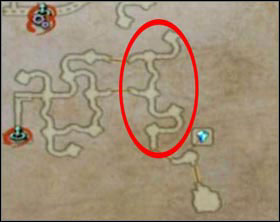 No. 73 - Disma
Lhusu Mines II - you need the Site 11 key to get there. Appear from time to time. The best probability of it appearing is just after the fight with Gilgamesh.
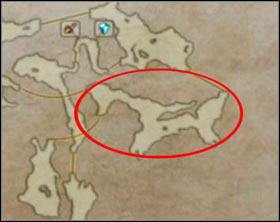 No. 74 - Ancbolder
Paramina Rift - kill everything moving down there, leave and re-enter. It should be there, often along with Anchagiem.
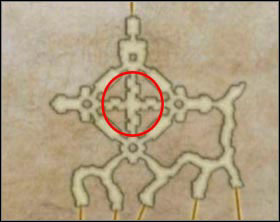 No. 75 - Wendice
Sochen Cave Palace - create a chain from Wendigos and Strikers. I should appear in the middle of that cross.
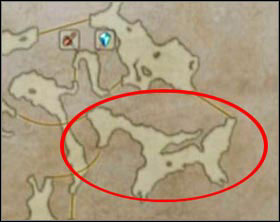 No. 76 - Anchag
Paramina Rift - kill everything moving down there, leave and re-enter. It should be there, often along with Ancbolderem.
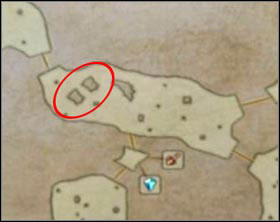 No. 77 - Bluesang
Cerobi Steppe - Appears randomly.
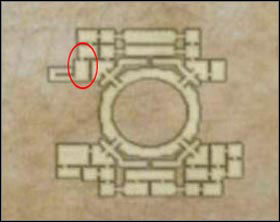 No. 78 - Avenger
Pharos at Ridorana - Second Ascent, 63 floor. Appears randomly.
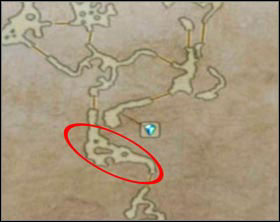 No. 79 - Alteci
Zertinan Caverns - create a chain from Malicants there. It should appear a short while later.
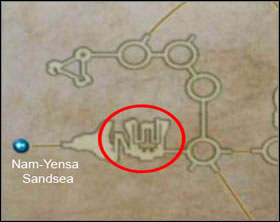 No. 80 - Urutan Exile
Ogir-Yensa Sandsea - kill over 100 Urutans there without leaving the area and it should appear there.
There are 13 Espers - monsters summoned by your heroes to fight along with them - overall. Among of them are five main once, which you encounter during the plot development. Below you'll see description of getting the additional Espers (those basic you'll find in sections about the plot).
Main:
Additional:
Besides from Montblanc you can get:
Generally there's a rule: if you can handle monsters that appear in the certain location - you'll handle the esper as well.
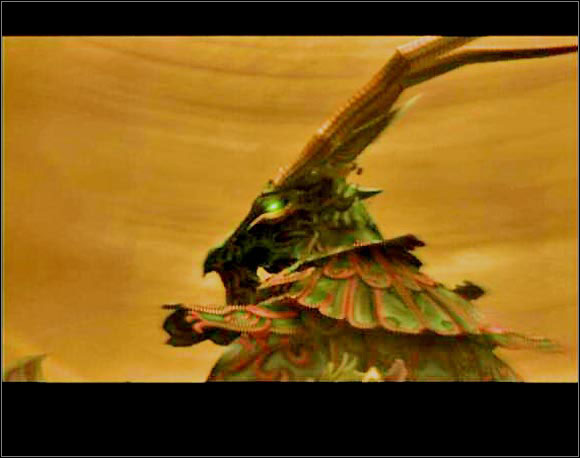
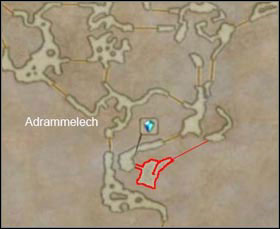
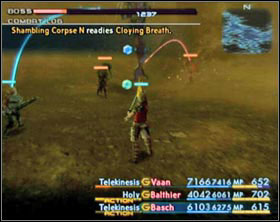
Adrammelech
About 40000 HP
Resistant to Libra,
Vulnerable to Ice,
Absorbs Thunder,
Flying
Flash Arc,
Bleed,
Thundara, Thundaja,
Perfect Defence
Adrammelech can be found in Zertinan Caverns in the central part. It's surely the easiest enemy to defeat. Problems may only cause lots of Shambling Corpses constantly coming from under the ground.
Adrammelech's element is Thunder, so most of his attacks are based on it - Flash Arc damages one target, Thundara damages all in it's range and Thundaja deals damage to you whole active party. There's also Bleed which except for dealing damage may cause Sap, and Perfect Defence thanks to which Adrammelech becomes completely immune to physical and magical attacks.
A good way of dealing with those Shambling Corpses is to give one of your heroes a weapon with Holy element and set "Foe: HP < 10,000 ---> Attack".
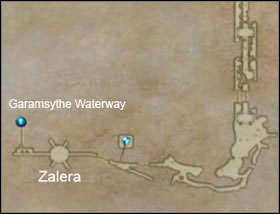

Zalera
About 73000 HP
Resistant to Libra
Enrage,
Kill, Death,
Sleepga,
Stop,
Reflectga,
Prime lvl. Death,
lvl 5 Reverse,
lvl 4 Break,
lvl 3 Disable,
lvl 2 Sleep
This Esper can be found in the most western area of Barheim Passage, but first you got to complete the "Backdoor" quest.
Zalera uses a lot of attacks related to level e.g. lvl 5 Reverse will cause reverse to every character who's level is a multiply of 5. The best choice is to pick a certain level and prepare equipment, which makes the wearer immune to the attack aimed at him. Just be careful and don't go fighting with Zalera if levels of your party members are prime numbers, because they'll become targets of the most dangerous attack - Prime lvl. Death, which kills everyone whose level is a prime number (a prime number is a number which divides only by itself and one).
Attacks related to level are this dangerous, because they have much bigger chance of working than the ordinary ones e.g. from Sleepga your characters on 56 level have a great chance of defending but when it comes to lvl 2 Sleep this chance drastically falls.
The additional difficulty in this fight is the time limit. You have five minutes to defeat the enemy or the battle will be stopped and you'll be teleported to the former area (the one with save crystal) and you'll have to begin everything from the beginning.
Also at the whole beginning Zalera is supported by Deadbones, but there's not many of them. A few will come from under the ground and after a short time they'll stop appearing. Then focus on Zalera. He may be immune to all attacks and you'll have to wait till he uses enrage - only then your attacks will start producing effects.
After the fight a passage from Barheim to Garamsythe Waterway opens.
To be able to face this esper you have to beat "White Mousse (rank V)" firs (details in "Ordinary hunt notices" part). Due to that you will obtain Sluice Gate Key, which allows you to manipulate with sluices in Garamsythe Waterway.
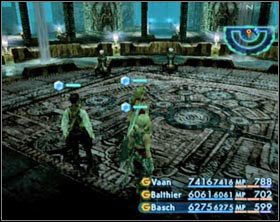 Sluice control devices 11 and 4
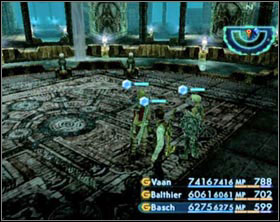 Sluice control devices 10 and 3
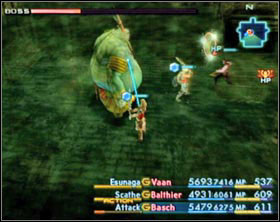
First, you have to close locks 4 and 11. After that you will be able to get to device No 1 North (left screen).
Then go back to the main room, open locks 11 and 4 and close 10 and 3. This will let you get to device No 1 South.
After opening north and south lock No 1 water level in a central part of sewer will decrease. You will fight there with Cchulainn after that.
 Main hall before drying
 Main hall after drying
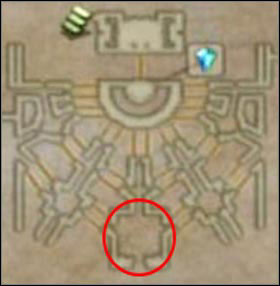
Cchulainn
About 130000 HP
Resistant to Libra
Poison,
Slowga,
Malaise,
Bio,
Disablega,
Invert,
Mana Spring,
Immobilizega
After getting through all those combinations with locks, go to the central point of sewer. Cchulainn will appear when you go downstairs
Foobars try to disturb you during the battle because they support the esper. Also, your HP level will slowly decrease during the battle.
Cchulainn doesn't use his force during fight. Actually, all his attacks blend something in your characters stats, and in conjunction with slow losing your HP, it becomes dangerous weapon. During that fight focus on healing yourself. You will always have time to defeat your opponent when your are alive. My proposition is, let the strongest character attack the esper, and the rest should heal him (and of course they can fight in their free time with Foobars). When jellies don't appear anymore, you can start attacking Cchulainn with two characters.
You can find Exodus in Mosphoran Highwaste after making Moogle, from Salikawood, to repair the gate. After that, moogles will come to Mosphoran and take care of Shrines of The Wind.
While being in the camp you have to activate south and north-west device. It opens the way to other locations. Leave the camp with north-east exit. You can see chocobo in front of you. Give him Gyshal Greens and go to the arena on the south from you. Turn right then and run on leaves to the rocky path. Face along it, until you get to the place that only chocobo can enter. You will see a T-junction on the next area. Run forward and proceed to the next area. You will be asked if you want to dismount from the chocobo. You have to say "YES". You will find here third device which you have to activate: the east one. Now leave the area, get back to the T-junction and turn left. At the top you will see another bridge made of leaves. The Exodus waits for you in the next area.
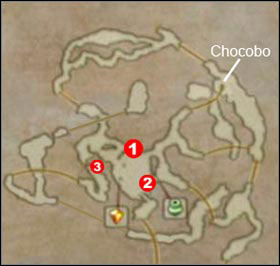
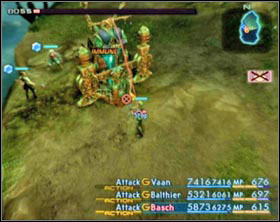
The numbers show the order of activating the shrines.
Exodus
About 120000 HP
Resistant to Libra
Flare,
Scathe,
Unleash,
Stop,
Reflect,
Paling
During that battle you cannot use items, which means that you won't be able to use the Chronos Tear, if any of your characters gets hit by Stop. Luckily Exodus uses that attack when the battle comes to end. It is useful to have Power Armlet.
Before that fight, equip one of your offensive mages with Opal Ring - Exodus's status is reflect, and Magick will be very useful during that battle.
Exodus is not the one with variety of attacks, but it doesn't mean that you should underestimate him. Mainly, he attacks with the ordinary attack (it wounds him also) and flare. He uses Scathe at the end.
Before the end he will use paling and the only way to defeat him is to attack with magick
Zeromus is the second esper in Stilshrine of Miriam. To get to him you need the Stone of Condamner (look in "Silshrine of Miriam" part, at the end).
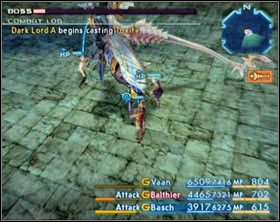
Zeromus
+ Dark Lords
About 170000 HP
Resistant to Libra,
Expose works on him
Slowga,
Gravity,
Piercing Graviga,
Hastega.
In that battle you cannot use magic, so remember to buff your characters before. Change their healing gambits to objects. Set it like that "Ally: HP<60% ---> X-potion". It is important to have all three Potion Lores and at least one Pheasant Netsuke (the more, the better). X-potion with three Potion Lores and Pheasant Netsuke restores 3600 HP. You should give Hermes Shoes to your strongest hero, to let him have Haste all the time. It's also important when one of your characters has his gambit set like this: "Foe: HP<5000 ---> Attack", to take care of Dark Lords, that appear all the time. Others should have "Foe: HP>=5000 ---> Attack", to care only about Zeromus. I don't have to mention that big reserve of X-potions and Phoenix Downs is necessary, so as Haste (or Hastega) Mote is.
Attacks of this esper are based on graviga. His normal Graviga consumes 25% of max HP level, and Piercing Graviga consumes 50%. Two attacks and whole team will be dead.
It is worth to use Expose at on Zeromus at the beginning since magic is not allowed.
This esper you will find in Necrohol of Nabudis behind the Door of Despair, but to have it opened you need to collect three Medallions (Medallions of Power/Might, actually) (look in "Nabreus Deadlands" part) and defeat Fury and Humbaba Mistant in Necrohol of Nabudis (look in "Bosses not connected with the Plot" part).
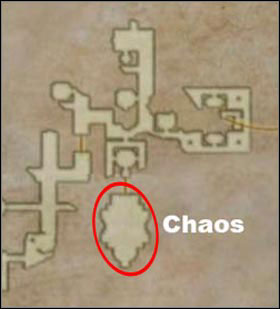
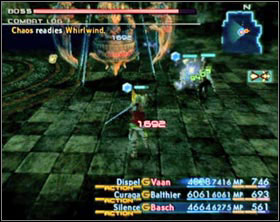
Chaos,
Air Chaosjet,
Earth Chaosjet,
Fire Chaosjet,
Water Chaosjet
About 195000 HP,
Chaosjets have 4079 HP
Resistant to Libra,
Vulnerable to Earth,
Vulnerable to Sap,
Absorbs Wind
Whirlwind
Protect,
Silence,
Aeroga, Aeroja,
Fearga,
Enrage
This is a very tough opponent, because you are not allowed to use normal attacks in this battle. Chaos starts the battle with four helpers called chaosjets. Each of them have an elementary weak point, but it is not worth to attack them with elementary spells. The best way is to attack them at one time with Scathe (if you have it already) or different (but not elementary) spell.
Do not forget to set all gambits connected with mana to: "Self: MP<10% ---> Charge" before the fight. The wizard that has the biggest magick rate, should have Rose Corsage, to keep his spells unstopped by Chaos's silence spell. Others can also use magick if they are able to, but they should keep the main wizard in a good health condition.
After killing all Chaosjets, take care of main dish, Chaos I mean. His attacks are:
What's more, he helps you when uses his normal attack, because it also has an influence on him.
At the beginning cast Bleed or Scourge spell on Chaos. That causes Sap. The good idea is to use Shear too, which decreases his magic defense. The only one thing left is to attack him continuously.
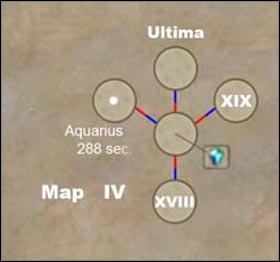
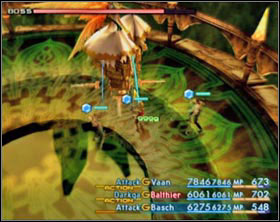
Ultima
About 283000 HP
Resistant to Libra,
Vulnerable to Dark
Redemption,
Holyja,
Greater Barrier
You will find Ultima at the top floor of Great Crystal. The way how to get there is in "Great Crystal II" part.
Ultima uses three attacks: Redemption, Holyja and sometimes Greater Barrier. Redemption and Holyja have Holy element. It is easy to disable them by wearing Sage's Ring or White Mask. Due to that instead of causing damage her attacks will heal you. Holyja may also cause Reverse, but since this attack didn't hurt you, no one from your team will try to heal you, and her normal attacks will keep healing you, so there's nothing harmful in that. There's still the matter of Greater Barrier left - what can I say - use dispel on her, when she uses that attack.
During this fight Fomalhaut with Dark Shot works well, berserked Yagyu Darkblade (eventually Orochi) and Darkga.
As you can see her attacks are nothing special so there must be something inside it. The thing is, all the "obstacles" you had encountered during the game will appear one by one in this order:
If you conform to my advices, have to face all of those obstacles (the fight will be over sooner) and will get Ultima without bigger problems.
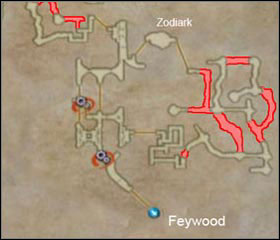
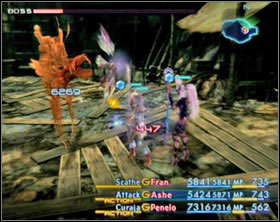
Zodiark
About 460000 HP
Resistant to Libra,
Vulnerable to Holy
Darkija,
lv. 2 Sleep,
lv. 3 Disable,
lv. 4 Break,
Banish Ray,
Greater Barrier,
Mana Spring,
Piercing Graviga,
Magick Barrier, Force Barrier,
Shift,
Bravery, Faith, Scathe
Zodiark, the strongest esper, can be found deep in Henne Mines. You will be able to get there after you talk with Geomancer in Jahra. But he needs to know if you are dignified, so you have to defeat "Mindflayera (rank IV)" and obtain at least 10 espers. Zodiark is in a small chamber (take a look at the map) but it is impossible to get there from west - you have to walk through the whole mine and get inside to that chamber from east.
Before the fight you cannot save the game, so heal all your characters before going inside the chamber. Zodiark's attacks are:
His HP level is quite easy to decline. But there is another surprise. Zodiark mobilize himself when he doesn't have much HP left. He uses Shift then, to change his weakness. Next he uses Magick Barrier and Force Barrier which makes him resistant to every kind of damage. In that state often he uses Faith and Scathe. As soon as he starts to use Faith on himself use Dispel on him, because combination of those attacks can be dangerous. After some time he will use Darkija and after that his Magick Barrier disappears. In that moment he uses Reflect. Don't waste time on dispel, because Magick Barrier restores very fast. When his barrier disappear attack him with Scathe, but remember to wear Opal Rings.
If your whole time dies, first thing you do after entering new chars is bringing everyone to life on reserve and restore their HP level.
In the whole fight the longest part is its end. But if you conform to my advices you will finish that battle fast and get that esper.
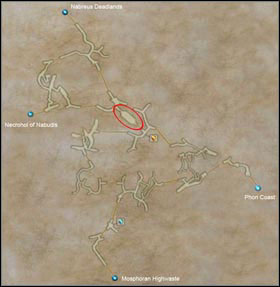 Salikawood
Bomb King,
Bombs
About 37000 HP (Maks x3),
Bombs ~3200 HP
Resistant to Libra,
Absorbs Fire
Oil,
Fire, Fira,
Cry for Help,
Renew
With that player you will have to fight if you want to go to Nercrohol of Nabudis or Nabreus Deadlands. You'll find him near the gate's crystal in Salikawood.
He mainly uses power of the fire during the fight. To increase his effectiveness he throws Oil. Besides he has possibility to summon little Bombs (Cry for Help), and when his HP level drops below 40-50% he will use Renew (it full restores his HP). He can use it three times. Unfortunately he is resistant to Syphon, so don't even think about sucking up his mana. But his helpers are the worst. You wish they didn't blow up, and surely not all at once.
At the beginning use two damage dealers to defeat those Little bombs. Set "Foe: Lowest HP" gambit. Wizard should cast silence at Bomb king. It doesn't stop Renew, but it stops Cry for Help and rest of magick attacks. When you got rid of helpers, and you have the Bomb King silenced, cast Berserk on one of your characters, and keep an eye on his HP level.
When the Bomb King runs away from you, it means that he is going to use Renew. Attack him with quickening and create nice combo. If you don't want to play with quickenings, berserk two of your heroes instead of one and watch the effects.
You will obtain 1300 gil and Mallet (2498g) from Montblanc for defeating Bomb King.
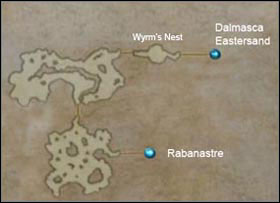
![This giant is on the area called Wyrm's Nest, north-east Westersand [screen 1] - Earth Tyrant - Bosses not connected with the plot - Final Fantasy XII - Game Guide and Walkthrough](https://game.lhg100.com/Article/UploadFiles/201512/2015121519064380.jpg)
This giant is on the area called Wyrm's Nest, north-east Westersand [screen 1]. Go there, you will see his tail disappearing in a huge sandstorm. You cannot chase him, because of that storm. Go back to Rabanastre. After entering the West Gate area you will see green bangaa named Rizmat. He looks a little woeful [screen 2]. Talk to him. He'll tell you he's from Archades and he studies sandstorms, but locals don't want to help him. Your answer here is: "Sure, I'll help".
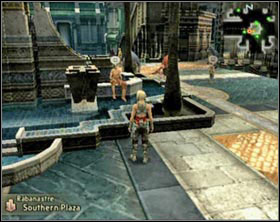
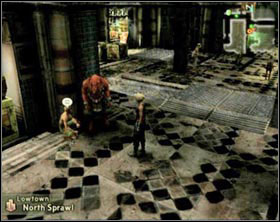
Go to Southern Plaza and talk to the man sitting on the fountain. His name is Cotze [screen 1]. He will tell you that he knew that but he doesn't remember anymore. He advices you to see Northon in Lowtown close to warehouse No 5 kneeling next to red bangaa. [screen 2]. Talk to him.
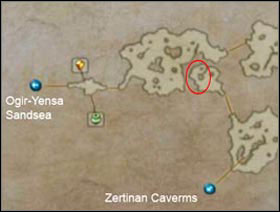
Now go back to Dalmasca Westersand. On west there is a small area with one exit [screen 1]. Go there. You can find there big cactuses called "Dynast Cactoids". Approach the left one in a shadow, under the rock [screen 2] and take a look at it. You should find the Wind Globe.
Get back to Rizmat. There will be Cotze and Northon with him. Talk to the standing one. He will take Wind Globe from you and will connect it with the one from Cotze. You will obtain Windvayne after that. Luckily Rizmat doesn't need it anymore, and you'll be able to subside the storm in Wyrm's Nest.
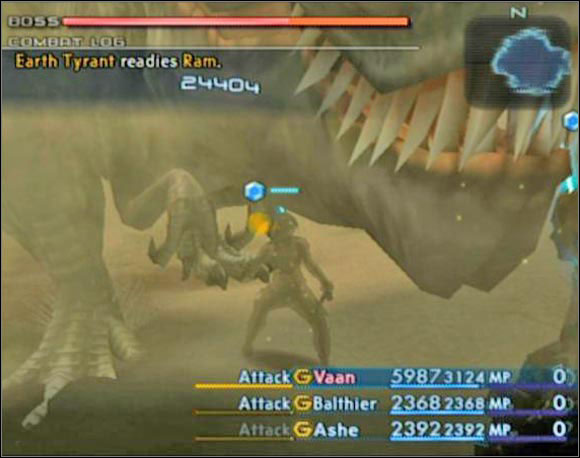
Earth Tyrant
About 70000 HP
Resistant to Libra,
Partly Resistant to Dark
Ram,
Sonic Fangs,
Screw tail
The fight isn't tough but long. Tyrant uses physical attacks like: ram (nothing special), Sonic fangs - very strong attack against one of your heroes and Screw Tail - attack that wounds everyone in front of Tyrant.
Standard tactic - 2x Berserk and Healer. At first the fight goes efficiently and quickly, but before it ends it gets difficult because Tyrant's defense increases. Finish him off and go to Montblanc for reward (1200 gil).
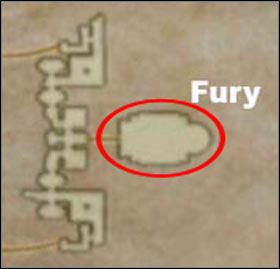
You will find him in Necrohol of Nabudis behind the Door of Loathing. You can open them by using Medallion of Love, but first you need to get it (look in "Nabreus Deadlands" part).
Fury
About 90000 HP
Resistant to Libra,
Vulnerable to Water
Lunge,
Bunny Slam,
Time Requiem,
Hero's March
Fury has Dreamhare's form, but don't underestimate it. Especially his Bunny Slam, that gives huge damage to one of your characters. He uses: Time Requiem, which causes Stop at everyone in range, Hero's March, which gives him loads of buffs in a second (Shell, Protect, Faith, Bravery, Haste). Before the battle ends he uses Bacchus's Wine on himself and his defense and strength increases.
Use two characters with berserk on short distance and one wizard on long distance. Now the fight shouldn't take too much time. Wizard should heal heroes with Berserk and use Dispel on Fury at the beginning and when Fury uses Hero's March.
After defeating enemy Lusterless Medallion gets a shot of power (it becomes Medallion of Might if you defeated Humbaba earlier).
You will get 2100 gil and Bacchus's Wine as a reward.
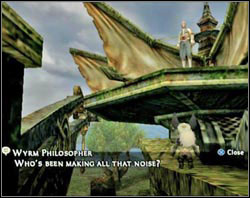
To get access to that boss you have to execute an order "Vyraal (rank V)". Give back a backpack to Viera and you'll obtain reward and Vyraal's scale, which was inside the backpack
Go with that scale to Cerobi Steppe and check a windmill No 10 (numeration in on the map in "Fishing" part).
Give scale to professor. He will give you Ageworn Key.
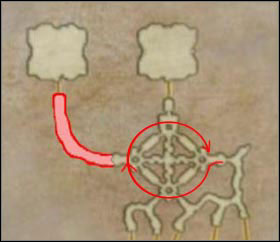
Go to Sochen Cave Palace with the key and in Destiny's March area make a circle like arrows show. You will hear the sound of opening doors. Run to the secret corridor to the west.
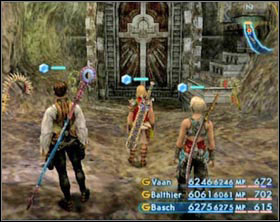 At the end of that corridor you will find another door. Open them using Ageworn Key. Hell Wyrm waits inside.
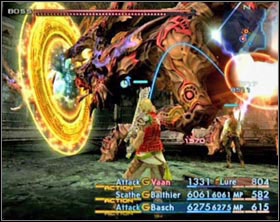
Hell Wyrm
About 8 500000 HP
Resistant to Libra,
Vulnerable to Holy
Rake,
Stone Breath,
Invert,
Waterga, Blizzaga,
Thundaga, Darkga,
Aeroga,
Judgement
This opponent has a lot of HP, but I don't have to mention that. Especially for that fight programmers used new life bar. At the top of a screen you can see a bar. Below that bar there's a dotted bar. One bar above is equal to one dot from the lower one.
Because of that huge amount of life, the fight is very boring. But well...
Hell Wyrm beside using strong attacks uses also Stone Breath, that may cause petrify. He also uses Invert when has few life. What's more he has Judgment - attack that wounds all heroes in the room with Holy power. Wyrm may also cause Stop. Moreover when he has less than 50% of life his physical and magical defense increase.
Here's an easy strategy: equip one of your heroes with Masamune, Genji Gloves, Genji Armor. Use Bravery, Berserk, Decoy and Reverse (eventually Haste) on him. Others should be equipped with Sage's Rings.
First person should attract all Wyrm's attacks. Because of Reverse Wyrm will heal our character. Because of equipment and buffs your hero will perform amazing combinations of attacks and will deal huge damage to Wyrm (my best is: 12 hits, 9999 damage each). Others will absorb Judgement Attacks due to Sage's Ring.
Optimal gambits scheme:
Hero I
Hero II
Hero III
Ally: Any --> Arise
Ally: Any --> Arise
Ally: Any --> Arise
Self --> Bravery
Ally: "Hero I" --> Reverse
Ally: "Hero I" --> Reverse
Self --> Berserk
Ally: "Hero III" --> Esuna
Ally: "Hero II" --> Curaga
Ally: Hero I" --> Stona
Ally: "Hero II" --> Esuna
Ally: Hero I" --> Stona
Ally: "Hero I" --> Stona
Ally: Any --> Chronos Tear
Ally: Any --> Chronos Tear
Foe: Nearest --> Attack*
Foe: Nearest --> Attack*
* Wizard can use Holy or Scathe
With that setting you can wait to the end of that battle. The only complication can be Stop on both unberserked characters. In that case change one of them with someone from reserve and cure Stop, then put that character back to reserve.
You will get 50000 gil from Montblanc and possibility of accepting an assignment: "Yiazmat (rank VIII)" (if you completed other hunts).
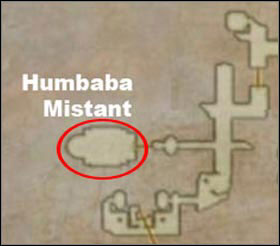
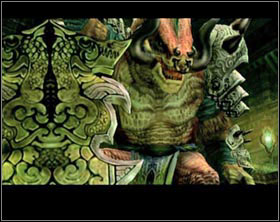
One of two bosses in Necrohol of Nabudis, which you have to face if you want to get to Chaos. To get to the room with Humbaba you'll need Medallion of Courage (look in "Nabreus Deadlands" part).
Humbaba Mistant
About 300000 HP
Resistant to Libra,
Vulnerable to Holy
Ram,
Darkness,
Temblor,
Protect
He isn't as strong as Fury, but has more HP. Alike Fury Humbaba doesn't have variety of attacks. His attacks are: Darkness, which deals damage with Dark power to anyone in front of him and Temblor, very strong attack against the closest enemy, which (the attack) may also cause immobilize and disable. Humbaba can cast Protect on himself - dispel him right away.
In that fight use two berserked characters for short distance and one wizard for long distance. If you cannot handle it stay with one berserked character.
After defeating enemy, Lusterless Medallion gets a shot of power (it becomes Medallion of Might if you defeated Fury earlier). You will also obtain Necrohol of Nabudis map.
You'll get 2100 gil from Montblanc as a reward
 Sleeping Omega
 Awaken Omega
Omega Mark XII
About 900000 HP
Resistant to Libra
Protect
Omega is located at the top floor of Great Crystal (look in "Great Crystal II" part for exact place). He is there all the time, but he is asleep. He wakes when you get a task to defeat Yiazmat. The only reason of that fight is to have him in Bestiary and getting Omega Badge.
As you probably noticed I mentioned only Protect, because he doesn't have more attacks, except for the normal ones, and actually, he uses it very rarely. He doesn't need other attacks at all, because he can kill your character with one shot, and your own attacks wounds you also. Not funny, eh? Not funny at all.
To that fight you need Bubble Belts. And use the same strategy like in Hell Wyrm's case, I mean Decoy and Reverse, but don't use Berserk. You need to have your characters with clear mind. Omega has less than one million HP, but it doesn't mean that he is easier to defeat. In that fight despite all appearances you will spend more time on healing yourself than on attacking him. Moreover try to cure without delay, and don't run, because Omega will use it and start to heal himself at a great speed.
I've got one more bad news - he becomes stronger at the end of the fight and his defense increases.
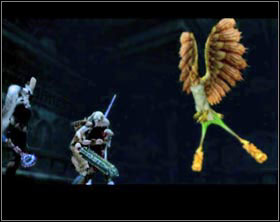
Phoenix
About 135000 HP
Resistant to Libra,
Vulnerable to Water
Lunge
Phoenix - one of the three minions of Shadowseer. Can be found in Pharos at Ridorana - Orgin of Darkness, north from Penumbra (for more infos look in the part with the same name).
There's nothing special with him. He has Lunge attack only (and normal of course). When you attack him , you get hurt too. When his HP level gets to critical level he will become to mix his ordinary attacks in long and fast combos.
To raise your effectiveness you can use expose.
Fighting him has only one reason - possibility of fighting with Shadowseer.
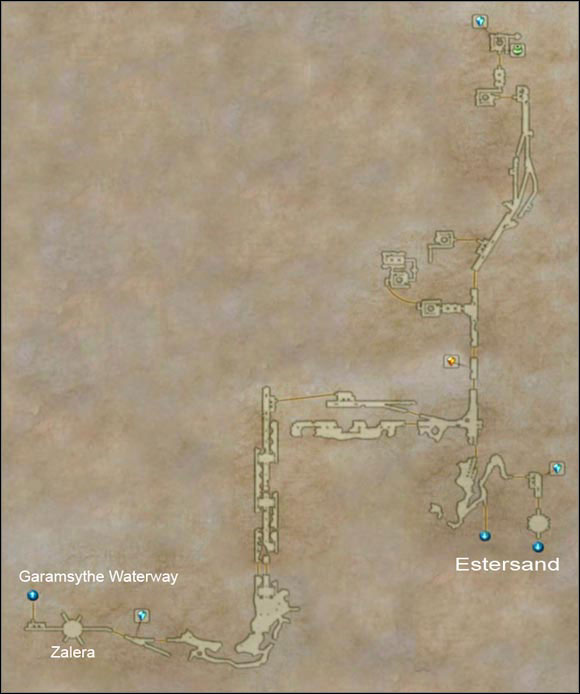
Name
Level
HP
Vulnerable to
Drops (price)
Steal (price)
Suriander
38-39
7069-7089
Ice
Storm Magicite (80g),
Pointed Horn (706g),
Indigo Pendant*
Storm Magicite (80g)
Adamantitan
~40
~14704
Wind
Water Stone (35g),
Turtle Shell (447g)
Water Stone (35g),
Water Magicite (80g),
Turtle Shell (447g)
Bomb
38-40
5090-5120
Water
Fire Magicite (80g),
Fire Stone (35g),
Bomb Fragment (1911g),
Quality Pelt (651g)
Fire Magicite (80g),
Bomb Ashes (200g)
Mimeo
39-40
6446-6686
Holy
Iron Ore (1043g),
Francisca*
Iron Ore (1043g),
500 gil
Dead Bones
38-39
6786-6966
Holy
Ancient Bone (2115g),
Blood-darkened Bone (1435g),
Dark Crystal (160g),
Eye drops**
Blood-darkened Bone (1435g),
Dark Crystal (160g)
Specter
36-39
6786-6804
Holy
Dark Magicite (80g),
Dark Stone (35g),
Sky Jewel (980g)
Dark Magicite (80g),
Glass Jewel (115g)
*Rare; ** It's better not to sell this
After completing the quest "Backdoor" and obtaining the key to the second entrance to Barheim Passage, the west side of that passage becomes unblocked (there are strongest monsters there).
You'll find here Zalera, Bloodwing and Gilgamesh.
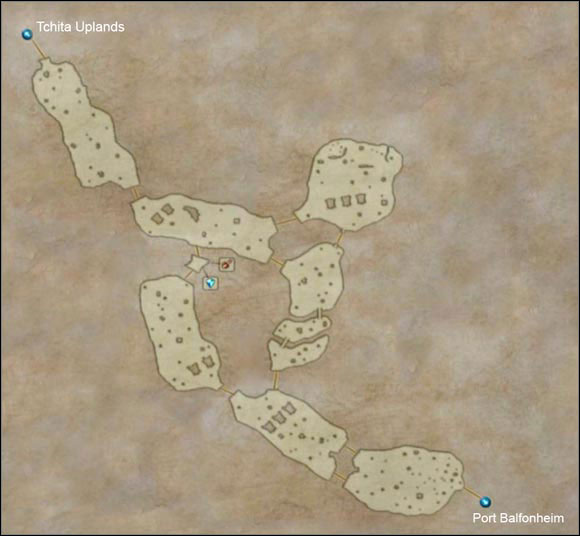
Name
Level
HP
Vulnerable to
Drops (price)
Steal (price)
Bander Coeurl
39-40
5300-5620
Ice
Quality Pelt (651g),
Teleport Stone**,
Storm Crystal (160g)
Storm Crystal (160g),
Phoenix Down**
Bellwyvern
39-41
9484-10844
Water
Fire Stone (35g),
Crooked Fang (287g),
Linien Cuirass*
Fire Stone (35g),
Teleport Stone
Silver Lobo
38-39
4464-4574
Earth
Wind Magicite (80g),
Teleport Stone* **,
Libra gem (150g),
Quality Pelt (651g)
Wind Magicite (80g),
Eye Drops**,
Libra gem (150g)
Charybterix
38-40
21219-21459
Earth
Wind Crystal (160g),
Split Armor (1968g)
Taurus Gem (150g),
Windslicer Pinion (1148g)
Adamantitan
41-42
34801-35121
Wind
Earth Crystal (160g),
Ancient Turtle Shell (1337g)*,
Adamantite (1479g)*
Aged Turtle Shell (1075g),
200 gil
Shield Wyrm
42-44
59679-61039
-
Ring Wyrm Scale (1285g),
Earth Crystal (160g),
Ring Wyrm Liver (1467g)
Ring Wyrm Scale (1467g),
Hi-potion**,
Winged Boots*
*Rare; ** It's better not to sell this
During the progress of plot you don't have to come here. But you'll find here valuable objects hidden inside jars like Fomalhaut or Cloud Staff. You'll get here while looking for Vyraal or the tip referring to legendary fishing rod of Matamuna. You also have to come here if you want to get to Hell Wyrm.
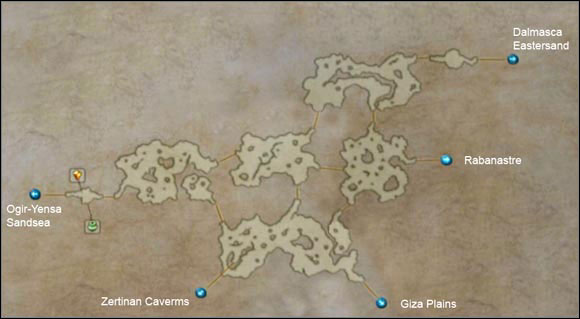
Name
Level
HP
Vulnerable to
Drops (price)
Steal (price)
Cactoid
1-4
72-224
Wind
Cactus Fruit (59g)
Earth Stone (35g),
Bundle of Needles (92g)
Cactus Fruit (59g)
Earth Stone (35g)
Wolf
2-9
94-155
Earth
Wind Stone (35g)
Wolf Pelt (41g)
Antidote* **
Wind Stone (35g)
Wolf Pelt (41g)
Cockatrice
3-8
136-617
Water
Small Feather (49g)
Fire Stone (35g)
Small Feather (49g)
Alraune
10-11
615-627
Wind
Earth Stone (35g),
Succulent Fruit (363g)
Earth Stone (35g),
Succulent Fruit (363g)
Urstrix
10-11
614-661
Wind
Large Feather (71g),
Earth Stone (35g)
Earth Stone (35g),
Large Feather (71g)
Sleipnir
9-11
724-764
Ice
Molting (74g),
Storm Stone (35g),
Broadsword*
Molting (74g),
Storm Stone (35g)
Dive Talon
(Flying)
27-28
4022-4090
Earth
Giant Feather (686g),
Wind Magicite (80g),
Burning Bow*
Giant Feather (686)
Gnoma Entite
45
48042
Wind
Earth Crystal (160g),
Feystone (1000g),
Gnoma Halcyon (1500g),
Electrum (3563g)
Earth Crystal (160g),
Feystone (1000g),
Gnoma Halcyon (1500g)
*Rare; ** It's better not to sell this
Monsters here are weak, the place is located close to Rabanastre and is a hideout for different kinds of monsters. Starting from Rare Games through Earth Tyrant and ending with Ring Wyrm (rank III) and the plot didn't bring you here, not even once. It's amazing, isn't it?
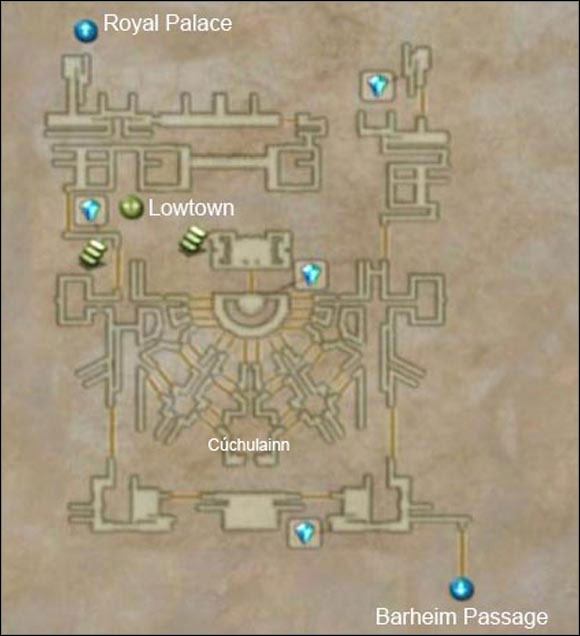
Name
Level
HP
Vulnerable to
Drops (price)
Steal (price)
Malboro Overking
38-39
11338-11578
Holy
Dark Crystal (160g),
Vanishga Mote**,
Malboro Fruit (612g)
Dark Magicite (80g)
Lizard
39-40
7069-7179
Water
Fire Crystal (160g),
Pointed Horn (706g)
Fire Magicite (80g)
Gespenst
41-42
7917-8097
Holy
Dark Crystal (160g),
Book of Orgain (532g)
Dark Crystal (160g),
Ninja Gear*
Baritine Croc
~40
~10745
Earth
Blood Wool (871g),
Wind Crystal (160g),
Broken Sword (1099g)*
Wind Magicite (80g),
Remedy**
Water Elemental
25
14830
Fire
Water Crystal (160g),
Water Magicite (80g),
Feystone (1000g)*
Feystone (1000g)*,
Water Crystal (160g),
Water Magicite (80g)
*Rare; ** It's better not to sell this
You can get access to Garamsythe Waterway sewer after defeating White Mousse (rank V) and obtaining Sluice Gate Key.
The main point of coming here is hunting for White Mousse and Orthoros, getting esper Cchulainn and Dull Fragment needed for obtaining Chaos.

Name
Level
HP
Vulnerable to
Drops (price)
Steal (price)
Mom Bomb
59-62
17684-18164
Water
Bomb Shell (896g),
Fire Crystal (160g),
Diamond Armlet*
Bomb Shell (896g),
Fire Crystal (160g),
Scorpio Gem (150g)*
Necrophobe
58-60
23579-23759
Holy
Dark Crystal (160g),
Sky Jewel (980g),
Bacchus's Wine**,
Ambrosia (1682g)
Dark Crystal (160g),
Sky Jewel (980g)
Shadonir
59-60
25544-25864
Holy
Storm Crystal (160g),
Charger Barding (1154g)
Storm Crystal (160g),
Aries Gem (150g)
Skullwyrm
60-61
41264-41944
Holy
Wyrm Bone (1647g),
Battlewyrm Carapace (871g)
Dark Crystal (160g)
Ash Wyrm
61-62
88423-89103
Earth
Wind Crystal (160g),
Ring Wyrm Scale (1285g),
Moon Ring (1647)*,
Koga Blade*
Wind Crystal (160g)
Reaper
62-63
27509-27683
Holy
Book of Orgain-Cent (924g),
Dark Crystal (160g),
Vaccine**
Book of Orgain-Cent (924g),
Dark Crystal (160g)
Forbidden
58-60
17684-18044
Holy
Dark Crystal (160g),
Forbidden Flesh (1397g),
Echo Herbs**
Kaiser Shield*
Giruveganus
~60
~45194
Holy
Prime Tanned Hide (1372g),
Dark Crystal (160g),
Broken Greataxe (1762g)*
Prime Tanned Hide (1372g),
Broken Greataxe (1762g)*
*Rare; ** It's better not to sell this
It's the same crystal you visited on your way for Treaty-blade but access to higher areas was denied (Scorpio Gate Stone didn't work). Now, when you posses Treaty-blade, you can reach higher floors, but make sure that you are ready for things that wait for you there. If so, open the Scorpio gate and use the portal IX to get to higher floors.
Map here, comparing to the one from lower levels is less colorful. The moving itself around this part of crystal is more difficult. One mechanism can open one of two gates - it depends on you which one. After activating you have defined amount of time to get to the chosen gate and to open it. On the map it's showed in that way: device is marked with a white dot and next to it is the name of that device and time which you have to get to the gate (e.g. Taurus 252 sec. - device named Taurus gives you 252 seconds to get to the one of its gates), and gates which are opened by that device are marked as lines crossing paths and there is a name of the device and roman number I or II (e.g. Taurus II - second of two gates that can be opened by Taurus).
I didn't use colors to mark the Way Stones too because there's a lot of them here and I didn't want them to mix up because of similar colors. Portals are connected in that way: IX (lower floors) - X ; XI - XIII ; XII - XIV ; XV - XVI ; XVII - XVIII ; XIX - XX ; XXI - XXII ; XXIII - XXIV.
The main reason of getting here is esper Ultima and additional boss Omega Mark XII.
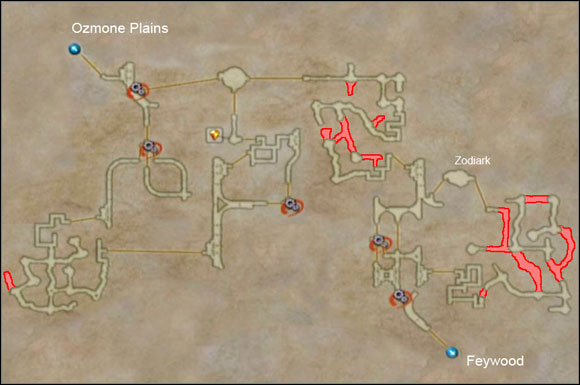 Hidden areas are marked in red
Name
Level
HP
Vulnerable to
Drops (price)
Steal (price)
Abysteel
64-65
20524-20644
Holy
Spiral Incisor (998g),
Dark Crystal (160g),
Vampyr Fang (1684g)
Red Fang**
Spiral Incisor (998g),
Teleport Stone**
Gizamaluk
61-62
53874-54554
Ice
Storm Crystal (160g),
Charger Barding (1154g)
Charger Barding (1154g),
X-potion**
Hectyes
62-65
34633-35323
Ice
Storm Crystal (160g),
Yellow Liquid (531g),
Unpurified Ether (1783g)
Chronos Tear**,
X-Potion**,
200 gil
Necrofiend
63-65
30785-31145
Holy
Dark Crystal (160g),
Sky Jewel (980g),
Lifewick (1740g),
Capricorn Gem (150g),
Vaccine**
Dark Crystal (160g),
Sky Jewel (980g),
Lifewick (1740g)
Etm
64-65
35916-36096
Holy
Dark Crystal (160g),
Book of Orgail-Mille (1477g),
Soul Powder (2241g)
Dark Crystal (160g),
Book of Orgail-Mille (1477g)
*Rare; ** It's better not to sell this
To get Access to Henne Mines deep you have to complete "Mindflayer (rank IV)" mission (look in "Ordinary hunt notices" part) for Centurio clan and get at least 10 espers. Then talk to Geomancer from Jahra.
This location is important, because you can find the strongest esper here - Zodiark.
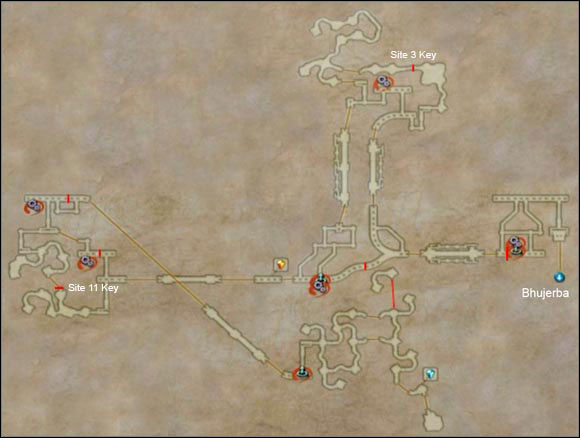
Name
Level
HP
Vulnerable to
Drops (price)
Steal (price)
Headless
39-41
8867-9707
Wind
Earth Crystal (160g),
Festering Flesh (542g)
Foul Flesh (143g),
500 gil
Dullahan
39-41
9100-9940
Water
Fire Magicite (80g),
Forbidden Flesh (1397g)
Fire Magicite (80g),
Fire Crystal (160g)
Bug
41-43
6739-7219
Wind
Earth Crystal (160g),
Iron Scraps (185g),
Iron Ore (1043g),
Antidote**
Earth Magicite (80g),
1 gil
Vampyr
42-44
5675-5915
Holy
Dark Crystal (160g),
Spiral Incisor (998g),
Zwill Crossblade*
Dark Crystal (160g),
Spiral Incisor (998g),
Taurus Gem (150g)
Killer Mantis
43-44
11703-11943
Wind
Earth Crystal (160g),
Insect Husk (680g)
Earth Crystal (160g),
Gigas Hat*
Gazer
~44
~9931
Holy
Dark Magicite (80g),
Dark Crystal (160g)
Dark Magicite (80g),
Dark Crystal (160g)
Malboro
~37
~8157
Wind
Earth Crystal (160g),
Malboro Fruit (612g)
Earth Magicite (80g)
Aeronite
59-60
27838-28518
Thunder
Wyvern Fang (1274g)
Wyvern Fang (1274g),
Hi-potion**
Pandora
61-62
15797-16037
Ice
Storm Crystal (160g),
Wrath of the Gods (2214g)*,
Hi-potion**
Iron Ore (1043g),
Cancer Gem (150g)
Abysteel
57-59
13099-13339
Holy
Dark Crystal (160g),
Spiral Incisor (998g),
Vampyr Fang (1684g)
Spiral Incisor (998g),
Teleport Stone**
Dark Lord
58-59
16375-16555
Holy
Blood-darkened Bone (1435g)
200 gil,
Dragon Mail*
*Rare; ** It's better not to sell this
To that part of mine you get access with notice letter on Antlion. After the fight you can find a key in Phon Coast, the key to even deeper areas of the mine (details in "Extraordinary hunt notices" / "Antlion (rank V)" part).
In that cave you will fight Gilgamesh, and some Rare Games.
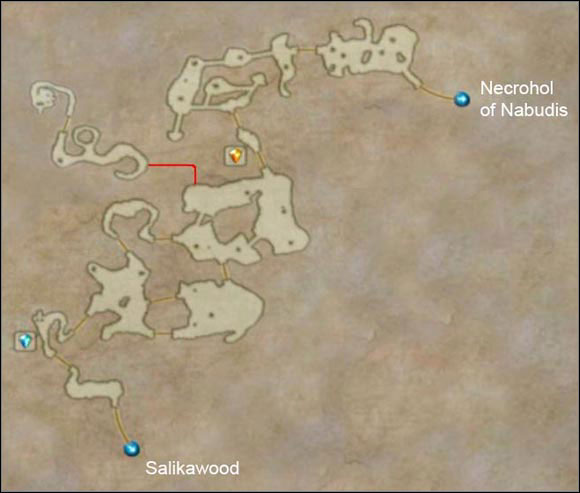
Name
Level
HP
Vulnerable to
Drops (price)
Steal (price)
Baknamy
43-44
8965-9205
Ice
Storm Crystal (160g),
Yankei*
Smelling Salts**,
Hi-potion**
Dead Bones
44-45
10592-10772
Holy
Dark Crystal (160g),
Strudy Bone (428g),
Ancient Bone (2115g),
Eye Drops**
Dark Crystal (160g)
Crusader
44-45
10592-10772
Holy
Strudy Bone (428g),
Dark Crystal (160g)
Strudy Bone (428g),
Capricorn Gem (150g)
Banshee
44-46
7017-7377
Holy
Dark Crystal (160g),
Zombie Powder (1975g),
Festering Flesh (542),
X-potion**
Festering Flesh (542),
Dark Crystal (160g)
Focalor
45-47
8576-8924
Ice
Storm Magicite (80g),
Ichthon Scale (1033g),
Storm Crystal (160g),
Dorsal Fin (1577g)*
Ichthon Scale (1033g),
Balance Mote**,
Pisces Gem (150g)
Foobar
43-45
10525-10985
Holy
Dark Crystal (160g),
Silver Liquid (1376g)
Sagittarius Gem (150g),
Echo Herbs**
Leynir
45-48
10135-11095
Holy
Storm Crystal (160g),
Wargod's Band (2214g),
Destrier Barding (1214g),
Charger Barding (1154g)
Iron Carapace (413g)
Emeralditan
45-47
20270-20590
Wind
Aged Turtle Shell (1075g),
X-potion**,
Scarletite (1679g)*
Aged Turtle Shell (1075g),
Turtle Shell Chocker*,
800 gil
Shield Wyrm
~47
~35082
-
Wyrm Carapace (739g),
Earth Crystal (160g),
Ring Wyrm Liver (1467g)
Wyrm Carapace (739g),
Hi-potion**
Leamonde Entite
45
48042
Holy
Dark Crystal (160g),
Feystone (1000g),
Leamonde Halcyon (1500g),
Electrum (3563g)
Dark Crystal (160g),
Feystone (1000g),
Leamonde Halcyon (1500g)
*Rare; ** It's better not to sell this
On this map is a gate crystal, but be aware - it is a Crystal Bug. When you defeat it a real crystal will appear.
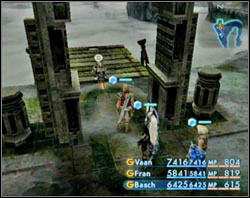
If you search for Chaos you should focus on Nabreus Deadlands. As you know you have to get three medallions. To be able to do that you gotta come here and talk with Ma'Kleou (Quiet Nu Mou).
You will find him in area with an ordinary save crystal, a little northerly from Salikawood.
He tells you about his two pupils who should be here but are late.
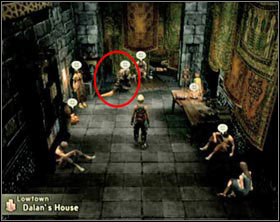
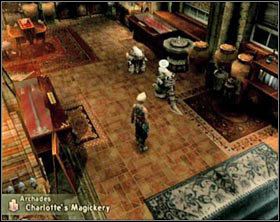
One of them is in Dalan's House in Lowtown (on the left), another one in a magic shop in Archades (right)
Start with the first one (in Dalan's), but you have to complete two hunts before: Wraith (rank I) and White Mousse (rank V). They are Ordinary hunt notices.
This pupil is Roh'kenmou. He's looking for the Medallion of the Courage. He knows it was taken-apart and pieces were hidden after.
Dull Fragment:

In the chamber's center pick up the shining object. It is the Dull Fragment.
Grimmy Fragment:
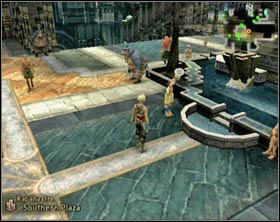
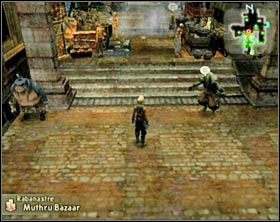
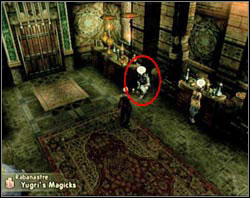
Blackened Fragment - Prize for Orthros (rank V). He belongs to exclusive hunts.
With all three fragments run to Dalan and give them to Roh'kenmou.
Then go to magic shop in Archades. You will find there Roh'kenmou and Roh'kenmu. Talk with Roh'kenmu and pick: "Inquire about the medallion".
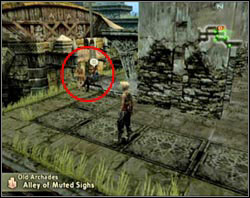
Roh'kenmu is looking for the medallion of the love. In a fact he had had it already but sold it to a man called Otto and cannot find him now.
Get to Old Archades. Otto is in the west part but close to the bridge which goes to the east part.
He sits there with his sweetheart. Talk with him. You will get the medallion back. It is damaged a bit but more powerful than ever.
Deliver it to Roh'kenmou.
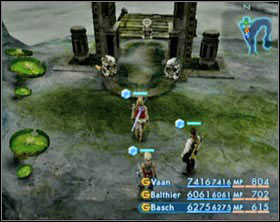
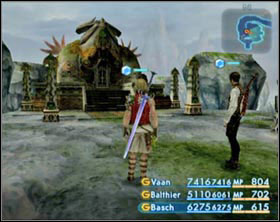
Now, return to Nabreus Deadlands and talk with Ma'Kleou. He is with his pupils [screen 1]. They decided that you had deserved to keep medallions. Speed to Overlooking Eternity area (This one which seems to be unreachable). To get there you have to find a path not visible on the map (on provided map it is marked with a red line). By the altar [screen 2] Ma'Kleou is waiting for you. Now, you will get 3 medallions: Courage, Love and Lusterless.
Medallion of Courage opens Door of Horrors to Humbaba Mistant and Medallion of Love opens Door of Loathing to Fury.
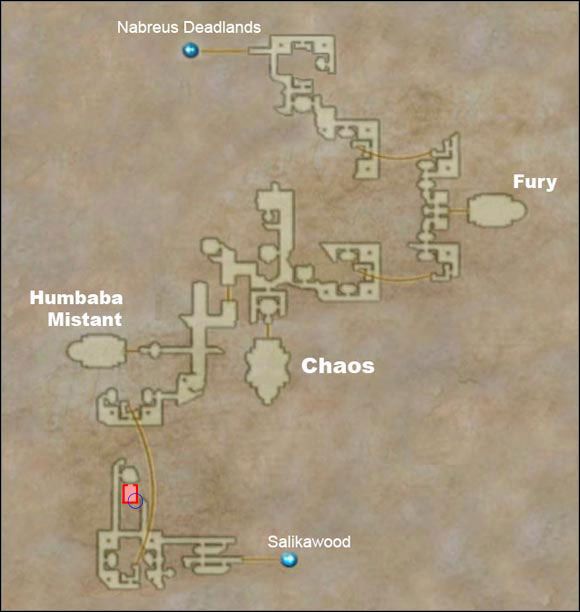 Hidden area is marked in red. Blue circle shows the location of Baknamy Merchant's shop.
Name
Level
HP
Vulnerable to
Drops (price)
Steal (price)
Baknamy
46-47
11338-11578
Ice
Storm Crystal (160g),
Teleport Stone* **,
Hastega Mote**
Remedy**,
X-potion**
Elvoret
46-48
10351-10671
Wind
Earth Crystal (160g),
Demon Eyeball (123g),
Demon Drink (1863g)
Demon Eyeball (123g),
Reflectga Mote**
Babil
47-48
24647-24887
Dark
Holy Stone (35g),
Holy Crystal (160g),
Quality Stone (1425g),
Einherjarium (1682)
Holy Stone (35g)
Zombie Warlock
47-48
8875-9055
Holy
Dark Crystal (160g),
Alarm Clock**,
Forbidden Flesh (1397g)
Dark Crystal (160g),
200 gil
Oversoul
48-49
13982-14162
Holy
Dark Crystal (160g),
Grimoire Togail (475g),
Soul of Thamasa (1856g)
Dark Stone (35g),
Capricorn Gem (150g)
Pandora
~48
~9366
Ice
Storm Crystal (160g),
Wrath of the Gods (2214g)*
Storm Stone (35g)
Dark Elemental
25
14830
Holy
Dark Magicite (80g),
Dark Crystal (160g),
Feystone (1000g)*
Dark Magicite (80g) ,
Dark Crystal (160g),
Feystone (1000g)*
*Rare; ** It's better not to sell this
There are a lot of reasons to come here. I will start with an additional esper - Chaos. More bosses too: Fury and Humbaba Mistant. You get also a commission on Goliath who prowls in this place. However, the most important is the hidden Baknamy Merchant. You can buy there the best (available in a shop) heavy armor, Scatche and Telekinesis.
Entrance to Pharos catacombs is possible after defeating Cid on it's peak. It just means that you can't enter at the first time when you visit this place. Before you will go there make sure that you are able to easily beat monsters which can be found there. You can be sure of a lot of struggles. In a hall you are being attacked by monsters constantly (type of monsters depends on a floor which you explore).
Moreover, the mini-map doesn't work in the catacombs, ordinary map is much limited and in chambers a deep darkness is spreading.
At Pharos's first floor use Dais of Ascendance to get to Penumbra. Then in order to get to lower floors you have to place the proper amount of Black Orbs in four altars - Pedestals of Night (details below). What is more, with every Black Orb placed in the proper altar it will become brighten in that chamber. System is the same as at first floor of Pharos, however except for finding Orbs in rivals' corpses you may find Massive Black Orb which equals three normal orbs + all which you didn't manage to collect while fighting enemies.
On maps below rooms maybe are not proportional but it plays its role. I mean they show connections between rooms and overall shape. In red I marked invisible areas so I couldn't use this color to mark Fool's Facade (as in chapter "Part III - Pharos at Ridorana"). They are marked in blue now.
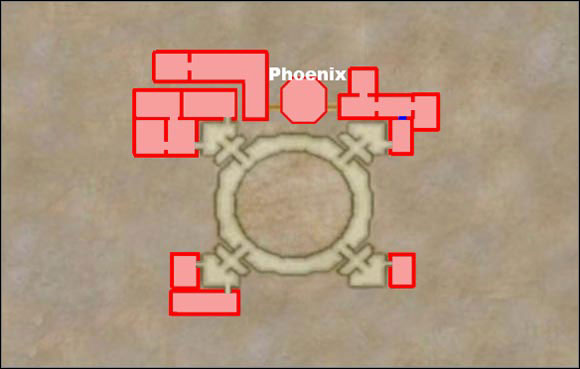
Name
Level
HP
Vulnerable to
Drops (price)
Steal (price)
Abaddon / BullAbaddon
55-58
16578-1689 / 19894-20534
Holy
Vaccine**,
Dark Crystal (160g)
Teleport Stone**,
Solid Horn (1288g)
Mistmare
54-56
15251-15571
Fire
Water Crystal (160g),
Chronos Tear**,
Grimoire Aidhed (1005g)
Grimoire Aidhed (1005g)
Nightwalker
58-60
18568-18928
Holy
Dark Crystal (160g),
Book of Orgain - Mille (1447g)*
Dark Crystal (160g)
Reaver
~58
~29353
Earth
Wind Crystal (160g),
Bacchus's Wine**
Beastlord Hide (1499g)
High Reaver
59-63
35056-36736
Earth
Wind Crystal (160g)
Beastlord Hide (1499g),
Vaccine**,
Gold Axe*
Dragon Lich
59-64
27851-31251
Holy
Dark Crystal (160g)
X-potion**,
Charger Barding (1154g)
Necrofiend
54-57
15914-16454
Holy
Lifewick (1740g),
Sky Jewel (980g),
Dark Crystal (160g)
Sky Jewel (980g),
Hi-potion**
Bune
58-59
16538-16998
Water
Fire Crystal (160g),
Forbidden Flesh (1397g),
Damascus Steel (2188g)*
Gemini gem (150g),
Gold Needle**
Magick Pot
???
~26500
Elixir
Ether**
Elixier**
*Rare; ** It's better not to sell this
At this floor in the hall you will be attacked by Mistmares, Abaddons and Bull Abaddons. Other monsters are in chambers around the hall.
At this floor you can find also additional boss: Phoenix (look chapter: "Bosses not connected with the plot").
Amount of Black Orbs needed at this level:
After using proper amount of black crystals on every altar listed, in Dais of Ascendance an option "Umbra" will appear.

Name
Level
HP
Vulnerable to
Drops (price)
Steal (price)
Mistmare
54-56
15251-15571
Fire
Water Crystal (160g),
Chronos Tear**,
Grimoire Aidhed (1005g)
Grimoire Aidhed (1005g)
Nightwalker
58-60
18568-18928
Holy
Dark Crystal (160g),
Book of Orgain - Mille (1447g)*
Dark Crystal (160g)
Dragon Lich
59-64
27851-31251
Holy
Dark Crystal (160g),
Corpse Fly (1798g)
X-potion**,
Charger Barding (1154g),
Corpse Fly (1798g)
Necrofiend
54-57
15914-16454
Holy
Lifewick (1740g),
Sky Jewel (980g),
Dark Crystal (160g)
Sky Jewel (980g),
Hi-potion**
Dead Bones
55-57
13262-13622
Holy
Dark Crystal (160g),
Ancient Bone (2115g),
Blood-darkened Bone (1435g),
Eye Drops**,
Golden Skullcap*
Dark Crystal (160g)
Magick Pot
???
~26500
Elixir
Ether**
Elixier**
*Rare; ** It's better not to sell this
In Umbra's corridors you are being attacked by Mistamary and Dead Boneses. Other monsters occur only in chambers.
Amount of Black Orbs needed at this level:
After using proper amount of black crystals on every altar listed, in Dais of Ascendance an option "Abyssal" will appear.
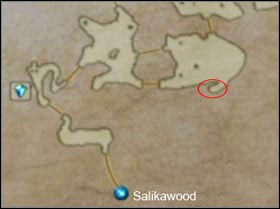
Name
Level
HP
Vulnerable to
Drops (price)
Steal (price)
Nightwalker
58-60
18568-18928
Holy
Dark Crystal (160g),
Book of Orgain - Mille (1447g)*
Dark Crystal (160g)
Dragon Lich
59-64
27851-31251
Holy
Dark Crystal (160g),
Corpse Fly (1798g)
X-potion**,
Charger Barding (1154g),
Corpse Fly (1798g)
Necrofiend
54-57
15914-16454
Holy
Lifewick (1740g),
Sky Jewel (980g),
Dark Crystal (160g),
Vaccine
Sky Jewel (980g),
Hi-potion**
Dead Bones
55-57
13262-13622
Holy
Dark Crystal (160g),
Ancient Bone (2115g),
Blood-darkened Bone (1435g),
Eye Drops**,
Golden Skullcap*
Dark Crystal (160g)
Zombie Warlock
59-60
11935-12115
Holy
Dark Crystal (160g),
Forbidden Flesh (1397g),
Capricorn Gem (150g),
Alarm Clock**
Dark Crystal (160g),
Capricorn Gem (150g)
Magick Pot
???
~26500
Elixir
Ether**
Elixier**
*Rare; ** It's better not to sell this
In the corridor of this floor you are being attacked by Necrofiends, Dead Bones and Warlock Zombies. Unlike previous floors you won't see them marching towards you. They come out of the ground when you come closer to them.
Actually it is last floor of Pharos. You can go lower but only to make an exclusive quest for the clan: "The Seer (rank VI)". Later, there is no possibility of going there.
In order to go to the lowest floor you gotta place right amount of Black Orbs needed in four altars for the last time:
After using proper amount of black crystals on every altar listed, in Dais of Ascendance an option "Unknown" will appear (If mission "The Seer" for the Centurio's clan is in progress).
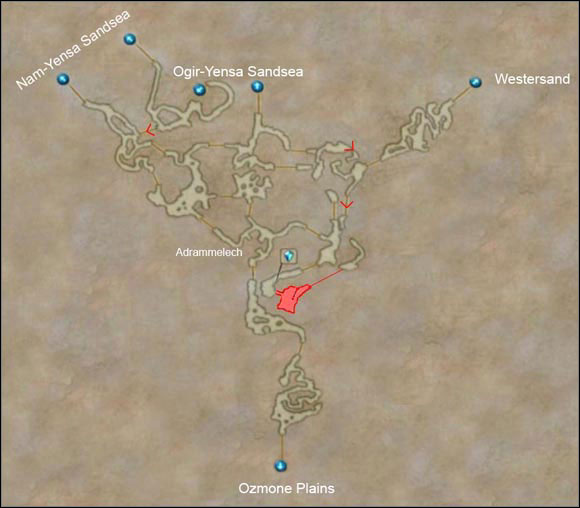 Area marked in red is not visible in a game. It is hard to detect it due to the down falling sand but it is there... for sure ;)
Whereas, in a places where red arrows are there are no passages - you need to bring down the stone to create them. Arrow's direction tells from which side it opens.
Name
Level
HP
Vulnerable to
Drops (price)
Steal (price)
Spear Tongue
16-17
1508-1828
Fire
Water Stone (35g),
Frog Oil* (1826g)
Water Stone (35g)
Slime
15-17
1629-2119
Earth
Wind Stone (35g),
Green Liquid (206g)
Green Liquid (206g)
Buer
37-38
5622-5792
Thunder
Ice Stone (35g),
Ice Crystal (160g),
Demon Tail (1203g),
Demon's Sight* (1704g),
Phoenix Down**
Ice Stone (35g),
Ice Crystal (160g),
Scorpio Gem (150g)
Gorgimera
36-37
5385-5505
Water
Fire Magicite (80g),
Bundle of Feathers (833g),
Teleport Stone* **
Fire Magicite (80g)
Grenade
36-38
4979-5299
Water
Fire Crystal (160g),
Chronos Tear**,
Bomb Fragment (1911g)
Fire Crystal (160g),
Scorpio Gem (150g)
Shambling Corpse
37-38
4338-4518
Holy
Dark Crystal (160g),
Blood-stained Necklace (1663g),
Foul Flesh (143g)
White Fang**
Dark Crystal (160g),
Foul Flesh (143g)
Skullwyrm
38-39
14895-15575
Holy
Battlewyrm Carapace (871g)
Dark Crystal (160g),
Wyrm Bone* (1647g)
Archaeoevis
~38
~11245
Ice
Battlewyrm Carapace (871g),
Emperor Scale* (1395g)
Battlewyrm Carapace (871g)
Mallicant
37-38
6158-6318
Wind
Earth Crystal (160g),
Magick Lamp (1753),
Eye Drops**,
Gaia Hat*
Earth Crystal (160g),
Grimoire Aidhead (1005g),
Phoenix Down**
Silicon Tortoise
~38
~14243
Fire
Aged Turtle Shell (1075g),
Water Crystal (160g)
100 gil
Bogey
~39
~6606
Holy
Dark Crystal (160g)
Sky Jewel (980g),
Death Powder (1323g)
Hammerhead*
Gold Needle*
Scythe Mantis
36-38
8835-9075
Water
Insect Husk (680g),
Tattered Garment (1470g),
Iron Carapace (413g)
Fire Crystal (160g),
Insect Husk (980g),
Iron Carapace (413g)
*Rare; ** It's better not to sell this
The main reason for these caves existence is to give esper Adrammelech a refuge. Apart from it, you fight here with Marilith (rank V) and Catoblepas (rank VI).
This minigame is available when the plot reaches Balfonheim harbor but completion of side quest: "Backdoor" is necessary.
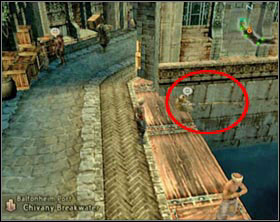
 Red circle tells position of the angler
To start head for South Bank Village and talk with Ruksel who's standing on the pier on the left [screen 1]. He will tell you he is bored an would like to angle but he has no fishing rod. Go to Balfonheim and walk into area with Aerodrome [screen 2].
![You will meet fishing stager there [screen 1] - Fishing - Side Quests - Final Fantasy XII - Game Guide and Walkthrough](https://game.lhg100.com/Article/UploadFiles/201512/2015121519064894.jpg)
You will meet fishing stager there [screen 1]. Talk with him twice and for a second time pick: "That Fishing Rod...". He won't give it to you of course. However he says he is hungry and would like to eat something. Now, move a little away, but do not leave the area, and came back after a while. Fisherman left the place for a meal and forgot to take his fishing rod.[screen 2]. Take it and go back to South Bank Village. Give it to Ruksel.
From this moment you can come here and fish with Ruksel, I mean he will be fishing and you will give him an info where a fish is by pushing the right button combinations. At first button combination appears at the screen edge, after a while it will start to move (from left to right, from right to left, up-down or down-up). Your task is to press the right combination before fish will reach a second side of the screen. Each fishing consists of six combinations. If you manage to do it correctly you will have a chance to drag up a shining treasure from river's bottom. It doesn't flee, so calm down and focus on pressing proper buttons. Even if you didn't manage to catch a treasure whole catch will be approved as a perfect.
You can fish in five places. Step by step it is harder to catch a fish - combinations are longer and more difficult. On the other hand fishes have a better quality and the prices are higher.
South of Ruksel stands Ada who buys fishes. Price-list:
Name
Price (gil):
Shop / Ada
Empty Bottle
1 / 0
Common Fish
10 / 10
Delicious Fish
25 / 100
Nebra Succulent
100 / 200
Fortunately, button combinations are not completely random and each area has its own certain amount.
Here we got a few areas where you can fish and the ways to procure them:
To fish in Hidden Shoals and Den of the River Lord you gotta have Matamune fishing Rod. Here's the way to gain this legendary rod:
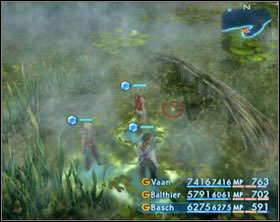
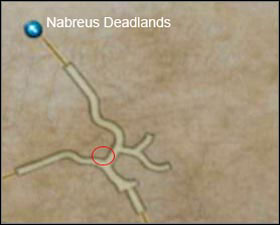
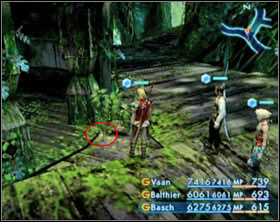
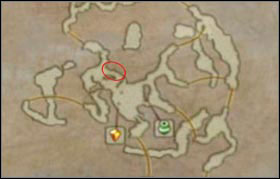
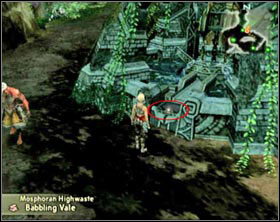
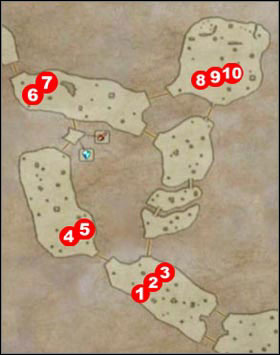
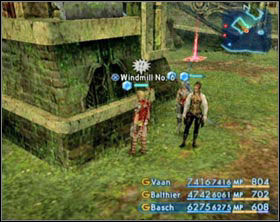 On the left shown is position of windmills in Cerobi Steppe.
Windmills 1,2,5,7,9 have to be turned on and 3,4,6,8,10 off.
Hi-Ether and Auric Message will appear when windmills will be properly turned on/off.
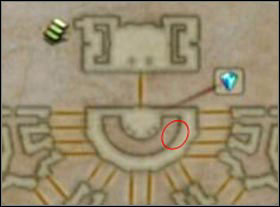
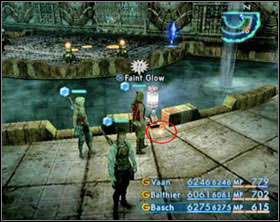
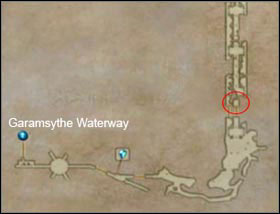
After gaining access to Den of the River Lord you will have to catch King of the Nebra. This fish has 9 lives. With one right button combination it looses one life. When it looses 9th life it will be yours just like Shang's Badge in its stomach.
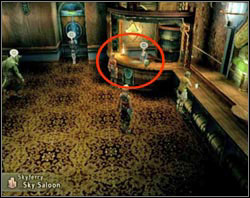
Quest is available after the first visit at Dreadnought Leviathan. You will have then an opportunity to use Aerodrome. Use it to fly from Bhujerba to Rabanastre (pick "Leisure Craft").
On a board go into Sky Saloon, stroll to Chief Steward and talk with her. Do not want to go to the room. Pick "Who's this... Rande?"
She will explain you that she have six sisters who work at similar ships and siblings including only brothers want to marry them.
In fact girls are not interested in their propositions but boys seem not to realize that. Randy who adores Ann proposes you a little bet. Ann gives you a letter and if you deliver it to every sister, brothers will give up. If you don't manage to do that they will marry these girls.
Flights:
From Rabanastre
From Nalbina
From Bhujerba
to Nalbina 200 gil,
to Rabanastre 210 gil,
to Rabanastre 250 gil,
to Bhujerba 200 gil,
to Archades 210 gil,
to Balfonheim 250 gil
to Archades 200 gil
to Balfonheim 210 gil
From Archades
From Balfonheim
to Rabanastre 200 gil,
to Nalbina 180 gil,
to Nalbina 200 gil,
to Bhujerba 180 gil,
to Balfonheim 200 gil
to Archades 180 gil
Now, visit all lines except return ones. It means you don't have to fly from Balfonheim to Archades and then back to Balfonheim because it is the same flight. On a ship boards talk with Chief Stewards and choose: "I have a letter from Ann..."
You will receive Ring of Renewal for successfully delivering the letter to each sister.
It actually is the entrance to Barheim Passage. Your stay there has been ended with passage collapse. There is no return, right? False. There is another passage north of this collapsed one. Only thing you need is a key.
You can take up this mission if you have finished the hunt for Flowering Cactoid (rank I).
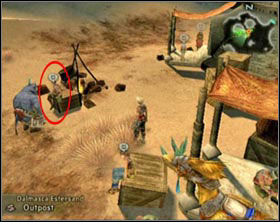 Dantro
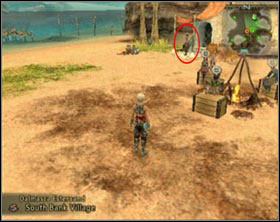
Dantro's wife
After a winning fight with Flowering Cactoid and collecting the prize from Dantro talk with him once again. He will ask you to take a flower Cactoid to his wife to a village on the south bank of the river (South Bank Village). She will have a few tasks for you. After completing all you will be awarded with a key.
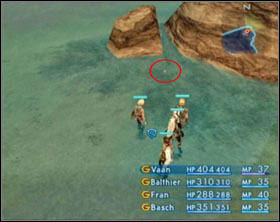
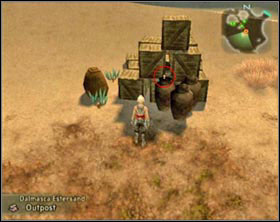
The first task is to collect shells: Sem-clam shells. Leave the village and go west. Get into water and look for flashes [screen 1]. When you collect all, come back to village and talk with Dantro's wife.
Now, she's going to ask you to bring her Nebralim. Go to Dantre and talk to him . He says there is a little nebralim in chests nearby. Approach them, take nebralim [screen 2] and go back to a village to talk with Dantro's wife.
Now, You won't be able to continue unless you have come back from Raithwall's tomb.
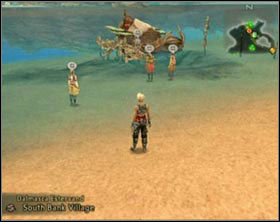
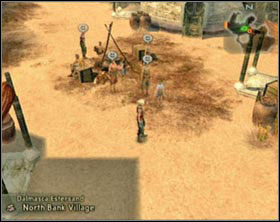
Come back to village where was Dantro's wife. You'll see that Tchigri's dad's boat have returned at last [screen 1]. Recently he hasn't been returning for a long time. Go and talk with Tchigri. He will tell you that his father didn't come back. Lad wants to search him but seniors are concerned abort him so they ask you for help. Pick: "Let's go" and swim to the other side. There, go and talk with Ruksel who stands by the fireplace [screen 2]. Now, you gotta come back and talk with Dantro's wife. She will tell you that a flower which you gave her is behind the house.
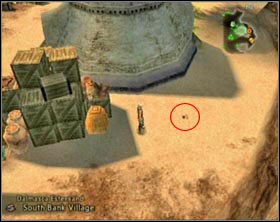
![Go there and pick up flower from the ground [screen 1], swim to other bank and approach the group of Cactoids standing there - Backdoor - Side Quests - Final Fantasy XII - Game Guide and Walkthrough](https://game.lhg100.com/Article/UploadFiles/201512/2015121519065192.jpg)
Go there and pick up flower from the ground [screen 1], swim to other bank and approach the group of Cactoids standing there. They will think that this cactus is actually their brother and will go away. You will get 1000 gils and Wyrmfire Shot. Now you can go to the northernmost part of Westersand: The Broken Sands.
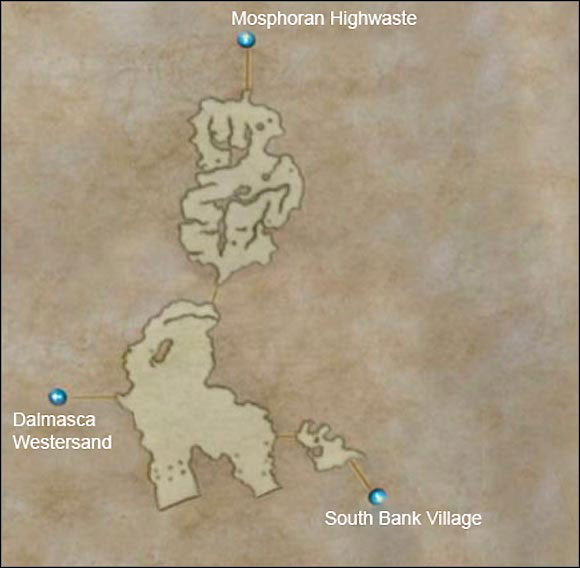
Name
Level
HP
Vulnerable to
Drops (price)
Steal (price)
Worgen
25-26
2011-2121
Water
Smelling Salts**,
Fire Magicite (80g),
Libra Gem (150g),
Throat wolf blood (1360g),
Quality Pelt (651g)
Hi-potion**,
Fire Magicite (80g)
Alpha Worgen
28-29
2413-2523
Water
Smelling Salts**,
Fire Magicite (80g),
Libra Gem (150g),
Throat wolf blood (1360g)
Hi-potion**,
Fire Magicite (80g)
Dive Talon
27-28
4022-4090
Earth
Handkerchief**,
Wind Magicite (80g)
Giant feather (686g),
120g
Ichthon
~26
~2765
Thunder
Water Magicite (80g),
Fish Scale (151g)
Phoenix Down**,
Eye Drops**
Brown Chocobo
~32
~3211
Thunder, Water, holy
Chocobo Feather (480g),
Gyshal Greens**
Fire Stone (35g)
Wild Saurian
~29
~7226
Wind
Tanned Hide (77g),
Tyrant Bone (1233g)
Hi-potion**,
Tanned Hide (77g)
Slaven Wilder
~28
3638
Wind
Tanned Giantskin (672g),
Earth Magicite (80g)
Tanned Giantskin (672g),
White Fang**
* Rare; ** It's better not to sell this
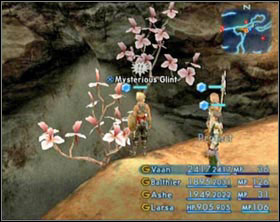
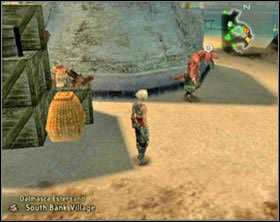
Wife of Dantro asked you to bring her Valeblossom Dew. You can find it only at Broken Sands. You have to find at least one bush with pink leaves [screen 1]. On them is what you are looking for. Pick up everything and come back to Dantro's wife. Talk with her twice and leave the village. Talk with her once again and go behind the house. There stands a patient who was cured by her [screen 2]. He will give you a key to Barheim. Another entrance (apart from collapsed one) is south-east of the village (look at Dalmasca Estersand map).
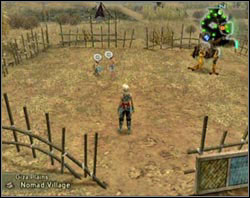
When the plot reaches Archades, from the camp in Giza all Cockatrices run away. Condition is to:
Archades - Agytha:
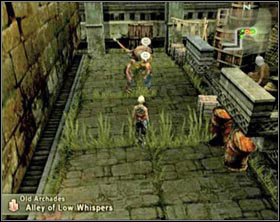
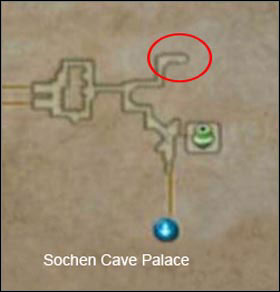
Domicile of the first Cockatrice - Old Archades. Talk with it.
 Agytha
Second Cockatrice you can find in the center of Archades. To get there you have to collect all Pinewood Chops and exchange them by Chop Master to Sandalwood Chop (The way to collect all Chops is in a chapter about Archades), but after the fight with Cid in Draklor Laboratories.
As soon as you enter this area you will see running Agytha. Crew of imperial soldiers attempt to catch her. Catch up with her - She's running around one pillar so you should cut corners and you will get her. Talk with her and say: "I saw a prin cockatrice in Old Archades". She will give you Tumulus and run at the meeting.
Jahra - Shurry:
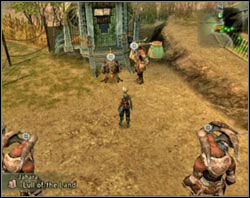
Go to Jahra. Everybody congregated and observe something. Take a look what is that. It turns out that it is Cockatrice. Talk to it. Then talk with Garif Herderem standing nearby and say: "It came from Giza Plains". Run to Elder Knoll and talk with Great Chief Ubll-Ka. You will get a gift for Normads in Giza. Bring it back to Garif Herder, Shurry will hit the road and you will get Platinum Dagger.
Eruyt Village - Chit:
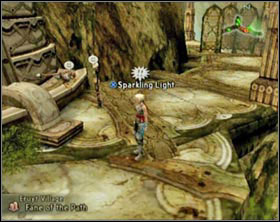
![At the very end of the village you will meet Mjirn and Chit [screen 1] - Lost sheeps... ekhm... Cockatrices - Side Quests - Final Fantasy XII - Game Guide and Walkthrough](https://game.lhg100.com/Article/UploadFiles/201512/2015121519065239.jpg)
At the very end of the village you will meet Mjirn and Chit [screen 1]. Talk with Chit, and next come up to lying nearby Sparkling Light and pick it up. It is Dewdrop Pebble. Talk with Mjirn and pick: "Offer her your Dewdrop Pebbles". Now you have to find 8 more of these trinkets (look at map).
I begin with the closest one:
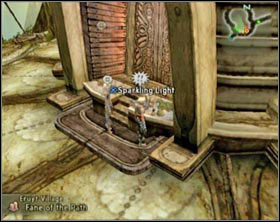 On the right side of two Vieras sitting
 On overgrown with leaves tree's bark
 On the tree-trunk near stairs
 On the bridge
 In blind alley on the weapon stand
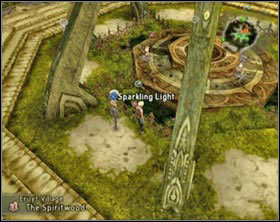 In a fountain. First, you have to catch sight of it. Next, talk with Wood-Dweller standing nearby and ask her to get it for you
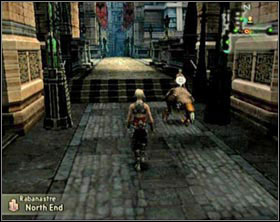 Among leaves under the stairs
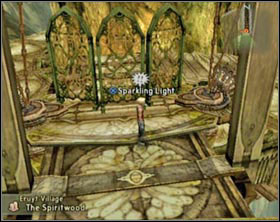 At the end of an empty, blind alley
When you collect all, come back to Mjirn and once again "Offer her your Dewdrop Pebbles". Now, talk with Chit. It will drop another Dewdrop Pebble from it's tail. Talk once again with Mjirn. Chit will recollect everything and hit the return road to Giza and you will get Yoichi Bow.
Rabanastre - Renn:
Take up this Chockatrice not before Chit's come-back to the village.
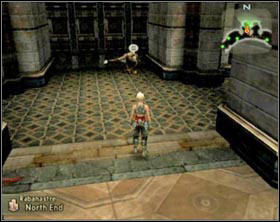
You will find it in the northernmost part of Rabanastre. Talk to it. It will start to run away. It will be running around this area. You can close to it at a distance. If you close too much it will run faster and just after a while will slow down. Cut corners near clan residence and the shop with gambits but be careful. It can't notice you are before it because it will turn around and start running in opposite direction. You have to close to her from behind.
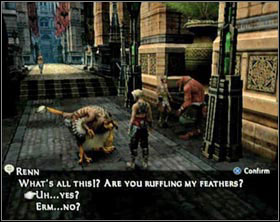
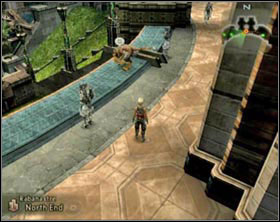
When you catch it talk with it. It doesn't matter what you will choose. It will tell you its story and back near the place where you meet it. Talk once again with it and pick: "Yes, Actually". After these words Renn will go back to the village and you will get Diamond Sword.
South Bank Village - Sassan:
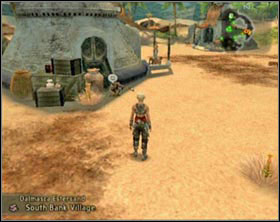
![You will find Sassan in front of one house nearby Gate Crystal in Dalmasca Estersand [screen 1] - Lost sheeps... ekhm... Cockatrices - Side Quests - Final Fantasy XII - Game Guide and Walkthrough](https://game.lhg100.com/Article/UploadFiles/201512/2015121519065374.jpg)
You will find Sassan in front of one house nearby Gate Crystal in Dalmasca Estersand [screen 1]. Condition is to have already a key to Barheim passage and to sluices in Garamsythe Waterway.
Talk with him. Next, run to talk with Tchigri and tell him that you want to cross the river. He will tell you about Sassan who wants to get on the other bank but he is afraid of wolf which is gamboling in the village: Nathyl. Then a small window appears where you can choose figures to transport through the river. At first pick Nathyl and on the other side pick "No one". Next, choose Arryl, on the other side "No one" and in the end pick Sassan. In northern part of the village run after Sassan to a fireplace [screen 2] and talk with him. After longer moment he decides to come back to a home and you will get Koga Blade.
Balfonheim - Moomer:
Last but not least - Moomer. He thinks he is a Chocobo. You have to convince him that he isn't a good material for being a Chocobo.
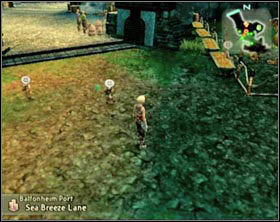
![Near the exit from Balfonheim to Cerobi Steppe you will see strolling Miffed moogle [screen 1] - Lost sheeps... ekhm... Cockatrices - Side Quests - Final Fantasy XII - Game Guide and Walkthrough](https://game.lhg100.com/Article/UploadFiles/201512/2015121519065405.jpg)
Near the exit from Balfonheim to Cerobi Steppe you will see strolling Miffed moogle [screen 1]. Talk with him. Then talk with Chocobo Wrangler sitting by a farm. She will notice your feather. Give it to her for a while: "Show her the Feather of the Flock" [screen 2]. After conversation will come to you that miffed moogle. Talk with him. He will notice Cocatrice and will be thinking it is defective chocobo. Go and talk with Gurdy (the one who rents Chocobo). Moogle will start a journey with Moomer and you will get Defender.
After you recover all Cocatrices go to Giza during rainy season and talk with standing in the farm Terra. For your help you will get 2x Hi-Ether.
On Southern Plaza in Rabanastre next to fountain stands a man who admires Viera's perfection. At first he is confined to admiring them but after your adventures in Raithwall's tomb he claims he would like to meet one of them.
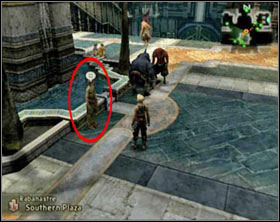
![Quest begins with your conversation with this man (Lovestruck man) [screen 1] - Rabanastran in love - Side Quests - Final Fantasy XII - Game Guide and Walkthrough](https://game.lhg100.com/Article/UploadFiles/201512/2015121519065474.jpg)
Quest begins with your conversation with this man (Lovestruck man) [screen 1]. Next, you go to the south gate and talk with Chocobo Viera who is standing near stables [screen 2].
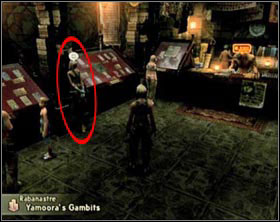
![Next, run after her to the shop with Gambits [screen 1] and then to Sandsea [screen 2] - Rabanastran in love - Side Quests - Final Fantasy XII - Game Guide and Walkthrough](https://game.lhg100.com/Article/UploadFiles/201512/2015121519065497.jpg)
Next, run after her to the shop with Gambits [screen 1] and then to Sandsea [screen 2]. Here, she asks you to find for her kindred spirit. Come back to Southern Plaza and talk with that man, pick option: "Ok. I'll do it". Come back to Sandsea and talk once again with Viera, pick: "There's this man in southern Plaza...". Run to Southern Plaza and talk with Viera. Your awards are Loxley Bow and 2x Hi-potion.
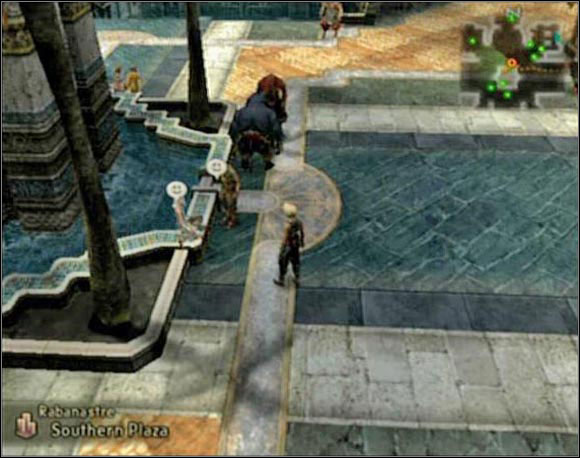 So we got a Happy End ;)
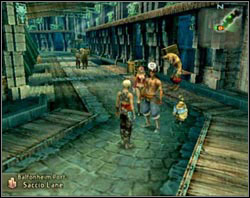
After incidents in Ridorana Cataract you can chase with Rikken and his friends.
To do that go to a front of Reddas's residence and talk twice with Rikken. Agree with his proposition.
There are 100 races for you (of course you don't have to participate in all at once ;)) For each won race you get a prize and advance to the next race. If you loose, you repeat the same race.
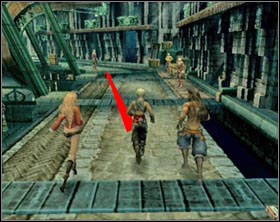
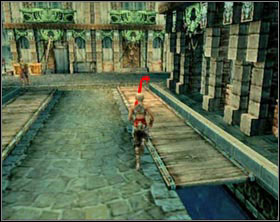

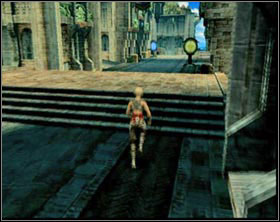
To run straight you have to press X and O by turn. By pressing only a few times X you sidetrack to the left and by pressing O to the right. There is no sense to press button as fast as you can because Vaan won't run faster. First of all you have to press them rhythmically so Vaan didn't stop at every step. You have to cut corners too. At the beginning it has no matter but later your opponents are much faster and cutting corners is necessary. After start run straight for a while and a little turn to the left (press X twice and continue running straight) [screen 1]. When you will be close to this bend turn a little to the right and next straight run at a slant. Just before bend to the right (start to press O quickly). Due to that you will pass it with inner line as close as it is only possible [screen 2]. Wait a while and when Vaan will be orientated straight to the finish line instead of pressing O start to pressing X quickly. Race is finished when you reach the stairs [screen 4].
Despite all appearances Raz is the fastest one. However it is not visible at the beginning. His biggest problem is to keep the balance - In first races he collapses and stays behind. In later races your victories will depend whether you "help" him in collapsing or not. Task is pretty easy. When you go out of first bend (which turns into left) you should rapidly turn to the right to cross Raz's way and cause his collapse [screen 3]. Now, your only task is to calmly get to finish.
Prizes:
Race
(tier)
Price
1
Potion
2
Phoenix Down
3
Eye drops
4
Antidote
5
10 gil, Echo Herbs
6
Gold Needle
7
Alarm Clock
8
Handkerchief
9
Bacchus's Wine
10
100 gil, 2x Balance Mote
20
300 gil, 2x Float Mote
30
800 gil, 3x Teleport Stone
40
1500 gil, 2x Vanishga Mote
50
2500 gil, 2x Reflectga Mote
60
3500 gil, 2x Hi-Ether
70
4500 gil, 2x Holy Mote
80
6000 gil, 2x Hastega Mote, Caramel (276g)
90
8000 gil, 2x Scathe Mote, Slime Oil (1717g)
100
10000 gil, 2x Elixir, Unpurified Ether (1783g)
As you have probably noticed awards are only listed till 10th race and then listed every 10 races. It doesn't mean that in races between you get nothing. There is just a simple schema: 1st race - 1x Potion, 11th - 2x Potion, 21st - 3x Potion etc. All together you get 55 things for races between the main ones. Remember, max. amount of things you can carry on is 99 so it is worth to make a place for them
After winning 100th race you are announced by Rikken the fastest man in whole Ivalice. If you want to race more it is not problem. Nevertheless, You will gain no more awards in races and the level will not raise anymore.

 Fable II Game Guide & Walkthrough
 Farming Simulator 15 Game Guide & Walkthrough
 Fallout 3: Mothership Zeta Game Guide & Walkthrough
 FIFA 16 Game Guide & Walkthrough
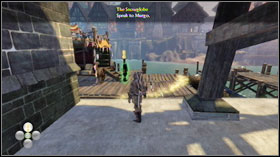 Fable II: See the Future Game Guide & Walkthrough