
In this Final Fantasy XIII guide you will find some detailed description about how to handle with all main quests that are appearing in the game. In addition you will be able to learn an exact localization of all chests and read some strategies that will help you in defeating all main bosses. In the first chapter, there are some basic information about paradigms and roles.
Last chapter are about some side quests and hidden treasures. You will find there a complete list of all achievements and side quests, map with an exact location of all Cie'th stones and chests. Chocobo fans will get something for them too. They can find some information about all buried valuable items.
[1], [2] - number that are referring to the screens located above the text. Number one is referring to the number on the left. Number two is referring to the number on the right.
Orange color- items
Red color - NPC's and monsters
Blue color - areas and buildings
Green color - abilities and other special things for example: Sentinel, Eidolon
buff - a spell that will strengthen your character.
debuff - a spell that will weaker your character.
tank - a character that is very resistant to melee attacks. In FFXIII Sentinel will take his role.
AOE (Area of Effect) - spells that are effective in the particular area, not only on a one target.

Fighting system in Final Fantasy XIII is based on two major elements: roles and paradigms. Role are some kind of professions that will give our characters abilities to fulfill their tasks in the group. Every character can develop all six roles. The best tactic is to start with three major one that are different to each character, then (when they will be on a good level) you can start to give some points to other. You can learn basic role for each character from this table:
Character
Role 1
Role 2
Role 3
Lightning
Commando
Medic
Ravager
Snow
Sentinel
Ravager
Commando
Sazh
Ravager
Commando
Synergist
Vanille
Saboteur
Medic
Ravager
Fang
Sentinel
Saboteur
Commando
Hope
Medic
Synergist
Ravager
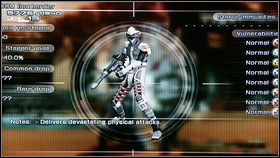
Commando is very important in every fight. Their attacks will not charge your chain gauge bar, they are necessary to stabilize it. Every Commando attack will slow the bar and they will allow Ravagers to stagger your enemies.
The second thing is that Commando attacks (the only exception is Sazh) will throw your enemies into the air. As a matter of fact, monsters will not be able to attack. If you will be playing well, then your opponents will be flying for the whole fight. In addition these attacks will make stagger to last longer.
A good thing is to learn something abort teams with two Commandos. They can attack two targets in one moment so they can immobilize two enemies. This is a very powerful strategy when you are trying to surprise your opponents.
This profession was unnecessary in Final Fantasy XII. Now it is very important in all difficult fights. It is a typical tank whose role is to draw attention of all enemies and resist their attacks. He don't have many abilities that can hurt your enemies (except of one, very weak) but he has some very powerful defensive spells. Sometimes only Sentinel is able to resist some most powerful attacks.
The best tactic is to use him against bosses and some larger groups of enemies when you will have to survive the first part of the fight. It is good to use him while healing and buffing the rest of the team. As a matter of using Challenge ability, chain gauge will stay on a high level.
As a healing character Medic is the best in every battle. To successfully support your team, the best option is to use two that kind of roles in one paradigm. But healing is not the only things that this caster can do - resurrection and Dispell spell will be handy later on.
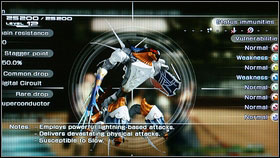
Ravager is a role with two main tasks: dealing damage and charging the chain gauge. He has very powerful attacks, but you have to use them wisely. First thing is to use the Libra ability as often as possible. As a matter of fact, you will learn something about your enemy resistances and immunities.
Ravager has also a second task - to charge enemy chain gauge. A major disadvantage of this ability is fact, that the bar is charging very quickly, but it can also get empty after few seconds. To slow this process it is good to attack with one Commando character. In fact, sometimes you will be able to manage with three Ravagers.
Similar to Sentinel, Synergist is not very handy at the beginning of the game but later on it will be necessary. Abilities like Haste, Shell and Protect will give you very powerful buffs in the battle. The main disadvantage is that buffing the hole team can take you many rounds. The best option is to start at the beginning of the fight. If your enemy is weak a good idea is to use Synergist only for two rounds - everyone will get haste buff and the battle will be easier.
The last, but not the least important class is Saboteur. As you can already know from the name, he's main role is to weaken the enemy. His main abilities is to lower your enemy resistances and stuff like that. Unfortunately, some enemies are very resistant to his debuffs and, as a matter of fact, the role of Saboteur could be limited is some battles. A very special ability is Death ( Vanille can learn it at the end of the game). It is good to invest some points here, because it will help you to defeat Adamantoise - one of the most dangerous monsters in the game.
Paradigms are the combination of roles that can be used in Final Fantasy XIII. The hole battle is about how to properly change paradigms (abilities are not so important at this time). In one fight, you can use only six paradigms that were chosen before the battle, and you have to remember that changing the team mate will reset your choice. You have many possible combination of paradigms and that is why, you have only some most important described below.
The main paradigm that is the best at the beginning of almost all battles. Commando will slow the chain gauge and Ravagers will do the rest. This combination is also very useful after staggering your enemy (Commando can throw you enemy into the air)
The best option is to use this tactic after Commando first attack. Chain gauge will be stable now and three Ravagers should be able to stagger your enemy with easy. After they will fulfill their task return to Commando (but not when your target is very weak against magic attacks).
This is the best healing paradigm. Two healers will heal every wound in one round with easy and Sentinel with the Challenge ability will slow the chain gauge. It is good to remember that tank will lower damage done to all party members - remember about this when fighting with last boss.
This is a very good combination at the beginning of almost every boss fight. It will provide your team with some buffs and, at the same time, it can also debuff your enemy. Try not to use it when your enemy has very powerful AOE. You will be forced to change to healing paradigm very often and that will cost you time.
It is safer version of the previous paradigm. You will do not have to worry about your teammates health. Sentinel and Medic will handle will damage taken and Synergist/Saboteur will do the rest.
In Final Fantasy you will be able to improve your weapons. Each item has its own experience bar that can be charged with some components found during the game. Important thing is that you can upgrade your weapon only in special places called save points (you have to pick the option: Upgrade).
These components can be divided in two groups: organic and mechanic. First one will give you less experience points but they will raise your multiply value and the others are good in rising EXP. The most important thing is to balance them in a proper way - use your organic components one after another and when the multiply value will get to the max (X3) then you can start upgrading your weapon with some mechanic parts. But when you will use them, multiply value will decrease (so you have to use as many of them at one time). In addition you can only one level at one improvement process. Maybe I will give you some example now:
You've got Lionheart lvl 1 with 0/4000 EXP. You don't know anything about requirements to the third level but, for sure, they are higher. So the best option is to use components worth 8000 EXP. As a matter of fact you will get Lionheart lvl 2 4000/4200 (or something close to this) EXP. You will be sure that the multiply value was used properly and that you didn't lose your valuable points.
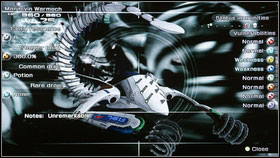
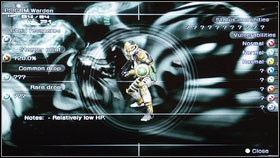
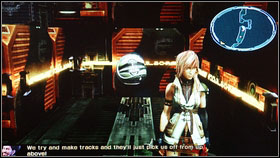
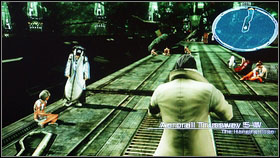
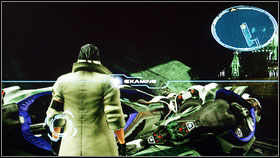
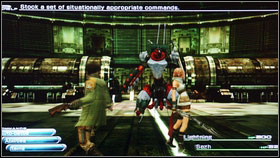
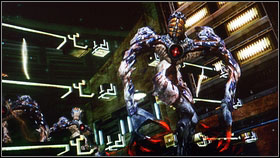
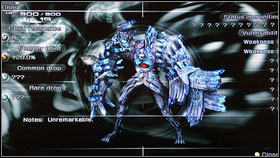
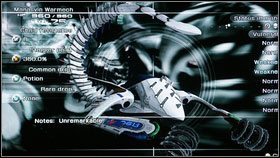
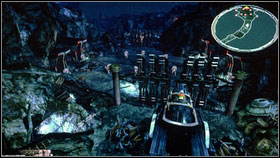
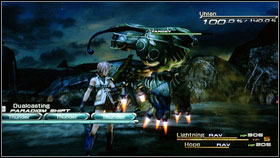
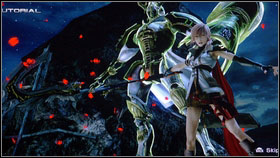
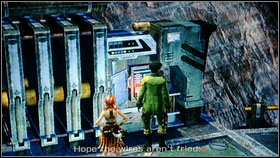
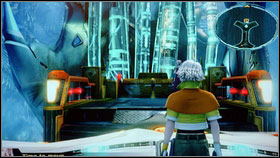
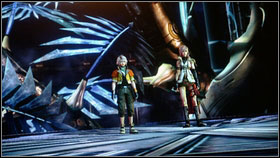
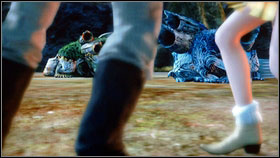
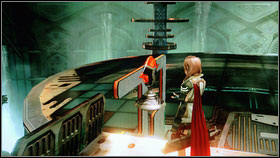
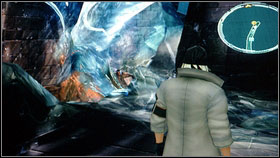
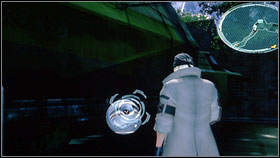
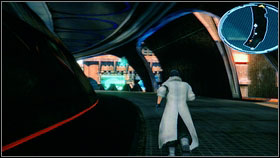
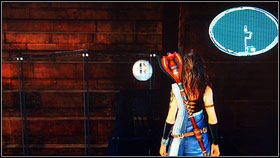
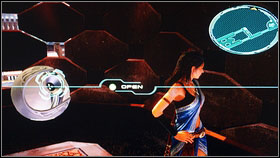
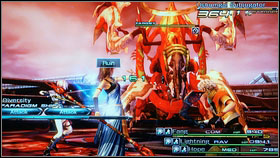
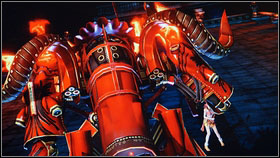
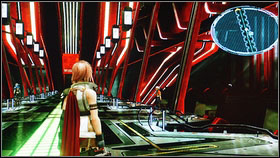
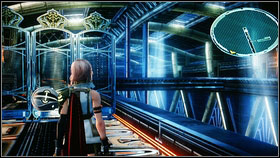
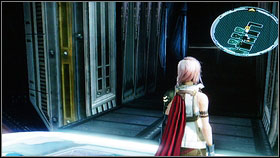
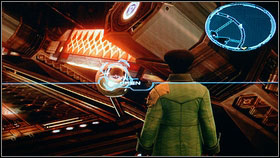
![You will start you journey with a short game guide - you will have to fight with a huge robot called Manasvih Warmeh [1] - Walkthrough - Chapter I - Walkthrough - Final Fantasy XIII - Game Guide and Walkthrough](https://game.lhg100.com/Article/UploadFiles/201512/2015121519070005.jpg)
You will start you journey with a short game guide - you will have to fight with a huge robot called Manasvih Warmeh [1]. Wait until the fight will begin [2] and you will learn something about ATB bar and stuff like that. When you will lose your health, then you can use some healing potion and return to fight.
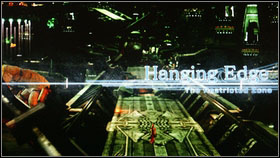
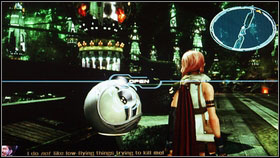
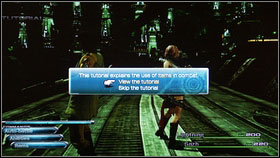
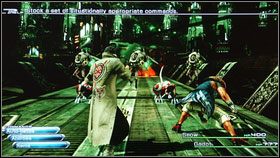
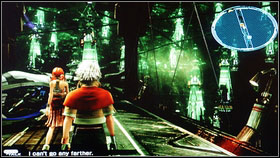
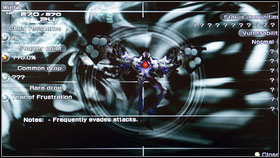
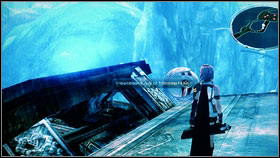
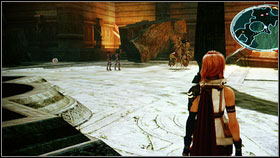
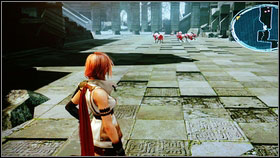
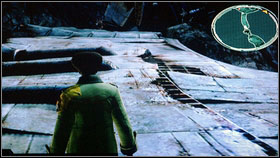
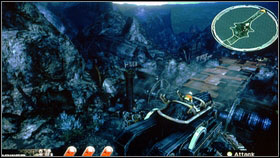
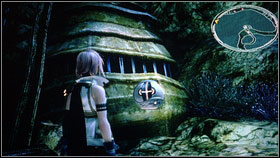
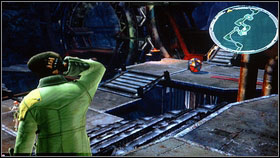
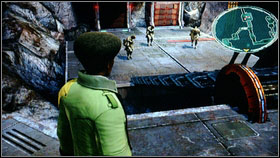
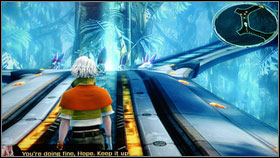
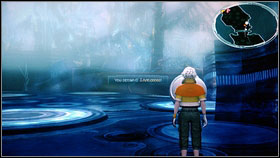
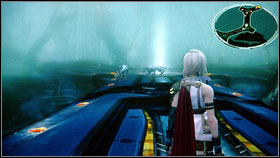
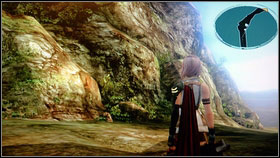
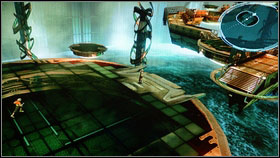
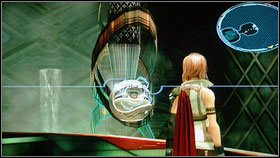
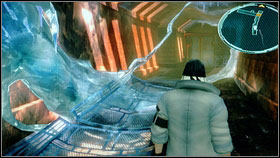
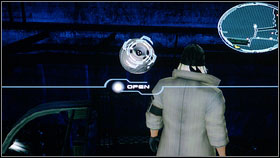
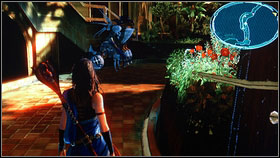
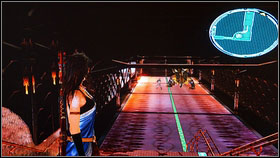
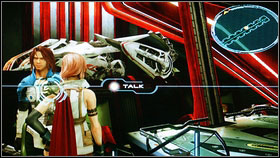
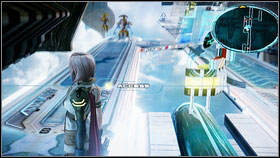
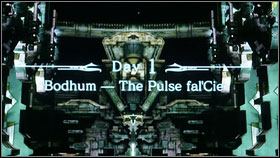
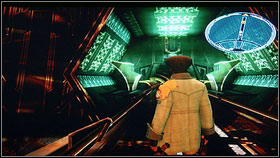
![After two rounds your enemy will run away and you will be able to explore the area called Hanging Edge [1] - Walkthrough - Chapter I - Walkthrough - Final Fantasy XIII - Game Guide and Walkthrough](https://game.lhg100.com/Article/UploadFiles/201512/2015121519070004.jpg)
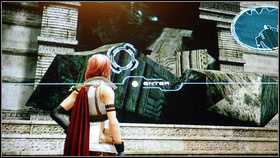
After two rounds your enemy will run away and you will be able to explore the area called Hanging Edge [1]. Start with changing your camera settings and then learn something about Datalog [2]. This is some kind of encyclopedia - you will find some information about monsters, locations, etc. here.
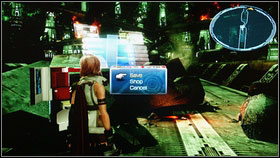
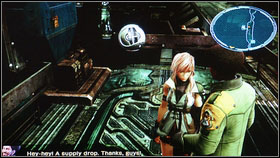
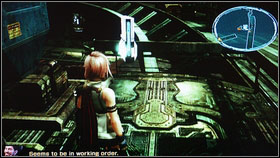
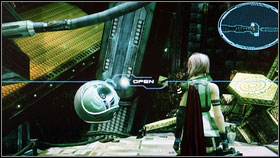
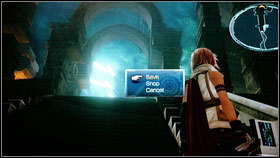
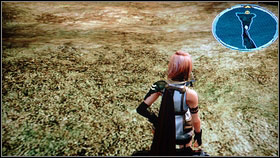
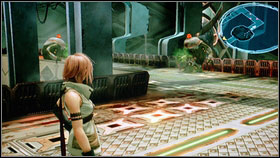
When you will read everything go straight ahead. You will get to the first save point [1]. Do not buy anything by go straight ahead. You will be attacked by some monsters, but you should handle with them with easy [2]. Use your normal attacks and finish the battle.
Jump over the barricade and defeat another group of Psicom Warden soldiers. Go further and you will get to the first chest full of treasures [2]. You will find a Potion inside.
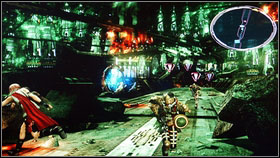
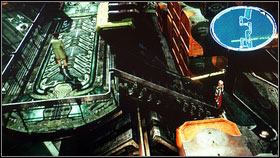
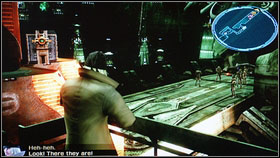
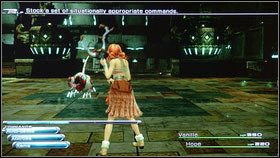
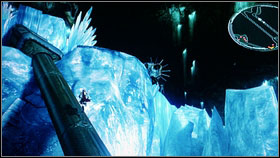
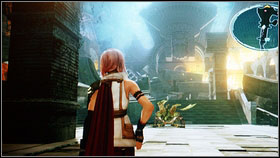
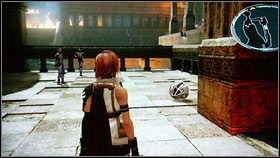
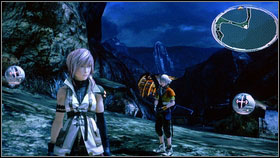
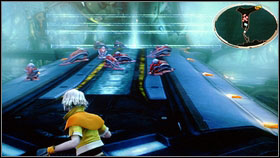
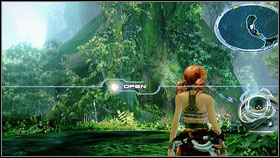
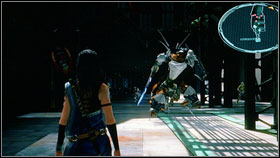
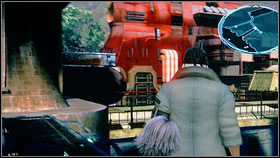
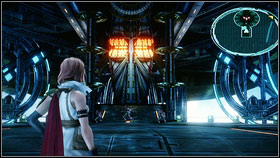
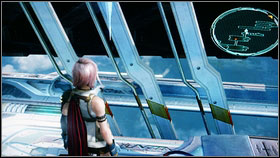
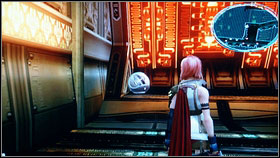
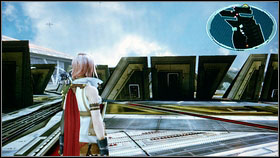
![Go straight ahead until you will have to fight with PSICOM Enforcer [1] and some Pantherons [2] - Walkthrough - Chapter I - Walkthrough - Final Fantasy XIII - Game Guide and Walkthrough](https://game.lhg100.com/Article/UploadFiles/201512/2015121519070178.jpg)
Go straight ahead until you will have to fight with PSICOM Enforcer [1] and some Pantherons [2].
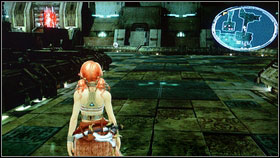
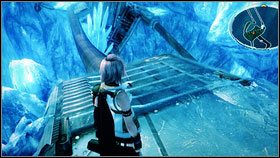
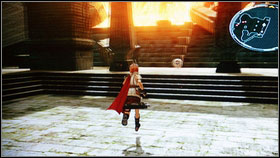
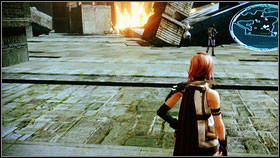
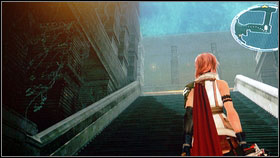
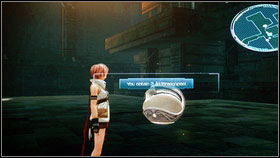
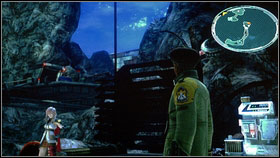
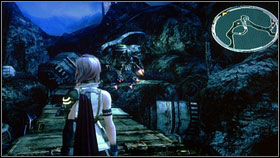
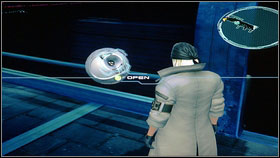
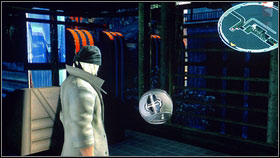
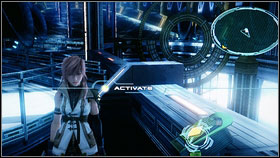
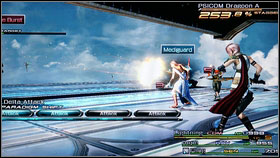
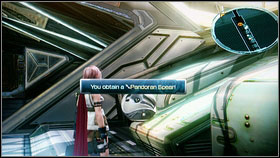
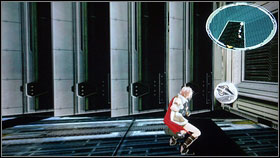
![Then take stairs located on the right to get another two Potions [1] - Walkthrough - Chapter I - Walkthrough - Final Fantasy XIII - Game Guide and Walkthrough](https://game.lhg100.com/Article/UploadFiles/201512/2015121519070130.jpg)
Then take stairs located on the right to get another two Potions [1]. On the left you will find a chest with Iron Bangle [2].
When you will pass the barricade, you will be forced to fight with PSICOM Aerial Recons. Kill them fast and follow the Sazh [1]. After the fight, turn round and open the chest - you will get 50 gils [2].
Run straight ahead to find another enemies. You will see a short presentation about weapons now [1]. After the cut scene you have to eliminate another group of enemies, then follow the Sazh. After few seconds, you will get to the next save point [2].
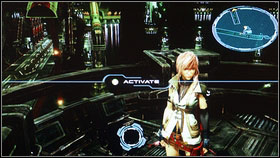
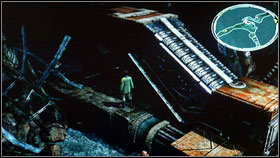
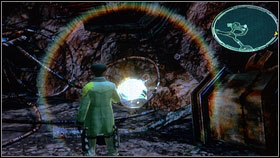
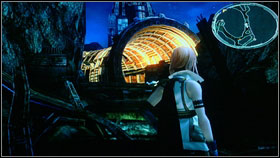
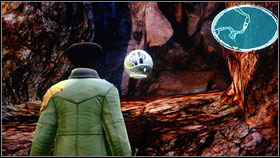
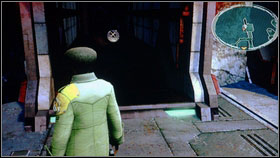
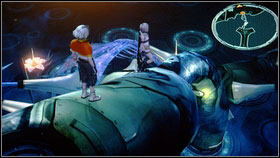
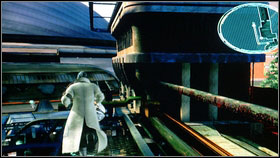
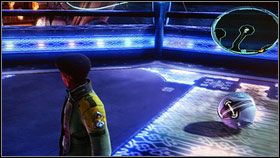
![Use the mechanism located on the ground [1] and go down - Walkthrough - Chapter I - Walkthrough - Final Fantasy XIII - Game Guide and Walkthrough](https://game.lhg100.com/Article/UploadFiles/201512/2015121519070279.jpg)
Use the mechanism located on the ground [1] and go down. Here you will have a chance to learn something about chain attacks. This is a very useful ability - you will be charging your enemy chain gauge. When it will be full, you will be able to stagger your enemy. Staggered monster will take much more damage than a normal one. As a matter of fact, the best option is to stagger the most powerful enemy as fast as it is possible. When you will kill the PSICOM Marauder [2] along with his companions, you will take control over Snow.
Save the game at the beginning and jump above the barricade. After the cut scene you will have to fight with some soldiers. Kill them all and run to a huge refugee group [2].

![Watch another cut scene and open the chest located on the left (Iron Bangle) [1] - Walkthrough - Chapter I - Walkthrough - Final Fantasy XIII - Game Guide and Walkthrough](https://game.lhg100.com/Article/UploadFiles/201512/2015121519070240.jpg)
Watch another cut scene and open the chest located on the left (Iron Bangle) [1]. Few steps later you will be able to save the game once again. After few weaker opponents you will have to fight with Beta Behemoth [2]. He seems to be very powerful but it is a very easy enemy. Press Auto Attack and heal the group.

![After the fight take control over Lightning to kill Myrmidona [1] - Walkthrough - Chapter I - Walkthrough - Final Fantasy XIII - Game Guide and Walkthrough](https://game.lhg100.com/Article/UploadFiles/201512/2015121519070344.jpg)
After the fight take control over Lightning to kill Myrmidona [1]. You will see a longer cut scene and afterward you will take control over Snow [2] once again. At the beginning you will find a chest with Power Circle and then another save point.
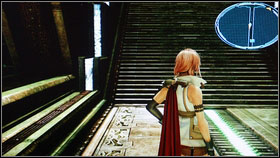
![Now you will have to eliminate some larger squad - Snow grenades will be useful here [1] - Walkthrough - Chapter I - Walkthrough - Final Fantasy XIII - Game Guide and Walkthrough](https://game.lhg100.com/Article/UploadFiles/201512/2015121519070334.jpg)
Now you will have to eliminate some larger squad - Snow grenades will be useful here [1]. Then get to the stairs located on the left [2].
You will find a chest behind the barricade - open it and take 100 gils. Kill three soldiers [1] the best option is to use grenades once again. Now get to the vehicle [2].
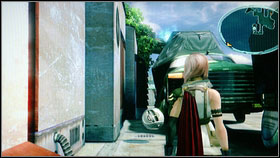
![Now you will take control over the boy named Hope [1] - Walkthrough - Chapter I - Walkthrough - Final Fantasy XIII - Game Guide and Walkthrough](https://game.lhg100.com/Article/UploadFiles/201512/2015121519070305.jpg)
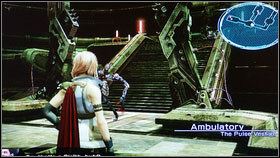
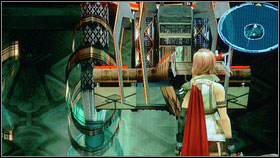
Now you will take control over the boy named Hope [1]. He will be with a girl - Vanille. Save the game and speak with her. Then use the vehicle to get to The Pulse Fal'cie [2].
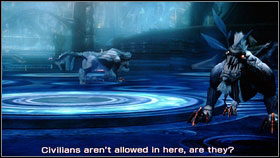
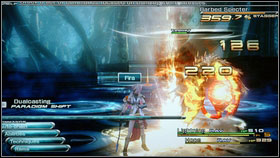
![After the cut scene you will be attacked by Pantheron [1] and Vanille will be a leader - Walkthrough - Chapter II - Walkthrough - Final Fantasy XIII - Game Guide and Walkthrough](https://game.lhg100.com/Article/UploadFiles/201512/2015121519070359.jpg)
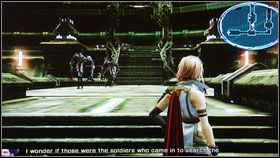
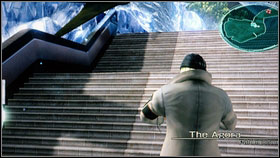
After the cut scene you will be attacked by Pantheron [1] and Vanille will be a leader. After the fight turn left and save the game [2].
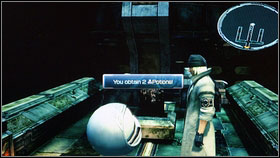
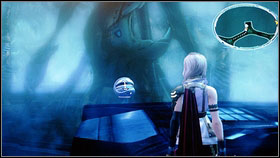
![In front of the save point you will find a chest with 30 gils [1] - Walkthrough - Chapter II - Walkthrough - Final Fantasy XIII - Game Guide and Walkthrough](https://game.lhg100.com/Article/UploadFiles/201512/2015121519070436.jpg)
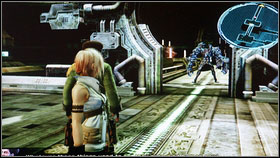
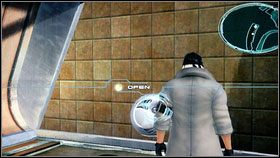
In front of the save point you will find a chest with 30 gils [1]. Now you can move to the next level. When you will be there, turn left and kill some enemies. You will have to fight with Pantherons and Zwerg Scandroids [2].
When you will be done, open the chest and take 4x Potion, then start walking toward the point marked on the map. During this trip you will learn some useful things about attacking [1]. Now, the best option is to surprise your opponents. Kill all robots and take Iron Bangle. Then give it to Vanille [2].
![Jump over the barricade and fight with another enemies [1] - Walkthrough - Chapter II - Walkthrough - Final Fantasy XIII - Game Guide and Walkthrough](https://game.lhg100.com/Article/UploadFiles/201512/2015121519070409.jpg)
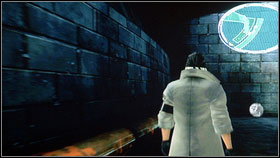
Jump over the barricade and fight with another enemies [1]. Then return to Snow. At the beginning turn round and open the chest with two Potions [2].
Now, you can return to the previous save point. After dealing with two Pantherons use the mechanism located nearby [1] to get to the Lightning. Now you will learn some information about vaporizers [2]. These are a special items that can be used before the fight to temporary raise our abilities. Use them by pressing LB and then A.
![Now, go straight ahead [1] - Walkthrough - Chapter II - Walkthrough - Final Fantasy XIII - Game Guide and Walkthrough](https://game.lhg100.com/Article/UploadFiles/201512/2015121519070402.jpg)
Now, go straight ahead [1]. Save the game and attack your enemy from surprise (use Deceptisol). Use it on Pantherons, because weaker enemies can be astonished without such helpful items. The open the chest and take Phoenix Down [2].
![Later, you will be attacked by Myrmidon [1] - Walkthrough - Chapter II - Walkthrough - Final Fantasy XIII - Game Guide and Walkthrough](https://game.lhg100.com/Article/UploadFiles/201512/2015121519070507.jpg)
Later, you will be attacked by Myrmidon [1]. Remember to use Potion in proper moment. Use the stairs to get upstairs and open the next chest. Take w Gladius [2] and give it to Lightning.
Use Deceptisol when you will be at the top and attack the robot. Then you will be moved to Snow. Turn around and go straight ahead. Get close to the chest and take two Potions [1]. Return to the start and attack your enemies [2].
![After the fight use the mechanism [1] - Walkthrough - Chapter II - Walkthrough - Final Fantasy XIII - Game Guide and Walkthrough](https://game.lhg100.com/Article/UploadFiles/201512/2015121519070571.jpg)
After the fight use the mechanism [1]. Now you can get on the lift [2].
![As a Vanille turn round and jump over the barricade that is blocking your passage [1] - Walkthrough - Chapter II - Walkthrough - Final Fantasy XIII - Game Guide and Walkthrough](https://game.lhg100.com/Article/UploadFiles/201512/2015121519070528.jpg)
As a Vanille turn round and jump over the barricade that is blocking your passage [1]. You will see some robots on the right - they are guarding the chest (its empty now) [2].
Turn left and kill another enemies. You will find save point somewhere here. Then you can go to the main room that is located here. Kill some robots [1] and open the chest where you will find Fortisol [2].
![Now the passage is blocked by two Pantherons [1][2] - Walkthrough - Chapter II - Walkthrough - Final Fantasy XIII - Game Guide and Walkthrough](https://game.lhg100.com/Article/UploadFiles/201512/2015121519070618.jpg)
Now the passage is blocked by two Pantherons [1][2]. Kill them fast and enter the corridor.
You will find another save point here. After you will save the game, attack another opponents. You will get to the chest. Open it and take 100 gils [1]. Now you will have to fight with some Ghouls [2].
![Fortunately, you will be able to use Snow [1] - Walkthrough - Chapter II - Walkthrough - Final Fantasy XIII - Game Guide and Walkthrough](https://game.lhg100.com/Article/UploadFiles/201512/2015121519070611.jpg)
Fortunately, you will be able to use Snow [1]. His grenades will take care of your enemies very quickly.
![As a Lightning go left and kill two Ghouls that are guarding the chest with Power Wristband [2] - Walkthrough - Chapter II - Walkthrough - Final Fantasy XIII - Game Guide and Walkthrough](https://game.lhg100.com/Article/UploadFiles/201512/2015121519070625.jpg)
As a Lightning go left and kill two Ghouls that are guarding the chest with Power Wristband [2].
Now you can take the path located on the other side, where you will gain some experience points. If you do not have time, then run toward the point marked on the map. You will meet some Ghouls [2] here. Kill them fast.
![At the top of the stairs, a more powerful enemy will be waiting for you - a Ghast [1] - Walkthrough - Chapter II - Walkthrough - Final Fantasy XIII - Game Guide and Walkthrough](https://game.lhg100.com/Article/UploadFiles/201512/2015121519070762.jpg)
At the top of the stairs, a more powerful enemy will be waiting for you - a Ghast [1]. One Potion should be enough to kill this opponent. Save the game after the fight and enter the corridor. Outside you will be forced to fight with many Ghouls [2].
![At the end, you will attacked by two Ghasts [1] - Walkthrough - Chapter II - Walkthrough - Final Fantasy XIII - Game Guide and Walkthrough](https://game.lhg100.com/Article/UploadFiles/201512/2015121519070784.jpg)
At the end, you will attacked by two Ghasts [1]. A good option is to use Deceptisol here. After the battle use the elevator to get upstairs and run to Sarah. Now you will be able to watch a long cut scene [2].
Run upstairs, kill two Ghasts and other enemies. You will find a new opponents here - Wight [1]. He is not very powerful so you should handle with him very quickly. At the top, you will find a chest with 5x Potion [2] and a save point.

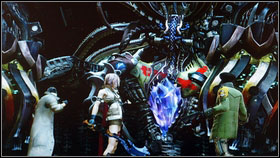
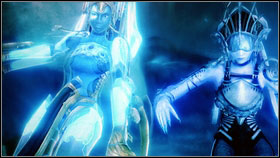
Save the game and enter the corridor. Now it is time to fight with Anima [2]. This is the first boss.
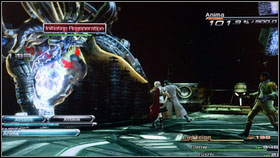
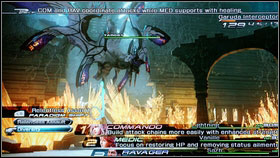
Your opponents is "equipped" with hands called Manipulators [1]. You should focus on attacks on them. After you will eliminate them, attack the crystal located in the middle [2]. Repeat the same action, until you opponent will be dead.
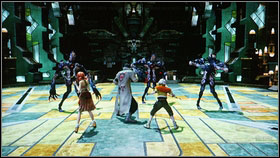
At the beginning of this chapter, a fight will start. Fortunately it is a good thing, because you will have a chance to learn something about paradigms [1]. Press LB to open the paradigm tab and choose the proper tactic. Change paradigm to Solidarity to heal the whole party. Then return your previous tactic and kill Ghasts. More information about each paradigm you will find in another chapter of this guide.
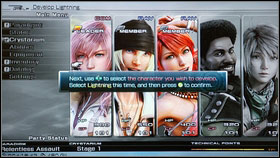
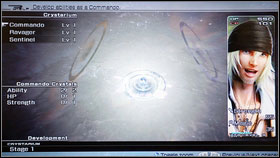
After the fight run straight ahead. During the short cut scene, you will learn about another element - Crystarium [1][2]. It is a system that will help you to develop your character. The major thing here is to choose the correct path for the role you are interested in. As a result, you will get new abilities and your stats will improve.
Choose your standard paradigm strategy and go to the crossroads. Take the right path to save the game [1]. Then take another road [2].
![At the end you will find a chest with Pearlwing Staff [1] - Walkthrough - Chapter III - Walkthrough - Final Fantasy XIII - Game Guide and Walkthrough](https://game.lhg100.com/Article/UploadFiles/201512/2015121519070848.jpg)
At the end you will find a chest with Pearlwing Staff [1]. Get back to save point and then run to the point marked on the map. After killing Ghast jump on the platform on the right where you will find another chest. Inside you will find 7x Chipped Fangs [2].
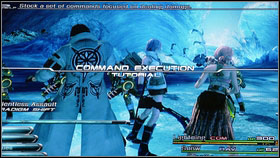
Jump above and you will find another chest - 200 gils. When you will get close to Snow another cut scene will start. Then you will have to fight with soldiers. During the battle, you will learn a new ability - command execution [1]. It will let you to use your attacks without charging the ATB bar. Just chose the proper attack and press Y. After the battle go straight ahead [2].
![Kill another group of enemies and turn right to open the chest with 5x Cie'th Tears [1] - Walkthrough - Chapter III - Walkthrough - Final Fantasy XIII - Game Guide and Walkthrough](https://game.lhg100.com/Article/UploadFiles/201512/2015121519070923.jpg)
Kill another group of enemies and turn right to open the chest with 5x Cie'th Tears [1]. Then you will meet another opponents. You will have to kill many monsters at once so be careful. When your HP bar will get below 150, change paradigm to Solidarity to heal the team. After the fight turn left, kill another group and open the chest with Silver Bangle [2]. Use this item and return to main path.

Save your game using the next save point (on the right). After few steps you will get to Pantherons [2].
Kill them fast and open the chest on the left. You will Phoenix Down [1]. another chest is on the right - 50 gils [2].
![Third chest with Strange Fluid is on the path [1], but you can also find another treasure that is guarded by some soldiers - Walkthrough - Chapter III - Walkthrough - Final Fantasy XIII - Game Guide and Walkthrough](https://game.lhg100.com/Article/UploadFiles/201512/2015121519070960.jpg)
Third chest with Strange Fluid is on the path [1], but you can also find another treasure that is guarded by some soldiers. After defeating them you will get Magician's Mark. Go in the direction marked by the game - you will get to another save point and then, to Sarah.
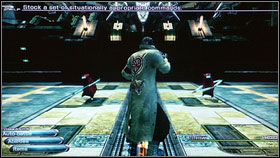
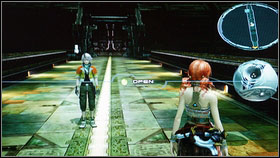
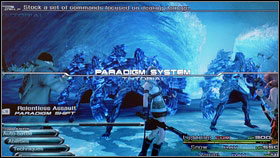
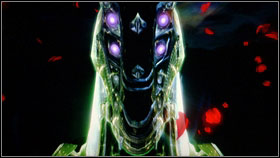
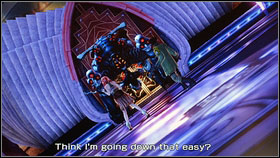
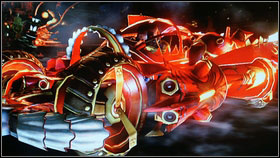
![After a short cut scene [1] you will have to fight with the enemy from the tutorial - Walkthrough - Chapter III - Walkthrough - Final Fantasy XIII - Game Guide and Walkthrough](https://game.lhg100.com/Article/UploadFiles/201512/2015121519071003.jpg)
After a short cut scene [1] you will have to fight with the enemy from the tutorial. Now you will have a chance to learn paradigms for good [2].
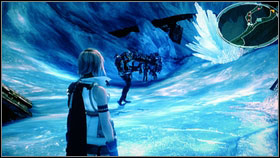
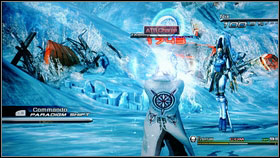
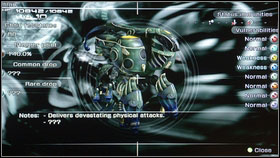
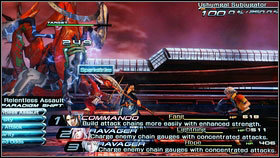
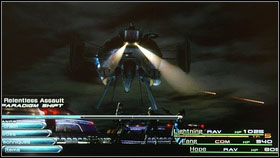
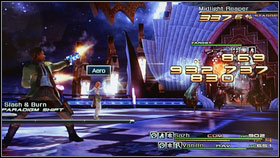
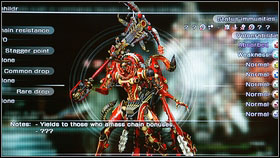
![To defeat Manasvin Warmech [1] you will have to change between Relentless Assault and Solidarity - Walkthrough - Chapter III - Walkthrough - Final Fantasy XIII - Game Guide and Walkthrough](https://game.lhg100.com/Article/UploadFiles/201512/2015121519071059.jpg)
To defeat Manasvin Warmech [1] you will have to change between Relentless Assault and Solidarity. When any of your team mates will have low HP, change to the healing paradigm and then to Relentless Assault. You have to be fast to stagger the enemy.

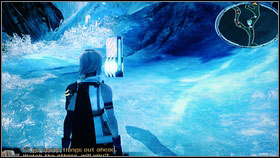
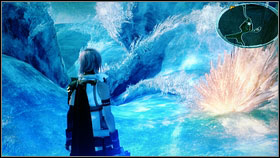
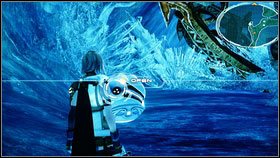
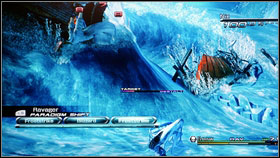
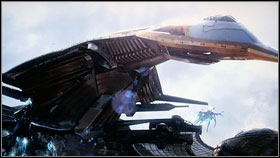
![After another cut scene run straight ahead and defeat some Terraquatiks [2] - Walkthrough - Chapter III - Walkthrough - Final Fantasy XIII - Game Guide and Walkthrough](https://game.lhg100.com/Article/UploadFiles/201512/2015121519071039.jpg)
After another cut scene run straight ahead and defeat some Terraquatiks [2].
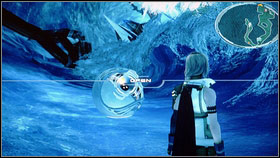
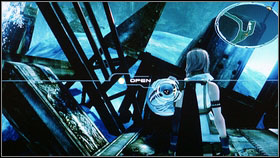
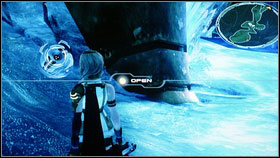
![On the first crossroads turn right to get the Strange Fluid [1] - Walkthrough - Chapter III - Walkthrough - Final Fantasy XIII - Game Guide and Walkthrough](https://game.lhg100.com/Article/UploadFiles/201512/2015121519071008.jpg)
On the first crossroads turn right to get the Strange Fluid [1]. Jump down and kill another enemies [2].
Use the bridge to get to the other side and open two chests with 240 gils and Deneb Duellers. Now, you can get back. Chose the bridge located upstairs [1]. On the other side you will be attacked by Terraquatiks.
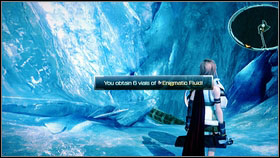
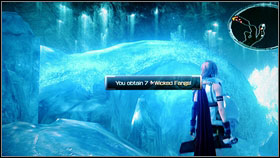
Kill them fast and open the next chest. Take 6 bottles of Enigmatic Fluid [1]. Get back to the main path and you will get to the destroyed machine. Use it to brake the ice. Before you will go to the right open another chest. You will find 7x Wicked Fangs [2].

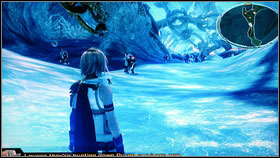
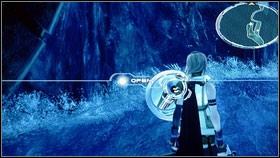
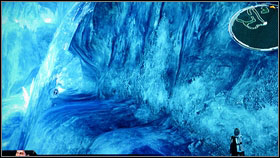
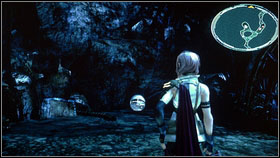
![Now you can cross the bridge [1] - Walkthrough - Chapter III - Walkthrough - Final Fantasy XIII - Game Guide and Walkthrough](https://game.lhg100.com/Article/UploadFiles/201512/2015121519071109.jpg)
Now you can cross the bridge [1]. On the other side you will see an ice ravine with the next save point. After few seconds you will be attacked bys Alpha Behemoth [2] and before the battle you will learn how to use Techniques.
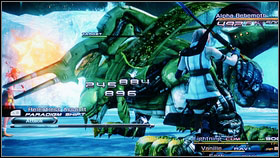
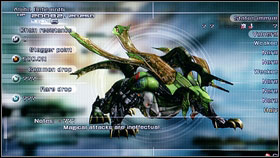
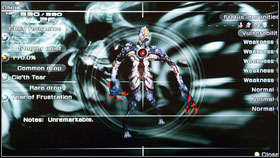
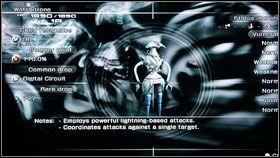
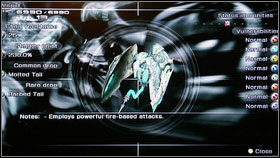
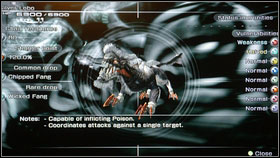
These are some kind of a special abilities. To use them, you have to have TP points than you can get after successful combos. The first technique is Libra - use it to know many interesting details about your enemies. Press RB to see his abilities and weaknesses. To learn all stats you must use Libra twice.

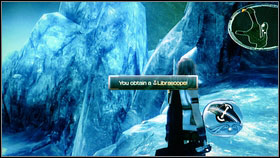
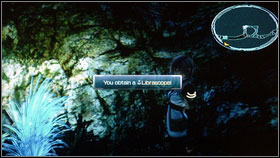
Fortunately, our friends will accommodate to your new ability and they will use their most effective spells. After the fight take the right path to get the Librascope [2].

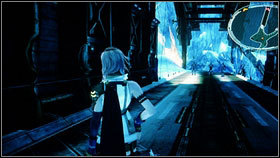
![After the cut scene [1] go straight ahead and kill all soldiers - PSICOM Trackers [2] - Walkthrough - Chapter III - Walkthrough - Final Fantasy XIII - Game Guide and Walkthrough](https://game.lhg100.com/Article/UploadFiles/201512/2015121519071133.jpg)
After the cut scene [1] go straight ahead and kill all soldiers - PSICOM Trackers [2].
![You meet more powerful Watchdrons too [1] - Walkthrough - Chapter III - Walkthrough - Final Fantasy XIII - Game Guide and Walkthrough](https://game.lhg100.com/Article/UploadFiles/201512/2015121519071232.jpg)
You meet more powerful Watchdrons too [1]. Defeat them and turn right to get 2x Digital Circuit [2]. Now you can go back and enter the tunnel.
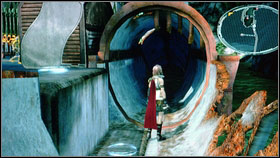
![At the end of the tunnel you will have to fight [1] - Walkthrough - Chapter III - Walkthrough - Final Fantasy XIII - Game Guide and Walkthrough](https://game.lhg100.com/Article/UploadFiles/201512/2015121519071290.jpg)
At the end of the tunnel you will have to fight [1]. After few steps you will get to the crossroads. Go straight ahead and open the chest with Paraffin Oil [2]. Get back to another path and climb to the top.
![During you trip you will find a chest with 50 gils [1] - Walkthrough - Chapter III - Walkthrough - Final Fantasy XIII - Game Guide and Walkthrough](https://game.lhg100.com/Article/UploadFiles/201512/2015121519071228.jpg)
During you trip you will find a chest with 50 gils [1]. When you will be at the top go right to open the chest with Insulated Cabling [2]. Get back and kill Ciconia Velocycle, then save the game. After a few steps, another cut scene will start. Then go straight ahead and kill one Dron group. Then open the chest with 30 gils.
Then you will find another chest with Begrimed Claw. Some time later, you will exit the cave and it will be possible to save the game [1]. Then enter the mysterious room where you will have to fight with Alpha Behemoth [2].
After the battle, go to corner on the right. In the chest you will find 600 gils [1]. Get back and turn right just before stairs. You will get to another chest with 2x Digital Circuits inside [2].
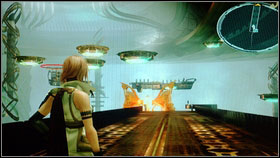
![Run to the room located nearby and kill another group of enemies [1] - Walkthrough - Chapter III - Walkthrough - Final Fantasy XIII - Game Guide and Walkthrough](https://game.lhg100.com/Article/UploadFiles/201512/2015121519071392.jpg)
Run to the room located nearby and kill another group of enemies [1]. Then go to the upper level [2] and jump on the other side.
![Here you will have to fight with Crusader [1] - Walkthrough - Chapter III - Walkthrough - Final Fantasy XIII - Game Guide and Walkthrough](https://game.lhg100.com/Article/UploadFiles/201512/2015121519071361.jpg)
Here you will have to fight with Crusader [1]. After the battle turn right and localize the chest with 7x Begrimed Claws [2]. Now return to the place of your last fight.
![On the other side of the square there is another chest guarded by some soldiers [1] - Walkthrough - Chapter III - Walkthrough - Final Fantasy XIII - Game Guide and Walkthrough](https://game.lhg100.com/Article/UploadFiles/201512/2015121519071389.jpg)
On the other side of the square there is another chest guarded by some soldiers [1]. Inside you will find a Sparked Ring [2].
![Use the stairs [1] and take another treasure - 3x Potions [2] - Walkthrough - Chapter III - Walkthrough - Final Fantasy XIII - Game Guide and Walkthrough](https://game.lhg100.com/Article/UploadFiles/201512/2015121519071344.jpg)
Use the stairs [1] and take another treasure - 3x Potions [2].
Run to the top and save the game. Kill another two groups of enemies [1]. In one of them you will meet PSICOM Executioner [2]. The best option is to kill his guards first, then take care of the boss.
After the third fight open the chest with Millerite. Now you will have to handle with another groups of weaker enemies. After dealing with three Pantherons [1] use stairs and then turn right. Now you may pass to the other side [2] to get to the save point. Save the game and get back.
Use the stairs on the right to get to chest guarded by two soldiers. After the fight take the Ferroeletric Film [1]. Now you may jump down and you will be attacked by powerful group of enemies. At the beginning kill all helpers and then their commanders. After the battle save the game. Then go left and turn right (after a while). On the left you will see a chest with 2x Librascopes [2] and another on the right with Phoenix Down.
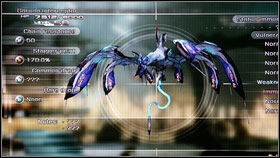
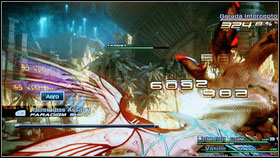
Few steps later a short cut scene will start. Then Garuda Interceptor [1] will attack you. At the beginning of the fight use Libra to strengthen DMG of your companions. As a result your enemy will be staggered without healing [2].
After a short time your opponent will run away to start the second phase. Repeat your tactic. When you will kill him for the second time, some new roles will be available for your teammates. Sahz will be able to develop Synergist tree and Vanilla - Saboteur.

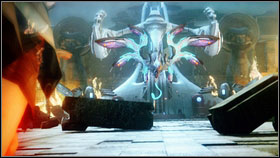
After a film, you will have to fight with some soldiers. You do not need to defeat them. After the battle first Eidolon [1] will appear. He will kill all your enemies and then he will try to harm Snow. Just before the fight you will be able to read a guide of how to fight with these creatures [2].
They have their own bra that you have to charge (impress the enemy). Just attack or use another abilities (you will full list after using Libra). You will be given a time to do this so you must be very quick. To defeat your opponent you will have to use Sentinel paradigm and the ability called Steelguard. When the bar will be charged press X. As a matter of fact you will gain your first summon and additional ATB bar.

After killing one group of mobs, you will take control over Sahz. You will see that one machine fragment is falling into the water. Then you will be able to see your companions memories.

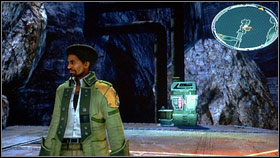
![Then you will learn some information about the role of Synergist [1] - Walkthrough - Chapter IV - Walkthrough - Final Fantasy XIII - Game Guide and Walkthrough](https://game.lhg100.com/Article/UploadFiles/201512/2015121519071586.jpg)
Then you will learn some information about the role of Synergist [1]. This is a very helpful character: may raise your teammates attack of defense rating. One of your Synergist is Hope. After starting this chapter run to the nearest save point. They buy some most necessary things and jump over the barricade [2].
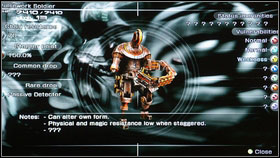
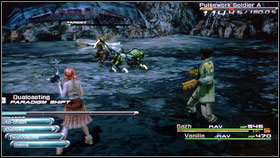
You will find a chest guarded by Thexteron here. You enemy is quite easy so you can check your new paradigms. After dealing with him take Librascope. Now you can go back to the main path. You will have to fight with another group of enemies [1]. After the battle go straight ahead. Kill all opponents and note that there will be one new creature - Pulsework Soldier [2].
Wait until he will turn back and then attack. If you will be quick, he won't be able to move [1]. Jump down and watch some Lightning memories [2]. Now it is time to get back to Sahz and Vanille.
It will turn out that Sahz can be a Synergist too (he is more effective in buffing attack stats). Faith spell will raise your Magic and Bravery - Strength. Enter the Crystarium to learn your new abilities and then save the game [1]. On the other side of the tunnel you will see that robots are fighting among themselves [2].
Destroy two drones and then take care of Pulseworker. Now you can use the mechanism in the middle to open the passage. Go straight ahead and kill all enemies. You will find a chest here with Black Belt [2] - it will raise your physical damage resistance. You exit the tunnel use the mechanism on the right and defeat your opponents.
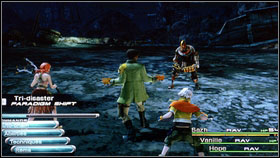
After few step, you will get to Hope. He will tell you something about his past. Then go upstairs [1] where you will be attacked by Pulseworker [2]. Change paradigm to Superiority and, after a while, return to Tri-disaster. As a matter of fact Synergists will buff the team, Saboteur will weak your enemies and Ravagers will end the fight.
![In the nearby chest [1] you will find Ninutral - new weapon for Hope - Walkthrough - Chapter IV - Walkthrough - Final Fantasy XIII - Game Guide and Walkthrough](https://game.lhg100.com/Article/UploadFiles/201512/2015121519071753.jpg)
In the nearby chest [1] you will find Ninutral - new weapon for Hope. Now go to the next save point [2].
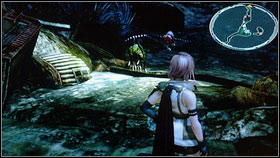
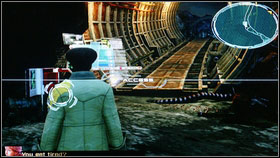
![After few steps you will get to the gates guarded by a robot [1] - Walkthrough - Chapter IV - Walkthrough - Final Fantasy XIII - Game Guide and Walkthrough](https://game.lhg100.com/Article/UploadFiles/201512/2015121519071759.jpg)
After few steps you will get to the gates guarded by a robot [1]. Kill him fast, turn left and defeat flying Incubuses [2]. Then go to the wreck.
![After a short cut scene run straight ahead [1] and kill every creature that you can find - Walkthrough - Chapter IV - Walkthrough - Final Fantasy XIII - Game Guide and Walkthrough](https://game.lhg100.com/Article/UploadFiles/201512/2015121519071755.jpg)
After a short cut scene run straight ahead [1] and kill every creature that you can find. Go to the another save point and two chests [2].
![In the first chest you will find Phoenix Down [1], in another - Metal Armband - Walkthrough - Chapter IV - Walkthrough - Final Fantasy XIII - Game Guide and Walkthrough](https://game.lhg100.com/Article/UploadFiles/201512/2015121519071747.jpg)
In the first chest you will find Phoenix Down [1], in another - Metal Armband. Now you may return to the main path and fight with another Incubusses and one Succubus. They should be very easy, if you will attack from surprise [2]. The same thing with the next group and two Pulseworkers.
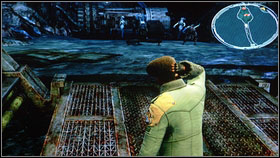
![When you will be on stairs, Lighting will join you [1] - Walkthrough - Chapter IV - Walkthrough - Final Fantasy XIII - Game Guide and Walkthrough](https://game.lhg100.com/Article/UploadFiles/201512/2015121519071735.jpg)
When you will be on stairs, Lighting will join you [1]. Follow her killing everything on your sight. Then use the special mechanism to create stairs. Go upstairs and kill all demons there. You may take the shortcut when the road will turn left. You will pass some enemies but also a chest with Ember Ring [2]. Follow the Lightning and save the game.

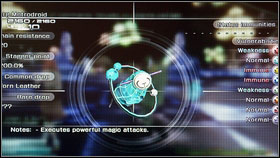
![Now you will have to fight with Dreadnought [1] - Walkthrough - Chapter IV - Walkthrough - Final Fantasy XIII - Game Guide and Walkthrough](https://game.lhg100.com/Article/UploadFiles/201512/2015121519071876.jpg)
Now you will have to fight with Dreadnought [1]. This is a difficult battle but the tactic is quite simple. Start with Libra and Bully paradigm. When your opponent will use his mightiest attack change to Diversity and heal the party. At the end use Relentless Assault and stagger you enemy. Repeat the same action until he will be dead. Remember that you can use Relentless Assault only when all you teammates are 100% healthy.
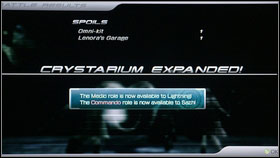
![As a reward of killing him, some new roles will be available - Medic for Lightning and Commando for Sahz [1] - Walkthrough - Chapter IV - Walkthrough - Final Fantasy XIII - Game Guide and Walkthrough](https://game.lhg100.com/Article/UploadFiles/201512/2015121519071804.jpg)
As a reward of killing him, some new roles will be available - Medic for Lightning and Commando for Sahz [1]. Also, you will be given a possibility to upgrades your weapons at save points [2]. To raise EXP of your items you will need components.
Few step later, you will get to another ship wreck. A very long film will start and then, you will have to fight with PSICOM Hit Squad. At the beginning the battle will be very difficult. Use the paradigm with medics to heal your team. Then use Blitz to deal some damage to many targets. After the battle go to nearest save point. Sometimes you will be attacked by Corps Regulars [1] and Corps Gunners. You shouldn't have problems with them. On the first crossroads turn left. Take Fiber-optic Cable [2]. This is a very useful component.
Get back to the road and run straight ahead. After dealing with Uhlana [1] turn right and open the chest with Librascope [2]. Now kill another group to have a clear path to the battle machine.
Go straight ahead and attack with A button. To restore your power you may destroy barricades that are on your way. After killing few enemies you will fall down and take control over Lightning.
![At the beginning open two chests [1] - Walkthrough - Chapter IV - Walkthrough - Final Fantasy XIII - Game Guide and Walkthrough](https://game.lhg100.com/Article/UploadFiles/201512/2015121519071976.jpg)
At the beginning open two chests [1]. You will find Spark Ring and 100 gils. At the end of the tunnel there is another chest [2].

![Open it and take Electrolytic Capaciter [1] - Walkthrough - Chapter IV - Walkthrough - Final Fantasy XIII - Game Guide and Walkthrough](https://game.lhg100.com/Article/UploadFiles/201512/2015121519071914.jpg)
Open it and take Electrolytic Capaciter [1]. Now save the game and attack the next group [2].
On the crossroads, turn right. Go upstairs and attack your enemy from behind [1]. At the beginning eliminate a soldier with grenades (they are really powerful).
![After the fight open the chest with Spark Ring [1] and jump down - Walkthrough - Chapter IV - Walkthrough - Final Fantasy XIII - Game Guide and Walkthrough](https://game.lhg100.com/Article/UploadFiles/201512/2015121519071940.jpg)
After the fight open the chest with Spark Ring [1] and jump down. Kill another soldiers and turn right. Inside the chest, you will find a Phoenix Down [2].
![Now you may enter the tunnel [1] - Walkthrough - Chapter IV - Walkthrough - Final Fantasy XIII - Game Guide and Walkthrough](https://game.lhg100.com/Article/UploadFiles/201512/2015121519071977.jpg)
Now you may enter the tunnel [1]. As a result, you won't be forced to fight with two grenadiers. Few steps later, you will be able to save the game. Then, you will have to fight with another Eidolon - Odin [2].
This is the best moment to use Crystarium. Odin have very powerful attacks and additional HP will be very handy. At the beginning of the fight use Libra and Synergist. After you will get all necessary buffs, change role to Avengers. The whole fight is bout changing between Dualcasting and Double Dose. After the fight, you will get an ability to summon Odin. Also an Lightning ATB bar will raise. Then run straight ahead until you will be attacked by some enemies. Now you will learn how to use your Eidolons.
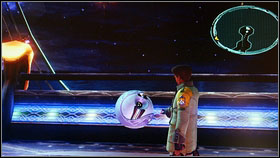
![To summon Odin [1] you have to chose Techniques and then Summon - Walkthrough - Chapter IV - Walkthrough - Final Fantasy XIII - Game Guide and Walkthrough](https://game.lhg100.com/Article/UploadFiles/201512/2015121519072048.jpg)
To summon Odin [1] you have to chose Techniques and then Summon. Test your new ability on next enemies. After summoning Eidolon an SP bar will appear. It will go down over time and when Odin is taking damage. When it will come to zero, your magic creature will disappear. A very interesting ability is Gestalt Mode. Activate it with X button when your summon is next to you. As a matter of fact, you will be able to attack your enemies from his back. Gestalt Mode depends on Gestalt Gauge of your character and this bar will recharge during combined attacks. When you will be sitting on Odin attacks with combinations that are appearing in lower left corner of the screen. Save the game after the fight and return to Shaz and Vanille [2].
![Turn back and open the chest with Phoenix Down [1] - Walkthrough - Chapter IV - Walkthrough - Final Fantasy XIII - Game Guide and Walkthrough](https://game.lhg100.com/Article/UploadFiles/201512/2015121519072056.jpg)
Turn back and open the chest with Phoenix Down [1]. Then return to main path [2].
![You will get to the strange red block that will be your enemy [1] - Walkthrough - Chapter IV - Walkthrough - Final Fantasy XIII - Game Guide and Walkthrough](https://game.lhg100.com/Article/UploadFiles/201512/2015121519072050.jpg)
You will get to the strange red block that will be your enemy [1]. It is very weak, but if you do not kill it fast, it will do huge damage. After the fight, follow the Vanille and eliminate another red bombs [2].
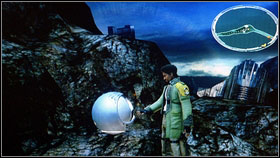
![After the fight jump down and use the strange mechanism [1] - Walkthrough - Chapter IV - Walkthrough - Final Fantasy XIII - Game Guide and Walkthrough](https://game.lhg100.com/Article/UploadFiles/201512/2015121519072172.jpg)
After the fight jump down and use the strange mechanism [1]. Your passage will be clear now. Couple of meters further you will have to fight. Then after next few meters, you will find another strange mechanism that needs some electricity [2]. Leave it for now.
![You will find chest with Auric Amulet on the right [1] - Walkthrough - Chapter IV - Walkthrough - Final Fantasy XIII - Game Guide and Walkthrough](https://game.lhg100.com/Article/UploadFiles/201512/2015121519072132.jpg)
You will find chest with Auric Amulet on the right [1]. Take this item and attack the nearest enemies. After the battle save the game [2].
![Now you will have to fight with new opponents - Gremlins [1] - Walkthrough - Chapter IV - Walkthrough - Final Fantasy XIII - Game Guide and Walkthrough](https://game.lhg100.com/Article/UploadFiles/201512/2015121519072171.jpg)
Now you will have to fight with new opponents - Gremlins [1]. They are very easy so kill them fast. Next creatures will be waiting for you in a gorge, near the chest with Ember Ring [2].
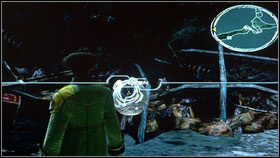
![Defeat them and get close to the strange construction [1] - Walkthrough - Chapter IV - Walkthrough - Final Fantasy XIII - Game Guide and Walkthrough](https://game.lhg100.com/Article/UploadFiles/201512/2015121519072198.jpg)
Defeat them and get close to the strange construction [1]. Kill everything on your way and go to the right [2].
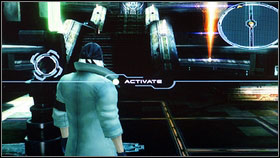
![Use two mechanisms to activate the lights in the middle [1] - Walkthrough - Chapter IV - Walkthrough - Final Fantasy XIII - Game Guide and Walkthrough](https://game.lhg100.com/Article/UploadFiles/201512/2015121519072104.jpg)
Use two mechanisms to activate the lights in the middle [1]. Repeat the same action on the other side [2]. Now you can go back to the mechanism that has needed the power and create the stairs leading to the platform.
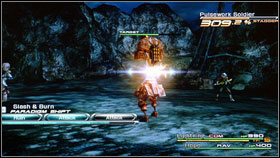
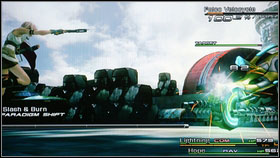
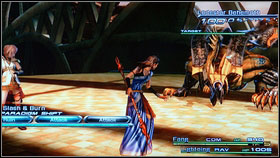
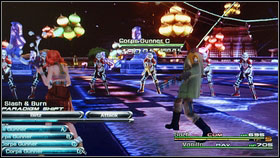
A very difficult fight is waiting for you here. You have to surprise your enemies [1]. The best option is to use paradigm Slash & Burn - this is the only way to stagger your opponents. After the fight open the chest [2]. You will find Vibrant Ooze there. Now get back to the ravine entrance.

Once again kill the group with two grenadiers and use the elevator. Defeat your enemies and use the mechanism on the right [2]. New stairs will lead you to the next switch.
![As a result you will get to area where you will have to fight with three grenadiers [1] - Walkthrough - Chapter IV - Walkthrough - Final Fantasy XIII - Game Guide and Walkthrough](https://game.lhg100.com/Article/UploadFiles/201512/2015121519072219.jpg)
As a result you will get to area where you will have to fight with three grenadiers [1]. Just before the battle change paradigm to have a Medic in your group and use Fortisol, Deceptisol and Aegisol [2]. After dealing with them open the chest and take Iron Shells. Now, you can get back to the power station.
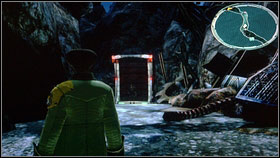
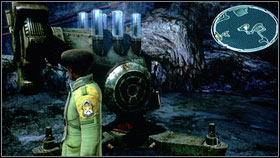
![Get on the middle platform, save the game and run into the cave in front of you [1] - Walkthrough - Chapter IV - Walkthrough - Final Fantasy XIII - Game Guide and Walkthrough](https://game.lhg100.com/Article/UploadFiles/201512/2015121519072256.jpg)
Get on the middle platform, save the game and run into the cave in front of you [1]. Entrance is guarded but it shouldn't be a problem. Go to the other side of the cave and open the chest with 300 gils [2]. Now you will see a film that will remind you about some memories of one of your friends.
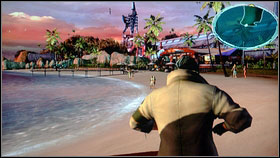
As a Snow run to the marked building.
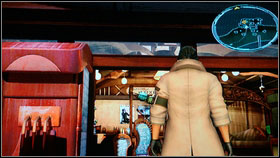
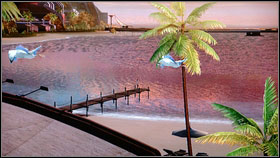
Speak with the bartender and with the bartender on the other side of the beach. After the conversation go to the bridge [2] and meet Sarah. After the cut scene, you will have to enter second CD.

![This time we will be playing as a Hope [1] - Walkthrough - Chapter V - Walkthrough - Final Fantasy XIII - Game Guide and Walkthrough](https://game.lhg100.com/Article/UploadFiles/201512/2015121519072321.jpg)
This time we will be playing as a Hope [1]. Run straight ahead and after the save point you will meet some new enemies - Frag Leech [2].
These maggots are very weak so the fight shouldn't last for too long. Go straight ahead and kill every opponent. Use the elevator located at the end of the path [2]. Save the game and focus on dealing with other enemies.
![After a long journey, you will get to the first crossroads [1] - Walkthrough - Chapter V - Walkthrough - Final Fantasy XIII - Game Guide and Walkthrough](https://game.lhg100.com/Article/UploadFiles/201512/2015121519072390.jpg)
After a long journey, you will get to the first crossroads [1]. Turn left and you will have to fight with Behemoth Alpha. He is guarding a chest with 3x Antidote. Now you can take the second path and use another elevator [2].
Go down and defeat another enemies. You will see two Vespids [1] on the right. They are guarding the chest with new weapon for Hope - Hawkey. The rest of your journey is really simple. After killing another Behemoth you will get to the next elevator and save point. The lowest level is quite different [2].
![You may find here some new enemies called Silver Lobo [1] - Walkthrough - Chapter V - Walkthrough - Final Fantasy XIII - Game Guide and Walkthrough](https://game.lhg100.com/Article/UploadFiles/201512/2015121519072487.jpg)
You may find here some new enemies called Silver Lobo [1]. To get across the power field you have to kill all of them.

After few battles you will get to the big chamber with a chest guarder by some worms. Blitz and Fira should be enough to deal with them and you will get 6x Antidote [1]. Now you have to take two more fights. After them you will be able to take care of Feral Behemoth [2].
As always while fighting with stronger enemy - the best option is to start with Libra. You will learn that your enemy is weak against water attacks. Use your ability called Water. A very good idea is to use some Synergist defensive spell and stagger the enemy with Ravagers. But remember to attack only when you have 100% HP, because you opponent has a very powerful attack that will take 90% of your health. After the fight use these shiny plants to get upstairs [1]. Here you have to exterminate another group of worms [2]. Preemptive attack will be useful here.
After the fight you will see a short cut scene and then you will take control over Lightning. Go down and save the game.
After few meters you will get to the first crossroads. Go right where two monsters are defending the chest with Star Pendant [2]. Take it and take the left path.
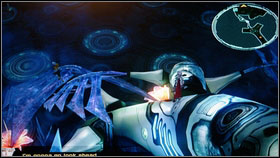
Here, you will meet another group of enemies, but they are very easy. On the upper platform, you will see another movie. When it will end, go straight ahead until you will get to the next enemies. One of them - Barbed Specter - will be guarding the chest with a sword for Lightning called Edged Carbine. After few battles next Feral Behemoth will attack you. Kill him, save the game and go to the next crossroads.
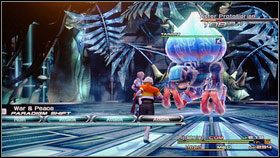
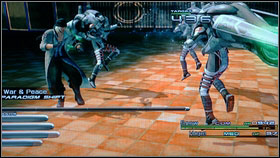
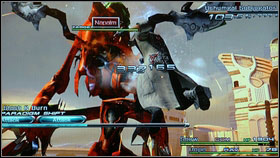
![The main path is leading left, but on the right you will find a Feral Behemotha [1] with some guards - Walkthrough - Chapter V - Walkthrough - Final Fantasy XIII - Game Guide and Walkthrough](https://game.lhg100.com/Article/UploadFiles/201512/2015121519072559.jpg)
The main path is leading left, but on the right you will find a Feral Behemotha [1] with some guards. They are defending the Fragrant Oil [2]. It is worth fighting. The best paradigm here will be War & Peace. As a Lightning use Blitz to kill all adds and Hope will take care of healing. After the battle return to your main path.
![Before you will go further, turn round and get close to the barrier [1] - Walkthrough - Chapter V - Walkthrough - Final Fantasy XIII - Game Guide and Walkthrough](https://game.lhg100.com/Article/UploadFiles/201512/2015121519072531.jpg)
Before you will go further, turn round and get close to the barrier [1]. You will find another enemy that is defending a chest [2]. Kill him and you will get 1500 gils. Now you can go further.
After a short fight turn left. At the end of the road you will a guarded chest. Kill all creatures, take Watchman's Amulet [1] and use plants to get to another level [2].
![Go to the next elevator [1] - Walkthrough - Chapter V - Walkthrough - Final Fantasy XIII - Game Guide and Walkthrough](https://game.lhg100.com/Article/UploadFiles/201512/2015121519072673.jpg)
Go to the next elevator [1]. After saving your game you will have to fight with another opponents to see next cut scene. Then go straight ahead and kill everything on your sight [2].
![It is good to open the next chest with Ethersol [1] - Walkthrough - Chapter V - Walkthrough - Final Fantasy XIII - Game Guide and Walkthrough](https://game.lhg100.com/Article/UploadFiles/201512/2015121519072696.jpg)
It is good to open the next chest with Ethersol [1]. Few step later you will be fighting with the boss - Aster Protoflorian [2]. It is a very difficult fight so be careful.
When you will have maximum HP change between two paradigms: Ravager + Commando and Ravager + Ravager. As a result you will stagger the boss and... you will still be alive. Use Libra at the beginning to learn that your enemy is very against fire.
After the battle you will be informed that some new options in Crystarium are now available. You can save the game and end this chapter.

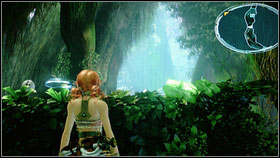
![Go straight ahead and kill all bests called Flandragora [2] - Walkthrough - Chapter VI - Walkthrough - Final Fantasy XIII - Game Guide and Walkthrough](https://game.lhg100.com/Article/UploadFiles/201512/2015121519072624.jpg)
Go straight ahead and kill all bests called Flandragora [2]. Then, at the crossroad, turn left.

As a result, you will get to the chest. Inside you will find a Mysterious Fluid [1]. Now you can return to the main path and kill all enemies to get to the next save point. Nearby you will find a chest with Belladonna Wand. It is good to give it to Vanille if you are using her as a Saboteur. Then climb up using the plants and fight with Gremlins.
After the battle you will get to the huge grass field. Examine the area killing everything on your sight. Open the chest located on the right and you will find Procyons [2] - new weapon for Sahz that will stagger the enemy for a longer time. Kill all the Gremlins and then turn right.
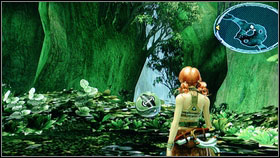
![After another battle you will get to the next chest with Doctor's Code [1] - an item that will double the effect of all potions - Walkthrough - Chapter VI - Walkthrough - Final Fantasy XIII - Game Guide and Walkthrough](https://game.lhg100.com/Article/UploadFiles/201512/2015121519072783.jpg)
After another battle you will get to the next chest with Doctor's Code [1] - an item that will double the effect of all potions. Now you can use the main path until you will get out from the forest [2].

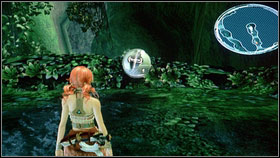
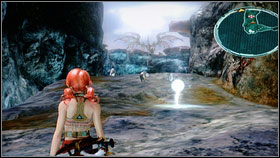
![Sahz will tell you that some very dangerous monsters are hiding somewhere here [1] - Walkthrough - Chapter VI - Walkthrough - Final Fantasy XIII - Game Guide and Walkthrough](https://game.lhg100.com/Article/UploadFiles/201512/2015121519072775.jpg)
Sahz will tell you that some very dangerous monsters are hiding somewhere here [1]. In fact they are quite easy, but the fight is very long. If you have time it is good to kill one enemy that is guarding a chest with 15x Iron Shells [2]. When you will go straight ahead, you will find another chest. Open it and take Librascope.
Now try to get to the marked area as fast as you can. Kill all Gremlins and find the chest with Scaled Wings [1] [2]. After the cut scene turn left and get to the Sahz. Watch another part of his memories and turn round to get the nearest save point.
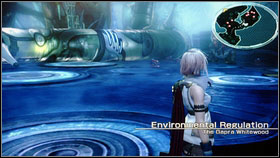
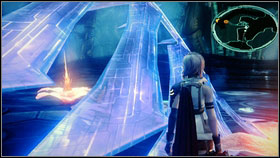
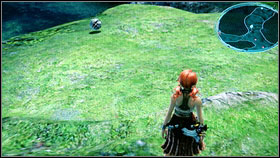
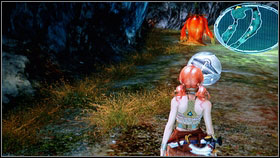
![Couple of seconds later, you will get to the Climate Control Orb [1] - Walkthrough - Chapter VI - Walkthrough - Final Fantasy XIII - Game Guide and Walkthrough](https://game.lhg100.com/Article/UploadFiles/201512/2015121519072859.jpg)
Couple of seconds later, you will get to the Climate Control Orb [1]. After you will use it, the climate will change and monsters will be different [2].
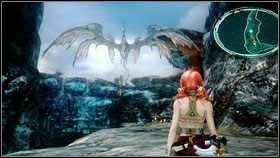
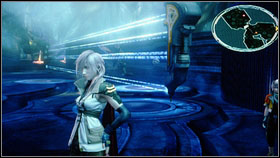
![Better thing is to fight during the rain because you wont have to handle with Wyverns [1] [2] - Walkthrough - Chapter VI - Walkthrough - Final Fantasy XIII - Game Guide and Walkthrough](https://game.lhg100.com/Article/UploadFiles/201512/2015121519072866.jpg)
Better thing is to fight during the rain because you won't have to handle with Wyverns [1] [2].
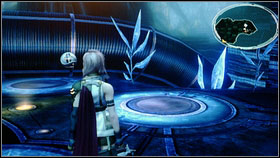
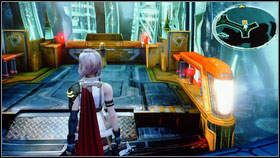
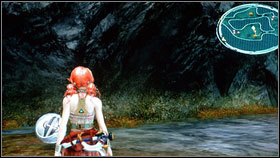
![On the first crossroad take the right path and open the chest with Metal Armband [1] - Walkthrough - Chapter VI - Walkthrough - Final Fantasy XIII - Game Guide and Walkthrough](https://game.lhg100.com/Article/UploadFiles/201512/2015121519072871.jpg)
On the first crossroad take the right path and open the chest with Metal Armband [1]. Deal with another groups of monsters to get to the stone tunnel [2].
On the other side, get close to the next orb and change the weather once again. Then get close to the nearest opponents, kill them and open the chest to get the Aqua Ring [1]. Now you can change the weather to rainy. Go straight ahead, save the game and watch the film [2].
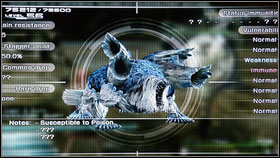
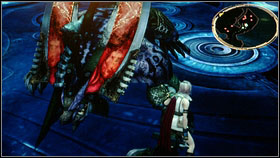
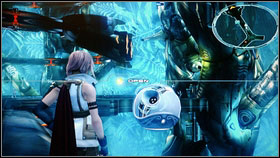
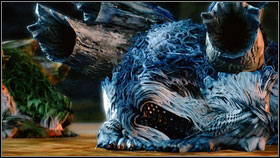
![After the cut scene you will have to fight with two new creatures - Enki [1] and Entil [2] - Walkthrough - Chapter VI - Walkthrough - Final Fantasy XIII - Game Guide and Walkthrough](https://game.lhg100.com/Article/UploadFiles/201512/2015121519072909.jpg)
After the cut scene you will have to fight with two new creatures - Enki [1] and Entil [2].
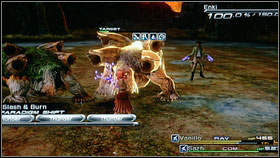
Your enemies have some powerful attacks so try to have maximum HP all over the time. After the battle your Crystarium trees will be upgraded. Now you can run straight ahead to end this chapter.

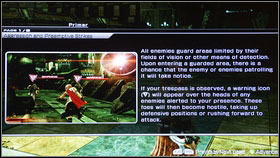
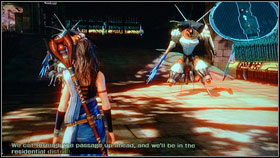
![At the beginning you must follow Hope and try to avoid all patrols [2] - Walkthrough - Chapter VII - Walkthrough - Final Fantasy XIII - Game Guide and Walkthrough](https://game.lhg100.com/Article/UploadFiles/201512/2015121519072931.jpg)
At the beginning you must follow Hope and try to avoid all patrols [2].
Before the tunnel turn right and find the chest somewhere between cars. As a result you will get Fiber-optic Cable [1]. When you will be underground go to the crossroad and take the left path. At the end of it you will fins Holy Water. Now you can back to the min road. After few meters you will get outside so run fast to the next tunnel. As a matter of fact, you will pass some enemies.
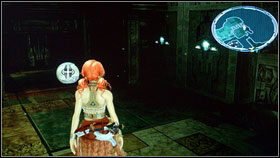
![Exit the tunnel and follow Hope [1] - Walkthrough - Chapter VII - Walkthrough - Final Fantasy XIII - Game Guide and Walkthrough](https://game.lhg100.com/Article/UploadFiles/201512/2015121519072930.jpg)
Exit the tunnel and follow Hope [1]. When you will get to the huge canal, turn right to take the Librascope [2].
Go straight ahead and kill every enemy that you can find (Flanitory). Then use the elevator that will transport you over the cliff. Try to avoid Lucidons - the fight is very long and boring.
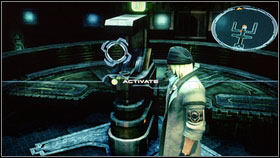
![When you will get to the second elevator, use the mechanism on the left [1] - Walkthrough - Chapter VII - Walkthrough - Final Fantasy XIII - Game Guide and Walkthrough](https://game.lhg100.com/Article/UploadFiles/201512/2015121519073089.jpg)
When you will get to the second elevator, use the mechanism on the left [1]. A platform will transport you to two chests guarded by some creatures [2].
![It is worth fighting because you will get 2x Mobius Coils and Aqua Ring [1] - Walkthrough - Chapter VII - Walkthrough - Final Fantasy XIII - Game Guide and Walkthrough](https://game.lhg100.com/Article/UploadFiles/201512/2015121519073092.jpg)
It is worth fighting because you will get 2x Mobius Coils and Aqua Ring [1]. After the fight return to the mechanism and the platform will go in another way. Then go straight ahead [2].
![Now watch a short cut scene and kill all enemies [1] - Walkthrough - Chapter VII - Walkthrough - Final Fantasy XIII - Game Guide and Walkthrough](https://game.lhg100.com/Article/UploadFiles/201512/2015121519073000.jpg)
Now watch a short cut scene and kill all enemies [1]. You will find a chest on your way. Open it and take Warding Talisman [2].
![Just near the save point you will find another lift that will take you to the upper floor [1] - Walkthrough - Chapter VII - Walkthrough - Final Fantasy XIII - Game Guide and Walkthrough](https://game.lhg100.com/Article/UploadFiles/201512/2015121519073047.jpg)
Just near the save point you will find another lift that will take you to the upper floor [1]. Then you will see a long film that will be ended with a fight - Snow against huge army [2]. When Shiva will disappear, summon her once again and finish the fight.
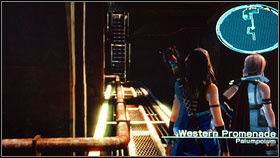
![Save the game and go straight ahead [1] - Walkthrough - Chapter VII - Walkthrough - Final Fantasy XIII - Game Guide and Walkthrough](https://game.lhg100.com/Article/UploadFiles/201512/2015121519073169.jpg)
Save the game and go straight ahead [1]. Kill all soldiers [2]. Enter the icy tunnel and kill another two groups of mobs.

Few meters further you will get to the place where you can jump to the other mountain. Before you will do this, go straight ahead and open the chest that is guarded by some troops. Inside you will find Fortisol [1]. Now you can jump over the abyss [2].
This path will lead you to the next group of enemies that will be easy to defeat. After the fight turn right and open the chest with Paladin [1]. It is a new weapon for Snow and it will improve his Mediguard and Steelguard abilities. Now, you can go back to the main path [2].
After dealing with next opponents, jump down and open the chest located on the left. Take 4x Insulted Cabling and turn round. When you will pass the save point, jump down. Few steps away from this place you will see a cut scene and then you will take control over new character - Fang [2]. See her Crystarium and spend the rest of her points. Kill other soldiers and return to Snow.
![The first you have to do now is to open the chest with 4x Holy Water [1] - Walkthrough - Chapter VII - Walkthrough - Final Fantasy XIII - Game Guide and Walkthrough](https://game.lhg100.com/Article/UploadFiles/201512/2015121519073140.jpg)
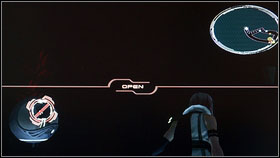
The first you have to do now is to open the chest with 4x Holy Water [1]. Now go straight ahead and kill your enemies. At the end of it, you will find 2x Incentive Chip [2]. Jump down and kill other opponents.
![After few steps you get to the chest with Guardian Amulet [1] - Walkthrough - Chapter VII - Walkthrough - Final Fantasy XIII - Game Guide and Walkthrough](https://game.lhg100.com/Article/UploadFiles/201512/2015121519073233.jpg)
After few steps you get to the chest with Guardian Amulet [1]. Take it, kill another two groups [2] and watch the film.
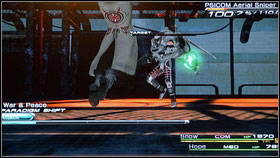
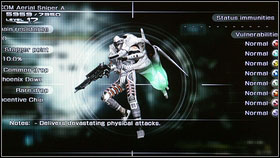
![After the cut scene you will have to fight with PSICOM Aerial Snipers [1] - Walkthrough - Chapter VII - Walkthrough - Final Fantasy XIII - Game Guide and Walkthrough](https://game.lhg100.com/Article/UploadFiles/201512/2015121519073277.jpg)
After the cut scene you will have to fight with PSICOM Aerial Snipers [1]. These units are not so powerful but the best thing is to kill one of them fast, because in large group they can be very harmful. After the fight go ahead and eliminate another snipers.
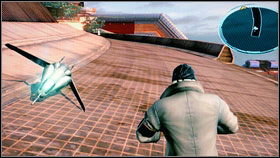
![After the film you will find yourself on the top of the building [1] - Walkthrough - Chapter VII - Walkthrough - Final Fantasy XIII - Game Guide and Walkthrough](https://game.lhg100.com/Article/UploadFiles/201512/2015121519073210.jpg)
After the film you will find yourself on the top of the building [1]. Another cut scene will start soon so watch it and then follow Hope.
![Downstairs, turn round, open the chest and take Shaman's Mask [1] - Walkthrough - Chapter VII - Walkthrough - Final Fantasy XIII - Game Guide and Walkthrough](https://game.lhg100.com/Article/UploadFiles/201512/2015121519073245.jpg)
Downstairs, turn round, open the chest and take Shaman's Mask [1]. This is a very useful item for characters that are depending on magic. Unfortunately, when you will get to the chest, a Falco Velocycle [2] will attack you. You have to stagger him fast, because he will do a very powerful attack that can kill you.
![After the fight go straight ahead [1] - Walkthrough - Chapter VII - Walkthrough - Final Fantasy XIII - Game Guide and Walkthrough](https://game.lhg100.com/Article/UploadFiles/201512/2015121519073318.jpg)
After the fight go straight ahead [1]. At the end you will find that two roads are turning right. As a result, you will avoid some enemies and you will find 3x Thrust Bearings [2].
After few meters turn right once again. You will find a chest and new weapon for Hope - Vidofnir [1]. Wear it and follow the road [2].
![After destroying the next vehicle, you will get to the chest with Decptisolem inside [1] - Walkthrough - Chapter VII - Walkthrough - Final Fantasy XIII - Game Guide and Walkthrough](https://game.lhg100.com/Article/UploadFiles/201512/2015121519073336.jpg)
After destroying the next vehicle, you will get to the chest with Decptisolem inside [1]. You may now jump upstairs where another fight is waiting for you. As before: first of all destroy the vehicle [2], then take care of the sniper.
When the battle will be over, turn right. Inside the chest you will find 2 000 gils [1]. Return to the road and kill another enemies [2]. You can gave some problems with vehicle combined with two snipers. It is good to open your Crystarium and upgrade your characters abilities. Start the fight with paradigm Sentinel + Medic. Use Steelguard and wait until your enemy will use his most powerful attack. Then start the fight: change between Ravager + Commando and Ravager + Ravager. When the vehicle will be destroyed, end the fight fast.

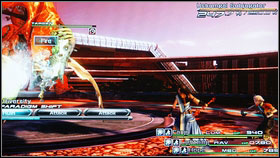
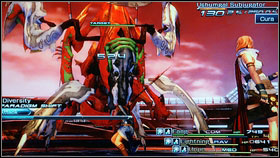
Few meters further you will get to the save point. Buy some necessary thing because now you will have to fight with boss - Ushumgal Subjugato [1]. At the beginning use Libra and then combination Synergist + Sentinel. When you will be buffed, you can start the attack. The best option is to use the same paradigms as in the previous fight. Stagger your enemy and defeat it. After the battle you will be transported to Fang and Lightning.
At the beginning turn round and go to the nearest chest. Take 15x Bestial Claws [2]. Enter the Crystarium to upgrade your characters.
Now return to the main path that will lead you to the save point. Then try to defeat one group of soldiers: the best option is to kill Bombardier [1] first because his rockets can be very harmful. When everybody will be dead, run ahead and kill Orion [2].
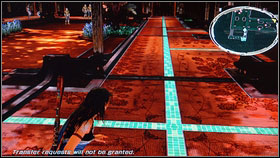
![When you will get to the crossroad, take the right path [1] - Walkthrough - Chapter VII - Walkthrough - Final Fantasy XIII - Game Guide and Walkthrough](https://game.lhg100.com/Article/UploadFiles/201512/2015121519073471.jpg)
When you will get to the crossroad, take the right path [1]. You will have to defeat many enemies but as a result you will get Gae Bolg - new weapon for Fang [2].
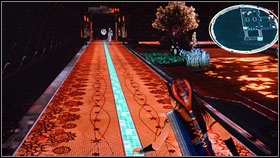
![Now go straight ahead killing all enemies on your way [1] until the next film will start [2] - Walkthrough - Chapter VII - Walkthrough - Final Fantasy XIII - Game Guide and Walkthrough](https://game.lhg100.com/Article/UploadFiles/201512/2015121519073405.jpg)
Now go straight ahead killing all enemies on your way [1] until the next film will start [2]. When it will end fight with soldiers.
![After killing two Orions [1] open the door located on the right - Walkthrough - Chapter VII - Walkthrough - Final Fantasy XIII - Game Guide and Walkthrough](https://game.lhg100.com/Article/UploadFiles/201512/2015121519073444.jpg)
After killing two Orions [1] open the door located on the right. You will find Axis Blade here for Lightning. Then watch a second cut scene [2].
After the film use stairs to get above and then defeat another group of enemies that are located in the upper left corner of this area. In the chest you will find Tungsten Bangle [2]. Go through the corridor killing next opponents.
When you will have to chose, take the path leading left. As a result, you will find the Black Belt [1] and a save point. One more fight and you will get to the place marked on the map. Then you will take control over Hope.
![After a cut scene you will have to fight with boss [2] - Walkthrough - Chapter VII - Walkthrough - Final Fantasy XIII - Game Guide and Walkthrough](https://game.lhg100.com/Article/UploadFiles/201512/2015121519073516.jpg)
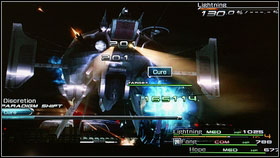
After a cut scene you will have to fight with boss [2]. This time you will have to manage without Snow. You do not have a change alone so lose the battle as fast as you can.
When you will do this, Lightning and Fang will try to help you. At the beginning the best option is to use paradigm called Evened Odds and then Diversity or Delta Attack.
You will be able to stagger the boss very quickly and change to Relentless Assault. If you won't succeed then before the restart change paradigm to Discretion - with two Medics and one Commando. When the enemy will be staggered, you can kill him with easy.
![After the fight go straight ahead and find another chest with Phoenix Down [1] - Walkthrough - Chapter VII - Walkthrough - Final Fantasy XIII - Game Guide and Walkthrough](https://game.lhg100.com/Article/UploadFiles/201512/2015121519073629.jpg)
After the fight go straight ahead and find another chest with Phoenix Down [1]. Now you will meet Hope [2] father.
![Save the game when you will be inside and turn on the TV [1] - Walkthrough - Chapter VII - Walkthrough - Final Fantasy XIII - Game Guide and Walkthrough](https://game.lhg100.com/Article/UploadFiles/201512/2015121519073679.jpg)
Save the game when you will be inside and turn on the TV [1]. Now you can watch a longer movie [2].
When it will end another fight will start. Enemies are very weak so you should defeat them very quickly. After the fight save the game and open the chest containing Ethersol. Few steps further you will have to fight once again. Then open the chest with Brawler's Wristband [2].
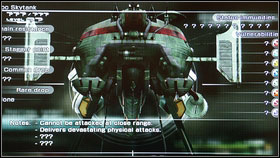
Take this item and go to the marked location. Another film will start [1] and then you will have to fight with Havoc Skytank [2].
This is quite difficult battle so watch the HP of your characters. Paradigm with two Medics is very useful in this fight. First of all buff your party members and destroy the turrets. You have to do this to avoid some huge damage.
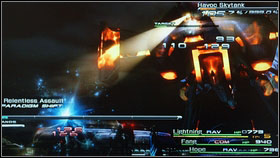

When all parts will be destroyed you can take care of Havoc Skytank. This is the easiest part of the fight. Just change between Relentless Assault and a paradigm with two Medics. As a reward you will be able to upgrade your Crystarium trees.

At the beginning save the game and get to the places marked on the map.

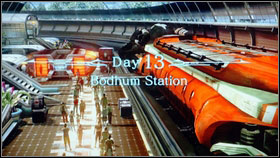
![After few films you will get to the elevator [2] that will take you to the Nautilius Park - Walkthrough - Chapter VIII - Walkthrough - Final Fantasy XIII - Game Guide and Walkthrough](https://game.lhg100.com/Article/UploadFiles/201512/2015121519073746.jpg)
After few films you will get to the elevator [2] that will take you to the Nautilius Park.
When the another cut scene will be over, turn round and get to the path that is located on the right. You will a chest with Phoenix Down [1] here. Now you can get back and use the main road to get to the park [2].
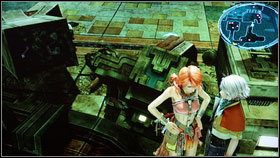
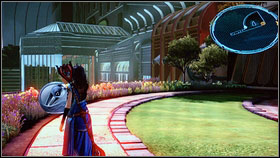
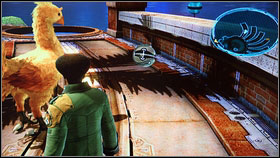
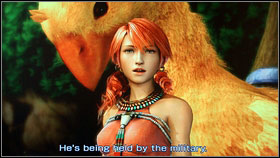
![When you will be there, Shaz will loose his little Chocobo [2] - Walkthrough - Chapter VIII - Walkthrough - Final Fantasy XIII - Game Guide and Walkthrough](https://game.lhg100.com/Article/UploadFiles/201512/2015121519073882.jpg)
When you will be there, Shaz will loose his little Chocobo [2]. To find it, follow Vanille.

When you will find him, a chest with Star Pendant will appear.
Pick him up and follow the bird to get to the save point. There, you will have to watch another film. After the cut scene run ahead to meet with some enemy soldiers.
Before the fight it is good to check your Crystarium. If it is possible - upgrade your characters, because you will have to fight in some very difficult battles. In addition you will meet some new opponents - Zwerg Metroids [2]. Defeat them and open the nearby chest that is containing Spica Defenders. These weapon is for Shaz and it will make his buffs to last much longer.
The next chest is guarded by some Zwergs and one Orion. Inside, you will find a Guardian Amulet [1]. Now you can run to the save point. Before you will turn in the direction of marked point, go straight ahead and open the chest with Healer's Staff [2]. This is a very useful item for Vanille if you are using her as a Medic. Save the game and run to your target.
![After few seconds, you will have to fight with Midlight Reaper [1] - Walkthrough - Chapter VIII - Walkthrough - Final Fantasy XIII - Game Guide and Walkthrough](https://game.lhg100.com/Article/UploadFiles/201512/2015121519073957.jpg)
After few seconds, you will have to fight with Midlight Reaper [1]. This is simple boss but you have to be very careful - he has one, very strong attack.
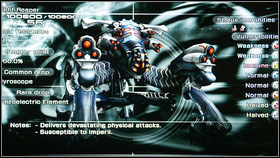
At the beginning of this fight use Libra and change your paradigm to Synergist with Saboteur (he will help you with his buffs).

After the cut scene, you will take control over Sazh. Make few steps and another cut scene will start. Now you have to fight with the third Eidolon - Brynhildr [2].
To win this battle you do not have to stagger hi. The most important thing is to charge the summon bar and to do this the best option is to use two Ravagers at one moment. Of course use your first rounds to buff your team mates and learn something about the enemy (Libra). You have enough time, so it shouldn't be a problem to defeat him. After the battle Sazh will get new section to his ATB bar. He will be able to use this Eidolon too. Now it is time to move to the next chapter of your journey.
You will start this chapter as a Lightning. At the beginning you can save the game, do some shopping and use the Crystarium.
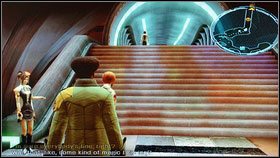
![Then go ahead and speak with the marked soldier [1] - Walkthrough - Chapter IX - Walkthrough - Final Fantasy XIII - Game Guide and Walkthrough](https://game.lhg100.com/Article/UploadFiles/201512/2015121519074089.jpg)
Then go ahead and speak with the marked soldier [1]. After a long film [2] you will be teleported to the ship called Cacoon where you will be attacked by some soldiers. They are very easy so finish them fast.
After the fight go further and handle with another group. Then try to go upstairs.
When you will be at the top, turn right. Open the chest with 4x Digital Circuits [2] and then go to the point marked on the map..
![When you will be outside, save the game once again [1] - Walkthrough - Chapter IX - Walkthrough - Final Fantasy XIII - Game Guide and Walkthrough](https://game.lhg100.com/Article/UploadFiles/201512/2015121519074047.jpg)
When you will be outside, save the game once again [1]. If you will go straight ahead, you will get to the vehicle. Use it to climb to another level of the ship. Then turn right and open the chest with 3x Incentive Chips [2]. Now you can move in another direction when you will meet many enemies. Kill them all to get to another ship.
Jump above and open another chest. This you will get 4x Silicone Oil [2].
Your trip should be safe now. At the end you will have to fight with some robots [1]. When you will won it, run back to the ship [2].
![After another cut scene you can save the game and then fight with another enemies [2] - Walkthrough - Chapter IX - Walkthrough - Final Fantasy XIII - Game Guide and Walkthrough](https://game.lhg100.com/Article/UploadFiles/201512/2015121519074177.jpg)
After another cut scene you can save the game and then fight with another enemies [2].
![When you will pass the first turn, you will find a chest with a new weapon for Lightning - Lifesaber [1] - Walkthrough - Chapter IX - Walkthrough - Final Fantasy XIII - Game Guide and Walkthrough](https://game.lhg100.com/Article/UploadFiles/201512/2015121519074164.jpg)
When you will pass the first turn, you will find a chest with a new weapon for Lightning - Lifesaber [1]. One more treasure can be found after the fight with Viking. This time you will get the Ember Ring [2]. Take this ring and go to the point marked on the map.

Soon, you will come across another save point and afterward the next chest will be waiting for you. Open it and take Pandoran Spear [2]. Now you will see another movie and then you will have to get back to Shaz and Vanille.

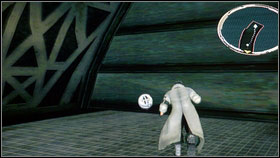
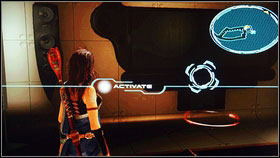
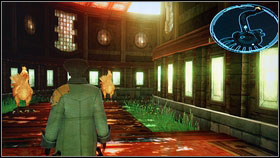
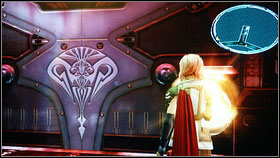
![Go straight ahead and kill all maggots found on your way [1] - Walkthrough - Chapter IX - Walkthrough - Final Fantasy XIII - Game Guide and Walkthrough](https://game.lhg100.com/Article/UploadFiles/201512/2015121519074269.jpg)
Go straight ahead and kill all maggots found on your way [1]. Then open the door with a nearby mechanism [2].
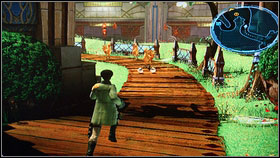
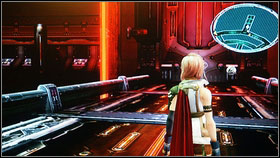
![Turn right on the nearest crossroad and kill some monsters that are guarding the chest [1] - Walkthrough - Chapter IX - Walkthrough - Final Fantasy XIII - Game Guide and Walkthrough](https://game.lhg100.com/Article/UploadFiles/201512/2015121519074289.jpg)
Turn right on the nearest crossroad and kill some monsters that are guarding the chest [1]. Take Royal Armlet [2]. Now you can go to the point marked on the map.

You will see another chest near the last door. Open it and take 12x Murky Ooze [1]. Now go ahead and meet with the rest of your team [2].
As a Lightning go straight ahead until you will get to the save point. If you have to gain many EXP then attack every enemy that is standing near a big chamber. You will also be able to find chests. They will contain: White Cape, Pain Dampener, Rhodochrosite and Perfect Conductor [1] [2].
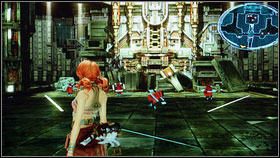
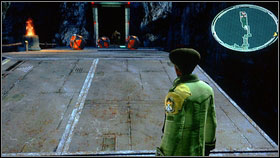
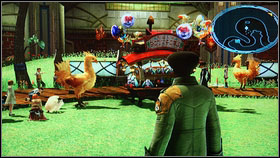
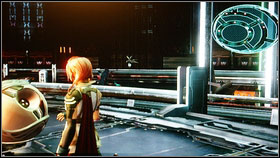
![Now go to the point marked on the map and after a short cut scene, you will take control over Shaz [1] - Walkthrough - Chapter IX - Walkthrough - Final Fantasy XIII - Game Guide and Walkthrough](https://game.lhg100.com/Article/UploadFiles/201512/2015121519074273.jpg)
Now go to the point marked on the map and after a short cut scene, you will take control over Shaz [1]. Kill monsters located in this area [2] and take all treasures.
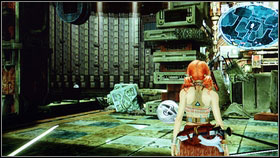
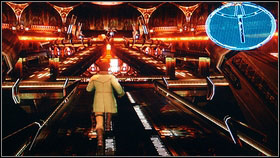
![On the outer ring (on the right side) you will find 8x Segmented Carapace [1] and in the middle: Phoenix Down [2] - Walkthrough - Chapter IX - Walkthrough - Final Fantasy XIII - Game Guide and Walkthrough](https://game.lhg100.com/Article/UploadFiles/201512/2015121519074399.jpg)
On the outer ring (on the right side) you will find 8x Segmented Carapace [1] and in the middle: Phoenix Down [2].
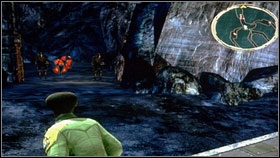
![When you will collect everything go ahead and defeat another enemies [1] - Walkthrough - Chapter IX - Walkthrough - Final Fantasy XIII - Game Guide and Walkthrough](https://game.lhg100.com/Article/UploadFiles/201512/2015121519074375.jpg)
When you will collect everything go ahead and defeat another enemies [1]. After the fight you will get back to the Lightning [2].
At the beginning turn round and go ahead to the chest guarded by two groups. Inside you will find the Whistlewind Scarf [2].

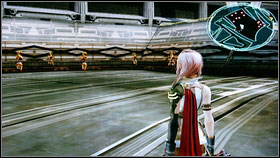
While going to the point marked on the map you will get outside. Unfortunately there is only one chest with Perfect Conductor [1]. Take it and go to the lower level to kill some hordes of enemy robots [2].
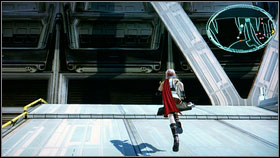
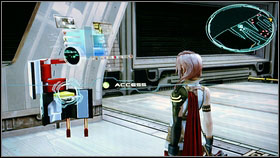
If you have some problems with them, you can run fast to avoid the fight. Now you can save the game and use the Crystarium [2].
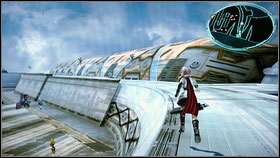
![After applying all the necessary upgrades, turn right and open the chest with 13x Barbed Tails [2] - Walkthrough - Chapter IX - Walkthrough - Final Fantasy XIII - Game Guide and Walkthrough](https://game.lhg100.com/Article/UploadFiles/201512/2015121519074499.jpg)
After applying all the necessary upgrades, turn right and open the chest with 13x Barbed Tails [2].
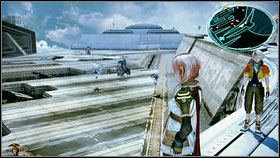

On the lower level of the ship you will find many enemies, but only one treasure - Spark Ring - in the upper right corner of the map. After few battles you will get to the point marked on the map. Here you will have to fight with new enemy - Kalavinka Striker [2].


Libra, buffs, stagger and thats all. A very important ability is lighting resistance casted by Hope. Unfortunately, after a short cut scene, you will meet a brother of this creature. Repeat the same strategy and watch a beautiful movie [2].
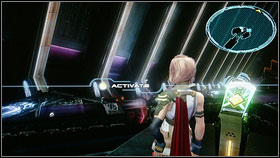
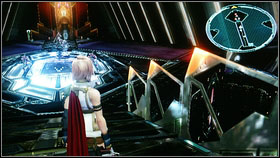
After the film you will have a chance to chose your team mates. The only thing that really matters is your own preferences. Try not to chose the same role too often. When you will do your task you will be able to use the nearby panel [1]. Go downstairs [2].
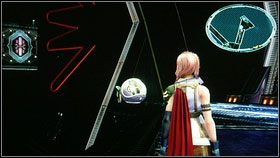
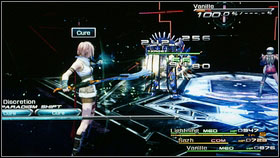
Some soldiers will be waiting for you here but should be eliminated with easy. Use the panel located on the right and open the chest with Librascope [1]. Somewhere here you will find another mechanism that will lead you to the platform with some enemies [2]. This troop are not so easy. Use Deceptisol and attack them from surprise.
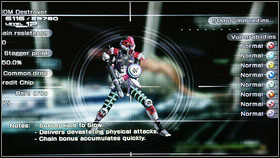
![A key to success is to eliminate the Destroyer [1] an the rest of the team - Walkthrough - Chapter IX - Walkthrough - Final Fantasy XIII - Game Guide and Walkthrough](https://game.lhg100.com/Article/UploadFiles/201512/2015121519074597.jpg)
A key to success is to eliminate the Destroyer [1] an the rest of the team. Examine every platform marked on the map and collect all valuable items: Umbra, 2x Rune Bracelets, Pain Dampener, 3600 gils, Gold Bangle, Perfect Conductor [2].
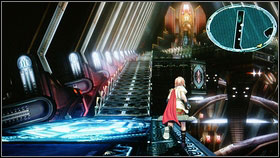
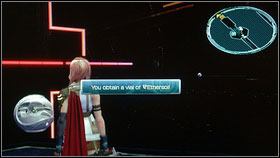
Now you will have to fight with another difficult group: PSICOM Beaver and Dragoons. In this case a Sentinel will be necessary. The best option is to use him along with the Medic and Synergist that will buff the whole team. Then finish the fight with Ravagers. I advise you to use Lightning, Hope and Snow in this fight. After the battle you can go in the direction of marked gates. You will find Ethersol [2] on your way.
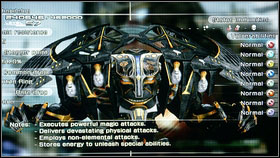
![After the save point you will have to fight with Barthendelus [1] - Walkthrough - Chapter IX - Walkthrough - Final Fantasy XIII - Game Guide and Walkthrough](https://game.lhg100.com/Article/UploadFiles/201512/2015121519074567.jpg)
After the save point you will have to fight with Barthendelus [1]. This is quite difficult enemy so upgrade your characters before the fight.
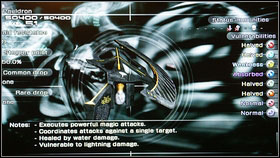
![As in the previous bosses fight you will have to destroy particular parts of your enemy: Pauldron [1] and Alette - Walkthrough - Chapter IX - Walkthrough - Final Fantasy XIII - Game Guide and Walkthrough](https://game.lhg100.com/Article/UploadFiles/201512/2015121519074539.jpg)
As in the previous bosses fight you will have to destroy particular parts of your enemy: Pauldron [1] and Alette. When they will disappear, take care of Barthendelus. You have to be well prepared to this fight. Buff, heal to the maximum and charge the stagger bar to the 90%. Then heal for the second time, stagger one part of the enemy and start the attack.
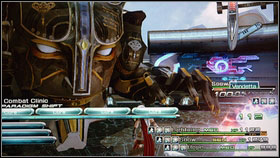
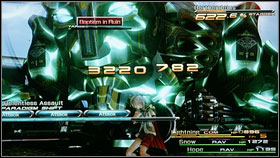
The most important thing is not to hurry. The fight is very long and you don't want to die just before the end. After destroying all parts a second phase of the battle will start. Now you have to stick to the tactic. Focus on staggering your enemy and watch when your enemy will be charging a weapon located on his back. If your characters have many HP then you can change your paradigm to Ravager + Ravager + Commando and after a short time to Ravager + Ravager + Ravager. Then you have to stagger your enemy as fast as possible. In other way he will do a very powerful attack that will take a lot of damage. Another thing is that it is the only possibility to hit him for a lot of DMG. If you won't be able to do that, the fight will last for too long and your character will be killed automatically.

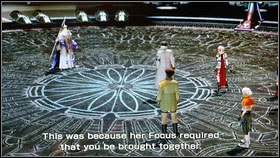
Repeat the same strategy to end. As a reward you will be able to upgrade your Crystarium and you will see a cut scene that will end the second CD.
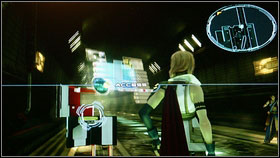
![At the beginning save the game and do some shopping in the nearest save point [1] - Walkthrough - Chapter X - Walkthrough - Final Fantasy XIII - Game Guide and Walkthrough](https://game.lhg100.com/Article/UploadFiles/201512/2015121519074685.jpg)
At the beginning save the game and do some shopping in the nearest save point [1]. Then you can go to the point marked on the map [2].
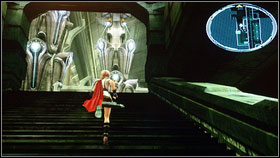
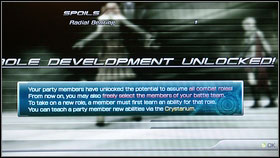
You will reach a strange room where you will be attacked by Pulsworker Knights. These enemies are quite simple so should handle with them very fast. As a reward our characters will be able to use every role that is available in the game [2]. You can change Lightning to Synergist and Fang can become a Ravager. All of this is up to you, but I advise you to focus on main trees.
![After the movie go ahead and kill every enemy [2] - Walkthrough - Chapter X - Walkthrough - Final Fantasy XIII - Game Guide and Walkthrough](https://game.lhg100.com/Article/UploadFiles/201512/2015121519074725.jpg)
After the movie go ahead and kill every enemy [2].
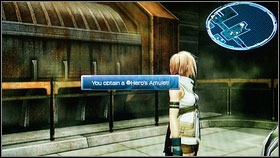
![On the right you will be able to find a chest with Heroe's Amulet [1] - Walkthrough - Chapter X - Walkthrough - Final Fantasy XIII - Game Guide and Walkthrough](https://game.lhg100.com/Article/UploadFiles/201512/2015121519074714.jpg)
On the right you will be able to find a chest with Heroe's Amulet [1]. The next chest can be found after you will turn left on the stairs. It is guarded by some robots, but they are very easy to defeat. Inside the chest you will find 8x Bomb Shells [2].
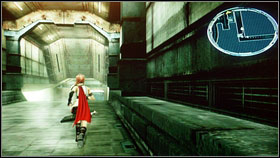
![Now you can return to the main path to the next point marked on the map [1] - Walkthrough - Chapter X - Walkthrough - Final Fantasy XIII - Game Guide and Walkthrough](https://game.lhg100.com/Article/UploadFiles/201512/2015121519074770.jpg)
Now you can return to the main path to the next point marked on the map [1]. As a result you will get to the room with many weak monsters [2].
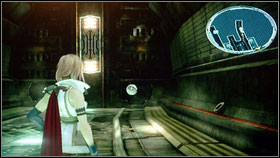
![Kill them all and open the chest located on the left [1] - Walkthrough - Chapter X - Walkthrough - Final Fantasy XIII - Game Guide and Walkthrough](https://game.lhg100.com/Article/UploadFiles/201512/2015121519074750.jpg)
Kill them all and open the chest located on the left [1]. Now run to the abyss and jump to the wall on the right.
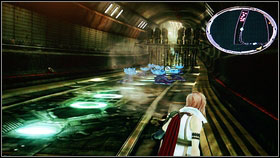
![The path will lead you to the tunnel [1] - Walkthrough - Chapter X - Walkthrough - Final Fantasy XIII - Game Guide and Walkthrough](https://game.lhg100.com/Article/UploadFiles/201512/2015121519074772.jpg)
The path will lead you to the tunnel [1]. At the end you will find the next chest with 10x Medicinal Oil [2].
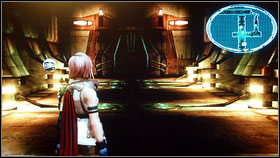
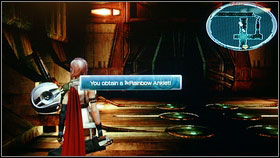
You may now return to the main road (follow the yellow arrow). After few seconds, you will get to the crossroad. Turn left to get another treasure - Rainbow Anklet [2].
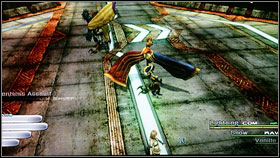
![Enemies that can be found near the gate are called Skata'ne [1] [2] - Walkthrough - Chapter X - Walkthrough - Final Fantasy XIII - Game Guide and Walkthrough](https://game.lhg100.com/Article/UploadFiles/201512/2015121519074860.jpg)
Enemies that can be found near the gate are called Skata'ne [1] [2]. They are not very difficult so kill them fast.
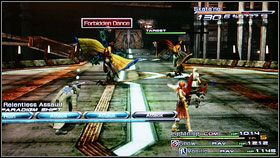
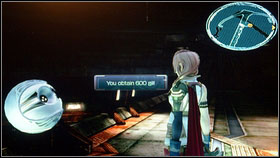
After the fight jump down and fight with another opponents. Open the chest located here and take 600 gils [2].
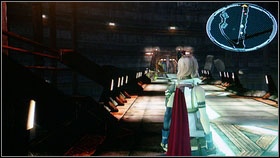
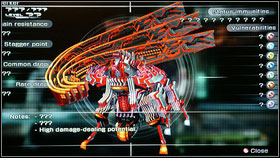
When you will get to the marked area a short cut scene will appear and then you will be transported to Hiberntorium. You will have to fight will some huge robots called Berserkers [2].
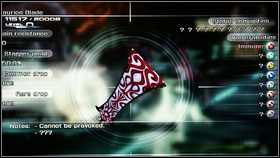
![Your first target is to destroy Centurion Blade [1] - Walkthrough - Chapter X - Walkthrough - Final Fantasy XIII - Game Guide and Walkthrough](https://game.lhg100.com/Article/UploadFiles/201512/2015121519074833.jpg)
Your first target is to destroy Centurion Blade [1]. When it will be destroyed you can attack the huge one. Battles are quite long but you will get many CP as a reward. When they will be dead use the nearby elevator [2].
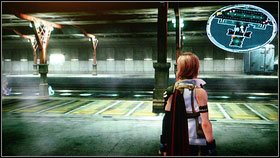
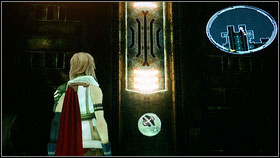
Downstairs turn right to get to the next chest. Inside, you will find Auric Amulet [2]. Now you may go in the marked direction.
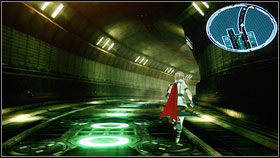
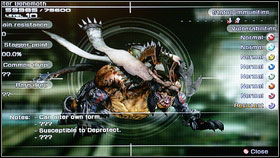
After a long trip, you will get to a huge room. In the chest located near the entrance you will find a new weapon for Hope - Alicantol. Take it and turn right. Few seconds later you will get to a chest guarded by a Behemoth [2]. Inside you will find 7x Gargantuan Claws.
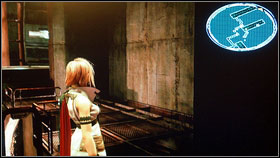
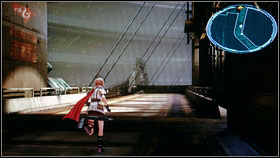
You can return to the main path now and it will lead you to the next tunnel full of monsters. Go to the upper right area of this location and open the chest with Metal Armband. Then save the game and get to the yellow point.
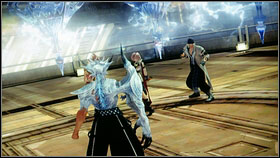
![Now it time to fight with Cid Raines [1] [2] - Walkthrough - Chapter X - Walkthrough - Final Fantasy XIII - Game Guide and Walkthrough](https://game.lhg100.com/Article/UploadFiles/201512/2015121519074937.jpg)
Now it time to fight with Cid Raines [1] [2]. Start with Libra and all necessary buffs.
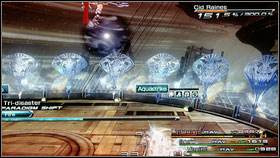
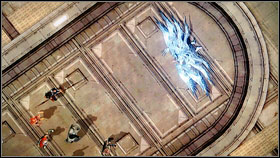
First staggering will can be processed in normal way. Charge the bar and start the fight. The second phase is more difficult. You enemy will be casting a lot of buffs and Saboteur is very important here. The most difficult thing is to hold the stagger bar on the same level and heal at the same time. Before the fight you have to change paradigm to Sentinel + Medic + Medic. Only now it will be possible to survive very strong attacks (Sentinel can be changed to Commando). The fight is very long so do not hurry. When the enemy will be staggered change paradigm to Commando + Ravager + Ravager. Now your opponent will be taking a lot of damage. After the fight you will be able to upgrade your Crystarium.
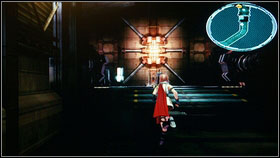
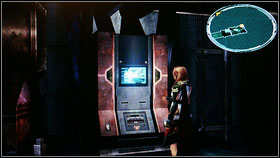
After the cut scene, run ahead and save the game. The use the elevator to get downstairs [2].
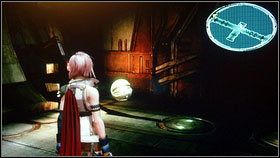
![Then follow the yellow arrow and open the chest with Feymark [1] - Walkthrough - Chapter X - Walkthrough - Final Fantasy XIII - Game Guide and Walkthrough](https://game.lhg100.com/Article/UploadFiles/201512/2015121519075002.jpg)
Then follow the yellow arrow and open the chest with Feymark [1]. Before the next elevator turn left to find another chest. Open it and take 3x Electrodes [2]. Take this items and go down.
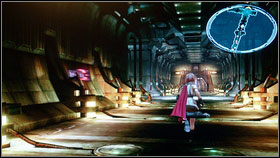
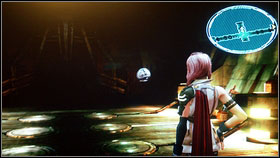
Soon, you will get to the crossroad. On the left you will find a chest with 2x Otherworldly Bone [2].
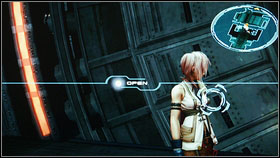
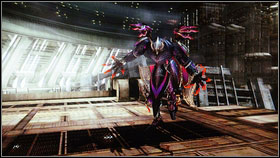
Now you can go ahead to fight with Berserkers. After the battles open the door[1] and watch the cut scene. Now this is time to fight with Bahamut [2].
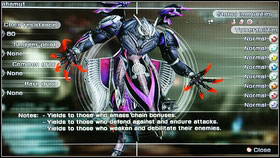

In this battle you have to use paradigm called Combat Clinic but the fight should be start with two Saboteurs and Medic. Debuff your enemy (Slow) and then change to Combat Clinic. While having the maximum HP you can change into paradigm with Ravagers but only for one round - two Eidolon attacks. As a reward you will get new summon and next ATB bar for Fang. After a short film go ahead and wait for a longer movie.
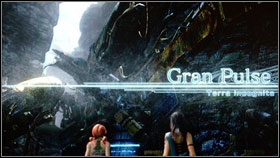

Save the game at the beginning and run straight ahead killing all enemies.
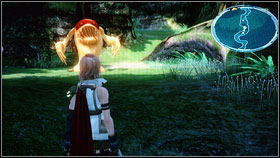
![Near one yellow maggot [1] you will find a chest with Partisan - new weapon for Fang [2] - Walkthrough - Chapter XI - Part 1 - Walkthrough - Final Fantasy XIII - Game Guide and Walkthrough](https://game.lhg100.com/Article/UploadFiles/201512/2015121519075195.jpg)
Near one yellow maggot [1] you will find a chest with Partisan - new weapon for Fang [2].
![Few steps further you will get to Hope where you will have to fight with Eidolon - Alexander [1] [2] - Walkthrough - Chapter XI - Part 1 - Walkthrough - Final Fantasy XIII - Game Guide and Walkthrough](https://game.lhg100.com/Article/UploadFiles/201512/2015121519075184.jpg)
Few steps further you will get to Hope where you will have to fight with Eidolon - Alexander [1] [2]. To get this summon you must start wit paradigm called Evened Odds. First of all, buff the team and start the battle with Ravagers. Repeat the same operation until stagger bar of your enemy will be charged. As a reward you will get this summon and Hope will get another part of her ATB bar.


Now it is time to move to some "open" spaces [1]. At the beginning you will learn bout a new game element Cie'th stones [2]. These are Cie'th in their last phase of metamorphosis and you can take some quests from them. Remember that in one moment you can have only one active mission. Full list of all available quest are in the next part of this guide.
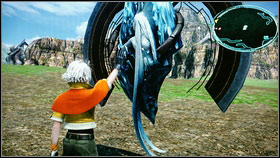
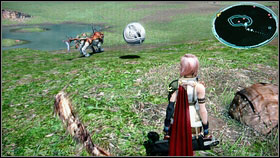
Activate the first stone and go to the red star marked on the map. You should see a chest on your way. Open it and take a new weapon for Vanille - Rod of Throne [2].
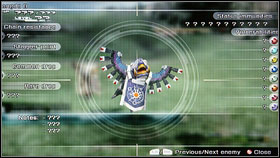
![After dealing with Ectopudding [1] the mission will be over and another task will appear - Walkthrough - Chapter XI - Part 1 - Walkthrough - Final Fantasy XIII - Game Guide and Walkthrough](https://game.lhg100.com/Article/UploadFiles/201512/2015121519075276.jpg)
After dealing with Ectopudding [1] the mission will be over and another task will appear. Accept it. This time you have to deal with Gorgonopsids [2] that are very dangerous in large groups. Attack them from surprise and use the paradigm with two Medics and Sentinel.
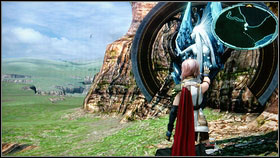
After the fight get close to the next stone [1]. Keep to the right side while going to your target. You will find a chest guarded by some Rangda [2].
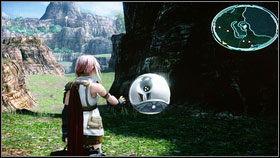
![Inside you will find Zephyr Ring [1] - Walkthrough - Chapter XI - Part 1 - Walkthrough - Final Fantasy XIII - Game Guide and Walkthrough](https://game.lhg100.com/Article/UploadFiles/201512/2015121519075212.jpg)
Inside you will find Zephyr Ring [1]. Now you have to run for a long time. When you will get to the ravine look right [2].
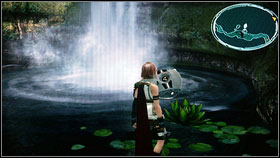
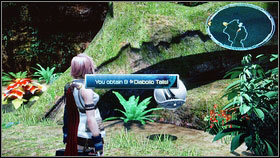
You will find next chest ear the waterfall. Open it and take Rune Bracelet [1]. When you will be at this place kill your opponent, save the game and go in the direction of yellow point marked on the map. Somewhere here you will find another chest with Diabolic Tails [2].
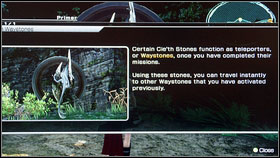
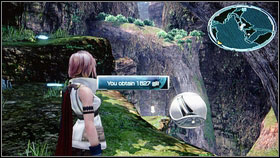
After the cut scene accept another mission. Note that the quest giver is a stone classified as a Waypoint [1]. These are teleports scattered all over the Gran Puse that will allow you to travel fast. To use them, you have to find at least two of them. On the lower level, turn round and get close to another chest (with Esoteric Oil) [2].
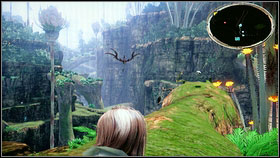
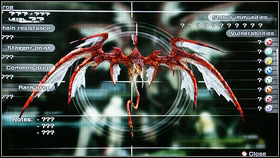
The next chest is located right of the next save point. It is guarded by a monster called Svarog [2].
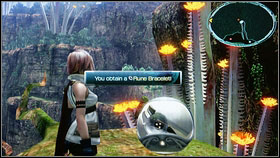
For defeating him you will be able to take Rune Bracelet [1]. The rest of your journey should be without any surprises. Keep to the left side after the crossroad. As a result, you will find a chest with 1827 gils [2].

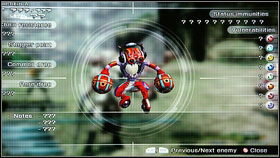
The last fight in this quest is quite simple but very long. Your enemies are very resistant to most of your attacks.
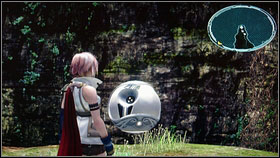
![After completing this quest you will be able to open the chest with 2x Millerite [1] - Walkthrough - Chapter XI - Part 1 - Walkthrough - Final Fantasy XIII - Game Guide and Walkthrough](https://game.lhg100.com/Article/UploadFiles/201512/2015121519075333.jpg)
After completing this quest you will be able to open the chest with 2x Millerite [1]. You can turn back and use the stone another time [2]. Accept next mission and go in the marked direction.
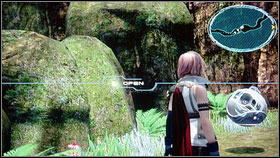
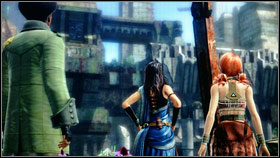
You have to win couple of battles to get to the crossroad. Now turn right to get to the chest with Mythril Bangle [1]. Now another cut scene will start. When it will end get back to the yellow point.
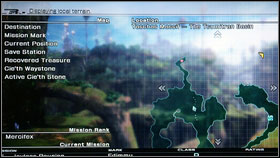

When you will be at the upper level of this area, go and complete your mission and then get back to the main plot of the game. Monster that you have to defeat is called Edimmu [2]. This is quite difficult fight but a standard tactic should be enough. As a reward for defeating him you will be able to take Millerite from the chest located behind him and you will complete the achievement called Kelger's Cup.
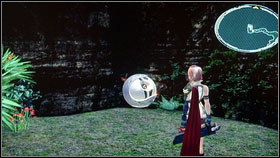
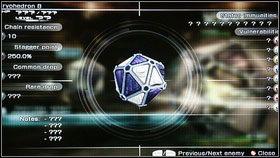
During your trip to the previous save point take the second turning right. You will find a chest with Watchmen's Amulet [1]. Then go to the yellow point marked on the map.

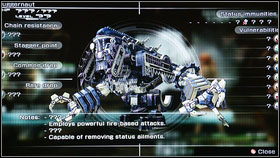
On the way to the cave you will find another chest. Open it and take Hauteclaire - weapon for Lightning [1]. On the crossroad go straight ahead, because on the left you will find Juggernaut [2]. He is too strong for you in that moment. The best option is to return to him after completing the game.
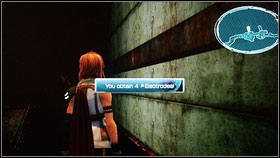
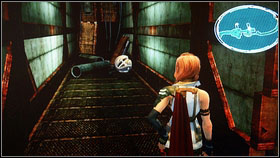
Few meters further another cut scene will start. Then follow the yellow arrow. On the left side, you will see two ruined tunnels. In of them you will find 4x Electrodes [1], in another - 4x Chobham Armor [2].
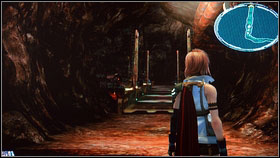
![After another movie go straight ahead [1] and at the end, turn left - Walkthrough - Chapter XI - Part 1 - Walkthrough - Final Fantasy XIII - Game Guide and Walkthrough](https://game.lhg100.com/Article/UploadFiles/201512/2015121519075559.jpg)
After another movie go straight ahead [1] and at the end, turn left. Jump on the lower platform and take 4x Tesla Turbines [2]. Now you can return to the main path and go to the marked direction.
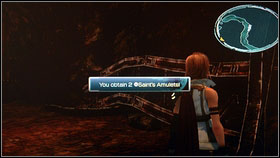
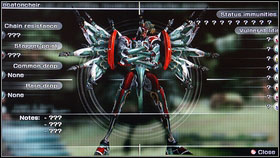
If you will have some problems with creatures, summon Odin and he will help you with the strongest opponents. Soon, you will notice a chest lying on the road. Inside, you will find 2x Saint's Amulet [1]. Few meters further you will be able to save the game. Then you will have to fight with the last Eidolon - Hetaconcheir [2].
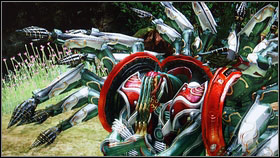
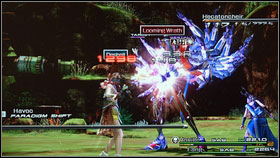
To get this summon you will need only two paradigms. Use Saboteur + Sentinel to attack and Medic + Sentinel for healing. Switch between these two tactics and you will win before the time will expire. As a result you will get additional ATB bar for your character. Now it is time to move along.
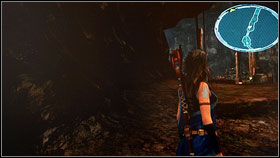
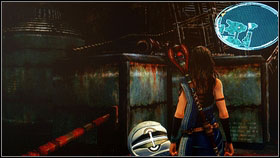
After a long walk, you will get to the next save point. Then turn right and you will find a chest with Particle Accelerator [2].
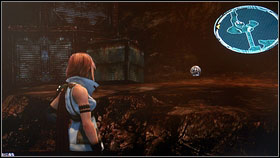
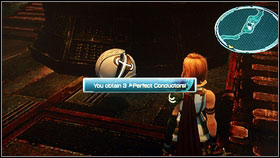
Now use the road on the other side. On the right you will see Juggernaut but leave him once again - he is too strong for you at this time. Soon you will see another chest. This time you will be able to take 3x Crystal Oscillator [1]. Then follow the yellow arrow and take next treasures: 3x Perfect Conductor [2].
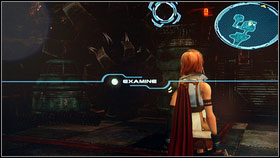
![When you will be at the end, press A, watch another movie and jump to the huge ball - Atomos [1] - Walkthrough - Chapter XI - Part 1 - Walkthrough - Final Fantasy XIII - Game Guide and Walkthrough](https://game.lhg100.com/Article/UploadFiles/201512/2015121519075686.jpg)
When you will be at the end, press A, watch another movie and jump to the huge ball - Atomos [1]. This huge creature will start to move. Few moments later he will free us near the save point where you will be able to do some shopping.
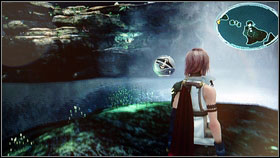
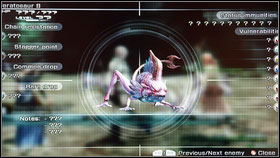
After visiting the save point, move along to the next cave. Watch another long cut scene and you will learn about the meeting between Vanille and Sarah. Then run straight ahead and open the chest with 13x Strange Fluid [1]. On the upper level, you will meet some new enemies. They are quite strong and they are appearing in large groups [2]. The best option is to use Libra and Slow and then kill your opponents as fast as possible.
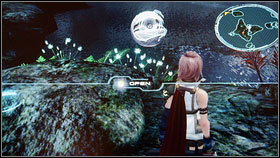
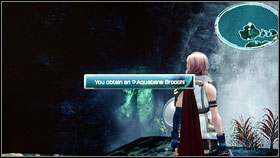
After the fight jump on the rock on the right. Open the chest with 10x Enigmatic Fluid [1]. Go further and you will get to three chests. Open them and take 6x Moistened Scale, 6x Seapetal Scales and Aquabane Brooch [2]. Now you can return to the main path.
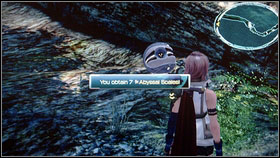
![Few steps further you will see another film and you will be able to open another chest with 7x Abyssal Scales [1] - Walkthrough - Chapter XI - Part 1 - Walkthrough - Final Fantasy XIII - Game Guide and Walkthrough](https://game.lhg100.com/Article/UploadFiles/201512/2015121519075689.jpg)
Few steps further you will see another film and you will be able to open another chest with 7x Abyssal Scales [1]. After the fight you will see another animation [2]. Now save the game in the nearest save point.
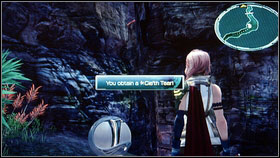
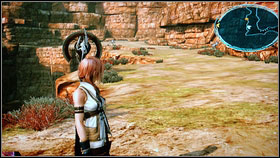
Follow the yellow arrow and open another chest. Take Cie'th Tear [1], watch another movie and accept the mission number 20 [2].

![It will lead you to the next chest with 20x Sinister Fang [2] - Walkthrough - Chapter XI - Part 1 - Walkthrough - Final Fantasy XIII - Game Guide and Walkthrough](https://game.lhg100.com/Article/UploadFiles/201512/2015121519075749.jpg)
It will lead you to the next chest with 20x Sinister Fang [2].
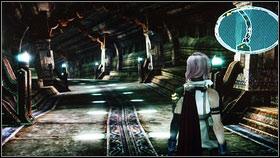
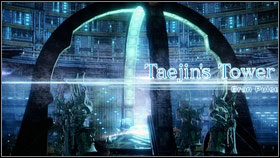
After completing this quest, you will be able to return to your main task (which is to get to the huge chamber).
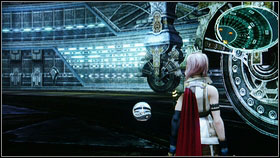
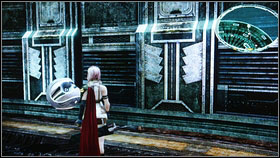
After the cut scene turn round and open the chest with 4721 gils. Examine this room and find another two chest. One with 12x Chipped Fang [1] and second with Sparkbane Brooch [2].
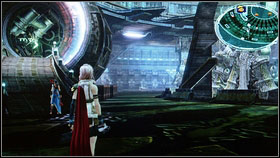
![Now you can get close to the strange mechanism [1] and chose a Second Tier [2] - Walkthrough - Chapter XI - Part 2 - Walkthrough - Final Fantasy XIII - Game Guide and Walkthrough](https://game.lhg100.com/Article/UploadFiles/201512/2015121519075707.jpg)
Now you can get close to the strange mechanism [1] and chose a Second Tier [2]. Here an interesting quest will be waiting for you.
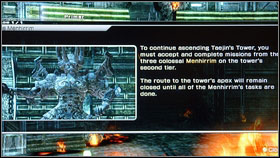
![To get to the top of the tower you have to complete missions [1] given by three statues - Menhirrim [2] - Walkthrough - Chapter XI - Part 2 - Walkthrough - Final Fantasy XIII - Game Guide and Walkthrough](https://game.lhg100.com/Article/UploadFiles/201512/2015121519075881.jpg)
To get to the top of the tower you have to complete missions [1] given by three statues - Menhirrim [2]. First of them is past the gap in the wall. Accept this quest and move in the direction of the star.
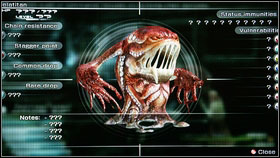
![Your task is to kill Gelatitan [1] - Walkthrough - Chapter XI - Part 2 - Walkthrough - Final Fantasy XIII - Game Guide and Walkthrough](https://game.lhg100.com/Article/UploadFiles/201512/2015121519075843.jpg)
Your task is to kill Gelatitan [1]. You should kill him with easy. After the fight you will have to accept another quest and kill another creature. This time it will be Ambling Bellows [2]. Start the fight with killing one guard and then take care of the min enemy. After his death you can take the third quest.
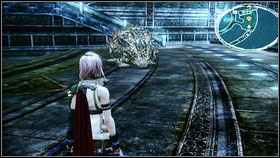
![Your last target is Gurangatch [1] - Walkthrough - Chapter XI - Part 2 - Walkthrough - Final Fantasy XIII - Game Guide and Walkthrough](https://game.lhg100.com/Article/UploadFiles/201512/2015121519075882.jpg)
Your last target is Gurangatch [1]. He can be surprised with easy so killing him shouldn't be a problem for you. After the fight fire will disappear and you will be able to move along. Try to get to the point marked on the map. As a reward you will get 5x Spark Plugs [2].
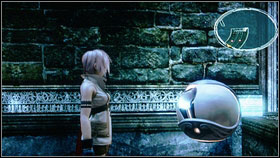
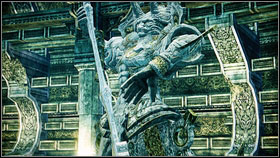
You will find the next chest by moving in the direction of the yellow arrow. Inside, you will find another weapon for Hope - Simurgh [1]. Few steps further you will get to the third level. Kill two groups of enemies and get close to the statue [2] that will turn on the elevator.
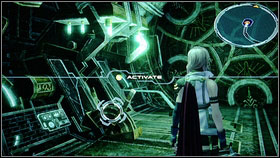
![It will take to you to the fourth floor [1] - Walkthrough - Chapter XI - Part 2 - Walkthrough - Final Fantasy XIII - Game Guide and Walkthrough](https://game.lhg100.com/Article/UploadFiles/201512/2015121519075887.jpg)
It will take to you to the fourth floor [1]. Go straight ahead and find a chest with 2x Glass Orb [2]. Take this items and enter the next lift.
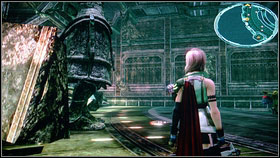
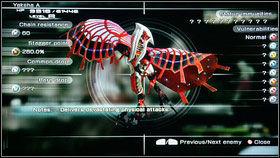
Now you will find yourself on the fifth floor where you will get the mission number 24. Your task is to eliminate some creatures locates few steps away.
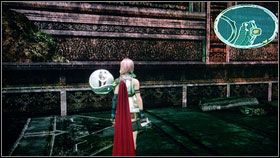
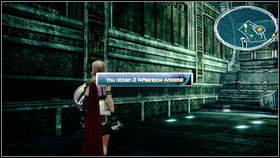
Kill them fast and open the chest with 9x Ancient Bones, then enter the elevator and return to 4th floor. Enter the elevator located on the opposite side and go to floor number 6. Before that open all chests and take Gale Ring [1] and 2x Rainbow Anklets [2].

![When you will be upstairs, take another quest from the statue [2] - Walkthrough - Chapter XI - Part 2 - Walkthrough - Final Fantasy XIII - Game Guide and Walkthrough](https://game.lhg100.com/Article/UploadFiles/201512/2015121519075963.jpg)
When you will be upstairs, take another quest from the statue [2]. To get to the marked location, you have to use statue located in the next room. Circles of the tower will move and you will be able to complete this quest.
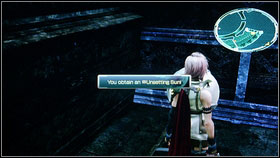
![While going to the marked monster, open the chest containing Unsetting Sun [1] - Walkthrough - Chapter XI - Part 2 - Walkthrough - Final Fantasy XIII - Game Guide and Walkthrough](https://game.lhg100.com/Article/UploadFiles/201512/2015121519075973.jpg)
While going to the marked monster, open the chest containing Unsetting Sun [1]. Your enemy is quite difficult by remember to use Ensune - it will help you for sure.
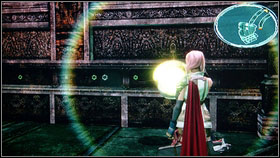
![After the fight go straight ahead and open the chest with Librascope [1] - Walkthrough - Chapter XI - Part 2 - Walkthrough - Final Fantasy XIII - Game Guide and Walkthrough](https://game.lhg100.com/Article/UploadFiles/201512/2015121519075998.jpg)
After the fight go straight ahead and open the chest with Librascope [1]. Few meters further you will et to the next statue that will give you a mission number 26 [2]. Soon, you will be attacked by a huge snake. This time your enemy will freeze your passage. You have turn round and move along with the yellow arrow. Statues will activate and ice will disappear. Now you can return.
![After another cut scene go to the statue that was blocked couple of minutes ago [1] - Walkthrough - Chapter XI - Part 2 - Walkthrough - Final Fantasy XIII - Game Guide and Walkthrough](https://game.lhg100.com/Article/UploadFiles/201512/2015121519080009.jpg)
After another cut scene go to the statue that was blocked couple of minutes ago [1]. Touch it and passage to the next elevator will be unblocked. Now this is time to move to the level called Apex [2].
![Before you will enter the elevator located in the middle [1] examine this area and open the chest with 2x Frostbane Brooches and Ethersol - Walkthrough - Chapter XI - Part 2 - Walkthrough - Final Fantasy XIII - Game Guide and Walkthrough](https://game.lhg100.com/Article/UploadFiles/201512/2015121519080099.jpg)
Before you will enter the elevator located in the middle [1] examine this area and open the chest with 2x Frostbane Brooches and Ethersol. When you will get close to the point marked on the map a fight with Dahaka will start.
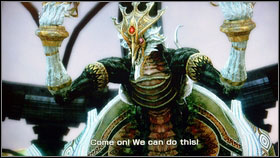
This fight is very simple but you have to have many HP. As in the previous fights start with Libra and Saboteurs. The boss will be weaker and you will be able to stagger him faster.
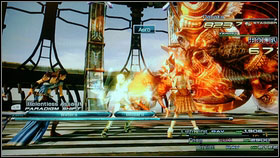
His normal attacks are not so strong, but from time to time he will use his special attacks. Two of them are quite harmful. First one will hit the whole team and you will be able to heal it. Second attack is more complicated. All of your teammates will get many debuffs and they will have to be removed with Esuna. In other way, you won't be able to survive another hit. The rest of the fight is simple.
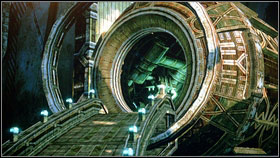
![After the battle use the elevator [1] - Walkthrough - Chapter XI - Part 2 - Walkthrough - Final Fantasy XIII - Game Guide and Walkthrough](https://game.lhg100.com/Article/UploadFiles/201512/2015121519080178.jpg)
After the battle use the elevator [1].
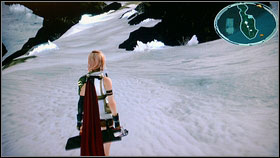
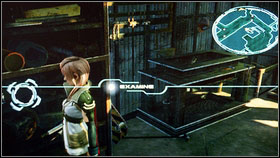
Downstairs go straight ahead and the turn left at the end.
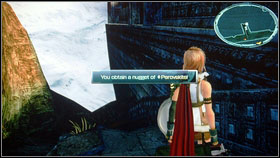
![Soon, you will find a chest with Perovskite [1] and a stone with quest 28 [2] - Walkthrough - Chapter XI - Part 2 - Walkthrough - Final Fantasy XIII - Game Guide and Walkthrough](https://game.lhg100.com/Article/UploadFiles/201512/2015121519080192.jpg)
Soon, you will find a chest with Perovskite [1] and a stone with quest 28 [2].
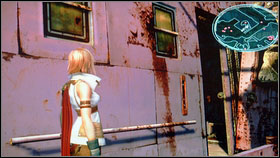
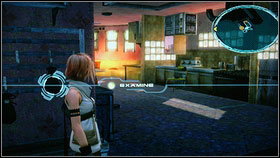
Few steps later you will get to the big square. Before this area, on the right, you will find stairs that will lead you to a room with an odd mechanism [1]. Return here later and now go to the building located on the side of the square [2].
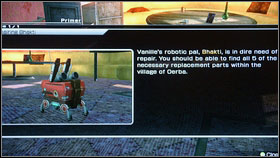
![Enter the first floor and check little robot lying on the floor [1] - Walkthrough - Chapter XI - Part 2 - Walkthrough - Final Fantasy XIII - Game Guide and Walkthrough](https://game.lhg100.com/Article/UploadFiles/201512/2015121519080165.jpg)
Enter the first floor and check little robot lying on the floor [1]. This the old friend of Vanille and he need to be repaired. Your task is to find some missing parts (they are marked on the map). Enter the building and you will find first cables in the right part of the square [2].
![Second part of missing screws is located in the building with strange mechanism and Vetala inside [1] - Walkthrough - Chapter XI - Part 2 - Walkthrough - Final Fantasy XIII - Game Guide and Walkthrough](https://game.lhg100.com/Article/UploadFiles/201512/2015121519080267.jpg)
Second part of missing screws is located in the building with strange mechanism and Vetala inside [1]. The next part is near the yellow mark shown on the map. You will get it for killing one of creatures wandering here [2].
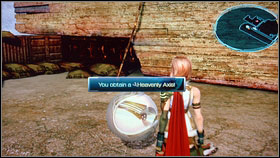
![It is good to find a new weapon for Vanille - Heavenly Axis [1] - Walkthrough - Chapter XI - Part 2 - Walkthrough - Final Fantasy XIII - Game Guide and Walkthrough](https://game.lhg100.com/Article/UploadFiles/201512/2015121519080246.jpg)
It is good to find a new weapon for Vanille - Heavenly Axis [1]. When you will be near the star shown on map, enter the stairs and go upstairs. You will find a chest and Librascope inside [2].
Now your task will be to eliminate a group of Ceratosaurs. Enemies are numerous and that is why you have to surprise them. If you will have some problems, summon one of your friends and enter the gestalt mode. Now you can start looking for next parts [1]. You will find them in the building on the right. The best option is to use stairs. You will find chests with Moogle Puppet and Pleiades Hi-Powers [2].
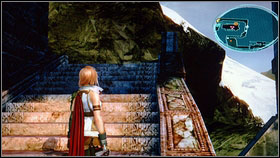
![On the upper level you will find the last missing part [2] - Walkthrough - Chapter XI - Part 2 - Walkthrough - Final Fantasy XIII - Game Guide and Walkthrough](https://game.lhg100.com/Article/UploadFiles/201512/2015121519080230.jpg)
On the upper level you will find the last missing part [2].
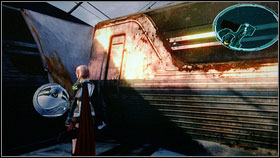
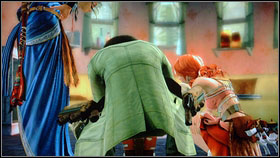
Before you will return to him open the chest located on the left. Inside, you will find Flamebane Brooch [1]. When the robot will be repaired, return to him.
![As a reward you will get 10x Deceptisol, 2x Ultracompact Reactor, Gold Nugget, 5x Perfume and 3x Platinum Ingots [1] - Walkthrough - Chapter XI - Part 2 - Walkthrough - Final Fantasy XIII - Game Guide and Walkthrough](https://game.lhg100.com/Article/UploadFiles/201512/2015121519080345.jpg)
As a reward you will get 10x Deceptisol, 2x Ultracompact Reactor, Gold Nugget, 5x Perfume and 3x Platinum Ingots [1]. Now this is the time to move to the next mission [2].
![Soon you will find another chest and a new weapon for Fang - Taming Pole [1] - Walkthrough - Chapter XI - Part 2 - Walkthrough - Final Fantasy XIII - Game Guide and Walkthrough](https://game.lhg100.com/Article/UploadFiles/201512/2015121519080342.jpg)
Soon you will find another chest and a new weapon for Fang - Taming Pole [1]. The next chest is near the save point. This time, you will find Ethersol [2].
![Few steps further you will have to fight with Barthandelus [2] - Walkthrough - Chapter XI - Part 2 - Walkthrough - Final Fantasy XIII - Game Guide and Walkthrough](https://game.lhg100.com/Article/UploadFiles/201512/2015121519080391.jpg)
Few steps further you will have to fight with Barthandelus [2].

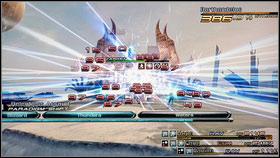
This battle is simple but you have to have good team. I advise you to take Hope, Vanille and Fang. Start with Libra, Synergist and two Saboteurs, debuff your enemy and then attack.
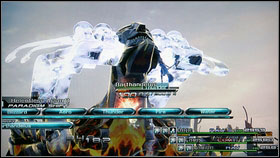
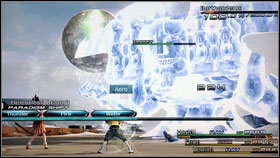
Change to the healing paradigm when someone of your teammates will have 50 of his/hers HP. The best ability is Cura. The battle with be very long but easy. You should be able to do this without any problems.

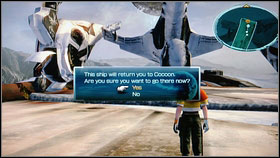
As a reward you will get another circles in your Crystarium. You may now get close to the statue located in front of you and watch the cut scene [1]. After a long movie jump on the board of the nearby ship that will take you to the Cacoon [2].

![This chapter will start with a boss fight [1] in gestalt mode - Walkthrough - Chapter XII - Walkthrough - Final Fantasy XIII - Game Guide and Walkthrough](https://game.lhg100.com/Article/UploadFiles/201512/2015121519080427.jpg)
This chapter will start with a boss fight [1] in gestalt mode. The fastest way to defeat your opponent is to repeat attack: LEFT + RIGHT + A until he will be staggered. Then press Y to end the battle and watch the cut scene [2].
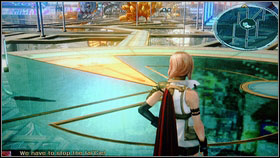
Save the game after the movie and go ahead. This is a good moment to learn something about your new Crystarium circles. The most important thing is to develop Death in Saboteur's tree (Vanille). It will be very handy in the future. After few fight, you will find a round platform.
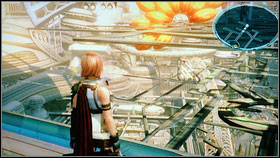
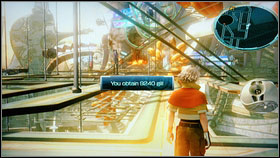
Go south east and find a chest with a new weapon for Lightning - Lionheart. Take this sword and return to platform. Turn right and find another chest. This time it will contain 9240 gils [2]. Now you can return to the yellow point.
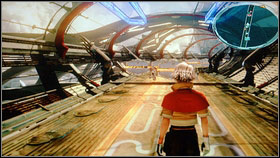
![Save the game when you will be downstairs and start fighting with Cacoon army [2] - Walkthrough - Chapter XII - Walkthrough - Final Fantasy XIII - Game Guide and Walkthrough](https://game.lhg100.com/Article/UploadFiles/201512/2015121519080529.jpg)
Save the game when you will be downstairs and start fighting with Cacoon army [2].
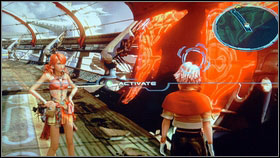
![Your task is to get to the red elevators [1] guarded by some soldiers - Walkthrough - Chapter XII - Walkthrough - Final Fantasy XIII - Game Guide and Walkthrough](https://game.lhg100.com/Article/UploadFiles/201512/2015121519080568.jpg)
Your task is to get to the red elevators [1] guarded by some soldiers. Use them and go down where you will have to fight for another time. Now you will have to defeat the Behemoth King [2]. Kill him fast and move along.
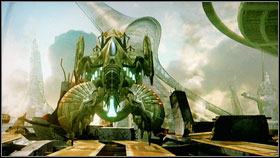
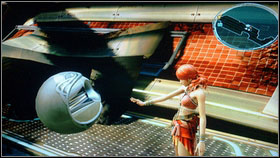
Keep to the right side. As a matter of fact you will find a chest with Rebel Hart [1] and then, the next one. This time with Otshirvani [2] - the best weapon for Hope. When you will be at the proper location. Another fight will start. This time with The Proudclad.
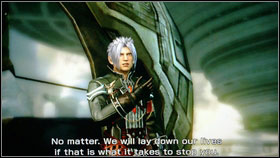
This fight is very hard, so you have to be well prepared. I advise you to use Hope, Vanille and Snow. Remember that your enemy is immune to any debuffs so Saboteur is useless here.
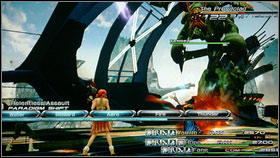
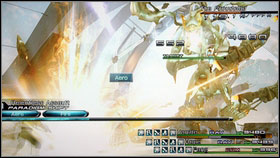
The most important ting here is to have a good tank (Sentinel). In my opinion, the best paradigm to start is Sentinel + Medic + Synergist. Buff your teammates and attack. Remember to cast new buffs when old one will disappear. Without them, even two medics won't be able to heal everything.
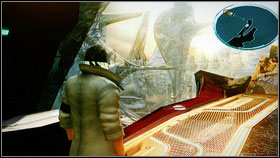
![After the battle run to the elevator marked on the map and then go down to kill Adamanchelid [2] - Walkthrough - Chapter XII - Walkthrough - Final Fantasy XIII - Game Guide and Walkthrough](https://game.lhg100.com/Article/UploadFiles/201512/2015121519080669.jpg)
After the battle run to the elevator marked on the map and then go down to kill Adamanchelid [2]. This time you will be able to use Saboteur in your team.
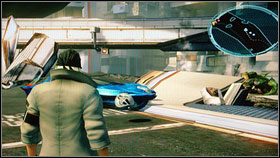
![When the turtle will be dead, run straight ahead and take the Punisher that is hidden in one chest [1] - Walkthrough - Chapter XII - Walkthrough - Final Fantasy XIII - Game Guide and Walkthrough](https://game.lhg100.com/Article/UploadFiles/201512/2015121519080629.jpg)
When the turtle will be dead, run straight ahead and take the Punisher that is hidden in one chest [1]. Now you will have to walk for a long time. Be prepared to fight may times.

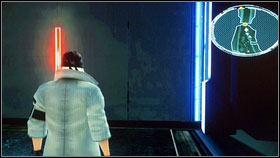
After few minutes you will be near the yellow point. Before you will reach your destination, turn right. At the end of the road you will find a chest with 15000 gils [1]. Now you can continue your journey [2].
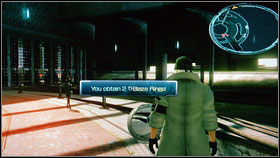
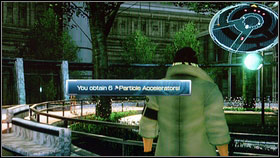
Save the game on the other side and turn right. You will find a chest at the big square. Take 2x Blaze Ring [1]. When you will be near the yellow sign, turn left. On the crossroad turn left once again. Then open the chest with 6x Particle Accelerator [2].
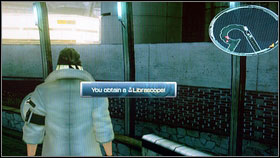
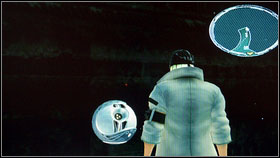
Return to the crossroad and go in opposite direction. It will lead you to another chest. This time you will find Librascope [1]. Soon, you will find another chest with Antares Deluxes [2]. Give this weapon to Sazh.
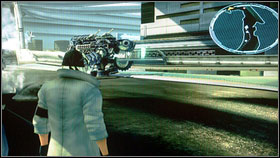
![Save the game and fight with all Juggernauts [1] [2] - Walkthrough - Chapter XII - Walkthrough - Final Fantasy XIII - Game Guide and Walkthrough](https://game.lhg100.com/Article/UploadFiles/201512/2015121519080743.jpg)
Save the game and fight with all Juggernauts [1] [2]. These battles are very easy if you have a spell that will raise your fire resistance. After some time, you will get to the next save point.

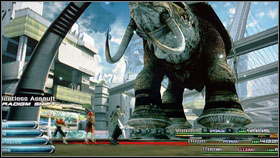
Save the game and attack another huge turtle located on the left. Adamantortoise [1] [2] is very difficult so use the Death spell and summon one of your friends. While he will be lying on the ground use Vanille to finish him. Of course this fight will be very long but it is worth that. You will get many EXP. After the battle enter the building.

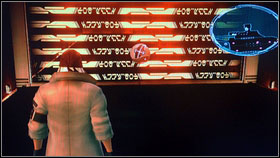
At the lower level, you will find two chests. From one of them, you will take 6x Particle Accelerator and from the second one - Chocobo Plush [1]. Now, return to the entrance and use the stairs located on the left. You will get to the chest with 12x Helish Talon [2].

![On the opposite side of the room you will find 17 Helish Talons [1] - Walkthrough - Chapter XII - Walkthrough - Final Fantasy XIII - Game Guide and Walkthrough](https://game.lhg100.com/Article/UploadFiles/201512/2015121519080794.jpg)
On the opposite side of the room you will find 17 Helish Talons [1]. You may now follow the yellow arrow. Pass the door to get to the long corridor [2].
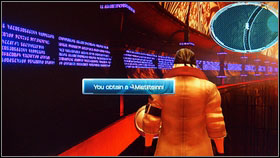
![Run straight ahead and open the chest with Mistiltein - weapon for Vanille [1] - Walkthrough - Chapter XII - Walkthrough - Final Fantasy XIII - Game Guide and Walkthrough](https://game.lhg100.com/Article/UploadFiles/201512/2015121519080816.jpg)
Run straight ahead and open the chest with Mistiltein - weapon for Vanille [1]. Soon, you will find yourself in a very difficult situation.
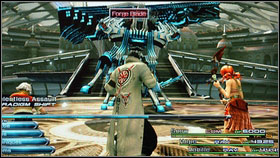
![On the left, you will see Juggernaut, on the right you will find Tyrant [1] - Walkthrough - Chapter XII - Walkthrough - Final Fantasy XIII - Game Guide and Walkthrough](https://game.lhg100.com/Article/UploadFiles/201512/2015121519080889.jpg)
On the left, you will see Juggernaut, on the right you will find Tyrant [1]. Defeat them one by one and run to the yellow marker [2].
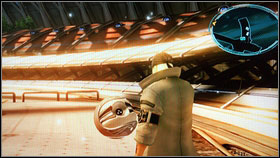
![You will find another chest near the next save point so take the Power Glove [1] - Walkthrough - Chapter XII - Walkthrough - Final Fantasy XIII - Game Guide and Walkthrough](https://game.lhg100.com/Article/UploadFiles/201512/2015121519080825.jpg)
You will find another chest near the next save point so take the Power Glove [1]. Then you will have to fight with Sacrifice [2] - a new kind of Cie'th. Attack your enemies from surprise and finish one of them on the first stagger. Second one will be quite easy.
Few meters further, you will find a chest with Ethersol [1]. Take it and attack the boss called The Proudclad [2]. You tactic will be almost the same. As before, use Snow + Vanille + Hope but without Saboteur.
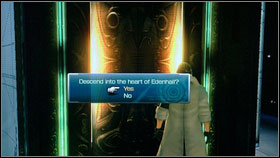
Save the game after the fight. Now, it is a time to start the last chapter of the game.
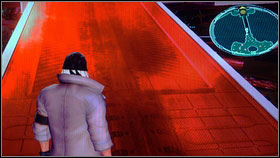
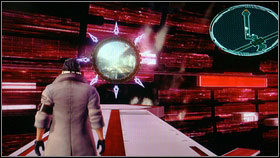
At the beginning make few steps and watch another cut scene. Then save the game and go straight ahead. Kill some enemies and soon you will get to the place with three portals [2]. Use them to return to Gran Pulse to finish undone missions. Complete list of them can be found at the end of this chapter.
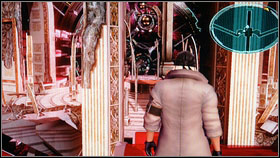
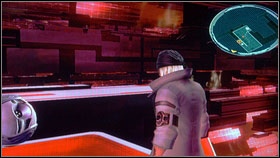
When you will complete everything take the path located left of the save point. It will lead you to a small crossroad. Turn left and you will get to the chest guarded by Megrim Threshera. Open it and take Millerite [2].
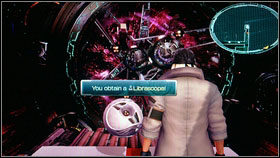
![Go straight ahead and open the chest with Librascope [1] - Walkthrough - Chapter XIII - Walkthrough - Final Fantasy XIII - Game Guide and Walkthrough](https://game.lhg100.com/Article/UploadFiles/201512/2015121519080906.jpg)
Go straight ahead and open the chest with Librascope [1]. Return to the main path and it will lead you to a strange creature. Use it and two platforms will suddenly appear [2]. At the beginning chose his one located on the left.
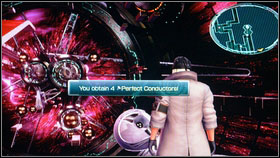
![Keep to the right side and you will find some treasures: 4x Perfect Conductor [1] and 5x Turboprop [2] - Walkthrough - Chapter XIII - Walkthrough - Final Fantasy XIII - Game Guide and Walkthrough](https://game.lhg100.com/Article/UploadFiles/201512/2015121519080965.jpg)
Keep to the right side and you will find some treasures: 4x Perfect Conductor [1] and 5x Turboprop [2]. Take them and move along.
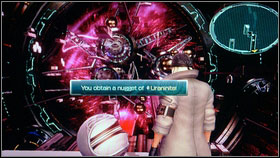
![In the next part of the island you will find chests with 3x Particle Accelerator and Uraninite [2] - Walkthrough - Chapter XIII - Walkthrough - Final Fantasy XIII - Game Guide and Walkthrough](https://game.lhg100.com/Article/UploadFiles/201512/2015121519081087.jpg)
In the next part of the island you will find chests with 3x Particle Accelerator and Uraninite [2]. Take them and return to the second platform [2]. Elevator will take you to the next flying area.
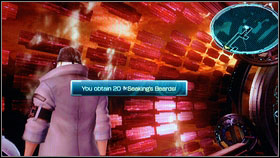
![At the beginning you should find a chest with 20x Seaking's Beard [1] - Walkthrough - Chapter XIII - Walkthrough - Final Fantasy XIII - Game Guide and Walkthrough](https://game.lhg100.com/Article/UploadFiles/201512/2015121519081059.jpg)
At the beginning you should find a chest with 20x Seaking's Beard [1]. Turn round and enter the path located on the left. It will lead you to the upper location. Kill all enemies [2] and open all chests.
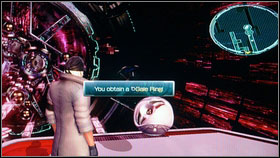
![You will find: 2x Aegisol, Gale Ring [1] and 9x Tear of Woe [2] - Walkthrough - Chapter XIII - Walkthrough - Final Fantasy XIII - Game Guide and Walkthrough](https://game.lhg100.com/Article/UploadFiles/201512/2015121519081060.jpg)
You will find: 2x Aegisol, Gale Ring [1] and 9x Tear of Woe [2]. Take everything and go down.
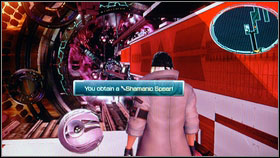
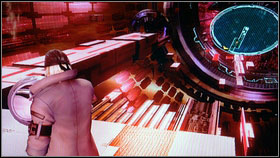
The next treasure will be located at the dead end located on the right. This time, you will find Shamanic Spear [1] - new weapon for Fang. Few step further, you will have to use the strange robot once again. Area will change and you will have to go to the elevator marked on the map. Do not enter it now, but look for the chest with Tetradic Crown [2].
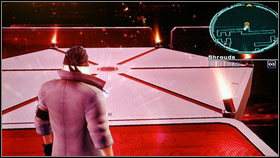
![Now you can use the platform [1] - Walkthrough - Chapter XIII - Walkthrough - Final Fantasy XIII - Game Guide and Walkthrough](https://game.lhg100.com/Article/UploadFiles/201512/2015121519081019.jpg)
Now you can use the platform [1]. You be transported to the lower level of this location where you will have two roads. Take the path located on the right and find a chest with 6x Starblossom Seed [2]. Return to the left path and go straight ahead.
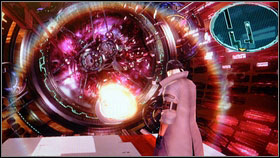
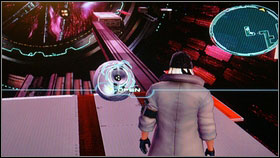
In one moment, you will be able to jump on the fragment on the left. One chest is located there. Open it and take 8x Black Mycelium [1]. The next treasure is located soon before the end of this road (Rhodohrosite) [2].
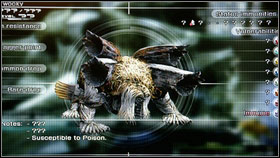
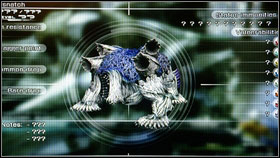
Now you can activate the strange creature once again. You will have to fight with Jabberwocky [1] and Bandersnatch [2]. This fight is quite simple, but you have to remember to kill Jabberwocky first (in other way he will be healing his friend).
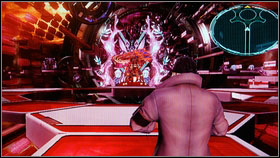
![Save the game and go straight ahead [1] - Walkthrough - Chapter XIII - Walkthrough - Final Fantasy XIII - Game Guide and Walkthrough](https://game.lhg100.com/Article/UploadFiles/201512/2015121519081118.jpg)
Save the game and go straight ahead [1]. Soon you will have to fight will another enemy - Immortal [2].
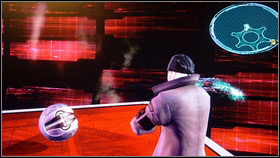
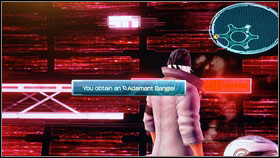
After the fight use the red mechanism that will take you to the area located above. You will find two chests here. Open them and take Weirding Glyph [1] and Adamant Bangle [2]. Take this items and use the portal on the other side of the platform.
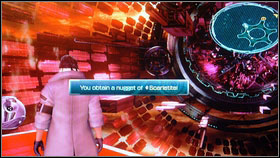
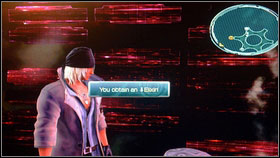
You will be teleported to another area. At the beginning open two chests and you will find Scarletite [1] and Elixir [2]. The next portal will take you to the main path.
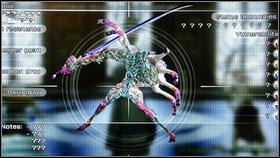
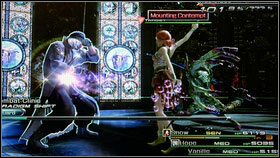
Now you have two roads to chose. Each of the is full of enemies and will lead you to the same target - robot. This time you will be teleported to the chamber with Wladislaus [1]. Your enemy is almost immune to stagger so try do defeat him in another way. The most important thing is to force your opponent to attack only tank. Remember to keep all buffs on Sentinel. Wladislaus attacks are very strong so do not attack without maximum HP. After few minutes your enemy will be dead and you will be able to move along.
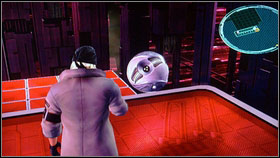
![Go in the direction of marked point and find two chests with 3000 [1] and 5000 gils [2] - Walkthrough - Chapter XIII - Walkthrough - Final Fantasy XIII - Game Guide and Walkthrough](https://game.lhg100.com/Article/UploadFiles/201512/2015121519081220.jpg)
Go in the direction of marked point and find two chests with 3000 [1] and 5000 gils [2]. Few steps further you will have to fight with Bandersnatch and Jabberwocky once again.
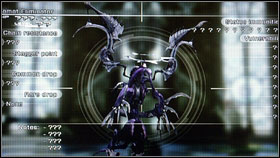
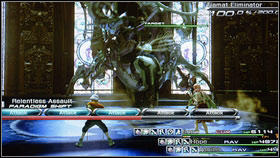
Repeat the same tactic and get close to the strange creature once again. This time it will move you to Tiamat Eliminator [1]. This enemy is simple but very irritating. Do not use Saboteur and Synergist. Your enemy is immune to debuffs and he will remove your buffs too. The most important thing is that your enemy will change his form from time to time and that will reset his chain gauge. The best option is to stagger enemy in his ground form. As a result your Commando will be able to throw your enemy into the air. After the fight enter the portal.
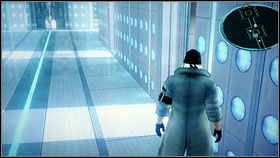
![Save the game inside the new room [1] and go straight ahead taking Ethersol [2] - Walkthrough - Chapter XIII - Walkthrough - Final Fantasy XIII - Game Guide and Walkthrough](https://game.lhg100.com/Article/UploadFiles/201512/2015121519081236.jpg)
Save the game inside the new room [1] and go straight ahead taking Ethersol [2]. Few steps further, you will be forced to fight with Barthandelus.
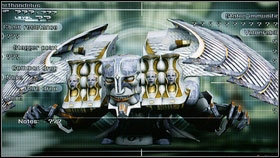
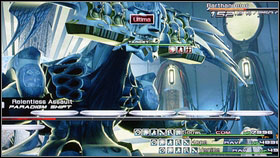
This battle will be simple if you have many HP. You have to use standard tactic and remember to change paradigm to two Medics when he will raise his head. He will do a very strong attack then so everyone must have 100% of their health.
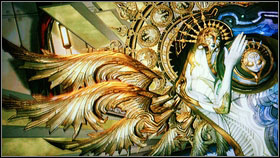
![After the battle you will have to fight with Orphan [1] - Walkthrough - Chapter XIII - Walkthrough - Final Fantasy XIII - Game Guide and Walkthrough](https://game.lhg100.com/Article/UploadFiles/201512/2015121519081392.jpg)
After the battle you will have to fight with Orphan [1]. This is much more difficult fight and the most important thing is to chose your team mates in a proper way. I advise you to take Lightning, Fang and Hope. The prepare four necessary paradigms:
Sentinel + Medic + Medic
Commando + Ravager + Ravager
Medic + Synergist + Saboteur
Sentinel + Medic + Synergist
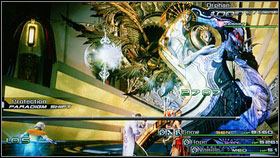
![Start the fight with two Medics and wait for Merciless Judgment [1] - Walkthrough - Chapter XIII - Walkthrough - Final Fantasy XIII - Game Guide and Walkthrough](https://game.lhg100.com/Article/UploadFiles/201512/2015121519081376.jpg)
Start the fight with two Medics and wait for Merciless Judgment [1]. This is a very powerful attack and you have to heal fast. Then buff your team and debuff the boss (4-5 buffs will be enough). Now you can attack: stagger your enemy and when the bar will be almost empty change to paradigm: Medic + Medic + Sentinel and wait for the next Mercilles Judment.
![In the first phase, a white orb was healing the boss [1] - Walkthrough - Chapter XIII - Walkthrough - Final Fantasy XIII - Game Guide and Walkthrough](https://game.lhg100.com/Article/UploadFiles/201512/2015121519081373.jpg)
In the first phase, a white orb was healing the boss [1]. In the second part of the battle the dark ball will appear and it will be shooting with a laser. In addition, from time to time, you will be attacked by some strange tentacle that is poisoning your characters. You have to neutralize it fast, because in other way your teammates will gain debuffs that will disable them from fighting and casting spells. The rest is as in the previous phase: stagger your enemy and change to two Medics to heal before the Mercilles Judgment. At the end your enemy will start to attack with some energy blasts [2] but Sentinel along with two Medics should be able to handle that.
![After the battle you will see a film and then you will have to fight with Orphanem [1] [2] fir the last time - Walkthrough - Chapter XIII - Walkthrough - Final Fantasy XIII - Game Guide and Walkthrough](https://game.lhg100.com/Article/UploadFiles/201512/2015121519081396.jpg)
After the battle you will see a film and then you will have to fight with Orphanem [1] [2] fir the last time. This is a very simple fight.
Buff yourself and attack. Stagger and kill him fast. After the battle you will see a final cut scene.
You will find 64 additional missions in the game. To accept them, simply touch Cie'th stone that are scattered all over the Gran Puls. These are simple quests where you have to find and kill some simple monsters. They divided in four groups: A B C D - where A means that the quest is simple and D that it's easy. Most of them are really simple. Only with two of them you can have some problems (they will be described later).
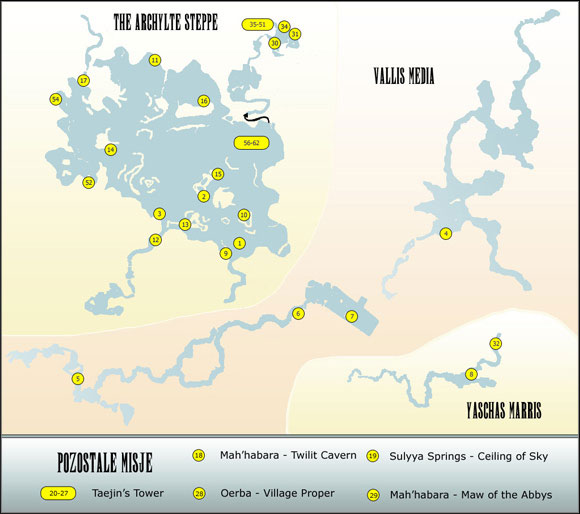
Nuber
Name
Difficulty Level
Stone Localization
Requirements
Target
Reward
1
Pond Scum
D
Archylte Steppe:Central Expanse
NONE
Ectopudding
Energy Sash
2
Goodwill Hunting
D
Archylte Steppe:Central Expanse
Mission 1
Uridimmu
Cobaltite
3
Massif Contamination
D
Archylte Steppe - Central Expanse
Mission 2
Ugallu
Platinum Bangle
4
A Hero's Charge
D
Yaschas Massif - Tsubaddran Highlands
Mission 2
Adroa
Pearl Necklace
5
Joyless Reunion
D
Yaschas Massif:The Ascendant Scarp
Mission 3
Edimmu
Sorcerer's Mark
6
No Place Like Home
C
Yaschas Massif - The Paddraean Archaeopolis
Mission 3
Munchkin Maestro
Fulmen Ring
7
Bituitus, the Pillager
C
Yaschas Massif - The Paddraean Archaeopolis
Mission 3
Bituitus
R&D Depot
8
The Eleventh Hour
C
Vallis Media:Base Camp
Mission 5
Rakshasa
Collector Catalog
9
Heave-ho
C
Archylte Steppe:Central Expanse
Mission 4
Kaiser Behemoth
Rhodochrosite
10
Hollow Hope
C
Archylte Steppe - Central Expanse
Mission 5
Ambling Below
4x Super Conductor
11
Pride Before a Fall
C
Archylte Steppe - Northern Highplain
Mission 5
Adroa
2x Frost Ring
12
Geiseric, the Profane
C
Archylte Steppe - Central Expanse
Missions 5 and 7
Geiseric
Royal Armlet
13
Eternity Unpromised
C
Archylte Steppe - Central Expanse
Mission 12
Goblin Chieftain
Cobaltite
14
Defender of the Flock
C
Archylte Steppe - Western Benchland
Mission 13
Sahagin
Ghysahl Reins
15
Tribal Warfare
C
Archylte Steppe - Central Expanse
Mission 12/Chocobo
Goblin Chieftain
Survivalist Catalog
16
Surrogate Slaver
B
Archylte Steppe - Eastern Tors
Mission 12
Sahagin
Rhodochrosite
17
A Widow's Wrath
B
Archylte Steppe - Northern Highplain
Dahaka's death
Pulsework Champion
3x Perfect Conductor
18
So close, Yet So Far
C
Mah'habara - Twilit Cavern
Mission 12
Ambling Bellows
Sorcerer's Mark
19
Triangle of Tragedy
C
Sulyya Springs - Ceiling of Sky
Mission 18
Uridimmu
Cobaltite
20
Words Unspoken
C
Taejin's Tower - The Palisades
NONE
Goblin Chieftain
Rhodochrosite
Number
Name
Difficulty Level
Stone Localization
Requirements
Target
Reward
21
Taejin's Tower - Second Tier
C
Taejin's Tower - Second Tier
NONE
Gelatitan
Speed Sash
22
Infernal Machine
C
Taejin's Tower - Second Tier
NONE
Ambling Bellows
3x Particle Accelerator
23
Natural Defenses
C
Taejin's Tower - Second Tier
NONE
Gurangatch
Warrior's Wristband
24
A Potent Song
B
Taejin's Tower - Fifth Tier
Missions 21 and 23
Mushussu
6x Moonblossom Seed
25
Spectral Hunt
B
Taejin's Tower - Sixth Tier
Missions 21 and 23
Vetala
Cobaltite
26
So Shrill, the Cry
B
Taejin's Tower - Fifth Tier
Missions 21 and 23
Penangglan
Diamond Bangle
27
Mithridates, the Lone
B
Taejin's Tower - The Cloven Spire
Defeat Dahaka
Mithiridates
Blaze Ring
28
Faded Glory
C
Oerba - Village Prope
NONE
Ceratosaur
Giant's Glove
29
Faltering Faith
B
Mah'habara - Maw of the Abyss
Mission 20
Juggernaut
Uraninite
30
Syphax, the Insidious
B
The Archylte Steppe - Haerii Oldroad
Get to Sulyya Springs
Syphax
Uraninite
31
Newfound Purpose
B
The Archylte Steppe - Haerii Archaeopolis
Mission 30
Pulsework Champion
3x Perfect Conductor
32
And Then There Was One
B
Vallis Media - Earthen Bosom
Get to Mah'habara
Amam
Glass Buckle
33
A Parent's Pledge
B
The Archylte Steppe - Haerii Archaeopolis
Mission 30
Adamanchelid
White Cape
34
Zenobia, The Butcher
B
The Archylte Steppe - Way of the Ancients
Mission 30
Tonberry
Hermes Sandles
35
The Road Less Traveled
C
Faultwarrens - Truthseeker's Rise
NONE
Gurangatch
Witch's Bracelet
36
Dark Deliverance
C
Faultwarrens - Primeval Crossroads
Mission 35
2x Amam
Uraninite
37
Dying of the Light
C
Faultwarrens - Primeval Crossroads
Mission 35
5x Rafflesia
Star Pendant
38
Moonlit Madness
B
Faultwarrens - A Dance of Shadow
Mission 36
Verdelet
Diamond Bangle
39
Seeing Stars
C
Faultwarrens - A Dance of Shadow/A Dance of Light
Mission 36 or 37
Ochu
Siltstone Ring
40
Solar Power
B
Faultwarrens - A Dance of Light
Mission 37
Verdelet
Zealot's Amulet
Number
Name
Difficulty Level
Stone Localization
Requirements
Target
Reward
41
Gaian Grudge
A
Faultwarrens - Via Lunae
Mission 38
Tonberry
Doctor's Code
42
Antihero
B
Faultwarrens - Via Lunae/Via Stellarum
Mission 38 or 39
Borgbear Hero
Witch's Bracelet
43
The Hero Never Dies
B
Faultwarrens - Via Stellarum/Via Solis
Mission 39 or 40
Borbear Hero
Speed Sash
44
The Old Ones go to Rust
A
Faultwarrens - Via Solis
Mission 40
Corrosive Custard
General's Belt
45
Emergent Evolution
A
Faultwarrens - Gaian Path
Mission 41
Neochu
Hunter's Friend
46
On Silent Wings
A
Faultwarrens - Salamandrine Path
Mission 42
Zirnitra
Gilgamesh Inc
47
Unfocused Rage
A
Faultwarrens - Salamandrine Path
Mission 42
Raktavija
Mnar Stone
48
The Abyss Stares Back
A
Faultwarrens - Sylphid Path
Mission 43
Verdelet
Twenty-Sided Die
49
Tyrannicide
A
Faultwarrens - Sylphid Path
Mission 43
Tyrant
7x Particle Accelerator
50
Road to Predation
B
Faultwarrens - Neired Path
Mission 44
Humbaba
Scarletite
51
Attacus, the Soulless
A
Faultwarrens - Sylphid Nereid Path
Missions 35-50
Attacus
Genji Glove
52
Head in the Clouds
A
The Archylte Steppe - Western Benchland
Get to Sulyya Springs
Zirnitra
Gale Ring
53
Freedom from Fear
A
Mah'habara - An Asylum from Light
NONE
Zirnitra
Blaze Ring
54
The Bigger They Are...
B
The Archylte Steppe - Northern Highplain
Find Cactuar
Gigantaur
Cactaur Doll
55
Can't We All Just Get Along?
A
Oerba - Deserted Schoolhouse (on the buildings roof)
Mission 14, Defeat Barthendelus in Oerba
Neochu
Growth Egg
56
A Toothy Grin
C
The Archylte Steppe - Eastern Tors
Get to Taejin's Tower
Ugallu
Rhodochrosite
57
What's Yours is Brine
C
The Archylte Steppe - Eastern Tors
Get to Taejin's Tower
Sahagin
Uraninite
58
The Culler of Many
B
The Archylte Steppe - Eastern Tors
Get to Taejin's Tower
Humbaba
Speed Sash
59
Two-faced Fiend
A
The Archylte Steppe - Eastern Tors
Get to Taejin's Tower
Zirnitra
Energy Sash
60
Dgela Vu
A
The Archylte Steppe - Eastern Tors
Get to Oerby
Gelatitan
Mnar Stone
61
I, Juggernaut
A
The Archylte Steppe - Eastern Tors
Get to Oerby
Juggernaut
Royal Armlet
62
Indomitable Will
A
The Archylte Steppe - Eastern Tors
Get to Taejin's Tower
Raktavija
Genji Glove
63
Crushed by Doubt
A
Sulyya Springs - Subterranean Lake
Get to Faultwarrens
Adamantortoise
Genji Glove
64
The Doomherald
A
Oerba - Rust-eated Bridge
Missions 27 and 51, Defeat Barthendelus in Oerba
Vercingetorix
Gold Watch
You have to kill a big turtle named Adamantortoise (you can find him at the end of the 12th chapter). He is very powerful but he has one weak point - he is not resistant to a Death spell. Change your team leader to Vanille and summon your Eidolon. Your enemy will fall on the ground and you will be able to cast your spell. Of course the possibility of killing him with one shot is very low so invest some points in your ATB bar. You can wear Belladonna Wand too. It will raise your spell effectiveness. If you have to win this battle in a standard way then you will have to upgrade your character to MAX first.
This is the last and the most difficult mission in the game. You have to be well prepared (all characters should have 3 or even 4 trees in Crystarium upgraded to the MAX). Your items should be on the highest level too. Important thing is to give Genji Glove to Commando and other items that will lower damage taken. The rest of your teammates should have some defensive items. I advise you to use these paradigms:
Sentinel + Sentinel + Sentinel
Saboteur + Saboteur + Saboteur
Medic + Medic +Medic
Commando + Ravager + Ravager
Commando + Ravager + Medic
Synergist + Synergist + Synergist
Now you have to use Aegisol and Fortisol and you can start the battle with Vercingetorix. The fight is very difficult but schematic. You enemy will do the same attacks in the same way. He will start with Wind Shear and Putrescence that will remove two buffs from your characters. Then he will cast Impenetrable Aura. As a result he will be immune to any attacks, regenerate 8% of his health. In addition he will cast some buffs and reset his chain gauge. The best option is to buff the team in this phase and heal everyone. Few seconds later the boss will do the Wicked Wirl. This the moment for paradigm with 3x Sentinel. This the only way to survive this attack. Remember that your enemy can be poisoned and that is why you have to use Saboteurs from time to time. The last important thing is that your enemy will get stronger at 90%, 60% and 30% of his health. After few tries you should be able to kill him. As a reward you will get a Gold Watch.
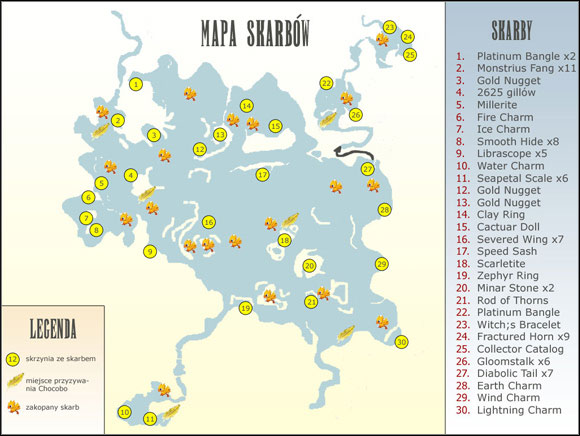
Many place in Archylte Steppe will be unavailable for you without Chocobo. To get this huge chicken you have to do mission number 14. As a reward you will get the Gysahl Reins. You will be able to summon your mount now, but only in places marked with yellow feather.
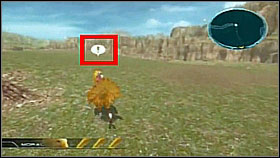
Chocobo will help you in traveling all over the Gran Pulse. In addition he will help you in avoiding some enemy soldiers. Remember that you have three morale points at the beginning and every hit will lower it by 1. When it will come to zero your chicken will run away [1]. The next thing is that when you will enter Archylte Steppe five places with treasures will appear. When you will be close to it and exclamation mark will appear above the head of your chicken [2]. It will be vibrating (the faster is vibrating the closer you are to the treasure). When you will be there, press the correct button and get the item:
Treasure
Possibility
Rhodochrosite
12,84%
Millerite
12,84%
Cobaltite
12,65%
CHocobo Plume
10,19%
Chocobo Tail Feather
9,94%
Gold Dust
9,52%
Dawnlight Dew
8,4%
Dusklight Dew
7,55%
Gold Nugget
6,32%
Moogle Puppet
5%
Plush Chocobo
4,75%
The are also some items that you will get when you will do the correct number of digs.
Treasure
Number of digs
Gold Nugget
1
Tetradic Crown
5
Tetradic Tiara
10
Entite Ring
15
Ribbon
20
Name
Points
Description
Requirements
Commando's Seal
15
Mastered the Commando role.
Gain Commando 5th level and all his abilities.
Ravager's Seal
15
Mastered the Ravager role.
Gain Ravager 5th level and all his abilities.
Sentinel's Seal
15
Mastered the Sentinel role.
Gain Sentinel 5th level and all his abilities.
Saboteur's Seal
15
Mastered the Saboteur role.
Gain Saboteur 5th level and all his abilities.
Synergist's Seal
15
Mastered the Synergist role.
Gain Synergist 5th level and all his abilities.
Medic's Seal
15
Mastered the Medic role.
Gain Medic 5th level and all his abilities.
Instrument of Fate
15
Took the first steps toward challenging an unjust fate.
Complete I chapter.
Instrument of Dissent
15
Survived the Purge to confront a greater peril.
Complete II chapter.
Instrument of Tragedy
15
Strode into danger's den and paid the consequences.
Complete III chapter.
Instrument of Flight
15
Slipped through the net and lived to fight another day.
Complete IV chapter.
Instrument of Vengeance
15
Resolved to be more than a victim of circumstance.
Complete V chapter.
Instrument of Survival
15
Evaded pursuers, though memories of the past still gave chase.
Complete VI chapter.
Instrument of Rebellion
15
Made plans to infiltrate enemy-occupied territory.
Complete VII chapter.
Instrument of Shame
15
Carried the burden of guilt to the end of the line.
Complete VIII chapter.
Instrument of Wrath
15
Took the fight to the enemy's door.
Complete IX chapter.
Instrument of Truth
15
Recognized the true threat to the world's future.
Complete X chapter.
Instrument of Hope
15
Traveled to the world below, seeking a way to alter fate.
Complete XI chapter.
Pulsian Pioneer
Took over 10,000 steps on the lowerworld surface.
Make 10,000 steps inGran Pulse. Speak with Pacti to gain this achievement.
Gysahl Wreath
15
Discovered buried treasure with a little help from a chocobo.
Dig out Ribbon.
Kelger's Cup
15
Completed all low-level Cie'th Stone missions.
Complete all quests given by Cie'th stones that are marked with D.
Xezat's Chalice
15
Completed all mid-level (C Rank) Cie'th Stone missions.
Complete all quests given by Cie'th stones that are marked with C.
Limit Breaker
30
Dealt 100,000+ damage with a single attack.
Hit the enemy for 100,000+ DMG in one shot.
Adamant Will
30
Felled a heavyweight of the lowerworld wilds.
Defeat Long Gui after doing mission 56-62.
Master's Seal
30
Fully developed all characters.
Gain 5th level of all characters.
Instrument of Faith
30
Defied destiny's charge and embarked on a different path.
Complete XII chapter.
Exorcist
30
Triumphed over undying lowerworld souls in seven fierce battles.
Complete missions: 7, 12, 27, 30, 34, 51 and 64.
Floraphobe
30
Toppled a green terror and cut an oversized succulent down to size.
Complete mission 54.
Natural Selector
30
Passed Titan's trials.
Complete missions: 35 - 51.
Dorgann's Trophy
30
Completed all high-level (B Rank) Cie'th Stone missions.
Complete all quests given by Cie'th stones that are marked with B.
Galuf's Grail
30
Completed all Cie'th Stone Missions.
Complete all quests given by Cie'th stones.
Treasure Hunter
80
Held every weapon and accessory.
Wear every weapon and accessory.
Loremaster
80
Discerned the full attributes of 100 enemies.
Gain all information about 100 enemies.
Instrument of Change
95
Witnessed the dawn of a new crystal legend.
Finish the game.
L'Cie Paragon
80
Earned a 5-star ranking for all Cie'th Stone Missions.
Gain 5 stars for every mission.
Superstar
80
Earned a 5-star ranking in the final battle to determine the world's fate.
Gain 5 stars for the fight with the last boss.


 FIFA 15 Game Guide & Walkthrough
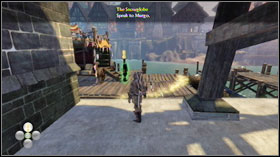 Fable II: See the Future Game Guide & Walkthrough
 Far Cry 3: Blood Dragon Game Guide & Walkthrough
 FIFA 16 Game Guide & WalkthroughFallout 3: Broken Steel Game Guide & Walkthrough