
This game guide for Fallout Shelter describes all key aspects of the game along with detailed advices that will help you develop your Vault faster and more effectively. It contains basic information about interface, notification, as well as a number of tips that you will find useful through entire game. A detailed description of dwellers and rooms will allow you to make an adequate expansion plan and assign dwellers to their tasks appropriately. You will also find chapters telling you how to cope with raiders' attacks and adversities. Author focused on descriptions of exploration and side tasks. Last but not least, there are plenty of general tips of different aspects of the game.
Fallout Shelter is a free of charge strategic game designed for devices using iOS and Android operating system. The game has been developed by Bethesda Game Studios, known for The Elder Scrolls series. The player manages the Vault - a post-apocalyptic shelter - as an overseer. His task is to manage human resources, help to maintain high morale among people and secure the expansion of the shelter so as not to run out of resources. Additionally he must take care of population's development and exploration of wasteland in order to get weapons and outfits needed to survive. The game is based on free-to-play model. However, microtransactions allows you to buy lunchboxes containing, for example, legendary dwellers.
Norbert "Norek" Jedrychowski ()
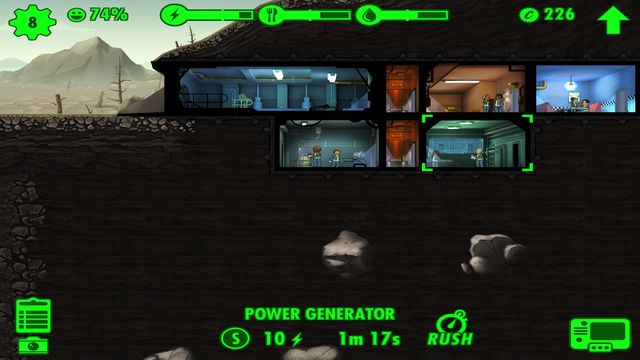
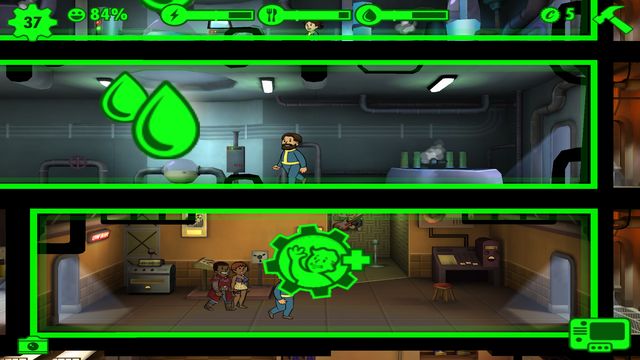
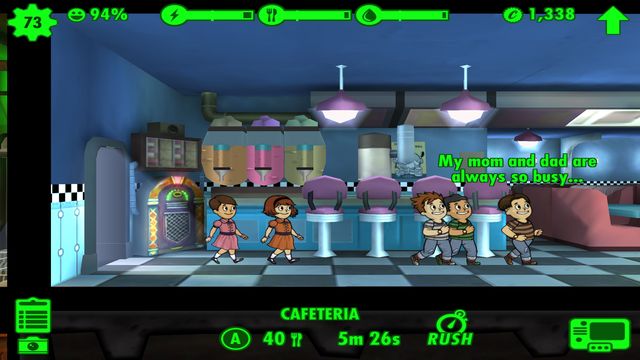
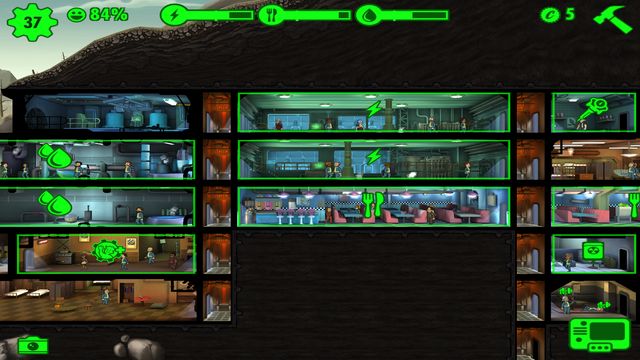
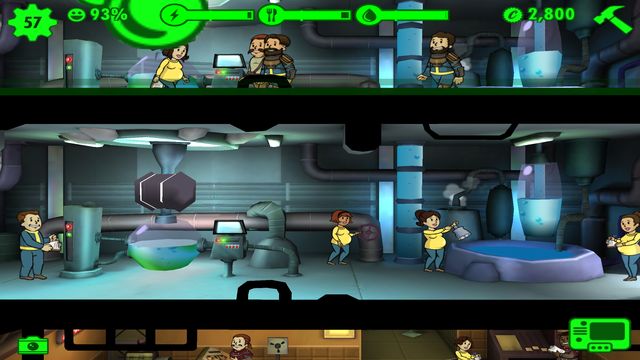
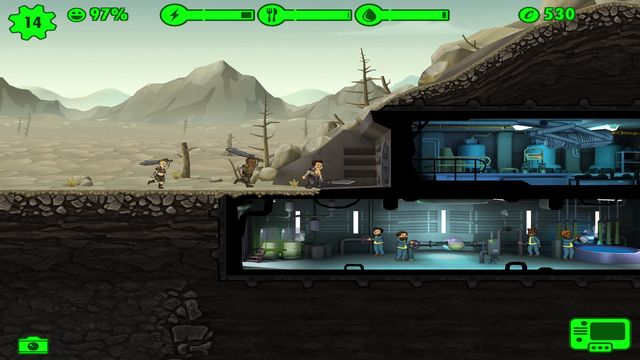
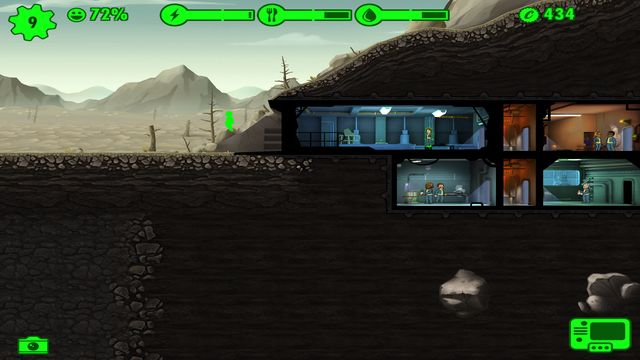
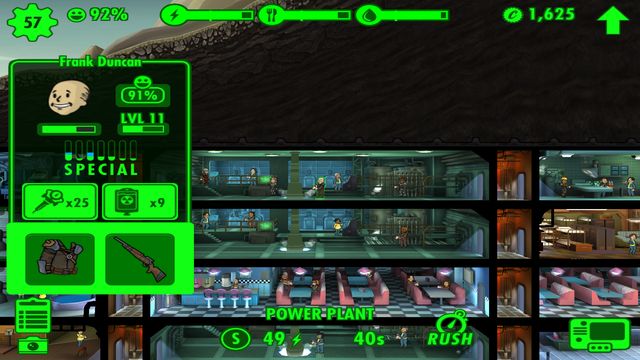
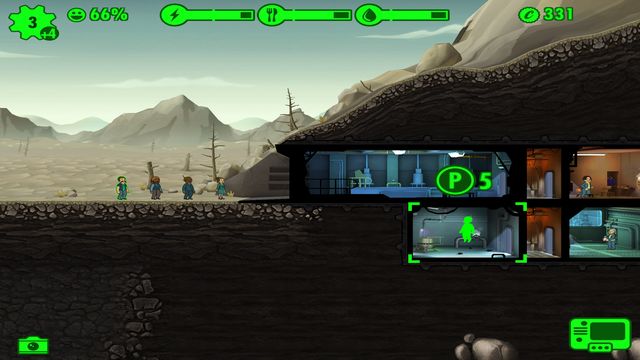
During the game, interface doesn't change significantly. The most important statistics are available all the time with a view on the interior part of the Vault. On the left upper corner you can find the information about population of your Vault [1] (by clicking on it you will open a list of dwellers that you can freely sort) and the level of its resident's satisfaction [2] In the middle you can see the level of resources: energy [3], food [4] and water [5].

When you click on any of listed resources, you can check the exact level of them. On each icon there is a line which indicates a limit that shouldn't be exceeded if you want to avoid negative effects (power loss, dwellers' health problems, injuries caused by radiation). While the raiders' attack, the resources may start to flicker in red color - that means somebody is stealing it away from you (therefore it is important to defeat raiders as soon as possible). On the right upper corner there is a summary of your budget [6], "a hammer" or "an arrow" [7] - by clicking it you can open a menu that allows you to build new rooms or to improve the selected, already existing one.
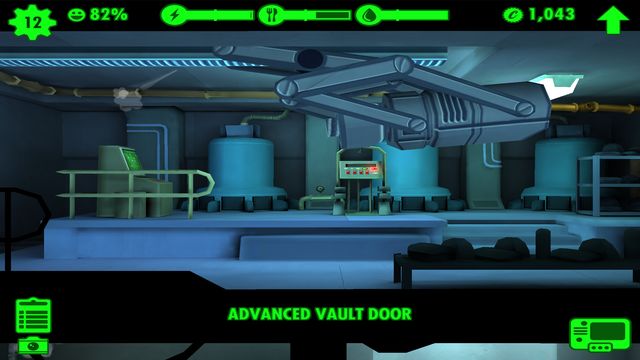
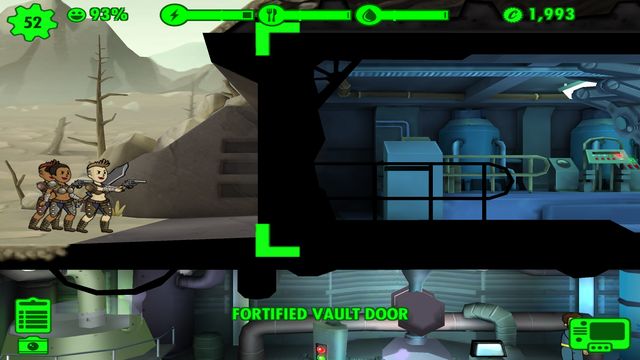 If you improve the front door, you gain additional time to organize a defense in case of an attack.
It depends on your expansion strategy how your Vault looks like, however the entrance is always located in the same point. [8]. In case of raiders' attack try to defend the entrance first, then spaces located right next to it (it's recommended to keep the well-armed dwellers close). Don't forget to collect just produced resources (not only energy, food or water but also Stimpaks or AntyRads) [9].
Last but not least, there is also the PipBoy [10]. Here you can find all game settings, weapon and outfits storage rooms, collection of discovered weapons and outfits and current objectives.
You will be informed about disasters immediately
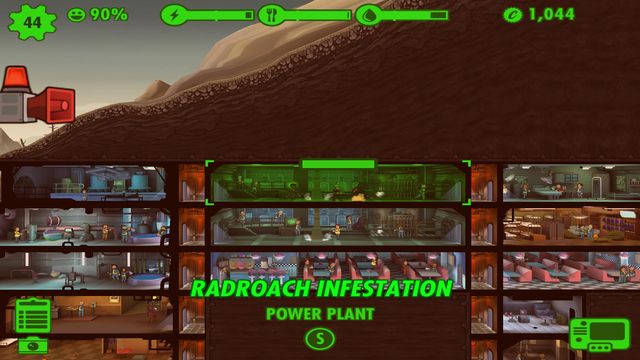
Apart from permanent elements of interface, sometimes icons symbolizing certain events will appear. One of them is an alarm in case of the raiders' attack, fire or a radroach infestation. You won't be able to build or improve your spaces until you cope with the adversity and the alarm is cancelled. While the rescue action, dwellers are moved and when the danger is gone they can come back to their duties - therefore you can send whoever you need to cope with the danger. Alarm is signalized with a specific sound.
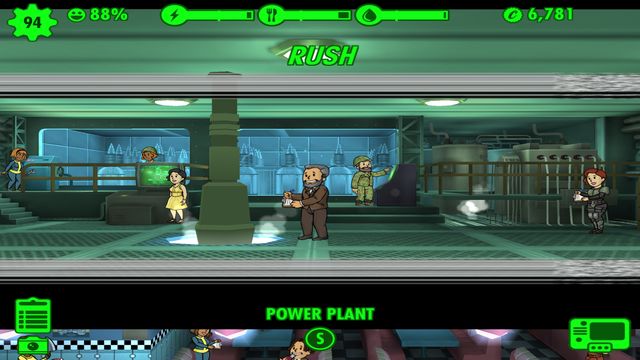
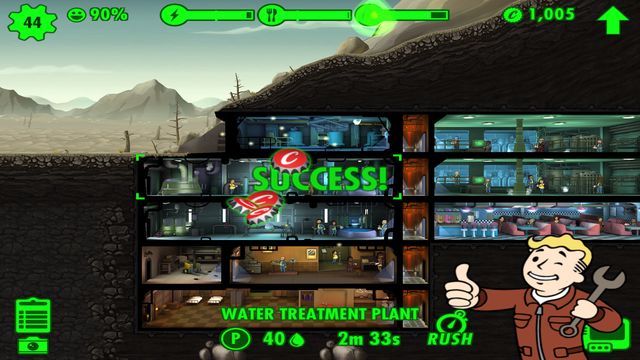 Successful acceleration of your work is awarded with several profits
You can accelerate your work by using a "rush" option, but you can either succeed or fail by doing it. In both cases you will be informed by a character appearing in the bottom right corner as well as a statement on the screen. In case of failure one of two disasters will happen in the room: fire or radroach infestation.
 After your absence, begin with collecting resources.
Each space that produces something needs time to deliver a final product, e.g. Stimpaks. When the time is over, the product icon will appear on the screen. Don't forget to click on it- work is suspended until you collect the product.
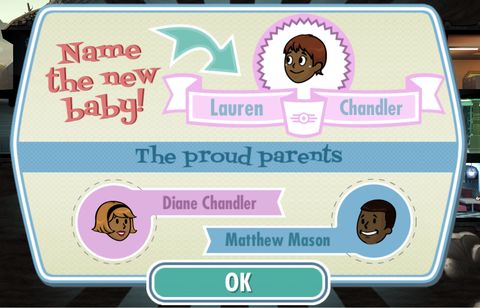
Appropriate statement also appears, when a baby is born in your Vault. The statement contains information about happy parents' names and enables you to change the name of the new resident.
 Brother and sister? No chance for offspring then.
If two characters are related, the game subtly informs you of this fact. They won't start any flirt as this match is impossible. Pay your attention to the messages you see above talking dwellers - if they mention about a family, it means that there is no chance for the flirt.
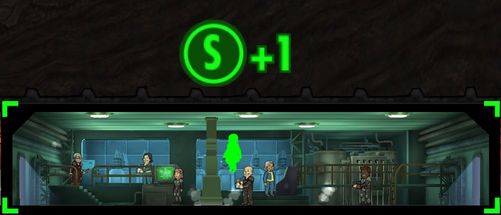
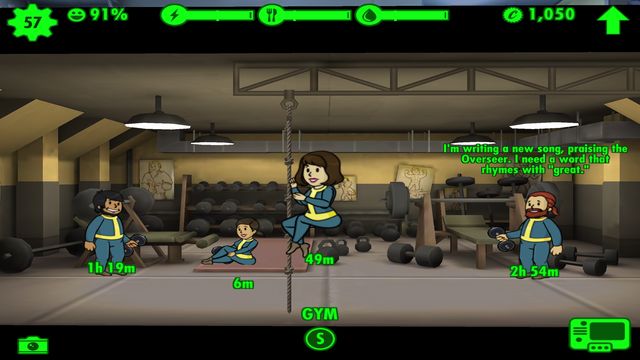
While moving dwellers between rooms, you will be informed which treat of S.P.E.C.I.A.L. statistics is used in a particular room. Before you "drop" the resident you can see a number in a circle- it equals a level of skill used in this room (e.g. 4 in the circle while moving to work at the power generator means, that the character has a skill developed on 4th level) If the room is full while moving, the person with the lower level of the skill will be replaced by the moved one. In that case, the number in the circle will be preceded by plus (+) or minus (-). It means that the moved person has the skill developed better or worse than the indicated amount. (e.g. her charisma is better of 2 points than the weakest person in the room)
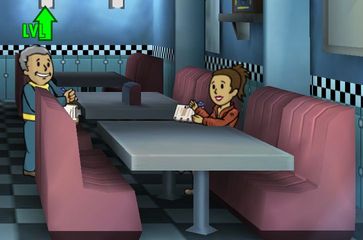
The last important icon is the one that allows you to increase a dweller's general experience level. Each of dwellers has experience bar that indicates the amount of experience gained by achieving objectives, exploring the wasteland and coping with disasters. When the line is full, there is a small "lvl" inscription above the dweller's head. Clicking it will increase the amount of experience, which will increase the amount of life points.

Caution: along with increase of the level, none of S.P.E.C.I.A.L. statistics get changed - those have to be worked out in designated rooms. When you complete the training, an appropriate icon will appear above the dweller's head. Click on it and the statistic will increase. If you don't remove the dweller from the room, workout is continued automatically.
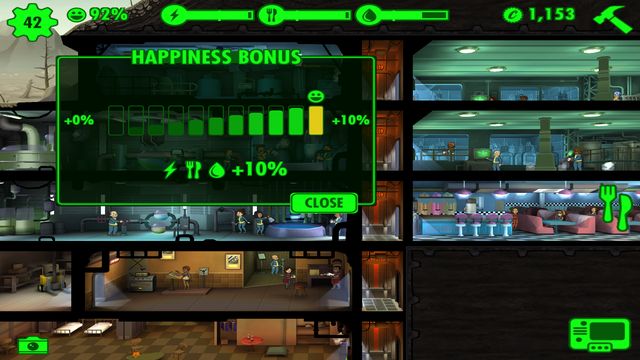 Maintaining high level of satisfaction is awarded with a bonus to your production score.
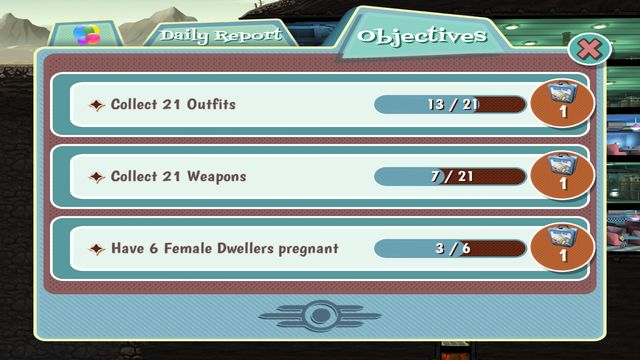 Objectives awarded with lunchbox are a bit harder, but worth the effort.
 Remember to leave some space to build next similar rooms.
After starting the game, a short tutorial starts. It contains basic information about tasks assignment or taking new dwellers. Completing the tutorial causes drastic decrease of new settlers - now everything depends on you. It is advised to get familiar with some basic rules in order to start the expansion of the Vault properly.
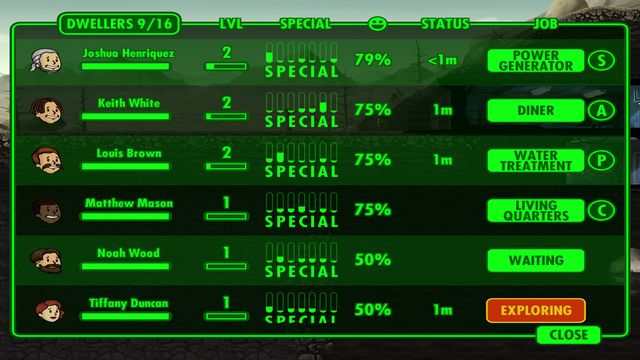 By browsing the list of dwellers you can quickly check which task will be most appropriate for which person.
1. Plan your work. At the beginning you have enough space to build several basic rooms delivering resources. Don't forget to take into account that you possibly will merge them in the future or you will want to build more rooms. Develop your Vault reasonably so you don't have to demolish half of it in the future. Remember, that the most efficient are the biggest (triple) rooms, leave some space to expand it in next stages of the game.
2. Get to know all of your dwellers. At the beginning you have only few of them so you can control statistics of all of them. It will help you to assign each of them to the right task, thanks of what your production will be faster and more efficient. Also, dwellers will be happier doing what they like to do.
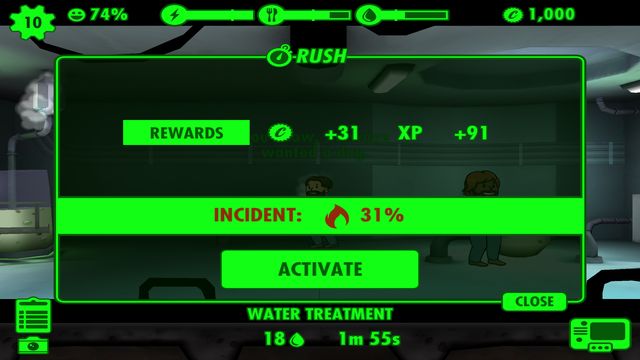
3. Don't overuse the "rush" option. It is very tempting as this option results with extra resources, experience, caps and higher satisfaction of your crew. Don't overuse it though because failure leads to disasters and it can slow down your development at the beginning of the game. Use it only when the possibility of an incident doesn't exceed 40%.
4. Achieve objectives. First side tasks are very easy and don't take much time so it is worthy to complete them fast and get some caps as well as much more precious lunchbox with resources. If you're patient, you can try to settle a new Vault until you draw at least one legendary dweller in received lunchboxes - it can be useful when exploring the wasteland.
 Using the "rush" option is important, but don't forget to check the level of an incident possibility
5. Watch out for disasters. They happen randomly and you can't do anything about it. When a disaster happens, assign citizens to fight the fire or radroaches. It's similar with raiders' attacks - in first order you should protect the rooms that are closest to the Vault entrance. You should also upgrade the entrance as quickly as possible to reduce the amount of attacks and make it longer for enemies to get inside.
6. Augment your population. When you complete the tutorial you find out, that there are not many new dwellers coming from the outside. What you can do is to make your women pregnant. You can make it your priority goal at the beginning, when you don't have to worry about lack of resources. Also, it is necessary to augment your population if you want to unlock new buildings. When you reach 20 dwellers you can buy a radio, however production of babies seems to be more efficient. Don't overdo though - pregnant women are not able to fend off disaster and raiders and babies needs to eat and drink like adults.
7. Increase the experience level of your dwellers. Each of them has an experience bar. It is quite easy to fill it at the beginning of the game. Don't hesitate to click on an "lvl" icon when it appears above your dwellers head. The higher the experience, the better the health of dweller is. It makes him more endurable in case of raiders and disasters.
8. Explore. Send rare or legendary dweller to explore the wasteland. At the beginning phase of the game you can order him to come back after finding a few items and give those items to other dwellers.
9. Give outfits to dwellers - their work will be more effective and you'll be able to collect your resources earlier.
10. Use the time while the application is turned off. You can't be attacked, but you can develop your Vault, explore the wasteland or give birth to new children. Remember to put at least one dweller into each room where resources are produced - when you turn the game back on, you'll get a maximum amount of them.
Dwellers are the basic propeller of the Vault. Thanks to them you can get resources, fend off the attacks or find new items while exploring wilderness. Each dweller is precious for well organized Vault because each of them has different strong points that let them achieve different objectives.
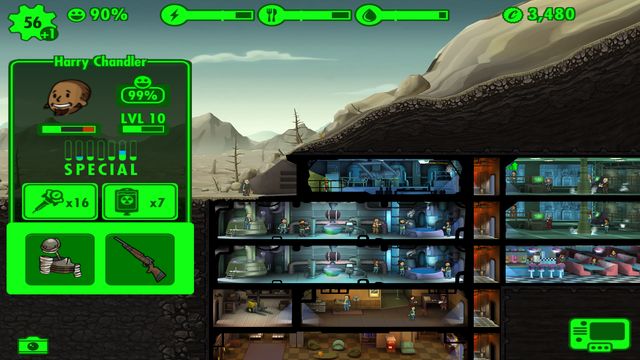
Statistics and experience level of a dweller decide, which work, weapon or outfit will be most appropriate for him.
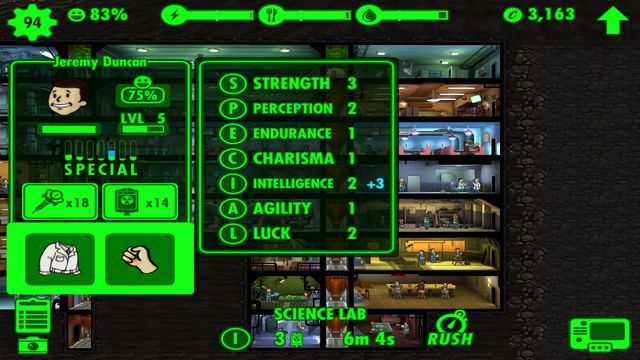 When you click on a dwellers profile you can analyze his statistics and bonuses gained from wearing an outfit
Seven most important statistics describing your dwellers are indicated by the acronym S.P.E.C.I.A.L. Each letter stands for one of specifics skills of a dweller that are crucial to develop and survive. Possessed skills are even more important than experience because they are not developed with the dwellers level, but in special rooms. That action demands time therefore it is advised to work out only those that will be useful in the future at work. If you choose an appropriate work for each dweller, it will make the production faster and make them happier.
S.P.E.C.I.A.L. is:
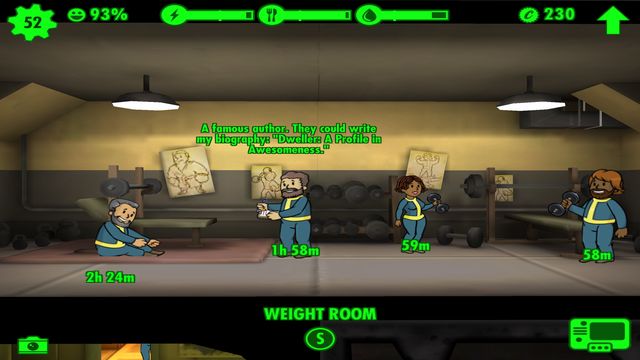
- S - strength - stands for physical work and is ideal for power generation
- P - perception - good for water treatment and purification
- E - endurance - important for dwellers that will explore wasteland as it makes them more resistant to injuries and radiation. It is also useful when working in "Nuka Cola Bottler" room.
- C - charisma - it accelerates flirt between two dwellers in the same room, useful also when working in Radio Studio
- I - intelligence - useful when producing Stimpaks and Antiradars (Medbay and Science Lab)
- A - agility - necessary to produce food
- L - luck - this skill is helpful in everything: on the wasteland it helps to find more items, it also increases the chance to find additional caps while collecting produced resources.
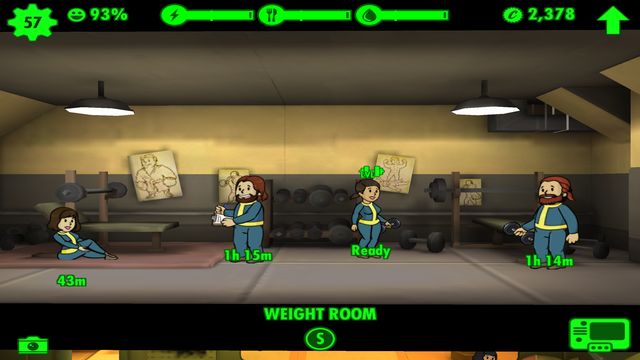
 Only training lets you permanently improve the skill.
Only training lets you permanently improve any of your skill. The bigger your training rooms are, the more dwellers can work out at the same time. "Upgrade" option shorten the time that they need to do it. It depends on the start level how long it will take to jump to the next level, e.g. dweller working for strength from level 1 to level 2 can do it much faster than from level 2 to 3. Additionally, dwellers work a bit faster when there is more than one of them in the room. After training click on appropriate icon in order to permanently improve your skill.
 Don't expect crowds trying to get into your Vault after completing the tutorial.
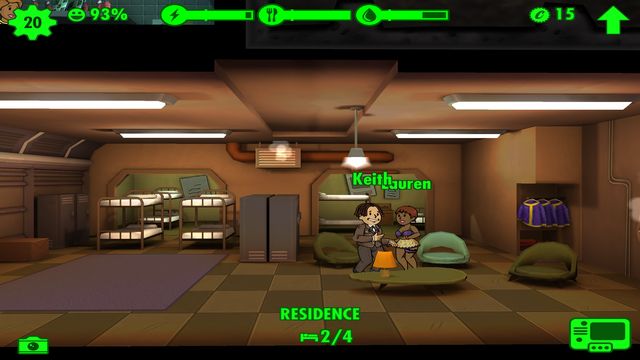
After completing the tutorial amount of dwellers coming from the outside will drastically decrease. To continue development and increase your population faster you have to pair your male and female dwellers up and lodge them together in rooms. If they're not related (note what they're talking about), the conversation will transform into a flirt (it depends on charisma level of both of them), then dance and then they'll move to the bedroom. Female gets pregnant that way and after 4 hours she will bore a baby. The baby needs as much resources as adult dweller but it can't work so you have to make sure you've got enough of water and food before you decide to increase the population. Try to match parents with best statistics - one of them will be inherited by the baby. After next 3-4 hours it will grow up and become an adult.
 The Radio allows you to call adult dweller - he will come to the Vault's front door.
Another way to gain new dwellers is attracting them by using the radio. You can unlock it when you have at least 20 dwellers. If you improve it, its signal will be more effective. Also - If the upgrade succeeds - you can collect produced coin and new dweller will come to the front door of your Vault. Otherwise, the counter starts to count from the beginning.
Dwellers with a high charisma factor should work in the radio room. If there are too many pregnant women, your signal decreases nearly totally. You can use the radio not only to attract new dwellers, but also to positively influence the satisfaction of those already living in your Vault.
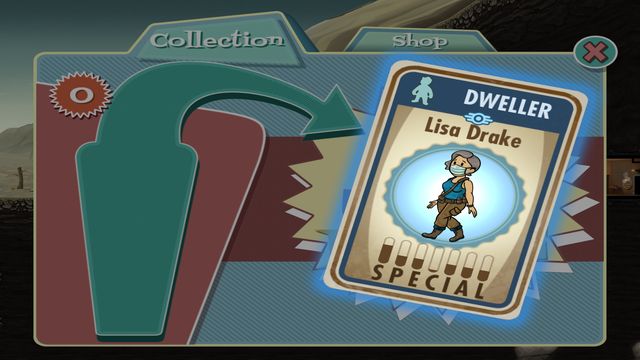
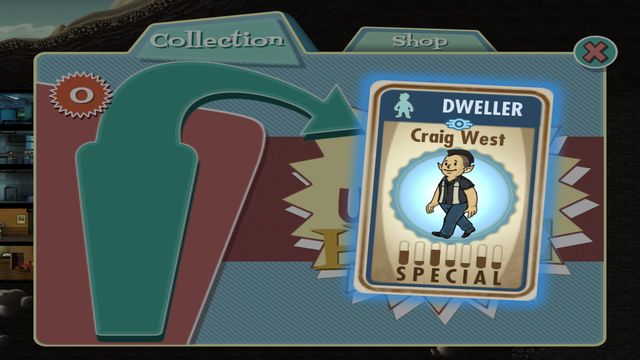 Rare and Legendary Dwellers can be won from opened boxes.
Last but not least, you can win Rare or Legendary Dwellers on cards you find in lunchboxes. If you find the card, won dweller appears at the front door of the Vault equipped with a weapon or/and an outfit.
 Crowd of children is a good step to develop the population, as long as you have enough resources to feed them.
Pregnant women differ from other dwellers. You can recognize them by the same clothing, independently from the outfit you assigned to them before. Also, nothing changes when it comes to their ability to work and train, but they are not able to cope with disasters and raiders. In both cases the only action taken by them will be panic and attempt to escape. Therefore you can take their weapons as it's not going to be used by them. If it is possible, try to always leave pregnant woman with another dweller that is able to defend them against radroaches, raiders and fire. Pregnant women can't die.
Children are not able to work or fight against disasters. It is also not possible to assign weapons or outfits to any of them. Likewise adults though they use a water and a food. You can click on a child to check how much time left until it becomes an adult. When it happens, you gain another productive dweller in your Vault. Until that moment it can't be killed.
 Blue color marks statistics that are improved by the outfit. The better they are, the more your bonus will be noticeable.
Every dweller can be equipped with a gun and an outfit. Owned pop gun will be useful especially while fighting off radroaches and raiders as well as while exploring the wasteland. The best weapon should be handed to dwellers working next to the front door - they are first to resist the raiders.
Outfit (while is worn) can improve some of the dweller's statistics. Appropriate usage of outfits lets you increase efficiency of your workers noticeably regarding to statistics useful in their work.
Weapons and Outfits can be found on wasteland, won from the lunchboxes or got along with won dwellers.
In a lunchbox you can also find a Rare or Legendary Dwellers. They have more experience than usual ones and - what's the most important - much better developed skills (40 S.P.E.C.I.A.L points). Legendary Dwellers can also answer you radio signal and come from the outside, but it happens very rarely. They always have a legendary weapon or/and outfit.
There is 21 Legendary Dwellers to be unlocked:
Name
S
P
E
C
I
A
L
Abraham Washington
2
8
6
6
8
4
6
Allistair Tempenny
2
9
2
9
7
2
9
Amata
4
6
5
8
4
7
6
Bittercup
5
4
7
9
5
5
5
Butch
5
7
6
9
5
6
2
Colonel Autumn
4
6
5
9
5
5
6
Confessor Cromwell
7
4
7
8
6
3
5
Dr. Li
4
6
6
7
9
4
4
Elder Lyons
4
3
3
9
9
3
9
Eulogy Jones
5
6
5
8
5
4
7
Harkness
8
5
8
5
5
6
3
James
5
8
4
7
9
4
3
Jericho
8
6
8
2
3
7
6
Lucas Simms
5
9
8
5
5
6
2
Moira Brown
4
8
3
8
7
5
5
Mr. Burke
4
7
4
6
9
2
8
Preston Garvey
3
9
8
6
5
6
3
Sarah Lyons
8
6
8
6
5
5
2
Reginald Rothchild
6
5
6
9
4
5
5
Star Paladin Cross
7
8
4
8
4
6
3
Three Dog
4
4
6
9
5
5
7
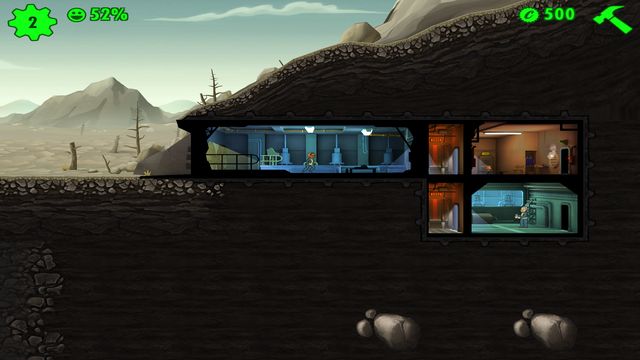 Plan the shape of your Vault at the very beginning.
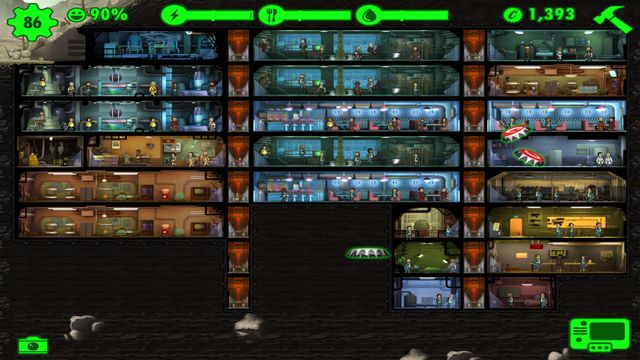
When you start the game you have a possibility to fill two levels of the Vault. You will devote it to resource generating rooms and for living quarters. Subsequent rooms will be unlocked with development of population and will allow you to produce Stimpaks and Antiradars or improve your dwellers skills. It is an appropriate building, merging and improving further rooms that decide of efficient operating of the Vault.
 Appropriate arrangement of rooms enables fast collecting of resources.
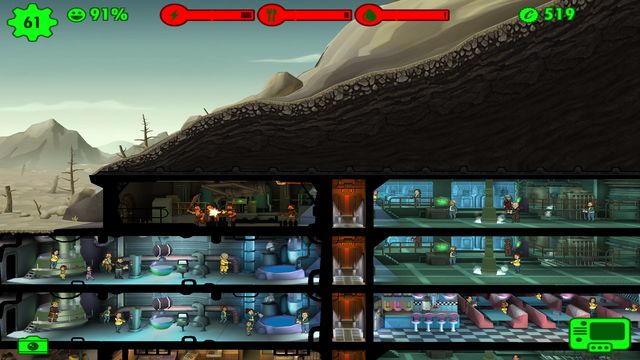
Most of all you have to care for resources: energy, food and water. The first one is used by all rooms. If you run out of energy, your rooms start to lose it starting from those most remote from the power source. Keep it in your mind as every new building need the power to work, make sure that the number of power generators is sufficient. Lack of water and food causes injuries and finally leads to death. Keep the supply on a high level all the time, especially if you plan a "baby boom".
 Subsequent rooms get unlocked when you reach a certain level of population.
There are three categories of rooms:
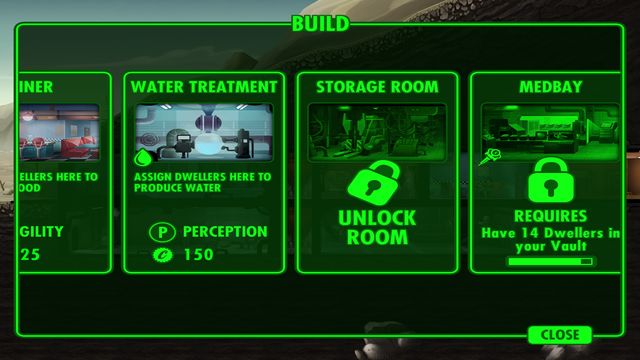
- Access rooms (access to wasteland and lower levels): Vault Door and Elevator. Vault Door can be improved like any other room - it impacts positively on frequency of raiders' attacks, on better strength and also provides more time to organize defense. Elevator let you get to the lower level of your Vault. Expansion of it proceeds mostly in a down direction so remember to provide enough of elevators (two for each level sounds good) to make it possible to move between levels efficiently.
- Resource production and storage rooms - available from the beginning. Remember to assign right dweller to the right room as each of them desires different S.P.E.C.I.A.L skills (strength is useful when producing energy, perception when gaining water and agility in the restaurant). This category also contains rooms in which you can produce Stimpaks and AntiRadars. Dwellers with well-developed intelligence are welcome to work in one of them.
- Special stat training rooms - when you reach 24 dwellers you get access to your first training room in which your dwellers can work out their skills. These rooms don't produce any resources. When you send your dweller there, he or she can work out their skills for some time and then it gets improved permanently by one point up. Keep in mind that the higher the level you try to work out, the more time it takes, so train only these skills that are useful in the dweller's job.
 An example of room merging - it allows to fully connect two segments and allows to quickly move between levels.
Every room can be merged to another one from the same category. It happens automatically, provided that both are the same level and built next to each other. It is a good idea to merge them straight away (if you have enough of money) or to leave space to do it in the future. The larger the room is, the more dwellers can work at the same time, it is also more efficient than single rooms, so merging them is always profitable.
 Upgrade your room as much as you can.
Not only can you merge your rooms but you can upgrade them as well. There are two upgrade options and its cost depends on the room's category as well as on size - upgrading two rooms of the same kind but of different sizes has different cost. To find upgrading menu, select the room, and then click on the arrow that will appear instead of a hammer (upper right corner). As an effect of upgrading, the capacity of the room and its production increases. It also influences positively on the radio signal (radio station) or shorten the time you need to work out a skill. If it's possible you should strive to have as high level of your rooms as possible by improving the existing ones and then building new, similar ones.
As mentioned above, rooms merge automatically under condition that they are on the same level. If it didn't happen, that means you have to upgrade one of them.
If you need to reorganize your Vault, it is possible to remove your rooms, provided that you meet two conditions:
- there are no dwellers assigned to the room
- it can't be placed between two other rooms or you must make sure that there is other way to get in them than through the room you want to remove, e.g. another room on the other side or elevator. If not, you have to arrange that connection or remove all of them.
If you plan building of the Vault reasonably, you don't need to remove rooms later on. What you should do is to divide the Vault into "segments", and for example destine the middle segment only for resource production and storage rooms. Generally, it is not profitable to use a removal option too often because you don't get all caps you had to invest in building it back.
 "Rush" lasts very shortly and you're informed of its effect straight away.
You can use a "rush" option to accelerate work in resource production and storage rooms. Its strong point is that if you succeed, you get your resources, extra experience points, satisfaction bonus and caps straight away. The only disadvantage of it is the possibility of a disaster and it is estimated in percentage. The estimation consists of the amount of people in the room, sum of their skills (essential for the room, e.g. agility for the restaurant) as well as the level of their luck. Generally, the better trained and happier the crew, the possibility of a disaster is lower. Use it only when the estimated risk is lower than 40%, or even 30%. Using the "rush" option too often will increase the risk of a disaster so try not to overuse it.
 It is possible to accelerate skills training only by using an "upgrade" option and sending more than one dweller to training rooms.
- Vault Door - you can use them to send dwellers to the wastelands, they are also the first place the raiders will attack
- Elevator - it is important when expanding the Vault deeper down
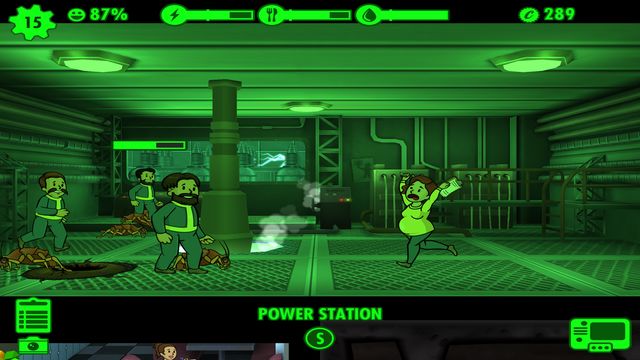
- Power Generator - where you produce the energy
- Water Treatment - where you produce the water
- Diner - where you produce food
- Living Quarters - increase limit of the population, this is where dwellers can flirt and women get pregnant
- Medbay - where you produce Stimpaks
- Science Lab - where you produce AntyRads
- Storage Room - increases the maximum amount of weapons and outfits
- Radio Station - lets you send the signal that attracts new dwellers to your Vault, also contributes positively to the satisfaction of you dwellers.
- Nuclear Reactor - more efficient room where you can produce more energy
- Water Purification - more efficient room where you can produce more water
- Garden - more efficient room where you can produce more food
- Nuka-Cola Bottler - room where you can produce food and water
- Special stat training rooms (Weight Room - strength, Athletics Room - agility, Armory - perception, Classroom - intelligence, Fitness Room - endurance, Lounge - charisma, Game Room - luck)
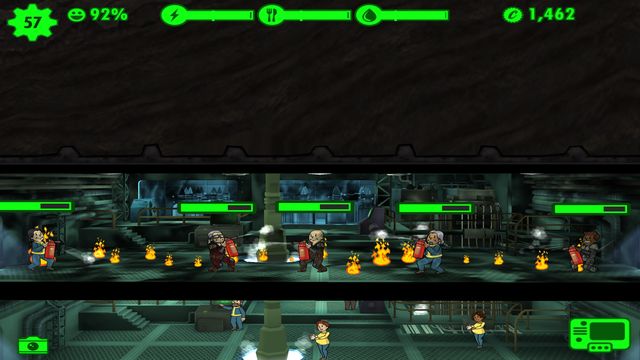
The more dwellers sent to fend off the disaster, the more effective is this action.Independently to how good you manage your Vault, you have to be prepared for some random events. From time to time you'll find out that there is a disaster in some rooms. It is not hard to fend them off, don't ignore them though if you don't want it to spread into other rooms. Both kinds of disasters also appear when you try to use a "rush" option and you fail. In both cases your dwellers can die.
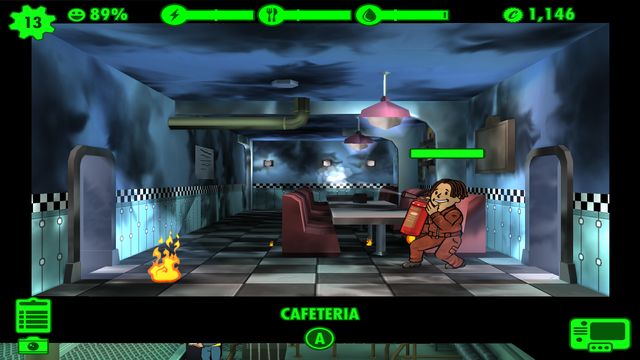 Fire in a small room isn't very dangerous.
One of disasters your dwellers have to face is fire. It is easier to fight than radroach infestation, it doesn't mean that it can be ignored though. Most often it happens in empty room or after failure when using "rush" option. Dweller in the room will automatically grab the extinguisher and start to fight with the fire. Remember that the bigger the room is, the more difficult it is to extinguish the fire, so always send enough dwellers to this action. It doesn't matter who it will be because everybody fight with the fire in the same way - by using extinguisher.
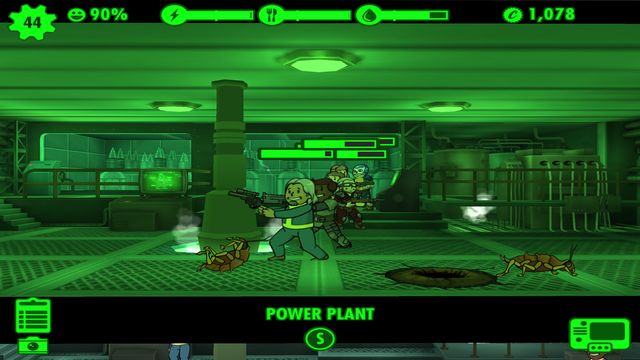 Don't ignore radroaches - send well equipped dwellers to fight them.
Radroaches are more dangerous than fire and usually cause more serious injuries. As fire, them appearing is a random event or a result of unsuccessful attempt to use the "rush" option. In contrast to fighting against the fire, it is important who you send to cope with radroaches. Appropriate weapon will be helpful if you want to fight it quickly. It is not essential though and you can also send dwellers without a weapon.
 Pregnant women can't fight against disasters - make sure there is always somebody around that is able to do this.
Each disaster is announced by an alarm. "Rush" option, building new rooms and upgrading existing ones will be blocked until you cope with a disaster, so if you don't want to disorganize the functioning of the Vault, try to do it as soon as possible, using all of your dwellers. Strength of the disaster depends on a room - the bigger it is, the more difficult it is to extinguish the fire.
 Fire and radroaches can spread to neighbouring rooms very fast.
Dwellers automatically get back to their work right after the disaster is gone, so you can use your best - equipped dwellers to fend off the radroaches infestation, knowing that your work system won't be perturbed. To empty rooms affected by the disaster send dweller living closest to it. If you don't take any action for a longer while, fire and radroaches can spread to neighboring rooms. The alarm won't stop until you extinguish the fire and fend off radroaches in every single room.
Important: Disasters don't spread through elevators - it means that if you are building rooms every two floors, you won't have to worry about the fire or radroaches spreading to other levels. It doesn't affect the rooms that are on the same level, separated with an elevator. Disasters left unattended in separated rooms will worn off automatically after some time.
 In case of a disaster, all pregnant women escape from the room
As mentioned before, pregnant women and children are not able to fight against disasters, therefore it is advised to put at least one dweller that is able to do it - he can call support and thus prevent the negative effects from spreading to other rooms.
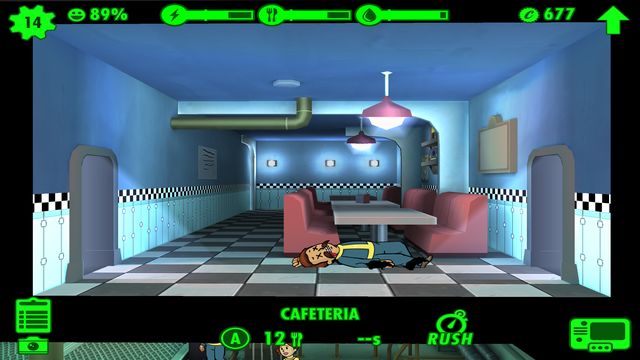 If you pay, dead dweller can be brought back to life
Dwellers are not immortal and they can be killed. When it happens, their body is laying on the floor until you remove it or pay to bring them back to life - click on the corpse to see both options. Revival costs some amount of caps and it depends on the dwellers skills and experience level. Stimpaks production and regular treatment is much cheaper option.
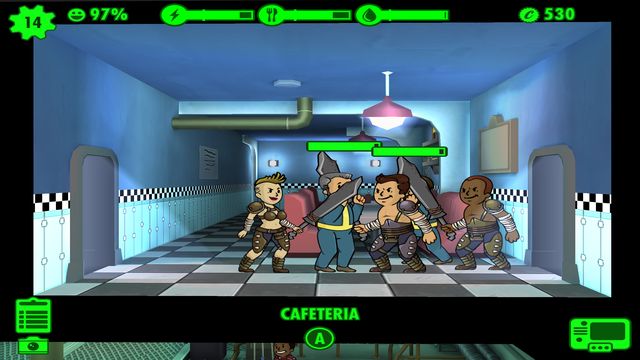 At first, raiders aren't well equipped - it changes later in the game.
Raiders' attacks are one of regular random events. You can't prevent it completely - like other disasters, raiders from time to time will visit your Vault. There are several ways to improve effectiveness of a fight with raiders and to avoid letting them steal too much of resources or to kill your dwellers. Remember that raiders develop as well and every time their attack will be more difficult to fend off.
Important: Pregnant women won't fight - they'll escape to another room so give their weapon to another dweller.
 Raiders get to the front door right after the alarm is raised so you have to organize your defense fast.
You will be informed of the attack straight away by the alarm. Group of armed enemies will appear from the wasteland. They will pound on the door to finally get in the Vault. They will search rooms and attack met dwellers. You will notice that you're losing your resources (it will start to blink on red) until you fend off the attack.
 First guardians should wait right next to the door.
In order to make your defense as effective as possible, make sure that in room next to the front door there is enough guardians equipped with the best weapon and outfits. Attackers head deeper into the Vault, exploring next levels one after another so it is important to get rid of as many of them as it is possible right after they appear at the front door (you can put some guardians there as well). This action will let you minimize losses. Generally, when distributing your weapon remember to give the best you have to those dwellers that are next to the door. You can also swap it quickly between dwellers.
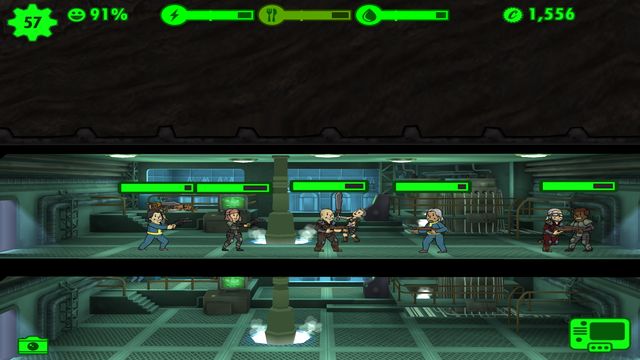 Room full of well armed dwellers is ready to fight against the raiders.
While the battle the alarms will be announced. Move your dwellers between rooms freely, they'll come back to work automatically after the fight. You should quickly move your dwellers on a battlefield and withdraw them back to safe rooms whenever they become weaker. Try to predicts the next move of your enemies and provide a good defense in a room you thinks they'll move next. The key to get rid of them fast are your well armed dwellers fighting with them from the very beginning. While fighting you can also use Stimpaks (it's always advisable to have some supply in your Vault). Just select a dweller and heal him.
 It is a good investment to strengthen the front door to impede the raiders to get in.
You can't avoid raiders attacks completely, but you can diminish the frequency of it by strengthening the front door at the beginning of the game (it costs 500 caps). It is advantageous for two reasons: firstly, attacks will happen less often, secondly, in case of an attack, stronger door demands more time to break them and get in so you will have more time to prepare your defenses. Next door improvement level is more expensive (2000 caps). If you invest that money though, raiders will attack even less often and even if it happens, you'll have enough time to prepare the defense.
On the other extremity there is a radio station. It is good to have dwellers working in it because it can attract new dwellers. On the other hand, you have to be aware that it can also attract raiders and provoke them to attack you more often.
 Raiders can steal your resources - it will be signaled by blinking red icons
To sum it all up, if you want to assure as effective protection as possible, remember:
- to strengthen the front door and put guardians next to it
- to arm your dwellers, especially ones living close to the front door
- that you can move your dwellers freely - they will get back to their work automatically when the alarm is called off
- about following the raiders' route and chasing them
- to swap the best weapon between dwellers living in next room visited by raiders
- to take away the weapon from pregnant women and hand it over to those dwellers that can make use of it.
- to use Stimpaks during the battle in order to heal your dwellers
You can produce all resources necessary to survive on your own in the Vault by assigning dwellers to the right room. Nevertheless it is not enough if you want to feel really safe. Raiders' attacks as well as disasters generate the need to possess an appropriate amount of weapons. You also need outfits to improve statistics of your dwellers. All of that you can find in lunchboxes, but most of them can be found in the wasteland.
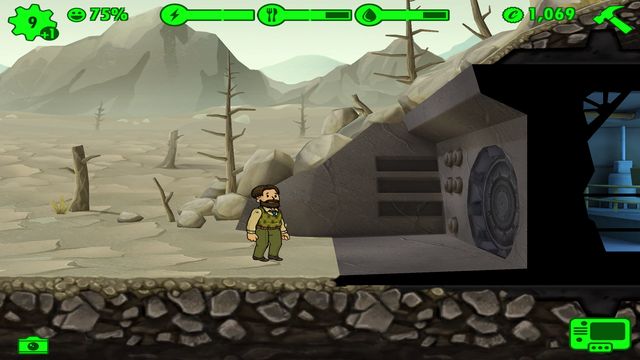
To send a dweller to explore the wasteland, drag him outside the front door and drop him there. You can give him some of Stimpaks and AntyRads. From that moment on you can't control him as much as you could when he was inside the Vault. You can check his status by selecting him from the dwellers' list or by clicking on a space outside the Vault (a list of all exploring dwellers will appear).
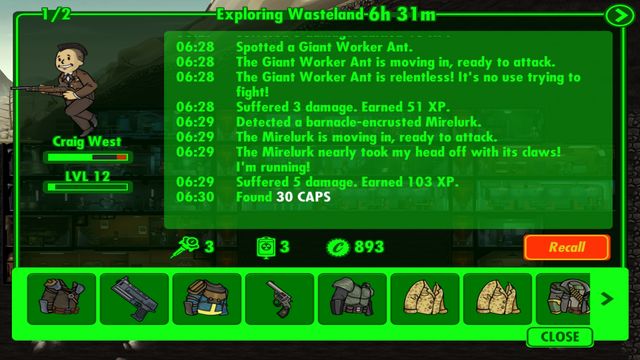 You can check the status of the exploration at any time.
The dweller that has been sent out to explore the wasteland will move on continuingly until he dies or you call him back (you can do it at any time). You also have an access to an exploration report that informs you of everything that happens to your dwellers while exploring the wasteland: defeated enemies, gained experience or found caps. You'll also see how much Stimpaks and AntiRads he has left and how many caps he'll bring back to the Vault. At the bottom you can find the most interesting details, such like all items found (weapons and outfits). In case of finding better weapon, dweller will swap it automatically.
 Remember to equip the dweller with medicines before you send him to explore the wasteland.
The longer the exploration lasts, the more dangerous enemies will your dweller meet. He will also have a bigger chance to find a better weapon. To maximize the time your dweller can live outside the Vault, make sure he has well Strength (S) and Endurance (E) statistics. Don't forget about Stimpaks and AntiRads. At the beginning of the game explorations won't last too long, but on more advanced stage medicines are essential to survive. An additional advantage is a high experience of a dweller (more life points) and happiness (L).
 Red rectangle informs you of a dweller's state
From time to time monitor the health and medicine state of an exploring dweller. Use his health indicator maximally, and call him back it when it's nearly zero. If sent dweller is equipped with Stimpaks and AntiRads, he will use it automatically in an appropriate time. If you notice that he runs out of it and that the health indicator is low, it's time to recall him to the Vault. It takes half of the time spent on exploring the wasteland and dweller can't get injured when traveling back to the Vault. When he's already back, take the report from him as well as all collected caps and items.
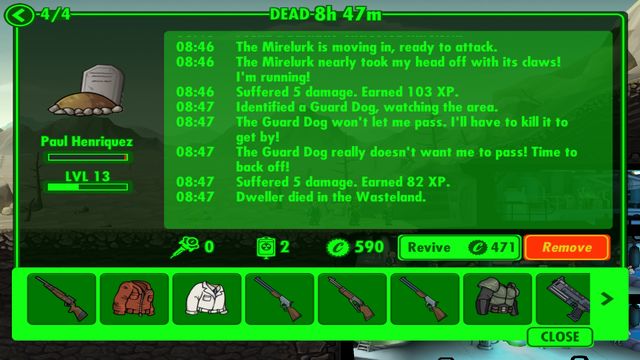 Dweller's death doesn't mean a loss of already found items - after revival he can keep on exploring.
If the dweller dies while exploration, you still can bring him to live by paying certain amount of caps. It depends on his value (experience level, statistics). Right after the revival dweller will continue the exploration, you can also recall him straight back to the Vault. You won't lose any of caps or items found by him.
To maximize the time your dwellers can spend in a wasteland (so he can bring more caps and items back to the Vault as well as get much more experience) remember:
- to send better experienced dwellers as they have more life points,
- to equip him with good weapon and outfit that improves statistics that can be useful in the wasteland (strength, endurance and happiness),
- to send the dwellers that have greater survival chances: with greater strength, endurance and luck. The luck will allow them to find more and better items.
- to provide a sufficient supply of Stimpaks and AntiRads so your dweller can heal himself (it happens automatically)
- utilize your dweller's health nearly to zero, while going back to the Vault he can't get injured
 If you are lucky, you'll find a legendary weapon in lunchbox
Dwellers need weapons primarily in order to defend themselves against raiders and radroaches infestation. Appropriate armament also allows surviving in the wasteland.
You can get weapons in several different ways:
- it can be found in the wasteland,
- it can be found in lunchboxes,
- it can be taken from legendary dwellers (when you win them from the lunchbox), you can later hand it over to other dwellers
There are a total of 139 weapons which can be obtained while exploring the Wasteland or through Cards found in Lunchoboxes: 22 can be classified as "common", 57 as "rare" and 60 as "legendary". The legendary ones are most difficult to find, however you can also get them while exploring the wasteland. It demands a high level dweller though, with highly developed skills.
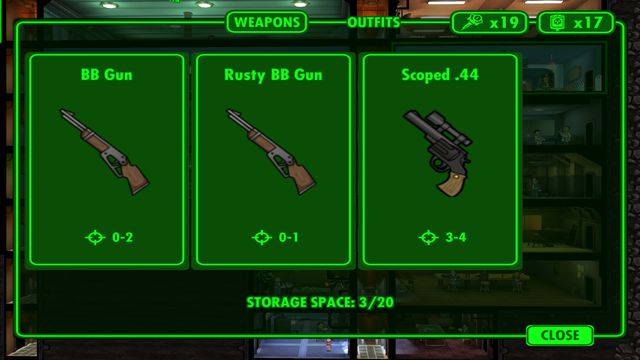 Sell useless guns (0-1 damage) to have more space in the warehouse.
Remember, that dwellers living next to the front door should be armed first as they are the first line of defense in case of the raiders attack. You can swap weapons between your dwellers freely, giving the best guns to those that need them the most. Your aim is to provide a weapon to everybody. Not equipped dwellers use a Fist which causes 0-1 damage. For this reason there is no point in storing the weapon of the same damage level as it is useless. You better sell it to gain an additional space.
 Bonus provided by an outfit is marked in blue on a dweller's profile page.
At the beginning of the game each dweller wears the same outfit. Later on, when you have more outfits, you can distribute them as you need. Each outfit improves one of S.P.E.C.I.A.L. skill of dweller wearing it. You can find information about improved skills on a dwellers profile page - green color indicates basic skills and blue color indicates those improved by an outfit. Using outfit as a fast way to improve skills can contribute to increasing productivity in work.
Each outfit can be handed over to another dweller whenever you wish. You earn it in the same way as weapons.
 Outfits let you save the time you spent on training
There are a total of 90 outfits divided into three categories: 16 "casual", 36 "rare" and 38 "legendary" ones. The higher the outfit's category is, the more skills it influences or the improvement of a single one is more significant.
Important: Bonus added to particular skill is active only while wearing the outfit. If you want to improve any skill permanently, you have to send your dwellers to the training room.
While you develop your Vault, you will have a number of objectives to achieve. Once you do it, you'll be awarded with various prices, especially caps and lunchboxes which are very precious - they contain 4 cards and at least one of them is rare. The cards provide you a lot of caps, new weapons and outfits, or even a high level dweller.
 At the beginning, prizes for achieved objectives can significantly help you in developing the Vault.
You can decide if you want to achieve the objective or not, but it is advised to do it. At one moment there are three objectives possible to work on and you can check them by using the PipBoy. Each of them contains a short description and a prize you can win if you succeed. The more difficult the objective is, the better the prize for it will be. If you're not able to meet specific requirements, you can reject one objective daily - just click on the red cross you can see next to it. When you do so, the red cross of other tasks will disappear so you can't reject any more of them. In that case you have to wait 24 hours or achieve one of other tasks to enable the next one to appear.
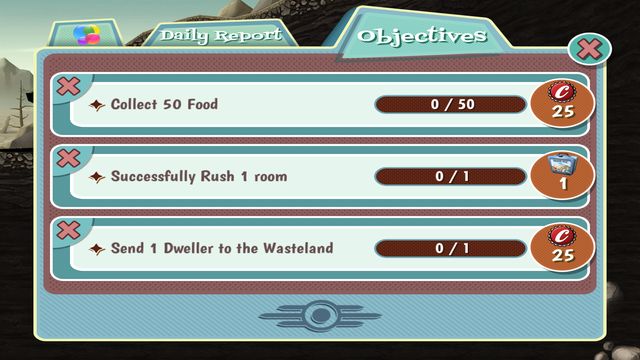 Try to achieve first objectives as soon as possible.
Try to achieve as many objectives as possible at the beginning of the game because they are still very easy on that stage, e.g. successful rush or collecting 100 water. Earned caps can be invested in building next rooms.
 You can find very good dwellers in lunchboxes.
The best prize you can win for achieving your objectives are lunchboxes containing cards with caps, weapons, outfits or new dwellers. You will receive such boxes relatively rarely so it is advised to choose these tasks that let you win one of them, even though they're more time-consuming than other ones. When you achieve the objective you can open the lunchbox (use the Pip Boy). Caps will appear on your account immediately as well as weapon or outfit in warehouse, and gained dweller will be waiting at the front door until you let him in.
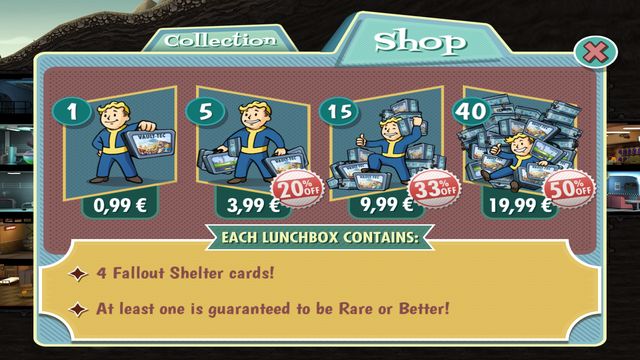 Lunchboxes can also be bought in the shop menu
Another way to get lunchboxes is to buy them. You can do it in shop menu, after using a Pip Boy.
Type of available objectives change from time to time, however with your progress in the game it will get more difficult and time consuming. Also, other requirement will change, e.g. if you're expected to "give birth to 1 baby" at the beginning, later on you'll be expected to "give birth to 10 babies" and so on.
 If your dwellers are assigned to the right work, it will increase your production.
- Assigning dwellers to the right room - choose a dweller with a right skill and assign him to the right room. You can move the dweller to another room and then move him back to the first one to achieve an objective (if he worked there before you begun the objective)
- Arming with weapons or giving an outfit - give any weapon or outfit to any dweller. You can give it to the dweller and then take it back to achieve an objective. If you're supposed to give 3 weapons, you'll need to have 3 different pop guns - using the same one for three different dwellers won't work.
- Collecting resources - you have to collect certain amount of a raw material. Just wait until the production if finished, you can repeat it several times if it's necessary. From time to time you can use a "rush" option to accelerate your work - if you succeed, the production is finished straight away.
- Collecting weapons and outfits - weapon and outfit can be found while exploring the wasteland ("Luck" is very useful while doing it) as well as in lunchboxes.
- Collecting Stimpaks - produce them in room called "Medbay".
- Improving the dwellers statistics - improving of one of S.P.E.C.I.A.L skill in one of training rooms let you achieve this objective. You gain the access to training rooms when your Vault population reaches 24 dwellers
- Merging rooms - you have to merge two small rooms in one large.
- Sending dwellers to explore the wasteland- explained in "Exploration, weapon and outfits" chapter.
- Successful "rush" your work - select the "Rush" option after pressing a specific room to try to rush its work. Check the accident risk - if it's higher than 40%, then the rush will probably fail.
Flirt leads to dance and dance leads to the bedroom.- Dancing dwellers - Flirt leads to dance and dance leads to the bedroom, which will finally lead to a pregnancy. If you don't want the woman to get pregnant, send both dwellers back to their work after the dance.
- Upgrading rooms - all explained in "Rooms" chapter.
- Increasing dwellers' satisfaction to 100% - happiness of certain number of dwellers must reach a maximum. The easiest and the fastest way to do this is to send male and female to the living room where after flirting they will go to the bedroom and the women will get pregnant - that's what is going to make her 100% happy. Slower but still effective way is to send the dweller to work that he or she likes. Their satisfaction will gradually increase.
- Extinguish the fire - you have to extinguish a certain amount of fires.
- Collecting Caps - you can do it by selling weapons and outfits, exploration of wasteland, collecting work results and training your dwellers.
- Prevention of incidents - incidents like fire, radroach infestation or raiders attacks. Just send your dwellers to fight against these disasters to gradually achieve this objective.
- Giving birth to new children - there is a certain number of new born babies that have to be reached.
- Pregnant women- you have to make certain number of women pregnant. Those that are pregnant before you get the task are not included.
- Increasing the experience level of your dwellers - each dweller has an experience indicated by a line. You can check it by clicking on a dwellers profile. When the bar fills in 100%, the dweller moves to next level. It will be announced by an icon over his head - all you have to do is click on it.
- Killing your enemies while exploring the wasteland - the longer our dweller is in the wasteland, the more enemies he can kill so remember to provide him with Stimpaks and AntiRads when sending for exploration.
 Enhanced door provides you with more time to prepare the defense in case of raiders attack.
Having completed the tutorial, there won't be too many rooms and dwellers in your Vault. Use this time to build basic rooms designed for the recourses production. It is advised to invest in "Medbay" and Stimpaks production as well. It is very important to get some weapons at the beginning of the game so you're able to fend off the raiders' attack. Send one of your best dwellers to explore the wasteland to get basic equipment.
 Once chosen strategy should be continued consequently.
The second stage of the Vault development is to reach 20 dwellers of its population. That will unlock your radio station. This room is very beneficial, make sure though that before you invest in it, you focus on a development of merged rooms producing resources. Develop slowly, but consequently. You don't have to build all possible rooms straight away. What's important on that stage is to find weapons and outfits as well as to enlarge your population by using the radio station or by causing "baby boom".
 It takes some time to generate the radio signal and not always it ends up with a success.
When you get to the stage that your room produces enough or even more than enough of resources, you can start to train your dwellers. Thanks to that you can influence the effectiveness of their work and in effect, you'll get resources much faster than before. That will enable you to build next rooms and to enlarge the population. If there are too many dwellers in your Vault, don't hesitate to send them to explore the wasteland - even weaker ones are able to find some weapons and outfits out there. Send stronger dwellers to longer exploration with better equipment.
 Remember to leave some space for new rooms.
If you possess sufficient supply of resources and well equipped dwellers, you can start to invest in building new rooms. Allocate caps for improving rooms and building new ones to merge them in the future and - if you need - make your rooms as large as possible. Sometimes it is better to leave space to expand the Vault in the future and move with other room to lower level. Expanding is expensive because the lower down you move, the more you pay for removing rocks, include this fact in your expenses. When you unlock more productive rooms, start to invest in them.
 Reaching 100 dwellers unlocks the last rooms.
Reaching 100 dwellers unlocks all of possible rooms in the Vault. Further expansion should proceed consequently according to the well-trodden path. It is advised to put impact on dwellers' training so every next generation has better statistics.
The final goal is not clearly defined - it can be to reach a maximum number of dwellers, to build the entire Vault or to collect all possible outfits, weapons and legendary dwellers. The game will process the same way all the time, remember to continuously strengthen your defense because raiders will gradually get better weapon.


 Fallout 3: Operation Anchorage Game Guide & Walkthrough
 F.3.A.R. Game Guide & WalkthroughFinal Fantasy XII Game Guide & Walkthrough
 Farming Simulator 2013 Game Guide & Walkthrough
 Far Cry 4 Game Guide & Walkthrough