


Welcome to the unofficial guide to the first downloadable add-on to Fallout 3, titled Project Anchorage. This guide has been divided into two parts. The first part consists of a very detailed walkthrough of all four quests of the game. I've also described how to activate the add-on properly and what kind of rewards you can get for completing it. The second chapter of the guide contains a detailed map of the Anchorage area, as well as a lot of info on how to collect all the bonuses. Good luck and have fun playing the game!
Stranger
Make sure that Project Anchorage has been installed properly on your computer and you'll also have to activate it from the game's autostart. You don't have to use savegames from the final moments of the game, because it's entirely possible to complete Project Anchorage using a character who just left Vault 101 after completing the tutorial section. I would recommend that you play using a fresh character, because not only you'll advance at least five levels of experience but you'll also gain possession of a lot of useful items. As a result you'll have an easier job continuing with the main quests and the exploration of Capitol Wasteland.
Start the game and begin exploring Capitol Wasteland as you would have normally. Obviously if you're playing as a character on the second level of experience (just after leaving Vault 101) you'll have to be extremely careful. The main reason is that you may die if you encounter too powerful creatures. If this is your fresh start, begin by moving towards Megaton, because that's going to be the first location marked on your map. If you have already spent a lot of time exploring Capitol Wasteland and gaining experience points, fast travel to Red Racer Factory. You'll have to wait 2-3 minutes before you're presented with a short message on your screen. Also - notice that an Outcast Distress Signal has been added to the list of your radio stations [#1]. Obviously you should choose the signal from the list in order to listen to a short radio transmission.
![[#1] - Activating the DLC - Prologue - Fallout 3: Operation Anchorage - Game Guide and Walkthrough](https://game.lhg100.com/Article/UploadFiles/201512/2015121518495707.jpg)
[#1]
Received from: automatically during the exploration of Capitol Wasteland [Capitol Wasteland]
Solution: Make sure you've read the message and now you'll have to go to the area where it's being transmitted from. This new location is going to be automatically marked on your personal map and the easiest way to get there is to fast travel to Red Racer Factory. If you haven't discovered the factory yet, you should consider beginning your journey near Megaton. Go through the ruins when you get to your destination and locate a building with a small door [#2]. Open the door and confirm that you want to travel to Bailey's Crossroads Metro.
![[#2] - QUEST 1: Aiding the Outcasts - part 1 - Prologue - Fallout 3: Operation Anchorage - Game Guide and Walkthrough](https://game.lhg100.com/Article/UploadFiles/201512/2015121518495715.jpg)
[#2]
MAP OF THE METRO TUNNELS:

Map legend: 1 - entrance to the metro tunnels; 2 - area where you encounter two feral ghouls; 3 - tunnel leading to the exit; 4 - exit to: Bailey's Crossroads Station
Thankfully the metro tunnels aren't too large and you'll only encounter two monsters while trying to explore the area. Start off by moving north and you'll find a Nuka-Cola machine along the way. Turn east and eventually you'll get to a larger area which is being occupied by two feral ghouls [#3]. Killing the beasts shouldn't be a major problem, even if you're using a 10mm pistol taken from Vault 101.
![[#3] - QUEST 1: Aiding the Outcasts - part 1 - Prologue - Fallout 3: Operation Anchorage - Game Guide and Walkthrough](https://game.lhg100.com/Article/UploadFiles/201512/2015121518495724.jpg)
[#3]
Kill all the beasts. You can now decide to spend some time exploring the metro tunnels or you can proceed to the eastern corridor, leading to the exit. If you decide to explore the tunnels, you should get to the north-western corner of the biggest room. You'll find a lot of useful items here, including drugs (jet and buffout), 5.56 ammo, Rad-X and a stimpak. Additionally - if you manage to get through the debris you'll get to a small stash with a BB gun. When you think you've spent enough time here, proceed to the eastern tunnel [#4] and after a short walk you'll get to a metal gate leading to Bailey's Crossroads Station.
![[#4] - QUEST 1: Aiding the Outcasts - part 1 - Prologue - Fallout 3: Operation Anchorage - Game Guide and Walkthrough](https://game.lhg100.com/Article/UploadFiles/201512/2015121518495754.jpg)
[#4]
When you get to the surface you won't have to spend additional time trying to explore this area, because you'll be surrounded by invisible walls (debris) from almost all directions. Use the stairs to get to the upper level. Notice a few outcasts in front of you. They will be fighting centaurs and supermutants as we speak [#5] and frankly you won't have to do a thing to help them. The only exception is when you're already playing as a more advanced character and you want to gain additional experience points. Otherwise remain in the back and wait for this battle to end. You can now spend some time looting supermutant bodies and you'll gain possession of a few hunting rifles, as well as .32 calliber rounds.
![[#5] - QUEST 1: Aiding the Outcasts - part 1 - Prologue - Fallout 3: Operation Anchorage - Game Guide and Walkthrough](https://game.lhg100.com/Article/UploadFiles/201512/2015121518495772.jpg)
[#5]
Like I've already said, ignore your surroundings and focus only on getting to your current destination. Start off by moving south-west and eventually you'll get to the outcasts. You should now begin following them. Each time a new battle has started move to the back and allow the outcasts to deal with hostile units. This is especially important when you get to a much larger area [#6], because some of the supermutants are going to be using miniguns. Obviously you should be on a look out for items of great value. You should also check bodies of fallen outcasts, because they'll be wearing power armors and they'll be using energy weapons, including laser pistols. Be careful not to fall down in the big room, because there's a lot of radiation around the barrels.
![[#6] - QUEST 1: Aiding the Outcasts - part 1 - Prologue - Fallout 3: Operation Anchorage - Game Guide and Walkthrough](https://game.lhg100.com/Article/UploadFiles/201512/2015121518495757.jpg)
[#6]
There are also going to be smaller gifts waiting for you in the surrounding area, including first aid posts on the walls. Eventually you'll have to get to an area where you'll be allowed to talk to Defender Morrill [#7]. This outcast will take special attention in your Pip-Boy and you'll be informed that his colleagues will be interested in using it. If this is an early stage of the game, you can ask Morrill about your father's whereabouts, but he won't have an answer for you. Instead he'll tell you to go and talk to his superior - Protector McGraw.
![[#7] - QUEST 1: Aiding the Outcasts - part 1 - Prologue - Fallout 3: Operation Anchorage - Game Guide and Walkthrough](https://game.lhg100.com/Article/UploadFiles/201512/2015121518495775.jpg)
[#7]
Notice that new battles have begun behind you. Some of the outcasts are attacking a new wave of supermutants. I wouldn't recommend staying here or trying to help them, because you would only lose health and ammunition. Instead proceed to the lower level and turn right. There's an elevator here [#8] and you'll have to use it by pressing one of the buttons. Wait for the elevator to take you to an Outcast Outpost.
![[#8] - QUEST 1: Aiding the Outcasts - part 1 - Prologue - Fallout 3: Operation Anchorage - Game Guide and Walkthrough](https://game.lhg100.com/Article/UploadFiles/201512/2015121518495772.jpg)
[#8]
MAP OF THE OUTCAST OUTPOST:
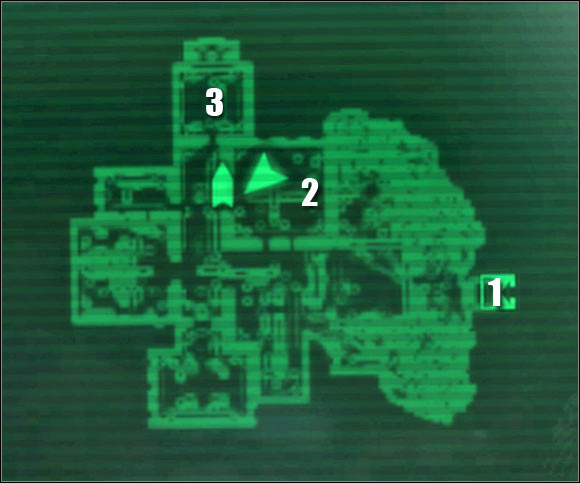
Map legend: 1 - entrance to the Outcast Outpost; 2 - area where you'll meet Protector McGraw; 3 - simulation pod
Wait for the elevator to reach the base and listen to Defender Sibley's instructions. Thankfully you won't have to follow him right away. Instead you should spend some time exploring the base. Start off by going towards the northern stash. Open the door, turn right and pick up the first crate. This will allow you to uncover the second crate [#9] and you'll find some drugs inside it. Obviously you should take them.
![[#9] - QUEST 1: Aiding the Outcasts - part 2 - Prologue - Fallout 3: Operation Anchorage - Game Guide and Walkthrough](https://game.lhg100.com/Article/UploadFiles/201512/2015121518495893.jpg)
[#9]
Go back to the main room and proceed to the next corridor. When you get to a much brighter area look for a passageway to the south [#10]. Use the stairs to get to the upper level. You can now go to the balcony with some defense turrets or you can go to a small room protected by a door. There are a few valuable items inside, including buffout, assault rifle, 5.56 ammo and power fist. You may return to the ground level.
![[#10] - QUEST 1: Aiding the Outcasts - part 2 - Prologue - Fallout 3: Operation Anchorage - Game Guide and Walkthrough](https://game.lhg100.com/Article/UploadFiles/201512/2015121518495832.jpg)
[#10]
Proceed to the end of the hall and inspect a medium size generator room which is located in front of you [#11]. Ignore one of the outcasts, because you won't have to get his permission to explore the area. Proceed to the back room and find a medical cabinet. There are also some fission batteries here, as well as mentats. Go back to the main corridor once again.
![[#11] - QUEST 1: Aiding the Outcasts - part 2 - Prologue - Fallout 3: Operation Anchorage - Game Guide and Walkthrough](https://game.lhg100.com/Article/UploadFiles/201512/2015121518495862.jpg)
[#11]
Finally you should inspect a door located to the left. One of the outcasts is sitting next to it [#12]. Notice that the lock requires you to use a bobby pin, but thankfully opening the door won't attract the attention of the outcasts. The lock itself is very weak, so you can try opening the door even if you've just started the game. The room contains a body of one of Gary's clones, but you'll also find two medical cabinets here, as well as a few Med-X injectors.
![[#12] - QUEST 1: Aiding the Outcasts - part 2 - Prologue - Fallout 3: Operation Anchorage - Game Guide and Walkthrough](https://game.lhg100.com/Article/UploadFiles/201512/2015121518495818.jpg)
[#12]
You can now move to the largest room of the base, because Protector McGraw is already waiting for you there [#13]. Listen to a short introduction after which you'll be allowed to talk to him. This conversation can only end in one way, so it's up to you whether you want to polite or hostile towards him. You can also trigger additional dialogue lines if you have a high intelligence and perception. Mention the possibility of receiving a reward if you want to. McGraw will finally ask you to finish a simulation for him, because apparently it's the only way to gain access to the armory.
![[#13] - QUEST 1: Aiding the Outcasts - part 2 - Prologue - Fallout 3: Operation Anchorage - Game Guide and Walkthrough](https://game.lhg100.com/Article/UploadFiles/201512/2015121518495872.jpg)
[#13]
Once you've ended your conversation with McGraw you should spend some time exploring the room he was standing in. You'll find a laser pistol here, as well as drugs, medical supplies, combat shotgun and hunting rifles. When you're ready proceed to the northern room and talk to Specialist Olin when you get there [#14]. You can ask here about the details of the simulation if you want to, however it's optional.
![[#14] - QUEST 1: Aiding the Outcasts - part 2 - Prologue - Fallout 3: Operation Anchorage - Game Guide and Walkthrough](https://game.lhg100.com/Article/UploadFiles/201512/2015121518495885.jpg)
[#14]
In order to begin the simulation you must first wear a neural interface suit you've received from Specialist Olin. Open your inventory and choose this object from the list. You can now finally approach the large pod located in the center of the room [#15]. Press the action key twice - firstly to open the pod and secondly to take a seat in the chair. Get ready to be transported to Anchorage, Alaska!
![[#15] - QUEST 1: Aiding the Outcasts - part 2 - Prologue - Fallout 3: Operation Anchorage - Game Guide and Walkthrough](https://game.lhg100.com/Article/UploadFiles/201512/2015121518495877.jpg)
[#15]
Received from: automatically upon completion of Aiding the Outcasts [Outcast Outpost]
Solution: Remember that you'll be dealing with similar progress to your trip to Tranquility Lane from the main game. This means the simulation has its own rules and you won't be allowed to use your equipment from the real world. You'll also have to acknowledge a few small changes and I'll tell you more about them when we'll get down to business. Don't forget about McGraw's warning - if you die in the simulator you'll die in the real world as well.
Wait to be transported to the first area of the simulator and listen to a short conversation with Sergeant Benjamin Montgomery [#16]. You should also spend some time analyzing your new equipment. You'll be given a few interesting items, including a silenced 10mm pistol, three explosive charges, winterized combat armor and helmet, Stealth Boy, trench knife and 50 bobby pins. You should choose the pistol from your inventory from obvious reasons. Proceed to the east.
![[#16] - QUEST 2: The Guns of Anchorage - part 1 - Simulation - Fallout 3: Operation Anchorage - Game Guide and Walkthrough](https://game.lhg100.com/Article/UploadFiles/201512/2015121518495819.jpg)
[#16]
You won't have to act stealthy here, however in some situations this may help you in getting rid of your enemies much easier. The first Chinese soldier you'll encounter [#17] should be killed from a relatively large distance. Prevent him from firing back, because otherwise you'll probably have to deal with his colleague. The second soldier will arrive from the left. Also - notice that you won't be allowed to inspect bodies of fallen enemies, because they'll disappear soon after they're shot. Thankfully you won't have any problems finding enough ammunition. Proceed to the platform where the first killed soldier was standing.
![[#17] - QUEST 2: The Guns of Anchorage - part 1 - Simulation - Fallout 3: Operation Anchorage - Game Guide and Walkthrough](https://game.lhg100.com/Article/UploadFiles/201512/2015121518495868.jpg)
[#17]
You must now locate a medium size item called a health dispenser [#18]. You will have to use these objects instead of standard stimpaks to heal your character. Thankfully you won't have to pay for the healing and you'll be allowed to use each dispenser as many times as you need to. Refill your health bar and proceed to the stairs. Be careful, because you're going to be attacked by a second soldier near the draw bridge. You should consider using the V.A.T.S. system while fighting at a close range, however a lot will depend on how many points you've spent on the Small Guns skill.
![[#18] - QUEST 2: The Guns of Anchorage - part 1 - Simulation - Fallout 3: Operation Anchorage - Game Guide and Walkthrough](https://game.lhg100.com/Article/UploadFiles/201512/2015121518495980.jpg)
[#18]
Obviously you must now use the large draw bridge to get to the other side of the canyon. When you arrive at the new location turn right and proceed towards the stairs. Keep heading upwards but slow down near the end. There's a Chinese soldier patrolling the upper platform and you'll have to get rid of him. Turn right and you'll find a small stash nearby [#19]. Use a new health dispenser and take two items - a mine and a sniper rifle. Make sure to create shortcuts to the new additions to your inventory, because you'll want to change your active arsenal often.
![[#19] - QUEST 2: The Guns of Anchorage - part 1 - Simulation - Fallout 3: Operation Anchorage - Game Guide and Walkthrough](https://game.lhg100.com/Article/UploadFiles/201512/2015121518495991.jpg)
[#19]
Return to the upper platform. You must remain careful here, because new Chinese soldiers have arrived in the area. Enemy soldier will cross the draw bridge and the path you've used to get here. I would strongly recommend that you surprise them before they get to your platform [#20]. Don't forget that it's wise to use the scope when firing a sniper rifle. Aim for their heads and don't leave this area until they've been eliminated. You may proceed to the north.
![[#20] - QUEST 2: The Guns of Anchorage - part 1 - Simulation - Fallout 3: Operation Anchorage - Game Guide and Walkthrough](https://game.lhg100.com/Article/UploadFiles/201512/2015121518495977.jpg)
[#20]
When you get to a new room start off by killing three enemy soldiers. One of them will be standing directly in front of you (small balcony) and the remaining two can be found to your left (large pipe). Make sure they've been killed and spend some time looking around. There are a few valuable items here, including mines, grenades and a chinese assault rifle. You should also use an ammo dispenser [#21]. It works identically to the health dispenser, but it refills ammo supplies for your most common weapons.
![[#21] - QUEST 2: The Guns of Anchorage - part 1 - Simulation - Fallout 3: Operation Anchorage - Game Guide and Walkthrough](https://game.lhg100.com/Article/UploadFiles/201512/2015121518495992.jpg)
[#21]
You may now proceed to the only available exit. Keep heading towards the large pipe where two enemy soldiers were standing just before you killed them. Move to the center of the pipe, turn around and use a destroyed draw bridge to get to the upper platform [#22]. You'll find only a Stealth Boy there, so you should go to that location only if you're planning on using these items regularly. Go back down and proceed forward. Turn right when you reach a new cliff.
![[#22] - QUEST 2: The Guns of Anchorage - part 1 - Simulation - Fallout 3: Operation Anchorage - Game Guide and Walkthrough](https://game.lhg100.com/Article/UploadFiles/201512/2015121518495904.jpg)
[#22]
Keep heading forward. You will notice an enemy soldier standing on a new large pipe in the distance [#23]. Get closer to him and then use your sniper rifle to get rid of him with a single shot. Keep heading upwards and be careful, because you'll encounter at least two other Chinese soldiers along the way. I would recommend using frag grenades and a Chinese assault rifle to get rid of them. When they're gone, use a door leading to Cave Outpost.
![[#23] - QUEST 2: The Guns of Anchorage - part 2 - Simulation - Fallout 3: Operation Anchorage - Game Guide and Walkthrough](https://game.lhg100.com/Article/UploadFiles/201512/2015121518495994.jpg)
[#23]
Make sure to take some time to familiarize yourself with updated orders. Proceed forward and get to a large cave. Notice an allied paratrooper being slaughtered by two Chinese soldiers. Kill them using frag grenades and an assault rifle. When they're gone take your time to find a Gauss rifle lying on the ground [#24]. Take this item and create a shortcut for it.
![[#24] - QUEST 2: The Guns of Anchorage - part 2 - Simulation - Fallout 3: Operation Anchorage - Game Guide and Walkthrough](https://game.lhg100.com/Article/UploadFiles/201512/2015121518495942.jpg)
[#24]
Turn around and focus on finding a small alcove [#25]. There's a new health dispenser inside. You'll also find a few interesting items here, including landmines, frag grenades, Chinese assault rifle and microfusion cells for the Gauss rifle. Make sure to take the cells, because you won't be allowed to use ammo dispensers to refill ammo supplies for this particular weapon. Exit the alcove and proceed towards the stairs. Get to the upper level and notice a single enemy soldier in front of you. Kill him using a sniper rifle.
![[#25] - QUEST 2: The Guns of Anchorage - part 2 - Simulation - Fallout 3: Operation Anchorage - Game Guide and Walkthrough](https://game.lhg100.com/Article/UploadFiles/201512/2015121518495952.jpg)
[#25]
You must now find a narrow passageway leading to the upper sections of the cave system [#26]. Eventually you'll have to get to a small corridor. Keep heading forward and when you enter a new room you'll meet Montgomery. Engage him in a conversation and make sure to ask him for supplies. Montgomery will give you 50 5.56mm rounds, 60 10mm rounds and 10 microfusion cells. End the conversation and notice that from now he'll be following your lead.
![[#26] - QUEST 2: The Guns of Anchorage - part 2 - Simulation - Fallout 3: Operation Anchorage - Game Guide and Walkthrough](https://game.lhg100.com/Article/UploadFiles/201512/2015121518495998.jpg)
[#26]
Notice a door exploding near where you and Montgomery are standing. Proceed to a new corridor and eventually you'll get to a door leading to the Cliffs. Exit the cave system and listen to Montgomery's warning. Don't even think about sliding down. Instead turn left and find a small passageway between the rocks [#27]. Approach the first group of enemy soldiers and allow Montgomery to attack them. Kill one of the soldiers yourself if it's going to take him too long to dispose of enemy troops.
![[#27] - QUEST 2: The Guns of Anchorage - part 2 - Simulation - Fallout 3: Operation Anchorage - Game Guide and Walkthrough](https://game.lhg100.com/Article/UploadFiles/201512/2015121518495979.jpg)
[#27]
Proceed to the level where some of the enemy soldiers were stationed. Turn right and notice a single Chinese soldier standing on a large pipe. Kill him and focus on getting to his location. You must move to the lower level and eventually you'll find a path leading to the pipe [#28]. You'll now have to get to a small hut located in the distance. Enter the hut and use a health dispenser. Ignore the radio. Instead try breaking into the left room. Open the lock and confirm that you want to enter a Field Storage.
![[#28] - QUEST 2: The Guns of Anchorage - part 2 - Simulation - Fallout 3: Operation Anchorage - Game Guide and Walkthrough](https://game.lhg100.com/Article/UploadFiles/201512/2015121518500017.jpg)
[#28]
Approach the table when you're inside the storage and notice a new radio. The most important thing is to collect the first briefcase [#29]. There are ten of these objects hidden in the simulator and you'll be rewarded with a perk for collecting all of them. Use a computer terminal if you want to and you'll be allowed to run a decryption program. There's also a holotape here (bombardment). Exit the Field Storage and go back to the large platform where you and Montgomery fought off Chinese soldiers. Start moving forward.
![[#29] - QUEST 2: The Guns of Anchorage - part 2 - Simulation - Fallout 3: Operation Anchorage - Game Guide and Walkthrough](https://game.lhg100.com/Article/UploadFiles/201512/2015121518500032.jpg)
[#29]
Be careful, because you'll encounter a single soldier along the way. He'll appear to your right and you should use an assault rifle instead of grenades to get rid of him. The next group of Chinese soldiers will appear in front of you, but not right away. Use the sniper rifle to dispose of more distant targets and use a draw bridge when the enemy forces have been killed [#30]. Choose a grenade from your inventory before you get to the other side.
![[#30] - QUEST 2: The Guns of Anchorage - part 3 - Simulation - Fallout 3: Operation Anchorage - Game Guide and Walkthrough](https://game.lhg100.com/Article/UploadFiles/201512/2015121518500088.jpg)
[#30]
Turn left quickly when you get off the draw bridge, because enemy soldiers will arrive in this area. I would strongly recommend using grenades to kill at least one of them. After that switch to a sniper rifle and deal with the remaining forces. Don't go to their location just yet. Instead look around and find a new Field Storage [#31]. Brake the lock and enter the new area. Find a second briefcase inside, as well as a holotape - goodbye. Exit the Field Storage and proceed towards the building which was being defended by enemy troops.
![[#31] - QUEST 2: The Guns of Anchorage - part 3 - Simulation - Fallout 3: Operation Anchorage - Game Guide and Walkthrough](https://game.lhg100.com/Article/UploadFiles/201512/2015121518500015.jpg)
[#31]
Proceed to a new corridor and keep moving forward. You'll find a new ammo dispenser after a short walk. Don't forget to collect other items located near the dispenser, including landmines, frag grenades and microfusion cells. You may proceed to the next section. Ignore the main exit from the tunnels, because you would put yourself in a very uncomfortable position. You could start running with the Stealth Boy engaged, however I wouldn't even recommend trying. Instead turn right and find a small door [#32]. Confirm that you want to go to Cave Passage.
![[#32] - QUEST 2: The Guns of Anchorage - part 3 - Simulation - Fallout 3: Operation Anchorage - Game Guide and Walkthrough](https://game.lhg100.com/Article/UploadFiles/201512/2015121518500010.jpg)
[#32]
When you get to the new section of the caves get ready to kill a Chinese soldier. He will appear in front of you [#33] and you must kill him before he starts firing back. When he's gone use the stairs to get to the upper levels. Eventually you'll have to get to a new door, leading back to the Cliffs. Once you've reached the surface press the crouch key and take cover behind the nearest object.
![[#33] - QUEST 2: The Guns of Anchorage - part 3 - Simulation - Fallout 3: Operation Anchorage - Game Guide and Walkthrough](https://game.lhg100.com/Article/UploadFiles/201512/2015121518500049.jpg)
[#33]
The problem of enemy units firing at you can be solved using at least two different approach methods. You can remain here and start using the sniper rifle, but you would have to be very precise. I would recommend that you begin moving towards them. Don't forget that you can activate a Stealth Boy to increase your chances of success. You won't be fully invisible, but you won't receive as many hits as would have without using it. Head on towards the closer bunker. Use the stairs and kill the Chinese soldiers after entering it [#34]. There's a health dispenser here.
![[#34] - QUEST 2: The Guns of Anchorage - part 3 - Simulation - Fallout 3: Operation Anchorage - Game Guide and Walkthrough](https://game.lhg100.com/Article/UploadFiles/201512/2015121518500053.jpg)
[#34]
You may exit the first bunker. Proceed to your right, but remain on the upper platform for as long as possible. Jump down only when you're close enough to the second bunker. There are more enemy troops inside. You can kill them with your assault rifle [#35] or you can hack into a nearby computer terminal in order to reprogram the security turret. Sadly you must have spent at least 50 points in Science in order for this action to succeed. If you weren't able to take over the turret, you'll have to destroy it using a Gauss rifle or frag grenades.
![[#35] - QUEST 2: The Guns of Anchorage - part 3 - Simulation - Fallout 3: Operation Anchorage - Game Guide and Walkthrough](https://game.lhg100.com/Article/UploadFiles/201512/2015121518500021.jpg)
[#35]
Leave the second bunker and proceed directly to the main entrance to the facility, leading to Chinese Artillery Outpost. Once inside consider using a new Stealth Boy and go to your left. You'll have to take out a few Chinese soldiers located in front of you [#36]. One of the enemy units will be standing in front of you and the rest can be found on the upper balconies. Once they're gone head down and go east.
![[#36] - QUEST 2: The Guns of Anchorage - part 3 - Simulation - Fallout 3: Operation Anchorage - Game Guide and Walkthrough](https://game.lhg100.com/Article/UploadFiles/201512/2015121518500002.jpg)
[#36]
Be careful, because you're going to be attacked by new Chinese units here. You'll be fighting them at a close range and this is a small room, so you should consider using landmines and frag grenades to take them out. Once they're gone explore the room and you'll come across two dispensers [#37]. There are also valuable supplies here, including a sniper rifle, mines, grenades, rockets and cells. Use the stairs located next to the dispensers.
![[#37] - QUEST 2: The Guns of Anchorage - part 4 - Simulation - Fallout 3: Operation Anchorage - Game Guide and Walkthrough](https://game.lhg100.com/Article/UploadFiles/201512/2015121518500058.jpg)
[#37]
You now have two options. If you're planning on collecting all the briefcases, you must travel to your left. Eventually you'll get to a small door [#38]. Be careful, because there are enemy units nearby and you may attract their attention. Use a bobby pin to open the door and enter a small room. Collect the third briefcase, as well as a Stealth Boy and a holotape - invasion. Once this is done go back to the stairs.
![[#38] - QUEST 2: The Guns of Anchorage - part 4 - Simulation - Fallout 3: Operation Anchorage - Game Guide and Walkthrough](https://game.lhg100.com/Article/UploadFiles/201512/2015121518500153.jpg)
[#38]
If you want to focus only on completing the main objective, start moving forward after you use the stairs. You'll notice a few Chimera tanks to your right, but thankfully the soldiers won't see you. Instead focus on securing the area in front of you [#39]. You'll be dealing with fairly large groups, so be careful and try to eliminate enemy soldiers from a large distance. Keep heading forward until you've reached a new ammo dispenser. Refill your ammo stock and collect typical supplies - mines, grenades, rockets and cells.
![[#39] - QUEST 2: The Guns of Anchorage - part 4 - Simulation - Fallout 3: Operation Anchorage - Game Guide and Walkthrough](https://game.lhg100.com/Article/UploadFiles/201512/2015121518500172.jpg)
[#39]
You should now spend some time trying to open the left door. You can use a bobby pin like you've used to so far or you can hack into a nearby security terminal [#40]. If you decide to use the computer you'll have to solve a well-known hacking mini game, requiring you to find out the correct password. The room you're trying to get into contains the fourth briefcase, as well as a grenade and a computer with some interesting data on it. Exit the room and proceed towards the stairs.
![[#40] - QUEST 2: The Guns of Anchorage - part 4 - Simulation - Fallout 3: Operation Anchorage - Game Guide and Walkthrough](https://game.lhg100.com/Article/UploadFiles/201512/2015121518500114.jpg)
[#40]
Get ready to defeat new enemy soldiers upon reaching the upper level. Just as before, you should be using a sniper rifle, so they won't get too close to you. Thankfully you can always go back to the ammo dispenser if you run out of ammo for the sniper rifle. As for this level, you'll find grenades and a health dispenser nearby. Keep pushing forward and begin attacking the next group stationed just around the corner [#41]. I would recommend that you allow Montgomery to kill some of your foes, but you can also use frag grenades and a Chinese assault rifle to eliminate them on your own.
![[#41] - QUEST 2: The Guns of Anchorage - part 4 - Simulation - Fallout 3: Operation Anchorage - Game Guide and Walkthrough](https://game.lhg100.com/Article/UploadFiles/201512/2015121518500192.jpg)
[#41]
You can go to the area where some of the enemy troops were defending themselves if you want to and in one of the corners you'll find a health dispenser. Otherwise use the stairs to get to the upper balconies. Turn right once you've reached a junction and use a bobby pin to open a new door [#42]. Sadly you won't find any new briefcases inside and the only item worth of your interest is going to be a holotape - overrun. Go back to the main corridor and proceed towards the unexplored corridor.
![[#42] - QUEST 2: The Guns of Anchorage - part 4 - Simulation - Fallout 3: Operation Anchorage - Game Guide and Walkthrough](https://game.lhg100.com/Article/UploadFiles/201512/2015121518500143.jpg)
[#42]
You'll have to kill one more enemy soldier along the way which shouldn't be a big problem. Eventually you'll get to a room with new dispensers and standard supplies (mines, grenades, cells, rockets). Keep heading forward, but make a step when you're close enough to a new warehouse [#43]. Choose a Gauss rifle from your inventory and enter the warehouse carefully. Notice enemy units falling from the ceiling. They'll be using camouflage to hide themselves the second they touch the ground.
![[#43] - QUEST 2: The Guns of Anchorage - part 4 - Simulation - Fallout 3: Operation Anchorage - Game Guide and Walkthrough](https://game.lhg100.com/Article/UploadFiles/201512/2015121518500116.jpg)
[#43]
You shouldn't be in a lot of hurry here, because you may lose a lot of health if you make a mistake. There are three concealed opponents for you to eliminate. Each time you should use your radar to locate them. At first they'll appear as green icons, but they'll change to red when you're close enough to them. Use the Gauss rifle to kill each soldier [#44]. Thankfully the first hit should stun him for a while, so you'll have plenty of time to reload your weapon. Use this method to dispose of all three soldiers.
![[#44] - QUEST 2: The Guns of Anchorage - part 5 - Simulation - Fallout 3: Operation Anchorage - Game Guide and Walkthrough](https://game.lhg100.com/Article/UploadFiles/201512/2015121518500169.jpg)
[#44]
Once you've secured the warehouse use one of the stairs to get to the upper balconies. Thankfully you won't encounter any new soldiers for the time being. Instead focus only on getting to an exit [#45]. Keep heading forward and you'll get to new dispensers, as well as standard supplies (mines, cells, rockets and grenades). Use the nearby door to get to Artillery Overlook.
![[#45] - QUEST 2: The Guns of Anchorage - part 5 - Simulation - Fallout 3: Operation Anchorage - Game Guide and Walkthrough](https://game.lhg100.com/Article/UploadFiles/201512/2015121518500126.jpg)
[#45]
You'll finally be given a chance to focus on completing the main objective of this quest which is going to be the destruction of all three guns. You should know that this area is built like a circle, so you'll be allowed to go left or right upon reaching the first junction. This will change the sequence in which two out of three guns are going to be destroyed. I would recommend that you start off by going left, because you'll only have to kill one soldier here [#46]. Still, he's well placed, so must be careful in order to avoid sustaining major injuries.
![[#46] - QUEST 2: The Guns of Anchorage - part 5 - Simulation - Fallout 3: Operation Anchorage - Game Guide and Walkthrough](https://game.lhg100.com/Article/UploadFiles/201512/2015121518500150.jpg)
[#46]
Watch out for an enemy sniper. He will appear on the upper balcony and you must get rid of him before he starts firing at you. Thankfully there's a health dispenser nearby. You should also find a path located near the passageway you've just used [#47]. A second sniper will be hiding to your right. Kill him and proceed towards the dispensers. Once you've regenerated health and received ammo don't forget to take grenades and cells.
![[#47] - QUEST 2: The Guns of Anchorage - part 5 - Simulation - Fallout 3: Operation Anchorage - Game Guide and Walkthrough](https://game.lhg100.com/Article/UploadFiles/201512/2015121518500132.jpg)
[#47]
Go back to the area where you've killed the first standard opponent and begin moving forward. The passageway to the first gun is located to the right of the health dispenser. Watch out when you get to the stairs, because a third sniper will reveal his position above yours. You'll also have to watch out for a soldier equipped with a flamethrower [#48]. Kill him before he gets too close and sets you on fire. Use the sniper rifle or a Gauss rifle and aim for his head. Continue your approach towards the first cannon.
![[#48] - QUEST 2: The Guns of Anchorage - part 5 - Simulation - Fallout 3: Operation Anchorage - Game Guide and Walkthrough](https://game.lhg100.com/Article/UploadFiles/201512/2015121518500237.jpg)
[#48]
It shouldn't take too long for you to reach the first cannon, however before you focus on blowing it up you should secure a nearby bunker. Use the Stealth Boy if you want to, but it shouldn't be necessary. Anyway there are two Chinese soldiers for you to kill inside the bunker [#49]. Thankfully you'll be allowed to use both dispensers when they're gone. Don't forget to take the cells for the Gauss rifle and exit the bunker.
![[#49] - QUEST 2: The Guns of Anchorage - part 5 - Simulation - Fallout 3: Operation Anchorage - Game Guide and Walkthrough](https://game.lhg100.com/Article/UploadFiles/201512/2015121518500250.jpg)
[#49]
Get closer to the first cannon. Your objective will be to locate a large panel [#50]. Approach it, press the action key and choose the first action from the list in order to plant an explosive device on the big cannon. The explosion will take place in twenty seconds, so you should have plenty of time to move back. You can wait for the gun to be destroyed or you may proceed towards the second target right away.
![[#50] - QUEST 2: The Guns of Anchorage - part 5 - Simulation - Fallout 3: Operation Anchorage - Game Guide and Walkthrough](https://game.lhg100.com/Article/UploadFiles/201512/2015121518500297.jpg)
[#50]
Look at the screen [#51] if you're having problems locating the passageway leading to the second cannon. Be careful, because you'll have to deal with two soldiers when you get there. One of them is going to be a sniper and the other one will be using a flamethrower. Locate the dispensers and supplies (mines, rockets, cells and grenades). Approach the second cannon and plant the explosive device. Don't forget to move back to a safe distance.
![[#51] - QUEST 2: The Guns of Anchorage - part 5 - Simulation - Fallout 3: Operation Anchorage - Game Guide and Walkthrough](https://game.lhg100.com/Article/UploadFiles/201512/2015121518500205.jpg)
[#51]
There's only one more cannon left for you to destroy and you'll have to find a narrow passageway leading to it [#52]. Watch out for a single soldier whom you may encounter along the way. When you get to the cannon don't forget to secure the bunker. Use both dispensers and collect much needed supplies, including microfusion cells. Proceed to the cannon and plant the device. Destroying the gun will allow you to end this quest. Wait for the game to transport you to U.S. Army Field Headquarters.
![[#52] - QUEST 2: The Guns of Anchorage - part 5 - Simulation - Fallout 3: Operation Anchorage - Game Guide and Walkthrough](https://game.lhg100.com/Article/UploadFiles/201512/2015121518500294.jpg)
[#52]
Received from: automatically upon completion of The Guns of Anchorage [U.S. Army Field Headquarters]
Solution: This quest will begin inside the Command Tent. Listen to what General Chase has to say to you [#53]. It doesn't really matter whether you play by the rules or try to convince him that it's only a simulation, because you won't receive any additional rewards nor penalties. Instead Chase will inform that you'll have to destroy three targets and that you'll take command of your very own team. Once the initial conversation has ended approach the large table and allow him to continue with the briefing [#54]. It turns out that two of the targets are accessible right now and you'll have to secure them before going after the last objective.
![[#53] - QUEST 3: Paving the Way - part 1 - Simulation - Fallout 3: Operation Anchorage - Game Guide and Walkthrough](https://game.lhg100.com/Article/UploadFiles/201512/2015121518500246.jpg)
[#53]
Once the briefing has ended, you'll be send over to talk to Lieutenant Morgan who should be sitting next to one of the computers [#54]. Notice that at the beginning of this new conversation you've been given five recruitment markers and two explosive charges. You should also know that you can ask Morgan about a lot of things, including choosing the best equipment and your teammates. Sadly you can't convince him that you would be capable of dealing with enemy forces alone. Don't forget to ask him about the importance and usage of recruitment markers he gave you. He'll tell you that your team can have up to three squad members. Finish the conversation by asking him a few questions concerning your three main objectives. It's not a requirement, but it's best to go in prepared and knowing what has to be done. Explore the tent once you've ended the conversation with him and you'll find psycho and a new holotape - I'm okay.
![[#54] - QUEST 3: Paving the Way - part 1 - Simulation - Fallout 3: Operation Anchorage - Game Guide and Walkthrough](https://game.lhg100.com/Article/UploadFiles/201512/2015121518500267.jpg)
[#54]
COMPLETING THE TEAM:
Let's start out by saying a few things on how to complete the perfect team. In order to make the necessary changes you will have to use Patterson's terminal [#55]. Like I've mentioned before, your team can have up to three members, however each member takes a certain number of markers. Here are the exact values:
Infantryman - 1 marker
Grenadier - 1 marker
Bazooka soldier - 2 markers
Sniper - 2 markers
Mister Gutsy - 3 markers
Sentry bot - 4 markers
I would recommend that you stick with one of two choices. If you want your team to have as many members as possible, you should consider choosing a sniper, a bazooka soldier and an infantryman (2+2+1). If you're going for maximum firepower, choose a sentry bot and an infantryman (4+1). Thankfully you will be allowed to make changes during the course of this quest, because fallen allies will be replaced by new units and that's when you'll have a choice to take someone new. When you've made up your mind confirm the request and deploy your team outside the tent. You may close this window.
![[#55] - QUEST 3: Paving the Way - part 1 - Simulation - Fallout 3: Operation Anchorage - Game Guide and Walkthrough](https://game.lhg100.com/Article/UploadFiles/201512/2015121518500283.jpg)
[#55]
CHOOSING EQUIPMENT:
In order to choose the best equipment you will have to use the left computer which is a Requisition Terminal (that's where Morgan was sitting) [#56]. You'll have to make up your mind on how you want to play the game. Here's the list of available equipment settings:
Fire team package - assault rifle x1, trench knife x1, frag grenade x12
Close assault package - power fist x1, 10mm pistol x1, combat shotgun x1, frag grenade x8, landmine x8
Sniper package - sniper rifle x1, 10mm pistol x1
Heavy weapons package - rocket launcher x1, 10mm submachine gun x1
If you plan on going to the chimera depot in the first place, you should use the sniper's package. If you want to visit the listening post, choose the heavy weapons package. Either way, you'll have to take a requisition hologram. You may exit the tent.
![[#56] - QUEST 3: Paving the Way - part 1 - Simulation - Fallout 3: Operation Anchorage - Game Guide and Walkthrough](https://game.lhg100.com/Article/UploadFiles/201512/2015121518500259.jpg)
[#56]
MAP OF THE FIELD HEADQUARTERS:
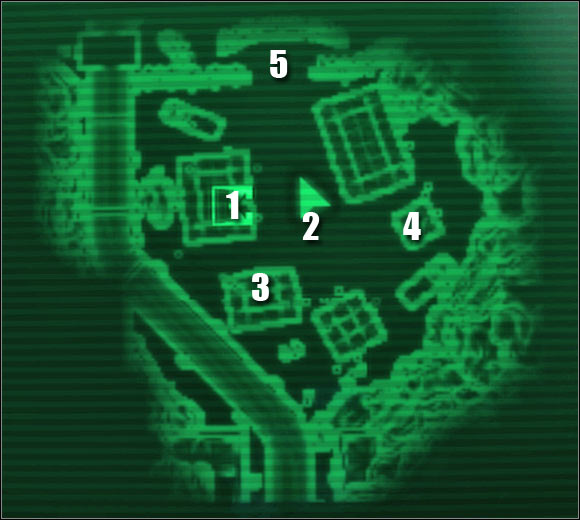
Map legend: 1 - command tent; 2 - area where your team members show up; 3 - Doctor Adami's tent; 4 - quartermaster's tent; 5 - main exit from the base
Once you've left the Command Tent you should head over and talk to Montgomery who will be standing next to your squad members. The main reason is that you will be allowed to issue orders to him that will affect the entire squad. The most important orders will concern moving towards designated areas of the map, however during the course of the quest you'll also want to ask him to replace fallen allies. You can show off by how intelligent you are during your conversation with Montgomery, however it won't do you any good. Instead order him to head on to the first location [#57]. If you plan on attacking the listening post, order him and other squad members to go to the mining town. If you want to attack the chimera depot, order him to wait for you near the ice camp. Thankfully you won't have to follow your teammates right away, because they'll wait for you when they reach their destination.
![[#57] - QUEST 3: Paving the Way - part 1 - Simulation - Fallout 3: Operation Anchorage - Game Guide and Walkthrough](https://game.lhg100.com/Article/UploadFiles/201512/2015121518500352.jpg)
[#57]
Don't exit the allied base just yet. Instead proceed to the southern tent which is a some kind of a field hospital. Talk to Doctor Adami if you want to. She'll offer you free healing and you'll also receive five units of psycho. There's a health dispenser to your right if you need one [#58]. Leave the tent once you've healed yourself.
![[#58] - QUEST 3: Paving the Way - part 1 - Simulation - Fallout 3: Operation Anchorage - Game Guide and Walkthrough](https://game.lhg100.com/Article/UploadFiles/201512/2015121518500393.jpg)
[#58]
There's only one more place for you to visit and that's the quartermaster's tent. Talk to the man. It's important that you win a speech challenge during the course of this conversation [#59], because the quartermaster will give you additional supplies. Notice that the Gauss rifle has been added to your inventory, along with eight microfusion cells. Don't forget to ask the quartermaster about your main package by giving him the holodisk received during your stay in the Command Tent. End the conversations and make sure that you've explored quartermaster's tent. There are both dispensers there, as well as standard supplies - mines, rockets, grenades and cells. You may finally proceed towards the main exit from the base.
![[#59] - QUEST 3: Paving the Way - part 1 - Simulation - Fallout 3: Operation Anchorage - Game Guide and Walkthrough](https://game.lhg100.com/Article/UploadFiles/201512/2015121518500381.jpg)
[#59]
SECURING THE CHIMERA DEPOT:
In order to get to the chimera depot you must begin moving north-west after you leave the base. Thankfully you'll be surrounded by blue force fields, so you can't really get lost. Ignore an American soldier whom you'll encounter along the way and allow him to proceed with the execution on the enslaved Chinese soldiers. Keep heading towards the area where you must team up with your squad. Talk to Montgomery when you get there [#60] and issue the order to begin the assault on the ice camp.
![[#60] - QUEST 3: Paving the Way - part 2 - Simulation - Fallout 3: Operation Anchorage - Game Guide and Walkthrough](https://game.lhg100.com/Article/UploadFiles/201512/2015121518500367.jpg)
[#60]
Follow your team members to the ice camp. You won't have to provide too much support, especially if you've chosen a sentry bot to be a member of your team. If you want to be a part of the assault, start using the sniper rifle to gun down more distant targets. This is also a good idea if you want to earn more experience points easily. Secure the first outpost and proceed towards the tents. There are more enemy units in the distance [#61] and it would be wise to use grenades to get rid of them. You can also wait for your colleagues to get here and finish the job for you. Notice that you've entered Chinese Forward Camp Delta.
![[#61] - QUEST 3: Paving the Way - part 2 - Simulation - Fallout 3: Operation Anchorage - Game Guide and Walkthrough](https://game.lhg100.com/Article/UploadFiles/201512/2015121518500359.jpg)
[#61]
Proceed towards the left tent. There are two dispensers inside the tent, as well as typical supplies (cells, mines, grenades and rockets). You can use the nearby computer if you want to run a decryption algorythm. Proceed to the opposite exit from the tent and start using the sniper rifle to take out new enemy soldiers. Focus on securing both guard towers [#62], because they seem to be the biggest threat. Watch out for guard dogs and use a standard 10mm pistol against the animals.
![[#62] - QUEST 3: Paving the Way - part 2 - Simulation - Fallout 3: Operation Anchorage - Game Guide and Walkthrough](https://game.lhg100.com/Article/UploadFiles/201512/2015121518500336.jpg)
[#62]
Don't forget to talk to Montgomery if you've lost some of your squad members or if you're unhappy with your current settings. Keep heading north, towards new tents. The left tent hides the fifth briefcase [#63]. Collect this item and then proceed to the right tent. Head on to the opposite exit. Turn left and start moving towards the main entrance to the base.
![[#63] - QUEST 3: Paving the Way - part 2 - Simulation - Fallout 3: Operation Anchorage - Game Guide and Walkthrough](https://game.lhg100.com/Article/UploadFiles/201512/2015121518500309.jpg)
[#63]
I would recommend that you choose grenades from your inventory, because enemy forces are taking cover just around the corner, to your right [#64]. Prevent them from making a surprise attack. Thankfully the explosions won't kill American soldiers. Approach each of the soldiers and press the action key to release them. This is an important activity, because you'll be rewarded with 50 experience points for each American soldier you're able to free. Notice an ammo dispenser, as well cells, grenade and mines.
![[#64] - QUEST 3: Paving the Way - part 2 - Simulation - Fallout 3: Operation Anchorage - Game Guide and Walkthrough](https://game.lhg100.com/Article/UploadFiles/201512/2015121518500337.jpg)
[#64]
You may start moving towards the canyon. You won't meet any standard enemy units here, but instead you'll be dealing with spider drones [#65]. Thankfully you can use even the pistol to dispose of the mechanical beasts. Alternatively you could remain in the back and allow your squad members to deal with all the spiders. The biggest group of drones will attack you near the frozen lake. Keep pushing forward and prevent the spiders from getting too close to your character, because they would explode.
![[#65] - QUEST 3: Paving the Way - part 2 - Simulation - Fallout 3: Operation Anchorage - Game Guide and Walkthrough](https://game.lhg100.com/Article/UploadFiles/201512/2015121518500352.jpg)
[#65]
You should be able to get to the Chimera Armor Depot soon enough. Start off by killing two enemy soldiers. They will be occupying nearby guard towers [#66]. The easiest way to get rid of them is to use a sniper rifle, however if you're patient, you can wait for your ally with a rocket launcher to kill them. Start moving towards the base. Approach the main gate and press the action key to open it.
![[#66] - QUEST 3: Paving the Way - part 2 - Simulation - Fallout 3: Operation Anchorage - Game Guide and Walkthrough](https://game.lhg100.com/Article/UploadFiles/201512/2015121518500482.jpg)
[#66]
Proceed to your left. One of the Chinese soldiers should be patrolling a nearby yard and you should try eliminating him from here. Enter the left building to find two dispensers and standard supplies (cells, mines, rockets). Also - you'll find the sixth briefcase on the left table [#67]. Take it and go back outside. Wait for your allies to get here and don't forget to ask Montgomery for reinforcements if your team has suffered some casualties.
![[#67] - QUEST 3: Paving the Way - part 3 - Simulation - Fallout 3: Operation Anchorage - Game Guide and Walkthrough](https://game.lhg100.com/Article/UploadFiles/201512/2015121518500402.jpg)
[#67]
The first tank you'll need to destroy is located directly in front of you [#68]. Approach the tank from the left side and press the action key. A well-known window is going to be displayed on your screen and you must confirm that you want to place an explosive charge on the tank. You can now wait for the huge explosion to occur or you can proceed to the second tank right away. Make sure that your team is following your lead and eliminate new enemy units along the way, including soldiers stationed on the high walls.
![[#68] - QUEST 3: Paving the Way - part 3 - Simulation - Fallout 3: Operation Anchorage - Game Guide and Walkthrough](https://game.lhg100.com/Article/UploadFiles/201512/2015121518500487.jpg)
[#68]
The area around the corner is being patrolled by a Chimera tank and sadly destroying it is going to be very difficult, even if you have a Gauss rifle and a lot of landmines in your possession. I would recommend that you get closer to the tank and allow your teammates attack it. You should begin moving to your left at the same time [#69]. Ignore single enemy soldiers whom you may encounter along the way and keep heading towards a small building.
![[#69] - QUEST 3: Paving the Way - part 3 - Simulation - Fallout 3: Operation Anchorage - Game Guide and Walkthrough](https://game.lhg100.com/Article/UploadFiles/201512/2015121518500430.jpg)
[#69]
Once you're inside the building, choose a good weapon for close range combat. If you're using sniper's package, you should choose between a pistol and a Gauss rifle. There are a few Chinese soldiers here [#70] and you must neutralize them. Thankfully there are dispensers in this room, but don't stay in one spot for a longer period of time, because you'll only attract the attention of the tank.
![[#70] - QUEST 3: Paving the Way - part 3 - Simulation - Fallout 3: Operation Anchorage - Game Guide and Walkthrough](https://game.lhg100.com/Article/UploadFiles/201512/2015121518500461.jpg)
[#70]
Exit the hut when you're ready and start running towards the second cistern [#71]. Thankfully even if you get hit, you shouldn't lose too much health. Plant the explosive device on the second tank and move back to a safe distance. Once the explosion has occurred, you'll only have to wait for Montgomery to join you after which you're going to be automatically transported back to the HQ (to the Command Tent to be more specific).
![[#71] - QUEST 3: Paving the Way - part 3 - Simulation - Fallout 3: Operation Anchorage - Game Guide and Walkthrough](https://game.lhg100.com/Article/UploadFiles/201512/2015121518500432.jpg)
[#71]
SECURING THE LISTENING POST:
If you've already secured the Chimera Depot, don't forget to change your equipment setting using one of the terminals. Obviously you could stay with your original choice and keep using the sniper's package. I would recommend choosing the heavy weapons package, because you'll want to have a rocket launcher in your inventory. Exit the tent and observe the war correspondent for a while if you want to. Talk to Montgomery again and ask him to recruit new members (only if you've lost your allies at the end of the previous mission). After that order him and your men to go to the mining town [#72]. Don't forget to visit quartermaster's tent in order to use the dispensers. Leave the base and start moving north-east.
![[#72] - QUEST 3: Paving the Way - part 3 - Simulation - Fallout 3: Operation Anchorage - Game Guide and Walkthrough](https://game.lhg100.com/Article/UploadFiles/201512/2015121518500493.jpg)
[#72]
The good news is that you won't encounter enemy units right away. The bad news is that reaching the listening post is not going to be easy. Get to the train depot and take cover behind the left carriage. Your teammates should be waiting for you here. Talk to Montgomery and give the order to proceed with the assault. Lean out carefully and begin attacking enemy troops. The most important thing here is to take out an enemy equipped with a rocket launcher. He will be standing to your right [#73]. Aside from him there are also two snipers for you to take care of. They're standing to your left (one on the container and his colleague next to a house). Watch out for guard dogs, but they're probably going to be killed by your allies. If not - use a submachine gun to kill the animals. Enter the Abandoned Mining Town.
![[#73] - QUEST 3: Paving the Way - part 3 - Simulation - Fallout 3: Operation Anchorage - Game Guide and Walkthrough](https://game.lhg100.com/Article/UploadFiles/201512/2015121518500460.jpg)
[#73]
You should now proceed towards a small hill where the rocket soldier was standing. Be careful, because his colleague is taking cover inside a nearby building [#74]. Use your rocket launcher (or a sniper rifle) to get rid of him before he starts firing missiles at you. There are also a few "standard" Chinese soldiers here. They must die as well.
![[#74] - QUEST 3: Paving the Way - part 3 - Simulation - Fallout 3: Operation Anchorage - Game Guide and Walkthrough](https://game.lhg100.com/Article/UploadFiles/201512/2015121518500496.jpg)
[#74]
Once the battle has ended take your time to explore the ruins of the building that was occupied by enemy troops. There are two dispensers here, so make sure that you regenerate health and refill ammo supplies. Aside from that you can collect grenades, mines, rockets and cells. It's also important that you find the seventh briefcase [#75]. You may now proceed to the north. There's a large building there with a Chinese flag.
![[#75] - QUEST 3: Paving the Way - part 3 - Simulation - Fallout 3: Operation Anchorage - Game Guide and Walkthrough](https://game.lhg100.com/Article/UploadFiles/201512/2015121518500486.jpg)
[#75]
Get closer to the building and get ready to defeat more enemy troops. Be careful, because Chinese soldiers are going to be stationed not only on the ground floor, but on the upper level as well. You should also know that at least one of them will be using a flamethrower. Defeat them and find a new stash. Use the dispensers and collect supplies. There's also a new American soldier here [#76] and you should free him. Exit the building. Get ready to eliminate new enemy soldiers and proceed to the north when they're gone.
![[#76] - QUEST 3: Paving the Way - part 4 - Simulation - Fallout 3: Operation Anchorage - Game Guide and Walkthrough](https://game.lhg100.com/Article/UploadFiles/201512/2015121518500508.jpg)
[#76]
Be careful, because from now on you'll be dealing with snipers using camouflage armors. Thankfully they will expose their positions when they attack you or your troops and your men won't have too many problems locating them. The first two snipers will be standing on top of the containers [#77]. Two other Chinese soldiers will occupy corners of the right wall. Get rid of them and continue your approach.
![[#77] - QUEST 3: Paving the Way - part 4 - Simulation - Fallout 3: Operation Anchorage - Game Guide and Walkthrough](https://game.lhg100.com/Article/UploadFiles/201512/2015121518500522.jpg)
[#77]
It shouldn't be too long until you reach the Listening Post. There are new enemy soldiers defending the main entrance [#78] and you should use a rocket launcher or a sniper rifle to get rid of them. Thankfully you'll be dealing with small groups. Proceed to the stairs when the area is safe. Notice that your sentry bot can't use the stairs, so you'll have to work alone with Montgomery from now on. Alternatively you could try making changes in your team, but you would have to do that soon after taking over the Abandoned Mining Town. Anyway you must use the stairs to get to the upper balcony. Find the door leading to the Listening Post.
![[#78] - QUEST 3: Paving the Way - part 4 - Simulation - Fallout 3: Operation Anchorage - Game Guide and Walkthrough](https://game.lhg100.com/Article/UploadFiles/201512/2015121518500514.jpg)
[#78]
Once inside, get ready to defend yourself against an enemy attack, because one of the enemy soldiers will arrive from the left. Proceed to a new room and ignore the Chinese technician. He won't attack you. Instead move on to the next section. Be careful when you get to the dark corridor, because a Chinese sniper will be hiding around one of the corners [#79]. Use frag grenades or a Gauss rifle to kill him and proceed towards the stairs.
![[#79] - QUEST 3: Paving the Way - part 4 - Simulation - Fallout 3: Operation Anchorage - Game Guide and Walkthrough](https://game.lhg100.com/Article/UploadFiles/201512/2015121518500514.jpg)
[#79]
Get closer to a new room and throw a couple of grenades inside. If you're lucky, you should be able to kill all enemy soldiers without actually having to attack them. Before you decide to use the stairs inspect the area to your right and you'll gain possession of the eighth briefcase [#80]. You may now proceed to the upper level. Keep pushing forward.
![[#80] - QUEST 3: Paving the Way - part 4 - Simulation - Fallout 3: Operation Anchorage - Game Guide and Walkthrough](https://game.lhg100.com/Article/UploadFiles/201512/2015121518500585.jpg)
[#80]
Make a stop once you've reached a larger room [#81]. There are two camouflaged snipers hiding inside the room. The first one is located to your left and you can kill him even before you enter the room. As for his colleague, you will have to look for him to your right and sadly you must get closer to his position. Once you've killed both snipers don't forget to locate a new stash. Use the dispensers and collect supplies (mines, grenades, rockets and cells). Open a nearby door and use the stairs to get to the upper floor.
![[#81] - QUEST 3: Paving the Way - part 4 - Simulation - Fallout 3: Operation Anchorage - Game Guide and Walkthrough](https://game.lhg100.com/Article/UploadFiles/201512/2015121518500561.jpg)
[#81]
Press the action key once you've reached a new door. Throw a couple of grenades before entering this new room. Wait for the explosions and deal with the survivors [#82]. It shouldn't be too difficult to win this battle. You may now proceed towards a door leading to the outside. When you get there approach the ledge and use your primary weapon to eliminate enemy troops standing in front of the listening post.
![[#82] - QUEST 3: Paving the Way - part 4 - Simulation - Fallout 3: Operation Anchorage - Game Guide and Walkthrough](https://game.lhg100.com/Article/UploadFiles/201512/2015121518500532.jpg)
[#82]
There are only two more Chinese snipers for you to hunt down. The first sniper is hiding to your right [#83] and his partner is taking cover inside the bunker. You can find him to the left of the entrance. Ignore the dispensers, because killing both snipers will allow you to take control over the post. Listen to a short conversation and wait to be transported to the Command Tent.
![[#83] - QUEST 3: Paving the Way - part 4 - Simulation - Fallout 3: Operation Anchorage - Game Guide and Walkthrough](https://game.lhg100.com/Article/UploadFiles/201512/2015121518500546.jpg)
[#83]
Received from: automatically upon completion of Paving the Way [U.S. Army Field Headquarters]
Solution: Notice that once again you begin the new quest inside the Command Tent. I would strongly recommend that you think hard about what type of equipment you want to take for your final mission. You should make a decision between the sniper package and the fire team package. The latter seems like a better idea, because you'll spend a lot of time fighting at close and medium range. You would lose too much time switching between the sniper rifle and the Gauss rifle or pistol. When you make up your mind leave the tent and visit the quartermaster to receive new gear and to use the dispensers. Talk to Montgomery and he'll inform you that you'll be going in without additional backup [#84]. Proceed to the exit.
![[#84] - QUEST 4: Operation Anchorage - part 1 - Simulation - Fallout 3: Operation Anchorage - Game Guide and Walkthrough](https://game.lhg100.com/Article/UploadFiles/201512/2015121518500586.jpg)
[#84]
Once you've left the HQ start moving north. This is the area where the explosions take place, but thankfully you should be able to avoid sustaining injuries. Turn north-east after a short while and you'll reach an area where you'll meet a few American soldiers. Ignore them and proceed towards the trenches [#85]. Keep pushing forward, but make a stop when you'll come across a single ally attacking enemy forces.
![[#85] - QUEST 4: Operation Anchorage - part 1 - Simulation - Fallout 3: Operation Anchorage - Game Guide and Walkthrough](https://game.lhg100.com/Article/UploadFiles/201512/2015121518500585.jpg)
[#85]
Lean out carefully and start using an assault rifle or a sniper rifle to take out enemy troops. Thankfully most of the Chinese soldiers are going to be using weak weaponry, so you won't have to worry about losing too much health. Keep heading towards the central area of the Battlefield Trenches. Don't forget to visit a small shed along the way [#86]. You'll find a health dispenser inside, as well as the ninth briefcase. There's also an American soldier here and you should free him.
![[#86] - QUEST 4: Operation Anchorage - part 1 - Simulation - Fallout 3: Operation Anchorage - Game Guide and Walkthrough](https://game.lhg100.com/Article/UploadFiles/201512/2015121518500685.jpg)
[#86]
Keep moving forward. New enemy soldiers are hiding just around the corner, so it would be a good idea to throw a couple of frag grenades at them [#87]. Make sure they've been eliminated and go to your right to find an ammo dispenser. Restock on your supplies and proceed towards the platform leading out of the trenches. You should begin moving west, but you'll soon turn to north-west.
![[#87] - QUEST 4: Operation Anchorage - part 1 - Simulation - Fallout 3: Operation Anchorage - Game Guide and Walkthrough](https://game.lhg100.com/Article/UploadFiles/201512/2015121518500637.jpg)
[#87]
You should be able to get to new trenches very soon. I wouldn't recommend acting too quickly here, because new enemy soldiers will appear in front of you [#88] and one of them will be using a flamethrower. Use landmines and frag grenades to eliminate them, however you can also wait for Montgomery to open fire on Chinese soldiers. Proceed to the trenches and be on a look out for a new stash. Use the dispensers and collect typical supplies.
![[#88] - QUEST 4: Operation Anchorage - part 1 - Simulation - Fallout 3: Operation Anchorage - Game Guide and Walkthrough](https://game.lhg100.com/Article/UploadFiles/201512/2015121518500635.jpg)
[#88]
You may proceed to the next section. Don't make any unnecessary stops, because you'll find yourself against heavy fire from the enemy soldiers stationed inside the bunker. When you reach a new junction you may proceed directly to your left or you can spend some time exploring the area to your right [#89]. Before you do that, make sure to kill new spider drones and prevent the little creatures from getting too close to your position. The right passageway will also be occupied by several soldiers, including the one equipped with a flamethrower.
![[#89] - QUEST 4: Operation Anchorage - part 1 - Simulation - Fallout 3: Operation Anchorage - Game Guide and Walkthrough](https://game.lhg100.com/Article/UploadFiles/201512/2015121518500689.jpg)
[#89]
You should be able to get to a small campsite after a short walk. This area will be guarded by a few soldiers, including a sniper who will be hiding to your right [#90]. You'll find two dispensers here (ammo & health), as well as some supplies. Return to the junction and choose the left passageway.
![[#90] - QUEST 4: Operation Anchorage - part 2 - Simulation - Fallout 3: Operation Anchorage - Game Guide and Walkthrough](https://game.lhg100.com/Article/UploadFiles/201512/2015121518500674.jpg)
[#90]
It shouldn't be too long before you reach a new junction. In this case choosing the passageway to your right will allow you to continue with your mission. If you decide to inspect the left passageway, you'll have to be ready to defeat a lot of enemy troops. Watch out, because one of the Chinese soldiers will be carrying a rocket launcher [#91]. Eventually you would get to a small campsite with a health dispenser and a computer. Use the computer if you plan on running a decryption program. Go back to the second junction and continue with your current assignment.
![[#91] - QUEST 4: Operation Anchorage - part 2 - Simulation - Fallout 3: Operation Anchorage - Game Guide and Walkthrough](https://game.lhg100.com/Article/UploadFiles/201512/2015121518500633.jpg)
[#91]
Be careful, because a soldier equipped with a flamethrower will show up directly in front of you and you may be surprised by his appearance. You'll also encounter a few Chinese soldiers along the way, but most of them will retreat to the ground level. Don't pursue them right away. Instead inspect the area to your left and you'll find new dispensers [#92]. There are also standard supplies here, including landmines, frag grenades, microfusion cells and missiles.
![[#92] - QUEST 4: Operation Anchorage - part 2 - Simulation - Fallout 3: Operation Anchorage - Game Guide and Walkthrough](https://game.lhg100.com/Article/UploadFiles/201512/2015121518500621.jpg)
[#92]
Once you've reached the surface ignore the bunker located in front of you. Instead turn left and find a good cover quickly. You should now start using one of the rifles to eliminate enemy soldiers located directly in front of you [#93]. Two of them will occupy the ground floor and the remaining third one can be found on the first floor. Once they're gone proceed to their location, however you could also return to the dispensers if you've suffered some injuries or lost too much ammo.
![[#93] - QUEST 4: Operation Anchorage - part 2 - Simulation - Fallout 3: Operation Anchorage - Game Guide and Walkthrough](https://game.lhg100.com/Article/UploadFiles/201512/2015121518500676.jpg)
[#93]
Go to your right and find the entrance leading to a new building. I guess you won't be surprised to find more enemy units inside [#94] and the best way to get rid of them would be to use some of the carried frag grenades. Enter the building when they're gone and locate a new health dispenser. You can now travel north-west or you can go east in order to secure a new bunker. It's optional, but it won't be too difficult and you won't lose too much time.
![[#94] - QUEST 4: Operation Anchorage - part 2 - Simulation - Fallout 3: Operation Anchorage - Game Guide and Walkthrough](https://game.lhg100.com/Article/UploadFiles/201512/2015121518500655.jpg)
[#94]
If you decide to clear out the bunker, don't forget about the possibility of using a computer terminal in order to reprogram the turret. Otherwise you'll have to kill enemy soldiers yourself, as well as to destroy the defense turret. There are a couple of grenades here. Take them and move west. The area should be secured by allied units, so you won't have to spend additional time trying to get rid of Chinese soldiers. Find a small building [#95] and explore the interior. You'll find a lot of useful items here, as well as two dispensers. Proceed south-west.
![[#95] - QUEST 4: Operation Anchorage - part 2 - Simulation - Fallout 3: Operation Anchorage - Game Guide and Walkthrough](https://game.lhg100.com/Article/UploadFiles/201512/2015121518500652.jpg)
[#95]
You will soon get to an area where allied troops are attacking enemy positions. Thankfully you won't have to provide them with any assistance, because they'll be victorious on their own. You can inspect the left building if you want to. There's a health dispenser inside, as well as a few grenades. If you don't need to resupply proceed directly towards the main battlefield [#96]. You must now begin moving east. Ignore the fights taking place around you and don't enter the bunker.
![[#96] - QUEST 4: Operation Anchorage - part 3 - Simulation - Fallout 3: Operation Anchorage - Game Guide and Walkthrough](https://game.lhg100.com/Article/UploadFiles/201512/2015121518500745.jpg)
[#96]
Eventually you should be able to reach a medium-size building [#97]. Thankfully the building itself won't be defended by anyone, so you may head inside without any interruptions. Find the final tenth briefcase and then approach the control panel. Press the button in order to disable the pulse field. This will allow your allies to advance forward.
![[#97] - QUEST 4: Operation Anchorage - part 3 - Simulation - Fallout 3: Operation Anchorage - Game Guide and Walkthrough](https://game.lhg100.com/Article/UploadFiles/201512/2015121518500763.jpg)
[#97]
Exit the building and start moving towards the Chinese Occupied Refinery. Notice that allied troops have begun their assault on the main gate. You should assist them by shooting at the defense turrets with your Gauss rifle [#98]. Make sure to maintain safe distance, because a large explosion will take place in this area. Proceed towards the main entrance and ignore radiation along the way, because you'll be dealing with very small doses. Save your game and use the gate leading to Chinese HQ.
![[#98] - QUEST 4: Operation Anchorage - part 3 - Simulation - Fallout 3: Operation Anchorage - Game Guide and Walkthrough](https://game.lhg100.com/Article/UploadFiles/201512/2015121518500757.jpg)
[#98]
Once inside the Chinese HQ, you'll witness a short cut-scene. You can't move, but you'll be allowed to look around. Wait for the game to initiate a conversation with the Chinese general Jingwei. You've got two options here. You can try and win a speech challenge if you're skilled enough. This won't allow you to make the general surrender, but he'll commit suicide instead [#99], allowing you to return to the real world quickly and safely.
![[#99] - QUEST 4: Operation Anchorage - part 3 - Simulation - Fallout 3: Operation Anchorage - Game Guide and Walkthrough](https://game.lhg100.com/Article/UploadFiles/201512/2015121518500738.jpg)
[#99]
If you fail to win a speech challenge or a different dialogue option, you'll be forced to defeat the general in a duel. I have to warn you that he acts a lot like a typical boss you would know from various shooters. During the duel you should be using a Gauss rifle or an assault rifle. Each time activate V.A.T.S. system and aim for general's head [#100]. Obviously you won't kill him in a single turn, so you'll have to start running away from him until your action points are regenerated. Make sure to avoid general's melee attacks, because he'll be using a very powerful sword. You'll also have to stay away from the areas where large explosions take place. Your adventure in the simulation will end with the death of general Jingwei. You'll now have to talk to general Chase after which you'll be transported back to Outcast Outpost.
![[#100] - QUEST 4: Operation Anchorage - part 3 - Simulation - Fallout 3: Operation Anchorage - Game Guide and Walkthrough](https://game.lhg100.com/Article/UploadFiles/201512/2015121518500794.jpg)
[#100]
Once you've returned to the real world, McGraw will congratulate you on a job well done. Press the action key to leave the simulation pod. You'll now have to use a security terminal in order to unlock access to the armory [#101]. Enter the armory quickly and make sure that you've saved your game, because all hell is going to break loose here soon enough. Notice that by entering the armory you've successfully completed the final fourth quest.
![[#101] - QUEST 4: Operation Anchorage - part 3 - Simulation - Fallout 3: Operation Anchorage - Game Guide and Walkthrough](https://game.lhg100.com/Article/UploadFiles/201512/2015121518500788.jpg)
[#101]
You'll soon find out that most of the outcasts present in this base want to keep the loot for themselves. The leader of the rebellion is going to be Sibley and only two outcasts are going to be on your side. The most important thing here is that you get ready for a huge battle while they're still arguing. Proceed forward and take two items [#102] - winterized T-51b power armor and winterized T-51b power helmet. As for the weapons, you should be using a plasma rifle, however if this is the beginning of your journey, take a Gauss rifle from one of the shelves. Don't forget to collect a few microfusion cells as well. Open the inventory to wear the armor and to pick the new weapon from your arsenal.
![[#102] - Armory - Epilogue - Fallout 3: Operation Anchorage - Game Guide and Walkthrough](https://game.lhg100.com/Article/UploadFiles/201512/2015121518500708.jpg)
[#102]
Approach the door of the armory and wait for the moment to Sibley and his colleagues to turn on McGraw and Olin. You'll know when this has happened when their icons change color to red. You should be using similar approach to the duel with the Chinese general, so activate V.A.T.S. and aim for their heads [#103]. Naturally you shouldn't be standing while you regain action points, so you must keep attacking them even when you've returned to real time combat. Thankfully your new armor will protect you against most of their attacks. Keep fighting until all hostile outcasts have been killed.
![[#103] - Armory - Epilogue - Fallout 3: Operation Anchorage - Game Guide and Walkthrough](https://game.lhg100.com/Article/UploadFiles/201512/2015121518500702.jpg)
[#103]
Rewards for completing Project Anchorage
There are three basic groups of rewards you can count on upon the completion of Project Anchorage. I've listed these profits below.
1) Enemies and survivors
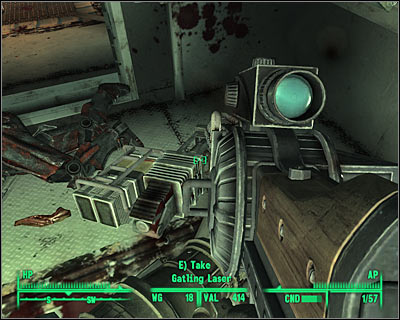
It's extremely important that you loot bodies of all dead outcasts after you've been able to defeat them, because you'll gain possession of A LOT of valuable and useful items. The biggest treat will include weapons, including Gatling lasers, miniguns, flamethrowers and laser rifles. You'll also be allowed to take a lot of outcast power armors. They're not as good as the armor you took from the armory, but you'll be able to sell them with a high profit.
If McGraw survived the assault you will be allowed to ask him to repair your equipment. Sadly he's skilled at a similar level to most of the traders, so you can't count on him repairing your items to a perfect status.
2) Items from the armory
The armory itself contains plenty of items worth of your interest. Here are some of the most interesting ones - winterized T-51b power armor, winterized T-51b power helmet, Gauss rifle, Jingwei's shocksword (the exact same one he was using during the duel), Chinese stealth armor (used by some of the snipers) and rocket launcher. Aside from that you'll also come across medical supplies, mininuke, explosive devices (plasma, pulse and frag grenades/mines) and cells of a few different types. Have fun collecting these treasures!
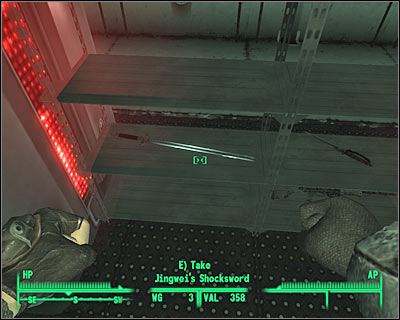
3) Perks
Finally, you'll be rewarded with two perks:
Power Armor Training - This means you don't have to visit the Citadel for the training, because you'll be allowed to wear all types of power armors from now on. The first armor can be collected from the armory and you'll also find plenty of these objects by the fallen outcasts.
Covert Ops - This perk can only be achieved if you've been able to find and collect all ten briefcases during your stay in the virtual world. Having Covert Ops increases your Small guns, Science and Lockpicking skills by three points.
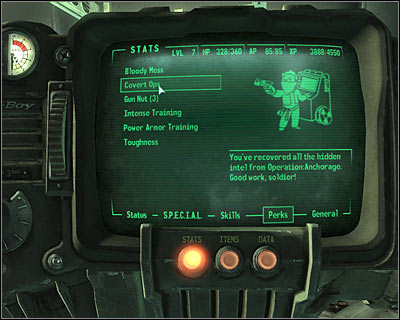
Main map of the virtual world
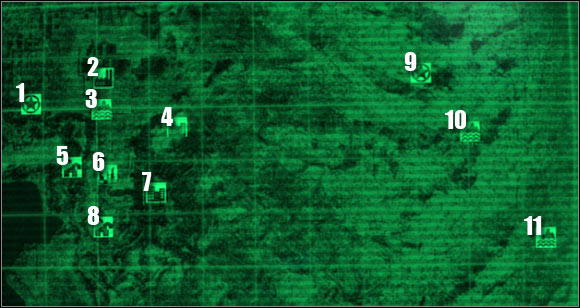
Map legend:
1 - Chimera Armor Depot
2 - Chinese Occupied Refinery
3 - Chinese Pulse Field
4 - Listening Post
5 - Chinese Forward Camp Delta
6 - Battlefield Trenches
7 - Abandoned Mining Town
8 - U.S. Army Field Headquarters
9 - Artillery Overlook
10 - Artillery Overlook Entrance
11 - Cliffs
List of achievements
Sadly there are only four achievements in Project Anchorage and they're also gained automatically each time you complete the main quest.
ACHIEVEMENT
RWD
REQUIREMENTS
Aiding the Outcasts
20
Complete Aiding the Outcasts quest (gained automatically upon completion).
Operation: Anchorage!
40
Complete Operation: Anchorage! quest (gained automatically upon completion).
Paving the Way
20
Complete Paving the Way quest (gained automatically upon completion).
The Guns of Anchorage
20
Complete The Guns of Anchorage quest (gained automatically upon completion).
Hidden briefcases
You can try finding ten briefcases during your stay in the virtual copy of Anchorage. If you manage to collect all of them, you're going to be rewarded with Cover Ops perk. Check the following chart in order to find out where to search for more detailed descriptions in the main guide.
First briefcase
Quest 2 - The Guns of Anchorage
Screen #29
Second briefcase
Quest 2 - The Guns of Anchorage
Screen #31
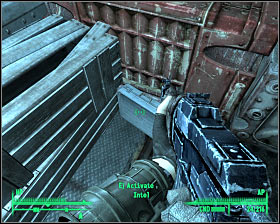
Third briefcase
Quest 2 - The Guns of Anchorage
Screen #38
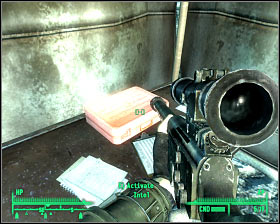
Fourth briefcase
Quest 2 - The Guns of Anchorage
Screen #40

Fifth briefcase
Quest 3 - Paving the Way
Screen #63
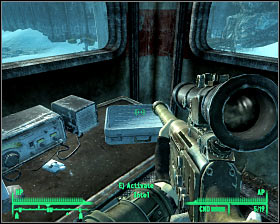
Sixth briefcase
Quest 3 - Paving the Way
Screen #67
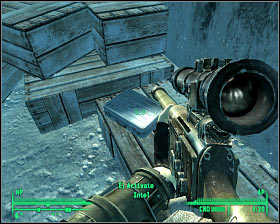
Seventh briefcase
Quest 3 - Paving the Way
Screen #75
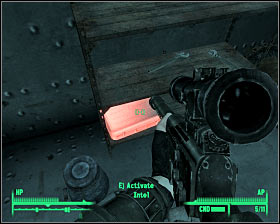
Eighth briefcase
Quest 3 - Paving the Way
Screen #80
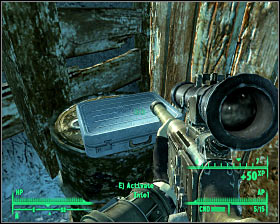
Ninth briefcase
Quest 4 - Operation: Anchorage!
Screen #86
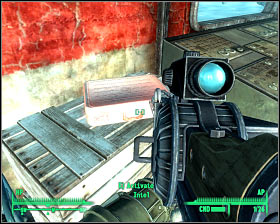
Tenth briefcase
Quest 4 - Operation: Anchorage!
Screen #97


 F.3.A.R. Game Guide & Walkthrough
 Fable III Game Guide & Walkthrough
 Final Fantasy XII Game Guide & Walkthrough
 FIFA 16 Game Guide & Walkthrough
 Farming Simulator 2013 Game Guide & Walkthrough