
The guide to Fallout 3: The Pitt includes a detailed walkthrough for all the main and side quests available in this expansion pack for the Fallout 3 RPG game. The individual missions have also been enriched with a sheer amount of screenshots. In this guide, you can also find the descriptions of new achievements, helpful maps and also gameplay hints.
This guide includes:
Fallout 3: The Pitt is the second official DLC for Fallout 3, developed by Bethesda Softworks. Thanks to the developer, this time you will visit the post-nuclear Pittsburgh which has been seized by the slavers. This expansion pack offers new quests, armors, items, achievements and perks. This is enough to grant you a several-hour-long fun.
Make sure that The Pitt has been installed properly on your computer and you'll also have to activate it from the game's autostart (ThePitt.esm). The first expansion to Fallout 3, titled Operation Anchorage, tolerated exploring the new content using a "fresh" character who has just left Vault 101, however The Pitt tends to be less forgiving. I wouldn't recommend starting this new journey unless you have a character on level 5-6. Thankfully this won't be a major issue, because the game will make enemies weaker or stronger depending on your current experience level. The same goes with your allies, so if you're playing as a weak hero they'll help you on many occasions. It's fairly important that you ditch most of your current equipment before travelling to The Pitt area. There are two main reasons to do that - you will lose your equipment upon entering The Pitt (thankfully - only for the purpose of completing two quests) and you'll want to collect a lot of cool items found in the new area. You wouldn't be able to carry both (current & future equipment). It would be a good idea to leave one good armor, one helmet and one heavy weapon. The rest of your stuff, including smaller guns and drugs, should be left in your home in Megaton or in your apartment in Tenpenny Tower. The only real exception to that rule are keys and figurines, because you won't lose them no matter what happens.
This time you won't have to wait for a few minutes to receive a distress call, because The Pitt will start automatically once you've loaded one of your saved games. Remember that you must be somewhere in Capitol Wasteland where you can get reception. Wait for a dialogue window to appear on your screen, informing you that a new distress call has been added to your list of radio stations. Open the Pip-Boy if you want to and play Wernher's Distress Signal [#1]. You can now listen to a short transmission made by Wernher which will repeat once every ten seconds. It's not required to open the list, because a new location titled Radio Tower is going to appear on your personal map either way.
![[#1] - Activating the DLC - Prologue - Fallout 3: The Pitt - Game Guide and Walkthrough](https://game.lhg100.com/Article/UploadFiles/201512/2015121518502657.jpg) [#1]
[#1]
Received from: automatically during the exploration of Capitol Wasteland [Capitol Wasteland]
Solution: The Radio Tower can be found near the northern edge of the map. I assume you haven't been to those regions before, so you'll have to be ready for a long and difficult journey. If you've visited that area before, you should start from one of three nearest locations - Fort Constantine, SatCom Array NN-03d or MDPL-21 Power Station. As for means of reaching the tower, you must approach it from the south-west, because it's surrounded by cliffs from all other directions. Once you've arrived at the Radio Tower you should notice that Wernher (he's the one responsible for setting up the distress call) is being attacked by a few raiders [#2]. If you're character is strong enough, you'll have to defeat them on your own. If you're playing as a newbie, Wernher should be able to repel the attack without your immediate assistance. Thankfully in both cases all the raiders are going to be focused on him, so it shouldn't be hard to organize a surprise attack.
![[#2] - Prologue - QUEST 1: Into the Pitt - part 1 - Prologue - Fallout 3: The Pitt - Game Guide and Walkthrough](https://game.lhg100.com/Article/UploadFiles/201512/2015121518502693.jpg) [#2]
[#2]Once you've defeated all bandits, Wernher will thank you for your help and he will tell you more about why he sent the distress call to the wasteland. I guess I should tell you that you won't change the course of the conversation if you're very polite towards him nor if you decide to be hostile [#3]. Wernher will tell you that he escaped from a place called The Pitt and he'll ask you to help him in acquiring a cure from Ashur - leader of the raiders. End the conversation by asking him how to get into that area. Wernher will give you a small clue that you should acquire a slave outfit. You must now travel west, because not only you'll find an entrance to The Pitt there, but you'll also have a chance to meet a new group of raiders. Explore the area around Wernher if you want to or begin your journey right away. Your current destination is the Train Tunnel.
![[#3] - Prologue - QUEST 1: Into the Pitt - part 1 - Prologue - Fallout 3: The Pitt - Game Guide and Walkthrough](https://game.lhg100.com/Article/UploadFiles/201512/2015121518502633.jpg) [#3]
[#3]You shouldn't have any major problems reaching the Train Tunnel and you should also know that you won't be attacked by the raiders stationed near the tunnel. The only exception is if you've decided to kill all their colleagues in Paradise Falls. You'll come across four raiders here, however the only person willing to talk to you is going to be Ramsey. He can be found near a small cage. You may now make a choice regarding slaves being held here. I should also warn you that you shouldn't even think about jumping into the cage, because that would make the raiders hostile towards your character. Here's how you can resolve this situation:
1) You can buy all the slaves from Ramsey, however it would cost you 600 bottle caps [#4]. If you're successful, Ramsey will give you a key to the slave pen. Approach a small gate, use the key to open it and talk to Prosper who'll thank you for rescuing him and all other slaves.
2) You can also acquire the key using brute force, however you must be ready to defeat Ramsey and three other guards. Once they've all been killed, inspect Ramsey's body, take the key and use it to free the slaves.
![[#4] - Prologue - QUEST 1: Into the Pitt - part 1 - Prologue - Fallout 3: The Pitt - Game Guide and Walkthrough](https://game.lhg100.com/Article/UploadFiles/201512/2015121518502690.jpg) [#4]
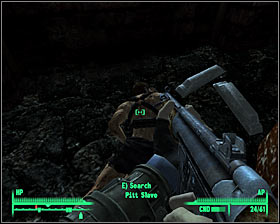
[#4]Opening the pen not only will allow you to gain a few karma points for rescuing all the slaves, but you'll also have a chance to gain possession of a slave outfit mentioned to you earlier by Wernher. Notice that one of the slaves was dead even before your arrival [#5]. Inspect his body and take the outfit. You should also know that talking to Ramsey is not mandatory, because you can go to The Pitt right away. As for the outfit, you will have one more chance in the near future to acquire such an item. It's your choice whether you want to interfere or not. Once you've made up your mind go to a large entrance to the tunnel. There's a small door to your right and you must use it to get to Pitt Tunnel. Wernher will be waiting for you inside. Ignore him and approach a small hand cart. Press the action key and confirm that you want to travel to The Pitt. Don't forget that you won't be allowed to return to Capitol Wasteland until you've completed three new quests!
![[#5] - Prologue - QUEST 1: Into the Pitt - part 1 - Prologue - Fallout 3: The Pitt - Game Guide and Walkthrough](https://game.lhg100.com/Article/UploadFiles/201512/2015121518502605.jpg) [#5]
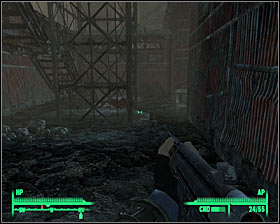
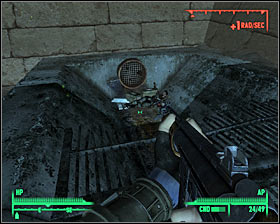
[#5]You will soon find yourself standing in the first area of The Pitt and you should know that it won't be your last stop. Start off by following Wernher's lead. He will soon meet one of the women representing raider's interests. Get ready for a fight, because your new ally will shoot her without giving you any heads up. There are two additional snipers for you to take care of. The first sniper can be found directly in front of you [#6]. In order to locate the second sniper you must turn around and face south. That's not all. A second group of enemy units will arrive from the same direction as the shot woman (from the north-east). Kill all the hostiles. You won't have to take too much time inspecting their bodies (you can reach them using wooden platforms), however you would come across stimpacks and RadAway's. All the raiders are also wearing good armors, but I'm sure that you're wearing a good protection yourself, so you wont' have to make any trades.
![[#6] - Prologue - QUEST 1: Into the Pitt - part 1 - Prologue - Fallout 3: The Pitt - Game Guide and Walkthrough](https://game.lhg100.com/Article/UploadFiles/201512/2015121518502786.jpg) [#6]
[#6]
You can take your time exploring the area and collecting additional equipment, but sooner or later you'll have to talk to Werhner. He can be found in the north-east, next to a large gate. Approach the gate and he'll automatically talk to you. Wernher will inform you that you'll be on your own from now on. I'd strongly recommend that you choose the first response from the list [#7] and your character will ask him whether he can smuggle a small weapon into The Pitt. Wernher will offer you a choice between a knife and a .32mm pistol. The latter seems like a better idea, because you'll find a lot of ammunition for the pistol and you won't have any problems getting your hands on a good weapon after you've lost your equipment. Ignore the fact that Wernher didn't give you the item right away, because it will be added to your inventory automatically soon enough.
![[#7] - Prologue - QUEST 1: Into the Pitt - part 2 - Prologue - Fallout 3: The Pitt - Game Guide and Walkthrough](https://game.lhg100.com/Article/UploadFiles/201512/2015121518502770.jpg) [#7]
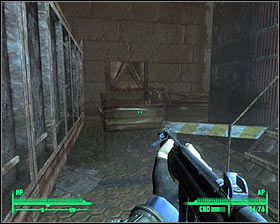
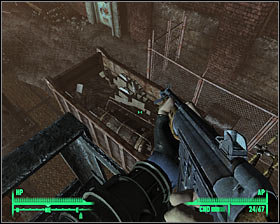
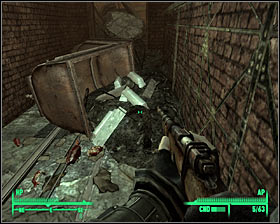
[#7]Start moving forward. You won't have to be too careful here, because you shouldn't encounter any hostiles right away. If you take your time to explore the area you'll find a few stimpacks (carriage) and RadAway's (southern wall). Check the inside of a destroyed building if you want to [#8], however you would have to be ready to defend yourself against three wildmen. You can find them on the upper levels, so you must use the stairs to get to them. There's a bed here if you need to heal your injuries before moving on.
![[#8] - Prologue - QUEST 1: Into the Pitt - part 2 - Prologue - Fallout 3: The Pitt - Game Guide and Walkthrough](https://game.lhg100.com/Article/UploadFiles/201512/2015121518502737.jpg) [#8]
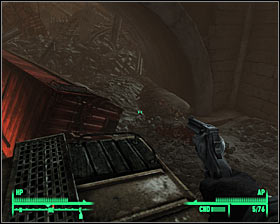
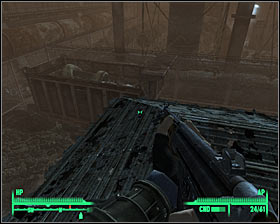
[#8]You may finally proceed towards the bridge. Don't even think about swimming to the other shore, because the area is highly toxic and you would die almost instantly. The bridge is your only choice, but it won't be as easy as it seems. The biggest problem is that there are A LOT of landmines on the bridge [#9] and it'll be up to you to disarm them. It shouldn't be a problem, as long as you're moving carefully. Watch out for the landmines located on the outside balconies of the bridge, because you may not notice them. As for expanding your equipment, you may decide to collect the mines, however it wouldn't do you any good, because you'll lose your things very soon. Watch out for two guard dogs as well. Kill the animals with a gun or a good melee weapon.
![[#9] - Prologue - QUEST 1: Into the Pitt - part 2 - Prologue - Fallout 3: The Pitt - Game Guide and Walkthrough](https://game.lhg100.com/Article/UploadFiles/201512/2015121518502750.jpg) [#9]
[#9]The final phase of crossing the bridge will also require you to deal with an enemy sniper. He can be found on an upper balcony. You've got two choices here - you can kill him with a similar weapon from a larger distance or you can try getting closer to him. If you're interested in close combat, find a small platform located to your right [#10]. Choosing it will allow you to get to the upper balconies. There are a few items near the sniper, but nothing worth mentioning. Keep moving forward and you'll eventually notice new slaves running towards you. Make a stop and wait for the slaves to trigger nearby landmines. If you've already acquired a slave outfit you may ignore them. Otherwise inspect their bodies looking for such an item. You may now wear the outfit, however it won't be necessary, because you'll gain access to the inner areas of The Pitt either way.
![[#10] - Prologue - QUEST 1: Into the Pitt - part 2 - Prologue - Fallout 3: The Pitt - Game Guide and Walkthrough](https://game.lhg100.com/Article/UploadFiles/201512/2015121518502769.jpg) [#10]
[#10]Make sure that you're far away from the minefield before putting on a new outfit. Proceed to your right and start heading towards a large checkpoint. Open the main gate. You'll now have to decide on how you want to get to the Downtown area. There are two main solutions:
1) You can begin shooting at the raiders the second they let you in [#11]. I have to warn you - they're well equipped and armored, so it won't be easy to defeat them without losing too much health and ammunition. Once they're gone use a passageway leading directly to Downtown. Sadly, you're going to be surprised by a much larger group when you get there. Reddup and his men will stun you without giving you any chances of fighting back. You'll regain consciousness in a different area and without your equipment. Notice that Midea has started talking to you. She won't be pleased by your actions and she'll tell you that you should have been more discrete.
2) You can initiate a conversation with Mex and tell him that you've came here to join the raiders. The only good thing about this solution is that you won't be attacked by him and the other guards. Aside from that, everything else will stay the same, because you'll be knocked unconscious the second you've arrived at the Downtown area.
[#11]3) The best solution in my opinion is to lie to Mex that you're one of the slaves and that you've decided to return after an unsuccessful escape. Clearly you'll have more chances of convincing him if you're wearing a slave outfit, but even without one it shouldn't be hard to convince him to believing in your story [#12]. Proceed to a gate leading to Downtown. This time you won't be attacked by anyone and you won't be interrupted by Midea. Instead of searching for her remain near the start area and observe a few slaves being executed by a raider.
It doesn't matter how you'll decide to play out the conversation with Mex, because you'll still end up in Downtown and without your equipment. The only exception is going to be the camouflaged weapon smuggled for you by Wernher. This is where the introductionary quest will come to an end.
![[#12] - Prologue - QUEST 1: Into the Pitt - part 2 - Prologue - Fallout 3: The Pitt - Game Guide and Walkthrough](https://game.lhg100.com/Article/UploadFiles/201512/2015121518502785.jpg) [#12]
[#12]
Received from: automatically upon arrival in Downtown [The Pitt - Downtown]
Solution: It doesn't really matter if you've already talked to Midea or if you have to find her, because it won't interfere with the rest of the quest. Obviously you should take some time to explore the Downtown area, especially since none of the slavers will order to you to get to work. The area isn't too big, but sadly you won't be allowed to initiate conversations with most of the slaves and raiders. There are only two exceptions in the western section of Downtown. Adan has some rather useless information. Nola on the other hand is a much more interesting person [#13], because she can heal your wounds free of charge. It's a good idea to return to her each time you've suffered major injuries. There aren't any valuable items in the area, aside from a stimpack found in a broken hydrant. It's also going to be very difficult to steal items from raiders, because you'll be observed constantly by thugs occupying upper balconies.
![[#13] - Inside The Pitt - QUEST 2: Unsafe Working Conditions - part 1 - Inside The Pitt - Fallout 3: The Pitt - Game Guide and Walkthrough](https://game.lhg100.com/Article/UploadFiles/201512/2015121518502712.jpg) [#13]
[#13]When you fell you're done exploring the western section of Downtown, proceed to a rather small passageway leading to the eastern section [#14]. Midea will be waiting for you there, but only if you've chosen a "peaceful" approach while trying to get to Downtown. She'll tell you that she wants to meet you in her house to go over details. If you've already talked to her, you won't meet her again, so you may proceed forward right away. As for the eastern part of town, the only person you'll want to talk to is Kai. I wouldn't recommend asking her for free meat, because it's highly toxic and you would only increase your radiation levels. There are a few useful items hidden in the area. Take two stimpacks and purified water from an engine block and three stimpacks from a TV (near Kai).
![[#14] - Inside The Pitt - QUEST 2: Unsafe Working Conditions - part 1 - Inside The Pitt - Fallout 3: The Pitt - Game Guide and Walkthrough](https://game.lhg100.com/Article/UploadFiles/201512/2015121518502765.jpg) [#14]
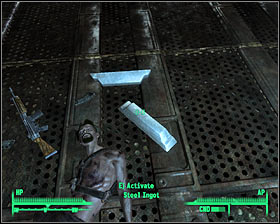
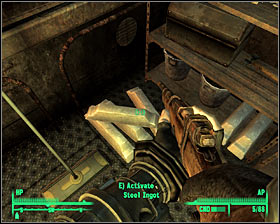
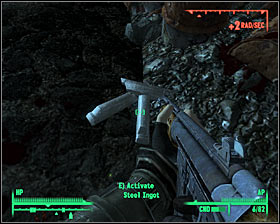
[#14]You may finally head over to Midea's Quarters. Once inside you'll automatically initiate a new conversation. Just as while you were talking to Wernher, you won't have to be extra polite towards her, because you won't gain any rewards [#15]. On the other hand, if you're rather hostile you won't make her mad enough for her not to help you. Remember to ask Midea about the strange creatures of The Pitt called Trogs, especially since you'll start encountering them very soon. You can also ask about receiving a better weapon from the one smuggled by Wernher. Midea will tell you to ask Marco from The Mill district, because he may have something interesting for you. This conversation is going to be eventually interrupted by one of the slavers. Thankfully you don't have to worry about taking part in a new fight. Instead you'll be given a task by the slavers - collecting steel ingots.
![[#15] - Inside The Pitt - QUEST 2: Unsafe Working Conditions - part 1 - Inside The Pitt - Fallout 3: The Pitt - Game Guide and Walkthrough](https://game.lhg100.com/Article/UploadFiles/201512/2015121518502850.jpg) [#15]
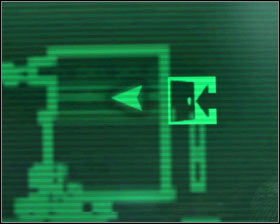
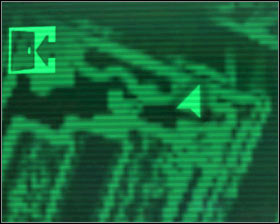
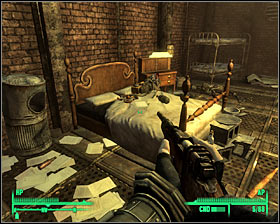
[#15]Wait for the conversation between Midea and Jackson to come to an end. You won't have to talk to her again, because you've already received your new assignment. There aren't any interesting items in her quarters, so you may exit this area right away. Return to the start area. Talk to Milly along the way if you want to. She'll ask you to find her friend Wild Bill. He was sent to where you're going right now, so it would be polite to agree to help her out. Go to the area where you've talked to Adan and find a door to his left [#16]. Use the door to travel to The Mill.
![[#16] - Inside The Pitt - QUEST 2: Unsafe Working Conditions - part 1 - Inside The Pitt - Fallout 3: The Pitt - Game Guide and Walkthrough](https://game.lhg100.com/Article/UploadFiles/201512/2015121518502873.jpg) [#16]
[#16]
Once you've arrived at the new area it would be wise to once again spend some time exploring the surroundings. You can't access some of the areas just yet, including The Hole and a gate leading to Uptown. Thankfully you won't have to worry about that, because you'll go to these locations much later. Check some of the lockers near where you've started and you'll find ammunition for your camouflaged pistol. Ignore most of the slaves, because they'll only respond to you in the form of short sentences. One of the rare exceptions is going to Brand. Be careful, because he's a snitch. You can share your plans or findings with him if you're playing as a bad character, especially since each time you'll be rewarded with two stimpacks and some negative karma. Some of the things you may tell him include your plans for stealing the cure and cooperation between Midea and Werhner. You can also tell him about Marco's weapons later on. If you're playing as a good character the best solution would be to ignore him entirely or to tell him that you don't know any secrets.
![[#17] - Inside The Pitt - QUEST 2: Unsafe Working Conditions - part 2 - Inside The Pitt - Fallout 3: The Pitt - Game Guide and Walkthrough](https://game.lhg100.com/Article/UploadFiles/201512/2015121518502855.jpg) [#17]
[#17]Before you decide to travel to The Steelyard, it would be a good idea to follow Midea's hint and to visit Marco at his toolshop. Marco can be found in the northern section of The Mill district. Begin the conversation and ask him whether he has some weapons for you [#18]. As a result Marco will give you the basic version of the coolest weapon of The Pitt, called AutoAxe. You don't have to choose it from your inventory right away, but you can create a shortcut for it. You should also know that you won't be forced to use this melee weapon, because you'll find an assault rifle soon enough. Continue your exploration of The Mill. There are several terminals here, but you may as well ignore them. The same goes with two slavers - Bone and Hammer.
![[#18] - Inside The Pitt - QUEST 2: Unsafe Working Conditions - part 2 - Inside The Pitt - Fallout 3: The Pitt - Game Guide and Walkthrough](https://game.lhg100.com/Article/UploadFiles/201512/2015121518502833.jpg) [#18]
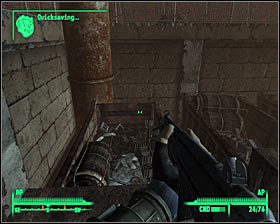
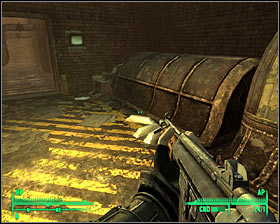
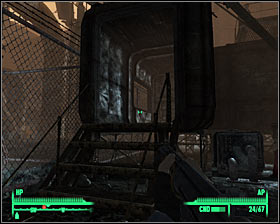
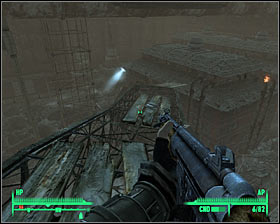
[#18]When you're ready to undertake Midea's missions, proceed to the western section of The Mill and find a guy named Everett. Initiate a conversation and confirm that you're the one who volunteered for the job in The Steelyard. You must now follow Everett to a back room. Before you leave The Mill, make sure to inspect a small office area [#19]. There's a briefcase here and you can find a nice suit inside. Wear the suit if you're still using a slave outfit. One of the lockers also contains more ammunition for your basic weapon. Use the door to travel to an Abandoned Area. Keep following Everett when you're there and make sure to listen to his comments about the Trogs. End this part of the task by approaching a door leading directly to The Steelyard. Open the door to get there.
Go to the section titled 'QUEST 4: The Mill Worker' in order to find out where to look for the steel ingots. If you've already collected ten or more of these objects (there are 100 of them) you may keep reading on what to do next. Remember that you must have the required number of ingots in order to move on with this quest.
Go to the section titled 'Rewards for completing The Pitt' if you want to find out what you can get for delivering the ingots to Everett (or his replacement).
![[#19] - Inside The Pitt - QUEST 2: Unsafe Working Conditions - part 2 - Inside The Pitt - Fallout 3: The Pitt - Game Guide and Walkthrough](https://game.lhg100.com/Article/UploadFiles/201512/2015121518502846.jpg) [#19]
[#19]Once you've returned from The Steelyard with ten or more ingots, talked to Everett and received your rewards you will finally be allowed to return to Midea. In order to do that you must head back to Downtown district. Go to Midea's Quarters once again (eastern section), however you can talk to Milly if you find her [#20]. Here's how you can resolve situation concerning her and the disappearance of Wild Bill:
1) You can win a Speech challenge and lie to Milly that Wild Bill is alive and well. She'll be happy to hear that and she'll give you six stimpacks.
2) You can win a Speech challenge and lie to her that Wild Bill died horribly. The downside is that you won't gain anything aside from Milly passing out due to your gruesome explanation.
3) You can tell Milly the truth about finding Wild Bill's body in The Steelyard. Just as in 1) you'll be given a reward of six stimpacks, so the only difference is that you won't lose karma.
![[#20] - Inside The Pitt - QUEST 2: Unsafe Working Conditions - part 2 - Inside The Pitt - Fallout 3: The Pitt - Game Guide and Walkthrough](https://game.lhg100.com/Article/UploadFiles/201512/2015121518502859.jpg) [#20]
[#20]Enter Midea's Quarters and initiate a conversation in order to tell her that you've completed your job with the ingots. Listen to Midea's plan concerning taking part in fights organized in The Hole. Winning those will allow you to receive an audience with Ashur. Leave Midea's Quarters once the conversation has ended and take your time to listen to a short speech made by Ashur [#21]. Go back to the passageway leading to The Mill district.
![[#21] - Inside The Pitt - QUEST 2: Unsafe Working Conditions - part 2 - Inside The Pitt - Fallout 3: The Pitt - Game Guide and Walkthrough](https://game.lhg100.com/Article/UploadFiles/201512/2015121518502868.jpg) [#21]
[#21]
You must now proceed to the central area of The Mill district. You've probably encountered a locked gate here before. You can finally go inside [#22], because this is the passageway leading to the area where the fights are being managed. Talk to Spook along the way, however it's going to be a relatively short conversation. Use the stairs to get down to a lower level and find Faydra. You can ask her about the rules, additional equipment, your enemies and you can tell her that you're ready to begin.
![[#22] - Inside The Pitt - QUEST 2: Unsafe Working Conditions - part 3 - Inside The Pitt - Fallout 3: The Pitt - Game Guide and Walkthrough](https://game.lhg100.com/Article/UploadFiles/201512/2015121518502817.jpg) [#22]
[#22]GETTING READY
Thankfully the first round won't begin automatically. It's a good thing, because you'll want to spend some time preparing for what's about to come. I would strongly recommend that you use your equipment from The Steelyard quest, including the rewards given to you by Everett. You should have at least one Gamma armor in your possession. Wear it, because it grants protection against radiation. As for the guns, an assault rifle should be more than enough to win the first round, but you'll probably need something better for two other rounds. Ignore a locker pointed to you by Faydra [#23], because you'll find a very weak weaponry inside, including a pistol and some melee weapons. Make sure that you've used RadAway's and stimpacks before moving on with the fights. When you're ready approach a small hatch and confirm that you want to enter The Hole.
![[#23] - Inside The Pitt - QUEST 2: Unsafe Working Conditions - part 3 - Inside The Pitt - Fallout 3: The Pitt - Game Guide and Walkthrough](https://game.lhg100.com/Article/UploadFiles/201512/2015121518502895.jpg) [#23]
[#23]WINNING THE FIRST ROUND IN THE HOLE
The biggest problem with all three fights is going to be radiation. You'll be dealing with very large doses, up to 10 rads per second. As a result you will have to focus all of your efforts on ending each round in under sixty seconds, because otherwise the radiation will become critical and you'll risk a chance of losing your life. The first round will require you to go against three armored slaves [#24]. Each opponent will be equipped with a medium-size gun. I would recommend that you start by eliminating a thug who is armed with a combat shotgun. Remember to attack him from a larger distance, because the shotgun is deadly at close range. Aim for his head and this also applies to your other enemies. Once you've defeated all three opponents you may spend some time looting their bodies or (if your radiation levels are extremely high) you can go back through the hatch to The Mill.
[#24]Once you've successfully returned to The Mill Faydra will neutralize all negative effects of radiation [#25], so you don't have to worry about having enough RadAway's in your possession. Sadly this doesn't apply to standard wounds. You can either treat yourself if you have a lot of stimpacks to spare or you can always head back to the Downtown district and ask Nola to heal the main character. Don't forget to reload your weapon or to choose better guns for the second round. Talk to Faydra when you're ready and tell her that you want to begin the second fight. Use the hatch to enter The Hole.
![[#25] - Inside The Pitt - QUEST 2: Unsafe Working Conditions - part 3 - Inside The Pitt - Fallout 3: The Pitt - Game Guide and Walkthrough](https://game.lhg100.com/Article/UploadFiles/201512/2015121518502980.jpg) [#25]
[#25]WINNING THE SECOND ROUND IN THE HOLE
This time you'll be going against well-equipped brothers. One of your opponents will be using a flamethrower and he should be the one to die faster [#26]. Remember that he can only attack you at medium and close range. Also - prevent his brother from taking his weapon once he's eliminated. As for the second opponent, he will try getting as close to you as possible, because he'll be using a Deathclaw gauntlet which is one of the best melee weapons. If you can't escape him, consider using one of the autoaxes during the duel. Just as before, you should spend some time looting bodies for extra equipment. If you don't have enough time due to high radiation levels focus only on taking the gauntlet from one of the brothers. Notice that they were both using Gamma armors, but you could acquire an identical model from The Steelyard and if you've collected more ingots you probably have something even better right now. Allow Faydra to neutralize radiation, heal the main character and confirm that you're ready for your final third challenge.
![[#26] - Inside The Pitt - QUEST 2: Unsafe Working Conditions - part 3 - Inside The Pitt - Fallout 3: The Pitt - Game Guide and Walkthrough](https://game.lhg100.com/Article/UploadFiles/201512/2015121518502982.jpg) [#26]
[#26]WINNING THE THIRD, FINAL ROUND IN THE HOLE
The final duel will require you to go up against a single opponent. As you've probably suspected, he will be using state of the art equipment, including a unique rifle called The Infiltrator. It's up to you how you want to play this out. You can either try getting closer to him and finish him off with an autoaxe or you can keep firing at him from a larger distance. If you prefer the second option don't forget to aim for his head. Inspect his body when the battle has ended and make sure to take his rifle. You may now return to The Mill district. Allow Faydra to treat you for the last time and take part in a conversation with Krenshaw. He will inform you that you've won the rights to have an audience with their leader Ashur.
![[#27] - Inside The Pitt - QUEST 2: Unsafe Working Conditions - part 3 - Inside The Pitt - Fallout 3: The Pitt - Game Guide and Walkthrough](https://game.lhg100.com/Article/UploadFiles/201512/2015121518502950.jpg) [#27]
[#27]
Received from: Krenshaw [The Pitt - The Mill]
Solution: Before you decide to go talk to Ashur, it's extremely important that you retrieve your original equipment which you've lost upon your arrival in the Downtown area. Thankfully you won't have to fight for it anymore, because you'll find all your things inside a nearby locker [#28]. Open the locker and take your time to create new shortcuts to your best weapons. Like I've said at the beginning, it's important that you were "light" before entering The Pitt, so now you can carry your original equipment and things found in The Steelyard, received from Everett or retrieved from The Hole.
![[#28] - Inside The Pitt - QUEST 3: Free Labor - Inside The Pitt - Fallout 3: The Pitt - Game Guide and Walkthrough](https://game.lhg100.com/Article/UploadFiles/201512/2015121518502948.jpg) [#28]
[#28]You may now travel to the Uptown district. There are two ways for you to get there and they both lead through previously inaccessible gates. The closer gate can be found here in The Mill and it's located in the northern section of the map. You shouldn't have any problems finding it. Ignore Hammer [#29] and head on to the stairs. An alternative passageway to Uptown leads through a gate in the Downtown district. The exact location of the gate is to the left of Midea's Quarters. In both cases you'll be presented with an opportunity of inspecting upper balconies. I wouldn't recommend ignoring it, because you'll find a lot of interesting items. Still, don't forget that some of those things will belong to raiders, so taking them will be counted as thievery. You can also find people to talk to. There are more of them in Downtown. When you're done talking and exploring proceed to Uptown.
![[#29] - Inside The Pitt - QUEST 3: Free Labor - Inside The Pitt - Fallout 3: The Pitt - Game Guide and Walkthrough](https://game.lhg100.com/Article/UploadFiles/201512/2015121518502916.jpg) [#29]
[#29]The main building which is Ashur's headquarters can be found in the north-eastern section of the Uptown district. It doesn't really matter whether you came through The Mill or Downtown, because these passageways are located close to each other. As for means of reaching your current destination, there are two main paths. If you decide to remain on the ground you'll have to pick lock on a nearby gate [#30]. If you can't or don't want to waste your time on opening gates, you can also use upper balconies to go through the building area. Like always, it would be wise to spend some time exploring the surrounding area. There are a few interesting characters for you to meet, including Mona (you can ask her about the scars on her face), Vikia (she's training on how to use a sniper rifle), Reddup (you can tease him a little bit), Squill (he will congratulate you on your achievements in The Hole) and Duke.
![[#30] - Inside The Pitt - QUEST 3: Free Labor - Inside The Pitt - Fallout 3: The Pitt - Game Guide and Walkthrough](https://game.lhg100.com/Article/UploadFiles/201512/2015121518502977.jpg) [#30]
[#30]Before you proceed towards your current goal area you should also take interest in more thing and that is exploring Abandoned apartments. There are two entrances to the apartments and they're both located in the northern part of the district. You should also know that one of the entrances is being protected by a locked gate [#31]. Once inside, you would have to acknowledge the fact that you would be dealing with large number of Trogs, including especially powerful Trog Brutes. You should also watch out for the gas, because firing a gun may trigger an explosion and result in your character getting killed. If you do survive you can count on finding a lot of interesting treasures. Some of them will be out in the open, but the most valuable items are hidden or stashed inside safes. It's really up to you how thorough you want to be and how many treasures you're planning on finding. You can also ignore the buildings and continue with the main quest right away.
![[#31] - Inside The Pitt - QUEST 3: Free Labor - Inside The Pitt - Fallout 3: The Pitt - Game Guide and Walkthrough](https://game.lhg100.com/Article/UploadFiles/201512/2015121518502963.jpg) [#31]
[#31]You must continue moving east if you want to get to Ashur's main headquarters. There's a large entrance leading to the inner compound [#32], so it shouldn't be a problem to find it. Inspect the surrounding area if you want to, but sooner or later you'll have to get to a large gate leading to Haven Entrance. Once inside ignore exploring the surrounding rooms and proceed to the upper floor. Locate an elevator similar to the one found in Tenpenny Tower and use it to get you directly to Haven. Start moving forward and enter a large chamber. You must wait here for Ashur to finish briefing one of his men. You'll now have to make a very important decision whether you want to side with the raiders (Ashur) or with the slaves (Wernher).
Continue reading the next chapter of my guide, titled 'Final decisions', if you want to find out more about possible ways of ending this quest.
![[#32] - Inside The Pitt - QUEST 3: Free Labor - Inside The Pitt - Fallout 3: The Pitt - Game Guide and Walkthrough](https://game.lhg100.com/Article/UploadFiles/201512/2015121518502908.jpg) [#32]
[#32]
Solution: Ashur is thankfully far more forgiving than you might have anticipated, so you won't have to lie to him in order to choose the answers that would please him the most. Generally you can start the conversation by choosing one of three dialogue options shown to you on the screen. You'll only have to avoid the final fourth dialogue option, because that would automatically trigger a fight with Ashur. During the conversation you can win a couple of Speech challenges [#33], however even if you fail nothing bad will happen and you won't make Ashur mad enough to actually attack you without warning. Eventually you'll have to agree into helping him. Ashur will want you to stop Wernher and other rioting slaves. He will end this conversation by asking you to talk to his wife Sandra, because she'll have more info for you concerning their plans. Ashur will then be summoned to help out the slavers in fighting the slaves, so he'll leave the building immediately.
![[#33] - Final decisions - Siding with Ashur - Final decisions - Fallout 3: The Pitt - Game Guide and Walkthrough](https://game.lhg100.com/Article/UploadFiles/201512/2015121518502932.jpg) [#33]
[#33]Sandra can be found in a smaller room, located to the right of Ashur's chamber. I'm sure you won't have any problems finding it, because it's a small building. Before you decide to talk to Sandra you might want to inspect a nearby terminal. The main reason is that you'll find out a lot of interesting things, including the fact that the cure is... her child. Initiate a conversation with Sandra [#34]. Similar to Ashur's situation, you won't have to be extrapolite towards her in order to acquire additional information. This scene will end in a positive manner as long as you don't decide to take the baby away from her. Feel free to question her motives if you want to. Once you're done go back to Haven entrance and then exit the building.
![[#34] - Final decisions - Siding with Ashur - Final decisions - Fallout 3: The Pitt - Game Guide and Walkthrough](https://game.lhg100.com/Article/UploadFiles/201512/2015121518502905.jpg) [#34]
[#34]As you've probably noticed by now, intense fights are taking place in Uptown. Most of the slaves have begun attacking the raiders. Obviously you will have to avoid the slaves, because since you've already made up your mind to side with Ashur, they'll be hostile towards you. DON'T ATTACK the slaves, because that would automatically cancel any possible dialogue options with Midea and Wernher in the near future. Notice that some of the raiders will be using rocket launchers. You can wait for them to get killed and steal their weapons. Your current destination is the Downtown district and this means you'll have to return to the upper balconies. Watch out while using smaller bridges, because if you encounter a slave, you won't have anywhere to run. Locate a door leading to Downtown [#35] and confirm that you want to travel to that location.
![[#35] - Final decisions - Siding with Ashur - Final decisions - Fallout 3: The Pitt - Game Guide and Walkthrough](https://game.lhg100.com/Article/UploadFiles/201512/2015121518503034.jpg) [#35]
[#35]Notice that you've begun the exploration of the Downtown district on an upper balcony. As a result you shouldn't be in a lot of hurry, because you'll be safe here. Remember that you shouldn't attack slaves yourself, however you can wait for other raiders to kill them. You can also inspect some of the upper balconies and buildings on in order to interact with some of your new allies, including Harris (he sells food and drugs) and Friday (she sells and repairs weapons and armor). Be on a look out for safes and stashes, BUT don't touch items belonging to other raiders. Use the stairs to get to the ground floor when you're ready and enter Midea's Quarters. Initiate a new conversation. You can acquire the exact location of Wernher using persuasion, intimidation or force. Here are the possible outcomes:
1) You can win a Speech challenge [#36] in order for Midea to disclose Wernher's location.
2) If you fail a Speech challenge you can try intimidating Midea by threatening that you'll kill all other slaves (second dialogue option).
3) You can steal the note away from Midea and read it to find out where Wernher is hiding.
4) You can kill Midea and find the note in her pocket.
I wouldn't recommend killing Midea nor making her attack the main character, so you'll have a chance to talk to Wernher when you'll actually find him.
![[#36] - Final decisions - Siding with Ashur - Final decisions - Fallout 3: The Pitt - Game Guide and Walkthrough](https://game.lhg100.com/Article/UploadFiles/201512/2015121518503003.jpg) [#36]
[#36]You now know that Wernher is hiding in The Steelyard, so that's your next destination. Leave Midea's Quarters. In order to get to The Steelyard you must obviously travel through The Mill and this means going through slave-infested areas. You'll probably witness new fights taking place along the way and don't forget to ignore them, so you won't have to fight back. Once you're in The Mill proceed to the passageway leading to an Abandoned Area. It shouldn't take too long for you to get to your final destination. You'll now have to travel to the staircase where you found Wild Bill's body the first time you were here [#37]. Check the description of the fourth main quest if you forgot where it was.
![[#37] - Final decisions - Siding with Ashur - Final decisions - Fallout 3: The Pitt - Game Guide and Walkthrough](https://game.lhg100.com/Article/UploadFiles/201512/2015121518503005.jpg) [#37]
[#37]Ignore Wild Bill's body, because clearly you won't receive any additional intel here. Use the stairs to get to the upper level. Your current objective is a small shack where you fought the wildmen. Be careful, because this area may now be patrolled by one of the slaves. Ignore his attacks, because if you respond to them you won't be able to talk to Wernher. Instead proceed directly to a blue door, located to the right of the shack [#38]. Enter the new area which is going to be Wernher's Hideout.
![[#38] - Final decisions - Siding with Ashur - Final decisions - Fallout 3: The Pitt - Game Guide and Walkthrough](https://game.lhg100.com/Article/UploadFiles/201512/2015121518503063.jpg) [#38]
[#38]Make a few steps forward and allow Wernher to approach you, initiating a new conversation. The only exception is when you've killed at least one slave and in such case you would have to attack him right way. Here's how the conversation can end:
1) You can kill Wernher by saying that you don't have any alternatives. I have to warn you - he's a very skilled warrior, so you would have to be using one of your most powerful guns to take him down.
2) You can win a Speech challenge and convince Wernher to leave The Pitt with nothing [#39].
3) You can use a Black Widow perk if you're playing as a woman and if you've already chosen this talent during one of earlier level-ups.
![[#39] - Final decisions - Siding with Ashur - Final decisions - Fallout 3: The Pitt - Game Guide and Walkthrough](https://game.lhg100.com/Article/UploadFiles/201512/2015121518503083.jpg) [#39]
[#39]It doesn't really matter if you spare Wernher's life or kill him, because it'll solve Ashur's problem. Notice that you've been left alone inside the hideout, so you can look around a little. You'll now have to return to Uptown using a passageway located in The Mill or in Downtown. You can keep ignoring the slaves, however killing them wouldn't affect any future conversations anymore. Go to Haven Entrance and then use the elevator to reach Haven. Obviously you must go and talk to Ashur. He will thank your for your assistance. Ashur will give instructions on how to use an ammo mill than can be found in The Mill district [#40]. You'll also find out that you can start bringing in teddy bears for Sandra's baby and you'll be rewarded for each such find. Exit The Pitt or go to The Mill to manufacture ammo. Either way, your job in The Pitt is done. Congrats!
![[#40] - Final decisions - Siding with Ashur - Final decisions - Fallout 3: The Pitt - Game Guide and Walkthrough](https://game.lhg100.com/Article/UploadFiles/201512/2015121518503073.jpg) [#40]
[#40]
Solution: If you decide to assist the slaves in regaining their freedom you won't have to start shooting at every raider you meet, starting with Ashur. If you play this out correctly, you will eliminate only those targets that will stand in your way of completing the quest. There are two ways of ending the conversation with Ashur which will begin once he's briefed one of his men. If you feel you're ready to take him down, you may choose the final fourth dialog option from the list. Ashur would attack you immediately [#41] and you would also have to kill his men. I would recommend choosing a much safer way. Talk to Ashur and agree to help him in getting rid of Wernher. Remember that you can still betray him and making him think that you're his ally will result in him leaving the building to fight the slaves. As a result you are going to be left alone which will make your plan go a lot smoother.
![[#41] - Final decisions - Siding with Wernher - part 1 - Final decisions - Fallout 3: The Pitt - Game Guide and Walkthrough](https://game.lhg100.com/Article/UploadFiles/201512/2015121518503004.jpg) [#41]
[#41]I would recommend that you start off by visiting Ashur's private chambers, located to the left of the main room where you last spoke. There's a computer terminal on the right wall [#42], but sadly using it can only be possible if you've spent at least 75 points into Science skill. The terminal can be used to deactivate or to reprogram a turret located in the main room. You can also open the safe located on the opposite wall. Don't forget that all these actions are treated like stealing, so you'll be losing small amounts of karma points. If you can't hack the terminal, focus only on opening the safe using a bobbypin. It's relatively important that you acquire its contents, because you'll gain possession of two Stealth Boys which will come in handy during the escape from Uptown which will take place in the near future.
![[#42] - Final decisions - Siding with Wernher - part 1 - Final decisions - Fallout 3: The Pitt - Game Guide and Walkthrough](https://game.lhg100.com/Article/UploadFiles/201512/2015121518503086.jpg) [#42]
[#42]You may now return to the main chamber where you've talked to Ashur. This time choose a corridor located to your right and eventually you'll get to a room where you'll meet Ashur's wife - Sandra. Before you initiate a conversation with Sandra, take special notice of a nearby computer terminal. You'll find out that the real "cure" is her own baby. Remember that you want to side with Wernher, so you'll have to kidnap the baby in order for the slaves to get leverage and to start research of their own. Here's how you can play out the kidnapping:
1) You can kill Sandra without even initiating a conversation with her. Despite what you might think, this is a very interesting idea. The only thing that you must know is that Sandra should die far away from other raiders, so they won't be alarmed right away. You can test this by going to the corridor guarded by them. If you're not attacked on sight, then you'll have a free passage to the elevator. Don't forget to take the baby or this will be all for nothing!
2) You can initiate a conversation with Sarah and force her to hand over the baby. The little kid will automatically be added to your "inventory". Sandra will obviously be furious, so you can expect that she'll call for the guards. She won't attack you at first, but she'll join other slavers the second they begin firing at you.
3) You can take the baby from the crib without taking to Sandra nor killing her. The crib can be found next to the terminal [#43]. In this case you'll also have to be ready for Sandra to call for the guards. Stealing the baby without her knowing about it is next to impossible.
![[#43] - Final decisions - Siding with Wernher - part 1 - Final decisions - Fallout 3: The Pitt - Game Guide and Walkthrough](https://game.lhg100.com/Article/UploadFiles/201512/2015121518503089.jpg) [#43]
[#43]Expect heavy resistance from the guards if you've chosen an option that will require you to kill them [#44]. If you haven't reprogrammed the turret, you should escape from this area as soon as possible. Otherwise you may remain in the main chamber and the turret will make getting rid of the guards much easier. Don't forget to use your most powerful guns, however you can also be using an autoaxe. Keep pushing towards the elevator and use it to get to Haven Entrance. Proceed to the stairs right away and flee from the building before you'll become a target for all nearby slavers. Activate your Pip-Boy once you've successfully left the building (as long as you took one from the safe or have one from previous journeys).
[#44]You'll now have to be ready to complete a very difficult portion of this quest. Notice that raiders are fighting the slaves, however you can't count on your enemies being distracted all the time. This is very important at the beginning, because there are a lot of soldiers equipped with rocket launchers around you [#45]. As a result you should focus on getting out of here as soon as possible, especially since their attacks can seriously injure your character. Like I've mentioned before, using a Stealth Boy is a good idea, because enemy units will have more problems locating your exact position. Make sure not to attack the slaves while trying to escape and keep moving west.
![[#45] - Final decisions - Siding with Wernher - part 1 - Final decisions - Fallout 3: The Pitt - Game Guide and Walkthrough](https://game.lhg100.com/Article/UploadFiles/201512/2015121518503141.jpg) [#45]
[#45]Your current objective is to reach the door leading to the Downtown district. You probably remember that in order to get there you must use upper balconies. I wouldn't recommend going upwards the first chance you get. Instead, stay on the ground and keep heading towards a large metal gate [#46]. Open the gate, turn left and find a small staircase. Use the staircase to get to an upper floor. You may now decide to help the slaves in getting rid of the raiders or you can ignore both groups and head straight for the exit. It's important that you remember this route, because you'll be returning here very soon. Confirm that you want to travel to the Downtown sector.
![[#46] - Final decisions - Siding with Wernher - part 1 - Final decisions - Fallout 3: The Pitt - Game Guide and Walkthrough](https://game.lhg100.com/Article/UploadFiles/201512/2015121518503131.jpg) [#46]
[#46]Once you've reached Downtown you'll have to acknowledge the fact that most of the upper balconies are going to be occupied by enemy units. If you don't want to fight them right now use the nearest staircase [#47] to get to the ground level. Once you're there turn left and it shouldn't take too long for you to locate an entrance to Midea's Quarters. The conversation with Midea is going to be short, however you can express your concerns about kidnapping an innocent baby. Don't worry, because it won't change the outcome. Midea will guide you to Wernher, because he's the only one capable of protecting the child against the slavers. Wernher is hiding in The Steelyard, but for now exit Midea's Quarters. You may also read a short note, but you won't find out anything new.
![[#47] - Final decisions - Siding with Wernher - part 1 - Final decisions - Fallout 3: The Pitt - Game Guide and Walkthrough](https://game.lhg100.com/Article/UploadFiles/201512/2015121518503110.jpg) [#47]
[#47]
In order to get to The Steelyard you must first get to The Mill and it's not going to be an easy task. Here are a few suggestions:
1) You may decide to go back to Uptown the same way you came here before. The main reason is that Uptown should be overrun by the slaves right now and it wouldn't be difficult to get to a second door (leading to The Mill) from there.
2) You can remain here, activate your Stealth-Boy and start running towards the door leading to The Mill. This seems like the best choice, especially since you'll be allowed to treat your injuries upon arrival in the new area.
3) You can ambush most of the slavers by firing at one of them and moving to the staircase [#48]. The rest should arrive there shortly and you can use a good melee weapon to get rid of them. The only downside is that you would have to spend more time here.
![[#48] - Final decisions - Siding with Wernher - part 2 - Final decisions - Fallout 3: The Pitt - Game Guide and Walkthrough](https://game.lhg100.com/Article/UploadFiles/201512/2015121518503145.jpg) [#48]
[#48]Once you've returned to The Mill you should notice that it's gotten a little easier here, because there are only going to be a few slavers left and they'll be running away from the slaves. Nevertheless, avoid them if you can, especially if you came from Uptown. Just as before, you'll have to get to an Abandoned Area and from there to The Steelyard. Start moving forward once you've reached your final destination and head over to where you found Wild Bill's body. It's a large staircase [#49]. Use the stairs to get to the top level.
![[#49] - Final decisions - Siding with Wernher - part 2 - Final decisions - Fallout 3: The Pitt - Game Guide and Walkthrough](https://game.lhg100.com/Article/UploadFiles/201512/2015121518503116.jpg) [#49]
[#49]Keep heading upwards. Your current destination should be the area where you found the shack the last time you were here. One of the slaves can be found here, but thankfully he'll act peacefully. Focus on finding a blue door [#50], located to the right of the shack. Open the door to get to Wernher's Hideout. Once inside, you can either go to a small tent area or you can wait for Wernher to come on down and greet you. Talk to him and give him the baby. You can share your concerns with him like you did with Midea, but it won't change anything. Wernher will now tell you that he has a plan to get rid of Ashur and other raiders. He'll then give you two important items - a Stealth-Boy and a key to Pitt Underground. You may exit his hideout.
![[#50] - Final decisions - Siding with Wernher - part 2 - Final decisions - Fallout 3: The Pitt - Game Guide and Walkthrough](https://game.lhg100.com/Article/UploadFiles/201512/2015121518503191.jpg) [#50]
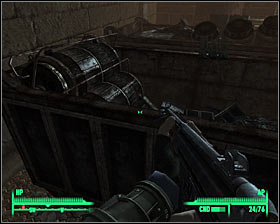
[#50]Don't leave The Steelyard district just yet. Instead go back to the train tracks where you've found a lot of ingots during your first visit to this location. Ignore the carriages and start moving towards a collapsed tunnel at the end of the train tracks. There's going to be a small hatch to your left [#51]. Open the hatch using the key given to you by Wernher and you'll find yourself standing in a new location, called Pitt Underground. I would recommend that you spend some time healing the main character and choosing a good weapon. An autoaxe should be more than enough to survive, however you can also be using a laser rifle, a plasma rifle, a combat shotgun or an assault rifle.
![[#51] - Final decisions - Siding with Wernher - part 2 - Final decisions - Fallout 3: The Pitt - Game Guide and Walkthrough](https://game.lhg100.com/Article/UploadFiles/201512/2015121518503128.jpg) [#51]
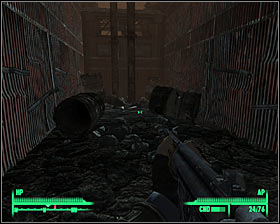
[#51]Going through the underground has its perks, but you'll also be dealing with a lot of problems. The good news is that there's only one main path leading to your current destination. Even if the sewers may seem like a maze at first, you can't get lost along the way. The only exceptions will include exploring larger rooms for additional equipment. The bad news is that the underground is swarming with Trogs. Furthermore, you won't be allowed to avoid the beasts, because most of them will stand in your way, forcing you to attack them. Make sure to be very cautious, so you won't be surprised by any monsters. Aside from Trogs you'll also have to watch out for single landmines. They can be found in several places, including near a dead person. Eventually you'll have to get to a much larger room with a lot of pipes [#52].
![[#52] - Final decisions - Siding with Wernher - part 2 - Final decisions - Fallout 3: The Pitt - Game Guide and Walkthrough](https://game.lhg100.com/Article/UploadFiles/201512/2015121518503164.jpg) [#52]
[#52]Proceed to a much smaller room in the back where you'll come across a computer terminal. Thankfully you will be allowed to use it right away, without having to show your hacking skills. Open the main menu and choose the first option from the list [#53]. This will allow the Trogs to get to Uptown which is being occupied by the raiders. As you've probably suspected, you'll have to be moving rather quickly from now on, because the beasts are heading the same way. Locate a nearby corridor and eventually you'll get to the stairs. Use the stairs and you'll find yourself standing inside a small room. Explore the area or use the nearest door to travel to Uptown.
![[#53] - Final decisions - Siding with Wernher - part 2 - Final decisions - Fallout 3: The Pitt - Game Guide and Walkthrough](https://game.lhg100.com/Article/UploadFiles/201512/2015121518503162.jpg) [#53]
[#53]It's EXTREMELY important that you activate your Stealth-Boy the second you leave the underground, because you'll want to remain in the shadows from now on. If you haven't killed Ashur in his HQ, you'll meet him here [#54]. Don't even think about fighting him, because the Trogs will soon begin appearing in the Uptown district. If you won't leave this area immediately, the monsters will eventually attack your character, because all the slavers will be gone by then. Start off by travelling south-west, so you'll be heading towards the main gate to the inner compound.
![[#54] - Final decisions - Siding with Wernher - part 2 - Final decisions - Fallout 3: The Pitt - Game Guide and Walkthrough](https://game.lhg100.com/Article/UploadFiles/201512/2015121518503149.jpg) [#54]
[#54]I wouldn't recommend staying on the ground level, because you would come across a lot of beasts and it would be too difficult to escape them. Instead use the nearest platform [#55] to get to the upper balconies. It's going to be rather tough here, because you'll also be dealing with hostile raiders. Ignore most of them and eliminate only those who stand in your way. Sooner or later Trogs will join the party on the balconies so clearly you can't spend too much time there. Keep pushing towards the door leading to Downtown. You should remember the way, because you were using the same path not long ago. Use stimpacks regularly in order to prevent the main character from getting killed. Approach the door and confirm that you want to travel to the Downtown district.
![[#55] - Final decisions - Siding with Wernher - part 2 - Final decisions - Fallout 3: The Pitt - Game Guide and Walkthrough](https://game.lhg100.com/Article/UploadFiles/201512/2015121518503231.jpg) [#55]
[#55]This is almost the end of this quest. The only thing left to do here is to talk to Wernher. He can be found standing in the middle of a square in Downtown [#56]. Your ally will thank you for your assistance. If you're interested in rewards - Wernher will tell you than you can start delivering him teddy bears for the kidnapped kid. You'll also be made aware of that you can use an ammo mill in The Mill district. There's going to be a note on how to operate it. Congratulations for completing the final quest!
![[#56] - Final decisions - Siding with Wernher - part 2 - Final decisions - Fallout 3: The Pitt - Game Guide and Walkthrough](https://game.lhg100.com/Article/UploadFiles/201512/2015121518503263.jpg) [#56]
[#56]
Received from: Midea [Downtown - Midea's Quarters]
Solution: Important! In order to fulfill Midea's request you'll only have to find ten steel ingots, but in order to complete this quest you must locate all of them. There are 100 ingots for you to find and you should keep reading if you don't plan on looking for them on your own. Obviously you can change the route depending on how much time you want to spend in The Steelyard. Each find has two pictures in my guide. The first picture shows the ingot (or ingots) in the game world and the second screen shows the location on the map.
Once you've arrived at The Steelyard make a few steps forward and located a body of a killed slave. There are first two ingots here, but the more important activity is to collect an assault rifle, as well as some ammunition. You can now continue using an autoaxe from Marco or you can switch to your new gun. Inspect the body of the slave for more bullets, as well as several bobbypins.
INGOTS #1, #2
Location: Next to a dead slave.
You may proceed forward, towards large carriages seen in the distance. Inspect the area to your right and you'll notice a "conversation" taking place between one of the slaves and his brother who is now a Trog. You can react as soon as the Trog attacks his brother by firing at the creature or you can allow the beast to get its hands on fresh meat. For now focus on reaching the stairs leading to a hood of a large truck. Get on top of the truck, make a few steps forward and turn left. There's a large container in front of you and you must jump towards the container.
INGOTS #3, #4
Location: Container next to the truck.
Turn right and you'll notice a similar second container. Make a jump towards the container, but watch out not to lose balance, because you would have to start the jumps from the beginning.
INGOTS #5, #6
Location: Second container from the left.

There's one more large container here, but you wouldn't find any new ingots inside. Instead jump down to the ground and check the corner near the third large container. You'll come across a smaller container here. Ignore the body of a dead slave and take a look inside the container to collect three new ingots.
INGOTS #7, #8, #9
Location: Smaller container with a body of a dead slave.
Once you've collected ingots from a small container turn around and proceed to the stairs located to your left. Use the stairs to get to the upper level and head towards wooden boards. Go right and head over to a small alley found to your left. Be careful, because once you've collected new ingots you may be attacked by the first creature. Don't forget to inspect bodies of fallen Trogs, because you'll find a lot of interesting items, including drugs and bobbypins.
INGOTS #10, #11
Location: Dark alley.

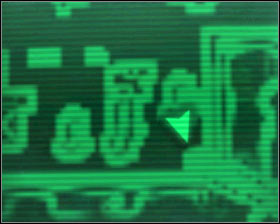
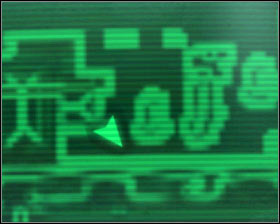
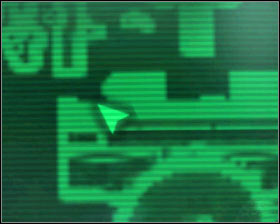
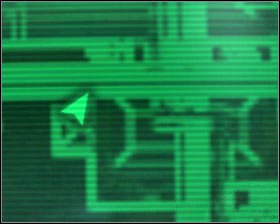
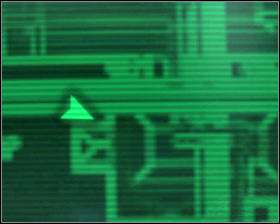
Go back to the narrow passageway where you've used the wooden boards to get through. Turn left and start moving near the ledge. You should be standing to the right of a large fence. Look at the screen [#57] to find out where you'll have to stop. It should be the third metal platform counting from the end. If you're facing the platform, you should be able to notice a Trog and the slave from one of the previous encounters.
![[#57] - Additional quest - QUEST 4: The Mill Worker - part 1 - Additional quest - Fallout 3: The Pitt - Game Guide and Walkthrough](https://game.lhg100.com/Article/UploadFiles/201512/2015121518503369.jpg) [#57]
[#57]Jump onto the platform CAREFULLY. Remember that you can't be standing in the middle of the platform or otherwise you'll lose balance and fall. Start moving forward while still standing on the platform, but don't go all the way to the end. Instead make a stop at about a half way through. Look down and you should be able to locate a carriage with two ingots on top of it. Slide down to land on that carriage. Take the ingots and defeat a Trog, preventing the creature from making a surprise attack.
INGOTS #12, #13
Location: On top of one of the carriages.


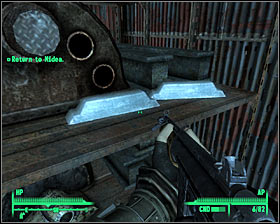
In order to get to other ingots you'll have to go back to the upper platform. This means going to the stairs and to the wooden boards. Use the same metal platform as before (third from the end), but now go all the way to the end. Look down and you should notice three new ingots in an opened container. Slide down in order to land inside the container.
INGOTS #14, #15, #16
Location: Container near the fence and under the platform.

Go back to the upper ledge for the last time and start moving next to a fence. This time ignore the third platform from the end and proceed to the final metal platform. Hop onto the platform and from there get to one of the carriages. Slide down to land on top of the carriage and start moving north. You should notice a few Trogs located nearby, but since you're standing on a carriage killing them with a rifle should be very easy. Make sure they've all been killed, get to the ground level and find two new ingots near the collapsed tunnel.
INGOTS #17, #18
Location: Near the collapsed tunnel entrance.
Turn around and begin moving south-east. You will soon reach an area with a few pods [#58]. If you're skilled enough you can hack into a nearby terminal in order to activate Protectrons. Watch out, because you may get attacked by new Trogs in the process.
![[#58] - Additional quest - QUEST 4: The Mill Worker - part 2 - Additional quest - Fallout 3: The Pitt - Game Guide and Walkthrough](https://game.lhg100.com/Article/UploadFiles/201512/2015121518503333.jpg) [#58]
[#58]You can also ignore the pods, because you've already secured the area near the train tracks. If you've activated Protectrons, they should begin sweeping the area for more hostiles, but don't count on them moving further into the factory complex. For now focus on finding a small door in this area. Confirm that you want to travel to a Supply Plant. Once inside start moving forward. Inspect a destroyed Protectron and collect energy cells. You can now hack into a nearby computer terminal [#59] in order to activate security turrets. This will allow you to dispose of a Trog located in the next room.
![[#59] - Additional quest - QUEST 4: The Mill Worker - part 2 - Additional quest - Fallout 3: The Pitt - Game Guide and Walkthrough](https://game.lhg100.com/Article/UploadFiles/201512/2015121518503412.jpg) [#59]
[#59]Notice that by going towards a nearby tunnel you've put yourself to a small dose of radiation. Begin retreating as soon as you reach the second room, because you'll notice more Trogs heading your way, as well as some wildmen. Kill all of them, disable the turrets and return to the second room. This time focus on finding three new ingots.
INGOTS #19, #20, #21
Location: In the second room, next to a terminal.

Ignore the second terminal, because it doesn't control any turrets nor any other objects inside the plant. Instead start moving forward. I wouldn't recommend making any unnecessary stops, because you'll only become more radiated. The only exception should be a medical kit on one of the shelves. Once you've reached a much larger area start firing at the Trogs from the upper balcony. Get ready for the monsters to attack you as soon as they locate your position. Once they're gone use the stairs to get down to a lower level. Inspect a small carriage with a destroyed Protectron inside. You will also find more supplies nearby, including RadAway's, Rad-X's, stimpacks and ammunition. Use the third terminal to activate a fully functional Protectron if you want to. If not - proceed directly to the train tracks located to your right and head on towards a relatively small tunnel [#60].
![[#60] - Additional quest - QUEST 4: The Mill Worker - part 2 - Additional quest - Fallout 3: The Pitt - Game Guide and Walkthrough](https://game.lhg100.com/Article/UploadFiles/201512/2015121518503454.jpg) [#60]
[#60]I would recommend to be cautious here, because there are hostile units nearby. Check your surroundings - you'll soon find a flamethrower on the ground. There are a few wildmen just around the corner. They've killed the Trogs and now they're after you. I would strongly recommend using grenades to eliminate them. Don't move too close, especially since one of your enemies is carrying a flamethrower. Kill them, proceed to end of the tunnel and collect eight (!!!) steel ingots.
INGOTS #22, #23, #24, #25, #26, #27, #28, #29
Location: At the end of the tunnel, inside a small carriage.

Go back to the previous area where you found the supplies. Notice that you haven't been to the left corridor, so that should be your next destination. Thankfully you won't have to worry about encountering any new monsters for the time being. Keep moving forward until you reach a metal door with two corpses on both sides of the door [#61].
![[#61] - Additional quest - QUEST 4: The Mill Worker - part 2 - Additional quest - Fallout 3: The Pitt - Game Guide and Walkthrough](https://game.lhg100.com/Article/UploadFiles/201512/2015121518503451.jpg) [#61]
[#61]Sadly it won't be easy to get to new ingots, because the door is locked. You should have more than enough bobbypins (you'll find them on almost every Trog corpse), so it all depends on your lockpicking skills. Once inside take your time to collect new supplies, including radiation drugs, stimpacks and ammunition. The most important activity here is to take six ingots. Two of them can be found on the ground and the remaining four on the shelves. There's also a terminal here, but may as well ignore it.
INGOTS #30, #31, #32, #33, #34, #35
Location: Inside a small room.

Leave this small shed and proceed to your right. Use the stairs to get to the upper level and you'll find yourself standing inside a much larger room. Your primary object of interest is the bed. Collect an improved version of an autoaxe. You can also take some fuel for the flamethrower. Finally go to the nightstand and take a single steel ingot. Use the control panel that is located next to the nightstand.
INGOT #36
Location: Next to a large bed, on the nightstand.

Theoretically you could exit the plant by using the same path you've chosen before, but it would take too much time. There is a much shorter route, however you will be forced to deal with a couple of Trogs along the way. The first group of the beasts can be found on the opposite end of this room and you must be ready to kill at least one more Trog coming out of a nearby corridor [#62]. Kill the monsters and go to that corridor. Eventually you'll get to a closed door. Use a nearby panel to open it and you'll end up standing inside the first room of the plant. Exit the building using the door on your right.
![[#62] - Additional quest - QUEST 4: The Mill Worker - part 3 - Additional quest - Fallout 3: The Pitt - Game Guide and Walkthrough](https://game.lhg100.com/Article/UploadFiles/201512/2015121518503567.jpg) [#62]
[#62]You'll now have to return to the upper sections of the factory complex and this means using the stairs and a small bridge made out of wooden planks. You've already explored the alleyway to your right, so now you should go to your left. Don't plan too far ahead, because you'll have to make a stop almost right away. There's a small building to your right and obviously you must enter it. Aside from two new ingots you'll also find RadAway's, purified water and a couple of stimpacks. Be careful on your way out, because you may be surprised by a single Trog.
INGOTS #37, #38
Location: Small building near wooden planks.
![Proceed to your right and keep moving forward until you reach the stairs by the left building [#63] - Additional quest - QUEST 4: The Mill Worker - part 3 - Additional quest - Fallout 3: The Pitt - Game Guide and Walkthrough](https://game.lhg100.com/Article/UploadFiles/201512/2015121518503580.jpg)
Proceed to your right and keep moving forward until you reach the stairs by the left building [#63]. The stairs can be found just around the corner. Remain on the main street and you shouldn't have any problems getting there.
![[#63] - Additional quest - QUEST 4: The Mill Worker - part 3 - Additional quest - Fallout 3: The Pitt - Game Guide and Walkthrough](https://game.lhg100.com/Article/UploadFiles/201512/2015121518503568.jpg) [#63]
[#63]Use the stairs to get to the roof of this building. Turn around and move to the corner of the roof located closest to a new large container. Make a jump from the roof in order to land inside the container. There are new ingots here.
INGOTS #39, #40
Location: Inside a large container near the fence.

Remain on top of the container, because you'll have to get to an isolated area in order to collect two other ingots. Make sure that you're facing the southern fence [#64] and that you're standing on the ledge of the container.
![[#64] - Additional quest - QUEST 4: The Mill Worker - part 3 - Additional quest - Fallout 3: The Pitt - Game Guide and Walkthrough](https://game.lhg100.com/Article/UploadFiles/201512/2015121518503536.jpg) [#64]
[#64]Move back a little, start running towards the fence and press the jump key at the very last second. If you did everything according to the plan you'll end up standing inside an isolated area. Go to your right and keep going straight until you find the body of a slave. Take the ingots.
INGOTS #41, #42
Location: Next to a dead slave.
Getting out of there shouldn't be too difficult. All you have to do is to move back a little, look up and locate a few wooden boards. Get on top of the boards and you won't have any problems jumping over the fence with the barb wire. You could now go left (towards the stairs), however I would recommend going back to the container from where you made your first jump. In order to do that keep going next to the fence and when you reach an opening turn around. You'll once again end up standing near the stairs leading to the roof of the building. This time ignore the stairs and proceed forward [#65].
![[#65] - Additional quest - QUEST 4: The Mill Worker - part 3 - Additional quest - Fallout 3: The Pitt - Game Guide and Walkthrough](https://game.lhg100.com/Article/UploadFiles/201512/2015121518503640.jpg) [#65]
[#65]Watch out for a single Trog, because you may be attacked by the monster very soon. Instead of going all the way to the end of the path look for an opening to your left. You should end up standing between two buildings. Move forward but make a second left turn as soon as possible. There are going to be at least two Trogs here and it'll be up to you to get rid of them quickly. Collect two ingots and don't forget to loot bodies of killed monsters for extra equipment.
INGOTS #43, #44
Location: Between the buildings, near the stairs.

You must now go back to the main path leading to the lower sections of the complex. This is where you've been attacked by a single Trog. Go all the way to the end and notice that you'll be dealing with radiation here. Thankfully the radiation will be small (1-2 rads per seconds). Locate the body of a dead guard. Inspect the body in order to collect frag grenades and a Gamma armor. The armor is a very useful object, because it'll increase your protection from radiation. Wear the armor and finish off by taking three ingots.
INGOTS #45, #46, #47
Location: At the end of a long path.

Don't go back up, because you should spend more time exploring the irradiated zone. It shouldn't be a big problem, especially since you now possess a Gamma armor and you've probably collected a lot of RadAway's so far. Start off by moving north and focus on eliminating three Trogs as soon as possible. Remember that the longer you fight the more radiation you'll receive. Once the Trogs have been killed you can focus on finding the ingots. There are three of them and they can be found in the middle of this path, near barrels. There's also a dead slave here. Looting his body will result in picking up yet another assault rifle.
INGOTS #48, #49, #50
Location: Near the barrels, inside an irradiated area.

I would recommend that you keep moving north. Once you've reached an impenetrable fence turn left and head west. You will soon reach the stairs. Use the stairs to get to the roof of this new building. Continue moving forward until you reach a large gap in the balcony section [#66]. Move back a little and then jump over to the other side, landing on the roof of the smaller building. You could also try going back to find a safer way, but it shouldn't be necessary.
![[#66] - Additional quest - QUEST 4: The Mill Worker - part 4 - Additional quest - Fallout 3: The Pitt - Game Guide and Walkthrough](https://game.lhg100.com/Article/UploadFiles/201512/2015121518503685.jpg) [#66]
[#66]This isn't over yet. Once you've landed on a new roof turn right. You will now have to locate some wooden planks [#67]. Get on top of the planks and from there you should be able to make a second jump, landing on the highest section of this roof.
![[#67] - Additional quest - QUEST 4: The Mill Worker - part 4 - Additional quest - Fallout 3: The Pitt - Game Guide and Walkthrough](https://game.lhg100.com/Article/UploadFiles/201512/2015121518503659.jpg) [#67]
[#67]You should now begin moving north. There's a large black bridge in front of you and that's where you should be heading. Get there by using new wooden planks and then turn north-west. It shouldn't take too long for you to locate two ingots.
INGOTS #51, #52
Located: On a destroyed black bridge.
Remain on the destroyed bridge where you found the last group of ingots and continue moving north-west. Don't change the direction of your movement even when you find yourself standing on the roof of a new building. Ignore a new dead slave along the way and instead focus on landing on a smaller section of the roof. Collect two new ingots.
INGOTS #53, #54
Location: On a lower part of the roof.

Once again, don't leave the area where you found the last two ingots. Turn your character, so you'll be facing west. Slide down from the roof to the ground, turn around and find two other ingots directly in front of you.
INGOTS #55, #56
Location: On the shelf.
Proceed south and when you reach one of the corners of the left building head south-east. Inspect the area BELOW the stairs (large tires to be more specific). There are two steel ingots here. Don't worry if you can't see them right away, because they're well hidden.
INGOTS #57, #58
Location: Hidden behind the tires.
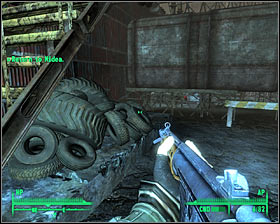
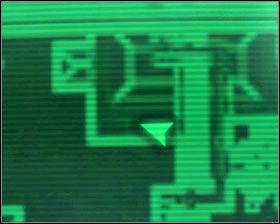
The immediate area is "secured", so you can now consider going back to the staircase mentioned by me a little while back. In order to do that you must begin by travelling south-west. When you get to a wall of a much larger structure just keep moving south and eventually you'll get to the stairs. Notice Wild Bill's body after using the first set of stairs. He's the man Milly told you about. I would strongly recommend taking Bill's pistol, because it's a better version of the camouflaged pistol you've received from Wernher. Don't forget to collect a letter, as well as two ingots.
INGOTS #59, #60
Location: Next to Wild Bill's body.
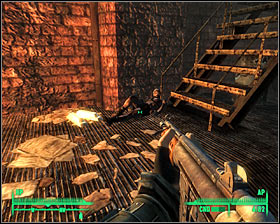
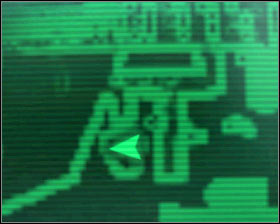
Use the stairs to get to the upper level, but make sure to choose an assault rifle from your inventory along the way. Once you're at the top approach a small shack and get ready to get rid of a few wildmen. I had to deal with two opponents, but you must be ready to encounter potential reinforcements. Once you've won make sure to inspect bodies of fallen enemies. You should also look around the shack, because it contains two ingots and other valuables (including ammo for the assault rifle and a medical kit).
INGOTS #61, #62
Location: Inside a small shack.
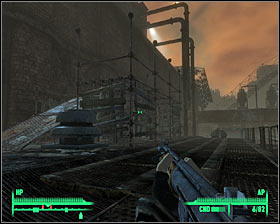
Exit the hut and begin moving forward, towards balconies leading to other sections of the compound. Keep going straight and don't stray off the path, because you don't want to get lost. Eventually you should be able to get to a roof that's being guarded by one of the wildmen. Kill him and get ready to dispose of a few Trogs as well. A rather large group of monsters will appear behind you, so you must be ready to engage them. Once they're gone focus on getting to a large pipe located in the south-eastern corner of the roof [#68].
![[#68] - Additional quest - QUEST 4: The Mill Worker - part 5 - Additional quest - Fallout 3: The Pitt - Game Guide and Walkthrough](https://game.lhg100.com/Article/UploadFiles/201512/2015121518503834.jpg) [#68]
[#68]Make a few steps forward while standing on a pipe and notice that one of the monsters is "guarding" two ingots. Kill the beast from a larger distance and collect your rewards.
INGOTS #63, #64
Locations: On a large pipe, guarded by a Trog.
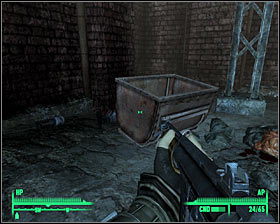
Once you've taken both ingots from a large pipe turn around and start moving forward (west). Don't change that direction even when you get to an another section of the roof. Go to the edge and slide down. Turn right, so you'll be facing north and locate a small passageway between two buildings [#69]. Go there now.
![[#69] - Additional quest - QUEST 4: The Mill Worker - part 5 - Additional quest - Fallout 3: The Pitt - Game Guide and Walkthrough](https://game.lhg100.com/Article/UploadFiles/201512/2015121518503847.jpg) [#69]
[#69]You can now either go to the other end of this passageway or you can turn left at the first chance you get, choosing another narrow alleyway. Either way, you should be able to find an area where the Trogs are attacking wildmen. Human opponents will probably prevail, but you should wait for the monsters to at least injure them. Deal with all hostile units, collect ammunition and take a look inside the main cart. There are four ingots here, as well as a medical kit and even more ammunition.
INGOTS #65, #66, #67, #68
Location: Inside a small mine cart.
Once you've won and collected all valuable items proceed to the north-east and then start moving east. Make sure that you stay close to the large fence and turn right when it blocks you from moving forward. Go to the other end of this alleyway and locate a body of a dead slave. There are two ingots here. Furthermore, you can collect a combat shotgun with some ammunition. This is a very useful weapon against the Trogs.
INGOTS #69, #70
Location: Next to the fence.
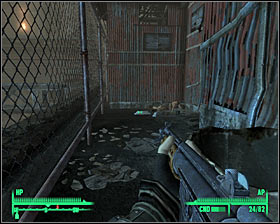

You'll now have to take a long walk, going back to the stairs where you originally found Wild Bill's body and defeated the wildmen. It shouldn't be too hard, because you're nearby. Once you've arrived at the small shack go to your right once again in order to use the upper balconies. Keep using the same path as before until you reach a new roof where you already defeated a single human opponent. This time ignore the pipes and lower parts of the roof. Instead find stairs leading to the upper sections of the factory [#70].
![[#70] - Additional quest - QUEST 4: The Mill Worker - part 5 - Additional quest - Fallout 3: The Pitt - Game Guide and Walkthrough](https://game.lhg100.com/Article/UploadFiles/201512/2015121518503968.jpg) [#70]
[#70]Once you're standing on a metal roof go to your right and you should notice a new staircase in the distance. Ignore the stairs for the time being and instead be on a look out for a small passageway which is going to be located to your right. Go there and explore the surrounding area. The north-western corner of the roof is being guarded by a single beast. Kill the Trog and find four ingots. You should also examine contents of two medical cases.
INGOTS #71, #72, #73, #74
Location: Corner of the roof with a few large domes.
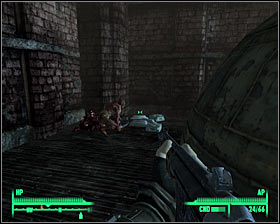
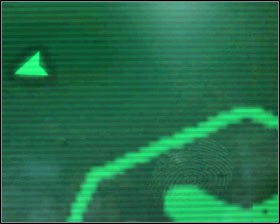
Get ready for a very long and for a very difficult journey. Make sure that the main character has been healed and take your time to organize his equipment. Go back to the previous area of the roof and proceed to the stairs mentioned before [#71]. Using these stairs will allow you to get to the top level of this huge structure. Be careful, because before you even get to the stairs you'll notice a small area in front of you. It may be occupied by a human opponent or by monsters. Get rid of these threats before moving on.
![[#71] - Additional quest - QUEST 4: The Mill Worker - part 5 - Additional quest - Fallout 3: The Pitt - Game Guide and Walkthrough](https://game.lhg100.com/Article/UploadFiles/201512/2015121518503999.jpg) [#71]
[#71]You'll now have to begin moving upwards. You'll be using relatively small balconies and you may encounter a lot of threats along the way, namely more wildmen. Be careful, because some of your opponents may occupy upper levels, so you won't notice them right away. Use your assault rifle or a sniper rifle to get rid of them. Make a stop once you've reached a huge platform and kill a few thugs from here. You must now begin RUNNING westwards. Take cover behind the nearest pillar. Notice an enemy turret nearby. You can destroy the turret with one of your weapons or you can disable it by hacking into a security terminal [#72] Make sure that you've spent at least 50 points into Science skill, because otherwise you won't be allowed to use the terminal and that'll leave you with having to destroy the object.
![[#72] - Additional quest - QUEST 4: The Mill Worker - part 5 - Additional quest - Fallout 3: The Pitt - Game Guide and Walkthrough](https://game.lhg100.com/Article/UploadFiles/201512/2015121518503995.jpg) [#72]
[#72]
Once you've disabled or destroyed the turret and taken care of all hostile units go to the stairs leading to the top of this tower. You shouldn't encounter any additional enemies along the way. Keep heading upwards and eventually you'll get to the top. Examine medical cases and begin collecting ingots. There's going to be TWELVE of them here!!!
INGOTS #75, #76, #77, #78, #79, #80, #81, #82, #83, #84, #85, #86
Location: On top of a huge tower.
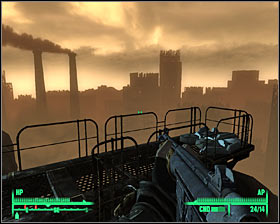

Make sure that you've taken all ingots and begin descending slowly. Reach one of the lower platforms and find an opening that will allow you to get to a large conveyor belt [#73]. Use this structure and start moving forward. Once again, you'll be perfectly safe.
![[#73] - Additional quest - QUEST 4: The Mill Worker - part 6 - Additional quest - Fallout 3: The Pitt - Game Guide and Walkthrough](https://game.lhg100.com/Article/UploadFiles/201512/2015121518503910.jpg) [#73]
[#73]Like I've already said, you shouldn't encounter any monsters nor wildmen. Get to the opposite end of the conveyor belt, find a small ledge to your left and collect seven new ingots.
INGOTS #87, #88, #89, #90, #91, #92, #93
Location: On a small ledge.
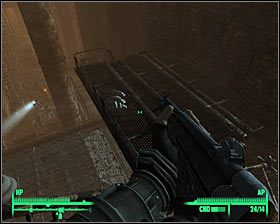

There's only one more set of ingots for you to find here in The Steelyard. In order to avoid serious complications you should follow my instructions carefully. Once you've taken the last pack of ingots go back to the conveyor belt and go back the same way you came before. Once you're there go to the platform where you disabled the turret and continue your descent using nearby balconies and staircases. Get to the lower section of the roof where you defeated a single wildman or some creatures. It's to the left of the final staircase [#74]. You can find this area quite easily, especially if you search for the large domes.
![[#74] - Additional quest - QUEST 4: The Mill Worker - part 6 - Additional quest - Fallout 3: The Pitt - Game Guide and Walkthrough](https://game.lhg100.com/Article/UploadFiles/201512/2015121518504036.jpg) [#74]
[#74]Proceed directly to the south until you've been stopped by a large fence. Turn east and try to get past the fence without actually falling down. This will allow you to approach the southern wall of the building. Once again you must turn east. Approach the ledge very carefully and try sliding down near a large pipe [#75]. If you're lucky, you'll hit a few bumps along the way, so you won't lose any health due to the fall.
![[#75] - Additional quest - QUEST 4: The Mill Worker - part 6 - Additional quest - Fallout 3: The Pitt - Game Guide and Walkthrough](https://game.lhg100.com/Article/UploadFiles/201512/2015121518504092.jpg) [#75]
[#75]This isn't over yet. You should now be standing on a lower part of the roof. Make a few steps to the east and you'll notice an isolated area of the compound beneath your current position [#76]. Slide down once again. This time you won't be dealing with large heights, so you won't sustain any injuries.
![[#76] - Additional quest - QUEST 4: The Mill Worker - part 6 - Additional quest - Fallout 3: The Pitt - Game Guide and Walkthrough](https://game.lhg100.com/Article/UploadFiles/201512/2015121518504045.jpg) [#76]
[#76]You may finally proceed eastwards. Keep going straight until you've been stopped by yet another large fence. This means you'll have to turn south. It shouldn't take you too long before you find a body of a dead slave. There's an improved autoaxe here, but you already have a better model from the plant. The most important thing is that you collect all four ingots.
INGOTS #94. #95, #96, #97
Location: In the corner, next to a dead slave.
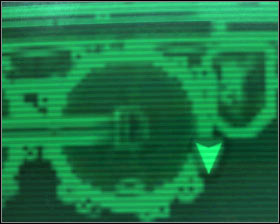
You'll now have to leave not only this area but also The Steelyard, because the other three ingots can be found somewhere else. Sadly picking up the last set of ingots has resulted in new monsters heading your way. I wouldn't recommend fighting them. Go to the south-east quickly and jump over the fence [#77] before you're attacked. You will find yourself standing next to a large container where you've already found some ingots a long time ago.
![[#77] - Additional quest - QUEST 4: The Mill Worker - part 6 - Additional quest - Fallout 3: The Pitt - Game Guide and Walkthrough](https://game.lhg100.com/Article/UploadFiles/201512/2015121518504033.jpg) [#77]
[#77]You may now begin moving towards the exit. If you can't remember where it is head north and then turn east. You'll probably walk past the carriages along the way. Confirm that you won't to go back to the Abandoned Area. Star moving forward, using the path shown to you by Everett. Defeat a single Trog and locate a hole in the fence that can be found to your right [#78].
![[#78] - Additional quest - QUEST 4: The Mill Worker - part 6 - Additional quest - Fallout 3: The Pitt - Game Guide and Walkthrough](https://game.lhg100.com/Article/UploadFiles/201512/2015121518504049.jpg) [#78]
[#78]Head on to the unexplored area and proceed to the north-east. You should be able to find the remaining three ingots inside a mine cart.
INGOTS #98. #98, #100
Location: In the mine cart.

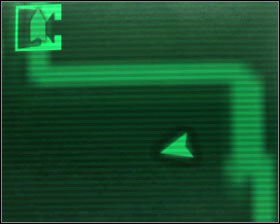
You may finally return to The Mill district using a nearby door. Once you've arrived at your new destination you'll automatically trigger a conversation with Everett. Remember that you had to find at least 10 ingots to be able to continue with the second quest, however you can continue giving him more of these objects [#79]. Obviously Everett will reward you for finds. Go to the chapter titled Rewards for completing The Pitt if you want to find out more. If you plan on going back to Midea, go to section titled QUEST 2: Unsafe Working Conditions and keep reading to find out what has to be done to get to Ashur's location.
![[#79] - Additional quest - QUEST 4: The Mill Worker - part 6 - Additional quest - Fallout 3: The Pitt - Game Guide and Walkthrough](https://game.lhg100.com/Article/UploadFiles/201512/2015121518504012.jpg) [#79]
[#79]
There are four basic types of rewards you can count on for completing the entire DLC, parts of it or just for exploring the surrounding area.
1) Equipment left by inhabitants of The Pitt
Remember when I told you to ditch your equipment? Here's why - you'll find tons of useful equipment during your stay in The Pitt, especially if you're playing as a new character and not as a superhero on the 20th level of experience. A lot of powerful items that can be taken from your enemies. This includes primarily witnessing battles taking place between raiders and slaves near the end of the game. Remember that you should wait for some of the fights to end before you decide to loot bodies. Otherwise you may end up being attacked and you wouldn't be able to get ready to repel actions of your enemies. There's also some cool equipment to be taken from fights taking place in The Hole, as long as you remember about not staying too long in the irradiated area. As for The Steelyard, don't forget to inspect bodies of fallen Trogs, because the monsters may be carrying bobbypins or medical supplies.
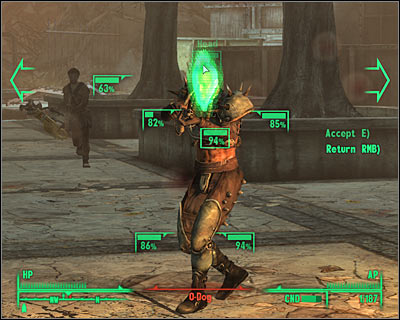 Wait for the battles between the slaves and the raiders to come to an end before you start looting their bodies.
2) Rewards for finding the ingots
Here's a list of all items you can receive for finding the steel ingots in The Steelyard district. It's a part of the fourth quest of the game. At first you'll be delivering these objects to Everett, however if you decide to help the slaves he may be replaced by someone else at the end. Thankfully that won't affect the outcome, because you'll still receive your rewards. Obviously I would recommend that you explore the entire Steelyard and collect all 100 ingots, because the best equipment will be handed over to you at the end of this process. Receiving these items will make your life easier, particularly winning duels inside The Hole. Don't forget to read the description of the FOURTH QUEST to find out where to look for the ingots.
INGOTS
REWARDS
10
Laborer Outfit (strength +1, agility +1, endurance +1).
20
Filtration Helmet (radiation resistance +10%).
30
Steel Knuckles.
40
Metal Master Armor (agility -1, unarmed +10, energy weapons +10).
50
Metal Blaster and 96 microfussion cells.
60
Bombshell Armor (heavy guns +10, explosives +10).
70
Leather Rebel (charisma +1).
80
The Mauler.
90
Perforator.
100
Tribal Power Armor (action points +15, melee weapons +5, luck +1, strength +1, agility -1).
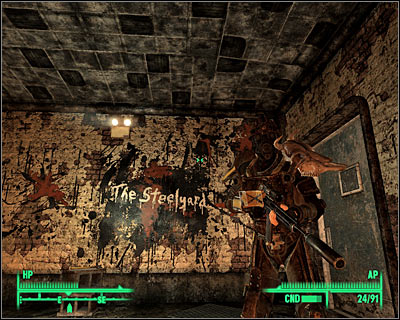 A Tribal Power Armor is the best item you can get for finding the ingots.
3) Perks
During your stay in The Pitt you can be rewarded with three new perks. Here are their descriptions:
Auto Expert - You can receive this perk automatically when you find all 100 ingots in The Steelyard and Abandoned Area districts. Main character inflicts 25% more damage with autoaxe weapons.
Booster Shot - You can receive this perk automatically when you finish the third main quest of the game. It doesn't matter whether you've sided with slavers or slaves. Main character becomes more resistant to radiation by 10%.
Pitt Fighter - You can receive this perk automatically when you go back to The Mill district after winning the final third duel in The Hole. This will also be the end of the second main quest of the game. Main character becomes more resistant to damage and radiation by 3%.
4) Manufacturing ammunition
This is the final reward for finishing The Pitt and you can start using its perks the second you've finished the last quest of the game, helping Ashur or liberating the slaves. In both cases things will look the same, so you won't have to worry about anything else while trying to choose your alignment. An ammo mill can be found in the middle of The Mill district and you'll receive notes on how to use it either from Ashur or Wernher. The rules are quite simple. You put junk or unwanted ammunition into a large slot and then you must use a computer terminal (screen) to decide what type of ammunition you want to be manufactured. Have fun!
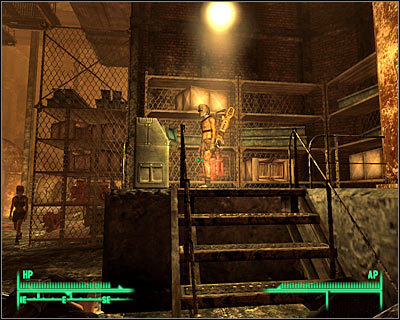
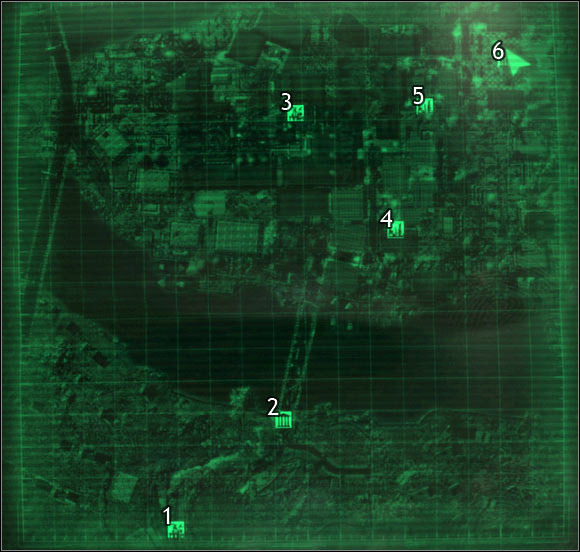
Map legend:
1 - Pitt Train Yard
2 - The Pitt Bridge
3 - Pitt Steelyard
4 - Pitt Downtown
5 - Pitt Uptown
6 - Haven
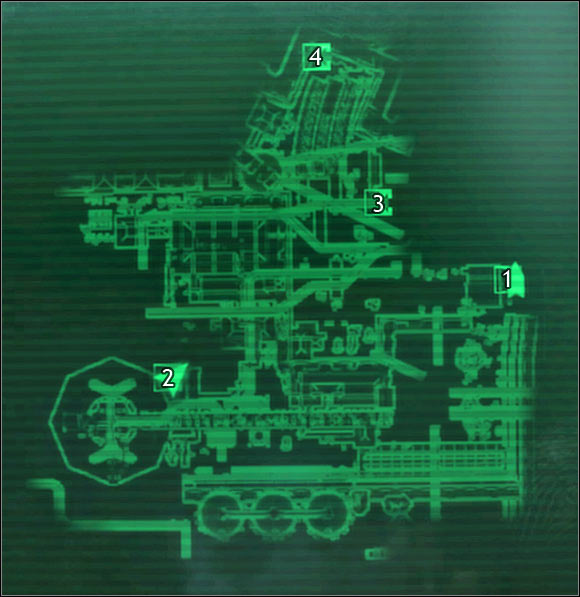
Map legend:
1 - door to: Abandoned Area
2 - door to: Wernher's Hideout
3 - door to: Supply Plant
4 - hatch to: Pitt Underground
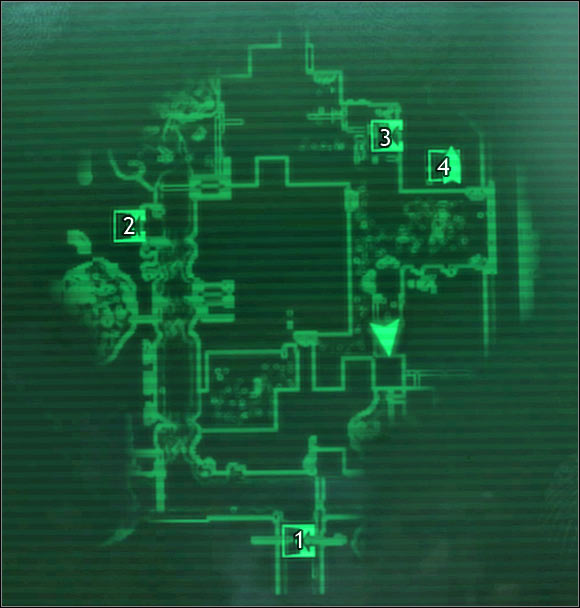
Map legend:
1 - door to: The Pitt Bridge
2 - door to: The Mill
3 - door to: Uptown
4 - door to: Midea's Quarters
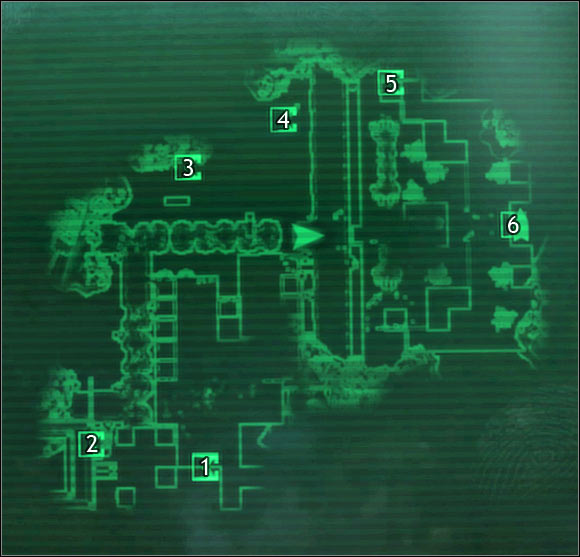
Map legend:
1 - door to: Downtown
2 - door to: The Mill
3 - door to: Abandoned Apartments
4 - door to: Abandoned Apartments
5 - door to: Pitt Underground
6 - door to: Haven Entrance
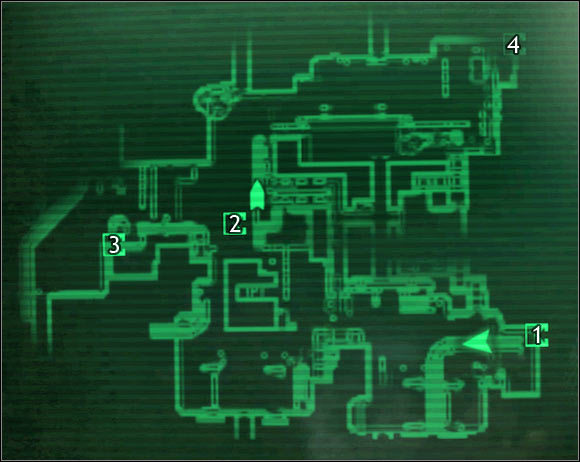
Map legend:
1 - door to: Downtown
2 - hatch to: The Hole
3 - door to: Abandoned Area
4 - door to: Uptown
Similar to Project Anchorage, there are four achievements waiting for you to be unlocked in The Pitt. Three achievements are connected to completing main quests and the fourth achievement is given for finding all the missing ingots.
ACHIEVEMENT
REWARD
REQUIREMENTS
Free Labor
40
Complete Free Labor quest (gained automatically upon completion).
Into the Pitt
20
Complete Into the Pitt quest (gained automatically upon completion).
Mill Worker
20
Complete Mill Worker quest. This means you must find all 10 ingots hidden in The Steelyard and Abandoned Area districts.
Unsafe Working Conditions
20
Complete Unsafe Working Conditions quest (gained automatically upon completion).


 Fallout 3: Operation Anchorage Game Guide & Walkthrough
 Farming Simulator 15 Game Guide & Walkthrough
 FIFA 16 Game Guide & Walkthrough
 Far Cry 2 Game Guide & Walkthrough
 Fallout 3: Point Lookout Game Guide & Walkthrough