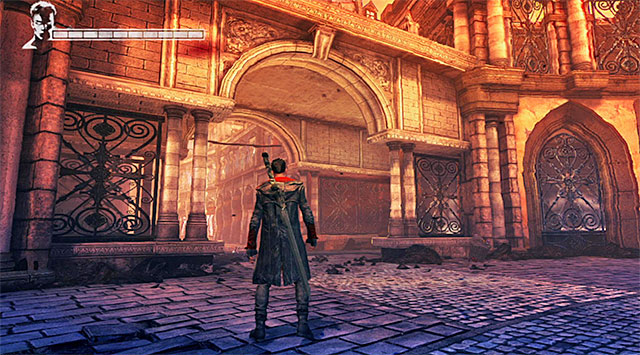
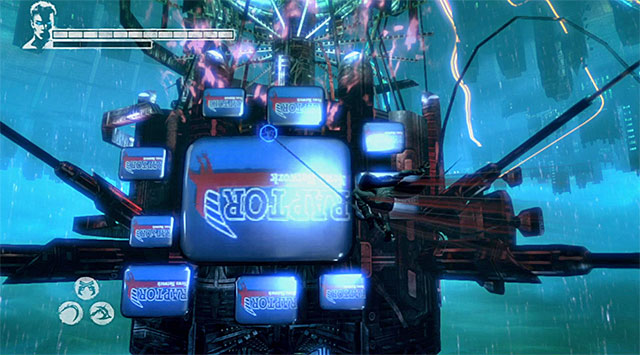
Guide to Devil May Cry contains detailed walkthrough. In description of every level you find mainly information about eliminating enemies (normal monsters and powerful bosses) and completing platform sections to reach next locations. Also locations of hidden items and bonus areas are included. In the final part of the guide you can find also a list of main hero skills and list of achievements/trophies.

In the following guide those colors are used:
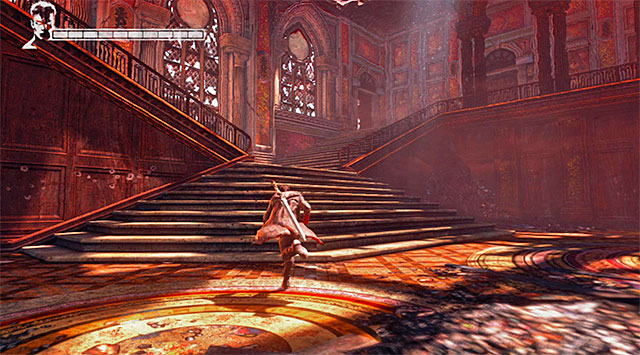
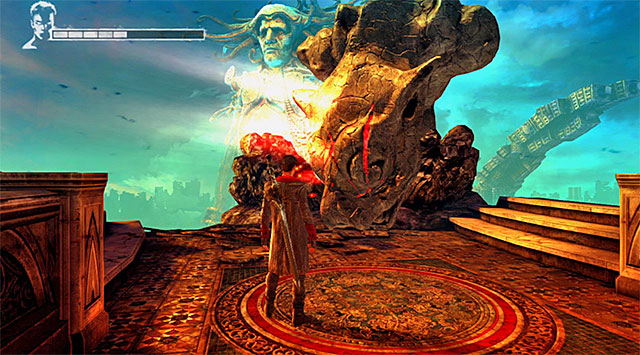
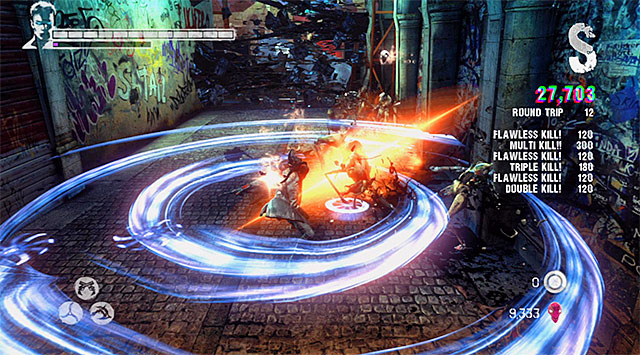
Devil May Cry is a type of game which encourages to completing levels many times. It should not only improve your score but mainly let you search places which were unavailable during the first play.
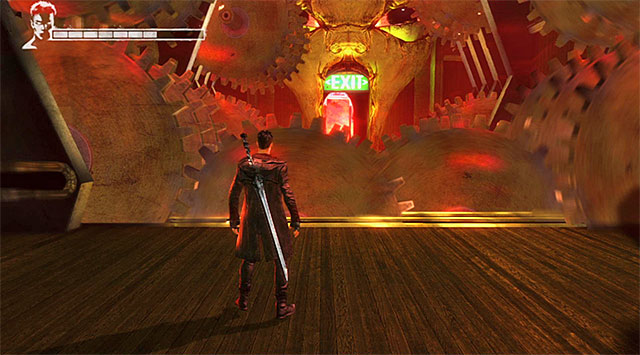
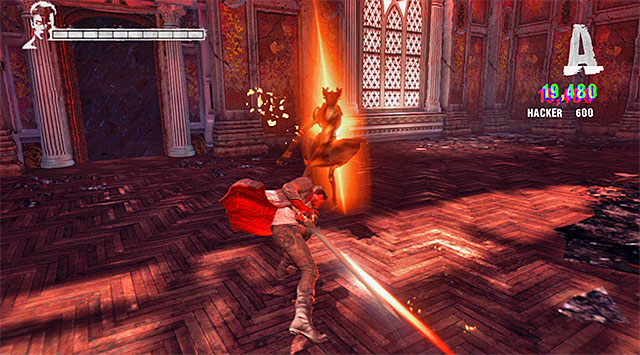
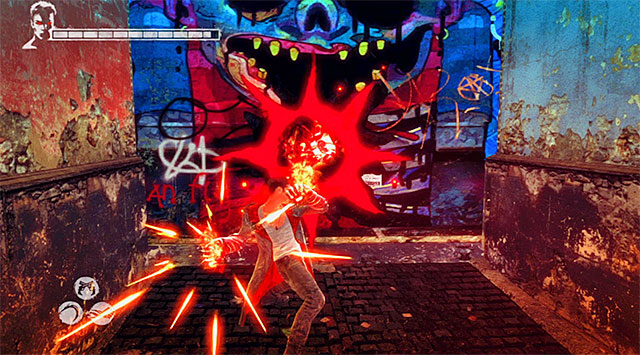
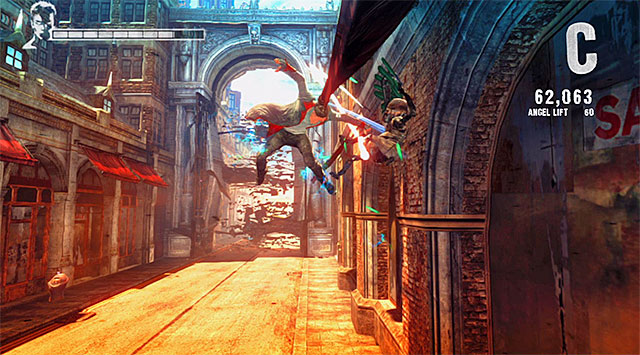
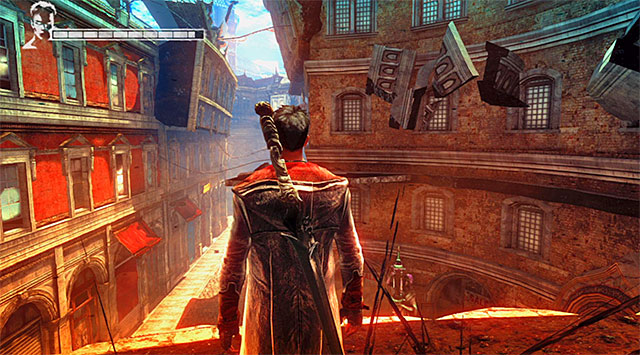
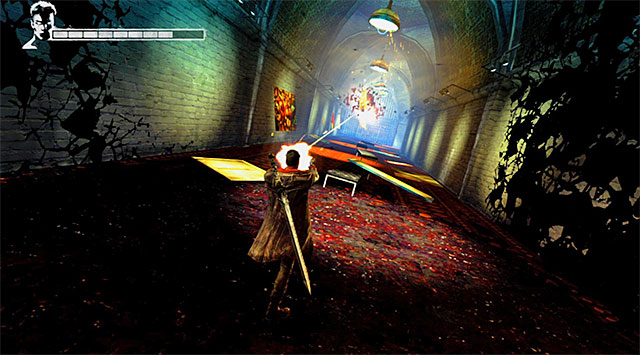
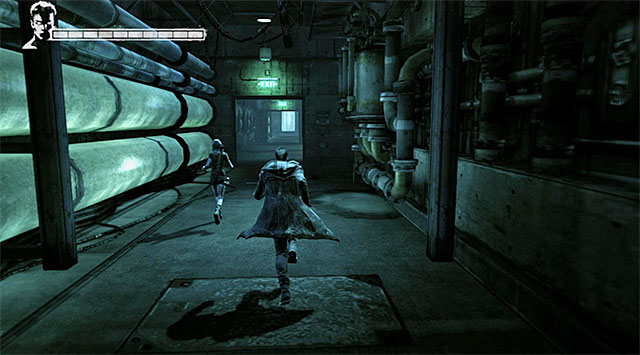
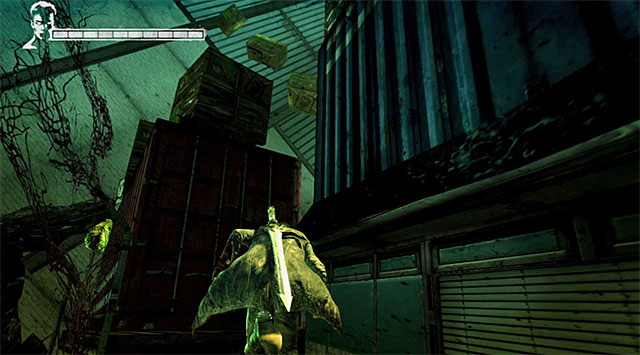
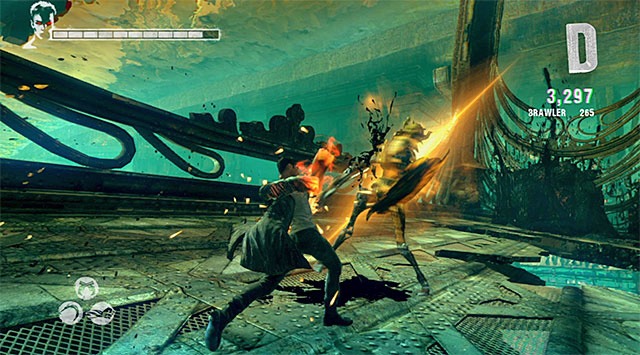
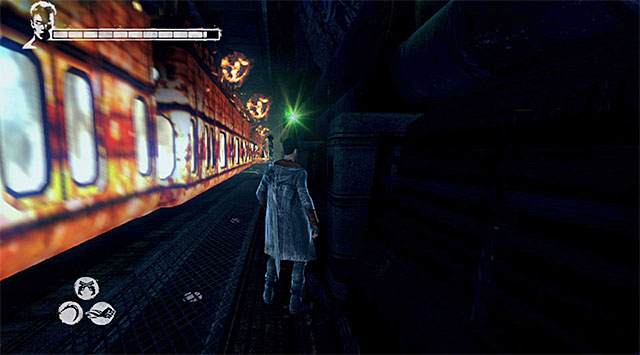
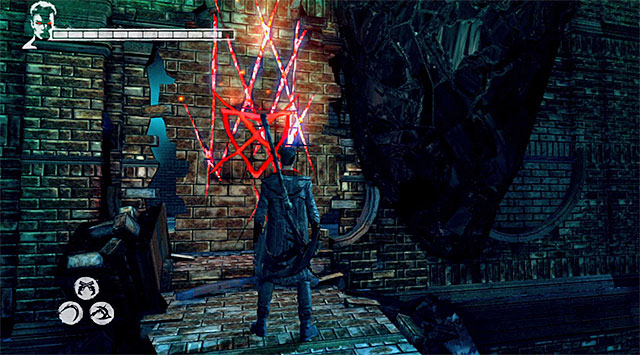
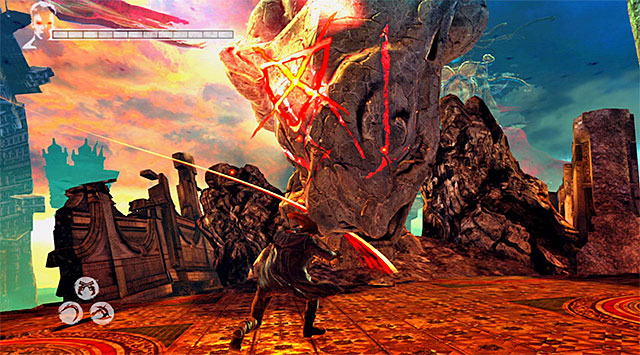
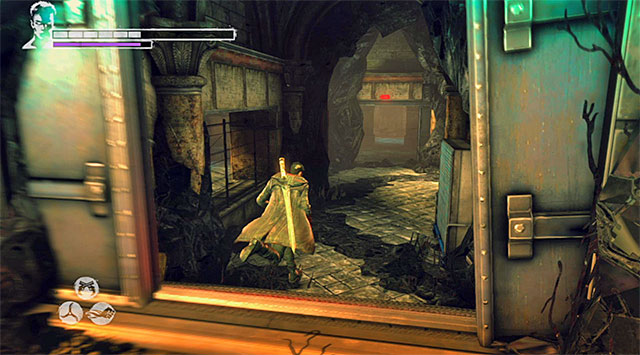
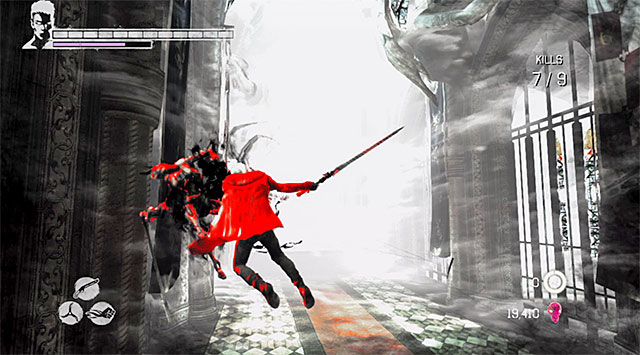
After watching all introductory movies, you begin your first fight in which you have to defeat few groups of monsters. It's a kind of tutorial, where you get to know basic Dante's skills. So check how to use Rebellion sword, throw up enemies and attacking them without touching the ground and evade. Try not to get hurt, because Dante's energy won't regenerate. You should have got explained also how important is to collect white Orbs (they are like XP, allowing to unlock new skills) and Red orbs (ingame current).
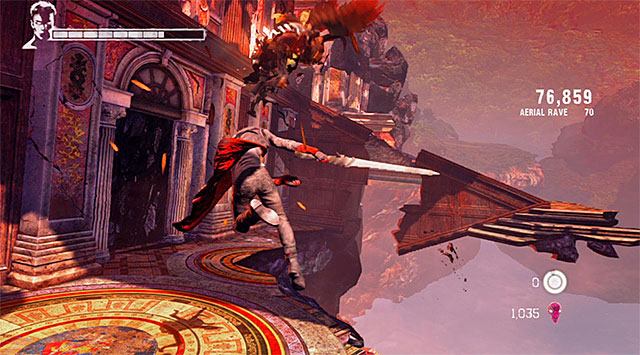
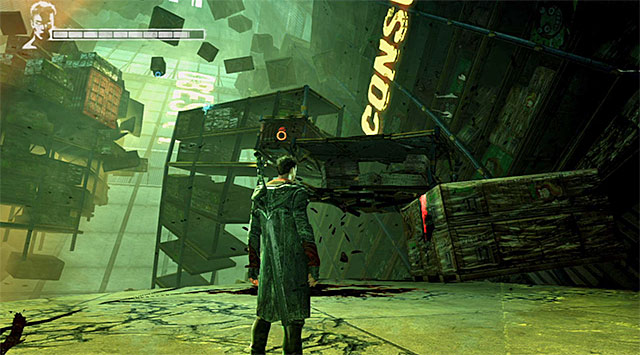
Continue attacking until all monsters are defeated. You can look around if you want and destroy some destructible objects what will give additional red Orbs. When it's done, jump over obstacles shown on the screen above.
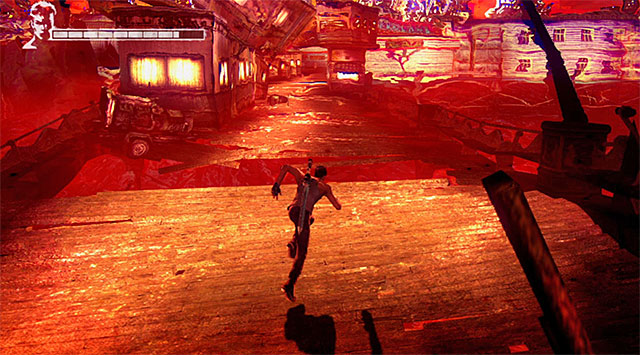
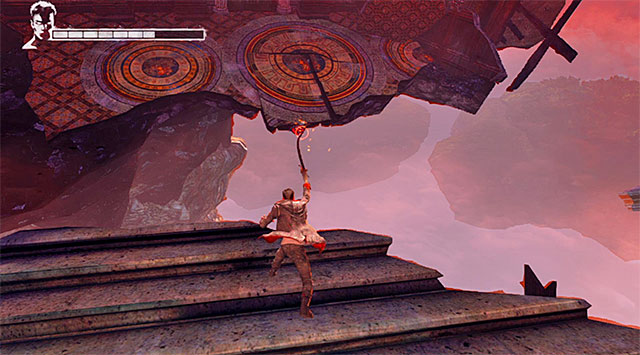
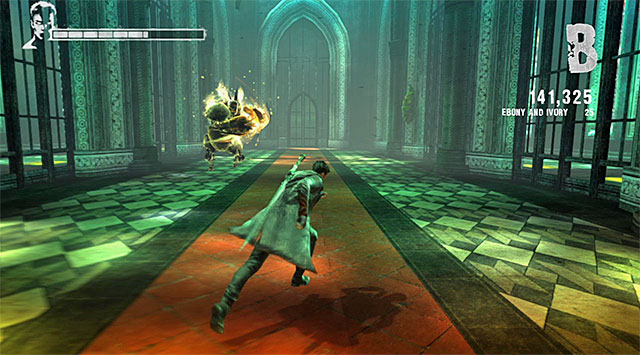
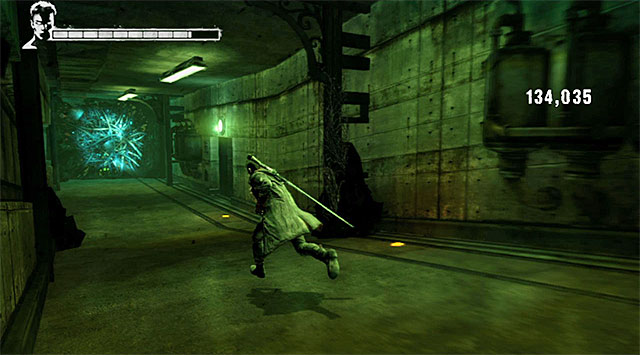
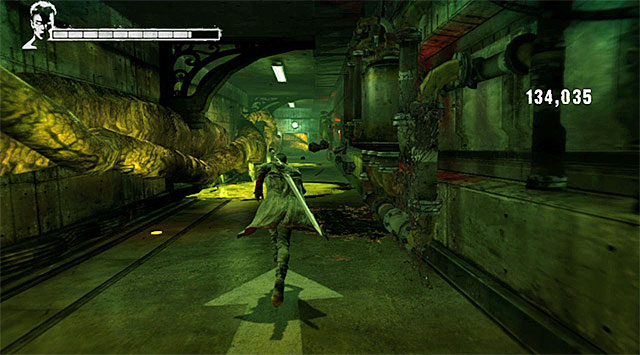
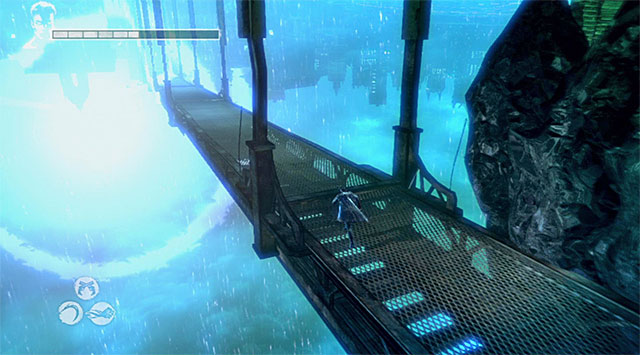
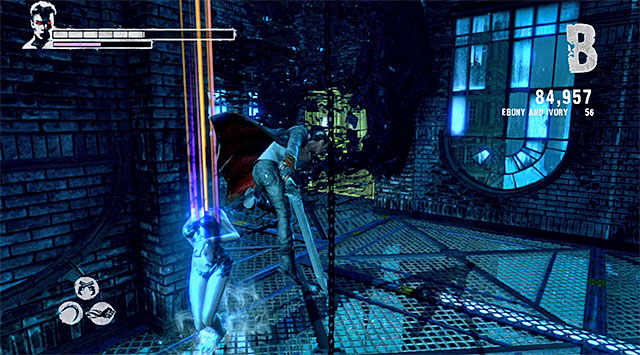
Prepare yourself for a runaway scene. Move forward, do not stop and jump over holes. While passing bigger obstacles, hit Jump button twice, just in case. In the next cut scene Dante regains his pistols (Ebony & Ivory).
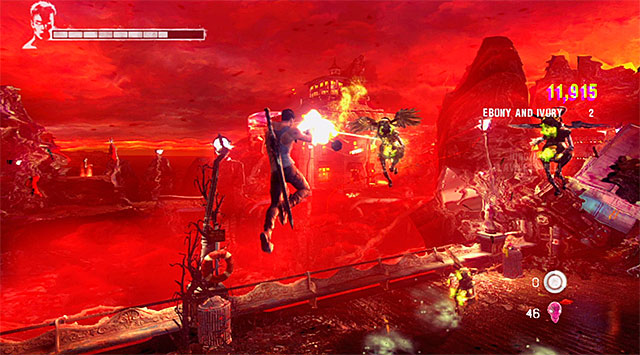
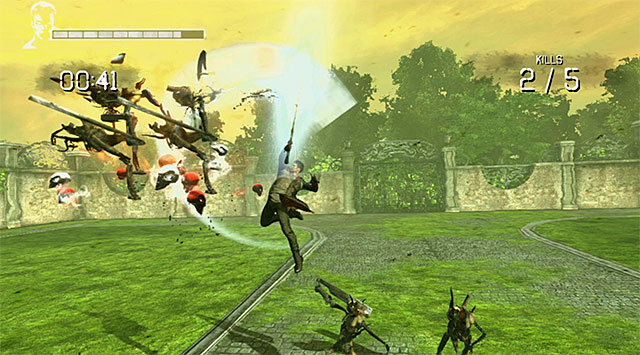
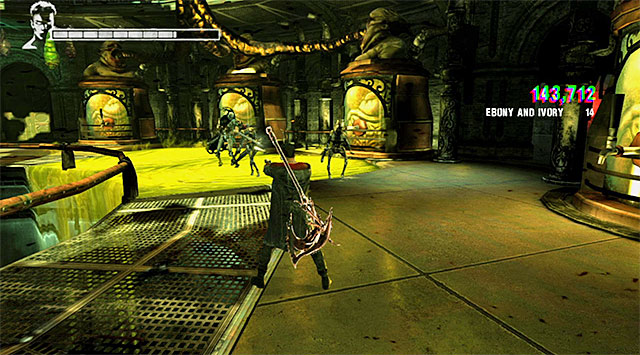
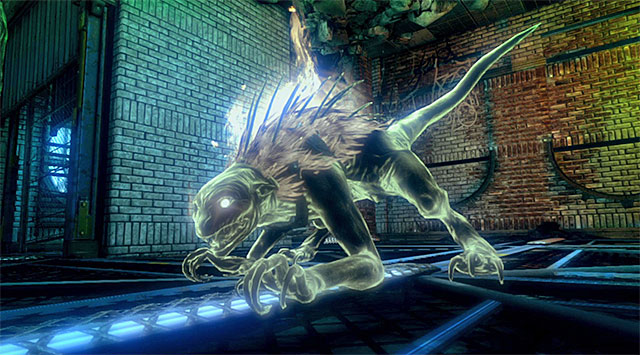
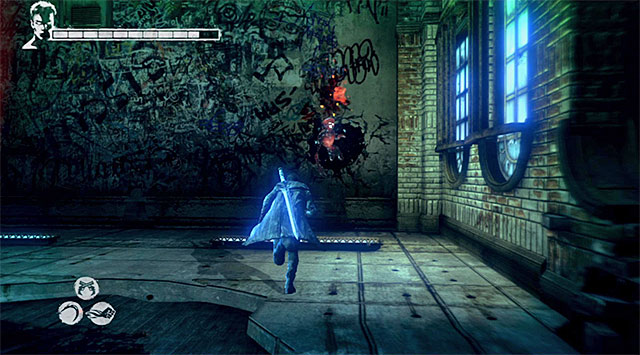
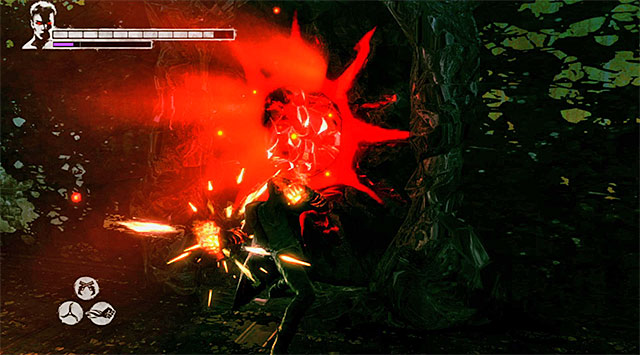
Game will let you test your newly regained guns, forcing you to battle with a new type of monsters (Bathos). To eliminate those flying creatures you should use pistols, as you can fire both from the ground or while flying. Avoid explosives thrown by them, constantly moving and using Evasion button. More monsters join in the further part of an encounter, but they shouldn't be problematic.
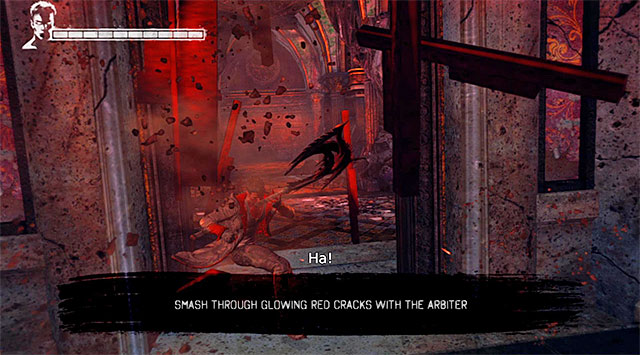
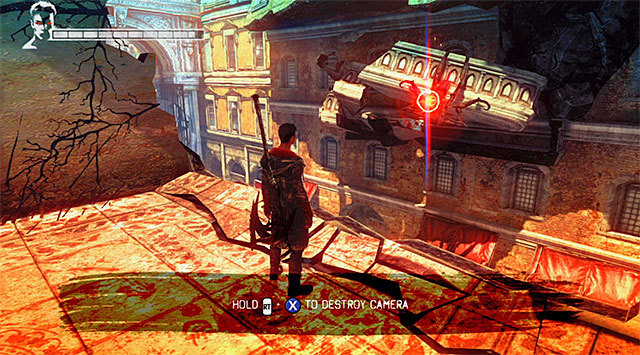
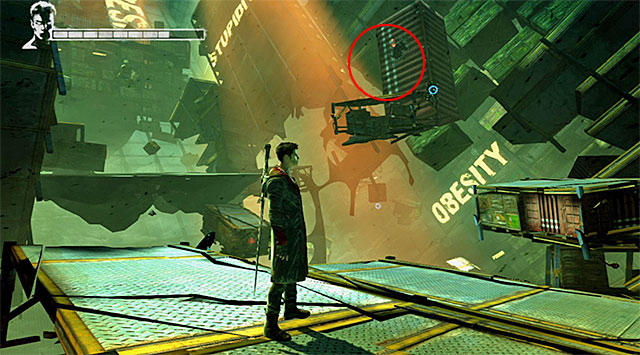
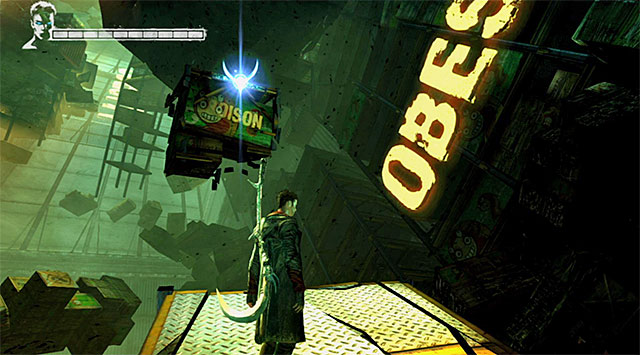
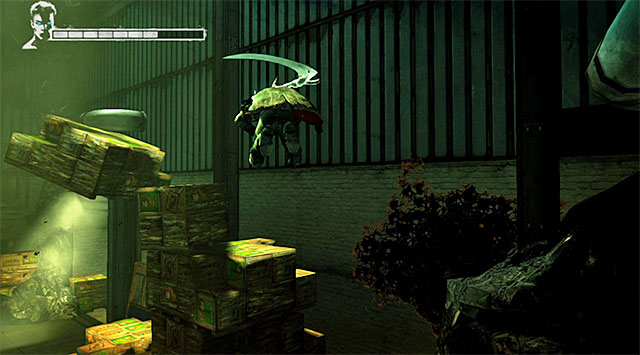
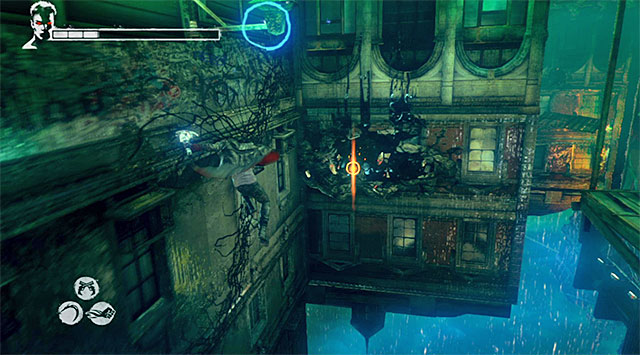
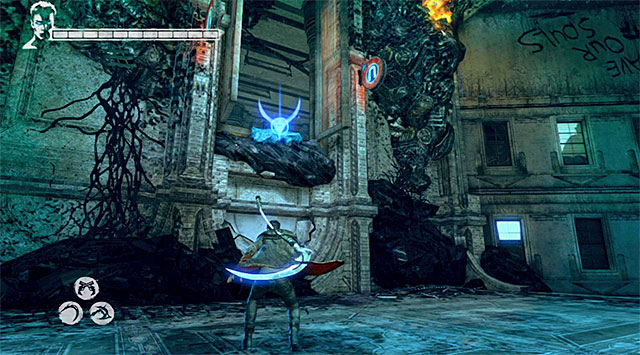
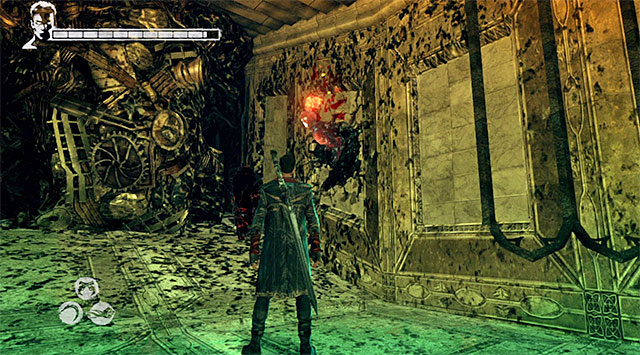
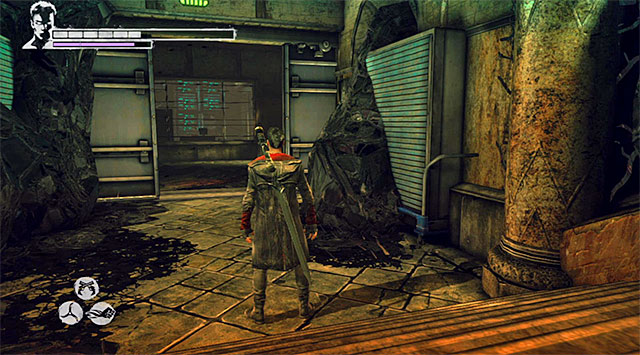
SECRET ROOM: If you repeating this mission with Eryx gauntlets from level six, you can use them to destroy a part of wall (screen above). Hold standard attack button and wait until gauntlets are charged. In secret room you find interactive items and the Lost Soul.
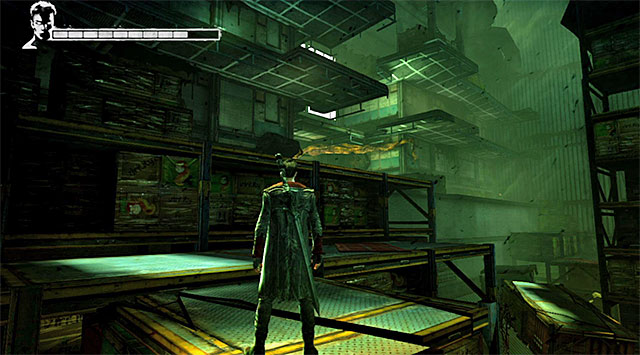
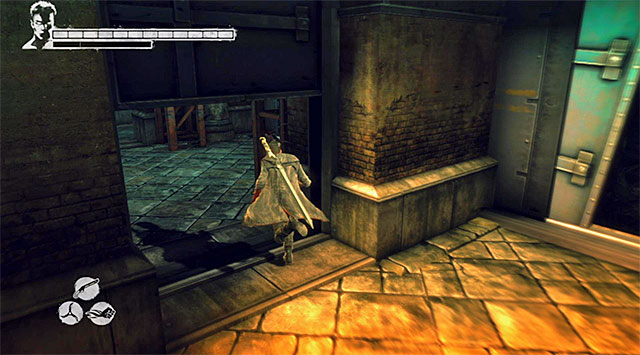
You can move on. Notice small spiders on your way - exterminating them provides you with more red Orbs. Listen to a new talk with Kat and choose a path shown on the screen above. After a while you reach the Lost Soul which is worth to be freed with a few sword strikes.
Stay in the place where you had freed a soul and go along the left path (screen above), making few easy jumps on your way. You have to reach a shelf, on which you can find Copper Key. After that return to the soul and choose right path which leads to the next area.
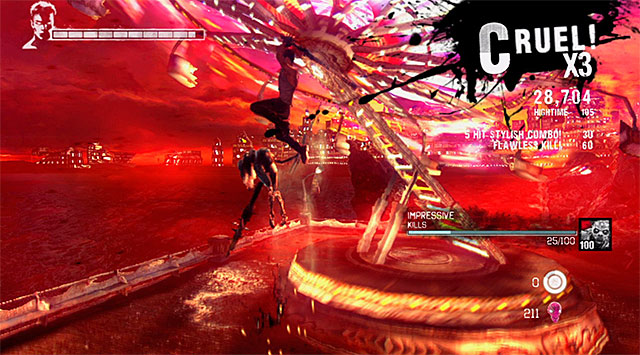
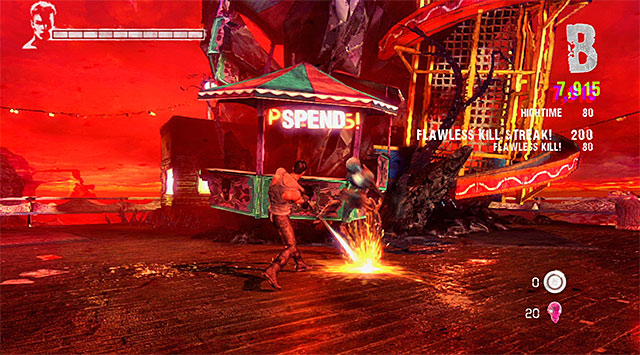
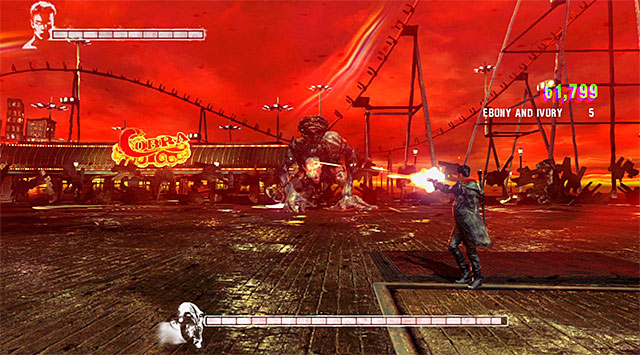
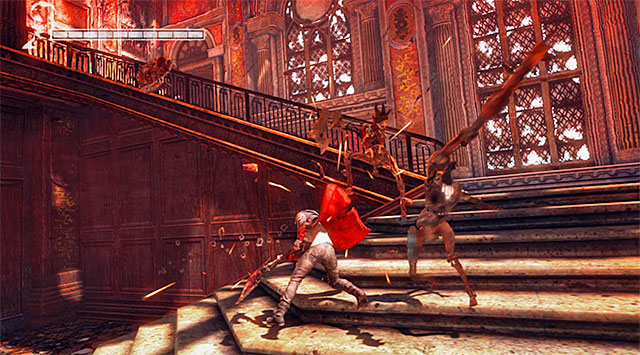
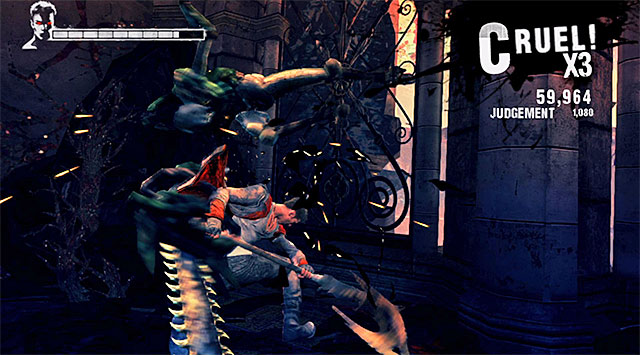
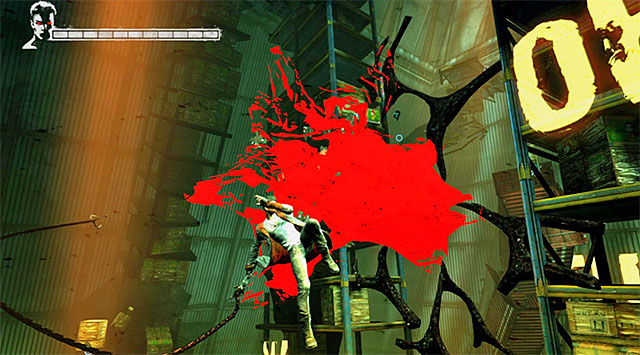
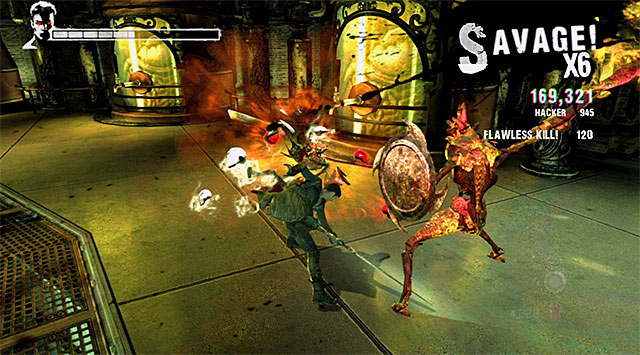
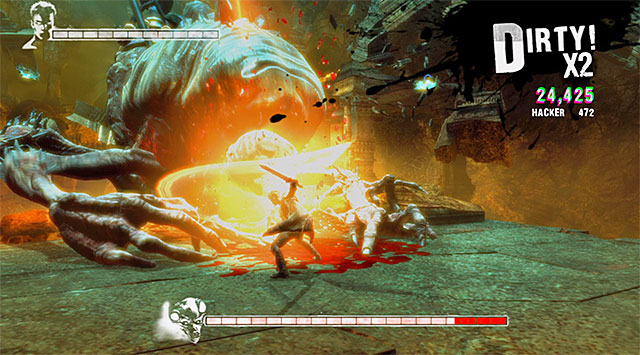
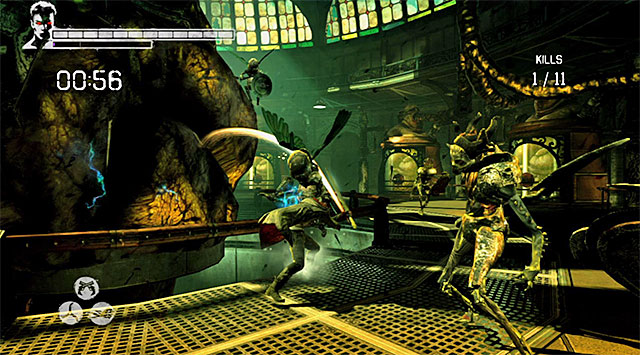
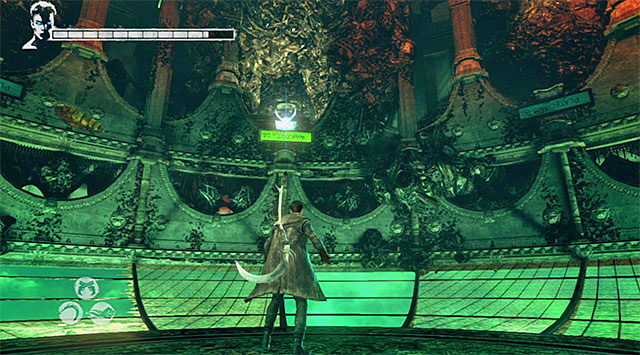
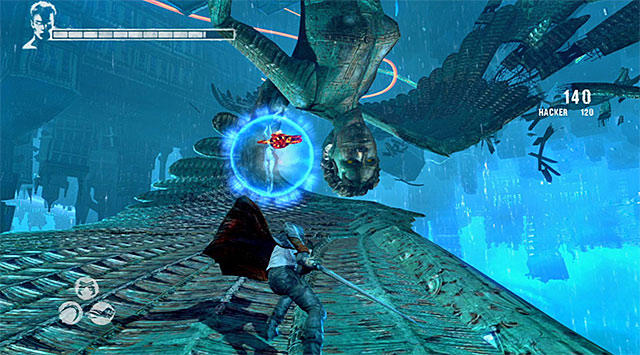
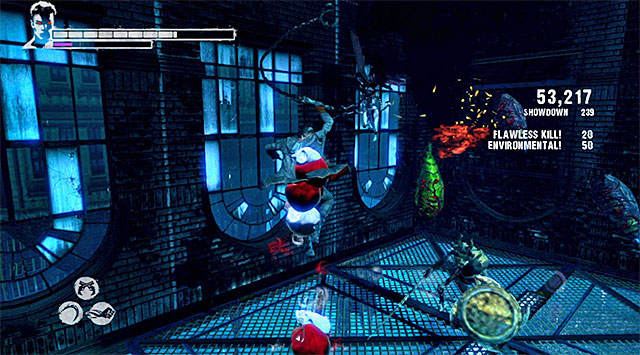
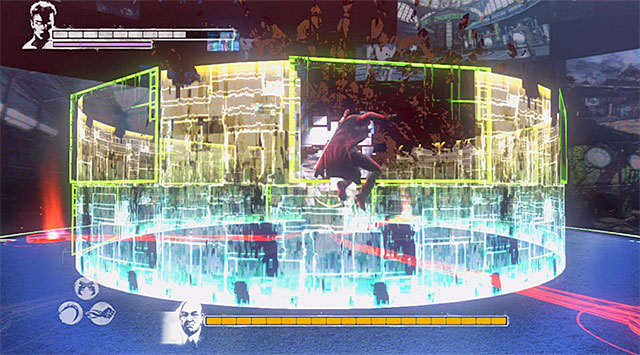
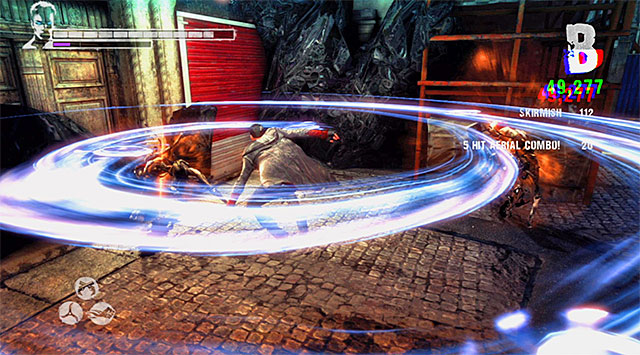
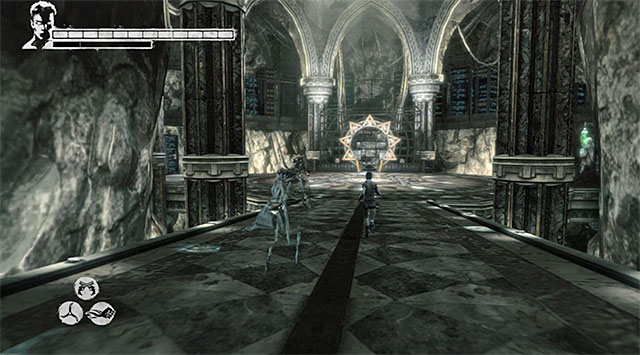
After reaching an area with merry-goes-round, a battle with well known monsters begins. Try to make long sequences of hits for maximum score. Try also not to touch the mentioned carrousel. At this point, game should acknowledge you with the meaning of green Orbs, which regenerate Dante's health.
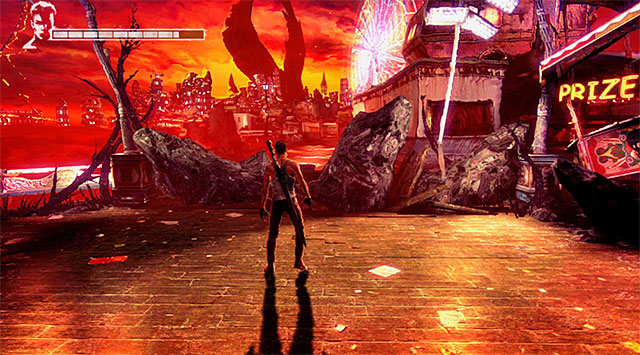
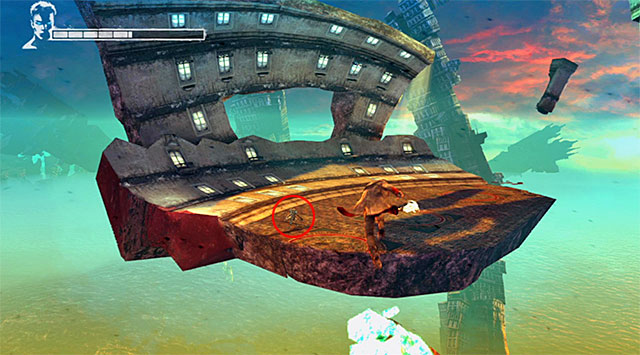
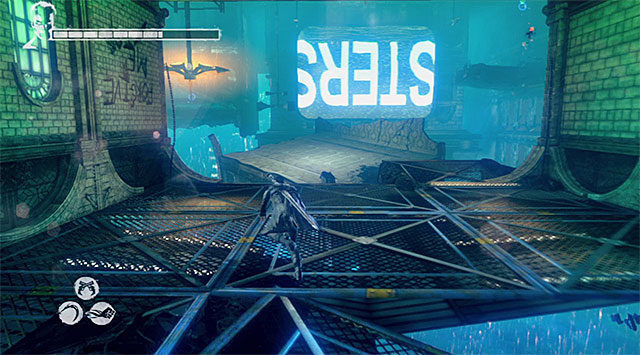
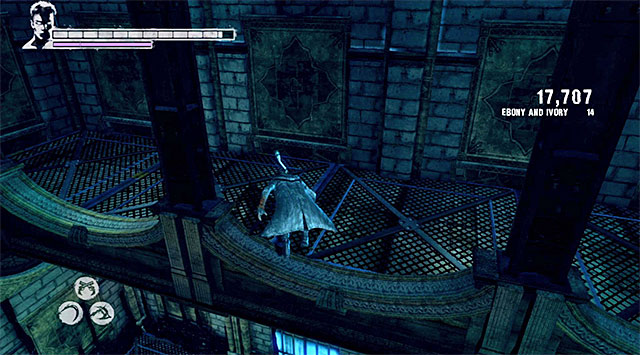
As usual, look around when the battle is over. After that head to the next location, testing higher jumps on your way (hold and press Jump button twice). After completing double jump, you find the Gold Orb which resurrects Dante (you can have three of those in your equipment). Get to the last segment of a funfair.

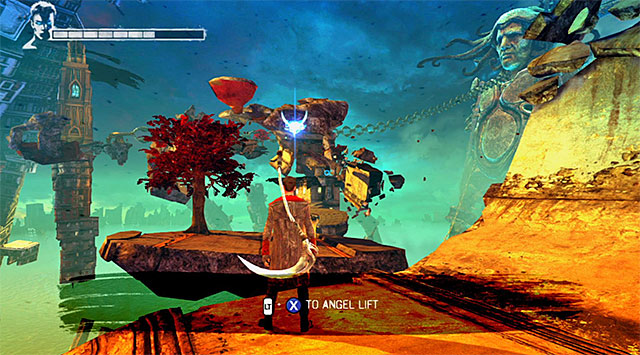
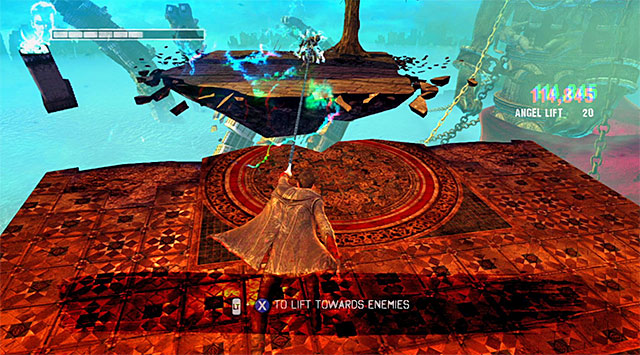
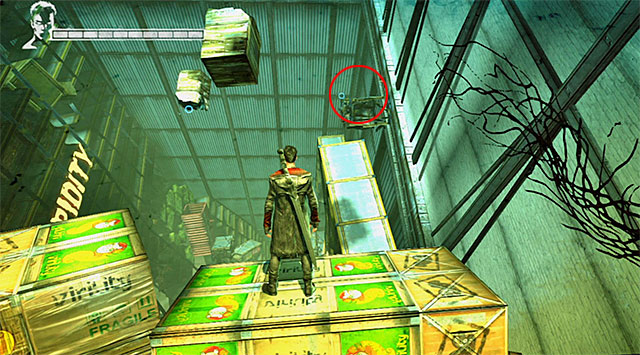
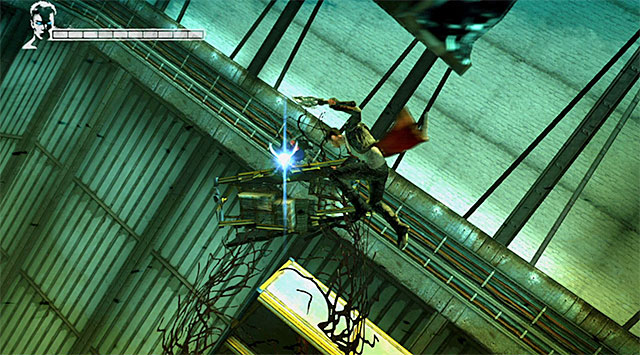
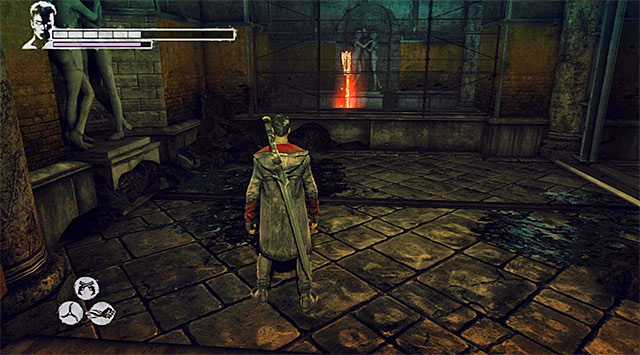
SECRET AREA: If you repeat this level with Ophion Angel Lift from the second level, you can use it to catch a hitch (1st screen). Catch following ones until you reach a shelf shown on the 2nd screen. Here you find another Lost Soul.
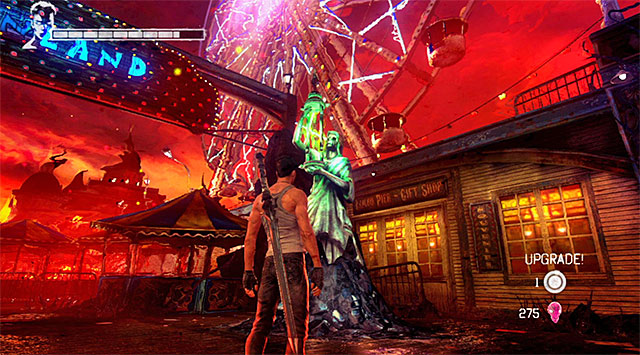
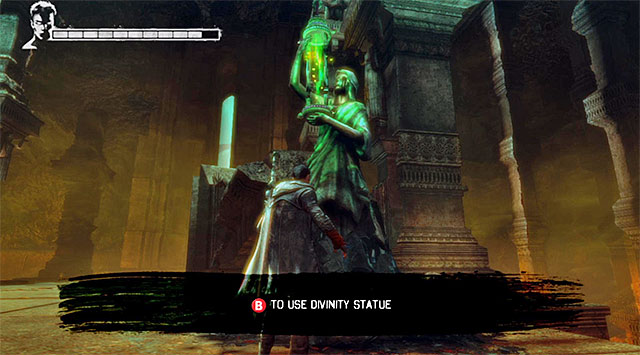
Look for Small Vital Star. This item recharges Dante's energy; you can have ten of those in your equipment. A second important object is a Divinity Statue shown on the screen above. Statues are used to buying items and unlocking new skills. As you should have one skill point, buy a new skill or develop old one.
Move on, what begins another battle. During this encounter, deal with the flying monsters firstly and then finish off those on the ground.
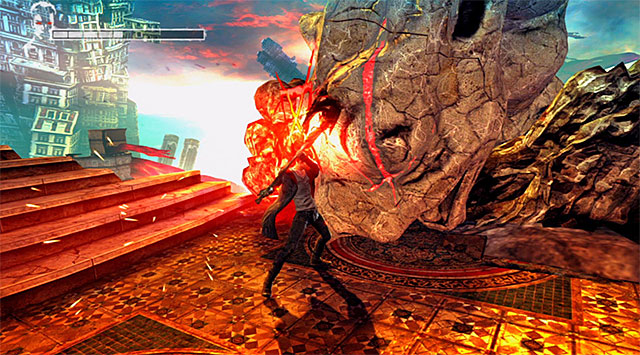
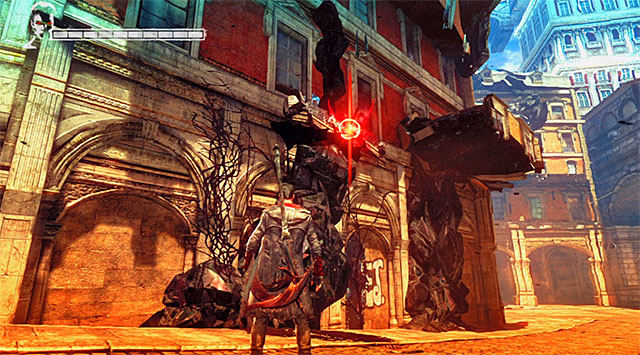
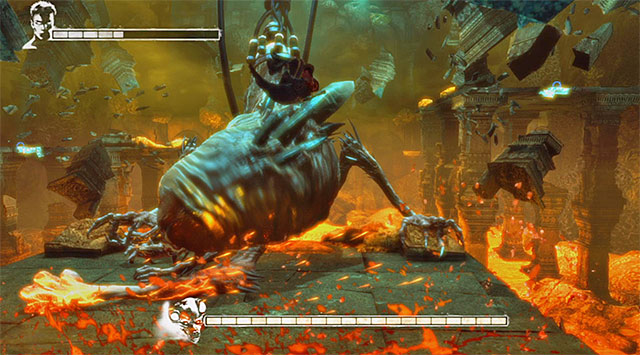
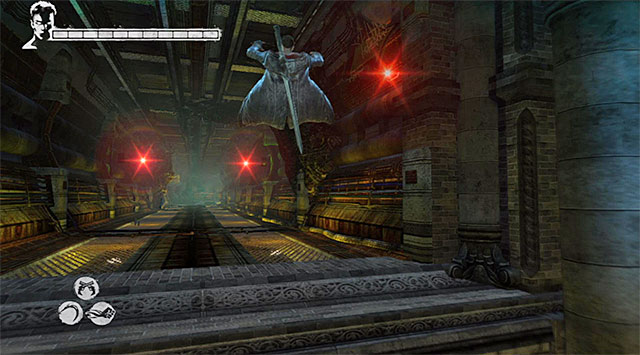
After that, you meet your first boss (Hunter) with who you'll fight normally later. For now on, you should focus on avoiding his distance attacks - just press evasion button in particular moments.
Don't count on that boss will be bored and don't fire at him because he is immortal at this moment. Instead, try get to an entrance seen away (screen above), avoiding getting hurt.
Move forward, watching out for boss, who will ram through the wall. You just have to wait until the road is unlocked.
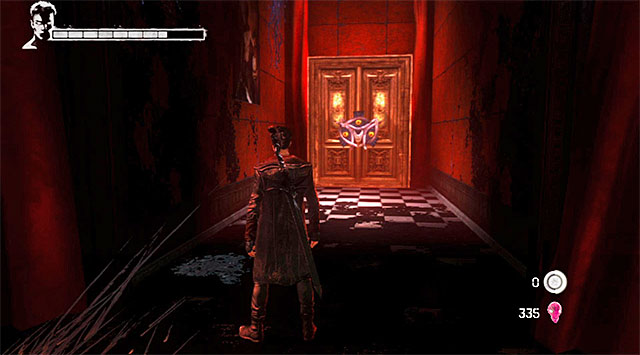
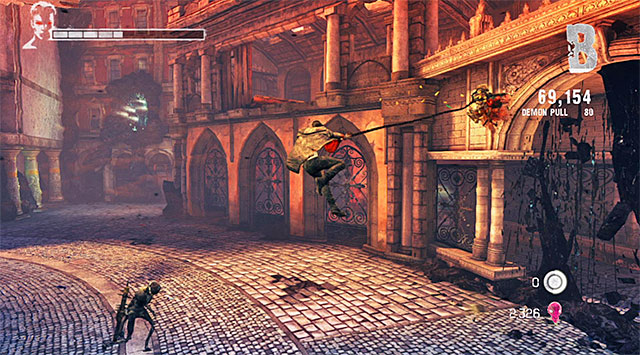
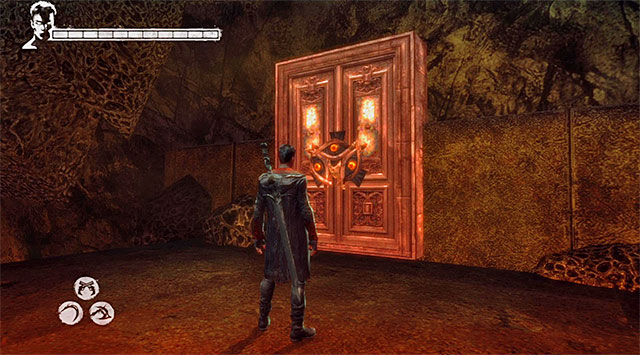
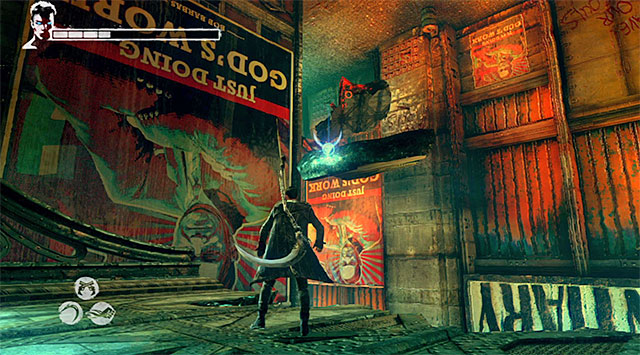
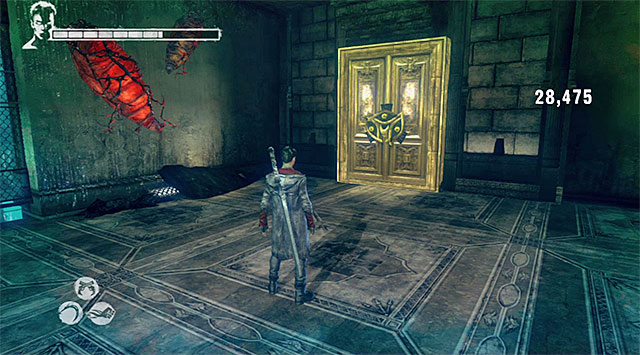
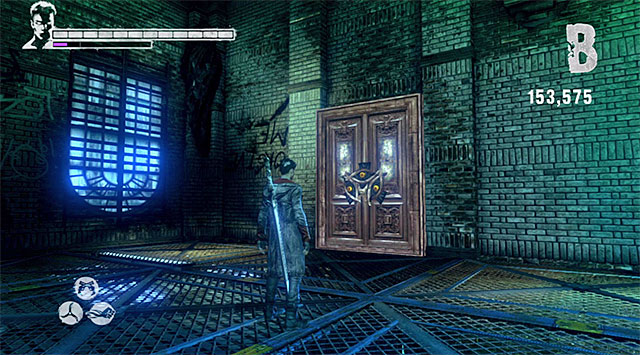
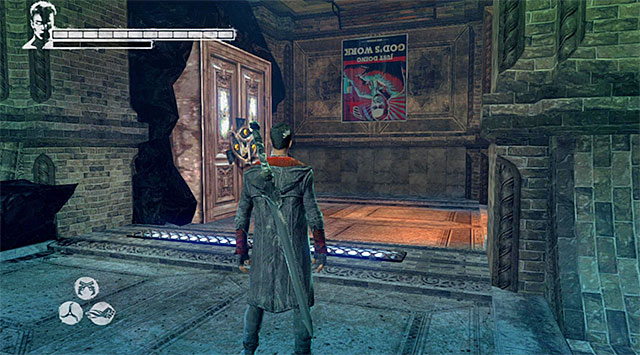
BONUS MISSION: A bit further you find Secret Door shown on the 1st screen and if you have a Copper Key you can open them, what transfers you to the bonus mission Air Brawl (2nd screen). To complete it, you have to damage enemies in the air. So every attack you have to begin from throwing enemy up in the sky and then hit him. Reward for this mission is the Health Cross Fragment. To complete the cross, you have to gather four pieces.
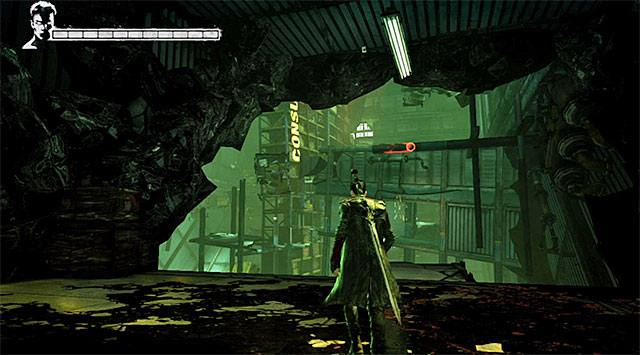
Resume exploring the building. Approach to the big mirror and watch a cut scene with the boss. Go through a new passage and search side rooms where you find two Lost Souls. SECRET ROOM: If you repeat this mission, use an Arbiter (from the second level) to destroy door shown on the screen above. It unlocks an access to a room with another Lost Soul.
After searching the vicinity, choose stairs shown on the screen above. Enter the room with working machines. Game won't let you head straight for the exit, so you have to fight again. During an encounter try not to run into working mechanism, because you'll lose health. Elimination should be easy.
Only now you can head for an exit, but you will meet three traps (working machines) on your way. In the first and third case you just have to wait for a proper moment to run. And when it comes to the second one (screen above), you have to jump over the racks, using double jump.
When you regain control, look around and use a new Divinity Statue if you want. Then jump on the platforms. After reaching a much bigger area destroy nearby lanterns and prepare for the boss fight.
Hunter isn't a difficult boss, but you may want to spare a moment for learning his attacks. His basic one is a blade swing.
His second main attack is about to jump at you, so you have to be careful and avoid them. There are traces on the ground informing where he will land.
It best to attack him with pistols, staying at a safe distance.
When he get stunned, run quickly toward him and make your hardest blows using melee weapon, weakening his head.

An encounter with Hunter has two blips. First of them is when boss jump off from the battleground. Again, you'll be forced to avoid his distance attacks. Fire at him to encourage him to return on the arena.

The second one happens when Dante's vision gets limited. Also in this case you have to jump, but this time to avoid quickly moving blade. Wait until it moves back to the Hunter and the encounter resumes.
Continue attacking with pistols and (after stunning) melee weapon, defeat him and end a mission. After that watch a score screen, make some shopping and unlock new skills.
After all cut scenes start exploring Dante's mansion. Follow the path, reaching a main hall in a while. SECRET ROOM: If you repeat this mission with Ophion Angel Lift go to the left door. Jump down and use it in the place shown on the 1st screen, what brings you to the room with a Lost Soul. If it is your first visit here, stay in the main hall. Then, head for stairs shown on the second screen.
Firstly, I recommend go right for checking two nearby rooms. Besides spiders and destructible items you find here also a Copper Key. Return to main stairs and go left. Use a passage (screen), passing a Divinity Statue on your way.
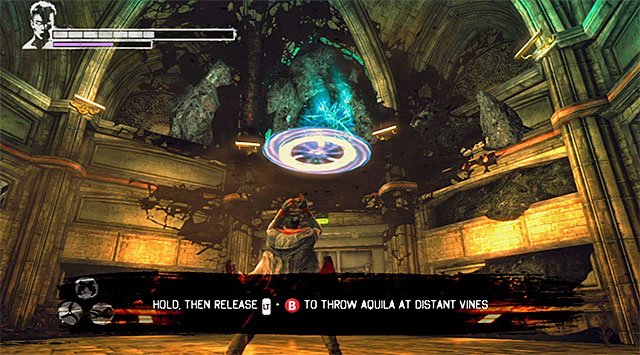
SECRET ROOM: If you repeat this mission with Aquila obtained at the tenth level, you can use it just after passing a statue, in the place shown on the screen above. Throw blades at a grapevine and use Angel Boost to get to a newly unlocked room. Here you find another Lost Soul.
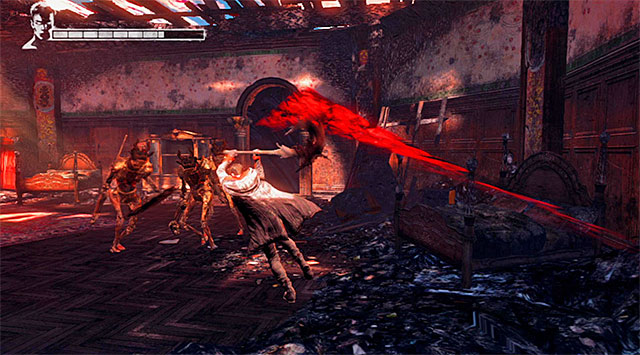
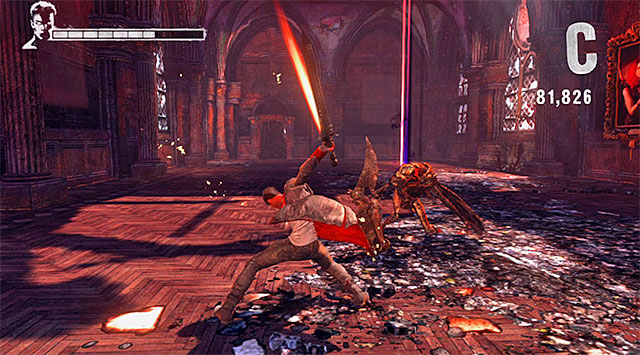
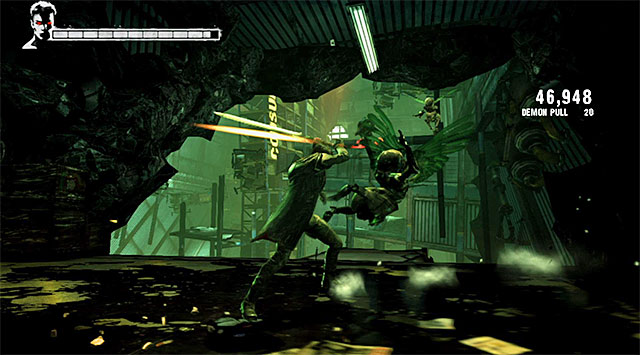
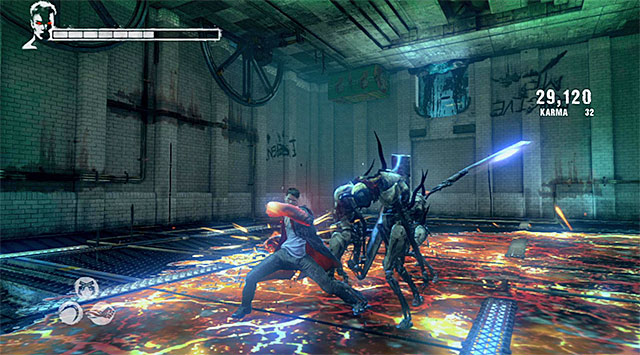
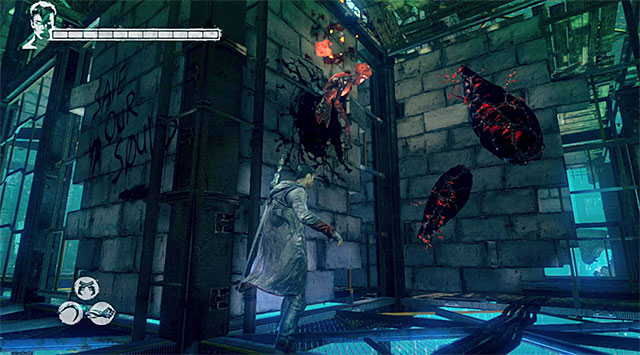
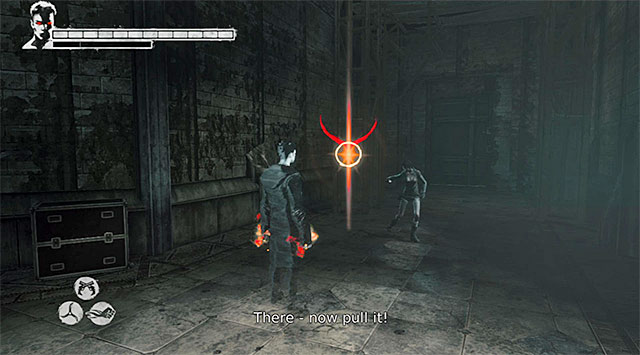
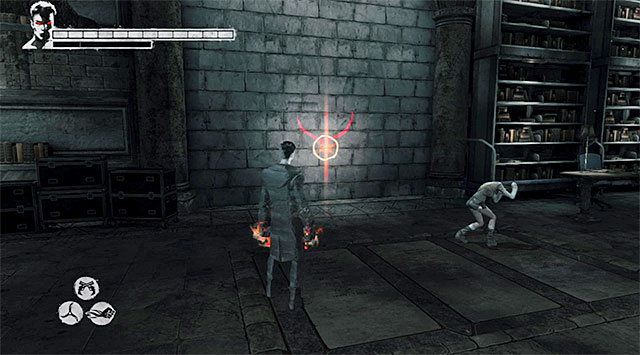
Follow the corridor until you reach a room with Sparda's painting. Watch a cut scene and prepare for a battle. In its first part, you'll be attacked by well known monsters, so it shouldn't be problematic.
In the second part of encounter you'll fight with new type of enemies - Death Knight. Avoid its charges and notice its shield. It makes more difficult to perform some attacks, for example with pistols. The best tactic for now is to wait until knight expose himself after an unsuccessful attack, when he is helpless. After a battle approach the painting, what gives you a new weapon - demonic axe, Arbiter.
I recommend to read list of Arbiter's basic attacks which will be displayed. Notice also, that for using this weapon (instead of Rebellion) you have to press and hold particular button/trigger. Test the weapon at new group of enemies. You should observe that this one is much better than your sword when it comes to crushing shields.

Use the only one available exit and move forward. SECRET AREA: If you repeat this mission with Angel Boost from the third level, you can fly to a Lost Soul (1st screen) after reaching huge breach. If it is your first time here, jump into the breach, turn around and save a Lost Soul shown on the second screen.
SECRET LOCK: If you repeat this mission with Eryx gauntlets from the sixth level, you can use them to destroy a glowing red fragment of the floor. You have to use an attack called Stomp, hitting the red mark on the floor. Inside you find an Argent Key.
Resume walking until you return to the main hall, where you've already been. You'll be attacked by a new wave of monsters. Remember to use your new axe, especially against Death Knights.
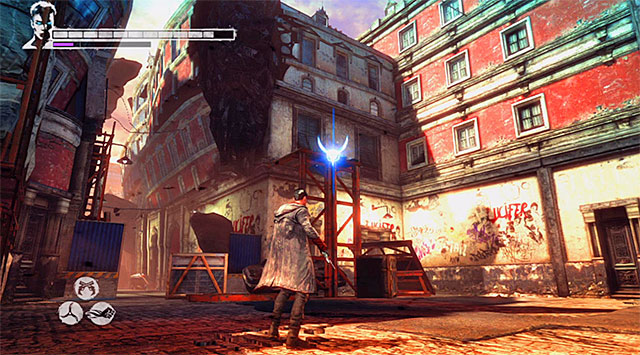
Watch the cut scene after a battle. To reach the door shown in it, you have go upstairs and choose the right balcony. Place yourself next to the door with red marks and use Arbiter (standard attack) to destroy it. After that, free Lost Soul sticking out from a wall over destroyed door and move on.
SECRET ROOM: If you repeat this mission with angelic scythe Osiris, stop where the screen above shows and destroy blue grapevine with it. Enter unlocked room, where you find a Lost Soul.
Get to the another room. A standard encounter awaits here, with more Death Knights. Defeat them all and see the cut scene which transfers Dante to the Dream World.
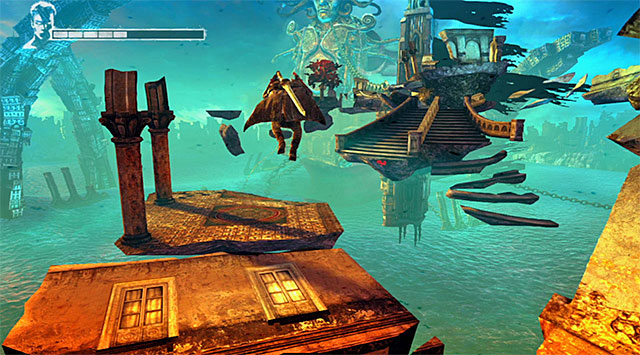
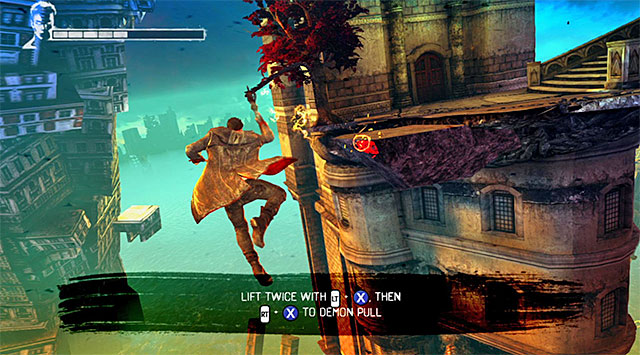
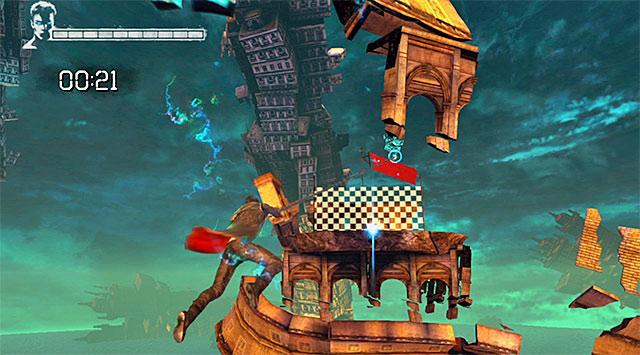
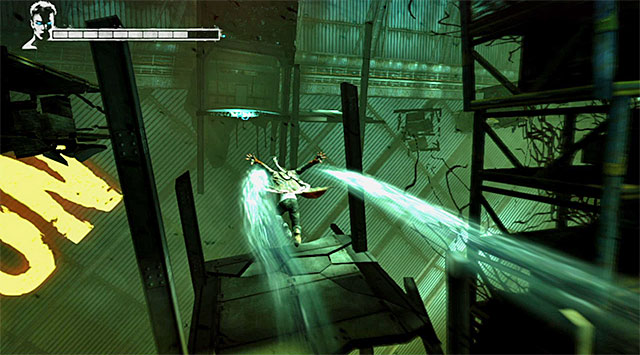
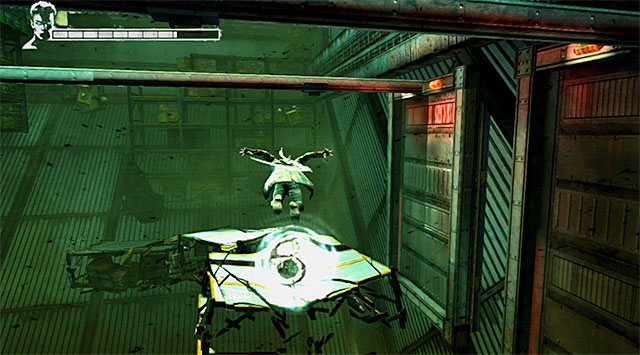
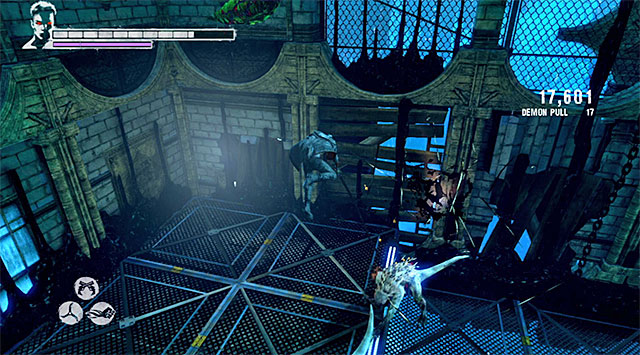
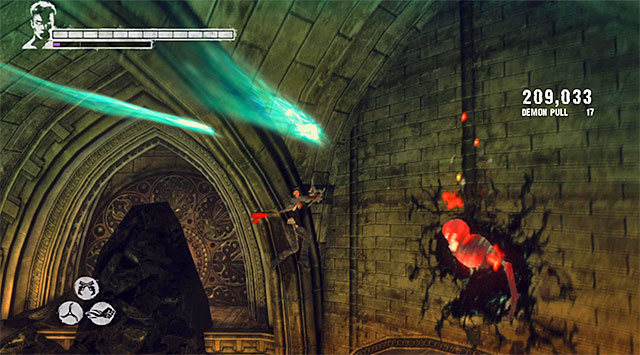
Not-that-complicated platform sequence awaits you. Move forward, jumping on next platforms. Make double jumps, just for safety. After reaching the last platform you obtain Ophion Demon Pull.
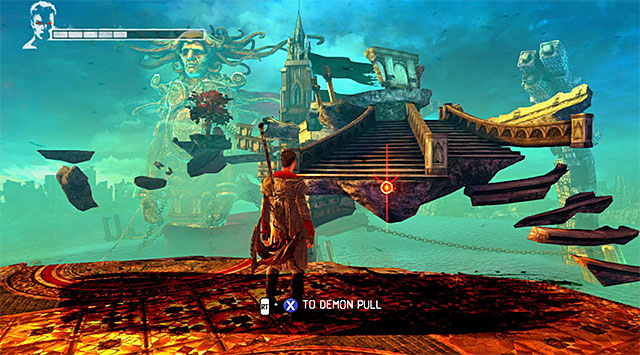
Game let you try out your new toy immediately. Use a displayed button combination to pull a platform. Jump on it and then on the stairs to continue your journey.
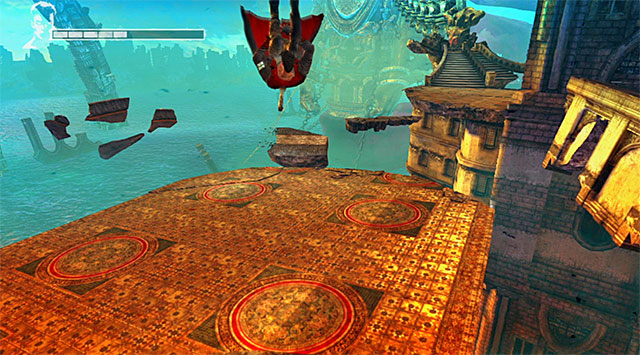
Now you'll have to use your new tool. Remember to make no mistake during jumps, because it'd be a waste of energy. You have to reach a bigger platform (screen above), which is used as an arena.
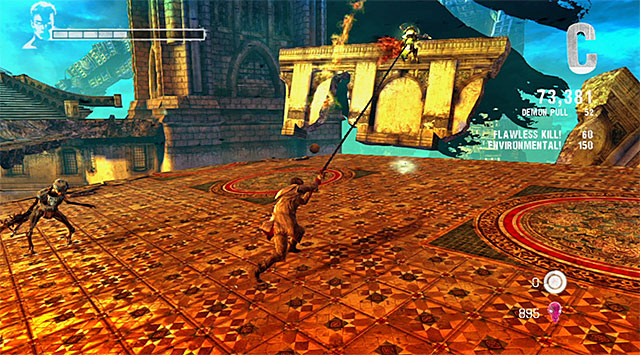
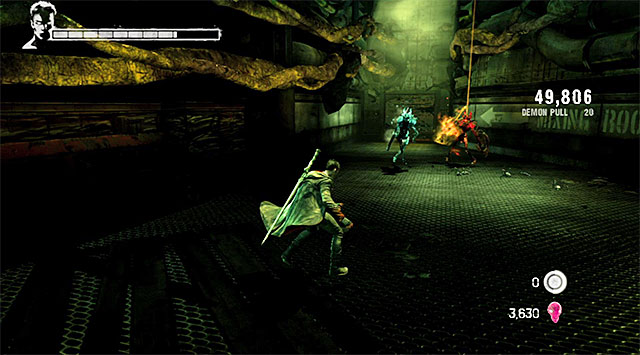
There a new encounter begins, where, as game suggests, you should use Ophion Demon Pull. You can pull weaker monsters (especially useful with flying ones) making them helpless. Eliminate all nearby enemies.
Resume jumping on next platforms. Your goal is a red stone, shown on the screen above. Use an Arbiter to destroy it. This triggers a cut scene and return to a mansion.

BONUS MISSION: When you return, approach a big hole and jump down. You find Secret Door (1st screen) and if you have a Copper Key you can open it, to begin a bonus mission Simple Eradication (2nd screen). It's relatively simple, you just need to kill all monsters in particular time, so remember to use your best weapons and abilities.
SECRET LOCK: If you repeat this mission with Eryx gauntlets from the sixth level, you can use them to destroy a red glowing part of the floor. You must use a Stomp and hit a red mark on the floor. In the lock you find Small Vital Star.
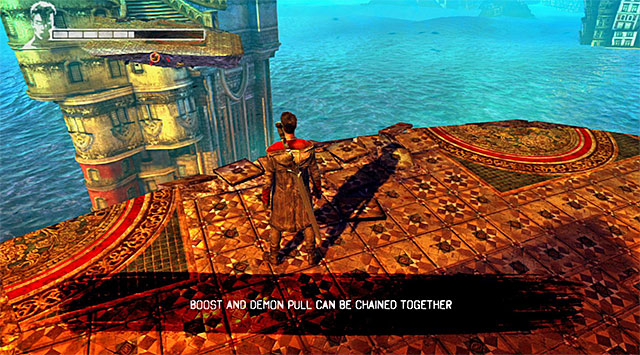
Choose the only one available passage and stop. Turn around and free Lost Soul from over the passage. Only then resume walking. Stay at the edge and use Ophian Demon Pull at interactive spot (screen above).
Jump on the platform and then on a shelf. Next part of walking isn't complicated. Use your Pull regularly at platforms. Your goal is door (screen above) which you have to destroy with Arbiter.
Go forward and turn right on the crossroads. Then, the game will force you to with new flying type of monster, Shielded Bathos. As you noticed, they use shields. For now on, it's best to attack them when they expose themselves, what happens during throwing explosives at you.
Now you have to get to the door shown in a short cut scene. Start double jumping, getting on the next platform and reaching stairs leading to an upper balcony. After getting on the top, use an axe to destroy door. use a Divinity Statue if you want and move on.
After a while you reach a room with Evy's painting. Begin battle, defeating Death Knights and, as it is suggested, using Pull to "expose" enemies with shields. When it's clean up, approach the painting - you'll obtain angelic scythe, Osiris.
As it was with an axe game will display list of standard attacks and let you test it during an encounter. Osiris is best when attacking big groups of enemies at once. Try also to keep a sequence of attacks, because the scythe deals more damage when it's charged.

After the battle choose the only one available passage. Stop at a barrier shown on the screen and use Osiris to make a way through - with an attack called Prop. Check a new room where you find a Lost Soul.
Choose the corridor where spotted ghost went, passing a Divinity Statue on your way. After getting outside, jump at levitating fragments of stairs. When you get at the last platform, use a Pull (screen above). Jump onto a new platform and use a Pull once again. At the end jump to the door which you should destroy with an Arbiter.
Move forward. At blocked passage, use your scythe again at blue grapevine - an attack called Prop. Move on.

SECRET ROOM: If you repeat this mission with an Angel Boost from the third level, look for a corridor shown on the screen above on your way. Use Angel Boost to reach a room seen in front of you, where you find another Lost Soul.

BONUS MISSION: Stay in the room where you find a Lost Soul (after using Angel Boost). Here you can find also Secret Door (1st screen) shown on the screen, and you can open it if you have a Copper Key. It begins a bonus mission Stylish Victory (2nd screen). It's a very simple mission, in which you have to gain a S (Stylish) multiplier. If you try hard, you can make it in under thirty seconds. Remember to mix used styles and weapons.
Soon you'll get to another blockade, and at this time you should use your axe. Your target is a library. After searching it, approach a blue rose lying on the floor what triggers the second memory.
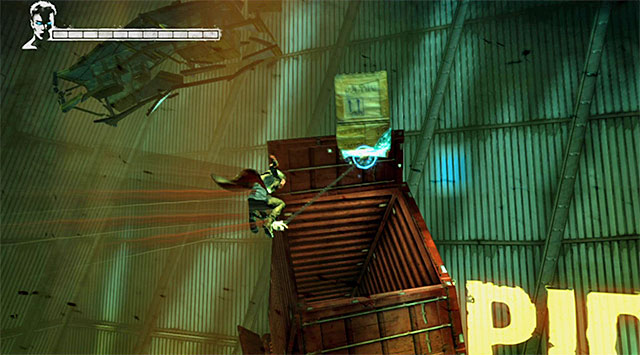
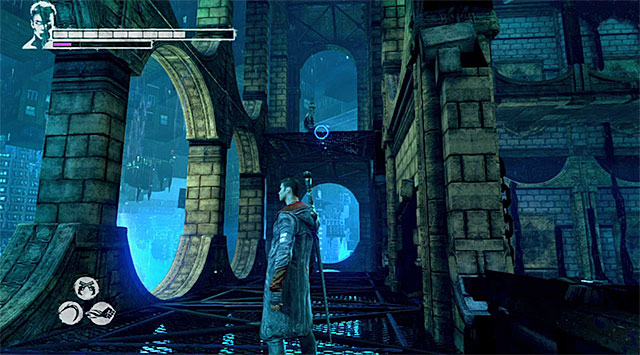
Move forward. After reaching an edge of the first big platform, you get an access to Ophion Angel Lift. Use it to pull a catch shown on the screen.

Move on, repeating this move. Prepare for a more difficult sequence, when you get to the place shown on the screen above. You have to use Pull and release it at regular intervals so Dante catches at next latch and doesn't fall into abyss.
Go upstairs. After reaching a monster, try out an offensive use of the Pull. After that finish off the monster.
Return to standard use of Pull - catch latches. Watch out at the end, because you have to pull at a monster, not at a latch (screen).
An encounter awaits here. As flying monsters are also involved, it's worth to use your Pull to get at them and smash them easily.
After that, look for a new latch. This part is a bit more difficult, because after using Angelic Pull you have to use Demonic Pull during a fly in the place shown on the screen. After landing get to a rock and destroy it with an Arbiter, what returns you to the mansion.
Another big battle in front of you. Among others, flying creatures will be involved and you can try out, due to the game suggestion, movement by throwing out their explosives. It works by activating Prop attack (Osiris) in the good moment.
Repelling explosives isn't obligatory, but makes the battle easier. You have to get rid of all monsters, using all your weapons and attacks. After that go to an exit, what launches a longer cut scene.
When you regain control, move forward. Stop where the screen above shows and start using angelic Ophion and remember to catch latches until Dante falls down. Head for a leaned platform and wait until you get on a levitating shelf.

Here you have to use alternately angelic (blue points) and demonic (red points) Pull. You need to get onto a bigger platform (screen).
Use an entrance in front of you. Now you have to begin to run, so rush forward without stopping and avoid bigger holes by jumps. After getting to glowing point, the mission ends.
First battle begins when the mission stars. Firstly, focus on attacking shielded enemies. If you can, try to use tricks you've learned in the previous chapter - like "uncovering" shielded enemies or repelling explosives.
After a while, a new type of enemy with a chainsaw joins the battle (Ravager). Most important thing is to keep a distance when he starts glowing and begins his charge (screen above) or you'll be spiked on the chainsaw. Only exception is when you have a Drive skill with your Rebellion, what allows you interrupt charges. About eliminating Ravagers: it's best to throw them up in the air and hit during the flight, they can't defend against such attacks.
SECRET ROOM: Look around after a battle. If you repeat this mission with Aquila from the tenth level you can use them to destroy grapevine shown on the screen above. It discovers a latch for your angelic Pull. Search a small room behind it where you find a Lost Soul.
After searching the arena (you'll be back here) go to a passage (screen), stop here and check two side branches.
Left corridor leads to a Divinity Statue and a wall through which you can go using an Arbiter. After that, go upstairs and take a Copper Key. Right corridor leads to a Small Vital Star.
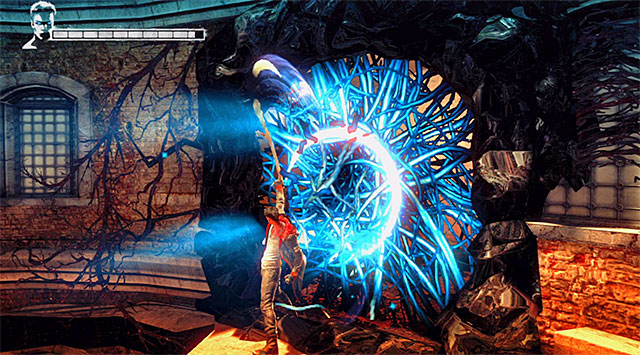
At the very end go where Kat is. A large abyss will be created in front of you what forces you to find a new plan.

Begin from turning around and releasing a Lost Soul. Then return to where you begin from and prepare for a new battle. Also now watch out for an enemy with a chainsaw. As there are many weak enemies, use area attacks.
After a battle find a latch (screen) and catch it with Ophion Angel Lift.
Start exploring new corridor and be prepared for a surprising attack of Ravager. Be careful, because the place is narrow and you may have difficulties in avoiding charges. On the other hand, he is less likely to avoid your attacks.
When it's done, go at the other end of corridor. Place yourself as the screen above shows and start using angelic Pull. Remember that you can't touch the ground.
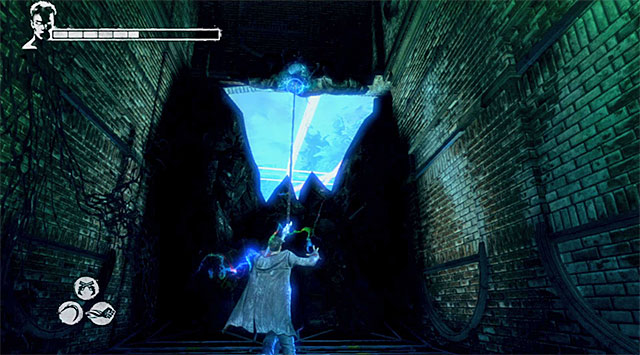
You should land on a shelf, where you should use Ophion Demon Pull. Start jumping again and stop where the screen above shows. Wait until a vertical platform appears in front of you. Jump onto it and then onto the one with a Blue Rose, what transfers you to the Dream World.
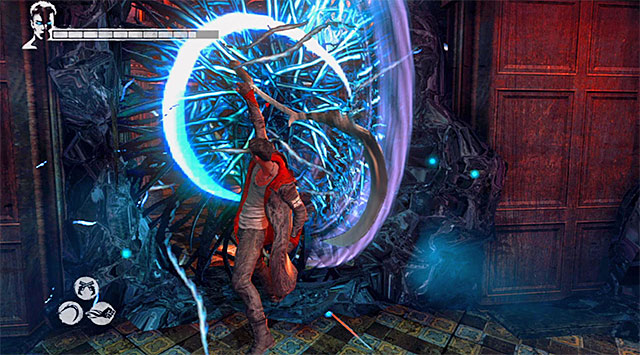
Just when you get there, you'll get a new skill, Angel Boost. You can use it to get to unreachable places. Testing starts now. Get to the edge and after jumping launch the Angel Boost (screen above) what takes you to the next platform. Remark: if you have problem with using it, make sure that you first press and hold button/trigger responsible for angelic powers and then press jump button.
Repeat this with next platforms and, according to the game's hint, remember that hitting this skill at the peak elongates Dante's flight. It's very important in the moment shown on the screen above. Activate Angel Boost at the peak and don't release button/trigger until Dante lands in new place.
Move on and stop only at the edge shown on the screen above. From now on, the things get a bit complicated. Firstly, you have to use an Angel Pull and then Angel Boost during a flight to get to a next shelf.
Next sequence has three parts. Start from using an Angel Pull. Then activate Angel Boost to get to another latch. Catch it with an Angel Pull and use again Angel Boost to land at the next platform.
Next part mixes Demon Pull and Angel Boost (screen above). Jump with Angel Boost and use a Demon Pull at a shelf and then quickly activates Boost again to get safely onto a platform.
The final part of this sequence is easy. Make the last jump and reach a place where you destroy a stone with Arbiter (screen above).
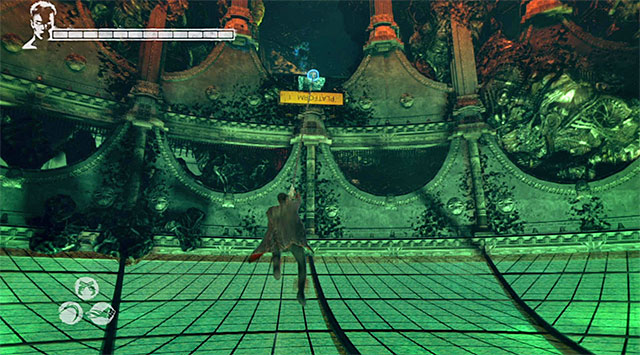
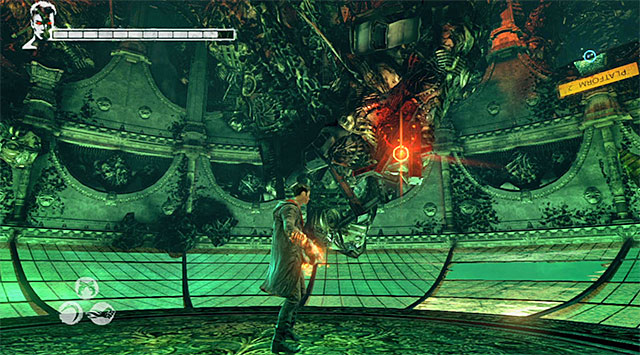
Just after your return the last battle begins with a new flying type of creatures, Pathos. They aren't dangerous, especially that you can pull them. As in the previous battles, watch out for chainsaw guys.

Before you leave this place, look around. Use an Angel Boost to get to a shelf (screen above) with a Lost Soul. You have to bounce from the higher point and land there.


BONUS MISSION: Next worth checking place is Secret Door shown on the 1st screen. Use Angel Boost to get there from the place where you've found a Blue Rose. If you have Argent Key you can begin a bonus mission to What Goes Around (2nd screen). It's not typical mission, because enemies in it can be damaged only by other enemies. Begin from attacking those on the ground, pulling them and waiting until flying ones throw explosives at you. Don't worry about health. Then finish off flying monsters. To eliminate the last one, you have to wait until he throws an explosive and then quickly pull him.
Kat is where she was, at the large abyss next to the arena. You need to use Angel Boost. I recommend to use double jumps. Reaching Kat ends this mission.
Move forward, after a while you get to an area with the camera, where the first battle begins. A new type of monsters appear (Stygian), but they are not scary. Remember to avoid their blades and that's all. In the later part of this battle Ravager joins.
After this battle look around, and find the first Lost Soul. Then head to the crossroads and choose left branch. In the place shown on the screen above use Ophion Demon Pull what reveals a platform. Stay in the same position and use Ophion Angel Lift what takes you onto a shelf.
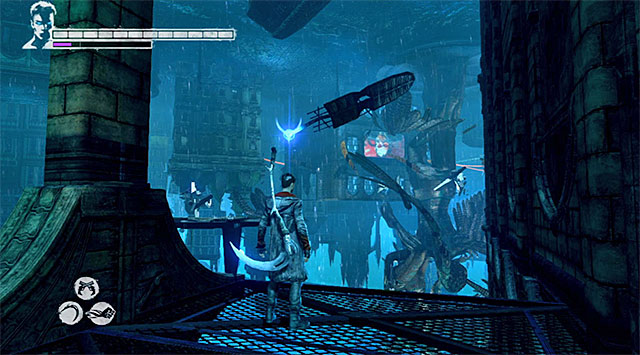
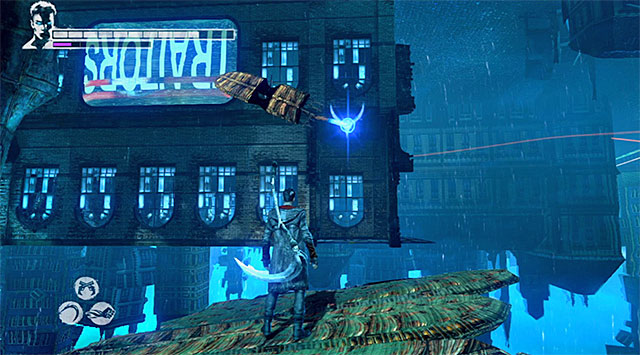
Jump onto the next platform. From the nearby building's house a Lost Soul sticks out and you have to attack it during the flight (screen). Now you have to return at the upper platforms.

After returning, look at a latch and use demonic Pull. Wait until the platform slides out and use angelic Pull what takes you onto it.
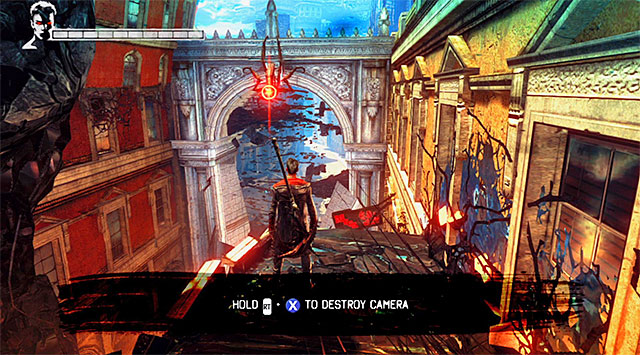
Jump onto the next platform and place yourself where the screen above shows. According to the game's hint, use a Demon Pull at the first camera to destroy it and move to the next location.
Jump down and use a passage under the destroyed camera. After a cut scene go left and find Small Vital Star. Turn around and jump to the Lost Soul (screen above). Now return to an abyss and choose right path, that is the one which Kat showed you.
SECRET AREA: If you repeat this mission with Eryx gauntlets from the sixth level, turn right when you can. Here you can use them to destroy a fragment of the wall (screen above). Hold a button for attack and wait until gauntlets charge. In this area you find Argent Key.
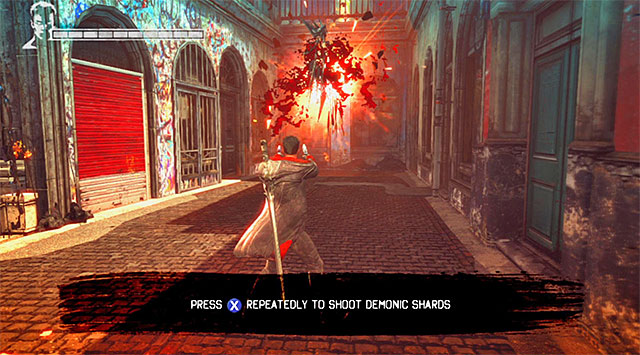
Follow narrow paths, finding Demonic Shards on your way. As the game suggests, use pistols to destroy them. Resume walking, using Angelic Boost to avoid an abyss.
After a while you get to a bigger square, where you'll fight another flying type of monsters: Shielded Pathos. Focus on them, using your attacks to uncover them. During an encounter avoid also a new type of chainsaw enemy.
Before moving on, look around. If you need, use a nearby Divinity Statue and then climb up on a not working fountain. Place yourself as it is shown on the screen above and fly to the Lost Soul using your Angelic Boost.
Return at the top of fountain and use Angelic Boost to get to a latch (screen) which you should catch with an angelic Pull.
Turn right and use Boost once again, to get a new Lost Soul. After that, return on the roof from which you've made a jump and enter the building (screen above). Look around, you'll find many interactive objects and a Gold Key.
Now you can return down and choose a path on left from the statue. You'll have a short escape sequence, during which you have to jump over two abysses. Of course, you can use double jumps and Angelic Boost. When it's done, you get to a new area with two demonic cameras.
But before you get to the new cameras, you'll have another fight in which you meet Frost Knights. The most important information is that you have to use angelic weapons against them, e. g. Osiris scythe. Of course, make various attacks to increase a multiplier. Avoid their attacks, because they may freeze you for a while.
After eliminating the first group of knights, other types of monsters join the battle. Follow your standard tactics against them. It shouldn't be difficult.
After a battle look around for interactive items, ignoring secrets on upper levels for now. At the very end choose a right passage which takes you to a new Divinity Statue.

Place yourself as the screen shows and use angelic Pull to get onto a platform over you. After that jump (you may use Angelic Boost) to a nearby Lost Soul.
Return the platform and jump onto next one. before you move on localize a blue grapevine (screen above) and use Osiris to go through (Prop attack).

BONUS MISSION: Search a small room shown on the 1st screen where you find Secret Door. If you have a Copper Key you can open it and begin a bonus mission Simple Traversal (2nd screen). It isn't too difficult, it's a time race. You can use only Ophion Angel Lift.
Return to where you've destroyed grapevines and place yourself as it's shown on the screen above. Use Angel Boost and fly to the shelf in front of you and then use a demonic Pull to destroy the second camera.

BONUS MISSION: Stay on the shelf from which you've destroyed the second camera. Turn to see far Secret Door. Make a double jump with Angel Boost. After reaching the shelf with door you have to use also angelic Pull. If you have an Argent Key, you can begin a bonus Flawless Conquest (2nd screen). You can't be hit in this mission. I suggest to begin from eliminating those flying monsters. Then finish off Ravagers, watching out for their charges. At the very end take care about two Frozen Knights, avoiding their wave of cold.
Jump down and locate a left alley shown on the screen. You meet Kat and watch a cut scene with her.
Begin from using Demon Pull where you've been talking with Kat. Now travel through upper platforms, using demonic Pull on once Angel Boost on your way. Your target is a shown on the screen roof.

Begin exploration from a double jump heading for a Lost Soul. Then return on the roof and use the Arbiter to destroy a barricade. Enter a small room where you find eighth Lost Soul.
Again return on the roof and jump down on its lower part. Place yourself where the screen shows and use a demonic Pull to destroy the last camera.
Just after that you'll be forced into a new battle. I recommend to begin from eliminating all flying monsters (screen above) and only then jump down to finish of remaining ones.
After battle head for a newly unlocked passage (screen). Prepare, because another escape sequence begins here.
As in the previous ones remember to move constantly and avoid abysses and bigger obstacles. In two places you can use angelic Pull - so do it.
Be careful when you get to the tunnel (screen above), because you'll run into demonic shards. use pistols or evade them. Run until you reach a big cathedral.
A long, divided on four parts, battle begins in the cathedral. During the first part focus on flying monsters. But don't forget about those on the ground.
The second part of an encounter is a fight with Frozen Knights - remember to use Osiris against them. As they are tough, focus on single targets.
Flying monsters return in the third part. But now you should watch out more for Ravagers with chainsaws. Don't let them hit you.
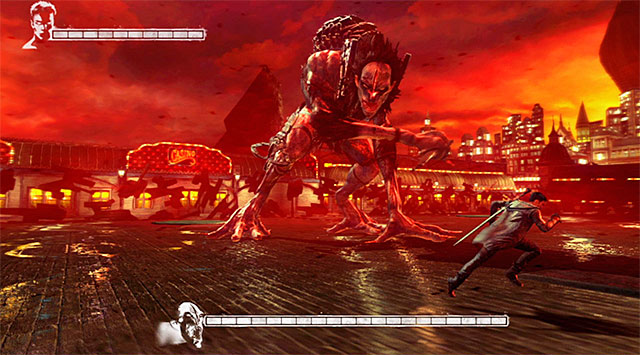
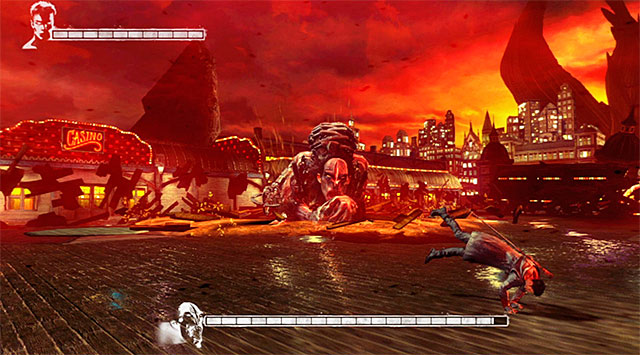
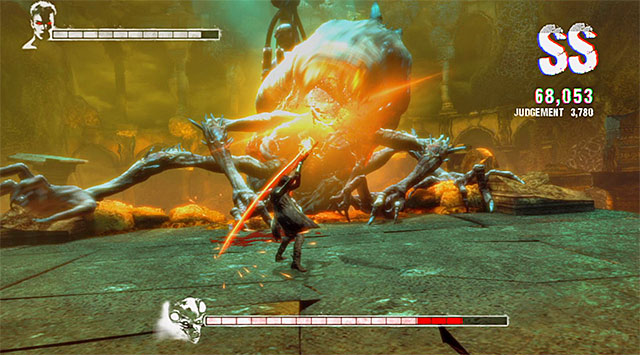
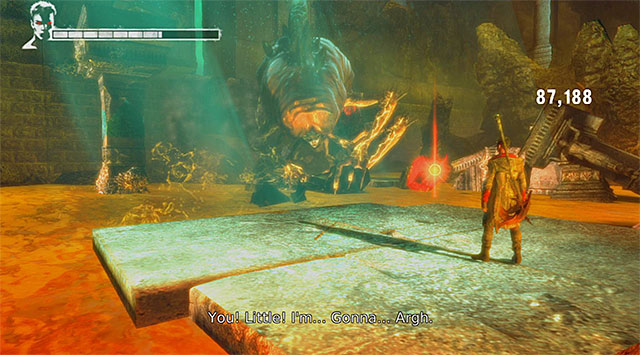
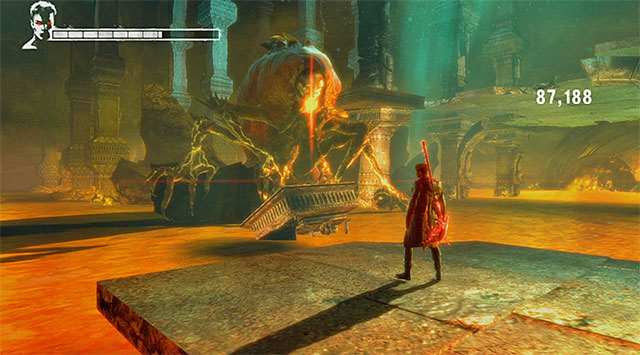
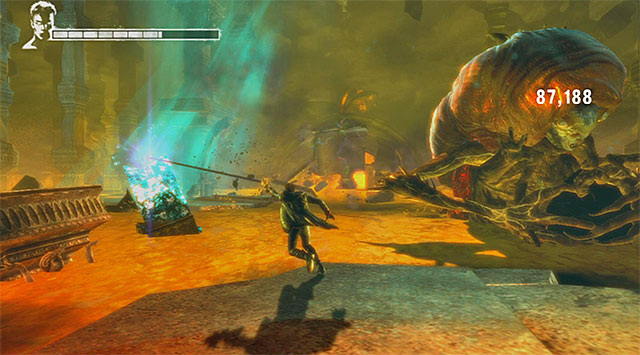
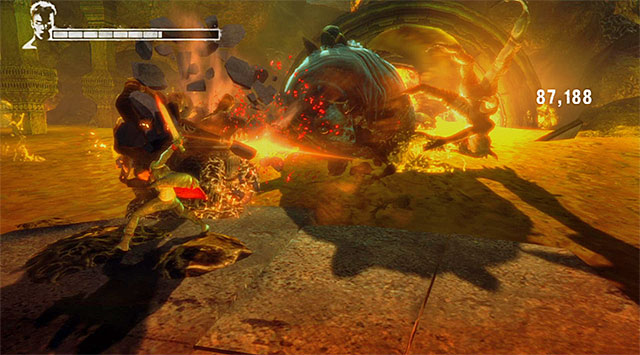
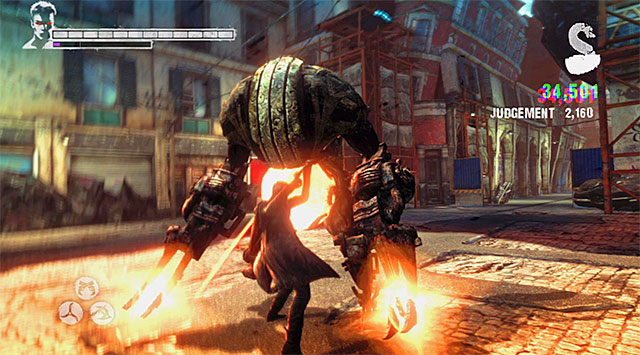
The last, fourth part is a duel with an obese enemy, Tyrant. Beast deals much more damage than any from previous enemies, so it's very important to evade its attacks properly. Beware of his charges and jumps.
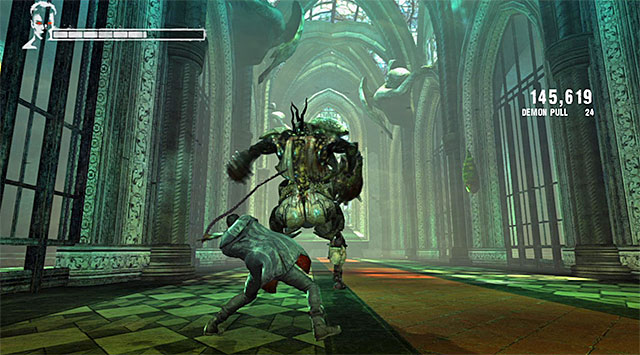
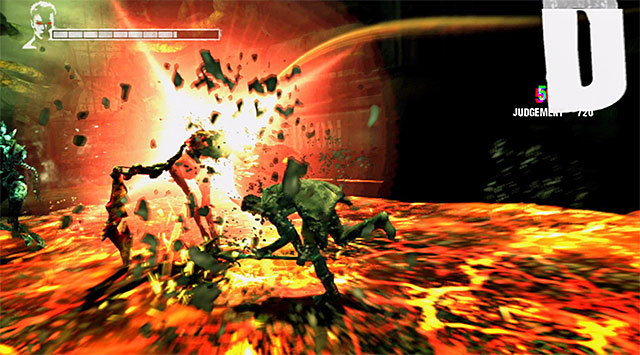
It's best to attack him after every unsuccessful charge, aiming at his back. And instead of standard attacks, use demonic Pull to knock him down (screen above).
After winning, head for a far stained glass. Pieces of floor will be falling apart so make double jumps combined with Angel Boost.
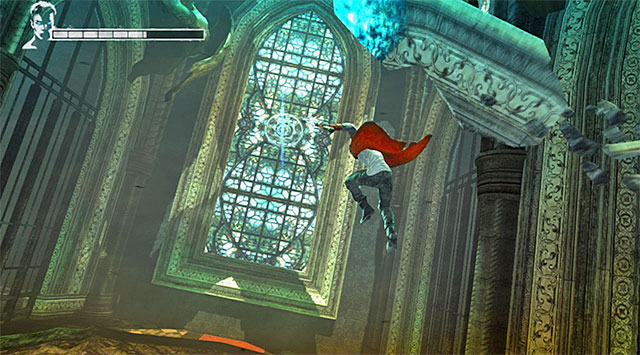
At the very end prepare to catch few latches with an angelic Pull. The last one point is the very stained glass and flying through it ends mission.
Beginning is very linear. No enemies, no interactive items. If you want to finish this part quickly, just follow Kat.
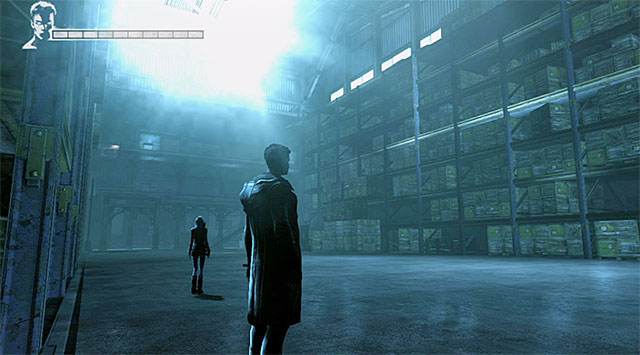
Your target is a warehouse (screen above). Wait until Kat opens a breach through which you get to the limbo.

Start climbing, using platforms. Stop where the screen above shows. You have to decide whether you go left or right. Both paths end in one place, but if you want to find all items and collect many Orbs, I recommend to search both of them.
If you chose left path, start from using a Ophion Demon Pull. Repeat it to tear a bigger formation. After that use Ophion Angel Lift. You have to use it twice without touching the ground.
After landing on a small platform, you find yourself on another crossroads and to keep continuity choose left platforms, using demonic Pull. be careful when you get to the shelf shown on the screen above, because you may be attacked by a small group of monsters. Don't get pushed out of the platform and beware of flying monsters.
Look around and get on a small shelf (screen above). Jump onto next container (use Angel Boost) and then use Angel Pull to get onto a higher platform. Here you can free first Lost Soul. After that return on a big platform where you've been fighting with enemies.
Now you can continue your journey through left side of warehouse or go to the right side. If you want to remain in the left one, slide out a platform (angelic Pull) walk on it and use Pull on latches (screen above). It has to be perfectly synchronized or you'll die.
If you chose right path, use Ophion Demon Pull few times, moving to the higher platforms. After landing, you find yourself on a crossroads and again choose right side.
Next step is using Ophion Angel Lift where the screen shows. Repeat this with next latches over you to get onto a bigger shelf. You may be attacked by a small group of enemies. Don't let yourself be pushed out and eliminate flying monsters first.
Now you can continue your journey through right side of warehouse or go to the left side. If you want to remain in the right one, slide out a platform (demonic Pull) walk on it and use Pull on latches (screen above). Continue climbing.
Both paths leads to the same platform, which is shown on the screen above. Here you have to make a more complicated platform. Use Angel Pull on an upper latch and Demon Pull during flight to open a container. Do not press a jump button because Dante should get inside the container without it.
Go through container reaching a big platform. A new battle begins. At the beginning you'll fight with a new type of enemy: Hell Knight. The most important information: you have to use a demonic weapon against them (on the time being: Arbiter). It's worth to have pressed demon mode button/trigger all the time, what protects you against Knight's lava. Soon, more monsters will join the fight.
In the second part of the battle, the biggest danger is a new Tyrant, a monster which you've already fought. Remember to avoid his charges and strong attacks. Hit him after unsuccessful charges, using a Demon Pull to knock him down. In the meantime, beware of remaining monsters.
After that, search the area carefully. Start from jumping onto containers (screen). Climb up and reach a Copper Key which you've probably spotted earlier through a net.
Now stay at the edge and notice a platform (1st screen). make a double jump with Angel Boost. After getting close to the shelf (2nd screen) use Angel Pull to pull it. You can free another Lost Soul.
Make sure that you've finished all businesses in the first warehouse and only then choose a path shown on the screen above. It is unlocked after a last battle. Don't forget to use a new Divinity Statue.
Stop when you reach boxes shown on the screen above and start climbing. After getting onto top, use an Angel Boost to get on a balcony on left.


BONUS MISSION: There, look for Secret Door, shown on the 1st screen. You can open them if you have a Copper Key, what begins a bonus mission Demonic Conflict (2nd screen). You have to eliminate all enemies using only demonic weapons (like Arbiter) and in particular time. You shouldn't have had problems but remember about avoiding attacks of flying monsters.
Jump down and continue your journey, destroying demonic shards on your way. Start jumping onto new boxes, reaching an upper balcony. After a while you should find yourself at the entrance to the second warehouse (screen above).
Be careful, because you'll be attacked by flying beasts after entering the warehouse. Pull them to avoid risk of falling into abyss. Be prepare for at least one more such encounter.

When you finish them off, use Demon Pull. When you get into new place, look for a Lost Soul. Like in the first warehouse, you have to choose your path.
If you choose left path, begin from using Angel Boost (screen above). After landing on a small shelf, use angelic Pull to get onto upper platforms.
Turn right and jump onto next levitating shelves. You don't have to use Angel Boost, double jumps should be fine.
If you choose right path, you also have to begin from using Angel Boost and reaching a platform (screen above).

After landing jump onto levitating shelves. You don't have to use Angel Boost, double jumps should be fine. At the very end use an Angel Pull (screen above).
Both paths lead to a shelf (screen above). Use a Demon Pull and then jump onto an upper platform and try go near to an exit, what launches a new battle.
Main difficulty in this battle is a fact, that you'll be simultaneously attacked by Frozen and Hell Knight. Frozen one attack with angelic weapon (Osiris), Hell one with demonic weapon (Arbiter).
Activate a demon mode when fighting with Hell Knight to avoid damage from lava. I recommend to kill them in a sequence, focusing at one firstly. Fight until you kill both of them.
After that, look around searching for a Lost Soul. Before you leave this place, go onto upper levels of warehouse where more secrets can be found. Do to so, find a destroyed staircase (screen above).
SECREAT AREA: If you repeat this mission with Aquila from the tenth level, turn right when you get onto upper balconies. Throw blades at grapevine (1st screen). After that use an Angel Pull on a newly unlocked latch. Now you have to use it on two rings of acceleration (2nd screen) and don't remember about pressing a jump button. After landing on a high platform use Angel Boost and get onto a smaller shelf where you find a Lost Soul.
Search upper balconies, looking for the next Lost Soul. Get to the other end of balcony, stopping where the screen above shows.
A demanding sequence in front of you. Firstly, use quickly Angel Pull two times, catching interactive latches. Prepare to use a demonic Pull to tear something blocking your way (screen above). Of course, you have to do it while flying.
Immediately use Angel Pull so you can continue your travel and catch further latches. The last one is on the container (screen above). Do not push a jump button, your hero will automatically jump into it.
SECRET ROOM: If you repeat this mission with Eryx gauntlets from the sixth level, you can use them to destroy a glowing part of a wall on the right. Inside, you can destroy few more interactive objects.
Continue journey, using Angel Pull on a latch (screen above). Turn left and, using Angel Boost, fly to a small platform.

At the very end, use an Angel Pull and Angel Boost and land on a shelf (screen above), where you find an Argent Key. Now you can return to the main platform, where you've been fighting Knights.
Make sure all is done in the second warehouse and then choose a passage (screen above). It unlocks after the battle with knights.
Follow a path until you get to a big, square room. A long battle begins here, divided onto three parts. During the first one, use area attacks, as you'll be fighting mostly groups of weak monsters. The only exception are Ravagers, but you should've known already how to deal with them.
Second part is a replay of the last battle in the second warehouse. Again you'll fight at once Frozen and Hell Knights. Remember to use proper weapon and activate a demon mode when the lava appears.
Last, third part is an encounter with three demonic shards. If you've developed pistols, you may try destroy them. Otherwise, prepare to make at least one perfect evasion. After that, use the only exit in the room.
Easy corridors in front of you with few crossroads. Focus, when another demonic shard appears in front of you (screen above).
After reaching a crossroad after defeating a shard, choose a tunnel leading to a blue grapevine (screen above). Unlock it with Osiris. Enter a room and pick up Small Vital Star.
Return to the crossroads and choose a corridor with two spots of acid (screen above). Try to jump over them.
After reaching another crossroads be ready to eliminate a single shielded enemy. Kill him and then destroy a glowing fragment of wall with an Arbiter.


BONUS MISSION: Search a newly unlocked area, finding a lot of interactive items and Secret Door (1st screen). You can open them with an Argent Key and begin a bonus mission, Displaced Skirmish (2nd screen). It's a difficult mission. You can damage enemy only while standing in green circles. Circles will get narrower and narrower, so you have to change your position often. I recommend to pull enemies rather than waiting for them, because you race with time. Ravagers are the one who will be the worst nightmare here.

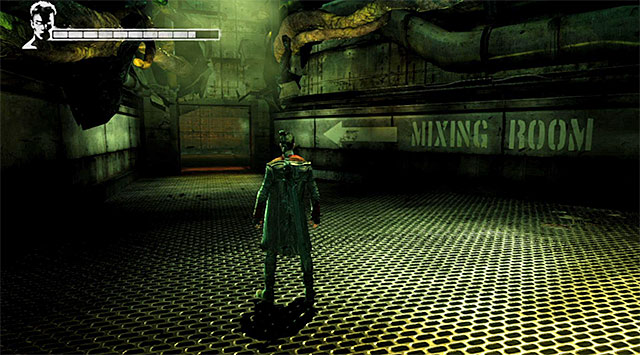
Return to the crossroads and choose not searched yet corridor. Be ready for an encounter with Ravager. After that move on. Use a Divinity Statue on your way and buy Vital Stars because soon the last battle in this mission begins. Find an entrance to mixing room (screen above).
During this battle watch out for appearing spots of acid. Avoid it, because it'll hurt you.
In the first part of a battle you fight mostly with weaker enemies, but there are also Ravagers and one Hell Knight.
Second part of this battle is more difficult, because you'll be attacked by two Tyrants. Focus at attacking one of them at once. Use your best attacks and don't forget to knock them down after their charges.
After battle destroy interactive objects and then head for a passage where Kat is standing (screen above) what ends this mission.

This mission begins from a time race. You have to minutes to reach the other end of this tunnel. Start from turning around and jumping onto a shelf where you find a Copper Key. Then, return to the beginning and jump over a small hole.
When you get onto a new platform, you run into a new enemy. Eliminating monsters isn't obligatory now. But I recommend to kill them for points, using your best attacks to save time. Now you make two more jumps which lead you to platform with more monsters.

Passing an abyss in front of you is harder. You have to use Ophion Angel Lift and then Angel Boost to catch latches and then to get into a bigger part of the tunnel.
Be careful, there are monsters nearby. Depending on what you like, you can pass enemies or kill them and then use an Ophion Demon Pull on a latch (screen above) to turn a platform on which you have to jump.
To pass another abyss, mix Angel Pull and Angel Boost. After getting onto a new platform find a Lost Soul (screen above). Free it and move on, noticing a single, strong monster on your way.
Jump over a smaller breach stopping at the edge of an abyss (screen above). Use again Angel Pull and Angel Boost, reaching the last place with monsters. If you have more than 20 seconds, eliminate monsters. Otherwise speed up to the end of a tunnel.
Again stay at the edge and start using Angel Pull supporting yourself with Angel Boost. Last thing you have to do is to catch a manhole with a Demon Pull.
Move forward, reaching an exit after a while. There begin from using a Divinity Statue. Before a boss fight, although it's not that difficult, you should buy healing stuff. Search the area finding interactive objects and a Lost Soul.

BONUS MISSION: Use Angel Boost to fly onto a shelf on left side. You find here among Secret Door (1st screen) and if you have a Copper Key you can open it and begin a bonus mission Rapid Descent (2nd screen). This mission is a time race. You have one minute twenty seconds to run through 20 gates. Plan your way carefully to not omit any of them. In most of cases you'll use a double jump and Angel Boost but one gate is reachable only with Angel Pull. Try to not make mistakes - because although falling down doesn't mean losing, just moving you back to the start, but the clock isn't restarted.

After making all things done, use a passage (screen above). It leads to Succubus' lair, this mission boss.
Don't attack Succubus when the battle begins, just wait. Boss will try to hit you with his upper limbs. Make double jumps to avoid blows.
Notice, that at every attempt a red bump uncovers. Use it, running quickly and attacking it with random melee weapon. Hit hard until you see that boss is ready to attack you once again. Move back and watch for his blows again.
Boss doesn't limit himself to attack with limbs, he'll also from time to time try to hit you with an acid. You have to react quickly, because all platform gets covered in acid. To run from it use an Angel Pull to get onto a neighbour platform (screen above).
After reaching new platform, resume attacking boss and remember about double jumps and running away from acid.

You have to eliminate a first bar of boss' energy. In this moment a short cut scene is displayed which uncovers two cables attached to boss' body. Wait until you regain control and use Demon Pull to pull out cable. Remark: if Dante says he is too far from the cable, quickly move onto upper platform and try once again.
Your action weakens and irritates boss. It means that you have to run away from a platform before it'll get destroyed. To do so, use an Angel Pull.
Next phase doesn't differ from the first one. You have to avoid boss' attacks (upper limbs and acid) looking for an occasion to attack a bump on his forehead.
Continue attacking until you reduces the second energy bar to zero. Wait until you regain control, catch a cable with a Demon Pull and run away from the platform (Angel Pull) before it is destroyed.
In the next phase you can't run onto side platforms. Boss should be so weak that he won't try to spit an acid at you. You should quickly destroy his energy bar.
This time you must use Demon Pull at succubus' mouth.
Wait until you regain control and quickly use an Angel Pull at a latch in front of you. Return to where the Divinity Statue was, what takes you to the second part of an encounter with succubus.

The second part is very easy, almost like a sequence of quick-time events. Begin from catching a right pillar with an Angel Pull.
Next steps are using a Demon Pull on a red point (1st screen) and on a boss (2nd screen).
Now you have to move onto a left platform, using Angel Pull (screen above).
The last one step is attacking a part of pillar which boss is holding on with a melee weapon. Mission ends soon and Dante receives Eryx gauntlets.
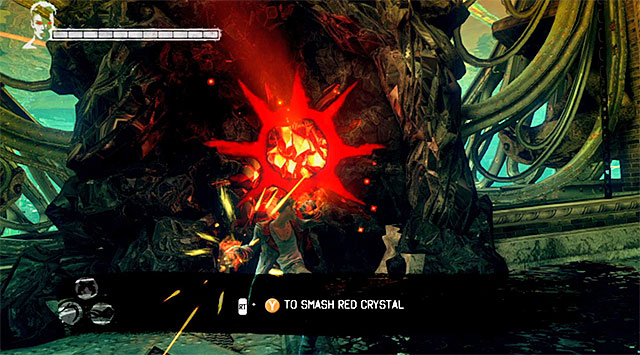
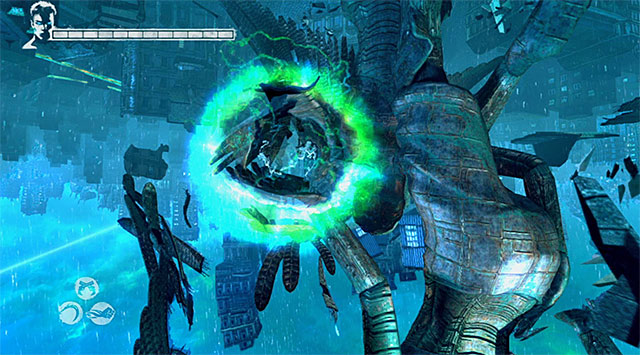
Start jumping onto platforms, using double jumps. Stop where the screen above shows. To destroy a crystal you have to use Eryx gauntlets. Choose them from the equipment. Hold a standard attack button and wait until they charge. Then smash the crystal and unlock the way.
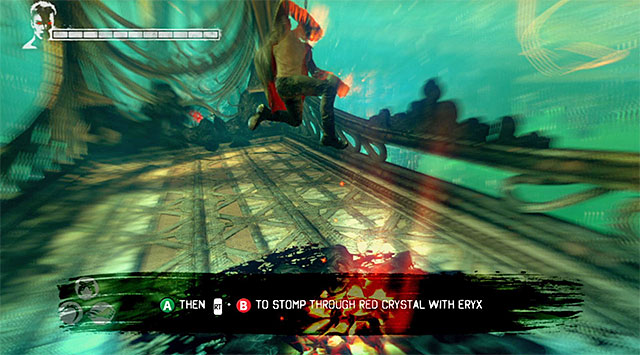
Enter new area and notice a red place on a floor. Also here you have to use Eryx, but this time you will perform an attack called Stomp. It's a strong attack from the air.
After getting into new place, start using Ophion Angel Lift. You have to land on a platform, approach the third crystal and destroy it with Eryx.
Jump onto a pushed truck, helping yourself with an Angel Boost. Two next activities are more obvious. You need to use Angel Lift at latch and then go through another crystal with Eryx.
Move forward, what launches a cut scene and triggers first battle here. During fights you can use Eryx, but it isn't necessary. In my opinion gauntlets are better than Arbiter, because they let you make quick strong attacks. You can also switch between those weapons quickly.
After battle, start moving for a crystal in far away, which you have to destroy with Eryx. Also here a battle begins. Remember to activate demon mode when the lava appears.
Eliminating the main group of monsters doesn't end the battle, because you'll have an encounter with Tyrant also. Use a standard strategy: avoid his charges and use Demon Pull on his back. According to the game hints you can also try to block his charges with Eryx. They have to be fully charged (hold button) and an Uppercut attack must be performed just before Tyrant hits you.
Then head to the red crystal and use Eryx on it. Later, stand where the screen shows and use Angel Lift. After that use Demon Pull and jump onto a shelf.
Use Angel Boost and get onto a next platform, turn left and use Demon Pull once again. Jump onto a new platform and stand on the edge (screen above). You have to get to a platform in front of you, so use Angel Boost.
Now a bit harder sequence. Use a Demon Pull on a latch and then, in flight, Demon Pull landing on a shelf.

Turn right and jump on a next shelf. Before you do anything, look at a wooden platform on left (screen above) - fly there with Angel Boost and free a Lost Soul. After that, return to previous platform and go through wall using Eryx.
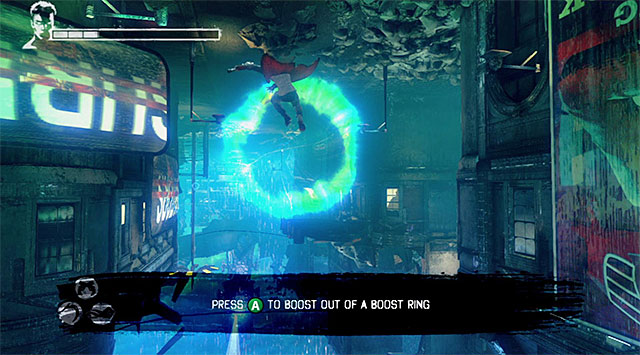
At the very beginning you will be acknowledged how Boost Ring works. Start from catching a Ring like a latch, using Angel Lift. After reaching Ring you have to press a jump button. After landing in new place, repeat those action with the second Ring.
Use Angel Lift on a latch. SECRET ROOM: If you repeat this mission with Aquila, turn right and throw blades at grapevines far away (screen above). Then use Angel Boost and catch a newly unlocked latch. In the room you find Copper Key.
Make sure that you're on a container to which Dante get thanks to Angel Lift. Jump onto left platform, staying on the left side of a net. Place yourself as the screen above shows and use Angel Boost to get onto a hardly visible platform. Free the Lost Soul.
BONUS MISSION: You find Secret Door (1st screen) and if you have a Gold Key you can begin bonus mission Divergent Slaughter (2nd screen). It's difficult mission. Its assumption is that you can't use any attack twice. I recommend to attempt this challenge as late as you can, with as much weapons and attacks unlocked as you can. Concentrate also on performing blows throwing enemies out of the ring, for example Stinger attack of Rebellion sword.
Return to the previous shelf. You can get to the next area in two ways. The better one is to go through o container (screen above). Use Angel Lift and then use Eryx gauntlets This choice let you collect Large Vital Star.
Optionally, you can also use a right passage (screen above), jumping onto next platforms. In this case, you have to take into account eliminating few flying creatures.
Your current target is shown on the screen above. If you choose a way via container, you need to use Angel Lift. Otherwise a series of jumps will be enough.

Turn right and use Angel Lift to catch a latch (screen above). After reaching a new platform free Lost Soul. Return to the bottom and this time catch a Boost Ring, remembering about pressing jump.

After a short cut scene, use a Divinity Statue and look for a metal platform on left (screen above). Use Angel Boost with Angel Lift to get onto it, and then search it to find an Argent Key.
Return to the Statue and head for a nearby warehouse, where a new battle begins. During it, I recommend to eliminate weaker monsters firstly and then the Hell Knight.
After getting to the second part of battle, use the similar strategy, but this time with Frozen Knight as a dessert. The last, third part is the most difficult, because you fight Frozen and Hell Knights at once (screen above). As you have been in such situation already, I just remind you about focusing one of them at once and using angel and demon modes wisely.
To get out of warehouse, you need to use Angel Lift. March though several corridors reaching a place where you meet a new monster, Rage. During fighting them remember that they are very agile and you can pull them only when they're are preparing an attack.
From time to time those monsters activates fury mode (screen above), what firstly triggers when you eliminate one of them. You can react similarly to Tyrant's charges - avoid them, stay in the air or block them with Eryx. Eliminate both monsters.

Destroy all interactive items after a battle and head to the exit. Turn left and free a Lost Soul (screen above). Now you can head for the next part of a prison.
After reaching elevator shaft turn right where after a while you find Lost Soul. Now return to the beginning place and go left. Use Angel Boost to pass a destroyed fragment of staircase.
Be ready for a short battle, starting from eliminating flying monsters and then finishing off a new Hell Knight. Resume marching toward higher floors, using Angel Boost and Pull on your way. Stop after using Pull second time. Turn around and place yourself as the screen above shows. Start using Angel Boost to get onto next platforms. Your goal is to get to another Lost Soul.
Return to where you've used Angel Lift lastly and resume marching. Jump into elevator shaft. You have to use Eryx gauntlets where the screen above shows - Stomp attack as with the crystals. Wait until you ride onto a lower level.
Move forward. After reaching a new room start from freeing the next Lost Soul. Repeat an action with Eryx, hitting the red mark on the floor.
Be ready, because a harder battle awaits. You have to defeat two Rage beasts. Use your attacks wisely and be especially careful if any of them get into fury mode. It's worth to focus on single target than attacking both of them equally.

BONUS MISSION: Stay where you've been fighting with Rage beasts. You find here Secret Door (1st screen) and if you have a Copper Key you can open them and begin a bonus mission Angelic Warfare (2nd screen). It isn't too difficult. You have to use only angelic weapons. As you already used to (with Frozen Knights for example), it shouldn't be problematic.

Use Angel Lift on the latch but don't hurry with leaving the warehouse. Turn around and use Angel Boost to get onto a shelf (screen above) where you find a Copper Key.
Return to the previous shelf and move on. After reaching a small room use a Divinity Statue and free the Lost Soul. At the very end use Angel Lift to get out of the building.
After regaining control, you can just follow one path. Don't worry that you can't use any skill - the game will display soon a cut scene.
Place yourself where the screen above shows and use Angel Lift. After landing on the roof of wagon, fly to the next car using Angel Boost. Next two steps are using Angel Lift on Boost Ring and Angel Boost to get onto a shelf where prisoner fights with monsters.
The first encounter with Harpies in front of you. Avoid their distance attacks, which shouldn't be too frequent (screen above).
Harpies can defend well against using of Demon Pull, but you can easily reach them with Angel Lift. But do not use it too often, because you may get into abyss. It's better to wait until Harpy flies over a platform. Defeating all of them ends mission.
Start from using Angel Boost to return onto a shelf with prisoner and frighten attacking Harpies. Now you have to pursuit them. To do so, use Ophion Angel Lift on a latch (screen above).
Turn right and use Angel Lift again. In the next room you have to use Demon Pull. Jump onto a freshly slid out platform, getting into a bigger room. On the left you can another point on which you can use Angel Lift.
Approach a crystal in the wall. Of course, you have to destroy it using well known attack of charged Eryx gauntlets.
SECRET ROOM: If you repeat this mission with Aquila from the tenth level, turn right just after going through a wall (screen above). Throw blades at grapevine and use Angel Boost to get into an unlocked room. Here you find another Lost Soul.
BONUS MISSION: Stay where you have found a Lost Soul and go right, reaching a Secret Door (1st screen above). If you have a Copper Key you can open it and begin a bonus mission A Taste of Heaven. It's rather a difficult mission, because both Dante and his enemies dies from a single blow. Unfortunately, your opponents have shields what means that you have to hit them more than once to defeat them. I recommend to begin with eliminating flying monsters and then the rest of them. Use your best attacks (a skill Devil Trigger may be helpful too) to not risk too much and make it in the particular time.
Make sure that you're in the room with destroyed wall and move forward. Destroy the second crystal, what unlocks an entrance to a small room with Small Vital Star. Exit the room, turn around and catch a platform (screen above) using a Demon Pull.
Stay in the same place, because after revolving a platform, a Boost Ring appears. It means that you have to use Angel Lift and after getting nearby the levitating shelf (screen above) you have to press also jump button what accelerates you. Move forward, stopping at the edge. Wait until metro passes you.
Jump into metro tunnel and move left where you find Lost Soul in the wall. Return to the starting point and go right. Use Angel Boost to avoid breaches and holes. Be ready also to avoid collision with metro. Every time you see it coming move to one of tunnel's walls.

Continue marching through the tunnel, avoiding metro and passing holes. To jump over the last one you need to use Angel Lift. Your target is a railway station (screen above), where new battle begins.
It will be long encounters, during which the most dangerous will be Frozen and Hell Knights. Leave them at the end, eliminating weaker enemies first. I recommend to use a passing metro to eliminate monsters and throw enemies at it (screen above).
After battle, go to the next part of tunnel (screen above). Start exploring this area, turning right after a while. Use Osiris to make a way through and check a corridor behind grapevine. You will find an Argent Key.
Return to the railway station, where the last battle took place. This time, choose a side passage (screen above), which was shown in a cut scene. Go to the lower levels and be prepared to destroy few Demonic Shards on your way.
After reaching the bottom level, go through the wall using Eryx. Use a nearby Divinity Statue and then head for Harpies far away. Don't hurry, you have two small side rooms to check on your way. In the right one you find Lost Soul.

BONUS MISSION: In the left one you find a barricade (1st screen) which you need to destroy with an Arbiter. Behind it you find Secret Door which you can open if you have an Argent Key and begin a bonus mission Moderate Traversal (2nd screen). It isn't too difficult, but you have to use Angel Boost and Angel Lift flawlessly. And if you make mistake, you don't back to the start - only the current fragment is restarted, so you lose only few seconds.
Return to the main corridor and move forward. Be ready to destroy quickly new Demonic Shards. Remark: if you won't destroy shards quickly, consider moving back to one of side rooms to avoid being damaged. Your target are Harpies, shown on the screen above.
When you're in Harpies' lair, limit walking on a glass roof to minimum, because it's easy to break and fall down. Try to keep it in good condition to not make your next battle more difficult.
Before you run for the stolen eye, search two side corridors going out from the nest. You'll recognize them due to the latches which you can catch with Angel Lift (screen above).

In each of side corridors you find a Lost Soul, but you have to watch out also for Demonic Shards which can suddenly appear in front of you.
After finishing all things, use Demon Pull on a mechanical eye (screen above) what triggers the battle.
At the beginning of the battle you'll be attacked only by Harpies. Avoid their distance attacks and pull yourself to them with Angel Lift to use melee weapons against them.
In the further part of the battle other flying monsters appear (Shielded Pathos) but I recommend not to change your playstyle. What is more, constant use of Angel Lift minimize risk of touching a brittle roof under you.
After the battle find new latch (screen above) and use an Angel Lift. Now you have to return from where you've begun the mission. Consider another use of Divinity Statue on your way.

Turn left and head for upper levels, watching out for net Demonic Shards. New big battle awaits at the railway station, where you run into two Rages. Kill them one after another and remember to be extra cautious when they go into fury mode.
After a battle, find a railway tunnel leading to one-eyed prisoner whose eye you retook. To pass destroyed parts of tunnel use Angel Lift and Angel Boost. Be ready also to eliminate few weak monsters and more Demonic Shards.
After getting into the final part of tunnel, turn left. Jump over the balustrade, getting onto lower level. Ahead, a last battle in this mission, where you have to fight Tyrant. Use double jumps to avoid his charges.
Fight until all enemies are dead and then go to the unlocked passage (screen above) which was shown in the cut scene. Getting to the starting place shouldn't be problem. Here you meet Phineas (one-eyed prisoner) what ends mission.
After a conversation with Phineas move forward, following the path. After reaching the end of a shelf stay in front of a red part of the wall and use an Arbiter to destroy it.
Start exploring corridors. I recommend to stop where the screen above shows, at grapevine. Destroy it with Osiris, enter new room and free a Lost Soul. After that resume marching. A moment later you'll meet Phineas again.
Now you have to jump onto platforms beneath you. Use double jump and Angel Boost every time to be sure, you won't fall into abyss.
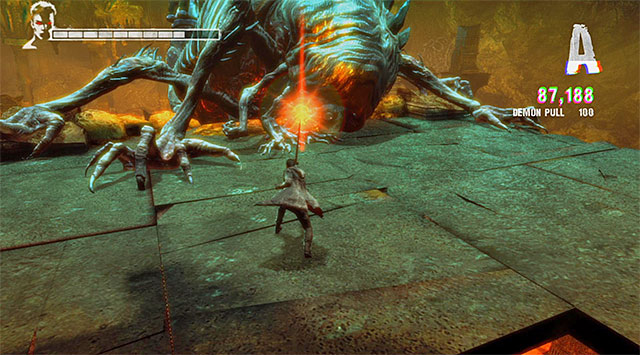
After reaching the big wing, you will fight the Witch for the first time. During battles with them I recommend to be careful, because they have various attacks, can cause huge damage and you not always can hurt them. Focus on avoiding standard Witch's attacks (screen above) still moving and making evades.
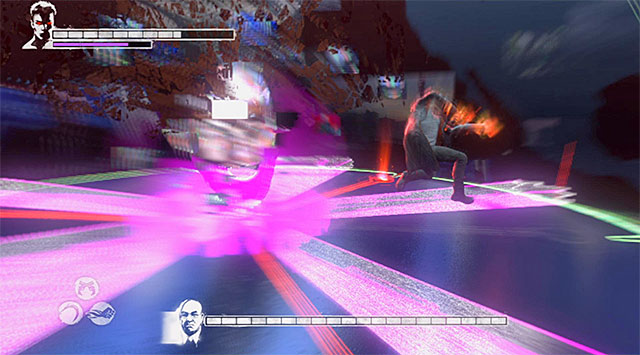
Witch's second attack is to throw a demonic blade at you. Also in this case you can evade it but it is better to throw the blade away. When you notice that it appears over the Witch, hold it with a Demon Pull and when it's pulled to Dante bounce it to hit a monster.
When it comes to attacking Witches, the main difficulty lies in their force field. You can deal with that on two ways. First one is to bouncing their demonic blades. The other one requires attacking them with angelic weapons (like Osiris). When the field is down, use your strongest attacks.
After battle find a latch and use Angel Lift. Be careful, because you will be forced to use quickly Demon and Angel Lift in one place (screen above). Continue until you reach a new part of a wing.
Jump onto next platforms using Angel Boost if necessary. In the further part of travel you will have to use Angel Lift again. Be careful at the second time, because you'll catch a Boost Ring (screen above). It means that you have to remember about pressing a jump button. Wait until Dante gets artifact and will be moved to the Dreamworld.
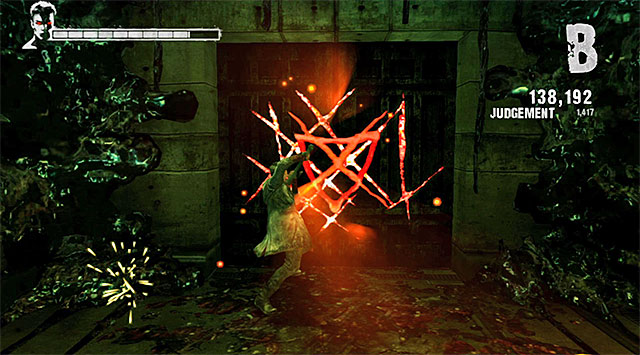
Move forward, getting onto new shelves with Angel Boost and Angel Lift. Stop when you reach a new rock and destroy it with an Arbiter. After a few cut scenes you'll get a new offensive skill, Devil Trigger, thanks to which Dante gets stronger and enemies are helpless for few moments.
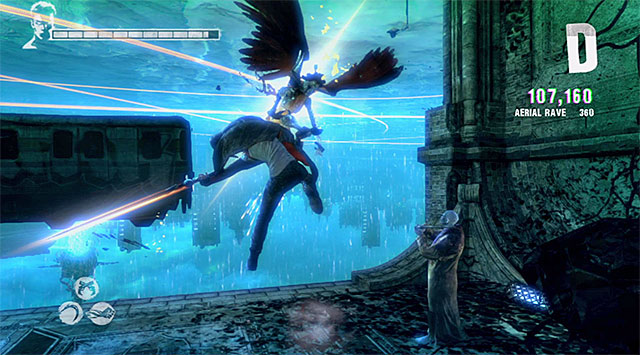
Of course, game will immediately let you test Devil Trigger, helping you with suggestions. Observe a bar of its power. I recommend to activate this skill only when the bar is full, because its duration is limited. Use Devil Trigger on the first group of monsters. According to the game's hint the best is to damage monsters in the air, because it gives more points.

Probably you won't finish them off with active Devil Trigger, so end the battle. After a moment this sequence ends.

Find a new latch and grab it with Angel Lift and additionally use Angel Boost to get safely on a shelf. Use Angel Lift again to get into a warehouse. Here you will fight.

At the beginning, you must eliminate two Rage beasts. You can make it as usual or use Devil Trigger. I personally recommend to spare this skill, because eliminating those monsters doesn't finish the battle.
In the second part of a battle focus on a Witch, because it can also protect other monsters. Remember about bouncing her demonic blade and destroying force field with angelic weapons.
SECRET AREA: Even before the battle ends, it's good to make some steps toward a secret in here, because later it won't be possible. Make sure that there are at least two monsters vulnerable to pull and that you have bought an Ability called Enemy Step. Start on one of higher platforms in the warehouse's corners. Make a double jump and while being at the peak of flight pull the first monster with Demon Pull (1st screen). Bounce from him and use Demon Pull again, on the second monster. Bounce from him too. After that launches Angel Boost to get an upper balconies (2nd screen). Here you find a Gold Key.
After battle look for the exit from warehouse. Turn right and grab a latch with Angel Lift.

SECRET AREA: If you repeat this mission with Aquila from tenth level, you can turn around after using Pull and use Aquila to destroy grapevine (screen above). Then go onto a new platform and pick up Small Devil Trigger Star.
Move on, passing a Divinity Statue. Go right, stop at the edge (screen above). Grab a latch with Angel Lift and launches Angel Boost in flight to make it safe. Jump onto a next piece of a wing, again with Angel Boost.
Continue journey on levitating platforms. Begin from using Angel Lift few times. Stop where the screen shows. After using Angel Lift activates Angel Boost BUT fly to right (outer) metal platform (screen above), thanks to which you reach a new Lost Soul. Only now fly to left platform, which lead to the new battle.
Battle here isn't easy, because you have to watch out for missing pieces of the floor and do not get pushed into abyss and what is more don't fight where you have no stable ground under your feet. Harpies is best to pull to and then hit them.
In the further part of battle more types of monsters join, with shields also. Control Dante skillfully, do not take too much risk. Wait until a new Witch appears to eliminate her ASAP.

BONUS MISSION: Search this area and find a Secret Door (1st screen). If you have a Gold Key you can open door and begin a bonus mission Subsistence. It's relatively easy mission. You have to keep Dante alive for 3 minutes, but he'll lose health also when you do nothing. The only way to regenerate is to eliminate monsters. During all this challenge I recommend to aim and eliminate the weakest monsters. Those with shields and chainsaws attack only when you can't see any others. When you're almost dead activate Devil Trigger. The reward for this mission is a Devil Trigger Cross Fragment.
Place yourself as on the screen above. Use Angel Lift few times and the mission is over.
Move forward. Don't care about reversed vision, because after running several meters cut scene will be displayed and situation returns to normal.
Prepare, because if you want to avoid a ray fired at you, you have be quick and flawlessly. Start from jumping onto right platform helping yourself with Angel Boost. Repeat the same with the second shelf.
Next step is using Angel Lift on latches on left. After catching the second one activate Angel Boost to get onto a new platform.
Start running to the left edge of the screen and when it's possible use Angel Lift to grab a new latch. Be ready to use Lift once again, landing on an unstable platform.
The last part of this scene isn't demanding. You have to use Angel Lift few times, without touching the ground. At the very end aim over the big screen to fly through it.
In sequence in front of you, you don't have to hurry. Start from Angel Boost to get onto a right shelf. Then make a double jump what takes you onto a higher platform.

Now fly to the left platform and after landing use Angel Lift, grabbing a latch far away. After reaching it triggers an Angel Boost to get safely on a next shelf.
Now make a longer flight and continue journey reaching a new latch after a while. After climbing on a higher shelf, stand before a latch use Angel Lift and Angel Boost. Only two more latches and the boss is yours (screen above).
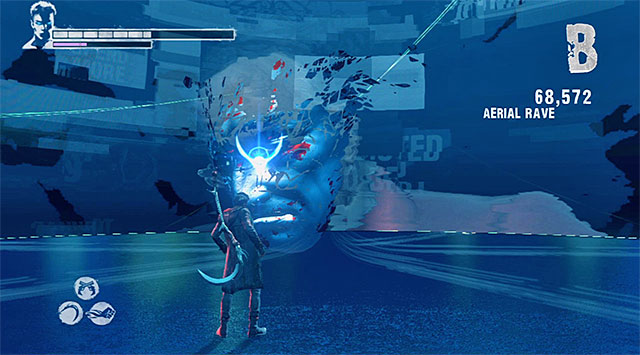
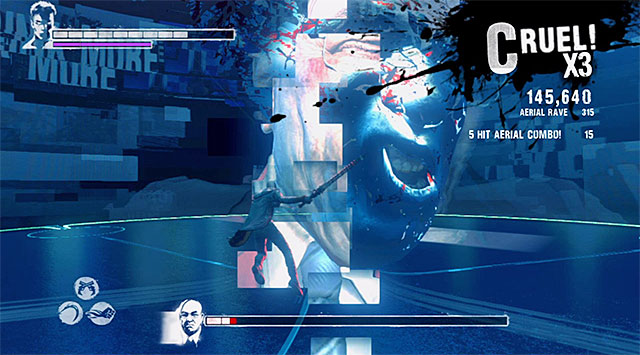
Encounter with Bob Barbas has few parts and its own rights. Firstly, get to know with main attacks of the boss. Blue color means that a ray of light will appear there, so you have to avoid this.
Purple and green are for rays running on the ground, which you have to jump over. A good way to stay longer in the air is to charge weapon. It'll be especially useful in further parts of the battle, when some rays get wider.
Yellow stands for the wall of light. Don't run from the arena but look for holes in the wall, running through them. Walls are in both lower and upper part of the wall.
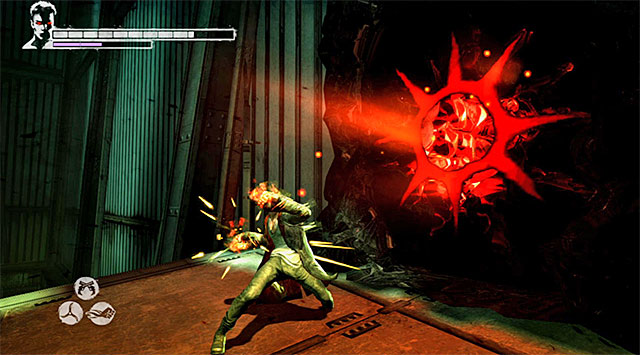
Don't try to attack boss in normal way, he is untouchable. Instead of this, focus on red marks on the arena. After reaching one of those, you have to charge Eryx and attack it from the air, like in the case of red crystals.
After hitting the mark, Bob should stop attacking you. Approach him quickly and make your best attacks.
When you notice that a red circle appear around a boss move away to not get hurt. Wait until it explodes and then attack boss again. Explosion of the second circle equals boss's return, so you shouldn't attack him for now.
Now you have to repeat stated above actions, which are avoiding attacks and running on the arena to hit the red mark.

You need to zero first bar of boss health. Then the short cut scene should be displayed. Use an Angel Lift at a latch.
This scene is also untypical, because you fight when Bob Barbas make a TV broadcast. First of all, get used to a changed view. Don't move away from the helicopter which is recording the battle, because your vision will be limited.
Main simplification is a fact that you're fighting only with the weak monsters. It's a good opportunity to get a high point multiplier. What is curious, you don't have to eliminate all monsters. You fight only to moment when Bob ends the broadcast.
Second part has few more difficulties. Main Bob's attacks are way stronger. It's best visible with the yellow one (1st screen), where you have to avoid now two walls. Also his other attacks have changed (2nd screen).
Another difficulty is a fact that to "uncover" boss you have to hit two red marks, not once. After hitting the first one run quickly to the other and use Eryx again.
Luckily, the part when you attack hasn't changed. Make your best attacks and move away every time you see a red circle around the boss. If you want to finish this part of encounter quickly then use Devil Trigger, but I personally wouldn't.
As in the first part, you fight until the next health bar runs zero. After that use an Angel Lift at a latch.

Second battle is very similar to the previous one, although it takes place in other location. View is untypical and you fight many weak monsters. Use this situation to charge your Devil Trigger bar which may be useful during a final part of the boss encounter.
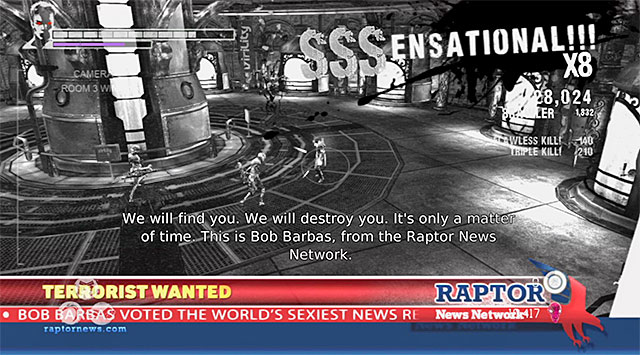
As in the previous case, you don't have to eliminate all monsters. Just fight until Bob Barbas ends the transmission.
The last, third part of the boss fight has even more difficulties. Bob's attacks got stronger again, due to which now you have to avoid three walls (1st screen) and deal with much more wider rays (2nd screen).

Another fact is that you have to hit three red marks instead of two.
Every time boss stops his attacks run to him and make your own blows. It's a perfect moment for activation the Devil Trigger. If you make it skillfully, single usage of this skill will get rid of the whole boss health bar.

Independently on what you have done, destroy the last health bar of Bob Barbas. As a reward you obtain two angelic blades (Aquila) and the mission ends.
Just after the mission begins, you'll have an opportunity to test Aquila. Choose this weapon and start killing Stygians. You should quickly notice that Aquila are great for eliminating groups of weak monsters even if you make basic attacks.
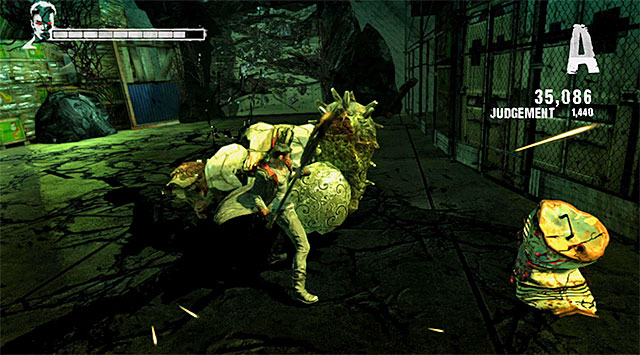
After eliminating all monsters from the first group you'll fight much stronger Butcher. This monster has two chainsaws and it's worth to know his basic attacks. He can attack at short distance as well as throwing his chainsaws at a long distance. As during fighting Tyrants, I recommend to perform flawless evades, because his attacks will cost you a lot of health.
Do not use angelic blades at Butcher. Rebellion will be fine, especially if you have upgraded it. To damage him you have to aim at a orange bump. Do it just after your enemy's failed attempts to hit you, when he is helpless for few seconds. After that jump out and wait for another occasion.
Be careful, because Butcher may get furious in the late stage of an encounter (screen above). It such a moment he is even more dangerous, so you have to play even more cautious. It's good to know also that Butcher explodes after death, so move away.
After defeating Butcher a new battle with normal enemies begins. Winning shouldn't be a problem. Try to get high multiplier and charge Devil Trigger bar.
After all battles look around to find a latch shown on the screen and use Angel Lift. Jump at higher shelves using Angel Lift.

Stop where the screen above shows. Here you have to use a new skill connected with Aquila. Press a displayed combination of buttons and the blades will destroy the grapevine and make new way. Now you can use Angel Lift.
Begin an exploration from going through a nearby wall thanks to Eryx gauntlets. After getting into the room use Divinity Statue if you want. Use Eryx again, this time at a red crystal in the floor.
Grapevine is a next obstacle. You can use Osiris or Aquila, according to your preferences. Stand in front of grapevines and destroy them (screen above). Then use an Angel Boost to get into a new corridor where you find a Small Vital Star.
Only now return to the hole in the floor and jump into it. Start from searching a small room on right, where you find a Lost Soul. Then use Eryx to destroy a red part of the wall, what triggers a cut scene.

Follow the path until you reach a room with crystal in the ground, which should be destroyed with Eryx gauntlets. A moment later you'll have to use gauntlets again, this time to destroy a wall. Your target is a bigger room shown on the screen above. Jump down, what begins another battle.

Firstly, focus on weaker monsters. Use Aquila to defeat them and move in a way so the enemies will be damaged by the Butcher. Leave Butcher for the end. Use a tactic as in the previous encounter, so attack his hump and avoid chainsaws, especially when he got furious.
Elimination all of them triggers a second part of the battle. This time begins from eliminating the Witch. As the game suggests, you can use Aquila (attack Round Trip) to destroy her force field, but it isn't necessary. After killing Witch focus on a Tyrant, avoiding his charges and knocking him down.

Look around and use a passage which a moment later will be exploded by soldiers assaulting Order's residence in the real world. You need to get into a room shown on the screen above, where the new battle begins.
Begin a battle. Firstly, defeat all flying monsters. I recommend to pull them with Angel Lift and use your strongest attacks. At the end finish off those on the ground - the best way is to use Aquila.
After battle look for another Lost Soul. Now you have to use Aquila on away grapevine (screen above). After that use Angel Lift on a latch, what let you pass a locked door.

After landing in the next room, be ready to quickly destroy two Demonic Shards. You should use pistols to do it. Then a standard battle begins. As previously, first take care of flying monsters and only then of the ones on the ground.
It's not the end, because you'll be attacked by two Ravagers. As the room is small, I recommend to attack from the air, pulling Ravagers to yourself. After that choose an unlocked passage to get into a main part of Order's base.
Turn right on crossroads. Stay close to the right wall while moving through badly lit corridors. Nearby you can find a new Lost Soul. Be careful, because on your way back to the starting point you'll be attacked by a single Ravager.
Now you choose a corridor (screen above) on right from where you've begun exploring the main base. Also here you'll run into a Lost Soul.
Continue walking, finding among others locked door. Then look for a room with a key (screen above). Turn right and go through the wall using Eryx gauntlets. Now you can pick up a Copper Key.
Go back to the starting point and be ready to eliminate another Ravager. Now choose the left corridor (screen above).
Stop when you reach a destructible wall. Use an Arbiter to destroy it, what gives you an access to another Lost Soul.
Continue walking. When you run into another blockade, use Eryx to go through the right wall.
BONUS MISSION: If you want to reach a new secret, you have to act quickly. Move on, looking for a left passage (1st screen). Use it before the barrier closes. Search nearby corridors and you'll find a Secret Door. If you have a Copper Key you can open it, beginning the bonus mission The Power Within. Here you have to eliminate all monsters having the Devil Trigger activated, which's duration is extended every time you kill anyone. Don't experiment, just use Angel Lift and make quick blows with Rebellion.

Look around for another Lost Soul. A bit further you find also Divinity Statue. Use it if you want and resume walking.
After reaching stairs, turn left and pick up a Small Devil Trigger Star which charges Devil Trigger bar. Return to stairs and enter an area where the final battle takes place (screen above).
Start attacking weaker monsters, using Aquila or your other favorite toy. Meanwhile, watch for attacks of the new Butcher. As in the case of previous battles, leave him for the very end, to focus only on him. During fighting him remember about avoiding his strong attacks and aiming at his bump. Try to have this encounter in the second room, to have more space.
SECRET AREA: Even before end of a battle with Butcher and his fellows make actions which let you find another Lost Soul (1st screen above). It's default unavailable and you can reach it only after unlocking an ability called Enemy Step. Make a double jump nearby the soul. At a peak pull the first monster, using Demon Pull. Bounce from him and immediately use the Pull on the second enemy. Bounce also from him. At the very end, fly to the Soul using Angel Boost (2nd screen).
Defeating Butcher doesn't ends mission, because you'll have fight also with a mysterious enemy with a red mask. Spare few moments to get to know his attacks. First of all, try to avoid his attacks just after a teleportation. What is more, make evades every time he tries to charge.
The best is to attack him after his failed attempt to hit you after the teleportation (screen above). He isn't too durable and a few such actions should make him go away.
After a fight look for interactive objects. Then go to the next room to talk with Kat and end this mission.
This mission begins in extraordinary way. You will not have any fights or use any weapons. Your task is to protect Kat. Wait until she make a sign at one of the pillars and then use Ophnion Demon Pull. Remark: you have to do it quickly, or Kat will be killed.
Do the same in the case of next two signs: this on the right pillar and this on the wall (screen above). You have to use your Demon Pull twice.
Follow Kat. You don't have to lurk into rooms you pass because here you won't find any secrets. Be ready to use Demon Pull at a new sign. After reaching a locked door wait until Kat opens a passage.
When the cut scene ends, move on. Another important event takes place when you reach a room with kidnapped scientists. Be ready to use Demon Pull. You have to use it when one of guards appears in front of the locker on which Kat have made a new sign (screen above).
You can resume marching. There will be no more difficulties on your way. Your target is a room shown on the screen above where you find Vergil.
Only now you begin a normal game. Your first task is defeating a new Butcher. As you probably remember, crucial thing is to avoid his attacks with chainsaws. Aim at his orange bump.
Be careful at the end of the encounter, because Butcher will get furious. Move away before he explodes. Watch a new cut scene with Vergil and Kat. You'll get to know that you'll have to fight in Limbo while they'll be busy deleting some data.
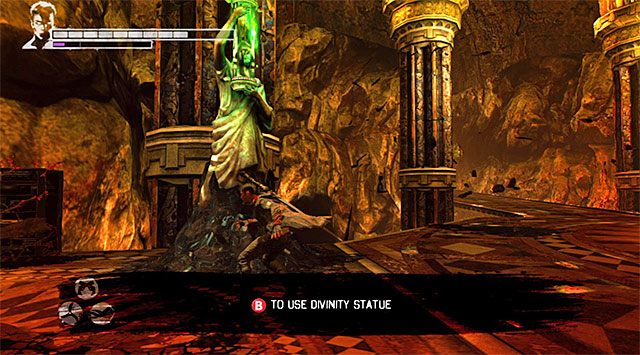
Use a fact that battle begins after a while and search the vicinity. First of all, notice a Divinity Statue. Additionally, try to remember where the green plants are in order to regenerate yourself during the battle by destroying them if it is necessary.
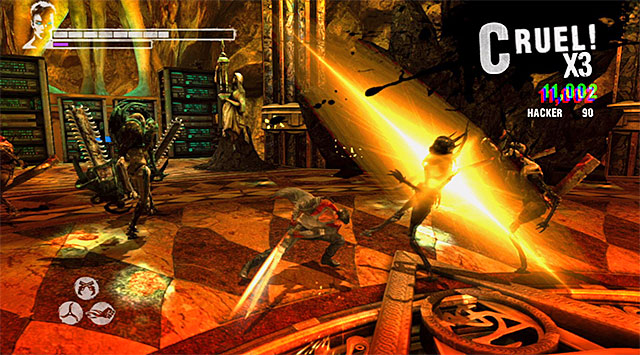
In the first part of battle, you'll meet standard monsters with Ravagers. Use area attacks, using for example lately achieved Aquila. Observe Ravagers to not give them too many opportunities for successful attacks.
In the next part of battle you'll be attacked by another Ravagers and a Butcher. Begin with eliminating those first ones. Leave the biggest monster at the end, finishing him off as it's described above.
The third part of battle is, in my opinion, the easiest one because you have to eliminate only smaller versions of well known beasts, Rage Spawns. They don't deal big damage and die very quickly. To eliminate them quickly use area attacks.
The fourth part of the battle is also rather easy, although you have to use pistols to destroy Demonic Shard smoothly. If you see that you are not able to destroy a Shard in time, prepare to make an evasion, to avoid damage. When this part of battle ends, Vergil gives you a shotgun: Revenant.
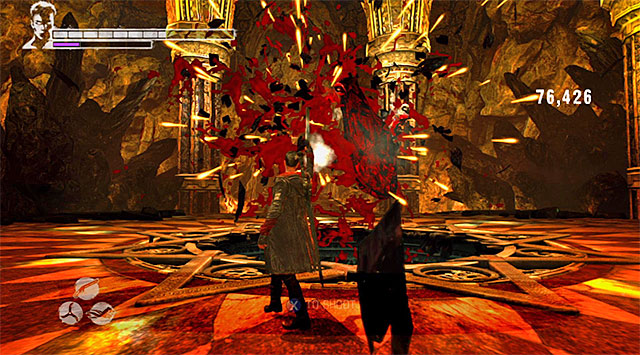
After getting to the fifth part of battle, use your newly acquired shotgun to destroy Demonic Shards, because it's very efficient at short distance.
Sixth part of the battle is like the third one. Also here you have to eliminate a group of Rage Spawns. More interesting is the seventh one, because you'll meet Harpies there. Eliminate them using Aquila or pulling them with Angel Lift and killing in the air. Only when you finish off Harpies, take care of the remaining monsters. Help yourself with area attacks.

The last, eighth part of the battle is an encounter with adult Rage beasts. Focus on single target at once until you kill it. Be ready to avoid their attacks and retaliate when one of them gets furious. After winning this battle you'll see a cut scene which ends this mission.
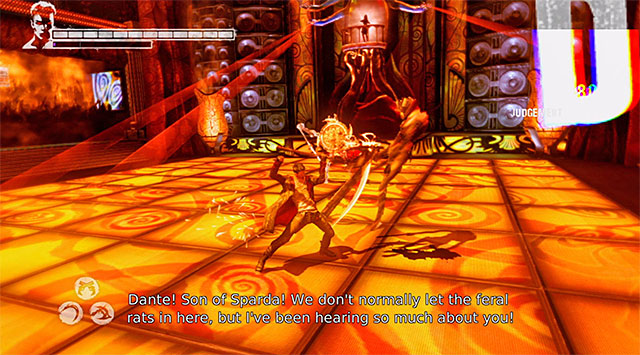
First part of this battle takes place on the main floor of the club. As you'll fight only with weak monsters, it shouldn't be problematic. Try to maximize your points multiplier, because after eliminating this group of monsters the battle will go on.
The second part of battle is also not too demanding, although you have to take into account presence of the Hell Knight. Reminder: you should attack this type of monster with demonic weapon (Arbiter or Eryx). It's worth to have demon mode activated all the time to avoid damage from lava.
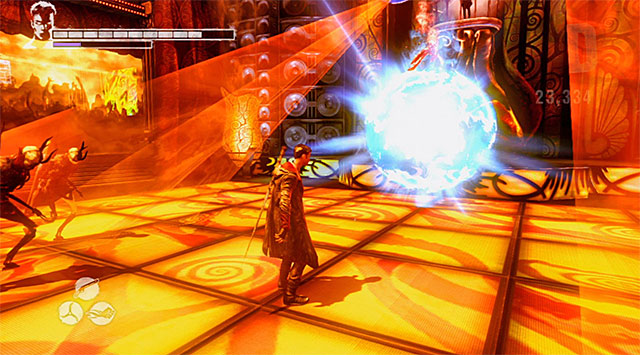
The third part of battle is a bit more challenging. Firstly eliminate the Witch, destroying her force field (for example with Aquila) and then back her into a corner. Then take care of remaining monsters.
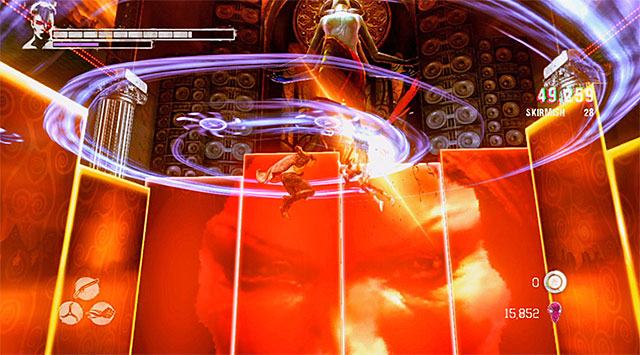
When the arena starts changing its shape, the fourth part of the battle begins. Firstly, I suggest to eliminate Harpies. Pull to the using Angel Lift, because while attacking them in the air, you don't have to care for what Tyrant is doing. Eliminate Tyrant at the end, knocking him down or block his charges with Eryx.
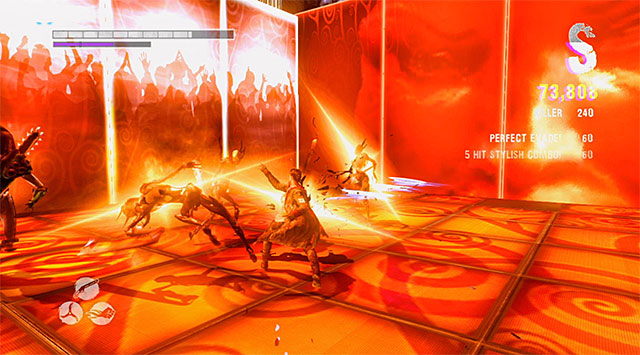
Fifth part of the battle is also not that difficult, but you have to be of course careful against Ravager. I recommend using firstly area attacks at weakest monster and deal with Ravager at the end. After a battle listen a conversation with Lilith and wait until the arena change again.
At the very beginning, turn around and jump onto an upper balcony (screen above). Here, look for a Lost Soul.
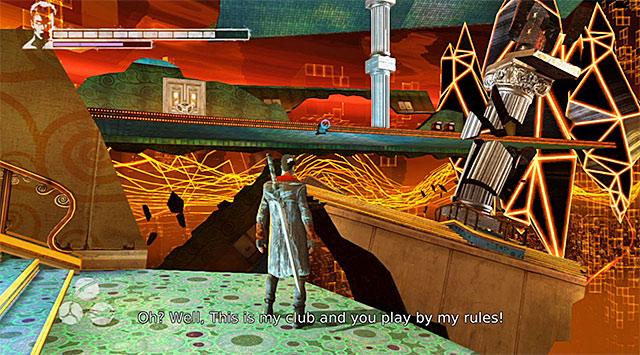
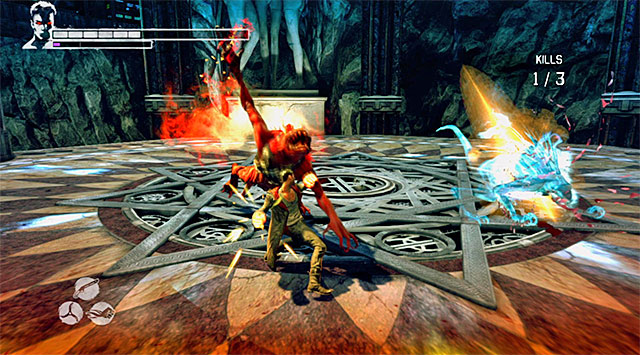
BONUS MISSION: Turn to platforms on left, shown on the 1st screen. Try to reach the bigger one, using Angel Boost and Angel Lift. Here you find Secret Door which you can open with Ivory Key and begin a bonus mission Shenanigans (2nd screen). This mission is a standard battle where you have to defeat three strong enemies. Start from the Witch, pulling her to you if you can (after destroying her force field). Then use Aquila to stop Ghost Rage for a while and attack Blood Rage in the meantime. Don't let yourself get hit, because you can't heal.
Get interested in platforms on right from the beginning place. Place yourself (screen above) and use Angel Lift to catch a Boost Ring. Don't forget about pressing a jump button. Then use Angel Lift again to get onto a bigger platform with Gold Key. After taking the key return to the beginning location, using Angel Boost.

If you need, you can use nearby Divinity Statue. Head for main stairs, but before you use them, check an area underneath it, where you find a Lost Soul. Then go upstairs.
Stand on a big plate. You have to do the same as in the case of red crystals in the floor what is using a Stomp attack of Eryx (screen above).

You'll run into a first test from a crazy TV show "The Devil has Talent". You have to use skillfully angel and demon modes to move on colorful tiles. On red ones activate demon mode, on blue ones angel mode. As the tiles are next to one another, it's best to jump into the new areas what gives you time to activate proper mode in the flight.
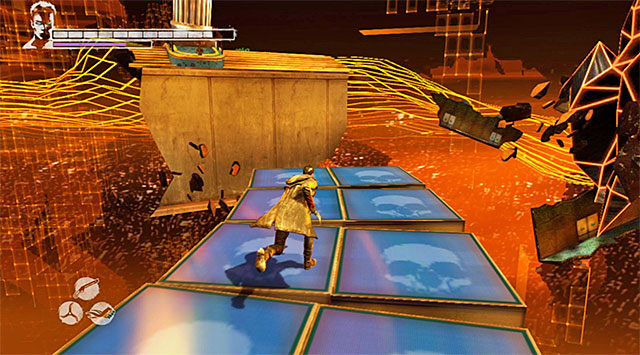
Move forward, using demon mode. When you reach crossroads turn right. Jump to the small platform on which you have to use angel mode. Turn right, make two jumps, firstly on platform with red tiles (demon) and then on one with blue tiles (angel). At the end use Angel Boost to reach a bigger platform. Here you find another Lost Soul.
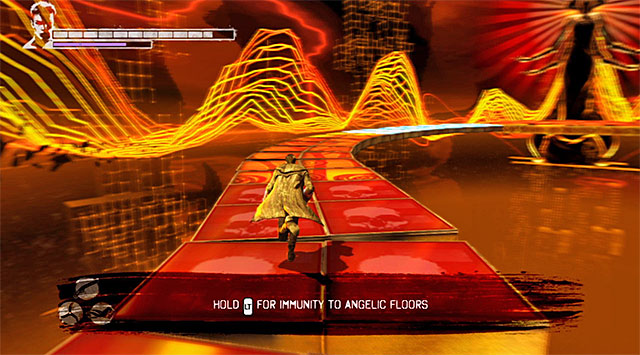
Return to the beginning place and choose the left path. At first you have to use demon mode, but then you'll be forced to switch on a angel mode. You have to reach a bigger platform where you have to survive the first round.
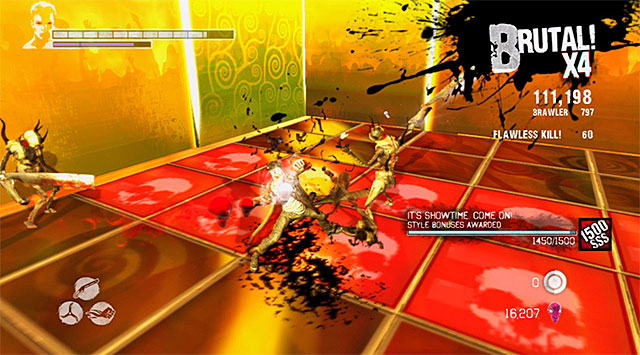

A typical feature of the battle which stands for the first round is a fact that from time to time, the tiles on the ground activates. Do as previously. When you see red tiles (1st screen), activates demon mode, when you see blue tiles (2nd screen) use angel mode.
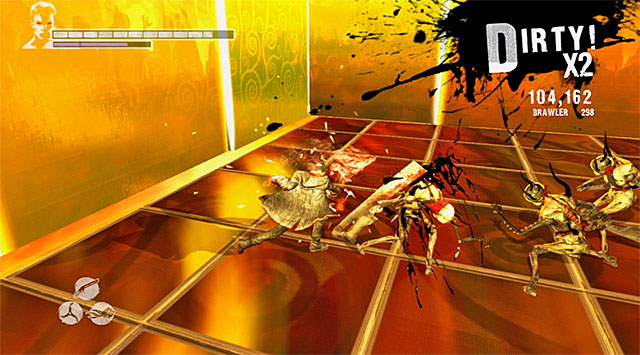
A good idea is to fight in the air so you don't have to control tiles' color all the time, but it isn't necessarily. You have to eliminate all monsters.
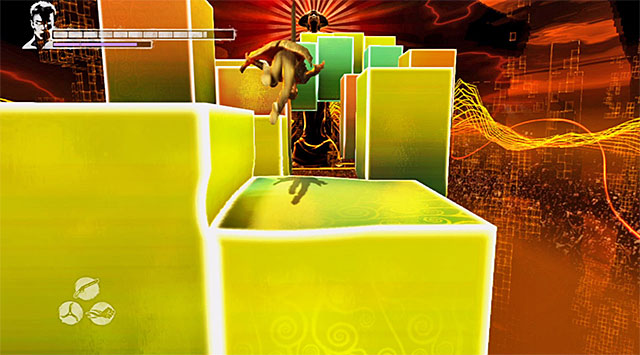
After a battle stand on a new plate and use Eryx. Now start jumping onto platforms in front of you. Notice that every shelf is moving. Knowing that, jump and use Angel Boost when the one on which you're standing reaches its peak.
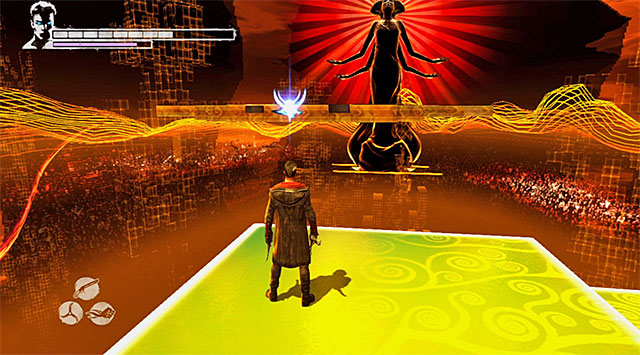
I recommend to use platforms on left side, because it's easier to jump onto them. Don't overuse Angel Boost, because it's easy to misland, the platforms are small. When you reach the highest platform (screen above) use Angel Lift on a latch what transfer you where the second round begins.

Second round has one difficulty: you have to eliminate all monsters in time shorter than 30 seconds. First, eliminate the flying monsters, using Angel Lift and breaking their shields quickly.
Only when the air is clan focus on the ground ones. Also now use your best attack, but activating the Devil Trigger may not be necessary. When you eliminate all of them you should have few seconds in advance, so you don't have to hurry too much.
As previously use Eryx on a plate what unlocks new paths. Don't choose a lower path (screen above), because you'll miss a secret. What is more, you'll have to eliminate two monsters in risky places.
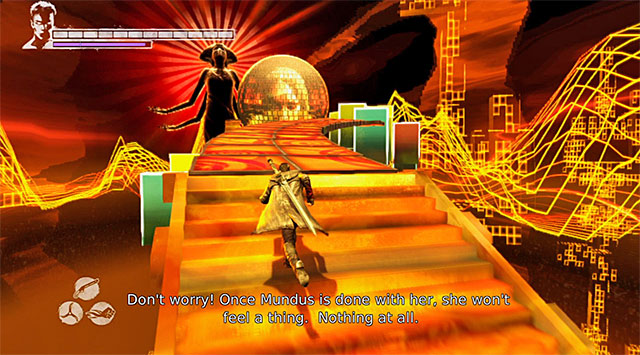
Better is to use an upper path, to which lead stairs. After reaching new moving platforms, start making double jumps.
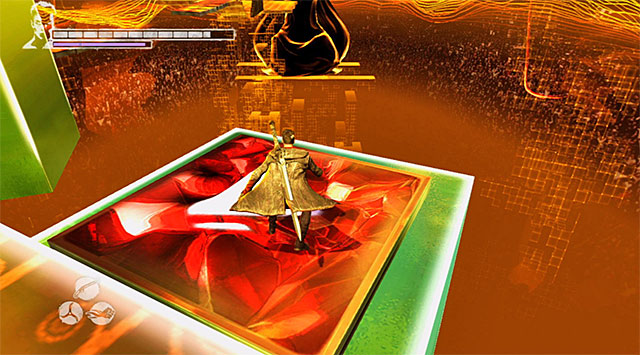
Search all moving platforms, thanks to which you find a plate on one of them (screen above). Use Eryx gauntlets on it.
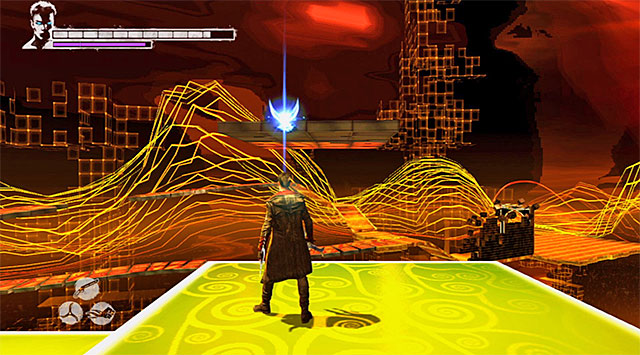
Fly to the new moving blocks with Angel Boost. You have to reach particular platform shown on the screen above. Here, use an Angel Lift to get onto a higher levitating platform, where you find Small Vital Star. Now you can return to the plate and resume your walking. Be ready to eliminate a monster on your way.
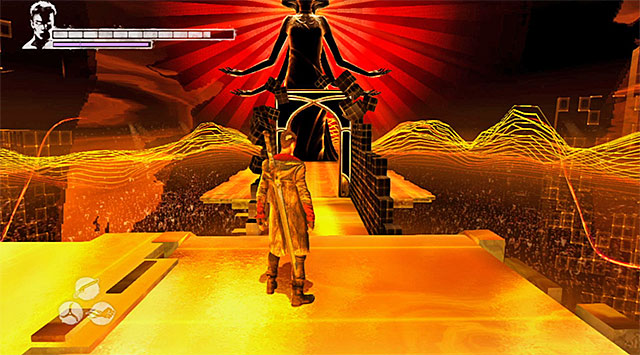
Independently on your choice, you'll reach a place shown on the screen above. Move forward entering the arena where the third round begins.
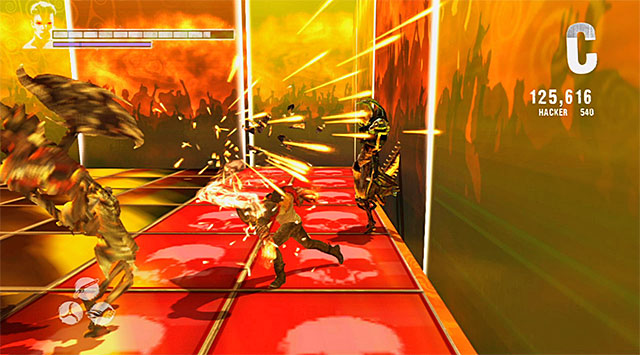
Third round looks similar to the first one. It means that you have to watch at tiles' color, activating the demon mode (red tiles) or angel mode (blue tiles).
A stronger monsters than in the first round participate here. Especially look at the new Ravager. As previously you can consider pulling monsters to attack them in the air, but it isn't necessary.
Begin, of course, from hitting the plate with Eryx gauntlets. Stay there and look for a Lost Soul (screen above).
Only after that choose a corridor leading to the room where the fourth round begins.
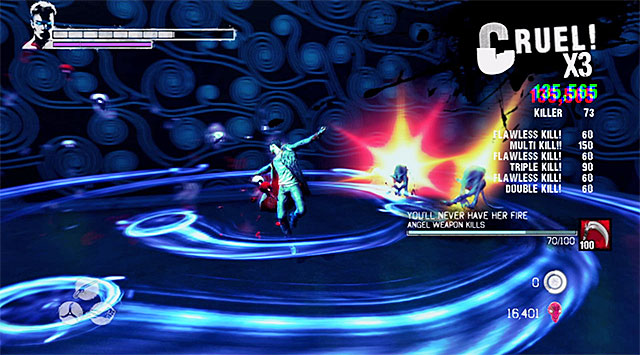
Fourth round is the simplest one, because you have to defeat only a group of Rage Spawns. The best idea to eliminate them is to use area attacks of angelic Aquila blades (screen above).
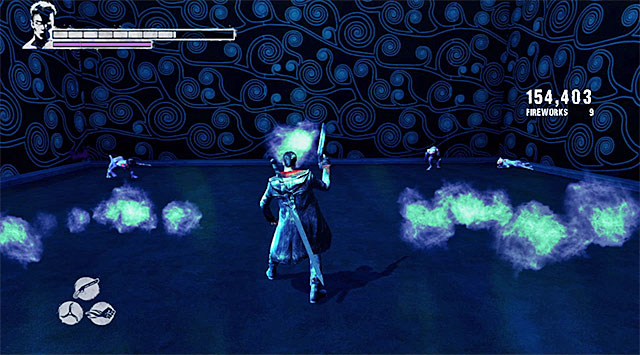
If from any reasons you don't want to use blades, you can also use Rebellion or, as the game suggests, test a Fireworks attack of Revenant (screen above).
Begin from hitting a new plate with Eryx, what makes two new paths appear.
Both paths lead in the same place. If you don't sidetrack, you'll get onto a first arena (screen above). Here you'll be forced to take part in a battle, where you should watch for Frozen Night - use angelic weapons to hurt him. After that hit the plate with Eryx gauntlets.
The better idea is to sidetrack from main paths, looking for a levitating platform (screen above). Catch it with an Angel Lift.

Then, catch a Boost Ring and press jump in the particular time to catapult Dante to bigger platform. Here, hit the plate with Eryx, what unlocks a path leading to the next shelf. Search this platform, where you find another Lost Soul. At the very end hit another plate with Eryx.
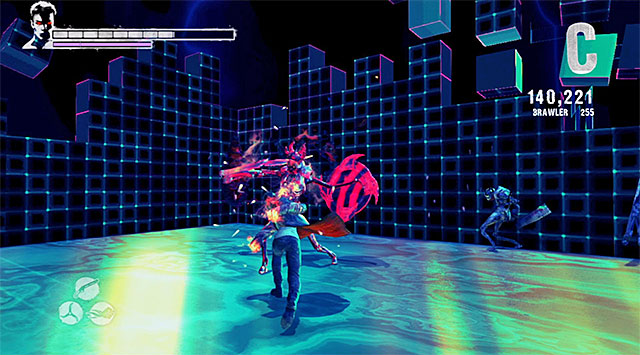
Independently on your choices, you'll reach a second arena (screen above). Here you'll have a battle very similar to the previous one, but with Hell Knight. Remember to use demonic weapons against him.
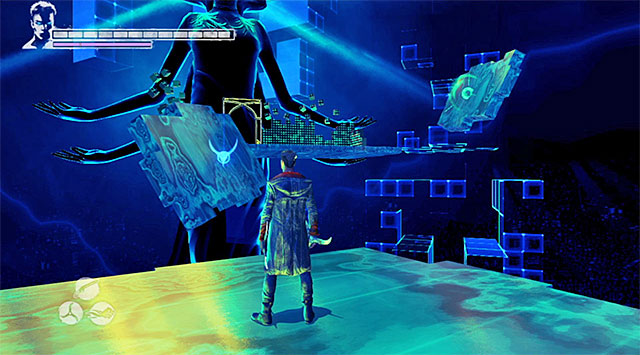
Hit another plate with Eryx gauntlets and move on to another platform (screen above). Catch a Boost Ring with Angel Lift, bounce from it and reach the other one. Press jump button again, what takes you to arena where the next round takes place.
Fifth round is an encounter with mysterious enemy, who you've met in Order's base. Don't attack him at once, wait for his action. The best is to attack him after his teleports, but you have to jump out later to avoid damage.
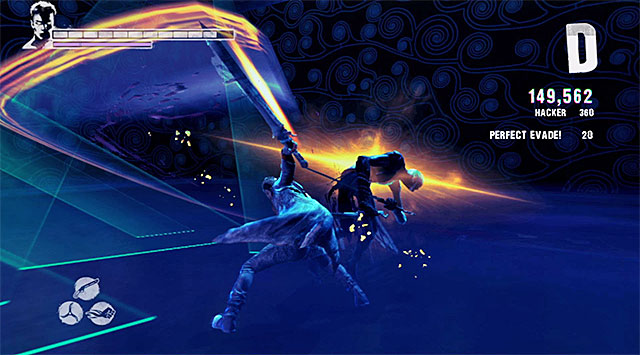
Good moment to attack is also when an enemy fails to make a charge. Every time make few blows, but move back quickly as he regenerates quickly. Fight until he leaves the arena.
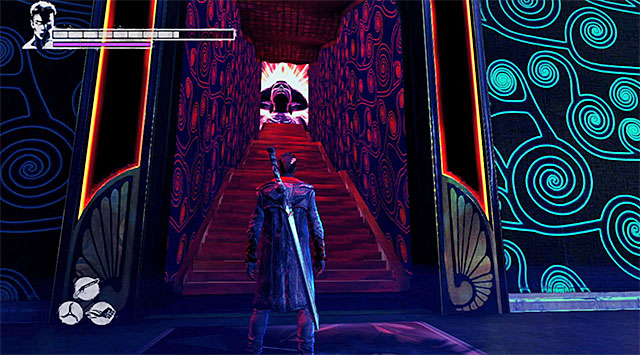
As previously, you have to begin from using Eryx gauntlets. Go upstairs, where you reach a bigger area with many levitating platforms.
First, catch the platform shown on the screen above with an Angel Lift. Use Lift on nearby latches, reaching the one with Small Devil Trigger Star and Lost Soul. After collecting them return to the beginning place (use Angel Boost carefully).
BONUS MISSION: Jump onto a lower part of the main platform. Here you find Secret Door (1st screen) which you can open with an Argent Key what begins a bonus mission Hasty Acquisition (2nd screen). This isn't typical mission. You have to collect 90 Orbs from destroyed items in less than 35 seconds. I recommend to begin from items behind Dante's back. Later on, look for groups of items and make simple, quick blows to not lose precious time.
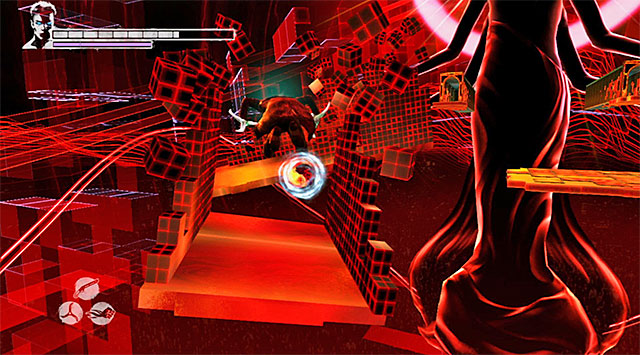
Return to the starting platform and use nearby Divinity Statue. You can continue your journey, heading for a shelf shown on the screen above. Make double jumps and use Angel Boost if you need.
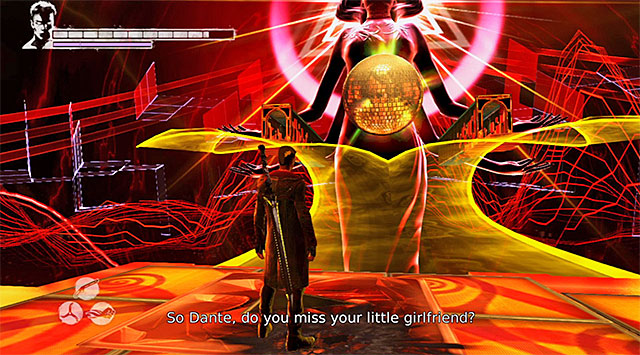
After landing on a bigger platform look for a Lost Soul. You can hit another plate with Eryx. After getting where the screen above shows, choose whichever path because both of them leads to Lilith and where the last round takes place.
The last round consists of three battles. First, you'll fight a Ghost Rage. Activate angel mode, what let you avoid his attacks. To hurt this beast use angelic weapons (Osiris, Aquila). Don't let him make too many attacks and run him into corner.
Second part is an encounter with Blood Rage. In this case you need to activate demon mode and use demonic weapons, like Arbiter and Eryx. In my opinion, gauntlets work better.
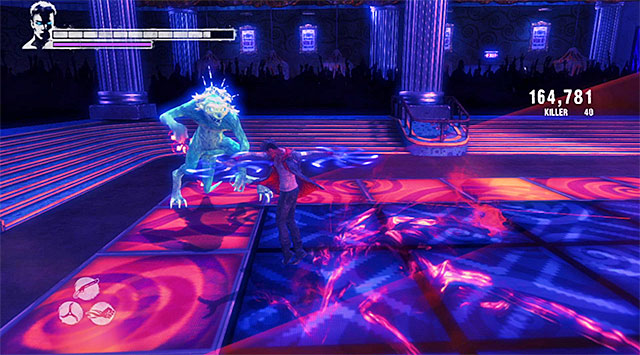
The last part is a battle with both those beasts. You can eliminate them in random sequence, but pay attention to what the one you're no attacking is doing, so he won't surprise you. As it's a very end of the mission, you may use Devil Trigger.
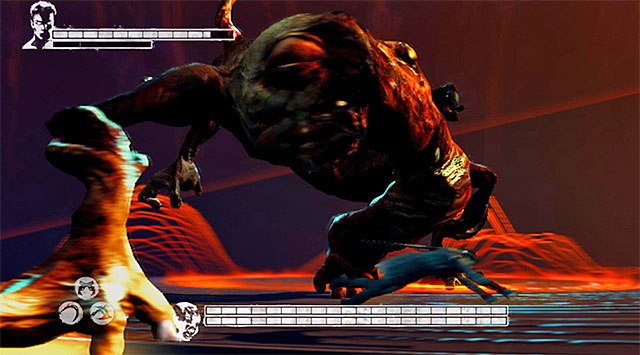
Battle with boss begins when the mission starts, and this time you fight Mundus' Spawn. As usually, spare some time to get to know his attacks. First of all, pay attention to swings of his upper limbs, which you can jump over.

The another technique used by boss is hitting on the ground what causes a shockwave. Make double jumps to avoid it.
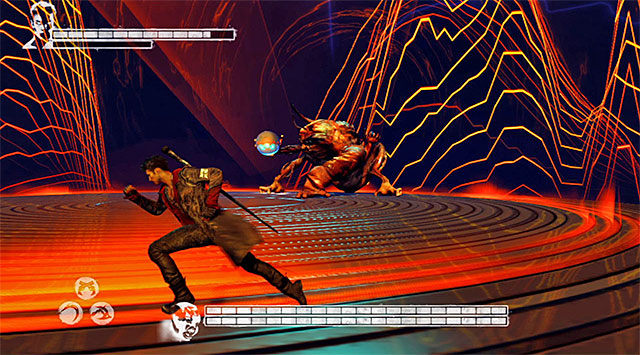
He'll also throw at you some orbs (screen above). What you need to do is just pressing an evade button in a good moment.
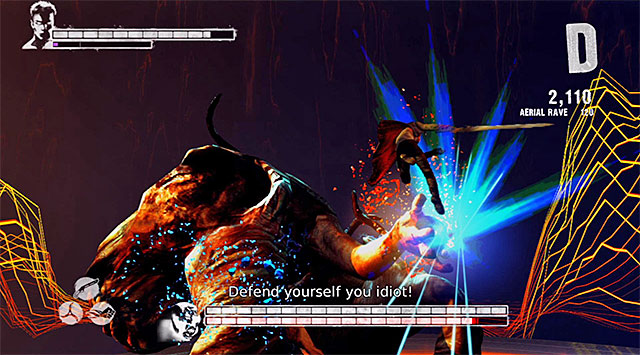
Don't attack him in a standard way, but look for opportunities to use an Angel Lift onto an interactive point on his body (screen above). After that make few strong attacks, but not too much so he has no chance for retaliation.
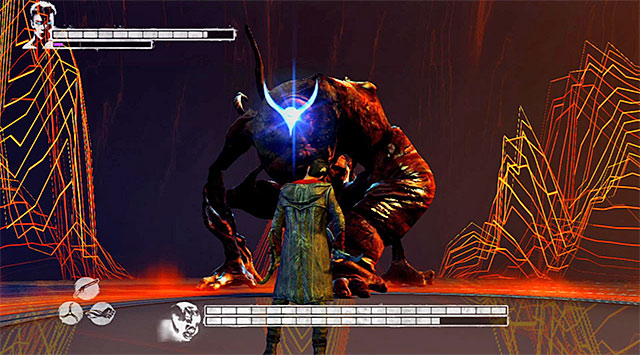
Continue weakening mentioned spot on boss' body until game suggest a new one on his forehead. Repeat described above actions.
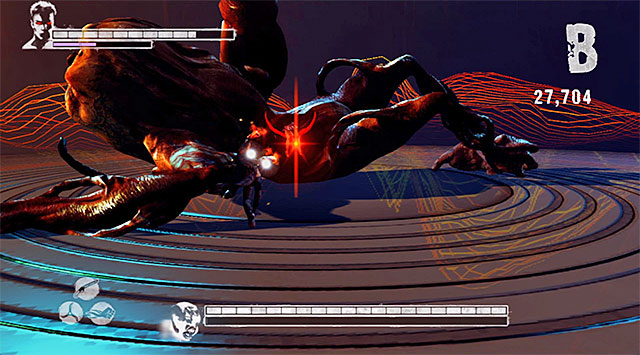
Your goal is to eliminate a lower health bar. It uncovers Lilith who was absorbed by the boss at the beginning of a battle. When you see here, pull her out using Demon Pull.
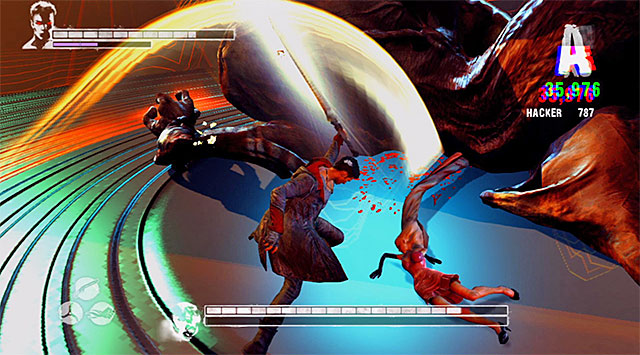
Start attacking helpless Lilith. Use your best attacks to decrease an upper health bar.
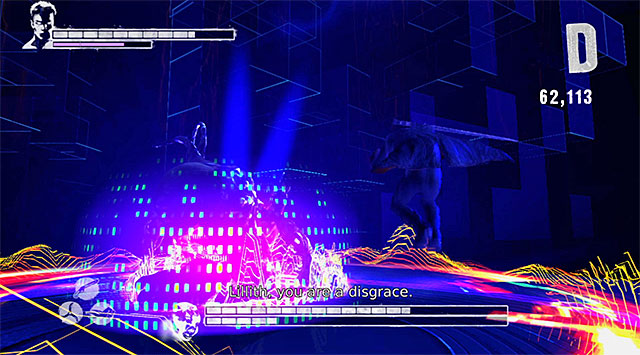
Soon, arena will be changing to a darker design, what modifies the battle. Boss' attacks got stronger - for example now he creates few shockwaves at one hit (screen above). It means that you have to make a flawless series of jumps to avoid damage. Also his other attacks are strengthened.
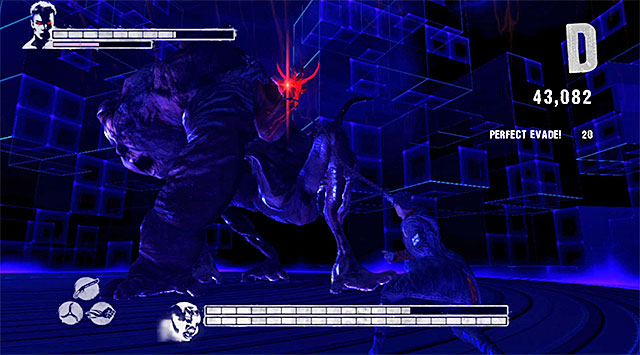
Run around boss, looking for a place to use Demon Pull (1st screen). Just after that use an Angel Lift on the same spot (2nd screen). Another step is as in the previous stage of battle: start attacking the vulnerable part of boss' body.
Wait until game suggests you to attack an eye on his forehead. Use Angel Lift and your best attacks.
When the boss loses his health bar, pull out Lilith as previously (Demon Pull) and attack her. Also here she'll be totally helpless.
As you probably won't destroy her health bar in one attempt, you'll need to repeat all actions described above. When Lilith's health bar drops to zero, you win the battle.
During all this mission your main task is to eliminate obstacles in front of car with Vergil and Kat. As the time slows down in dangerous places, you can't stop anywhere because it may kill your friends. Luckily, it doesn't mean that you have to resign from discovering secrets. Begin from using Angel Lift on a car, to get onto its roof.
Jump onto a next container and use Demon Pull on the container which is on the car's way.
Now you have to return on a car's roof. As it's pretty far away from you, use Angel Boost and only then Angel Lift. Repeat those actions to reach new containers.
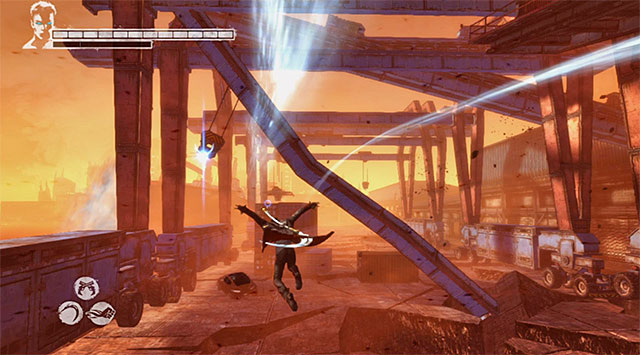
Turn left and use Angel Boost to get to containers shown on the 1st screen. Turn right and look for Copper Key (2nd screen). Now you have to return to containers on which you have landed after bouncing off the car.
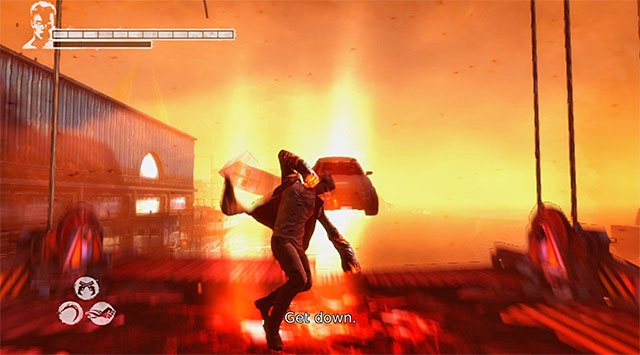
Find a red crystal and, as always, use Eryx on it. You need to hit containers three times, to destroy an obstacle.
Now start using Angel Lift on nearby latches. Be careful, because you'll reach the third one only using Angel Boost.
Then you have to grab a latch on new containers. After landing on a platform, run forward and catch it. Use Angel Boost again what takes you to the last one latch. Bounce and land, what launches a cut scene. \
Now you can act in two ways. If you want to get precious points, ASAP destroy group of monsters, paying an attention to new Ravager. If you don't want to risk a mission's failure, leave this place at once.
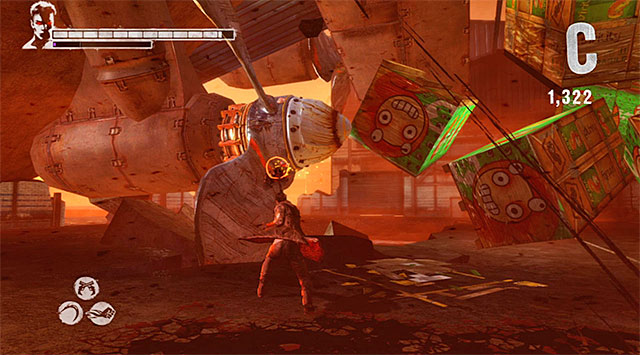
Use Angel Boost to reach allies' car. Now choose Demon Pull and use it on one of the propellers.
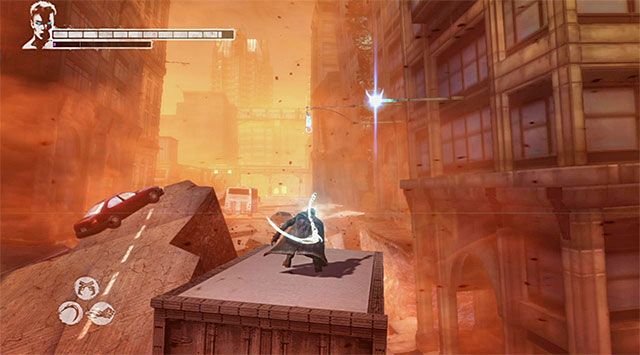
Don't leave a truck's roof. Wait until you get very close to a new latch co you can grab it with Angel Lift.
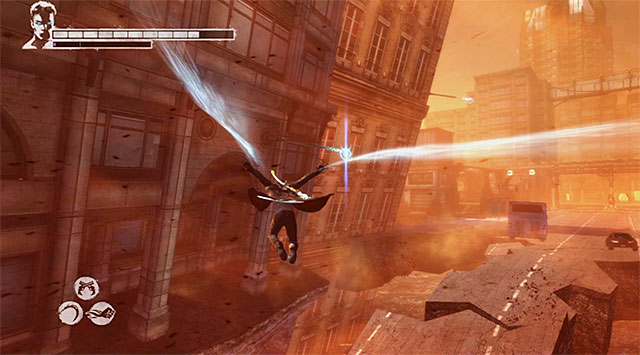
Catch the second latch and activate Angel Boost to get to the one on the left side (screen above). Use Angel Boost again what takes you to the last latch. Now you can let Dante land safely.
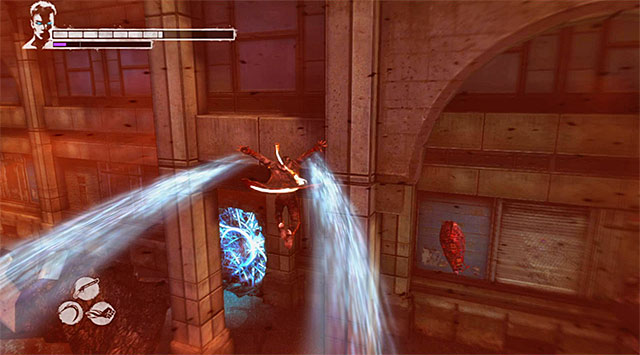
This is a second area with secrets. Firstly, use an Angel Boost to get onto a small platform on right (screen above) and enter a tiny room. You find Small Vital Star.
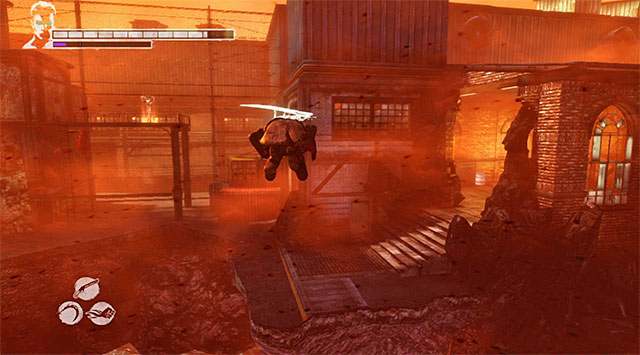
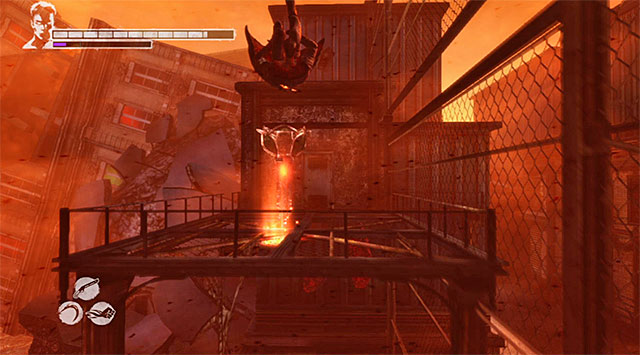
Return to the beginning place and now head for buildings shown on the 1st screen. Search an area on your left. On a balcony (2nd screen) you find Copper Key.
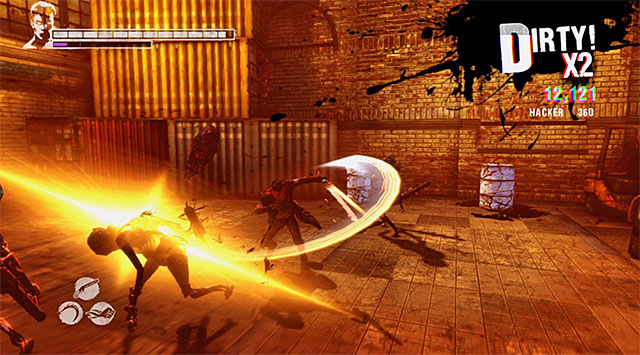
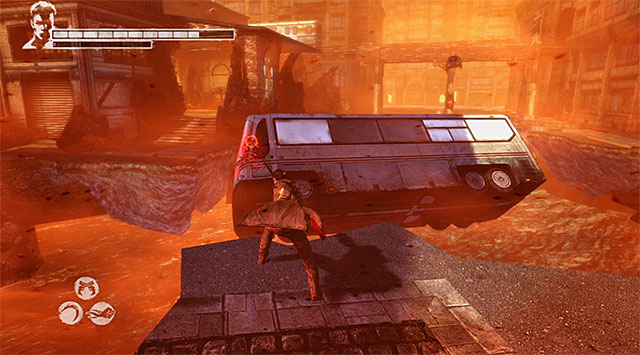
To where the Vergil's and Kat's car is you can get in two ways. If you took the key, you should run through a warehouse (1st screen) in which you have to omit/defeat a group of monsters. If you collected all secrets, you should move a bus (2nd screen), jump on it and fly to a small shelf on the right. Also here you'll meet a group of monsters. As previously, you can fight or avoid a confrontation.
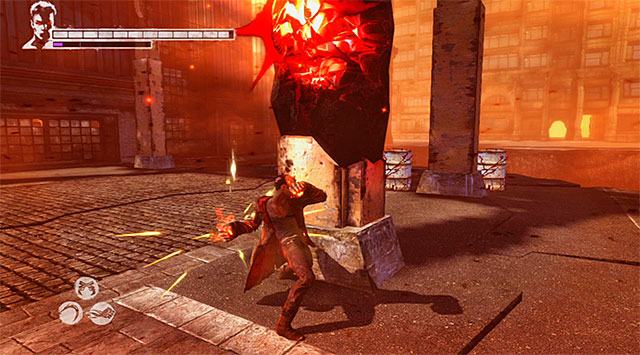
After reaching the car, you need to do just one more thing. Use Eryx on a pillar shown on the screen above.
You start with a time race. Not until you reach a vicinity of the tower, are you allowed to stop for longer or Dante will die. Jump onto next levitating platforms, making double jumps and using Angel Boost if necessary.
Be ready to catch Boost Ring with Angel Lift and bounce from it pressing a jump button. Make a second bounce when Dante gets to a left vertical platform.
Move forward, but remember that you can't stop. Avoid abysses to reach a new Boost Ring (screen above). Grab it and bounce from it. Repeat with two next Rings. At the ned you reach a latch - grabbing it moves you nearby the tower.
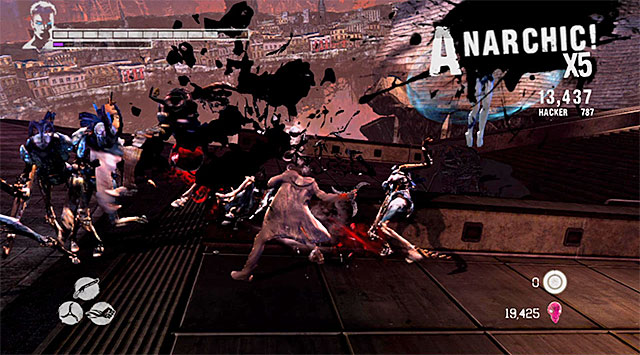
Don't think that you'll be able to enter the tower immediately. You'll have to fight a battle with stronger type of monster you've already known, Elite Stygian. General tactics should stay the same. So perform area attacks, using for example Aquila. In the further part of battle a new Witch appears, so you should focus on her.
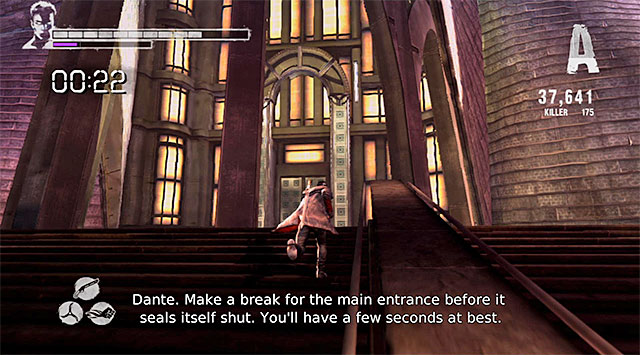
After watching a cut scene with Vergil eliminate quickly weaker monsters and rush for the tower - you have only 30 seconds to get inside Mundus' building.
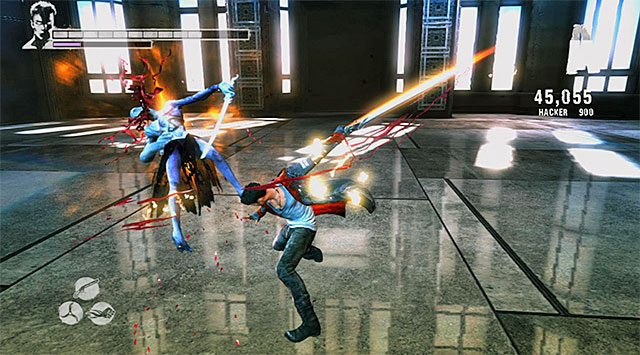
After getting inside, you'll fight a mysterious enemy (Dreamrunner) very similar to the ones from previous mission. Do like usual: wait for his attacks, avoid them and retaliate. Every time make few blows and jump off, looking for next opportunities.
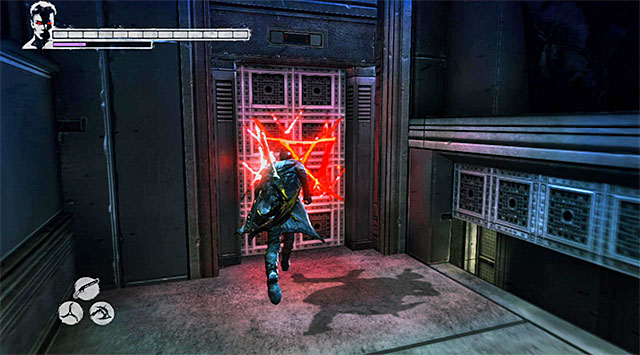
After winning, look for green items regenerating health and move on. You'll reach a Divinity Statue. Move on, but don't enter an elevator. Instead, use an Arbiter to unlock a right passage (screen above).

After getting to the staircase, head for lower floors to find a Lost Soul and Small Vital Star. After that return to the elevator and enter it. Wait until it takes you at the 87th floor.
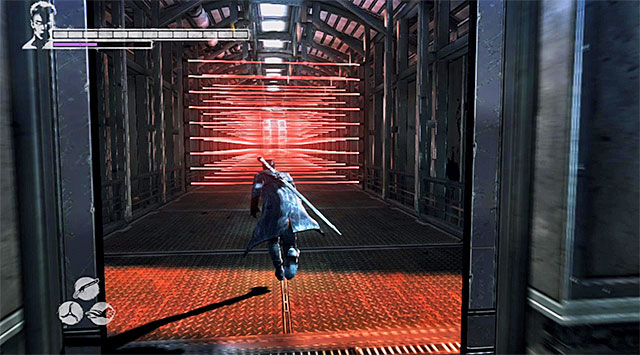
Move right. You won't find any secrets. Be ready to fight a small group of monsters, focusing first on the one with a chainsaw. After that locate a passage between buildings (screen above) and wait until Vergil turns off lasers.
After getting into a eastern wing, a new encounter with Dreamrunner begins. Behave as during the previous one: avoid facing him openly, wait for opportunities to retaliate after his failed attacks. Be careful, soon flying monsters with shields will join the battle. I recommend pull to them and kill in the air.
Search the vicinity, ignoring an elevator from which a white light is spreading. Be ready to destroy Demonic Shards (Revenant maybe?) in one of office room. You need to localize a latch (screen above) and using it get onto upper balconies.
Move right, beginning a battle with two Rage beasts. Attack one of them, kill, and then the second one. Avoid their hits and beware of their fury.
Now you can go to the elevator (screen above) and wait until it takes you on the 105th floor.
After reaching the 105th floor go right. When you reach a bigger room, notice holes on the floor and avoid them. Stand where the screen above shows, wait until chests stop flying and jump onto a next shelf. Here you find a (Gold Key) and two Lost Souls.
Return from where you've begin and go left. When you get to a new, big room, the battle begins. Use strong area attacks to eliminate weaker monsters and then focus on a single Witch when she appears.
After that go into a nearby corridor but be ready to destroy Demonic Shards. A moment later you'll fight two Ghost Rages. As the game suggests, you may use Aquila to "freeze" one of them (screen above), what make easier to attack the other one. Independently on what you do, remember to use only angelic weapons and many evades.
End exploring the area, and look for a latch (screen above). Use a left, suggested passage.
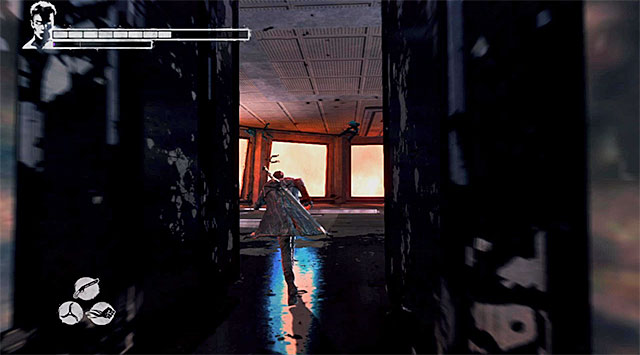
After getting into a new corridor, go forward. You can't stop even on a moment because Dante will be crushed. Enter the bigger room, paying an attention to a many holes on the floor.
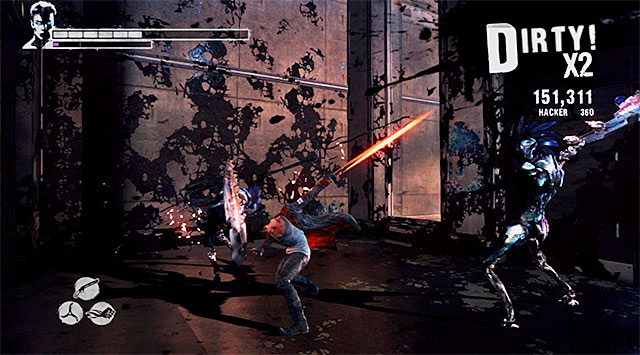
Head to the right corridor. This passage will be blocked, so you'll have to fight at a small area. Make your best attacks as you don't have too much place.
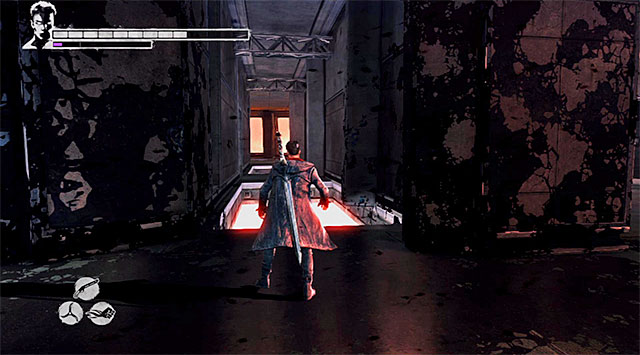
Move on, and turn right when you can, stopping where the screen above shows. Use Angel Boost to fly over the first hole. Ignore the other one and turn left, what takes you to a staircase.


BONUS MISSION: Head for the lower floor. When you reach a 104th floor, you should find Secret Door (1st screen) and if you have a Gold Key you can open it and begin a bonus mission Extreme Traversal (2nd screen). This mission is a time race. use skillfully an Angel Lift, Demon Pull and Angel Boost. In few places you need to also destroy obstacles with Arbiter, Eryx, Aquila or Osiris. A good news is a fact that a time limit is rather big, so even if you make mistake, you should complete this mission.
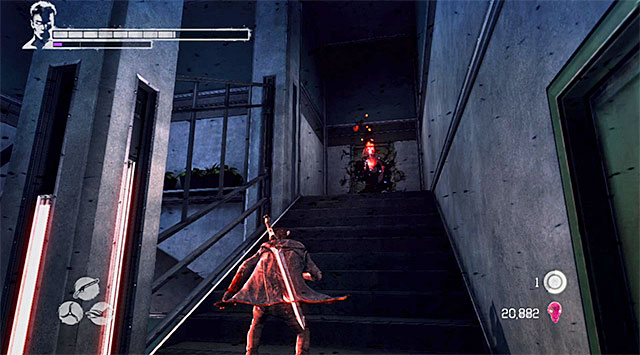
Now head for upper floors, what grants you with a Lost Soul (screen above). Now you can leave a staircase and use Angel Boost again to fly over a hole in the floor.
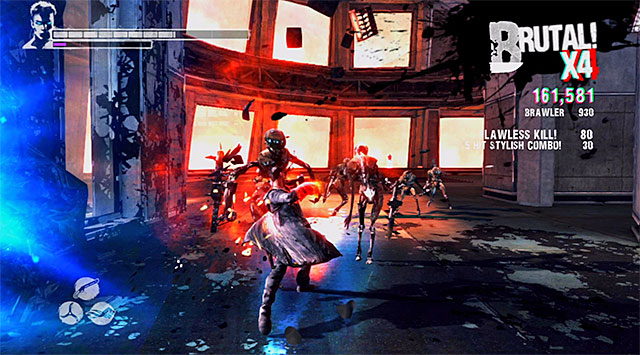
Stop when you reach a place where the stable platform ends. Jump onto a lower (105th) floor. After that you'll begin a new battle, but only with weak monsters. After that, look into office rooms and eliminate Demonic Shards in one of them.

Make your way through (screen above), using Aquila or Osiris. Inside you'll find a Lost Soul.
Continue an exploration, finding among others a Small Devil Trigger Star. Then approach the elevators. Right one should open (screen above), jump into it. You'll find two Lost Souls.
After searching a 105th floor, return onto a higher level, catching a latch where you've fought the last big battle. Turn around and use Angel Lift at a latch shown on the screen above.
Use a Lift again, this time at a Boost Ring. Prepare to use it a last one time, grabbing a latch (screen above). Use door and enter a new passage with laser traps.
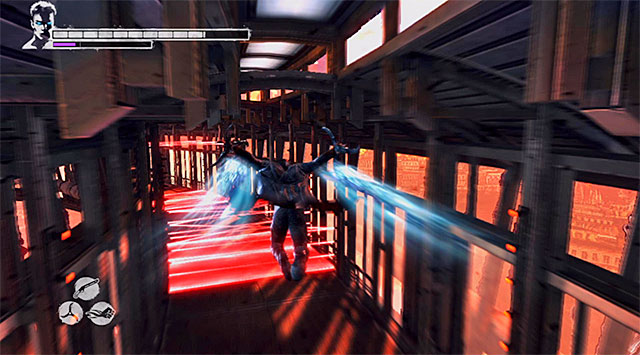
As this time Vergil wasn't able to turn lasers off completely, you have to take care. Notice, that upper lasers turn off from time to time. Wait for it and jump over the bottom ones, using an Angel Boost. Repeat it with the second group of lasers.
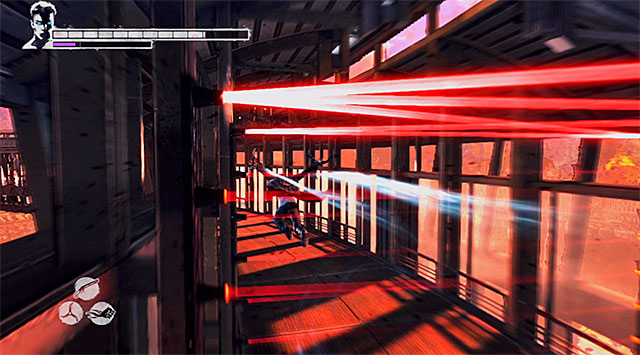
Avoiding the third group of lasers is a bit more difficult. You have to make a single jump and activate Angel Boost. Don't make double jump because it may take you up too high.
Move on, you'll get where you'll fight a Dreamrunner again with a group of weaker monsters. First, eliminate the weaker ones. As the place is not so good for you, I recommend using Devil Trigger to eliminate Dreamrunner's guards ASAP. Take care of Dreamrunner at the end, using your old tactics.
Head for the next lasers and avoid them like previously: with double jumps and Angel Boost. After leaving a passage between buildings, use a nearby door and turn left to get to a Lost Soul (screen above).
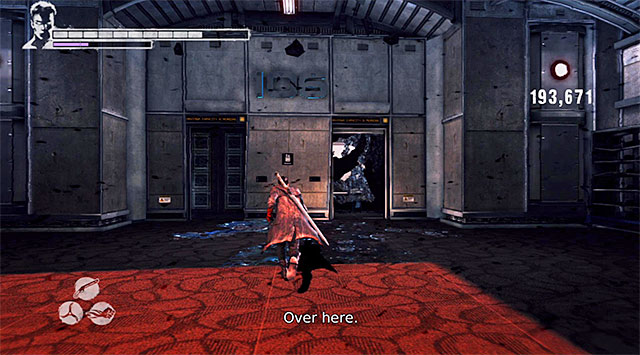
Now go right, and find a Divinity Statue. After reaching a room with elevators, approach the right one (screen above), what launches a cut scene with Vergil who gives you a new demonic weapon, Kablooey. Elevator takes you on 154th floor.
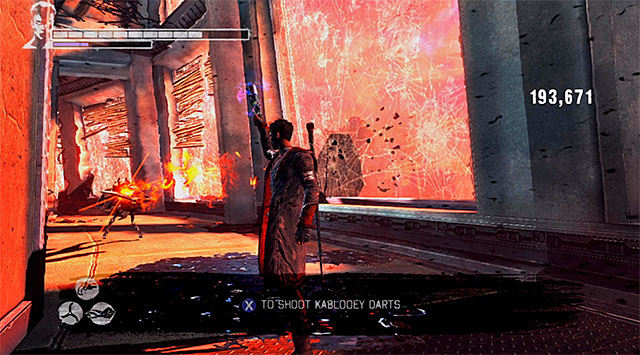
Move forward and turn left. As the game suggest, test your new weapon. It fires out an explosive darts, which stick to enemies and have to be detonated manually. Try to detonate them, when there is a lot of enemies nearby the mined one.
Notice, that a new flying monsters appear here. You can destroy them in a traditional way (pull & attack) or continue testing your new toy. Resume marching and eliminate enemies on your way.

After reaching a new passage between buildings move forward and free a Lost Soul (screen above). Only then return to the passage and head for a western wing.
This time you'll meet no monsters, but you'll have to hurry up and act flawlessly. Fly to next latches and activate Angel Boost if necessary.
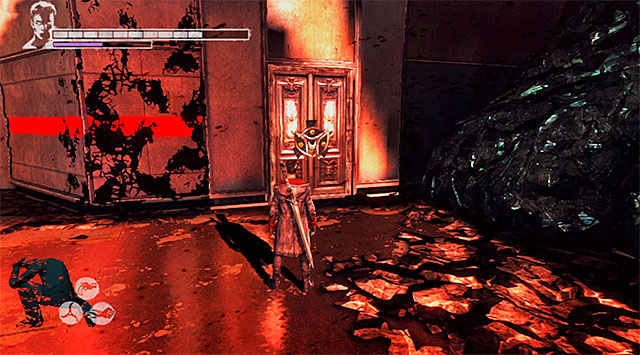

BONUS MISSION: After reaching a western wing, look around and find a Secret Door (1st screen). If you have a Copper Key you can open them and begin a bonus mission Bait and Switch (2nd screen). It isn't difficult, but you have to make perfect Demon Evades. Get to know this move if you need it: you activate a demon mode and then make an evade. If you make it right, the time slows. An assumption of this mission is that you can attack only after successful Demon Evades. Every time you make it, run to the monster and eliminate it. As a reward you obtain a Devil Trigger Cross Fragment.
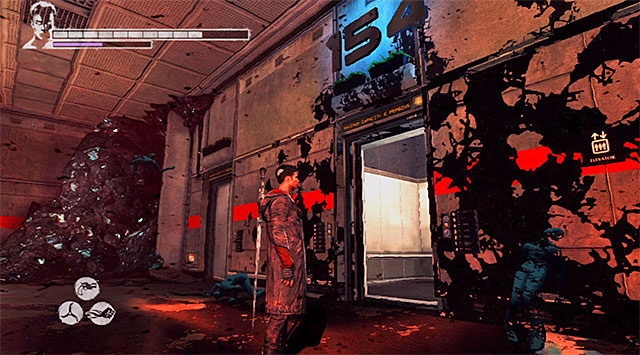
After finishing all things on 154th floor, head for an elevator (screen above). Wait until it takes you onto 159th floor.
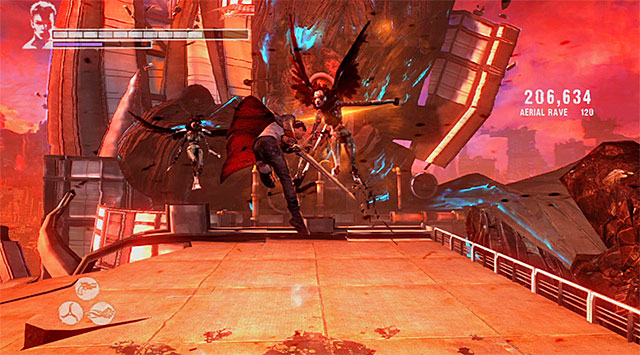
A last part of battles in this mission in front of you. Firstly, you'll encounter a group of Harpies. You can defeat them by cutting of their wings, pulling to them or using your newly acquired gun.
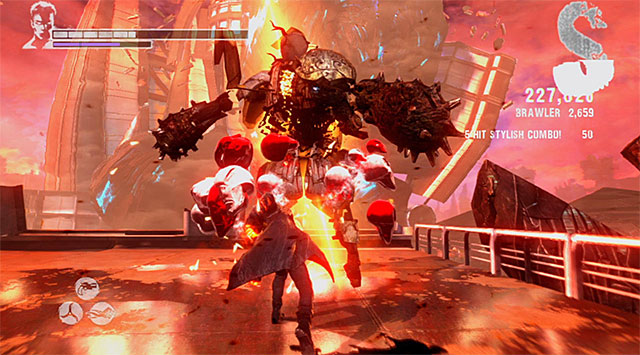
Soon, a new Tyrant will join the battle. Eliminate him in a standard way: knock him out after failed charges. Read also a hint about how to interrupt his fury with Kablooey.
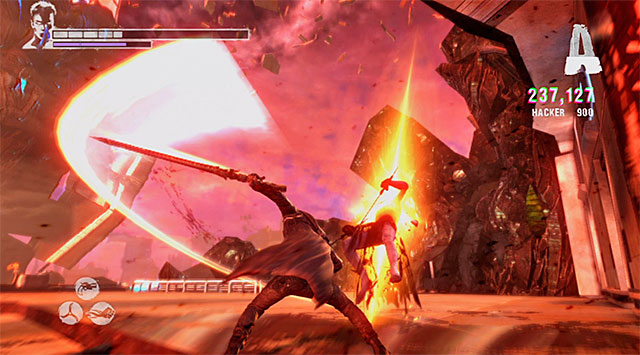
At the very end you fight an enemy in red mask, with who you'd been fighting among others in the Order's base: Drekavac. Perform many evades and wait for opportunity for retaliation, after his teleports or failed charges. If you need to heal, look for green things to destroy.
When you regain control, start jumping onto a next platforms without stopping.
Be ready to use an Angel Lift once again. Run through a small tunnel and use Lift again, to get to the Core.
Spend few moments to get to know main assumptions of this mission. You have to avoid contacts with stream of dammed soul, or it'll cost you a loss of health. I recommend to make a single moves, stop at every platform and wait until the stream passes away. After jumping on a first platform, you'll have two ways to choose. It's good to search both, as every of them has one important secret to discover.
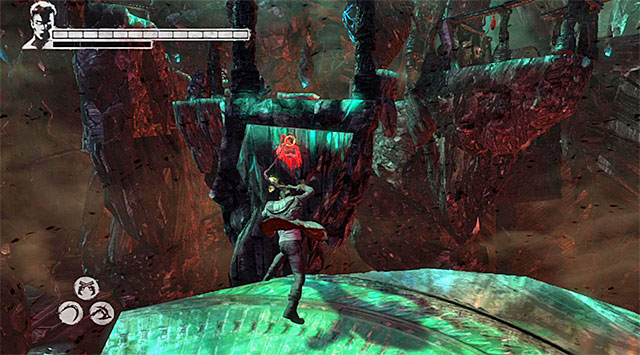
If you chose left path, jump onto a first platform and use a Demon Pull at another. Continue journey making double jumps sometimes supported by an Angel Boost.

A bit further you need to use Angel Lift. When you grab a latch, use an Angel Boost what takes you safely on a new shelf. Search this platform and walk around one of the pillars to find a Lost Soul (screen above).
You can move on. Use three latches (screen above) what ends a first part of the journey.
If you chose a right path, you have to make flawless jumps supported by Angel Boost. Use an Angel Lift at a latch (screen above).
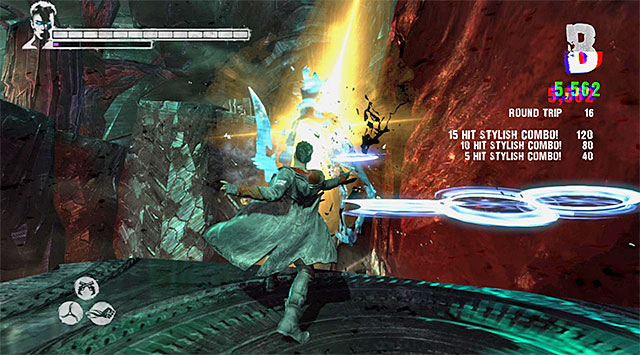
Head for upper platforms. When you reach a bigger shelf, you'll fight a Frozen and Hell Knight. Focus one of them and remember to use a proper weapon (Frozen - angelic, Hell - demonic).
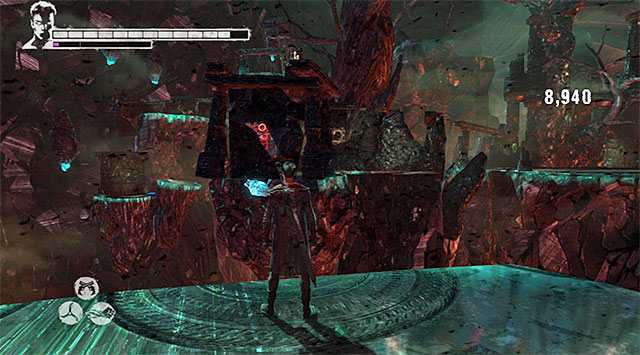
After battle look for a red latch (screen above). Fly to it with Angel Boost and grab it with Demon Pull.

At the very end use Angel Lift what safely takes you on a new platform. Look for Lost Soul (screen above).

Return to the platform on which you were fighting with Knights and resume your travel, moving for upper shelves. After reaching one of them, find a Small Vital Star and then start using Angel Lift on latches (screen above). Soon you'll finish a first part of the journey.
Both paths lead to a very big platform (screen above). Here you fight first big battle in this mission, which is detailed described below.
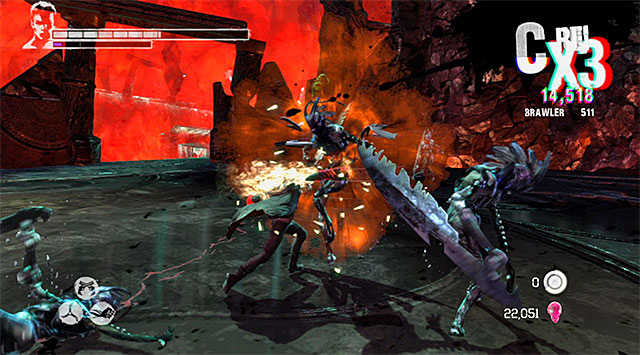
First battle has two parts. At the beginning, you'll match a Butcher with a group of weaker enemies. First eliminate the weaker ones, avoiding strong Butcher's blows in the meantime. Leave a Butcher for the end and remember to attack his bump.
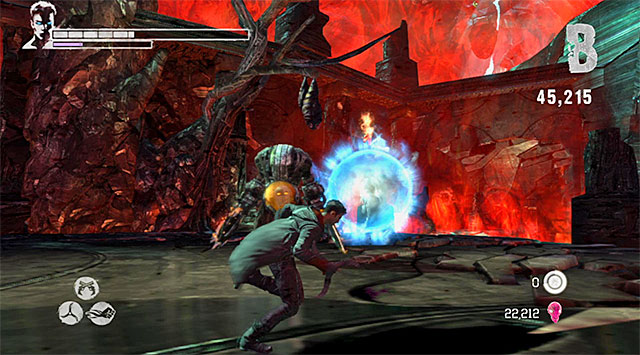
Second part of battle is harder. Here you have to eliminate another Butcher but this time he is supported by a Witch. So eliminate the Witch first, because she may protect Butcher. As a reminder: you can destroy Witch's force field with Aquila or by bouncing her blades.
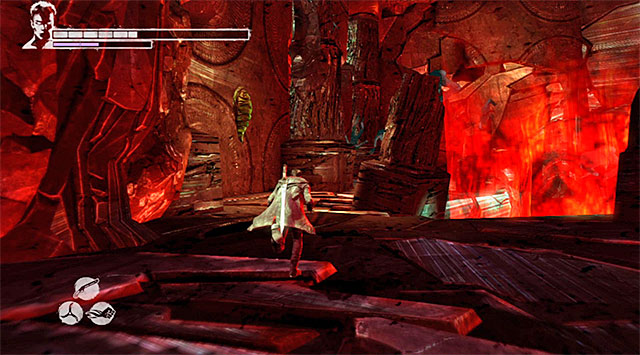
After a battle destroy nearby objects. Look also for a side passage (screen above). Here you find another Lost Soul.
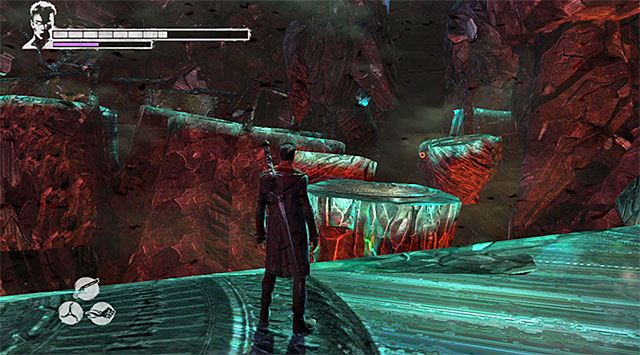
Only then go to the platforms (screen above) and resume climbing. After landing on the second one, use an Demon Pull at platform on right.
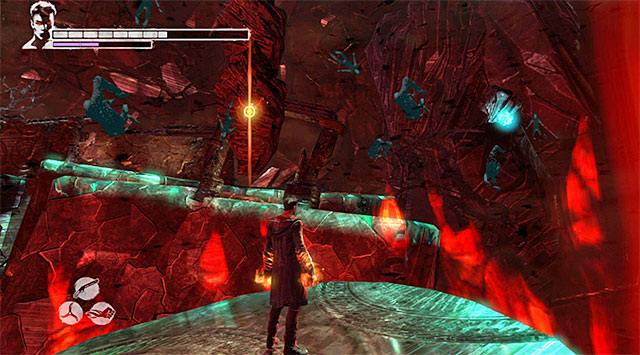
Move on. When you reach the highest platform look for a latch (screen above). You have to use Demon Pull and then Angel Lift.
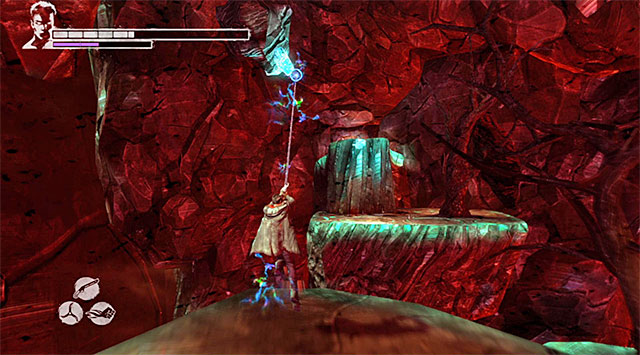
After that go right. Find another latch (screen above) and get to a next shelf. Use Angel Lift again and reach a small balcony. Destroy grapevines blocking the way with an angelic weapon. In an unlocked area you find an Ivory Key.
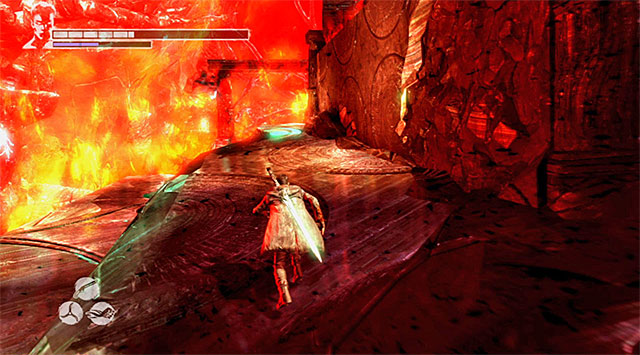
Now you can return to the previous platform and go left (screen above). Be careful, you'll see Ravager and Hell Knight in far away. You can run into them or wait until they reach you. In my opinion the first option is better, because you reach a bigger platform to act.
Move on and stop where the screen above shows. A difficult sequence in front of you, which has to be performed quickly to avoid a stream of souls. Start from using an Angel Lift. But at the next latches first use Demon Pull and then immediately Angel Lift.

After reaching a stable platform use a Divinity Statue if you want. Then use another latches (screen above) using an Angel Lift three times. On next platform you fight a group of weak monsters, which shouldn't be a problem. Eliminate them and find another Lost Soul.
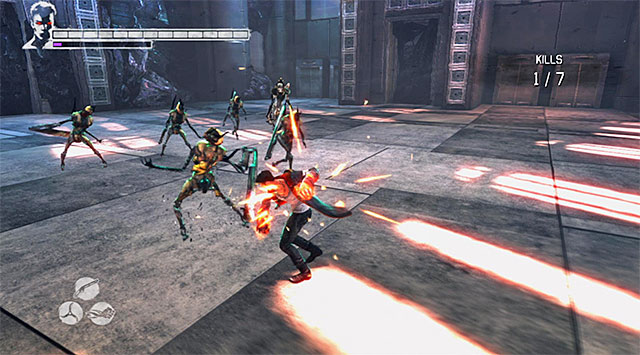
BONUS MISSION: Localize a platform which can be moved with Demon Pull. Fly to it with Angel Boost and head for a Secret Door (1st screen above). If you have a Gold Key you can open it and begin a bonus mission A Day in Hell. In this mission you have to destroy seven monsters and Dante dies after a single blow. So you have to play carefully, without taking any risk. Eliminate weaker monsters one after another with Rebellion and Eryx gauntlets, in meantime avoiding Ravager's charges. Eliminate a Ravager at the end. As a reward you obtain a Devil Trigger Cross Fragment.
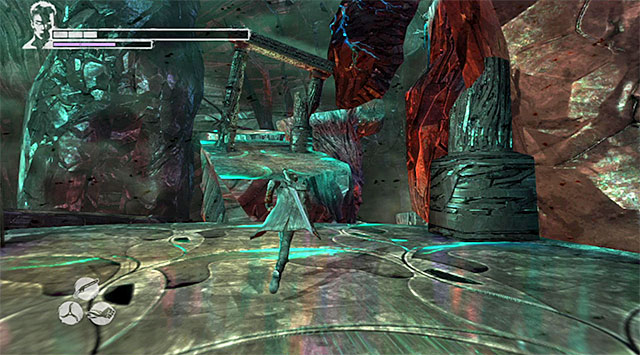
Return to the platform where you've fought a group of monsters and continue climbing (screen above). Stop at a platform rotated by 45 degrees and catch a Boost Ring with Angel List. Don't forget to press a jump button.
After landing look for a second Boost Ring and use it. Wait until Dante lands on a new platform and jump on a small nearby shelf, where you find a Large Devil Trigger Star. Return to the main platform and grab a latch (screen above).
Then move forward through a small bridge. Destroy grapevines on an upper platform with Aquila (screen above). It unlocks a latch, which you can grab with Angel Lift.
Jump and use Angel Boost what takes you to a levitating rock. Now use a Demon Pull at a pillar (screen above). You can jump to a new arena, where the next big battle begins.
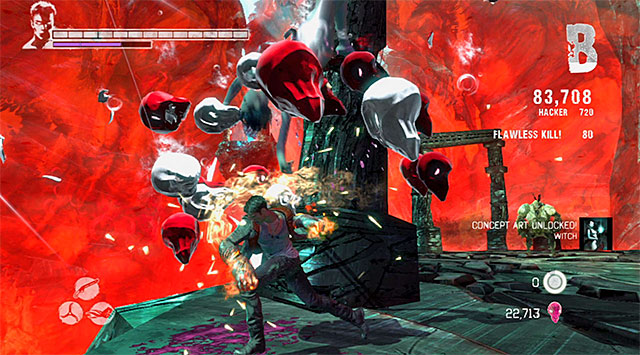
This battle has three parts. At the beginning you'll be attacked by a Tyrant and Witch. Eliminate the Witch first. If you want to avoid Tyrant's attack in the meantime, make attacks from air and pull the Witch when you destroy her shield, to not touch the ground.
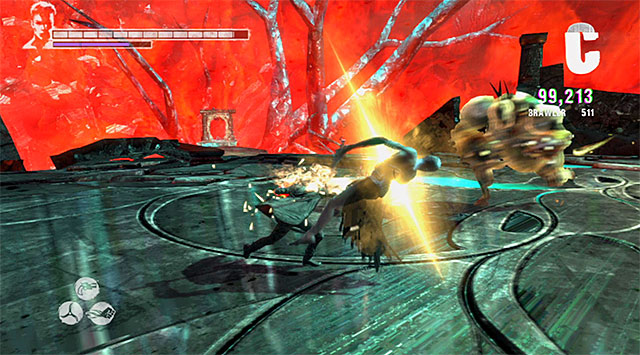
Then you'll fight another Tyrant accompanied by a Dreamrunner. You can kill them in whatever sequence you want to, there is no recommendation.

In the last, third part of the battle, you'll fight a Witch and Dreamrunner. I recommend to act like in the first part, so to destroy Witch's force field and then pull it, staying in the air. After killing her, eliminating a Dreamrunner shouldn't be problematic.
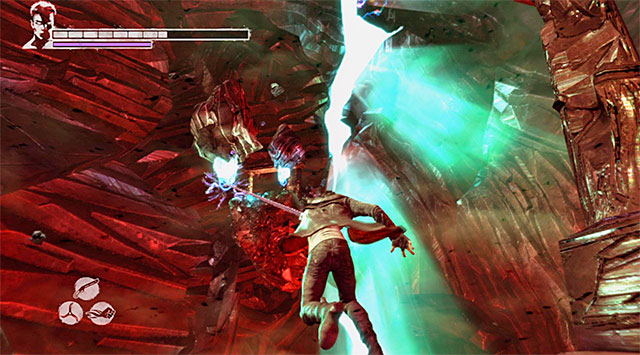
After that search an arena and then look for a latches (screen above). Start using Angel Lift and remember to be hurry so the stream of souls doesn't hurt you.
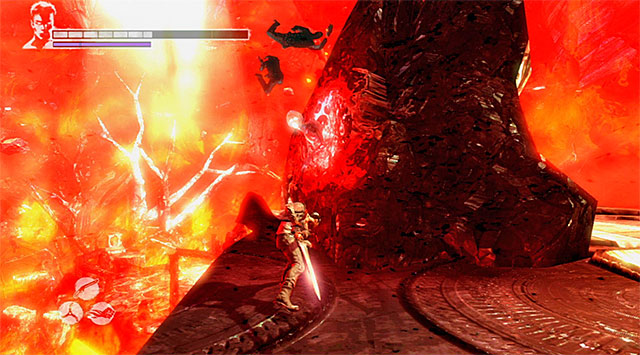
After landing, walk around one of stones to localize a Lost Soul (screen above).
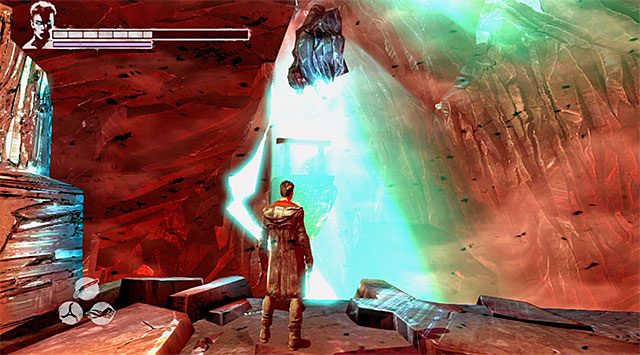
Now you can go where the screen above shows. Grab latches and the Boost Ring at the very end which takes you to a new, small platform. Now you just need to use Angel Lift once again to end the mission.
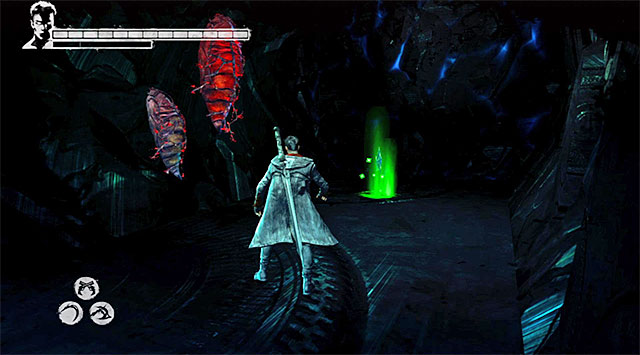
At the very beginning turn around and search a small area (screen above). Here you find a Small Vital Star. Only now enter a hall with great vault's door and listen what Vergil has to talk. Remember where the nearby Divinity Statue is, because you'll be returning here a lot.
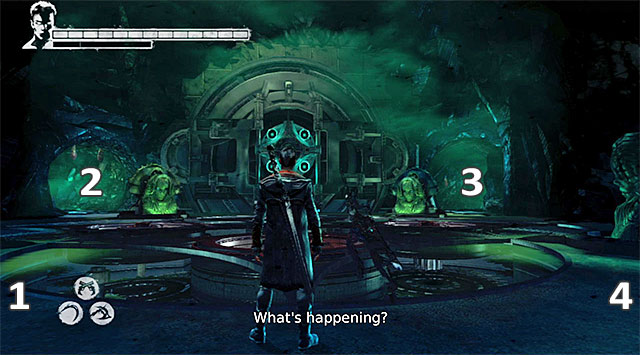
Your main task is to restart four backup generators. Every of them is in unique area, to which a proper tunnel leads. I recommend to search them clockwise. Begin from the generator nr 1 (screen above).
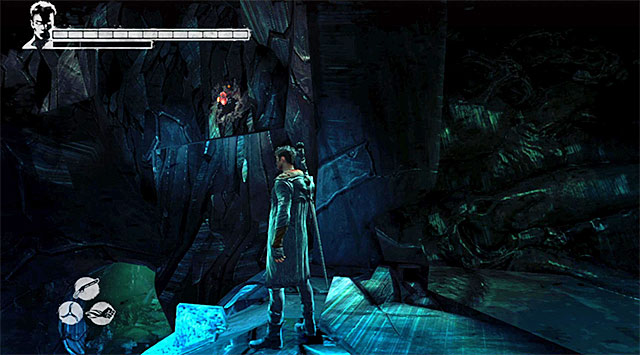
Follow a corridor. When you get to a bigger cave, turn right. Use a double jump with Angel Boost to get onto a higher shelf (screen above). Here you find a Lost Soul.
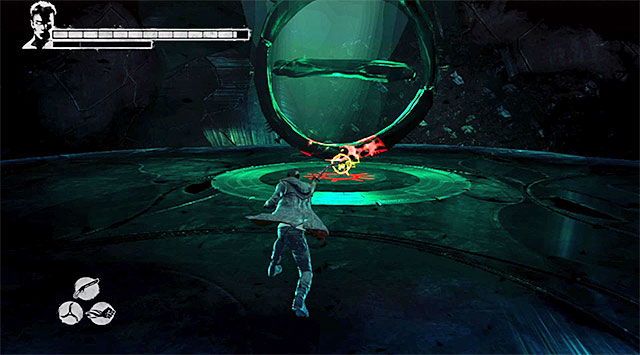
Carefully move to a lower platforms and continue journey. When you reach a chamber with the generator, jump over an abyss and use Demon Pull. Be ready to fight a battle in here.

You have to defeat Blood Rage and Ghost Rage. As you'd fought this combination before, you know what to do. Reminder: the best tactic is to stop a Ghost Rage with Aquila, so you can attack a Blood Rage. Remember also about choosing proper weapon against each of them.
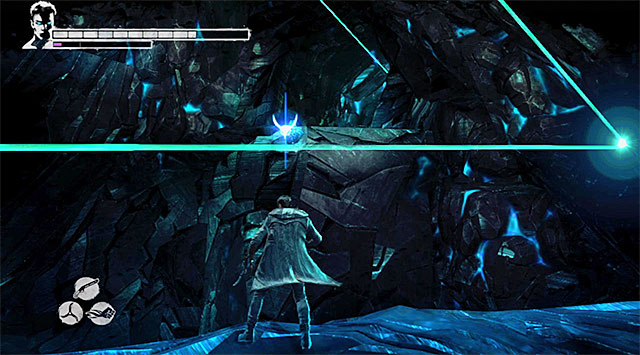
After a battle head for a main hall, where the Vergil is. On your way you need to use Angel Boost and Angel Lift. Listen to Vergil. Put off a matter of plugging cables to the restarted generator until you restart all of them.

Now go to the 2nd generator. Follow corridors until you reach a bigger cave. Resume walking here, staying close to the right wall. Stop where the screen above shows and use an Angel Boost heading for a shelf below. Free a Lost Soul. Use Angel Boost again, to reach a path on left.


BONUS MISSION: It's worth to stay in this cave and look for Secret Door (1st screen above). If you have an Argent Key you can open it and begin a bonus mission, Colossal Triumph (2nd screen). It's a rather difficult mission in which you have to defeat Tyrant in less than 45 seconds. A crucial for the victory is to shorten intervals between time when you can attack a monster. Think especially about charging Eryx gauntlets and putting explosive darts at him with Kablooey. What is more, you should make your strongest blows when you knock him down - what can be accompanied by Devil Trigger.
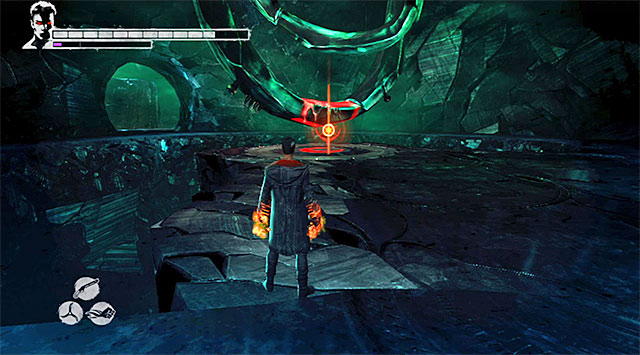
Continue your journey through caves, until you reach a chamber shown on the screen above. As previously, you have to use a Demon Pull.
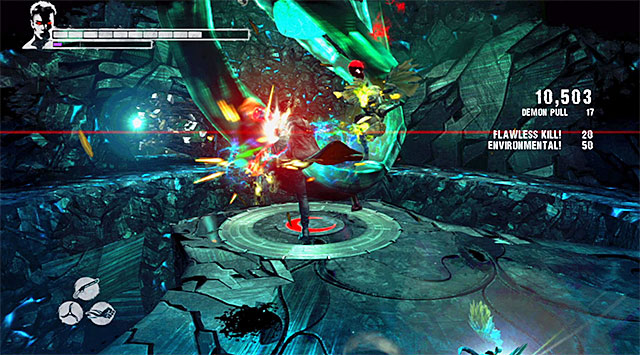
Also here a battle begins, but it's less demanding. I recommend begin from weakest and flying enemies. Leave a single Dreamrunner at the end, avoiding his attacks and waiting to retaliate.
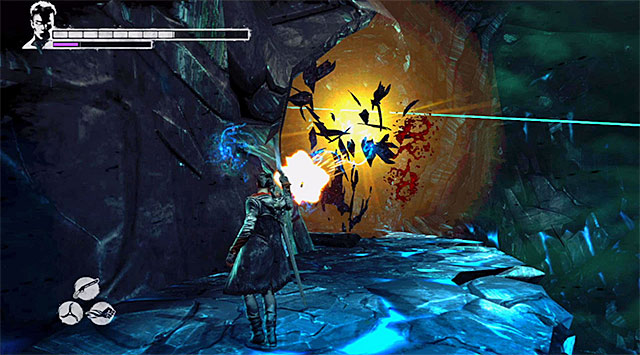
Now you can return to the main hall. But be careful - you'll run into new Demonic Shards. Shoot them down.
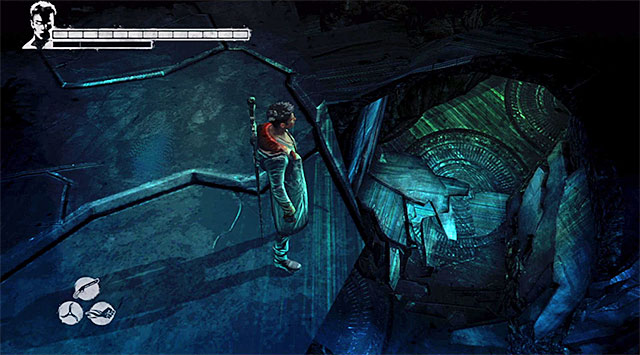
Head for a generator number three. When you reach an edge of the abyss, stop and look down. Try to jump down on a shelf (screen above). Search new corridor and find an Argent Key on an upper balcony.
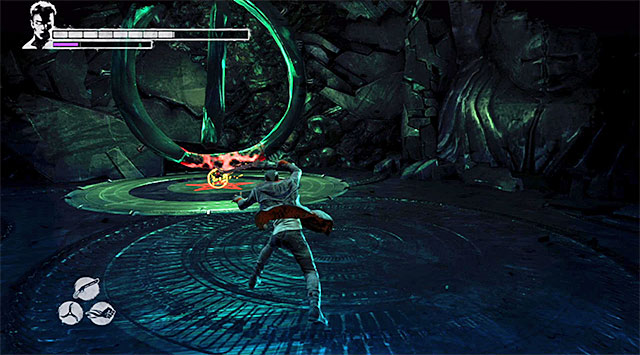
Jump onto a lower level and enter a room with the third generator. Use Demon Pull again.
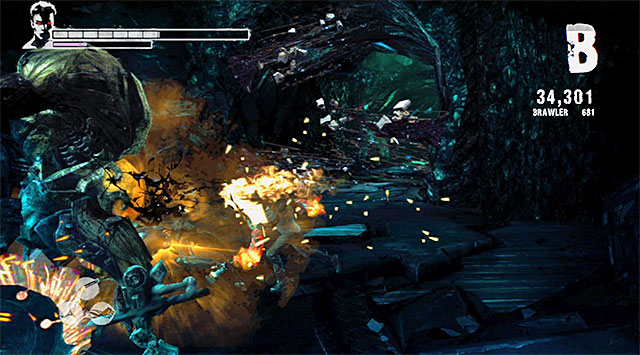
Begin a new battle from weakening enemies with area attacks. In the meantime, avoid Butcher's blows, leaving him for the very end (remember about the bump). After a battle head for a main hall, but don't hurry - you'll meet even more Demonic Shards.
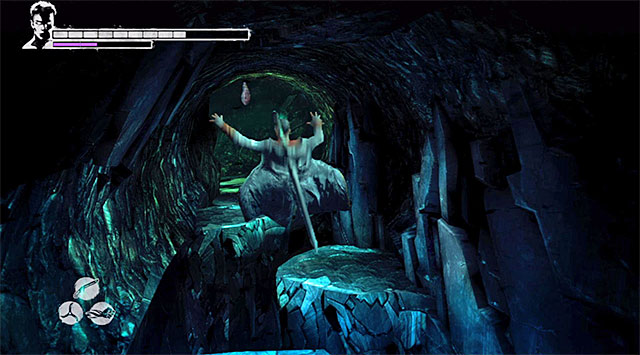
The last one generator remains. Head for it, jumping from platform to platform.

When you get to the chamber with it, use a Demon Pull. Prepare for a new battle and notice many holes in the ground. You should avoid them or you'll lose a steady ground under your feet.
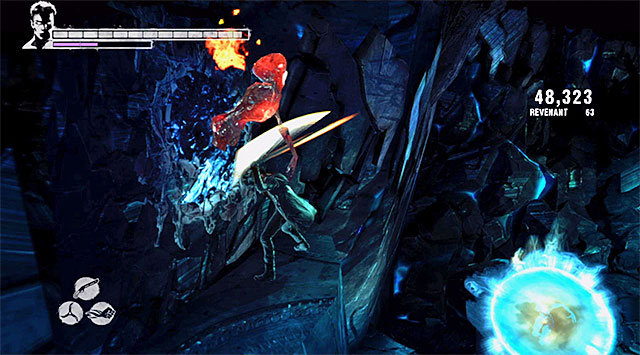
SECRET AREA: When the battle begins, ignore enemies and focus on reaching an upper rock shelf. Make sure that you've bought an Ability called Enemy Step. Make double jump and while being at its peak pull an enemy with Demon Pull. Bounce from him and use Demon Pull again at the another enemy and bounce again. Launch an Angel Boost just after that, to reach a shelf (screen above). Here you find a Lost Soul.
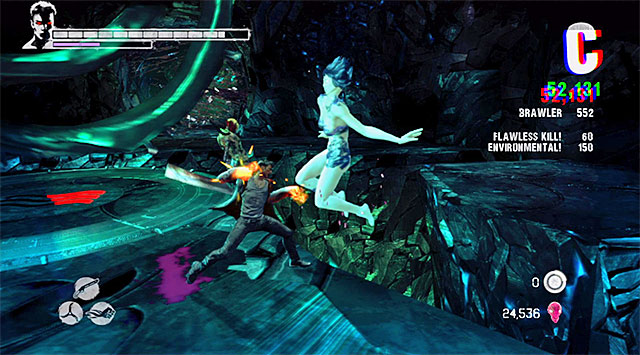
Only then attack enemies. During this battle focus on eliminating Witches ASAP. After that get rid of the remaining ones. It's worth to fight in the air, what decreases a risk of falling into abyss. After a battle head for a vault and be ready to destroy more Demonic Shards on your way.
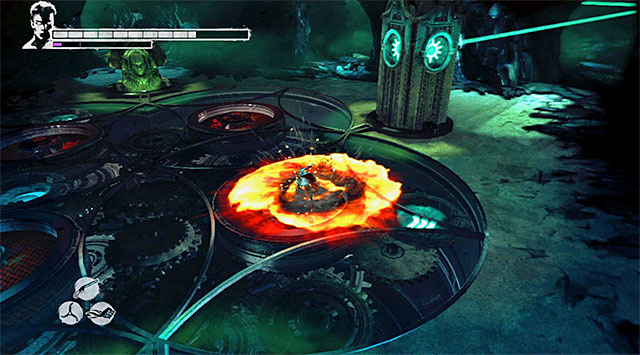
Now you just need to solve a simple riddle. Notice that hitting a red mark on the ground with Eryx gauntlets make its parts move.
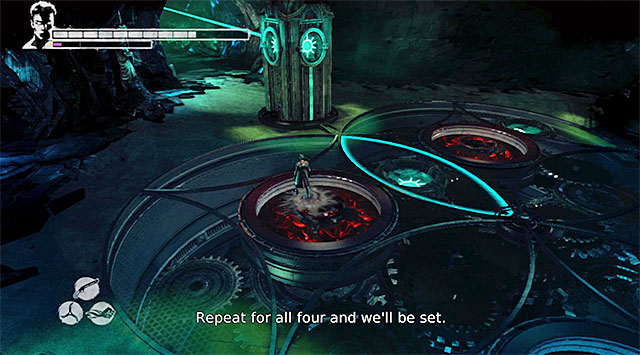
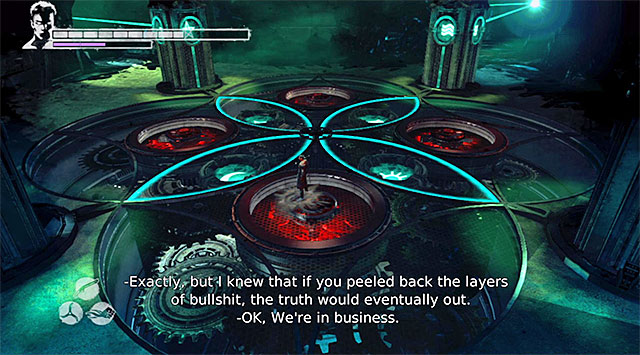
You need to adjust marks to generators, for example star need to be next to the generator with the same symbol. If you make it right, a part of the floor lights (1st screen above). Continue hitting the marks on the ground until all four marks match (2nd screen above). Now watch a cut scene what ends this mission.
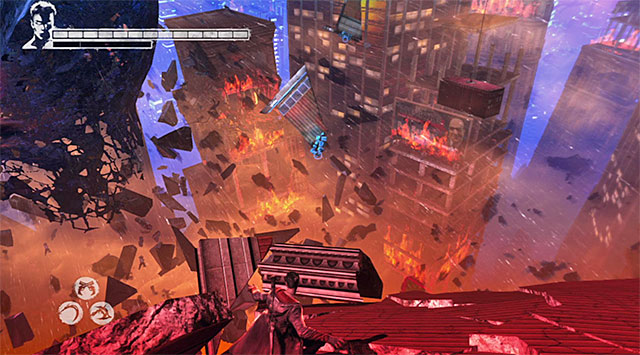
Prepare. After regaining control you'll be forced to use an Angel Lift a few times, grabbing few latches and a Boost Ring at the end.
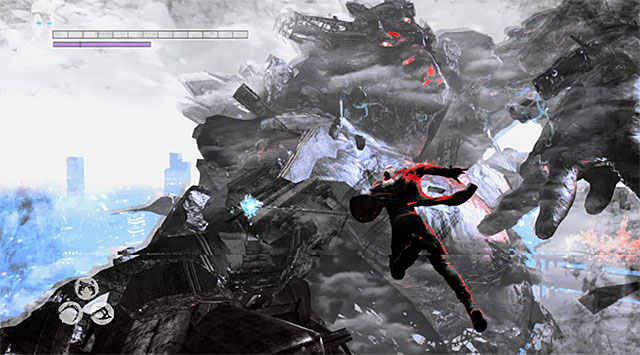

After landing on the roof watch a new cut scene and prepare for using Angel Lift again. Besides new latches, you have to grab also two Boost Rings and bounce from them properly. At the very end use Demon Pull aiming at an interactive point (2nd screen above).
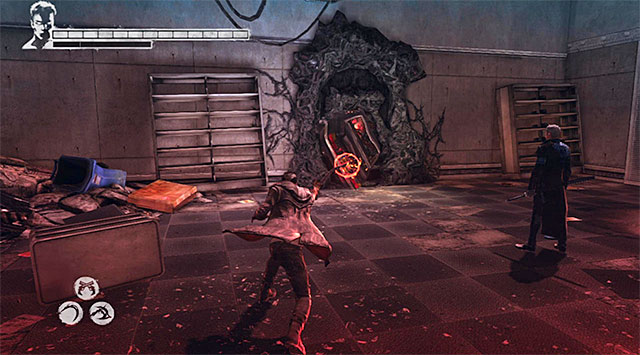
Now you start going through one of buildings. On your way you find no secrets, so don't look around. Use a Demon Pull to unlock an exit from the first room.

Demon Pull will be useful also a bit further. In the final part of marching you have to destroy a wall using Eryx (screen above) and then Arbiter.
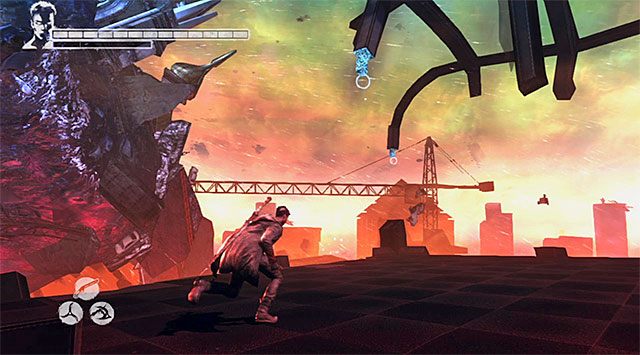
Wait until you're transferred at a new roof and start using an Angel Lift (latch and Boost Ring). Soon you get on the place where an encounter with Mundus begins.
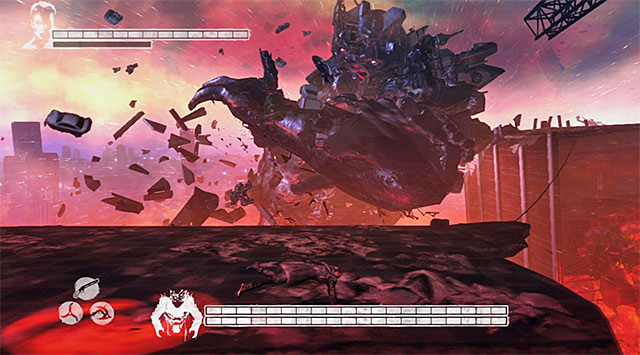
The first part of an encounter with Mundus is the longest one, in which you have to eliminate two bars of health. They stand for energy of two upper limbs of boss. Spend some time to get to know with all main attacks of Mundo. The most common one is to make a strong blow with his upper limbs. Every time you see that he tries to attack you like that, start running on the arena and make an evade from a red point which marks the place where the Mundus hits.
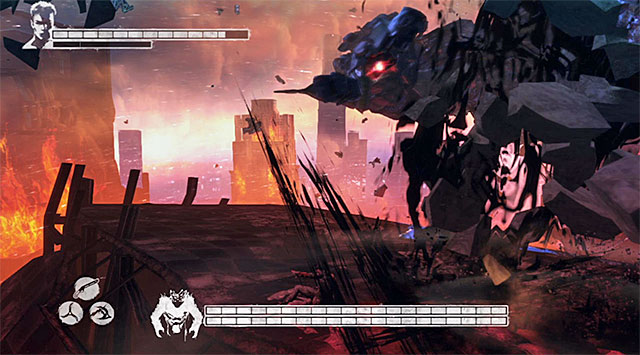
From time to time, he'll make a stronger type of this attack, which are three blows in the row. Evade as the normal one, and make three perfect dodges.
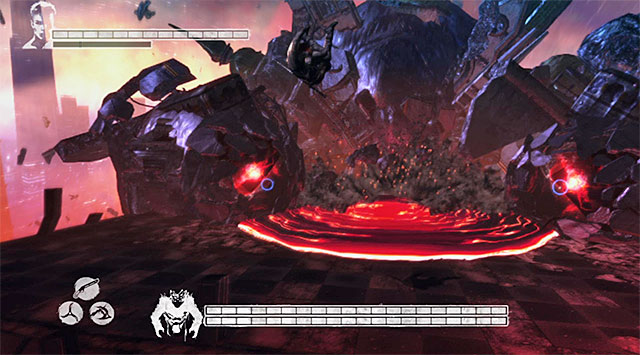
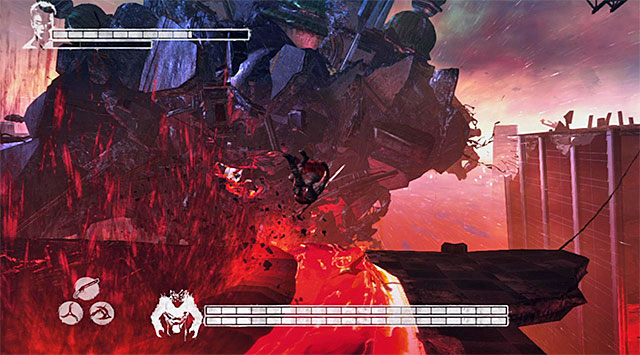
Another variety is a simultaneous blow of two fists in the roof. In this case your task is easier. You just need to jump over a shockwave (1st screen above). Do the same when the boss creates a shockwave from left to right (2nd screen). In this case making a perfect double jump may be harder.
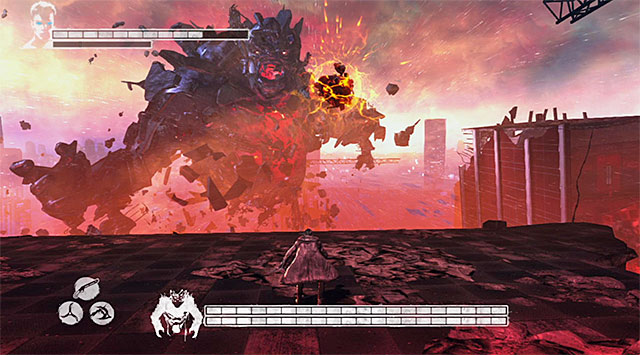
Completely other attack is throwing fireballs at you. To avoid them, you need to dodge just after he throws a fireball (not when he's preparing to the throw).
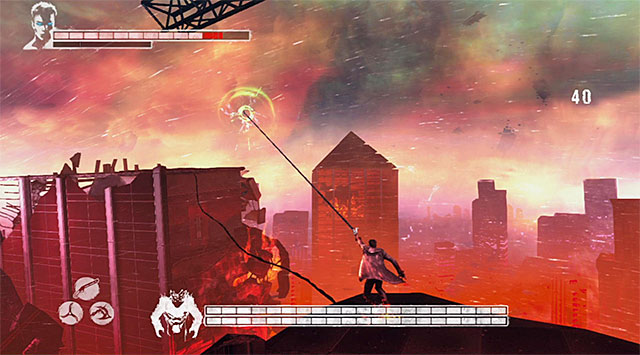
At the end few words about his most unique attack - covering a roof with a lava. In such case you need to act as during the fight with Succubus. Find quickly an interactive point (Boost Ring) and use an Angel Lift to get onto a next roof.
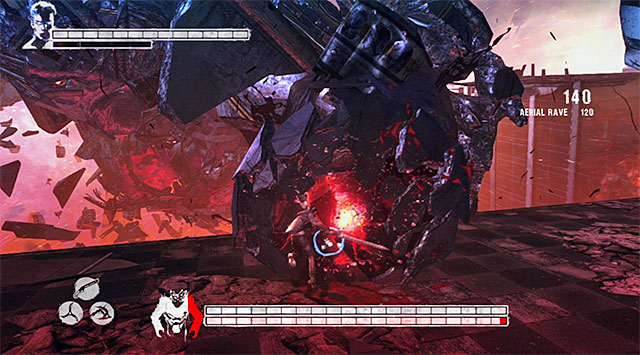
Now, your turn to attack. Notice that after every Mundus' attack with upper limbs, he stays uncovered for a while. Pull to him with Angel Lift and make strong blows weakening one of his arms.
Continue attacks and evade boss' actions. Destroy one of Mundus' limbs (1st screen). Use a Demon Pull at his eye (2nd screen).
Resume attacking - boss' behavior doesn't change. This time focus on the other arm. When it's done, use a Demon Pull on his eye again.
The second part of the fight with Mundus is much easier than the previous one. But also here you need to move between roofs if necessary.
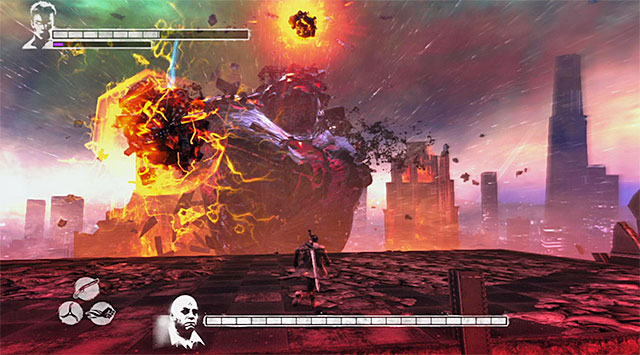
New Mundus' attack is to throw three fireballs at Dante. But it is very easy to avoid.
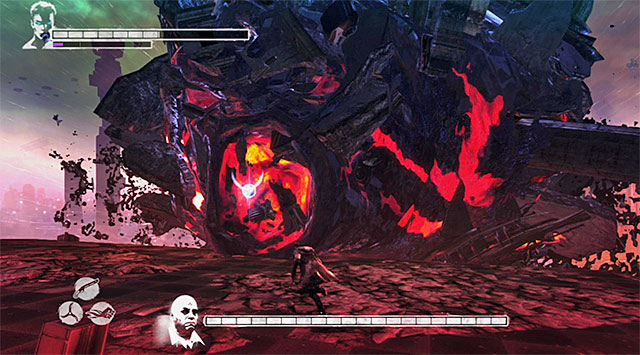
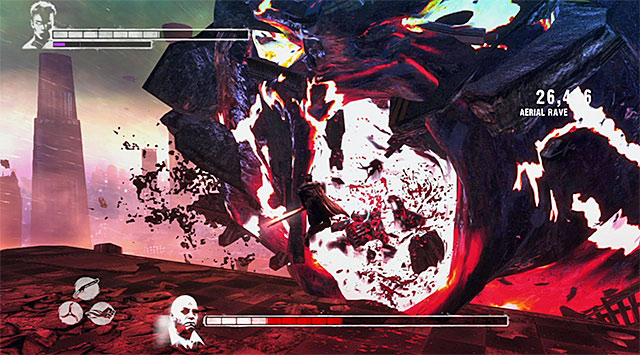
Wait for moments when you can grab Mundus' mouth (1st screen). Pull to it with Angel Lift and perform strong blows (2nd screen). Repeat until the boss' health bar disappear.
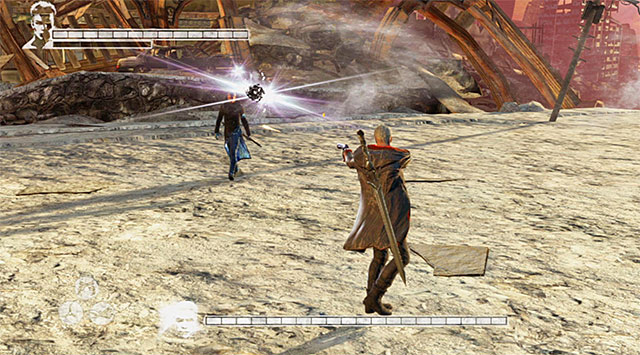
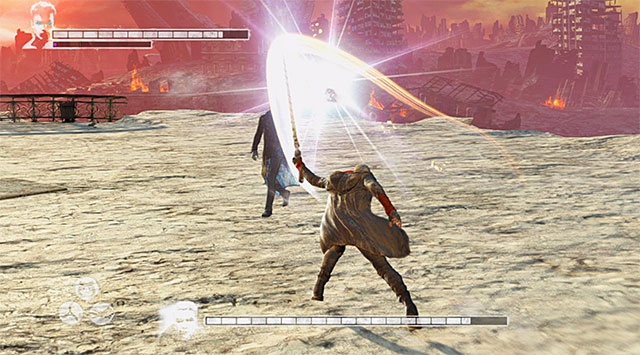
A duel with Vergil is very similar to fights with Dreamrunners. Dante's brother can block your attacks, so you have to play defensively and wait for an occasion to retaliate. Firstly, get to know boss' attacks. Very often Vergil throws white blades at Dante. At the beginning only one, but the number will grow up to four. Try to destroy them before they head for you. You can use gunfire (1st screen above) or Aquila (2nd screen above).
Vergil has also another ranged attack. He can throw bigger blades from the air or hit the ground strongly. In this case play also defensively and focus on evades, although you could try use Angel Lift or Demon Pull at him.
You can have a similar dilemma during Vergil's charges. You can retaliate them (for example with Eryx), but easier is to just avoid those attacks. Every mistake during counterattacks will cost you highly.
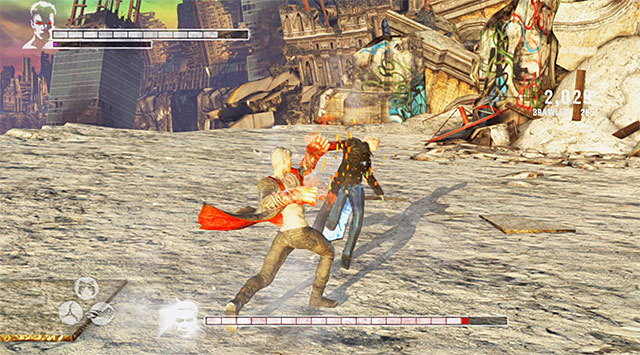
As it was during fights with Dreamrunners, attack Vergil after his failed attacks, when he is helpless for few seconds. I recommend to use a Stinger Ability connected with Rebellion (1st screen above). It let you reach Vergil quickly and perform a series of undefendable blows. If you don't have this ability, perform other strong attacks, for example using Eryx (2nd screen above).
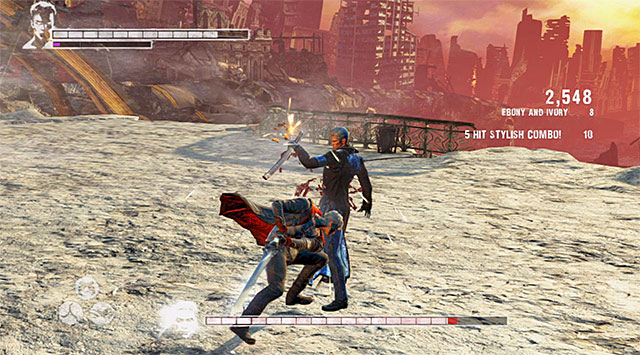
Stop attacking Vergil when you notice that he starts blocking your hits. Move back and avoid his attacks waiting for another opportunity. As Vergil's health bar drops, some of his attacks grow stronger. It means that you have to play even more carefully.
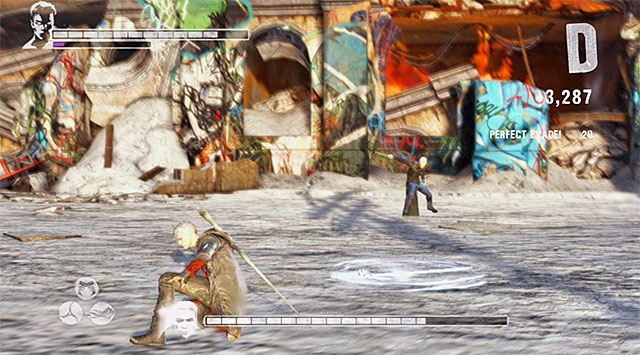
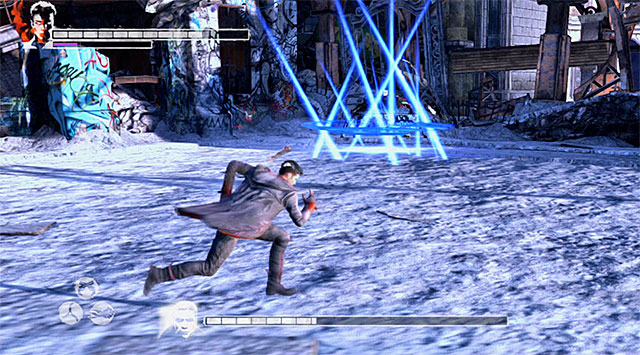
As the time passes, Vergil will gain new attacks. Especially avoid a series of three blades, over which you should jump (1st screen above) and his attack which makes a group of blades appear in the particular place (2nd screen). In the latter case keep moving and press a dodge button just before he attacks.
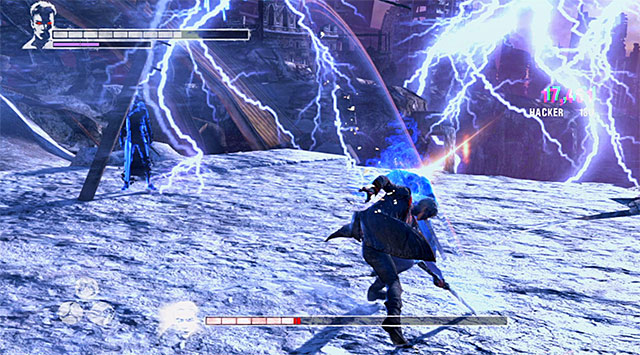
The last new thing is an appearance of Vergil's look-alike. It happens first when Vergil loses about 2/3 of health bar. A new enemy means troubles. If you begin to attack the double, then, besides getting damaging Vergil, you'll obtain Devil Trigger orbs. But the better idea is to focus on Vergil, as he'll try to regenerate in the meantime. The double will disappear after a few moments.
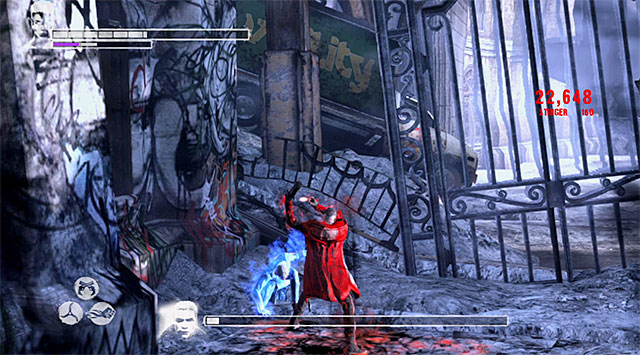
Continue attacking Vergil until he loses almost all health bar. He should kneel and summon a double again. Launch Devil Trigger immediately, ignore the look-alike and attack helpless Vergil (screen above). Single blow will give you a victory. Remark: if you don't have enough energy to activate a Devil Trigger, then focus on double. But you have to know that Vergil will be regenerating, so don't waste to much time or the encounter will be elongated.
Now you can enjoy winning the game. Congrats!
KEY 1/1 (COPPER) - Key can be found just after regaining Dante's pistols and defeating a small group of monsters. When you reach a crossroads (the one with Lost Soul), choose a left path.
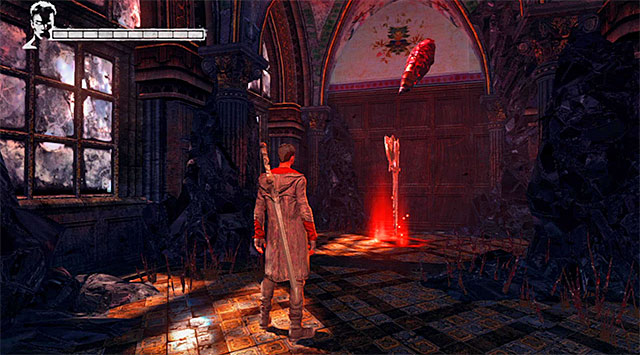
KEY 1/2 (COPPER) - Key can be found in one of the small rooms next to the main hall.

KEY 2/2 (ARGENT) - Key can be found in the secret lock, which you reach after getting an Arbiter. To destroy a red mark on the floor you need to use Eryx gauntlets.
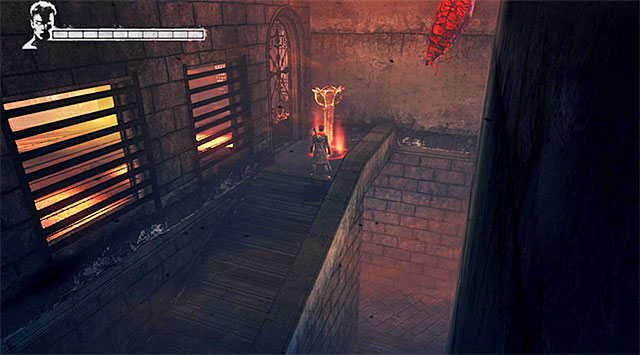
KEY 1/1 (COPPER) - Key can be found in one of the rooms next to the main arena. To get to it, you need to go through a wall (red part) using an Arbiter.
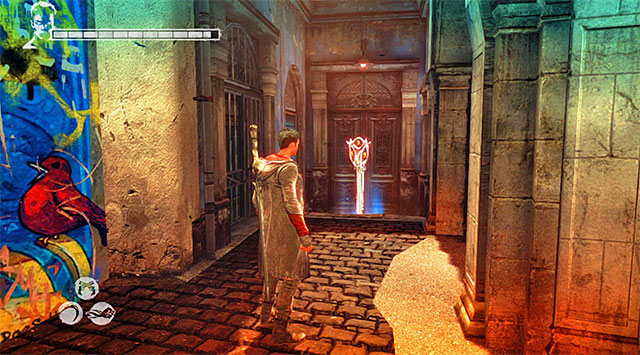
KEY 1/2 (ARGENT) - You can find the key in the alley, just after you've destroyed the first camera. To get it, you need to use Eryx on the wall with red mark.
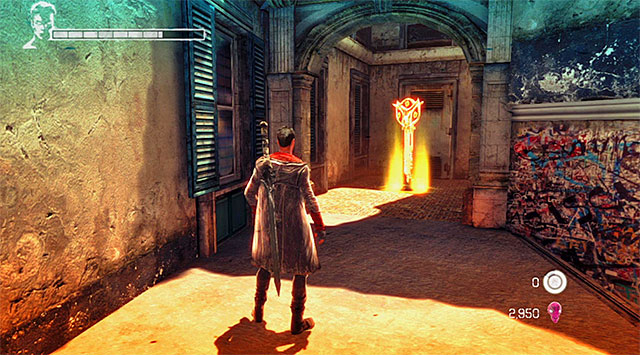
KEY 2/2 (GOLD) - Key is on one of the roofs next to the Divinity Statue. First use Angel Boost then Angel Lift to get onto a roof. Then go through small room and few corridors.
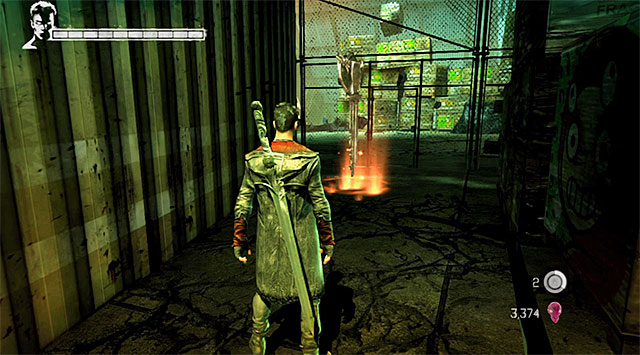
KEY 1/2 (COPPER) - Key can be found behind the containers and a net, where you have a main battle in the first warehouse.
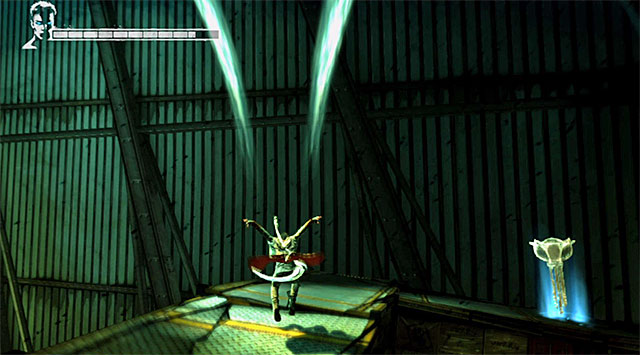
KEY 2/2 (ARGENT) - Key is placed on the last of upper shelves in the second warehouse. To reach it, you need to use skillfully Angel Boost, Angel Lift and Demon Pull.
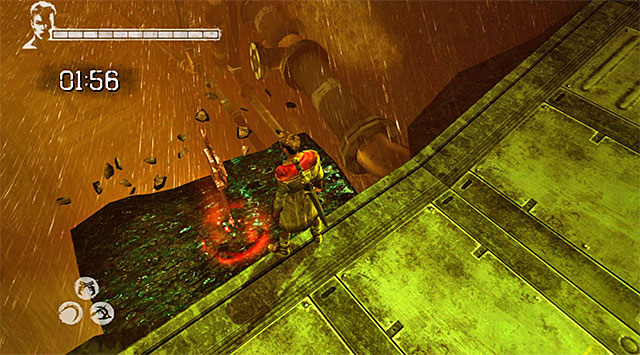
KEY1/1 (COPPER) - You find a key at the very beginning of the mission. Turn around and jump down on a shelf.

KEY 1/3 (COPPER) - Key is in the reversed building in the first part of the prison. To get to it, you need to use Aquila to destroy grapevine and then use Angel Boost and Angel Lift.
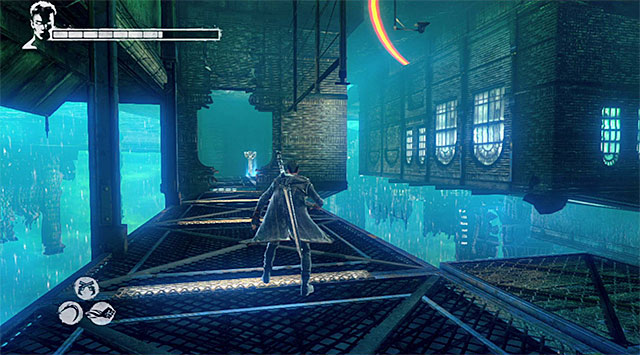
KEY 2/3 (ARGENT) - This key can be found during making through a second part of the prison, when you reach a Divinity Statue. You have to fly (using an Angel Boost) to a platform on the left of Statue.
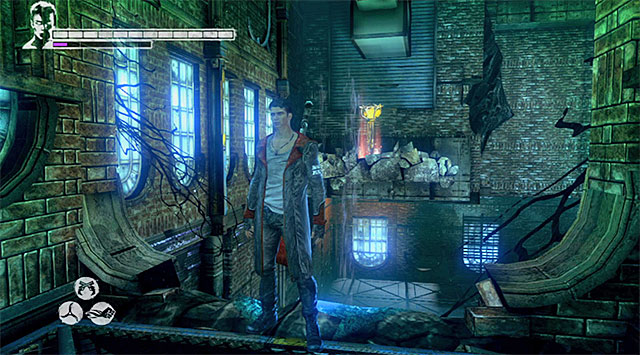
KEY 3/3 (COPPER) - Key is in the warehouse, where you have the last battle with Rage beasts. You have to get onto an upper balcony, turn around and use an Angel Boost.
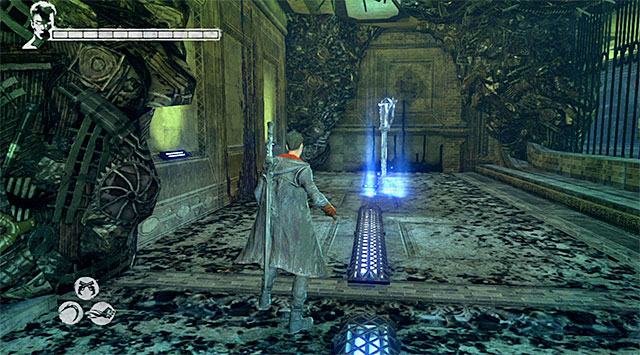
KEY 1/1 (ARGENT) - Key can be found just after a battle at the metro station. Search the further part of the metro tunnel, where you find a grapevine. Destroy them with Osiris or Aquila.
KEY 1/1 (GOLD) - Key is on the upper balcony of the warehouse, where you get just after unlocking a Devil Trigger attack. Balcony is available only if you have an Ability called Enemy Step. Use it to get on the proper height and use Angel Boost to fly onto a balcony.
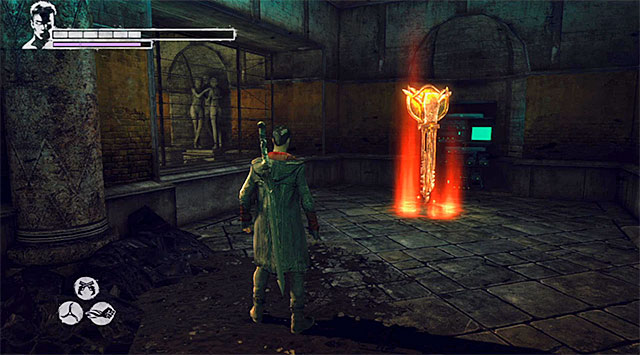
KEY 1/1 (COPPER) - Key is the right part of the main Order's base, in a locked room to which you can get into only thanks to Eryx gauntlets.
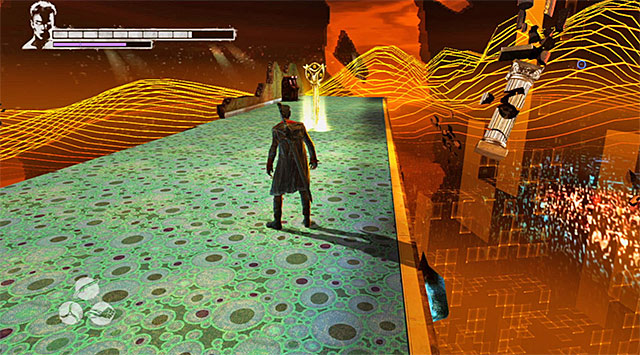
KEY 1/1 (GOLD) - Key can be found when the beginning battle in the club ends, before moving on. Look for platforms on left from a Divinity Statue and start using an Angel Lift.
KEY 1/2 (COPPER) - Key can be found nearby an area where you need to hit containers three times. Before doing that, go left and use Angel Boost. Search a square looking for the secret.

KEY 2/2 (COPPER) - Key can be found when you reach a place where you can pull a bus. Go left and use an Angel Boost to avoid a big abyss. Look left for a balcony with a key.

KEY 1/1 (GOLD) - Key can be found on the 105th floor of the skyscraper. It's in the corridor with two souls, where the access is difficult because of flying chests.
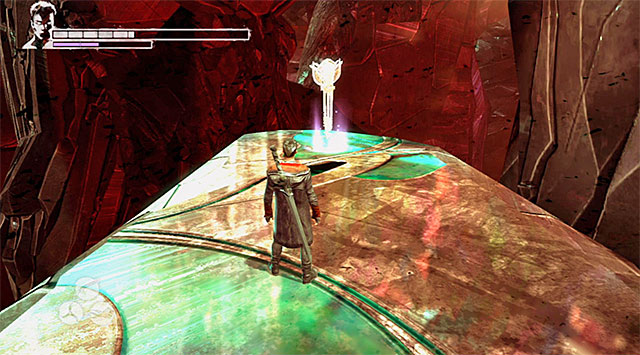
KEY 1/1 (IVORY) - Key can be found during an exploration the second part of the Furnace of Souls. During climbing, look for a small shelf, which you can reach with an Angel Lift. Continue climbing, destroy grapevine and grab your secret.
KEY 1/1 (ARGENT) - Key can be found during exploration an area connected with the third generator (the one right from the vault's door). Stop when you approach the first abyss and jump down on a shelf. Start exploring a new corridor and reach an upper balcony with the key.

DOOR 1/1 (required Copper Key; bonus mission Air Brawl) - You run into door while exploring a funfair, just before approaching a big mirror and Hunter's appearance.

DOOR 1/2 (required Copper Key; bonus mission Simple Eradication) - Just after finishing the first memory.

DOOR 2/2 (required Copper Key; bonus mission Stylish Victory) - Door is in a secret room, to which you can get into after using an Angel Boost to fly over an abyss. It's just after obtaining Osiris.
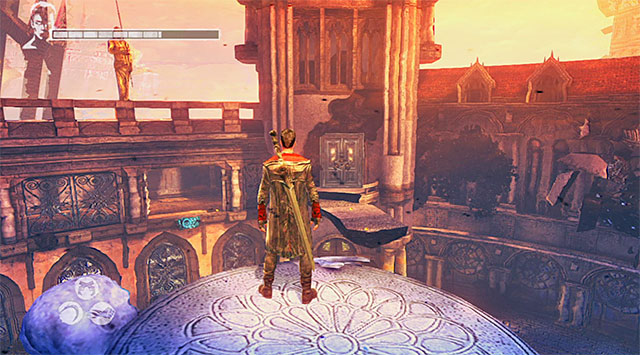
DOOR 1/1 (required Argent Key; bonus mission What Goes Around) - Door is on the upper balcony at the main arena. You need to use Angel Boost and bounce from an upper shelf.
DOOR 1/2 (required Copper Key; bonus mission Simple Traversal) - Door is in a small room next to the second camera. To get there you need to destroy grapevine with Osiris or Aquila.
DOOR 2/2 (required Argent Key; bonus mission Flawless Conquest) - Door is on a high balcony behind the second camera. You need to use Angel Boost and Angel Lift.
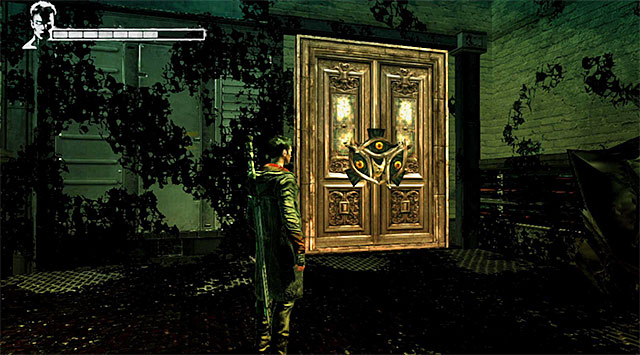
DOOR 1/2 (required Copper Key; bonus mission Demonic Conflict) - Door is in dimly lit upper balcony in the passage between the first and the second warehouse.
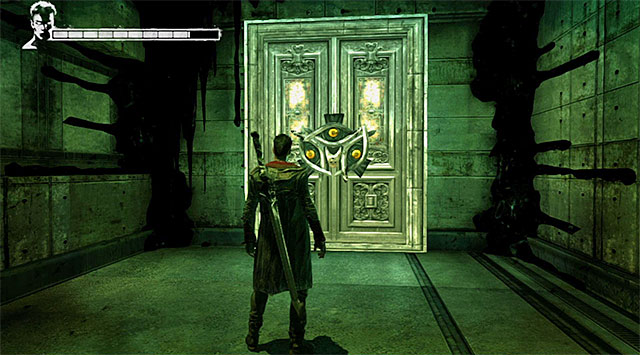
DOOR 2/2 (required Argent Key; bonus mission Displaced Skirmish) - Door is in the secret room. You find it on your way to the mixing room and to get it you need to use an Arbiter at a wall.

DOOR 1/1 (required Copper Key; bonus mission Rapid Descent) - Door is on a platform on left of an entrance to Succubus' lair. Use an Angel Boost.

DOOR 1/2 (required Gold Key; bonus mission Divergent Slaughter) - You can find this door in the first part of the prison. When you reach containers, stay close to the left net and use Angel Boost to get onto a next platform.

DOOR 2/2 (required Copper Key; bonus mission Angelic Warfare) - Door is in the warehouse where you fight the last battle with Rage beasts.

DOOR 1/2 (required Copper Key; bonus mission A Taste of Heaven) - Door is in the secret area nearby the place where the mission begins. To get there, destroy grapevine with Aquila and use Angel Boost.
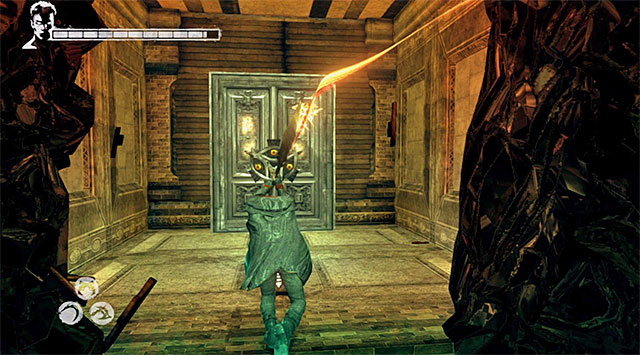
DOOR 2/2 (required Argent Key; bonus mission Moderate Traversal) - Door is in one of the side rooms of corridor leading to Harpies' lair. Use an Arbiter to destroy a red marked part of the wall.
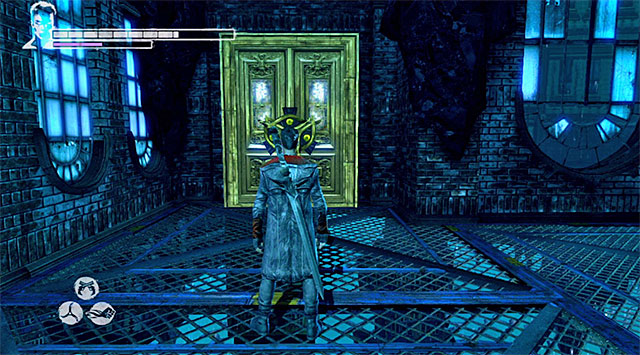
DOOR 1/1 (required Gold Key; bonus mission Subsistence) - Door is in the warehouse where you have the last battle in ninth mission.
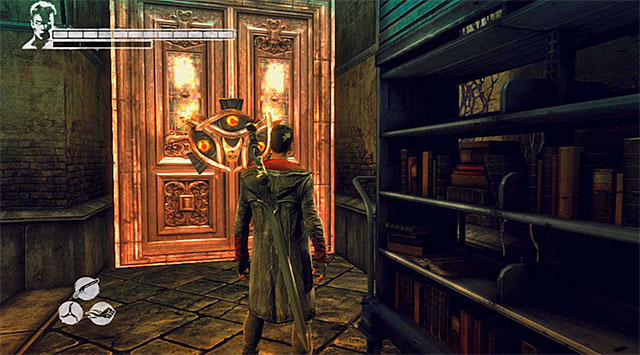
DOOR 1/1 (required Copper Key; bonus mission The Power Within) - Door is hid in the main Order base. When you search a last part of the base (after destroying a wall with Eryx), start looking for passage on left and use it before a barrier closes.
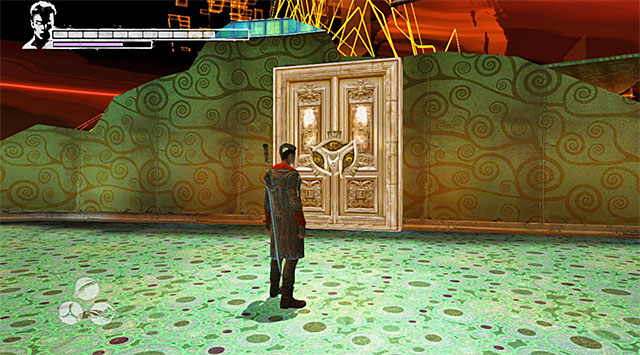
DOOR 1/2 (required Ivory Key; bonus mission Shenanigans) - Door can be found after ending first battle in the club, before moving on. Look for platforms on right from the Divinity Statue and get onto a balcony using Angel Boost and Angel Lift.

DOOR 2/2 (required Argent Key; bonus mission Hasty Acquisition) - Door can be found on your way to the sixth round, on the lower level of the biggest platform (the one with Divinity Stature).
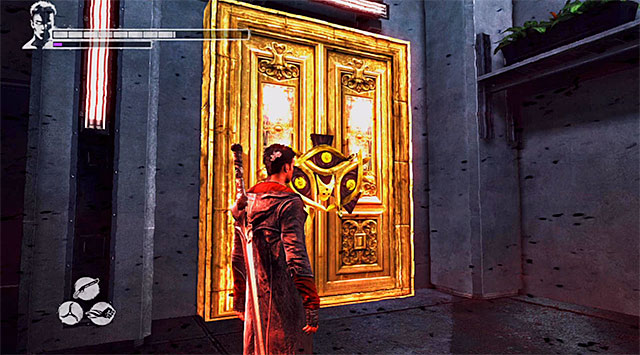
DOOR 1/2 (required Gold Key; bonus mission Extreme Traversal) - Door is at the very bottom on the staircase, to which you can get during searching a 106th floor. You need to go through a well hid passage and fly over an abyss earlier.

DOOR 2/2 (required Copper Key; bonus mission Bait and Switch) - Door is on the 154th floor. It is next to the elevator which takes you on 159th floor.

DOOR 1/1 (required Gold Key; bonus mission A Day in Hell) - You can find door during exploring the second part of Furnace of Souls, after passing a Divinity Statue. Find a platform which can be moved with a Demon Pull and fly to it (Angel Boost). Continue jumping on next platforms until you reach the door.
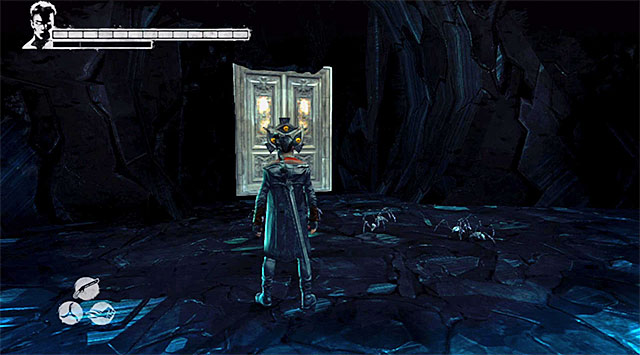
DOOR 1/1 (required Argent Key; bonus mission Colossal Triumph) - Door can be found during searching an area connected with the second generator (on the left from vault's door). Check the left side of the big cavern.
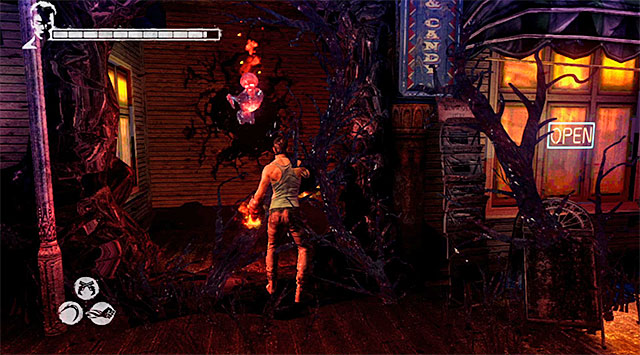
SOUL 1/6 - soul can be found in a secret room, to which you get after regaining Dante's pistols. You need to destroy a wall with Eryx.
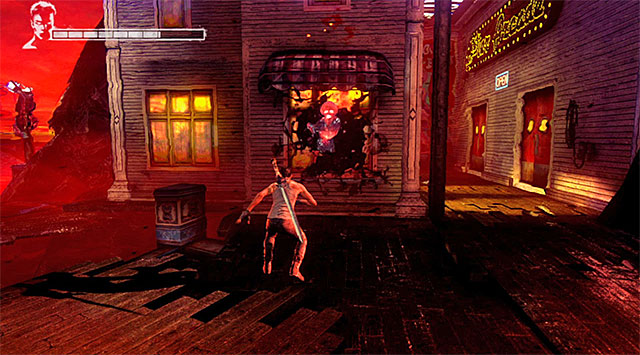
SOUL 2/6 - Soul can be found just after you find Dante's pistols and defeating a small group of monsters. It's in the place where you choose your further path.
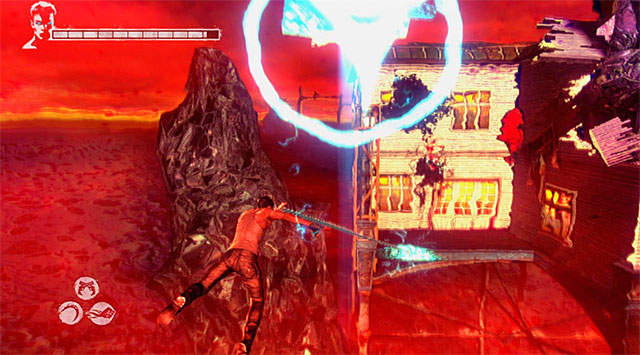
SOUL 3/6 - Soul is in the secret area next to the part of funfair where you find a first part of Divinity Statue. To reach it, you need to use Angel Lift few times.
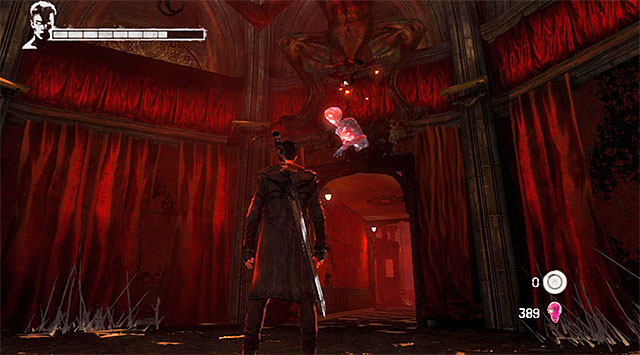
SOUL 4/6 - SOUL is in one of accessible building in the funfair.
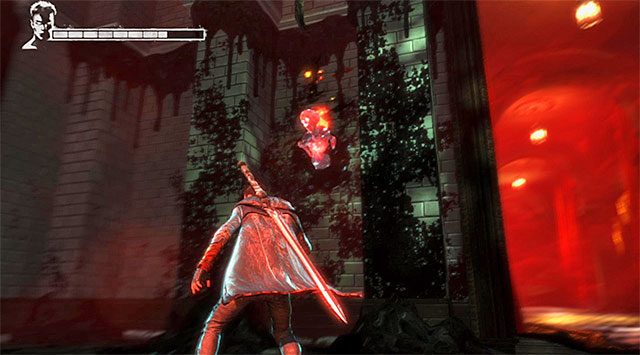
SOUL 5/6 - SOUL is in one of accessible building in the funfair.

SOUL 6/6 - SOUL is in the secret room in the funfair. To get into, destroy a red marked part of the wall using Arbiter.
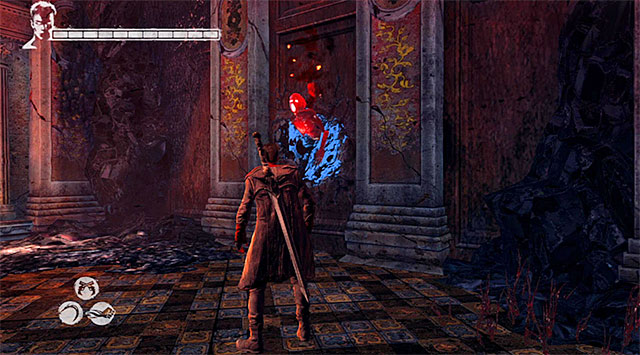
SOUL 1/9 - SOUL is in the secret room on left from the main hall of the mansion. Use an Angel Lift to get to it.
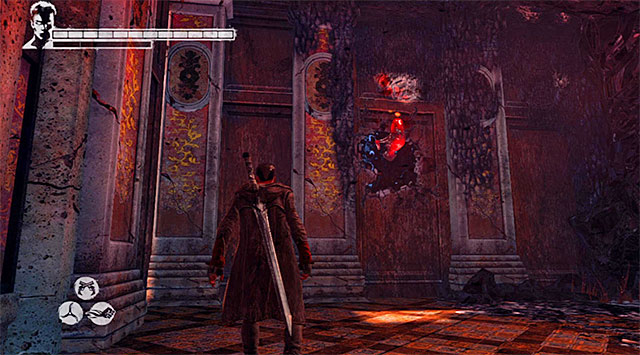
SOUL 2/9 - Soul can be found on the way to Arbiter. You need to find a grapevine, destroy it with Aquila and get into a secret room.
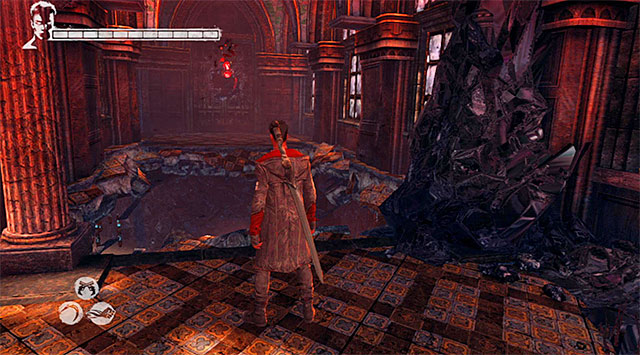
SOUL 3/9 - You find soul just after obtaining Arbiter. Use Angel Boost to fly over an abyss and reach a small balcony.
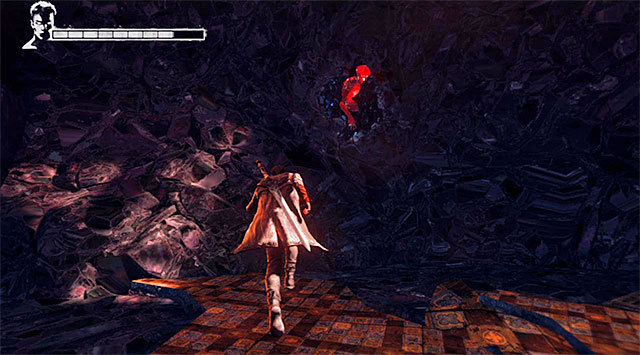
SOUL 4/9 - You find a soul just after obtaining an Arbiter. When you reach a big hole, jump on a lower level and turn around.
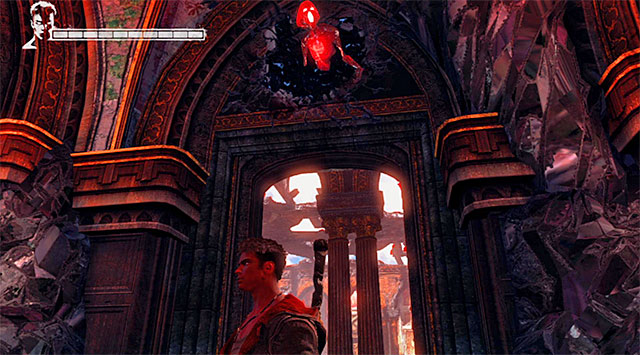
SOUL 5/9 - SOUL is over the door in the main hall of the mansion, which you destroy with an Arbiter.
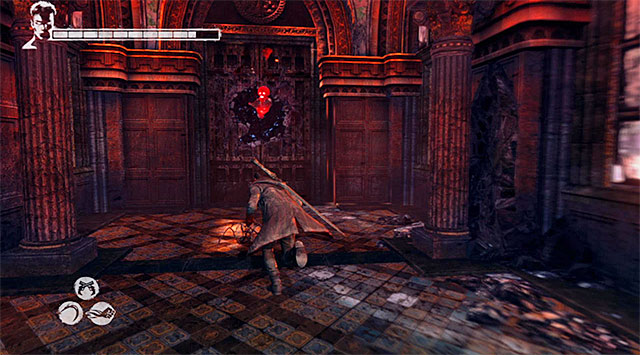
SOUL 6/9 - Soul can be found before the first memory. You need to find grapevine and destroy it with Osiris or Aquila.
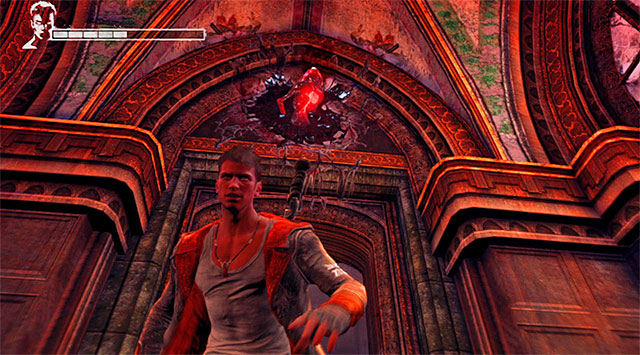
SOUL 7/9 - SOUL is over the door. You find it just after the first memory, before start using a Demon Pull. j
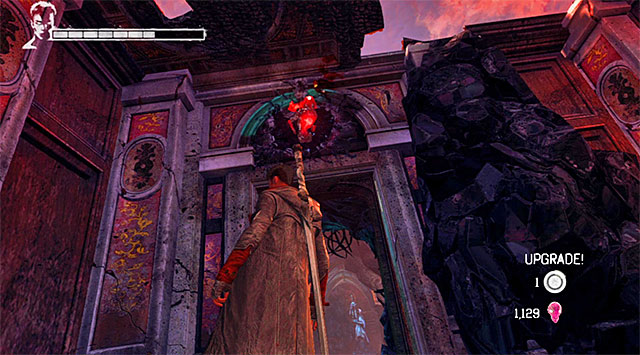
SOUL 8/9 - Soul can be found in the room, to which Dante get into after using Osirirs for the first time.
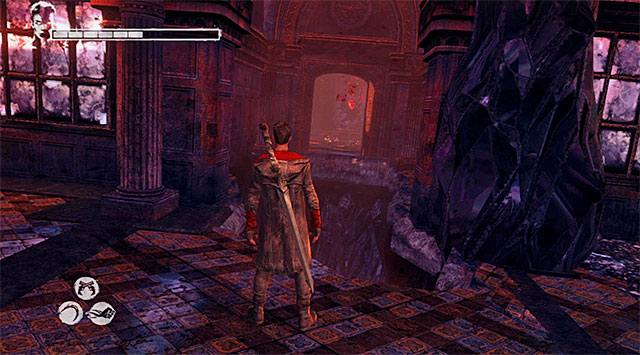
SOUL 9/9 - SOUL is in the secret room, to which you get into after getting over an abyss. It happens just after receiving an Osiris.
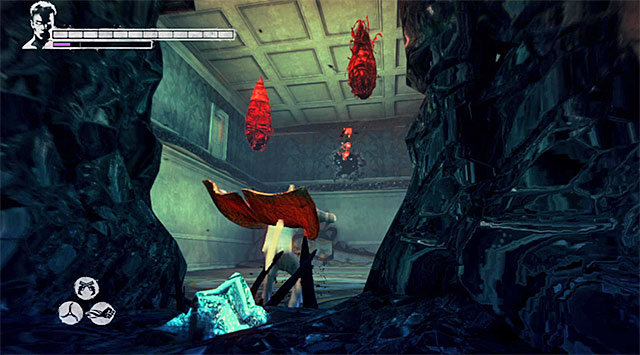
SOUL 1/3 - SOUL is in the secret area, next to the main arena. To get there, use Aquila at grapevine and then Angel Lift.
SOUL 2/3 - SOUL is where the Kat is, and you need to jump to it.
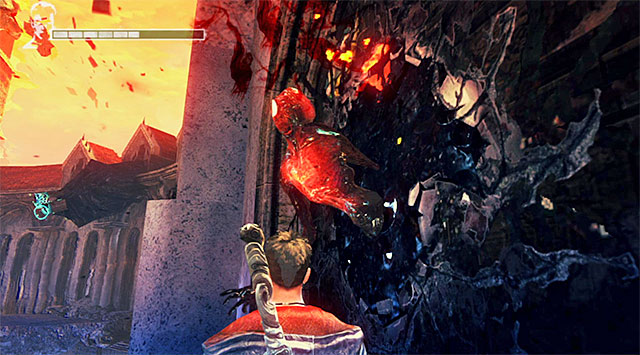
SOUL 3/3 - SOUL is on a small balcony at the main arena, you can reach it with Angel Boost, bouncing from the higher shelf.
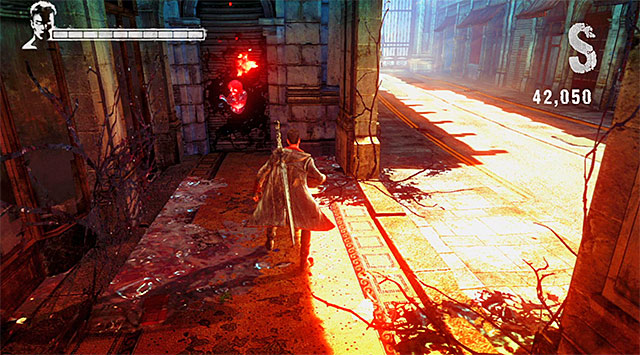
SOUL 1/8 - SOUL is on the wall, nearby the place where you begin the mission.
SOUL 2/8 - SOUL is on a wall of one of buildings, nearby the first camera. You need to jump to it from one of higher balcony and free it without touching the ground.

SOUL 3/8 - SOUL is at the end of left corridor, just after the first destroyed camera.

SOUL 4/8 - SOUL is on the wall of a building on a square with Divinity Statue. Use an Angel Boost and bounce from fountain to reach it.
SOUL 5/8 - SOUL is on the building's wall, nearby the square with Divinity Statue. Use an Angel Boost and bounce from the roof to get it.
SOUL 6/8 - SOUL is on the wall of building nearby the second camera. Use an Angel Boost to reach it.
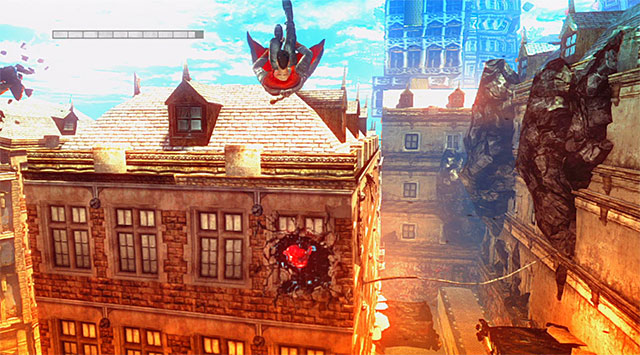
SOUL 7/8 - SOUL is on the wall of building nearby the third camera. Jump to it, bouncing from the roof.
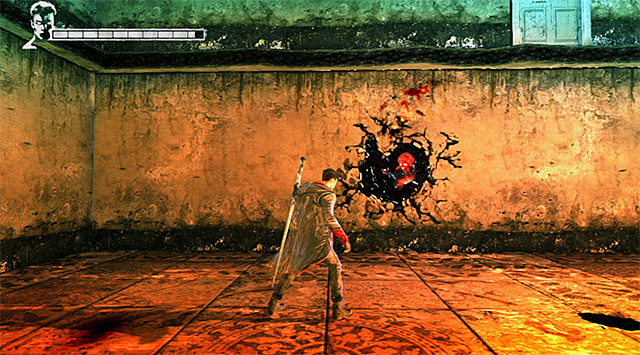
SOUL 8/8 - SOUL is in the secret room, nearby the third camera. You need to get onto a roof and then destroy a part of wall (red mark) with an Arbiter.
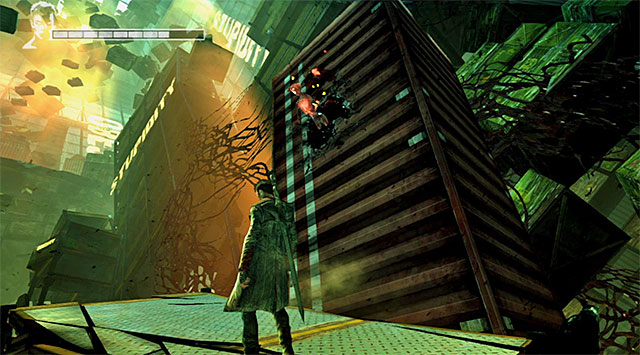
SOUL 1/6 - Soul can be found on one of platforms in the left part of the first warehouse.
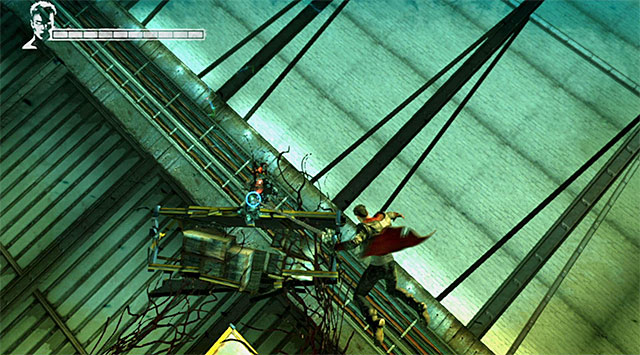
SOUL 2/6 - You find soul on one of platforms in the left side of the first warehouse. Use an Angel Boost to get onto it from the place where you've fought a main battle.
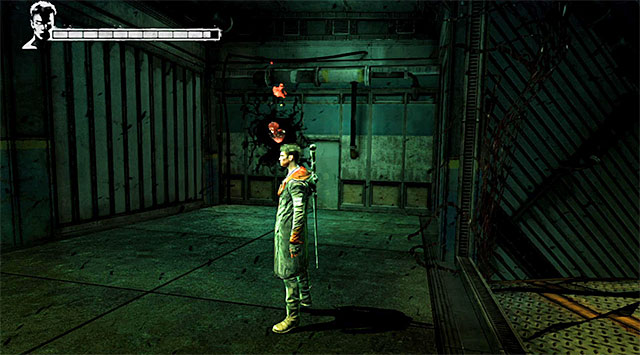
SOUL 3/6 - Soul can be found after entering the second warehouse and destroying the first group of enemies.
SOUL 4/6 - SOUL is in the second warehouse, nearby the place where the main battle takes place.

SOUL 5/6 - Soul is in the upper part of the second warehouse. You need to destroy grapevine with Aquila, use two Boost Rings and then launch Angel Boost.
SOUL 6/6 - SOUL is on the upper balcony in the second warehouse, over the place you've had a main battle.
SOUL 1/2 - SOUL can be found during marching through a long tunnel, when you reach an area with a single strong monster.
SOUL 2/2 - SOUL is on one of pillars in the location with Divinity Statue (nearby an entrance to Succubus' lair).
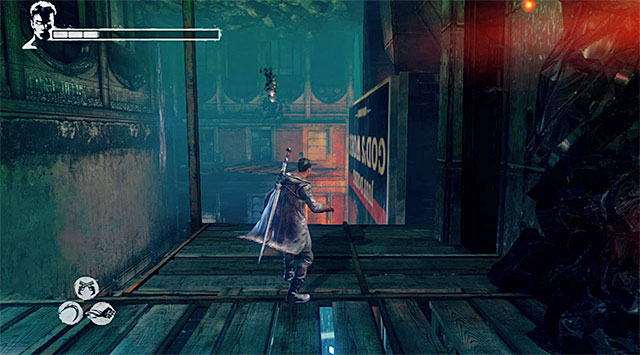
SOUL 1/8 - Soul can be found when you enter the prison. When you reach the last platform (one with the destructible wall), turn left and fly to a smaller shelf away.
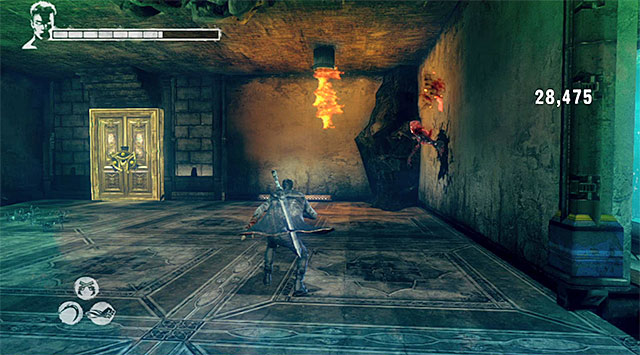
SOUL 2/8 - Soul can be found during exploring the first part of the prison. When you reach containers, stay close to the left net and use an Angel Boost to get onto a next platform.
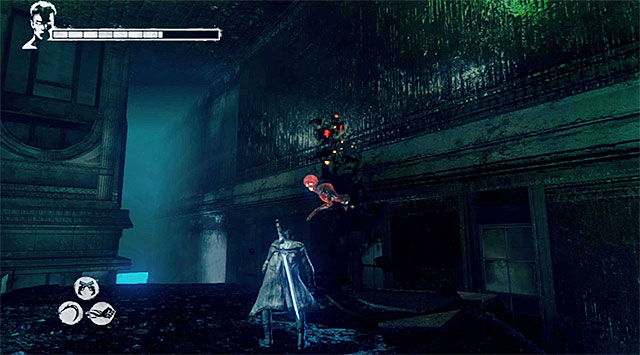
SOUL 3/8 - You find a soul just after you enter the second part of the prison. Use an Angel Lift to get onto an upper shelf on right.
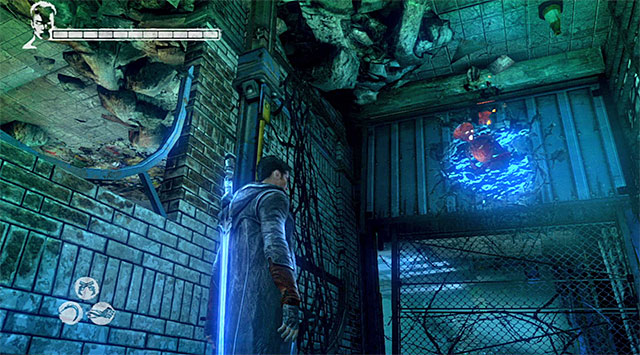
SOUL 4/8 - SOUL is nearby the warehouse, where you have the first battle with Rage beasts. Turn left when you exit the warehouse.

SOUL 5/8 - You need to on the lowest lever of elevator's shaft. When you enter an area with elevator, turn right.
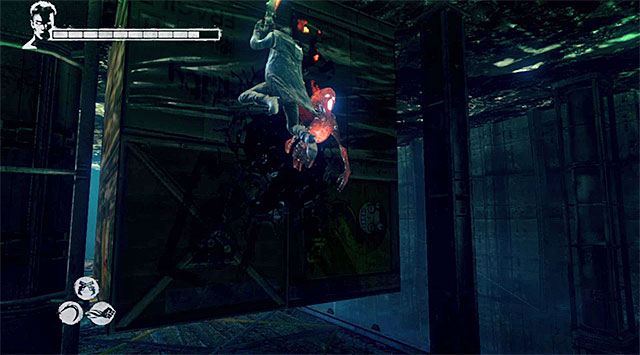
SOUL 6/8 - SOUL is hid on one of elevator's upper levels. Find a shelf onto which you can get only using Angel Boost. Repeat this move with next platforms until you reach a secret.

SOUL 7/8 - Soul can be found just after you get onto a lower level.

SOUL 8/8 - You find this soul at the end of the mission, when you reach the last Divinity Statue. It happens after a battle with Rage beasts in the warehouse.
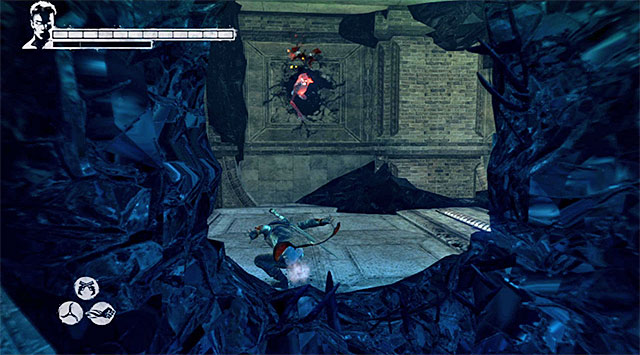
SOUL 1/5 - SOUL is in the secret area, near from the place where you begin. To get there, destroy a grapevine with Aquila and then launch an Angel Boost.
SOUL 2/5 - You can find soul when you enter a metro tunnel for the first time. Turn left instead of going right.

SOUL 3/5 - SOUL is in one of side room of corridor leading to Harpies' lair.
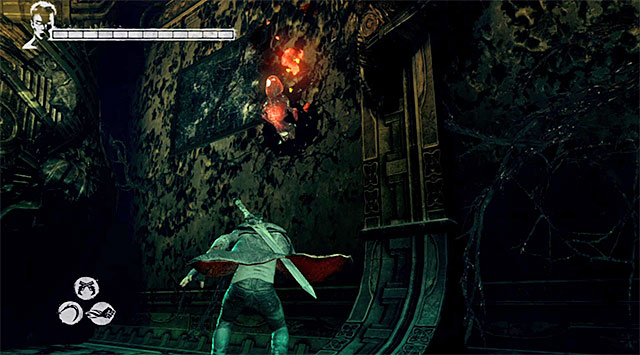
SOUL 4/5 - SOUL is in one side corridor, going out of Harpies' lair. To get it, use an Angel Lift.
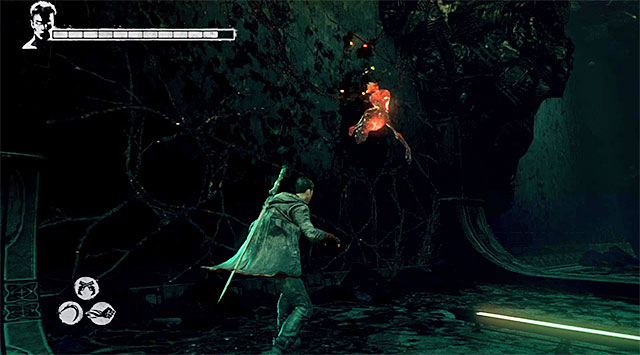
SOUL 5/5 - SOUL is in one of side corridor going out from Harpies' lair. Use an Angel Lift to get it.

SOUL 1/2 - Soul can be found at the beginning of the mission. When you run into grapevine, use Osiris or Aquila to destroy it.
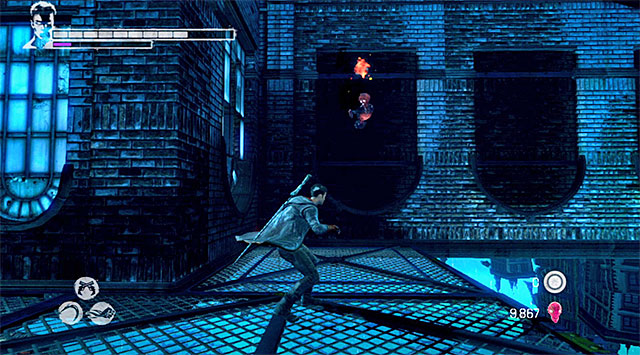
SOUL 2/2 - Soul can be found on your way to the warehouse where the last battle takes place. Stop before a latch, use it and launch Angel Boost aiming at an outer right balcony. Search this place and find a Soul.
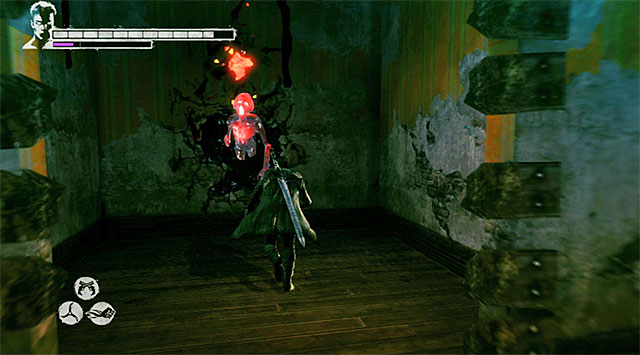
SOUL 1/7 - Soul can be found during exploration of the first building, just after going through a floor with Eryx. It's in a side, small room.
SOUL 2/7 - SOUL is in one of rooms next to Order's base (in the one where you destroy grapevine).

SOUL 3/7 - SOUL is in the main Order's base. When you enter it, turn right, stay close to the right side and choose a dimly lit corridor.
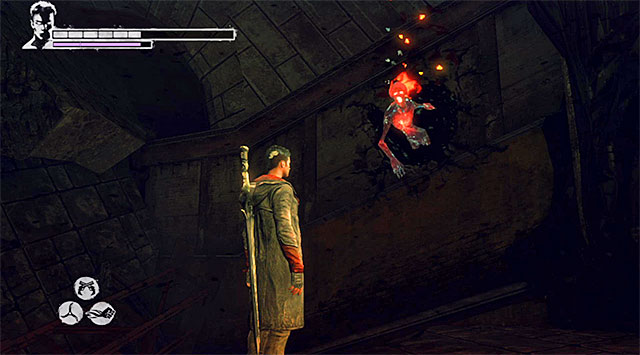
SOUL 4/7 - SOUL is in the right part of the main Order's base.
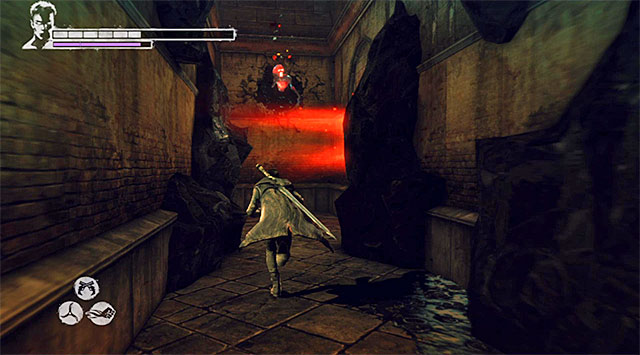
SOUL 5/7 - Soul can be found in the left side of Order's base. It's in a secret room to which you get into by destroying a red marked part of the wall with an Arbiter.
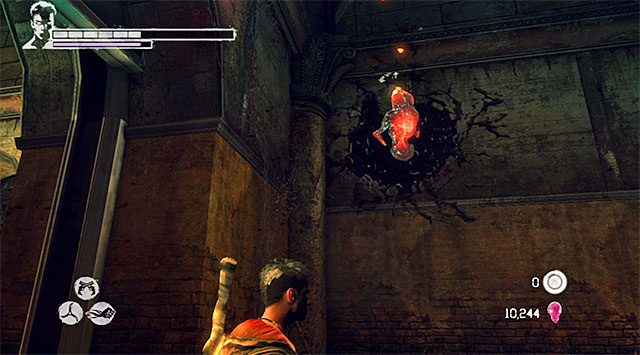
SOUL 6/7 - SOUL is in the left part of Order's headquarters. You find it nearby passages to secret door and Divinity Statue.

SOUL 7/7 - SOUL is in the room, where you have the last battle in this mission. To get it, you need an Ability called Enemy Step to bounce from enemies. When you reach a peak, launch Angel Boost to reach a secret.
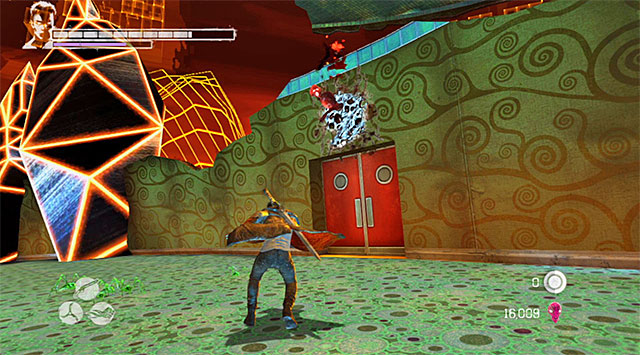
SOUL 1/7 - Soul can be found when the begin battle ends and before moving on. Turn around when you get to the Divinity Statue and get onto an upper balcony.
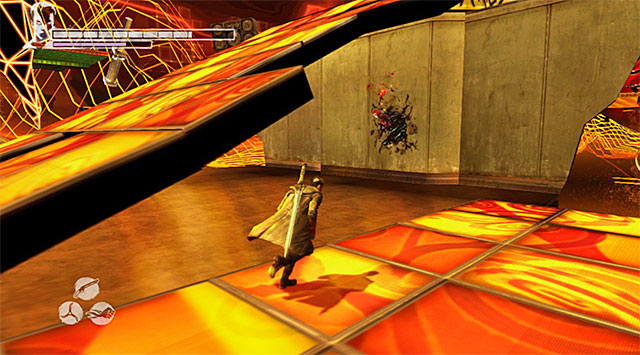
SOUL 2/7 - Soul can be found nearby the first Divinity Statue, under the stairs.
SOUL 3/7 - Soul can be found on your way to the first round. When you reach crossroads (with two-colored plates) go right and then turn right again, jumping on platforms.

SOUL 4/7 - You find a Soul after winning the third round.
SOUL 5/7 - You can find this Soul on your way to the fifth round. During your march look for an upper platform, which is reachable for Angel Lift. Move forward until you get to the bigger platform with a secret.
SOUL 6/7 - You can find soul on your way to the sixth round. When you get onto a main platform (with a Divinity Statue), look for a smaller levitating shelf and jump on it. Continue using an Angel Lift until you reach the last platform.
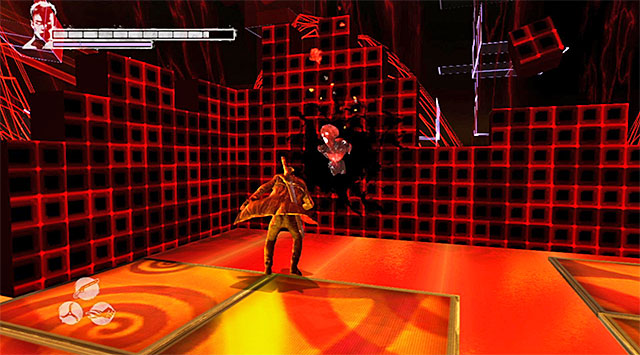
SOUL 7/7 - You can find this Soul on your way to the sixth round, just after you use Boost Ring and before reaching a final crossroads.
SOUL 1/9 - SOUL is on the ground floor. Before using an elevator for the first time go right and destroy a wall with Arbiter, what opens a passage to a staircase.
SOUL 2/9 - Soul can be found on 105th floor. It's in the chest with Gold Key, in the area with flying chests.
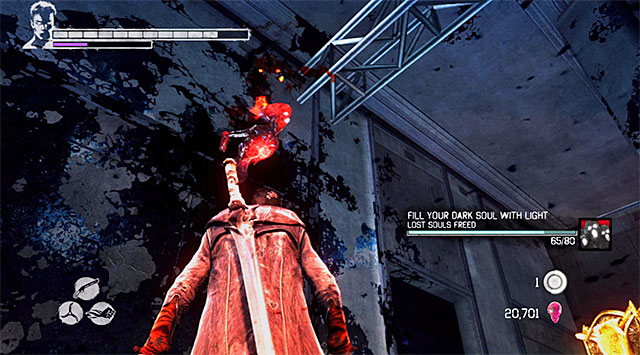
SOUL 3/9 - You can find this soul on the 105th floor. It's in the corridor with Gold Key.

SOUL 4/9 - You find this soul, if you explore the peak of staircase you reach during searching a 106th floor. There is a secret passage leading there preceded by the hole (fly over it).
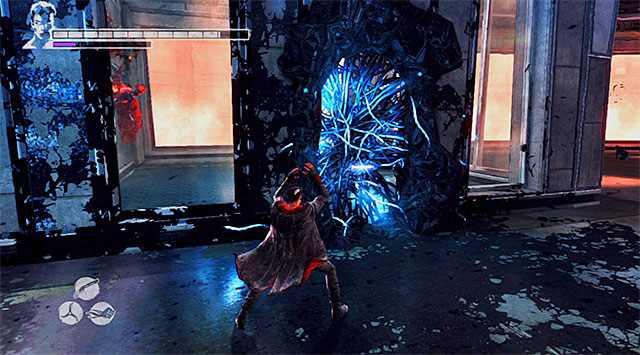
SOUL 5/9 - You can find soul at the end of exploring the 106th floor in the moment when you have to return to 105th floor for a while. Look for an office room blocked by grapevine.
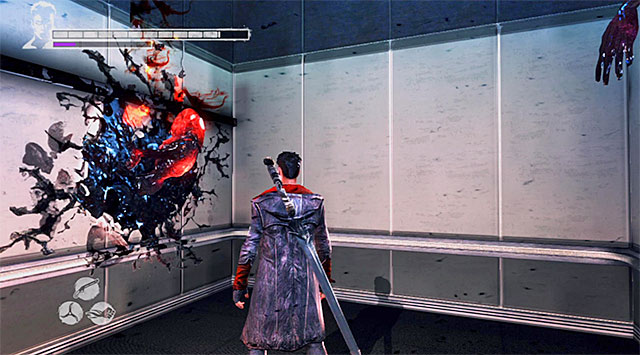
SOUL 6/9 - You can find soul at the end of exploring the 106th floor in the moment when you have to return to 105th floor for a while. Approach the right elevator, wait until it opens and jump in.
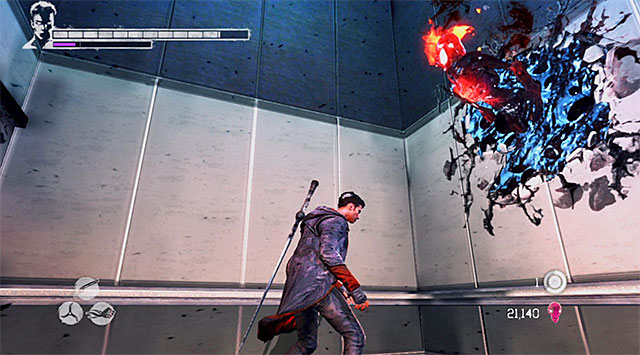
SOUL 7/9 - You can find soul at the end of exploring the 106th floor in the moment when you have to return to 105th floor for a while. Approach the right elevator, wait until it opens and jump in.

SOUL 8/9 - You can find this soul after avoiding laser traps at 106th floor. When you reach a new wing of building, turn left.
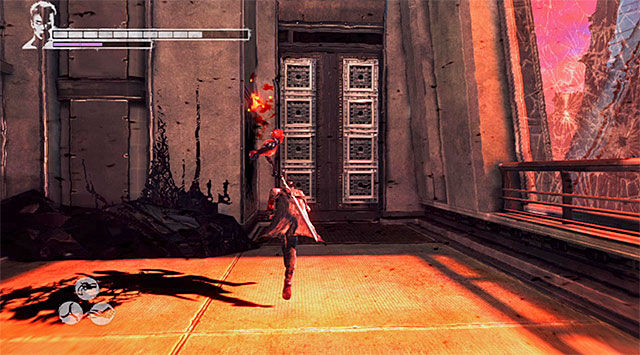
SOUL 9/9 - Soul can be found during exploration of 154th floor. Before choosing a passage between buildings, search a main corridor to the very end.
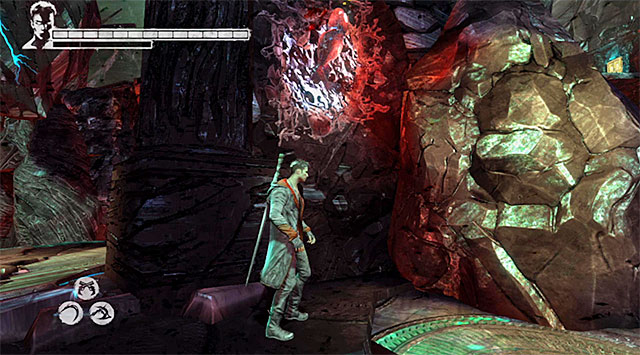
SOUL 1/5 - Soul can be found, if you choose a left path during a first part of your travel through the Furnace of Souls. When you reach a bigger platform, walk around a big pillar.

SOUL 2/5 - Soul can be found if you choose a right path during a first part of going through the Furnace of Souls. When you defeat two Knights, get onto a nearby shelf using Demon Pull.
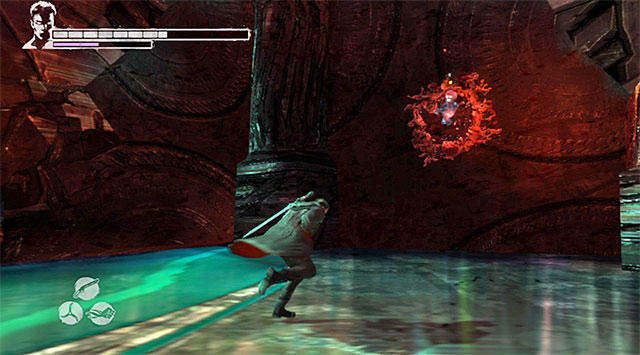
SOUL 3/5 - Soul can be found after a first big mission in seventeenth mission. After fight look for a side passage.
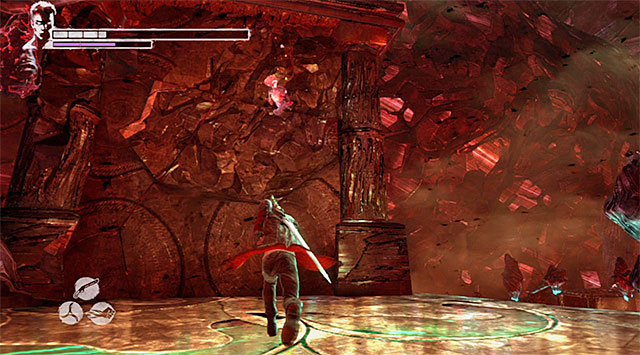
SOUL 4/5 - Soul can be found during exploration the second part of the Furnace of Souls, when you pass a Divinity Statue and fight few weaker enemies.

SOUL 5/5 - Soul can be found during an exploration of the third part of the Furnace of Souls. When you reach a bigger platform, walk around a big rock.

SOUL 1/3 - Soul can be found during exploration an area connected with the first generator. Stop in the first cave and fly to the upper balcony on right.
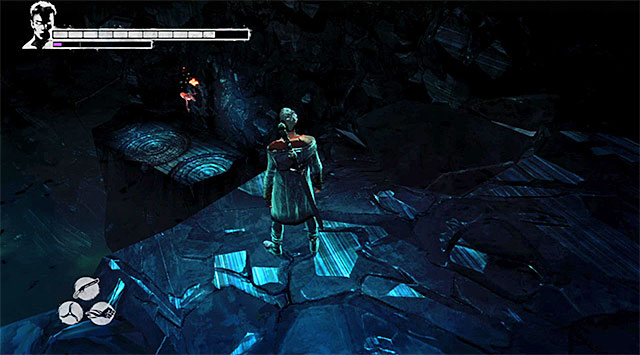
SOUL 2/3 - Soul can be found during exploration an area connected with the second generator. Stop in the first cave and fly to the lower shelf.

SOUL 3/3 - Soul can be found during exploration an area connected with the fourth generator. After restarting generator, when the battle begins, start using Enemy Step to bounce from enemies. When you reach a peak, use Angel Boost to fly to a small shelf.
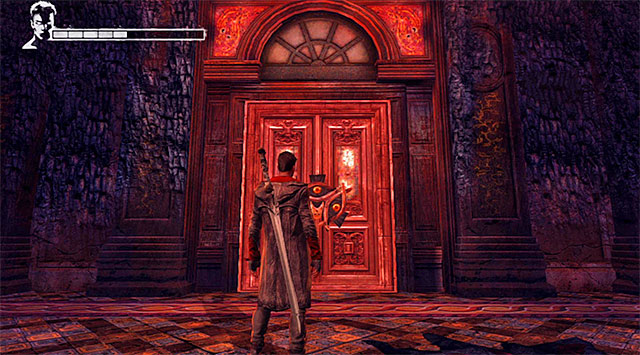
You can unlock and complete 21 secret missions in the game. During playing for the first time, you'll run into secret door which you can open with proper keys. Of course, you don't have to do those missions at once. In many cases it's even recommended until you unlock better skills and attacks. In bonus mission you can't use your inventory. Completing the mission gives you a proper bonus. Firstly, you'll get fragments of Cross (all four fragments elongates Dante's health bar) but later on you'll obtain also other rewards.

Unlocked in: mission 1
Assumptions: you have to damage enemies in the air. So every attack you have to begin from throwing enemy up in the sky and then hit him. If you return to this mission later, use Angel Lift to pull enemies. Reward for this mission is the Health Cross Fragment.

Unlocked in: mission 4
Assumptions: This mission is a time race. During run use Angel Lift. In some place you need to make a series of few pulls to not touch the ground.
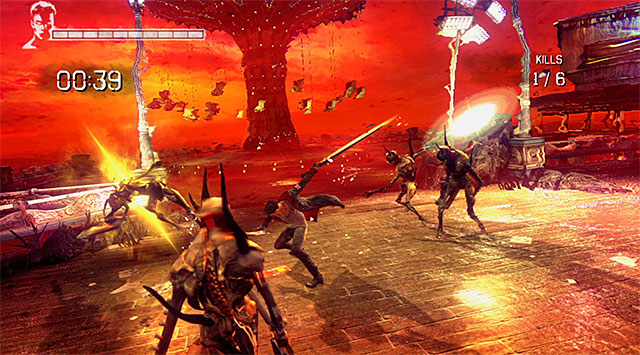
Unlocked in: mission 2
Assumptions: You just need to kill all monsters in given time, so remember to use your best weapons and abilities.

Unlocked in: mission 5
Assumptions: You have to eliminate all enemies using only demonic weapons (like Arbiter) and in particular time. You shouldn't have had problems but remember about avoiding attacks of flying monsters.
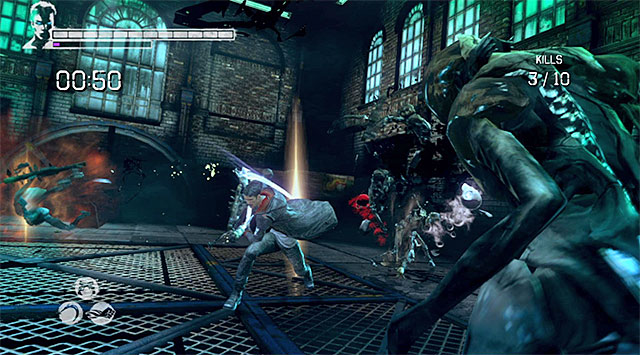
Unlocked in: mission 7
Assumptions: It isn't too difficult mission. You have to use only angelic weapons. As you already used to (with Frozen Knights for example), it shouldn't be problematic.
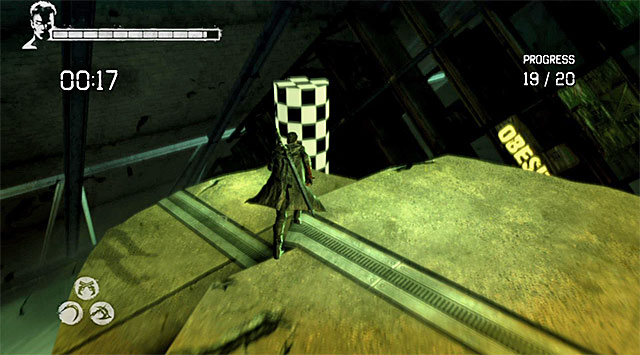
Unlocked in: mission 6
Assumptions: This mission is a time race. You have one minute twenty seconds to run through 20 gates. Plan your way carefully to not omit any of them. In most of cases you'll use a double jump and Angel Boost but one gate is reachable only with Angel Pull. Try to not make mistakes - because although falling down doesn't mean losing, just moving you back to the start, but the clock isn't restarted.

Unlocked in: mission 8
Assumptions: It's rather a difficult mission, because both Dante and his enemies dies from a single blow. Unfortunately, your opponents have shields what means that you have to hit them more than once to defeat them. I recommend to begin with eliminating flying monsters and then the rest of them. Use your best attacks (a skill Devil Trigger may be helpful too) to not risk too much and make it in the particular time.
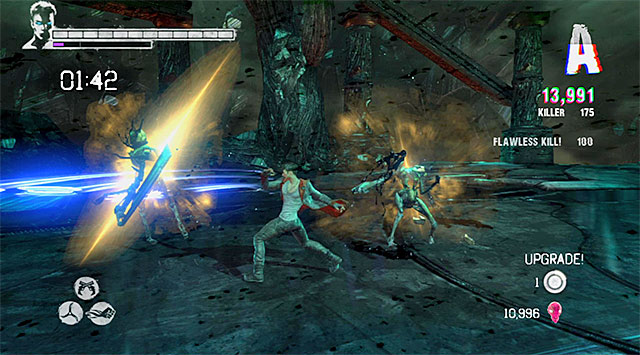
Unlocked in: mission 2
Assumptions: It's a very simple mission, in which you have to gain a S (Stylish) multiplier. If you try hard, you can make it in under thirty seconds. Remember to mix used styles and weapons.
Unlocked in: mission 16
Assumptions: It isn't difficult, but you have to make perfect Demon Evades. Get to know this move if you need it: you activate a demon mode and then make an evade. If you make it right, the time slows. An assumption of this mission is that you can attack only after successful Demon Evades. Every time you make it, run to the monster and eliminate it. As a reward you obtain a Devil Trigger Cross Fragment.

Unlocked in: mission 11
Assumptions: Here you have to eliminate all monsters having the Devil Trigger activated, which's duration is extended every time you kill anyone. Don't experiment, just use Angel Lift and make quick blows with Rebellion.
Unlocked in: mission 3
Assumptions: It's not typical mission, because enemies in it can be damaged only by other enemies. Begin from attacking those on the ground, pulling them and waiting until flying ones throw explosives at you. Don't worry about health. Then finish off flying monsters. To eliminate the last one, you have to wait until he throws an explosive and then quickly pull him.
Unlocked in: mission 8
Assumptions: It isn't too difficult, but you have to use Angel Boost and Angel Lift flawlessly. And if you make mistake, you don't back to the start - only the current fragment is restarted, so you lose only few seconds.
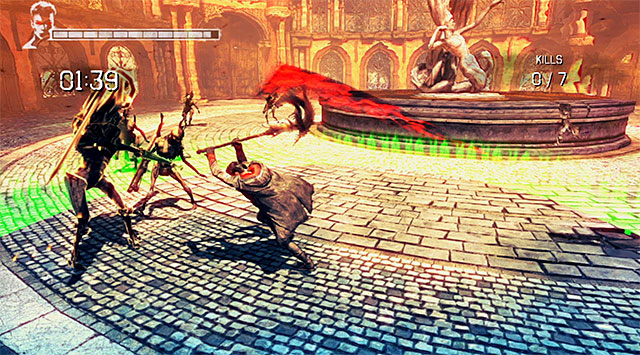
Unlocked in: mission 4
Assumptions: You can't be hit in this mission. I suggest to begin from eliminating those flying monsters. Then finish off Ravagers, watching out for their charges. At the very end take care about two Frozen Knights, avoiding their wave of cold.
Unlocked in: mission 18
Assumptions: It's a rather difficult mission in which you have to defeat Tyrant in less than 45 seconds. A crucial for the victory is to shorten intervals between time when you can attack a monster. Think especially about charging Eryx gauntlets and putting explosive darts at him with Kablooey. What is more, you should make your strongest blows when you knock him down - what can be accompanied by Devil Trigger.
Unlocked in: mission 13
Assumptions: This isn't typical mission. You have to collect 90 Orbs from destroyed items in less than 35 seconds. I recommend to begin from items behind Dante's back. Later on, look for groups of items and make simple, quick blows to not lose precious time.
Unlocked in: mission 5
Assumptions: It's a difficult mission. You can damage enemy only while standing in green circles. Circles will get narrower and narrower, so you have to change your position often. I recommend to pull enemies rather than waiting for them, because you race with time. Ravagers are the one who will be the worst nightmare here.

Unlocked in: mission 7
Assumptions: It's difficult mission. Its assumption is that you can't use any attack twice. I recommend to attempt this challenge as late as you can, with as much weapons and attacks unlocked as you can. Concentrate also on performing blows throwing enemies out of the ring, for example Stinger attack of Rebellion sword.
Unlocked in: mission 16
Assumptions: This mission is a time race. Use skillfully an Angel Lift, Demon Pull and Angel Boost. In few places you need to also destroy obstacles with Arbiter, Eryx, Aquila or Osiris. A good news is a fact that a time limit is rather big, so even if you make mistake, you should complete this mission.

Unlocked in: mission 17
Assumptions: In this mission you have to destroy seven monsters and Dante dies after a single blow. So you have to play carefully, without taking any risk. Eliminate weaker monsters one after another with Rebellion and Eryx gauntlets, in meantime avoiding Ravager's charges. Eliminate a Ravager at the end. As a reward you obtain a Devil Trigger Cross Fragment.

Unlocked in: mission 9
Assumptions: It's relatively easy mission. You have to keep Dante alive for 3 minutes, but he'll lose health also when you do nothing. The only way to regenerate is to eliminate monsters. During all this challenge I recommend to aim and eliminate the weakest monsters. Those with shields and chainsaws attack only when you can't see any others. When you're almost dead activate Devil Trigger. The reward for this mission is a Devil Trigger Cross Fragment.

Unlocked in: mission 13
Assumptions: This mission is a standard battle where you have to defeat three strong enemies. Start from the Witch, pulling her to you if you can (after destroying her force field). Then use Aquila to stop Ghost Rage for a while and attack Blood Rage in the meantime. Don't let yourself get hit, because you can't heal.
A chart below lists achievements available on Xbox 360 version which are similar with Trophies on PlayStation 3 version.
NAME
POINTS
OBTAINING AND REMARKS
A man with guts and honor
10
You reached the end of the descent on Mission 6 having killed all of the enemies.
Absolutely crazy about it
20
You have spent 50,000 Red Orbs.
And welcome to Hell!
100
Completed all missions on Hell and Hell difficulty.
And you are set free
10
You have found half of the Lost Souls.
Bring it on!
20
You have slayed 1,000 Demons.
Cleaning up his Dad's mess
20
You have defeated Mundus.
Come on Puppy. Let's go!
20
You have defeated the Hunter.
Devils never cry
100
Completed all missions on the Dante Must Die difficulty.
Dude, the show's over!
10
You have found all 21 Keys
Every hero has a weakness
10
You completed Furnace of Souls without taking damage from the furnace.
Fill your dark soul with light
20
You have found all of the Lost Souls.
Flock off, feather-face!
20
You have defeated the Tyrant
For Tony Redgrave
10
You killed 50 enemies using nothing but firearms.
He's a demon too
10
You helped Phineas by retrieving his eye.
Impressive
10
You have slayed 100 Demons.
In the name of my father
10
You killed 100 enemies using nothing but Demon weapons.
It's got to stay in the family
10
You have acquired Arbiter.
It's only the rain
10
You Killed 10 enemies by pushing them into the Hurricane ride.
It's showtime. Come on!
20
You earned 1,500 Style Bonuses.
It's time to finish this!
10
You helped Vergil open the Vault.
Jackpot!
80
Completed all missions on the Nephilim difficultly with a SSS rank.
Keeps getting better and better
40
You have been awarded a 100% completion rank on all missions, at random difficulty level.
Let's rock, baby!
10
You have upgraded Dante's health to maximum.
Let's welcome chaos!
10
You have opened all 21 Secret Doors.
Looks like it's your lucky day
10
You completed a level without taking any damage.
Looks like we have a winner
30
You have slayed 5,000 Demons.
More than just a few sparks
10
You have acquired Revenant.
No talking!
20
You have acquired Aquila.
Now my coat's all charred
10
You navigated the Sky Bridge without hitting the lasers.
One hell of a party!
50
You have completed all of the Secret Missions.
Only kind of gift worth giving
10
You have acquired the Angel Boost ability.
Power... Give me more power!
20
You have purchased all of Dante's combat upgrades.
Sensational!
10
You gained a SSS Style Rank during combat.
Stylish!
10
Completed a mission with a SSS rank.
The end? Don't bet on it
40
You defeated Vergil on any difficulty.
Thing drives me crazy
10
You have acquired Osiris.
This baby sure can pack a punch
20
You have acquired Eryx.
This is my kind of rain
10
You have spent 10,000 Red Orbs.
This is what I live for!
10
Completed all missions on Heaven Or Hell difficulty,
This party's just getting crazy!
20
You have completed 10 of the Secret Missions.
Time to go to work guys!
10
You purchased your first upgrade.
Too easy!
40
Completed all missions on the Son of Sparda difficulty.
Whatever, Lady
20
You have defeated Mundus' spawn
Where does the time go?
10
You completed a level in 2 minutes or less.
You are not a Human, are you?
10
You have acquired the Devil Trigger ability.
You can't handle it
10
You have upgraded Dante's Devil Trigger to maximum.
You'll never have her fire
10
You killed 100 enemies using nothing but Angel weapons.
You're not going to shoot me
10
You have acquired Kablooey

 Dark Souls II Game Guide & Walkthrough
 Dragon Age II: Legacy Game Guide & WalkthroughDMC: Devil May Cry Game Guide & Walkthrough
 DayZ - ArmA 2 mod Game Guide & Walkthrough
 Dragon Ball: Xenoverse Game Guide & Walkthrough