

The unofficial guide for Dragon Ball: Xenoverse is a collection of essential information about the game that will help the new players approach it, while the more experienced ones will discover useful advice and the requirements to complete the game in 100 per cent. This guide contains the full walkthrough of Time Patrol campaign and Parallel Quest challenges along with information about the secret objectives, so you can get a better rank and level up faster. The description includes mentors and a map of Tokitoki City with brief descriptions of the most important places. Advice about the game and a combat guide conclude the guide.
Dragon Ball: Xenoverse is another game dedicated to the legendary manga and anime. This time, the developer - Dimps Corporation, known for previous installments of the series - puts the players directly into the game, allowing them to relive the major fights as their own characters. You'll see the adventures of Goku and his friends once again, but this time in an alternative timeline that you'll see and experience. Aside from the traditional campaign and numerous challenges, the developer implemented a multiplayer mode that allows you to play in teams or complete the challenges in co-op mode.
The unofficial Dragon Ball: Xenoverse guide contains:
Patrick "YxU" Homa ()

Movement

Camera

Boost

Preview/using a skill

Guard

KI Blast

Ascend (flight) / Jump

Descend (flight)

Special attack (Ultimate)

Strong attack

Lock on target

Weak attack

Aim

Items (use)

Objective

Chat

Dragon Radar (during the special challenges)

Scouter

Pause / Menu

Movement

Descend (flight)

Camera

Boost

Preview/using a skill

Guard

Aim

Pause / Menu

Ascend (flight) / jump

Strong attack

KI Blast

Weak attack

Scouter

Items (use)

Objective

Chat

Movement

Descend (flight)

Camera

Boost

Preview / using a skill

Guard

Aim

Pause / Menu

Ascend (flight) / jump

Strong attack

KI Blast

Weak attack

Scouter

Items (use)

Objective

Chat

Movement

Descend (flight)

Camera

Boost

Preview / using a skill

Guard

Aim

Pause / Menu

Ascend (flight) / jump

Strong attack

KI Blast

Weak attack

Scouter

Items (use)

Objective

Chat

Movement

Descend (flight)

Camera

Boost

Preview / using a skill

Guard

Aim

Pause / Menu

Ascend (flight) / jump

Strong attack

KI Blast

Weak attack
<-
Scouter
->
Items (use)
^
Objective
V
Chat
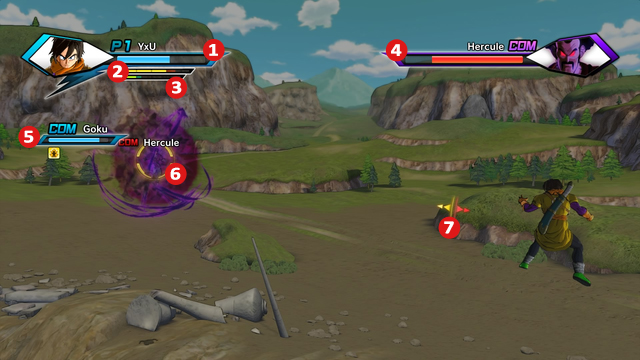
In this chapter, we'll take a quick look at the combat screen. The interface is rather similar to other fighting games. The specific elements are as follows:
1 - health bar. If it gets depleted, you lose or pass out (depending on the current objective). Another fighter might revive you by giving you a few health points. You can regenerate your HP with capsules, some races have abilities that let them do it by themselves.
2 - Ki meter. It's the energy used for activating skills. The ones from "strike" category, which are just combos, use Ki as well.
3 - Stamina bar. As long as there is anything in this bar, you can use defense, teleportation to and from the enemy, and Boost - fast flying. When it drops to zero, you won't be able to use any of those abilities until it gets refilled again.
4 - Enemy's HP - the longer the bar, the more difficult the enemy. In case of the hardest enemies, the bar is orange, when it drops to zero, you'll get a new, red one.
5 - Optional: HP of an ally (one or more) - the place to watch your allies' physical state.
6 - Current enemy (target) - the yellow outline shows the current target. If another enemy approaches you, don't forget to change your target.
7 - Locations of nearby enemies - the yellow icon shows the current target, while the red one (or more of them) - location of the enemies - the arrow is turned away from the enemy.
 Scouter
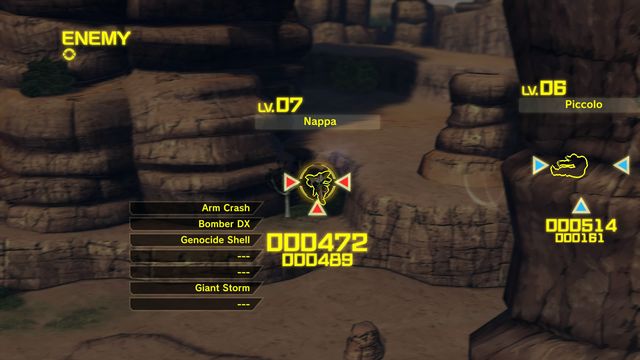
Scouter is a sort of a radar, you'll receive it from Trunks after completing the first task, "Trunk's Test!". You don't have to equip it (despite getting such an accessory) to use it. While in the arena, use the scouter to localize the enemies and allies, find hidden items and gates (portals). In case of some enemies, you'll also get information about their level, health, and techniques. Items marked with the scouter are shown on the arena as red question marks.
 The progress screen, showing your rank and tasks
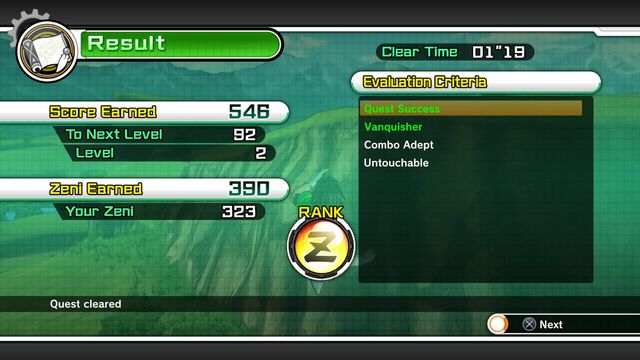
In the beginning, your character will be weak. To make him more powerful, you have to keep getting a higher level and winning fights. Reaching a level gives you three attribute points, which improve the character's abilities. You'll get experience from any kind of fight - main story, challenges and fights against other players. The box on the right shows the "challenges" you can complete during the fight - using an ability / performing an attack a number of times, finishing the fight with low damage, defeating most enemies or defeating the last enemy with a finisher. Every task has a base value of given experience, depending on the difficulty. Completing more difficult tasks will get you a higher rank. The ranks are as follows: Z, S, A, B, C, D, where no rank equals failure. The rank represents your skills and affects the money (Zeni) you get for a victory.
You will receive money and experience even if you fail, but it will be just a fraction of the reward. You're also rewarded for retaking the challenges - you'll get random extra awards (capsules, equipment, skills). When you retake a challenge, you'll receive the most if you get a better rank than before.
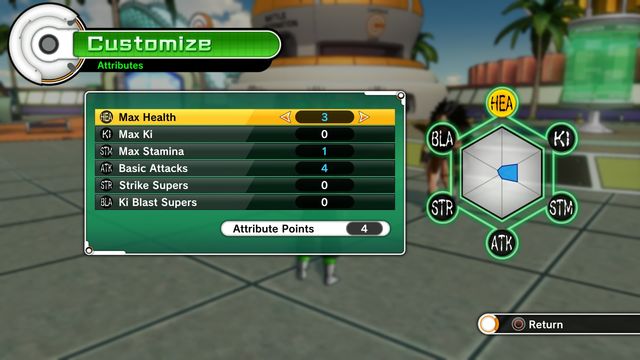 Attribute distribution screen
Each warrior has his own specific abilities, you'll notice that some characters are easier to play with than others. This situation is affected by two factors: distribution (and number) of attribute points and techniques. In this chapter, we'll focus solely on the attributes.
Each race and gender has its own unique base attributes, adjusted for specific styles of playing. That's why selecting the most suitable race is so important. When you gain experience and attribute points, you can "retrain" the character, but he/she won't be as effective if the base points are not developed. In each new level you'll get three attribute points. The characters are defined by six attributes:
BLA - Blast Strike - how the character handles using Ki Blasts - energy projectiles.
STR - Strike - the techniques that consume Ki as well, but usually they are just combos.
ATK - base attack - damage done with regular hits, weak or strong.
STM - Stamina, marked with the green bar. It is used for defence - when you keep your guard up, enemy attacks affect the stamina bar instead of the health bar. It regenerates over time. You'll also use it during a boost (fast flying), teleportation, or when you use a certain kind of defensive techniques, which use 300 (three bars) stamina points.
KI - your Ki energy level. It is used for both regular and ultimate abilities. Some races regenerate their Ki automatically, by default you'll get it by damaging the enemies. You can also buy skills that will let you recharge it more quickly.
HEA - health points. Regardless of your character's race, keep upgrading this attribute.
The attributes can be easily divided into two groups: if you prefer fighting at close range, upgrade ATK, STM and STR. If you like keeping a distance and using Ki Blasts: KI, BLA, maybe some ATK and STM. Keep upgrading HEA (for example, every three levels, spend all points on health).
Fighting games usually use a distinctive terminology for each game, where various elements of the interface, fighting styles and techniques are described in many different ways. Below you'll find a brief glossary of the terms used both in the guide and in the game.
Combo - one of the basic terms - uninterrupted combination of hits made of various attacks/techniques, which deals massive damage.
Finisher - a technique/attack that ends the fight - in this game, using strong techniques as finishers effectively is rewarded with extra experience.
Health Points (HP) - how long you or the enemy will survive on the arena.
Time Patrol (TP) - quests of the main single player campaign.
Parallel Quest (PQ) - challenges for a team of up to three people, available in the on-line mode as well.
Zeni - currency used in the game.
Capsules - a thing that appears only in the world of Dragon Ball - small capsules that may contain various items - in the game, they are used for healing and regeneration during fights.
KI - a type of energy in the game, it is used for techniques.
KI Blast - a projectile of Ki energy - implicitly the key that activates it or a technique.
Scouter - a special radar-like device. It shows you objectives, hidden items and characters.
Strike - all techniques that use combinations of hits.
Z-Soul - a special piece of equipment. It allows, for example, upgrading your stats, regenerating your Ki, improving some attacks etc.
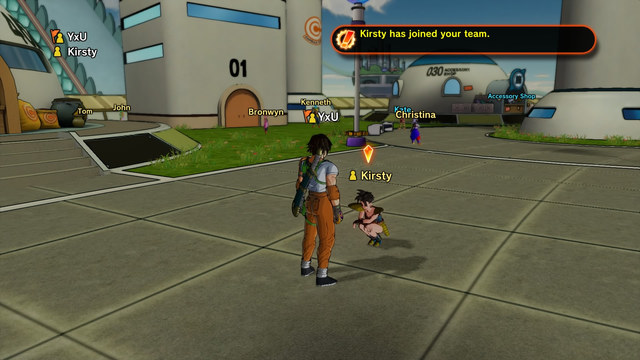 Character creation - selecting the race
In Dragon Ball Xenoverse, you can play as a character that you create. Choosing any unlocked character is only possible in duels and challenges - the campaign must be completed as your own character. Firstly, you have to select your race. It is a difficult decision, as it can't be changed and it affects the attributes of your character. Unique outfits are also made to improve the racial abilities. You can choose from five races:
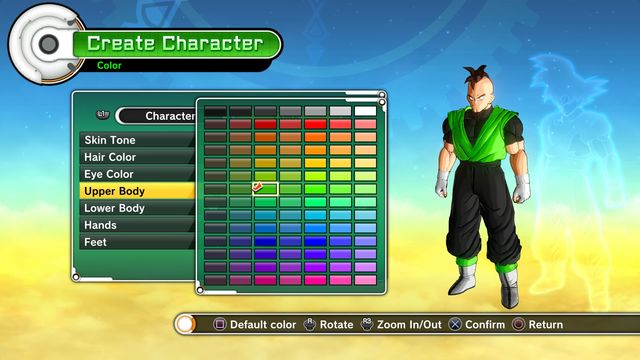 Character creation - adjusting the colours
After you pick the race, you have to select a few more things: hair, face, build and height. With these variables, you can create any character from the Dragon Ball universe. Adjust your outfit: thanks to the wide selection of colours, you can create a rather unique character. Finally, choose your character's name and voice - you'll only hear it in screams or notifications, because the character does not say a single line of dialogue throughout the game. Click the accept button and think about your style of playing. The decision is not permanent, but it affects the comfort of starting the game. You can choose one of three modes: melee - you'll get several Strikes, Ki Blasts - you'll get several skills that use the energy waves, or balanced - two skills of each category - recommended for beginners.
Accept and start playing.
Tokitoki City is a place from which you perform all the actions. It was implemented instead of a traditional interface. You can begin new quests, contact other players or NPCs to create teams, trade or additional activities. You'll move between specific areas using portals placed on both ends of the location. When you explore the city, you can't fight or perform other special activities. Always look for people with red, blue or green question marks above their heads. Red ones represent quests, blue are extra challenges and mentors, while the green ones are people who have presents for you. If you need help, go to Garid - the robot, who'll give you advice about the game, whether it be exploring the city or combat mechanics.
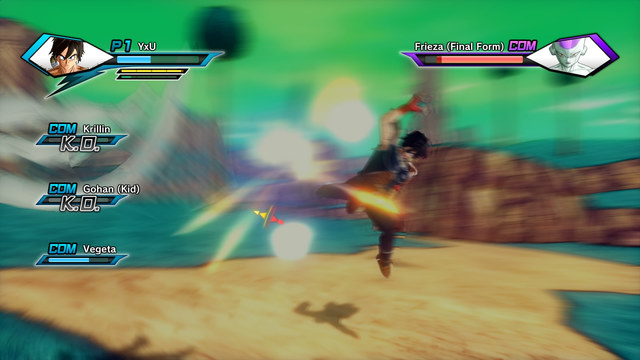 To be effective, gain experience and work out your own style
Combat in Dragon Ball: Xenoverse is different from most fighting games. It was based on the previous Dragon Ball game - Tenkaichi, where the camera is placed behind the character. In this installment, up to six players/NPCs can be on the arena at a time. It requires an ability to watch all of the arena, help the allies and handle the fight against several enemies at once.
To attack a target, the enemy has to be marked with a proper key. The basic elements are melee attacks and defence. Default defence is raising the guard - if you do it, the attacks will affect your stamina, not health. You can break the enemy's guard in several ways: by grabbing the enemy, using a "charged" attack, by holding the attack key or with stronger techniques or ones that use grabbing. Other ways include attacking until the enemy runs out of stamina or pressing the jump button to teleport behind the enemy, but it will use your stamina.
Melee attacks are divided into weak and strong ones. You can use them to perform combos. Moreover, you can perform Ki Blasts - small balls of energy that don't use your stamina or Ki. You can't include them in combos or deal a lot of damage with them. They can, however, break the enemy's combo. Use them as often as possible, especially while fighting against more enemies. Almost every combo ends with throwing the enemy away - use the weak attack to quickly rush towards the enemy and keep attacking, or use the jump button to teleport to the spot where the enemy will land.
Obviously, no fighting game is complete without special and ultimate attacks, and evasive skills. The first two are offensive and use your Ki. Evasive skills, on the other hand, use your stamina and are mainly used for stopping an attack or evading it. Super attacks can be stopped when they're being charged. If two attacks are performed at once, the stronger one or the one with a longer duration will win. Ultimate attacks can be stopped as well, but it is much more difficult. You'll use Evasive Skills to perform quick dodges or to stop the enemy's combo, or to minimise the taken damage.
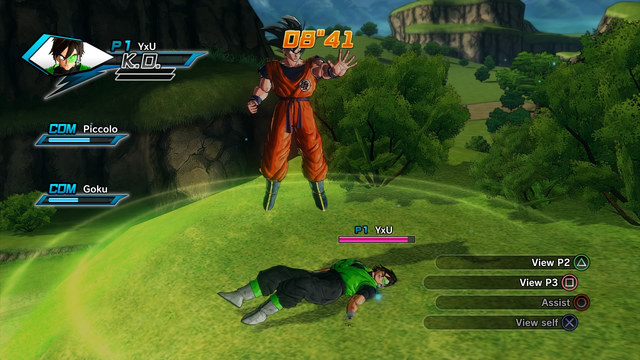 The character getting revived by an NPC
When you fight alongside your allies, one of you might get knocked out. If a character gets a KO, you can revive them - they will get some of their health points. To do it, select the knock out ally and enter the bright area around them. The process of reviving will be completed when the pink bar is full. Obviously, the character who performs the reviving is completely vulnerable, but they can keep their guard up. To avoid the risk of not being revived, use a capsule called Senzu Bean which will revive you instantly without any assistance.
 You can recruit any person with a yellow name
Even if you're playing offline, you can use Team Registration. It allows you to pick a team out of other players or NPCs marked in yellow. After you register your team, approach any player or NPC and enter their details. If they have skills or level that you're looking for, you can hire them (in case of players, you'll need their permission). Many NPCs have a high level and interesting skills, so they might be much better as your companions than characters from Dragon Ball: Xenoverse. You can recruit a team made up of three people, so you + two companions.
Campaign quests, Time Patrol (TP), are taken straight from fragments of the original story presented in Dragon Ball manga. This time, however, you'll face your enemies as a character who travels in time to help the heroes defeat their enemies, who are stronger than before. It is just the description, though. In reality, the enemies don't necessarily have to be that strong - it depends on your skills, equipment and experience.
Completing quests will let you unlock new challenges (PQ), new playable characters and mentors who will teach you some new unique skills.
In the main campaign, you have to take care of your allies as well - they must not die. In case of a failure, you will get some experience points, but you'll have to retake the quest to continue. If a specific mission is too hard, obtain some equipment and increase your level by completing challenges.
You can retake quests to get a better rank. Just go directly to the building in Time Nest instead of Trunks.
Winning conditions: Defeat Trunks
Failure: -
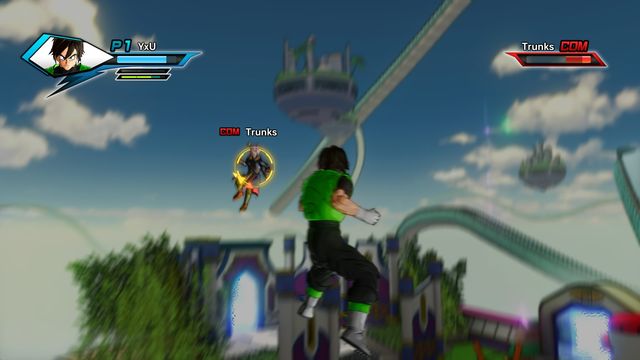 The first fight of the tutorial
In the prologue you will learn the basics of combat. You should follow the tutorial, but you'll pass if you simply defeat Trunks. He will barely attack you, just for encouragement, because you can't lose this quest. The only moment when you might have problems is when the enemy starts to keep his guard up. You can charge an attack to get past his defence or grab him by pressing guard and Ki Blast.
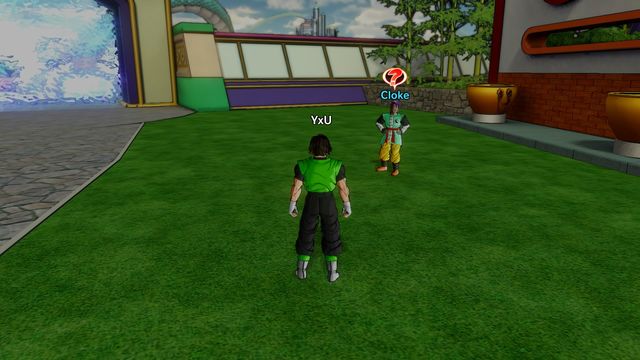 One of the NPCs that you have to talk to
Talk to Trunks. To get familiar with the game, you will have to find four characters with red question marks above their heads in Tokitoki City. Two of them are in Plaza of Time, near the eastern bridge and the western corner. The third one is in the Industrial Sector, in he center of the location, near the exclamation mark on the map. The last one is obviously in the Time Machine Station near the portal to the Industrial Sector. Go back to Trunks to finish the quest.
Winning conditions: Defeat Raditz
Failure: If you die
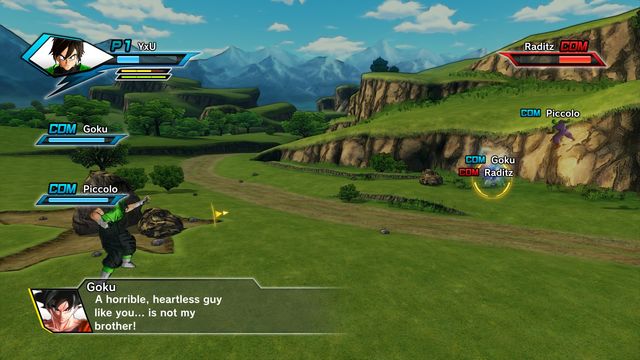 This time, you'll fight along your allies
After completing the challenges in the prologue, you can start your first real quest by talking to Trunks. You have to help Goku and Piccolo fight Raditz. The fight is uneven - three vs one - you should not have any trouble. If you selected balanced or distance fighting while creating the character, you will be able to get away from the fight and attack from a distance, as long as you have some Ki left. You can run away and hide, letting your allies win the fight, but do it only if you absolutely can't fight - you'll get money and experience for fighting.
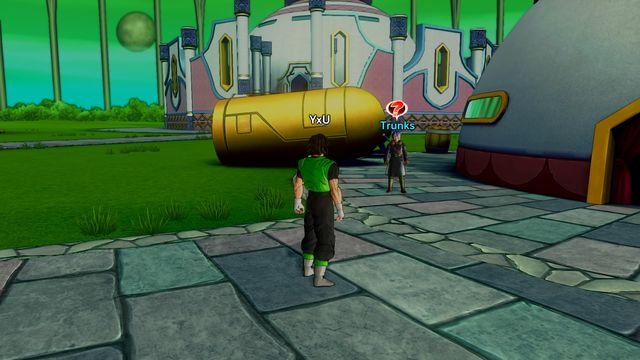 Trunks will be here whenever you wish to continue
After you finish the second quest, you'll return to Time Nest. Talk to Trunks - you'll receive an accessory - Scouter. You can read more about the device in Introduction ? Interface. Get through the portal to return to the city. Head to the second district to start a PQ (Parallel Quest) - these are challenges unlocked by completing the main quests. You can find out more about them in Challenges ? Parallel Quest (PQ). Complete the Parallel Quest Tutorial to continue.
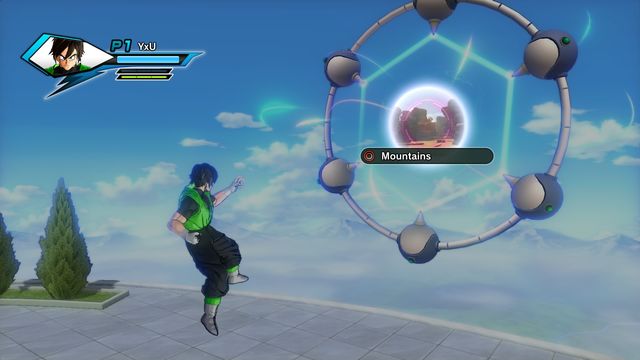 Gate
GateAlthough it is a tutorial, sometimes you might miss something, some sort of an important message, and end up stuck - that's why we will include a brief description. After you start the challenge, talk to Trunks - he'll guide you to a Gate - a portal between arenas. To use it, aim at it and press the Ki Blast key when you're close enough (you'll see a picture of the location).
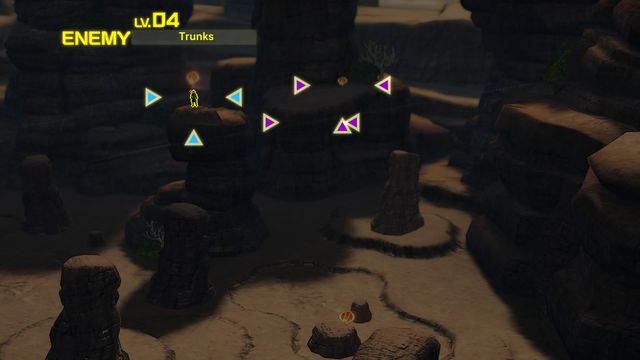 What you see through the Scouter
Approach Trunks in the next arena, then use the Scouter to find the hidden items. They are marked with purple arrows on your radar, then with red question marks in the arena itself. When you're above it, use the action key (Ki Blast) to pick the item up. Collect them all and go to the next Gate.
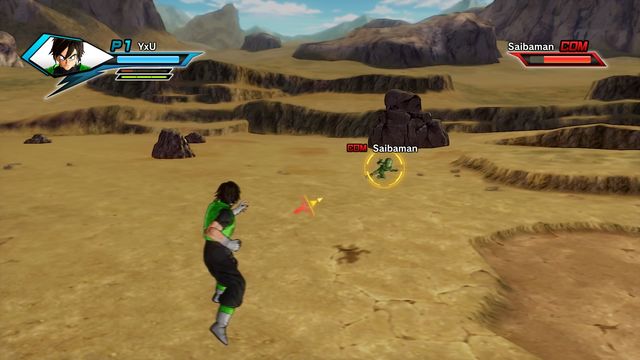 A suicidal Saibaman - be afraid!
Defeat the enemy in the last arena. You can die this time, but defeating Saibaman should not be a problem, just use the basic attack and defence keys.
Winning conditions: Defeat 20 enemies
Failure: If you die
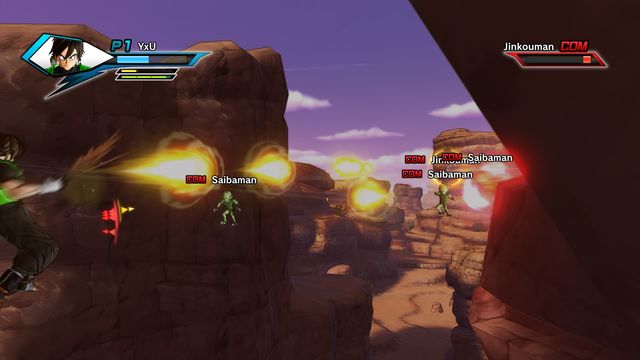 Shooting really often does not cost anything and it will discourage the enemies
The third quest is divided into several stages. In the first one, you'll face Saibamen - small, rather weak creatures that you met in the first PQ. You have to defeat twenty of them. At first, two allies will help you, but later you'll have to fight by yourself. Use your defence as often as possible, especially when several of them use Ki Blasts at once. Another important thing is that you have to defeat them one by one - focus on one enemy and keep fighting until you defeat him. Enemies with low health do not have lower attack. Even if you are being attack by another Saibaman, it's better to run away than leave one of them with just a tiny bit of health.
If you can't complete the quest, Energy Capsules will help by healing you instantly. Before you continue, you might want to return to the Time Nest to continue this quest later.
Winning conditions: Defeat all enemies
Failure: If you or any ally dies
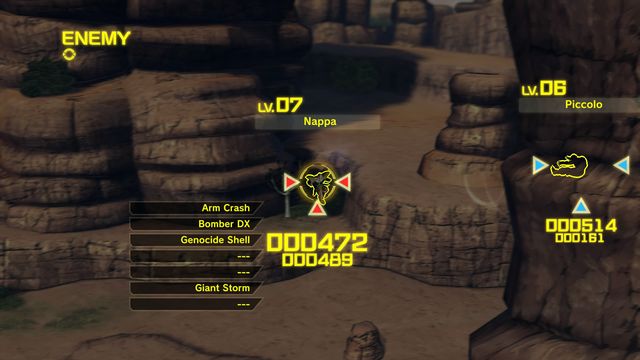 You can use the Scouter to see the enemy's attacks
In the second part of the quest, you will fight against Nappa. Firstly, take half of his health as quickly as possible while watching the level of health that won't be regenerated in the next stage. In the second stage, you have to make him lose around 3 of his health - this time, you should be more careful. In the third stage, you'll fight alone. Take care of Goku - he must not die. When you take care of Nappa, fight along Goku until you defeat Vegeta, which will happen when his health reaches ~1.
Winning conditions: Defeat Great Ape Vegeta
Failure: If you or any ally dies
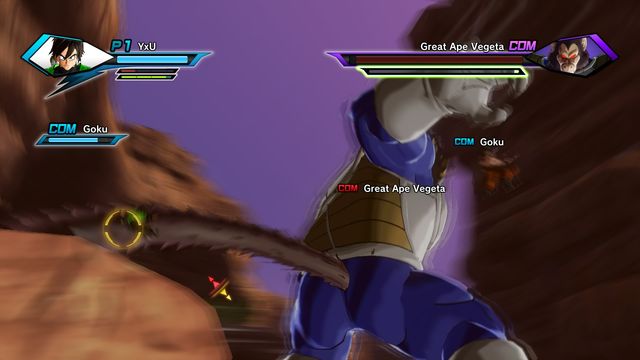 When you grab Vegeta's tail, you might consider yourself a winner
The next part is unusually easy. After transforming into the Great Ape, Vegeta gets stronger. To deal any damage, you have to make him lose stamina by hitting him or grabbing his tail. Ki Blasts are not very effective. You can attack his head and torso as well.
To finish it quickly, perform a few combos on the Ape's head, then grab his tail to move to the second part.
In the second part, the task gets a bit harder, because you are going to fight alongside your allies, who must not die. Attack Vegeta's head as quickly as possible and don't let him perform an attack that might defeat several people at once.
Winning conditions: Defeat Vegeta
Failure: If you die
In the last part, you will join Goku to fight against Vegeta. This time, it's just pure fighting. Goku can die, but he should live as long as possible. Use a lot of Ki Blasts because Vegeta is fast and he might interrupt your melee combo. If you can't handle the fight, let Goku attract the enemy so that you can attack him from behind.
Winning conditions: Reduce Ginyu's health or defeat Recoome
Failure: If you die
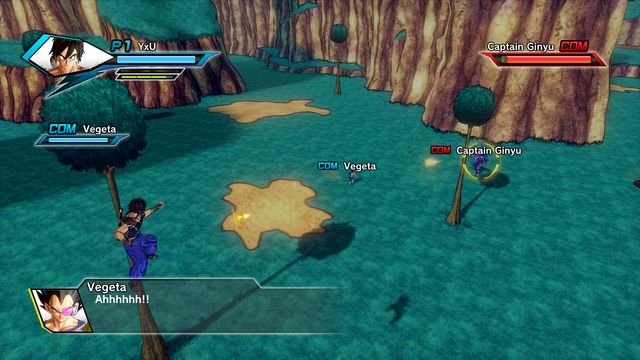 Note that Ginyu will probably have a lot more health than you
In the first part, Vegeta will join you to fight Ginyu. You don't have to worry about your companion, only your health matters in this fight. The objective is to lower the enemy's health to around 1.
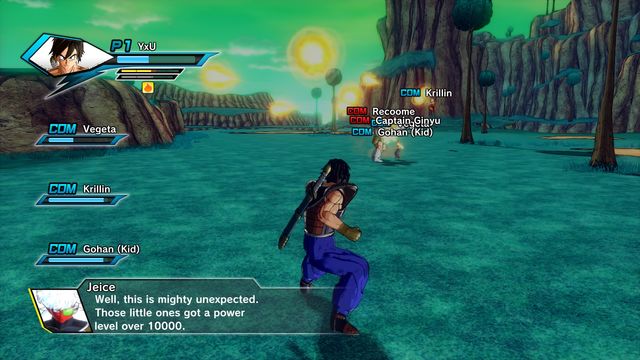 When the reinforcements arrive, this place will get a little crowded
Krillin and Gohan will join you, while Recoome will help Ginyu. Your and Vegeta's health levels will remain the same. Decide who you want to fight first. Ginyu has a higher level, but his health is a bit lowered. He's also faster, but his hits are not as strong as Recoome's and it's easier to break his combo.
Winning conditions: Reduce Ginyu's health to around 1
Failure: If you die
Fight Ginyu and lower his health to more or less 1, just be careful. Jeice and Burter will join the fight. Both will try to kill you, so leave Ginyu to your companion and focus on them. The fight won't be easy since the enemies are quite fast. Focus on one at a time and try to push him back so that the other one can't attack you. Like earlier, the winning condition is lowering the health of any enemy to ca. 1.
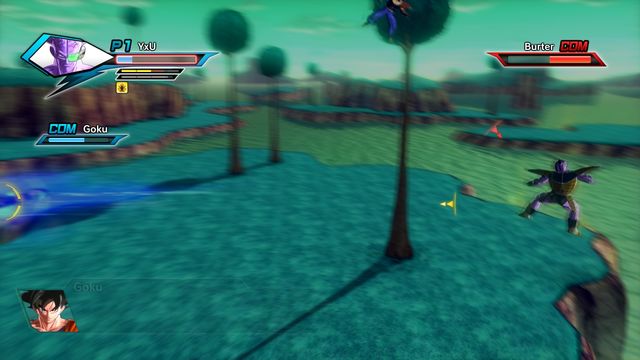 You can explore the map - just be careful about your stamina.
The next part wouldn't be so difficult if it wasn't for the fact that you'll play as Ginyu. Powers and skills are changed as well, you'll also have your health lowered. Luckily, you only have to avoid the enemies now - you can fly, hide underwater or behind objects. After a minute or so, a cutscene will be triggered and the quest will be over.
Winning conditions: Defeat 20 enemies
Failure: If the player or any ally dies
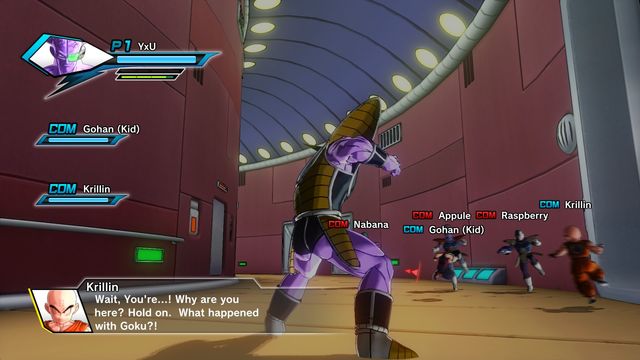 It's not the strength of the enemies that's the problem, it's their number
Still as Ginyu, defeat 20 enemies on the spaceship, Krillin and Gohan will help you. Watch their health, because they must not die. When you defeat around half of the enemies, Guldo from Ginyu Force will appear. He won't be more difficult than others. Defeat his minions first. When you lower his health by 90%, he'll run away during a cutscene.
Winning conditions: Defeat all enemies
Failure: If the player or any ally dies
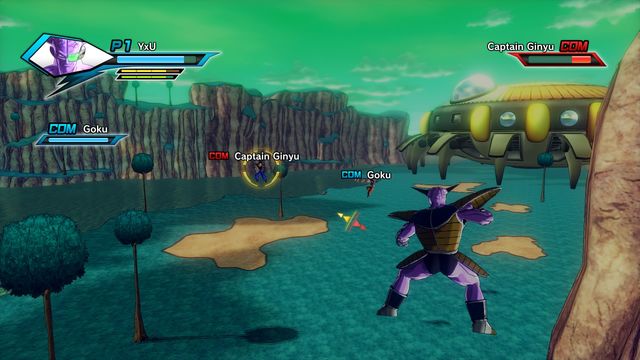 Fighting as Ginyu is not that easy
In the last mission of the saga, you'll fight as Ginyu against your own character. The fight is not too long, you'll get your body back in no time. However, Goku will become the enemy while Ginyu will help you. Remember that your health has been reduced and you have to watch Goku as well.
This time, Ginyu will keep his abilities. You can't rely on your comrade, if you leave them alone to fight, almost nothing will happen. After you defeat Ginyu, Vegeta will join as a new ally, while Guldo is going to become the new enemy. Take care of Guldo first, because Vegeta can't handle him for too long. It's the last part of the fight, so try to survive.
Winning conditions: Lower the enemy's health by half
Failure: If you die
You are going to fight against a new enemy - Mira. According to the dialogue, this fight is supposed to be a test, but it does not mean that you can die. The enemy will use defence quite often. Use charged attacks, grabbing and teleportation to break it. Try not to use the most powerful techniques, save your Ki for when the enemy uses less defence, which will happen when he has less than 20% of health.
Winning conditions: Lower the enemy's health by 3/4
Failure: If you or Goku dies
In the first round, you and your three companions will fight Frieza. You can't revive then, so try to get rid of the enemy as fast as you can, while he is in his basic form. When you reduce his health to around 1, he will transform to his highest form. Your health will not increase when Frieza regenerates. Reduce his health by 75% one more time, then you will start fighting alone. The next round is almost the same, except that Piccolo, not Vegeta, will help you. The fourth round will be fought alongside Goku, but Frieza has a bit lowered health. The fifth round requires you to survive until Goku collects enough energy - it will happen in a minute, more or less.
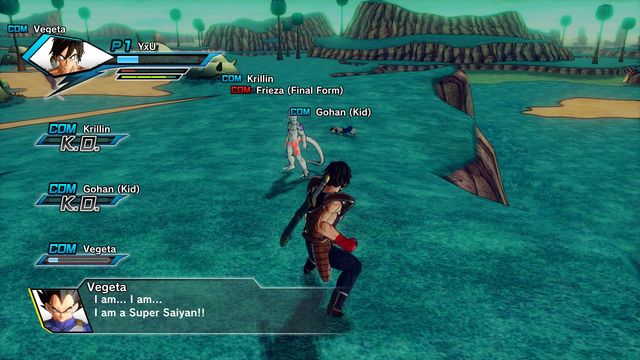 You might be the only person in the arena at the end of the fight
Saving your health in every round is the key to success. Your allies might die (except Goku in the last round). Before you start the fight, get some Energy Capsules - without them, you don't stand a chance.
Winning conditions: Lower the enemy's health by 3
Failure: If you die
This fight is going to be quick and easy. You and Goku have to reduce the enemy's health by 75%. When it happens, a cutscene will appear and the fight will be over. If you aren't feeling good enough, Goku might do most of the job for you.
Winning conditions: Defeat Frieza
Failure: If you die
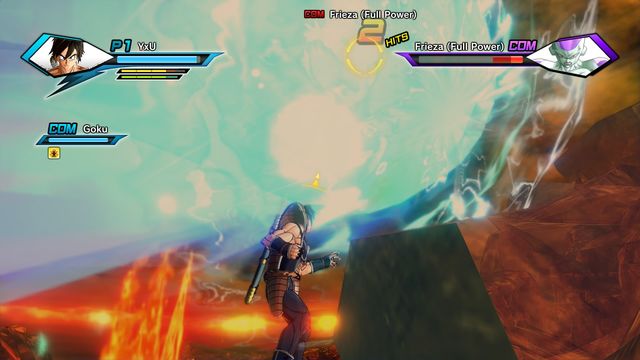 Don't let Goku get all the reward
Another easy fight. Once again, you have to join Goku to defeat Frieza. Try to cooperate - attack the enemy without pushing him too far away. Goku's distance attacks will be accurate and damaging.
Winning conditions: Reduce the enemy's health by 4/5
Failure: If you or Hercule dies
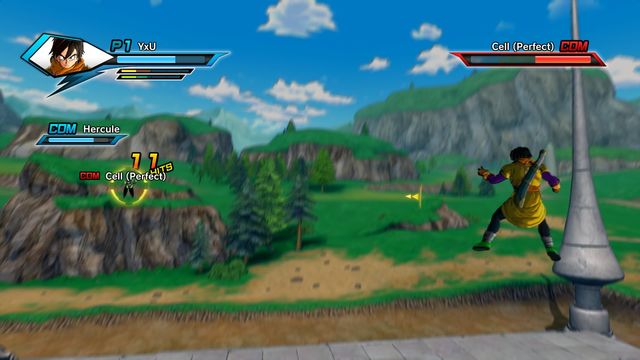 Keep an eye on Cell so he doesn't get Hercule
This quest might try your patience. You have to defeat Cell by reducing his health by 4/5. It wouldn't be that hard, but you have to protect Hercule - one of the weakest characters in the game. Get some capsules before you start the fight. Ki attacks are quite effective against Cell, while he usually ignores regular hits. Use Ki Blasts as well to keep him interested in you, not Hercule.
Winning conditions: Defeat Hercule
Failure: If you die
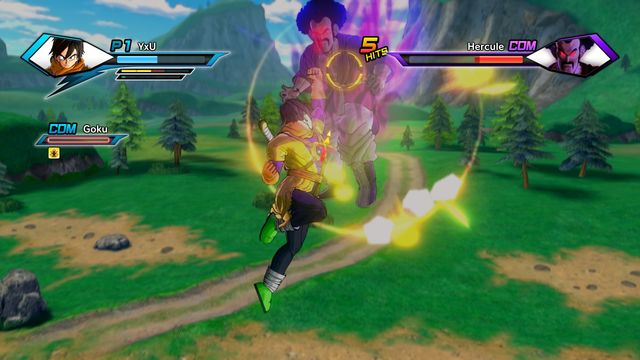 Suddenly, Hercule stops being so weak
One of the funniest, most surprising fights. You have to defeat Hercule, who has been given incredible power. You should focus on melee instead of Ki attacks. Hercule will dodge all projectiles, but he does not have any special skills himself.
Winning conditions: Defeat Hercule
Failure: If you die
This mission is the continuation of the previous fight against Hercule. He gets a bit tougher and knows a few tricks now, but he rarely uses them. Your style should be balanced between melee and Ki attacks. Don't worry about Cell, he won't even notice you.
Winning conditions: Defeat six Cell Jr.
Failure: If you or any ally dies
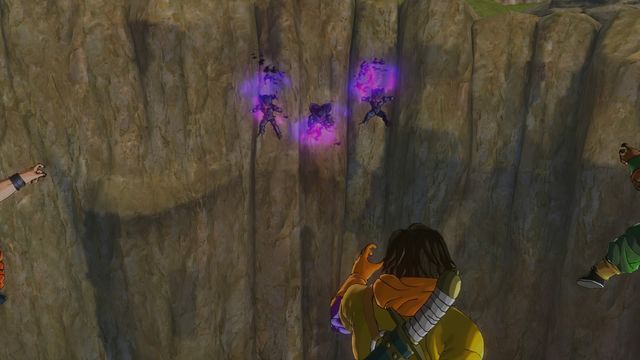 Protect your allies - these little creatures are dangerous to them
You'll fight along Yamsha and Tenshien to get rid of three Cell Jr. Choose one target and fight until you win. In the meantime, watch your companions' health. This part is going to be easy, but the next three will be much stronger and more aggressive. You'll also have to protect Gohan, who is currently fighting Cell. Do not attack Cell directly, use Ki blasts or skills.
Winning conditions: Defeat Mira
Failure: If you die
You'll encounter Mira again. This time, Trunks will help you. The fight should not be too hard, but if you have any problems, let Trunks fight. When they clash, use Ki skills - there is a high probability that the enemy won't defend himself.
Winning conditions: Defeat Cell
Failure: If you or Gohan dies
You'll come back to fighting on the arena. Now you'll have to defeat Perfect Cell. The fight is going to be hard. Regular hits and Ki Blasts don't affect the enemy. Try to use teamwork - attack on the opposite side and use your Ki skills when Gohan does.
Winning conditions: Defeat all enemies
Failure: If you or Trunks dies
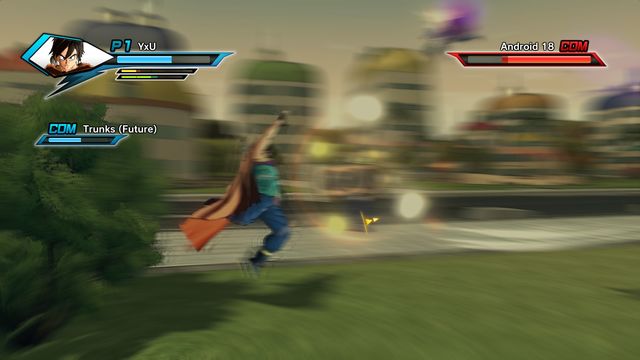 Fights against Androids will always be fast and energetic
In this quest, your enemies are two Androids: 17 and 18, while Future Trunks is your ally. The androids will not want to focus on a single enemy. Now it's time to start fighting all enemies at once. You have to protect Trunks from the androids, especially when they attack simultaneously.
Winning conditions: Defeat Cell
Failure: If you or Trunks die
Once again, you and Trunks will fight Cell. The enemy will be resistant to weak attacks, so use a lot of defence, gather Ki and hit him with your strongest, most accurate attacks/skills. Having Energy Capsules is a good idea. Trunks is good at defence - don't expect him to kill Cell for you.
Winning conditions: Defeat Mira
Failure: If you die
In the first fight of this saga, you'll face Mira again. This time, the fight is 1vs1 and he uses all of his power. Mira will be really aggressive, so there is no need to chase him. He's good at melee, but he can't dodge Ki attacks too well. Use this fact to your advantage. After performing a strong attack that pushes the enemy back, make sure if you need to replenish your health with a capsule.
Winning conditions: Defeat 3 Majin Buu
Failure: If you die
It's time for a difficult fight. You and Goku on his third level will fight against three Majin Buu. Be careful about your health and don't worry about Goku - he will survive. In the second round, when you have to fight against five small Majin Buu, use your defence, especially when they start attacking with Ki Blasts. Use mainly Ki to defeat them. When you hear Trunks's voice and your situation is uncertain, just start running around the arena. When the dialogue ends, the fight will be over.
Winning conditions: Defeat Piccolo and Demigra
Failure: If you or any ally dies
Two teams fight here: you, Trunks and Goten vs. Piccolo and Demigra. Piccolo can parry combos and he has more health than Demigra, so defeat him first. Balance between attacks and skills, because both are equally effective.
Winning conditions: Reduce Super Buu's health to 1
Failure: If you or any ally dies
After fighting Super Buu, guys from your team will perform Fusion - they will be merged into one character - Gotenks. The fight will get rather steady now, but be careful. Buu's attacks are strong and hard to predict. Perform combos, then let Gotenks fight. Next, use Ki attacks from the distance and go back to combos. You should finish the fight almost untouched.
Winning conditions: Reduce Super Buu's health to 1
Failure: If you or any ally dies
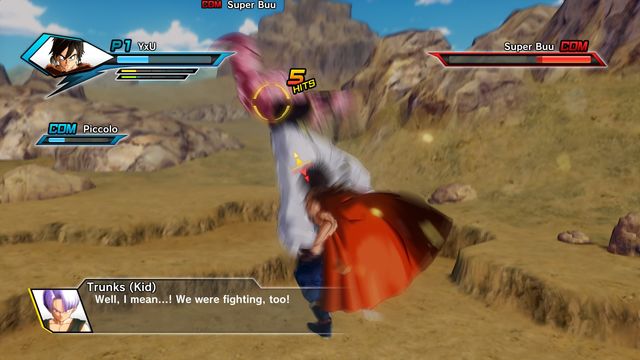 When Piccolo recovers, he will help you fight
Piccolo will help you with the next fight. Don't let him fight alone for too long. You can see the moment when the enemy starts performing hits, try to interrupt him by a strong attack, grabbing him or running away. Reduce Buu's health to around 25%.
In the second part, Gohan will join the fight instead of Piccolo. He can fight more than his predecessor. After you reduce Buu's health again, he will transform. You should still have at least one healing capsule. If you don't, try to avoid Buu's attacks and let Gohan attack him, or attack him together. When he uses an energy wave, do the same. Reduce Buu's health to 1.
Winning conditions: Defeat Kid Buu
Failure: If you or any ally dies
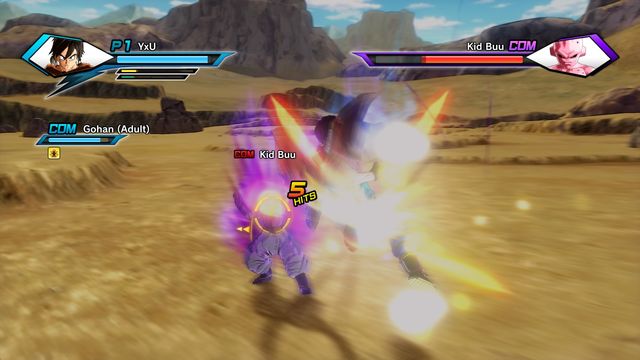 Kid Buu can parry many of your attacks
The last fight of the saga might be a bit disappointing since it's really easy. Together with Goku and Vegeta, reduce Buu's health to 1/5. In the second part, Goku will not fight and you have to protect him. Attack the enemy with combos. He won't resist too much. In this part, you have to make him lose all health.
Winning conditions: Reduce Beerus's health by 3/4
Failure: If you die
Your new enemy is Beerus - god of destruction. He's got a very long health bar, moreover it's "double" - when you deplete the bar, there is another one underneath it. Your goal is to reduce his health until he only has half of the second bar. Beerus is rather tough (like Cell), so use a lot of Ki attacks.
Goku will join you in the second part - you can leave most of the work to him. Watch the amount of your capsules. You have to reduce Beerus's health to half of the red bar again.
Winning conditions: Reduce Beerus's health by 3/4
Failure: If you die
This fight is similar to the last one. You and Goku have to reduce Beerus's health. Again, you can just help Goku when he fights. Watch out for the giant energy ball that the enemy uses as a special attack, it can make you lose half of your health.
Winning conditions: Defeat Demigra
Failure: If you die
This time, Beerus becomes your friend and he helps you fight Demigra. He gets tough, use energy attacks. You can't really lose. You can keep avoiding the enemy, Beerus is stronger and he can finish the fight himself.
Winning conditions: Defeat Beerus and Whis
Failure: If you die
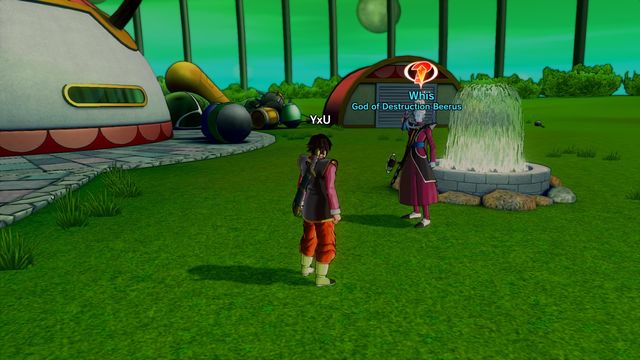 To start the quest, talk to Whis in the Time Nest
If your level is lower than 45, don't even try to start this quest. You and Trunks will fight against Beerus and Whis. Both are resistant to damage, so only Ki skills and attacking from the back will be effective. One of the possibilities is learning the Energy Boost skill, which will let you charge your Ki energy. Because of that, you'll be able to perform Ultimate skills. On the other hand, you might have trouble with defence, because Trunks won't last long. This mission is a test - if you're still on a low level and you managed to get this far, you can see what you have to learn or buy. In the meantime, perform a few challenges to increase your level. We recommend level 50-55 for this fight.
My strategy is as follows: buy/equip complete Goku (or similar) outfit - one that increases your health and damage of Ki Blasts. Buy all healing capsules. Don't get ones that heal all team - they won't work on Trunks in this fight. Protect Trunks in the arena. Use as many Ki skills as possible. Focus on one target - preferably Beerus, since Whis doesn't have really dangerous skills, while their health is equal.
Winning conditions: Defeat all enemies
Failure: If you die
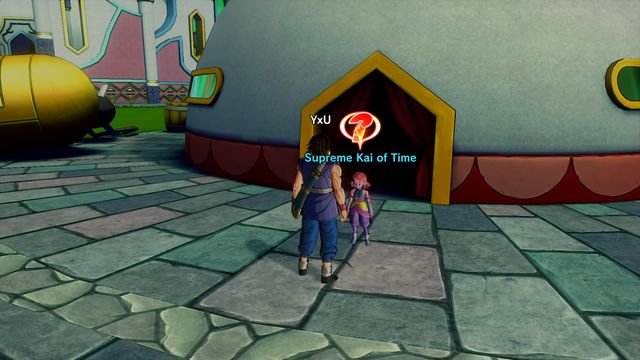 You'll get the final quests directly from the Supreme Kai of Time
This mission is divided into two rounds. In the first one, you'll fight against Cell, Frieza and Kid Buu. After dealing some damage, Goku will come to help you. Having a plan is essential here. Equip skills that can throw the enemies away, e.g. Gravity Impact - it allows you to focus on a specific enemy for a moment. You should get rid of them in the following order: Frieza, Cell, Kid Buu - Frieza won't stop your powerful combos, unlike the other two. Even though the fight is difficult, don't rush and try to save as much health as possible for the next fight.
In the second round, you'll face Gohan, Gotenks and Vegeta. Use the same strategy as before. This time, defeat them in the following order: Gohan, Gotenks, Vegeta. Take care of Goku's health. If he dies, you'll have trouble fighting two enemies at once.
Winning conditions: Defeat all enemies
Failure: If you die
The next fight is the final encounter with Demigra. If your level is ~60, it should not be a problem. Stamina is the key factor here. You should equip Z-Soul that will increase its regeneration or amount. The enemy is rather resistant to melee attacks, but perform them anyway. Demigra's favourite technique is turning you into a small ball. To avoid it, you have to keep moving, having your guard up is not enough.
After you make Demigra lose one health bar, Trunks will join the fight, but this time as your enemy. Now the best strategy is to throw Trunks back and finish Demigra. Obviously, you will have to fight the other enemy as well.
As if it wasn't enough, it's not over yet. Demigra will regenerate all his life and he'll fight you again, but this time, Goku will join you. Be careful about his charges. Energy Charge skill can help you by recharging your Ki.
Winning conditions: Defeat Demigra
Failure: If you die
The last fight is not very difficult. Demigra is harder to hit, but his attacks can be avoided easily. He will use a technique that throws three energy balls at you - it's the perfect moment to attack from a distance. If you have the Instant Transmission skill, you can instantly teleport behind him. Another great skill here is Change the Future, which stops the attack and teleports you towards the enemy while attacking him with a wave of energy. After you reduce his health by 1, Goku will arrive. You don't even have to fight anymore if you don't want to.
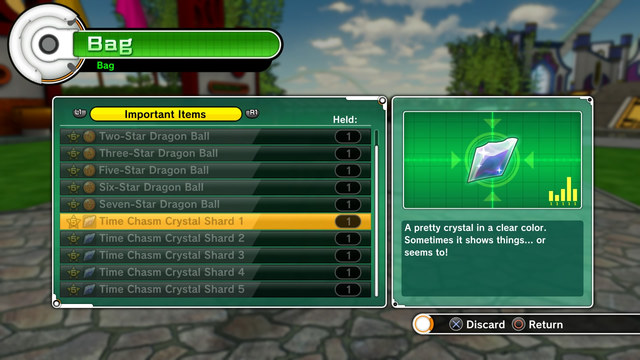 Time Shards in the equipment
To unlock this saga, you have to collect 5 Time Shards. They will be available after you finish "Demigra Saga" (where you'll get a Shard during the third mission). First, talk to Recon near the portal to the Time nest. You'll receive the second Shard. The remaining ones can be collected as random items that you get after completing challenges. After you get all five of them, go back to Recon. Now you can go to Trunks in the Time Nest to start the new saga.
Winning conditions: Defeat 15 enemies and reduce Frieza's health.
Failure: If you or Bardock dies
The first quest is the most difficult one - if you complete it, you'll complete all the rest. Firstly, defeat 15 helpers of Frieza. It won't be easy because they're tougher than in previous fights. Your main task is to cover Bardock. He should have at least 30% of his health until the end of this part - you can't heal him, obviously... Make the enemy focus on you and use Ki Blasts often. The enemies will throw energy balls really often. Equip all skills that can slay and throw back lots of enemies at once.
In the second part, focus on fighting Frieza. When you manage to make him fall, se how the situation looks near Bardock and help him if it's necessary. Frieza won't use powerful skills, but you should defeat him as soon as possible - you have to reduce his second health bar by 3.
Winning conditions: Defeat Broly
Failure: If you or any ally dies
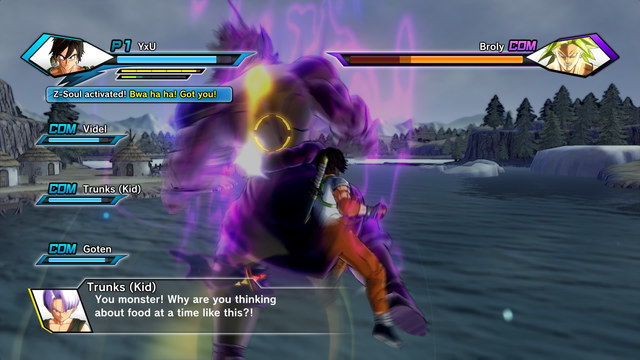 Videl is the weakest link - keep an eye on her
In he first round, Broly will be incredibly resistant to your attacks, partially even to abilities. If you make him attack you, he won't stop and you won't have to worry about your allies. When you deplete his first health bar, Gohan will arrive - the fight is almost finished. In the second round, Broly becomes more vulnerable, but your combos won't be very effective - use distance attacks.
Winning conditions: Reduce Broly's health by 3
Failure: If you or Bardock dies
The next fight against Broly is not a difficult one. Use a lot of Ku Blasts. When you dodge, move away from the enemy - melee attacks and pushing won't affect him. Bardock might die very quickly, but Broly is easy to attract. Just keep attacking him and don't forget about healing capsules.
Winning conditions: Defeat Broly
Failure: If you or any ally dies
The last quest is a piece of cake. Only the first part might cause you problems. For a while, you'll fight alone against Broly - follow the earlier advice, i.e. keep a distance and use Ki Blasts. After a moment, Bardock will arrive in his Great Ape form. He can't fly, so circle him for the hits to reach the enemy. Broly can't really harm him - and unfortunately, he will not want to. After you reduce his health, Vegeta will come. If Broly focuses on him, distract him. Vegeta's help won't be very useful, so stay close to Bardock and attack Broly until you deplete all his health.
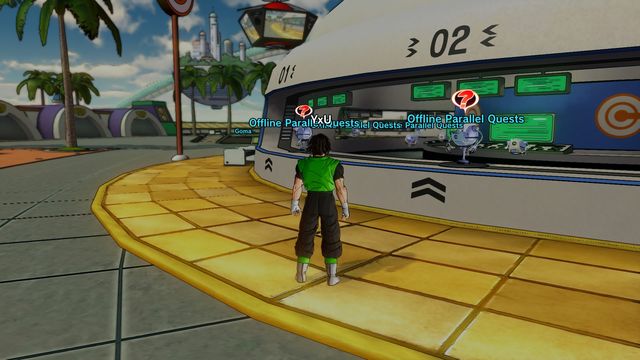 You can begin the quest by talking to the robot at the Offline Parallel Quests stand.
Parallel Quests (PQ) become available after the first Time Patrol quest. They get unlocked as you progress in the main story, by completing previous quests or talking to an NPC. The quests can be completed many times, so it's a great way to earn money, experience and unique items. The amount of money and items you'll get depends on the challenge and how you complete it (what rank you get). You'll get some items every time, some for completing additional requirements, others are random.
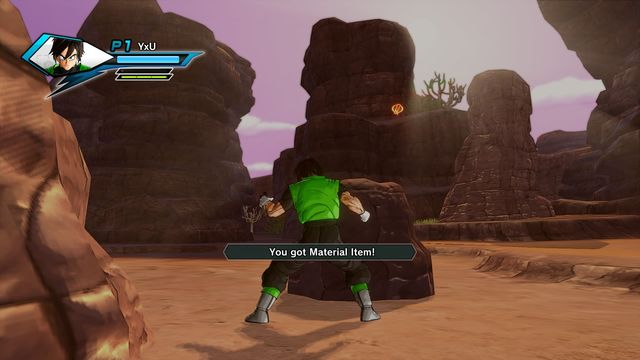 You'll receive a notification when you collect materials
What's important - you can also find materials used for crafting, dragon balls and unique items of high value. Materials can be found on every arena by using your Scouter. Dragon balls and unique items can be acquired after fights against Time Patrollers. You'll find them in most challenges divided into arenas, after you clear one and unlock the portal to the next one. Use the Scouter and see if there is a Patroller nearby. Approach and challenge him. If you win, you'll receive a reward. It will remain in your equipment only if you complete the whole challenge.
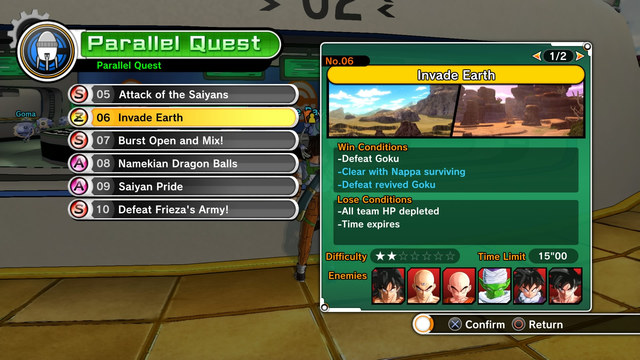 List of PQs
Below you can see the list of all available challenges and secret achievements that will be awarded with a better completion rank. The quests have been sorted by the order of completing them - each group will be unlocked after a specific saga. Some quests require completing previous ones or passing some side quests. Some requirements become active if the previous ones are completed, some when you have a good combat style and pace, for example, additional enemies will rarely appear if you have around a minute until the end of the challenge. By "revived" enemies we mean a situation when, after defeating all enemies, one of them returns to full health. The challenge will be completed even if you lose against them, but defeating them for the second time is a requirement of 100% completion.
Name and number of PQ challenge
Additional conditions
00 - Parallel Quest Tutorial
- Defeat all Saibamen
- Defeat Raditz
01 - World Tournament Tag Team
- Complete in five minutes
- Defeat Piccolo
02 - Prepare for Attack of Saiyans!
- Complete in five minutes
- Defeat Goku
03 - Saiyan Blook
- Raditz must have over 50% of health when you finish
- Defeat Gohan
04 - Saibamen's Revenge
- Complete in five minutes
- Defeat Nappa
Name and number of PQ challenge
Additional conditions
05 - Attack of the Saiyans
- Defeat all Saibamen without letting any of them flee
- Defeat all revived Saiyans
06 - Invade Earth
- Finish when Nappa is still alive
- Defeat revived Goku
07 - Burst Open and Mix!
- Complete in ten minutes
- Defeat Time Patroller
08 - Namekian Dragon Balls
- Complete by defeating Guldo
- Collect seven dragon balls during the quest
09 - Saiyan Pride
- Vegeta must have over 50% of health when you finish
- Defeat revived Goku
10 - Defeat Frieza's Army!
- Complete in ten minutes
- Defeat Ginyu, Burter and Jeice
Name and number of PQ challenge
Additional conditions
11 - Force Entrance Exam
- Guldo must have over 50% of health when you finish
- Defeat Ginyu
12 - Fierce Battle! Ginyu Force
- Complete in five minutes
- Defeat Frieza
13 - Tri-Race Coop
- Complete in five minutes
- Defeat Frieza and revived enemies
14 - Legendary Super Saiyan
- Defeat Krillin before Goku
- Defeat Super Saiyan Goku
15 - The Explosion of Namek
- Complete in three minutes
- Defeat Time Patroller
16 - Super Saiyan Legend
- Vegeta (when on your team) must be alive when you finish
- Defeat Super Saiyan Vegeta
Name and number of PQ challenge
Additional conditions
17 - Challenger Hercule
- Hercule must have over 50% of health when you finish
- Defeat revived Vegeta
18 - Return of Ginyu Force!
- Complete in five minutes
- Defeat Frieza
19 - Let's Train
- Finish with Vegeta and Gohan after SSJ transformation
- Defeat revived Gohan
20 - Multiple Cell Jr. Hunt
- Complete in five minutes
- Defeat Cell
21 - The Cell Games Begin
- Defeat Piccolo and Goku before Gohan
- Win without defeating Cell
22 - Earth in Danger!
- Defeat all enemies
- Defeat all revived enemies
23 - Clash! Perfect Cell!
- Complete in three minutes
- Defeat revived Cell
24 - Power Teams
- Complete in ten minutes
- Defeat revived Gohan and Cell
25 - 17 and 18 of the Official History
- Vegeta and Piccolo must be alive when you finish
- Defeat revived Androids 17 & 18
Name and number of PQ challenge
Additional conditions
26 - Warriors' Annihilation - Future Chapters
- Androids 17 & 18 must be alive when you finish
- Defeat Trunks
27 - Artificial Warriors
- Finish by defeating all Cell Jr.
- Defeat Cell and revived Androids 17 & 18
28 - Take Back the Dragon Balls!
- Finish by defeating all Cell Jr.
- Collect seven dragon balls
29 - 2nd World Tournament Tag Team
- Complete in five minutes
- Defeat all appearing enemies
30 - Great Saiyaman is Here
- Great Saiyaman must be alive when you finish
- Defeat revived Frieza and Cell
31 - Majin Chaos
- Complete in ten minutes
- Defeat Majin Buu
32 - Super Saiyan Bargain Sale
- Complete in five minutes
- Defeat Goku Super Saiyan 3
33 - Namek Berserker
- Complete in five minutes
- Defeat revived Piccolo
Name and number of PQ challenge
Additional conditions
34 - Majin Revival
- Majin Buu must have over 50% of health when you finish
- Defeat revived Hercule
35 - Tag with Gotenks
- Complete in five minutes
- Defeat Ultimate Gohan
36 - Majin Banquet
- Complete in five minutes
- Defeated Hercule and revived Majin Buu
37 - Potara Warrior
- Super Buu must have over 50% of health when you finish
- Defeat Super Vegito
38 - Blast the Super Spirit Bomb!
- Majin Buu must be alive when you finish
- Defeat revived Kid Buu
39 - The Cell Games Continued
- Defeat Videl and Piccolo before Gohan
- Complete without defeating Cell
40 - Stop Beerus' Destruction
- Complete without KO of any ally
- Defeat Whis
41 - Frieza's Nightmare Returns!
- Defeat Gotenks before Vegito
- Defeat Gotenks (Super Saiyan 3) and Super Vegito
42 - Power of a Super Saiyan God
- Complete in three minutes
- Defeat revived Goku
43 - Old Rivals and Dragon Balls
- Complete by defeating enemies under three minutes
- Collect seven dragon balls
44 - God of Destruction and His Master
- Complete in five minutes
- Defeat revived Beerus
Name and number of PQ challenge
Additional conditions
45 - Saiyan Battle
- Complete in five minutes
- Defeat Goku and revived Gohan and Vegeta
46 - Evil Seeks Dragon Balls Yet Again!
- Complete by defeating all enemies
- Collect seven dragon balls
47 - Super-Super Ultimate Series of Battles!
- Complete in ten minutes
- Defeat Vegito and Gotenks
48 - Gathering of the Great Evil Alliance
- Complete in ten minutes
- Defeat revived Frieza, Cell and Kid Buu
49 - Saiyan Revolt
- Nappa and Raditz must be alive when you finish
- Defeat Vegito
50 - Parent and Child
- Complete in ten minutes
- Defeat Bardock, Raditz and Goku
51 - Heated, Furious, Ultimate Battle
- Goku must be alive when you finish
- Defeat revived Broly
52 - Great Ape Festival
- Complete in ten minutes
- Defeat Time Patroller
53 - Dangerous Duo! Warriors Never Rest
- Defeat Broly when Gohan is still alive
- Collect seven dragon balls
54 - Saiyan Warriors
- Complete in ten minutes
- Defeat all revived enemies
55 - Power Berserkers
- Complete in ten minutes
- Defeat Gohan, Broly and Bardock
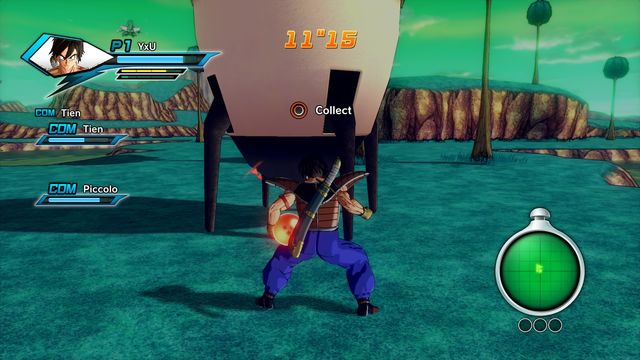 Bring every ball to the ship
While completing Parallel Quests, you'll see objective of collecting Dragon Balls. You need to collect three to succeed. In additional requirements, the number is raised to six or seven. You don't have to fight any enemies (although defeating them is one of the secret requirements and it will grant you a better rank). Just collect the Dragon Balls and bring them to the Time Machine, which is always in the center of the location.
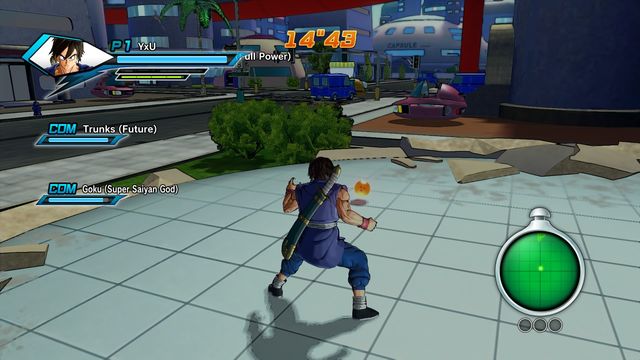 The balls can be on a various height, inside many objects
During these quests, you'll get a special radar that shows the Time Machine as a flag and Dragon Balls as dots. You can carry two balls at a time. If you get attacked, you'll drop them and you'll have to pick them up again. If an enemy picks them up, he can't do anything, but he will protect them. Dragon Balls in these quests are not related to the ones that you need to collect to summon the dragon.
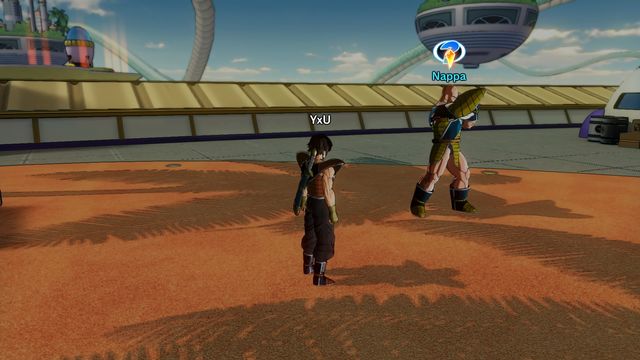 Participants of recent events who have blue question marks above them will give you side quests
Secondary quests are the ones given to you by NPCs. They appear in Tokitoki when you make progress in the campaign and offer you to participate in an alternative version of what happened, where you'll often help the "bad guys". They become available after every Time Patrol saga and can be activated by talking to NPCs with blue question marks above their heads. Each one is performed alone, so they are incredibly hard.
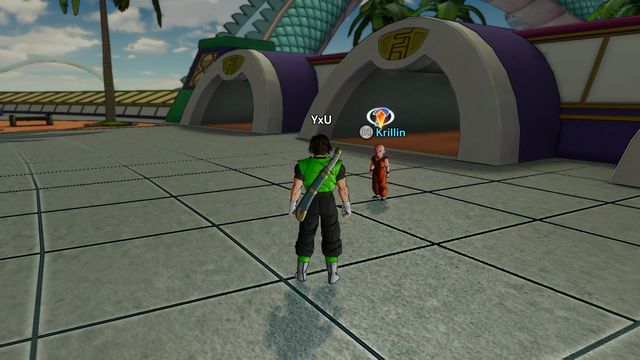 Krillin - one of the mentors, marked with a proper icon
Mentors are NPCs who can give you a special training. If you have met them before or know more about them, it will be easier for you to decide who to choose. You can change the teacher at any time, while keeping progress with the previous one. Mentors are available on a certain level shown in the table below.
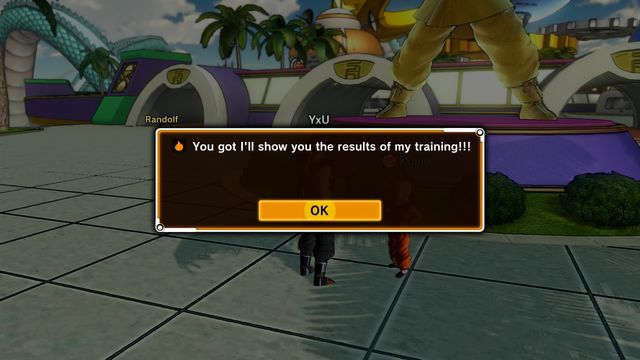 Getting the Z-Soula for completing the training
What will the training give you? Each mentor will teach you four skills. When you finish the training, you'll get a Z-Soul from each teacher - a piece of equipment that increases the power of attacks learned from a specific NPC. If you fight alongside your teacher and you use his techniques, you have a chance to randomly deal more damage (like critical hits).
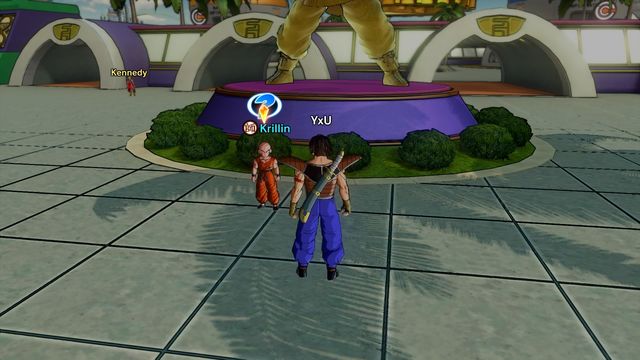 See when the mentor wants to talk to you
What does the training look like? Well, to become a student, you have to pass a test, i.e. just defeat the master, or to be more specific, reduce his health by 50-75%. When you become the student, every level you acquire increases your friendship with the mentor. You don't even have to use his techniques or go into battles with him. High-level mentors (harder to unlock) are more difficult when it comes to earning experience. Current level is available in the "Player Data" menu. When your level is high enough, a question mark will appear over the mentor's head. When you talk to him, you'll be able to take a test. It might be a fight against the master or other characters. Each mentor will want you to bring him a capsule or a Z-Soul. You can buy both of them in the store.
Below you'll see the list of mentors and what is required for them to appear in the city. If you can't find a specific mentor, don't worry. They appear randomly during loading (e.g. when you move between the areas of the city). Sometimes you'll have to take a walk around the city several times to find the next mentor.
Mentor
Progress required
Level required
Krillin
After you finish "Trunk's Test!" in Saiyan Saga
-
Piccolo
After you finish "Trunk's Test!" in Saiyan Saga
5
Vegeta
After you finish the Saiyan Saga
8
Ginyu
After you finish the Ginyu Forces Saga
15
Frieza
After you finish the Frieza Saga
20
Hercule
After you finish the Cell Saga
-
Perfect Cell
After you finish the Cell Saga
30
Android 18
After you finish the Android Saga
34
Gohan & Videl
After you finish the Buu Saga
40
Gotenks
After you finish the Buu Saga
40
Son Goku
After you finish the Demigra Saga
70
Beerus
After you finish training with Son Goku
70
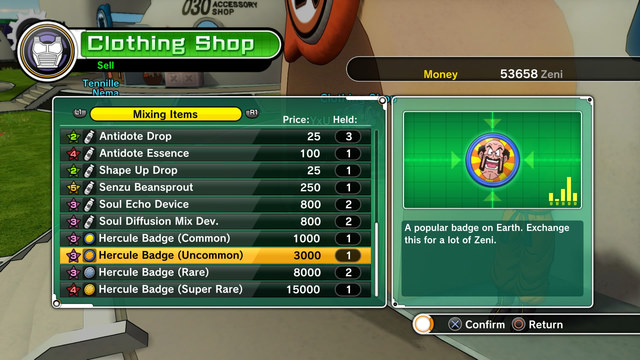 Examples of equipment
Equipment is a very important part of Dragon Ball: Xenoverse. The elements of equipment are:
Outfits - they replace your default clothes. Their cost is somewhere between a couple thousand and a hundred thousand Zeni for one element - the full outfit is made of four elements. They modify your attributes by changing your stats. Some elements are only available for certain races and gender, so character creation in the beginning is quite important.
Accessories - cosmetic items. The only thing they affect is how your character looks. Thanks to them, your character can stand out when you play online.
Z-Soul - an element of equipment that affects the character's performance. Each Z-Soul is unique and gives special bonuses, e.g. automatic Ki regeneration, increasing performance of a certain type of techniques, or giving the character some unique skills. Z-Souls can be obtained in four ways: basic ones can be bought in the Item Shop, most of them can be acquired as rewards for challenges. Z-Souls that you get from mentors are a separate category - they improve the techniques you have learned from the mentors. The last group, the most powerful one, are Z-Souls created by combining other ones. It can be done in the Mixing Shop where you can find recipes and information on crafting Z-Souls.
Capsules - the most basic element of the game. Capsules can be used during a fight. They can regenerate health, stamina or Ki of either the character or the whole team. You can use only one capsule of each type during a fight. You can buy them in the Item Shop or craft them in the Mixing Shop. Crafting is recommended in the beginning of the game, because crafted capsules are cheaper. You can get the ingredients from the item shop or collect them in arenas. You'll find them with your Scouter.
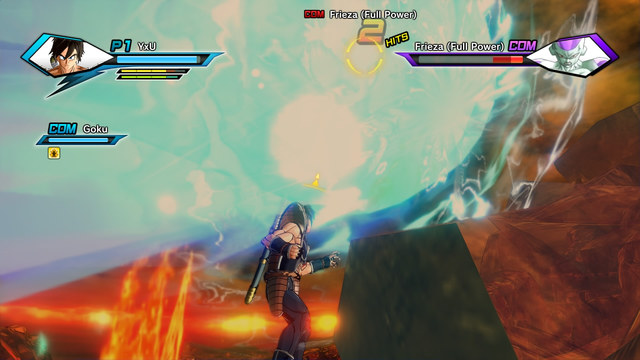 Ultimate attacks are difficult to dodge, they deal a lot of damage and look spectacular
The game would be boring if fighting was based only on combos. The player can use a wide range of techniques that they can choose for the character and use in battles. You'll acquire them by completing Parallel Quests, learning from mentors or buying in Skill Shop. The techniques are divided into three categories:
Super Attack Skills - you can choose up to four techniques for the character. This category contains basic attack and defence skills used in fights. They use 100 Ki, which is a single part of the energy bar. Their effects vary significantly, from combos, through energy waves, to transformations and defensive barriers.
Ultimate Attack Skills - skills that use Ki energy. Identical to Strike Skills, just much more powerful. They cost 300 Ki, but it's proportional to damage done. You can give the character two skills of this type.
Evasive Skills - these techniques are purely defensive. You can use most of them when you're being attacked, to reduce the damage that you take. These techniques use stamina, not Ki. You can give your character only one of these.
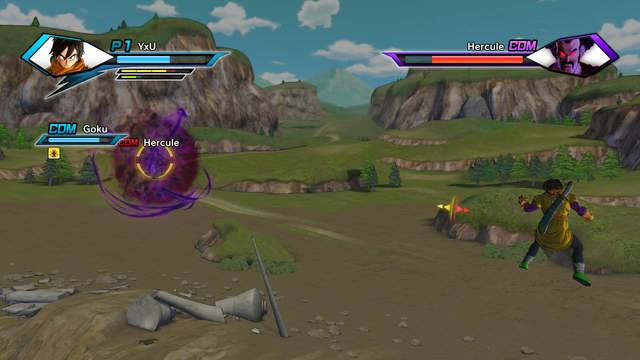
Some skills can be really useful
The player chooses skills that will be most effective for their specific style. However, some skills are worth seeing:
Change the Future - defensive skill. Enemy's Ki Blasts will turn to your advantage, even Ultimate ones. You'll teleport towards the enemy and attack him with a wave of energy. The attack won't deal much damage, but it is safe for you.
Quick Sleep - Exclusive for Majin race. It allows you to fall asleep in order to regenerate your health.
Energy Charge - a useful technique that allows you to recharge your Ki. It has two powerful upgrades: Full Power Charge and Maximum Charge.
Gravity Impact - a skill that you'll get from Cell while being his student. It pushes the enemy (or a group of them) backwards, dealing medium-low damage. It's unique because it can absorb some of the damage from the enemy's attack. It can be used as defence against weak Ki Blasts.
Wall of Defence - this skill comes in handy when you have to protect a weaker companion. It makes you teleport towards the enemy and make him focus on you, while protecting the ally.
Super Drain - grabbing the enemy, taking some stamina from him and giving it to yourself. It deals minor damage and it throws the enemy back.
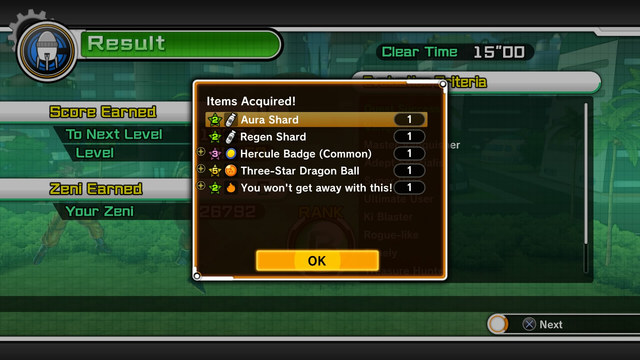 After a fight, you'll learn about rewards - if it's going to be a ball, you'll see it
Dragon Balls are probably the most unique items in the game. Collect seven of them to summon the dragon who will grant you one wish. To collect the balls, enter a Parallel Quest that contains a Time Patroller. After you defeat the enemies, look through the Scouter and see if there is a Patroller nearby. Talk to him. If you win the fight against him and complete the quest, you will receive a Dragon Ball. If you don't get a ball, you will probably receive materials or Hercule Badge that you can sell for quite a lot.
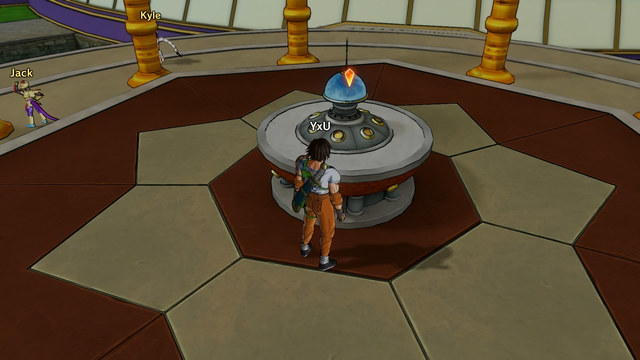 The pedestal where you have to place all Dragon Balls
When you collect seven balls, go to the pedestal in Tokitoki to summon the dragon. You can choose one wish, so take a look of their description below. When the wish is granted, you can start looking for the balls again.
Available wishes:
I want money - receive 500000 Zeni.
I want a rare item - receive Power Pole (accessory).
I want to dress up - receive a special outfit, Journey To The West.
I want to get stronger - receive crafting materials.
I want to grow - receive enough experience to level up.
I want a new Ultimate Attack - receive Ultimate attacks.
I want a new Super Attack - receive Super Attacks.
I want more usable characters - unlock unique characters
I want a second chance at life - increase your attributes
I want to be drop-dead gorgeous - change the character's looks
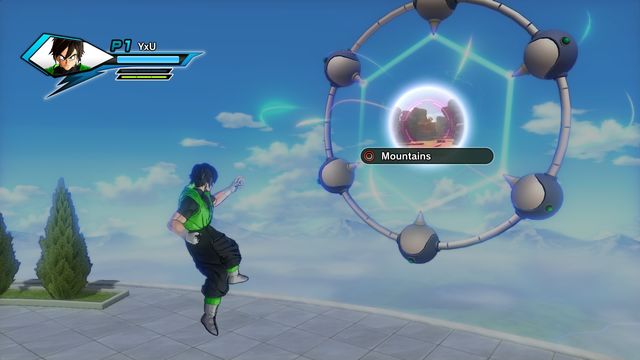 Gate - a portal
To move between arenas, use Gates. To pass through them, you have to aim at them, get close and press the corresponding key.
You'll unlock new characters when you make progress in Time Patrol, the main campaign. You'll unlock some characters after each saga. Two special characters, Bardock and Broly will be unlocked after you complete the Legendary Super Saiyan that you'll unlock by collecting five Time Shards (more about that in the description of the saga). Some of the unique characters can only be unlocked with a wish. These are: Omega Shenron, Super 17 and Gogeta. Other unlockable characters are: Vegito - complete PQ 37 - Potara Warrior and Goku SSJ4 - after you finish all 55 Parallel Quests.
Mentors are being unlocked when you make progress in Time Patrol. Some of them require you to have a specific experience level. You can find out more about it in the Mentors chapter.
The mentor's level increases when you gain experience in Time Patrol and Parallel Quests. High-level mentors are more difficult to gain experience for. You can see your level in the "Player Data" menu.
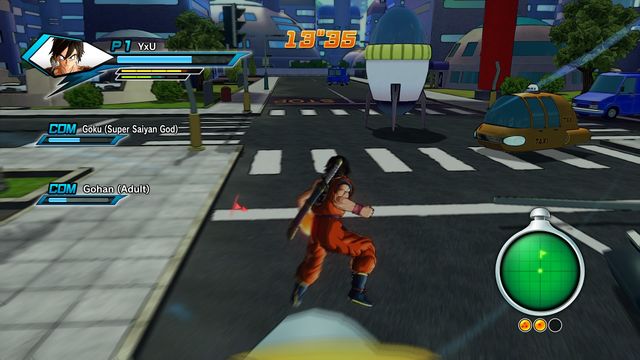 The location is really small
When you're a bit further in the game, the Old Rivals and Dragon Balls challenge will let you earn 15000 XP and an equal amount of Zeni in less than a minute! You have to collect three Dragon Balls scattered across the city. You don't have to worry about enemies, just collect the balls. It can be repeated as many times as you want.
After you complete the Legendary Super Saiyan Saga and new challenges, you will unlock a new quest: Dangerous Duo! Warriors Never Rest, where you'll get 15000 XP and 60000 Zeni for collecting three Dragon Balls.
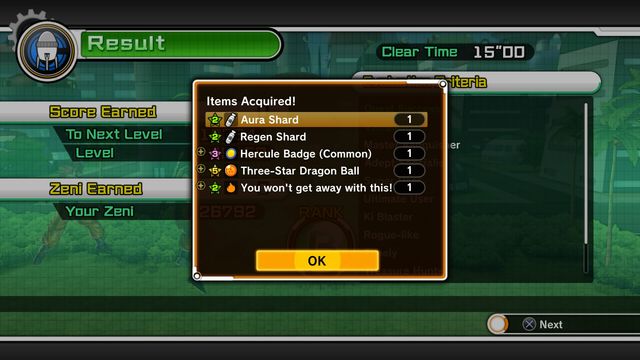 Notification about acquiring the ball
There is only one way of acquiring the Dragon Balls. When you're doing a quest, find a Time Patroller, a character created by other players. They are in most challenges in which you have to move between arenas. Activate your Scouter after every fight and look for an NPC with a question mark. When you talk to him, a fight will start. When you win, you'll get a notification about obtaining a "Key Item". It does not have to be a Dragon Ball, the probability is lower when you try to get the ball several times in the same quest. You have to win the whole quest to keep the ball.
Achievements are available for consoles and PC through Steam.
Get all the achievements.
Complete the prologue
Complete the Saiyan saga.
Melancholic curtain call
Complete the Return of the Saiyans saga.
Complete the Ginyu Force saga.
Legendary Super Saiyan
Complete the Frieza saga.
Good bye, warriors
Complete the Cell saga.
Complete the Android saga.
Complete the Majin Buu saga.
Complete the God of Destruction Beerus saga.
Complete the training with Goku.
Complete the training with Piccolo.
Complete the training with Krillin.
Complete the training with Vegeta.
Complete the training with Gohan and Videl.
Complete the training with Ginyu.
Complete the training with Frieza.
Complete the training with Android 18.
Complete the training with Cell.
Complete the training with Hercule.
Complete the training with Gotenks.
Complete the training with Beerus.
GotDragonBall
Find the first Dragon Ball.
Find the two-star Dragon Ball.
Find the four-star Dragon Ball.
Acquire seven Dragon Balls and summon Shenron (the dragon).
Unlock all characters and their outfits.
Fight on all arenas.
Play online.
Play online seven times.
Win online seven times.
Add a Patrol member to your favourites (online).
Send a gift (online).
Receive a gift (online).
Complete a Parallel Quest (PQ).
Complete seven Parallel Quests (PQ).
Complete half of the Parallel Quests (PQ).
Complete 80% of the Parallel Quests (PQ).
Complete all Parallel Quests (PQ).
Collect all "Ultimate" attacks.
Collect all "Super" attacks.
Complete seven "Auto-Patrols" (online).
Watch seven fights (online).
Collect 500,000 Zeni.
Enter Endless Battle
Participate in seven "Endless Battles" (online).
Complete seven "Endless Battles" (online).
Revive seven enemies online.
Reach maximum "friendship" with all mentors.
Finish the Demigra saga.
Finish the Legendary Super Saiyan saga.
Dragon Ball: Xenoverse is not a system-consuming game, although playing with 60FPS would be nice. The game should run on older PCs and laptops, preferably with dedicated GPU. In case of slower computers, minor lags are possible, especially when there are many enemies in the arena.
Singleplayer: Yes
Offline Co-op (split screen/hot seat): No
Online Co-op: Yes
Multiplayer: Yes


 Dragon Age: Origins - Awakening Game Guide & Walkthrough
 Divinity: Original Sin Game Guide & Walkthrough
 Divinity: Dragon Commander Game Guide & Walkthrough
 Dead Space 3 Game Guide & Walkthrough
 Dragon Age: Inquisition Game Guide & Walkthrough