This guide to Divinity: Dragon Commander will help every player, entangled in the duties of the Dragon Commander, learn about all aspects of the gameplay in this unique game. It describes all the game modes in minute details, including the RPG, strategic and arcade, connected with the hard life of the dragon equipped with jetpack who, apart from waging wars, also needs to focus on his popularity among the subjects, as well as pamper his princess.
This guide includes:
To ensure the clarity of decisions, and their outcomes, this guide has been color coded for every rise and drop in relations with individual races. The decisions themselves have been marked with numbers in orange, in the order in which they come. If a decision comes as a result of another decision, it is going to be marked with a number in the decision consequences.
Arek "Skan" Kaminski ()
Dragon Commander is a unique game, whose classification into a specific genre may be troublesome. To some extent, it is an RPG (the Raven Phase), a turn-based strategy, (the Risk Phase) and an arcade (the Dragon Phase). The modes are interconnected and they are related like in a chain reaction, where one comes as results of another. The Raven Phase is the command centre where you talk to your subjects and take decisions of the political nature. Directly from the Raven, you are transferred into the Risk Phase, i.e. the strategy map of the world. In this phase, you take actions with your military which, sooner or later, will result in a battle with the enemy and the third phase, where you order your armies in real time. Additionally, during the battle, after some, predefined, time has passed, you can materialize your main character - the dragon - and take control over the creature. This will start the arcade part of the game. The first two modes are the key element and they are essential. The latter two can, and sometimes should be neglected to leave the result of a battle to pure mathematics and fate.
Detailed information on the individual modes can be found in the chapters dedicated to them. It is also good to mention the resources available in the game.

Gold - The most basic resource collected from each owned region. In the individual countries, you can build a gold mine in order to double the received amount. You spend gold on the generals' pay (but only if you send one to the battle), creation of new units, erecting buildings and buying new cards. The income of gold per turn in a given province also equals the number of soldiers that can be produced there.

Research points - just like in the case of gold, you receive it once a turn from each province you control. You spend it to unlock new dragon abilities, new units and upgrades.

Population - a combined number of all recruits in a given country that can be used in the fight phase. Production of each unit in this phase uses up some of the recruits available in the pool. When you use up the pool to the maximum, you will be unable to create new units during the battle. To increase the number of population, take over the entire construction site (including the turrets) and build citadels

Reinforcements - just like population, this resource is used during battle, for unit creation, building and dragon activation. The reinforcements depend on your popularity with the race that occupies a given territory. This resource can also be increased during battle, by building citadels.

Fortifications - this resource decides about the already made reinforcements at the outset of the real-time battle. The fortification level increases with each turn from the countries that you are currently controlled but, this also depends on the status of the neighboring countries. A country that is surrounded by allied countries, will build its fortifications to the maximum. If it is surrounded by hostile countries, or armies, the level of fortifications will start to drop. E.g. one region that borders with two other, where one of them is a hostile one, may only have 50% of fortifications at most. A region that borders with three regions, out of which only one is under your control, will only have 30%.
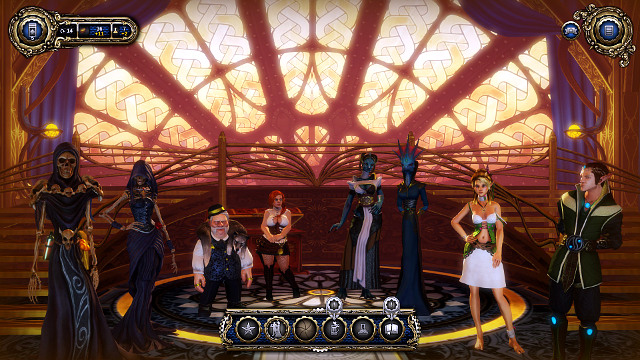
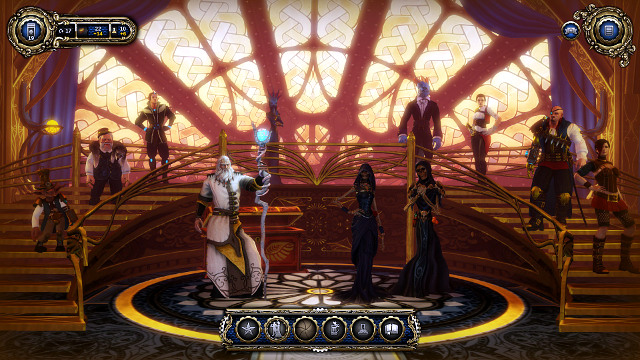
 Onboard the Raven, you will be playing the RPG mode of the game
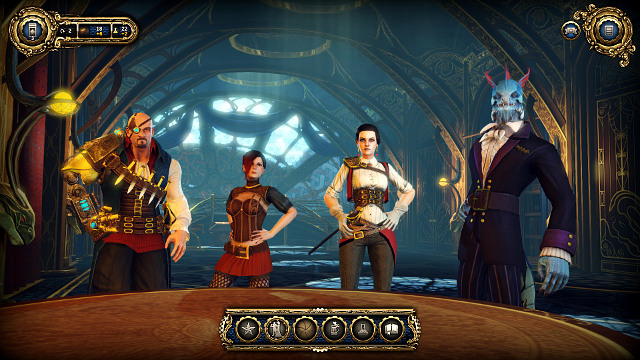
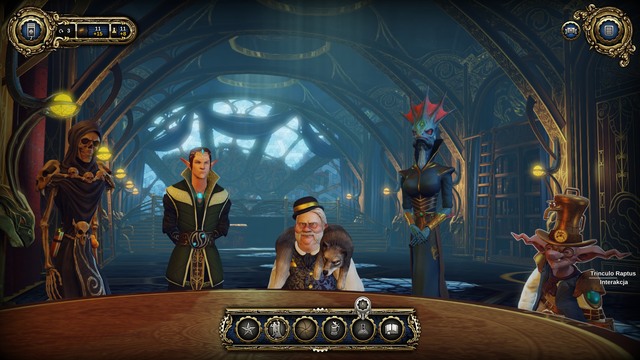
The Raven phase is named after the ship on the board of which it takes place. The Raven is main the command unit of the fleet. There, you will find all of the characters that are important to the plot what you will be able to talk to. It is here that you will be taking decisions that are key to the political and economic situation in the country. Every choice you make, will have its repercussions that, usually improve on the relations with one of the sides and deteriorate with another. The raven is divided into 7 parts:
The Bridge - the main command centre. From here, you can switch into the strategy map (the Risk phase) . In an event of a serious situation, it is here that you will find the characters immediately involved in the situation, who will quickly report on the current situation.
The Throne Room - here, you will find the ambassadors of individual races, who will be proposing on changes in law, on a regular basis. Of course, unanimity and politics rarely go hand in hand so, individual suggestions will be supported by one race bun not necessarily by the other. Taking decisions is a process that has been left entirely in the hands of the player. Each decision has its positive and/or negative effects but, in general, your job is will be to appease especially those races that are the majority in the controlled lands. Especially if they are situated near the frontline. Higher popularity with the race that dwells in a given region, influences the numbers of soldiers that you will be able to deploy during battle.
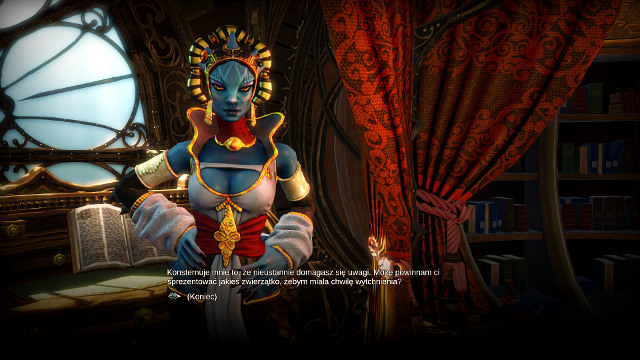
Personal Quarters - during the game, you will have to choose from among four princesses of each race (all races save the Imp princess who died during an explosion in an unfortunate accident). After you make your choice, you will be able to find your wife in this chamber. There is a separate strand of plot for each of the queens, i.e. another portion of decisions that you will have to make, and another portion of results of these decisions to deal with. The selection of wife is also player dependent. There are no choices here which would be better than the others.
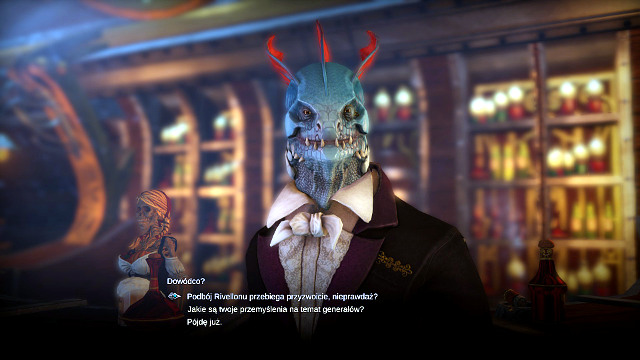
The Bar - in the bar, you can, most often, meet your generals and, sporadically, ambassadors also. They will share their opinions on the most recent events and other characters. Here, you will be taking decisions connected with your commanders.
Engineering Bay - You will find Grumio here, the head engineer to the army. For the research points you will be able to unlock here new units to purchase, as well as upgrades for these.
Royal Chamber - this place is occupied by Maxos, who will drive the main plot of the game. For the Research Points, you will be able to buy here new abilities for your dragon. Later on, you will also find here the entrance to Corvus's staying place.
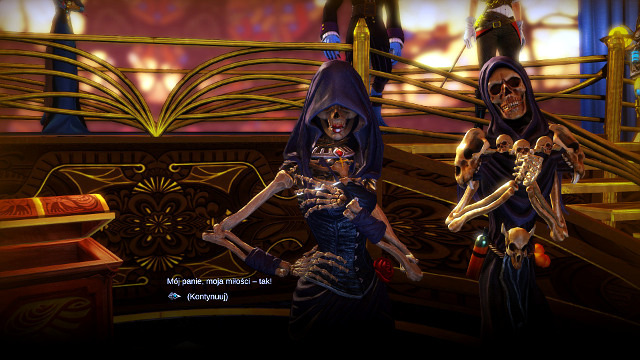
Corvus - Corvus is a demon that lives in the ship (literally) and its only aim is the greatest possible bloodshed. In exchange for small gifts (like e.g. a princess you will be able to marry another one (so, it is a way to make the plot more complicated), or the ability to feed on minds of citizens. He will also offer you mighty cards that are unavailable in any other way. Sooner or later, trusting Corvus will come with a dear price to pay, when it will be impossible to cover up for missing characters. But, a sporadic deal, especially in a situation in which you are cornered by the enemy, will be acceptable to the majority of the subjects. Of course, the cards that you receive from Corvus are to be kept in strictest confidence and used only in the most threatening situations.
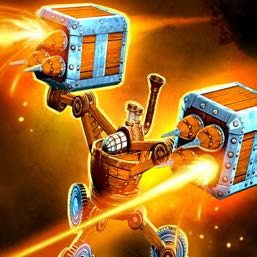
 Commanders heavily influence the game
Generals play a crucial role in the game. As a dragon, during one turn, you can play only one battle. If, within one turn, the situation requires that you play more skirmishes, you can designate a general as the commander to increase your chances in an automatic battle. If you are going to fight an automatic battle, it is best to check out which one of the commanders gives you the highest, percent, chance of winning. Still, you should remember that it costs the national treasure additional gold to use a general. Male generals will, at first, demand a higher pay than female ones but, both pays will be equal after the implementation of the decision of gender equality. Generals are of their own mind and they not necessarily agree with this decision and/or like the player, and each other. Each one starts with a set of two special skills but, as their individual stories develop, you will be granted the opportunity to unlock additional skills.
 The arrogant Edmund is a genius tactician
Startup skills:
A genius Tactician - decreases the enemy's firepower
Offensive - decreases the numbers of the enemy units that defend
The best commander in the initial stages of the game, especially for offensives. The differences are minor but, he is the most likely to have the highest percent of winning. Later on, development of other generals will possibly diminish his significance.
Backstory:
Edmund is convinced of the superiority of his race over all the rest to the extent that he considers the others completely insignificant, and he is not going to condescend to interacting with them His decisions will concern the interaction with the remaining races. Edmund will try his best to shirk from all tasks that involve interacting those of the "lower birth". Still, if you make him interact with the rest, he will develop respect and appreciation for them with time.
Decisions:
1. Edmund does not want to meet up with the Imp ambassador.
a) Force him to meet the ambassador. > The relations with lizards rise, relations with imps fall. A random mercenary card.
b) Help him shirk from the meeting. > imps, lizards. A random dragon skill card
2. A dwarven scholar intends to publish a book on the origin of species. Edmund does not want to allow the publication of such rubbish.
a) Hold the publication > Dwarves. A random mercenary card.
b) Do not hold > Undead, lizards. A random dragon skill card.
3. the word is that the elves are being murdered by the undead. Edmund was supposed to look into the matter but he didn't feel like.
a) Rebuke him and order him to his duties > the undead, elves. A random mercenary card.
b) The fate of this village does not matter > elves, Lizards, the undead. Random dragon skill card.
4. Prospera suggests that a new law is enacted that stipulates all races as equal . Edmund does not like it.
a) Nobody is equal to the dragon! > Imps, elves, the undead, lizards, dwarves. Influx of gold from the lands of dwarves and lizards+1. Random mercenary card.
b) Let Prospera do whatever she wants > Imps, elves, the undead. Random dragon skill card.
5. Edmund fell in love with an elven girl. Her father is against such union. Edmund wants to kill him.
a) It is not a good idea > Elves. Random mercenary card.
b) He will not see tomorrow! > Elves. Random dragon skill card.
After you take the last decision, Edmund's storyline finishes. If you make him cooperate with the remaining races, he will realize that he was wrong about them. Otherwise, he will develop an even stronger conviction of their inferiority and will decide to lead an unmarried life, out of lack of the person as worthy as himself. Regardless of the choice, Edmund will receive two new skills -
Terrible and Defensive.
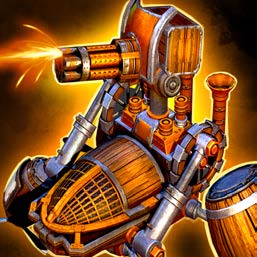
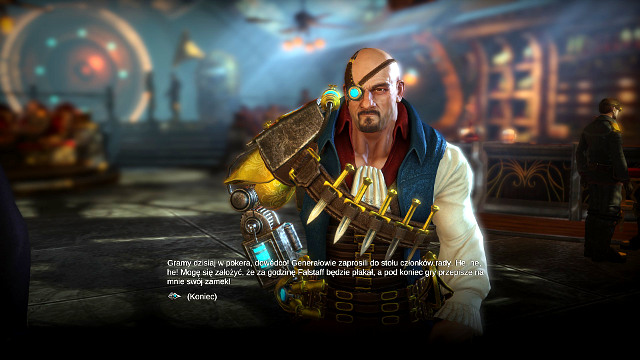 Henry belongs to the harsh generals that prefer acting over thinking
Startup Skills:
Unit specialist- increases the effectiveness of heavy and medium units
Fierce - influences the destructive power during attacks
Like Edmund, Henry is predominantly an offensive general. Due to his skills, his importance rises with time, as you gain access to better units.
Backstory:
While serving under the Dragon Commander's father, Henry was betrayed and lost his arm and his eye. Now, he has a negative attitude towards cooperating with the others so, decisions made in connection with him are, of course, concerned with cooperation. Eventually, Henry may trust people or remain a lone wolf for the rest of his life.
Decisions:
1. Henry decides to tell the story of his replacements.
a) Should the need arise, you also can flee. I have no need for a cripple general ( Random combat unit diversion card.
b) You have been a loyal servant to my father, I hope I will deserve your respect also ( Random combat card unit advantage.
2. Henry and Edmund are to soothe down lizard rebels. Henry wants to go alone.
a) Let him go alone > Lizards. New Skill- Offensive. Random combat card - unit diversion.
b) It is an opportunity to practice > Lizards. Random combat card - unit advantage.
3. Henry has an argument with Catherine over cooperation.
a) It is only yourself that you can trust > Elves. Random combat unit diversion card.
b) Give us a chance > random combat card - unit advantage.
4. Henrzas daughter faces a threat of kidnapping. Scarlett and Catherine want to help him prevent this.
a) We are at war. Thez should be staying on the Raven ( Random combat unit diversion card. ( 5
b) Let them go > Lizards. Random combat card - unit advantage. ( 6
5. The daughter has been kidnapped. Henry threatens to demolish the Spire of the Undead is she isn't returned.
a) Let the spire fall if it has to > The Undead. Random combat unit diversion card.
b) Make him stop > The Undead. Random combat card - unit advantage.
6. Henry's daughter is safe but the counselors demand reparations for the damage done.
a) I want it off my head and someone has to pay. > Random combat unit diversion card.
b) Your daughter is safe now. Is it such a high price to pay? > Random combat card- unit advantage.
Depending o the daughter's fate, and what was Scarlett and Catherine's role in it, Henry will either choose the life of a lone wolf, or become friends with them. He will also receive a skill - Terrible.
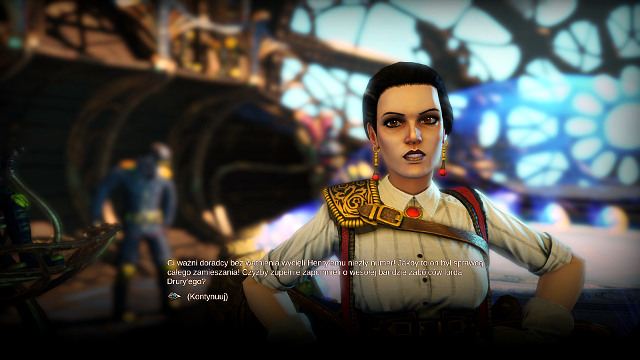 Cathy will prove her value in sea operations
Startup skills:
Naval Specialist - increases the destructive power of sea units
Trepidation - considerably decreases the enemy units in numbers
Useful in the case of large numbers of marine units (not necessarily at sea) and when you are outnumbered. It is the only commander that is going to have as many as five special skills.
Backstory:
Catherine is an ardent feminist and her storyline concerns endowing women with their rights. If you provide her with your support, she will come to the realization that not all men are chauvinists. Otherwise she will grow to despise them even more.
Decisions:
1. Women should earn as much as men.
a) Introduce equal pay ( the pay of Catherine and Scarlett will be equal to those of Edmund's and Henry's. Scarlett will receive a new skill - Patient, Catherine will receive the Light Units Specialist skill. Random sabotage card.
b) No way > No changes.
2. The dwarven custom of abandoning women in the woods should be forbidden.
a) Straight away> dwarves, lizards. Random sabotage card.
b) It is only a legend > dwarves, lizards.
3. Ban on the arranged marriages without the girl's consent.
a) Support > Elves, Dwarves, Imps. Random sabotage card.
b) Do not change the custom > Dwarves, Imps, Elves.
4. Catherine demands it that the rapist soldiers be sentenced to death.
a) Support Cathy > Lizards, The Undead. Random sabotage card. New Skill- Offensive. The number of the units deployed at the very beginning drops by 10% > 5
b) We need every soldier > The Undead, Lizards. > 6
5. Women should comprise half of the army's officers.
a) Consent > Lizards, The Undead.
b) It is skills, and not sex, that should decide about officer appointment > The Undead, Lizards.
6. Women should be allowed to abort the unwanted pregnancy.
a) Grant your consent > Lizards, The Undead, Dwarves. Random sabotage card.
b) Do not grant your consent > The Undead, Dwarves, Lizards.
Depending on your choices, the devastated Catherine will realize that nothing can help women or, she will thank you for your help in the fight for their rights. She will receive a new skill -Airborne units specialist.
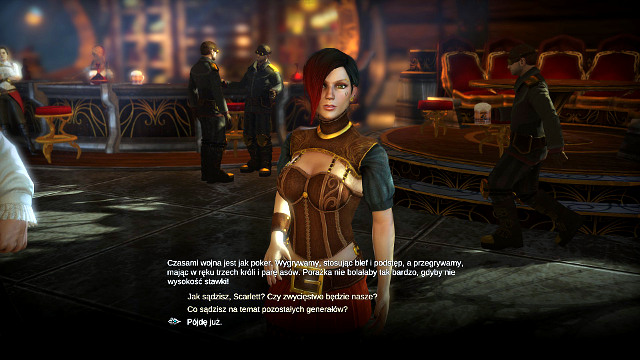 The swashbuckling Scarlett is surprisingly god in defense
Startup skills:
Units specialist - increases the destructive power of light units
defensive - influences the importance of numbers in defense.
A typically defensive character, best in the initial turns.
Backstory:
Scarlett is lesbian. She will take an active part in all of the discussions about homosexuals and come to their defense. Depending on your decisions, she will either be proud to come out of the closet or, will hide in humiliation.
Decisions:
1. Elves want gay marriages to become legal. Scarlett wants you to support her motion.
a) Support > Elves, Dwarves, The Undead. Random combat card - unit acquisition.
b) Do not support > Dwarves, The Undead, Elves. Random mercenary card.
2. The Undead want to destroy the works of a famous sculptor after she came out of the closet.
a) Do not allow the destruction of the works > Lizards, The Undead. Random combat card - unit acquisition.
b) I do not intend to big about the political unrest > The Undead, Lizards, Random mercenary card.
3. Scarlett turned down Henry's advances. Now he is spreading the rumor that she must be a lesbian. Scarlett confesses that it is true.
a) I will keep the secret, I hope you will find your happiness > Random combat card - unit acquisition.
b) In my army this is of no significance > Random mercenary card.
4. Elven archduke murders everyone suspected of homosexuality. Oberon offers you a gift to prevent his arrest.
a) Arrest the elf > Lizards, Elves. Random combat card - unit acquisition > 5
b) Accept the gift of money from Oberon and blink at the rumors > Elves, Lizards. Random mercenary card. +20 gold pieces > 6
5. The arrested elf was locked up in his estate, where he is basking in luxury and keeps killing those suspected of homosexuality. Scarlett wants to kill the elf.
a) Order the elf beheaded > Lizards, Elves. Random combat card - unit acquisition.
b) This would be a lynch > Elves. Random mercenary card.
6. Scarlett wants to leave:
a) I accepted the gold being led by pragmatism. I must win this war. > Random combat card - unit acquisition.
b) Don't be so dramatic and pull yourself together! > Random mercenary card.
Depending on your choices, Scarlett will be proud of her orientation, join a religious order or become a drunkard and sleep with casual people. The first two options will result in obtaining the - Terrible skill. The last one (Don't be so dramatic ...) will result in her not getting new skills.
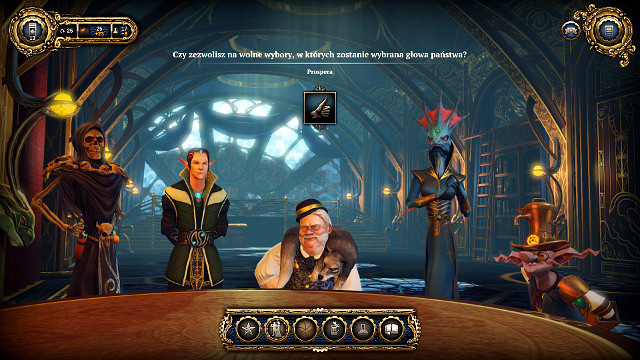 Counselors will be proposing alterations in law on a regular basis
An important element of the game is to make sure every race is happy. Popularity with all the races is decisive not only in terms of the units that are available during each battle, but also in terms of percentage chance of success in the case of an automatic battle. Although it is, usually, a good idea to appease the race that lives in the land in largest numbers, you shouldn't, at the same, ignore any of the races. High popularity with the entire nation will start a special storyline of three decisions, which will deteriorate your popularity with all other races but, will offer three special permanent cards, which are stronger with each decision that you take. That is why, as a rule of the thumb, it is best to gain popularity with one race, collect the cards and change sides to another race. To find out what each of the races has to say about a given amendment, you need to talk to each one of the representatives before taking any decisions. You can find your current ratings either in the newspaper or in the kingdom review. While taking your decision, try to balance them out, so that your popularity with any of the races does not fall below 30% (although, even popularity of the level of 0% will not influence the storyline in any way). You should also remember that your choices will, sometimes, have a direct influence on the game itself. The general principle (although it is not a rule) is that, if a decision costs you money, you will benefit from taking it in some other way. E.g. if you stipulate the equality of rights between men and women, you will make their pays equal but, at the same time, you will unlock some new special abilities with the female generals.
Falstaff - Dwarves
Dwarves are, predominantly, concerned with making money and stable economy They do not care about family values ad moral values. They will be the supporters of any idea that helps save several gold coins and does not affect them.
Permanent cards:
1. Dwarves want to forbid publication of materials concerned with the harmfulness of smoking:
2. Enrich cigarettes with addictive agents:
3. introduction of the mandatory smoking lessons in schools:
Oberon - Elves
Elves can be perceived as a mix of socialists, pacifists and ecologists. They promote the ideas of freedom and equality for everyone, will support ideas like free health-care or permission for same-sex marriages.
Permanent cards:
1. Introduce labor unions:
2. Introduction of high minimal pay:
3. Introduce eight-hour working day:
Trinculo - Imps
Imps do not attach too much significance either to individual people or to traditional values. Their major concern are the most stunning gameplay and technological development. They will support the introduction of levy in mass or the right to carry arms.
Permanent cards:
1. Imps want to dig up all Elven graves in search of a special element that will make it possible to carry out a huge explosion:
2. The element is contained directly in the Elven remains. Imps plan on producing gunpowder:
3. Imps want to initiate the production of the Megabomb which will be capable of razing cities to the ground:
Prospera - Lizards
Lizards are the least radical of all races. They are placid and prefer reason over unquestioning fanaticism. If you try to balance the society, gaining high popularity with lizards is probably going to be the least problematic. They are sober-minded and stand against all forms of primitivism like, the permission on the consumption of the orc meat. They are also the only race to support the introduction of democracy.
Permanent cards:
1. Allow referendum o the introduction of the Republic:
2. Hold a free election for the head of the state:
3. You abdicate to the benefit of the new president (this decision has no bearing on the storyline):
Yorrick - The Undead
The Undead are the anchor of piety. They stand against all sorts of deviation from the norm and all sorts of sins. They do not sign up for half measures. Things should be dealt with the way "intended by the god" or should be left aside. Every living being is lives only to sacrifice his life in god's name.
Permanent cards:
1. The Undead introduce paid indulgence:
2. All believers should be marked and nonbelievers forced into slavery:
3. The first born son of the infidels should be taken away from the parents and made into a slave:
 Your choice of a princess improves your relationship with her race and creates a new storyline
With your progress in the campaign, you will face the necessity to choose a princess for yourself, who will become the queen of the empire. There is a storyline following each one of the ladies that you will naturally benefit from, and will allow you to shape your relationships with the other races. Your choice has no direct bearing on the game and comes only as a sort variety to the plot so, you can decide to select whichever you want. Each of the princesses comes with a dowry characteristic for her. And so, the dwarven princess will present you with gold and the lizard one with research points. What is even more, you will not be bound to one of the princesses to the rest of your life. In exchange for mighty cards, you will have the opportunity to sacrifice her to Corvus and replace her with another princes. As far as conscience allows you to, you will be able to do this after the married princess' storyline ends.
 Ophelia's storyline is, arguably, the most riveting one
Ophelia has been infected with a terminal illness that corrupts her body. The petrified undead princess wants to stop the pangs of death and heal the disease.
decisions:
1. An imp quack offers a medicine that will heal the princess. Ophelia wants the thing tested on her.
a) Test the medicine on the undead > Combat card - start the battle with the recruit numbers of 100. The Undead, Imps.
b) Test on the Orcs > Combat card - start the battle with the recruit numbers of 100. Imps, Elves, Lizards.
2. the medicine has not worked (regardless of the race that you have chosen). The bodies fell apart, but their souls survived. Using magic or technology, they could be accommodated in new bodies.
a) We are not going to kill the innocent. Ask the Imps for help ( Combat card - start the battle with the recruit numbers of 100. Imps, Dwarves, Elves > 3
b) put souls into the bodies of several condemned to see what happens ( Combat card - start the battle with the recruit numbers of 250. Elves, The Undead. > 7
3. Imps have developed a project of a mechanical body for Ophelia.
a) Let them start > Combat card - start the battle with the recruit numbers of 100. > 4
b) A living girl will be a better solution > Card - number of recruits: 250. Elves, the Undead. > 7
4. Imps are ready to initiate the process.
a) We have gotten too far to give up now > Card - number of recruits: 100. Imps, The Undead > 5
b) If you do not like this idea, we will give up on this > card - number of recruits: 500. The Undead, Dwarves, Imps. > 6
5. Ophelia was turned into a golden robot but, she does not feel well about this.
a) Cut out the dramatics > Card- number of recruits: 100. The Undead. Storyline end.
b) Imps could try and give you the real body> 7
6. A magician, who will offer to turn Ophelia into a real girl, will arrive. In exchange, he demands gold or a night spent with the queen.
a) Let Ophelia sleep with the magician > Card- number of recruits: 500, Dwarves, The Undead. Ophelia will turn into a human girl. Storyline end.
b) Pay > Card - number of recruits: 500. You lose 30 pieces of gold. Dwarves, The Undead. Ophelia will turn into a human girl. Storyline end.
7. An appropriate girl, whose form Ophelia can take on. She, however shirks from killing an innocent girl.
a) Conduct the experiment > card - number of recruits: 500. The Undead, Lizards. > 8
b) give up > number 6
8. Ophelia becomes a human. She fears, however that she will grow old and die one day. The demon offers her immortality.
a) Come to terms with the fate and thank for a new life > The Undead. Storyline end
b) Accept the demon's offer. > Ophelia will turn into a vampire. The Undead, Lizards. Storyline end
 Camila will guard the justice
Camila is a lawyer and most of her decisions are connected with the rulings of the court.
decisions:
1. A dwarf and held onto a piece of wood to avoid drowning. The dwarf kicked the lizard into the water and is now tried for murder.
a) A sentence severe, but just > Random sabotage card. Lizards, Dwarves. > 4
b) Wouldn't you do the same if you were in his shoes? > Random sabotage card. Dwarves, Lizards. > 2
2. A lizard killed and elven girl yet, he was pardoned by the jury.
a) infringing with the sentence would go against the law > Random sabotage card. Lizards, Elves > 4
b) Sometimes, justice does not have much to do with the law > Random sabotage card. Elves, Lizards. > 3
3. Dwarves tricked the undead.
a) They did it in accordance with what the law stipulates, The Undead brought it on themselves > Random sabotage card. Dwarves, The Undead, Elves, Imps.
b) This situation can lead to a civil war > Random sabotage card. The Undead, Elves, Imps, Dwarves.
4. A dwarf is tried for rape but, there is no sufficient evidence to sentence him:
a) The dwarf needs to be allowed to walk > Random sabotage card. Dwarves, Imps > 3
b) Sentence him anyways > Random sabotage card. Imps, Dwarves. > 3
5. The subjects of the Elven dictator demand that he is released or else they kill the hostages:
a) We do not negotiate with terrorists > Random sabotage card. Dwarves, Elves > 6
b) Free him and save the subjects > Random sabotage card. Elves, Dwarves, Lizards. > 7
6. The rescue mission ended in a failure:
a) You have acted in accordance with the procedure. Deal with > Random sabotage card. Dwarves, Elves. Storyline end.
b) The person to blame should leave the post > Random sabotage card. Elves, Dwarves. Storyline end.
7. The released elf started to operate again.
a) we will drag him to the court > Random sabotage card. Elves, Lizards, Dwarves. Storyline end
b) send out assassins. > Random sabotage card. Dwarves, Elves, Lizards. Storyline end.
 Lohannah will try to preserve her race's culture
The Elf will be torn apart over the her race's ideals and the entirely new, free view that sheds the shackles of restrictions that she experienced at home.
Decisions:
1. The queen has been invited to a dinner by Dwarves. Elven customs, however, do not allow her to eat meat.
a) Taste it, maybe you will like it > Random dragon skill card. Dwarves, Elves. > 2
b) I'll tell them that you suffer from migraine. > Random dragon skill card. Elves, Dwarves. > 3
2. The Elf liked the dwarven dishes and now she feels like tasting wine.
a) Why not. ( Random dragon skill card. Lizards, Elves > 4
b) It is not the best idea. > Random dragon skill card. Elves, Dwarves > 5
3. Lohannah wants to apologize to the offended Dwarves. She resolves that a peace pipe will be a good idea.
a) Maybe it is better to bake a cake? > Random dragon skill card. Dwarves, Elves.
b) I think it is a good idea > Random dragon skill card. Elves, Dwarves.
4. you receive a bottle of luxury liquor as a gift .
a) Thank you very much. > Random dragon skill card. > 5
b) Don't you drink a bit too much? > 5
5. Lohannah is to be immortalized in the form of a sculpture.
a) Excellent idea. > Random dragon skill card. Lizards, Elves. > 6
b) You'd better not. > Random dragon skill card. Elves. > 7
6. The radical Elves want to demolish the sculpture with explosives.
a) The law bears fanaticism, fanaticism bears insanity, it's not your fault> Random dragon skill card. > 7
b) That is the way it happens if you stand against your people > Random dragon skill card. > 7
7. Imps want to start cultivating techno-vegetables, to prevent starvation among refugees. Elves deem this reprehensible.
a) If refugees are not fed, they will starve. > Random dragon skill card. Imps, Elves. > 8
b) It is too risky > Random dragon skill card. Elves, Imps, Lizards. > 9
8. The dam build by dwarves made one of the species of jackal stand at the brink of extinction:
a) This is war, fatalities are to be taken into account > Dwarves, Elves. Storyline end.
b) Let's destroy the dam > Random dragon skill card. Imps, Elves, Dwarves. You lose one of the factories. Storyline end.
9. refugees died, Lohannah is blamed for their deaths by Imps and Lizards.
a) Use the diplomatic immunity > Random dragon skill card. The army grows in size by 10%. Elves, Imps, Lizards. Storyline end.
b) Defend yourself in accordance with the law> Random dragon skill card. > 10
10. the queen is sentenced to death.
a) I am the Dragon Commander. I am the law > Random dragon skill card. Elves. Lohannah remains aboard the ship. Storyline end.
b) Unfortunately, I need to accept this sentence > Random dragon skill card. Elves. Lohannah is imprisoned and disappears from the ship. Storyline end. When you visit Maxos, you will have the opportunity to choose another bride for yourself.
 Aida has a slight problem wither father
Aida's storyline concerns her squabble with her father.
Decisions:
1. Aida's father wants to raise taxes. Aida wants you to stop him.
a) For my queen, everything > Random diplomacy card. Gold influx from the dwarven countries doubles.
b) The dwarven nobility should take care of its problem themselves > Random diplomacy card.
2. Aida wants to obtain her father's secret journal.
a) I do not wish to increase tensions between you two > Random diplomacy card > 3
b) My spies will obtain the journal > Random diplomacy card. > 6
3. Aida's father published an offensive letter, about his daughter, in a newspaper.
a) I will not honor this miserable attack with my reply > Random diplomacy card >4
b) My spies will obtain the journal > Random diplomacy card > 6
4. Thelor is at the brink of dying and needs a blood transfusion from his daughter.
a) Heal your father > Random diplomacy card. Dwarves, The Undead. > 5
b) If he is to fall victim to the illness, so be it. > Random diplomacy card. The Undead, Dwarves. > 7
5. Thelor will live but Aida gets a chance at the throne.
a) It is not to steal his throne that you have gone so far. > Random diplomacy card. Dwarves, Elves. Storyline end.
b) If you want power, it is your best opportunity. > Random diplomacy card. Elves, Dwarves. Storyline end.
6. Aida obtained the journal and now wants to publish it
a) You should return the book > Random diplomacy card. Dwarves, Imps. > 4
b) Publish it > Random diplomacy card. Dwarves, Imps. > 8
7. Thelor died, Aida does not intend to bother with his funeral.
a) He was a bastard and treated his daughter like scum > Random diplomacy card. Dwarves, The Undead. Storyline end.
b) Thelor was a king and, all in all, he deserves your respect > Random diplomacy card. Dwarves. Storyline end.
8. The people mentioned in the journal swore revenge to the king.
a) King Thelor dug out his grave himself. > Random diplomacy card. > 7
b) Are you sure that you want him dead? > Random diplomacy card. > 9
9. Thelor avoided death and started hunting the assassins down.
a) Why do you bother about the assassins? > Random diplomacy card. Dwarves, Lizards. Storyline end.
b) Use your contacts to stop this. > Random diplomacy card. You lose 20 pieces of gold. Dwarves, Lizards. Storyline end.
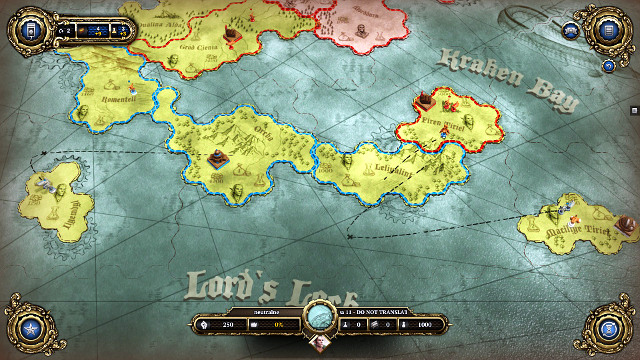
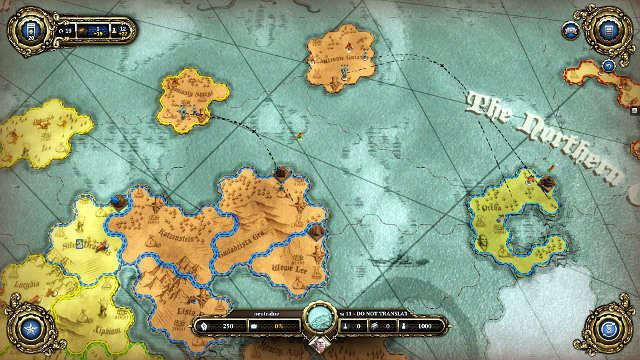
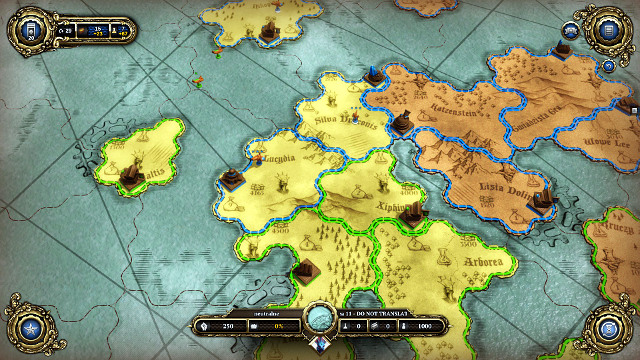
 Your actions on the strategy map are the main element of the game
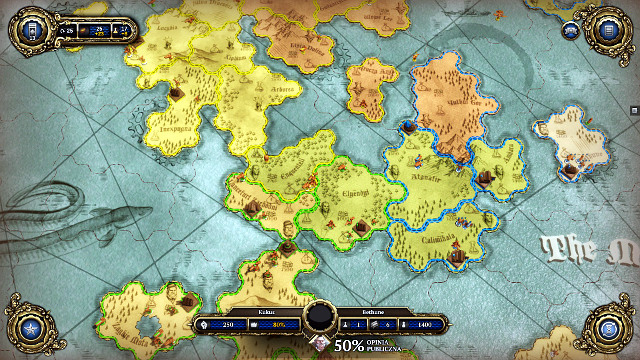
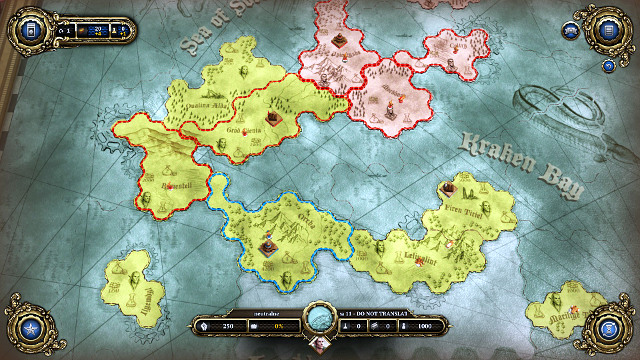
The name "Risk" comes from a famous board game of the same name. In this phase, in turn based mode, players move around their armies, erect buildings and use their cards that offer a number of improvements and upgrades. The world map has been divided into sectors, countries. Each country is characterized with the amount of gold, the research points, the overall population and the race that dwells in this country. These values are marked in each province. If you move your armies into a neutral area, where there are enemy armies, you will initiate a battle which you can play yourself, or automatically by selecting a general or without one. You should remember, though, that only ground units can seize control over a territory. Aircraft and ships that you deploy there, will fight the battle t, even if they are victorious, the area still remains free of your control. At the same time, ground units are incapable of crossing seas. First, you need to load them onto transporters. Each unit has a predefined that it can cover within one turn. By default, ground units move one field per turn, the sea units by 2/3 and the airborne ones by 3.
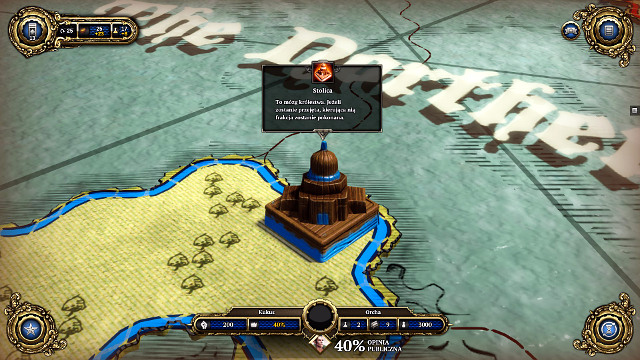 Seizing the enemy capital city is the main aim of the game
The most important point on the map is the Capital City. It is the key country, whose losing equals absolute defeat. After losing the Capital City, the player at the brink of losing still has one turn to recapture it. If he fails - the game will be lost. The capital City should not be left unguarded, especially if it is located near the enemy regions e.g. across the river.
This is the most important phase of the game, which, to a large extent, is a decisive point when it comes to victory and defeat. Below, there are several useful tips that will be helpful with every game:
 Cards can easily turn your army into a crushing power
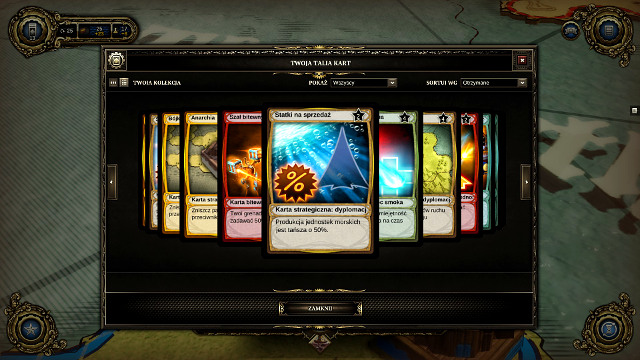
Cards fulfill the function of temporary special bonuses that last for one, or several, turns, or even the entire battle , depending on its kind. Cards are awarded depending on the decisions taken by you onboard the Raven as well as for the buildings that you build on your strategy map. You can also purchase them for the gold that you obtain from markets. There is a plethora of them and they concern virtually every unit, skill and upgrade so, containing it all in this guide is virtually impossible. It is also absolutely necessary to use them correctly, to win the campaign. Cards have been divided into several kinds, depending on what their purpose is:
Strategic cards: diplomacy- these are cards that you use on the strategy map for bolstering your troops' strength. They are very potent, with their potential ranging from the income in gold, through decreasing the unit cost, to increasing the number of moves in one turn.
Strategic cards: sabotage- they are similar to diplomacy cards but, instead of strengthening the kingdom, they weaken the enemy units. You can use them to destroy enemy buildings, immobilize the enemy army and even murder a number of citizens of a given country.
Combat cards: mercenary - these are cards that offer you access to mercenaries for the duration of one battle. The role of a mercenary can be fulfilled by any unit. These are very useful cards that can alter the outcome of otherwise lost battles. After the battle finishes, both the summoned units, and the card, disappear.
Combat cards: dragon skill- they offer you dragon skills for the duration of one battle . If you have already learned the skill offered by the card, this will render the card useless. That is why you should make sure that you do not yet have the skill, before you spend money on the card.
Combat card: Unit buff- for the duration of the battle, a specific unit will be strengthened in some way. This can be increased speed of movement, increased speed of shooting, increased damage or an improvement that you have not yet developed.
Combat cards: unit debuff- they work just like mirrored buff cards. You can slow the enemy unit down, weaken them or their armor.
Permanent cards - a special type of cards whose effect is permanent. You receive it for taking special decisions with races among which your popularity is high. The cards of each race are different and you can find their descriptions in the chapter bout counselors.
Each country on the map can have one building. They provide support, which depends on their type. The prices for the buildings will fluctuate, depending on the number of erected buildings (each building of the same kind is more expensive), on how far into the game you are and on the decisions taken by you. You can also destroy buildings and erect something else in their place. The only exception here is the capital city, where you can neither build nor destroy buildings. It is also the only country which does not need a gun factory to produce units. Furthermore, there is one special buildings there - market, which cannot be built and can only be captured in the neutral areas, usually on single island in the corners of the map. Once you control them, you will be able to purchase cards there, in exchange for gold.

Academy- generates one research point per turn, and a combat card every three turns. A very useful building, it is a good idea to have several of these.

Tavern- generates mercenary cards every three turns. Also very useful facility. Mercenaries can easily tip the scales in the battle and you should always have at least two up your sleeve, to be able to use them if necessary.

Gold mine - doubles the income, in gold, from a given country That is why, it is best to erect them in a country that provides most profit. At the same time, you should avoid building mines near the frontline. This is because they can be easily captured, and also you should be building war factories there.

War factory- thanks to these, you will be able to create and build units. To unlock units, you first need to develop them at Grumio's, onboard the racen. Additionally, sea units can only be build in seaside countries. It is best to build them near the war theatre where there is the largest income of gold per turn. After the war moves away, they can be demolished, with gold mines erected in their place.

Parliament - generates strategy cards every three turns.

Magic Tower - Generates the cards of dragon skills every 3 turns. If you are not a fan of the dragons, this is probably going to be the least meaningful building. In the long run, even if you do use the dragon, learning dragon skills onboard the Raven is a better option. Therefore, you can ignore this building and have, one or two, at most.
This is the armies that you have under your command. There are three kinds of these - ground, sea and airborne units. Their kind also determines the number of fields they can travel during one round. Ground units, in general, are inferior to the remaining ones and, an army composed only of these, deployed against aircraft and ships is bound to lose. On the other hand, they are necessary to seize lands in the Risk phase, as well as of buildings in the combat phase. Do not underestimate any of the types, even ships, on maps predominantly made of mainland, can be an asset. You can take advantage of their long range to fire at the enemy at a distance. They can also be used to transport units into another region of the map.
Trooper
Upgrades:
Enhanced engines - unit speed-up by 160%, 5 research points
Spoils of war -troopers can seize enemy buildings, 5rp
For the empire! -troopers self-destruct and inflict heavy land damage, 5rp
The most basic unit which is, in general useless, but valuable only in large groups. They are useful, though, thanks to the Spoils of war, which enables them to seize enemy buildings. A small trooper unit combined with e.g. warlocks, who can act as a cover for units, can cut into the side-base of the enemy without being detected, and take it over. On the strategy map, they have one movement point.
Grenadier
Upgrades:
Imp binoculars - increases the attack range by 25%, 5rp
Enhanced explosives - equips grenadiers with rockets that inflict heavy damage, 10rp
Chemical warfare - poisons the enemy and damages him for 3,5% hp per second, the poison can, additionally spread to the nearby units. Units remain poisoned until healed. 10rp
Decent infantry, which additionally come equipped with AA defense, thanks to which it is capable of defending against the enemy aircraft. Above all, they work well against armored vehicles and dragons. They are weak against hunters and heavy units. On the strategy map, they have one point of movement.
Shaman
Upgrades:
Immunity - decreases the damage taken by a friendly unit by 50% and also heals all of the negative conditions, 10 research points
Cripple - paralyzes units within 100 meters for 8 seconds, 20rp
Charm - The player takes over a selected enemy unit for 50 seconds and controls it, 40rp
In themselves, shamans are of no combat value and the will die quickly without any support. If properly protected, they can tip the scales of the battle. Enemy shamans should always be number one target for elimination. On the strategy map, they have one movement point.
Warlock
Upgrades:
Cloak - the warlock becomes "almost" invisible for 150 seconds, 5rp
Meet the beetles - turns the enemy unit into a bug for 56 seconds, 10rp
Death from above- a meteorite rain hits the designated area, 20rp
A support unit. Unlike the shamans, warlocks can defend themselves if necessary. Still, it should not be used for direct fight and will die quickly. When kept outside of the main heat of the battle, it can deal a lot of damage to the enemy. On the strategy map, warlocks have one movement point.
Hunter
Upgrades:
Revelation - exposes the enemy units within the radius of 1000 meters, 10rp
A Bird in the hand - allows engaging the airborne units, 20rp
Teleportation - hunter can teleport to a friendly unit, 40rp
Perfect against the enemy infantry. After upgrading, they are also very good against airborne units and dragons. Very weak against heavy equipment. On the strategic map, they have two movement points.
Armor
Upgrades:
Public transportation - allows the vehicles to transport soldiers, 5rp
Short, sharp shock- strong ground damage within the radius of 400 meters of the vehicle, 10rp
You are mine! - vehicles can drop mines onto the battlefield, which explode on contact with the enemy, 20rp
A decent and universal unit. It works against every other unit, apart from grenadiers and air attacks. On the strategic map, they have two movement points.
Devastator
Upgrades:
Enhanced Engines - moves faster by 140%, 10rp
Besiege - the devastator goes into the siege mode, at the cost of mobility it increases its range, 20rp
On the double - the devastator fires twice instead of once, but the destructive power of each shot is reduced to 75% of a regular shot, 40rp
Typical artillery, formidable against all ground and naval units, as well as against buildings. The greatest threat for them is dragons and airborne units. On the strategic map it has two movement points.
Transport
Upgrades:
Minesweeper - the transport disarms the enemy mines, an absolute must-have, 5 research points
Cloak - The transport disappears from the enemy sight for 225 seconds. 10rp
For the Empire! - the transport self destructs and inflicts damage to the enemy units
A unit that is absolutely necessary if you want to win on the strategy map. During the battle, it is, in general, useless unless the map is crisscrossed with rivers that enable a surprise attacks from behind. In reality, however it involves a lot of work and does not necessarily have to be a good move. On the strategic map, they have two movement points.
Ironclad
Upgrades:
revelation - exposes enemy units within 1200 meters, 5rp
Sea Mine-Maids - plants a sea mine, 10rp
On Guard - for 18 seconds the ironclad can destroy all of the incoming projectiles.
The basic naval unit. Effective against Juggernauts, air units and dragons. Weak against infantry. On the strategic map it has two movement points.
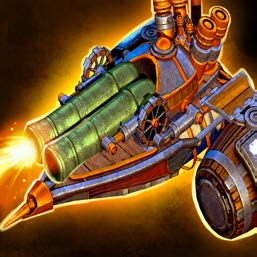
Juggernaut
Upgrades:
Imp Backup - allows you to produce fighter planes that can protect the ship, 5rp
Imp Binoculars- increases the range by 25%, 20rp
Bunker buster - the strongest skill of all available in the game. Additionally, it can be reinforced with the permanent card from the Imps. The mighty bomb falls on the designated point on the map and destroys everything in its way. Still, it can be destroyed with a projectile before it hits the ground, 40rp
Formidable units but vulnerable to Ironclads. They can also be threatened by devastators and bomber balloons, which can be countered with reinforcements. On the strategic map, they have two movement points.
Imp fighter
Upgrades:
Iron Plating - increases hp by 50%, 10rp
Bombs Away - fighters can attack ground and naval units, 20rp
War of Attrition - fighters slow down the enemy units for 3 seconds with each shot they take, the effect cumulates, 40rp
By default an AA unit but, after you develop bombs, it also works against all types of infantry, apart from grenadiers and the hunter with the bird in the hand. They can be threatened by heavy ships. On the strategic map, they have four movement points.
Bomber Balloon
Upgrades:
Mine High Club - mines in the air, they activate after an enemy unit comes within 200 meters, 20rp
Revelation- exposes the enemy units within 1200 meters, 20rp
Enhanced Explosives - bolsters the balloon's basic attack, 40rp
Immensely useful against big enemy groups. They can be threatened by fighters, grenadiers and ironclads. On the strategic map it has three movement points.
Zeppelin
Upgrades:
"Fly my flaming pretties!" - the blimp shoots a series of 12, flaming projectiles, 5rp
Mustard Gas - the blimp drops a bomb that poisons everything within the range of 500 meters for 19 seconds, 20rp
Fog of war - the blimp can cloak all of the units within 500 meters for 225 seconds, 40rp
A support unit that is almost defenseless if alone. It increases the range of the nearby units but, in the long run, it is useless, at least by the time of developing the fog of war. Then, it is excellent for surprise attacks from behind. On the other hand, however if the enemy has the ability of revealing the map at his disposal, e.g. from a balloon, such an attack becomes risky and it is, probably, best not to pull it off. On the strategic map it has 3 movement points.
The combat phase is the part of the game that will cause the most problems to players. On the other hand, this is the part that will be enjoyed by the RTS fans most. The overall rules have not changed, in comparison with the other games of this genre. Still, there are a few differences. Before a direct battle is fought, all of the sides to the conflict need to make preparations.
At this point, you will decide if you want to fight the battle alone, if any of the generals should take the command, or the army should remain without its commander. A general and the dragon can only be used once a turn, the remaining battles, if any, will have to be fought without a commander. That is why, if in a given turn, you expect 3 or more battles, it is very important to make a careful selection of the staff. In other words, the army will do well if only it outnumbers the enemy. If the situation is bad - a commander may be your only solution. It is good to know that the game does not impose on you the necessity to fight a battle and the whole game can be completed with automatic battles only.
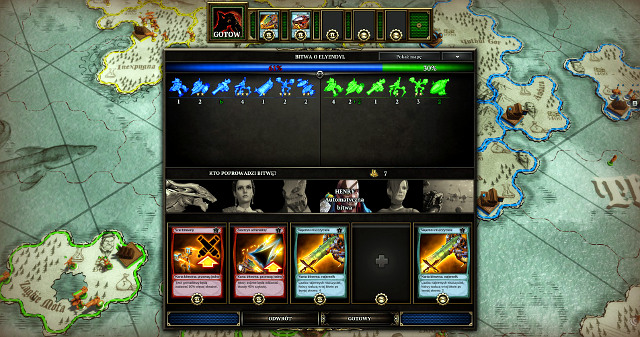
The bar above signifies the percentage chances of victory in a given skirmish. Apart from the number of soldiers, and their upgrades, the chances for victory are also influenced by generals (e.g. Henry shown in the above screenshot, thanks to his skills, gives more chances for victory than the others), as well as by your popularity among races, buildings (remember that each country surrounded by allied countries has higher and higher buildings with each turn. The condition of buildings in the countries bordering with the enemy will deteriorate on a regular basis) and the selection of cards. There are five slots into which put the cards. The first three are visible and two last slots will be invisible for the enemy. Of course, you should make your selection in such a way, as to strengthen your units as much as possible. In the case of the automatic battle, there is no point in using a card that improves on the grenadiers' shooting speed, if there are no grenadiers in your army. Such a card will be most useful in a regular battle, because it will bolster all of the grenadiers that you create in the RTS mode. It is best to put the most crucial cards into the invisible slots, which can surprise the unsuspecting enemy, and which would scare him into retreat if he saw these in the visible slots.
With the automatic battle, each single percent point is of significance. Nonetheless, it is still trusting the fate blindly and, even in the case of an 80%-20% advantage, theoretically, the chances of losing are still high. What remains is the matter of loses which, even in the event of victory during the automatic battle may prove to have adverse effect on your campaign, and which you could not suffer if you played yourself. The choice is up to you. If you are good playing RTS games, fighting the battles yourself is probably going to be a better option. On the other hand, these are quick and demanding clashes which will bring more harm to players that are not that experienced. You should also remember that you can change the pace of the gameplay, during battles, if it is too high for you.
 The blue orb in the middle indicates how much time is left until you can turn into dragon
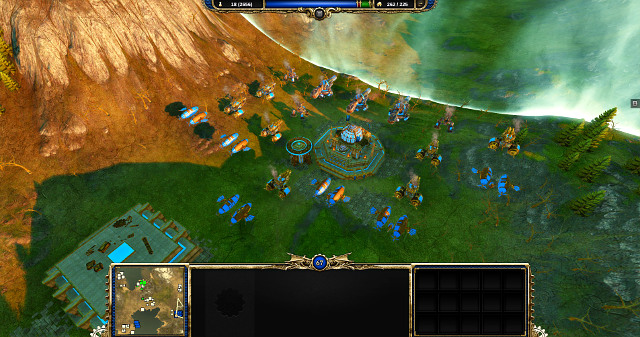
The basic deviation from the norm in the RTS part of the Dragon Commander is the absence of typical builders that you have seen in the other games. The buildings build themselves but, you can erect them in specific areas of the map (the white patches of land on the minimap). You first need to seize such a region by keeping your ground units next to it, and then, build a building of a given type. If the building has already been built, in order to take over the foundation, you need to demolish the structure and raise your own. You can use troopers, with their special ability Spoils of War, which allows you to take over the enemy buildings. This will save you time an money.
Apart from the building system, the rest of the gameplay is nothing out of the ordinary. With passage of time, you gain support points (the higher following in the race, on whose grounds you wage war, the more points you get) that perform the function of a resource for which you buy units and build structures. Your objective is to destroy the base (bases) that belongs to the enemy, in order to win a battle. Maps are sometimes very big and the units build very fast and in high numbers. This may result in swarms of soldiers that wander aimlessly around the map who will be difficult to control. That is why you should not hesitate during the battle and strive for completing it as fast as possible. The size of the maps is, at the same time, the greatest trap connected with fighting battles where one side outnumbers the other greatly. In theory, during such battles, the enemy should be quickly pacified with the battle finished. In practice, however, reaching the enemy embankments may take long enough for the enemy to manage to take over the nearby areas, build new bases and new units which will alleviate your advantage in numbers. If you face such a situation, do not forget to send out trace numbers into the side-regions of the map, where there are building sectors, to take over these regions before the enemy does. This will clip the enemy's wings. Assuming that the enemy does not have heavy equipment at his disposal, you should do with two turrets to defend such a strip of land, which you can additionally support with the dragon. On the other hand, if such a situation happens to you, and you are outnumbered, playing cat and mouse, and escaping from the enemy (and attacking the divided units, to the extent it is possible), seizing as many neutral regions as possible, and postponing the final clash to win time to erect as many structures as possible will be the only recipe for success.
What matters in the fights themselves is the speed that you react with. You should not allow the enemy to scatter all around the map like locust. You should, of course, remember about the basic rules like keeping shamans at the backs. Create units which will allow you to control the enemy ''s strategy. Do not forget about the skills of your soldiers. It will be immensely useful if you learn keyboard shortcuts quickly. You will be able to discern it mainly while constructing new units. On big maps, you can go as far as ten (or more) production buildings. Controlling it all manually is a very difficult task. All types of buildings have their own shortcut (by default, these are Z, X, C, V), thanks to which you will be able to mark the buildings of a type all around the map. Remember also about gathering points. Do you want to attack the base in the upper-right corner of the map? Just press Z to select all of the Battle Forges that you have already built and right-click on the area where the enemy base is. From now on, all of the units that you build, all of the newly built units will go where soon the battle will take place. Shortcuts are the key to success, especially if you plan on playing with the dragon often.
Finally, the more buildings, the higher number of these at the beginning of the battle. Also, do not forget that the units that you produce during the battle disappear after it finishes. At the same time, units built in the Risk phase, that will be destroyed during the battle, will disappear from the strategy map.
 New production buildings can be constructed in each construction point of the map
If you control the building spots, you can build buildings. It depends on the individual field what type of structure you can put there. The smallest, circular ones are for turrets. In the big circular ones, you can put up a citadel which will provide you with new recruits and more support. In the areas at the seaside, you can build a shipyard and, in the square fields, you can build one of the three factories:
-Battle Forge: allows you to enlist troopers, grenadiers, shamans and warlocks;
-Aerofactory: fighter, bomber balloon, Zeppelin;
-war Factory: hunter, Armor, devastator.
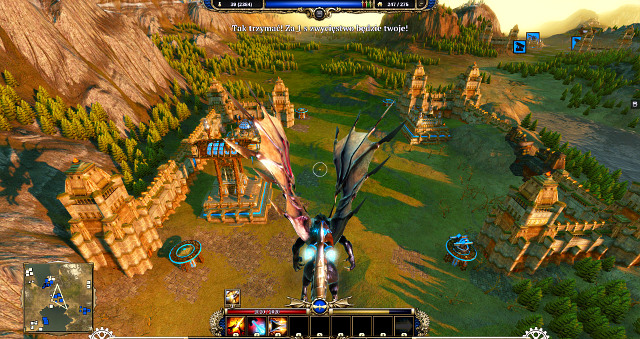
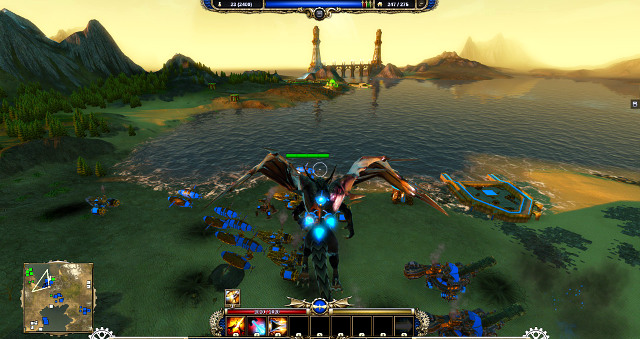 The dragon can be decisive when it comes to the outcome of the battle but, vesting too much trust in its abilities will end in a failure.
The dragon, with all its "dragonity", jetpack and other super-duper gizmos can quickly lure players that are fed up with chaotic battles, to abandon the troops and focus on flying as the fire-belching monster. Unfortunately, the situation is not that easy - if you ignore your troops and focus on playing as the dragon, you will doom your armies. You cannot play the game as the dragon. It is too weak, after all, and the arcade will end as soon as the health bar drops to zero and you will be, no longer, able to perform dodges. If you cannot dodge, a medium-sized enemy army will send your dragon to the dragon heaven in a matter of seconds. Although you can still issue orders to your armies and build new buildings, in practice it is extremely troublesome. That is why, it is better to spend your research points on development of units and neglect the dragon, in a way. The best idea is to summon the dragon whenever you need to tip the scales, after which you should send it away. It is useful for the elimination of the jolly enemy units behind your lines, who take over neutral territories.

Movement

Basic attack (continuous fire can cause overheating, which is symbolized by the red bar that fills around the crosshair)

Use Jetpack. The energy level is marked with the yellow bar, when it drops to zero, you cannot use jetpack anymore.

Use the dragon's skill

Select all units on the map

Select all units around the dragon

Select all units around the target

Move troops to the specified area or attack the units there

Unselect all of the selected units
At the beginning of the game, you will select a dragon which you won't be able to change later on. There are three types to choose from - Mountain Dragon, Sabre Dragon and Zephyr Dragon. In general terms, they are an offensive, balanced and defensive dragon respectively. However, in practice, you can easily equip your dragon with any set of spells you want. The only difference is the initial set of skills. The dragon can be equipped with, at most, 9 skills that you choose at the beginning of each battle so, you are not tied up with the same skills throughout the entire game
Rejuvenation - health regeneration is 100% faster, 5 research points

Aura of Restoration- heals all of the friendly units within 1500 meters, 10rp
Aura of Annihilation - it permanently increases damage dealt by the units within 1500 meters, 40rp

Aura of Frailty- decreases the range of enemy units within 1500 meters, 20rp
Blood Leech - you apply a shield to a unit, which decreases the damage taken by that unit by 50%, at the same time, each shot at this unit heals the dragon, 10rp
Devastation - increases damage dealt by the basic attack by 33%, 20rp
Soar - Increases the speed of flight by 40%, 5rp
Scales of Steel - the dragon receives 33% less damage, 20rp
Acid Blaze - For 13 seconds you will be shooting acid balls, 10 research points
Advance! - for some time, the units within 1700 meters will move faster by 60%, 5rp

Shield - the marked unit will be receiving damage lower by 70% and it will receive immunity to negative effects, 5rp
Bastion - creates a ten-second shield around dragon, which provides increased defense and immunity to negative effects, 20rp
Breaching Fire - after it is activated, you deal more damage to dragons, medium and heavy units, 20rp
Berserker Roar - units within 1700 meters shoot more often and inflict more damage for the next 25 seconds, 10rp
Call of Valor - the units within 1700 meters receive increased protection and deal more damage for the next 25 seconds, 40rp
Chameleon Hide - for the next 63 seconds, you disappear from enemy vision. 10rp

Charm - for 150 seconds you win an enemy unit over to your side, 20rp

Cleansing Charge - you lift all the negative effect from the units within 1700 meters, 10rp
Crippling Roar - for 10 seconds, you paralyze the enemy units within 1000 meters by disabling their basic attacks, 40rp

Dread Roar - all of the units within 825 meters are paralyzed with fear for 13 seconds, 20rp

Eye of Patriarch - you cast a single projectile, which explodes and deals damage to everybody within 300 meters, 40rp

Inspire - You speed up a unit by 100% and increase damage dealt by that unit by 200% for 38 seconds, 5rp

Mass Restoration - completely heals all units within 500 meters, 20rp

Pillar of Restoration - for 16 seconds you generate a pillar of restoration in a selected spot of the map. All of the allied units within 500 meters will receive their health points every second, 40rp
Pillar of Flame - you create a pillar of fire in a given spot of the map. All the enemy units within range will start losing health points every second, 40rp
Purifying Flames - supplants the basic flame attack. As you shoot towards the allied units, you heal them. Unlike fire, this one does not cause overheating., 5rp

Ray of Power - increases the damage dealt by a unit of your choice by 175%, 5 rp
Sabotage- you block the abilities of buildings or units for 15 seconds, 10rp
Salvation - you regenerate 55% of your health, 5rp
Unveil- exposes all hidden enemy units within 2000 meters, 5rp
Before you start the campaign, you will be asked to select the dragon that you will be playing as. Selection of the dragon determines its looks and initial skills (you will be able to change them later on). The mountain dragon starts the game with purely offensive skills, Zephyr with defensive skills and the Sabre attempts at combining these two. The skills that you are going to have at the beginning of the game depend on which dragon you select (Hunter with the Sabre, Warlock with the Mountain and shaman with the Zephyr). The choice is yours and make it in accordance with the style that you prefer. Zephyr will constitute a good support for your units. His basic attack heals allies and, additionally, it does not overheat. If you, however, plan on basing your gameplay on the dragon, then the Mountain Dragon is your choice.
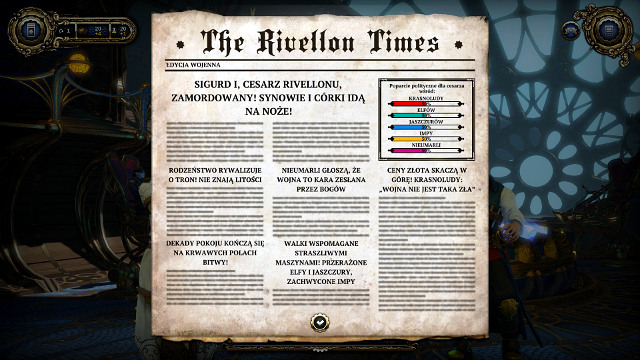 Each turn starts with a quick look at the newspaper onboard the Raven
You start the game on your flagship - the Raven - where the mage - Raxos- will explain you the current condition. You are a bastard child of the former emperor who died by the hands of his own children when they rebelled and started a war on an unseen scale. Your aim is to pacify the sibling and restore the due glory to the empire. On the Raven, you will meet the first two of your commanders - Henry and Edmund. The generals will, every now and then, have some business with you and they will want to talk. A detailed description of their problems and the ways to solve them, have been contained in the chapter devoted to the commanders. Remember that the decisions are permanent and they will be in effect throughout the rest of the game. On the other hand, as soon as you finish the mission before you have had all of the conversation, they will be transferred to the next map. That is why you do not need to bother about playing too fast because you won't miss anything anyways.
Get to know both the Raven and its denizens. In the last two chambers, you will find Grumio and Maxos. This is where you can work on developing new technologies. It is a good idea to develop Transportation and Spoils of War for troopers, with Grumio. You should spend the remaining points on any of the remaining units, depending on which one you have unlocked with your selection of the dragon. Get acquainted with the new home and transfer from the bridge to the strategy map by clicking on it.
The first glance at the map may not cheer you up. As you can see, your enemy controls the definite majority of the map and he borders directly with your capital city! Fortunately enough, it is not as bad as it may seem. First of all, you should seize the terrains to the East. You start with four troopers . Move one of them to the right, to seize the neutral land. If you want to play an offensive game, you can use the remaining three squads to attack the enemy region near the border, as long as there are no embankments there. The battle will be heated but, by using the dragon/a general and a card or two, you should emerge victorious. If you, still, do not want to risk straight away, you should withhold any actions with your troops. Build the transport in the capital city, which you have already developed at Griumio's and a squad of grenadiers. Then, end the turn.
In the turns to follow, focus on seizing control over the entire Southern portion of the map. Use transport to seize all of the nearby islands. Remember that transport, by itself, cannot seize any lands! First, load your troops into the ship and carry them over to the island to the West. Then, right-click on the transporter to unload it . You should also watch out for a landing to the East, where the enemy transporter is sure to appear also (the screenshot). These are going to be very small forces so, you will deal with them easily. Throughout the rest of the game, the computer should not try anything similar but, if you want to make sure, you can keep there a squad or two. After you have won in the first battle, you will be informed that two another generals - Catherine and Scarlett - have joined your cause.
 At the beginning of the game, try appeasing the Undead or the Elves
In the meantime, there will be ambassadors of individual races to have arrived aboard the Raven. They will be busy, for the rest of the game, trying to propose various amendments to the law. The decisions you make will be followed by increase or decrease in the income, increase/decrease of the number of recruits, drop in the cost of one unit etc. What counts here, however, is the popularity with the race that influences the following in a given region. The decisions that you take have no direct bearing on the plot. In general, they are options for and against that increase, or decrease your popularity with a given race. When your popularity with one of the races comes near 100%, that race will forward a special proposal not supported by any other race. If you agree though, you will receive a gift in the form of a special permanent card, different for each of the races. The best method, therefore, is to support the suggestions of one f the races, and change sides after you cash in. The map for the first mission is occupied by elves and the undead only. You should soon receive a motion for the introduction of compulsory draft. Agreeing to that will. Not only improve your relations with the undead, but also decrease the cost of new units which will be very useful throughout the rest of the mission.
 Before you attack the enemy lands, conquer and build up the lands to the South
Once the southern part of the map is under your control, you will only have to launch an offensive on the enemy territories. You can use ships to attack at both sides at the same time, or order your entire army across the land. The enemy should be no threat to you. Conquer all the lands around the capital city but leave the capital unconquered. It will be heavily defended so, it is better to seize the remaining territories, for the time being, and gather a bigger army. With the majority of the map under your control, the enemy should have nothing to respond with. Keep occupying the two countries that border with the capital and seize the remaining countries with a single squad and a transporter. In the meantime, remember to develop your technologies at Grumio's.
 Once you are ready, launch an onslaught on the enemy territory
The only thing you need to do now is seize the capital. Conquering it will finish the first task. Gold, discovered technologies, cards, research points, popularity and the consequences of your decisions will be carried over to the next part of the game. So, to make the second mission easier for yourself, you can wait a few turns before you launch the final attack, so you can gather more gold and cards.

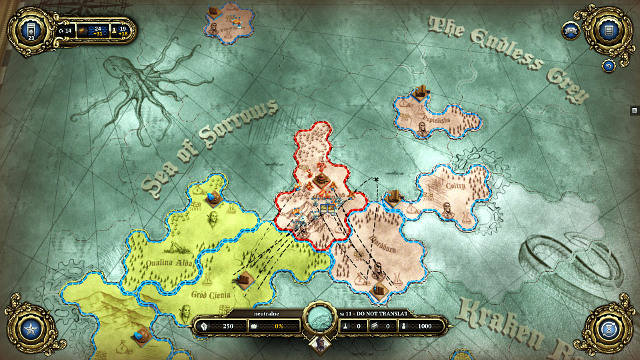
The second mission is definitely more complicated and unpredictable. First of all, you will be fighting three of the siblings simultaneously. On the other hand, there are no alliances here, so it is a good idea to take advantage of the fact that they will be battling among themselves. Two of the capitals are on the mainland, with one on an island, right next to yours. The sea, itself, is being patrolled by ironclads and juggernauts so, it is not possible to attack that way. At first, you should try and get a stronghold on the land, where you can think of expanding your dominion. There is a country called Starlington, where there are a few neutral units and a gun factory. Load your army into the transporter and move your forces over there, just like in the screenshot. The research points and the money, which you have saved from the previous part, should be spent and the development of the fleet. The faster you obtain a strong armada, the earlier you will be able to seize the cluster of neutral islands, and also threaten your neighbor, before he attacks first.
 Soon after the start, you will have to choose your future wife
Meanwhile, aboard the ship, you will be informed of your wedding. Soon, four beautiful brides from the races of Rivellon, will be introduced to you. One of the ladies will be happily married to you. The storylines of the princesses have been covered in the chapter devoted to them.
 Controlling the seas will ensure the capital with safety
Keep pushing to the West with the frontline. The yellow player, at the same time, will be attacked from the bottom so, your task should be easier. Delineate the border near his capital, to secure all of your areas with one country. At the same time, after you create, at least 4 ironclads, move some of your armies to the Northern isle full of neutral units. Take your time, if you attack too soon, you can thwart all of your work and you will be wasting the money that you have saved on the previous mission. If necessary, wait for some three turns until you cross the sea to allow the enemies decimate each other.
 You can deal with Corvus only in the second act
In the RPG mode, you will meet Corvus - a demon. He will offer you extraordinary powers in exchange for offerings of your subjects. You can allow him to feed on the citizens of your kingdom, or offer him the queen. In exchange, you will receive mighty cards that are unavailable in any other way or, an additional 20% of popularity with one of the races. Each time you agree to cut a deal with Corvus, he will grow stronger and the cards will be better and better. At the same time, due to the offerings, the society will suffer in a way. The number of recruits will fall and the disappearing queens will damage your relationships with the races. All in all, dealing with Corvus is more damaging than it is profitable. The cards themselves, although powerful, are disposable ones. The damage done to the economy will be permanent and will maim the process of army formation in the future. Nothing bad will happen, though, if you offer him a queen after her storyline is over. Within one game, you will be able to complete the storyline of another one, and there will be a few good cards to enrich your portfolio. This will come with the dropping support from everybody but, this is an acceptable trade off. Doing business with Corvus does not influence the ending of the game and it is possible in this act only.
 Try to seize the capital of the yellow player to put your hands on considerable deposits of gold
The following actions will depend on how the game plays out. If your base on the mainland is well secured, and your fleet is strong, you can attempt launching an attack at the red player's capital. It would be good if, at the same time, you would prevent any of the remaining factions (yellow, green) from gaining too much economic advantage. If the situation on the continent is bad, leave the red player for the end and focus on the yellow one. At the same time, allow the green player to fight most of the battles, but do whatever you can to seize control of the capital yourself. It is a good strategy to allow the green player to attack the capital and attack it yourself quickly in the next turn, when your enemy is still drained from the heavy battle. This may not be the most honest of solutions but, nobody says dragons cannot cheat here and there. Keep looking out for the transporters approaching by sea at the other side to prevent being taken off guard from behind. Keep your ironclads ready. It is also a good idea to spend some gold on fighters whose range is the largest from among the units available in the game. Thanks to this it will be easy to deploy them wherever threat appears. Of course, you should keep some of your units in the capital to protect it from possible attacks.
 Defeating a player will be followed with a gift from Maxos
After you seize the first capital, you should focus on the second enemy. It is best to leave the green player for the end, due to the inaccessibility of his capital. Your enemies will probably try to launch a landing on your capital. To the extent it is possible, use your armada of ironclads to destroy all of the ships before they hit the shore. A destroyed transporter kills, automatically, everyone that was onboard. This will pave the road to a relatively easy victory. Even if you are outnumbered by the enemy, he won't be able to take advantage of that, if you do not allow him to unload them and send them to the bottom of the sea instead. Try to gain control on the seas by using ironclads and use the fighters to control the continent. Expand your economy. Taverns will be very useful here, as well as parliaments. After you deal with the second enemy, take your time. If you are in control of the seas, you will be safe anyways. Expand the army and develop the units (low numbers of upgraded units are better than larger numbers of units without upgrades) and attempt pushing the green enemy to the South.
 Attacking the last capital will finish this game
After you have seized two capitals, you can deal the final blow to the green capital in several ways. You can attack over land from the North or from the South or, with the powerful armada from the sea (which will be the fastest way and, if you can withstand the enemy counter-attack, will allow you to finish the game without seizing any of the countries of the enemy. You can also try combining various options. You are going to need special cards received from the princess, the races and even from Corvus. If you capture the capital, you need to hold it for one more turn and your victory will be complete. Of course, the enemy may not control any other capital on the map. Once again, if only you can, hold the enemy suspense for a number of turns before the final attack. The gold and the cards will be transferred to the grand finale.
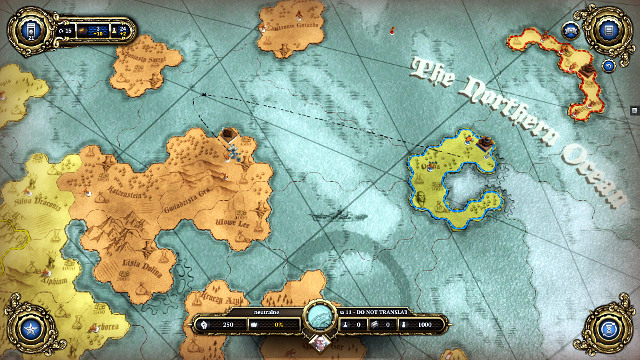
The second mission is definitely more complicated and unpredictable. First of all, you will be fighting three of the siblings simultaneously. On the other hand, there are no alliances here, so it is a good idea to take advantage of the fact that they will be battling among themselves. Two of the capitals are on the mainland, with one on an island, right next to yours. The sea, itself, is being patrolled by ironclads and juggernauts so, it is not possible to attack that way. At first, you should try and get a stronghold on the land, where you can think of expanding your dominion. There is a country called Starlington, where there are a few neutral units and a gun factory. Load your army into the transporter and move your forces over there, just like in the screenshot. The research points and the money, which you have saved from the previous part, should be spent and the development of the fleet. The faster you obtain a strong armada, the earlier you will be able to seize the cluster of neutral islands, and also threaten your neighbor, before he attacks first.
 Soon after the start, you will have to choose your future wife
Meanwhile, aboard the ship, you will be informed of your wedding. Soon, four beautiful brides from the races of Rivellon, will be introduced to you. One of the ladies will be happily married to you. The storylines of the princesses have been covered in the chapter devoted to them.
 Controlling the seas will ensure the capital with safety
Keep pushing to the West with the frontline. The yellow player, at the same time, will be attacked from the bottom so, your task should be easier. Delineate the border near his capital, to secure all of your areas with one country. At the same time, after you create, at least 4 ironclads, move some of your armies to the Northern isle full of neutral units. Take your time, if you attack too soon, you can thwart all of your work and you will be wasting the money that you have saved on the previous mission. If necessary, wait for some three turns until you cross the sea to allow the enemies decimate each other.
 You can deal with Corvus only in the second act
In the RPG mode, you will meet Corvus - a demon. He will offer you extraordinary powers in exchange for offerings of your subjects. You can allow him to feed on the citizens of your kingdom, or offer him the queen. In exchange, you will receive mighty cards that are unavailable in any other way or, an additional 20% of popularity with one of the races. Each time you agree to cut a deal with Corvus, he will grow stronger and the cards will be better and better. At the same time, due to the offerings, the society will suffer in a way. The number of recruits will fall and the disappearing queens will damage your relationships with the races. All in all, dealing with Corvus is more damaging than it is profitable. The cards themselves, although powerful, are disposable ones. The damage done to the economy will be permanent and will maim the process of army formation in the future. Nothing bad will happen, though, if you offer him a queen after her storyline is over. Within one game, you will be able to complete the storyline of another one, and there will be a few good cards to enrich your portfolio. This will come with the dropping support from everybody but, this is an acceptable trade off. Doing business with Corvus does not influence the ending of the game and it is possible in this act only.
 Try to seize the capital of the yellow player to put your hands on considerable deposits of gold
The following actions will depend on how the game plays out. If your base on the mainland is well secured, and your fleet is strong, you can attempt launching an attack at the red player's capital. It would be good if, at the same time, you would prevent any of the remaining factions (yellow, green) from gaining too much economic advantage. If the situation on the continent is bad, leave the red player for the end and focus on the yellow one. At the same time, allow the green player to fight most of the battles, but do whatever you can to seize control of the capital yourself. It is a good strategy to allow the green player to attack the capital and attack it yourself quickly in the next turn, when your enemy is still drained from the heavy battle. This may not be the most honest of solutions but, nobody says dragons cannot cheat here and there. Keep looking out for the transporters approaching by sea at the other side to prevent being taken off guard from behind. Keep your ironclads ready. It is also a good idea to spend some gold on fighters whose range is the largest from among the units available in the game. Thanks to this it will be easy to deploy them wherever threat appears. Of course, you should keep some of your units in the capital to protect it from possible attacks.
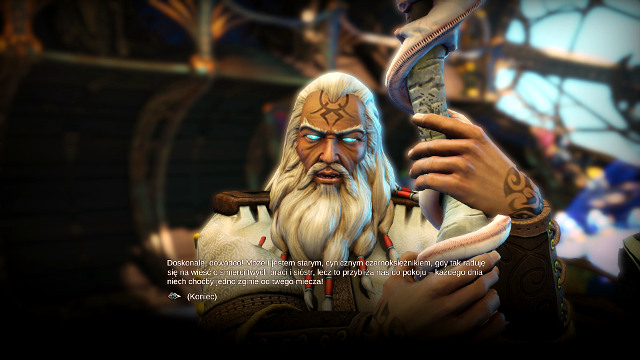 Defeating a player will be followed with a gift from Maxos
After you seize the first capital, you should focus on the second enemy. It is best to leave the green player for the end, due to the inaccessibility of his capital. Your enemies will probably try to launch a landing on your capital. To the extent it is possible, use your armada of ironclads to destroy all of the ships before they hit the shore. A destroyed transporter kills, automatically, everyone that was onboard. This will pave the road to a relatively easy victory. Even if you are outnumbered by the enemy, he won't be able to take advantage of that, if you do not allow him to unload them and send them to the bottom of the sea instead. Try to gain control on the seas by using ironclads and use the fighters to control the continent. Expand your economy. Taverns will be very useful here, as well as parliaments. After you deal with the second enemy, take your time. If you are in control of the seas, you will be safe anyways. Expand the army and develop the units (low numbers of upgraded units are better than larger numbers of units without upgrades) and attempt pushing the green enemy to the South.
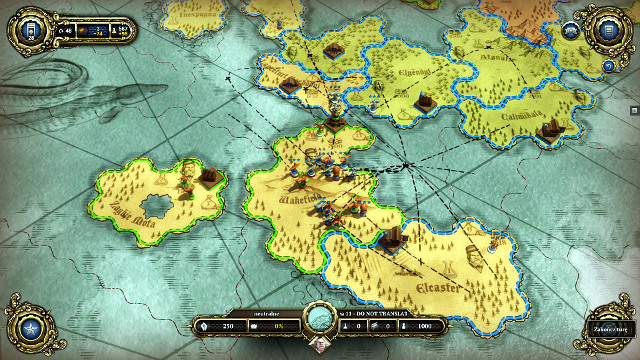 Attacking the last capital will finish this game
After you have seized two capitals, you can deal the final blow to the green capital in several ways. You can attack over land from the North or from the South or, with the powerful armade from the sea (which will be the fastest way and, if you can withstand the enemy counter-attack, will allow you to finish the game without seizing any of the countries of the enemy. You can also try combining various options. You are going to need special cards received from the princess, the races and even from Corvus. If you capture the capital, you need to hold it for one more turn and your victory will be complete. Of course, the enemy may not control any other capital on the map. Once again, if only you can, hold the enemy suspense for a number of turns before the final attack. The gold and the cards will be transferred to the grand finale.
 Duke Nukem Forever Game Guide & Walkthrough
 Daylight Game Guide & Walkthrough
 Dragon Age II: Legacy Game Guide & Walkthrough
 Drakensang: The Dark Eye Game Guide & Walkthrough
 Dracula 4: The Shadow of the Dragon Game Guide & Walkthrough