In this guide to Dark Souls II, you will find all of the most important information concerning the game, thanks to which you will be able to deal with the dangers that await you. Among others, you will learn how to fight the individual opponents, how to develop your character, where o find the best items and what to do in critical situations. This guide consists of three vast parts, whose aim is to make it easier, for the player, to find the required contents. The first part provides 10 easy-to-follow steps that discuss the most important matters in Dark Souls II. Thanks to them, in an easy and problem-free way, you will learn how to survive in the brutal world created by From Software. You will learn the rules that govern combat, how to develop your character and also, you will find information on important merchants. The second part of the guide presents detailed information on all of the elements of the game, e.g. the hero, combat, items collectibles, merchants or the spells available in the game. Also, you will find there a detailed walkthrough, along with hints on how to fight bosses and the more difficult enemies. In the third part of the guide, you can find special video clips that present the means of reaching and defeating all of the 25 bosses in the game. In a situation, in which you are dealing with one of the most frustrating and relentless action cRPGs of the recent years, a guide for its next instalment should come in handy.
This guide to Dark Souls II includes:
Damian Kubik ()

Dark Souls II in 10 easy steps, is a guide for Dark Souls II, which includes 10 select issues concerning this difficult game. In the first chapter, you will find information concerning the character that you control, the character creation process and, class selection and the starting gift selection. The second chapter has been devoted to describing the first day in the world of Dark Souls II. It includes hints for beginners and the walkthrough for the beginning stages of your journey. From the third chapter, you will learn everything that there is to know about leveling up, and the fourth one has been devoted to the discussion of the means of healing in the game. The fifth chapter concerns bonfires, which constitute an important element of the game. In the next part of the guide, you will find information concerning bartering and the first merchants that you encounter in the game. The game includes, among others, a list of items that they have for sale. Chapter seven concerns the upgrades available in the game. You will learn how and where to improve your equipment. The information about the Covenants, of the beginning of the game, has been included in chapter eight. The ninth part of this guide has been devoted to magic and the tenth to combat. Thanks to the numerous hints, most of the enemies, at the beginning, should cause no major problems to you. Dark Souls II is the continuation of the popular RPG game of 2011. It has been released by From Software, i.e. the same, Japan-based, studio that developed part one. Again, the game takes you into the gloomy fantasy world that has already been presented in the first installment of the game, whose action took place in the land known as Lordran. This time, however, you visit its other regions and you do that as a completely different hero.
Damian Kubik ()
The chapter that discusses the character creation process. A detailed description of all the classes and statistics available in the game.
From this section of the guide, you will learn how to play to keep kicking for as long as possible. Hints, tactics and general description of the game mechanics.
From this chapter, you will learn where and how to increase your character's experience level.
The chapter where you will find detailed information on how to heal your character.
The chapter that discusses what bonfires are and what kind of options are available at them. You will also learn how they influence your character.
In this section of the guide, you will learn where are the merchants that you can encounter at the beginning of the game. Also, you will find here descriptions of the items that they offer for sale.
From this chapter, you will learn how and where to upgrade your equipment (weapons, shields, armors and items).
The chapter that discusses covenants that you can join at the beginning of the game.
From this chapter, you will learn everything that there is to know about magic in Dark Souls 2, such as its types and what you need to cast spells.
From this section of the guide, you will learn how to adjust the fighting style to various types of enemies. Also, you will find here a handful of the golden rules concerning duels.
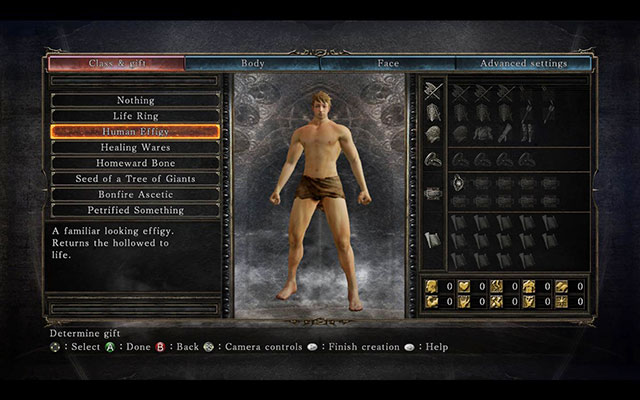
From this chapter, you will learn how to create your character, which you will be controlling throughout the game. You will learn everything on the available character classes, their starting statistics and the equipment that is available at the beginning of the game. Also, you will learn here about all the gifts that you can receive, while creating your character.
 The class selection
You always start the game as "undefined". To create a character, you need to go to a small cottage in the area. The way is simple, you just need to go straight ahead. The first step, while creating the character, is to choose a name for yourself. The developers gave the player quite a freedom, when it comes to defining the looks. As a matter of fact, if you try to do your best and spend some time with it, you can create a character that very much resembles you. But, let's focus on the most important thing, which is character classes.
There are eight classes in the game. The most important piece of information, concerning lasses, is that, although it might seem otherwise, they do not impose a pre-set playing style on you, and suggest some solutions instead. In other words, the class division, in the game, is arbitrary and you can develop your character in any way that you want (e.g. choosing a mage does not mean that you need to use magic). Classes only define the base statistics, the general level and, which is probably most important, the starting equipment.
Statistics that describe your character:
Each one of the classes has unique statistics at the beginning of the game. You can find a detailed division in the table below.
Class
Warrior
Knight
Swordsman
Bandit
Cleric
Sorcerer
Explorer
Deprived
Level
12
13
12
11
14
11
10
1
Strength
15
11
9
9
11
3
6
6
Vigor
7
12
4
9
10
5
7
6
Dexterity
11
8
16
14
5
7
6
6
Endurance
6
6
8
7
3
6
6
6
Adaptability
5
9
6
3
4
8
12
6
Vitality
6
7
4
11
8
5
9
6
Intelligence
5
3
7
1
4
14
5
6
Attunement
5
4
6
2
10
12
7
6
Faith
5
6
5
8
12
4
5
6
 Gift selection screen
While creating your character, you can receive one of items to be added to your equipment, at the beginning of the game.
An especially noteworthy class is the Explorer. The balanced distribution of the statistics, which allows the character to be evenly developed in various directions. Apart from that, the hero starts with many useful, necessary even, items on him, which makes the game more accessible for any player.
From this chapter, you will learn how to survive your first day in Dark Souls 2 without too many problems and not do die too often. Also, you will find here the general information concerning the gameplay. You will learn how to travel the game world without exposing yourself to too much risk. Also, you will find here a description of the first location that will take you to the central place in the game, where you start your actual journey.
 At the beginning, always use the shield
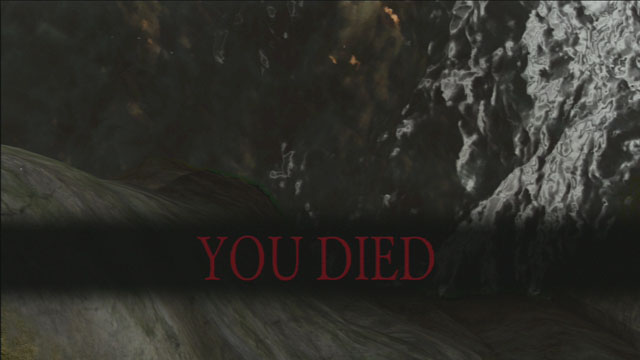
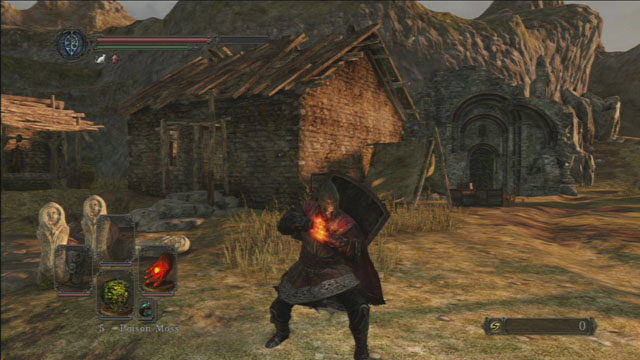
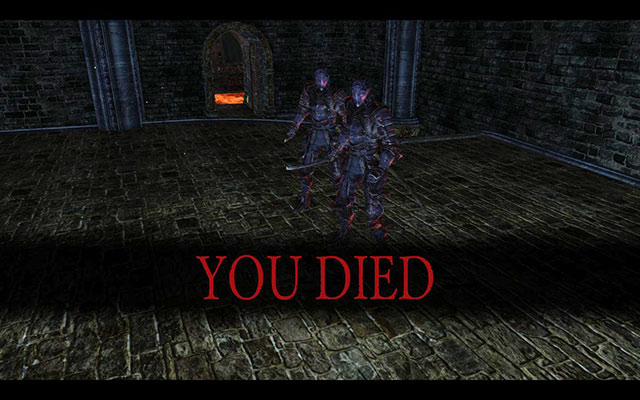
Dark Souls 2 is a difficult game, you could even say it is very difficult. The most important asset, while playing this game, is patience. You cannot dash headlong and hope that you will handle it. You need to be careful with each step that you take. The game has been designed in such a way, that you will never know what is lurking around the corner. The road may look safe and friendly but, out of a sudden, you may fall down a chasm, or encounter an enemy that deals with you in one blow and see "YOU DIED!" on the screen.
While fighting your enemies, always try to use the shield. At the beginning of the game, t will be your best friend. At the moment at which you will have to face off against a larger number of enemies, try to lure them one-by-one. Then, combat becomes much easier and more enjoyable. The best tactic, while fighting, is to block the enemy's attack with the shield and to skip away from them. At the moment at which you stop the enemy's attack, it is your turn to strike. Hit once and go into the defense. This will allow you to retain as much health as possible and decrease the number of times that you die.
Also, you need to remember that not always does it pay off to kill an enemy. For example, if you are trying to defeat a boss, you do not need to attack all of the enemies that you encounter on your way to his "chamber". Maybe it is enough to ignore the weaker opponents to focus your attention on the man himself. You simply need to sprint and perform several dodges. This way, you will save a lot of time.
The game is very vast and non-linear. Once you walk into a location, and you decide that it is too difficult for you, go elsewhere. Maybe there it will be easier with your lower experience level. The rule at work here is very simple, go where you can handle things. If, at the beginning of a location, it is too difficult, ahead it is going to be even more difficult. At the same time, do not fear to noose through various corners - sometimes it may pay off to take the risk, or even to die, while exploring some recess. Remember that you do not lose the items that you have collected (unlike souls).
Spend your souls with consideration - not always developing your character is the most important thing. It is the best prepared ones that manage to survive. Always have a supply of arrows, gems, healing potions and the other valuable items on you.
The most important rule: do not lose your heart. The beginnings are difficult, but you are guaranteed to feel satisfaction after you beat the game. And keep telling yourself that you are going to make it.
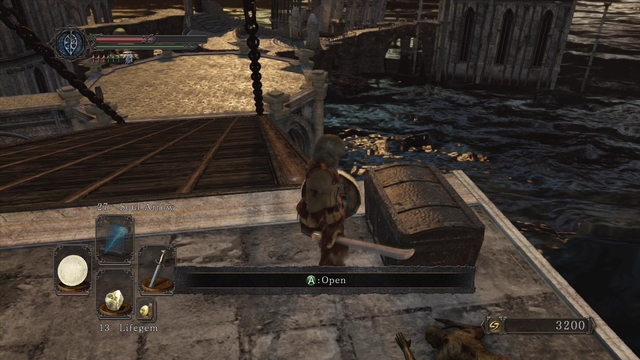
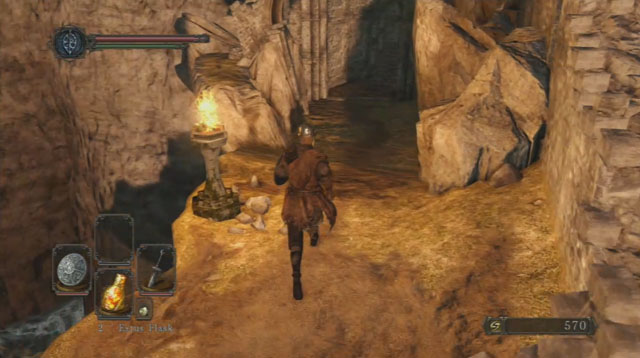
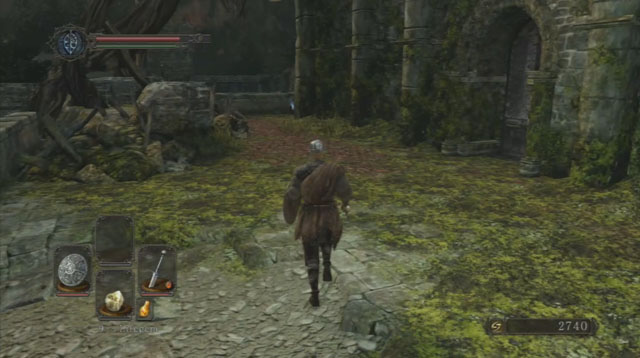
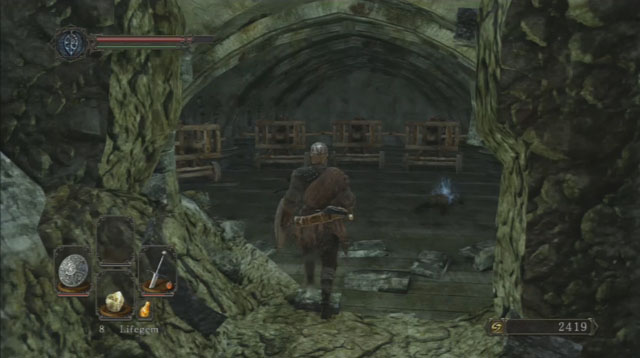
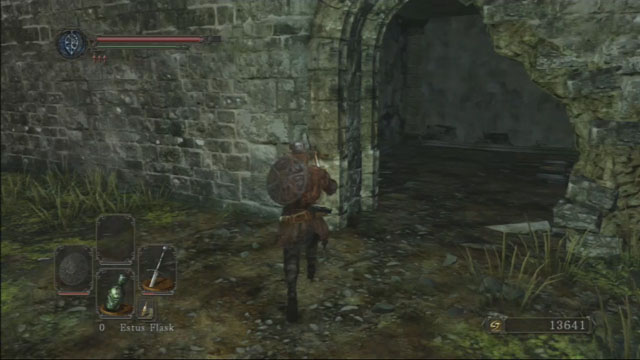
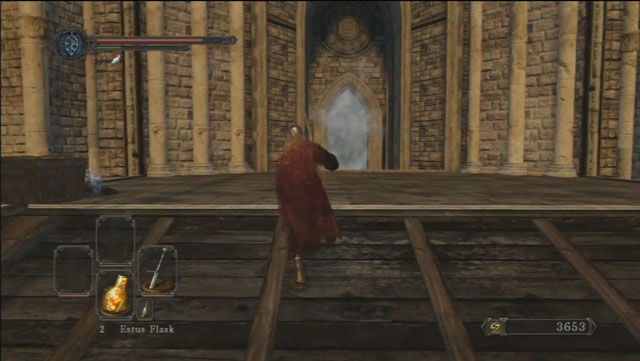
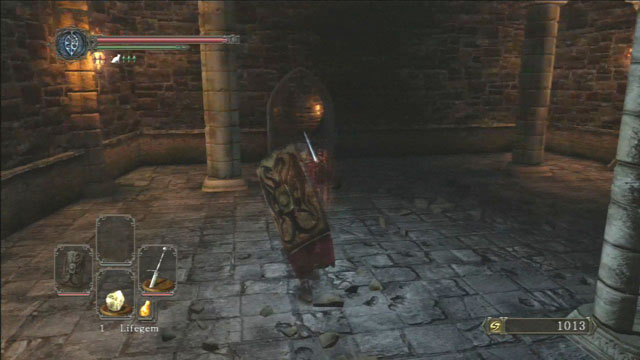
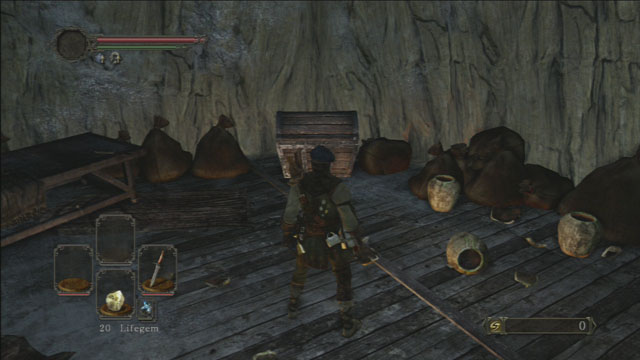 Collect the item
At the very beginning, go upstairs and collect the Human Effigy. Then, walk through the door, into another location, where you will find a soul and a torch, behind the cart. You can also start your first campfire here. Keep going ahead and, once you go past the tunnel, walk through the mist on the left. As you go deeper into the cave, you will encounter two opponents. They are relatively weak, block the first strike and attack yourself. Of course, try to lure them to you one-by-one. Several steps ahead, you should be especially careful, because there is another enemy around the corner.
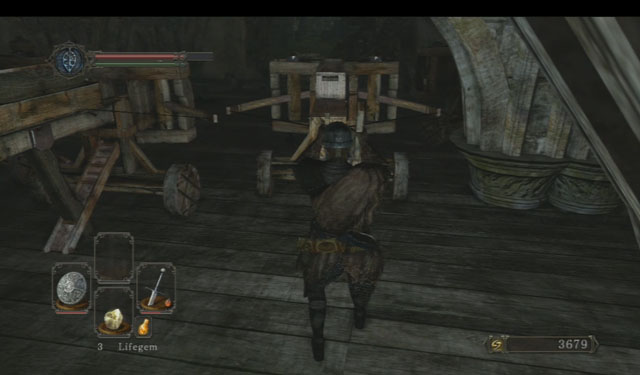
 Attack from behind
Once you exit the cave and reach the rocky ledge, go left. You will notice an enemy ahead, with its back turned at you. This is an ideal moment to strike by surprise. Approach him, very carefully, and perform an attack. At this moment, you will see a short cutscene, where your character lands several lethal blows. Go a bit ahead and collect the item at the end of the ledge. Then, go deeper into the cave, where you will encounter further enemies. One of them is an archer. First of all, deal with the first bandit and try to be n constant movement, to avoid taking damage from arrows. An ideal way to deal with the archer is to run up to him, while strafing to the sides, every now and then. Once you are close to the enemy, he will try to produce his sword so, seize the opportunity and attack. As you follow the caves, you will encounter more enemies, who you need to deal with. After the fight, you can collect the item in the corner on the left side of the grotto.
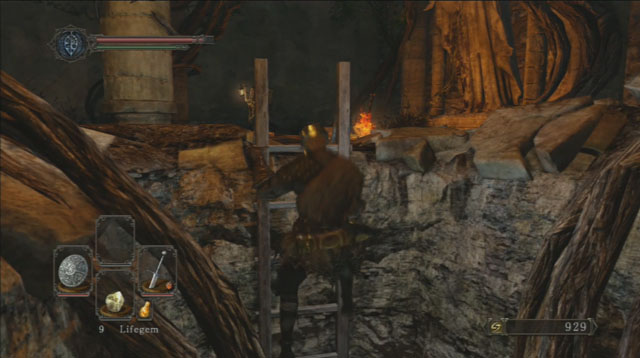
 Kick the ladder
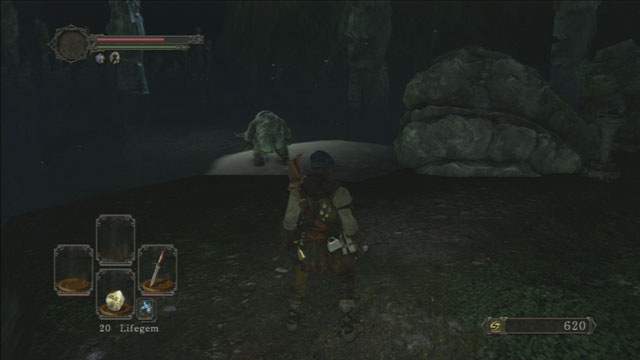
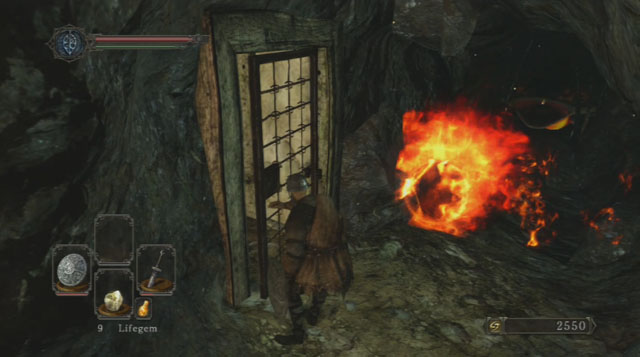
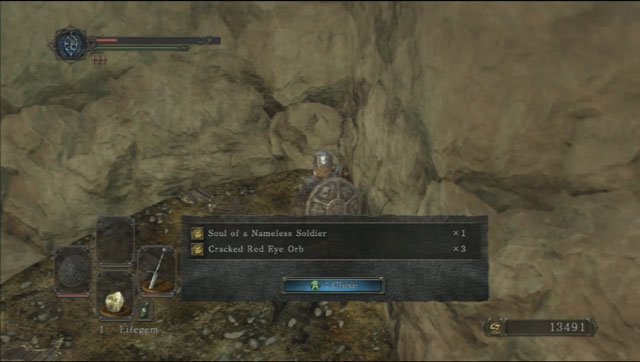
Once you are on another rocky ledge, the first thing that you should do is kick the ladder. This way, you will unlock a shortcut that you will be able to use later into the game. Also, note the nest on the left of the entrance. If you already have the Small Smooth & Silky Stone, you can leave it in this nest. At the moment, at which you take rest at the campfire and return here, you will be able to collect Amber Herb. On the right, there is another ledge that you can jump down onto and collect the item. Then, jump down and walk through the mist. This way, you will reach another cave, where you will encounter two enemies that you have already fought. After you defeat them, leave through the other exit and climb up the ladder on the right wall. At the other side of the wall, there are two enemies, below. You can defeat the first one of them, practically, with one blow, jump off the ledge and, when you are still in mid-air, attack, which will prove lethal to the opponent below. Defeat the other opponent and, before you leave, open the door on the right. Inside, you will find a Cracked Red Eye Orb. Then, walk through another mist.
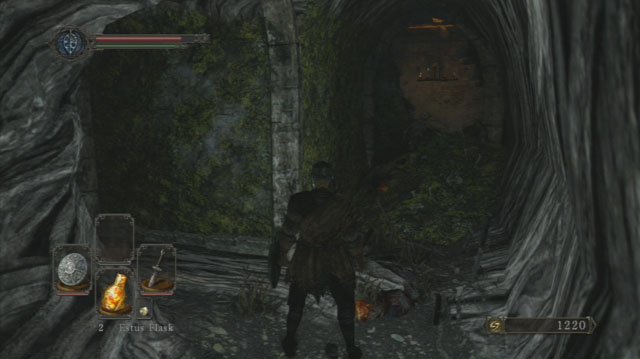
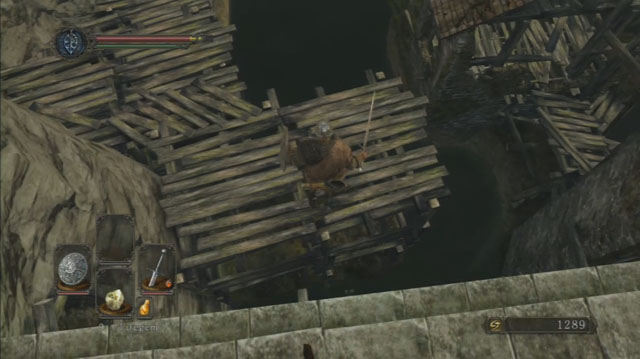
 Kick the tree
Keep going ahead and, after you reach a stone bridge, jump off it and walk through another mist. At this point, be especially careful, because the cave is quite dark and there is a chasm in front of you. Avoid the arrows of the archer at the other side, approach the tree and tip it over to create a bridge for yourself. Run over the fallen tree and defeat the enemy. In front of you, there is a hole in the ground, which you can jump into. While still in mid-air, perform an attack to kill the enemy below. Immediately, run up to the ladder and climb, because there is another archer here. After you defeat the enemy, walk through the mist.
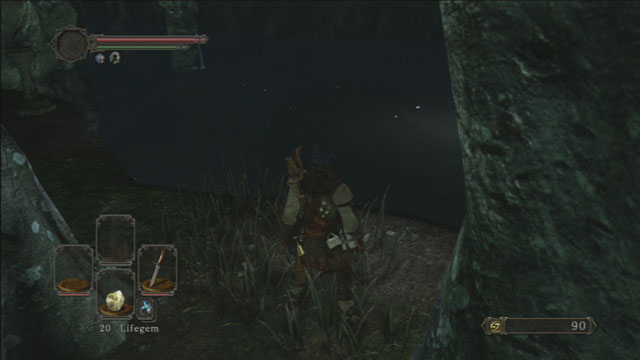
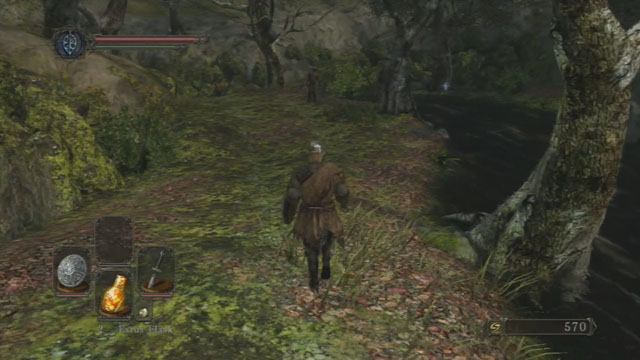
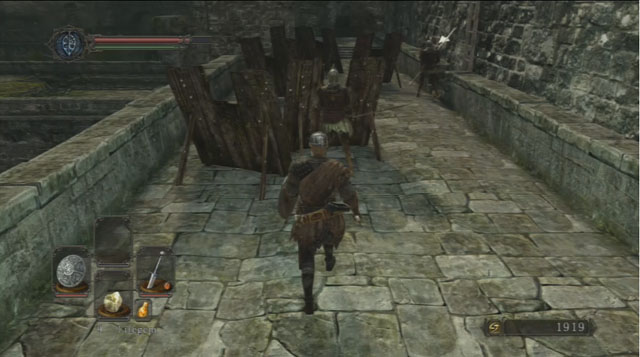
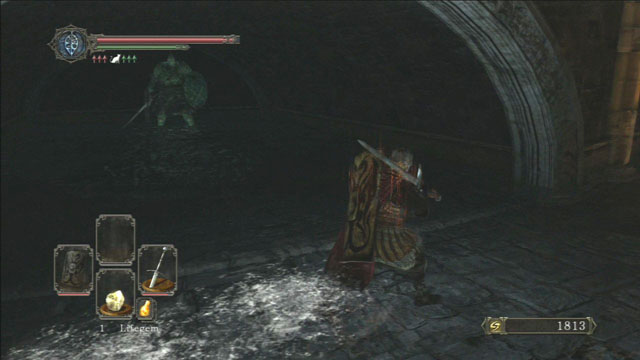
 Do not attack the enemies that are too strong
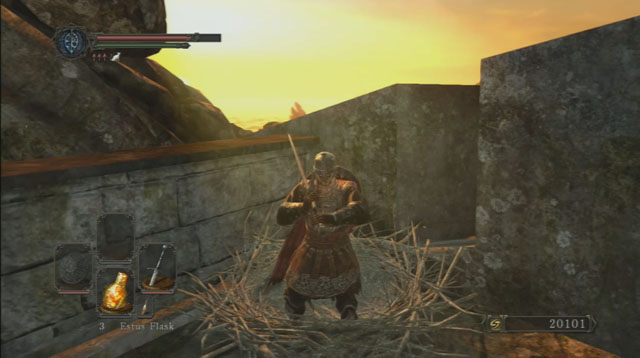
Once you leave, a bandit will approach from the left side. After you kill him, do not attack the big beasts at the lake; right now they are too strong for you to handle them and fighting them may be fraught with consequences. In case you still want to challenge them, you can use the fact that the monsters are too big to fit into the cavern that you came from against them - you can lure them there and try to eliminate them with a hit & run tactics (get in - attack - jump back). Follow the road that the previous opponent approached from. At the end of the ledge, there is another tree that you need to kick to create a footbridge for yourself, over the chasm. Then, turn left and keep running ahead.
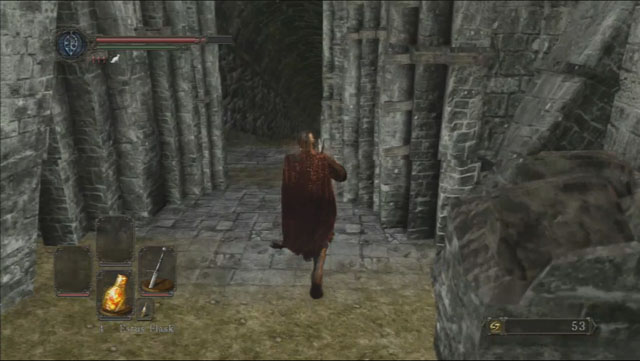
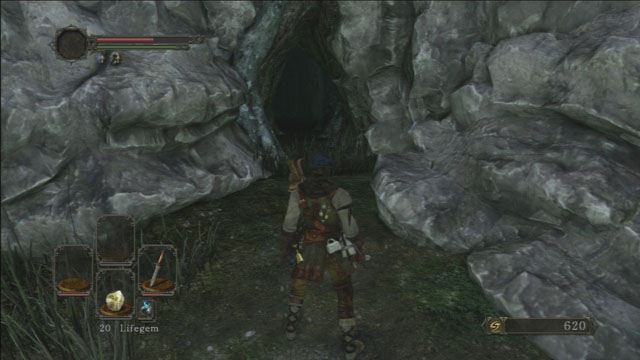 Walk through the narrow passage
Enter the narrow passage and keep going ahead. This way, you will reach the central location, named Majula.
From this chapter, you will learn how to do the most important thing in the game, i.e. to level up. Here, you will find information that concern the requirements that you need to meet, and also where to go to do that. Also, you will also learn about the way and the system of leveling up and investing into specific statistics. Also, you will find here information on how to obtain souls, which are necessary for you to get promoted, and how to prevent losing them.
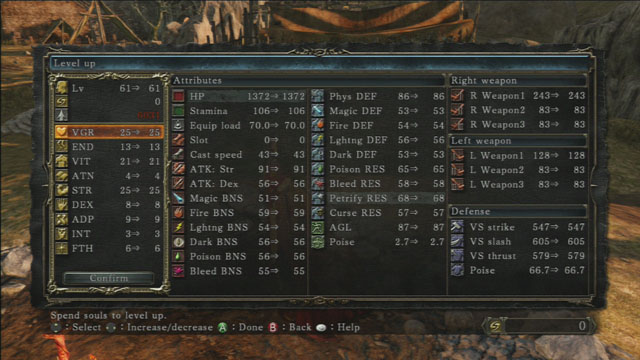 Level up
You can raise your character's experience level at Emerald Herald's, who can be found around the bonfire in Majula. To do that, you need to start a conversation with her and select the Level Up option.
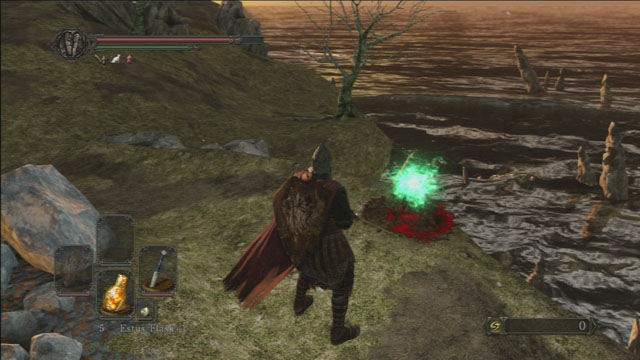
To raise your character's experience level, you need souls. You can obtain them in two ways. The first one is defeating the enemies. For each opponent that you defeat, you receive a certain amount of souls. The stronger the enemy, the more souls you receive. At the beginning of the game, you may find the Covetous Silver Serpent Ring, whose effect is that you receive more souls from each enemy that dies by falling from height. The most souls that you receive is from bosses.
The second way is to consume the souls that you find. Depending on what type of soul you find, you receive a certain amount of points. It is best to consume such souls right before you level up, because it would be a pity to lose them by dying. You receive a similar type of souls by killing a boss, but it is better to save them up for later, when you will get the opportunity to forge them into special weapons.
 You can retrieve the souls that you lose
All of the souls, which you not yet managed to use up, can be lost after dying. Once you die, all of the points, which you have so far amassed, disappear. Of course, you can retrieve them. When you go back to the place where you have died, above the ground, you will notice a mist. Watch out however, while going to that location, because you can only retrieve those of the souls, which you have lost with the most recent death, all the other ones are lost forever. If you, e.g. fall into a chasm, the mist usually appears at the edge of the bridge or the chasm, where the accident happened. At the moment, at which you have gathered a considerable number of souls, and you are afraid that you might lose them, you can use the Homeward Bone, which takes you to the bonfire that you have most recently visited.
The higher the level of your character, which you are interested in, the more souls you need at a given moment. For example, to reach level 62, you need a total of 6031 souls. Raising any statistic by a point, results in raising the character's level by one. For example, if you raise Dexterity by three points and Endurance by two, your character's level increases by five. Rolling over a statistic, displays parameters, on the panel to the right, which will be increased thanks to the promotion.
In this chapter, you will learn everything about healing your character. You can find here information on items that influence the condition of your health and how to use them. You will also learn how and where you can upgrade your healing items. Also, you can find here information on how death influences your character and about the ways to avoid its adverse effects.
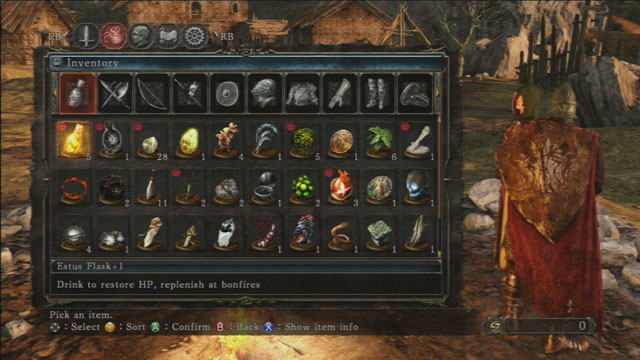 The Estus Flask is the most important healing item
In Dark Souls 2, there are many items that you can use to heal your character, or to raise the maximum of your health points.
You can also restore health points by resting at bonfires.
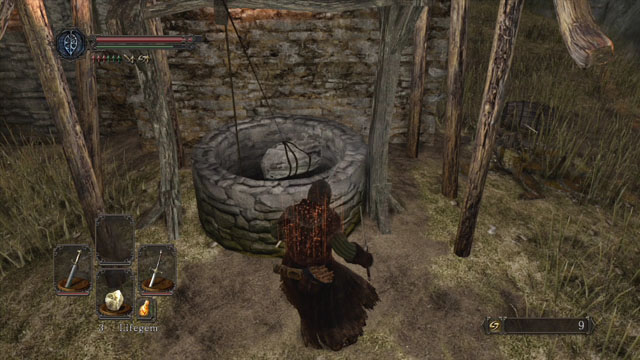 Hit the stone to obtain the Estus Shard
You can enhance the maximum uses of the Estus Flask. To do that, you are going to need the Estus Shard. You can find one in Majula, next to the villa. Approach the well and hit the stone at its rim. This way, you will start an elevator. What arrives on the platform is a corpse and the Estus Shard. Then, go to the Emerald Herald and choose the Upgrade Estus Flask option.
 You died?
In Dark Souls 2, the death of the hero does not go without its effects. Once you die, you are transferred to the most recently visited bonfire but, the game does not end, in a typical way. If you have been in the human form, at the moment of dying, you lose your human form and turn into an undead. This has its consequences,. Each time you die, the maximum of your health points drops. To the level of 50%. To regain your human form, you need to use the Human Effigy. This, however, needs to be done with deliberation, because you will not be able to find too many of them, along your path. Note: Human Effigy only unlocks the full health bar and does not restore health that you lose earlier.
If your situation is critical and, as a result of many deaths your health bar is shorter by a half - do not worry. There is still hope! You can then use the Ring of Binding to your aid, which decreases the penalty for dying. Thanks to this, your health bar will drop to 80% and will not be declining any further. Where to find it? In Heide's Tower of Flame, or rather the Cathedral of Blue, adjacent to it! The ring awaits heroes in a chest that you will reach after you lower the big bridge (it is here that you fight one of the bosses). Phew!
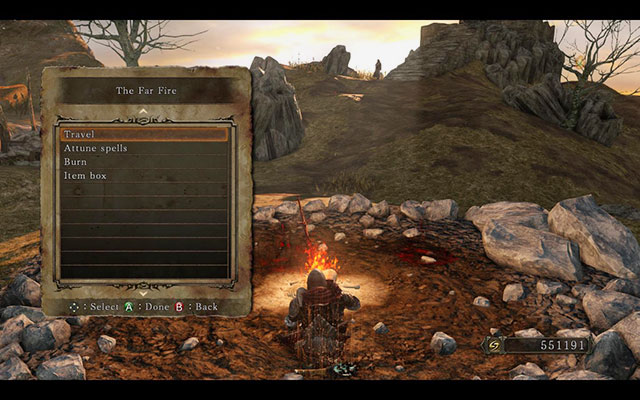
In this chapter, you will learn what bonfires are and what they are used for, as well as what is the role that they play in the game world. You will find here detailed information on all of the options, which are available from the beginning of the game. Also, you will learn here about the profits of resting at the bonfire, as well as what effects can be removed at it.
 The options that are available at the bonfire
You can say that bonfires in Dark Souls 2 are a kind of checkpoints. If your character dies, you return to the bonfire that you have most recently visited. At the beginning of the game, if you sit at a bonfire, you can use several options.
Here, you will learn how to barter in the game world. Also, you will find here information about merchants who can be encountered at the very beginning of your journey. Here, you can learn about the whereabouts of all of the merchants and about the items that you can purchase from them. You will learn what is the game's currency and how you can obtain it. Also, you will get to know about the items that are worth buying.
 The bartering window
In Dark Souls 2, merchants have miscellaneous items on sale. Each one of them specializes in a certain area of bartering. The merchants available at the beginning of the game. have been listed below.
Name: Blacksmith Lenigrast
Location: Majula (he starts his business after you buy the smithy key from Merchant Hag Melentia - you can encounter the witch in the Forrest of the Fallen Giants)
Available goods: Longsword, Broadsword, Falchion, Estoc, Rapier, Battle Axe, Mace, Spear, Wood Arrow, Iron Arrow, Wood Bolt, Heavy Bolt, Repair Powder, Titanite Shard.
Worth buying: Titanite Shard, Repair Powder, Wood Arrow
Name: Sweet Shalquoir (cat)
Location: Majula (the house to the right of the big hole)
Available goods: Ring Of The Evil Eye, Silvercat Ring, Redeye Ring, Name-engraved Ring, Ring of Whispers, Homeward Bone, Prism Stone, Alluring Skull, Lloyd's Talisman.
Worth buying: Ring Of The Evil Eye, Silvercat Ring, Homeward Bone
Name: Maughlin the Armourer
Location: Majula, (the house to the left of the big hole)
Available goods: Iron Parma, Silver Eagle Kite Shield, Twin Dragon Greatshield, Standard Helm, Hard Leather Armor Hard Leather Gauntlets, Hard Leather Boots, Infantry Armor, Infantry Gloves, Infantry Boots, Falconer Helm, Falconer Armor, Falconer Gloves, Falconer Boots
Worth buying: Falconer Set and Twin Dragon Greatshield
Name: Merchant Hag Melentia (with progress with the game, she will move to Majula)
Location: Forest Of The Fallen Giants
Available goods: Straight Sword, Axe, Hammer, Fists, Travelling Merchant Hat, Travelling Merchant Coat, traveling Merchant Gloves, Travelling Merchant Boots, Human Effigy, Lifegem, Amber Herb, Firebomb, Witching Urn, Throwing Knife, Pharros' Lockstone, Lenigrast's Key, Soul Arrow, Heal
Worth buying: Human Effigy, Lifegem, Firebomb, Witching Urn, Pharros Lockstone, Lenigrast's Key
Name: Licia of Lindeldt
Location: Heide's Tower Of Flame
Available goods: Cleric's Sacred Chime, Ring of Prayer, Heal, Med. Heal, Great Heal Excerpt, Replenishment, Replenishment Life, Caressing Prayer, Force, Lighting Spear, Homeward, Guidance
Worth buying: a player who invests in Faith and wants to use miracles, can find here a wide variety of goods to buy.
The currency that you can buy from merchants with, are souls. You obtain them in the very same way as described in chapter 3, which concerns leveling up. The most important thing is that each one of the merchants has a limited amount of certain wares (with the exception of e.g. the Basic arrows, you can buy as many of these as you want). After they are depleted, they will not be restored in that merchant's stock.
In this chapter, you will read everything about the basics of upgrading your equipment, i.e. weapons, shields and items. Also, you will find information on where to go to modify your gear, what materials to use and how to unlock the upgrading place. You will also learn which materials provide a certain feature.
The smithyAt the beginning of the game, you can upgrade at Blacksmith Lenigrast's. His smithy is in Majula. However, before you are able to buy anything from him, or upgrade, you will have to help him find his smithy key. To do that, go to Forest Of Allen Giants. You can buy the key from Merchant Hag Melentia. At the smithy, you can also upgrade and repair your equipment. As much as you only need the right amount of souls, to repair, the matter with upgrading is more complicated than that. For that, you are going to need the right materials. The table presenting the type of upgrades, which you can perform with a given material, has been presented below.
Material
Upgrade
Titanite Shard
Upgrades regular items +3
Large Titanite Shard
Upgrades regular items +6
Titanite Chunk
Upgrades regular items +9
Titanite Slab
Upgrades regular items +10
Twinkling Titanite
Upgrades special items +5
Estus Shard
Upgrades Estus Flask
The long-standing question is which weapon to choose. In Dark Souls II this question is a manifold one. First of all, choose a weapon in accordance with statistics. First of all, you should pay attention to damage that it deals, and which statistics govern that. The statistic in the game, e.g. strength or agility, govern the powerfulness of the individual swords, halberds, etc. You can look that up, in the weapon's description, in the equipment screen. Look for the character's statistics icons with letters (e.g. D, C, B, A, S assigned to them; here, D is the lowest value and S is the highest. Not all of the weapons have this feature, but it is worth remembering because, with high value of that statistic, and good "scaling", the weapon becomes much more powerful.
Secondly, you need to select your equipment in accordance with its features and use. Note that the animations of attacks, for the individual weapons, vary - some are fast, some slow, some attack in a straight line, where the others require you to swing them. As a result, the best idea is to have, on you, several weapons and use them for specific situations. The same holds true for shields and armors, although the main factor here is resistance to individual types of damage (when you know that you are fighting poisonous enemies, wear the armor that protects against poison, etc.).
From this chapter, you will learn what Covenants, which you can join, are. You will find, here, the information on what a given covenant consists in, what changes will be implemented, to your game, after you join one and where and when you can join one. You will also learn where, and with whom, you can waive your membership and where in the interface you can find, whether you are a member of a covenant.
 Entering a covenant
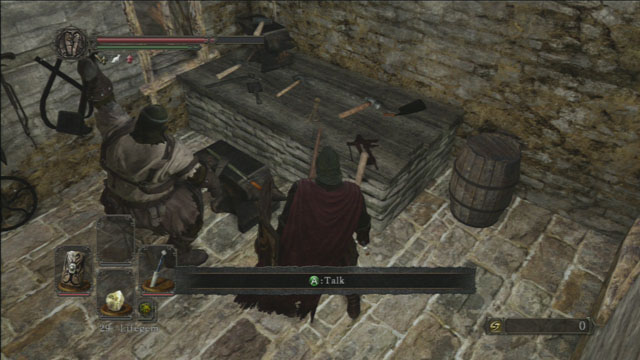
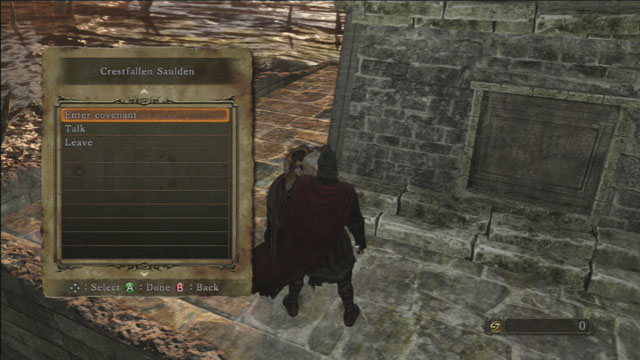
In Dark Souls 2, Covenants play a significant role. They are tightly bound with online play, i.e. with duels with the individual players. At the beginning of the game, there are two covenants that are available, which you can join in Majula. One of them concerns the online play, whereas the other focuses on the single player campaign.
You can enter the Way Of Blue covenant very early into the game. To do that, you need to go to the right of the bonfire and climb up the stairs. At the obelisk, there is Crestfallen Saulden sitting. During a conversation with him, you can enter the covenant. It is for the new players, who want to enjoy the game, without fearing that they may be attacked by another player at any moment. Once you are a member of this covenant and you are wearing the Blue Seal ring, at the moment at which another player invades your world, you will receive bodyguards, who will help you fight the invader. To join the covenant, you do not need to meet any requirements.
Another covenant that you can join in Majula is the Company Of Champions. You can enter this one at the "shrine", which is located at the elevation. To get there, you need to go past the entrance to the Heide's Tower Of Flame and climb up. This covenant is for experienced players. Membership in this covenants results in more damage, dealt by the enemies and in their increased toughness. This covenant is definitely something to be avoided by beginners.
If you want to waive your membership in any of the covenants, go to Sweet Shalquoir in Majula. After the conversation with the cat, select the Abandon covenant option. If you want to find out about your ranks in a specific group, select the Covenants option. If you are far away from Majula and you do not remember if you entered a covenant, look at the wheel next to the endurance bar. Additionally, you won't be able to summon players to your aid while being in this covenant! If it is empty, this means that you do not belong to any of the covenants, at the moment.
In this chapter, you will find information concerning the basics of magic in Dark Souls 2. You will learn about its types, the characteristics of the fields of magic, the items that you need to use magic, as well as example spells, alongside with their use and effect. Also, you can find here the information on merchants that barter in magic and the way to prepare the spells to be used.
 Magic is divided into three kinds
In Dark Souls 2, magic has been divided into three kinds: Spells, Miracles and Pyromancy. To use each, you need a different item. To cast spells, you need a catalyst, e.g. the Bone Staff or the Sorcerer's Staff. To use miracles, you need a talisman, e.g. the Cleric's Sacred Chime. To dabble in pyromancy, you are going to need the Piromance Flame. Below, you can find example spells listed, along with their effects.
Spells:
Miracles:
Pyromancy:
At the beginning of the game, you can buy from two merchants. Spells can be bought from Merchant Hag Melentia (she will move to Majuli later on)in the Forest Of The Fallen Giants, and miracles can be bought from Licia of Lindeldt in the Heide's Tower Of Flame. If you want to assign a spell to a slot, you need to sit at a bonfire and select the Attune Spells option.
In this chapter, you will read what fighting styles you can use and how to pick the weapon fitted for a certain fighting style. Also, you will find here information on how to match your fighting style with various types of opponents. Also, this chapter details the statistics that it is worthwhile to mind, during duels. You can also find here, several golden rules, thanks to which fighting against opponents, even the strongest ones, will be easier and more enjoyable.
 Match your fighting style with the opponent
While exploring the game world and encountering various opponents, you can use several fighting styles, depending on the type of the enemy that you are fighting.
One-handed weapon and a shield - this fighting style is ideal at the beginning of the game. At this stage, you should not lean out from behind the shield. Patience is the basic feature that you need to use here, to succeed. This fighting style is perfect against fast and agile opponents. Thanks to the shield, you can block most of the attacks and respond with your attack, when the moment is right. Try (at least at the beginning) not to strike more than twice. The fight will be longer, but the success more tangible.
Two-handed heavy weapon - this fighting style is more fitted for experienced players. It is ideal for fighting strong, sluggish opponents. Blocking their attacks with the shield is not always effective, which is why you should practice dodging. While fighting such an opponent, you can use his sluggishness to your advantage and, at the moment of his attack, dodge and use the time to strike yourself. It is best to act on the observation-dodge-attack basis.
Dual wield - an unique fighting style, requiring the proper equipment, statistics and proficiency. First of all: you will need two pieces of equipment, both with the same attack patterns. It may be two daggers, two rapiers, and, in the case of powerful, strength-oriented characters, even two, two-handed swords! Then you will have to make sure, that your statistics are 1.5x higher than needed to effectively wield a given weapon. A double shortsword, requiring 7 points in strength and 10 points in dexterity, will have a requirement of 11 strength and 15 dexterity. All you need to do now is to press the button responsible for dual-handed grip, and you character will take a dual-wielding style stance. From this point onwards, all your attacks performed with your left hand will cause your character to attack with both weapons.
Ranged attack - at the moment, at which the opponent is farther away, seize the opportunity and deal as much damage as you can, if you have the a ranged weapon on you. You can get lucky enough to stun the enemy, who will, e.g. fall into the chasm. You can always try that.
Special techniques - in the game, there are several special techniques, which it pays to learn at the very beginning. The first one is attack from behind. You perform it by sneaking up to the enemy from behind. They are especially useful while fighting sluggish enemies which are easy to circle. The second special technique is parrying. If you have the right type of shield, or weapon, you can deflect the attack aimed against you, by the enemy, and counter-attack quickly. This technique is just as powerful as the blow from behind , but it requires, of you, more proficiency.
The remaining special attacks are assigned to the weapon type. We should start with the fact that a weapon can be held in one hand or in two (in the latter case you cannot use the shield). It is also worth noting that your character performs a different attack if you, e.g. (1) strike after you roll, (2) strike while running, (3) lean away the movement stick while striking. Keep experimenting with your weapons and you will discover more such curiosities!
 Observe the golden rules
Below, you can find several golden rules that it always pays off to observe, while fighting in Dark Souls 2.
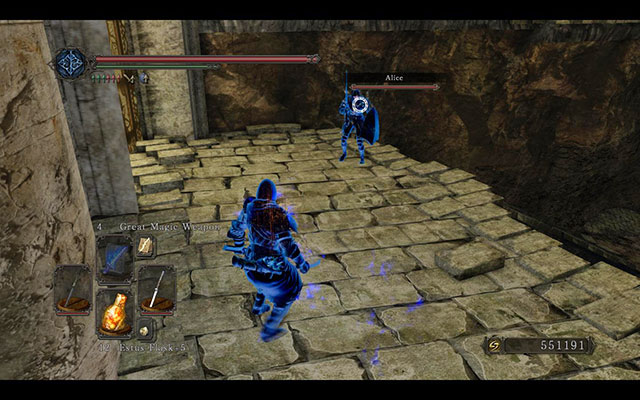
Mind your health. If you see your health bar declining at a fast rate, retreat and heal yourself.
Do not let your endurance drop to zero. As soon as the level of the green bar reaches zero, you will be, virtually, defenseless. You will neither block the enemy's attack, nor will you attack or dodge. You will be, in practical terms, without chances.
Fight one-on-one. As much as possible, always try to lure one opponent at a time. When you focus on one opponent, it is going to get much easier.
Pay attention to your surroundings. Your path is full of pitfalls. One careless move and you can fall into a chasm, or be killed by an enemy.
Attack from behind. As often as possible, try to get your enemies from behind and attack their backs. Before they realize what has happened, you will manage to deal considerable damage.
Ensure healing. Before you set off for further journey, make sure that you have a healing kit on your equipment.
And most importantly- Be Patient.
Dark Souls II - guide, walkthrough, bosses includes a complete walkthrough for the storyline mode and an exact presentation of all the boss fights. This walkthrough has been richly illustrated, which is why you are not likely to experience any difficulties, while trying to find secret passages, or to find places where you can unlock shortcuts in a given location. Also, information concerning the important elements of the game (e.g. character development, healing), or the whereabouts of all the items, spread across the entire land of Drangleic has also been included here. The game, which has been created by the From Software studios, is a difficult game and the opponents are often very demanding, which is why, from this walkthrough, you will learn how to fight the enemies that you encounter. Also, the guide abounds in the descriptions and characteristics of the NPCs that you encounter, while exploring the slowly dying Drangleic. This guide will allow you to explore the game world in a relatively safe and stress-free way, thanks to the suggested path of visiting the individual locations. The game is very much non-linear, and even at the very beginning, you can get into a situation that results in the displaying of the YOU DIED caption on the screen! When it comes to pure technicalities, you will also find here the information on controls and system requirements, whose meeting is necessary to launch the game. Dark Souls 2 is the third installment (after Demon's Souls and Dark Souls) of a "hardcore" RPG, which tells the story of a lonely warrior, who is now exploring the land of Drangleic, while fighting very demanding opponents and attempting to alter the fate of the world. The From Software studios reach the heights of their capabilities and, after having released the ideal Dark Souls, they have created a game that is even better and even more engaging. The game is exploration-oriented and it will surely provide you with hour-long adventure of your life.

This guide for Dark Souls 2 includes:
Damian Kubik ()
 The classes available
The choice of the class is made during character creation process. It affects only the beginning of the gameplay, changing the stats of the character and his equipment. No particular restrictions come with choosing a given class, so you can for example start as a warrior, for a better gear, and then develop to be a sorcerer.
Class
Lvl
Vig
End
Vit
Att
Str
Dex
Adp
Int
Fai
Total
Warrior
12
7
6
6
5
15
11
5
5
5
65
Knight
13
12
6
7
4
11
8
9
3
6
66
Swordsman
12
4
8
4
6
9
16
6
7
5
65
Bandit
11
9
7
11
2
9
14
3
1
8
64
Cleric
14
10
3
8
10
11
5
4
4
12
67
Sorcerer
11
5
6
5
12
3
7
8
14
4
64
Explorer
10
7
6
9
7
6
6
12
5
5
63
Deprived
1
8
6
6
6
6
6
6
6
6
54
The best classes to start with are Cleric and Warrior. They have the best distribution of stats and a decent gear. What's more, Cleric can use the Heal miracle, which is very useful at the first stage of the gameplay, as there are not many ways to heal yourself during combat.
 Quite a lot of gifts
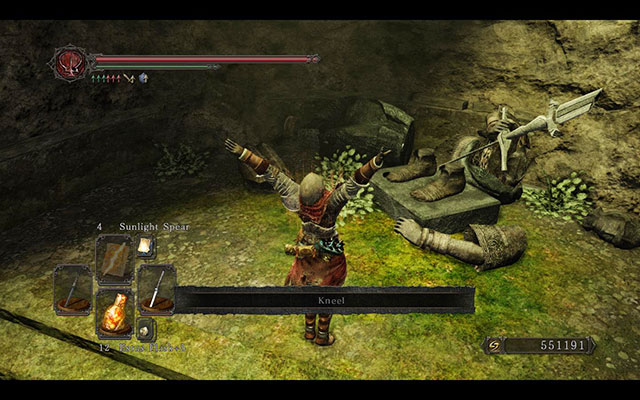
Gifts are special items that you choose when creating new character. There are seven of them, but each one can be obtained later in the game, so the only difference is that they will help you during the beginning. You can also choose not to take any gifts, but it is just a waste.
Name
Description
Life Ring
Increases maximum HP by 5%
Human Effigy
-Reverses hollowing, turning you back into human form
-Heals curses
-Can be burned in a bonfire to reduce the chance of invasion
Healing Wares
- 10x Lifegem
- 5x Radiant Lifegem
- 1x Old Radiant Lifegem
Homeward Bone
Teleports you back to the last bonfire
Seed of a Tree of Giants
Makes enemies attack the invaders
Bonfire Ascetic
Can be burned in a bonfire to raise difficulty of nearby area, which makes the enemies stronger (e.g. from NG to NG+, NG++ to NG+++)
Petrified Something
Can be exchanged with Dyna & Tilo (Things Betwixt) for a random item
The most valuable gifts for new players are Human Effigy, Petrified Something and Healing Wares. Homeward Bone is very easy to obtain. Bonfire Ascetic is rare to find, but it's useful only for advanced players. Seed of a Tree Giants is very rare, but not useful during most of the gameplay. Life Ring may be tempting, but 5% is a rather low increase.
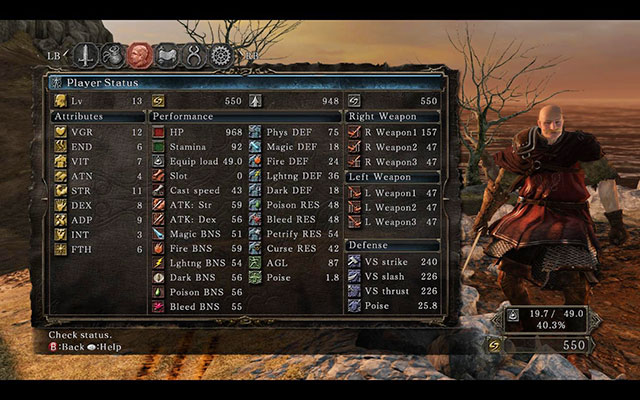 A window with all the statistics
Stats describe your character in numbers and define your specialization. When choosing the starting class, you also choose the value of 9 attributes. Every one of them can be developed to a maximum of 99 and the sum of all the attributes is the level of your character, which raises when the value of one of them is increased.
 Poison
There are several negative status effects in the game, which can be placed upon the player. Every character has a particular amount of resistance to these effects, which reduces the chance of being affected by them. Resistance can be increased by using consumables, special gear, rings or some spells.
Description of negative status effects:
 It takes some effort to defeat these giants
Fighting is the most important feature of Dark Souls 2. Almost every creature in the game is aggressive towards our hero and we will often have to fight it more the once. Therefore, it is good to learn the basics of the combat system.
Death is not the end of the game in Dark Souls 2. When the hero dies, he loses all the souls and becomes hollowed (if he was human before), and then he resurrects at the last bonfire. At the location of his death, there is a bloodstain which can be activated to regain the souls. To reverse the hollowing process, which reduces the maximum amount of health with every death, you have to use Human Effigy.
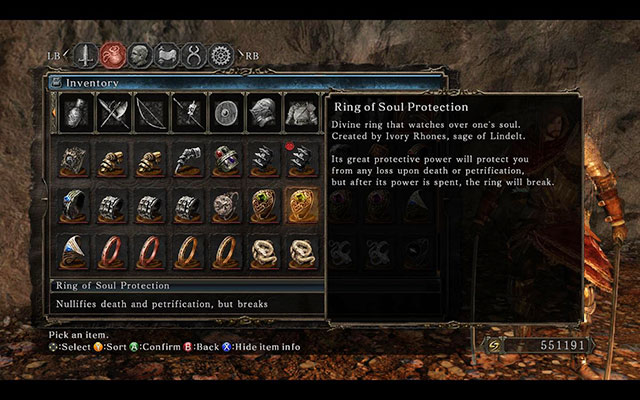 Ring of Soul Protection can be very useful
There are some ways to protect yourself from the negative effects of death. Ring of Life Protection and Ring of Soul Protection enable you to retain human form and all the souls in case of dying. Unfortunately, those rings are destroyed after only one death. They can be repaired for, respectively, 3000 souls and 6000 souls, to be used again.
 The only completely safe bonfire
Bonfires are an important feature of Dark Souls 2. They are special safe places, which allow the access to some useful functions. When resting at a bonfire, we can fill up Estus Flasks, regenerate health and spells and even get rid of some of the negative effects.
Description of the functions available at bonfires:
 Praise the sun!
Covenants are groups that focus on various aspects of the gameplay and give new ways of interacting with the world. There are nine different covenants and you can switch between them freely, without any negative consequences of leaving the previous one. Every covenant has 3 ranks and rewards connected to them, which can be weapons, armors, items or spells. The requirements to achieve a particular rank vary for every covenant.
A covenant that focuses on cooperation and helping other players in difficult fights. Members of this group have a special golden aura, when summoned as phantoms to the player's world. Additionally, for every act of help, members obtain one Sunlight Medal, which is required to achieve higher ranks in this covenant.
How to join: Activate a shrine in Harvest Valley.
Perfect choice for new players. Members of this group are protected by Blue Sentinels covenant. If a player is attacked by an invader, a member is summoned to rescue him.
How to join: Talk to Crestfallen Saulen in Majuli.
This group focuses on PvP. Their task is to protect members of the Way of the Blue covenant. They also punish players that have sins and fight on the arena.
How to join: Talk to Blue Sentinel Targray'em in Cathedral of Blue. You have to have Token of Fidelity in your equipment.
This covenant protects the bells in two locations: Belfry Luna and Belfry Sol. If any player enters one of these locations, members of the covenant are summoned to defeat him, preventing him from ringing the bells. Player obtains one Titanite Chunk for every defeated opponent.
How to join: Talk to Bell Keeper in Belfry Luna or Belfry Sol.
A covenant that focuses only on PvP. Members of this covenant can get a higher rank in three ways: they can fight on the arena with other members, place summon signs (Red Sign Soapstone) to be summoned to another player's world or use Cracked Red Eye Orb, to invade other players.
How to join: Talk to Titchy Gren in Undead Purgatory. You have to have Token of Spite in your equipment.
It is a rather cunning covenant, which allows you to summon players that are not in this group to your world in Grave of Saints and Doors of Pharros. Enemies in these locations do not attack members of this covenant, but attack the summoned players. Additionally, members can use various traps, which they activate using Pharros' Lockstones.
How to join: Talk to Rat King in Grave of Saints.
A covenant focusing on 1v1 duels. Members place special summon signs using Dragon Eye. Other players can summon them and challenge to a duel. The winner obtains Dragon Scale, which is required to get a higher rank
How to join: Give Petrified Dragon Egg to Magerold of Lanafir in Iron Keep.
A covenant for advanced players, who look for more challenges. After joining this group, the level of difficulty is increased. Enemies deal more damage and have more HP points and the player cannot summon others to help him.
How to join: Activate Victro's Stone in Majula.
This covenant offers the player three additional locations with very difficult enemies in them. After defeating all of the opponents and lighting three beacons, the player can fight with an optional boss, which is considered one of the most difficult bosses in the game.
How to join: Talk to Darkdriver Grandah in Black Gulch, Shaded Ruins and Drangleic Castle.
 1v1 on blue arena
Dark Souls 2 has multiplayer mode (requires permanent connection to the internet), which sort of mixes with singleplayer. In nearly every place and time, the player can summon others to help him, may be attacked by invaders or can challenge others to fight on the arena. You can also encounter less direct forms of interaction with the community, like for example massages on the ground, illusions of other players, bloodstains marking the place where somebody died, etc. The only way to leave the multiplayer is to disconnect from the internet.
Below you will find a short description of the most important aspects and items in multiplayer:
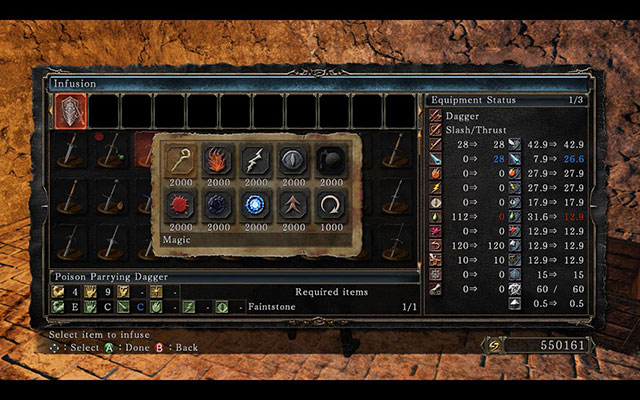 Weapons upgrade options
Every weapon and piece of armor can be upgraded using special materials, which increase their stats and make them more suitable for different modes of gameplay.
There are two ways of modifying the gear:
Below you will find a table with descriptions of Reinforcements of Infusions:
Name
Smith
Description
Normal
Lenigrast, McDuff, Ornifex
Standard weapon and armor reinforcement up to +10. Every level adds 10% to physical base power. Requires: Titatinte Shard (1-3), Large Titanite Shard (4-6), Titanite Chunk (7-9) and Titanite Slab (+10)
Boss Weapons & Armour
Lenigrast, McDuff, Ornifex
Reinforces up to +5. Each level adds 10% to physical base power. Requires: Twinkling Titanite (1-5)
Special Weapons & Armour
Lenigrast, McDuff, Ornifex
Reinforces up to +5. Each level adds 30% to physical base power. Requires: Petrified Dragon Bone (1-5)
Raw
McDuff
Increases physical base power by 14,4%, but decreases stat scaling. It is best to use it on a weapon which already has low scaling. Requires: Raw Stone
Bleed
McDuff
Adds bleed effect to a weapon. Decreases base power by 30,5%, but adds 112 bleed base power. Decreases Strength/Dexterity Scaling by 1-2 levels. Requires: Bleed Stone
Magic
McDuff
Adds magic damage to a weapon and increases Intelligence scaling. Decreases base power by 30,5% and Strength/Dexterity scaling by 1-2 levels. Requires: Faintstone
Dark
McDuff
Adds dark damage and increases dark scaling. Decreases base power by 30,5% and Strength/Dexterity scaling by 1-2 levels. Requires: Darknight Stone
Fire
McDuff
Adds fire damage and increases fire scaling. Decreases base power by 30,5% and Strength/Dexterity scaling by 1-2 levels. Requires: Firedrake Stone
Lightning
McDuff
Adds lightning damage and increases lightning scaling. Decreases base power by 30,5% and Strength/Dexterity scaling by 1-2 levels. Requires: Boltstone
Mundane
McDuff
Associates the power of a given weapon with the lowest attribute. Decreases base power by 50% and scaling from default attributes. Useful almost only for players with rather equal attributes. Requires: Old Mundane Stone
Poison
McDuff
Adds poison effect to a weapon. Decreases base power by 30,5%, but adds 112 poison damage. Decreases Strength/Dexterity scaling by 1-2 levels. Requires: Poison Stone
Enchanted
McDuff
Increases Intelligence scaling and decreases scaling form all the other attributes. Doesn't add any magic damage and doesn't decrease base power. Useful for magic classes with a lot of Intelligence. Requires: Magic Stone
 Collect the item
At the very beginning, go upstairs and collect the Human Effigy. Then, walk through the door, into another location, where you will find a soul and a torch, behind the cart. You can also start your first campfire here. Keep going ahead and, once you go past the tunnel, walk through the mist on the left. As you go deeper into the cave, you will encounter two opponents. They are relatively weak, block the first strike and attack yourself. Of course, try to lure them to you one-by-one. Several steps ahead, you should be especially careful, because there is another enemy around the corner.
 Attack from behind
Once you exit the cave and reach the rocky ledge, go left. You will notice an enemy ahead, with its back turned at you. This is an ideal moment to strike by surprise. Approach him, very carefully, and perform an attack. At this moment, you will see a short cutscene, where your character lands several lethal blows. Go a bit ahead and collect the item at the end of the ledge. Then, go deeper into the cave, where you will encounter further enemies. One of them is an archer. First of all, deal with the first bandit and try to remain in constant movement, to avoid taking damage from arrows. An ideal way to deal with the archer is to run up to him, while strafing to the sides, every now and then. Once you are close to the enemy, he will try to produce his sword so, seize the opportunity and attack. As you follow the caves, you will encounter more enemies, who you need to deal with. After the fight, you can collect the item in the corner on the left side of the grotto.
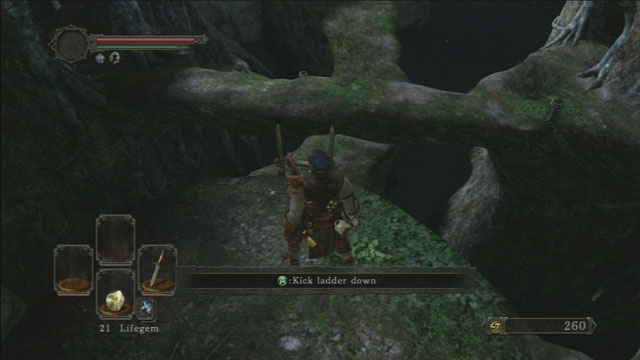 Kick the ladder
Once you are on another rocky ledge, the first thing that you should do is kick the ladder. This way, you will unlock a shortcut that you will be able to use later into the game. Also, note the nest on the left of the entrance. If you already have the Small Smooth & Silky Stone, you can leave it in this nest.The item which you have left on the ground will be replaced by other random item or weapon. On the right, there is another ledge that you can jump down onto and collect the item. Then, jump down and walk through the mist. This way, you will reach another cave, where you will encounter two enemies that you have already fought. After you defeat them, leave through the other exit and climb up the ladder on the right wall. At the other side of the wall, there are two enemies, below. You can defeat the first one of them, practically, with one blow, jump off the ledge and, when you are still in mid-air, attack, which will prove lethal to the opponent below. Defeat the other opponent and, before you leave, open the door on the right. Inside, you will find a Cracked Red Eye Orb. Then, walk through another mist.
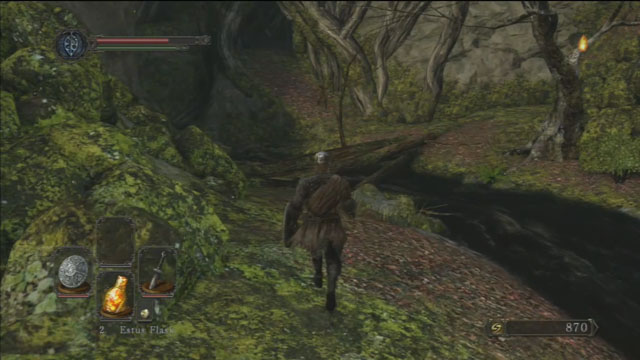
 Kick the tree
Keep going ahead and, after you reach a stone bridge, jump off it and walk through another mist. At this point, be especially careful, because the cave is quite dark and there is a chasm in front of you. Avoid the arrows of the archer at the other side, approach the tree and tip it over to create a bridge for yourself. Run over the fallen tree and defeat the enemy. In front of you, there is a hole in the ground, which you can jump into. While still in mid-air, perform an attack to kill the enemy below. Immediately, run up to the ladder and climb, because there is another archer here. After you defeat the enemy, walk through the mist
 Do not attack the enemies that are too strong
Once you leave, a bandit will approach from the left. After you kill him, do not attack the big beasts at the lake; right now they are too strong for you to handle them and fighting them may be fraught with consequences. Follow the road that the previous opponent approached from. At the end of the ledge, there is another tree that you need to kick to create a footbridge for yourself, over the chasm. Then, turn left and keep running ahead.
 Walk through the narrow passage
Enter the narrow passage and keep going ahead. This way, you will reach the central location, named Majula.
 Majula
Majula is the game's central location. It is here that you take your first decisions, where you can buy your first items, upgrade your weapon and level up. Also, it is here that you can find the first two location where you can enter a covenant.
At the edge of the chasm, there is a bonfire and this is here where your start continuing your adventure. Next to the bonfire, there also is the Emerald Herald that you can level up and upgrade the Estus Flask with. On the right, on the elevation, there is a big monument, thanks to which you will check a very interesting statistic, i.e. how many you have died and how many times the other players in the world saw the YOU DIED caption displayed on their screens. It is here that you can also enter the Way Of Blue Covenant.
In this location, there also are four buildings. In the first one, you can find the Blacksmith Lenigrast, but to get to his smithy and be able to upgrade your weapons, you will need to obtain the key. You can buy it from Merchant Hag Meletia at Forest Of The Fallen Giants.
The next building is a bit ahead. At its right wall, under the makeshift tent, you can collect a Lifegem. Inside, there is a cat, named Sweet Shalquoir that you can buy rings from and find out which Covenant you are currently a member of. The cat has a very useful Silvercat Ring, which decreases, considerably, the damage that you take in battle.
 Hit the stone
A bit ahead, you will find a villa but, to access it, you need to get the key, which can be obtained from the cartographer at the Forest Of The Fallen Giants. On the right side of the entrance, there is a well. If you hit the stone lying at its brim, you will be able to collect the Estus Shard. Once you are inside, you will be able to collect several useful items. In the first room, which is stacked with books, around the corner on the right, there is a corpse, on which there is a Human Effigy. After you reach the very bottom, you will have to fight a skeleton. It is a relatively easy opponent. You need to block its attacks and deal damage, after it finishes its sequence. It drops a Human Effigy. As you proceed ahead, you will find an Estus Shard and a chest, from which you can collect a Soul Vessel.
The only building to the left of the bonfire is the home of Maughlin The Armourer. from him, you can buy weapons and shields. It is a good idea to buy the Twin Dragon Greatshield here, because you will find it very useful in the future. Yu can also climb to the higher level and collect the Titanite Shard from the chest.
From Majula, you can go into five different directions:
The first location that you go to, from here, is the Forest Of The Fallen Giants.
 Go along the slope
From the bonfire in Majula, you need to go alongside the slope. You will reach a stone chamber, where there is a chest, around the corner, with a Rusted Coin. Keep following the corridor and take a turn to the left, at some point. You will reach a metal grate which requires you to pull the lever, if you want to open it. Past the passage, there is a corridor with a wooden bridge at the end. Once you cross the bridge, turn left and make it over the wooden planks onto the islet. Open the chest and collect a Human Effigy.
Keep following the only possible path. At the end of the tunnel, turn right and go up the river; at the end, you can collect another item. return to the bank where you will find several opponents which you have already fought in Things Betwixt. Try to lure them away from the group and kill one-by-one. After the battle, cross the river, where you will find a Lifegem, under a tree. A bit ahead, on a small meadow on the right, there is a bonfire, which you can kindle.
Cross the bridgeCross the makeshift bridge over the river. At the other side, there are two enemies. Defeat the one with the shield, in the first place, by blocking his attacks and, at the moment at which he finishes his sequence, start yours. On the elevation, there is an archer. Run towards him and attempt to avoid his arrows. At the moment at which he draws his sword, attack. Once you have defeated all of your enemies, jump down to the river, where you will find a sleeping bandit. Once you attack him, he will wake up. After the fight, follow the river a bit and collect the soul.
 Watch out for the archer
Then, go to the location where you have been fighting the archer. In the cave behind him, there is a ladder that leads deeper into the location. Up there, there is a tough fight for you to fight. You will be attacked by three opponents who are additionally reinforced by an archer on the walls. The best way to win in this situation is to hide behind the tree, where you will be unreachable for the arrows. Raise your shield and, at the moment at which any of the opponents ends his sequence, attack. The next step is to defeat the archer. To do that, go towards the passage and, right past it, turn left and climb the stairs. Be careful while doing that because, as soon as you start climbing, you will be attacked by a bandit. Once atop the stairs, run up to the archer and kill him. You can now collect all of the items here. Under the tree, there is a white knight sitting but, as long as you do not attack him, he is not hostile. Walk through the mist now.
 Keep running ahead
Run along the tunnel and walk through the hole in the wall of the next location. There are two opponents here. After you defeat them, exit the location and turn left, approach silently to the enemy and attack him. Turn around and run down the corridor at the end, before you reach the stairs, you will meet another enemy who is preparing to attack. Land 1-2 blows and switch to defense.
 watch out for the fireballs
Atop the stairs, you will encounter four enemies. One of them is casting explosive bombs. The best way out of this situation is to defeat him in the first place. Once you have dealt with all of them, take the shield on the rubble. Climb up the ladder, where you can go to the optional location. To get there, you need to jump down the wooden scaffolding to the very bottom and defeat the enemies along the way. Once you are at the bottom and kill all the enemies, on the left, you will notice two entrances. The first one will take you to a corpse with an item on it. The next opening leads deeper into the cave where, at the end of the tunnel, there is a fire spewing beast. Enter a bit deeper into the cave and retreat, because you will be attacked by a bandit. Once you defeat him, run towards the door on the left and open it. Inside, you will find a chest with the Fire Longsword in it.
 Open the door
Return now to the very top, to the location where you have jumped down to the scaffolding. Around the corner, you will find an item and a sitting opponent. Take advantage of that and deal as much damage to him, before he manages to get up, as possible. Then, open the door. At the other side, there is a bonfire and a merchant - Merchant Hag Melentia, from whom you can buy the Lenigrast's Key.
 Climb down the ladder
Climb down the ladder. At the wall, you will notice a sitting knight. At this moment, you can attack him and take advantage of his inattention, to deal damage. However, you need to be careful, because there is a knight going your way, over the stone bridge. Maintain medium distance between you and him. He will perform a combo of three blows. The last one is a hit against the ground, at which point you should counter-attack. Once you cross the bridge, you will notice another opponent, lying down on the ground. Kill him before he manages to his feet and collect the soul next to him.
 Jump down onto the platform
Return to the other side and enter the other location. At the bottom of the stairs, behind the column there is another opponent, lying down on the ground. After you kill him, walk through the mist and climb up over the big root. Once you are atop the wall, stop in a convenient positions and jump down onto the wooden platform. Run over it and enter the room. Be especially cautious here, because there will roll a stone from above. Run up to the location that the stone fell down from, defeat one opponent along your way, and talk to the Cartographer. He will give you a key to his villa in Majula. In one of the corridors, at the end, collect the item.
 Attack the opponent from behind
Leave this place by going along the same way that you got here and climb onto the wall, over the ladder. Defeat the archer here and jump down a bit ahead. Kill the two enemies on the wooden platforms. Return to the root and climb over it. Halfway along the root, you can jump down to a stone balcony below. Defeat the undead and collect the item,. return to the top of the wall, over the root. Approach, slowly the opponent with his back turned at you and attack his back. Then, fight the knight with the halberd. Once you defeat him, climb up the ladder. In the corner, there is an enemy throwing fiery bombs. If you come closer to him, silently, you will be able to attack him and he will fall down to a lower level, before he knows what hit him. return now to the lower level and finish him off. Around the corner, there are another two opponents. One of them will run up to you. He is armed with a pike so, you should have your shield raised, at all times. After his combo, you can attack. He can also attack with his shield, at which point you should move away, and attack when he stoops. Then, kill the knight with the halberd.
 You need to dodge, quickly
Climb down another ladder. On the right, you will notice a hole in the wall. Enter and skip away at the same moment, because there are stationary crossbows inside. There will be several knights, armed with two-handed swords, to run out of the room. The best way to defeat them is to return to the higher level, over the ladder, and pepper them with fire bombs. Once you have killed all of them, enter and climb down the ladder. There is a chest there but, you need to watch out, because poison will be released, at the moment at which you open it. Approach, open it and skip away. Collect the Titanite Shard.
 Use the weapon to deal the highest damage possible
Return upstairs and approach the second "crossbow" on the right. Once you use it, you will hit the barrels which will explode to deal damage to another enemy. And it is not that easy to defeat. Exit the location and go straight ahead. You need to watch out, because you will be peppered with bombs. Run up to the enemy with the club and retreat immediately. This way, you will be able to fight him without taking the risk of being hit by a bomb. He has three attacks: vertical hit, horizontal swing and a series of thrusts. After each one of such attacks, attack once and retreat. Repeat until successful.
 Turn right
When you turn right, you will be able to climb the wall that you were peppered with bombs from. Follow until the very end and enter the room. A level below, there are opponents. You can use your bombs to defeat them. Once you eliminate them, jump to the lower level and open the chest. Jump out of the window to fall to the very bottom. walk through the passage that used to be guarded by the beast with the club.
 Defeat the pikemen
First, climb up the stairs on the right. From the corpse, collect the Lifegem and the Homeward Bone. Return to the lower level and defeat two pikemen. Try to lure them one-by-one. On the right, you will notice a big sword stabbed into the building that you are in. At its end, there is an item guarded by a knight with a two-handed sword. Walk to the lower level and walk through the mist.
 Take the lift to the lower level
In the next location, enter the room on the right. At the wall, there is an undead sitting. Kill him before he stands up, to avoid the fight. At the other side, at the bottom of the stairs, there is a corpse and a soul. G towards the elevators and open the door. This way, you will unlock a valuable shortcut to the bonfire. Take the lift to the bottom. Follow the corridor, where you will encounter a knight with a two-handed sword, halfway through. Walk through the mist, where there is The Last Giant.
 Jump on a branch.
After the encounter with The Last Giant, you've received a Soldier Key, which opens the further part of the location. Let's start from the beginning. Run up the stairs behind the Merchant Hag Melentia. Atop the stairs you will stumble upon a door - open them with the previously acquired key. Inside, you will see a large number of barrels and wooden chests. Behind the wagon, which you must destroy, you will find a Lifegem and a Hand Axe. A bit further you will notice another door. Before opening them, however, kill the enemy lying beside it. Step into the next room and open the chest. From it, take an Estus Flash Shard and a Small Sign Soapstone. Approach the hole and jump down, trying to land on a branch - take a Divine Blessing from it.
 Open the door.
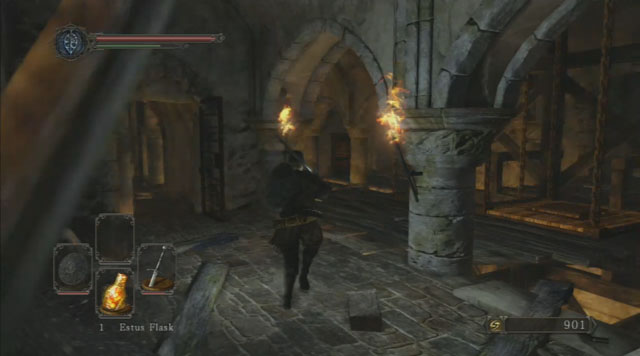
Afterwards, use the ladder and enter the previously visited place. Open the door to the left with the key. Go down the stairs. Kill a halabard-wielding soldier, sitting against the wall on the left. Go slowly ahead, until you encounter a beast with a mace. Wait for a bit, for the beast to move, and retreat to the stairs. Fight the beast like the last time - attack only after the beast's attack. Pick up a Black Firebomb and a Homeward Bone from under the left wall. Go straight ahead and get rid of the bomb-throwing enemy. In the further part of the corridor, you will encounter another enemy with a mace. Take the torch and kill the pikeman guarding the door.
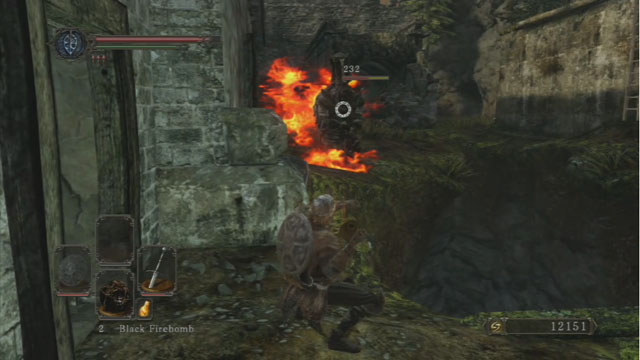 Throw bombs at the enemy.
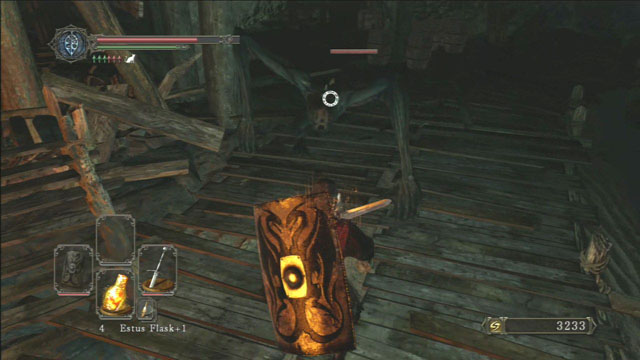
After leaving the basement, a difficult passage awaits you. In this location, you will have to face five mace-wielding enemies. In most cases, you will be able to fight them one on one. At the beginning, you can greatly injure one of the enemies, without much risk. To do so, lean out from behind the wall a little and throw a fire bomb at him - after that, don't bother yourself with him, as he will have a long way to travel in order to reach you.
 Defeat the enemies.
In the meantime, another enemy will come running to you. After you defeat him, finish off the one you threw the bomb at earlier. Being here, you should be wary of the archer on the other side of the gulf - there's a small chance that he will fall off of it, but you can never be sure. Open the door before you, get inside and deal with the beast.
 Collect the items from the roof.
After reaching the roof with a ladder, a tough encounter awaits you. You will have to face two enemies on a limited roof space. To defeat them, you will have to circle around them and wait for them to be next to each other - then strike and jump back. Pick up the souls after the battle. Afterwards, go down and into the building. There will be two bandits standing on your way. After killing them, pick up a Bastard Sword. Leave the building and kill another bandit. Approach the grating and collect a Green Bossom and Amber Herb.
 Go through the hole in the wall.
Go to the other side through the hole in the wall. If the archer didn't fall, you now have a chance for a direct encounter. Climb up the wooden platform and from the chest pick up Trash. Go through another reach and light the bonfire inside. From there, you can transfer to the place where you will find the Merchant Hag Melentia.
Open the door.Climb down the ladder and go through shortcut you unlocked earlier. Go straight ahead and defeat several pikemen at the end of the route. Turn left, open the door next to the stairs, and after reaching the upper level, you will have to face two enemies - one wielding a pike and one with a halberd. When you get to the top, on your right there will be souls and a Lifegem to pick up. Afterwards, go through the fog - you will encounter The Pursuer here.
 Use the nest.
After the boss fight, go further through the narrow passage and jump down a level, to pick up a Drangleic Set. Go all the way up through the same route that you used to get to the boss. After reaching the elevation, you will see a nest - you can use to it move to the Lost Bastille. Do it just to unlock the bonfire. You will come back here later.
 Go down the stairs.
Go get to the Heide's Tower of Flame, you have to set off from Majula. The entrance to the location is situated behind the blacksmith. Go through the stairs all the way down. Along the way, you will stumble upon a chest - you can collect a Crimson Parm from it. After reaching a closed passage, pull the lever on the left side. A path leading through the canals will be opened. Pick up a soul and a Broken Thief Sword at the end of them. Exit through the tunnel and follow the trail down. Turn to the right behind the destroyed bridge and light the bonfire.
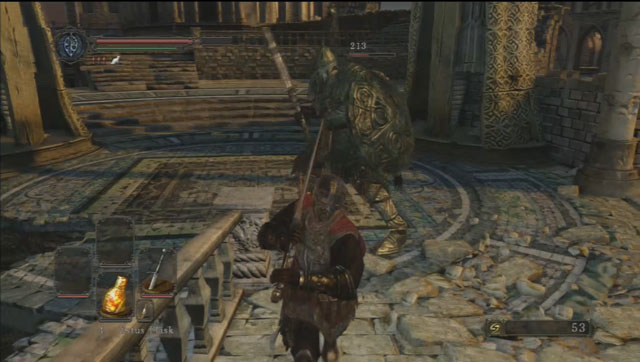 Get back on the bridge and defeat the knight.
Afterwards, get back on the bridge and engage the enemy - a large knight equipped with a sword and a shield. Defeating him is rather simple. To deal higher damage, take your sword in both hands. The enemy's attack pattern consists of 3 strikes: two fast swings and one, slower but stronger smash. After his two fast swings, jump behind his back the moment he starts preparing for his slower attack. Perform a single strike and jump back. Rinse and repeat 5 or 6 times (depending on the damage that your character can deal).
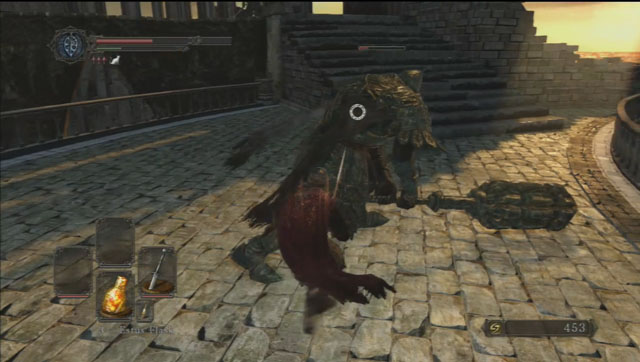 After the fight, this enemy won't be reborn.
Climb up the stairs to face another foe. He looks very similar, but he's equipped with a two-handed mace. He's a rather dangerous enemy. He has a few types of attacks at his disposal: a strong, overhead strike, a swing, or a series of attacks (two powerful overhead strikes). The best tactic for him is to circle around him with your weapon drawn. Beware, as when you see that he is preparing for a transverse cut, you must jump away from him - this attack can reach you even when you're behind him. After defeating him collect a Sublime Bone Dust. What's important, the enemy won't be reborn again.
 Use the lever.
Collect souls and a Human Effigy lying in the corner. Climb up the stairs and engage another enemy knight, wielding a sword and a shield. After getting rid of him, use the lever, which will raise a platform in a nearby tower. Also, collect a Lloyd's Talisman. Go further through the destroyed bridge, until you reach a building. Inside, you will encounter three enemy knights: two wielding a sword and a shield, and one equipped with a two-handed sword. Try to fight them one-on-one, as engaging all three of them at the same time might be difficult. After the battle ends, go straight ahead to come out on the other side.
 Try to fight the enemies one-on-one.
You will stumble upon two enemy knights: one equipped with a sword and a shield, and the other one with a two-handed sword. Try to engage them in a one-on-one combat. To the left there are destroyed stairs - climb them up and collect a Divine Blessing. Afterwards, climb the stairs and get on a platform occupied by a knight with a shield. After defeating him, a switch will appear, which will lower a drawbridge.
 Collect the items and go through the mist.
Go upstairs and collect the items on the left side - inside the corpse you will find a Old Radiant Lifegem, while a chest holds a Ring of Binding and a Human Effigy. Go through the mist, where an Old Dragonslayer awaits you.
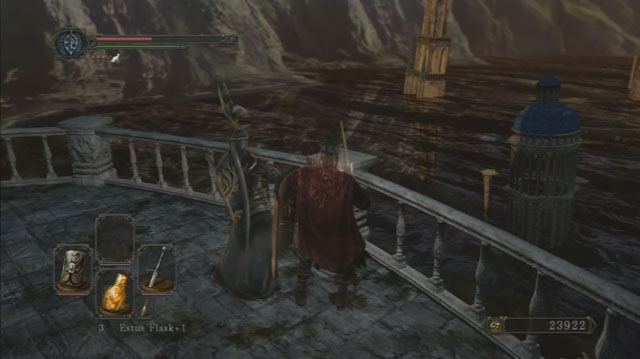 You can talk with the knight.
After the fight, go on the balcony and empty the chests, where you will find a Cracked Blue Eye Orb, Heide's Knight Iron Mask, and a Tower Shield. You can also talk with the knight standing at the balustrade. Afterwards, go down the stairs and light up the bonfire.
 Open the chest.
Go back to the place occupied by the three knights. If you have recovered by the bonfire, the knights will be reborn. Use the passage on the left side and go down the stairs. Here, you will have to face an enemy equipped with a two-handed sword. You can also open up a chest, which holds a Green Bossom. Go through the mist to face the Dragonrider. After the fight, go up and light up the bonfire and unlock an access to a miracle vendor, Licia of Lindeldt.
 Go through the bridge.
Starting from the bonfire, go through the bridge and enter the subsequent tower. Go down using the winding staircase, below which you will find a Monastery Charm. Go into the next room and defeat an enemy wielding a two-handed sword. Go further ahead, along the balustrade, and defeat another knight - after that collect souls, an Old Knight Halbert, a Human Effingy and Dark Torches.
 Go through the door.
Go through the door (the one that was protected by a knight with a two-handed sword) and get on a lower floor. There's a foe awaiting you there - this time equipped with a sword and shield. After the encounter, turn right (there' nothing in the corridor to the left) - you will stumble upon another shield-wielding enemy. Behind him there's one more room, in which you must use the elevator to get to the next level.
 Defeat the knight.
After leaving the elevator, go straight ahead, through a water-filled corridor. There will be another knight with a sword and shield on your left - you need to make sure that you execute your dodges perfectly, because the water will slow you down. After the fight, go upstairs - you can pick up a Knight Set there. Go back to the lower level and go through the corridor, to the left and through the hole in the wall. Continue through the stone tunnel and speak with a character standing at its end. Light up the bonfire. The road further ahead will lead you to No Man's Wharf.
 Go straight ahead.
Go straight ahead and enter the building on the left side, just behind the bridge. Watch out for flame arrows fired by an archer on your way there. After reaching the building, stop by the stairs, as you will fight three bandits here. Go upstairs and pick up a Titanite Shard from a chest. Afterwards, get on a wooden platform, defeat the enemy and collect the soul. Go down and through the bridge, defeat another bandit and an archer and continue towards the land. On you left side, in the water, you will find a soul and a Lifegem. After reaching the shore, you will encounter a group of three bandits - two of them will exit from the nearby buildings, the other one will jump from above. Collect a Dark Pine Resin from the nearest building.
 Bloathead.
Go along the platform and enter the building through the hole in the wall. Inside, you will encounter a new type of enemy, a monster called Bloathead. Fighting him can cause some problems at the beginning - the things you must watch out for are his attacks' reach and bleeding damage. The best method to defeat this foe is to get close to him, wait for him to start his attack animation - when this happens, jump back and immediately throw your own attack. After the enemy is dealt with, enter the building and collect an Iron Arrow lying behind the chests.
 Install the Pharros Lockstone.
Go back to the place where you've fought the three bandits and climb up the stairs. Halfway through the stairs turn to the right and engage the knight and his dog. You have to be extra careful about the archers standing on the platform above you. Turn right on the square in front of the building and get on a small elevation, where you can activate the Pharros Lockstone. After doing so, all the lamps in the location will light up, scaring off all the monsters, making the fight a lot easier. Afterwards, enter the building on the square.
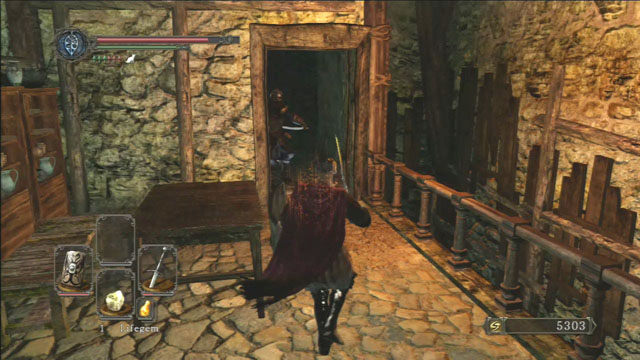 Defeat the enemies.
Inside, you will encounter a group of three enemies, each one equipped with two swords. Two of them is asleep next to the table on the left side - because of that, you can inflict some damage on them before they even realize that you're there. Fighting this type of enemy is fairly easy, as the only thing you need to do is to block their attacks and attack at the right moment. Afterwards, climb up the stairs to reach the upper floor - watch out for an enemy jumping down on them. Open the chest and take a Repair Powder and a Titanite Shard. Defeat the two archers outside and jump down. Get back to the stone stairs. Enter the building on the opposite side and climb up the stairs. Defeat the enemy and approach the door. Outside, there's another enemy equipped with two swords, standing near the stone stairs - it's best to defeat him from afar. When you reach the square, immediately turn to the right, because there's an enemy awaiting you there - another one, wielding two swords, accompanied by a dog, will run towards you from the opposite side. There's no point in searching the nearby buildings, as there's nothing hidden inside of them.
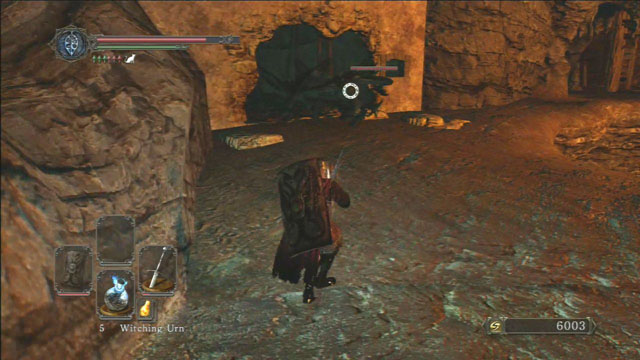 Kill the beast.
Go through the stairs on the upper level and be extra cautious, as you will encounter a group of Bloatheads here. If you've lit the fire with the Pharros Lockstone, each and every one of them will be hiding inside the building, at the end of the route. If you have fire or magic bombs, you can inflict some damage on a few of them at a time. Afterwards, lure them out with a bow or a crossbow. After defeating all of them, another group of three enemies will approach you, coming through the wall on the left side. When you get rid of all the enemies, use the stairs to get to the upper floor and defeat another beast. Behind the door, you will find two chests, from which you can take a Greatsword and a Silver Talisman. CAUTION: the wooden chest on the right side contains a trap - after opening it jump back immediately to avoid getting damaged. There's a Lonesome Gavlan merchant by the window - you can buy poison-neutralizing antidotes here. He's a rare type of merchant, because you can sell him your items.
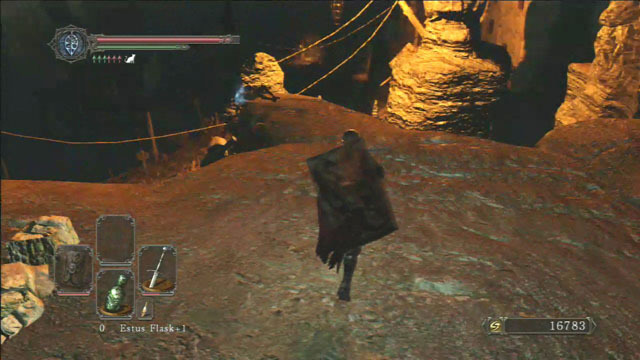 Collect the items.
After you've finished trading with the merchant, go down and outside. You can collect souls and an Emit Force, lying by the corpse on the edge of the cliff. Afterwards, continue along the wall until you reach wooden structures. Enter the first room, defeat the dual-wielding enemy, and climb up the stairs to reach the upper floor, where you will encounter another enemy. Go outside and through the next stairs. Use a lever located on a wooden bar - this way you will summon a ship, which, until now, was far away from the buildings. Jump on the lower ledge and collect a Lifegem and a Homeward Bone from the corpse. Jump further down and enter the building. You will find a Fire Arrow lying on the stairs, whereas below you will encounter two more beasts. If you have a supply of bombs or throwing knives, you can attack them from the stairs, without the risk of them retaliating - when they come close to you, you must go back to the top of the stairs and after they leave repeat the whole process.
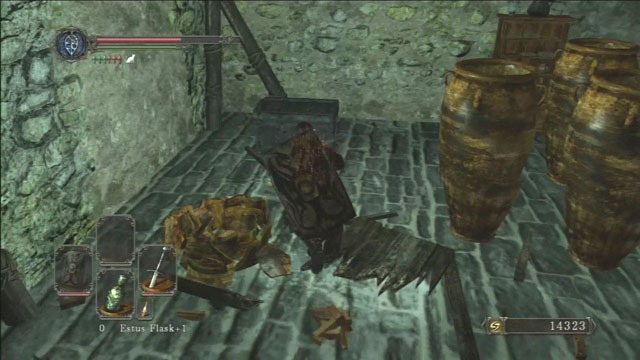 Open the chest.
After the fight, go outside and down the stone ledge. You can enter the wooden house, occupied by two dual-wielding enemies - while fighting them avoid hitting the yellow urns, as they contain poison. In the corner of the room, behind those urns, you will find a corpse with a Throwing Knife and a Flame Butterfly. Also, open the chest and pick up an Estus Flash Shard.
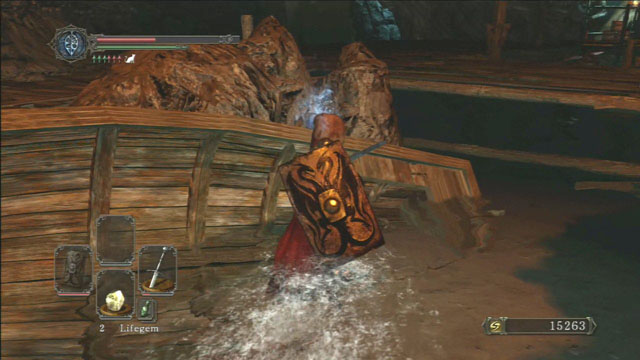 Collect all the items from the boat.
Go outside and continue to the right, in towards the buildings. Open the door and climb up the stairs, defeating the enemy equipped with two swords. While on the upper level, go through the door on the right side and activate the device, to open the grating - this way, you've unlocked a shortcut to this place from the last bonfire. Additionally, on the floor you can find a sign, with which you can summon Lucatiel Of Mirrah to aid you. Exit to the square in front of the buildings and go down through the stairs. On the left side there's a building with a hole in the wall. There are two beasts inside. You can enter the water to collect a Human Effigy and a Lifegem, hidden in the corpse lying on a boat. Also, there's a dual-wielding foe awaiting you in the water. Go along the right branch of the bridge to approach a sitting character - it's a mage named Carhillion, with whom you can talk.
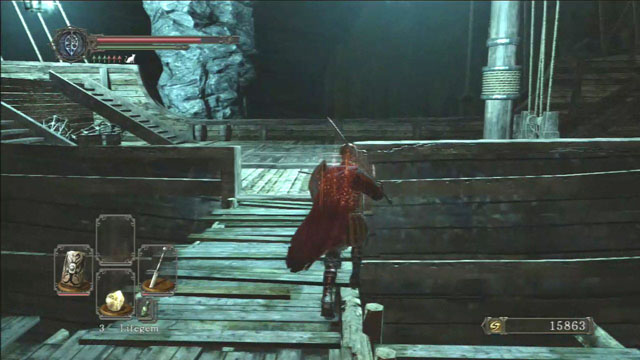 Get on the ship.
Go straight ahead, along the parallel side of the bridge, until you reach its end - wait for a bit, as there are enemies following your footsteps and closing on you. Get rid of them, trying not to fall in the water and turn to the left, to get on the deck of the ship. You must act quickly and decisively, as there are archers located on both sides of the ship. First, take out the one on the left side. Afterwards, go to the opposite side of the ship and deal with the other one. Now you can peacefully take out the rest of the enemies on the deck.
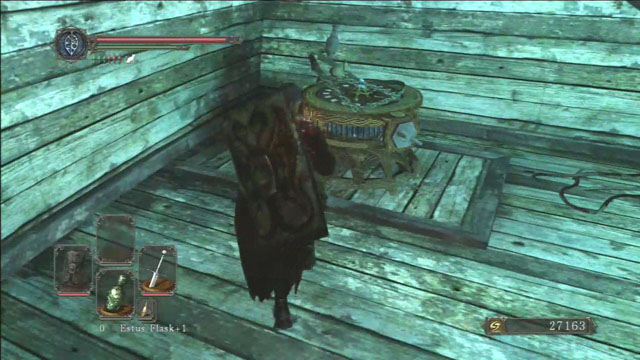 Use the navigation.
After clearing the deck, get inside through an entrance between the stairs. Considering that all the planks are of the same color, it can be hard to locate the hole. Go down the stairs and through the mist, where a Flexile Sentry awaits you. After the fight go through the door on the opposite side of the arena and use the ladder to reach the upper floor. Collect a Pyromancy Flame and a Fireball from the chest. Use the navigation device to get to the Lost Bastille and unlock the second bonfire in this location.
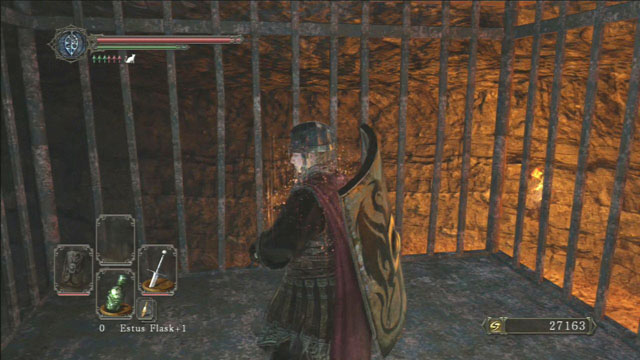 Use the elevator.
After leaving the ship, go along the bridge, towards the shore and enter the building before you. Inside, use the elevator to get to the upper level, from where you will embark on your further journey. After reaching the upper level, search through the nearby cells - inside one of them you will find souls and a Radiant Lifegem. Afterwards, go upstairs and search the surrounding, open rooms - you will find a Common Fruit and a bonfire to light. After doing so, teleport to the bonfire that you've unlocked after the fight with The Pursuer - you will save a lot of time doing it.
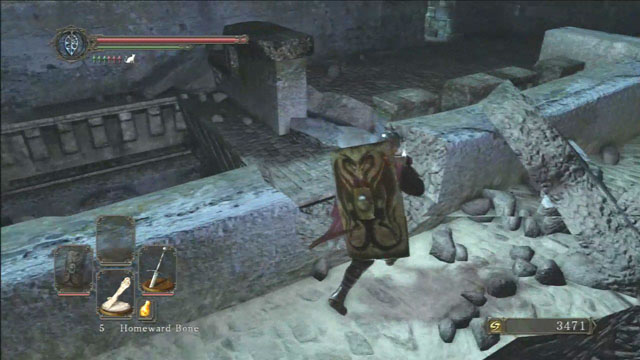 Go through the destroyed wall.
Leave the tower and go straight ahead, until you reach the rubble - from there, turn to the left and get on a narrow piece of a wall. You can circle around the wall to collect an item. Afterwards, go to the other side of the wall and defeat the nearby giant. Use the passage in the wall and enter the room - there's an archer and a couple of dogs at the bottom of it. After jumping down (or using the ladder to get down), the archer should follow you - it should allow you to easily defeat him on the lower level. Go through the door and open a chest on the other side of the room, containing an Antiguated Key and a Covetous Silver Serpent Ring.
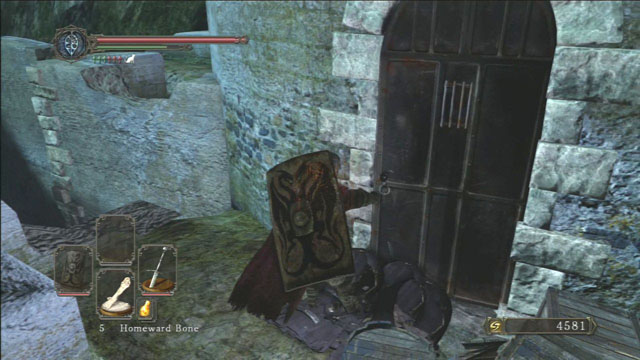 Open the door.
Go back upstairs and run through the bridge towards another tower. At the foot of the tower there will be barrels blocking the entrance - destroy them to open the passage. Inside, you will encounter Lucatiel of Mirrah again. After speaking with him, you will be given a Human Effigy. From here, you can teleport to the bonfire unlocked after the ship trip, to explore the rest of the location.
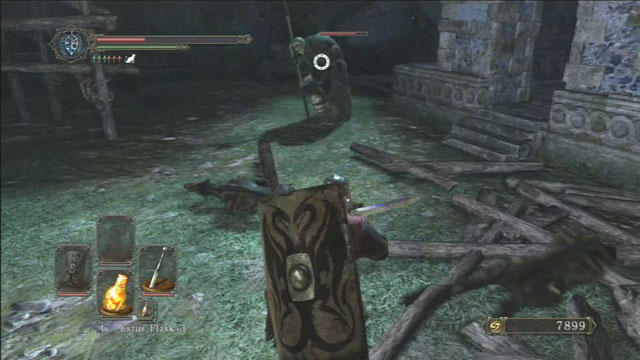 Defeat the giant.
After returning to the bonfire, exit the cell and climb up the stairs. You will stumble upon a white knight on the stone bridge. You don't need to fight him if you don't want to - unless you attack him first, he will leave you alone. On the edge of the bridge you will see a couple of barrels. Destroy them to be able to attack the enemy standing on a platform, below you - all you have to do is to stand on the edge and jump down, attacking in the process. Fighting him may be a little tricky, as he uses a weapon with a longer reach, but by using a suitable tactic, you should be able to handle him. You can either attack by blocking his attacks and counterattacking when he's staggered, or by dodging and attacking his exposed back. Also, keep in mind that a couple of dogs will join the fight as soon as you hit the ground. Destroy the wooden scaffolding drop down an item.
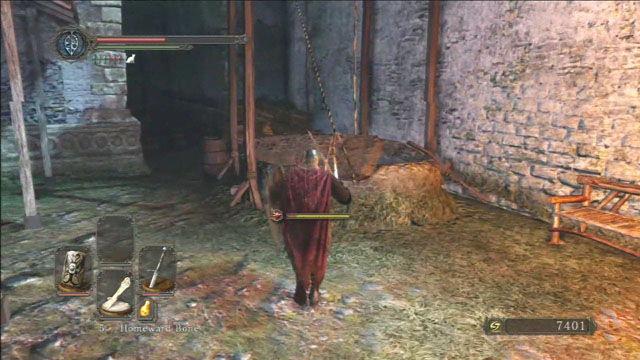 Hit the stone.
Approach the wall to notice a hole boarded with wooden planks. Break them and get inside. On the left side you will see a wooden platform spread between the pillars - there's another enemy hiding behind them. He's just a regular knight with a two-handed sword - all you have to do is to block and/or dodge his attacks and attack him when he's exposed. After the fight, get inside the cell, to encounter a new enemy - a Zombie. Fighting them may be a little complicated, as they have a nasty attack - they drop to the ground and explode, dealing quite a lot of damage in the process. Because of that, you have to kill them before they can use it. Collect a Flame Butterfly from the corpse lying by the wall. Use the Antiguated Key to open the door. A pack of dogs awaits you on the other side. After dealing with them, approach the well and hit the stone. A group of three zombies will emerge from below. Defeat them and pick up a Wanderer Set. There's another building located behind the well - the safest route would be to approach it from the side. To do so, go along the left wall and climb up the wall to reach the roof. Jump through the window and defeat the two crossbowmen located on an elevation. Afterwards, jump down and defeat an enemy equipped with a two-handed sword. Climb up the ladder to reach the top and collect souls and a Green Blossom from a corpse.
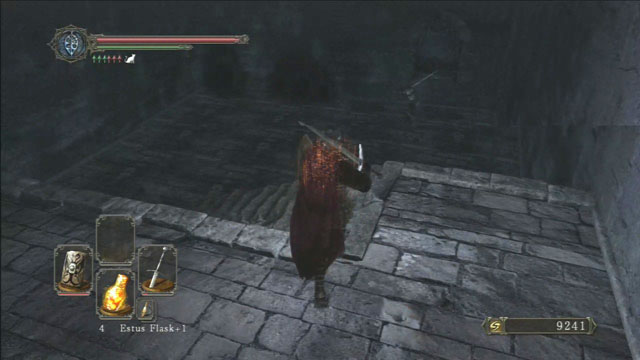 Kill the dogs.
Go outside and continue straight ahead, towards a narrow passage. A pack of dogs await you here. Use the switch to raise the grating and kill them one by one. Carefully approach the stairs, as the giant on its top will throw an exploding barrel at you - to avoid taking damage, run next to the wall. Attack the enemy in a similar manner as you did with a previous giant. Defeat another group of dogs - one of them will run straight at you, the other one is hidden around the right corner. The latter is protecting a corpse containing a Gold Pine Resin.
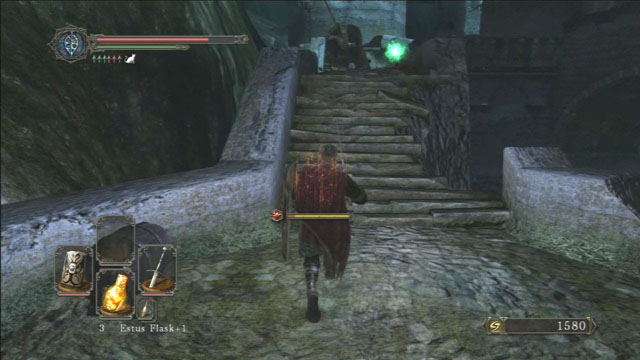 Run through the bridge.
Go ahead, along the bridge and kill another dog. At the top of the next stairs you will again encounter a giant. Lure him to a steady ground, because fighting him on a damaged stairs can be dangerous. After the fight, climb up the rubble to get on the wall and go through the door, to get to the further part of the location.
You have two routes to choose from.After going through the door, you will have two routes leading to the next boss to choose from. You can pick the left one and go through a narrow corridor, or use go down the stairs on the right side. The first option may be a little difficult, as there are many enemies awaiting you there - but there's a trick to it. Get inside the corridor and back up as soon as the enemies notice you. Throw a single attack and jump back, until you've defeated all the enemies. Go back into the corridor and use the switch to raise the grating. Behind it, another group of enemies awaits you. After getting rid of them, you will be in another corridor - at its end there's a mist leading to the boss room.
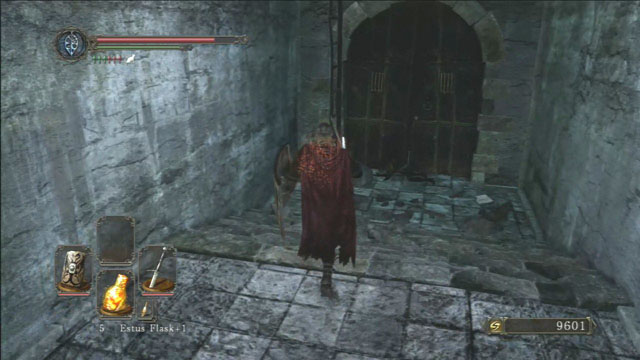 Climb up the ladder.
The second route leads downstairs. You will encounter enemies on your route, but they won't be packed up in a single place. After reaching the bottom, you will find a corpse lying by a destroyed door - from it you can collect souls and a Human Effigy. NOTE: don't open the single-winged doors on one of the walls, and even if you open them, don't cross them, as you will fall down and die. Use the ladder to get to the upper level. You will encounter two enemies here. You are inside a corridor - at its end there's a mist leading to the boss room. Going along it you can search the nearby cells - in one of them you will find Lucatiel of Mirrah to aid you. Afterwards, go through the mist to enter a boss fight with the Ruin Sentinel's.
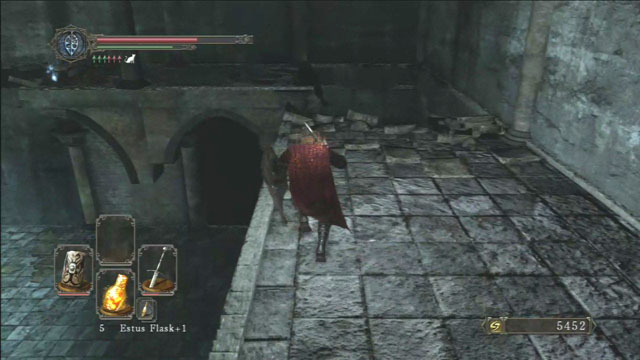 Jump over the hole.
After the boss fight, go through the hole in the wall and continue upstairs. You will land on a upper, heavily damaged floor. You can jump to the other side of the balcony to collect a Homeward Bone. Use the passage in the wall and collect the souls from the first cell on the right. Afterwards, run through the corridor without stopping for even a second, as this is a trap.
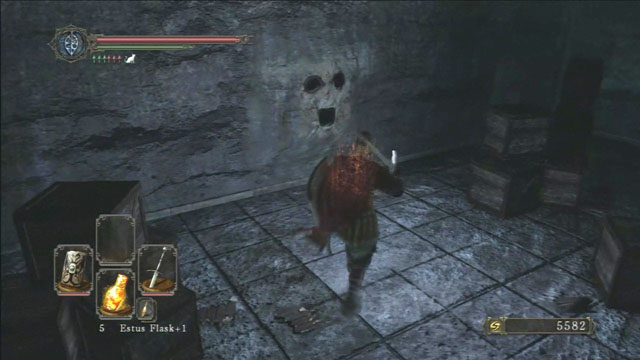 Use the Pharros Lockstone.
Light up the bonfire located in the corner of the room. There's a ladder leading down next to it. Get rid of the dog lurking in this room and find a corpse containing souls, lying in the corner of the room, and a chest, where you can find a Priest's Chime. There's a device on one of the walls - use the Pharros Lockstone to activate it. Afterwards, a similar "face-like" device will appear next to the one you've just activated - hit it to unlock a passage leading to the Belfry Luna.
 Belfry Luna.
Open the door leading to the further part of the location. Behind it, you will notice a dwarf sitting on top of a chest - you can join the Bell Keeper alliance by speaking with him. Afterwards, go upstairs, where you will encounter a new enemy, an armored dwarf. It's easy to defeat him. Behind him, you can see a corpse hung over the railing - you can collect a Skeptic's Spice from it. Go to the upper level, where two more dwarfs await you.
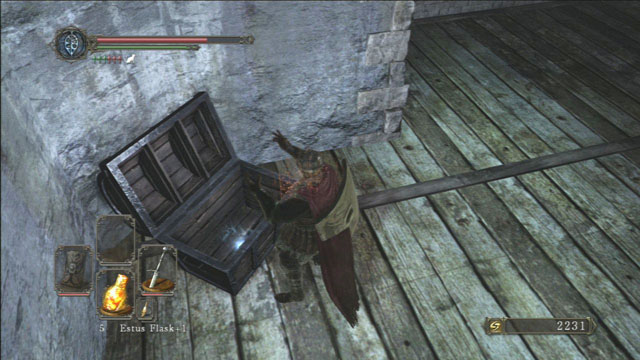 Open the chest.
Use the ladder and get on top of the tower, occupied by a fair number of enemies. You can hide behind the walls, to kill them one by one. Open the nearby chest to collect a Radiant Lifegem and a Twilight Herb. Behind one of the walls, there's a corpse containing a Skeptic's Spice. Ring the bells by using the lever, which will open the passage leading to the boss fight. Go through the mist to fight with the Belfry Gargoyle.
 Open the chest.
After the fight, get inside the tower and go downstairs. Collect a Southern Ritual Band from the chest. Go outside and light up a bonfire, located at the end of the bridge. Afterwards, climb down the ladder and defeat the dogs. Pick up a Bastille Key from the corpse lying by the wall.
 Go through the wooden planks.
Get back to the bonfire in the Lost Bastille and use the stairs leading to the corridor - at its end you will find a door. After opening it, you will be able to cross through the wooden planks to reach the wall. You will encounter another giant on your left side. Defeat him, get inside the tower and use the passage on the left side. There's another enemy lurking just behind it. Kill him and get to the subsequent roof to collect a Flame Butterfly. Jump on the other roof to collect souls. Climb up the ladder to reach the next room. You will notice a zombie, sitting by the barrels - kill it before it gets up.
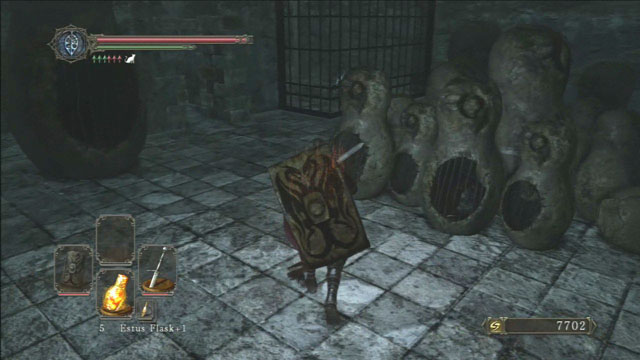 Destroy the stone cages.
Use the switch to raise the grating - another one, behind which a group of zombies await, will open automatically. Defeat the enemies and enter the next room. There are stone, cage-like objects here - smash them, as there are zombies hidden inside. Another enemy is lurking above you, on a stone ledge. You will encounter two additional zombies on the upper level. Open the door and enter the next room. On the opposite wall you will find a corpse containing a Skeptic's Spice. To get the other items present in this room, you will have to work a little - Silvercat Ring is worth equipping, as it decreases the fall damage. On the first ledge you will find a Bonfire Ascetic. Jump below and collect a Wilted Dusk Herb from a chest. To go back up, you will need to enter the cage hanging on a chain.
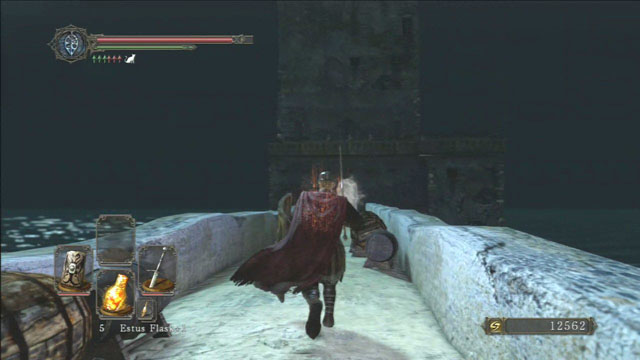 Run towards the mist.
Get to the upper floor and defeat the mummies lurking there. You will notice a bonfire in a cell, blocked by a stone statue - ignore it for now, as you will unlock it later. You can open the next cell by using the Bastille Key - inside you will find a Petrified Dragon Bone. Go back down and use the switch, to open the grating. Turn to the right and defeat a knight around the corner of the room, to pick up a Lifegem. Run through the bridge towards the mist, avoiding the crossbowmen's belts. Run all the way to the mist, without a single stop and none of them should reach it. Go through the passage and climb up the wall, hidden behind a hole in the wall, to get to the upper level. Light up the bonfire.
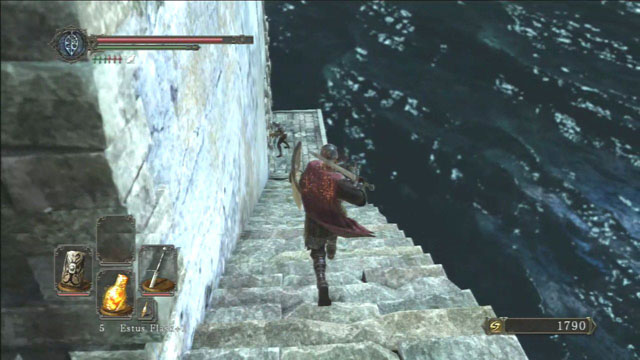 Run down the stairs.
Your journey in this location begins near probably the worst bonfire in the game - every time you respawn, you will be immediately attacked by a group of crossbowmen. To get rid of them, approach of the enemies with a raised shield to force him into close combat. After he draws his sword, back up and wait for him to follow you. Defeat him in direct combat - rinse and repeat until all the enemies are killed. Climb down the ladder and run downstairs, defeating the crossbowmen located at the bottom. There's a corpse located at the corner of the room - you can collect a Human Effigy from it. There's a group of three crossbowmen lurking in the room. Use a ranged weapon to defeat them - lean out from behind a wall and fire at them.
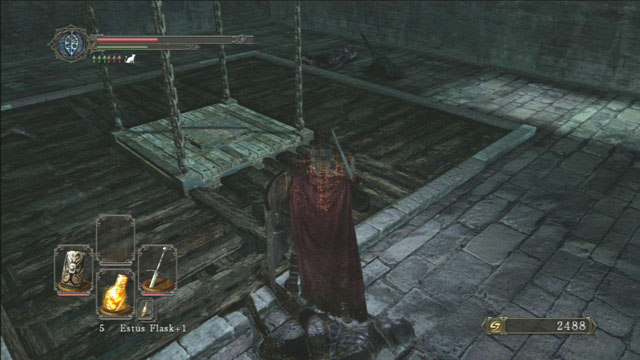 Use the elevator.
After you've defeated the enemies, use the elevator and ride it down - jump on a wooden ledge at the right moment to collect a Lacerating Knife. After reaching the lower level, use the stairs to get into a water-filled room. You will encounter a new enemy here - water giants. Fight them one by one, jumping back before their attacks. Avoid his tail attack, as it deals a high amount of damage. There are three water giants awaiting you in this location. Kill the first one and collect a Sublime Bone Dust from the room he came out of. The next one protects the corpse with souls and after defeating the lest one you will get a Bell Keeper Shield.
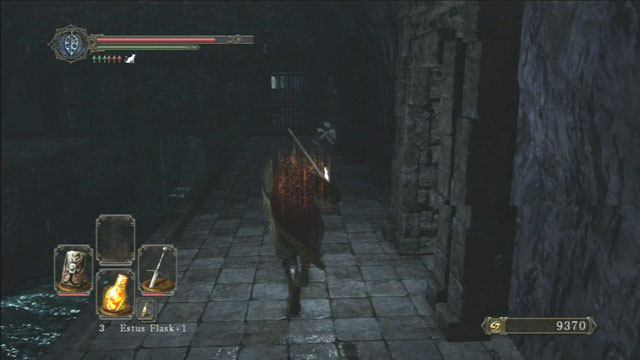 Run through the flooded corridor.
Go along the flooded corridor - at the stairs, on the right side, you will encounter another exploding mummy. You can climb the left and/or the right stairs to defeat the enemies and collect the items. The cells below, in the deep water, hide another enemies - fight them one by one, as engaging a group of kamikaze-mummies may prove fatal. After searching through the cells, you will acquire a Pharros Lockstone and souls. Use the switch to raise the grating. Again, you can summon Lucatiel Of Mirrah to aid you in battle - a place to summon the phantom is located near the elevator.
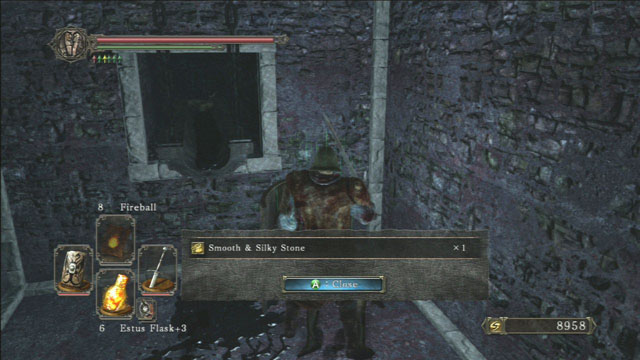 Light up the torches.
Run through the bridge towards the mist - at its end search the terrain thoroughly, as you will find an item to pick up here. Go upstairs and open the grating with the Bastille Key. Inside, light up the oil in the trough by using the torch. Repeat the process in the room behind the stairs, on the opposite side - you will illuminate the boss' arena with this, making the encounter a lot easier. Go through the mist and engage the Lost Sinner. After the fight, go through the door and open the chest - inside you will find a Fragrant Branch of Yore and an Elizabeth Mushroom. In the further part of the room, light up the bonfire, which will teleport you automatically to the Majula. With the help of the former item you can light up the bonfire in The Lost Bastille, which was blocked by a stone statue.
 Talk to Licia
Once you go through all dialogue options with Licia Of Lindeldt, she will take you near the switch in the tower that leads to Heide's Tower Of Flame. She will request 2,000 souls to turn the switch which moves the wall aside, thus opening the way to another location. At the beginning of the tunnel, pick up the Rouge Water and walk straight ahead. When you get to the top of the stone ledge, talk to the character sitting on a chair on the right.
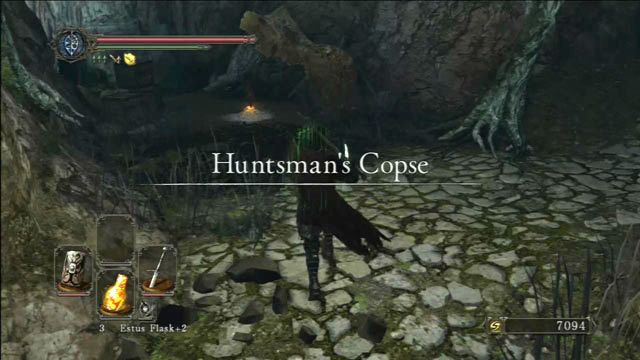 Light the bonfire
When you step outside, light the bonfire on the left side. Then go up the hill and enter the cave. You can kill the undead who is sitting in front of the entrance. More opponents await you inside. Fighting them is very easy, they do not deal much damage, just 1-2 blows is enough to beat them.
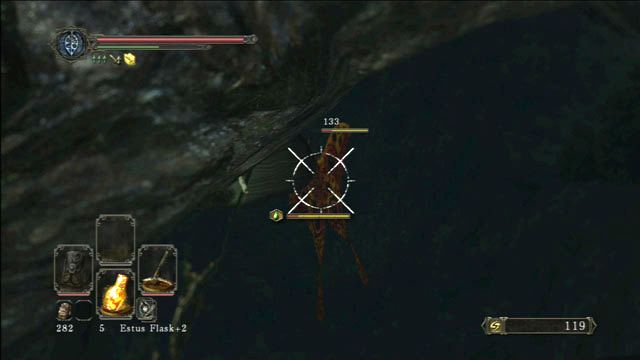 Kill the butterfly
Once you make it through the cave, be extra careful, since as soon as you step onto the stone bridge you will see some kind of green fog. Do not go into that, because it is a poisonous cloud released by butterflies sitting on rocks. The best way to safely reach the other side is simply to kill them. Only ranged weapons are suitable for that purpose. There are some more enemies of the type below. You will take care of them later.
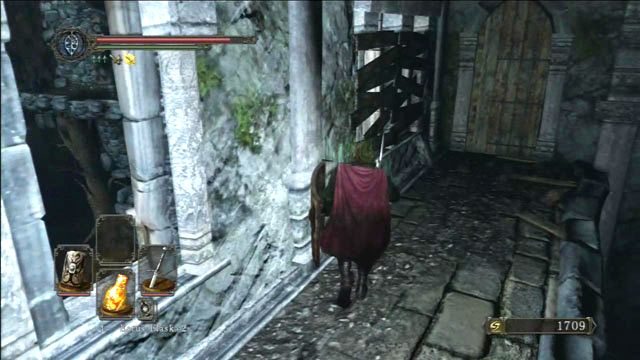 Destroy the planks in the window
Run to the other side of the bridge and climb up the stairs on the right. There is an entrance to the building at the top. Inside, you will be attacked by an undead with two blades. He is pretty fast, so you should kill him before he strikes you. You may destroy the planks in the window to make things easier. As a result, all the inside gets illuminated. There is a door before you, but do not open it the traditional way. Approach it slowly, strike once and jump back. An enemy lurks behind it and he is going to attack you when you get too close.
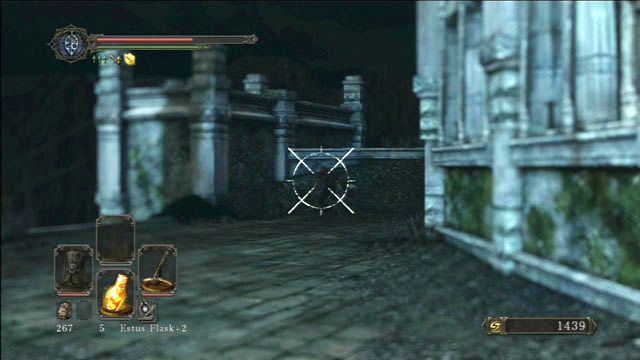 Lure out your opponent
You can then jump down to the lower level to collect items that are lying there. A large group of zombies roams about, however, you can defeat them easily. First, take care of the enemies on the stairs, since they are armed with crossbows. Watch out for the hole in the floor, because if you fall down, you will have to start the level from the beginning. Once you "clear" the room, climb up the ladder on the opposite side. You will find yourself in the courtyard, at the end of which an enemy lurks. You can lure him out with a ranged weapon. Then go to the edge, but do not jump off down immediately, because another opponent will attack you there. Good reflexes and timing can make it possible to kill him while falling. Take Poison Moss and Lifegem from the corpse on the lower ledge.
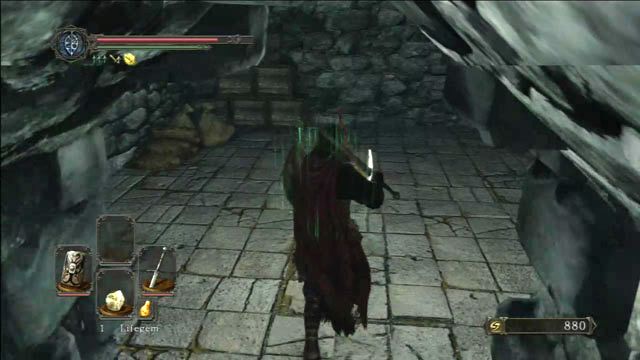 Light the bonfire
When you are at the bottom, go back inside the building and get out on the outside through the destroyed door. Another opponent is around the corner. Grab the Cracked Red Eye Orb from the far end of the ledge. In a moment there will be time for some exercise, but first you have to go down to light a bonfire. You can reveal a shortcut by kicking the timber next to the room with the bonfire.
 Open the secret passage
You can now go back to the top to jump to a nearby rock and take an item from there. Then jump back to the location you came from and enter the cave. Shoot down all the butterflies in the area in order to avoid getting poisoned. In the water at the bottom another enemy lurks. However, you do not have to fight with him directly, because when you stand on one of the mushrooms sticking out of the wall, you will be able to kill him with a ranged weapon. Once you defeat him, jump into the water and walk toward the chest in the corner - you can take Ricard's Rapier from it. Then walk toward one of the walls - this one is quite distinctive, as it has a slightly visible outline of a door on it. If you are in human form , press A (Xbox 360) or X (PS3) to remove the stone plate. Go inside and take a soul, then enter the cage that will take you to the top. Take the stairs and remove another wall. This way you can get into a room with a hole in the floor. Now go back to the bonfire to move on.
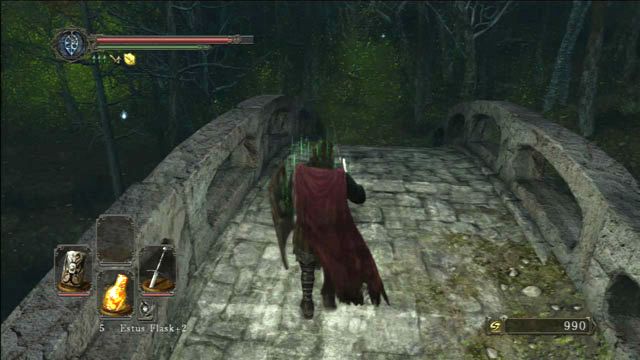 Cross the bridge
Exit the room and go into the woods. At the very beginning, you will be attacked by two enemies - a zombie with a sword and the other one with a torch. Once you cross the stone bridge, immediately turn right and walk along the river bank to the next bridge. On the other side, you will be attacked by two zombies and a new kind of enemy - Purgatory Guardian. At first, fighting him may seem troublesome, because his weapon inflicts a lot of damage. However, you can defeat him in a very simple way, by circling around him with a raised shield and looking for good moments to strike him in the back.
 Watch out for enemies on the columns
Then go further along the hill, at the end of which there is another zombie and an item to collect. Now enter the narrow isthmus and get to the other side of the mountain. Here you have to be very careful, because Purgatory Guardians are lurking on the columns. It is best to fight them one by one, therefore work your way forward very slowly, and when you see that one of them jumps off, back up a few steps so that others did not join the fight. Follow the same pattern with each one of them.
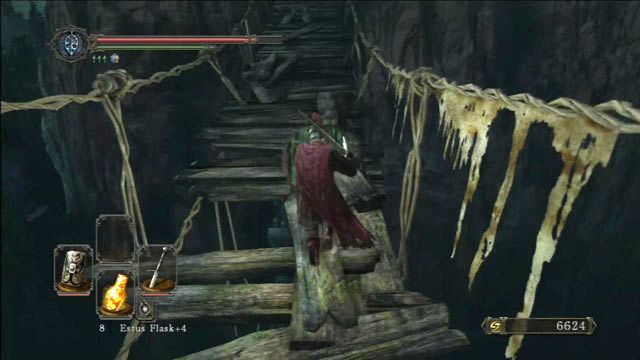 Watch out for holes in the bridge
After the fight, go to the long wooden bridge, but be very careful of the missing planks lest you fell down. At its end, you can jump on the ledge next to it in order to pick up an item, however, you should to do that only after the fight with the boss, because then you will light a bonfire that is relatively close. Now go through the fog beyond which the Executioner Chariot is waiting for you. After you defeat him, you can go up the stairs to light a bonfire.
 Defeat the enemy
Now teleport to the previous bonfire. Take the same way to the stone bridge. Once you cross it, shoot butterflies sitting in the trees with a bow or a crossbow. A giant with two curved blades will attack you. It has two attacks: he swings his weapons to inflict considerable damage and tries to pin you down. In that case, he first strikes with one of his blades and then with the other. His weapons stick in the ground, which gives you time to finish him.
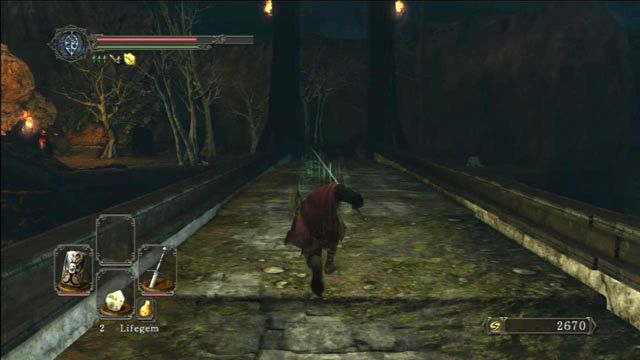 Run across the bridge
Now you can search the entire area to collect items and defeat the remaining enemies. Then go to the opposite side of the forest, to the great bridge. You will see a hut with a broken wall in this area. Go inside, but watch out for the enemy that will attack you from above. After killing him, pull the lever that lowers the bridge making it possible for you to get to the other side.
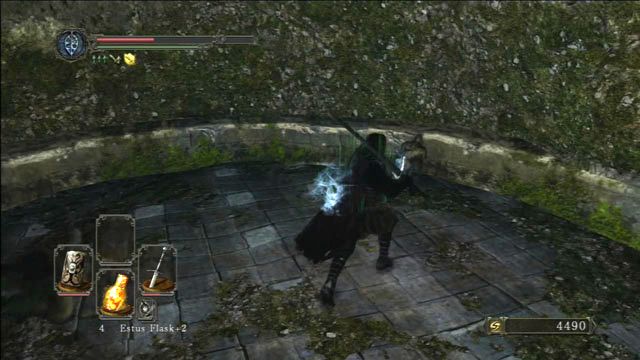 Take the key from the corpse
On the other side, you will see three locations. A closed hut with a bonfire inside, an entrance to a cave, and a stone bridge. First, go across the bridge. You will encounter some mummies and archers on your way - you should be particularly careful with the latter. After a while, you will get to another stone hut, guarded by an undead armed with knives. Kill him and go inside, deal with the two opponents and take the Undead Lockway Key from the corpses lying by the wall. This can open the room with the bonfire, so now it is good to go back there and light the bonfire.
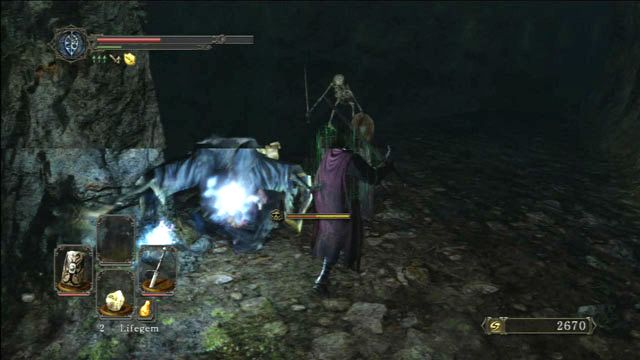 Defeat the mage
Inside, you can talk to the character sitting by the wall. After leaving the building, go inside the cave on the right. First, take the Titanite Shard and the Magic Mace from the corpse. Inside, there are skeletons waiting for you - they are very easy to knock down, but until you defeat the mage, he keeps reanimating them. Once killed, the mage will not raise again in the future. You should also pay attention to the yellow urns that give out black smoke. It is a curse, so destroy those closest to you as fast as you.
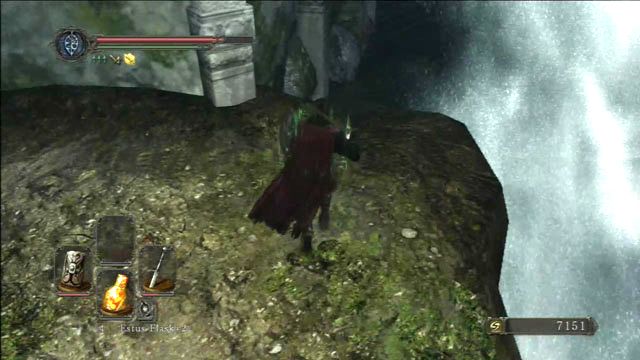 Go under the waterfall
Exit the cave and turn right, once you have passed the wooden bridge. Along the way, you can go to the higher level to collect some items. There are three enemies. Then jump down to the lower level from which you got to the top and run toward the building. Go under the waterfall and go to the stairs leading to the fog. Do not walk into that yet, but go a little bit further and enter the cave. Inside, you will encounter another group of skeletons and a mage standing on the other side of the gulf. You can kill him from a distance or jump to him, however, the second option may result in falling down and dying.
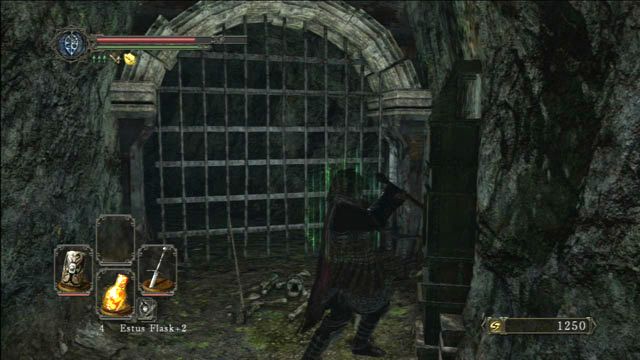 Unlock the shortcut
Once you defeat all the enemies, go down the tunnel and pull the lever. This opens a shortcut to a bonfire. Take a tour of the entire cave in order to collect items. Now go back to the stairs and go through the fog, beyond which Skeleton Lords await you. After the fight, exit the room, and then after going through the tunnel, pull another lever to lower a bridge. Go through it and then run through the stone tunnel. At the end of it, behind a wooden wagon, turn right, where you can light a bonfire. You will have to go across toxic water.
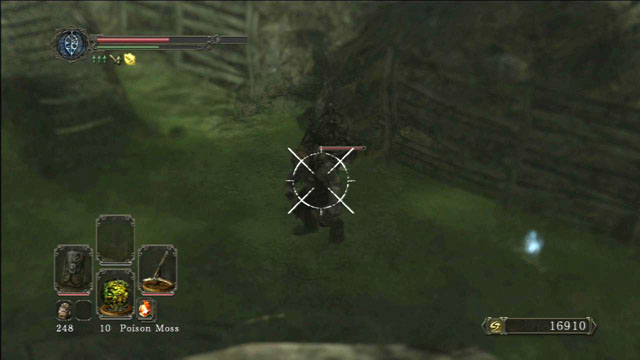 Use ranged weapon.
After lighting the bonfire, leave the cave and turn right. After reaching the edge speak with Chloanne. Afterwards, use your bow or crossbow to take down the enemy below you. Backtrack a little and go through a tunnel, until you reach a place filled with poisonous mist. Enter it and collect all the nearby items. Watch as the bar representing your poisoning gradually fills and leave the mist before its full - you can consume a Common Fruit to delay the effects of toxins. In the meantime you will be attacked by skeletons.
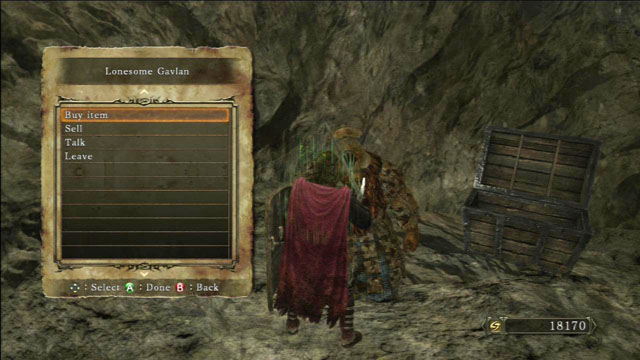 You can buy and sell stuff at the merchant called Gavlan.
After collecting all the items enter the next room. Kill all the skeletons rising by the wall and, while avoiding the hole in the wall, go into the subsequent chamber. Inside, there's a chest containing a Raw Stone and a merchant called Gavlan. Jump into the hole you just passed by and collect a Fire Seed and a Divine Blessing from a chest.
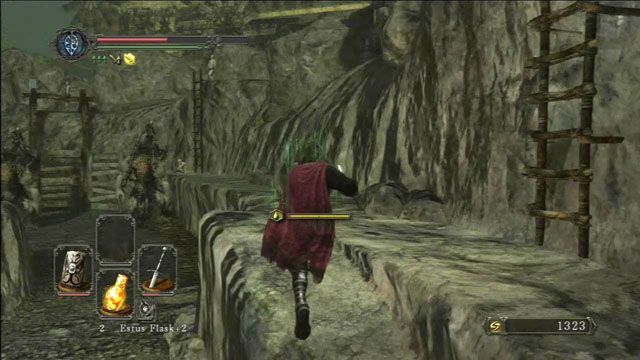 Climb up the ladder to attack safely.
When you are done collecting items, go up the stairs and through a stone tunnel located ahead. At its end you will run into two enemies - to avoid direct contact, climb up the ladder on the right side. There, collect a Hexing Urn from the corpse and kill both foes with a bow or a crossbow.
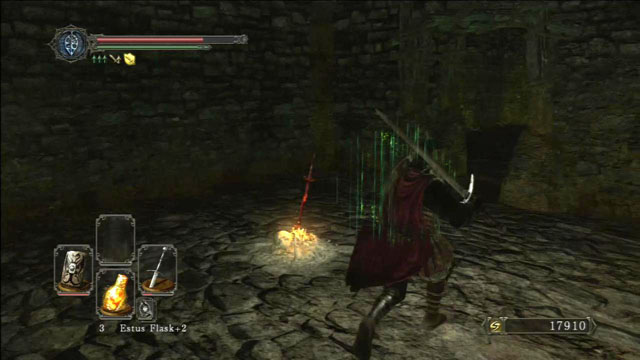 Use the lever.
After killing the dark magic wielding giants, go down the ladder and continue ahead, along a stone ledge. Get rid of the undead by the next ladder and climb it up. Kill the two enemies and open up the passage by flipping the lever. Another encounter awaits below you. Enter the corridor and turn right, towards a cave. Light a bonfire inside.
 Jump into the hole.
Turn right as soon as you leave the cave. Four holes in the ground can be seen on the plaza - by jumping into them, you can collect various items. Besides the holes, there are two passageways leading from the plaza. First, go through the left branch. At the end of the tunnel, behind wooden boards, there's a giant wielding dark magic. You can use him to get to the items hidden behind the wall. Evade him and make him fire his magic at the wooden wall, which should destroy it, opening a passage. While running towards the giant, pay attention to the passageway on the right, leading to another part of this location.
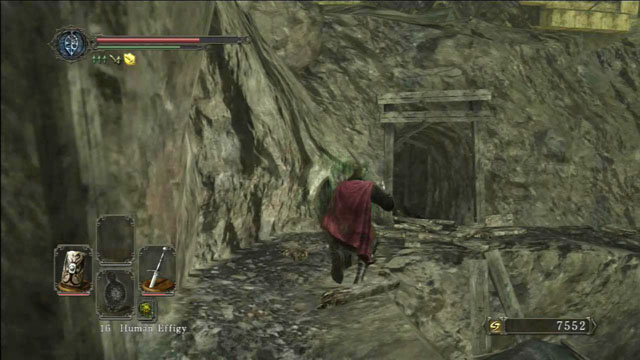 There's only one way leading from this place.
A very difficult encounter awaits you here - on a very limited area, you will be attacked by monsters you've encountered in the Huntsman's Copse. The only differences are that there are more of them and that they are a lot stronger now. The best method to safely get rid of them, is to run on the stone ledges, wait for them to get closer, and then attack them and jump back. Rinse and repeat, until there's none left. Afterwards, collect all the items and get away from this place. Use the passage above the wooden cart and turn right at the end of the tunnel. You will emerge on the plaza with the holes.
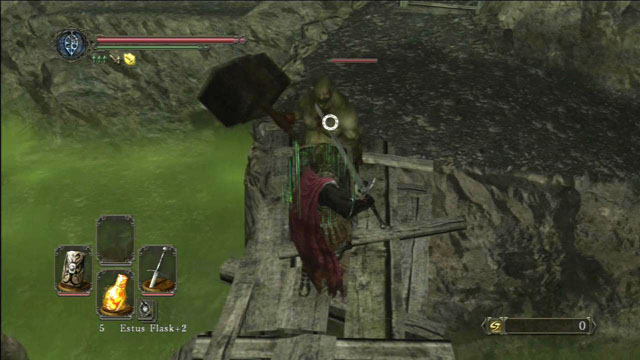 Defeat the enemy.
Now, use the other passageway. There should be two giants standing in front of you, in the poisonous mist. You will have to get close to them to force them into attacking you. Get on the wooden bridge and defeat the enemy with the warhammer - wait for him to slam his weapon into the ground and attack immediately. Afterwards, turn left and go through a stone ledge towards the windmill. Soon after entering the cave, you will be attacked by an enemy wielding a pair of curved blades. Defeat him and go deeper into the cave, until you see a broken statue - here you can join the Brilliant Covenant.
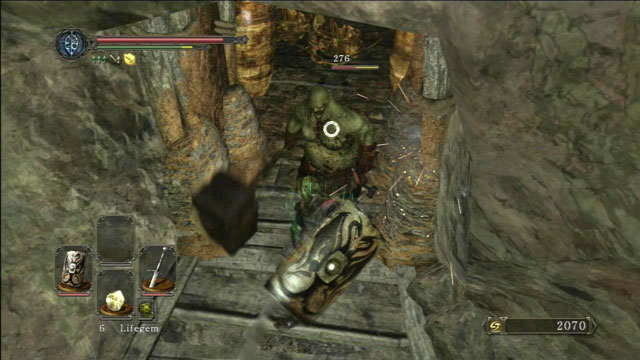 Defeat the enemy.
Go back to the wooden bridge and go through it. There are two roads leading to the building - one beside the bridge and the other one a little further, to the right. Use the one next to the bridge. An enemy wielding a warhammer will run from the building. Defeat him, go inside and avoid the yellow vases - restrain from breaking them, as there's poison inside.
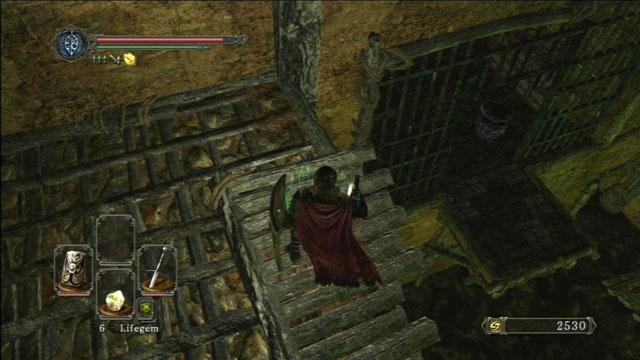 Jump below.
Go straight ahead and climb up the stairs to reach the upper floor. There's a poisonous fungus at the top of the stairs - kill it and leap to the next room. Inside, kill another fungus and enter the subsequent chamber. While in the corridor, you must pay attention to two things - enemies wielding dual swords and a switch on the ground, which will activate a trap. At the end of the corridor you will find a corpse and a chest, containing a Heavy Crossbow +3 and a Heavy Bolt.
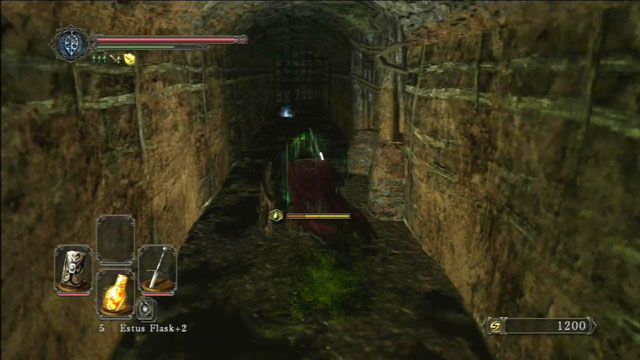 Run all the time.
Get back to the grating and jump on the staircase located below. Before entering the toxic water, make sure that you have protection against poison and a full health bar. At the end of the corridor, there's an Estus Flask Shard. Halfway through the corridor, you will find an entrance to a side room. Kill all the fungi inside - do it as fast as possible, to avoid getting poisoned. You can use the Pharros Lockstone on one of the walls. A blue face will appear on the opposite wall - hit it to unlock a secret room, where you can find a bunch of fairly interesting items.
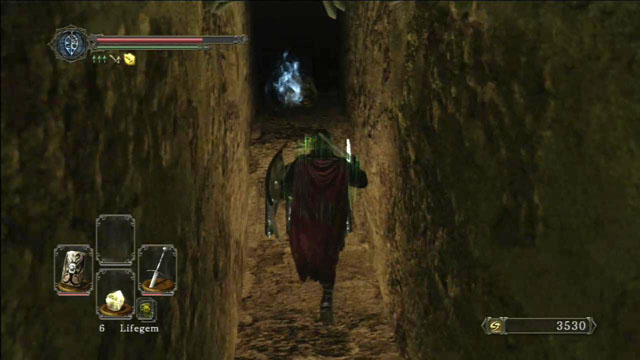 Collect the item.
Get back to the place you've previously jumped from. There's a hole by the stairs, where a fungus is hiding - kill it and collect the item located on the corpse at the end of the corridor. Go back upstairs, where you will have to deal with four enemies equipped with warhammers. Before going through the mist, climb the stairs on the right side. Get rid of the fungi and open the chest (beware of the trap) - inside you will find a torch. Now you can enter the mist, where a Covetous Demon awaits you.
Light up the bonfire.There are two passages leading off the boss' arena - use the one on the right side. Climb up the stairs and light up the bonfire. You can also speak to Lucatiel of Mirrah, to receive a Ring of Steel Protection.
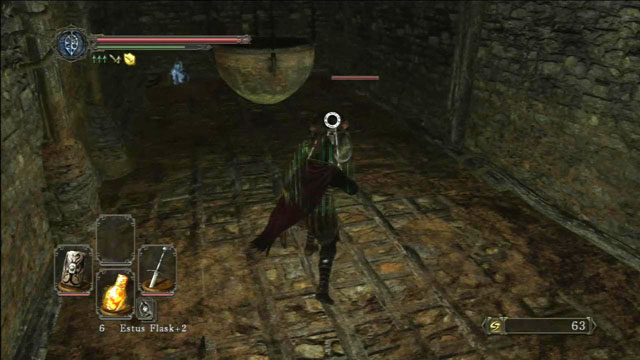 Defeat the warriors.
Exit the room with the bonfire and climb yet another staircase, where you will encounter two warriors. Block their attacks and launch your counterattacks when they are preparing for another move. There's a giant with a warhammer hidden behind a bowl hanging from the roof - defeat him and collect a Radiant Lifegem, located inside the corpse by the wall.
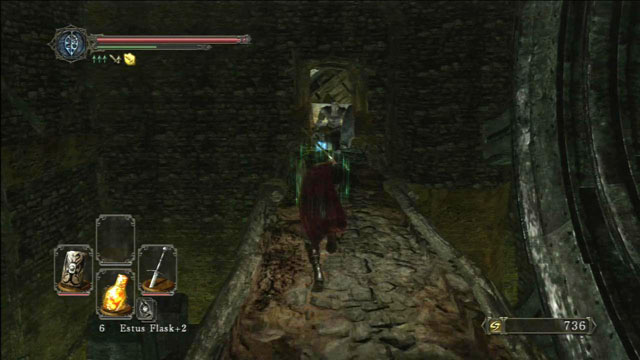 Run through the bridge towards the enemy.
Exit the room and run across the bridge, towards the knight with a club. Block his attacks and launch your own whenever he's exposed. Afterwards, go outside and pay attention to the left side, from where two enemies will slide down the ladder. Kill them and go towards a hanging bowl. Get on a second, destroyed bridge - there are two archers here. You can get rid of them from a safe distance using a bow or a crossbow, hiding behind a wall after each shot. Collect all the nearby items and go outside.
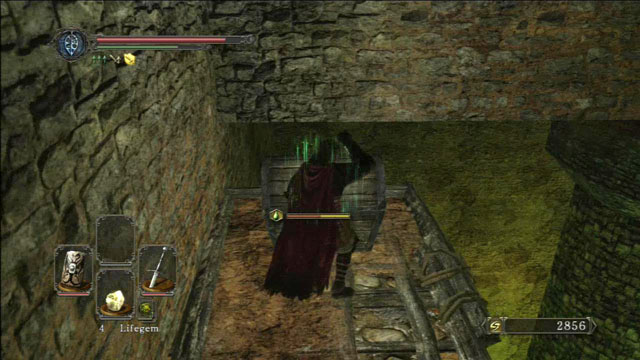 Open the chest.
Going further to the right side, you will see a lever on the wall. After flipping it, the bowl will raise up. Going upstairs, you will encounter another enemy. Run straight ahead and collect a Pike from the chest. Backtrack to the top and use the ladder.
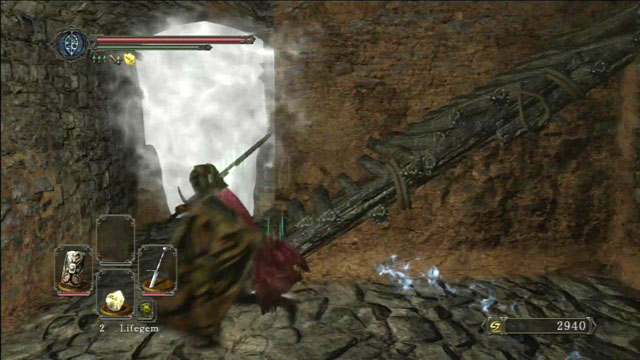 Go through the mist.
Defeat another headless enemy and go through the mist, where you can find a bonfire to light.
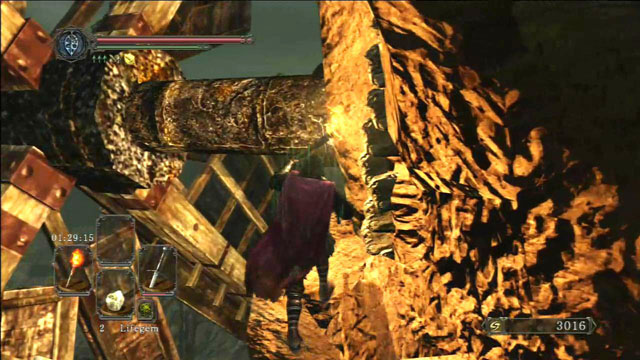 Ignite the device.
Ignite the torch from the bonfire and approach the windmill. Light the oil located on the shaft of the device, which will stop the pump from spreading the poison on the lower level of the location, making your journey a lot easier.
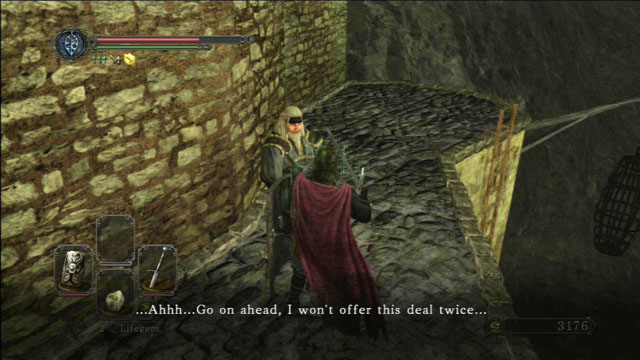 Speak with Gilligan.
Go upstairs and on the balcony, where you will be attacked by yet another enemy. Destroy the wooden railing and go along the edge of the wall on the right, to collect a Simpleton's Spice. By going to the opposite direction, you will reach the Laddersmith Gilligan. After speaking with him, by contributing 2,000 souls, he will set up a ladder for you, allowing you to go on the lower lever to collect a Pharros Lockstone and a Twinkling Titanite. After exhausting all the dialogue options, he will transfer to Majula.
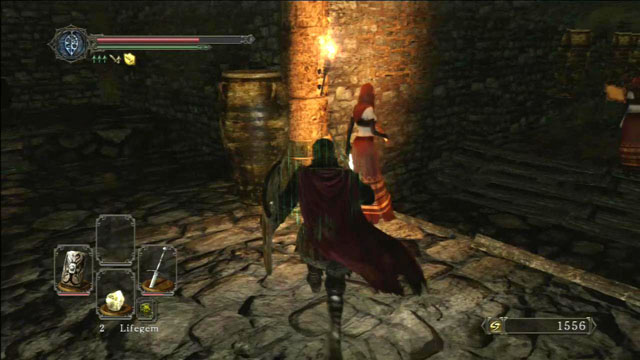 Defeat the enemies.
Go back to the balcony and run on its far end. Flip the lever located on the wall to lift an elevator, below which you will find a soul and a Divine Blessing. Use the elevator to reach the top and collect a Mirrah Shield from a chest. Go back down, climb the ladder to reach the upper level and run along the corridor. Turn right halfway through it and go down the stairs, to speak with Jester Thomas. Go back into the corridor and continue along it, until you reach its end. An encounter with a knight wielding a magical spear awaits you here. Get rid of him, go a little further and kill another group of two knights an two witches - the witches are fragile, but they have a powerful fire attack at their disposal.
 Jump down.
In the middle of the room you will find a round mechanism - if you've burned the windmill, it should be motionless. Jump down and kill the headless warrior. The exit out of this room is located behind the yellow, poison-filled vases.
 Defeat the enemy and climb up the ladder.
Get all the way back to the place from which you emerged on the balcony. Watch out for a switch located on the floor - if you stumble upon it, you will activate a trap. There's another enemy hiding behind the pillars. Kill him and pick up a Minikin Mask, located inside the corpse on the edge of the wall. Afterwards, climb up the ladder to reach the upper level.
 Kill the witches.
By going into the corridor on the right side, you will reach the other side of the round mechanism - there's nothing of interest there, so just go to the left. Climb the stairs all the way to the top and defeat two witches - note that they are in a close vicinity of the poison-filled vases. There's another knight and a witch hiding on the staircase on the right side.
 Destroy the vases from the distance.
Climb up another staircase, where you will have two paths available. After going to the right, use your throwing knives or bombs to destroy the vases from afar. Inside, there's a bunch of poisonous fungi. You can also see a chest there - restrain from opening it, as it's a Mimic. Stand behind the chest and start attacking it with your sword - try to land as many strikes as possible, before the chest transforms into a monster. After killing it, collect Dark Gauntlets and a Work Hook. There's also a place to use your Pharros Lockstone here, but you will just be flooded with poison if you do so.
 Check the walls to find a secret, hidden room.
Climb the stairs on the topmost level. There are vases with poison located on the edge. Stand with your back against them - there are secret, hidden walls located on the both sides of the entrance. By opening the one on the right side, you can collect a Petrified Something from a chest - the left one covers a bonfire.
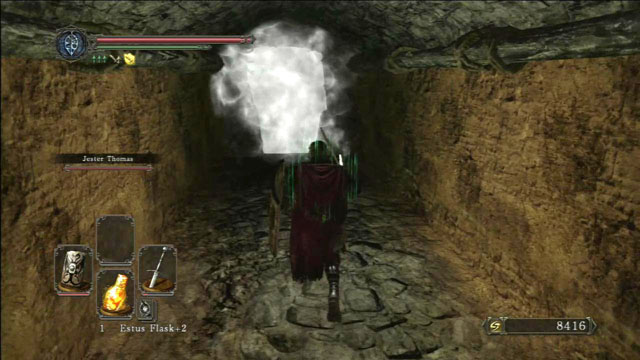 Go through the mist.
Go down and defeat the two knights guarding the mist. On the right side of the staircase you will wind a Jester Thomas summoning sign, whereas inside the corpse on the left side there's a Poison Stone. Afterwards, go through the mist, where Mytha, the Baneful Queen awaits you.
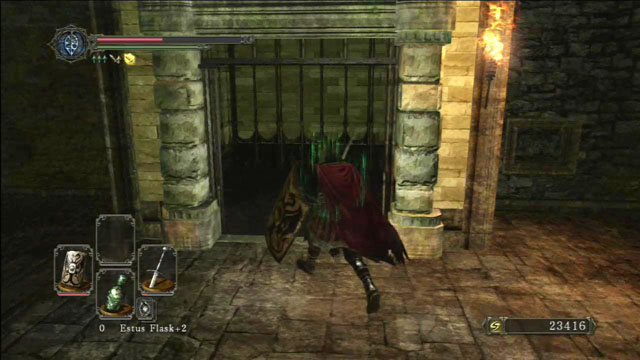 Use the elevator.
Use the second exit after the fight with the boss. Go upstairs and use the elevator. Run along the corridor and on its end, just before the bridge, turn left and light up the bonfire at the bottom of the stairs. There's a Human Effigy on a burning stone.
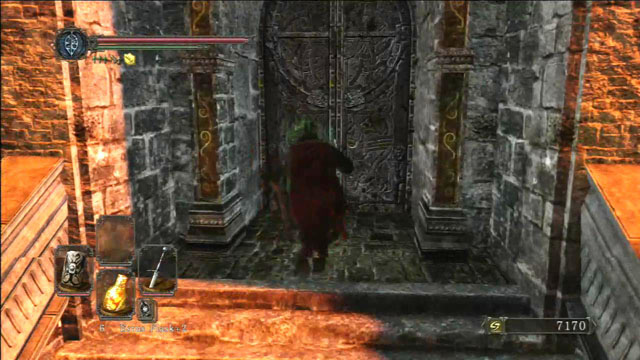 Open the door.
Run to the other side of the bridge and defeat the knights - they are fairly mobile, which is why you should hide behind your shield and attack at the right moment. After getting rid of them, open the door to the palace.
 Speak with the merchant.
Immediately after entering into the room, turn to the right. Climb the stairs located halfway through the corridor and defeat another knight. Collect a Pharros Lockstone from the corpse. Go down and turn to the left, into a chamber - speak to Magerold of Lanair sitting next to the wall.
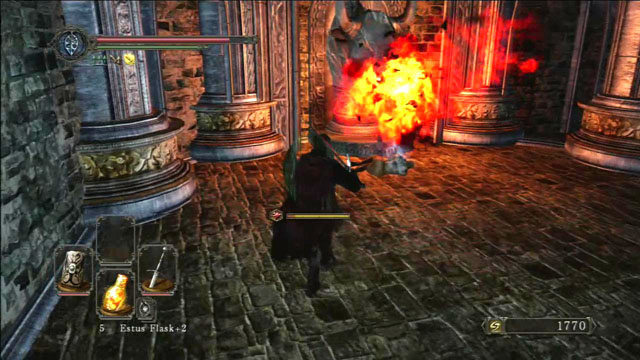 Collect the key from the corpse.
Get back to the main room and defeat the two knights located on the elevation. In the center of the room, there's a fire-breathing statue and a key located in the corpse, below the stream of fire. You can collect the Iron Key, if you approach it from the left side. Afterwards, climb the stairs to reach the subsequent room, where a group of three enemies await you. Approach the entrance and as soon as the enemy sees you and starts his pursuit, retreat a little and take care of him. Repeat the process with the other melee enemy. Afterwards, run into to the room, turn right and get rid of the archer.
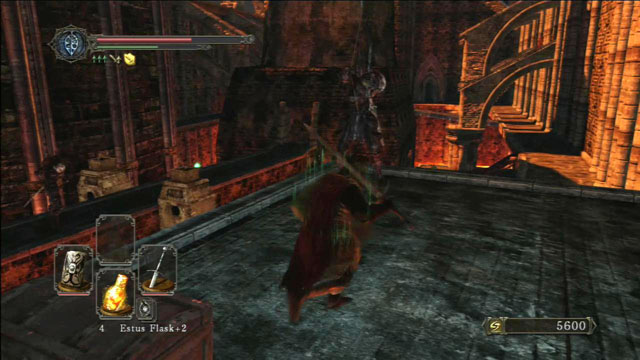 Kill the archer.
Go outside and draw your ranged weapon. On the right side, behind a wall, there's an archer firing heavy arrows, which inflict a lot of damage. Lean from behind the wall and fire at him, until he's dead. Afterwards, run ahead and defeat the knight. There are two more archers in this room, so pay attention to your surroundings. Run to the other side of the pathway and jump down, through a ladder gap. Collect a soul and a Repair Powder from the corpse. Go back to the ladder and climb it all the way to the top. There's an archer here, who can inflict serious damage even in melee combat - run straight to him and try to damage him as much as possible before he draws his magic sword. Collect a Life Ring +1 and a Twinkling Titanite. You can also take down the knight on the bridge near you, by using your ranged weapon.
 Run across the bridge.
Jump on the lower level use the metal staircase to get down. Defeat the enemy a flip the lever to lower the bridge. Backtrack to the top and run across the bridge, defeating the enemy standing on the middle of it. Defeat the archer standing near the mist - afterwards, the location should be free of enemies and you can safely search the surroundings.
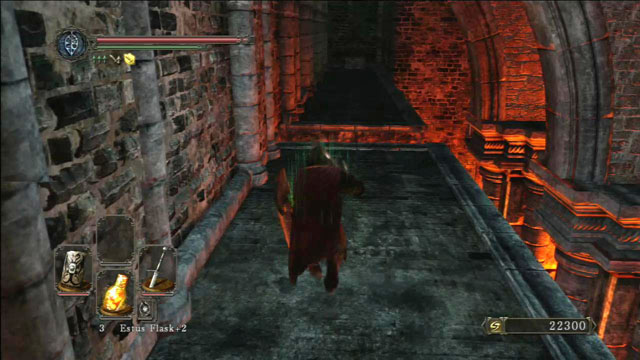 Get to the chest.
On a nearby pillar you should find a corpse - collect a soul and a Red Leech Troches from it. Afterwards, run to the other side of the pathway - halfway through you will have to jump over a cleft. Collect a Zweihander from the chest.
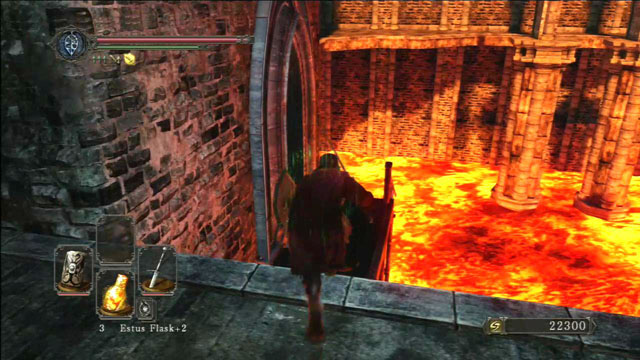 Jump onto the stairs.
Jump to the tower where the first archer was. There's a Dull Ember located on the destroyed staircase. Get inside and use the ladder to get to the upper level. Instead of using your Pharros Lockstone, simply jump down.
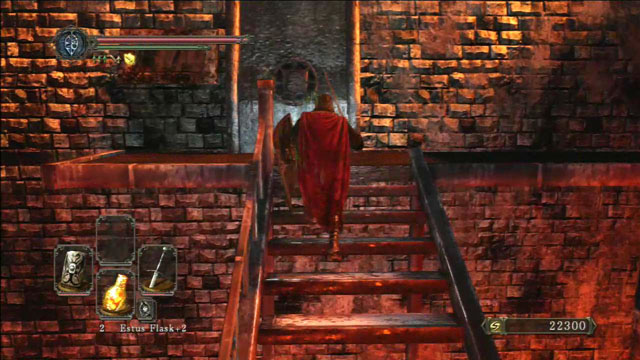 Turn the valve.
Get back on the bridge and jump down. Approach the valve located on the building's wall and turn it - by doing so, you will extinguish flames inside. Get inside and collect a Large Titanite Shard and a Petrified Dragon Bone.
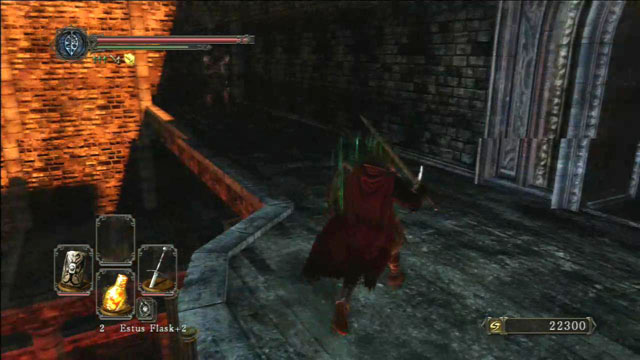 Kill the archer.
There are two choices for you here - you can either decide to enter the mist and fight the Smelter Demon, or, if you feel that you won't be able to defeat him yet, climb up the ladder, go straight ahead and climb yet another ladder. If you've selected the more difficult path, go through the mist, where a Smelter Demon awaits you. After killing him, go upstairs and open a chest, where you will find a Porcie Shield and a Flame Butterfly. In the next room you will find a bonfire and a door, which will unlock a shortcut after you open them - regardless of your "path selection", you will be in the same room by now. Kill the knight with the magic sword and enter the subsequent room. Here you will stumble upon two enemies equipped with maces, which you've fought in the Forest Of The Fallen Giants - the method to defeat them is the same.
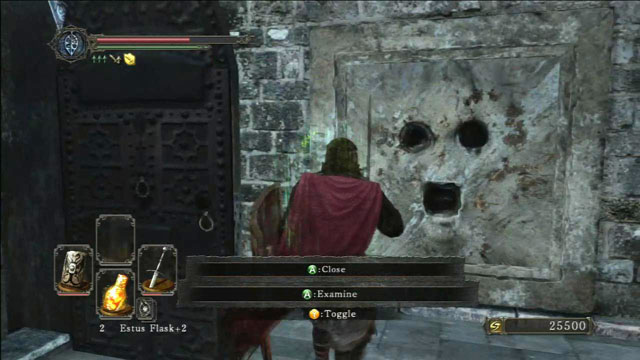 Use the Pharros Lockstone.
Enter the next room and open the door on your left side. Inside, use your Pharros Lockstone and hit the blue face to open a passage to an optional location - Belfry Sol.
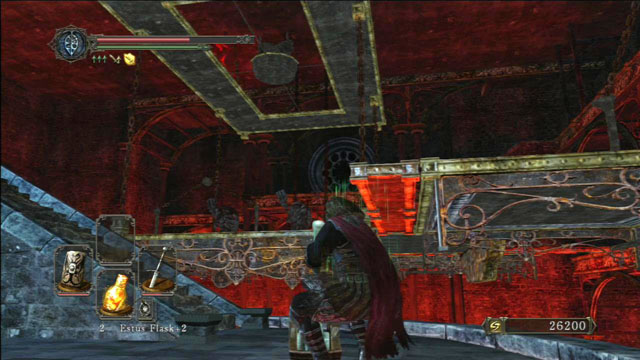 Flip the lever.
The nearby staircase leads to a group of hanging platforms, with archers and mace-wielding enemies on them. You can get rid of the latter by flipping the lever - the platforms will slip straight to the lava. Flip the switch again to get the platforms back on their place.
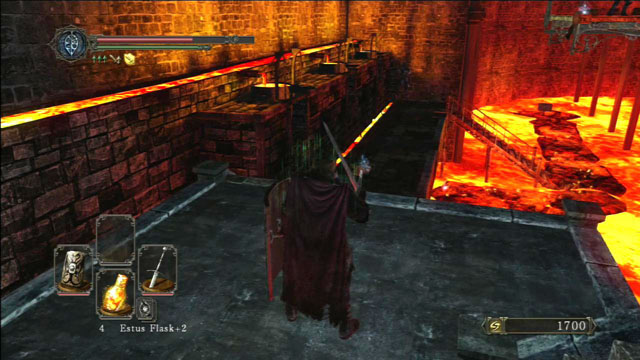 Watch out for the switches.
Climb the stairs and go to the other side. Here, there's another staircase leading to an archer - watch out for the nearby switches, as they activate a mechanism which pours lava. Collect a soul and a Radiant Lifegem along the way. If you have a decent protection against fire, you can run all the way through the burning stones.
 Watch out for the flames.
Get back on the platforms. The switches located on the joints are used to lower the individual parts of the platform. This way you can easily defeat all the archers. Run to the other side, in the direction of the fire-breathing statues.
 Use the flames to defeat the enemy.
You will be attacked by another mace-wielding enemy - you can lock him in place with your shield near one of the statues, which should take a decent chuck of his health. Run to the other side of the pathway and collect a soul and a Monastery Charm from the corpse. Afterwards, go through the mist.
 Kill the knight.
Go through the corridor until you reach the staircase. On the left side, on one of its bays, there's a knight. Kill him and run downstairs. You will stumble upon another enemy equipped with a mace in a narrow corridor - kill him and approach the guillotine. Flip the lever to raise it. Wait for a couple of seconds and run to the other side of the corridor. Lure the next enemy and hold him near the guillotine - it should automatically fall down, killing the enemy in the process.
 Avoid the flames.
Continue your journey until you reach fire-breathing statues. Avoid them by going to the left side. After passing a single and then a double statue, you should approach a ladder. Get all the way to the top by using yet another ladder. Light a bonfire, go upstairs and flip a switch - it should turn the statues off.
 Go through the mist.
Go all the way down and avoid the enemy with a mace. Run across the roof and enter the mist, where the Old Iron King awaits you.
 Descend the ladder
To get to this location, go from Majula bonfire towards the big hole. Laddersmith Gilligan, whom you met in Eathern Peak, sits next to it. For a fee, he'll build three ladders inside it. Notice that you can find many interesting items on ledges.
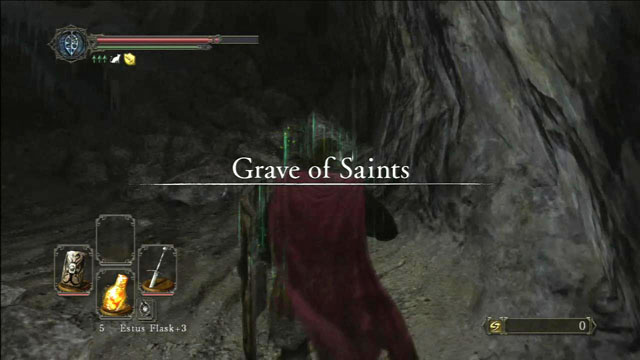 Light the bonfire
To get to this location, use the medium ladder. When you get down, jump three levels down and enter a cave. First, light a bonfire nearby.
 Kill the rats.
Go forward through the tunnel until you reach a round room. A few rats will attack you here.
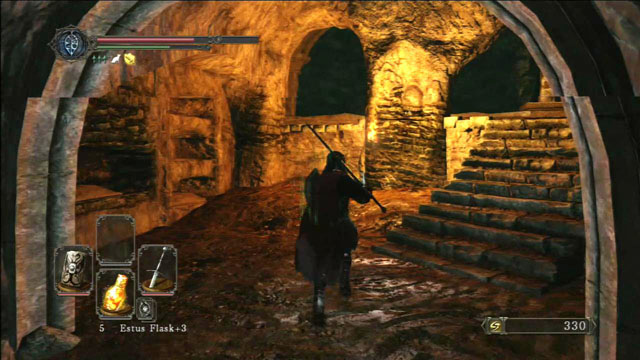 Enter the next room
After you go around the chamber, enter the next illuminated room. Go upstairs, then turn left to take an item. Continue going forward while killing some rats.
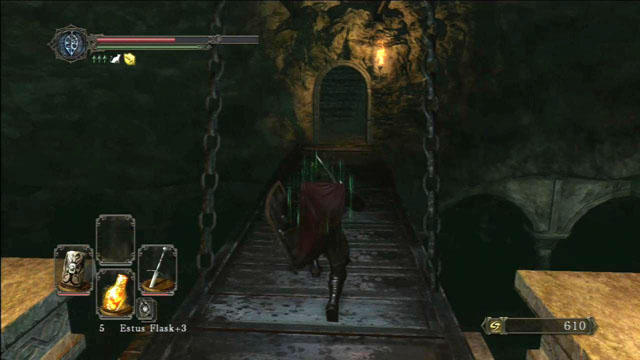 Cross the bridge
If you use the Pharros Lockstone right by the stairs, a bridge will be lowered. You can use it to get to a room on the side. Take the Poison Moss located by the wall and kill the rats. Go upstairs and take the Whisper of Despair and a torch.
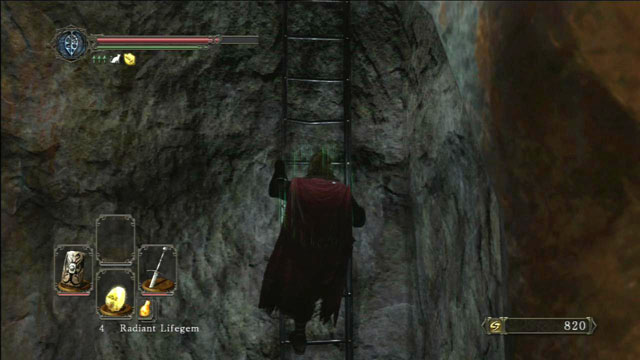 Climb the ladder.
Cross the bridge back to the main room and go forward through the corridor. Turn right in the middle of it and use the ladder. You'll get to a higher floor. Turn left and go to the end of the corridor, then turn left. You'll find a Homeward Bone in a side room.
 Light the bonfire
Go back to the main corridor, go forward and kill the rats. Turn right at the end of the corridor and light the bonfire.
 Go through the fog
There's another boss behind the fog, Royal Rat Vanguard.
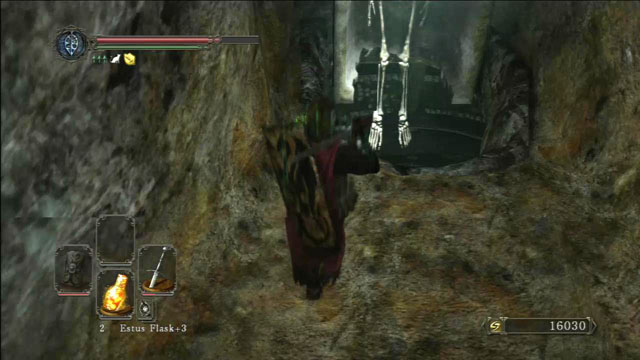 Talk to the rat
After the fight, exit the room and go forward. You'll see a pile of bones and a rat on it. When you talk to it, you can join Rat King Covenant. To increase your reputation, you can give it the Rat Tail as a covenant.
Jump into the holeAfter you talk to the rat, go forward and jump into the hole next to the giant skeleton. Take the Pharros Lockstone from the corpse and jump down.
Kill the enemies from a distanceKeep jumping down until you reach a bridge. Jump on the fragment of a broken floor to take the Disc Chime. At the very bottom you'll see exploding mummies. You can kill them from a distance to avoid a confrontation.
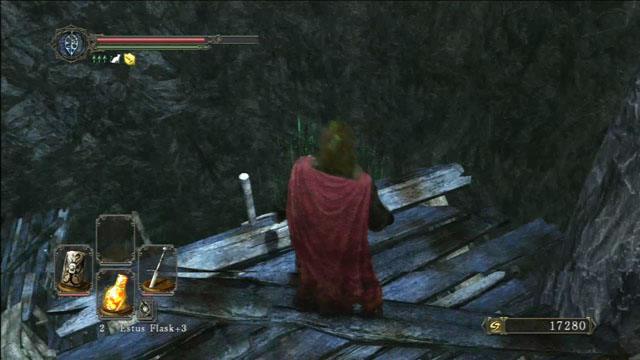 Use the ladder
When you kill all the enemies, jump down and go along the corridor until you reach a ladder. You'll see a wooden structure, use the ladders to get to the bottom. Enter the tunnel to reach the next location.
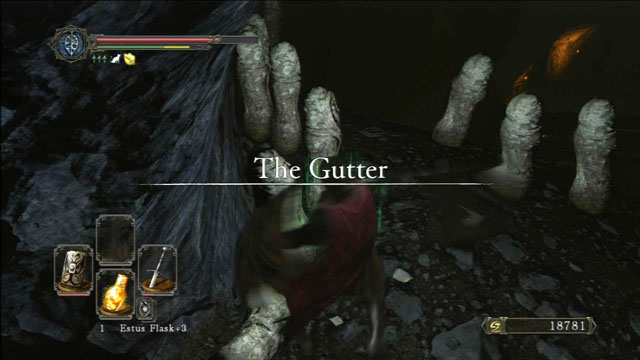 Destroy the statues
Watch out for stone statues because they shoot poisoned darts. Try to approach them from the side or back and destroy them. You can't break them with a regular bow or crossbow.
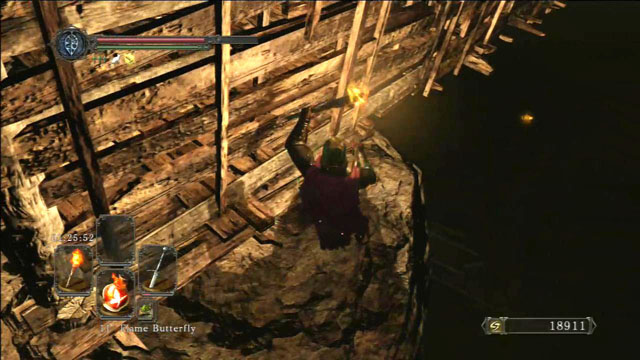 Jump towards the bonfire
After you break the statues, jump to the wooden bridges. Light a torch because it's really dark here. You can also light some lamps on the way. Jump down to the lower bridge and go up. Kill the zombie and stand on the right. You'll see a bonfire in the distance. Run up to the ledge and jump towards the bonfire to light it.
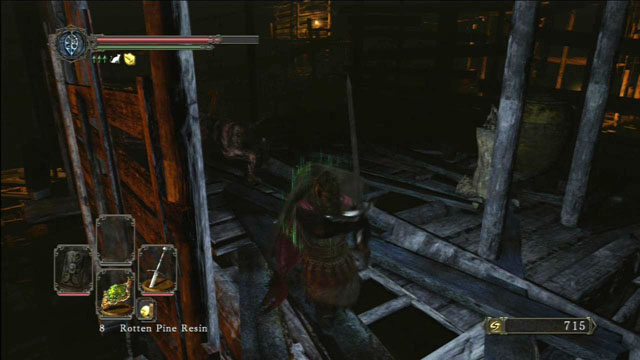 Kill the dog
Cross the bridge and go forward. You'll see a mutant dog. It attacks with its paws so the best way to fight it is to jump back and attack.
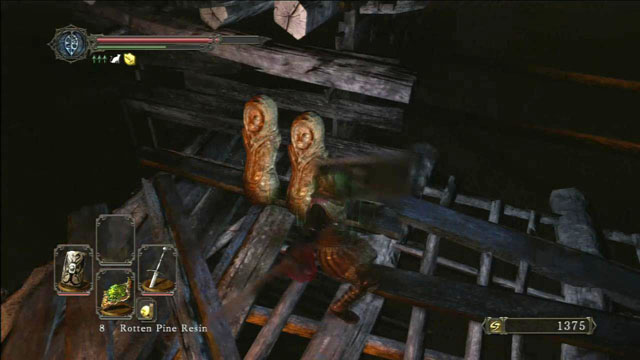 Destroy the statues
After you kill the dog, jump down and destroy the statues. Cross the bridge to get to the farther part of the location.
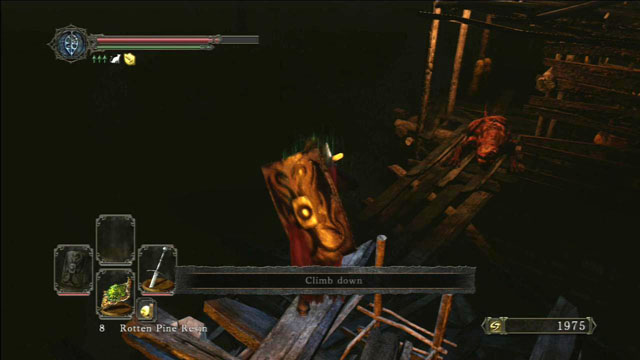 Kill the dog
You'll find more zombies. Climb the ladder to the roof of a wooden shack. You can kill a mutant dog from here to avoid confrontation. There's a chest there as well.
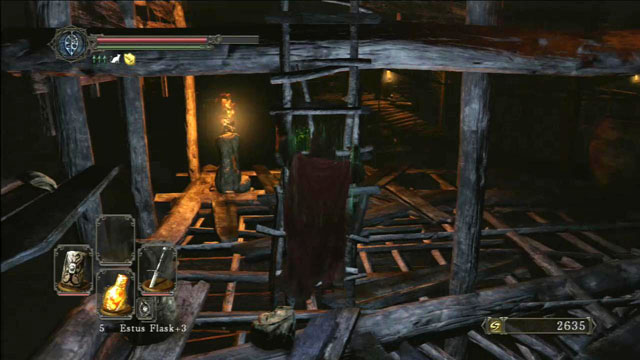 Climb the ladder
Go down and towards a shack. You have to watch out because there's quite a lot of stone statues. Climb the ladder and kill a zombie in the corner with a torch.
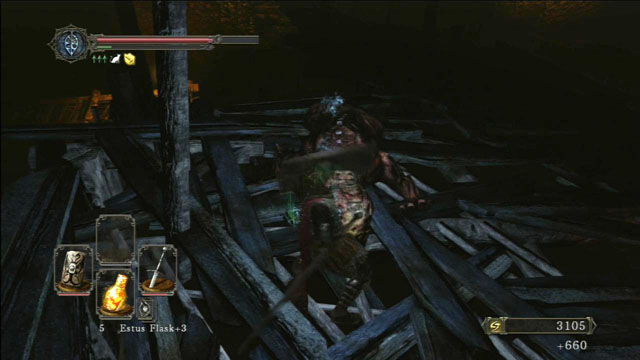 Kill the dog
Cross the bridge and kill an exploding zombie and a mutant dog. Cross another bridge and go along the wall.
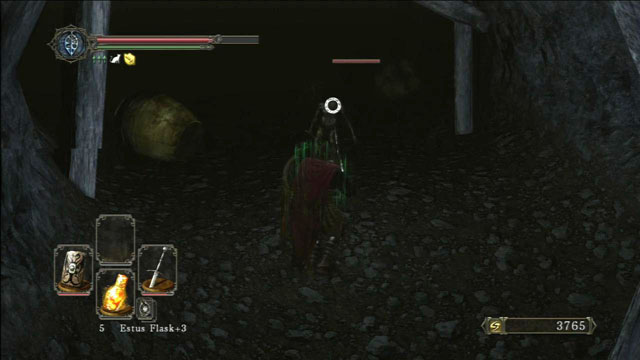 Enter the cave
You'll see a cave entrance on the left. There are some zombies inside. Kill them, take the items and open the chest.
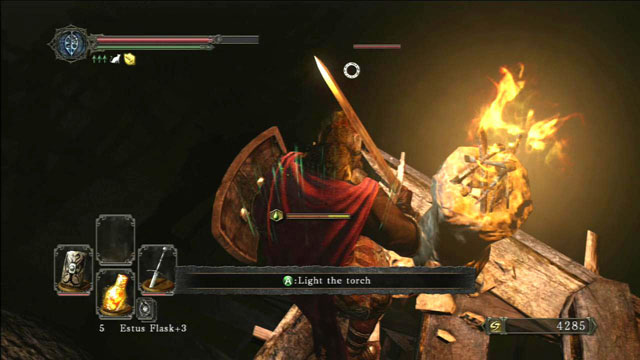 Jump down
Keep going along the wall and jump down at the end of the bridge. You can take the opportunity and attack the dog below. Destroy the vases to take the Poison Arrow and walk through the fog.
 Ladders
Inside you'll see some ladders leading down. They all lead to the same place. But before you use it, destroy one of the walls to reach another bonfire.
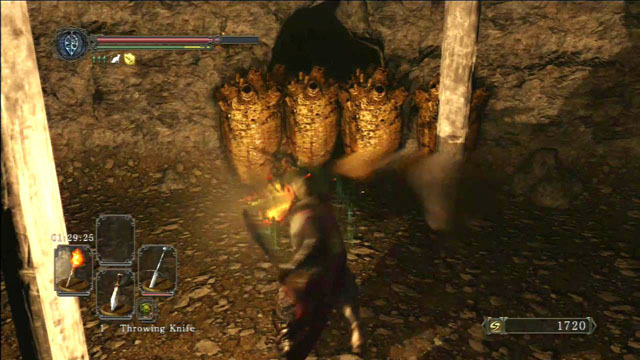 Destroy the "hearts"
Use one of the ladders. At the bottom kill all the exploding zombies. After you do that, go towards the "hearts" and destroy them from a distance. Knives are the best for that. Don't destroy them when you're close because they release acid that destroys your equipment.
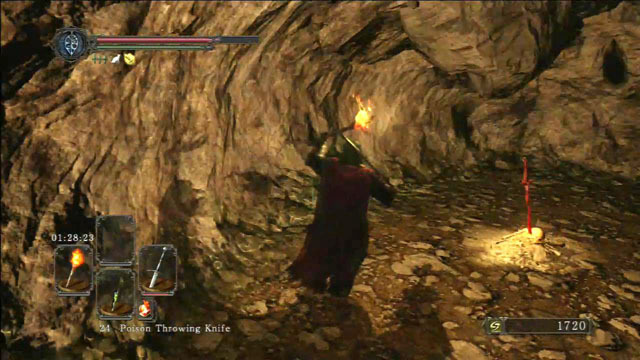 Light the bonfire
Jump to the lower level and take the Fragrant Branch Of Yore. Run forward and walk through the fog. You'll see a tunnel. Turn left at the end of it and light a bonfire.
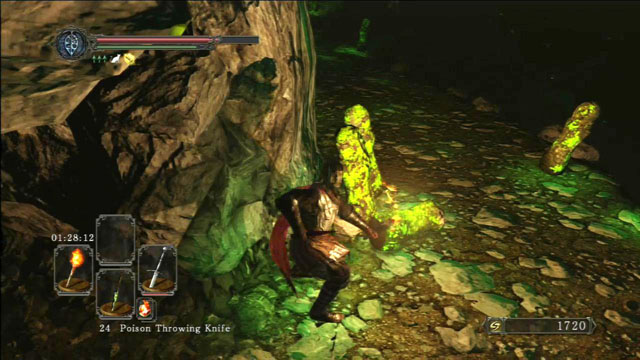 Destroy the statues
You have to watch out here, because there are stone statues on both sides of the passage. Approach them carefully and destroy all of them.
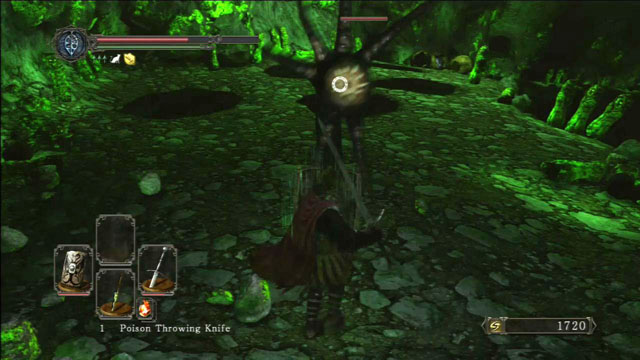 Kill the octopus
Finally, you'll notice some dark puddles. When you get close to them, venomous octopuses will come out of them. Don't let them grab you because this attack takes a lot of health points.
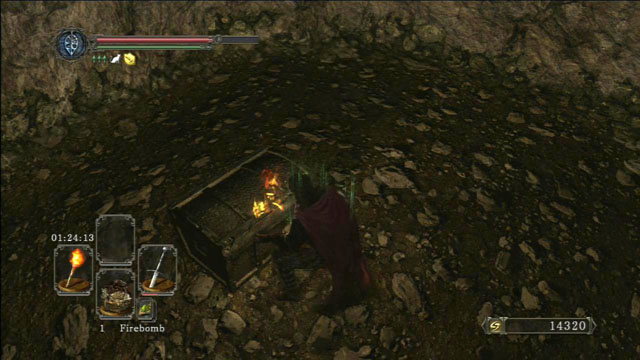 Kill the worm
There's a corridor on the left, a chest at the end of it contains Shotel and Great Magic Weapon. Two giant worms will come out of holes in the wall afterwards. Come up to them from the side and perform several quick strikes.
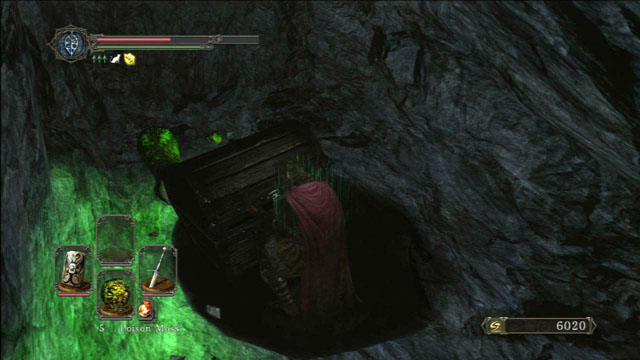 Open the chest
Then, more octopuses will show up and you'll see another corridor with a chest that contains a Divine Blessing.
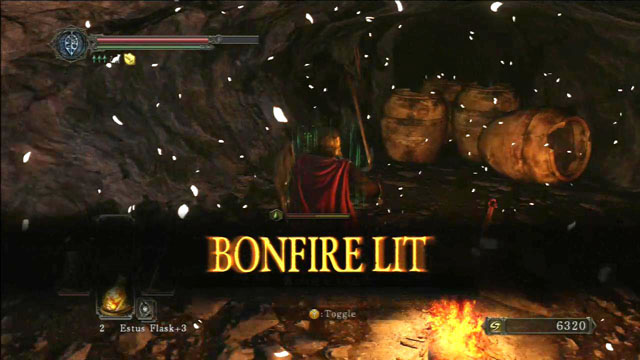 Light the bonfire
Go along the wall and destroy the statues. Pass the corridor with fog and take a path up. You'll be in a cave where you can light a bonfire. There's a Pharros Lockstone in one of the yellow urns.
Go along the tunnelAfter you light the bonfire, you can explore the side of this location. Go back to the place where you fought the worms. Approach the ledge between holes and jump down. You'll see a closed door. Jump farther down and enter the dark tunnel. There are two giants there. Fighting them is really hard. The best way to kill them is to lure them to the tunnel and reaching the ledge. They won't go all the way towards it but you'll have time for 1 or 2 distance attacks. It's time-consuming, but it's the best way to defeat them.
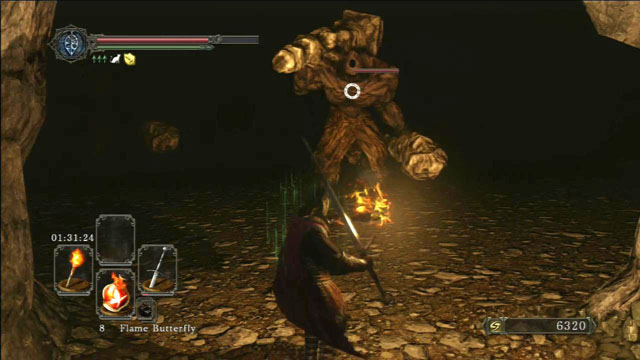 Kill the giant
When you defeat them, you'll get a Forgotten Key and a Soul of a Giant. Explore this place because there is a chest with a Ring of Giants +1 and Petrified Dragon Bone in one of the caves.
Open the chestEnter the next cave and take the Silver Talisman. Then enter the cage to go up. Go to the ledge and jump down. You can summon someone to help you fight the boss here.
 Talk to the old man
But first go back to the closed door and open it with the key you've found. Inside you'll find an inactive teleporter and an old man sitting on a chair. Talk to him and use all the dialogue options.
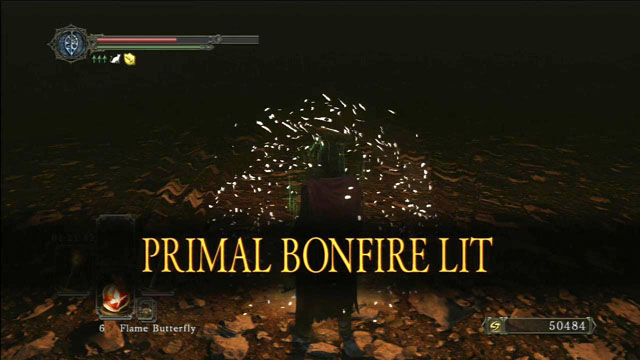 Light the bonfire
Go back up and walk through the fog to begin the fight against The Rotten. When you defeat the boss, explore the location. Take the Fire Seed from the corpse. Find a way out and open the chest that contains Bone Dust, then light a bonfire that will transport you to Majula.
 Take the passage
The way to Shaded Woods is very simple. From the bonfire in Majula, go left, in the direction from which you came here, for the first time. Ahead of you, there are two passages. The one to the left goes to Things Betwixt and the right one to Shaded Woods.
 Talk to the character
Keep going ahead and stop only after you reach a character sitting on the left. Talk to that character and continue on your way. On the left side of the stairs, collect the item and enter the room.
 Kill the enemies behind that door
Open the door on the left and kill the enemy behind it. This is a new kind of enemies. Quite fast creatures armed with venomous weapon. They land various combos, which is why it is best to keep them at a medium distance. After you kill the opponent, collect the Lloyd's Talisman, lying at the wall. At the other side, behind the door, there is another opponent like that.
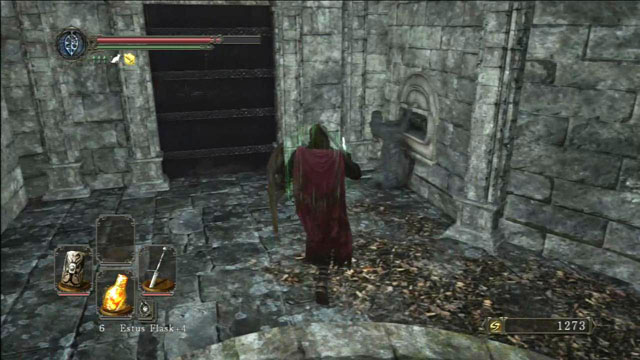 Bring the statue to life
Approach the stone statue, which is blocking the switch to the door. Use the Fragrant Branch Of Yore on it, to remove the stone shell.
Talk to RosabethThe name of the girl that you saved is Rosabeth. After you talk to her, you will receive the Prism Stone. Additionally, she can upgrade your Pyromancy Flame and sell protective amulets to you. After you have exhausted all of the dialogue options, she will teleport you to Majula, into the vicinities of the monument where you can enter the Blue Covenant.
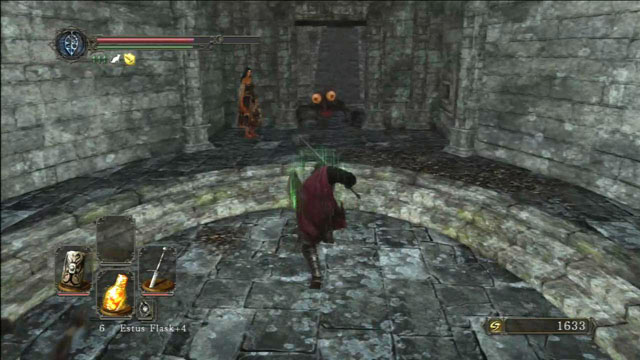 Kill the frog
Use the switch to open the door. Due to this action, the passage at the other side will be blocked, up until the moment in which you use the switch again. At this moment, you will be attacked by a larger wave of enemies and a frog-like creature, which blows fumes that destroy your equipment. As for the frog, stand at its side and land several blows. As a result, it dies and you will be outside of the reach of the toxins.
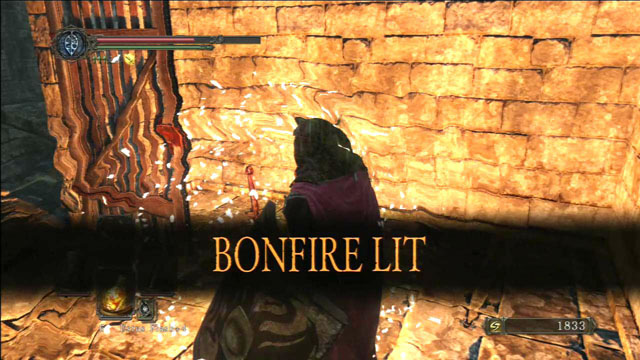 Light a bonfire
Walk through the door to the next room. At both sides of the stairs, you will find doors with important items behind them. On the right, collect the Estus Flask Shard from the chest, and on the left, there is a bonfire. Light it and climb up the stairs. You can open all of the doors on the higher level, to collect all of the items and kill all of the enemies.
 Shaded woods
Exit now and keep running ahead. On the right, you will notice a crouching monster that is devouring a corpse. Leave it, for the time being, because there is another one in front of you, and ready to attack. Kill both of them and collect the Fading Soul from one of the corpses.
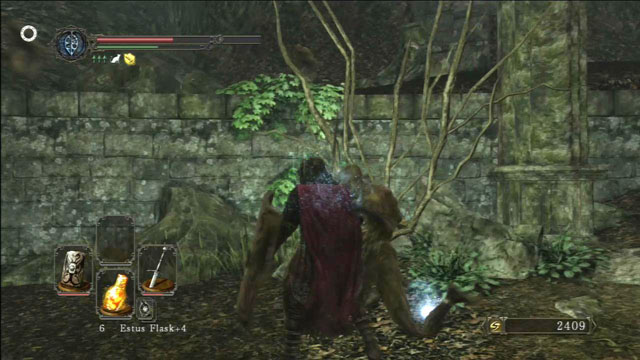 Defeat the opponents
Keep running ahead and the opponents. Two of them are at the stairs, where there are more of them on the elevation, on the left.
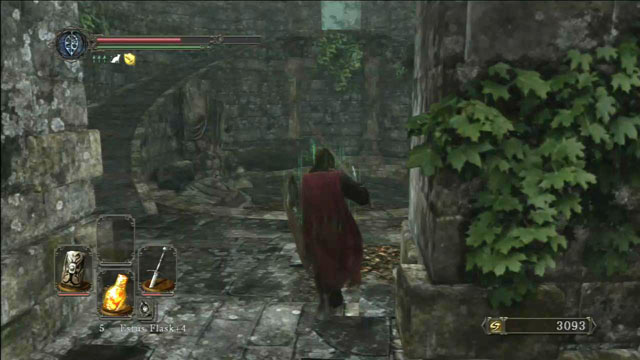 Light a bonfire
Keep running ahead and defeat the enemies, until you reach a building, where you will be able to light a fire.
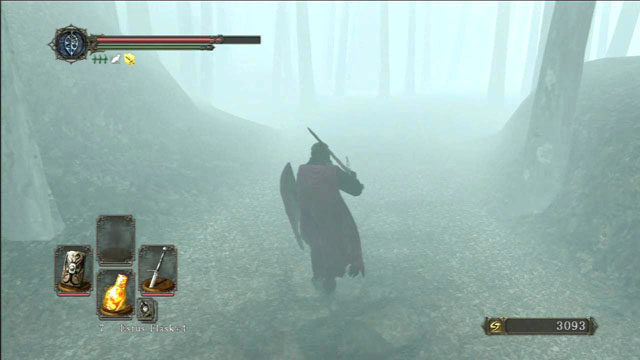 Cross the forest
Going from the bonfire, go upstairs and use the rightmost passage. You can talk to the lone knight by the wall. Go through the hazy forest. You'll see a corpse next to a tree, you can take a soul and Radiant Lifegem from it. Ghosts of soldiers will attack you on your way.
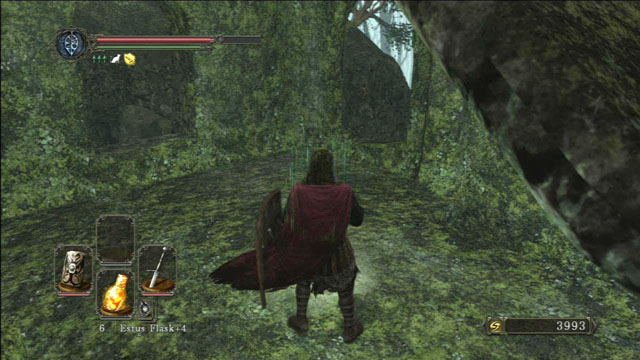 Light the bonfire
After you get out of the forest, walk inside the ruins and light the bonfire. Keep going forward and come back to the ruins when you go outside. Defeat the enemies and go back outside.
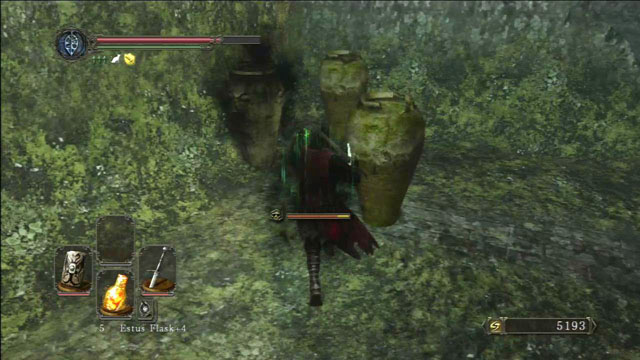 Destroy the vases
First, go left. You'll find a Flame Butterfly and a torch in a corpse behind the building. Go inside and break the yellow vases. Be careful about the ones with black smoke because standing near them for too long may result in a curse.
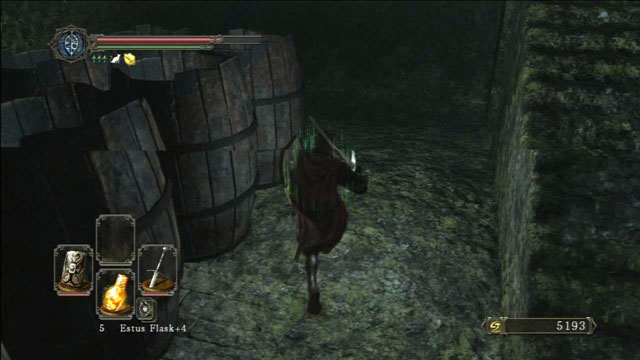 Destroy the barrels
Go downstairs and break the wooden barrels. There's a soul and a Pharros Lockstone behind them.
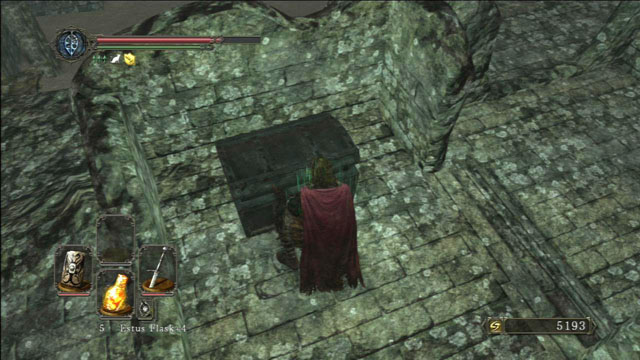 Open the chest
Go outside and take the Dark Scythe from the chest. Jump down and enter the basement. You'll have to kill another orc. A statue blocks one of the passages, but it will move when you use the Fragrant Branch Of Yore. You'll find here e.g. Black Knight Halberd.
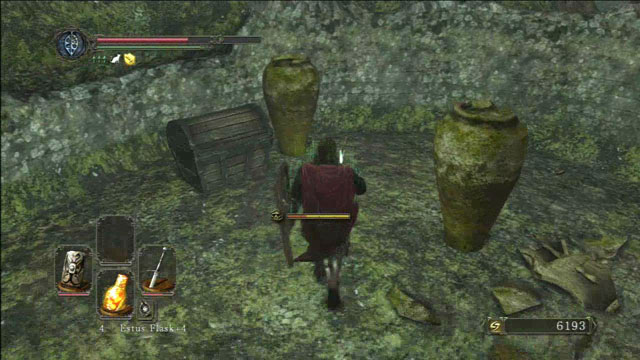 Open the chest
Go back to the main location and open another chest that contains a Human Effigy and Bleeding Serum.
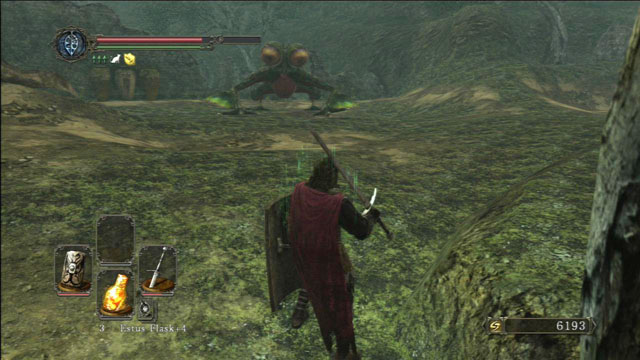 Defeat the frog
The time has come to fight a giant frog. With a right strategy, this battle can be really easy. Come close to it and move to its side when it goes up. Hit it a few times and move back to a safe distance. Repeat until you win. Search the ruins behind the frog to collect some items.
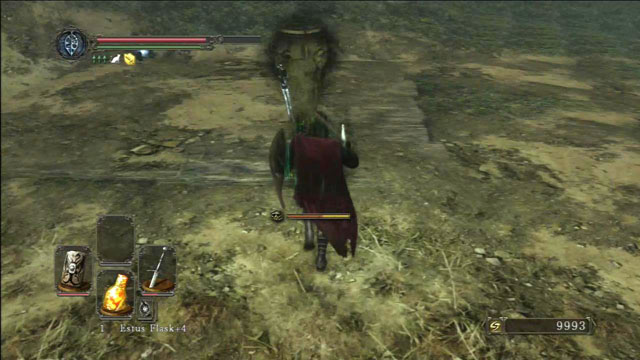 Watch out for broken boards
Another orc is a bit farther. Kill it and destroy the vases on the right. You'll see another urn and a corpse in the corner. Be careful because the boards will break and you'll fall into a hole if you stand on them.
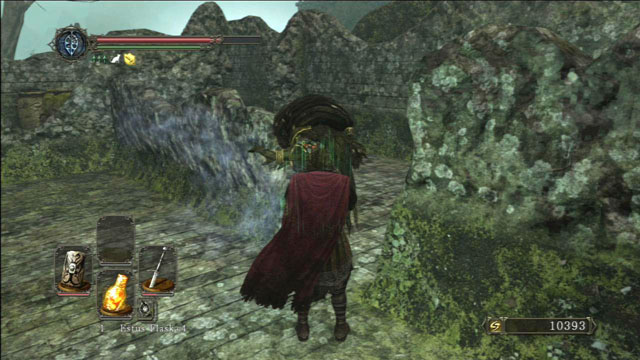 Defeat the orc
Keep going and defeat the orc. Scour the ruins on the right for items. When you make the statue move, you'll be able to access a chest with Fragrant Branch of yore and Lion mage Set inside.
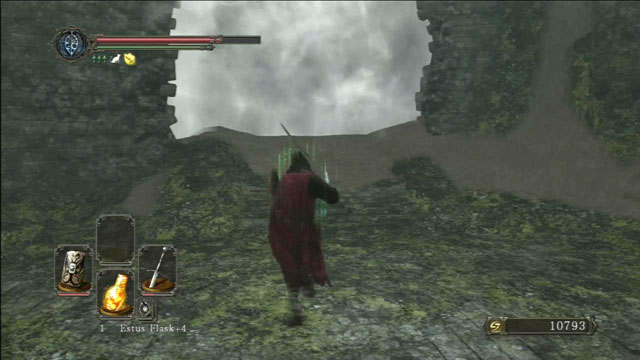 Walk through the fog
A bit farther, in the grass, there's a hole that you can jump into. When you get inside, talk to another old man on a chair, empty the chest and go back up. When you enter the tower on the right, you'll be able to take a soul and Skeptic's Spice. Take the passage between two towers and go forward. When you cross the fog, you'll have to fight Scorpioness Najka. After the fight go to Doors Of Pharros.
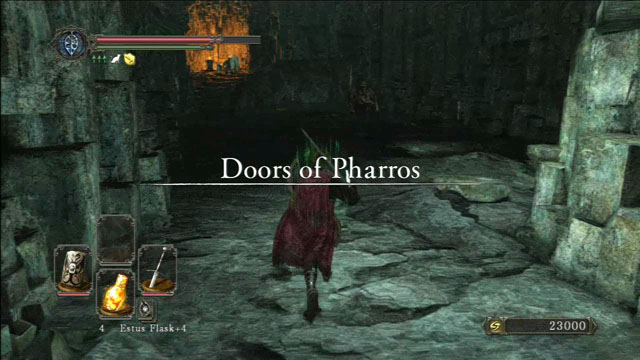 Doors Of Pharros
When you exit the tunnel, you'll encounter an elephant-man. This fight is rather difficult. The best way to defeat him is to circle him with your shield raised. Attack when you're behind him.
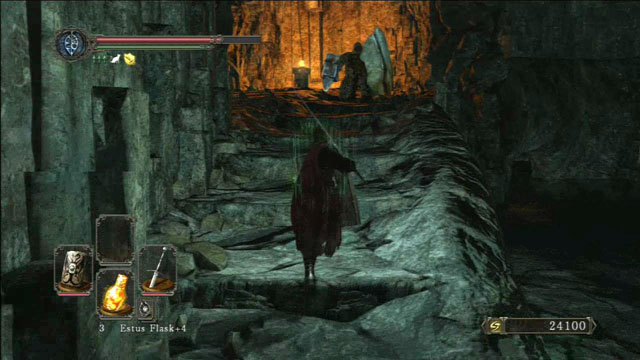 Kill the dwarf
A dwarf armed with a hammer is your next enemy. Wait until he attacks and hit him a few times to kill him.
 Watch out for a Mimic
Take the Prism Stone from the corpse by the wall. There's a chest nearby. NOTE: There's a Mimic inside, so hit it a few times. When you kill the enemy, you'll get a Black Scorpion Singer and Dark Leggings.
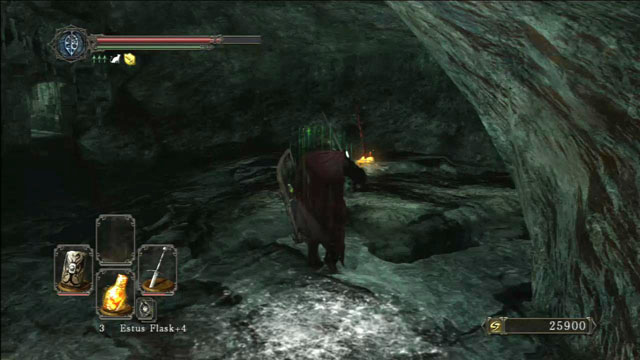 Light the bonfire
Walk through the hole in the wall to light a bonfire. You can go to an optional part of this location from here.
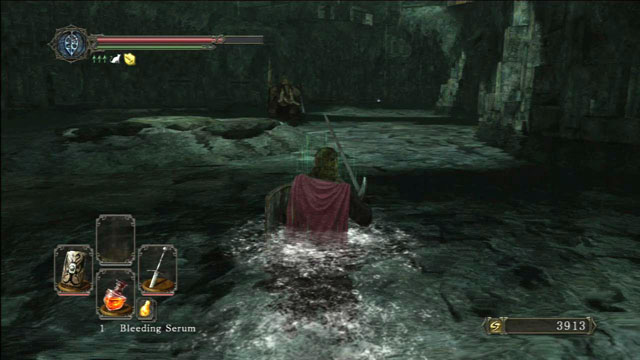 Defeat the enemy
Walk through the corridor and enter the huge flooded room. Another elephant will attack you. Defeat it the same way as the last time.
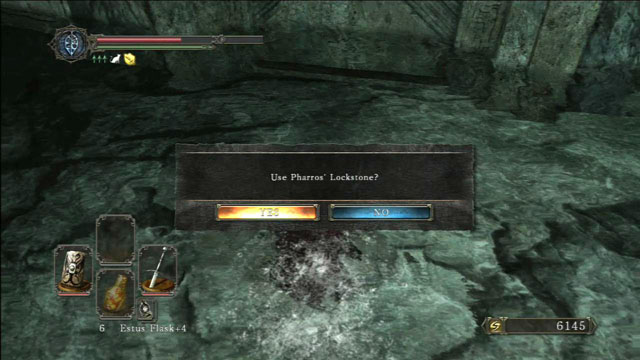 Use the Pharros Lockstone
There's a lot of doors that you can open only with a Pharros Lockstone in this location. The first one is on the right wall. There are three parts, but you only need to place the stone in a hole in the floor to get inside. The lower part of the door will open, but it's big enough for you to get through. There's one more advantage - the elephant won't get out and you'll be able to kill it from a distance. There's a Santier's Rapier in the chest.
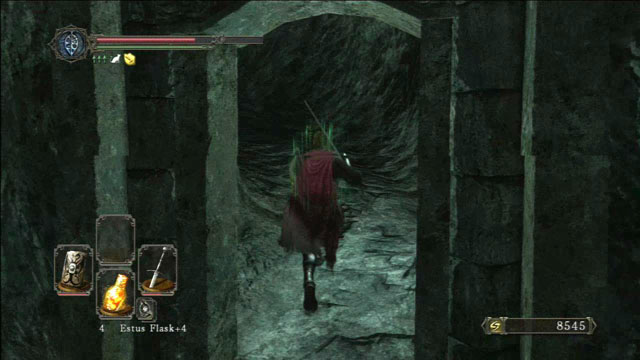 Go up
Go upLook for an open passage on the left wall. Go through the tunnel to a ledge where you can take a Gyrm Axe and a torch from a corpse. You'll see some closed passages but you only need one stone to open them. There are dwarves that drop Large Titanite Shards behind them.
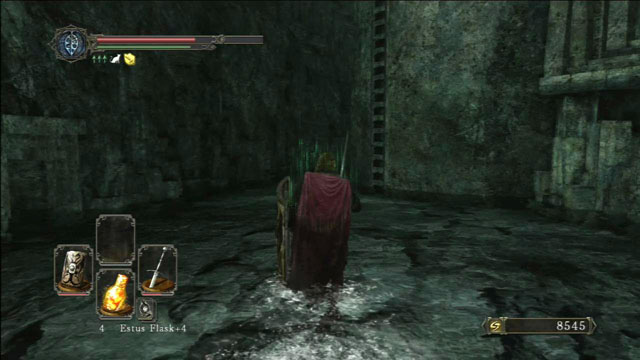 Climb the ladder
Walk through the next passage. Two mutant rats will attack you. After you kill them, climb the ladder. Go along the ledge. You'll encounter a few dwarves along the way. You'll also find a chest from which you can take a Titanite Chunk and a Petrified Dragon Bone. Be careful because there's a trap inside. Stand by one of the corners of the chest to avoid getting shot.
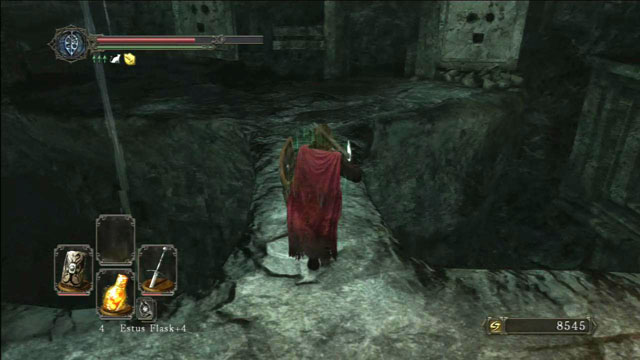 Cross the bridge
Keep walking forward. Take a Pharros Lockstone and a soul from a corpse on the left side of the stairs. Continue to the next room.
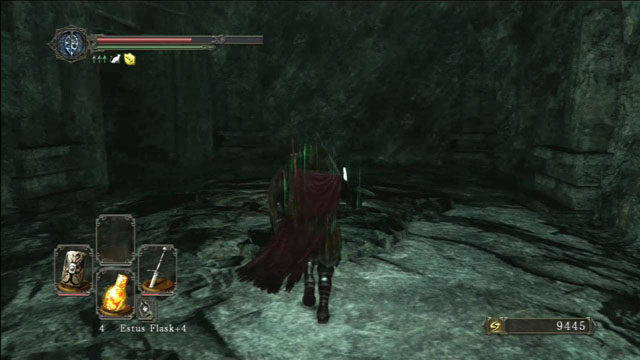 Light the bonfire
Explore the location while killing some dwarves and collecting items. Find a passage in the wall and use it. Light the bonfire in the next room. There's a boss behind the fog - Royal Rat Authority.
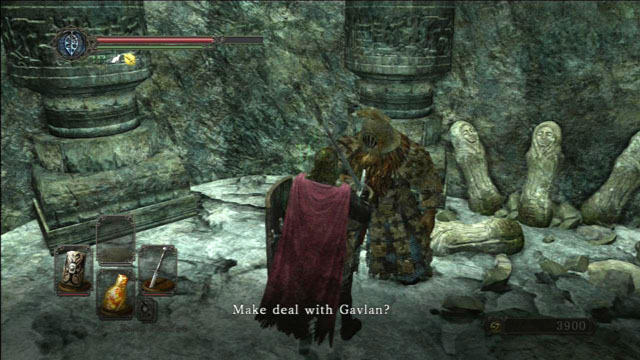 Talk to Gavlan
Go back to the first bonfire here to get to the farther part of the location. Go upstairs where you first seen a dwarf. After you kill him, keep going and kill another enemy. Open the chest and take some trash from it. Go upstairs and talk to Gavlan in the next room. Take a Lifegem from the corpse by the wall. Go forward to the higher floor.
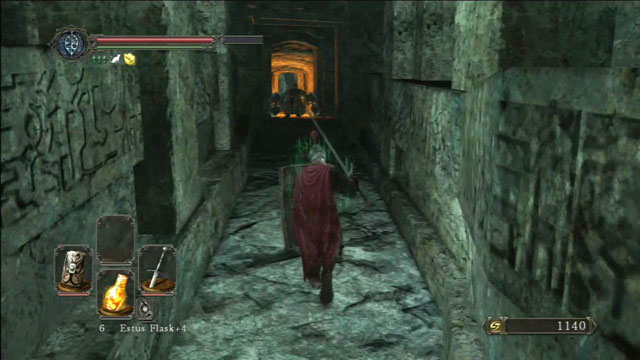 Watch out for flying axes
You'll see an axe-throwing dwarf at the end of the corridor. They fly quite slowly so it's easy to avoid them. Go forward. You can kill an enemy in a side corridor. Keep going and kill another enemy. Be careful because there's little space and you can fall into a pit quite easily.
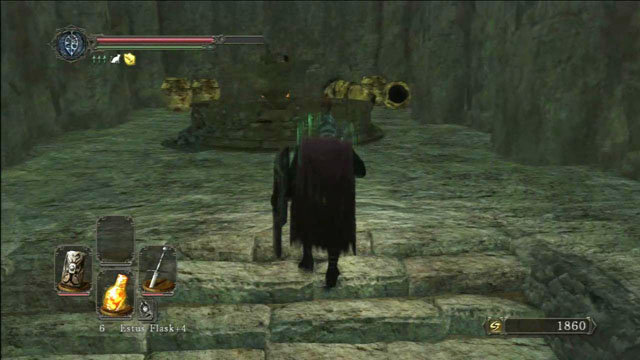 Break the vases
Go all the way upstairs. Break the vases to take the Lifegem and go outside. You'll get to Brightstone Cove Tseldora.
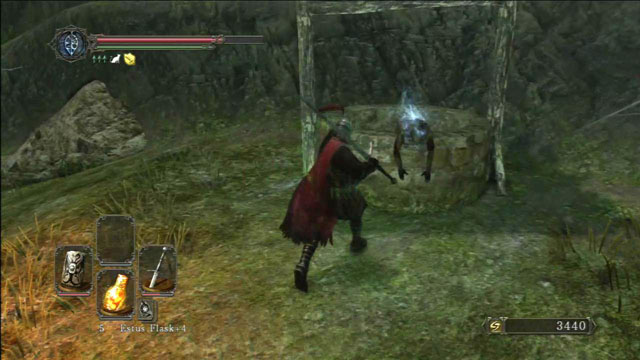 Jump into the well
You'll stand on a campsite. You'll have some villagers and pigs to kill. When you kill them all, start exploring the location. Start with the well. A corpse lies on the edge of it. You can take a Titanite Shard from it. Jump into the well. Take the Holy Water Urn and go along the tunnel. Climb the ladder and open the chest containing a Human Effigy. Get out of the house.
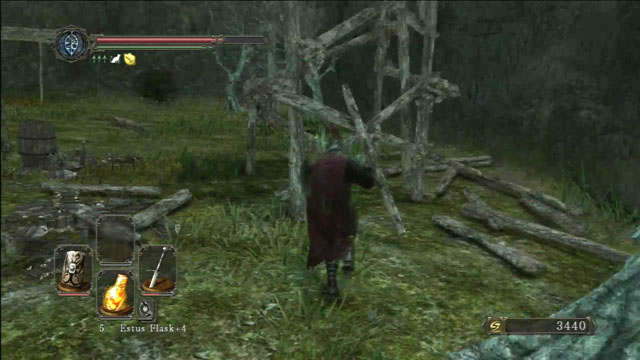 Destroy the towers
There are urns next to one of its walls. Break them and take the soul. You can also destroy the wooden towers. A corpse containing a Lacerating Arrow will fall from one of them.
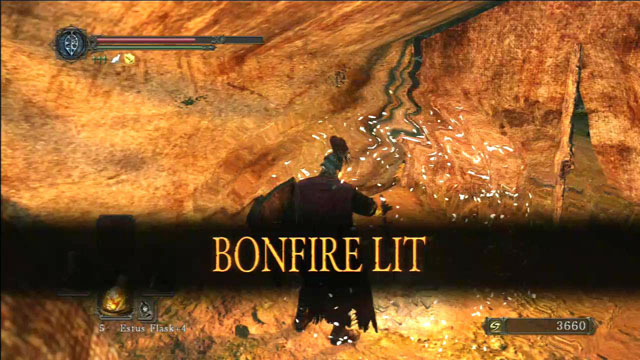 Light the bonfire
Search the tents, there's a bonfire in one of them.
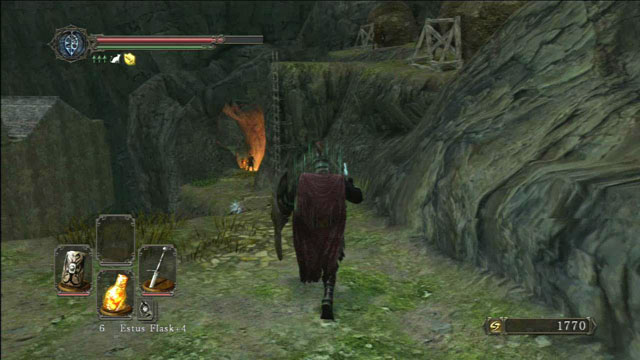 Watch out for the rocks
Then go along the wall. Eventually you'll notice two rocks. Come closer to the first of them and quickly go back. The stone will fall down.
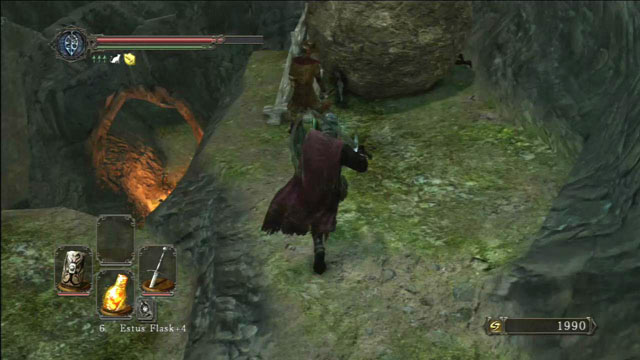 Kill the guard
Climb the ladder and kill the second guard by the rock. The second rock will fall down. You'll find a soul behind it, in the corner.
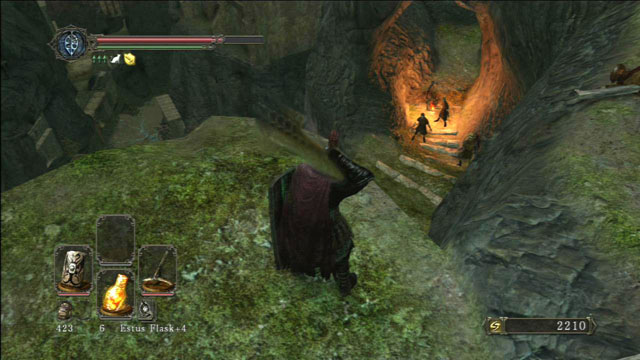 Kill the villagers
When you stand on the ledge, you'll see four armed villagers guarding the exit. You can kill them from a distance.
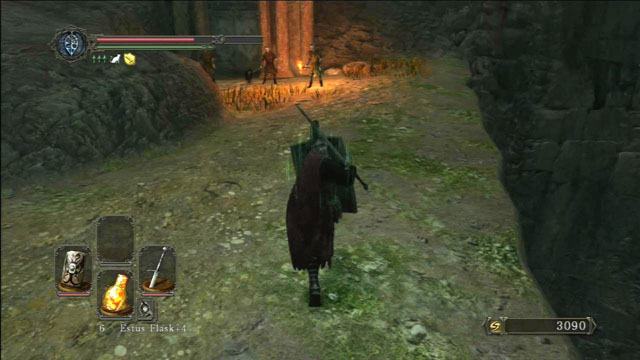 Kill the villagers
Go down and get to the next part of this location. At the end of the tunnel, you'll find a corpse from which you can take a Large Titanite Shard. The next passage is guarded by three villagers. Lure them away from it and kill one by one.
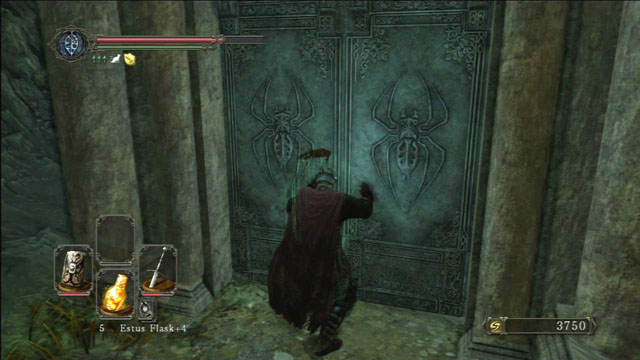 Open the door
Open the door and enter the cave. There's a chest in one of the chambers. When you open it, a swarm of spiders will appear. Get back to the corridor and kill them one by one.
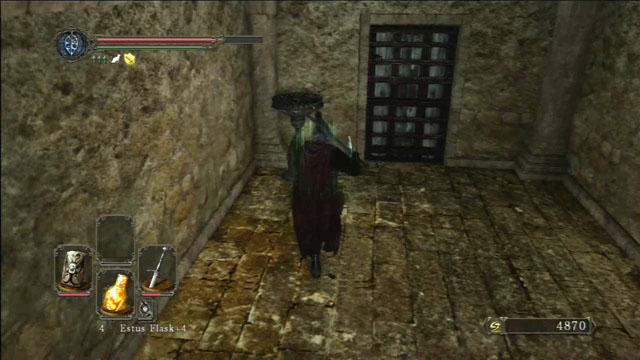 Open the door
Open the door and go through the fog, there's another boss behind it - Prowling Magus & Congregation.
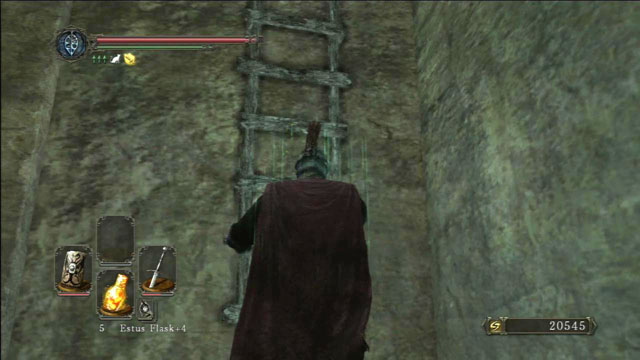 Use the ladder
Get out of the chapel and turn left. You'll see an entrance and a ladder. If you go up, you'll enter the attic. You can talk to Cromwell the Pardoner here. You can ask him for pardon if you've done something wrong to NPCs, you can also buy spells from him. There are some interesting items here.
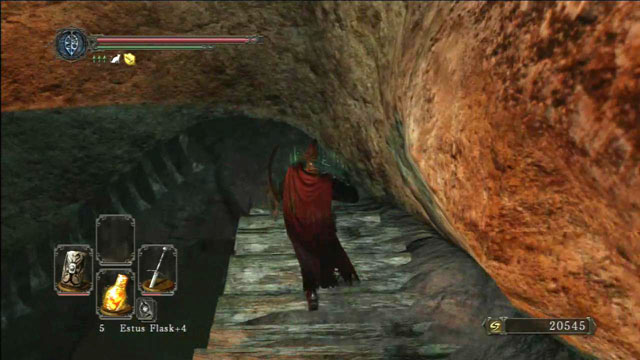 Go downstairs
Go back down and enter the cave. Light the bonfire and go downstairs. There's a soul in a corpse under the stairs. Break an urn in the next room to find a Wilted Dusk Herb.
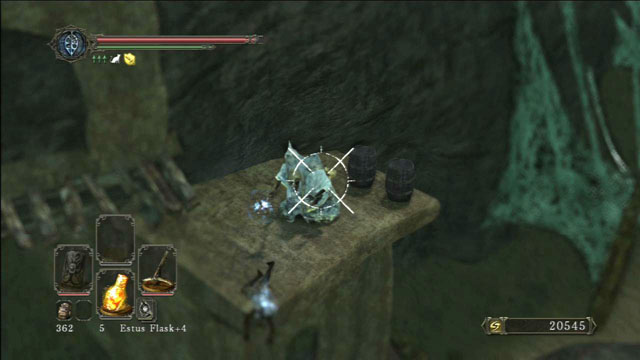 Kill the mage
Go outside. You can kill a few enemies with your long-distance weapons while standing on a ledge.
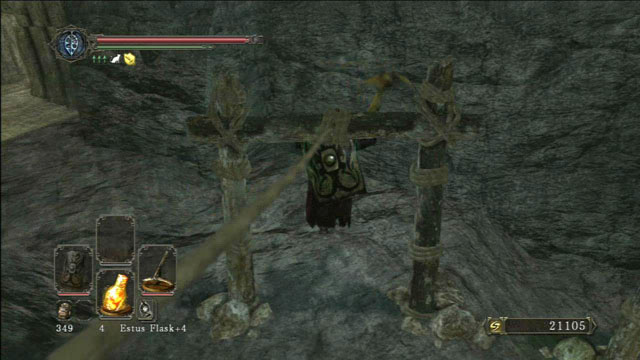 Slide down the rope
Slide down the rope to the other side. You'll get to another bonfire that you can light.
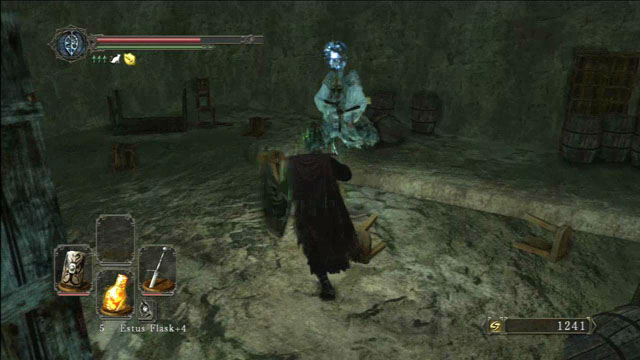 Kill the mage
You have to watch your step here because of the giant whirlpool at the very bottom. You'll see a wooden double door. You'll encounter a mage and a spider behind it. You'll get to the next part of the room after you break some wooden furniture. There's another spider there and a chest with Crescent Axe and Soul Vortex behind it.
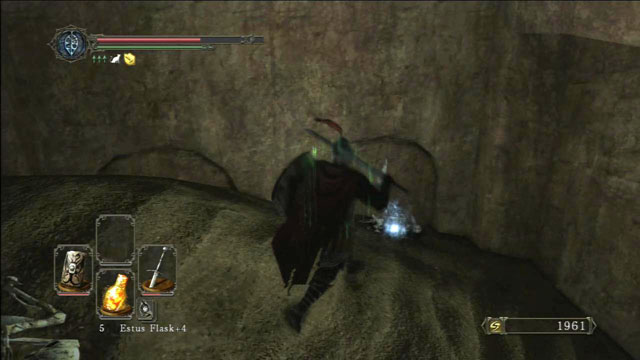 Search the corpse
After you exit the room with a chest, go through a hole on the left. When you climb the sand, take the Titanite Chunk from the corpse.
 Kill more enemies
Go through the door and get to the next part of this location. You'll encounter a new type of enemies - undead with spiders on their backs.
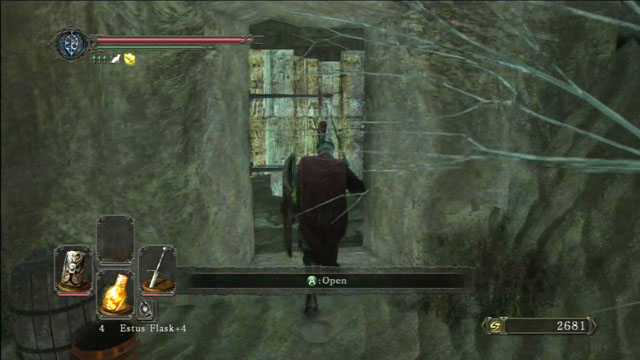 Open the broken door
Open the broken door, opposite the entrance you've just used. Two spiders await you. When you defeat them, go upstairs. Go through the next door and take the Large Titanite Shard from the corpse.
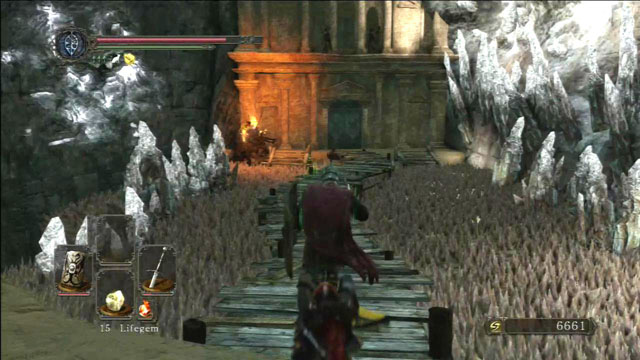 Be careful here
Jump down and kill more enemies. Cross the bridge towards the high building. You have to be careful because there are spikes on both sides of the bridge. When you reach the door, two spider hosts will jump down to you. Kill them and get inside.
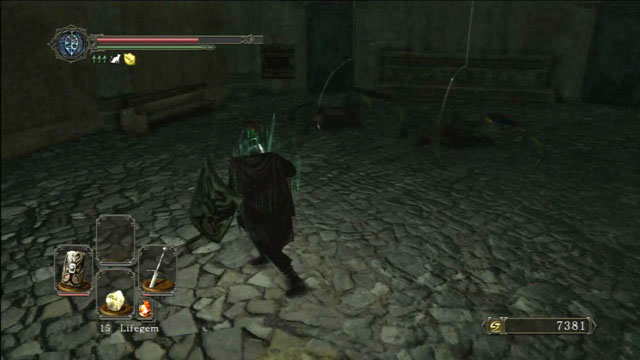 Kill the spiders
When you step into the building, spiders will slide down. Kill them and go to the door on the right side of the wall. When you pull the lever, you'll see a corpse from which you can take a Homeward Bone. After opening the door, kill another host and climb up the ladder.
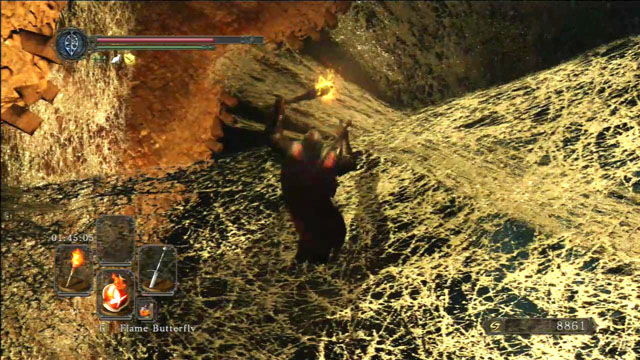 Go down the spider web
You'll need a torch here because it's really dark. You have to jump to the very bottom using spider webs. You'll have to kill some spiders on your way down.
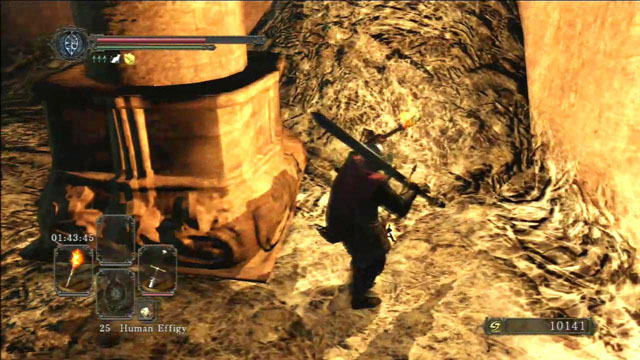 Use the mark to call for help
If you're a human, there's a mark behind one of the columns at the bottom. You can use it to summon Aspen Knight Boyd. Walk through the fog to a boss fight - The Duke's Dear Freja.
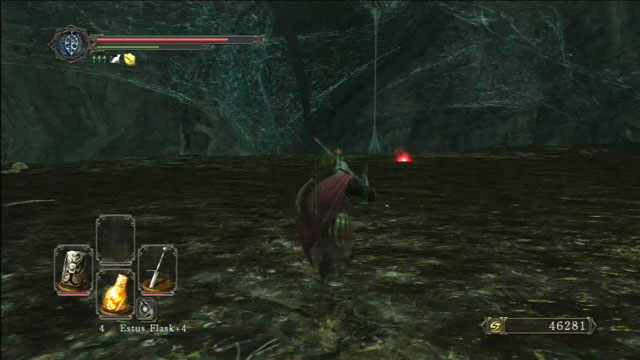 Take the souls
After you're done, take the last of the powerful souls. It's a red sphere located where the boss came from.
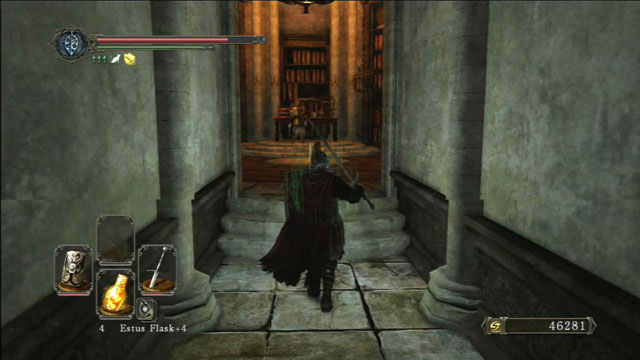 Enter the chambers
Go through the tunnel to the private chambers. Defeat the guard and take Brightstone Key, Fragrant Branch of Yore and Dark Quarto Ring +1 from him. Use the key to open the closed door in a room where spiders slid from the ceiling. There's a chest inside.
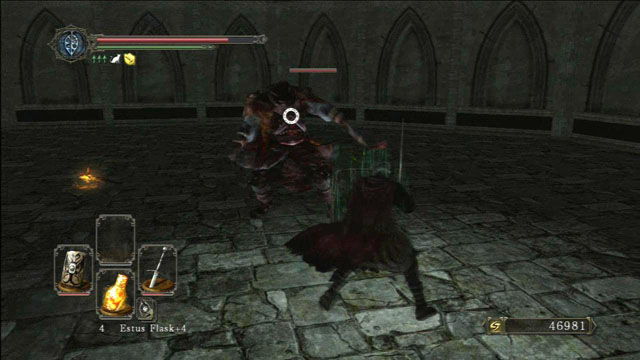 Kill the guard
Go downstairs and enter the round room. You'll fight against a headless guard armed with two swords. The best way to defeat him is to circle him and wait until you can attack from behind. After you kill him, take the Vengarl's Set and use the bonfire that will teleport you to Majula.
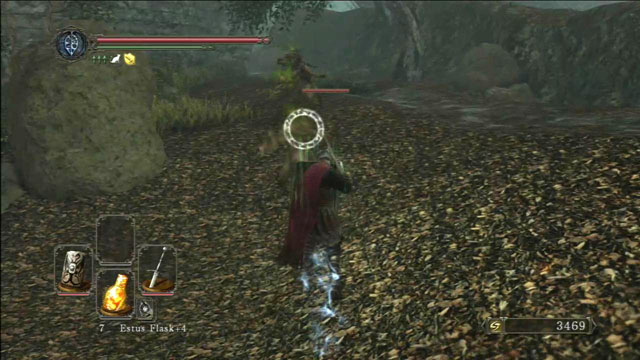 Defeat the undead
Teleport to the Shaded Woods bonfire. Go upstairs and use the passage on the left. Defeat some enemies and go forward. Turn left behind a round building and kill two undead. Go a bit forward to take a soul and Ring Of Life Protection from a corpse.
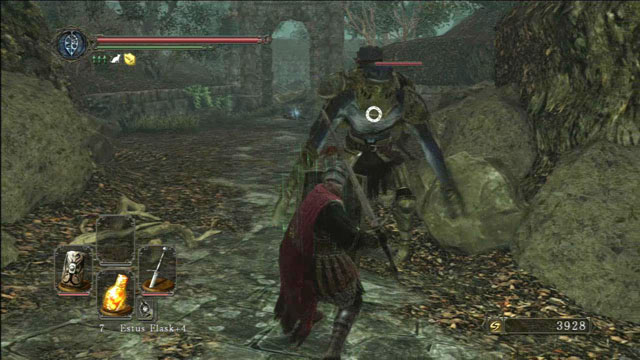 Kill the guard
You'll encounter a guard. Fighting him is similar to a boss from one of the previous locations. A Twinkling Titanite will fall out of him. You'll see a corpse from which you can take a Dragonslayer's Crescent Axe and Golden Falcon Shield.
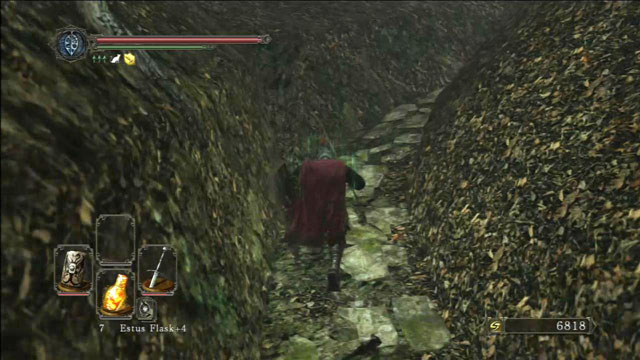 Take the path
Go along the path to the other side of the hill. Go up to the door that will open automatically if you have four souls of main bosses. Go downstairs and turn left to take a spell and a soul.
 Shrine of Winter
Go forward and take a Divine Blessing from a corpse. You'll see a sleeping knight but he won't wake up unless you attack him. Take all the items and enter the dark tunnel.
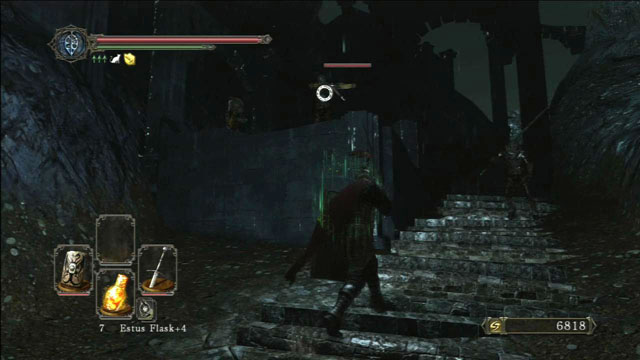 Kill the guards
You'll see first castle guards at the end of the staircase. Try to defeat the ones with crossbows first.
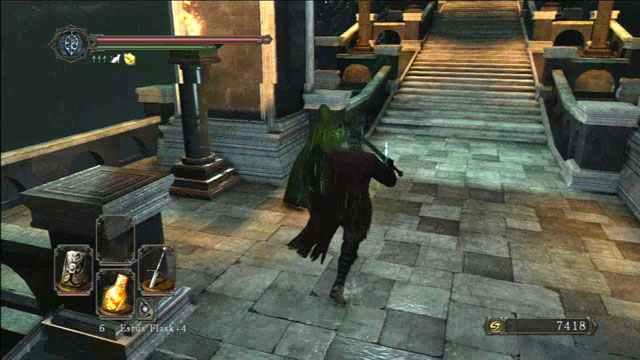 Cross the bridge
Go forward. Take a Holy Water Urn from a corpse behind a rock. Go to the bridge and talk to Emerald Herald. You've just reached Drangleic Castle.
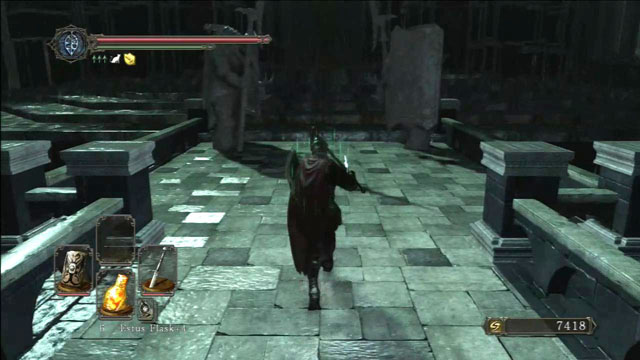 Kill the humanoid mammoths
Keep going forward. You'll see statues of two humanoid mammoths at the end of the bridge. They will come alive if you come close to them. There is a very good way to defeat them. Go back to the stairs and stop halfway. Keep your shield up and wait for their attacks. When they are above you they might not reach you. Focus on a single enemy. When you defeat it, kill another one.
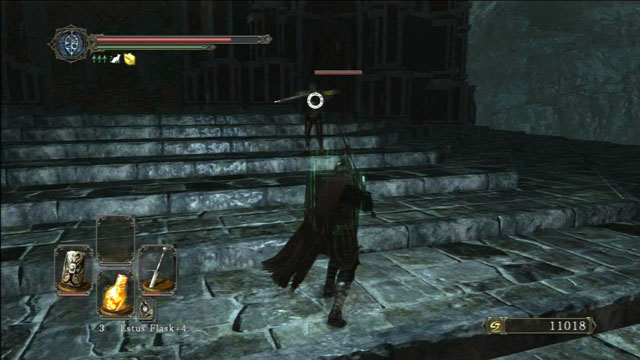 Kill the guards
Go towards the gate. A few guards will attack you. Try to kill them as close to the statues next to the entrance as possible. Their souls will be absorbed by the statues and the gate will open. There is a chest containing a Great Combustion and Fire Seed on the right side of the castle.
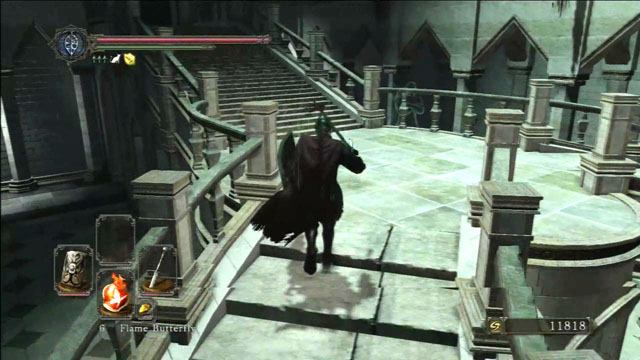 Talk to the ghost
Get inside and go towards the stairs. You can talk to the ghost of a doorman.
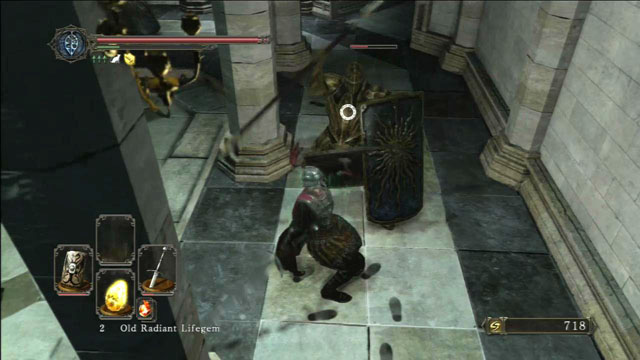 Defeat the strong guards
Go to the stairs. You'll encounter strong guards. Keeping your shield up is essential. Try to block their hits and attack in right moments. Lure them into a wider space so that they can't corner you.
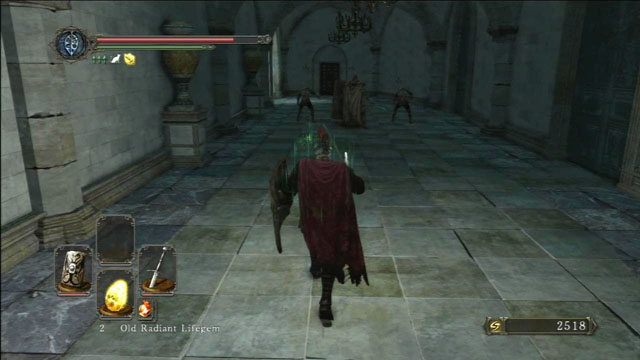 Attack from behind
After you kill them, use the passage on the right side of the stairs. You'll be able to attack the next few enemies from behind. Attack the powerful guard in the middle first.
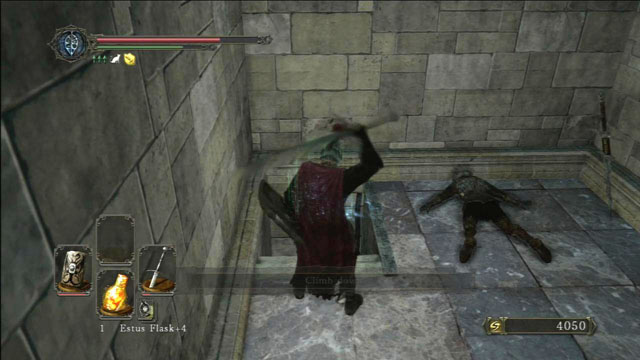 Climb down the ladder
Open the door that was behind the enemies. Kill two regular guards inside and climb down the ladder.
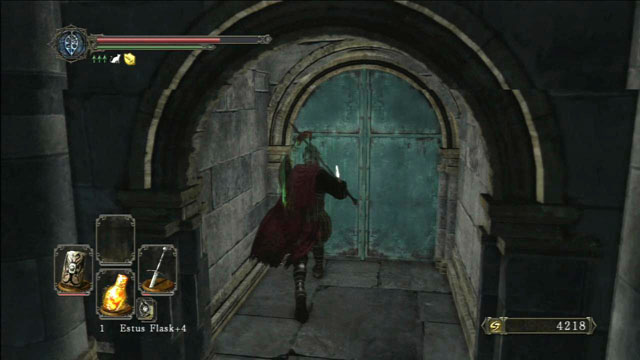 Open the door
Go forward and open two blue doors. There is a bonfire behind them.
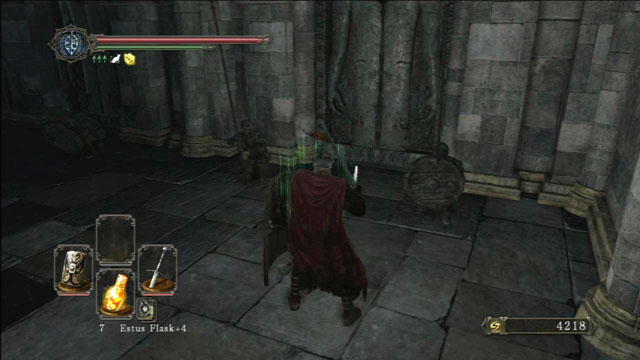 Kill the guards near the door
Light the bonfire, go out of the room and turn left. There are six doors there. Two sleeping guards are on both sides of each door. They will come alive when you approach them. When you kill them, their souls will be absorbed by the door and it will open.
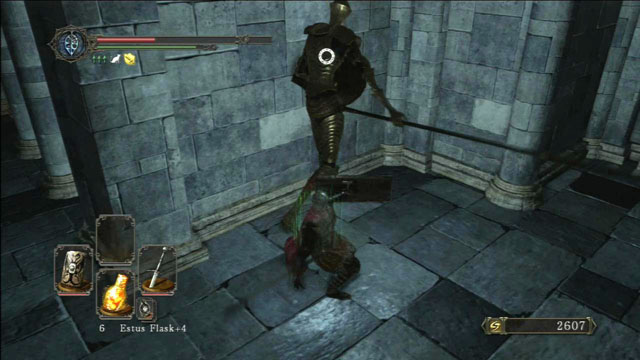 Defeat Ruin Sentinels
There is a way to another bonfire and an old man on a chair behind the third door on the left. If you talk to the man, he'll let you go to an optional location for one Human Effigy each time. Back to the doors - each of them lock an enemy - equivalent of a Ruin Sentinel, but stronger. Try to open only one door at a time. When you defeat all the enemies and take items from chests, go through the first door on the right.
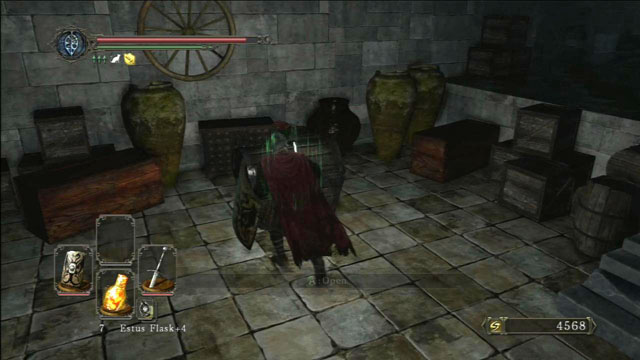 Open the chest
Open the chest and take the Dark Arrow. Moreover, you'll find a corpse from which you can take a soul, Old Radiant Lifegem and Monastery Charm next to the stairs.
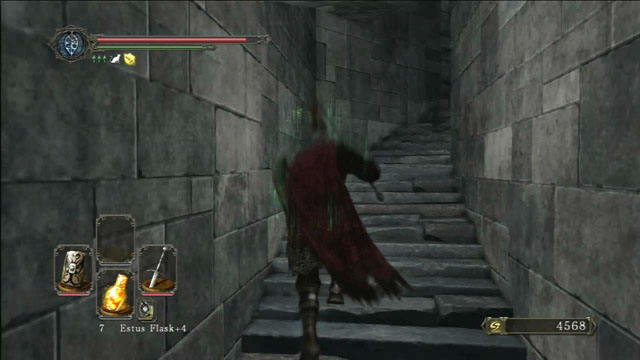 Go upstairs
Go upstairs. You'll see some spilled acid. If you want to take items from here, take off all your items because the acid will destroy them.
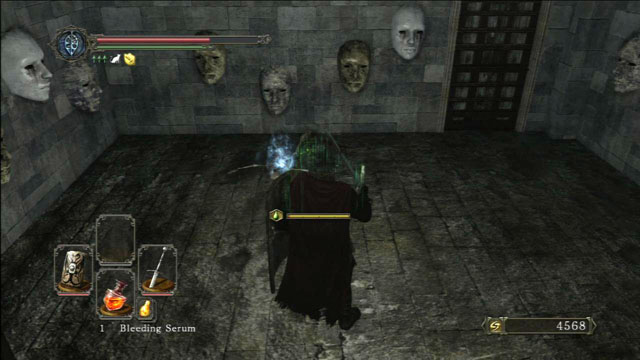 Avoid the mask
Go upstairs until you reach a room with masks on the walls. Be careful because they shoot poison darts. Take a soul and a Twinkling Titanite from the corpse.
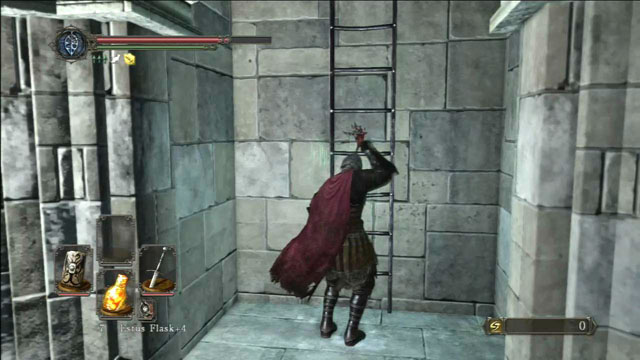 Kill enemies one by one
Go out of the room and go to the next one. There are three powerful guards inside. Lure them towards the stairs and kill them one by one. You can kill a guard with a crossbow first. Watch out for the painting because it's cursed.
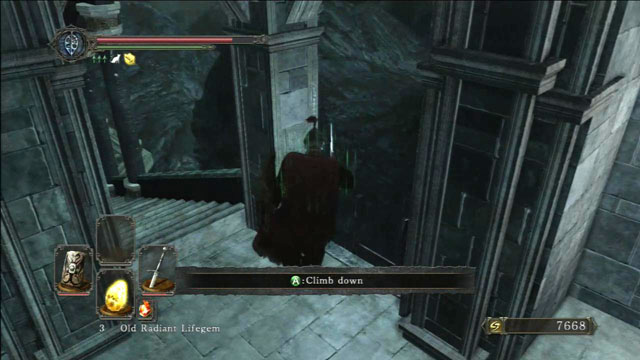 Climb down the ladder
Exit the room, turn right and go upstairs. Climb down the ladder. There is a hidden room around the corner and a bonfire inside it. Light it. Kill the crossbowmen and climb up the ladder.
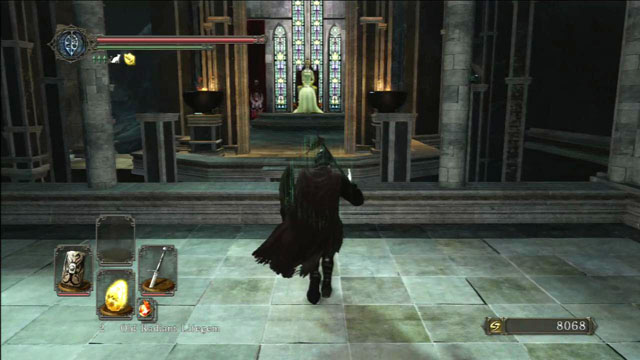 Talk to the queen.
Go upstairs. Talk to the queen sitting on a throne on the opposite side of the room.
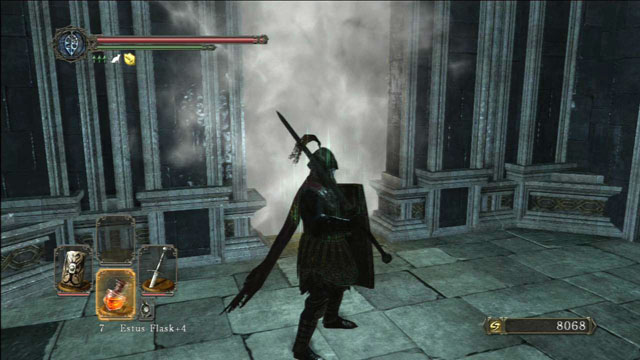 Walk through the fog
Go out of the room and walk along the wall to the fog. You'll fight two Dragonriders behind it.
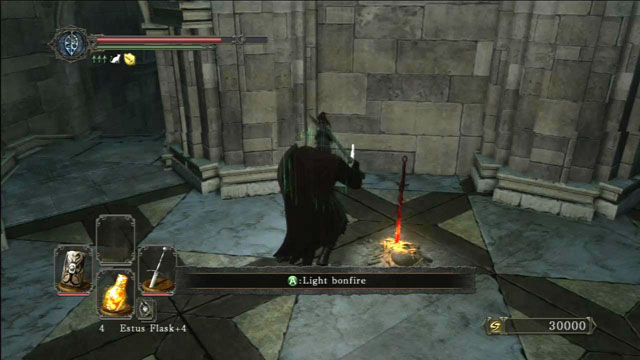 Light a bonfire
After the boss fight, go to the next chamber and light a bonfire.
Climb the ladderUse a passage to the left from the bonfire. Go down the stairs and climb the ladder located near a lift, which you cannot use right now. Open the iron gate at the top and enter the next chamber.
 Open the chest
Inside, you will see several stone guardians. Try to kill them close to the stone monument. By absorbing their souls, you will activate the lift. Go through the door to the next room. Here you will find two chests, from which you can take Old Knight Hammer, Caitha's Chime and Soul Greatsword.
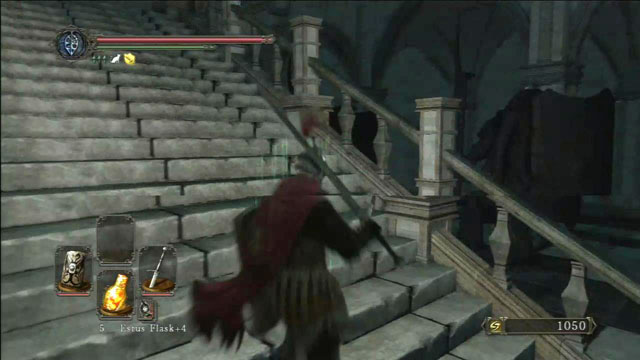 Go up the stairs
Walking along, you will reach a big chamber. First, run up the stairs and turn right. You have to be very careful now, because you will be fighting archers carrying long bows. Kill the enemies standing on the balcony to the left and then head to the one to the right. After the fight, open the chests, in which you will find Fire Greatarrow and Firestorm. Be careful when opening the chest on the right, because it releases poison.
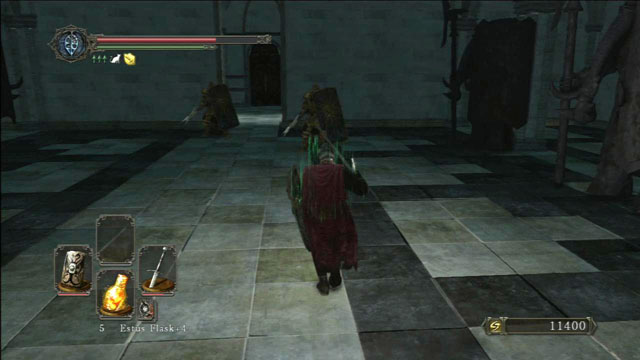 Kill the knights
Go downstairs and deal with the enemies guarding the door. First, lure the armoured mammoth to you. Defeat him near the stairs so that the guards won't attack you. Then, lure one of the knights and kill him at a safe distance. After dealing with the last enemy, head through the corridor.
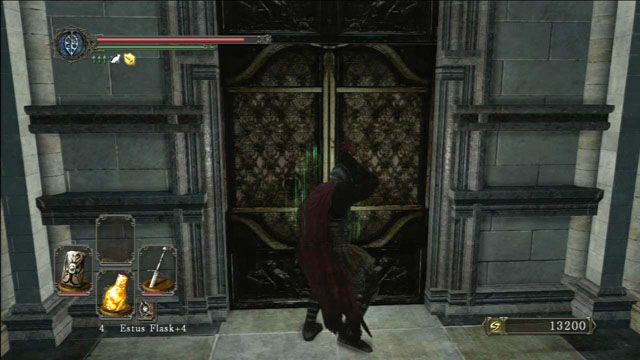 Open the door
Open the big door and head outside. Another mammoth fight awaits you. After killing it, go up the stairs and use the ladder. There are some more archers at the top. Kill them so that they won't interrupt you in further exploration of the room.
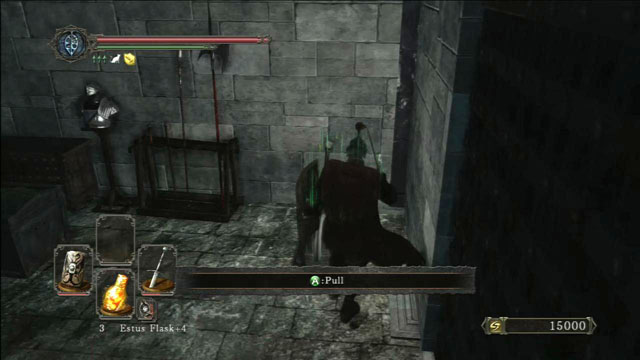 Use the lever
Go downstairs and open the door. Enter the armoury. Loot the corpse lying near the wall and take Repair Powder and Flame Butterfly. Take Estus Flask Shard from the chest. Using the lever, open the gate that blocks the way to the next door.
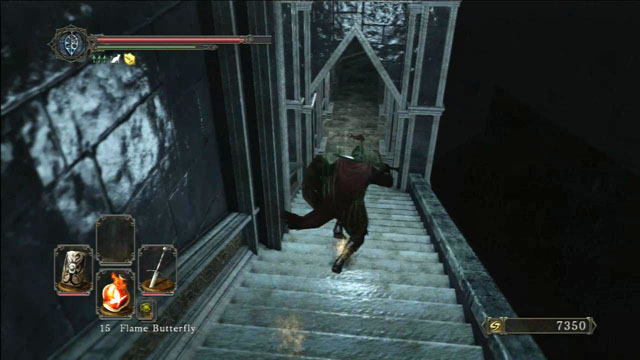 Run down the stairs
Go through the door and kill the knight standing on the stairs. Run straight until you reach the bonfire that you have lit earlier.
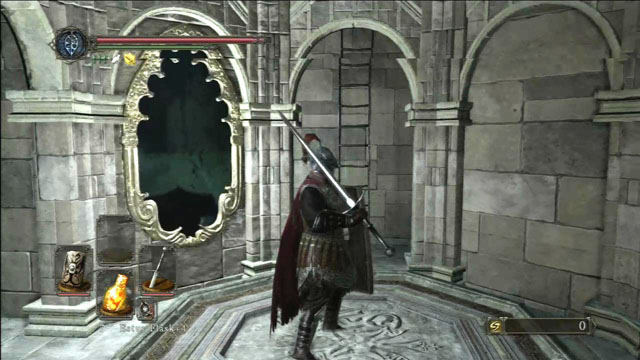 Use the lift
Approach the hole in the ground and use the lift. Go to the very top, open the door and enter the chamber.
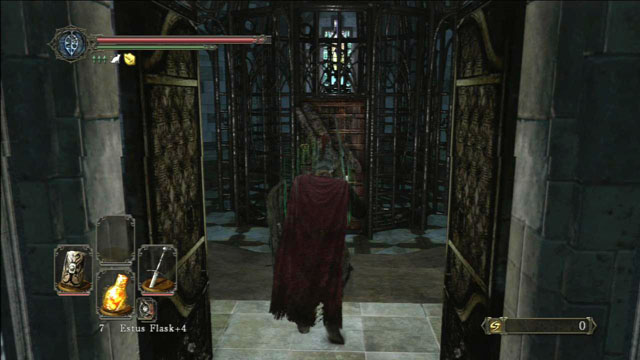 Search the room
Search the chests when inside. Besides a few useful items, you will find a key that unlocks the way to the further part of the location. Don't worry about the cage in the middle, you will deal with it later.
 Open the door
Use the lift to go down and open the door with the key. You will see a long corridor with a fog at the end of it. When walking through the passage, you will encounter a few stone guardians. You can avoid the fight, but you will need to concentrate in order to do that. Notice the monuments on both sides of the passage. The ones having their head in the right place will come to life. You can cut off their heads to defeat them without a fight.
 Kill the knight and go through the fog
The last obstacle before reaching the fog is a knight. After killing him, head through the fog to find the Looking Glass Knight.
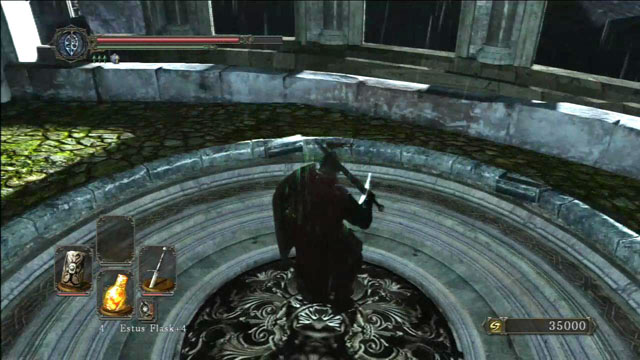 Use the lift to go down
After the fight with the Looking Glass Knight, head to the centre of the circle and go down using the lift.
 Destroy the vines
When at the bottom, run straight through the underground tunnel. Turn right at the end of it and destroy the vines blocking your way to a treasure. Loot the corpse for a Greek Blossom.
 Light a bonfire
Run towards the other side. Head straight through the tunnel until you reach a bonfire, which you should light.
 Open the door
Go down the stairs to a lower level and open the door. On the left, you will notice a corpse hanging on a tree. You can destroy the tree and loot the corpse after it hits the ground. Run towards a cave and destroy the barrels and a poisonous mushroom when inside. Open the chest and take Wilted Dusk Herb and Sceptic's Spice.
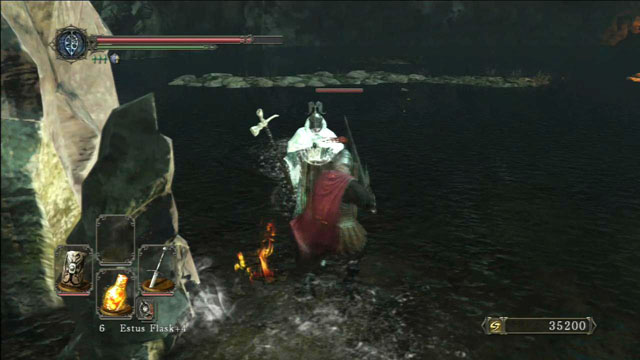 Kill the knight
Go down all the way to the bottom of the stairs. Here, another enemy awaits you. It is a white knight. He fights similarly to all other knights, so use the combination: block - dodge - hit from behind. You will also encounter lizard men hiding in the water. It's sometimes difficult to notice them, so be careful not to be ambushed. You can see their backs sticking out of the water. Try not to go far away from the trail, because the edge is irregular and you can easily fall down.
 Enter the hut
Run straight ahead and go inside a hut. Talk to the singer, who is sitting near one of the walls. Go outside on the other side of the building.
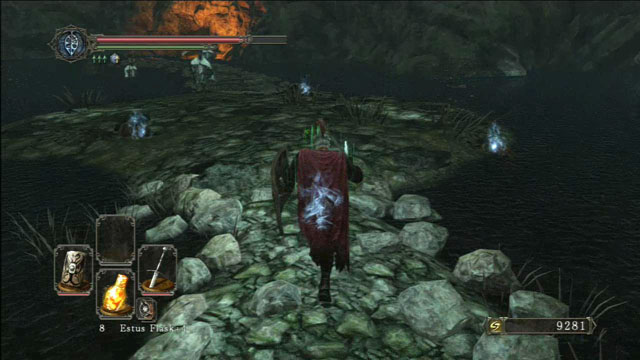 Collect the loot
Head straight, looking out for the lizard men. About halfway through the path, you will notice some white knights. Lure them to you one by one, preferably using a distance weapon. After killing all of your enemies, collect the loot and enter the cave.
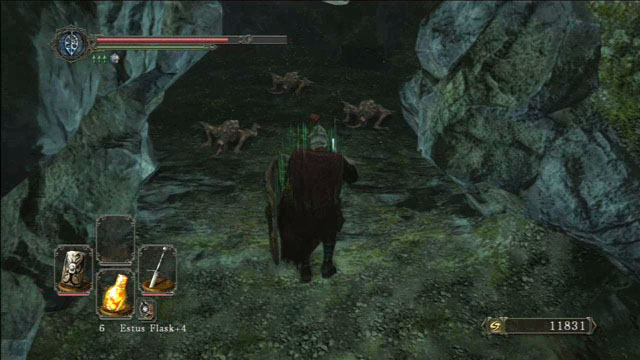 Kill the lizard men
You will notice a cave to your left, with quite a few lizard men inside. If you happen to have a bomb with you, you can use it to deal some initial damage to them. After killing all of the enemies, open the chest and take Twinkling Titanite and Smith & Silky Stone.
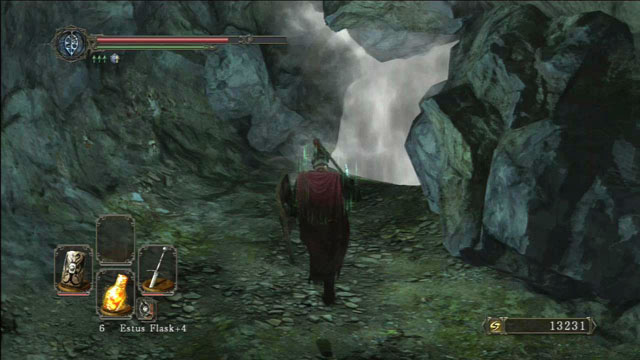 Go through the fog
Kill the poisonous mushroom outside the cave and head forwards. You will notice a fog at the end of your path.
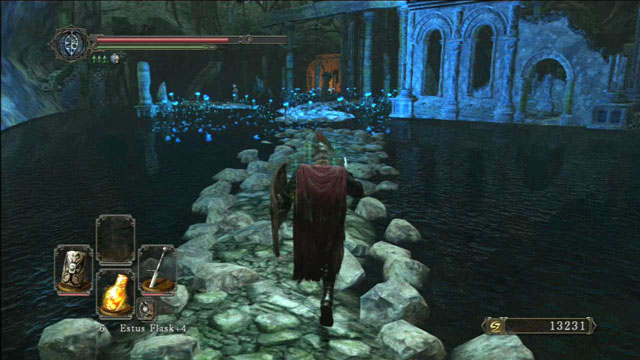 Head to the ruins on the left
You will see a path in front of you, with some blue lights glowing. The first thing which you should do here, is to light a bonfire. It is located in the ruins nearby. One of the lizard men awaits you near the entrance.
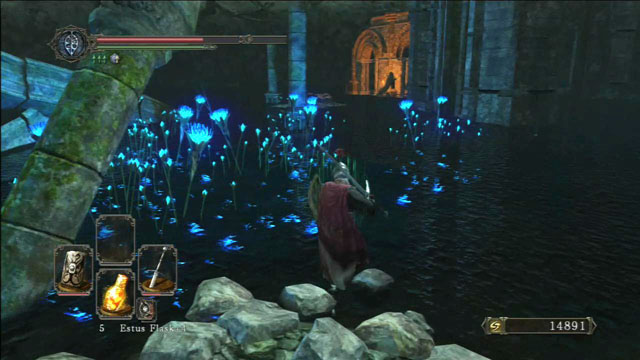 Run along the path
After lighting the bonfire, continue pressing forward. In this location you will encounter a new type of enemy. These are mages, slightly shorter, but smarter than those in Brightstone Cove of Tseldora. It is best to try to ambush them. If however, it is not possible, use distance weapon. Hide behind columns and walls to avoid the projectiles that track your movement. Have your sight active all the time. Lean out - shoot - hide. Repeating this combination will surely bring you victory.
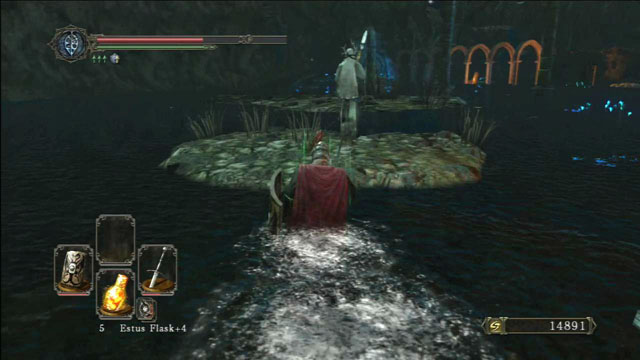 Kill the mage
Follow the path all the way. Behind a ruined wall, you will se a mage standing on a small island. Kill him and hide behind the columns. Kill the mage standing on a path near the hut, then run towards him and go inside.
Loot the corpse near the wall and go outside on the other side of the building. Lure the white knight to you. After killing him, use distance weapon to get rid of the mages around you. There are four of them. One is standing behind the columns, one on the bridge, one on an island near the bridge and one is guarding the entrance.
You still have to defeat two more white knights to reach the fog. When you are in the cave, destroy the poisonous mushrooms located near the left wall. Head to the left and light a bonfire.
Destroy another small mushroom. Use a bow, a crossbow or spells to get rid of it. You will also see a bigger mushroom producing a lot of poison. Don't get to close to it, because the acid can damage the items in your equipment.
After you go outside, watch out for the mages standing on a circle. Kill them using distance weapon and then head towards their location. Kill the lizard men and collect the loot. Watch out not to fall down. Run along the path and kill another mage. When you reach the hut, talk to the singer and go through the fog. The Demon of Song awaits you.
After killing the boss, go outside through a tunnel. When you reach the building, head towards another one along a narrow path. A flight of spiral stairs leads to it. Light a bonfire inside. Now, you can return to Drangleic Castle if you want. If you take the lift all the way to the top, you will be able to open the peculiar cage. After freeing the prisoner inside, you will receive Ring of the Dead.
Return to the latest bonfire and go up the stairs. Open the door and run along the ledge. Kill a mage standing at the end of your path and enter the building. When inside, talk to the singer and return to the bonfire. Go downstairs and open the door located in the ruins. Use the lift to go all the way to the bottom and light a bonfire underneath the stairs.
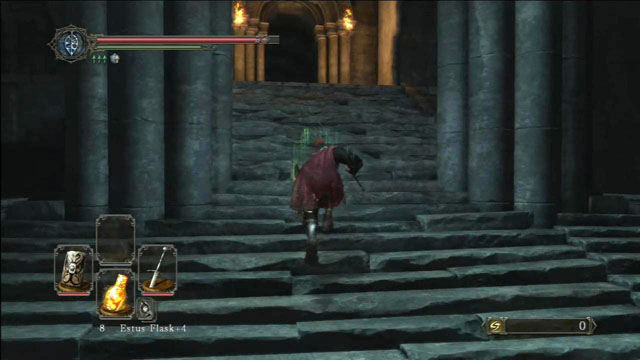 Go up the stairs
Go upstairs and run through the corridor. In the next room, you will encounter a zombie holding a torch. Kill him and stand near the entrance to the next crypt. When you lean out, you will notice a mage, who fights using black magic. Kill him using distance weapon.
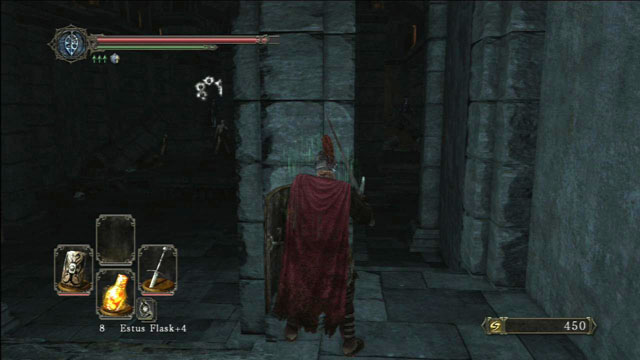 Kill the mages
Go inside and kill the zombies standing on both sides of the entrance. Stand behind a column and get rid of two mages. After killing all three of them, kill the rest of the zombies in the chamber.
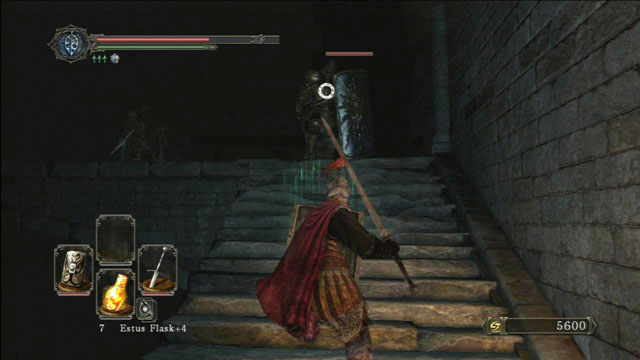 Kill the knights
Run through the corridor to another room. You will notice two enemies standing on the upper level. They won't attack you if you don't get to close. Go outside and try to lure one of the knights near the stairs. Kill them one after another. You can also jump down to the lower level and head to a ladder along the ledge. When on top, defeat the enemy and take Crushed Eye Orb and Fire Seed from the chest.
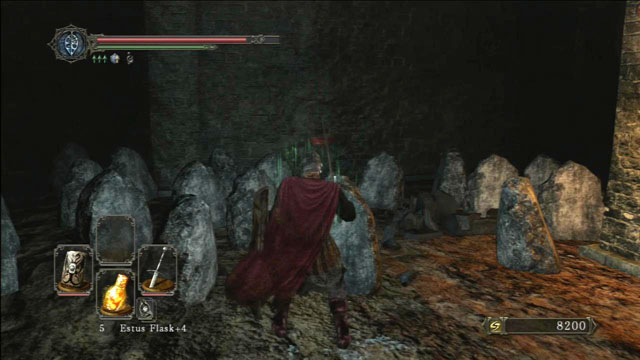 You can clear the way by destroying the rocks
Run straight ahead and then turn right to the next chamber. Here you will notice some rocks sticking up from the ground. Just hit them with your sword to break them. Run across the room as fast as you can and go upstairs.
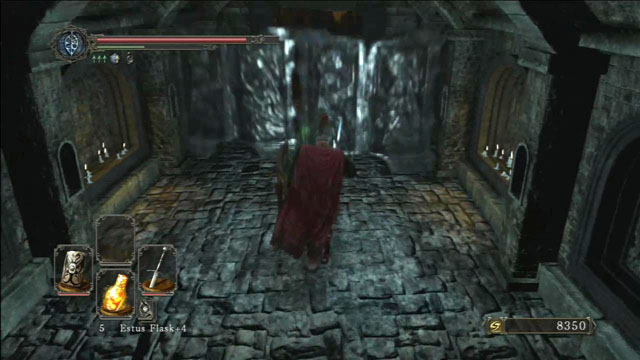 Provoke the enemies to attack you
Take the corridor trying to stay in the middle of it, because there will be ghosts attacking you from the walls. The road is blocked by two very strong warriors, carrying two shields. Hit the shields until the warriors attack you and run straight to the previous chamber. It is very likely, that only one will follow you to the room. Raise your shield and circle your opponent. Hit once on the back and circle again. Do the same with the second one.
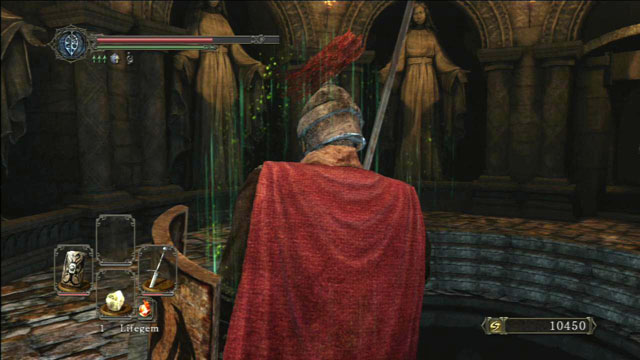 Jump into the hole
Run through the corridor, which is now clear, and jump into a hole. It is a rather difficult moment in this location. First, try to destroy all of the stone monuments as fast as you can. This will prevent the acolytes from resurrecting. Watch out not to ring the bell, because it summons more enemies.
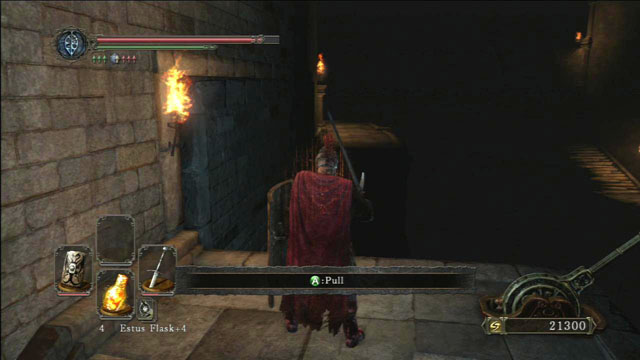 Use the lever
Go outside and turn left. You will unlock a shortcut when pulling the lever. Approach the big passage. On the left, there is a chest from which you can collect Magic Stone and Darknight Stone. Enter the big chamber. First, go down the stairs and turn right. Kill the zombie in a hole under the stairs, which is guarding the bell. Now you can head across the chamber, towards the fog. Here, a rather difficult fight awaits you. It is difficult mainly because the number of your enemies. There are also a few acolytes and strong knights. You can defeat them one by one, luring them with a distance weapon. If you would rather avoid fighting, run along one of the walls and when at the end, dodging the attacks of the knights, run towards the stairs, straight into the fog. Behind it you will find Velstadt, The Royal Aegis.
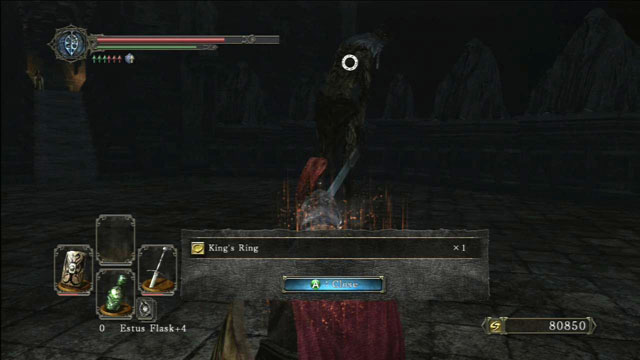 King's Ring
Go outside after the fight. You will notice king Vendrick walking around the arena with his sword pointed to the ground. It is an optional boss. He won't attack you right away, you need to make him fight you. You will see an item lying near the wall. It's a King's Ring. Return to Shaded Woods, where you will have three paths to choose from.
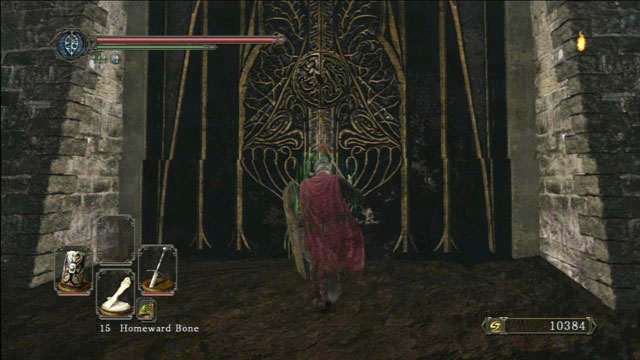 Wear the King's Ring and open the gate
Take the middle passage in Shaded Woods. Run straight ahead all the time. Take Red Tearstone Ring, which is lying in the water. Run up the hill. Wear the King's Ring and approach the big gate. If you're wearing the ring, the gate will open for you.
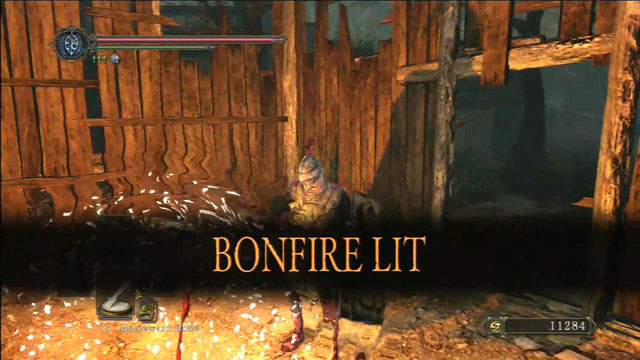 Light a bonfire
Run forwards, colleting items along the way. Kill the cursed monkeys that attack you and enter a wooden hut to light a bonfire. Behind the hut, you will find a chest. Watch out, because it's a Mimic. Hit the chest several times to kill it. Take Sunset Staff and Dark Mask.
 Run along the corridor
Approach the stairs and collect Fire Seed lying near them. Go up. You can jump into the fountain to collect Radiant Lifegem. Go ahead and enter the building.
 Dragon skeleton
Go through the corridor and open the door. In the hall, you will find a huge dragon skeleton. If you approach it and hit several times, the head will raise, but then it will collapse and hit the ground.
 Use the lever
Walk along and turn left under the stairs. Pull the lever at the end of the corridor. This will open the passage to Royal Sorcerer Navlaan. You will find him at the end of the same kind of corridor, located on the other side. You can buy a lot of magic items from him.
 Open the chest
Go up the stairs. You will see some mirrors on the wall in front of you. First, turn right and take the corridor. At the end of it, there is a chest from which you can take Great Magic Barrier.
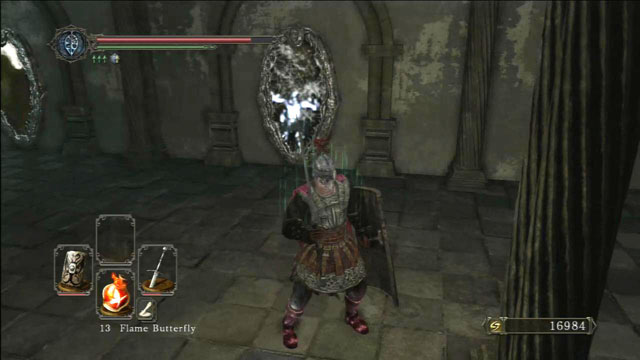 There will be enemies coming out of the mirrors
Return to the mirrors. Some of them spawn all kinds of enemies. You are not required to go through this place, but you can collect a lot of souls and items like Northern Ritual Band +2 or Petrified Dragon Bone.
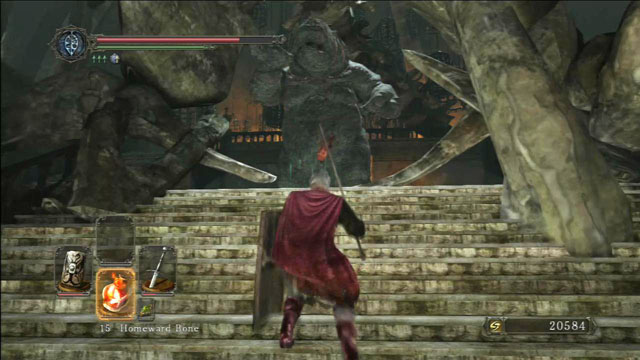 Make the monument come to life
Go upstairs. Use Fragrant Branch of Yore on the monument blocking your way. A very good way to defeat it is to use distance weapon. The enemy won't be able to approach you, because dragon bones are blocking his way. There's therefore no use in trying a close fight.
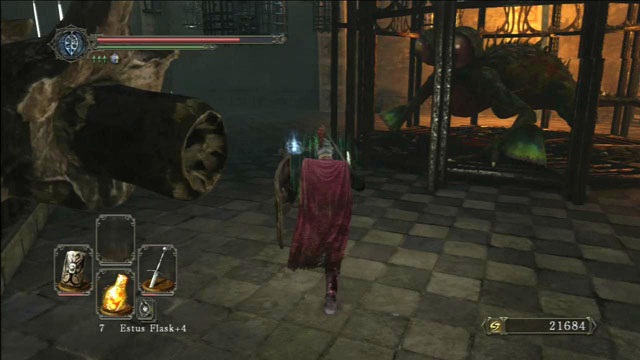 Kill the giant frog
Take another stairs and go up. You will see a giant frog sitting in a cage. When you come near, it will destroy the cage and attack you. When fighting it, use the same tactic as with the enemy in the previous room.
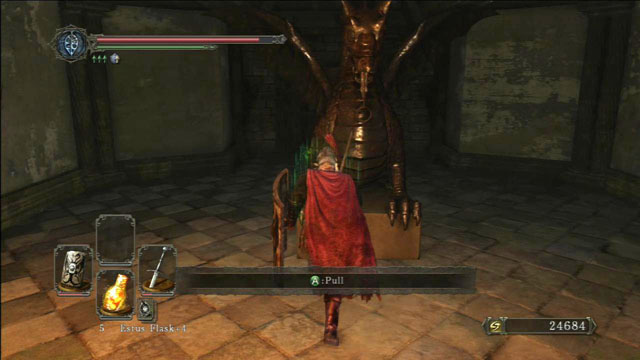 Use the lever
When you defeat the frog, collect the items lying nearby and enter the next room. Pull the lever located near a dragon statue. This way you will open the passage behind it.
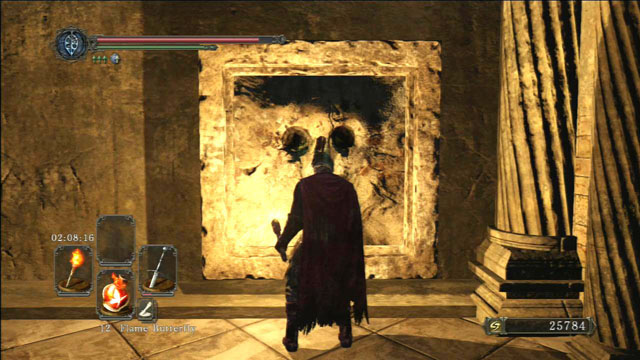 Use Pharros Lockstone
On the left, there is a slot to place Pharros Lockstone in. By doing that, you will light the whole corridor making your way easier.
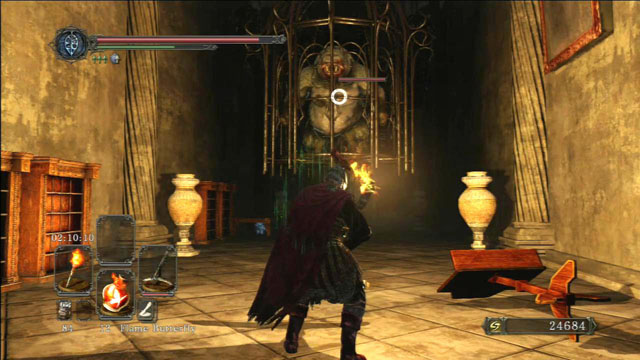 Provoke the enemy
Go ahead until you reach a cage hanging from the ceiling, with a yeti inside. The yeti will break the cage and attack you if you come close. Run fast to the room with the dragon statue. Your enemy is to big to fit in the door and you will have no problem killing it with a distance weapon.
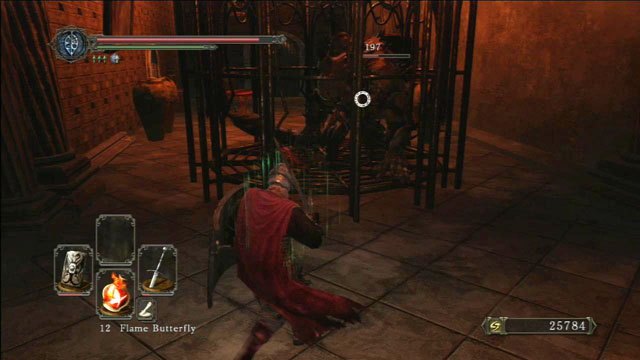 Kill the enemy
Walking along, you will see a cage with two strange long-tailed creatures in it. The enemy is not able to break the cage, so you can defeat them easily.
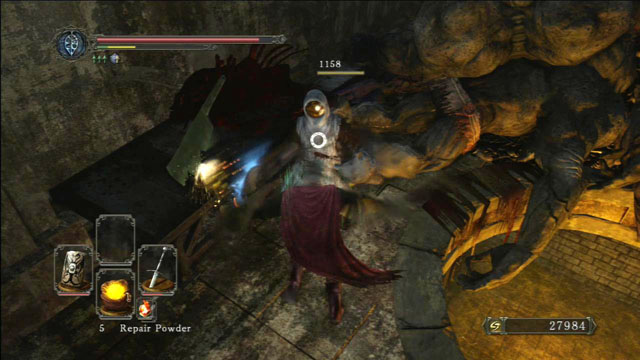 Defeat the mage
Right behind the cage, you will find a room and a mage inside. Get rid of him. Take off everything you wear and jump into a hole filled with acid. Reach the gate as fast as you can and open it. When out of the acid, wear your equipment again and get ready for a fight with a mutant dog.
 Open the secret passage
When running up the stairs, stop halfway through and open a secret passage. You will find a bonfire behind it. Go upstairs and open the door to find yourself in a corridor again.
 Approach the door
Behind the cage which has not been destroyed, you will find another door. They will be destroyed by the yeti when you approach them. The strategy is the same. Head to the passage and attack using a bow, a crossbow or spells.
 Destroy the mushroom
Along the way, you can also open a door in the wall to your right. Here you will find a few items and a giant mushroom, which you can destroy from distance.
 Break the door
After searching the workshop, run towards the door at the end of the corridor and open it. You have to be very careful now, because another Yeti will attack.
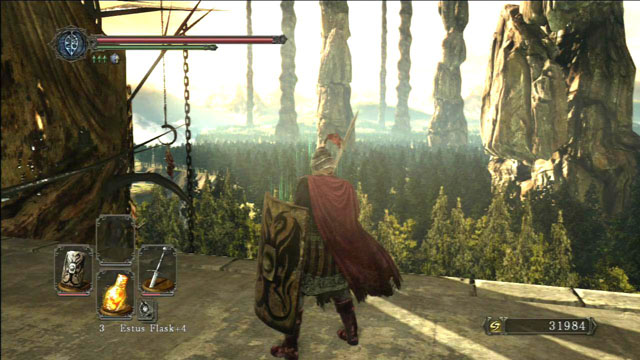 The landscape before the dragon fight
After killing the enemy, run across the bridge and enter the fog. Get ready to fight with Guardian Dragon.
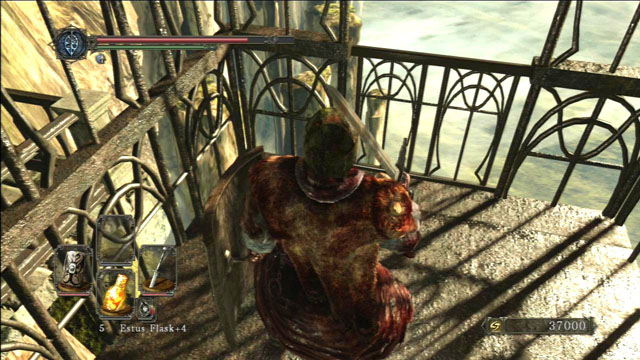 Use the lift
After the dragon fight, run across the bridge towards a lift. On the right side behind the passage, collect Dragon Scale from the corpse. Enter the lift, which will take you up.
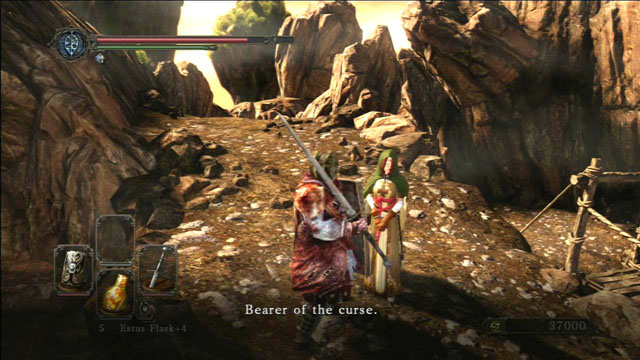 Talk to Emerald
Enter the corridor and run straight ahead. At the end of your way you have to talk to Emerald Herald. Go down and make your way through a hanging bridge, to the other side of the chasm. You can light a bonfire here.
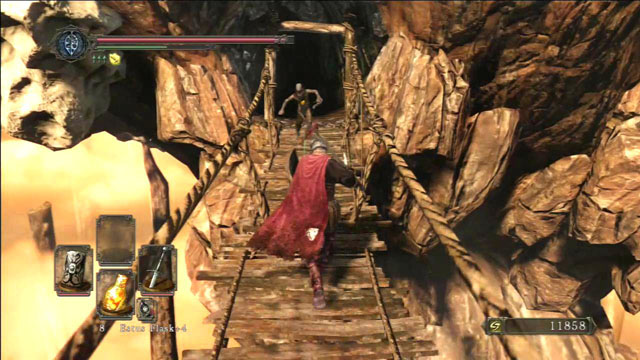 Kill the exploding mummy
Walk straight along the path. Notice the exploding mummy as you reach the bridge. Kill it before it gets close to you.
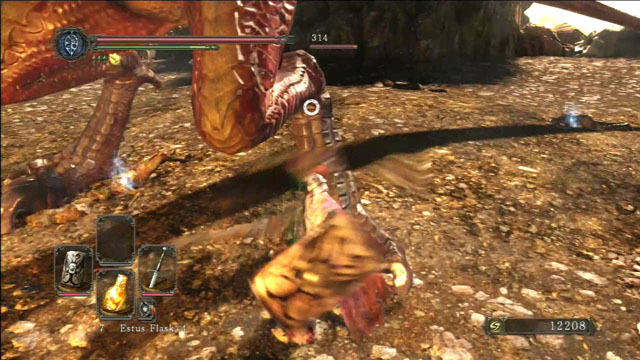 Go for the dragon's legs
Turn left after entering the cave. You will reach a red dragon. During the fight, stay close to his legs. Watch out for the stamps, because they deal quite a lot of damage. After defeating the dragon, collect the items lying nearby and run across another bridge.
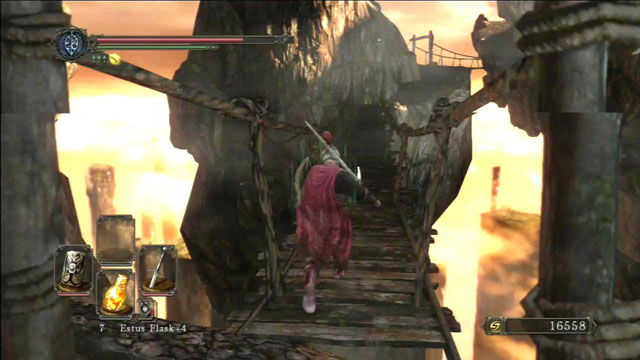 Go across the bridge
Kill the exploding mummy and go to the other side of the bridge. Another mummy and another bridge. Go up the hill and make your way to the arena where you will be fighting another dragon.
 Go along the precipice
After killing the dragon, take the path along the precipice. The way to the third dragon is blocked by eggs. You just have to destroy them to proceed. Collect the items after the fight and run across the bridge.
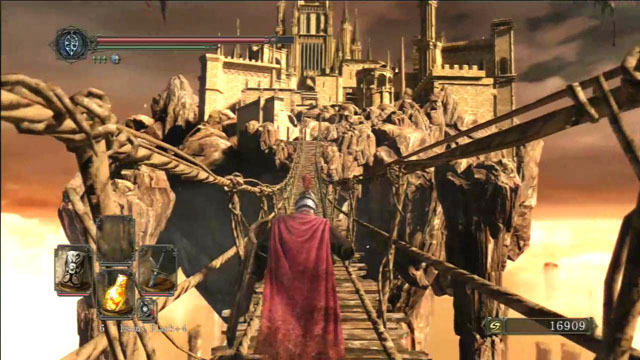 Run across the long bridge
Turn right and step on a very long bridge towards the fortress. Enter the first building and light a bonfire.
 Defeat the giant knight
Go up the stairs. Here, a rather difficult fight awaits you. The best way to defeat the giant knight is to constantly circle him and dodge his attacks. When he is preparing to hit again, strike a blow.
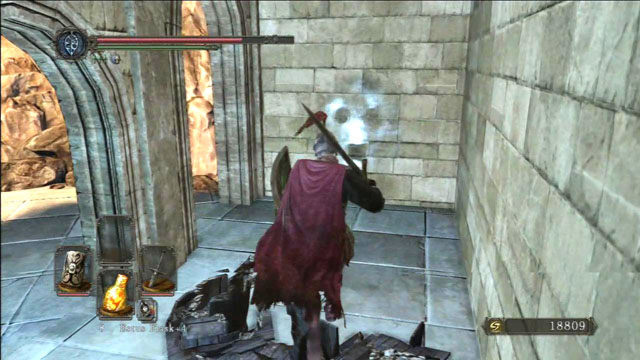 Open the secret passage
In the place behind the knight, you can use Pharros Lockstone. A blue sign will show up on the wall in front of you. When you hit this spot, a secret passage will open. There is a chest inside, containing Staff of Wisdom and Judgement Set.
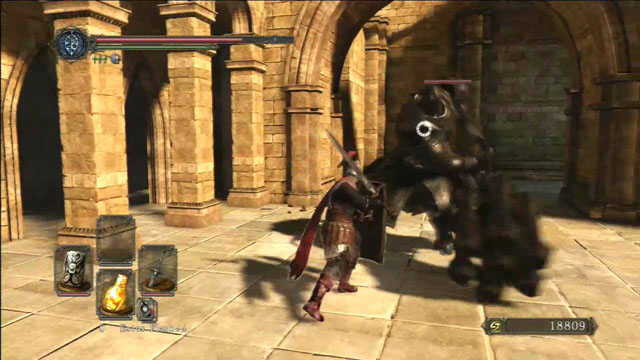 Face another knight
Go upstairs to a higher level. You will find another giant knight here. This one is much stronger. His attacks are quick and very dangerous. You need to have mastered the art of dodging in order to fight this opponent. If you can't manage defeating him, you can go past him, straight to another stairs.
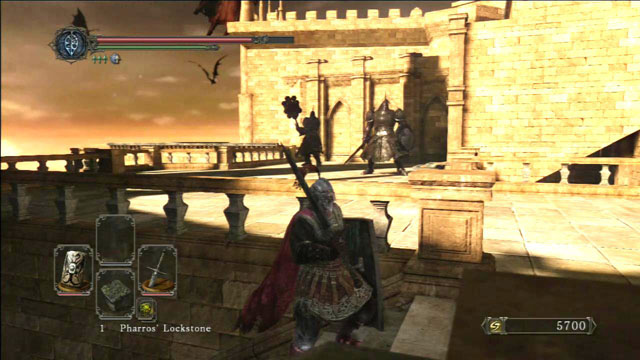 Enemies guarding the door
You will find two guards on the top, guarding the only available door. Try to lure them one by one. If this doesn't help, lure them to the stairs and when they lose aggro, run closer to them, hit and immediately return to the stairs.
 Defeat the guards
Open the door and take the stairs leading up. Behind another door, you will see another flight of stairs. Two knights are guarding it. After killing them, you will have to face very fast warriors. Then, another pair of knights and another warrior. The key to success here is to fight each one of them separately.
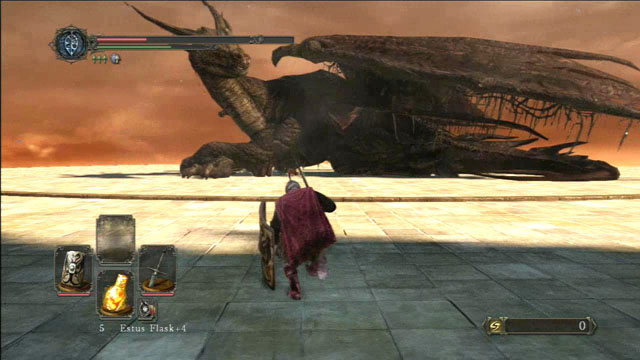 Ancient Dragon
When you finally manage to defeat all of the guards, you will reach the Ancient Dragon.
Return to the Forest Of The Fallen Giants. Go down the ladder and across the stone bridge. Open the door using Soldier Key and turn left. You will find yourself on a square. If you're wearing the King's Ring, the gate will open. Behind the gate you can light a bonfire. Go near the giant statue and you will be taken to another location. Turn right towards the stairs and run through the fog. Run along the right wall. You have to watch out for the fire and the rocks, which are rolling towards you.
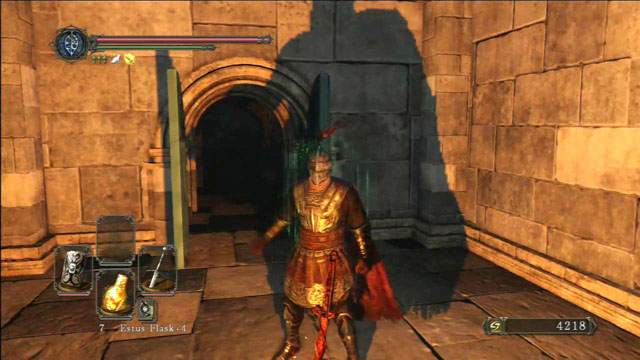 Return to the bonfire
Return to the first bonfire in Drangleic Castle.
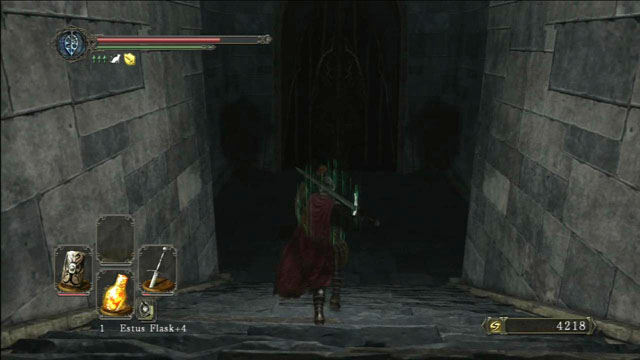 Open the gate
Turn left and go downstairs. The gate will open only if you're wearing the King's Ring. Run forwards along the only available path. After running through the fog, the final fight will begin.
 The Last Giant
The Last Giant is a huge opponent that can deal huge damage. However, it is still relatively easy to defeat. Your fight with the giant boils down to attacking his legs, simply because your character cannot reach higher. Below, you can find a list of the giant's attacks and hints on how to defeat him, while sustaining as little damage as possible.
 You succeeded
The best and most reliable tactic to defeat the Last Giant is to dodge. The shield is of no use here. Also, before you enter the arena, grab your sword with both hands and get into the fight. What proves effective here is locking on the opponent Approach him, at the moment that he takes the swing, jump between his legs and attack the legs. Perform 1-2 attacks and get away to a safe distance to regenerate your stamina. Do not hit more than 2 times, because, at the moment at which you are at the opponent's legs, you can be squashed. The fight may be schematic, which however does not deprive it of the emotions that accompany it. Act in accordance with the following scheme: run up, jump between the legs, attack, jump away. This way you are sure to succeed.
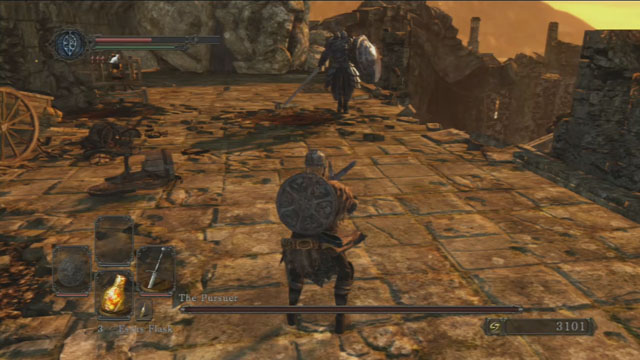 The Pursuer
The Pursuer may seem to by a very difficult foe, especially given his tremendous speed and damage dealt. Generally, he's a medium-sized knight, equipped with a large sword and a shield. Curiously enough, he's not moving typically, on foot - actually he's levitating above ground, which helps him to move quickly around the battlefield. There's a really simple way to defeat him - it can even take around 30 seconds.
The first maneuver the enemy performs is a charge in your direction. Raise your shield and jump in his direction just before he closes in on you. This way you will land behind him to deal some damage. Rinse and repeat every time he decides to charge at you. Pay attention to his series of attacks - after he swings his sword, observe if he's not preparing his shield to attack. If yes, retreat from him at once, as this attack can hurt you a lot.
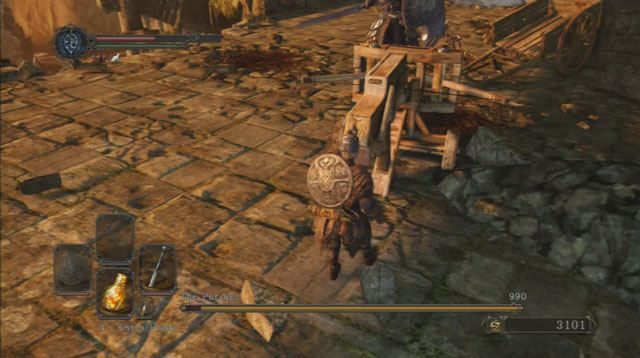 Use the ballista.
The best way to deal with this boss, is to circle around him with a raised shield and jump away from his attack. The moment you land behind his back, you can perform your own attack.
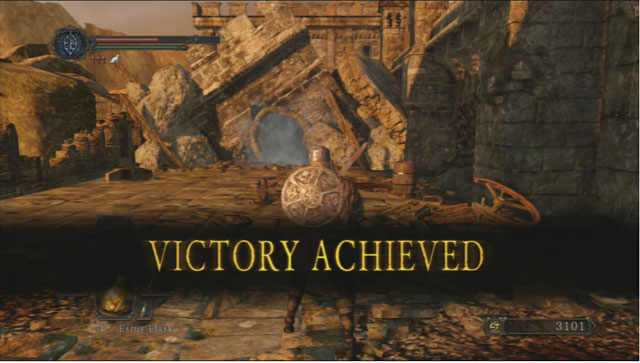 Victory!
There's also a way to defeat the boss without any problems, in half a minute, quite literally. After going through the mist, wait for a bit for the enemy to charge at you - dodge his attack to land behind him. At his point, you must run to the other side of the arena, mount the ballista and attack him with it. The projectile should deal so much damage, that you will only need one accurate attack with your sword to strike him down and end the battle.
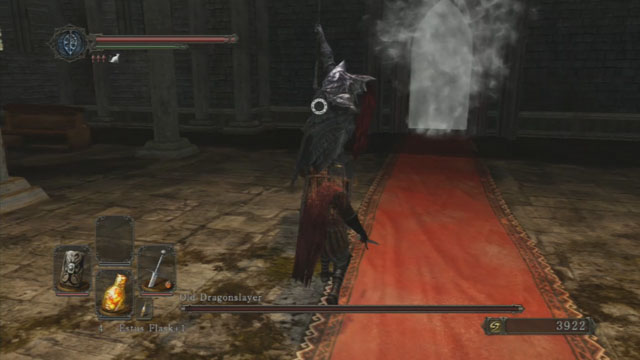 Old Dragonslayer
A foe, which most fans of the "first" Dark Souls should be familiar with. One of the twins, Ormstein, is back in the game, but he's not the "undefeated one" who made life a misery for many players, even those vastly experienced. He's not dealing so much damage, and, what's most important, he's all alone. By using the proper tactics and methods, you should be able to defeat him almost effortlessly.
The best method to deal with him, is to circle around him with a raised shield - the Twin Dragon Greatshield will be your best choice at this point in the game. You must circle around him, keeping the shield up, and attacking the enemy from behind. Retreat from him from time to time, to regenerate your stamina.
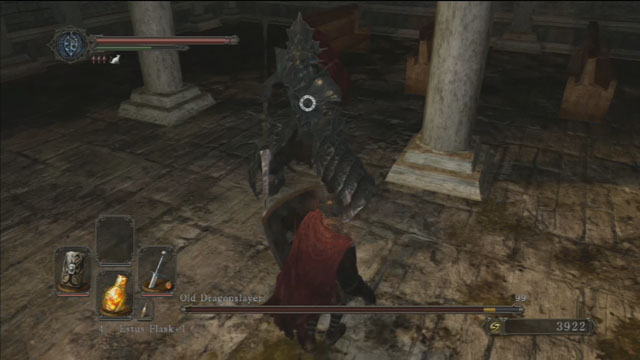 His attacks can be blocked with a good shield.
As soon as you notice a black matter gathering near the enemy, retreat from him at once, as this is a sign that he will soon jump into the air to land on the ground a second later, sending a shockwave around, leading quite a damage and knocking you down.
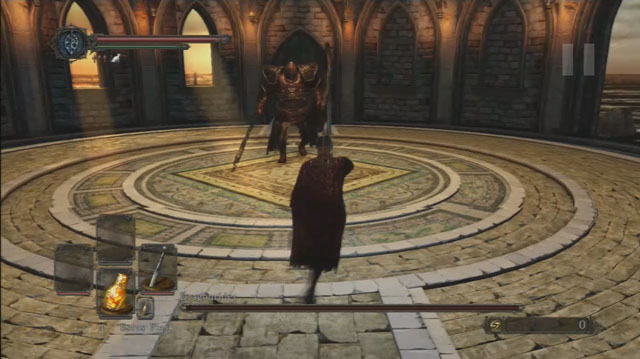 Dragonrider
Another boss you will encounter in the Heide's Tower of Flame. With a proper approach and tactics, he can turn out to be quite an easy foe. He's a medium-sized knight, equipped with an impressive armor. Besides this, his equipment consists of a large shield and a weapon, which can be described as a combination of a spear and an axe. The battle takes place in the interior of the tower, but it's not a completely safe place. During your circling around the enemy, you must be extra careful not to fall down - between the arena and the edges of the building there's a moat.
With proper tactics and a little bit of patience, the Dragonrider is easy to defeat. The whole point is to circle around the enemy all the time and attack him the moment he performs his own attack and after that continue circling around him. It's a method that will allow you to defeat him - furthermore, there's a chance that you won't suffer any damage in the process.
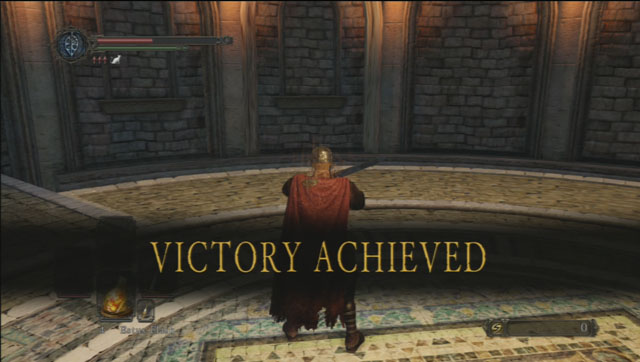 Victory!
A very important aspect of the fight, is that you must watch your every step. Between the arena and the edges of the building there's a moat - if you get too close to it, you can fall down, which will result in your death and you will have to go through the fight from the beginning.
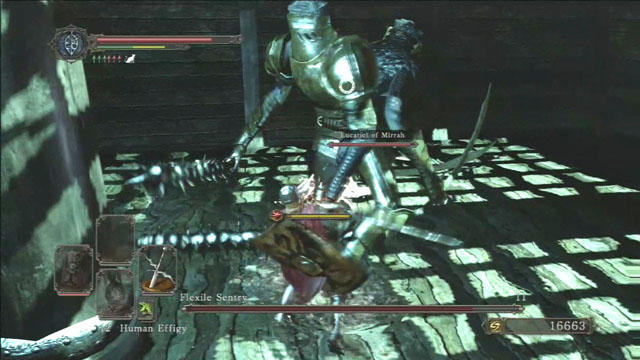 Flexile Sentry
He's one of the optional bosses in the game, which you don't have to fight at all - it's worth to do so, though. You will find him on the lower deck of the No-Man's Wharf ship. He's a four-handed, sword-wielding enemy. He's rather fast, but can be defeated easily with proper planning and former knowledge.
The best method to deal with him is to circle around him, trying to stay in mid range. The enemy "lacks back", so you can't really attack him from behind. Attack only when the boss have launched his own attack and starts preparing his next move. If you notice that he starts his spinning attack, get as far from him as possible.
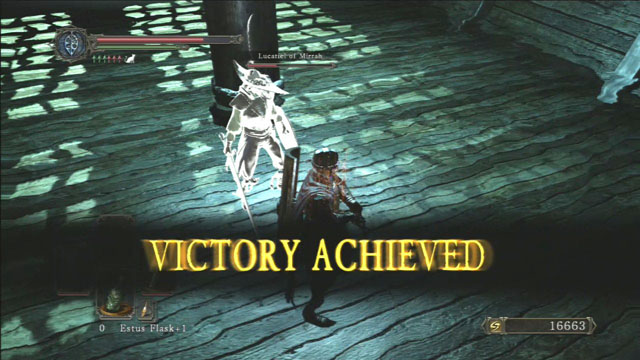 Victory!
You can summon Lucatiel of Mirrah to aid you in the fight, in form of a living shield / cannon fodder. She will take most of the enemy's, allowing you to strike the boss without fear.
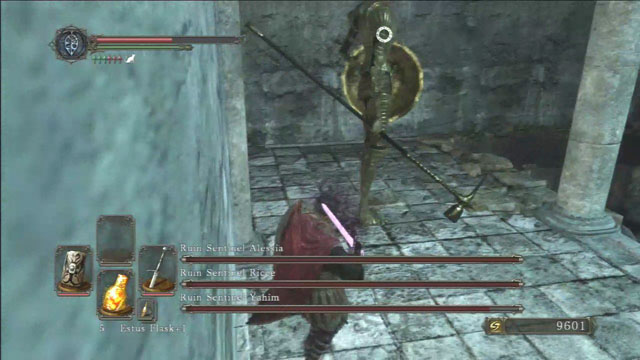 Ruin Sentinels
A group of three Ruin Sentinels, which can be a threat in a group, but alone they won't be able to do much. They are located in The Lost Bastille and are protecting a passageway to the further part of the location.
Try to fight one on one for as long as it's possible, standing on the platform where you've started the encounter. You can defeat the first sentinel this way without much effort - the only thing to remember is to keep your shield raised and attack after a successful block. Be careful when the boss falls down - she will jump up soon after it, performing her jump attack. After killing the first enemy, approach the wall and wait for the second one. Deal as much damage as possible, before the third one joins the fight. Afterwards, jump down to have more breathing space and focus on a single enemy.
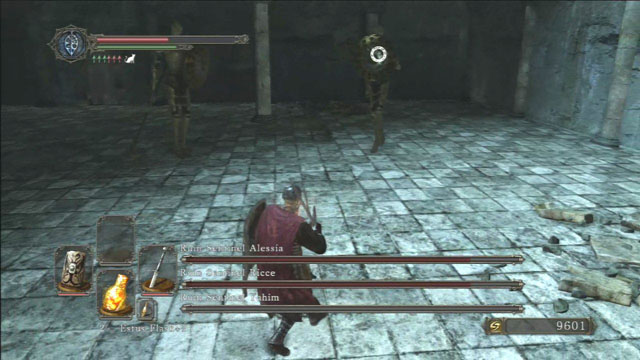 Focus on a single enemy.
You can summon a mage phantom, whose sign can be found on one of the cells leading to the arena.
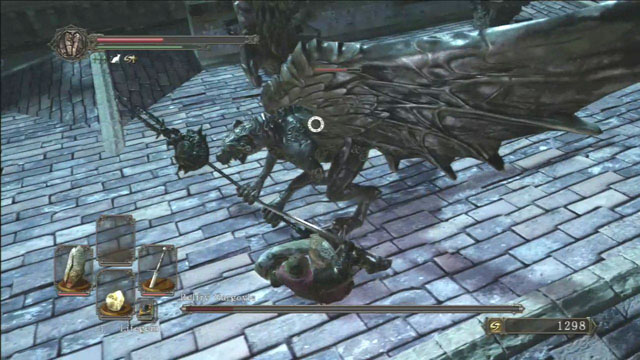 Belfry Gargoyle
To those who played the first Dark Souls game, the place and the enemy will be familiar. Gargoyles protecting the tower can cause some serious problems, because of their numbers and the lack of space to move freely. After the fight begins, you will face two enemies, however you will have to defeat six of them to win this fight. You should be careful not to fall down from the roof, as it will result in an immediate death.
The most important aspect of this fight, is to focus on one enemy only - if you start damaging all of them, it will result in you fighting six gargoyles simultaneously. Take advantage of the fat, that you're fighting only two of them at the beginning - rest of them will appear over time. Your best call to attack them is immediately after their swing or fire breath attacks. Fire breath lasts a long time, creating an opening for your attacks - you can hit him 2-3 times, provided that the other gargoyle won't attack you at that time. You should be careful not to fall down from the roof, as it will result in an immediate death.
 Victory!
The enemies have a really nasty and dangerous attack to their disposal - as soon as you notice that one of them raises his weapon into the air, get back as far as possible, as he will summon a magical discharge, which can kill you in one shot.
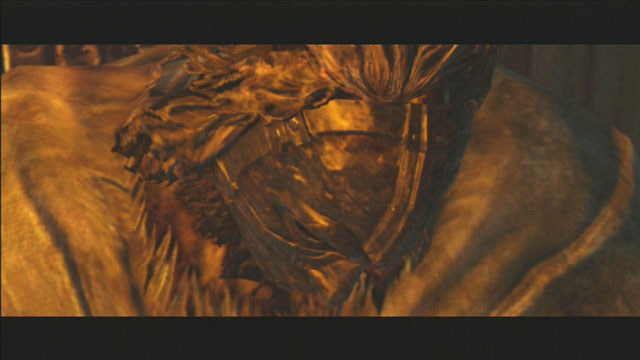 Lost Sinner
The Lost Sinner is one of the four main bosses of the game, which you must defeat in order to get inside the Drangleic Castle. He's wielding a heavy, two-handed sword, while being extremely fast and agile. To ease the fight, you can light up the lamps, which will illuminate the arena.
The most important thing during this battle is patience. Circle around the enemy, with your shield raised all the time and attack him 1-2 times after he attacked himself - afterwards, get away from him to refill your stamina. You can't attack him all the time, as you will run out of stamina and the enemy will kill you in an instant with his series of attacks. Use the automated targeting, because the boss is extremely mobile and can disappear from your sight if you're not careful.
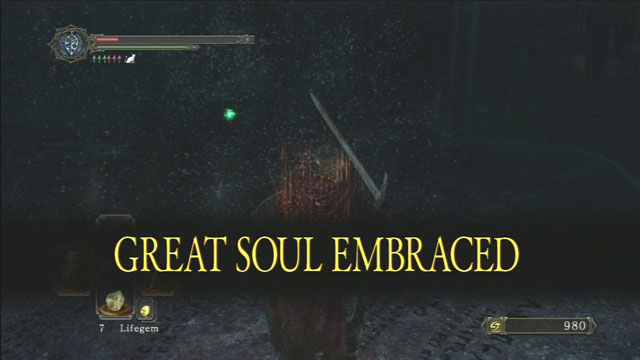 One of the four main bosses of the game.
You can summon Lucatiel of Mirrah to aid you in the fight - her sign is located by the elevator. To ease the fight, you can light up the lamps, which will illuminate the arena. They are located behind the grating, just before the mist. You can open it up by using the Bastille Key, acquired after your fight with the Gargoyles.
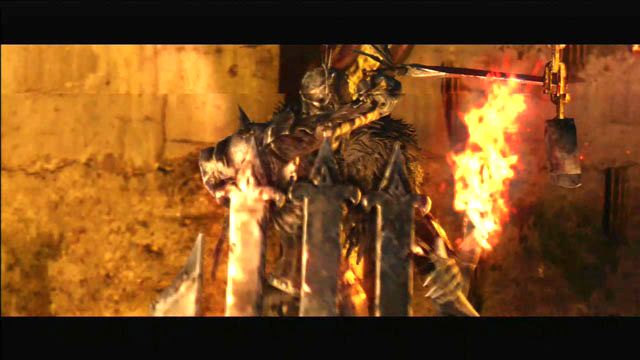 Executioner Chariot
Executioner Chariot is a boss who can be encountered in Undead Purgatory. This is not a typical opponent, since it moves around the arena on a chariot with a cursed horse. Another problem is that the chariot has blades attached to its wheels, so you have to hide from it in special aisles. There are also skeletons and two mages running around the arena, so you should fist take care of the mages, then the skeletons, and at the very end the boss himself.
The entire fight takes place on an unusual arena, or in the corridors of a circular shape. The chariot goes around the entire room. You can protect yourself from the blades attached to the wheels by hiding in special aisles. Skeletons may be another problem during the fight. When you knock them down, they get up again after a moment reanimated by mages hiding in the aisles. First, defeat the mages and then the skeletons. Only then can you safely proceed to the fight proper.
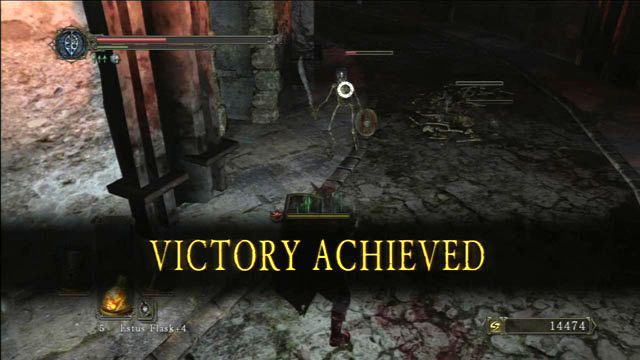 Victory
When you clear the arena of the enemies, run to the raised grille and pull the lever to lower it again. The speeding chariot will hit it and get destroyed. The last thing to do is to defeat the cursed horse. The best way to do that is to circle around him with a raised shield while trying to remain at its side all the time. The enemy cannot attack you from that position, so with a little bit of concentration you can end the fight without taking any injuries.
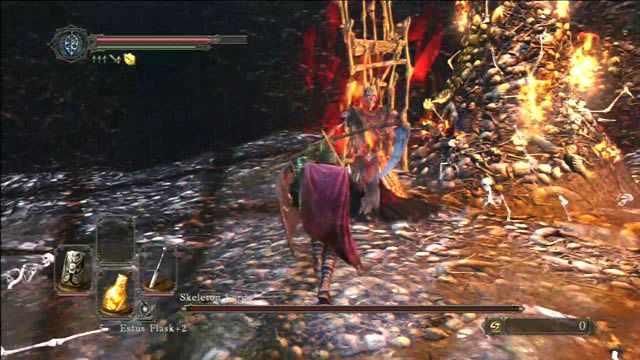 Skeleton Lord
This is a very unusual battle. This boss is made up of several lesser opponents, namely three lords, minor skeletons, and Bonewheel Skeletons, that is skeletons who can transform into wheels with spikes. All the opponents have one mutual health bar. The large number of enemies in one place and a limited field of action may prove to be the major difficulty in this fight.
When you start the fight, first attack the lords. Their fiery attacks can inflict a lot of damage, but they are not difficult to beat due to the small amount of hit points. After defeating the lords, take care of the minor skeletons. The best way is to circle around the arena with a raised shield and repel their attacks. At this point, you have to pay special attention to the stamina level of your character. Skeletons are pretty fast, so when can no longer defend yourself with a shield, they will be able to inflict high damage on you.
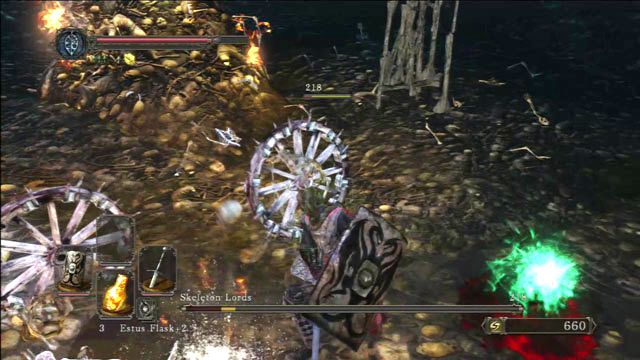 Bonewheel
Finally, you have to fight with the skeletons that transform into wheels and speed around the arena. This is stage is quite difficult, as you may be attacked by the skeletons from four sides. It is best to stand against the wall and jump away from their attacks. Deliver blows when they stop at the wall and kill them all.
 Covetous Demon.
The Covetous Demon is probably the easiest, and the ugliest, boss in the entire game. It's basically a huge, slimy worm, with a slight problem with his teeth. You can easily defeat him without suffering any injury - all you have to do is to focus.
Victory!The method to defeat this boss is fairly simple. During the whole encounter, you have to be on the boss' side - hit his torso and don't lead to a situation that you are fighting him face-to-face. As soon as the boss starts twisting his body, it means that he's preparing his rolling attack - all you have to do to avoid it, is to just sidestep or move away from him. Additionally, you can use your heavy crossbow to shoot down the vases located above you - a couple of prisoners will fall from them, attracting the boss' attention, which should give you a breathing room.
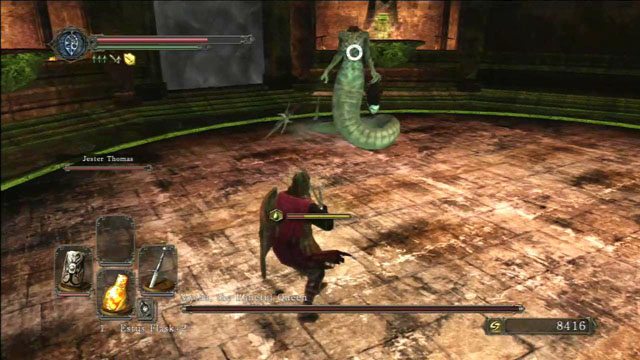 Mytha.
Mytha is a half-woman, half-snake, which you will encounter in the Earthen Peak. She's equipped with a spear and her head. By default, the whole arena is filled with poisonous swamp - not only that it poisons and damages you, it also heals Mytha as long as she's standing in it. To get rid of the poisonous swap, ignite the windmill near the bonfire, which should stop the whole mechanism in this location.
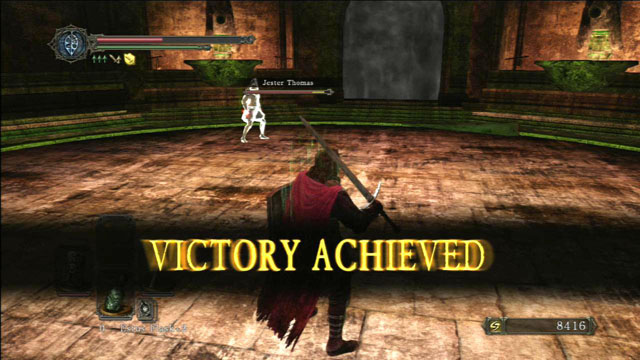 Victory!
The most important thing to do before the fight, is to ignite the windmill. This way you will avoid wading in the toxic swamp, which drains you of your health, healing Mytha in the process. Additionally, Mytha is vulnerable to fire-based attack, so pyromancy or a weapon with a fire attack would be ideal to deal with her. The best tactic is to circle around her with your shield raised and attack whenever she is resting - or to attack her from behind.
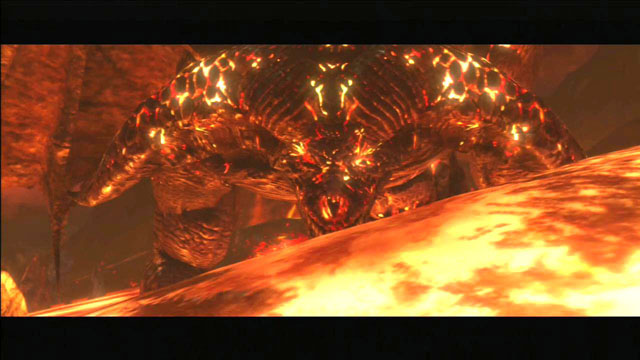 Old Iron King
The Old Iron King is the second one from the grand four bosses you must defeat in the game. His element is fire and the fight takes place in this scenery, which is why you should be extra careful of your steps. The King is a rather slow foe, but his attacks have a long reach - it's advised to equip yourself with some fire protection in advance.
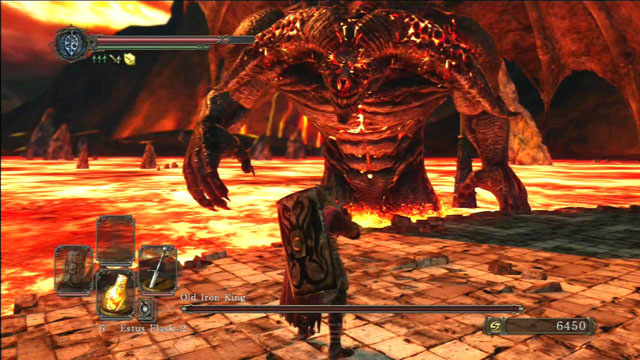 Old Iron King.
First things first, try to set the enemy in a convenient way. Before the King emerges from the lava, hide behind the building you just came from. After a few moments and a couple of fruitless attacks, the boss will submerge in the lava again. Position yourself on the "coast" near the building - this way the King will emerge in this area, giving you a lot of breathing room. Attack only after the enemy - for instance, when the enemy starts his fire beam attack and his hand is stationary. Run straight to him, hit him once and retreat immediately. Use this tactic during the whole fight and you shouldn't have any problems defeating him.
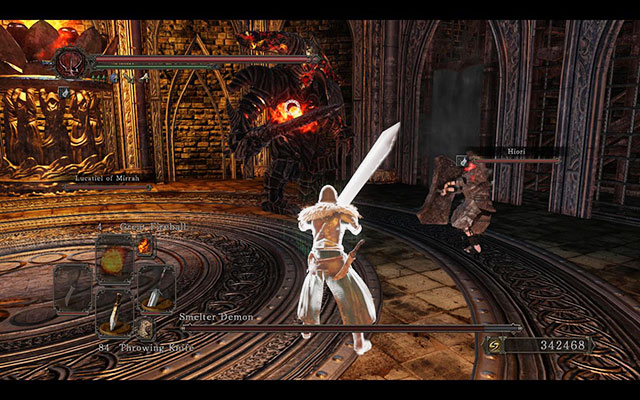 Victory!
Smelter DemonSmelter Demon is an optional boss guarding the passage to one of the bonfires in Iron Keep. He is considered one of the most difficult bosses in the game so it's advisable to ask other players for help or go back to fight him later, when our hero is stronger.
It is quite a large opponent and the arena is small. He moves rather slowly, but his attacks are fast and his weapon has a large range. Additionally, Smelter Demon is highly immune to fire, so fire based attacks and pyromancy will not be very useful here.
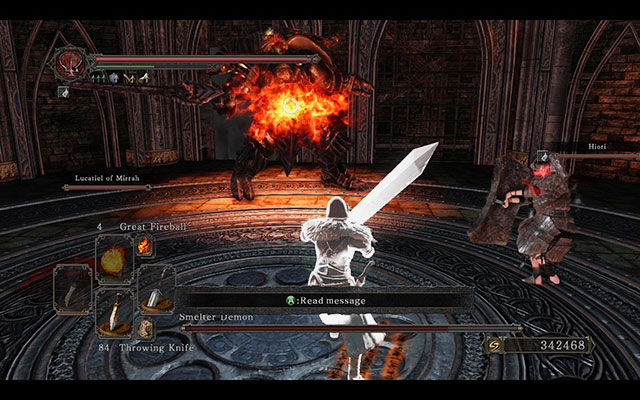 The second phase
Start with preparing yourself to the battle well. Get some equipment with high resistance to fire (Flame Quartz Ring, Hexer's Set). You can also use items like for example Small Orange Burr, or spells (Flash Sweat, Magic Barrier).
Smelter Demon has a lot of armor, so magic classes will have it easier here. The arena is small and the range of his attacks is quite large, so you have to be on the move all the time. If you're fighting on distance, try to stick to his flanks. Avoid his attacks and perform yours only during the short brake after one of his strong skills, like for example Jumping Plunge. You should be able to defeat him quite quickly by using spells or miracles. If you're using a bow, prepare magic arrows, as they deal the most damage in this fight.
This fight may be a bit more difficult for melee players. His attacks are very powerful and difficult to dodge. Always try to roll leftwards. By doing so, you have more chance of dodging an attack. If you have to block his attacks, equip a medium shield at least, preferably a greatshield. Perform your attacks immediately after his and try to stick to his flanks to get a few seconds for dodging or blocking. The only exception is Jumping Plunge. After landing, the opponent will take a short brake. It may look like a perfect moment to strike, but don't do that. Run away from the Demon as far as you can, because when you come near him after the landing, you will be hit by a strong explosion. It may even kill a hero with full health.
The last thing worth mentioning are his special "reinforcements" during the fight. He performs them two times, depending on the damage taken. During the first reinforcement, the enemy starts to roar and enhances his fire, which adds a little AoE damage. During the second one, he stabs himself in the torso setting his sword on fire, which greatly increases the damage of it. All damage dealt by the player when the boss is changing his stance are reduced by half.
This fight is a peculiar one, which may be either very easy or dauntingly difficult. Instead of one enemy, you have to fight with a horde of giant rats that can bite you to death. Small arena and a lot of obstacles make it even more difficult.
Before the fight, it is good to obtain items that protect from petrification and poison, like for example Ash Knuckle Ring, Poisonbite Ring, Common Fruit or Poison Moss.
Just after stepping through the fog, the health bar will appear and a few seconds later, hordes of rats will start coming from the holes in the ceiling. It is very important to stay on the move in this fight. Although the rats move rather slowly, they can circle a player who will stand in one place. Try to make rounds from one fog to another (located opposite the entrance). When you reach one of the fogs, turn around and kill some of the nearest rats and then run towards the other side. After killing 10 enemies, the main enemy - Royal Vanguard will jump through the hole. He is similar to other rats except for brown Mohawk haircut and a bit larger ears. You have to focus on this particular enemy, because regular rats will be coming constantly. Killing him shouldn't be difficult if you have spells or ranged weapon. Melee fighters will have to slash their way to the boss or try to lure him out of the horde by making the rounds mentioned earlier.
If you have AoE spells like Flame Swathe, Firestorm, Soul Appease, you can end the fight very quickly. Just gather a large group of rats in one place and launch the spell. To the same with the boss.
 The Rotten
The Rotten is one of the four bosses which souls you have to collect. It consists of hundreds of corpses squeezed together, which makes it resemble a rotting silhouette. It is rather slow, but its attacks are very powerful and have a large range. It performs them with a giant Butcher's Knife, which it holds in his right hand. Both the right and the left limb can be cut off with melee weapon, thus preventing it to attack. However, its hands grow back after some time.
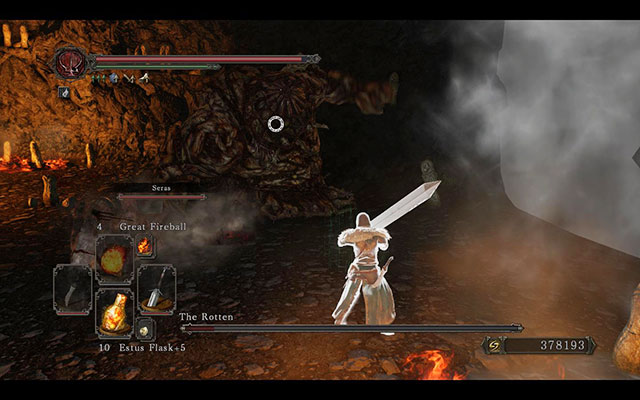 The Rotten swinging his knifes
The Rotten has low resistance to lightning damage, so it's good to have a weapon dealing it. Its attacks may be slow, but they deal a lot of damage and are difficult to block, so you should wear lighter armor for faster movement and better regeneration.
This fight should be rather easy for ranged fighters. You just have to stay on the move and stick to the centre of the arena, because you might fall into lava. The greatest danger are the AoE attacks, so always be ready to perform a few rolls. Every type of magic will work during this fight, but the best choice are lightning based spells like Heavenly Thunder or Lightning Spear.
Melee players have to have a bit more patience. Dodge its attacks and use the long pauses between them to hit a few times. Try to circle the enemy after its attacks, to obtain a few additional seconds for dealing damage. Additionally, if you use a weapon with a large range and can attack from above your head, you can try to cut off its hands, which will greatly decrease his power. Attack normally using left or right hand, without Lock-On.
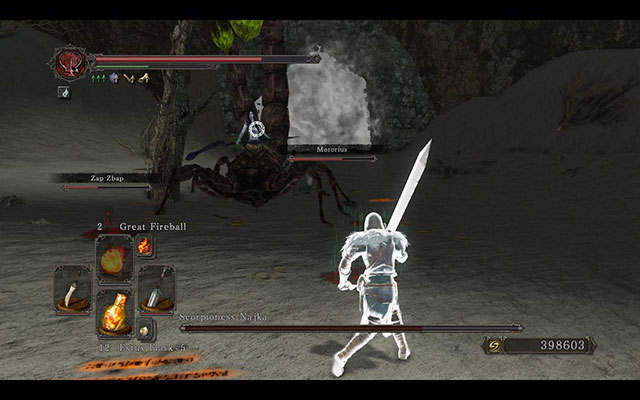 Najka is ready to fight
Najka can be found in Shaded Ruins. It is a merging of a woman's body and a scorpion, which allows her to perform incredibly poisonous and deadly attacks using two tails, as well as use powerful ranged spells. Although her attacks deal a lot of damage, most of them are easy to avoid.
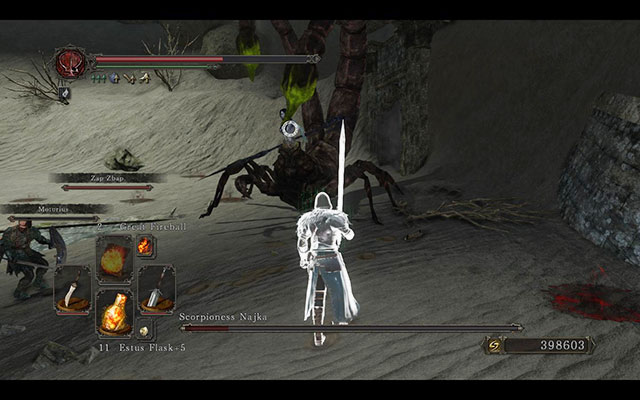 Najka pushed into a corner
Before the fight, you should prepare something that deals fire damage, as Najka is vulnerable to this element. Pyromancy, fire arrows and weapons with fire damage will e perfect for this encounter. Additionally, you can take some Poison Moss with you, because some of her attacks can cause poison effect.
In comparison to other bosses, it is a rather easy fight. Although the opponent's hits can deal a lot of damage, they are easy to dodge and cause long pauses for performing attacks yourself. No matter how you fight, try to stay close to the enemy. If you get too far from her, she will start using powerful ranged spells that are more difficult to avoid than her regular attacks. Dodge or block her blows, and then try to counterattack or cast spells during the pauses. If she burrows into the ground, pay attention to the movement of the sand. If she gets behind you, perform a few rolls to the side immediately to avoid her jumping out. The rest of her attacks shouldn't cause you trouble.
The next rat boss, but this time a lot bigger. Royal Rat Authority is an optional boss in Doors of Pharros. It is an incredibly quick giant rat, which can deal with a careless opponent with only a few attacks. What's more, it has its own small regiment of rats, which help him at the beginning of the fight and give a hard time to the player.
Attacks:
This boss has rather low resistance to fire, so weapons and spells with this kind of damage will be perfect.
The most important thing at the beginning of the fight is to eliminate 4 smallest rats as fast as you can. Only after attacking smaller enemies will the boss jump down onto the arena. Get rid of small rats, preferably using AoE spells like Firestorm, Chaos Storm or Lingering Flame. When you've done it, focus on the main enemy. Watch his moves closely and perform dodges in advance, attacking only after he attacks. Its size and speed allow it to get close to you and hit in only a few seconds. IF you fight using melee weapon, try to stay close to it and hit his paws. Be careful however, because from time to time it will raise the paw that you attack and perform a stomp.
When the enemy's health is low (below 1 of health bar), it will perform a very dangerous attack, which is spitting a large amount of acid. This attacks deals serious damage to you and your equipment. Be patient. When you see that the boss is preparing this attack, don't try to finish him at once. Run away from his head and focus on hitting its back paws. This way you should be out of his reach, at least for some time.
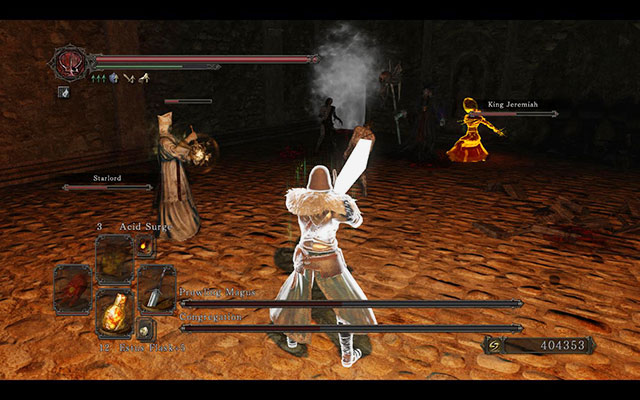 Mage and Cleric still alive
It is the first of two boss fights in Brightstone Cove Tseldora. Instead of one enemy, you will have to face three of them and multiple lesser undead. The opponents here are not very different from usual enemies that you meet during your journey, but the difficulty here is the number of them.
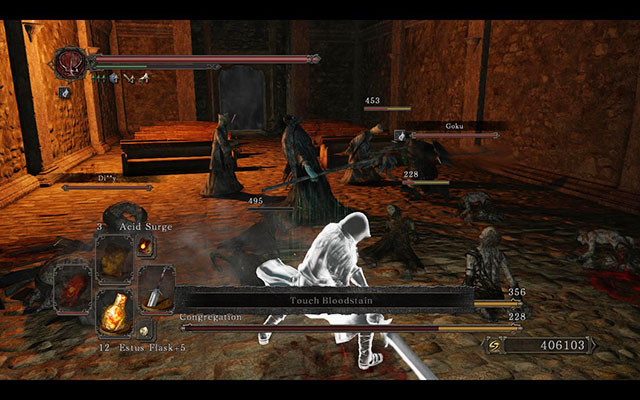 The group after some slashing
This fight is really easy if you use strong AoE spells like Firestorm/Chaos Storm, Souls Vortex or Soul Appease. All you have to do is to run into the centre and cast them a few times. Chances are you will win the battle immediately or, if not, you will at least eliminate all the lesser enemies.
If you don't have such spells, you will have to defeat the enemies one by one. Try to ignore the zombies and focus on killing the two clerics, as the can cause you the biggest trouble. Watch the area around you, because you can easily get circled, which may end tragically. When you eliminate the clerics, make your way towards the mage and finish him with a few accurate hits. After he's dead, you just have to get rid of the rest of the undead.
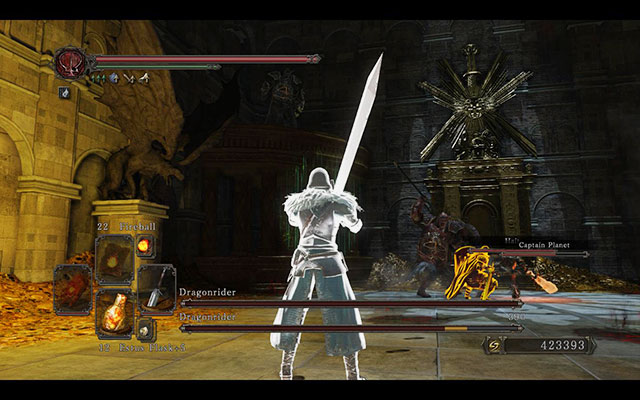 Sweet Freja
Freja, additionally to being a giant two-headed spider, is the Duke's favourite pet. She is also the last boss whom soul you need to obtain. Besides here enormous size and variety of attacks, Freja has her own swarm of spiders, which helps her at the beginning of the fight. Overall, this fight is very dangerous, so it is advisable to summon a phantom, whose summon sign you can find near the fog entrance, or another player.
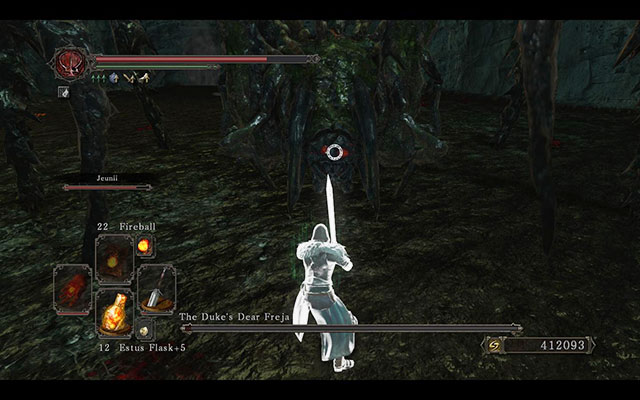 Spider under attack
Similarly to the royal rat, this boss has its own minions that will give you a hard time at the beginning of the fight. After stepping through the fog, run towards the other side of the arena and start to eliminate the spiders. Some of them will respawn from time to time, but it shouldn't be a problem. It is important to get rid of the first group.
There is one very good universal strategy for this boss, which works for all styles of playing. When you deal with small spiders, start to attack one of her heads immediately. After some time she will perform a special attack. Usually it will be Web Spit or one of the attacks with pincers or legs. As soon as you notice her preparing to do that, perform a dodge and hide between her first and her second leg, close to her body. Here you practically cannot be hit, except for when she jumps up. Right after the attack, go back to the head and hit as many times as you can, and then repeat the process. The head will fell down when you deal sufficient amount of damage and you will have to move to the other one.
Above, Dragonrider with a bowAnother fight with an enemy whom you already know. This time they appear in a duet. One of them is a melee fighter who uses a shield and a halberd and the other one begins the fight on a platform, holding a bow. If the health of the first one falls beneath 50%, the archer will jump down to the main arena and will start to fight with a halberd as well.
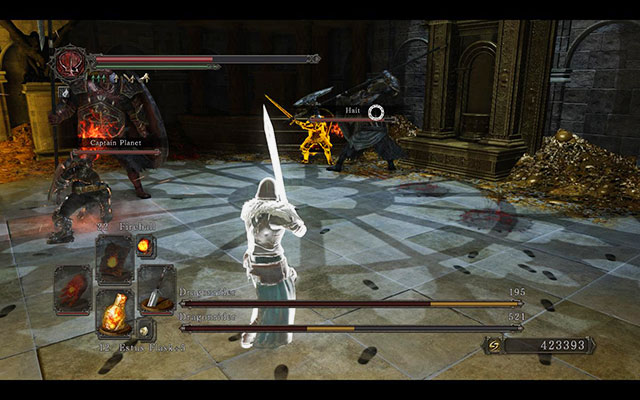 Dragonriders with halberds
The fight is relatively easy and doesn't require much preparation. These enemies are vulnerable to poison effect, so it's good to wield some poisonous weapon like Poison Throwing Knifes.
If you fight using ranged weapon or have some other option of attacking from distance, focus on the archer first. He has less health points and killing him shouldn't be a problem to you. As to the second opponent, avoid his attacks and perform yours during the pauses. He should fall on the ground after a dozen hits or so.
Melee fighters should focus on the Dragonrider with a halberd first. Bring his health to a half, dodging the arrows at the same time, and the other opponent should come down to help his companion. Get rid of him and then go back to hitting the first one.
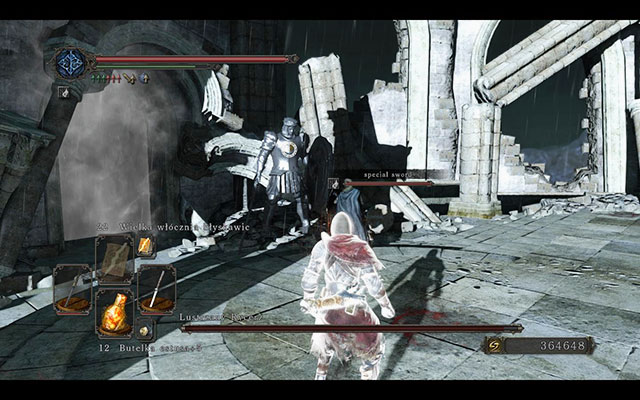 Our companion is looking at himself in the mirror
The second boss in Drangleic Castle. He fights using a sword and a large shield that has two interesting effects. The first one reflects spells of all kinds, if they hit the shield, and the second one summons an NPC or a player that will fight on the boss's side.
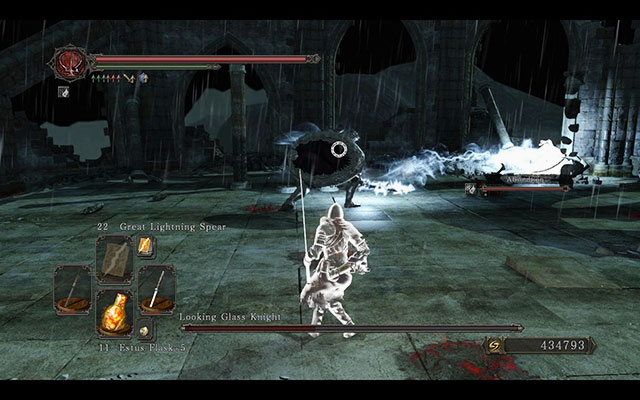 Looking Glass Knight's charged sword
His attacks can deal quite a lot of damage, but they are rather slow and easy to avoid even without rolling. Try to stay behind his back, a little to his right side and you shouldn't have any problems with dodging. Attack in two situations: when he is charging his lightning attacks and immediately after he finishes one of them. Don't try to hit too many times, because you may not have enough time to dodge.
The main danger however is no the boss himself. It is his special attack that summons NPCs or players. When you see that the enemy hits the ground with his shield and starts the summoning process, begin to attack him from a close distance to throw him off balance and interrupt the spell. If you don't manage to do that, focus on the summoned enemy and eliminate him as fast as you can, so that you wouldn't have to fight two enemies simultaneously.
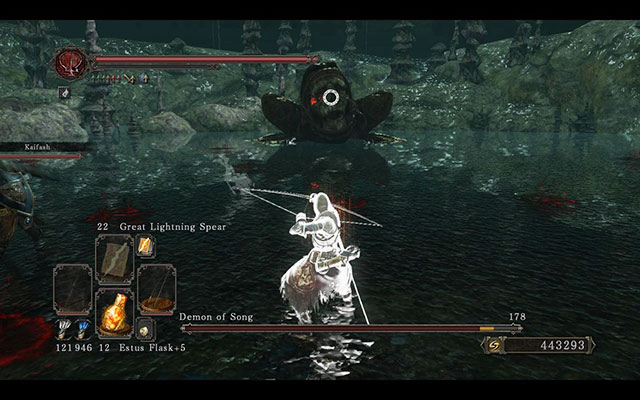 Demon of Song under attack
Demon of Song is the only boss in Shrine of Amana. It resembles a giant frog with a demonic head and arms sticking out of its mouth. It is one of the easiest fights in the game, but, as always, a moment of carelessness can cost you a lot.
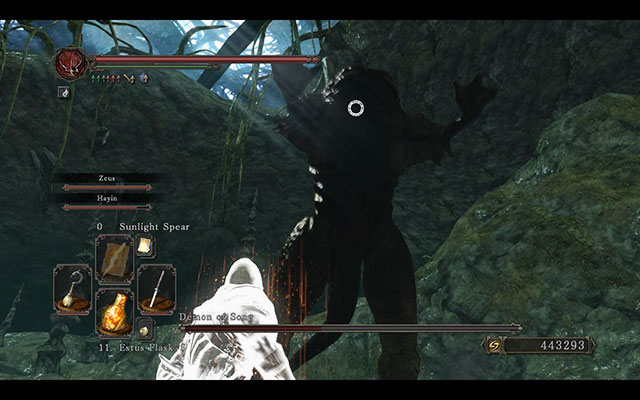 Demonic frog's daring jump
If you're a melee fighter, run towards the enemy right after the beginning of the fight and stand in front of him, approximately at the distance of his arms. Wait until he performs his attack (usually two arm sweeps), and then quickly run close to his head to hit a few times, go back and repeat the process. If the enemy jumps backwards, run after him and attack as soon as he lands. Instead of the head, you can also attack his arms, but only when he's not covering himself.
Ranged fighters should use a similar strategy. Place yourself a little farther from his hands and attack when his head is outside. Watch out for his attacks and keep a safe distance. If you get too far away, the boss will start using his water attacks. When that happens, make a roll to dodge them, get closer to the boss and continue attacking.
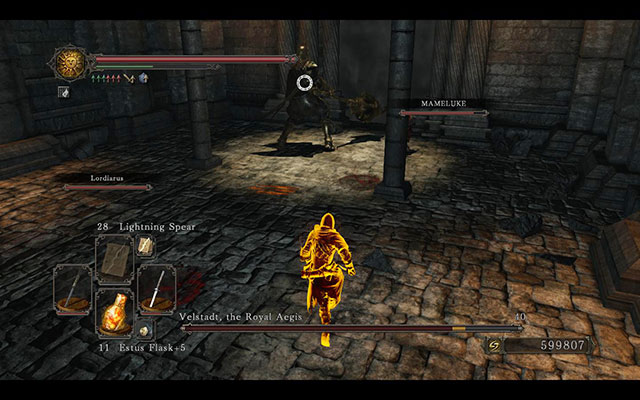 Velstadt, the protector of the dead king
Velstadt is king Vendrick's personal guardsman. Although he doesn't use any special powers, he is incredibly strong. He has sworn to protect his king and he will fulfill his promise even after his death. Defeating him is crucial for the plot, because he is guarding a key, which opens several passages in the game's world.
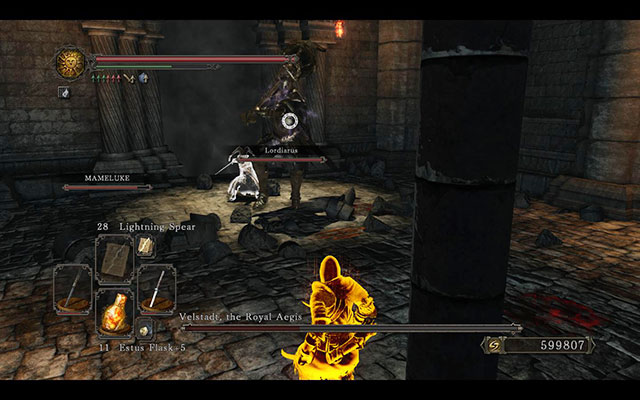 Black magic mode
This fight consists of two phases that depend on the health of the boss. As long as he is above 1 of his health bar, he will fight on short range. After his health drops below 50%, Velstadt will start using spells, especially if you get far from him.
His normal attacks are rather easy to avoid. If you have enough endurance and a strong shield, you can try to block them as well. Perform your attacks during the pauses between his. He usually hits two times, but sometimes a third attack ensues, which is a thrust with his hammer, so always be ready to perform an additional dodge. Below 50% of health, the boss's resistance to magic and dark damage increases and he will start using spells. You can easily make an advantage of that. Go back a little and wait until he begins to charge a spell. When that happens, run close to him and hit a few times. You can repeat this strategy until his health bar comes to zero.
Undead king Vendrick is a hollow who wanders around his crypt. He is an optional boss, which means that he won't attack the player right away. The hero has to hit him a few times to begin the fight.
The undead king has a special form of protection, which reduces the damage that he takes. You can use three ways here.
The strategy below assumes that you have collected five Giant Souls or fight right after defeating Velstadt.
The moves of the enemy are slow and easy to predict so you should have no problems staying behind his back. Stick a little to the right and perform your attacks. Most of his blows should not reach you. However, he may sometimes jump back and perform an attack from above his head, so be ready for such situation. If that happens, dodge, and then go return behind his back to continue hitting. After a short while his health bar should come to zero.
Guardian Dragon is really a red wyvern locked in a cage in Aida's Keep. His tail can be cut off with a few accurate hits, but it doesn't bring any special profits, except for making the fight a little easier.
Right after the fight begins, run close to your enemy and place yourself behind his head, either on the left or the right side. Avoid his attacks and hit during the pauses between them. Don't stand directly behind him as he might attack you with the tail. If you have a big enough weapon, you can try to cut it off. This way you will deal a lot of damage and ensure better safety. Watch out also for his fire attacks. Fire Breath is rather easy to avoid, as long as you stay next to the head or at the back. The second attack is more dangerous. When you see the boss flying up, immediately run under him to get far from the centre of the arena. This way you should be able to dodge the fireball.
Ancient Dragon is an optional boss and the fight with him can be very demanding due to his powerful fire attacks. He is kind of a Guardian Dragon in XXL version. You have to hit him 3-5 times to begin the fight. Killing him doesn't count as a sin.
This boss fight is very demanding. It requires a lot of experience, reflex and patience. A little luck might be useful as well. There are two different ways to prepare yourself to the fight. One of them is to take off your whole armor to speed up regeneration of stamina. Practically every one of the boss's attack will kill you right away, even if you're wearing your armor, so there's no point in wearing anything besides rings and weapon. The second option is to stack as much fire resistance as you can, preferably around 600-900. It is quite difficult to achieve and requires a lot of items and a few spells, but you will be able to survive some of the fire attacks. Also prepare a lot of spells, arrows and a few good weapons, as the fight may last for quite a while. The dragon has a lot of health and bringing it down requires patience and dealing rather high damage.
Cast all the available buffs and use the items that you need, and then approach the dragon. Hit him a few times until the health bar appears and run close to his left hind leg. Place yourself on the left side of it and begin the proper fight. Attack 2-3 times, not more, and always in that particular place. Don't attempt to attack other parts of the dragon, eve if you have the chance. You can only try to do it analogically with the right leg. When the opponent raises the paw that you're currently attacking, make two rolls away from it. After the stomp, go back to attack the paw. If the dragon starts to move his wings, stop hitting him immediately and go underneath him, watching his tail. When he raises, run towards the end of his tail to avoid the fire breath. Watch out not to stand under on of his legs when he lands. Return to the same paw and continue. Observe the moves of the dragon closely and perform dodges on time and you should manage to win the fight.
Giant Lord is a boss important in terms of the plot and can be found in Memory of Jeigh. He is the leader of giants, bigger, stronger and faster than usual. He also uses an enormous sword. After defeating him, you will receive Giant's Kinship, which is necessary for unlocking the path to the final boss.
Wait until all the bombs land and approach the boss. Place yourself near one of his feet, preferably the left one, and hit a few times. When you see him raising his foot, make a dodge immediately. Practically, this is the only attack that you can be hit by when standing near his foot. Attack 3-4 times and then dodge to avoid being crushed. Always have a little stamina left to perform the roll. Additionally, Giant Lord is vulnerable to fire damage, so if you happen to have pyromancy spells or an enchanted weapon, it is a very good moment to use it.
Two servants of the Queen Regent, who guard the passage to the last boss. They can be really irritating, due to their ability to revive each other. When the health of one of them is reduced to zero, he will not die, but instead he will fall on the ground and after about 20 seconds, he will be revived by his other companion, if you didn't manage to kill him during this time.
It's good to win this battle before fighting with Giant Lord. Otherwise, you will have to fight the final boss immediately after this fight.
The key to this fight is distributing damage equally between the two bosses. If you defeat one of them, he will be restored to full health after 20 seconds, unless you kill the other one in this time.
First, bring Throne Watcher to about 50% health, but not lower, because otherwise he will buff his sword. Ignore him for now and switch to Throne Defender. He has more hp than his companion and is a bit slower. Attack him, until he has about 10% of health. Switch back to Throne Watcher and bring him to about 10% as well. Now, prepare your most powerful attacks, because you will have to be quick. Bring Throne Defender's health to zero, switch to Throne Watcher and try to kill him, but remember that you have only 20 seconds to do that. After this time, he will start casting the reviving spell and you will have only about 3 seconds to interrupt it by throwing him off balance. If one of the is revived, you will have to start everything from the beginning.
Nashandra, Queen Regent of Drangleic, is the final boss in Dark Souls 2. She is a very demanding enemy and her attacks can kill in one hit. Moreover, she uses very annoying glowing orbs that can put curse effect on you and deal a bit of damage.
You should prepare well to this fight. Put on the following rings: Cursebite Ring, Dark Quarz Ring and Ring of Binding. The first two increase your resistance to curses and dark damage and the last one reduces health loss when turning into a hollow (to 85% instead of 50%).
When the fight begins, start eliminating the wisps. You just need to hit them with whatever you have, so its good to equip a quick bow and a lot of arrows. They will spawn throughout the whole fight, so you have to pay attention to them. Deal only with the wisps that are close to you and wait for the others to come nearer. Then, proceed to attacking the boss. Avoid her scythe attacks and use the pauses to hit 2-3 times. If you see her raising her hand to make a laser attack, prepare yourself to run or dodge. If the laser is released from beneath her legs, roll to the side, and if it is horizontal, run the other way. It covers about 1/4 of the arena, so you should be able to run away from it. Have some Lifegems and Human Effigy on your shortcut bar. If you are cursed too many times, use Human Effigy to reverse the negative effects and then use 2-3 Lifegems to restore health. Save Estus Flask for more serious damage.
Darklurker is an optional boss available for members of the Pilgrims of Dark covenant. To begin the fight, you have to first clear all three dungeons and light the beacons. At the end of the last location, the player will be teleported to the arena and the fight will start immediately. It's worth mentioning that if the player dies during this fight, he may try again. But every time that happens, he will have to clear the last one of the three dungeons, so he cannot start the fight right away.
The boss himself resembles an angel, has four arms and wears a hooded robe. He fights mostly using ranged spells, although he has some melee attacks as well. His spells are incredibly powerful, but they can be avoided quite easily. Additionally, after bringing him down to 50% of his health, the boss creates a clone of himself and you start to fight two opponents, who however have one health bar.
Darklurker is vulnerable to lightning and fire damage, so this fight may be surprisingly easy if you use a lot of miracles and pyromancy. When he is in the single form, avoid all his attacks and cast your spells during short pauses (enough for casting 1-2 spells). Use spells like for example Lightning Spears, Great Lightning Spears, Great Fireballs or Great Combustion, to bring his health to 50%. When his clone appears, lure the close to you and start casting all AoE spells that you have (Firestorm, Chaos Storm, Heavenly Thunder, etc.). This way you should win the fight in just a few minutes.
If you're not a class that uses a lot of spells, equip some powerful lightning/fire weapon or use Sunlight Blade and Flame Weapon. Also grab a solid greatshield. Try to dodge the attacks, block only in the last resort. Attack only during the pauses, especially when the enemy is opening some kind of a portal. Always have some stamina to perform 1-2 rolls. When the opponent summons his clone, focus on the one that will rush towards you. Usually one of them is a melee fighter and the other one casts spells from behind, but it is not a rule. If you have a big weapon, or one with special AoE attacks, use it to deal double damage by hitting them both simultaneously.
Dark Souls II, premiered on 11.03.2014 (world premiere), on 14.03.2014 (in Europe), for Xbox 360 and PlayStation 3. Personal computer players will be able to play the game on the 25th of April this year. In accordance with the official requirements, the game should have be easily run and computers with Windows 7, 4 GB RAM and Intel Pentium i3 processor. The NVIDIA GeForce GTX 465 GPU should also be enough to process the graphics without any problems. When it comes to the console versions, in accordance to the specialists of Digital Foundry the Xbox 360 version runs more smoothly than the one for PlayStation 3.
Singleplayer: Yes
Offline co-op (split screen/hot seat): No
Co-op over the internet: Yes, you can summon the other players to help you
Multiplayer: Yes, although unique. You can visit another player in his world and attack him. This also works the other way around.
The guide was drawn up basing on the Xbox 360 version of the game, which ran very smoothly. The lighting, especially of the Majula location, is impressive. Also, issues known from Dark Souls, when the frame rate dropped in Blighttown, do not happen here.

 Divinity: Dragon Commander Game Guide & Walkthrough
 Dragon Age: Inquisition Game Guide & Walkthrough
 Dragons Dogma Game Guide & Walkthrough
 Dead Space Game Guide & Walkthrough
 Devil May Cry 4 Game Guide & Walkthrough