Dungeon Siege III is a very interesting hybrid of cRPG and a hack'n'slash - highly acclaimed by both gamers and. Variation of interesting elements, common plot choices and a large amount of side missions - these factors will delight many gamers. Those are also the reasons behind this guide - using it you will be able to easily finish all the missions, draw pleasure from maximally developed characters and collect all the precious items.
- a thorough description of all main and side quests (47 missions in total);
- more than thirty maps with most important places and characters marked on them, including all treasures and secret passages;
- tables with plot choices together with their short and long-term consequences;
- a series of useful hints on ways of completing missions and carrying out dialogues;
- a description of the various plot paths and the influence that the players have on the ending;
MAPS
Map references have been marked in the following way: (Mx, y) where x marks the number of the map and y the position of that given map. For example (M3, 2) indicates that you should head to point 2 on map number 3.
All treasure chests have been marked on the maps using gold squares - remember that some appear only after certain moments in the game.
COLOURS
Special colour markings have been used in the test and on the maps to make navigating through the guide easier. Red is for NPCs and enemies, green for all sorts of items and levers, blue for quests and orange marks secret passages and locations.
GUIDE LAYOUT
Even though the game itself isn't split into acts, such division has been used in the guide to make it more legible. Critical plot moments serve as borders between the given parts. Thanks to it, navigation should be much easier.
Maciej "Czarny" Kozlowski
Translated to English by Jakub "cilgan" Lasota

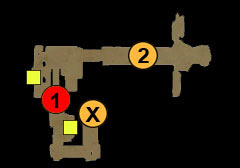
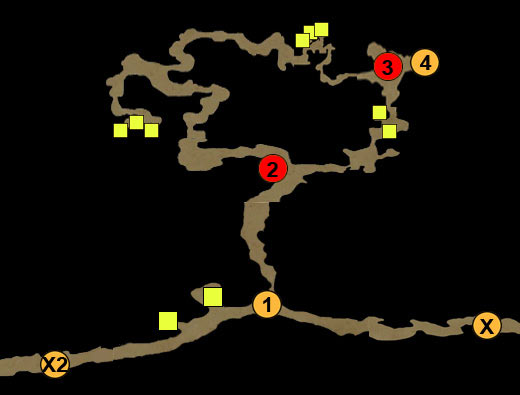
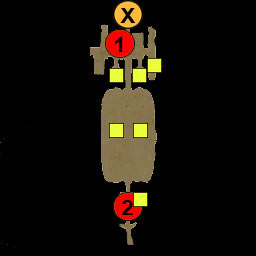
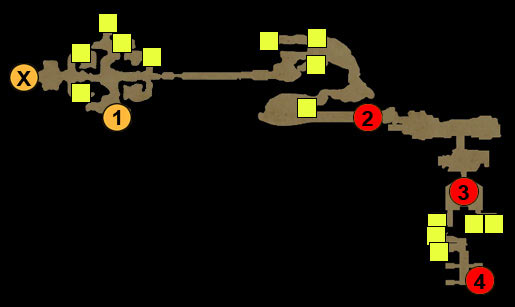
X - mission starting point
1 - Entrance to Montbarron mansion
2 - enemies
3 - basement entrance
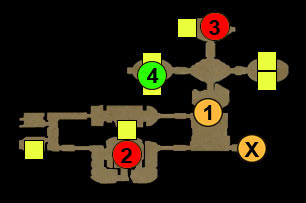
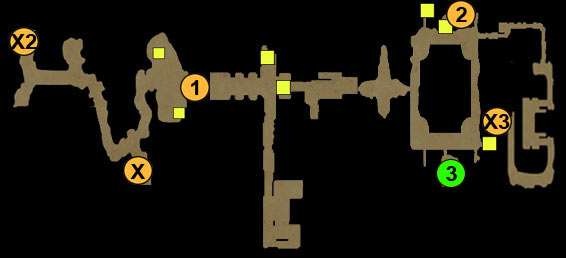
X - access from upper floor
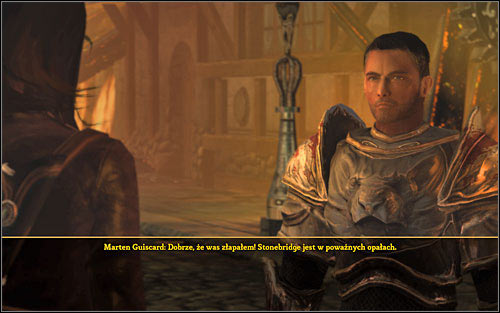
1 - Marten Guiscard
2 - bridge and gunpowder barrels
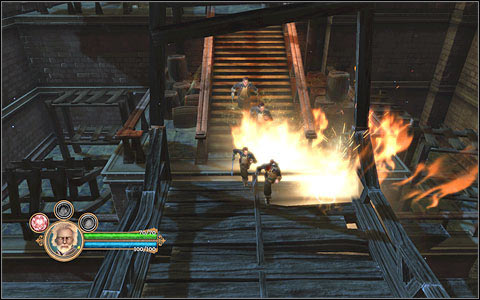
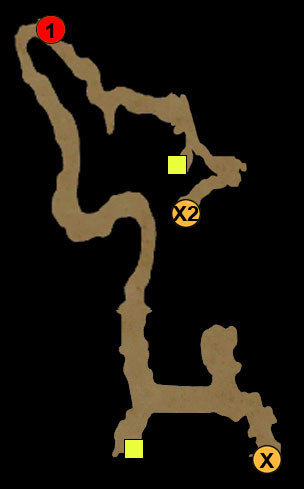
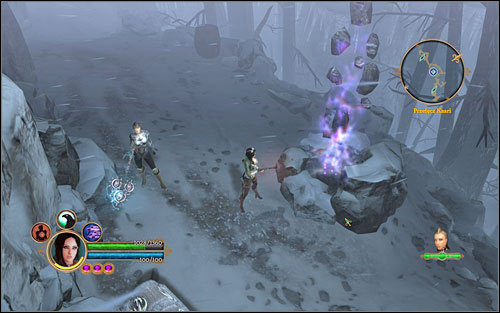
After you choose your character and difficulty setting and watching the intro movie, you will move to the game itself. Your first task (A Gathering in the North) is to reach the Montbarron estate - once you get there, it will turn out is that your destination is burning (M1,1).
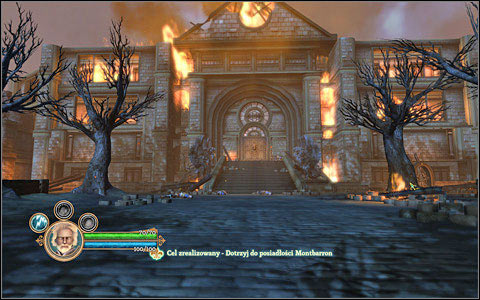 Darkness burning.
After going through the main door, take a good look throughout the rooms - you will find your first items on racks and in chests (M1). Go down the stairs, destroying barricades and collecting treasures. Beside the basement descent you will be attacked for the first time (M1,2), however the enemies shouldn't cause you any trouble. Go down to the basement (M1,3) where you will have to fight a group of enemies. After you get rid of the adversaries, Marten Guiscard (M2,1) will come and ask you to destroy the bridge - do it by lighting up three barrels (M2,2).
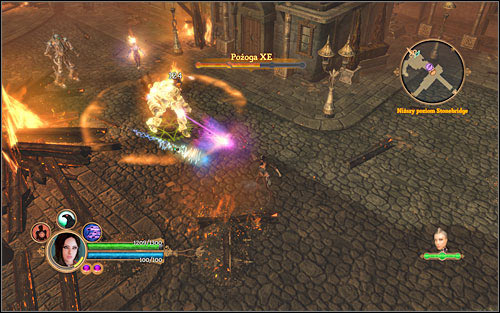
 Everything is better with explosions.
The prologue ends at this points and you will be moved to the Pilgrims' Road (M3).


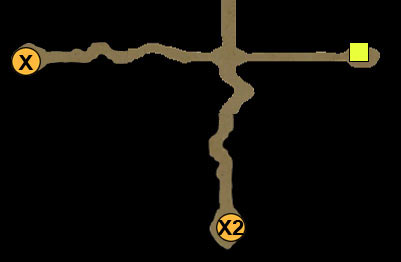
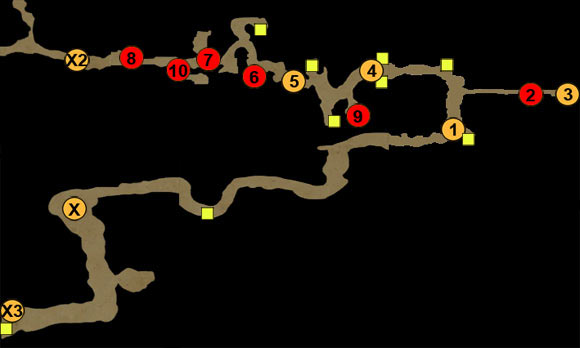
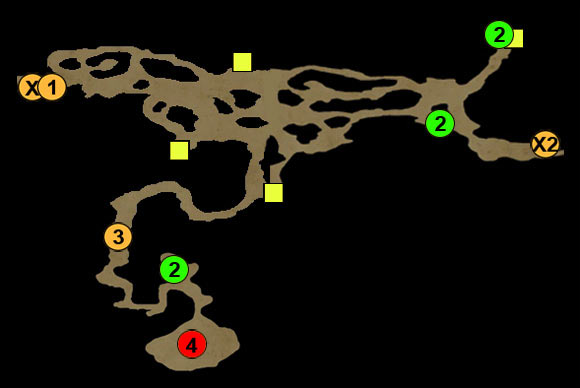
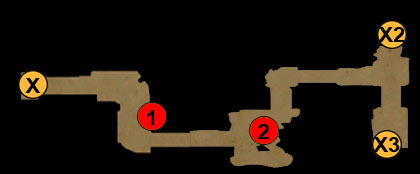
X - start of the journey
X2 - passage to West Forest
X3 - passage to Gunderic Manor and Swamps
1 - Lescanzi camp (after going to the Legion Chapterhouse you will meet Florina here, who will give you The Unlucky Merchant)
2 - enemies on the bridge
3 - Legion Chapterhouse (see M4)
4 - second Lescanzi camp
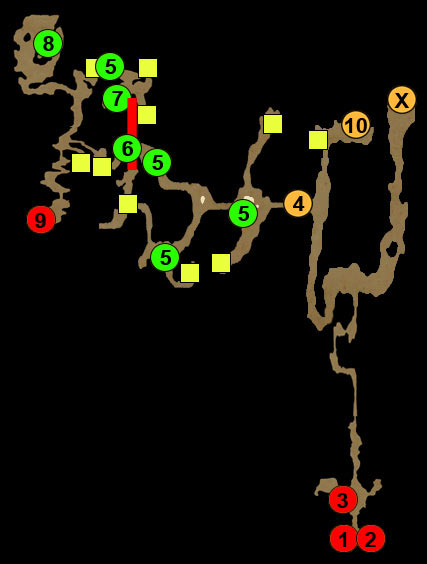
5 - Entrance to Raven's Rill
6 - Ludmila (Widow's Revenge)
7 - Katarina or Andriej (The Search for Survivors)
8 - Yacob (Fishing Hole and Unanswered Questions)
9 - River monster (Fishing Hole)
10 - Grigori (Unanswered Questions - only after finishing Fishing Hole)

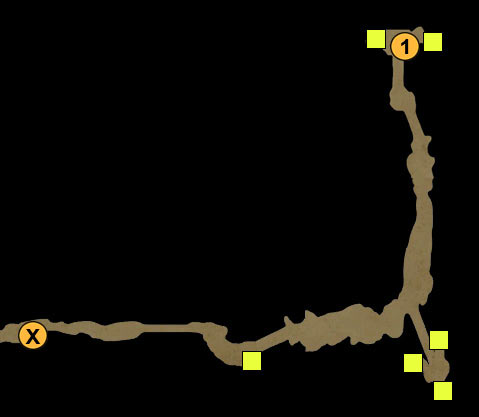
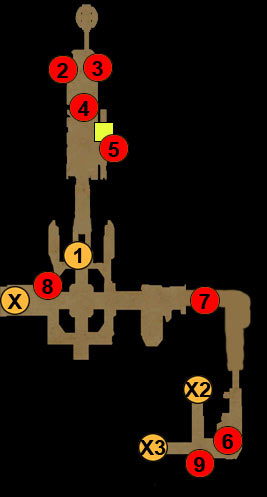
X - chapterhouse exit (leads to Pilgrims' Road, check M3)
1 - Odo (The Search for Survivors and Unanswered Questions)
2 - spiders
X - passage to Raven's Rill
X2 - passage to Gunderic Manor
1 - crossroads
2 - Leona (The Search for Survivors and Gunderic Manor)
3 - witch Vera
4 - cages with Armand and Anjali or Lucas (The Search for Survivors)

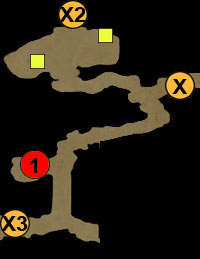
X - passage to Pilgrims' Road
X2 - Heroes' Crypt (you will receive the gate key after The Battle for Raven's Rill)
X3 - collapsed bridge (will be repaired after The Battle for Raven's Rill)
1 - Boris (Widow's Revenge)

X - West Forest
X2 - passage to Gunderic Library of Arcana
1 - Manor entrance
2 - sign
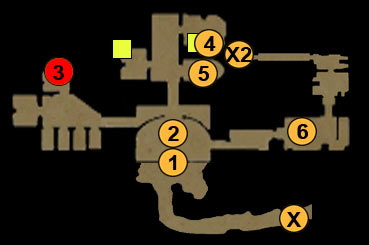
3 -Alisa Gunderic's ghost (A Wayward Soul)
4 - secret passage behind the bookshelf
5 - magic door and lord Gunderic's office
6 - east wing
X - passage to the upper floor
1 - broken lock
2 - the wizard and colossus
3 - Lord Gunderic (Gunderic Manor)
4 - Nagog's heart (A Wayward Soul)

X - Entrance to the Chapterhouse
X2 - passage to the Mournweald forest
1 - corpse (A Loss for Words)
2 - lost books (A Loss for Words)
3 - shadows cavern
4- Niko and the spider (Hiding Out)

X - passage to East Forest
1 - Lord Montbaron's corpse
X - portal to the Chapterhouse
X2 - passage to the cemetery

X - portal
1 - hidden treasure room
2 - witch
3 - Rajani (The Battle for Raven's Rill)
4 - Lazar (The Battle for Raven's Rill)
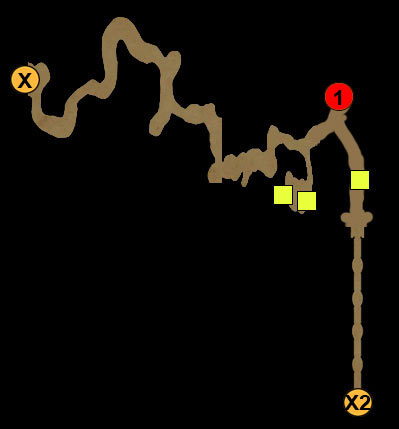
After running from the Montbarron Mansion, you will reach the Pilgrims' Road (M3) - your task is to reach the Chapterhouse (M3,3). Follow the only possible path, taking a look inside the Lascanzi camp, where you can find three treasures (M3,1).
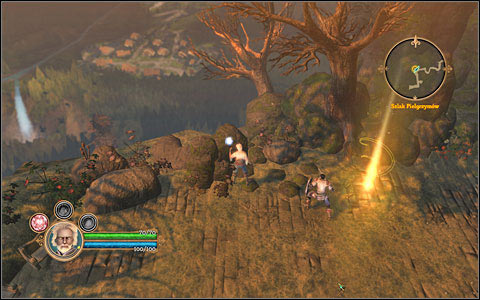 Raven's Rill visible in the distance.
Afterwards head to the bridge, where you will have to fight a few enemies (M3,2). However before you go to the Chapterhouse (M3,3), it's worth to pay a visit to the second enemy camp (M3,4) where you will find some valuable items as well.
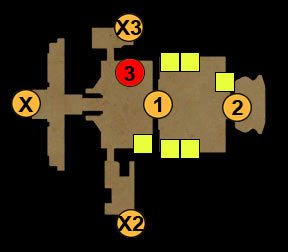
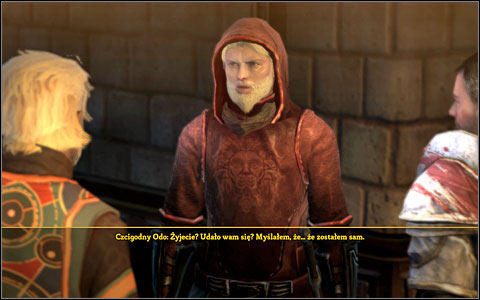 Odo is one of the key characters in the game.
Once you reach the Legion Chapterhouse, you will meet Odo who will give you two missions (The Search for Survivors and Unanswered Questions) - the key to both will be Raven's Rill (see: Fish Hole). However you shouldn't hurry - there are lots of treasures in the Chapterhouse that will certainly come in handy (M4). If you're curious, you can take a look at the bookshelves - many information regarding the game world can be found there. As you loot the treasure chests, be sure to look out for spiders found in the basement (M4,2).
Once you're done collecting the gear, return to the Pilgrims' Road and head to the already visited second Lascanzi camp (M3,4). Afterwards go to the Raven's Rill (M3,5), killing every enemy on your way.
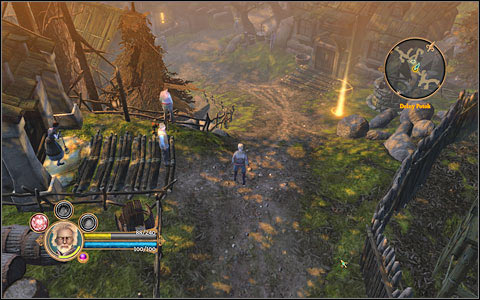 Raven's Rill.
Inside the city you can receive there are three characters with quests for you: Ludmila (Widow's Revenge, M3,6), Katarina (continuation of The Search for Survivors, M3,7) and Yacob (Fish Hole, M3,8). Of course if you're playing with Katarina yourself, you will receive the quest from another character (Andriej).
If you finish Yacob's quest, he will help you in Unanswered Questions.
You can get this mission from Yacob in Raven's Rill (M3,8). In order to complete it, get out of the city and head towards the river (M3,9). Use the secret bait received from the fisherman and lure the monster from the water - the beast is strong, but it shouldn't defend for long. Afterwards return to the city with the Nishemmu tooth. In return for the trophy, you can count for Yacob's help during Unanswered Questions - you will learn that you should look for Grigori (M3,10). Talk with him to finish the mission.
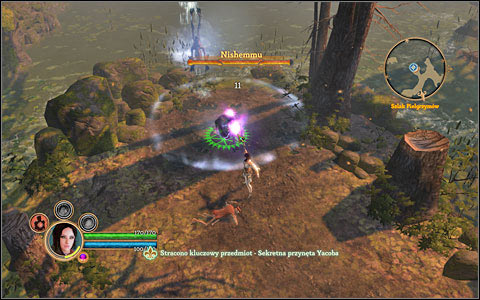 It's best to defeat the monster's underlings first and then attack the beast itself.
You will receive the mission from Ludmila (M3,6) in Raven's Rill. In order to complete it, you have to backtrack to Pilgrims' Road and get to the crossroads before Heroes' Crypt (M3,X3). On your way you will meet Florin (M3,1) who will give you The Unlucky Merchant. On the crossroads (M6,X) turn left and after a short fight you should defeat Boris (M6,1). Afterwards return to the city and collect your prize.
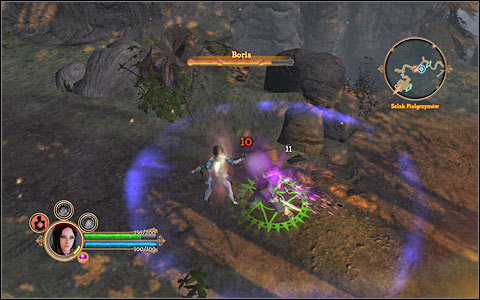 Before you can fight with Boris, you will have to defeat his allies.
Florin (M3,1) has been robbed by bandits and wants to get his items back. In order to help him, head to where you first appeared on Pilgrims' Road (M3,X). In return for defeating the bandits you can count for discounts at Florin's shop.
 You will have to fight Lascanzi - numerous, but not strong.
You will receive this mission from Odo in Chapterhouse (M4,1) and then move it forward thanks to Katarina in Raven's Rill (M3,7). Katarina (or a different character, if you're playing as her) will want you to reach the entrance to the Stormsong Cavern, where you need to talk with Leona. In order to get there, you have to exit Raven's Rill and head west - on the crossroads (M5,1) you must go right to reach the cavern. After a short conversation with Leon (M5,2) and taking a look around the area, move to eliminating the enemies (north-west road).
 Beautiful and dangerous.
After a series of fights with hordes of Lascanzi, you will reach a boss - Vera the witch (M5,3). You have to look out for her and divide attacks between her and her underlings (she can revive them).
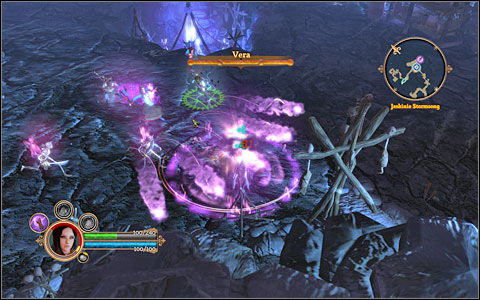 This time attacking Vera is more important than killing her allies.
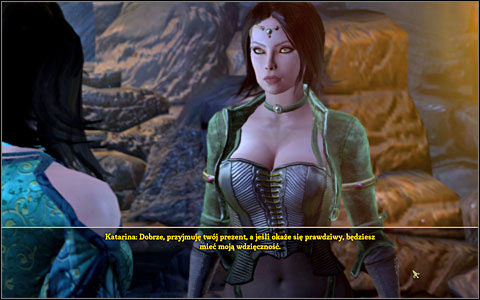
After the fight, open the cage (M5,4) to free Anjala (or Lucas of you're playing as Anjala yourself) and Armanda. During the conversation you can calm down your new companion to increase her/his trust (in case of the Archon you must choose "you wanted justice").
Leona will appear arrive right afterwards and give you another mission - clearing the manor (Gunderic Manor). Leave the cave - you will have to fight a few Lascanzi on your way, but they shouldn't cause you any problems. Afterwards head to Odon - on your way you will be accosted by Tatyana in Raven's Rill, who will ask you to find her husband (Hiding Out).
After a short talk with Odon, he will give you Enter the Mournweald.


Notice: mission available only after completing The Search for Survivors!
After talking with Leona, go out of the cave and go to Gunderic Manor (M7,1). Inside the main hall you should read the plate below the painting (M7,2) - it will cause Alisa Gunderic's ghost to appear in the room upstairs (M7,3). She will ask you to find her father (A Wayward Soul) and give you the east wing key - on your way there you will have to fight a couple enemies.
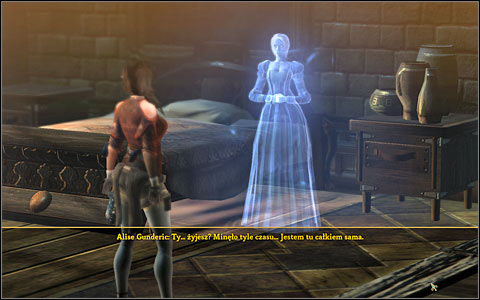 After talking with Alisa you should be ready for a sudden undead attack
Gunderic Manor and A Wayward Soul are closely related - in order to complete them, you first have to head to the upper floor rooms (look out for gargoyles and undeads!). Passage to one of the rooms is guarded by a magical door (M7,5) which will open if you give the correct password. It can be found inside the hidden room, behind the bookshelf (M7,4). After taking care of the talking door, enter the lord's office and take the key from the chest.
Notice that after solving the riddle you will receive the Solver of Ciphers deed (+2 agility).
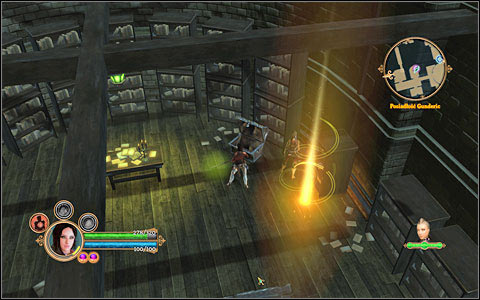 The key can be found inside the chest in the middle of the screen.
Having the item, go down and head to the east part of the manor (on your way you will have to fight some undeads, M7,6). After a short fight, enter Gunderic Library of Arcana (M7,X2).
As it will soon turn out, the vault door is locked (M8,1) - in order to get them opened, go west - there you will have to fight increasingly strong enemies and eventually a group of mages together with a colossus that they will summon (M8,2). After the fight you should thoroughly search the room - in its north-west corner there's a corpse from which you can take the item needed to open the vault door.
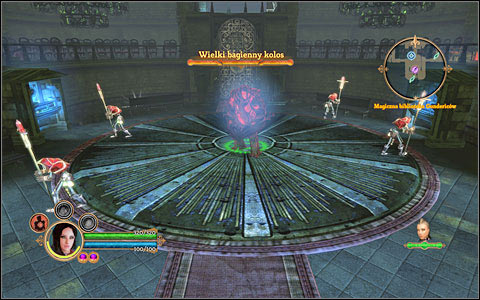 Take care of the mages first and then move to the colossus.
After repairing the lock, you will enter the inner sanctum. First head to lord Gunderic - fighting him shouldn't be really hard (M8,3). Afterwards go to the west side of the room where you will find Heart of Nagog and destroy it (M8,4).
The order is very important - if you destroy the Heart first and then the cursed knight, he will be much stronger and you might have trouble defeating him.
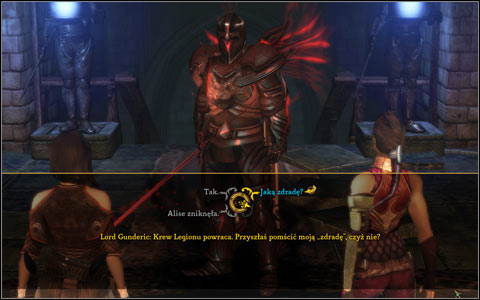 The lord is very slow - it's best to attack him from a distance.
After the fight, go out of the room and Leona will be waiting for you. During the conversation you will have to make a choice presented in table T1. You choice will have an influence on the game ending.
Table T1
Choice:
Consequence:
Long-term consequence:
Give the manor to Leona
Deed: Lescanzi Ally; +3 Will
Leona will become the local witch
Leona has to give the manor to the Legion
Deed: Legion Caretaker, +3 Stamina
You will regain the manor by the end of the game, it will become a school for new legionaries
Notice: mission available only after completing The Search for Survivors!
Tatyana, who will accost you in Raven's Rill (M3,5), will ask you to save her husband - in order to help her, you need to go to East Forest (M9). There you must enter the cave (M9,3) and save Niku from the large spider (M9,4).
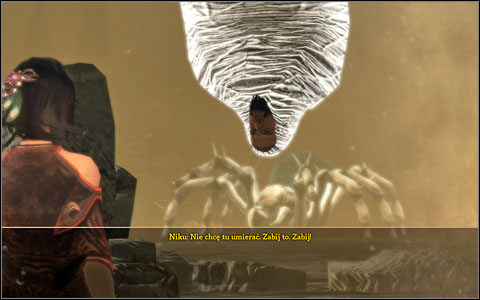 AoE attacks are best against the spider and her children.

Notice: mission available only after completing The Search for Survivors!
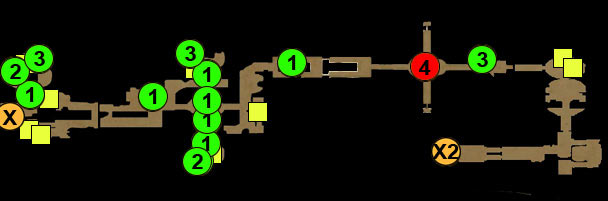
Right after leaving Chapterhouse you will come across a corpse (M9,1) - based on the information found beside it, it would seem that if you find three lost books and place them on the bookshelf at the Legion Chapterhouse (M4), you would open secret treasure.
 You must look out for enemies on your search for the books.
The places where you can find the books have been marked on the map (M9,2) and the bookshelf can be found inside the room with stairs in the northern part of Chapterhouse.

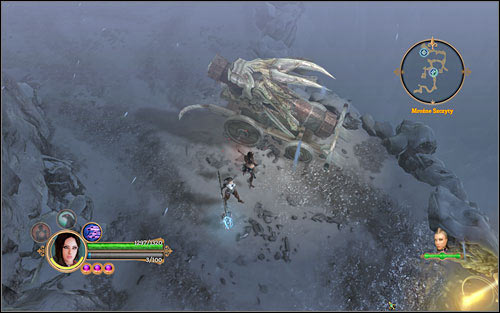
After leaving Chapterhouse you will reach East Forest (M9) - while you're there, it's worth to finish A Loss for Words and Hiding Out. Your main mission will be reaching the tree found in Mournweald - in order to reach it, you will have to fight your way through a horde of spiders and wolves in the West Forest (M9) and fishmen inside Mournweald itself (M10).
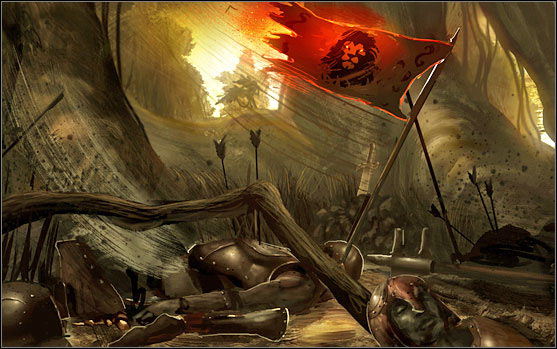
 The battlefield is one of the key locations in the game.
After getting there you will talk with the Radiant Youth (M10,1) who will teleport you to the edge of the forest. Return to Odo and show him the Montbaron Signet which you've found by the corpse (M10,1). He will tell you to open the portal (The Battle for Raven's Rill).
After receiving he mission from Odo, head to the portal (found in the upper part of the Chapterhouse, beside Armand). Cross the gate to reach Rukkenvahl Causeway (M11) - despite its appearance, there's no danger waiting for you there. Once you reach the east edge of the map, a road to a treasure will appear before you. Afterwards head south - there you will find a portal (M11,1) that will take you to the Gunderic Mausoleum (M12).
 Be sure to prepare for battle before crossing the portal.
Fight your way through hordes of gargoyles and collect all the treasures (one is hidden behind a wall, M12,1). After going out of the catacombs you will reach a cemetery - be ready to fight waves of undeads and Aria the witch (M12,2). Afterwards move to Raven's Rill and fight a Lascanzi army and two lesser bosses.
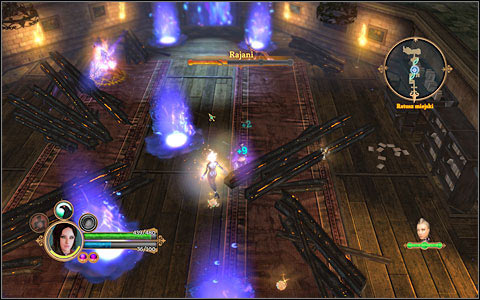 It's best to shoot Rajani from a safe distance and keep dodging her powerful attacks.
It's best to save your game before entering the city hall - you will have to fight Rajani who is a very demanding enemy (M12,3). Defeat her, free Lazar (M12,4) and return to Rajani to judge her. Table T2 contains the possible choices and their consequences.
Table T2
Choice:
Consequence:
Long-term consequence:
Kill Rajani
Deed: Ironhand; +2 attack; Anjali will receive the heavenly judgement spear
You won't be able to receive help from Rajani's sister by the end of the game.
Let her go
Deed: Gracious in Victory;+2 Will
Rajani and her sister will help you by the end of the game; team trust raises
It's worth to notice that heavenly judgement is one of the most powerful weapons in the game - the only question is, is it worth killing an innocent person?
Irrespectively of your choice, act 1 will end.

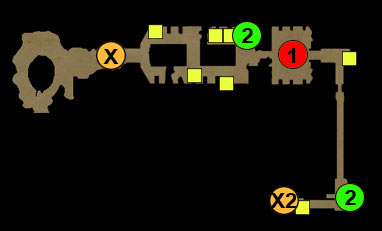
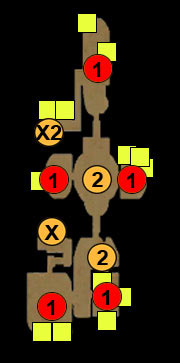
X - portal to Chapterhouse
X2 - passage to the cemetery
X - Road to Pilgrims' Road
X2 - swamps (road to Stonebridge)
X3 - basement upper level
1 - Entrance to the Heroes' Crypt (Heroes of Old and Relics of Another Age)
2 - corpse and key
3 - artifact (Relics of Another Age)

X - upper level descent
X2 - upper level entrance
1 - boss
2 - artifacts (Relics of Another Age)
X - passage to the Pilgrims' Road
X2 - Entrance to the Bioluminescent Cave
1 - Leopold

X - Bioluminescent Cave
X2 - Road to Stonebridge
1 - Lord Devonsey (The Root of the Matter)
2 - Roderick (Lost in the Swamp)
3 - Royalists (Lost in the Swamp)
4 - lever
5 - first shaman fight
6 - second shaman fight
7 - Arah (Missionary Work)
8 - boss and spider eggs (Missionary Work)
X - road from the swamps
X2 - Stonebridge
1 - Lascanzi unit and Ursula's supplies (Supply Lines)

X - Road to Swamps
X2 - The Grand Chapterhouse
X3 - further part of Stonebridge
1 - Ursula (Supply Lines)
2 - Frederik Pratz (Uncovering the Past of Act 3)
X - to Stonebridge
X2 - underground descent (see M20)
X3 - underground exit
1 - passage behind a bookshelf
2 - a shelf and a portal
3 - two barons (they appear only during Mediation in Act 3)

X - upper floor descent
X2 - upper floor entrance
1 - undeads and pedestals with books
2 - levers
Notice! Requires Gunderic Manor from Act 1!
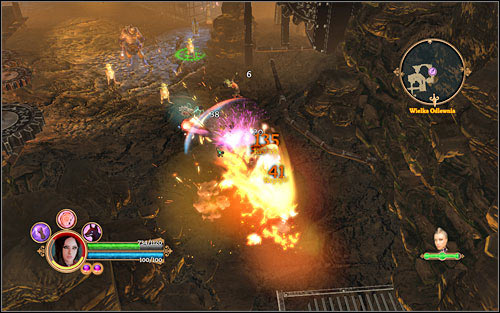
After Lazar asks you to clear the Heroes' Crypt (M13,1), head to it through the Pilgrims' Road (M3). Turn right on the crossroads - you will meet Maximilian on the square before the building, who will ask you to find a few artifacts inside (Relics of Another Age).
 An entire undead army awaits you inside the crypt.
You will need two signets in order to open the door - you can get one by killing lord Gunderic during Gunderic Manor (see M7 and M8), whereas you have already found the second by lord Montbaron (Enter the Mournweald). After you use the signets on the statues beside the door, the crypt will open.
 Speed is the enemy's largest weakness - make use of it.
Fight your way through more hordes of undead enemies until you reach a big square-shaped room. In its western side you will find a corpse and a key beside it (M13,2) - it will let you continue your journey. Move forwards, going down to the lower level of the dungeons (M13,X3).
Lots of treasures, enemies and a powerful boss await you there (M14,1). After defeating him, move on (M14,X2) to finally leave the catacombs.
The mission will end after talking with Lazar.


This mission is closely related to Heroes of Old - you receive it from Maximilian beside Heroes' Crypt. Your task is finding three artifacts - they have been marked on the maps (M13) and (M14). After collecting the required items, return to him to collect your prize.
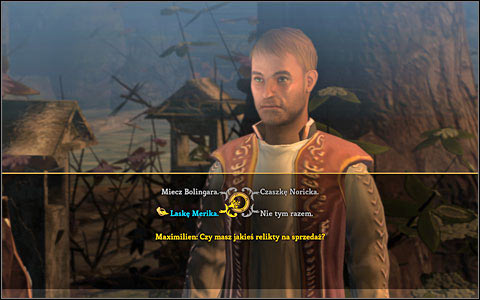 Maximilian, despite the appearance, pays rather well.

After you finish Act 1, Odo will ask you to reach Stonebridge and open the portal there. Go out of the Chapterhouse and follow the Pilgrims' Road (M3) south-west. On your way you will meet Lazar who will ask you to clear the Heroes' Crypt (M13,1) of undeads (Heroes of Old). It's well worth to complete this mission, as there are lots of precious items inside the catacombs.
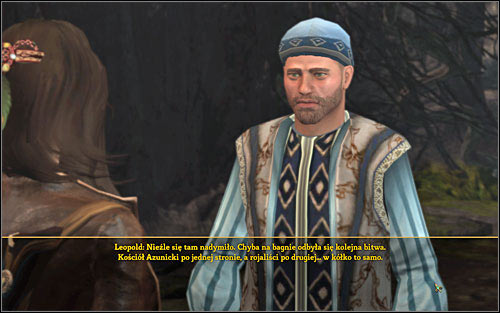 Leopold will tell you of the conflict between the ruling fractions which will be very important in the further part of the part.
Once you reach the crossroads to Heroes' Crypt, take the left branch - that way you will reach Eastern Swamp Bluffs (M15). If you're not playing as Katarina, you will be able to add her to the squad here. Inside the forest fight your way through a few gatherings of spiders and you will come across Leopold who will tell you about the battle between Royalists and Azunites.
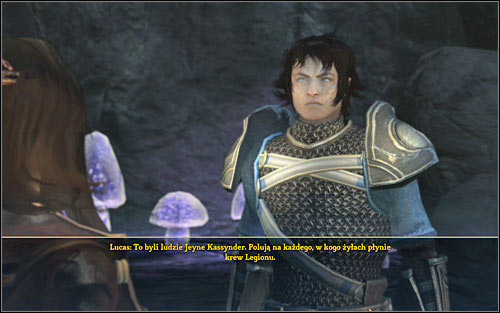 Lucas or Katarina will join your team.
Go inside the Bioluminescent Cave and fight your way through the enemies. If you haven't yet met Lucas or you're not playing as him, he will join the team here. If you will support the Royalists during the conversation with him, he will start trusting you more.
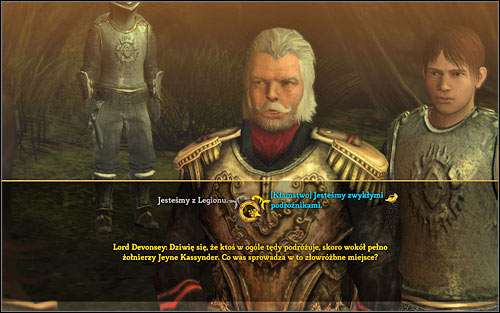 It's not worth to lie during the conversation.
After getting out of the cave you will reach the Swamps Battlefield - there you will find the Royalists' camp, who are in need of your help. Talk with Lord Devonsey (M16,1) who will ask you to find Phineas. During the conversation you can make a decision, the consequences of which are described below.
Table T3
Choice:
Consequence:
Unveil you're from the Legion
Team trust up
Hide the fact
None
Decide to negotiate with the First People
Lucas' trust up
Decide to attack the First People
Anjala's trust up
Before you go out of the camp, it's worth to talk with Roderick who will give you Lost in the Swamp.


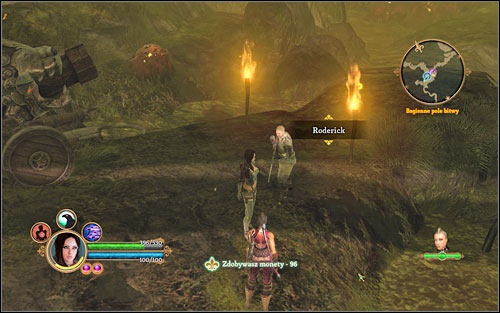

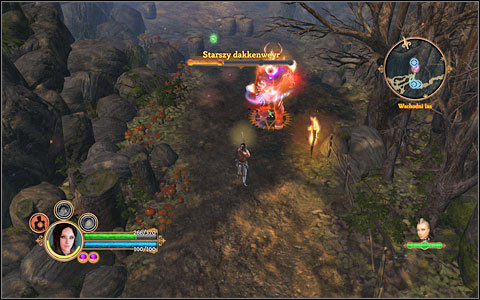
After talking with Lord Devonsey, head east (you will come across Roderick with Lost in the Swamp on your way). Go onto the swamps, fight with the local fauna and collect treasures. Eventually you will reach the First People Village - there you will have to fight a few not-so-strong enemies. At some point you will have to use the lever to move on (M16,4). In the further part of the village you will meet the leader - the will throw an army of his underling at you (M16,5). Defeat them and start chasing him, climbing up the large tree.
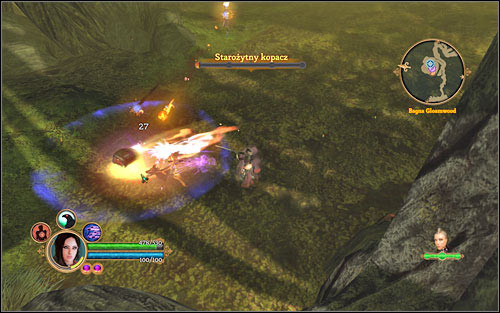
 The Shaman can summon very powerful minions - keep a safe distance.
Eventually you will have to fight the Shaman (M16,6). In return for defeating him you will receive lots of treasures and a ring that will let you go through the previously inaccessible parts of the jungle.
In order to finish the mission, talk with Phineas and return to the Royalist camp. On your way there however, it's worth to look for the soldiers (Lost in the Swamp) and talk with Arah (Missionary Work, M16,7). Once you return to the Royalists (M16,1), Phineas will take you out of the swamps thanks to which you will be able to return to Stonebridge (M17).
During the last talk with Lord Devonsey you can make a decision, the consequences of which are described below:
Table T4:
Choice:
Consequence:
Chide Phineas for defending the First People
Anjali's trust up
Support Phineas
Lucas' trust up

Roderick from the swamp camp will ask you to find his soldiers. Their location have been marked on the map (M16) - just remember that the second group can be saved only after completing The Root of the Matter.
It's worth to complete Roderick's mission - it's on the way.
Notice! You have to finish The Root of the Matter before attempting this mission!
Go out of the First People Village and you will come across - she will ask you to find the spider eggs thanks to which she will be able to heal the wounded soldiers. Your destination is in the very middle of the jungle - in order to get there, you will have to defeat an army of forest creatures and one boss (M16,8). After obtaining the precious ingredient, return to Arah to collect your prize.
 The enemy likes to go underground often - it's a good moment to regenerate your health.
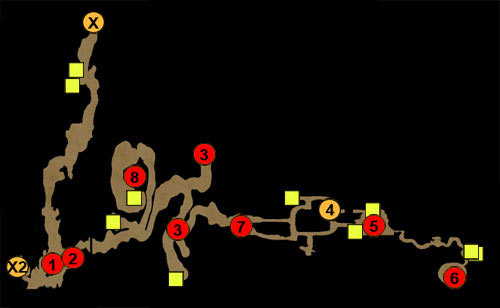
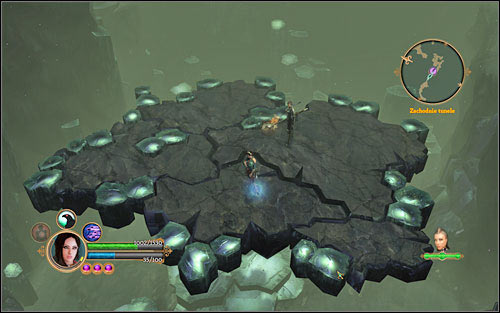
After getting to Stonebridge go forwards all the time until you reach the Grand Chapterhouse (M18,X2). There, go to the basement (M19,X2) to fight a group of cursed soldiers. They are immortal - even if you kill them, they will return to life eventually. The only way of getting rid of them for good is taking the book from the pedestal in the middle of the room (M20,1). Proceed identically in all other rooms, however you will have to pull some levers to reach them (M20,2).
 Don't bother fighting the enemies, just run for the book.
After you collect all five books, you should take them all to the shelf (M19,2). In order to reach it, you have to go through the secret passage behind the bookshelf (M19,1).
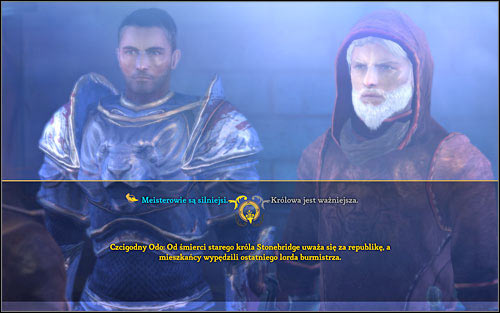 It's better to choose Meister first - you will have to complete both missions anyway.
A portal will open - Odo and Guiscard will come through it, giving you two more missions: Majority Rules and The Tumbledown Court. You have to decide which mission will you take on first - Majority Rules takes place in Stonebridge, so it's better to start with it.


Ursula the merchant (M18,1) is worried about her supplies - she will ask you to heck if they haven't been taken by Lascanzi. Go out of Stonebridge following the same path that you came there and eliminate the enemy warriors (M17,1). Afterwards search the chests and return to Ursula with the recovered goods.
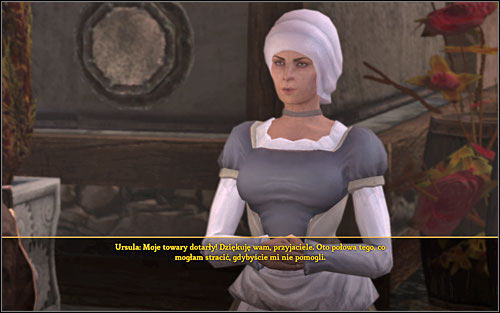 Ursula's mission is a quick way of earning some money.
The chests and Lascanzi will appear in the marked spot (M17,1) only after you accept this mission (there's nothing there otherwise).

X - passage to Stonebridge suburbs (see M18)
X2 - The Crypts of the Sacred Blood
X3 - Great Foundry
1 - Meisterhall
2 - Meister Kassel (Strike!)
3 - Mudgutter (Trouble in the Crypts)
4 - Fiddlewick (Mediation)
5 - Krog (Mediation)
6 - Werner Schnaus (Stolen Shipment)
7 - Automaton (Major Malfunction)
8 - Rudolf Maxwell (Uncovering the Past)
9 - Wenzel (Uncovering the Past)

X - exit to Stonebridge
X2 - passage to the second part of the dungeon (see M23)
X3 - exit from the second part of the dungeon
1 - Herman Holtzman
2 - Sweatcog (Major Malfunction and afterwards Proof of Sabotage)
3 - lever
4 - list (Stolen Shipment)
5 - gear (Proof of Sabotage)
X - passage from the first part of the dungeon
X2 - exit to the first part of the dungeon
1 - lever
2 - list (Stolen Shipment)
3 - legion relic (Cryptic Inheritance)
4 - boss (Trouble in the Crypts)
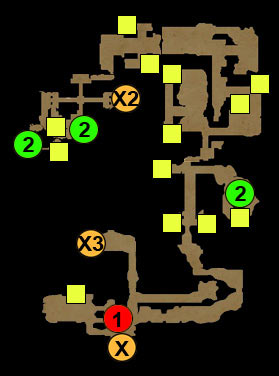
X - exit to Stonebridge
X2 - passage to the lower level
X3 - exit from the lower level
1 - Deter Snell
2 - levers (Cogs and Wheels)

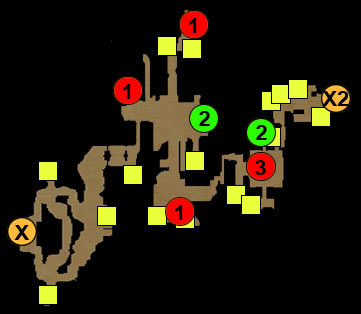
X - passage from the upper level
X2 - exit to the upper level
1 - imprisoned workers (Hostage Situation)
2 - levers (Cogs and Wheels)
3 - Cyclopes leader (Strike!)
Notice! If you decided to complete The Tumbledown Court first, go to Act 4.
After going out of the Grand Chapterhouse (M18,X2), go through the streets of Stonebridge to Meisterhall (M21,1). Right beside the building entrance you will meet constable Wulf - he will help you gain support in the council and will vote for you himself.
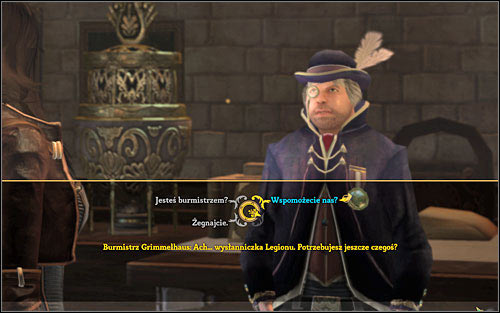 The mayor is one of the few without a mission for you.
Constable Wulf will take you to the city council - you will be able to try and convince them to support your cause. You will be able whether to punish the Legion murderers:
Table T5:
Choice:
Consequence:
Forgive the culprits
None
Demand justice
Team's trust up
After talking with the council, the members will spread throughout the room - each one will have a mission for you. Completing every mission will let you finish Majority Rules.
The main missions are: Strike! (Meister Kassel, M21,2) and Trouble in the Crypts (Mudgutter, M21,3).
Mediation received from Fiddlewick (M21,4) is an optional mission which won't help you in convincing the council, but is a good chance to gain some experience.
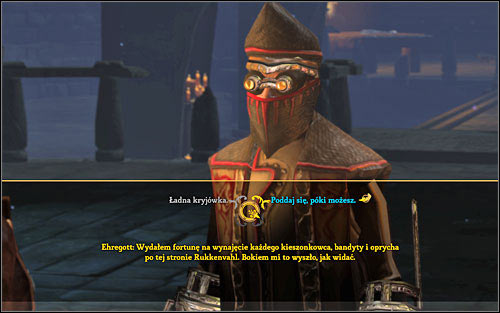
 Guiscard - an authentic concrete man.
After you complete Strike! and Trouble in the Crypts, fire will break out throughout Stonebridge. All automatons have gone mad - you have to fight your way through them and save the council in Meisterhall (M21,1).
 Fighting the automatons is a good opportunity to earn a few levels.
Once you reach the destination point, it will turn out that the Dapper Old Gent ran away right before your arrival. Chase him, going through the portal behind the main hall. The fight against him is very difficult.
 Destroying the gates (X) is crucial - enemies keep coming out of them.
After defeating Elegant, you will be able to decide his faith. Your decision will influence the game ending and deeds.
Table T6:
Choice:
Consequence:
Long-term consequence:
Sentence the Dapper Old Gent
Deed: Lord Protector of Stonebridge; +3 Stamina
Meister Wulf will become the mayor of Stonebridge
The Legion needs the Dapper Old Gent
Deed: Legion Redeemer; +3 Will
The hated Old Gent will live in Gunderic Manor (if you have it), where he will train young legionaries
If you haven't done it yet, you should take care of the Royalists in The Tumbledown Court.


After Mudgutter gives you this mission, go out of Meisterhall and head north, towards The Crypts of the Sacred Blood (M21,X2). In order to get there, you will have to tell the robot guard that you have been sent by the city council. Before the crypt itself it's worth to speak with Sweatcogi (Major Malfunction, M22,1) and Herman Holtzman (Cryptic Inheritance, M22,2). The second one will give you the catacombs key.
 The blades are far more dangerous than the enemies.
After getting into the crypt, fight your way through the hordes of enemies and open path to the further part of the complex by using the levers (M22,3). The order in which you activate them is strictly connected with the direction of exploration, so getting lost is pretty much impossible. On your way it's worth to collect everything you come across (three legion relics will let you complete Cryptic Inheritance, the gear - Proof of Sabotage and the shipment list - Stolen Shipment - see the proper chapters of the guide for more information).
 The levers are impossible to miss.
At the end of the labyrinth you will have to fight the criminal boss of Stonebridge. Defeat him by swiftly dodging his attacks and dealing as much damage as possible.
 Fighting the thug is difficult, but you already had more difficult enemies.
After the fight return to Mudgutter to collect your prize - he will also support you during the voting.
If you haven't done it already, you should take care of Strike!


Meister Kassel (M21,2) will ask you to deal with the workers in his Great Foundry (M21,X3). Go there and talk with Deter Snell (M24,1) who will fill you in on the situation.
 Quite hot in here.
After getting all the needed information, head into the Foundry itself. On your way there it's worth to complete Cogs and Wheels and Hostage Situation.
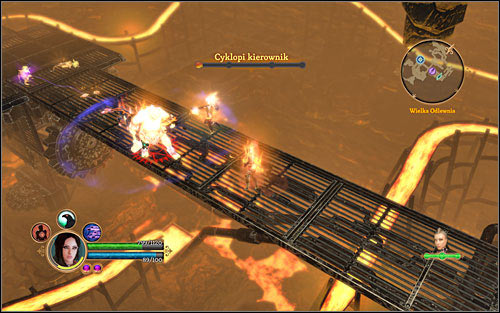
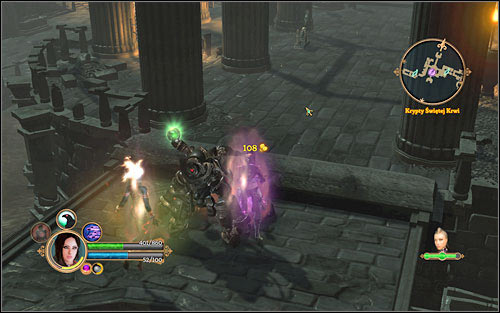
It's best to shoot the goblins first - they have strong ranged spells.After some fights you will eventually have to fight the leader of the striking Cyclopes, Ergomethens (M25,3). Once you defeat him (look out for his mighty hammer attacks!) you will be able to talk with him and learn his side of the story. As it turns out, Meister Kassel wasn't entirely honest.
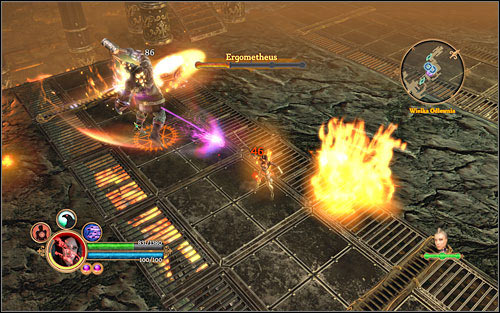 It's best to keep the Cyclopes leader at distance - he can kill you in two hits.
After talking with the Cyclops, head to the foundry exit - Meister Kassel and Meister Fiddlewick will be waiting there for you. You will have to decide the faith of the striking workers. The consequences of your decision can be seen below::
Table T7:
Choice:
Consequence:
Long-term consequence:
Cyclopes have their right
Fiddlewick will support you in the voting, deed: Proletarian Hero; +3 attack
With time, Cyclopes will become normal citizens.
Cyclopes will get nothing
Kassel will support you in the voting, deed: Strike Breaker; + 3 Will
Cyclopes will become angrier every day, a danger of revolution will be born.


This mission is closely related with Strike!, it can be completed during the exploration of the Great Foundry.
 The levers have been marked on the proper maps of the guide.
Deter Snell (M24,1) will ask you to once again start the underground mechanisms - you can do it by pulling the proper levers. Their locations have been marked on map (24) and (25). After repairing the mechanisms, return to Deter to inform you on your success.

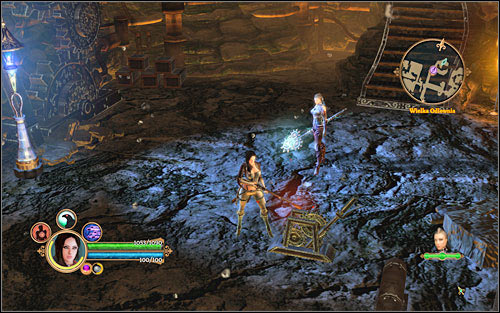
During your exploration of the Great Foundry you will meet Olbert (M25,1), who will ask you to free the hostages being held by the Cyclopes. Locations of the cages have been marked on map (M25).
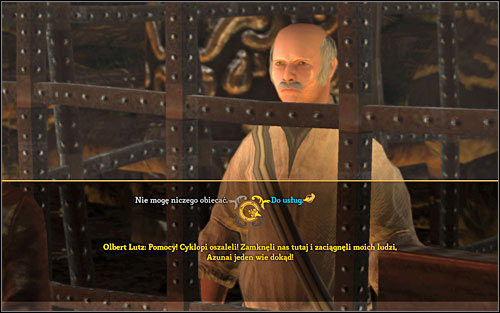 The prisoners are all being held nearby Olbert.
After finding all the imprisoned workers you should return to Olbert, who will be waiting for you by the Great Foundry exit.

Fiddlewick will ask you to take care of Krug's case. Head to the monster's cell (M21,5). Irrespectively of what your sentence will be, the mage Reinhart Manx will join your team. If during the conversation with the newcomer you will decide to forgive the murderer, you will additionally gain his trust.
It's worth to notice that at this moment you will have a complete team - in return you will be granted with the We are Legion deed (+4 Stamina).
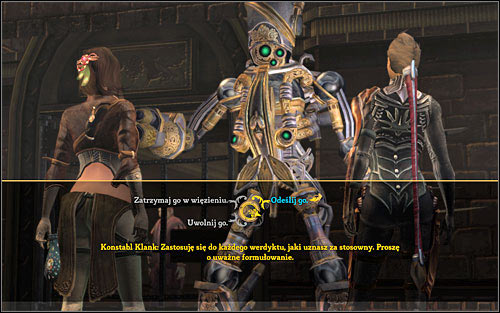 Your choice doesn't have any influence on the further chain of events.
After giving out your sentence to the automaton guard, return to Fiddlewick.
The goblin's next request will be to settling the quarrel between to aristocrats - I order to do that, go out of Meisterhall and head to the Grand Chapterhouse (M18,X2). After settling them, return to Fiddlewick to end the mission.
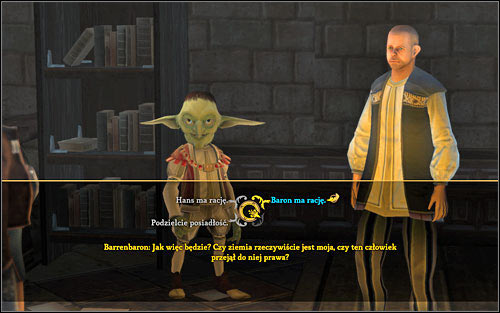 The verdict according to which the Baron is right will have the best reception.
The judgement won't have any influence on the further chain of events.


This mission will be given to you by Sweatcog, who you can meet before The Crypts of the Sacred Blood (M22,2). The little goblin will ask you to destroy the mad automaton, found in (M21,7). After you defeat it, return to Sweatcog and collect your prize.
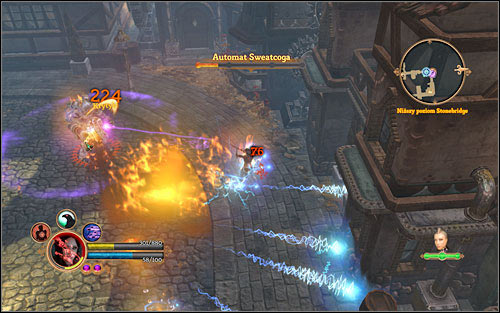 Look out for AoE attacks!
After you return to your employer, he will give you Proof of Sabotage.


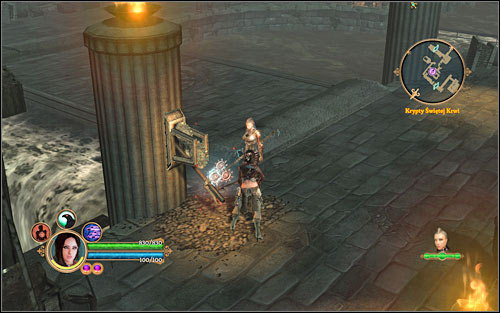
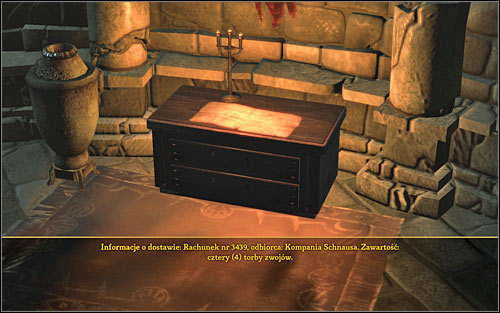
After you help Sweatcog (M22,2) with his crazy automaton (Major Malfunction), the little goblin will ask you to find a part of the machine that will help him understand the cause of the malfunction. Head to The Crypts of the Sacred Blood (M21,X2) and take the gear from the table (M22,5).
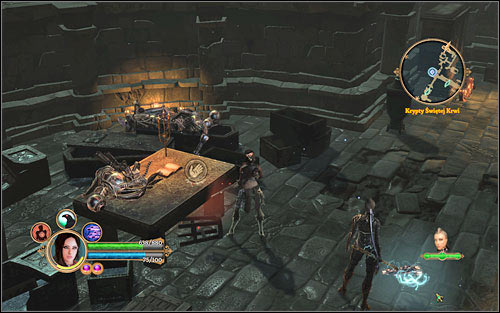 The gear can be easily missed - it's visible on the screen above, on the table.
Afterwards return to the goblin engineer and collect your prize.


You can receive this mission from Herman Holtzman, who can be found before The Crypts of the Sacred Blood (M22,1). In order to complete it, you just need to collect three Legion relics which can be found in the same crypt. Locations of these items have been marked on map (M23,3).
 Exploration can be dangerous.
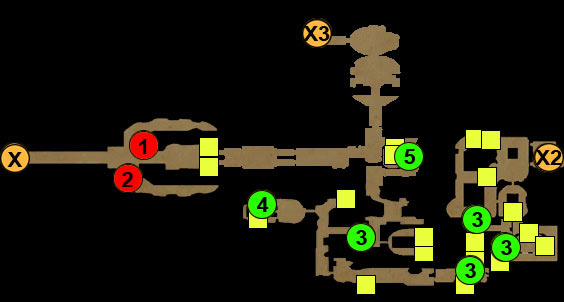

During the exploration of The Crypts of the Sacred Blood (Trouble in the Crypts) you will come across notes of the merchant Werner Schnaus. It worth to collect all three of them - the merchant will generously reward from you. Locations of these documents have been marked on maps (M22) and (M23).
 The documents aren't highlighted - finding them isn't easy.
Werner himself can be found in Stonebridge, on the corner of the street leading to Meisterhall (M21,6).


Notice! The mission requires you to finish Majority Rules!
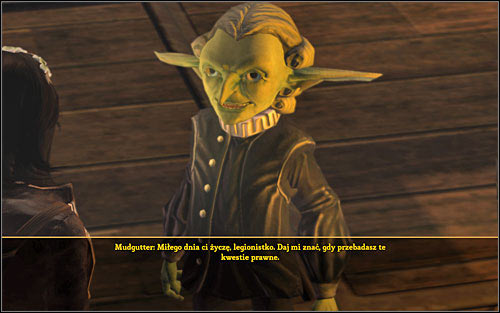 The goblin will help you catch the criminals.
Mudgutter in Meisterhall will ask you to find and judge three people guilty of legionaries slaughter. Locations of the culprits have been marked on maps (M18) and (M21). Your choices during the dialogues don't influence the plot in any way.


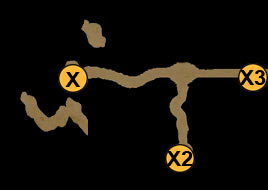
X - to Stonebridge
X2 - to Frostspire Mountain (The Tumbledown Court)
X3 - to Rukkenvahl Causeway (see M11)

X - to Stonebridge Causeway
X2 - The Kaari Pass
1 - royalists sapper (Making an Entrance)
2 - gunpowder (Making an Entrance)
3 - cannon (Making an Entrance)
4 - Azunite camp
5 - cannonballs
6 - cannon
7 - crystal wall

X - to Frostspire Mountain
X2 - tunnel connection (disappears after completing In Search of Solitude)
X3 - passage to the caves (after completing In Search of Solitude)
1 - Ibsen
2 - Stonestream
3 - lost soldiers (Untamed Mountain)
4 - cave (Ibsen's Cave)

X - passage from Kaari Pass
X2 - passage to Southern Mining Tunnels (see M30)
I - moving platforms route
1 - Geomantic Rock (All that Glitters)
2 - western corridor
3 - Roderick
4 - powder satchels (Uninvited Guests)
5 - platform switch (Building Bridges)
6 - boss and mine cart (Uninvited Guests)
X - passage to the Deep Well
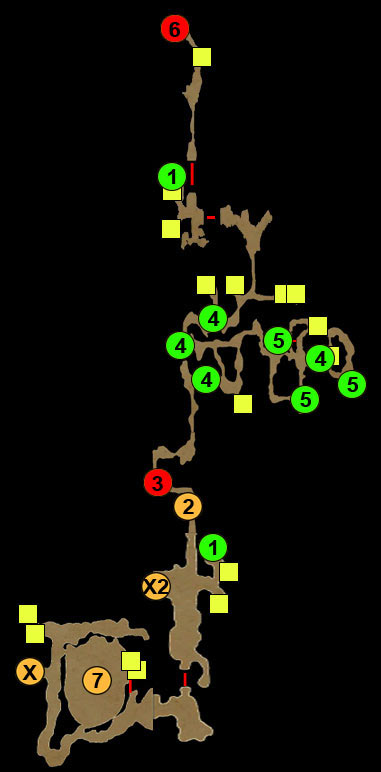
I - moving platforms route
1 - Queen
2 - Phineas
3 - Bartholomew
4 - southern corridor
5 - powder satchel (Enemy at the Gates)
6 - switch
7 - Geomantic Rock (All that Glitters)
8 - lost rifle (The Prototype)
9 - boss and mine cart (Enemy at the Gates)
Notice! If you decided to complete Majority Rules first, go to Act 3.
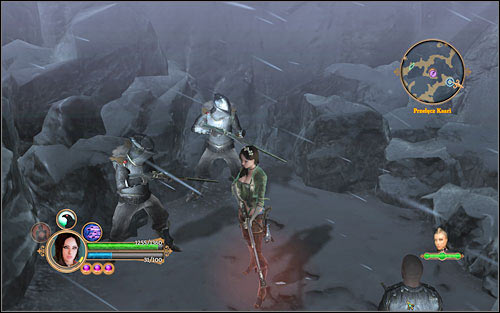
Go through the portal in Grand Chapterhouse (M21,1) and turn west in the abyss (M26,X2). After going out of the depth you will reach the windy Frostspire Mountain, where you will have to dodge cannon fire and fight with Jeyne Kassynder's soldiers. Inside the cave in the north you will come across a wounded Royalist Sapper (M27,1) who will give you Making an Entrance.
The guardsmen are quite a hard nut to crack.If you follow the path further, you will see a cutscene during which the Royalists lose a battle with the Fanatics. In order to help them, you need to find the cannonball (M27,5) and fire it from the cannon (M27,6) at the Azunites. Afterwards break though the crystal wall (M27,7) and go through the waterfall. There you will meet Ibsen (M28,1), who will help you in completing your mission if you do In Search of Solitude (he will also offer you Untamed Mountain).
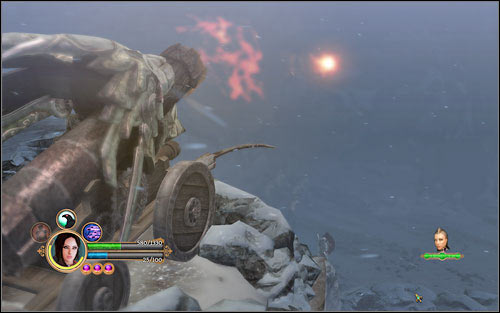 You will save the whole Royalists unit with one shot.
After you complete In Search of Solitude, you will be able to move on (M28,X3). There, talk with already-known Phineas and Roderick, who will fill you in on the situation.
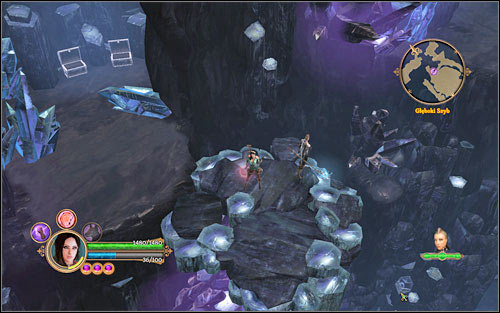 This treasures can be found only by moving the platform beside the Deep Well entrance.
Follow the Deep Well (M29) to the Tumbledown Court and talk with the Queen (M30,1). She will give you two more missions: Enemy at the Gates and Uninvited Guests.
 The Queen is young and naive, but it still beats Jayne Kassynder's tyranny.


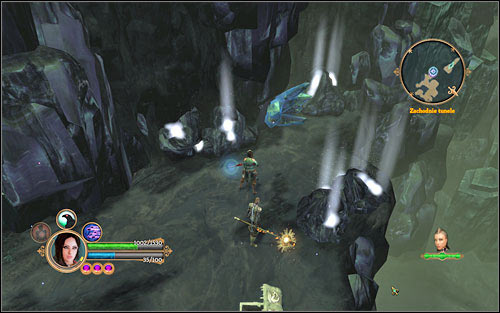
Ibsen (M28,1) will ask you to close three stonestreams - their locations have been marked on map (28). After destroying them, the hermit will give you Ibsen's Cave.
 It's a pity to destroy such things.
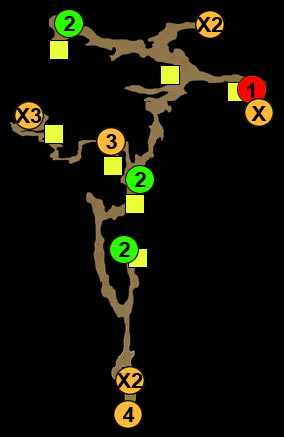
Inside the cave in the northern part of Frostspire Mountain you will meet a wounded Royalist Sapper, who will ask you to reach the powder depot (M27,2)
 Boom headshot!
After obtaining the powder, head to the cannon (M27,3) and fire it. An enemy soldiers unit will come in through the destroyed gate (M27,4), defeat them and collect the treasures found in their camp.

Ibsen (M28,1) informed you about a lost Royalists unit - you are to find them and bring back to the hermit. The soldiers can be found at (M28,3).
 Brave as always, lost as ever.
In return for your commitment, Ibsen will let you take a peek inside his chest.

Notice! Completing this mission is possible only after finishing In Search of Solitude.
 The enemy is more irritating than dangerous.
Ibsen (M28,1) will ask you to clear his cave - head to (M28,5) and eliminate everything that you find on your path. After completing the task, return to your employer.

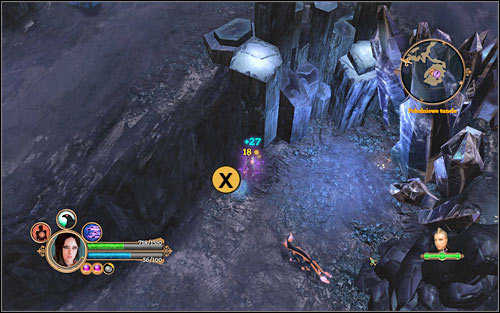
Head to the southern tunnels (M30,4) and look for the powder satchels (M30,5). During the exploration of the labyrinth you will have to use platform-calling crystals - their locations have been marked on the map for your convenience (M30,6).
 If only you keep the enemy at distance, you should be fine.
After you collect the charges, head for the boss (M30,9). Once he's down, throw the powder satchels into the mine cart and run.
Once you finish this mission and Uninvited Guests, you should head to the Queen to activate Ebb and Flow.

After the Queen (M30,1) orders you to clear the tunnels, head to the western tunnels (M29,2). On your way you will come across Roderick (M29,3), who will ask you to find his soldiers (Building Bridges). During the exploration of the underground you will probably also find powder satchels (M29,4) that will come in handy in blowing up the tunnels (M29,6).
 You will have to fly quite a bit...
One defeated boss and one spectacular explosion later, return to the Queen. If you had already completed Enemy at the Gates, Ebb and Flow will be activated.


Notice! Requires a completed The Tumbledown Court!
 The rifle can be found exactly as seen above.
Bartholomew, found at the royal court (M30,3), will ask you to find the prototype rifle. it can be found in the southern caves, in location (M30,8), behind the crystals (look out for artillery fire and spiders!).

Notice! Requires a completed The Tumbledown Court!
You will receive this mission from Phineas (M29,2) - it's best to take this mission as soon as possible, as it can be completed while you're onto main quests.
 Painite can be found throughout the underground.
Your mission is finding twelve pieces of Painite that Phineas needs for his experiments. The precious mineral has been marked on map (M29) and (M30).


This mission will be given to you by Roderick (M29,3) after you talk with the Queen and accept Uninvited Guests. In order to reach the trapped soldiers, you will have to activate three platforms by using the crystals (M29,5).
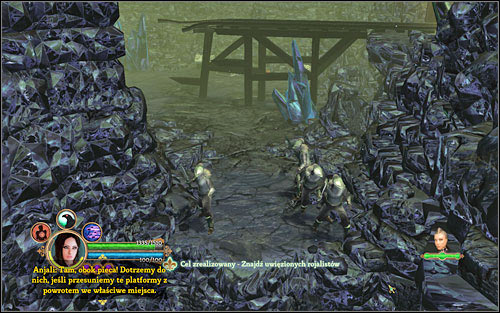 Just curious, are these the same soldiers that always fall in trouble?
After you save the soldiers, collect the treasures from where they were.
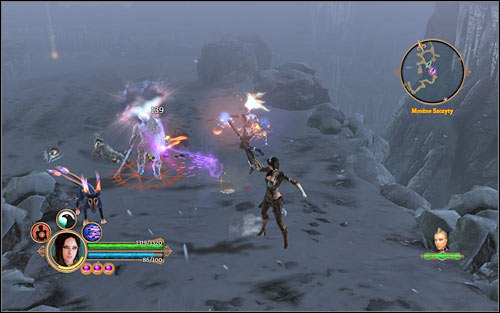
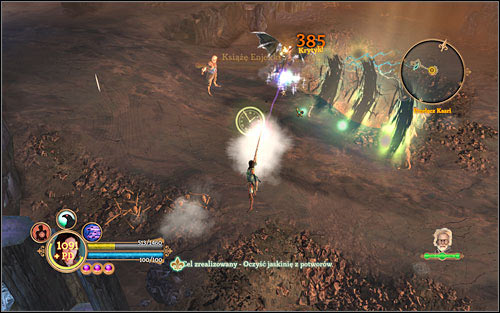
After you complete Enemy at the Gates and Uninvited Guests, the Queen (M29,1) will ask you to escort Phineas to the grand crystal in the middle of the underground (M29,10). Once there, protect the scientist from enemies until the Stonestream is turned off and afterwards return to aid the Queen in battle.
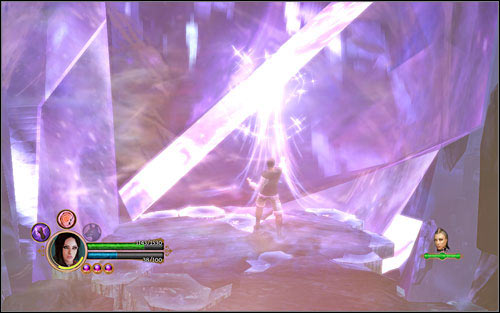 The enemies respawn every couple seconds - fight them off until Phineas finishes his spell.
Once you complete this mission, you will automatically receive Lord Devonsey's Trap.
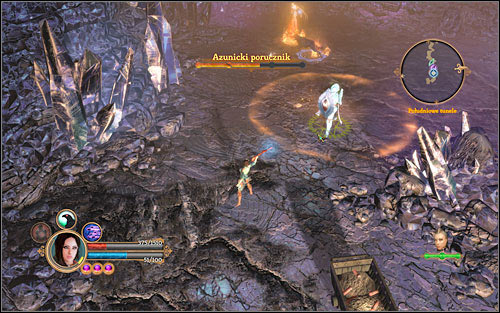
To complete this mission, you have to backtrack to the very entrance to the cave - there, on the main arena (M29,7), you will have to fight Jayne's and her soldiers.
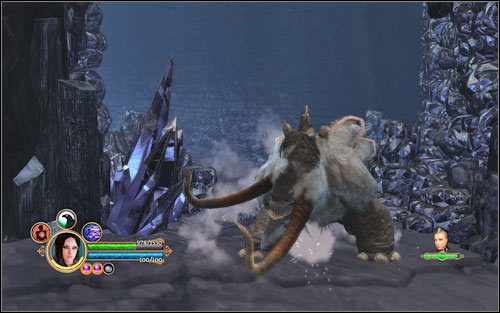 Large and dangerous.
After defeating the beast, you will be able to talk with the Queen about what you heard from Jayne. Despite the appearance, the dialogue options that you choose won't influence the further chain of events.
As you have the crown's help guaranteed, you will receive the Royalist Ally deed (+5 Stamina).
Leave the royal court together with Roderick and follow the passage (M26,X) to the Grand Chapterhouse. Act 4 will come to an end.


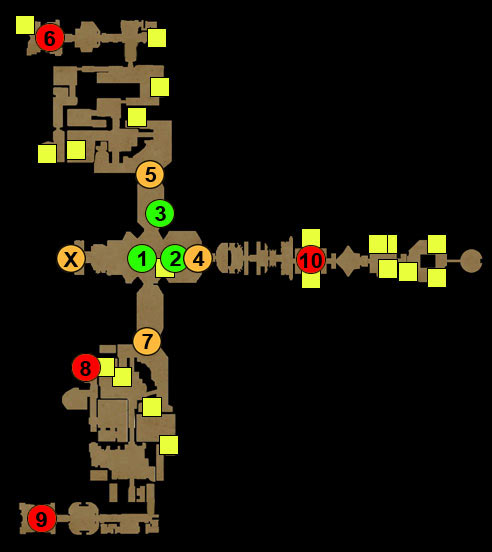
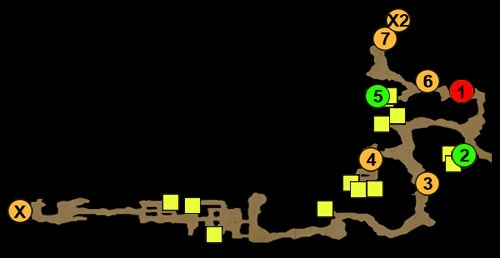
X - teleport from Stonebridge
1 - first switch
2 - second switch
3 - plate (Dungeon Siege)
4 - Entrance to the Prison (Dungeon Siege)
5 - West Tower
6 - Archon of War
7 - East Tower
8 - merchant
9 - Archon of Vengeance
10 - Jayne Kassynder
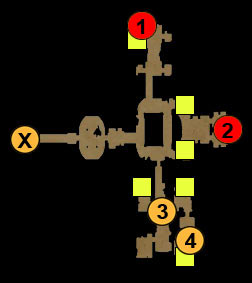
X - passage to Jayne Kassynder's stronghold
1 - imprisoned merchant
2 - Jailer
3 - cells with aristocrats
4 - hidden room
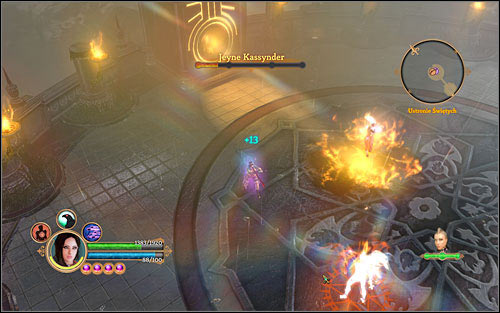
After returning to the Grand Chapterhouse (M19), head to the Meisterhall (M21,1) to ask the Meisters for help in fighting Jayne Kassynder. Pull the lever (M31,1) and afterwards (M31,2). On your way, you should consider completing Dungeon Siege.
 Fights at this stage of the game are very demanding.
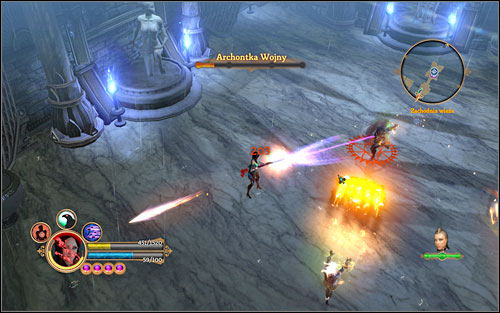
Afterwards head to the West Tower (M31,5), where you will have to fight your way through hordes of enemies (look out for Archon Handmaidens!). Afterwards head to the tower - ride the elevator up and fight the Archon of War (M31,6). After you defeat her, collect the precious artifacts and head to the East Tower (M31,7).
 Archonts have the same kind of powers as Anjali.
In location (M31,8) you will find a merchant who will offer you really good items (of course at an appropriate price). Afterwards head to the Archon of Vengeance (M31,9) and fight her. Collect the treasures and go fight with Jayne Kassynder herself (M31,10).
 It's best to start with the Archon on the right - she has the lowest health.
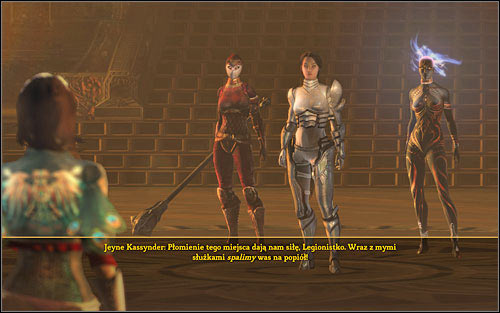
You will fight her three times - first aided by her underlings, then by her most faithful Archons and eventually only with her.
 Fighting Jayne is mostly about dodging and rarely about attacking.
After the fight go through the portal to chase after Jayne. If you have previously completed Dungeon Siege, on your way you will be able to buy new items from the merchant you freed, Fitch.
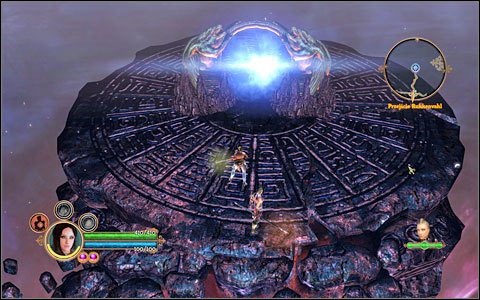
At this moment the last mission in the game - Rebirth - begins.


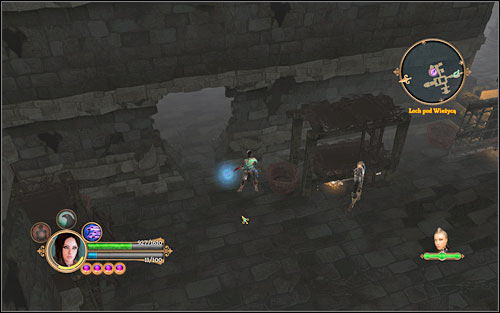
Inside Jayne Kassynder's stronghold there are hidden dungeons. In order to reach them, you will have to set the plate found in location (M31,3) - the door leading underground will then open (M31,4).
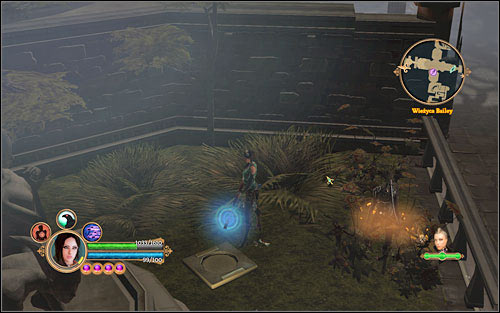 The gold plate does rather stand out.
After entering the dungeon you will have to fight some enemies and then move to the imprisoned merchant Fitch (M32,1). He will ask you to free him - it's well worth it, as the smart guy has the best items in the game and you will be able to buy them later on. In order to free your new wealthy friend, you will need the key - it's in possession of the Jailer (M32,2). Afterwards free the merchant and aristocrats from the second dungeon wing (M32,3).
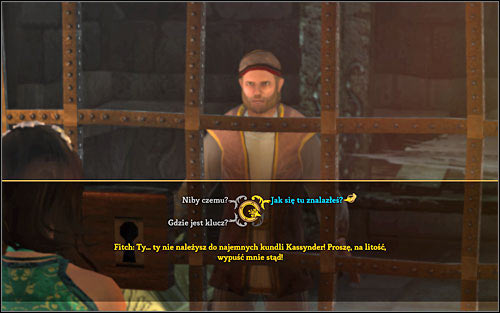 Inconspicuous, yet wealthy.
It's also worth to take a look inside the hidden room (M32,4) which can be accessed only by breaking through the wall where the aristocrats have been imprisoned. There you will find powerful gauntlets for Lucas, the Hand of Azunai.
You have to breach the wall in one of the rooms.If you free all the prisoners, you will receive the Liberator deed (+5 Stamina).


After Jayne runs away from the Spire, you will have to chase her. Follow the only possible path and you will reach the Chapterhouse (the one from the beginning of the game, M4). Take Armanda and Lazar through the portal that you came from, go to the basement and from there to the East Forest (M9). On your way to Mournweald (M10) you will have to fight a hole army of powerful Archons. Search through each corpse that you come across, as there might be very powerful items beside them.
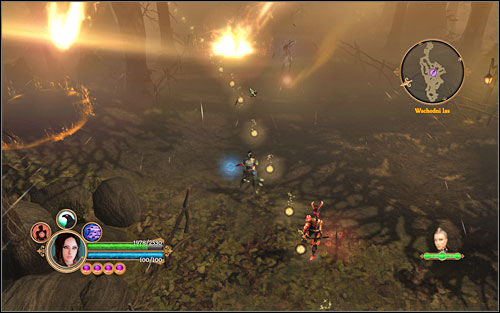 Fighting your way through the forest is quite a challenge.
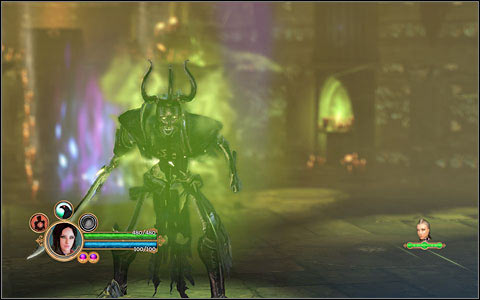
Eventually you will reach the spot where you once found Lord Montbarron's corpse (M10,1). There you will encounter Jayne, who will summon the Corrupted Creator.
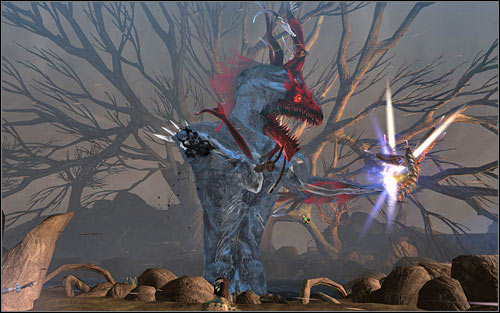 The final boss is one of the easiest fights in the game.
After you defeat him, you will have to decide what to do with Jayne. If you let her live, she will join forces with you and help the Queen in uniting the country. If you decide to slay her, the kingdom's fate will stay uncertain.
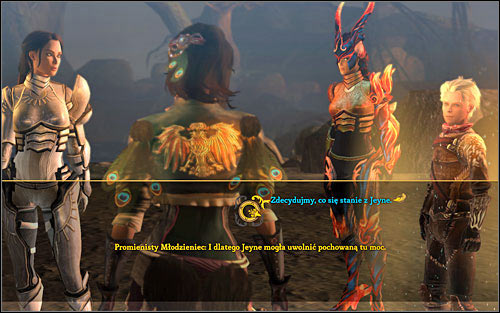 This is the moment when you decide the fate of the world.
Dungeon Siege III comes to an end at this point. Congratulations on finishing the game and I hope that the guide came in handy :)


 Dracula: Origin Game Guide & Walkthrough
 Diablo III: Reaper of Souls Game Guide & WalkthroughDragon Age: Origins Game Guide & WalkthroughDungeon Siege III Game Guide & Walkthrough
 Dungeon Siege II: Broken World Game Guide & Walkthrough