

Don't Starve is a very complex and a very demanding survival simulator. And a very unforgiving one, at the same time. It is enough to make one unnecessary step to have your character die a painful and irreversible death. To prevent that, or at least cut the number of prospective deaths down, it is a best to make use of this guide. The information contained in it is very useful, and may prove crucial for the struggle for survival in the wilderness.
The guide featuring:
Michal "kwisc" Chwistek
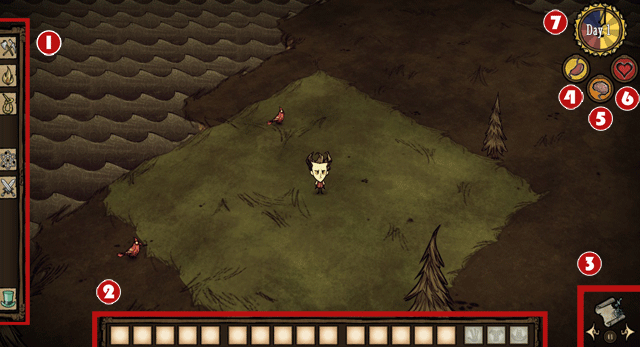
1. Tool creation bar- in here, you can find all the tools that you can craft, including the description of necessary resources.
2. Equipment - at the bottom of the screen, you can find your character's equipment. The last three icons to the right are slots for the items your character is currently equipped with (the right hand, the torso and the head).
3. Navigation buttons - map, pause and arrows to pan the camera with.
4. Hunger indicator -If the level of the indicator runs down, your character starts losing healthpoints. Replenish the indicator by heating berries, meat or the vegetables you cultivate. Cooked meals are always more effective when it comes to sating hunger. The stomach empties with the passage of time.
5. Sanity indicator - If the indicator drops below a pre-determined level, your character will start to hear whispers and to see various apparitions. To prevent that from happening, you need to avoid eating meat, green mushrooms and sleeping in the open air without a sleeping bag. The sanity indicator drops with the passage of time. You can find more information about sanity further in this chapter.
6. Physical fitness indicator - If it drops to indicate zero, your character dies. Unlike in the case of hunger and mental health, the physical fitness level doesn't drop over time. You lose health only when you take damage, starve or eat the wrong types of food. You can replenish the fitness level by eating the right foodstuff, or by taking medicines.
7. The clock - the clock's face has been divided into three parts that correspond to different daytimes: yellow (daytime), red (dusk) and navy blue (nighttime). Additionally, the clock displays a number of days you have managed to survive, as well as a ring to the left which indicates the phases of the moon.
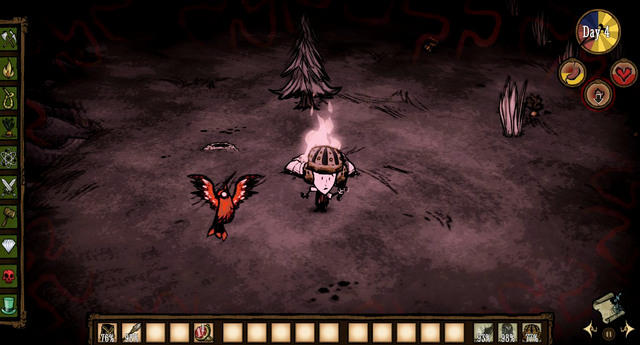
The sanity indicator is quite peculiar, and it can influence the perception of the world by your character. As it keeps dropping, your character starts to experience various symptoms of declining mental health:
The display starts to tremble and blur
Colors appear to be more vivid
The character starts to hallucinate and hear whispers
The looks of animals changes (rabbits become beardlings, and summer birds turn into winter birds)
Strange eyes appear in the darkness
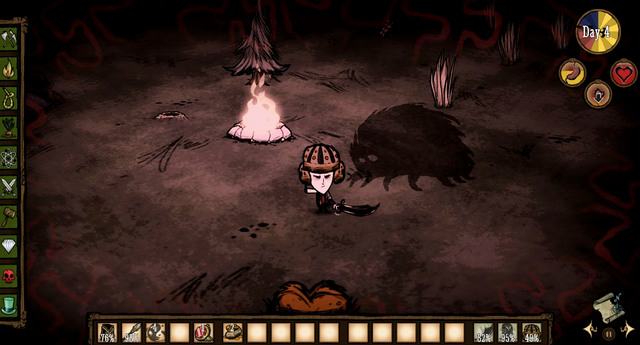
When the sanity level drops to 30, the character becomes insane and the animals that so far have been harmless, start to attack. To prevent that from happening, it is a good idea that you acquaint yourself with the below table. You can find there most of the activities that have positive, or adverse impact on your character's sanity.
Effect
Impact on Sanity
Sleeping in a Tent
+50
Sleeping on a Straw Roll
Killing a Terrorbeak
+33
Eating Taffy, Cooked Green Cap, Jerky, Pumpkin Cookie
Killing Crawling Horror
+15
Eating Garland, Small Jerky, Cooked Blue Cap
Shaving Wilson's beard
+10
Eating meals cooked in a Crock Pot, not including Taffy, Pumpkin Cookie, Wet Goop, Monster Lasagna
Picking Flowers
+5
Eating Durian, Dark Petals, Extra Smelly Durian, Monster Jerky
Picking Evil Flowers
-5
Eating food that's gone off and Meat, Drumstick, Morsel, Frog Legs, Cooked Monster Meat, Cooked Red Cap
Digging in a grave
-10
Eating Monster Meat I Blue Mushroom
Passing through a Worm Hole
-15
Eating Monster Lasagna
Nocturnal monster attack
-20
Eating Green Mushroom
-50
Effect
Mental shift over a minute
The Aura of an amicable pig (needs to be close)
+25
Playing as Maxwell
+20
Wearing Tam o' Shanter
+6.7
Wearing Top Hat, Dapper Vest
+3.3
Wearing Feather Hat, Breezy Vest, Puffy Vest, Amulet
+2
Wearing Garland, Winter Hat
+1.3
Rainfalls
max -3.3
Rearing Spiderhat, One-band Hat
-2
Negative aura Night Light
-3
Dusk
-5
Wearing Night Armor
-10
Wearing Dark Sword
-20
The negative aura of a Dark Flower and Spider
-25
Making friends with the pig using One-band Hat
-25/swinia
The negative aura of Beardling, Hound, Red Hound, Blue Hound, Tentacle, Spider Warrior, Ghost, Night Hand
-40
Utter darkness
-50
The negative aura of a Werepig, Treeguard, Crawling Horror, Terrorbeak,
-100
The negative aura of a Dearclops, Spider Queen
-400
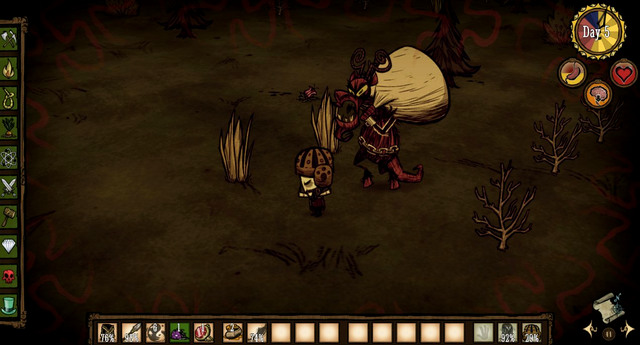
Naughtiness is a hidden statistics that rises every time you kill, either directly, or with a trap, an innocent animal. Once you gain 30-50 naughtiness points, a creature named Krampus will appear. It will try and steal all of the valuable items from your encampment. It will even go as far as to destroy the chest to get the hold of the treasures. You need to kill the beast in such a case. It is best to use Blow Darts to do that, they will finish out the creature quickly. To learn more about fight, consult the chapter devoted to it. The innocent animals, alongside with the number of points for killing each, has been included below.
Animal
Naughtiness points
Crow
1
Butterfly
1
Rabbit/Beardling
1
Redbird
2
Snowbird
2
Tallbird
2
Pig
3
Beefalo
4
Smallbird
6
Smallish Tallbird
6
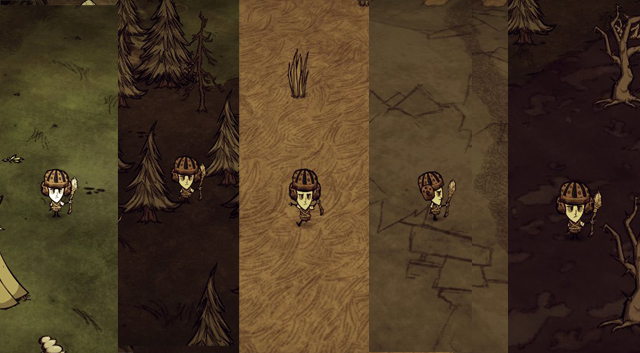
Maps in Don't Starve are created randomly, in every scenery, a different type of resources can be found. A full list of these has been included below.
Scenery type
Very popular
Moderately popular
Rare
Forrest
Log, Pine Cone, Twigs
Pig House, Spider, Petals, Grave
Berry Bush
Meadow
Flint, Petals, Carrots, Berry Bush, Pine Cone, Grass, Log, Twigs, Bee, Butterfly, Killer Bee, Firefly, Frog Pond, Rabbit, Spider
Rocks
Savannah
Grass, Rabbit, Redbird, Crow
Beefalo, Manure, Rock, Spider
Petals
Swamps
Reeds, Tentacle, Merm, Rundown House
Spider, Log, Twigs, Pond
Rocky terrain
Flint, Rock
Gold Nugget, Nitre, Tallbird, Tallbird Egg, Spider
Once you die, you are awarded experience points, whose number depends on how long you managed to survive playing that character. With the points you can unlock other characters with various skills and statistics. The only exceptions here are Maxwell and Wes that can be obtained in the Adventure Mode. A description of the mode can be found further in the guide.
Below, you will find a list of characters organized In the order of their unlocking.
Name
Hunger
Physical fitness
Sanity
Damage
Abilities
Wilson

150
150
200
1.0x
Grows the Magnificent Beard
Willow
150
150
200
1.0x
Fire resistance
Lights up in darkness
Wendy

150
150
200
1.0x
She can be visited by her sister Abigail at night. Abigail helps fight enemies.
Wolfgang

225
225
200
1.5x
Increased physical fitness., more stomach capacity, stronger attacks
WX-78
150
150
200
1.0x
Can eat stale food without adverse effects
Wickerbottom

150
150
200
1.0x
Can acquire a higher technology level. Thanks to this, she Has access to all schemata after the Alchemy Engine is built
Wes
112, decreases by 25% faster
112
150
0.75x
Says nothing
Maxwell

150
75
200
1.0x
His sanity regenerates at the pace of 20 per minute.
Starts the game with 1x Dark Sword, 1x Night Armor, 4x Nightmare Fuel, 1x Purple Gem
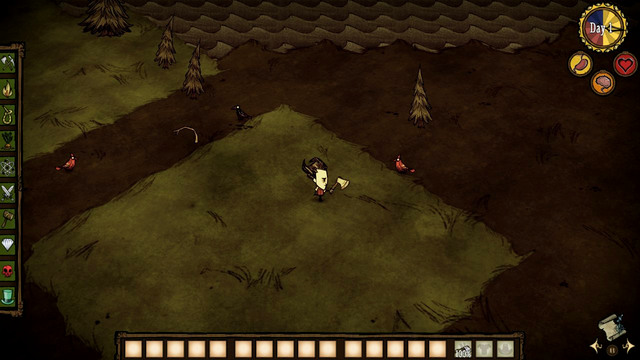
Your adventure always starts In the meadow, where there is an easy access to most of the basic resources. You should get to collecting them as quickly as possible. Nearly everything that you find lying on the ground, will come in handy soon.
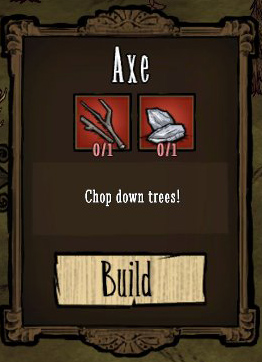
Your first task now is to create an Axe. What you are going to need for that is 1x Twigs and 1x Flint.
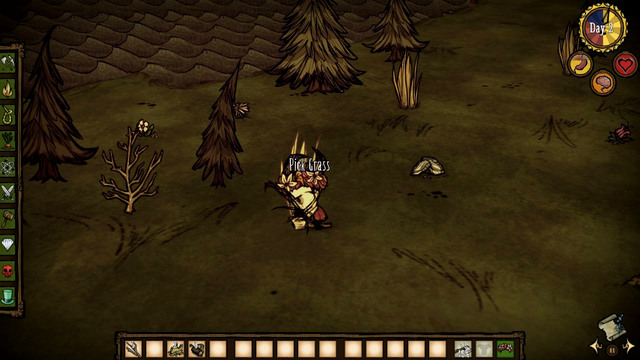
You get the former by left clicking on Sapling, and the latter one should be somewhere around on the ground. To create an item, you need to click on it in the Tools tab, in the toolbar on the left rim of the screen.
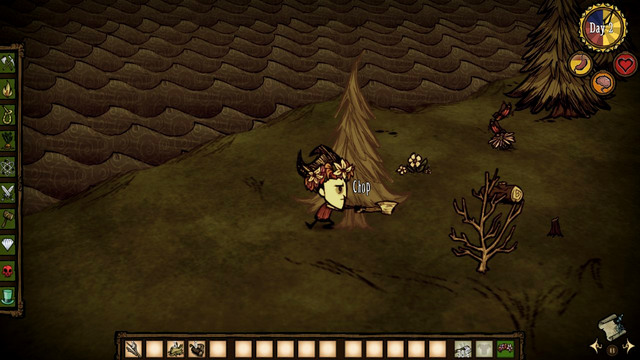
Once you create the axe, put it in the slot corresponding to the hand, on the right side of the equipment toolbar. From now on, you will be able to chop trees by clicking on them. This way you will be able to acquire wood (Log).
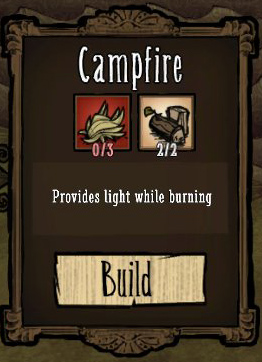
Your next task is to collect resources for a small Campfire. And so, you are going to need 3x Grass and 2x Log. Do not make fire yet. You will do that right before sunset.
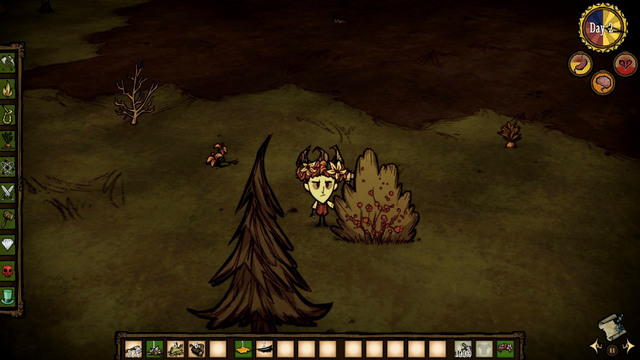
It is the time now to fill your character's stomach now. To do that, collect as many Carrots as you can find and Berries from the nearby Berry Bushes. If you Carry them over to the Campfire, you will be able to Cook those, which will increase their nutritional value.
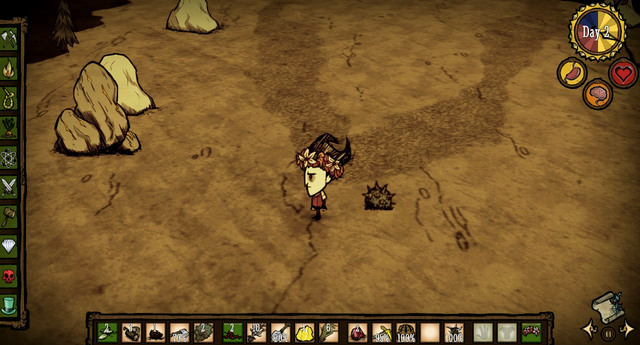
Once you get, at least, 5-10 pieces of food, you need to set out to search for Rocks. To do that, you need to discover a rocky area where there are the deposits of this material most often to be found. While wandering around, keep collecting all the resources you stumble upon, and also chop some trees to keep the campfire going throughout the night.
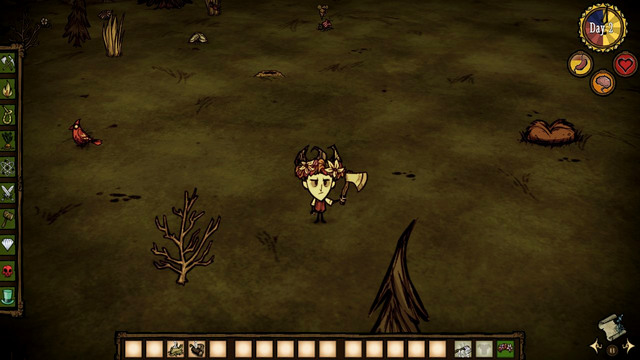
It is also a good idea to collect Flowers, as every 12 Petals can be used to create a Garland which increases your sanity level. You can find this item in the Dress tab. To make it work, you need to put it on your head by putting it in the appropriate slot to the right of the equipment bar.
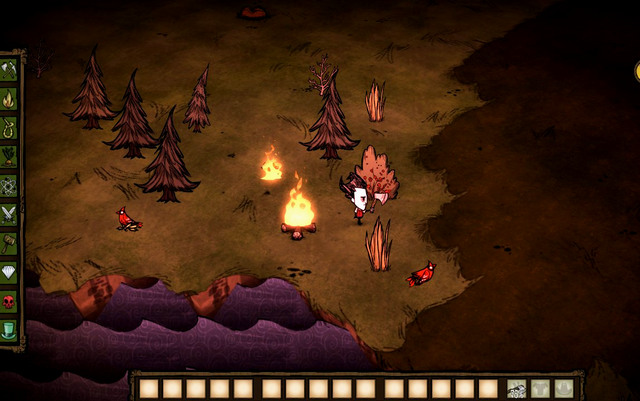
On the first day, you presumably won't manage to acquire rocks so, right before the nightfall, you need to kindle fire. You just need to make sure you don't start it too close to the trees, or else they will catch on fire. After you start fire, add one log to the fire, and make sure that the flame is medium in size. If the fire dies at night, so will your character. That is why you should always have some Grass and Logs on you. There is not going to be much to do at night. You should devote that time to cooking some food, to collecting the resources you can see and running through schemata available to you.
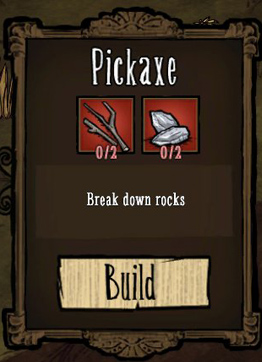
With the dawn of a new day, start searching for Rocks again. You are going to need a Pickaxe to extract them. What you are going to need to create it, are 2x Twigs and 2x Flint.
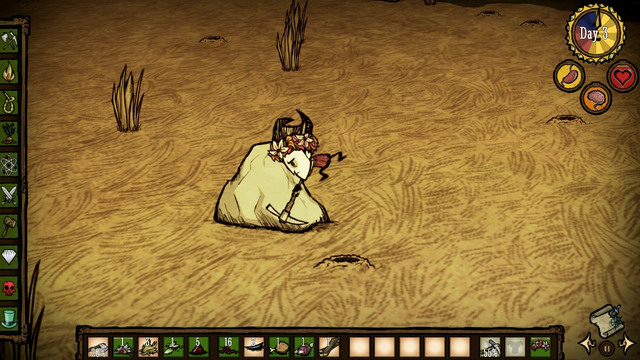
Take the tool into your right hand and click on the boulder several times to smash it. You need to acquire 16 rocks by working this way.
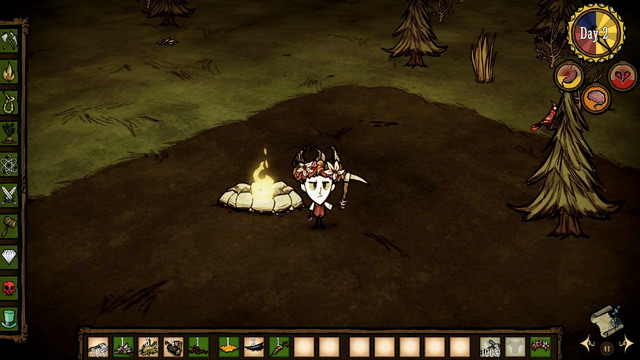
You are going to need twelve of them to create a Fire Pit. It is very useful, as it remains in place after the fire dies and everything you need to start fire again, is more logs.
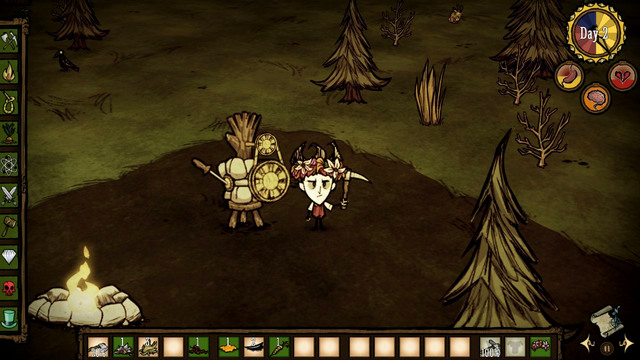
With the remaining four, you are going to build a Science Machine, available in the Science tab. Building the machine will give you access to a large number of new schemata.
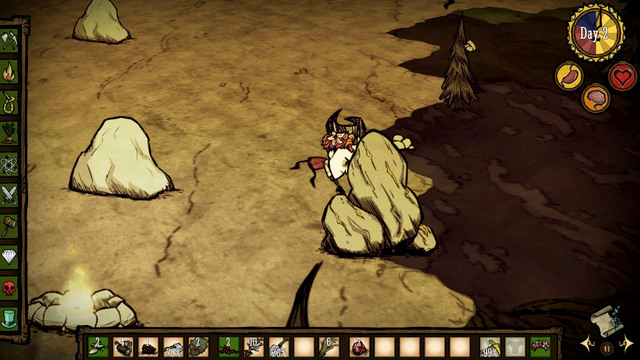
Unfortunately, building a Science Machine also requires, apart from the stones, a Gold Nugget. You can sometimes find it simply lying around on the ground, but this is a rather rare occurrence,. The most reliable source for gold are gold-bearing boulders. These are different from regular boulders In that they are crossed with a streak of gold on the surface. There is a 70% Chance of acquiring a gold nugget after smashing such a boulder. Once you succeed, you will be ready to set up your first permanent camp.
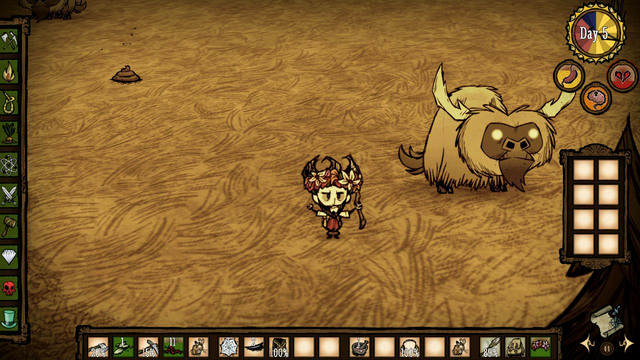
There are two things that you are going to need to set up a camp: Fire Pit and Science Machine. The former one allows you to kindle fire over and over again only by using wood. The former one gives you Access to New schemata. Neither of them, unfortunately, is portable. That is why, before you create them, you should determine what the Best location for your camp is. What should be the characteristics for the best location? First of All, this needs to be close a beefalo grazing land, or to a pig camp, or best near both. These are the only source for Manure, which you are going to Reed later one to cultivate your garden. To acquire manure from beefaloes, you actually need to do nothing. Yet, you need to feed pigs for that.
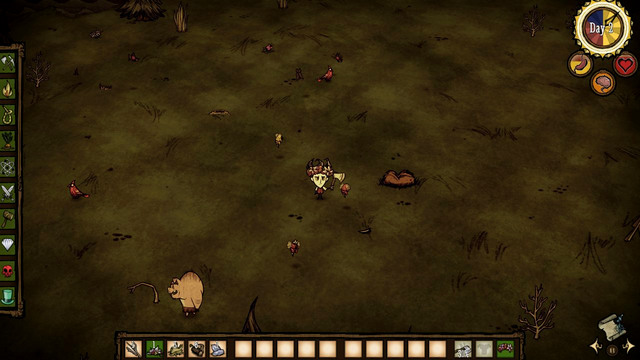
Another thing that you should be paying attention to, while searching for the perfect spot for your camp, is the terrain. Your best choice here is a grassland, because it will provide you with easy food and resources. I recommend against rocky areas, as you cannot plant there anything, and rocks, unlike pants, are a non-renewable resource which disappears after it is collected.
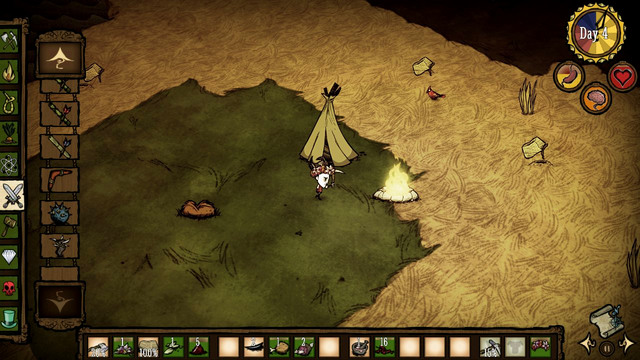
The last characteristic of a good camp is a heterogenous surrounding area. It is best to set up a camp where various areas come together, to ensure yourself with a quick access to the resources from savannah, swamps grasslands and in the woods. You won't then have to cover large areas to get these.
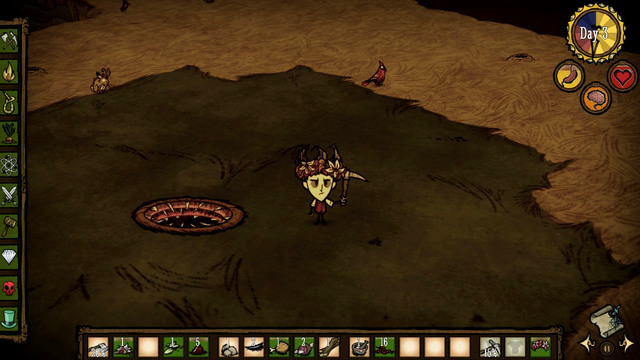
The neighborhood of one or several Worm Holes is an alternative though. Each of these is connected with another one, which makes for a quick transportation from place to place. Thanks to this, you can set up a camp in the middle of the woods, and still have an easy access to e.g. a rocky area. You just need to remember that each such journey along a wormhole decreases your sanity level by 15 points. You also need to watch out for Sick Worm Holes, which are effective only one way. Unlike the healthy ones, these are greenish instead of red in color.
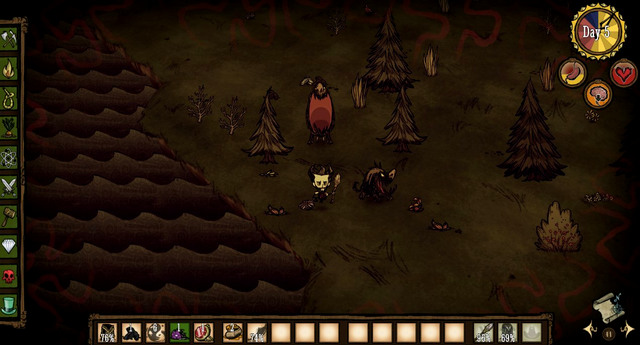
After you build a Fire Pit and a Science Machine You will have to work some more on your camp. It is a good idea to get prepared for defending it, in the first place. Every several days, your character will be attacked by Hounds, whose numbers increase with the passage of time. At first, there is going to be two of them, and most probably, they will attack somewhere between the third and the sixth day.
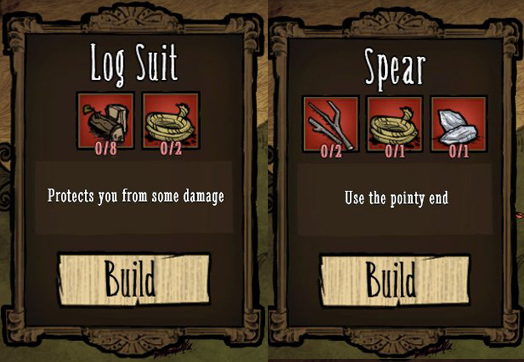
To defeat them without any problems, it is a good idea to arm yourself with a Spear and a Log Suit. The former one requires 1x Flint, 1x Rope, 2x Twigs, and the latter one 2x Rope and 8x Log. Rope is a rope that you can find in the Refined tab. To create it, you are going to need three pieces of Grass. Both of these pieces of armor should be kept in your inventory (but do not equip them yet). Equip these only right before the beasts attack. Some time before the attack starts, you will hear a dog howl, and your character will warn you by saying "Did you hear that?".
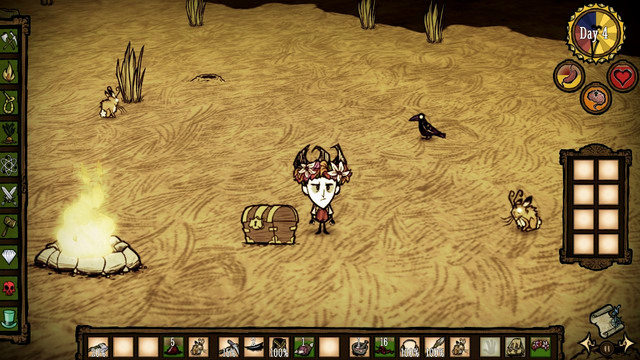
Once you are ready to defend the camp, you can finally start expanding it. It is best to start by building items for storing the collected resources.
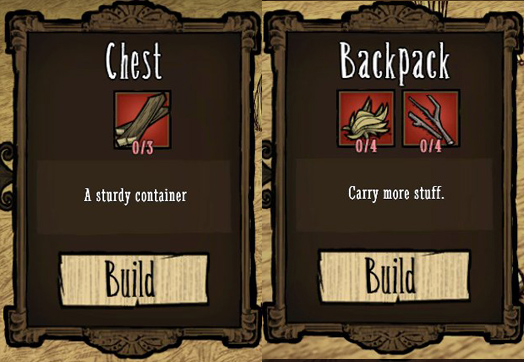
This means that what you should create is a Backpack and a Chest. The former one requires 4x Twigs and 4x Grass, and the latter 3x Boards (the Refined tab).
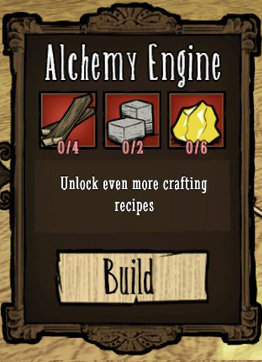
Your next task is to build the Alchemy Engine, which will unlock a lot of new schemata. What you are going to need here is 6x Gold Nugget, 4x Boards and 2x Cut Stone.
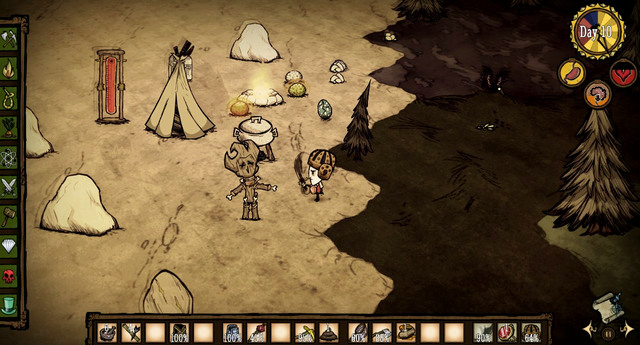
It is not easy to acquire six gold nuggets, but this is the only way to gain access to an Improved Farm and a Bird Cage. You will also need a Crock Pot. The description of these items can be found in the chapter devoted to food.
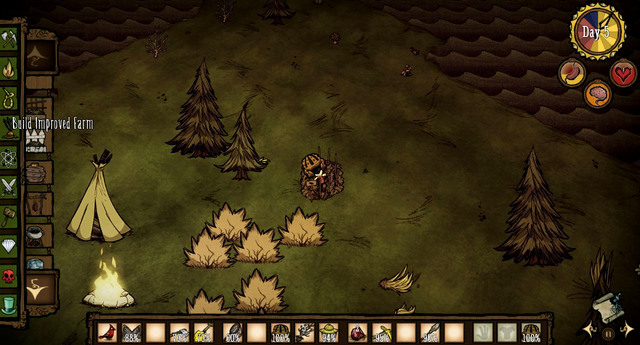
Farm is an excellent food source, but you will be able to create your first one after some time has passed. Until then, you need to rely on different sources. At first, your staple should consist of berries. It is relatively easy to gather them but there are several downsides to them: they are rarely to be found, have low nutritional value, and also you need to cover vast areas to find them. Wouldn't it be easier if you could find them right next to your camp?
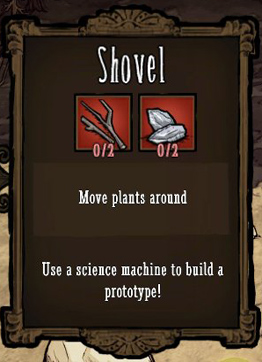
Here, you will need to use a Shovel. Craft it using up 2x Twigs and 2x Flint and always carry it around with you in your backpack.
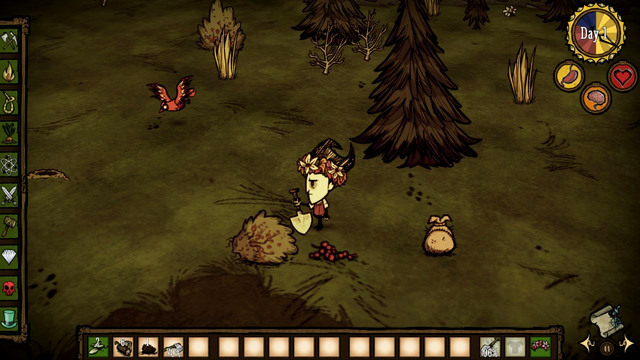
Thanks to this, whenever you find a Berry Bush, you will be able to dig it up and put it right next to your base.
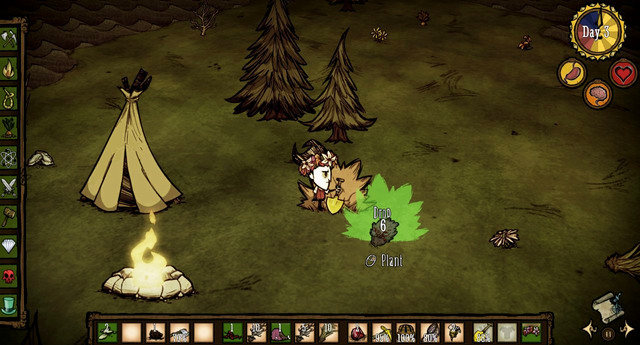
To plant it, you need to left click on it, and right click on the spot where you want to put it. Before the bush starts to bear fruit, it needs to be fertilized. For that, you need to use manure produced by pigs and beefaloes. As soon as you put the fertilizer onto the plant, it will change colors, and from now on you will be able to pick berries every 3-5 days. The frequency of harvests depends on the precipitation, and the bush is going to need fertilized after every 3-5 harvests (it changes colors again).
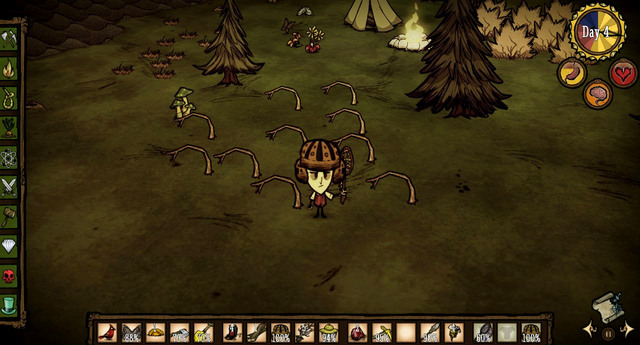
In the same way as the Berry Bush, you can plant Saplings and Grass. The former ones do not require additional fertilization.
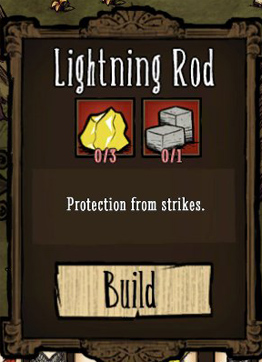
Be careful though, as you play a gardener. All of the plants are flammable and, as soon as one bush catches on fire, also the other plants will be consumed. To protect yourself from that, put a Lightning Rod near the plant patches (3x Gold Nugget, 1x Cut Stone).
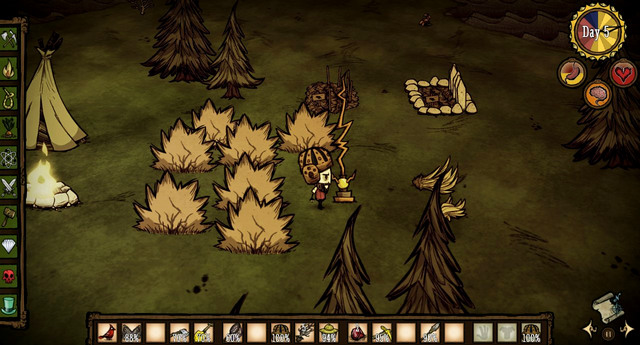
Lightning rods attract lightnings, which protects the plants from being struck. Another method of achieving this, is creating several smaller patches with some space in-between. This way, you will only lose some of the plants in case of fire.
Once you build the Alchemy Engine, you can finally get to building a farm. There are two kinds of these: Basic Farm and Improved Farm. The difference between those is the speed they give crops with and their longevity. The differences are outlined in the below table. Using the Basic Farm is not too effective, so it is better to create the improved ones right from the beginning.
Name
Basic Farm
Improved Farm
Materials
8x Grass, 4x Manure, 4x Log
10x Grass, 6x Manure, 4x Stone
Plant growth speed
40 hours of daylight
20 hours of daylight
Number of harvests before fertilizing is necessary
20
30
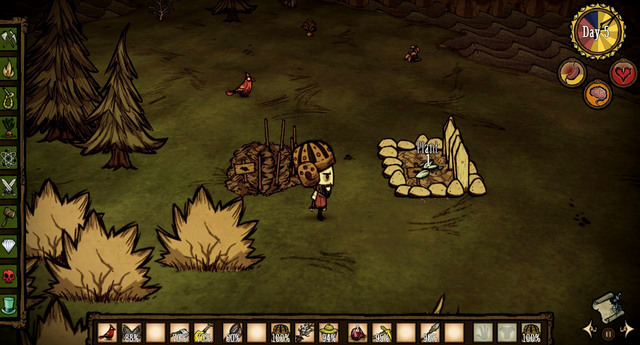
After you create the farms, you need to sow plants with regular Seeds or seeds for specific plants (e.g. Carrot Seeds). To create the latter ones, however, you need to have a bird. To learn more, read the chapter devoted to animals. Until you manage to catch a bird, you will have to make use of regular seeds, which yields random plants. The plants have been listed below.
Vegetable name
Chance of growing
Carrot
31,6%
Corn
31,6%
Pumpkin
10,5%
Eggplant
10,5%
Durian
5,25%
Pomegranate
5,25%
Dragon Fruit
5,25%
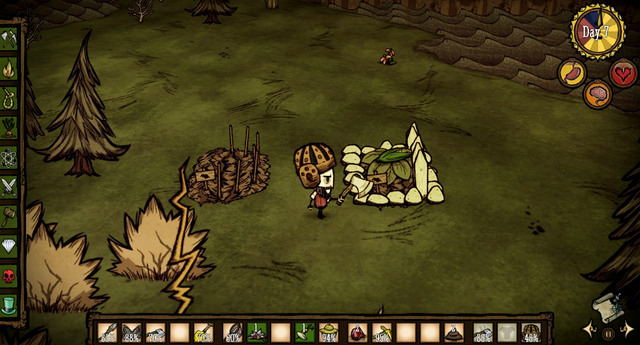
After planting, wait for 40 hours in the case of the Basic Farm and 20 hours in the case of the Improved Farm, before harvesting. Remember that only the daylight hours count here. Fortunately enough, there are several factors that increase the speed of growth. The ones that remain outside of your powers are temperature and rainfalls. If the temperature is above 28 degrees, the speed of growth is higher by 100%, and rainfalls can speed the process up even by additional 300% (depending on the intensity). Unfortunately, this works both ways. The temperature below 5 degrees halts all vegetation. That is why a farm is not the best food source during winters.
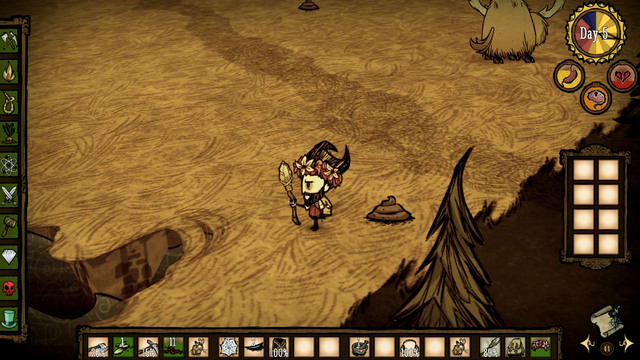
You can also speed the process up by yourself, by fertilizing the plants with Manure, Rot and Rotten Eggs. Basic Farm requires 4x Manure or 16x Rot/Rotten Egg, and Improved Farm 2x Manure or 8x Rot/Rotten Egg, to bear ripe vegetables. Still, the manure needs to be supplied in waves with intervals.
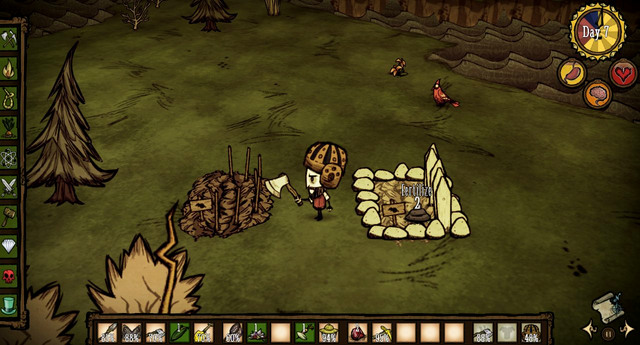
What also depends on the farm type is the number of harvests before the compulsory fertilizing. In the case of the Basic Farm it's 20, and in the case of the Improved Farm - 30. When the soil goes barren, (it will become grey and green), every piece of Manure applied to it will allow you to grow additional 10 plants. Rot and Rotten Egg increases the number by 2.
Growing plants and picking berries are not the only available food sources. Your character can easily turn from a veggie into a carnivore. Still, it happens not without an influence on the naughtiness level.
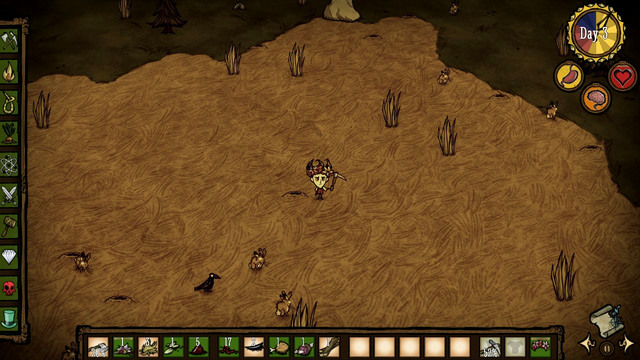
Start learning how to hunt by catching several rabbits. You are going to need some sort of bait for that (any vegetable or fruit will do, e.g. Carrot) and a Trap.
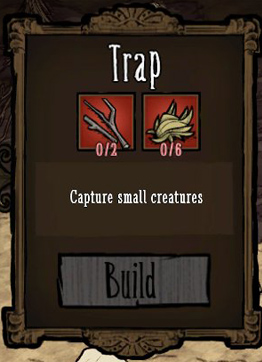
You create the latter one with 6x Grass and 2x Twigs.
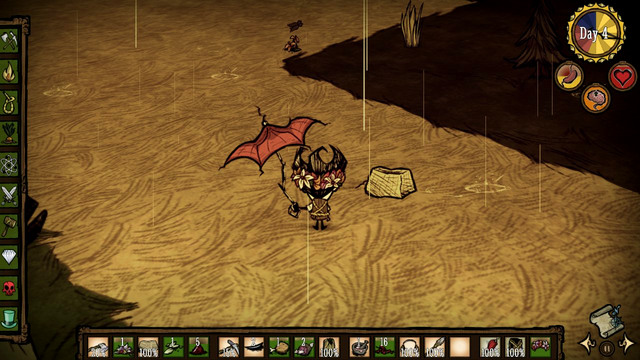
Place it several meters away from the animal, use bait on the trap and move away a bit. The rabbit should carefully approach the vegetable and get trapped as a result. You now need to collect the trap, and the meat will end up in your backpack. To turn the animal into meat, right click on it or carry it over to the fire to roast it. The upside of the alive rabbits is that you can store them for an extended period of time, so they are good for making provisions. There are also some other methods of hunting:
1. You can place the bait on the ground and wait for an animal to come and get it. While it is eating, you can hit the animal around the head with your axe. The upside of this method is that it does not use up the bait and does not require a trap.
2. Another method is by putting a trap right on the rabbit hole The animal will get trapped right after it comes out of the hole, without the necessity for bait to be used.
3. Driving animals into traps is also quite effective. It is a good idea, though, to put more than one trap to make sure that you succeed.
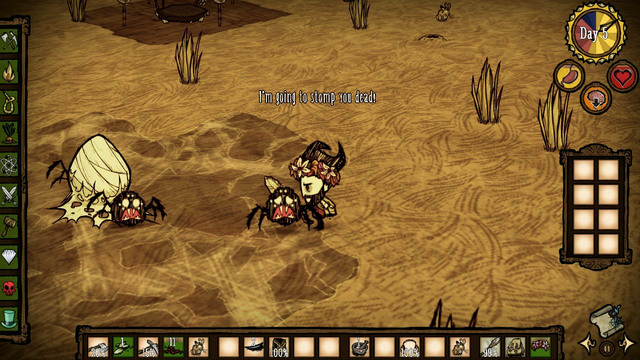
The last one of the methods is also very effective against aggressive animals. If you set several traps around a spider nest, you can easily get rid of unwanted neighbors. Animals like frogs, spiders die immediately after they enter a trap, and they leave meat and the remaining parts of the body behind.
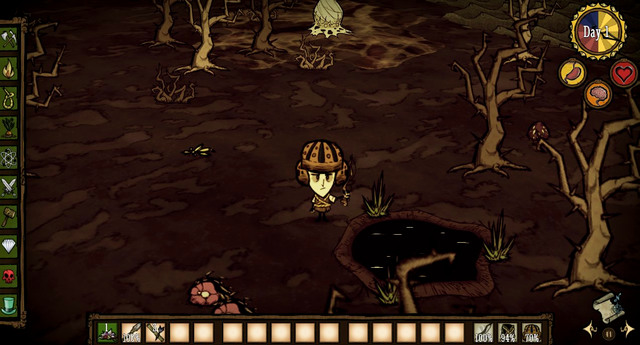
You can also ago fishing in the game. To do that, you need to equip your character with a Fishing Rod and find a Pond.
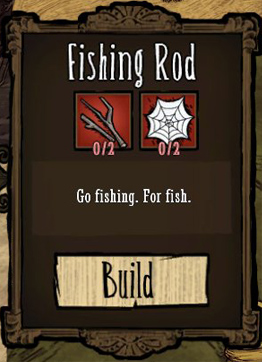
To craft a fishing rod, you are going to need 2x Twigs and 2x Silk, and the ponds are the easiest to be found in the swamps.
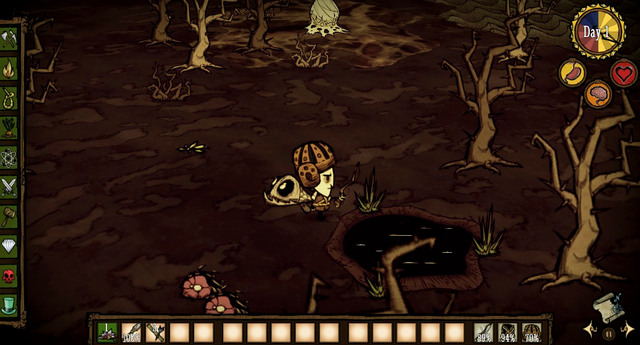
To catch a fish, click on the surface of the water and wait for the animal to catch onto the bait. You need to click onto the water (twice) and the fish is yours. The waiting times may be different each time between 2 and 20 seconds, which depends on the frequency with which you come fishing in an individual pond.
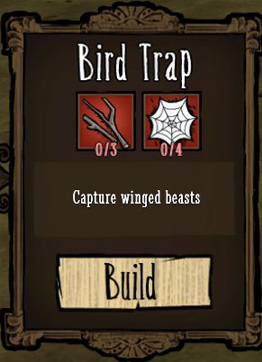
Birds are another good source of food. To catch these, you are going to need a Bird Trap. To craft it, you are going to need z 3x Twigs and 4x Silk.
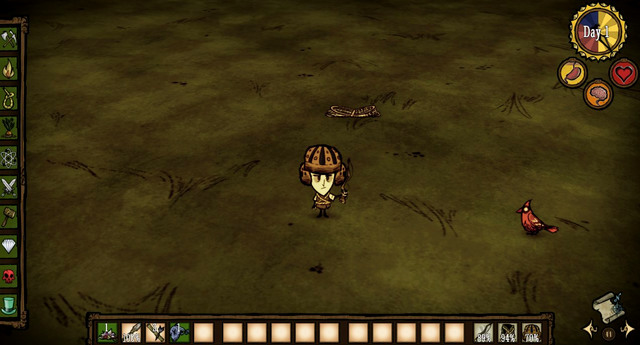
To catch one, you need to set the trap where you have noticed the bird and spill some Seeds on it. When you come back after some time, the animal will already be trapped..
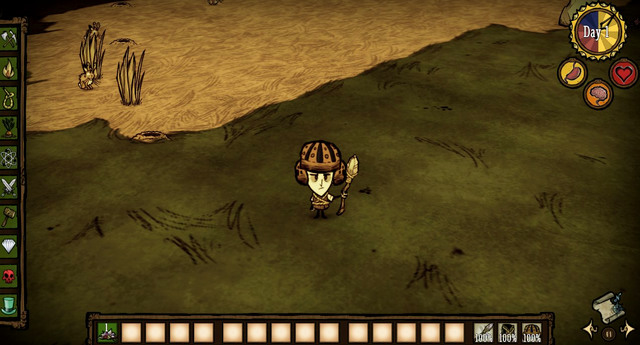
Hunting larger animals is not that easy anymore. Beefaloes and pigs can give you several scars here and there, if you have not prepared properly. At the very beginning, the best arms you can afford is a Spear and a Log Suit.
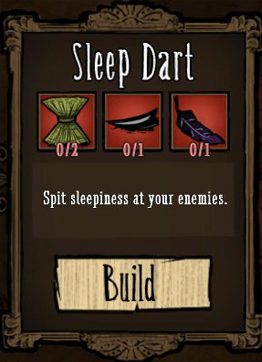
If you want to get well prepared for hunting anyways, you can create a supply of Sleeping Darts. To create them, you are going to need 3x Cut Reeds, 1x Stinger and 1x Crow Feather.
The first one grows in the swamps, the second one, you can get by killing bees, and the third one is what a Crow sometimes leaves behind if you kill it. If you hit an animal with such a dart, it falls sleep, and thus becomes a much easier target to hit.
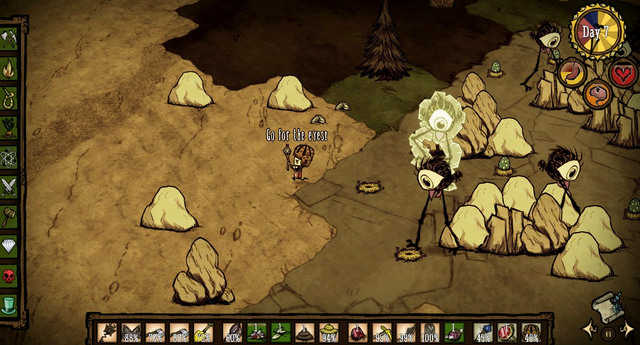
While hunting, remember at all times not to fight with too many enemies at once. While running away from a pack of beefaloes, always try to lure one of them away and kill it out of the others' sight. A very effective way to get rid of enemies is to set other animals on them. You can, for example drive a swarm of spiders mad and bring them to pig camp. The animals will start to fight each other, and afterwards, you will be able to collect the trophies they leave behind.
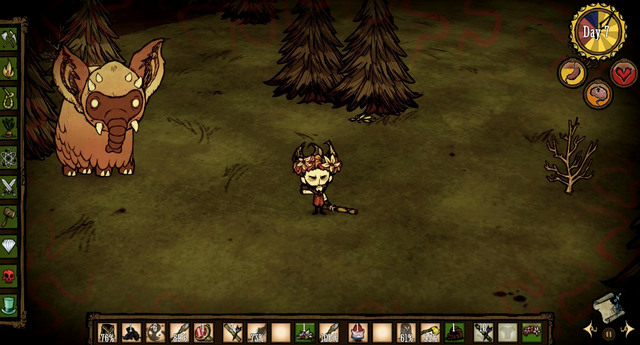
The last animal that requires a special notion is a Koalefant. The large creature that is a cross between an elephant and a koala bear is quite a challenge for every hunter. Finding it itself is a troublesome task.
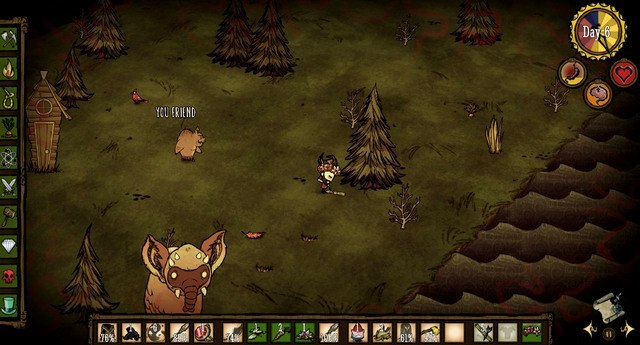
Unlike in the case of the other animals, you cannot simply stumble into it. You need to find it first. To do that, you need to find randomly generated Suspicious Dirt Piles on the map . After you examine it, you will find traces leading up to another such pile. When you find the last one, your character will state the animal must be close. Go towards the designated area to find the animal.
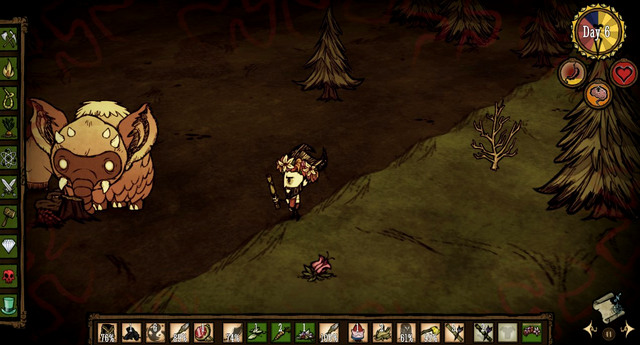
Koalefant Will not allow you to approach unless it is attacked. Therefore, you need to strike from afar with a Boomerang or a Blow Dart. The former item requires 1x Board, 1x Silk and 1x Charcoal, and the latter 2x Cut Reeds, 1x Hound's Tooth and Snowbird Feather.
After you hit it, the animal goes mad and starts charging towards your character. To defeat it, keep running for as long as it performs a missed attack. That is when you will have some time to deal 3-6 blows. Repeat for several times until you finally hunt the beast.
Along with the feeling of satisfaction, you will also receive 8x Meat this way, as well as 1x Koalefant Trunk. The other item is very useful, as it can be used for crafting a Breezy Vest, which protects from cold.
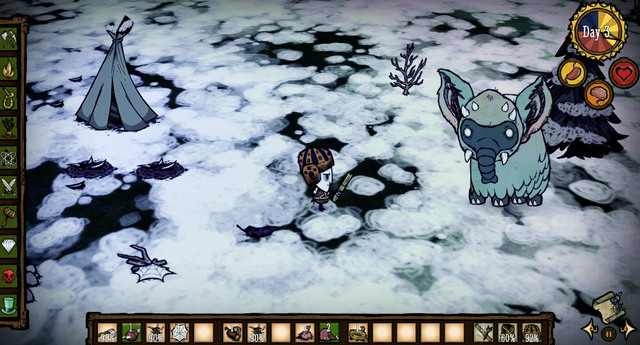
Apart from a regular Koalefant, there is also a winter variety - a Winter Koalefant. The method of hunting down this one is the same as for the regular one, but the reward is different. Instead of the Koalefant Trunk, you will receive a Winter Koalefant Trunk. This trunk is a component of the best winter piece of garment called Puffy Vest.
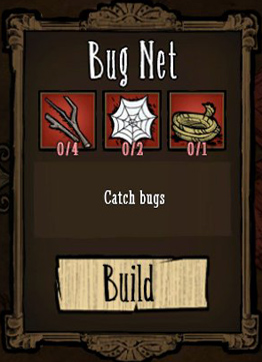
In Don't Starve, apart from hunting, you can raise animals, which come as a plentiful material resource. It is best to start off as a rancher is to start a butterfly farm. To do that, you are going to need a Bug Net and some patience while catching butterflies. To craft the net, you are going to need 4x Twigs, 2x Silk and 1x Rope.
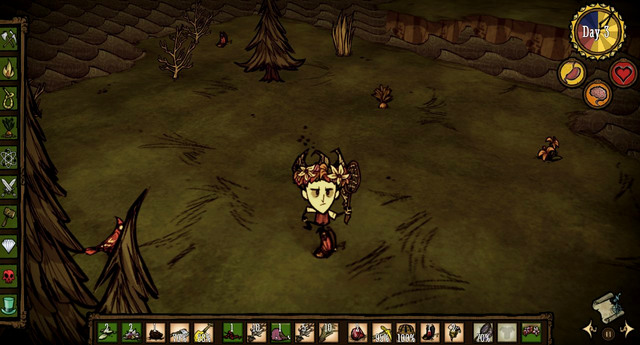
Once the net is ready you need to find an area with flowers in it, and start hunting. Catch 5-10 insects and use them to plant flowers in the same way you planted berry bushes earlier.
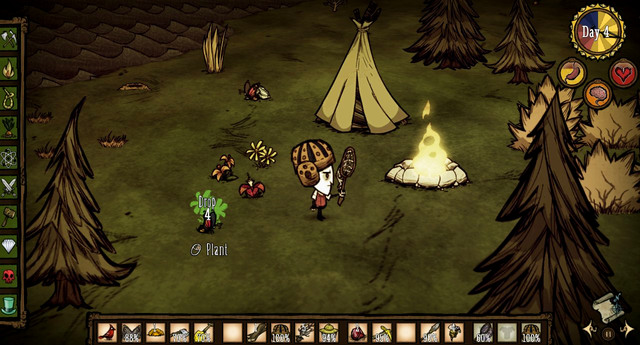
Vegetation planted this way does not require fertilization, and they will keep supplying you with further butterflies. They will also come in handy while setting up a bee box.
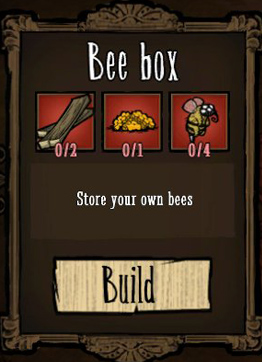
To start a mass production of honey, you are going to need a Bee Box first of all. The materials necessary for building it are 2x Boards, 1x Honeycomb and 4x Bee.
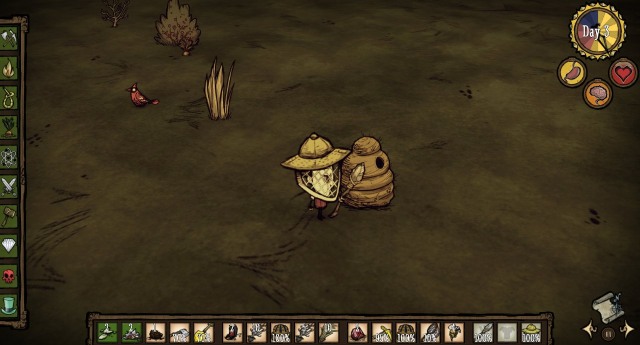
Honeycomb can be acquired by destroying a Bee Hive, that is, unfortunately, protected by a swarm of infuriated bees. How do you avoid bee stings? Right after the bees start attacking, run away a bit from the approaching bees, go around them and go back towards the bee hive.
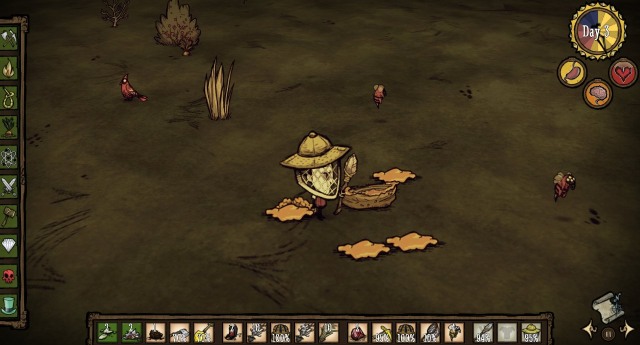
After you come back to the spot, destroy the hive before the blood thirsty insects catch up with you. Collect the materials left on the ground and set out to search for some more placid insects.
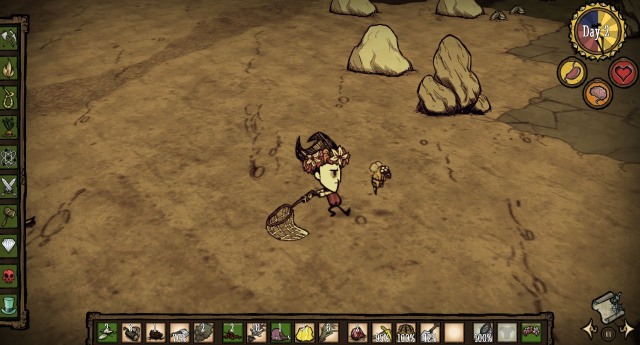
If you come armed with a Bug Net, Bees are an easy target. .To build a bee box, you need as few as four bees.
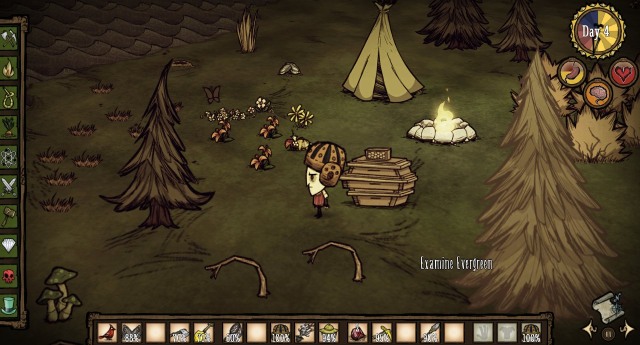
The bee box is best set up somewhere near the butterfly farm. This way you will ensure bees with an easy access to pollen, which will speed-up the honey-production process.
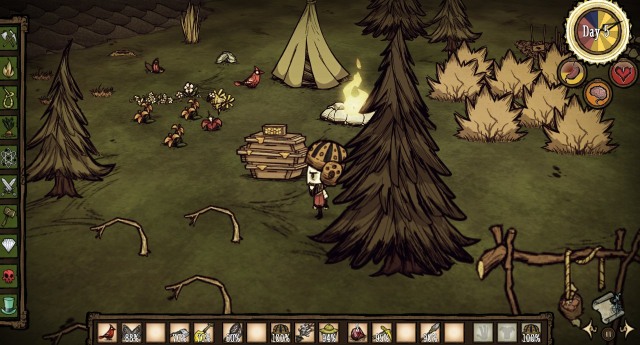
There are four phases to money-making process. At first, the bee box is empty. Then it ills up with 2,4, and then 6 units of Honey. If you want to empty the bee box, it is best to wait until the bees fly away and then collect everything you want from the bee box. The insects will then turn hostile for a short period of time.
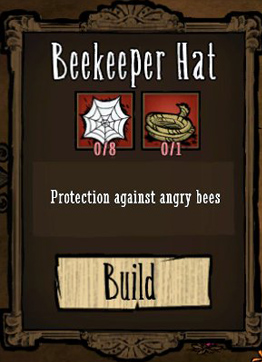
To avoid being bee-stung, you should equip yourself with a Beekeeper Hat. This will bring down the amount of damage dealt by the bees by 80%. To create the hat, you are going to need 8x Silk and 1x Rope.
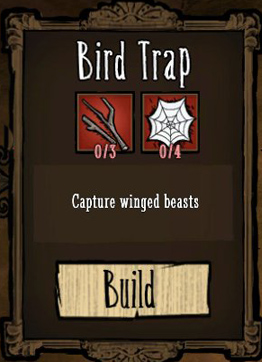
You can also raise birds. To catch them, you need to use a Bird Trap, which you can create with 3x Twigs and 4x Silk.
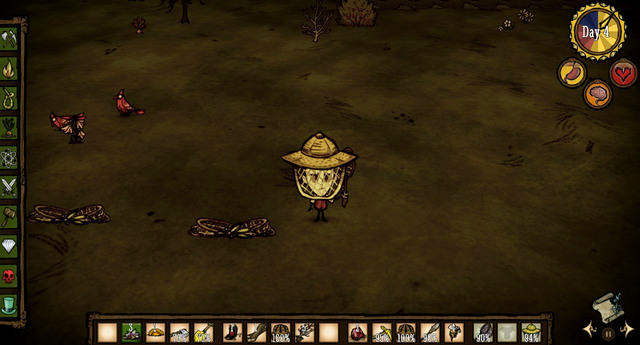
To catch one, you need to set the trap where you have noticed the bird and spill some Seeds on it. When you come back after some time, the animal will already be trapped.
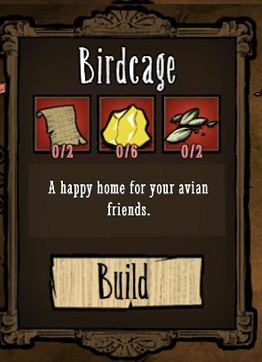
You can now take the bird to your camp and put it into the Bird Cage. To create one you are going to need 2x Paprus, 6x Gold Nugget and 2x Seeds.
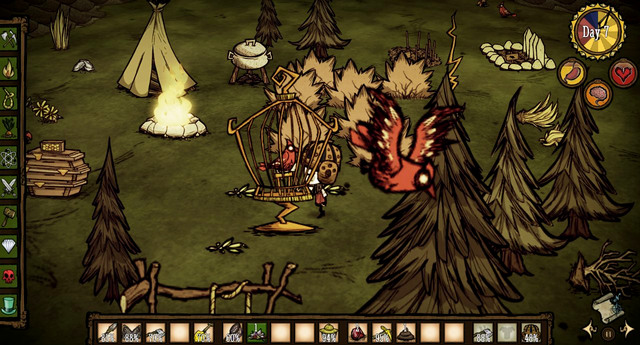
A birds caught in this way can be feed with seeds, vegetables and any kind of meat (save raw Monster Meat). A bird fed with vegetables will give you 1-2 seeds of the plant you feed to it. , and has a 25 chance of leaving regular Seeds. If you feed the bird with meat, what you will get in exchange is an Egg. The interesting thing is that you can not only eat the egg, but also take it to the Pig King and exchange it for Gold Nuggets.
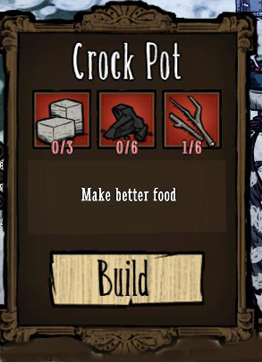
After you build the Science Machine you will gain access to Crock Pot schematics. To create it, you are going to need 3x Cut Stone, 6x Charcoal and 6x Twigs. You can obtain charcoal by burning trees.
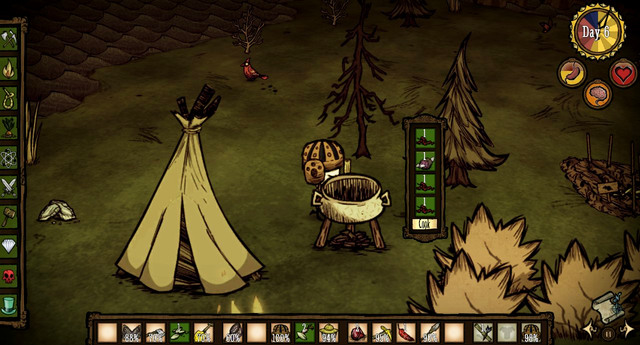
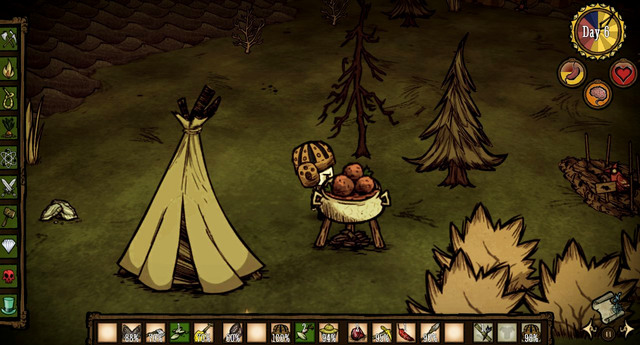
The already mentioned Crock Pot can be used for cooking meals using four ingredients, which brings down hunger very quickly, and heal your character. The cooking itself takes around 40 seconds, and if you leave it inside the pot for some time, it is going to be suitable for eating for a longer period of time. Below, you will find a detailed list of all recipes. Wherever there aren't 4 ingredients listed, you need to use , the so called, fillers, i.e. any other material not listed as a "Restriction". If you add ingredients used in the other meals, this will result in a meal with higher priority being cooked. In the case of equal priority, the result is random.
What will also prove useful, apart from the recipes, is the table of value for individual ingredients. Sometimes, to cook a meal you are going to need two pieces of meat. This means that you can use 4x Morsel (with the value of 0,5 each) or 2x Meat (with the value of 1 each). In a similar way, fruits, vegetables and apples have been divided.
Ingredients
Value
Meat, Cooked Meat, Monster Meat, Cooked Monster Meat
1x meat
Morsel, Cooked Morsel, Drumstick, Cooked Drumstick, Frog Legs, Cooked Frog Legs
0.5x meat
Pomegranate, Sliced Pomegranate, Durian, Sliced Durian, Dragon Fruit, Sliced Dragon Fruit
1x fruit
Berries, Roasted Berries
0.5x fruit
Carrot, Roasted Carrot, Corn, Popcorn, Pumpkin, Hot Pumpkin, Eggplant, Braised Eggplant
1x vegetable
Red Mushroom, Cooked Red Cap, Green Mushroom, Cooked Green Cap, Blue Mushroom, Cooked Blue Cap
0.5x vegetable
Egg, Cooked Egg
1x egg
Tallbird Egg, Fried Tallbird Egg
4x egg
Name
Fitness
Sanity
Hunger level
Priority
Ingredients
Restrictions
Mandrake Soup
+100
+150
+5
10
1xMandrake
Waffles
+60
+37,5
+5
10
1xButter 1xEgg 1xBerries
Fishsticks
+40
+37,5
+5
10
1xFish 1xTwigs
No Twigs
Dumplings
+40
+37,5
+5
5
1xEgg 0.5xmeat 0.5xVegetable
No Twigs
Dragonpie
+40
+75
+5
1
1xDragon Fruit
No meat
Honey Ham
+30
+75
+5
2
1xHoney meat
No Twigs
Turkey Dinner
+20
+75
+5
10
2xDrumstick 0.5xmeat 0.5xVegetable 0.5xFruit
Fruit Medley
+20
+25
+5
0
3xFruit
No meat and vegetables
Honey Nuggets
+20
+37,5
+5
2
1xHoney 0.5xmeat
No Twigs
Froggle Bunwich
+20
+37,5
+5
1
1xFrog Legs 0.5xVegetable
Butter Muffin
+20
+37,5
+5
1
1xButterfly Wings 0.5xVegetable
No meat
Bacon and Eggs
+20
+25
+5
10
2xEgg 1.5xmeat
No vegetables
Fish Tacos
+20
+37,5
+5
10
1xFish 1xCorn
Meaty Stew
+12
+75
+5
0
3xMieso
No Twigs
Meatballs
+3
+37,5
+5
-1
0.5xMeat
No Twigs
Stuffed Effplant
+3
+150
+5
1
1xEffplant 0.5xVegetable
Fist Full of Jam
+3
+62,5
+5
0
0.5xFruit
No Twigs, vegetables and meat
Ratatouille
+3
+37,5
+5
0
0.5xVegetable
No Twigs and meat
Kabobs
+3
+37,5
+5
5
0.5xMeat 1xTwigs
No Twigs and Monster Meat
Pumpkin Cookie
0
+25
+15
10
1xPumpkin 2xHoney
Wet Goop
0
+37,5
0
-2
Ingredients that do not go into any recipe
Taffy
-3
+37,5
+15
10
3xHoney
Monster Lasagna
-20
0
-20
10
2xMeat
No Twigs
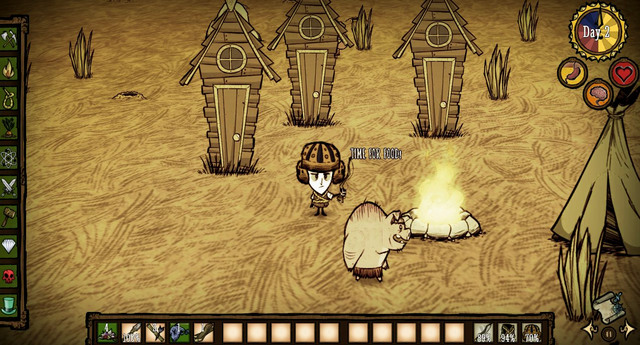
Two legged pigs play an important role in the game, so it is a good idea to have a closer look at them. First of all, they live in wooden houses called Pig Houses, which are generated at random, and can also be created by the player themselves.
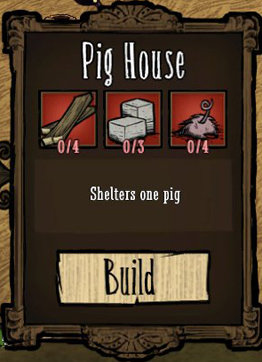
Putting up such a house requires 4x Boards, 3x Cut Stone and 4x Pig Skin. If you kill a pig, it will respawn in its house 4 days later. .
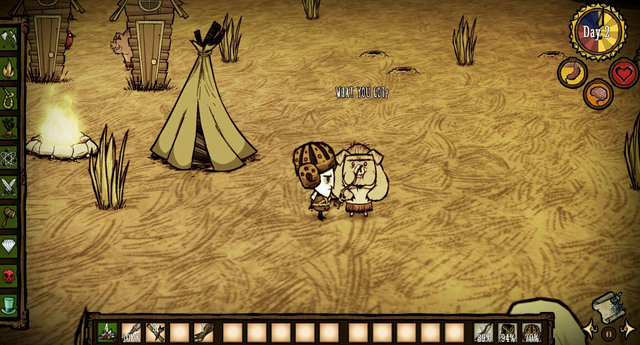
Secondly, pigs are an excellent source of various materials. A killed pig gives you Meat and Pig Skin sometimes, which you can use to create various items. If you feed vegetables to the animal, you will also get Manure, used in cultivation.
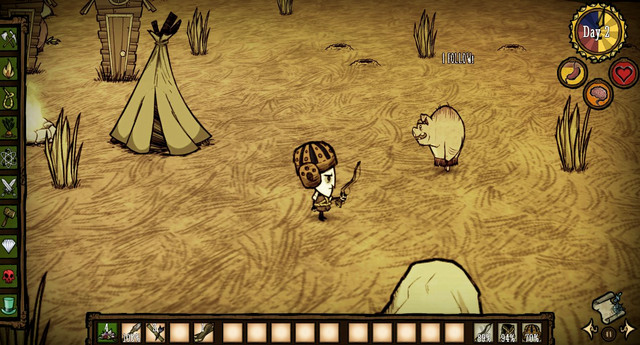
Pigs are also intelligent creatures which you can make friends with. To make this happen, you simply need to feed any kind of meat to one. The more it eats, the longer it will keep you company (2,5 days, at most).
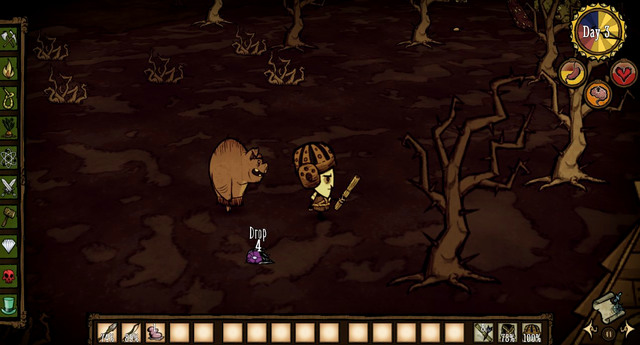
If, however, you feed to it four pieces of meat that lowers health (Monster Meat, Monster Jerky, Ham Bat or Monster Lasagna), it will turn into a Werepig. This same happens to any pig at full moon.
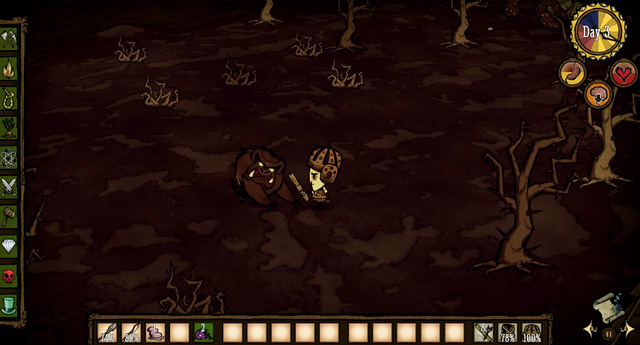
Werepig are strong and aggressive beasts that attack anything in sight. You can still use the transformation to your advantage. If you are bent on obtaining resources, lure one of the animals away from the others and feed monster meat into it, and then kill as quickly as possible.
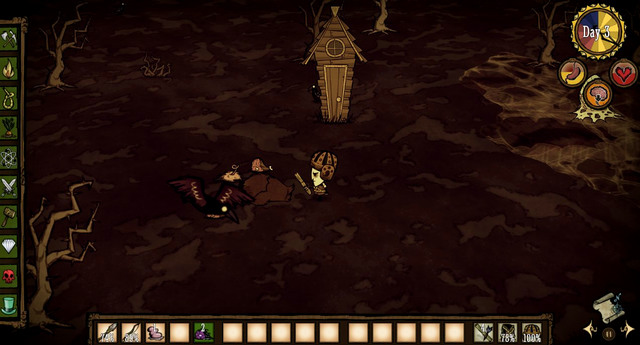
Once killed, werepig leaves behind two pieces of Meat and Pig Skin.
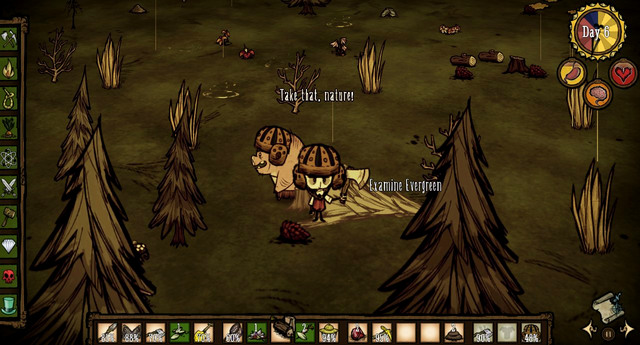
How can you profit from the friendship with pigs? First of all, their presence keeps on increasing your sanity levels (+25 per minute). Remember though, that this works only when you are standing close to the animal. Secondly, friendly pigs follow you around, help chop trees and fight. To make them more resistant, you can equip them with any headgear. A Football Helmet is best for this purpose. It is available in the Fight tab. To create it, you are going to need 1x Pig Skin and 1x Rope.
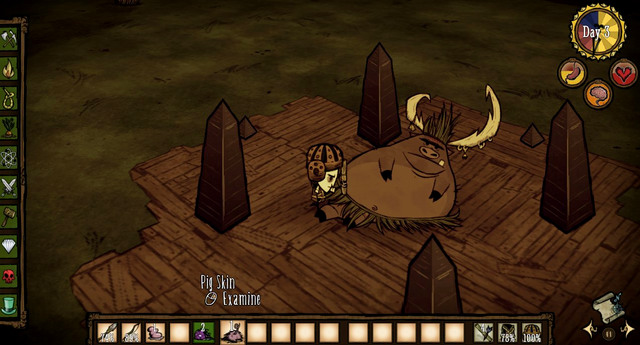
Apart from the pigs, and werepigs, you can also encounter a Pig King lying on the ground. If you give it food during the day, or treasures dug up from graves, you will receive Gold Nuggets in return. All exchangeable items and the size of rewards have been listed in the below table.
Item
Received gold
Any kind of meat except: Monster Meat and Frog Legs
1
Pig Skin, Koalefant Trunk, Winter Koalefant Trunk, Egg, Cooked Egg
1
All items found in graves except: Blue Gem, Red Gem, Nightmare Fueal, Gears, Amulet
2-8
The battles you fight in Don't Starve are not the most difficult ones, but they require some experience, appropriate equipment and learning effective battle techniques.
As far as the equipment is concerned, you should equip your character with appropriate weapon and armor. Although you can use a hatchet or a pickaxe to kill an enemy, it takes long and sure is difficult. Much better, in this respect, are the tools that are dedicated to fighting. Below, you can find a table listing all of the weapons and armors available, alongside with their most important statistics.
Name
Durability
Absorbed damage
Special features
Grass Suit
225
60%
Log Suit
450
80%
Night Armor
750
95%
Lowers sanity by 10 points/min and damage taken by 10%
.
Marble Suit
1050
95%
Decreases moving speed by 30%
Football Helmet
450
80%
Beekeeper Hat
750
80%
Protects only against Bees and Killer Bees
At first, the damage is absorbed by the armor worn as the last one, and then the one worn as the first one.
Name
Type
Damage
Durability
Special features
Fishing Rod/Bug Net
Melee weapon
4,25
Low
Shovel/Hammer/Pitchfork
Melee weapon
17
Low
Axe/Pickaxe
Melee weapon
27,2
Low
Torch
Melee weapon
17
Low
Makes possible to set beehives and spider dens on fire
Walking Cane
Melee weapon
17
None
Movement faster by 25%
Umbrella
Melee weapon
17
20 attacks
Decreases the drop in sanity level during rains
Ham Bat
Melee weapon
34
100 attacks
Spear
Melee weapon
34
150 attacks
Tentacle Spike
Melee weapon
51
100 attacks
May fall out of a killed Tentacle. Can't be crafted.
Dark Sword
Melee weapon
68
100 attacks
Drains for 20 sanity points a minute
Blow Dart
Ranged weapon
100
1 shot
Sleep Dart
Ranged weapon
0
1 shot
Puts the target to sleep
Fire Dart
Ranged weapon
50
1 shot l
Sets the target on fire
Ice Staff
Ranged weapon
0
20 shots
Freezes the target or slows it down
Fire Staff
Ranged weapon
50
20 shots
Sets the target on fire. Every use decreases sanity by 1 point.
Boomerang
Ranged weapon
0
10 toss
Returns to the tosser
Trap
Trap
0
8 uses
Kills smaller creatures like spiders and frogs
Bird Trap
Trap
0
8 uses
Used for catching birds
Bee Mine
Trap
-
1 use
Releases 4 bees that attack the enemy.
Tooth Trap
Trap
60
10 uses
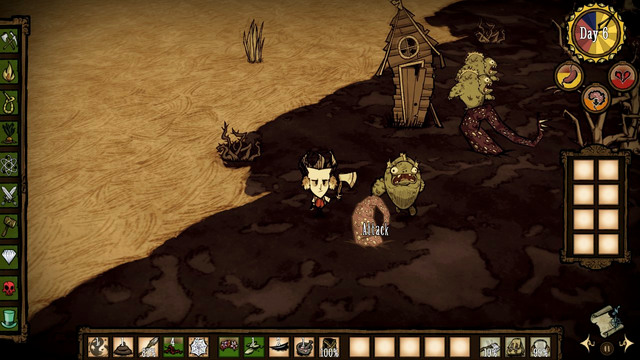
. Once you dress properly, it is time for some tactics. First of all, always try to fight single opponents. If any opponent comes in groups, try to lure one of them away from the others and then kill it before the remaining ones arrive.
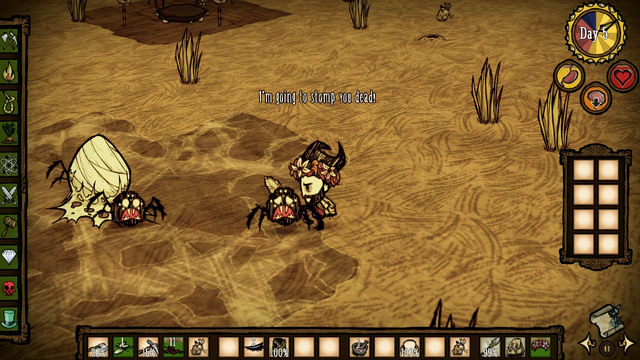
Fighting a single opponent is especially easy, if it is vulnerable to stunning. This means that every blow you deal resets the attack performed by the creature. This means that if you keep attacking, you make it impossible for the creature to defend itself, which removes the danger of a counter-attack. Unfortunately, only the weakest opponents can be killed this way. The stronger ones are resistant to stunning, so you need to utilize different methods here.
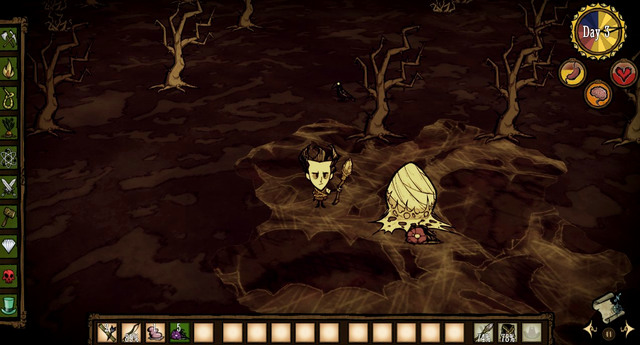
The first one uses a melee weapon and consists in running away from the opponent right before it deals a blow, and coming counter-attacking as quickly as possible. The method is effective, but it is not the safest one. It suffices that your character returns a fraction of second too late and you may receive a lot of damage.
If the enemy you encounter cannot be approached, or if it's too fast for avoiding to be effective, you need to make use of a ranged weapon. The ones that are included in this class are a Boomerang, any darts (e.g. Fire Dart) and magical staffs (Fire/Ice Staff). Thanks to these, you can kill an enemy without risking taking damage from counter-attacks. There are special characteristics to each of these, and it is a good idea to acquaint oneself with these.
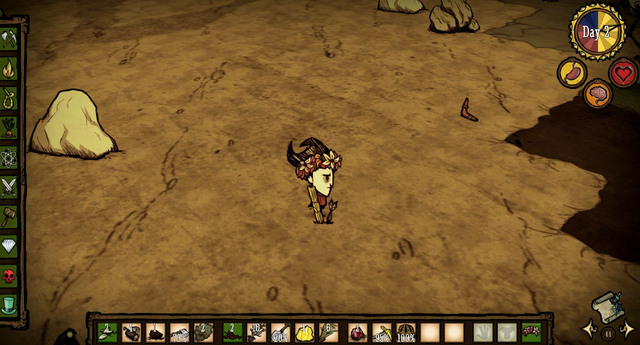
As you can deduce, a special characteristics for a Boomerang is the fact that it returns to the owner each time it is tossed. Still, to catch it, you need to press and hold down the SPACE key. If you don't, the weapon will hit your character and inflict damage.
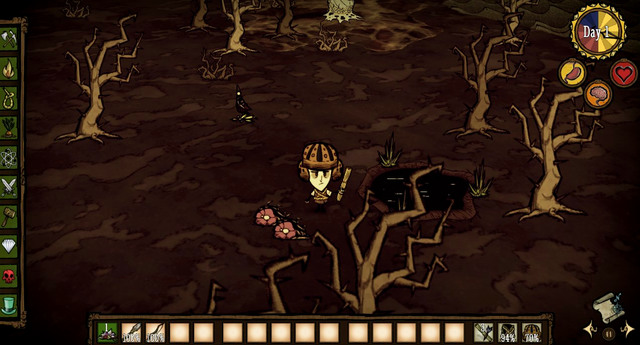
Darts are excellent for the battles, but they require a lot of materials, and they can be used only once. That is why you should equip yourself with at least several of these before you go hunting, and be frugal about using them.
Dart types:
1. Blow Dart - standard dart that inflicts 100p damage.
2. Sleep Dart - this dart type does not inflict damage, but it puts the targeted creature to sleep. Still, you need to remember that some bigger creatures (e.g. Hound or Tallbird) require four hits before they fall asleep, and some opponents are even invulnerable to this type of darts (Butterfly, Ghost, Mandrake, Tentacle and all apparitions).
3. Fire Dart - inflicts 50 damage and sets the target on fire. The blazing opponent, starts running then and setting on fire all of the nearby flammable objects. If the beast drops meat, it is already going to be roasted. You need to remember that some opponents are invulnerable to this weapon (e.g. Hound).
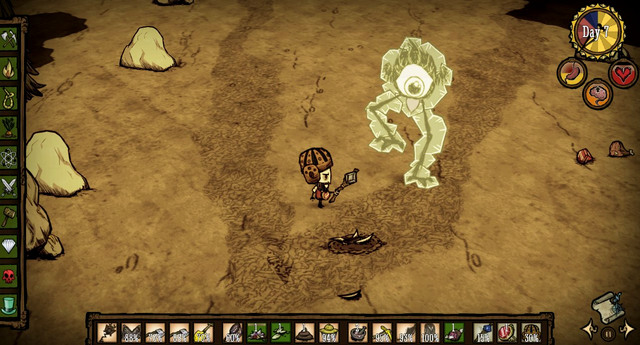
As far as staffs are concerned, they come in two types::
1. Ice Staff - shoots projectiles that freeze the target. To immobilize a larger opponent, you need to shoot several times (one shot merely slows the opponent down). Additionally, with every individual use, the item decreases your character's sanity level by 1 and speeds up his freeing process. To alleviate this , you should be dressed properly while using the Ice Staff.
2. Fire Staff - sets opponents and flammable objects on fire. Like in the case of the Ice Staff, each use decreases sanity by 1.
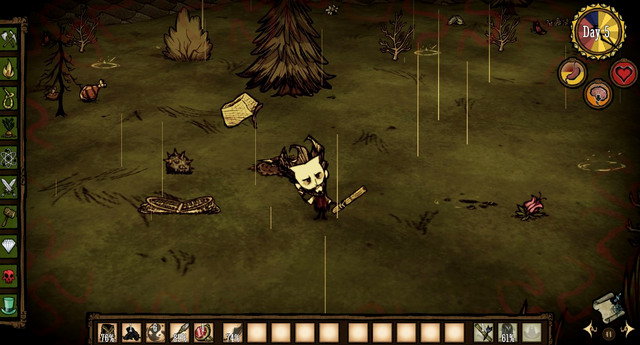
Apart from melee and ranged weapons, there are also traps available in the game. Thanks to these, you can defeat many formidable enemies without putting yourself to danger.
1. Trap - this kind of trap is most effective against small animals like spiders or frogs. The trapped animals die on the spot. It can be used 8 times.
2. Tooth Trap - inflicts 60 damage and it can be used 10 times
3. Bee Mine - a single-use mine that releases 4 bees after it is set off. The insects do not attack your character and they can call reinforcements in if they are wounded. After the fight finishes, it is possible to catch the surviving bees and reuse them to make another bee mine.
Some of the enemies in Don't Starve pose especially big threat and fighting them requires special preparations. They have been described below in detail.
Health: 2000
Damage: 50 (territorial)
Range: 8
Attacking speed: 3
Movement speed: 3
Sanity aura: -400/min
Dropped Items: 8x Meat, 1x Deerclops Eyeball
Special features: capable of destroying buildings and objects with its attacks
Deerclops is a formidable beast, which is a cross between a deer and the mythical Cyclops. The creature appears in winter only and, wandering around the world, it will sooner or later knock on your door. You need to get well prepared to fight it. First of all, you should have a Heat Stone on you, so you can run away from the campfire for some time. I recommend against fighting the creature in your camp. Its attack can destroy al of the structures put up by you.
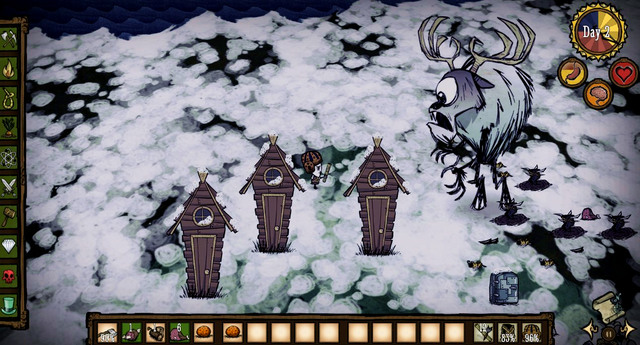
Because of the attack range and the sanity damaging aura, you should avoid fighting the creature in close quarters. What proves to be best at fighting the beast is darts of all kinds (especially Blow Darts). Prepare around 20 of these and you should be able to beat the beast without any problems.
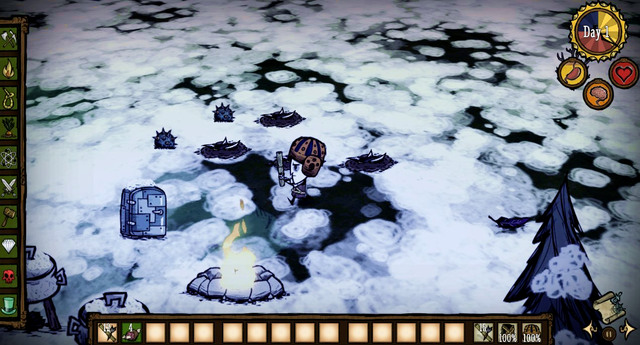
If you run out of darts, put Tooth Traps around the camp and keep fixing them every time the monster tramples them. Bee Mines make not much sense here as Deerclops kills all the bees with one territorial attack.
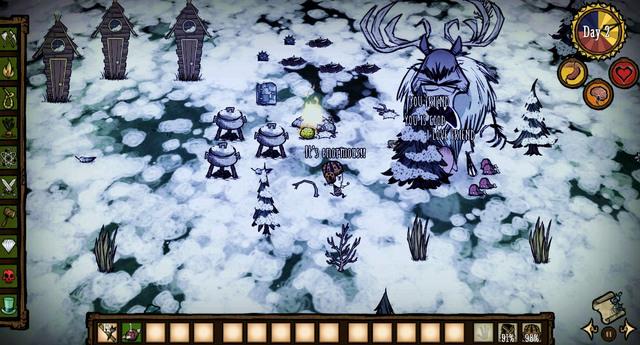
What can be useful for the battle are Football Helmet wearing pigs, as well as other wildlife beasts that will attack the one-eyes walking near them.
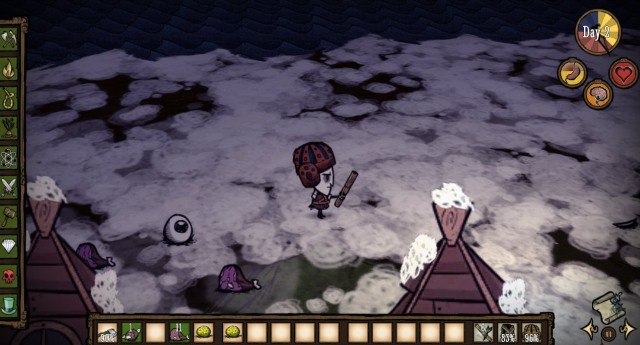
After it dies, the beast will drop a lot of meat and a Deerclops Eyeball. The latter item can be eaten to regenerate 60 healthpoints and 75 hunger points, but at the cost of 15 sanity points.
Health: 1250
Damage: 80
Range: 5
Attacking speed: 3
Movement speed: 1.75
Sanity Aura: -400/min
Dropped items: 4x Monster Meat, 4x Silk, 1x Spider Eggs, 1x Spider Hat
Special features: Bears spiders and Spider Warriors
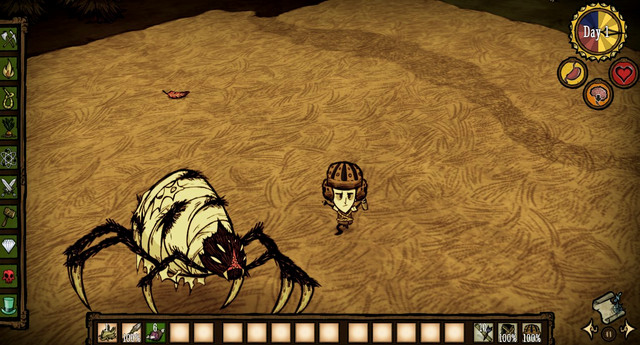
Spider Queens appear on the map if you approach an unnaturally big spider nest. This enemy type not only inflicts a lot of damage, but also creates new spiders every 20 seconds. (every third one is a Spider Warrior). To defeat the beast, keep running away as long as you get rid of all its minions. You can use all kinds of traps, ranged weapons and pig helpers.
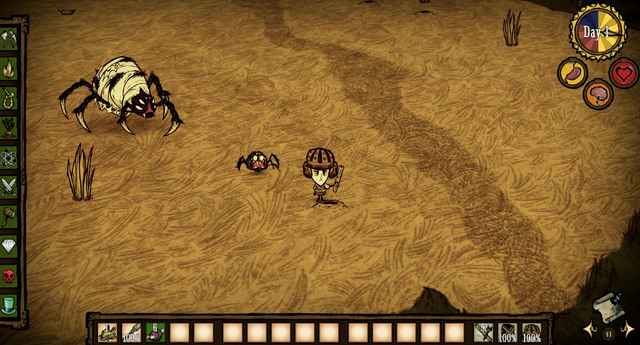
As soon as all the smaller spiders are dead, pound on the Spider Queen with Blow Darts. Because of negative aura, fighting at close quarters does not pay off. It is a good idea to lure the queen towards the other enemies like Tentacle (very frequent in the swamps), Beefalo or bees.
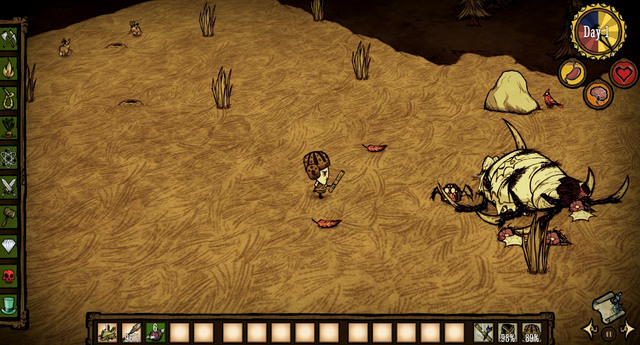
When the monster is killed, it drops two interesting items: Spider Eggs and Spider Hat. Thanks to the former, you can locate a spider nest anywhere you want. The latter one enables you to control spiders. The hat uses up after two minutes, so use it wisely. It can be a good idea to locate the spider nest in a place surrounded by wall of stone, and use it as a regular source of Silk.
Health: 1400/2000/2500
Damage: 35/50/62
Range: 2.1/3/3.75
Attack speed: 3
Movement speed: 1.05/1.5/1.875
Sanity Aura: -100/min
Dropped Items: 1x Monster Meat, 6x Living Log
Special features: None
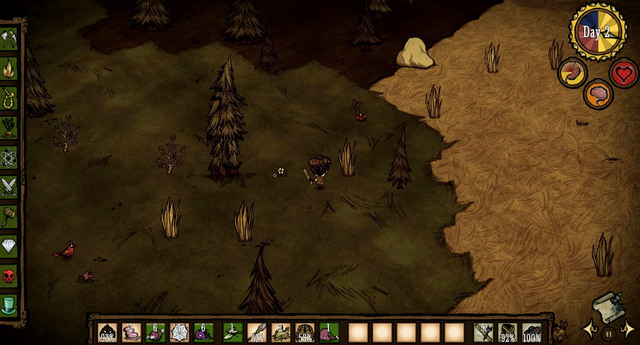
Before the Treeguard moves, it is no different than a regular tree. It attacks only if a lumberjack cuts a nearby tree stump. That is when the creature will start chasing your character around, while performing strong swipes with its branches. Still, it is very sluggish and you can avoid blows with ease. If you manage to do that, perform 2-3 quick attacks and resume running away. The best strategy against the ent, is to jump in, perform several swift attacks and jump away.
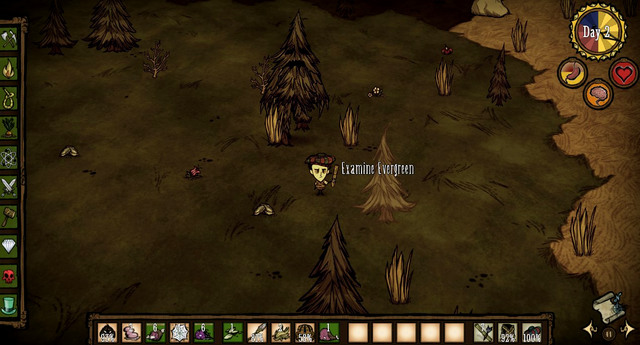
Another effective strategy is to make use of Tooth Traps. Not only do they inflict considerable damage, but they are also capable of immobilizing the enemy. If you are bent on avoiding the battle, you can soothe the Treeguard by planting young trees around it. For that purpose, use Pine Cones that appear on the ground after you chop a tree. The closer you plant a tree, the greater the likelihood that the monster will stop chasing you.
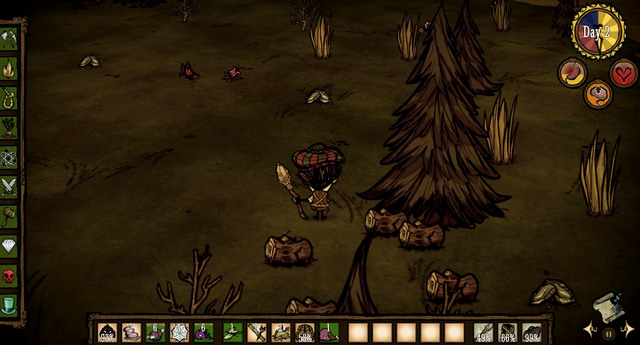
The Living Log that the monster drops after it dies is key to creating a Shadow Manipulator and the Dark Sword (the most powerful weapon in the game). Remember also that the monster comes in three different sizes that differ from each other I terms of statistics.
Health: 150
Damage: 33
Range: large
Attack speed: 3
Movement speed: 3(walk)/6(run)
Sanity aura: none
Dropped items: Meat, Blow Dart, Walrus Tusk (60% probability), Tam o' Shanter (25% probability)
Special features: always walks around accompanied by its son Wee MacTusk and two Blue Hounds
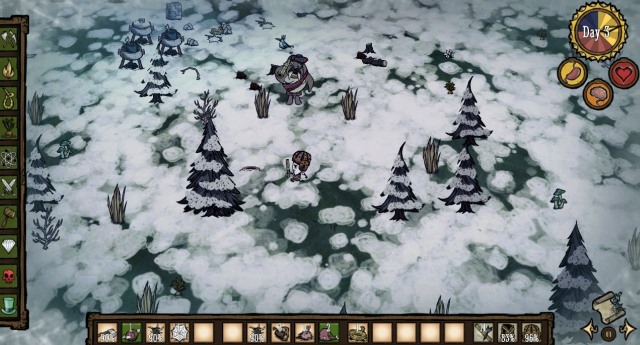
MacTusk is a walrus dressed in tartan that comes out of the Walrus Camp (igloo) Exclusively in winter. This enemy does not have to many health points but it shoots lethal darts and always walks around in the company of two Blue Hound and its son Wee MacTusk.
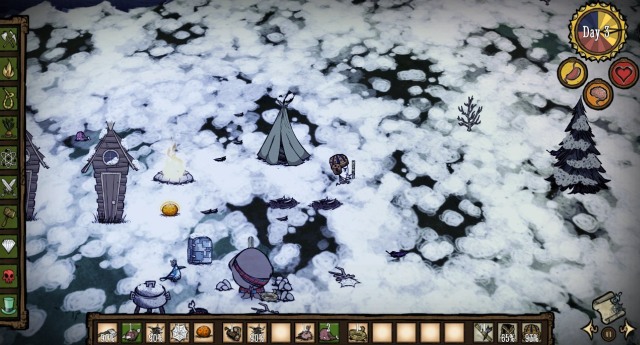
To defeat the beast, you should equip ranged weapon and the best armor you have. You should also have strong healing items on you. First of all, get rid of the monster's posse by running around the enemy incessantly, if you want to avoid the lethal darts. When the walrus remains alone, take several shots at it to finish it off. Also, if you want to, you can set traps around the Walrus Camp and wait around for the first day of winter.
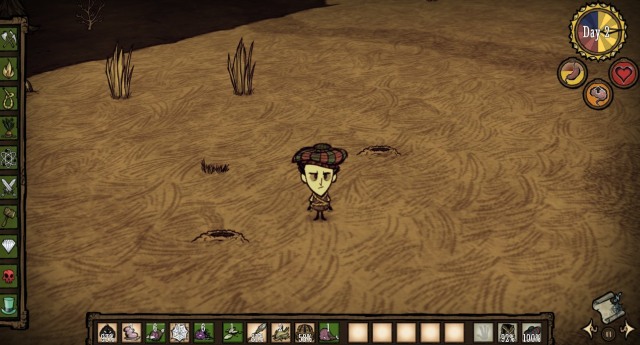
The items dropped by MacTusk - Walrus Tusk and Tam o' Shanter, - are very useful items. The former is prerequisite for the creation of the indestructible weapon that increases walking pace (Walking Cane), and the latter is a hat that increases sanity and protects from cold.
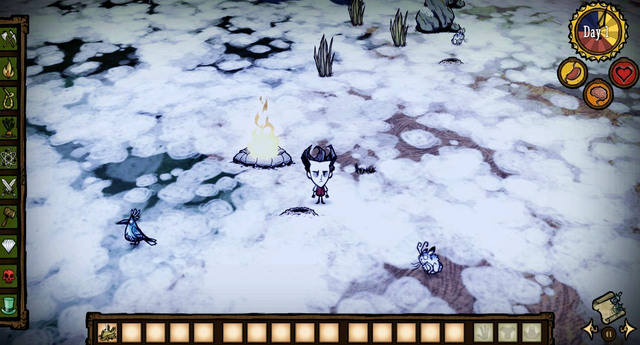
You almost always start playing Don't Starve in summer that lasts 20 days, after which 15 days of winter come. Winter time is much more difficult to survive and that is why it is a good idea to get well prepared.
During winter:
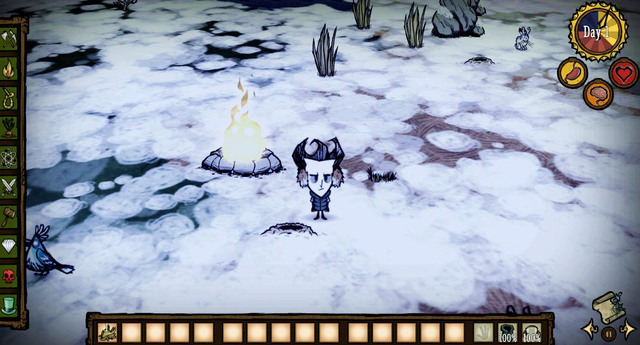
Temperature drops considerably during winter, which gives rise to a new threat: freezing cold. To avoid freezing, you need to stay near some heat source at all times: e.g. a campfire. If you want to move away from fire, you need to get some warm clothes, which will allow you to survive longer in cold forest.
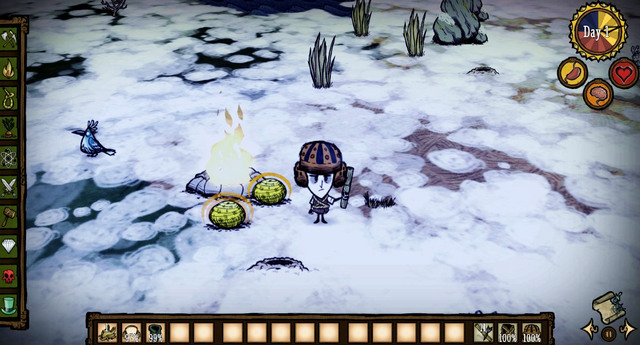
It is also a good idea to carry a Heat Stone around, which acts like portable fire. However, you need to put it next to the campfire before the intended use. The torch does not grant necessary heat but, you can still set on fire other object with it, and get warm this way.
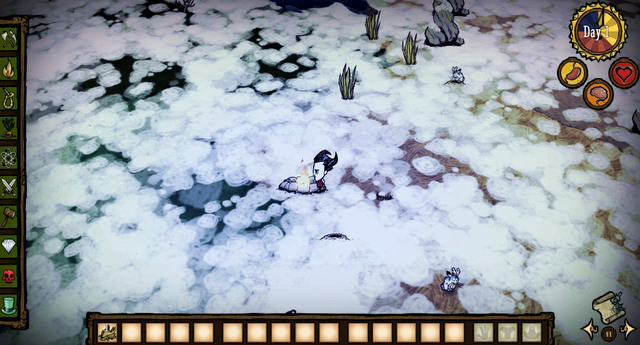
The freezing process relies on two factors: your character's body temperature and the temperature of the surroundings. The former may oscillate between -20 and 40, and it always adjusts to the temperature of the surroundings by falling by 1 point per second. If it falls below 0, your character will start to freeze by receiving -1.25 damage per second. The cooling speed maz be described with the following formula: -30/(30+insulation). As you can see, thanks to insulation you can slow down the process of cooling, with insulation provided by all sorts of warm clothing. These have been presented in the below table.
Item name
Insulating value
Dapper Vest
60
Breezy Vest
60
Rabbit Earmuff
60
Tam o'Shanter
120
Winter Hat
120
Beefalo Hat
240
Puffy Vest
240
Wilsona's beard
0/15/45/135
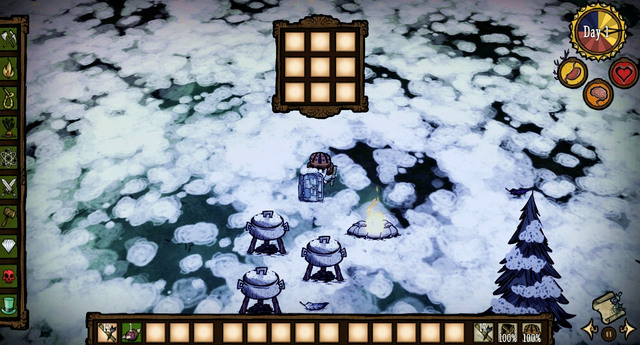
To survive the 15 days of cold, you should already start gathering supplies in summer. Earlier, you are going to need a Winterometre (2x Gold Nugget, 2x Board). Thanks to this device, you will know about the nearing winter beforehand.
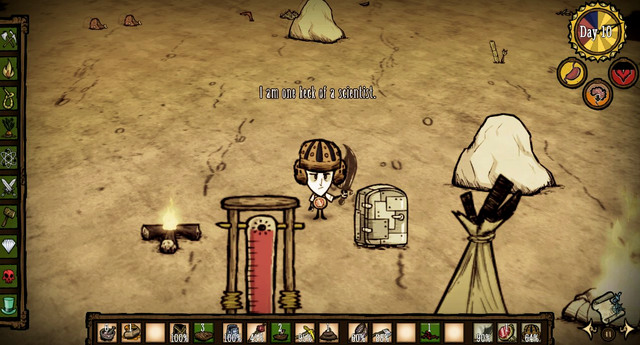
When the snow falls, you are going to need, first of all a lot of food, because winning food is going to be way more difficult in winter. You need to remember, though, that keeping food in your backpack will result in spoiling it so, it is a better idea to keep it in the Ice Box.
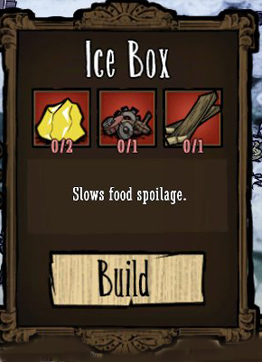
To craft it, you are going to need 2x Gold Nugget, 1x Boards and 1x Gears. The latter ingredient is dropped by the Clockwork Knight and Clockwork Bishop, whose job is to protect Maxwell's artifacts.
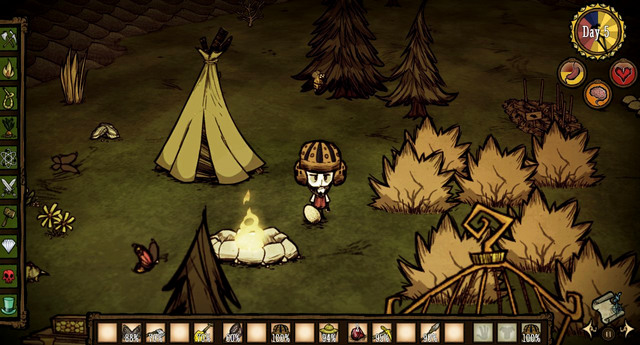
Another reliable method of gathering food is to plant a larger number of Berry Bushes. Although they rarely bear fruit in winter, you can always pick berries in winter if you don't do that in summer (without worrying that they will get spoiled).
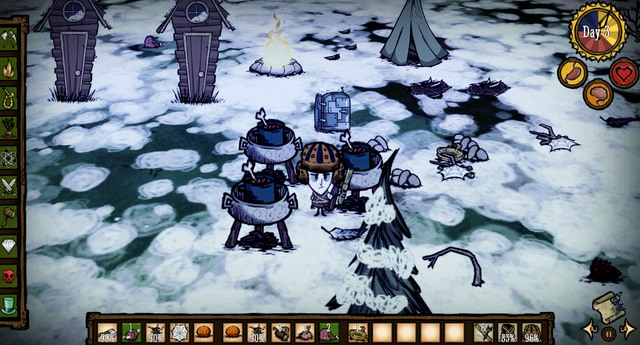
In a similar fashion, you can store meals cooked in Crock Pots. It suffices that you leave them in the pots and they will last a bit longer.
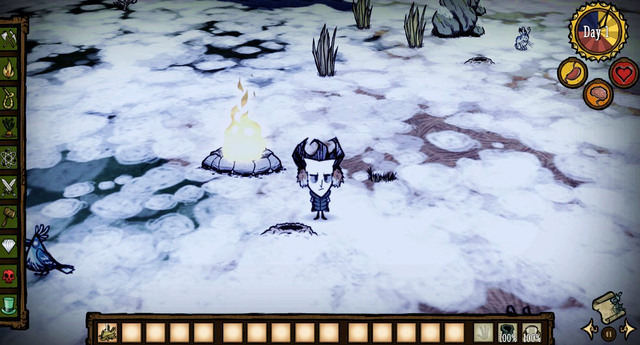
Food is not everything, though. What is also very important is fire and warn clothing. It is a good idea to make a supply of firewood in the summer to avoid having to move too far away from the fire in winter. If you run out of firewood, it is better not to set out to the woods without wearing the Breezy Vest), the Winter Hat and the Heat Stone.
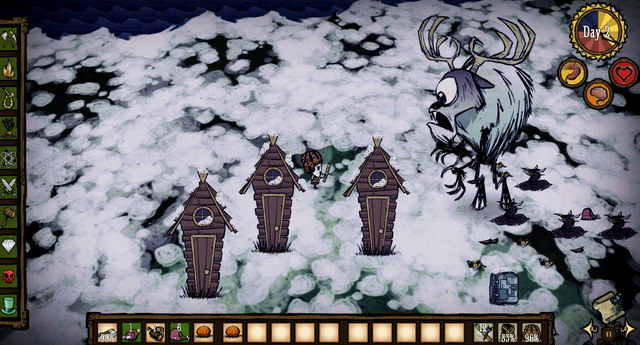
Still, it isn't the cold that is the greatest threat in winter. It is the powerful Deerclops. The one-eye monster, which is a cross between a deer and the Cyclops, appears only in winter and poses a deadly threat to your character. To survive an encounter with the monster, you need to amass as many darts (it's best to gather 20x Blow Dart) or get another ranged weapon, and also get an army of pigs by building Pig Houses near the camp. A detailed description of how to fight the monster can be found in the chapter entitled "Bosses".
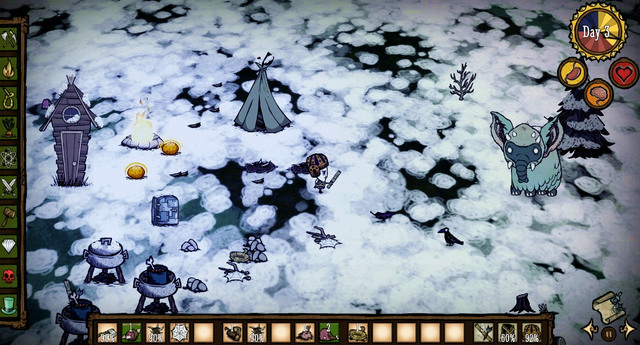
Winter is also the only season when you can hunt down the Winter Koalefant and win Tam o' Shanter worn by MacTusk. More about it can be found in the chapter entitled "Hunting" and "Bosses". Even in the winter time it is a good idea to have some fun instead of squatting at the campfire all the time.
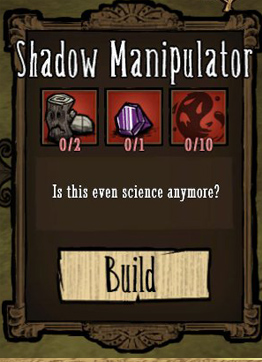
Apart from regular items, Don't Starve also gives you the opportunity to use magical items. To be able to create those, you first need to craft the Shadow Manipulator. To build it, you are going to need 1x Purple Gem, 2x Living Log and 10x Nightmare Fuel. The former can be created by combining the Blue Gem and the Red Gem, that can be dug for in the graveyard. The Living Log is dropped by the Treeguard after it dies. More information about this enemy can be found in the chapter entitled "Bosses".
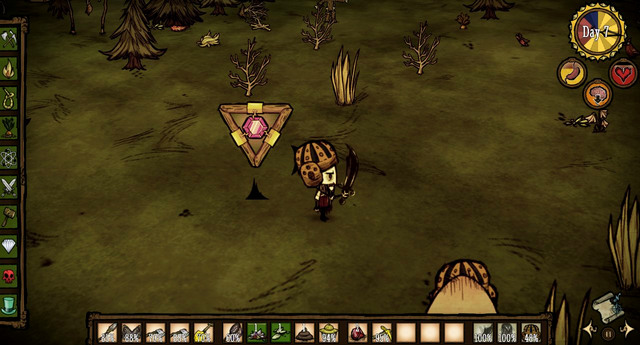
The last ingredient, and the most important one, is the Nightmare Fuel. This special kind of fuel is used to create most magical items, so it is a good idea to learn how to obtain it. First of all, you can use four Dark Petals (from Evil Flowers). Another method consists in catching a large number of rabbits, and keeping them as long as your sanity falls below 80. The animals turn into Beardlings, then. After being killed, they drop Nightmare Fuel. The fuel is also dropped by dead hallucinations. To attack them while they are neutral, click on them while holding down the Ctrl key. You can also set Tooth Trap around the camp, which will also kill the creatures without setting them on your character. Once you finally manage to build the Shadow Manipulator, you will gain access to many magical recipes.
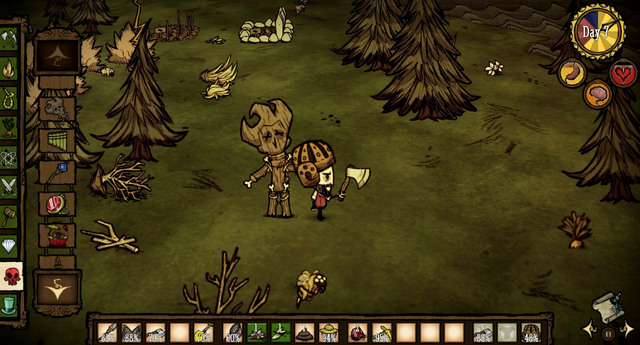
It is an ugly wooden monument that can be crafted only by Wilson. To create it, you are going to need your character's beard (4x Beard Hair), 4x Boards and 4x Cooked Meat. To get the first element, you need to play Wilson, wait until he grows enough facial hair, and shave with Razor. How many hairs you get, depends on how big a beard you have shaved. After four days- 1x Beard Hair, after 8 days - 3x Beard Hair, and after 16 days - 9x Beard Hair. Another way to get the hairs is to kill Beardlings that replace rabbits after your sanity drops.
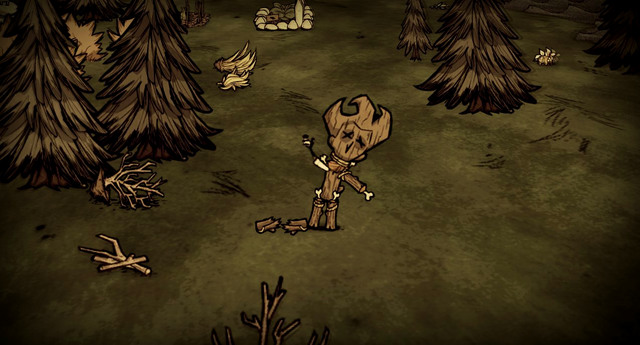
What do you use Meet Effigy for? It allows you to bring your character back to life after an accidental death, but only once. The price to pay for that, is the decrease in health by 30 points. For every standing sculpture. Your health returns to the normal level when you destroy the effigy, or are brought back to life.
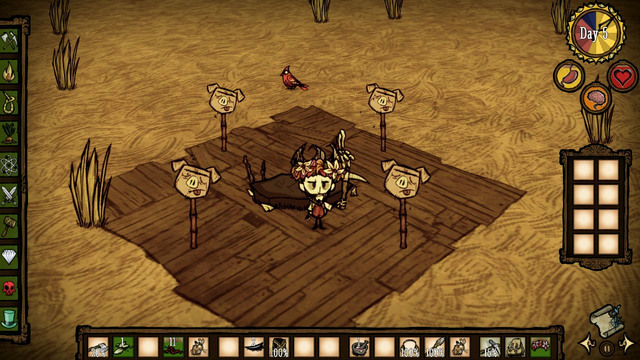
The so called, Touch Stone is an alternative for the effigy. The stones are scattered around the map at random. They also can be used to bring your character back, but they work for every available character.
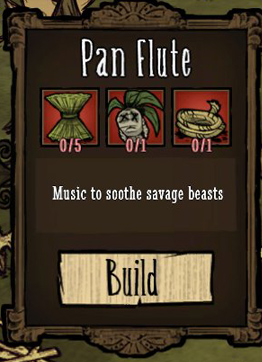
To create a Pan Flute you need 5x Reeds, 1x Rope and 1x Mandrake. The first ingredient can be found in the swamps, the second one can be crafted using Grass, and the third one is mandrake that grows in various parts of the world. The instrument itself can be used to put to sleep all creatures in the vicinity. The instrument can be used 10 times and if you hit the sleeping enemy, all of the remaining creatures will wake up. The item does not work against Mandrake, Ghost and Werepig.
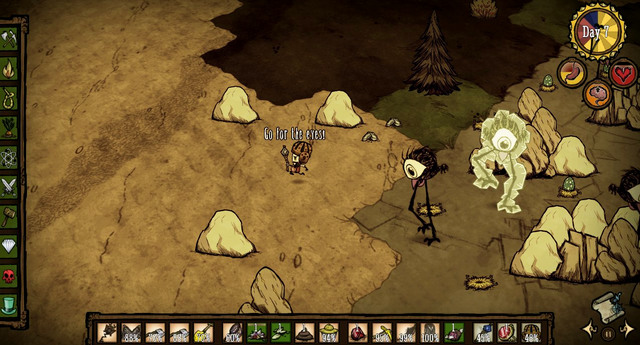
Both are pieces of weaponry useful against stronger enemies. The Ice Staff slows down and freezes the enemy, whereas the Fire Staff inflicts damage while setting the target on fire.
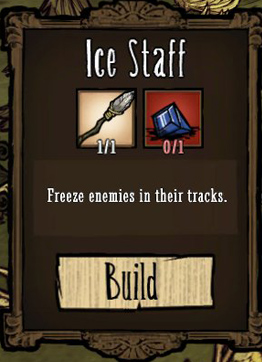
To create the Ice Staff, you are going to need a Blue Gem and a Spear, and the fire staff requires a Red Gem, a Spear and 2x Nightmare Fuel.
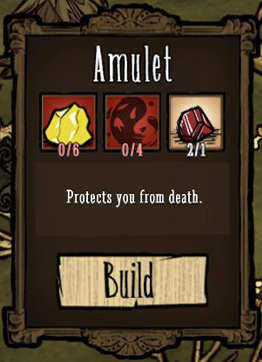
The Amulet is yet another item that can be used to bring your character back to life. To do that, you need to wear it as an armor. The character brought to life with the amulet appears in the same spot in which he/she died, but all of the beasts around the corpse are put to sleep. Additionally, the stone, if worn, keeps on increasing your character's sanity by 2 points per minute. To create the amulet, you are going to need 6x Gold Nugget, 4x Nightmare Fuel and 1x Red Gem.
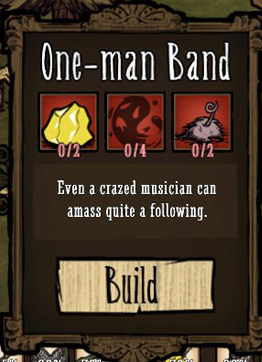
It is an instrument that allows making quick friends with up to 9 pigs. The animals follow your character for as long as you keep playing the instrument, but no longer than 3 minutes. Although the instrument itself decreases sanity by 2 points per minute, each enchanted pig increases it by 25. Therefore, you need to be very careful while playing it. To create One-man Band you are going to need 2x Gold Nugget, 4x Nightmare Fuel and 2x Pig Skin.
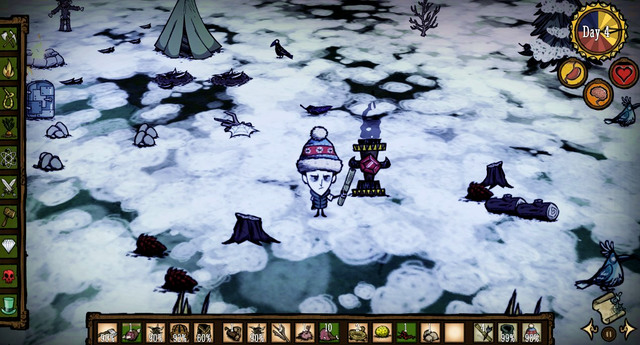
Night Light functions in the same way that camp fire does, but to fuel it, you are going to need Nightmare Fuel instead of wood. After you give up on one unit of the fuel, the fire will be lit for the next 175 seconds. Apart from ensuring light, the black flame decreases sanity of your character by 3 points, if you are standing close to it. You can avoid the effect by standing a bit further away, but still within the blaze.
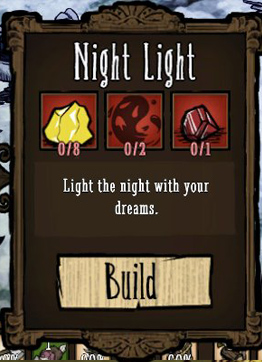
To create the Night Light you need 8x Gold Nugget, 2x Nightmare Fuel and 1x Red Gem.
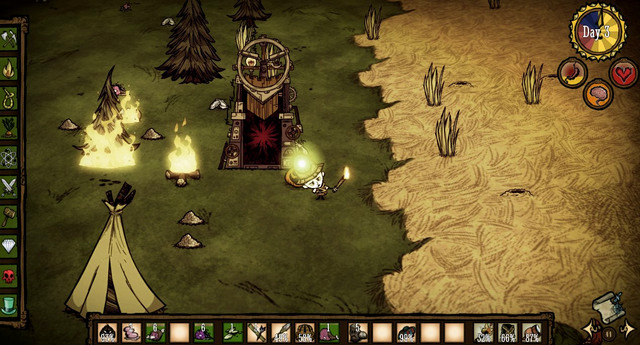
Adventure Mode is a special game mode that starts after you walk through the so called Maxwell's Doors. The adventure is about beating, at most, 5 game worlds, generated out of the pool of 6 different types. As you are starting the adventure mode, you need to know that::
1. If you die in the adventure mode, you are transferred back to the world which you came from. If you cross the door again, the Adventure Mode starts over from the very beginning.
2. to beat a world, you need to create a special machine using 4 items scattered around that world: Crank Thing, Box Thing, Metal Potato Thing and Ring Thing. Once you collect the items, you need to put all of them into the Wooden Thing, to create a portal to the next world.
3. After you teleport to the new world, there will appear the Divining Rod next to your character. It is a portable piece of equipment that will allow you to locate Things (like the Box Thing), by emitting more airwaves the closer you are.
4. As you teleport across worlds, you can only take 4 items with you. All of the remaining ones need to be dropped before the teleportation.
5. Crossing Maxwell's Doors replenishes statistics like fitness and sanity. This does not happen, though, during teleportation between worlds.
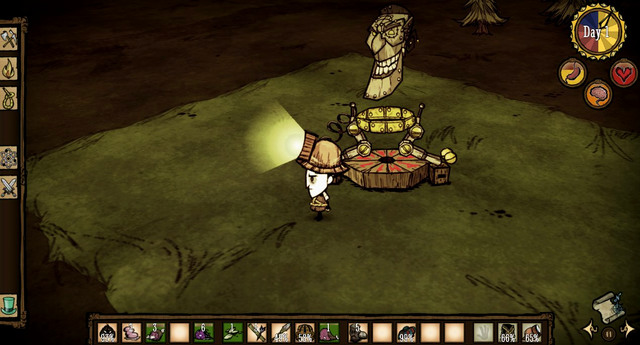
1. Because your statistics do not regenerate while teleporting, you should always replenish them before you teleport, to the maximum. It is a good idea to use Crock Pots for that.
2. Do not build large camps while playing in the Adventure mode. You should rather focus on finding the necessary parts as quickly as possible and teleporting over to the next world.
3. An item that you should take with you over to the next world is the Walking Cane. It is very useful because it speeds you up, and can be used as an indestructible weapon. The easiest way to craft it is while in The King of Winter world, as it requires a Walrus Tusk, dropped by the dead MacTusk. This enemy appears only in winter. More about this enemy can be found in the chapter entitled "Bosses".
4. After you beat the second world, pig forts will start to appear. These are full of aggressive animals so, you need to be very careful around them. You should also arm yourself with a Hammer. You can use it to prevent new pigs from appearing.
5. In the Adventure Mode you can encounter portals blocked off with black obelisks. They are identical to the ones standing around the Pig King To cross them, you will have to decrease your sanity below 30, which exposes you to the appearance of hallucinations.

In the Adventure Mode you can unlock a mime character named Wes. You can find it next to the two sculptures of Maxwell, which appear in different worlds at random. To free Wes, you need to use the pickaxe against the sculptures and smash them, and then defeat the attacking Clockwork Bishops and Clockwork Knights. As soon as the last remaining enemy drops dead, you will regain your sanity and gain access to the rescued character.
1. Archipelago differs from the other world in that it consists of isles conjoined with Worm Holes. To find all the necessary artifacts, you need to keep going through the oles, while losing sanity at the same time. It is worthwhile to get an item that regenerates sanity.
2.The greatest threat here are the Killer Bees. They come in large swarms and may appear right at the other end of a Worm Hole. To avoid being stung, you should craft a Log Suit and a Beekeeper Hat as soon as possible.
3. Every isle consists of two types of landscape, and that is why, before using a Worm Hole you should gather the most crucial ingredients from each location. If you don't you may regret that later on.
4. You start playing this world in a grassland where you should be able to find Flint. Sometimes, you may not be able to find it. That is why you should quickly change islands and find another grassland or get the flint from a rock if you teleported here with one from the previous world. Before you finally manage to make fire, you can use a torch and set the nearby objects and trees on fire.
A special characteristic of this world is the everlasting winter. It is not going to be easy to survive in such conditions. Fortunately enough, you will land close to fire. A bit further, you should be able to find a backpack with a random scheme, , 1x Heat Stone, 1x Torch, 1x Rabbit Earmuffs and several units of wood and grass. It is best to make a camp near rabbit holes, because they will be your best source of food during severe colds. More on how to survive winter can be found in the part of the guide devoted to this season.
The Cold Reception differs from the other worlds in that it rains here more, and seasons of the year change faster. Apart from that, in the place in which you land, you will find a fire and 1x Axe.
1. Create an Umbrella as soon as possible, to prevent dropping sanity also headgear like: Garland and Top Hat is going to be helpful.
2. Every now and then, the world may be infested with the plague of raining frogs. It is a good idea to make precautions and build several Traps. The animals you trap will ensure you with a supply of meat.
At the beginning of this world, you are going to find a chest with a few useful items and, above all wood that is short supply around here. Trees can be found on different islands, but the bridges you can use to get there, are guarded by enemy groups. Until you manage to get past them, you can keep the fire going with Manure left by the Beefaloes that are numerous around here. If your island is completely cut away from the rest of the world, locate a Worm Hole.
Two Worlds consists of two entirely different isles, where one of them is an utter paradise, and the other is an utter hell. You start your adventure in the paradise, but all of the items that you need to build a teleportation portal are in the hell. What is even more, both islands are usually connected by means of a Sick Worm Hole, which works only one way. That is why you should get prepared as well as possible before setting out to the hell island.
Paradise island:
1. Almost all resources in large quantities.
2. The sun is visible above the island for the larger part of the day.
3. It never rains.
4. The only threat are black hound that attack you occasionally.
5. You should be able to build here most of the tools you are going to need in the worlds to come.
Hell island:
1. Most of its area covered in swamps that are home to various opponents.
2. It rains very often.
3. Standard length of daytime.
4. Only here you can find the artifacts you need to teleport.
Darkness is always the last world , which is the most difficult at the same time. You start it surrounded by several campfires and a nearby backpack. Inside there are a scheme for the Miner's Hat, a lot of Logs and Grass, Fire Staff, Gunpowder, and sometimes an additional, random scheme.
1. W There is always nighttime in here, the exception being the so called Maxwell's Light.
2. What can be the biggest problem, is the shortage of food, so take every opportunity to hunt a pig or a Tallbird. Sometimes, you may also encounter a Koalefant, which is an excellent source of food.
3. To gain access to one of the world's parts, you are going to have to take a bridge blocked by a boulder. To smash it, you may use Gunpowder, or the pickaxe. IT is a good idea to take it with you from the previous world.
4. Some passages are going to be blocked off by obelisks. To lower them, your sanity needs to drop below 30, so it is a good idea to have something to regenerate it quickly for you (e.g. Taffy) as well as something that can lower it (e.g. a Blue Mushrooms that you can find growing around).
5. A Bug Net is a very useful item in this world . Thanks to it, you will be able to catch Fireflies, that are flying around. They are necessary to create new Miner's Hats. Or this purpose, you should take as many Gold Nuggets as possible from the previous world.
Checkmate is an epilogue for this exhausting adventure. It is a small world, where there is always darkness intermittent with periods of light coming from the Maxwell's Light. Your task here is to reach the end of the lit pathway where there waits the imprisoned Maxwell. You can achieve this very quickly without setting up a camp. Once you reach the end of the path, put the Divining Rod in the pedestal next to the prisoner's throne, and your character will take his place. After a short monologue, the Adventure Mode draws to an end. Then, you will be returned to the regular world and you will be able to play as Maxwell.
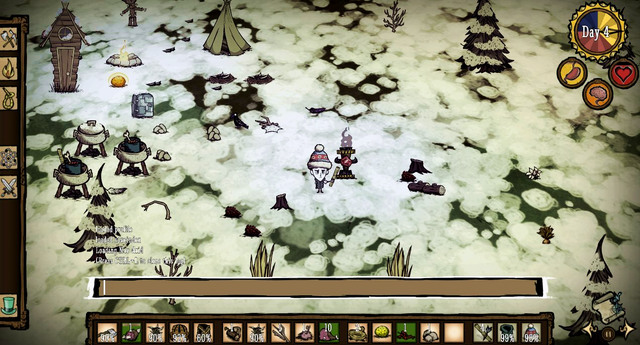
To be able to use cheat codes, you first need to unlock access to the in-game console. To do that, you need to access "settings.ini" with any word processor (it is best to use the Notepad). You can find it in "Documents\Klei\DoNotStarve". Once inside, you need to add the following line, and click "Save".
[MISC]
ENABLECONSOLE = true
When you are done, start the game and press "'". You can find it to the left of "1". This way you will open the console and you will be able to enter the codes. To confirm the code hit "Enter".
Type: GetPlayer().components.builder:GiveAllRecipes()
Press enter, and then click any item in your inventory. This way you will gain access to all schemata and will be able to create items without the necessity of having the necessary ingredients..
Type: GetPlayer().components.hunger:Pause(true)
From now on, your hunger level will stop dropping.
Type: GetPlayer().components.sanity:SetMax(500)
You will get maximum sanity. Remember, however, that if the insanity symptoms already started to appear, this code cannot remove them.
Type: GetPlayer().components.health:SetMaxHealth(300)
Type: minimap = TheSim:FindFirstEntityWithTag("minimap")
After you hit Enter, access the console again and type:
minimap.MiniMap:ShowArea(0,0,0, 10000)
This will uncover the entire map.
Type: GetPlayer().components.health:SetInvincible(true)
21 May 2013
For the first time players can explore underground areas. Cave entrances can be also found on the maps generated prior to the release of this patch.
11 June 2013
Following changes were applied:
- herds of neutral Lobsters now roam in underground areas
- Bunnymen transform into Beardlords, when your sanity is low
- Lureplant - enables to acquire Veggie Meat
- you can taste delicious bananas;
- you have an option of burning a Fern
- large number of Mushtrees serve as light sources
- stalagmites come in different colours
- even more Tentacles
New items ready to be used or crafted:
- Vampiric Bat Bat
- Compass.
New features of the map generator:
- admire abysses in caves
- better-looking cave walls
Adjustments:
- time passes both on the surface and in caves regardless of your location
- map generator may generate levels which are completely dark
- wearable items will "remember" their inventory slot
- Snurtle Shell Armour - if you are hiding there for more than 5 seconds, enemies will stop attacking you
- plants will not grow in places where they could not grow in real life
- Iceboxes can be set close to one another
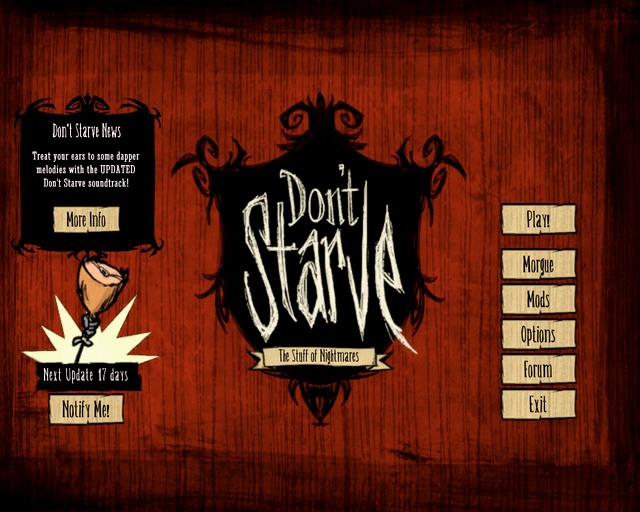 The main menu notifies about incoming updates.
31 July 2013
Added new creatures:
- Slurper - lives in caves, is attracted by your hunger
- Clockwork Castle - can be found near the Maxwell Wooden Things scattered around the world
Gems and Items:
- Yellow Gem and Orange Gem can be found underground
- Star Caller's Staff requires a Yellow Gem to be crafted. This summons a tiny star, which is a source of light and heat
- The Lazy Forager's Amulet - requires an Orange Gem to be crafted; this picks items from the ground
- Telelocator Focus - use it to control energy of Telelocator Staff
Adjustments:
- the research system adjustments so as to separate science from magic; build the Prestihatitator to gain access to magic
- Splumonkeys can now wear hats
- new unlockable special powers for each character
- new character - Woodie. The lumberjack and his trusted axe are ready to chop down plenty of trees. Beware, though, of his dark secret
- Splumonkeys now lurk in the caves
- added a Gemology Tab
- Red amulet (Life Giving Amulet) - apart from its resurrecting power, it can now convert hunger into health
- you can craft Blue Amulet (Chilled Amulet) - has many side effects
- Purple Gem - can be used to craft the Telelocator Staff
- Pengulls - in winter they will occasionally spawn in the ocean and migrate to land
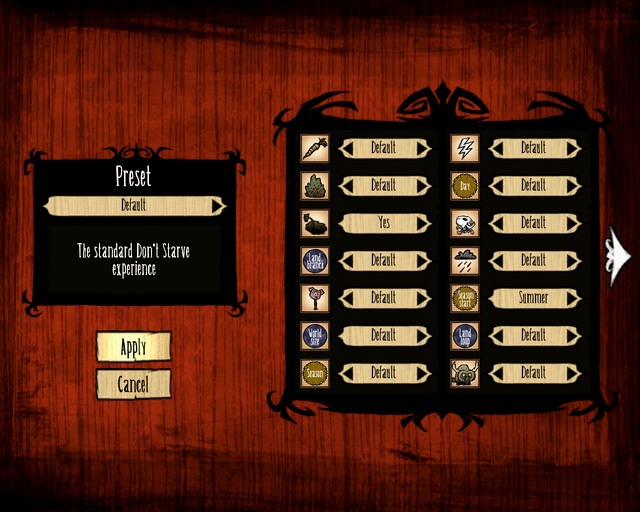 This is how the world generation menu looks like
21 August 2013
World generation changes:
- new level: the Ruins, which are in the second level of the Caves; discover secrets of a great civilization, who once lived there
New creatures:
- you will encounter ancient Clockwork Monsters
- terrifying Ancient Guardian lurks in the labyrinth
- watch out for an ambush: added The Dangling Depth Dweller Spider
New items:
- Thulecite
- Slurper Pelt
- Green Gem
- Lichen
- Broken Clockworks
- Relics
- Statues
- Nightmare lights
- Ancient Pseudoscience Station
- Pillars
- Ornate Chest
- Thulecite Walls
- Wild Pond
New craftables:
-The Pick/Axe - has dual functionality
- Magiluminesense - lights the path, while keeping your hands and head free for activities
- The Lazy Explorer - don't like walking? This stuff is for you!
- Construction Amulet - come in handy in crafting
- Thulecite Medallion - measures magical flux in ruins
- Belt of Hunger - reduces you hunger
- Thulecite Suit - protects you from physical attacks
- Thulecite Club - a weapon which hurts your enemies bad
New screen:
- keep an eye on the number of deaths in the new Morgue Screen
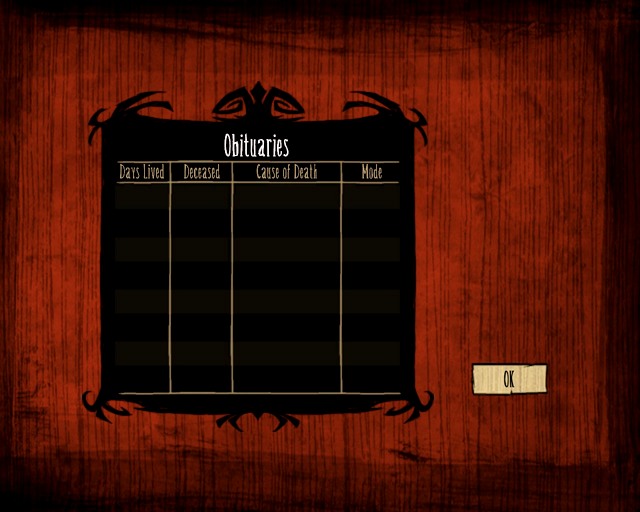 This screen keeps track of your unsuccessful attempts at staying alive in the game's world.
The caves are underground areas that are generated automatically. Cave entrances can be found in surface areas. These are so called Plugged Sinkholes. You have to use Pickaxe, Pick/axe, or Opulent Pickaxe to get inside. This will also produce Flint and Rocks. There are not many cave entrances. Note that once a Sinkhole is unplugged, Batilisks come out of it at dusk. They live in the caves. If they stay outside till morning, they fall asleep. Upon entering a cave you will see a message stating that the cave is unfinished and you will be given a choice between entering, leaving, or regenerating the cave. The third option is useful e.g. when you need different materials. After you enter the cave, you will see a rope leading up to the surface.
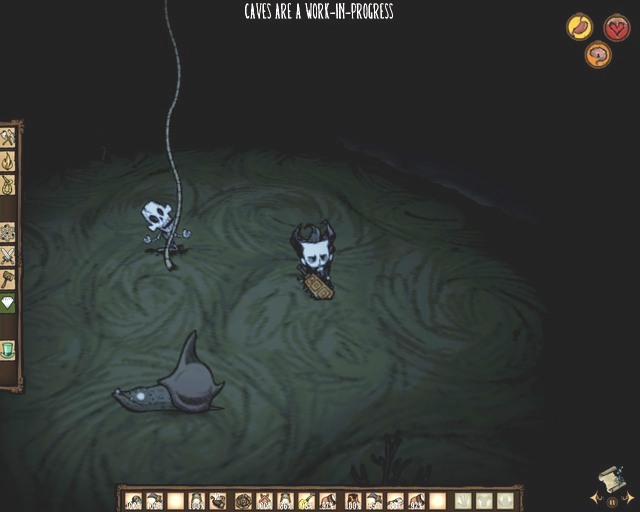 This rope will help you get back on surface.
The lower level of the caves is the ruins. Note that there is always night in the caves. There is no clock underground. Because of deep darkness, you may want to use a Miner Hat or a Lantern. The latter occupies your hand slot, thus forcing you to hide your weapon. A Miner Hat is a much better choice, since it occupies only your head slot, allowing you to use your weapon or a pickaxe freely. You can also set a Pumpkin Lantern on the ground, which will generate some light. Note that these items can be used up, though, using a Light Bulb on a lantern will refuel it. Those can be obtained from Light Flowers, which grow underground. You can also find there some Guano left by Batilisks. This has more uses than Manure found on the surface.
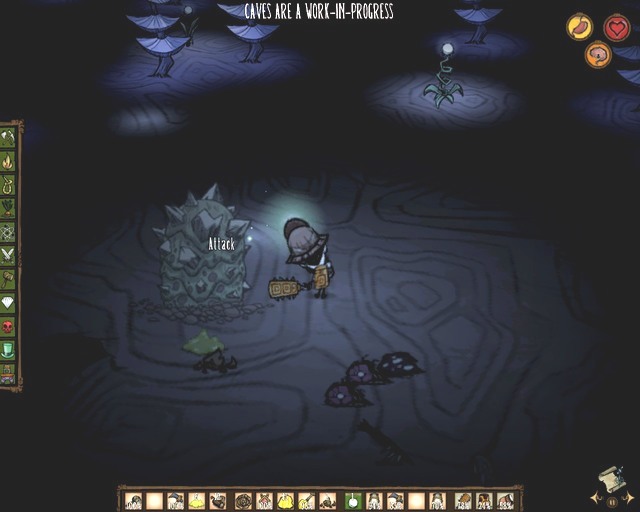 Light Flower is a light source.
Cave maps are different then others. There are three types of terrain in the caves. These are marked by different colours on the map. On the darkest one you can find Mushtrees, Light Flowers, Slurtles, Fireflies, and Tentacles. The brighter type of terrain contains Spiders, Stalagmites, and Spilagmites. The brightest area serves as a link between the other two and is empty.
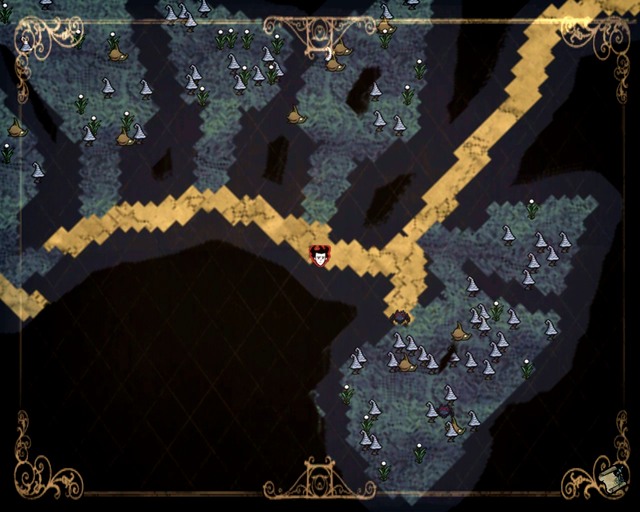 The map shows your location.
While being under the ground, beware of earthquakes. They cause screen to shake, and Nitre and Marble to fall down from the ceiling. Red, blue, orange, and yellow gems fall down too. You may get hurt during an earthquake. Right after an earthquake Snurtles and Slurtles emerge seeking for food - they eat rocks. You can start an earthquake yourself with Gun Powder. If you die in the cave, you will respawn on the surface, but your items will be left underground. You can die plenty of times in the caves, and it doesn't end the game.
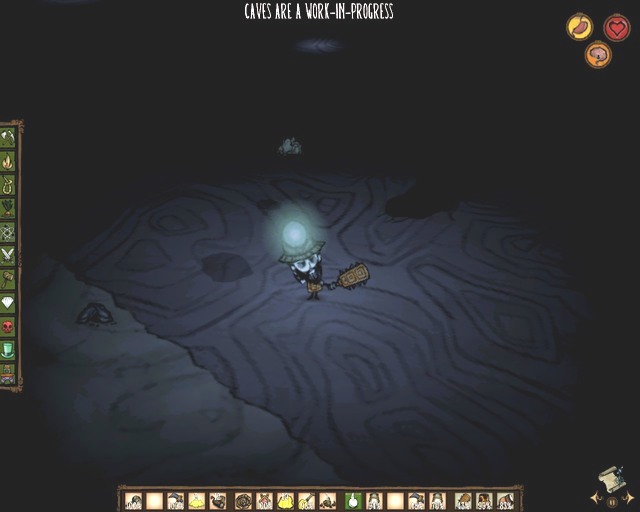 Remember to collect all materials left by an earthquake.
In caves you will encounter well-known creatures, such as: Spiders, Tentacles, and Fireflies. You can also meet there Cave Spiders. Their main feature is their shell where they hide themselves, thus minimizing the receiving damage. They live in Spilagmites, which can be destroyed e.g. with an axe. Note though, that Spilagmites are rebuilt upon re-entering the cave. Along with spiders there are also Spitters. They spit web-projectiles, so watch out for them.
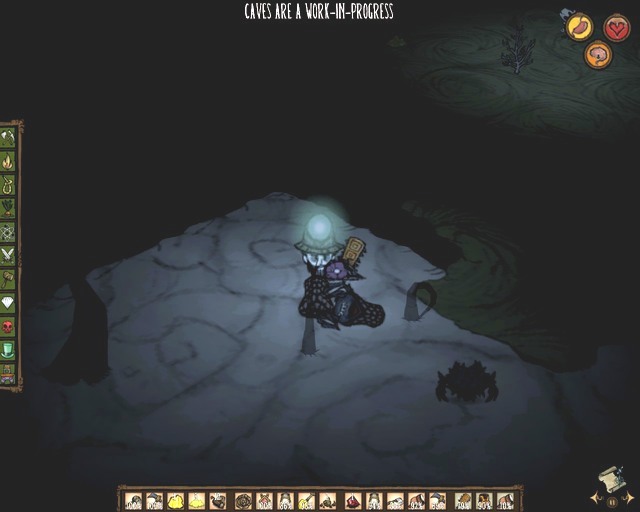 Spiders drop meat when killed.
Batilisks were already described above. You will also meet Bunnymen. If your sanity is too low, they transform into Beardlords, who drop Beard Hair and Meat when killed. Slurtle/Snurtle are neutral mobs who can hide themselves in their shell. They drop Broken Shell and Slultre Slime. They live in rock mounds, which can be destroyed.
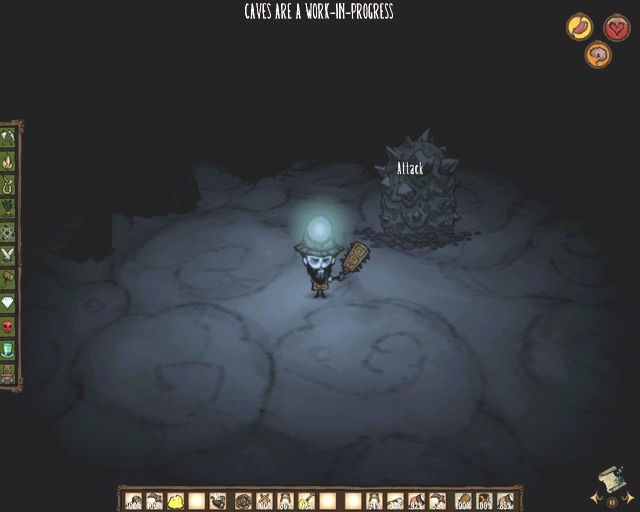 Slurtles have high health.
While spelunking, you can also meet neutral Rock Lobsters. They eat gold, flint, and rocks. Slumonkeys are neutral too. They live in Barrels where they hide when their health is low. They also do that during earthquakes. Big Tentacle is larger than the one living on the surface. When its health is low, it retreats into its hole, causing an earthquake. Watch out for Charlie (Grue, Night Monster) - he attacks when it's dark.
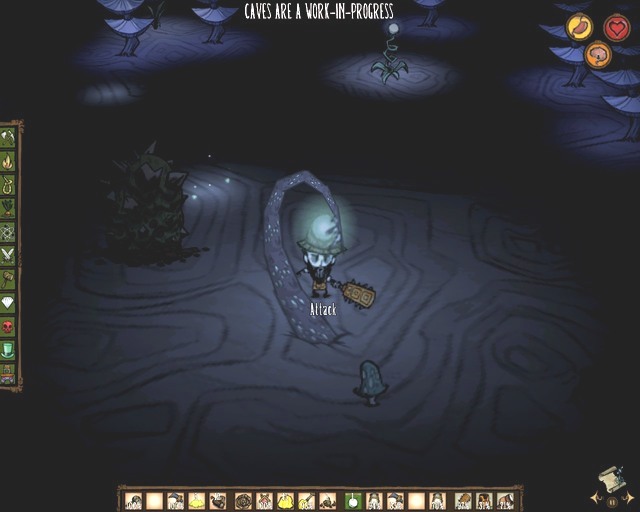 Big Tentacle is a real threat.
Other new creatures:
- Clockwork Castle - very strong; can be met near the Maxwell's Wooden Things
- Lureplant - it uses Leafy Meat as a decoy; it can spawn Eyeplants, which will attack you
- Pengull - it lays eggs, and hides them from you. This may cause the eggs to became Rotten Eggs. Pengulls produce Manure.
Just like on the surface there are plants growing underground, such as Mushrooms and Saplings. However, Light Flower, which is a light source, can only be found underground. It produces Light Bulb. When picked, Light Bulb will regenerate after a while and then it can be picked again. Mush Tree is a light source; chopping it down produces a Log and a Blue Cap. A Stump can be dug out with a shovel for an extra log. The most common trees are evergreens. Burning them produces Ash and Charcoal. These trees do not grow back.
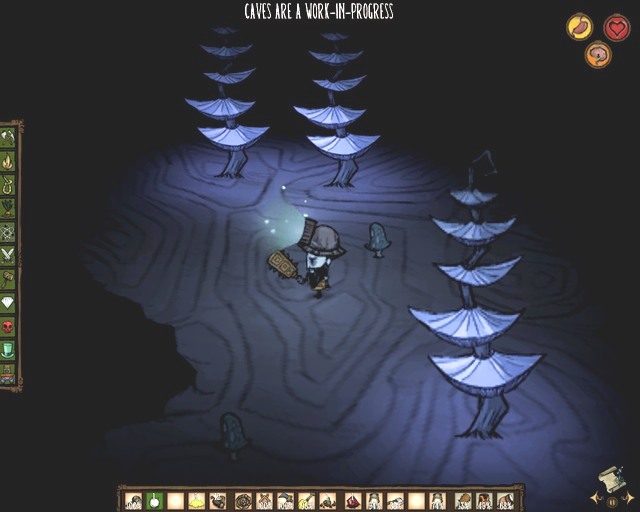 As you see, you can bump into more than one tree at the same place.
Cave Banana Tree grows only in the caves. You can chop it down and get 2 Twigs and 1 Log. A Stump can be dug out with a shovel (1 extra log). You can eat bananas just like a Splumonkey does. Bananas regenerate. Shatter Stalagmites with a pickaxe to find rocks, gold, flint, and occasionally gems. You will also come across Lava Pits. Using a Hammer on a lava pit will cause it to glow for a while. Use the hammer again, when it goes off. Yellow and Orange Gems can only be found in the caves. The best chance of finding them is right after an earthquake. You can also try your luck crushing stalagmites - but this is rather rare.
New items include:
1) Vampiric Bat Bat leeches enemy's health but at the same time drains sanity of your character. To craft this, you need: 5 Batilisk Wings, 2 Living Logs and Purple Gem - the last can be found in Magic Tab.
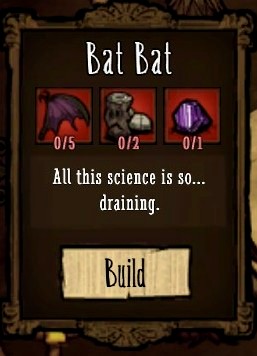 An interesting alternative for standard weapons; a pity, though, that it drains sanity.
2) Compass - to craft this, you need: a Gold Nugged and Papyrus. The device gives you a sense of direction by showing which direction your character is turned to. Can be found in Survival Tab.
3) Snurtle Shell Armour - the armour protects you from physical damage. This one is unique, since it allows you to hide inside. If you are hiding for more than 5 seconds, your enemies will leave you be. To get this, you need to beat a Snurtle.
4) Star Caller's Staff - to craft this, you need: 4 Nightmare Fuel, 2 Living Logs, and 2 Yellow Gems. This is a magical item. It creates a tiny star, which provides warmth and light. Crafting it costs you 3 points of sanity, although using it will regenerate your sanity.
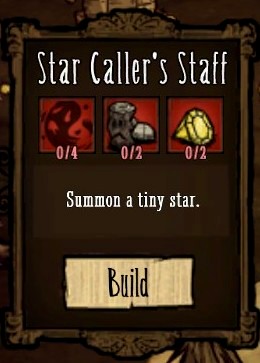 The star will come in handy in pitch-darkness.
5)The Lazy forager's amulet - enables you to automatically pick up materials from the ground, so you don't have to use your mouse or keyboard to do this any more. Note that it will also pick any trap. To craft it you need: 2 Nightmare Fuel, 1 Walking Cane, 2 Orange Gem.
6)Telelocator Focus - to craft this, you need 4 Nightmare Fuel, 4 Living Logs, and 8 Gold Nuggeds and you also have to possess the Shadow Manipulator. The device will work only when you combine it with 3 Purple Gems (Give command). Then you can teleport yourself to the structure from anywhere. Restarting the machine requires 3 Purple Gems. Note that you need the Telelocator Staff for teleportation. Using it will teleport you to a random location, unless the Telelocator Focus is active.
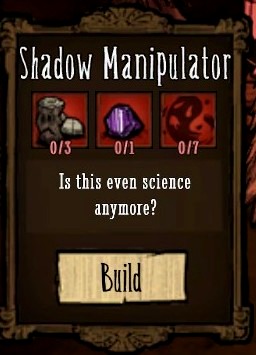 This device will unlock several recipes.
7) Prestihatitator - unlocks almost all magical items, including: Purple Gem, Nightmare Fuel, Night Light, Shadow Manipulator, Ice Staff, Fire Staff.
8) Red Amulet - already in the game (a.k.a. Life-Giving amulet). Apart from its previous resurrecting function, it serves another purpose, i.e. slowly converts hunger into health. Can be crafted with: 3 Gold Nuggets, 2 Nightmare Fuel and 1 Red Gems.
9) Blue Amulet; Chilled Amulet - regenerates some of your sanity, while slowly cooling your character. To craft this you need 3 Gold Nuggets and 1 Blue Gem.
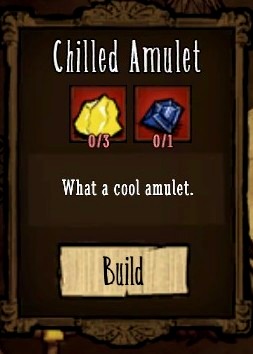 Sadly, this amulet won't protect you from chill.
10) Purple Amulet; Nightmare Amulet - puts your character into insanity state and spawns hallucinations. When you take it off, everything goes back to normal. Crafted with 6 Gold Nuggets, 4 Nightmare Fuel, and 2 Purple Gems.
Woody - a new character. He is a lumberjack equipped with his magical Lucy The Axe, which chops down trees much faster than traditional tools. You have to survive at least 80 days (1600 xp) to unlock it. Woody is under a curse, so if he chops down too many trees in a short time or if it is a full moon, he will transform into Werebeaver. This state has a hunger indicator which is constantly dropping. When it reaches 0, Woody will change back to human form. Note that receiving damage speeds up the process. Werebeaver can't carry the inventory, so it is dropped on the ground. It has sharp teeth, which can easily substitute tools or serve as a weapon. They don't wear out.
Changes in the unlockable characters' traits:
Willow
- being close to fire grants sanity bonus. Fire doesn't hurt her
- has a lighter, which serves as an infinite light source, but has a very small radius
- has a lower max sanity
- starts random fires when her sanity is low
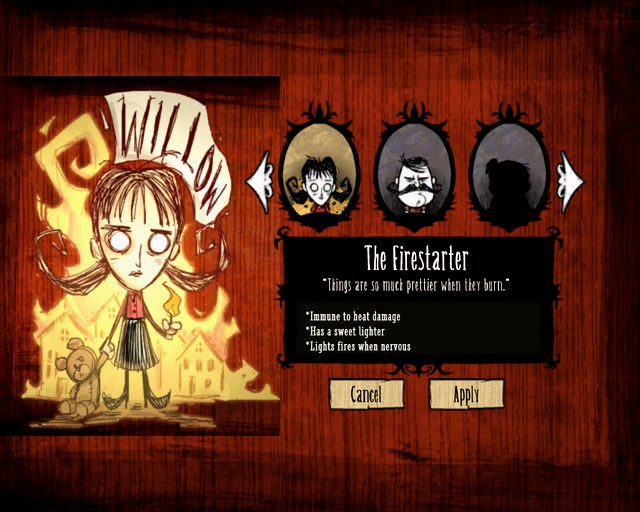 You don't need to be afraid of fire when you play as Willow.
WX-78
- can eat spoiled food with no penalty
- starts with very low stats, but can upgrade himself by eating Gears
- watch out for rain, as it causes you damage; sparks produce light
- when hit by lightening, experiences systems overload, causing him to move faster and produce light
Wes
- her stats are very low, but as a consolation she has the ability to make Balloon Animals
Wolfgang
- has an enormous stomach capacity
- loses sanity in the dark and near scary things (such as monsters)
- gets damage and health bonus when full, and penalty when hungry
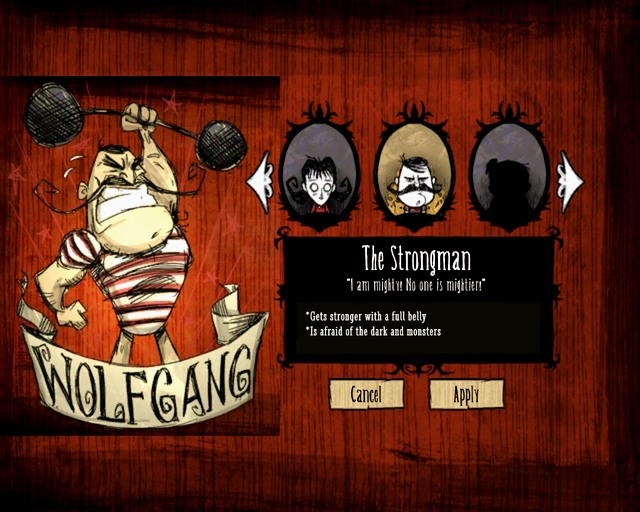 Remember to keep this character well fed.
Wendy
- decreased damage
- is less afraid of the dark and monsters
- carries around Abigail's Flower. This can summon Abigail who will aid her in combat. However, this requires a blood sacrifice (monster's blood is enough).
Wickerbottom
- science bonus: he doesn't have to construct Science Machine
- high max sanity
- the only character who can craft books, which can be read to cast powerful spells. This will unlock Book Tab
- cannot sleep and has higher penalties for eating spoiled food. The former can be a major nuisance, since it prevents the character from regenerating sanity from sleeping
The Ruins are in the second level of the caves and are automatically generated. Beware of earthquakes. Their frequency grows with the increase in magical flux (it's variable). High magical flux causes Nightmare Light to produce light, and the red veins on the ground to glow brightly. When this happens, Ancient Statues are slowly being covered in dark matter. You will experience hallucinations regardless of your sanity level - so get ready for a fight. The entrance to the ruins is in the caves. First, though, you have to clear the rubble that covers the entrance.
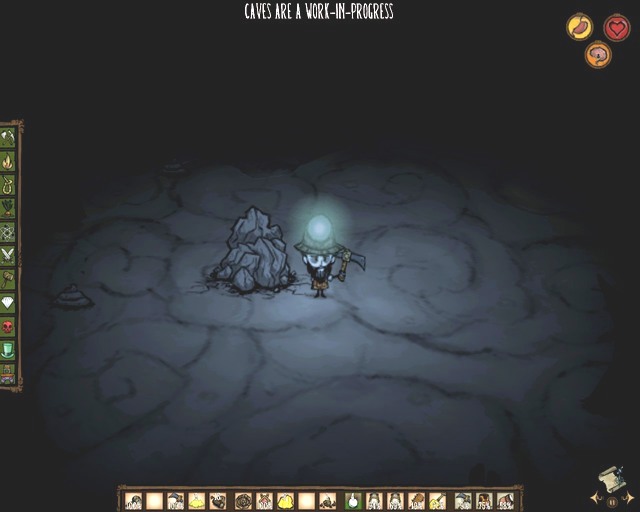 To go deeper you have to use a pickaxe.
There are three types of terrain in the ruins. On sand-coloured terrains you will find Fern, Lichen, Barrel, Wild Pond, and Light Flower. On the darker area there are spider lairs, Nightmare Lights, and Ornate Chests - the last can be crushed with a hammer. The third type of terrain contains Ancient Structures and Nightmare Lights.
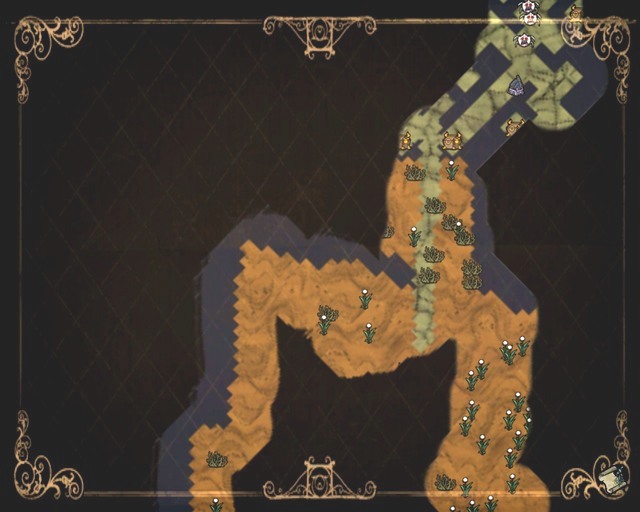 Ruins are really vast.
Prepare to fight a new type of spiders - the Dangling Depth Dweller Spider. It's cobwebs are marked on the map. With its first attack, the spider drops itself from the ceiling.
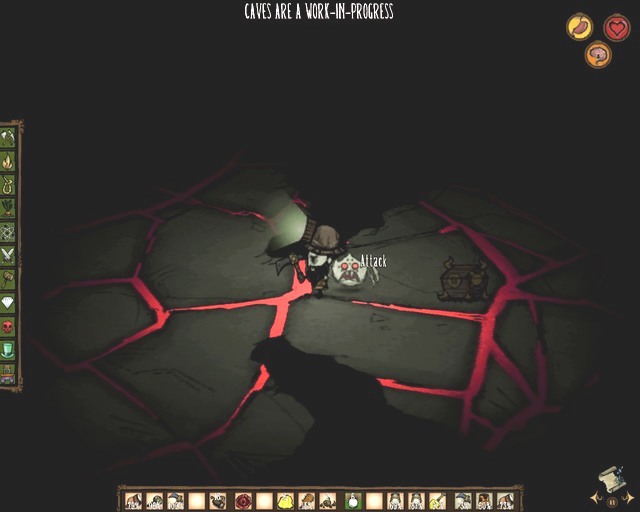 Don't let him catch you off guard!
Ancient Guardian - it's a boss mob; when killed, it drops Meat and a Large Ornate Chest.
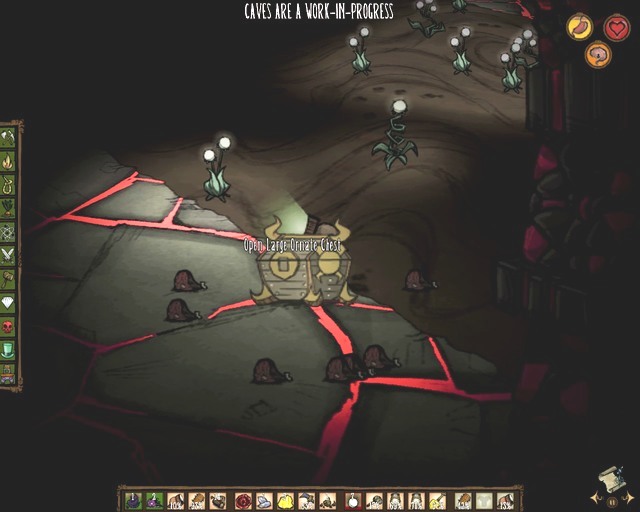 Beating the Ancient Guardian will be rewarded with all the treasures from the chest.
You will encounter Damaged Clockwork Bishop and Damaged Clockwork Rook, when you destroy a Broken Clockwork with a hammer. Both adversaries will drop Gears.
1)Thulecite - this material can only be found in the ruins. It is necessary for crafting several items, including: Lazy Forager's Amulet, Thulecite Suit, and Thulecite Club. Thulecite can be obtained from Ancient Statue and Antic Head Statue. Hammering Relics has a chance of producing Thulecite.
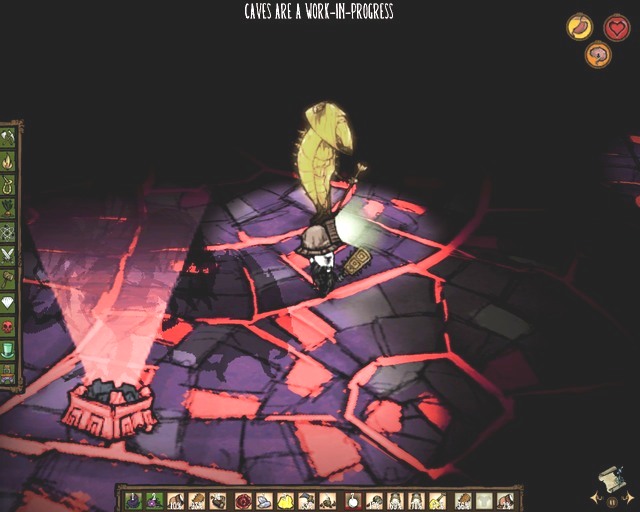
These statues are sources of Thulecite.
2) Slurper Pelt - can be obtained by killing a Slurper. This can be used to craft a Belt of Hunger.
3)Green Gem - can only be found in the ruins. Can be used to craft a Construction amulet and a Deconstraction Staff, which is useful for deconstruction and construction of items.
4)Lichen - grows only in the ruins.
5)Relics - can be destroyed. This will produce Rocks and occasionally Thulecite.
6)Night Lights - can only be found in the ruins. When magical flux in the ruins increases, they open up and produce bright light. Note that they can quickly drain your sanity.
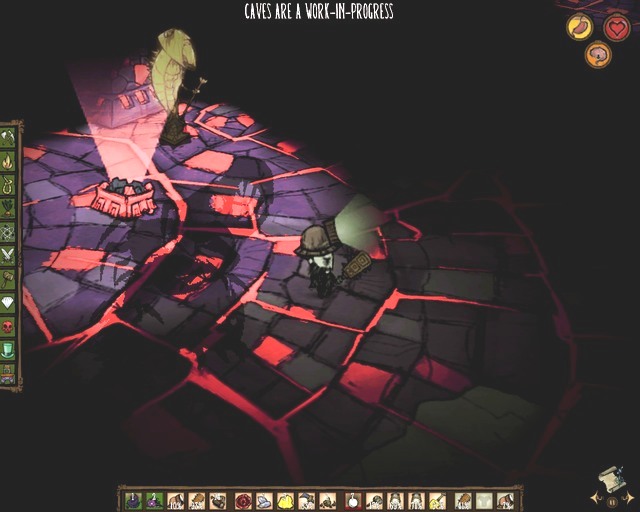
When you see Nightmare Lights giving out bright light, keep an eye for hallucinations.
7)Ancient Pseudoscience Station - exists only in the ruins. Using it opens Ancient Tab, which gives you access to many items. Or you can destroy it with a Hammer. Each strike produces random items or monsters. Initially it is broken.
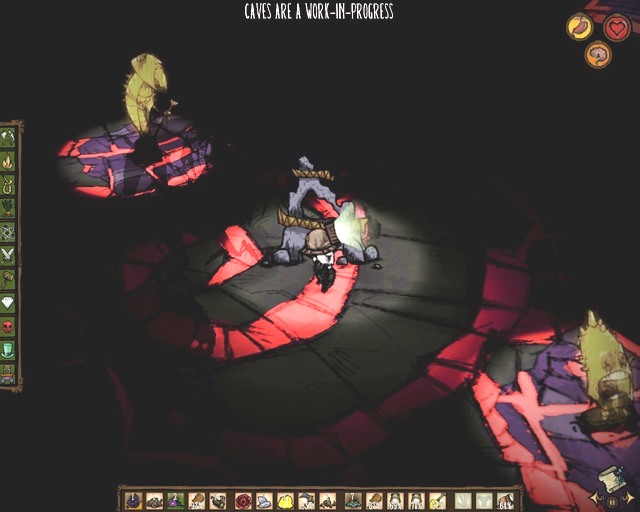 This is how the broken Pseudoscience Station looks like.
To repair this, you need 6 Thulecite.
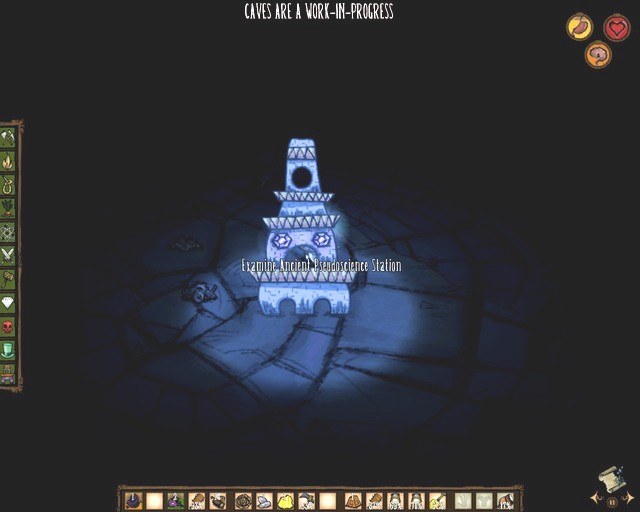 When repaired, Pseudoscience Station looks much better.
8) Pillars - exist only in the ruins.
9) Ornate Chests - exist only in the ruins. Can be found near cobwebs. If you want to open one of them, you better be ready for a fight. However, the reward is worth the effort. You can obtain e.g.: Thulecite, Nightmare Fuel, or gems of different colours.
10)Thulecite Walls - similar to ordinary walls, except for the fact that you can't build them by yourself. You can only find them in the ruins. Can be repaired with Thulecite.
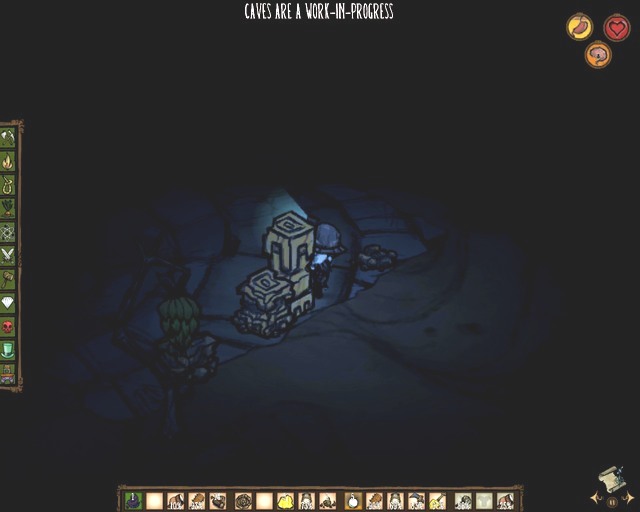
Thulecite walls can be destroyed.
11) Wild Pond - can be found under the ground in the ruins. You can fish there.
12)The Pick/Axe - can be used to destroy rocks or chop down trees. To craft this, you need: 1 Luxury Axe, 1 Opulent Pickaxe and 2 Thulecite.
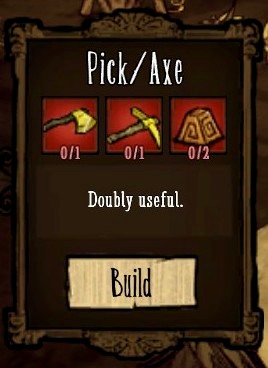 This tool will come in handy.
13)Magiluminesense - is a light source, and speeds up the growth of sanity level. To craft this, you need: 2 Thulecite, 3 Nightmare Fuel and 1 Yellow Gem.
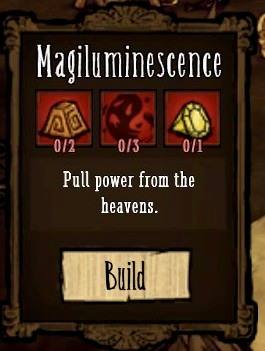 This amulet is quite useful.
14)The Lazy Explorer - enables teleportation to any location, by clicking the right mouse button. To craft this, you need: 1 Walking Cane, 2 Orange Gems and 2 Nightmare Fuel.
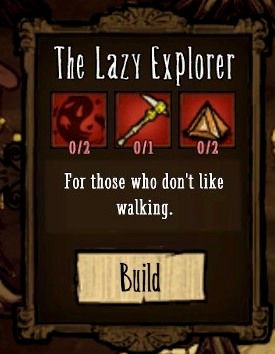 Using it has a cool effect - try it!
15)Construction Amulet - to craft this, you need: 2 Thulecite, 3 Nightmare Fuel, 1 Green Gem. This lowers the required quantity of materials when crafting items. It also improves sanity.
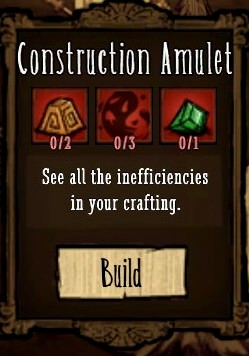 This will save you a lot of materials.
16) Thulecite Medallion - can be used to measure magic flux in the ruins. Note that you don't have to repair the Pseudoscience Station to craft this. It will let you know, when the statues and lights start to glow in a particular way, and, consequently, that the creatures may attack you. To craft this, you need: 2 Nightmare Fuel and 2 Thulecite.
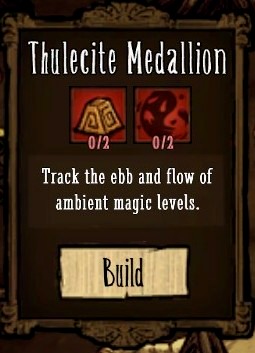 When wearing this you will easily foresee an incoming danger.
17)Thulecite Suit - grants almost complete protection from physical damage and replenishes sanity. To create this, you need: 6 Thulecite and 4 Nightmare Fuel.
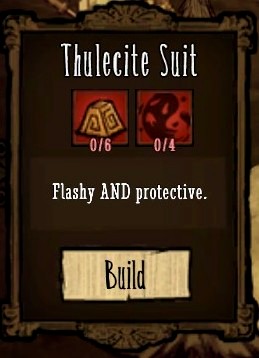 One of the best armours in the game.
18)Thulecite Club - to create this, you need: 3 Living Logs, 4 Thulecite and 4 Nightmare Fuel. A very good weapon. Its strikes may summon a Shadow Tentacle, which will attack nearby enemies.
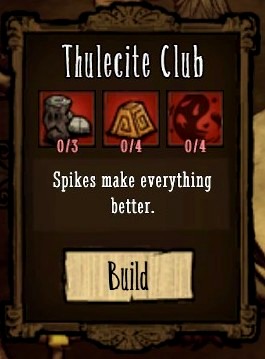 With this by your side, you need not to be afraid of any hostiles.
The most recent update introduced the Morgue to the game. This is available via game options. It contains statistics from previous games which ended with your death. This shows:
- how many days you survived
- the name you chose
- the way you died
- game mode: Survival, Adventure, or Cave
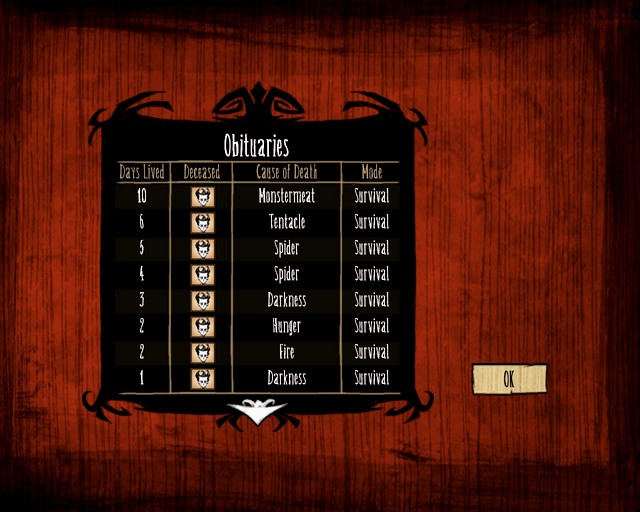 Surviving more than 10 days can be considered a success.
The game is constantly being expanded by its developers, so it is very likely, that this screen will contain more information in the future.
Creatures:
- by using gears on junk pile, you can summon a friendly mob
- new Nightmare Knight
- new Nightmare Monkey
- changes in Splumonkey's behavior so as to make it easier to beat
 Last update's title is shown in the main menu
World:
- added a day/night cycle to the Sinkhole (the entrance), not synchronized with the upper world
- added a new pillar type into the level one caves
Items
- players can craft Shooty Horn/Eye Turret/Houndius Shootius
- added Potted Ferns
- Deconstruction Staff - can be used to deconstruct an item which was crafted with a Recipe. This way you can acquire the materials that were used to craft the item. You will receive less materials, if the item was used, e.g. if it's used up by 50 per cent, you will get only half of the materials. Note that this way you cannot get back gems used to craft the item.
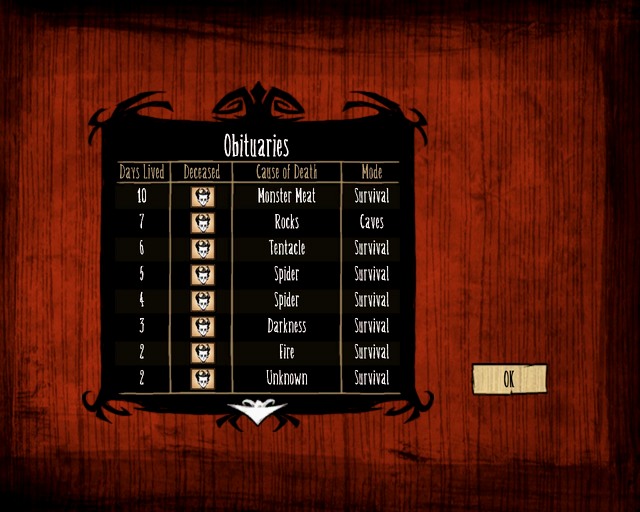 No changes in the Morgue Screen
- you can now create Thulecite Walls
- in the ruins you can find Thulecite Fragments which can be refined into Thulecite
- Ancient Guardian drops Horn when killed
- fishing in Wild Pond will now produce an Eel; cooking it results in getting Unagi
- pick/axe wears out slower
Nightmare Knight/Damaged Clockwork Knight - can be met in ruins. May appear upon destruction of Broken Clockworks. Using 3 Gears on a Pile Of Broken Clockwork will summon a friendly knight who will aid you in combat.
Nightmare Splumonkey - can be met in ruins when your sanity is low and the magical flux is high. Note that monkeys no longer live in Barrels, but in Splumonkey Pods.
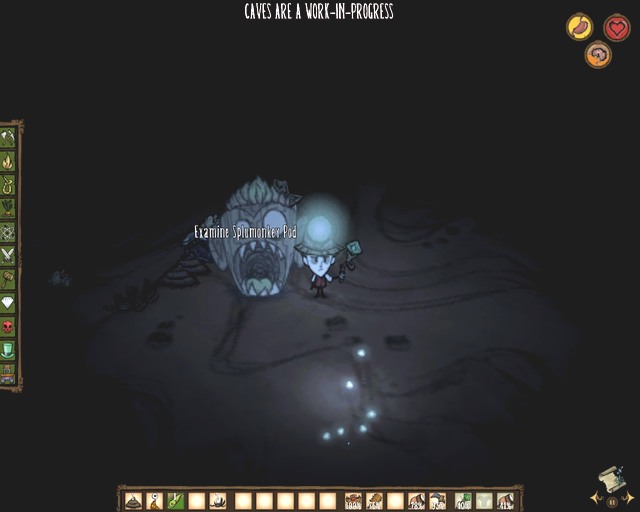 This is how Nightmare Splumonkey's dwelling place looks like
Shooty Horn/Eye Item/ Houndius Shotius - can be crafted with: 1 Deerclops Eyeball, 1 Guardian's Horn, and 5 Thulecite. Its function is simple: casts projectiles at your enemies.
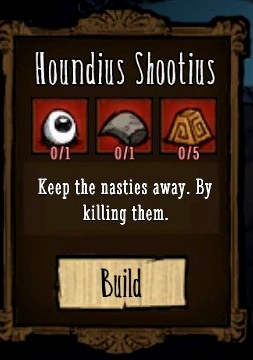 This device can help you repel an enemy attack
Potted Fern - can be crafted with: 5 Foliage and 1 Broken Shell. This currently serves only as a decoration.
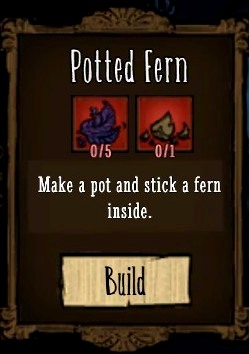 This can be used to decorate your camp
Deconstraction Staff - you need: 4 Nightmare Fuel, 2 Green Gem, 2 Living Log. You can use it only 5 times. Click the right mouse button on an item you want to deconstruct. This will grant you materials. Cannot be used on walls or turrets. Note that you can only use the staff on items that lie on the ground. You cannot deconstruct an item in your inventory.
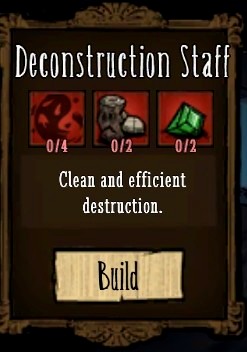 If you are in dire need of materials, this staff is just what the doctor ordered
Ancient Guardian - will drop Horn when killed. This can be used to craft a turret.
Eel - you can now attach an eel. Cooking it produces Unagi. To do this, you need two fillers, such as Twigs. Another necessary ingredient is Lichen.
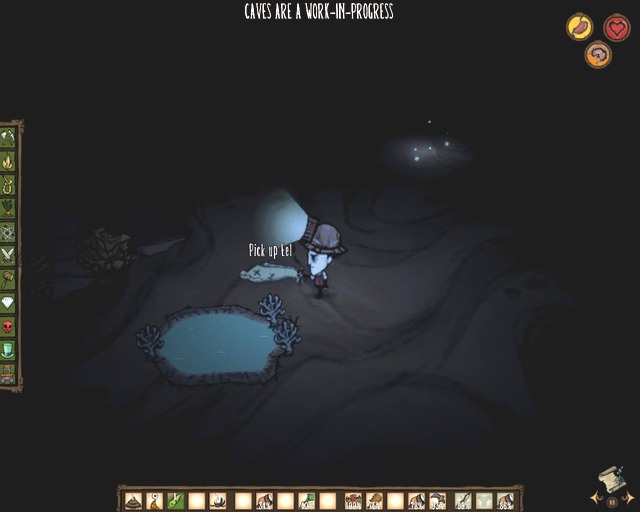 An eel is a new element of the game.
Thulecite Crown - to craft this, you need 4 Night Fuel and 4 Thulecite. You can wear it on your head. This will grant you 90% damage resistance.
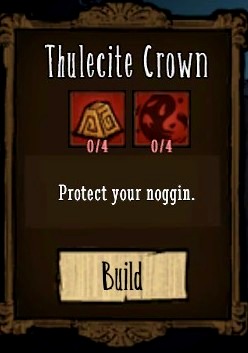 The crown will give you proper protection.
- Dying in a cave has the same result as dying on the surface. Your save is deleted.
- Caves can no longer be regenerated
 This update changes revolve mainly around the undergrounds.
- time in all underground locations is now synchronized
- you can be revived in between cave levels
- some changes and improvements have been done in caves generation system: the levels are now more unique and new Biomes have been added. More specifically these are: Red and Green Fungus Forest and Sunken Swamps
- Nightmare has even bigger influence on caves. Fissures can be found everywhere. In Ruins serve as sources of light
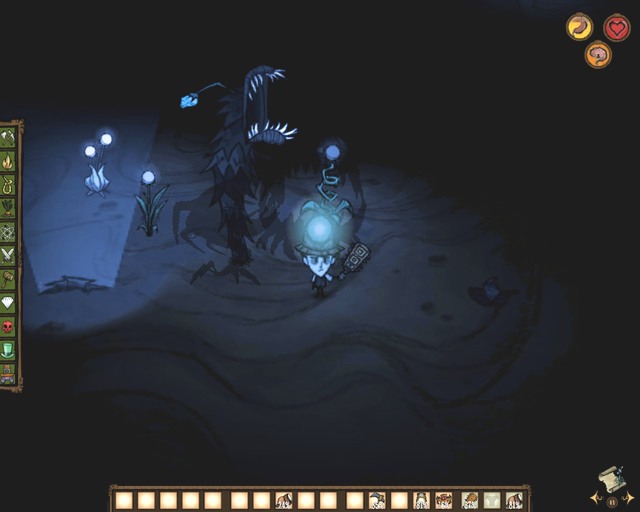 You won't fall down into a fissure.
- Stalagmites can now be completely destroyed
- new model of the ruins entrance
- Beware of a new horrible monster digging in caves - Depths Worm is hostile. When killed, the unpleasant creature drops magical cave food.
 Your new enemy in all its glory.
Your followers now stick to their leader
- Fire Hounds can be frozen and Ice Hounds can be set ablaze
- when you get close to Ancient Guardian, you will discover that he can now perform a new melee attack
- Gobblers drop two Drumsticks when killed
- Thulecite Crown has a new magical effect
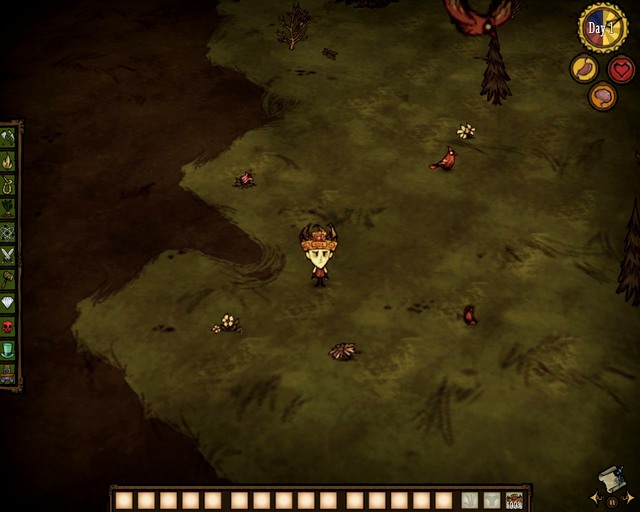 This is how your character wearing the magic crown looks like.
- Fire Darts can now be used against fire-resistant creatures, to no effect though. You may also use them to melt frozen creatures.
- Joy pad support has been added. Improvements of the controls will appear in the next update. It is now possible to customizing the controls in pause menu.
 This is how the Controls menu looks like.
- you can now dig up Turf - this can be found under roads
Depths Worm is a very dangerous opponent. It can be met underground. Do not let him lure you with his bait. You can only kill it when it emerges from under the ground. While chasing you, it moves under the ground (this is a novelty in the game). The creature bears some similarities to Hounds, because as the days pass, you will be attacked by more numerous groups of these creatures. You can tell the creature is approaching by the grumbling noise. During a nightmare, some fragments of its body are glowing red. Whenever the creature hides under the ground it leaves Dirt Mound behind.
 Even while fighting big worms, you can pause the game by clicking Escape button.
Thulecite Crown has new features. Every time you are hit, there is a chance that a force field will appear around you. It will protect you from damage for a short time. A few seconds must pass before this can be used again. Unfortunately, there is a fly in the ointment - whenever this happens, your sanity drops (depending on the damage you took). The force field also emits light.
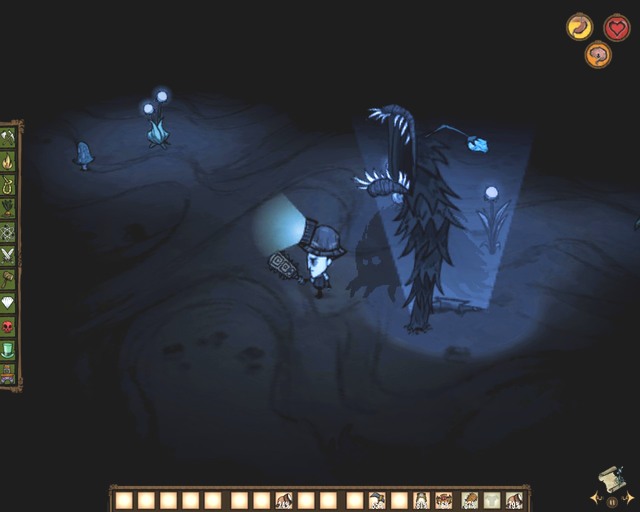
You can use the new feature of Thulecite Crown while fighting this beast.
Sunken Swamps - prepare for fighting Cave Spiders. These can be met while exploring caves. You can find Reed and Spiky Bush. You may also be attacked by Tentacles.
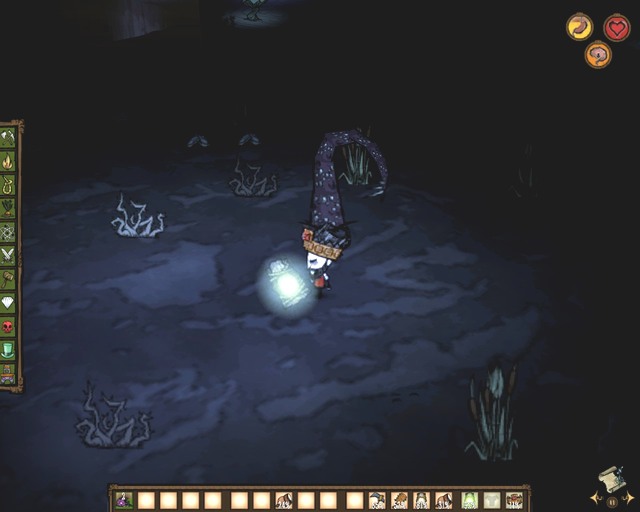 A tentacle is an annoying opponent.
Red And Green Fungus Forest - these appear in caves. There are: Mushtree, Red Mushtree, and Green Mushtree in there. If you have a Pitchfork, in your inventory you can dig up some Fungal Turf. You have also a chance of meeting a Bunnyman. Look out for Carrots too.
- Maxwell may summon, to his aid, the so called, Shadow Helpers. There may be a maximum of 3 of them. The will follow you and fight at your side.
 The developers released another patch at a quite short notice.
- Screecher is a new mod that is completely free of charge, for all the users of Don't Starve
- the Mosquitoes that you defeat drop Loot
- "The Totally Normal Tree can now appear anywhere in the world
Monsters
- Depth Worm - his attacks have been modified
- when it comes to the Spitters the range and velocity of their projectiles have been decreased
 To play with the mod on, you need to restart the game.
- Miner Hats - can now glow for a longer period of time, if you use the Light Bulb or Fireflies
- Wickerbottom's books have been provided with descriptions
- Tooth Trap and Bee Mines cannot, from now on, be deployed close to each other
General
- The Main Menu buttons have been rearranged
- controls have been enhanced, e.g. the action button is now used to harvest crops from farms, or to eat from Crockpots
 This is what the title screen looks like after the mod has been implemented
To play this mod, you need to access the "Mods" option in the Main Menu, or to click onto the frame with its name. The game will restart and you will see a screen with a standard warning displayed, which informs you that the game developers cannot be held responsible for the problems that may occur while playing this mod. You should click the "I understand" button.
 In this screen, you will learn that the mod has been installed properly.
You will, then, see the title screen and, to start playing, select the Begin option. If you want to return to the basic version of the game, click onto "Don't Starve".
The area that you move over has been generated at random, e. the map is not in the Jacket at all times. You start near the campfire. To walk around use W (forward) and S (back), and the Space bar to interact. To turn the Flashlight on and off use the right mouse button.
 This is where you start your adventure.
Remember to ransack through Boxes, Garbage and Bags.
Inside, you will find Battery or Note.
Close nearby, there is a Box. Open it and you will obtain a Flashlight.
 On the top of the screen, there is information of the flashlight battery status.
Next to the Flashlight, you will find a Note and a Battery. You need to remember that if the flashlight goes off for a longer period of time, you will die.
In total, there are 9 Notes and they help you get involved into the game. Still they are not mandatory to beat the game. Your objective is to reach the helipad.
 This is where you need to get.
Walk along paths. You will be pointed to the helipad by the Sign with the letter H. When you get close to your destination, you will notice a large letter H on the map. Before that, however, you need to find the map. At the road, there are big, abandoned encampments, which you need to search through. As you follow the path away from the campfire, you will encounter a woman (press the Space bar). You will not get to talk to her, because she will escape after she sees you. Close nearby, you will always find a map (you bring it up by pressing the Tab key).
 This is what your quick map looks like.
Along your path, you will encounter apparitions so, you need to shed light, from the Flashlight, on them. If you do not manage to do that before they approach you, you will die. Keep tapping the right mouse button. Eventually, you will reach the Radio. Turn it on to call for help.
 This screen appears after you die.
Close nearby, there is the Generator. You need to try several times to switch it on, before it goes online.
 If you reach the generator, this means that you are close to the end.
After the generator is on, your Flashlight will start to fail. You need to turn it on quickly again. If you manage to do that, you will have finished the game. Information on how many Notes you have found will display.


 Diablo III Game Guide & Walkthrough
 Drakensang: The River of Time Game Guide & Walkthrough
 Dreamfall: The Longest Journey Game Guide & Walkthrough
 Devil May Cry 4 (PC) Game Guide & Walkthrough
 Dragon Age II: Legacy Game Guide & Walkthrough