Diablo III Game Guide
This Diablo III game guide contains mostly a detailed description of all of the game's quests. The missions have been divided into acts and they are listed in the guide in the same order they're received. The walkthrough is filled with a lot of pictures and descriptions of possible character and monster encounters. An additional chapter of the guide explains all classes and also features examples of good character builds. All of these have been supplemented with descriptions of the secret levels, such as the Whimsyshire or the Infernal Machine. Diablo 3 is a Hack 'n' slash type of game that was released by the Blizzard studios in 2012. The game itself is the third installment of the series, which tells the story of a war between angels and demons. In the middle of the story, there appears your character, who has been lured into the vicinities of the new Tristram, by a shooting star. During the game, you can take control over a character of one of five classes: Barbarian, Wizard, Demon Hunter, Monk and Witch doctor. The creators have included the system of master levels into the game so, in theory, you can keep developing your character endlessly. The game itself has been divided into four acts, which differ in terms of the monsters that you meet, the story background and the boss. The game ending is, as a matter a fact, only the beginning, because the important element are the difficulty levels, to which you get promoted, as soon as your character is strong enough.
List of contents:
Maciej "Psycho Mantis" Stepnikowski, Aver, Terrag, Xanas and Asmodeusz ()
Translated to English by
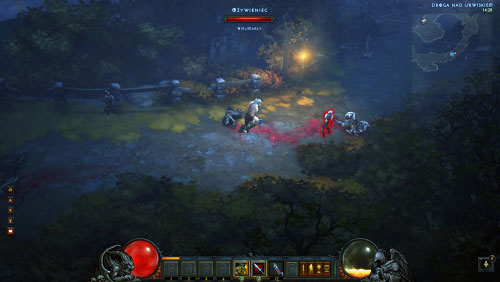
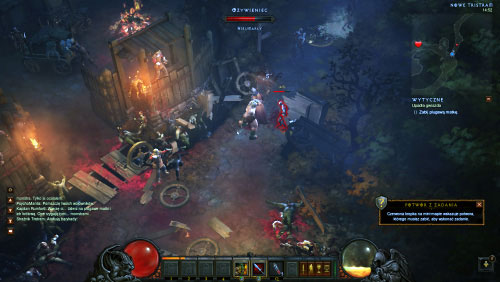
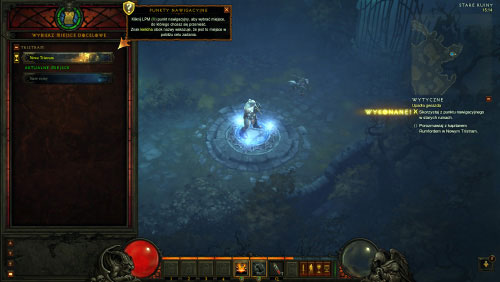
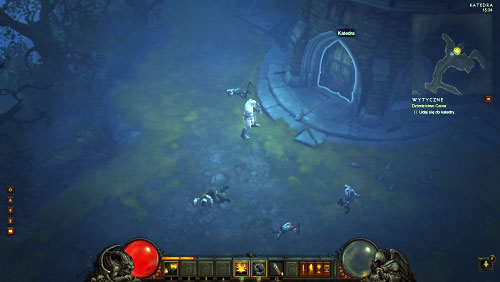
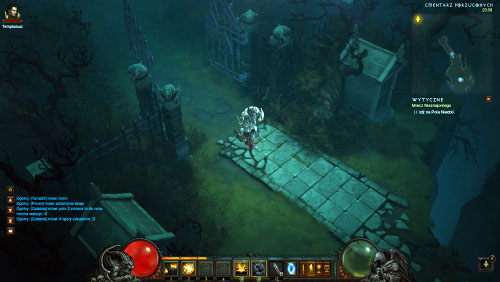
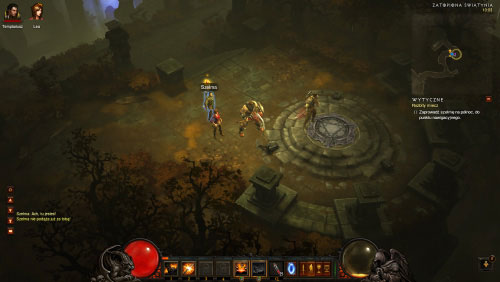
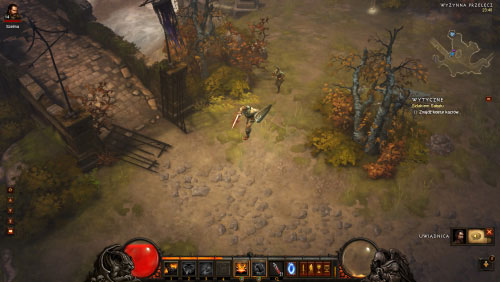
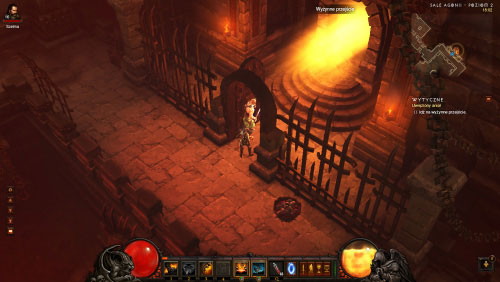
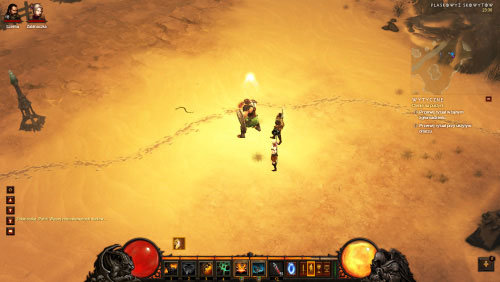
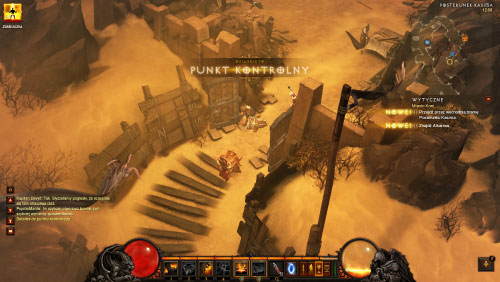
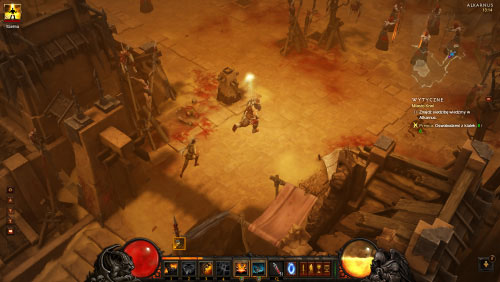
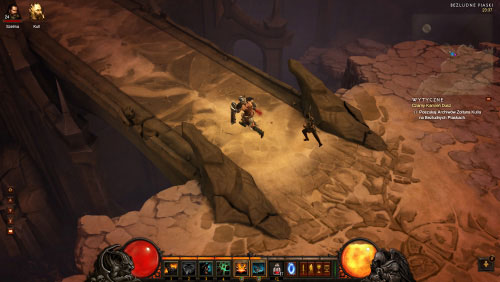
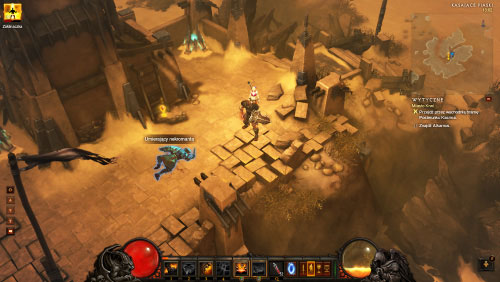
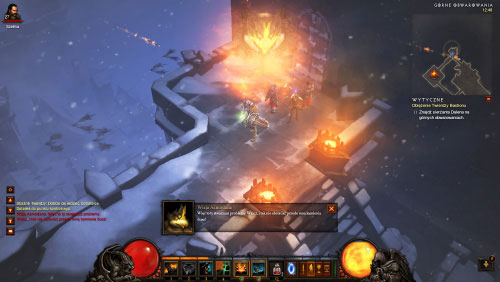
You will begin the game on the Road Next to the Cliff. Proceed east and eliminate a few Risen along the way. You will soon have to turn north. Approach the gates of a town named New Tristram.

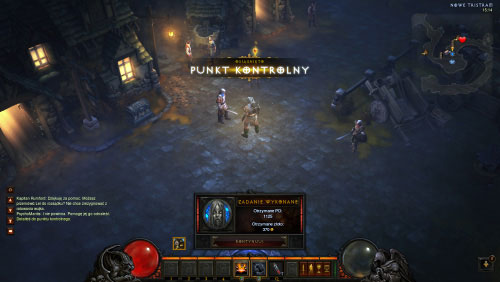
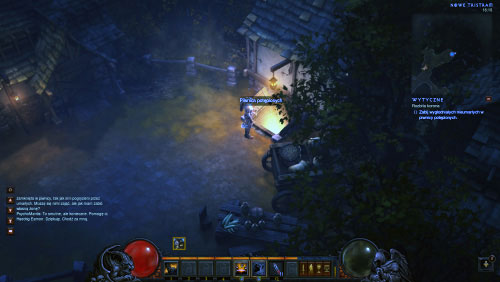
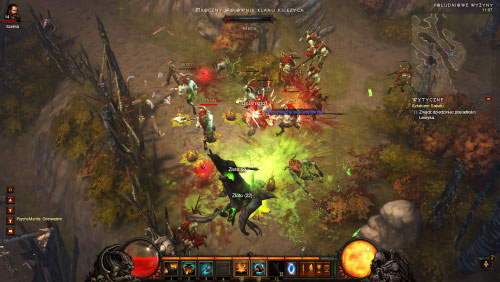
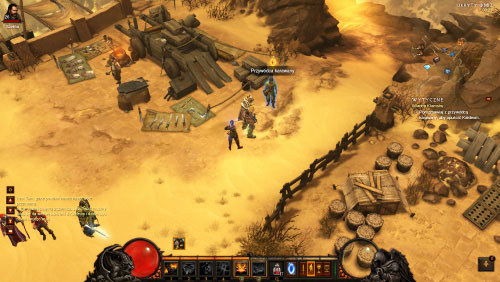
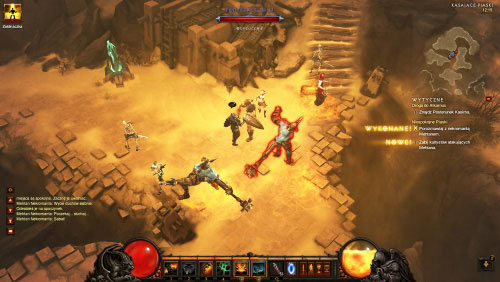
Captain Rumford should be standing in front of the closed gates and additional defenders can be found on the palisade. Talk to the captain to receive your first task.
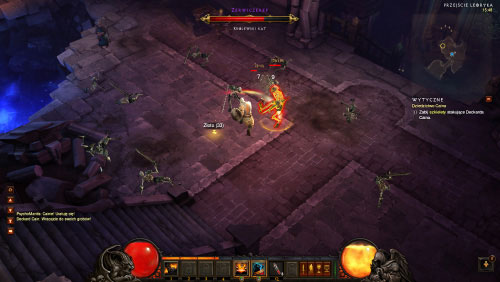
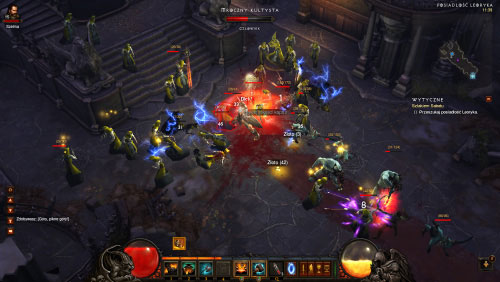
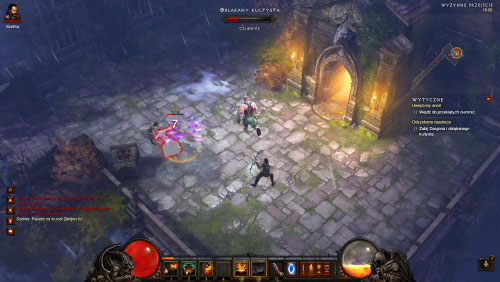
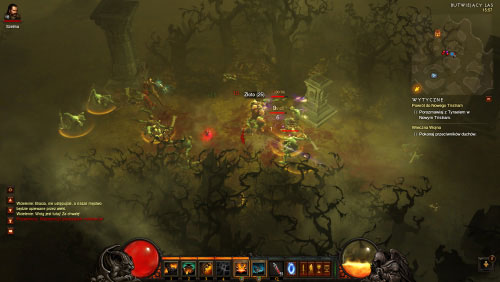
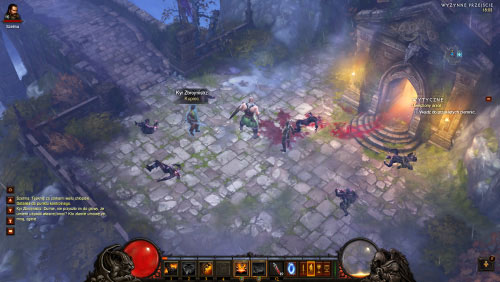
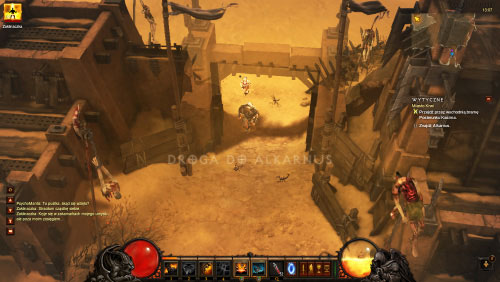
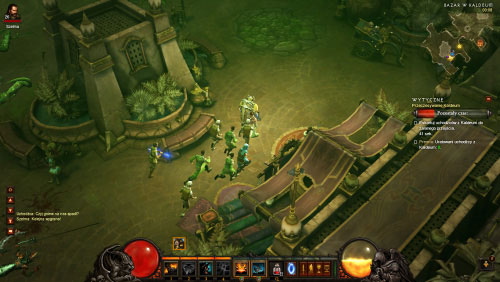
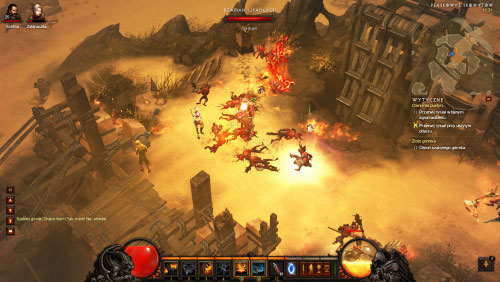
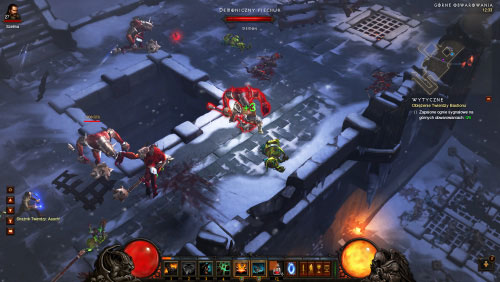
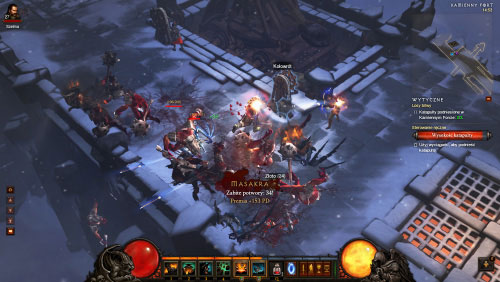
Monsters will start appearing close to the woods to the east. Join the defenders and start attacking them. You'll encounter a small group at first, however once the undead have been defeated a much a larger group will join the battle.

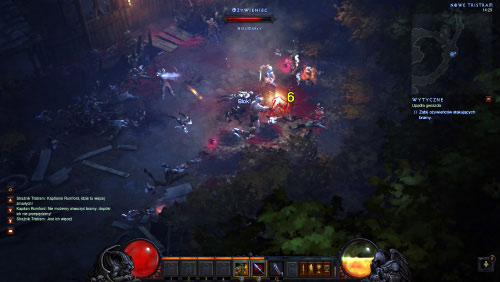
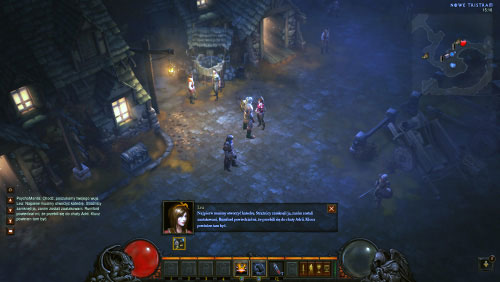
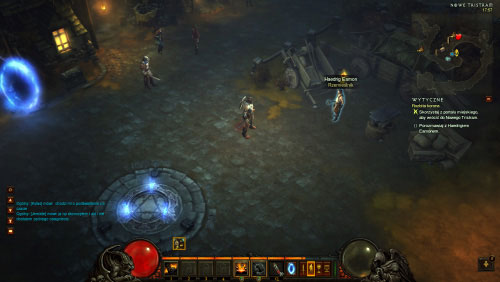
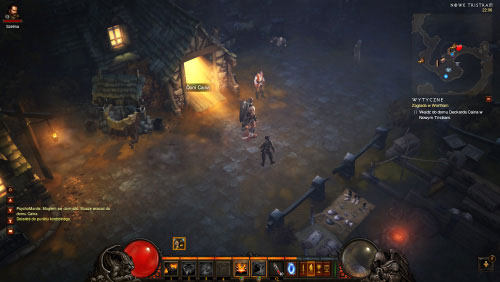
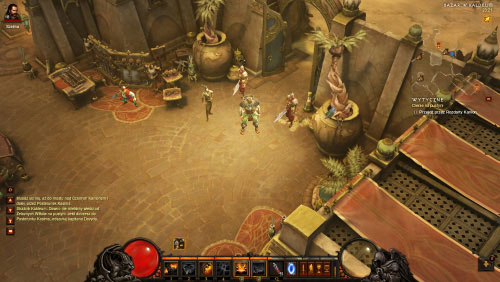
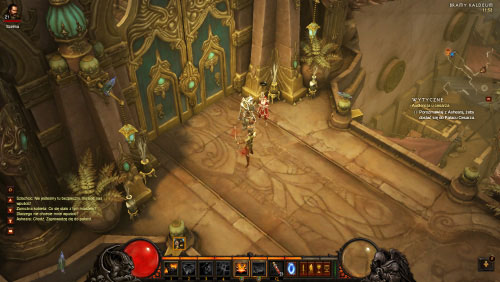
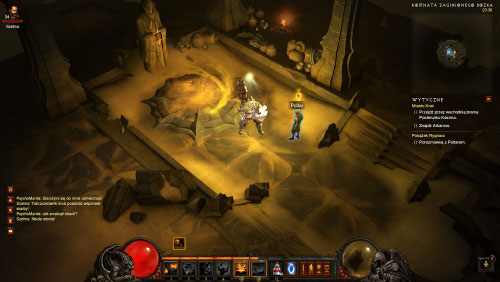
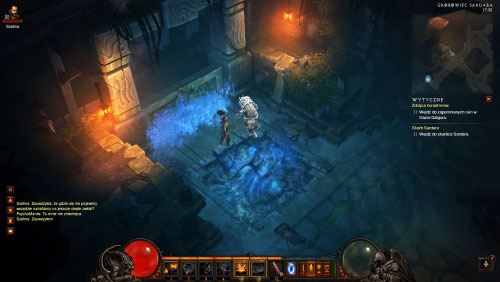
Enter the city and proceed towards the town square where the inn can be found. The building you're looking for, as any other quest objective, is marked on your map with a pulsating circle. Enter the inn, find Leah next to the bar and talk to her.
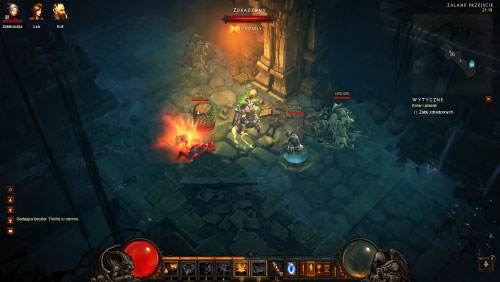
During the conversation a bunch of people standing in the inn will suddenly turn into Risen. Leah will help you in getting rid of them.
Finish your conversation with Leah that was interrupted by the attack of the Risen. Leah's Room can be found nearby, but aside from her journal you won't find anything interesting there.
Exit the inn and return to the gates. You must talk to Captain Rumford again.
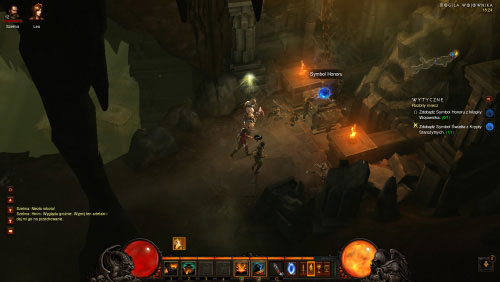
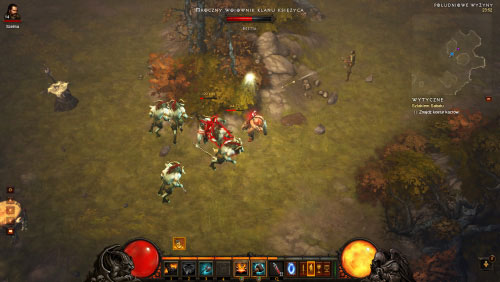
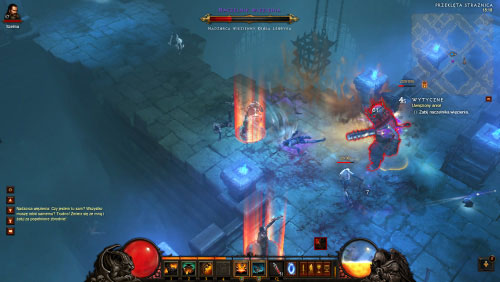
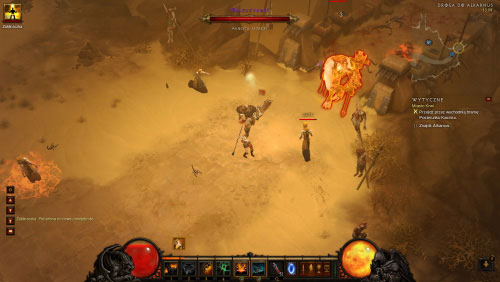
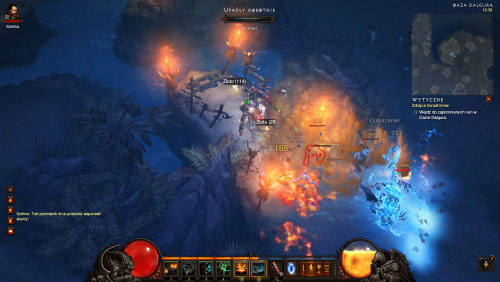
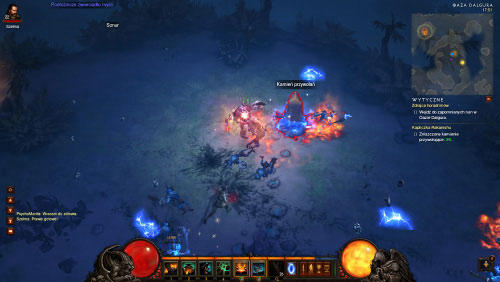
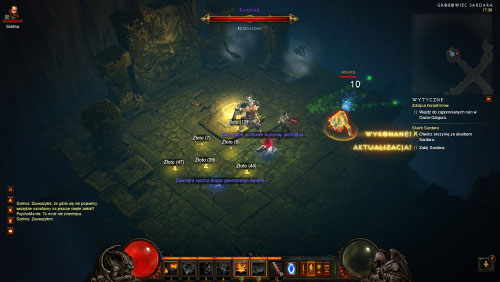
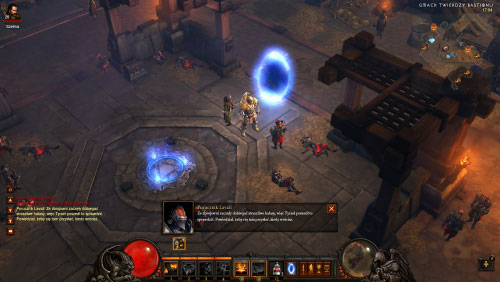
New Risen will attack from the north. They are being breeded by the Wretched Mother, so you must focus on killing her as soon as possible in order to prevent new monsters from joining the battle.
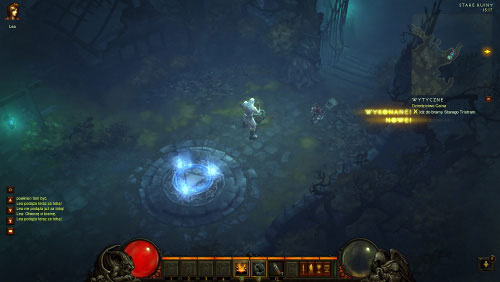
Head north, choosing a narrow path along the way. You should find yourself using Old Tristram Road and it's recommended that you explore this location.
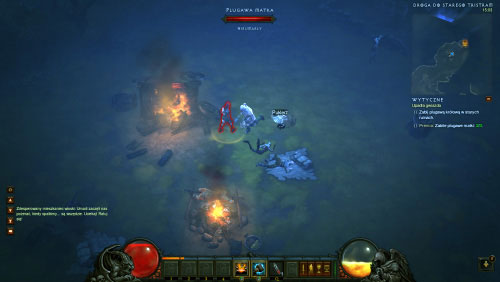
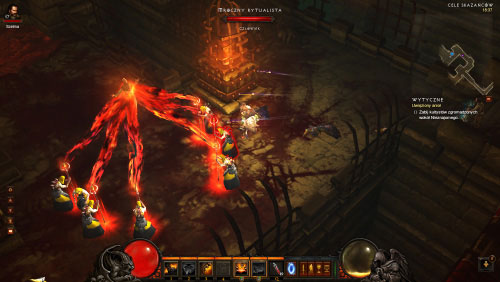
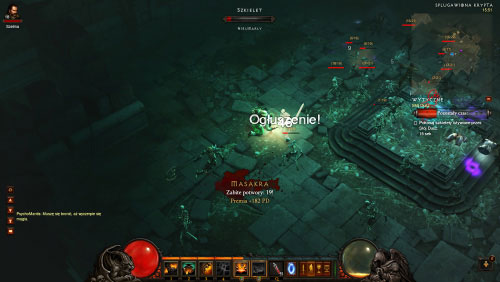
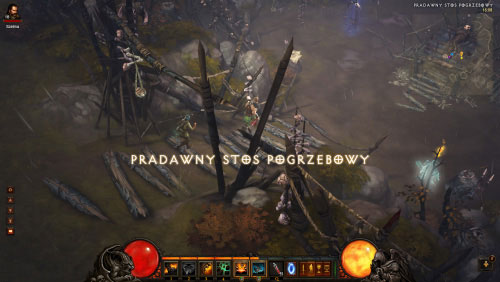
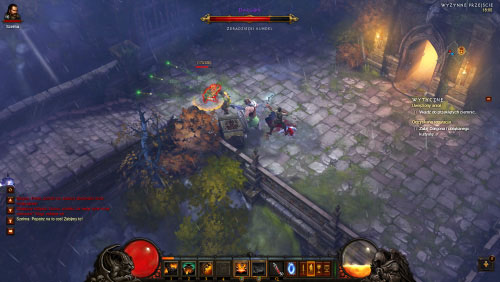
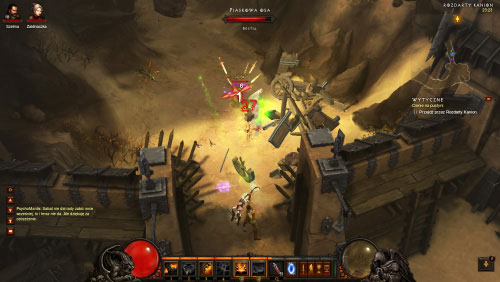
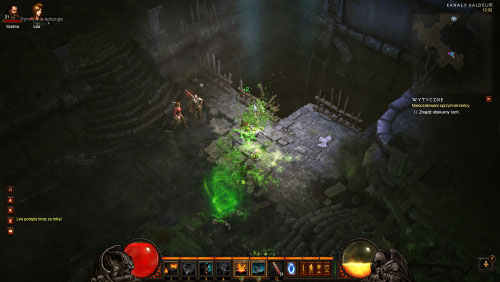
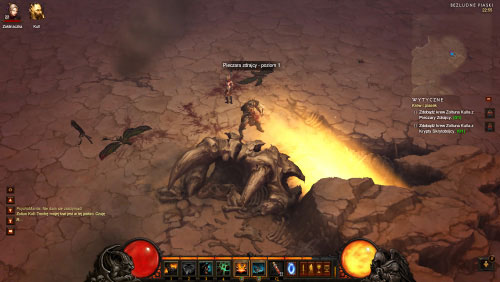
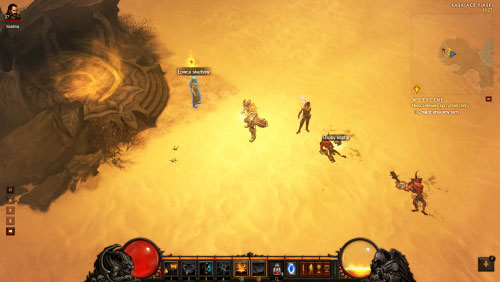
The area is swarming with the Risen, Quill Fiends and Walking Corpses (don't forget that you must also kill Crawling Torsos once they're defeated). There are a lot of corpses of Tristram defenders here, as well as snags, piles of bones and other objects that you may examine in order to collect gold and valuable items. You shouldn't have any problems locating three Wretched Mothers and killing them will allow you to complete the bonus objective. The area isn't too big and you should stick to the main road if you want to move ahead.
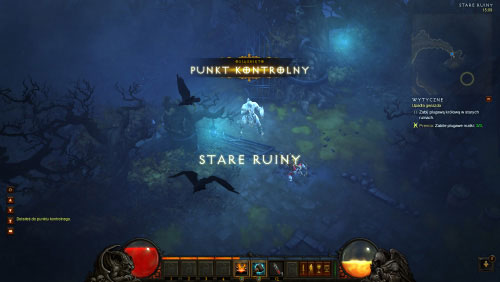
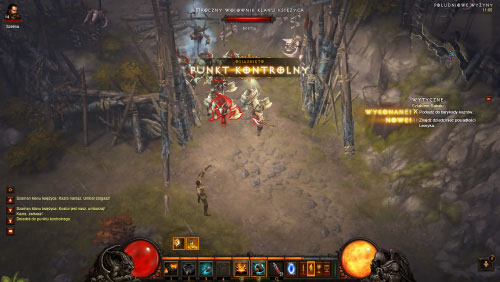
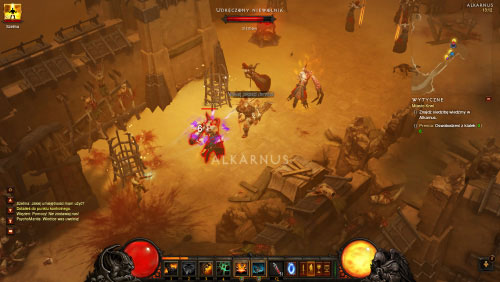
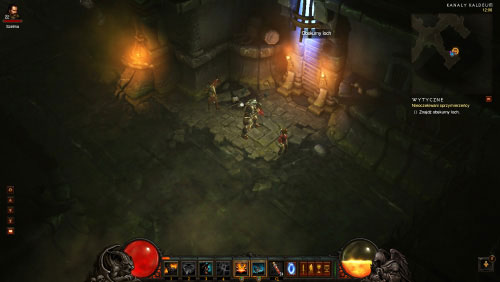
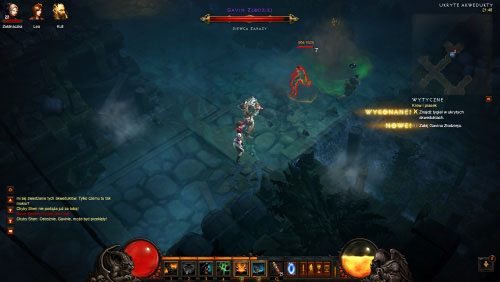
The main path will soon narrow down and you'll enter the Old Ruins. This is the old Tristram and it's being occupied by the same creatures you've previously encountered on the Old Tristram Road. The Wretched Queen can be found in the south-eastern part of the town and she's marked with a red dot on your map.
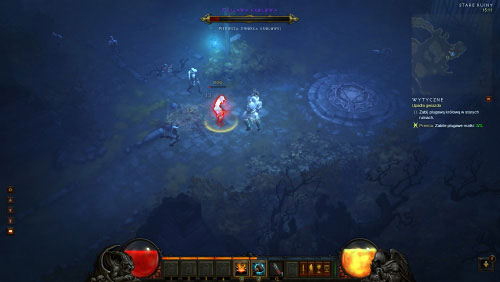
The queen is quite resistant, but she's slow. She also continues to breed new Risen, so you should focus only on killing her.
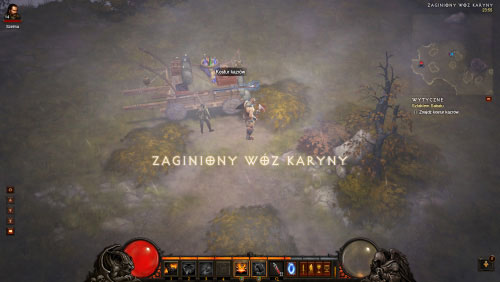
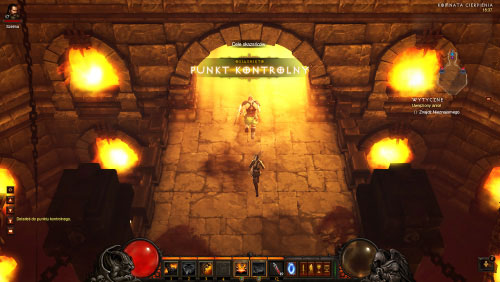
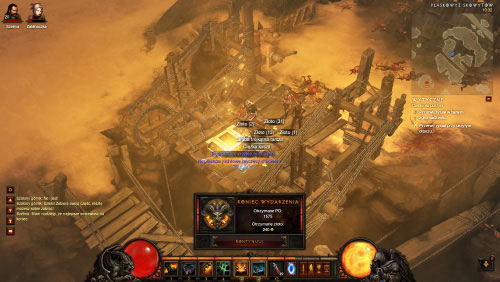
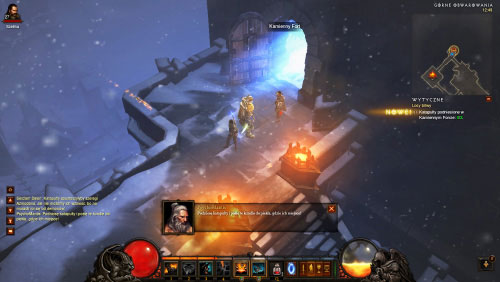
Before you decide to use the waypoint you should explore the entire area. For example, in the ruins of Griswold's workshop (he's the blacksmith from the first Diablo game) you'll find an armor stand. Click on the waypoint and travel to New Tristram.
Captain Rumford should be standing close to the waypoint. The conversation with the captain will end this quest and you'll receive experience points (EXP) and gold as a reward.
This quest can be obtained by talking to Leah. She's standing in the main square of New Tristram.
Click on the waypoint and travel to the Old Ruins.
Once you've used the waypoint to travel to the old Tristram you must follow Leah to the gate. The archer will open the gate, allowing you to move on.
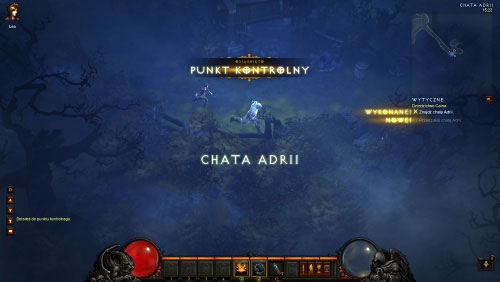
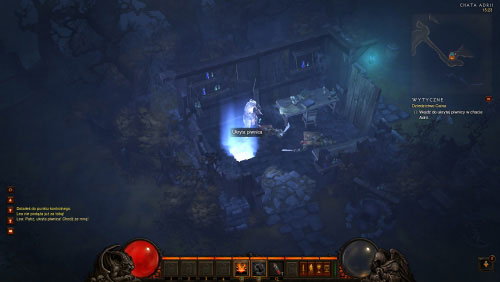
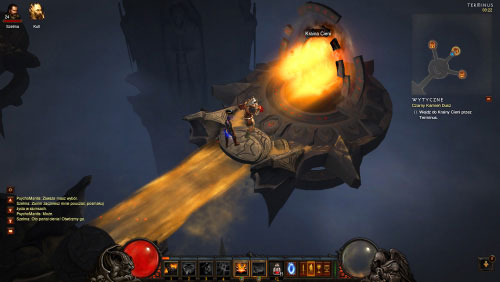
This task begins on the Old Tristram Road. Follow the narrow path and you'll eventually locate Adria's Hut.
Enter the hut. You and Leah will locate an entrance to a Hidden Cellar.
Leah should automatically enter the cellar and you must follow her.
The cellar isn't too big and therefore you'll soon discover that Adria was a witch.
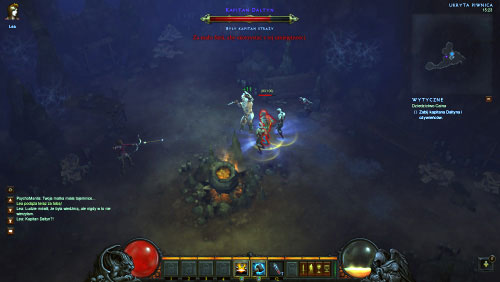
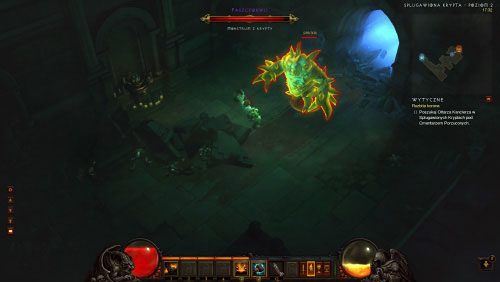
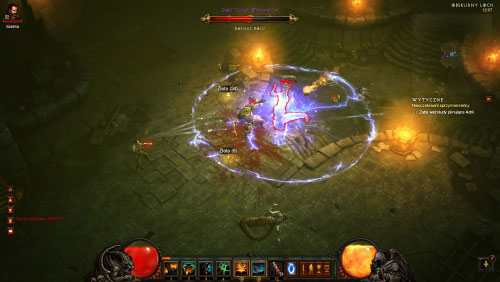
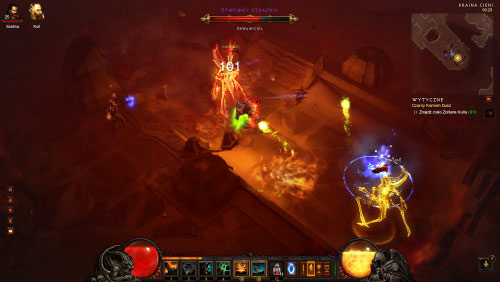
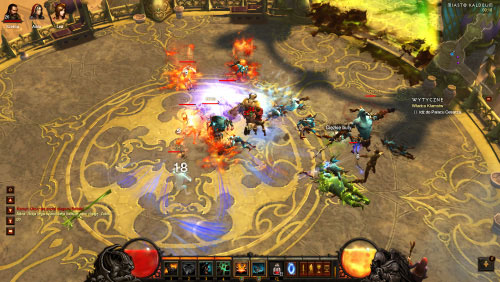
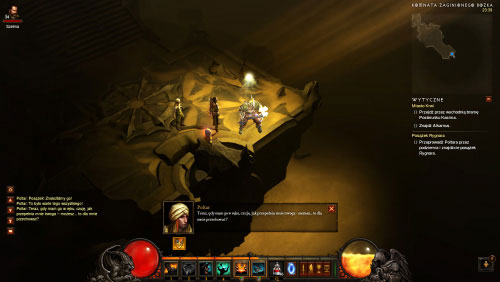
An ex-guard captain will soon appear in the central part of the cellar. He will be accompanied by his servants and they must all die. Captain Daltyn isn't a demanding opponent. He's slow and even though he's resistant his attacks don't inflict a lot of damage. It's recommended to get rid of his servants before attacking him.
After you've defeated the captain you'll have to talk to Leah. She will leave you here and you'll continue the journey alone.
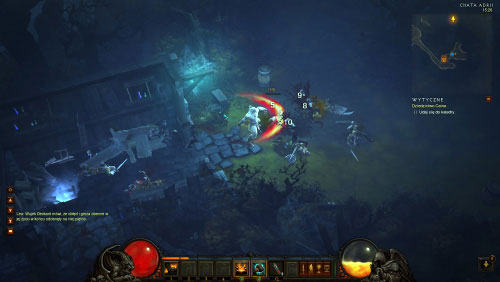
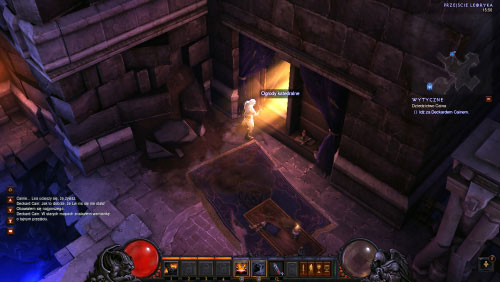
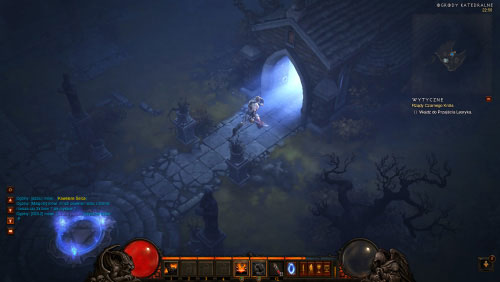
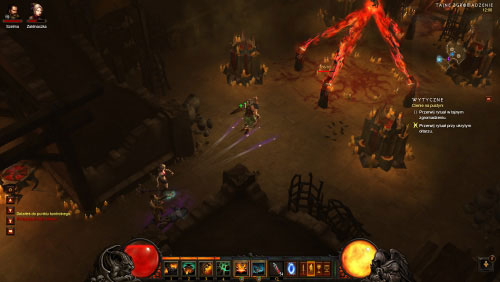
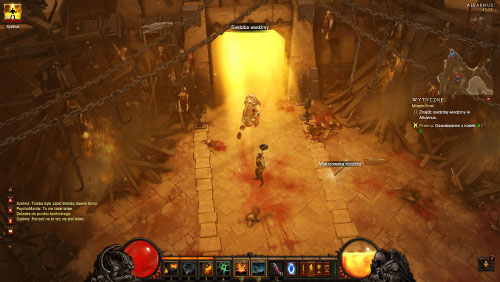
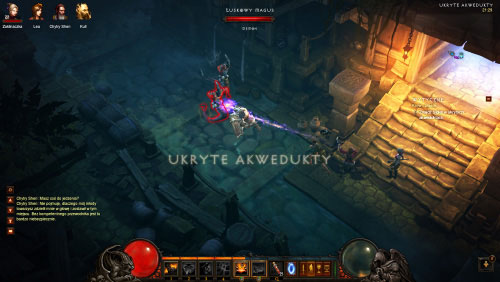
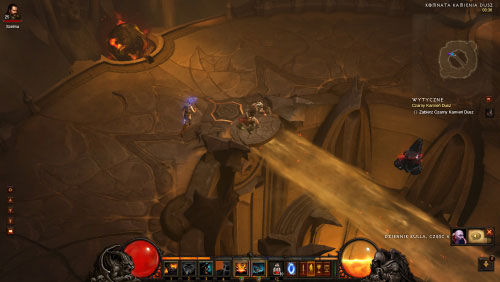
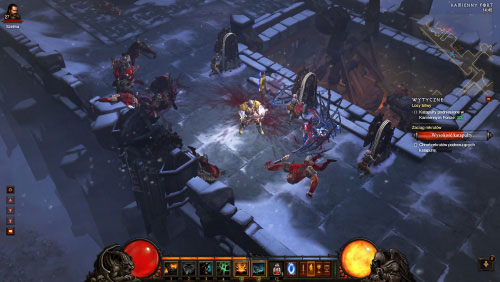
Exit the Hidden Cellar and expect to be attacked by a group of Risen. The only way to reach the cathedral is to go right. You'll want to go back to the Old Tristram Road.
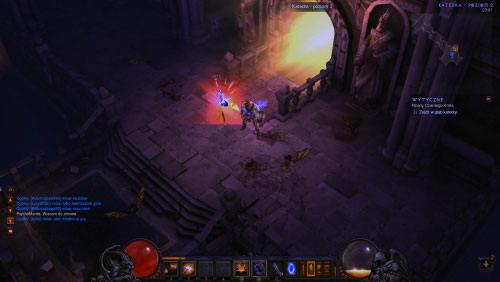
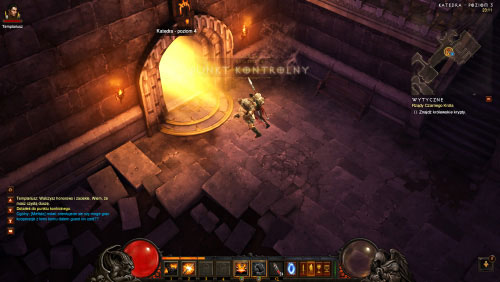
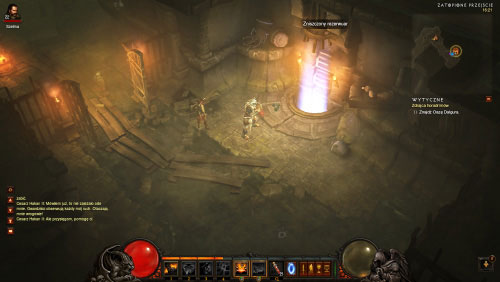
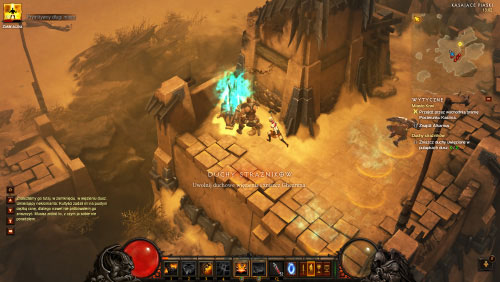
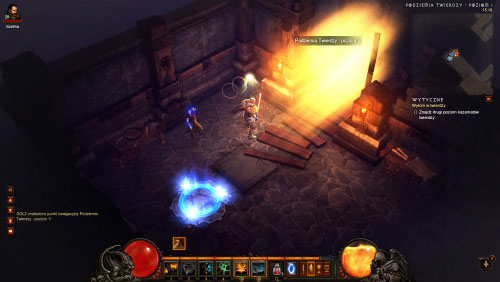
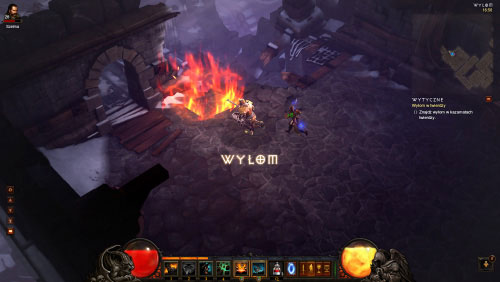
Keep following the narrow path, killing more Risen along the way. It shouldn't take long for you to reach the Cathedral. Open the door and enter the building.
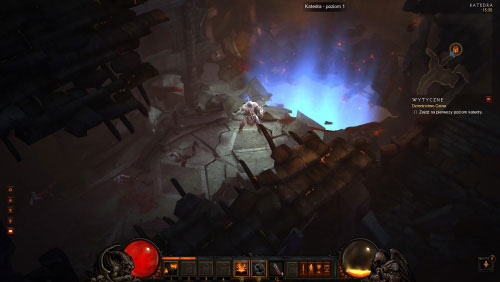
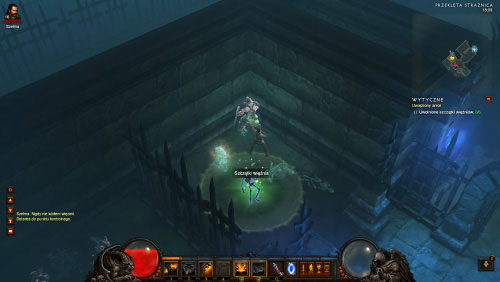
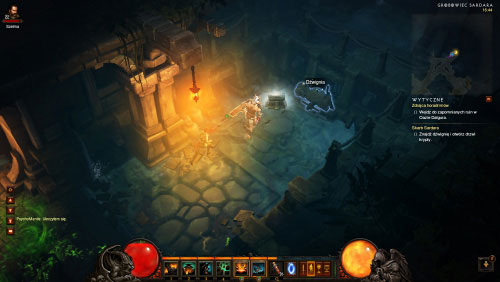
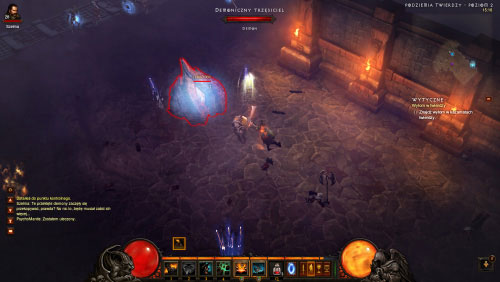
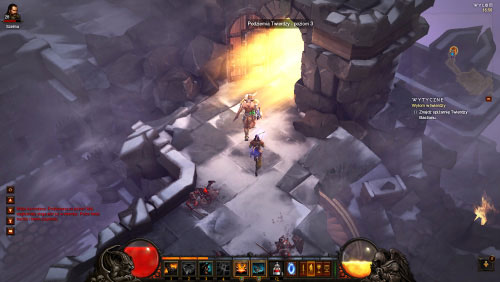
There are some monsters in the corridor and you must kill them. Find a crater and descend, heading towards Cathedral Level 1.
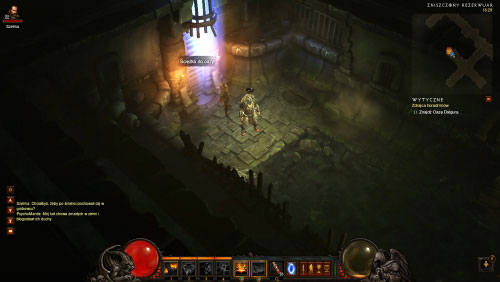
You'll begin on the first level, however Deckard Cain isn't here. This means that you must locate a passageway to the next area.
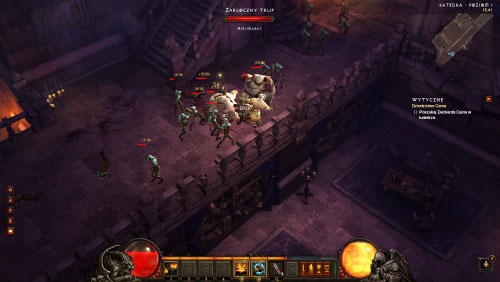
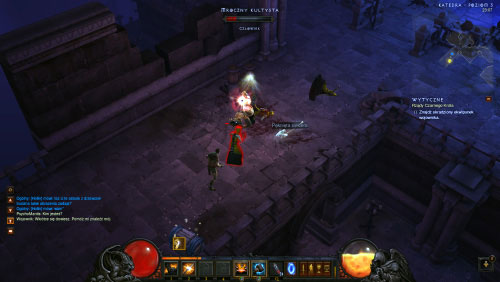
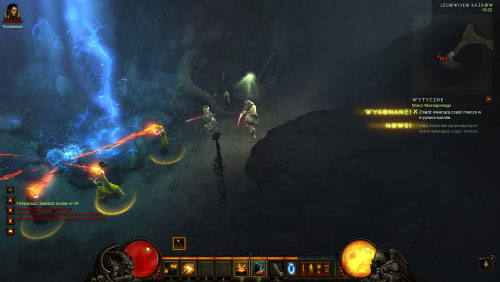
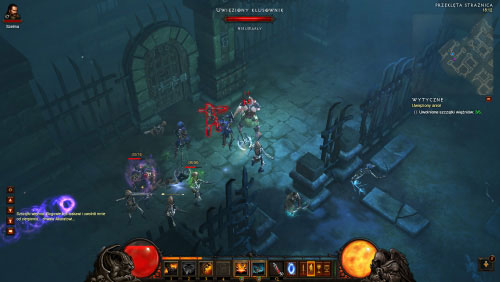
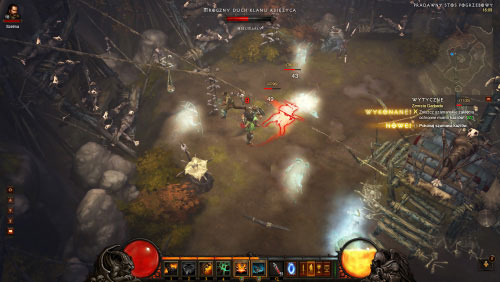
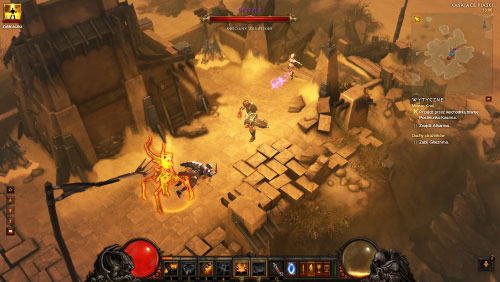
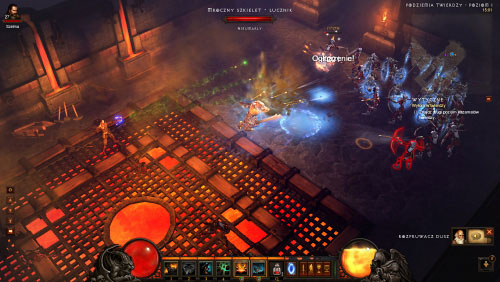
The location you've entered is larger and it has a lot of corridors. You'll encounter new types of monsters here. Ravenous Dead are slow and they shouldn't be considered a major threat unless they operate as a group. Watch out for Grotesques, because they explode when they die and they leave behind crawling monsters called Corpse Worms. The cathedral is also a home to Carrion Bats and they inflict lightning damage. Prevent them from cornering you, because they may become a huge threat even to a barbarian.
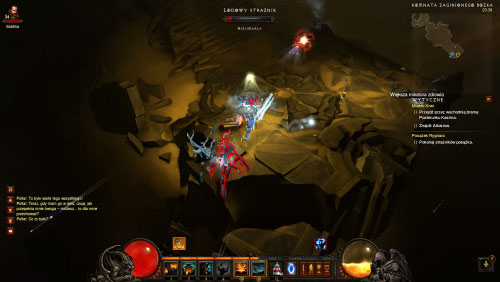
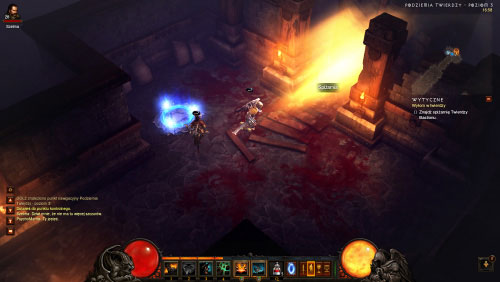
Continue exploring the cathedral until you find an exit leading to Leoric's Passage.
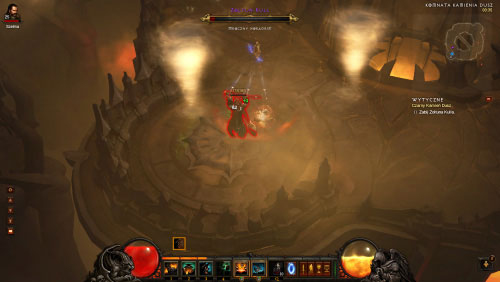
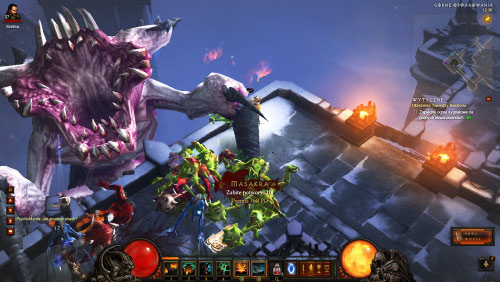
You'll witness a short cut-scene and it'll inform you that Deckard Cain is in danger. Descend the stairs and start defending Cain. There's a boss among the skeletons and it's named Headcleaver. Thankfully this battle shouldn't be too difficult, because the boss will die quickly and also the injuries it inflicts aren't serious.
Keep fighting until it's safe and then talk to Cain.
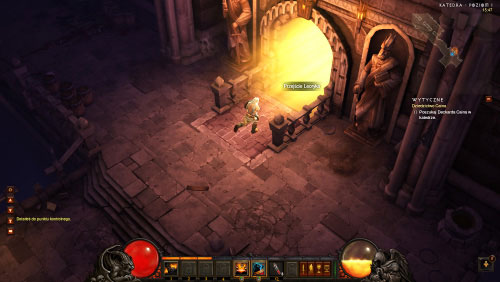
Deckard will open a passageway leading topside and you must follow him to find your way to the Cathedral Garden.
Talk to Leah in New Tristram
There's a waypoint near the entrance you've used to exit the cathedral. Use it to travel to New Tristram.
Talk to Leah to finish this quest.
Don't forget that you've rescued Deckard Cain - talk to him to find out more about king Leoric. Cain will also give you this quest.
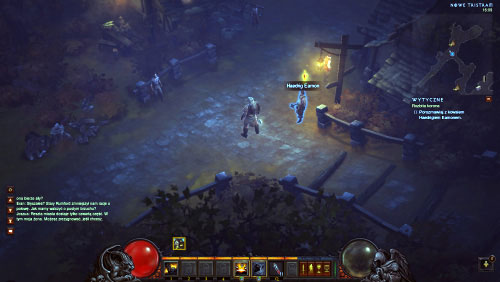
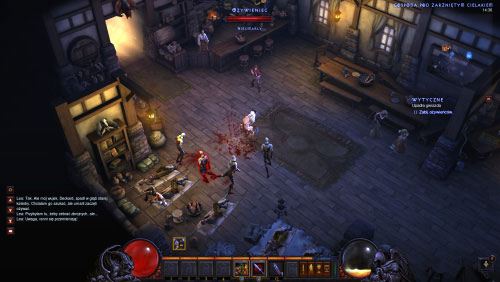
Start at the town square and use the path located to your left. Pass by the townsfolk and merchants until you've located the blacksmith standing at the crossroads. Talk to him.
Follow the blacksmith to the Cellar of the Damned and enter it.

You'll find a short corridor here and a door. Destroy the door to enter a new chamber. There are more than a dozen Ravenous Dead in this room for you to kill.
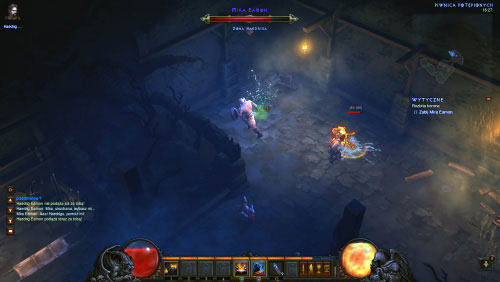
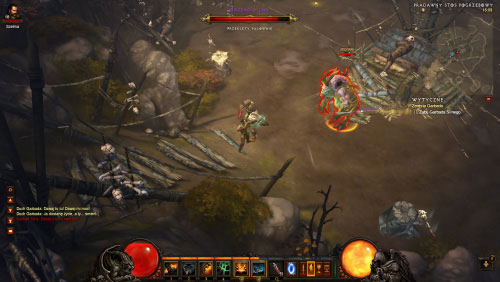
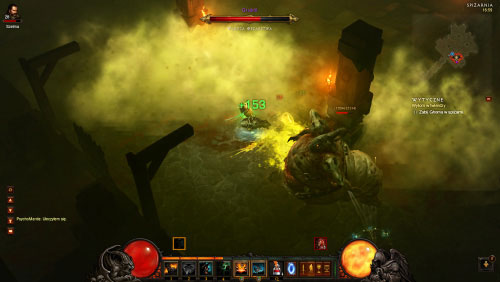
You'll find the blacksmith's wife at the end of the cellar and sadly you'll have to kill her as well. Mira Eamon is considered a boss, so she's more demanding than standard monsters. She's very slow, however she deals heavy blows and spits venom if you move away from her (poison damage).
After you've killed the boss talk to Haedrig in order to complete his assignment.
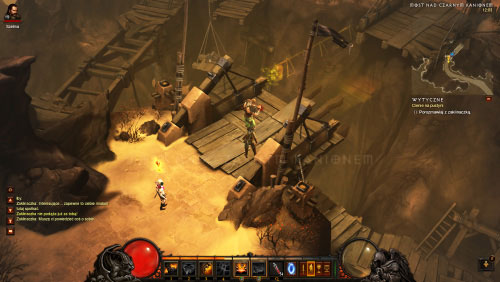
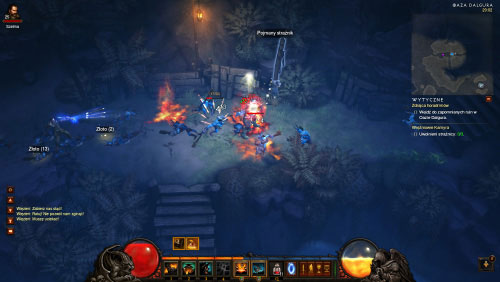
Exit the cellar and return to the gate you've probably noticed earlier on when you were following the blacksmith. Enter the new area and be ready to engage a group of Scavengers in combat. You can return to the city if you want some assistance in killing them.

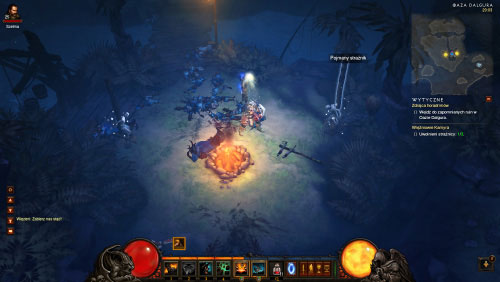
Travel to the other side of the bridge in order to enter the Weeping Hollow. This is a large area that's occupied mostly by the Hungry Corpses and the Retching Cadavers that breed them. You'll also encounter Grotesques and very fast Scavengers. Watch out for the crawling Ravenous Dead coming out of the bushes.
Since this is an open area you may find yourself encountering a new group of monsters while trying to run away from the previous one. As a result you should be exploring the map slowly if your character can't handle so many enemies, so that you won't have to fight too many of them at the same time. You may find a corpse of Haedrig's apprentice in this location and you'll inform the blacksmith about this during your next encounter.
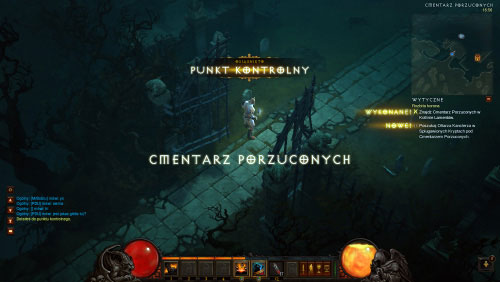
The best way to find the cemetery is to move near the edge of the map. Find a narrow passageway leading to the gate of the Cemetery of the Forsaken.
You are standing in the cemetery. There's a waypoint next to the gate and you should approach it in order to activate it.
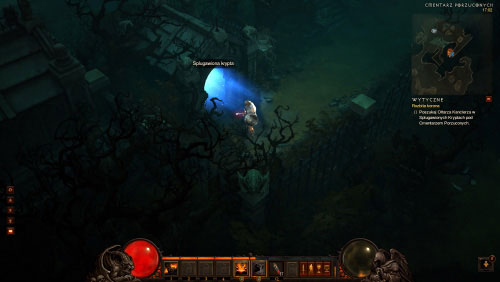
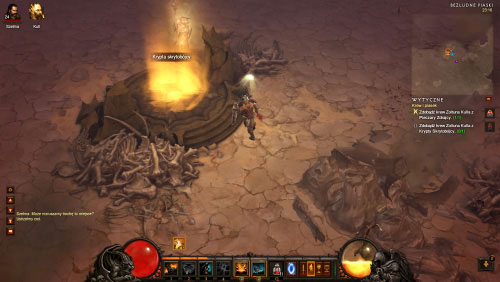
You must check three Defiled Crypts. The entrances to them are located on the cemetery grounds.
Only one of the Defiled Crypts mentioned above has a second level and this is the one you must choose in order to proceed with the next part of the quest (the remaining crypts have only one level). As for the cemetery itself, it's guarded mostly by Skeletons, small Imps and several other types of monsters you've already encounter before. You may be attacked by bosses in the two less important crypts and they may have additional abilities like knockback or teleportation.
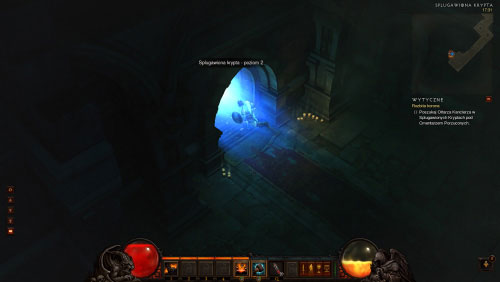
Go back to the Defiled Crypt with the passageway leading to level two and choose it.
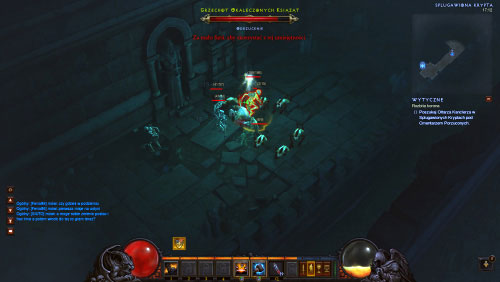
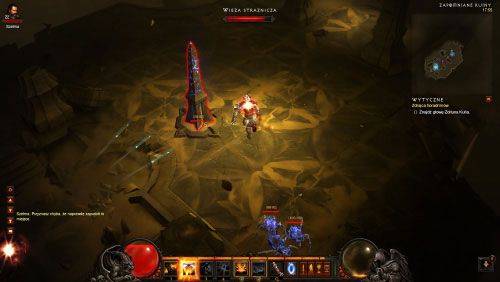
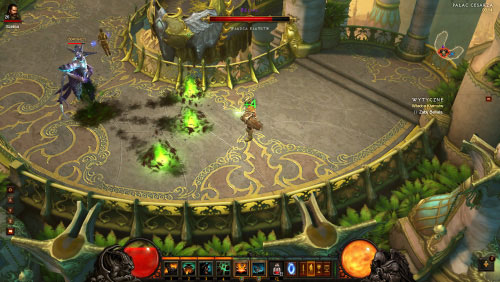
Begin exploring Defiled Crypt Level 2 which is rather small. Approach a door and be ready to attack a monster named Manglemaw. This creature has more than 300 health points (three times as much health as the blacksmith's wife you've killed not long ago), so it's tough. Thankfully the boss is slow and uses knockback instead of serious blows. Once you've killed the monster open a new door to proceed to the Chancellor's Tomb.

A Tomb Guard can be found in this small area and it can summon Skeletons. Kill the guard to prevent it from summoning too many servants.
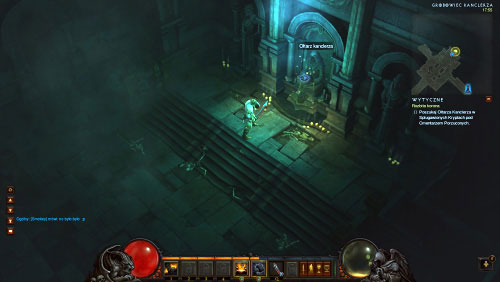
The final section of the tomb is the chancellor's altar where his crown can be found.
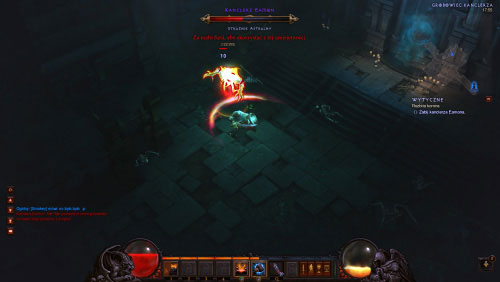
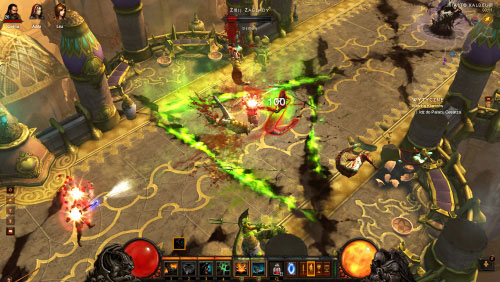
Chancellor Eamon will appear when you'll attempt to take the crown. He's a tough opponent and you should also know that he can teleport himself across the battlefield. The chancellor will perform freeze attacks each time you're not standing close to him and as a result you may receive serious damage and you may also be slowed down. If you manage to get closer the chancellor will be using knockback attacks in addition to trying to slow down your moves. Overall this duel isn't too easy and you must also control your health bar.
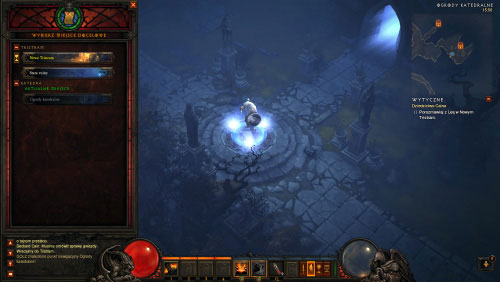
You may approach the altar to pick up the Skeleton King's crown.
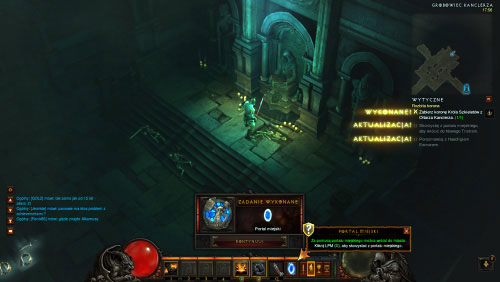
Notice that you've obtained a powerful spell which allows you to teleport yourself to the nearest town. Press the T key (or a button on the lower panel) and wait until you're transported to your destination.
You will appear in the town square. Find the blacksmith and talk to him. He will repair the crown and you will finish this quest.
This quest can be unlocked by talking to Deckard Cain.
As mentioned in the description, use a waypoint to travel to the Cathedral Garden.
You must choose the same path as the one you've used after you've rescued Deckard Cain. Proceed to the passageway leading to Leoric's Passage (you're travelling to the place where you've first met Cain).
Go to the place where you've found Cain earlier in the game. Proceed to your right, descend the stairs, open the golden door and enter the new area.
You're standing in Cathedral Level 2. This is a rather large area that's populated by plenty of monsters. Watch out for Tomb Guardians, because they can summon Skeletons.
Your objective is to find a passageway leading to the next level of the cathedral. Once you use it you'll find yourself in Cathedral Level 3. Head left here.
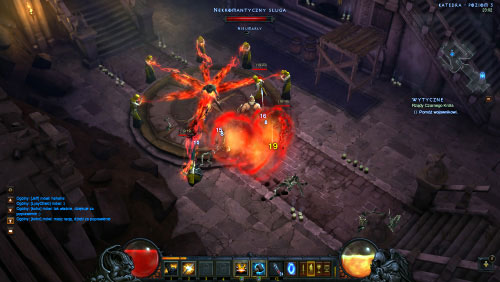
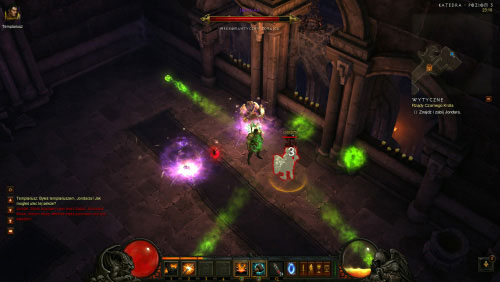
You will encounter a group of Necromantic Minions here and you'll notice that they're using magic to hold a warrior in prison. Kill them all and also deal with other monsters present in the area. Once you've saved the warrior talk to him.
Use the stairs to head up and search the nearby chambers. Your current objective is located directly in front of you and there are some monsters in your way.
Dark Cultists are guarding the chest with stolen items. Kill them and then open the chest so that the warrior can reclaim his things. The Templar will join you and you'll also find a waypoint nearby.
Head forward, travelling through corridors and using stairs along the way. You will soon find a door that's protected by black magic, but thankfully your new companion will deal with this problem. Head down and it shouldn't take long for you to reach Jondar's hideout.
Jondar can summon Skeletons and he is also capable of firing projectiles that inflict poison damage. You should also notice that he's incredibly fast. Once you've defeated him your companion will finish him off.
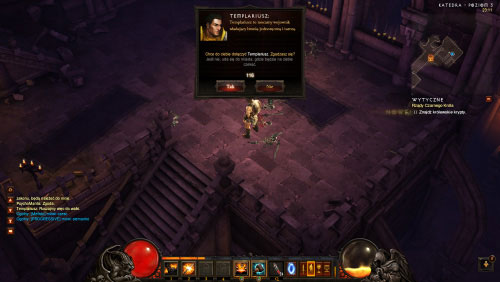
You will now have to decide whether you want the templar to continue following you or not. It's highly recommended that you agree to his offer. Once he's a member of your team open his character panel - it's used to change his equipment and to activate his skills.
Descend the stairs and use the passageway leading to Cathedral Level 4.
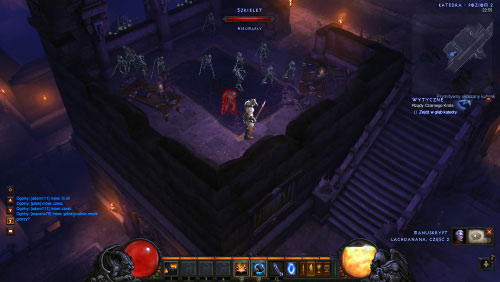
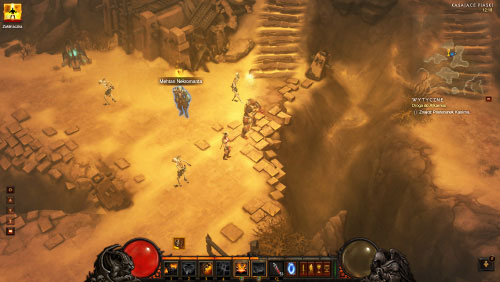
This location is huge and it contains a lot of corridors and chambers. You will encounter monsters that you already know as well as some new types of creatures. Skeletal Shieldbearers are equipped with shields and they can use them to defend themselves against your attacks. Skeletal Archers are equipped with bows and they can become a threat if they operate as a large group. Don't forget about killing the Tomb Guardians as soon as possible in order to prevent them from summoning too many Skeletons. Your objective here is to locate a passageway leading to the Royal Crypts.
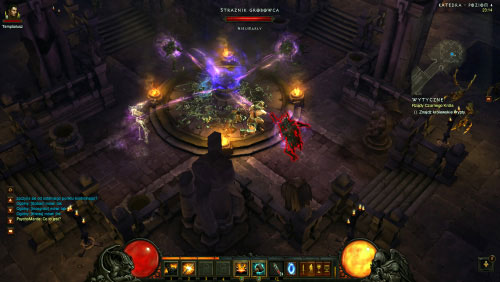
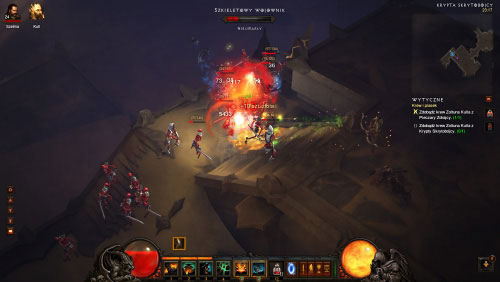
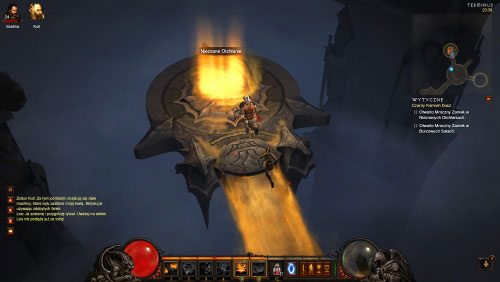
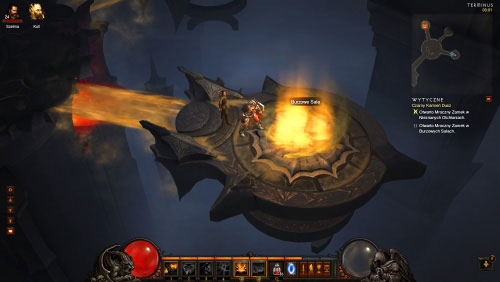
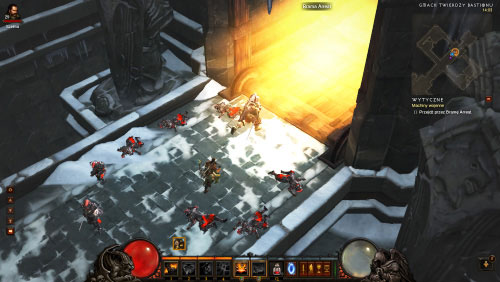
We're almost there. Choose the only available corridor, defeat a new group Skeletons and locate a waypoint. Approach Leoric's sword to witness a retrospection of the king's death. You may proceed forward.
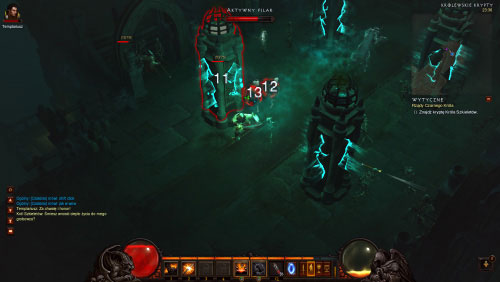
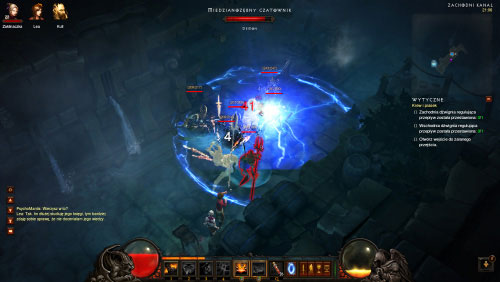
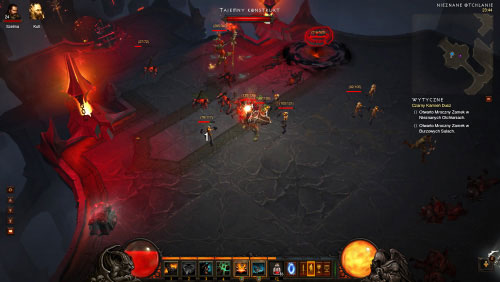
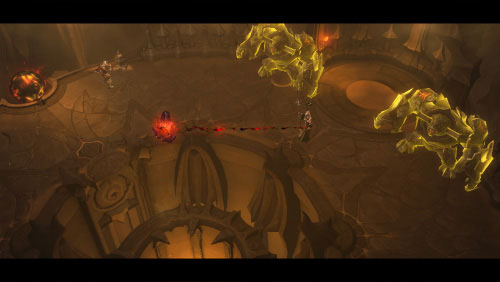
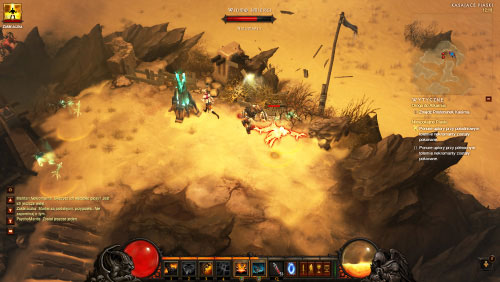
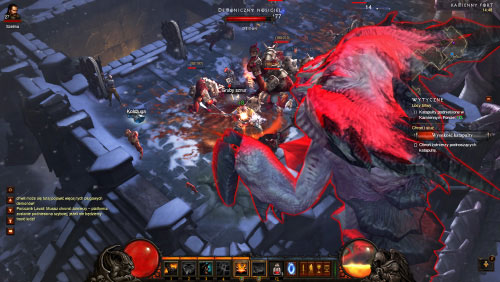
You'll meet Skeleton King here once again. Notice four Activated Pillars that are responsible for summoning Skeletons to the battlefield. You must destroy them, but be careful, because you'll be dealing with dozens of Skeletons. In addition to that you'll find yourself under fire from the Skeletal Archers. Keep fighting until you've destroyed the pillars and then follow the Skeleton King to the next area.
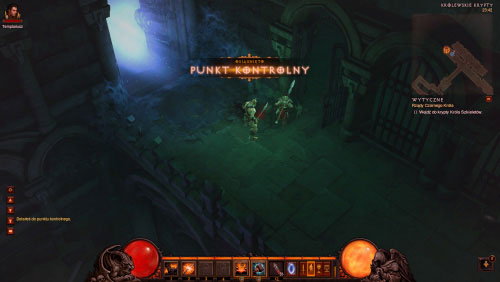
Keep heading forward until you've located a passageway leading to the Crypt of the Skeleton King.
Choose the passageway to find your way to the Crypt of the Skeleton King. You'll witness a cut-scene here showing the Skeleton King.
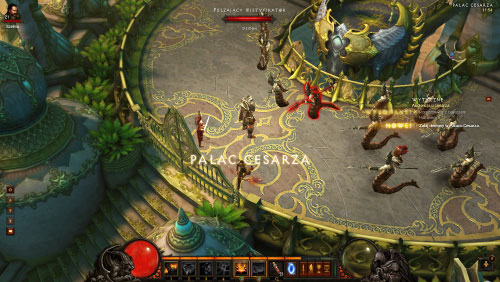
Proceed to your right. The king will close the gate and send a group of the Returned after you. The monsters you're fighting are stronger versions of skeletons. Once they're gone the gate will open again.
Head up the stairs and approach the throne where the king's body can be found. Place the crown on his head, bringing him back to life and starting a boss battle.
The Skeleton King is constantly summoning the Returned (stronger skeletons) and the Forgotten Soldiers (skeletons with shields). He can teleport himself across the battlefield and he has a lot of health points. You should also know that thanks to his long weapon he can attack you from a larger distance. When you're attacking him you should focus on killing the summoned creatures quickly, so that you'll have a chance to injure the king before he can call more monsters for help. If the creatures he's summoned aren't standing in your way you can also use the opportunity to approach him right away before he teleports to another location.
Once you've killed the king enter the chamber located underneath the throne.
You've reached the point of impact. Descend to the crater to find Stranger. You must talk to him.
Head left to locate a waypoint. Use it to travel to New Tristram.
Talk to the old man to end this quest (Cain can always be found on the main square).
Talk to Cain again to start this new quest.
Stranger will remain with Deckard and Leah in the city and meanwhile you will be tasked with a job of going to the Fields of Misery. Use a waypoint located in the middle of the town's square and travel to the Cemetery of the Forsaken.
Once you've arrived at the cemetery travel north-west and walk through an opened gate. You must cross the bridge and it shouldn't take long until you've reached the Fields of Misery.
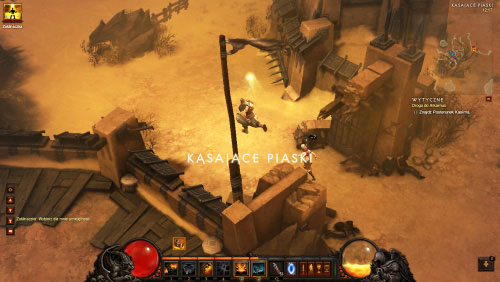
This is the biggest location you will have a chance to visit in Act I and you shouldn't be surprised to hear that you will encounter new types of enemies here. Some of the most important ones are: Moon Clan Warriors, Wood Wraiths (they leave poisonous remains after they're defeated), Burrowing Leapers (they emerge from the ground and they're extremely fast), Plague Carrier (they are breeded by Plague Nests and they can fly) and Savage Beasts (they're very large and they like to charge at the main character). There's also a new waypoint in this area, as well as several dungeons. I guess I don't have to add that you should spend a lot of time here to cover as much area as possible.

Your main objective is to locate the Khazra Den and it can be achieved by exploring the Fields of Misery thoroughly. Enter the den with a plan of finding the first part of the sword.
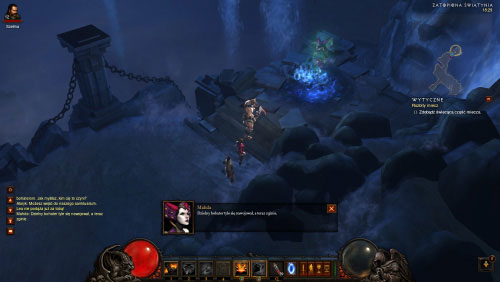
The den isn't a large location and therefore it shouldn't take long for you to encounter a group of Enraged Zealots. Killing them will result in Mahda's arrival and after a short conversation she will summon a dozen more Enraged Zealots. Eliminate all hostile creatures.

Maghda will disappear and you can collect the first part of the sword.
Use the town portal spell to return to New Tristram. Speak with Deckard Cain here to officially end this quest.
Talk to Leah. Doing this will result in her joining you in the next adventure.
Use a waypoint to travel to the Fields of Misery. Once you're there locate a passageway leading to The Old Mill.
It's best to find the main path and to remain on it during the journey. Keep moving forward until you encounter a Scoundrel who will ask you for help.
Follow the Scoundrel to the mill.
Talk to one of the Brigands. Sadly the negotiations about letting the innocent woman go will end in a failure.
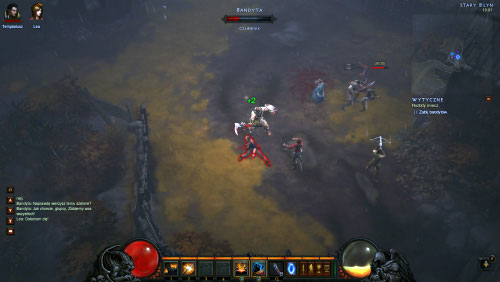
Kill all the Brigands that are guarding the woman. Another group will soon exit a nearby a house and one more group will arrive from your left. You must kill all enemy units.
Approach the Scoundrel to have a word with him. He will join your team.
Choose the northern gate to return to the Fields of Misery. Follow a narrow path until you've reached a new waypoint. Scoundrel will offer his services to you here, however if you agree to that you will have to say goodbye to the Templar. It's worth knowing that if you let the Templar go he will return to the town square in New Tristram and therefore you will be allowed to change your mind again if you won't find the new party member helpful.
Descend the stairs to reach the temple.
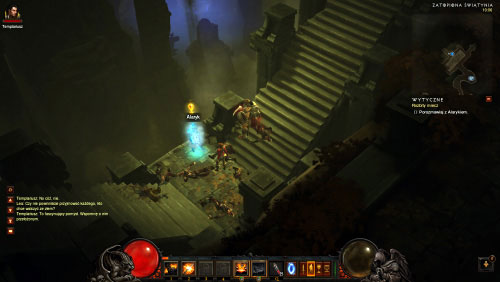
Use the next set of stairs and then talk to Alaric.
Follow Alaric by going to your right and wait until he has repaired a bridge, allowing you to move on with your journey. Cross the bridge to enter the dark forest.
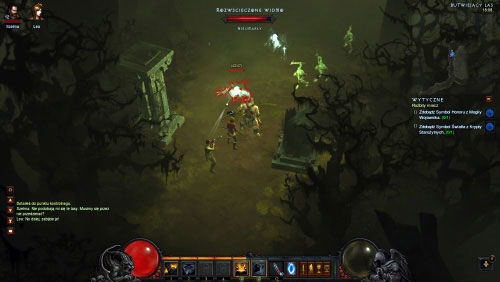
The Festering Woods are a rather large location and aside from the well-known monsters you'll also encounter several new types of creatures here. Thankfully most of them won't be a serious threat. You should only watch for Enraged Phantoms, because they like to appear and disappear without warning and they can slow you down. It's worth adding that there's a new waypoint in the forest.
Your primary objective is to locate entrances to two underground locations - to Warrior's Rest and to Crypt of the Ancients. Each dungeon contains one of the artifacts you seek.
Crypt of the Ancients is being occupied by Returned Summoners and by the standard versions of the Returned that are being summoned to the battlefield. As usual you should always begin by killing all the summoners you've encountered. Be careful while exploring the crypt, because it's big and you'll be dealing with large groups of monsters.
Make sure you've killed all monsters and take the Beacon of Light from the pedestal. The area where the beacon is being stored is small, so you can't miss it.
Warrior's Rest is a fairly small location and you'll be dealing mostly with skeletons and archers while exploring it.
Continue exploring the crypt until you've located the Beacon of Honor.
Return to the Festering Woods, locate a waypoint mentioned earlier in the text and once you've found it use it to travel to the Drowned Temple. Alternatively you can cast a town portal spell to return to New Tristram and then interact with the waypoint located in the town's square. Either way you must return to the area where you've first met Alaric. There are two pedestals to the left and to the right of Alaric and you must place the beacons on them.

Head down to meet with Alaric. An entrance to the temple will open.
You may begin exploring the Drowned Temple. Cross a narrow bridge, eliminating Returned Summoners and the Returned along the way. You'll soon encounter Ezek the Prophet and thankfully he's very easy to kill, because his attacks are slow and he's not that tough. Besides you can count on Leah and on your mercenary to help you.
Soon before his death Ezek the Prophet will summon three of his brothers to help him - Brother Moek, Brother Larel and Brother Karel. They're weaker than him, however there's three of them and their attacks are much faster. Aside from the main boss and the three brothers you'll also have to watch out for several Returned Archers, especially since you can't hide from them anywhere.
Once you've killed all enemies locate Alaric standing where you've first encountered Ezek and talk to him.
Notice that a nearby passageway was opened. Head over there and expect to have a second encounter with Maghda. This time she will summon several Dark Zealots.
Deal with the zealots and once it's safe collect the second part of the sword.
Travel back to New Tristram to end this quest.
Speak with Stranger to receive a new quest.
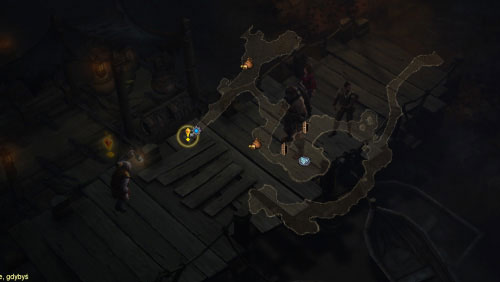
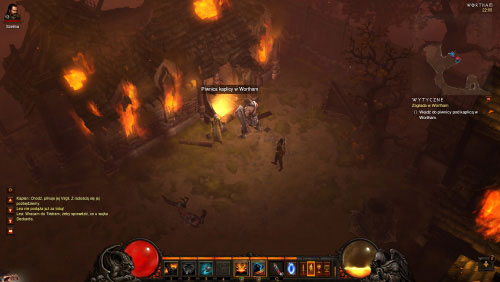
Go to the western part of the town. Once you've reached the crossroads where you've met with Haedrig Eamon earlier in the game go to your left. Locate the Ferryman and talk to him in order to travel to Wortham.
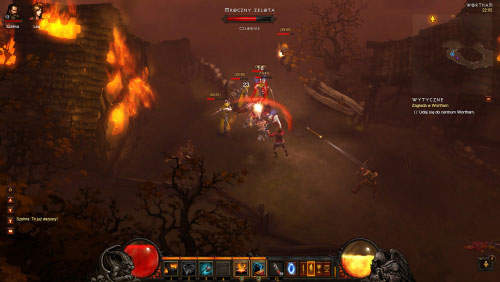
The location you've entered has suffered almost total annihilation. Head to your left, killing more than a dozen of Dark Zealots along the way. You may also encounter Dark Evokers and you should know they can cast spells.

Stay on the main path and it shouldn't take long to reach the chapel. A new group of Dark Zealots will probably be waiting for you here.
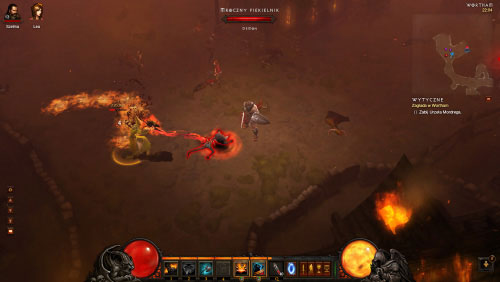
Maghda will suddenly appear near your position. She will summon new groups of Dark Zealots and Dark Evokers, as well as a boss - Urzel Mordreg. The boss and the evokers are capable of summoning Dark Hellions, so they should be the ones to die first. If you get overrun don't forget that you can flee south.
That's not all, because after you've killed the boss and all the other monsters Maghda will summon three more enemies called Dark Berserkers. They don't have a lot of life points, however they can use a very powerful bashing attack. They're also quite fast.
Once you've eliminated all monsters from all groups talk to the Priest standing in front of the chapel.
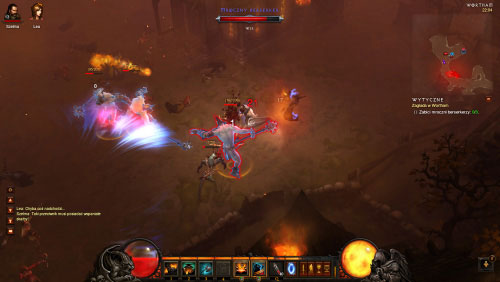
Leah will decide to return to New Tristram and you will have to enter the Wortham Chapel Cellar (the entrance can be found on the side of the chapel).
There's nothing here except for Maghda.
Listen to a short conversation and then find a waypoint in order to safely return to New Tristram. Cain's house can be found near the town's square, close to the place where you've talked to the old man during previous visits. Enter the house and watch a cut-scene involving Maghda, Leah, Stranger and Deckard Cain. Once the cut-scene has ended you'll end up in the square with Leah and you'll also end this quest.
Talk to Leah after you've left Cain's House in Tristram and she'll tell you where to go next.
Use the waypoint to travel to Wortham Chapel Cellar. Exit the cellar to end up in Wortham again. Head left to find yourself standing in front of the chapel and then travel north, heading towards a gate.

Keep moving forward until you've reached Wortham Bluffs. I suggest that you use your map here to find your way to your current destination. You shouldn't encounter any creatures in this area. Cross the bridge and head down to find the entrance to Caverns of Araneae.
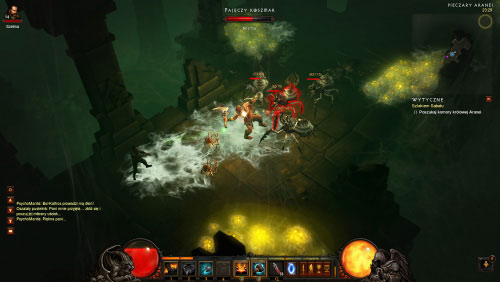
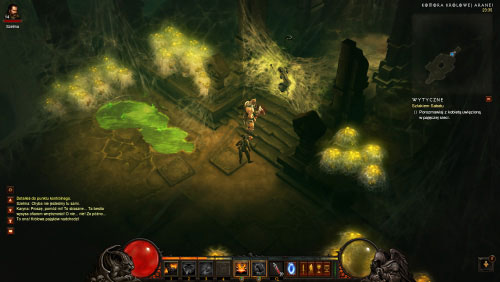
This is a large location that's occupied by various types of spiders, as well as by Ghouls. Small Spiderlings won't do you any harm unless you're attacked by a horde. Arachnid Horrors are slightly larger and they can spit webs at you, slowing down your movements. The largest monsters are Toxic Lurkers. They can also slow you down and the damage they inflict is far greater. You should know that spiders can appear on the edges of the map, drop down from ceilings and jump out of cocoons you encounter during your exploration.
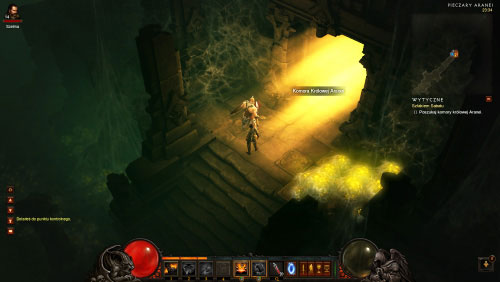
Your primary objective is to locate the passageway leading to the queen's chamber. The map can help you in your search, because an arrow will appear on it once you're close to the exit.
Once you're inside the Chamber of Queen Araneae head forward and you'll notice a trapped woman. Approach her in order to initiate a conversation.
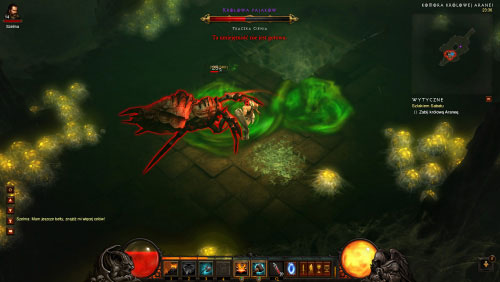
The Spider Queen will soon show up and the boss battle will commence. The queen can spit at you and it'll always slow you down. She can also create green fluid stains with poison and inflict major injuries in direct combat. Each time the queen has suffered some injuries she will run away to hide and you'll have to deal with her servants.
After you've defeated the queen collect some venom. The pool you're looking for is located in the area where the boss battle took place, close to the trapped woman.
Use the venom on the trapped woman to destroy the webs and to release her.
Follow Karyna to the exit from this lair. The passageway is located behind the area where she was being held.
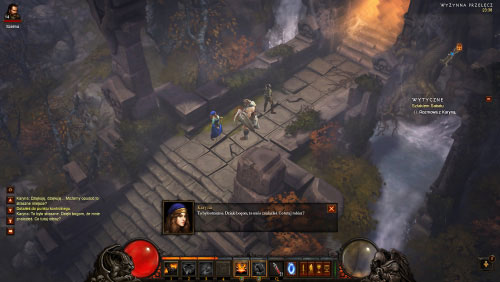
You'll soon exit the lair and find yourself in a new area called Highlands Crossing. Talk to Karyna, because she'll explain you the next step. Descend the stairs after the conversation has ended.
This is a rather small area, however you can find a new waypoint here. Once you've activated the waypoint follow the path to reach a bridge.
Notice that you've entered Southern Highlands. This is a very large location, however it's not as vast as Fields of Misery. It shouldn't come as a surprise that you'll encounter various types of monsters here. Withermoths are huge mantis's and they usually hide near the trees to appear out of nowhere. Highland Walkers are walking trees and they specialize in deploying poisonous traps. Savage Beasts are not only large, but they can also charge at the main character to throw him back. There are also several clan members in this area: Dark Moon Clan Warriors use swords, Dark Moon Clan Impalers throw javelins and Dark Moon Clan Shaman know magic. Be careful, because a large group of these monsters, especially if accompanied by a champion or a boss, can be a serious threat to the safety of your team.
Your primary objective at the moment is to locate Karyna's Lost Cart. Inspect the cart to find the Khazra Staff, however be careful, because as soon as you've collected this item a group of Dark Moon clan members will emerge from the ground.
Your next task is to locate the Khazra barricade. Once you're close enough to your destination a gate will open and a group of Dark Clan monsters will rush out, starting a new battle.
Keep heading up the barricade, using a narrow path and eliminating all the monsters you encounter. You'll be dealing with the same creatures as in the highlands, however since you won't have a lot of space to move around you'll have to prevent them from surrounding you.
Eventually you will reach the Northern Highlands. Find a waypoint here and be ready to engage new monsters in combat. It's recommended to explore this entire area, however your main objective is to locate a large building. There's a passageway on the side of the building, but you shouldn't choose it right away, because there are several groups of monsters there.
Once you've used the passageway mentioned above you'll find yourself in Leoric's Hunting Grounds. This is the last location you must explore before reaching your final destination. The opponents remain the same and the area isn't that big. Locate a bridge leading to Leoric's Manor Courtyard.
There are several Dark Cultists in the manor's courtyard. Once they're gone locate the entrance to the manor itself.
You must be very careful, because you'll be "greeted" by a very large group of monsters as soon as you've entered the courtyard and there isn't a lot of space where you can hide or run away to. You'll be dealing mostly with Dark Cultists and Dark Berserkers. Once they're all gone start exploring the manor, including the side chambers. Your destination is a large chamber with a staircase leading down.
You will encounter Maghda here, as well as a group of Dark Cultists. Maghda will leave the manor and the cultists will attack you from the staircases located on both sides. Killing the cultists will result in ending this quest.
This quest starts of course inside the Leoric's Manor. Talk to a Wounded Man found near the door and you'll find out where you'll need to go next.
Open the door mentioned above and activate a new waypoint. Remain inside the manor and use the stairs leading to Halls of Agony Level 1.
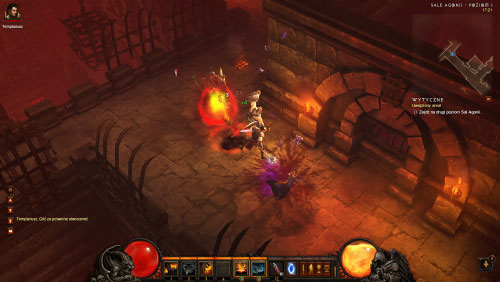
Start exploring Halls of Agony Level 1. The hallways here are reasonably wide. You'll be fighting with the creatures that you already know and with some monsters that you will meet for the first time. Dark Berserkers move fast and they use powerful weapons, however their attacks are slow. You'll also encounter plenty of cultists and Voracious Zombies in all the areas where there are flames. As mentioned in the objective name, your task is to locate a staircase leading to Halls of Agony Level 2.
Halls of Agony Level 2 is very similar to the previous floor in terms of the structure and monster encounters. Make sure to explore this area thoroughly to locate a new waypoint. Continue exploring the level until you've found an exit leading to the Highlands Passage.
This is a spectacular location. You must follow a narrow path, cross a few bridges and use some stairs to reach the Cursed Hold. Some monsters will of course try and stop you on your way to the hold.
Enter the hold and approach the ghost of Queen Asylla. Talk to her and she'll ask you to release the souls of her servants.
You will now have to travel through a prison, searching for the remains and for the ghosts of the prisoners standing next to them. Click on each dead body so that the spirit can leave in peace. You must release six souls that way.
The friendly ghosts aren't the only beings you'll encounter in prison, however most of the monsters you'll be fighting shouldn't be considered a major threat. Watch out only for Returned Executioners, because even they're slow their weapons can inflict a lot of damage, and for Tortured Summoners, because they can summon archers.
Once you've released all six souls mentioned by Queen Asylla proceed to the central area of the prison and you should encounter a Warden surrounded by Savage Fiends. The Warden is a simple opponent, especially since he doesn't have a lot of life points. You should know that he occassionaly casts a spell which prevents your team from moving, however this doesn't mean you can't continue defending yourselves or activate skills. Finally, watch out for the slow projectiles he shoots, but even if you get shot it's not a big deal, because you'll receive minimal damage.
Once you've defeated the boss find a passageway leading to Halls of Agony Level 3. You may want to explore a side room before using the passageway, because you'll be rewarded with a retrospection of the execution of Queen Asylla.
The location you've just entered is similar to previous levels. You'll be fighting the same monsters, however you'll be dealing with more of them. Your objective is to find the entrance to a larger chamber where a difficult battle awaits you.
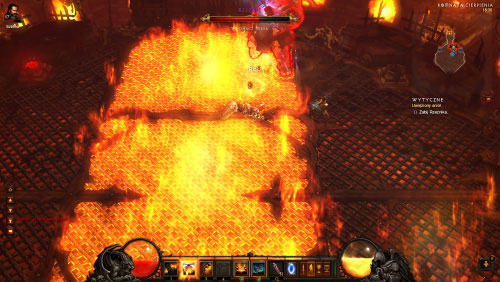
A short cut-scene will involve Maghda again and she will present you with your new opponent, called The Butcher. Notice that the area where the duel takes place isn't too big. There are two healing shrines here and they regenerate quickly so it's possible to interact with them several times during the course of the battle. As for the boss, he has several attacks and skills. If you move away from The Butcher he may throw a hook at you and if he succeeds he will pull you towards him. He also has two chains which can inflict injuries even from a large distance. When you're close to the boss he usually attacks with his hammer and uses a magic puff directed at you. Finally, The Butcher sometimes decides to charge at you and each time you've successfully dodged this move you will have some time to perform several attacks of your own.
The location where the duel takes place is divided into several parts and you'll also have to watch out for the flames. Each time you've found yourself in a burning area you must move away quickly, because you'll be receiving fire damage. Don't forget that you must monitor your life bar and that all the potions you drink take a while before they start healing the main character. As a result it's much better to rely on healing shrines and use potions only if the shrines haven't recharged yet.
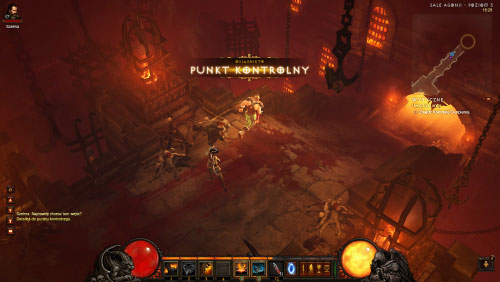
Proceed north after you've killed The Butcher and you'll find an exit from this location which leads to the Cells of the Condemned. Descend the stairs to continue your journey.
It shouldn't take long until you've reached an area where several Dark Cultists are using binding spells to keep the Stranger hostage. Kill them to release your friend.
Talk to the person you've just rescued and give him back the sword so that he can retrieve his memories. The Stranger will introduce himself as Tyrael and you will end this quest.
Talk to Tyrael again before leaving the Cells of the Condemned. He will cast a town portal spell that will transport you back to the city.
Follow the angel to New Tristram. Once you're there find Tyrael where Deckard Cain usually stood and to talk to him to learn more about the situation.
Tyrael will send you to talk to the Caravan Leader and this person can be found on the main square. The leader will ask if you want to travel east . If you'll agree you'll automatically end this quest and leave New Tristram for good. You'll also advance to Act II of the game.
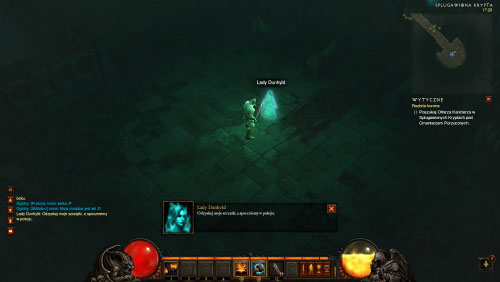
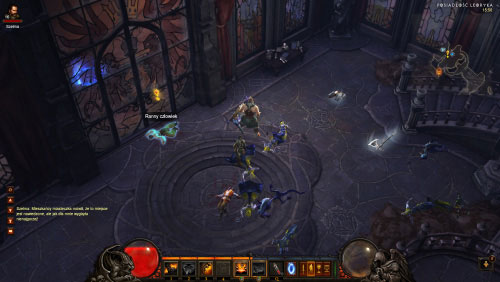
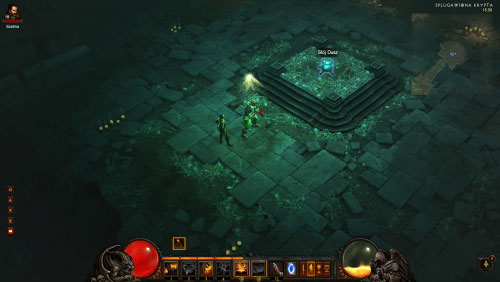
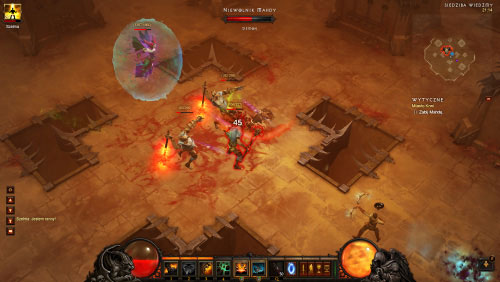
There are three Crypts underneath the Cemetery of the Forsaken and you may encounter a ghost of Lady Dunhyld in one them. Talk to the ghost to find out that she wants to leave in peace.
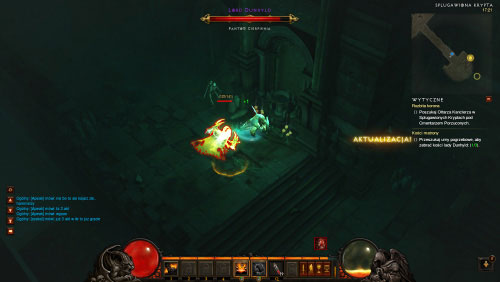
The three urns mentioned in the objective's name are located close to the area where you've met the ghost. Find them to collect all bones. Each time you've interacted with an urn you will have to fight Lord Dunhyld and a group of Skeletons, but the monsters don't have a lot of health points, so they should die quickly.
Once you've collected all bones proceed to the sarcophagus and interact with it to place the bones inside. The sarcophagus can be found close to the area where you've met Lady Dunhyld.
here are three Crypts underneath the Cemetery of the Forsaken and you may find a chamber with a Jar of Souls inside one of them. Click on the jar.
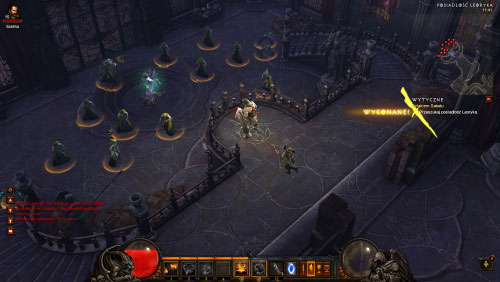
Your new objective is to survive a massive attack of the Skeletons that lasts a little over a minute. The monsters will be coming from all directions, so you must be careful. Once the time is up the remaining monsters will automatically die.
Click on the Jar of Souls again to destroy it and to end this event.
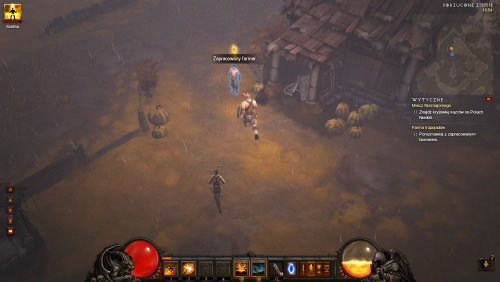
You may find a farm while exploring Forsaken Grounds in the Fields of Misery. Talk to the Farmer who should be standing next to the house and he'll ask you for help.
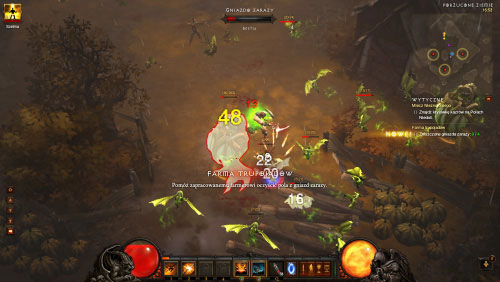
Your objective is to destroy four Carrion Nests that are responsible for breeding Carrion Birds. The area is fenced off and the nests are close to each other, so it shouldn't come a surprise that it won't be easy to get past all the birds which are guarding the farm.
Return to the Farmer to end this event.
While exploring the Fields of Misery you may find an entrance to a Decaying Crypt Level 1. Explore the first level of the crypt to locate a passageway leading to Decaying Crypt Level 2. On this level you may encounter a ghost of Wilna Rathe and you will be asked to help in releasing the souls of all members of the Rathe family.
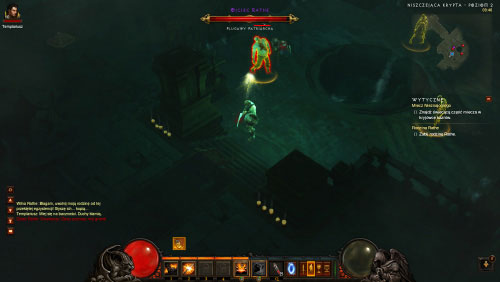
Releasing the souls means killing three ghosts, including Father Rathe and Mother Rathe. The spirits can be found nearby and they shouldn't be a big challenge assuming you won't fight all of them at once.
Once you've defeated all the ghosts return to where you've met Wilna Rathe and talk to her again to end this event.
While exploring the Fields of Misery you may find an entrance to Lost Mine Level 1. Explore the first level and then descend to the second level. You may encounter Tashun the Miner here.
The miner will ask you for help in finding two things. Search the entire second level of the mine to locate metal deposits and a clean jewel. They may be well hidden, so you shouldn't be moving too fast.
There's one more assignment and that is to eliminate several Burrowing Leapers.
Return to the miner to talk to him and to end this event. It's worth adding that he's a merchant, so you will be allowed to trade with him.
This event may be started while exploring the Festering Woods. Approach a memorial tablet and click on it.
Enraged Spirits and Ghouls will suddenly appear around you. Defeat all the monsters to end the event.
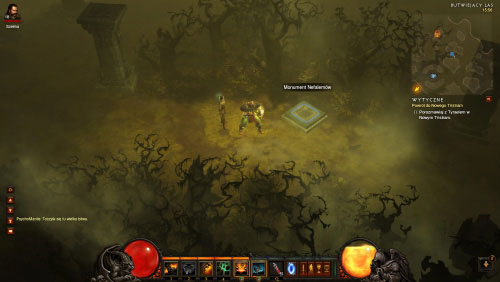
While exploring the Festering Woods you may find one more thing and that is a Nefalem monument. Click on the monument to watch a battle retrospection.
Monsters will appear in the area and they're the same ones you've already met while exploring the forest. Kill them all to end this event.
This event may be started while exploring the Southern Highlands and to be more specific by finding a small village with an ancient funeral stack. You'll know that the game will allow for this event to be completed if you'll meet a ghost in the village. Talk to the ghost.
There are two totems in the village and once you've destroyed the first one you're going to be attacked by Dark Moon Clan Spirits.
After you've destroyed the second totem a Spectral Khazra Shaman will appear. Defeat him.
Talk to Gharbad's ghost and be ready for an unpleasant surprise.
The ghost will turn into a powerful creature called Gharbad the Strong. The monster is very resistant and it performs fast attacks, however it moves slowly around the battlefield. Killing the creature will allow you to end the event.
After you've left Halls of Agony Level 2 and returned to Highlands Passage you may encounter Kyr the Weaponsmith. Talk to him to find out about his small problem.
Head forward, eliminating less important monsters along the way. It shouldn't take long for you to find Dargon and his companion. You must eliminate both of them and it shouldn't be difficult.
Return to the person who gave you this quest. Doing this will end the event, however you'll also be allowed to trade with Kyr the Weaponsmith from now on.
This act begins in the Hidden Camp. Talk to the blacksmith and to all other interactive characters found in the camp. The first quest can be unlocked by talking to Leah.
There's a road near the blacksmith and you must choose it to reach your destination.
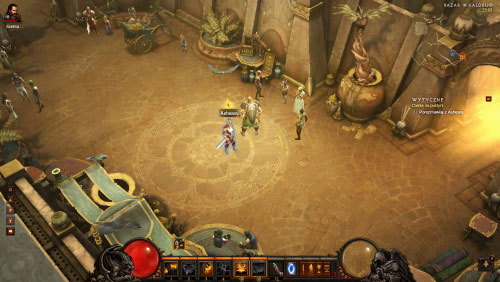
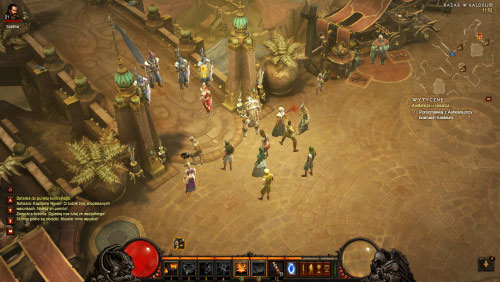
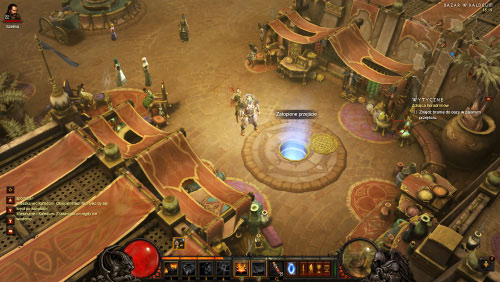
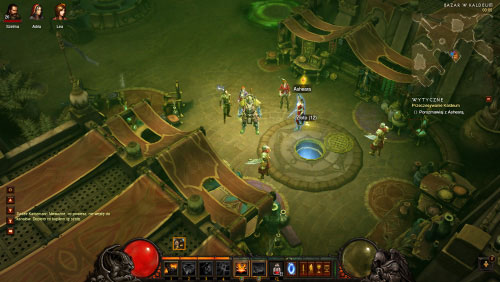
Keep going until you've reached the Caldeum Bazaar. Talk to Asheara found in the first area of the bazaar.
Before you leave the bazaar you should spend some time to explore this area and to meet the merchants. It's also recommended to visit Searing Sands Inn. Once you're ready to move on with the quest proceed to the passageway marked on your map and start exploring the Sundered Canyon. You will encounter an Enchantress after a while and she'll be more than happy to join you. Follow the designated path together.
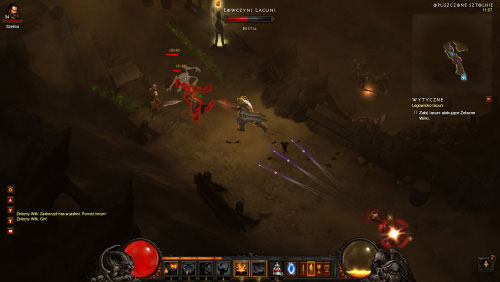
Since this is a new act and a new location you shouldn't be surprised when you'll encounter entirely new types of enemies. Sand Wasps can fly and they're extremely fast which makes them harder to kill. Watch out for the projectiles they shoot at you (mini-bees), because you can receive poison damage if you get hit. It's recommended that you don't fight groups of wasps at the same time. Another important enemy are Lacuni Huntresses. They perform surprise attacks by jumping down from higher platforms. They're not dangerous in direct combat, but they like to throw exploding potions at you. You should also watch out for large rocks while going through canyons, because coming in contact with the moving objects may cost you a lot of health.
Continue to follow a narrow path and eventually you'll encounter a blocked passageway. Here's where you'll be surprised by a group of enemies you may already know - by Deranged Cultists and by Accursed Hellions. You shouldn't have any problems winning the battle.
Talk to the Enchantress as soon as the battle has ended. She'll use one of her spells to unlock the passageway, allowing you both to move on.
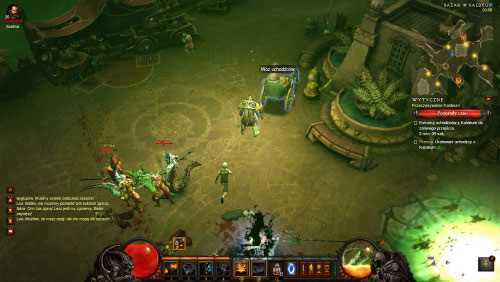
Keep heading forward until you encounter a group of soldiers being attacked by Lacuni Huntresses and by a Lacuni Warrior. Help the soldiers in defeating enemy units.
Once you've won the battle initiate a conversation with the leader of this group -Jarulf Iron Wolf. He will thank you for your help and he'll also tell you what to do next.

Continue your journey through the Sundered Canyon and you'll soon enter an area called Howling Plateau. Expect to be attacked by new types of monsters here. The Fallen and Fallen Overseers aren't a serious threat. Dune Threshers move under the sand surface and they attack by surprise when they're close to your character. Thankfully they aren't a serious problem, because they die after taking a few hits. The biggest threat is the same as in the canyon - it's posed by Sand Wasps and the poisonous projectiles they can fire at you.
Your objective is to locate entrances to two locations - to a Secret Altar and to a Hidden Conclave. The easiest way to achieve this is by following the signs of the sand and to listen to hints provided by the Enchantress. The first signs can be located on the border between Sundered Canyon and Howling Plateau.

Once you've found the passageway to the Secret Altar enter the basement. You'll notice a group of Deranged Cultists performing a ritual and they man be accompanied by Pain Mongers. Interrupt the ritual by killing all hostile units and expect the cultists to summon at least a few Frenzied Hellions.
Once you've cleared the area around the altar return to the surface and start following the signs on the sand again to reach the Hidden Conclave. This is also a small basement that's occupied by Deranged Cultists. Kill them all.
Return to the surface for the second time and focus your efforts on locating a Black Canyon Bridge. The best way to do that is to choose the road leading from the Sundered Canyon through the entire Howling Plateau.
Talk to your companion after finding the bridge. She will remove the illusion from the bridge, allowing you to cross it. She will also ask you if you want her to continue the journey with you instead of your previous companions (Scoundrel or Templar). The decision is entirely up to you, you need to go back to the waypoint in the Hidden Camp if you decide not to use the Enchantress anymore, because that's where two previous companions will be waiting for you. Either way the quest will end.
This new quest will begin automatically. Cross the bridge to enter Black Canyon Mines. There's a waypoint in this location. As for the enemies, you'll be dealing mostly with the creatures you already know, like Dune Threshers, Fallen Overseers and Sand Wasps. The only difference is that in most situations there's going to be more of them than before.
Your main objective is to find Khasim Outpost and sadly you can't get there simply by using the main path, because it's blocked. Check the surrounding area to locate an entrance to Stinging Winds. This is another large area that's filled by monsters you're already familiar with.
Continue moving forward. Since the new location doesn't have a main path you should consider staying close to the edges of the map. Find a proper passageway to Khasim Outpost and activate a waypoint along the way. Walk past the guards and enter the outpost.
You shouldn't have problems locating Lieutenant Vachem and you must talk to him.
The lieutenant will send you to the Command Post to consult with Captain Davyd and the entrance to the outpost is located next to him. Head down to find out that you've been trapped.
Maghda can be found here and you'll also find out that the defenders of the city were an illusion. Get ready to defend yourself from the Copperfang Lurkers. The monsters will attack as a group and they're the biggest threat, because there's nowhere to hide. Keep running around the entire basement if necessary, decreasing the chances of their attacks. Once all the monsters have been killed open the cages to release the prisoners.
Go back outside to witness a battle taking place. Help your allies in getting rid of a new group of Copperfang Lurkers.
The last thing you need to do is to talk to Captain Davyd - he can be found in the same place where you've previously met Lieutenant Vachem. The quest will come to an end.
This quest begins automatically. Once you've finished your conversation with Captain Davyd follow him to the gate. He will open it for you.
Once you've left the Command Post you'll once again end up in the Stinging Winds. The opponents you'll encounter in the near future are the same ones you've fought before, however you may also be attacked by several cultists. Your objective is to find the passageway to the next location and the easiest way to do that is to follow one of the edges of the map.
Use the passageway mentioned above to begin exploring Road to Alcarnus. This is a small location that contains a waypoint. You may be attacked by a creature called Shatterbone along with some hell beasts along the way. The Shatterbone doesn't have a lot of health points and it's not too fast, however it can deal powerful blows. Kill all the monsters and continue the journey until you've reached your destination - Alcarnus.
There are a lot of monsters from hell waiting for you here. You will encounter groups of Corrupt Vessels and they can transform into Tormented Thralls. There's also plenty of Crazed Summoners that specialize in summoning groups of Frenzied Hellions. Don't forget about finding and releasing the prisoners while fighting the monsters to complete the bonus task.
Choose the narrow passageway to travel deeper into the city and be prepared to encounter even more enemy units.
Your current objective is to locate a large entrance to Maghda's hideout.
Enter the Lair of the Witch and head forward until you're stopped by Maghda. She is a very challenging opponent. One of her attacks is to send a slow projectile which thankfully can be avoided without any major problems. She also likes to surround herself with a magical barrier and likes to summon small groups of Thralls of Maghda.
Once you've killed Maghda consider using a town portal spell to return to the Hidden Camp and to officially end this quest.
Upon your arrival you'll discover that Leah was imprisoned during her journey to Alcarnus. Speak with Tyrael to begin this new mission.
Travel to the Caldeum Bazaar where you'll have to talk to Asheara. She can be found in front of the palace and once you're done talking you'll be allowed to continue the quest.
Follow Asheara to the Gates of Caldeum. Stop in front of the large gate, initiate a conversation and then enter the Imperial Palace.
A short cut-scene will show the meeting with the emperor and you'll also meet with Leah.
The guards will soon transform into Writhing Deceivers and you've probably met similar creatures before. Thankfully you can count on Leah's assistance during this battle and you'll have a lot of room for manuever. Don't forget, however, that the monsters are masters of illusion and therefore can approach you without being seen.
Once you've killed all the monsters the south-western gate should open and naturally you must travel there (Leah will join you again). Enter the City of Caldeum and stay on the wide path. You'll be stopped by new groups of Writhing Deceivers, as well as by Scaled Magi (they can cast lightning spells) and by Imperial Guards (they prefer melee combat).
The demons are being called by four Demon Summoners, so while fighting the beasts you must also remember about destroying the summoners sooner later than later, preventing more monsters from showing up.
Once you've destroyed all Demon Summoners you will be allowed to resume your journey. Keep following Leah until she'll locate an entrance to the sewers. Go there to end this quest.
This quest will begin as soon as you've entered the Sewers of Caldeum. You can find a new waypoint here and you'll be dealing with several types of monsters. Sandlings are small and they don't pose a serious threat. Diseased Bodies on the other hand are much more dangerous, because they explode when they die, poisoning the area around them. You can also encounter Bone Warriors and Writhing Deceivers here.
The web of sewer tunnels isn't too vast and your primary objective is to locate a passageway leading to the Wretched Pit.
A short cut-scene will be displayed here and you'll find out that Adria is being interrogated. Defeat several Writhing Deceivers to rescue her.
Once you've saved Adria you must also talk to her.
The first conversation isn't too long. Return to the Hidden Camp using a town portal spell. Once you're there find Adria and talk to her again to end this quest.
This quest can be started by initating a conversation with Leah.
Leah will send you underground. Start in the Hidden Camp and travel to the Caldeum Bazaar. You should be able to locate a hatch near one of the stands and using it will transport you to the Flooded Causeway. Merchant Karl can be found here, as well as the Emperor Hakan II.
Approach the emperor to have a word with him.
Emperor Hakan II will open a gate, allowing you to use a new hatch and to travel to the Ruined Cistern.
This location is filled with many types of monsters and some of them are: the Betrayed, Diseased Bodies (don't forget that they explode after death leaving a poisonous cloud), Bone Warriors, Writhing Deceivers and Sandlings. Your primary objective is to locate an exit leading to the Path to the Oasis.
Start exploring the Path to the Oasis, finding a waypoint along the way and finally reaching the Dahlgur Oasis. This is a very large area and in contains several smaller dungeons. Watch out for exploding flowers, because they will try to poison you if you get too close to them. As for the normal monsters, here's a short list of some of the creatures you may encounter: Dush Dervish (they can slow down the man character), Serpent Magi, Writhing Deceivers (you probably know them well by now), Gore Harriers (they're birds and they attacks with their claws), Fallen Peons, Fallen Masters (they're a stronger version of the Fallen you've met earlier in the game) and Fallen Conjurers (they can resurrect Fallen Peons). The oasis also contains a new waypoint.

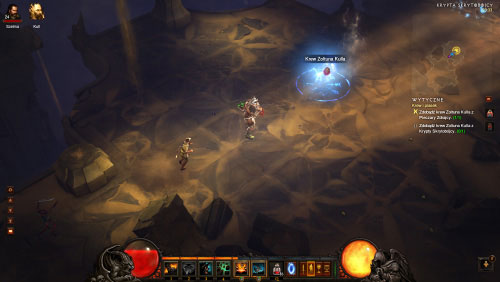
Your main objective is to find a portal which will transport you to The Forgotten Ruins.
The portal will transport you to an entirely new area and your objective is to find Zoltun Kulle's head. Thankfully this location isn't too big. As soon as you've noticed Guardian Towers start attacking them, because they're responsible for summoning new monsters to the battlefield. Watch out for Spine Hewers, because even though they're slow their weapons can inflict serious injuries. Several types of skeletons can also be encountered in the ruins, including the ones carrying shield. Zoltun Kulle's head is hidden in one of the last areas of the ruins.
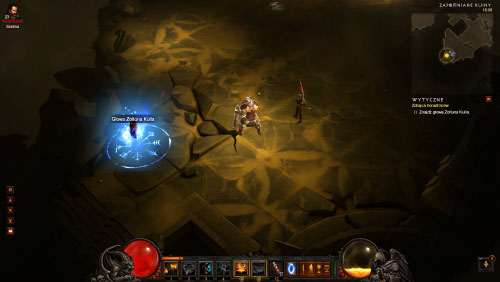
Be careful, because as soon as you've taken the head an artifact guardian will suddenly emerge from the ground.
Use a Town Portal spell to return to the Hidden Camp where you'll have to talk to Adria. A ghost of Zoltun Kulle will be summoned to this place and the quest will soon end.
The only way to begin this new quest is to talk to Zoltun Kulle's ghost in the Hidden Camp. Leah will be helping you during this mission, however you'll also be carrying Kulle's head with you.
Return to the Dahlgur Oasis and travel close to the edges of the map until you locate a passageway to the next location. Choose a narrow path and follow it until you come across a closed door. Zoltun Kulle will open the door for you.

Enter the Ancient Waterway. Talk to the Emperor Hakan II and then choose the passageway leading to the Western Channel.
Watch out for Electric Eel's here, because they'll be attacking you in groups. You may also encounter Noxious Guardians, Carrion Bats (they inflict lightning damage), the Accursed (they explode when they die) and more common creatures like skeletons.
As for the location itself, it's a network of corridors. Continue exploring it until you locate a passageway to Western Flow Control Room.
You should find a lever upon entering the new area and you must interact with it, completing one of the objectives. Notice that the game has unlocked a passageway to the Eastern Channel.
Start exploring the sewers again. The opponents here are the same as in the previous channel and once again your objective is to locate an exit. Go to the Eastern Flow Control Room, pull the lever and use a newly unlocked passageway. The game will open an entrance to the Ancient Waterway.
All you have to do is to use the newly opened passageway.
Enter the Waterlogged Passage. Head forward to encounter a "Talking Barrel" and a group of Betrayed. You must kill them all.
Once you've dealt with the monsters destroy the barrel to find out that a man was trapped inside.
Initiate a conversation with the Covetous Shen. He will ask you for help in retrieving an item and he'll also join your team.
Continue moving forward until you've reached an exit from this location.
You may begin exploring the Hidden Aqueduct and it shouldn't come a surprise that you'll encounter similar monsters to the ones from the canals.
Continue exploring the aqueduct until you've located the Crucible. This object is being guarded by Gavin the Thief and killing him shouldn't be a problem, because he doesn't have a lot of life points and his attacks aren't that strong.
Pick up the Crucible after you've dealt with the boss. Covetous Shen wants a word with you and he'll tell you that he is a jeweler and from now he will be offering his services to you close to your personal chest in the Hidden Camp.
Resume your journey and keep heading forward until you've located a passageway to the Ancient Path. Leah will leave you here and return to the Hidden Camp.
The Ancient Path is a small location, however you will find a new waypoint here. Locate a passageway to the Desolate Sands. This area on the other hand is much bigger and you'll encounter various monsters here, including Lacuni Slashers, Lacuni Stalkers, Gore Harriers, Vile Swarms, Desert Hornets (they can deploy poisoned projectiles), Rockworms (they like to suddenly emerge from the ground) and plenty of others you're already familiar with.
Your current objective is to explore two areas. Start off by finding an entrance to Cave of the Betrayer Level 1.
You will be fighting monsters that you already know, however some of them may be more powerful and resistant to your attacks. Watch out for spiders and rockworms and focus on locating a passageway to Cave of the Betrayer Level 2.
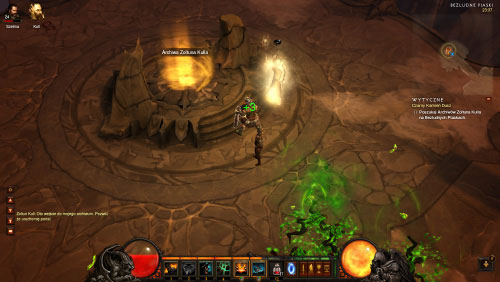
The second level is a large area and you'll be dealing with the same creatures. Find Zoltun Kulle's blood, pick it up and return to the surface (Desolate Sands).
Another area you must find is the Vault of the Assassin. It doesn't have a typical entrance, because you must interact with a portal. Wait to be transported to a new location.
The vault is huge and it's filled with monsters. Don't forget about destroying Guardian Towers in order to prevent more hostiles from joining the battles. As for the monsters, aside from the skeletons and other common creatures you'll also encounter Blazing Guardians and their specialty is to throw fireballs.
You'll find Zoltun Kulle's blood probably somewhere on the edges of the map. Pick it up and return to the portal to end this quest.
This quest will begin automatically after you've finished the previous one. After you've returned to the Desolate Sands you will have to start searching for a passageway leading to the last portal. It's best to explore the northern part of the location while moving close to the edges of the map.
Zoltun Kulle will activate the last portal and you must use it to travel to the Archives of Zoltun Kulle.
Start running forward and make a stop once you've located a new waypoint. You should also encounter Emperor Hakan II and Leah here. Continue your journey until you've reached the Terminus.
Listen to a new conversation and then approach a portal which will transport you to the Unknown Depths. This is the first location where you'll have to use the mage's blood to activate a lock.
You must be very careful, because it's very dangerous here. Watch out mostly for Rock Giants, however you'll also have to acknowledge the presence of the Fallen and their shamans, Guardian Towers and various types of skeletons and spiders. It's also crucial to quickly destroy all Toxic Constructs before they summon too many monsters.
The depths are a large location and your objective is to reach the opposite end of the map where you'll have to open a Shadow Lock. The first part of the main mission is now completed. Find a portal nearby to go back to the Terminus.
You must now travel to the second portal which will transport you to the Storm Halls. This location is similar to the depths, so it's big and it's populated by large groups of powerful monsters.

Continue exploring the halls until you find the second Shadow Lock. Open it and then use a new portal to go back to the Terminus.
Proceed to the third portal which will teleport you to the Realm of Shadow.
This is a dark location occupied by many tough monsters. Shade Stalkers are little demons and they're hard to track and Sand Behemoths are extremely resistant to attacks. Aside from them you'll also encounter plenty of wraiths, spiders and Guardian Towers. Approach Zoltun Kulle's body with caution, because it will be heavily defended.
Once you've collected the body use the portal to return to the Terminus. Talk to Leah here and she'll use her powers to resurrect Zoltun Kulle.
Zoltun Kulle will open a portal to the Soulstone Chamber and you must follow him there.
Head forward and get ready for an unpleasant surprise - a new battle.

The best way to begin this battle is to eliminate the Eternal Guardians. They are quite tough, however they're also very slow. Try to avoid Zoltun's attacks in the meantime, because he won't wait until you focus on him.
Zoltun Kulle himself has an ENORMOUS life bar. He likes to cast a spell which slows down your team, assuming of course you will find yourself within the radius of the spell. Other Kulle's attacks are a whirlwind which inflicts major injuries and fireballs which explode after coming in contact with a target. Kulle can teleport himself across the battlefield which makes killing him even harder. Expect this duel to take a large amount of time and wisely use your health potions and skills.
Once you've eliminated Kulle and his servants you will be allowed to collect the Black Soulstone which is in the middle of the chamber. You must now take part in new conversations with Leah and Tyrael. As for the soulstone, Adria will take it.
Use a portal to travel back to the Terminus, because you can't use the town portal spell within the Soulstone Chamber. Return to the Hidden Camp and talk to Adria again to end the quest.
Talk to Leah to begin this new mission. It's also worth mentioning that three merchants from the Caldeum Bazaar have moved to the Hidden Camp in the meantime and they'll remain here for the rest of the act.
Go to the Caldeum Bazaar and notice that Belial has already begun the attack on the city. Run towards Asheara - she should be standing close to the entrance to the Flooded Causeway.
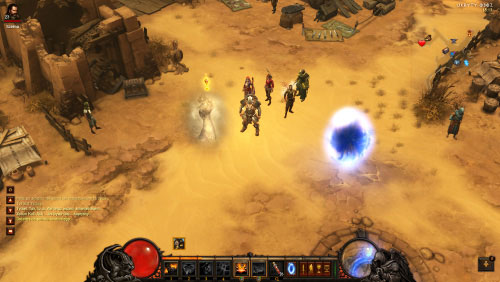
Your job is to evacuate people from the city to the canals. Make sure to use your map, because it'll show where you'll find the refugees that need to be saved. You must approach each civilian for that person to start following you and then escort the refugee to the Flooded Causeway, eliminating monsters encountered along the way. Some of the refugees may be hiding under wagons and in this case you must click on them to force them to come out of hiding. Remember to hurry, because you only have a limited time to save the innocent people. I suggest that you start with the refugees located to your right.
Once you've rescued the first group of refugees go to your left and choose a previously unaccessible passageway. Remember that you shouldn't travel to the sewers too often. It's best to add at least several refugees to the group before returning with them. Try to save as many people as possible.
You should still be in the Caldeum Bazaar and you must run towards the palace. Leah will destroy the door, allowing you to head inside.
You've ended up in the City of Caldeum. You know this location quite well, because you've already explored it by travelling in an opposite direction with the emperor. Keep moving towards the Imperial Palace. Well-known monsters are waiting for you here, however you will also have to kill a powerful mage named Kamyr along the way (his spells are blocking the passageway).
Watch out for small rifts, because toxic fumes will be coming out of them. Time your moves so you won't lose health in these places. Expect more enemies to stand in your way. Wait until Leah has destroyed a new door and enter the Imperial Palace.
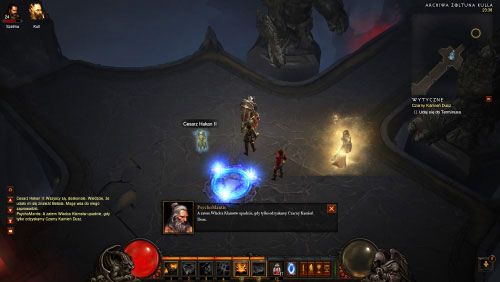
Watch a short cut-scene which will inform you that Emperor Hakan II is in fact Belial. Once the battle has started he will be standing in the exact same spot where you've met him as the emperor for the first time. Start attacking the Veiled Sentinels.
Belial will soon use the stairs and join the battle, however this is only a taste of the things to come. The boss has a lot of health points, he's extremely fast, he can send out poisonous projectiles and he occassionaly summons more Veiled Sentinels to aid him. Continue attacking Belial until he's lost enough health points and that's when the main part of the battle will begin.
In this new stage of the battle Belial is even more powerful. He's got a very long health bar, so expect the duel to last at least a few minutes. The boss will use his large limbs to attack areas marked with green circles and that information should help you in avoiding massive injuries.
Belial often turns on his rage mode and this is when he slams his hands into the ground you're standing on and causes explosions inside all of the green circles. This is his most powerful attack which deals incredible amounts of damage, so make sure to act quickly and to position yourself far away from the green circles. Aside from the attack described above Belial also likes to rely on a poisonous breath which covers the entire battlefield, but it's not that deadly. Try regenerating mostly thanks to health spheres and use the potions only if you don't have any other choice.
As soon as you've defeated the boss you will return to the palace. Among the items left here there's a very important one - Soul of Belial. Take the soul, causing additional characters to appear in the area. Leah will use the recently obtained Black Soulstone to imprison the soul.
Use a town portal spell to return to the Hidden Camp where you must speak with Tyrael.
It's time to move on and the procedure is the same as in the first act. Talk to the Caravan Leader and confirm that you want to leave this place.
You may encounter a Crazy Miner while exploring the Howling Plateau and you must talk to him.
A group of Fallen and Fallen Shamans will suddenly appear in the area. Kill them all in order to keep the Crazy Miner alive.
The event will end after you've won the battle and you'll have chance to take treasures from a golden chest.
You may find an abandoned groove while exploring the Howling Plateau and you'll notice an injured guard lying on the ground next to the entrance. Enter the underground location.
Kill all Lacuni Huntresses found in the dungeon. They should be fighting the soldiers.
Once you've killed all huntresses locate the commander using your map and report your success.
New monsters will appear after a short conversation. Attack a group Lacuni Huntresses and a large Ghas. Just as before, you can count on the soldiers to help you. Defeating this group of enemies will end the event.
You may find a Chamber of the Lost Idol while exploring the Stinging Winds. Enter the new location.
The event will automatically start upon entering the underground location. Approach Poltar and talk to him.
Poltar will ask you for your assistance in finding the idol. Explore the entire dungeon with him, killing monster along the way. Completing the objective may take some time, because this location is rather large.
Continue exploring the dungeon until you've found the Idol of Rygnar.
Pick up the idol and be ready to deal with an unpleasant surprise.
Your team is going to be surrounded by four monsters. Kill them and notice a portal near the place where you've found the idol. Leaving this place will result in completing the event.
You may encounter a Dying Necromancer while exploring the Stinging Winds. Talk to him.
Look around near the place where you've talked to the necromancer and you should find soul prisons. Click on each interactive object to release several skeletons and wraiths. Kill them.
Once you've eliminated all standard enemy units Ghezim should appear. He relies on lightning damage, however he doesn't have a lot of health points, so he shouldn't be considered a difficult opponent. Killing him will end this event.
You may encounter a necromancer who goes by the name of Methan while exploring the Stinging Winds. Talk to him to find out that he needs your help.
There are two necromancer totems near the place where you've talked to Methan. Each time you've clicked on a totem you're going to be attacked by several Deathly Haunts and it'll be up to you to get rid of them.
Return to the necromancer after slaying all beasts and talk to him. Get ready for a nasty surprise.
New enemies will suddenly show up and start attacking the necromancer. Kill them to protect your ally.
Talk to the necromancer again to end this event.
You may encounter a Treasure Hunter standing next to a portal in the Stinging Winds. Talk to him and then enter The Crumbling Vault through a portal.
The location you've just been teleported to is vast and additionally you have to worry about the time limit. Don't waste your time fighting all the monsters and instead try avoiding them when you can. Find a second portal which leads to the The Crumbling Vault Treasure Room and immediately use it.
Once you've been transported to the The Crumbling Vault Treasure Room you can stop worrying about the time limit and the event will officially end. Naturally you should spend some time opening crates found in the area. Once you're done use a portal to return to the Stinging Winds.
While exploring the Dahlgur Oasis you may encounter a group of Fallen Overseers and Fallen Lunatics. Some of the monsters are capable of inflicting lightning damage.
There are five summoning stones that need to be destroyed. Watch out for additional monsters while trying to complete this objective. Destroying the stones will end this event.
While exploring the Dahlgur Oasis you may find an interactive lever on top of a small hill.
Interacting with the lever will drain the water and it will allow you to enter Sandar's Tomb.
The tomb is a rather large location and it's occupied by the monsters you've met in your previous journeys. Locate a lever that opens the vault.
Approach the vault and the door will open. You may head inside.
Approach a golden chest and open it.
Sandar will appear and immediately attack you. He doesn't have a lot of health points, so you don't have to prepare for this duel. Killing Sandar will end the event, however don't forget to search the entire vault for potential treasures.
While exploring the Dahlgur Oasis you may encounter a group of guardians that were tied to posts. The area is swarming with the Fallen.
Kill all the monsters and release the captured guards to end the event.
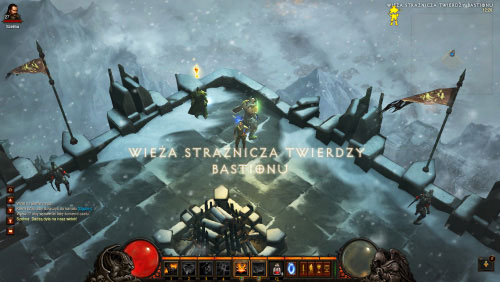
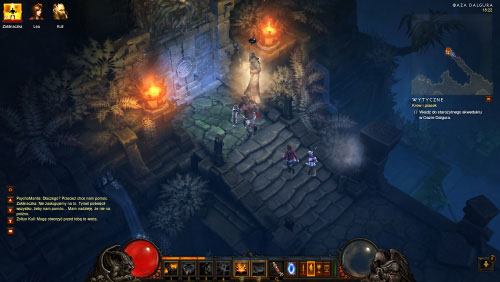
You begin in the Bastion's Keep Watchtower. Speak with Tyrael who should be standing next to you to get your first assignment. Descend the stairs afterwards and enter the Armory.
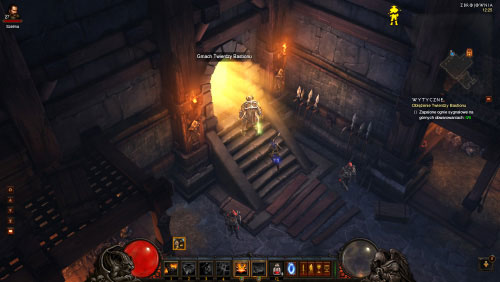
You'll meet Leah and Adria here and you should also notice the Black Soulstone. Proceed to the next door.
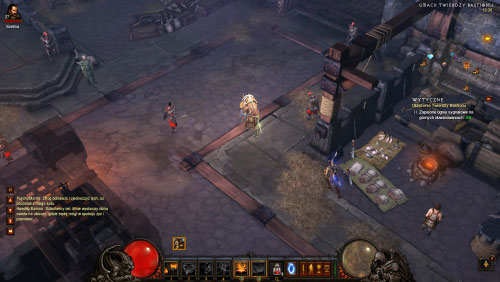
Enter the Bastion's Keep Stronghold. This location is the central part of the city and this means you'll find merchants here, as well as a blacksmith, a jeweler and companions for hire. Proceed to the gate located next to the blacksmith.

Be careful, because you're going to be attacked by Demon Troopers here. They're big, however they're not a serious threat, mostly because they don't have a lot of health points. Witness the vision of Azmodan which will be a taste of things to come.
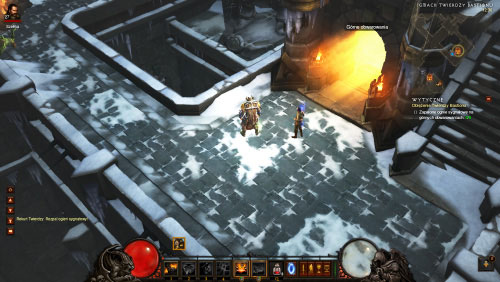
Once you're ready proceed to the door leading to the Skycrown Battlements.
Begin exploring the Skycrown Battlements. This is a large location that forces you to travel through the stronghold's defense walls. Your primary objective at the moment is to light five signal beacons. Naturally you will be constantly interrupted by monsters and most of them will be more dangerous than the creatures encountered in the previous acts.
You've already fought with the Demon Troopers in the previous location. Aside from them you'll also be dealing with Fallen Hellhounds (they don't die as quickly as they should and they usually appear in groups), Fallen Grunts (they're not a serious threat), Fallen Prophets (they can resurrect Fallen Soldiers), Fallen Mongrels (they have a lot of health points), Fallen Overlords (they're also hard to kill and they have a powerful bashing attack) and Demonic Hellflyers (not only they can fly, but they also spit fireballs). I recommend that you always focus on the creatures with the abilities of resurrecting their kind.
Watch out for enormous Demonic Hellbearers. They are clinging to the stronghold's walls and spit new monsters from their mouths, usually new Demon Troopers. It's not easy to kill a hellbearer, because you'll have to deal with all the monsters it spat out first.
Another danger you must be aware of are huge objects landing on the stronghold's walls. Red circles marks areas where they will land, however you can't anticipate where smaller projectiles will hit the ground.
Follow the only route through the stronghold's walls, locating and activating signal beacons along the way. Each beacon will be defended by a single Demonic Hellbearer. Continue your journey until you've lit all five beacons. It's worth adding that you may also encounter Colossal Golgors while trying to complete this objective. They're slow, however they have a lot of life points and their attacks are very strong.
Keep exploring this location even after you've lit all five beacons and you will soon encounter Sergeant Dalen. Watch another vision of Azmodan which will end this quest.
Speak with Sergeant Dalen to begin this quest. He will open a door leading to the next location of the stronghold.
Start exploring the Stonefort. This is another large location which features exploration of the stronghold's defense walls.
You'll be encountering mostly the same monsters as in previous quest. Follow the path until you locate the first catapult. It's worth knowing that in order to continue this quest you may be required to complete an event called Waiting for Reinforcements (it's described in the chapter about events of Act 3).
Talk to the soldier standing close to the first catapult and you'll find out that you must protect the recruits while they set it up. This is a part of another side event, called Raising Recruits. Wait until the catapult is ready before moving on.
Continue moving forward until you've reached the second catapult. Once again, you will have to protect your allies. This is achieved as a part of an event called Protect and Serve and it's going to be much harder this time to win.
Once again you must resume exploring the stronghold's walls. Locate the final third catapult. In this case you'll have to ready the catapult by working in co-operation with a lieutenant. It's achieved by interacting with a winch and fending off monsters at the same time and it's a part of an event called Manual Override.
Use a town portal spell to return to the Bastion's Keep Stronghold and to finish this quest.
Locate Tyrael in the Bastion's Keep Stronghold and talk to him to start a new mission.

Find the jeweler and approach a passageway located next to him which leads to Keep Depths Level 1. Deal with a small group of Demon Troopers and then use this passageway.
Start exploring the Keep Depths Level 1. This is an enormous location and you must be extremely careful, because large groups of monsters may occupy even smaller rooms of the depths. As for the details on the monsters, you may encounter Soul Rippers (they use their very long tongues and they can jump once they grab you), Icy Quillbacks (they shoot spikes), plenty of skeletons (including the ones with shields and bows) and the creatures from the previous quests.
Your main objective is to locate a passageway Keep Depths Level 2, however before you use it make sure to locate and activate a waypoint on level 1.
This is another large location and it's occupied by several new types of monsters, including Demonic Tremors (they can shield themselves to prevent you from injuring them), Swift Skull Cleavers (they're not only fast, but they also have a lot of health points and their large swords inflict major injuries), Demon Raiders and Fallen Maniacs (they may explode if they manage to get closer to you).
Continue exploring the second level until you've found the Breach. Witness another vision of Azmodan to find out that you've arrived too late.
Continue moving forward. There's an entrance to Keep Depths Level 3 near the Breach and you must use it.
The third level isn't as big as the previous ones, however it contains a waypoint. Keep exploring the level until you've located an entrance to the Larder.
Head forward after entering the Larder and it shouldn't take long for you to find a chamber occupied by Ghom. His primary attack is to create a poisonous cloud and you should stay away from it if you can. The boss can also spit Gluttons and it's best to avoid them or to kill them as soon as possible. Also, it's important to know that Ghom isn't as slow as it might seem and that he has a lot of health points.
Cast a town portal spell to return to the Bastion's Keep Stronghold. Doing this will end the quest, however you will also be presented with another vision of Azmodan.
Since Tyrael can't be found anywhere in the Bastion's Keep Stronghold you must speak with Lieutenant Lavail to begin this very short mission.
As the objective states, you must travel to the Armory.
Leah will lose control over the Black Soulstone for a while and a dozen of Shadow Vermin will appear in the Armory. Thankfully they're not a serious threat and they're very easy to kill.
Talk to Leah to officially end this quest.
This quest will begin automatically after completing the previous one. You start in the Armory and the first thing you need to do is to return to the Bastion's Keep Stronghold. Once you're there locate a large passageway leading to the Arreat Gate.

Descend the stairs. You don't have to remain cautious here, because you won't encounter any demons. Approach the catapults, locate Sergeant Pale and talk to him.
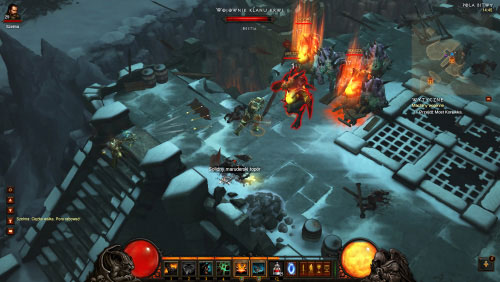
You may proceed forward. Soon after you've walked through a gate you will enter a new area called The Battlefields and you must be ready to engage new monsters in combat. Blood Clan Warriors always act as a group and some of their attacks have a bashing effect. Heralds of Pestilence like to put one hand in the ground, allowing themselves to poison you even from a large distance. Winged Moloks are a stronger version of flying creatures you've already encountered on the stronghold's walls. They usually attack in groups and they like to spit fireballs. Reviled aren't a threat. Hell Bringers on the other hand are a serious problem. You should know that they like to surround themselves with traps and they activate them when you move closer. Aside from the creatures described above you should also expect to meet some of the monsters you've already fought with in this act.
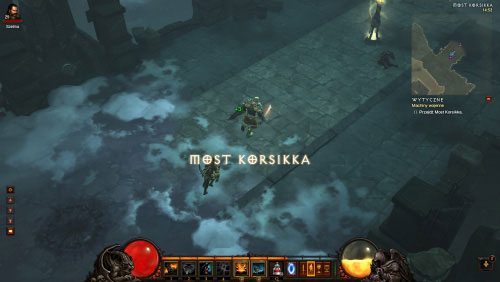
The fields definitely aren't one of the larger locations of this act. Continue exploring them until you've located the Bridge of Korsikk.
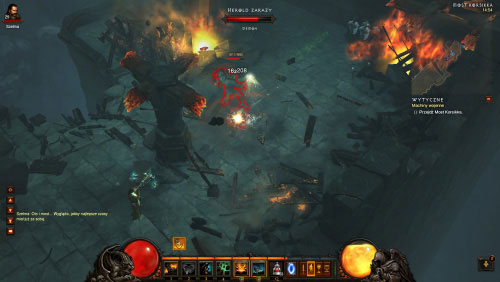
Enter the bridge and head forward. The bridge is heavily damaged in order to get to the other side you'll be forced to use stairs and destroy various barricades. You'll also encounter monsters (all of them are already familiar to you) and find a new waypoint.
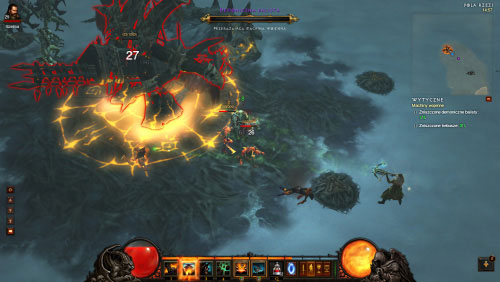
After you've crossed the Bridge of Korsikk you'll enter a new location named Fields of Slaughter. This is a large area that's heavily occupied by various types of demons. Your objective is to destroy three ballistae and one trebuchet. The ballistae are marked on your map and they're very distinctive, so you shouldn't have problems locating them. They're also poorly built so a few hits should be enough to destroy each one of them.

Don't forget to monitor your surroundings while searching for the war machines, because this entire location is swarming with demons. It's best to move slow in order to remain safe.
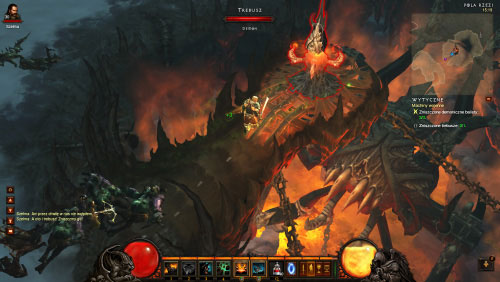
The trebuchet is an enormous structure and in order to destroy it you must go to the middle of it and start attacking its weak point. Once you've successfully destroyed all war machines you're going to be rewarded with a new vision of Azmodan.
Continue exploring the Fields of Slaughter to locate a large passageway leading to the next location.
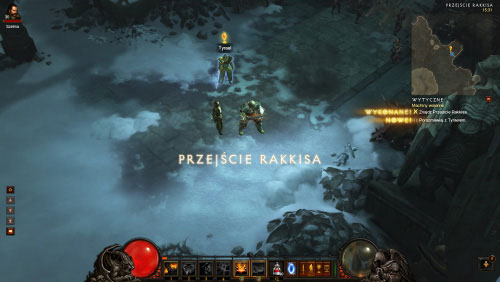
Tyrael should be waiting for you here. Talk to him in order for him to join you. This quest will soon end and you'll witness yet another vision of Azmodan.
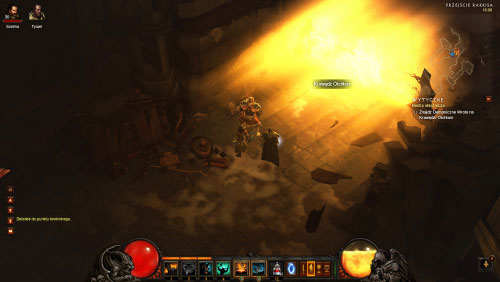
Head deeper into the Rakkis Crossing. This location is very similar in terms of its structure to the Bridge of Korsikk from the previous quest, however you'll be dealing with more demons than before.
At the end of the Rakkis Crossing you should be able to locate a passageway to the Edge of the Abyss.
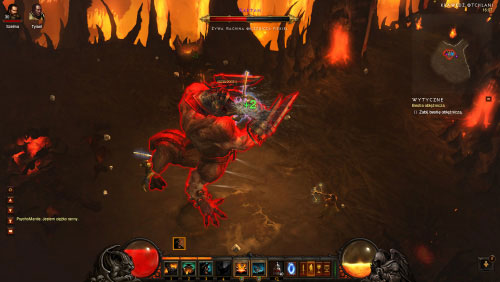
The only way to move on is to defeat Kartan and you should know that this demon has a very extensive life bar. Fighting this monster in close combat may be very dangerous, because the boss can grab you with its huge claws and can then throw you, dealing severe damage. If you decide to attack it from a distance you also won't be completely safe, because the demon can charge at you. Thankfully the arena where you're fighting is large, so you'll always have a place where you can run away to.
As soon as you've eliminated Kartan you should notice that Adria has arrived here using a town portal spell. Talk to her to end this quest and to learn that Tyrael won't be a part of your team anymore.
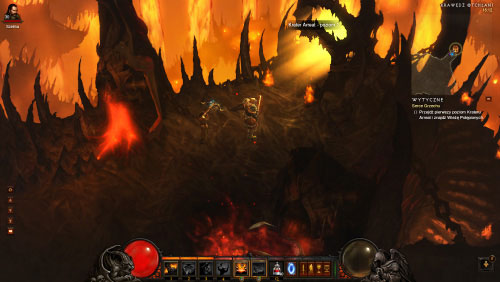
This new quest will begin automatically after ending the conversation with Adrii in the Edge of the Abyss. Step through the gate to find yourself in Arreat Crater Level 1. A waypoint should be located somewhere nearby.
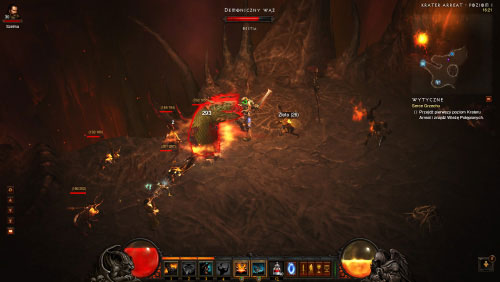
Get ready for a long journey filled with a lot of battles. Some of the monsters that will try to take your life will be: Fallen Soldiers, Fallen Firemages, Demonic Serpents (they like to suddenly emerge from the ground), Stygian Crawlers (they're small spiders), Heralds of Pestilence (you've fought them before) and Colossal Golgors (you should already know them as well).
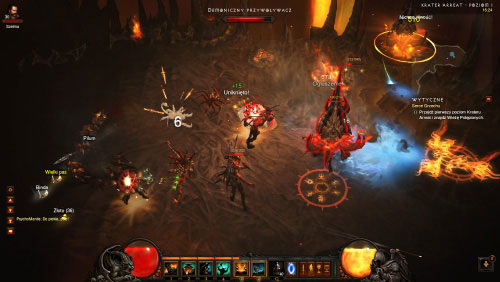
Keep pushing until you've encountered a group of Demonic Summoners. It's crucial that you eliminate them as soon as possible, because otherwise they'll summon more demons to the battlefield.
Your current objective is to locate a passageway leading to the Tower of the Damned Level 1. The journey will be interrupted by a new vision of Azmodan.
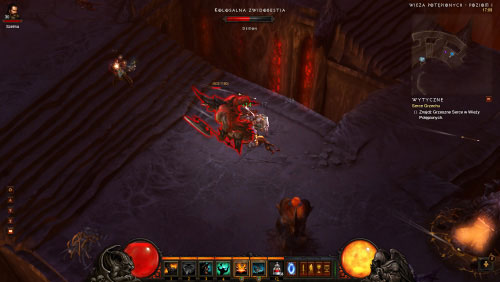
Once you've started exploring the Tower of the Damned Level 1 you'll have to be ready to engage new types of monsters aside from the ones you already know. Hulking Phasebeast seem to pose the biggest threat. You should also be on a lookout for a new waypoint.
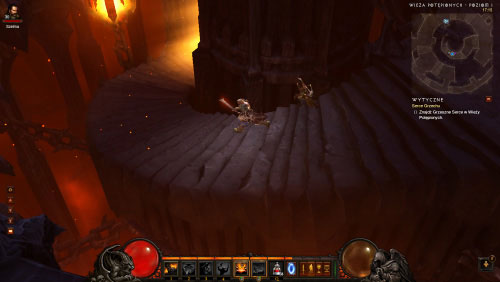
The location you're currently exploring has an oval shape and you will be constantly moving down. The passageway to the next area can be found at the bottom of the staircase, however before you get there you'll take part in a lot of fights, including the ones with Succubuses which can burden your team with curses.
You'll soon reach Tower of the Damned Level 2. Cydaea will start talking to you here and she'll be your next main opponent. Continue using the stairs, killing Hulking Phasebeast and other demons along the way. Eventually you'll get to a new passageway.
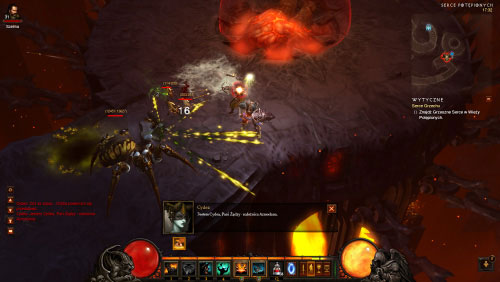
Once you've reached the bottom of the Tower of the Damned you'll enter a location named Heart of the Damned. Continue moving downwards. Cydaea will appear near the Sin Heart. She can effectively slow you down and spit poisonous projectiles which give birth to smaller spiders. Don't count on ending this battle quickly, because Cydaea will soon flee.
As I've mentioned, Cydaea will flee and she'll leave you to "play" with her daughters - a group of Succubuses. Once these monsters are dead there will be nothing else stopping you from destroying the first heart.
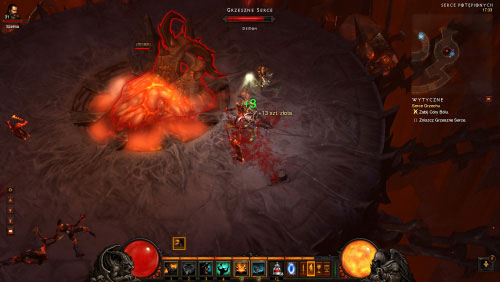
Destroy the first heart. It doesn't pose any threat and it has a small energy bar.
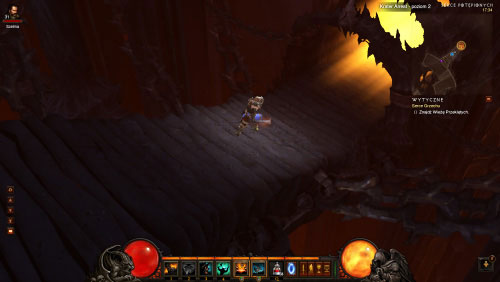
Destroying the first heart will open a new passageway. Head forward and continue moving until you've located a passageway leading to Arreat Crater Level 2.
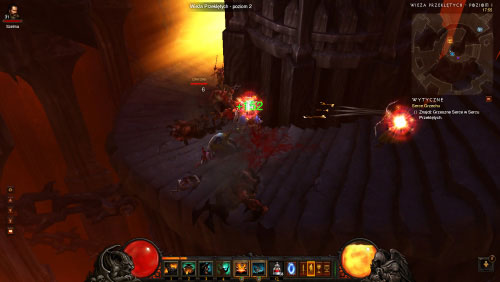
Search the area to locate a waypoint. Reaching the second heart will be similar to finding the one which you've already destroyed. Arreat Crater Level 2 has an almost identical structure to Arreat Crater Level 1 and it's occupied by well-known monster types. You'll have a chance to watch a new vision of Azmodan along the way and eventually you'll get to the Tower of the Cursed Level 1. There's another waypoint in this location. Start using the stairs again, heading downwards. Your final objective is the Tower of the Cursed Level 2.
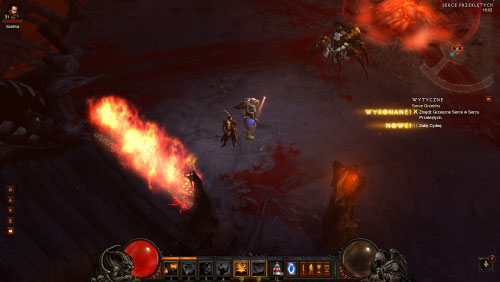
Once you've reached the bottom of the tower you'll have to defeat new demons and locate a passageway to the Heart of the Cursed. Notice that you aren't allowed to use a town portal spell here, so make sure to take the trip to the city before entering this area. Continue your march until you've located the heart and Cydaea.
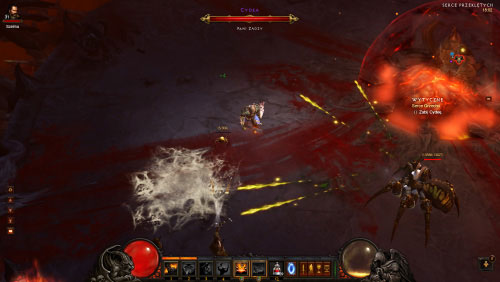
You already know what Cydaea is capable of, but here's a quick reminder: she can deploy a web which slows you down and she can spit poisonous projectiles. You also have to acknowledge the presence of smaller spiders that will be helping her.
Once you've killed Cydaea you'll be allowed to focus on destroying the second heart. Doing this will unlock the passageway to the next location. Head down and locate an entrance to The Core of Arreat.
There's a new waypoint in The Core of Arreat and you should also know that this is the last area you'll explore before taking part in the final battle of Act 3. Eliminate new demons, moving towards a passageway leading to the Heart of Sin. Proceed forward here and you'll soon enter a much larger room where Azmodan will already be waiting for you.
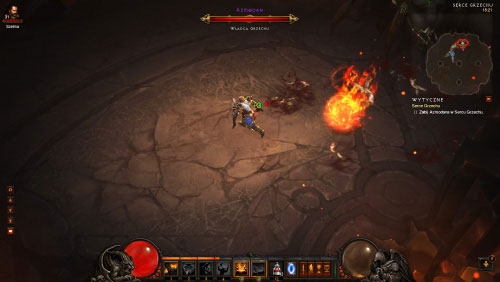
Azmodan has several types of attacks. The most common attack is about casting huge fireball at your team. The fireballs move rather slowly, however they won't be flying in a straight line. Instead they'll be homing in on your position and only if you continue to successfully evade them for more than a few seconds they'll explode. If you fail and get in contact with them you'll receive severe fire damage.
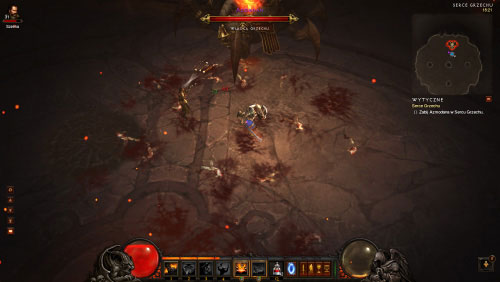
The boss also likes to "bombard" the area with dead bodies and you can receive damage if you get hit by one of them. The best way to avoid injuries here is to observe what's happening on the map, because a circle will appear on it soon before an area of the battlefield will be bombarded, giving you time to move away.
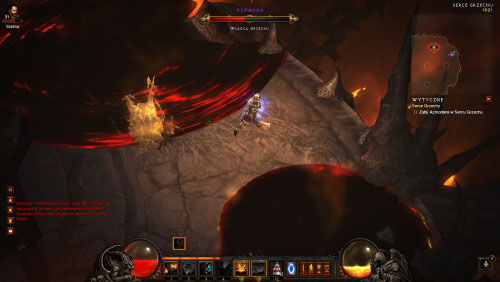
Another one of Azmodan's attacks is about creating black circles that are filled with the power of hell and expand over time. Make sure to stay away from them, because otherwise you'll receive massive injuries. The best tactic here is to start running towards the opposite edge of the battlefield, hoping that the black circle won't catch you.
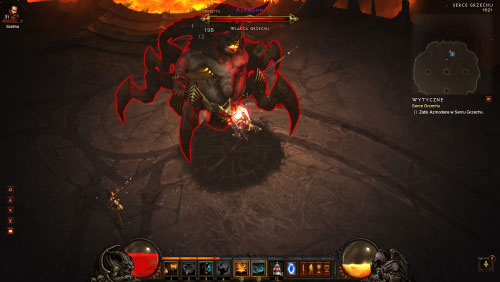
Demon Gates may appear on the battlefield during the battle and Azmodan's Servants will be able to use them to join the fight. It's not a big threat, however you should be destroying the gates each time you notice them. The last one of Azmodan's attacks is a ray of fire and the boss can use it to inflict damage from a larger distance.
Killing Azmodan requires some time. Be patient, avoid his attacks as much as you can and look for opportunities to perform your attacks. Defeating this boss is rewarded with tons of treasures.
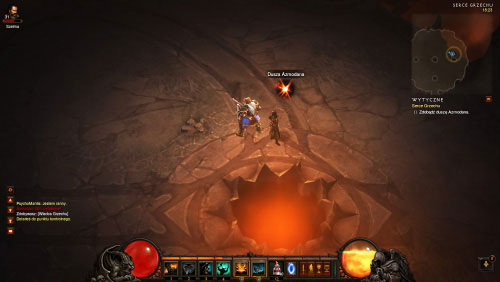
The deal is the same as with the battle with Beliala from the previous parts of the game, because you'll be forced to get Azmodan's soul. As soon as you've clicked on the soul Adria, Tyrael and Leah will show up here. Leah will perform the ritual to imprison the soul within a Black Soulstone.
Use a town portal spell to return to the Bastion's Keep Stronghold.
Lieutenant Lavail should be standing next to the town portal you've created. Talk to him and he'll give you new orders.
Proceed to the Armory.
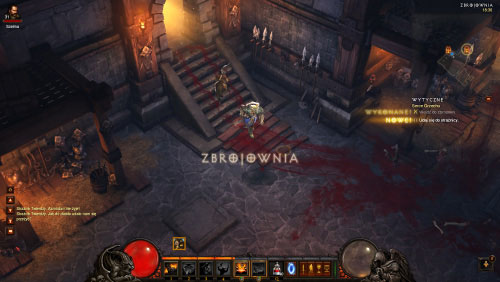
You won't encounter anyone here when you'll enter the Armory. Follow the blood trails to the Bastion's Keep Watchtower. You'll soon learn all the truth about Adria's betrayal and about Leah being used by Diablo.
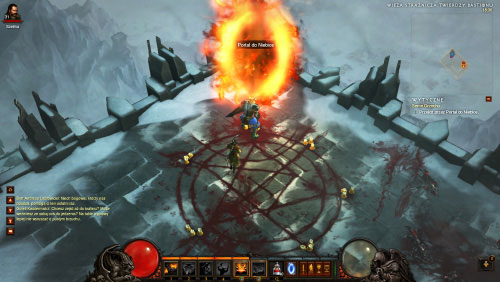
Make sure that you've completed all events, as well as visited the merchants and the blacksmith. Step through the portal to end this act and to advance to the last one.
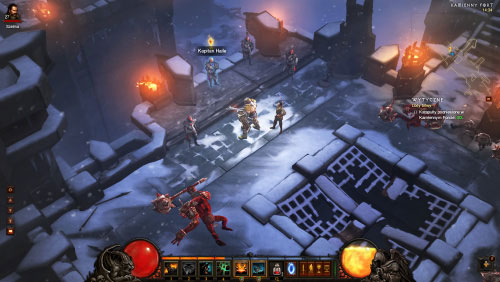
You may encounter Captain Haile while exploring the Stonefort. He'll ask you for assistance in defending against enemy attacks until reinforcements arrive.
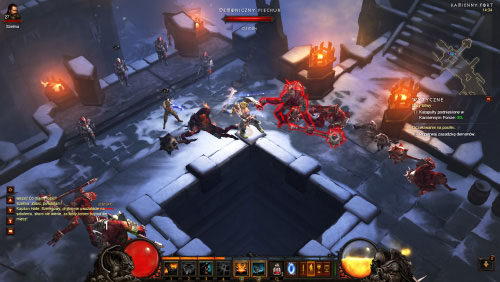
The monsters should appear near a hole in the middle of the stronghold wall. Continue fighting until they're all gone.
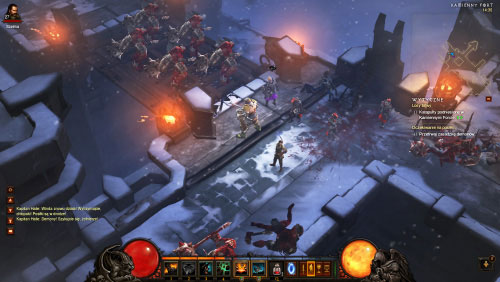
An elevator will soon arrive here, however instead of receiving reinforcements you'll discover that you'll have to defeat one more group of monsters. Winning this second battle will end the event and you'll be allowed to continue the main quest.
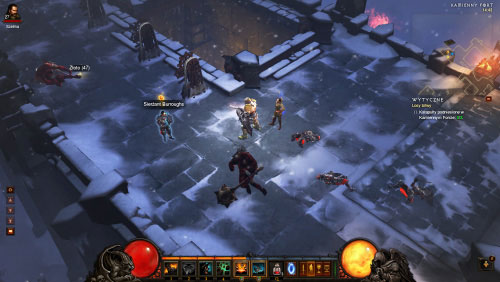
You will encounter Sergeant Burroughs while exploring the Stonefort. To be more specific, he should be standing near one of the catapults. Talk to him to learn about the current situation.
Follow the sergeant to the barricade. You must destroy it and also defeat several demons.
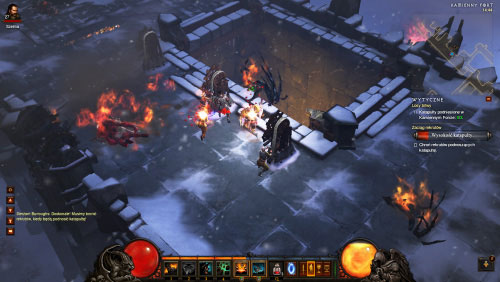
The recruits will start using the winches to raise the catapult and your job is to protect them from demon attacks. You'll know that the catapult has been raised properly when a red bar seen near the right edge of the screen will become fully filled. This event will end just after that.
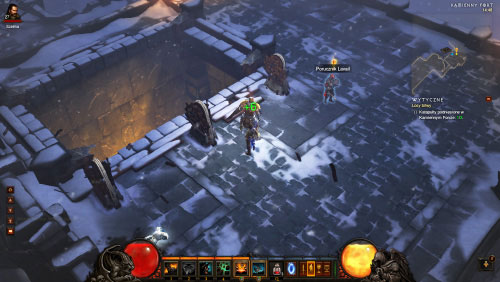
You may encounter Lieutenant Lavail while exploring the Stonefort.
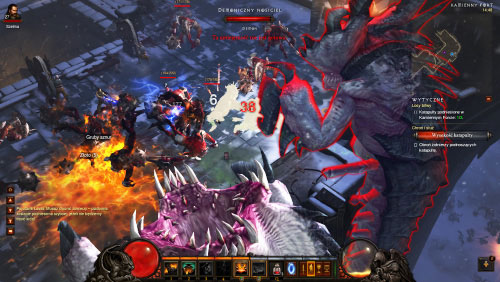
Just as in the previous event, your job is to protect the soldiers while they're trying to raise the catapult. This time you should expect additional complications, because several Demonic Hellbearers will appear near the walls and they'll be joined by dozens of smaller demons. You don't have anywhere to hide, so you're left with only one option - fighting them. Once the catapult has been raised this event will come to an end.
You may encounter Lieutenant Clyfton while exploring the Stonefort. Unlike two previous events described in this guide you won't have to protect anyone, because you and the lieutenant will be the only ones tasked with raising the third catapult.

The objective isn't that simple, because aside from interacting with the winch you'll also have to defend yourself from hordes of demons. Keep fighting and interacting with the winch until the catapult is ready. This will cause the event to end.
Using one of the doors in Bastion's Keep Stronghold allows the main character to travel to Keep Depths Level 1. This is where you may encounter Ironsmith Maldonado. He should be standing in a corridor surrounded by lava and it's a good idea to talk to him.
The ironsmith will begin his job and your task will be to defend him from Skeletal Marauders.
Once the time is up you'll have to deal with the remaining skeletons.
After you've secured the area return to Ironsmith Maldonado and talk to him to end this event. It's worth adding that you'll also be allowed to trade with him.
While you're exploring the Arreat Gate you should travel north of the place where Sergeant Pale was standing and where the ballistae could be found. You may be able to locate an entrance to The Barracks Level 1. Explore the first level and locate a passageway leading to The Barracks Level 2.
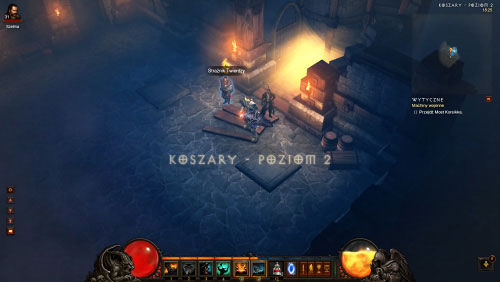
Once you've reached the second level of the barracks you should almost immediately encounter a Stronghold Guardian and you must talk to him.
The guardian will ask your for help in finding his friend and you should also notice that he's joined your team. Start exploring this level, encountering plenty of monsters along the way.
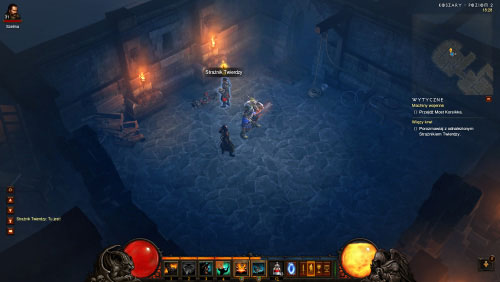
Once you've found the missing Stronghold Guardian you must talk to him to officially end this event.
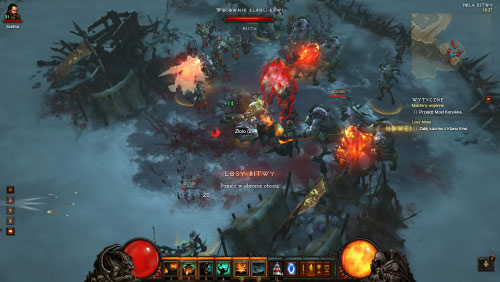
You may find a camp while exploring The Battlefields and this event will automatically start when you'll get closer to it. Your first objective is to kill all the Blood Clan Warriors found in the camp and since you've already fought them you'll know what to expect.
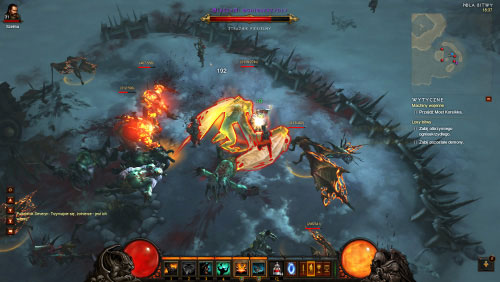
Once you've dealt with the warriors new monsters will show up. It's going to be a Colossal Firewing that should be treated as a boss and a group of Winged Moloks. Kill them all.
After you've killed all the monsters talk to Colonel Severyn who can be found in the camp. Doing this will end the event.
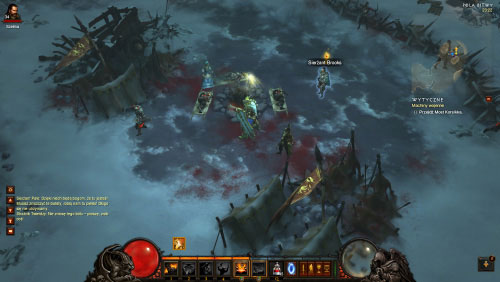
You may find a camp while exploring The Battlefields and you'll know that it's the right one if you encounter Sergeant Brooks. Talk to him.
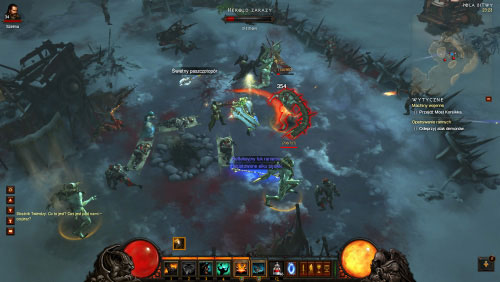
The campsite will soon be attacked. Winged Moloks will be the first ones to show up, however they'll soon be joined by Heralds of Pestilence. All the monsters you need to kill are marked with red dots on your map.
Once you've killed all the monsters return to the center of the camp and talk to Sister Melana.
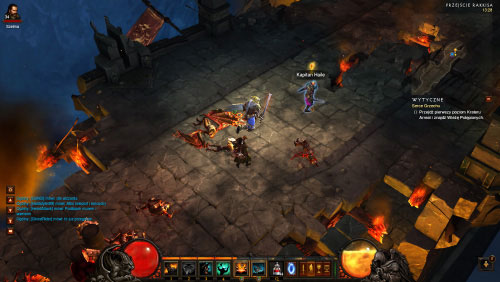
You may encounter Captain Haile while exploring the Rakkis Crossing and you must talk to him to activate this event.
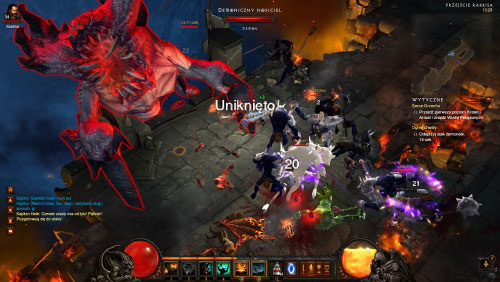
Your job is defend yourself from demon attacks until the time limit expires and you can count on Captain Haile's support. As for the monsters you'll be fighting with - expect Demon Troopers, Winged Moloks and at least one Demonic Hell Bearer to show up. One thing is certain - it's going to get hot in here.
Continue fighting until the timer reaches zero and then focus on eliminating the remaining demons.
Return to the captain to end this event.

You may encounter Private James while exploring the Rakkis Crossing and he should be lying on the ground near the stairs. Talk to him in order to find out that he wants you to deliver a spyglass to his superior.
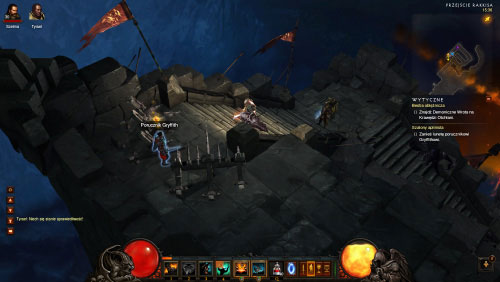
Use the stairs to reach the upper level. It shouldn't take long until you've located Lieutenant Gryffith. Talk to him to end this event.
This act begins at the Diamond Gates and you'll be exploring High Heavens from now on. You won't find any cities here, however town portal spells and waypoints can transport you back to the Bastion's Keep Stronghold, allowing you to meet with merchants, blacksmiths, jewelers and followers. Head forward to find a new waypoint. Listen to a conversation between Tyrael and Imperius and then speak with Tyrael.
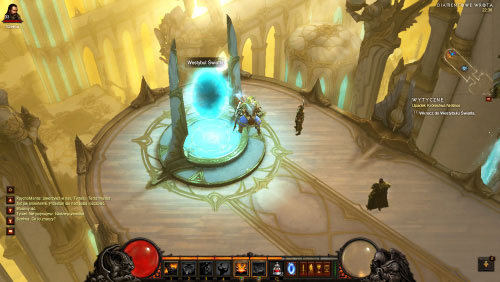
Notice that there's a portal here which can transport you to the Vestibule of Light. Use it.
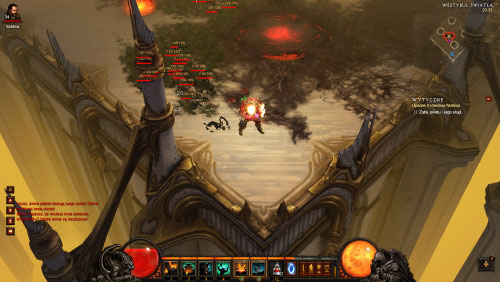
You'll soon have to have to defeat the first demon Diablo sent after you. Start off by attacking Iskatu's minions - Shadow Vermin. To be honest they're the biggest problem during this battle.
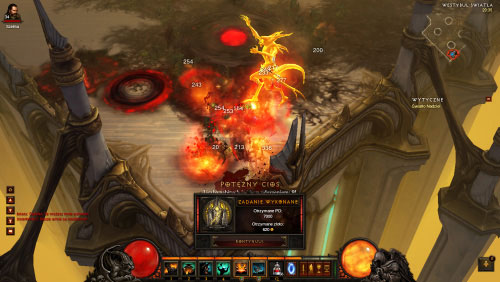
Iskatu doesn't have a lot of health points and his attack don't inflict a lot of damage, so the only problem is to make your way to the boss by eliminating all the Shadow Vermin standing in your way. Once you've defeated Iskatu you'll end the first quest of this act.
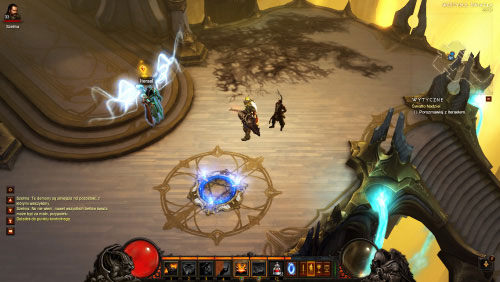
This new mission will begin automatically after ending the previous one. Head forward and you'll encounter Itherael near a new waypoint.
Talk to the archangel to find out about the next step of your journey.
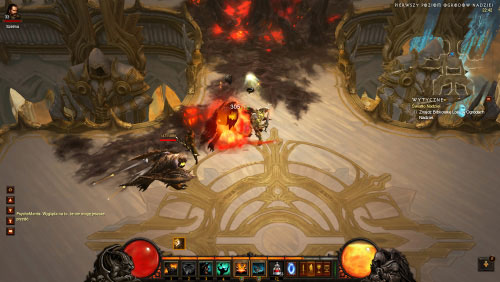
A passageway can be found behind the archangel and you must use it to travel to Gardens of Hope 1st Tier. Expect to encounter hordes of demons along the way, however you can count on the help of angels present in the area. Watch out for Armored Destroyed, because they drop from the skies like projectiles. Bile Crawlers are fast, but they're not dangerous and they can attack only in close combat. Oppressor use not only their swords, but they also like to shout and perform chargers. Subjugators tend to throw exploding objects at you. Vile Temptresses are a stronger versions of Succubuses encountered in the previous acts. As for the gardens, you will probably find corrupt growths blocking your way and you'll be allowed to destroy it later in the game.
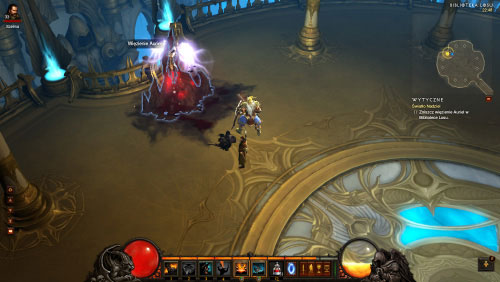
The gardens also contain a new waypoint and obviously you must activate it. Continue exploring the area until you've found an entrance to the Library of Fate. Head inside.
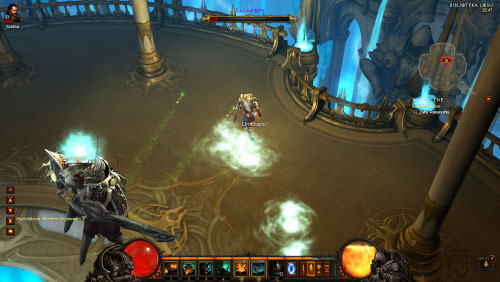
Another one of Diablo's servants will be waiting for you here. Rakanoth has a lot of life points, however the arena where you're fighting is large, so you'll have plenty of space to move around. Watch out for the boss though, because he can move very fast and therefore can immediately approach you to perform an attack. Rakanoth uses swords in melee combat and if you move away he fires projectiles at you which are easy to avoid. He also likes to summon Soul Devourers for help.
Once you've dealt with Rakanoth free Auriel from the prison by destroying it. Itherael should appear here.
Talk to Auriel to find out about your next objective.
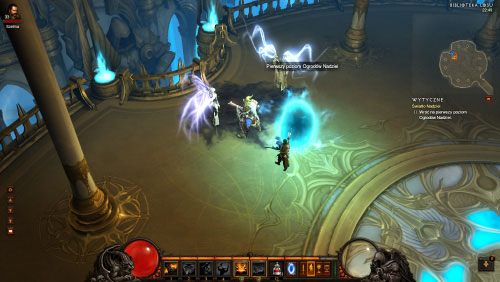
The archangel's will open a portal, allowing you to return to the Gardens of Hope 1st Tier.
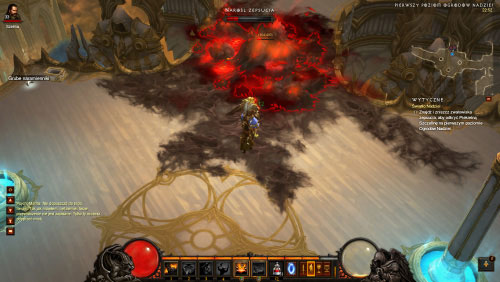
You may begin destroying the Corrupt Growths. Each growth has a small number of energy points, however once it's destroyed you'll have to defeat a small group of Bile Crawlers.
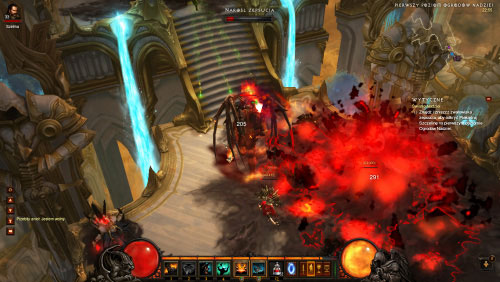
Explore the entire first gear, destroying all Corrupt Growths you encounter. Expect more demons to try and interrupt that process.
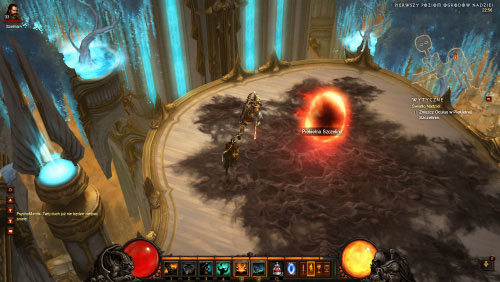
Destroying one of the Corrupt Growths will result in a portal appearing instead of it. Use it to travel to the Hell Rift.
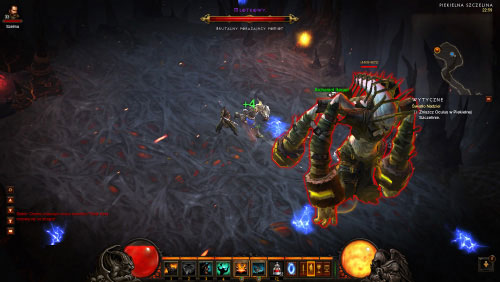
We're back in hell again. This isn't a large location, however it's heavily occupied by various types of demons. Warping Horrors are a stronger versions of demons you've encountered during your previous trip to hell. Mounted Armaddons have a lot of life points and they can turn into Subjugators. Occulus will be waiting for you at the end of this location and expect that the boss will be heavily defended.
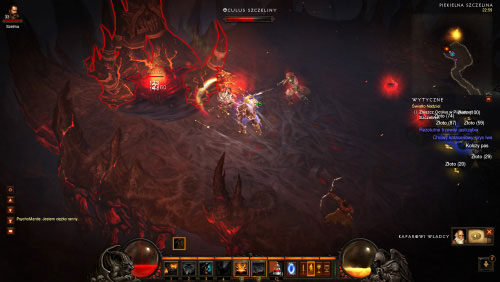
Once you've defeated all the monsters destroy a Rift Occulus. Auriel will arrive here to give you the details of your next assignment.
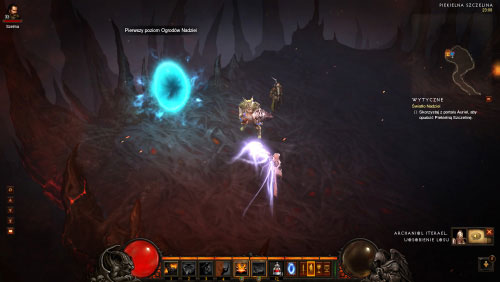
Notice that Auriel has opened a portal for you. Step through the portal to return to Gardens of Hope 1st Tier.
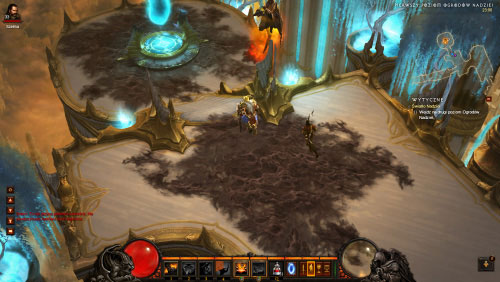
Use your personal map to find a rather distinctive area with yet another portal. Use this portal to be transported to Gardens of Hope 2ndt Tier.
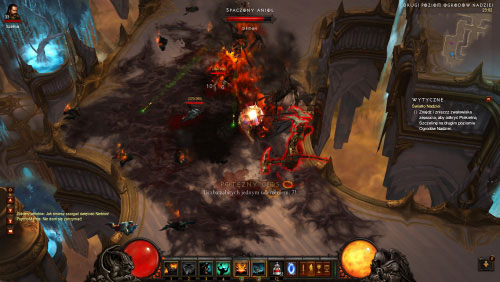
There are several new Corrupt Growths here for you to destroy, however you'll also be dealing with lots of demons on this tier. Some of them are: Oppressors, Corrupted Angels (they like to charge at the main character), Spine Lashers, Darksky Fire Demons and Morlu Invaders. Just as before, you can count on the angels to assist you in some of the battles. You should also be on a look out for a new waypoint.
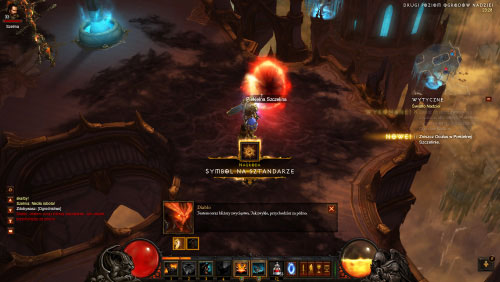
Start destroying the Corrupt Growths and continue this process until one of the growths reveals a portal leading to the Hell Rift.
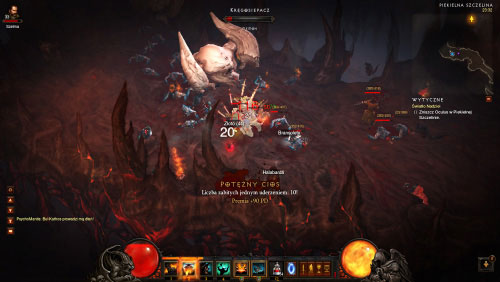
Start exploring the hell again. This visit is similar to the previous one, so you'll be exploring a rather small location and you'll be fighting with the creatures you already know.
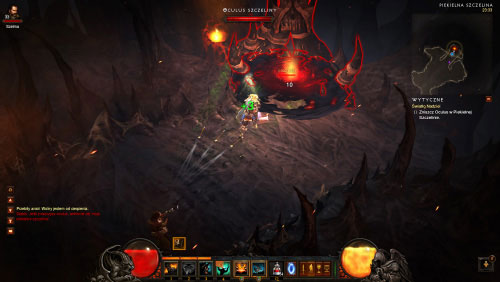
Keep pushing forward until you've located a boss of this location. Kill the creature and then destroy the second Rift Occulus.
Just as before, Auriel will arrive here as soon as you've destroyed the Rift Occulus. She'll tell you what to do next and she'll also open a portal which you must use.
Notice that you've returned to the Gardens of Hope 2nd Tier and your main objective is to locate another portal.
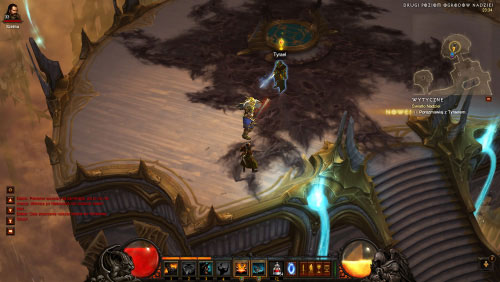
Once you've located the portal mentioned in this quest objective you should encounter Tyrael. Talk to him and notice that he's joined your team.
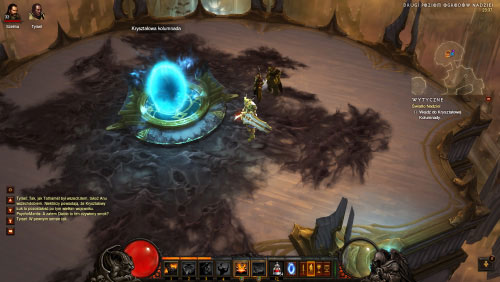
Use the portal which will open next to Tyrael. Doing that will allow you to end this quest.
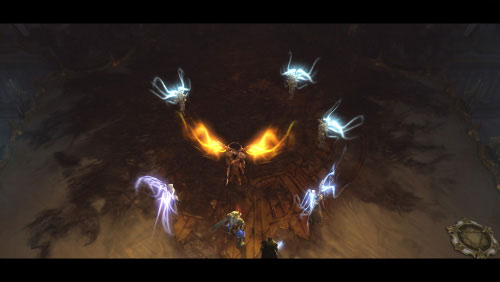
This quest begins automatically after entering the Crystal Colonnade. Head forward and you'll be rewarded with a cut-scene showing Imperius's warning. Auriel and Itherael will soon show up.
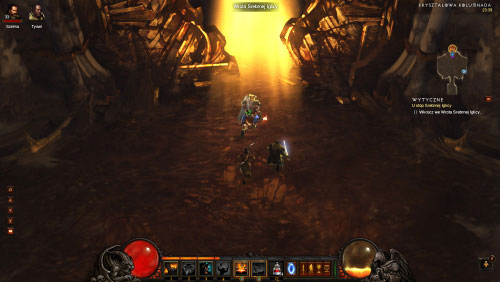
Choose a passageway located at the end of this location. Diablo will leave a surprise for you here, but you're not in any danger. Choose the Gateway to the Silver Spire to officially end this third quest.
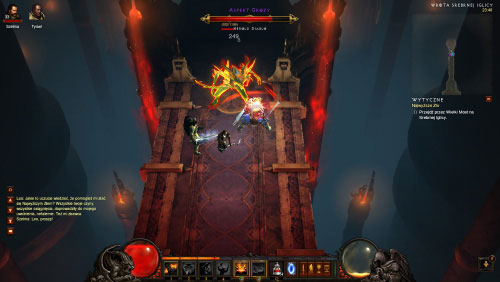
This final quest of the game will begin as soon as you've entered the Gateway to the Silver Spire. Head forward to meet an illusion of one of the characters that died during your journey. Talk to that person. The conversation will soon be interrupted, because the illusion will transform into one of Diablo's servants.
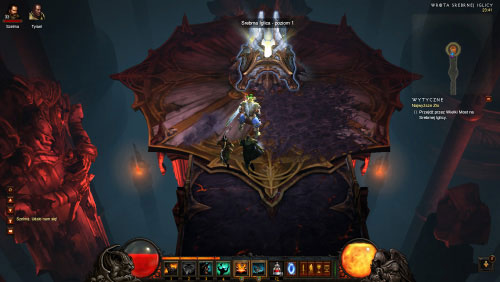
Once you've defeated the monster head forward. The location you're exploring isn't that being and at the end of the bridge you'll locate a portal which will transport you to The Silver Spire Level 1.
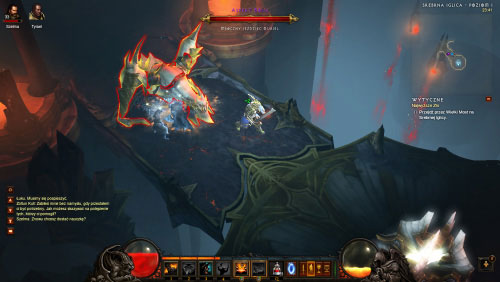
As soon as you've used the portal you'll come across another illusion of a dead character. Initiate a conversation and be ready to defeat a demon that is one of Diablo's servants.
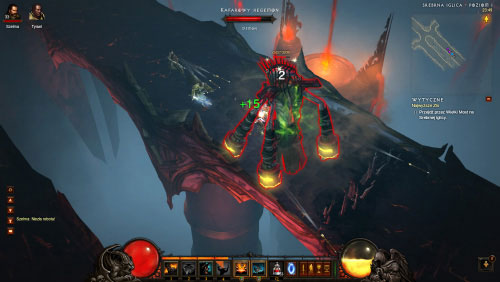
This location is much bigger than the one you've explored at the beginning of the quest. Watch out for rifts, because flames will be coming out of them and you may receive fire damage. As for the monsters, you'll be dealing with the demons you're already familiar with, but also with several new types of creatures. Terror Demons inflict serious damage and they have a lot of health points. Morlu Incinerators can create circles of fire on the ground that deal serious damage and they can also move fast. Shade Stalkers will be frequent targets of your attacks, as well as Hell Witches and Gloom Wraiths.
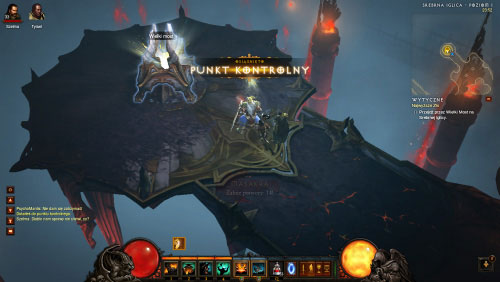
Continue exploring The Silver Spire Level 1 until you locate a portal that can transport you to The Great Span.
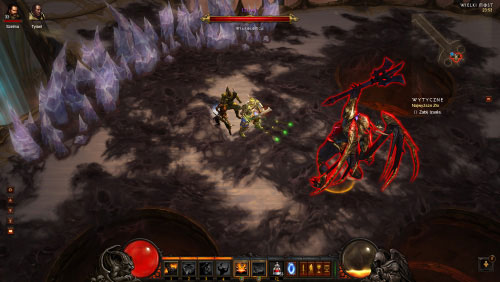
Cross the bridge and get ready for another one of Diablo's surprises. This time you'll be forced to fight a fallen angel named Izual (you've already met him in Diablo II). The boss doesn't have a lot of health points, however he's surrounded by smaller demons. The biggest threat is his freeze attack that can immobilize you completely even for a few seconds. Watch out for white crystals seen in the air, because they explode after a while and they can also freeze you if you were inside the radius of the blast. Another one of Izual's attacks is to fire ice projectiles in all directions. They won't stop you, but they can slow you down. The fallen angel is very fast and you should know that the arena where you're fighting doesn't give a lot of places where you can escape.
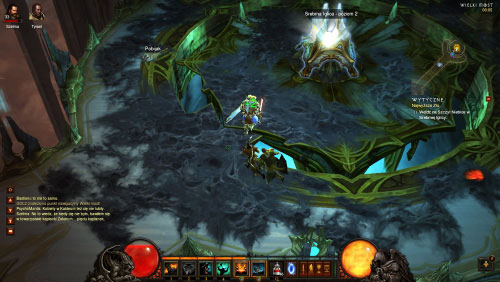
Once you've defeated Izual use the second part of the bridge, eliminating smaller demons along the way. Locate a new waypoint and then approach a portal which will transport you to The Silver Spire Level 2.
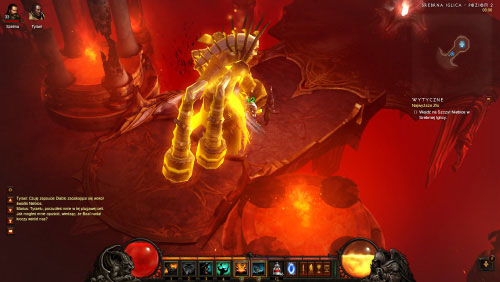
Get ready to encounter one more illusion after exiting the portal. The deal here is similar to previous encounters so expect to be attacked by a servant of Diablo.
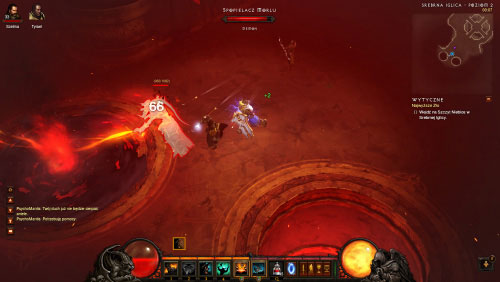
Once you've defeated the demon start exploring this large location. You'll be encountering the monsters you already know. Don't forget to kill Morlu Incinerators as soon as you can, because they can summon more creatures.
Your current objective is to find the last portal which can transport you to the Pinnacle of Heaven. You'll soon start the final battle, so wait for your skills to recharge and resupply before using the portal.
Enter the Pinnacle of Heaven. Imperius will try to interrupt in your journey, but because of Diablo him and all other angels will lose their powers. Talk to Tyrael who should be standing next to you.
Head forward and use the portal located at the end of the corridor.
Begin exploring the Crystal Arch. Diablo will soon imprison your companion and it means that you'll have to take part in the final battle alone. Head forward and use the stairs to reach the arena.
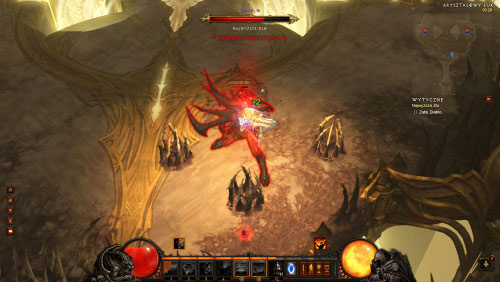
The first phase of the final battle will take place in the Crystal Arch. This is a large location and therefore you'll have plenty of room to move around. Notice two healing shrines and remember to use them wisely. The most important thing about this battle is that you should keep moving. Diablo will be deploying traps similar to the one that has stopped your ally. You can't destroy them and if you get caught Diablo will grab you and will heavily injure you by throwing you to the ground. Thankfully you can find out where the next trap will be deployed, because the ground will become darker in that place. This should give you enough time to move away.
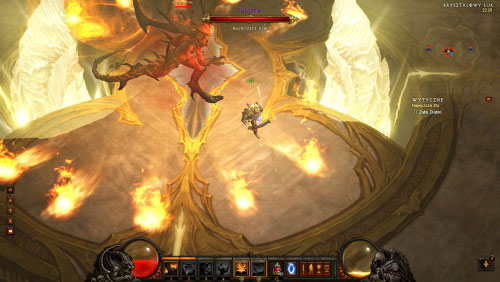
Diablo can teleport himself across the battlefield, so don't be surprised if he suddenly appears next to your character. The boss uses his claws in melee combat and he also likes to throw fireballs in all directions (you should know this attack from Diablo II).
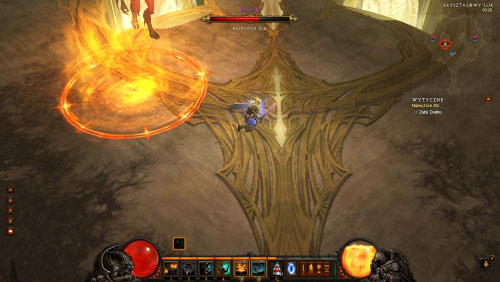
Diablo can also cast a single fireball and that fireball creates a fire circle on the ground after the explosion. Stay away from the circle, because otherwise you'll catch on fire and most likely lose a lot of health points. Thankfully the fire circles don't work as traps, so you can escape without problems. Diablo's last attack is to burden you with a destruction curse and it inflict additional damage for a few seconds.
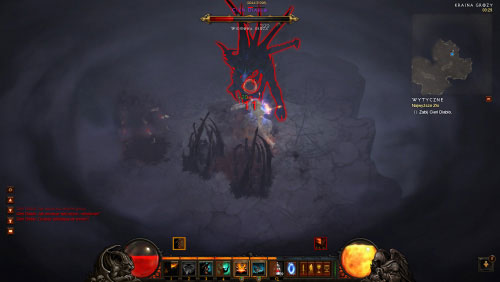
Once you've sufficiently injured Diablo (he should have a little more than half of his life bar left) you'll advance to phase two of the battle. This phase takes place in the Realm or Terror and your job is to kill the Shadow of Diablo. The shadow uses the same tricks as the main boss from phase one.
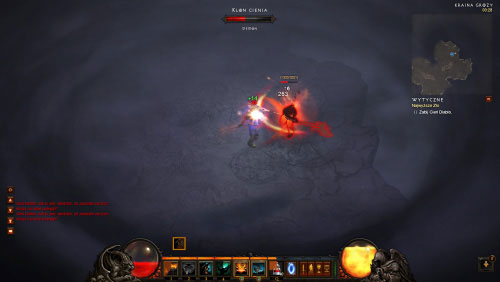
The Shadow of Diablo shouldn't be your only concern, because once in a while you may also be forced to with a Terror Phantasm. The location where you're fighting may also cause problems, because you'll be dealing with low visibility. Be prepared to repel any kinds of attacks and continue fighting until you've killed the Shadow of Diablo.
Once you've killed the Shadow of Diablo you'll return to the Crystal Arch and the last third phase of the battle will begin. Diablo will have the same health bar as he did at the end of phase one. He'll also be using the same tricks - traps, circles of fire, curses, shooting fireballs in all directions etc. There's only one new attack he'll start using and you probably remember it from Diablo II, because it's about sending a powerful ray. If you get caught by the ray you'll receive an enormous damage and therefore you can die really quick.
It's not unusual that this final battle will be long and will require you to stay focused, but thanks to that killing Diablo should provide some satisfaction.
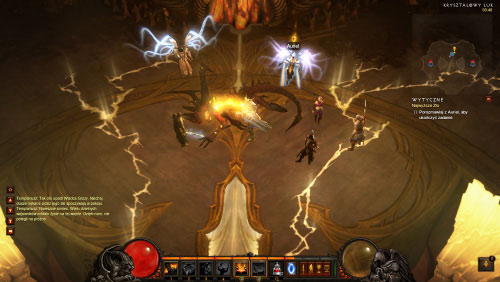
After you've killed Diablo in the Crystal Arch a lot of characters will appear here - Auriel, Itherael, Tyrael and your three companions. Talk to Auriel and watch the epilogue. Congratulations on ending the game and don't forget to repeat the campaign on higher difficulty levels.
this is the first difficulty level available for each of the newly-created character. It allows you to learn about the game world gradually and to acquaint yourself with the skills of your character. Since the opponents should not pose too much threat to you, for the majority of the game, you can experiment here a bit, both while choosing skills and the available equipment. The only attribute to pay attention to while choosing equipment is Damage Per Second - the higher, the better. In case some monsters are starting to become too difficult to deal with, invest in equipment that will raise your Core Attribute and Vitality. With a properly selected set even the boss battle should be a walk in the park. It needs to be pointed out here that at the normal level, you can now encounterChampion and Elite opponents, who drop valuable items, but they are difficult to defeat.
The hard difficulty level is the second of the available four. This mode is available immediately after you start the game, together with the Normal difficulty level. The first thing to notice is that the enemies are more resistant to our attacks and at the same time can deal us a bit more damage. The second important change is an additional skill (modifier) which from now on is added to Rare Monsters (yellow names) and Champions (blue names). Luckily, our character is not left behind: it's on Hard that we'll unlock the better part of our most powerful skills. The sole gameplay shouldn't be too different from what we've been doing so far: testing new skills (try to use each one of them at least once so as to know what will be available for a future use) and collecting more powerful equipment according to the same rules.
Also this level is available immediately after you start the game. Mobsters there generate even more gold and provided more experience but, of course, they are more difficult to defeat. This level is recommended for the players that already have more health and rare items. It's high time to review all acquired skills and bet on those with highest effectiveness instead of attractiveness. The first thing to do, however, is to decide upon defensive skills, such as Diamond Skin for Wizards or Smoke Screen for Demon Hunters. Although we'll be using them only sporadically during more challenging battles with stronger packs of Champions, it's best to slip into the habit of pressing the button responsible for defensive skills rather sooner than later.
The other skill category to look into and make a more frequent use of is the so called Crowd Control (CC). It includes every skill than can either stun, freeze, force to flee or slow down the enemy. They give us time to fall back, drink a healing potion or move to a better position. Remember that a frozen enemy is an enemy which cannot deal us any damage - this way we can save up our defensive skills or gain a few precious seconds before they cool down. Combining these two skill types should provide us with a sufficient defense up to the completion of Expert. It's also good to remember about an option called Elective Mode (ESC ( Options ( Gameplay): enable it to be able to bind any skill to hotkeys (1-4) and both mouse buttons. To do it, press the right mouse button on the skill bar, and then select the category and the skill you want. This will allow us to use two or even three defensive skills at once or bind Meteor to the left mouse button. All according to our will.
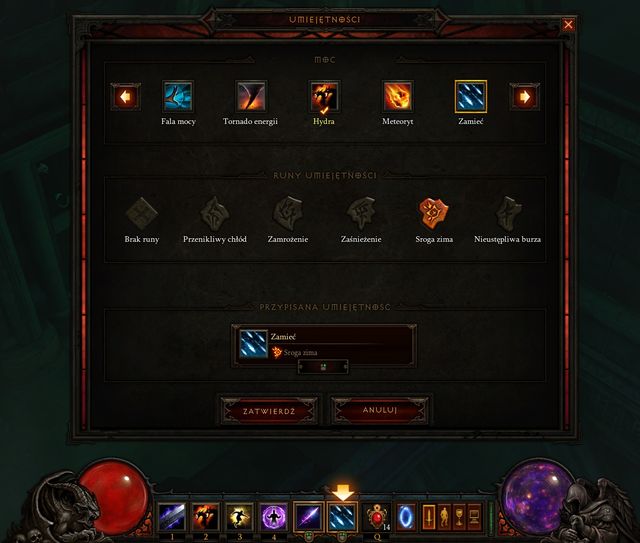
The Elective Mode enables the use of two spells from the Force category at once, with one of them bound to the right mouse button.
The last thing to polish up is equipment. It's imperative to obtain items that increase the Core Attribute or Vitality, preferably both of them at once. Now, it is easier than before, because the game determines the items based on your statistics. While choosing the weapon, you need to be guided by the highest damage possible and, right after that, presence of the basic factor.
The Master mode becomes available only after you have completed the fourth act at any, lower, difficulty level. You will not have too much time for experimenting with new skills here, unlike at the previous levels, because you need to rely on the mobility of your character, during combat. Even if your character is very tough, it is a good idea to dodge from some of the blows, because they may leave you surprised, after it costs you a half of your health bar. This difficulty level has been designed for fighting in groups and when you have several legendary items on you, for the sixtieth experience level. Although you explore the area in a group of four, the monsters are stronger. Still, it is easier to kill them, than when you are alone (even if you have several legendary items on you). Additionally, the presence of the other characters in your party provides you with bonuses, thanks to which you are more likely to obtain magical items. The more people around you, the better for you.
The most interesting difficulty level is, definitely, Torment that is additionally divided into six difficulty sub-levels. each higher level provides you with more gold, magical items and experience points. You need to be careful, however, with determining the difficulty level on the scale, because each slide considerably raises the strength of the opponents. It needs to be pointed out here, that there is no point in choosing Torment I without high damage per second and health factors. Of course, the latter can be shared with the armor and you can add more armor, at the cost of health and still do well.
The first thing to do if we want to complete Inferno is to change our approach to fighting altogether. From now on there is no place for heroic charges in the middle of several dozen enemies, since most of them will end in a quick death. Instead, we'll be using a technique know from many MMORPGs called Kiting (from kite), which is all about attacking and running away from the enemy in turns. The technique differs depending on whether we're playing a melee or a ranged character. In the case of Wizards, Demon Hunters and Witch Doctors, start off by attacking the nearest opponent - he'll start running towards you. The whole difficulty lies in dealing damage and keeping the monsters at a safe distance at the same time. To be able to do this, use Crowd Control abilities to slow the foe down (the Wizard's Blizzard or Demon Hunter's Caltrops work magic here) and give you enough time to land a few strikes. If the monsters get too close, increase the distance by, for example, freezing them or pulling back, or use defensive skills such as Teleport, Smoke Screen or Spirit Walk (the enemies will stop chasing after us while we will be pulling back from them). This way our character gets a "tail" of enemies, hence the name Kiting - from the tail of a kite. With some practice, this technique will allow us to eliminate whole packs of Champions without receiving a single hit.
The situation changes if our character is a Barbarian or a Monk. Since they lack the skills that allow them to attack from a distance, we need to force the enemies to attack us by approaching them. When the monsters start chasing after us, use Crowd Control abilities as the very beginning, hit them a couple of times, then pull back and wait for all abilities to cool down. Repeat the whole cycle until our character is able to take on the rest of the enemies in close combat. As we level up and acquire more powerful equipment, this technique will be needed less and less, and our Monk or Barbarian will be able to fight just like during the good old times on Nightmare or Hell. Nevertheless, keep it in mind while fighting Champions and other players, because more often than not we'll have to use Crowd Control abilities to shield ourselves from their attacks.
In multiplayer, our role depends on the character we're playing. Ranged characters should stay away from enemies and use Crowd Control to deal damage only in self-defense or to save other players from certain death. The job of melee characters is to draw monsters away from Wizards, Demon Hunters and Witch Doctors, so that they can focus on eliminating enemies rather than running away and kiting. An important thing here are the modifiers that determine healing in combat. If you are playing as a close-range character, your healing factor should be high enough to sustain low or no losses of health, while fighting hordes of opponents. However, if you cannot make it in this way, you can always retreat quickly and replenish health with red orbs or potions. As soon as you learn how to fight at the Torment, it is a good idea to focus on your equipment.
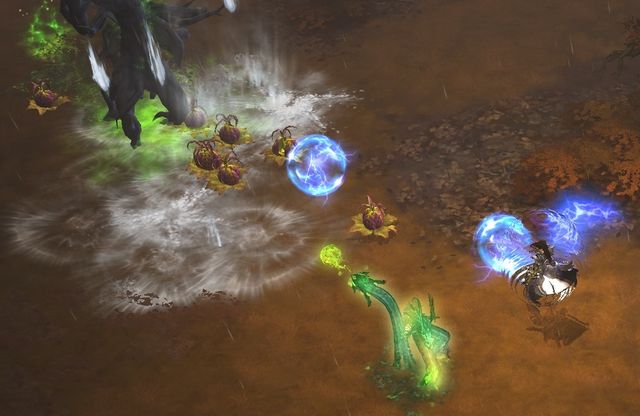
Kiting as done by a Wizard. In use: Hydra, Blizzard and Shock Pulse (piercing orb).
Unlike the lower levels, this time we'll be paying attention to a different set of values, depending on whether we're playing a ranged or a melee class. Wizards, Demon Hunters and Witch Doctors should most importantly invest in Damage Per Second on weapons, Core Attribute (Intelligence or Dexterity), Increased Attack Speed (rings, amulets and gauntlets) and Vitality. Apart from that, consider gear which increases Critical Hit Chance and Critical Hit Damage. It's particularly important for Demon Hunters if you want to get everything there is out of the Sharpshooter passive skill. Playing a ranged class is all about one thing: dealing as much damage in the shortest time possible - a dead opponent is no threat to us.
In case of melee classes, the shopping list is a little bit different since the most important thing for them is resistance and the ability to fight for as long as possible. For starters: leave two-handed weapons and dual wielding weapons in peace. Shield is everything. A good piece with a few bonuses and an increased Chance to Block (Block %) will ensure our continued survival on Inferno. The weapon should still have the highest possible Damage Per Second rate, but it's better if it also modifies our Core Attribute or Vitality. In some cases melee characters also invest in Health Points on Hit and Attack Speed %, which restore health points with each landed hit. Another stat to invest in is All Resistance - have each armor piece give you several dozen points. The combination of Vitality, armor, resistances and bonuses from the Core Attribute (dodge for Monks and armor for Barbarians) will allow us to stay in the fight without the need to retreat.
Another way of acquiring better gear is to use equipment which increases Magic Find. Rings, amulets, pieces of armor, even a gem: Topaz - all of them should give you at least a couple of bonus points. When our character becomes strong enough to face Champions and Rare Monsters without effort, it pays off to equip some of these items. Keep in mind, though, that current bonuses to finding rare items don't work on Resplendent Chests. It needs to be pointed out that there appeared the Infernal Machines at the Torment level (to learn more, see the chapter entitled "Infernal Machines")
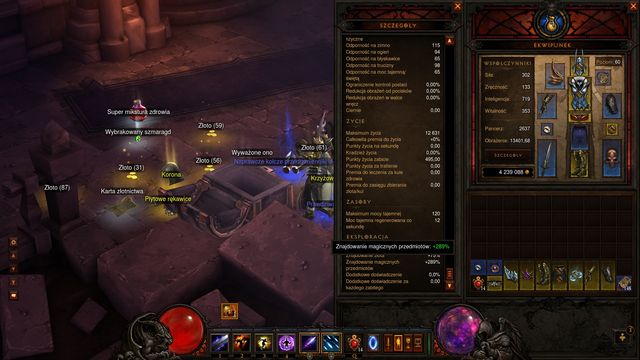 +289% bonus to Magic Find and five Nephalem Valor points.
While exploring the world of Sanctuary, we will meet artisans ready to assist us with their skills. After completing a quest in Act 1, we'll gain access to the Blacksmith, while the middle of the Act 2 introduces us to the Jeweler. In both cases the artisans start off on level 1, but if we invest some money in their line or work and find appropriate Pages of Training, they will quickly level up and extend their services.
Pages of Training are dropped by monsters on higher difficulty levels.
Learning how to build our artisans' skills is one thing, but it's another to learn how we can use them on the higher difficulty levels. Throughout the whole gameplay we'll be obtaining all kinds of gems, which - upon placing in sockets present in some items - will increase their powers.The Jeweler will allow us to combine lower lever gems with higher level gems, thus acquiring better bonuses. Hence, if we have unnecessary gem stones in the inventory it's better to upgrade them at once, and then place in armor or weapon sockets. But what to do if we want to get rid of equipment? This is when the Jeweler's other skill comes into play - unsocketing of items.For a small fee we can remove a gem from one item and put it in another one. Thanks to that we can obtain various Attribute bonuses and increase Magic Find(Topazin helmet), Critical Hits (Emeraldin weapon), or even the amount of health points (Amethyst
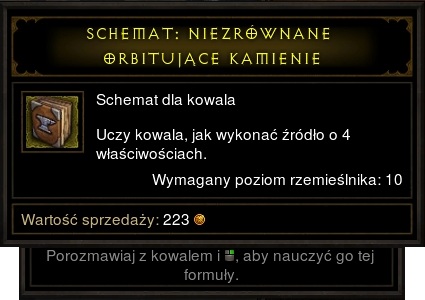
The other artisan whose skills we will be using throughout the whole game is the Blacksmith. The Blacksmith's basic ability is the salvaging of items - it allows us to break down a magic, rare or legendary item and obtain special materials from it. The kind of the item that you receive depends on its type. We can then use those materials to create new magic items: and it's best to use the best weapon or a piece of armor available at the present moment, because the higher the level of the item, the better the chance of acquiring the strongest properties
After you reach the tenth experience level, you will be allowed to craft exalted items at the smithy. These are the best weapons and armors that can be crafted in the game, as long as you have schematics for them.
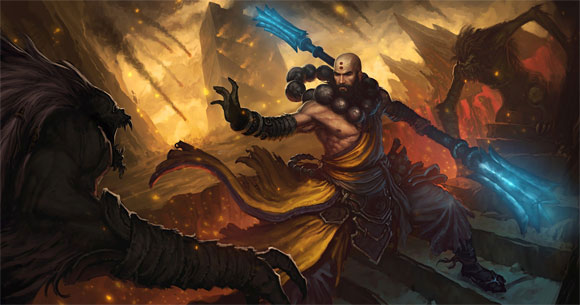
Forget about Barbarian's might, about the creatures summoned by a Witch Doctor, about Demon Hunter's traps & dodges and about Wizard's powerful distance spells. Monk is all about quick melee combat, high stamina while fighting the demon hordes and about being able to use plenty of defensive skills.
Monk in Diablo III is very different from a monk which you may already know from the Hellfire expansion to Diablo I. To use the words of a devoted fan of the "second game", he is a combination of an Assassin and a Paladin. On one hand he has quick and effective attacks which can be combined to create combos and on the other and he has a lot of skills which allow him to regenerate health and to actively support the rest of the team. Depending on the skill choice a monk can become a tank, trying to absorb the strength of all enemy attacks, or he can become an assassin, focusing on inflicting damage and then quickly running away.
You should consider playing as a monk mostly because of the incredible speed of his attacks and also because of the effectiveness of his skills. Choosing this character class means on the other hand that you can't use two-handed weapons (the only exception are the Daibo sticks) and all gear that allows to attack from the distance (the same thing applies skills which would allow something like that). If you don't see this is a problem, then you'll receive a character that can perform fast attacks with wrist weapons, creating an impenetrable area of death and destruction.
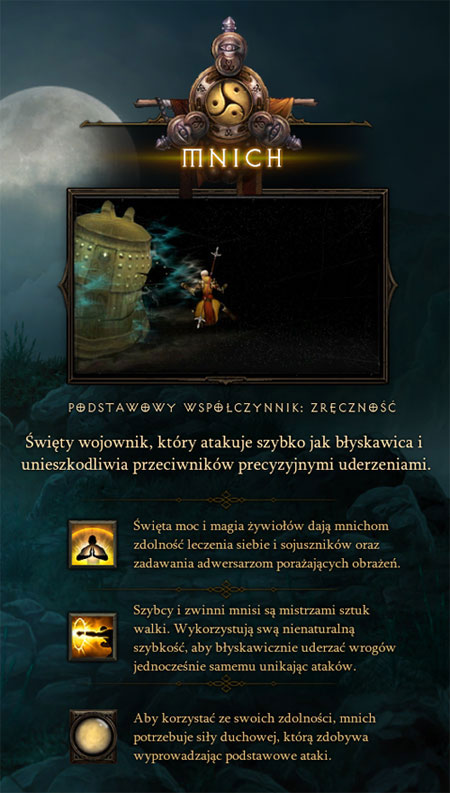
Monk's primary attribute is his Dexterity, because it allows him to inflict deadly blows. Performing attacks is possible thanks to force of spirit that can be generated by using one of four available skills. Monk is different than a Barbarian in this aspect, because once you've fully or partially loaded the spirit bar (150 points) you won't lose any energy and this will allow you to have a little room to breathe and to plan your next attacks.
Monk can use only melee weapons. The weapons designed specifically for him are the Daibo sticks, which are slow but often offer bonuses to spirit regeneration, and small and extremely fast wrist objects (mostly different versions of knuckle-dusters and claws). As for the armor, monk's unique type of gear are spirit stones which offer protection to his head, as well as increase the rate of energy regeneration and damage inflicted by some of the monk's skills.
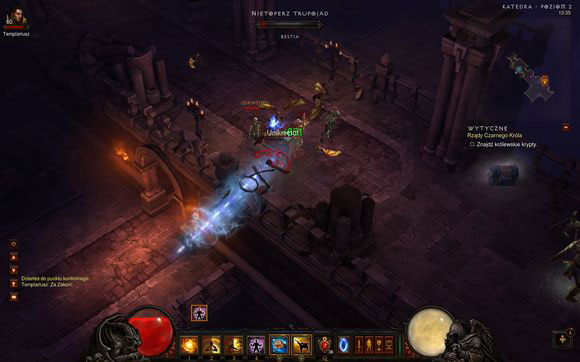
To summarize, a Monk should be your top choice if you like a character that displays a lot of finesse in battles, likes to constantly fight in close combat, wants to support the rest of the team during the dangerous journeys and can quickly regenerate health without resorting to health orbs and healing potions.
I've spent about 80 hours so far playing as a monk. I've started playing this character class during the days of beta of Diablo III and my initial goal was to turn him into a "quick barbarian". Investing only in Dexterity which allows to increase 'damage per second' value is however a good idea only until Act IV of the Normal difficulty setting. After I you've begun playing the campaign on the Expert difficulty setting I had to rethink my first strategy. Ultimately I've started searching for a more balanced character, increasing the strength of the attacks based on the amount of the force of spirit and also not forgetting about the equally important defensive and regenerating skills.
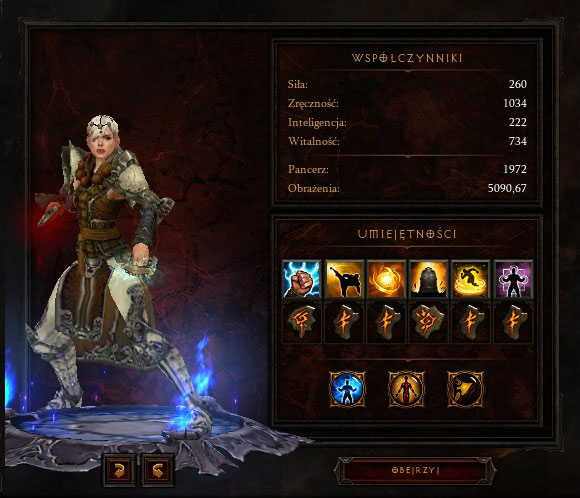
Below is an example of a build I've used to advance to 60th level of experience, along with a list of the most important skills and runes. This build isn't the only way of developing a successful monk - there are millions of possible combinations for each character class in Diablo III and dwelling on them and explaining them would require a person with more knowledge and better memory than Deckard Cain himself. Feel free to add your favorite builds in the comments to this section of the guide.
What is my Monk build based on? Mostly on high health regeneration and on high stamina. I don't focus on trying to kill every character I meet with only one hit, but to assure that my Monk will survive in the worst possible conditions, using his speed and his defensive and offensive skills to my advantage. . When it comes to collecting items, I always tried to keep the ones that enhance Vitality and dexterity to the maximum level, while granting bonuses to Health Orbs, health regeneration or health steal with each hit. I've been using mostly wrist weapons while playing the game. It's crucial to choose weapons which offer very fast attacks and it's also more than welcome if they provide bonuses to Monk's life bar with each attack he performs. It's also recommended to use weapons which can be upgraded even further thanks to amethysts and rubies.
Check the list of active and passive skills seen below to learn which skills I recommend using. It's worth adding that this build acknowledges the changes made in the game's balance that were introduced on May 22, 2012. Aside from the name of each skill I also say which rune should be used and on which experience level it becomes unlocked.

Fists of Thunder + Quickening (42)
This is the Monk's starting skill and it's also among the best three attacks this character class has to offer. The attack itself deals lightning damage and if you add the suggested rune you'll also ensure that your spirit energy will generate very quickly. This is a very important skill if you want to use Wave of Light and Mantra of Healing more often, because they require a lot of spirit energy.

Lashing Tail Kick + Vulture Claw Kick (7)
This skill is very useful throughout the entire game. It inflicts serious damage and it also knocks back enemy units. Combining it with the Vulture Claw Kick rune will allow you to perform even more deadly fire blows. Once you've advanced in the game you might want to suggest start using the Hand of Ytar rune (52), because it's very effective against fast enemies with unpleasant attacks, like for example with bees from Act II.

Serenity + Peaceful Repose (23)
This skill allows to surround the Monk with an invisible shield that lasts three seconds. It's extremely useful while fighting very strong enemies and groups of champions. It's good to use this skill in combination with Mantra of Healing or Breath of Heaven. As for the runes, this skill is a good match basically with any of the runes you can choose from, however I've chosen Peaceful Repose, because it works as an additional source of health regeneration. After advancing to higher experience levels you may want to take interest in Instant Karma rune (54) instead and each time you want to you use it you should leave the battlefield to gain a few extra seconds for regeneration. As for the early parts of the game, you may also try using a different combination: Blinding Flash + Self Reflection (12).

Sweeping Wind + Blade Storm (33)
I have to admit I underestimated this skill for a very long time and when I've finally discovered its usefulness it became one of the key elements of my build. The skill is especially useful when you're surrounded by a large group of monsters, however you may also use it on other occasions, assuming you have enough spirit power. Being able to damage all opponents standing around the Monk is more than enough to recommend this skill over Crippling Wave. If you like to play dynamically you won't need the first rune, because the skill will be charged almost every time. At first I was using the Fire Storm rune (38), but ultimately I've changed my mind and decided on the Blade Storm rune. The reason for that is simple - being able to affect a larger area isn't as important as being able to inflict more damage.

Wave of Light + Explosive Light (25)
I've started using this skill as soon as I've unlocked the rune mentioned above. The skill is very helpful when you want to escape from the battlefield after being surrounded or simply if you want to inflict serious damage to enemy units. I don't like other runes than the recommended one, because they strike in a straight line and therefore can make hitting faster targets difficult. You may on the other hand consider using a different combination from time to time, like for example Seven-Sided Strike + Sudden Assault (23) or Fulminating Onslaught (60). They could come in handy while fighting small groups of stronger opponents (when there's more of them the damage is being divided into many monsters, making the skill much less effective). At the beginning of the game you may also consider combining Wave of Light with Cyclone Strike - you can pull the monsters towards you and then push them back (and most likely kill them) with Explosive Light (or with Lashing Tail Kick + Vulture Claw Kick).

Mantra of Healing + Sustenance (31)
The application is simple - with the drop of the health points by half, you need to activate mantra to regenerate your health in combat. Repeat every 4 seconds. It is also useful in team, because its effects embrace allies also - my companions thanked me many times, for using it, whenever we were surrounded by a swarm of enemies. At the beginning stages of the game, the Mantra of Healing can well be supplanted with Breath of Heaven + Circle of Scorn(14) or the Circle of Life (21).

Transcendence (16)
This is the most important one of all Monk's passive skills. It saved my life more than once after my health dropped to a dangerously low level. You can also count on this skill healing you outside of combat. You just have to activate an active skill which spends spirit power in order to regain a certain number or health points in exchange for energy points.

One With Everything (45)
This is a useful skill on the higher difficulty levels, because that's when you'll be receiving more elemental and magic damage from the monsters. This skill allows to invest in items which increase only one type of resistance. Aside from this skill I also like to use Seize the Initiative (20) and Pacifism (30) and it all depends on the types of monster I encounter.

Resolve (10)
Decreases damage that you take, which increases the chances of survival in tougher battles. Outside of battles, it is a good idea to use it interchangeably with the Epiphany (20), which allows you to regenrate the pool of Spirit.
An additional advantage of the build described above is that most skills can be obtained on the same level. To be more exact, you should be able to unlock them somewhere around level 25 and you should be near the end of Act II by then.
While playing on the Normal difficulty setting it's best to focus on inflicting as much damage as possible. Combining Cyclone Strike with Wave of Light is best when running in between larger groups of monsters and eliminating them quickly or knocking them back if things start turning for worse. Blinding Flash/Serenity and Breath of Heaven/Mantra of Healing offer good protection when going against bosses and champions. I also encourage you to use the Normal setting to test all other skills and runes in case you may find something else you like.
Once you've advanced to the Expert difficult setting you should start investing in Vitality and in additional bonuses which increase health regeneration and the overall speed of your attacks. Those are crucial aspects in creating a good build and also to distinguish yourself from the Barbarians that only think about increasing strength and dealing massive damage.
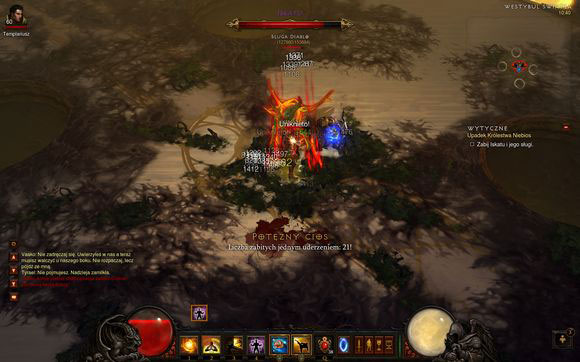
When I was forming my build on the higher difficulty levels it became crucial to pay attention to how long each of the skills lasts and to choose and use them wisely. For example, it's not a good idea to use Mantra of Healing and Serenity + Peaceful Repose one after the other (unless it got really dangerous). It's best to keep activating the skills so that the recharge of Serenity is available at the same time when you have enough spirit power. The same deal applies to other combinations.
I absolutely recommend against using the Cyclone Strike, unless your character is strong enough, for you to complete the game with one hand on the keyboard and clicking casually. To attract strong enemies that deal high DPS may be reckless, unless you like playing with the Wave of Light + Explosion of Light to push them away.
Since the moment I've advanced to level 60 I started to avoid very large groups of monsters. It doesn't mean that I don't like getting surrounded by a bunch of demons. On the contrary, this is when this build works best, allowing me to inflict major damage to all opponents and to maintain a high number of life points at the same time. When it gets messy I wait for the Serenity to kick in and then I use the Wave of Light. This combination gives me a few seconds of freedom which I can use to move away from the enemy units or to the target the weakest beings in order to quickly eliminate them. Encounters with champions are an entirely different thing - in this case it's much better to move away from the battlefield once in a while. Sadly retreating also means that the value of the spirit power will drop down to zero.

When playing as a team it's crucial to remain close to each other. If you have the option to communicate with other gamers via a headset, then I recommend introducing the Inner Sanctuary to the build. Assuming you've coordinated your actions properly, you can gain a few additional seconds during which players using classes that attack from the distance won't lose any health points and will be allowed to deal with the surrounding monsters. The key to success however is to keep Monk close to them.
In the cooperative modes it's extremely important to have at least one mantra in the build. Mantras add bonuses to your allies and the only exception is one of the runes of the Mantra of Conviction. The most important and practical mantra in my opinion is the Mantra of Healing, however if you're accompanied by another Monk, then you may choose a different mantra to offer a larger variety of bonuses to your team.
Releasing a series of very fast attacks which deal lightning damage. Every third hit you perform adds damage to all enemy units standing in front of the Monk and it also knocks them back a little. Since this is a fast attack it's also the one which generates spirit power the quickest.

Required level: 1.
Resources: Generates spirit power points.
Runes for the Fists of Thunder skill:

Thunderclap - The main character can teleport to his opponent and release electric shockwaves which injure all monsters standing nearby, dealing lightning damage.
Required level: 6.

Lightning Flash - Increased chances of dodging enemy hits that last for a short period of time.
Required level: 14.

Static Charge - Your target becomes charged with electricity for a few seconds. He will then receive lightning damage each time you attack other opponents with the Fists of Thunder skill.
Required level: 30.

Quickening - Critical hits generate additional points of spirit power.
Required level: 42.

Bounding Light - Every third hit you perform releases chain lightning instead of knocking back enemies a little. The chain inflicts lightning damage.
Required level: 52.
Creating a ray of pure force that works on a short distance and deals additional damage. Every third hit you perform has an increased radius.

Required level: 3.
Resources: Generates spirit power points.
Runes for the Deadly Reach skill:

Piercing Trident - Increased range of the second and third hit.
Required level: 9.

Keen Eye - Every third hit you perform improves the main character's armor for a few seconds.
Required level: 18.

Scattered Blows - Every third hit you perform is replaced by an attack that can harm several targets at once and that also deals lightning damage.
Required level: 34.

Strike from Beyond - Critical hits generate additional points of spirit power.
Required level: 47.

Foresight - Every third hit you perform increases the damage from all types of attacks.
Required level: 54.
Performing a series of sweeping attacks that inflict additional damage to all enemy units standing in front of the main character. Every third hit you perform dazes enemies stationed around the Monk, decreasing their speed and attacks for a few seconds.

Required level: 11.
Resources: Generates spirit power points.
Runes for the Crippling Wave skill:

Mangle - Increased damage inflicted by the Crippling Wave.
Required level: 17.

Concussion - Lowering for a few seconds damage inflicted by enemy units hit with the Crippling Wave.
Required level: 26.

Rising Tide - Critical hits generate additional points of spirit power.
Required level: 36.

Tsunami - Increased range of the third hut and a stronger version of the effect that slows down enemy units.
Required level: 51.
Breaking Wave - Enemies hit with the Breaking Wave become more susceptible to all types of attacks for a few seconds.
Required level: 57.
Releasing a series of fast punches which inflict additional damage.

Required level: 15.
Resources: Generates spirit power points.
Runes for the Way of the Hundred Fists skill:

Hands of Lightning - Increased number of hits during the second strike.
Required level: 24.
Blazing Fists - Critical hits increase the speed of the attacks and character's movement speed for a few seconds. The effect can accumulate several times.
Required level: 32.

Fists of Fury - Inflicting for a few seconds additional holy damage to all targets afflicted by the main skill. There's also a possibility of performing a short dash while trying to reach the opponent to perform the first strike.
Required level: 40.

Spirited Salvo - Every activation of the skill grants a chance of generating additional spirit power points.
Required level: 48.

Windforce Flurry - Every third hit you perform creates a wave of wind that inflicts additional physical damage to all enemy units standing in front of the main character.
Required level: 60.
Performing a tail kick that inflicts additional damage and knocks back enemies.

Required level: 2.
Resources: Requires spirit power points.
Runes for the Lashing Tail Kick skill:

Vulture Claw Kick - Creating a storm of fire that knocks back enemy units and inflicts additional fire damage.
Required level: 7.

Sweeping Armada - Increased range of the knockback and improved effect of slowing down movement of the attacked enemies.
Required level: 15.

Spinning Flame Kick - The Monk deploys a column of fire that burns opponents and inflicts additional fire damage.
Required level: 28.
Scorpion Sting - A chance of stunning the opponents for a short while instead of knocking them back.
Required level: 38.

Hand of Ytar - The main character attacks from a large distance, slowing down his opponents for a few moments.
Required level: 52.
Charging through the enemy units, slowing them down for a while and dealing a portion of the damage while running.

Required level: 5.
Resources: Requires spirit power points when used and when being regenerated.
Runes for the Tempest Rush skill:

Northern Breeze - Reduced cost of using the Tempest Rush skill.
Required level: 11.

Tailwind - Increased movement speed while charging at the enemy units.
Required level: 20.

Flurry - Increased strength of the effect responsible for slowing down enemies.
Required level: 33.

Slipstream - Reduced damage received while performing a charge.
Required level: 45.

Bluster - The charge aside from slowing down enemy units also weakens the strength of their attacks.
Required level: 56.
Focusing a wave of light which inflicts holy damage to all opponents surrounding the Monk and also deals damage to enemies standing in a straight line from the main character.

Required level: 12.
Resources: Requires spirit power points.
Runes for the Wave of Light skill:

Wall of Light - Increased damage dealt by the first wave of the skill.
Required level: 18.

Explosive Light - Creating bursts of energy which inflict additional holy damage to all enemies standing close to the Monk.
Required level: 25.

Empowered Wave - Reduced cost of using the Wave of Light skill.
Required level: 35.

Blinding Light - A critical hit can stun an opponent for a few seconds.
Required level: 49.

Pillar of the Ancients - An ancient pillar is being summoned to the battlefield. It inflicts weapon damage when hit and soon after it's activated.
Required level: 57.
Creating a flash of light which blinds all nearby opponents for a few seconds. Elite enemy units regain vision quicker, however their attacks can miss the target.

Required level: 4.
Resources: Requires spirit power points.
Runes for the Blinding Flash skill:

Self Reflection - Opponents remain blind for a longer period of time.
Required level: 12.

Blinded and Confused - A chance of causing the blinded opponents to attack each other.
Required level: 19.

Blinding Echo - Soon after activating the Blinding Flash skill another flash appears, however it's much less effective.
Required level: 28.

Searing Light - Increased chances of elite units performing unsuccessful hits after they were blinded.
Required level: 41.

Faith in the Light - All attacks inflict additional damage for a few seconds after using the Blinding Flash skill.
Required level: 55.
Creating a blast of divine energy which heals the main character and all other allies standing nearby.

Required level: 8.
Resources: Requires spirit power points.
Runes for the Breath of Heaven skill:

Circle of Scorn - Inflicting additional holy damage to all opponents standing close to the Monk.
Required level: 14.

Circle of Life - Improved effects of the healing.
Required level: 21.

Blazing Wrath - Increased damage of the main character's attacks after the Breath of Heaven skill was used. The effect lasts long.
Required level: 32.

Infused with Light - Receiving additional spirit power points from all of Monk's attacks capable of generating them. The effect works for a few seconds after the Breath of Heaven skill was used.
Required level: 44.

Penitent Flame - Causing the enemies that were exposed to the Breath of Heaven skill to start running away from the Monk. The effect lasts a few seconds.
Required level: 59.
Surrounding the main character with a shield which absorbs all damage for a few seconds and also protects the Monk from all effects and spells that could immobilize him.

Required level: 16.
Resources: Requires spirit power points.
Runes for the Serenity skill:

Peaceful Repose - Additional effect which heals the main character.
Required level: 23.

Reap What is Sown - The shield explodes after the skill stops working, inflicting some of the absorbed damage from enemy attacks (as holy damage). The amount of damage dealt to a single opponent can't exceed the number of Monk's life points.
Required level: 29.

Tranquility - The shield is expanded and it can heal allies. They also become immune for a short while to all attempts of immobilizing them.
Required level: 39.

Ascension - The Serenity skill lasts longer.
Required level: 47.

Instant Karma - When the Serenity skill is active it can give back some of the damage to the enemies.
Required level: 54.
Creating a runic circle of protection on the ground which lasts a few seconds and that can't be penetrated by enemy units.

Required level: 22.
Resources: Requires spirit power points.
Runes for the Inner Sanctuary skill:

Safe Haven - The main character and his allies can count on increased health regeneration if they're standing inside the runic circle.
Required level: 26.

Sanctified Ground - When the skill stops working another circle appears on the ground and it slows down all enemy units that step on it.
Required level: 31.

Consecration - Extended duration of the runic circle.
Required level: 37.

Circle of Protection - The main character and his allies can count on receiving less damage from enemy attacks if they're standing inside the runic circle.
Required level: 43.

Forbidden Palace - The main character and his allies can count on inflicting more damage to enemy units if they're standing inside the runic circle.
Required level: 58.
Performing a quick dash towards a new area or towards an opponent, inflicting damage if possible and stopping the target for a short while.

Required level: 9.
Resources: Requires spirit power points.
Runes for the Dashing Strike skill:

Way of the Fallen Star - After an enemy was hit using the Dashing Strike skill the main character can move faster for a few seconds.
Required level: 15.

Flying Side Kick - The Monk performs a flying kick which inflicts damage and has a chance to stun an opponent for a while.
Required level: 23.

Quicksilver - Reduced cost of using the Dashing Strike skill.
Required level: 32.

Soaring Skull - The main character immediately moves towards the target and slows down other enemies passed along the way.
Required level: 39.
Blinding Speed - Increased chances of successful dashes which last a few seconds.
Required level: 49.
Ability of causing enemies to bleed for a few seconds after taking a physical hit. If an opponent dies as a result of bleeding out his body explodes, inflicting damage to other enemies present in the area. The strength of the explosion depends on the maximum health of the person that died.
Required level: 13.
Resources: Requires spirit power points.
Runes for the Exploding Palm skill:

The Flesh is Weak - Increased damage inflicted as a result of bleeding.
Required level: 18.

Strong Spirit - If an opponent explodes as a result of bleeding out, then the main character can receive spirit power from all other enemies injured as a result of the explosion.
Required level: 25.

Creeping Demise - Reduced movement speed of the enemy attacked with the Exploding Palm skill.
Required level: 36.

Impending Doom - Extended duration of the bleeding effect.
Required level: 44.

Essence Burn - The attacked target instead of bleeding out is set on fire and receives fire damage each second. If this person dies as a result of the effect of the rune his body ignites other opponents stationed nearby (they receive reduced fire damage).
Required level: 51.
Surrounding the main character with a vortex which inflicts damage to all enemy units stationed nearby. The vortex lasts a few seconds, however the timer is reset each time an opponent is hit in melee combat. Critical hits can extend the duration of the vortex and the effect can be accumulated several times.

Required level: 21.
Resources: Requires spirit power points.
Runes for the Sweeping Wind skill:

Master of Wind - Extended duration of the vortex.
Required level: 27.

Blade Storm - Increased strength of the vortex, resulting in inflicting more damage (for both standard attacks and critical hits).
Required level: 33.

Fire Storm - Increased range of the vortex and changing the type of damage it deals to fire damage.
Required level: 38.

Inner Storm - Causing the Monk to receive spirit power points with each second that has passed as long as the vortex is inflicting maximum damage.
Required level: 46.

Cyclone - A chance to cause a tornado assuming that the vortex is inflicting maximum damage. The tornado deals lightning damage and lasts a few seconds.
Required level: 56.
Pulling all nearby opponents towards the main character after which an explosion takes place, dealing severe holy damage.

Required level: 14.
Resources: Requires spirit power points.
Runes for the Cyclone Strike skill:

Eye of the Storm - Reduced cost of using the Cyclone Strike skill.
Required level: 21.

Implosion - Increased distance from which the enemies may be pulled towards the Monk.
Required level: 25.

Sunburst - The skill's standard energy explosion is turned into a fire explosion that can also cause fear among enemy units.
Required level: 34.

Wall of Wind - A chance of performing a dodge that unlocks after using the skill and lasts a few seconds.
Required level: 41.

Soothing Breeze - The activation of the skill heals the main character and his allies.
Required level: 55.
Performing a series of seven fast strikes which inflict heavy damage.

Required level: 17.
Resources: Requires spirit power points.
Runes for the Seven-Sided Strike skill:

Sudden Assault - The Monk teleports himself to the target and deals even more damage.
Required level: 23.

Several Sided Strike - Increased number of hits.
Required level: 29.

Pandemonium - A chance of stunning the target for a few seconds.
Required level: 37.

Sustained Attack - Shortened regeneration of the Seven-Sided Strike skill.
Required level: 43.

Fulminating Onslaught - Each strike causes an explosion which inflicts holy damage to all other enemies standing nearby.
Required level: 60.
Summoning a mystic ally that fights alongside the main character, dealing physical damage. The ally stays on the battlefield until he's killed by enemy units.
Required level: 22.
Resources: Requires spirit power points.
Runes for the Mystic Ally skill:

Water Ally - The mystic ally uses the power of water, being able to create a wave which inflicts additional damage and slows down opponents for a short while.
Required level: 27.

Fire Ally - The mystic ally uses the power of fire, being able to perform fire kicks. Each kicks deals fire damage to enemy units. Also, all opponents standing in front of the main character receive physical damage.
Required level: 31.

Air Ally - The mystic ally uses the power of air, being able to restore a lot of the main character's spirit power points with each strike he performs. The summoned ally is also surrounded with a tornado that inflicts small damage to all nearby enemies.
Required level: 39.

Eternal Ally - The mystic ally uses the power of life and thanks to it he has a chance of reviving himself a few seconds after he died. Damage dealt by the ally is also increased.
Required level: 46.

Earth Ally - The mystic ally uses the power of earth. This results is that both the ally and the main character receive additional life points. The summoned creature can also create seismic waves which inflict physical damage to one of the opponents and force that person to attack the ally.
Required level: 53.
Reciting a mantra, resulting in the main character and his allies receiving a chance of dodging enemy attacks for the next several minutes. The effect is the strongest during the few seconds after the skill has been activated.
Notice - This is a mantra skill and the main character at a certain moment of the game can have only one active mantra.

Required level: 19.
Resources: Requires spirit power points.
Runes for the Mantra of Evasion skill:

Hard Target - Improved armor for all characters affected by the mantra.
Required level: 24.

Divine Protection - Each time the main character or one of his allies suffers from low health a protective shield appears around that person, decreasing the strength of the received hits. This effect can be activated once every minute or so.
Received level: 33.

Wind Through the Reeds - Improved movement speed.
Required level: 40.

Perseverance - Reduced duration of all negative effects which may slow down or immobilize the main character.
Required level: 50.

Backlash - A successful dodge can cause an explosion to take place which damages all opponents standing close to the Monk.
Required level: 58.
Reciting a mantra, resulting in the main character and his allies being able to reflect some of the taken hits, dealing holy damage in return. The effect lasts several minutes and it's the strongest during the few seconds after the skill has been activated.
Notice - This is a mantra skill and the main character at a certain moment of the game can have only one active mantra.

Required level: 21.
Resources: Requires spirit power points.
Runes for the Mantra of Retribution skill:

Retaliation - Increased number of reflected enemy hits. The mantra can also reflect attacks performed from a distance.
Required level: 28.

Transgression - Increased speed of attacks performed by the main character and his allies.
Required level: 36.

Indignation - A chance of stunning enemy units when the mantra is returning their hits.
Required level: 41.

Against All Odds - A chance of restoring some of the spirit power when the mantra is returning enemy hits.
Required level: 56.

Collateral Damage - An enemy damaged by the effects of the returned hit may explode, receiving holy damage himself and dealing the same damage to all other opponents standing nearby.
Required level: 59.
Reciting a mantra, resulting in the main character and his allies receiving much faster health regeneration. The effect lasts several minutes and it's the strongest during the few seconds after the skill has been activated.
Notice - This is a mantra skill and the main character at a certain moment of the game can have only one active mantra.

Required level: 26.
Resources: Requires spirit power points.
Runes for the Mantra of Healing skill:

Sustenance - Increased bonus to health regeneration.
Required level: 31.

Circular Breathing - The mantra generates additional spirit power points.
Required level: 38.

Boon of Protection - The mantra creates a magical shield around the main character and his allies, absorbing damage for a few seconds. The amount of damage being absorbed depends on the Monk's maximum life.
Required level: 42.

Heavenly Body - The Mantra increases the main character's Vitality by a few percent.
Required level: 48.

Time of Need - All resistances increased.
Required level: 53.
Reciting a mantra, resulting in enemy units becoming more susceptible to receiving damage. The effect lasts several minutes and it's the strongest during the few seconds after the skill has been activated.
Notice - This is a mantra skill and the main character at a certain moment of the game can have only one active mantra.

Required level: 30.
Resources: Requires spirit power points.
Runes for the Mantra of Conviction skill:

Overawe - Enemies take even more damage than usual. It affects the standard version of the mantra and its increased strength that is sustained for a few seconds after activation.
Required level: 35.

Intimidation - Enemies affected by the mantra perform weaker attacks.
Required level: 44.

Dishearten - The mantra slows down all nearby enemy units.
Required level: 47.

Reclamation - The main character and his allies have a chance of regaining some of the health points each time they perform an attack.
Required level: 55.

Submission - Enemies affected by the mantra receive a small amount of holy damage each second.
Required level: 60.
Icon
Required level
Description

10
Fleet Footed
Increased movement speed of the main character.

10
Resolve
Performed attacks reduce the strength of enemy hits for a few seconds.

13
Exalted Soul
Increased number of available spirit points.

16
Transcendence
Each spirit point spent allows to regain a small number of life points.

20
Chant of Resonance
Increased duration of all mantras. Regeneration of spirit points each second as long as a mantra is currently active.

20
Seize the Initiative
Improved armor. The size of the bonus depends on how many dexterity points the main character has at the moment.

24
The Guardian's Path
Holding a weapon in each hand grants a chance of dodging enemy attacks. If the main character is using a two-handed weapon his spirit power receive faster regeneration.

27
Sixth Sense
Improved chances of dodging enemy unit. The size of the bonus depends on the current critical hit chance value.

30
Pacifism
If the main character is stunned or under an effect of fear or charm, he receives less damage than he should.

35
Beacon of Ytar
Reduced cooldown on all active skills.

40
Guiding Light
Each time one of the Monk's active skills is used to heal another player you and your ally receive a bonus to the inflicted damage.

45
One With Everything
Monk's resistance to all elements becomes equal to the value of his current highest resistance.

50
Combination Strike
Each skill that helps in generating spirit power increases the amount of damage inflicted by the Monk (for a few seconds after activation).

58
Near Death Experience
The main character regains some of his health and spirit power after receiving a fatal hit. The effect can be used once every minute or so.
Level
Active Skills
Passive Skills
Skill Runes
1

Fists of Thunder
2

Lashing Tail Kick
3

Deadly Reach
4

Blinding Flash
5

Tempest Rush
6

Thunderclap rune of Fists of Thunder
7

Vulture Claw Kick rune of Lashing Tail Kick
8

Breath of Heaven
9

Dashing Strike


Piercing Trident rune of Deadly Reach
10

Fleet Footed

Resolve
11

Crippling Wave


Northern Breeze rune of Tempest Rush
12

Wave of Light


Self Reflection rune of Blinding Flash
13

Exploding Palm

Exalted Soul
14

Cyclone Strike


Lightning Flash rune of Fists of Thunder

Circle of Scorn rune of Breath of Heaven
15

Way of the Hundred Fists


Sweeping Armada rune of Lashing Tail Kick


Way of the Fallen Star rune of Dashing Strike
16

Serenity

Transcendence
17

Seven-Sided Strike


Mangle rune of Crippling Wave
18


Keen Eye rune of Deadly Reach


Wall of Light rune of Wave of Light

The Flesh is Weak rune of Exploding Palm
19

Mantra of Evasion


Blinded and Confused rune of Blinding Flash
20

Chant of Resonance

Seize the Initiative


Tailwind rune of Tempest Rush
21

Mantra of Retribution

Sweeping Wind
Circle of Life rune of Breath of Heaven


Eye of the Storm rune of Cyclone Strike
22

Inner Sanctuary

Mystic Ally
23


Flying Side Kick rune of Dashing Strike


Peaceful Repose rune of Serenity


Sudden Assault rune of Seven-Sided Strike
24

The Guardian's Path


Hands of Lightning rune of Way of the Hundred Fists


Hard Target rune of Mantra of evasion
25


Explosive Light rune of Wave of Light


Strong Spirit rune of Exploding Palm


Implosion rune of Cyclone Strike
26

Mantra of Healing


Concussion rune of Crippling Wave

Safe Haven rune of Inner Sanctuary
27

Sixth Sense


Master of Wind rune of Sweeping Wind


Water Ally rune of Mystic Ally
28


Spinning Flame Kick rune of Lashing Tail Kick


Blinding Echo rune of Blinding Flash


Retaliation rune of Mantra of Retribution
29


Reap What is Sown rune of Serenity


Several Sided Strike rune of Seven-Sided Strike
30

Mantra of Conviction

Pacifism


Static Charge rune of Fists of Thunder
31


Sanctified Ground rune of Inner Sanctuary


Fire Ally rune of Mystic Ally


Sustenance rune of Mantra of Healing
32


Blazing Wrath rune of Breath of Heaven


Quicksilver rune of Dashing Strike


Blazing Fists rune of Way of the Hundred Fists
33


Flurry rune of Tempest Rush


Divine Protection rune of Mantra of evasion


Blade Storm rune of Sweeping Wind
34


Scattered Blows rune of Deadly Reach


Sunburst rune of Cyclone Strike
35

Beacon of Ytar


Empowered Wave rune of Wave of Light


Overawe rune of Mantra of Conviction
36


Rising Tide rune of Crippling Wave


Creeping Demise rune of Exploding Palm


Transgression rune of Mantra of Retribution
37

Pandemonium rune of Seven-Sided Strike


Consecration rune of Inner Sanctuary
38


Scorpion Sting of Lashing Tail Kick


Fire Storm rune of Sweeping Wind


Circular Breathing rune of Mantra of Healing
39


Soaring Skull rune of Dashing Strike


Tranquility rune of Serenity


Air Ally rune of Mystic Ally
40

Guiding Light


Fists of Fury rune of Way of the Hundred Fists


Wind Through the Reeds rune of Mantra of Evasion
41


Searing Light rune of Blinding Flash


Wall of Wind rune of Cyclone Strike


Indignation rune of Mantra of Retribution
42


Quickening rune of Fists of Thunder


Boon of Protection rune of Mantra of Healing
43


Sustained Attack rune of Seven-Sided Strike
Circle of Protection rune of Inner Sanctuary
44


Infused with Light rune of Breath of Heaven


Impending Doom rune of Exploding Palm


Intimidation rune of Mantra of Conviction
45

One With Everything


Slipstream rune of Tempest Rush
46


Inner Storm rune of Sweeping Wind


Eternal Ally rune of Mystic Ally
47


Strike from Beyond rune of Deadly Reach


Ascension rune of Serenity


Dishearten rune of Mantra of Conviction
48


Spirited Salvo rune of Way of the Hundred Fists


Heavenly Body rune of Mantra of Healing
49


Blinding Speed rune of Dashing Strike


Blinding Light rune of Wave of Light
50

Combination Strike


Perseverance rune of Mantra of Evasion
51


Tsunami rune of Crippling Wave

Essence Burn rune of Exploding Palm
52


Bounding Light rune of Fists of Thunder


Hand of Ytar rune of Lashing Tail Kick
53


Earth Ally rune of Mystic Ally


Time of Need rune of Mantra of Healing
54


Foresight rune of Deadly Reach


Instant Karma rune of Serenity
55


Faith in the Light rune of Blinding Flash


Soothing Breeze rune of Cyclone Strike


Reclamation rune of Mantra of Conviction
56


Bluster rune of Tempest Rush


Against All Odds rune of Mantra of Retribution


Cyclone rune of Sweeping Wind
57


Breaking Wave rune of Crippling Wave


Pillar of the Ancients rune of Wave of Light
58

Near Death Experience


Backlash rune of Mantra of Evasion


Forbidden Palace rune of Inner Sanctuary
59


Penitent Flame rune of Breath of Heaven
Collateral Damage rune of Mantra of Retribution
60


Windforce Flurry rune of Way of the Hundred Fists


Fulminating Onslaught rune of Seven-Sided Strike


Submission rune of Mantra of Conviction
Wizard is one of the most universal classes available in the game and it's also among the most popular ones. Assuming the main character has been developed properly he can face even the most challenging opponents on the highest difficulty settings without having to constantly worry about his life. Sadly all this goodness comes at a price. The beginnings while playing as a Wizard might be unpleasant, because this class becomes uber powerful only after you've advanced to Nightmare and higher levels. This is an entirely different experience from classes which rely on constant contact with enemy units, like a Barbarian or a Monk. The mentioned classes are the most powerful ones early in the game, allowing the player to kill enemy units without any major problems, however they become much worse to play on two of the highest difficulty settings, forcing the player to come in terms with constantly dying and having issues with many monsters. If no mistakes were made while developing a Wizard, then this character will easily advance to the Inferno level.
When it comes to statistics and choosing the right gear, Wizard's most important attribute is definitely Intelligence. This attribute has a lot to say when you want to improve the DPS value (damage per second) done by the spells you cast on the battlefield. Wizards use arcane power as the energy source needed to cast spells. The power is represented by a sphere seen in the bottom right corner of the screen and it regenerates automatically over time. The only spells which don't need this energy source and the "basic" ones. It's also worth adding that if you use proper types of runes along with your skill, then you may improve the regeneration process, for example by generating arcane power points with each successful hit.
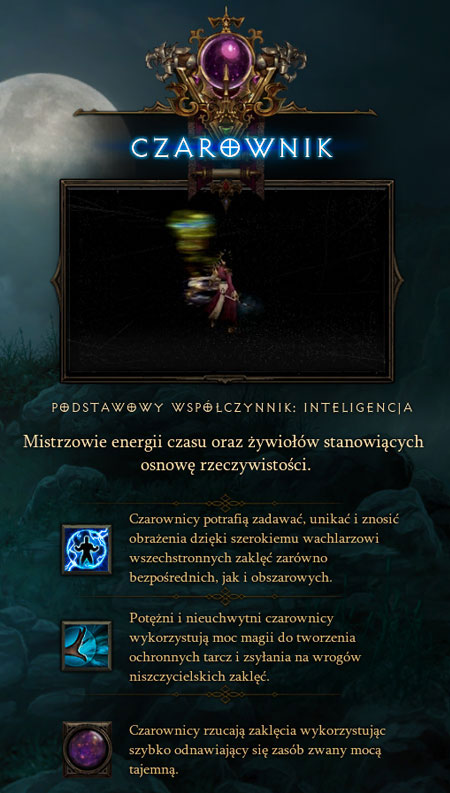
An interesting thing to know about the Wizard is how the statistics influence the damage that can be inflicted by the spells. Descriptions provided by the game suggest that the only factor which is taken under consideration is the damage of the weapon the main character is using. This doesn't mean however that you should pay no attention to your gear, for example to rings which increase the attack speed (and also DPS) or to other objects which boost damage. The strength of the spell is counted based on several variables. The formula begins with the weapon damage and it's being multiplied by a percent of the main character's Intelligence and by a percent of the spell's strength. Also - if a weapon is enchanted and therefore grants additional percent it's also added to the equation used to estimate the size of the damage that can be dealt.
The attack speed mentioned earlier on is an important subject. It may seem normal that the increase of the speed of your attack also increases the DPS value. What's less obvious is that depending on which skills you've chosen for your character build it may be different in some cases. Certain skill combinations profit from lowering the attack speed statistic to a minimum in order for the main character to be able to inflict more damage. It all depends on the types of spells Wizard uses. If for some reasons you want to stick with the "basic spells" you should maximize the speed of attacks, because that group of spells doesn't use any arcane power and they can also be casted very rapidly. If you're lucky you can also generate additional damage thanks to various effects provided by the skills and the chances of them happening are raised along with the number of tries.
We already know that it's good to have a weapon which allows fast attacks when it comes to basic spells, because it allows to cast them more often. But what to do if the basic attacks aren't enough for you? Here's where it gets tricky, because some of the more powerful spells won't work as good as planned if they're combined with a fast weapon. For example, if you're using Disintergate spell combined with high attack speed you'll deplete arcane power too soon and you won't be inflicting as much damage as you'd like. As a result it's important that you always know what you want to achieve and what are the "weak points" of the gear you're using. You can't let the items you're carrying to work against you because of combining them with wrong types of skills.
My Wizard build is basically a confirmation of my previous statement about how universal this character class can really be. The skills suggested by this build allow to create a character than can be called a "battle mage", because he can fight on the first lines of the front, fighting on many occasions alongside a Barbarian or a Monk. It's not a common way of using this character class, because in most online games Wizards often hang in the back and support the rest of the team from a safe spot. I can assure you however that combined with good equipment you can easily use this build to advance to the Inferno difficulty setting. And what then? Well, all build require from the player to be focused on Inferno and to use the available skill wisely. This one is no different.
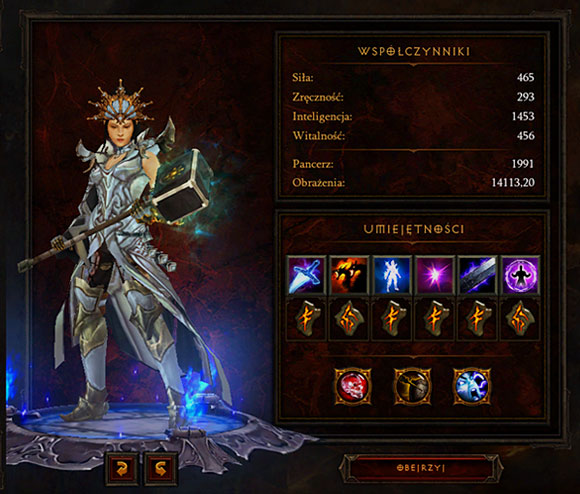

Spectral Blade + Deep Cuts (19)
This is a basic type of an attack that should be assigned to the left mouse button. It allows to inflict a lot of damage in close combat and thanks to the suggested rune the attacks are even more powerful.

Hydra + Venom Hydra (38)
This is a skill that should be assigned to the right mouse button and if used properly (and after some training) you'll be allowed to add the hydra to the battlefield before starting each fight. The best thing about this skill is that it lasts 15 seconds, so you won't have to pay attention to it after it's been casted. The hydra also chooses and attacks the targets on its own. As for the rune I've chosen for it, it increases the damage by creating a venomous pools that harm all enemy units standing on them. You're free to choose any other rune before the one mentioned in the build becomes unlocked.

Diamond Skin + Mirror Skin (32)
This skill allows you to become virtually indestructible for a few seconds. You must pay a lot of attention to its cooldown process, activating it as soon as it becomes available again. When playing on higher difficulty levels you may even consider retreating for a few seconds in order to wait in a safe place for the skill to regenerate. The suggested rune makes the skill even better, because it allows for the enemies to receive back some of the damage they've inflicting and it'll probably save your skin more than once.

Familiar + Sparkflint (30)
I've decided to have a familiar by my side only because of the rune mentioned above. The reason for that is because it increases the damage dealt by the Wizard by 12%. The creature itself harms opponents with projectiles inflicting 20% of the weapon damage, however it's not as a smart as hydra and it doesn't choose the targets on its own. In other words - it shoots where you aim and only there. While playing on Normal and Nightmare you might consider choosing Archon + Pure Power (46) combination instead of this one.

Magic Weapon + Venom (46)
This is another skill which is used only to raise your character's DPS value. It increases the damage by 10% and thanks to the suggested rune it also poisons the targets, adding another 15% of damage for the next three seconds.

Energy Armor + Force Armor (54)
This skill is most useful while fighting champions and other bosses. It increases the armor values and it scales the damage you get so that you will never receive more than 35% of your maximum life points. I've started using this skill while playing on the Hell difficulty and before that my favorite skill was the Ice Armor combined with the Jagged Ice rune (42). I've ultimately realized that my current tactics weren't working, because my Wizard was losing too much damage. As a result I've changed my mind and started using this combination.

Glass Cannon (16)
You shouldn't be bothered with the side effects of this passive skill (lowered armor rating and resistance) until you reach the Inferno difficulty setting and you'll be thanking the DPS bonus which will make your attacks much more powerful. Once you've started playing on Inferno you should switch this skill with Blur (10).

Galvanizing Ward (40)
This passive skill not only increases the duration of armor spells, but it also activates health regeneration at the same time. The regeneration itself will not be as efficient when you'll gain more Life points, however it'll still save you from dying on more than one occasion.

Unstable Anomaly (60)
After you'll start playing on the Hell difficulty you'll be finding yourself quite often surrounded by problematic opponents and with nowhere to go. This skill opens a way to survive, releasing a shockwave in a critical moment which knocks backs all nearby enemies and gives you about two seconds of peace. As you've probably noticed it can't be unlocked early in the game so before you can use it you should rely on Cold Blooded (30) skill instead, especially since it works well with the Ice Armor active skill.
One of the things to remember is to use the Hydra skill in each battle. It's very important to place the hydra in one of the strategic points and to revive the creature after the skill has stopped working (it lasts 15 seconds). Continue repeating this pattern and you'll soon be doing all the actions almost automatically, without even having to think about it. Furthermore, Hydra is not only a defensive spell, but it can also be used in offensive actions, especially if your DPS value is high and if the hydra itself can additionally poison enemy units. This creature saved me on many occasions, usually while fighting champions with an immortality aura or when I was running around, waiting for the Diamond Skin skill to recharge. Obviously it's good to have gear which increases the movement speed of the main character, so it'll all work perfectly. In later stages of the game Hydra may even be able to handle some of the fights on its own, allowing the Wizard to avoid engaging enemies in battle.
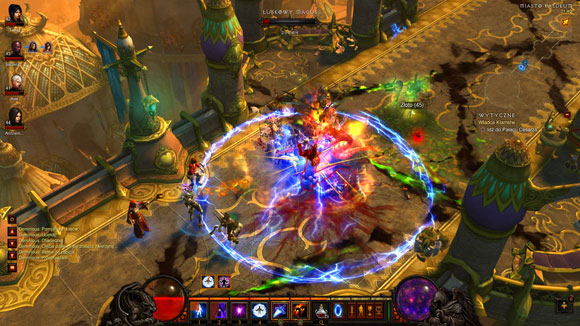
Another important aspect of the Wizard build presented in this guide is that it's based on a lot of skills which temporarily boost the character's statistics and therefore it's important to always keep them active. Sometimes it's hard to focus in battle on icons saying whether the boosts are active or not, so you may consider activating everything once every few seconds. The truth is that arcane power is not needed for combat (not counting the Hydra, of course), so you don't have to pay a lot of attention to how much of it is left. My build isn't heavily based on the arcane power and I never had problems with running out of it.
While playing on the lower difficulty levels or online with at least one player that acts a "tank" and encourage enemies to attack his character you may consider using the Archon skill. The enormous damage inflicted thanks to this skill will allow you to clear out entire rooms of enemy units in a manner of seconds. The main problem with Archon is that it appears when you can receive major damage. This issue is so big that eventually it becomes impossible to survive without Diamond Skin and Energy Armor. As a result I've stopped using the Archon after advancing to higher levels, despite the enormous help it provided in the earlier journeys.
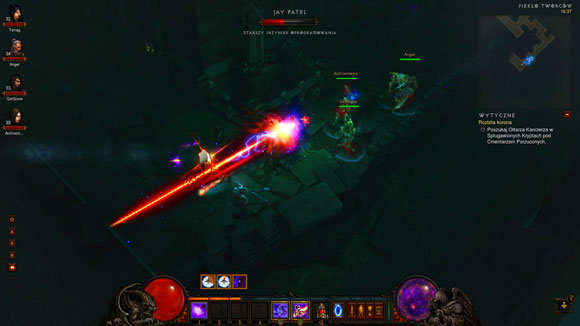
The Ice Armor active skill and the Cold Blooded passive skill present a similar problem to the archon. Until champions weren't a deadly threat to my main character, allowing them to kill or heavily injure the Wizard with only one hit, I liked both skills mentioned above. Freezing the enemies with the armor saved me many times while playing in cooperation, allowing the players to perform attacks on an immobilized enemy or giving my Wizard a chance to escape. As for the passive skill, it granted me a chance to inflict additional 20% damage to the enemies I've successfully frozen.
As I've already mentioned my build focuses a lot on the topic of melee combat so you shouldn't be afraid of increasing the speed of your attacks. This will have an enormous influence on your DPS value, probably even bigger than investing points in Intelligence. Also, by using the game's auction house you shouldn't have any problems finding good items for sale which increase the attack speed AND Intelligence at the same time. Choosing good equipment for a Wizard is important, because you want to move fast and strike hard. If you don't have enough money to buy good items from other players you may consider returning to previous acts of the game and using objects which increase chances of finding magic items. You'll gain a lot of loot from these actions and you won't have any problems fighting the weaker monsters. The only exception to that strategy is Inferno, because on this difficulty level even a short moment of disorientation may cost your character his life.
Launching a magic missile which inflicts arcane power damage. It's worth adding that this is one of the basic spells and therefore it doesn't need arcane power points to work.

Required level: 1.
Runes for the Magic Missile skill:

Charged Blast - Increased damage inflicted by the Magic Missile.
Required level: 6.
Split - Several magic projectiles are fired at the same time, however each missile deals smaller damage than a normal, single missile.
Required level: 13.

Penetrating Blast - A chance of piercing through a target and hitting other opponents with a missile.
Required level: 31.

Attunement - Each successful missile hit generates several arcane power points.
Required level: 42.

Seeker - The missile targets the nearest enemy and inflicts additional damage.
Required level: 52.
Releasing several charges that inflict increased lightning damage. It's worth adding that this is one of the basic spells and therefore it doesn't need arcane power points to work.

Required level: 3.
Runes for the Shock Pulse skill:

Explosive Bolts - Enemies killed with the Shock Pulse skill explode after they die, inflicting small lightning damage to everyone standing close to them.
Required level: 9.

Fire Bolts - Creation of fire bolts that inflict additional fire damage.
Required level: 18.

Piercing Orb - All bolts are combined into a single orb that slowly flies forward, inflicting lightning damage to all enemy units standing in its way.
Required level: 33.

Lightning Affinity - Each successful bolt hit generates several arcane power points.
Required level: 47.

Living Lightning - Creation of an electric impulse that pierces through enemies, electrocuting them and inflicting lightning damage.
Required level: 54.
Summoning a spectral blade that strikes all opponents standing in front of the main character, inflicting weapon damage. It's worth adding that this is one of the basic spells and therefore it doesn't need arcane power points to work.

Required level: 11.
Runes for the Spectral Blade skill:

Deep Cuts - Enemies start to bleed after they're hit with the blade, receiving additional injuries for the next few seconds.
Required level: 19.

Impactful Blades - A chance to knock back enemies and to stun them for a short while after receiving a blade hit.
Required level: 24.

Siphoning Blade - Each successful blade hit generates several arcane power points.
Required level: 35.

Healing Blades - A critical blade hit results in the regeneration of a certain number of the Wizard's Life points.
Required level: 51.
Thrown Blades - Increased range of the blades.
Required level: 57.
Sending lightning arcs which inflict lightning damage and which can jump between enemies. It's worth adding that this is one of the basic spells and therefore it doesn't need arcane power points to work.

Required level: 15.
Runes for the Electrocute skill:

Chain Lightning - Increased number of enemies that can be affected by the lightning arcs.
Required level: 22.

Forked Lightning - Causing critical hits to create four additional arcs, inflicting reduced lightning damage.
Required level: 29.

Lightning Blast - Creation of a lightning blast that pierces through enemy units, injuring more targets.
Required level: 36.

Surge of Power - Each successful lightning hit generates several arcane power points.
Required level: 44.
Arc Lightning - Creation of a cone of lightning that inflicts reduced lightning damage to all targets standing nearby.
Required level: 59.
Shooting a beam of frost which inflicts cold damage to the first target it hits and which also slows down the attacked enemy unit.

Required level: 2.
Resources: Requires arcane power points.
Runes for the Ray of Frost skill:

Numb - Increased strength of the effect responsible for slowing down enemies.
Required level: 7.

Snow Blast - The ray stays focused on one target for some time, inflicting increased damage.
Required level: 15.

Cold Blood - Reduced arcane power cost of casting the Ray of Frost spell.
Required level: 28.

Sleet Storm - Creation of a sleet storm that inflicts cold damage to all opponents standing nearby.
Required level: 38.

Black Ice - Enemies killed with the ray leave a patch of ice behind that stays for a few seconds and inflicts increased cold damage to all enemy units standing on it.
Required level: 53.
Releasing an orb of energy that explodes upon coming in contact with a target, inflicting arcane damage to all enemy units standing nearby.

Required level: 5.
Resources: Requires arcane power points.
Runes for the Arcane Orb skill:

Obliteration - Increased damage inflicted as a result of the orb's explosion.
Required level: 11.

Arcane Orbit - Several magic orbs are created and they circle around the main character, exploding when they come in contact with enemy units. Each explosion deals reduced arcane damage.
Required level: 20.

Arcane Nova - Increased range of the orb's explosion.
Required level: 32.

Tap the Source - Reduced arcane power cost of casting the Arcane Orb spell.
Required level: 45.

Celestial Orb - The orb pierces through targets, inflicting damage to any enemy it touches.
Required level: 55.
Releasing a series of magic projectiles that inflict arcane damage to all enemies standing close to the impact location.

Required level: 12.
Resources: Requires arcane power points.
Runes for the Arcane Torrent skill:

Disruption - Targets hit by the projectiles are disrupted for a few seconds, becoming susceptible to all kinds of arcane damage.
Required level: 18.

Death Blossom - A large group of projectiles is released. The main character can't control them, however they inflict much more damage.
Required level: 25.

Arcane Mines - Mines are being placed on the ground instead of firing projectiles. Each mine is armed after a few seconds and it explodes when someone touches it. The explosion deals severe arcane damage and slows down the movement and attack speed of the affected target.
Required level: 34.

Power Stone - A chance of creating a power stone each time a projectile hits a target. The stone regenerates arcane power points once it's collected.
Required level: 49.

Cascade - All enemies killed with the Arcane Torrent skill have a chance to fire a new projectile when they die. The projectile hits the nearest target, inflicting increased arcane power damage.
Required level: 57.
Shooting a beam of pure energy that inflicts increased arcane power damage and disintegrates enemy units.

Required level: 21.
Resources: Requires arcane power points.
Runes for the Disintegrate skill:

Convergence - Increased size of the beam that allows for it to injure more enemy units at the same time.
Required level: 26.

Chaos Nexus - The main character becomes charged with energy when firing the beam. That energy can jump at nearby enemies and inflict reduced arcane damage.
Required level: 30.

Volatility - Enemies killed with the beam may explode and that explosion causes severe damage to other opponents standing nearby.
Required level: 39.

Entropy - The beam is separated and released as cones, inflicting increased arcane damage.
Required level: 48.

Intensify - The power of the beam continues to increase until it reaches the maximum level.
Required level: 59.
Creating an explosion of ice which freezes all nearby enemies for a few seconds.

Required level: 4.
Runes for the Frost Nova skill:

Shatter - A chance to cause a second Frost Nova after killing a frozen enemy.
Required level: 12.

Cold Snap - Reduced cooldown time of the main skill.
Required level: 18.

Frozen Mist - The Frost Nova doesn't freeze enemies anymore, but leaves a frozen mist behind that inflicts extensive cold damage for a few seconds.
Required level: 28.

Deep Freeze - Increased chances of performing a critical hit if the nova has frozen enough enemy units.
Required level: 41.

Bone Chill - Causing the frozen enemies and those attacked by cold damage to become more susceptible to receiving injuries.
Required level: 51.
Turning the Wizard's skin into diamond for a few seconds. The new skin absorbs a lot of the received damage.

Required level: 8.
Runes for the Diamond Skin skill:

Crystal Shell - Increased number of the damage that can be absorbed by the spell.
Required level: 14.

Prism - Reduced costs of casting other spells when the Diamond Skin skill is active.
Required level: 20.

Mirror Skin - The Diamond Skin can reflect back some of the damage to the attacker.
Required level: 32.

Enduring Skin - Extended duration of the Diamond Skin skill.
Required level: 44.

Diamond Shards - When the Diamond Skin stops working her shards explode in all directions, inflicting physical damage to enemies standing nearby.
Required level: 56.
Creating a sphere for a few seconds which reduces the movement and attack speeds of enemies standing inside it, as well as slows down projectiles flying through it.

Required level: 16.
Runes for the Slow Time skill:

Miasma - Enemies continue to move and attack slower for a few additional seconds after leaving the sphere.
Required level: 23.

Time Warp - Enemies standing inside the sphere are more susceptible to receiving damage.
Required level: 29.

Time Shell - The time sphere becomes smaller, however it also becomes much stronger when it comes down to slowing down enemy units.
Required level: 39.

Perpetuity - Reduced cooldown time of the main skill.
Required level: 47.

Stretch Time - Increased speed of attacks performed by allies standing inside the sphere.
Required level: 53.
Teleporting the main character to the selected location.

Required level: 22.
Resources: Requires arcane power points.
Runes for the Teleport skill:

Safe Passage - The main character receives less damage for a few seconds after a successful teleportation.
Required level: 26.

Wormhole - A slight delay of the cooldown process occurs after a successful teleportation, allowing the Wizard to instantly teleport again.
Required level: 31.

Reversal - Casting the Teleport spell again after a short break results in returning the Wizard back to the original location.
Required level: 37.

Fracture - Decoys are created after a successful teleportation and they remain on the battlefield for a few seconds.
Required level: 43.

Calamity - A shockwave occurs in the location the main character has teleported to, inflicting physical damage to all nearby opponents.
Required level: 59.
Creating a wave of pure energy that stops the incoming projectiles and knocks back all nearby opponents. The wave also reduces the movement speed of enemy units and inflicts increased physical damage.

Required level: 9.
Resources: Requires arcane power points.
Runes for the Wave of Force skill:

Impactful Wave - Increased distance to which the enemies are knocked back. They also become stunned for a short while.
Required level: 15.

Force Affinity - Reduced cooldown time and arcane power costs of the main skill.
Required level: 22.

Forceful Wave - Increased damage inflicted by the wave at a cost of a less powerful knockback effect.
Required level: 32.

Teleporting Wave - Enemies hit by the wave may be teleported to a random location.
Required level: 39.

Exploding Wave - Enemies hit by the wave may cause a smaller wave to appear (it also deals physical damage and knocks back enemy units).
Required level: 49.
Creating a twister of pure energy which inflicts arcane power damage to all enemies it comes in contact with. The tornado lasts a few seconds.

Required level: 13.
Resources: Requires arcane power points.
Runes for the Energy Twister skill:

Mistral Breeze - Reduced costs of casting the spell.
Required level: 19.

Gale Forces - Increased damage inflicted by the tornado.
Required level: 24.

Raging Storm - Creating one powerful vortex each time two standard tornadoes collide.
Required level: 36.

Wicked Wind - Tornadoes remain in one spot for the entire duration of the spell instead of constantly moving.
Required level: 41.

Storm Chaser - Each time the Energy Twister spell was casted the main character receives one wind charge. All collected charges are released when one of the basic spells is casted, creating a giant tornado that inflicts massive arcane power damage.
As for the basic spells mentioned in the description, here's a list of them:
Required level: 52.
Summoning a hydra for 15 seconds which attacks nearby enemy units, inflicting fire damage. Only one hydra can be summoned at a certain moment of the game.

Required level: 21.
Resources: Requires arcane power points.
Runes for the Hydra skill:

Arcane Hydra - All projectiles fired by the hydra inflict arcane power damage.
Required level: 26.

Lightning Hydra - All projectiles fired by the hydra inflict serious lightning damage.
Required level: 33.

Venom Hydra - All projectiles fired by the hydra create pools of acid which inflict poisonous damage to enemies standing on them.
Required level: 38.

Frost Hydra - All attacks performed by the hydra inflict serious cold damage.
Required level: 46.

Mammoth Hydra - A giant snake that spits flames is summoned instead of hydra. The creature sets the ground on fire, dealing fire damage to all enemies standing in that areas.
Required level: 56.
Summoning a giant meteor which hits the ground at high speed, dealing severe fire damage to enemy units. The area where the meteor landed is also flooded by lava, inflicting smaller fire damage for the next few seconds.

Required level: 25.
Resources: Requires arcane power points.
Runes for the Meteor skill:

Molten Impact - Increased damage inflicted by the meteor and by the lava field created where it landed.
Required level: 29.

Star Pact - Reduced costs of casting the spell.
Required level: 34.

Meteor Shower - Summoning several small meteors instead of a larger single one. Each meteor deals smaller fire damage.
Required level: 43.

Comet - Summoning an icy meteor which inflicts cold damage instead of fire damage and which creates a frosty mist instead of a field of lava. The mist remains on the battlefield for a few seconds, slowing down enemy units and dealing ice damage.
Required level: 46.

Liquify - The lava can remain on the battlefield for a longer period of time if the meteor has struck a critical hit.
Required level: 58.
Summoning ice shards which fall in the designated area, dealing increased cold damage. Casting several Blizzards in the same spot doesn't make the attack any stronger.

Required level: 27.
Resources: Requires arcane power points.
Runes for the Blizzard skill:

Grasping Chill - A small mist appears in the attacked area, remaining there for a few seconds and slowing down enemy units.
Required level: 35.

Frozen Solid - Enemies that were attacked by the Blizzard may become frozen for several seconds.
Required level: 42.
Snowbound - Reduced costs of casting the spell.
Required level: 47.

Stark Winter - Increased size of the Blizzard.
Required level: 54.

Unrelenting Storm - Extended duration of the Blizzard spell and also increased damage.
Required level: 60.
Creating an ice barrier around the main character which can chill opponents or freeze them for a few seconds.
This is an armor spell and you can have only one spell from this group active at the moment.

Required level: 14.
Resources: Requires arcane power points.
Runes for the Ice Armor skill:

Chilling Aura - The temperature around the main character is lowered, chilling or slowing down nearby enemy units.
Required level: 21.

Crystallize - The Wizard's armor improves each time he is hit by an opponent. The effect can be accumulated several times.
Required level: 31.

Jagged Ice - Enemy units attacking the main character in melee combat receive cold damage.
Required level: 42.

Ice Reflect - A chance of causing a frost nova which damages the attackers with cold damage.
Required level: 49.

Frozen Storm - A frozen storm is created around the main character, lasting a few seconds and inflicting cold damage.
Required level: 53.
Creating a storm barrier around the main character which can inflict lightning damage to all enemy units standing nearby.
This is an armor spell and you can have only one spell from this group active at the moment.

Required level: 17.
Resources: Requires arcane power points.
Runes for the Storm Armor skill:

Reactive Armor - A chance of creating a shield when the main character is hit. The shield lasts a few seconds and deals lightning damage to nearby enemy units.
Required level: 23.
Power of the Storm - Reduced costs of casting all spells as long as the Storm Armor is active.
Required level: 33.

Strike Back - Increased damage inflicted by the Storm Armor.
Required level: 37.

Scramble - Each time the main character is hit his movement speed increases for a few seconds.
Required level: 43.

Shocking Aspect - All critical hits have a chance of electrocuting opponents and therefore inflicting additional lightning damage.
Required level: 58.
Imbuing a weapon with magical energy for several minutes, increasing the amount of damage it deals.

Required level: 20.
Resources: Requires arcane power points.
Runes for the Magic Weapon skill:

Electrify - Each weapon attack has a chance of creating an electric beam that injures nearby opponents with lightning and weapon damage.
Required level: 27.

Force Weapon - Increased bonus to weapon damage and a chance of knocking back opponents.
Required level: 35.

Conduit - Melee attacks have a chance of restoring a small amount of the arcane power.
Required level: 38.

Venom - Attacks poison enemy units, inflicting poisonous damage which lasts a few seconds.
Required level: 46.

Blood Magic - Melee attacks restore some of the main character's Life points.
Required level: 55.
Summoning a familiar that stays on the battlefield for a few minutes. The creature attacks the same targets as the Wizard, inflicting arcane power damage. It's also important to know that it can't be attacked by the enemies.
Required level: 22.
Resources: Requires arcane power points.
Runes for the Familiar skill:

Sparkflint - A fiery ally is summoned and it increases the damage inflicted by the Wizard.
Required level: 30.

Dartling - An electric ally is summoned and its projectiles have a chance to pierce through opponents.
Required level: 40.

Ancient Guardian - A defensive creature is summoned and once in a while it consumes all the damage the main character has taken. The effect works only if the Wizard has lost a lot of health.
Required level: 44.

Arcanot - Having the Familiar alongside the main character improves the regeneration rate of the arcane power.
Required level: 50.

Cannoneer - Projectiles fired by the familiar explode when coming in contact with a target, inflicting arcane power damage to all nearby enemies.
Required level: 57.
Improving the main character's armor for a long period of time. This isn't achieved for free, because as long as the skill is active the maximum value of the arcane power is lowered.
This is an armor spell and you can have only one spell from this group active at the moment.

Required level: 28.
Resources: Requires arcane power points.
Runes for the Energy Armor skill:

Absorption - Each time the main character is hit he receives a chance of regaining a small amount of the arcane power.
Required level: 32.

Pinpoint Barrier - Having the Energy Armor active increases the chances of scoring critical hits.
Required level: 41.

Energy Tap - The Energy Armor increases the maximum point value of the arcane power instead of lowering it.
Required level: 48.

Force Armor - Enemy attacks that deal more damage than a certain number of Wizard's Life points are weakened by that value.
Required level: 54.

Prismatic Armor - All resistances are greatly increased.
Required level: 60.
Cumulating energy around the main character which explodes after a short while and inflicts physical damage to all enemies standing nearby.

Required level: 19.
Resources: Requires arcane power points.
Runes for the Explosive Blast skill:

Unleashed - Reduced costs of casting the spell.
Required level: 24.

Time Bomb - The energy cumulates longer and therefore inflicts more damage when the explosion occurs.
Required level: 29.

Short Fuse - The explosion takes place as soon as the spell has been activated.
Required level: 39.

Obliterate - Increased radius of the explosion.
Required level: 50.

Chain Reaction - Three explosions occur instead of only one. Each explosion inflicts smaller physical damage.
Required level: 56.
Summoning duplicates of the main character for a few seconds. Each duplicate has some of the Wizard's health and skills, however they can't inflict any damage.

Required level: 25.
Runes for the Mirror Image skill:

Simulacrum - Increased health of the duplicates.
Required level: 31.

Duplicates - Increased number of summoned duplicates.
Required level: 37.

Mocking Demise - Each time a duplicate is destroyed it explodes, inflicting lesser physical damage. The explosion also has a chance to stun the targets.
Required level: 45.

Extension of Will - Extended duration of the spell and an increase to the duplicate's health.
Required level: 51.

Mirror Mimics - All the spells casted by the duplicates inflict a part of the damage dealt by the main character.
Required level: 58.
Transforming the main character into a creature of pure energy for 15 seconds. An archon has its own powers and it can also count on an improvement of his armor and resistances. Each enemy archon manages to kill extends the duration of the spell.

Required level: 30.
Resources: Requires arcane power points.
Runes for the Archon skill:

Arcane Destruction - An explosion occurs during the transformation, inflicting massive arcane damage to all enemies standing nearby.
Required level: 36.

Teleport - The Wizard can use the Teleport spell during the transformation.
Required level: 40.

Pure Power - Reduced cooldown time of the spell.
Required level: 46.

Slow Time - The Wizard can use the Slow Time spell during the transformation.
Required level: 52.

Improved Archon - Increased damage inflicted by the archon's spells.
Required level: 60.
Icon
Required level
Description

10
Blur
Reduced damage received in melee combat.

10
Power Hungry
Each collected health orb also generates arcane power points.

13
Evocation
Reduced cooldown time of all skills.

16
Glass Cannon
Increased damage (all types) at a cost of a weaker armor and lower resistances.

20
Prodigy
Each time an opponent is hit with basic spells the main character regains some of the arcane power points.
Here's a quick reminder which spells are considered the basic ones:
Magic Missile
Shock Pulse
Spectral Blade
Electrocute

24
Astral Presence
Increased maximum arcane power value and faster arcane power regeneration.

27
Illusionist
Each time the main character has suffered from a serious hit his Teleportation and Mirror Image spells are instantly recharged.

30
Cold Blooded
Increased damage inflicted to chilled and frozen targets.

34
Conflagration
All fire attacks add a burning effect that continues to inflict damage to affected enemies for the next few seconds.

37
Paralysis
Attacks based on lightning damage have a chance of stunning an opponent for a short while.

40
Galvanizing Ward
Extended duration of all armor spells. Each time an armor spell is active the health also begins to regenerate.
Here's a quick reminder which spells are considered the armor ones:
Ice Armor
Storm Armor
Energy Armor

45
Temporal Flux
Each time arcane damage is inflicted there's a chance of slowing down the target for a short while.

50
Critical Mass
Critical hits reduce the cooldown times of all spells.

55
Arcane Dynamo
Each time an opponent is hit with a basic spells he gains a flash of insight. After collecting a few flashes his other spells (non-basic ones) begin to inflict additional damage.
Here's a quick reminder which spells are considered the basic ones:
Magic Missile
Shock Pulse
Spectral Blade
Electrocute

60
Unstable Anomaly
Each time the main character's health drops to a dangerously low level he triggers a shockwave which knocks back all nearby enemy units. The effect can't occur too often.
Level
Active Skills
Passive Skills
Skill Runes
1
Magic Missile
2

Ray of Frost
3

Shock Pulse
4

Frost Nova
5

Arcane Orb
6

Charged Blast rune of Magic Missile
7


Numb rune of Ray of Frost
8

Diamond Skin
9

Wave of Force

Explosive Bolts rune of Shock Pulse
10

Blur

Power Hungry
11

Spectral Blade


Obliteration rune of Arcane Orb
12

Arcane Torrent


Shatter rune of Frost Nova
13

Energy Twister

Evocation


Split rune of Magic Missile
14

Ice Armor


Crystal Shell rune of Diamond Skin
15

Electrocute


Snow Blast rune of Ray of Frost

Impactful Wave rune of Wave of Force
16

Slow Time

Glass Cannon
17

Storm Armor
18


Fire Bolts rune of Shock Pulse


Cold Snap rune of Frost Nova


Disruption rune of Arcane Torrent
19

Explosive Blast


Deep Cuts rune of Spectral Blade


Mistral Breeze rune of Energy Twister
20

Magic Weapon
Prodigy


Arcane Orbit rune of Arcane Orb


Prism rune of Diamond Skin
21

Disintegrate

Hydra


Chilling Aura rune of Ice Armor
22

Familiar

Teleport


Force Affinity rune of Wave of Force

Chain Lightning rune of Electrocute
23


Miasma rune of Slow Time


Reactive Armor rune of Storm Armor
24

Astral Presence


Impactful Blades rune of Spectral Blade


Gale Forces rune of Energy Twister


Unleashed rune of Explosive Blast
25

Meteor

Mirror Image

Death Blossom rune of Arcane Torrent
26


Convergence rune of Disintegrate


Arcane Hydra rune of Hydra


Safe Passage rune of Teleport
27

Blizzard

Illusionist


Electrify rune of Magic Weapon
28

Energy Armor


Cold Blood rune of Ray of Frost


Frozen Mist rune of Frost Nova
29


Time Warp rune of Slow Time

Time Bomb rune of Explosive Blast


Molten Impact rune of Meteor
30

Archon

Cold Blooded


Chaos Nexus rune of Disintegrate


Sparkflint rune of Familiar
31


Penetrating Blast rune of Magic Missile


Crystallize rune of Ice Armor


Wormhole rune of Teleport


Simulacrum rune of Mirror Image
32


Arcane Nova rune of Arcane Orb


Mirror Skin rune of Diamond Skin


Forceful Wave rune of Wave of Force


Absorption rune of Energy Armor
33


Piercing Orb rune of Shock Pulse


Power of the Storm rune of Storm Armor


Lightning Hydra rune of Hydra
34

Conflagration


Arcane Mines rune of Arcane Torrent


Star Pact rune of Meteor
35


Siphoning Blade rune of Spectral Blade


Force Weapon rune of Magic Weapon

Grasping Chill rune of Blizzard
36


Raging Storm rune of Energy Twister


Lightning Blast rune of Electrocute


Arcane Destruction rune of Archon
37

Paralysis


Strike Back rune of Storm Armor


Reversal rune of Teleport


Duplicates rune of Mirror Image
38


Sleet Storm rune of Ray of Frost


Conduit rune of Magic Weapon


Venom Hydra rune of Hydra
39


Teleporting Wave rune of Wave of Force


Time Shell rune of Slow Time


Short Fuse rune of Explosive Blast


Volatility rune of Disintegrate
40

Galvanizing Ward


Dartling rune of Familiar


Teleport rune of Archon
41


Deep Freeze rune of Frost Nova


Wicked Wind rune of Energy Twister


Pinpoint Barrier rune of Energy Armor
42


Attunement rune of Magic Missile


Jagged Ice rune of Ice Armor


Frozen Solid rune of Blizzard
43


Scramble rune of Storm Armor


Fracture rune of Teleport


Meteor Shower rune of Meteor
44


Enduring Skin rune of Diamond Skin


Surge of Power rune of Electrocute


Ancient Guardian rune of Familiar
45

Temporal Flux

Tap the Source rune of Arcane Orb


Mocking Demise rune of Mirror Image
46


Venom rune of Magic Weapon


Frost Hydra rune of Hydra


Pure Power rune of Archon
47


Lightning Affinity rune of Shock Pulse


Perpetuity rune of Slow Time


Snowbound rune of Blizzard
48


Entropy rune of Disintegrate


Comet rune of Meteor


Energy Tap rune of Energy Armor
49


Exploding Wave rune of Wave of Force


Power Stone rune of Arcane Torrent

Ice Reflect rune of Ice Armor
50

Critical Mass


Obliterate rune of Explosive Blast


Arcanot rune of Familiar
51


Bone Chill rune of Frost Nova


Healing Blades rune of Spectral Blade


Extension of Will rune of Mirror Image
52


Seeker rune of Magic Missile


Storm Chaser rune of Energy Twister


Slow Time rune of Archon
53


Black Ice rune of Ray of Frost


Frozen Storm rune of Ice Armor


Stretch Time rune of Slow Time
54


Living Lightning rune of Shock Pulse


Stark Winter rune of Blizzard


Force Armor rune of Energy Armor
55

Arcane Dynamo


Celestial Orb rune of Arcane Orb


Blood Magic rune of Magic Weapon
56

Diamond Shards rune of Diamond Skin


Chain Reaction rune of Explosive Blast


Mammoth Hydra rune of Hydra
57


Thrown Blades rune of Spectral Blade


Cascade rune of Arcane Torrent


Cannoneer rune of Familiar
58


Shocking Aspect rune of Storm Armor


Liquify rune of Meteor


Mirror Mimics rune of Mirror Image
59


Arc Lightning rune of Electrocute


Intensify rune of Disintegrate


Calamity rune of Teleport
60

Unstable Anomaly


Unrelenting Storm rune of Blizzard


Prismatic Armor rune of Energy Armor


Improved Archon rune of Archon
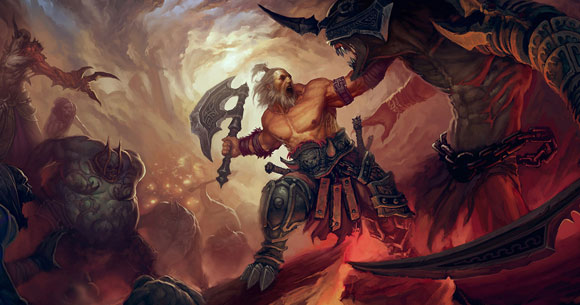
Barbarian is the Blizzard's vision of Hulk. This character is all about pure power. His attacks make the ground shake and the hell beasts always think twice before stepping in his way. This character class is one of two in Diablo III that focus on melee combat. Unlike the Monk that shows a lot of finesse in terms of tactics and skill choice, Barbarian is a more straightforward character, created to deal as much damage as possible.
Gamers whom liked the barbarian in Diablo II shouldn't be disappointed with his updated version. The creators of Diablo III haven't touched all the key elements of this character class, however they've also added some new skills that work well with the Barbarian's style of play. It shouldn't come as a surprise that this character class uses the most powerful skills for close combat encounters. Similar to the previous version of the Barbarian from twelve years ago you can also count on skills which increase the resistances, allow to use weapon for distance attacks, unlock sinister shouts and make it easier for the Barbarian to quickly move through the battlefield. If you still remember the battle with three warriors encountered near the mountain Arreat, then you should be pleased to hear that the Barbarian can summon his three brethren from time to time to assist him in battles.
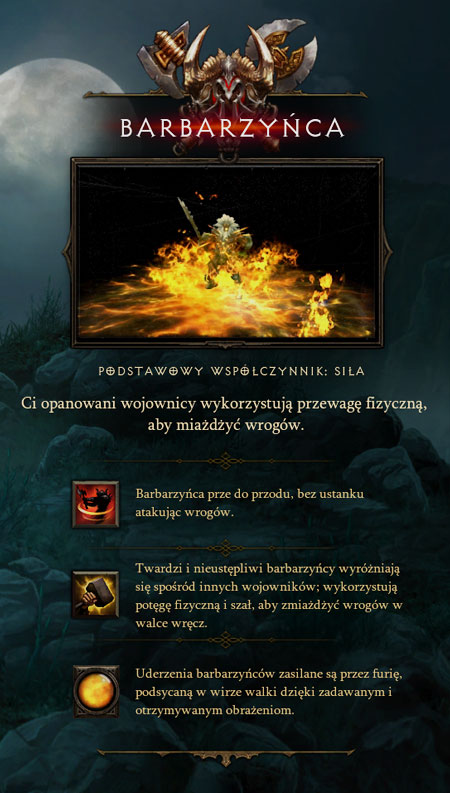
Barbarian always has only one purpose and that is to keep pushing forward, leaving piles of dead bodies behind. This isn't only a smart marketing slogan, especially since the barbarian's main source of energy is fury. The energy can be recharged in battle and it's achieved by using the basic skills. Once you've progressed in the game you may also find magical items or unlock better skill which will allow you to increase the fury's size, however for entire game fury level (the maximum is 100 points) will depend on the strength of your attacks. As for the attributes, barbarian's most important attribute is his Strength. This parameter influences how much damage you can inflict, how high is your DPS (damage per second) value and how good is your armor value.
Authors of Diablo III have prepared two types of special items for the Barbarian. The first group of objects are belts and they often increase the armor and/or Barbarian's strength. The second group are powerful one-handed and two-handed weapons. Unlike the Monk it's possible to play as a character holding a weapon in both hands and because of the high damage these kinds of weapons inflict it's recommended to use them. Sure, they often have a low attack speed, however combined with certain skills this drawback may become a secondary issue that won't bother you during the game.
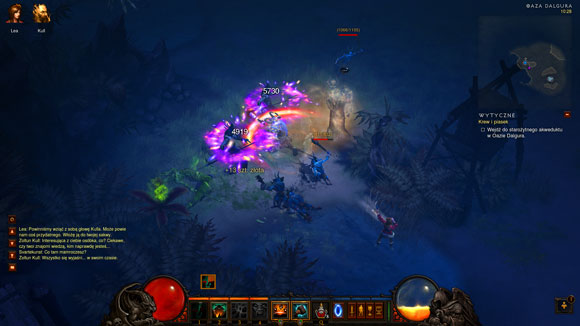
To summarize, playing as a Barbarian can be a joyful experience, as long as you don't mind engaging in the simplest and most direct battles. Barbarians are mean, brutal, uncompromising and very deadly, displaying the spirit of Blizzard's game in the best possible way. This is also a character class with which it's best to begin your journey with Diablo III.
When I started playing as a Barbarian I wanted to feel the incredible strength of my attacks and their deadly effectiveness with each mouse click. In my opinion this character class is an ideal choice for melee combat based on all types of weapons which offer high DPS value, however you may also find it suitable if you like to play with a one-handed weapon and a shield. I've had many years of experience with action RPG games and since the first minutes of my game as a Barbarian I've decided on a classical solution - inflicting massive damage using very powerful two handed-weapons and wearing heavy armors offering the best possible protection.
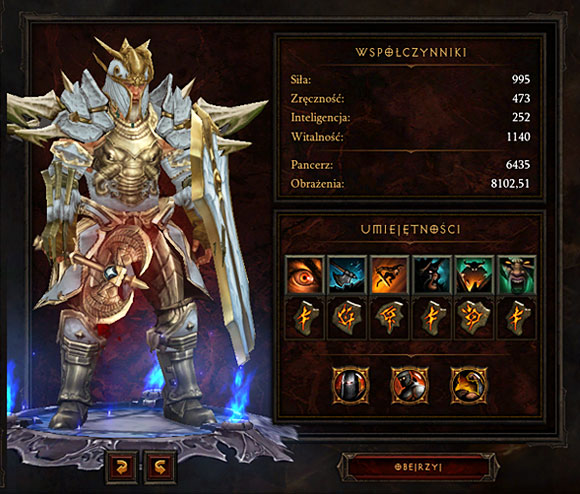
I've been using this character build with good results until reaching Act III on the Hell difficulty level. This build is a result of a lot of trial and error runs, however it's also based on my personal taste and preferences when it comes to tactics. Assuming you have the right gear it may however be named as a universal build that will suit gamers with various styles of play.
The list of suggested active and passive skills seen below contains many abilities which require the Barbarian to achieve a high experience level. Don't worry, because you can use alternative skills in the earlier parts of the game and in most cases they're equally interesting. As in other builds, I've also added recommendations on which runes you should choose and I also inform you when they become unlocked.

Frenzy + Maniac (59)
This is definitely one of the most important skills of my Barbarian build. The description of this skill says it all - your attack speed increases with each hit and after five hits it can reach a total bonus of 75 percent. Furthermore, the Maniac rune increases the damage up to 20 percent. Both of these bonuses will allow your hero to quickly deal with most of the enemy units he comes in contact with. Before you reach level 59 needed to unlock the suggested rune you may want to keep using the Triumph rune (22) instead. This rune can be very helpful when you have to wait for the healing potions to activate again.

Seismic Slam + Cracking Rift (57)
The suggested combination of skill and rune works a lot like Hammer of the Ancients on steroids. It has a very wide attack range which will make your Barbarian a person capable of performing successful attacks from a distance. This combination is helpful in both offensive as well as in defensive actions, because it allows you to slow down enemies that may want to pursue the Barbarian. Before you're eligible to use the rift rune you may want to replace it with Shattered Ground rune (25).

Leap + Iron Impact (14)
This jump is the most useful skill on the first two difficulty levels. You should use it especially if you want to quickly find yourself standing near enemy units to "steal" them from the rest of the team or to use the Revenge skill more effectively. As for the Iron Impact rune, it works like a safeguard, because it increases your armor value, giving you more time to react in case the demons you've started attacking turned out to be much harder to kill then they seemed. I wouldn't recommend using this skill on single enemies unless you've mastered it and you're sure you won't waste it.

Revenge + Provocation (52)
This is the second of the key skills of my character build. As mentioned above, it' works best with Leap + Iron Impact combination. You'll find this skill useful on many occasions, especially when it'll help you to eliminate a dozen enemies after getting surrounded. It's worth mentioning that this skill doesn't have an activation cost and it doesn't need to recharge. You can use it as much as you like, even once per second and against the same enemy units as before. This all makes it a lot of fun and you'll most likely immediately like the skill. The Provocation rune isn't of course your only choice. You may also consider using the Vengeance is Mine rune (19; improved health regeneration) or the Retribution rune (36; the Barbarian becomes even more deadly).

Battle Rage + Marauder's Rage (26)
The suggested combination allows the Barbarian to inflict 30 percent more damage for the next 30 seconds. It's best to activate it each time you're preparing to make a jump or you just want to move closer to a group of enemy units. When you've advanced to higher levels you'll be forced to start using better passive skills. This is a good moment to stop using the Animosity passive skill (27) and to modify the current build by using the Battle Rage along with Into the Fray rune (46). Doing this will allow to keep the fury at a reasonable level.

Wrath of the Berserker + Insanity (40)
This combination turns the Barbarian into a large, wild warrior that enters amuck and can deal with the most difficult opponents. This skill has a two minute regeneration period so it should be used only on the best enemies (you'll encounter plenty of them while playing on Hell and Inferno difficulty levels). As for the rune choice, Insanity is in my opinion a much better choice than Arreat's Wail (36). The reason is very simple, using the suggested rune allows you to inflict much more damage to enemy units. The suggested combination isn't the only one you should consider. Earthquake + The Mountain's Call (39) is also a good idea, especially when going against large group of enemies.

Nerves of Steel (13)
This passive skill was a very important part of my build until reaching the Inferno difficulty level. The best thing about Nerves of Steel is that the skill works really well with a tactic of inflicting as much damage as possible and having a lot of armor points at the same time. It's even better when you advance from Normal to Nightmare and when you to start to invest in Vitality points.

Tough As Nails (30)
This skill is a good combination with Nerves of Steel mentioned above. It's worth to invest in items which increase the strength of reflected enemy hits when you'll reach higher experience levels, because that's when the skill will reveal its true power.

Brawler (45)
The third passive skill on your list may constantly change depending on the circumstances you've currently found yourself in. My first favorite skill was Weapons Master (16). I've switched to Berserker Rage (20) and Animosity (27) as I've progressed in the game, however Brawler became my final choice. The main reason for that was the size of the bonus to damage.
A barbarian is without any doubt the king of the battlefield when it comes to short ranged combat and I've witnessed it many times while using the build described in this chapter of the guide. From the very beginning of the game I was able to pull deadly combos that were based on jumping towards enemies using Leap skill, damaging them using the Frenzy skill and ultimately annihilating them using the Revenge skill (don't forget that this skill can be activated several times in a short time without any penalties). That's how it was for the first two difficulty levels, however don't think they were boring. Hell no! Each use of all three skills above provided me with a lot of joy and satisfaction and I won't even mention that these skills made my Barbarian almost invincible.
Once I've advanced to Hell difficulty the gameplay became more interesting and of course much more demanding. Leap should still be among the skills you're using in all major battles, however you'll have to pay more attention to where you're landing, because even a short moment of disorientation can cost your Barbarian his life. This is especially important if you're fighting champions instead of standard monsters. When it gets really ugly you should rely on short jumps and count on improved armor. You'll probably notice when playing on Hell and Inferno difficulty levels that Earthquake becomes a less powerful skill, however you don't necessarily have to stop using it. It's worth to consider combining Wrath of the Berserker skill with the Earthquake. Both skill need a lot of time to recharge and depending on your preferences you can use them alternately or simultaneously.
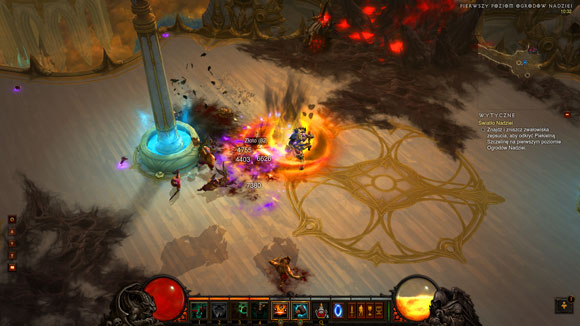
I would like to add a few words about possible variations of my build. If you notice that your Barbarian has difficulties handling flying enemies, like for example bees from Act II, you should consider adding Weapon Throw skill to your list even for a few minutes. It's recommended to upgrade this skill with Ricochet rune (25), allowing it to eliminate up to three enemy units with one attack. Throwing Hammer rune (33) on the other hand is useful when you encounter a goblin carrying a treasure and you want to slow it down to catch up to it. As for situations when you want to quickly run away from dangerous enemies, skills like Furious Charge are definitely worth testing.
As time progresses you'll be encountering more difficult monsters and this build will require to make some changes that suit your personal style of play. For example, in my case Battle Rage has stopped being useful in the middle of Act II while playing on the Hell difficulty level. As a result I've switched it to War Cry, but only because I was playing in the co-operative mode with my friends and that skill allowed to improve their armor values. The shout is best combined with Impunity rune (60), because some of the best enemies encountered on higher difficulty levels often deal elemental and magic damage. Before that rune becomes available you may consider using Hardened Wrath (32) instead.
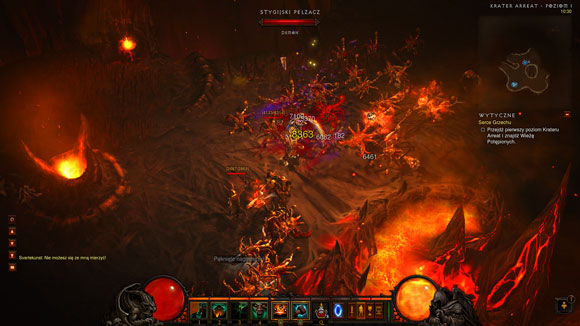
During my adventures with the Barbarian class I was searching mostly for items that provided bonuses to Strength and to Vitality. The warrior from the North is slightly different from his version in Diablo II, because he doesn't have a skill responsible for increasing natural resistance. This means that when playing on Hell and Inferno difficulty settings it's very important to acquire gear that lowers the significance of this problem and therefore increases his resistances. The last thing you should be looking for are weapons and jewels which increase damage done by critical hits.
The last thing I want to talk about is playing in multiplayer sessions. Barbarian's role is very similar in this case to a Monk, because he should become a "tank", taking most of the hits and convincing enemies to attack him. The difference between a Monk and a Barbarian is that a Barbarian is better at being a killing machine, because he has more offensive skills and can improve his armor value. It's also important to try and remain close to a player that can heal his colleagues and to a Monk that can improve the regeneration of health for the rest of the team. The more defensive classes - Wizards, Demon Hunters and Witch Doctors - should stay in the back, without engaging anyone in close combat. Don't forget about available shouts which can also help your allies, especially about the War Cry.
Smashing an enemy with a weapon. The attack inflicts increased damage and has a chance to knockback the target.

Required level: 1.
Resources: Generates fury points.
Runes for the Bash skill:

Clobber - The attacked opponent is stunned instead of knocked back.
Required level: 6.

Onslaught - Each attack has reverberations which cause additional damage to enemy units. Removed chance of knocking back the target.
Required level: 13.

Punish - Each time Bash skill is used the damage inflicted by the Barbarian's other skills is increased for a few seconds. The effect can be accumulated several times.
Required level: 26.

Instigation - Increased number of fury points generated by the Bash skill.
Required level: 44.

Pulverize - The Bash skill creates a shockwave that hits the enemies standing behind the attacked target. The wave inflicts weak weapon damage.
Required damage: 52.
Performing a wide weapon swing. The attack inflicts increased damage to all enemies that were hit.

Required level: 3.
Resources: Generates fury points.
Runes for the Cleave skill:

Rupture - Enemies killed with the Cleave skill explode when they die, inflicting smaller damage to other opponents standing nearby.
Required level: 9.

Reaping Swing - Increased number of fury points generated by the Cleave skill.
Required level: 18.

Scattering Blast - Each time an opponent is injured by a critical hit he's knocked back and adds additional damage to other opponents he bumps into.
Required level: 30.

Broad Sweep - Increased damage inflicted by the Cleave skill.
Required level: 47.

Gathering Storm - Enemies move slower for a short while after they're hit.
Required level: 55.
Performing an attack that aside from inflicting more damage increases the speed of the Barbarian's attacks with each hit. The effect can be accumulated several times.

Required level: 11.
Resources: Generates fury points.
Runes for the Frenzy skill:

Sidearm - Each attack offers a chance of throwing an axe at one of the nearby enemies. The thrown weapon damages all enemy units standing on the path to its target.
Required level: 17.

Triumph - Each time the Barbarian manages to kill an opponent while the Frenzy skill is active he will receive a small healing. The strength of the healing depends on the Barbarian's maximum number of Life points.
Required level: 22.

Relentless - Barbarian receives a bonus to movement speed as long as the skill is active.
Required level: 34.

Smite - Each attack performed while the Frenzy skill is active has a chance of stunning the target.
Required level: 51.

Maniac - Aside from increasing the attack speed the Frenzy skill also increases the amount of damage dealt to enemy units. The effect can be accumulated several times.
Required level: 59.
Summoning a massive hammer that strikes opponents standing in front of the Barbarian, inflicting increased damage. The skill also has a greater chance of scoring critical hits.

Required level: 2.
Resources: Requires fury points.
Runes for the Hammer of the Ancients skill:

Rolling Thunder - The hammer deals less damage, however it creates a shockwave that affects enemies standing a few meters away from the main character.
Required level: 7.

Smash - The skill affects a smaller area, however it deals more damage.
Required level: 15.
The Devil's Anvil - Tremors are created in the area of the attack and they slow down enemy units for a short while.
Required level: 27.

Thunderstrike - Each time an opponent is killed with the Hammer of the Ancients nearby enemy units become stunned for a few seconds.
Required level: 39.

Birthright - If the Hammer of the Ancients skill scores a critical hit there's a chance of receiving an additional treasure or a health orb from the slain enemy.
Required level: 53.
Performing an attack that causes all enemy units standing close to the Barbarian to bleed. The effect lasts a few seconds.

Required level: 5.
Resources: Requires fury points.
Runes for the Rend skill:

Ravage - Greatly increased range of the skill.
Required level: 11.

Blood Lust - Part of the damage inflicted by the Rend skill returns to the Barbarian in a form of Life points.
Required level: 19.

Lacerate - Greatly increased damage dealt by the skill.
Required level: 33.

Mutilate - Extended duration of the Rend skill.
Required level: 45.

Bloodbath - If a bleeding enemy was killed, then his death will cause smaller bleedings to affect other opponents standing nearby.
Required level: 56.
Punching the ground in order to cause a seismic wave which inflicts additional damage and knocks back enemy units.

Required level: 12.
Resources: Requires fury points.
Runes for the Seismic Slam skill:

Stagger - The seismic wave has a chance of stunning opponents for a short time.
Required level: 18.

Shattered Ground - Increased damage and extended knockback range of the skill.
Required level: 25.

Rumble - The Seismic Slam skill leaves tremors behind after it's stopped working. The tremors deal additional damage to nearby enemies for some time.
Required level: 35.

Strength from Earth - Greatly reduced number of fury points needed to cause the wave.
Required level: 48.

Cracking Rift - The seismic wave deals more damage, however it injures only the opponents standing directly in front of the main character. The range of the skill is also reduced.
Required level: 57.
The barbarian becomes a moving and living whirlwind, adding increased damage to all enemy units standing around him. Movement speed is reduced for the duration of the Whirlwind skill.

Required level: 20.
Resources: Drains fury points each second the skill is active.
Runes for the Whirlwind skill:

Dust Devils - Additional whirlwinds are created and they also damage everything in their path.
Required level: 24.

Hurricane - The main character can move with normal speed while the Whirlwind skill is active.
Required level: 29.

Blood Funnel - Each critical hit regenerates some of the main character's Life points.
Required level: 37.

Wind Shear - Each enemy strike generates fury points.
Required level: 44.

Volcanic Eruption - The whirlwind is turned into a torrent of magma that inflicts massive fire damage.
Required level: 59.
Stomping the ground with great force that stuns all nearby enemy units for a few seconds.

Required level: 4.
Resources: Generates fury points.
Runes for the Ground Stomp skill:

Deafening Crash - After the stun effect stops working the enemies move slower for a few additional seconds.
Required level: 12.

Wrenching Smash - The area affected by the stomp is increased and enemies are pulled towards the Barbarian moments before the attack.
Required level: 18.

Trembling Stomp - Enemies from the radius of the attack also receive lesser weapon damage.
Required level: 28.

Foot of the Mountain - Increased number of generated fury points.
Required level: 40.

Avalanche - Enemies affected by the stomp are knocked back and they also inflict damage to other opponents they bump into.
Required level: 54.
Performing a long jump, inflicting damage to all enemies stationed near the landing area. The enemies injured during the attack also have their movement speed reduced for a few seconds.

Required level: 8.
Resources: Generates fury points.
Runes for the Leap skill:

Iron Impact - The Barbarian receives a large bonus to his armor after he lands. The effect lasts a few seconds.
Required level: 14.

Launch - Enemies stationed in the area where the jump originated from are slowed down for a few seconds.
Required level: 21.

Toppling Impact - Knocking back enemies stationed near the landing area.
Required level: 32.

Call of Arreat - Increased range of the slow down effect. Affected enemies are also thrown to the sides.
Required level: 44.

Death From Above - Stunning enemies stationed near the landing area. The effect lasts several seconds.
Required level: 60.
Increasing the main character's movement speed. The effect lasts a few seconds.

Required level: 16.
Resources: Requires fury points.
Runes for the Sprint skill:

Rush - Increased chances of avoiding enemy hits while sprinting.
Required level: 23.

Run Like the Wind - Tornadoes appear behind the Barbarian, following him and injuring everyone they come in contact with.
Required level: 29.

Marathon - Increased duration of the sprint and further improvement to the movement speed.
Required level: 38.

Gangway - The Barbarian can slam through enemy units, inflicting minor damage to them.
Required level: 46.

Forced March - Increased movement speed of nearby allies. The effect lasts a few seconds.
Required level: 53.
Decreasing for a few seconds the damage inflicted by enemy units.

Required level: 22.
Runes for the Ignore Pain skill:

Bravado - Knocking back all enemies standing around the Barbarian, along with inflicting small damage to them.
Required level: 26.

Iron Hide - Extended duration of the skill.
Required level: 31.

Ignorance is Bliss - Some of the received damage is transformed into Life points.
Required level: 36.

Mob Rule - Increased radius of the skill so that it can also influence the Barbarian's allies.
Required level: 43.

Contempt for Weakness - Some of the ignored damage is reflected back to injure enemy units.
Required level: 58.
Throwing an ancient spear at an enemy. The weapon pulls the enemy towards the Barbarian, as well as inflicts increased damage and reduces the opponent's movement speed.

Required level: 9.
Resources: Generates fury points.
Runes for the Ancient Spear skill:

Grappling Hooks - Two additional spears are thrown and they hit enemies standing on both sides of the main character.
Required level: 15.

Skirmish - Increased number of generated fury points.
Required level: 23.

Dread Spear - Some of the inflicted damage is converted into Life points.
Required level: 32.

Harpoon - The spear pierces through targets found on its path and then drags them back.
Required level: 39.
Rage Flip - The Spears pulls back the targets, inflicting increased damage.
Required level: 49.
Receiving a chance of performing a Revenge attack each time the main character is hit by someone. The skill itself deals increased damage to all enemies standing nearby and also regenerates some of the Life points with each successful hit.

Required level: 13.
Runes for the Revenge skill:

Vengeance is Mine - Increased number of received Life points. The Barbarian also receives fury points each time he attacks someone with the Revenge skill being active.
Required level: 19.

Best Served Cold - After the Revenge skill was activated the critical hit chance is increased for a few seconds.
Required level: 25.

Retribution - Increased damage inflicted by the Revenge skill.
Required level: 36.

Grudge - After the Revenge skill was activated all opponents standing nearby are knocked back.
Required level: 41.

Provocation - Increased chances of activating the Revenge skill as a result of being attacked.
Required level: 52.
Performing a charge that deals massive damage to all enemy units standing in the Barbarian's way.

Required level: 21.
Resources: Generates fury points.
Runes for the Furious Charge skill:

Battering Ram - The Barbarian charges towards a specific target, inflicting even more damage to that opponent.
Required level: 27.

Merciless Assault - Each time an opponent is hit with the Furious Charge the cooldown time of the skill is reduced.
Required level: 33.

Stamina - Each time an opponent is hit with the Furious Charge skill the Barbarian receives several fury points.
Required level: 38.

Bull Rush - If a critical hit was made with the Furious Charge skill the attacked opponent becomes stunned for a few seconds.
Required level: 47.

Juggernaut - Each time an opponent is hit with the Furious Charge skill the Barbarian regains some of the Life points.
Required level: 56.
Dealing major damage to all targets stationed around the Barbarian. Each critical hit can shorten the amount of time needed to recharge the skill.

Required level: 26.
Runes for the Overpower skill:

Storm of Steel - The Barbarian throws three axes at nearby enemies, dealing reduced damage.
Required level: 29.

Killing Spree - Increased chances of scoring critical hits. The effect lasts a few seconds.
Required level: 34.

Crushing Advance - Some of the received damage is reflected back to the enemy units. The effect activates along with the Overpower skill and stays active for a few seconds.
Required level: 42.

Momentum - Each successful attack made with the Overpower skill grants several fury points.
Required level: 48.

Revel - Each successful attack made with the Overpower skill allows the Barbarian to regain some health.
Required level: 59.
Throwing a weapon at an enemy unit, inflicting major injuries and decreasing the target's movement speed.

Required level: 14.
Resources: Requires fury points.
Runes for the Weapon Throw skill:

Mighty Throw - Increased damage inflicted by the thrown weapon.
Required level: 21.

Ricochet - The thrown weapon ricochets, hitting as a result several enemies (they must be standing close to each other).
Required level: 25.

Throwing Hammer - The thrown weapon has a chance to stun the target for a short time.
Required level: 33.

Stupefy - A chance to disorientate an enemy for a few seconds, causing him to attack other opponents.
Required level: 42.

Dread Bomb - All available fury points are spent on throwing a corpse of a defeated opponent. Enemies standing in the area receive additional damage (the size of the damage depends on how many fury points were originally spent).
Required level: 54.
Performing a shout which results in reducing the strength of the attacks performed by nearby enemies. The effect lasts 15 seconds.

Required level: 17.
Resources: Generates fury points.
Runes for the Threatening Shout skill:

Intimidate - The shout reduces the movement speed of all affected enemy units.
Required level: 23.

Falter - Attacks of enemy units affected by the shout become slower for the next few seconds.
Required level: 28.

Grim Harvest - A chance to collect an additional treasure if an enemy affected by the shout was killed.
Required level: 37.

Demoralize - Enemies affected by the shout are forced to attack only the Barbarian.
Required level: 43.

Terrify - A chance for the affected enemy units to start running away from the Barbarian.
Required level: 57.
Entering a rage mode that lasts half a minute. While in this mode the barbarian's attacks inflict more damage and he also has higher chances of performing critical hits.

Required level: 22.
Resources: Requires fury points.
Runes for the Battle Rage skill:

Marauder's Rage - Increased bonus to inflicted damage.
Required level: 26.

Ferocity - Successful critical hits extend the duration of the rage mode.
Required level: 31.

Swords to Ploughshares - Successful critical hits performed while the rage mode is active increase the chances of enemies dropping health orbs.
Required level: 38.

Into the Fray - Successful critical hits performed while the rage mode is active have a chance of generating additional fury points.
Required level: 46.

Bloodshed - Successful critical hits performed while the rage mode is active have a chance of causing blood explosions that damage all enemies standing nearby.
Required level: 54.
Shouting a war cry which results in increasing the armor of the main character and all of his allies standing nearby. The effect lasts one minute.

Required level: 28.
Resources: Generates fury points.
Runes for the War Cry skill:

Hardened Wrath - Increased bonus to armor.
Required level: 32.

Charge! - Increased number of generated fury points.
Required level: 35.

Invigorate - Increased maximum number of Life points and improved health regeneration of all characters affected by the War Cry.
Required level: 41.

Veteran's Warning - Increased chances of dodging enemy hits.
Required level: 49.

Impunity - Increased resistances of all characters affected by the War Cry.
Required level: 60.
Causing the earth to shake for a few seconds. As a result of the earthquake enemies receive enormous fire damage.

Required level: 19.
Resources: Requires fury points.
Runes for the Earthquake skill:

Giant's Stride - Earthquake's aftershocks follow the Barbarian, inflicting smaller fire damage to encountered enemies.
Required level: 24.

Chilling Earth - The earthquake deals frost damage and significantly reduces movement speed of the affected enemy units.
Required level: 29.

The Mountain's Call - The skill stops using fury points and its cooldown time is shortened.
Required level: 39.

Aftershocks - Earthquake's aftershocks deal fire damage to enemy units and they also knock them back.
Required level: 50.

Path of Fire - Earthquake's aftershocks appear in front of the Barbarian, dealing smaller fire damage.
Required level: 56.
Summoning three ancient barbarians - Talic, Korlic and Madawc. The barbarians remain on the battlefield for 15 seconds, supporting the main character in combat. Each of the summoned barbarians deals lesser damage and uses his own skills. Talic is using a shield and a sword and he also knows the Whirlwind skill. Korlic is using a polearm and he also knows the Cleave skill. Madawc uses two axes and he also knows the Weapon Throw skill.

Required level: 25.
Resources: Requires fury points.
Runes for the Call of the Ancients skill:

The Council Rises - Increased damage inflicted by the ancient barbarians. They also receive a large bonus to their armors.
Required level: 31.

Duty to the Clan - Extended duration of the skill.
Required level: 37.

Korlic's Might - Morlic gains the Furious Charge skill which allows him to inflict additional damage to his targets.
Required level: 45.

Madawc's Madness - Morlic gains the Seismic Slam skill which allows him to inflict additional damage to his targets.
Required level: 51.

Talic's Anger - Talic gains the Leap skill which allows him to inflict additional damage to enemies standing near his landing points.
Required level: 58.
Entering a berserker mode that lasts 15 seconds. While in this mode the barbarian can count on several bonuses: to critical hit chances, attack speed, dodge chances and movement speed.

Required level: 30.
Resources: Requires fury points.
Runes for the Wrath of the Berserker skill:

Arreat's Wail - Nearby enemies get knocked back and receive massive damage when the skill is activated.
Required level: 36.

Insanity - Very large bonus to inflicted damage.
Required level: 40.

Slaughter - As long as the berserker mode is active there's a chance of causing blood explosions with critical hits. The explosions damage all enemies standing nearby.
Required level: 46.

Striding Giant - Increased chances of performing dodges.
Required level: 52.

Thrive on Chaos - Each time a sufficient number of fury points is gathered the berserker mode is extended.
Required level: 60.
Icon
Required level
Description

10
Pound of Flesh
Increased chances of finding the health orbs and improved healing received from them.

10
Ruthless
Increased chances of performing critical hits. They also deal more damage.

13
Nerves of Steel
The armor is improved based on the Barbarian's current Vitality.

16
Weapons Master
Receiving one of the bonuses depending on the currently used weapon:
Sword or a dagger: increased damage
Mace or an axe: increased chances of scoring critical hits
Polearms and spears: increased attack speed
Mighty weapons: addition fury points gained with each hit.

20
Berserker Rage
The Barbarian can inflict more damage if he has a maximum number of Fury points.

20
Inspiring Presence
The shouts last twice as long and once they've ended the Barbarian's health is being regenerated.
Here's a list of available shouts (active skills):
Battle Rage
Threatening Shout
War Cry

24
Bloodthirst
Some of the damage dealt to enemy units returns to the Barbarian as Life points.

27
Animosity
Improved fury regeneration and fury's maximum value.

30
Superstition
Reduced non-physical damage received by the Barbarian. He can also count on receiving several Rage points if he suffered from a ranged or a magical attack.

30
Tough As Nails
Improved armor value and increased thorns damage.

35
No Escape
Increased damage inflicted by the Ancient Spear and Weapon Throw skills. If the spear gets a critical hit, then it instantly becomes available again. The thrown weapons recharges Fury points if a critical hit was scored.

40
Relentless
Each time the Barbarian is low on health his skills stop draining Fury points and he receive less damage from his enemies.

45
Brawler
Additional damage can be inflicted if the Barbarian is surrounded by at least a few enemies.

50
Juggernaut
Reduced duration of effects that can immobilize the main character. There's also a chance of regenerating health points each time the Barbarian was stunned, feared or charmed.

55
Unforgiving
The Barbarian instead of losing Fury points outside of battle can slowly regenerate them.

60
Boon of Bul-Kathos
A significant reduction to cooldown times of the Earthquake, Call of the Ancients and Wrath of the Berserker active skills.
Level
Active Skills
Passive Skills
Skill Runes
1

Bash
2

Hammer of the Ancients
3

Cleave
4

Ground Stomp
5

Rend
6


Clobber rune of Bash
7


Rolling Thunder rune of Hammer of the Ancients
8

Leap
9

Ancient Spear


Rupture rune of Cleave
10

Pound of Flesh

Ruthless
11

Frenzy


Ravage rune of Rend
12

Seismic Slam


Deafening Crash rune of Ground Stomp
13

Revenge

Nerves of Steel


Onslaught rune of Bash
14

Weapon Throw


Iron Impact rune of Leap
15


Smash rune of Hammer of the Ancients


Grappling Hooks rune of Ancient Spear
16

Sprint

Weapons Master
17

Threatening Shout


Sidearm rune of Frenzy
18


Reaping Swing rune of Cleave


Wrenching Smash rune of Ground Stomp


Stagger rune of Seismic Slam
19

Earthquake


Blood Lust rune of Rend


Vengeance is Mine rune of Revenge
20

Whirlwind

Berserker Rage

Inspiring Presence
21

Furious Charge


Launch rune of Leap


Mighty Throw rune of Weapon Throw
22

Battle Rage

Ignore Pain


Triumph rune of Frenzy
23


Skirmish rune of Ancient Spear


Rush rune of Sprint


Intimidate rune of Threatening Shout
24

Bloodthirst


Giant's Stride rune of Earthquake


Dust Devils rune of Whirlwind
25

Call of the Ancients


Shattered Ground rune of Seismic Slam


Best Served Cold rune of Revenge


Ricochet rune of Weapon Throw
26

Overpower


Punish rune of Bash


Marauder's Rage rune of Battle Rage


Bravado rune of Ignore Pain
27

Animosity


The Devil's Anvil rune of Hammer of the Ancients


Battering Ram rune of Furious Charge
28

War Cry

Trembling Stomp rune of Ground Stomp


Falter rune of Threatening Shout
29


Run Like the Wind rune of Sprint


Chilling Earth rune of Earthquake


Hurricane rune of Whirlwind


Storm of Steel rune of Overpower
30

Wrath of the Berserker

Superstition

Tough As Nails


Scattering Blast rune of Cleave
31


Ferocity rune of Battle Rage


Iron Hide rune of Ignore Pain

The Council Rises rune of Call of the Ancients
32


Toppling Impact rune of Leap


Dread Spear rune of Ancient Spear


Hardened Wrath rune of War Cry
33


Lacerate rune of Rend


Throwing Hammer rune of Weapon Throw


Merciless Assault rune of Furious Charge
34


Relentless rune of Frenzy


Killing Spree rune of Overpower
35

No Escape


Rumble rune of Seismic Slam


Charge! rune of War Cry
36


Retribution rune of Revenge


Ignorance Is Bliss rune of Ignore Pain


Arreat's Wail rune of Wrath of the Berserker
37


Grim Harvest rune of Threatening Shout


Blood Funnel rune of Whirlwind


Duty to the Clan rune of Call of the Ancients
38


Marathon rune of Sprint


Stamina rune of Furious Charge


Swords to Ploughshares rune of Battle Rage
39

Thunderstrike rune of Hammer of the Ancients


Harpoon rune of Ancient Spear

The Mountain's Call rune of Earthquake
40

Relentless


Foot of the Mountain rune of Ground Stomp


Insanity rune of Wrath of the Berserker
41


Grudge rune of Revenge


Invigorate rune of War Cry
42

Stupefy rune of Weapon Throw


Crushing Advance rune of Overpower
43


Demoralize rune of Threatening Shout


Mob Rule rune of Ignore Pain
44


Instigation rune of Bash


Call of Arreat rune of Leap

Wind Shear rune of Whirlwind
45

Brawler


Mutilate rune of Rend


Korlic's Might rune of Call of the Ancients
46


Gangway rune of Sprint


Into the Fray rune of Battle Rage


Slaughter rune of Wrath of the Berserker
47


Broad Sweep rune of Cleave


Bull Rush rune of Furious Charge
48


Strength from Earth rune of Seismic Slam


Momentum rune of Overpower
49


Rage Flip rune of Ancient Spear


Veteran's Warning rune of War Cry
50

Juggernaut


Aftershocks rune of Earthquake
51


Smite rune of Frenzy


Madawc's Madness rune of Call of the Ancients
52


Pulverize rune of Bash


Provocation rune of Revenge


Striding Giant rune of Wrath of the Berserker
53


Birthright rune of Hammer of the Ancients


Forced March rune of Sprint
54


Avalanche rune of Ground Stomp


Dread Bomb rune of Weapon Throw


Bloodshed rune of Battle Rage
55

Unforgiving


Gathering Storm rune of Cleave
56


Bloodbath rune of Rend


Path of Fire rune of Earthquake


Juggernaut rune of Furious Charge
57


Cracking Rift rune of Seismic Slam


Terrify rune of Threatening Shout
58


Contempt for Weakness rune of Ignore Pain


Talic's Anger rune of Call of the Ancients
59


Maniac rune of Frenzy


Volcanic Eruption rune of Whirlwind


Revel rune of Overpower
60

Boon of Bul-Kathos

Death From Above rune of Leap


Impunity rune of War Cry

Thrive on Chaos rune of Wrath of the Berserker
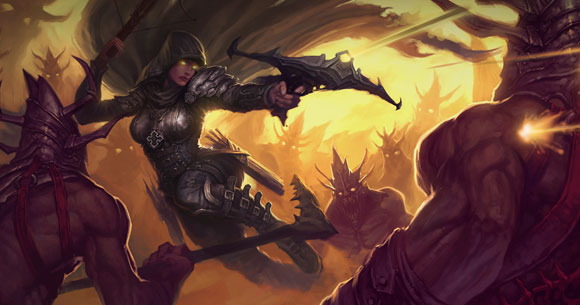
My first contact with the Demon Hunter was interesting, because this character class immediately reminded me of a combination between the Amazon from Diablo II and the famous Witcher from other RPG series. The more I played the game this feeling was becoming stronger.
Demon Hunter is in my opinion the most interesting of all the character classes available in the game. While playing in close combat you must be constantly moving, trying to circling the enemies. When the fights switch to large distance combat you may use many various strategies. These strategies include carrying bows, fast one-handed crossbows, heavy two-handed siege crossbows, throwing knives and grenades, as well setting up traps, constructing defense turrets and relying on shadow skills which allow the Demon Hunter to stay invisible for a short while. That's not all, because I didn't even mention summoning various companions to the battlefield, like ravens, spiders, bats, boars, ferrets or wolves...
The Demon Hunter has one important similarity with the Monk, because his main attribute is Dexterity which allows him to deal more damage and which increases his chances of performing successful dodges. This class has various offensive and defensive skills and uses two types of energy sources. Hatred restores quickly and it can also be charged by some skills. Discipline on the other hand is used with more "technical" skills. It regenerates much slower and it offers a smaller number of points. Having two energy types means of course that you can use very advanced tactical manuevers, making this class a feast for a fan of the hack'n'slash genre.
The hunter can be armed only with one-handed weapons in melee combat, however he shows his true potential when he's carrying and actively using one of the ranged weapons. If you prefer high speed ranged attacks, then you should consider equipping this character class with two crossbows. If you prefer to have better attributes and want the weapon to show more potential, then you should consider using a bow mixed with special types of quivers, like for example with "ammunition" which increases attack speed, improves Dexterity or allows for faster regeneration of both energy sources. It's worth mentioning that Demon Hunters can use hoods created specifically for them and these objects in many cases allow the hunters to improve their Dexterity.
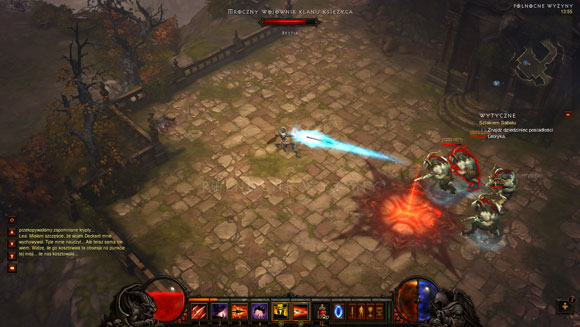
The official Blizzard's artbook says that Demon Hunters have a unique gothic style inspired by the clothes worn in the Middle Ages. This and all the perks mentioned earlier in the text should be enough for a recommendation and each Diablo III fan should spend time exploring the advantages of this class at least once.
I've associated the Demon Hunter with speed from the very first minutes I've spent playing as this character class. I wasn't a big fan of the Amazon in Diablo II, however in this case I've almost immediately decided to rely on the hunter's bow & crossbow talents. The combination of those two elements - agility and attacking from afar - convinced me to focus mostly on the skills which increase the amount of damage inflicted by ranged attacks. I've also wanted to stay out of the range of enemy units for as long as possible and therefore I was extensively using skills and runes helpful in slowing them down.
Below, I have presented the build that I have been using almost throughout the entire game, along with various variations. Torment requires a bit different approach and frequent altering of tactics, and skills, but before you reach there, you will become no stranger to the most arcane aspects of fighting as the Demon Hunter and you will be able to arrive at your own build. I encourage you to share your combinations of skills, in the comment section below! Next to the individual skill, I provided the name of the applied rune and, in the parentheses, I supplied the level at which you can unlock it. Remember that, to be able to use the below combination of skills, you need to have activated the "selection mode" in the "Game" tab, in the game options.

Entangling Shot + Heavy Burden (34)
I've been using the Hungering Arrow since the moment I've started playing the game, however I've made the change as soon as the Entangling Shot skill became available. This skill works great with the previously described tactic of slowing down enemy units and inflicting major damage from a distance. You can also use the time you've been given to retreat to a safe place. I would like to add that in closed spaces, likes dungeons, crypts or caves, you may consider choosing the Grenades skill instead, because it's very effective, creating deadly fields of explosions in front of the main character.

Rapid Fire + Web Shot (19)
I have to admit that this skill is my weak spot. Seeing the Demon Hunter use his bow almost as a machine gun is a joy for the eyes. The skill itself is also very effective and versatile, because it allows to control both the single enemies as well as groups of opponents. The Web Shot rune is a great addition, because the arrows can slow down enemy units even by 80 percent. I strongly recommend using this active skill in combination with the Vengeance passive skill, because it increases the number of available Hatred points. Otherwise you may run out of energy very quickly.

Caltrops + Hooked Spines (12)
This tactical ability allows the main character to safely retreat from the battlefield or, by placing three caltrops in a line, to gain additional seconds needed to kill an enemy. The Hooked Spines rune is the best choice if you want to use this skill to slow down enemy units and Jagged Spikes rune (28) is the best choice if you want to use it to inflict more damage. At the beginning of the game, I had a preference for the former rune mentioned here.

Vault + Tumble (33)
This is another "tactical" skill that allows to instantly gain a ranged advantage over an opponent or to secure the Demon Hunter's quick escape. It's also a fundamental skill when it comes to fighting bosses and all other stronger opponents, because it helps in evading their best attacks that take a lot of time to charge. The same thing applies to situations when a large group of enemies appears on the horizon rather unexpectedly. Once I've advanced in the game I've finally decided to switch this skill with Evasive Fire + Displace (42) combination. I was still able to make a similar jump for a lower Discipline cost and the recommended combination inflicted serious damage to enemy units (it's not however as useful as moving on the battlefield very fast).

Elemental Arrow + Frost Arrow (29)
This skill works great with the tactic of slowing down enemy units whenever possible and it offers a similar effect to Hungering Arrow + Shatter Shot (26) combination. I usually start each fight by using this skill and then add the Rapid Fire skill to finish off enemy units. I also like to load the Hatred bar by activating the Entangling Shot. Once you've advanced to level 59 you may also consider using the Nether Tentacles rune, because it's one of the few ways to guarantee yourself health regeneration.

Multishot + Fire at Will (26)
A perfect skill in acts III and IV, where you often need to deal with swarms of the pesky small opponents. The rune decreases its cost considerably, which at the same time makes it available to be used with the other skills that use hatred.

Vengeance (10)
Vengeance is a key passive skill for me, especially since I use three active skills based on Hatred. Thanks to the regeneration of Demon Hunter's two energy sources (by collecting health orbs) this passive skill is absolutely crucial while playing on higher difficulty levels. It also encourages the hunter to move a lot around on the battlefield.

Cull the Weak (20)
This is an indispensable skill considering my tactic of combining quick attacks with being able to effectively slow down enemy forces. You may also consider using Steady Aim (16) from time to time.

Archery (30)
If you've decided on fighting with bows and crossbows, then you absolutely must choose this passive skill. It mixes very well with the previous passive skill described above, increasing the effectiveness of ranged attacks. Once you've advanced to higher difficulty levels you may want to start using Sharpshooter skill (50) instead, especially if you have a high DPS value.
The most important thing about the build recommended by this guide, and this applies to all difficulty levels, is to keep a safe distance from enemy units, especially if Steady Aim passive skill was chosen. This tactic is called kiting and it's about avoiding enemy hits and being on a constant move.
Depending on a type of enemy you've encountered, you may want to start the battle with the Elemental Arrow skill followed by the Rapid Fire skill or move back to create a larger distance between the opponent and the main character. This can be achieved by using Vault / Evasive Fire skills or by leaving the Caltrops behind the Demon Hunter. If an enemy is capable of pulling the main character towards him you should have Smoke Screen / Vault ready to be used. Don't forget to collect health orbs while moving on the battlefield. This should be done even when your Life bar is full, because you can still regenerate Hatred.
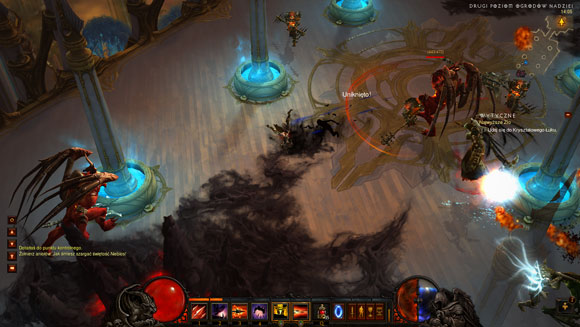
Towards the end of the Expert difficulty level I slowly started to abandon the Multishot skill. When I didn't have to fight a group of small enemies I prefer the Fan of Knives + Retaliate (32) combination. This combination is very useful when the Demon Hunter gets surrounded and obviously it happens very often. It also comes in handy when you can't use Smoke Screen or Vault. If you want to follow a different path you may delete the Fan of Knives skill from the list and choose the Preparation + Battle Scars (35) combination, especially when the Caltrops skill was replaced by Smoke Screen (read the next paragraph).
It's worth adding a few lines about modifying this build so that it can respond better to certain types of situations when playing on the Hell difficulty level. If you notice that you're using the Vault too often, then you may consider replacing the Caltrops skill with Smoke Screen. You may also start using the Preparation skill instead of Multishot. Starting at level 35, the Preparation skill offers the Battle Scars rune which regenerates 60 percent of your Life. Once you have this combination the tactics are simple: use the Smoke Screen each time you've found yourself in a dangerous situation and then activate Preparation when the smoke disappears to regain Life and Discipline points. The next step is to activate the shield or jump away, waiting for the Preparation skill or some other ability to recharge. The last phase may be expanded by drinking a health potion. Another tactic for resolving the problem of dying too often is to replace Cull the Weak / Steady Aim with Brooding which regenerates Life outside of combat, but it should be treated only as last resort.
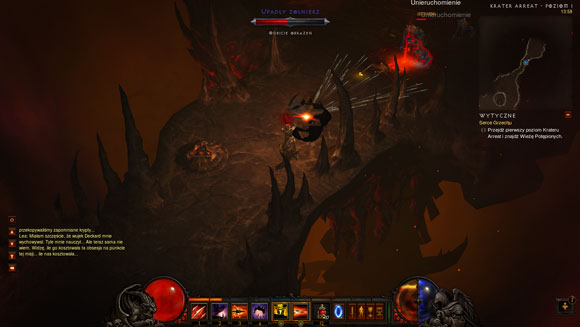
When using this build on the higher difficulty levels it becomes obvious that you must equip your Demon Hunter with items which increase attack speed (almost all quivers among other things), and increase movement speed (boots, amulets etc). I was also collecting items which at the same time increase Dexterity / Vitality, guarantee health regeneration (when striking an enemy and a result of killing enemies) and recharge one of the energy sources. Once you've advanced to the highest difficulty levels it's good to ensure that all parts of the Demon Hunter's gear add bonuses to both attributes mentioned above. Good jewels are also priceless, especially amethysts (more Vitality and Life points), emeralds (more Dexterity and greater chances of scoring critical hits) and rubies (more weapon damage).
All Demon Hunter builds based on slowing down enemy units, including this one, are very good if you're playing with a team. Slowing the opponents will allow your allies to gain valuable seconds needed to eliminate large groups without receiving too much damage. The Multishot may often save Barbarians and Monks from being surrounded by a lot of enemy units.
If during your time spent playing as a Demon Hunter you'll notice that some of the skills I've ignored are suited to your style of play, then don't hesitate to use them. As always, this build is merely an example and thousands more can be created. There's also no such thing as an ideal build. Still, if you'll follow my instructions you shouldn't be disappointed.
Firing a magic arrow which searches for a target and inflicts increased damage. The arrow also has a chance to pierce through a demon and to hit the next enemy.

Required level: 1.
Resources: Generates hatred points.
Runes for the Hungering Arrow skill:

Piercing Arrow - Increased chances of the arrow piercing through a body of an enemy unit.
Required level: 6.

Serrated Arrow - the arrow is set on fire and damage from weapon turns into damage from fire. Increases the inflow of Hatred points.
Required level: 17.

Shatter Shot - If the arrow pierces through an opponent it splits into several projectiles.
Required level: 26.

Devouring Arrow - Each successful piercing results in inflicting more damage to an enemy unit.
Required level: 42.

Spray of Teeth - A critical hit with an arrow causes an explosion which inflicts lesser damage to all nearby enemy units.
Required level: 52.
Firing a magic arrow imbued with dark energy which inflicts small damage and entangles enemy units. The movement speed of the affected opponents is reduced for a while.

Required level: 3.
Resources: Generates hatred points.
Runes for the Entangling Shot skill:

Chain Gang - Increased number of entangled enemies.
Required level: 9.

Chain Lightning - Lightning damage is inflicted to an attacked opponent for a few seconds.
Required level: 18.

Heavy Burden - Increased duration of the slow down effect.
Required level: 34.

Justice is Served - Increased number of generated hatred points.
Required level: 47.

Bounty Hunter - Enhances the slow-down effect.
Required level: 54.
Firing an explosive bola which wraps itself around the enemy and explodes after a short while, dealing increased fire damage to the target and smaller fire damage to other enemies standing nearby.

Required level: 11.
Resources: Generates hatred points.
Runes for the Bola Shot skill:

Volatile Explosives - Increased radius of the explosion.
Required level: 14.

Thunder Ball - When the bola explodes it inflicts increased lightning damage and also has a chance to stun the target for a short while.
Required level: 24.

Acid Strike - Several bolas are fired and they inflict increased poison damage to their target. The downside is that they don't explode and they don't injure other enemy units.
Required level: 37.

Bitter Pill - When the bola explodes the main character receives a chance of regaining several discipline points.
Required level: 51.

Imminent Doom - damage from bolas is enhanced and it turns into damage from fire.. Also, the explosion occurs with a slight delay.
Required level: 57.
Throwing several grenades which inflict fire damage to all affected enemy units.

Required level: 15.
Resources: Generates hatred points.
Runes for the Grenades skill:

Tinkerer - Increased number of generated hatred points.
Required level: 22.

Cluster Grenades - Cluster grenades are thrown instead of standard ones, inflicting more damage to all enemies standing nearby.
Required level: 32.

Cluster Grenades - you throw several grenades that deal damage from fire.
Required level: 40.

Stun Grenades - Grenades have a chance of stunning enemy units for a short while.
Required level: 48.

Gas Grenades - Grenades are filled with gas. They inflict poison damage when they explode and they also leave a poisonous cloud behind. Enemies standing in the cloud continue to receive lesser poison damage.
Required level: 60.
Impaling an enemy to inflict huge weapon damage.

Required level: 2.
Resources: Requires hatred points.
Runes for the Impale skill:

Impact - A chance of knocking back and stunning the target with the Impale skill.
Required level: 7.

Chemical Burn - the target additionally burns and receives enhanced damage from fire, for several seconds.
Required level: 15.

Overpenetration - The blade pierces through all enemies standing in a straight line.
Required level: 28.

Ricochet - the dagger ricochets and hits several opponents.
Required level: 53.

Grievous Wounds - Critical hits inflict more damage.
Required level: 58.
Firing a series of arrows rapidly, inflicting increased physical damage.

Required level: 5.
Resources: Requires hatred points for each first attack of the series and smaller number of points for the next ones.
Runes for the Rapid Fire skill:

Withering Fire - Reduced hatred cost. The arrows are also set on fire which allows them to inflict fire damage.
Required level: 11.

Web Shot - Affected enemy units move slower for a while.
Required level: 19.

Fire Support - Homing missiles are deployed when the Rapid Fire skill is active. The missiles hit nearby targets, inflicting lesser physical damage.
Required level: 32.

High Velocity - Fired arrows have a chance of piercing through enemy units.
Required level: 45.

Bombardment - Grenades replace the arrows and they inflict fire damage to all opponents standing nearby.
Required level: 56.
Firing a spinning chakram which inflicts increased physical damage to enemy units standing in its way.

Required level: 12.
Resources: Requires hatred points.
Runes for the Chakram skill:

Twin Chakrams - Two chakrams are released, however each one of them deals less damage.
Required level: 18.

Serpentine - The thrown chakram moves slower on an arc path, inflicting poison damage to the affected enemy units.
Required level: 26.

Razor Disk - The thrown chakram spirals out, inflicting arcane damage to the affected enemy units.
Required level: 34.

Boomerang - The thrown chakram acts as a boomerang, inflicting increased lightning damage to the affected enemy units.
Required level: 48.

Shuriken Cloud - The main character becomes surrounded with spinning chakrams and they add lesser physical damage to all enemies they come in contact with.
Required level: 57.
Firing a burning arrow which inflicts increased fire damage to all targets it passes through.

Required level: 20.
Resources: Requires hatred points.
Runes for the Elemental Arrow skill:

Ball Lightning - A slow moving arrow is fired and it deals increased lightning damage to all targets it passes through.
Required level: 24.

Frost Arrow - A frost arrow is fired. It explodes after coming in contact with the target, releasing several smaller projectiles and dealing increased frost damage. The movement speed of all affected enemy units is reduced for a while.
Required level: 29.

Screaming Skull - A chance of shooting a skull which scares away enemy units for a short time.
Required level: 36.

Lightning Bolts - Electrified arrows are deployed and they stun enemy units each time a critical hit occurs.
Required level: 43.

Nether Tentacles - Tentacles are fired. They inflict increased physical damage and transform some of the damage into Life points.
Required level: 59.
Placing a caltrops trap on the ground which activates when an opponent gets close enough to it. The caltrops slow down enemies for a few seconds.

Required level: 4.
Resources: Requires discipline points.
Runes for the Caltrops skill:

Hooked Spines - Increased strength of the slow down effect.
Required level: 12.

Torturous Ground - When the trap is activated all nearby enemies become immobilized for a short while.
Required level: 18.

Jagged Spikes - Enemies standing within the trap's range receive small weapon damage each second.
Required level: 28.

Carved Stakes - Reduced cost of activating the Caltrops skill.
Required level: 41.

Bait the Trap - The main character receives increased chances of scoring critical hits if he's standing within the trap's range.
Required level: 54.
Disappearing in a cloud of smoke, resulting in the main character becoming invisible for some time.

Required level: 8.
Resources: Requires discipline points.
Runes for the Smoke Screen skill:

Displacement - The Demon Hunter receives a bonus to movement speed after the skill was activated.
Required level: 14.

Lingering Fog - Extended duration of the skill.
Required level: 23.

Healing Vapors - while you are invisible, your health regenerates.
Required level: 33.

Special Recipe - removes the cost to use the skill but extends cooldown time.
Required level: 44.

Choking Gas - The main character leaves a cloud of gas behind him which stays for a while, inflicting lesser physical damage to enemy units.
Required level: 59.
Using the power of the shadow which for a few seconds transforms some of the damage into Life points.

Required level: 16.
Resources: Requires discipline points.
Runes for the Shadow Power skill:

Night Bane - slows down the enemies within the radius of 30 meters.
Required level: 21.

Blood Moon - More Life points received as a result of using the Shadow Power skill.
Required level: 29.

Well of Darkness - removes the cost to use the skill but extends cooldown time.
Required level: 37.

Gloom - Receiving less damage from enemy units.
Required level: 51.

Shadow Glide - When the Shadow Power skill is active the main character's movement speed is increased.
Required level: 58.
Performing a big backwards somersault.

Required level: 9.
Resources: Requires discipline points.
Runes for the Vault skill:

Action Shot - Arrows are released when performing the somersault and they inflict small weapon damage to nearby foes.
Required level: 16.

Rattling Roll - All nearby enemies are knocked back and stunned while performing the somersault.
Required level: 23.

Tumble - Each somersault performed within a short amount of time costs less discipline points than the previous one.
Required level: 33.

Acrobatics - The skill doesn't need discipline points anymore, however it needs to recharge after each activation.
Required level: 38.

Trail of Cinders - Enemies affected by the skill are set on fire and therefore receive fire damage.
Required level: 49.
Immediately regenerates 35 discipline points.

Required level: 13.
Runes for the Preparation skill:

Invigoration - permanently increases the maximum amount of discipline.
Required level: 19.

Punishment - for some of the discipline points, you receive 75 hatred. Removes cooldown time for Preparation.
Required level: 25.
Battle Scars - Some Life points are restored after activating the Preparation skill.
Required level: 35.

Focused Mind - Instead of restoring all discipline at once the recharge rate of this energy source is greatly increased.
Required level: 44.

Backup Plan - A chance for the Preparation skill to immediately recharge.
Required level: 52.
Summoning a crow companion which can attack enemies periodically, inflicting small physical damage.

Required level: 17.
Resources: Requires discipline points.
Runes for the Companion skill:

Spider Companion - A spider is summoned instead of the crow and its attacks slow down enemy units.
Required level: 22.

Bat Companion - A bat is summoned instead of the crow. Having the bat as a companion means that the main character can regain several hatred points each second.
Required level: 29.

Boar Companion - instead of the raven, the skill summons a boar that attacks all enemies around. Enhances health regeneration and resistance.
Required level: 41.

Ferret Companion - A ferret is summoned instead of the crow. This companion can collect gold and having it as an ally also increases the chances of enemies leaving more gold when they die.
Required level: 46.

Wolf Companion - A wolf is summoned instead of the crow and it's capable of inflicting physical damage. The wolf howl increases the dealt damage by 30.
Required level: 59.
Marking an enemy with a death sign for 30 seconds. A tagged opponent becomes more susceptible to attacks.

Required level: 21.
Resources: Requires discipline points.
Runes for the Marked for Death skill:

Contagion - When a marked enemy is killed the death sign spreads to nearby opponents. The effect can be repeated several times.
Required level: 27.

Valley of Death - An area on the ground is marked for 15 seconds and all enemies that occupy it become more susceptible to receiving damage.
Required level: 31.

Grim Reaper - Some of the damage dealt to the marked target is also spread among other nearby enemies.
Required level: 39.

Mortal Enemy - Attacks on the marked target allow to regain hatred points.
Required level: 48.

Death Toll - Attacks on the marked target allow to transform some of the damage into Life points.
Required level: 60.
Shooting at an enemy, inflicting increased weapon damage. If the target is close enough to the main character, than the Demon Hunter also performs a backflip.

Required level: 14.
Resources: Generates hatred points.
Runes for the Evasive Fire skill:

Shrapnel - Exploding bullets are deployed and they go off after hitting the target, inflicting lesser fire damage to all opponents standing nearby.
Required level: 21.

Parting Gift - Each time the Demon Hunter performs a backflip he leaves a poisonous bomb behind. The bomb detonates with a delay, inflicting poison damage to all nearby enemies. The attacks made before the backflip also deal poison damage.
Required level: 26.

Covering Fire - A series of bullets is released. They can hit several targets, inflicting increased weapon damage.
Required level: 34.

Displace - Increased distance of the backflip.
Required level: 42.

Surge - removes cooldown, but the skill costs you discipline.
Required level: 53.
Throwing a fan of knives which inflict increased damage to all opponents standing around the Demon Hunter. The affected enemy units also have to deal with reduced movement speed.

Required level: 17.
Cost: Free
Runes for the Fan of Knives skill:

Pinpoint Accuracy - Increases cooldown and increases damage.
Required level: 23.

Bladed armor - surrounds your character with whirling blades, which adds to armor.
Required level: 32.

Knives Expert - removes cooldown cost but increases hatred cost.
Required level: 38.

Fan of Daggers - A chance to stun enemies with the knives for a short while.
Required level: 44.

Assassin's Knives - The main character starts using long range knives which hit several additional targets, inflicting weaker weapon damage.
Required level: 59.
Placing a spike trap on the ground which is armed with a slight delay and activates when an opponent gets close enough to it. The trap inflicts additional physical damage to all affected enemy units. The number of traps that may be placed at the same time is limited.

Required level: 17.
Resources: Requires hatred points.
Runes for the Spike Trap skill:

Echoing Blast - increases damage from traps.
Required level: 27.

Sticky Trap - The trap is placed on an enemy unit instead on the ground. If an enemy dies within a designated time limit, then the trap explodes, inflicting damage to other nearby opponents.
Required level: 30.
Long Fuse - More time needed to arm the trap and more damage inflicted by it.
Required level: 39.

Lightning Rod - The trap releases a pulse of lightning when it's activated. The pulse jumps between enemies, inflicting increased lightning damage.
Required level: 46.

Scatter - Several traps are simultaneously placed on the ground.
Required level: 55.
Deploying a sentry turret which starts attacking nearby enemies, inflicting lesser weapon damage. The turret is active for 20 seconds.

Required level: 25.
Resources: Requires Hatred points.
Runes for the Sentry skill:

Spitfire Turret - The sentry also fires homing missiles which hit random targets and inflict additional damage.
Required level: 28.

Impaling Bolt - fires projectiles that pierce the enemy.
Required level: 36.

Chain of Torment - A chain is created between the main character and the turret and it inflicts small weapon damage to all enemies that touch it.
Required level: 45.

Aid Station - Nearby allies regain Life points each second.
Required level: 52.

Guardian Turret - The turret creates a shield which reduces damage inflicted to allies.
Required level: 60.
Shooting at random enemies, inflicting increased weapon damage. The main character's movement speed is reduced when he shoots.

Required level: 19.
Resources: Requires hatred points.
Runes for the Strafe skill:

Emberstrafe - You leave a trail of fire.
Required level: 24.

Stinging Steel - The main character throws knives instead of shooting. The knives inflict additional weapon damage if they manage to score a critical hit.
Required level: 29.

Drifting Shadow - Lower penalty to movement speed when shooting.
Required level: 37.

Rocket Storm - The main character also fires homing missiles which inflict lesser fire damage.
Required level: 50.

Demolition - Grenades are thrown and when they explode they inflict greater weapon damage to all nearby enemies.
Required level: 56.
Firing many arrows at the same time. They inflict increased damage to all enemies in the attacked area.

Required level: 22.
Resources: Requires hatred points.
Runes for the Multishot skill:

Fire at Will - Reduced cost of activating the skill. Also, the arrows deal lightning damage.
Required level: 26.

Burst Fire - each shot that you take causes a burst of poison.
Required level: 31.

Suppression Fire - Each time an enemy is hit the Demon Hunter receives some discipline points.
Required level: 39.

Full Broadside - Increased damage inflicted by the Multishot skill.
Required level: 46.

Arsenal - Missiles are also fired and they inflict small fire damage.
Required level: 55.
Firing a cluster arrow which explodes, inflicting increased fire damage. The explosion also creates smaller fire bombs which inflict standard fire damage.

Required level: 27.
Resources: Requires hatred points.
Runes for the Cluster Arrow skill:

Dazzling Arrow - Enemies hit by the arrow may become stunned for a while.
Required level: 33.

Shooting Stars - Several missiles are deployed instead of grenades. They inflict greater physical damage.
Required level: 36.

Maelstrom - Shadow energy is released instead of grenades. It inflicts greater physical damage and the main character can also transform some of the damage dealt into Life points.
Required level: 41.

Cluster Bombs - Bombs are sent flying in the air. They inflict increased fire damage when they land.
Required level: 49.

Loaded for Bear - More damage inflicted by the first explosion.
Required level: 58.
Firing many arrows in the air. They land after a few seconds, inflicting lesser weapon damage to all affected enemy units.

Required level: 30.
Runes for the Rain of Vengeance skill:

Dark Cloud - Extended duration of the "arrow rain". The arrows inflict less damage, however they're homing in on enemy units.
Required level: 35.

Shade - Enhances the area of effectiveness of arrows.
Required level: 40.

Stampede - A wave of beasts is summoned. They attack enemies by inflicting lesser weapon damage and knocking them back.
Required level: 47.

Anathema - A shadow beast is summoned which throws grenades at enemy units, inflicting increased weapon damage. The beast stays on the battlefield for a few seconds.
Required level: 54.

Flying Strike - A group of shadow beasts fall from the sky, inflicting weapon damage in the designated area and stunning enemies for a short while.
Required level: 60.
Icon
Required level
Description

10
Tactical Advantage
Each time the main character uses the Vault, Smoke Screen or Evasive Fire skill his movement speed is increased for a few moments.

10
Thrill of the Hunt
One of the fired arrows immobilizes a target once every few seconds.

13
Vengeance
Increased number of hatred points. Also, each collected health orb generates some hatred and discipline points.

16
Steady Aim
If there are no enemies standing close to the Demon Hunter, then all of his attacks deal more damage.

20
Cull the Weak
Increased damage inflicted to slowed targets.

20
Night Stalker
Each critical hit has a chance of regenerating some of the Demon Hunter's discipline points.

25
Brooding
If the Demon Hunter didn't receive any damage recently his health regenerates once every second.

27
Hot Pursuit
After you hit an enemy, you receive a bonus to speed of movement.

30
Archery
A bonus is received depending on a type of ranged weapon the Demon Hunter is using:
Bow: increased damage.
Two-handed crossbow: more powerful critical hits.
One-handed crossbow: increased chances for critical hits.

30
Numbing Traps
Damage inflicted by enemy units is reduced for a few seconds assuming they were recently attacked by Fan of Knives, Spike Traps or Caltrops skill.

35
Perfectionist
All skills need less discipline points. Enhances resistance to elements, health and armor.

40
Custom Engineering
Enhances the duration of the Caltrops, Marked for Death, Spike Trap and Sentinel as well as the amount of these.

45
Grenadier
Enhances damage from grenades and blast radius. The main character leaves a grenade on the ground when he dies and the object explodes inflicting increased fire damage.

50
Sharpshooter
Critical hit chances increase with each second that passes. The bonus is reset each time the main character performs a critical hit.

55
Ballistics
Increased damage inflicted by various kinds of missiles.
Level
Active Skills
Passive Skills
Skill Runes
1

Hungering Arrow
2

Impale
3

Entangling Shot
4

Caltrops
5

Rapid Fire
6


Piercing Arrow rune of Hungering Arrow
7


Impact rune of Impale
8

Smoke Screen
9

Vault


Chain Gang rune of Entangling Shot
10

Tactical Advantage

Thrill of the Hunt
11

Bola Shot


Withering Fire rune of Rapid Fire
12

Chakram


Hooked Spines rune of Caltrops
13

Preparation

Vengeance
14

Evasive Fire


Displacement rune of Smoke Screen


Volatile Explosives rune of Bola Shot
15

Grenades


Chemical Burn rune of Impale
16

Shadow Power

Steady Aim


Action Shot rune of Vault
17

Companion

Fan of Knives

Spike Trap


Cinder Arrow rune of Hungering Arrow
18


Chain Lightning rune of Entangling Shot


Torturous Ground rune of Caltrops


Twin Chakrams rune of Chakram
19

Strafe


Web Shot rune of Rapid Fire


Invigoration rune of Preparation
20

Elemental Arrow

Cull the Weak

Night Stalker
21

Marked for Death


Shrapnel rune of Evasive Fire


Night Bane rune of Shadow Power
22

Multishot


Tinkerer rune of Grenades


Spider Companion rune of Companion
23


Lingering Fog rune of Smoke Screen


Rattling Roll rune of Vault


Crippling Razors rune of Fan of Knives
24

Thunder Ball rune of Bola Shot


Equilibrium rune of Strafe


Ball Lightning rune of Elemental Arrow
25

Sentry

Brooding


Punishment rune of Preparation
26

Shatter Shot rune of Hungering Arrow


Serpentine rune of Chakram


Parting Gift rune of Evasive Fire


Fire at Will rune of Multishot
27

Cluster Arrow

Hot Pursuit


Bandolier rune of Spike Trap


Contagion rune of Marked for Death
28


Overpenetration rune of Impale


Jagged Spikes rune of Caltrops


Spitfire Turret rune of Sentry
29


Blood Moon rune of Shadow Power

Bat Companion rune of Companion


Stinging Steel rune of Strafe


Frost Arrow rune of Elemental Arrow
30

Rain of Vengeance

Archery

Numbing Traps

Sticky Trap rune of Spike Trap
31

Valley of Death rune of Marked for Death


Burst Fire rune of Multishot
32


Fire Support rune of Rapid Fire


Cluster Grenades rune of Grenades


Retaliate rune of Fan of Knives
33


Breathe Deep rune of Smoke Screen


Tumble rune of Vault

Dazzling Arrow rune of Cluster Arrow
34


Heavy Burden rune of Entangling Shot


Razor Disk rune of Chakram


Covering Fire rune of Evasive Fire
35

Perfectionist


Battle Scars rune of Preparation


Dark Cloud rune of Rain of Vengeance
36


Screaming Skull rune of Elemental Arrow


Vigilant Watcher rune of Sentry


Shooting Stars rune of Cluster Arrow
37


Acid Strike rune of Bola Strike


Well of Darkness rune of Shadow Power


Drifting Shadow rune of Strafe
38


Acrobatics rune of Vault


Hail of Knives rune of Fan of Knives
39


Long Fuse rune of Spike Trap


Grim Reaper rune of Marked for Death


Suppression Fire rune of Marked for Death
40

Custom Engineering


Fire Bomb rune of Grenades


Beastly Bombs rune of Rain of Vengeance
41


Carved Stakes rune of Caltrops


Boar Companion rune of Companion


Maelstrom rune of Cluster Arrow
42


Devouring Arrow rune of Hungering Arrow


Displace rune of Evasive Fire
43

Lightning Bolts rune of Elemental Arrow
44


Special Recipe rune of Smoke Screen


Focused Mind rune of Preparation


Fan of Daggers rune of Fan of Knives
45

Grenadier


High Velocity rune of Rapid Fire


Chain of Torment rune of Sentry
46


Ferret Companion rune of Companion


Lightning Rod rune of Spike Trap


Full Broadside rune of Multishot
47


Justice is Served rune of Entangling Shot


Stampede rune of Rain of Vengeance
48


Boomerang rune of Chakram


Stun Grenades rune of Grenades


Mortal Enemy rune of Marked for Death
49


Trail of Cinders rune of Vault


Cluster Bombs rune of Cluster Arrow
50

Sharpshooter


Rocket Storm rune of Strafe
51


Bitter Pill rune of Bola Shot


Gloom rune of Shadow Power
52


Spray of Teeth rune of Hungering Arrow


Backup Plan rune of Preparation


Aid Station rune of Sentry
53


Awareness rune of Impale


Surge rune of Evasive Fire
54


Bounty Hunter rune of Entangling Shot


Bait the Trap rune of Caltrops

Anathema rune of Rain of Vengeance
55

Ballistics


Scatter rune of Spike Trap


Arsenal rune of Multishot
56


Bombardment rune of Rapid Fire


Demolition rune of Strafe
57


Imminent Doom rune of Bola Shot


Shuriken Cloud rune of Chakram
58


Grievous Wounds rune of Impale


Shadow Glide rune of Shadow Power


Loaded for Bear rune of Cluster Arrow
59


Choking Gas rune of Smoke Screen


Wolf Companion rune of Companion


Assassin's Knives rune of Fan of Knives


Nether Tentacles rune of Elemental Arrow
60


Gas Grenades rune of Grenades


Death Toll rune of Marked for Death


Guardian Turret rune of Sentry


Flying Strike rune of Rain of Vengeance
After a 12 year break the Necromancer from Diablo II returns in an entirely different form. Black magic, charms, summoning zombies and fetishes - this is what you can count on when playing as the most original and dark class in Diablo III. Witch Doctor should be an ideal choice for players that like to surround themselves with various types of allies, rely on magic based on the forces of nature, poison their enemies and make them scared.
Blizzard has managed to create a very interesting character. The Jamaican shaman knows English very well and on one hand it's based on warlock/druid/shaman characters and on the other hand it presents lots of similarities to pirates and members of the old cultures of Latin America. This character class has its own style, mixing dark humour with dark powers of the voodoo. Playing as a Witch Doctor may prove to be a challenge at first glance and it may seem that this character isn't easy to develop and control, however sooner or later you'll start recognizing the amazing usefulness of his deadly skills. There's tons of abilities to choose from. For example, you can shoot poison darts, throw frogs and jars filled with spiders, weaken enemy units with charms and voodoo magic, use fetishes known from act III of Diablo II and summon powerful allies, like zombie dogs or bats. There's also a chance to call a colossal toad for help, to create a wall made of zombies or to build a tower made of ghouls which falls down on enemy monsters. To summarize, there's plenty of options and the variety of the skills makes the Witch Doctor a universal warrior, unlike anything you may have seen in other hack'n'slash games.
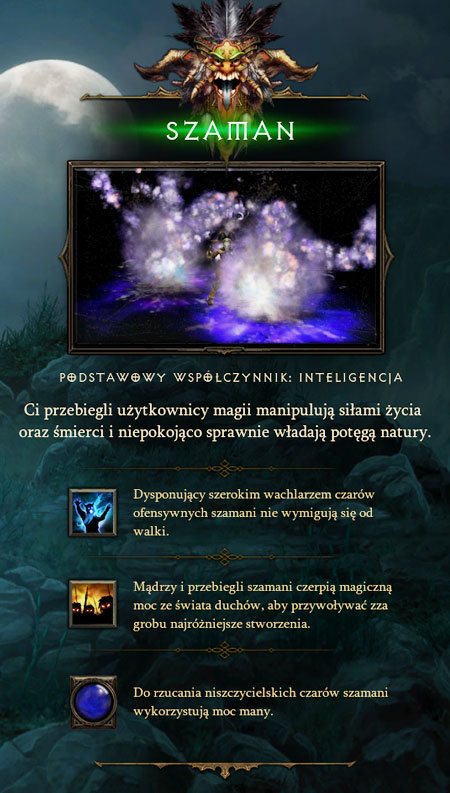
Playing as a Witch Doctor is an art of finding balance between ranged attacks, summoning monsters which help out the main character and using charms in a proper way. You also have to pay a lot of attention to cooldown times of all available skills. This character class uses the traditional mana as the energy source. Mana regenerates on its own and it happens both during combat as well as between fights. The Witch Doctor has one important similarity with the Wizard, because his most important attribute is Intelligence. Increasing Intelligence allows to inflict more damage.
The Witch Doctor can use three types of unique items. Ceremonial knives come in handy in melee combat. They also often increase the Intelligence attribute, mana regeneration and the main character's resistances. A mojo is a good choice for the other hand. This category of items contains voodoo dolls and jars filled with eyes, snakes and other nasty stuff. All these objects can also increase main attributes and resistances of the Witch Doctor. The bonuses mentioned above are so useful that it's recommended to equip mojos even if using bows or two-handed weapons may seem like a better choice. As for third category, Witch Doctors can use unique voodoo masks which come in various and often hilarious shapes and forms.
Let's do a quick summary. If you liked to play as a Necromancer in Diablo II, then you should definitely consider the Witch Doctor as your top pick in the game. It doesn't mean that the choice is restricted to the necromancer fans, because all players can enjoy the humour, style of play and skill variety of the Witch Doctor. I strongly recommend giving this character class a chance. Even if you won't like it at least you'll have good memories from seeing a toad swallowing enemies or a group of small fetishes stabbing demons with knives.
The Witch Doctor for me is a synonym of the art of relying on forces of nature, poisons and voodoo magic, however I had no idea how to approach this character class when I was starting the game. The main reason for that is because it offers many different styles of play and all of them allow to inflict a lot of damage.
Ultimately I've decided to create a shaman that will be attacking his enemies from a distance and that will summon powerful creatures to take roles of "tanks" (it means their job is to center enemy attacks on them and to keep the monsters away from the main character). I've also been using charms whenever possible, trying to stay away from areas where main battles take place.
The build described below is a result of the tactic I've just explained. I've been using it with good result until advancing to the Hell difficulty level. At that point I was forced to make some significant changes and they're mentioned in the section about tactics on the battlefield.
Just as in other build examples, I provide suggestions not only about skills, but also about the best runes for each ability. I also say when a certain rune becomes unlocked.

Poison Dart + Splinters (6)
This is an uncomplicated, easy to use skill. I've been relying on this attack from the moment I've unlocked the first rune for it. It may seem at first glance that the recommended rune offers a low damage value, however it makes up for it with the speed of the attacks and with high precision. This makes the skill a great choice to take down enemies from a distance, even if you can't see them on the screen. You may want to consider a different combination when you advance in the game - Firebomb + Flash Fire (28). If you'd like to stay with the Poison Dart, then you should switch the suggested rune with Flaming Dart (43) as soon as the latter becomes available.

Firebats + Dire Bats (11)
This skill uses tons of mana if it's activated without any runes. Thankfully it can change when you advance to level 11, because that's when the Firebats + Dire Bats combination becomes available and it's almost perfect. Both actions offer chances of attacking the enemies from a distance and also the main skill allows to harm the monsters that were able to get closer to the main character. The bats are much reliable than for example zombies from the Zombie Charger + Zombie Bears (54) combination, because they have a bigger range and they can be summoned much quicker.
Spirit Walk + Jaunt (23)
This is an ideal skill to be used when you need to free yourself after being surrounded or simply when you want to move away quickly from the main battlefield. Spirit Walk saved my life on many occasions on higher difficulty levels, however I've discovered its full potential after unlocking the Healing Journey rune (53). The reason for that is because that rune makes it easy to heal in every situation and on all difficulty levels.

Soul Harvest + Siphon (21)
From what I know this is one of Witch Doctor's skills that is a part of a great number of character builds published by other gamers. It increases the inflicted damage and it also restores a large portion of the main character's health. You can use it even when you're going against a single opponent, however it's most powerful when fighting large groups of monsters. There's only one problem about Soul Harvest - in order to fully charge this skill you must find yourself close to at least five enemy units. Such attempts may have tragic consequences if you're not careful enough, so make sure that you're surrounded by zombie dogs and other allied creatures.

Summon Zombie Dogs + Life Link (28)
The main purpose of the zombie dogs existence is to grant the Witch Doctor enough time to kill all enemy units from a distance. That's all, but it's a strong enough reason. The dogs aren't too resistant and you might even think that this skill is totally expendable, however their objective isn't too survive, but to give you more time to perform your main attacks. This tactic is repeated in all battles and it always works. When you've advanced in the game you might consider using the suggested rune interchangeably with Leeching Beasts (54).
Gargantuan + Restless Giant (29)
This is another creature that can be summoned and is used only for a purpose of becoming a "tank", giving you more time to use the Poison Dart or some other offensive ability. As for the Restless Giant rune, it's important, because it increases the offensive capabilities of the gargantuan. You may want to consider switching it with Bruiser (56) later in the game.

Jungle Fortitude (10)
This is an indispensable passive ability when using two active skills to summon allied creatures. You may consider switching this ability with Zombie Handler (24) when playing on Normal and Nightmare. After you've advanced to higher difficulty levels reducing the damage taken from enemy units will become more important than increasing health values of summoned units.

Spiritual Attumnemtn (13)
This passive skill is very helpful when you're using skills which require a lot of mana to work, like Firebats for example. Passive energy regeneration only increases its value. I haven't changed this skill to any other throughout the entire game and I would recommend that you do the same thing.

Bad Medicine (20)
This is a very good skill, because it reduces the strength of enemy attacks. I've been frequently switching it with Blood Ritual (20) while playing on Nightmare and I've finally changed my mind and started using the Vision Quest (40) skill when it became available to me. The reason for that change was because it was helping me in tougher battles, especially when I've activated all skills and run out of mana needed for basic offensive actions (it happens very often on Hell difficulty).
Playing as a Witch Doctor is not always a piece of cake. You must spend a lot of time running and once you've advanced to higher difficulty levels you must invest in items which allow the main character to regenerate life and mana points easily. Just like in other character classes that prefer ranged attacks you should also practice a tactic called kiting - moving around the battlefield quickly and avoiding enemy attacks whenever possible.
On all difficulty levels except for Inferno my tactic of playing as the Witch Doctor with the build described earlier in the text looked pretty much the same. Each time I've encountered a group of enemy units I casted Soul Harvest in order to increase the damage inflicted by the main character. I then moved back to a safe distance, allowing my zombie dogs and other summoned creatures to stop enemies from going after me. The next step was to start attacking enemies with Poison Dart and Firebats skills. Each time it was getting more dangerous near my character I was using the Spirit Walk ability to pull away even further from the battlefield in order to give my active skills plenty of time to recharge. This defensive skill isn't your only choice when you want to escape. Horrify + Stalker (21) combination also worked very well, however only on lower difficulty levels, because enemies from higher levels are often resistant to these types of charms.
Each time I encountered a boss when playing as a Witch Doctor I switched Gargantuan with Hex + Hedge Magic (26) in order to receive an additional source for health regeneration. When going against bosses it's also a good idea to mix Summon Zombie Dogs skill with Leeching Beasts rune so that the summoned creatures can last longer. It's worth mentioning that a good source for Life regeneration is the Haunt + Consuming Spirit (18) combo.
During your journeys it's best to modify your build depending on the current situation on the battlefield. When moving in tight corridors you should consider using the Wall of Zombies + Pile On (49) combination. Encounters with groups of smaller monsters in acts III and IV are on the other hand good moments to test Mass Confusion + Paranoia (46), Grasp of the Dead + Rain of Corpses (53) and (in early parts of the game) Plague of Toads + Rain of Toads (35) combos. What's interesting is that Grasp of the Dead skill is still very useful on the Inferno difficulty setting, especially with a rune which slows down enemy units, allowing other players in the game to have a breathing moment.
Once you've finished the game on Normal and advanced to Nightmare you should start equipping your Witch Doctor not only with items which increase his Intelligence (DPS and resistances) but also his Vitality (number of Life points). Make sure to keep all objects which allow you to regenerate your health and energy quickly, add bonuses to damage (rings, mojos) and improve your skills. The shaman may feel like a fragile character at the beginning of the game, but as the game progresses he becomes a true demon killing machine, especially with raised resistances and faster mana regeneration.
Last but not least, let's talk about playing as a Witch Doctor in multiplayer. When you're exploring the world in co-operation with other players you should be using two skills as often as possible: Hex + Hedge Magic (26) and Big Bad Voodoo (all runes for this skill will do the job). The first recommended skill is a healing one and it's extremely helpful when going against stronger monsters. The second recommended skill offers similar bonuses, however it can also be used to increase attack speed and damage inflicted by other players from the group.
Firing a poison dart which inflicts poison damage after hitting the target. The effect lasts a few seconds.

Required level: 1.
Resources: Requires mana points.
Runes for the Poison Dart skill:

Splinters - Three poison darts are fired and each dart inflicts smaller poison damage.
Required level: 6.

Numbing Dart - Toxins from the poison dart reduce movement speed of the attacked enemy.
Required level: 13.

Spined Dart - Each time a dart hits an enemy the main character regains some of his mana points.
Required level: 25.

Flaming Dart - The dart is set on fire and thanks to that it inflicts increased fire damage.
Required level: 43.

Snake to the Face - The poison dart turns into a snake that has a chance to stun the target for a short while.
Required level: 52.
Throwing a jar full of spiders. They inflict lesser physical damage during their short lifespan.

Required level: 3.
Resources: Requires mana points.
Runes for the Corpse Spiders skill:
Leaping Spiders - Leaping spiders are summoned. They inflict more damage and they can leap towards distant targets.
Required level: 9.

Spider Queen - A queen is summoned for 15 seconds. It gives birth to smaller spiders which inflict weak poison damage. Only one queen can be summoned at a certain moment of the game.
Required level: 18.

Widowmakers - A group of widowmaker spiders is summoned. They regenerate Witch Doctor's mana each time they hit someone.
Required level: 33.

Medusa Spiders - Medusa spiders are summoned. Their attacks have a chance of slowing down enemy units.
Required level: 45.

Blazing Spiders - Blazing spiders are summoned and they can inflict greater fire damage.
Required level: 55.
Releasing a group of toads. They inflict increased poison damage to all enemies that stand in their way.

Required level: 11.
Resources: Requires mana points.
Runes for the Plague of Toads skill:

Explosive Toads - The toads mutate, exploding and dealing serious fire damage to all enemies they come in contact with.
Required level: 17.

Toad of Hugeness - A giant toad is summoned. It remains on the battlefield for a few seconds, swallowing enemies and dealing physical damage. This rune also adds a 5-second cooldown to the main skill.
Required level: 24.

Rain of Toads - Toads rain down from the sky. The effect lasts a few seconds and enemies receive increased poison damage.
Required level: 35.

Addling Toads - Yellow mutated toads are created. They inflict increased poison damage and they can confuse enemies for a few seconds.
Required level: 51.

Toad Affinity - The Plague of Toads skill is used for free.
Required level: 54.
Throwing an exploding skull. The explosion deals small fire damage to all enemies standing nearby.

Required level: 21.
Resources: Requires mana points.
Runes for the Firebomb skill:

Flash Fire - The skull instead of exploding leaps several times between opponents, dealing less damage after each jump.
Required level: 28.

Roll the Bones - The skull bounces several times before exploding.
Required level: 31.

Fire Pit - The explosion sets the area on fire. The effect lasts a few seconds and deals small fire damage to all enemies standing in the fire.
Required level: 38.

Pyrogeist - A column of flames is created. It spits fire towards the nearest opponent, inflicting increased fire damage for the next few seconds.
Required level: 47.

Ghost Bomb - Aside from the first explosion the skull also creates a secondary explosion. It's bigger and it inflicts fire damage.
Required level: 60.
Causing ghoulish hands to reach out from the ground for a few seconds. They inflict small physical damage and slow down enemy units.

Required level: 2.
Resources: Requires mana points.
Runes for the Grasp of the Dead skill:
Unbreakable Grasp - Increased strength of the slow down effect.
Required level: 7.

Groping Eels - More damage inflicted by the Grasp of the Dead skill.
Required level: 15.

Death is Life - Enemies killed by this skill may leave additional health orbs behind.
Required level: 25.

Desperate Grasp - Reduced cooldown time of the skill.
Required level: 28.

Rain of Corpses - Corpses rain down from the sky. The effect lasts a few seconds and it inflicts physical damage.
Required level: 53.
Summoning a swarm of firebats. They burn enemies standing in front of the main character, inflicting increased fire damage.

Required level: 5.
Resources: Requires mana points.
Runes for the Firebats skill:

Dire Bats - A smaller group of bats is summoned, however they inflict more damage and they can fly further.
Required level: 11.

Vampire Bats - The main character receives back some of the damage inflicted by the bats as Life points.
Required level: 19.

Plague Bats - Plague bats are summoned and they cause infections among enemy units. The poison damage is small at first, however it gains in strength over time.
Required level: 29.

Hungry Bats - Fast bats are summoned. They seek out nearest targets, inflicting increased fire damage.
Required level: 45.

Cloud of Bats - A swirl of bats is summoned and they inflict fire damage to all nearby enemies. The damage increases each second, reaching a certain level.
Required level: 56.
Summoning a ghost which follows an enemy for some time, dealing increased arcane damage. If the target has died the ghost starts to follow another opponent.

Required level: 12.
Resources: Requires mana points.
Runes for the Haunt skill:

Consuming Spirit - The summoned ghost regenerates Witch Doctor's health each second.
Required level: 18.

Resentful Spirit - A vengeful ghost is summoned. It stays on the battlefield only for a few seconds, however it deals more damage.
Required level: 23.

Lingering Spirit - If there no more targets on the battlefield, then the ghost stays longer, seeking for new enemies.
Required level: 35.

Grasping Spirit - Reduced movement speed of enemies haunted by the ghost.
Required level: 48.

Draining Spirit - The summoned ghost regenerates Witch Doctor's mana each second.
Required level: 57.
Releasing a locust swarm which attacks an enemy, inflicting increased poison damage for a few seconds. The swarm also leaps to other nearby targets.

Required level: 21.
Resources: Requires mana points.
Runes for the Locust Swarm skill:

Pestilence - A chance for the swarm to leap to two targets instead of one.
Required level: 27.

Devouring Swarm - The Witch Doctor receives some mana points for every enemy attacked by the swarm.
Required level: 33.

Cloud of Insects - Extended duration of the skill.
Required level: 37.

Diseased Swarm - Enemies killed by the swarm leave a cloud of locusts behind. The cloud remains for a few seconds, dealing lesser poison damage to all affected units.
Required level: 42.

Searing Locusts - An enemy is surrounded by a burning swarm which inflicts increased fire damage.
Required level: 59.
Summoning zombie dogs which follow the Witch Doctor and attack enemy units, inflicting small physical damage.

Required level: 4.
Resources: Requires mana points.
Runes for the Summon Zombie Dogs skill:

Rabid Dogs - Zombie dogs infect their victims when they bite them, dealing small poison damage that lasts a few seconds.
Required level: 12.

Final Gift - A chance for a health orb to appear after a zombie dog has died.
Required level: 19.

Life Link - Zombie dogs absorb some of the damage received by the Witch Doctor.
Required level: 28.

Burning Dogs - Fiery dogs are summoned and they burn nearby enemies, inflicting lesser fire damage.
Required level: 40.

Leeching Beasts - Some of the damage dealt by the zombie dogs returns to them and to the Witch Doctor as Life points.
Required level: 54.
Putting on a spectral mask which horrifies nearby enemy units, causing them to flee. The effect lasts a few seconds.

Required level: 8.
Resources: Requires mana points.
Runes for the Horrify skill:

Phobia - Extended duration of the horrify effect.
Required level: 14.

Stalker - The Witch Doctor moves faster for a few seconds.
Required level: 21.

Face of Death - Extended range of the Horrify skill.
Required level: 34.

Frightening Aspect - The Witch Doctor receives an armor bonus that stays active for a few seconds.
Required level: 44.

Ruthless Terror - The Witch Doctor receives back some mana for each opponent he managed to scare away.
Required level: 56.
Leaving physical body and entering the spirit realm. The Witch Doctor can move freely in this form and the effect ends when his body receives major damage.

Required level: 16.
Resources: Requires mana points.
Runes for the Spirit Walk skill:
Jaunt - Extended duration of the skill.
Required level: 23.

Honored Guest - The Witch Doctor regains mana points each second he spends in the spirit realm.
Required level: 29.

Umbral Shock - When the journey to the spirit realm ends the Witch Doctor's physical form explodes, dealing lesser fire damage to all nearby enemies.
Required level: 38.

Severance - Enemies that the Witch Doctor passes through in his spirit form receive physical damage.
Required level: 47.
Healing Journey - The Witch Doctor regains Life points each second he spends in the spirit realm.
Required level: 53.
Summoning a fetish shaman for 12 seconds that transforms enemies into chickens. Enemies in the chicken form can't attack and are more vulnerable to receiving damage.
Required level: 22.
Resources: Requires mana points.
Runes for the Hex skill:

Hedge Magic - The fetish shaman heals his allies from time to time.
Required level: 26.

Jinx - Enemies affected by the hex are even more susceptible to receiving damage.
Required level: 31.

Angry Chicken - The fetish shaman transforms into an angry chicken for a short while. The chicken explodes, dealing increased physical damage to all enemies standing nearby.
Required level: 36.

Painful Transformation - The hex causes enemies to bleed and this effect inflicts small physical damage.
Required level: 43.

Unstable Form - Enemies affected by the hex explode when they die, dealing poison damage to other opponents in the area.
Required level: 58.
Feeding on the life force of several nearby opponents and receiving a bonus to Intelligence for each hit. The effect lasts 30 seconds.

Required level: 9.
Resources: Requires mana points.
Runes for the Soul Harvest skill:

Swallow Your Soul - The Witch Doctor receives some mana points with each hit.
Required level: 15.

Siphon - The Witch Doctor receives some Life points with each hit.
Required level: 21.

Languish - The movement speed of enemy units is reduced for a few seconds.
Required level: 32.

Soul to Waste - Extended duration of the skill.
Required level: 39.

Vengeful Spirit - Enemies affected by the skill also receive small physical damage.
Required level: 49.
Banishing the Witch Doctor's zombie dogs, forcing them to explode. The explosions inflict greater weapon damage to all nearby enemies.

Required level: 13.
Runes for the Sacrifice skill:

Black Blood - Black substance is created near bodies of killed zombie dogs and it slows down enemy units for a few moments.
Required level: 18.

Next of Kin - Each zombie dog that was sacrificed has a chance to become reborn.
Required level: 24.

Pride - The Witch Doctor regains mana points for each zombie dog that was sacrificed.
Required level: 36.

For the Master - The Witch Doctor regains Life points for each zombie dog that was sacrificed.
Required level: 41.

Provoke the Pack - Each time a zombie dog was sacrificed the main character can inflict more damage for some time.
Required level: 51.
Causing paranoia among enemy units. The result is that some opponents start fighting alongside the Witch Doctor.

Required level: 22.
Resources: Requires mana points.
Runes for the Mass Confusion skill:

Unstable Realm - Reduced cooldown time of the Mass Confusion skill.
Required level: 26.

Devolution - A chance for the enemies killed in the confused status to turn into zombie dogs.
Required level: 34.
Mass Hysteria - Some of the enemies that weren't affected by the paranoia become stunned for a few seconds.
Required level: 43.

Paranoia - All enemies within a range of the skill become more susceptible to receiving damage.
Required level: 46.

Mass Hallucination - An enormous ghost appears after activating the skill. It assists the Witch Doctor, dealing increased physical damage to all enemies it passes through.
Required level: 54.
Summoning a suicidal zombie which deals increased poison damage to all opponents standing in its way.

Required level: 14.
Resources: Requires mana points.
Runes for the Zombie Charger skill:

Leperous Zombie - The zombie leaves a poisonous vapors behind it and they inflict smaller poison damage.
Required level: 21.

Undeath - If the suicidal zombie has managed to kill an enemy, then it will be reborn and will continue to inflict strong poison damage. The effect can be repeated only several times.
Required level: 27.

Wave of Zombies - Several charging zombies are summoned and each creature inflicts smaller poison damage.
Required level: 33.

Explosive Beast - An exploding zombie dog is summoned. It heads for it target, exploding upon contact and dealing greater fire damage to all nearby enemies.
Required level: 42.

Zombie Bears - Zombie bears are summoned to the battlefield. They begin to charge, dealing increased poison damage to all nearby enemies.
Required level: 54.
Bombarding the target with spirit projectiles which inflict serious physical damage.

Required level: 17.
Resources: Requires mana points.
Runes for the Spirit Barrage skill:

The Spirit is Willing - Each time the barrage hits an enemy the Witch Doctor regains some mana points.
Required level: 23.

Well of Souls - Several ghosts are also summoned and they inflict smaller physical damage.
Required level: 32.

Phantasm - A spectre is summoned for several seconds and it inflicts lesser physical damage to all nearby enemy units.
Required level: 37.

Phlebotomize - The main character receives back some of the damage inflicted by the barrage as Life points.
Required level: 44.

Manitou - A spectre is summoned. It stays on the battlefield for some time, following the Witch Doctor and weakening enemies with physical damage.
Required level: 59.
Causing an acid to rain down. The attack starts by inflicting poison damage and then it damages enemies standing in the affected area for a few seconds, dealing lesser poison damage.

Required level: 22.
Resources: Requires mana points.
Runes for the Acid Cloud skill:
Acid Rain - Extended initial range of the acid cloud.
Required level: 26.

Lob Blob Bomb - The acid rain creates a poisonous slime that remains on the ground for a few seconds, dealing small poison damage to all enemies it comes in contact with.
Required level: 30.

Slow Burn - Acid pools remain longer on the battlefield.
Required level: 39.

Kiss of Death - A cloud of acid is spit. It starts by inflicting increased poison damage and then it injures all enemies within its range.
Required level: 46.

Corpse Bomb - A corpse explosion is triggered. It inflicts greater poison damage to all nearby opponents.
Required level: 55.
Creating a wall of zombies that stays for a few seconds. The wall damages nearby opponents, dealing small physical damage.

Required level: 28.
Resources: Requires mana points.
Runes for the Wall of Zombies skill:

Barricade - Increased width of the wall.
Required level: 32.

Unrelenting Grip - The zombie wall reduces movement speed of the attacked enemies for a few seconds.
Required level: 35.

Creepers - Several burning zombies emerge from the ground. They attack enemies, inflicting fire damage.
Required level: 41.

Pile On - A zombie tower is created. The tower falls over, dealing enormous physical damage and knocking back enemy units.
Required level: 49.

Dead Rush - Zombies emerge from the ground. They start running in all directions, inflicting increased physical damage.
Required level: 60.
Summoning a gargantuan zombie which joins the Witch Doctor in battles, inflicting lesser physical damage.

Required level: 19.
Resources: Requires mana points.
Runes for the Gargantuan skill:

Humongoid - The gargantuan zombie can use a Cleave skill which allows it to attack several opponents at the same time. The damage inflicted by the monster is also increased.
Required level: 22.

Restless Giant - Each time the gargantuan zombie encounters an elite opponent or becomes surrounded by a group of enemies it enters rage mode for 15 seconds. While in rage mode the gargantuan has increased movement and attack speed and it also deals more damage. This effect can be activated only once in a while.
As for the elite opponents mentioned in the description, here's their list:
Champions
Rare monsters
Bosses
Other players
Required level: 29.

Wrathful Protector - The gargantuan zombie is summoned for a shorter period of time, however the monster deals serious fire damage and knocks back enemy units.
Required level: 39.

Big Stinker - The gargantuan zombie becomes surrounded by a poisonous cloud which inflicts lesser poison damage to enemy units.
Required level: 48.

Bruiser - The gargantuan zombie can slam enemies, inflicting massive physical damage and stunning them for a few seconds.
Required level: 56.
Summoning a fetish that performs a ritual dance. The effect of the ritual is increased movement and attack speed of the Witch Doctor and his allies that lasts 20 seconds.

Required level: 25.
Runes for the Big Bad Voodoo skill:

Jungle Drums - Bonuses provided by the ritual last longer.
Required level: 31.

Rain Dance - Mana is regenerated in the area where the ritual took place.
Required level: 37.

Slam Dance - Increased damage inflicted by the Witch Doctor and his allies.
Required level: 44.

Ghost Trance - Health of the Witch Doctor and his allies is regenerated each second.
Required level: 50.

Boogie Man - A chance for enemies killed near the ritual site to transform into zombie dogs.
Required level: 58.
Summoning an army of fetishes that stays on the battlefield for some time, fighting alongside the Witch Doctor and dealing lesser physical damage.

Required level: 30.
Runes for the Fetish Army skill:

Fetish Ambush - Each fetish deals increased physical damage to nearby enemies at the moment when it's summoned.
Required level: 34.

Devoted Following - Reduced cooldown time of the Fetish Army skill.
Required level: 40.
Legion of Daggers - Increased number of summoned fetishes equipped with daggers.
Required level: 46.

Tiki Torches - Additional fire-breathing fetishes are summoned. They inflict small fire damage.
Required level: 52.

Head Hunters - Additional fetishes-hunters are summoned. They attack enemies with blowdarts, inflicting small poison damage.
Required level: 60.
Icon
Required level
Description

10
Circle of Life
Each time an opponent has died near the Witch Doctor there's a chance of a zombie dog joining the battle. The range of the effect can be extended by items which improve radius of collecting additional gold.

10
Jungle Fortitude
Less damage received by the Witch Doctor and his allies.

13
Spiritual Attunement
Quicker mana regeneration and increased mana maximum value.

16
Gruesome Feast
Each collected health orb also regenerates some mana and increases the Witch Doctor's Intelligence for a while. The effect can be accumulated several times.

20
Bad Medicine
Each time an opponents has received poison damage the damage he inflicts is reduced for a few seconds.

20
Blood Ritual
Improved health regeneration of the main character. Also, some of the mana costs are paid with Life points.

24
Zombie Handler
Increased limit of zombie dogs that can be summoned to the battlefield. Zombie dogs and gargantuan zombies have more health.

27
Pierce the Veil
Increased damage inflicted by the Witch Doctor at a cost of more mana points needed to power his spells.

30
Fetish Sycophants
Each time a physical realm spell is casted there's a chance of summoning a fetish equipped with a dagger. The creature stays on the battlefield for some time.
Here's a list of physical realm spells:
Poison Dart
Plague of Toads
Zombie Charger
Corpse Spiders
Firebats
Firebomb
Locust Swarm
Acid Cloud
Wall of Zombies

30
Spirit Vessel
Reduced cooldown time of Horrify, Spirit Walk and Soul Harvest skills. When the Witch Doctor receives a deadly blow he enters the spirit realm for a few seconds, regaining back some of his health - this effect can work only once every 90 seconds.

36
Rush of Essence
Spirit spells improve mana regeneration for a few seconds.
Here's a list of all spirit spells:
Haunt
Horrify
Mass Confusion
Soul Harvest
Spirit Barrage
Spirit Walk

40
Vision Quest
Greatly increased mana regeneration when one of Witch Doctor's skills is on cooldown.

45
Fierce Loyalty
All summoned creatures receive thorns and health regeneration bonuses from the Witch Doctor's items.

50
Grave Injustice
Each time an opponent dies in the area the Witch Doctor regenerates some health and mana and also his skills also take less time to cooldown. The range of this effect may be expanded with items which increase the range of collecting gold.

55
Tribal Rites
Reduced cooldown time of Fetish Army, Hex and Big Bad Voodoo skills.
Level
Active Skills
Passive Skills
Skill Runes
1

Poison Dart
2

Grasp of the Dead
3

Corpse Spiders
4
Summon Zombie Dogs
5

Firebats
6


Splinters rune of Poison Dart
7


Unbreakable Grasp rune of Grasp of the Dead
8

Horrify
9

Soul Harvest


Leaping Spiders rune of Corpse Spiders
10

Circle of Life

Jungle Fortitude
11

Plague of Toads


Dire Bats rune of Firebats
12

Haunt


Rabid Dogs rune of Summon Zombie Dogs
13

Sacrifice

Spiritual Attunement


Numbing Dart rune of Poison Dart
14

Zombie Charger


Phobia rune of Horrify
15


Groping Eels rune of Grasp of the Dead


Swallow Your Soul rune of Soul Harvest
16

Spirit Walk
Gruesome Feast
17

Spirit Barrage


Explosive Toads rune of Plague of Toads
18


Spider Queen rune of Corpse Spiders


Consuming Spirit rune of Haunt


Black Blood rune of Sacrifice
19

Gargantuan


Final Gift rune of Summon Zombie Dogs


Vampire Bats rune of Firebats
20

Bad Medicine

Blood Ritual
21

Firebomb

Locust Swarm


Stalker rune of Horrify


Siphon rune of Soul Harvest


Leperous Zombie rune of Zombie Charger
22

Acid Cloud

Hex

Mass Confusion


Humongoid rune of Gargantuan
23


Resentful Spirit rune of Haunt

Jaunt rune of Spirit Walk


The Spirit is Willing rune of Spirit Barrage
24

Zombie Handler


Toad of Hugeness rune of Plague of Toads


Next of Kin rune of Sacrifice
25

Big Bad Voodoo


Spined Dart rune of Poison Dart


Death is Life rune of Grasp of the Dead
26


Acid Rain rune of Acid Cloud


Hedge Magic rune of Hex


Unstable Realm rune of Mass Confusion
27
Pierce the Veil


Undeath rune of Zombie Charger


Pestilence rune of Locust Swarm
28

Wall of Zombies


Desperate Grasp rune of Grasp of the Dead


Life Link rune of Summon Zombie Dogs


Flash Fire rune of Firebomb
29


Plague Bats rune of Firebats

Honored Guest rune of Spirit Walk


Restless Giant rune of Gargantuan
30

Fetish Army

Fetish Sycophants

Spirit Vessel


Lob Blob Bomb rune of Acid Cloud
31


Roll the Bones rune of Firebomb


Jinx rune of Hex


Jungle Drums rune of Big Bad Voodoo
32


Languish rune of Soul Harvest

Well of Souls rune of Spirit Barrage


Barricade rune of Wall of Zombies
33


Widowmakers rune of Corpse Spiders


Wave of Zombies rune of Zombie Charger


Devouring Swarm rune of Locust Swarm
34


Face of Death rune of Horrify


Devolution rune of Mass Confusion


Fetish Ambush rune of Fetish Army
35


Rain of Toads rune of Plague of Toads


Lingering Spirit rune of Haunt


Unrelenting Grip rune of Wall of Zombies
36

Rush of Essence


Pride rune of Sacrifice


Angry Chicken rune of Hex
37


Phantasm rune of Spirit Barrage


Cloud of Insects rune of Locust Swarm


Rain Dance rune of Big Bad Voodoo
38


Umbral Shock rune of Spirit Walk


Fire Pit rune of Firebomb
39


Soul to Waste rune of Soul Harvest


Wrathful Protector rune of Gargantuan


Slow Burn rune of Acid Cloud
40

Vision Quest


Burning Dogs rune of Summon Zombie Dogs


Devoted Following rune of Fetish Army
41


For the Master rune of Sacrifice


Creepers rune of Wall of Zombies
42


Explosive Beast rune of Zombie Charger


Diseased Swarm rune of Locust Swarm
43


Flaming Dart rune of Poison Dart


Painful Transformation rune of Hex


Mass Hysteria rune of Mass Confusion
44


Frightening Aspect rune of Horrify


Phlebotomize rune of Spirit Barrage


Slam Dance rune of Big Bad Voodoo
45

Fierce Loyalty


Medusa Spiders rune of Corpse Spiders


Hungry Bats rune of Firebats
46


Kiss of Death rune of Acid Cloud


Paranoia rune of Mass Confusion


Legion of Daggers rune of Fetish Army
47


Severance rune of Spirit Walk


Pyrogeist rune of Firebomb
48


Grasping Spirit rune of Haunt


Big Stinker rune of Gargantuan
49

Vengeful Spirit rune of Soul Harvest


Pile On rune of Wall of Zombies
50

Grave Injustice


Ghost Trance rune of Big Bad Voodoo
51


Addling Toads rune of Plague of Toads


Provoke the Pack rune of Sacrifice
52


Snake to the Face rune of Poison Dart


Tiki Torches rune of Fetish Army
53


Rain of Corpses rune of Fetish Army


Healing Journey rune of Spirit Walk
54


Leeching Beasts rune of Summon Zombie Dogs


Toad Affinity rune of Plague of Toads


Zombie Bears rune of Zombie Charger


Mass Hallucination rune of Mass Confusion
55

Tribal Rites


Blazing Spiders rune of Corpse Spiders


Corpse Bomb rune of Acid Cloud
56


Cloud of Bats rune of Firebats


Ruthless Terror rune of Horrify


Bruiser rune of Gargantuan
57


Draining Spirit rune of Haunt
58


Unstable Form rune of Hex


Boogie Man rune of Big Bad Voodoo
59


Manitou rune of Spirit Barrage


Searing Locusts rune of Locust Swarm
60


Ghost Bomb rune of Firebomb


Dead Rush rune of Wall of Zombies


Head Hunters rune of Fetish Army
A long time ago, back when many players were enjoying the first part of the Diablo series, there was a rumor about a hidden secret level. It involved three cows grazing around the town of Tristram. Rumor had it that if you clicked the cows enough times, there appeared a portal leading to a cow level where you had to fight huge mooing beasts.
In time, the legend of the cow level grew so popular that Blizzard decided to place such location in Diablo II. After finding specific items and combining them in the Horadric Cube, the player could go to a location which had gigantic cows equipped with deadly scythes running around on hind legs.
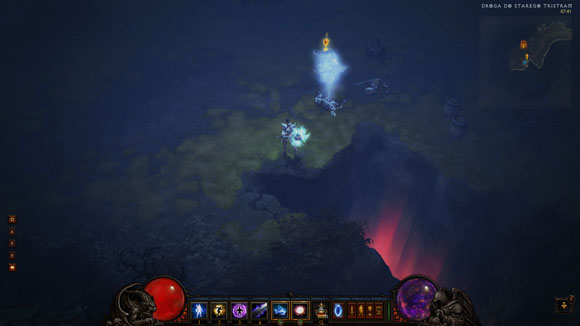
It was an open secret that, similarly to the second part of the series, Diablo III also contained a hidden level. This time, though, the caption "There is no Cow Level", which appears on the loading screen, is true. The place we're going to visit has (almost) nothing in common with these lovely animals.
Whimsyshire, the land we're talking about, is a vibrant location inhabited by unusual creatures. They live among bright green pastures with smiling clouds and colorful rainbows floating in the above their heads. It's nothing other than Blizzard's inside joke on all the allegations that Diablo III supposedly has sweet and sugary graphics.
Whimsyshire is also a place rich in gold and unique magic items. Depending on the difficulty level, we can find equipment matching our character's current level and face more challenging opponents. For example, Whimsyshire on Hell is comparable to Hell in Act III or IV, while Inferno will be as challenging as Act IV on the same level.
To gain access to Diablo III's hidden level, we need to acquire a recipe for the Staff of Herding for the Blacksmith, and collect a set of five items.

The plans for the Staff of Herding are dropped randomly by Izual, the last but one boss in Act IV. You'll encounter him on The Great Span, between the 1st and the 2nd level of The Silver Spire during the Prime Evil quest. It's probable that you'll have to do this quest and fight Tyrael's former lieutenant multiple times.
To reach Whimsyshire on higher difficulty levels, go to Bastion's Keep. For one gold coin you can buy improved plans for the staff, adjusted to your current difficulty level, from Gorell the Quartermaster (on the condition that you're in the middle of completing the Prime Evil quest). If you already have the Staff the Herding, you don't need to look for items to make it. Simply craft it at the Blacksmith's, paying as follows:
Once you have the plans, go to the town, open the crafting menu and use the right mouse button on the recipe in your equipment. The Staff of Herding will appear among items available for crafting. To craft it, you need to pay 50 thousand gold and have the following "ingredients":
It's worth mentioning that they are assigned to the Battle.net account, so they can't be bought and, once dropped, other players can't pick them up. On the other hand - there's nothing stopping you from inviting (or joining) a friend after finding the item / chest / opponent - this way a couple of players can obtain the material in one go. This kind of cooperation greatly increases the searching process.
Those who played Diablo I can surely remember the quest where Adria the Witch asked us to bring her some black mushrooms from the lava caves under the cathedral in Tristram.
In Diablo III, the Black Mushroom can be found on the first level of the Cathedral in Act I. Since it's a randomly generated item, search the whole location very thoroughly, specifically looking for a large square chamber.
Can be found by clicking the fireplace in one of the rooms of Leoric's Manor, just before the entrance to the Halls of Agony Level 1 in Act I. The room in question is a larger chamber to the right of the manor's entrance. Unfortunately, whether we find what we're looking for is completely random, so we'll probably be forced to reload the game a couple of times. It remains unexplained what is a bone of the Mad King of Tristram doing in a pile of burned wood. Maybe it's better not to touch the subject...
It's one of the most difficult items to find. Go to Dahlgur Oasis in Act II, specifically use the "Path to the Oasis" waypoint, which is unlocked during the Betrayer of the Horadrim quest. In the south part of the Oasis there is a watery location with a couple of houses, where Zevan the Alchemist is fighting off haunts.
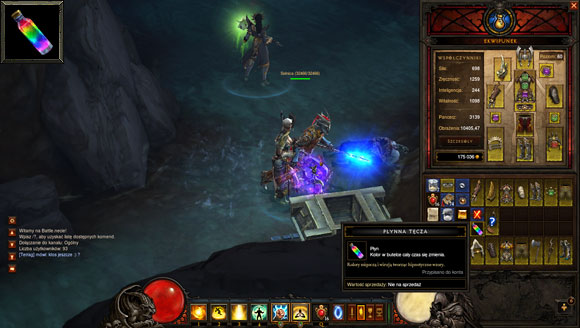
After winning the battle, a way to a Mysterious Cave will open. On its 1st level there will probably be a (randomly generated) Mysterious Chest, with the wanted item inside. Note! The search can take up to several dozen attempts where you'll have to exit and load the game again!
Remember the one-legged boy Wirt from the first Diablo? If so, you'll be happy to know you can have his bell. You can buy it in Act II from a girl named Squirt, who trades in Caldeum Bazaar or (further in Act II) at the Hidden Camp. Wirt's Bell costs 100000 gold and it can be found in the "Miscellaneous" tab.
The second, following Liquid Rainbow, hardest to find material for the Staff of Herding. With luck, you can find it in Act III. To become its happy owner, head to "The Bridge of Korsikk" waypoint, and to the Fields of Slaughter from there. In the north-west or the south-east area there should be Caverns of Frost (not to mistake with Icefall Caves!). Go down to the 2nd level and look for an elite boss called Chiltara, which spawns randomly and drops the Gibbering Gemstone. If you can't find it at the first try, exit the game, reload the quest and hope that you'll find both the Caverns of Frost and Chiltara at the next go.
Having collected all necessary materials, go to the Blacksmith and pay him 50000 gold to craft the Staff of Herding. The newly created "weapon" is not disposable and can be used as often as we see fit.
Next, move to Act II and go to Old Tristram Road, the location between New Tristram and the Ruins of Old Tristram. It's fastest to use "The Old Ruins" waypoint and head west from there. A few seconds later, not far from the ruins and on the right side of the map, you should see a rift in the ground which is emanating with bright colors. There should be a skeleton of a cow lying nearby. Click the ghost of the cow and listen to the speech of the Cow King, and you'll be free to enter Whimsyshire and enjoy its benefits to the fullest. Life couldn't be any better!


 Dreamfall: The Longest Journey Game Guide & Walkthrough
 Duke Nukem Forever Game Guide & WalkthroughDying Light Game Guide & Walkthrough
 Dont Starve Game Guide & WalkthroughDiablo III Game Guide & Walkthrough