
This unofficial guide to DARK video game contains primarily a very detailed walkthrough of its prologue and all six chapters. Description of each level focuses on providing complete information on moving through locations while staying completely undetected and without triggering any alarms. The guide also helps in completing all of the side tasks (optional missions, conversations with other friendly characters etc.) and in finding all of the secret objects (collectibles).
The final chapter of the guide is entirely about the main character and developing his vampiric abilities. You can find extensive descriptions of all available powers and upgrades and additional suggestions on which supernatural abilities you should be interested in the most.
DARK game guide offers:
Four different colors have been used in this guide:
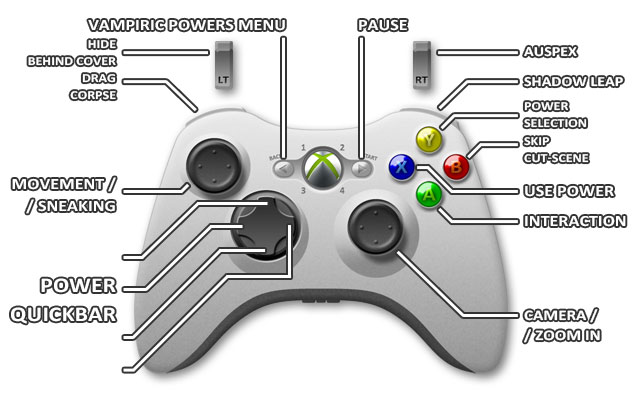

Movement

Sneak

Look around

Zoom

Interaction

Skip cut-scene

Use active power

Power selection

Power quickbar

Power quickbar

Power quickbar

Power quickbar

Drag corpse (hold)

Hide behind cover (hold)

Shadow Leap ability (hold)

Auspex ability (hold)

Vampiric powers menu

Pause
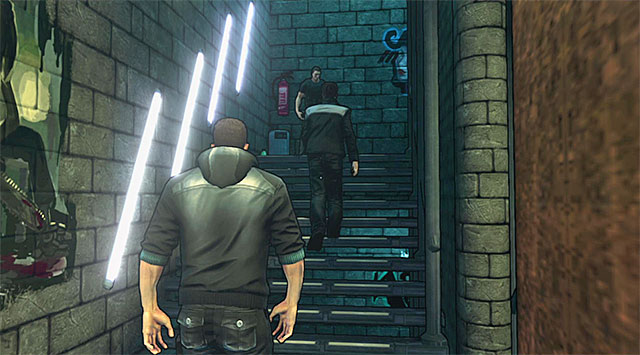
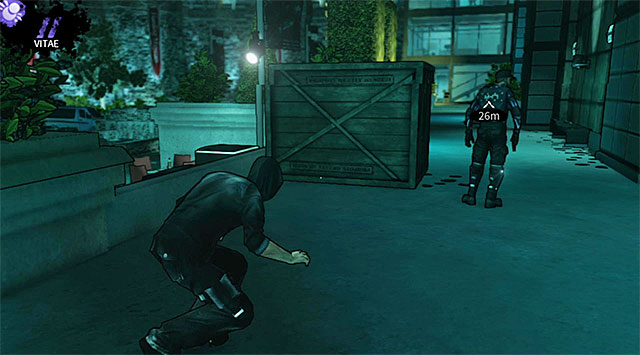
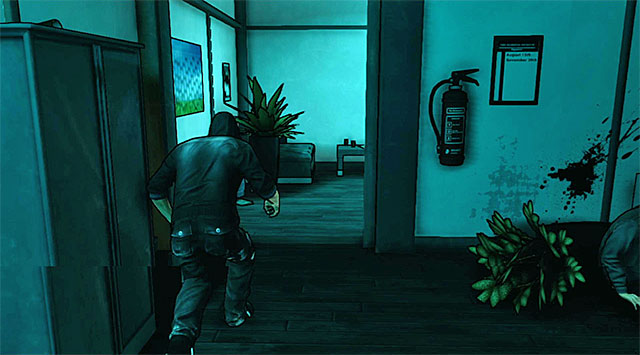
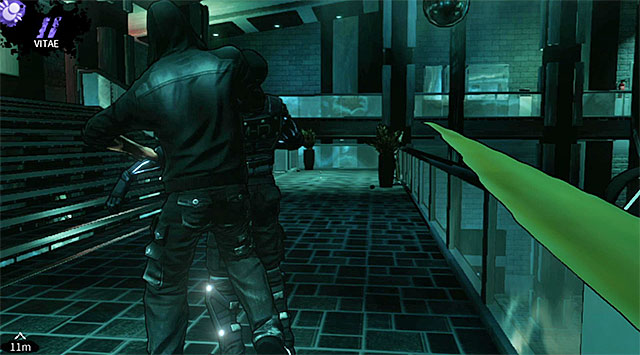
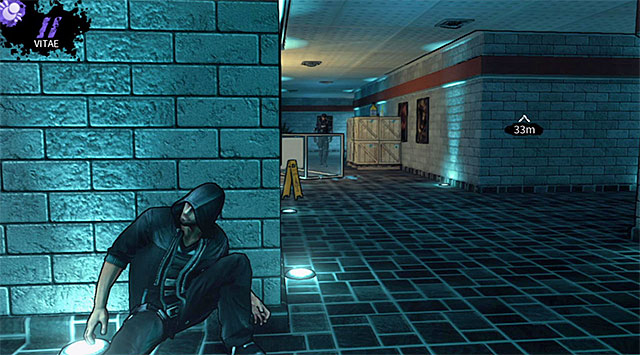
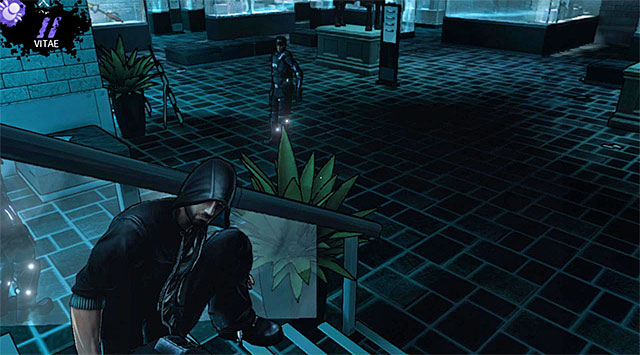
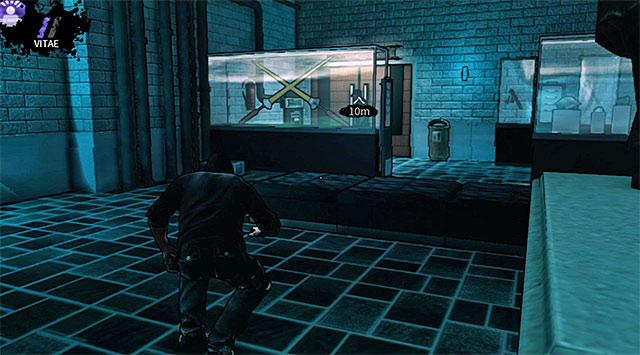
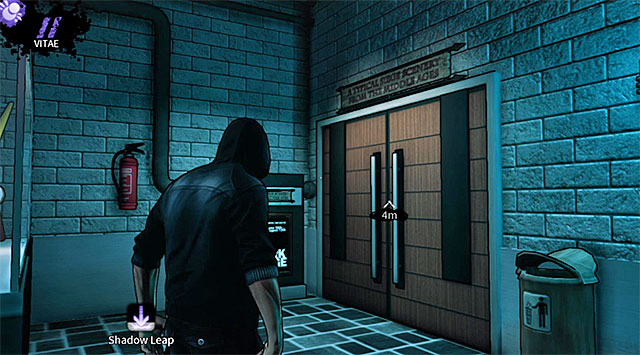
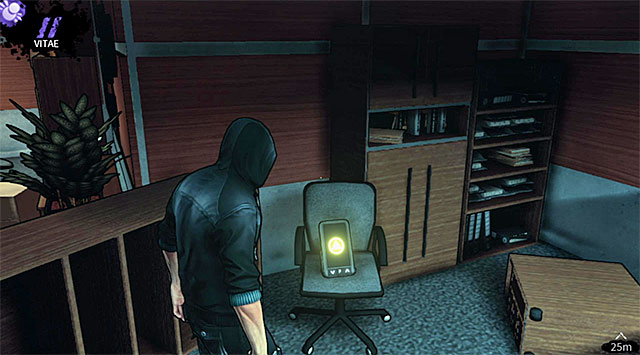
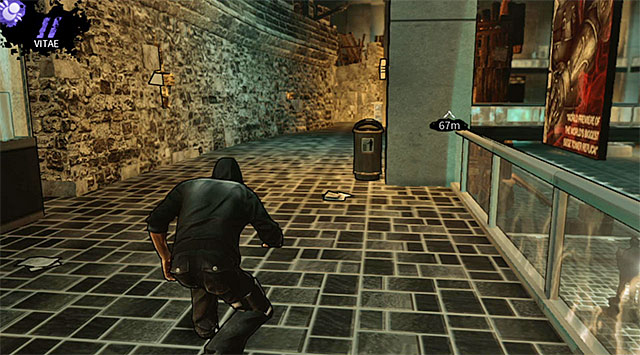
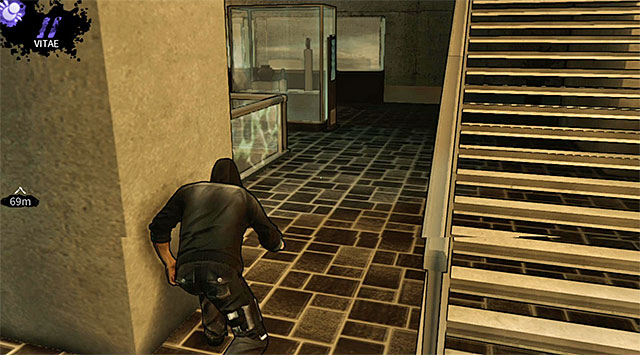
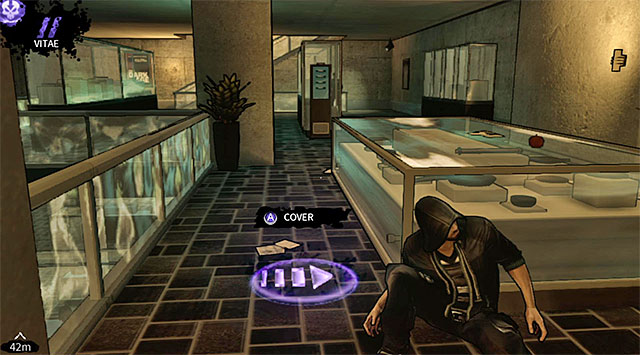
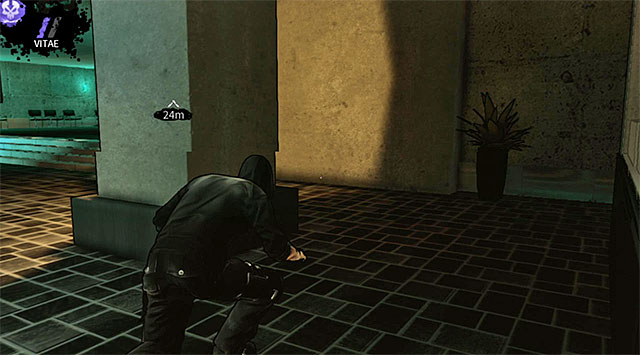
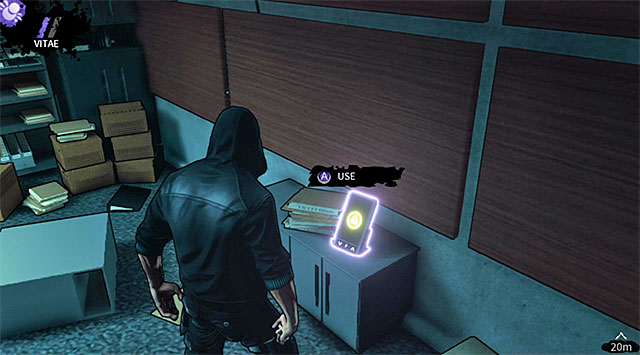
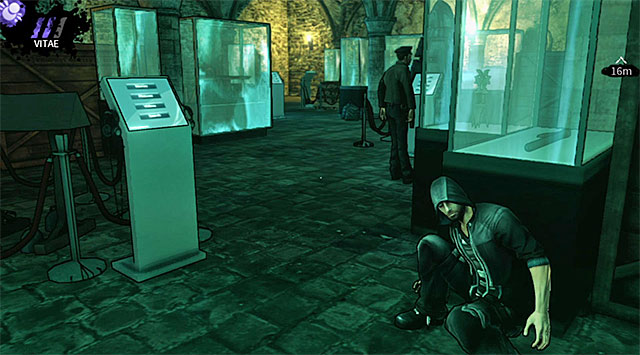
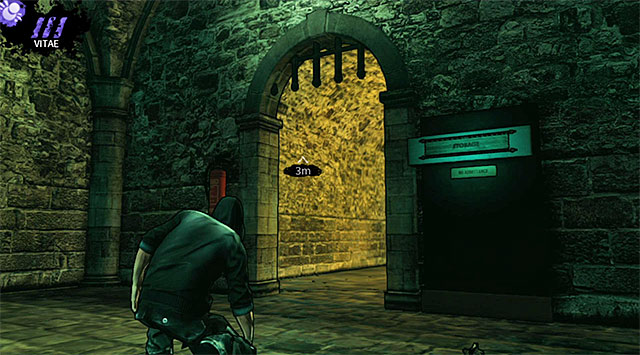
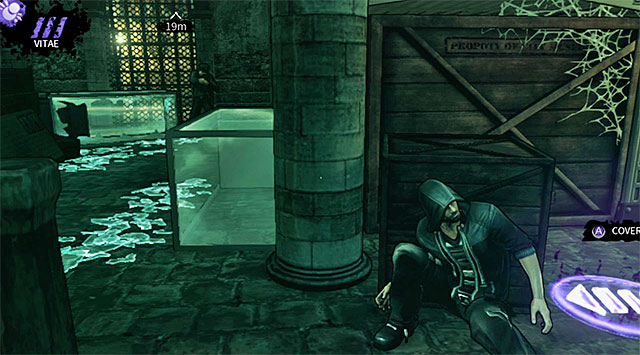
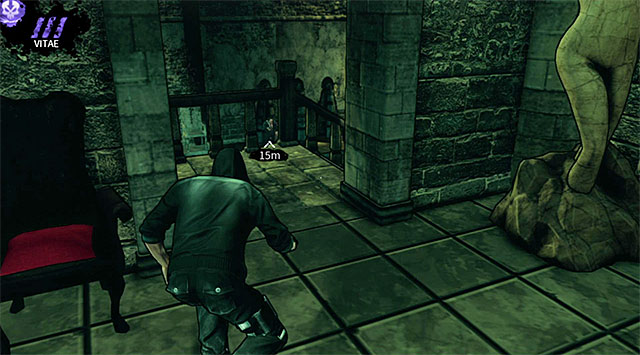
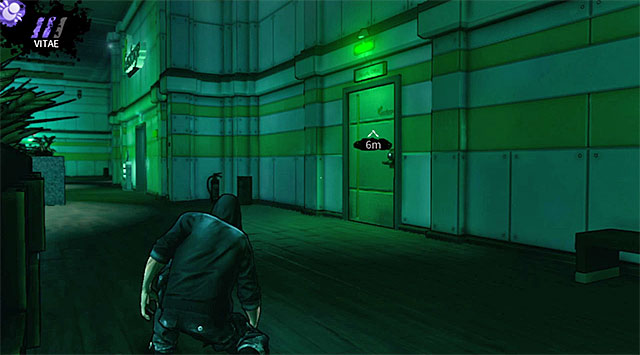
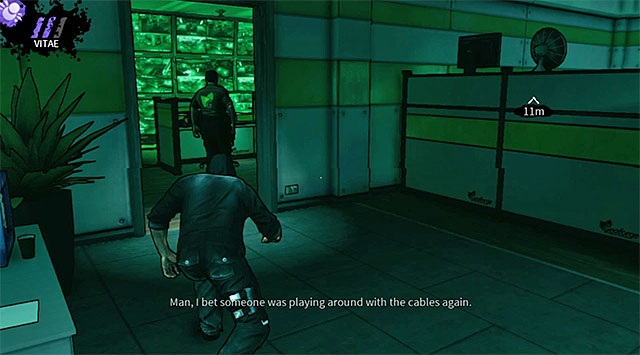
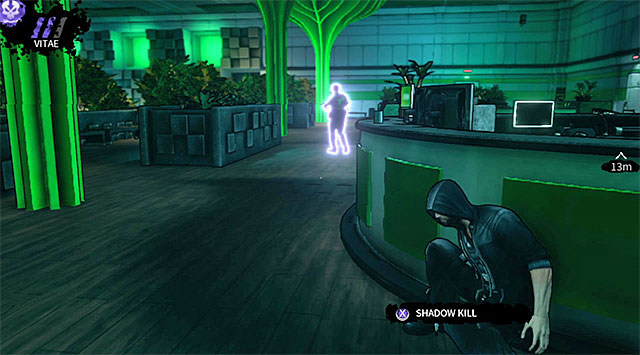
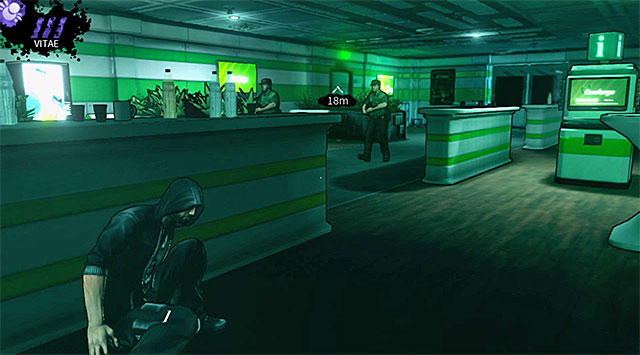
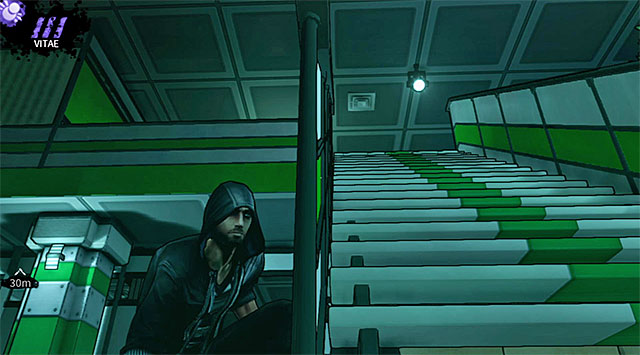
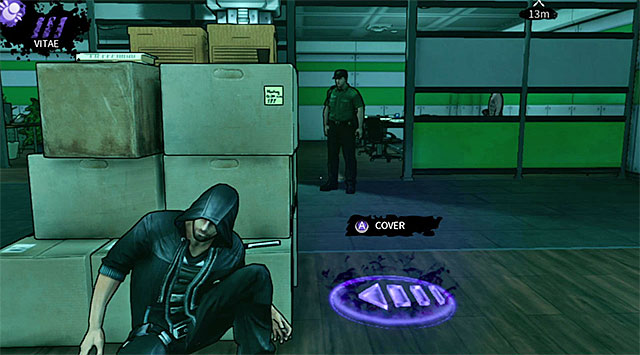
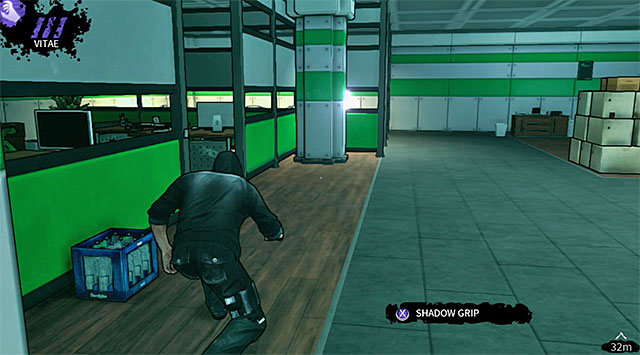
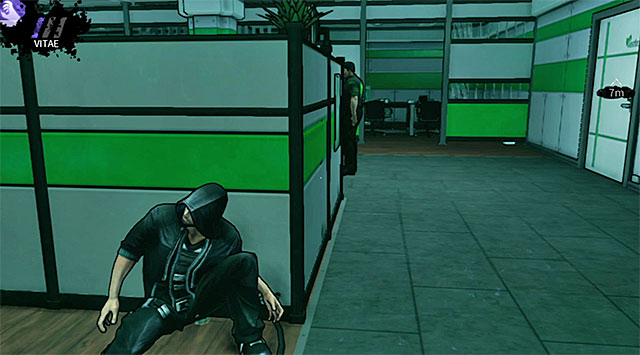
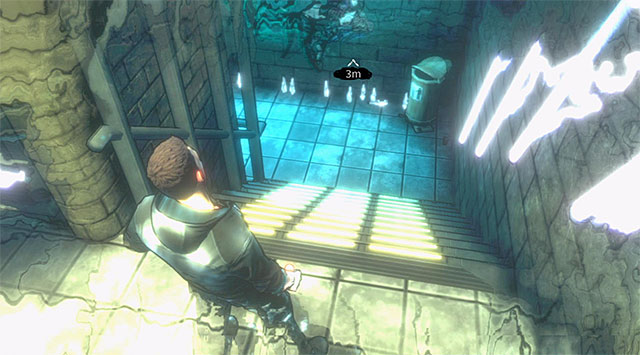 Stairs leading to the cellar
Wait until you've received full control over Eric's movements. The club's bouncers won't let you in to the main area or to the first floor so you're left only with the stairs leading to the basement.
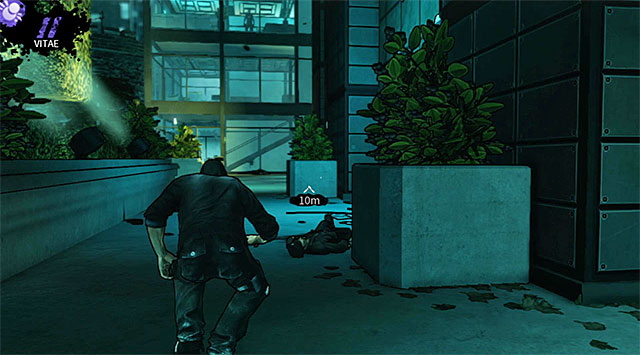
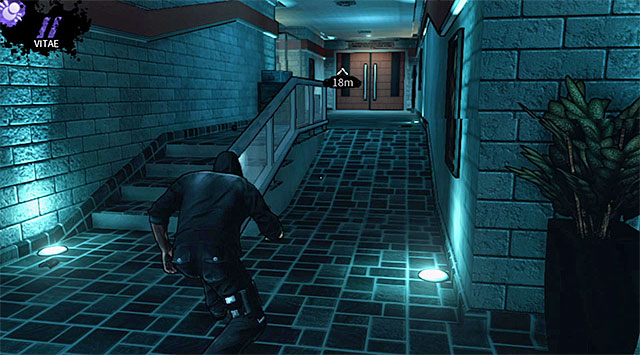
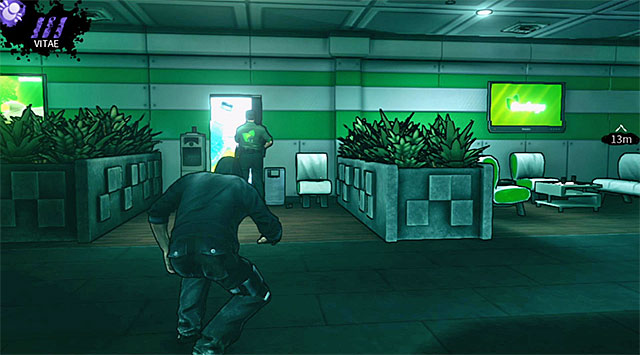
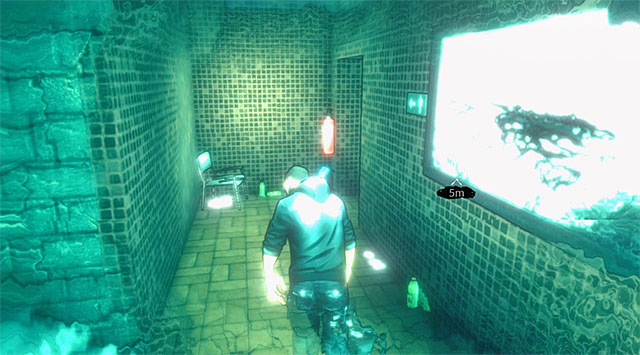 Corridor leading to the left toilet
Proceed to the toilets found in the club's cellar. Enter the left toilet, triggering a cut-scene from an encounter with an "angel".
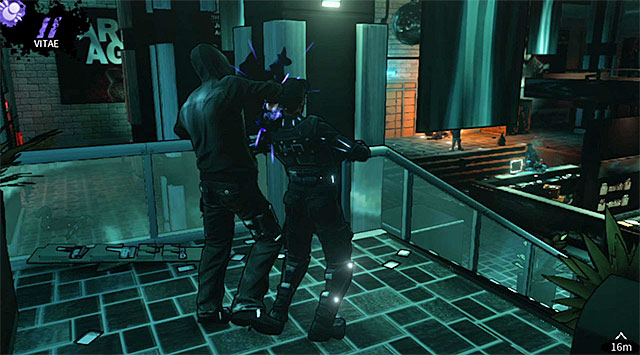
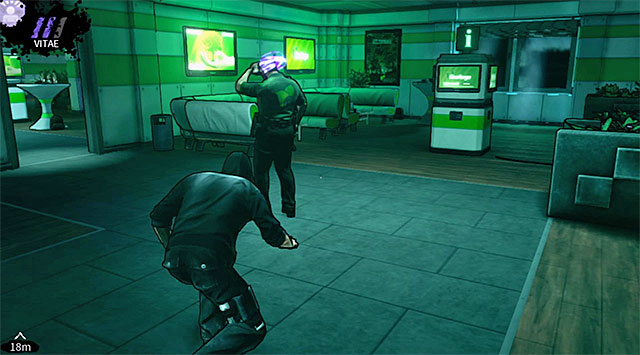
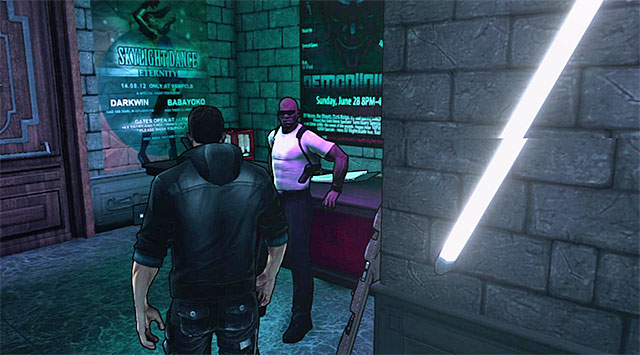 A bouncer
Return to the main floor of the building (that's where you've started the game). Turn right here an approach a bouncer standing next to the main entrance to the club. Allow Eric to talk to the bouncer and he'll send you to his boss named Tom.
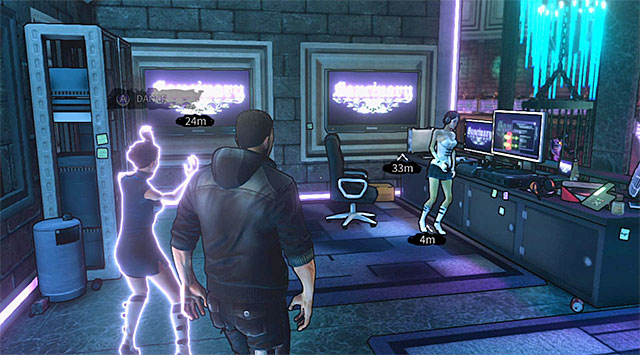
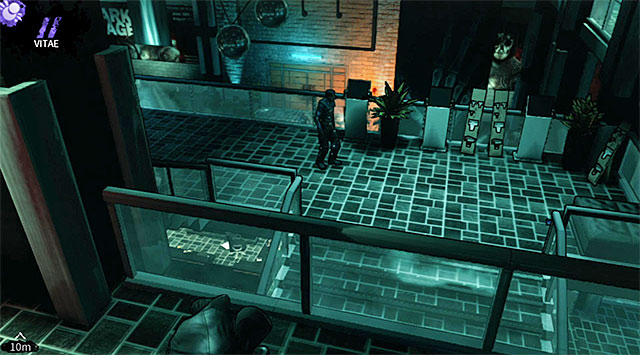
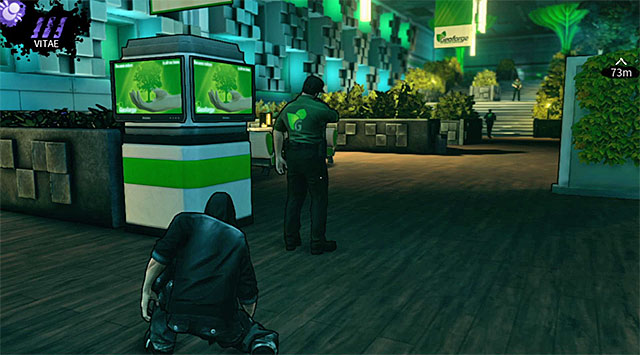
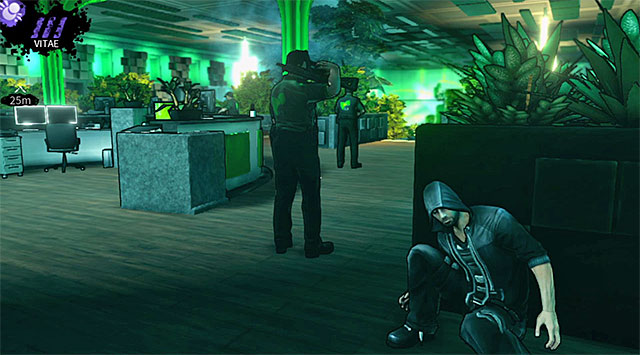
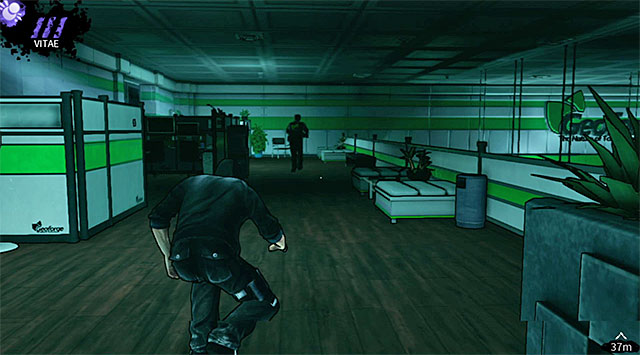
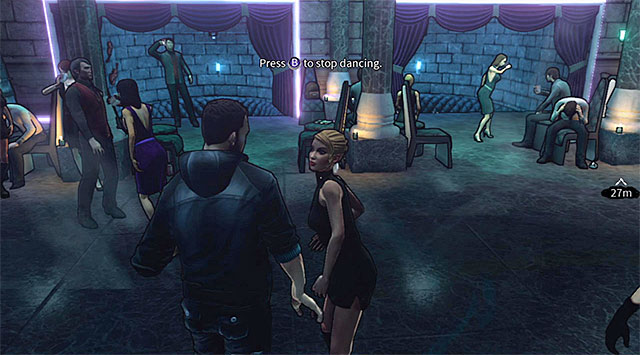 Main area of the club
Turn around and head towards the main area of the Sanctuary club which has become accessible in the meantime. You can decide to talk to some of the patrons of the club to listen to their short responses and you can also dance with some of them. There's also an interactive fountain near the entrance, but examining it doesn't change anything.
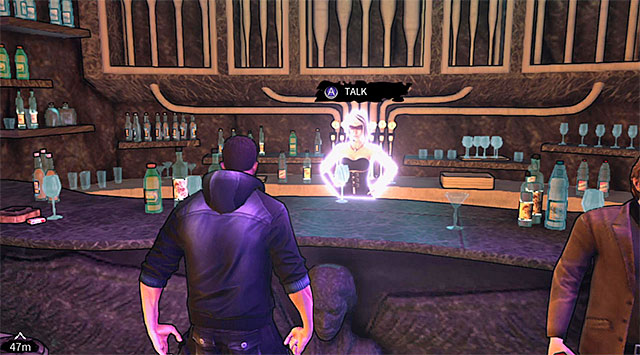
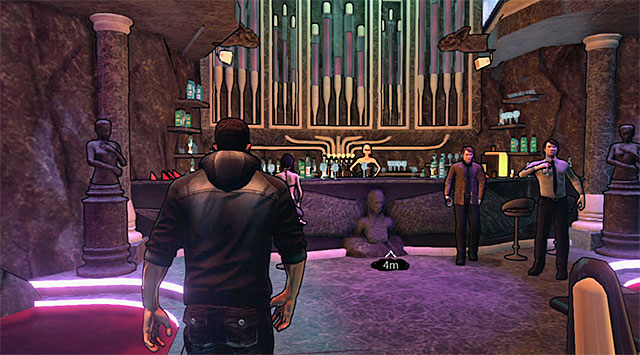 The bar
Once you've familiarized yourself with the club (or not - you'll have plenty of time for that later on) approach the bar located at the opposite end of the main area. The game will show a cut-scene here of a conversation with April (she's working at the bar) and Rose (she's the owner of Sanctuary).
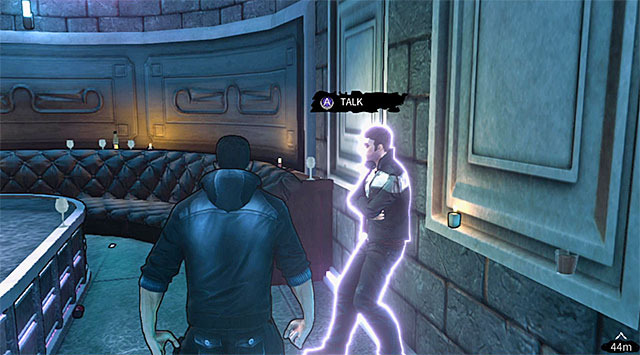
 Tom
TomTurn around and proceed to the stairs located to your right, reaching an upper balcony. Enter a side room and initiate a conversation with Tom (he's standing next to the wall).
 Passageway to the top floor of the club
Once you've ended your short conversation with Tom start following him. You'll return to the corridor where you've started the game, but you'll soon notice that you can now use the stairs leading to the top floor. Enter Rose's office (she's the owner of the club you've already met at the bar).
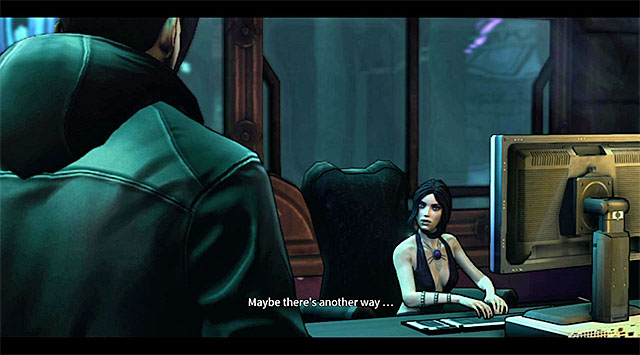
 Rose
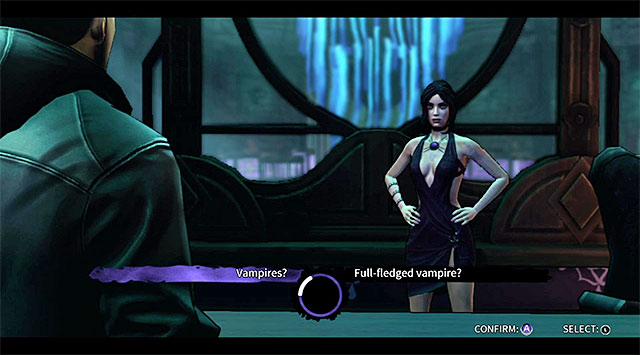
RoseDuring the meeting with Rose Eric will be informed that he's been transformed into a vampire. The game will give you an opportunity for the first time to ask the woman some additional questions concerning the vampires. You may also skip that and find out what needs to be done to become a full-fledged vampire and therefore avoid turning into a mindless ghoul.
 Conversation with Tom
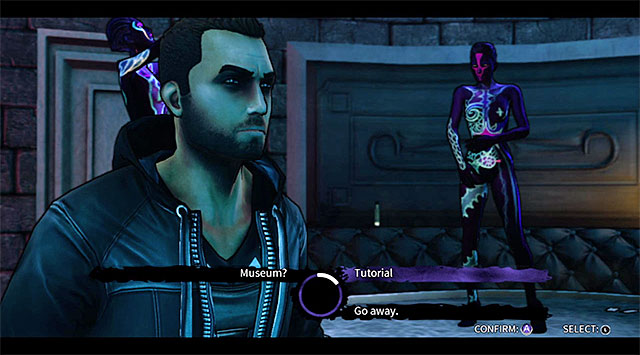
Once you've ended your conversation with Rose return to Tom again (you'll find him in the same room as before). You can ask Tom a few additional questions about the museum and the vampires. It's highly recommended, because doing that will unlock a side mission connected to obtaining electronic books about vampires while visiting the museum. End the conversation with Tom by choosing Tutorial and Start tutorial dialogue options. Wait until you're transported to a separate location that will be used a training area for you.
 Instructions on staying undetected
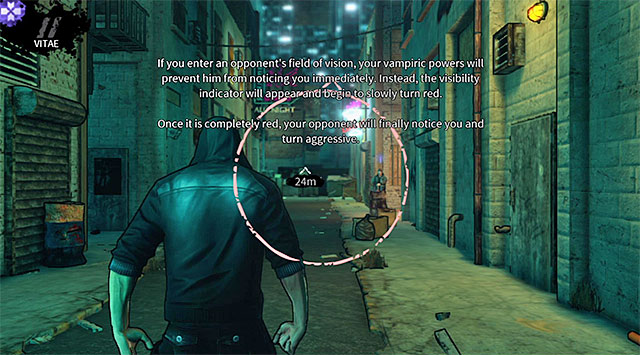
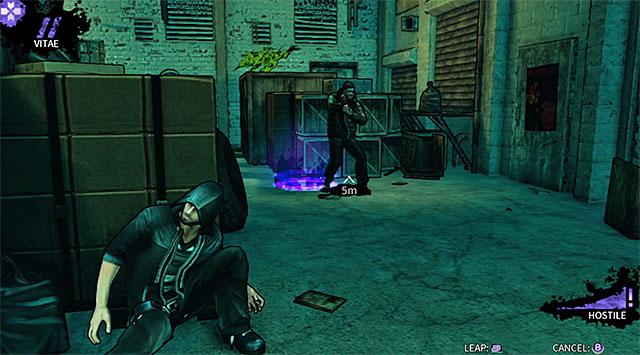
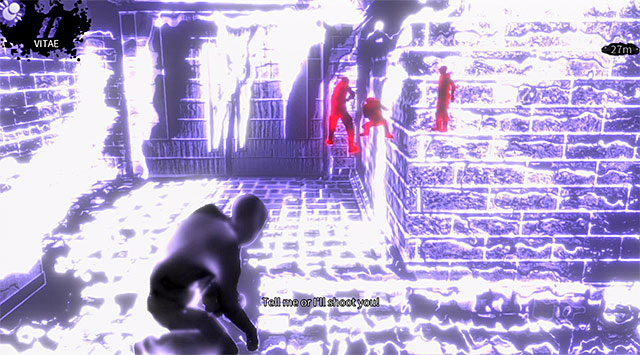
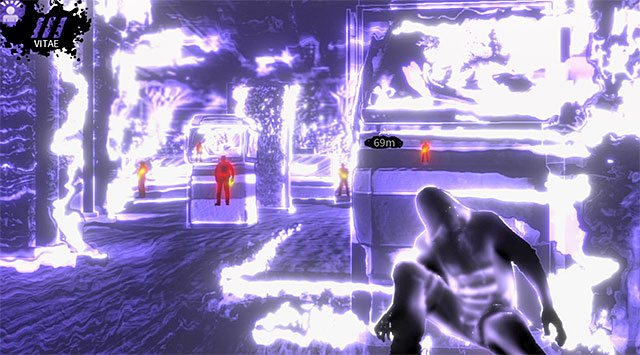
The main purpose of this tutorial is to teach you about the game's interface and to practice using some of the basic vampiric powers (more complex actions can be unlocked later on and you'll have to do that on your own). Start off by learning what a circle appearing on the screen means to Eric - the circle is displayed when you're noticed by someone or something and it's starting to slowly turn red. Once the circle is bloody red all the enemies in the area are alarmed by your presence. Don't worry that it happened right now, because it's all for the purpose of the training. You must however avoid being spotted later in the game by leaving other people's lines of sight if you mistakenly find yourself completely in the open.
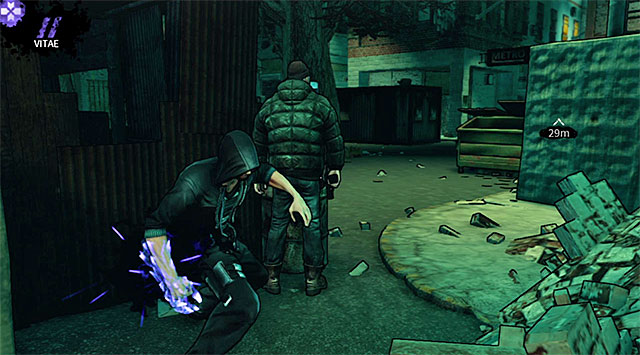
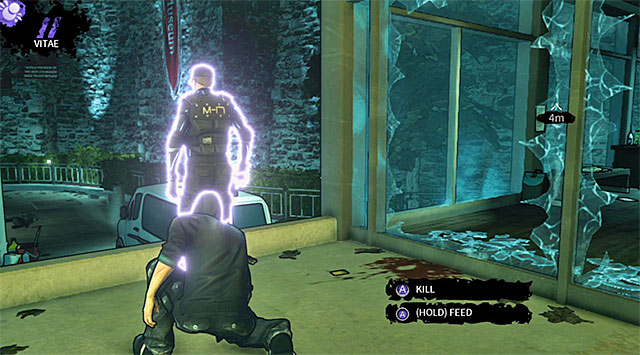
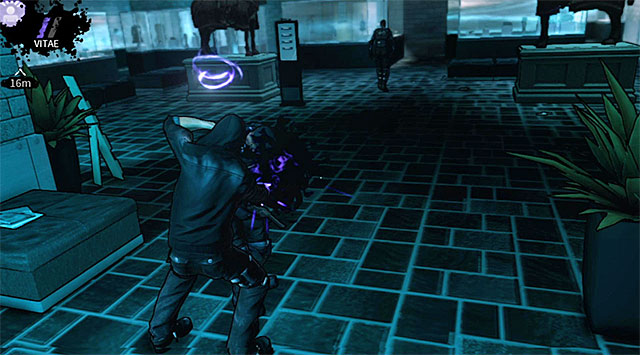
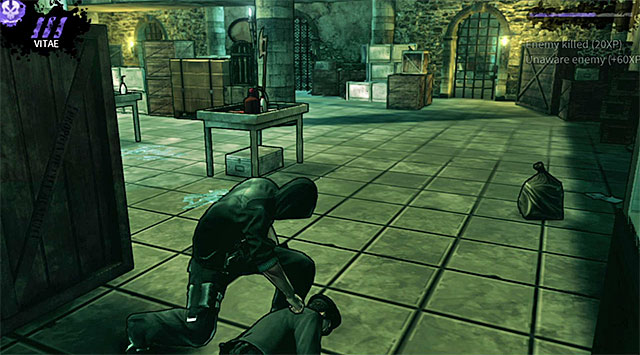
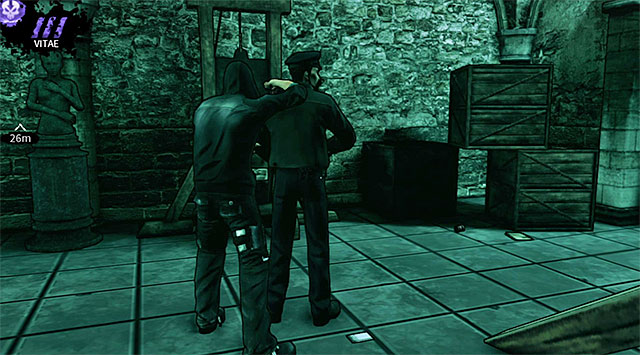
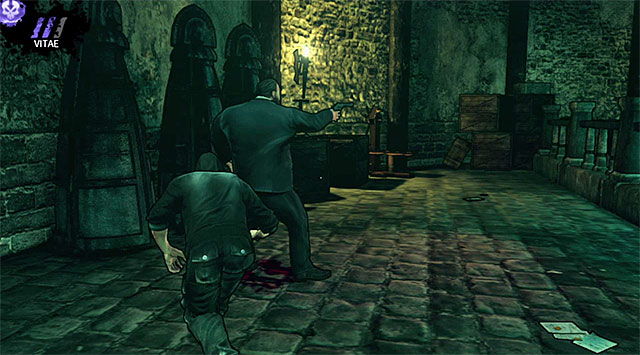
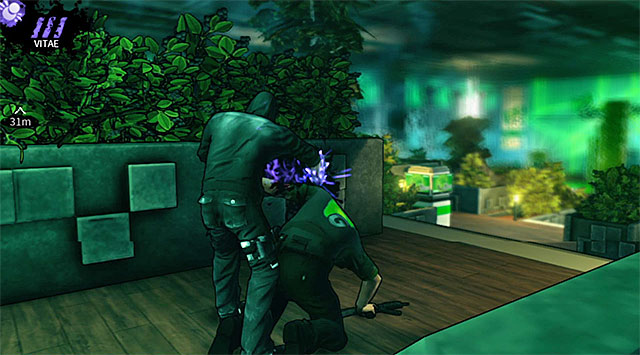
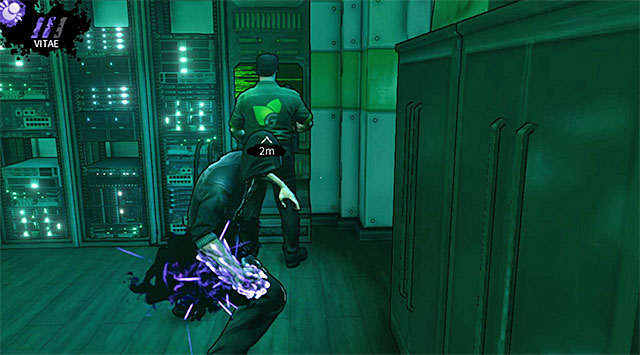
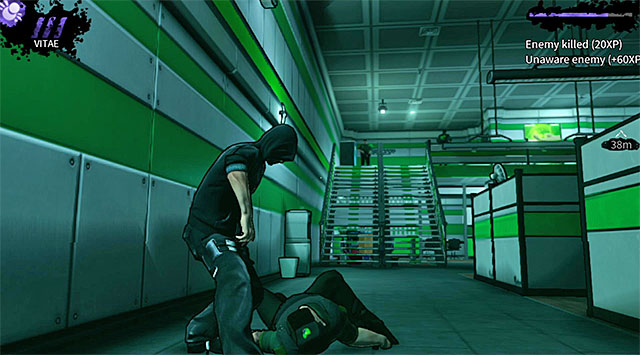
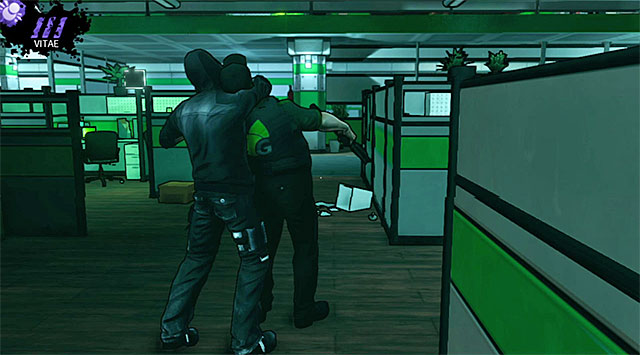
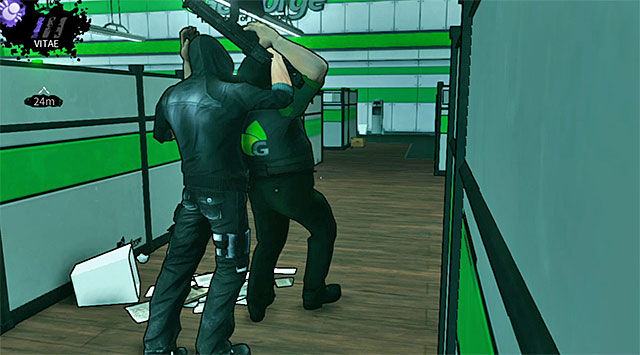
 Draining an opponent of his blood
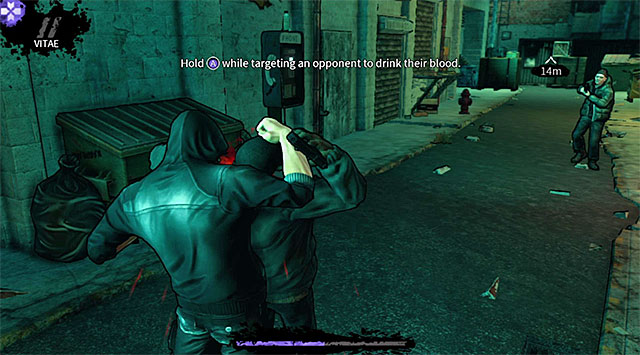
Wait for Eric to teleport himself behind one of the thugs and then hold the designated key/button to start drinking his blood. This process takes some time (you can make it shorter by purchasing upgrades later on) and it's purpose is to fill up the Vitae bar. The vital energy is extremely important, because it's used to "power" all of Eric's active abilities. One other thing you should notice is that you've received 80 experience points: 20 points is a standard bonus for killing someone and the additional 60 points can be received each time you've attacked a person that was unaware of Eric's presence and wasn't prepared for his attack.
 Alleyway leading to other bandits
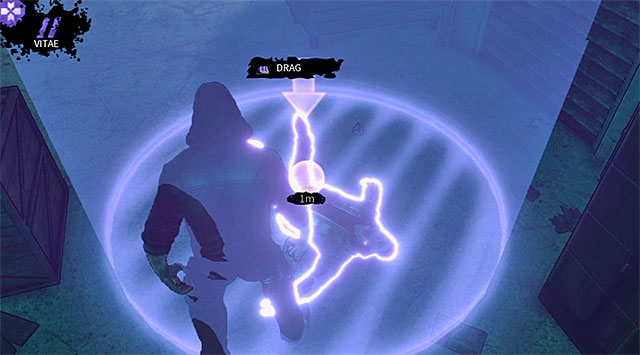
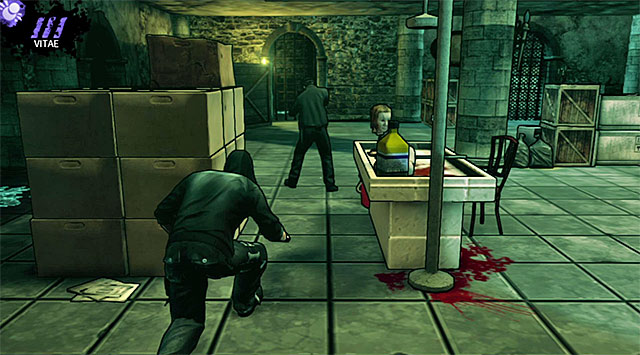
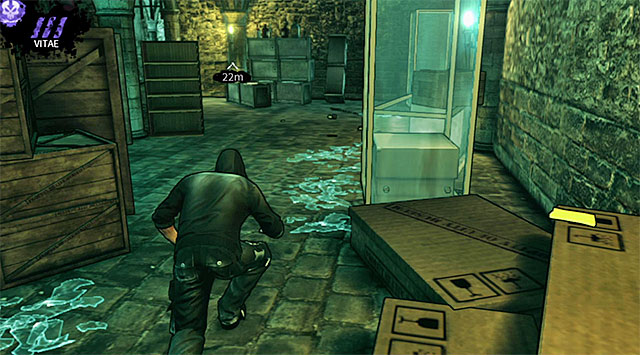
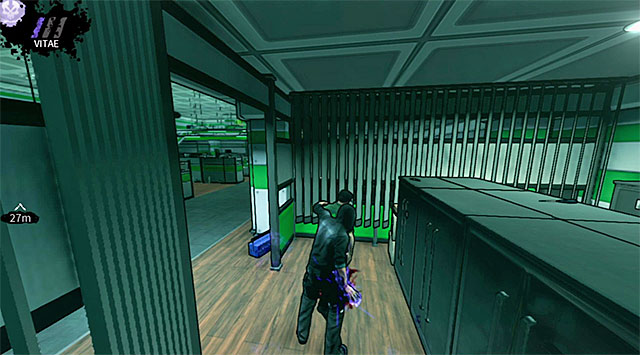
You can now practice dragging corpses to safety if you want to, however the game will also give you instructions on that a little bit later. Hiding bodies is important, because it allows Eric to lower the chances of a guard raising an alarm. Stand next to the corpse, hold the key or a button displayed on the screen and start dragging the body in the first-person perspective. Naturally the best way to avoid detection is to leave bodies in dark places not visited by other guards. It doesn't matter if you've practiced this move right now or not, because either way you'll have to move to a new area where other bandits are currently stationed.
Push the analog stick (or a corresponding key on your keyboard) to start sneaking and then approach a large object seen on screen 1. You must now proceed to a brick wall located to the right and displayed on screen 2. Hold the key/trigger to hide behind it.
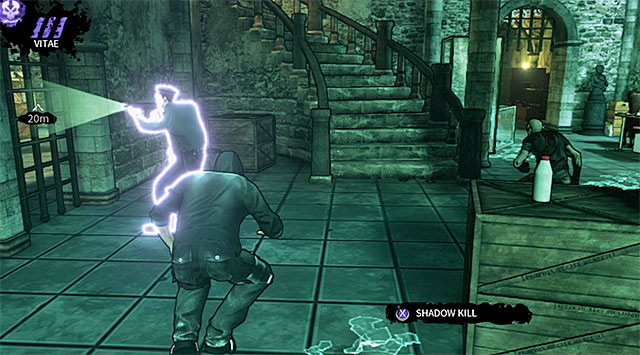
 List of available executions on an unaware enemy
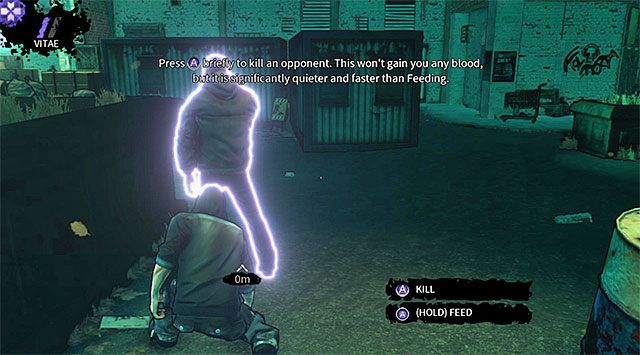
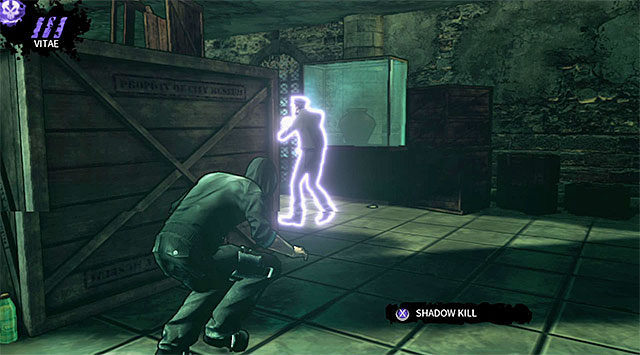
Continue moving right and press an additional key/button when you'll reach a corner so that Eric will move past it safely. Finish off by carefully approaching the second bandit from the back. The game will suggest not to rely on feeding here and you should follow this advice by only pressing the designated key/button and therefore performing a silent execution. Silent kills allow you to easily get rid of enemy units, however their main disadvantage is that they can't be used to regain Vitae.
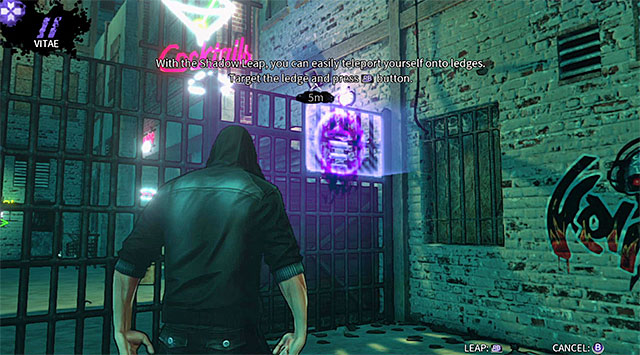
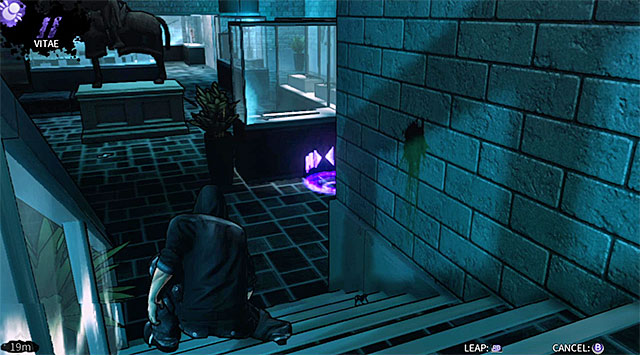
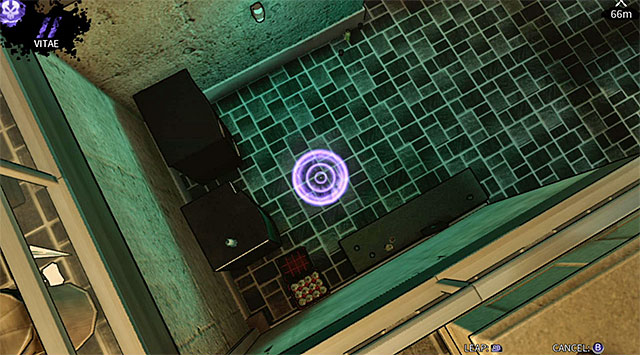
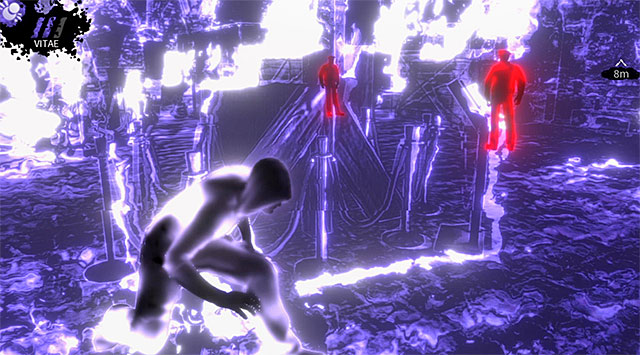
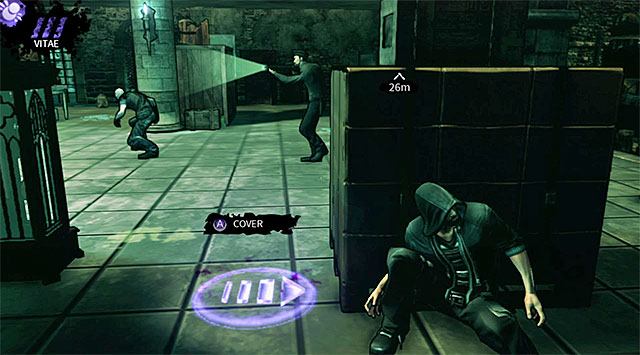
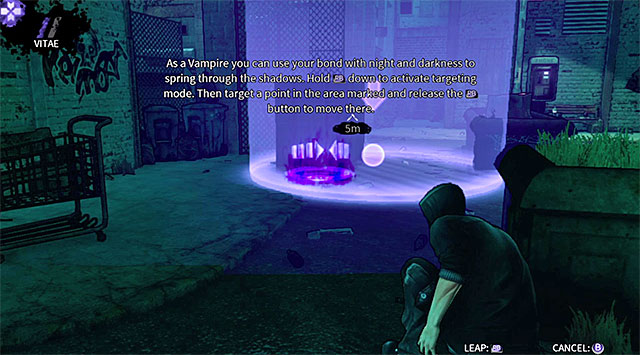 Shadow Leap ability test
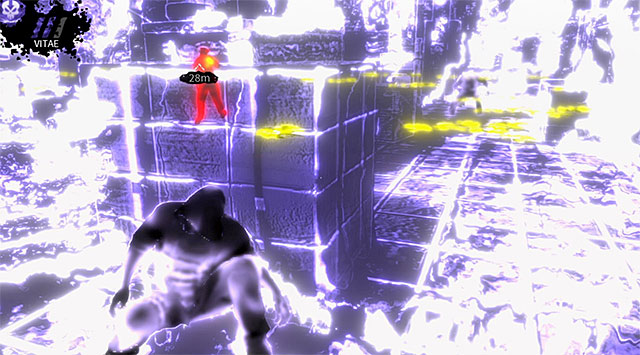
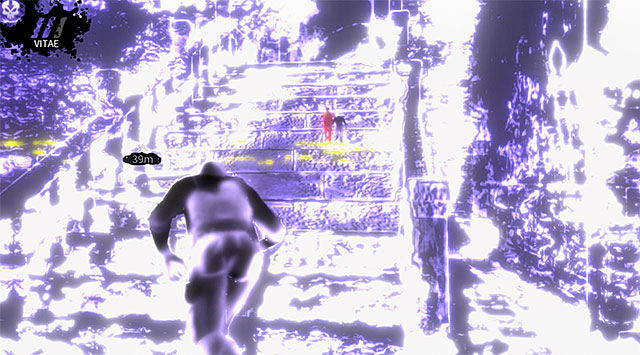
You don't have to hide this body, because there are no other thugs in the vicinity. Proceed to the next area instead. The game will soon force you to perform a test of an ability called Shadow Leap. This is an extremely fast sprint which almost acts as a teleportation. Enter the aiming mode and move the target cursor so it's somewhere inside the purple circle. Release the trigger/key, allowing Eric to perform a teleportation.
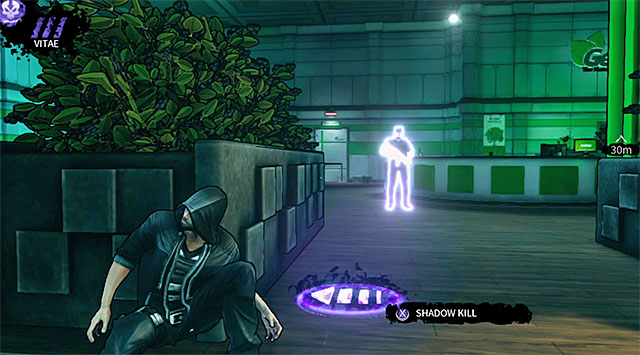
 Elimination of the last bandit from the group
The biggest advantage of the Shadow Leap ability is that it can allow you to quickly and seamlessly move to a different location. Sadly it also has two very important disadvantages. The first problem is that you must wait for Shadow Leap to regenerate after it's been used. As for the second disadvantage, arriving in a new place makes a lot of noise and therefore can attract the attention of nearby enemies. This all means you must be careful while using Shadow Leap, choosing destinations carefully so that they're not too close to enemy forces. An important thing to know is that you'll be allowed to counter some of the problems mentioned above by unlocking vampiric upgrades and you can find more on that from the last chapter of the guide. Wait for the final third bandit to turn around, approach him and feed on him to regain the second Vitae bar (thankfully Shadow Leap doesn't need any Vitae).
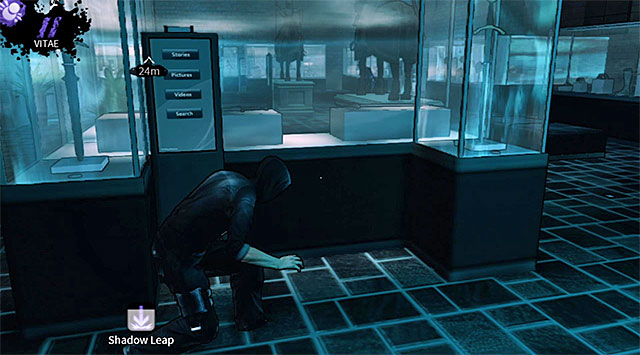
 Power selection screen
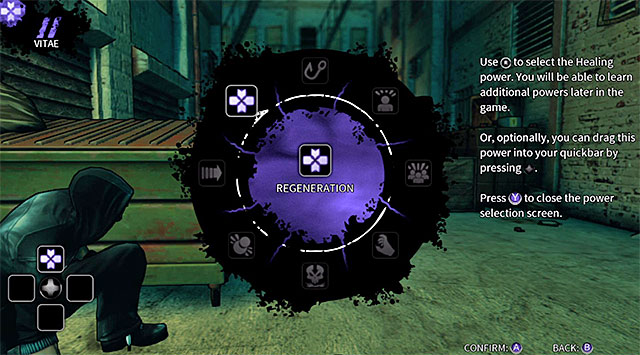
You may now proceed towards an alley located between the buildings. A new bandit will use his firearm on Eric here and the main character will suffer some injuries. Open the power selection screen and take interest in the Regeneration ability which can be used to regain health. You can add this power to your quickbar so that it can be activated using the D-pad (or corresponding keys) and you should also use it right now to get back to full health. Activating this power will of course drain a part of the Vitae energy and as a result you shouldn't forget about feeding on enemies frequently to have plenty of Vitae for more advanced vampiric abilities.
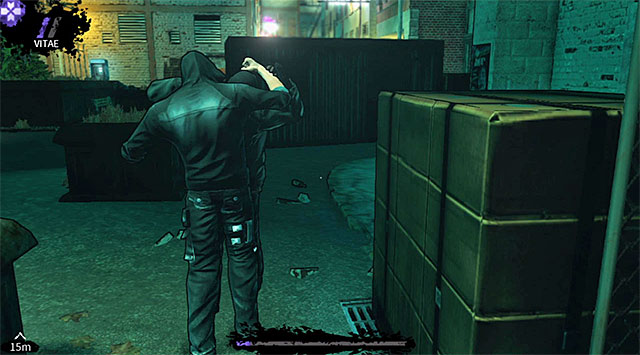
Ignore the fact that you've been discovered by the bandit mentioned above, because you can't count on him to stop searching for Eric. The best way to safely move closer to the thug is to start using Shadow Leap ability, moving between large objects found on both sides of the alley (screen 1). Once you're close enough to your opponent teleport yourself behind him (screen 2) and drain him before he's able to fight back.
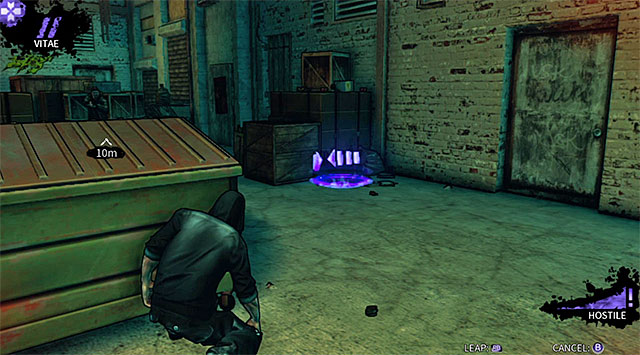
 Suggested area where you should leave the body
The next part of the tutorial is hiding bodies and if you've been following this game guide you'll already be familiar with this part of the game's mechanic - you must stand next to the corpse, hold the designated key/button and start dragging the body in the first person view. Your objective is to leave the corpse within a new purple circle.
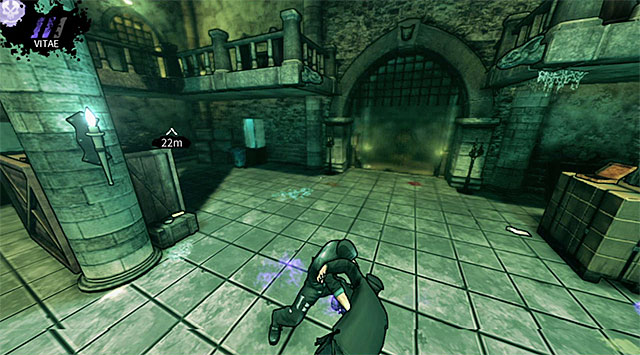
 Interactive part of the gate
Approach the gate and use the Shadow Leap ability to teleport Eric to an interactive fragment. Get to the other side and drop down.
 Enemies in the ghetto
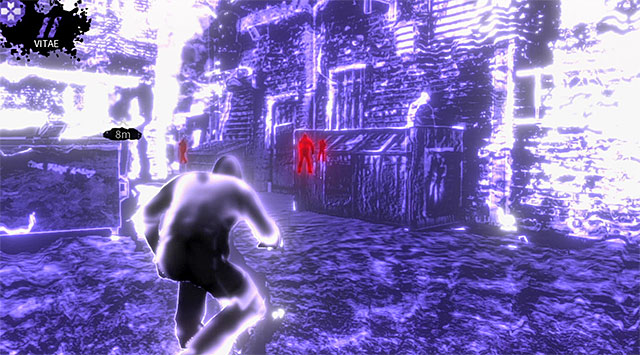
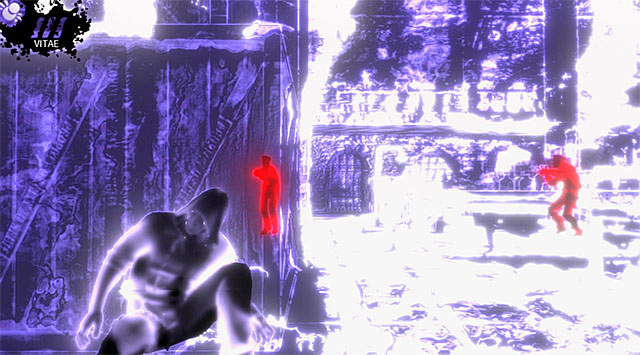
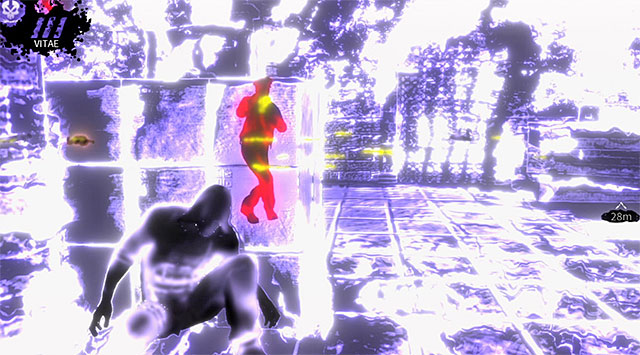
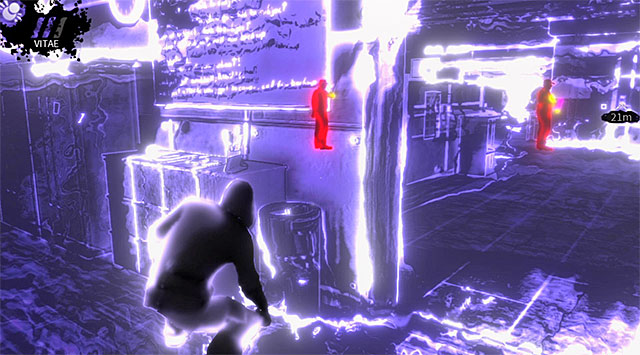
You should follow a new hint and use the Vampire Vision ability before entering a new location (this one also doesn't need any Vitae). This power is an alternative type of vision. It's used to monitor enemy movements and the additional advantage of activating it is that it slows down time. In this case you'll find out that a nearby ghetto is being guarded by three new thugs.
Approach the courtyard and start off by moving towards the bandit seen on the screen above. His back is exposed so you shouldn't have any problems with a silent execution, however make sure to no one else is looking his way. Once you've performed a silent kill you can move the body behind the shack, however even if you ignore this action you shouldn't worry about causing an alarm in the nearby future.
 Second thug
The second bandit is stationed to the left of where you've started exploring the ghetto. This person is travelling between two areas and you should start following the thug as soon as he begins moving towards the more distant point. Move the corpse quickly to prevent an alarm, hiding the body behind or inside one of the shacks.
 The last opponent
The last of the thugs is patrolling the area located far away from the starting place. Wait for this person to start moving, quickly approach the bandit from the back and perform a silent kill or feed off of this opponent. It's also important to remember that you can use Shadow Leap to move around more efficiently, however it's not required and you'd have to be careful not to teleport too close to the bandit.
 Exit from the ghetto
Once you've secured the entire courtyard start moving towards the exit from the courtyard. You'll soon return to the Sanctuary night club and you'll also receive 2000 experience points for your efforts.
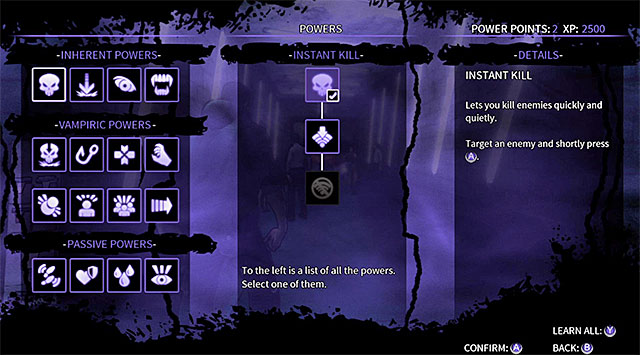 Menu used to unlock new vampiric powers and upgrades
The first thing you should do after returning to the club is to improve Eric's vampiric abilities for the first time. This is possible, because as a result of completing the tutorial the main character has advanced to a new experience level twice and therefore has received two Power Points. You're free to choose what you want (my recommendation is to unlock at least one new active power) and you can find the info on all the abilities and their upgrades in the last chapter of this guide.
 Tom
TomStart off by returning to Tom. It's a good idea to ask him a few additional questions about the Sanctuary night club.
 June
JuneAnother person you should pay a visit is June and she works in the club as a DJ. June can be found on one of the upper balconies to the left and you can get there by choosing a well-lit staircase. Sadly, despite many conversation options (Museum, Vampires, June) she won't be too interested in talking to you.
 April
AprilYou should return to the bar to talk to April again about the vampires and about your upcoming trip to the museum. You can also order a drink, but it doesn't have any real effects.
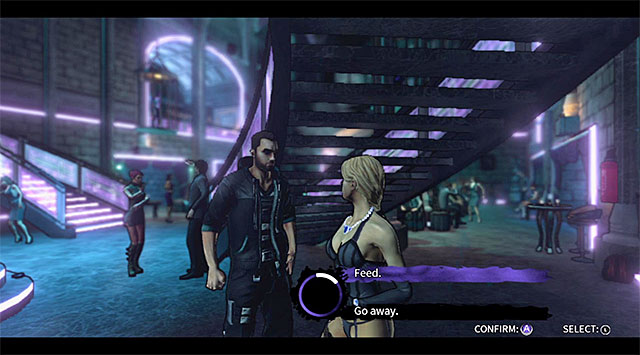 Jennifer
Look around close to the bar and you'll locate Jennifer who's still a human. The game will give you an opportunity to feed on Jennifer for free. Doing this will not only help you to regain Vitae, but you'll also earn 100 experience points.
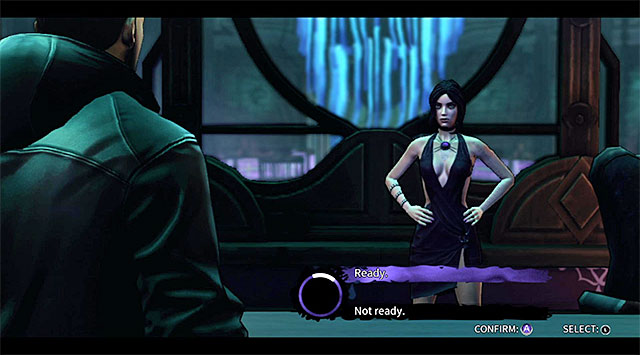 Final conversation with Rose
Once you've interacted with all of the characters in the club return to Rose's office. Confirm that you want to travel to the museum by choosing Ready dialogue option. The game will also give you a chance again to set the difficulty level.
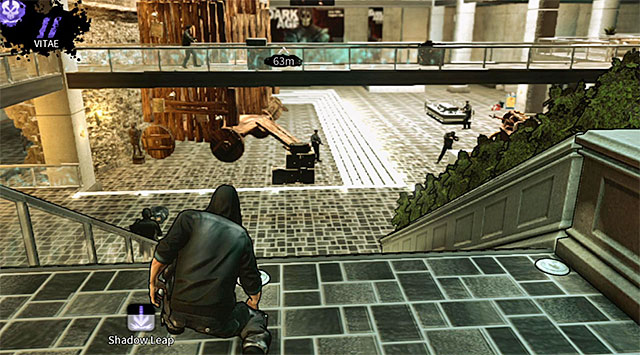
 First opponent encountered near the museum
Listen to a conversation with Rose concerning "unwanted guests" before diving straight into action. Carefully approach the first soldier encountered on a small bridge. The game will inform you that this opponent won't leave his post. The most obvious method of play is to eliminate this person, however you can as well try and spare the guard's life. If you choose this method of playing then you must remember about not ending up in the soldier's line of sight later on in the mission.
Side passagewayIt doesn't matter if you've killed the first guard or not, because either way you should proceed to your right. You will encounter two other soldiers here. Familiarize yourself with a new hint which will be about avoiding objects on the ground. Stepping on these objects (in this case it's garbage) will be noticed by Eric's enemies and can prevent him from making a surprise attack.
 A guard standing next to the garbage
If you don't want to kill anyone then you should proceed to your left, heading towards the nearby stairs. Otherwise approach the soldier standing closer to you. Wait for his colleague to start moving left before doing the silent kill (don't try drinking blood from this guard!) and don't forget not to step on the litter found on the ground. Once the enemy has been killed quickly drag his body to some quiet place.
 A guard patrolling the upper path
Now you can focus on eliminating the second guard who's patrolling the upper path. If you have Shadow Kill or Shadow Grip abilities you can obviously attack him from the distance. If you don't have these powers or if you don't want to waste Vitae points on a simple kill then you should move closer to the stairs located to the right. Hide behind cover, move closer to the upper path and wait for the soldier to start moving towards a large crate. Quickly follow him and perform a silent kill or feed off of him.
 Area close to the entrance to the pavilion
You may finally proceed towards the pavilion you've been ignoring so far (if you didn't kill anyone yet don't forget about avoiding all of the guards!). Once you're close enough to the entrance you'll watch a short cut-scene featuring soldiers talking to each other. Two of the guards will remain here afterwards and their third colleague will go back to the building.
 A small brick wall near the pavilion
As soon as you've regained control over Eric make sure that you're still hidden behind a small brick wall, because otherwise you may be easily spotted by one of the soldiers. If you don't want to kill any of the guards you must wait for them to turn the other way and then quickly move behind their backs (consider using Shadow Leap ability, but make sure to choose your destination very carefully). I don't recommend acting this way, because you would be forcing yourself to deal with addition problems while exploring the pavilion, especially since it has glass windows and you can be easily seen by the people standing outside.
 One of the enemies guarding the entrance to the pavilion
A much better idea is to kill both soldiers stationed in front of the pavilion. Wait for the enemy soldiers to go their separate ways (the guard standing closer to the entrance must go left). Approach the enemy found closer to your current position and attack him when he's next to the stairs (screen above). Once you've eliminated this person immediately start dragging the corpse, leaving it on the stairs or somewhere else where it's safe.
 Second of the guards stationed near the pavilion
Remain close to the stairs, hide behind cover and wait for the second opponent to go left again. Follow this person and perform a quick execution (don't try feeding on this guard, because you may be heard by other enemies!). Just as before, start dragging the body (you may leave it on the stairs).
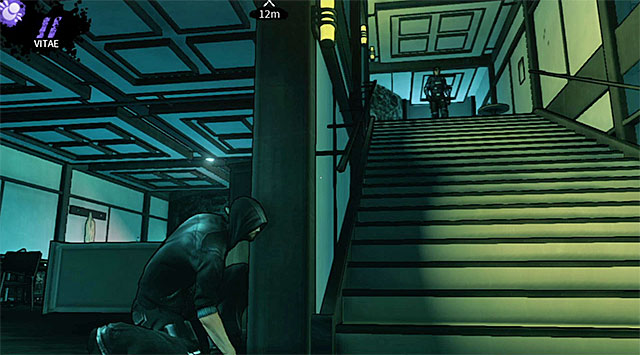 Stairs leading to the second floor
Carefully enter the pavilion and position yourself to the left of the stairs leading to the second floor. If you've already eliminated all of the guards from the plaza then you don't have to be extra careful here. Otherwise consider taking cover behind the corner (watch out for a new opponent there!) so that you won't be noticed by them while they're still patrolling the grounds.
 A single enemy on the second floor
Use the Vampire Vision to check the current position of a single guard who's patrolling the second floor. As you probably suspected you must wait for this person to start moving left (away from the stairs). Quickly go to the second floor. If you don't want to kill the soldier then immediately enter a side room. Otherwise approach him from the back and perform a silent execution on him.
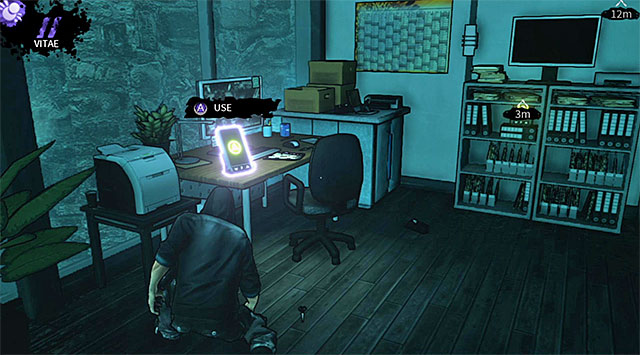
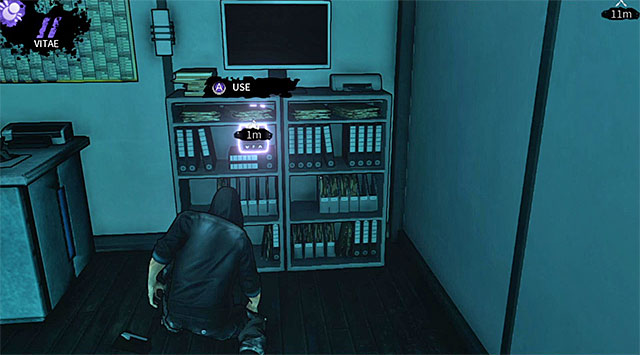
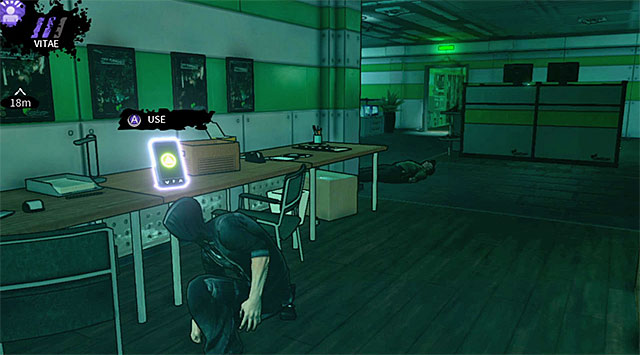
Sooner or later you'll have to check the side room mentioned above. Start off by approaching a desk seen on screen 1. There's a PDA here. Objects like this one are considered collectibles and in addition each PDA has a short message which you can read. It's also important to know that finding a PDA is always rewarded with 200 experience points. The second item you should take can be seen on screen 2 and it's an e-book reader. This device is connected to a side mission you've received from Tom during your stay in the Sanctuary night club (assuming you've chosen all available dialogue options while having a conversation with him).
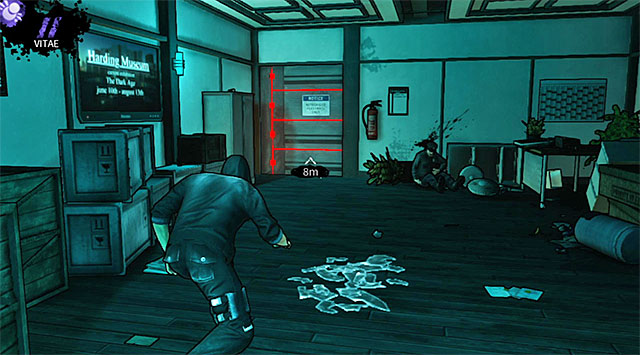 Blocked-off entrance to the museum
Leave the side room and use the stairs leading to the third floor of the pavilion. There's a single guard standing next to a glass wall and you can kill him or ignore him (watch out for glass pieces found on the ground!). What's more important is to inspect an entrance to the museum which is protected by laser sensors. Talk to Rose about unlocking access to the next area.
 Killing a guard encountered on the first floor of the pavilion
Return to the first floor of the pavilion and explore the room found to your left. A single guard is stationed here. You can act the same way as with the previous person and eliminate the hostile mercenary or sneak behind him avoiding all contact. Watch out for new glass pieces in this room, avoiding them so you won't be heard and discovered prematurely.
 Security office
Approach a winding staircase and head on to the top of the tower. Notice a single soldier here. You will have to kill this person, because it's the only way of gaining access to the security terminal and to neutralize the defences.
 Unlocked entrance to the museum
Return to the ground floor one more time. You must now go back to the entrance located on the second floor which you have visited before. Notice that the laser sensors are turned off and that you can enter the next area. Wait for Rose to open the second door for you before heading in. The game should now reward you for making your way through the plaza and the pavilion - 1000 experience points is a standard reward for entering the museum, however if you didn't raise an alarm in any of the previous locations then you'll also receive 1000 experience points as a bonus.
 First opponent in the museum
I strongly recommend activating Vampire Vision frequently while exploring this location, because the main hall is well-guarded by enemy units and an alternative vision will help you in noticing and avoiding them (the same applies to other areas of the museum). Start off by heading left. The first soldier is easy to avoid, but nothing is stopping you from killing him.
 A guard on a lower balcony
Be careful, because there are some glass pieces in a nearby corner. If you eliminated the guard described above then you can take the risk and walk on the glass. Otherwise it's best to use Shadow Leap to avoid this obstacle and not make additional noise. Make a stop when you're close to the stairs leading to a lower balcony. Take some time and notice that one of the guards stops on that balcony from time to time.
 The last soldier on the top balcony
There's one more soldier patrolling the top balconies which you currently occupy. The most obvious resolution would be to ignore this person, however you can also try to kill the guard to earn additional experience. If you prefer the hostile approach then you must wait for the soldier to start moving the other way. Use vampiric abilities or get closer to the guard using normal ways, eliminating him before he turns around. Important - Don't attack the guard when he's leaning on a balustrade, because his body may fly over the railing and land on a lower level, causing a risk of being found and an alarm being raised.
 Killing the soldier from the lower balcony
Return to the stairs with the guard from the lower balcony I've mentioned not long ago. The safest method is to kill this person using long distance powers like Shadow Kill or Shadow Grip. If you don't have these abilities or if you ran out of Vitae then you must wait for a right moment to surprise him from the back to perform a quick execution on him. Another important thing is to hide the body after a successful kill. If you plan on avoiding this guard you will have to be extremely careful, because he may be able to surprise you during the next parts of your descent.
Two other soldiers are guarding the stairs located in the left and in the right part of the main hall (screens 1 and 2). It's a good idea to eliminate both of them, either by using advanced vampire abilities or by approaching them from the back immediately after they've started their patrols.

No matter how you've acted while exploring the upper balconies eventually you should choose the left staircase seen on screen 1. If the guard stationed here is still alive then you will have to quickly sneak behind him (after he's stopped on the stairs) or kill him right now. If he's already dead then there are no other dangers waiting for you in the vicinity. Don't use the stairs to head all the way to the ground level, because you would enter a field of vision of one of the soldiers from the reception. Instead make a stop half way on the stairs and use Shadow Leap to teleport yourself towards one of the big pillars (screen 2).

Start moving forward after a successful teleportation. Check the nearest corner of the main hall to find a PDA (200 experience points) displayed on the screen above. Quickly take this collectible, because you'll enter the line of sight of one of the guards. Important - If you don't want to take unnecessary risks then you can return for the PDA after you've secured this entire location or use the Obfuscation ability to make Eric partially invisible.
Turn around and start exploring the area located beneath the balconies you were using earlier on. There's a single guard nearby and he is shown on the screen above. I suggest that you eliminate this person, because otherwise you would have to distract the guard (Domination, running next to a cover etc.) or outsmart him somehow (Obfuscation is always a good idea). Hide the corpse in a dark place just to be safe.
 Reception
You can leave the main hall right now if you want to (scroll down to the bottom of this page), but you can also try and deal with two of the final soldiers in this area. Two guards are standing between the reception desk and large yellow doors. Approach them carefully so that they'll start a conversation.
Wait for the guards to end the conversation and go their separate ways. Approach the guard seen on screen 1. Perform a quick execution on this person (a standard kill or an execution based on more advanced vampiric powers). Once this person is dead quickly hide the body behind the reception desk. You may now focus on the other soldier seen on screen 2. This is the last person in the main hall so even using an aggressive ability won't put you in jeopardy, however you may also choose a standard kill and approach the soldier from the back. Important - Don't allow the guards to meet for the second time after ending their patrols, because that's when one of them will proceed towards the upper balconies and as a result that person may discover the bodies of all the people you've killed earlier on.
If you've secured the entire main hall then you will have plenty of time to explore this area and to collect the PDA mentioned earlier without any dangers. No matter how you've played this out find an exit as seen on the screen above which is located on the ground floor.
 A guard appearing near the junction
Start exploring linear corridors. Once you've reached a junction turn left and take cover behind the corner. Wait for one of the guards to arrive here. Notice that this person is heading towards the main hall and as a result it would be a good idea to kill the guard, especially if you've left some bodies behind in the previous area of the museum. If you've managed to leave the main hall without killing anyone you won't have to worry and you can also leave this soldier alone.
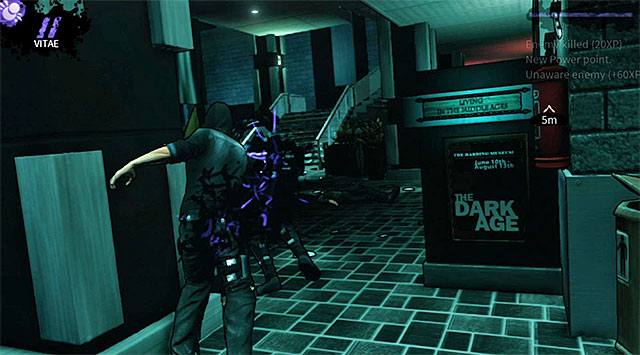
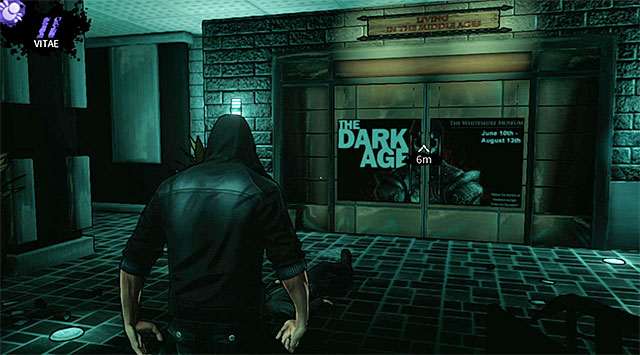
 Entrance to the first exhibit
Resume your journey and it won't take too much time for you to reach a door leading to the first medieval exhibit (Living in the Middle Ages).
Turn left and make a mandatory stop after reaching the nearest corner. There's a PDA (200 experience points) here and it's shown on the screen above.
 A single guard on the upper balcony
Proceed to your right and watch out for new broken glass found along the way. There's also a guard stationed here and you can either kill him or easily avoid him.
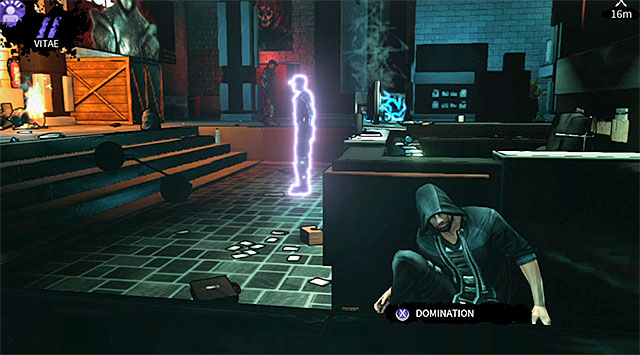
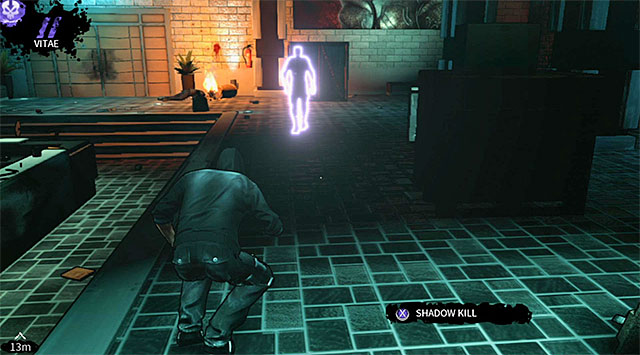
Choose the stairs leading to the ground floor. Stop when you're in a position shown on screen 1 and make sure that you're using the left balustrade for cover. There are two enemies here and sadly eliminating them can be tricky, because they're both observing each other. A good idea for resolving this situation is to use Domination ability on one of the enemies. You must follow this through by performing a quick execution on the stunned guard (screen 2) and then catching up with the other mercenary before he manages to turn around. You can also practice with such powers as Distract and Presence (stunning both enemies at the same time) or try and lure out the guards to the upper floor (running next to a cover or using a basic version of Shadow Leap).
 Suggested destination for the teleportation
If you don't have any of the vampiric powers mentioned above or don't want to experiment too much then it would be best to avoid both enemies. Make sure that the soldier standing close to the staircase is looking the other way and quickly teleport yourself towards the glass cases located to the right.
Choosing the longer route to your destination will be safer, however you must remember about an additional thing you found out about after arriving at the exhibition. Some of the showcases here have motion sensors, like the one seen on the screen above. It means that a showcase may start playing a recording if you get really close to it. Activating a showcase isn't equal to raising an alarm, however you can be sure that at least one of the nearby guards will show up to inspect the problem. This can be a complication, but you can also turn it into an advanced tactic, separating a certain person from the rest of the pack and performing an execution when it's safe to do so.
 A side room
The longer path mentioned above leads through a smaller room located on the opposite end of the hall. You won't encounter any enemies here, but watch out for a new motion sensor.
 Area near the exit from the first exhibit
Whether you've killed both guards or decided to avoid them you'll still have to leave this area. Don't rush towards the exit from the first part of the exhibit, because there are other soldiers in the area.
 A guard patrolling the area near the door
If you want to leave this area as soon as possible then you must wait for a nearby guard to start moving right before heading towards the exit. If you plan on eliminating this person then start sneaking close to the guard, remembering to avoid new motion sensors along the way.
Make a stop once you've reached a showcase seen on the screen above. It's very important to use Vampire Vision here, because there's a second soldier in a new side room. Wait for this person to turn around and move away before attacking the guard you were following up to this point.
 Last guard from the second side room
You can now either take your time and carefully drag away the corpse to safety or immediately enter the second side room to kill the last guard before he manages to turn around.
The exit from the first part of the exhibit is located in a corner to the left of the stairs you've used to get to the ground floor and you can see it on the screen above.
 Enemies interrogating an innocent person
Start exploring very linear corridors, witnessing a new cut-scene featuring "the angel". Ignore a conference room found along the way, because it doesn't hold any valuable treasures. You should on the other hand approach the entrance to the left room. There are two enemies inside this room and they're interrogating a museum guard. Wait for this person to be killed (unless of course you're not planning to kill the soldiers - in that case it's best to leave this area as soon as possible).
Move away to one of the previous corridors, because enemy soldiers will soon leave the room and one of them will start moving your way. It's best to surprise this person near one of the corners in order to perform a silent kill (screen 1). As for the other opponent, he will begin patrolling between the corridor and the room with the killed museum guard. Make a surprise attack when the mercenary is facing the other way (screen 2).
The biggest advantage of killing both enemies described above isn't earning additional experience, but gaining access to the room where they were interrogating the museum guard. Explore this room to find a PDA (200 experience points) shown on the screen.
 Entrance to the siege machines exhibit
You may resume exploring the narrow corridors and you'll soon get to a door leading to a much larger medieval exhibit.
 Default positions of enemy guards
This is a very vast location and as always you shouldn't be trying to leave it as soon as possible. It's best to take some time to familiarize yourself with the surroundings, preferably using the Vampire Vision ability. Your current objective is to reach a door located on the lower level on the opposite of the siege machines display. Naturally it's not going to be easy to get there, because the area is heavily occupied by armed museum guards.
 Lower level
Let's start off by saying a few things about each of the three levels of the siege machines exhibit. The lower level is the one that's guarded by the largest number of enemies. Furthermore, most of the museum guards are facing the balcony you start on so it's not recommended to use the main stairs to get to the ground floor. Thankfully you will be able to reach the lower level using other staircases or by relying on teleportation.
 Main level
The main level of the exhibit is the one where you start your exploration. There are balconies to the left and to the right of the main part of the exhibit. Both balconies are connected by a small bridge and by default the bridge is being patrolled by a single guard. It's also worth mentioning that during your time spent on the main level you will often come across staircases leading to other floors.
 Upper level
The upper level of the exhibit consists of a replica of a wall surrounding a medieval stronghold and of a group of metal balconies (there aren't as many balconies in here as on the main floor). The largest group of museum guards resides in the right section of the level. You can skip visiting this floor of the museum entirely, because you won't find any collectibles here and going through the upper level won't bring you any closer to reaching the exit. As a result the only exception is if you plan on eliminating as many guards as possible in order to obtain additional experience points.
Enough with the preparations - we may begin. The first thing you should do is to approach the stairs leading to the lower level. Don't use the stairs, but instead activate Shadow Leap ability to teleport yourself to an area to the left of the stairs (screen 1). Explore the left part of the main hall with the siege machines and you'll uncover a PDA (200 experience points) seen on screen 2. Once you've taken the collectible use the teleportation again to return to the starting point.
 The right path on the main level
I strongly recommend that you follow my instructions from this point onward so that you'll reach the exit from the second exhibit without experiencing too many problems. Proceed to your right, ignoring a staircase found along the way.
 A corridor with a single guard
Make a stop once you're close enough to new showcases (this location also contains motion sensors so you must avoid them!) and wait for one of the museum guards to arrive. It's highly recommend that you eliminate this person and a perfect moment for an attack is when the guard is moving away from Eric. If you want to leave this person alone you'd have to spend a lot of time using vampire powers and other tricks trying to stay hidden.
 The right side of the hall
Keep moving forward, staying on the right side of the main exhibit. Don't forget about a single guard patrolling the middle bridge. Thankfully this person should be moving towards the left balcony at this point so the guard won't cause any serious problems.
 Two new guards
Turn right the first chance you get and carefully approach two new museum guards. The person standing to the right is facing in your direction so it's important not to remain in the open for too long. As for the left guard, he's constantly moving between two areas of this balcony and you don't have worry about him starting to go towards Eric all of a sudden.
 A guard when he's about to stop near the railing
If you plan on eliminating both guards mentioned above then you should begin with the one to the left. An ideal moment to attack him is when he's close to the balustrade (make sure to grab his body quickly so it doesn't fly over the railing and land on the lower level). Once this person is dead carefully approach the second guard from the back. He shouldn't move so it'll be an easy kill. The biggest advantage of getting rid of both enemies is that you can now use the stairs to safely reach the ground floor. If on the other hand you've decided to let both enemies live then you should remain close to the left balustrade and wait for a good moment to use Shadow Leap to teleport Eric to the lower level.
An area under the balcony you've just visited (the one with two guards you've avoided or killed) is being patrolled by a single enemy shown on the screen above. The best method of eliminating this person is to use a long-distance vampiric powers like Shadow Kill or Shadow Grip. If you can't use these abilities or don't want to then you can take cover behind one of the showcases on the ground floor and start following the guard, trying to kill him before he gets too close to the main area. It's going to get even more complicated if you don't intend on killing anyone - in this case you should consider using powers good for distracting enemies (Obfuscation, Distract or Domination) and rely on teleportation in combination with hiding behind showcases.
 An area close to the exit from the second exhibit
All of the methods described earlier in the text will allow you to get closer to the exit from the second exhibit. Turn right and you'll notice a door in a distance. Don't try getting there too fast, because the exit is well guarded.

If you want to leave the second exhibit without any additional kills then you can start moving slowly towards the exit. It's important to stay close to the right wall and use pillars found along the way for cover (screen 2). Wait for the enemy that's guarding the exit to move left a little and then quickly approach the door (screen 2). Consider using Obfuscation ability here to lower the chances of being spotted.
If you don't have anything against killing all the guards stationed near the exit from the exhibit then you should rely a lot on your vampiric abilities. I recommend that you start off by performing a quick execution on an enemy stationed to the left (screen 1). Once he's gone use Shadow Kill or Shadow Grip power on the person guarding the exit (screen 2). You must do this before the second guard turns around and sees the body of his colleague. You should also wait until a third guard moves far away from this area (he's patrolling the large siege machines located to the left) so you'll have enough time to hide both bodies.
You can leave the second exhibit right away using the door seen on the screen above. If you plan on staying here longer and eliminating all of the remaining museum guards then you'll have to be prepared for a long and challenging journey, especially since a lot of your enemies are observing each other instead of patrolling the area without any backup. I recommend that you start securing the exhibit by clearing the main level. Once it's safe there move to the upper level using the stairs found on the right balcony. Finish off by eliminating all hostiles from the lower level (begin near the exit, not where you've originally started exploring the exhibit).
Open the door and start exploring narrow corridors. I recommend that you visit a small office found along the way (screen 1). Eliminate a single guard present in this location and then spend some time exploring the room in order to locate a PDA (200 experience points) seen on screen 2. You may now leave this area by entering an elevator which will transport you to a new floor of the building. The game will also reward you here - 500 experience points is the basic reward for making it through the exhibits, however if you didn't trigger any alarms in the locations you've recently visited you'll receive an additional prize of 2000 experience points.
 A view of the catacombs
Wait for the elevator to transport you to the catacombs. Exit the elevator, hide behind the nearest crates and take some time to get to know your new surroundings. During your time spent in the catacombs you'll be dealing not only with new museum guards, but also with undead monsters called ghouls. These creatures don't have good eyesight and you definitely can use this to your advantage. There's also some bad news, because alarming the ghouls means serious trouble and is essentially equal to restarting the level from the last checkpoint. The reason for that is because alarmed ghouls start to move very fast and they can inflict poisonous attacks.
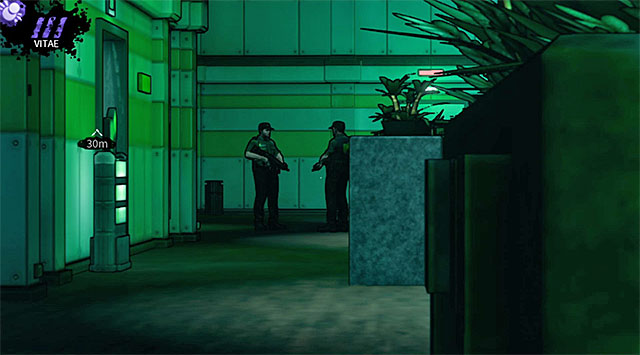
 First guard in the catacombs
Go to your right and don't forget to use the balustrade for much needed cover. There are two guards in the vicinity and they'll soon go in different directions. Focus on a guard that will go left and eliminate him so that he doesn't surprise you later in this stage. An interesting thing to know is that you can drink the blood of this opponent, because even though this action will get the ghoul's attention it won't convince them to check the source of strange noises and as a result you won't be discovered. Once the guard has been killed move his corpse slightly to the left.
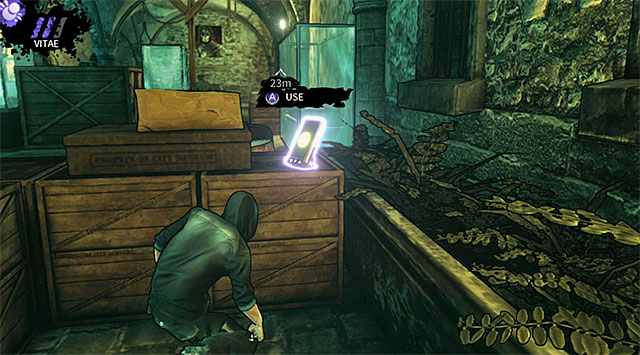
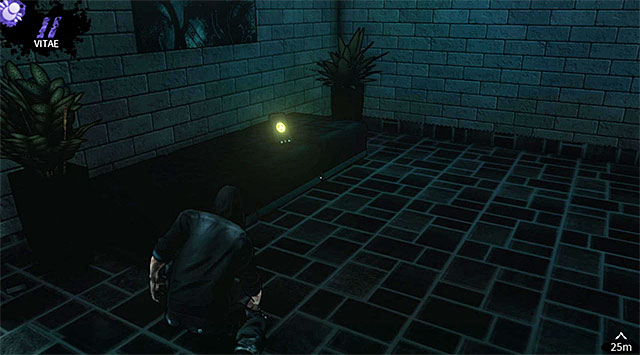
Return to the area where both guards were recently having a conversation. Watch out for the remaining enemy, because he's still active and he may have returned to this area in the meantime. There are also new motion sensors in the catacombs and you'll have to remember about them. Find the crates seen on the screen above and collect a new PDA (200 experience points).
 A guard patrolling a side corridor
It's strongly recommended that you kill the second museum guard as well. Wait for this person to turn around and immediately start closing in on your opponent. You must kill the guard before he gets too close to other enemies from the catacombs, because otherwise he may enter their line of sight. Drag the body to the area where you've found the last collectible and leave it there. Important - If you plan on keeping all of the nearby guards alive you will have to use nearby showcases for cover. Relying on vampiric abilities is also a good idea.
 A guard from the central part of the room
The third opponent is standing in the middle of the room, near the ghouls that are consuming one of the corpses. This person shouldn't move from his original post, so eliminating the guard won't be a big problem. The only thing you need to watch out for is to stay away from new motion sensors, because otherwise you'll alarm the guard about your position.
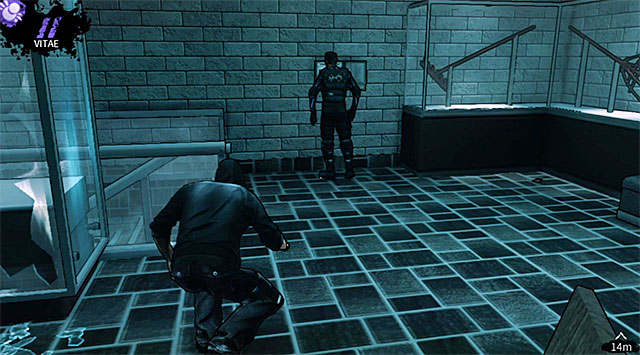
 A view of the final guards from the first room
You may now carefully approach the last two guards from the first area of the catacombs. It's crucial that you wait for them to end their conversation, because that's when one of them will start moving in a different direction.
You can avoid both guards mentioned above if you want to, however I recommend killing them, especially since it won't be hard. Start off by attacking the guard that doesn't plan on leaving his post (screen 1) and then quickly get to his colleague before he manages to turn around (screen 2).
If you've followed my instructions then you've eliminated all the guards and there are only ghouls left here. The monsters are stationed close to each other so it's best that you leave them alone, because even using more advanced vampiric abilities will be risky here and can cause an alarm. The exit from the first part of the catacombs can be seen on the screen above.
 A passageway leading to the first encounter with Blooming
Use the narrow corridors to reach the next area, witnessing a new cut-scene featuring an "angel" along the way. You'll soon get to a larger cellar. Ignore exploring the cellar and proceed directly to the stairs leading to Blooming's hideout.
 A cover used to hide from the guards
Sadly you can't expect for Blooming to give you his blood voluntarily. Instead the vampire will begin a (long) escape and he will also send two of this guards after you. Make sure that Eric is taking cover behind a large crate, because you can't be exposed too early. Wait for the more distant guard to go left and move to your right, because you've probably noticed that his colleague is heading your way.
Walk around the large crate so you're not caught while trying to stay in the original position. Use the large crate to surprise the first guard from the back (screen 1). You must kill this person, because it's the only way to move on with the mission. Grab the corpse and hide it behind the crate (screen 2). This is extremely important, because a new guard will show up in this room later on and he will turn hostile if he finds the body.
 Second guard
Notice that the second guard has stopped in the left part of the room. Start moving towards him and make sure not to step on the broken glass while trying to close the distance to him. Perform a silent kill and also take care of hiding the body. Leave the corpse behind one of the big obstacles so that it won't be seen from the middle of the room.
Blooming will soon send more enemies after you. To be specific - you will have to deal with a single ghoul and with two museum guards. Take cover behind the crate seen on the screen above. Wait here for the monster and for one of the opponents to show up. If you hid the bodies then the guard shouldn't be alarmed and he'll stop for a while in the center of the room (next to the ghoul).
Useful tip - Ghouls can't be seen by default when using the Vampire Vision ability. You can change that by purchasing a Clairvoyance upgrade (Auspex category) and it's certainly a good idea, because you'll be dealing with these monsters rather frequently.
 Eliminating the guard who's commanding the ghoul
Notice that the guard is commanding the ghoul and wait for him to send the creature to the first room of the cellar that you've been to some time ago. You can now either immediately attack the unprotected guard (Shadow Kill and Shadow Grip abilities) or you can wait for him to go past you and approach him to perform a quick execution. If you chose a standard kill then you must also make sure that you're not seen by the other guard from the adjacent room.
Use the stairs and return to the previous area of the cellar. You must be careful, because aside from a ghoul there's also a second guard here. I recommend that you turn left immediately after using the stairs and take cover behind the crates seen on screen 1. Wait for the guard to start moving away and follow him, avoiding new broken glass along the way. You can leave the guard alone and leave this area right now or go after him and kill him (screen 2).
Before you decide to leave the main area of the cellar you can also murder the ghoul that was commanded by one of the museum guards. It's not mandatory, however it's an easy way of scoring additional experience points. Approach the ghoul from the back and press the key/button responsible for performing quick executions (sadly you can't drink the creature's blood to regain Vitae). Once you're done here use the passageway seen on the screen above - it's located next to a corridor which was patrolled by the last guard.

Once you've entered this location you'll watch a short cut-scene informing you about an arrival of a new group of Blooming's helpers. Listen to a conversation with Rose and check your surroundings to locate a PDA (200 experience points) seen on the screen above.
 Stairs leading to a new guard-ghoul duo
Carefully approach the stairs leading to the next room, because it's occupied by a new guard and a ghoul. Don't rush inside and instead use the Vampire Vision to check the current position of your opponents. The main reason for that is because the guard sends the ghoul to check various parts of the room and you can't count on staying hidden even if you take cover somewhere near the entrance. As a result you must remain on the stairs before heading in for the kills.
An ideal moment to take the initative is when the guard sends out the ghoul towards an exit seen in the distance and shown on screen 1. Quickly approach the guard and kill him before he's able to issue another command (screen 2). You may now murder the monster. It's going to be easier to kill the ghoul, because it's awaiting commands and it shouldn't move or even turn around.
Proceed to the next location and you'll soon trigger a cut-scene involving Blooming. Notice that the vampire is armed with a pistol so choosing the main corridor isn't a good idea, because you would be noticed and shot at. A much better plan is to choose the right corridor displayed on the screen above. Get as close to Blooming as possible before returning to his field of vision. Don't worry about being seen by Blooming and instead focus on getting closer to him. Sadly the vampire will escape once again. Furthermore, he will send three guards and a ghoul to kill Eric.
Start off by taking cover behind an object seen on screen 1, because one of the guards is heading in your direction and he'll soon enter this room. Wait for this person to walk past Eric (you must stay behind cover to avoid being seen!) before making your move (screen 2). You can either perform a quick execution or feed on the guard (doing this may alarm the ghoul mentioned before, but the creature won't show up here to investigate the disturbance).
 A new guard with his ghoul
Take cover next to the exit from the room you currently occupy and wait for the remaining guard to send the ghoul to the side passageway you've used yourself not long ago.
Quickly start moving towards your opponent. You can decide to avoid this guard or kill him. If you choose the first option then you should rely on Shadow Leap to avoid being seen by him and leave this area as soon as possible (screen 1). If on the other hand you plan on killing the guard you should choose a long-distance attack like Shadow Kill or Shadow Grip (screen 2). Once the enemy is dead you may also approach the ghoul from the back and kill the creature for additional experience.
 A single guard patrolling the upper balconies
Return to the previous room you've visited not long ago, but this time choose the stairs located to your right. Make a stop before making your way to the top of the stairs and activate Vampire Vision to check the current position of a single guard patrolling the nearby balconies. I recommend that you wait for this person to go left and then either avoid him or kill him.
Your current objective is to make your way to the opposite end of the upper balconies. Locate a small passageway seen on the screen above - it leads to Blooming's hideout and you'll watch a new cut-scene there.
 A guard stationed under Eric
After you've regained control over Eric you will have to act quickly, because you're standing on a very small balcony and you may soon be noticed by a guard who's currently patrolling the area to your right. Quickly look down and notice that another enemy is standing directly beneath you. This person will soon start moving right. If you don't mind killing your opponents you should use Shadow Kill or Shadow Grip on this person and then quickly hide the corpse behind the wall. Otherwise you should wait for this guard to move away and then use standard teleportation (Shadow Leap) to leave the balcony.
Ignore the remaining enemies stationed to your right and focus on getting closer to Blooming (screen above).
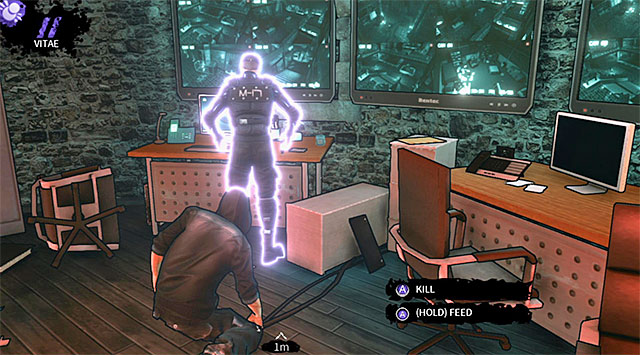
 Blooming
Notice that the vampire keeps turning around. As a result you must wait for Blooming to start looking the other way and then quickly move towards him. HOLD the interaction key/button to grab Blooming and to start draining him of his blood. Ignore the fact that this process usually takes a few seconds, because a cut-scene will be triggered very quickly. Wait for Eric to return to the Sanctuary club and get your reward - 1500 experience points.
 Mission report
Start off by going to Rose's office (as you probably remember it's located on the top level of the night club). Eric will share a full report of his recent trip to the museum and he'll also find out from Rose that he might have more luck with an ancient vampire named Vlad. Rose will send you to Tom to get more details.
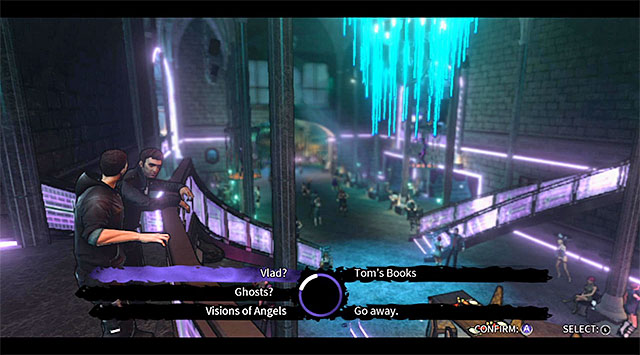 Meeting with Tom
Tom can be found next to the bar. Initiate a conversation and then follow the vampire to the upper balcony. You'll take part in a longer conversation there and obviously you should choose all available dialogue options (Vlad, Ghosts, Visions of Angels). If you've found e-books during your visit to the museum (they were in the pavilion that you've entered at the beginning of the chapter) then you may also choose Tom's Books dialogue option. Doing this will complete the side-mission and result in receiving 1000 experience points.
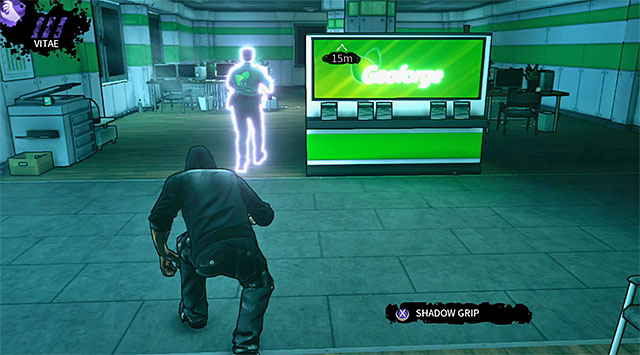
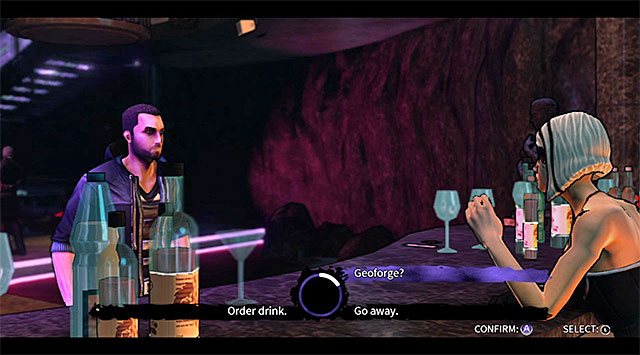 Meeting with April
Head back down and talk to April (she's still working at the bar). You should ask April about the Geoforge corporation, because you'll receive 100 experience points and find out more about Vlad's current whereabouts. April will also ask you for a small favor involving deleting her personal data from the Geoforge servers.
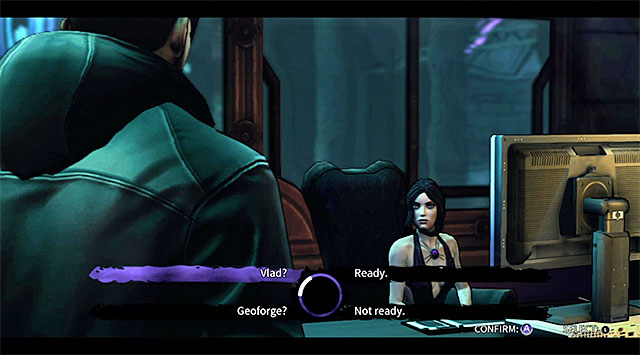 Preparations before the next mission
Head back to Rose (you don't have to meet with June, because she won't be interested in a longer conversation). Ask Rose all the additional questions (Vlad, Geoforge) and then confirm that you're Ready for your next assignment.
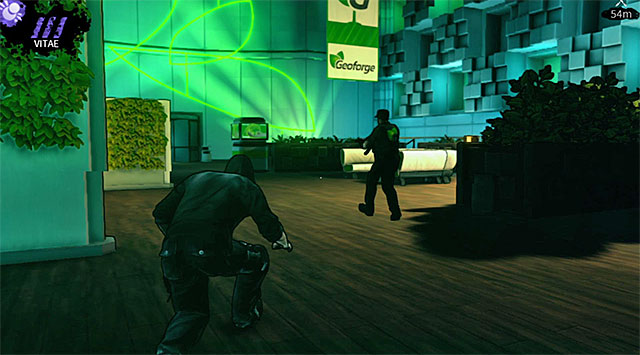
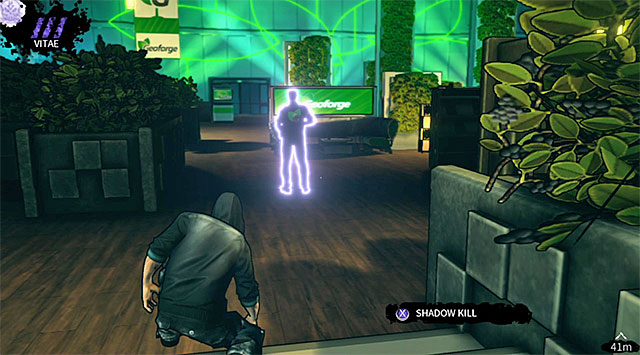
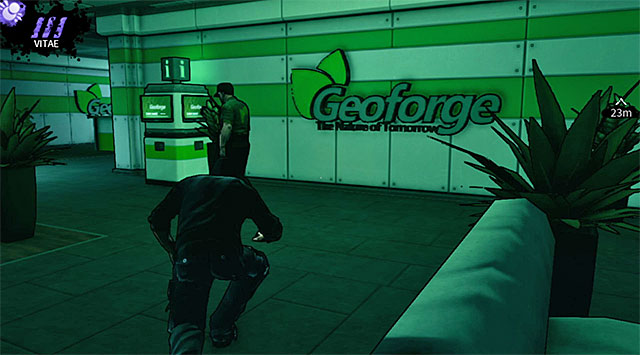
 A view of the enemies in the lobby
You begin this chapter in the Geoforge tower lobby and as always you should spend some time to learn your surroundings. Your current objective is a reception located on the opposite end of the lobby, because that's where you'll find a door leading to the security room. Naturally it's not going to be easy to get there, because you'll be dealing with a lot of armed guards.
 The first guard
The first guard is standing to the left of where you've started. You don't necessarily have to kill him, but nonetheless you should proceed with this plan, especially since he won't move and as a result is considered an easy target. As soon as you've killed this person drag the corpse somewhere to the left so it's not found by anyone.
The next guard you should take interest in also won't move from his initial post. It's the person standing in the middle of the lobby's lower level (screen). Don't attack this enemy right away, because you must make sure that another guard who's patrolling this location is not heading this way. Start dragging the body after making a kill, leaving it somewhere to the right (don't go too far so you won't be noticed by enemies who are guarding the stairs).
 Suggested destination for Eric's teleportation
The best way to reach the lobby is to choose the stairs located to the left. If you don't want to kill anyone then you can simply walk past two of the "stationary" enemies mentioned above and wait for other guards to get on with their patrols. Choose a good moment to make a move towards the stairs. Using Shadow Leap will be a good idea here, however you may also rely on some of Eric's passive powers to stun or disorient enemy units.
If you don't have anything against killing enemies then wait for a right moment to attack the guard seen on the screen above, doing that from his left flank. Start dragging the corpse quickly, leaving it near the right stairs (again - don't move too close to the stairs, because this area is well guarded!).
 Guard patrolling the left side of the lobby
You may finally take interest in a single guard patrolling the left side of the lobby (he was "inaccessible" before, because he was observed by other enemies). I recommend attacking him when he's far away from the stairs, close to the area where you've started this chapter.
Like I've already said you should proceed to the stairs located on the left side of the lobby (either after eliminating all hostiles from the lower level or after avoiding them). You'll probably notice that a single guard is making stops here from time to time. Take cover behind the left brick wall (screen) and make a surprise attack or quickly leave this area. If you've chosen the more aggressive approach then don't forget to hide the corpse (preferably on the lower level).
Choose a narrow passageway leading to the right side of the lobby. You'll encounter two new guards here and once again you'll be presented with a choice whether you want to kill them both or leave them in peace. Choosing an aggressive path should begin with attacking the guard found on this level (screen 1). Once he's dead return to the last person on the ground level (screen 2) and surprise the guard by attacking him from behind.
Theoretically you can start thinking about leaving the lobby right now, but I don't recommend this plan unless you don't want to kill anyone and don't care about a new secret that can be found in the lobby. It's much better to continue securing this area. Choose the narrow path again and return to the left side of the lobby. Use the stairs to reach the top level and make sure that no one is heading your way. Use the Shadow Leap ability to teleport Eric to one of the brick walls located to the left (screen).
 Guards talking near the exit from the lobby
One of the guards stationed here will soon start moving right. He will join his colleague and they'll start a conversation. This isn't a good situation for you so consider moving closer to both enemies to "convince them" to end their conversation and to return to patrolling the lobby.
Guards after they ended their conversationRemain hidden behind the wall on the left side of the lobby and wait for another enemy who's patrolling this entire area to move away. Carefully head towards the first guard and eliminate him (don't even think about draining him of his blood, because you would raise an alarm). Don't forget to hide the body, leaving it behind one of the brick walls.
 Killing the second guard
Notice that the second guard from the last group has started moving towards the right side of the lobby. Keep using cover and don't move, because he'll return soon. He will probably make a stop near the stairs and this is a good moment to attack him. Don't forget to take some time to hide the body - you can leave it behind a brick wall or drag it to one of the lower levels.
 Last armed opponent in the lobby
There's one more armed guard in the lobby. He's travelling close to the reception and you must wait for him to make his way to the left side of this location. Kill him using your favorite attack and hide his body (despite him being the last hostile - you'll know why you needed to do that in a few minutes).

Approach the reception area from the left side and take some time to locate a PDA (200 experience points) seen on the screen above. Notice that there's an unarmed receptionist here. You must follow the instructions you've received at the beginning of this chapter and avoid this person at all cost. The game won't allow you to kill civilians, however they can still see you and raise an alarm, treating Eric as a hostile.
 Stairs leading to the exit from the lobby
Once you've taken the collectible mentioned earlier return again to the passageway found on the lower level and proceed to the right side of the lobby. Turn left here and use the stairs to get to the top level. If you've followed my instructions thus far you will have to watch out only for the receptionist. Thankfully it's not that difficult to avoid this person, because the receptionist often stops next to computer terminals, giving you plenty of time to walk past him. If on other hand you've trying to play it clean and so far haven't killed anyone then you'll still have to watch out for three standard guards. In this case you should use the Shadow Leap power to transport Eric to one of the brick walls to the right. Once you're there wait for the enemies to move away.
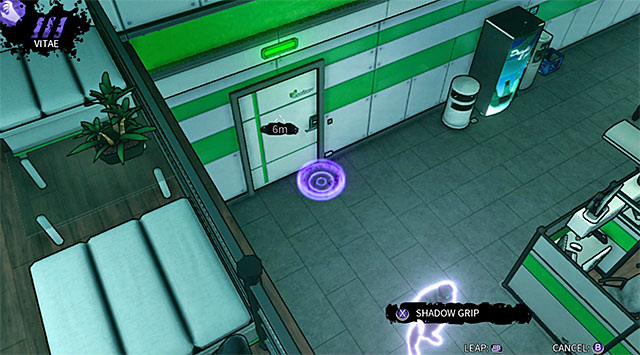
All of the actions described on this page have one common goal and that is to reach a door leading to the security office (screen above). Open this door and proceed to the next location.
 A guard standing next to a broken vending machine
Use the narrow corridors to reach the security room. There are five guards in total in this area. The first guard is standing next to a broken vending machine. If you plan on killing this person then wait for the second opponent to go left. Once you've killed the soldier quickly drag his corpse to the previous corridor.
Wait for the second guard to move away for the second time (he will enter a room located to your left). Quickly start moving towards two other guards seen on the screen above. Perform quick executions on your enemies and then hide their bodies. It's also important to do that before the second guard shows up again and finds his dead colleagues.
Remain in the central part of the security room and search the area located to your right. There's a PDA (200 experience points) here (screen above).
 Entrance to the side room
Once again you must wait for one of the security guards to proceed to the left room. Follow him there and eliminate him.
 A guard standing next to a computer terminal
The last opponent from the security room is standing next to a computer terminal found to the right of the entrance and it's the only person you really MUST kill in order to proceed with the mission (if other guards are still alive then don't forget to hide the corpse somewhere near the monitors).
You may finally interact with a computer station shown on the screen above. Doing this will shut down the tower's security system.
Exit the side room. If you've already killed all nearby guards then you may start moving towards the reception right away. Otherwise you will have to remember about avoiding the guards seen on the screen above (they also make it really difficult to reach a secret found in the security room). In this case you should rely on Shadow Leap, as well as on such powers as Domination, Distract or Presence. Watch a cut-scene from a new meeting with the "angel" and then finish going back to the reception.
 A single guard in an empty reception
Once you've returned to the lobby you should notice that the receptionist has vanished and instead a new guard is stationed near the reception. The guard will soon start a patrol so you should kill him rather quickly before he finds the bodies of the people you've killed at the beginning of this chapter.
Once you're done here locate an active elevator seen on the screen above. Enter the elevator and wait for Eric to be transported to one of the tower's higher levels. The game will reward you with 500 experience points for finishing the first part of this chapter, however if you didn't raise any alarms in the lobby and in the security room you'll also receive a bonus - 1000 experience points.
 Unavailable passageway leading to the staircase
Exit the elevator and proceed towards a room marked on your HUD. Try opening the door leading to the staircase and sadly you'll find out that this passageway is locked. That's not the only problem, because a guard will show up in this area very soon.
 A single guard
Quickly hide behind a good cover and wait for the guard mentioned earlier to walk past you. It's entirely up to you to decide whether you want to kill this guard or leave him alone. In any case remember to stay away from information posts (they're marked in yellow when you activate vampire vision) on all of the upper floors of the tower. These devices act the same way as the showcases from the museum - they have motion sensors and they can be activated if you move too close to them.
 A new group of guards
Find a door leading to the accounting office (Accounting II sign). As soon as you've entered a small room take cover behind one of the nearest obstacles, because two new guards are moving in your direction.
The guards will soon split up and you should consider using this is an opportunity to leave this area as soon as possible. If you plan on murdering the guards you'll most likely have to rely on your vampiric powers, because they'll get back together really soon. I recommend that you start off by attacking the guard who has stopped next to a vending machine (screen 1). As soon as this person has been killed face the other opponent and use one of disorienting powers (Domination would be my pick) on the second guard (screen 2). Doing this will allow you to approach him without having to worry about him raising an alarm.
 Entrance to the accounting office
Both variants described above have an identical next step - you must get to a door leading to a very large accounting office. Your objective here will be to reach the top floor and to get to an exit located to the left of where you're starting. It shouldn't come as a surprise that you'll be dealing with plenty of new guards here.
 Attack on the first guard from the accounting office
I recommend that you start off by eliminating a guard who is patrolling the cubicles on the ground floor of the accounting office. You shouldn't have any major problems surprising him from the back, however don't attack him if he gets too close to one of the upper balconies or to the stairs, because the attack may be noticed by someone from the upper floor.
It's a good idea to focus on reaching the upper levels of the office as soon as possible, because many of the guards from the first floor are constantly observing the ground floor and you may be easily spotted by them while trying to kill someone or simply while trying to explore your surroundings. Choose the stairs located directly in front of where you've started (screen above), but before you head upstairs make sure it's safe.
 First guard on the upper level
One of the guards should arrive here really soon and he's patrolling the entire first floor. If you plan on leaving this person alone then you should hide in one of the cubicles and wait for him to walk past you. I don't recommend this style of play, because you would have to act fast while exploring the rest of the first floor in order to prevent him from "catching you". It's much better to eliminate this person, preferably when the guard is somewhere close to the stairs. Important - Don't forget to avoid attacking the guards from the first floor when they're close to the balustrades, because their bodies may fly over the railing and land on the lower level causing a risk of an alarm.
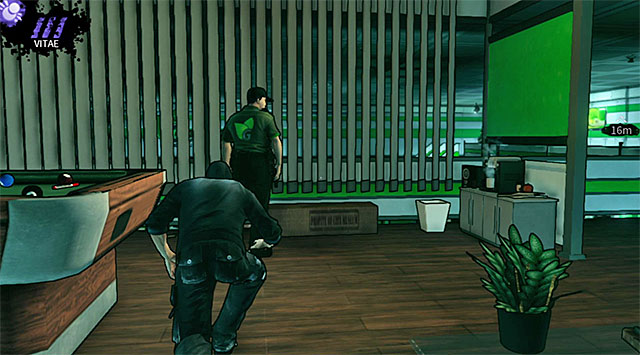 A guard inside a small room with a pool table
Start moving towards your current destination. Another opponent is patrolling a small side room with a pool table in the center of it. Wait for a suitable moment to make your move and perform a silent execution (don't forget to hide the corpse behind the pool table).
 A guard stationed near the exit from the accounting office
The next guard is patrolling the area near the exit from this office. Don't forget about the recent tip and restrain yourself from attacking this guard when he's close to the balustrade, because his body could land on the lower level. Instead it's best to attack him when he's on the move (use a long-distance attack if you don't want to take any risks). Important - It's also possible to avoid both guards described above, but you would have to time your moves perfectly and rely a lot on vampire vision.
 An opponent inside the conference room
You can leave this area right away, however I would recommend that you continue securing this location in order to obtain additional experience points. Turn left and focus on surprising a single guard who is visiting a nearby conference room from time to time.
 A guard near the staircase
Another opponent may cause you some problems, because he's travelling between the stairs and the balustrade. Make an attempt to attack him when he's moving, but make sure that he's not too close to any of his colleagues.
 Last opponent on the top floor
The last guard on the top level is guarding the stairs located to the left of where you've started exploring the accounting office. He shouldn't move from his designated post so he'll be an easy target for you and you may even consider drinking his blood.
 Second guard patrolling the cubicles
Return to the ground floor and start moving towards the second opponent patrolling the cubicles. There are plenty of objects here you can use for cover and as a result you shouldn't have any problems performing a perfect silent kill.
 Room with the civilian
There are only two people left in the accounting area - a guard and a civilian in a corner office. Approaching these people isn't exactly a good idea. The guard will leave the room after the conversation, however he will remain in the civilian's line of sight. This means you can't go for a standard kill and it would only be a waste of time trying to use running or vampiric powers to distract the guard to move away from the civilian.
The thing you should definitely do on the other hand is to explore the area under the second stairs. One of the offices (screen above) hides a new PDA (200 experience points).
As I've already mentioned the exit from the accounting office is located on the first floor and it's shown on the screen above.
Don't be too hasty in your attempts of reaching the next section of the building, because a small area you've just entered contains a PDA (200 experience points). The secret is on a small table (screen). Once you have the PDA proceed to the door leading to the Administration.
 Areas where you should attack enemies from the administration section
There are two guards in the administration section of the building. The guards will be standing close to each other when you arrive here for the first time and if you don't want to kill them you should quickly move to your right (use Shadow Leap if needed). If on the other hand you plan on killing them then you should get closer to them and wait for them to end their conversation (it'll take some time - be patient), because that's when they'll go their separate ways. This is your moment to attack. Don't forget to hide the first body so that the second guard doesn't notice it prematurely.
Once you've secured this area check the cubicles located in front of the entrance to the administration office and you'll locate a PDA (200 experience points) seen on the screen above.
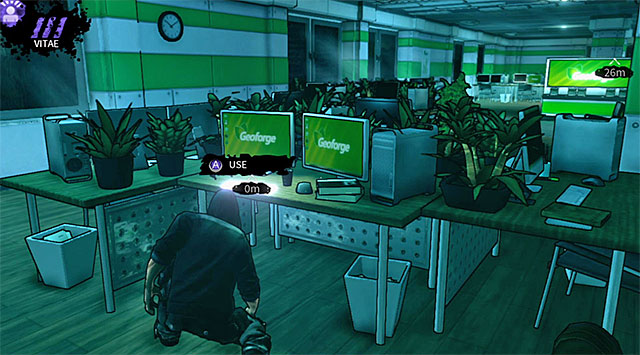
The collectible described above isn't the only interesting thing in this area. Search for a computer terminal like the one displayed on the screen above. If you've talked to April at the end of the previous chapter then you've most likely agreed to helping her. You may interact with the computer station in order to delete all electronic trace of April from the Geoforge's servers.
You may finally proceed to your right. Search the area to locate an access card which was left on one of the smaller tables (screen). Listen to a conversation with Rose and notice that you've received new rewards - 500 experience points is a bonus for finding the access card and 1000 experience points can be received for avoiding alarms in the accounting and administration offices.
 Return to the accounting office
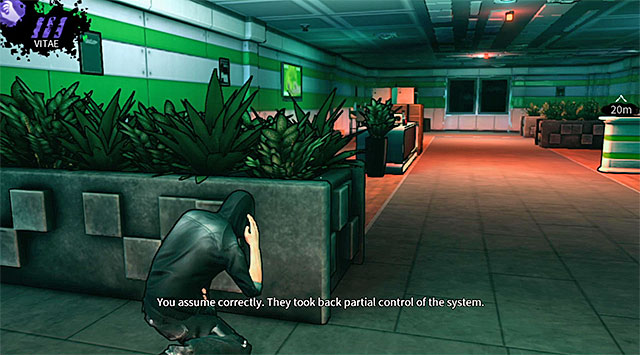
Start heading back towards the accounting office. You'll probably notice along the way that Geoforge's security guards have regained some of the control over the system and obviously this will complicate your progress. Open the door leading to the accounting area.
 Briefing
The situation in the accounting office has changed since the last time you were here. Your objective is to backtrack to the door located on the ground level in order to unlock the passageway to the staircase using a recently obtained access card. The biggest problem is that new guards have arrived in the office and this time the ground level will be defended by more of them.
 First opponent on the upper floor
There are only two enemies on the upper level. Avoiding them would be easy, however I still recommend that you eliminate them both. The first guard is patrolling the area close to the conference room located to your right.
 Second (last) enemy on the upper level
The second guard is patrolling the left side of the balconies and an ideal place to surprise him is the room with the pool table.
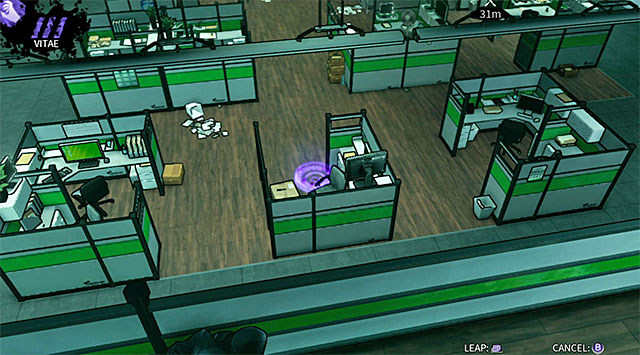
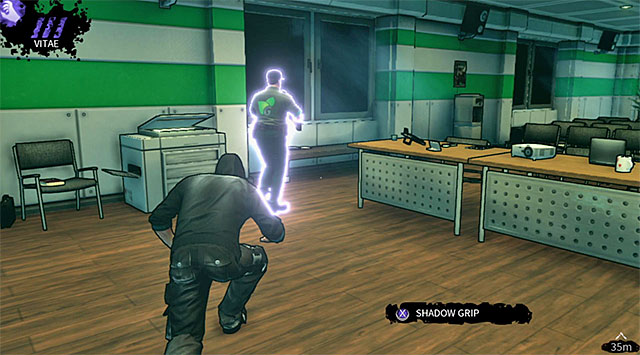
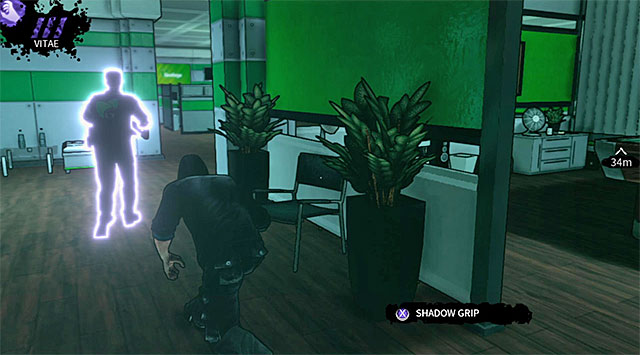
It doesn't matter to the mission's outcome whether you've killed both guards on the upper floor or avoided them, because sooner or later you will have to make your way to the ground level. If you've upgraded your Shadow Leap ability then you may consider performing a risky attempt of teleporting Eric directly behind the enemy who's guarding the exit from the accounting office (screen 1). This plan can only succeed if your teleportation isn't making too much noise, if other guards are looking in different directions and if you manage to quickly to open the door. If you don't want to take any risks then you can choose a safer approach and teleport the main character to one of the cubicles located in the center of the office (screen 2). Doing this will give you a good cover immediately after the teleportation.
 A guard busy checking the offices closer to the starting point
There are five enemies in total on the ground level. If you want to start avoiding them then you should be relying on Vampire Vision as much as possible and use the nearby cubicles for cover. Otherwise it's good to start eliminating them one by one. The first person you should kill is a guard who is checking the offices located under the balcony where you've started.
 One of the guards from the middle of the office
Another guard is patrolling the central area of the accounting office. Hide inside one of the cubicles and wait for him to show up. If you have some problems attacking him when he's alone you can step on a loud surface or start running to attract his attention.
 A guard checking the offices near the exit
The third guard from the "hit list" is checking the offices located closer to the exit. It's reasonably easy to kill him, however make sure not to find yourself standing in the line of sight of the soldier who's guarding the exit.
 An opponent exploring the middle of the office
The fourth opponent on the list should be the one patrolling the cubicles located closer to the exit from the accounting office. Just as before, you may consider walking over objects lying on the ground or running to disorient him, however you may also use long-distance powers like Shadow Kill or Shadow Grip if you're experiencing difficulties while trying to surprise him from behind.
If you've been following my instructions thus far then there should be only one more guard here and it's the person standing near the exit (screen). Approach this enemy from his left flank and wait for him to move away from the door . You can now head directly to the door or surprise the guard in order to perform a silent execution on him. Either way you must leave the main office area.
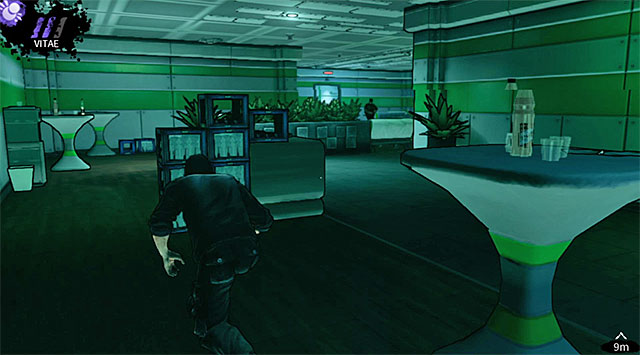
The troubles aren't over yet, because the corridors leading to the locked door are being patrolled by three additional guards. Make a stop once you've reached a junction. You can choose the left path (screen 1) or the right path (screen 2). In both cases you'll encounter a single opponent and you'll be allowed to surprise him or to avoid him using the side brick walls.
 A guard stationed near the locked door
As for the third guard, he is standing close to the locked door leading to the staircase. You can act the same way here and either use cover to avoid him or approach him from behind and attack him. The second option is much better, especially since you will have a chance to feed on your opponent.
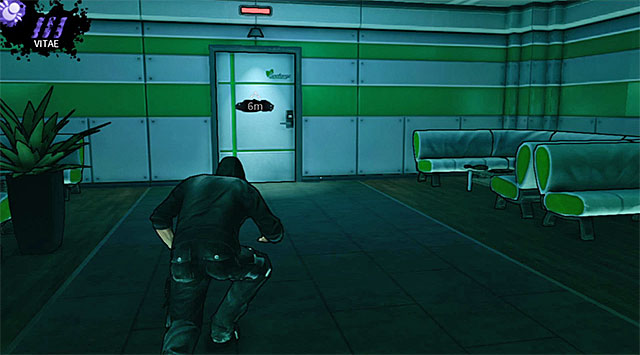
Your current objective can be seen on the screen above. Use the access card found in the administration office to open the door leading to the staircase. Start moving towards upper floors and you'll soon enter a park built inside a huge dome. Wait for the game to grant you new prizes - 500 experience points is a reward for getting to the park and 1000 experience points is a reward for leaving the previous locations without triggering any alarms.
 First opponent in the park
Start moving forward. Notice that the first enemy from the park is guarding a nearby alcove. If you don't want to kill this person then proceed directly to the stairs located to your left. Otherwise use the brick wall for cover and surprise the guard from behind, performing a silent execution on him.
 Second guard from the park
Use the stairs leading to the park's main path. It's recommended that you activate Vampire Vision while heading down to check the current position of the second guard. If you want to keep it clean wait for this opponent to move left. If you want to kill this enemy wait for him to go right and perform a surprise attack.
 Main part of the park
Head towards the main part of the park. The good news is that the park is a vast location so you'll have plenty of room to hide and to plan your attacks. New guards from the park never patrol the area in pairs and they don't stop in the same places. This will make staying hidden much easier, especially if you don't want to murder other people. Sadly, there are also two problems. The first problem is that the patrol routes and fields of vision of most of the guards can cross in some places. This means of course that you'll have to pay more attention when attacking them and when hiding their bodies. The second problem is about your surroundings. The bushes may seem like a good cover, however they're not treated as such and you may be spotted while trying to hide behind them. As a result it's much better to rely on stable cover and to use Vampire Vision to constantly monitor movements of all enemy units.
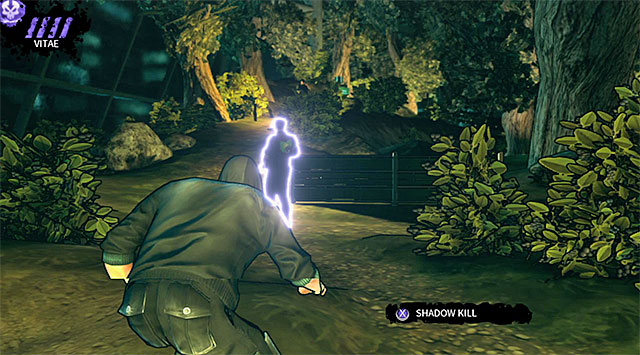
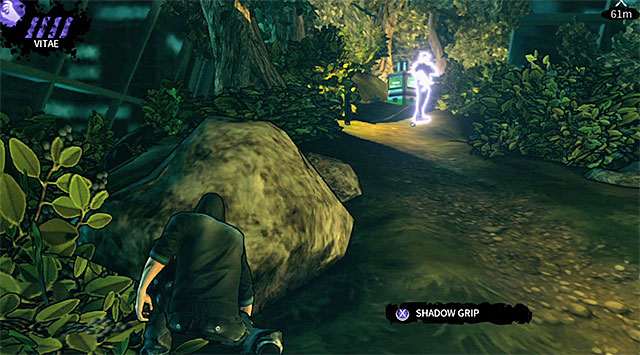
The marker for your current mission objective is very misleading, because you can't access the upper balconies from anywhere in the park. The only way to get to them is to reach the only available stairs located to the right of where you've started exploring the central area of the park. If you don't want to kill anyone then you should proceed towards the stairs right away, using Vampire Vision and other vampiric powers to stay hidden. Otherwise you should go to your left. Start off by eliminating a guard stationed near the metal barriers (screen 1) and then take care of his colleague who is occupying a nearby hill (screen 2).
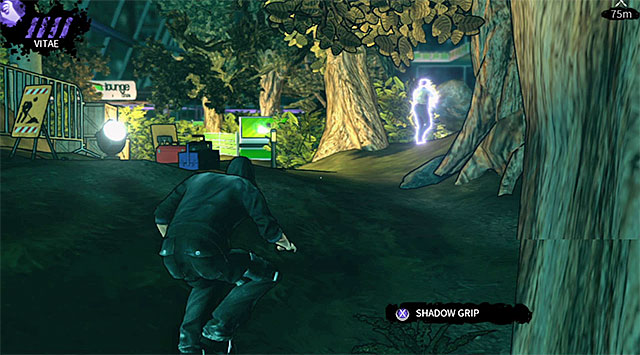 A larger area in the left part of the park
Keep moving and try to stay in the left side of the park. Be careful after moving closer to a larger clearing, because just as I've mentioned patrol routes of some of the guards are similar and you may be discovered while trying to do a silent kill or drag away a corpse. Don't forget that you can always use long distance attacks (Shadow Kill and Shadow Grip) if you notice that one of the enemies is about to discover a body or Eric.
Your current goal should be to reach a bar seen on the screen above. Approach this location very slowly, because the bar is being protected by three guards. I wouldn't advise on attacking any of the soldiers, because they're standing close to each other and they often change their positions or turn around. The only exception is if you have tons of Vitae to spare and if you've unlocked all long-distance attacks.
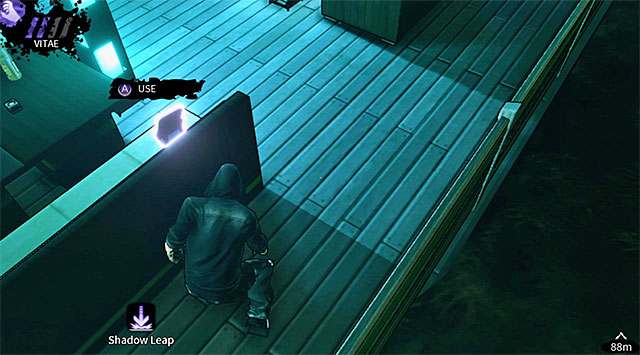
The main purpose for visiting the bar is that you can get your hands on a new PDA (200 experience points). The secret can be found on one of the sofas in the right side of the bar. Stop in a position seen on the screen above so you won't have to leave cover and risk exposing yourself.
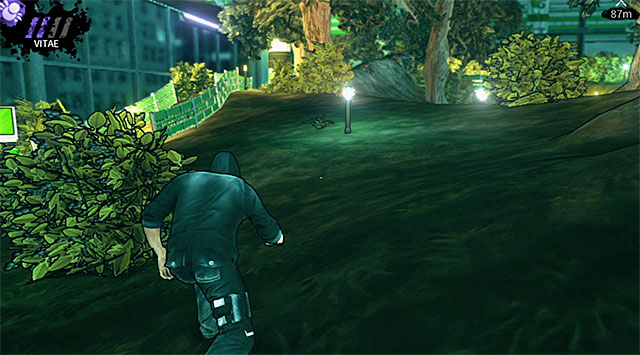
Once you've taken the secret you may choose a path leading right (screen). Don't move too fast here, because this path is most likely patrolled by a single guard. You can avoid this person while trying to maintain safe distance or try and kill the guard. I have to warn you that it's not going to be easy, because it's bright in here and you won't have many occasions to hide behind cover.
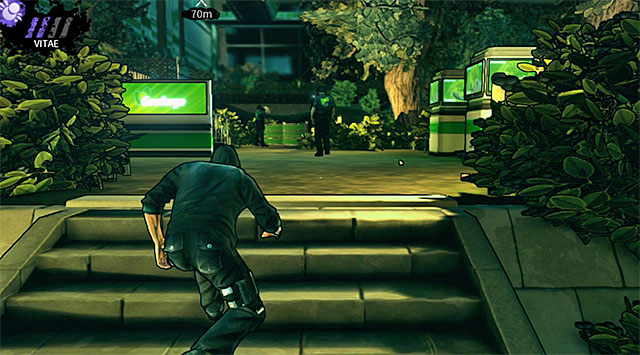 Guards stationed near the stairs
It shouldn't take long for you to notice the stairs I've mentioned at the beginning of this page. The bad news is that the path to the upper balconies is protected by two guards. I recommend that you approach both of the guards from behind in order to murder them. If you would like to avoid them then use some of the nearby obstacles for cover and wait for one of the soldiers to go on a patrol.
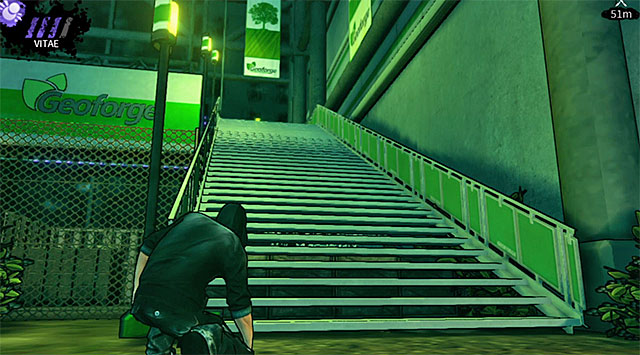
All the options described earlier in the text have the same outcome and that is to reach the stairs seen on the screen above. Head to the upper balconies and listen to a new conversation with Rose which will be about anti-vampire safeguards.
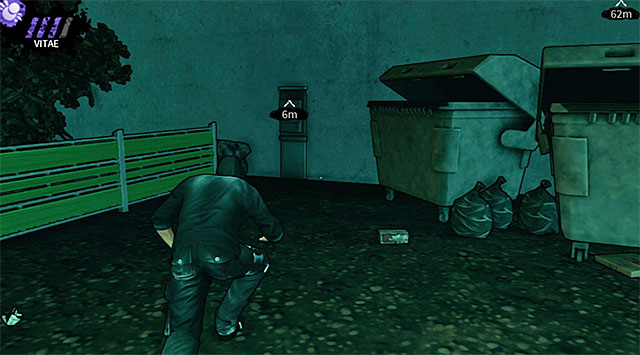
I would strongly like to dissuade you from an idea of entering a tunnel with UV lamps, because Eric would start to lose health and he wouldn't be able to use any of his supernatural powers. Return to the ground floor and locate a fenced area to the right. Find a fuse box under the stairs (screen above) and interact with it in order to disable the UV lighting in all of the tunnels in the upper balconies.
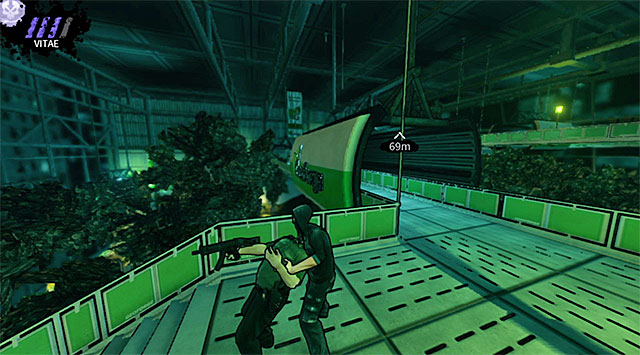 Killing one of the enemies from the upper balconies
Head back to the upper balconies and proceed to your left. The balconies are being patrolled by six enemies in total, however you should be pleased to hear that eliminating them will be reasonably easy. There are a few reasons for that: they're standing far away from each other, they have pretty obvious patrol routes and they often stop for longer periods of time. You can also use cover to close the distance on them so you won't be noticed. Try to avoid attacking the guards when they're close to the balustrades, however it's not a major issue if you've already secured the park. If you plan on avoiding all hostile units then don't forget to rely on Shadow Leap.
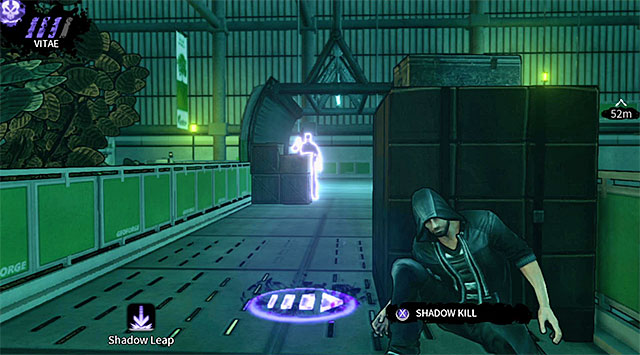
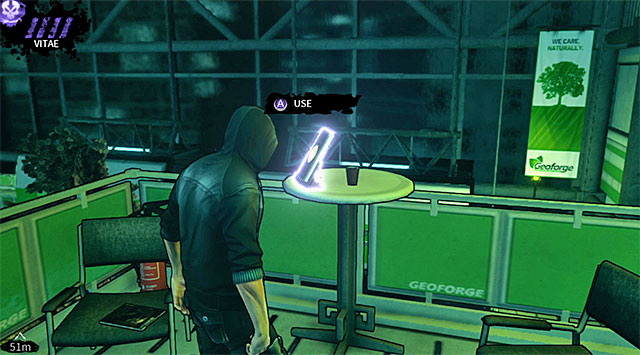
Start exploring the balconies, turning left twice and reaching the area seen on screen 1. There's a single enemy here. It would be good to kill this person, because you'll have more time to explore your surroundings - pick up a PDA (200 experience points) from a small table (screen 2).
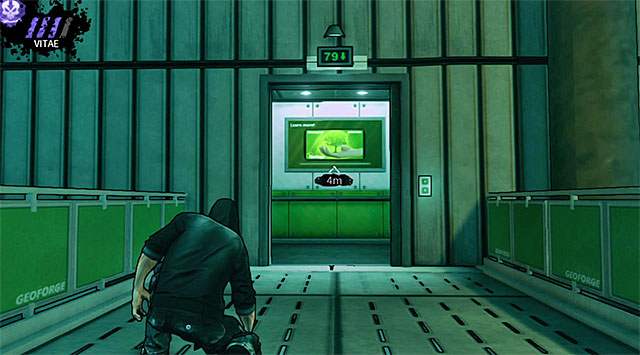
The exit from the biodome is shown on the screen above and you can head over there as soon as you've taken the collectible or after securing the rest of the balconies. Enter the elevator and wait for it to transport you to Vlad's penthouse located at the top of the tower. You'll receive new rewards here - 500 experience points is a basic reward for reaching the penthouse safely and 1000 experience points is a bonus for getting through the entire park without alarming enemy units.
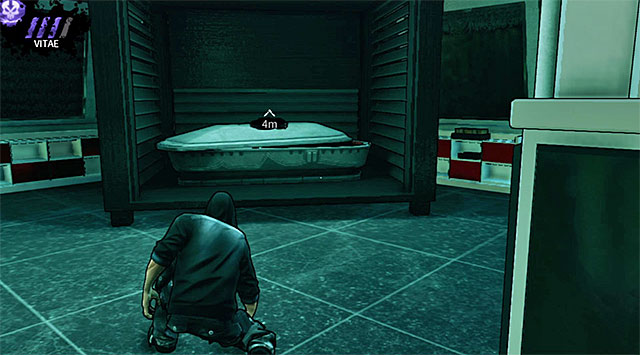 Vlad's coffin
You won't encounter any enemies in Vlad's penthouse when you arrive here for the first time so you don't have to be sneaking around. Ignore the upper floor of the apartment for the time being and approach a large coffin only to discover that Vlad is not resting here. Listen to a conversation with Rose before moving on.
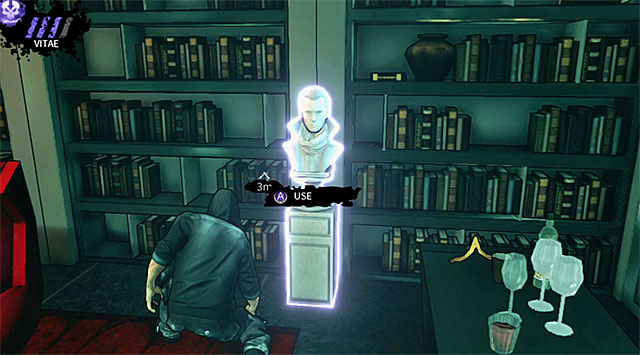
Turn around and find the stairs leading to the apartment's upper floor. Enter Vlad's office and examine a bust seen on the screen above. Interacting with this statue will result in gaining access to a secret chamber.

Enter the trophy room and take some time to locate a new PDA (200 experience points) (screen). Wait for Eric to finish his conversation with Rose and notice that a group of enemies has arrived in the penthouse.
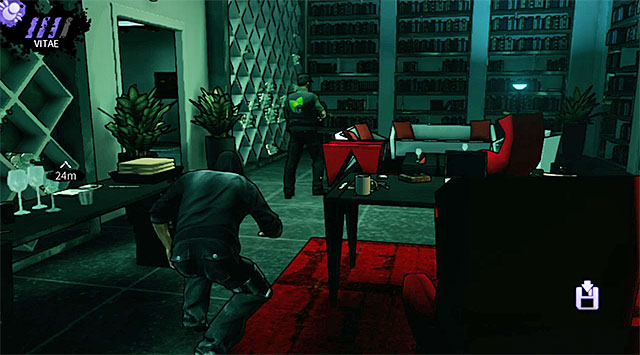 A guard in Vlad's office
Stay inside the trophy room, however get closer to the passageway leading to Vlad's office. The first guard will show up on this floor really soon. Wait for this person to stop inside Vlad's room and to turn around. You can now either approach this enemy and kill him or go directly to the left exit.
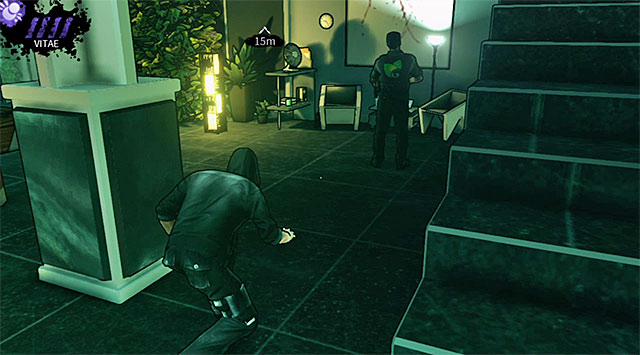 An enemy stationed near the stairs
Another guard will make a stop near the stairs, on the lower floor of the apartment. This mercenary shouldn't move from his original post so you won't have any problems with him even if you want to leave him alone. If you killed this person hide the body behind the pool table or drag it to the upper floor.
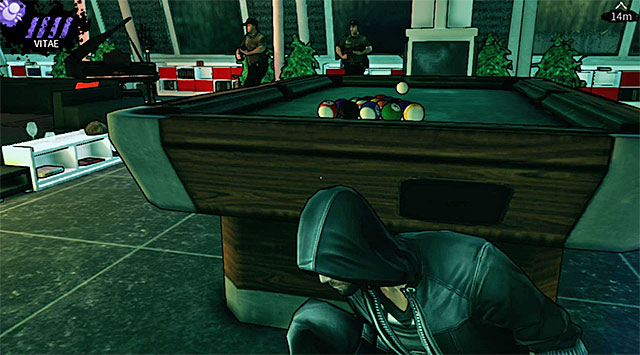
There are two guards left in the penthouse and you can see them on the screen above. You can quickly go past them or wait for the guards to go their separate ways and eliminate them. Killing both soldiers will be pretty easy, especially since there are plenty of objects inside the penthouse Eric can use for cover.
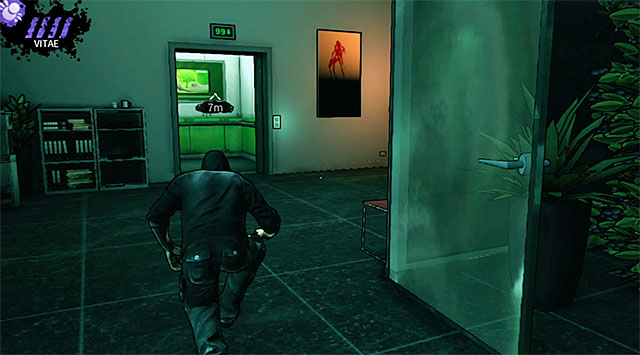 Elevator in Vlad's apartment
Once you've finished your business in Vlad's penthouse return to the elevator and wait for it to transport you back to the huge dome.
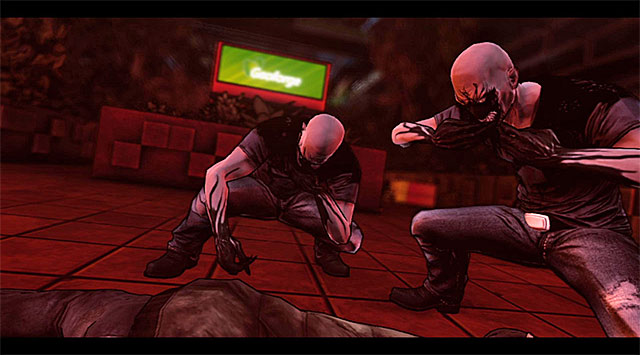 A cut-scene informing about the arrival of the ghouls
Pay attention to the cut-scene. The movie will inform you that the park not only has been reoccupied by new guards, but now you'll also have to be dealing with ghouls. As for your current objective, your first task will be to inspect two areas in the park in hopes of finding Vlad according to the intel provided by Rose.
 A ghoul occupying the top balcony
Start moving towards the stairs, because before you can check the designated areas you must first leave the upper balconies. You will be presented with a choice after reaching the first junction. You can attack a single ghoul by going straight ahead if you don't have anything against eliminating hostile beings.
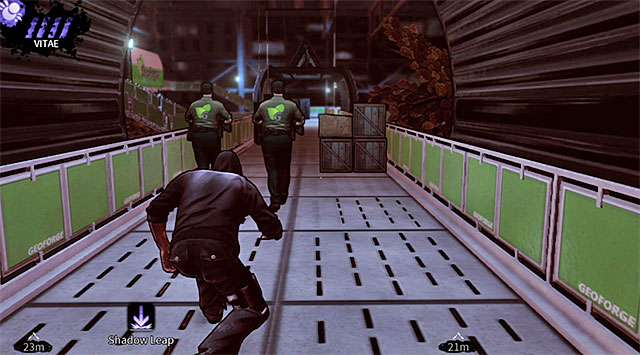 First group of guards on the upper balconies
If you don't want to risk having a close encounter with a ghoul you can turn right at the junction and start moving towards the area where you've found the PDA the last time you were here. Eric will encounter two guards here and you can start following them without any problems. Furthermore, the game will allow you to kill them easily, because attacking one of the guards from this pair shouldn't be noticed by the second opponent.
 An example of one of the guards
All the parts of the upper balconies located further away from the starting point are being patrolled by other guards and killing them is optional. If you want to get rid of all of them you must remember to time your attacks perfectly - the guards can't be moving towards each other and they shouldn't be leaning on the balustrades when you're attacking them.
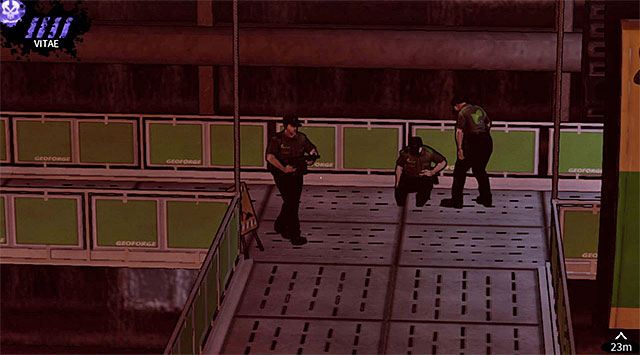
If you want to leave the upper balconies as soon as possible turn right the first chance you get and you'll approach two guards seen on the screen above. Wait for one of the enemies to go left. You can use this opportunity to avoid both guards or you can eliminate them by surprising them from behind.
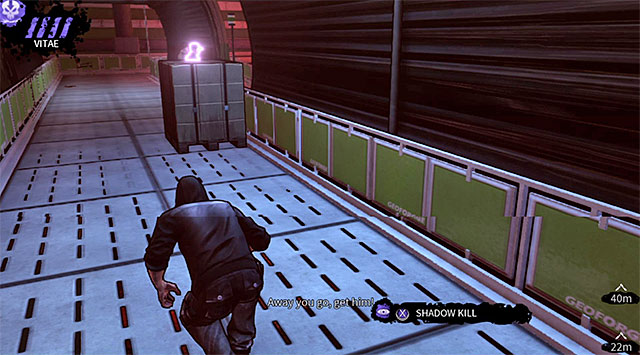 Last two guards on the balconies
Turn right once again and carefully move closer to the last two guards on the upper balconies. Just as before, you can decide to avoid them (Shadow Leap ability may come in handy here) or you can murder them. If you choose the aggressive approach then wait for one of the enemies to go on a patrol and once you're done with him return to his colleague (he won't leave his post).
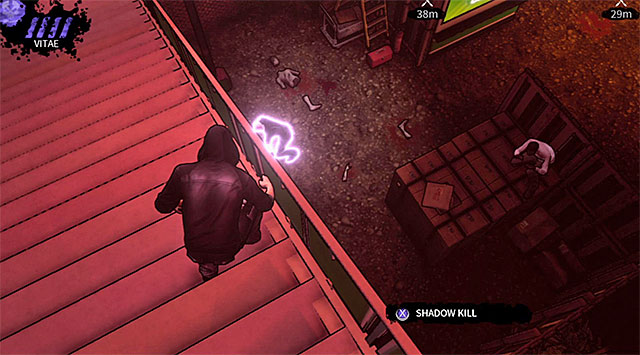 A ghoul found near the stairs
It shouldn't take very long for Eric to find himself close to the stairs leading to the main part of the park. Notice that there's a ghoul here and that the creature is terrorizing an innocent civilian. I would recommend using long-distance attacks like Shadow Kill or Shadow Grip to kill the monster without taking any risks (sadly the civilian won't reward you for rescuing him). If you plan on avoiding the ghoul then your best option is to rely on teleportation.

We may finally focus on checking the areas suggested by Rose in a recent radio conversation. Start off by heading towards the point located closer to the stairs (approximately 25 meters from your current position). This area is shown on the screen above. You won't find Vlad here, however you will encounter two standard guards. Wait for the left guard to start a patrol and then kill his colleague standing to the right. Once this is done quickly take care of the left opponent before he notices that something is horribly wrong.
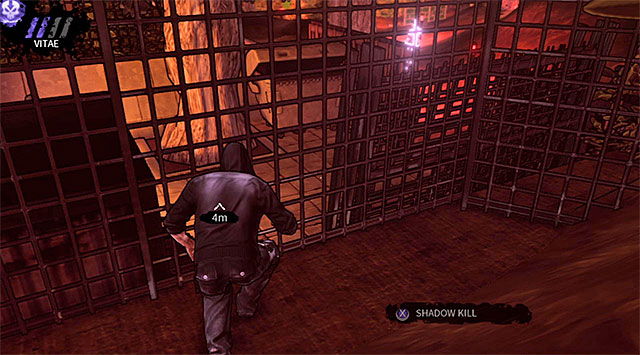
The second area mentioned by Rose is located to the left and you can see it on the screen above. Just as before, you won't find Vlad and instead you'll come across two guards. The enemy who is patrolling the path should be the first one to die. Once he's gone carefully approach the fenced area and wait for a good moment to get rid of the second opponent.
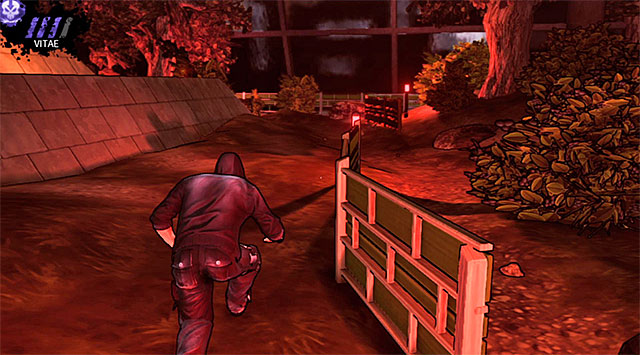 An empty park
This is the final part of your visit in the park. Your objective is to reach the stairs in hopes of getting back to the area where you've started exploring the dome the first time you were here. You shouldn't encounter any more enemies in the main area of the park so you don't have to be moving slowly.
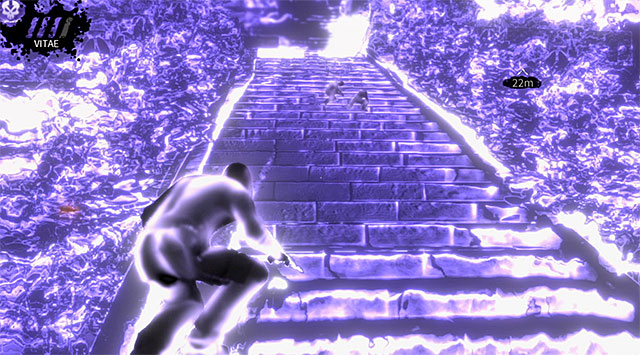
Make a stop once you're close enough to the stairs mentioned above. Use Vampire Vision and you'll notice that there are two ghouls in your vicinity (screen).
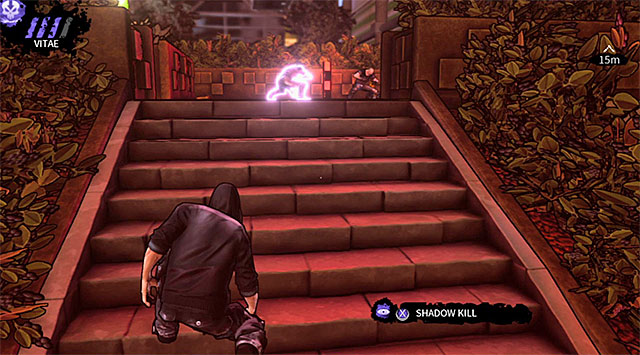 Eliminating the first ghoul
As you've probably noticed the first ghoul is more "nervous" - he runs around the area from time to time, making stops close to the stairs. Don't move too close to the monster, because otherwise you may be spotted. There are two main ways of resolving this problem. If you want to kill the ghoul use Shadow Kill or Shadow Grip instead or relying on a standard execution. If you prefer to leave the monster in peace then wait for the ghoul to return to the corpse and quickly use Shadow Leap to teleport Eric behind the left brick wall.
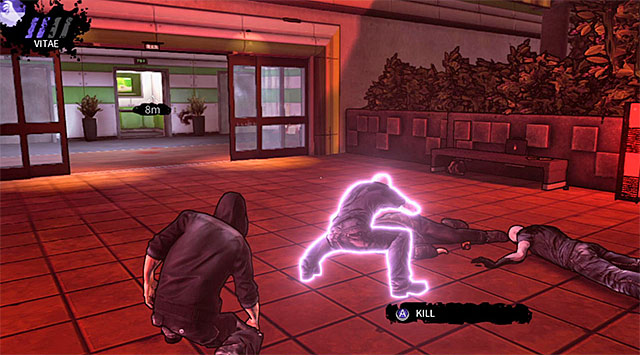 Eliminating the second ghoul
As for the second ghoul, this monster shouldn't be moving from its original location and as a result killing or avoiding the creature will be very easy. I recommend eliminating both ghouls since you'll get experience for that.
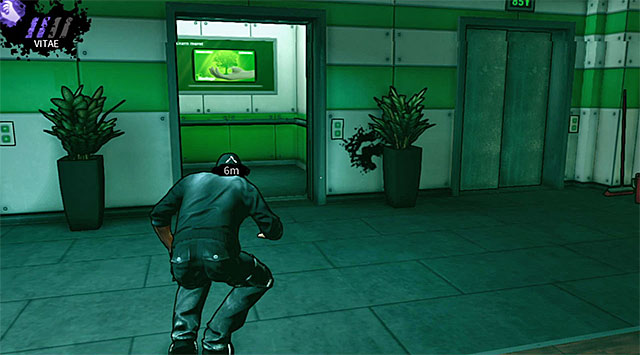 Elevator
Proceed to the exit from the park. This time you won't be using the stairs, because instead you'll have to enter an elevator which was called here by Rose. You will receive two rewards on your way to the last location of the second chapter - 500 experience points is a reward for leaving the park (for good) and 1000 experience points is a bonus for not raising any alarms.
 Vlad
VladEnter the hunting grounds and you'll automatically trigger a cut-scene during which you'll find out that Vlad is waiting for you and that he's carrying a sniper rifle. As you've probably suspected your main objective here will be to find a safe path to the ancient vampire who is occupying one of the highest balconies in this location. It's going to be a tricky assignment so make sure to read all of the information presented below.
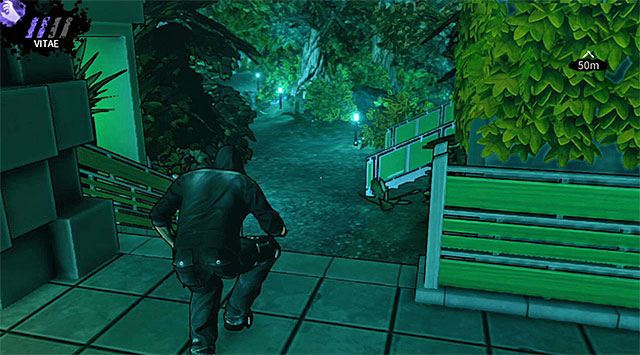 The path leading to the fuse box
Your fist task will be to reach a fuse box, because interacting with it will allow you to turn off some of the UV tunnels on the upper balconies. Follow the game's suggestions by heading right. Make sure to monitor the movements of all guards occupying the balconies of the nearest building, because you can't allow them to see you (usually this can happen if a guard has stopped close to one of the railings).
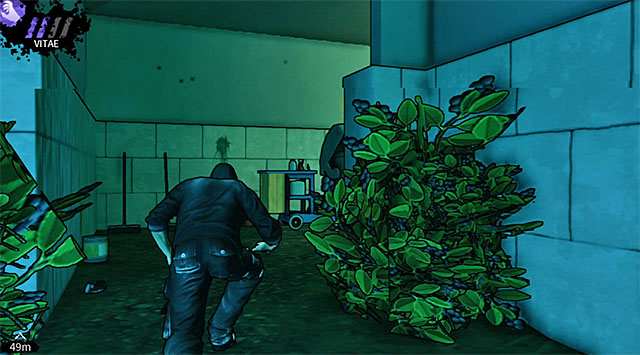
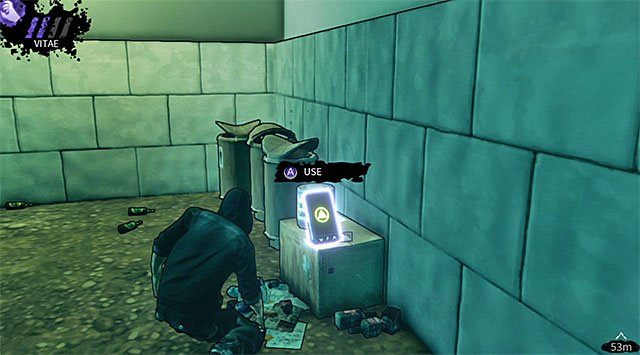
Leave the platform where you've started exploring the hunting grounds and immediately turn left, choosing a very narrow passageway seen on screen 1. Enter a small area and look around to find a new PDA (200 experience points) (screen 2).
You may resume your journey towards the fuse box. Watch out for the guards standing close to the left staircase seen on the screen above, especially since a ghoul will accompany them. The enemies are guarding access to the structures located to your left and since you don't have to go there right now it's best to avoid them while maintaining safe distance.
 A ghoul found near the fuse box
Don't try to get to the fuse box too fast, because you'll encounter a single ghoul on your way to your current destination. It's best to eliminate this monster, because otherwise the ghoul may notice your attempts of reaching the fuse box. Once the creature is dead hide its body somewhere in the bushes.
Fuse boxYou may finally approach the fuse box and interact with it. You should know that sabotaging the fuse box will turn off only some of the UV tunnels on the upper balconies. Thankfully it won't be a major problem, because you'll have plenty of opportunities of avoiding the tunnels that are still active.
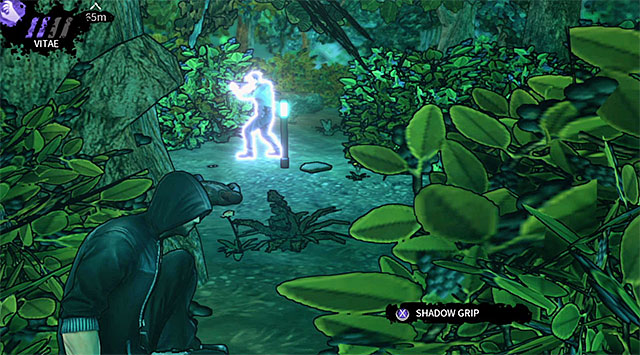
QUICKLY take cover behind a tree seen on the screen above, because one of the guards will arrive here very soon alarmed with the sabotage you've just performed. Notice that the guard is slowly turning around and the best moment to attack him is when he's facing in an entirely different direction (if you don't want to kill him leave this area as soon as possible).
 A second opponent with a ghoul
The guard described above isn't your only concern, because a second opponent has also appeared in this section of the hunting grounds and he has a ghoul as his sidekick. In this case I wouldn't recommend performing any attacks (unless you have a full supply of Vitae and don't mind taking risks).
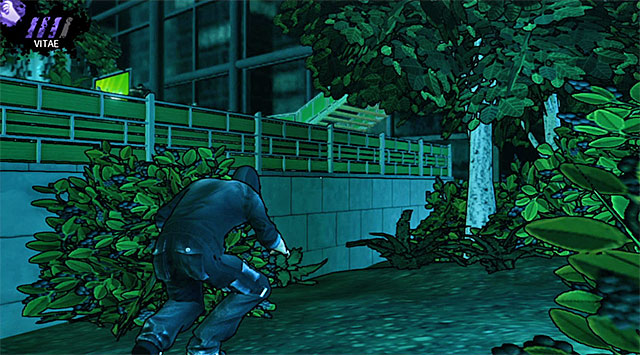
You must now make a decision if you want to go after Vlad right away or if you want to take some time exploring and securing the rest of the hunting grounds. The second option is a much better idea, because you'll gain additional experience from killing enemy units and you'll also discover a new secret. Begin exploring the hunting grounds by going right and make a stop once you've reached the area displayed on the screen above.
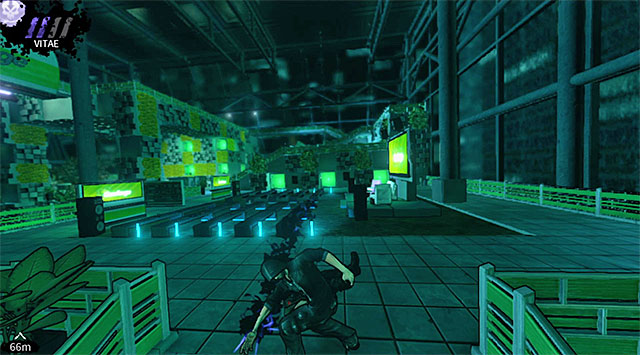 A guard standing close to the railing
You can use Shadow Leap here to teleport Eric to the upper platform, however an even better plan is to use a long distance attack on a guard present in this location so you won't have to worry about him after a successful teleportation.
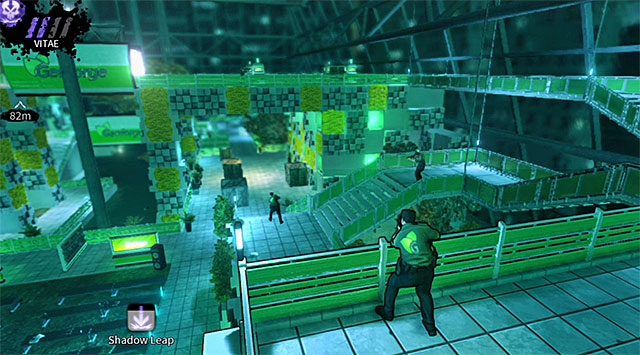
Notice that there's a tower structure nearby with several smaller balconies around it (screen above). The tower itself is guarded by three enemies. If you've upgraded your Shadow Leap ability you will be allowed to teleport to the top of the tower. Otherwise choose one of the lower balconies and pay more attention to enemy positions. In both cases you must remain unseen and you should start your killing spree with the person occupying the highest vantage point.
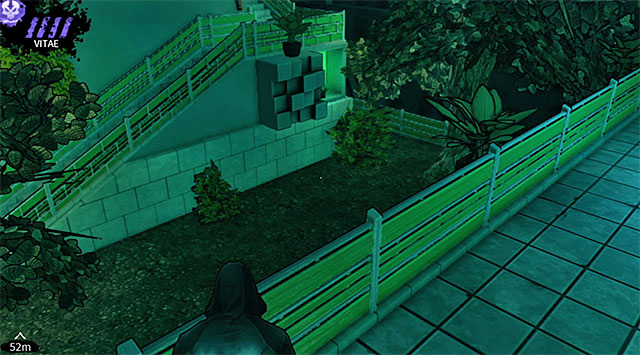
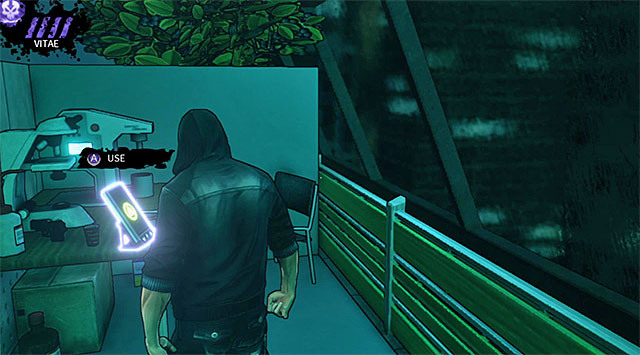
Once you've secured the tower you may start exploring the central area of the hunting grounds. Try and make your way to a small courtyard seen on screen 1. Enter the courtyard using teleportation or by locating the stairs. Check this area thoroughly and you'll discover a PDA (200 experience points) seen on screen 2.
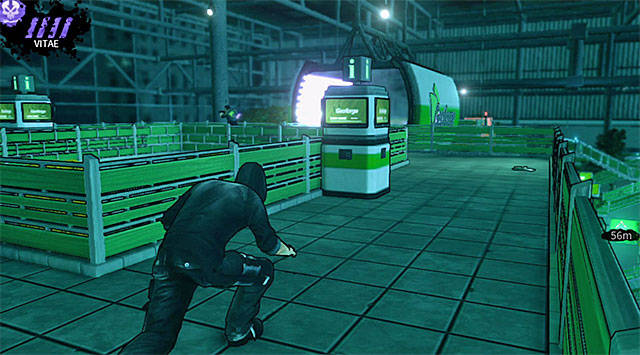
Return to the tower which was guarded by three enemies and use the stairs leading to the highest balcony. This area is being patrolled by a single guard (screen above) and since it's very easy to predict his movements you shouldn't have any troubles killing him without exposing your position.
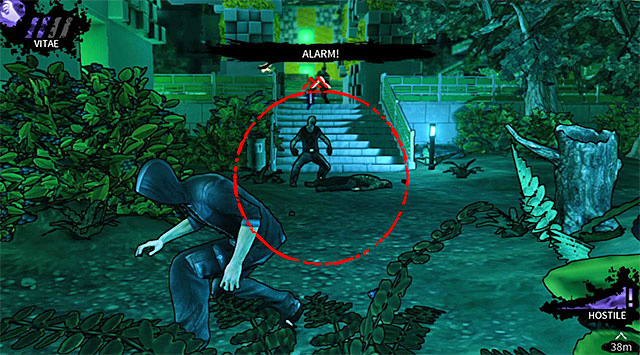
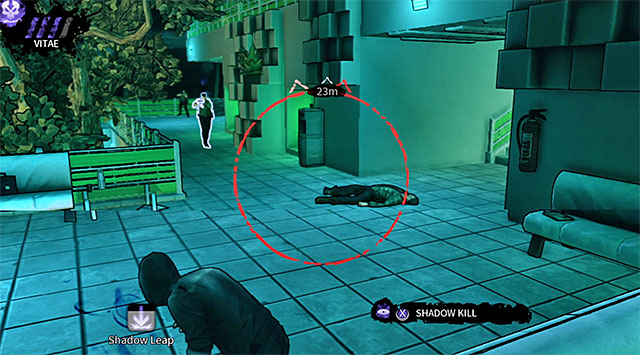
There are two places in the hunting grounds you should stay away from, because the risk of alarming guards or even Vlad himself is very high there, even if you try using advanced vampiric powers to your advantage. The first unsafe area is the staircase with some guards and a ghoul (screen 1) and the second unsafe area is the building located close to where you've started exploring the hunting grounds (screen 2).

You can reach Vlad's balcony by choosing one of three main paths. The first option is the best one if you plan on skipping on the exploration of the hunting grounds, because after sabotaging the fuse box you only have to move back a little towards the starting point and where you've found the first PDA. Notice the stairs here leading to the upper balconies (screen).
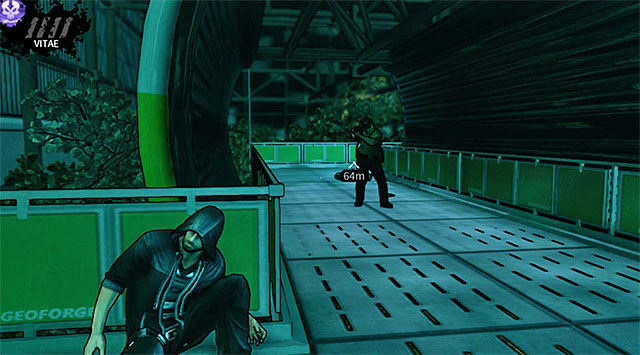 A guard patrolling the balconies near Vlad
Make sure not to be seen by Vlad while exploring the upper balconies so check his current position often and use the railings for much needed cover. Sabotaging the fuse box resulted in turning off the nearest UV tunnel. Don't head over towards it too soon, because a single guard is patrolling this place and you should take care of him first.
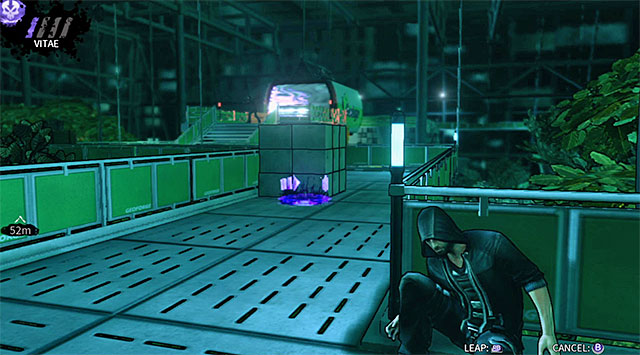
Start moving slowly towards the central platform with Vlad. Leave cover only when the vampire is looking the other way. You should also consider using Shadow Leap to teleport between objects used for cover, decreasing the chances of being spotted prematurely.
The second way of reaching Vlad is very much like the first one, however in this case you must find the stairs located at the back of the hunting grounds (screen). It's crucial that you stay behind the right balustrade while using the stairs, because Vlad will probably look your way and he may notice you if you're not careful enough.
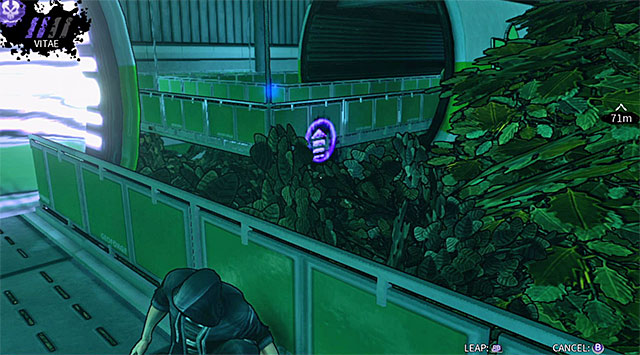 Adjacent balcony with a single guard
You'll soon come across an active UV tunnel. Don't enter the tunnel no matter what and instead resolve this problem by teleporting yourself to an adjacent balcony located to the right (I recommend performing a long distance kill on a guard seen in the distance). The rest is the same as in the first variant so you'll have to move closer to Vlad's balcony.
The last third option is in my opinion the most interesting one, however you will be allowed to choose it only if you've followed my advice and decided to secure the rest of the hunting grounds. In this case you should begin on a top balcony which was previously occupied by a single guard (screen above).
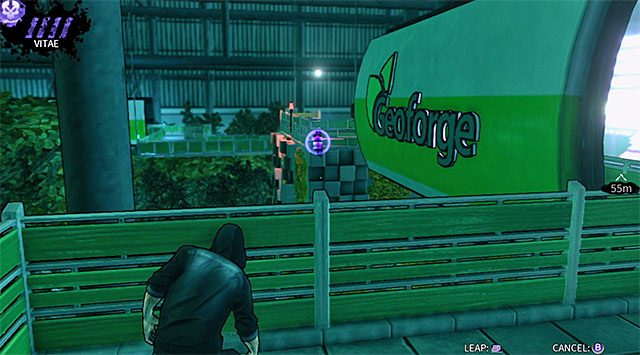 A view of Vlad's platform
Approach the railing and you'll notice that you've found yourself behind Vlad. Furthermore, you can use Shadow Leap ability to safely reach his balcony, avoiding a nearby active UV tunnel.
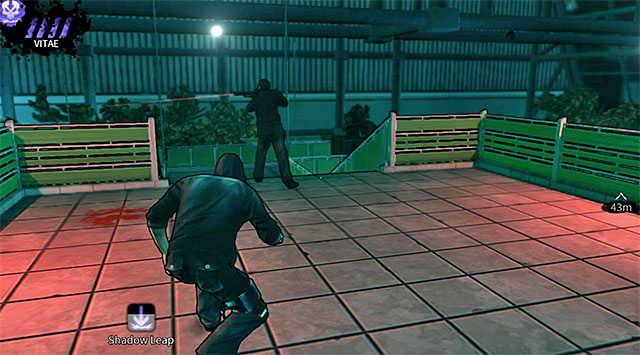
Once you've arrived at Vlad's platform one of the two things can happen. If you've decided to choose the third option then the most likely scenario is that the vampire won't even notice you're there and as a result you'll be allowed to approach him easily (screen above).
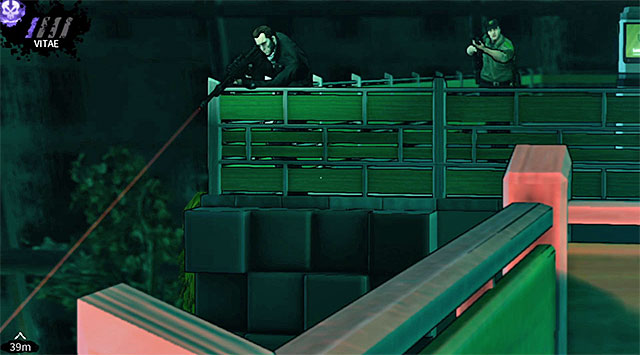
If you've decided to choose the first or the second option then Vlad may decide to teleport himself to an adjacent platform. In this situation you'll have to follow him while trying to avoid being seen by him (Vlad will be teleporting between the corners of the platform and he'll spend some time in each corner to check the surroundings). In both cases you must get close to Vlad and hold the interaction key/button to start draining him of his blood. The game will soon show a cut-scene and you'll be given 1500 experience points as a reward.
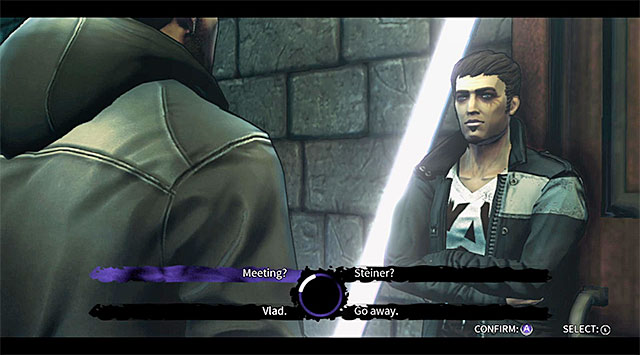 Meeting with Tom
This chapter will end with another short visit to the Sanctuary night club. Start off by going to Rose's office. You'll come across Tom in front of the office and he'll inform you that Rose is currently in a very important meeting. You can use this opportunity and ask Tom several questions (Meeting, Vlad, Steiner).
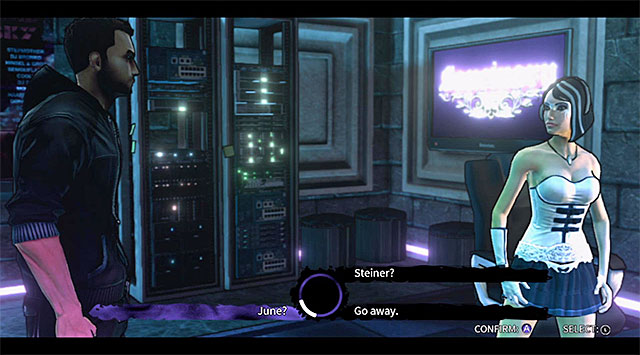 Meeting with June
Head to the main area of the club and choose the stairs located to the left. Doing this will allow you to get to June's booth (she's a DJ here). Initiate a conversation with June in order to ask her some questions (June, Steiner).
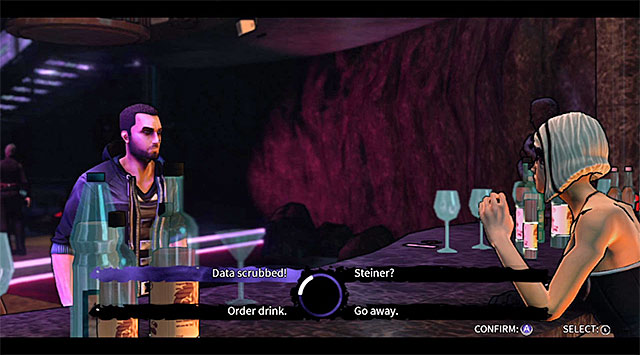 Meeting with April
Proceed to the bar so that you can meet with April. You can ask April if she knows anything about Steiner. If you've completed April's side mission while visiting the Geoforge tower (deleting her personal data from the servers) then an additional Data Scrubbed dialogue option will appear on the list. Choose it and you'll get 1000 experience points as a reward.
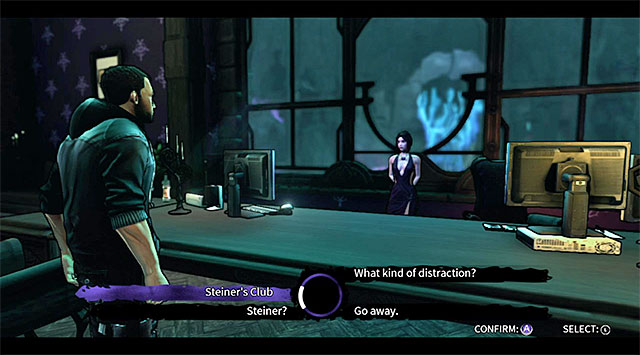 Final meeting with Rose
Head back to Rose's office again. This time she'll be available and she'll want to talk to you. Ask Rose about Victor Steiner and about his club named Atlantis (Steiner's Club, Steiner, What Kind of Distraction). Make sure that you're Ready and leave the Sanctuary.
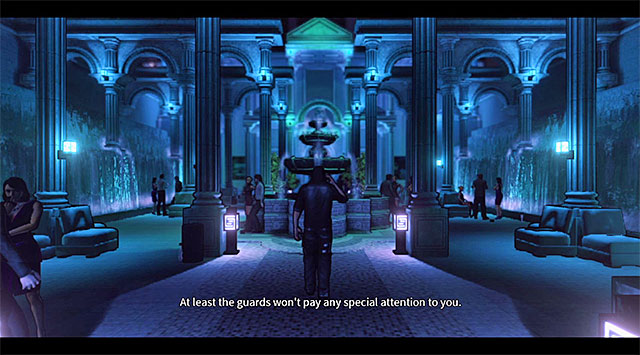 Area near the entrance to the Atlantis club
Take some time to get to know the rules of the first part of this chapter. Eric's job will be to plant smoke bombs in certain areas of the Atlantis club and until he does that he won't be able to his vampiric powers (the only exception is the Vampire Vision since using this ability doesn't affect the surrounding world). Another restriction is that you won't be allowed to attack anyone. Sadly you can't count on enemies making it easier for you. As a result you will have to pay more attention than usual to avoiding them and also you'll have to stay away from the local security cameras.
Important tip - If you're seen by a guard or by a local camera then you'll automatically fail the mission and return to the last checkpoint. Once this happens you shouldn't "manually" reload the checkpoint, because even though you didn't succeed you won't lose experience points from collecting PDA's and completing tasks. You can use this opportunity to earn some extra XP and therefore advance faster to higher levels.
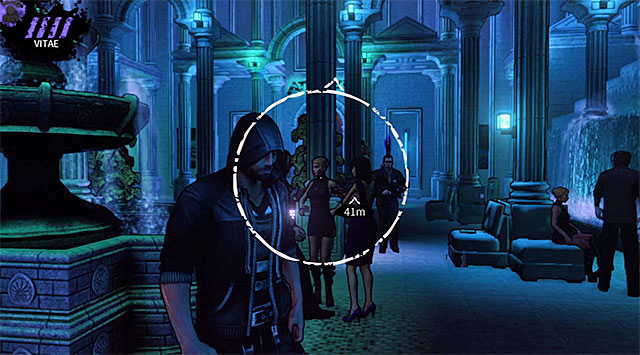 A guard circling the fountain
As soon as you've regained control over Eric start paying attention to a guard who's circling the central fountain (he's moving clockwise). Use nearby pillars and other big obstacles to avoid stepping in his field of vision.
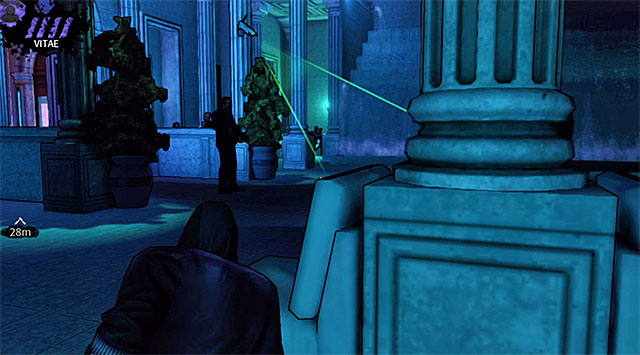 Path leading to the club
Approach the main entrance to the building from the left side and notice that it's being monitored not only by a second guard but also by a security camera. Thankfully the game will always let you to know what area the cameras are observing and in each case you'll have to wait for them to turn in another direction. If you're spotted by a camera you won't raise an alarm instantly, however you will have to find cover very quickly (moving away from the camera won't do the trick).
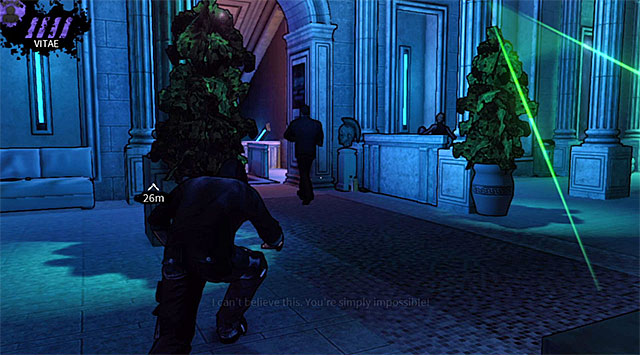
Look at the screen displayed above, because it shows an ideal moment for when you should move - the guard will be heading towards the entrance himself and the camera won't be covering your position. Follow the guard into a narrow corridor.

Once you're inside the building you shouldn't rush to get to the main area of Atlantis as soon as possible, because there's one more guard in front of you. Take cover near a brick wall seen on the screen above and patiently wait for a good moment to get moving.
 Sneaking into the club
Start moving towards the entrance IMMEDIATELY AFTER the guard seen in front of you has turned around. You can't do it too late, because you won't make it in time and he'll face the stairs again noticing your presence.
 A view of the main area of the Atlantis club
Just as in the previous location you should spend some additional time to learn your surroundings. The game will mark all three locations where you need to place the smoke bombs - one bomb must be placed on the first floor and two remaining charges must be placed on the second floor. The club also has a third floor, however getting there isn't a requirement at the moment. During your time spent in this location you will have to avoid guards and cameras and once again Eric won't be allowed to kill anyone or even use his vampiric powers.
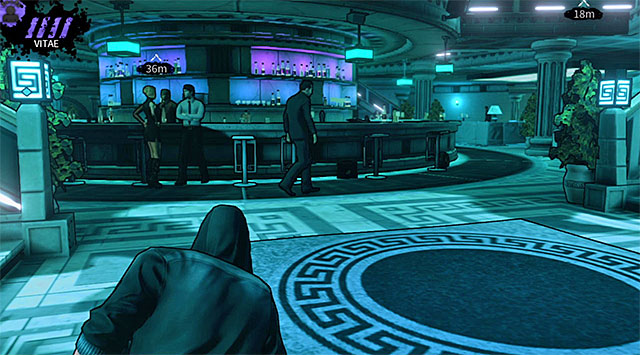 Guard circling the central bar
Proceed to your left. You'll soon notice that one of the guards is circling the large bar located in the center of this location. Take cover somewhere near the tables found to the left and stay there until he goes past you. It's recommended to remain close to the bar when the opponent mentioned above is not around, because it will allow you to avoid other enemies and security cameras.
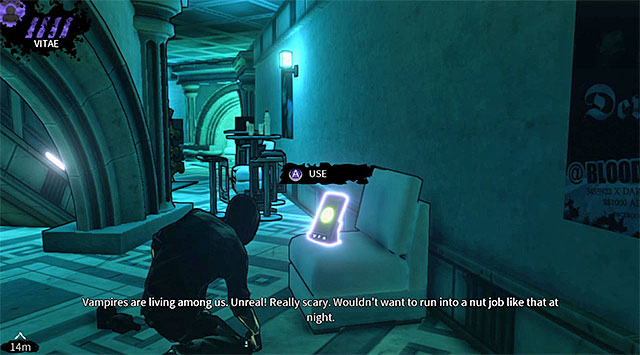
You shouldn't be in a lot of hurry to get to the first bomb placement site, because there's a new secret nearby. Stop close to the stairs leading to the second floor and check the area under the stairs. Doing this will give you an opportunity to get your hands on a new PDA (200 experience points) (screen).

Once you have the collectible with you approach the two guards seen on the screen above. You must be very patient here and wait for the guards to end their (long) conversation (don't forget to monitor the person from the bar area at the same time, because you still have to keep avoiding that guard).
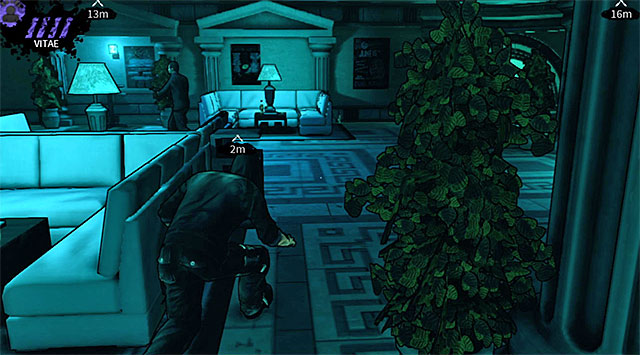 Trashcan used to place the first bomb
Wait for the guards described earlier in the text to move away from the trashcan. Approach this object and interact with it in order to place and arm the first bomb.
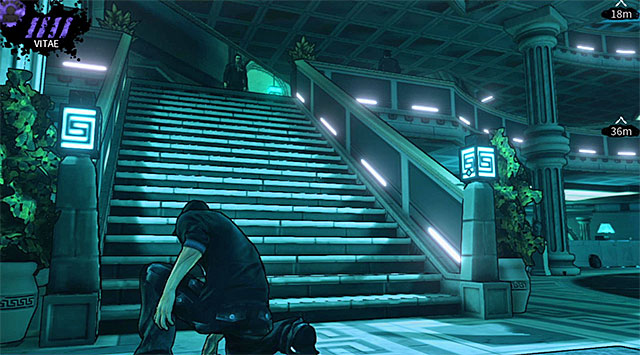
You should now carefully return to the area where you've started exploring the Atlantis club not long ago. Face the left staircase displayed on the screen above. Don't use the stairs right away and instead activate Vampire Vision to check if a new guard isn't heading your way. If that's the case then wait for the enemy to start moving in a different direction.
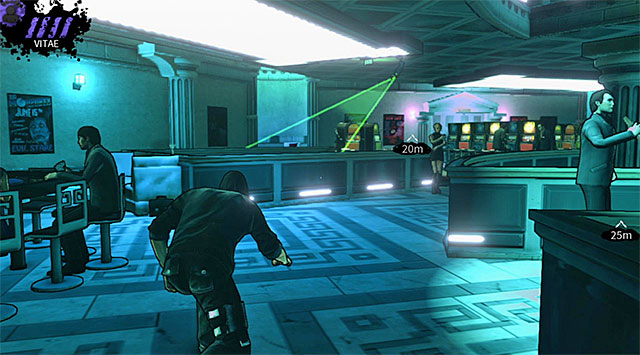
Use the stairs to get to the second floor and start moving towards the trashcan you'll use to hide the second bomb. Use the tables with guests for cover if needed and be careful when you're close to the stairs seen on the screen, because aside from a camera you'll also have to watch out here for a new guard.
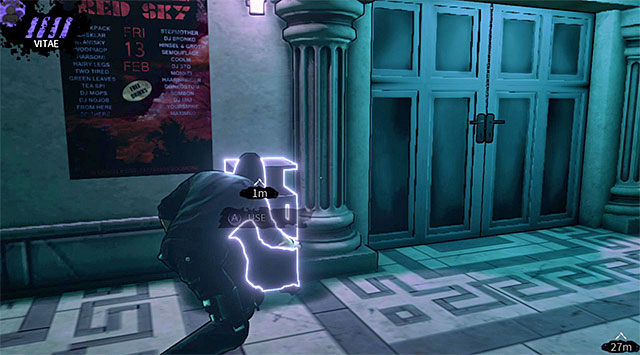 Trashcan used to place the second bomb
The second trashcan can be found next to a door that's temporarily closed. Don't approach the bin from the front, because the slot machines are being guarded by a new enemy. Instead move from the left and quickly place the charge before you're noticed.
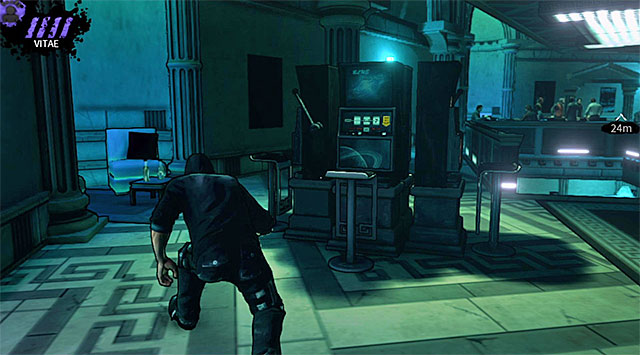 Stairs leading to the first floor
Thankfully you don't have to return to the starting area again. Remain on the second floor and continue moving towards the last trashcan (you will be moving clockwise). Make your first stop when you're close to the stairs leading to the ground floor and check the area to find out if someone isn't looking towards Eric or heading his way.
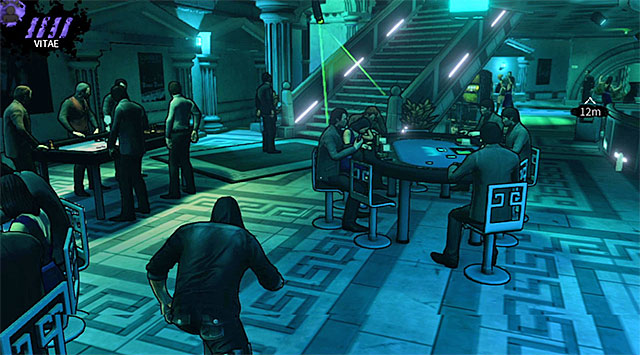
You'll have to stop at least one more time on your way to your current destination and you should do that when you're close to the stairs leading to the top floor (screen). Notice a guard and a security camera here.
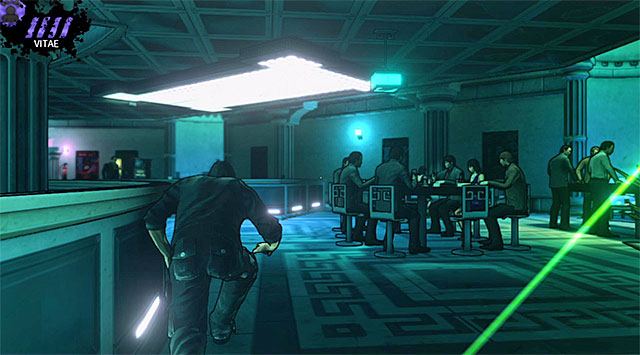 Trashcan used to place the last third bomb
Wait for the guard mentioned above to start moving away from the main character and quickly follow him, avoiding the security camera thanks to walking or sprinting (you don't have to worry about being heard by someone). Quickly approach the last third bin and place the bomb before the guard turns around.
Return to the second trashcanYou must now reach a special chamber which is located on the third floor of the Atlantis club. Turn around and start moving again towards the trashcan where you've placed the second bomb. Ignore the first staircase found along the way, because even though using this passageway to reach the top floor would be easy you would find yourself in a compromizing position being surrounded by a lot of enemies.
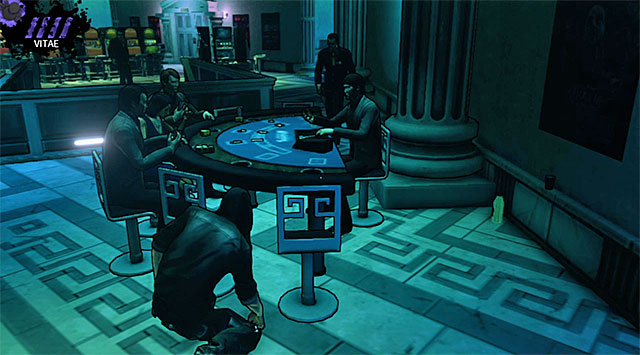
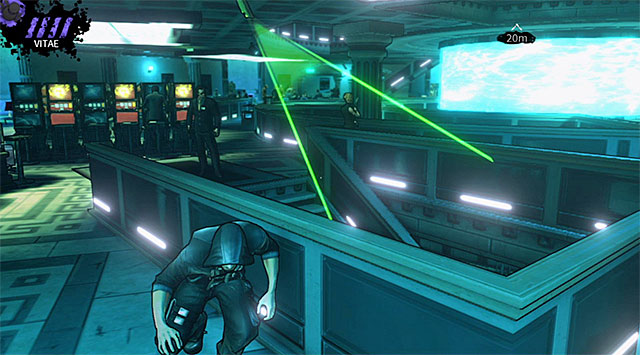
Continue moving counterclockwise and remember to often rely on Vampire Vision to check current positions of nearby guards and to find out where they're heading. Suggested areas where you should make new stops are displayed on screens 1 and 2.
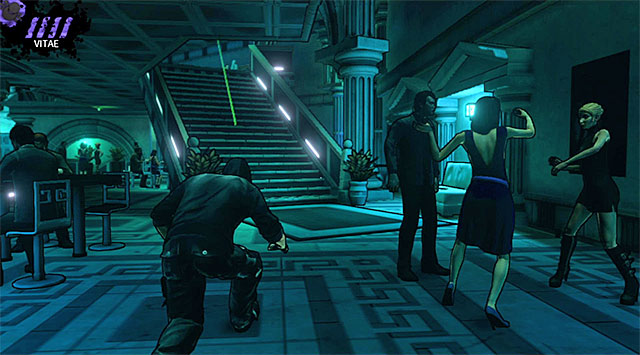 Stairs leading to the third floor
You will soon come across a new staircase leading to the third floor and this is the one you should choose. Don't forget to avoid a security camera found here, but it shouldn't be a big problem.
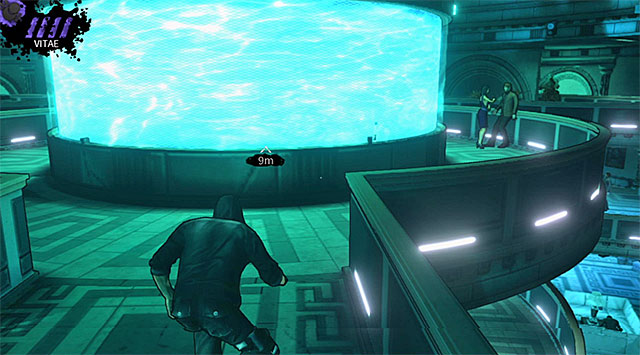
If you've chosen the stairs recommended in this guide then after you've arrived at the top floor you'll find yourself close to the oval structure seen on the screen. Be careful here, because one of the guards is patrolling the nearby balconies.
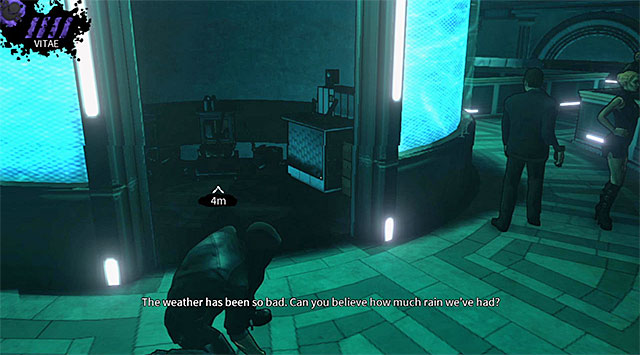 A small chamber where Eric must hide to wait for the gas to be released
All there's left for you to do is to reach a small room located on the third floor. Enter the chamber and wait for a cut-scene which will show the gas being released inside the club. This non-lethal attack will scare away the guests of the club and you'll also regain access to all of your vampire powers. The reward for the troubles you had to endure is 500 experience points.
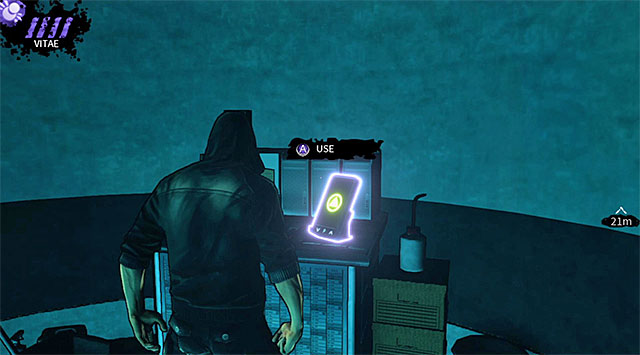
Stay inside the chamber which Eric has used to avoid the release of the gas. Check this small room to find a PDA (200 experience points). You may finally head outside and you should know that your objective will be to reach a recently unlocked door on the second floor of club bar. The door is located next to a trashcan where you've placed the second bomb.
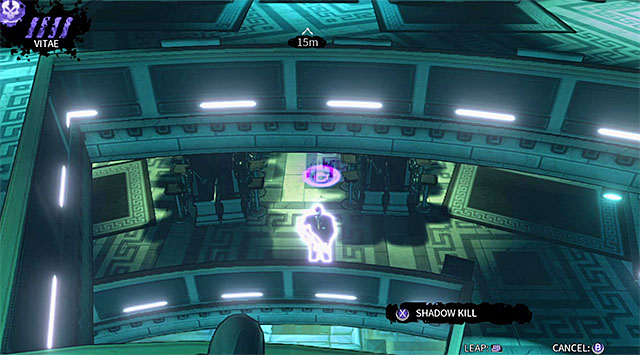
If you've fully developed your Shadow Leap ability then you may consider a risky attempt of teleporting as close to the exit from the main area of the club as possible. You would have to stand next to the railing and aim for the slot machines seen on the screen above. This method is very risky, even if you consider using Vampire Vision to your advantage. It's much better to reach the exit on foot, especially if you plan on using this occasion to clear the area.
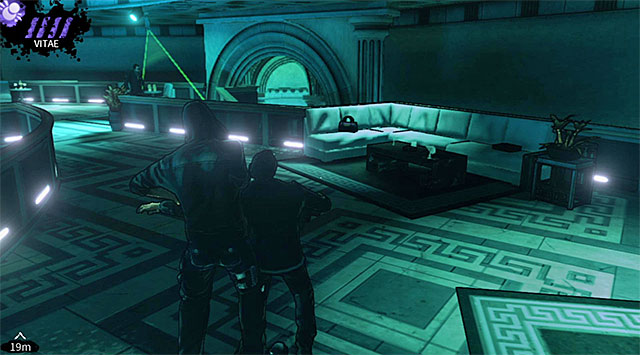

There are two guards on the top floor of the club and you should check both screens seen above this text to find out about the ideal locations of performing surprise attacks on the them. It's important that they should be standing far away from security cameras so you won't cause unwanted alarm when the camera sees Eric or one of the corpses.
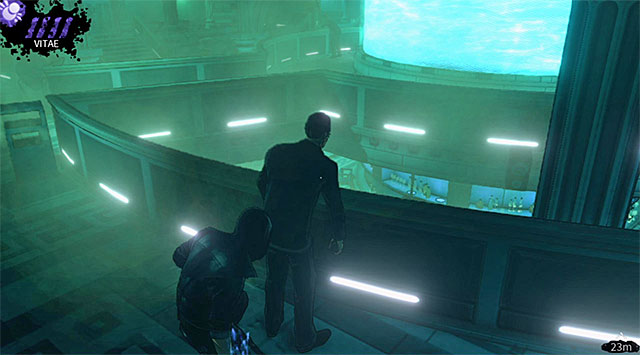
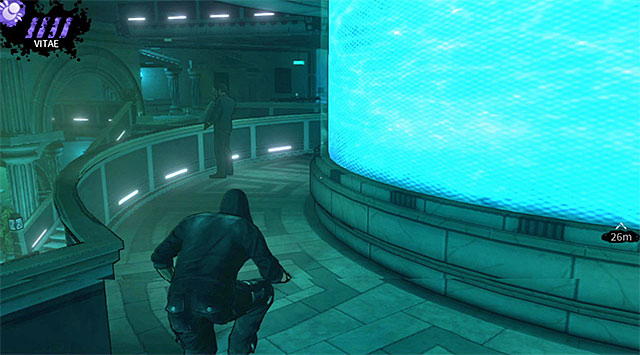
Descend to the second floor of the club. Start off by eliminating enemies standing far away from the exit (screen 1) and a couple of guards patrolling the central area of the club (screen 2). Don't forget to be cautious when attacking people standing close to the balustrades so that their corpses won't land on the first floor and won't be noticed.
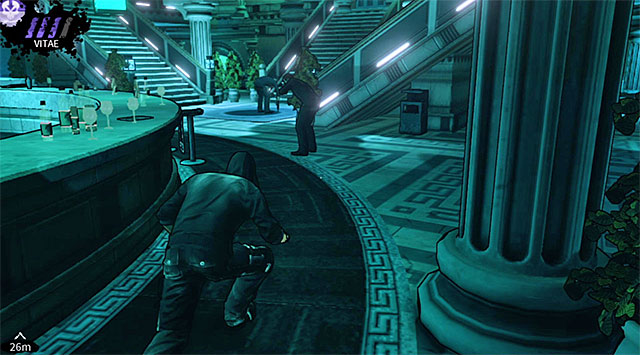
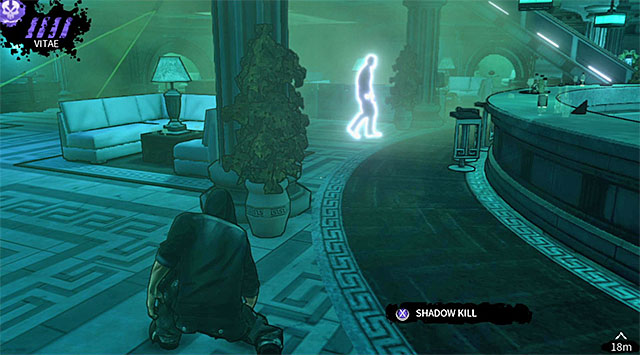
I recommend that you also head down to the first floor of this location in order to continue the process of securing the entire club. The ground floor is occupied by four guards. It's very easy to kill two guards standing close to the entrance (screen 1) and as for more complicated kills you will have to watch out for an enemy who often stops next to a security camera (screen 2). My recommendation is to kill him when he's going to the bar area.
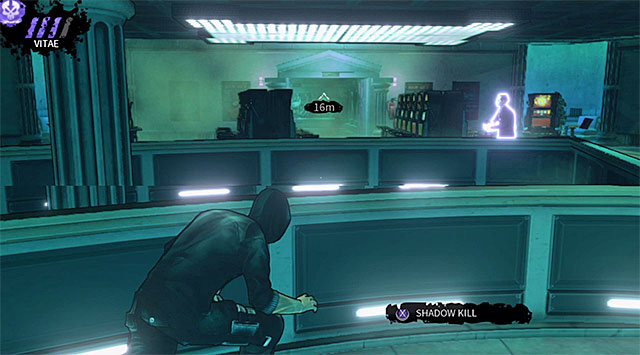 Guards gathered close to the exit from the club
You may return to the second floor of the club and move closer to the recently unlocked exit. You should be careful here, because depending on your previous actions this area will still be defended by two or three guards. If you prefer an aggressive approach then you should start eliminating them (continue hiding bodies behind large objects). If on the other hand you don't want to kill anyone then you can disorient them with special powers or use teleportation.
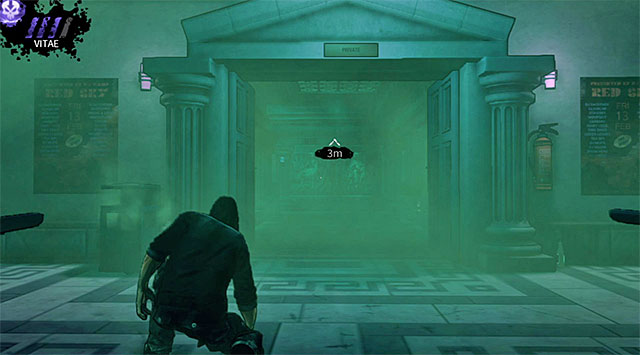
The passageway you'll have to reach can be seen on the screen above. Use this exit to leave the main part of the club and to continue exploring the building.
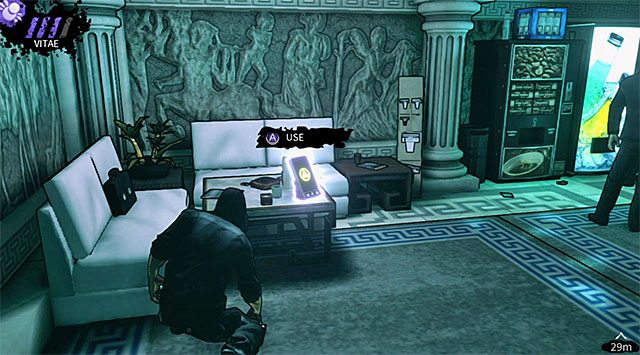
Make a stop once you're close enough to new guards and a security camera. Don't even think about attacking enemy units, because even if you would use more advanced powers you wouldn't be able to hide the bodies in time (the only real exception is fully upgraded Shadow Grip, but even this power needs a cooldown). The result of this is that you should focus only on picking up a new PDA (200 experience points) (screen).
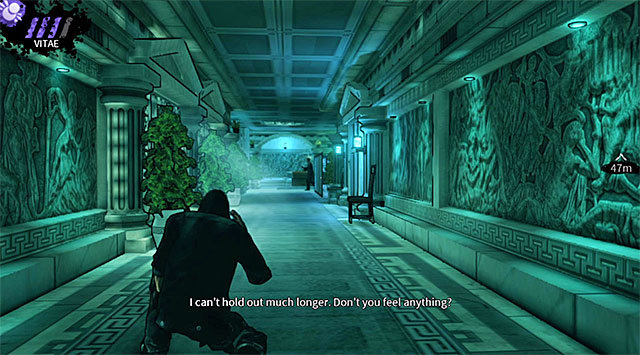 Area patrolled by a new guard
Wait for the camera to turn towards the place you came from and quickly avoid it. Continue exploring the building, listening to a conversation with Rose along the way. You'll soon reach a junction and you should wait for the guard to go left before attacking him from behind.
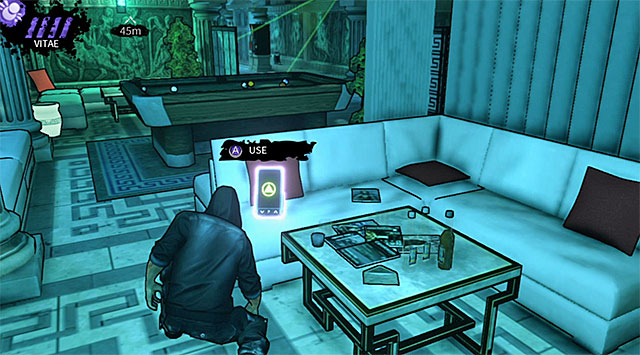
Stay in the area where you've eliminated the last guard and look around to find a PDA (200 experience points) on one of the sofas (screen). Resume your journey and make sure to avoid a new security camera properly.
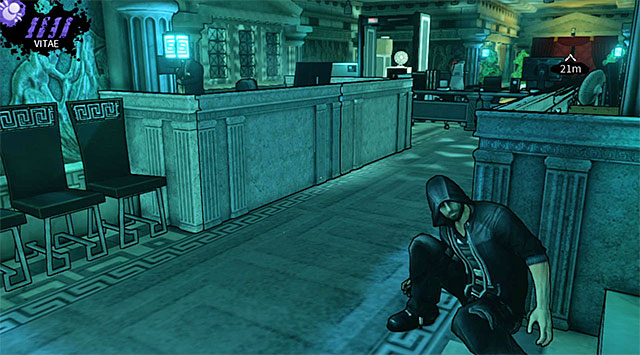
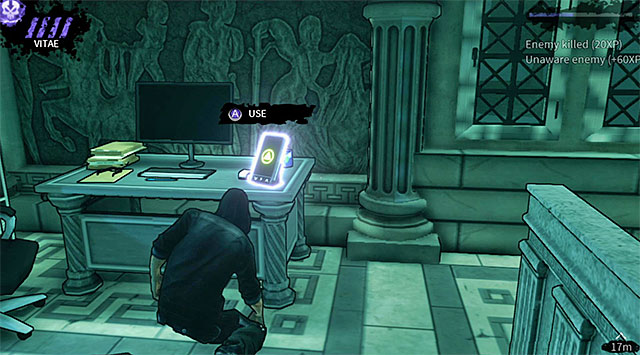
Make a stop when you're close to a new area occupied by enemy units and take cover behind the obstacle seen on screen 1. If you don't want to attack anyone then wait for the guards to move to the sides of the room and then avoid them. Otherwise pick a good moment to attack the left guard. Don't leave this area just yet, because you'll come across yet another PDA (200 experience points) (screen 2).

The opponent stationed to your right shouldn't move from his post. You can use Shadow Kill or Shadow Grip to perform a long-distance attack on him or you can surprise him yourself from behind. If you choose the second option then you will have to avoid triggering a metal detector seen on the screen above. This is very easy, because all you have to do is to activate Shadow Leap.
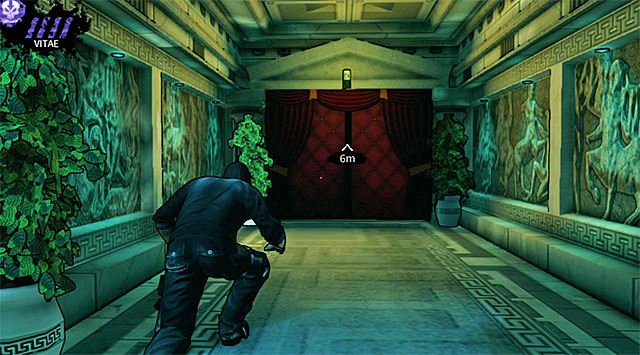 Entrance to the Titty Twister club
Once you're done here proceed to a red door leading to a private club named Titty Twister. The game will grant you two rewards upon your arrival in this location - 500 experience points is a reward for leaving the main part of the building and 1000 experience points is a bonus for avoiding alarms.
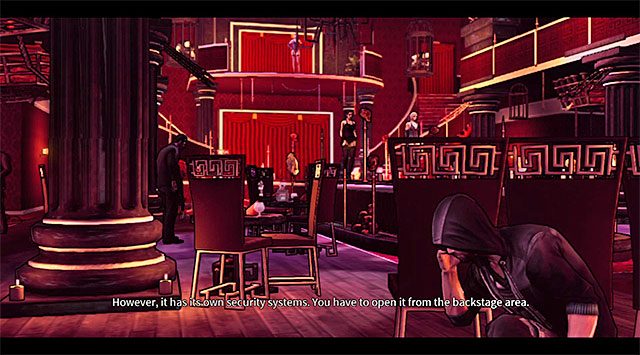 Titty Twister club
As usual you shouldn't be in a hurry, especially since that Titty Twister is occupied by a lot of enemy units. You will have to watch out mostly for the guards and a very large group of them is surrounding the main stage. Aside from this problem you'll also have to pay attention to the ghouls kept in the cages above the stage and avoid being seen by them. I don't recommend attacking any of the guards near the stage, because they're standing close to each other and their lines of sight are very similar. Your current objective is to make your way to the back of the Titty Twister club and to be honest there's only one safe path leading there.
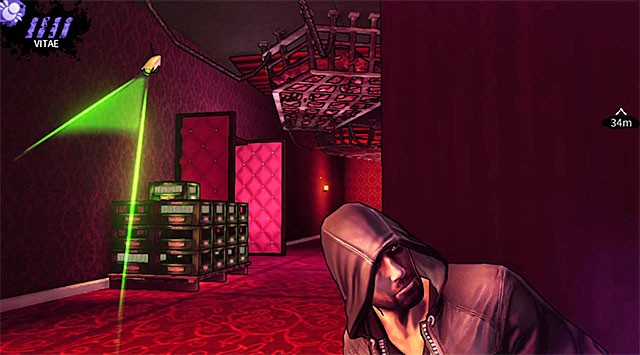 Left corridor
Choose a corridor located to the left of where you've started and be careful, because this area is monitored by a security camera. Wait for a good moment and walk under the camera. You can use this opportunity to visit the toilets found to the left. It's entirely optional, however you will be presented with a chance of eliminating one of the enemies (you don't have to hide the body, because the second guard won't exit the cabin).
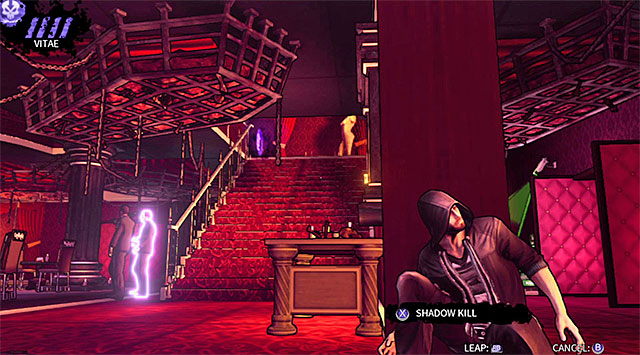
Use the left corridor and once again get closer to the main room of the club. Notice the stairs seen on the screen above. Wait for a person guarding these stairs to move away and quickly proceed to the second floor (you can get there on foot or teleport Eric to his current destination).
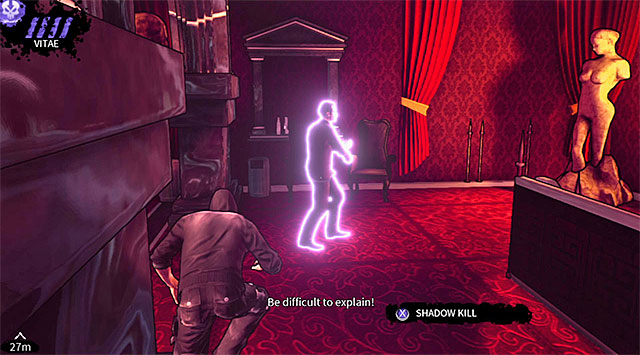 First guard on the upper floor
It's a good idea to kill the guard mentioned before, however make sure to swiftly hide his body, leaving the corpse near the stairs or to the left of the stairs). Don't forget about the ghouls from the cages and don't get too close to the railings while standing up, because they may easily see you and sound an alarm.
The main reason for hiding the corpse of the first guard was because a new enemy will soon appear near the second staircase seen on the screen above. If you plan to go aggressive then a long-distance attack is your only option, because you can't allow this person to return to the ground level. You can also try and avoid both guards mentioned here and you can do that by hiding to the left of the stairs and waiting for the first opponent to walk past Eric.
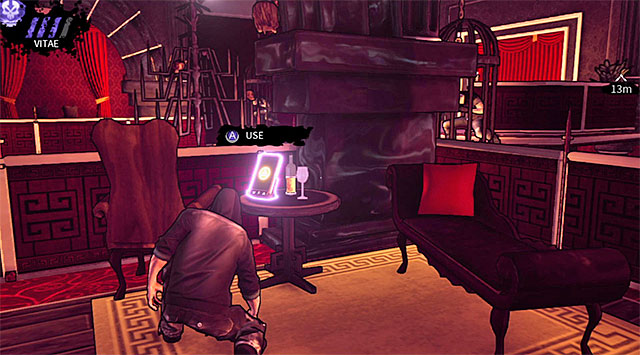
Ignore the second staircase where one of the enemies was stopping from time to time. Instead remain on the upper level and head left. Be on a look out for a new PDA (200 experience points) in this location (screen).
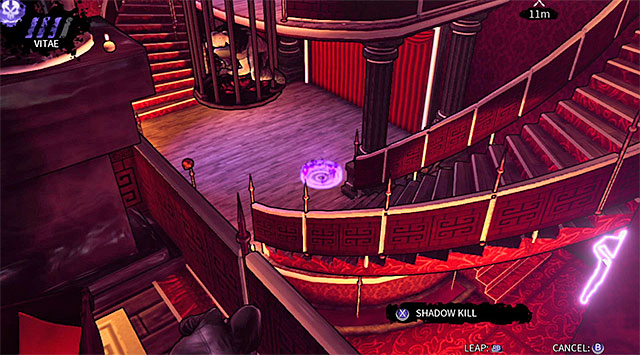
Make a stop once you've reached the end of the upper balconies. You can now act in one of two different ways. The first option is to use a long-distance attack on a guard seen on screen 1. The second option is to leave this opponent alone and use teleportation to transport Eric near the stairs (screen 2). In this case you won't have to worry about the guard, because he won't leave his post.
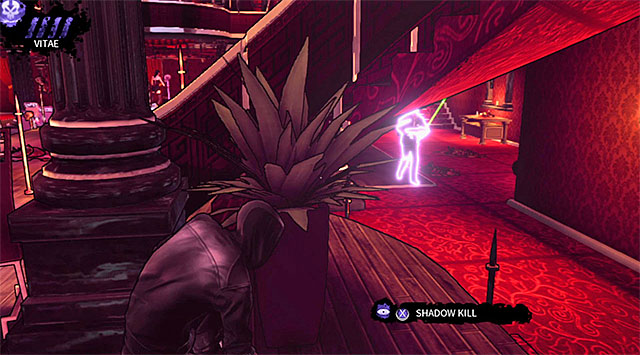
Both options described above have the same finale and that is to get closer to the left part of the stage. Don't move too fast here, because you must avoid an additional opponent seen on the screen. You CAN'T leave cover if he's looking in your direction. Wait for this person to turn around before quickly moving towards a passageway leading to the back of the club.
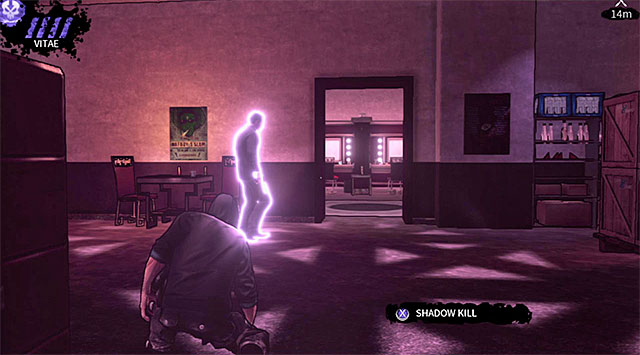
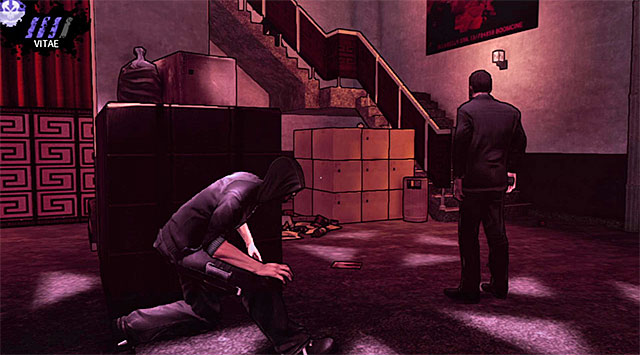 Enemies on the ground floor
Once again you must be careful, because the lower floor of the building is occupied by two new guards. If you plan on attacking your enemies then you should begin with the guard patrolling the central area of the room and follow that by killing the person making stops close to the stairs. Don't forget to drag away both bodies and consider using advanced vampiric powers to speed up the process of eliminating enemies and disposing of their corpses.
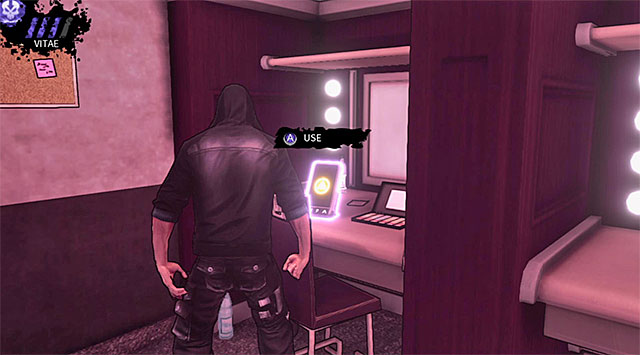
Once you've secured the ground floor enter a small room located to the left (the one without the dancers), because there's a PDA (200 experience points) here (screen).
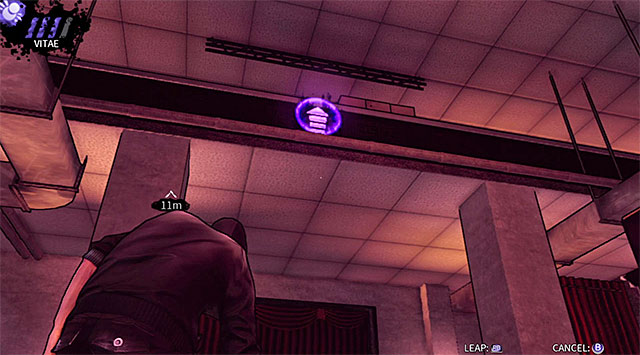
Your next objective is to make it to the upper level. The easiest way to achieve that is to use Shadow Leap on the balustrade (screen) and if you plan on choosing this method then you will have to wait for new guards to temporarily leave the balcony, because otherwise you'll be discovered almost instantly.
 Left staircase with a camera
If you don't have anything against eliminating enemy units then approach one of the staircases (warning - there's a security camera above the left staircase) and wait for a perfect moment to start moving towards the upper level.
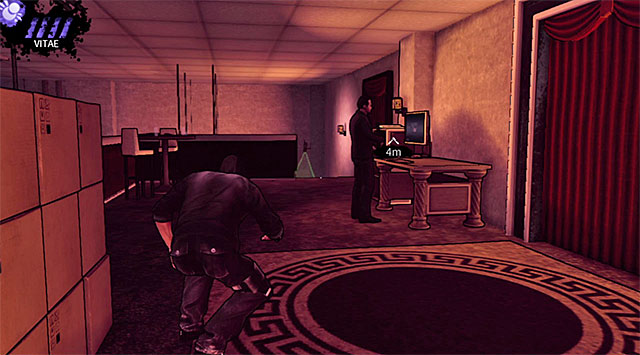
I recommend that you start by eliminating the guard who's moving between the central part of the balcony and the staircase without the camera. Once he's dead take interest in his colleague - the best moment to attack him is when he's stopping next to a computer station (screen).
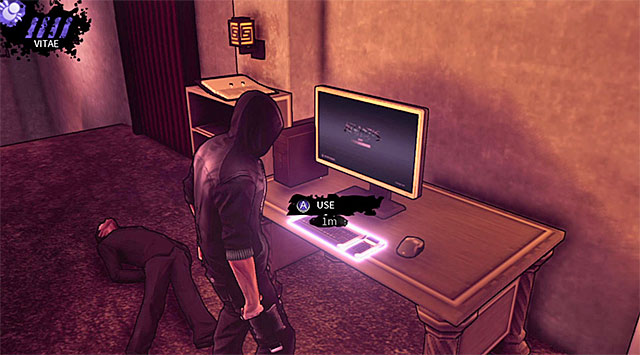 A terminal used to open the door
If you've secured the upper level then there's nothing else for you to worry about. Otherwise you will have to complete your current objective very quickly so you're not noticed. Your job is to interact with a computer terminal found on the second floor in order to unlock a door located in the main room of the Titty Twister club.
 One of the new ghouls inside Titty Twister
The first thing you must do is to return to the ground level. If the guards are still patrolling the back of the club then use Shadow Leap to quickly and safely avoid them. Otherwise choose the staircase without the security camera. In both cases you'll have to return to the passageway leading back to the main part of the club. The game will show a short cut-scene here informing you about an arrival of new guards and ghouls.
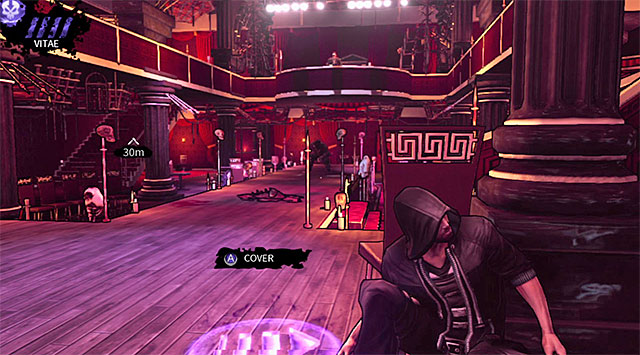 The back of the stage
Just as before there's only one safe path leading to the exit from the Titty Twister. Don't even think about choosing the corridor to the right (the one with the toilets), because you would later have some serious problems avoiding enemy units. Instead turn left and carefully approach the stage which is now occupied by a ghoul.
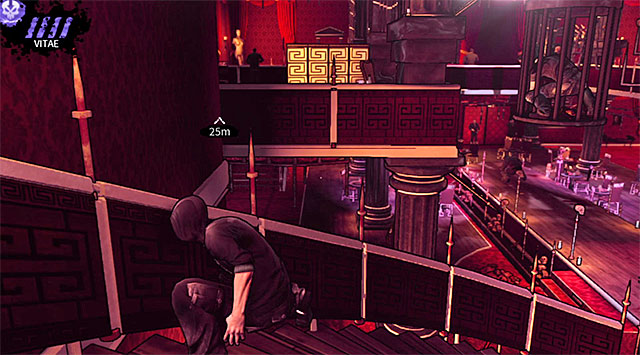
Wait for the ghoul to start moving away from Eric and quickly proceed to the left staircase displayed on the screen above.
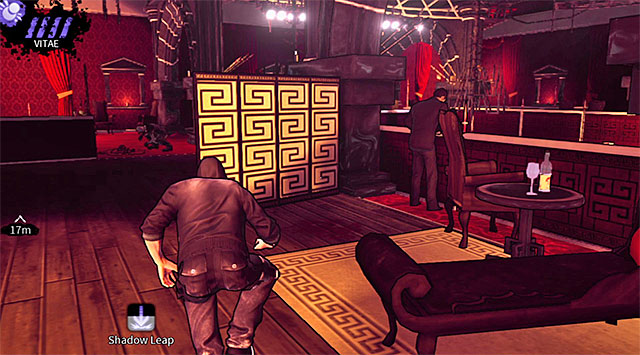 A guard standing next to the balustrade
Face the upper balcony you were using not long ago and notice that it's now occupied by a guard and by a ghoul. Wait for the guard to stop near the right balustrade and quickly teleport Eric to the balcony. The opponent you're standing close to is an easy target and you should definitely kill him, because otherwise avoiding him would become very tricky.
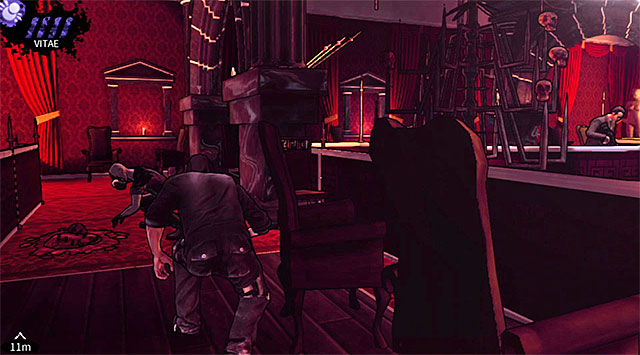 A ghoul encountered on the upper level of the club
You may now concentrate on the ghoul mentioned earlier. The best way to resolve this problem is to CAREFULLY approach the ghoul from its left flank in hopes of killing the monster. If for some reason you don't want to kill the ghoul then you can use teleportation or distract the ghoul to grant Eric a safe passage.
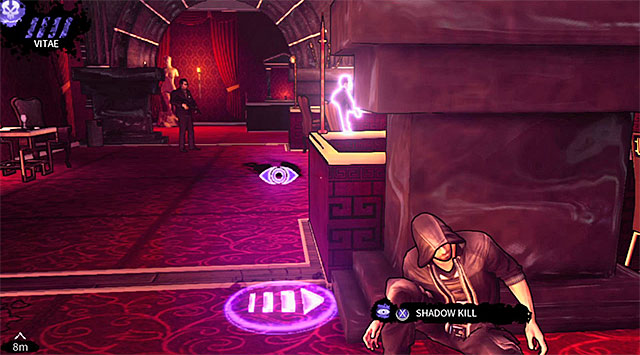 Other guards on the upper floor
Stay sharp, because the rest of the upper level is being patrolled by two guards. Eliminating the enemies is optional, however if you decide to go ahead with it you won't encounter any major problems. The best way to act here is to wait for the guards to go their separate ways and then quickly eliminate them using long-distance powers if necessary.
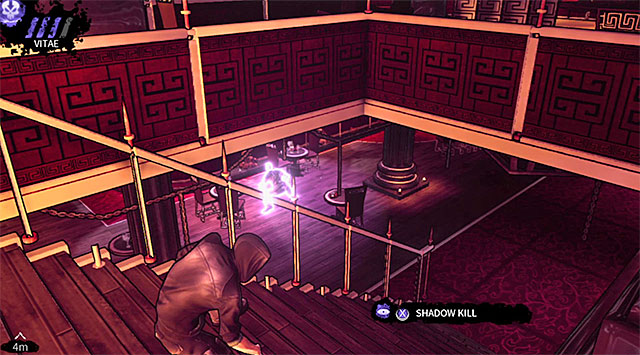
Sooner or later you will have to leave the second floor and return to the ground level. I recommend using the left staircase seen on the screen above (the one closer to the ghoul you've recently avoided or killed).
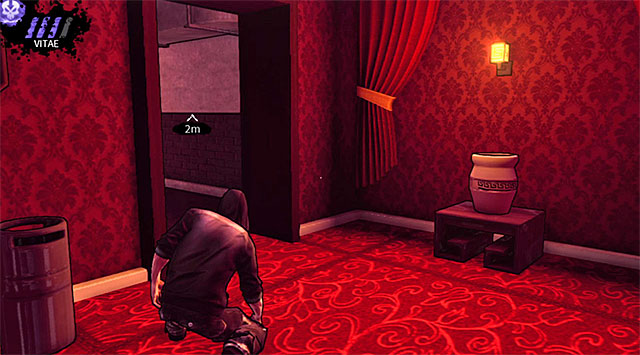
Make your way to the ground level, turn 180 degrees and quickly go past the two guards located to your right (I recommend using Shadow Leap or Obfuscation to make it harder for them to recognize Eric). The exit from the Titty Twister club is located to the left and it's displayed on the screen above.
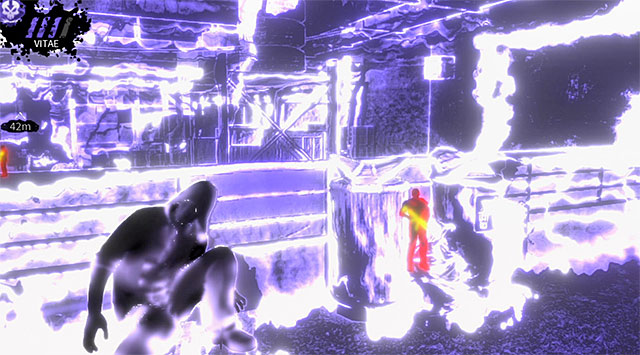 Warehouse
Follow the linear corridors and they will lead you to a fairly large warehouse. There are five enemies in total in this location and as always you'll be allowed to choose between avoiding them and murdering them. I recommend choosing the second option, especially since securing the warehouse will make it easier for you to locate a new collectible.
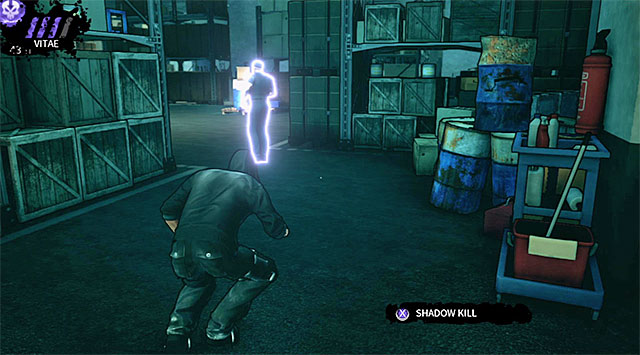 First guard
The first guard is stationed close to where you've started exploring the warehouse. If you want to kill him then you should proceed with this plan as soon as possible so that other enemies won't show up here in time. Once he's gone drag his corpse to the ramp you've used to reach the main part of the warehouse. If you prefer to leave the guard alone then stay close to the left wall and you shouldn't have any troubles.
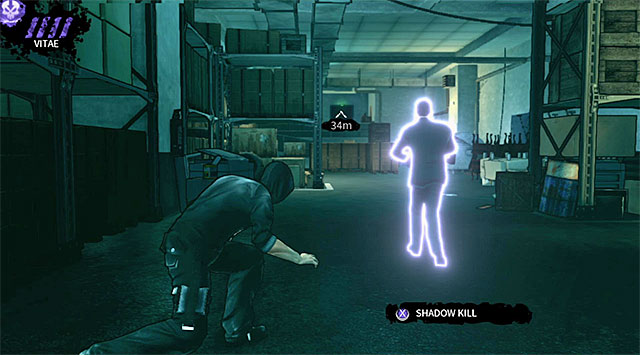 Second guard
The next guard is patrolling one of the more distant corners of the warehouse. Surprising this person from the back is reasonably easy, however you can't ignore the step about hiding his body (preferably behind the crates or big shelves).
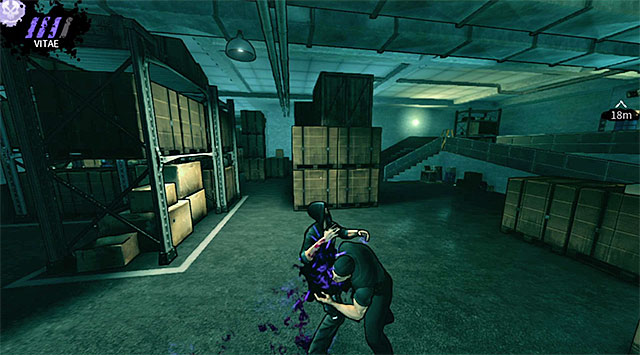 Third guard
Stay sharp, because the third guard may soon appear in this area. Wait for this person to move away from the rest of the enemies or attack the guard right away and hide his corpse.

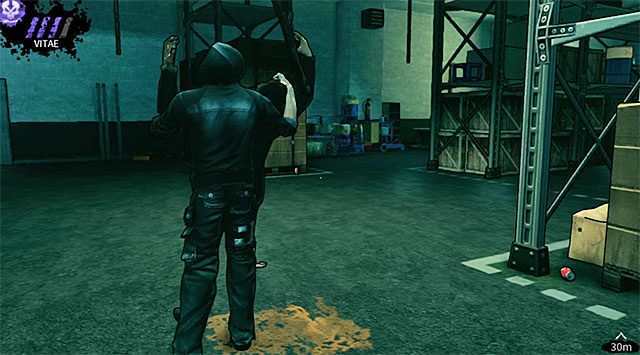 Final opponents encountered in the warehouse
There are two more guards here for you to deal with and they're the ones that were having a conversation up until recently. You must be very careful, because the guards will be stopping close to each other from time to time. Proceed with killing them as soon as they go their separate ways. Important - If you don't want to kill anyone in the warehouse then you must rely on shelves and other big obstacles and use them for cover. You should also be using Vampire Vision to constantly monitor current positions of all enemy units.
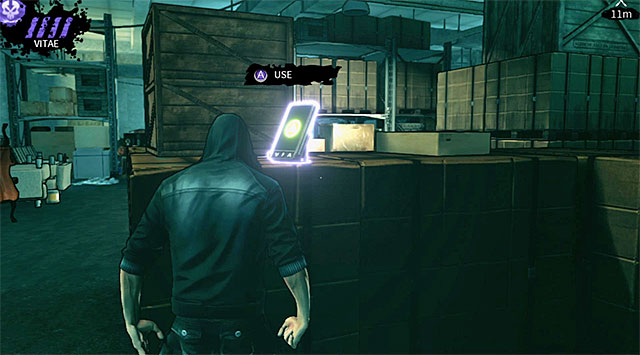
Remember a collectible I've mentioned at the beginning of this page? It's a good idea to find it after dealing with all the guards. The PDA (200 experience points) is on one of the crates (screen).
Proceed towards a new ramp and it shouldn't take long for you to reach an exit from the main part of the warehouse seen on the screen above. Start exploring a new linear corridor. You'll witness a new vision involving "an angel" and once it's finished approach a door leading to the next location.
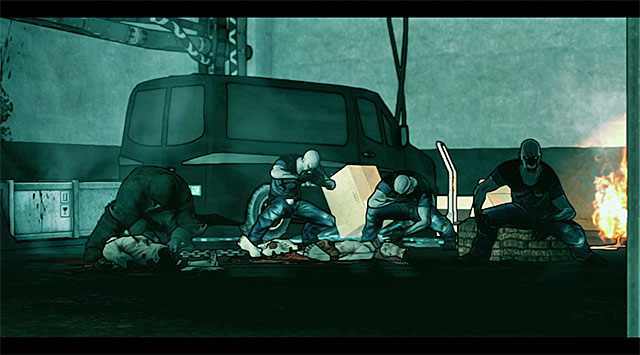 An ambush
The game will soon play a new cut-scene and you'll find out that enemies have prepared an ambush here and that they are also accompanied by several ghouls. Wait until you regain control over Eric and make sure that he's well hidden behind a cover.
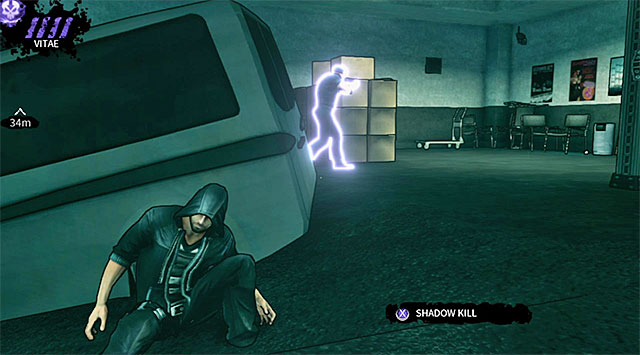 An enemy inspecting the starting area
You must act quickly, because one of the guards is currently heading your way and he'll want to check the cover where Eric is hiding. I suggest that you immediately teleport yourself to a vehicle parked to the left. Wait for the guard to go past you and decide whether you want to continue avoiding him or if you want to kill him. If you prefer the second option then I recommend using long-distance attacks (Shadow Kill or Shadow Grip) just to be safe. Leave the body where you've started, because no one else will show up there.
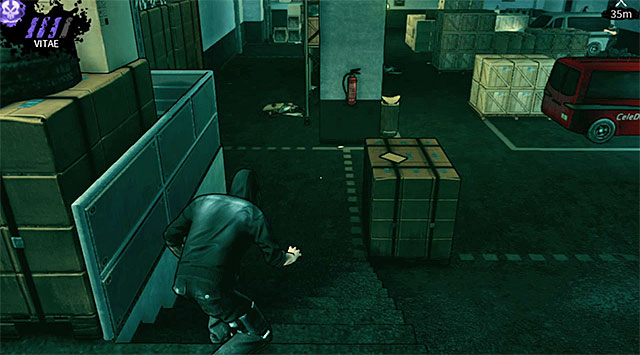
It doesn't matter if you've decided to ignore the first guard or to eliminate him, because in both cases you should proceed to the stairs seen on the screen above. It's very important to remain close to the left wall, because the right side of this location is occupied by three ghouls.
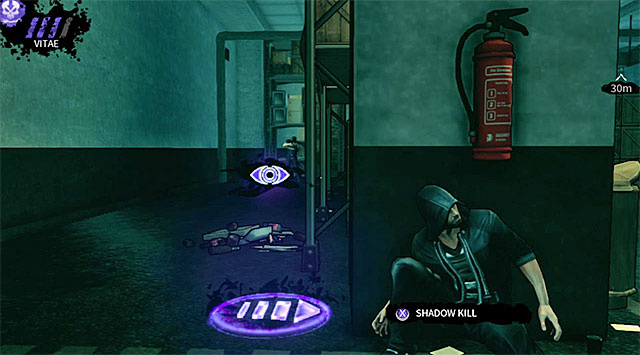
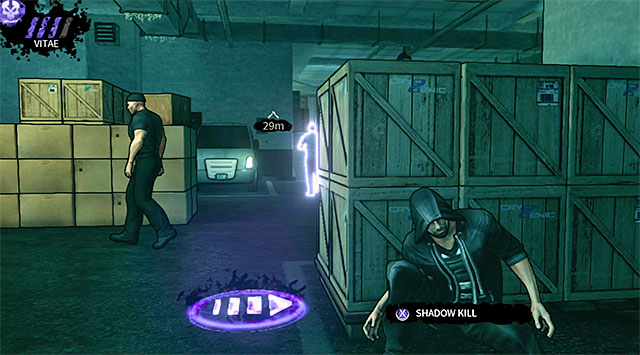
As you've probably noticed you're getting closer to an area patrolled by two of the remaining guards. Start off by taking cover behind a pillar seen on screen 1. Wait for one of the guards to move away towards a nearby corner. Once this happens get to the crates seen on screen 2 (watch out for broken glass along the way, because you can alarm your enemies!).
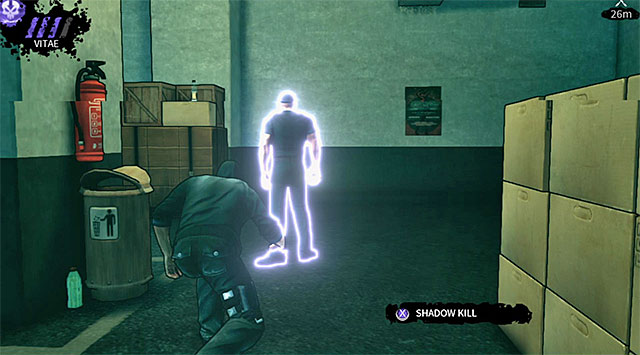 An unsuspecting guard
If you want to attempt to avoid both guards then you should proceed slightly to the left and take cover behind a new vehicle. It's much better to kill them and if you choose this option then start with the left guard. Don't forget to quickly hide the body some place where it won't be found.
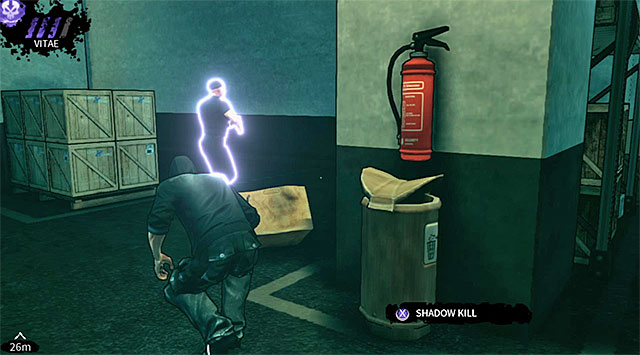 The last guard
You may now focus on eliminating the last enemy. He sometimes stops close to the side passageway you've used yourself and it's a good moment to attack him.
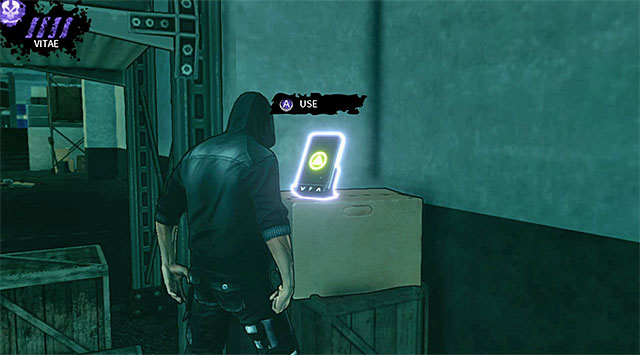
Don't leave this area too soon, because a new PDA (200 experience points) can be found here (screen above).
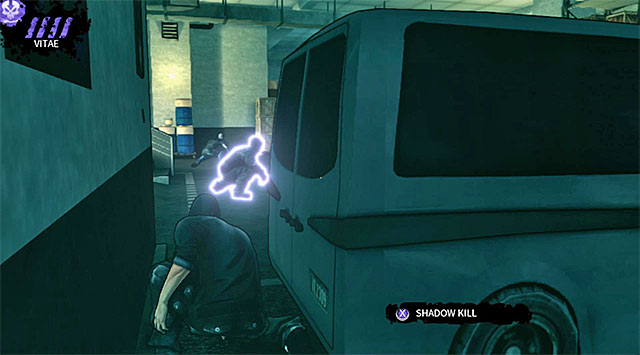
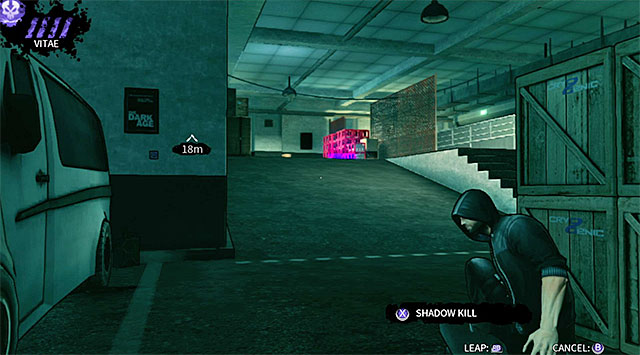
There are two ways of reaching a ramp leading to the exit from this location. The first option is to choose a very narrow passageway behind a parked van (screen 1). The second option is to take cover behind the crates seen on screen 2 and to use teleportation to avoid being noticed by the ghouls.
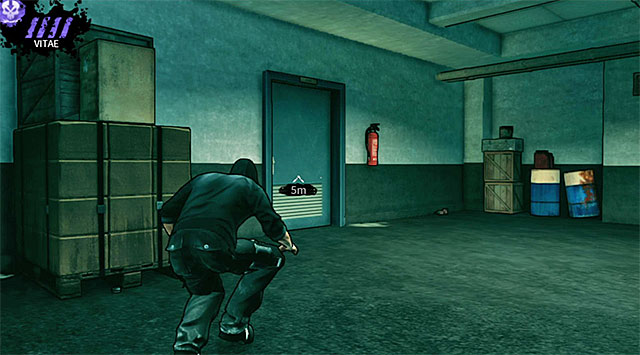 Exit
ExitYou can deal with all three ghouls if you want to and it won't be a problem, because you've found yourself standing behind them. I recommend proceeding with this plan, because an experience bonus is always a good thing. Once you're done here proceed to the exit.
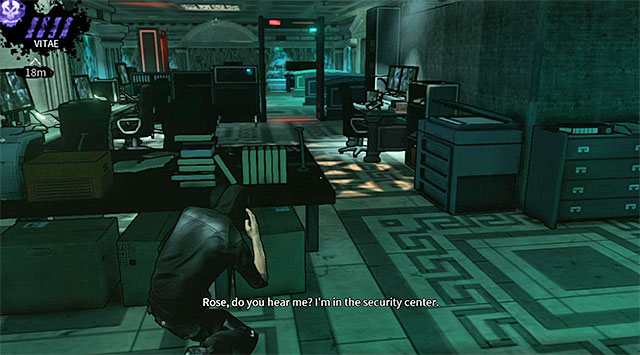 A view of the security room
Use the narrow corridors to reach the security room. Eric will make an unsuccessful attempt of contacting Rose and that's not the only problem you'll have to deal with, because four new guards will arrive in an elevator soon and of course it will make it harder to reach the exit.
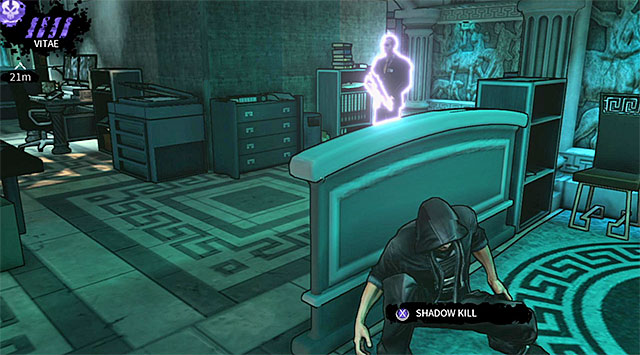
Quickly take cover to the right and wait for all enemies to reach their designated posts (don't try running to the exit from the security office, because you won't make it in time and as a result you will be noticed by enemy forces). Keep using cover, waiting for the first guard to appear to your right (screen above). The best way of killing this person is to use a long-distance attack. If for some reason it's not possible then you will have to wait for the guard to turn around and quickly move closer to him to perform a standard execution.
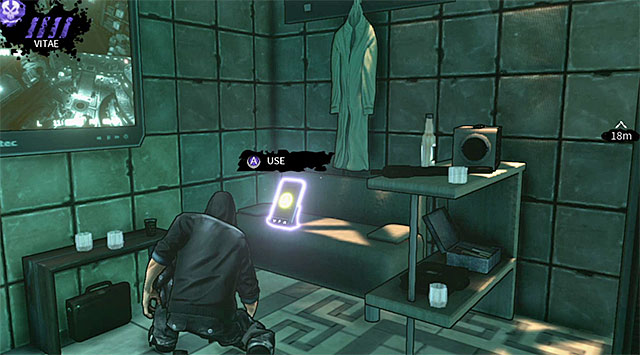
Head over to your right, avoiding the main part of the security room for the time being. Make sure to keep checking your surroundings here, because you'll find a PDA (200 experience points) along the way (screen).
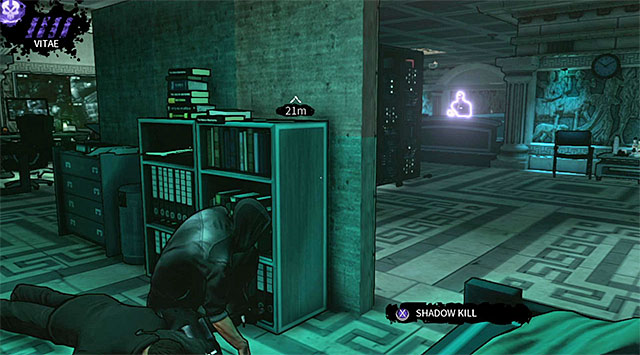
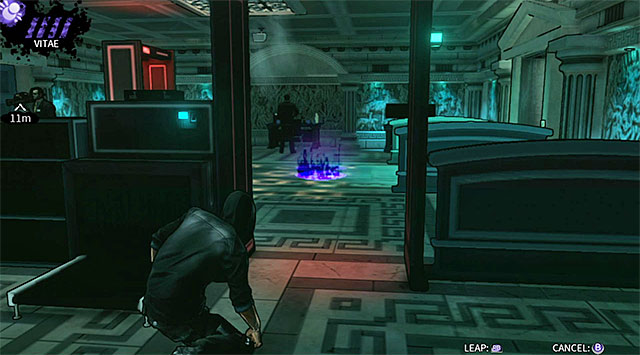
The next person you should take special interest in is the guard seen on screen 1. Wait for this person to turn around and to move closer to one of the computer terminals. You can now either use one of your vampiric powers to kill the guard from a distance or activate Shadow Leap to avoid a metal detector in order to get enough for a standard kill (screen 2).
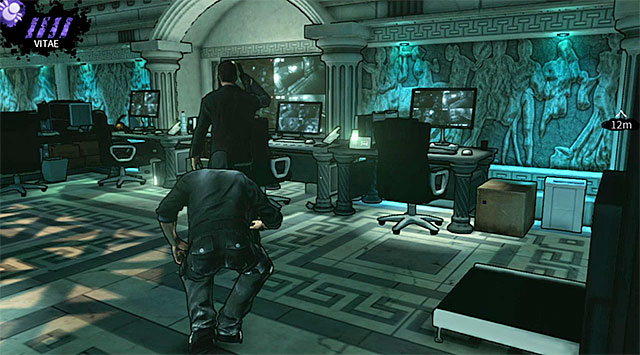 A guard standing in the middle of the security room
Avoid the metal detector for the second time and return to the main part of the security room. One of your enemies is standing here and you should eliminate him.
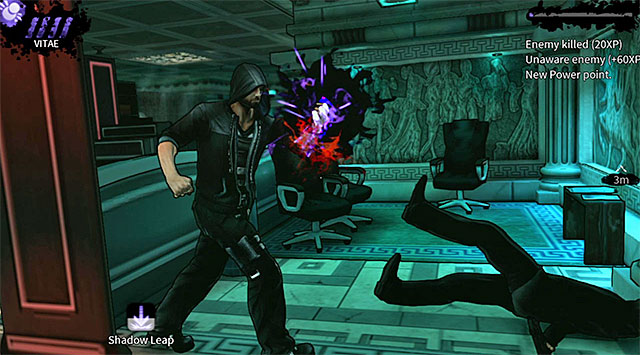 Killing the last guard
The last guard is stationed close to the exit from the security office. Just as before you should consider using Shadow Kill or Shadow Grip to eliminate this person from a distance. If you want to do a standard kill then use Shadow Leap, but make sure to choose a destination for your teleportation as far away from your target as possible.
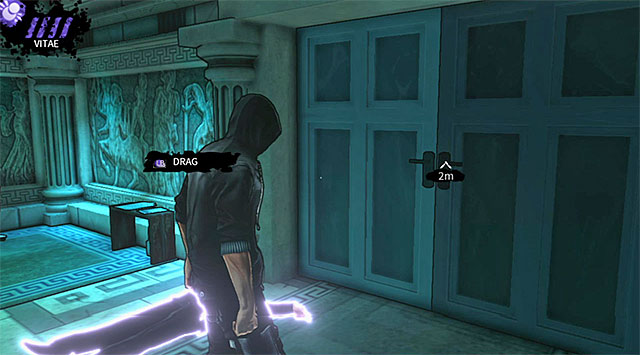
Your current destination can be seen on the screen above and it's an exit from the security office. Important - If you don't want to kill anyone in this location then you must rely heavily on teleportation, pay special attention to two of the guards who are constantly moving and avoid stepping through metal detectors.
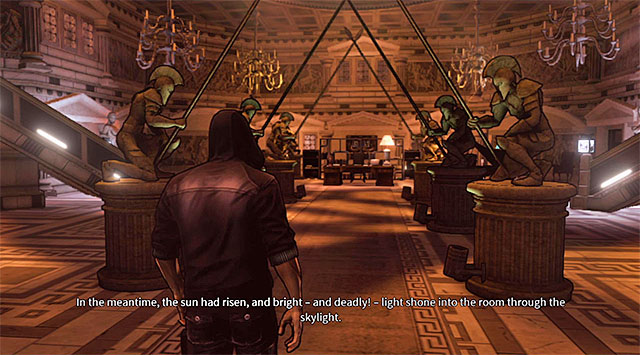 Steiner's hideout
You'll receive two rewards as soon after leaving the security office: 500 experience points is the main reward for reaching Steiner's hideout and 1000 experience points is a bonus for escaping the previous locations without triggering any alarms. Use the linear corridor to enter a large office where Steiner can be found. The game will automatically trigger a conversation with this ancient vampire.
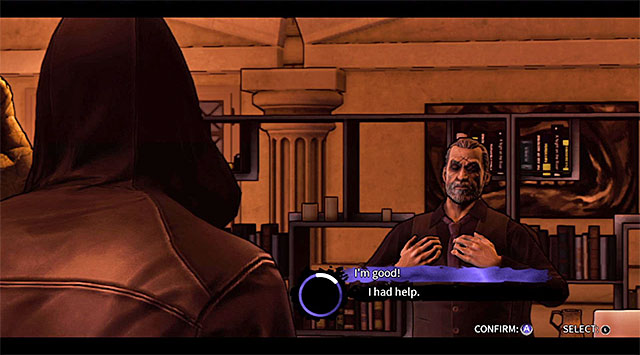 First list of dialogue options
You can start the conversation by taking all of the glory for reaching this location (I'm good!) or by admitting that you had help from others (I had help). Generally the choices you'll make during this conversation won't have any influence on its outcome so the only real difference is what responses you'll hear. You'll soon have a chance to ask Steiner some additional questions about the vampires and about himself.
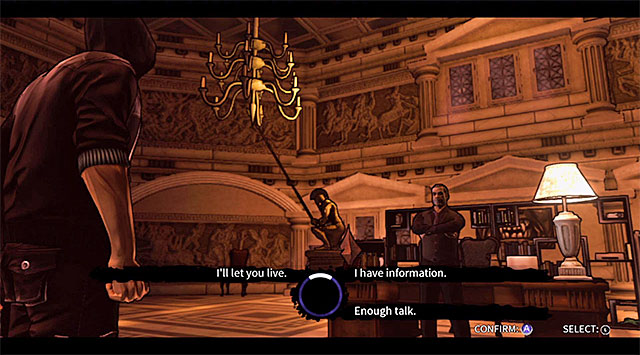 Final list of dialogue options
A list of dialogue options will appear one more time after Eric will mention that he needs Steiner's blood in order to avoid turning into a ghoul. Offering Steiner precious knowledge (I have information) will end in a failure, because he won't be interested. Saying that you'll spare him afterwards (I'll let you live) won't scare him. The last option (Enough talk) will allow you to cut this conversation short.
 Cut-scene
No matter which dialogue options you've decided to choose you won't receive Steiner's blood and you won't be forced to fight him. Sooner or later a cut-scene will be played and it will show vampire hunters led by an unidentified woman kidnap Steiner. Eric will use the commotion and escape from Steiner's lair without being taken as well. This is the end of this chapter and once again you'll be rewarded - 1500 experience points is the main reward for finding Steiner and 1000 experience points is a bonus for avoiding alarms (you can't miss it, because since the moment you left the security office Eric didn't have to avoid any new guards).
 A view of the first backyard
Proceed towards the first backyard. The game will show a short cut-scene in this location during which you'll find out that you'll be dealing with vampire hunters. That's not the only problem, because you'll be informed that some of the hunters are wearing heavy armors and Eric won't be allowed to drain them of their blood. Thankfully you can still kill them, either by surprising them from behind or by using long-distance powers (Shadow Kill and Shadow Grip).
 An opponent in a small alley to the right
Quickly approach the main part of the backyard and follow an opponent found to your right. Don't attack the hunter until he makes his way to a side alley, because the kill won't be noticed there and you also won't have to worry about hiding a corpse afterwards.
Make sure that the body can't be seen from the backyard and use this opportunity to pick up the first PDA (200 experience points).
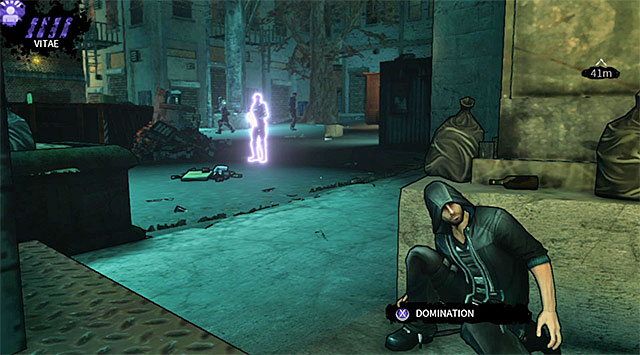
Carefully move closer to the main part of this location and start paying attention to a new vampire hunter seen on the screen above. You must wait for this person to turn around and move away or help yourself by using Shadow Leap. Either way your current objective should be to return to the starting area.
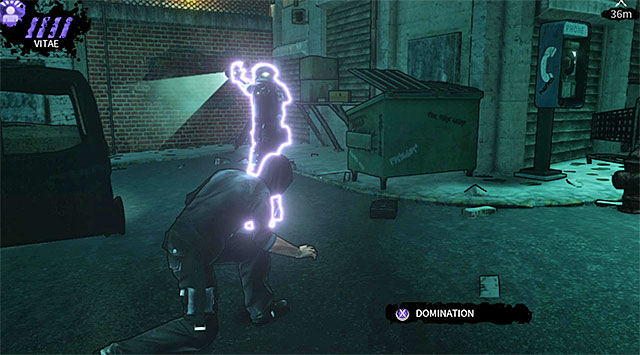 An armored opponent
You should now focus on an armored soldier standing close to the left alley. This person won't move, but before you approach the hunter make sure that the guard stationed to your right isn't looking in this direction. Attack the "elite" hunter from behind and quickly hide his body behind one of the nearby obstacles so that it won't be discovered by anyone else.
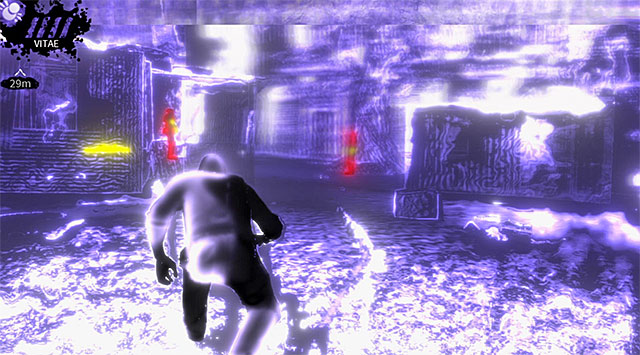 Enemies blocking the exit from the first backyard
Get ready for the most difficult part of your journey, because all of the remaining enemies are observing each other and attacking either one of them without any real preparations will end in a disaster. You can of course try to leave this area using teleportation or Obfuscation ability to make it harder for the hunters to recognize Eric, however if you don't mind killing your enemies I suggest that you follow the instructions published below.
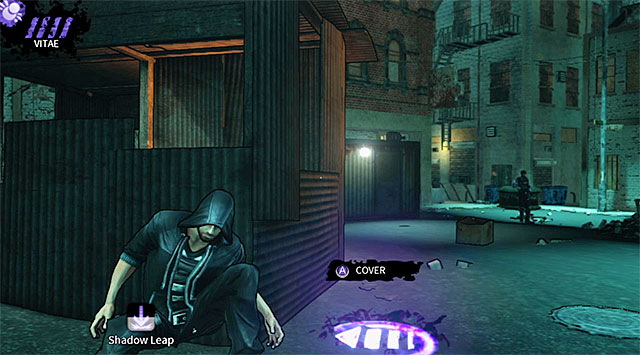
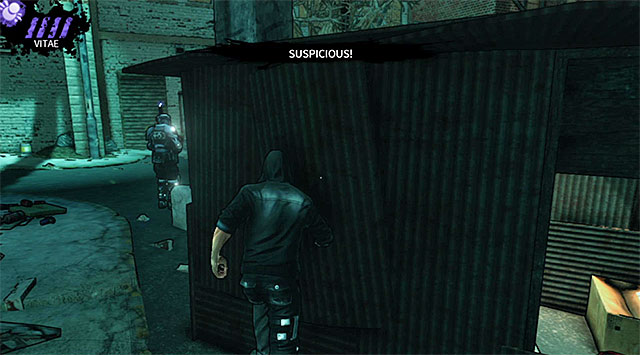
Approach the two hunters stationed close to the exit from the first backyard, taking cover behind a small shack seen on screen 1. Wait for the single guard who is patrolling the center of this location to move away, stand up and perform a short sprint next to the cover. If you've done everything according to the plan then Eric will make enough noise to attract the attention of a nearby armored hunter (screen 2). Get ready, because this person will soon start moving here to check the source of the disturbance.
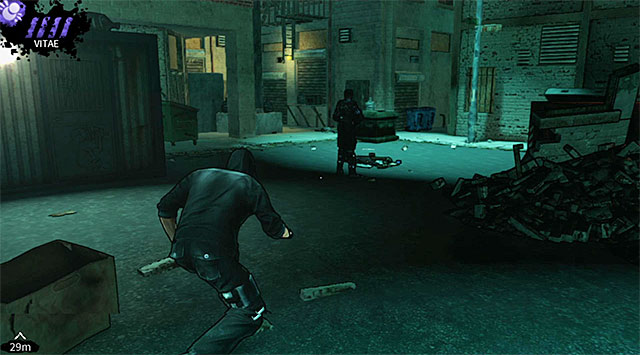
Use the fact that the soldier in an armor has stopped observing his colleague patrolling the central area of the backyard and attack this standard guard (screen above). I guess I don't have to remind you to hide his body, especially since that the armored opponent will soon return to his original post.
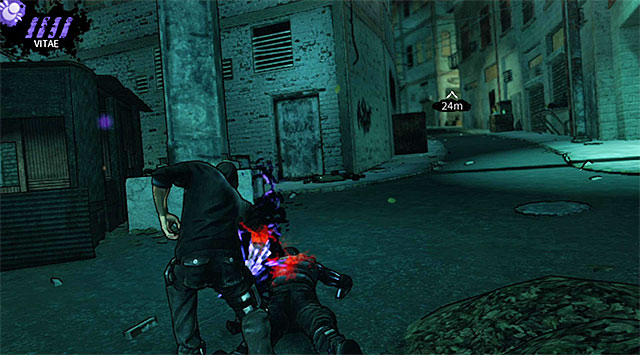
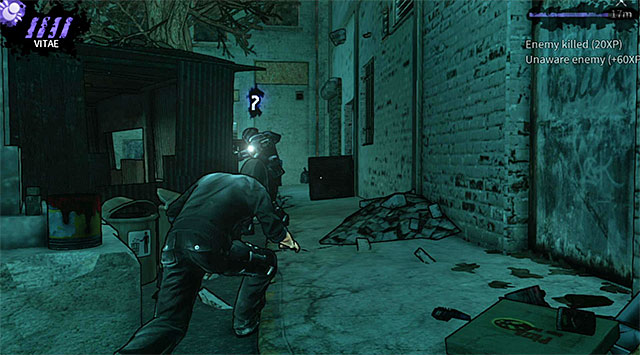
You must now repeat one of your previous actions by running close to the shack in order to distract the armored soldier. Wait for this person to go left for the second time and once this has happened quickly approach the right guard seen on screen 1. Murder this person and immediately proceed towards the armored hunter so that you'll kill him before he turns around and finds out what's going on (screen 2).
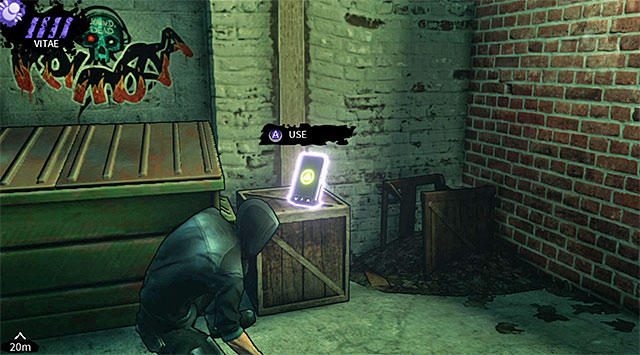
You may finally proceed towards the second backyard. Listen to a conversation with Rose along the way and make sure to check a small alley to your left, because you'll find a PDA (200 experience points) there (screen).
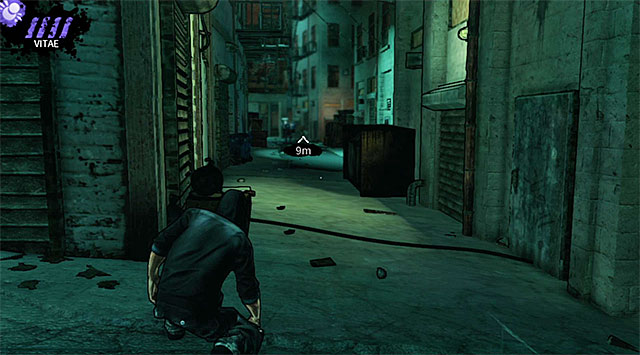 Path leading to the second backyard
Notice there's a single hunter at the end of the path you're currently exploring, however killing this person is entirely optional. Sooner or later you will have to choose a passageway located between the buildings to your right. Approach the second backyard and familiarize yourself with a new warning message which will be about nearby motion sensors. You must avoid standing in front of the sensors (red beams), because otherwise the device will start making noise and it will be noticed by all nearby enemy units.
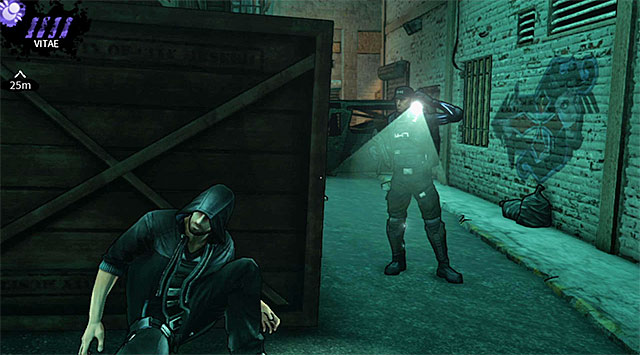
Avoiding two motion sensors found in the second backyard will be very easy (more on that subject later in the text), however the same can't be said about new vampire hunters. Start off by taking cover next to a large crate seen on the screen above. Notice a single guard to your right. Wait for this opponent to turn around and to start moving towards the central area of the backyard. Use this opportunity to quickly approach the hunter from behind. Kill the guard and drag his corpse towards the crate where you were hiding recently.
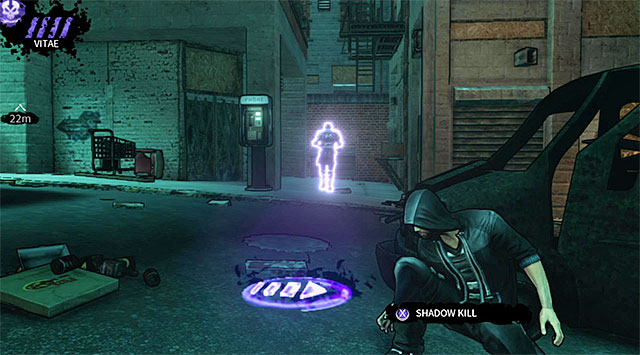 The best moment to attack the armored opponent
An armored opponent can also be found nearby and he's patrolling the area between the main backyard and a side alley. Attacking this person from behind is out of the question, because the soldier is observed by his colleagues. If you still want to kill him then you should choose Shadow Kill or Shadow Grip power and wait for him to stop in a side alley, far away from the line of sight of other enemies.

Sooner or later you will have to start moving closer to the exit from the second backyard (MUCH sooner if you didn't attack anyone) and it's located to the left of where you've started. I strongly recommend choosing the path displayed on the screen above so you should be staying very close to the left wall, avoiding the first motion sensor without triggering it.

Make a stop once you've reached a small brick wall (screen above) and take some time to familiarize yourself with the current situation. The area to the left is being patrolled by two "standard" hunters. Your objective is to reach an entrance to an old cinema which is a building to the right. The entrance is being defended by a second motion sensor (it's attached to the right container), by a security camera and by two armored opponents.
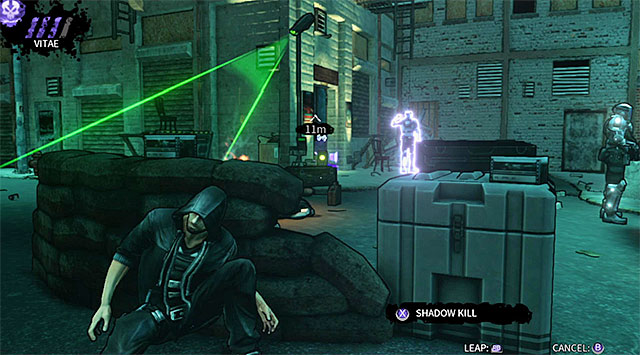
If you don't want to kill anyone in this location then you may perform an extremely risky attempt of using teleportation (Shadow Leap ability) to transport Eric directly to the inside of the old cinema (screen above). I don't recommend this method, especially since choosing it means skipping on an opportunity of obtaining two collectibles.
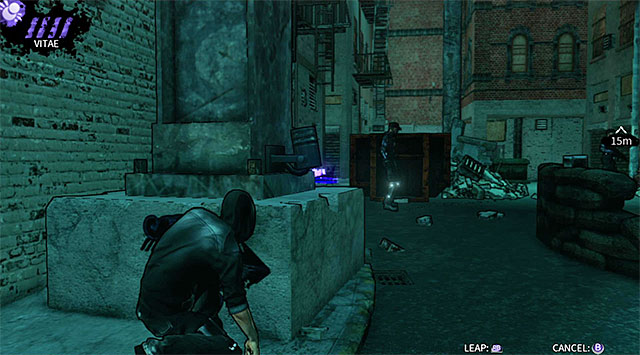
A much better idea is to continue securing the second backyard. Make sure that you're hidden behind the brick wall and get ready to use teleportation. Activate Shadow Leap when a guard seen on the screen above will move to the right (you'll end up behind him).
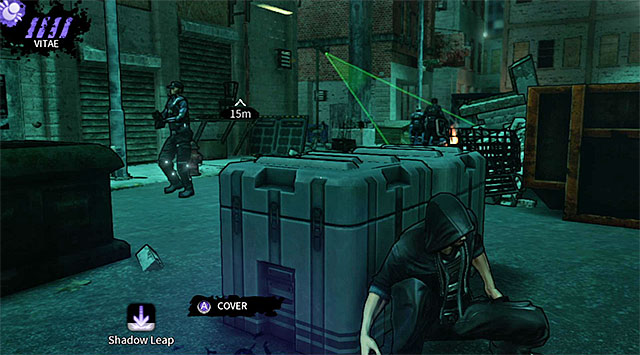 Suggested cover where you should wait for the second standard guard to show up
Quickly move further ahead, because the person you've avoided a moment ago will soon start moving towards the main character. Take cover behind one of the nearby obstacles and wait for the second standard hunter to go left. Surprise this enemy from behind and hide his corpse.

Stay here for a little while longer, because you'll uncover a PDA (200 experience points) (screen) nearby and it would be a good idea to pick it up right away.
You can finally take interest in the first standard guard (the same person you were avoiding so far). Don't attack this hunter when he stops far away from your current location, because doing that would surely result in an alarm. Instead use the same trick as before and start running close to the container seen on the screen above to get his attention.
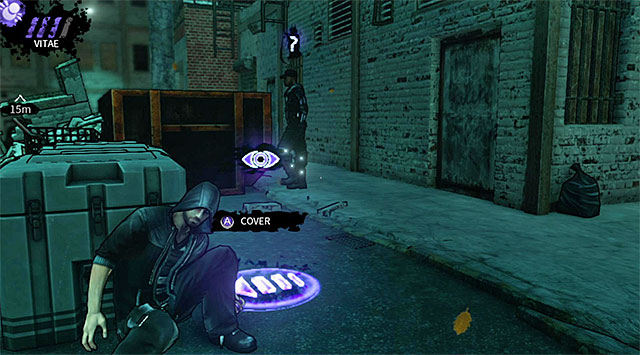 Attack on a suspicious enemy
Quickly move back and hide behind one of the nearby objects. Wait for the suspicious guard to show up near the container. You can attack this person right away (long-distance powers) or surprise the hunter after he turns around (in this case you must catch him in time before he returns to the main area of the backyard).
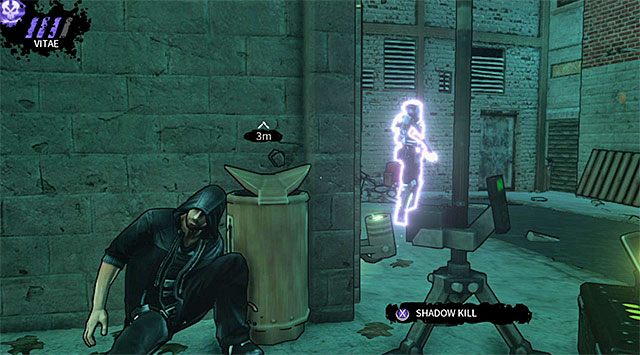
The next step is to carefully approach the old cinema building. Take cover in a location seen on the screen above, under an active security camera.
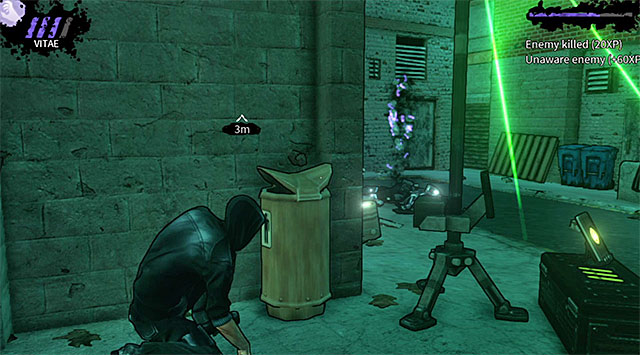
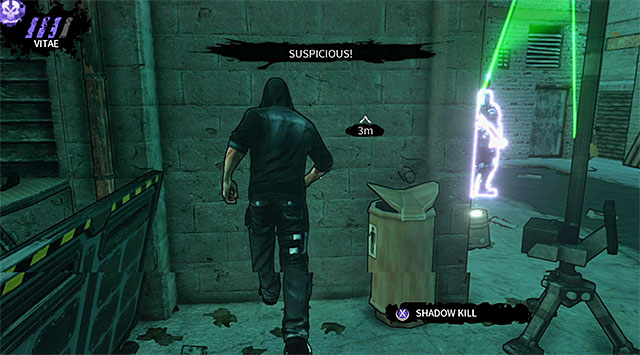
As you've probably noticed an armored hunter is preventing you from entering this building. The easiest way of killing this person is to use a fully upgraded Shadow Grip ability (screen 1), because not only you won't have to approach him, but you'll also get rid of his body and you won't have drag it away to safety. If you don't have the power mentioned above you can stun the guard (Domination ability would be a good pick) or start running near the building's wall to get his attention (screen 2).
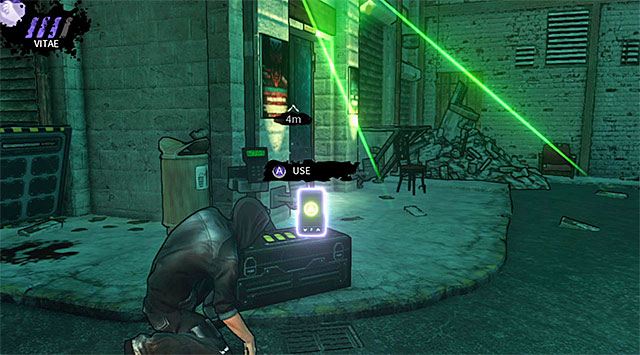
Stay close to the security camera mentioned earlier, because there's a second PDA (200 experience points) here (screen above). Now is a good moment to collect it, because it's no longer in the field of vision of the armored opponent.
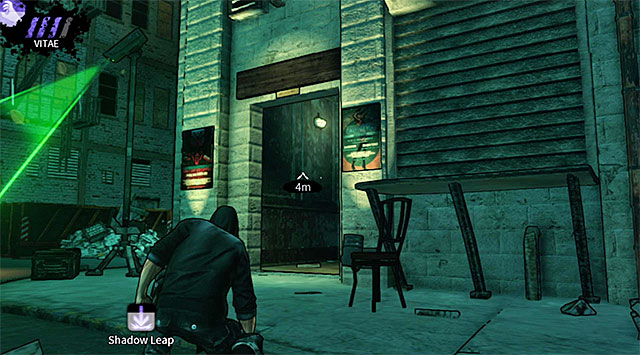 Entrance to the old cinema
There's only one more armored hunter left in the area and obviously killing him is optional. If you do intend to eliminate him then you should use Shadow Grip on him so you won't have to risk too much. Once you're done exploring this location proceed to the entrance to the old cinema.
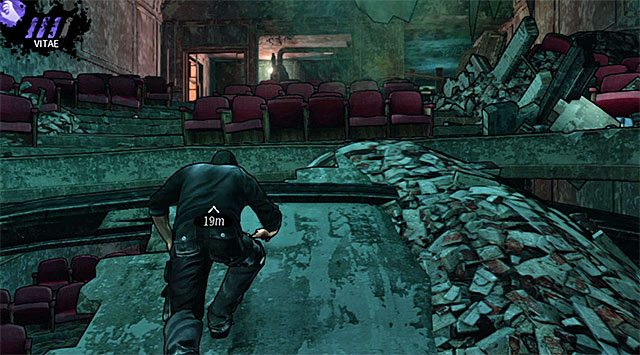 A ramp leading to the projection room
Watch a short cut-scene involving one of the ghouls and then proceed with the exploration of the old cinema. The game will grant you rewards along the way - 1000 experience points is a reward for reaching the cinema and 1000 experience points is a bonus for not raising an alarm in any of the backyards. Get to the main room and choose the upper path.
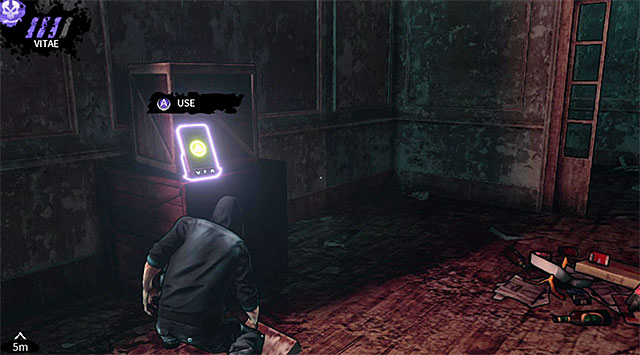
Enter a small projection room and eliminate a nearby ghoul by performing a surprise attack on the creature. You may now explore this entire room in order to find a PDA (200 experience points) displayed on the screen above.
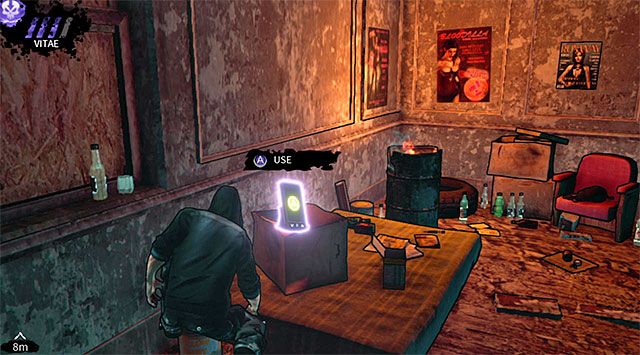
Head over to your right. Approach the staircase and inspect a short corridor found to the left. This is important, because you'll find one more PDA (200 experience points) there. Try using the stairs to head down and the game will play a cut-scene showing a group of vampire hunters entering the cinema.
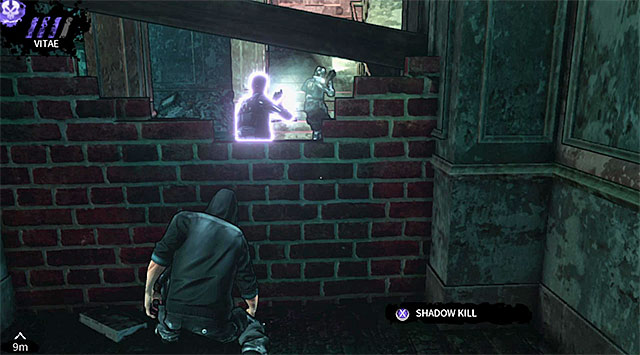
Enemies are currently heading in your direction and there are two ways how you can resolve this problem. If you want to leave the cinema as quickly as possible then return to the ground level and choose the lower path you've ignored before. Make a stop when you're close enough to a hole in the wall seen on the screen above. You can either use standard teleportation here or perform a long distance attack on one of the hunters.
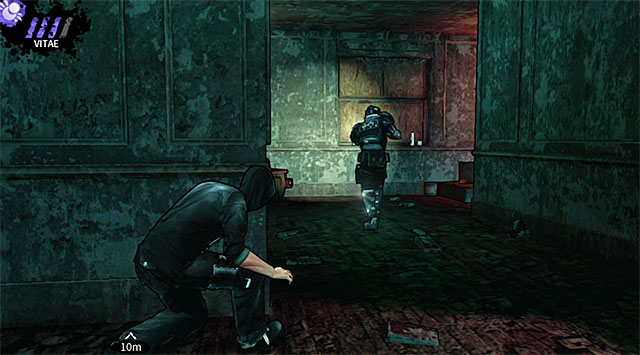 An armored hunter
If you don't mind staying here a little while longer then remain on the upper floor and retreat to the projection room where you've found the first collectible. Wait for an armored opponent to show up nearby and make sure that he's not in the line of sight of the second hunter before attacking him. Also, watch out for litter found near the exit from the projection room, because stepping on it may alarm the soldier.
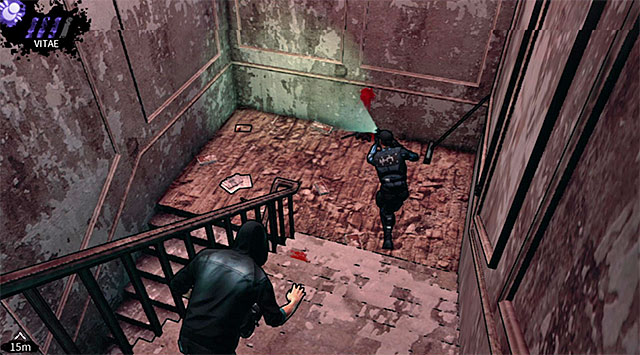 Second soldier
Drag away the corpse of the armored opponent, leaving it somewhere in the projection room. This process can't take you too much time, because sooner or later the second opponent will move closer to your position. You can avoid this person by using teleportation near the staircase or you can attack him from behind when he's moving towards the ground floor.
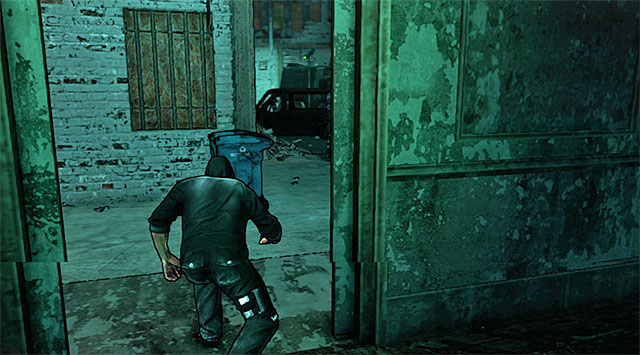 Exit from the old cinema
All of the paths described above have an identical last part, because you must make your way to the exit from the cinema and proceed to a courtyard that's occupied by new enemy units.
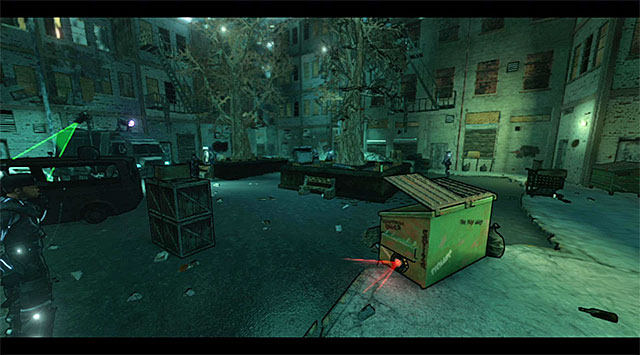 A view of the first courtyard
As usual you should spend some time to get to know the new location before you get down to business. The first courtyard is occupied by vampire hunters and aside from them you'll have to deal with security cameras and motion detectors. This is also the first location where you'll encounter an UV generator. This device not only emits sound when Eric gets too close to it, but can also send out UV radiation which inflicts serious damage to all the vampires found in its range (a few meters in a 360 degree angle around the generator). Your current objective is to reach the exit from the first courtyard which is located far away to the left, past the generator mentioned earlier.
Start off by taking cover behind the nearest dumpsters. Activate aiming mode and choose the destination seen on the screen above. Start monitoring the movements of a nearby armored soldier at the same time, because he'll be moving in your direction. Wait for this person to move away from the area where you want to go and then activate Shadow Leap to teleport Eric there. Important - If you didn't upgrade your vampiric powers yet then you should try moving closer to the courtyard and to the left hunter before activating the ability and you should also pay more attention to hiding again after a successful teleportation.
Turn left and take cover behind small crates shown on the screen above. The crates are located close to a UV generator and two guards who will be having a conversation.
Enter aiming mode again and set your destination close to the exit from the first courtyard (screen above). Don't activate Shadow Leap just yet, because you must wait for one of the vampire hunters to move away from the UV generator and to go left.
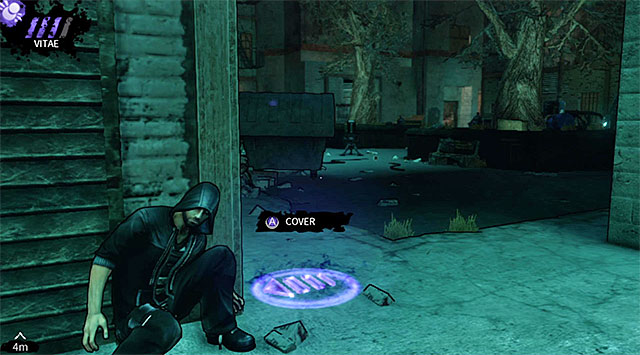
If you've fully upgraded Shadow Leap power and chosen a good destination for Eric's teleportation then the generator shouldn't come online and the hunter standing next to it shouldn't become suspicious. Otherwise the guard may start looking around and if this has happened then you must immediately take cover behind the wall of the building to your right so you won't find yourself in his field of vision. You can also try moving closer to the UV generator before activating teleportation so that when it's complete you'll be further away from the device. In all cases you must hide behind the wall of the building seen on the screen above. You must decide here if you want to leave the first courtyard right now or if you want to stay here in hopes of securing this entire area. Choosing the second option is obviously a risky manuever, however it's entirely possible to get rid of all the hunters and it's been described below.
 An armored guard after he's stopped close to the exit from the courtyard
Remain hidden behind the building's wall and wait for an armored hunter to make a stop nearby (this is the same person that was standing by the UV generator before you got here). Wait for the soldier to turn around and attack him from behind. Once the hunter is dead leave his body where you were hiding.
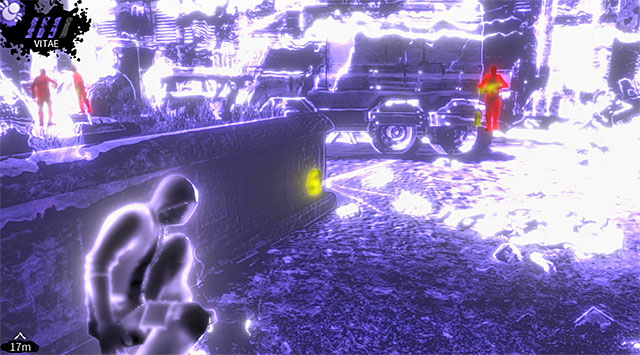
You should now proceed to your right. Take cover behind a small brick wall seen on the screen above, next to an active motion sensor.
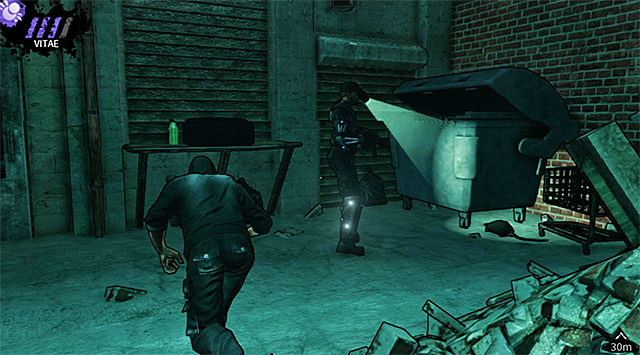 A guard patrolling the area near the truck
Wait for a guard to appear in the distance (to the right of the truck parked nearby). Start moving as soon as you'll notice that this person is going right and perform a quick execution. This isn't over yet, because you must hide the body in the left alley in order to prevent it from being discovered later on.

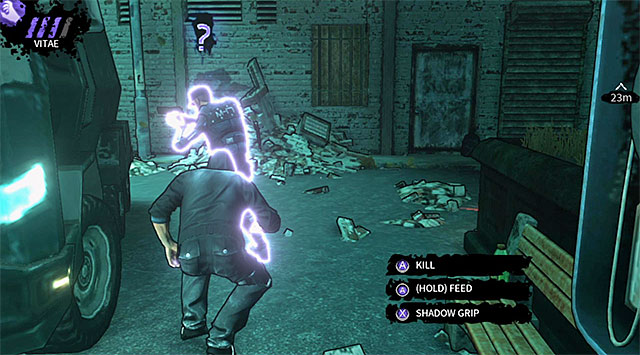
The next guard on your hit list should be the one patrolling the area between the truck and the entrance to the first courtyard. Use sprint or activate a motion sensor attached to the truck to make this person suspicious (screen 1). Wait for the guard to start moving towards the back of the truck and surprise him from the other side, avoiding a security camera along the way (don't forget that you won't raise an alarm immediately after being seen by the camera). Attack the hunter and kill him. Important - If you don't want to risk going under the camera then you may also eliminate your opponent while staying behind a safe cover and use one of the long-distance powers on him.
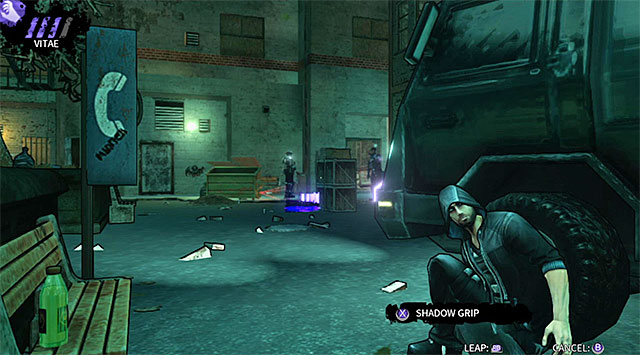 Return to the start area
You should now use the Shadow Leap ability twice to return to the area where you've started exploring the first courtyard (don't forget to use this ability only after an armored opponent has started walking in an opposite direction).
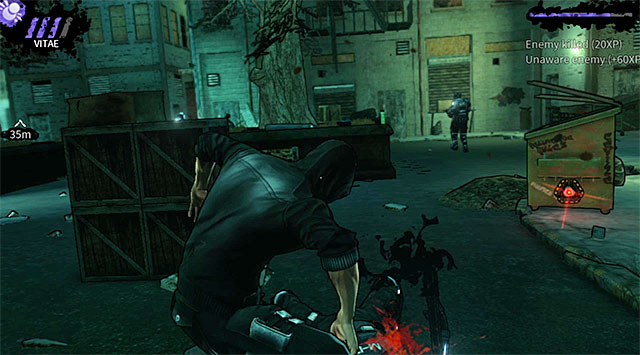 Killing the guard located near the start
Once again you must wait an ideal moment to make your move. Your task is to attack a standard vampire hunter standing close to the trashcans where you were starting out earlier on. Once he's dead quickly start dragging his corpse, hiding it behind the trashcans or inside the cinema building.
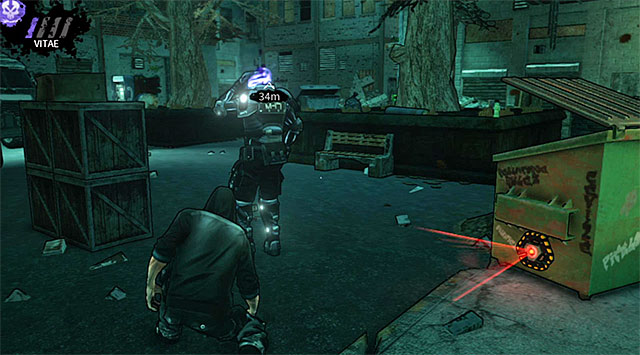 Eliminating the armored opponent
The next target is an armored opponent who's patrolling the area. You can attack him when he is moving away from the starting point or you can use a long-distance attack on him (fully upgraded Shadow Grip would be my recommendation).
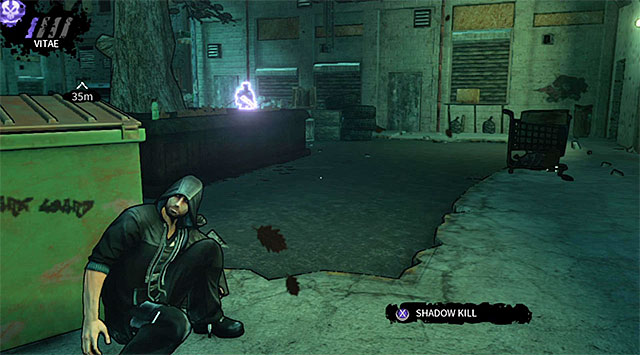 An armored opponent standing close to the UV generator
There are only two people left in this courtyard. Start off by moving closer to an opponent in an armor who's moving between the UV generator and the right side of the courtyard. Just as before the easiest way to get rid of this soldier is to activate a fully developed Shadow Grip so you won't have to worry about disposing of his body. If you don't have this ability then you should attack the hunter as soon as he starts moving towards the generator. This method is more risky, because you must kill the opponent before the generator notices Eric and becomes active.
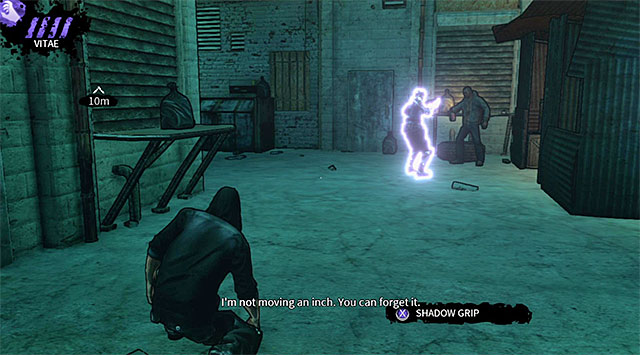
The last guard is also stationed in the right side of the courtyard and the good news is that he never turns around to find out what's happening behind him. Since this is a standard opponent you should really consider feeding off of him, especially if you were intensively using vampiric powers. Stay here after the kill to collect a PDA (200 experience points) which was guarded by the hunter.
The exit from the first courtyard is displayed on the screen above and you can head over there the first chance you get (after performing two successful teleportations) or after securing the entire location.
A guard terrorizing one of the beggarsThere's a very linear alley leading to the second courtyard. Listen to a conversation with Rose and head forward. You'll come across a single vampire hunter along the way and if you intend on killing him then it's best to do it before he murders an innocent beggar.
 First guard stationed in the second courtyard
Another opponent will be standing just around the corner. Don't attack this person right away, because the guard is probably observed by an armored hunter stationed a little further ahead. Wait for the armored opponent to leave this area before making a surprise attack. Don't forget to drag the body to the previous alley so it won't be discovered. Important - Avoiding this guard without killing him will be very difficult, because you would have to use one of the powers intended for distracting enemies (like Domination) and then quickly leave this area before the hunter returns to his post.
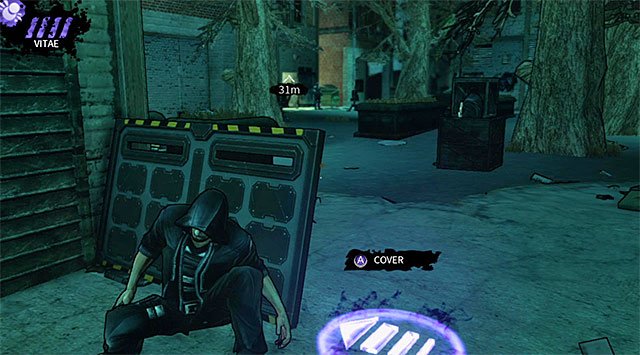 A view of the first courtyard
Approach the second courtyard and once again take some time to learn your surroundings. Your current objective is to get to an entrance to a building seen far away to the left. Obviously it won't be that easy to achieve, because you'll be dealing with vampire hunters, motion sensors, a security camera and two UV generators.
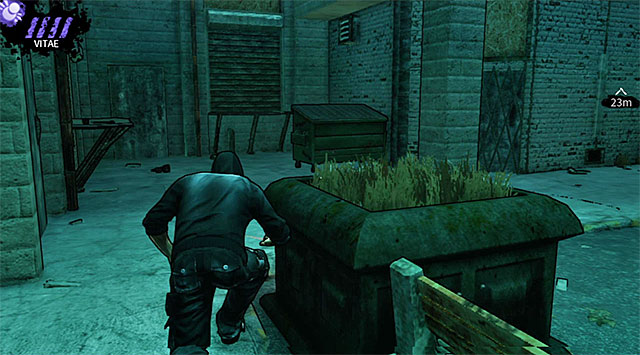

Start off by waiting for a good moment to go left. Proceed towards a container seen on screen 1 and take cover behind this obstacle. Wait for a standard guard to show up here and perform a silent kill on him as soon as he turns around (screen 2). Hide the body behind the dumpster afterwards.
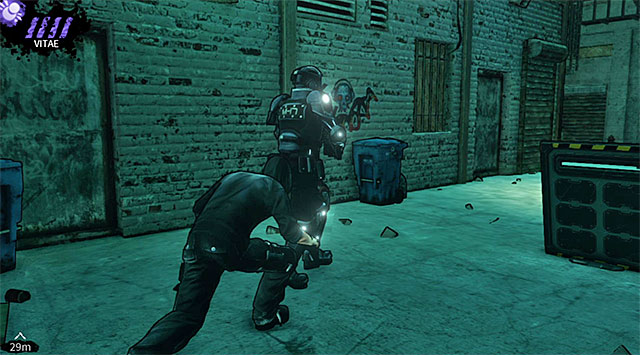 An armored opponent patrolling the area close to the starting point
Don't count on being able to take a shortcut to the left building, because two UV generators will stand in your way and they'll make it impossible to get to the exit simply by moving close to the left wall. Return to the start area instead and take some time to surprise an armored opponent mentioned earlier in the text. Make sure to hide this body as well, preferably in an alley you've used to get here.
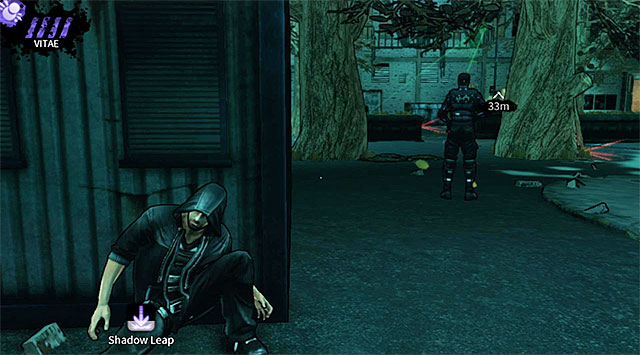 A single guard in a side alley
Your next target should be a standard guard who can be found in an alley located to the right. Use the passageway which was patrolled by the last armored opponent and avoid stepping on the objects found on the ground. Surprise the hunter from the back and hide his body behind the wall.
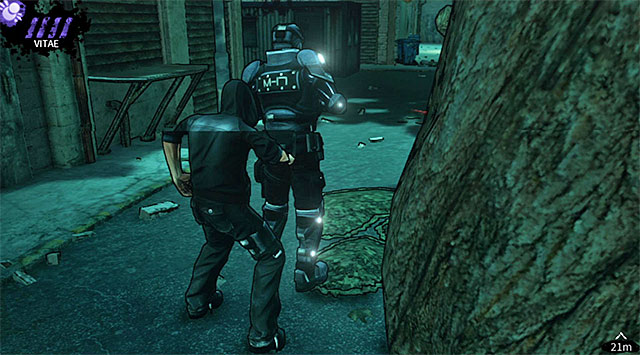 A hunter in the middle of the courtyard
Notice that a new armored opponent is patrolling the central area of the second courtyard. The best moment to attack this person is when the hunter is far away from the starting point. Avoid stepping on the leafs while trying to organize a surprise attack. The same applies to a motion sensor attached to one of the trees and to a security camera which is monitoring this entire square.
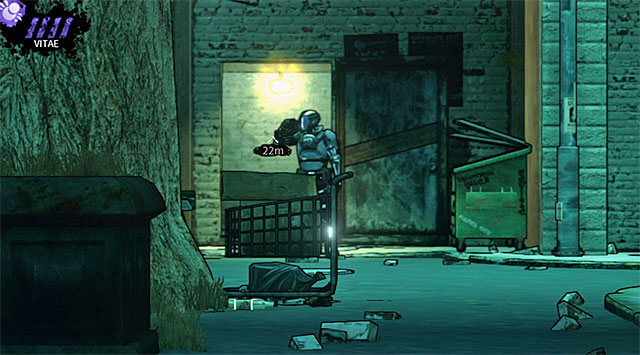
You can also try avoiding all of the hunters mentioned above - you'll have a lot of problems with the guard from the right alley and you would have to distract him somehow (for example by stepping on litter) or stun him with one of your advanced vampiric powers. All of the tactical options have the some goal and that is to get closer to the exit shown on the screen above.
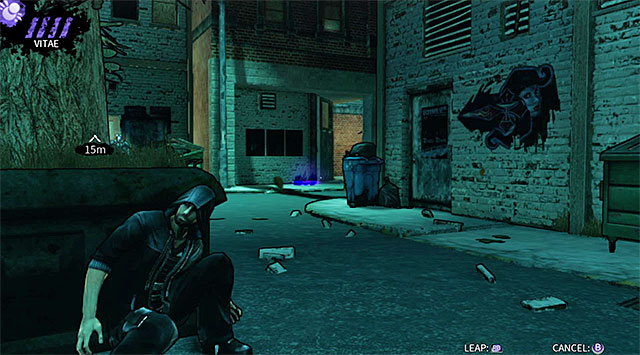
Once again you should consider using Shadow Leap here. My recommendation is to teleport Eric to an area located to the right of the exit (screen above), however before you activate this ability make sure that a hunter patrolling the alley to the right is heading the other way. Important - If you still didn't fully upgrade your teleportation skills then you must consider moving a little bit closer to the exit before activating your ability, but make sure not to activate a nearby UV generator if you don't want to complicate things even more.
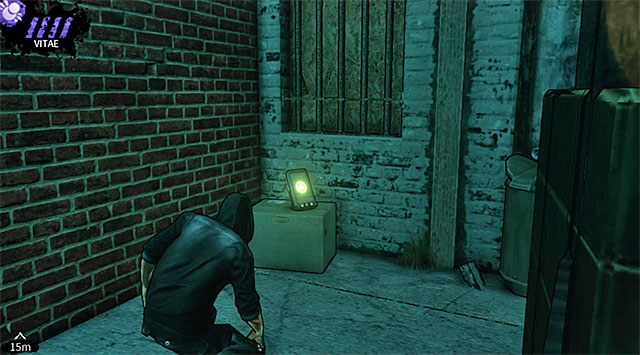
Proceed to a side alley after a successful teleportation and it's especially important if your "jump" wasn't perfect and resulted in the UV generator becoming active for a while. Explore a side corridor located to the left and you'll uncover a new PDA (200 experience points) (screen above).
 A guard patrolling the side alley
You should now take care of a single guard who is inspecting the side alley. The patrol routes of this person are easy to predict so you shouldn't have any trouble.
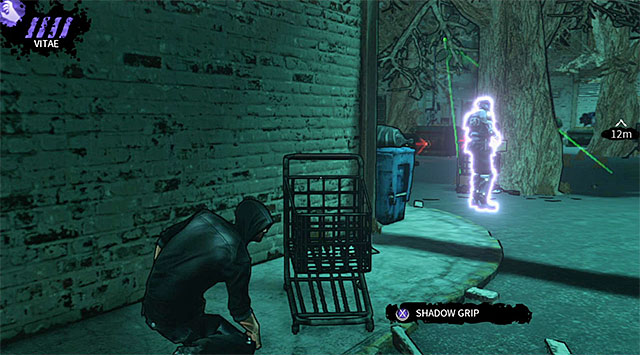 Last opponent in the second courtyard
There's only one more vampire hunter for you to kill and it's very likely that your last teleportation has convinced him to inspect the first UV generator. Obviously this will make things even more difficult for you. If you have unlocked the Shadow Grip ability (even the basic version) then that's how you should kill him. Otherwise consider activating Shadow Kill along with moving back from the UV generator or distracting him somehow.

The exit from the second courtyard is seen on the screen above and you can head over there after securing this entire location or after teleporting yourself to the side alley (this means you'll leave the final two armored hunters alone). In both cases it's good to use Shadow Leap to your advantage so you won't have to worry about activating the second UV generator by mistake.
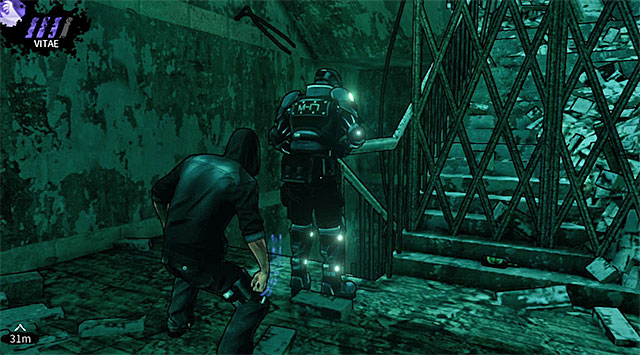 A vampire hunter standing near the staircase
Don't move too fast, because there are two additional enemies inside the building you've just entered. The first vampire hunter is standing next to a staircase. You shouldn't have any problems killing him. Avoiding him on the other hand will prove to be very tricky and you would have to distract or stun him.
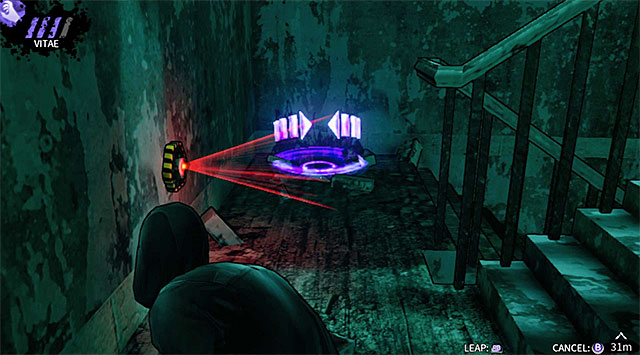 Motion sensor
Approach the stairs and head down. Make a stop when you're close enough to a motion sensor and use the Shadow Leap ability to go past it.
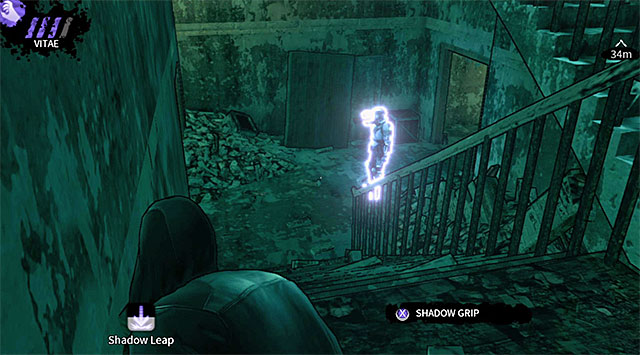 Last guard standing in the basement
Notice that there's a single enemy standing near the stairs in the basement. The best method of play here is to teleport Eric behind this person in order to avoid the hunter or to surprise him from behind. I wouldn't recommend using the motion sensor to convince the guard to visit the upper floor, because he may discover a body one of his colleagues (assuming you didn't spend a lot of time hiding the corpses).
 An elevator
You may finalize your journey to the Sanctuary club by approaching the elevator and watching a new vision with "the angel". The main reward for leaving both courtyards is 1000 experience points, however you can receive another 1000 experience points if you didn't raise any alarms.
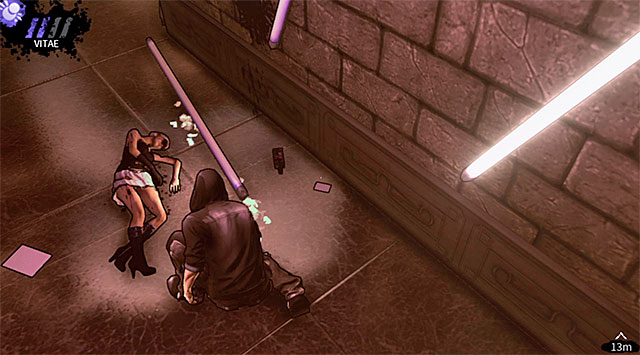 April's corpse
Follow the corridors leading to the Sanctuary club. Once you've reached a destroyed staircase wait for Eric to automatically teleport himself to an upper floor. Proceed to the main corridor of the club and turn right in order to find April who's been killed by the vampire hunters.
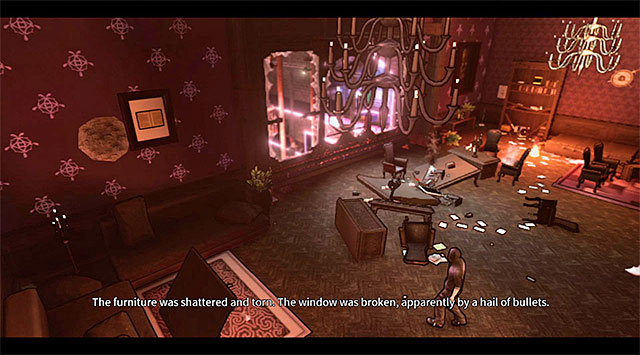 Ransacked office
Return to the staircase once again and wait for the main character to transport himself to the top level of the club. Enter Rose's office in order to trigger a new cut-scene. Eric will soon teleport to the main area of Sanctuary.
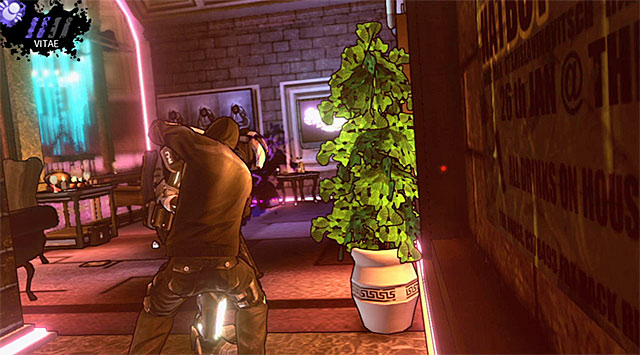 A hunter patrolling the right balcony
Your job here will be to kill all of the vampire hunters found in the Sanctuary and if you haven't been avoiding conflicts so far it won't be difficult to succeed. As soon as you've regained control over Eric turn right and choose the stairs leading to an upper balcony. There's a single guard here and you should try and kill him before he moves too close to the railing. Important - If you won't make it in time to surprise this opponent from behind then wait for him to complete his route, because otherwise he would check the area where you came from.
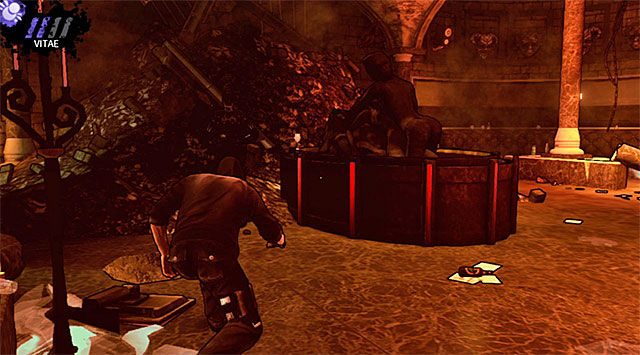
Return downstairs and start paying attention to an "elite" vampire hunter who's wearing a heavy armor and using a minigun. This person should be the last one to die so you'll have to keep avoiding the hunter for the time being. Wait for the elite enemy to start moving towards the bar before proceeding with the mission. Notice that there's a standard enemy standing near a collapsed entrance to the club (screen above). Kill this person and leave the corpse near the stairs you've used not long ago.
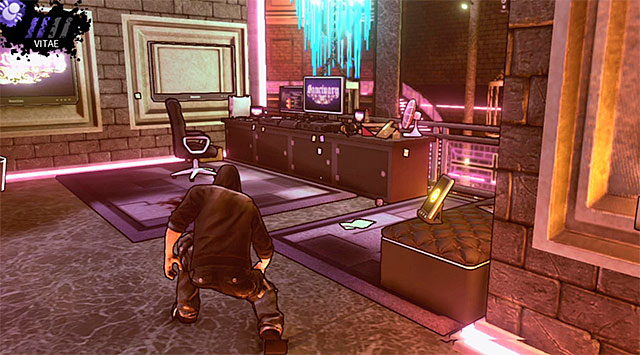
You should now head over to the stairs located to the left. As you probably remember the stairs lead to June's booth (she was a DJ in this club). You won't find June here, however you will be given an opportunity to collect a PDA (200 experience points) displayed on the screen above.
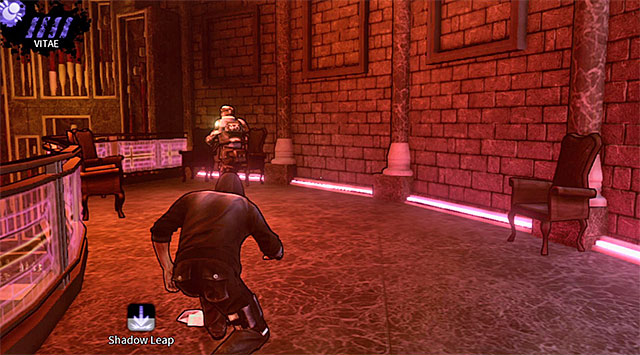 A guard patrolling the balcony close to the bar
Once again return to the area where you've started securing the night club. Wait for the elite hunter to turn around and use teleportation to transport the main character to the balcony located near the bar. This area is being patrolled by a single enemy and you should attempt to surprise this guard from behind before he turns around and finds out what's going on.
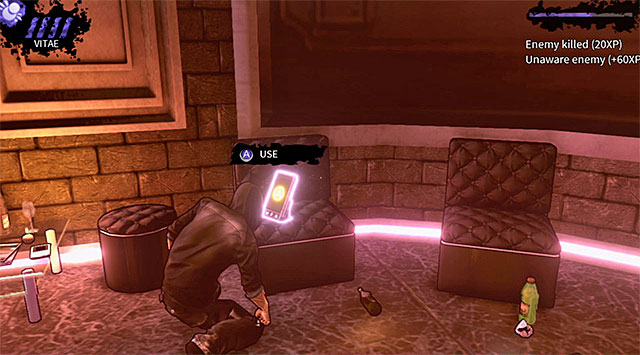
Remain on the upper floor and carefully approach the entrance to a small room located to the right. Use Vampire Vision to start monitoring movements of a guard present in this room. Enter the room when it's safe and kill your opponent. Don't leave this area just yet, because you'll also find a new PDA (200 experience points) here.
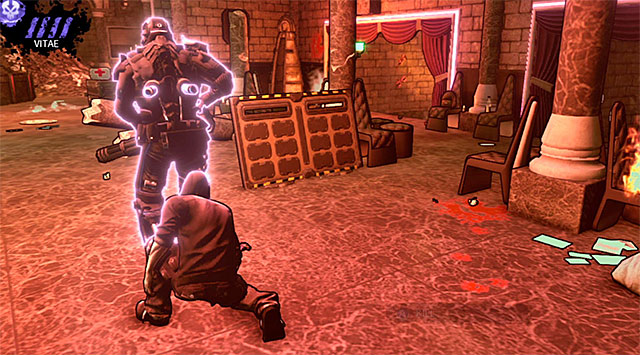
Return to the stairs and wait for the elite hunter to start facing the area where you've started. Quickly approach this enemy from behind. Sadly you can't use any of your vampiric powers on this enemy so your only choice is to press the execution key/button to remove the first cylinder from his armor (screen above).
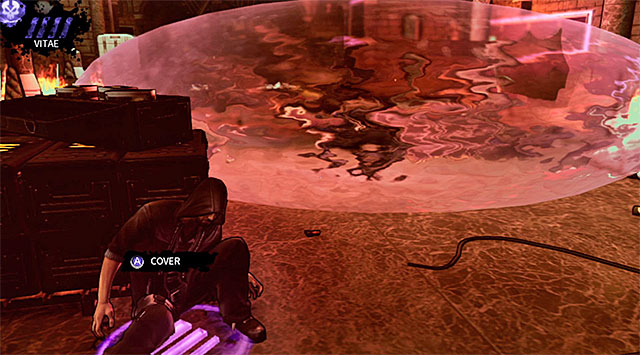 UV radiation explosion
QUICKLY HIDE BEHIND COVER, because removing the first cylinder won't get the job done. Furthermore, a UV explosion will occur soon and the elite hunter will become hostile. You can't let him see you and you should be fine if you're using cover.
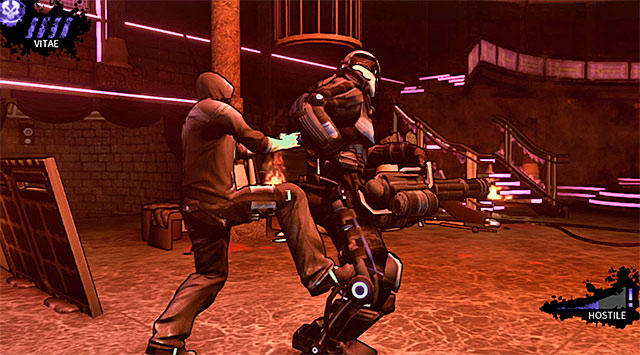 Removal of the second cylinder
Depending on where you've decided to hide you will have to use teleportation to find yourself once again behind the elite opponent or you will have to simply approach him. Remove the second cylinder from the armor and this time it'll be enough to achieve victory. Collect your reward (1500 experience points) and watch a new cut-scene which will end this chapter.
Map legend: A - starting point; B - recommended entrance to the Cryogenic building; C - other entrances to the Cryogenic tower
Your first objective in this chapter will be to make your way to the lobby of the Cryogenic building. You begin in an area marked with a letter A on the map seen on the screen above so you'll be to the south-east of your current destination. My recommendation is to get to the entrance marked with a letter B, because it's definitely the least guarded one. All of the remaining entrances (C letters on the map) are well guarded and you wouldn't gain anything from choosing them, because the lobby of the building won't be patrolled by anyone the first time you get there. As for the complications you'll have to prepare yourself for, you'll be dealing with a standard "set" of obstacles - vampire hunters (normal and armored ones), motion sensors, security cameras and UV generators.

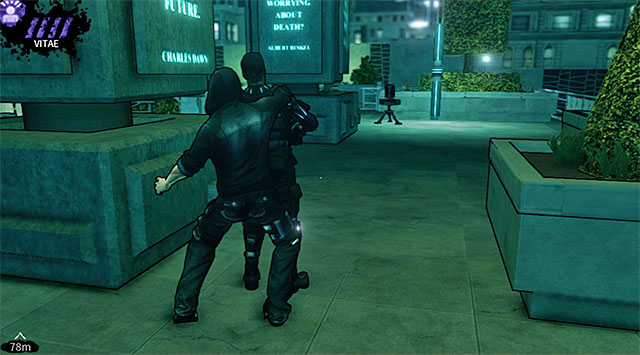
As soon as you've regained control over Eric use the Shadow Leap ability to teleport the main character to an upper northern balcony seen on screen 1. Immediately hide behind the left cover and wait for a guard seen on screen 2 to walk past you. Obviously you could leave this person alone, however it's much better to get rid of the guard. If you prefer a more aggressive approach then attack the hunter before he gets too close to the railing, because otherwise a nearby UV generator may activate itself and therefore may alarm the opponent of your presence.
 An armored guard and a security camera
Remain on the upper balcony and approach its north-western corner so that you'll notice there's an armored hunter patrolling the lower level. If you want to play it safe you could attempt to avoid this person and in this case you would have to teleport Eric to the western platform, ignoring the area he's guarding and not having to worry about being seen by a security camera.
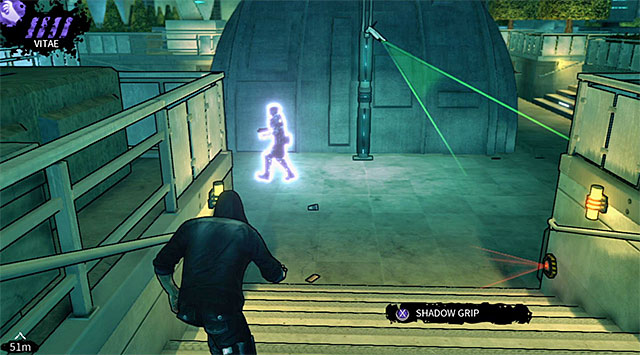 Attack on the armed opponent
If you prefer to get rid of the armored opponent then you should wait for him to leave the area which is being monitored by the camera. You can use a long-distance attack on him or surprise him yourself from the back (in this case you must watch out for the security camera).
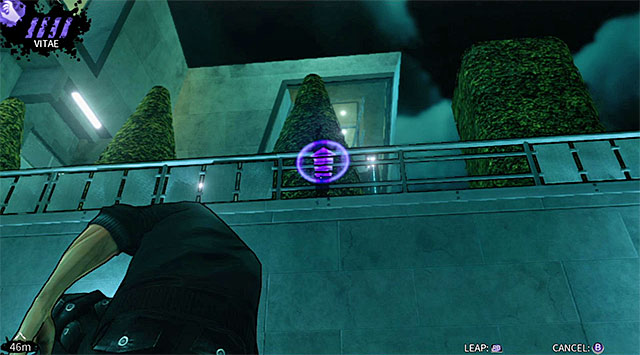
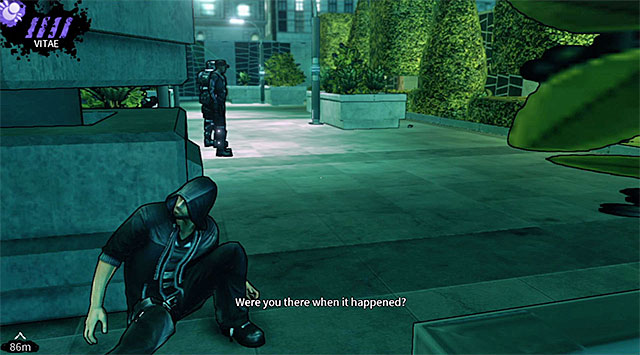
Face the northern building which as you already know is your current destination and use Shadow Leap to teleport Eric to an upper balcony seen on screen 1. Repeat this action with the second upper balcony and then turn left. If you've done everything according to the plan then you should be standing in front of the recommended entrance to the tower (screen 2). You can now enter the lobby and ignore exploring the rest of the plaza and if you want to leave this area as soon as possible then you can skip to the page entitled Lobby (before hunter's arrival). Otherwise you should keep reading this section of the guide in order to find out how you can get rid of the rest of the enemies stationed around the skyscraper.
Enemies standing close to the starting areaYou should begin securing the plaza by returning to the area where you've originally started exploring this location. Notice that two guards are having a conversation here and you should approach them to speed up this process, because that's the only way to convince them to split up. Start off by eliminating a standard hunter and then focus on killing his armored colleague. Watch out for a security camera found in this area and make sure that your second attack won't be noticed by any of the enemies stopping close to the eastern stairs.
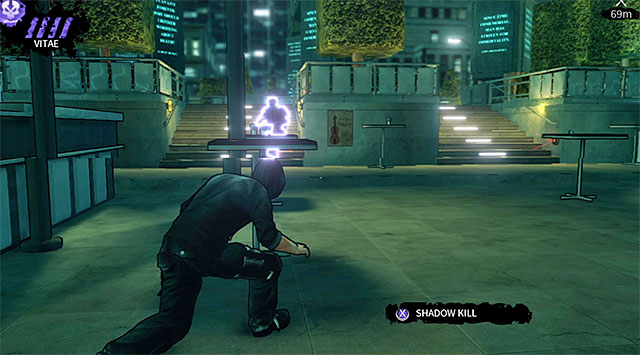
You should now focus on the eastern stairs mentioned above, because two armored hunters are making stops here (thankfully not at the same time). I recommend that you wait for the hunters close to the stairs or behind a brick wall located to the north and seen on the screen above. Try and make it fast with the first kill so you'll have plenty of time to drag away and hide the corpse.
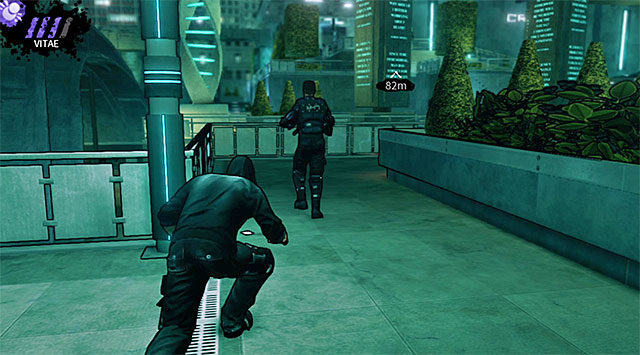 A standard opponent encountered in the eastern part of the plaza
The next person you should kill is a standard guard who is patrolling the balconies in the eastern section of plaza. The best moment to perform an attack is when he starts moving left (west).
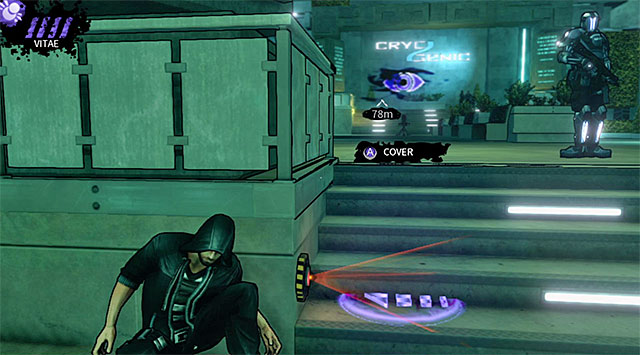
Proceed towards the north-eastern corner of the plaza and take cover near the stairs seen on the screen above. This area is also being patrolled by two armored hunters and you can eliminate them one at a time as long as you don't forget to hide their bodies. Another thing you must watch out for is a motion sensor attached to the left wall.
Armored opponent patrolling the central part of the plazaReturn south, but turn west after a while. Notice that an opponent in an armor is patrolling the central (lower) part of the plaza. Surprising him will be easy since all other enemies from this area are already dead, however watch out for new motion sensors.
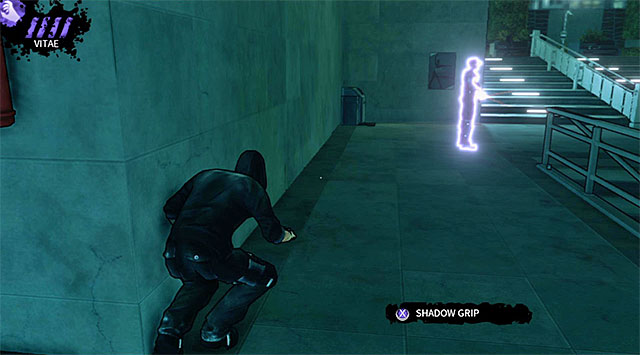
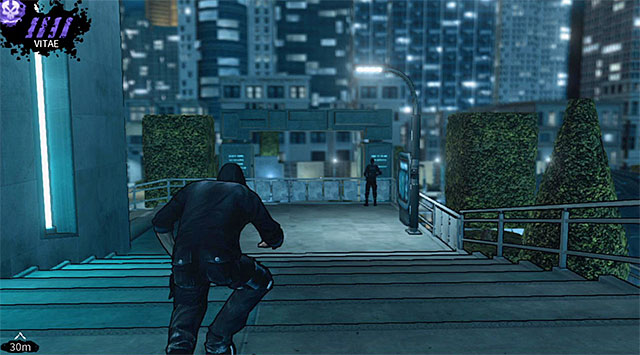
Go west again, towards the entrance to the building I've recommended at the beginning of this page. Make your way to the upper balconies for the second time and start looking for two standard guards stationed in this area. The first guard is occupying the lower level (screen 1) and the second guard is travelling on the top level, close to the tower's east wall (screen 2).
Head south-west and it shouldn't take long for you to reach a huge chess board seen on the screen above. You will have to be cautious here, because aside from motion sensors and two security cameras you'll also come across two UV generators.
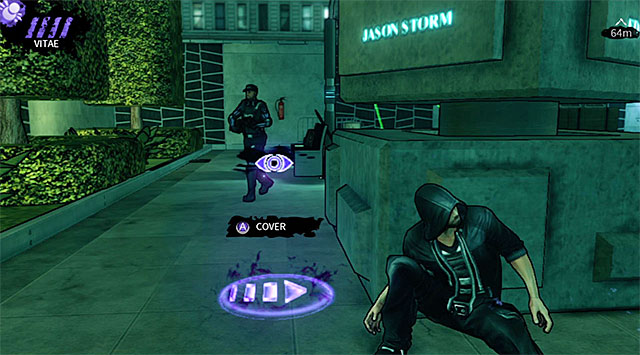 An opponent patrolling the west side of the plaza
Stay close to the chess board mentioned earlier and wait for one of the standard guards to arrive here. Don't do anything until this person moves far away from a local security camera, because otherwise your actions might be noticed.
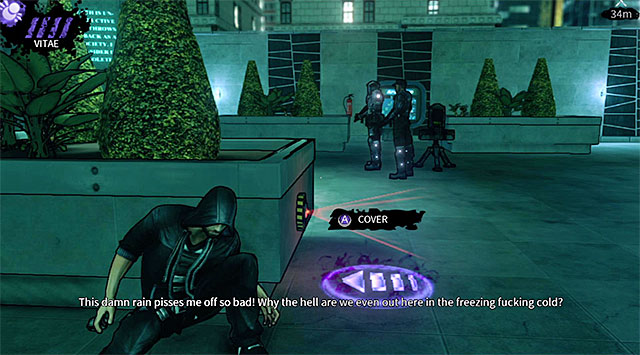 Guards standing close to an active generator
Move closer to the guards standing next to one of the UV generators. As always your enemies won't move until they've finished having their conversation.
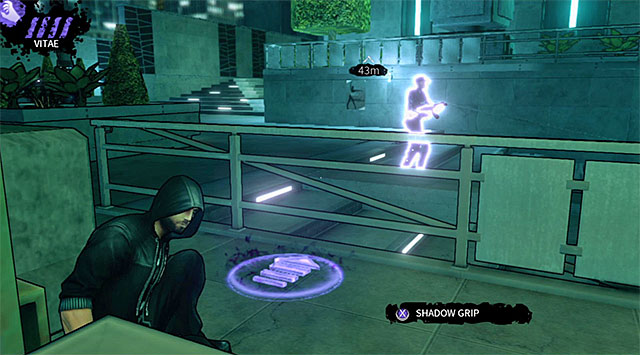 First guard from the group
Notice that one of the guards has started moving east. You can attempt to eliminate them, however make sure not to find yourself too close to the second UV generator.
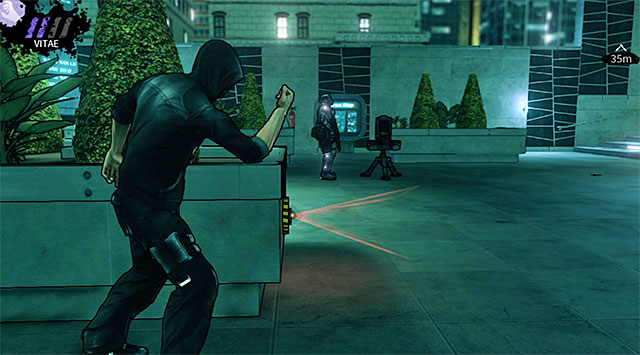 Second guard from the group
An armored opponent sadly won't move and he'll stay close to the first UV generator where he was recently talking to his colleague. This means that you must either make him suspicious (by running near cover or by activating one of the motion sensors) or you must use a long-distance attack on him (Shadow Kill or Shadow Grip).
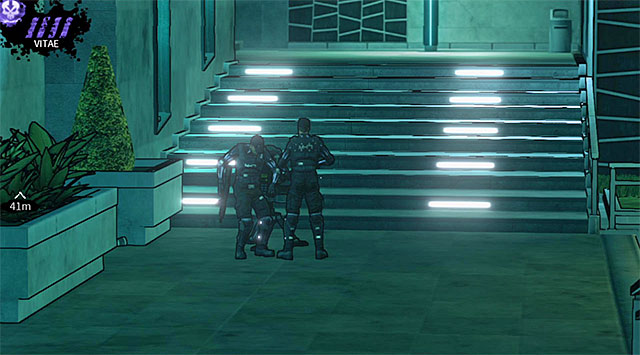
If you've followed my instructions so far then there are only two more guards left in the plaza. The hunters are standing by a UV generator close to the eastern wall of the building (screen above) and I recommend leaving them alone, because after finishing their conversation they won't move and as a result you would have to spend a lot of time distracting them. You may now advance to the next page which concentrates on entering the lobby and exploring it for the first time.
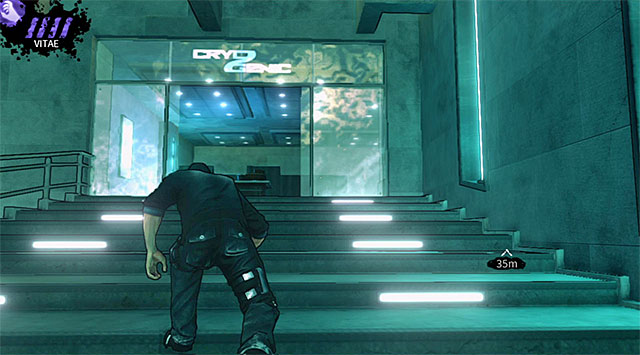 Recommended entrance to the Cryogenic tower
Let's start off by doing a short recap on how you can enter the building and therefore reach its lobby. The recommended passageway is located in the south-eastern corner of the skyscraper and the easiest way to get there is to rely on the Shadow Leap ability to teleport Eric to the upper balconies.
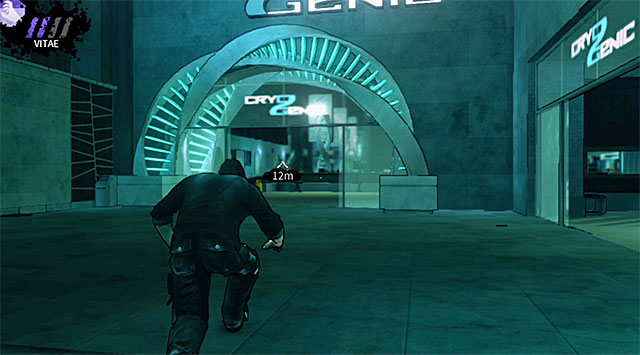 Two entrances in the western part of the tower
Two other entrances to the skyscraper can be found in the north-western corner of the plaza. Reaching those entrances is far more difficult, because Eric would have to avoid at least three vampire hunters along the way, as well as UV generators and security cameras.
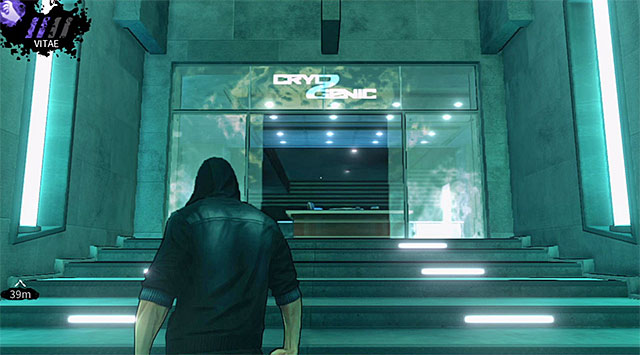 Last available entrance
It's even more challenging to get to the last available entrance located in the north-eastern corner of the building, because the staircase leading to it is defended by an UV generator and by two enemies who won't leave their posts.
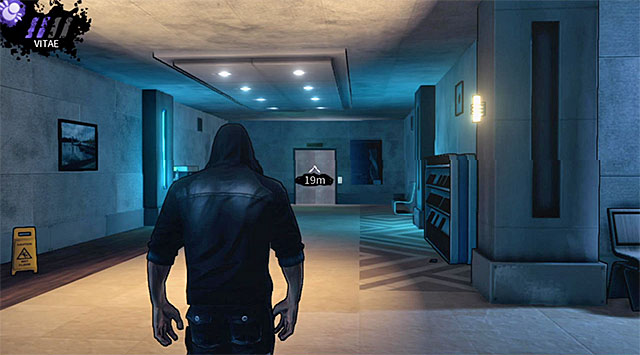 Corridor leading to the elevator
If you've started exploring the lobby on the upper level then you must use one of the stairs leading to the ground floor. Ignore new UV generators and other defences encountered along the way, because they're all inactive at the moment. Your objective is to get close to an elevator in the lobby and this is where you'll receive two rewards: 1000 experience points for reaching the lobby and another 1000 experience points for leaving the plaza without triggering any alarms. Sadly I also have some bad news for you - the elevator is not working and new vampire hunters will soon show up in the lobby.
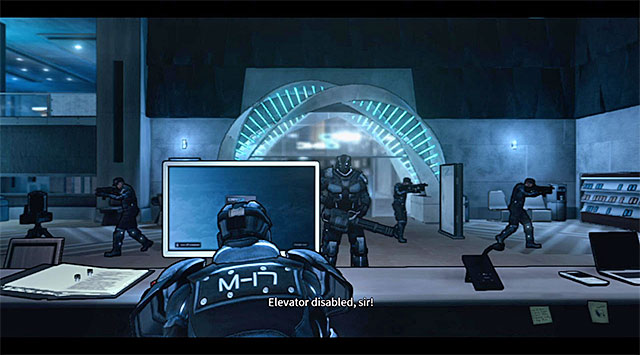 Vampire hunters arriving in the lobby
The primary objective of this part of the chapter will be to reach a computer terminal in order to unlock access to the elevator, HOWEVER you won't be allowed to interact with it until you've killed all the vampire hunters in the lobby. Furthermore, living beings won't be your only concern, because you'll also have to watch out for UV generators, motion sensors, security cameras and interactive information posts (they have motion detectors as well).
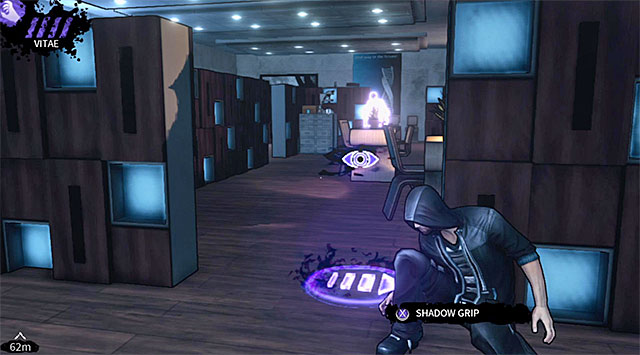
Start off by taking interest in a small office area located to the right of where you've started (if you activate Vampire Vision you'll notice a new collectible here). This area is being guarded by three enemies and you'll have to time your actions perfectly so that you won't be caught while trying to eliminate them. Begin by using teleportation to avoid a hunter standing close to the security camera and take cover near an obstacle seen on the screen above.
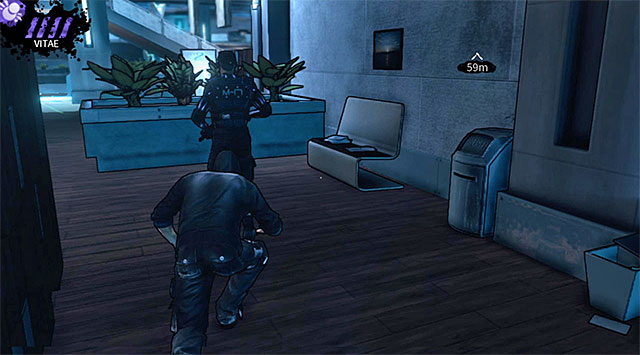 First opponent
Wait for the guards to make their way to their posts and start by neutralizing the person standing to the left. Obviously you should surprise this hunter from behind and you must also hide his body behind a goo cover.
 Second opponent
Now you should attack the hunter who is patrolling the central area of the office space you're currently visiting. Just as before don't forget to hide his corpse after a successful kill.
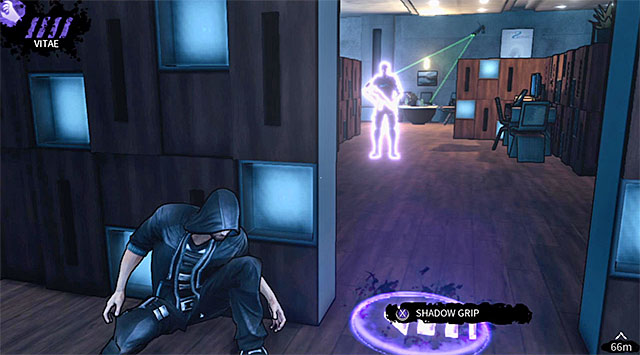 Final third opponent from the group
There's one more opponent left here and he spends all of his time close to a security camera. You may attempt to encourage this person to move away from the camera using running next to cover or by activating an information post. If you still have problems killing him (or one of the other hunters from this group) you can also consider activating a long-range attack (fully upgraded Shadow Grip would be my pick, because the body vanishes after performing an execution).
Don't leave the office area too soon, because there's a PDA (200 experience points) on one of the desks near the camera (screen).
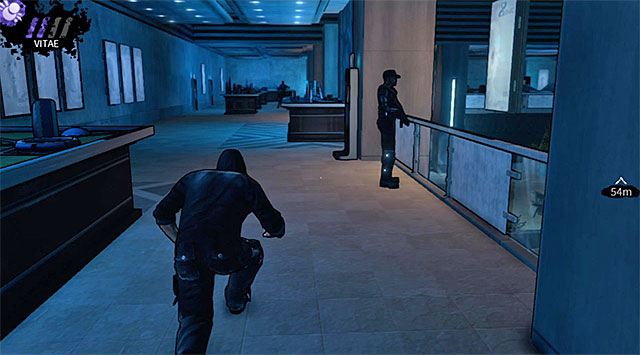 First enemy on the upper level
You may now proceed to the stairs located to the left of where you've started. Use the stairs to reach the upper level of the lobby and start by eliminating an opponent who often stops close to the right balustrade. Don't forget to quickly grab the corpse so that it won't fly over the railing and land on the lower level (with a high probability of alarming other guards).
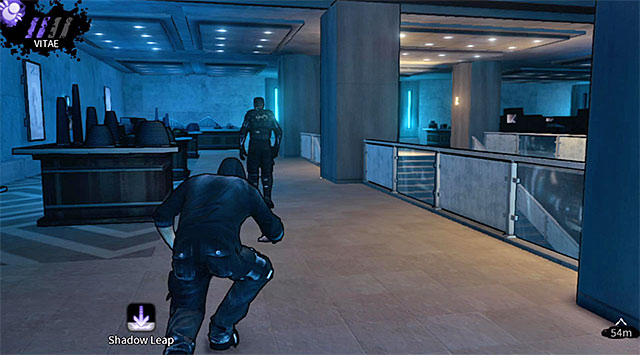 Another opponent from the upper balconies
I recommend leaving the corpse of the first guard near the stairs. Move forward and it won't take long until you've encountered another hunter. Killing this person is an easy thing, however make sure not to activate any of the nearby information posts.
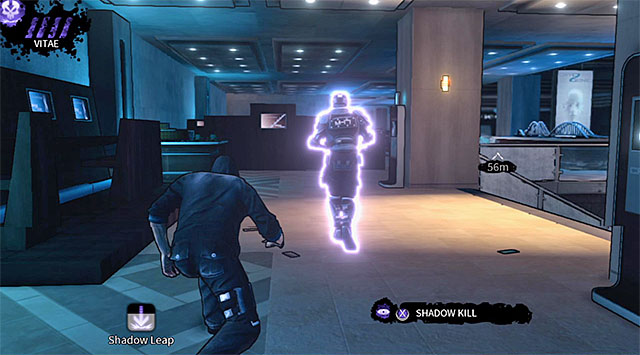 An armored soldier encountered on the second floor
Your next target is an armored soldier stationed a little further ahead. A good moment to attack this guard is when he's standing close to the stairs leading back to the first floor, but only if a guard from the lower level isn't looking directly at him.
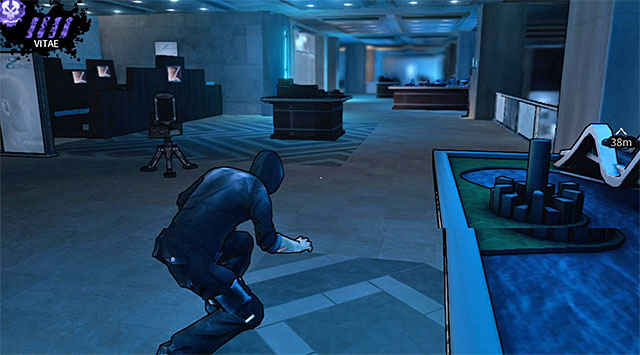 A generator and a security camera
Continue exploring the upper balconies, using teleportation when necessary and avoiding an UV generator found along the way (thankfully even if the generator becomes active its sound shouldn't attract any hunters). You'll also have to avoid a security camera and it's best to sneak under it.
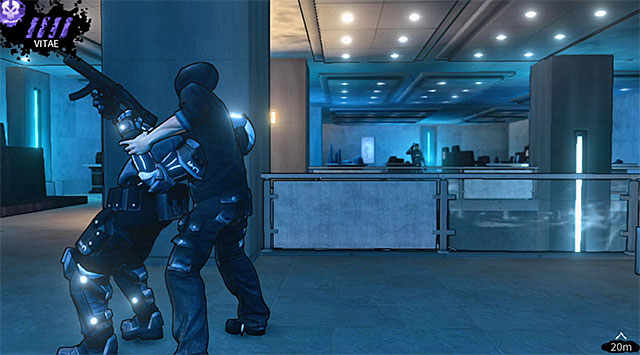
A new armored soldier will be your next kill. Take cover behind a wall or another good obstacle and wait for a good moment to proceed with the attack. The suggested area for eliminating this person can be seen on the screen above.
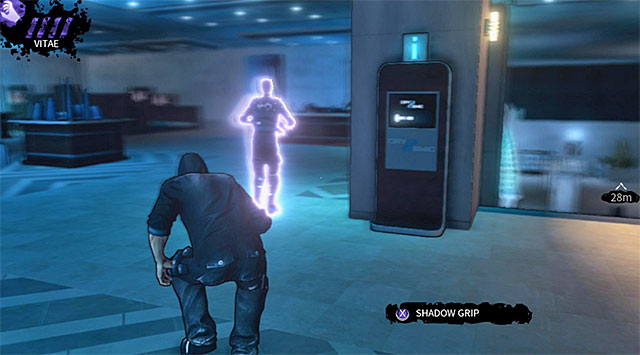 Last opponent on the upper level
There's only one more guard patrolling the second floor of the lobby. You don't need to get too creative here, because you only have to wait for this person to start moving towards a blocked exit from the skyscraper.
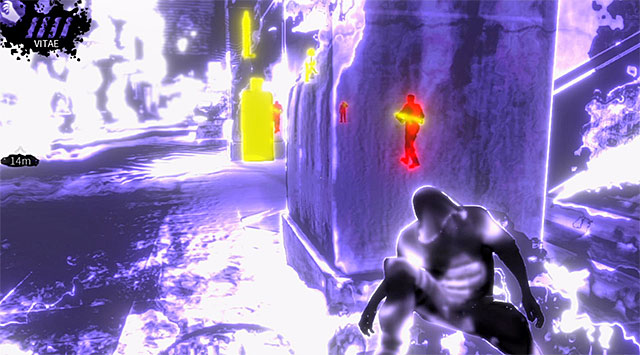
Return to the stairs where the last guard was stopping from time to time and use Vampire Vision to find out more about the current situation and if it's safe to go down. Head to the lower floor and notice that the area to the right is being patrolled by another hunter (screen above). Attack this person when a good moment presents itself and drag the body either to the upper level or behind the crates located nearby.
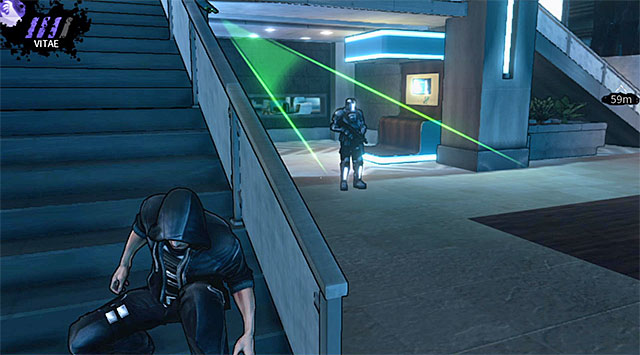
You should now use the upper balconies again to go back to where you've started exploring the second floor. Enemies are still present on the ground floor and eliminating all of them will be your next priority. Start off by moving closer to an area monitored by a security camera (screen above).
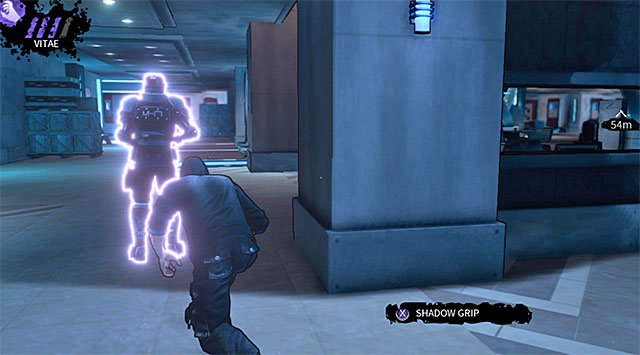 Attack on an armored guard
Wait for an armored hunter stationed here to start moving away from the main character and quickly follow him, avoiding the camera along the way by staying close to the left wall. It's important that you attack the soldier at a correct moment - you must wait for the other guard to go right. Once the armored opponent is dead hide his corpse behind the corner.
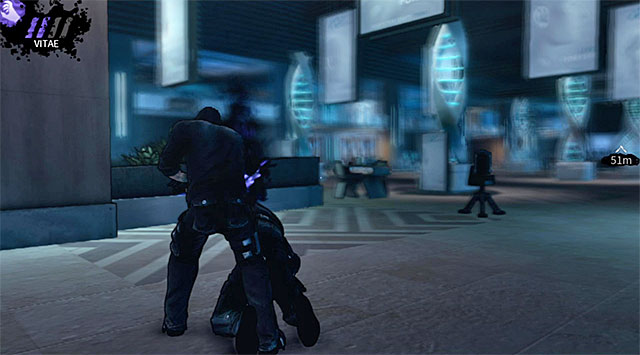 An enemy near a new UV generator
The standard guard mentioned above should become your next target and it's best to attack him after he starts moving right, however you must achieve this before he gets too close to a new UV generator and as a result becomes hostile when the device sounds an alarm.
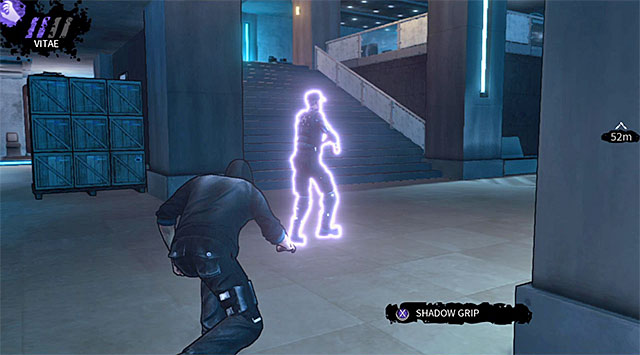 A hunter guarding the stairs
The next guard is moving between the main corridor and the stairs located to your right. I recommend killing this enemy when he's close to the stairs, especially since you've already secured the upper level of the lobby.
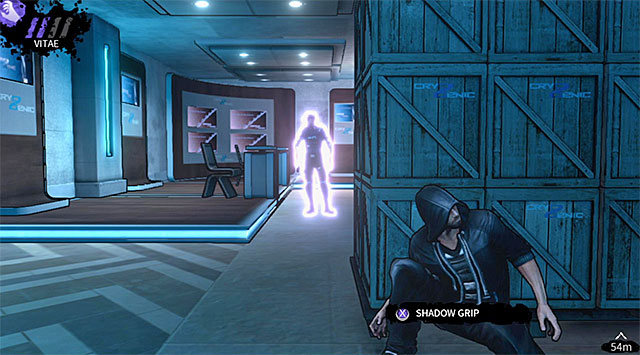
Move a little bit further ahead and take cover behind the crates seen on the screen above. Wait for a new guard to appear in this corner. Attack this hunter before he manages to get closer to a new security camera.
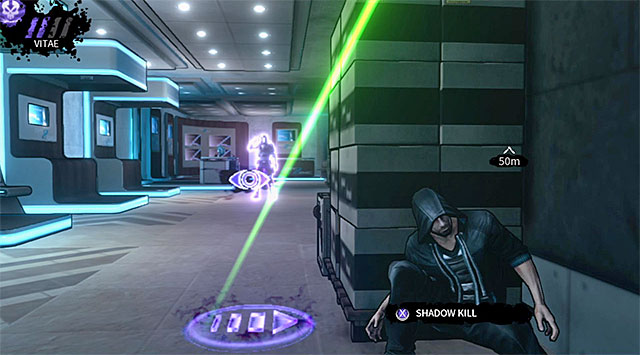 Last enemies from the corridors on the ground floor
Approach the corridor and carefully move under the camera, taking cover behind the nearest obstacle. There are two armored hunters left in your vicinity. Attack one of the enemies from behind and immediately after he's gone proceed towards the second opponent. This is also a good moment to rely on your long-distance powers, because they can help in lowering the chances of an unwanted alarm.
There's only one more hunter in the lobby and it's the person wearing a heavy armor and using a minigun. The enemy mentioned above is patrolling the area close to the reception. Take cover behind the reception desk seen on the screen and make sure that you weren't discovered so you won't complicate things.
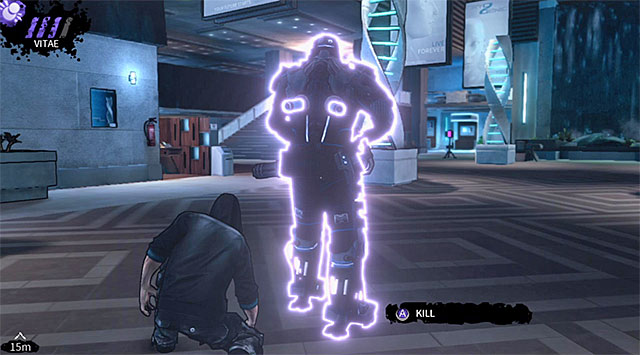 First attack on an enemy in a heavy armor
Wait for the hunter in a heavy armor to move in a different direction, quickly approach him from behind and remove the first cylinder.
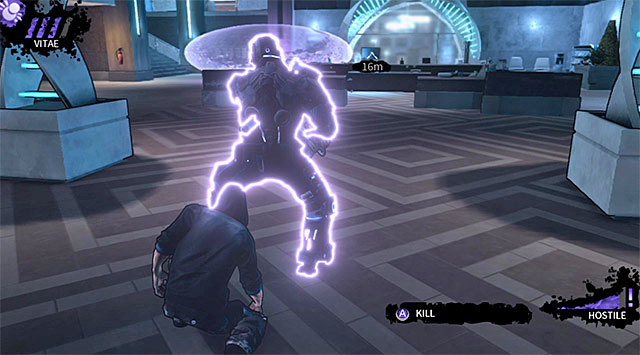 Second attack on an enemy in a heavy armor
As you probably remember from the last chapter you must find cover very quickly, because an UV explosion will occur in this area and your opponent will become hostile as a result of your recent attack. Use teleportation or Obfuscation ability to find yourself again behind the elite hunter and just as the last time press the interaction key/button. Doing this will result in removing the second cylinder from the armor and you'll defeat the elite hunter.
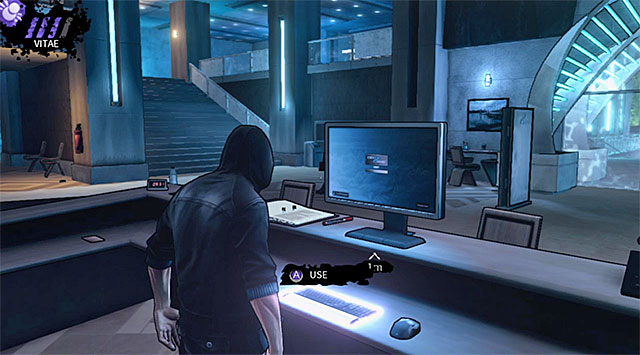 A terminal used to unlock access to the elevator
You may finally approach the terminal located in the reception, because it's not guarded by anyone. Interact with the computer and you'll unlock access to the elevator. Head over there again. Collect 1000 experience points as a reward, witness a new cut-scene involving "an angel" and wait to be transported to a new floor of the Cryogenic tower.
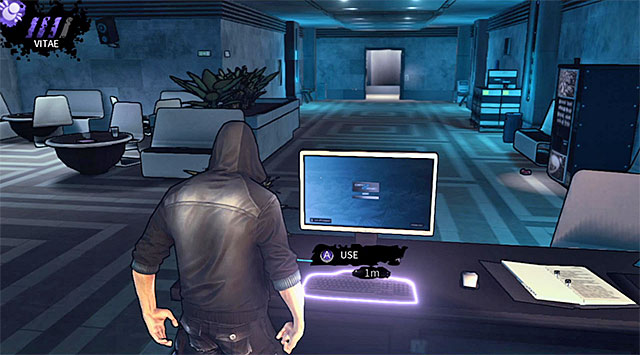 A computer terminal
Start moving forward and interact with a designated computer terminal so that you'll unlock access to the side corridors leading to the next area. You may now approach the atrium, however you must be careful, because you'll start encountering all kinds of threats very soon - vampire hunters, motion sensors, security cameras, UV generators and interactive information posts.
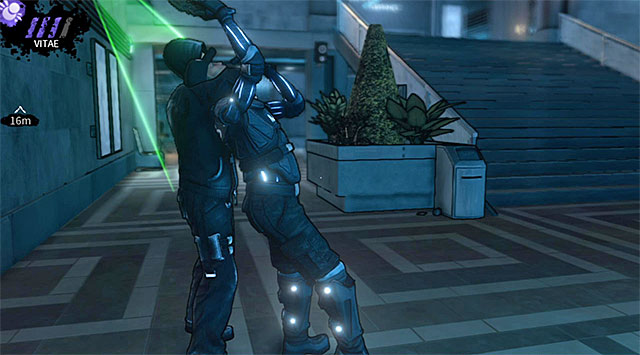 A guard stopping near a security camera
The first guard is patrolling the area close to the entrance to the atrium and he's stopping near a security camera. Obviously you should consider attacking this person, however make sure to do it when the camera is facing in another direction. It's also important to hide the corpse quickly, preferably in a corridor you came from.
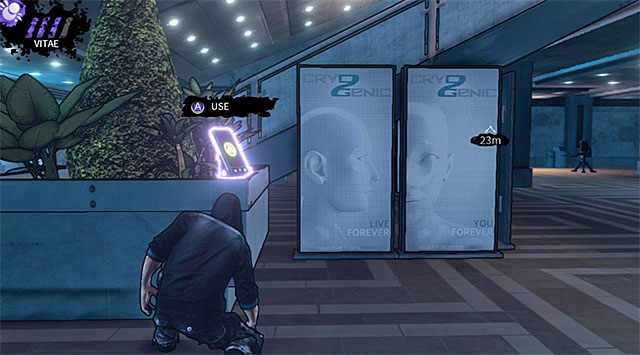
Move closer to the stairs leading to the upper levels of the atrium. Don't use the stairs just yet and instead inspect the area to the right so that you'll come across a PDA (200 experience points) displayed on the screen above.
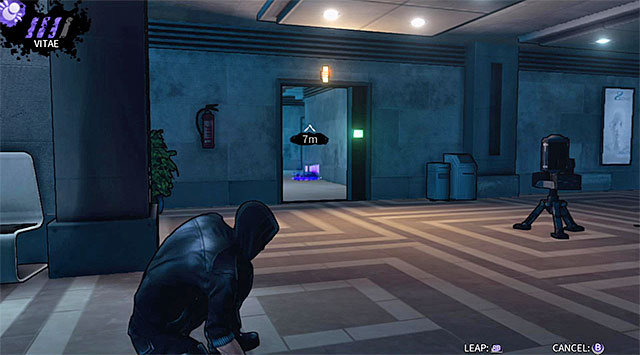
You should now approach the marked passageway on the ground floor . Use teleportation to avoid a local UV generator. Start exploring a series of unguarded corridors and it won't take long for the main character to get to a locked door. An attempt of opening the door to the warehouse will be unsuccessful and as a result your next job will be to find a key to unlock this passageway.
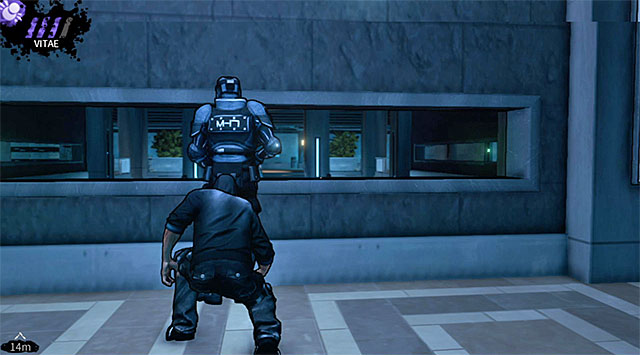 First guard on the upper floor
Return to the area where you've started exploring the atrium. This time you should use the stairs (the ones located close to the secret you've already collected) to reach the second floor. Don't go all the way up, because you must make sure that the guards patrolling side corridors are far away from here. Once it's safe approach a single enemy who will be observing the ground floor and eliminate him. Quickly grab the body and drag it down to the first floor.
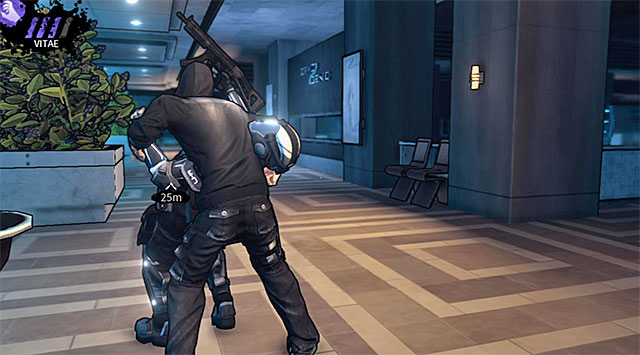 A hunter from the right corridor
I recommend that you now take some time securing the rest of the upper balconies. Start by killing a person patrolling the corridor to your right.
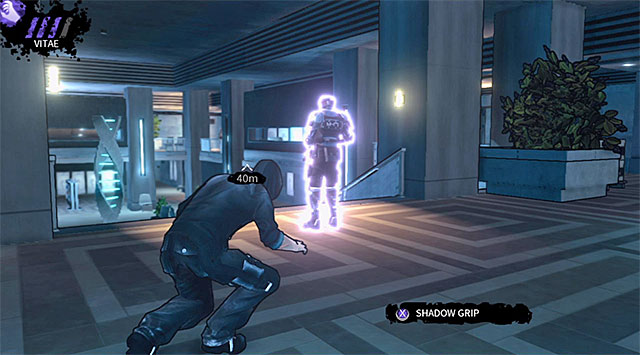 An opponent guarding the second staircase
Head on towards the opposite end of the upper balconies. Notice that there's a second armored hunter standing next to a new staircase and you should attack him when it's safe. Hide the corpse in the corridor you've used to reach this location.
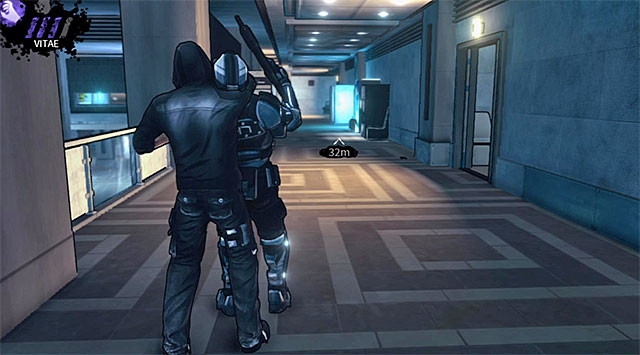 A hunter from the left corridor
There's one more guard here and he's patrolling the left corridor. The best moment to attack this hunter is when he's far away from a security camera so that his death won't be noticed . If you don't like killing enemies you can attempt to avoid them and in this case you should be relying on Vampire Vision to constantly monitor their movements.
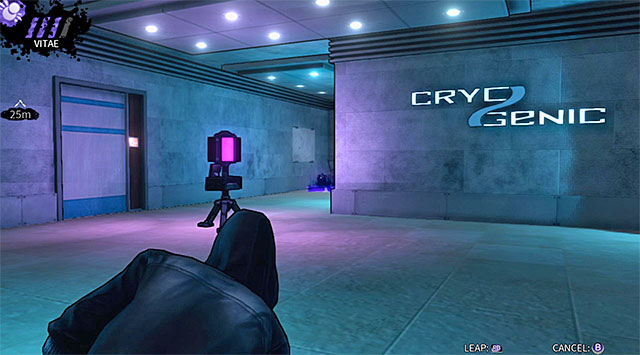
As you've probably noticed your HUD is telling you that the key you're looking for is on the second floor, inside one of the rooms to the right of where you've started exploring the upper balconies. Choose the first passageway to the right and make a stop once you're close enough to an UV generator seen on the screen above. Use teleportation here (Shadow Leap ability) to safely move past the generator. Continue your journey and you'll soon reach a door leading to an office.
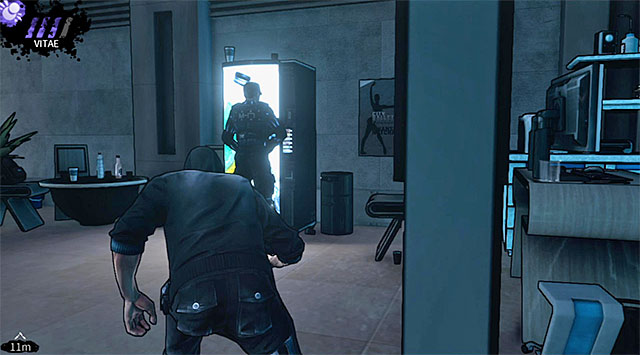 A guard standing next to a vending machine
Activate Vampire Vision and wait for an armored hunter to go left. You may now enter this office space and you should start using nearby obstacles for cover. Make sure that the armored soldier is far away from Eric's current location and attack a single guard standing close to a vending machine. I guess I don't have to add that you must immediately hide his body, leaving it close to one of the desks.
 A perfect moment to kill the armored hunter
Your last kill resulted in something useful, because the armored enemy mentioned above is no longer observed by other hunters and as a result you will be allowed to easily surprise him from behind when he shows up here.
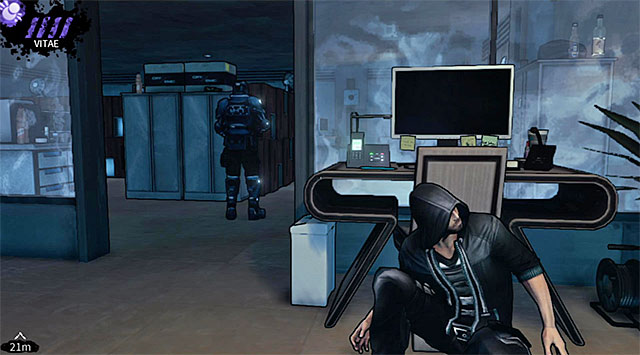 First opponent from an adjacent office
You may now move closer to the second office which is also occupied by two enemies. Start off by attacking an armored hunter, preferably when he stops near the passageway between the offices and turns in another direction.
 Last guard
Eliminating the last guard from this group may prove to be harder, because he won't leave his post even for a second. You can resolve this problem either by running next to a cover to make him suspicious or by using a long-distance attack on him. If you plan on distracting the hunter then don't forget to hide the bodies of all other enemies so he won't discover them while inspecting a disturbance.
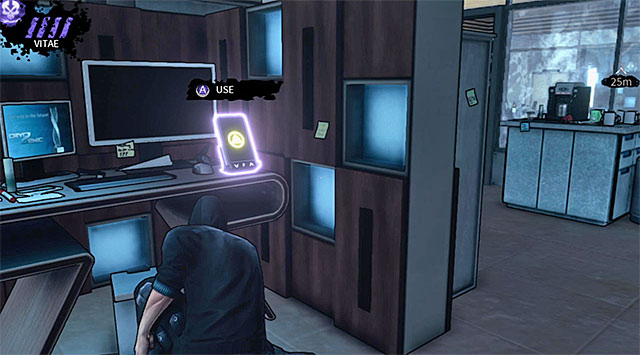
Since you have successfully secured both offices now is a good time to explore them. There are two important objects here for you to find: a PDA (200 experience points) (screen 1) and a key needed to unlock access to the next location (screen 2).
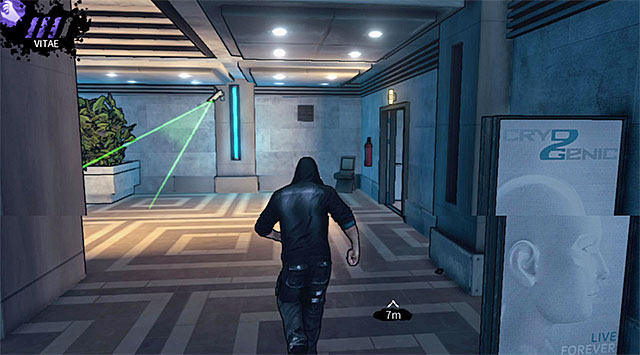
Return to the main part of the atrium. I don't recommend leaving this location right away, because there are also two rooms in the left section of the second floor and it's a good idea to visit them as well. Choose the passageway located under a security camera seen on the screen above. You'll also come across a new UV generator and once again you should rely on teleportation to avoid this obstacle. It may seem like I want to make things more difficult for you, but choosing the corridor defended by the generator will allow you to start exploring new rooms from a better position and as a result it'll be easier to get rid of enemy units.
 Enemies in the conference room
There are two vampire hunters inside the conference room. Wait for an armored opponent to start moving right and quickly attack his colleague, hiding his body in the corridor you've used to get here. Wait for a good opportunity and approach the armored enemy to get rid of him as well. You may now proceed to the door leading to an adjacent room, however don't open it without using Vampire Vision to scan the area first.
 First enemy inside the server room
Begin securing the server room by attacking a new armored hunter, preferably when he's passing near the door where you're currently hiding.
 Last opponent on the upper floor
The second guard is patrolling the central part of the server room. You can easily approach him from behind and it's also a good opportunity to drain him of his blood.
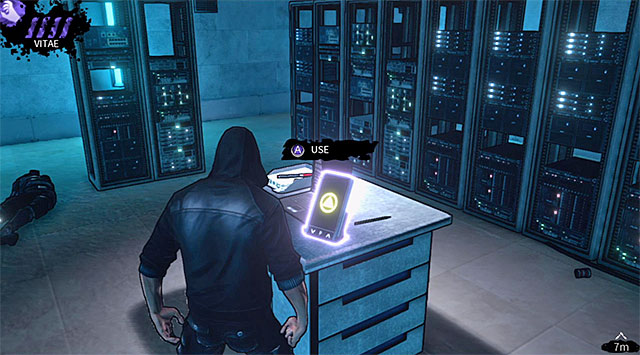
Once you've secured the entire upper floor you may finally check the server room in order to find a PDA (200 experience points) (screen).
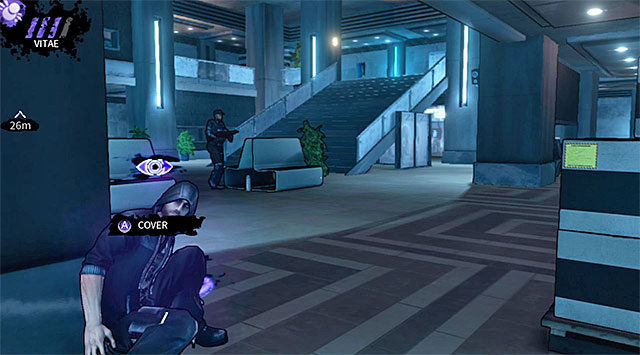 A hunter patrolling the lower level of the atrium
Return to the main part of the atrium for the last time. There are only two guards left here and they're both patrolling the lower level of the atrium. Eliminating the hunters may prove to be risky so think it through if it's really worth it to fight for additional XP. If you still want to try then start off with the opponent who is patrolling the center of the atrium.
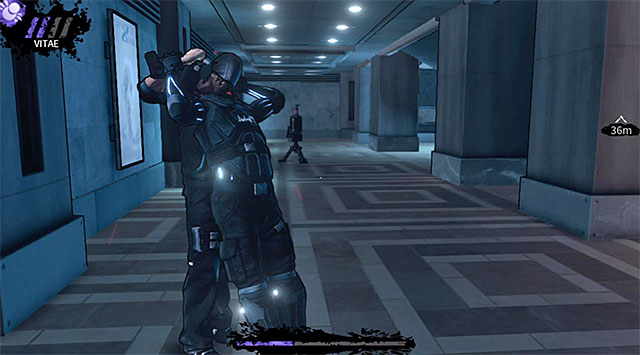 A hunter staying close to an UV generator
The second vampire hunter is patrolling the area under the balconies you've visited before. I recommend attacking him when he's close to one of the corners of the atrium, because there's an UV generator in the middle of his path and you could alarm him unintentionally.
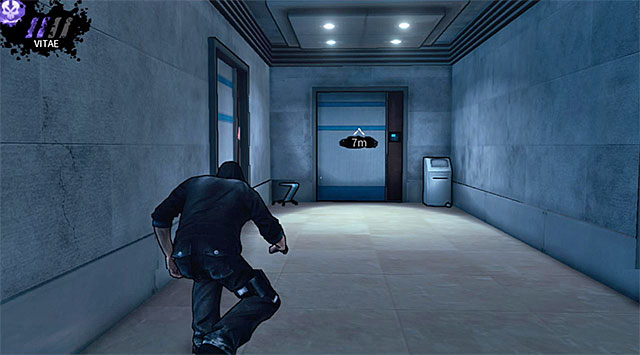 A door leading to the warehouse
That's it for the atrium so once again choose one of the corridors on the left side of this location (ground floor). Approach the door leading to the warehouse and use the key acquired from one of the offices to open this passageway.
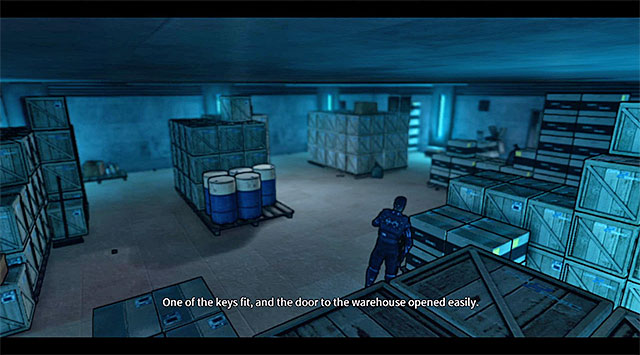 First area of the warehouse
The warehouse is a large location which consists of three areas. An important to thing to know about this place is that you'll be dealing with very large groups of vampire hunters and you'll be exploring small rooms. As a result avoiding killing other people will be practically impossible. I recommend that you follow the instructions published below, especially since aside from living opponents you'll also have to watch out for UV generators and security cameras.
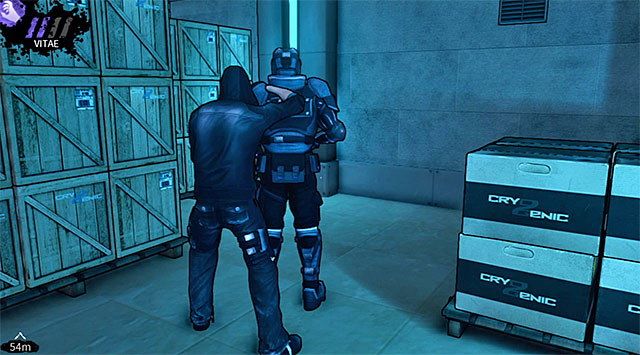 An armored opponent patrolling a side passageway
Head left as soon as you've regained control over Eric and attack an armored hunter who's currently patrolling this side passageway. Once the soldier is dead hide his corpse behind the crates.
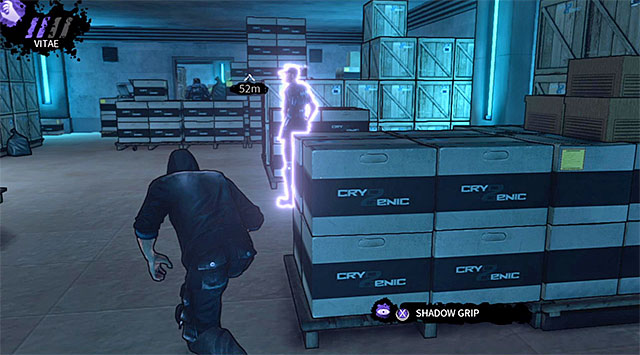
You should now move to the right side of this room, using teleportation if necessary. Wait for a new hunter seen in the distance to turn around and leave this room. Once this has occurred deal with a standard guard seen on the screen above. Make sure to grab the body afterwards and to drag it to the right.
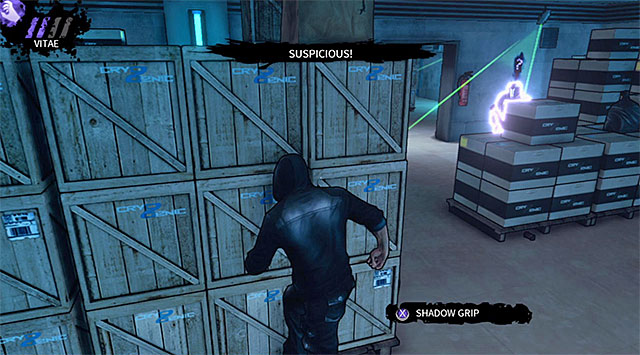 Suggested area to distract an armored opponent
Take cover near the large crates located close to the exit from the first area of the warehouse and wait for the armored opponent mentioned earlier to show up here again. Stand up and start running to attract the attention of this hunter. Wait for the suspicious guard to start moving your way, approach him from the other side of the crates and eliminate him.
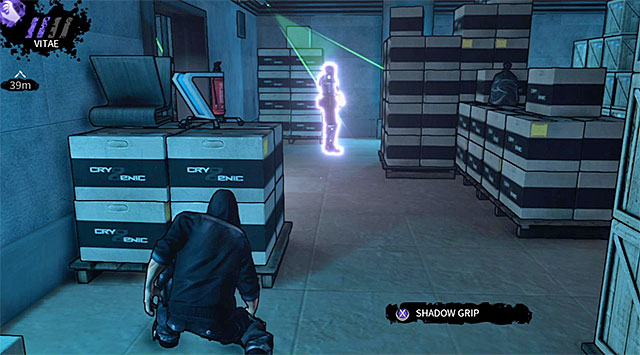 A guard standing under the camera
The last guard from the first area of the warehouse is standing directly underneath a security camera. The best way to get rid of this person is to use Shadow Grip and if that's not possible you should avoid this hunter, because relying on running to make him suspicious may prove to be quite risky.
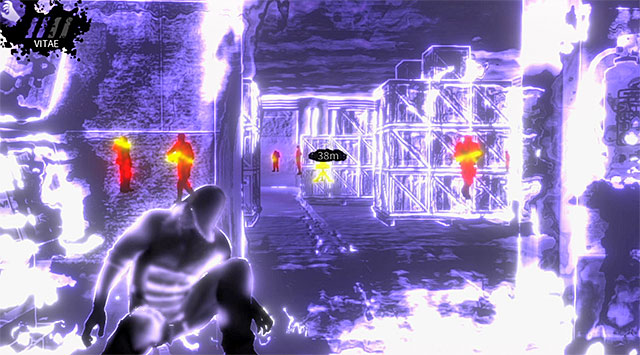 Enemies from the second area
Don't rush to enter the second area as soon as possible and instead take cover close to the entrance. Activate Vampire Vision and notice that new hunters are occasionally stopping to the left and to the right.
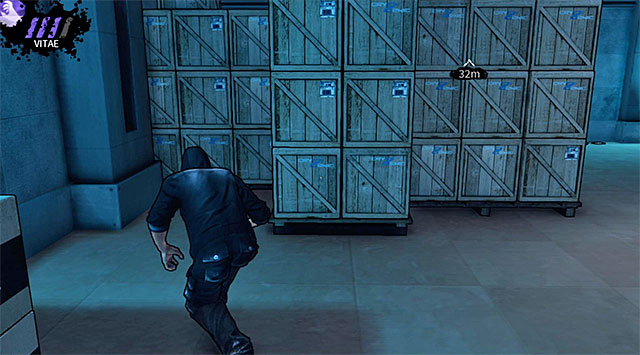
Wait for both guards to start moving in an opposite direction. Quickly enter the second area and move left, avoiding a new security camera along the way. Take cover behind the crates seen on the screen above (they're located directly behind a standard guard you're trying to avoid).
 Attack on an enemy returning to his original post
Remain hidden and wait for the enemies to once again start moving towards the passageway you've recently used to get here. Attack a standard soldier from behind and attempt to drain him of his blood, because having a lot of Vitae will come in handy very soon. As for the body of this opponent, you should consider dragging it to the previous area. I must warn you though, because it may prove to be risky since Eric will have to avoid a second hunter and both cameras at the same time.
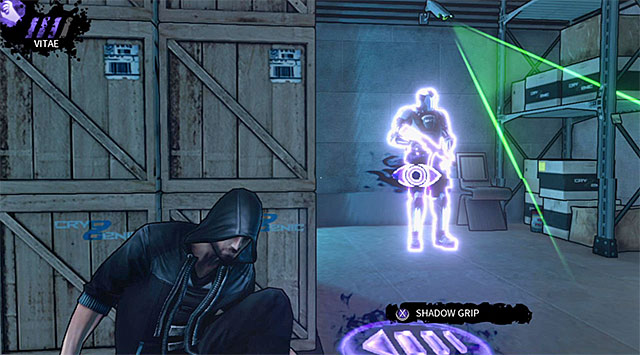 First armored opponent in the second area
There are still two armored hunters in the second area of the warehouse and the first person to die should be the soldier guarding a passageway located to the right of the entrance. If you don't want to take any risks you can use Shadow Grip on him. If you didn't fully develop this ability or if you want to spend Vitae somewhere else then you may consider using running to distract this soldier, allowing you to eliminate him someplace quieter.
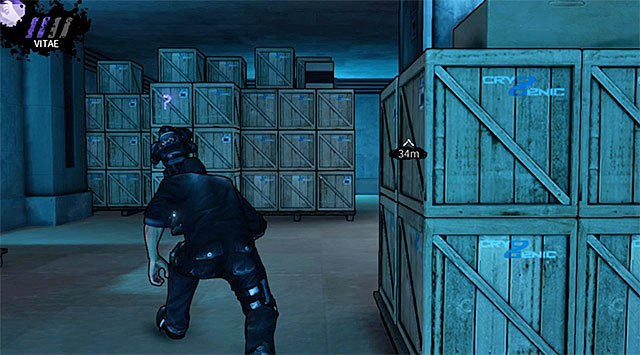 Eliminating a distracted second armored hunter
The second armored opponent is guarding the exit from this room. In this case you should rely on your running to make the guard suspicious so that he leaves his post. Attack him when he's close to the crates and leave his body there.
 Final third area of the warehouse
You may now carefully move closer to the entrance to the third area of the warehouse. Get ready for the most challenging part of your journey during which you will be dealing with three hunters and an UV generator.
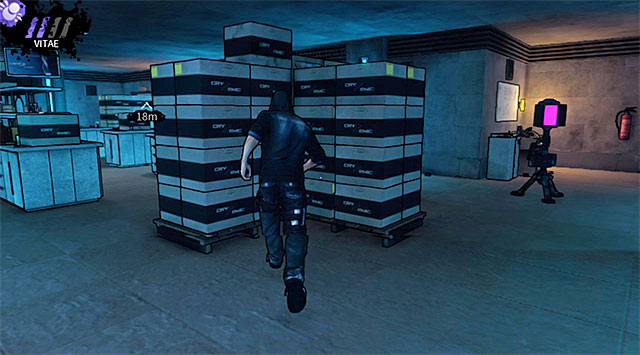
Eric by default should be able to distract the opponents from the third area using running. You can use this method to lure out an armored hunter by running close to a wall (screen 1) and then on a standard guard by running close to the crates (screen 2).
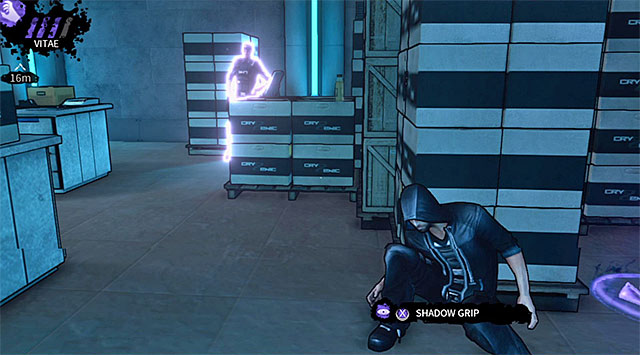 A guard standing to the right
If you've been regularly improving your vampiric abilities then you've probably unlocked silent running and as a result the method described above may not work, because your enemies simply won't hear you from a larger distance. This means that you'll have to think of an alternative way of how to get rid of them. Wait for an armored opponent to move far away from you (don't forget that this hunter will turn around soon after he starts moving!) and take cover behind the crates to the right, not too close to an UV generator. Use Shadow Grip to kill a guard to the right and dispose of his body or quickly teleport yourself behind him to perform a standard execution (in this case you'll have to hide his body yourself behind one of the larger obstacles).
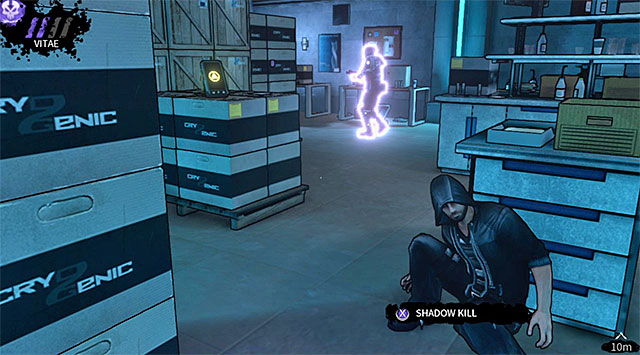 An armored hunter patrolling the center of the room
Once you've eliminated the guard who was standing to the right you may finally focus on an armored hunter who is patrolling the center of the third area. Once again the safest way to go is to rely on a long-distance kill, because otherwise you would have to approach him very carefully, making sure not to move too close to the UV generator.

Go back to where you've killed the first guard and inspect the crates located near the generator to find a PDA (200 experience points) seen on the screen above.
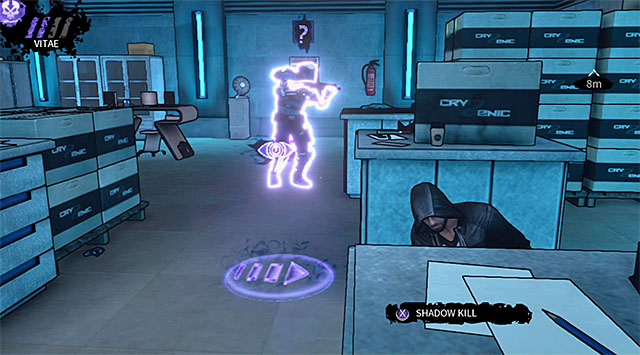 Last opponent in the warehouse
There's only one more armored hunter left in this area and you should take interest in him right now. In this case using a long-distance power isn't the only good option, because you may as well perform a sprint near a cover and surprise him from behind when he shows up here to inspect the source of the disturbance.
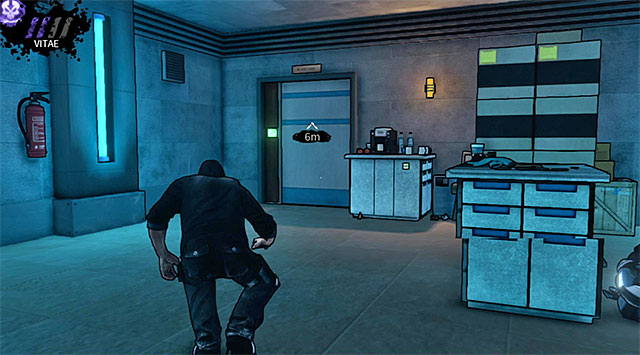 Exit from the warehouse
Proceed towards the exit from the final third area of the warehouse, arriving in a short corridor leading to the laboratory.
 First vampire hunter
Take cover behind the nearest table as soon as you've arrived in the laboratory. Wait for the first vampire hunter to show up here and consider attacking this person. This is also a good moment to drain your opponent of his blood, because he won't be seen by other hunters and you probably don't have a full "supply" of Vitae after visiting the challenging previous location.
Remain where you've killed your first enemy and inspect all of the nearby laboratory tables, finding a PDA (200 experience points) on one of them (screen above).
You should now take cover behind a left table seen on the screen above. Wait her for one of the armored hunters to arrive and attack this soldier as soon as he turns around so that he won't be allowed to move too close to a security camera found in the corner of the room.
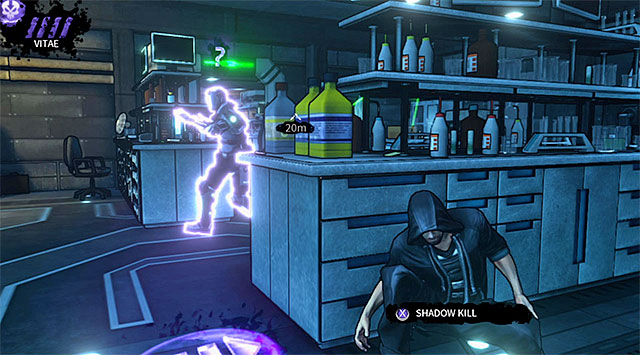 Convincing a guard to check the first room in order to perform a silent kill on him
Approach the entrance to the second laboratory room from the left side and hide behind one of the nearby tables. Wait for an armored opponent to show up near this passageway and perform a short sprint so that you'll make him suspicious. Quickly retreat to a different cover, wait for this hunter to get here and attack him from behind.
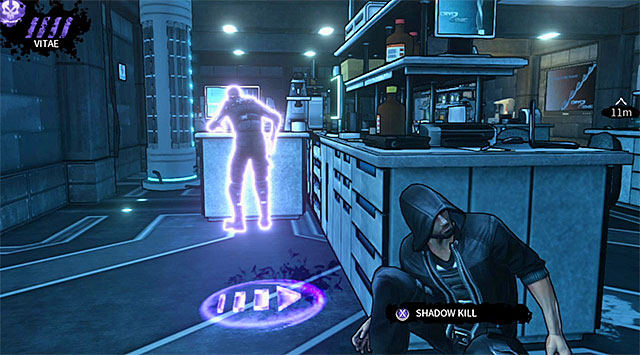 First hunter in the second laboratory room
Use Vampire Vision to check if it's safe to enter the second room. Turn left here and attack a single guard standing next to one of the tables.
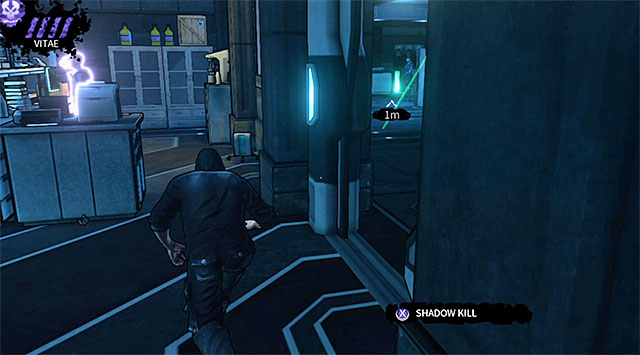
You may proceed to the right side of the room in order to get closer to two vampire hunters seen in the distance. Wait for a guard from the central area of the room to turn around and then quickly move closer to the cover seen on the screen above. This isn't your only concern, because you also can't allow enemies from the area to your right to see you.
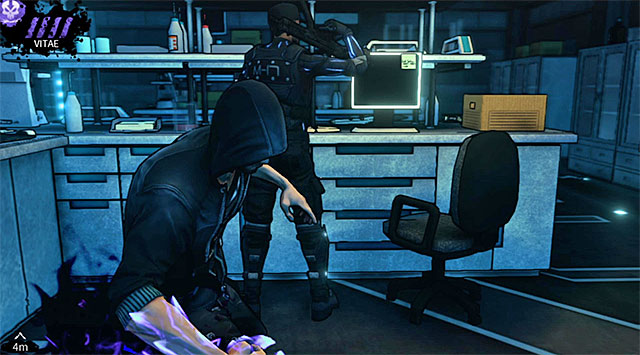 Eliminating a stationary guard
Wait for one of the opponents to go left again and use this opportunity to attack and murder his colleague who won't move from his post.
 Attacking the last hunter from the second room
You may finally focus on the last vampire hunter you were avoiding so far. I recommend approaching this guard from behind when he starts his patrol again. Once it's safe here take some time to drag all of the bodies away from the passageway leading to the next area, hiding them behind large obstacles.
 A guard patrolling a corridor with a camera and a generator
You may now approach the exit from the second laboratory room. Wait for a new guard to arrive from the left and once again use sprint to convince him to inspect the noises he's just heard. Quickly hide behind one of the tables, wait for the vampire hunter to show up and surprise him from behind.
 An alternative way of eliminating the guard
The tactic described above might not work if you've fully developed your vampiric powers and invested in silent running among other abilities, because in this case the guard may not hear you and as a result he won't become suspicious. If you can't distract the hunter then you may use a long-distance attack on him or quickly approach him when he stops close to Eric (you must be quick so that the guard won't be alarmed by a nearby UV generator coming online). That's not all, because you'll also have to immediatelly drag the body to the previous lab area.
 Hunters stationed to the right
You shouldn't try to leave this area too soon, because there's a new collectible nearby. Wait for a new armored hunter to go right and head over there as well, trying to stay away from an UV generator in the meantime.
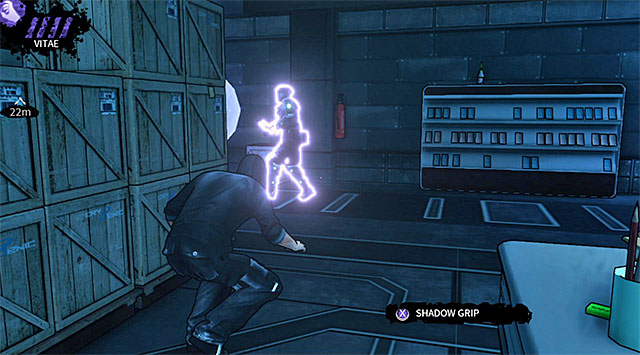 An armored hunter patrolling the corridor near the generator
Take cover behind the crates and wait for a guard in an armor to start moving left. The safest way of eliminating this person is to use Shadow Grip, because otherwise you would have to quickly approach the guard before he gets alarmed by an UV generator.
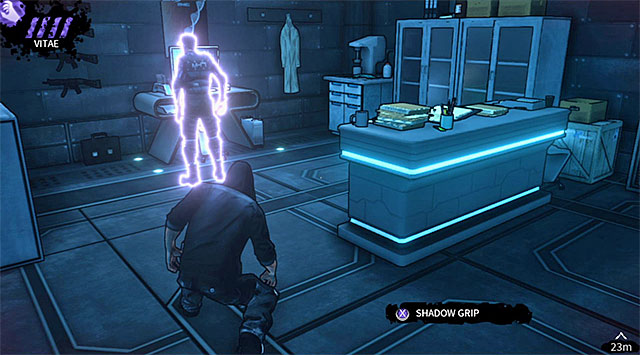 Last guard in the laboratory
There's only one more guard left in the laboratory and he's standing to your right. It's best to feed off of him since you don't have to worry about him alarming anyone else.
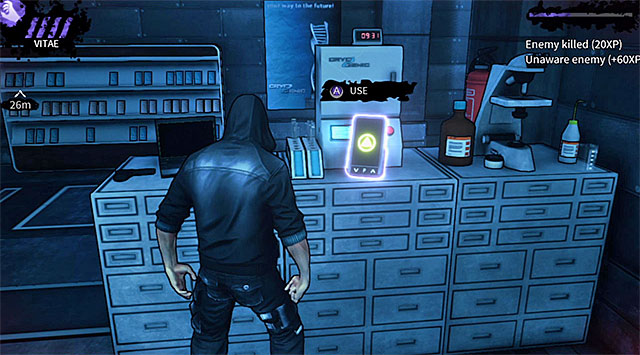
Don't leave this area just yet, because there's a PDA (200 experience points) here seen on the screen above. Once you have the collectible head back left, avoiding the UV generator for the last time.
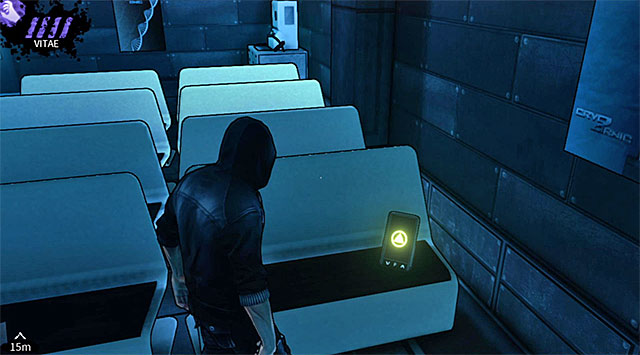
Carefully approach the corner of the nearest corridor and walk under a new security camera. Enter the next room and after you've witnessed a new vision involving an angel check the benches located to the left to find a PDA (200 experience points) (screen).
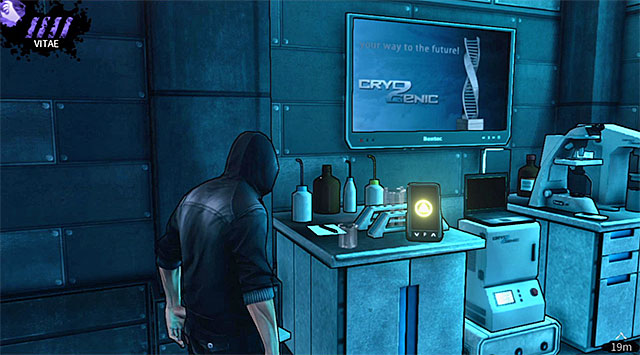
You may now enter a room filled with cryo chambers. Start off by exploring the area to your left and you'll find one more PDA (200 experience points) (screen). You may now proceed towards a designated computer terminal in order to end this chapter. You'll receive two rewards here - 1500 experience points is a reward for reaching the room with cryo chambers and 1000 experience points is a bonus for not raising alarms in the warehouse and in the laboratory.
 A single opponent in a destroyed control room
The last chapter of the game will begin with a very long cut-scene during which you'll meet Samantha Fields. You'll also find out that Steiner was being held here and as a result of a failed experiment he has turned into a horrible mutant and escaped imprisonment. Exploring a nearby control room is entirely optional, however you should know that you will encounter a single vampire hunter there. You can use a long-distance attack on this person, attempt to teleport Eric behind the guard (I recommend this only if you've fully upgraded Shadow Leap) or try to convince him to leave his post by running close to a wall.
The biggest advantage of getting rid of the person mentioned above is that you can now explore the control room in order to locate a PDA (200 experience points) displayed on the screen above.
 A guard facing in another direction
You may finally start moving towards your current destination. On your way to the headquarters you'll also come across one more guard and since he'll be facing the other way killing him will be extremely easy. Obviously you should use this opportunity to drain your opponent of his blood and regain Vitae point (or points if you've unlocked a certain upgrade).
 A briefing taking place in the headquarters
Sooner or later you'll reach a door leading to the headquarters. The game will soon play a short cut-scene and you'll find out that new vampire hunters are stationed in the area. That's not everything, because you'll also have to pay attention to staying away from motion sensors and security cameras.
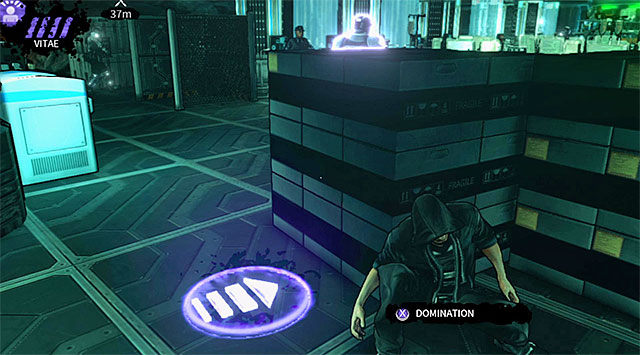
Once you've regained control over the main character proceed to your left and take cover behind the objects seen on the screen above. If you want to leave the headquarters as soon as possible then you should scroll down to the bottom of the page to find out how to reach the left staircase. Otherwise you should remain where you are so that you'll soon begin eliminating nearby vampire hunters. This is a much better in my opinion, because aside from the additional experience you'll also have a chance to find two secret objects.
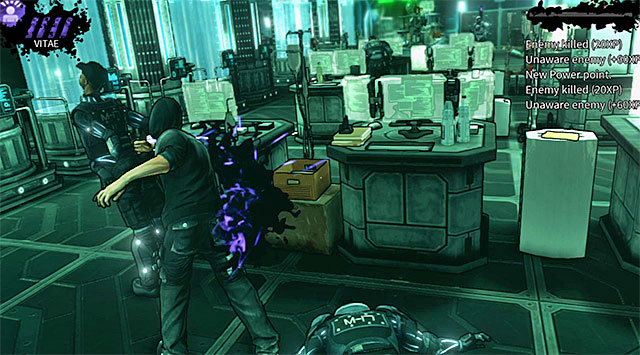 Enemies stationed in the left side of the headquarters
Wait for an armored hunter seen in the distance to start moving right and take interest in two other enemies standing near the stairs where you're currently hiding. I wouldn't recommend performing standard executions on the guards, because one of them is moving between computer terminals and he might notice that something is wrong. Instead it's best to distract one of the opponents by running next to the crates or to use powers like Domination on the left opponent. All of these options must end the same - with you hiding the bodies behind the crates or in one of the corners of the room.
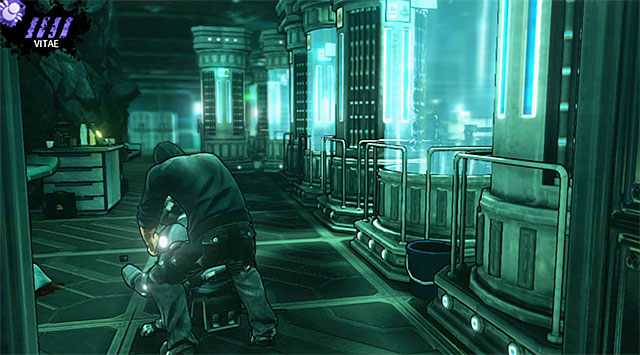 An armored opponent moving between the staircases
It would be a good idea to focus on an armored opponent mentioned not long ago - he occupies the lower level of the headquarters and moves between the staircases leading to the elevator. I recommend approaching from behind soon after he starts moving right again.
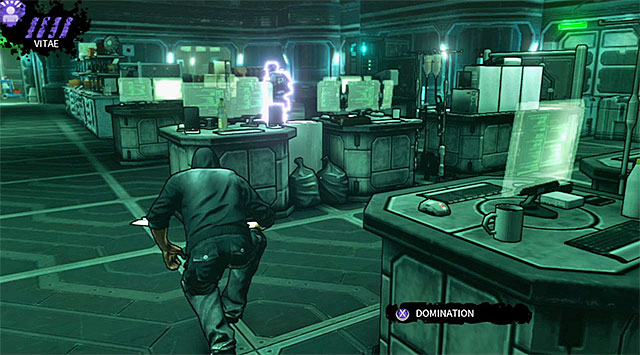
Return to the main part of the room and slowly start moving in on an armored opponent seen on the screen above. Don't attack this guard if he's being observed by another enemy in an armor. You should also know that he doesn't make long stops near computer terminals so you can't take too much time while trying to surprise him.
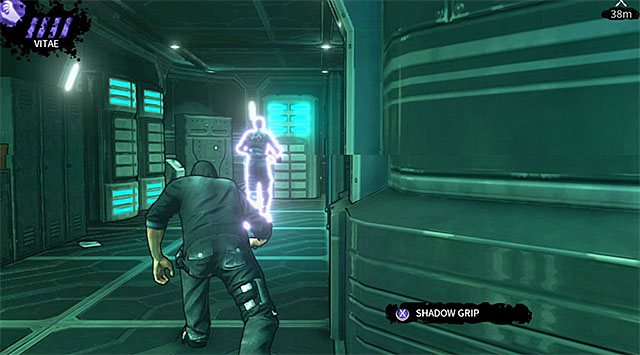 One of the guards from the side corridors
Carefully approach the area near the right stairs and notice that one of the standard guards is visiting a side room quite often. Wait for this hunter to leave the main room of the headquarters and follow him. Try to kill the guard before he gets too close to a window so that you'll be sure your attack won't be noticed.
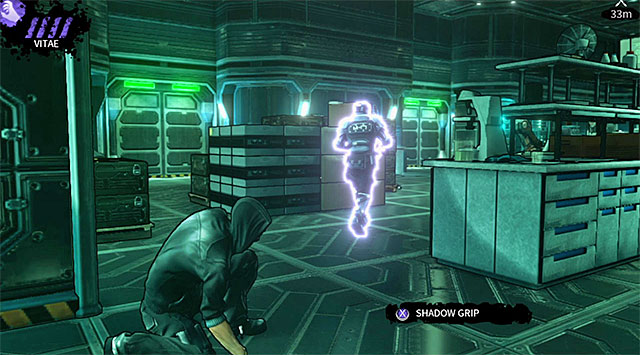 An armored guard in the main part of the headquarters
Return to the main area of the headquarters. You may finally target an armored opponent you've been ignoring thus far. Attack this person when a nearby standard guard leaves this place.
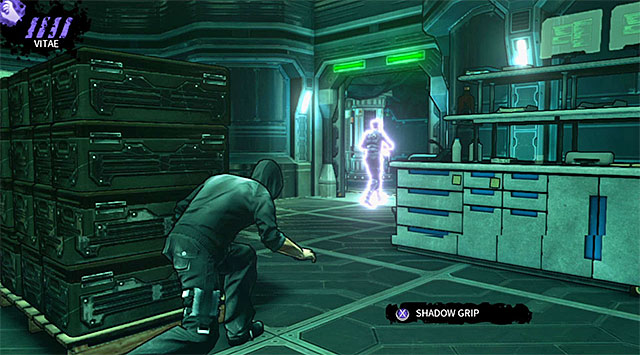 A standard guard moving between the main area and a side corridor
The last guard encountered on the lower level of the headquarters is constantly moving between the area you're currently visiting and a nearby side room. This should make eliminating him very easy since you can predict his next steps.
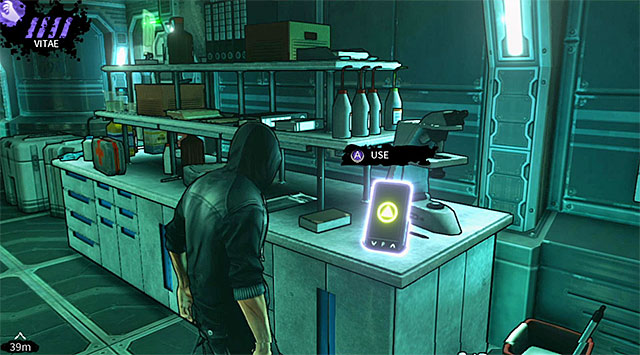
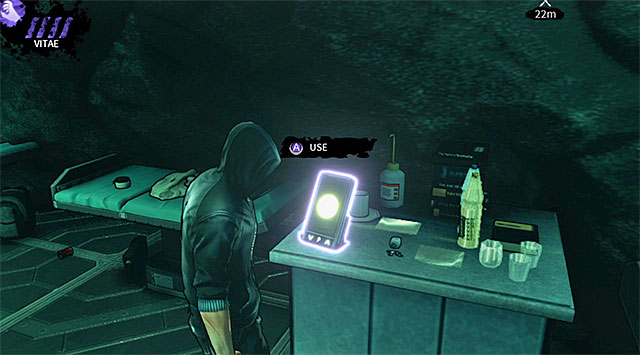
Since you've secured the main part of the headquarters now would be a good time to explore this entire area. There are two collectibles here: the first PDA (200 experience points) can be found to left of where you've originally started (screen 1) and the second PDA (200 experience points) is next to a passageway connecting both staircases (screen 2).
 Both staircases
It doesn't really matter if you've decided to secure the main area of the headquarters or if you plan on leaving this location the first chance you get, because sooner or later you will have to choose one of the staircases leading to the upper level. Notice that both stairs are protected by motion sensors and that there's a single guard patrolling the upper platform (use Vampire Vision to check his current position and wait for him to start moving in an opposite direction).
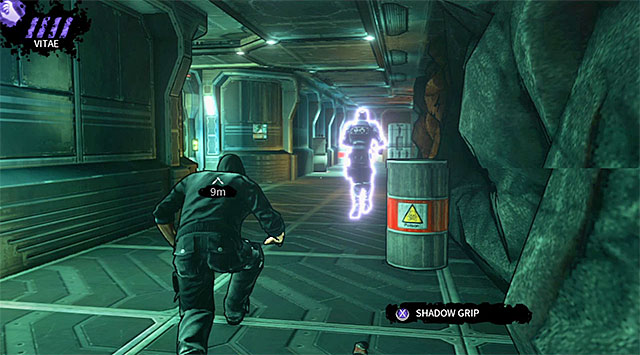 Last vampire hunter
The vampire hunter mentioned above is patrolling the upper level of the headquarters and he's moving between the two staircases. Surprising this character is reasonably easy, however if you've killed him then it's CRUCIAL to drag his body somewhere to the lower level. Hide the corpse where it won't be found and also use this opportunity to check if other bodies aren't in the open.
 A terminal used to unlock access to the elevator
Approach the elevator located on the upper level (next to a corridor which was patrolled by the last vampire hunter you've killed) so that you'll find out it's currently inactive. Return to the main floor and proceed to a side room which was previously guarded by a single enemy. Find an active console here and interact with it.
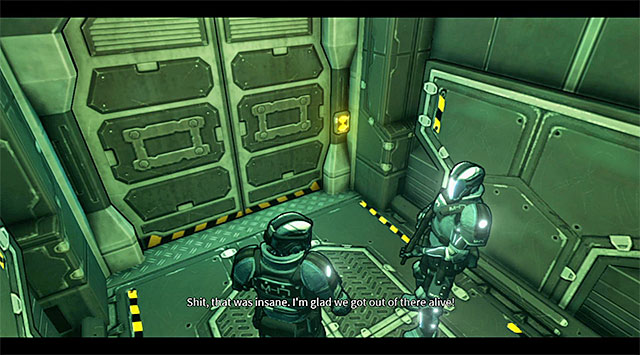 New hunters arriving in an elevator
Start moving towards the elevator again. Once you're close to your destination the game will trigger a cut-scene and you'll be informed that two new vampire hunters will arrive in the headquarters very soon along with the elevator.
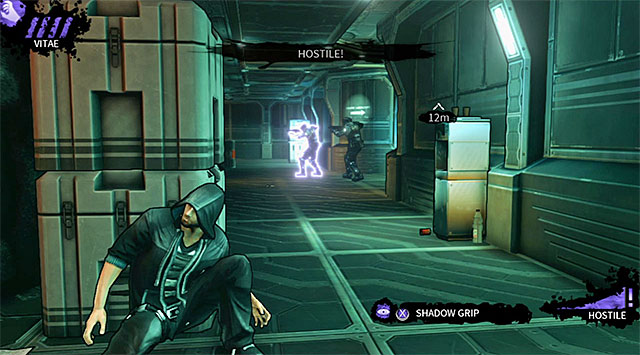 Alarmed enemy units
Now you know why it was so important to hide the corpses of all the people you've killed in the headquarters and especially the ones close to the elevator - skipping this step would have resulted in making the armored hunters hostile almost instantly.
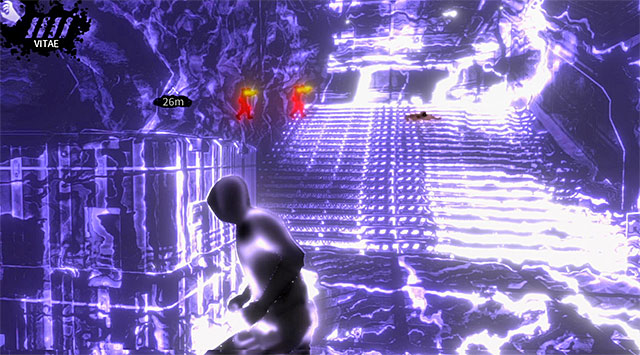 Enemies unaware of Eric's presence
If the hunters weren't alarmed after stepping out of the elevator then they should both start moving right. You can use powers such as Distract or Domination if you plan on killing them. Otherwise it's better to proceed to the left staircase and to focus only on reaching an empty elevator to leave this area as soon as possible. You will receive two rewards while inside the elevator: 1000 experience points is the main reward for leaving the headquarters safely and 1000 experience points is a bonus received assuming you didn't raise any alarms while exploring the previous location.
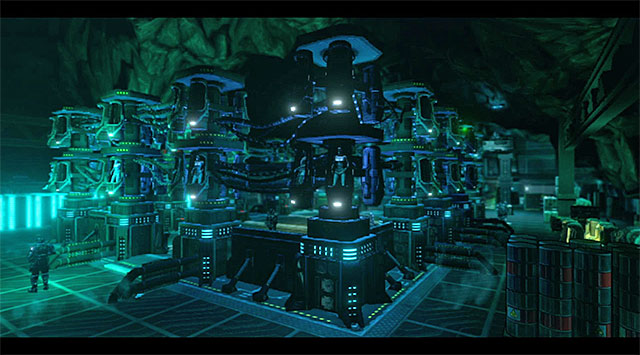 A view of the hall with cryo chambers
You'll soon enter a large area filled with cryo chambers. Once again you will have to watch out for vampire hunters, especially since one of them will be wearing a heavy armor and using a minigun. Thankfully there also some good news. First of all, there are only motion sensors in this hall so you won't have to be on a look out for other countermeasures. Second of all, you will have a chance to easily avoid all of the enemies and reach the exit in under a minute.
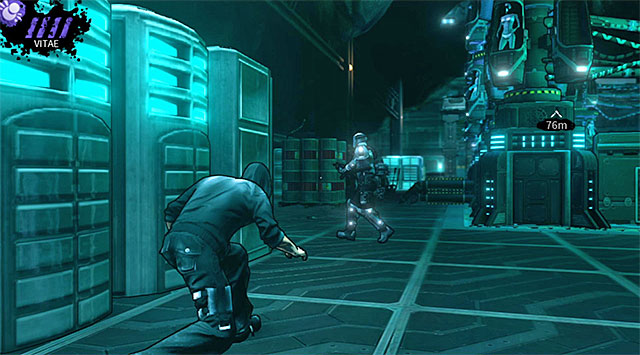 Enemies stationed to the left
The room where you're starting has two exits. If you intend to choose the left side of the hall then it won't take long for the main character to come across two armored hunters and depending on your preferred style of play you can either avoid them or kill them. If you plan on eliminating enemy units then start by killing a soldier who often goes to the right and don't forget to hide his body. Once he's gone focus on his colleague - you can surprise this person from behind, perform a long-distance kill or start running close to a nearby cover so that the hunter will change his position and become an easier target.
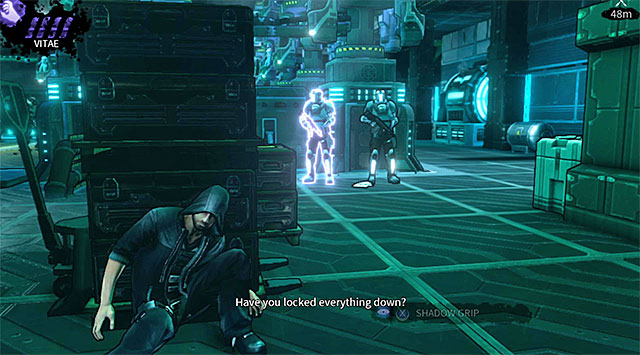 Hunters close to the left staircase
You'll come across two other guards near the area where the left path is ending and as always they won't start their patrols until they've finished having their conversation. You can use the opportunity that they won't move while they're still talking and quickly sneak past them or you can kill them after they split up - one of the guards will move to the area to the left to the stairs and the second hunter will start patrolling the area under the upper balconies.
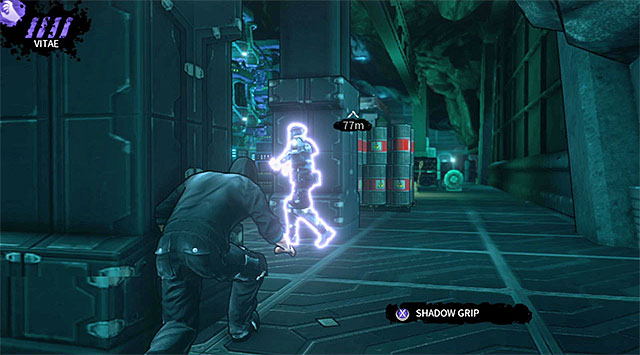 An enemy stationed to the right
If you intend to choose the right side of the hall then you'll almost immediately encounter a single armored hunter and depending on your preferred style of play you can either avoid him or kill him. If you plan on eliminating this soldier then wait for him to start moving left and don't forget to hide the body (preferably inside the room where you've started).
Hunters encountered during the exploration of the right pathYou'll come across two other guards near the area where the right path is ending and as always they won't start their patrols until they've finished having their conversation. You can use the opportunity that they won't move while they're still talking and quickly sneak past them (teleportation will come in handy here) or you can kill them after they split up - one of the guards will start moving towards the starting point and his colleague will start patrolling the area under the upper balconies.
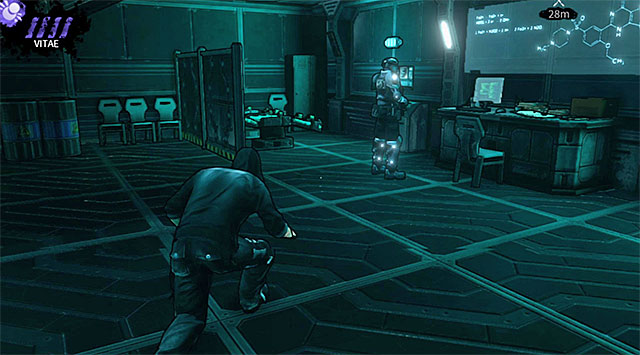 A guard close to the right staircase
You'll encounter one more guard at the very end of the right path, near the stairs leading to the upper level. Thankfully the game will make it easy for you to either avoid this person or to perform a surprise attack. You also won't have to worry too much about hiding the body, because no one else will show up here.
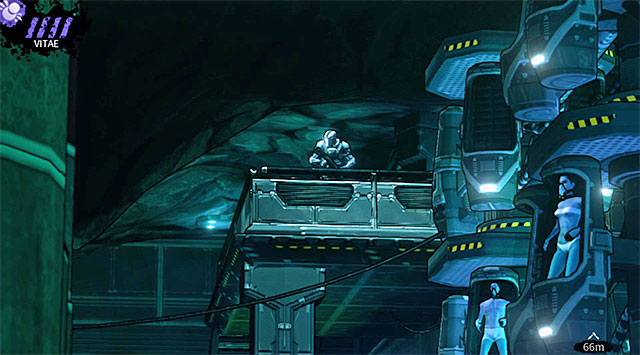
There are some problems you should know about no matter which path you've decided to choose. The most important thing to know is that you must constantly monitor a guard from the upper balconies (screen above) and use cover to avoid being seen by him (he'll do that when he's stopped close to the railing). The same things applies to attacking enemies when it's safe and not leaving their bodies out in the open.
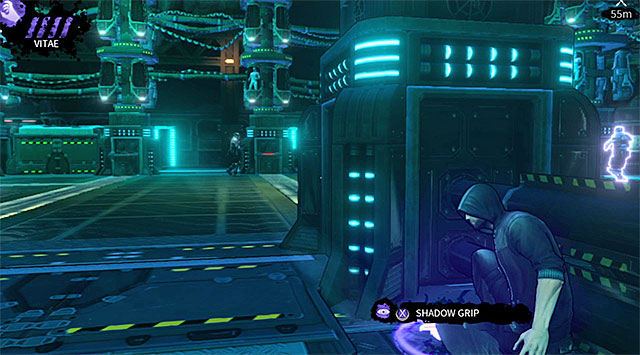
Another thing you should know about is that the central area of this location (screen above) is being occupied by a lot of hunters. I strongly suggest that you leave them alone unless you plan on spending a lot of time here and don't mind paying attention to your every move. Another reason why you shouldn't attack them is because there's a soldier in a heavy armor among them and as you probably remember it's not possible to kill this hunter without him becoming hostile towards Eric. Don't forget about this area when exploring side corridors, because a lot of the enemies will be stopping nearby and you might be seen (using Vampire Vision to monitor their movements is of course a good idea).
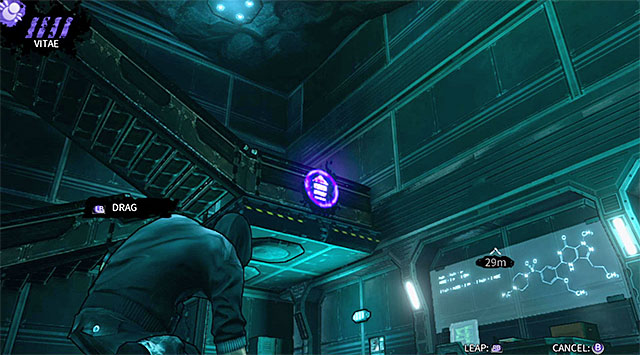 Reaching the stairs using teleportation
The only way to get to the next location is to make your way to the upper balconies and you can achieve this by using one of the side staircases. It's worth mentioning here that you don't have to risk activating motion sensors found near the stairs, because you may as well rely on teleportation.
 A single guard on the upper balcony
Once you've reached the upper balconies you'll have an opportunity to get rid of the armored hunter tasked with observing the ground floor. You can also leave this person alone, but killing the guard is a better idea, especially since he spends a lot of time near each post and so you don't have to worry too much about being discovered. The only thing you have to remember is to prevent the corpse from landing on the lower level, because it can mean serious trouble.
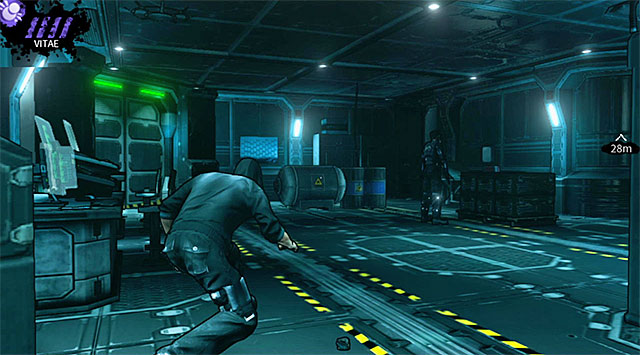 The last hunter
The last hunter can be found inside a small room on the upper floor. I recommend that you feed off of this person, because it won't be noticed by anyone and you'll regain much needed Vitae.
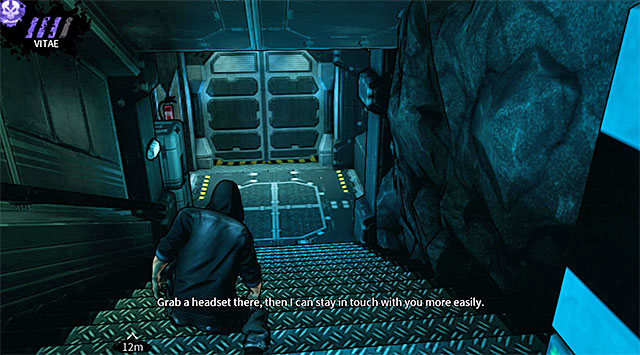 Stairs leading to the security office
Once you're done in this location (sadly there are no collectibles nearby) proceed towards the designated exit and then use the stairs to head down. You'll soon enter a large security office.
 A briefing taking place in the security office
I guess you won't be surprised to hear that there are a lot of security cameras and motion sensors in the security office and that you'll also be dealing with another large group of vampire hunters. I strongly recommend that you attempt to eliminate as many enemy units as possible, especially since you'll have to revisit certain areas of the office later on in the game.
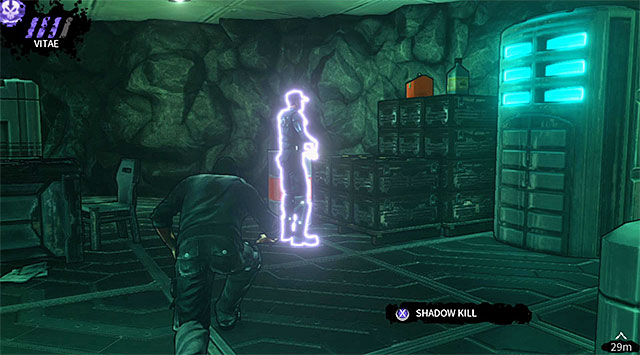 A guard stationed close to the starting point
You should attack the nearest guard from behind as soon as you've regained control over Eric. It's also important to start dragging the corpse right away, because there are three other hunters heading your way. Avoid the obstacle where you've started from the left side (don't get too close to a local security camera!) and leave the corpse in this place, because it shouldn't be noticed here.
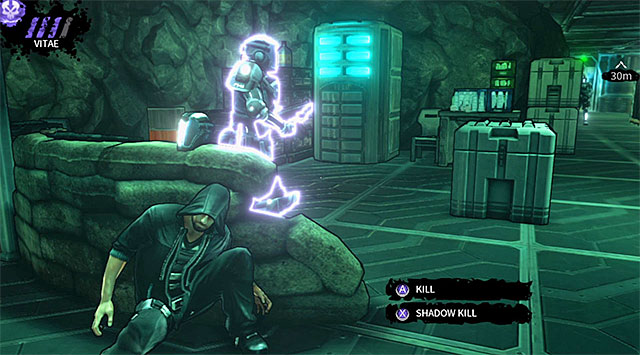 The first armored hunter
Remain where you've started exploring the security area and allow three of the armored enemies to go in their separate directions. Notice that one of the hunters will soon make a stop very close to where you're hiding (that's why it was so important to hide the body of the first guard). Attack this soldier immediately after he turns right and starts moving away and leave the body in the exact same spot as the first one.
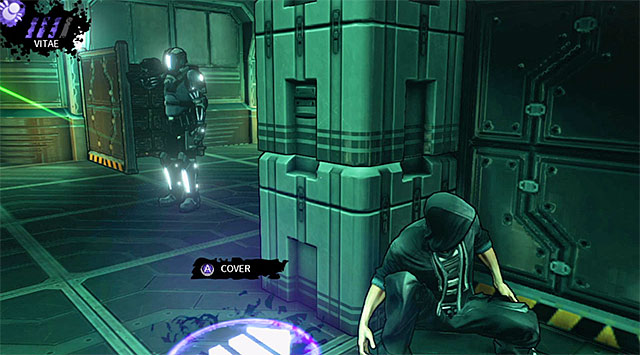
You should now move to the right and take cover behind an obstacle seen on screen 1 so you'll have a good view of the remaining two armored enemies from the last group. Wait for the left hunter to turn around and start moving away from here. Once this has happened move closer to the armored soldier stationed to the right and take cover behind the crates seen on screen 2.

 Killing two vampire hunters
Once again you must show a little bit of patience and don't do anything until an armored hunter turns around and starts moving right. Start off by killing a standard guard stationed near the desk and once he's gone deal with the armored opponent. Don't forget to quickly hide both bodies behind a solid cover.
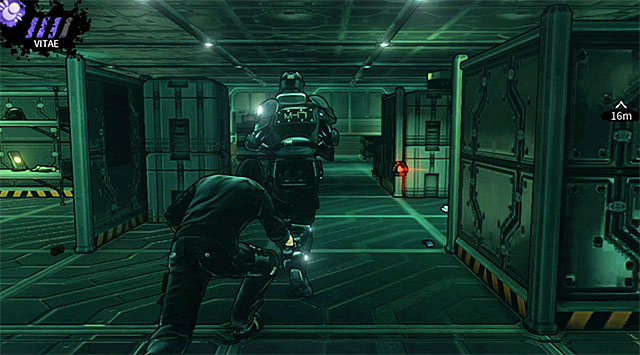 Last armored hunter from the initial group
Wait for the last third armored hunter to show up in this area (the one from the group you've been avoiding since your arrival in this location). You shouldn't have any problems planning this kill, because all you have to do is to wait for this person to turn around and to begin another patrol. Catch up with this enemy and kill him, remembering to avoid motion sensors and security cameras at the same time.
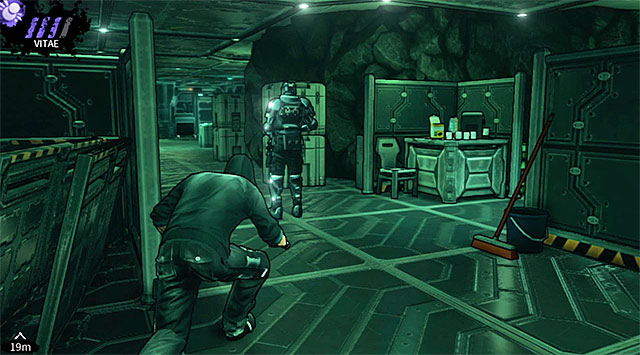 An armored opponent stationed in the left side of the security office
The next enemy you should consider killing is a single armored hunter who is patrolling the left side of the security office. Wait for this person to move away from other enemies and then perform a surprise attack.
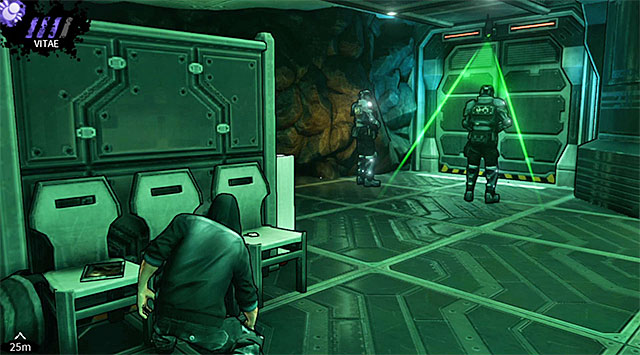
If you've done everything according to my instructions then there are only two guards currently in the security office. Sadly the hunters won't leave their posts and this means you'll have to choose between letting them live and distracting them using vampiric powers or a sprint next to a cover.
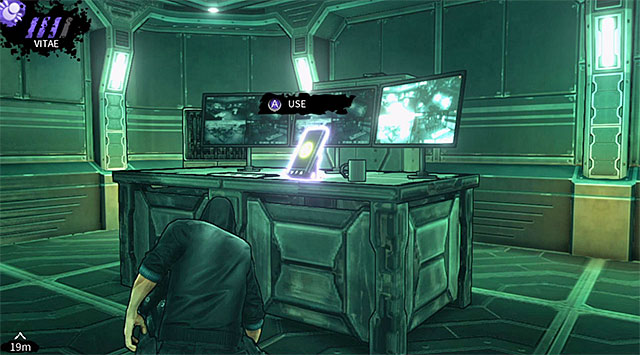
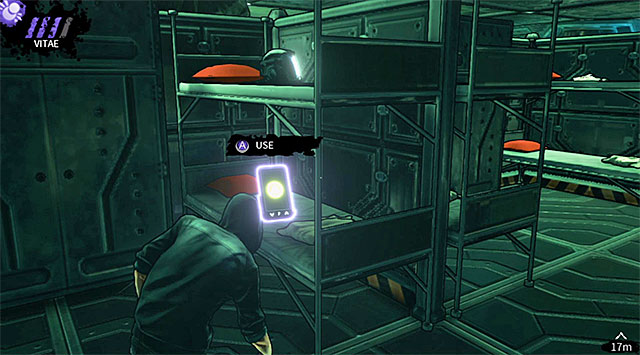
You should now spend some time exploring this entire location, because you'll be presented with an opportunity of collecting two secret items. The first PDA (200 experience points) can be found on a desk where you've met a standard guard and an armored hunter earlier on (screen 1), and the second PDA (200 experience points) is on a bed in the barracks located near a corridor which was patrolled by an armored guard (screen 2).
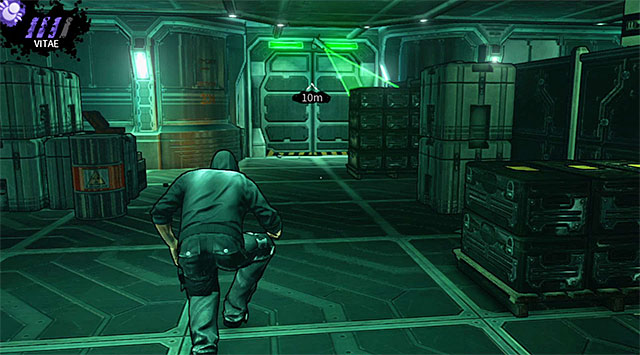 Exit
ExitOnce you're done exploring and picking up collectibles proceed towards a door marked on your map. Be careful here, because there's a security camera above the door and you must wait for it to change its angle so that it'll be safe to head inside.
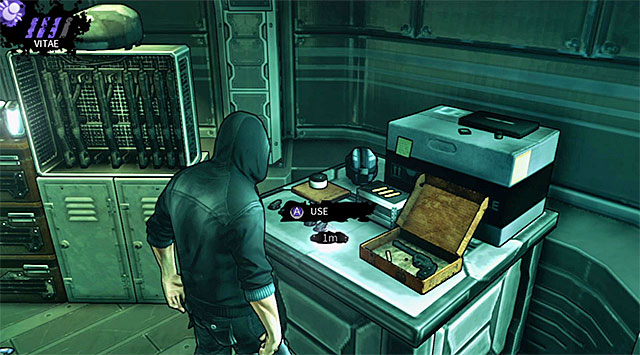 A headset
Enter a new room and approach a small table where you'll find a headset. Pick up this object and listen to a new conversation with Rose. She will tell your that your next assignment will be to reach two computer terminals located in other areas of the security center.
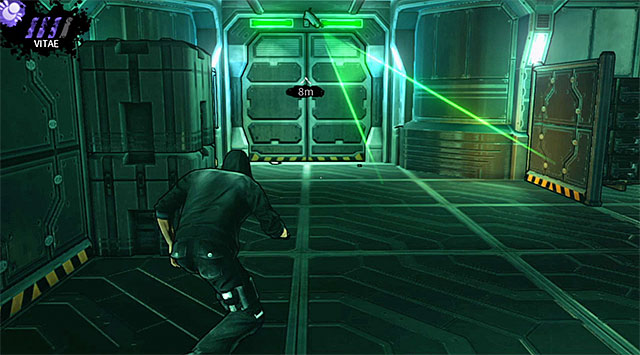 Passageway leading to a room with the first computer
The first computer terminal can be found inside a room located close to the area where you've killed a standard guard and an armored hunter not long ago. Avoid a security camera and interact with the device.
 Passageway leading to a room with the second computer
The second computer terminal can be found inside a room located to the right of the final two vampire hunters. Sneak past the enemies and the camera and interact with the computer.
Take some time to listen to a conversation with Rose and then return to the area where you've originally started exploring the security office. Notice that you can choose a newly unlocked passageway located to your left (screen above). Get to a door leading to a prison where Tom is being held.

The scenes in the prison will play out in a very specific way. It's not a coincidence that Rose is constantly reminding you of rescuing Tom, because the fact is that you'll have less than one minute to save him from certain death. If you don't make in time then Tom will die (screen above). If that happens you'll still be able to continue your mission, however I recommend that you do what you can to save him, especially since that the game will create a checkpoint when you arrive here and even if you fail for the first time you'll be allowed to retry the "rescue operation" without losing too much of your progress. In order to save Tom you'll have to make your way to a computer terminal located on the second floor so that you'll open all cells (including the one in which he's being held).
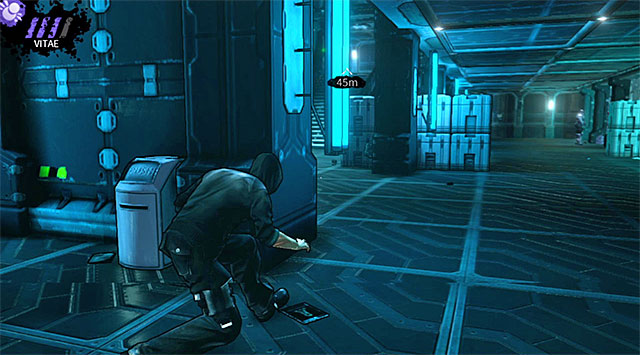 Ground floor of the prison
As soon as you've regained control over Eric move to your right and rely on sprint if necessary so that you won't be noticed by any of the vampire hunters moving towards your position from your left.
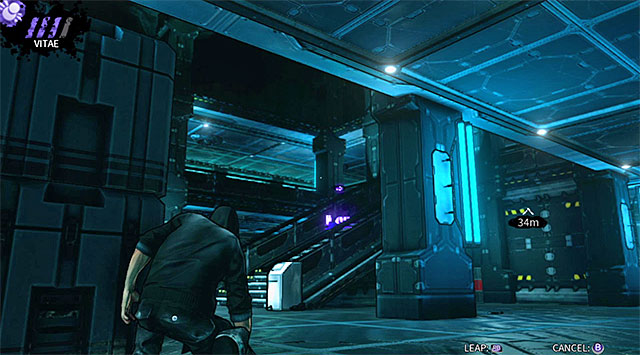 Main staircase
Stop by the nearest crates and take a short moment to figure out how you want to reach the upper floor. The most obvious way is to use Shadow Leap to teleport Eric towards the central staircase.
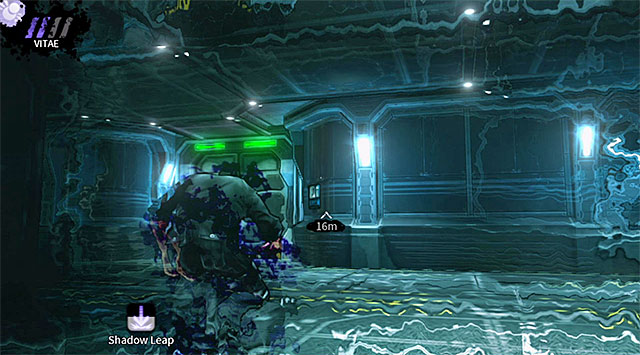 Obfuscation can be useful in reaching the designated room
Remain in the middle part of the stairs and notice that the entrance to a room with the computer terminal you're trying to get to is guarded by two vampire hunters. You'll probably have more problems with the guard stationed to the right, because he's observing the staircase. I recommend acting in one of two ways here - use Domination to stun the guard or use Obfuscation so that you'll become partially invisible.
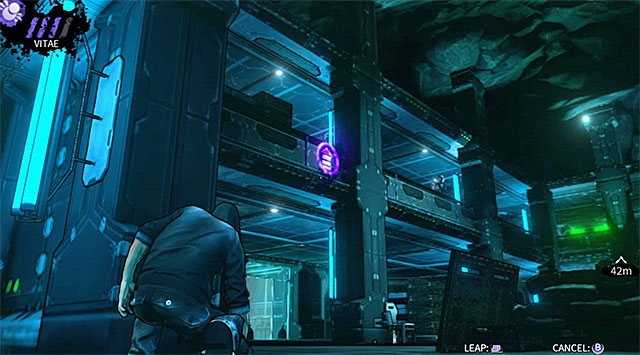 Teleportation towards one of the balustrades
If you didn't fully upgrade your teleportation skills or if for some reason you can't teleport to the stairs then you can try using Shadow Leap to reach one of the balustrades. I don't recommend choosing the balconies located to the left, because that area is being patrolled by an additional guard and you would have to kill him very quickly.
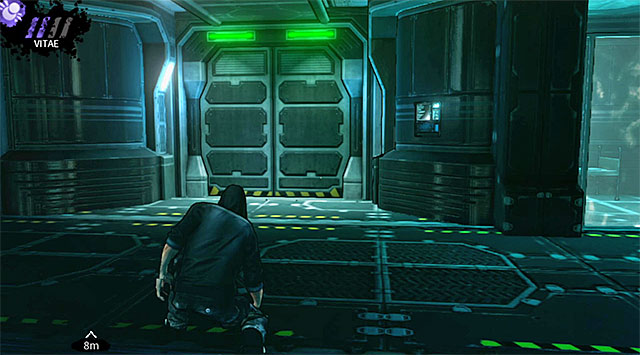 Entrance to the side rooms
It's much better to teleport the main character to the balconies located to the right of where you've started exploring the prison. The main reason is that you'll locate an entrance to several side rooms here and using this passageway will allow you to easily reach your destination.
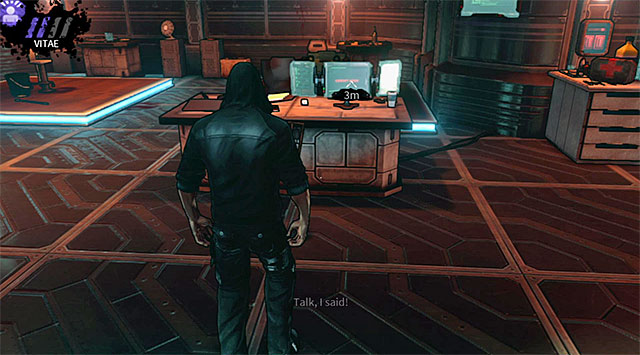
All of the actions described above have a common goal and that is to reach a small room on the upper floor seen on the screen above. Quickly approach a computer terminal and interact with it. Doing this will not only open Tom's cell, but you'll also free all of the ghouls and the creatures will murder nearby prison guards. The game will reward you here for your efforts - 1000 experience points is a standard reward and 1000 experience points is a bonus for reaching the terminal without being seen.
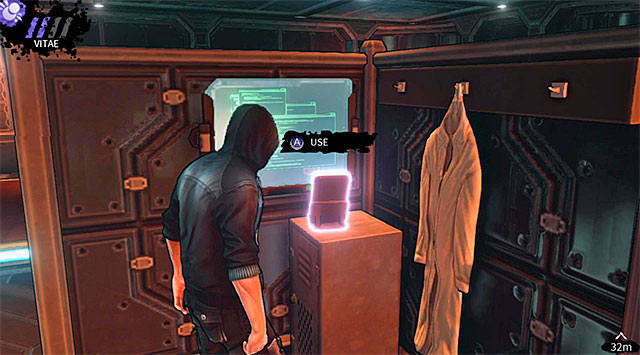
Stay where you've interacted with the computer terminal and check a corner of the room located to your right. Doing this will allow you get your hands on a new PDA (200 experience points) (screen).
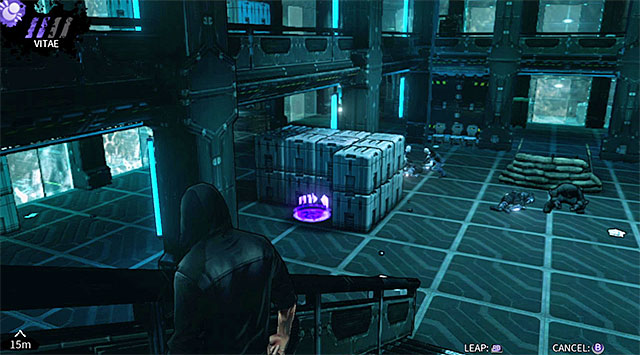 Ghouls in the prison
Carefully go back to the main part of the prison. As I've already mentioned the ghouls have killed all of the prison guards - there are two monsters on the second floor and five ghouls on the first floor.
Make a stop close to the central staircase and use Shadow Leap to teleport yourself downstairs. I recommend teleporting Eric towards the crates seen on the screen above, but you may as well choose a different destination as long as it's far away from the ghouls, because otherwise you'll risk becoming discovered and attacked.
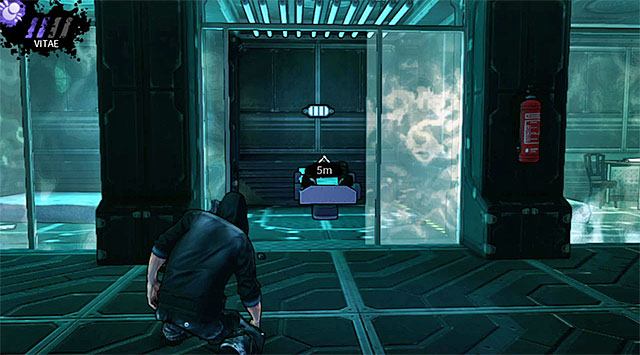 Tom's cell
Start moving towards the cell where Tom was being held. Enter the cell to rescue your ally and listen to a new conversation with Tom and Rose.
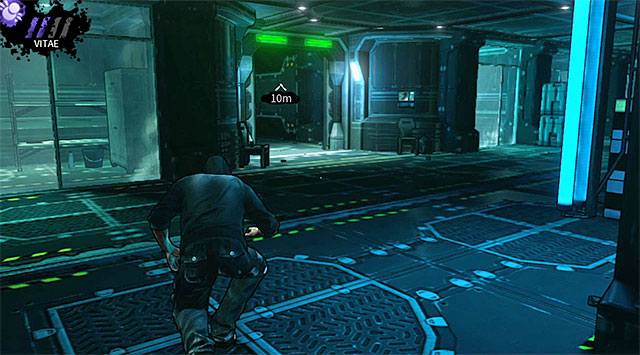 Exit from the prison
Return to the stairs and once again carefully use teleportation to switch floors. Once you've reached the upper balconies turn right, because the corridor to the left is being guarded by two ghouls. Reaching the exit from the prison seen on your HUD shouldn't be a big problem.
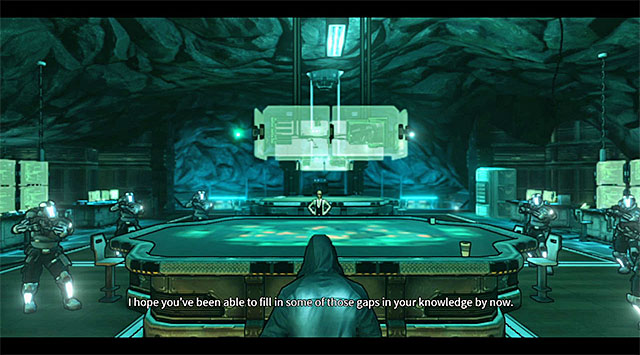 Close encounter with Samantha
Keep following the narrow corridors and you'll soon enter a new area where you'll receive two rewards: 1000 experience points for finding the command center and another 1000 experience points for leaving the prison area without triggering any alarms. Choose the main staircase and approach a large command table. The game will play a longer cut-scene here during which you'll have a chance to exchange a few words with Samantha. The woman will soon order her vampire hunters to go after you so get ready, because as soon as you'll regain full control over Eric you will have to start hiding again.
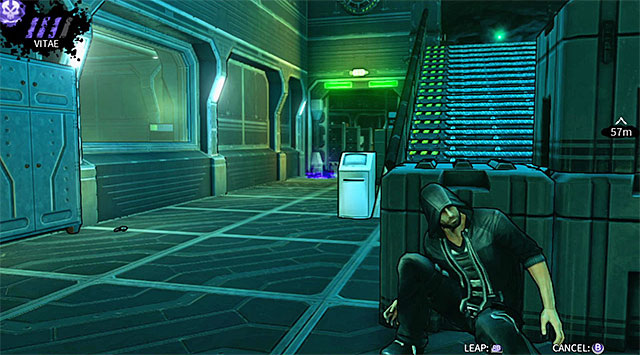
If you don't want to kill any enemy units then immediately teleport Eric towards the crates located to the left. Use Obfuscation (or wait for Shadow Leap ability to regenerate itself) and proceed to the left corridor seen on the screen above.
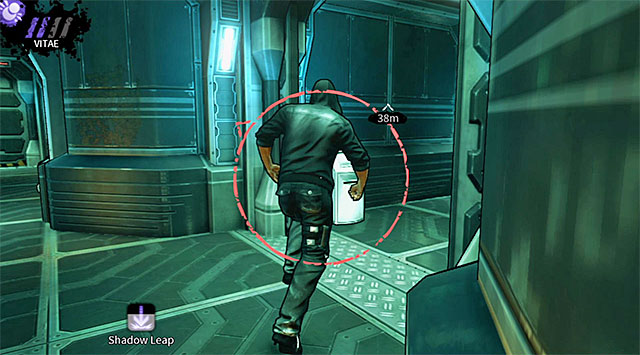
If you don't have anything against eliminating all of the nearby vampire hunters then use teleportation to transport Eric to the crates located to the right and then quickly enter a side room seen on the screen above (using vampiric powers here to avoid detection shouldn't be necessary). This is a much better idea in my opinion, because you won't encounter any major problems murdering enemy units and you'll also have a chance to find a new secret object.
I assume that you've followed my recommendation and decided to make your way to a storage area located to the right of where you've started. Explore this room and you'll find a PDA (200 experience points) seen on the screen above.
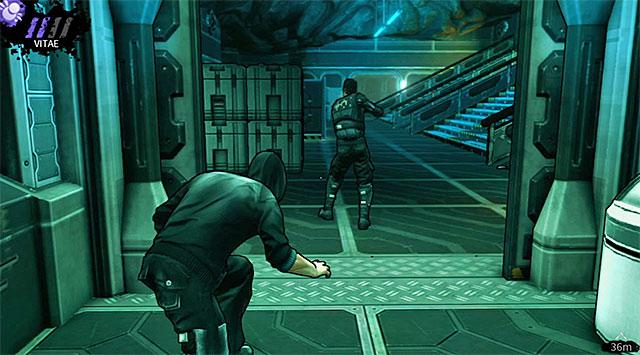 An enemy stationed in front of the storage room
Stay in this room and wait for one of the guards to make a stop in front of the storage area where you're hiding. This person will turn in another direction so organizing a surprise attack will be very easy.
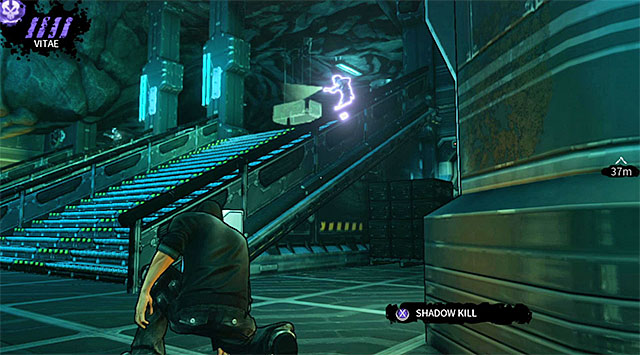 One of the enemies standing near a command table
Carefully move closer to an upper platform located to the right (this is the area where you've talked to Samantha when you arrived here for the first time). Get ready for the most difficult step, because you will have to use either Shadow Kill or Shadow Grip to get rid of an opponent standing next to the staircase (you can't approach him on foot, because he's facing the stairs).
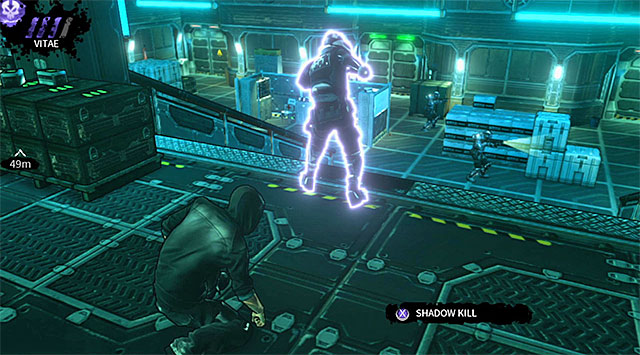 Second hunter on the upper platform
Remain on the upper platform mentioned earlier and surprise the second armored hunter from the back. In this case you don't have to expect any additional complications.
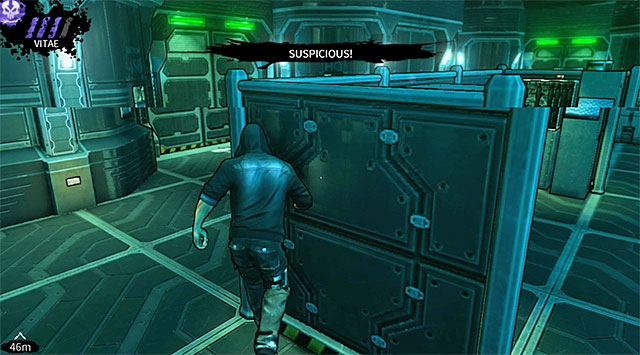

Return to the lower level and approach two enemies stationed close to each other. Start running next to a cover seen on screen 1 so that one of the hunters will become suspicious. Quickly change cover, wait for this person to show up and perform a successful surprise attack from behind (screen 2).
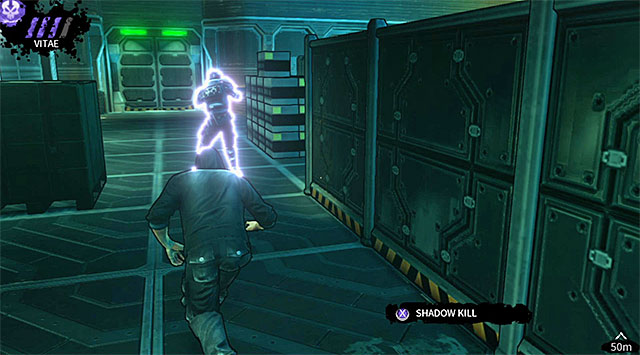
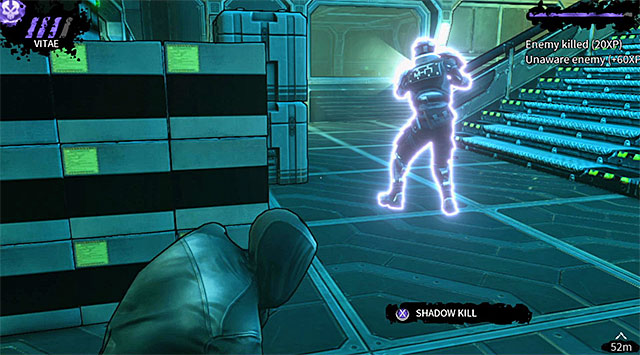 Two last hunters from Samantha's group
There are only two hunters left here and they're both wearing armors. Thankfully both enemies should be facing the left storage area and as a result you won't have any problems performing surprise attacks.
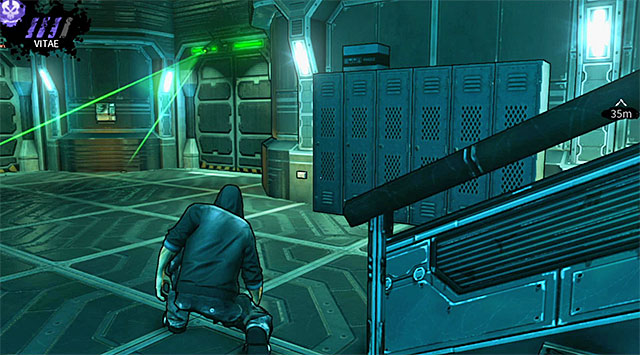
It doesn't matter if you've decided to avoid enemies or kill them all, because sooner or later you will have to get to the opposite end of this command center. Approach the right door seen on the screen above and make sure to avoid being noticed by a new security camera.
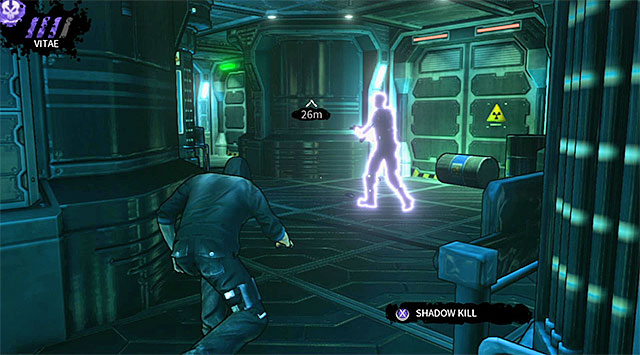 A single guard patrolling a long corridor
Use Vampire Vision ability to check the current position of a guard who's patrolling a corridor behind the door. I guess I don't have to add that you shouldn't move for the kill if you see him heading your way.
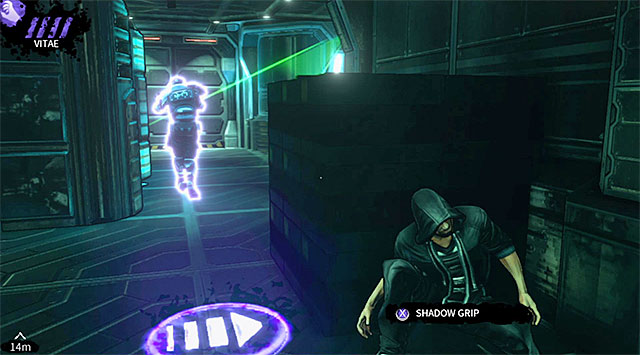 An armored hunter moving between computer terminals
Make your way to a new room and enter it carefully. You will have to avoid a new security camera here, as well as an armored hunter who will be moving between computer terminals found at the back. You can leave the guard alone or you can perform a sprint near one of the larger obstacles so that you'll encourage this person to move closer to the center of the room. Don't attack the hunter without doing these preparations, because by default he is being observed by another camera.
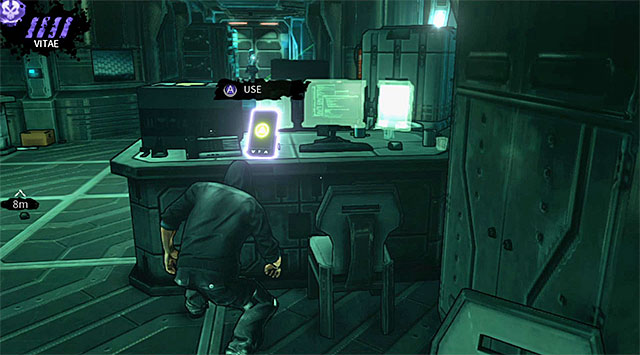
Don't leave this area just yet, because there's a PDA (200 experience points) on a desk seen on the screen above and you should pick it up.
 Computer terminal
You may now proceed to a much smaller room located to the left, avoiding yet another security camera along the way. Approach a computer terminal and interact with it in order to upload a virus.
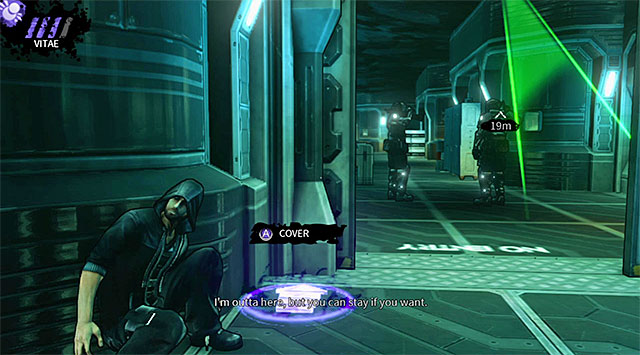 New enemies in the command center
Head back to the command center using the same corridors as before. DON'T enter the command center right away, because two enemies have arrived in the area. Wait for the vampire hunters to end their quarrel, because one of them will murder his colleague. The killer will stay close to the door and this will make avoiding him a little tricky. If you didn't unlock silent running you can try and lure him to the corridor where you're standing (sprinting next to a wall) and then surprise him after he starts to move back to his original post.
 Recommended destination for the teleportation
If you have silent running unlocked and/or don't want to kill the last hunter then you must move closer to him and then use teleportation to transport Eric behind large crates found to the left. You can attempt here again to make the guard suspicious or you can focus on leaving the command center as soon as possible.
The exit from the command center is seen on the screen above and if you didn't kill the last armored hunter then you will have to use teleportation again to reach it. Descend the stairs to get to a new area, listening to a conversation with Rose along the way.
 A single guard encountered near the entrance to the canteen
You will encounter a guard on your way to the canteen. You can avoid this person easily, however a much better idea is to feed off of this opponent, especially if you've been using vampiric powers often and don't have a full supply of Vitae.
CanteenEnter the main area of the canteen and you'll watch a short cut-scene here informing you about an arrival of yet another group of vampire hunters. You should also know that aside from the living opponents you'll also have to watch out for security cameras in this location.

Go left the second you regain control over Eric, using nearby objects for cover and avoiding a security camera. Approach the stairs seen on the screen above and wait for an armored hunter from the floor above you to start moving in an opposite direction.
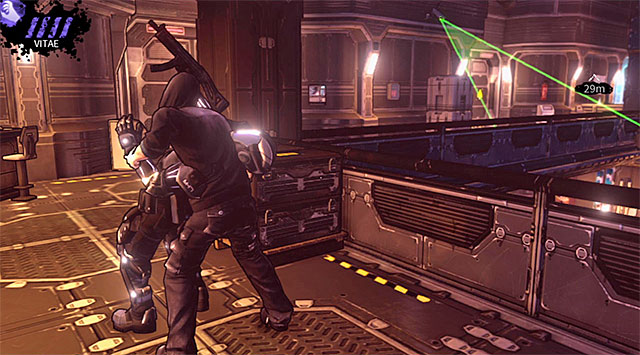 First guard from the upper balconies
Try and catch up with the armored opponent mentioned above so that you'll have a chance to perform an execution on him before he moves too close to other enemies. If you don't want to kill this person then take cover behind one of the objects encountered along the way and wait for the guard to go past you after he starts moving towards the stairs again.
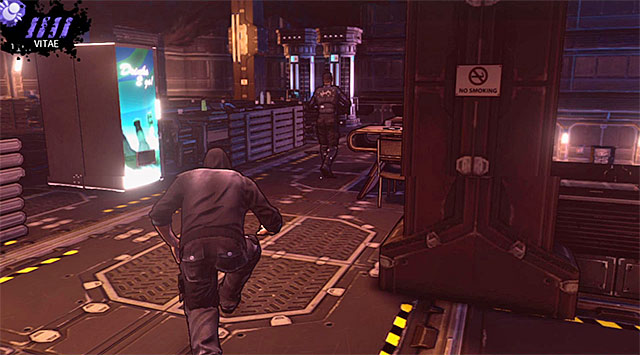 A standard opponent
Approach the main part of the upper balconies and wait for a standard guard to start moving to your right. It would be a good idea to perform a silent execution on this person, however it won't bring you any closer to completing your current mission.
 Two final guards on the second floor
You can leave the canteen right now if you wish to, but I would recommend that you stay here to continue securing this location. There are only two enemies left on the second floor - start off by attacking an armored hunter and then focus on a standard guard standing close to the railing (as always do your best to prevent the corpse from landing on the lower level).
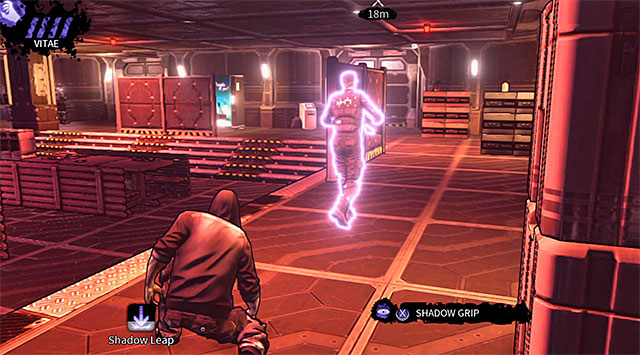 The right side of the canteen
Return to the first floor and notice that there are four vampire hunters here in total. It would be best to begin securing this location by proceeding to the right side of the canteen. Start attacking the guards and don't forget about hiding their corpses. You can also attempt to eliminate at least one of the hunters by performing a long-distance kill from the balconies you've secured not long ago.
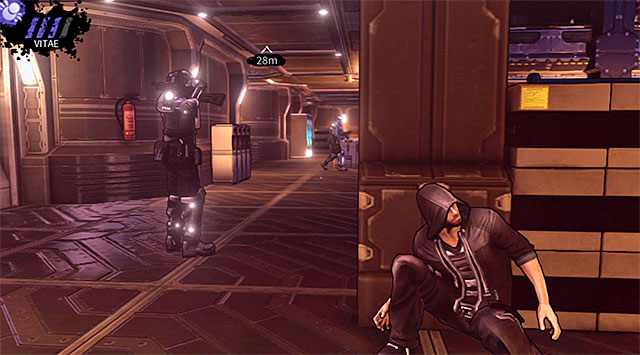 The left side of the canteen
Proceed to the left side of the canteen and focus on eliminating the two remaining hunters. Just as before it's best to wait for the guards to go their separate ways so that you'll have plenty of time to hide the first corpse before the second enemy notices your presence.
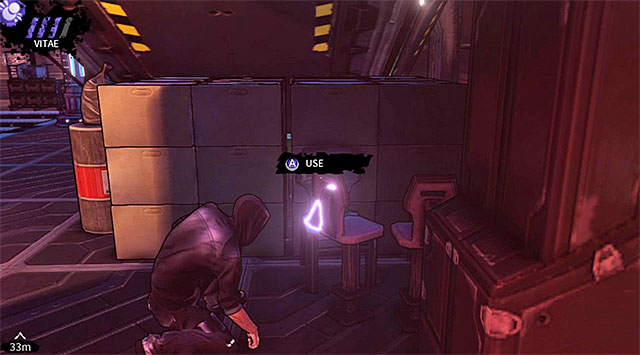
The last thing to do in the canteen is to pick up a secret object - the PDA (200 experience points) you're looking for is hidden under the stairs used before to get to the upper balconies (screen above). This means that you can obtain this item even if you don't want to kill the hunters.
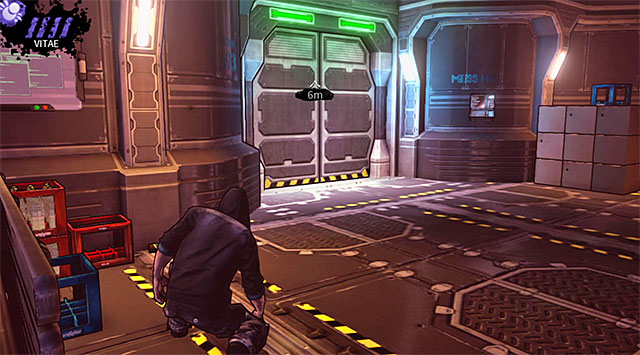 Exit from the canteen
Like I've already said the only available exit from the canteen is located on the second floor. Start moving towards the final location of the game, using an elevator along the way and receiving two rewards - 1000 experience points is a reward for leaving the command center and the canteen and another 1000 experience points can be received if you didn't raise any alarms.
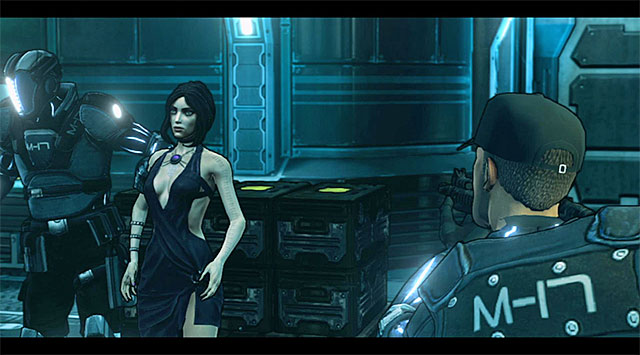 Imprisoned Rose
As you've probably noticed you've returned to a large hall with cryo chambers you've already had a chance to visit earlier in this chapter. The overall goal is the same as the last time you were here - you'll have to make your way to the upper floor, because that's where Rose is being kept. Ignore the central "arena" for the time being, because you won't have to worry about mutated Steiner just yet.
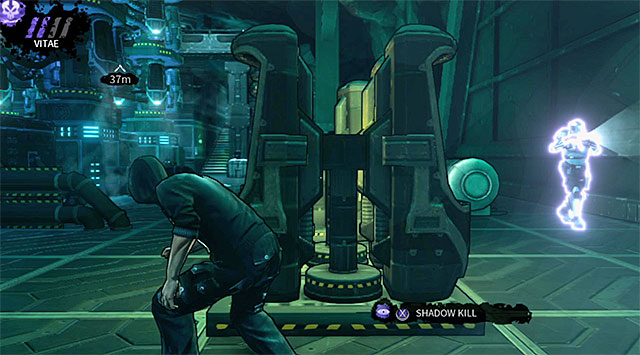
Two pairs of vampire hunters are heading towards Eric and each pair will be travelling using one of the side passageways. I recommend that you go right as soon as possible and take cover behind a large obstacle seen on the screen above. You may use this object along with Vampire Vision to avoid two guards.
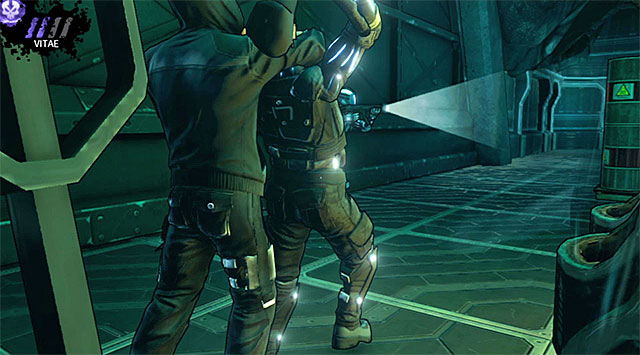
 Eliminating the first group of hunters
Theoretically you can resume your journey towards the upper level right away, but I recommend that you go back to the enemies you've just avoided and take them by surprise. Start off by eliminating a standard guard and then approach an armored hunter. In this case you'll have to wait for an armored opponent to turn in an another direction before performing a silent kill.
 An area to the left of the starting point
You can also use this opportunity and deal with two enemies stationed to the left of where you've started. Head over there and use teleportation to reach your destination without any complications.
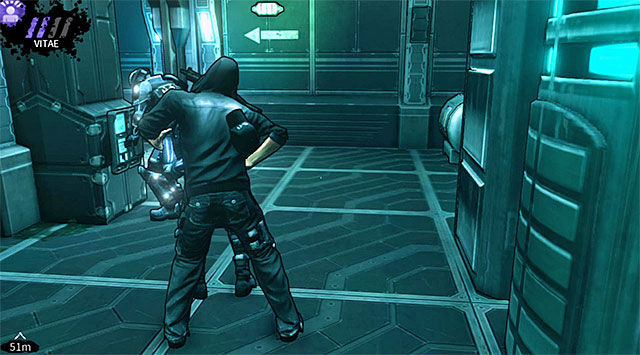 Eliminating the second group of hunters
The vampire hunters from this group are standing very close to each other. You don't have to worry about, because an attack on a normal guard shouldn't alarm his armored colleague.
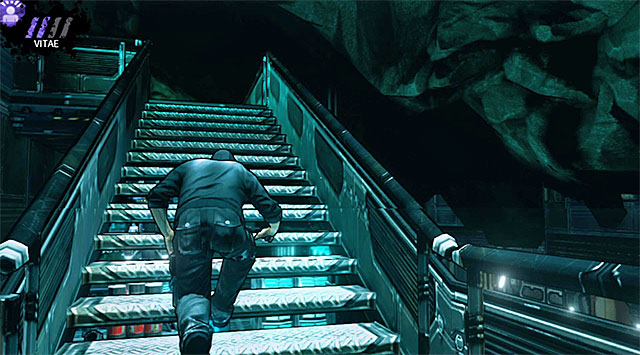 Stairs
Proceed towards the upper balconies and once again watch out for a single guard from the second floor, because he'll be stopping close to the balustrade and monitoring the area. Use one of the staircases to reach the top level.
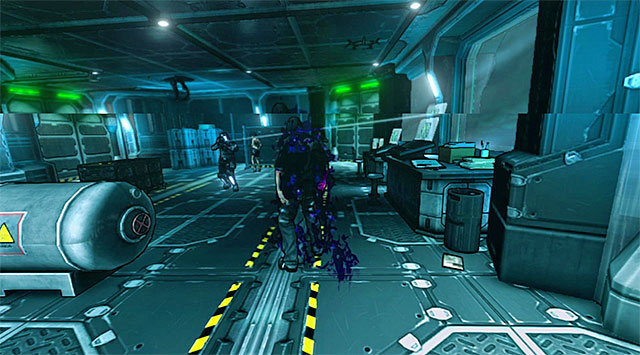 Rescuing Rose
What's interesting is that you probably won't have to kill the guard mentioned above, because Eric will automatically enter the room where Rose is being held and he'll rescue her without your assistance. It's important to listen what Rose will want to tell you now, because she'll explain her entire plan - it will be about distracting Steiner and activating terminals.
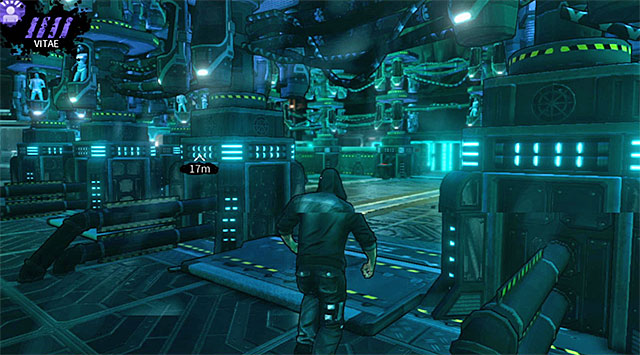 One of the entrances to the arena
Use the stairs to descend to the ground level and choose one of the entrances to the arena in order to begin a duel with Steiner. It's worth mentioning here that if you've managed to rescue Tom recently then he will now be murdered by the mutant and sadly you won't be allowed to prevent it from happening.
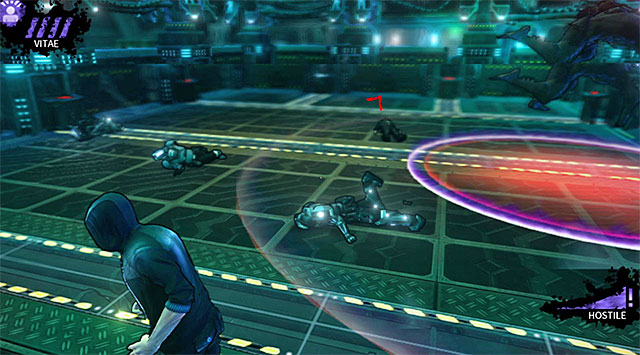
A fight with Steiner is much easier than you might think. You won't have to use any of your offensive vampiric abilities and you also won't have to fight the boss in close combat. Instead focus on staying on the run and ignoring powerful stomps performed by Steiner. The game will always warn you about his upcoming attack - you'll see circles appearing on the floor (screen above) and obviously your job will be to move away from the endangered area in time. If you do receive some injuries then don't forget to use Regeneration to heal yourself (it's highly recommended to fully upgrade this power).
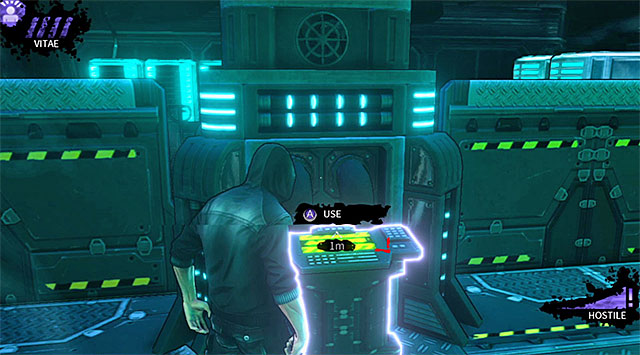 The first out of four terminals
Keep attacking the boss until you receive an information from Rose about activating one of the nearby terminals. Approach this terminal as soon as possible and interact with it.
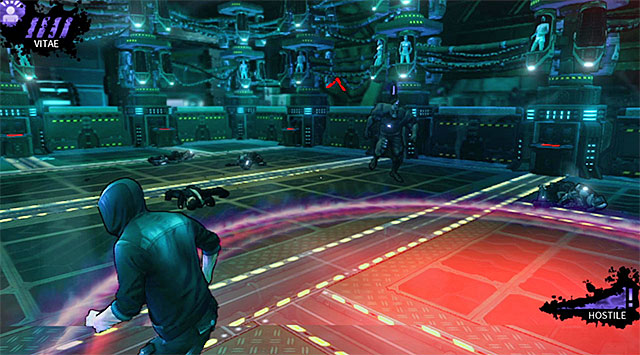 Steiner's alternative charge
The duel will have a similar progress from now on and the only new thing will be Steiner's alternative charge. It will be slightly faster than his usual stomps, but you'll still be warned by circles appearing on the ground.
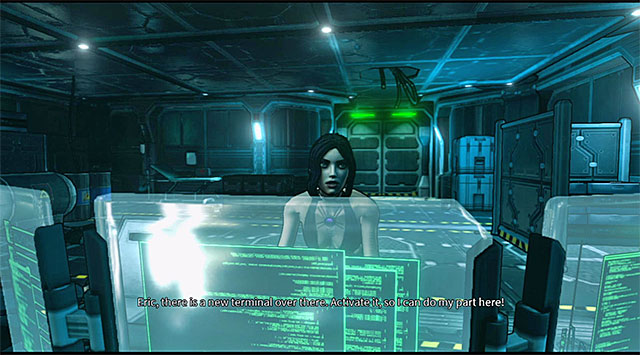 Cut-scene after which you'll have to choose an ending
You must keep repeating the actions described above by approaching and activating other computer terminals. Your job is to activate four terminals in total, because that's when you'll watch a new cut-scene and will have to choose an ending.
Important! The game has two endings and you can see them both without having to repeat the entire sixth chapter. Once you've watched one of the endings return to the main menu, choose Load from the list of options and find a checkpoint entitled M17 Base - Cryo Chamber. You will begin after rescuing Rose and this means that you will have to repeat the final fight with Steiner, but since you'll already know how to act it should be easier to succeed.
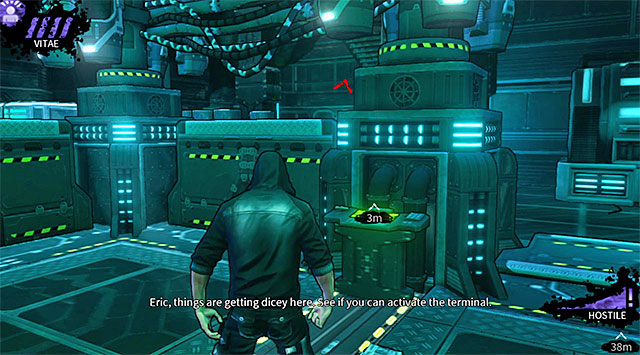 Final fifth terminal
If you want to see the first ending then you must approach the last fifth terminal marked on your HUD and interact with it.
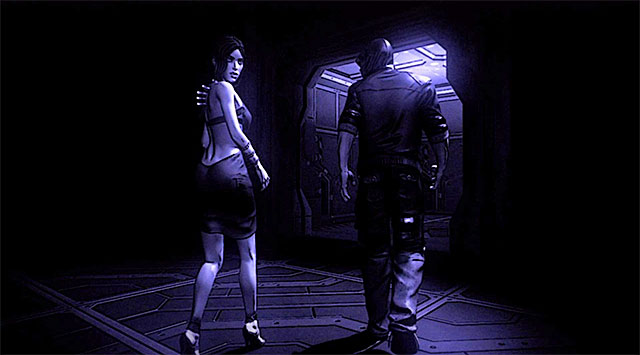
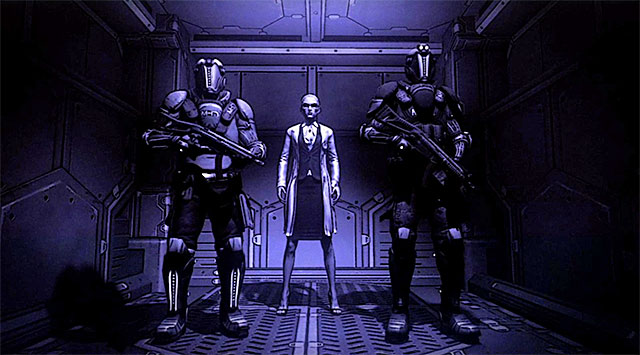 First ending
Choosing this ending will allow you to keep Rose alive, however Samantha will manage to escape the M17 facility.
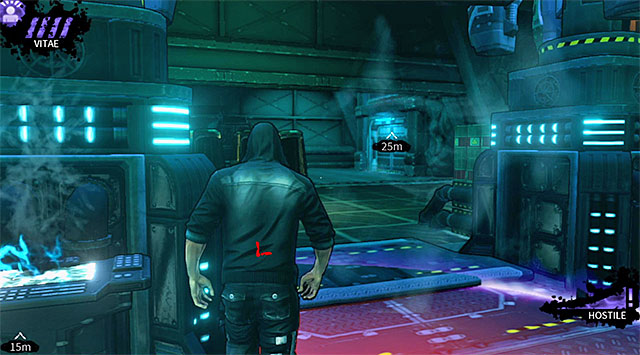 Door used by Samantha
If you want to see the second ending then you must leave the arena and proceed to the door Samantha has used during her escape.
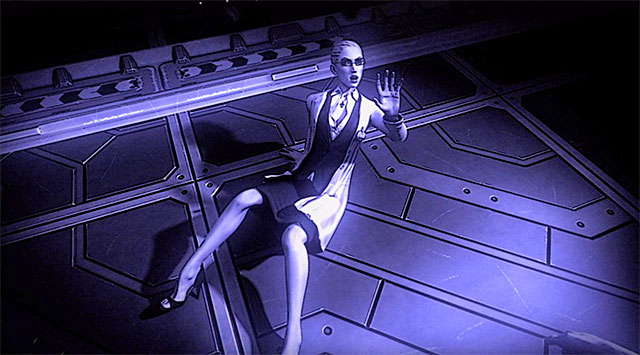
 Second ending
Choosing this ending will allow you to catch up with Samantha and kill her, however as a result of that Rose will also die.
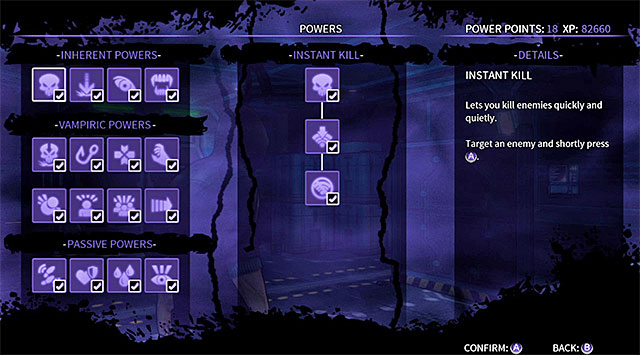 Menu used to unlock new powers and upgrades
There are sixteen different powers available in DARK, however each power has one, two or three upgrades. Unlocking new abilities is a very standard process in this game, because it happens as a result of earning experience points. Each time you've gathered enough XP the main character will automatically advance to a higher experience level and he will also receive one power point which you'll be allowed to spend on unlocking a new power or on upgrading one of your existing abilities. You can earn experience points by:
An important thing to know is that if you'll use every opportunity to earn XP then you will unlock all available powers and upgrades long before finishing the game - I was able to achieve this at the beginning of the fifth chapter and by the time the game has ended I had nearly 20 unspent power points. This means that you don't have to worry if you'll fail somewhere and don't receive an XP bonus, because it won't jeopardize your chances of fully developing the main character. It doesn't mean of course that you shouldn't be trying, especially since unlocking all of the best powers early in the game will make it much easier.
EFFECTS: Performing a silent execution on an enemy unit.
USEFULNESS: high
COST: - (you don't have to unlock this power, because it's available from the start of the game)
COMMENTS: This is a basic attack and you'll be using it throughout the entire game to get rid of living opponents and ghouls.
UPGRADE 1/2 - QUIET KILL
EFFECTS: Less noise caused by a silent execution.
USEFULNESS: high
COST: 1 power point
COMMENTS: It's good to unlock this upgrade early in the game. It will come in handy especially in smaller areas where enemies are standing close to each other.
UPGRADE 2/2 - SILENT KILL
EFFECTS: Activating Instant Kill doesn't cause any noise.
USEFULNESS: high
COST: 1 power point
COMMENTS: This upgrade will become useful later in the game, because enemies will patrol the areas in pairs more often than before.
EFFECTS: Teleporting the main character to a designated destination.
USEFULNESS: high
COST: - (you don't have to unlock this power, because it's available from the start of the game)
COMMENTS: Teleportation is very useful when you want to avoid enemy units or reach areas from where it will be easier to perform surprise attacks on them. Make sure to upgrade this ability, because it causes a lot of noise by default (the noise can be heard near Eric's destination).
UPGRADE 1/3 - INCREASED RANGE
EFFECTS: Increased range of the teleportation.
USEFULNESS: high
COST: 1 power point
COMMENTS: It's a good idea to quickly unlock this upgrade, because Shadow Leap doesn't have a long range in its original form.
UPGRADE 2/3 - REDUCED COOLDOWN
EFFECTS: Shorter cooldown.
USEFULNESS: low
COST: 1 power point
COMMENTS: The only time when you can really use this bonus is when you plan on making two "jumps" within a short period of time, but that doesn't happen often. As a result the only reason to unlock this upgrade is to gain access to the one described below.
UPGRADE 3/3 - PERFECT SHADOW LEAP
EFFECTS: Second increase in range of the teleportation. Activating Shadow Leap doesn't cause any noise.
USEFULNESS: high
COST: 2 power points
COMMENTS: This upgrade requires you to sacrifice 2 power points, but nonetheless you shouldn't wait too long with unlocking it. A second bonus to the ability's range will come in handy in larger areas and since it won't make any noise anymore you won't have to worry so much about alarming enemy units.
EFFECTS: Activating vampire vision.
USEFULNESS: high
COST: - (you don't have to unlock this power, because it's available from the start of the game)
COMMENTS: The biggest advantage of this ability is that it doesn't need any Vitae to operate and it means you can use without any restrictions (no cooldowns). Furthermore, activating vampire vision slows down the time.
UPGRADE 1/2 - CLAIRVOYANCE
EFFECTS: Ghouls and weapons are seen in the vampire vision mode.
USEFULNESS: medium
COST: 1 power point
COMMENTS: You don't have to unlock this upgrade right away. A good moment is the final part of the first chapter, because that's when you'll start encountering ghouls.
UPGRADE 1/2 - CLAIRVOYANCE II
EFFECTS: Cameras, UV lights and PDA's are seen in the vampire vision mode.
USEFULNESS: low
COST: 1 power point
COMMENTS: Just as before you should wait with the purchase until you've bought more important powers and upgrades. Plus you don't have to rely on vampire vision to find the PDA's, because their locations have been mentioned in this guide.
EFFECTS: Draining an opponent of his blood.
USEFULNESS: high
COST: - (you don't have to unlock this power, because it's available from the start of the game)
COMMENTS: Feeding on human enemies is the only way to regain Vitae needed to activate more advanced vampiric powers. An important thing to know is that you won't be allowed to feed off of armored guards and ghouls.
UPGRADE 1/3 - SANGUINARIAN
EFFECTS: Feeding takes less time.
USEFULNESS: medium
COST: 2 power points
COMMENTS: Having this upgrade lowers the chances of being exposed while trying to drain someone of their blood. Sadly, you must spend two power points instead of one.
UPGRADE 2/3 - SANGUINARIAN II
EFFECTS: Less noise caused by feeding.
USEFULNESS: low
COST: 2 power points
COMMENTS: This isn't a particularly useful upgrade. Since you can't hide when you're feeding you should still pick opponents standing far away from other enemy units even after you've gained access to this upgrade.
UPGRADE 3/3 - SANGUINARIAN III
EFFECTS: Two Vitae points are regained after a single feeding.
USEFULNESS: high
COST: 3 power points
COMMENTS: This upgrade is very costly, however it becomes extremely useful later in the game, allowing Eric to use all of his vampiric abilities more frequently and decreasing problems caused by encountering more and more armored enemies (as you probably remember they're "immune" to feeding).
EFFECTS: Teleporting Eric towards an opponent and performing a silent kill.
USEFULNESS: high
COST: 1 power point
COMMENTS: It should be your top priority to unlock this power as soon as possible, because it comes in handy in killing more distant targets. Another advantage of this ability is that it can also be used to kill ghouls and armored soldiers (the only exception are the elite hunters with miniguns).
UPGRADE 1/3 - SILENCE
EFFECTS: Activating Shadow Kill doesn't cause any noise.
USEFULNESS: high
COST: 1 power point
COMMENTS: I strongly recommend purchasing this upgrade, especially since it requires only one power point.
UPGRADE 2/3 - REDUCED COOLDOWN
EFFECTS: Instant regeneration of Shadow Kill.
USEFULNESS: low
COST: 1 power point
COMMENTS: You shouldn't waste your time and valuable power points on this upgrade. Situations when you'll want to perform two kills soon after each other are very rare and besides you'd need two Vitae points to pull it off.
UPGRADE 3/3 - STUN
EFFECTS: Enemies standing close to the killed target are being stunned.
USEFULNESS: high
COST: 2 power points
COMMENTS: You can ignore this upgrade for a long time as well, because you shouldn't risk attacking enemies who are standing close to other hostile characters.
EFFECTS: Distracting enemy units.
USEFULNESS: medium
COST: 1 power point
COMMENTS: This power may come in handy in certain situations, especially since you can choose where nearby guards are supposed to be looking. If you like to kill your enemies then invest in something more useful in performing silent executions.
UPGRADE 1/2 - EXTENDED DURATION
EFFECTS: Enemies are distracted for a longer period of time.
USEFULNESS: high
COST: 1 power point
COMMENTS: If you've decided to unlock the main ability then you should invest in this upgrade as well, because Distract only lasts four seconds by default.
UPGRADE 2/2 - INCREASED AREA OF EFFECT
EFFECTS: A larger area is affected by the ability.
USEFULNESS: low
COST: 2 power points
COMMENTS: It's best to focus on distracting only very small groups. Besides being noticed by a more distant enemy isn't equal to an instant alarm, because you'll usually have some time to hide before you're discovered.
EFFECTS: Regaining health points.
USEFULNESS: low
COST: - (you don't have to unlock this power, because it's available from the start of the game)
COMMENTS: If you plan on using this guide to help you in finishing the game then you won't need to regenerate yourself, because you won't be attacked even once. The only exception is the fight with the final boss, but by then you will most likely have all powers and upgrades at your disposal.
UPGRADE 1/1 - INSTANT REGENERATION
EFFECTS: Instant health regeneration.
USEFULNESS: low
COST: 1 power point
COMMENTS: Like I've already said you probably won't have to use Regeneration and when you'll start the fight with the last boss your character will already be fully developed.
EFFECTS: Performing an execution from a distance.
USEFULNESS: high
COST: 1 power point
COMMENTS: The main difference between this ability and Shadow Kill is that after activating Shadow Grip the main character doesn't teleport himself to his target but instead he performs an execution without leaving cover. This is a very useful power, but make sure to fully develop it.
UPGRADE 1/2 - SILENT GRIP
EFFECTS: Activating Shadow Grip doesn't cause any noise.
USEFULNESS: high
COST: 2 power points
COMMENTS: I strongly recommend that you unlock this upgrade as soon as possible, because Shadow Grip makes a lot of noise by default and the execution may easily be noticed by someone.
UPGRADE 2/2 - DESTROY CORPSE
EFFECTS: Automatic body disposal after a successful kill.
USEFULNESS: high
COST: 3 power points
COMMENTS: This upgrade is extremely expensive, however it greatly increases the usefulness of the Shadow Grip ability. Having this upgrade will allow you not only to eliminate distant enemies, but you also won't have to worry about getting to their corpses to dispose of them.
EFFECTS: Becoming a shadow that's harder to spot.
USEFULNESS: medium
COST: 1 power point
COMMENTS: It's a good idea to have this ability "on stand-by" so that you can immediately activate it when you'll notice that you're close to being discovered by an enemy guard or by a security camera.
UPGRADE 1/2 - EXTENDED DURATION
EFFECTS: Extended duration of the Obfuscation ability.
USEFULNESS: high
COST: 1 power point
COMMENTS: If you like using this ability then you should also invest in the first upgrade, because it extends the partial invisibility to eight seconds (it's only four seconds by default).
UPGRADE 2/2 - EXTENDED DURATION II
EFFECTS: Second extension in the duration of the ability.
USEFULNESS: low
COST: 2 power points
COMMENTS: Thanks to unlocking this upgrade you'll have 15 seconds in total, but to the be honest you won't need that long and as a result it's better to focus on gaining access to more useful powers and upgrades.
EFFECTS: Stunning an opponent.
USEFULNESS: medium
COST: 1 power point
COMMENTS: This is a fairly interesting ability and you may find it useful each time you encounter two guards stationed close to each other. It's not absolutely necessary to unlock it though, because in most cases you can just wait for enemies to go in their separate ways or get their attention by running next to cover.
UPGRADE 1/2 - REDUCED COOLDOWN
EFFECTS: Instant regeneration.
USEFULNESS: low
COST: 2 power points
COMMENTS: Being able to use Domination several times in a row isn't something special. Once you've encountered a larger group of enemies it's better to avoid them or to use such powers as Distract or Presence.
UPGRADE 2/2 - ENHANCED EFFECT
EFFECTS: Increased duration of the Domination ability.
USEFULNESS: low
COST: 3 power points
COMMENTS: This is another upgrade you don't have to unlock right away, especially since it costs 3 power points. It also doesn't improve your chances in any major way, because Domination lasts four seconds by default and that's plenty of time to avoid or kill a stunned enemy.
EFFECTS: Confusing a group of opponents.
USEFULNESS: low
COST: 2 power points
COMMENTS: Being able to stun a group of enemies at the same time may seem like a great idea. Sadly Presence is very weak in its original form, because it lasts only two seconds. It's also expensive, requiring you to spend 2 power points.
UPGRADE 1/1 - FORGET
EFFECTS: Increased duration of Presence. Alert status of affected enemies is lowered after activating the ability.
USEFULNESS: medium
COST: 1 power point
COMMENTS: Unlocking this upgrade improves the usefulness of the main ability in a major way and that's thanks to a bonus which automatically lowers alert levels of all affected enemy units. Using this power may allow you to survive uncomfortable situations after you've been seen.
EFFECTS: Moving very fast.
USEFULNESS: low
COST: 1 power point
COMMENTS: This is by far the least useful active vampire power. It's much better to invest power points in improving standard teleportation (Shadow Leap), especially since using that ability doesn't require any Vitae.
UPGRADE 1/2 - EXTENDED DURATION
EFFECTS: Extended duration of the Celerity ability.
USEFULNESS: low
COST: 1 power point
COMMENTS: Making the "vampire sprint" last eight seconds (instead of the standard five) doesn't change anything.
UPGRADE 2/2 - EXTENDED DURATION II
EFFECTS: Another extension to a duration of Celerity.
USEFULNESS: low
COST: 2 power points
COMMENTS: The deal here is same as before - unlocking this upgrade doesn't make the main power any more useful and as a result this should be one of your last purchases.
EFFECTS: Causing less noise when walking and sprinting.
USEFULNESS: low
COST: 1 power point
COMMENTS: The base ability doesn't improve the sneaking process in a major way, because the noise made during walking and sprinting is lowered by merely 5 percent. You should treat it only as a gateway to much better upgrades described below.
UPGRADE 1/3 - SILENCE IN THE DARK
EFFECTS: Walking and running are significantly quieter.
USEFULNESS: high
COST: 1 power point
COMMENTS: In this case the difference is substantial, because walking and sprinting make 30 percent less noise. Unlocking this upgrade will allow you to perform risky manuevers more often without having to worry about being heard.
UPGRADE 2/3 - GHOST
EFFECTS: Less chances of being noticed by enemies.
USEFULNESS: high
COST: 2 power points
COMMENTS: You should do your best to unlock this upgrade early in the game so that you won't have to be stressed so much when sneaking around near enemy units.
UPGRADE 3/3 - ENHANCED SNEAKING
EFFECTS: Faster movement when sneaking.
USEFULNESS: high
COST: 2 power points
COMMENTS: This is yet another upgrade which should make its way to the top of the list of your purchases. Being able to move faster while sneaking is extremely useful and you can use it to perform better surprise attacks or to leave dangerous areas faster than before.
EFFECTS: Receiving more health points and regenerating health faster.
USEFULNESS: low
COST: 1 power point
COMMENTS: This is a useless vampiric ability, assuming of course you plan on sneaking and completing the entire game without raising any alarms. Much like with Regeneration there's only one exception, because a health boost may come in handy during the final boss battle.
UPGRADE 1/2 - TOUGHNESS II
EFFECTS: Another bonus to health points.
USEFULNESS: low
COST: 1 power point
COMMENTS: The health boost provided by this upgrade is large (75 percent), but it doesn't change the overall situation.
UPGRADE 2/2 - TOUGHNESS III
EFFECTS: Final bonus to health points and even faster health regeneration.
USEFULNESS: low
COST: 2 power points
COMMENTS: Having 200 percent more health may seem like a great thing, but as I've already said it'll only come in handy in the final battle and only if you won't be careful when going against the last boss.
EFFECTS: Receiving an additional Vitae point.
USEFULNESS: high
COST: 1 power point
COMMENTS: You should unlock this ability early in the game, because Eric has only two Vitae points by default.
UPGRADE 1/1 - VITAE II
EFFECTS: Another Viate point.
USEFULNESS: low
COST: 2 power points
COMMENTS: You can obtain the final fourth Vitae point a little bit later. I recommend doing it after fully developing the Feed ability so that you'll be allowed to use vampire powers often and you'll regenerate two Vitae points with each feeding.
EFFECTS: Receiving an information if using a power or feeding on someone will be heard by other enemy units.
USEFULNESS: medium
COST: 3 power points
COMMENTS: Having this ability isn't absolutely necessary in order to perform silent kills effectively. There's also one more disadvantage, because it needs three power points. I recommend that you make a purchase after you've unlocked all of the best powers and upgrades.
All of the suggestions published below are about playing the game exactly how it was planned by its creators. It means that you shouldn't avoid having contact with enemy units entirely and that aside staying in the shadows you should be silently eliminating all of your opponents (or at least most of them). I don't recommend trying to finish the game without killing hostile beings, because the game won't reward you for these efforts in any way. Furthermore, the only way to regain Vitae energy needed to activate more advanced vampiric abilities is to feed on your opponents and each feeding ends with a kill.
One of your first purchases should be Shadow Kill ability, because by unlocking this power you'll guarantee yourself a way of eliminating enemy units from a distance. This ability in its basic form is more useful than Shadow Grip. The second of the mentioned powers becomes much powerful on the other hand when it's fully developed, because it allows Eric to automatically get rid of the bodies. This patent is especially helpful if a guard is standing under a camera or somewhere else where it's hard to attack him and to dispose of the corpse.
Investing in teleportation (Shadow Leap ability) right from the start of the game is also a good idea. The upgrades are very handy, because not only they allow you to use teleportation without being heard, but they also increase the effective range of this skill. You'll notice the difference almost right away after each purchase, because being able to safely transport the main character to upper balconies or behind good covers will allow you to plan and execute your silent kills with a lot less to worry about.
Don't forget about other inherent powers - improving Instant Kill will allow you to lower the chances of being discovered while performing standard executions and purchasing upgrades for Feed will improve your safety when drinking someone's blood and as a result will give you a chance to use advanced powers more frequently.
As for the available passive powers, you should take interest in Assassin. Don't be fooled by a weak basic bonus, because each of the three upgrades of this ability offers extremely useful bonuses to sneaking and staying hidden. You should also consider acquiring at least the basic version of the Vitae ability, because you'll gain access to an additional Vitae point.
Once you've advanced further in the game start unlocking new upgrades for the powers mentioned above, making them even stronger. As for entirely new abilities, I recommend that you take interest in Auspex (being able to find ghouls and cameras will certainly help you), Distract & Domination (distracting and confusing enemy units is helpful from time to time) and Obfuscation (becoming partially invisible can save you on more than one occasion).
 One of the challenges
DARK doesn't offer a lot after you've successfully finished the entire singleplayer campaign, because the game doesn't have any New Game Plus modes. Another factor that doesn't encourage the player to start over is that you can easily unlock the game's both endings simply by replaying the final boss battle. The only way to extend your time spend playing the game is by choosing Challenges available from the main menu. The challenges aren't original and they don't introduce any new gameplay elements, forcing you to eliminate hostile guards in the shortest amount of time possible while trying to remain undetected. Sadly the game doesn't reward you for completing challenges in any way and all of them take place in locations which Eric already had a chance to visit in the main campaign.
I recommend that you start doing the challenges after you've finished the entire game so that you'll be very familiar with the advanced mechanics and you'll also know the locations. The bad news is that you won't be allowed to transfer any of your vampiric powers from the main campaign. You are thankfully given a few power points at the beginning of each challenge so make sure to read the chapter about Eric's abilities to find out which ones you should invest in.
ACHIEVEMENT
HOW TO UNLOCK / COMMENTS
A Friend in Need
You must rescue Tom while playing the sixth chapter of the game. Read the walkthrough for more info.
A Time to Make Friends
You must have a conversation with Samantha. This is a story-related achievement and it can't be missed.
A Transient Shadow
You must use Shadow Leap ability 50 times.
After Dark
You must leave the club area of the Atlantis club. This is a story-related achievement and it can't be missed.
Caine
You must unlock all of Eric's vampiric powers and their upgrades.
Data Collector
You must find 7 PDA's during a course of a single chapter. You will be finding more PDA's while completing the chapters so don't worry if you'll miss one or two along the way, because sooner or later you will complete this achievement.
Enjoy Nature
You must reach the Geoforge park. This is a story-related achievement and it can't be missed.
Experienced Vampire
You must spend 10 power points on new powers or upgrades.
Full-Fledged
You must agree to completing a tutorial while playing the first chapter of the game. Tom will offer you a chance to start a training during one of your conversations.
Just a Ghost
You must complete an entire level without triggering any alarms.
Kiss From a Rose
You must rescue Rose at the end of the game (go to the page about the game's endings to find out how you can achieve this).
Know-It-All
You must use your vampiric powers 50 times.
Must've Been the Wind
You must clear 10 large locations without triggering any alarms.
Night at the Museum
You must meet with Blooming in the museum. This is a story-related achievement and it can't be missed.
No Place to Hide
You must get to the ruins of the Sanctuary club. This is a story-related achievement and it can't be missed.
Powerful Vampire
You must spend 20 power points on new powers or upgrades.
Revenge!
You must go after Samantha at the end of the game (go to the page about the game's endings to find out how you can achieve this).
Silent Assassin
You must kill 50 enemies unaware of Eric's presence.
Tasted Blood
You must advance to level 2. This is a story-related achievement and it can't be missed.
The Great Silence
You must kill 50 enemies.
What's Going On Here?
You must stun five enemies and then feed on them. It's worth mentioning that you don't have to use only vampiric powers to stun your opponents. You can achieve the same result by starting to feed off of an opponent and then interrupting that process. Resume feeding after that and wait until Eric kills the other person after drinking the entire blood.


 Dracula 4: The Shadow of the Dragon Game Guide & Walkthrough
 Diablo III: Reaper of Souls Game Guide & Walkthrough
 Destiny Game Guide & WalkthroughDeadfall Adventures Game Guide & Walkthrough
 Darkest Dungeon Game Guide & Walkthrough