
This Deadfall Adventures strategy guide contains a complete walkthrough along with numerous screenshots of consecutive parts of the game. It also includes additional advice on completing specific chapters and location of all hidden treasures. Every secret is described in detail and the description includes screenshots that will help you find them.
In this Deadfall Adventures strategy guide you'll find:
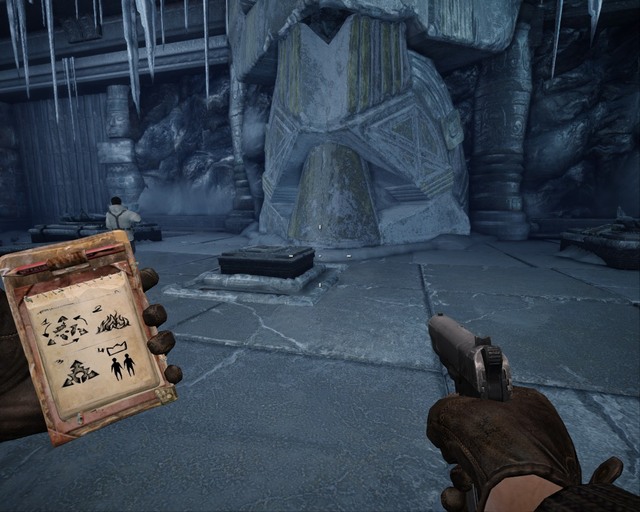
Deadfall Adventures is a first-person perspective action game. You play as a famous adventurer and roam through ancient ruins, pyramids and jungles. You'll see many puzzles, traps set by builders, and even mummies. Nazis will do their best to stop you from finding any treasures. The game was created by Polish studio The Farm 51.
Marcin "Xanas" Baran ()
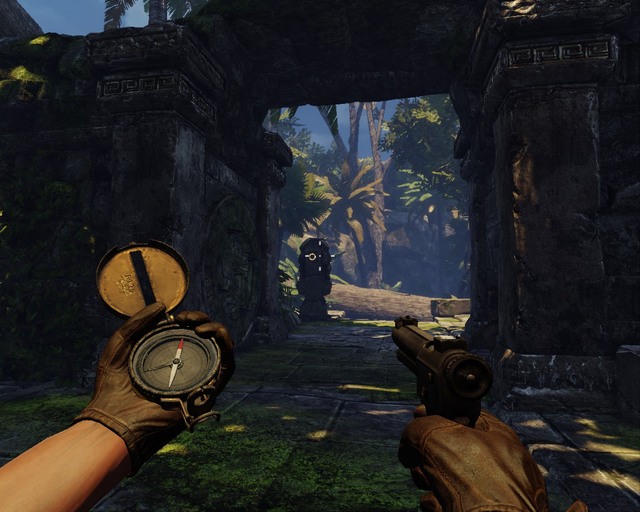
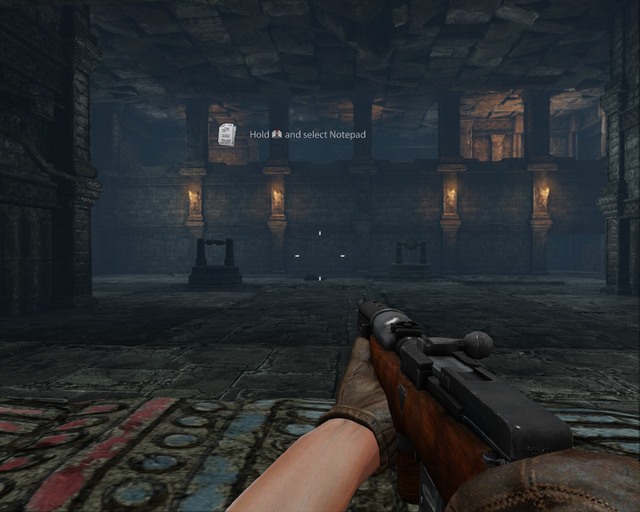
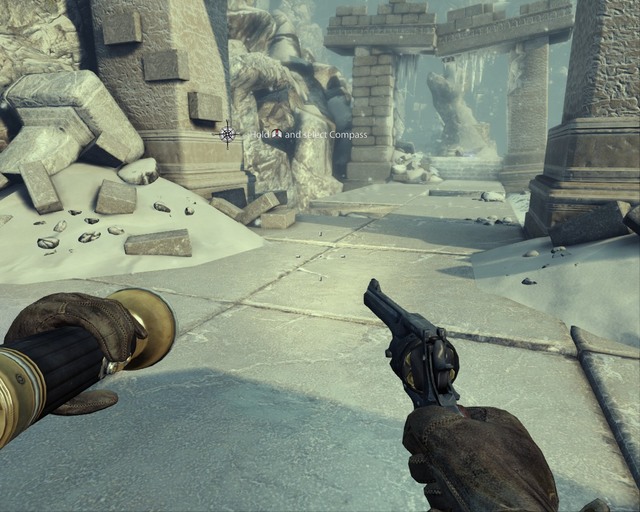
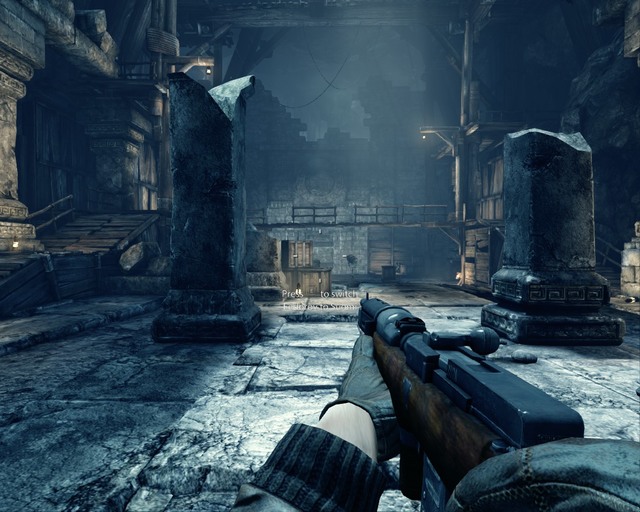
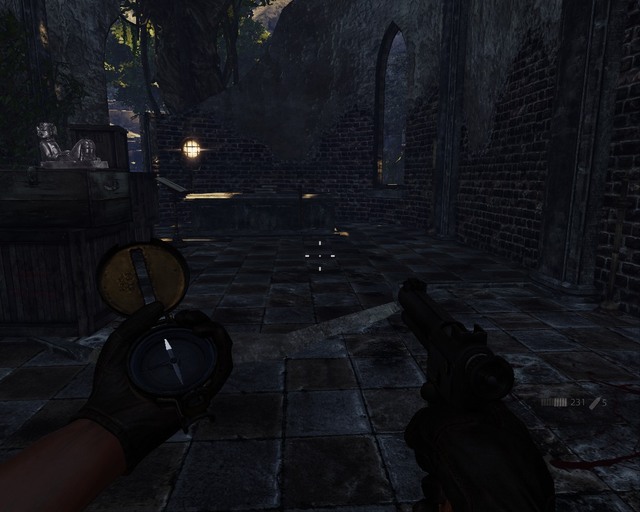
After a quick car ride you'll be in front of stairs. Go upstairs and head forward. After a while you'll reach a place where you have to crouch to go between two statues. Crouch using a proper button.
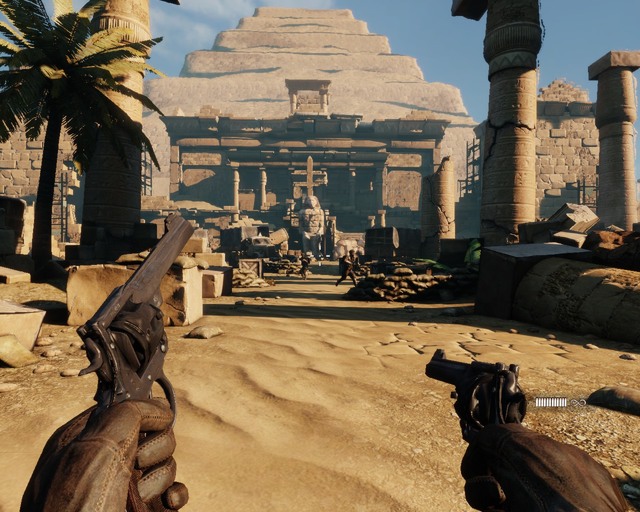 Thirty seconds into the game and someone already wants you out.
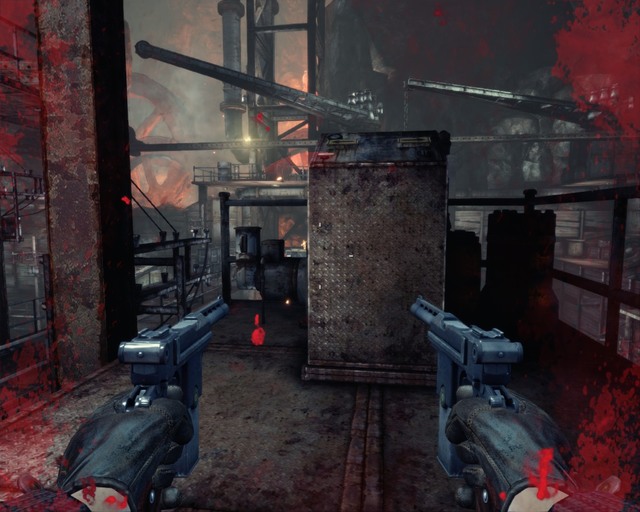
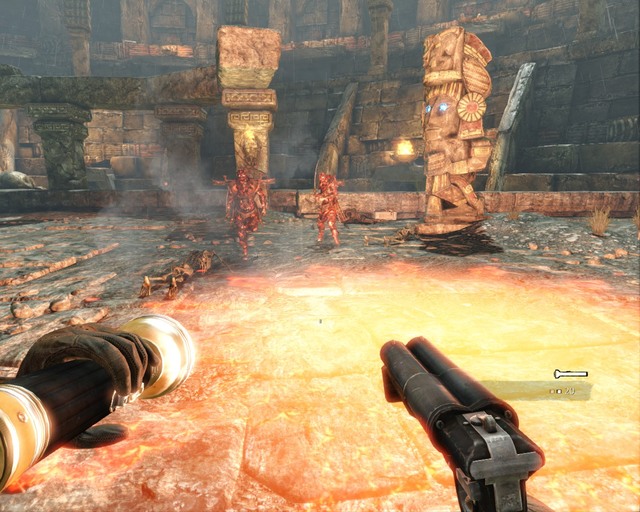
After next few steps you'll see a welcoming committee that won't have any good intentions towards you. Kill your enemies and move forward while hiding behind pieces of ruins. There won't be many of them and after a while the area should be cleared.
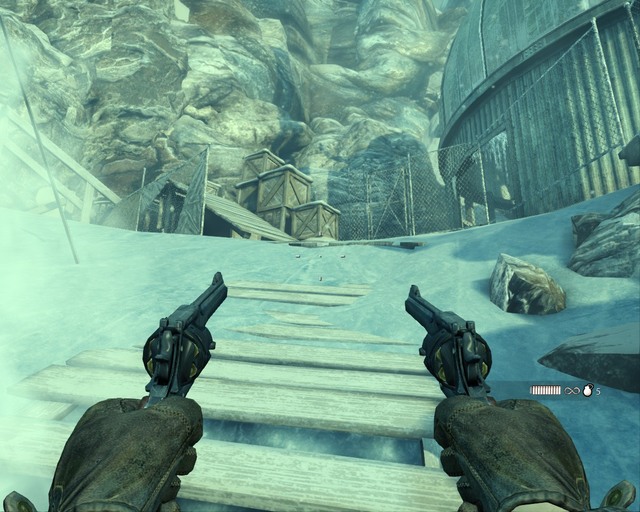
You will have an opportunity to take a weapon other than two revolvers.
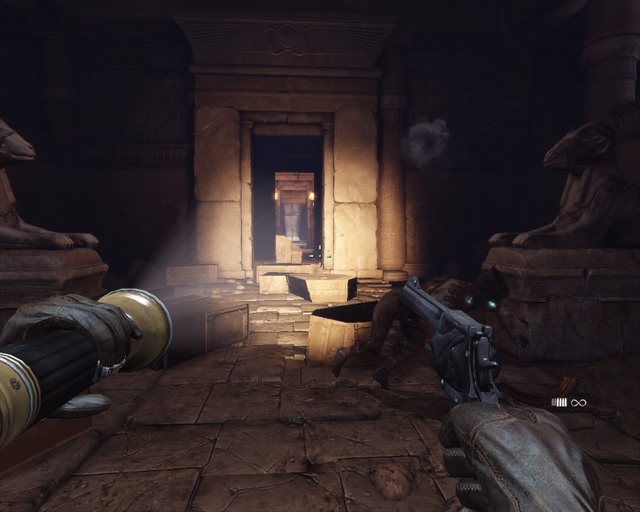
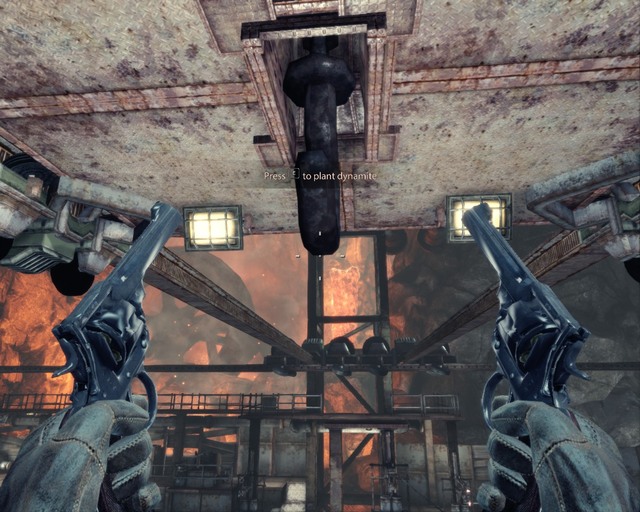
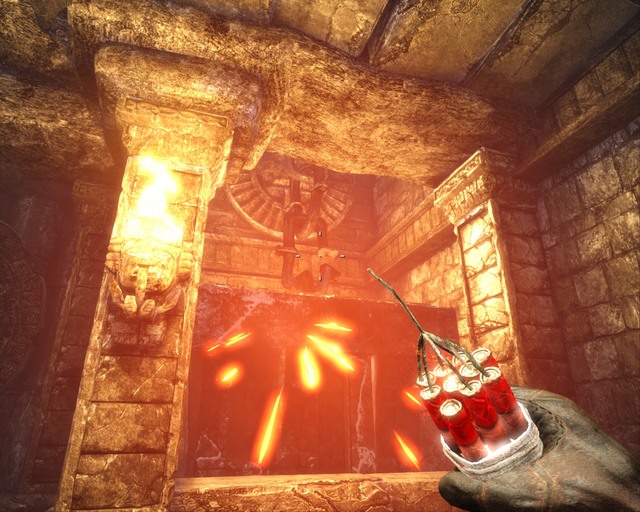
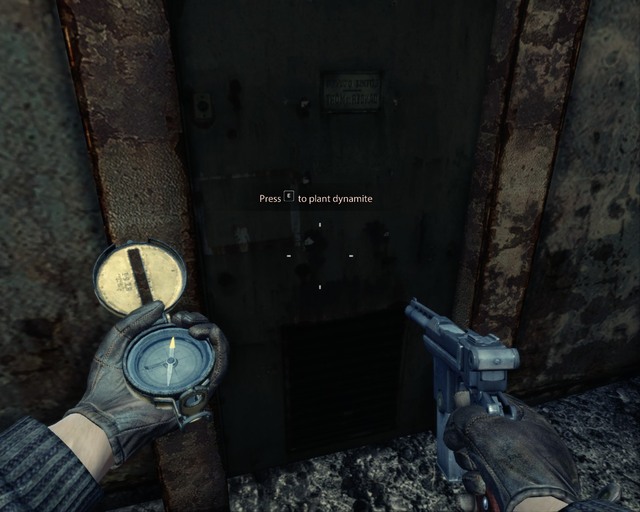
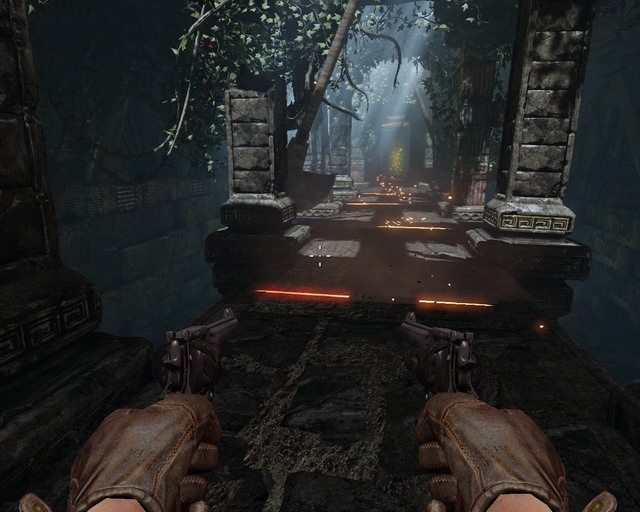
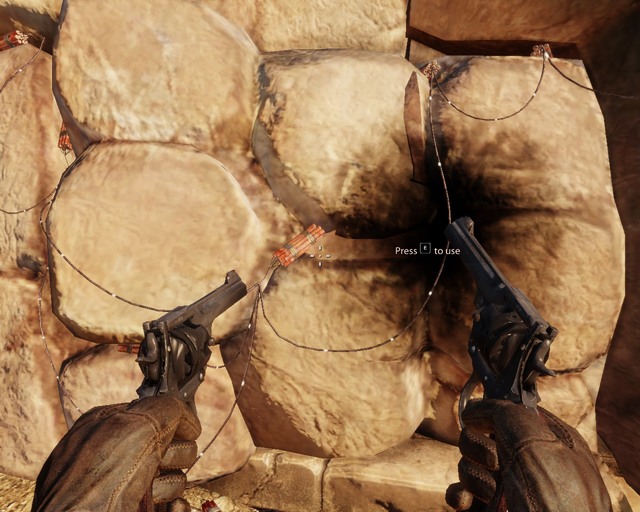 You can use dynamite in this place.
After a while you will reach a part where you'll have to use dynamite to open the entrance to the temple. You'll find some dynamite sticks near the passage. Take them and get close to a pile of rocks, you'll be able to plant them on the scorched side. Do it and enjoy the scene.
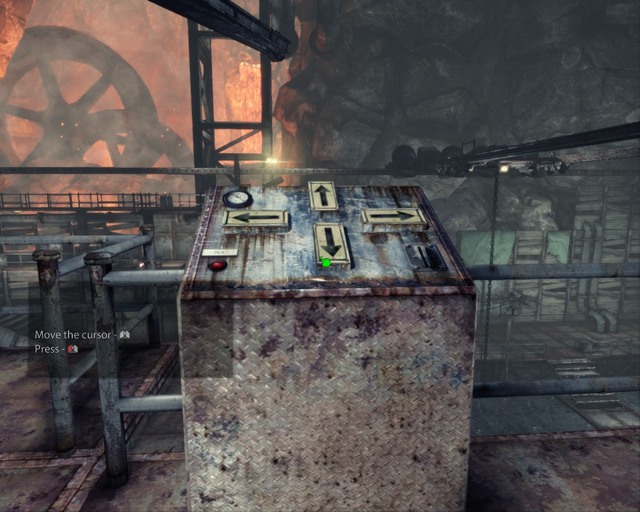
 This lever will start the elevator.
After a moment the passage will be clean and you'll be able to take the stairs to the temple. When you're inside, you'll se a big, old elevator. Use the switch on the right to go down.
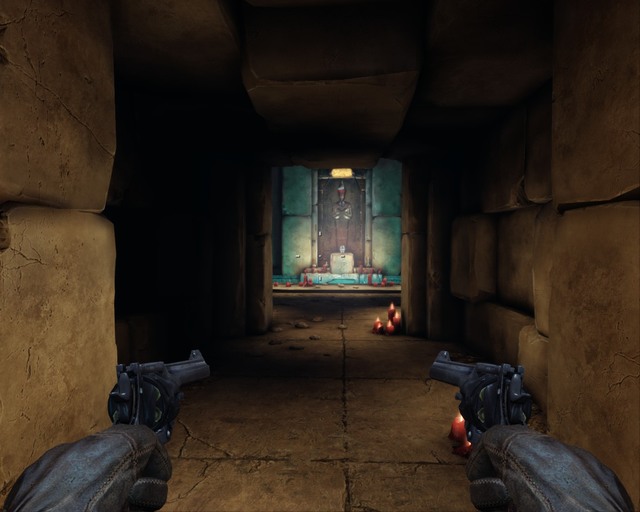
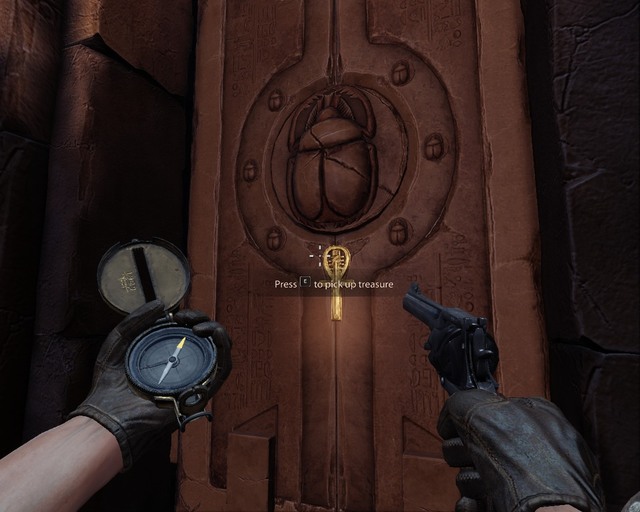
 Take the key and insert it into the lock.
After a while you'll reach a corridor that leads to a rather big chamber with a big gate. Take a key from your companion and insert it into the lock to open the gateway.
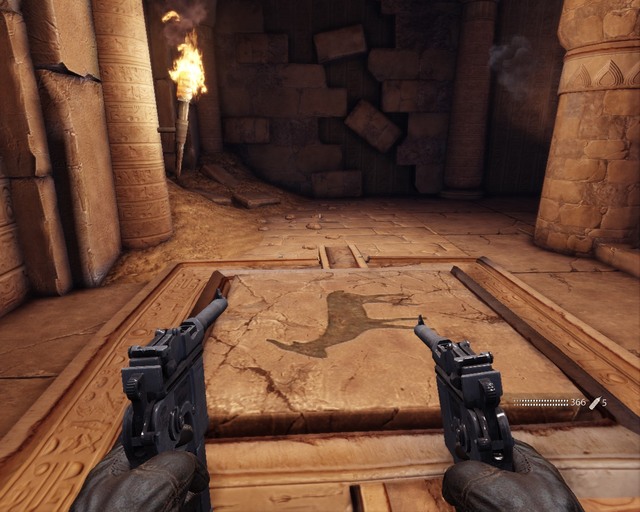
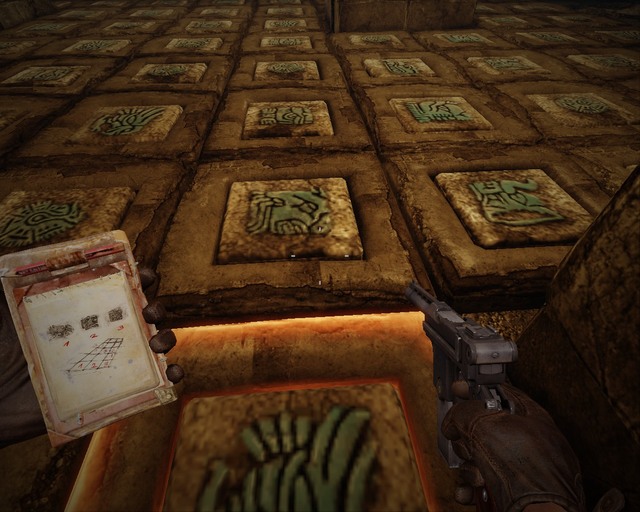
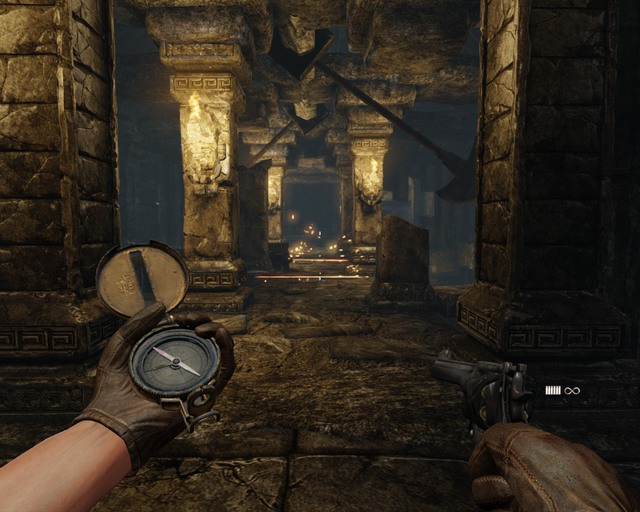
After a cutscene your character will run from the nazis and reach a dark corridor lit by torches. Turn left on the first crossroad and enter the next chamber. There will be pictures of a snake and an eye. Thanks to your journal you will know not to step on the ones with a snake.
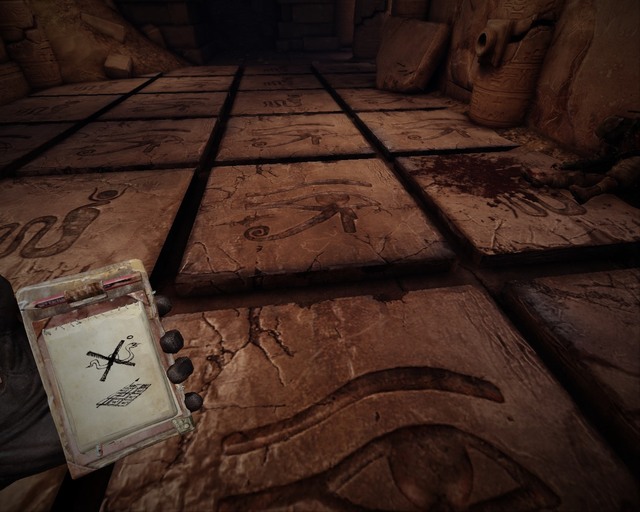 First riddle. It's not hard if you use your journal.
Walk only on the tiles with an eye on them. After a moment you'll be able to go left or right. Turn right and walk by the wall.
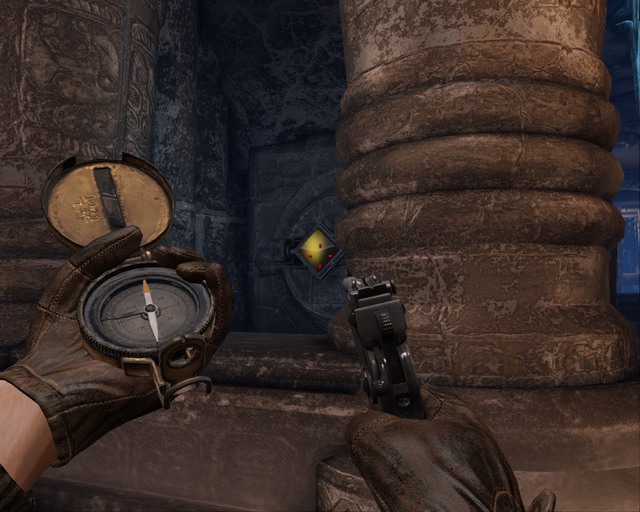
You'll enter another room. The door will be locked and it will be another puzzle. The journal will come in handy - it says that you can use the levers on each side of the door. The important thing is to set both levers like a symbol shown on the door.
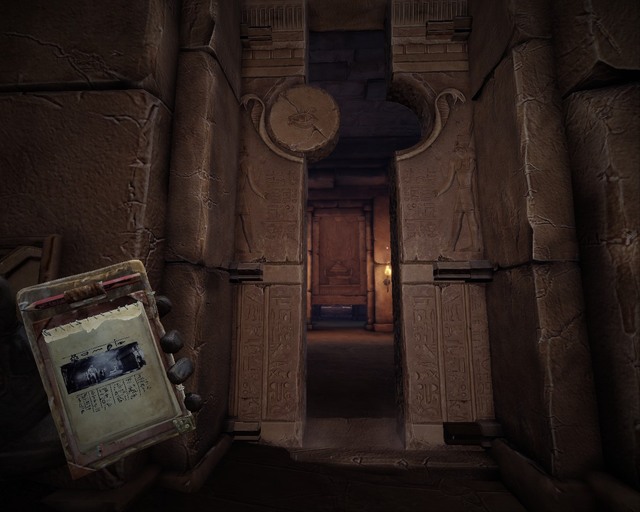 Gate opening after you placed the blocks properly.
When you set a proper combination it will open and you'll be able to go forward. Go under the next door using the crouch button.
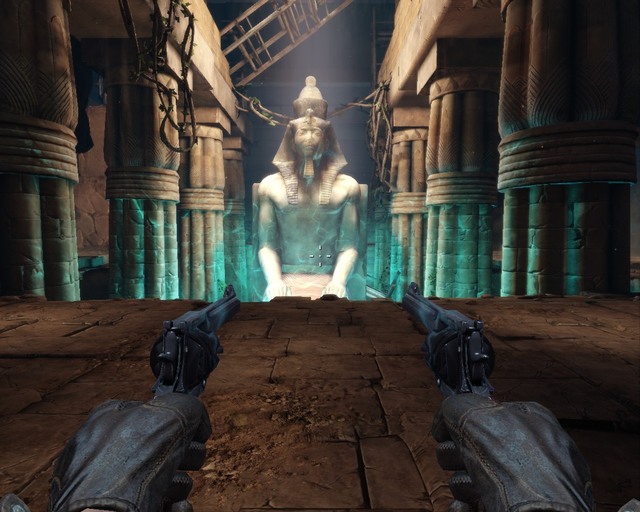
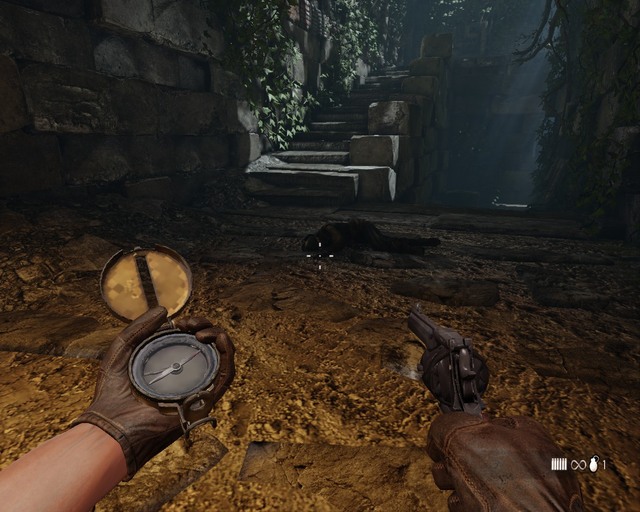
You'll see another chamber. This time you'll see a statue that shines with a green light and an adventurer's corpse that you can search, you'll find two revolvers.
 You have to make your way through
The green statue gives you points to your skill tree. When you're familiar with the tree, head to the boarded up door. Shoot the boards and keep going.
After a moment you'll hear voices and see three nazis. Get closer and kill them, then move on.
 Left or right path, it doesn't matter.
In this room you'll find two paths, left and right. They both have traps - falling blocks that can crush your bones. You have to keep an eye on them - they fall quite slowly - and run below them when they go up. Then you'll reach another corridor and a chamber.
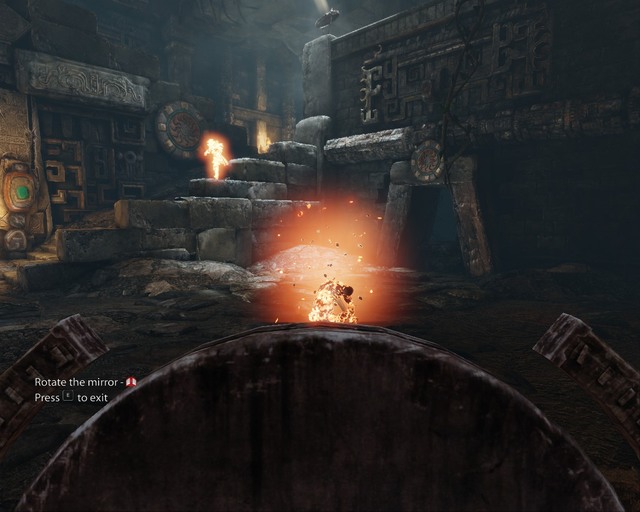
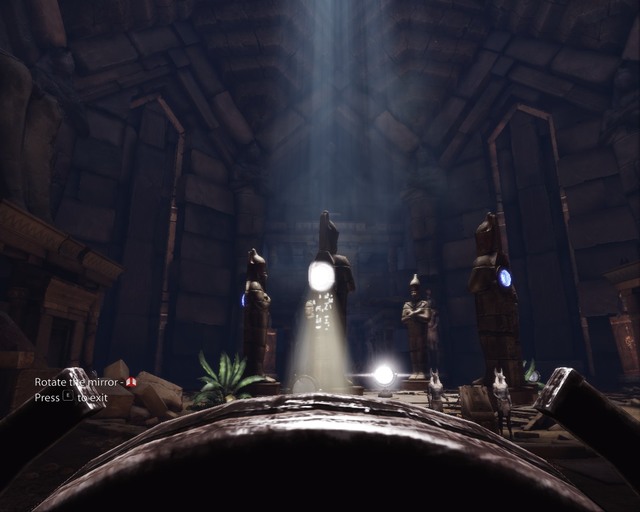 Correct position of one of the mirrors, wait until the column heats up.
There's another puzzle there. Quite an easy one and well-known from other games. You have to turn the mirrors so they reflect light into upper parts of the statues. Success will be shown with the fact that their eyes will shine. So first you turn the middle mirror towards one of those in the back and then you reflect light on the statues.
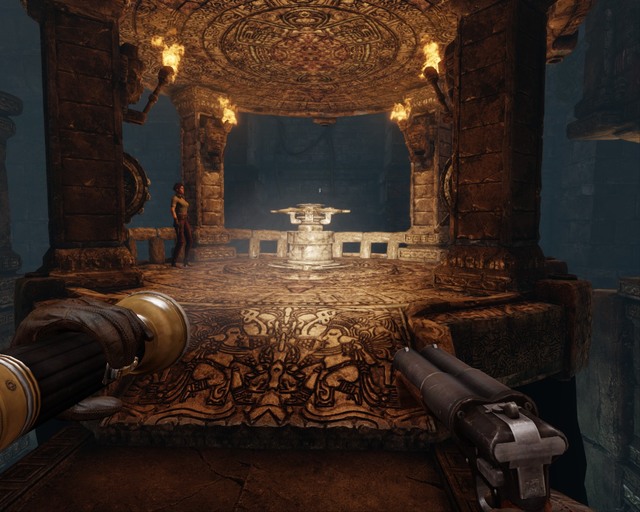
After lighting up all the statues you'll see a short cutscene after which you will find one of the pieces of the ancient Heart. After the cutscene ends put it into the mechanism in front of you.
 Put the heart here to unlock another minigame.
Next use two buttons on the pedestal to arrange the rays so they would look like a constellation. You can click one of the arrows as well and when it's done, the game will trigger another cutscene. (you can click left 4 times)
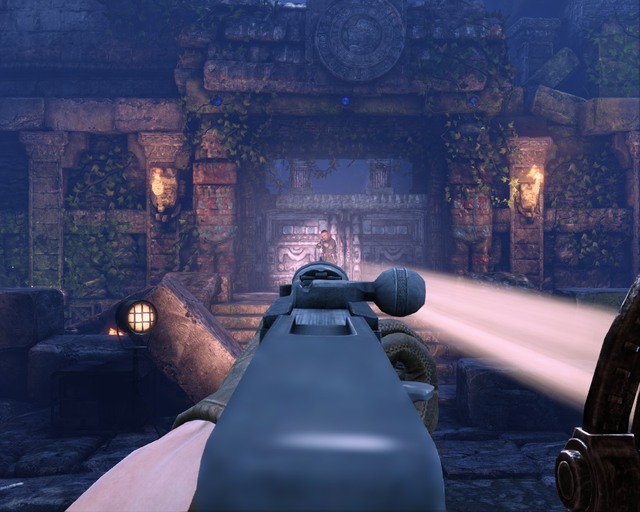
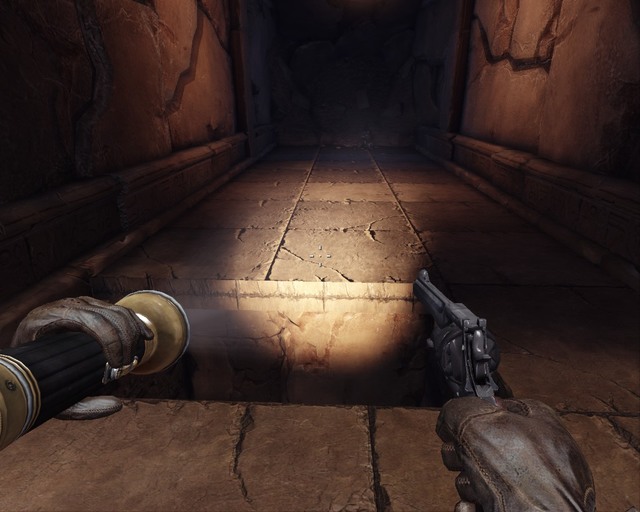
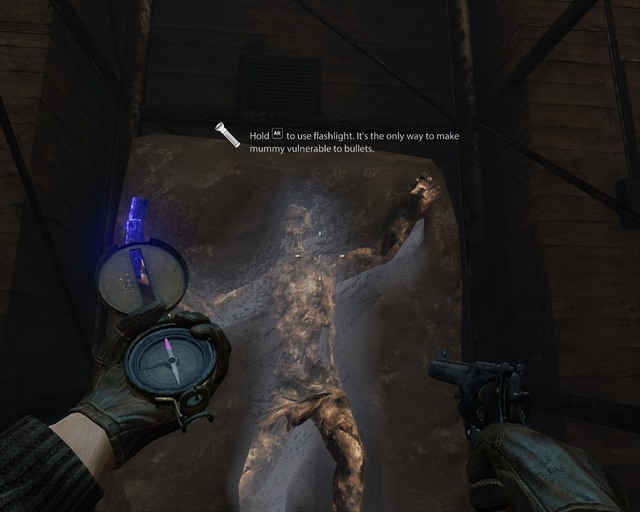
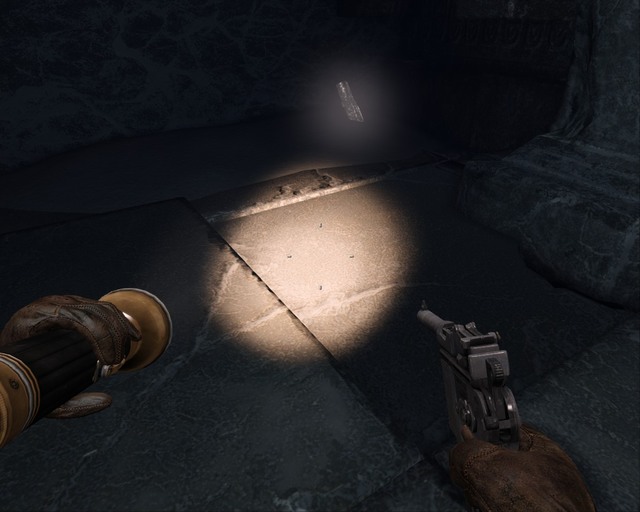
 The flashlight is your best friend in this game.
Once it's over, you'll be in another corridor. Go along it. After a while you'll see your first undead enemy. You need to use the flashlight to defeat him. Point it at him and hold alt to focus the light. When the mummy gets red it will also become vulnerable to your attacks.
After defeating the mummy enter the next room which turns out to be a dead end. After taking a few steps the floor will collapse under your partner and you'll have to take her out. You will fail and start sliding deep into the pyramid with her.
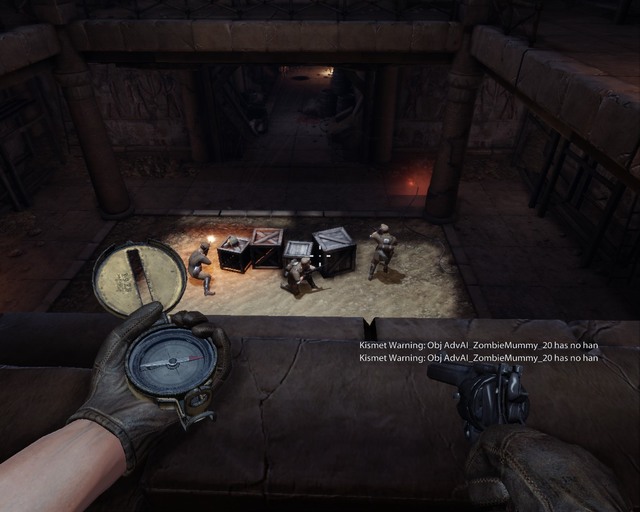
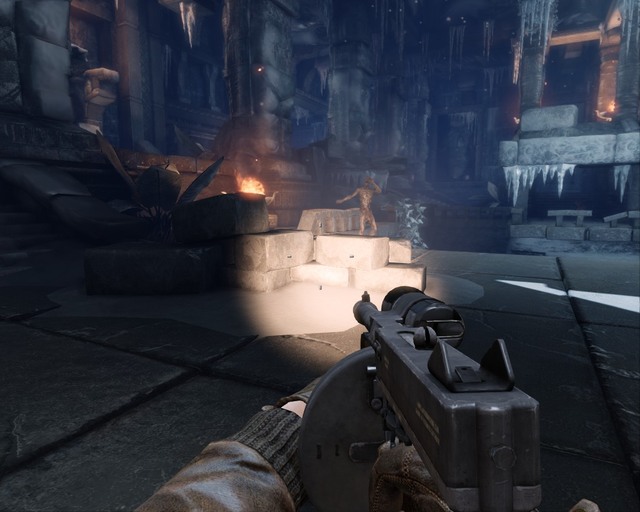
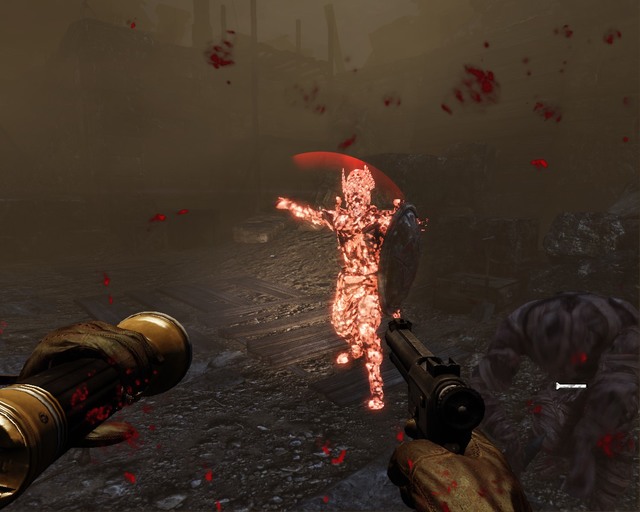
 First battle between nazis and mummies.
After a quick ride you'll come across a fight between mummies and the nazis. Kill both groups to be able to move on - none of them are your allies.
When you defeat all the enemies enter the corridor in front of you. Turn right at the crossing and open the door with a switch. Kill all the enemies inside.
Keep going, you'll see another fight - the undead will definitely win if you don't do anything. You can wait until they kill each other or join the fight straight away.
 Germans versus Zombies, it will be faster if you kill them all by yourself.
When the fight is over, jump down and go left and then left again. When you keep going forward, you will move under the grates to a room with another statue where you can distribute skill points. The grates will separate you from your comrade and her chamber will start collapsing. You have to open the door by setting the eye symbol on one switch and three crosses (or whatever that is) on the other one. Your notebook will be helpful.
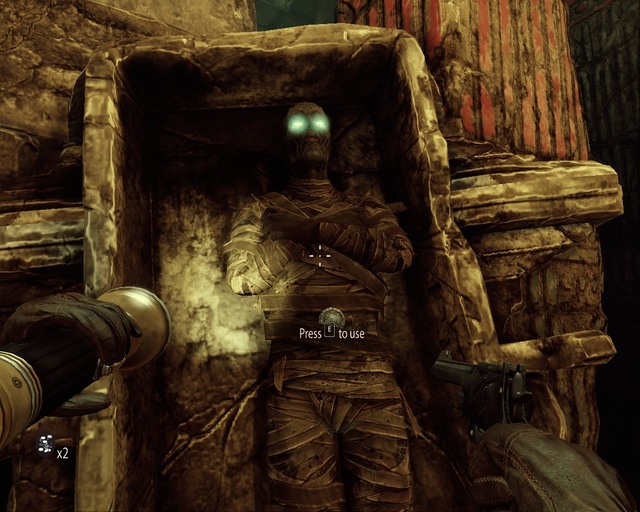
After you open the grate you can distribute skill points and the only available way will be on the right. Go along it and you'll reach a chamber with a tomb in the middle and statues on a pedestal. At the end of it there's a massive door with a round puzzle. Walk up to the sarcophagus and take a piece of a puzzle from it, then put it inside the door.
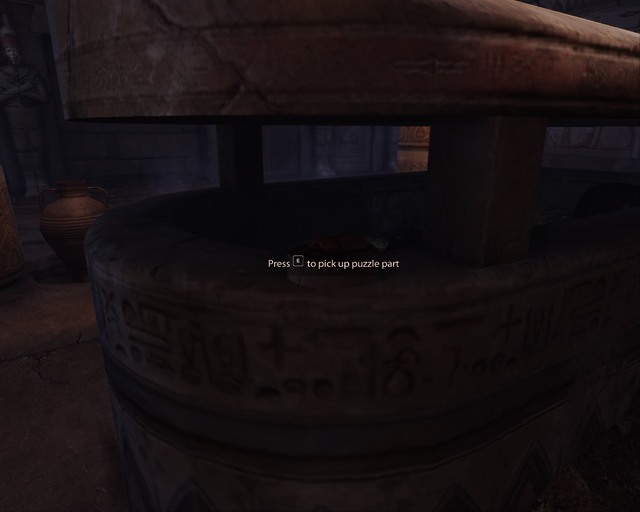 First part of the puzzle.
The mummies will appear when you do it. Kill all of them - it should not be a problem - then take three remaining scarabs and put them in the mechanism.
When you open the door, go downstairs. The only available path will be the left one - the one on the right doesn't have a bridge and there's a crocodile at the bottom so it's not a good idea to jump. After crossing the bridge it will collapse making it impossible to go back.
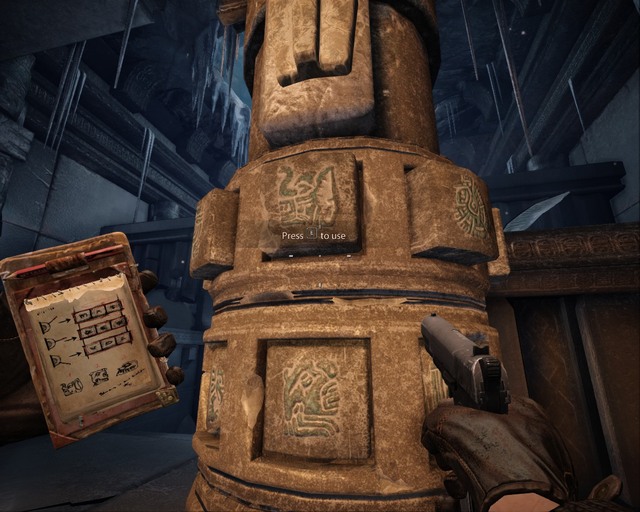
 Move the column with buttons like that, this is the second one.
Go forward and you'll se more Germans in the next room. After taking care of them continue moving forward and another puzzle will appear.
You have to walk around the door (doesn't matter from which side) and press the panels with symbols from your journal. The only problem here will be the Nazis that you have to kill all the time so they don't kill you. After activating all three panels the door behind the statue will open and you'll be able to move on.
Go forward, your character will slide down the rope, leaving enemies behind.
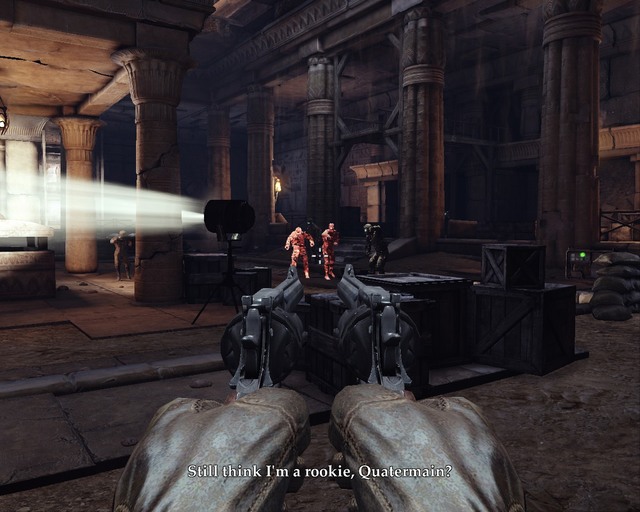
 A big gun is a good gun.
Go outside and take care of more enemies waiting for you there. Walk over to the green board and distribute the skill points. Then turn around and press the button on the wall. It will open another door.
Go through it, then follow your partner. She will take you to a car in which you will leave.
 Watch out for strings like that, they're tied to grenades.
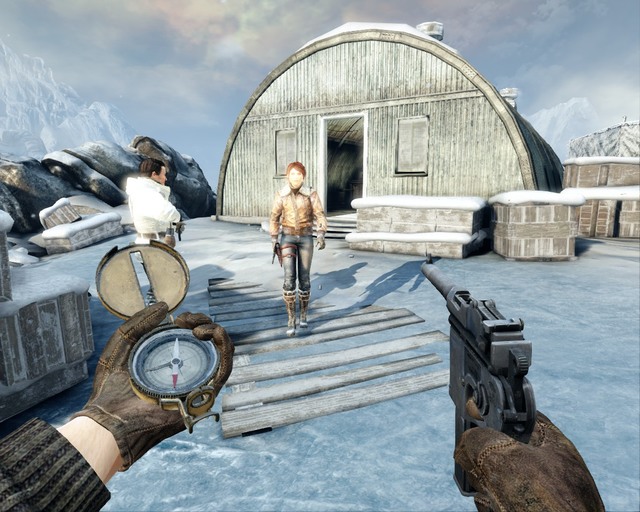
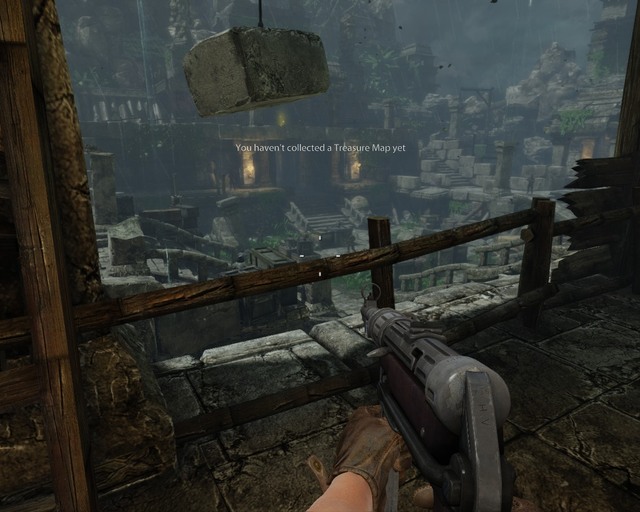
After passing a check go forward. You can take three treasures nearby. Head towards the tents. Watch your step, there will be traps in the form of strings attached to bombs at the height of your ankles. Destroy them by shooting the explosives from a distance.
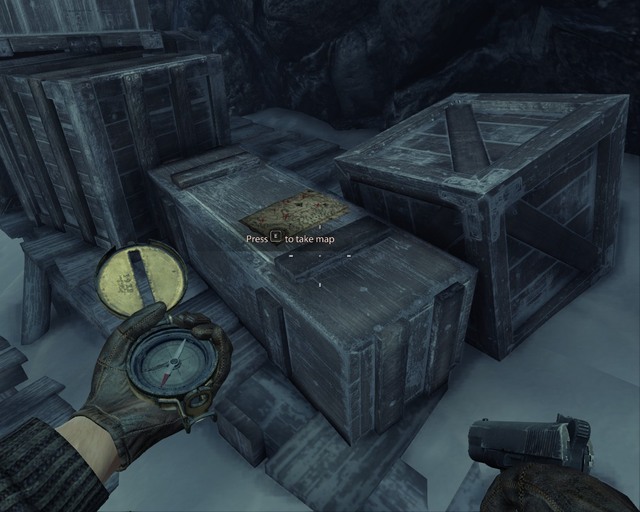
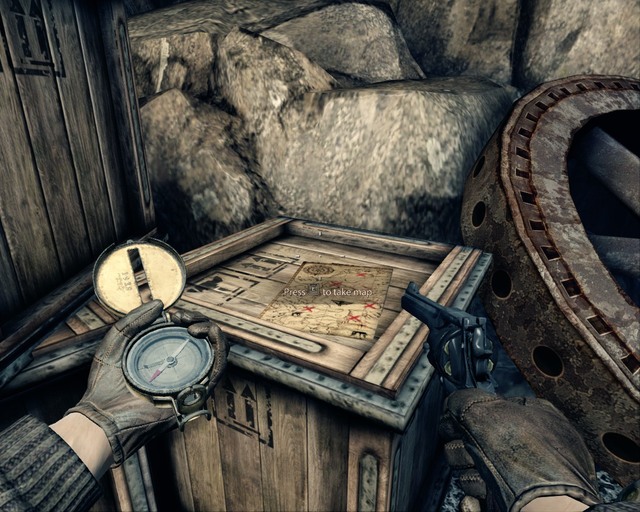
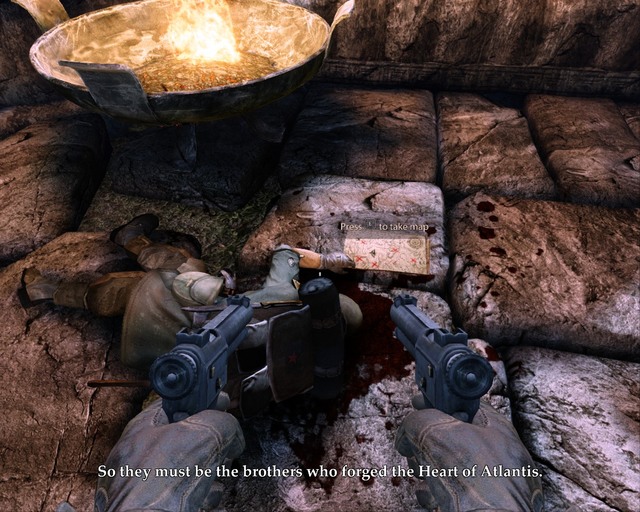
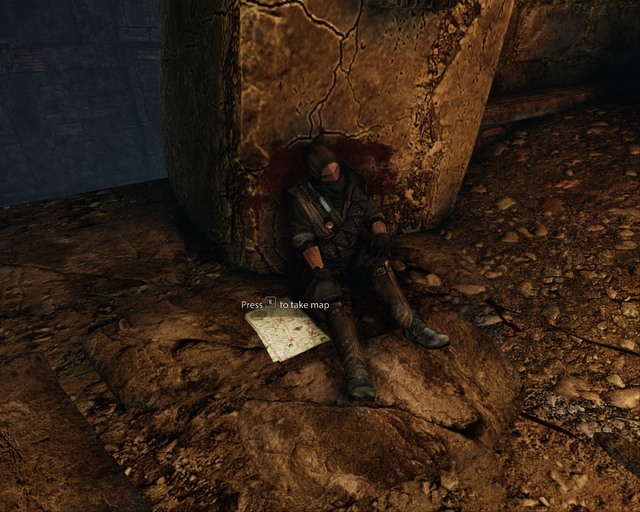
In the camp, when you start to see the traps, you can also enter a shack on the right (there's a dead soldier there) and find a treasure map that will show you locations of all the artifacts.
 After a cutscene you'll get a new companion.
Get back on the road and go up while watching out for traps. After a moment you'll reach a shack which is mined. Destroy the traps and go inside. There will be a cutscene, go down again when it's over.
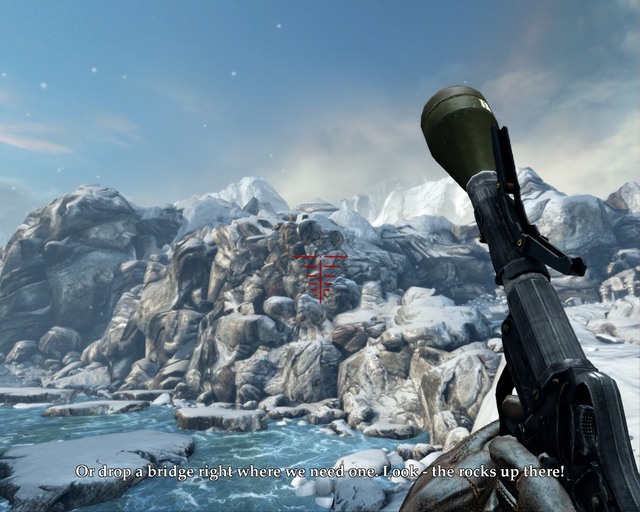
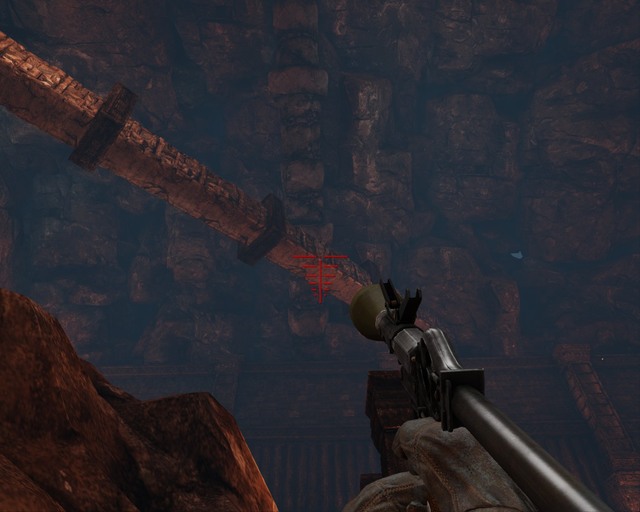
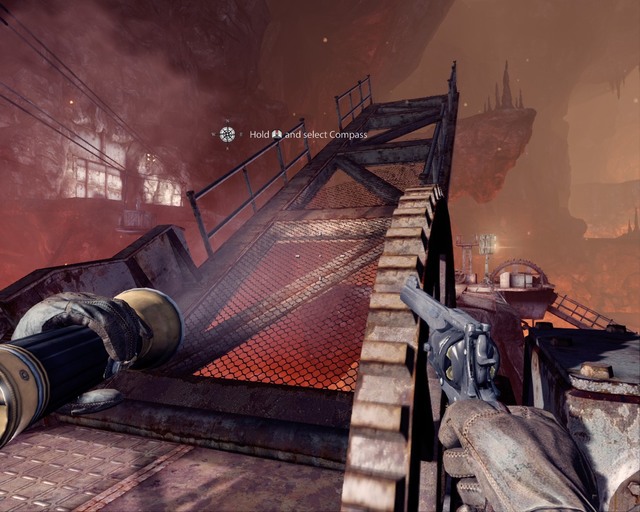
Approach the gate, wait until your old friend opens it, then follow him. When you stop, there will be a rocket launcher next to a vehicle on your right.
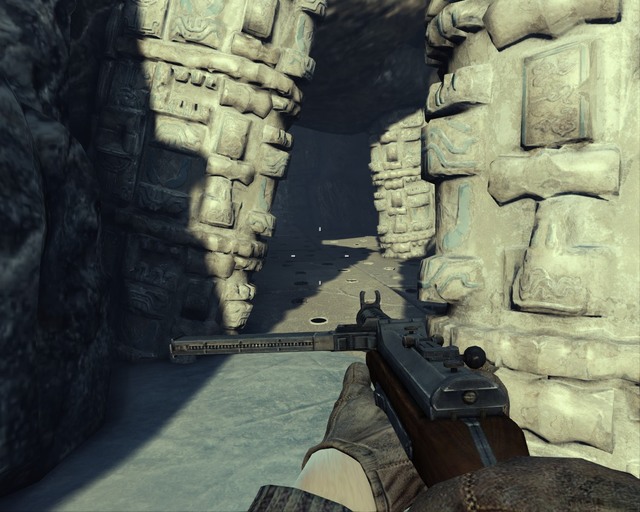
 There's quite a lot of sets of weapons, creatively used.
Take it and start shooting the rocks on your right. After two shots there should be a path of ice on which you can move on.
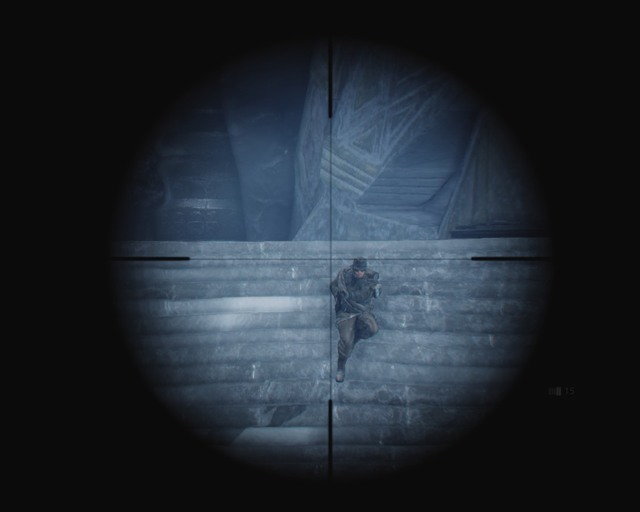
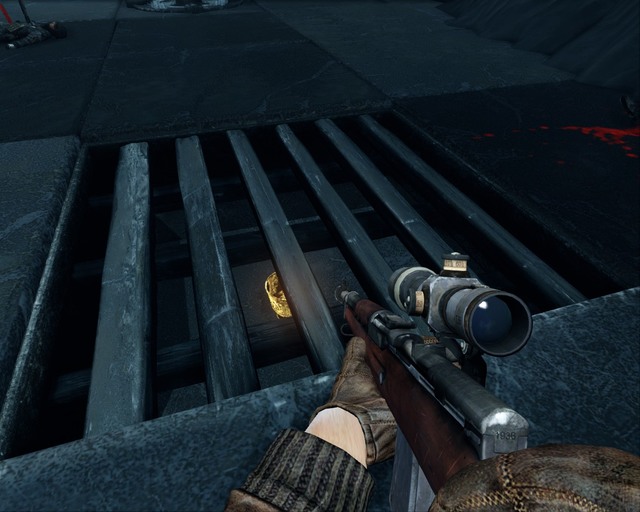
After a cutscene a lot of enemies will start shooting you. You can kill them with a sniper rifle on your right or use the rocket launcher.
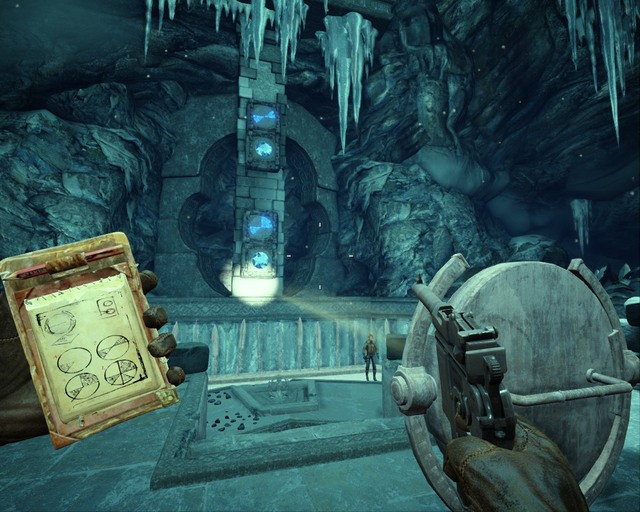
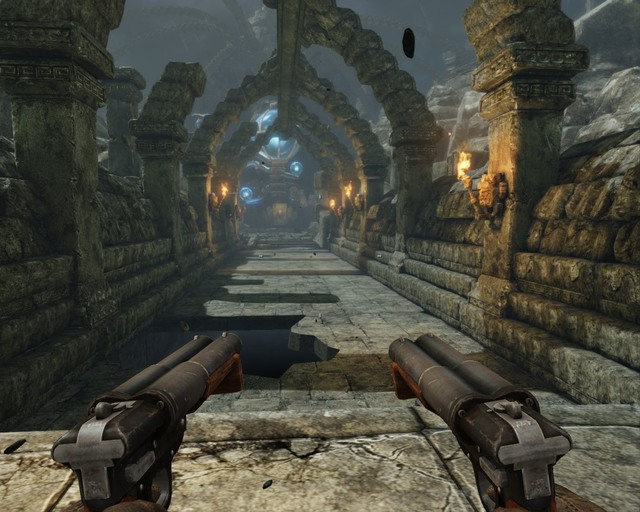
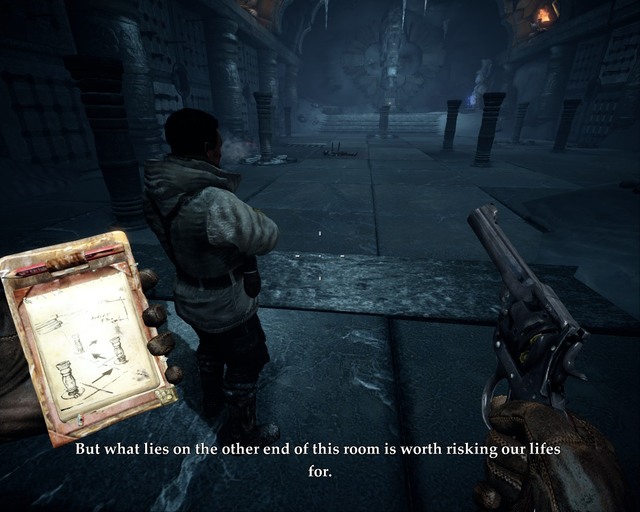 Puzzles look very interesting here, go from one column to another.
After killing them go down and follow your comrades. You'll reach a large room where arrows will kill you if you step on a wrong tile.
This puzzle is easy because you just have to go from one column to another in a straight line. You must have one behind you and one in front. When you finally reach the end press a button shaped like a skull. Three columns will emerge from the floor, you have to set the first one to show a hawk (or a symbol above the skull you pressed), the second one - the first symbol after a hawk (towards the skulls), the last one - the second symbol after the hawk.
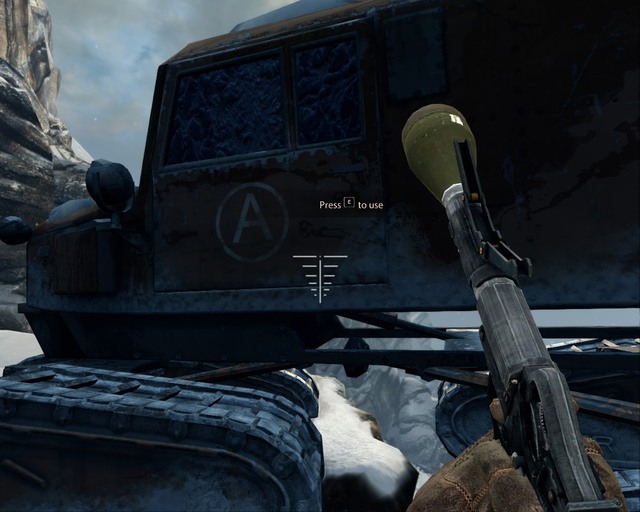 Use the vehicle that's by the cliff.
When you do it and press the switch, an artifact you need will show up in front of you. Go back and check if the vehicle at the end of the camp works. A cutscene will start.
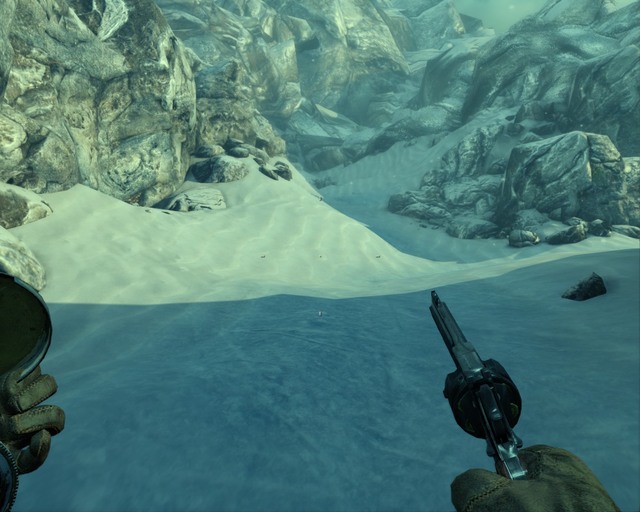
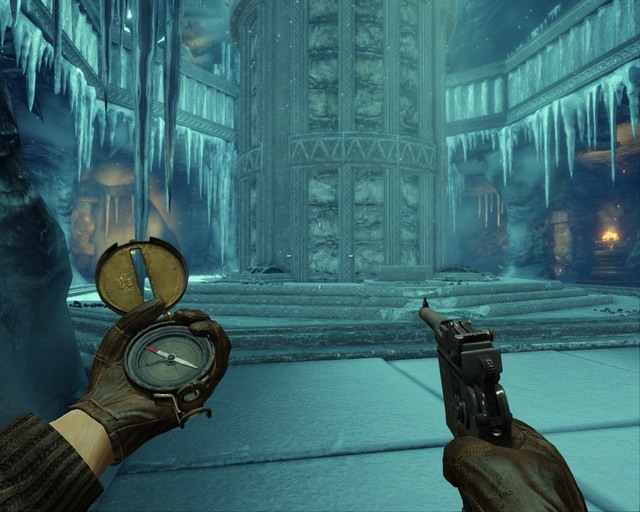
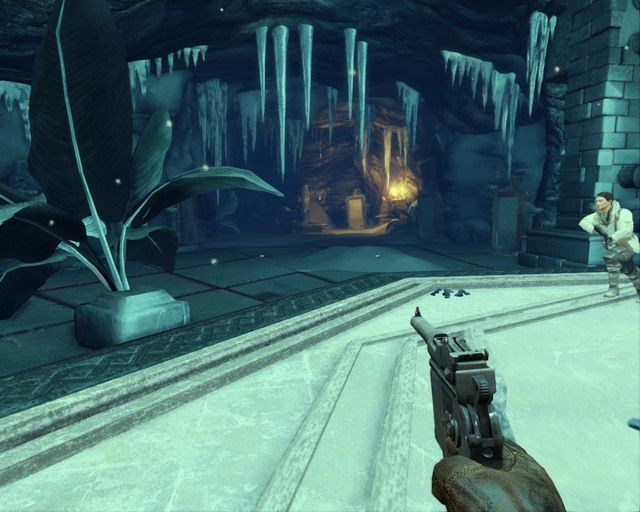
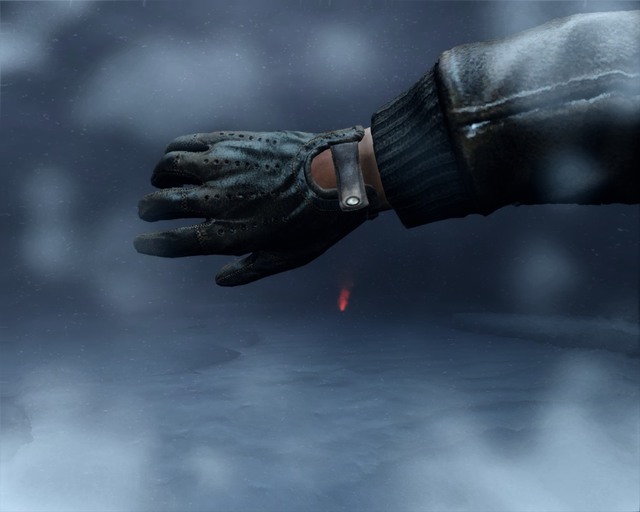 Interesting setting, a blizzard.
When the scene ends, you'll get stuck in a blizzard. You have to follow the path shown by flares. Go from one to another, your character will pass out. When he wakes up, follow your comrades and they will lead you to another enemy camp. Kill all of them, then enter the cave ahead. When you reach more enemies, use the rocket launcher to destroy part of the ceiling, then take care of the enemies and use the board on the left to distribute the skill points.
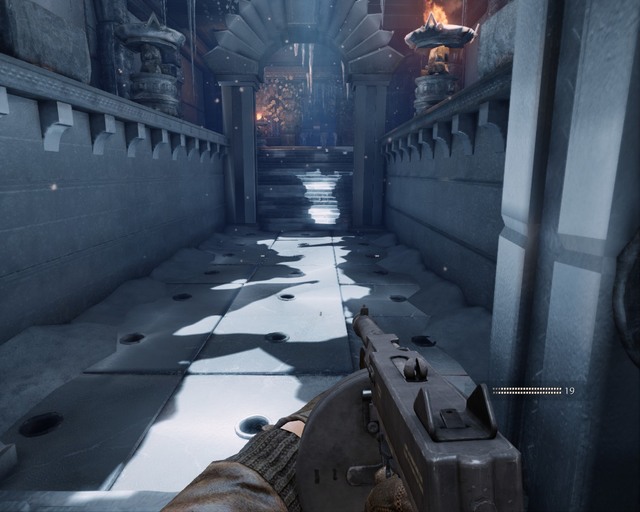
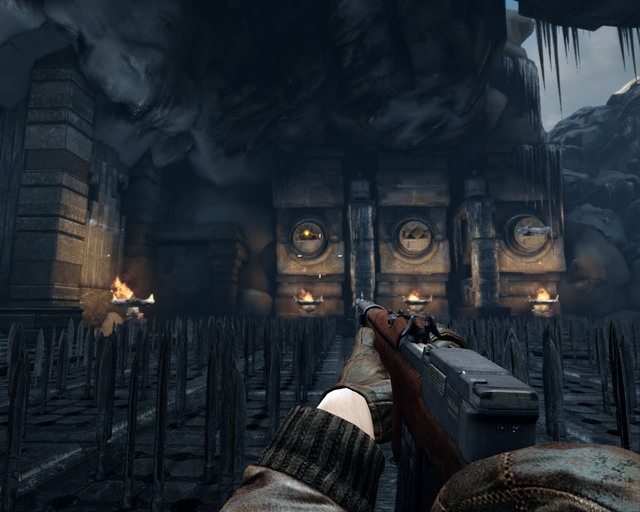 Chamber with spears, shoot the spinning tiles to unlock the way forward.
Proceed through the corridor, you'll see another puzzle. A lot of spears will move out of the floor and in the middle you'll see plates you can shoot.
Shoot the right one first, then the left. A path that you have to take to a safe spot will open. Now look to the left. There will be three more plates under the ceiling. First shoot the middle one, then the right one, finally the left one and run when the path opens. When you're in another safe spot, look at the other ones. There are three above the fire and one in the shadow. Shoot the ones above the fire first - right, left, center, and then the one in the shadow.
When the path appears, get on it and you'll complete the puzzle. Stand on the brown circle and wait there until your partners come. The door will open.
 Switch that unlocks the way at the and of the chapter.
Go forward until you reach a large room. You can take an artifact and go upstairs. When you're on the higher floor, follow the way next to the wall and kill the Nazis in front of you. At the end press the switch that will unlock the way. Go that way to finish the chapter.
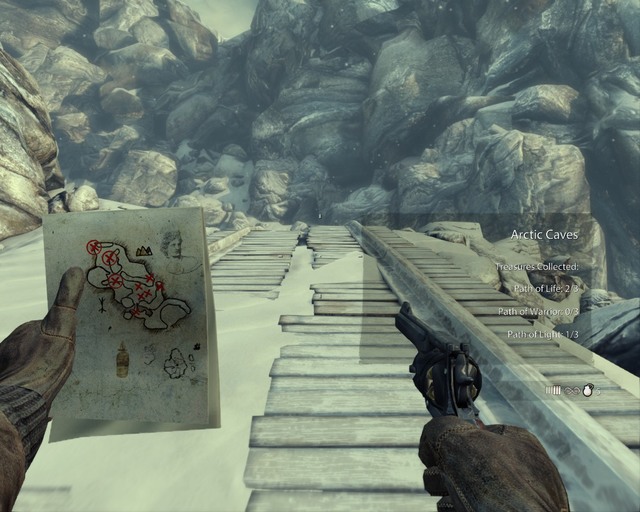
Treasure map in the beginning.
Get out of the mine and take a treasure map on the left side of the exit.
 The way after you took the first rope.
Walk along the track, then turn right and use a rope to slide down a few floors. First enemies will appear. Kill them and go where they came from. Enter another mine, go along the tracks while killing a battalion of enemies. At one point the tunnel will collapse and you will have to go upstairs.
 Use the lever to let your comrades in.
Go through the collapsed path and kill two enemies with machine guns, then go down. Keep going, then let your comrades through a steel door using the lever. Then turn back and walk a few steps where you came from. A cutscene will start and you'll get outside.
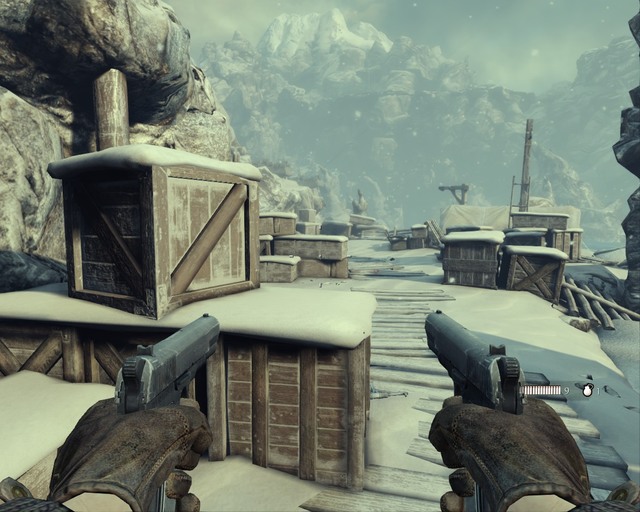
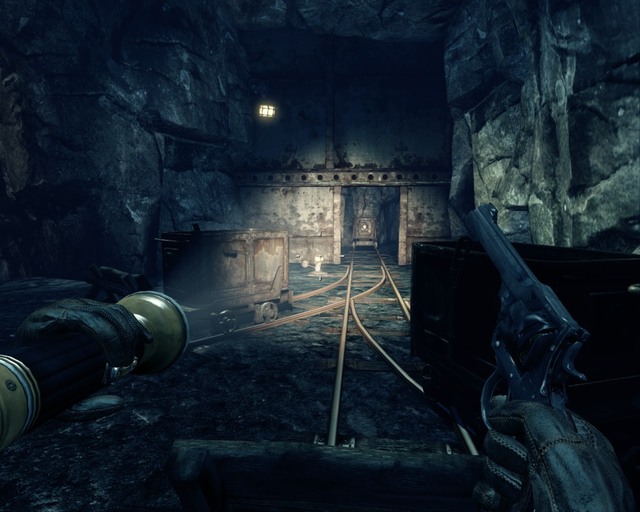
 The road to the warehouses leads along tracks.
Go forward through the gate, then along the tracks forward and up. Go to the armory, pass it and reach the elevator.
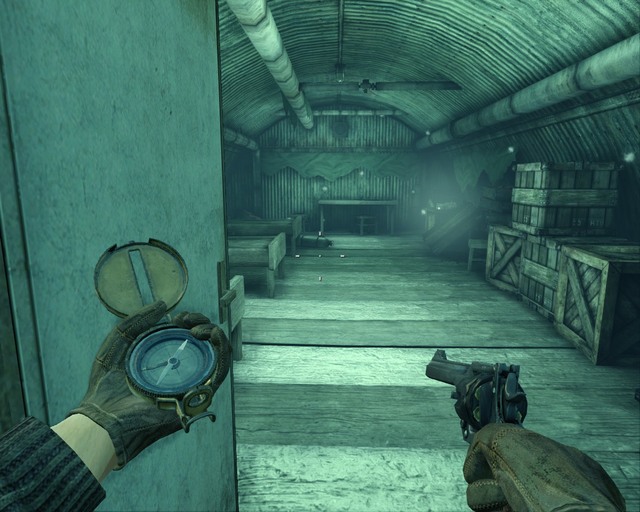
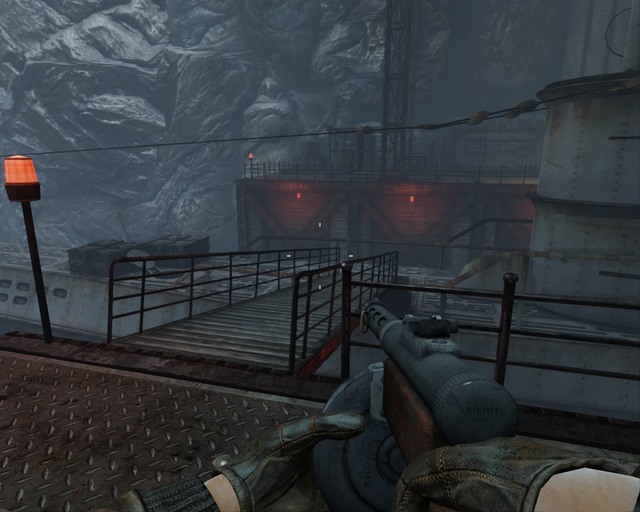 After taking the elevator you'll be near a submarine.
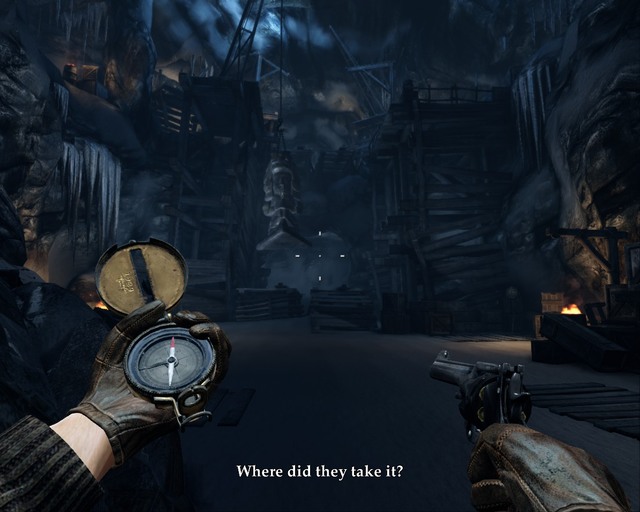
You can find good weapons next to it. Take the elevator down. Germans will be shooting at you so you'll have to defend yourself. When you get out of the elevator, go forward while killing enemies.
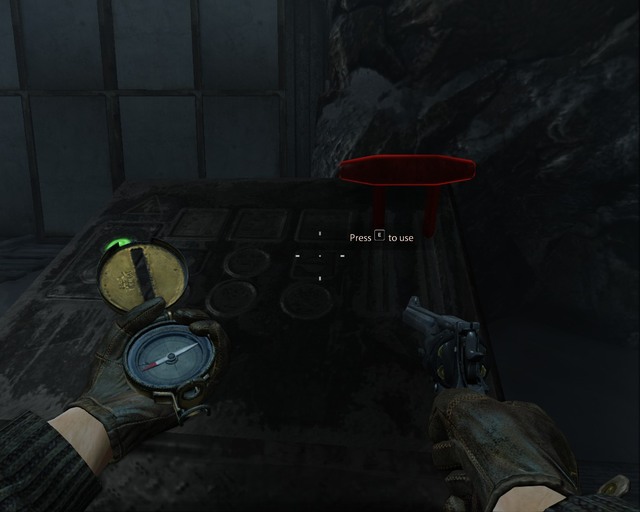
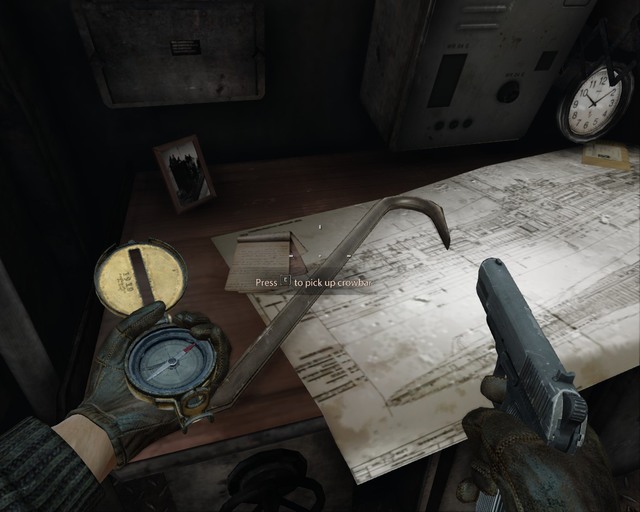 The item you need to close the valves.
You'll eventually fight your way to the submarine. Get inside through the hatch. Go to one end and close the valves to unlock a way forward. You'll need a crowbar from one of the desks to close one valve. After closing them turn around and go to the other end of the ship. You won't find the artifact you're looking for but a mummy will attack you.
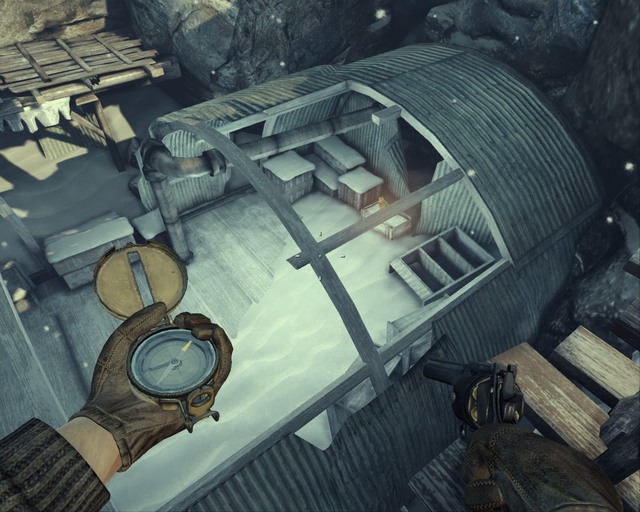
Exit the submarine through the nearest hatch then go back to the land and use the other elevator to go back up. Keep going forward through the corridor and at the end open the gate in a booth on the right.
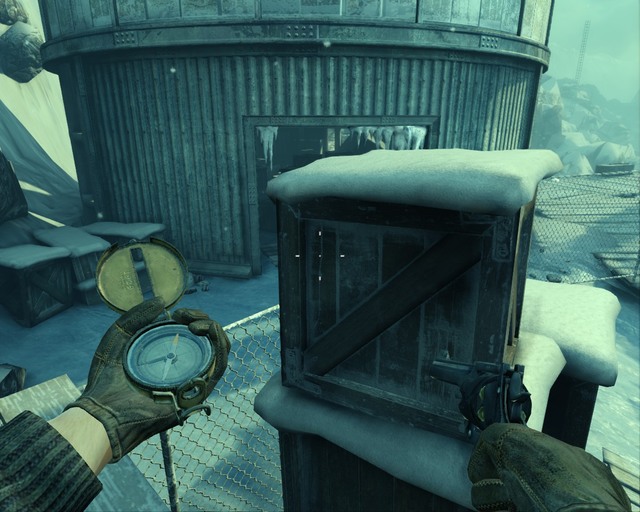
 Watch out, this way is full of traps.
When you're outside, take the path up. You have to watch out, there will be traps with strings at the height of your ankles again. Destroy them and keep going forward. Walk to the observatory and go around it. Slide down the rope and start fighting the enemies. A sniper rifle is the best for that.
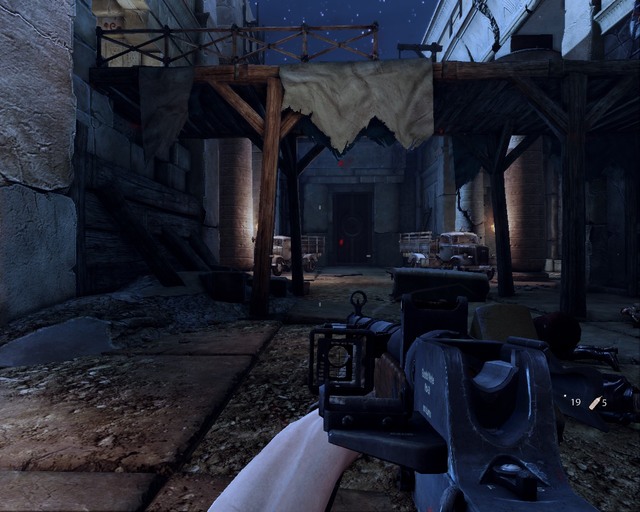
 Way inside the camp is now opened.
When you do it, take a rocket launcher and when you reach the gate, destroy two generators. They will be on both sides of the gate. When the gate opens, go inside.
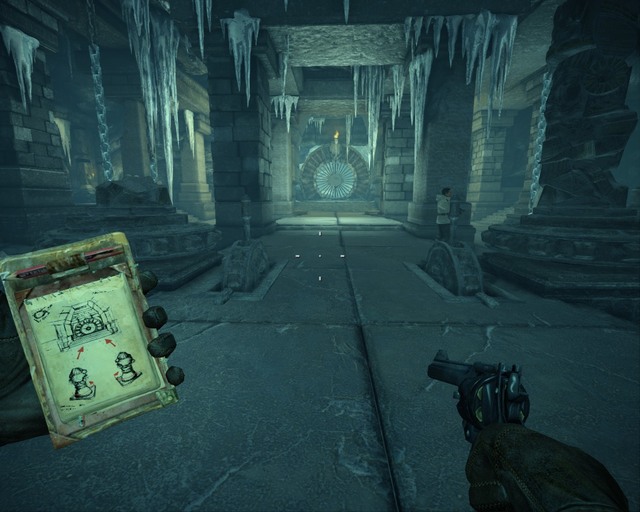
 Turn two statues so they face the door, the left one is destroyed but you can see if it's in the right position.
Pass the camp and enter another cave with a puzzle through the corridor. You have to turn two statues so that they face the door and then shoot two skulls on both sides. After that, the door will open.
 I hid here, there's dynamite next to you, the sniper rifle does no harm to the boss.
A boss fight will start. It's not very challenging. You just have to get close, take some dynamite from the left side and throw two pieces at him to destroy the ground it's standing on. After beating it the chapter will end.
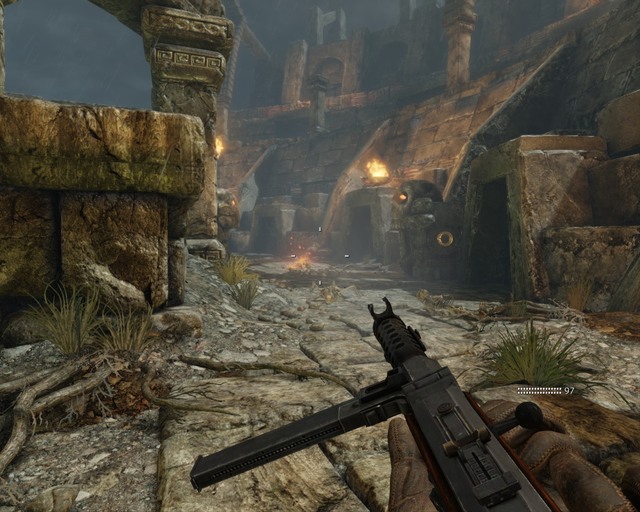
 A fight right after you start this part, it's a good idea to use a sniper rifle.
Right after the chapter starts, you'll have to fight more German soldiers. There's quite a lot of them but you can get a sniper rifle downstairs on the right.
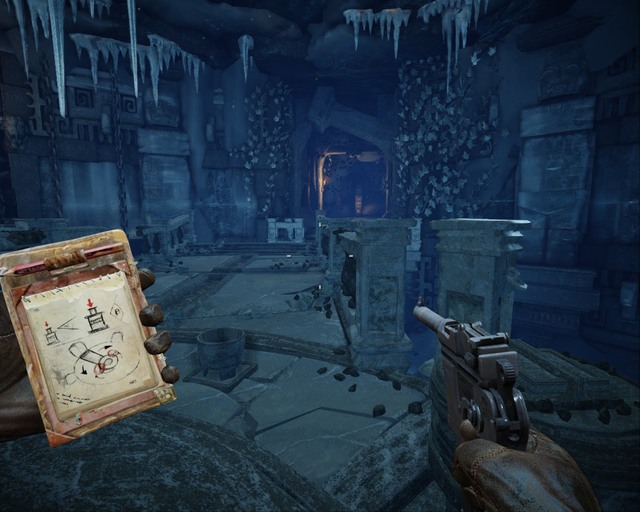
After beating the enemies, look up and shoot the line that holds the footbridge up. When it falls down, cross it. After a while you'll reach the first puzzle here. You can take a treasure map, it's on the right next to a corpse of a soldier.
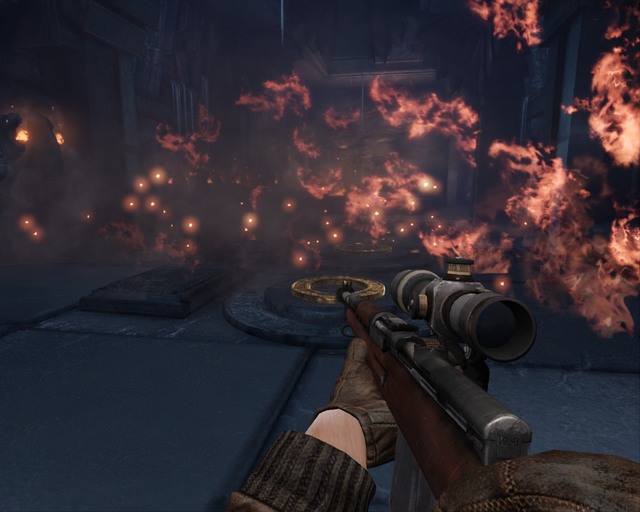
 A door will appear here when you start a fire properly.
You have to light the fire in a correct order. The right order, when you're looking at the statue in front of you is: near left, far right, far left, near right.
After completing the puzzle a door will appear. Enter it to reach another puzzle, there will be fire shooting out of the floor making it unable to pass.
 You have to set the symbols correctly.
There are two columns on both sides. You have to find the symbols from your journal on the left column and put them in the same places on the right one. When you do it, shoot the skull next to the trap do deactivate it.
 It's an elevator, when you put a statue on the pedestal, it will go up.
Go forward, there will be a cutscene when you enter the next room. When it's over, keep going forward. You'll enter a giant chamber. Turn right, move the statue that blocks the entrance. Kill the mummy that's in the ice (melt the ice first), then take a statue from a chest nearby. Place it on the altar in the middle of the chamber and take the elevator up.
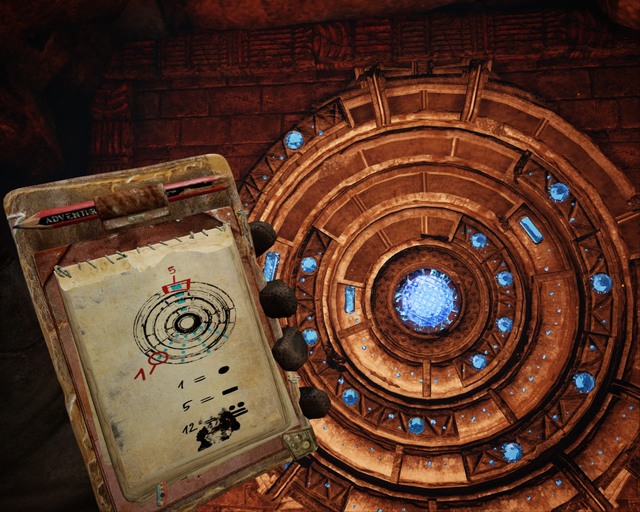
 Another puzzle, you just have to light up the crystals as shown in the journal.
Another puzzle. Your journal shows which crystals to light up to move forward. There are levers next to you, the ones on the sides turn the pedestal you're standing on and the one behind you moves it up and down. To light up the crystals you'll need the mirror in front of you.
When you do it, you'll be able to move forward. Walk along the corridor, you'll reach the skill point board. After using it continue forward and turn left to take the stairs.
Flashlight on a machine gun is a major convenience.Go downstairs to a big chamber, where all hell will break loose. Large groups of zombies will start appearing in the room, kill all of them. Keep going forward and go upstairs. Eventually the waves of the undead will stop appearing. Insert the crystal into the door upstairs.
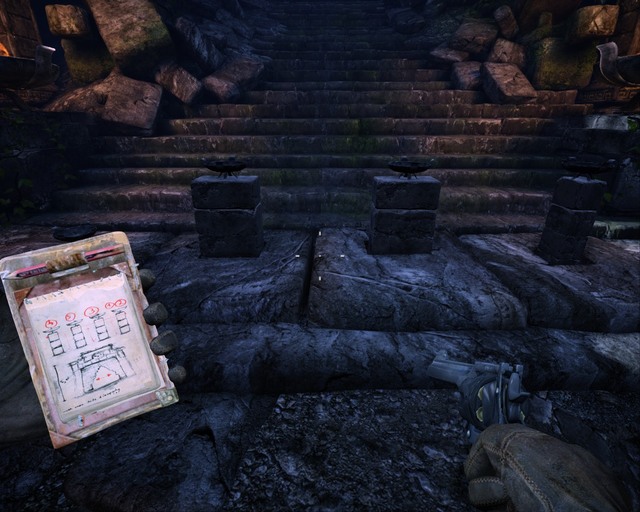
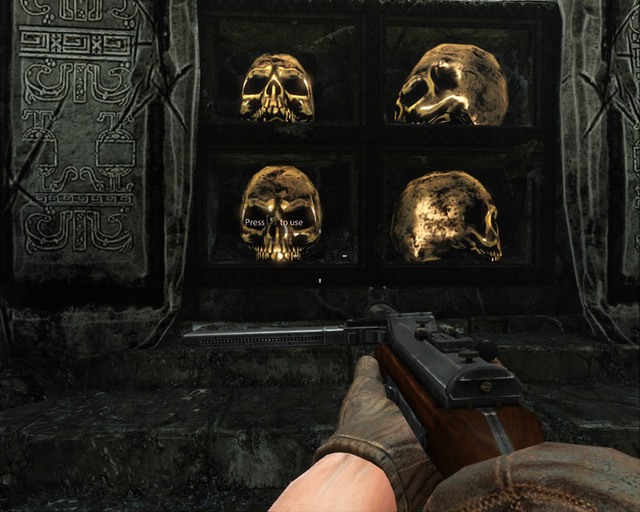
 When you find the skulls, put them in the bowls in front of you.
You'll reach another room with a puzzle. You have to turn the bridge in such a way that it lets you get into the corridor on the right and then on your left. Firstly, use the bigger switch on your right and then a smaller one on the left and the way to the right corridor will be ready. Take the skull you find there and come back.
Now use the big left switch, then the smaller left one and take another skull. Go back to the platform and put the skulls into bowls.
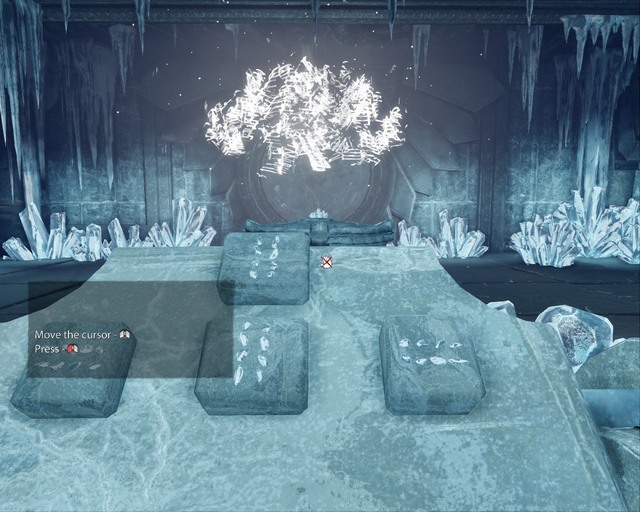
After a while you'll see a map that looks almost like the one you found in the pyramid. You have to set it just like you see on the screenshot above.
Then a short cutscene will happen, after which you'll have to deal with a few Russians to finish the chapter.
 Sometimes you may find a map near the start.
You'll wake up in an abandoned mine and one of the Russian soldiers will start hitting you. You have to use space and left mouse button at the right moment to set yourself free.
Before you keep going, take your equipment from a crate on your right. There's also a treasure map on another crate. Go left, there's an electricity booth around the corner. Destroy it, then go through the grate door.
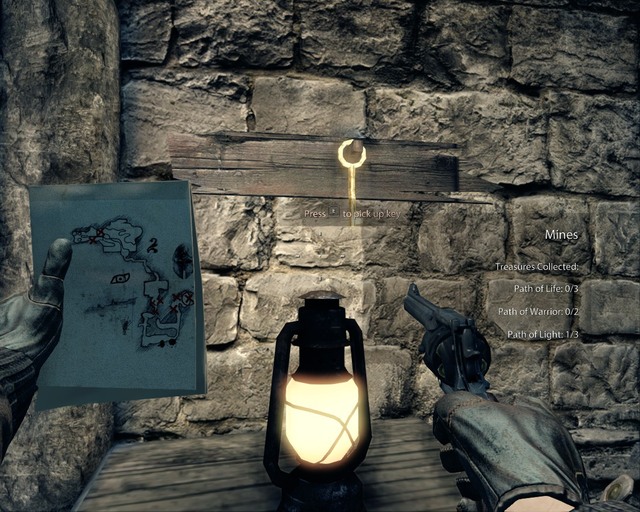 You have to take the key that's hanging on the wall.
Go to the end of the corridor and take the key from the wall. Go back again and use the key on the door on the right. Go through the rope bridge. Then the first fight in this area starts. Head forward and turn left at the end. You should find a switch by the rails at the end of the camp.
 A rollercoaster ride with revolvers in hands.
Use it and a trolley will approach you. Enter it and go for an exciting ride through the mine. It won't be boring because the Russians will also have their trolleys, so you'll have to take part in a gunfight during the ride.
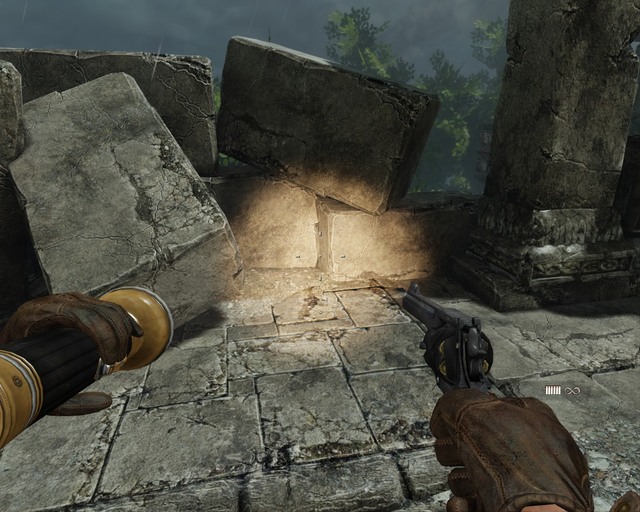
 All that's left from a stone door.
When you get out, the enemies won't go easy on you. After a fight take the dynamite from a place where you got out of the trolley. Go to the front doors and place the charges.
Even more enemies will show up after the explosion. You can destroy sarcophagi here, so the mummies would start attacking the Russians. Look for another trolley that's on the left.
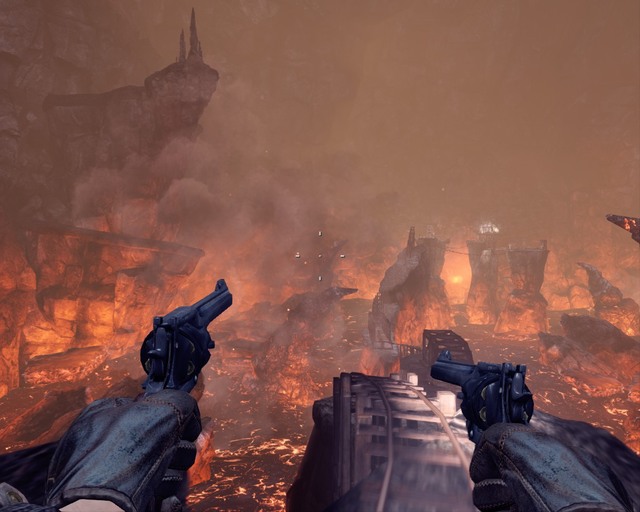 Looks like a trip to the core of the Earth.
After a long ride your character will crash on one of the rocks. He'll quickly recover and you'll be able to continue your journey.
Go to the bridge controls on the right and lower your part. There should be a sniper rifle nearby, so take it and shoot the lever on the other side of the bridge. It will lower and you'll be able to go through it.
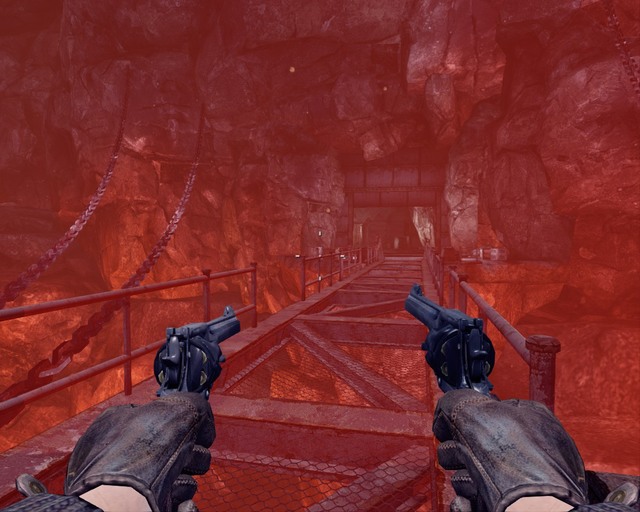 You lower bridges like this one with a switch.
Kill more enemies and lower another bridge in front of you. Keep going and more Russians will appear. After you kill them go to the end of the room and open the gate. Now time for the last puzzle needed to reach your partner.
 Move one of the ramps to the right with this mechanism.
Enter the room and turn right. You'll see a storage of explosives. Destroy it so it won't bother you later. Then find a console with left and right buttons on the higher floor on the right. Move it to the right.
Run across the room and find a cargo elevator. There will be dynamite on the right. Take it because you'll need it.
 Move the hook to the left with this console.
After using the elevator find another control panel and move the hook towards you (left and backwards). When it's near you, plant an explosive on it then move it until it stops. It has to touch the chain that blocks your way. When it does, shoot the dynamite.
 Plant the dynamite on the hook and shoot it when it touches the chain.
The chain should break. Move the hook left as far as it's possible and a bit up. Leave the control panel and go upstairs, then start jumping on the railway. You shouldn't have any problems with running to your companion and jumping through a window (in the roof).
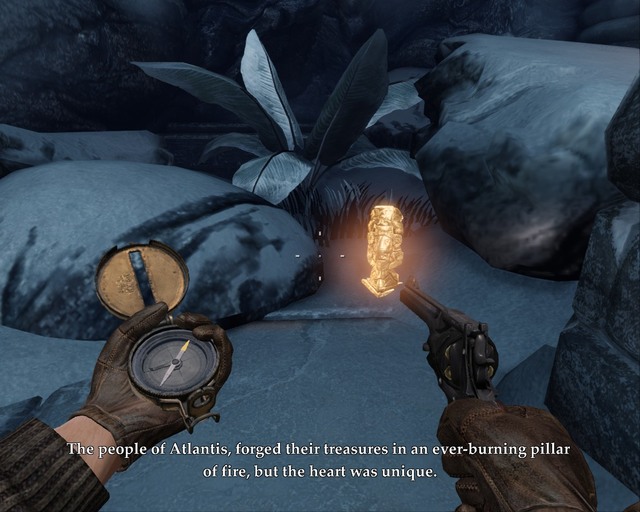
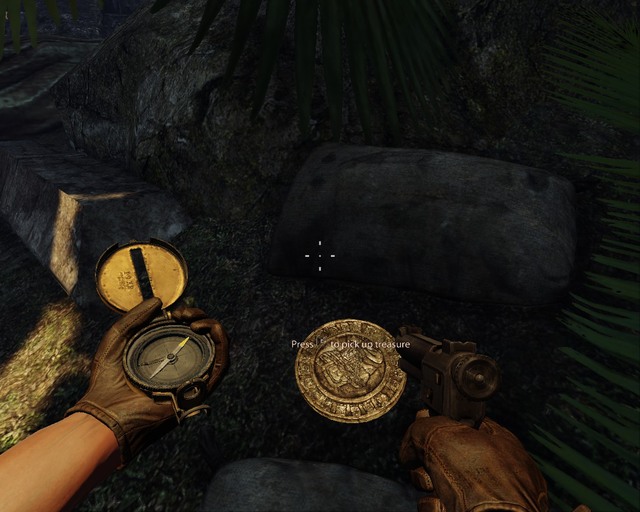
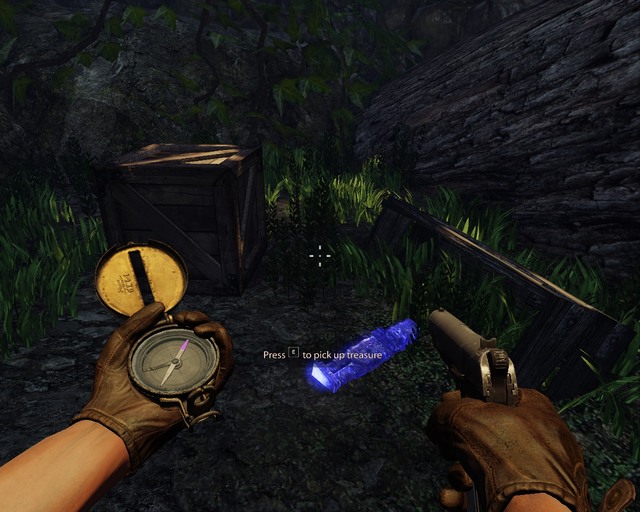
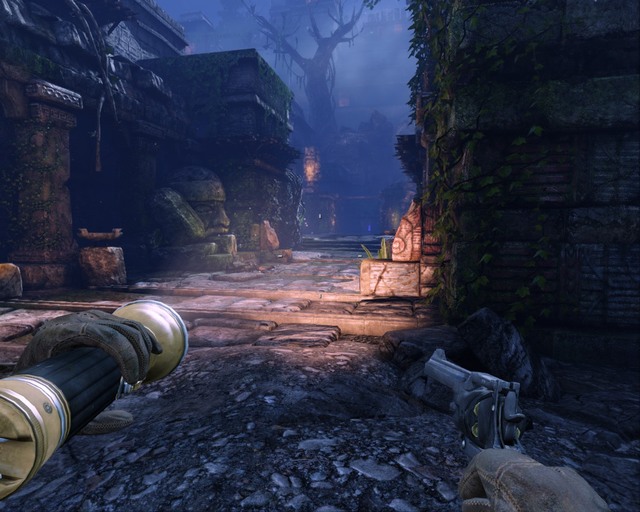
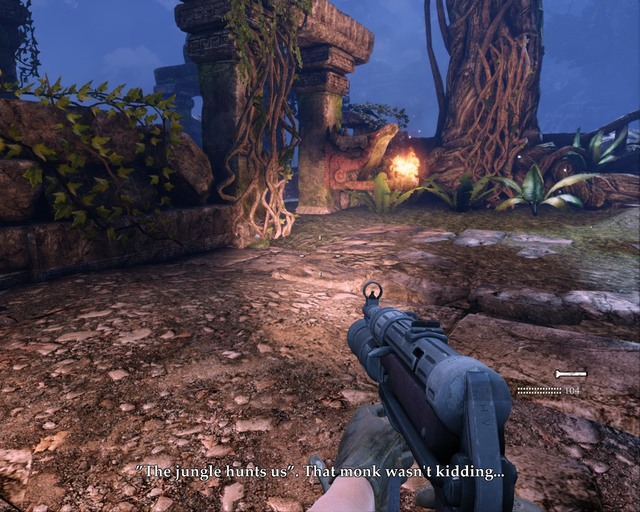
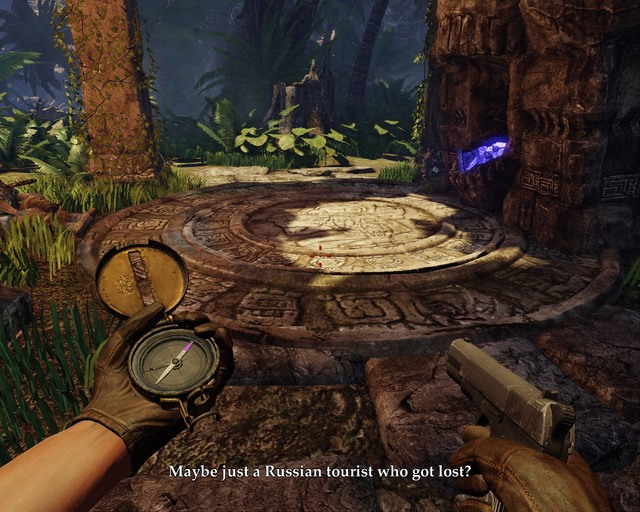 You just can't miss the first treasure.
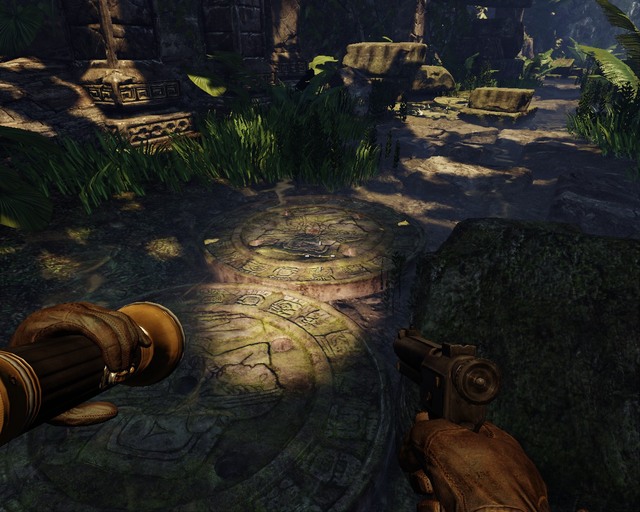
You start this chapter in a jungle. Head forward until you reach an object of worship with a treasure on it. Watch out for the circle, you'll die if you step on it.
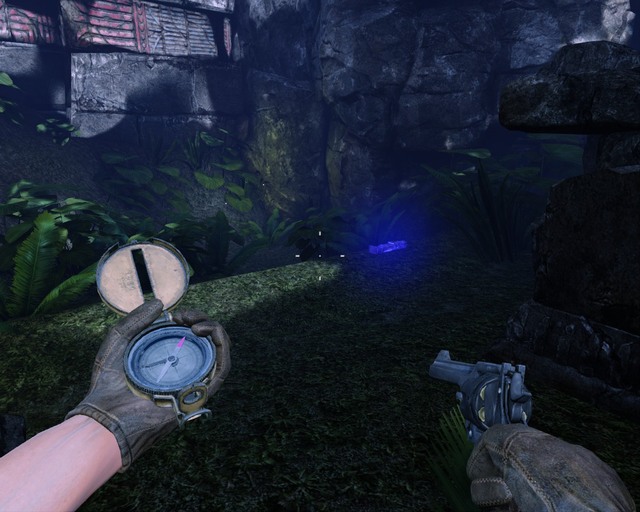
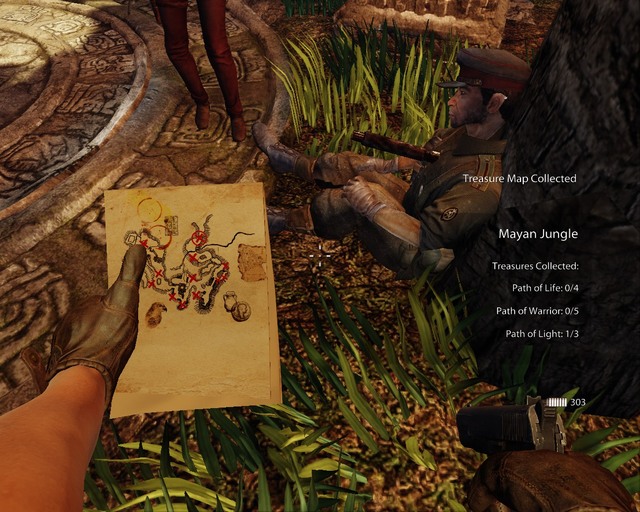 The map you found will be helpful.
On the edge of the circle you'll also find a treasure map for this chapter. It's not a bad idea to take it, at least you'll be sure you don't miss anything. The map is helpful because it circles the treasures that you've already found.
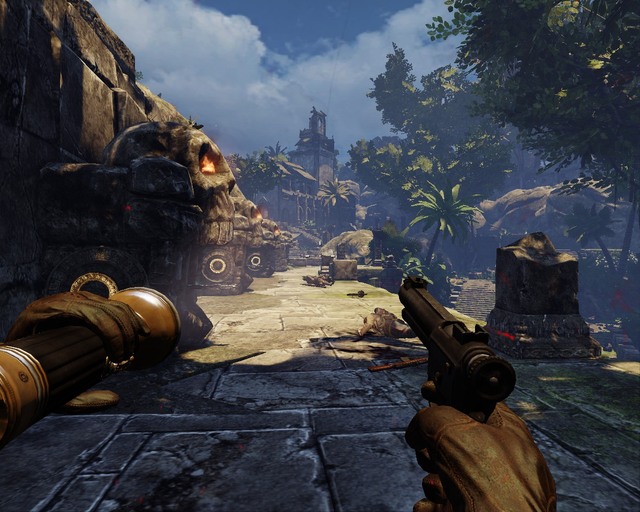
When you overcome the trap, continue moving forward until you reach a crashed plane. To get it down, shoot each engine a few times. Take dynamite and a new gun from the plane and keep going up.
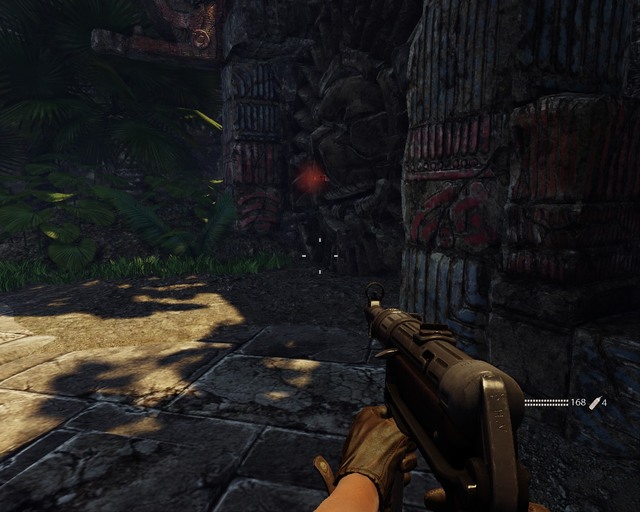 Fire in the hole!
Put dynamite in the stone door and wait until it explodes. Then go through the passage and defeat all the enemies. Take the stairs up the hill.
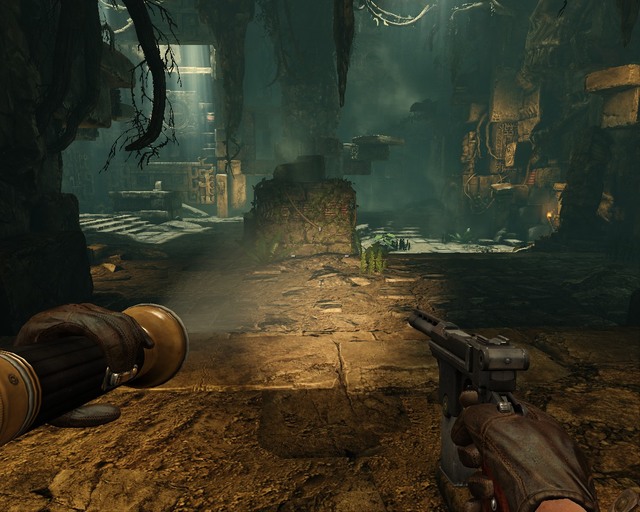
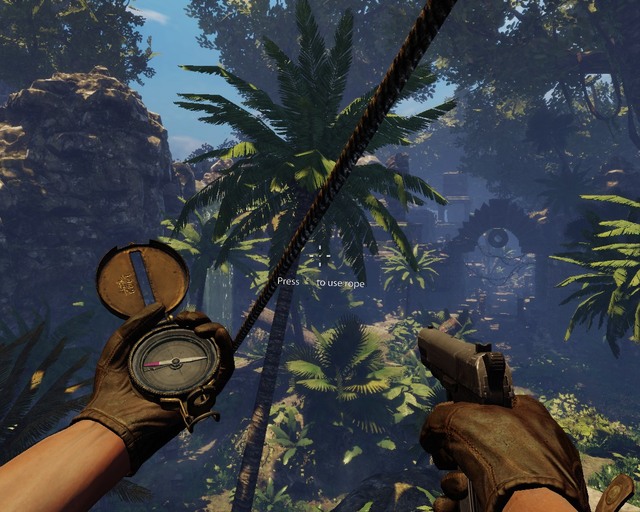 A rope will take you farther
The game will show you a cutscene, when it's over, go through another passage and you'll see a rather big jungle area below. Walk to the rope on the right and slide down.
Keep running on the road on the right (there are two treasures on the left). After a moment you'll see a golden board, it works the same way as the previous green ones. Distribute your skill points and keep going.
 Keep going this way while watching out for traps.
Go between skull-shaped statues and quite a big gunfight will start. There's a machine gun close by, it should be helpful.
When you beat the enemies go down, but watch out for the circles. Stepping on them means instant death. It's best to use the side paths, not the middle one.
In the end turn right and you'll get out of this death zone, then go forward. You'll reach more of the ancient building, there will be a fight inside.
 You'll see some ruins every few moments.
Go forward, then turn right, and along the path. New enemies will appear every few moments.
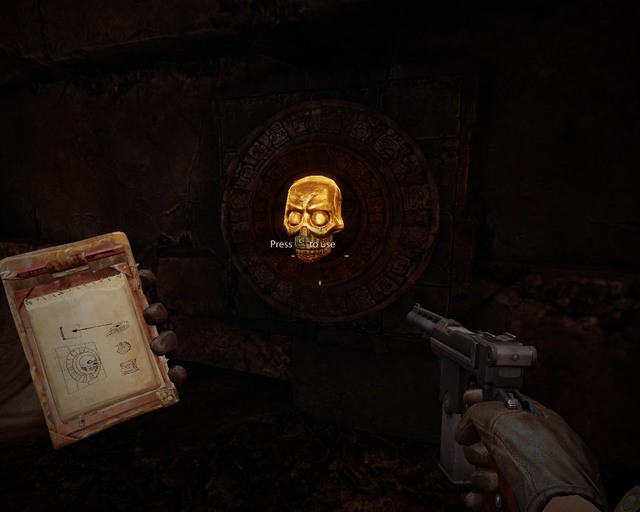
When you get through the ruins, you'll see a round gate. There's a note with hints on the table.
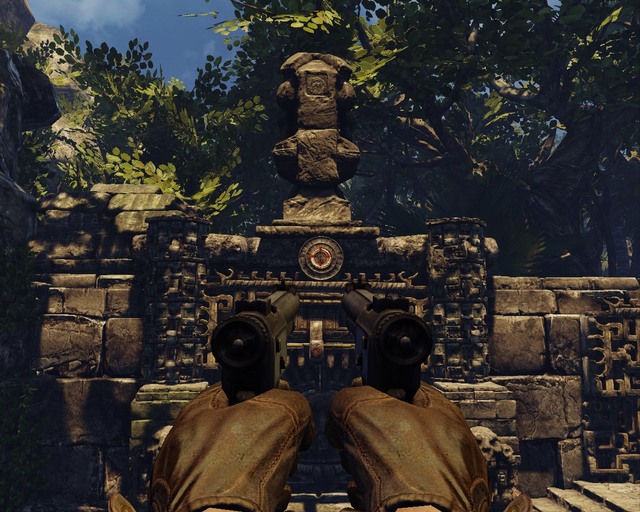 After turning the wheel shoot the button.
Turn around and go to the higher ledge. You'll find a wheel there. Turn it and a statue above the door will move. Turn the wheel until it stops and shoot the circle below it. Then it will move back to the previous position but some buttons will appear. You need to set the elephant symbol on the right one and an eagle on the left. Afterwards, the door will open.
 Another trap that can be easily deactivated.
Proceed forward while killing the Nazis and pass a red plane. Keep going until you reach a peculiar trap. It blocks the way and shoots arrows horizontally. Shoot the circle on the other side and the trap will turn off.
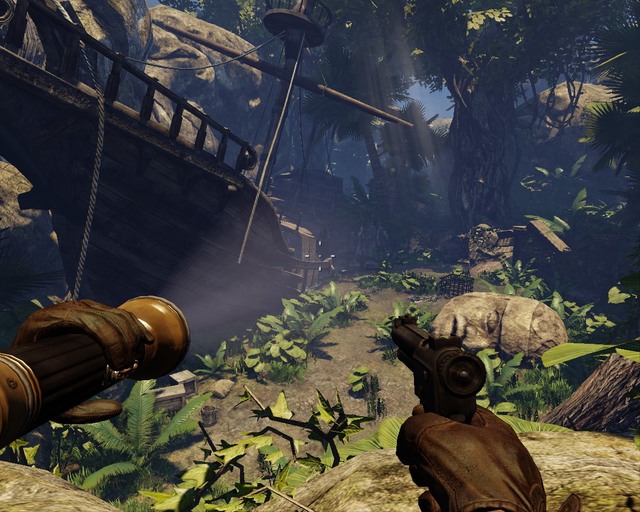
Keep going but watch out not to activate another trap that will make spears move out of the skulls. Go this way until you reach a shipwreck.
 The wreck is impressive, get inside and take the journal.
Get inside and go to the captain's cabin. Retrieve a journal from his dead body and listen to what your character reads. Then go outside and see what your partner found - cannonballs.
Take one. Load a cannon on the ship and shoot. This unlocks the way. Follow your comrade.
 The road is full of traps, luckily some of them don't work anymore.
You'll reach more ruins. Watch out, there's a lot of traps in the water. Take a look at each of them before you step on it. You can see tips of spearheads on the armed ones.
Now just go forward until you see another trap that is armed. There are swords coming out of skulls and cut in a straight line so you can't pass. There's no problem with them because the switches are on the statues - shoot them to turn the trap on and move forward.
You'll pass a stone that lets you distribute the skill points, then walk up on a fallen tree and through the bridge.
 The switches on your side will help you eliminate the Germans.
The Germans will appear once again. Keep going in the direction that the enemies come from and take the stairs up when you're able to.
Enter the building on the right and take the journal of one of the inhabitants, then go left and a grate will open
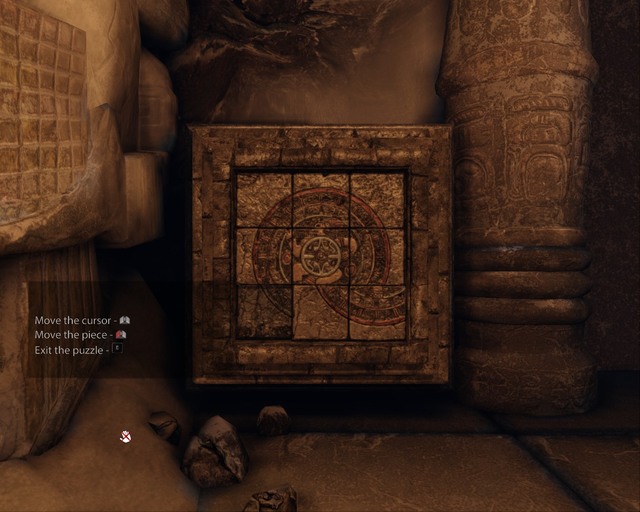
When you're outside, go down to the excavation and walk up to the stone table.
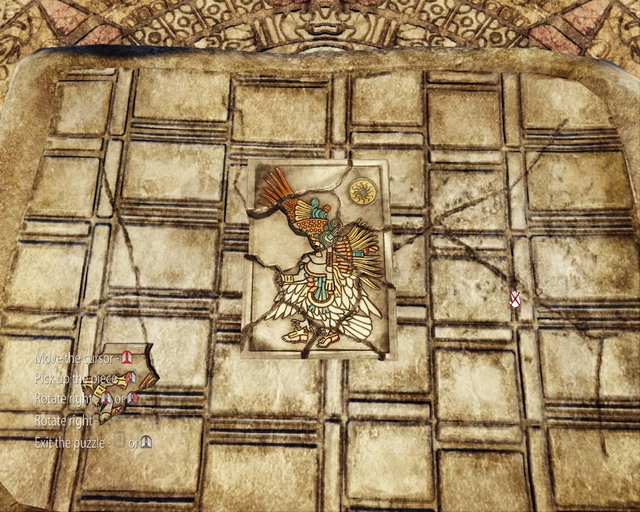
There will be a minigame - put all pieces of the puzzle in correct places. The screenshot above shows the right way to do it.
 A horde of mummies will attack you, get your flashlight ready.
After completing it, a sandstorm will start and you'll see a cutscene. Watch out when it ends because a large group of mummies will attack you. Try to keep moving and stay away because there's going to be a lot of them.
After you deal with them, the door to the tombs will open. Get inside and finish the chapter.
In the beginning, walk the way the game shows you. Mummies will attack you but they shouldn't be much of a problem because there will be traps on their way - you can use them to your advantage.
 One of three switches for the first puzzle.
After a fight continue forward until you reach the first puzzle in this chapter. You'll just have to press three buttons that look like skulls. All of them are on walls nearby. First the one with a snake, then the blank one and in the and the one with a head.
After completing the puzzle continue forward, killing some mummies. At one point the floor will collapse under you and you'll be forced to slide down through the compound. Watch out for all kinds of obstacles, avoid them using the movement keys.
 A whole lot of zombies will attack you in this room. Open the windows and the sun will burn them.
After you go all the way down, a lot of zombies will show up. The best way to defeat them is throwing grenades and letting the light inside by opening the windows. To do it you have to find a golden plate on the wall and shoot it. Then you can stand in the light and kill the mummies as soon as they reach it.
When it's over, the door on the other side of the room will open. Keep going and avoid the trap that may crush you if you step on it (watch your step).
 Another puzzle. First change two symbols, then shoot the golden plate.
Enter the next chamber, another puzzle awaits. Two skulls with symbols. Change the right one to an elephant and the left one to the thing below the hawk (whatever it is).
Part of the passage will unlock. Get on the first platform, shoot the golden plate on the other side and move along the new path.
Come closer so you can see the inside of another platform and shoot another golden plate there. Move along the new path.
You'll reach the exit. Go forward, there will be a place to distribute your skill points on your way.
 A mirror that reflects light is not something mummies like.
Go forward and you'll reach a chamber with a mirror that reflects light. A horde of mummies will appear again. Using the mirror is the easiest way to get rid of them.
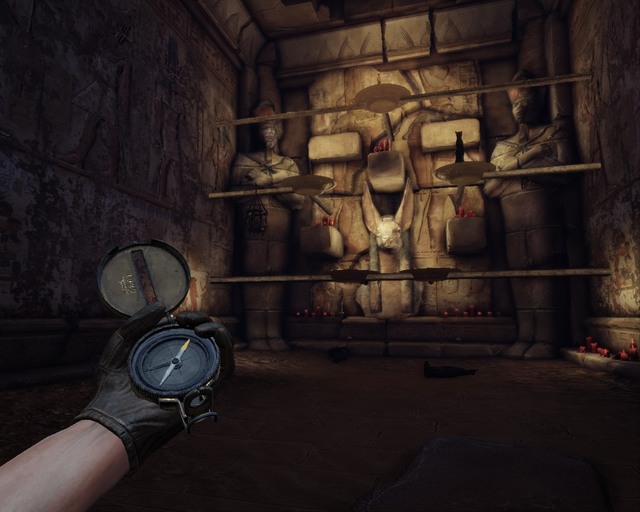
 You'll need a skull and three coins, you can find them in this room.
Enter another room, there's yet another puzzle. Walk up to the wall on the right side of the door and shoot the ring on the wall. Then come back to the lever in the middle of the room and take the skull. Put it on the right scale. You need to put three coins on the other one. One of them is in one of the tombs near the legs, the other one on the table on the right and the last one is near the lever.
After placing three coins and the skull on the scales, pull the lever. A way forward will open.
 Swinging blades, an old trick.
After a moment you'll reach another chamber that will test your reflexes. There will be some swinging blades on your way. Of course you have to walk between them. It should not be a problem because they're not very fast.
There will be a place to distribute your skill points on the other side.
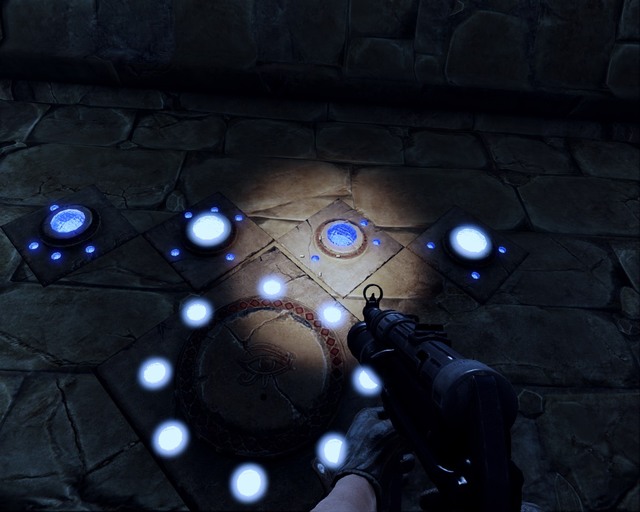
 And another puzzle, light up 1 crystal at the bottom and one before the last at the top (don't get confused by the notebook on this screenshot)
Afterwards, turn right and go upstairs. You'll see a door with blue gems. You need to take the flashlight and focus the light on the correct ones to open it. The easiest way is to light up first circle at the very bottom and the rectangle that's not on the same ring as the lit up ones. Then the lock will open.
 You have to walk according to the tiles' numbers, that's the only way to open the door.
Go forward and you'll reach a chamber with another puzzle. Check the paintings on the walls and a page in your notebook. You have to walk according to the tiles' numbers. If you step on a wrong tile, you'll have to start over.
After reaching the stone tile check your notebook again because the symbols you have to step on have changed. Remember the order and move along the correct path.
After reaching the other side, another door will open.
Jump down and walk along the corridor while killing mummies in armors. You can also destroy parts of the ceiling above them to make it easier for you.
 Ending of the chapter.
You'll finally go outside, distribute the skill points in a place nearby. Keep going and enter another place inside the building. Another puzzle is waiting for you.
Again, you have to activate switches the way your notebook shows you. In the middle of the room there's a mechanism that will lead you to the right ones. You can rotate the platform with a horizontal wheel and move it up and down with the vertical ones. The door will open after you press the right switches.
The Nazis will show up again, better kill them before you take care of the remaining switches. Be careful not to press the wrong ones or you'll get burned. Press only the one with a dragon on both sides.
Then go up and use the lever to finish the chapter.
 Map at the beginning of the chapter.
Right after the chapter starts, get out of the building and turn left to find a treasure map. Then turn around and take the path on the right. Watch out, holes with spears on the bottom will start appearing. Another one of the simple traps you can fall into easily.
 Watch your step
Move forward avoiding the traps and go between the buildings. Turn left and continue forward, after a while a few mummies will attack you.
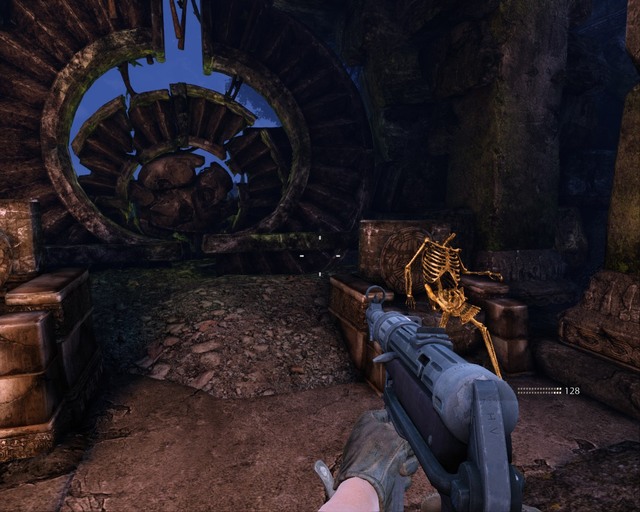 Take the skeleton's head.
Enter the shack on the left, then get out of it on the right side and move along the path. Defeat first tree mummies and go upstairs to jump down after a moment. Time for the first puzzle in this chapter.
Take the head from the skeleton without a crown and carry it to another door. Put the head on the skeleton that doesn't have one. The door will open and you'll be able to continue forward.
 Set the pedestals like your notebook shows you.
Keep going, a bunch of undead enemies will attack you. Help yourself with three fire traps and go forward. Four levers will appear on your right. Use them like the notebook shows you to open the door to a deeper part of the city.
Now an interesting fight will occur. First there will be a big wave of regular enemies and then the Guardian will appear and he'll just charge at you. Light him up and shoot him with a machine gun to make him go away. There are ammo crates on the right if you need them. A path on the right will open. Enter it and pull the lever.
 You have to use three of those levers to proceed.
Go back and repeat everything you did earlier, now a way to the left will open. Do the same and go forward along the main path. There's a third lever at the end of it.
After doing all this walk up to the golden statue and jump down. Wait until your partner stops talking, then take the flashlight and light up the crystal in the middle from all sides while lighting up all four crystals on the sides as well.
 You have to light up the crystal from every side.
A skeleton of a golden warrior will appear in front of you. Light it up using the crystal and a door will open behind you.
Go outside. After you reach the place where you distribute skill points, continue along the broken rock.
Now you have to fight living enemies. The most important thing is to shoot and throw grenades at the one that stands in front of the door. He has more health than the rest and doesn't move.
 Concentrate all fire on him.
After you get rid of him, a cutscene will start, and when it ends, the undead will appear. Light up the crystals at the top using the mirror in the middle. You only have to aim the mirror at the crystal and you can continue dealing with the undead, do it three times.
Then the path forward opens and the chapter will end.
 First fight after the chapter starts.
Right after the chapter begins, a fight will happen. After you kill all the enemies, go upstairs to the temple. On top of the stairs, next to a corpse, you'll be able to pick up a treasure map of this area.
Get inside and you'll see some swinging blades that you already know. Get through them.
 Throw dynamite at the chain.
You'll see two moving stones. Throw a dynamite at each of them to unlock the way. You'll find dynamite between the blades. When you do this, go back outside and walk on the left over the entrance. Watch out, mercenaries will attack you once again.
 Place the skull here and turn its back towards you.
Go where the fire was burning earlier and defeat the first tree zombie in this area. Go along the way, then take the stairs and kill more mercenaries. You'll see the first puzzle here. Turn left by the next stairs and take a big skull from the shack. There will be a smaller one next to it, put it in its place. Head to the entrance and put the big skull into the door.
Now you have to turn its back towards you. Then turn the lower skulls (with burning eyes) as it's shown on the door. The door will open.
 Go slowly through that bridge, it's full of scripts.
Go forward, a few mummies will show up on your way. Then move straight through the corridor, you'll get to a place where you can distribute skill points. Keep going and the ground will start shaking. You'll reach something like a bridge on which parts of the floor fall down. Try not to fall down, it shouldn't be a problem if you're not charging.
 In my opinion this is the best place to resist the attacks of the ghouls
At the end there's a boss fight - a full version of the guardian that you've met before. First, shoot him a few times until he disappears. Then a lot of ghouls will appear. My advice: go left as far as you can, to an ammo crate. Remember to have a machine gun. Now turn around and shoot anything that comes to you, you can also use fire from the skulls that you can activate from here.
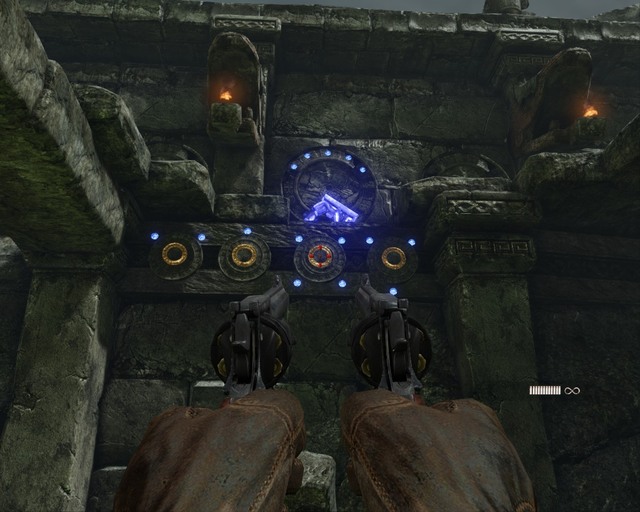
 Stand behind the statues and activate them by lighting up the crystals behind them.
Finally they will stop appearing, go to the center and upstairs. You'll see some weird machinery. You have to stop it, to do it you just need to stand behind the columns with blue eyes and light them up. Of course, it won't be easy because that bastard guardian will appear again and he'll send more of his minions. Remember to kill them and then light up.
When you do it, the machine will fall apart, and the storyline will go forward. You'll be able to finally get rid of the guardian.
 The guardian in all his glory.
His strategy is simple, he charges at you and attacks. You have to light him up all the time and shoot him, preferably with a machine gun. If you're low on ammo, it should be on the right. If you hurt him severely, he'll disappear and some of his minions will show up. Defeat them and the guardian will appear again. Repeat this until you kill him, when you do it, the chapter will end.
 Map in the beginning of the chapter.
Right after the chapter starts, you'll notice that you don't have any weapons. If you go downstairs then you can get a treasure map that's next to the dead mercenary.
Then go even lower and head forward, turn right by the big statue and continue along the way. After a moment you'll reach a place with explosives planted. Use the detonator that's close by and get through the hole you've just made.
 A puzzle you've already solved once.
After a while you'll reach a puzzle just like the one you've solved earlier. You have to light up two circles at the bottom and three rectangles at the top. Then you'll unlock a door you've passed before. Go back to the place where you destroyed the door with dynamite and go straight.
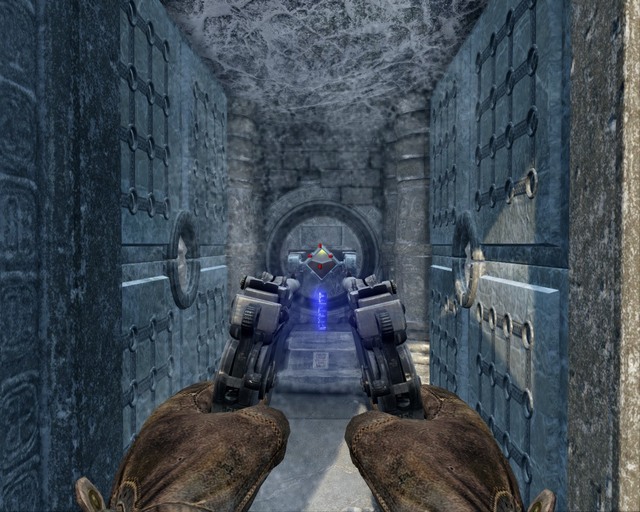
 Go forward until you reach the elevator.
You'll reach a newly opened chamber, get inside. It turns out to be an elevator, but with a trap. As soon as you see the exit, move to that end and get out as soon as possible. Otherwise spears would kill you.
When you get out of the elevator, enter the chamber and a mummy will appear. Remember that you don't have a weapon. You have to quickly activate three switches on the skulls - the mummy will burn and the door will open.
 You have to shoot these switches.
On the left there will be another elevator with a switch and in front of it, a body of a soldier, you can take his guns. Take them and take the elevator down. Then go along the corridor while killing a few mummies. At the end of the corridor you'll see another switch. Use it to make all walls disappear and puzzle will show up.
Just shoot the turning switches to move the elevator up. Do the same thing when you're on the halfway.
When you're higher, get out of the elevator and walk up to the door with a little window. Shoot another switch to go higher. Enter the corridor and keep going.
 You have to set the light as shown.
At the end of the corridor you'll have access to one of the mirrors. Using it, light up one of the crystals below and you'll unlock the stairs. Go along the unlocked way to another mirror and kill some mummies.
When you reach the next mirror, turn it so it lights up another crystal and keep going next to it. A passage will open and more mummies will appear. The best way to get rid of them is using a shotgun and a trap that you'll see there.
 Set the statues as shown.
After a while you'll reach three levers and a wheel. You have to turn two statues and a medallion above them like your notebook shows you. So the statues must face each other and the medallion has to face you. Try using the levers to understand how they work.
When you do it, a cutscene will start and a way through will unlock on the right side. Go along it. A lot of mummies will appear again, but you can easily defeat them with the traps. At the end of the corridor another cutscene will appear and you'll be able to jump down.
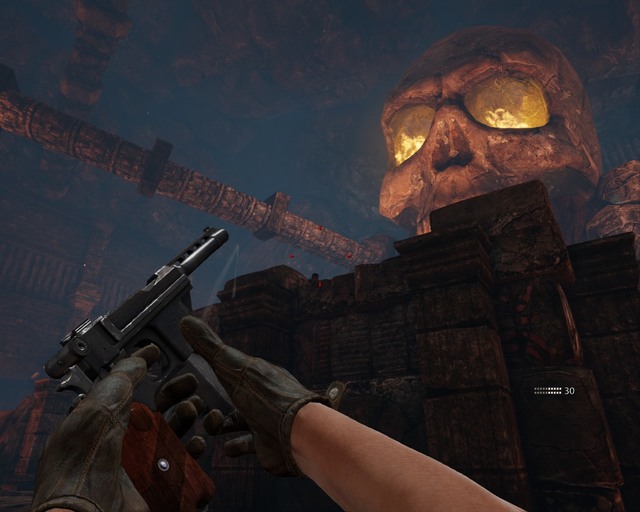
Shoot the eyes of two statues.You'll witness a fight between the mummies and the mercenaries again. You have to kill them all to continue the storyline. When you do it, you'll see another puzzle. Go to the bridge in front of a giant burning skull and shoot the eyes of two masks on your sides. Another cutscene will occur.
A bridge will open. Go get the professor.
 Shoot the professor's head.
In the first part of the fight he'll shoot you with a rocket launcher and throw grenades. The strategy is simple, you just have to avoid his attacks and shoot him back. If you run out of ammo, there's a crate in one of the corners. It's not very challenging except that you have to move all the time.
 When he becomes immortal, shoot the columns like this one.
When you hurt him enough, the second part of the fight begins. He'll summon two immortal mummies and become immortal himself. Don't mind them and pick up the rocket launcher that should be close by. You have to destroy four columns that support the temple to defeat the enemy. The crosshair turns red when you aim at them. When you destroy all four, you can relax and watch the final cutscene.
Treasures are a very important part of the gameplay because there are up to over a dozen of collectible artifacts on each location. Some of them are easy to find, other are more hidden and some of them are surrounded by traps or puzzles.
They aren't just ordinary treasures that you can collect for fun, they're important because they give you skill points.
Speaking of skill points, you can spend them on Path of Warrior, Light or Life. The maps will almost always show you all three types of treasures so if you collect them all you'll make progress in all three skill trees - for example, you can't use Light artifacts to get Life skills
 One of the places where you can distribute points.
Moreover, you can't distribute the points at any moment, just at some special places shown as glowing statues.
Path of the Warrior has two branches. One of them is increasing rate of fire and recoil, the other one - faster reloading and aiming. I advise you to get more damage skill first because it's essential while fighting the enemies.
Path of Light has only one branch, thanks to it the flashlight can light the enemies up and reload faster.
Path of Life has two branches. You can choose increasing maximum health and faster recovering or faster and longer sprinting. The latter one is less important, unless you like running away from the zombies and that's your strategy. I would rather choose the health branch first so you don't have problems with survival.
Path of Life x5
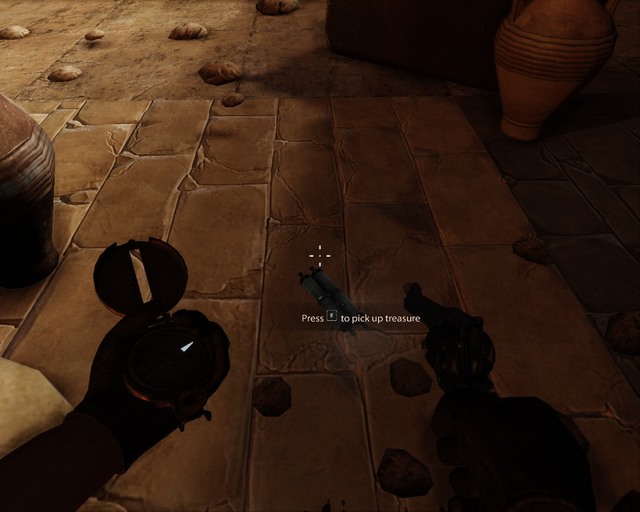
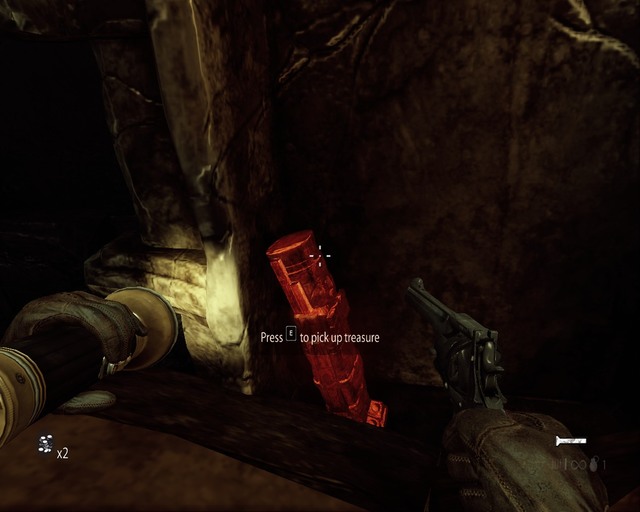
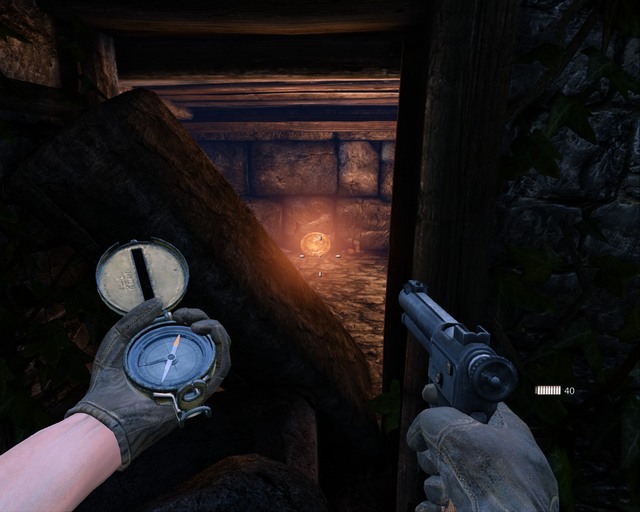
 First treasure
The first treasure is behind you when you gain control over your character for the first time. Turn around and go downstairs, where you'll have to remove the camlet next to wooden beams to find the treasure.
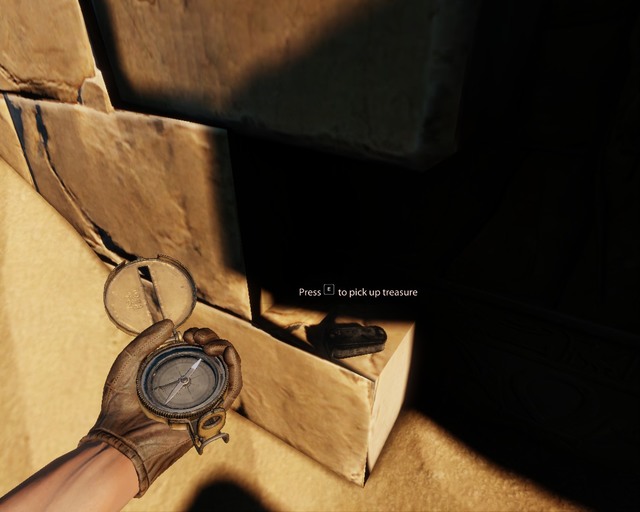 The second treasure, on the right side of the car.
The second one will be on your right, as soon as you get out of the car. Keep going right and pass the remains of a wall. The artifact will be in a dark hole in the wall.
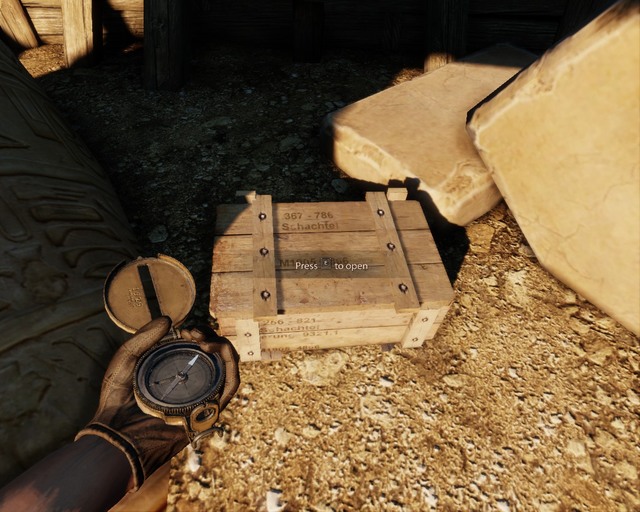 You'll find an artifact in this crate, right after you go between the statues.
Right after you walk between two statues at the beginning of the game, turn left, and you'll find a treasure in a crate on a side of the map.
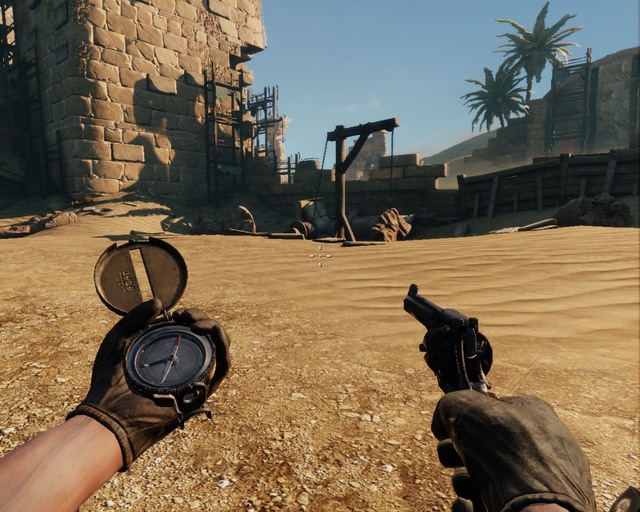 Another one next to a crane.
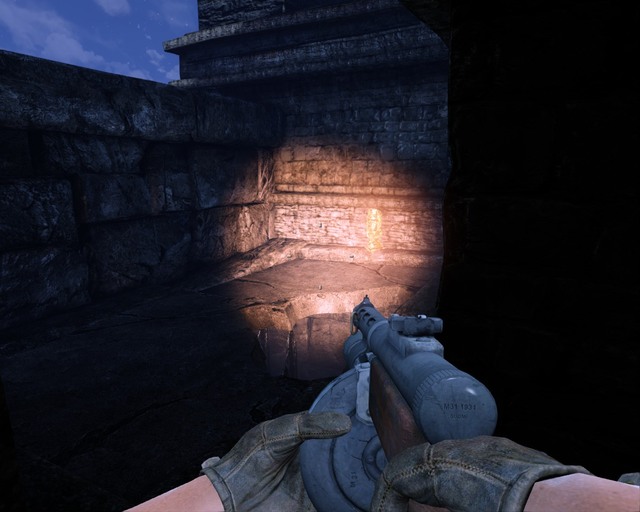
You'll be able to find this one when you'll have to blow up the gate with dynamite. Turn right and go forward. You'll find another treasure behind the destroyed statue, next to a primitive crane.
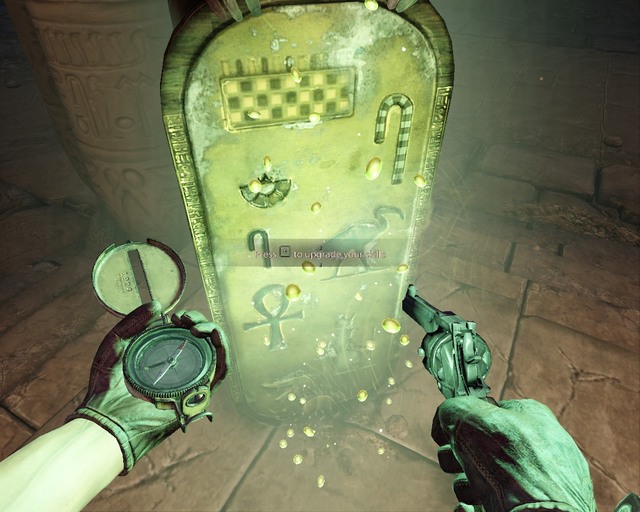
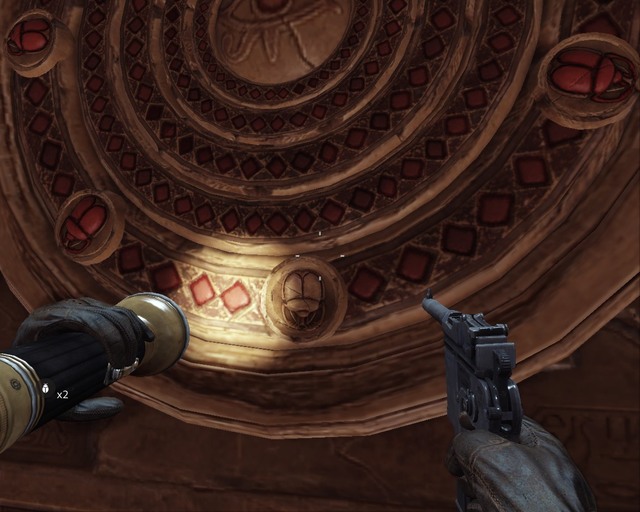
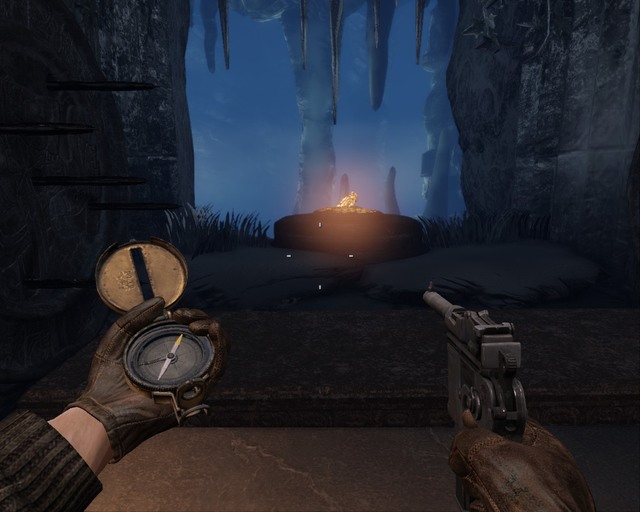
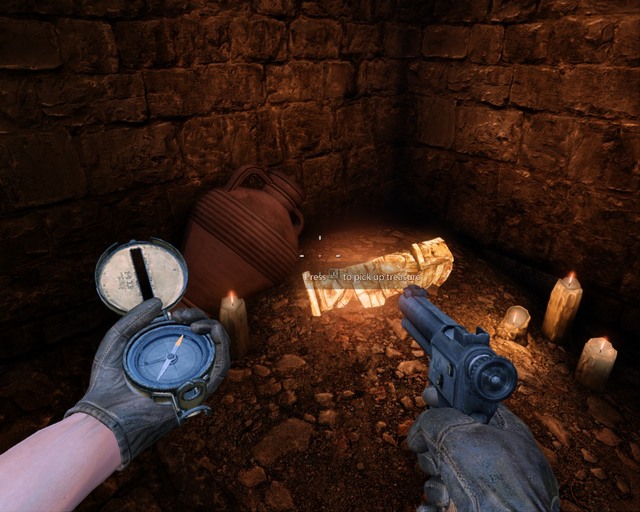
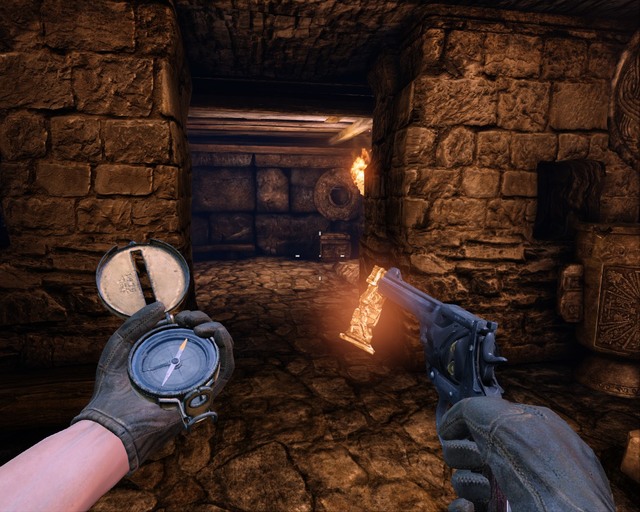
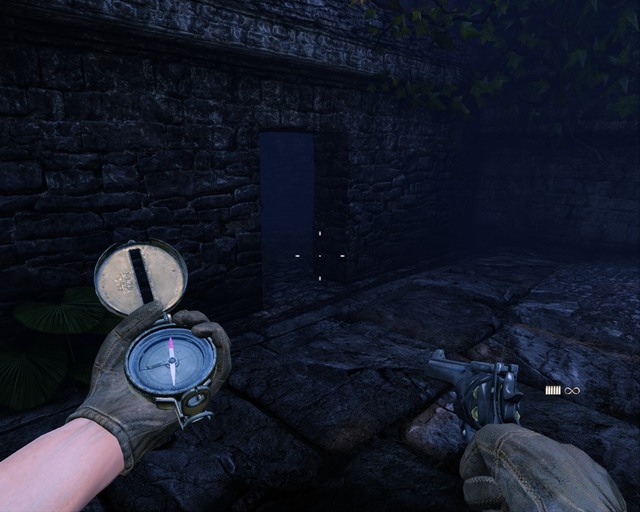
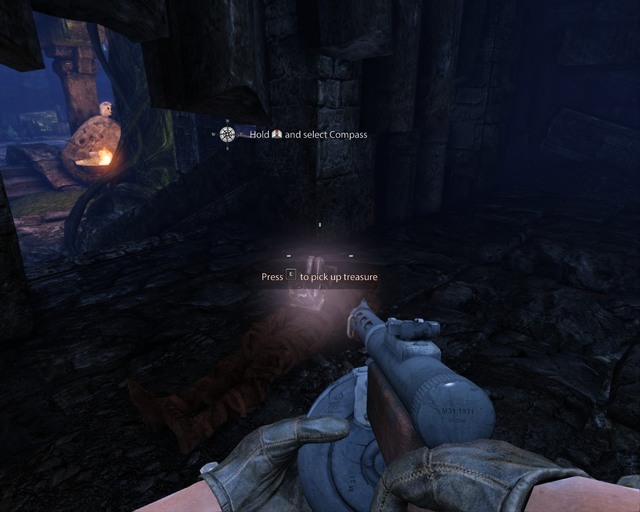
 In a broken vase.
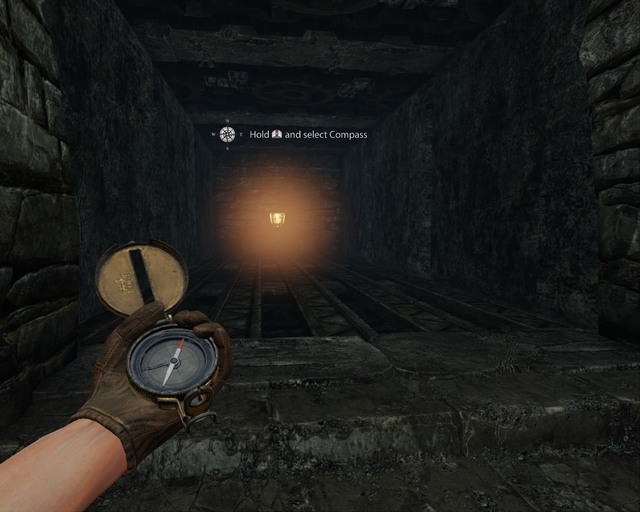
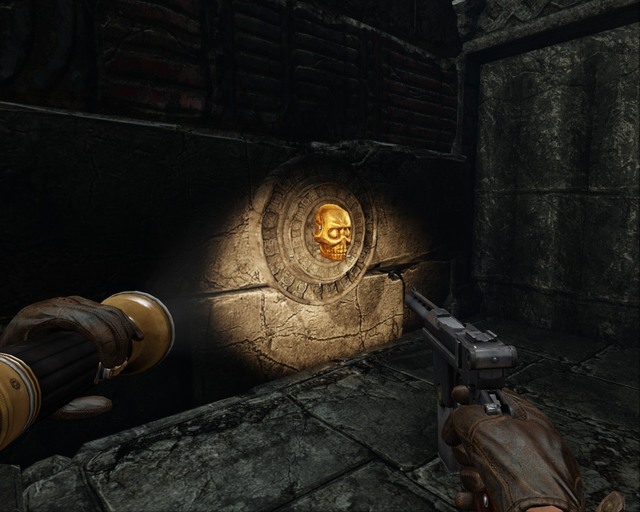
As soon as you enter the temple, your compass will show you the location of a new artifact. Move forward until you reach the wall. There will be a rather large vase there, destroy it and a parchment that you're looking for will fall out of it.
Path of Warrior x5
Path of Light x4
Path of Life x5
 Artifact on top. Shoot the wooden supports.
When you walk through the door that you opened by setting the eye symbol on two displays, you'll be in a room with a statue that glows green. Go forward and you'll reach a room with wooden beams. Shoot them and the treasure will fall to you. You can find guns in a corpse in the previous room.
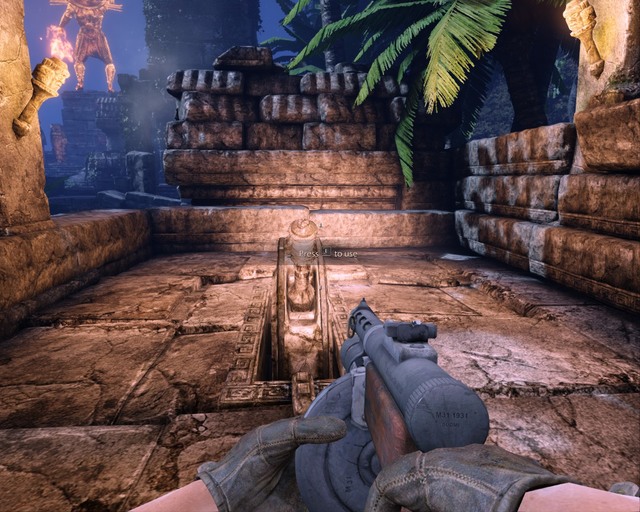
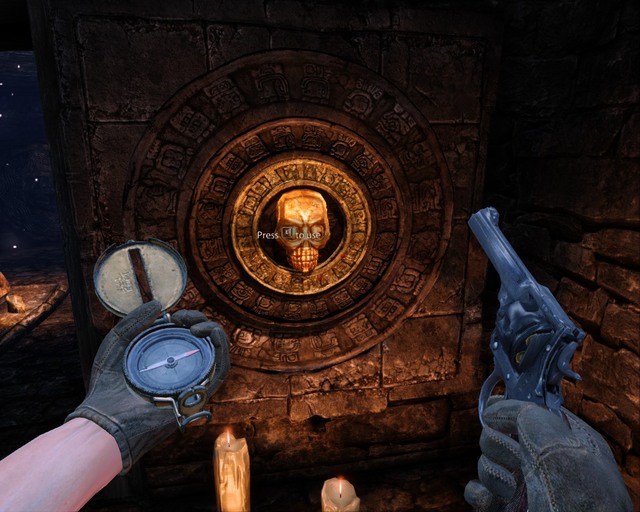
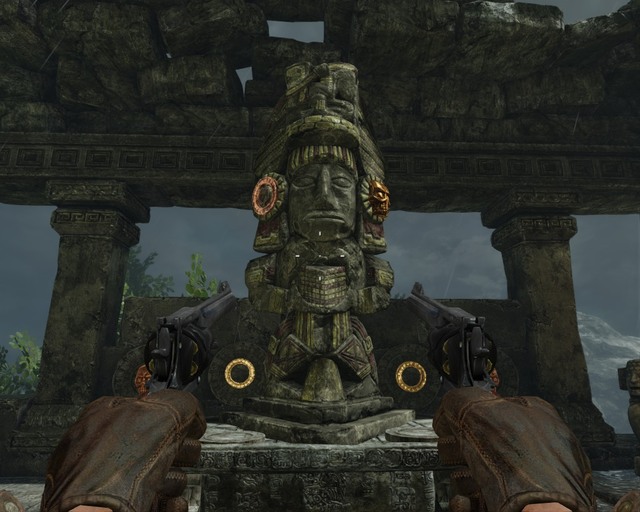
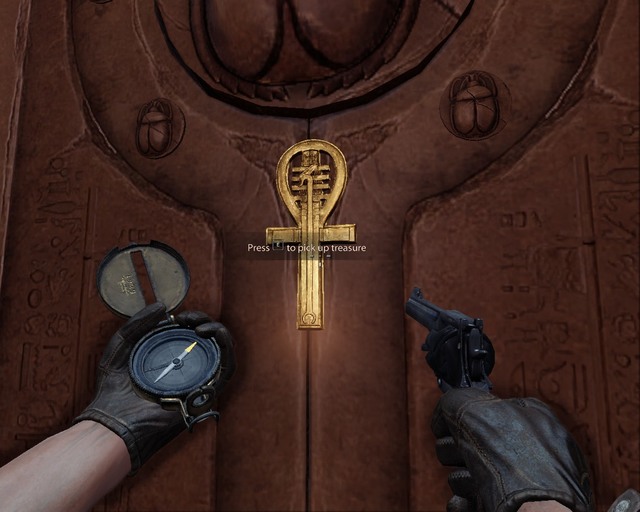 You just can't miss this treasure.
When you get through the room with a trap that drops a giant stone block on its victim, go straight forward and there will be a treasure in the next door behind the sphinx (literally attached to the door)
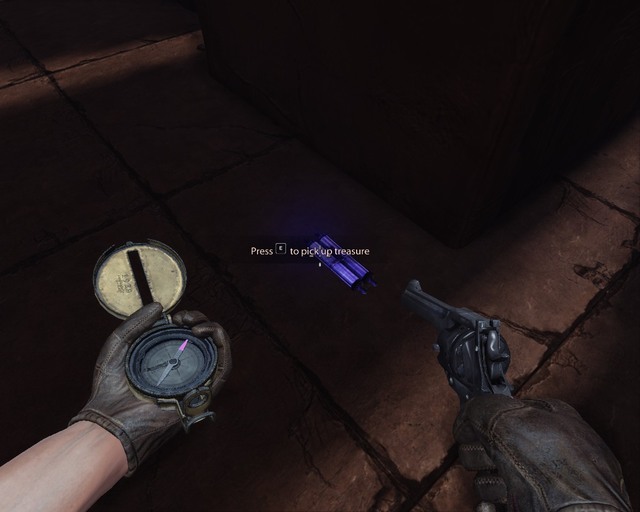
 Treasure on the left on the first floor.
After walking above a pool full of crocodiles you'll reach a big chamber with a few Germans inside. After killing them you can go forward or left. Go left to the higher floor and walk along the wall until you get to the treasure.
In the room where you have to use three switches on the ground to move the statue and then the Germans attack you. Take dynamite from a crate on the bridge and plant it on the wall below. The wall will explode and you'll get the treasure.
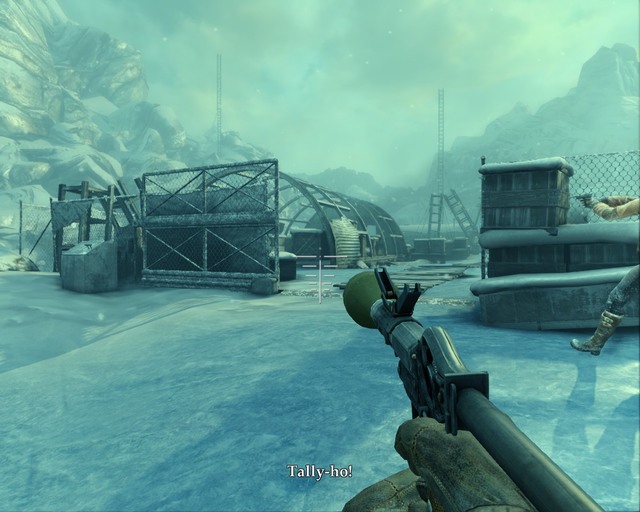
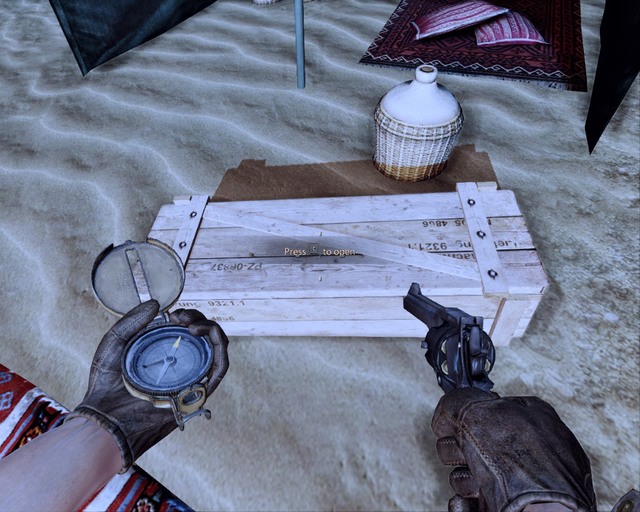 Treasure in a crate behind the door that you open with a switch on the wall.
The treasure is inside a crate in a camp on the right, as soon as you get outside the walls that surround the pyramid.
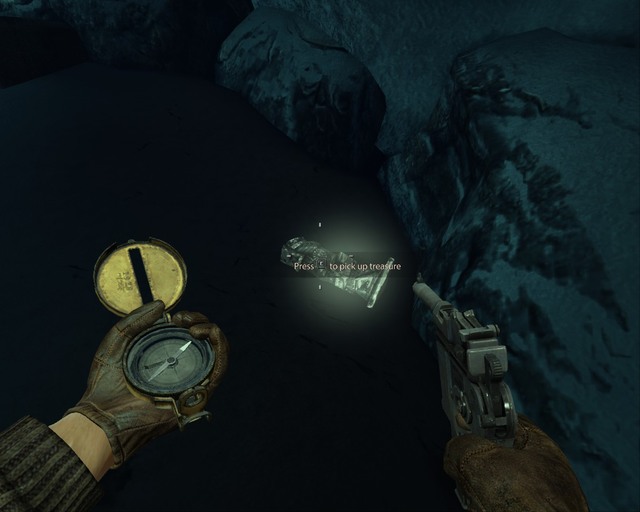
 Treasure that fell out of the urn.
After defeating the first mummy you'll be in a room where a treasure is in one of the urns on the floor. You have to break it to get the treasure.
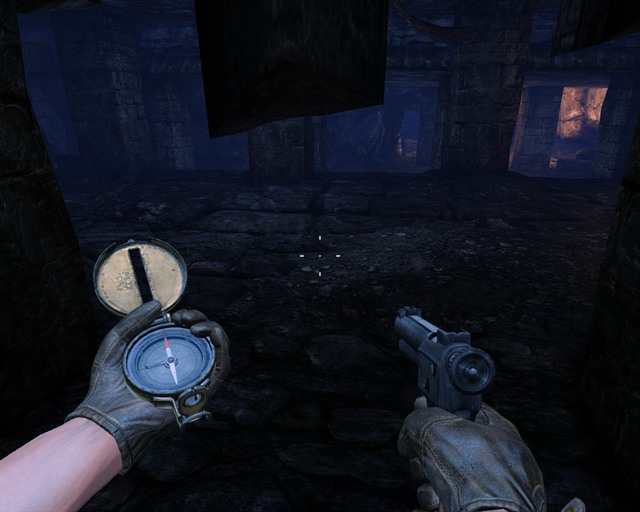
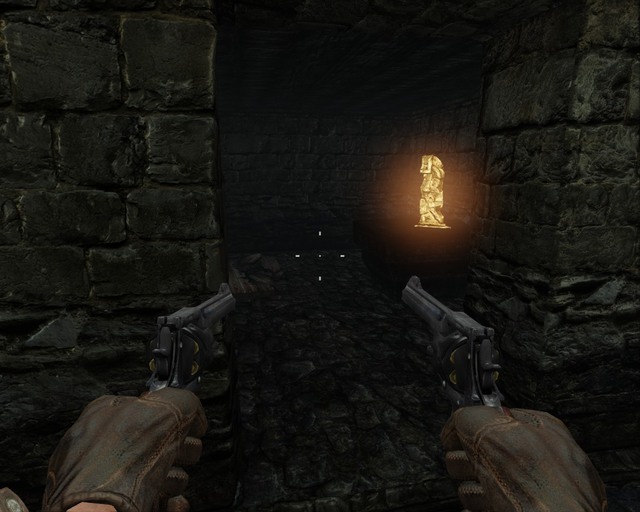
 When you pick up the treasure, gas will get into the chamber.
After participating in the first fight between mummies and the nazis keep going along the corridor and turn left on a first crossing. Destroy the beams in the passage and go this way to find a treasure on a pedestal. Remember to run away when you take it because you'll release toxic gas into the corridor and it may kill you in a few seconds.
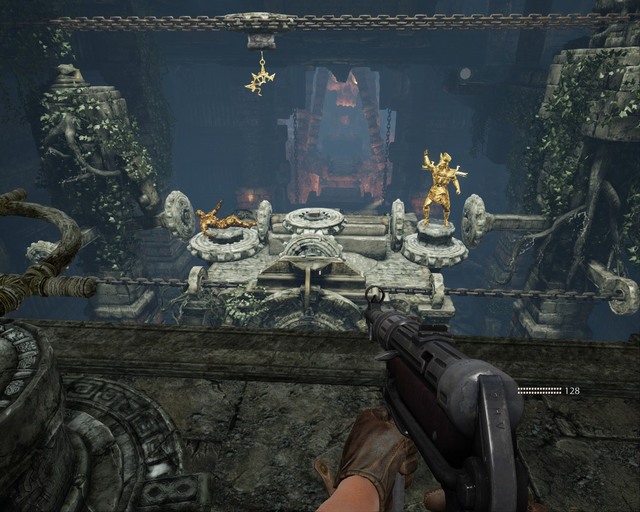
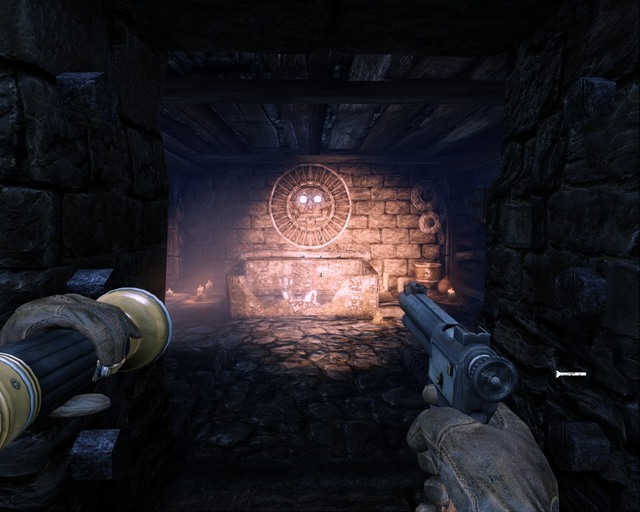
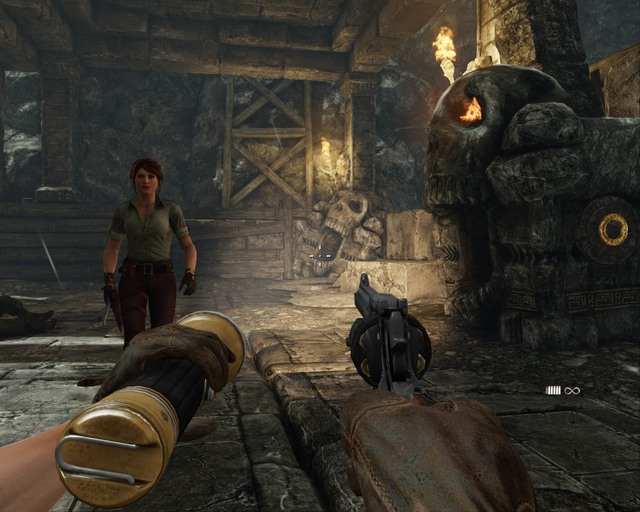
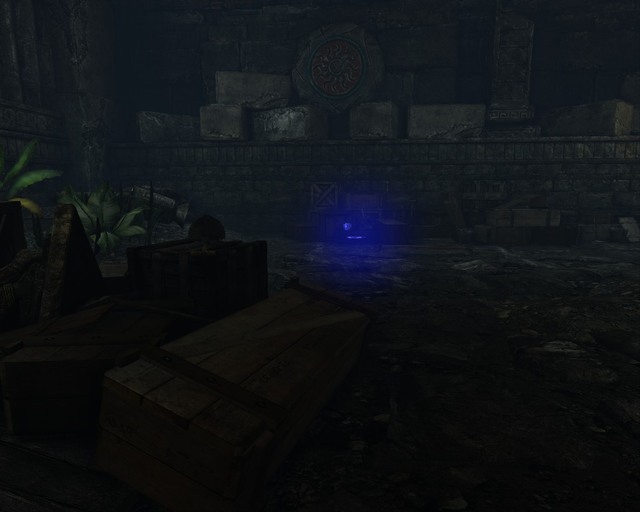
 In a room with this mechanism.
After distributing the skill points for the second time (by the green stone) you'll reach a room with a puzzle that opens the door (round mechanism). You have to put a scarab inside (it's on a sarcophagus in the middle of the room). Then the mummies attack. The treasure is in one of the niches that opened now.
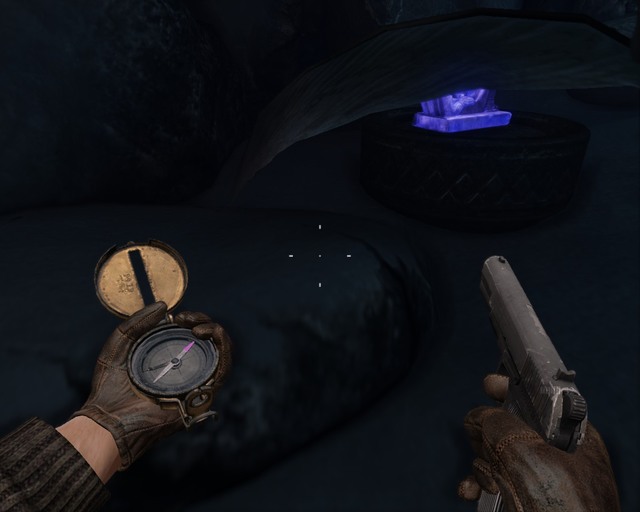
When you go outside the pyramid's wall, walk near the left side until you reach the entrance. Light up the crystals with your flashlight as shown on the screenshot and a treasure chest will open.
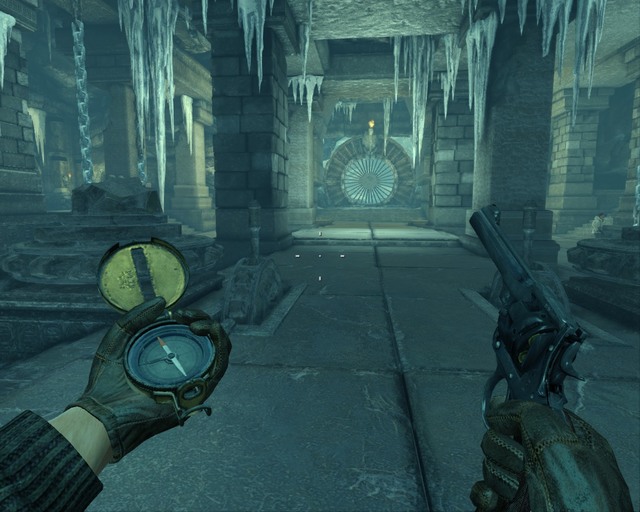
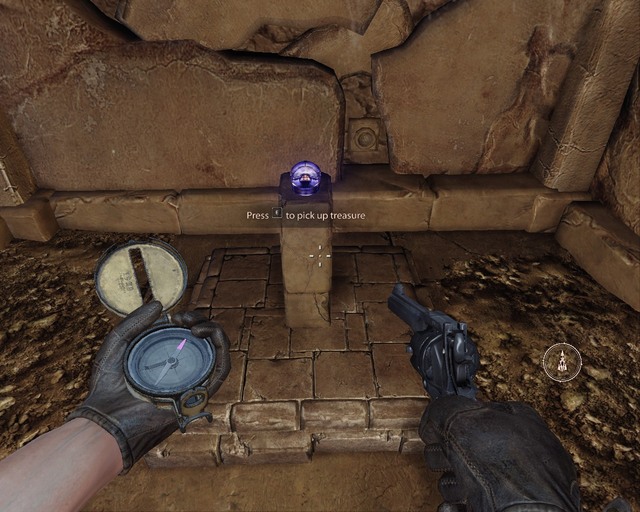
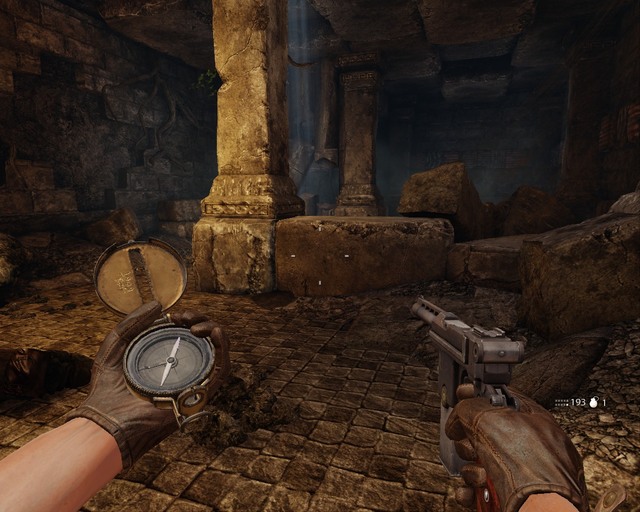
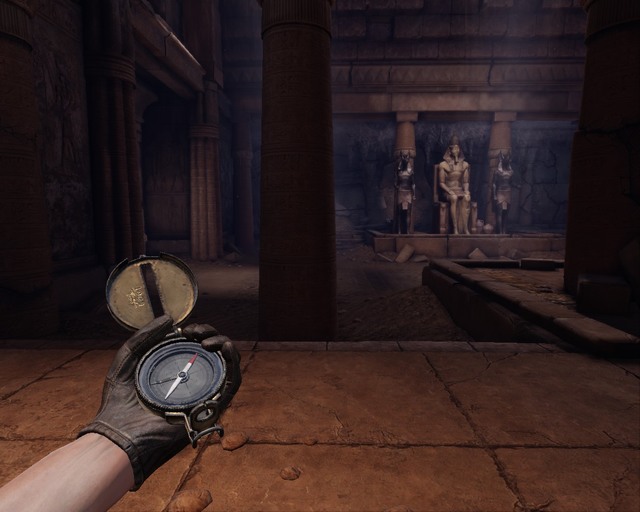 It's hiding behind this statue.
When you pass the puzzle where you had to walk along the tiles with an eye on them, you'll enter another chamber with statues inside. If you use your compass, it will guide you to the treasure. If not, you just have to go towards the wall and you'll find the artifact among the rubble.
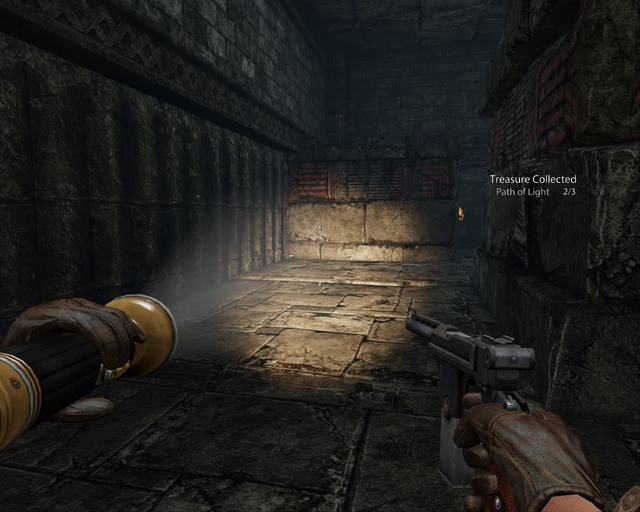
 In a chamber with falling blocks on the left.
In a chamber with falling blocks. As soon as you enter it (after killing three nazis) turn left and walk near the wall to the chamber it leads to. There will be an artifact at the end of it. Shoot a golden plate above the statue to open a bridge leading to the artifact.
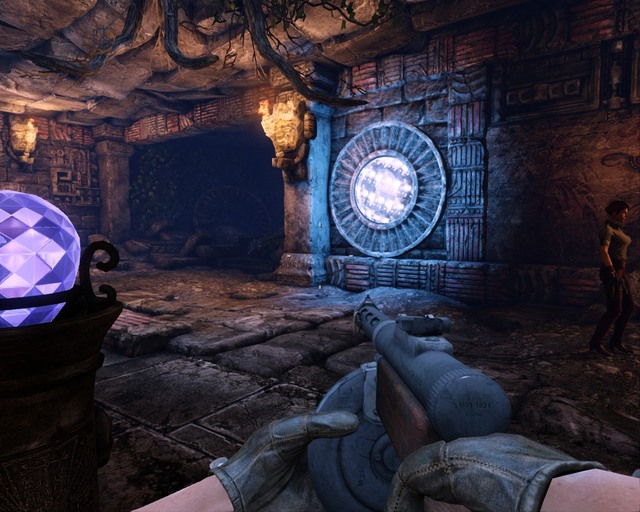
 Turn right from here and shoot the staff that the statue is holding.
There is one more treasure next to the one in the door. Turn right and shoot the staff held by the statue above. The treasure will fall to you.
 The same minigame as in the beginning.
After the second fight between the nazis and the undead jump down and go right. There will be a treasure on a pedestal but first you have to walk along the tiles with correct symbols. Just like the last time, step only on the tiles with an eye on them. If you can't keep going, just jump using the jump button. Take the artifact and go back the same way you came.
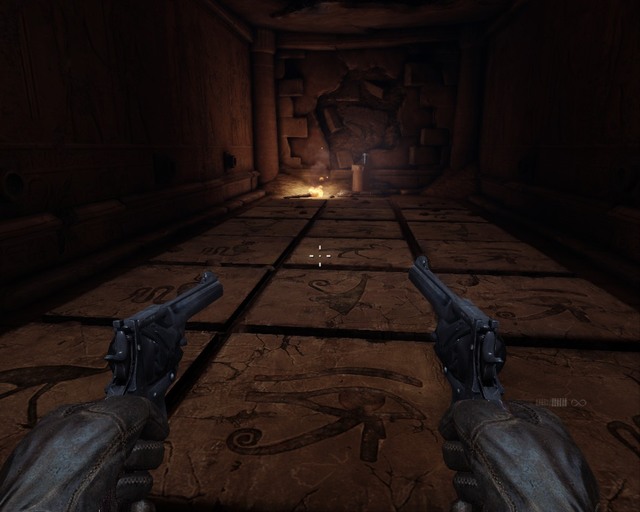
 See through the hole which tiles are supported.
After you take the last treasure keep going along the other way and go forward. You'll see a hole and a treasure at the end. You have to be careful because stepping on a wrong tile will kill you. Thanks to the hole you can see which tiles are supported and walk along them to the treasure. While you walk, the wrong ones will fall down and you'll be able to see where to go next.
Path of Warrior x2
Path of Light x2
Path of Life x2
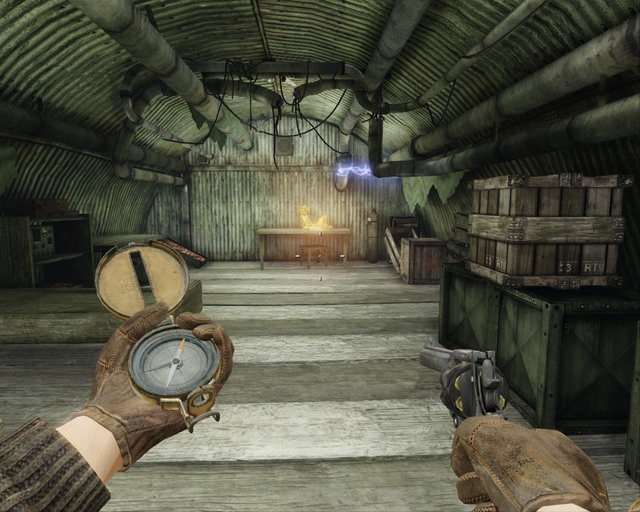 First collectible in the game, you have to destroy the generator to get it.
Right after the chapter starts go to the right and walk up to the generator inside the shack. Destroy it, then enter the shack and take the treasure.
 Artifact.
Behind the enemy camp, when you will have to walk from one column to another to avoid getting shot. After solving puzzle icons on the wall will change. Move columns one more time to get hidden bowl.
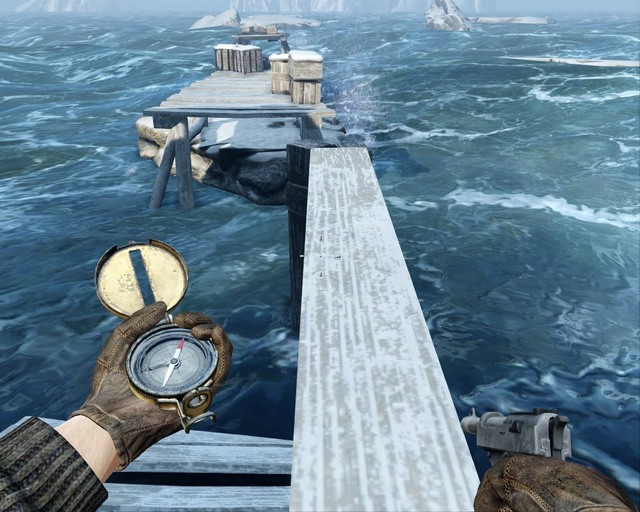 You'll find treasure on the next bridge.
After the chapter starts, go along the left side and find a wooden way to the shore. When you're at the end, you'll see a pole and a glowing treasure on the other side of the water. Take a board from the floor and put it in the right place to be able to cross the water. Take the treasure and go back the same way.
 Watch out for the trap. You have to shoot this switch before you enter.
When you have to use the rocket launcher to destroy rocks, turn right and go up. You'll see a door. Shoot the plate above and it will open. There's a trap inside that you can deactivate by shooting another plate above the statue. Then you can take the artifact.
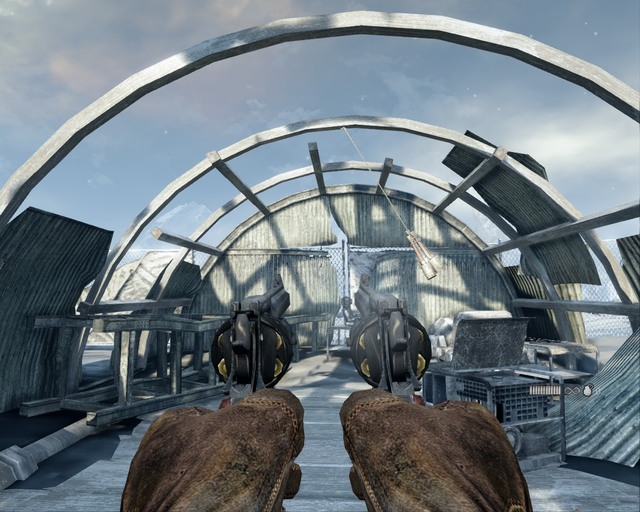 In a barrack without the roof and with swinging grenades.
Go forward as soon as the game starts. When your character starts to talk, stop and go towards the nearest tent. Watch out for the string near the entrance. Destroy the trap and go inside. Shoot two swinging grenades and take the artifact.
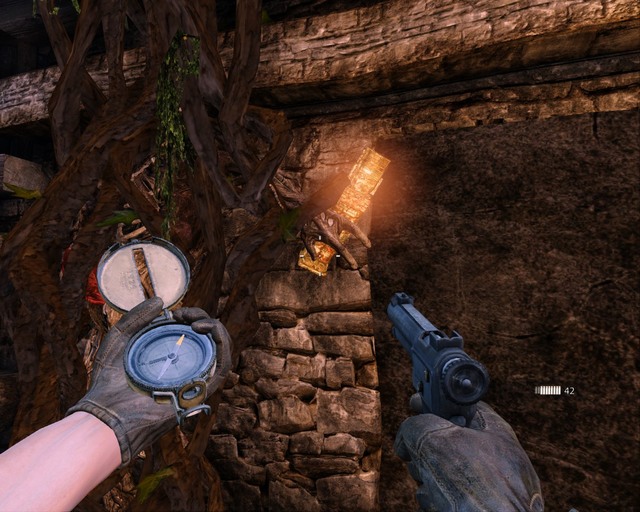
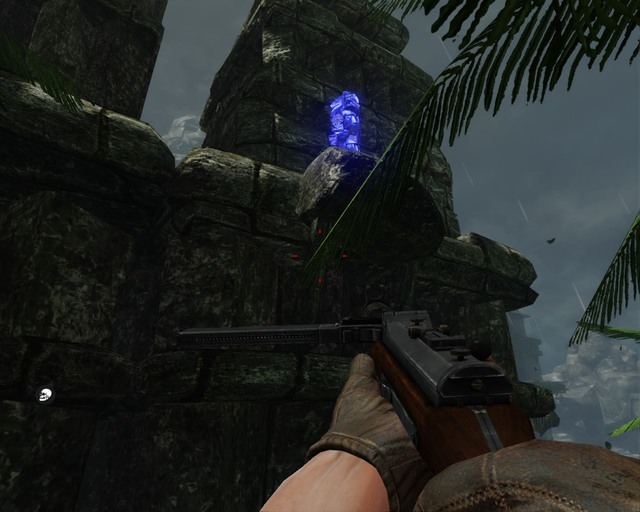
 On a hanging statue. Shoot the rope to get to it.
After the spears coming from the ground in a cave. There will be a huge stone statue hanging on a rope. Shoot the hook so the statue falls, now you can take the artifact.
Path of Warrior x3
Path of Light x3
Path of Life x3
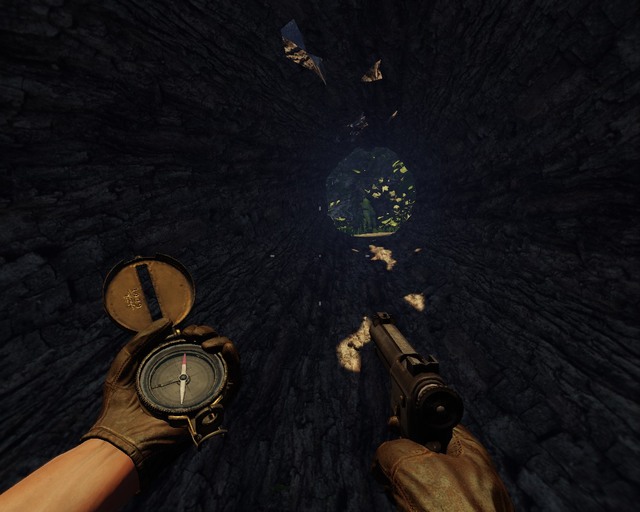
 Treasure at the bottom, you can jump down there but getting out might be a problem.
When you leave the mines after the scene with the hook, go forward along the tracks. When there's a crossroad, go right. You'll reach a barrack and a rather large wooden structure. Get on top of it and use the rope to slide down. Jump through a hole and you'll be able to take the statue.
 Inside the observatory.
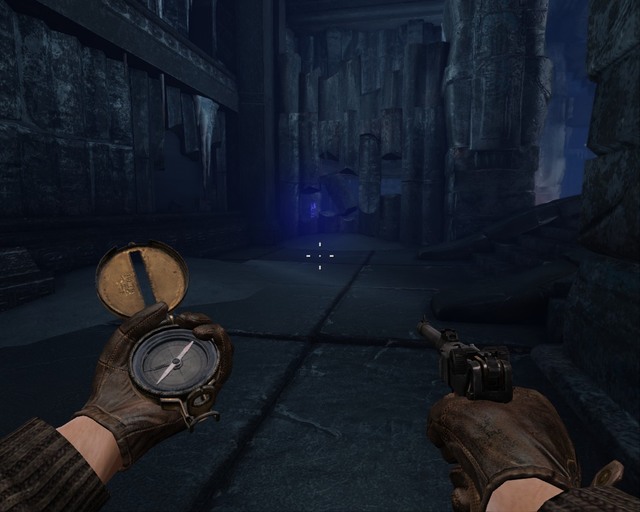
After you get out of the submarine and you're outside go forward and when you see a grate, get on the wooden structure, then right and to the observatory. There's an artifact there.
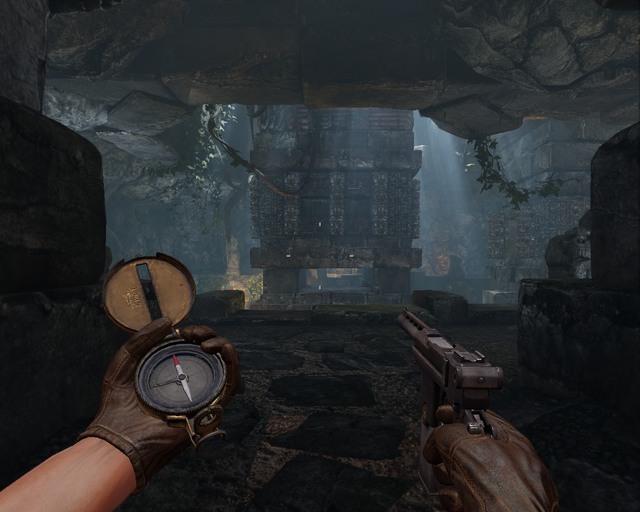
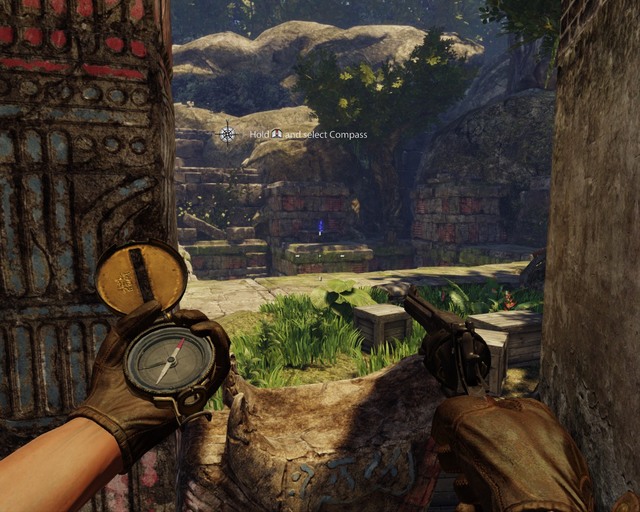
 Use your compass in this room.
In the last cave with columns and skulls, on the left. You have to turn two statues so that they face the door and then use the switch to open the door. Next artifact is yours.
 At the end of this road made of flagstones.
Right after you slide down the rope, go forward and look for a way down on the right. When you find it be careful because some of the tiles will fall down. There's a treasure at the end.
 Your flashlight has enough power to melt that ice, watch out for the mummy.
When you enter a large warehouse along the tracks, there will be a mummy trapped in ice on your left, it will be holding a statue. You have to melt the ice with your flashlight to get to it.
 Turn right here.
After you search through the submarine and getting out again, turn right on the first crossroad , the statue will be next to the stone where you can distribute skill points.
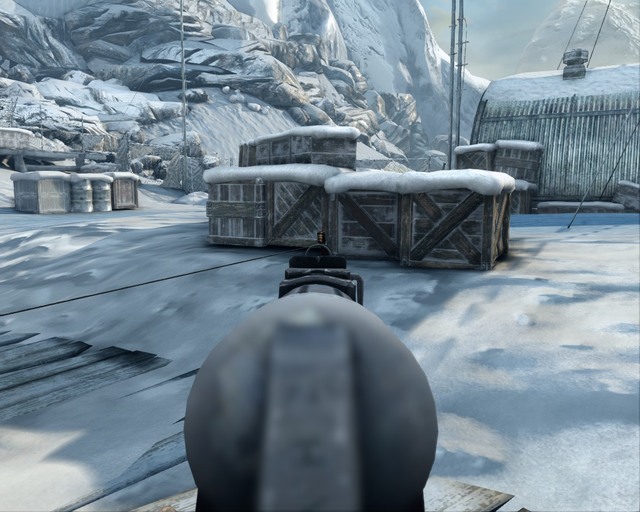
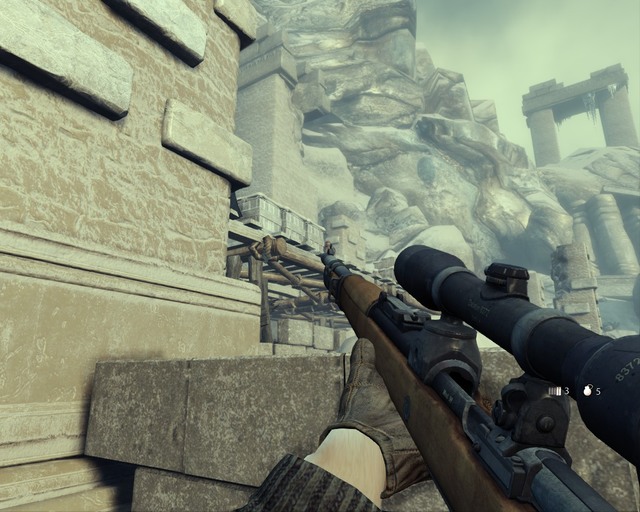
 The statue is next to the mountain's cliff, inside a crate
As soon as the chapter starts, after you get out of the mine, turn right and walk along the mountainside. You'll find the treasure in the crate at the end.
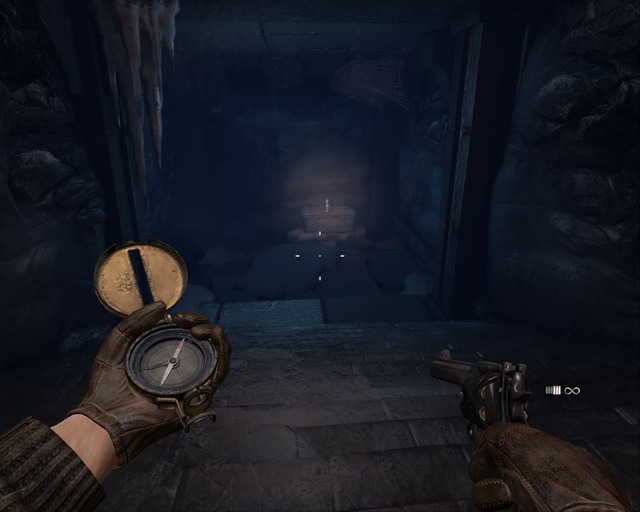
 The entrance right after you slide down the first rope.
Turn left right after you use the rope and you'll notice a gap in the rocks. Enter it and run to the end. You'll see a statue that you have to take. Turn around and wait until the spears move out. When they move back, run to the exit.
 Inside one of the barracks in the last camp.
When you slide down the second rope, you'll see a gate of a camp. The artifact is in the camp, inside one of the barracks.
Path of Warrior x5
Path of Light x4
Path of Life x5
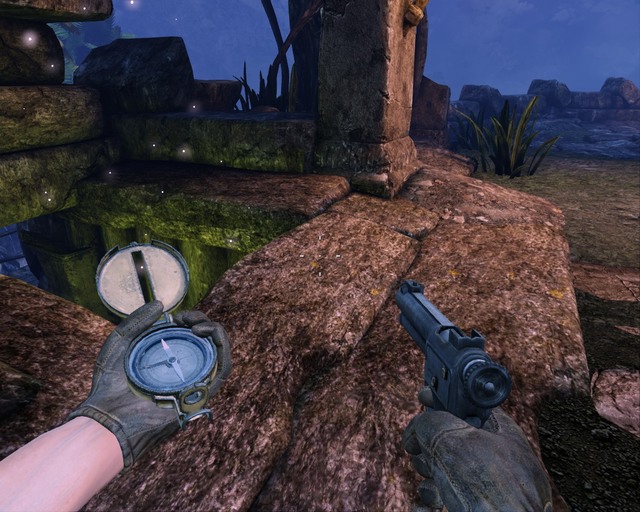
 Near the first puzzle.
After crossing a wooden footbridge in the beginning of the chapter, turn right and use your compass. It will lead you to the treasure.
 Go to the end of this tunnel, then turn right and go back.
You'll get this statue when you disarm the trap that spits fire from the floor. You have to cross it, then immediately turn right and go back. After a moment you'll see it behind a miniature version of the previous trap. You can simply cross it at the right moment.
 The treasure will pop out after you kill the mummy.
You have to turn right and move the statue in the giant chamber after the first cutscene. Then thaw the mummy and after you kill it, the treasure will appear behind you.
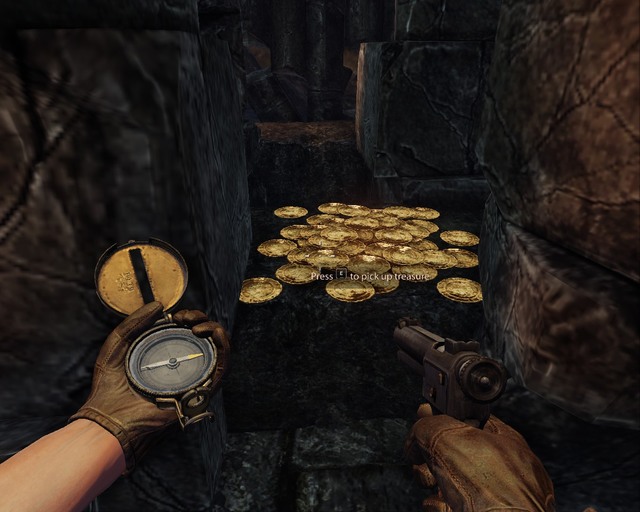
 Run when the arrows pass you.
After you distribute your points for the first time in this chapter, head forward and you'll see a pile of coins at the end of the corridor. Stand on a stone panel in front of them and start running as soon as the arrows stop flying out, then you'll be able to take the treasure.
 Hidden switch responsible for turning the statue.
Behind the chamber with a lot of zombies. Go into the corridor on the left and keep going along it. Stand by the statue and shoot a switch on your right. There will be a treasure at the end.
 Shoot the switches on the floor to cut the fire off.
When the game starts and you defeat the first enemies, turn right and you'll see a corridor with fire coming out of one side. There will be an artifact at the end but to get to it, you have to slowly shoot the switches on the floor and stone slabs will move out of them, blocking the fire.
 Statue behind the flower.
After the second clash with the Germans, behind the flower at the end of the corridor (next to a frozen mummy).
 There are two treasures in this room.
After the first cutscene, in a big chamber, you have to go forward and move the statue that covers the entrance. Then thaw the mummy and after you kill it, the treasure will appear behind you.
 Upstairs in the chamber with the undead.
In the chamber with a lot of zombies, upstairs.
 Watch out for the floor, it will collapse.
When the game starts and you get rid of the first few enemies, turn right and go forward. You'll find the treasure at the end of the corridor but the floor will collapse. See on which side there's a part of the floor left and go along this side.
When you complete the puzzle with starting fire, go through the open door and go along the right wall. You'll find a puzzle that you have to solve as shown on the screenshot (just move the bottom tile to the left). It takes a while but it's not hard. The most important thing is to solve the upper part first and then it will be much easier. When you manage to do it, you can take the treasure from the next room.
 A statue hidden between rocks after the puzzle with the mirror.
After the puzzle where you had to light up crystals using a big mirror, go down on the right, use your compass and it will lead you to the treasure.
 This way to the treasure, you just have to destroy the sarcophagi.
After the puzzle with lighting up crystals with a mirror, find a place with a lot of sarcophagi nearby. Destroy them and kill mummies. When you get rid of them, a treasure chest will open.
 Avoid the tile that's lit up by the flashlight.
In a room with a lot of zombies under the bridge. Don't step on the tile on the right, next to the statue.
Path of Warrior x2
Path of Light x3
Path of Life x3
 When you see this, turn left and start going back.
After a long gunfight and a ride in a trolley, turn around as if you were going to go back and there will be a tunnel to the treasure on the right.
 There's a treasure behind that door, you need a crowbar and dynamite.
When you lower two bridges and move on, another fight will begin. There will be a door leading to the treasure in a corridor on the left but you'll need dynamite and a crowbar. You can get dynamite a little earlier, on the right behind the bridge (or at the end of the same room). You'll find the crowbar in the room where the last fight took place, in a corridor on the left (it's on a crate). When you open the door, you'll see the treasure.
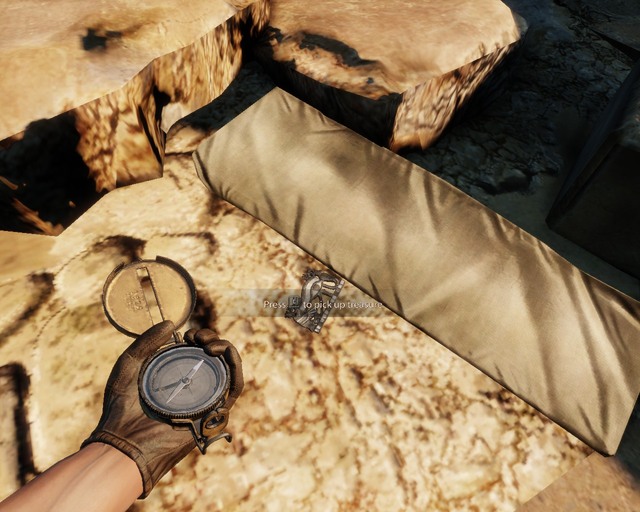
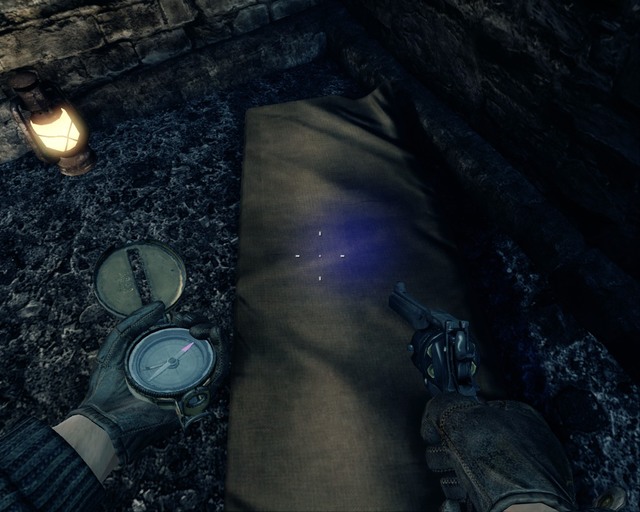 There's a treasure under the canvas, you can even see it through.
You'll reach it when you get through the first lattice door. It's at the end of the corridor under a canvas that you have to move.
 You have to move the trolleys to reach the treasure.
Ignore the switch your character is talking about after the first fight and go forward. You'll find trolleys that you have to get out of your way (there are levers below that control the tracks). When you remove them, you'll find a treasure inside the room.
 Pour water into every bowl to open the door to the treasure.
When you plant dynamite on the gate, even more enemies will show up, you can destroy the sarcophagi to make the mummies attack the Russians. It will make it a bit easier for you. In the end you'll get to a grate with three bowls in front of it. Go back and down, there will be a bucket. Take it and pour water to each bowl, starting from the left.
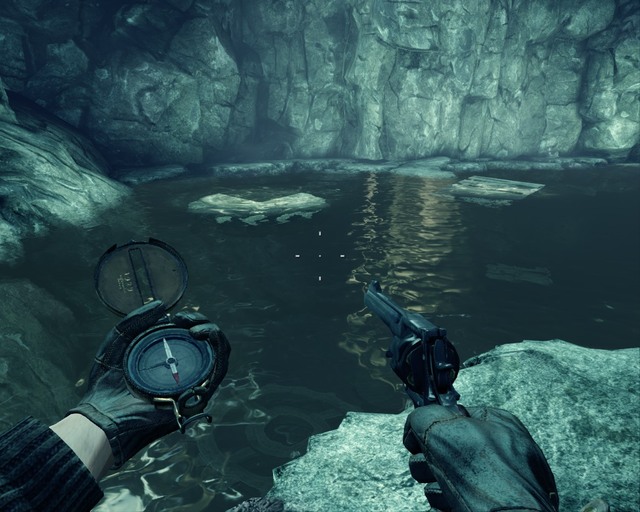 Treasure on the other side of the lake, you have to jump on emerging things, it's really hard.
Stick to the right wall of the cave during the gunfight. Some items will start emerging from the lake, you can stand on them so you don't get into water. Jump from one to another to get to the treasure.
 When you see this, go to the footbridge on the left, there will be a treasure in the corridor.
After a trolley ride and a gunfight, go up on the footbridge and turn left. The treasure will be in a crate.
 You have to find a can of gasoline to lower that bridge.
After a long trolley ride and when you lower the first bridge, take the gasoline can and fill the engine that controls the bridge on the right. Lower the bridge and go up to the left. Destroy the engine there and use ropes to get to the very bottom, press space in the right moments to get the artifact.
Path of Warrior x5
Path of Light x4
Path of Life x4
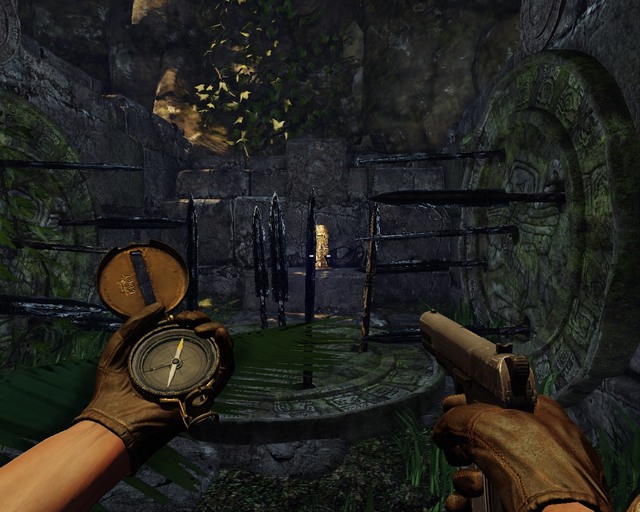 The second treasure, you have to disable the trap.
Another treasure is a bit further. After you find the first one try to go along the right side so you don't miss a path. Go along it for a while and you'll see a statue on a pedestal. The difficult part is that there are spears in front of it. To deactivate the trap, you have to shoot all the golden circles, from left to right.
 A treasure you can collect in a cave under the waterfall.
After taking the previous treasure, go back to the waterfall and get inside the cave. Use dynamite on an annex on the right and you'll find quite a lot of golden coins.
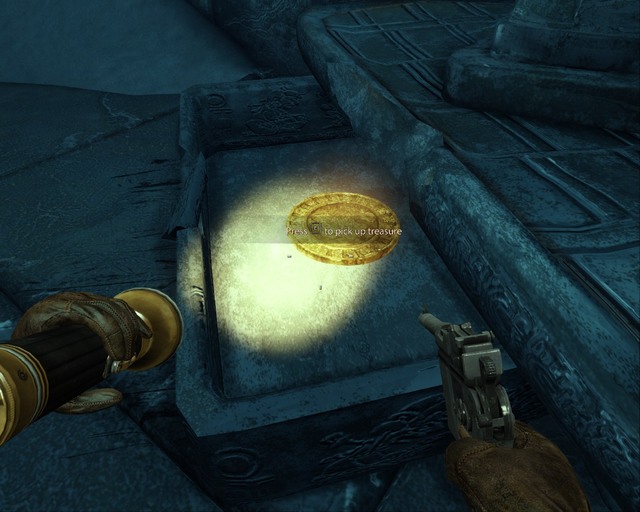
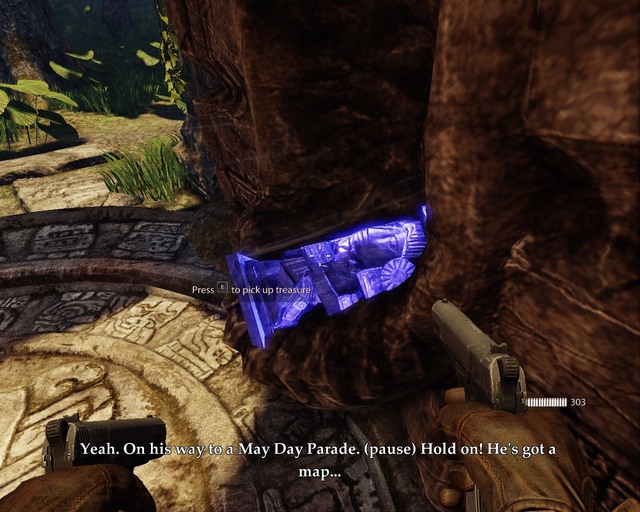
 Golden disk between the stones.
Turn left after you get through the path with skull statues and go back into the jungle. There will be a golden disk next to a pile of rocks.
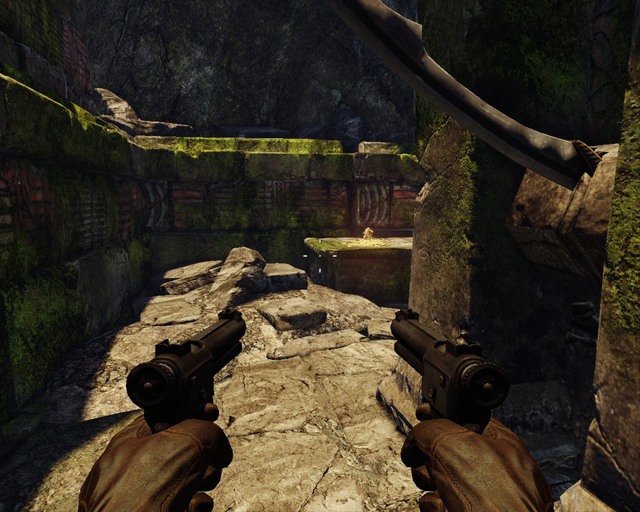 Gold on a table.
When you get through the round door go forward. When the Germans start shooting you, go upstairs on your left and then along the collapsed block. You'll find a pile of coins at the end. Watch out for the falling blade.
 Inside this ship, in the captain's cabin.
Inside the only ship in the game, there will be one of the treasures.
 First treasure here, impossible to miss.
It's in the beginning of this part, right next to the circle with an arrow shooting trap. Shoot the circle and take the treasure.
 A statue right after you slide down the rope.
After the cutscene with a statue's head falling down you'll have to use the rope to slide down to the jungle. When you're at the bottom, turn around and go across a wooden footbridge, there's a treasure at the end of it.
 Stick to the right side when you enter the ruins.
After going through the path with skull statues and back to the jungle, keep going forward and when you go between some buildings turn right, there's another treasure there.
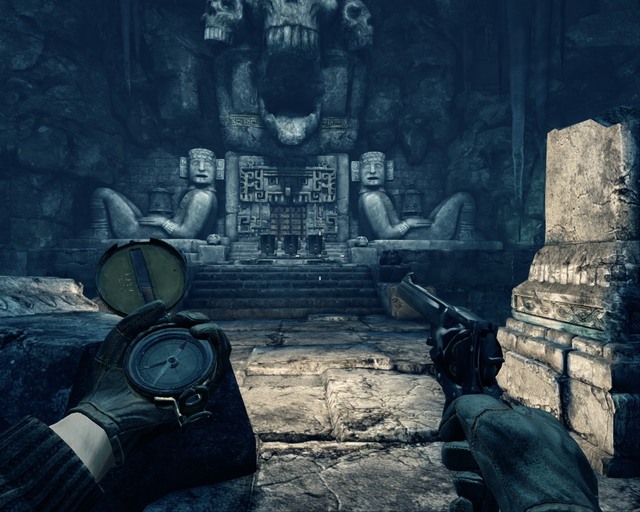
 You can see the treasure from here, watch out for crocodiles at the bottom.
When you exit the temple, go right. To get the treasure, you'll need two stone statues. One of them is next to the places where you have to put them and the other one behind the tent on the left.
 Coin under a stone platform.
After the cutscene with statue's head falling down you'll have to use a rope to slide down to the jungle. When you're at the bottom, go along the way on the left and you'll reach some beams that support a stone platform above. There's a treasure between them.
 Turn around, you'll see a statue.
At the end of the ruins where lots of enemies appear you'll reach a place where a big round door stop you. The treasure is across, inside one of the crates.
 You have to go along this path inside a tree to get to the statue.
After crossing the trap (arrows keep flying in a narrow passage), go down and right. Go through a fallen tree and you'll find a treasure at the end.
 There's a treasure in this building that looks like a monastery.
After a board where you can distribute skill points, in a large building where the nazis are.
Path of Warrior x4
Path of Light x6
Path of Life x4
 After this puzzle there will be a golden statue in the corridor.
After solving a complex puzzle and crossing the falling stone bridges, go forward. The treasure will be in the corridor where you can hear some kind of an animal.
 Go right and down, the treasure is there.
In the chamber with swinging blades, downstairs on the right. It's on the ground.
 Go downstairs here.
After the chamber with swinging blades go right and down. There's a treasure at the end.
 Go up to take the treasure.
While you solve the puzzle with a wheel and three switches. Turn the wheel so it lowers the bridge halfway to the unmarked passage and jump to the other side. Use your compass if needed.
 These ones you can, they're in the sarcophagi.
Chamber with a puzzle and a skull on the lever. Inside tombs that you can break. Six statues.
 To the end of that corridor, then left and come back.
When you reach the first puzzle, turn around and go along the second corridor. There's a statue at the end of it.
 Treasure between these columns.
After you solve the first puzzle with golden skulls go downstairs. The treasure will be lying next to the column in the corridor.
 Treasure in the room on the right.
When the floor collapses under you and you slide down to a big room with a lot of zombies, kill them all and see where the door opened. On the right from it there's a chamber with treasure in it.
 At the right, after you pass it.
After the puzzle with lit up crystals on the left, when you go through the gate.
Path of Warrior x6
Path of Light x5
Path of Life x5
 Entrance on the other side of the building.
Right after the start of this chapter, in the first house on the left. After you take it, an undead enemy will appear.
 In the hut, in the corner.
In the hut from which a ghoul will run out breaking the door from the puzzle with skulls.
 Iron grip, you have to wake the mummy up to retrieve the treasure.
After the puzzle with skulls you'll enter the further part of the ruins. Stick to the left wall and you'll eventually see a tree mummy that holds the treasure in its hand. Start a fire in front of it to wake it up and retrieve the treasure.
 Halfway of this path, to the right.
After the puzzle with skulls, when a lot of zombies appear and you'll be able to use fire to help yourself, there's an entrance on the right of these fire traps. Use the trap's switch on the left and take the treasure.
 Walk on the right side or you'll fall.
After opening the gate, a cutscene and switching three levers during a fight, turn around and shoot a switch near the third lever. Now go back to the right lever and the compass will lead you to the treasure. Walk on the right side when you see it.
 One of the huts on the left, after the first fight against the Guardian.
After you open the gate, a cutscene and switching three levers during a fight, turn around and shoot the switch near the third lever. Now go back to the left lever and the compass will lead you to the treasure.
 In the house ahead when the chapter starts.
Right after the chapter starts, when you reach the buildings. Ahead of the way you walked.
 The treasure is behind this passage ahead.
After the fight with the first "tree mummies". Behind the entrance on the left. You have to move the lid from the tomb and take the statue immediately. Run away as soon as you do it or else you'll get crushed.
 You can see it clearly.
After you defeat a horde of the undead with fire traps, the blue statue will be clearly visible ahead. Step on the tiles carefully, some of them will collapse and kill you. No rush.
 After the crystals, outside in the bushes.
After you light up the crystals, go outside and down. The treasure is in the bushes near the place where you can distribute skill points.
 In this hut, next to a place where you can use your points.
After you light up the crystals, go outside and down. The treasure is in a hut on the right side of the place where you can distribute skill points.
 Treasure under that stone face.
After the first fight against the mummies. To open the entrance to the treasure, you have to light up two crystals through windows on the sides of the entrance using your flashlight.
 Left from here.
After the first fight against the mummies you had to go inside a hut to exit it on the right. Jump to the left as soon as you see the columns.
 Crouch and go forward here.
After the puzzle with skulls that you had to put on the heads go forward and turn right at the end, crouch under a destroyed pillar. Go to the end and take the treasure from the mummy's hands.
 Near the exit, if you take the Path of Life #3
After taking Path of Life #3, when you go back, a mummy like the previous one will appear near the exit.
 Switch of the trap inside the hut.
After you light up the crystals, go outside and down. The treasure will be in the hut ahead. Watch out for a trap. Go inside the room on the right and deactivate it with a switch.
Path of Warrior x3
Path of Light x3
Path of Life x3
 Broken door.
In the house on the first place, upstairs and left (you have to break the door).
 Statue in the house, you should've seen it before from below.
After defeating the first tree zombie and going upstairs, turn right and go through a hut with no walls. Then right again and you should see the statue.
 Treasure is in the mouth where the flashlight shows.
After the traps that you already know - skulls that shoot blades.
 Shoot the switches and the treasure will fall down.
Right after the game starts and you go downstairs, head right and shoot the switches.
 A statue above, shoot the supports.
After defeating the first tree zombie and going upstairs, turn right (when the mercenaries appear for the third time). There will be a statue nearby, you have to shoot the supports to make it fall down.
 A disk is where the flashlight shows you.
After the traps that look like stone skulls but before the place to distribute points, in a corridor on the left.
 Turn right here and go all the way down.
After you enter the temple, go down on the right by the blades, there will be a treasure behind the trapdoors. Wait until all the middle ones close and cross them. When you go back, don't walk on the stairs, stand next to them for a moment because a rock that can kill you will fall down.
 Start shooting the switches from this one.
After you walk through the door with skulls, face the further part of the corridor. You should see a switch on a column at the end of it. Shoot it. Now turn right and shoot two switches starting with the nearest one, then next ones on the opposite wall starting from the nearest one, finally the one that shows up on the right wall.
 Activate the correct switches.
After you distribute skill points behind the stone skull traps. Activate a skull on the right side of the statue and a ring on the left.
Path of Warrior x3
Path of Light x3
Path of Life x3
Grab the treasure and run.After the chapter starts, when you pass the giant statue, turn around and you should find a tunnel inside it. There's a golden bowl at the end of it. Take it and run to the exit because the walls will start moving towards you.
 Can you see a golden skull on the screenshot? Switch it to find two treasures.
After you get a weapon, when you cross the primitive labyrinth, you'll see two switches. Use the one on the left and there will be treasures at the end of the corridor that will appear.
 Right after the game starts.
On the left, after the chapter starts.
 First switch after getting a gun.
After you get a gun, when you walk through the changing corridors, use your compass and wait until you find a skull-shaped switch. When you open the door, there will be treasure behind it.
 After this puzzle and going up.
The last one is after you take the elevator up (the complicated one with a puzzle) and go to the end of the corridor. It will be lying on the ground.
 Turn left after solving this puzzle.
When you solve the puzzle with crystals on a circle. A locker with treasure will open on the left.
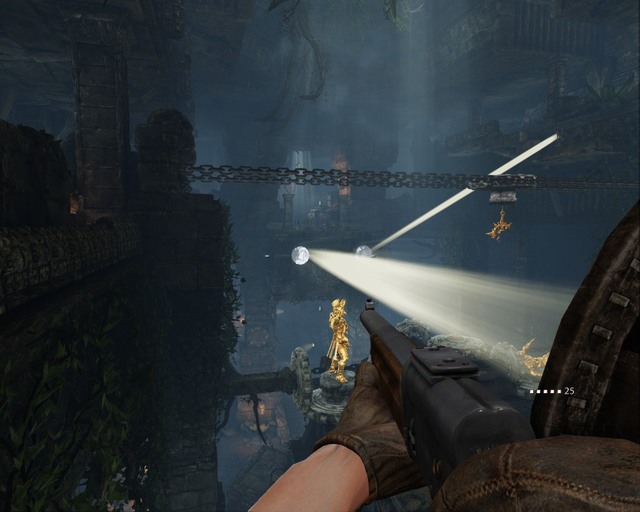 In the corridor near this mirror.
Near the second mirror.
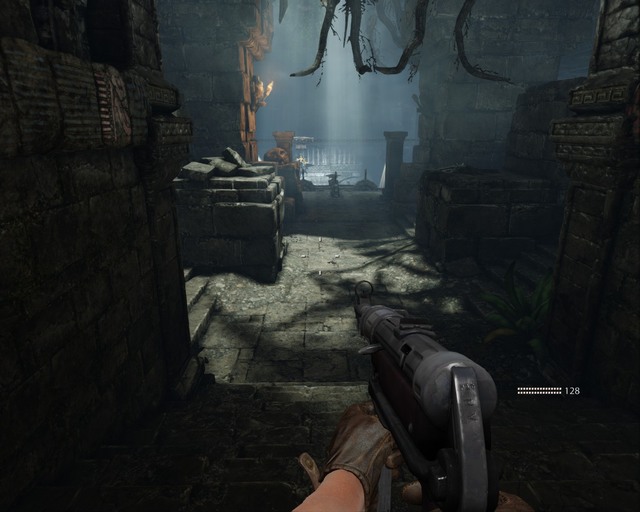 Turn around when you see these levers.
The last treasure in the game is opposite to the three levers after a puzzle with two mirrors.
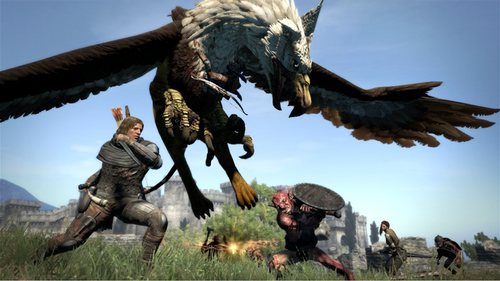 Dragons Dogma Game Guide & Walkthrough
 Darkest Dungeon Game Guide & Walkthrough
 Dracula 4: The Shadow of the Dragon Game Guide & Walkthrough
 Devil May Cry 4 Game Guide & Walkthrough
 Dreamfall: The Longest Journey Game Guide & Walkthrough