
This guide to Dead Rising 2 contains a description of all the main and side missions, together with hints on the tougher fights. Important places connected with mission have been additionally marked on the detailed maps of all the Fortune City regions. In the further part of the guide you will also find a full list of the Combo Cards and mixed drinks, the location of the hidden cards and Zombrexes.
In order to make using the guide easier, the following symbols had been introduced:
[1], [2] - symbols corresponding to the screens above the text. One is for the screen on the left and two to the one on the right.
A map reference is often placed by the name of a location, for example One Little Duck Bingo (M6, 3). It means that the store can be found on map M6 and is marked with 3. 1st
Michal "Kwisc" Chwistek
Translated to English by Jakub "cilgan" Lasota
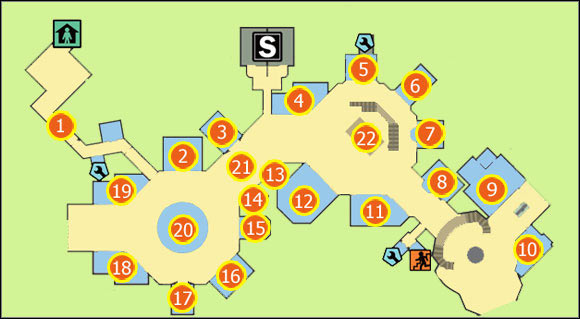
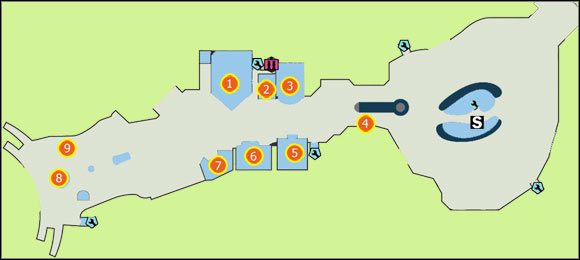
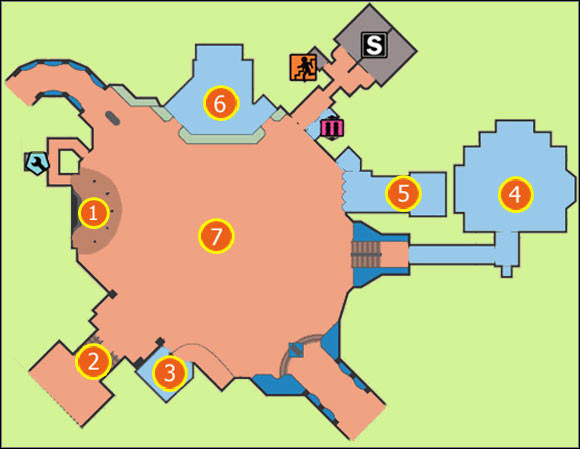
1) Magazine
2) In The Closet - clothing store
3) The Man's Sport - sport store
4) The Shoehorn - shoe store
5) Tunemakers - music store
6) Wave of Style - hairdresser
7) Ye Olde Toybox - baby store
8) Marriage Makers - accessories store
9) Roy's Mart - pharmacy
10) Modern Businessman - clothing store
11) Sturdy Package - travel store
12) SporTrance - sport store
13) The Chieftain's Hut - tobacco store
14) Hat Racks - clothing store
15) Universe of Optics - optician
16) Three Club Monte - clothing store
17) Astonishing Illusions - baby store
18) Stylin' Toddlers - clothing store
19) Casual Gals - clothing store
20) The Dark Bean - cafe
21) Yesterday, Today & Tomorrow - newsstand
22) Square

Elevator

Save point

Maintenance Room

Stairs
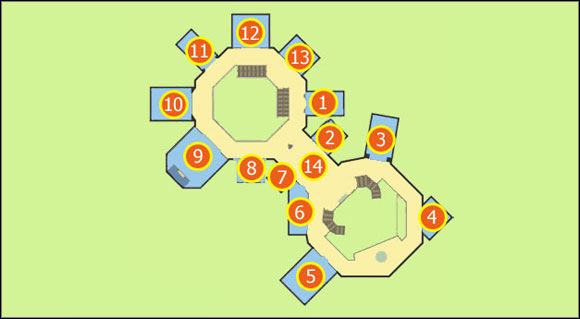
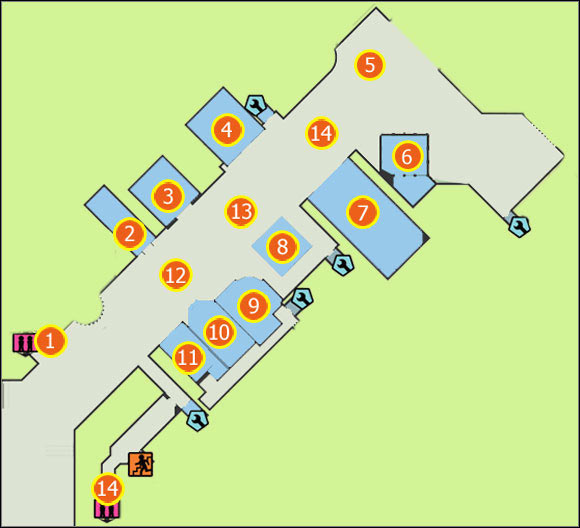
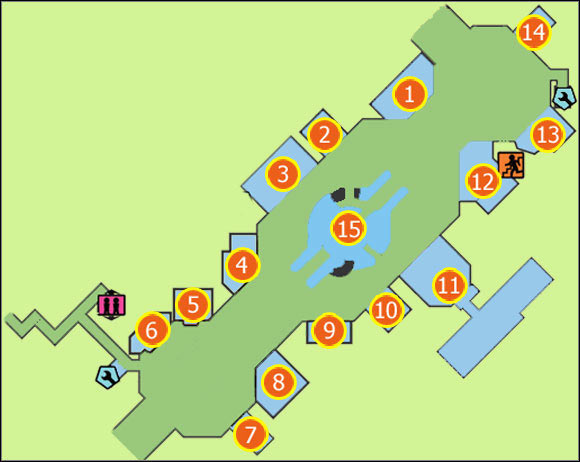
1) Just in Time Payday Loans - pawnshop
2) Eternal Timepieces - accessories
3) Kathy's Space - clothing store
4) Earmark Leather - clothing store
5) Children's Castle - baby store
6) Small Fry Duds - clothing store
7) Ragazines - newsstand
8) Players - music store
9) Sportrance - sport store
10) Albert's Apparel - clothing store
11) Wily Travels - travel agency
12) Antoine's - household equipment store
13) Estelle's Fine-lady Cosmetics - cosmetician
14) Rush Wireless - electronics store

Elevator

Save point
Maintenance Room

Stairs
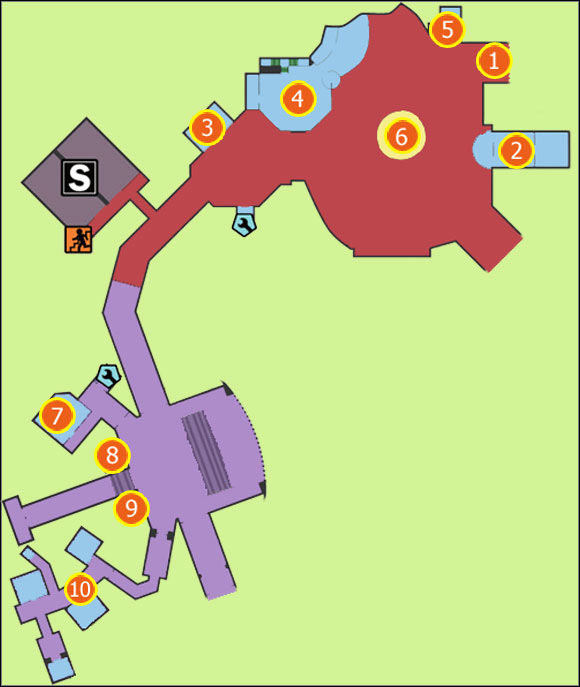
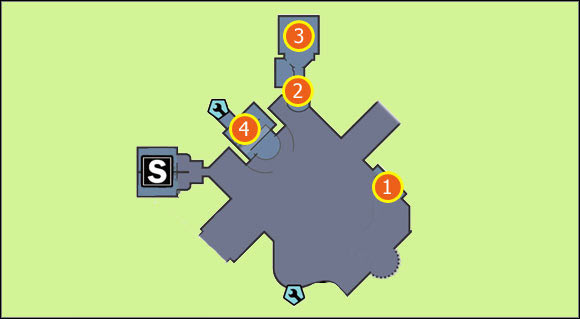
1) Entrance from Royal Flush Plaza
2) Counters - on the left (below)
3) The American Historium - souvenir store
4) Bonnie Jack's BBQ Shack - restaurant
5) Security room
6) Shots & Awe - night club
7) Staff room
8) Terror Togs - gift store
9) Hostile Zone - gift store
10) Corridors

Elevator

Save point
Maintenance Room

Stairs
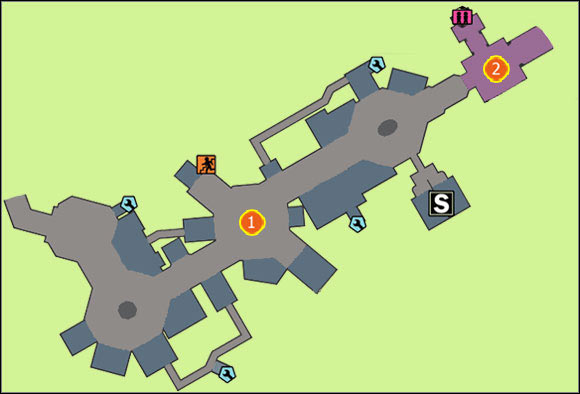
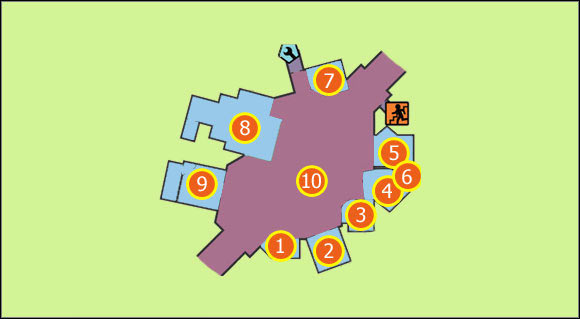
1) South Plaza
2) Fortune City Hotel

Elevator

Save point

Maintenance Room

Stairs
1) Cash Gordon's Casino - casino
2) Juggz Bar & Grill - bar
3) Paradise Platinum Screens - cinema
4) Roof of the store under construction
5) Moe's Maginations - pawnshop
6) Dining at Davey's - restaurant
7) From Fortune with Love - gift store
8) Motorcycle
9) Souvenir Kiosk - newsstand
10) Souvenir Kiosk - newsstand

Elevator

Save point

Maintenance Room

Stairs
1) Royal Flush Plaza - roof
2) Swept Away - chapel
3) One Little Duck Bingo - casino
4) Tinkerbox - pawnshop
5) Motorcycle trailer (after completing Meet the Contestants)
6) Luaii Wauwii - restaurant
7) Shamrock Casino - casino
8) Scene
9) Pub O' Gold - night club
10) Peep Hole - entertainment
11) Hot Excitorama - clothes
12) Atlantic Casino - roof
13) Rockets Red Glare - gift store
14) Juggz Bar & Grill Kiosk - bar
15) Barrel of Goods - gift store

Elevator

Save point

Maintenance Room

Stairs
1) Bar
2) Counters
3) Security room
4) Behind the scene

Elevator

Save point

Maintenance Room

Stairs
1) Speedy Expresso - bar
2) Hungry Joe's Pizzeria - restaurant
3) Rojo Diablo Mexican Restaurant - restaurant
4) Hamburger Fiefdom - restaurant
5) Lombardi's - cake shop
6) Roof above Lombardi's (accessible using the food vendors)
7) Cheesecake Mania - restaurant
8) Cucina Donnacci - restaurant
9) Wild West Grill House - restaurant
10) Kiosk

Elevator

Save point

Maintenance Room

Stairs
1) Scene
2) Passage to Silver Strip
3) Staff room
4) Shoal Nightclub - night club
5) Counters
6) Baron Von Brathaus - restaurant
7) Sculpture

Elevator

Save point

Maintenance Room

Stairs
1) Wallington's - clothing store
2) Beach Body Swim House - clothing store
3) Flexin' - sport store
4) Ultimate Playhouse - baby store
5) Fair Moans - chemist's
6) Finders Peepers - optician
7) Entertainment Isle - music store
8) Trendy Cindy - clothing store
9) For Your Leisure - clothing store
10) Chocolate Confession - grocery store
11) KokoNutz Sports Town - sport store
12) The Venus Touch - chemist's
13) Bagged! - jeweller
14) Shank's - hunter store
15) Swimming pool

Elevator
Save point

Maintenance Room

Stairs
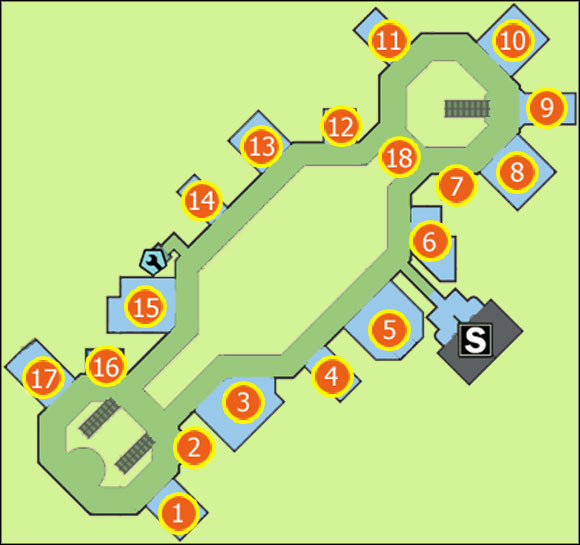
1) High-noon Shooting Range - sport store
2) Robsaka Mobile - electronics store
3) Chris' Fine Foods - groceries store
4) Everything Diamond - jeweller's
5) KokoNutz Sports Town - sport store (described on the 1st floor map)
6) Robsaka Digital - music store
7) Leigh's Fine Liquor - bar
8) The Cleroux Collection - gallery
9) Kids' Choice Clothing - clothing store
10) Army Surplus Gift Store - souvenirs store
11) Under the Sea Travels - travel agency
12) Stan's Large Pront Books & Magazines - newsstand
13) Space - clothing store
14) Ned's Knicknackery - antiques store
15) Brand New U - clothing store
16) Que's Hats - clothing store
17) Kicks for her - clothing store
18) Newsstand's roof

Elevator

Save point

Maintenance Room

Stairs
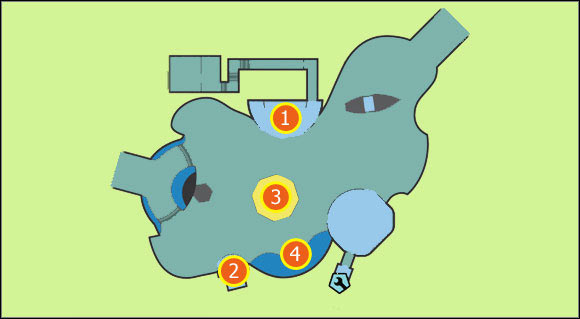
1) VIP room
2) Security room
3) Fountain
4) Scene

Elevator

Save point

Maintenance Room

Stairs
1. Research Labs

Elevator

Save point

Maintenance Room

Stairs
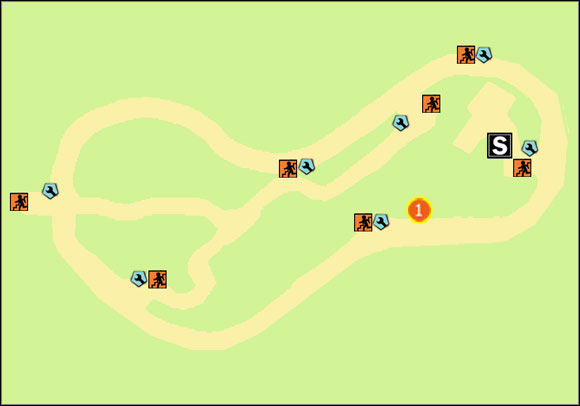
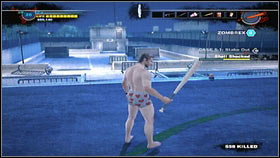
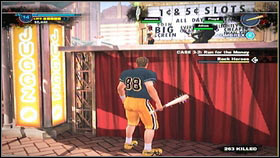
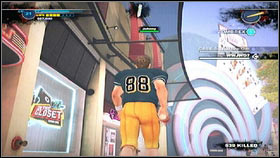
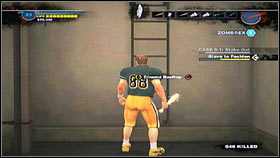
![You begin the game by participating in Terror is Reality and your task it to run over as many zombies as possible in one minute [1] - Prologue - p. 1 - Main missions - Dead Rising 2 - Game Guide and Walkthrough](https://game.lhg100.com/Article/UploadFiles/201512/2015121417410921.jpg)
You begin the game by participating in Terror is Reality and your task it to run over as many zombies as possible in one minute [1]. The controls are as follows: R2 - acceleration, L2 - reverse gear/brake and turning with the left analog stick. In order to win, just keep driving back and forth through the arena and aim for the undeads with pink icons above the heads [2]. Winning isn't obligatory-.
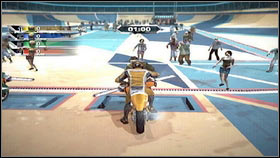
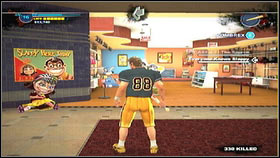
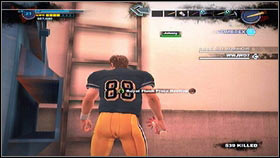
![After the cutscene, you will find yourself in the changing room [1], from where you should go forward and follow the arrow - Prologue - p. 1 - Main missions - Dead Rising 2 - Game Guide and Walkthrough](https://game.lhg100.com/Article/UploadFiles/201512/2015121417410919.jpg)
After the cutscene, you will find yourself in the changing room [1], from where you should go forward and follow the arrow. You can also pay a visit to the rest room, where you will be able to save the game [2].
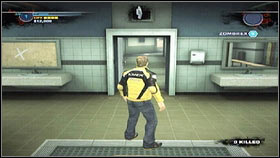
![Once you're finished, move on in the given direction, enter the elevator and ride it upstairs [1] - Prologue - p. 1 - Main missions - Dead Rising 2 - Game Guide and Walkthrough](https://game.lhg100.com/Article/UploadFiles/201512/2015121417411082.jpg)
Once you're finished, move on in the given direction, enter the elevator and ride it upstairs [1]. After another short cutscene, you will be attacked by a group of zombies [2]. In order to fight them, pick up the items scattered throughout the ground and use them with square. Holding down the button will result in a stronger blow.
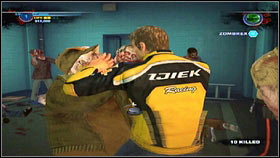
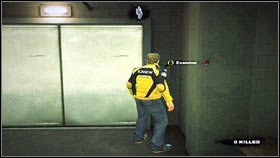
![If you get caught by the enemy, follow the instructions displayed onscreen [1] - Prologue - p. 1 - Main missions - Dead Rising 2 - Game Guide and Walkthrough](https://game.lhg100.com/Article/UploadFiles/201512/2015121417411083.jpg)
If you get caught by the enemy, follow the instructions displayed onscreen [1]. Most often you will have to quickly turn the left analog stick or press one of the buttons. The arrow will lead you to the hero's room [2], where you will find his daughter.
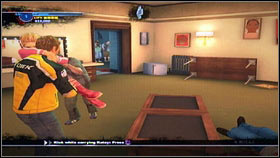
![Hold her and run in the given direction, avoiding the enemies in your way [1] - Prologue - p. 1 - Main missions - Dead Rising 2 - Game Guide and Walkthrough](https://game.lhg100.com/Article/UploadFiles/201512/2015121417411073.jpg)
Hold her and run in the given direction, avoiding the enemies in your way [1]. This way you will reach the Safe House [2]. Curiously, you can get there faster by losing all your health points. The game will then automatically move you there.
![In the bunker, you will meet Stacey [1], who will offer to help you find Zombrex for your daughter and give you a transceiver [2], using which you will be able to contact the base and get updates on new missions - Prologue - p. 1 - Main missions - Dead Rising 2 - Game Guide and Walkthrough](https://game.lhg100.com/Article/UploadFiles/201512/2015121417411090.jpg)
In the bunker, you will meet Stacey [1], who will offer to help you find Zombrex for your daughter and give you a transceiver [2], using which you will be able to contact the base and get updates on new missions. Press right on the d-pad to answer a call.
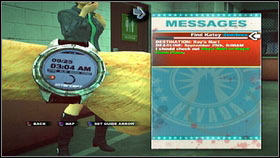
![You should also learn how to use the watch [1], as time plays an important role in Dead Rising - Prologue - p. 1 - Main missions - Dead Rising 2 - Game Guide and Walkthrough](https://game.lhg100.com/Article/UploadFiles/201512/2015121417411152.jpg)
You should also learn how to use the watch [1], as time plays an important role in Dead Rising. Katy has to receive her medicine once every 24 hours, exactly between 7 and 8 AM. Otherwise, she will turn into a zombie. All other missions work similarly. You can complete them only in given hours, so keep an eye on the bars on the right [2], which will inform you on the time left. To check the time, press left on the d-pad.
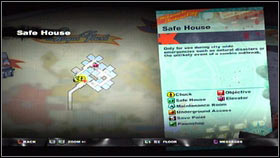
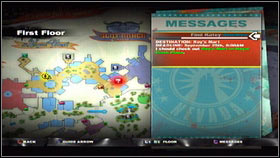
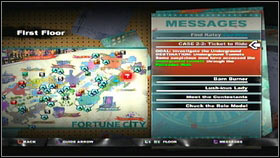
![The last important thing is the map [1], which can be viewed by pressing select - Prologue - p. 1 - Main missions - Dead Rising 2 - Game Guide and Walkthrough](https://game.lhg100.com/Article/UploadFiles/201512/2015121417411192.jpg)
The last important thing is the map [1], which can be viewed by pressing select. If you press square while viewing it, you will see the locations of the available missions [2].

After getting acquainted with everything, leave the room and turn right. Save the game in the nearby rest room [1]. Remember to save when only you have a chance. You'll die really often during the game and it's surely better to devote a couple minutes on finding a toilet then a couple hours to complete the same missions all over again. Once you've saved, move on following the arrow, which will take you to a vent [2]. Using it you will be able to get out of the Safe House and begin looking for Zombrex.
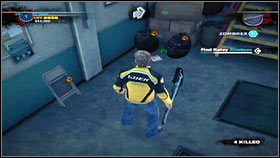
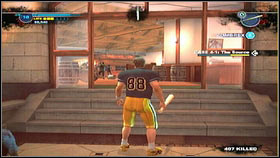
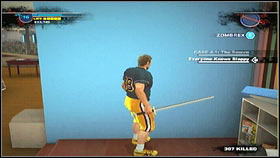
Once on the other side, move forward all the time and pick up useful items on your way. The first one is a baseball bat, lying nearby the stairs [1]. It's not the strongest weapon out there, but it will do in the beginning. The second useful item is a pack of crisps [2]. Using it you will be able to recover your health. Swap items using L1 and R1 and use with square.
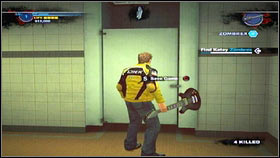
![Having collected everything, answer the call [1] and go to the exit - Prologue - p. 2 - Main missions - Dead Rising 2 - Game Guide and Walkthrough](https://game.lhg100.com/Article/UploadFiles/201512/2015121417411167.jpg)
Having collected everything, answer the call [1] and go to the exit. Open the door by pressing circle [2].
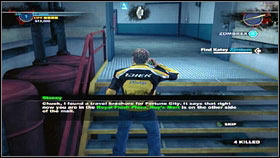
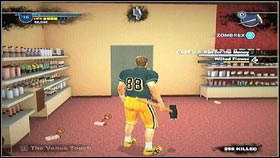
![After heading outside, press select find the pharmacy (M1, 9) on the map [1] - Prologue - p. 2 - Main missions - Dead Rising 2 - Game Guide and Walkthrough](https://game.lhg100.com/Article/UploadFiles/201512/2015121417411213.jpg)
After heading outside, press select find the pharmacy (M1, 9) on the map [1]. Follow the arrow and you should easily get there. If you want, you can check out the various shops on your way and collect a couple useful items [2]. The best starter pack is two food portions and two weapons. Keep in mind that items tend to deteriorate quickly, so it's always worth having an additional weapon with you.
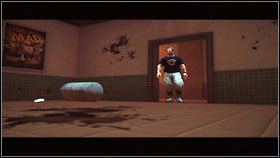
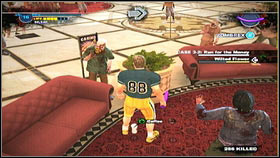
![Once you reach our destination, open the door [1] and watch a cutscene, after which a group of burglars will attack you - Prologue - p. 2 - Main missions - Dead Rising 2 - Game Guide and Walkthrough](https://game.lhg100.com/Article/UploadFiles/201512/2015121417411234.jpg)
Once you reach our destination, open the door [1] and watch a cutscene, after which a group of burglars will attack you. Swing the baseball bat and you should quickly get rid of them. After the fight, press X to jump over the counter and talk with the pharmacist.
The woman will join you and your task will be escorting her to the bunker [1]. Before you do it however, open the nearby door and pick up Zombrex from the desk [2]. You can now return to the base. While escorting the pharmacist, you can use two special actions. Pressing triangle will cause the escorted person to come to you. Additionally, you can point out where she should head by holding down L2.
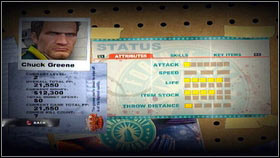
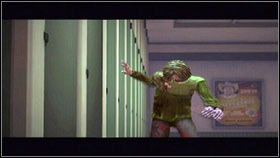
Use these two functions properly and you shouldn't have problems with getting the woman safely to the safe house. Keep in mind that when you're leaving a given location by e.g. entering a vent, the escorted person has to be nearby. Otherwise you will leave her in the previous location and will have to return for her. Whether the person is close enough or not is represented by the green icon above her head [1]. Once you're done, you will receive 10,000 PP. Thanks to them the hero's level increases. This way you will gain new skills, health points or stronger attack [2]. PP points are rewarded for completing various types of missions, killing zombies or psychopaths.
![Once the mission ends, go save your game [1] and head out - Prologue - p. 2 - Main missions - Dead Rising 2 - Game Guide and Walkthrough](https://game.lhg100.com/Article/UploadFiles/201512/2015121417411214.jpg)
Once the mission ends, go save your game [1] and head out. Just keep in mind to return to the bunker at 7 AM and give Katy the Zombrex. You have only one hour to do that, so consider going there a couple minutes earlier [2]. Once you apply the medicine, a long cutscene will play. Afterwards you will receive a task of finding the reporter which is accusing you of causing the disaster.
Goal: watch the TV news.
Right after applying the Zombrex, Stacey will turn on the TV, from which you will learn that Chuck is being accused of causing the zombie attack. A rescue team will reach the city in three days and during that time you have to clear your name and find the real culprit.
Goal: find the reporter.
Location: Fortune City Hotel
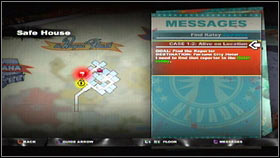
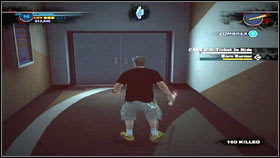
Before you begin completing the mission, you should learn how to choose the active mission. To do that, turn on the world map and press square. A list of missions will be displayed - choose the one you're interested in and accept with X [1]. An arrow will appear above your head, which will lead you to the goal. It makes navigating the world much easier, as you don't have to waste time on checking the map. After setting the active mission on Case 2, save the game and head towards the exit [2].
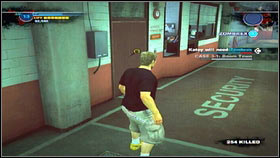
![Right in front of it you should talk with the sheriff, who will give you a very useful item - Maintenance Room Key [1] - Case 1 - Main missions - Dead Rising 2 - Game Guide and Walkthrough](https://game.lhg100.com/Article/UploadFiles/201512/2015121417411353.jpg)
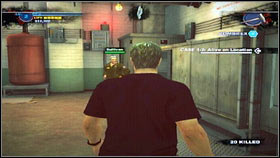
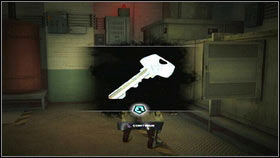
Right in front of it you should talk with the sheriff, who will give you a very useful item - Maintenance Room Key [1]. Thanks to it you will gain access to rooms in which you can combine items into powerful weapons [2]. Such places have been marked on the map with a blue wrench, just like the items that can be used there.
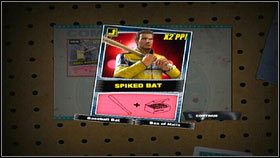
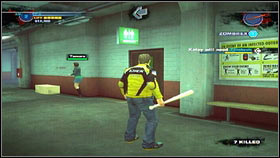
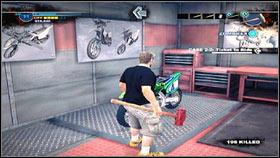
Right after exiting the vent, you will receive the first side mission onto your phone. To check it, press left on the d-pad. It you have enough time, you can complete the mentioned mission on continue with the plot. Thorough descriptions of the side missions can be found in the further part of the guide. Go up the stairs to reach the Maintenance Room [1] and receive the first Combo Card - Spiked Bat [2]. Items made from them deal additional damage and also give additional PP. if you make an item without having its card, it will also give you additional experience as well, but at a lesser scale. That's why you should use weapons from cards as much as you can.

![To create the mentioned Spiked Bat, take the nails from the shelf [1] and place them on the table in the middle [2] - Case 1 - Main missions - Dead Rising 2 - Game Guide and Walkthrough](https://game.lhg100.com/Article/UploadFiles/201512/2015121417411314.jpg)
To create the mentioned Spiked Bat, take the nails from the shelf [1] and place them on the table in the middle [2]. Do the same with the nearby baseball bat. After a short cutscene the weapon will be ready and you'll be able to leave the building and start the mission.
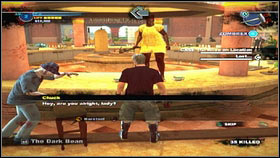
![However before you head to the hotel, it's worth to save the woman standing opposite to the exit (M1, 20) [1] - Case 1 - Main missions - Dead Rising 2 - Game Guide and Walkthrough](https://game.lhg100.com/Article/UploadFiles/201512/2015121417411419.jpg)
However before you head to the hotel, it's worth to save the woman standing opposite to the exit (M1, 20) [1]. Her name is LaShawdra and you will receive a nice sum of PP for her.
![Once you're finished, save the game in the toilet north-east of the bunker [1] and head out to find the reporter - Case 1 - Main missions - Dead Rising 2 - Game Guide and Walkthrough](https://game.lhg100.com/Article/UploadFiles/201512/2015121417411411.jpg)
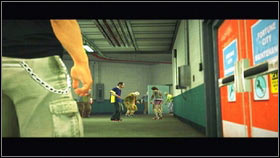
Once you're finished, save the game in the toilet north-east of the bunker [1] and head out to find the reporter. Inside the hotel you will watch a short cutscene [2], after which the further part of the level will begin.
Goal: follow Rebecca to Arona Security Office.
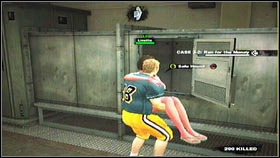
![At first the reporter will take you to the nearby toilet, where you can save your game [1] - Case 1 - Main missions - Dead Rising 2 - Game Guide and Walkthrough](https://game.lhg100.com/Article/UploadFiles/201512/2015121417411423.jpg)
At first the reporter will take you to the nearby toilet, where you can save your game [1]. Once you're done with it, talk with the woman and follow her to Fortune City Arena [2].
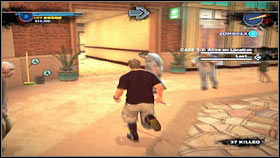
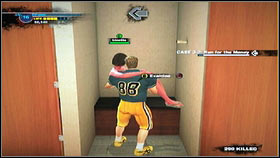
![After a couple minutes you will reach a locked door (M3, 7) [1] - Case 1 - Main missions - Dead Rising 2 - Game Guide and Walkthrough](https://game.lhg100.com/Article/UploadFiles/201512/2015121417411429.jpg)
After a couple minutes you will reach a locked door (M3, 7) [1]. Open them with circle and watch a short cutscene [2].
Goal: return to the safe house.
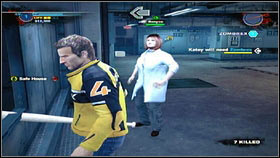
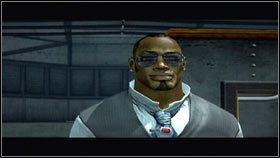
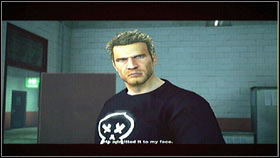
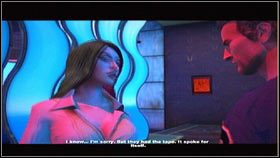
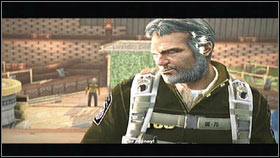
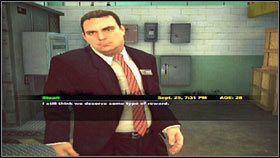
![After the cutscene, Stacey will call you to tell that Sallivan [1] want to throw Katy out - Case 1 - Main missions - Dead Rising 2 - Game Guide and Walkthrough](https://game.lhg100.com/Article/UploadFiles/201512/2015121417411470.jpg)
After the cutscene, Stacey will call you to tell that Sallivan [1] want to throw Katy out. You have to quickly return to the safe house and clear the situation. The sheriff can be found with Stacey in the security room. After another cutscene [2], save your game and wait till 7:30 PM. Only then will you be able to begin the next stage.

After entering the security room, watch a cutscene after which you will be able to begin the next mission. Even though you have quite a bit of time for the side mission, make sure not to begin Case 2-2 at the last minute. Otherwise it might turn out you don't have enough time to complete it. It'd be best to head for it once the mission bar turns yellow.
Goal: check the underground tunnels.
Location: underground tunnels - descent in Palisades Mall.
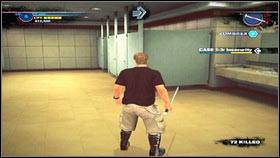
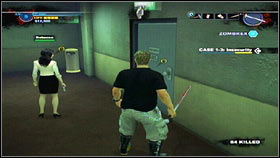
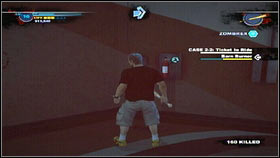
![After going underground, keep following the arrow until a cutscene with TK starts [1] - Case 2 - Main missions - Dead Rising 2 - Game Guide and Walkthrough](https://game.lhg100.com/Article/UploadFiles/201512/2015121417411512.jpg)
After going underground, keep following the arrow until a cutscene with TK starts [1]. After watching it, hide behind the nearest shelf and try to eliminate the nearby guards one by one [2].
![In case you lose too much life, regenerate it with the juices lying nearby [1] - Case 2 - Main missions - Dead Rising 2 - Game Guide and Walkthrough](https://game.lhg100.com/Article/UploadFiles/201512/2015121417411549.jpg)
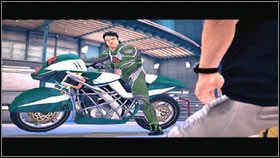
In case you lose too much life, regenerate it with the juices lying nearby [1]. Once the last guard is dead, another cutscene will play and you will land on a motorcycle [2].
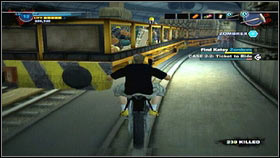
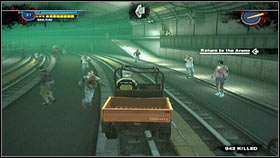
![You have to catch the traitor's train as fast as possible [1] and jump onto it using the ramps - Case 2 - Main missions - Dead Rising 2 - Game Guide and Walkthrough](https://game.lhg100.com/Article/UploadFiles/201512/2015121417411589.jpg)
You have to catch the traitor's train as fast as possible [1] and jump onto it using the ramps. You should make it after a couple attempts. Once you're done with it, keep going forward all the time while eliminating the enemies on your way. In case you have any problems with them, hide behind a cover and wait for them to approach you on their own [2]. A couple minutes later you should finally reach TK and end the mission.
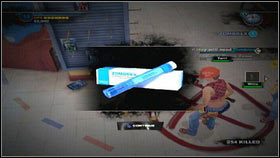
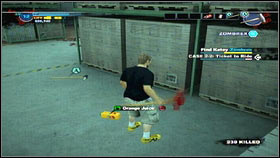
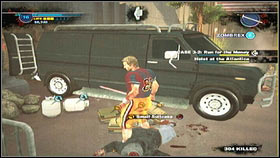
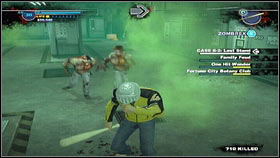
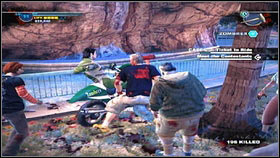
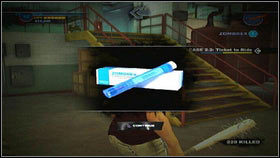
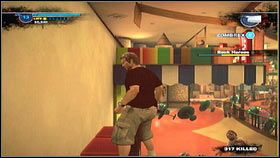
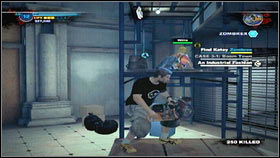
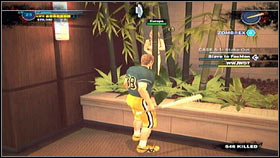
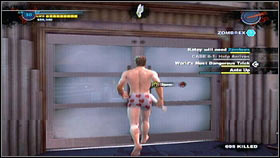
![Quickly leave the underground, as it's high time to find Zombrex [1] for Katy - Case 2 - Main missions - Dead Rising 2 - Game Guide and Walkthrough](https://game.lhg100.com/Article/UploadFiles/201512/2015121417411563.jpg)
Quickly leave the underground, as it's high time to find Zombrex [1] for Katy. Right after exiting, you can complete An Industrial Fashion, saving two builders [2].

Zombrex can be acquired by completing Code Blue, buying for $25,000 at the pawnshop (each next costs $25,000 more) or by finding one the packages hidden in Fortune City. The location of all the medicines can be found in the further part of the guide. Remember to use it between 7-8 AM.
Goal: go to the security room at the bunker.
Goal: stop the thieves.
Location: American Casino, Slot Ranch Casino, Yucatan Casino
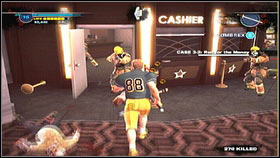
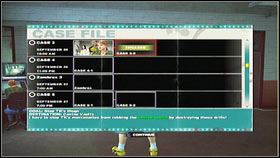
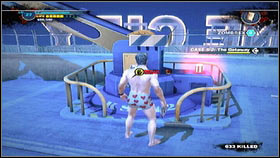
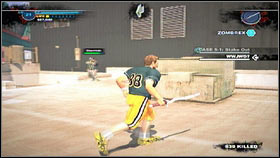
![Your task is to stop the thieves from robbing the casinos' vaults [1] - Case 3 - Main missions - Dead Rising 2 - Game Guide and Walkthrough](https://game.lhg100.com/Article/UploadFiles/201512/2015121417411654.jpg)
Your task is to stop the thieves from robbing the casinos' vaults [1]. To do that, you have to kill the criminals and then destroy the drills they're using [2]. Begin with American Casino (M3, 2), afterwards move to Slot Ranch (M7, 3) and end with Yucatan (M9, 5).
Once you destroy the third drill, go to Fortune Park, where the last machine is. Destroy the car beside it [1] and watch the cutscene [2].
Goal: meet with Rebecca and her "source".
Location: Yucatan Casino - Shoal Nightclub (M9, 4).
Above all, remember that the time displayed on the missions list is the time left to complete the mission and not beginning it, so go to the goal when only it turns yellow. Otherwise you might not be able to eliminate the enemies in time. Before entering the club, save the game in the casino toilet and make preparations at the restaurant beside [1]. You will find quite a bit of wine bottles, which you should merge into a Quick Step [2]. It not only recovers your health but also increases running speed, which might come in handy in the upcoming fight.
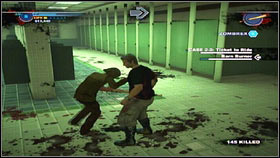
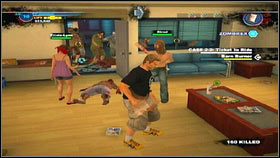
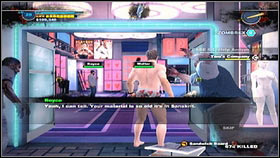
![Once you're ready, go inside [1] and start fighting the twins [2] - Case 4 - Main missions - Dead Rising 2 - Game Guide and Walkthrough](https://game.lhg100.com/Article/UploadFiles/201512/2015121417411730.jpg)
Once you're ready, go inside [1] and start fighting the twins [2]. They are really fast and their attacks are difficult to dodge, but luckily you just have to eliminate one of them for the fight to end.
![To do that, drink the previously prepared Quick Step and run after the chosen target [1] - Case 4 - Main missions - Dead Rising 2 - Game Guide and Walkthrough](https://game.lhg100.com/Article/UploadFiles/201512/2015121417411713.jpg)
To do that, drink the previously prepared Quick Step and run after the chosen target [1]. Once she stops, avoid her strike and hit her 2-3 times [2]. Regenerate health with another Quick Step or some of the alcohols lying around. You however have to be careful, as drinking too much will cause nausea.

After the fight, watch the cutscene and save your game.
Goal: find Zombrex for Katy.

![Just like before, you can buy it at a pawnshop for 25000, complete Mail Order Zombrex [1]/Hunger Pains (described in the further part of the guide) or find one of the hidden packages - Case 4 - Main missions - Dead Rising 2 - Game Guide and Walkthrough](https://game.lhg100.com/Article/UploadFiles/201512/2015121417411790.jpg)
Just like before, you can buy it at a pawnshop for 25000, complete Mail Order Zombrex [1]/Hunger Pains (described in the further part of the guide) or find one of the hidden packages.
Goal: go to the roof and look out for the helicopter.
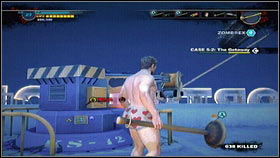
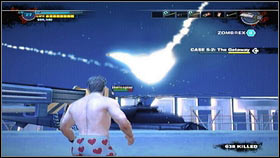
![Go to the bunker's roof [1], where a cutscene will begin at 7:00 AM sharp [2] - Case 5 - Main missions - Dead Rising 2 - Game Guide and Walkthrough](https://game.lhg100.com/Article/UploadFiles/201512/2015121417411826.jpg)
Go to the bunker's roof [1], where a cutscene will begin at 7:00 AM sharp [2].
Goal: stop the helicopter.
Location: Fortune City Hotel (M4, 2).
Just like in the couple previous missions, the time shown by the bar is the time left to complete the mission, so start it as fast as possible. After entering the hotel turn right, where you will have to fight a couple criminals armed with guns [1]. Kill all of them and wait for the elevator with another criminal to arrive [2].
Once you defeat the last enemy, ride up where you will meet TK trying to run away onboard the helicopter. To stop him, use the mechanism by the crane [1] and afterwards throw the items lying around or your weapons at the enemy [2]. You have just a couple second for it, so pick up the closest items.

Once the machine gets hit, it will fly up into the air and try to kill you. Avoid the crane by running a couple meters toward the elevator [1] and the propeller and shots by rolling in the right moment. After surviving two attacks, get the machine down to the ground again and repeat the whole operation [2] until the helicopter explodes.
Goal: find the last ZOMBREX for Katy.
The last dose can be once again bought, found or gained by completing the previous side missions.
Goal: return to the bunker as the army arrives.
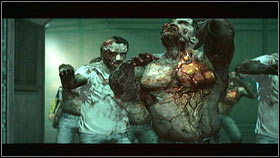
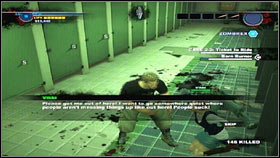
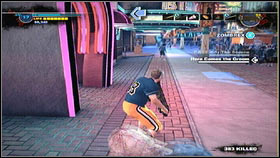
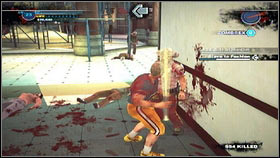
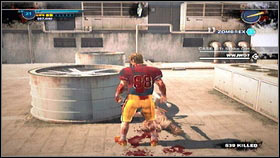
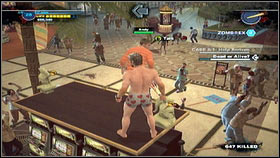
The mission is trivial (the only thing you have to do is be inside the safe house at the proper time), but try to complete as much side missions as you can before it. If you don't do them now, you might not be able to return to them afterwards, as a new type of zombie will appear in the city [1]. The new undeads not only take more health points, but are also quicker than the others and can attack by vomiting [2], which stuns you. Navigating through the city becomes much more difficult and completing even the simplest escort can be quite problematic.
Goal: save Rebecca.
Location: Underground Loading Bay (M13, save point).
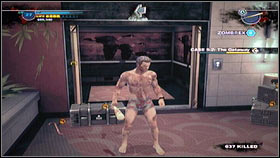
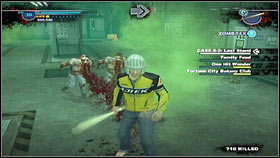
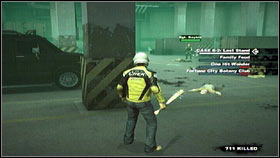
![In order to find the reporter, head to Palisades Mall, where you will find stairs leading underground, next to Bageedl [1] - Case 6 - Main missions - Dead Rising 2 - Game Guide and Walkthrough](https://game.lhg100.com/Article/UploadFiles/201512/2015121417411966.jpg)
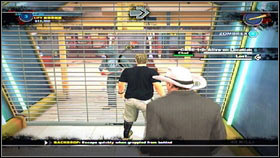
In order to find the reporter, head to Palisades Mall, where you will find stairs leading underground, next to Bageedl [1]. Once below, head north [2] and after a few steps a cutscene will begin, followed by a fight with the rescue team commander.
The fight is really difficult, so be sure to collect lots of healing items beforehand. To defeat the enemy, you have to approach, attack two times and move aside [1]. Unfortunately the soldier is so scripted, that sometimes you just won't be able to avoid his attack by any means [2]. Whether you'll be able to escape without getting hit or not is pure luck.
If you're lucky enough to avoid getting hit, quickly hide behind the nearby cover, avoid the grenades and repeat the attack. There's also a far less dangerous method, but it's also time-consuming. It consists of hiding behind the elements of the environment and attacking only when the enemy reloads or shoots the ceiling. You can be sure he won't attack you then, but you have only a couple seconds to hit him, so try to be as close to the boss as possible the whole time. After a couple well-aimed hits, the fight will end.
Goal: take Rebecca to the safe house.
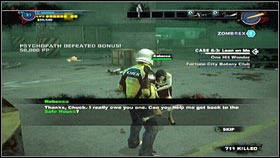
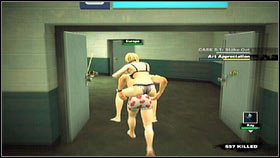
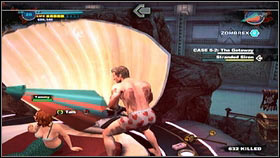
![Unfortunately the woman is sore that she's unable to walk on her own and needs your help [1] - Case 6 - Main missions - Dead Rising 2 - Game Guide and Walkthrough](https://game.lhg100.com/Article/UploadFiles/201512/2015121417411939.jpg)
Unfortunately the woman is sore that she's unable to walk on her own and needs your help [1]. However instead of carrying her all the way, it's worth to use one of the nearby cars [2].
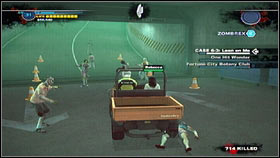
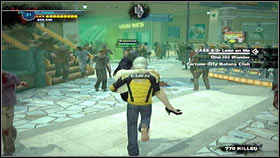
Enter one of it, ride to the Royal Flush Plaza and move on foot from there. While you're driving, make sure not to ride over too many zombies, as the car break down.
Goal: secure the safe house.
Location: Safe House.
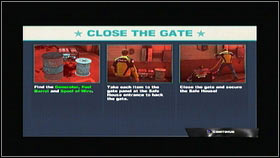
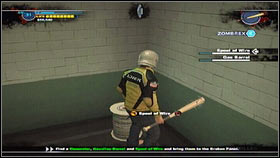
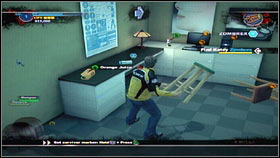
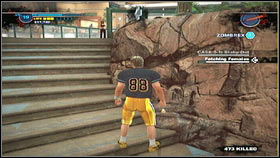
In order to complete this mission, you have to repair the bunker's main gate. To do that, you will need: Generator, Fuel Barrel and Spool of Wire [1]. All these items will be successively pointed by the arrow, so you shouldn't have any problems with finding them [2].
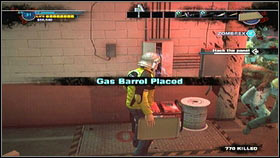
![Use the found parts on the mechanism by the gate [1] and once they're all in their places, close the bunker by quickly pressing X [2] - Case 6 - Main missions - Dead Rising 2 - Game Guide and Walkthrough](https://game.lhg100.com/Article/UploadFiles/201512/2015121417412017.jpg)
Use the found parts on the mechanism by the gate [1] and once they're all in their places, close the bunker by quickly pressing X [2].
Goal: return to the safe house.
Location: Safe House Lounge.

This mission consists only of cutscenes.
Goal: find the gas source.
Location: underground tunnels.
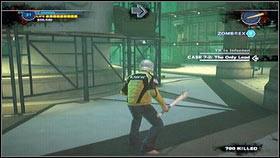
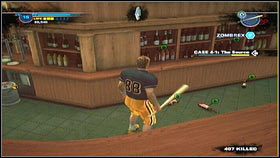
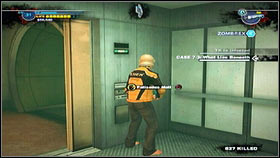
![In order to find the source of the gas, head to South Plaza [1] and go underground through the passage located there [2] - Case 7 - Main missions - Dead Rising 2 - Game Guide and Walkthrough](https://game.lhg100.com/Article/UploadFiles/201512/2015121417412088.jpg)
In order to find the source of the gas, head to South Plaza [1] and go underground through the passage located there [2].
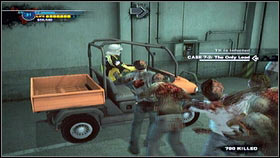
![Once below, head towards the tunnel, enter the nearby vehicle [1] and head towards the point marked on the map [2] - Case 7 - Main missions - Dead Rising 2 - Game Guide and Walkthrough](https://game.lhg100.com/Article/UploadFiles/201512/2015121417412098.jpg)
Once below, head towards the tunnel, enter the nearby vehicle [1] and head towards the point marked on the map [2].
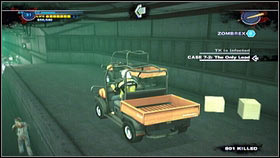
Try not to get your car too damaged, as you won't get too far on foot. Luckily you can always change the car, by driving onto the side ramps [1]. Your target is the brightly lit gate [2]. Open it with the nearby mechanism and go inside.
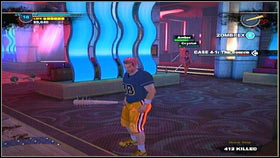
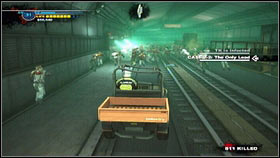
![After a short cutscene [1], you will be attacked by a group of guards [2] - Case 7 - Main missions - Dead Rising 2 - Game Guide and Walkthrough](https://game.lhg100.com/Article/UploadFiles/201512/2015121417412101.jpg)
After a short cutscene [1], you will be attacked by a group of guards [2].
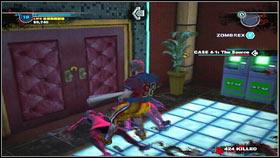
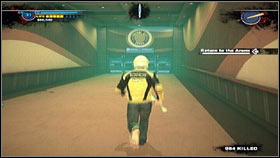
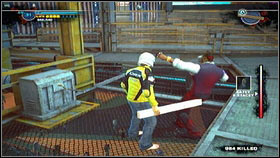
![To stop the attackers, run to the other side of the room and climb up [1] - Case 7 - Main missions - Dead Rising 2 - Game Guide and Walkthrough](https://game.lhg100.com/Article/UploadFiles/201512/2015121417412195.jpg)
To stop the attackers, run to the other side of the room and climb up [1]. Killing the enemies shouldn't cause you any problems now [2].

![Once the fight is over, head to the door marked on the map [1] and go inside, where you'll be attacked by two scientists [2] - Case 7 - Main missions - Dead Rising 2 - Game Guide and Walkthrough](https://game.lhg100.com/Article/UploadFiles/201512/2015121417412156.jpg)
Once the fight is over, head to the door marked on the map [1] and go inside, where you'll be attacked by two scientists [2]. Run to them quickly and keep pressing square all the time, ignoring the enemies' weak attacks. After three-four hits the fight will end.
Goal: return to the safe house.
Location: Safe House.
Ride the elevator upstairs, return to the bunker and watch a cutscene.
Goal: find Zombrex for TK.
The medicine can be bought at the pawnshop or found in Fortune City. Completing this mission has a large influence on the ending of the game. You have to complete it to get the happy ending.
Goal: stop Sullivan.
Location: Yucatan Casino Rooftop.
In order to complete the mission, head to Yucatan Casino and ride the elevator by the toilets onto the roof. Once you fight your way through the band of zombies, open the door, watch the cutscene and begin the fight with Salivan. It's definitely the hardest fight in the game, so it's worth preparing for it properly.

You will need: 2x healing potion, 2x food portion, LMG and one hand weapon. You can get the food at the casino restaurant, the LMG can be found in three places: on Yucatan Casino roof, at the pawnshop in Platinum Strip or at the pool in Palisades Mall (in the bushes, by the middle of the slide). Once properly equipped, save the game and move out.
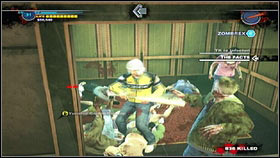
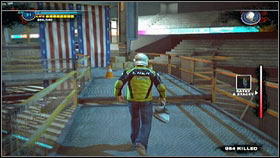
![Right after the fight begins, run to the middle of the location and climb up the scaffolding [1] - The Facts - Main missions - Dead Rising 2 - Game Guide and Walkthrough](https://game.lhg100.com/Article/UploadFiles/201512/2015121417412227.jpg)
Right after the fight begins, run to the middle of the location and climb up the scaffolding [1]. Even though your enemy is completely invulnerable to hand weapons, you should try keeping one of them equipped throughout most of the fight. It's because sometimes you let go of your weapon once getting hit and you'd surely want it to be a baseball bat, not an LMG. Once you're upstairs [2], keep running around the boss until he rolls backwards. To a quick dodge and then kick the enemy by holding down R2 and pressing square. This way you will stun him and will be able to shoot him freely with the LMG (without aiming, you just need to be facing him), but stop when only the enemy stands up. Otherwise he will perform a very powerful and hard to dodge attack.

Definitely the hardest part is hitting the boss with the mentioned kick, but there is luckily an alternative. Instead of kicking, you can try to hit the enemy with a different attack. Execute it by jumping and holding down square once in the air. It requires a high enough level, but you should have it at this point in the game. If you lose too much health, patch up either downstairs by one of the tower's walls or upstairs right after the enemy does a somersault. Sometimes the boss can knock you down and you might get trapped inside the tower. Unfortunately it's a bug and the only way is to restart the game. After repeating the kick and LMG action a couple times the enemy should finally fall [1] and a cutscene will play [2].
Goal: complete TK's instructions and kill him.
This level is available only if you've given TK the Zombrex. Otherwise the game will end after the fight with Salivan. Overtime consists of finding a whole lot of items for TK. Their locations have been marked on the map, so you shouldn't have problems with finding them. It's best to complete the missions in the below order:


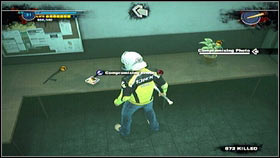
1. Compromising Photo - America Casino - security room (M3, 5) [1]
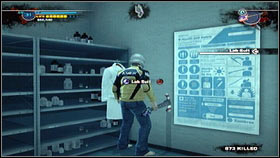
2. Lab Suit - Royal Flush Plaza - Roy's Mart (M1, 9) [2]
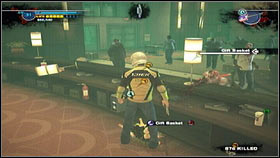
3. Gift Basket - Fortune City Hotel (M4, 2) [1]
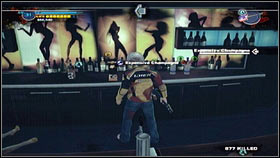
4. Expensive Champagne - Silver Strip - Pub O' Gold (M6, 9) [2]
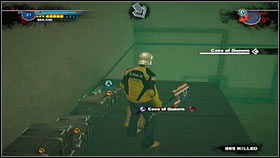
5. Case of Queens - Underground - Research Labs (M13, 1) [1]
6. Mobile Headset - Yucatan Casino (M9)
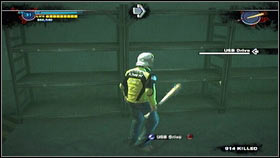
7. USB Drive - Underground - under Yucatan Casino (M9, stairs) [2]
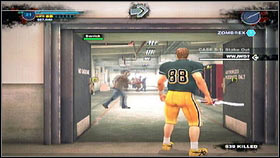
After collecting all the items, head to Fortune City Arena (M3). The quickest way there leads through underground, through you have to chance vehicles often, otherwise the zombies will easily kill you. Go onto the surface at American Casino, save the game and head to TK [2]. Once the cutscene ends, the fight with the black news reporter will begin.

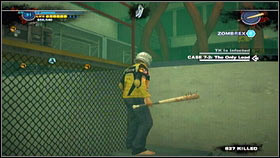
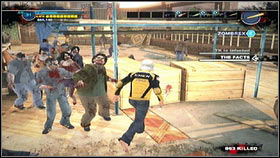
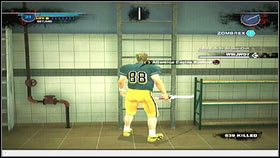
The first thing you have to do is getting some weapon. You can find a couple items on the fence, so climb it quickly [1]. However you can't stay there for too long, as the enemy will start shooting you. The other side of the fence unfortunately isn't very safe either. Fireworks will start shooting from the ground, which you should avoid by running anti-clockwise [2]. Pick up one item or destroy (by jumping) cardboards on each lap. Once you're properly equipped (2x plank, 4x food), return to the main hall, avoiding the last firework with a somersault. After the long preparations, you can finally begin the proper fight.

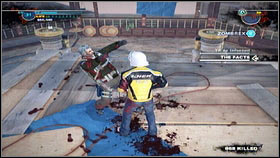
The enemy has many various attack, but the method is rather easy. Just take out a plank (2x4) from your backpack and start hitting the enemy, while ignoring his attacks [1]. The only enemy attack which is worth mentioning is the charge. When you get hit with it, move the analog stick as fast as possible and afterwards press the buttons appearing onscreen [2]. After a couple hits with the plank TK will run away and you should alternate between doing two things.
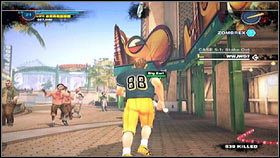
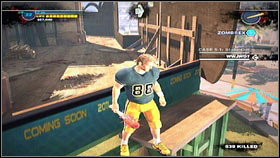
![Either heal yourself and collect more food or use the nearby mechanism [1] to pull Kary and Stacey up - The Overtime - Main missions - Dead Rising 2 - Game Guide and Walkthrough](https://game.lhg100.com/Article/UploadFiles/201512/2015121417412474.jpg)
Either heal yourself and collect more food or use the nearby mechanism [1] to pull Kary and Stacey up. Do it by quickly pressing X. On the right side of the screen there is a bar which shows the height on which they are [2]. You should probably keep them in the middle all the time.


After repeating the plank action a couple times TK will die and you will be able to watch the happy ending!
Dead Rising 2 can be finished in a couple different ways. Below there's a list of possible endings together with requirements you need to fulfill.
Below you will find a complete list of all side mission received via the transceiver and a description of the psychos not connected with any particular missions. While completing missions or searching for the psychos, you must remember that:
1. Side missions and psychopaths are assigned to particular parts of the main plot (Case) and you can receive a specific mission or meet a psycho only while they last. If you pass on to the next step of the investigation, you won't receive any new mission connected with the previous Case (you can continue the old ones).
2. The hours given by the missions are only approximate and can vary, depending on your actions.
3. There can be maximally 8 people to rescue on the map at once and once you reach the limit you won't receive any new missions until you help someone. The game takes all people into account, also those not connected with missions. The safe house inhabitants are an exception.
4. Some mission might be unavailable if you miss one of the previous ones.
Time: 9:00 AM
Goal: visit the pawnshop.
Location: Platinum Strip - Moe's Maginations (M5, 5).
![The mission consists of finding a shop with various available items [1] - Case 1 - p. 1 - Side missions - Dead Rising 2 - Game Guide and Walkthrough](https://game.lhg100.com/Article/UploadFiles/201512/2015121417412416.jpg)
The mission consists of finding a shop with various available items [1]. Once you're inside, all other such points will be marked on the map. Remember that you can buy Zombrex for $25000 here [2]. Each next medicine is $25000 more expensive.
Time: 9:20 AM
Goal: Help the trigger happy lady.
Location: Platinum Strip - Souvenir Kiosk (M5, 9).
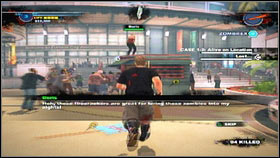
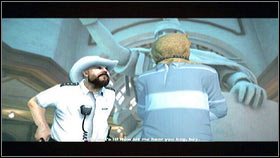
![Doris [1] is standing on the roof of the newsstand and doesn't want to move from there without her husband Chad - Case 1 - p. 1 - Side missions - Dead Rising 2 - Game Guide and Walkthrough](https://game.lhg100.com/Article/UploadFiles/201512/2015121417412545.jpg)
Doris [1] is standing on the roof of the newsstand and doesn't want to move from there without her husband Chad. Luckily he's not hard to find. Just head along Platinum Strip to the east and you should notice a man in a cowboy hat [2]. He's nearby Moe's Magination Store (M5, 5), where you can also complete One Man's Trash. After a short conversation the man will agree to go with you, through firstly you have to help him in killing the zombies.
It's not a difficult task, though you have to look out not to hit Chad as the mission will end if he loses too much health. After killing all the enemies, return to Doris [1] and escort the couple to the safe house [2].
Time: 11:30 AM
Goal: talk with the lost woman.
Location: Royal Flush Plaza - Children's Castle (M2, 5).
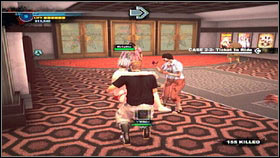
![You have to help the old lady who has been looking for a present for the granddaughter and haven't noticed the zombie attack [1] - Case 1 - p. 1 - Side missions - Dead Rising 2 - Game Guide and Walkthrough](https://game.lhg100.com/Article/UploadFiles/201512/2015121417412527.jpg)
You have to help the old lady who has been looking for a present for the granddaughter and haven't noticed the zombie attack [1]. The woman walks very slowly, so it would be best to pick her up by pressing circle [2]. Your movements are limited there, but you can still kick by pressing square. The store is nearby the safe house, so you shouldn't have problems with getting there.
Time: N/A
Goal: kill the mad tiger tamer.
Location: Yucatan Casino.
![After getting to the casino, you will meet the crazy Theodor [1], who will send his bloodthirsty on you - Case 1 - p. 1 - Side missions - Dead Rising 2 - Game Guide and Walkthrough](https://game.lhg100.com/Article/UploadFiles/201512/2015121417412567.jpg)
After getting to the casino, you will meet the crazy Theodor [1], who will send his bloodthirsty on you. To kill the tamer, approach him, hit two times and jump off to the side [2]. Once he starts chasing you, dodge his attack and repeat the whole process. His tiger will jump onto you from time to time, but moving the analog stick will be enough for it to let you go.
![After a few hits, the man will die [1] - Case 1 - p. 1 - Side missions - Dead Rising 2 - Game Guide and Walkthrough](https://game.lhg100.com/Article/UploadFiles/201512/2015121417412553.jpg)
After a few hits, the man will die [1]. The fight with the tiger is quite similar, the beast is just a lot faster than its master [2]. You however don't need to fight it. Instead you can go to the nearby restaurant and pick up some steaks. To tame the tiger, place the meat on the ground and place yourself so that the enemy runs through it once charging onto you. After eating three pieces, lead it to Katy in the safe house.
Time: 12:30 PM
Goal: help the man in the knives shop.
Location: Palisades Mall - Shank's (M10, 14).
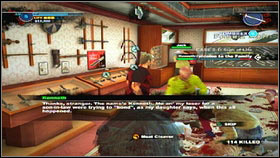
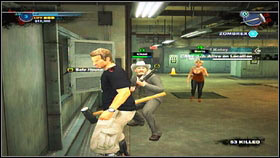
![Inside the store you will find two men: Keneth and his son-in-law Jack [1] - Case 1 - p. 1 - Side missions - Dead Rising 2 - Game Guide and Walkthrough](https://game.lhg100.com/Article/UploadFiles/201512/2015121417412604.jpg)
Inside the store you will find two men: Keneth and his son-in-law Jack [1]. Talk with the first and then with the second one and escort both to the safe house [2].
Time: 2:00 PM
Goal: help the drunk dancer.
Location: American Casino.
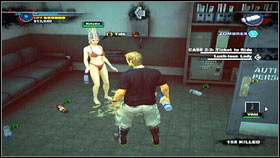
It's one of the easiest tasks, which shouldn't take you much time. It's best to complete it right after Chuck the Role Model. The woman you're looking for is in the room right next to the passage between American Casino and Royal Flush Plaza [1]. After a short conversation pick her up and take to the safe house [2].
Time: 3:00 PM
Goal: compete against the TIR participant.
Location: Platinum Strip - western edge (M5, 8).
![This time the enemy will be your old friend from TIR [1] - Case 1 - p. 2 - Side missions - Dead Rising 2 - Game Guide and Walkthrough](https://game.lhg100.com/Article/UploadFiles/201512/2015121417412651.jpg)
This time the enemy will be your old friend from TIR [1]. Right before the fight you will receive the keys to a motorbike which will make navigating the map much faster, but isn't needed in this particular fight. To defeat the enemy, you have to find a place with no zombies around and watch the surroundings closely. Once the bike appears, dodge in the last moment and wait for it to stop [2].
Hit it a couple times then and dodge again. Make sure to attack the enemy from behind, as the saws in the front cause a lot of damage [1]. After the fight, you will gain access to your enemy's bike trailer [2]. You can repaint it according to your taste by using the spray cans found around throughout the map.
Time: 4:00 PM
Goal: stop the thief couple.
Location: American Casino.
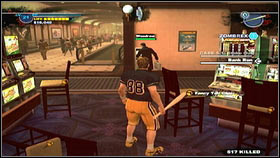
![Your target is a couple standing behind the metal barriers, between the slot machines [1] - Case 1 - p. 2 - Side missions - Dead Rising 2 - Game Guide and Walkthrough](https://game.lhg100.com/Article/UploadFiles/201512/2015121417412685.jpg)
Your target is a couple standing behind the metal barriers, between the slot machines [1]. Firstly talk with the woman, who will ask you to stop her crazy husband. In order to do that, kill the zombies surrounding the man, hitting hit 2-3 times while at it. Once you're done, talk with him and afterwards take his wife into the team. Now you can escort this strange couple to the safe house [2].
Time: 5:00 PM
Goal: find the CURE protestant.
Location: American Casino - men's toilet.
![You better prepare before entering the toilet [1] as inside you will have to fight a dangerous psycho [2] - Case 1 - p. 2 - Side missions - Dead Rising 2 - Game Guide and Walkthrough](https://game.lhg100.com/Article/UploadFiles/201512/2015121417412713.jpg)
You better prepare before entering the toilet [1] as inside you will have to fight a dangerous psycho [2]. Above all you should have at least 2 healing items and some quick and fast weapons. Once you're properly equipped, go inside and watch the short cutscene.
![The course of the fight is pretty standard, but it's important to always stand near the exit [1] - Case 1 - p. 2 - Side missions - Dead Rising 2 - Game Guide and Walkthrough](https://game.lhg100.com/Article/UploadFiles/201512/2015121417412771.jpg)
The course of the fight is pretty standard, but it's important to always stand near the exit [1]. This way you will avoid the enemy's attacks, as he will jump out of the cabins from time to time [2].
To defeat him, dodge when he jumps on you, hit him two times and dodge again [1]. Repeat this until he falls down [2].
![After the fight, talk with the tied woman [1] and escort her to the bunker [2] - Case 1 - p. 2 - Side missions - Dead Rising 2 - Game Guide and Walkthrough](https://game.lhg100.com/Article/UploadFiles/201512/2015121417412792.jpg)
After the fight, talk with the tied woman [1] and escort her to the bunker [2]. On your way there you can also complete Lush-lous Lady. The drunk woman can be found in the room next to the passage between American Casino and Royal Flush Plaza.
Time: 6:00 PM
Goal: save the trapped people.
Location: Fortune City Arena - changing room (M3, 10).
![Head to the backstage [1] and find the changing room - Case 1 - p. 2 - Side missions - Dead Rising 2 - Game Guide and Walkthrough](https://game.lhg100.com/Article/UploadFiles/201512/2015121417412726.jpg)
Head to the backstage [1] and find the changing room. It's not hard to find, considering there's a fire there [2].
![To save the trapped people, pick up the fire extinguisher in the corridor [1] and use it on the flames [2] - Case 1 - p. 2 - Side missions - Dead Rising 2 - Game Guide and Walkthrough](https://game.lhg100.com/Article/UploadFiles/201512/2015121417412824.jpg)
To save the trapped people, pick up the fire extinguisher in the corridor [1] and use it on the flames [2].
![Once the fire is gone, talk with the two survivors [1] and take them to the safe house [2] - Case 1 - p. 2 - Side missions - Dead Rising 2 - Game Guide and Walkthrough](https://game.lhg100.com/Article/UploadFiles/201512/2015121417412859.jpg)
Once the fire is gone, talk with the two survivors [1] and take them to the safe house [2].
Time: 8:00PM
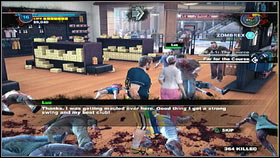
Goal: help the wounded man.
Location: Royal Flush Plaza (2nd floor), Wily Travels (M2, 11).
![It's a rather easy task, but you do need a dose of Zombrex to complete it [1] - Case 2 - Side missions - Dead Rising 2 - Game Guide and Walkthrough](https://game.lhg100.com/Article/UploadFiles/201512/2015121417412863.jpg)
It's a rather easy task, but you do need a dose of Zombrex to complete it [1]. The wounded man [2] has to receive it, as he was bitten by a zombie. You can obtain the medicine by completing Code Blue or buying it at a pawnshop. You can also find one of the boxes hidden in Fortune City. Their locations can be found in the further part of the guide
![Once the man injects himself with Zombrex, grab him [1] and escort to the safe house [2] - Case 2 - Side missions - Dead Rising 2 - Game Guide and Walkthrough](https://game.lhg100.com/Article/UploadFiles/201512/2015121417412828.jpg)
Once the man injects himself with Zombrex, grab him [1] and escort to the safe house [2].
Time: 10:00 PM
Goal: locate the medic who might know where Zombrex is.
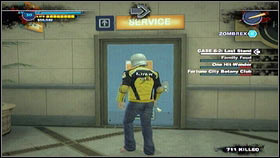
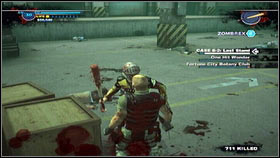
Location: Silver Strip - One Little Duck Bingo (M6, 3).
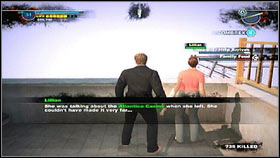
![In the room to which the arrow leads [1] you will find Sven [2], a medic who has lost faith in his abilities - Case 2 - Side missions - Dead Rising 2 - Game Guide and Walkthrough](https://game.lhg100.com/Article/UploadFiles/201512/2015121417412874.jpg)
In the room to which the arrow leads [1] you will find Sven [2], a medic who has lost faith in his abilities.
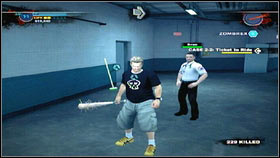
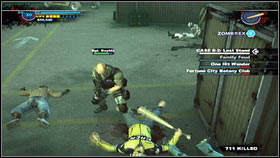
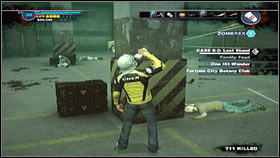
![After a short conversation you will be able to convince him that he might be needed in the bunker and that's where you should lead him [1] - Case 2 - Side missions - Dead Rising 2 - Game Guide and Walkthrough](https://game.lhg100.com/Article/UploadFiles/201512/2015121417412917.jpg)
After a short conversation you will be able to convince him that he might be needed in the bunker and that's where you should lead him [1]. In return you will receive quite a lot of PP and Zombrex.
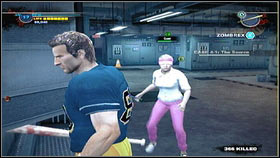
Time: 10: 30 PM
Goal: get rid of the chef.
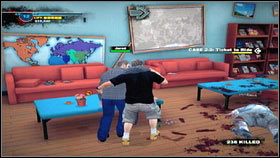
Location: Food Court - Cucina Donnacci (M8, 8).
Another mission from the "kill the psycho and rescue his victim" series. This time your enemy is a chef-cannibal [2].
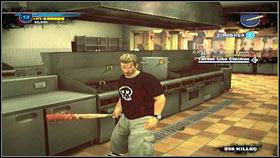
![All you need to do in order to defeat him is running away all the time [1] and attacking only when he eats [2] - Case 2 - Side missions - Dead Rising 2 - Game Guide and Walkthrough](https://game.lhg100.com/Article/UploadFiles/201512/2015121417412941.jpg)
All you need to do in order to defeat him is running away all the time [1] and attacking only when he eats [2]. Of course make a dodge after two attacks and repeat the operation. You have to be quick, as the enemy will regenerate his health if he eats for too long.
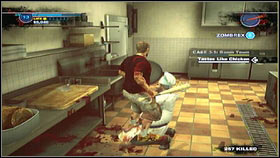
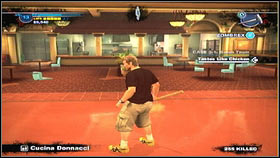
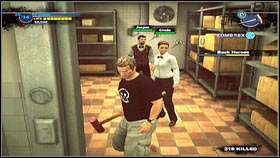
![After the fight, go to the room at the back of the restaurant [1] and talk with the saved woman [2] - Case 2 - Side missions - Dead Rising 2 - Game Guide and Walkthrough](https://game.lhg100.com/Article/UploadFiles/201512/2015121417412994.jpg)
After the fight, go to the room at the back of the restaurant [1] and talk with the saved woman [2]. She unfortunately won't agree to go with you unless she sees her beloved one - Jasper.
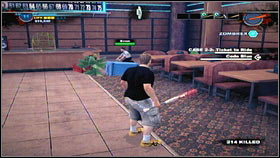
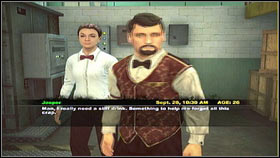
![The man isn't easy to find, as he has climbed onto the roof of one of the shops (M8, 6) [1] - Case 2 - Side missions - Dead Rising 2 - Game Guide and Walkthrough](https://game.lhg100.com/Article/UploadFiles/201512/2015121417413093.jpg)
The man isn't easy to find, as he has climbed onto the roof of one of the shops (M8, 6) [1]. In order to get to him, climb onto the machines beside Lombardi's [2], and from there onto the roof.
![Jasper is above Hamburger Fiefdom [2] - take him to his girlfriend - Case 2 - Side missions - Dead Rising 2 - Game Guide and Walkthrough](https://game.lhg100.com/Article/UploadFiles/201512/2015121417413081.jpg)
Jasper is above Hamburger Fiefdom [2] - take him to his girlfriend.
After a short conversation, escort them both to the safe house.
Time: 11:30 PM
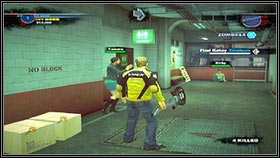
Goal: save the building crew members.
Location: South Plaza, by the stairs (M4).

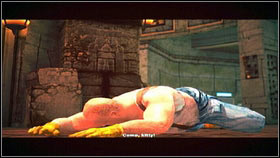
![After getting to the destination, talk with one of the women [1], who will agree to go with you once you check out if her friend is alright - Case 3 - p. 1 - Side missions - Dead Rising 2 - Game Guide and Walkthrough](https://game.lhg100.com/Article/UploadFiles/201512/2015121417413065.jpg)
After getting to the destination, talk with one of the women [1], who will agree to go with you once you check out if her friend is alright. The woman is lying just nearby, on the first floor of the scaffolding [2].
![Jump there using the crates [1] and take both ladies to a safe place - Case 3 - p. 1 - Side missions - Dead Rising 2 - Game Guide and Walkthrough](https://game.lhg100.com/Article/UploadFiles/201512/2015121417413076.jpg)
Jump there using the crates [1] and take both ladies to a safe place. You will have to piggy-back one of them [2], but it shouldn't be a difficulty.
Time: 07:00 AM
Goal: end the rock concert.
Location: Silver Strip - scene (M6, 8).
![Walk onto the stage [1], talk will every band member [2] and escort them to the safe house - Case 3 - p. 1 - Side missions - Dead Rising 2 - Game Guide and Walkthrough](https://game.lhg100.com/Article/UploadFiles/201512/2015121417413164.jpg)
Walk onto the stage [1], talk will every band member [2] and escort them to the safe house.
Time: 12:00 PM
Goal: locate the mascot.
Location: Palisades Mall 2nd floor - Kid's Choice Clothing (M11, 9).
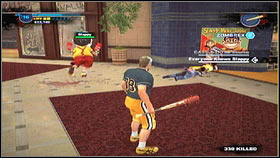
![After arriving at the shop, check out the big doll [1] and watch a short cutscene, which will be followed by a fight against the crazy Slappy [2] - Case 3 - p. 1 - Side missions - Dead Rising 2 - Game Guide and Walkthrough](https://game.lhg100.com/Article/UploadFiles/201512/2015121417413184.jpg)
After arriving at the shop, check out the big doll [1] and watch a short cutscene, which will be followed by a fight against the crazy Slappy [2].
![Most of the time the enemy will be skating back and forth and attacking you with fire streams [1], which you can jump over - Case 3 - p. 1 - Side missions - Dead Rising 2 - Game Guide and Walkthrough](https://game.lhg100.com/Article/UploadFiles/201512/2015121417413178.jpg)
Most of the time the enemy will be skating back and forth and attacking you with fire streams [1], which you can jump over. Sometimes he stops to fire 3 projectiles. To dodge the fireballs, try to stay in motion the whole time or hide behind the blue wall inside the shop [2]

![Inside the shop you can also find the gun which you will need to defeat Slappy - a water gun [1] - Case 3 - p. 1 - Side missions - Dead Rising 2 - Game Guide and Walkthrough](https://game.lhg100.com/Article/UploadFiles/201512/2015121417413115.jpg)
Inside the shop you can also find the gun which you will need to defeat Slappy - a water gun [1]. Shoot him with it and hit him 2-3 times with a club once the start waving his pistols [2]. Repeat the whole process a couple times. From time to time he can put his mask onto your head. Knock it down by quickly moving the left analog stick and dodge to avoid the charge.
If you run low on life, hide behind the blue wall [1] and drink a proper drink. The enemy will fall down after a couple hits [2].
Time: 01:30 PM
Goal: find the woman.
Location: Palisades Mall - The Venus Touch (M10, 12).
![At the back of the building [1] you will find a woman who has almost fried herself at the solarium [2] - Case 3 - p. 2 - Side missions - Dead Rising 2 - Game Guide and Walkthrough](https://game.lhg100.com/Article/UploadFiles/201512/2015121417413205.jpg)
At the back of the building [1] you will find a woman who has almost fried herself at the solarium [2]. Before you can take her to the bunker, you need to find her something to drink.
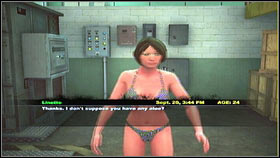
![The closest coffee should be lying on the ground between the couches in front of the solarium [1] - Case 3 - p. 2 - Side missions - Dead Rising 2 - Game Guide and Walkthrough](https://game.lhg100.com/Article/UploadFiles/201512/2015121417413233.jpg)
The closest coffee should be lying on the ground between the couches in front of the solarium [1]. Once Linette drink it [2], she will tell you about a secret shortcut to the safe house, which is located on the second floor of Palisades Mall, inside Brand New U Clothing (M11, 15). Head there quickly.
The entrance is inside one of the dressing rooms. Just press circle and you will find yourself right next to the bunker [2].
Escort the woman to the safe house and from now on you'll be able to freely use the shortcut.
Time: 06:00 PM
Goal: investigate the wedding.
Location: Silver Strip - Swept Away, Wedding Chapel (M6, 2).
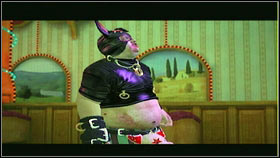
![Once you get to the chapel [1], you will witness a quite gruesome wedding [2], after which you will have to fight the groom - Case 3 - p. 2 - Side missions - Dead Rising 2 - Game Guide and Walkthrough](https://game.lhg100.com/Article/UploadFiles/201512/2015121417413307.jpg)
Once you get to the chapel [1], you will witness a quite gruesome wedding [2], after which you will have to fight the groom.

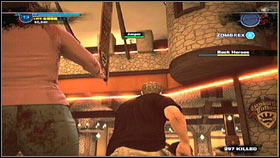
![The best way to fight him is constantly jumping between the balustrades [1] and attacking only when the enemy stops to catch a breath [2] - Case 3 - p. 2 - Side missions - Dead Rising 2 - Game Guide and Walkthrough](https://game.lhg100.com/Article/UploadFiles/201512/2015121417413384.jpg)
The best way to fight him is constantly jumping between the balustrades [1] and attacking only when the enemy stops to catch a breath [2]. A spear and flamethrower are both good weapons here, as they allow to attack from behind the balustrade thanks to their range.
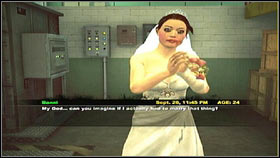
After the fight, take the would-be bride to the safe house.
Time: 08:00 PM
Goal: find the woman.
Location: Royal Flush Plaza - SporTrance (M1, 12).
Yet another easy task. You just need to kill the zombies inside the shop [1] and the woman will agree to go with you to the safe house [2].
Time: 9:30 PM
Goal: face Stuart.
Location: Safe House.
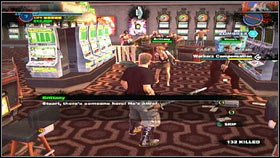
In order to receive this mission, you have to previously complete Workers Compensation. Talk with Stuart standing beside the toilet [1] and calm him down to receive precious PP.
Time: 11:00 PM
Goal: check the mail.
Location: Royal Flush Plaza - The Man's Sport (M1, 3).
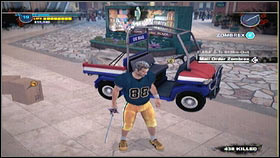
![Your target is the mailman's car [1], located a couple steps from the bunker entrance - Case 4 - p. 1 - Side missions - Dead Rising 2 - Game Guide and Walkthrough](https://game.lhg100.com/Article/UploadFiles/201512/2015121417413423.jpg)
Your target is the mailman's car [1], located a couple steps from the bunker entrance. Check it by pressing circle and watch the short cutscene. Once it ends, the fight with the man mailman will begin [2].
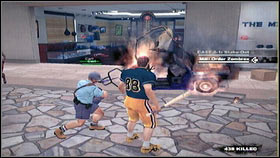
![Your enemy has two types of attacks: he shoots from a shotgun [1] and throws exploding presents [2] - Case 4 - p. 1 - Side missions - Dead Rising 2 - Game Guide and Walkthrough](https://game.lhg100.com/Article/UploadFiles/201512/2015121417413446.jpg)
Your enemy has two types of attacks: he shoots from a shotgun [1] and throws exploding presents [2]. Protect yourself from the shots by hiding behind the nearby stands and dodge the packages by rolling away.
![To defeat the madman, just normally run to him [1], hit two times and run to a safe place - Case 4 - p. 1 - Side missions - Dead Rising 2 - Game Guide and Walkthrough](https://game.lhg100.com/Article/UploadFiles/201512/2015121417413440.jpg)
To defeat the madman, just normally run to him [1], hit two times and run to a safe place. The best time for attacking is when his shotgun gets jammed [2]. In return for defeating him you will receive quite a bit of PP and a Zombrex.
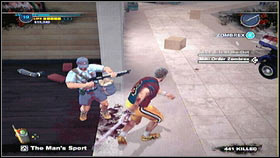
Location: Kokonutz Sports Town - back room (M10, 11).

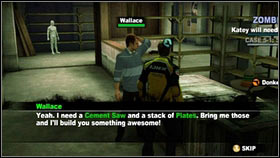
You won't receive this mission through your transceiver, but completing it is obligatory for receiving a particular mission during Case 6. To complete Tape it or Die, go to Kokonutz Sports Town [1] and talk with the four people in the back of the shop [2]. They will ask you to bring a Cement Saw and Plates. Both items can be found in South Plaza (M4, 1) at the construction site.
Time: 02:00 AM
Goal: find the man who's searching for food.
Location: Platinum Strip - Dining at Davey's.
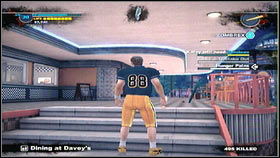
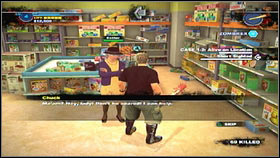
![The man you're looking for is at Dining at Daveys (M5, 6) [1] and is willing to follow you to the safe house, but firstly he has to eat something [2] - Case 4 - p. 1 - Side missions - Dead Rising 2 - Game Guide and Walkthrough](https://game.lhg100.com/Article/UploadFiles/201512/2015121417413468.jpg)
The man you're looking for is at Dining at Davey's (M5, 6) [1] and is willing to follow you to the safe house, but firstly he has to eat something [2].
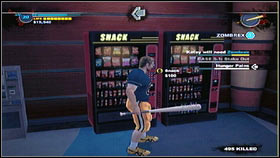
![He's not too fastidious, so a plain pack of chips from a vending machine in the cinema will do the job [1] - Case 4 - p. 1 - Side missions - Dead Rising 2 - Game Guide and Walkthrough](https://game.lhg100.com/Article/UploadFiles/201512/2015121417413530.jpg)
He's not too fastidious, so a plain pack of chips from a vending machine in the cinema will do the job [1]. Take the sated man to the safe house [2] and you will receive Zombrex in return.
Time: 03:00 AM
Goal: check out the pool.
Location: Palisades Mall - pool (M10, 15).
![Your task is to escort the three models swimming in the pool to the safe house [2] - Case 4 - p. 1 - Side missions - Dead Rising 2 - Game Guide and Walkthrough](https://game.lhg100.com/Article/UploadFiles/201512/2015121417413529.jpg)
Your task is to escort the three models swimming in the pool to the safe house [2]. They however will demand $10000 for the opportunity of saving them.
![The fastest way of getting that amount is destroying the nearby ATMs [1] - Case 4 - p. 1 - Side missions - Dead Rising 2 - Game Guide and Walkthrough](https://game.lhg100.com/Article/UploadFiles/201512/2015121417413554.jpg)
The fastest way of getting that amount is destroying the nearby ATMs [1]. Each will give you $2500, so return to the pool after busting 4 of them and end the mission [2]. Use the shortcut you discovered while completing Wilted Flower.
Time: 4:40 AM
Goal: examine the construction site.
Location: South Plaza.
![This time your target is the mad sheriff [1], who has decided to administer justice on his own, by hanging the survivors - Case 4 - p. 1 - Side missions - Dead Rising 2 - Game Guide and Walkthrough](https://game.lhg100.com/Article/UploadFiles/201512/2015121417413581.jpg)
This time your target is the mad sheriff [1], who has decided to administer justice on his own, by hanging the survivors. The tactic for defeating the lunatic is approach, hit two times and roll away as fast as possible. After he attacks with his knife, repeat the operation. Try not to get too far away from him throughout the whole fight [2], or he'll start shooting and using his lasso, which can end pretty badly for you.
![Once he's dead [1], go to the nearest maintenance room (west of the toilets) - Case 4 - p. 1 - Side missions - Dead Rising 2 - Game Guide and Walkthrough](https://game.lhg100.com/Article/UploadFiles/201512/2015121417413555.jpg)
Once he's dead [1], go to the nearest maintenance room (west of the toilets). You will find a man there [2], take him to the safe house.
Time: 06:00 AM
Goal: examine Slot Ranch Casino.
Location: Slot Ranch Casino.
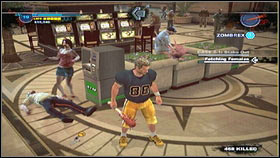
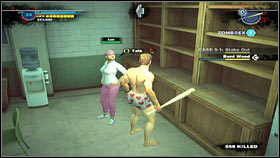
![After getting to the destination, talk with Woodrow [1], who will ask you for help in emptying his ATMs - Case 4 - p. 1 - Side missions - Dead Rising 2 - Game Guide and Walkthrough](https://game.lhg100.com/Article/UploadFiles/201512/2015121417413686.jpg)
After getting to the destination, talk with Woodrow [1], who will ask you for help in emptying his ATMs. Your task is to follow the man and protect him from the zombies [1], while he collects the money.
![Having emptied three machines [1], take him back to the safe house [2] - Case 4 - p. 1 - Side missions - Dead Rising 2 - Game Guide and Walkthrough](https://game.lhg100.com/Article/UploadFiles/201512/2015121417413657.jpg)
Having emptied three machines [1], take him back to the safe house [2]. In return you will receive quite a lot of PP and $50000.
Time: 09:00 AM
Location: Fortune Park.

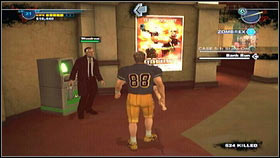
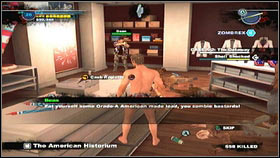
![Right after entering the location, there will be a cutscene presenting a group of American radicals [1], who have organized themselves a manhunt in the city [2] - Case 4 - p. 2 - Side missions - Dead Rising 2 - Game Guide and Walkthrough](https://game.lhg100.com/Article/UploadFiles/201512/2015121417413615.jpg)
Right after entering the location, there will be a cutscene presenting a group of American radicals [1], who have organized themselves a manhunt in the city [2]. The enemies are not only on top of hard to access roofs, but are also equipped with sniper rifles. To avoid getting hit, try to constantly change the way you're running.
Johnny will be your first target. He's on top of the building [1] between the entrances to Royal Flush Plaza and Slot Ranch Casino. Access the roof using the ladder [2] hidden in one of the backstreets.
Fighting all other snipers is identical. Keep strafing to dodge the shots [1], approach one of them and attack two times once he draws his knife. Repeat this until he dies [2] and move on to the next one. You can also try to kill them from a distance using a sniper, but it's a harder and more time-consuming method. You're basically unable to dodge the enemy shots because of the long time it takes to reload the sniper rifle.
Your second target should be Darrick, stationed on the roof of Atlantic Casino. To get there, head to Silver Strip and go into the first street on the right. Right next to the maintenance room there is a corridor [1] which will lead you to the ladder [2]. The fight is identical to the last one.
![The third sniper can be found on the roof of the building which is being renovated (M5, 4), between Platinum Strip and Fortune Park [1] - Case 4 - p. 2 - Side missions - Dead Rising 2 - Game Guide and Walkthrough](https://game.lhg100.com/Article/UploadFiles/201512/2015121417413768.jpg)
The third sniper can be found on the roof of the building which is being renovated (M5, 4), between Platinum Strip and Fortune Park [1]. Climb there using the scaffolding [2], from the side of the park.
![This time you have less room to manoeuvre [1], so have a couple healing drinks ready and use them while behind the wall if needed - Case 4 - p. 2 - Side missions - Dead Rising 2 - Game Guide and Walkthrough](https://game.lhg100.com/Article/UploadFiles/201512/2015121417413778.jpg)
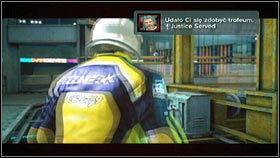
This time you have less room to manoeuvre [1], so have a couple healing drinks ready and use them while behind the wall if needed. If you've been completing all the missions described in this guide until now, you should receive a trophy and Orange Prison Outfit [2], into which you can change in the safe house (restroom).

The last cowboy is at the Paradise Platinum Screens roof (M5, 3), w Platinum Strip. The roof entrance [1] is located a couple meters to the west, right beside the maintenance room [2].
Time: 09:00 AM
Goal: play poker in the Safe House.
Location: Safe House Poker Room.
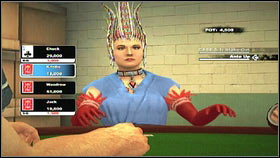
![In this mission, you have to play poker [1] and undress one of the other players to underwear [2] - Case 4 - p. 2 - Side missions - Dead Rising 2 - Game Guide and Walkthrough](https://game.lhg100.com/Article/UploadFiles/201512/2015121417413805.jpg)
In this mission, you have to play poker [1] and undress one of the other players to underwear [2]. The rules are quite simple. At first you have to pay an entrance bid, which goes up with each round. After receiving 2 cards, you can choose one of the 4 options: Fold - give up and lose your money, Check - check the next cards, Rise - rise the stake (all other have to equalize to play further) and All In - bet all the money you have. After you make a decision, 5 cards common for all players are unveiled on the table. With each card you can resign, raise the stake or check further. The one with the best combination wins. Description of the combinations can be found in the special manual which can be launched by pressing triangle. If you lose all your tokens you have to take off one part of your clothing, but you can head to the restroom, dress up and continue the game.
Time: 12:00 PM
Goal: find the nervous woman.
Location: Fortune City Hotel (M4, 2).
![After getting to the spot, it will turn out that the woman you're searching for [1] is dressed just in underwear and doesn't want to go to the safe house - Case 4 - p. 2 - Side missions - Dead Rising 2 - Game Guide and Walkthrough](https://game.lhg100.com/Article/UploadFiles/201512/2015121417413801.jpg)
After getting to the spot, it will turn out that the woman you're searching for [1] is dressed just in underwear and doesn't want to go to the safe house. To convince her, you have to dress similarly to her, that is just in underpants. You can find a proper size at the western edge of South Plaza [2].
Having fulfilled the woman's wish [1], piggy-back her and return to the safe house [2].
Time: 11:00 AM
Goal: gain Zombrex.
Location: Safe House.
If you've previously completed Once Bitten, you will have to get Jared another Zombrex for Jared. Buy it at the pawnshop, complete a mission with Zombrex as the reward or find one of the packages hidden in Fortune City.
Time: 12:00 PM
Goal: investigate the art gallery.
Location: Palisades Mall - Cleroux Collection (M11, 8).
Another easy escort mission. Pay the art gallery owner $3000 for his paintings [1] and take him to the safe house [2].
Time: 01:00 PM
Goal: talk with the gambler.
Location: Silver Strip - Shamrock Casino (M6, 7).
Very similar to the previous mission. This time you have to pay $20000 so that the old gambler [1] agrees to go with you to the safe house [2].
Time: 01:00 PM
Goal: help the armed man.
Location: American Casino - The American Historium (M3, 3).
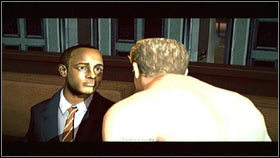
![The man you're searching for is wounded [1], but he unfortunately doesn't agree to be carried - Case 4 - p. 2 - Side missions - Dead Rising 2 - Game Guide and Walkthrough](https://game.lhg100.com/Article/UploadFiles/201512/2015121417413935.jpg)
The man you're searching for is wounded [1], but he unfortunately doesn't agree to be carried. You have to lead him to the safe house, walking veeery slowly [2].
Time: 04:00 PM
Goal: hear out Luz's proposition.
Location: Safe House.
![The saved golf player [1] will ask you to bring her a new golf club - Case 5 - Side missions - Dead Rising 2 - Game Guide and Walkthrough](https://game.lhg100.com/Article/UploadFiles/201512/2015121417413900.jpg)
The saved golf player [1] will ask you to bring her a new golf club. The nearest one can be found at Sport Trance (M1, 12). After you bring the item [2] you will receive a quite big money reward.
Time: 04:00 PM
Goal: check the crowd.
Location: Slot Ranch Casino - scene (M7, 4).
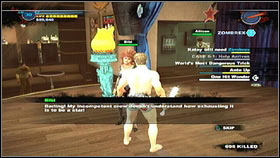
![As you approach the scene, a short cutscene will start [1] - Case 5 - Side missions - Dead Rising 2 - Game Guide and Walkthrough](https://game.lhg100.com/Article/UploadFiles/201512/2015121417413956.jpg)
As you approach the scene, a short cutscene will start [1]. Talk with the mad stripper once it ends [2]. To complete the mission, you have to run some errands for her.
![At first she will ask you to bring her something to drink [1] - Case 5 - Side missions - Dead Rising 2 - Game Guide and Walkthrough](https://game.lhg100.com/Article/UploadFiles/201512/2015121417413933.jpg)
At first she will ask you to bring her something to drink [1]. The bottle of whiskey can be found in the nearby bar (M7, 1) [2]. Now it's time to get properly dressed.

![The woman will be satisfied only if you dress up in a Tuxedo, you can find one at the Modern Businessman (M1, 10) [1] [2] - Case 5 - Side missions - Dead Rising 2 - Game Guide and Walkthrough](https://game.lhg100.com/Article/UploadFiles/201512/2015121417413959.jpg)
The woman will be satisfied only if you dress up in a Tuxedo, you can find one at the Modern Businessman (M1, 10) [1] [2].
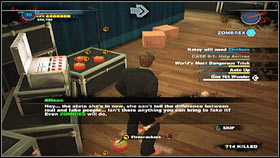
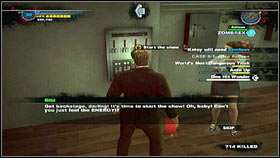
The second to last task consists of creating a crowd by the scene. To do that, go behind the scene and pick up the Firecrackers lying there [1]. Throw them by the scene and the zombies will come, lured by them [2]. Once there's enough of them, the stripper will ask you to begin the show.
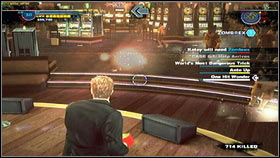
![Do it by using the flashing green mechanism behind the scene [1] - Case 5 - Side missions - Dead Rising 2 - Game Guide and Walkthrough](https://game.lhg100.com/Article/UploadFiles/201512/2015121417414046.jpg)
Do it by using the flashing green mechanism behind the scene [1]. You will have to play an easy mini-game, which works similarly to Guitar Hero. Pictures will keep flying at the bottom of the screen and you have to press proper buttons at the right time [2].
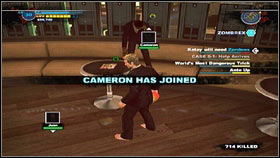
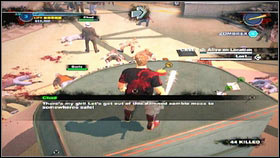
![After three series, kill the zombies surrounding the mad woman and take her to the safe house, together with three ex-prisoners [1] - Case 5 - Side missions - Dead Rising 2 - Game Guide and Walkthrough](https://game.lhg100.com/Article/UploadFiles/201512/2015121417414021.jpg)
After three series, kill the zombies surrounding the mad woman and take her to the safe house, together with three ex-prisoners [1]. One of the men is wounded, so help him walk [2].
Time: 06:00 PM
Goal: save the siren.
Location: Atlantica Casino - fountain (M12, 3).
![It this mission your task is to save the poor woman, trapped inside a siren suit [1] - Case 5 - Side missions - Dead Rising 2 - Game Guide and Walkthrough](https://game.lhg100.com/Article/UploadFiles/201512/2015121417414030.jpg)
It this mission your task is to save the poor woman, trapped inside a siren suit [1]. The "Siren" doesn't have any underwear, so unfortunately you have to take her to the safe house together with her tail [2].
Time: 08:00 PM
Goal: talk with the armed man.
Location: Palisades Mall - newsstand beside Trendy Cindy (M10, 8).
![The man can be found on the roof of one of the newsstands at Palisades Mall [1] - Case 5 - Side missions - Dead Rising 2 - Game Guide and Walkthrough](https://game.lhg100.com/Article/UploadFiles/201512/2015121417414136.jpg)
The man can be found on the roof of one of the newsstands at Palisades Mall [1]. After a long conversation you will be able to convince him to go with to the safe house [2].
Time: 12:00 AM
Goal: examine the scene.
Location: Atlantica Casino - scene (M12, 4).
![After entering the room [1] you will witness a magic trick going rather wrong [2] - Case 5 - Side missions - Dead Rising 2 - Game Guide and Walkthrough](https://game.lhg100.com/Article/UploadFiles/201512/2015121417414129.jpg)
After entering the room [1] you will witness a magic trick going rather wrong [2]. Once it ends, the madmen will attack Chuck. Firstly focus on the man with no facial hair - hit him two times and dodge roll, while trying to keep him close. Once he's dead, finish his brother following the same pattern, avoiding his sword attacks.
Time: 02:20 AM
Goal: examine Hot Excitorama.
Location: Silver Strip - Hot Excitorama (M6, 11).
![Inside the shop you will find two men who came to Fortune City for a cabaret contest [1] - Case 5 - Side missions - Dead Rising 2 - Game Guide and Walkthrough](https://game.lhg100.com/Article/UploadFiles/201512/2015121417414161.jpg)
Inside the shop you will find two men who came to Fortune City for a cabaret contest [1]. They will agree to go with you to the safe house if you listen out their jokes and then give one of them the prize for the best showman. Pick up the nearby trophy and give it to the one you liked more [2]. Unfortunately that won't be enough, as the loser won't want to go. Convince him by paying him $5000 and then take both men to the safe house.
Time: 03:00 AM.
Goal: help the girl on the roof.
Location: Fortune City Hotel - roof (M4, 2).
![After you get onto the roof, talk with the girl [1], who will ask you to find her lost mother - Case 5 - Side missions - Dead Rising 2 - Game Guide and Walkthrough](https://game.lhg100.com/Article/UploadFiles/201512/2015121417414195.jpg)
After you get onto the roof, talk with the girl [1], who will ask you to find her lost mother. She can be found in Atlantica Casino, right next to the entrance to Fortune City [2]. Walk her to her daughter and then take them both to the safe house. If you firstly escort the mother and then return to the daughter, she will commit suicide.
Time: 5:00 AM
Goal: talk with Vikki.
Location: Safe House Lounge.
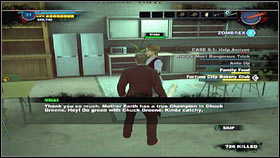
![Talk with Vikki [1] and she will ask you to find a very rare plant - Case 5 - Side missions - Dead Rising 2 - Game Guide and Walkthrough](https://game.lhg100.com/Article/UploadFiles/201512/2015121417414123.jpg)
Talk with Vikki [1] and she will ask you to find a very rare plant. It can be found in Palissades Mall - Baggedl (M10, 13) [2].
Time: Case 6
Goal: save the group of kids.
Location: Palisades Mall - Kokonutz Sports Town - backroom (M10, 11).

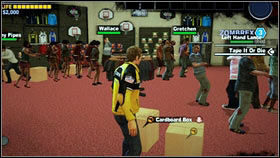
Talk with each member of the group and then escort them to the safe house.
Card name
First ingredient
Second ingredient
Air Horn
Pylon
Spray Paint
Auger
Pitchfork
Drill Motor
Blambow
Dynamite
Bow and Arrow
Blitzkrieg
Assault Rifle/LMG
Electric Chair
Burning Skull
Bull Skull
Motor Oil
Beer Hat
Bottle of Beer
Construction Hat
Blazing Aces
Tiki Torch
Tennis Raquet
Tesla Ball
Bingo Ball Cage
Battery
Tenderizers
MMA Gloves
Box of Nails
Super B.F.G
Blast Frequency Gun
Amplifier
Super Slicer
ServeBot Mask
Lawnmower
Spear Launcher
Leaf Blower
Spear
Spiked Bat
Box of Nails
Baseball Bat
Sticky Bomb
Lawn Dart
Dynamite
Boomstick
Pitchfork
Shotgun
Driller
Power Drill
Spear
Defiler
Sledge Hammer
Fire Axe
Drill Bucket
Power Drill
Bucket
Dynameat
Hunk of Meat
Dynamite
Electric Chair
Wheelchair
Battery
Fire Spitter
Toy Spitball Gun
Tiki Torch
Exsanguinator
Vacuum Cleaner
Sawblades
Electric Rake
Battery
Leaf Rake
Snowball Cannon
Fire Extinguisher
Water Gun
Rocket Launcher
Rocket Fireworks
Lead Pipe
Roaring Thunder
Battery
Goblin Mask
Ripper
Cement Saw
Saw Blade
Power Guitar
Electric Guitar
Amplifier
Pole Weapon
Push Broom
Machete
Plate Launcher
Cement Saw
Plates
Paddlesaw
Canoe Paddle
Chainsaw
Molotov
Whiskey Bottle
Newspaper
Portable Lawnmower
24
Lawnmower
Flamethrower
Water Gun
Gasoline Canister
Flaming Gloves
Boxing Gloves
Motor Oil
Fountain Lizard
Lizard Mask
Fountain Firework
Freedom Bear
Stuffed Bear
Light Machine Gun
Freezer Bomb
Fire Extinguisher
Dynamite
Hacker
Flashlight
Computer Case
Gem Blower
Gems
Leaf Blower
Hail Mary
Football
Grenade
Handy Chipper
Wheelchair
Lawnmower
Heliblade
Toy Helicopter
Machete
Holy Arms
Training Sword
Nails
Knife Gloves
Boxing Gloves
Bowie Knife
I.E.D.
Box of Nails
Propane Tank
Infernal Arms
Training Sword
Motor Oil
Parablower
Parasol
Leaf Blower
Laser Sword
Flashlight
Gem
Wingman
Nectar
Queen
You will obtain most Combo Cards by completing missions and gaining new experience levels, but 9 of them have been hidden in Fortune City. Below you will find a complete list, together with exact locations and how to obtain them.
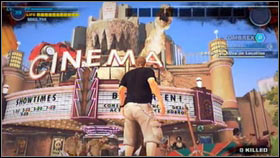

1. Laser Sword - examine the poster at Paradise Platinum Screens, Platinum Strip (M5, 3).
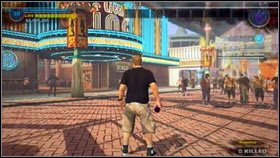
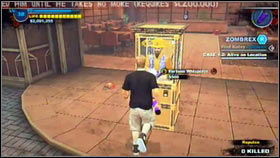
2. Burning Skull - spend 1,200,000$ at the fortune telling machine at Silver Strip (M6, 3).
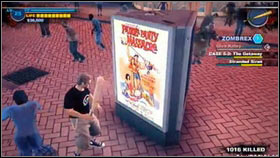
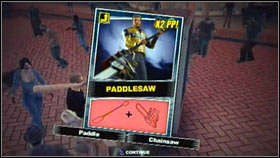
3. Paddlesaw - examine the poster at Silver Strip, nearby the Maintenance Room.
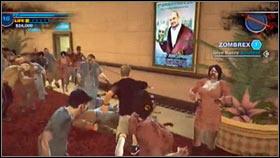
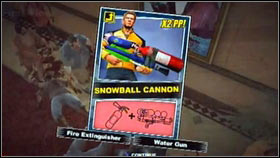
4. Snowball Cannon - examine the poster at Palisades Mall, second floor.
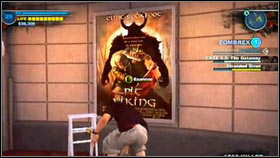
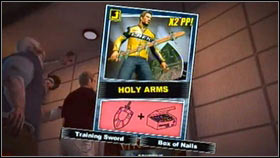
5. Holy Arms - examine the poster at Atlantica Casino.
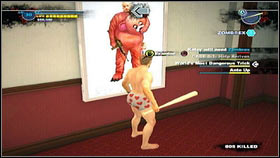
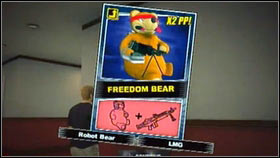
6. Freedom Bear - examine the poster at Yucatan Casino, by the men's restroom exit.

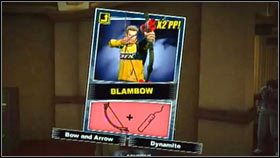
7. Blambow - examine the poster at Cucina Donnacci, Food Court (M8, 8).
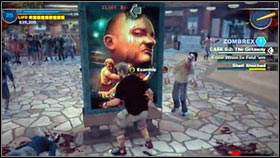
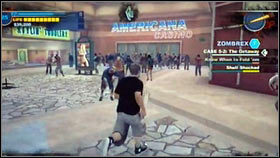
8. Tenderizers - examine the poster at Royal Flush Plaza, in front of the American Casino entrance.
9. Wingman - a secret card that you will receive after combining two items: Nectar and Queen. The first one can be acquired by mixing two Orange Juices and the second one is the orange worm which falls out of dead zombies (after giving Katy the second Zombrex). By combining those two items in the Maintenance Room, you will receive the Wingman card and a secret trophy.
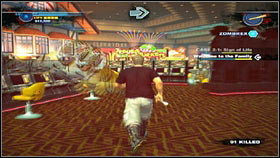
![Inside the bars found throughout Fortune City (for example Yucatan Casino [1]), there are mixers, used to combine various types of foods into cocktails - Mixed drinks - Items - Dead Rising 2 - Game Guide and Walkthrough](https://game.lhg100.com/Article/UploadFiles/201512/2015121417414341.jpg)
Inside the bars found throughout Fortune City (for example Yucatan Casino [1]), there are mixers, used to combine various types of foods into cocktails. Below is a full list of drinks, together with a description of the effects they give and how to make them.
Drink
First ingredient
Second ingredient
Effect
Nectar
Orange Juice
Orange Juice
Summons Queen and calls in any others worms in the area.
Energizer
Chili
Chili
Chuck becomes immortal. Duration: 1 minute.
Pain Killer
Beer
Beer
Chuck received +50% resistance to physical attacks. Duration: 1 minute.
Quick Step
Wine
Beer
Chuck gets a speed boost. Duration: 1 minute.
Randomizer
Wine
Vodka
Causes vomiting. Duration: 3 minutes.
Repulse
Chili
Large Soda
Zombies stop attacking Chuck. Neutralises Zombait. Duration: 1 minute.
Spitfire
Ketchup
Ketchup
Chuck attacks by spitting fire. Duration: 1 minute.
Untouchable
Pizza
Large Soda
Chuck cannot be grabbed by zombies, but still receives damage from other attacks. Duration: 1 minute.
Zombait
Jelly Beans
Chili
Draws zombies to Chuck. Duration: 1 minute.
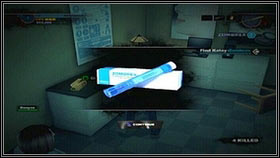
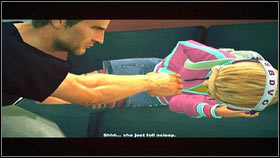
Zombrex is a medicine which you have to give Katy four times during the game. You can get it in three different ways:
1. Receive as a prize for completing missions.
2. Buy at the pawnshop. The first one costs $25000 and each next one is $25000 more expensive than the previous.
3. Find one of the hidden packages.
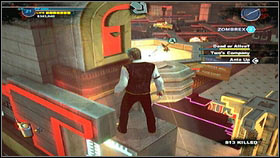
![The first one can be found behind the main scene [2] at Slot Ranch Casino (M7, 4) - Zombrex - Items - Dead Rising 2 - Game Guide and Walkthrough](https://game.lhg100.com/Article/UploadFiles/201512/2015121417414411.jpg)
The first one can be found behind the main scene [2] at Slot Ranch Casino (M7, 4).
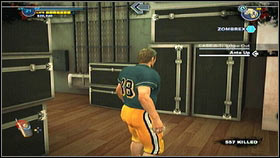
![Climb using the boxes [1] and jump onto the column with the medicine [2] - Zombrex - Items - Dead Rising 2 - Game Guide and Walkthrough](https://game.lhg100.com/Article/UploadFiles/201512/2015121417414423.jpg)
Climb using the boxes [1] and jump onto the column with the medicine [2].

![To get the second package, go to Bonnie Jacks BBQ Shack at American Casino (M3, 4) [1] - Zombrex - Items - Dead Rising 2 - Game Guide and Walkthrough](https://game.lhg100.com/Article/UploadFiles/201512/2015121417414462.jpg)
To get the second package, go to Bonnie Jack's BBQ Shack at American Casino (M3, 4) [1]. Go to the second floor and from there, using the lamps, jump onto the "ledge" with Zombrex.
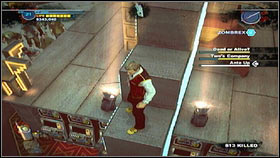
The third one can be found at Yucatan Casino. It's lying at the very top of the monument in the middle of the casino (M9, 7).

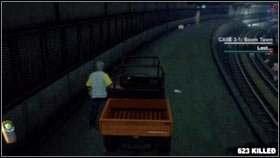
The last one isn't hidden too cunningly. Just go underground and ride to the Maintenance Room below Atlantica Casino (M13) [1]. The medicine is lying a few steps from the entrance [2].

 Dark Messiah of Might and Magic Game Guide & WalkthroughDont Starve Game Guide & Walkthrough
 Dungeon Siege III Game Guide & Walkthrough
 Dark Souls II Game Guide & WalkthroughDungeon Siege II: Broken World Game Guide & Walkthrough