Unofficial Dead Space 2 Guide by vhayste for
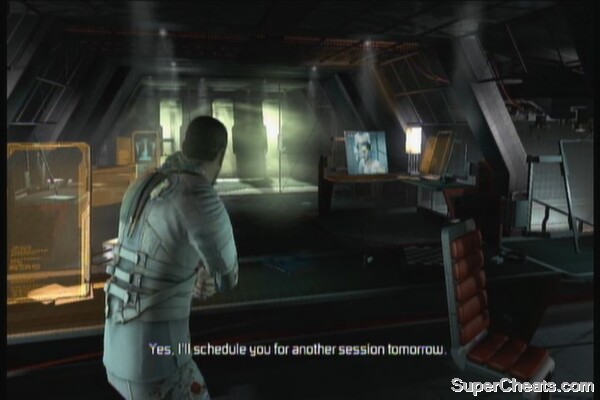
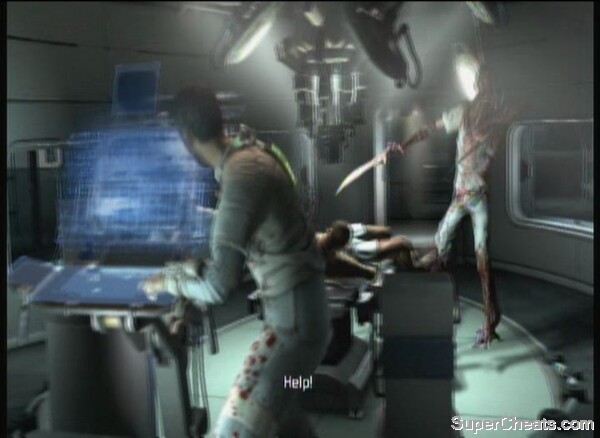
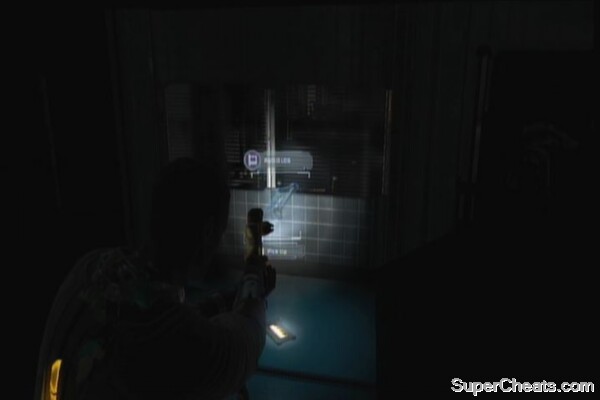
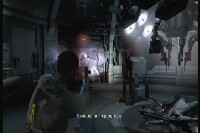
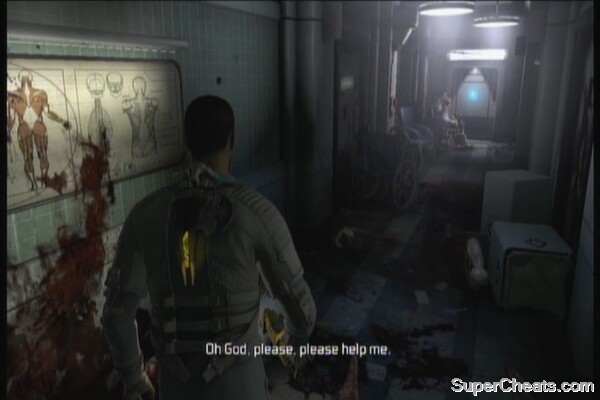
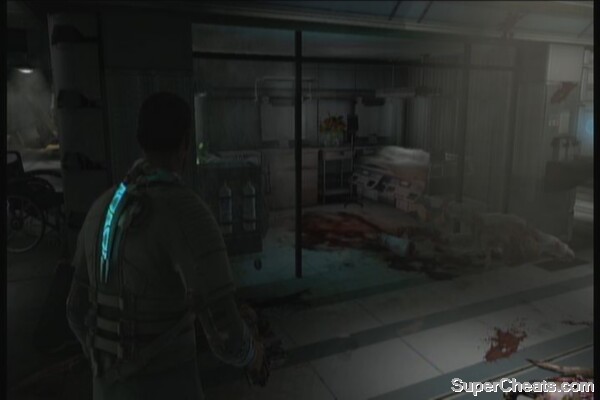
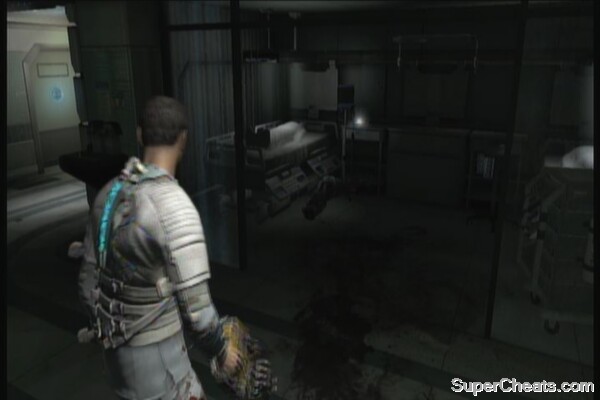
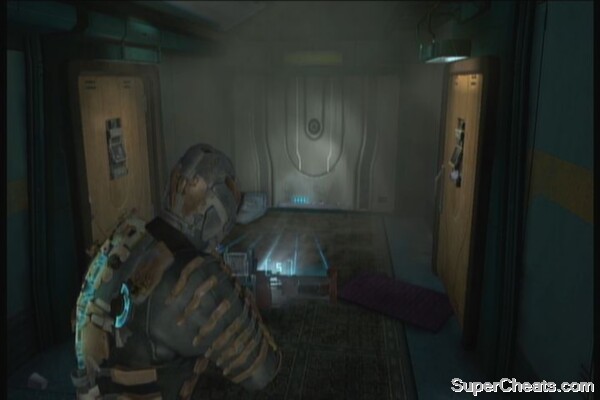
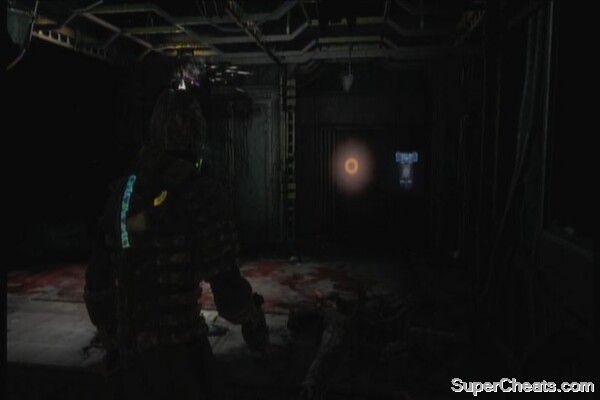
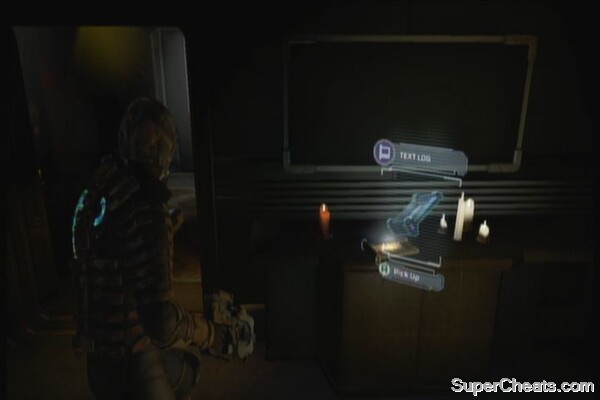
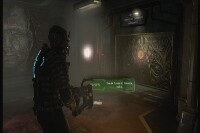
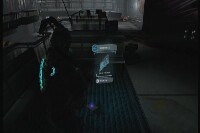
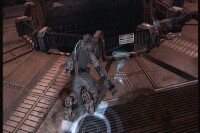
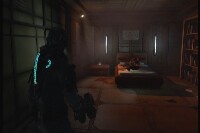
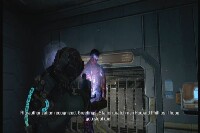
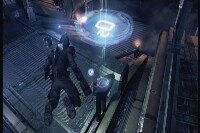
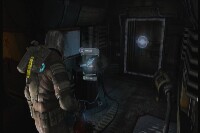
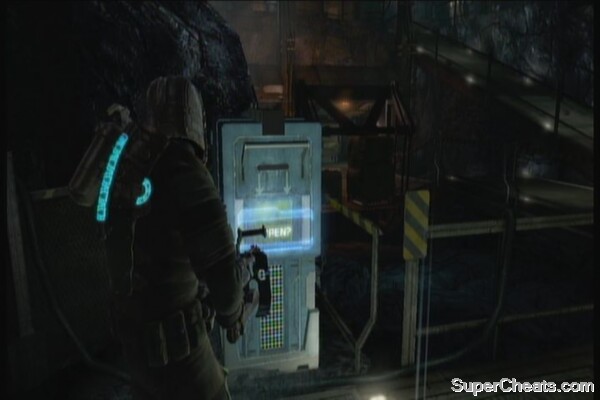
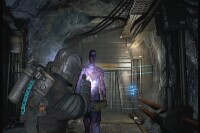
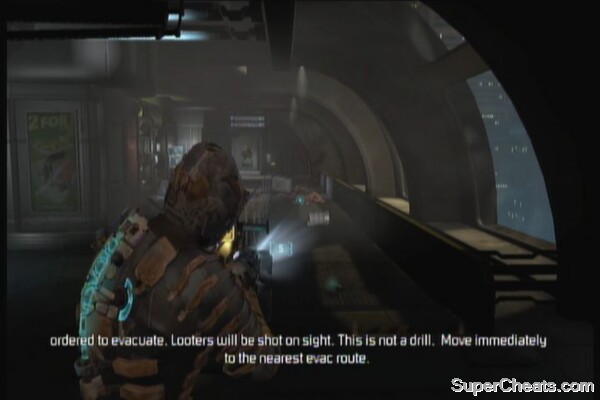
Dead Space 2 is a space-based, third-person survival-horror game by Visceral Games and EA. Players take control of Isaac Clarke, the protagonist from the first game and his struggle to survive the terror that's been released on the space station he was brought in. Players of the first game will be able to immediately adapt as the same bloody, gory and creepy atmosphere lingers in every corner. The Necromorphs, the hideous monsters that overrun the station are back, with new variants that will require various tactics to defeat. New players won't have a problem as well as the tutorials are activated by default. Players will have access to stores later in the game where they can purchase new equipment and supplies to help them survive. New inventory items can be found by bringing “schematics” to the store. Power Nodes are also scattered about; these little devices are used to upgrade Isaac's weapons and rig (armor), as well as open especially-locked doors that may contain more loot. This guide will help players find their way around The Sprawl, offer helpful gameplay tips and feature screenshots and videos needed to unlock various achievements or simply display some of the game's various highlights. Survival Tips 1. Dismember them 2. Look out for the glowing, orange points 3. Beware of necromorphs playing possum 4. Use your environment 5. When cornered, go crazy 6. Carry the essentials 7. Manage your inventory wisely 8. Upgrade your equipment whenever you have the chance 9. Keep at least 1 Power Node with you AT ALL TIMES 10. Know your weapons You'll start off without any weapons so just ignore what's going on around you and run (press LB). There's only one path so just continue running until a necromorph jumps on you. Just keep pressing A to push it away. Continue forth to find the first save station. Follow the straight path until you reach the monitoring room upstairs. Continue along until you get attacked by a deranged personnel. After releasing you from your straight jacket, open the wall locker as he suggested and grab the health pack and the flashlight. Use the health pack immediately. Take the elevator next, then go through the dark room. After exiting to the corridor, there's an audio log (Popsicles) on the floor next the locked door to your right. Follow the corridor then save the game. Go past the shower room then crawl into the maintenance vent. After falling into the operating room, approach the panel to the left and deactivate it. You'll have access to your first ability, the Kinesis Grab. Grab one of the rods there and shoot the glass to the left. Two necromorphs will approach you so use the rods to pin them on the wall. Take the elevator and grab/use the health pack inside. In the next room, more necromorphs will attack you so use the nearby rods to kill them. Before leaving the area, make sure to crush the necromorph corpses to get more loot. Exit through the door and destroy the corpses in the hallway to get credits. Exit to the next operating room and loot the wall lockers in the individual rooms. Don't bother going through the tied up necromorph by the door since you'll only get damaged. Enter the operating room and activate the terminal. You'll obtain your first weapon, the Plasma Cutter here. Shoot the two necromorphs that will attack you. Disable the head of the tied up monster to kill it. Exit to the next room, then follow the hallway. Grab the 1000 credits in the room to the left. Take note that three necromorphs will attack you after the fire control system triggers. Before entering the next room, check the wall locker in the waiting room to the right, and a plasma kit from the body by the chairs. Enter the next two rooms and grab the items inside until you reach hallway. Before heading to the next objective, check the room to your left to find a text log (Orderly TPS Report 1411). After grabbing the log, check the waiting area before moving to the objective to grab some items. Once you've reached the lockdown area, you'll need to fight off some necromorphs before you can move on. After the lockdown lifts, enter the lobby and grab the Power Node, ammo and a text log (Anxiety Spike) Enter the next hallway and save at the save station. In the next room, you'll have to hack the panel, slow down the charging necromorph and kill it while it's slowed down. Grab the text log (Heisenberg) on the floor on the right corner. Open the door using the panel in the middle of the room. You can't exit immediately so stasis the door then run past it.

The Basics and Survival Tips
This section offers a few important pointers to help you survive the brutal and dreaded environment of Dead Space 2. Veteran players can just skip this portion or maybe, just skim through the items for a quick review.
Necromorphs are fast, dangerous and resilient. Body shots are not that effective (with the exception of a handful of weapons) so you must dismember them by shooting the limbs and head. Take note that disabled necromorphs may still move - crawling or limping their way to you so make sure that they're completely dead before letting your guard down or turning your back away from them.
Most necromorphs have a glowing, orange-colored swollen part that explodes when enough damage is dealt. These are their weak points and should be your primary targets. Lower level enemies that feature these parts are usually explosive, making it possible to damage nearby enemies and produce a chain reaction if the same type of enemies are clustered together.
Yep, these mindless abominations can lay motionless and wait for you to fall for an ambush. You can immediately recognize them if you happen to walk in a corridor and find a suspiciously, intact necromorph. The trick to not fall to this guise is to assume that all “dead” and complete necromorphs are alive. It won't hurt to hurl something at it or just shoot it to make sure.
In higher difficulty levels, ammo becomes a luxury and rarity so you'll have to be very accurate with your shooting to ensure that your shots count. Isaac can use kinetic energy to lift objects and hurl them at enemies. You'll find sharp metal rods that can pin enemies on walls or even use sharp, dismembered necromorph claws against them. Effective and deadly.
If you happen to encounter a swarm of enemies and you're not fast enough to shoot them down before they get near, you may want to swing your weapon like crazy to shove them off, giving you breathing space to fire your weapon at the same time dealing damage. Weaker enemies can be easily killed by melee attacks or by stomping at them.
Since inventory space is limited, it is wise to carry at least two health packs (more potent variants required for later levels) all the time. You also need to carry extra ammo, leaving a handful of free slots for more important loot like schematics and semi-conductors. As you upgrade your armor, more inventory space becomes available so this becomes less of a problem in the long run.
As mentioned, schematics permanently add new inventory items for the shop so they're more valuable than anything else. If you happen to find one and if you can still backtrack to a nearby shop, it is imperative to run back and deliver it there to free up precious inventory slot at the same time registering the schematic to the shop. Semi-conductors are precious loot that can be sold of credits in shops. Power Nodes are also important pieces that can be used to upgrade Isaac's weapons and rig, as well as open especially-locked doors that may contain more loot. Additionally, necromorphs carry various loots after they're killed so make it a habit to crush their bodies for them to drop items.
In specially designated areas, you can find workbenches. This is where you can upgrade your rig, stasis and current weapons. It is recommended that you upgrade your rig first, as it allows you to have more HP, increase your air capacity (gives you more time to survive those vacuum environments) and increase telekinesis damage. After that, you may want to upgrade your stasis, then the weapon that you'll be using most of the time.
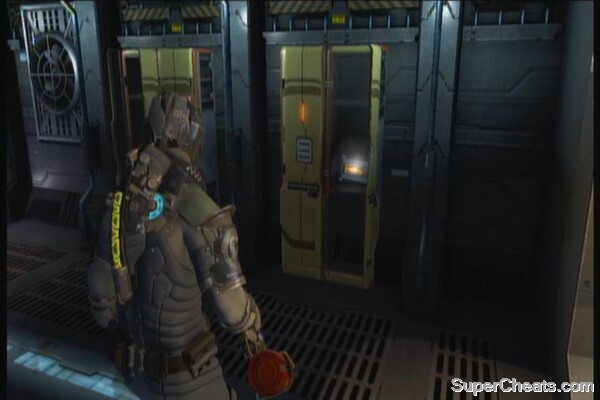
You'll come across locked rooms that can only be opened by inserting a Power Node in it. These rooms usually contain a good number of items, ammo, including schematics and semi-conductors. You don't want to find yourself unable to open these doors since you won't have the chance to come back for them later on.
Every weapon has a secondary function that will benefit you if you know how and when to use it. Make sure to read the description as well as practicing using it. Popular weapons include the Ripper since its best for most close-range encounters, the Pulse Rifle for its power and accuracy or the trusty Plasma Cutter for its instantaneous damage and pinpoint accuracy.
Chapter 1

stasis
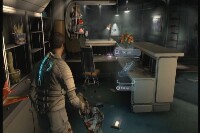
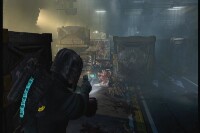
Head to the next room where you'll find two acid-spewing necromorphs. Get rid of them then open the two wall lockers and grab the Power Node on the table nearby.

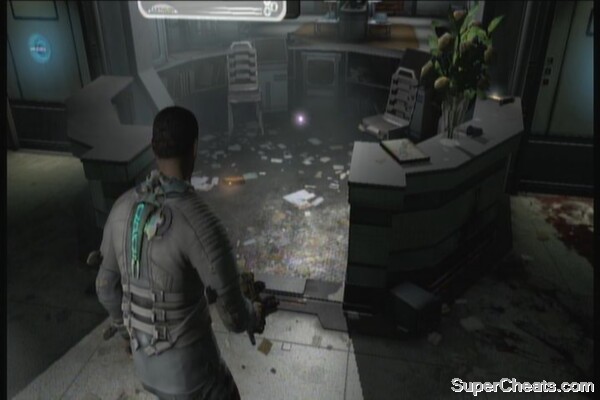
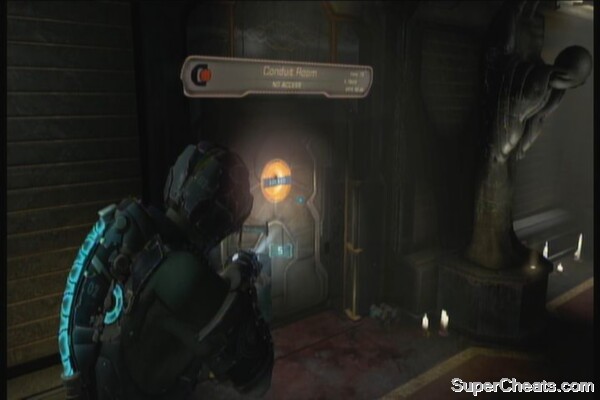
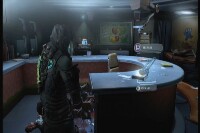
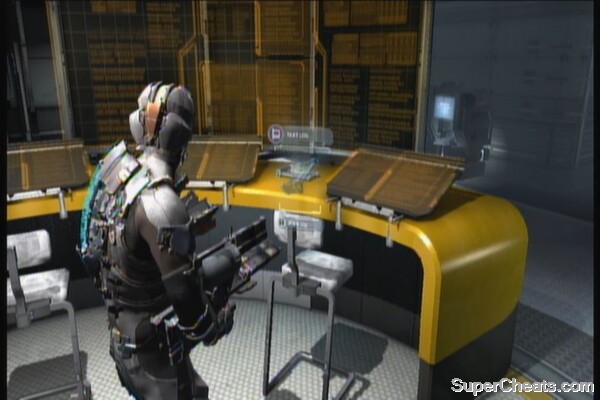
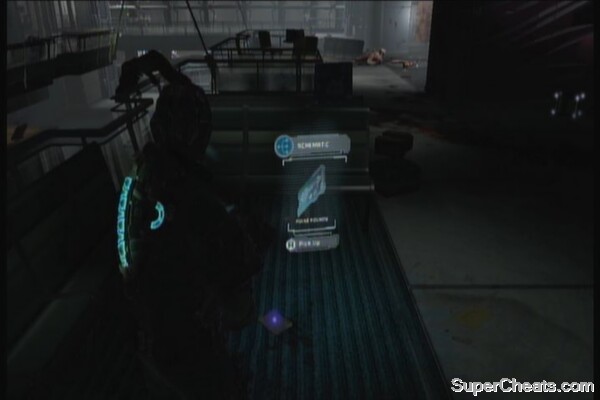
Take the elevator up to the Patient Care area. After reaching the area, check behind the counter to obtain a text log (Secrecy) and a Power Node. The Conduit Room nearby contains another log but it can only be accessed if you have a save file of the arcade game Dead Space Ignition. The same applies to all Conduit Rooms you'll find from hereon. If you can't access them, you can just ignore them.
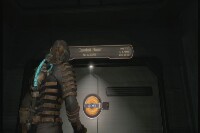
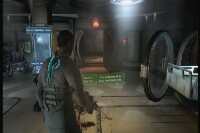
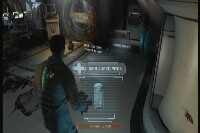
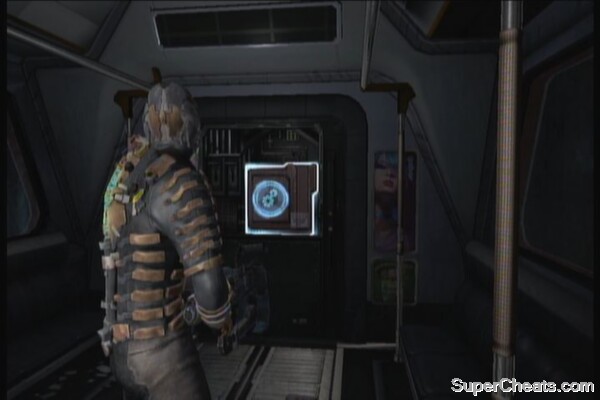
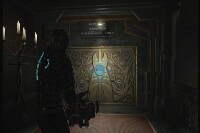
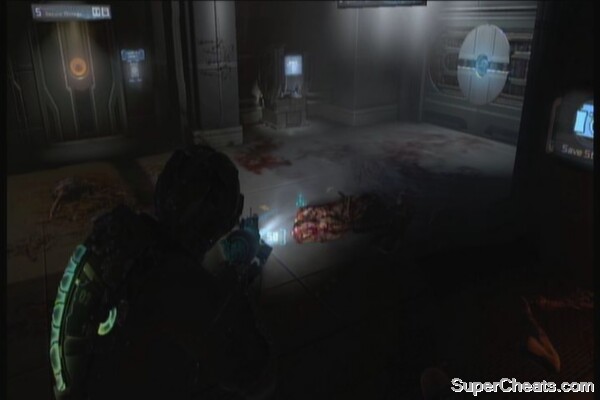
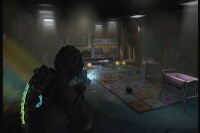
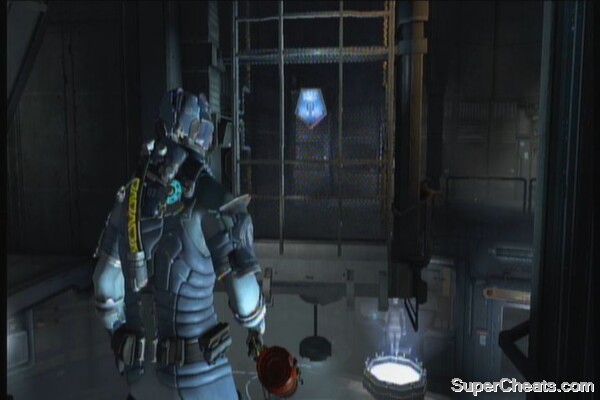
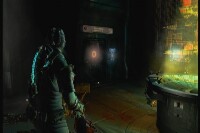
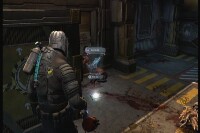
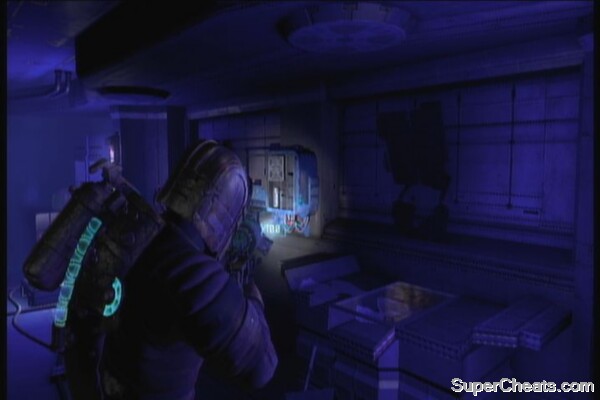
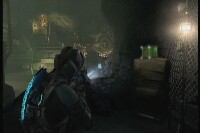
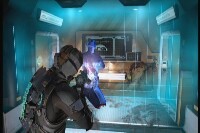
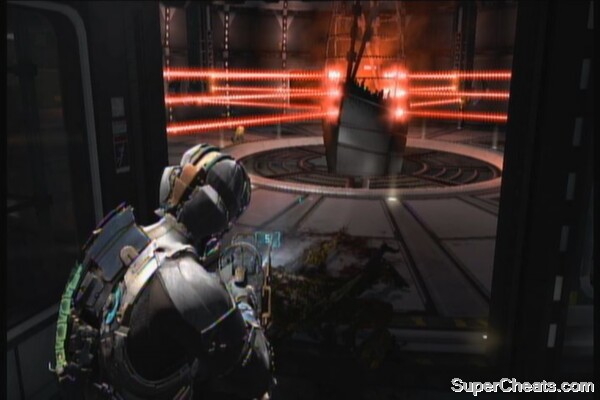
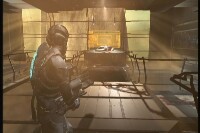
Head to the next room and the hull will be breached. Shoot the red triangle above to close the breach. Head to the next room where you'll find a save station, a store and another Power Node. There's a necrom playing possum on the floor so don't let it catch you off guard. Shoot it before it ambushes you. Access the store to grab your first rig and sell or store some of your extra stuff.

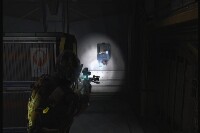
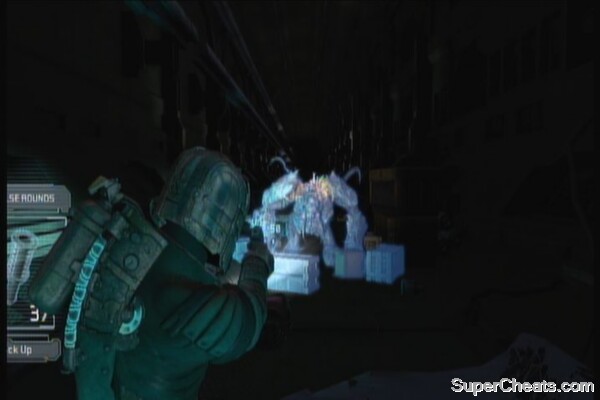
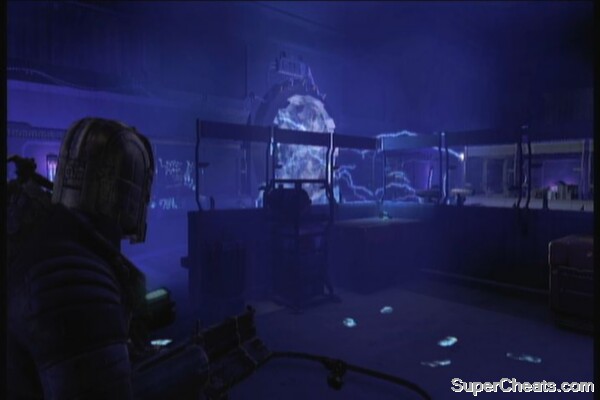
Exit to the vacuum and quickly find the other end of the path. Here, you'll find a large room and your first encounter with a large necrom. Use stasis on it and shoot the glowing orange parts of its limbs. There's a nearby stasis recharge station just in case. After taking down the enemy, grab the loot and backtrack to the store to sell some of them (especially the semi-conductor) then save the game.
Necrom
Take the other door leading to the maintenance bay. Search the room for items then use kinesis to move the panel ahead. Enter the maintenance vent.
Chapter 2 starts as soon as you exit the vent. You'll find the first log of this chapter (Cut off Their Limbs) in front of the store. You also have access to the workbench nearby. Like what is suggested earlier, you must keep at least one Power Node with you always. For now, upgrade your Rig's HP. Don't worry later on as the upgrades you apply on this suit will be carried over to any new suits you'll don later on.
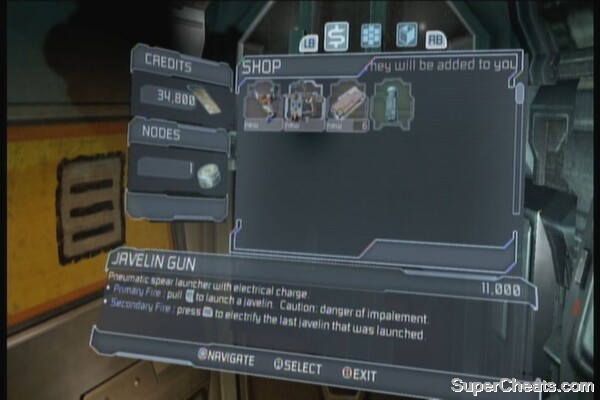
Two new weapons will be available as well. I suggest getting the Javelin Gun at least.
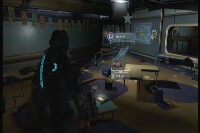
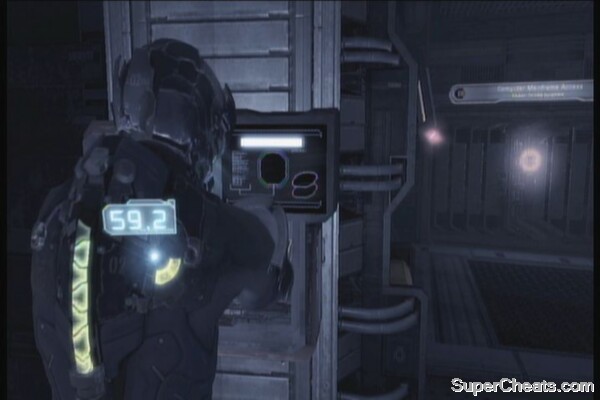
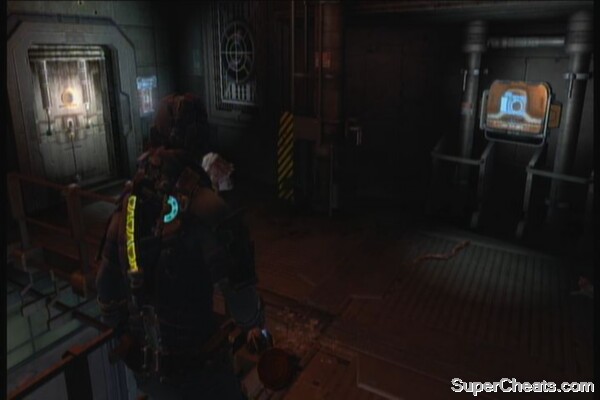
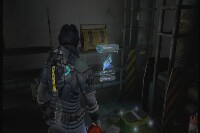
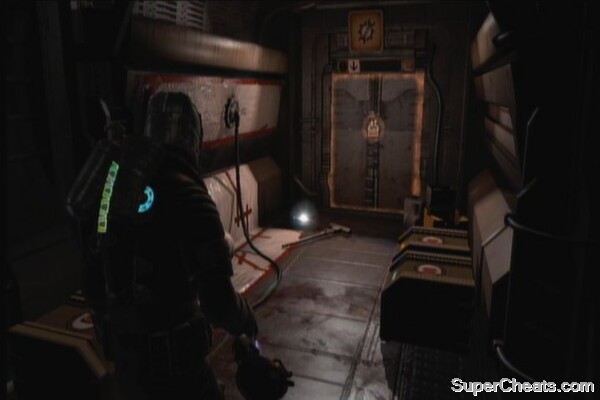
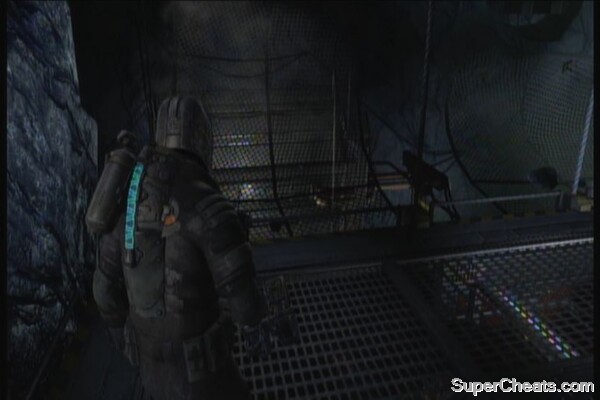
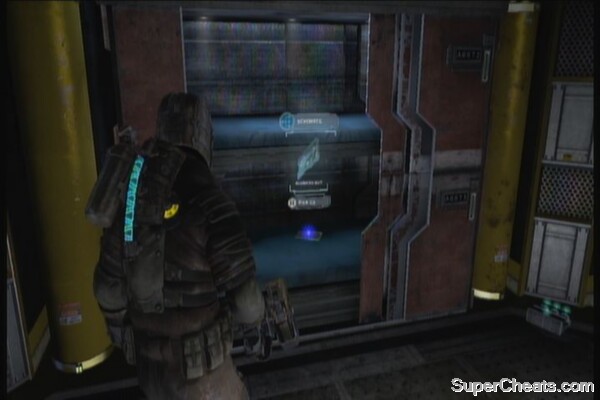
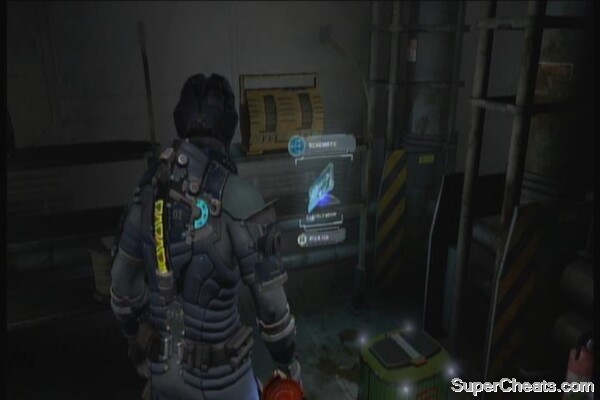
Exit the room then kill the pretentious necrom on the walkalator then loot the boxes nearby. There's a stasis pack in the dark corner right after the array of monitors. Up ahead is a locked room. Insert a Power Node to open it and grab the goodies inside, including the schematics for Power Node, text log (Quarterly Report), Ruby Semi-conductor and other items. There's also a nearby save point so backtrack to the store to register the Power Node and maybe purchase a few more. Sell the other stuff as well, especially the Ruby semi-conductor.
Save your game then head to the next hallway. You can unlock an achievement here, just refer to the video below to learn how to do it.
Achievement: Going for Distance
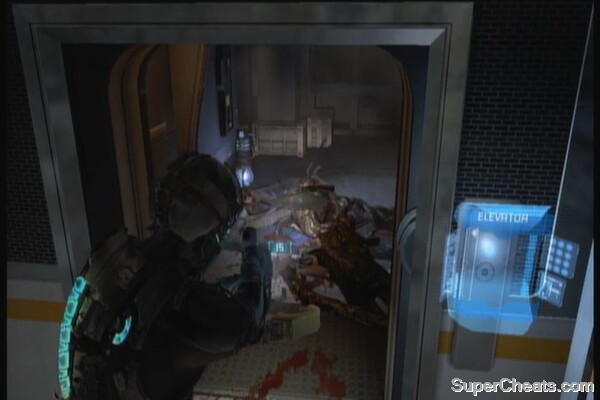
Grab the Power Node on the floor to the left, then kill the necroms that will attack you. Take the elevator nearby. After disembarking from the elevator and talking with Stross, head to the next area.
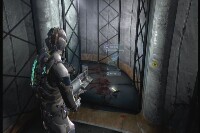
A necrom will jump on you so kill it. There's a halved acid necrom in the next room so take it out as well. Beware of another necrom that will appear in the corridor ahead. After that, head to the next area to find the laundry room. Take note that several slashers will attack you as the lights go out.
Laundry Ambush
After getting rid of them, head to the next area. There's a text log (Titan Part 1) at the end of the short corridor and some items. Take the elevator down.
After getting off the elevator, use the save station nearby. There'll be a necrom that will spring in front of you from the vent to the right of the exit. Exit to the next area and you'll find a long corridor. There's a pretentious necrom on the floor so kill it to avoid getting damaged unnecessarily.
Continue to the end of the corridor but don't be appalled to discover the doors locked. (There's a Conduit Room here as well if you have access to it) You need to kill the wave of enemy suicide bombers that will come from the other side and one from behind you. Once the power is restored, continue forth.
Suicide bombers
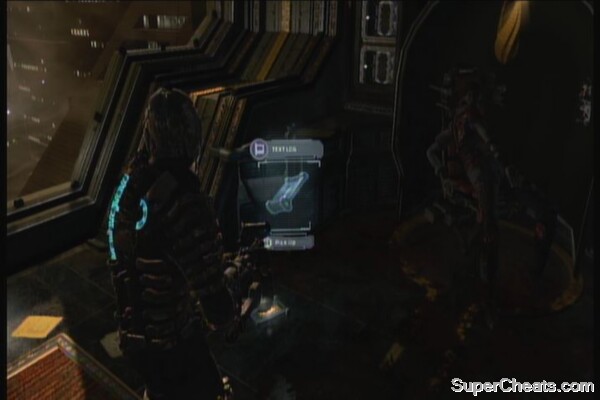
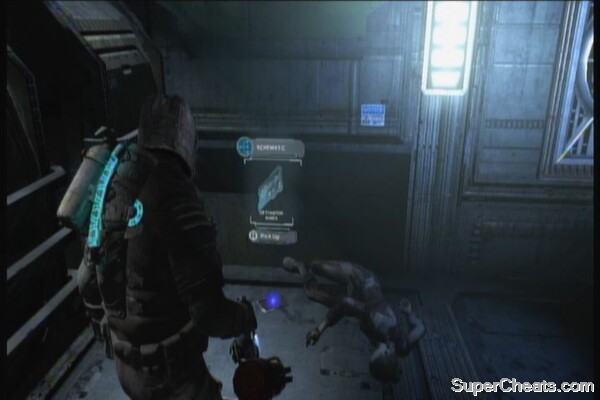
After Isaac's dreadful vision and after reaching the tram platform, look down the tracks to the right to find the schematics for Stasis Pack. Search the platform for other items. Approach the tram's door and watch a flyer mutate a necrom in front of you. Kill them both, as well as the other one that will appear from behind. Enter the tram and hack the panel in the next car.
Schematics for Stasis Pack
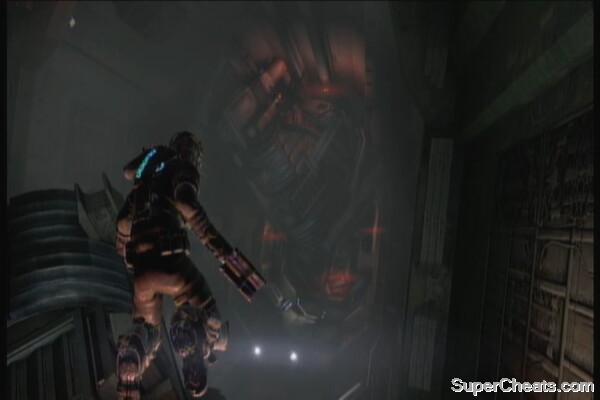
As soon as the train starts to move, head to the next cars while taking out necroms along the way. Continue forth and you'll have a sequence where you'll need to jump to the next car. Do so until you successfully land there. Fight your way through again until the train derails and sends you sprawling on the floor. Finally, you'll be hanging upside down; take out the necroms that will attack you, and shoot the large one that will appear from the train itself. Completing this sequence unlocks an achievement and completes the current chapter.
Train Sequence
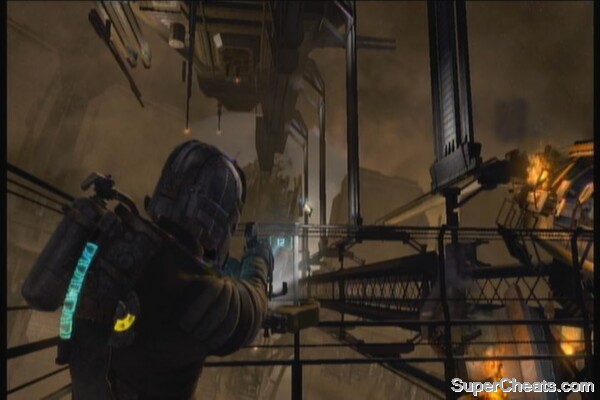
Once you're back in your feet, check the crates behind you to find a Power Node. Check the containers in the left side of the room, behind the burning debris to find the schematics for the Pulse Rifle.
Schematics for Pulse Rifle
Don't break the crates here or open wall lockers yet since you probably have full inventory at the moment. There's a store nearby so you can backtrack in a short while. Head to the ramps and grab the 1000 credits along the way. Use the save station above then enter the door.
After entering the next room and getting the creepy silhouette of a pack, turn to the left to find a power node. There's also a slasher that's playing dead near the ramp so don't let it take by surprise. Continue forth and exit until you reach the large hallway.

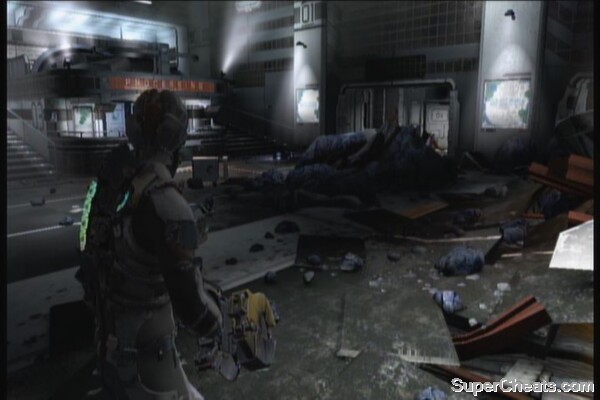
Carefully approach the store and the pack will rush at you. These are persistent and fast little guys so swing your weapon if ever they come too close. There are two possible achievements (My Boom Stick and Shock Therapy) that you can get here, provided that you bought the Line Gun and the Javelin. Refer to the achievement list for more details and videos. After taking care of them, check out the store to clear your inventory, then backtrack to grab the loot you haven't collected before.
Persistent little guys
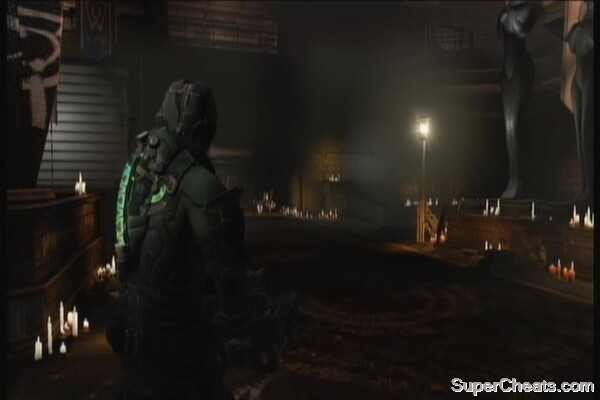
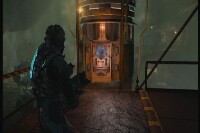
Once ready, take the elevator. Upon exiting, you can take out the head of the rotating statue for an achievement.
Lightspeed de Milo Achievement
Check the floor in front of the bar to the left to find a text log (Titan Part 2). Check the whole mezzanine for some stray credits. Don't forget to pick up the gold semi-conductor in lower floor; just use kinesis to pick it up.

Once done, head to the elevator. Just across it is another text log (Altman's Footsteps). Hack the panel to power up the elevator then head down. Upon exiting the elevator, grab the text log (Recruiting) and credit on the table.
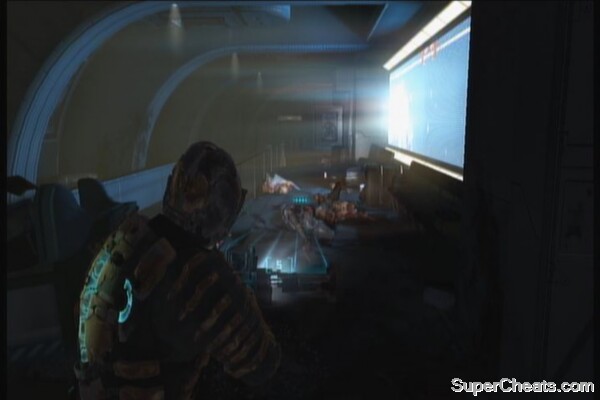
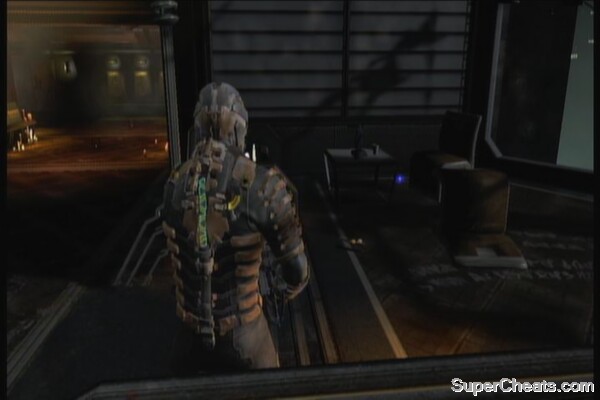
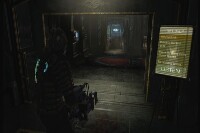
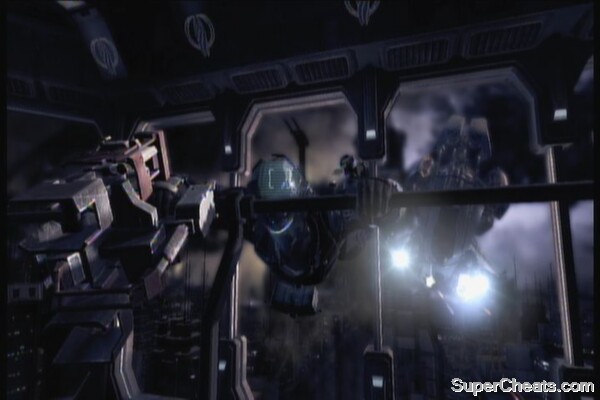
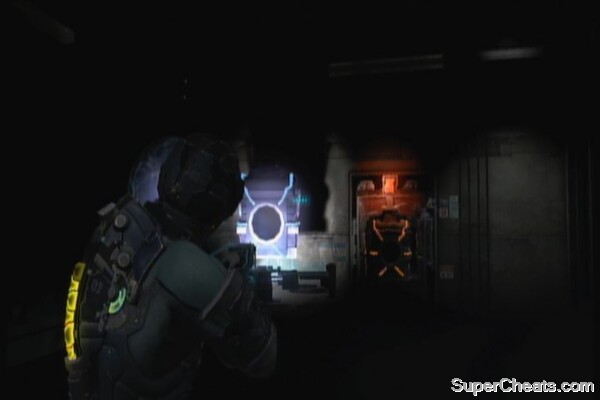
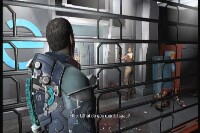
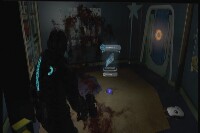
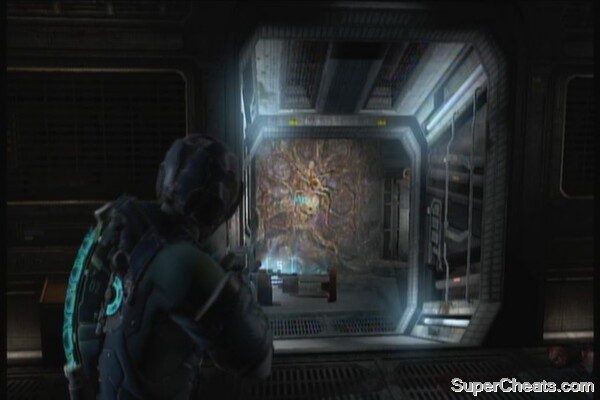
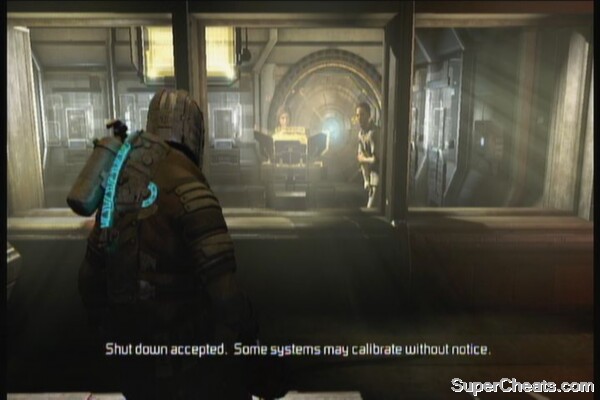
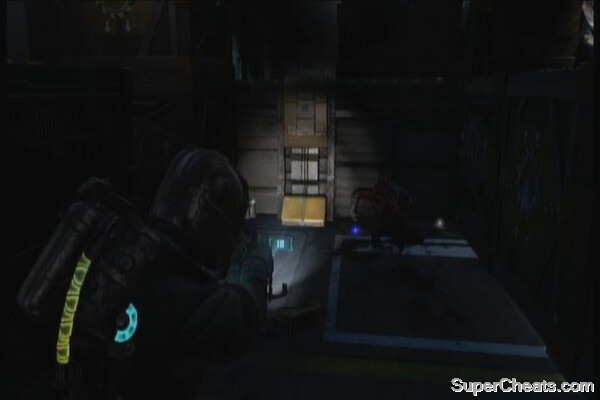
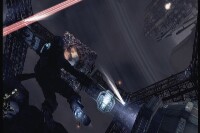
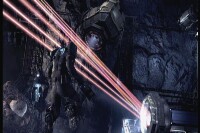
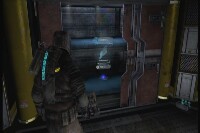
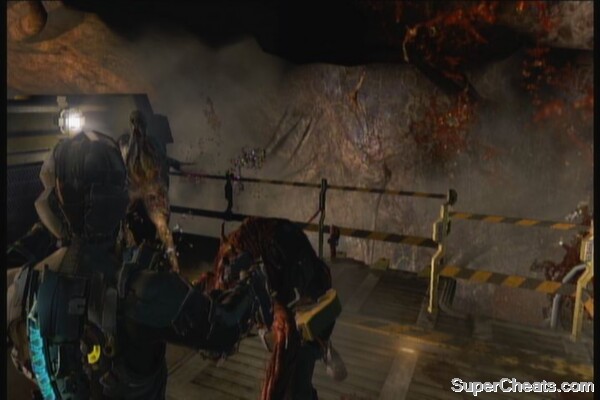
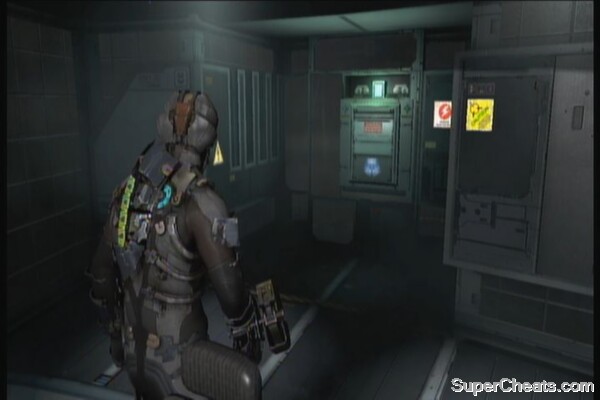
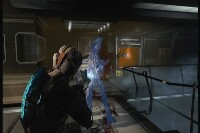
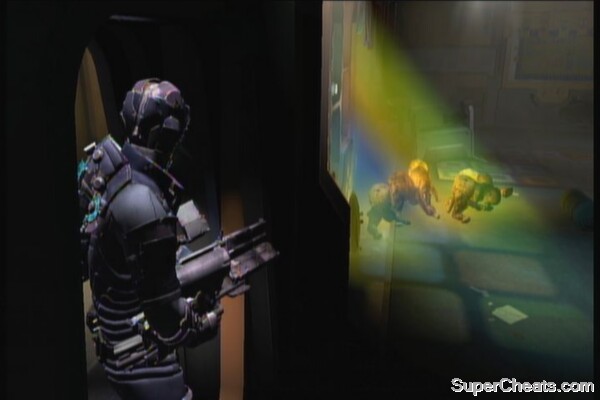
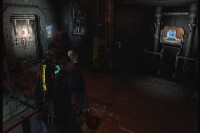
You can get another achievement here by using a rod to pin a necrom to the glass partition. You need to shoot the red triangle at the top to close the blast doors and survive. Don't worry if you fail as the checkpoint is registered right after you stepped out of the elevator. Refer to the video below for more information. Additionally, using the vacuum of space to kill enemies without getting sucked out yourself is counted towards the “Vacuum Cleaner” achievement. Refer to this guide's achievements section for more details.
Skewered in Space
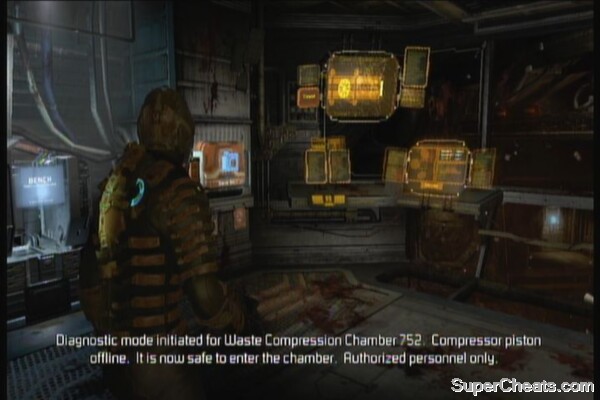
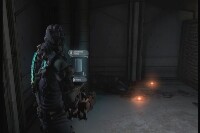
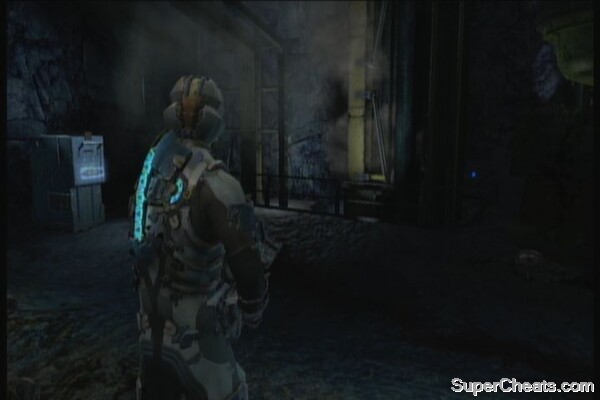
Take out the remaining enemies then crawl in the maintenance vent nearby. Upon exiting, stomp on the nearby containers for some items and credits. Go up the ramp to access the control room. You can also find a workbench and a save station there. Upgrade whatever you want, loot the nearby wall locker then save your game. Examine the control panel to put the area in diagnostic mode, enabling you to safely navigate the area. More necroms will appear as you exit so be prepared.
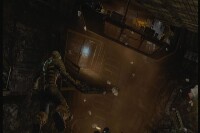
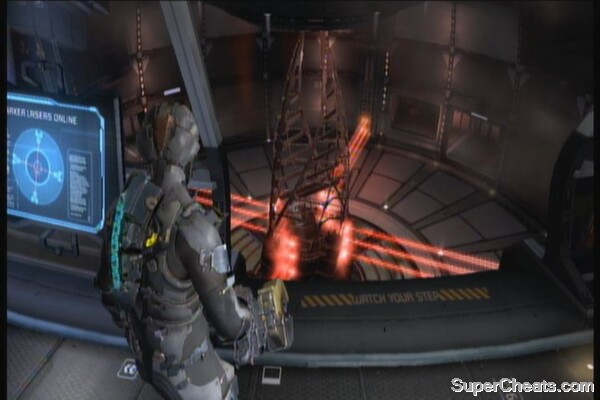
Exit to the zero-g area then click LS to hover. Check the room under the control room for some wall lockers and a power node. Check the other door to find another control panel to activate the pump. Exit then hover through the opening. Boost your way to find the next door at the end. An achievement will be automatically unlocked after landing there.
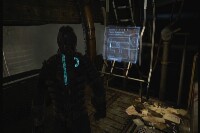
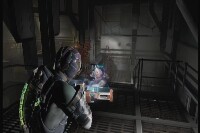
Enter the room and smash the nearby containers for more items. The power will go out so just advance carefully as a necrom will spring out of nowhere. Kill it then grab the nearby power cell using your kinesis then place it in the power slot to restore the lights. Use a power node in the locked door nearby to access the items inside. Use the elevator.
After getting off from the elevator, grab the power node nearby then exit to the door. Check the room to your immediate left to find a text log (Sally 3). Kill the small critters first then loot the body in the bathroom for 1000 credits.
Clear the next rooms until you reach the exterior balcony. Head to the other side, kill the necrom that will jump from the vent to the left then take the elevator down. There's a nearby save station so use it then head to the next area. There's a lot of enemies here so kill them all, then loot their bodies. Don't forget to grab the schematics for the Javelin Spears under the seats left of the marker replica. Enter the large door next then keep running until you reach the Church of Unitology.
The objective tracker will point you to the right but you should check the gift shop to the left, containing a store, save station and workbench. There's a text log (Tour Staff) on the floor, between the seats in the reception counter in the ground floor as well.
Go upstairs and check the reading room there to find a text log (Two Tines) and a power node. A necrom will drop down from the ceiling as well. Once ready, head to the next other side.
Check the floor of the second reception counter to find an audio log (Harsh Pressure). Continue upstairs. Clear the enemies in the next area then take the elevator. Head to the next corridor, then go to the right first to find a fuse. Shoot it to open a shortcut. If you want to, you can return to the gift shop to clear up your inventory before proceeding.
Head to the next room and enter the room to the right. You need to replace the lost power panel in the upper right, using an available one from one of the broken viewing seats there. There's also a text log (Recruit Test Results) on the floor and some containers as well. As you exit, more enemies will appear. You can shoot the glass partition then enter the room to avoid getting sucked out.
Recruit testing room
Use stasis on the door then enter the security room. Grab the ammo and items inside, including the schematics for the Security Suit. If you want, you can head back to the gift shop to change your suit, as it offers better protection and more item slots.
When ready, enter the maintenance vent in the security room. Upon exiting, press A repeatedly to prevent yourself getting killed, then grab the power node and 1000 credits on the tables. Exit the room then shoot the fuse to the left open yet another shortcut for you.
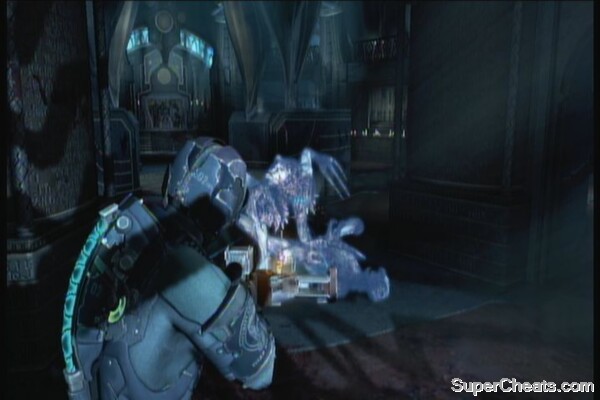
Head to the objective point and grab the items in the balcony. Take the lift down. Approach the door and it will be disabled by a large... thing. Run back in the middle of the room to find new enemies called stalkers. These enemies will rush towards you and will run back to hide after knocking you down. They'll hide behind cover and stalk you. They're fast so use your stasis to slow them down. An achievement (Clever Girls) will be automatically unlocked after defeating them.
Hack the panel to activate the lift, then ride it up. Check the corpse to the left to find a power node. Follow the objective marker to reach the hallway. There's a Conduit Room to the left should you have access to it.
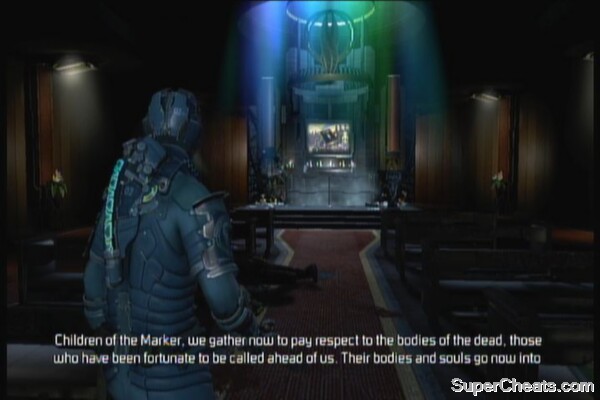
Follow the path but before going to the main door, continue ahead and shoot the fuse to unlock a shortcut that will take you directly to the gift shop. When ready, head to the main door. Approach the altar slowly then kill the slashers and the swarm that will appear. Loot the bodies and grab the credit offerings by the casket. Kill the pretentious necrom by the elevator entrance, then ride the elevator down.
Continue downstairs to reach the save station. The chapter concludes.
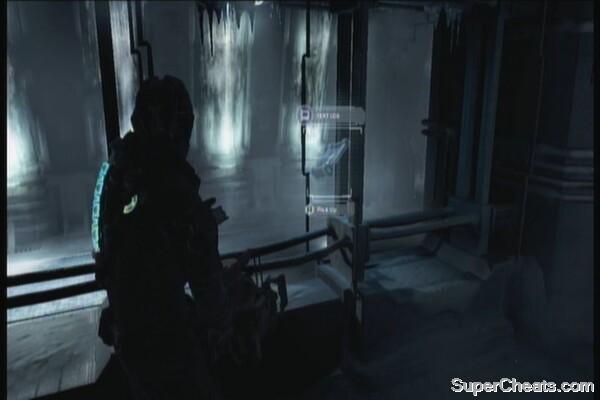
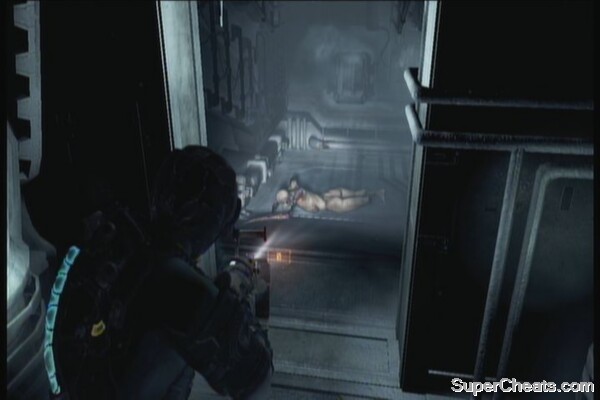
Proceed to the cryo chambers and destroy the wall containers to reveal the items inside. Keep heading through first three chambers. On the third one, you'll find a text log (Thawed Bodies)
Continue forth and kill enemies along the way. The last chamber has several necroms. Be wary of the acid-spewing Puker as your movement will be restricted due to their corrosive bile. Also, there's a pretentious necrom by the door on the last chamber.
Exit to the coffin disposal room and grab the text log by the control panel (Stuck Coffins). Take the lift down. Grab the schematic for the Ripper in the wall near the control panel. Approach the panel to grab the power node and hack it to release the capture arms. Use kinesis to pull them down and use stasis afterward to give you enough time to work on the other arms. Recharge your stasis, then launch yourself. Use stasis on the fan the boost your way up.
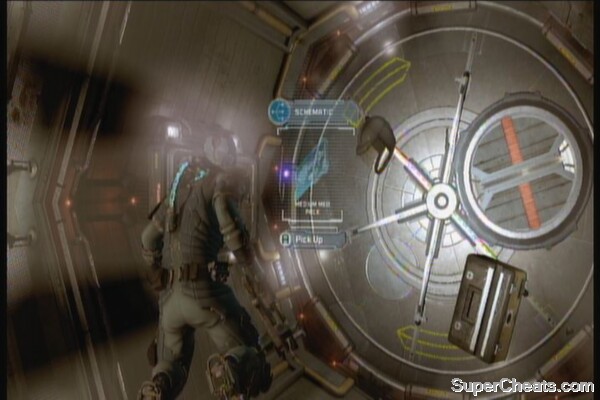
On the other side, you'll find the schematics for Medium Health Pack floating around in the middle so grab it.
Land on the catwalk and activate the gravity control again. Enter the next door where a store is waiting for you. There's a workbench in the next room, and 1000 credits across it. Move the hanging containers to free up the save station and the maintenance vent. Save your game then enter it.

Traverse the maintenance vent until you fall down. Check the items behind you, including 10,000 credits on top of a crate. Continue forth to the next room. Find the schematics for the Line Racks in the shelf in one corner of the room. Grab the other items inside.
Schematics for Line Racks
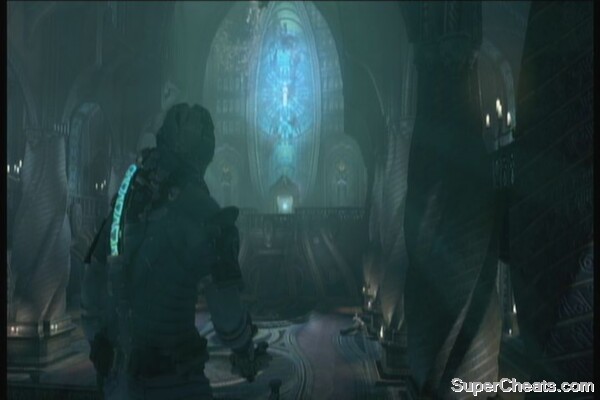
Exit to the next hallway and kill the enemies. Follow the path until you reach another church area. A large tripod will leap on you so just shoot its glowing limb to force it to flee. The pack bastards will swarm towards you again so kill them all. Go upstairs and be careful of the enemies that will stop you along the way. Don't forget to grab the medium health pack in the middle balcony, across the door. Continue heading to the next rooms then ride the elevator up.
A slasher will drop down in the elevator so don't get surprised. Exit the elevator the talk a short sprint around the corner. There's a room with the save station, power node and the schematics for the Detonator Gun. Grab the other items and save your game.
Schematics for Detonator Gun
Follow the corridor and open the door. Watch the following scenes. Once you're prompted to, keep hitting A to open the vent and escape the gunship.
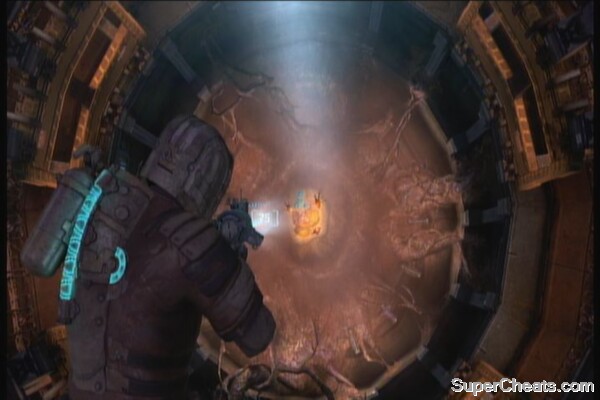
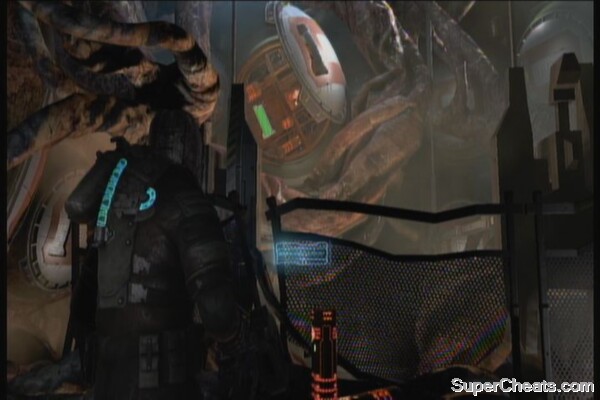
After reaching the vent, a tormentor will attack you. Just keep shooting the orange part until it releases you. Once you're back in your feet, run towards the hatch and use kinesis to open it. Continue running towards the window and watch the following scenes again. Once you have the chance to shoot, aim for the fuel cells to make them explode. You'll be miraculously thrown back to the station and you'll unlock an achievement (Torment Me No More) shortly after.
Tormentor sequence
Check the room behind you for some credits and a power node. Check the next open room for additional credits. Exit through the door to find a save station. Instead of entering the door to the left, check the other door first to find a container and a schematic for Seeker Rifle.
Schematics for Seeker Rifle
Exit to the next area and check out the rooms for various items, then exit to the hall. Ride the elevator down then use the savepoint. Head to the next area where you'll need to defeat some leapers as well as large, bloated Pregnants that release small critters if not killed immediately. There's a store also across the exit for your convenience.
Once done, head to the door to find a hallway littered with cysts. You can unlock an achievement here by catching the mine and throwing it back. Make sure you're at a distance though.
Bouncing Betty Achievement
Use projectiles to trigger the cysts pre-maturely. At the end of the corridor, you'll find a locked supply room, a workbench and a save station.
You can backtrack to the store to sell some stuff, especially the semi-conductors. Save your game and proceed to the next area. The area is in zero-gravity and you're not going anywhere without extinguishing the flames. Before doing so, it will be a good idea to scour the area for items first. Fly to the second floor balcony and look for the power node locker inside. There's also an audio log (Happy Hope) in the corner of the balcony near the fire. There's also a few containers floating around as well.

To take out the fire, you must remove the three power cells that controls the life support system of the area. Two are at ground level while the third is on the ceiling. After the fire dies out, return the two cells head to the hallway that was previously blocked by the fire. There are two tentacled baby necromorphs around the corner so take them out before proceeding. Bring one power cell with you as you need it to replace the busted cell in the next room. There's also a acid-spewing necrom inside the elevator so have your stasis ready to prevent it from spitting acid on you.
After exiting the elevator, grab the power node and credits from the wall lockers then use the save station. Shoot the fuse to enable to door to the Concourse Supply Storage. Continue down. You need to fend off a stalker ambush. You may want to fall back to a closed corner as you'll be in a disadvantage if you remain in the middle. If you have the Detonator gun, you can lay down mines in front of you (at a safe distance). One effective way is to fall back to the ledge where you came from and use the Line Gun's mines while the stalkers are taking cover. If ever one stalker chases after you, you have enough time to slow them down and kill them.
Once all stalkers are killed, scour the area for more items and containers. Once done, head to the other end of the warehouse and hack the panel to unlock the door. Follow the corridor to the concourse. You'll see another survivor fending off several necromorphs. You don't need to help her; just approach her and wait for her to open the grate after the conversation. Don't follow her immediately; instead, check the floor a few steps to your right. You should find the schematics for Pulse Rounds.
Ride the elevator until you reach another hallway. Destroy the nearest cyst so you can safely access the store and save station. More necroms will appear along the way so make sure to clear the area before completely moving to the nursery.
Once inside, you can peek through the window to learn about the newest enemy you'll face – volatile crawlers. There's an achievement for killing a certain number of crawlers without detonating them. Refer to the Achievements section for more details. You can maximize your crawler kills here by luring them and opening the door and standing by it. The crawlers won't follow you to the door but will clump together in one side of the room. From there, you can safely pick them off accurately. Refer to the video below for more info.
Daycare Bug
Head to the next open room then destroy more crawlers. Carefully traverse the next room then continue to the nurse's station. Grab the text log (School Nurse Report 8022) on the counter and items from the wall locker. Save your game.
Head to the gymnasium and kill the adorable little necroms that come your way. Go behind the stage props so you can access the panel. Hack it and prepare for an onslaught of several packs and a few crawlers. This is also a good spot to unlock the Lawnmower Man achievement. See the video below.
Kids Gone Crazy
Exit the gymasium after looting the bodies and the lockers then enter the next classroom to get the text log (Kids Gone Crazy) inside. Check the backroom to find the Flamethrower schematic.
Exit to the next room. After Isaac's vision in the playground, grab the power node in the rocket then use the elevator. The achievement (The Graduate) will be unlocked automatically. After disembarking from the elevator, grab the items and save your game. Exit to the transport hub.
After meeting up with Ellie and Stross, check the area for some items. When the power goes out, you'll be facing a brute. Use stasis to slow down its charge and shoot its weak points. If you managed to defeat it without getting damaged, you'll unlock an achievement. Refer to the video below for more details.
Brute Juice Achievement
After that, head to the next open door and grab items along the way. Disable the tripwires and kill the necrom on the wall. You need to destroy all tentacles to kill it. An well-placed Line Gun explosive or Pulse Rifle grenade launcher (ALT) should be enough to kill it in one blast. Continue forth and take the elevator to end the chapter.
After disembarking from the elevator, you'll be in a room with the save station, workbench and a store. Beware since there's two necromorphs inside as well. There's an achievement for killing enemies using the flamethrower so might as well buy it and equip it now. Also, there's an elevator sequence later in the chapter which you'll need the Detonator Gun for. If you purchased it as soon as you can and have collected ammo for it, then you're in luck. However, if you just bought the gun now, you'll only have three shots.
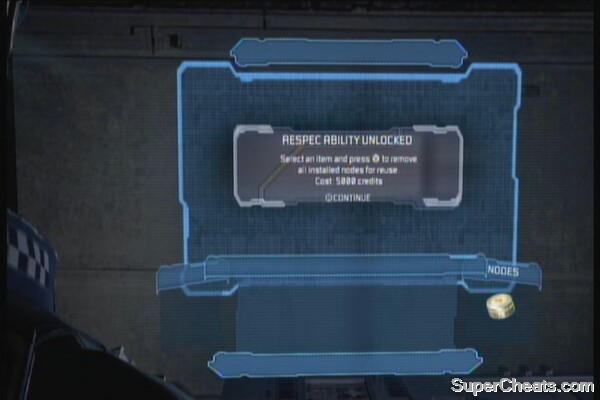
The workbech here will also enable you to use the Respec feature. Pay 5000 credits to remove all installed power nodes on an item so you can use it. This is a really helpful feature in case you mistakenly installed power nodes on other weapons you're not using frequently. When ready, head out to the door.
Some swarm may jump on you as you open the door. Just smash them then proceed to the Elevator Maintenance Bay. This is a zero-G area. To move the large debris here, you need to shoot the thrusters attached to them. Collect the items in the area, including the schematics for the Ripper Blades on the floor.
Shoot the two thrusters underneath the elevator. Don't take the elevator just yet; return to store to register the schematic and save your game. Take the elevator and prepare for the assault of tripods. Just shoot them off the window using your Detonator Gun or the grenade launcher of your Pulse Rifle. If you can't kill them all on the first run, you may want to try again on your second playthrough as the schematics for the Detonator rounds won't be available until Chapter 8.
Elevator Sequence
After exiting the elevator, kill the cysts and loot the lockers. If you haven't unlocked the Bouncing Betty achievement earlier, this is the best place to do so since the stasis capsules will slow down the mines, making it easier for your to catch them. You'll also find the schematics for the Force Gun inside one of the lockers here. Head to the exit; be careful of the cyst overhead.

Bouncing Betty Achievement - Alternate method
In the next room, you won't be allowed to pass through the door by the AI. Use the store for the meantime (there's a cyst nearby) and save station. Don't forget to grab the power node in the kiosk beside the store. Head to the other room where you'll find a corpse and a text log (Personal Log: Howard Phillips: Record Number 302 ). Drag his body to the scanner to open the door.
Carefully walk to the corridor until the AI raises its anti-personnel tripwire. You can hurl objects to trigger the tripwires at a distance. The walkway to the left has a wall locker and a power node container that you shouldn't miss. Exit to the next room.
Carefully walk in the middle of the room as the AI will deploy tripwires again that will open the vacuum. More necromorphs will attack so get rid of them. Head to the control room and open the lockers for some items, including the second text log in the chapter. (Personal Log: Howard Phillips: Record Number 466)
Hack the panel nearby. Once done, kill off the necromorphs that will ambush you, then take the lift. Use the workbench nearby then follow the walkway. Remove the GRIP objects using your kinesis to create a path for you. Tripwires will be deployed as well so be careful. Check the lockers left of the save point for items and a power node. Save your game.
Enter the next hallway. There's a stalker here so carefully move ahead. Kill them quickly then hack the panel to proceed, before your air runs out.
In the next room, the AI will lock you down. Take note that this is also the place where you can find the rare Peng Treasure, that's also part of the achievement. See the videos below for details.
First, you need to activate re-route then take the maintenance vent. This will take you to the mainframe room. Remove the GRIP covers, grab the blocks and place them in the panel to the left. Take note that the color of the block must turn blue. Just place all blocks until they all turn blue. Look behind you to reveal a new re-route panel. Activate it and the maintenance vent will take you directly to the Peng treasure, along with other goodies.
Peng Treasure Achievement
Return to the mainframe room then re-arranged the blocks until they all turn green this time. This will reveal a control panel. Use it to deactivate the mainframe's shielding. Hit re-route again, then exit to the other side.

After exiting, hit re-route once more to reach the other mainframe room. Do the same thing then activate the second panel to proceed. Expect necromorphs as you exit the maintenance vent. Destroy all the power fuses to completely shut down the AI and open the door to the next area. Clear the hallway then head to the next room.
Kill the enemies here, then open the locked supply room to the left of the save point. Inside, you'll also find the schematics for the Contact Beam and the last log for this chapter. (Personal Log: Howard Phillips: Record Number 497)
Once done, save your game then hack the panel. Head to the solar panel control pod. You'll need to exit to space to align the solar panels. There are also oxygen recharge stations here to refill your air if you need. You need to align two panels by flying to their panels and manually pointing them using your right stick.
There's also a large necromorph here called the Nest. It shoots homing projectiles which you can easily evade. Just shoot those juicy sacs to kill it.
Nest
After aligning the two panels and activating the solar array, fly back to the control pod in the middle. Examine the seat and control Isaac to avoid the debris, until he makes it back to the station.
Crashing down
After landing, use the store to free up your inventory then loot the room before heading to the transport hub. Collect all the items until the area becomes a vacuum, and necromorphs start to attack you. You need to wait for Ellie to open the door for you to escape. But for the meantime, you need to fend them all off. The ripper will do its job perfectly here. Just remember to quickly loot the bodies as you kill them. Be careful of the pukers since their bile will slow you down and restrict your mobility, which spells bad news if you're surrounded by packs and slashers. Once Ellie opens the door, run towards it and activate the elevator.
Head to the next room find a store and save station. Grab the Audio Log on the floor, as well as some items. (Ellie's Story 1). Head to the next room then grab the power node and some more items. Continue to the Operation Control Room. More necromorphs will appear. The advanced form of slashers (dark colored ones) are great targets to attempt the C-Section achievement of your Force Gun. This small room is a perfect place to attempt this achievement. Refer to the video below.
C-Section Achievement
Once done, open the supply room to find more goodies and the schematic for the Vintage Suit. Bring it back to the store and buy it.
Head to the next room. After the operation control room, you'll be in a short corridor. There's a pregnant right around the corner so take it out. Grab the second text log on the floor. (Ellie's Story 2) Enter the next room and grab the Power Node in the wall to the left. Continue following the straight forward path to the Fuel Processing Control to meet up with Ellie and Stross.
Save your game then continue to Pressurization Control. As soon as the machines start, anticipate some necromorphs to show up. After killing them, use the workbench as needed. Also, don't forget to grab the schematics for Detonator Rounds, beside a dead body in the left corner.
Head to the next zero-g area. Use your kinesis to attach the thruster under the vent. Shoot it to fire it up and open your path. Continue along the path and the machines will start moving again. Carefully navigate through them and use your stasis as necessary.
Loot the containers along the way and watch out for stasis recharge stations if you haven't bought stasis packs. Be careful of the lurkers on the walls as well. Use RB to orient yourself on the ground frequently so you won't get confused. Once you reach the end of the plant, pull the thruster on the floor then attach it on the hatch. Exit to the large tunnel and kill the nest in the other side. Use the thrusters again to open the hatch, then continue to the next door.
Continue to the next room and kill the necromorph there. Grab the power node on the wall then head to the Fuel Pressurization Tower to find Ellie and Stross. After the conversation, look for the schematic for the Large Med pack on a shelf behind you. Grab the other supplies, save and proceed to the exit.
Fight off this chapter's first wave of enemies then take the lift. As you around the corner, a slasher will burst out from a vent. After dispatching it, follow the corridors. Get rid of the crawlers, carefully if you're after the achievement then head to the Fuel Pressurization Control 2.
Kill the two lurkers and the puker here. Grab the items, including the audio log, Ellie's Story 3. Utilize the store then head to the next area. Here you'll encounter a Divider. This enemy splits into multiple, smaller parts after killing it so be careful. Take the elevator next.
After exiting, grab the power node to the right. A slasher and exploder will attack so get rid of them. Take note that there's also a fragile partition window here so be careful where you shoot. Head to the next area. Destroy the mines in the first ramp to the right then remove the debris to find the schematics for the Flame Fuel and another audio log (Ellie's Story 4)
Continue along the walkway to find a guardian. Use your blast weapons or their alt fire (Pulse Rifle -alt, Detonator, Flamethrower -alt, Line Gun -alt) to kill it safely at a distance. Ride the lift next.

More necromorphs will appear. Take them out then use the workbench and save point inside the room. Grab the spare blue disc on one of the shelves to the right then place it in the machine in the middle. To get the other two parts from the adjacent machines, use kinesis to lift their covers then immediately use stasis so you can grab their parts. Place them in the middle to power it completely. Activate the panel near the window to call the tram. Kill the two advanced slashers that will attack, then ride the tram. Activate it and watch the following scenes.

Head to the next area and carefully clear the cysts first. Grab the power node to the left and be careful of the stalkers that will appear shortly. Grab another audio log beside a dead body near the door, a few steps away from the power node container.
Fight your way until you find a guardian by the elevator. Kill it and check the space behind it to find the schematics for the Seeker Shells and other goodies.
Take the elevator, then clear the next hallway of cysts. Use the store and save your game. Head to the next area. There's a large tentacle blocking the tram tracks. Use kinesis to throw one of the nearby explosive capsules to the pod to detonate it and destroy the tentacle. Use the lift afterward.
From here, you'll need to throw the explosive capsules to the pod. You need to throw at least 3 to overload it. During this time, tripods will constantly attack you. Don't bother sticking around and killing them as they're infinite during this task. Just use stasis then kill them quickly, grab a explosive capsule and throw it. After successfully overloading the pod, use the lift on the other side of the room then ride the tram.
Fuel Pod Arena
Follow the path until you reach the lift going up. The current chapter concludes.
You'll now be back in the ship where it all began. If you played the original Dead Space, you may feel a bit nostalgic – unless you're creeped out. After reaching the landing dock of the Ishimura, remove the blockade on the first door to the left then grab the first text log of the chapter. (The Clogger). Continue inside to find a power node to the right and another log on the left.
Exit the bathroom then head to the lounge and perform a diagnostic report. Follow the path, take the elevator down and you'll reach a room with a workbench. Use it if you want, then continue forth until you reach the control room with the save point. Exit but before heading right to the objective, turn to the left and grab another log. (No Transfer)
Continue forth until you reach a long, large tunnel. Be careful though since this is the part where the enemies will start showing up again. Fight your way to the end of the tunnel to reach the lift. Grab the power node in the far end, then hack the panel. Use the lift up.
Follow the path until you reach the store and save point. Take the elevator and grab an audio log inside (Re-Animate) Exit the elevator to reach another room. Use the workbench there if you want. Enter the central room when ready. Wait for the decontamination to finish.
Once done, head to the next arcing hallway. There will tons of enemies here so have your weapon ready. Head to the left first to find a power node at the end. Fight your way to the objective point; just be careful of the enemies sneaking behind you. Keep going until you reach the zero-g area. There's a Force Energy schematic in this area as well.

Schematics for Force Energy
The centrifuge is missing some components which are those floating parts with red blinkers. Grab them and place them in the center of the centrifuge. They'll turn green if they're placed correctly. Once done, land on the catwalk and activate the controls.
Once the centrifuge is online, run back to the decontamination room. Prepare for battle since enemies will start swarming in. Once done, make your way back to the elevator. Be careful of the necrom that's playing dead by the elevator entrance. Save your game if your game then continue backtracking until you reach the transport. Ride it till you reach the medical deck.
Fight your way through the first hallway of the medical deck until you reach the observation room. Grab the power node in the middle, then enter the room. Be careful since two pairs of advanced slasher and exploder will attack. Hack the panel to open the door.
More enemies will attack as soon as you finish hacking. Get rid of them then follow the path. Loot the lockers along the way, then grab the items and the power node inside the next room. Continue forth until you reach the lift.
Head up, then use your kinesis on the GRIP platform to create a walkway for you. Walk around and do the same to reach the next lift. Take the enemies then enter the room behind you to find a power node and more items. You need to power off the electrical surge by pulling out the battery.
More enemies will appear as soon as you power off the surge. After getting rid of them, grab the Ruby Semi-conductor inside the tube in the middle. There's a workbench nearby, as well as an emergency supply room filled with health packs. Continue forth until you reach the save station. Use the store nearby as well. Follow the path until you reach the zero-g tunnel. Kill the lurkers you encounter along the way, until you reach the next platform. Follow the path until you reach the ship's bridge area.
There will be several enemies here. The last log for this chapter is located in the room to the left, by the workbench. Kill all the necromorphs here then make your way in the middle. Save your game then open the door below to find the bridge. Press and hold on the panel to activate the tethers.

Once done, exit the bridge then ride the escape pod. Watch the following scenes and this chapter ends.
As soon as the chapter starts, look behind you to find a log floating (Personal Log, Rig 438642 #5). Use kinesis to grab it.
After saving the game, head through the door, down the ramp. There will be enemies that will appear so take them out as necessary. Head to the next room and hack the panel. Continue along the ruined corridor and take out the cysts. Grab the items along the way, especially the power node right before the next door. The next hallway has another savepoint and a store so use them as necessary.
Continue to the next area. You need to go down the ramp and remove the defective battery. The replacement battery is found near the lift's ground level. Drag it back to the outlet to activate the door on the second level. Kill the necromorphs that will appear, then head to the next area.
Save your game and walk a bit. You'll find Ellie and Stross again. Continue forth and you'll be dragged by a tentacle out in space. There's a nest nearby so take it out first. You need to re-align the lasers to clear your path. Look for the open pod that contains some thrusters inside. Install them on the lasers then shoot them to re-align. Before heading inside, check out the schematics for Contact Energy, floating around outside of the shaft, near the right window.
Author's Note: I initially missed this schematic but for some reason, it was added to the first store I've accessed in Chapter 13 WITHOUT having the schematic at all. My brother who was playing on a separate file also confirmed that he got this even when he missed the schematic in Chapter 11.
Once done, enter the central shaft. Use the corpse to get rid of the cysts along the way. Continue until you reach the non-zero-g room. Grab the ammo on the floor and save your game. Take the lift next. Fight off necroms along the catwalk. Grab the power node on the netting to the left, after the second corner then continue to the Mining Hall B access door.
Open the emergency supply room to your right first to find the schematics for the Advanced Suit. Throw one of the corpses to the tripwires to clear your path and save ammo.
Continue along the corridor. Just take out the two cysts on the walls before proceeding to the panel. Hack it once ready and go to the next area. Kill Stross and stomp on his body to get the second log. (I Could Never Hurt You)

Go through the door and you'll be back in the previous area you're in. Backtrack to the store first to sell some stuff and upgrade your armor. Upgrading to the Advanced Suit will unlock the Looking Good achievement. Return to the previous area then take the elevator this time.
Continue to the next area. There's a slasher that will jump on you by the lift so be ready. Grab the items from the other side, including another log (Personal Log, Rig 438642 #1) and a power node. Take the lift up.
You'll be attacked by several necromorphs here. In such a tight area, the Ripper is your best friend. If you upgraded it already, then you shouldn't have problems fending off these enemies.
Lift Carnage
After getting off the lift and entering the next room, Isaac will confront Nicole. Once in control again, use the store and workbench then save your game. Head to the next area to begin the next chapter.
After the conversation with Ellie, head to the left side and clear the cysts on the ground to access the spare battery. There's also some ammo and a power node lying on the ground on the other side of the container, beside the drill.
Go up the ramp next to find a Diamond Semi-conductor on the rocks. Loot the other boxes first then use the platform to reach the other side. Two more slashers will appear. Get rid of them then use the kinesis to remove the cover. Grab the Circuit Board behind it.
Go back down and place the board on the panel beside the batteries. Manually hotwire it to start the driller. The machine will start to turn around so go up the ramp to avoid getting crushed. Kill the packs that will appear as well. Head back the driller and ride the platform on the side. Necromorphs will climb up on the sides. Kill them as they appear. Just make sure you don't step as far as the drills go or you'll get caught and die.
As the driller moves, keep an eye out of items on the sides, as well as lurkers. Keep killing enemies until the story scene triggers. The chapter ends.
Follow the corridor and grab items along the way. Your objective is on the first door to the left, by the corner. Don't go there yet; instead, turn right and follow the path to find a power node and more items. Head to the Security Gunship Docking Bay next. Approach the panel and watch the scenes.
Once in control, follow the walkway to reach the shop and savepoint. Take the elevator the head to the lounge. There will be several enemies here so do your best to fend them off. After clearing the area, check the other side of the room for a power node. Take the stairs next then hack the panel to open the door.
Once inside, go down. When you enemy soldiers appear, quickly enter the bathroom to the right. Grab the power node and other items then take the maintenance vent. After exiting, continue upstairs to reach an office. There's a power panel inside. Pull out the power cell to turn the power off. Watch the horror of the soldiers below you.
Once ready, head out and kill the enemies. Enter the office then loot the containers. Head to the next room and use the nearby body to remove the barrier. Follow the path then grab the audio log on the floor (Patient Four)
Continue forth to reach the save point. More enemies will appear so take them out. Proceed to the next area and sweep it clean from necromorphs. Find the second log (Shield Questions) behind the desk by the entrance.

Continue down to the next room where you'll find an emergency supply room and a workbench. There's a divider that will appear here as well so be careful. Head to the next area, where you'll need to fight off some annoying stalkers again. Grab the power cell hanging from above then replace the one by the door. You can also pick up another log (Same Signal) by the sludge on the floor, near the two wall lockers.

Head to the next hallway to find a savepoint. Continue down to the next area and you'll find yourself in a room with rotating laser centrifuge. Kill off the enemies, including some crawlers. Ready yourself and use stasis on the centrifuge arm behind, then quickly run to the next room. Kill off the enemies and grab the power node and items inside. Repeat the process to the next two rooms.
After reaching the larger side room, use the lift to go to the second level. Use the panel to disable to laser centrifuge. Once its offline, use kinesis to the GRIP platforms to create walkways for you to reach the other side of the room. Loot the items then enter through the door.
Continue to the data monitoring room and stomp on the corpses to loot more items. Pick up on the log beside the round display module in the middle of the room. (Marker Success) Save your game then continue to the next room. You need to head down to the lowest level and in each level, there will be multiple enemies that will come it in all directions. Fight your way to the lowest level. You'll find another log on the floor near the entrance (Tiny Marker). Approach the panel and a brute will appear. With your upgraded weapons, you should be able to defeat it without that much of a problem.
Brute battle
Hack the panel then continue through the next few doors until you reach the store and save point. There's another log here as well. (Dire) Just across it is another log (It's Making Use Make It!) across the first one you found, hidden behind a helmet. Use the workbench then take the elevator when ready.
Continue forth to trigger some scenes. When ready, step on the machine. You need to manually and carefully guide the needle towards Isaac's iris. You may want to do it slowly as Isaac will easily panic and his eyes will become extremely erratic. Once done, watch the following scenes. An achievement (Cross your Heart, Hope to Die) will be unlocked.
Eye Poke Machine
From here on, an new necromorph, called the Ubermorph will appear. This regenerates its body parts so your best bet is to chop it down to pieces using your ripper (or any weapon of your choice) then use stasis to slow down its regeneration. Quickly hack the panel and use the stasis recharge station as needed. Open the door and start running. You'll come across this chapter's first log on the floor (Illegal Evacuation), along the hallway.
This necromorph will follow you, in addition with more enemies that you need to take care off. Continue fighting your way until you reach a large room with a security scanner. You need to take the dead body of the scientist in the middle platform and have the scanner scan it and unlock the door. There's also a log located near the body. (Evacuation SNAFU) The regenerating enemy is also here, in addition to advanced pukers and slashers so you need to work quickly before you get overwhelmed. Loot the lockers and power node inside when you have the chance. The best way to do this is by grabbing the corpse from a distance then throw it directly to the door. If done correctly, the scanner should be able to register the corpse and unlock the door for you without too much fuss. If not, kill all enemies then disable/ slow down the Ubermorph and manually grab the body and present it to the scanner.
After exiting the room, keep running to the next two hallways. Before entering the corridor on the second catwalk, check behind the pillar to grab a power node and a random item. Fight through the narrow corridor as the Ubermorph joins the fray. Take out the slashers and call the elevator. Stand behind by the elevator door while waiting for it.
Upon disembarking the elevator, quickly work on opening the door as more enemies, including the Ubermorph appears. Disable it and exit through the door. Activate the panel to enter the vacuum. Hover and make your way through the dangerous machines. There's also a nest at the far end so carefully move through the dangerous flame jets while evading/ shooting its projectiles.
ZeroG Sequence
After clearing the area, turn on the gravity then head to the next area. There's a secure storage here so open it with a power node and loot the stuff inside. Past it is a room with a store, save point and workbench.
TIP: This is where you can earn unlimited number of Power Nodes and ruby semi-conductors. Save your game, exit it and reload it. Now, make your way back to the secured storage room earlier and you'll find replenished power nodes. (If you see credits only, just restart the checkpoint and try again.) Now head back to save your game, reload the saved file and do it again. Sometimes you'll get one or two power nodes. If you're lucky, you'll find two nodes and Ruby Semi-conductor.
Credits to the other gamers (and whoever is the original discoverer of this glitch) for sharing this trick on the internet.
Unlimited Power Node Glitch
You may also need to upgrade your Pulse Rifle and bring lots of ammo for it. When you have enough, exit through the next door.
You need to run through the walkway and fight your way against hordes of advanced necromorphs and the Ubermorph. Keep running until you reach a lift. The last collectible log should be on the floor before the lift. (Tidemann's Last Hope)Take the lift to go up and save your game. Go through the corridors again and destroy the fuses to create pathways for you. This is actually the perfect place to take out the Ubermorph once and for all. Refer to this guide's Necromorph list for more details. Head to the light and win the sequence with Tiedemann. Next, you'll need to fight something...
You need to shoot Nicole to expose the marker's “core”. Once its exposed, shoot the core. Repeat the process and prevent her from getting near you. The Pulse Rifle will do its job here, especially if you fully upgraded it already. Just keep repeating the process until the core explodes and frees you.
The Final Sacrifice
Once done, stay put but don't relax yet. Ellie will come to rescue you; control Isaac and steer him towards the gunship. Enjoy the credits!
Save your cleared game file.
Unlocks:
New Game
Elite Engineering Suit and Riot Security Suit
Hardcore Mode.
(Elite Engineering Suit schematic available in the room with the first store. )

Note: New Game not only carries all the weapons, armor and items you bought, but also the number of power nodes you have stored from your last save. The items in your inventory and storage will remain as is, and all the upgrades applied to your equipment will be retained as well. The credits you're carrying will be carried over as well.
All the unlocked schematics in the previous playthrough will be retained so there's no need to collect them again. If you happen to come across the schematic locations, you'll find other goodies instead, usually semi-conductors.
Chapter 14, after the Zero-G area.
Save your game, exit it and reload it. Now, make your way back to the secured storage room earlier and you'll find replenished power nodes. (If you see credits only, just restart the checkpoint and try again.) Now head back to save your game again and reload the saved file and do it again. Sometimes you'll get one or two power nodes. If you're lucky, you'll find two nodes and a Ruby Semi-conductor.
Unlimited Power Node Glitch
Note: At some point this trick may be patched.
This section will feature some help and pointers on how to unlock various achievements in the game. Self-explanatory and story-related achievements are excluded. In case you're not familiar with the enemy types, you may want to check this guide's Enemy List to know the different types of necromorphs you'll have to deal with. You can also access the in-game Achievement list which will also keep track of your progress in some achievements. We've only dealt with achievements, but unlocking the corresponding trophies shobe similar.
Mission Impossible (50G)
Complete the game on Zealot setting
Romper Stomper (25G)
Stomp 10 Containers
Vacuum Cleaner (30G)
Decompress 20 Necromorphs without getting sucked out yourself.
You must not get sucked out yourself for the kills to count. If you're getting dragged out to the vacuum, shoot the red triangle to close the blast doors. Alternately, you can shoot the window from a distance and immediately take cover to avoid getting sucked out. Using the Line Gun's ALT fire near the window then taking cover will help as well.
Made Us Whole (10G)
Complete the game on any difficulty setting
Frozen in Time (10G)
Kill 50 Necromorphs while they are in Stasis (single player only)
As long as the enemy is hit by your stasis and glows blue when you kill it, it will count. Upgraded stasis will help unlocking this achievement faster. This can be done along with Think Fast achievement if you kill the enemy using a kinesis object while it's in stasis.
First Aid (10G)
Use Quick Heal ten times (single player only)
Quick heal by pressing B. Isaac will automatically use the more potent health pack (medium pack over the small pack)
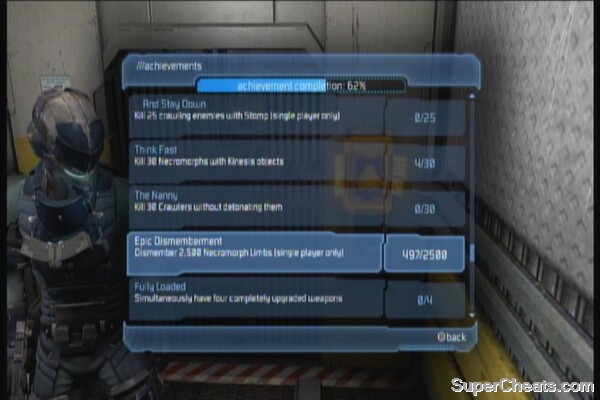
Epic Dismemberment (50G)
Dismember 2,500 Necromorph Limbs (single player only)
Just dismember every necromorph you encounter and you'll be able to unlock this achievement in one, if not, two playthroughs. Stomping on intact necromorph (human bodies, obviously do not count) corpses will also count so make it a habit to squash any necromorph you kill along the way.
…And Stay Down (10G)
Kill 25 crawling enemies with Stomp (single player only)
Best way to “create” crawling enemies is by dismembering their legs then kill them by stomping. Stasis may be needed for slowing down fast enemies like slashers.
Think Fast (15G)
Kill 30 Necromorphs with Kinesis objects
Use rods and other items scattered to kill enemies using kinesis. Upgrading your rig's DMG stat will also increase the damage done by thrown kinesis objects. You can get the kill counts along with the Frozen in Time achievement if you put the target in stasis mode before shooting a kinesis object towards it.
The Nanny (10G)
Kill 30 Crawlers without detonating them
Crawlers are the explosive babies that you'll first encounter in the Nursery/ School section of Chapter 6. You need to behead them to kill them without detonating their explosive sacs. You can also use the Force Gun to kill them instantly, without detonating them.
You can maximize your crawler kills for the first time by luring them to the door, opening it and standing by it. The crawlers won't follow you to the door but will clump together in one side of the room. From there, you can safely pick them off accurately. Refer to the video below for more info.
Daycare Bug
C-Section (10G)
Knock down an enemy with Contact Beam Alt-Fire then kill it with Primary Fire before it stands up
First, obtain the schematics for the Contact Beam in Chapter 7, in the locked supply room right after the mainframe room where you can get the Peng Treasure.
Once equipped and loaded, use its ALT fire to knock down an enemy then immediately use stasis to ensure that it doesn't stand up immediately.
C-Section Achievement
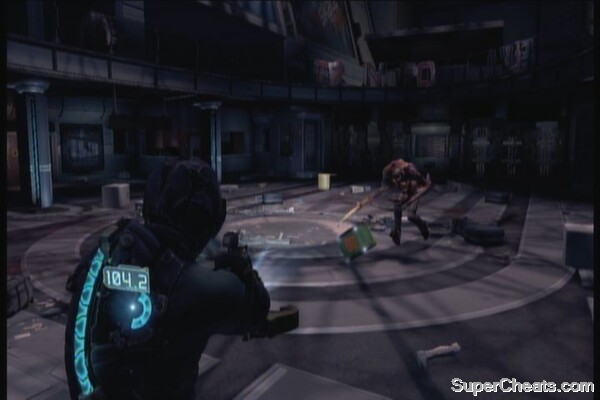
Going for Distance (20G)
Impale an enemy and make him fly through the air for 17 meters – it must stick to the surface
You can use a kinesis object or the necromorph's own limb (e.g slasher) to pin it on the wall.
Going for Distance
Taste of your own Medicine (20G)
TK Impale a live Slasher to a surface using a Slasher's arm – it must stick to the surface
The best way to do this is by using stasis on a charging slasher, then shoot off its arm. Immediately use kinesis on the arm and shoot it back to the slasher. Make sure that you're facing a nearby wall to impale it. Upgrading the duration of the stasis and rig's DMG (kinesis damage) will help but not entirely necessary.
It's a Trap! (20G)
Kill 20 enemies with Detonator Mines in a deployed state
The schematics for the Detonator Gun is found near the end of Chapter 5, after the elevator ride out of the Church of Unitology. Its inside the same office where you can find the savepoint.
It's easier to do this against enemies that aggressively charge towards you. (e.g slashers, stalkers) Straight, tight corridors and bottlenecks are also a good spot to lure enemies towards the mines that you'll deploy. Take note that you can deploy the mines on walls as well. Only mine kills will count; if a mine disables an enemy and you kill the limping necrom by any other means, then it won't count.
Necro Flambé (10G)
Kill 50 enemies using the Flamethrower
The Flamethrower schematics is found in the backroom of the classroom right after the gymnasium in Chapter 6. This is before you reach the small playground leading to the exit.
Peek a Boo! (20G)
Kill a Stalker with the Seeker Rifle while in Zoom Mode
(The Seeker Rifle schematics is found at the start of Chapter 6, just outside of the room containing the chapter's first save point. )
You can shoot a stalkers head as it peeks from its cover. If one is rushing towards you, putting it in stasis is imperative. Just zoom in and kill it to earn the achievement.
Peek a Boo Achievement
Brute Juke (10G)
Kill a Brute without taking damage
There are many ways to kill a brute but the most effective (that worked for me at least) is using stasis Javelin's ALT fire.
Brute Juice Achievement
Shoot the Limbs! (10G)
Dismember 25 Necromorph Limbs (single player only)
Bouncing Betty (10G)
Kill a Cyst by catching its Mine and throwing it back
A Cyst will react to a nearby body so you can trigger it pre-maturely by throwing something towards it and immediately grabbing the mine it releases. Alternately, you can just approach it yourself, grab the mine, walk afar then throw it back to unlock the achievement. I was a bit careless in the video though but hey, the achievement matters right?
Bouncing Betty Achievement
You can also do this later in Chapter 7, after the elevator sequence. There's some stasis capsules that you can throw to the nearby cysts, slowing them down. It will be much easier to unlock this achievement using this method.
Bouncing Betty Achievement (Alternate Method)
Skewered in Space (15G)
Impale an enemy into a Decompression Window to cause it to blow out
It doesn't matter if you get sucked out; as long as you impale a necromorph to the fragile glass, causing it to break, you'll get the achievement
Skewered in Space Achievement
Hard to the Core (50G)
Complete the game on Hard Core setting
Clean Cut (10G)
Sever all three tentacles of a Lurker with one Line Gun Primary Fire shot (single player only)
Lurkers are those tentacled babies that love to crawl on walls. They can shoot projectiles at a distance as well. Since you can't change the orientation of the Line Gun, you need to shoot them while they're on the ground. As usual, using stasis to slow them down will be very helpful so you can have a steady aim and sever the tentacles in one shot.
Clean Cut Achievement
Lawnmower Man (10G)
Kill 4 enemies with the same Ripper blade
Best used against those pesky packs of necromorph kids that swarm at you. Upgrading the Ripper's duration and damage is helpful but not necessary.
Kids Gone Crazy
Fully Loaded (50G)
Simultaneously have four completely upgraded weapons
It is suggested that you exploit the Unlimited Power Nodes trick.
http://www.supercheats.com/guides/dead-space-2/unlimited-power-nodes-trick-glitch
The Sampler Platter (20G)
Kill a Necromorph with every Weapon in the game (single player only).
You need to kill a necromorph using the weapons listed below. Kills also count if you happen to use a DLC or non-retail versions of the weapons. Most weapons need schematics to unlock them on the store. Schematic locations are already revealed along the way in the main walkthrough. Check the Schematics section for more details.
Plasma Cutter: Default
Javelin Gun: Available in the store in Chapter 2
Line Gun: Available in the store in Chapter 2
Pulse Rifle: Chapter 3
Ripper: Chapter 5
Detonator: Chapter 5
Seeker Rifle: Chapter 6
Flame-thrower: Chapter 6
Force Gun: Chapter 7
Contact Beam: Chapter 7
Lightspeed de Milo (10G)
Dismember the Lightspeed Boy Statue
You have two chances to do this; first is when you first visit the shopping area of the station in Chapter 3. The second time is when you meet Ellie for the first time in Chapter 6.
Lightspeed de Milo Achievement
Looking good (10G)
Purchase the Advanced Suit
Find the schematic in Chapter 11, after your little space walk to re-align the space lasers. Head inside the office, and walk across the catwalk. It is inside the emergency supply room that can be unlocked with a power node.
Fully Outfitted (30G)
Upgrade your RIG and Stasis completely
You may want to sell extra ammo, semi-conductors and other unneeded stuff to earn credits and purchase more power nodes to get this achievement early. If not, you'll have to resort to the Unlimited Power Node trick.
http://www.supercheats.com/guides/dead-space-2/unlimited-power-nodes-trick-glitch
Picking favorites (30G)
Upgrade 1 Weapon completely
You may want to sell extra ammo, semi-conductors and other unneeded stuff to earn credits and purchase more power nodes to get this achievement early. If not, you'll have to resort to the Unlimited Power Node trick.
http://www.supercheats.com/guides/dead-space-2/unlimited-power-nodes-trick-glitch
The Engineer (10G)
Collect 10 Schematics
Weapon, ammo and armor schematics count. Refer to the Schematics Location section for details.
My Boom Stick (20G)
Kill 6 enemies at once with Line Gun's Alt-Fire (single player only)
Best done when attacked by the pack for the first time in Chapter 3, in the long hallway. Shoot the Line Gun's mine and run towards it to lure the enemies. Make sure you're at a safe distance to avoid getting hit by the explosion. If you seem to be having problems timing the explosion, you can just plant the mine then stay near its blast radius. You'll suffer damage but it won't kill you. After getting the achievement, just restart the checkpoint to start again with full HP.
My Boom Stick Achievement
Shock Therapy (10G)
Impale an enemy with the Javelin Gun and use its Alt-Fire to shock 3 others (single player only)
Best done when attacked by the pack for the first time in Chapter 3, in the long hallway. Shoot a Javelin spear on a pack then run towards it to lure the enemies. Trigger the electrical shock to kill all nearby enemies. Make sure you're at a safe distance to avoid getting electrocuted yourself.
Shock Therapy Achievement
Collect Peng (20G)
Find the Peng treasure
Finding this unique treasure requires some minor tinkering and strategy. It is found in Chapter 7, after getting locked out by ANTI, the AI. First, you need to activate re-route then take the maintenance vent. This will take you to the mainframe room. Remove the GRIP covers, grab the blocks and place them in the panel to the left. Take note that the color of the block must turn blue. Just place all blocks until they all turn blue. Look behind you to reveal a new re-route panel. Activate it and the maintenance vent will take you directly to the Peng treasure, along with other goodies.
See the video below for more details.
Peng Treasure Achievement
The Librarian (10G)
Collect 100 logs
Take note that story-related logs do count but it won't hurt collecting the scattered audio and text logs along the way to bolster your collection. You can get it early, provided that you're collecting all those collectible logs you can find.
The Electrician (10G)
Collect 10 Semiconductors
Semi-conductors are usually found inside emergency supply rooms (requires power node to open) or dropped by major necromorphs such as guardians, brutes or nests. You don't need to keep them in your inventory or storage; even if you sell them as soon as you find them, they will count towards the achievement.
The Fugitive (50G)
Escape the Facility
Cross your Heart, Hope to Die (30G)
Survive the Eye Poke Machine
The Final Sacrifice (50G)
Destroy the Marker
Clever Girls (10G)
Survive your first encounter with Stalkers
Torment Me No More (20G)
Kill the Tormenter
The Graduate (20G)
Win the fight at the School
Patient on the Loose (15G)
Get your first Suit
Derailed (20G)
Survive the Train Sequence
One Small Step (10G)
Get through the first Zero-G area
Hornet's Nest (30G)
Destroy the Tripod Nest
Operation! (15G)
Snare the Shard with the Ishimura
Knock Knock (25G)
Complete the Drill Ride
Elevator Action (15G)
Knock off every Tripod during the Elevator Sequence
Shut Down (10G)
Defeat the AI
Powered Up (15G)
Complete the Solar Array Puzzle
The main walkthrough in this guide will come across all schematics. In case you missed some, you may refer to this section for some general directions leading to them. Since most of them are inside secured supply rooms, it pays to carry at least one power node with you always.
Chapter 1
Elite Engineering Suit (Available in New Game , any difficulty)
Found on the seat in the same room of the first store.
Chapter 2
Power Node
Found inside the first locked storage room, by the save point and past the walkalator.
Stasis Pack
Found in the empty tracks in the tram platform.
Stasis Pack
Chapter 3
Pulse Rifle
After surviving the derailment, check the shelves in the back of the train wreckage.
Pulse Rifle
Javelin Spears
Near the end of Chapter 4, where the viewing deck is, you'll find the schematic on the floor behind the table and a chair. This on the left side of the marker replica.
Chapter 4
Security Suit
Found on top of the shelf at the back of the security room.
Chapter 5
Ripper
Found in the room where you need to turn off the gravity drive.
Medium Health Pack
Shortly after turning off the gravity drive, you'll need to exit to the other side. The schematics is just floating around in the middle.
Line Racks
After falling down from the maintenance vent, you'll the schematics on the next room, by the shelf.
Line Racks
Detonator Gun
This one is hard to miss since its in the same with a savepoint and other goodies.
Detonator Gun
Chapter 6
Seeker Rifle
Check the balcony outside the room containing the chapter's first save station.
Seeker Rifle
Pulse Rounds
After meeting Ellie for the first time, check the farthest seats in the mezzanine to find the schematics on the floor.
Flamethrower
After clearing the gymnasium, find this schematic on the next classroom.
Elite Vintage Suit (New Game only)
After reaching the transport hub, check the displayed rig to the left to find the schematics on the floor.
Chapter 7
Ripper Blades
When you reach the large, zero-g area where you need to push the elevator up by shooting the thrusters underneath it, find the schematics lying on the floor at the bottom.

Force Gun
After the elevator sequence, you'll find yourself in a circular catwalk with cyst-laden lockers on both sides. One of these lockers contain the schematics.
Contact Beam
In the corridor leading to the Solar Panel Control Pod (and after the previously locked-down mainframe room), you'll find a secured supply storage room beside a save point in the far end of the corridor. You'll find the schematics inside.
Chapter 8
Vintage Suit
Inside the Operations Control Room (the small room near the starting point and where you'll get attacked by four necromorphs) is a secured storage room. The schematics are found inside.

Detonator Rounds
After meeting up with Stross and Ellie, exit to the large machine room. The schematics is on the floor, beside the corpse to your immediate left.
Large Med Pack
After meeting up with Stross and Ellie again near the end of the chapter, find the schematics on the shelf behind.
Chapter 9
Flame Fuel
After the small room with a breakable partition window, you'll find a narrow corridor with two ramps. The first ramp has two deployed mines. Destroy the mines then remove the barricades to the right to find the schematics on the floor, beside the dead body.
Seeker Shells
After clearing the large warehouse of stalkers, you'll find a guardian by the elevator. Check behind it to find some items and the schematics
Chapter 10
Force Energy
In the zero-G, centrifuge area, you'll find it on the ground below.
Force Energy
Chapter 11
Contact Energy
In the vacuum area where you need to move the lasers away from the shaft, hover to the right side of the shaft to find the schematics floating near the window.
Author's Note: I initially missed this schematic but for some reason, it was added to the first store I've accessed in Chapter 13 WITHOUT having the schematic at all. My brother who was playing on a separate file also confirmed that he got this even when he missed the schematic in Chapter 11.
Advanced Suit
After the spacewalk, you'll be in mining hall. Follow the catwalk to Mining Hall B door. There will be a secured storage to the right. You'll find the schematics there.
This section will discuss the game's weapons in an attempt to evaluate their individual strengths and weaknesses, as well as their overall practicality.
Plasma Cutter
Found in: Acquired through the story event.
Primary: Targeting beam in vertical orientation, fires plasma energy capable of ripping through flesh and bones without difficulty.
ALT: Changes the targeting beam in horizontal orientation
Practicality: 4/5
The plasma cutter is a handy weapon that will serve you well in the first few chapters of the game. It is very accurate and can deal instantaneous damage.
Refurbished Plasma Cutter
Found in: First store, have a completed Dead Space saved game file.
Primary: Targeting beam in vertical orientation, fires plasma energy capable of ripping through flesh and bones without difficulty.
ALT: Changes the targeting beam in horizontal orientation
Practicality: 4/5
Exactly the same stats and function of an ordinary plasma cutter, this weapon's main difference is its skin.
Javelin Gun
Found in: Chapter 2 Store
Primary: Fires a metal rod capable of impaling enemies on the wall or floor.
ALT: The metal rod discharges an electric shock capable of damaging nearby enemies.
Practicality: 3/5
The Javelin Gun's primary fire is already powerful enough to take down enemies. However, it has a slow firing rate, making it inadvisable when facing multiple and/or faster necromorphs. Its ALT fire however, can be used to deal extra damage or draw out enemies in hiding.
Line Gun
Found in: Chapter 2 Store
Primary: Fires a wide horizontal energy capable of cutting through multiple enemies.
ALT: Fires a timed mine with a large blast radius and capable of dealing heavy damage
Practicality: 4/5
Best used in corridors with less obstacles, the Line Gun can make things easier for you by cutting through several necromorph limbs in a straight line. Its weakness however, is that if its projectile hits an obstacle, the cutting power is drastically reduced.
Pulse Rifle
Schematics found in Chapter 3
Primary: Fires automatic pulse rounds
ALT: Releases a pulse grenade that explodes on impact, dealing considerable damage in a large blast area
Practicality: 5/5
This could easily become one of your main weapons all-throughout the game. It is the only automatic weapon you can get, and its explosive grenade launcher feature is a must have for almost any situation. It has pinpoint accuracy and no recoil – perfect for taking out enemies at any distance. Well-placed and timed grenade shots are also best in dealing with larger targets such as brutes and nests.
Ripper
Schematics found in Chapter 5
Primary: Fires a hovering, rotating blade that can slice through multiple enemies.
ALT: Releases a high-speed disc blade
Practicality: 5/5
This weapon is unstoppable when dealing multiple enemies up close. When its duration and damage is upgraded, expect nothing that can go through you up front. Its long range ALT fire is also helpful if you want to dismember pesky enemies at a distance without changing weapons.
Detonator Gun
Schematics found in Chapter 5
Primary: Deploys a mine that releases a tripwire. Capable of sticking on walls as well.
ALT: Disables the targeted mine, making it recoverable
Practicality: 3/5
Perfect when playing hide and seek against stalkers or dealing with large necromorphs, you can lay down mines on tight corners to trap unsuspecting or aggressive enemies trying to flank you. Mines that hit the target explode on impact as well, dealing the same damage as a deployed mine.
Seeker Rifle
Schematics found in Chapter 6
Primary: Fires a high-damage shells capable of hitting targets at long ranges with pinpoint accuracy
ALT: Rifle enters in Zoomed state, allowing enhanced precision and damage.
Practicality: 2/5
The only sniper rifle in the game, this weapon boasts the ability to deliver heavy damage to enemies at long ranges. The bad news is, you'll be facing necromorphs in short-mid range most of the time, making the Seeker Rifle a bit impractical in most situations.
Flamethrower
Schematics found in Chapter 6
Primary: Fires a steady stream of fire, igniting enemies and will continue to burn for a few more seconds, dealing extra damage
ALT: Releases an incendiary grenade
Practicality: 3/5
Good for taking out multiple enemies and stopping them on their tracks, the flamethrower might seem to be a good choice. As a downside, it uses fuel rather quickly. The flame's range is only limited so you'll need to change to a long rage weapon to deal with enemies at a distance.
Force Gun
Schematics found in Chapter 7
Primary: Fires an AoE shockwave, throwing lighter enemies off and knocking back average-sized necromorphs.
ALT: Fires a concentrated blast capable of piercing through multiple targets. Heavy damage
Practicality: 3/5
This is the weapon of choice for taking out crawlers without detonating them. For larger necros, you need to use stasis then use the gun's ALT fire to kill, since the shockwave won't be strong enough to kill them.
Contact Beam
Schematics found in Chapter 7
Primary: Fires a charged particle projectile that deals massive damage
ALT: Releases a shockwave that will knock down even larger enemies.
Practicality: 2/5
This weapon's ALT fire will certainly help you get out of tight situations thought its primary fire won't be that much of a help most of the time. You'll end up using stasis often if you want to use this massive weapon.


 How to Connect and Update Xbox One Controller Manually to support Xbox One Stereo Headset Adapter for Enhanced Sound
 How to unlock and change skins in Batman: Arkham Knight
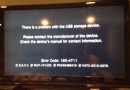 Wii U Error 160-4711 Workaround Fix Discovered
 Destiny Beta: Invincible Enemies
 Mario & Luigi: Dream Team is Out Today in the UK