

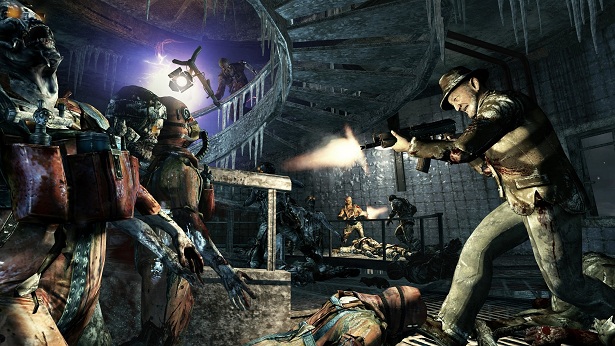
A zoo, a missile stockpile, a small town and of course, more zombies — Call of Duty: Black Ops’ newest map pack, Escalation, promises a ton of new content for the discerning multiplayer connoisseur. But of course, going it alone and heading into the new maps without any intel is borderline suicidal, so we’re working on getting a full strategy guide for each of the new maps and a rundown of the newest Zombies offering, Call of the Dead, so you don’t have to go into battle unprepared. Check back here on May 3 for the first installments and hit the ground with your gun loaded and your trigger finger itchy. We’ll also have a full rundown of Escalation’s Achievements and Trophies so you can unlock everything the DLC has to offer.
Call of the Dead Walkthrough
A ship run aground makes up a huge portion of Call of the Dead, the new Zombies map that comes with the “Escalation” map pack. And circulating throughout is a juggernaut George Romero, who carries an electrified set light that he uses as a hammer as he stalks around the map. He moves slowly for the most part, unless you get too close or hit him with a bullet — then he goes into berserker mode. When that happens, you’ll need to lead Romero into one of the various pools of water around the level in order to cool him off and calm him back down.
Meanwhile, Call of the Dead is actually probably the biggest Zombies map to date. There are a lot of hazards to deal with — Romero, for one, as well as the pools of icy water that can actually kill you if you stay in them too long and a lack of high-powered weapons like the black hole grenades found in the Ascension map. There also seem to be no Hellhound or Space Monkey-type rounds to break up the onslaught of zombies — which means you’re never guaranteed an ammo refill for your progress.
Maintaining a flow of points to keep your guns filled is crucial in Call of the Dead, so don’t go spending everything you have without grabbing some spare clips off the wall. You’ll also want to check out our video on turning on the power in the level — it’s key to getting perks and surviving into the later rounds.
How to Kill George Romero
Cold Water Survival Perk Location
Stamina Up Perk Location
PHD Flopper Perk Location
Speed Cola Perk Location
Getting the Jugger-Nog Perk
Turn on the Power
M-14 Knifing Strategy
Knife and Pistol Strategy
Deadshot
We’ll continue updating with more tips, tricks and information for Call of the Dead as we explore it. Check back here over the coming days for further updates.
Zoo
Zoo is essentially a set of three central corridors running the length of the map, with areas and interiors surrounding it on all sides. Getting to know how those central corridors interconnect is key to success on this map, because savvy players will be able to use that information to do a ton of flanking — and in fact, it’s a good idea to avoid the central corridors for most of your fighting, as you’ll always be exposed at your sides and back if you try to fight down the main hallways.
The two outer corridors connect in a sort of sweeping oval going around the outside of the map, with one containing the faux-rock animal habitat on one side (a great place to camp out with a team, if you can cover the entrances) and the monorail track and station on the other. In the center of the map is a large building that’ll almost always have players inside it, both shooting out its top windows that face both sideways and lengthwise down the map, straight across from a catwalk that can access the monorail track.
Get to know the elevated positions
The monorail track is a key way to quickly cross the map and get the drop on players in several locations, but it’s almost always populated by at least one sniper. The staircase at one end that lead to the overhead bridge is a handy means of accessing the upper portions, but be careful of claymores and snipers waiting for you up there. Once you’re up top, you can follow the monorail track across about one half of the map and wind up in the big central building, or descend and head over to the rock habitat. Holding down this upper area with a couple of teammates can mean an elevated position and a ton of kills as players run around the central corridor.
The main building in the center is also a great spot for shooting down on distracted enemies milling about or having fights below, but be careful — this position always attracts attention and lots of gunfire.
Keep on the Move
In deathmatch situations, Zoo is a great place for players who maraud around, catching up with guys by flanking them around the backs. There’s also an underground tunnel system that can be accessed by ladder at one end of the map and in the dried water habitat at the other, near the rock habitat. This is a good escape route if you’re in trouble, but avoid coming out of the water toward the rock habitat, as that section of the map is a phenomenal hiding and sniping spot. Better to approach that location from the back, near the monorail.
Watch the Angles
In all game types that you need to hold a position, Zoo can get problematic — claymores can help hold down corners and flanking positions, so use them. A handy spot for such ordinance is in the stairs that connect the main corridors to one another, or near the doorways to the main buildings. Teamwork for controlling an area is key because no position in Zoo is even partially secure, so expect to have guys come up behind you.
Convoy
Another map with a central corridor ringed by outskirt buildings and detritus, only in Convoy, there’s only one way through the center, and it’s usually death. The overpass in the middle of the map is accessible by three or four different entrances, but that doesn’t make going out there a good idea. This is the territory of newbs, who line up to get gunned down by shooters on the overhead bridges, of which there are always several. Use this road at your own peril.
Get to Know the Town
Instead, head around the outside of the map in a circle and find a good place to set up shop as a deadly sneaky killing monster. You don’t need a special class setup to do this, although the Ghost perk and silencers help tremendously. But even a small team can work wonders hanging out near the park behind the gas station, or taking up residence in the motel. The motel is especially deadly, in fact, because it includes so many sharp corners, but the strength of Convoy is the diversity — find an area where you’re comfortable and get to know its ins and outs, and flies will constantly wander into your deadly spider web.
Find Cover and Keep to It
The best part about Convoy is that it’s a map you can easily traverse and, for the most part, stay out of the open. If you’re smart and patient about how you travel, you should be able to get around unnoticed, picking off more careless enemies who are paying less attention than you. In the park, sneak toward the back fence. Use the open train car for cover in the train yard section. Climb behind the billboard near the Las Vegas sign. Jump through the windows of the gas station, the trailer park and the motel. All these methods will make you less noticed and help you survive when others don’t. This also goes well for missions in which you need to defend a fixed point — Convoy bristles with tough-to-spot locations where you can hide and do some real damage. Pay attention to all the areas that are off the beaten path, and make them your own.
Hotel
Hotel is, in a word, huge. It’s also a pretty deadly maze, which is why 90 percent of all fighting will take place out in the open in the area surrounding the drained pool. And that’s exactly why you don’t want to be out there — you want to be nearby, on the sides, sneakinga round near there, but you don’t want to be exposed to all the cross-fire, the elevated sniper positions, or the marauding soldiers that will frequent the map’s middle at all times.
Instead, try to learn the interior sections of hotel, because these will give you serious access to the ability to flank everybody. You’ll want quick routes to and from the sniping positions and the pool, because especially early on in the map pack’s life, you’re going to be able to give lots of people the slip just by knowing which doors to duck through. Hotel consists of the open patio in the center with corridors along the left and right side, and two huge interior buildings at either end — if you can make it into those buildings, you can generally give people the slip, and knowing the ins and outs means getting behind enemies and killing them as they track you.
Stick to the Shadows
Hotel is ideal for small groups. A team of two or three soldiers can capitalize on the entire map in deathmatch, taking out lone enemies and flanking players trying to get a shot on the pool area. If you’re forced to venture out, there are sections of the exterior that you can navigate without catching too much cross-fire. Avoid the center section and watch for players lying in the small bar structure next to the pool — they love to remain motionless in there and pick off stragglers.
Crossing the outside is always best done in the spa section on one side. Avoid the opposite side, where stairs take you down; you’ll find enemies like to sit in those corners above the staircase and shoot down on players who don’t see them. In the spa, however, you’ve almost always got the upper hand, particularly when you move in force. So long as you’re not totally flanked out, you can take the upper section easily (avoid claymores) and move through the structure while it provides you with a ton of cover. You never have to travel in the open.
You’re Hard to See Inside
When holding down fixed positions or completing objectives, remember that the inside of the casino and hotel are really busy places as far as visual stimuli. That means, basically, that you’re generally better off remaining motionless and getting the drop on enemies. The casino particularly makes it really tough to identify non-moving enemies, so move through it cautiously when you must head there, and take advantage of other players’ confusion when you know they’re coming your way. Claymores and other traps are hard to identify among the blinking lights, so make use of them.
Stockpile
Stockpile can be a mass of confusion, particularly because it’s awash with small interior spaces and buildings. The primary fighting almost always take place in the control room in the center of the map, in a building with two sliding doors that can be closed. This is an especially problematic location to try to hold down — it includes lots of entrances, only a couple of which can be sealed off, leaving you with too many angles to cover with any kind of sensible strategy. Fighting in the control room very often equates to death.
If you feel the need to challenge other players for supremacy in the center, though, it’s best to do so with multiple teammates to back you up, if for no other reason than to take fire and check the doorways. The central area of the control room has no fewer than five or six entry points, and it’s dangerous just to walk through it. Add to that the fact that lots of players like to sit motionless in the corners, waiting for poor suckers to happen by, and you can see why you’re better off staying away.
Control the Camp
Players will often find much more success just wandering around outside, specifically by staying behind walls and interiors and keeping their eyes open for movement. There are a whole lot of places to hide outside, and what’s better, you can generally move freely without getting flanked out too much if you’re careful about it.
In fact, cruising the outside of Stockpile with an assault rifle can net you some serious damage, as long as you stay away from a few key locations. Approaching the church is a bad idea, as this has a tendency to attract players who like to use its low wall as a good spot to pick off people moving on the road. Trying to take this position on your own is always a pain and usually a losing proposition — better to try in the fields between buildings on the other side of the control room. The Ghost perk can definitely be a must-have here, as the ability to give your enemies the slip and sneak up on them will be invaluable in the corner-strewn Stockpile.
Move as a Group
More than many of the other maps, Stockpile can really be overrun by a team moving as a unit. There aren’t many locations, barring the inside of the control room, where you can expect to have enemies coming at you from all sides — unlike Zoo or Hotel. Grouping up with a smart team will allow you to control incoming threats because you’ll be able to face mostly the same direction and concentrate fire.
Teams are especially effective in the areas outside of the control room away from the church — for some reason I always have real trouble there — and a strong team will have a much easier time controlling the angles for stationary objectives. Although Stockpile is all corners, it’s a more concentrated map in many respects than its counterparts in Escalation, and for that reason, a fire team with good communication can generally run it.



 Solo strategy for “FIVE” – To get ready for BO2
 Top 10 Best iPhone Games of all time
 Catherine Achievement and Trophy Guide
 Pac-Man and the Ghostly Adventures 2 – Everything you need to know about the game .
 Brink Guide