Unofficial Brink Guide by CM Boots-Faubert for
Due to the nature of this game, any Introduction must start with the following statement: You are either going to Love this game, or you are going to Hate it. There is no middle ground. I suspect that part of the reason for a lot of players feeling disappointed has to do with the fact that Brink is published by Bethesda, and the early PR for the game made it sound like it was closer to a Fallout type game with deeper content. It is not. What it is, short and sweet, is an online PvP Team-Vs-Team shooter, and it is pretty darn good at being that. It is not so good at being a Fallout style game, because it really is not. There were a lot of reports of bugs -- some of them game-impacting -- posted online. I used the XBox 360 version for this guide, and it was completely bug-free play so I cannot say one way or the other just what the story is there. This game has good class structure and abilities, an awesome mechanic, and interesting graphics. In fact other than the fact that the developer -- Splash Damage -- relied way to heavily upon Grief Code in giving the enemy unfair advantages, it is a great game. About the Grief Code... To be honest the Campaign Mode in this game was probably about 6 hours long when they first created it, and then realized it was way too short. Rather than redesign the missions, or find ways to make them more challenging, they instead went into the code and tweaked it, giving huge advantages to the enemy in the game. The enemy does not have to follow the rules -- their Engineer can repair objects while running quickly back and forth so you cannot shoot him. Their bot can roll through the object YOU must destroy when you are playing that side, and they routinely get extra time added to their clock to complete detonating a bomb or hacking an object -- what the game called "overtime" and, no surprise, you don't get. Those are just a few of the obvious cheats that they used to stretch the Campaign from 6 hours of play to 20. Yes, that sort of approach sucks. But hey, this is NOT a campaign-based game mates! It is a multi-player team-vs-team shooter! So what if they cheated? So what if they made parts of the campaign tedious and frustrating? It is only there to teach you how to play so you can go online and kick butt! This Guide will get you through the Campaign -- including the rough bits -- with your sanity intact. I hope that it helps you and that you enjoy it! When you slot the game you are presented with a sterile start screen that, if you allow it to sit idle for a few moments, changes to the sort of demo mode that you expect to see on the TV's at your local game store -- rapid-fire action, angry faces, and the promise that this game is something different. Hitting Start signs you into the Brink Servers and triggers the background CS that tells the story of The Ark while on screen a claymation city is built before your eyes. Things are grim though -- there is a much larger population of refugees than were planned for. The choice is a simple one, the old woman prompts: Will you save the Ark? Or escape it? At this point the screen fades to black and you have a choice to make... Selecting Save the Ark puts you squarely on the side of Security -- selecting Escape the Ark makes you part of the Resistance. What is it going to be? (Coin Flipped -- Comes up Heads) OK, let's start with the Resistance shall we? -- The Resistance -- The slums of The Ark are not a nice place -- you meet Brother Chen, the leader of the Resistance Forces (doesn't he sound like Splinter from Teenage Mutant Ninja Turtles??) and then, after an all too brief address, you are shunted into the character select / character create menu! If you are slotting the game for the first time -- as I am -- you need to decide on the Archetype for your character. There are a lot of choices but, save for body type, they are mostly superficial! Just remember, the more muscular and stocky body type is going to be better able to handle heavy weapons, while the thinner and more lithe body can do Parkour moves better. After you pick the body, you select your voice, and then save the changes or selections that you made! You are then popped into the Character Select Screen, where your new character awaits! Picking them takes you to a prompt that tells you that there is 1,000 free XP in it for you if you are willing to sit through a brief Introduction video... Hey, free XP? Heck yeah!
-- The Orientation Video -- As you watch you receive a very brief overview of the different settings and play styles, learn about XP and Rank, outfits and weapons, and then she tells you about objectives and the need to change classes before telling you about the classes. The Command Post allows you to change classes, and you learn you can earn extra points by capturing those that belong to the enemy. She tells you about the objective wheel and how to use it -- and then explains special abilities and the supply meter. The screen display is explained, then she covers being incapped and the wonderful services of the Medic -- and finally she gives you some closing advice on how to play well and stay alive. "Follow these guidelines and you can win the war!" The video ends and you find yourself back in the Character Screen, only now you can select a mission and go! Before we do that though, there are a few things we need to look at... -- Online Stats -- Near the bottom of the menu is the heading "Online Stats" that, when you select it, provides you with a code to use and the URL to the website to register your character with the Stats Server. The URL is www.brinkthegame.com -- so why not go ahead and load your browser and register now? When you load the site you need to pick your country -- then you are sent to the main page. Select the Stat Server Link and follow the instructions, entering the game code on your screen to complete linking your console to the game server! -- Character & Weapons -- With that done, select the flashing Character & Weapons Button to load that screen. Here you can adjust your Appearance and your Abilities -- so first check Appearace and you can customize some of how you look. This is all superficial stuff -- the important item is Body Type, but right now you can only select Medium as you have not Ranked up and unlocked anything else! Under Abilities you have 1 point to spend -- choose wisely! Once you have made your selections for these two areas, the button stops flashing when you return to the main menu. Cool! -- Moving On -- At this point you have a choice to make -- you can either go straight to Campaign or you can do what I did and get yourself properly set up for the Campaign by boosting your levels to Rank 5 (Level 20) in Freeplay. Having your character at Rank 5 for the Campaign mission really does make sense, because you really do need access to the abilities that Rank 5 gives you! If you decide to do the level boosting you need to skip ahead to -- Sneaky Strategies now... Well mates, good luck! It is time to dive head-first into the game! Primary Objectives: Defend the Door / Stop the Agent This guide assumes that you went ahead and played Freeplay to boost yourself to Level 20 -- thus gaining access to the special Rank 5 abilities that you really do need for the Campaign. You should therefore at a minimum have the following abilities unlocked and purchased: -- Universal > Downed Fire There are others you will have (and want to have) like the Kevlar, the Supply abilities, and the extra clip etc., but the above are the keys to success in the Campaign as they make life so much easier and, without them some of the missions are very painful if largely impossible to complete. Assuming you are all set and ready to go, let's begin!

Booting Up
The Intro and Making a Character
Day 1: Getting Answers
Secondary Objectives: Defend Lift Generator
-- Soldier > Satchel Charge
-- Engineer > Extra Landmine
-- Engineer > Gatling Turret
Making sure that the Agent does not get Captured
-- The Introduction from Chen --
You learn from Chen that for months the Resistance has had an Agent in the enemy camp -- the Agent is coming out with Intel you need, and you must either help the Agent escape -- or kill him.
After a CS in which doubts are expressed, you begin the level armed and eager!
First you need to follow your crew through the halls and down the stairwell to the first contact point with Security -- at this point you need to decide which mission you want to actively participate in.
Once you have selected an objective to complete -- you will notice that the objective point is highlighted on the screen, even through walls, which means you now know where you need to go! The objectives are easy to find but not so easy to fully complete on your own... But give it a shot anyway, just remember that you can fail one part of the mission and, as long as the Agent does not escape, still win the mission -- you just do not get the points for the failed objectives.
-- Dealing with the Agent --
If for whatever reason you fail to stop them from opening the door, you will have to pursue and take out the Agent before they can get him to their evacuation boat -- basically you have to shoot him to incapacitate him so that they cannot get him to the boat as you run the timer out.
Spotting the Agent is not a problem -- he glows yellow and green -- and has Security trying to keep him buffed up and in motion! When you reach the Agent escaping stage, just keep shooting him to keep him from moving and let the timer run down and you win! Of course you also have to defend yourself from Security, which is not as easy as you might think...
Primary Objectives: Destroy the Conduit / Hack the Safe / Deliver the Pass Code /Escort Nechayev
Secondary Objectives: None
No Secondary Objectives for this one -- and no quick finish either, as this is a series of must-do's for you to complete... So, first head over to the Conduit and blow it up to open the door, then head for the safe, get the pass code and deliver it. Finally you need to escort Nechayev to the evac point!
Escorting Nechayev to Safety
One fact that you will have no doubt about -- when they get you into the the choke point and incapacitate Nechayev getting him out of there is going to be a problem unless you change to Medic.
The first thing you need to tell yourself -- and believe -- is that you have plenty of time. You do too, so work your way until you get to the choke point, and then get really aggressive really fast. Basically you will measure your progress through this open area and up the ramp in steps. You shoot until you are incapacitated, then you shoot until die -- then you run as fast as you can back and do it all over again!
You are a Medic -- so in theory a supporting class -- but you have to fight to get him through this. Once he is up the ramp the rest of the mission is cake!
Good on ya! You not only got Nechayev to the evacuation point, you also unlocked another Journal Entry!
Primary Objectives: Defend the Mainframe / Defend the Safe / Defend the Datakey
Secondary Objectives: None
This one is a series of defense objectives, which it may not seem like it but are actually easier to do than the attack missions since you only have to succeed at one of them to win the mission! Obviously it is easier to defend as an Engineer since they can deploy landmines and Gatling Turrets -- and I highly recommend that you do!
Keep Security from Uploading the Datakey
Chances are you will not be able to keep them from hacking the mainframe because of the structure of the room and their ability to toss grenades into it. The bar though, that is a different story. If they do get the safe open all is not lost, in fact keeping them from uploading the data is the easier of the three tasks -- just run ahead to the midway point to the terminal, set up your Gatling Turret and some mines, and then wait for them to make it to you -- if they can.
Your team is pretty good about taking down the key carrier -- so you may not even need to battle at all!
Primary Objectives: Destroy the Pillar / Escort the Bot / Destroy the Bridge / Hack the Gate Controls
Secondary Objectives: Hack the Shop Door
Right -- so this should be a cakewalk, right? Err... Not so much. You need to complete each of the steps in this mission to accomplish the goal and win it -- so start by blowing the Pillar, and then the bridge before you escort the bot to the gate so it can load the black box onto your boat and you can have you an escape!
Recover the Black Box and get it through The Gate
Blowing the Pillar to bring the helicopter down is not as trivial as it may appear because you do not have a cohesive unit for this mission -- meaning that your teammates do not cooperate or support you as well as they should... The best approach here is to keep doing runs to the Pillar until you can place the charge then duck into the store directly across from the Pillar where the charge is and crouch down to cover it, stopping their Engineer from removing it.
Basically it is the same deal with the bridge, though at least with that you get more effective help from your teammates. Once you blow it, the bot walk is actually pretty easy as long as you pay attention to the sides of the road.
At the end of the road when the bot finally stops, all that you need to do is go into the Gate House and provide covering fire for your Operative while they place the hacking device, and then shoot any enemy that tries to come in and remove it!
This really should not be that big a challenge compared to the earlier level -- and once you get the thing hacked you win!
Primary Objectives: Defend the Gate / Disable the Maintenance Bot / Defend the Crane / Defend the Sample
Secondary Objectives: Defend the Side Door / Defend the Stairs / Construct Market Barricade
Before we discuss the strategy for this mission there is something you need to be aware of -- the people who created this game rely heavily upon a tactic known as Grief Code to force the player into doing things that they want them to do. In simple terms, the programmers set the game up to cheat in favor of the enemy -- and while they chose to do this for understandable reasons, it is still pretty insulting.
Do not be surprised if during this mission you find that the enemy engineer can repair their bot while running back and fourth behind it -- something YOU cannot do -- so that you cannot hit him with constant fire from the Machine Gun Nest or your regular guns... Well, that is so the bot gets to the container, because that is what they want to happen. When I say that they did this for understandable reasons what I mean is that they cheat so that the missions are not "easy" -- but that begs the question, how come they could not devise a fair and challenging mission? Why so much obvious cheating? They do not even try to hide it!
Make a stand in the Shipping Container
Anyway the point to this is that you should expect to be abused by the programmers on this level, as the enemy is going to do things they should not be able to do...
Now, as this is a purely defensive mission, what I suggest you do to avoid the frustration of spending half an hour trying first to stop them from blowing the gates -- and having the game cheat to be sure that the gates get blown, and then experience the frustration of 20 minutes spent keeping the bot from moving down the street only to have the enemy Engineer walk up to it and repair it while running back and forth so that you cannot stop him from repairing it... Just let it all happen.
Let the bot get up the street -- let the enemy repair the crane -- let the bot cut open the container. And THEN go into it, place your Gatling Turret inside pointing out, and place your mines outside and hold the enemy off right there. Draw a line in the mud, give the enemy and the programmers the finger, and say "This far, no farther!"
The drugs are never going to leave that shipping container -- and after you run the timer out, you win.
Your reward for this mission is the satisfaction of kicking the enemy in the crotch -- and another Encrypted Journal Entry!
Primary Objectives: Destroy the Storage Depot Door / Deliver the Hydraulic Fluid / Hack the Warehouse Controls / Deliver the Avionics / Repair the Fuel Pump
Secondary Objectives: None
First, congratulations on making it to the final mission in the main story mode for the Resistance in the Campaign. There are actually two speculative missions that follow this one but they are not officially part of the story here, and so they do not count. Except they do sort of, because there are Achievements that are related to them, but do not worry about that for now!
Getting the plane ready for takeoff
As you can see by the long list of objectives above, this is not going to be a short mission -- we have a lot to do and, as usual, only limited time in which to do it, so you will want to get to it! Thankfully compared to the last mission this one is relatively easy and cheat-free.
Chances are that your teammates will have destroyed the door to the Storage Area before you even get to it -- and will have grabbed the Hydraulic Fluid. Whoever has that is glowing yellow -- so chase after them and, when they get killed pick up the fluid, run it to the trailer and install it to complete this phase of the mission.
The next thing you need to do is hack the Warehouse Controls -- you will have help here as there will be another Operative on your team, but go ahead and change to that class now so you can pick up the slack, and then simply run to the controls and hack them. It really is that easy!
Grab the avionics -- or chase after whoever has them on your team and be prepared to grab them if they get incapacitated. Either way get them to the target and install them. Chances are there will be mines at the install point -- if you are not carrying them, wait until the guy who is gets himself blown up, then grab them and install them!
The final objective is to repair the Fuel Pump -- chances are even if you change to Engineer to do this, one of your teammates will get the job done before you get there -- if not, then cool, you get the honor!
And with that last objective in the bag, you unlock another Encrypted Journal Entry and the last Video as well, that being the Resistance Campaign Movie! You also unlock the Achievements "The story has just begun" (100 GP) and "You've escaped the Ark" (75 GP).
That just leaves the pair of What-If Missions to completely finish the single-player Campaign!
Primary Objectives: Defend the Crane Controls / Defend the Missile Controls
Secondary Objectives: Construct Main Barricade / Construct Side Barricade / Defend Crane Controls
Obviously our priority here is the Main Objectives, which are both basic defense so hey, get defensive mates!
A Classic Defensive Mission
In this sort of operation Engineer has certain advantages -- like being able to place Gatling Turrets and Landmines -- so I recommend going with Engineer...
Your main tasks are to place your Landmines in front of the Crane Controls and your Gatling Turret facing towards the open area that they will approach from in front of the platform. Your secondary tasks are to assist the other Engineer in getting the main and secondary barriers constructed... But those are not a priority -- so if you find yourself getting cut to ribbons, back off and just maintain your turret and the mines, right?
The timer will run out, you will win, huzzah! You unlock yet another Encrypted Journal Entry by winning so hey, well done!
Primary Objectives: Hack the Vent System / Destroy the Reactor
Secondary Objectives: Repair the Bridge Access Panel
Here is the last of the Resistance Missions -- and it is one of the funner of them as we have to take out the reactor and ohh, that will be fun! I am starting to thing that Splinter... Err... Chen -- might be just a little nuts. He seems to take more pleasure in sticking it to the man than he does getting off of this floating prison -- but you know, that actually makes sense...
Attack the Reactor and Blow it Up!
I don't know about how it went for you, but getting the Vent System hacked was actually harder than blowing the Reactor up for me! As you can see in the video I nearly took it to the very last second before I got it hacked, while the Reactor I just walked up and stuck a bomb on...
Completing this mission finishes off the story mode, and unlocks the Achievement "Viva la revolution!" (50 GP).
Well, that, and you totally freak Splinter... Chen out, because it seems that while he told you to blow up the Reactor, you know, he did not mean blow up blow up, you see? I think we made him really mad...
Primary Objectives: Destroy Door / Escort the Hostage
Secondary Objectives: Repair Lift Generator
The plan for this mission is basically the opposite for what it was with the Resistance -- we need to get the hostage to safety basically, because that is the core objective for this one. Understand that you can fail the Secondary Objective and still complete this mission!
So, by the numbers -- you blow the door to get the hostage free, then you escort the hostage to the exit point. The Resistance is going to try to incapacitate the hostage and let the timer run out to cause you to fail the mission.
You will find that it is often the case that your AI Teammates can usually handle the first part of the mission -- in this case blowing the door -- all by themselves, but the second part that consists of getting the hostage safely out? Not so much.
Getting the Hostage Safely Evacuated
To make this as easy on yourself as you can, you want to be Medic Class -- remember that a Medic can still fight, but they can also heal both themselves, the team, and the hostage! Being able to not only revive the hostage but also keep their health topped-up yourself turns this from a pain in the buttocks type mission to a cake walk! The only real challenge is when you get to the choke-point on this map, the ramp going up to the main level -- which is where the enemy AI really shines in being able to delay you!
Just take command of the situation, kill the enemy blocking the ramp, and get the hostage up the ramp, because once they are up that ramp you are going to win this mission no worries mate.
If you decided to play Security first instead of the Resistance as I did, this will be your first mission in the Campaign -- and during it there are some Achievements that you will unlock as you play, including:
-- I live... again! (5 GP)
-- Not over till the fat lady sings (10 GP)
-- No, I insist, you take it (5 GP)
-- Oh I'm sorry, was that yours? (10 GP)
-- Boom! (10 GP)
-- Use the wheel, earn more XP (10 GP)
-- Great shot kid! One in a million (10 GP)
-- The start of something big (20 GP)
I know, it seems like a lot of Achievements to unlock in the first mission of the game but what can you do? That is how it shakes out! Trust me though, the rest of the missions are not going to be like that, as you hear the BINK! sound of an Achievement unlocking much less frequently as you cintinue through the Campaign...
Assuming you played well and killed lots of bad guys you should get your first few Levels off of this one mission... It will not take you long to get to Rank 2 (Level 5) and unlock that Achievement as well, but the Rank 5 (Level 20) one you will actually need to work for.
IF you have not already done so BEFORE you started the Campaign, now is a good time to skip ahead to Part 18 and get all of that done, so that when you return to the Campaign for the next mission you will have access to ALL of the abilities! So go do that -- I will wait for you!
Primary Objectives: Hack the Mainframe / Crack the Safe / Deliver Datakey
Secondary Objectives: None
If you allow it to be, this can be one of the most frustrating missions in the game -- the reason for that is really very simple: the Enemy AI in this game is especially good at finding choke-points and then using them very efficiently.
Your first two tasks are to Hack the Mainframe and then Crack the Safe -- which though it includes resistance from the enemy (see the video) is not determined resistance. That only comes AFTER you get the safe open and have picked up the Datakey. Once you do that they go into high gear and become a serious hassle to you.
So here is what will happen -- the enemy will appear from two different spawn spots in the bar area where the safe -- and the Datakey -- are located. Once you pick up the Datakey you become the only thing they are interested in killing.
Your objective is to get that key to the tram station and upload it into the computer there. How you do that is actually very simple! When you die -- and you will -- spawn instead of reviving so you appear near the Console, and then change your job to Medic. Why? Because you can heal yourself, and because you can revive yourself, that is part of the reason why -- the OTHER reason is that Medic is the only class in the game that will cause the OTHER classes to defend it. You read that right -- if you try to play as any class but Medic, your teammates will watch you die. If you play as Medic they will actually help you.
Getting the Datakey and Uploading it!
So, once you return to the bar and grab the key, head for the computer -- you will notice that one or more of the team is now with you, defending you. While that is great and it will help a lot, you need to go from cover to cover and be proactive about killing any enemy that you can, because they are trying really hard to kill you, and by extension whichever teammates are trying to help you.
If you do get killed the Key is magically teleported to the bar and back in the safe you got it from -- even if you are only 5m from the computer you were supposed to upload it into. That is probably the most frustrating aspect of this mission. No, I lie! The most frustrating aspect is that the game will cheat.
If you watch the video carefully you will see an enemy soldier who I engaged in a shootout with, and who is missing the top half of his head from the nose up because I blew it off -- and who is still on his feet, still shooting, and still killing your teammates -- and you if you let him. If that is not cheating I don't know what it is!
So to sum this up, get the Key while the enemy -- including dead ones -- try hard to kill you! Get the Key to the computer at the tram platform and upload it, and mission accomplished!
If you worked the Freeplay for Levels and Journals you now know that there is a limit to the number you can unlock that way -- the last few times you did Freeplay you did not get any Journals -- that is because you have to get the rest from the Campaign!
Some free advice here -- if you end up getting frustrated by this mission, watch the video to see how I did it -- and do that. But not while you are upset. Take a break, eat dinner, walk your dog -- do anything except play the game -- until you are in a relaxed and calm mood, and then give it another try.
Primary Objectives: Destroy the Gate / Escort Maintenance Bot / Repair the Crane / Deliver Sample
Secondary Objectives: Hack the Side Door / Construct Side Stairs / Destroy Market Barricade
Get the Bio-Weapon Sample to the Chopper
It really does not matter whether you did the Resistance Missions first or Security, it becomes obvious that both sides honestly believe that they are doing the right thing, so you have no reason for feel bad one way or the other... I am just saying...
So in this mission there are a lot of objectives -- the important thing for you to remember if you are playing single-player is that the Primary Objectives are all you should be trying to do. When you are playing with more than one human player you can think about doing the Secondary Objectives... So here we go!
Destroying the Gate is necessary to get the bot moving -- and once it reaches the gap you repair the crane to move it to the other side. Once it is on the other side you escort it to the container with the bio-weapon and wait while it cuts it open, then you have a choice to make...
If you remain any class OTHER than Medic, you are expected to get the bio-weapon sample, then carry it to the helicopter. If you change to Medic, one of your teammates will carry it. I suggest doing that because it is a lot easier to cover them, and escort them. Otherwise you get killed. A lot.
Once you escort the ball carrier (he is highlighted in yellow) to the gate and he turns the sample over to the officer there, the mission ends! Good on ya!
Primary Objectives: Defend the Conduit / Defend the Safe / Defend the Pass Code / Stop the Prisoner
Secondary Objectives: None
No Secondary Objectives to tempt you for this one -- just the need to defend the different objectives and keep the Prisoner from escaping!
When this mission gets complicated it is only because you are making it complicated -- all that you need to do here is defuse any charge that is placed on the gate or the conduit and guard the conduit to prevent the enemy from placing a charge on it! Easy-peasy Lemon-squeazy!
Defending the Conduit
Start out the level by changing to Engineer -- that way you actually can defuse a charge if one gets placed. The Gate is not important -- if they blow it that will not stop you from completing the mission with a success -- so do not worry about the Gate. Instead worry about the Conduit!
Your mates are actually useful in this mission, keeping the enemy bottled up around the fences, and setting up turrets in the area above that the enemy cannot reach easily to disarm. They also construct a gun nest up there that you can use if you like, but my strategy for this was not to stay above and shoot from relative safety and comfort -- my strategy was to go down and take cover by the Conduit and take out the bad guys as they approach.
The video for this mission perfectly illustrates this tactic -- once you begin the mission go to the nearby Console and change to Engineer Class, then jump off of the upper area down to the Conduit and take cover behind the concrete pillar there, and take out the enemy at your liesure.
None should get close enough to you to hurt you if you are doing it right -- just mind the flashbang grenades as those will blind you. Learn to fire defensively when you are blind (as illustrated in the video) and you will be fine! Take your place, defend the Conduit, and let the timer run out to win.
Success in this mission will unlock a needed Audio Journal Entry -- Founder Barbara Elmhurts's 01/16/45 entry in which she talks about consultation meetings with the Resistance.
Primary Objectives: Repair the Crane Controls / Hack the Missile Controls
Secondary Objectives: Destroy Main Barricade / Destroy Side Barricade / Repair Crane Controls
With plenty of objectives to go around, you have a wide choice when you are playing this level with a lot of other human players -- but when you play it solo in story mode, you really have to concentrate on the Main Objectives and not the Secondary ones.
You should be very well-versed in the objectives for this one -- assuming you did the Level Boosting we talked about earlier in the Guide.
Hacking the Missile Control System
So when the mission starts, go directly to the Console and change to Engineer -- then fight your way to the crane and repair the controls, completing that part of the mission. You will then be re-staged at the start point. BEFORE you do ANYTHING else, go to the Console and change to Operative. It is really dumb that the game does not do that for you when it re-sets you, but it does not. And you must be Operative to do this part.
Fight your way to the Missile and attach the hacking device to the controls. This next bit is really important so read it carefully: hack it as far as you can, and once you are shot and down, carefully use the shoot while incapacitated ability to keep the enemy operative from undoing your hack. Once you are revived, immediately resume the hack. You do it this way, you will get it done before the timeout.
Once you hack the missile instead of it taking out the tower it takes out a helicopter -- I am not sure if that is a good outcome, but it is better than the killing thousands of civilians in the tower I would guess... I don't know about you, but I did not receive a Journal Entry for this mission, which leads me to believe that maybe you can only get so many per mission?
Either way, well done! Only one more regular mission on the Security side of the game, then two What If missions and you are either done, or are going to do the Resistance side!
Primary Objectives: Defend the Vent System / Defend the Reactor
Secondary Objectives: Defend the Bridge Access
This is a simple defending challenge, and you can lose the vents and still win as long as the Reactor is not lost. Best advice here is to use cover as best you can, and try to stick with the group when you can.
If you lose the Vent System -- and it happens about half the time you play this level because it is one of those deals where bad luck can really mess you up -- you just have to make sure that you hold the Reactor for 17 minutes.
Protecting the Reactor Control System
The best way to do that is to go to the Reactor Room and place one mine in front of each of the two control access points -- that way you can guard one while the mine detonating at the other will let you know that they are trying to hack it! Simply move between the points, taking out the enemy who appear in the windows overhead.
Shoot in short controlled bursts and you will do very well... Yeah, it gets a little boring having to protect the controls but that is the point of this mission!
Success unlocks the Achievement "You've Saved the Ark" (75 GP) that you get for winning all of the main Security Missions (minus the What-If missions), so good on ya mate! Well done!
This just leaves the two What-If Missions, so why don't we do those now and be done with the Security side of the game?
It also unlocks the 03/19/45 Journal for Founder Barbara Elmhurst, and the Security Campaign Movie.
Primary Objectives: Defend the Pillar / Disable the Bot / Defend the Bridge / Defend Gate Controls
Secondary Objectives: Defend the Shop Door
First I want to say that I understand if you are tempted to walk away from the game due to this mission. It is bad, there is no question about it. Of all the missions in the game, this one has the most Grief Code in it, and the cheating on behalf of the enemy is so blatant that they may as well have named this mission the Cheater McCheat Cheating Mission of Cheats.
Defending the Gate Controls is the Key to this Mission
Instead of getting angry or frustrated, try to understand that the whole point behind their cheating is simple enough -- you are not intended to keep the Pillar from being blown -- you are not intended to keep the bridge from being blown. You are not intended to keep the bot from reaching the end of the road. In fact the game will not allow you to do any of those things -- unless you are incredibly lucky that is.
The point is that the programmers who created the game coded it to cheat in favor of the enemy so that the vast majority of players will try their heart out to fulfill the objectives and fail. Once you get to the end of the mission, in the Gate House, the odds are more even but NOT in your favor. During the last 30 seconds of the clock there will be a blitz attack, and if they already have the hack device in place, the game will give them extra time on the clock. Yes, more blatant cheating. But you CAN win this at the end, so do not put a lot of effort into the first two battles in this mission, just get through them and then set yourself up in the Gate House and take the bastards down. Yeah, that means sitting there waiting for 20 minutes, occasionally shooting an enemy or two, but that is how the mission was intended to go, so suck it up.
The Game is Programmed to Cheat in this Mission
If there is any remaining doubt in your mind that the game is set up to cheat in favor of the enemy, watch the video above -- as you know, the bridge must be blown for the bot to pass it and move on to the next objective -- but if you are too good at keeping the enemy from placing the charge to blow the bridge, eventually the bot ignores the bridge as if it was not there, and simply rolls through as shown in this video.
The only option that you have once the game lets the bot move through the bridge as if it were not there is to try to keep the enemy from getting close enough to "escort" the bot down the road, as it is not supposed to move unless is has a character escorting it... Notice that I said "not supposed to" instead of "cannot"? Yup, if you are able to keep the enemy away from the bot for long enough, the game then has the bot go into total auto mode, and it moves up the road as if there was a character escorting it when there clearly is not because you are keeping them from it!
I have listened to a lot of players complain about this level -- it is certainly the most hated in the game -- but the odd thing is that mostly they feel betrayed by Splash Damage. It is one thing to give a boss mob lots of XP, or make only every fifth shot able to damage them, but to basically ignore the rules of the game in order to force the player to lose? That is pretty bad.
-- One Last Chance --
If you fail to protect the bridge (chances are you will) then your last chance to win is to stop them from completing the hack on the Gate Controls at the end of the mission. Most players will win at this point, because that last battle takes place in a confined area and, if you place your assets strategically and use the cover available, the odds are actually in YOUR favor here!
What you want to do is pretty much what I did in the video -- keep replacing your two mines in front of the control panel, place and replace your Gatling Turret, and be sure to pick off the Engineer when he pops up to try to hack! Rinse and repeat and you will win this one!
In addition to the satisfaction of taking out the bad guys and winning the mission, you also unlock the Journal for 04/01/45 for Founder Barbara Elmhurst.
Primary Objectives: Defend Storage Depot Door / Defend Hydraulic Fluid / Defend Warehouse Controls / Defend the Avionics / Defend the Fuel Pump
Secondary Objectives: None
As the mission begins pay close attention to the load screen audio as you learn something startling about the situation with The Ark... It turns out that they had a good reason for trying to stop the Resistance after all! They had made contact in the past with outsiders and ended up having to move The Ark because the encounter was not good...
Preventing the Resistance from Launching their Plane
Considering all of the effort that they went to in setting up the previous mission against us, the ease at which this one was completed with success was rather disconcerting.
Obviously you were not expected to stop them from getting the Hydraulic Fluid, and thus not expected to be able to defend the Depot Door. The first opportunity that you actually have to win this one is at the Controls -- that is where I won the mission -- but in theory you could also win it at either of the following two phases I guess.
That wraps up the Security side of the Campaign -- you will automatically unlock the Achievement "To serve and protect" (50 GP) as your reward for this accomplishment, so good on ya mate! Congratulations! You will also unlock another Encrypted Journal Entry for this mission -- 12/08/44 of Captain Clinton for me.
At this point all that is left for you -- assuming you have already completed the Resistance side of the game -- is to do the various Star Challenges and complete collecting the Encrypted Journal Entries, and the odd Achievements you have yet to unlock. Some may require a bit of staging on your part, but they are all accessible via the Campaign Mode. Good luck with that mates!
When you first start playing the game and you start comparing your play experience in Campaign and then examine the Challenge Mode it becomes very obvious that you are looking at absolute opposites! Then you consider some of the Achievements and the situation gets even more convoluted...
In Campaign Mode having a leveled-up player is a good thing, both because it gives you access to the more advanced abilities (and they are really useful) and because it gives you access to the other body types. But when you approach the Challenge Modes the situation is just the opposite! You do NOT want to have a leveled character because that makes the challenges worse!
Finally when we examine Achievements in the game it becomes very obvious that some of them -- the encrypted journal collection in particular -- require you to do things in the game that are not part of normal game play!
In the end, with a little careful planning and extra play, you can arrive at the end of the game with all of the elements in place to complete the Achievements without it becoming a major issue or inconvenience -- by using the Freeplay System to acquire your Rank and most of the Journal Entries!
Gaming the System through Freeplay Mode
First Step: Freeplay
To make your life a lot easier, it is a good idea to spend your first few hours in playing through ALL of the missions in Freeplay, using them as a tutorial slash training system so that you become familiar with both the maps and the primary and secondary objectives, so your first session of play with the map set to any so it randomly rotates you through them all.
Your second session of play should be on the Shipyard Map ONLY -- please watch the video above to see how this plays out -- as your purpose here is to gain XP and Journal Entries and that is pretty much all you are doing.
For both session types you need to set up Freeplay with no bots, using the following settings:
-------------------------------------------------------------------------------
Game Settings
(1) Private Game-related
(2) Game Mode: Objective
(3) Play Mode: Versus
(4) Visibility: Friends & Invite
(5) Map: Any*
(6) Match Settings: Custom
Match Settings
(1) Min Team Size: 0
(2) Max Team Size: 8
(3) Required Players: 1
The rest of the settings are whatever you like them to be or none.
* Set to any for the first session, set to Shipyard for the second.
-------------------------------------------------------------------------------
Passive Achievements
As you play you will unlock Achievements without even trying -- just playing through a handful of Freeplay Missions over the course of an hour I got my Security Character to Level 16 and I unlocked the following Achievements:
-- Boom! (10 GP)
-- Cut 'em off at the pass (10 GP)
-- I think I know a shortcut (10 GP)
-- Oh I'm sorry, was that yours? (10 GP)
-- Use the wheel, earn more XP (10 GP)
-- Was it the red or the blue wire? (10 GP)
-- You shall not pass (20 GP)
-- You're going places kid (20 GP)
Note that the leveling up of characters is only for unlocking Achievements and for playing Campaign Mode and PvP/online... You do not want to use a leveled character for stuff like the star challenges because the enemy matches your level. For the star challenges you are best off making a new character and doing them at Level 1!
== As long as you leave the game set to Versus Play Mode you also gain audio logs when you play ==
== As long as you leave the game set to Online Mode regardless of whether or not you set it to Public or Private Match, you WILL receive the 20% XP Bonus for Online Play --
Note that when you complete each mission in Freeplay you get the same end assessment screen that you do in Campaign -- your XP is tallied up, you get your Level and Rank increases, and it shows you the items / abilities / collectibles that you unlocked for completing the mission if you Rank up. As long as you score a reasonable amount of XP and have the game in Versus Mode you also get a new Journal Entry with each match you complete!
There are a LOT of items / abilities / collectibles in the game -- and though it shows you the abilities you "unlock" you do not actually GET them until you buy them -- and to do that you have to be the right Rank and you have to have the required star points to spend.
-- Completing the Boost-able Achievements --
In addition to the Achievements that you unlock naturally while playing the Freeplay Sessions, there are some that require specific abilities on your character in order to unlock them. To make life easier on you, here are the steps to take to finish unlocking the ability-related Achievements:
Setting Up Your Character
The first thing we need to do is configure our Level 20 (Rank 5) Character. So, open the Character Menu and change their Body Type to Heavy under the Appearance Tab. Now access the Abilities Tab and buy the following Abilities:
-- Universal > Grenade Shooting
-- Universal > Battle Hardened
-- Universal > Sprinting Grenade
-- Universal > Sprinting Reload
-- Universal > Downed Fire
-- Soldier > Kevlar Vest
-- Soldier > Extra Magazine
-- Soldier > Satchel Charge
-- Medic > Transfer Supplies
-- Medic > Self Resurrection
-- Engineer > Gear Head-first
-- Engineer > Command Post Upgrade
-- Engineer > Extra Landmine
-- Operative > Cortex Bomb
Now that you have taken care of configuration -- and yes, you can add other abilities if you like, the above are just the ones you need for the Achievements and to make life a little easier -- it is now time to unlock these.
Boosting the Ability-Related Achievements
Select the first Campaign Mission -- it does not matter which side -- and then do the following actions:
(1) Set your Objective to Capture one of the Command Posts -- Health or Supply -- then go there and capture it. Once you have it captured, if you are not already Engineer than make yourself an Engineer, and then access the menu for it and hold it until the timer runs out and you upgrade the Command Post, unlocking the Achievement "Pump up the volume!" (10 GP).
(2) Make sure you are still playing as Engineer -- then plant a pair of mines one next to the other in a hall where you know the enemy will run through -- they will run through detonating the mines in sequence, dying as a result, and unlocking the Achievement "You can place another mine now" (10 GP)!
(3) Change to the Soldier Class at any Command Post and go to the place where you laid the mines as that is a known transit path -- plant a few Satchel Charges then back off to where you can see them and when the enemy is near, detonate them to kill the enemy and unlock the Achievement "It's a trap!" (10 GP).
(4) Change to Operative Class then go to a group of enemy and let them down you - and detonate your Cortex Bomb to take them out, unlocking the Achievement "A bit of a headache" (5 GP).
(5) Change your class to Medic, then transfer all of your supplies to a teammate and you will unlock the Achievement "T'is better to give than receive" (10 GP)
That wraps up all of the elective ability-related Achievements! Pat yourself on the back and feel good about getting them out of the way! That also wraps up this section of the Guide.
WARNING: If after you reach Level 20 / Rank 5 and spend your ability points and THEN you sell the points to redo them you will LOSE A LEVEL! You will be put back to Level 19, Rank 4, and all of the XP for Level 20 is deleted. Once that happens it CANNOT be undone. You have been warned.
The Dossier Menu contains the following selections:
-- Training
The Training Menu contains training videos (mini-tutorials) that will teach you the various points of the game. While some of the information that they pass on is basic, this is worth sitting through to pick up on some aspects you may not know about!
(1) The Basics
(2) Objectives
(3) Heads Up Display
(4) General Gameplay
(5) Classes
(6) The Battlefield
(7) Play All
-- Audio Logs
In addition to allowing you to listen to the Audio Logs that you have unlocked in the game, this also lets you see which ones you have unlocked.
Note that you can not acquire ALL of these logs in the Freeplay games you play to get to Rank 5 but you can score a lot of them by being sure that you are in Versus Mode. Each mission you complete will give you one random log as well, but you will need to do some online play to actually gather them all...
-- Tips Database
This section is literally every tip you are shown in the game. This is not part of the collection system, and they are too numerous to list here! Still, you should read these as you might learn something you did not know from them...
Abilities are a key element to building a character in Brink and are naturally the core difference between your medium body character and your friends -- you both have the same build, but different abilities, level and rank.
This Primer is intended to allow you to become familiar with the abilities and how you acquire them, and also points out the abilities required for unlocking the related Achievements!
-- The Ability Menu --
From the Main Menu select the 4th option -- Characters & Weapons -- and from that sub-menu select -- Abilities -- to access the Abilities Menu to both review what you have, and what you can purchase.
The first thing you need to understand about this menu is that it requires you to navigate it! There are actually five sub-menus under this screen, and unless you have changed them the default sub-menu you will see upon loading this screen is the Universal Abilities Menu. If you were not aware that there were other menus then chances are you spent your star points on this one. If you did no worries mate! You can easily start over by selling all of the abilities that you purchased previously to get the points back and re-cast your abilities configuration!
To do that hit the Y- Button, and then the A-Button to confirm that you want to sell them.
Before we start listing abilities we should get very familiar with the controls for these menus. Along the bottom of the screen you have several displays -- your Credit Balance, your current Rank, your current Level, your total XP count, and then the buttons you can use which are:
(Y) Sell All Abilities
(A) Buy an Item/Ability
(X) Map an Item/Ability to the Direction Pad
(B) Done
Using RB and LB (Right Bumper and Left Bumper) you can change between the Sub-Menus that are part of this Menu! For the record, the following are the Menus available here, from left to right, starting on the left:
(1) Universal Abilities
(2) Soldier Abilities
(3) Medic Abilities
(4) Engineer Abilities
(5) Operative Abilities
On each of these sub-menus the abilities are listed -- organized by Rank. Change to the Universal Abilities Menu now... There are four columns of abilities here, in stacks of 3 except for the last column, which only has a single ability in it.
If you move all the way to the right side of the menu using the left joystick you will see that in the 4th column there is one selection -- Downed Fire -- and if you examine it closely you will see that in the upper right corner there is a star and the number 5. That is not the price for this ability, it is the Rank Number, which as you can see, is Rank 5.
The Rank System in Brink is Level and XP based and requires the following:
Rank 1: 0 XP (Level 0 through 4) The Rank you begin playing as.
Rank 2: 15,250 XP (Level 5 through 9)
Rank 3: 60,750 XP (Level 10 through 14)
Rank 4: 148,000 XP (Level 15 through 19)
Rank 5: 300,000 XP (Level 20)
Rank 5 is the highest Rank, and only unlocks when you reach the highest Level.. Bearing in mind that when you play the game versus NPC characters (bots) they scape up to match YOUR Level, so being a high Level actually works against you for the most part, as it just makes it more difficult to defeat the NPC bots -- so with that in mind, if you are contemplating doing the challenges, or running through the missions, you really are better off using a new character!
Ideally you are going to want to have a minimum of three characters in the game (but probably more) which consist of the two characters you will be leveling to Rank 5 for use in playing online against other players -- one for Security and one for the Resistance. The third (or more) character will be one you actually try not to level too much, as it is the character(s) you will use to play through Campaign Mode -- whether solo or group -- to experience the story and unlock the Achievements that relate to Level and Rank.
Please read "Sneaky Strategies" for the details on how to easily rank-up while at the same time passively boosting a large number of the Achievements in the game.
-- The Abilities Selections --
As we covered above, the columns on the menu contain the icons for the abilities that apply to that class or your character in general, and each of the icons in the menu contains a gray shadowed picture that represents the ability, the ability name, and the Rank required in the upper right corner of the icon.
Any abilities that you have already purchased have their icons in the menu changed from the default light gray shadowed image to a very dark-gray version that, when you select it, turns a bright color of blue for its background field, with the image representing the ability being crisply defined in white accented black.
When you select an ability -- whether you own it or not -- on the bottom of the menu is a box in which the Description of the ability is displayed, with the actual cost of the ability listed in the upper right-hand corner. The following example is typical of the display and information you will find within this structure:
- - - - - - - - - - - - - - - - - - - - - - - - - - - - - - - - - - - - - - - -
Column 1, Number 3: Supply Max Increase
Description: Supply Max Increase permanently increases your Supply Meter by one pip, which allows you one additional use of special abilities before you must wait for a recharge.
Cost: 01
- - - - - - - - - - - - - - - - - - - - - - - - - - - - - - - - - - - - - - - -
The listing tells you what the ability is, what Rank is required to obtain it, and what it costs. The Description tells you what the ability will do for you in very simple terms.
The following Ability Catalog provides you with all of the information that you need to become very familiar with the abilities available to you, and will allow you to determine in advance which abilities you will work towards, and which you need.
The listings are separated by sub-menu, and are listed by Column, then Column Position, starting at the top and working down in each column, so for example the ability Supply Max Increase is listed as C1P3 -- Column 1, Position 3 -- while the ability "Battle Hardened" which is right above it, is listed as C1P2, and "Grenade Shooting" at the top of the column is C1P1. That is a nice basic system that is applied consistently and should be very easy for you to follow! If we refer to an ability in the game and we say Sub-Menu 3, Column 2, Position 2 then you know we are talking about the ability "Transfer Supplies" in the Medic Sub-Menu, right?
(1) Abilities Catalog: Universal Abilities
(C1P1) Grenade Shooting -- Rank 1 / Cost = 1
Grenade shooting allows you to shoot your Frag Grenades mid-flight. giving you more control over when and where they will explode (if your aim is right).
Related Achievement: (A05) Great shot kid! One in a million (10GP)
(C1P2) Battle Hardened -- Rank 1 / Cost = 1
Battle hardened permanently increases your Life meter by one pip, allowing you to withstand a small amount of additional damage.
(C1P3) Supply Max Increase -- Rank 1 / Cost = 1
Supply Max Increase permanently increases your Supply meter by one pip, which allows you one additional use special abilities before you must wait for a recharge.
(C2P1) Combat Intuition -- Rank 1 / Cost = 1
Combat Intuition allows you to sense if an unseen enemy is aiming at you. You will only get the warning if the enemy is NOT on your Radar, and if their crosshairs are directly on you.
(C2P2) Sprinting Grenade -- Rank 1 / Cost = 1
Sprinting Grenade lets you cook and throw Grenades without interrupting your sprint.
(C2P3) Sprinting Reload -- Rank 1 / Cost = 1
Sprinting Reload lets you reload your weapons while sprinting.
(C3P1) Sense of Perspective -- Rank 1 / Cost = 1
Sense of Perspective snaps your view to a 3rd person perspective while you capture Command Posts or Build/Repair stationary objectives as an Engineer. Instead of being able to move while doing these lengthy actions, you will be able to spin your camera around to watch for enemies from all angles.
(C3P2) Resupply Rate Increase -- Rank 3 / Cost = 1
Resupply Rate Increase boosts the recharge rate of your Supply meter for all classes, shaving several seconds off the normal recharge rate for each pip.
(C3P3) Silent Running -- Rank 4 / Cost = 1
Silent Running makes you move completely silently. Normally, your movement noise will make you appear on your enemy's radar from a large distance, but with this, you will not appear at all until you are within striking distance.
(C4P1) Downed Fire -- Rank 5 / Cost = 1
Downed Fire lets you shoot even when you are incapacitated, but only with your backup weapon, and only after an initial delay. You will have almost no Health while incapacitated, making it easy for enemies to finish you, so it's less likely that a Medic will be able to revive you.
(2) Abilities Catalog: Soldier Abilities
(C1P1) Standard Soldier Kit -- Rank 0 / Cost = Free
Soldiers complete Destruction objectives using the HE Charge, and can resupply their teammates' ammo, as well as their own. Soldiers also carry Molotov Cocktails by default, giving them more grenade power than any other class.
(C1P2) Molotov Cocktail -- Rank 0 / Cost = Free
Molotov Cocktails explode on impact, burning everything in their blast area. There is a Cooldown period between successive uses. This is a part of the standard Soldier Kit, and can be re-mapped on this screen.
(C1P3) Armor Piercing Ammo -- Rank 2 / Cost = 1
Armor Piercing Ammo upgrades the ammunition you supply yourself with, making it 100% effective against enemies who have the Kevlar Armor buff. However you cannot supply your teammates with the upgraded ammo, only yourself.
(C2P1) Flashbang Grenades -- Rank 2 / Cost = 1
Flashbang Grenades temporarily blind enemy players who see them detonate. Teammates who see them will only see a brief flash, unless you are playing in a Friendly Fire enabled match, in which case they can be blinded too. There is a Cooldown period between successive uses.
(C2P2) Grenade Mastery -- Rank 2 / Cost = 1
Grenade Mastery speeds up your grenade recharge timer, allowing you to throw standard Frag Grenades more often, as long as you remain a Soldier. Note, this does not affect the cooldown period of specialty grenades.
(C2P3) Scavenge -- Rank 2 / Cost = 1
Scavenge the equipment of dead enemies by interacting with them to refill your Supply meter.
(C3P1) Kevlar Vest -- Rank 3 / Cost = 1
Kevlar Vest increases your damage resistance while you are a Soldier. Enemies equipped with Armor Piercing rounds can still do full damage to you.
(C3P2) Extra Magazine -- Rank 3 / Cost = 1
Extra Magazine allows you to increase the total ammo capacity of your teammates (or yourself) by an extra magazine's worth. Subsequent resupply by Soldiers will fill up ammo to the increased limit.
(C3P3) Frag Blast -- Rank 4 / Cost = 1
Frag Blast increases the blast radius of your Frag Grenades but not their damage. This bonus does not appear to Grenade Launcher ammunition, only standard Frags.
(C4P1) Grenade Damage -- Rank 4 / Cost = 1
Grenade Damage increases the damage of your Frag Grenades but not their blast radius. This bonus does not appear to Grenade Launcher ammunition, only standard Frags.
(C4P2) Satchel Charges -- Rank 5 / Cost = 1
Satchel Charges are remote control bombs plantable on any flat surface. You can place up to three and detonate them simultaneously by pressing RB (with the ability selected), or individually by interacting with them from a distance. Enemy fire can destroy them, so try not to plant them in obvious places.
Related Achievement: (A08) It's a trap! (10GP)
(3) Abilities Catalog: Medic Abilities
(C1P1) Standard Medic Kit -- Rank 0 / Cost = Free
Medics can buff their teammates' health one pip above the normal maximum, and return incapacitated teammates to action by throwing them a Revive Syringe. They can also Heal and Revive Escort Objective VIP's.
(C1P2) Adrenaline Boost -- Rank 2 / Cost = 1
Adrenaline Boost lets you buff a teammate so they ignore all damage for a short period. When the effect (indicated by a golden outline) wears off they'll receive all the damage they ignored, all at once. There is a long cooldown before you can re-use the ability, and you can't self-administer it.
(C1P3) Increase Supplies -- Rank 2 / Cost = 1
Increase Supplies increases the length of your Supply meter by one pip, but only as long as you remain a Medic.
(C2P1) Metabolism -- Rank 2 / Cost = 1
Metabolism lets you make a teammates health regenerate at a faster rate than normal. The effect remains until they die. You cannot administer this buff to yourself.
(C2P2) Transfer Supplies -- Rank 2 / Cost = 1
Transfer Supplies lets you refill a teammate's Supply meter at the cost of your own. If you select this ability you will see interaction prompts on teammates who are low on supplies.
Related Achievement: (A22) T'is better to give than receive (10GP)
(C2P3) Improved Increase Supplies -- Rank 3 / Cost = 1
If you already have Increase Supplies, Improved Increase Supplies will further increase your Supply meter, but only as long as you remain a Medic.
(C3P1) Speed Boost -- Rank 3 / Cost = 1
Speed Boost lets you increase a teammate's sprint speed for a short period. You cannot administer this buff to yourself.
(C3P2) Improved Life Buff -- Rank 4 / Cost = 1
Improved Life Buff lets you increase a teammate's health by two pips, instead of the normal one pip.
(C3P3) Self Resurrection -- Rank 4 / Cost = 1
Self Resurrection allows you to Revive yourself when Incapacitated. There is a very long cooldown period between successive uses.
(C4P1) Lazarus Grenade -- Rank 5 / Cost = 1
The Lazarus Grenade is an experimental pharmaceutical aerosol bomb, letting you Revive all incapacitated teammates within its healing cloud. There is a cooldown period between successive uses.
(4) Abilities Catalog: Engineer Abilities
(C1P1) Standard Engineer Kit -- Rank 0 / Cost = Free
Engineers can complete Construction and Repair Objectives, disarm enemy HE Charges, remove enemy Hackboxes, and buff their teammates' weapon damage. They can also plant landmines that are hidden to the enemy.
(C1P2) Landmine -- Rank 0 / Cost = Free
Part of the Standard Engineer Kit, this lets you plant a mine on flat surfaces. Plant a new one, and the old one is removed. Your mine's status is shown in the HUD at the bottom left. Enemies cannot see these mines unless spotted by their Operatives. You can re-map the mine on this screen.
(C1P3) Extra Kevlar -- Rank 2 / Cost = 1
Extra Kevlar allows you to give your teammates additional armor protection that lasts until they die. You cannot administer this buff to yourself, or to a Soldier who already has the Kevlar Ability.
(C2P1) Gear Head -- Rank 2 / Cost = 1
Gear Head increases how fast you can build and repair Turrets, Deploy Mines, and build MG nests.
(C2P2) Nerves of Steel -- Rank 2 / Cost = 1
Nerves of Steel increases the speed at which you can disarm enemy explosives.
(C2P3) Light Turret -- Rank 2 / Cost = 1
This lets you plant a light Turret on flat surfaces. It only scans a small area, but once it acquires a target it will turn 360 degrees to track it. Its status is shown on the HUD at the bottom left; if damaged any friendly Engineer can repair it. If you place a new Turret, the old one will disappear.
(C3P1) Command Post Upgrade -- Rank 3 / Cost = 1
Command Post Upgrade allows you to upgrade any Health or Supply Command Post to double its effect on the entire team. This is accomplished by accessing the Command Post Wheel for an extended period of time. During this process, a progress meter will appear on the screen.
Related Achievement: (A14) Pump up the volume! (10GP)
(C3P2) Medium Turret -- Rank 3 / Cost = 1
This lets you plant a more powerful auto-turret which will detect and fire at any enemies. You cannot purchase this ability without first purchasing Light Turret.
(C3P3) Improved Weapon Buff -- Rank 4 / Cost = 1
Improved Weapon Buff allows you to even further increase your teammate's weapon damage.
(C4P1) Extra Landmine -- Rank 4 / Cost = 1
Extra Landmines allows you to have two mines active at once.
C4P2) Gatling Turret -- Rank 5 / Cost = 1
This lets you plant a Gatling auto-turret which will detect and fire at any enemies. You cannot purchase this ability without first purchasing Light Turret and Medium Turret.
(5) Abilities Catalog: Operative Abilities
(C1P1) Standard Operative Kit -- Rank 0 / Cost = Free
Operatives can complete Hack Objectives, spot enemy landmines by Iron Sighting over them, and disguise themselves as Downed enemies. Disguise lasts until you interact with an objective, fire a weapon, or are hit by an enemy Homing Beacon.
(C1P2) Firewall Command Post -- Rank 2 / Cost = 1
Firewall Command Post makes it take longer for an enemy to capture your team's Health or Supply Command Post. This is accomplished by accessing the Command Post wheel for an extended period of time. During this process, a progress meter will appear on the screen.
(C1P3) Homing Beacon -- Rank 2 / Cost = 1
Homing Beacon allows you to place a red outline on an enemy by Iron Sighting them for several seconds. This will allow the enemy to be seen by all your teammates, even through walls. The outline only lasts for a few seconds. Homing Beacon also allows you to reveal enemy operatives in disguise.
(C2P1) Comms Hack -- Rank 2 / Cost = 1
Comm Hack lets you extract technical intel from incapacitated enemies. If successful, every enemy's location will be shown on your and your teammate's radars, giving your team a huge advantage. The effect will only last for a brief time.
(C2P2) Sticky Bomb -- Rank 2 / Cost = 1
Sticky Bomb lets you throw a powerful grenade which sticks to any enemy it touches and can only be removed by their teammates. Enemies can destroy the Sticky Grenade by shooting at it while still on the ground. There is a cooldown period between successive uses.
(C2P3) Caltrop Grenades -- Rank 3 / Cost = 1
Caltrop Grenades scatter sharp spikes which damage enemies who cross over them, unless they move slowly. The valtrops will not hurt teammates, and will remain in the world for the length of the cooldown period.
(C3P1) Hack Turret -- Rank 3 / Cost = 1
Hack Turret lets you reprogram an enemy turret to become a friendly turret, owned by you. Approach the enemy turret from behind to improve your chances of hacking it.
(C3P2) Control Turret -- Rank 4 / Cost = 1
Control Turret allows you to take remote First Person control of friendly turrets. To initiate remote control, first place the device on the turret, and then interact with it from a distance.
(C3P3) Cortex Bomb -- Rank 4 / Cost = 1
The Cortex Bomb is a surgically implanted explosive charge that can be detonated when you are incapacitated, eliminating any enemies nearby.
Related Achievement: (A01) A bit of a headache (5GP)
(C4P1) EMP Grenades -- Rank 5 / Cost = 1
EMP Grenades temporarily disable enemy turrets, mines, and radars. They also slow down the progress of enemy Hacks and HE charges. There is a cooldown period between successive uses.
The Challenges are more than simply different missions for you to do either solo or with a bud, they are also the primary system for unlocking new weapons and -- perhaps of more interest -- the large collection of accessories that you can kit your weapons out with -- like silencers and laser sights, you know, the good stuff!
You reach the Challenge Menu by selecting Challenges from the Main Menu -- and the Challenges Menu contains the following choices:
-- Be More Objective * / ** / ***
-- Parkour This * / ** / ***
-- Escort Duty * / ** / ***
-- Tower Defense * / ** / ***
Each of the '*' are a different level of the same mission -- one star, two star, etc. Each of these unlocks its own unique weapons and kit -- if you look at the menu you will note that it specifically shows what each unlocks in its listing.
There are Achievements associated with these Challenges -- and they count for the Leaderboards as well. They can be played Solo, or by 2, 3, or 4 player groups.
The Objective Challenges are just what they sound like -- Objectives you need to complete in the specified time. These are basically tutorials to play the game elements that you already know how to play! The Parkour Missions teach you Parkour, the Escort... Escorting... And Tower Defense, well that is obvious.
The Challenges are not required elements of the Campaign, being strictly optional -- but they can be fun if you cannot find a PvP Match to play...
The Xbox version of Brink includes 36 Achievements with a total of 1,000 Gamer Points -- not including GP for DLC. These are unlocked through regular play, but many can be boosted!
-----------------------------------------------------------------------------------------
Achievements can be easily boosted
-- Boosting Achievements --
Achievements in the game can be boosted -- many of them solo -- by using the Freeplay Mode of the game. In the video above we boost the Achievement "They never knew what hit them" by playing Freeplay as Security on the mission Aquarium with all bots and opponents turned off. To unlock it all that you need to do is set and detonate the charge and escort the hostage, and voila! Achievement unlocked!
-----------------------------------------------------------------------------------------
-- Standard Game Play Achievements --
(A01) A bit of a headache (5GP)
Take down an enemy with a Cortex Bomb
(A02) Boom! (10GP)
Detonate a HE Charge
(A03) Brinksmanship (10GP)
Complete an Operative Primary Objective within 5 seconds of breaking disguise
(A04) Cut 'em off at the pass (10GP)
Close an enemy team's shortcut
(A05) Great shot kid! One in a million (10GP)
Take down an enemy by shooting a grenade
(A06) I live… again! (5GP)
Revive yourself
(A07) I think I know a shortcut (10GP)
Open a shortcut for your team
(A08) It's a trap! (10GP)
Take down an enemy with a Satchel Charge
(A09) King of the world! (100GP)
Complete all 3 Star Challenges
(A10) No I insist, you take it (5GP)
Use the last of your Supplies to refill a teammate's ammo rather than your own
(A11) Not over till the fat lady sings (10GP)
Take down an enemy with gunfire while knocked down
(A12) Not so sneaky now, are you? (10GP)
Reveal an enemy in disguise
(A13) Oh I'm sorry, was that yours? (10GP)
Capture an enemy Command Post
(A14) Pump up the volume! (10GP)
Upgrade your team's Command Post
(A15) Smart decisions win battles (10GP)
Attempt to Revive an objective-class teammate over a non-objective teammate near a Primary Objective
(A16) That mine you found? Disarmed! (10GP)
Spot a mine which is later defused by another Engineer
(A17) That's how you win a match (10GP)
While on defense, take down an attacker who's completing a Primary Objective
(A18) The start of something big (20GP)
Win any mission, whether campaign or What-If
(A19) The story has just begun (100GP)
Win both story campaigns (not including What-If missions)
(A20) They never knew what hit them (20GP)
While on offense, win the match in less than 30% of the time limit
(A21) Time to start a new character (100GP)
Reach Rank 5
(A22) T'is better to give than receive (10GP)
As a Medic, using the Transfer Supplies ability, give the last of your Supplies away
(A23) To serve and protect (50GP)
Win every Security campaign mission, including What-If missions
(A24) Tough as nails (80GP)
Win all storyline campaign missions (exc. What-If missions) in either Online Versus, or in Hard mode
(A25) Use the wheel, earn more XP (10GP)
Complete an objective after first selecting it on the Objective Wheel
(A26) Very well done indeed! (20GP)
Complete your first 3 Star Challenge
(A27) Viva la revolution! (50GP)
Win every Resistance campaign mission, including What-If missions
(A28) Was it the red or the blue wire? (10GP)
Disarm an HE charge
(A29) Well done! (10GP)
Complete your first 1 Star Challenge
(A30) Well that was educational (50GP)
Collect all Audio Logs
(A31) Who's bad? (25GP)
Complete all 1 Star Challenges
(A32) You can place another mine now (10GP)
Take down an enemy with a mine
(A33) You shall not pass! (20GP)
While on defense, prevent the attackers from completing their first objective
(A34) You're going places, kid! (20GP)
Reach Rank 2
(A35) You've escaped the Ark (75GP)
Win all main missions of the Resistance campaign (not including What-If missions)
(A36) You've saved the Ark (75GP)
Win all main missions of the Security campaign (not including What-If missions)
In the PlayStation 3 version of Brink there is a total of 37 Trophies that can be unlocked -- 14 Bronze, 19 Silver, 3 Gold, and 1 Platinum -- with the extra being due to the traditional Platinum Trophy that is awarded for unlocking all of the other trophies in a PS3 game.
Bear in mind while you are working toward unlocking these that, like the Xbox 360 version, many of the trophies in the game can be boosted (unlocked quickly) in solo play!
-- Bronze Trophies --
(B01) A bit of a headache (Bronze) Take down an enemy with a Cortex Bomb
(B02) Great shot kid! One in a million (Bronze) Take down an enemy by shooting a grenade
(B03) I live... again! (Bronze) Revive yourself
(B04) It's a trap! (Bronze) Take down an enemy with a Satchel Charge
(B05) Not over till the fat lady sings! (Bronze) Take down an enemy with gunfire while knocked down
(B06) Not so sneaky now, are you? (Bronze) Reveal an enemy in disguise
(B07) Oh I'm sorry, was that yours? (Bronze) Capture an enemy's Command Post
(B08) Pump up the volume! (Bronze) Upgrade your team's Command Post
(B09) The start of something big (Bronze) Win any mission, whether campaign or What-If
(B10) Tis better to give than receive (Bronze) As a Medic, using the Transfer Supplies ability, give the last of your Supplies away
(B11) Use the wheel, earn more XP (Bronze) Complete an objective after first selecting it on the Objective Wheel
(B12) You can place another mine now (Bronze) Take down an enemy with a mine
(B13) You've escaped the Ark (Bronze) Win all main missions of the Resistance Campaign (not including What-If missions)
(B14) You've saved the Ark (Bronze) Win all main missions of the Security Campaign (no including What-If missions)
-- Silver Trophies --
(B15) Boom! (Silver) Detonate a HE Charge
(B16) Brinksmanship (Silver) Complete an Operative Primary Objective within 5 seconds of breaking disguise
(B17) Cut 'em off at the pass (Silver) Close an enemy team's shortcut
(B18) I think I know a shortcut (Silver) Open a shortcut for your team
(B19) No I insist, you take it (Silver) Use the last of your Supplies to refill a teammate's ammo rather than your own
(B20) Smart decisions win battles (Silver) Attempt to Revive an objective-class teammate over a non-objective teammate near a Primary Objective
(B21) That mine you found? Disarmed! (Silver) Spot a mine which is later defused by another Engineer
(B22) That's how you win a match (Silver) While on defense, take down an attacker who's completing a Primary Objective
(B23) The story has just begun (Silver) Win both story Campaigns (not including What-If missions)
(B24) They never knew what hit them (Silver) While on offense, win the match in less than 30% of the time limit.
(B25) To serve and protect (Silver) Win every Security campaign mission, including What-If missions
(B26) Very well done indeed! (Silver) Complete your first 3 Star Challenge
(B27) Viva la revolution! (Silver) Win every Resistance campaign mission, including What-If missions
(B28) Was it the red or the blue wire? (Silver) Disarm an HE charge
(B29) Well done! (Silver) Complete your first 1 Star Challenge
(B30) Well that was educational (Silver) Collect all Audio Logs
(B31) Who's bad? (Silver) Complete all 1 Star Challenges
(B32) You're going places, kid! (Silver) Reach Rank 2
(B33) You shall not pass! (Silver) While on defense, prevent the attackers from completing their first objective
-- Gold Trophies --
(B34) King of the world! (Gold) Complete all 3 Star Challenges
(B35) Time to start a new character (Gold) Reach Rank 5
(B36) Tough as nails (Gold) Win all storyline campaign missions (not including What-If missions) playing either Online Versus, or in Hard mode
-- Platinum Trophy --
(B37) Time to sleep (Platinum) Earn all other trophies
This guide and its content is Copyright © 2011 Web Media Network Ltd. All rights reserved.
This website and its content is Copyright © 2011 Web Media Network Ltd. All rights reserved.
The SuperCheats Unofficial Guide to Brink was written by CM Boots-Faubert as a work-for-hire for Web Media Network, Ltd.
The Guide is licensed to appear exclusively upon the website SuperCheats.com and other websites licensed to display the Guide under agreement with Web Media Network Ltd.
Questions about the contents of the Guide may be directed to its author, CM Boots-Faubert, by email to [email protected] with the subject to include the words ' Brink Guide' as otherwise your email may not be received due to the odd behavior of the author's spam filter.
Before writing to CM Boots-Faubert, please be aware that he cannot and will not grant permission for you to display this guide on your website no matter how deserving you feel it is. Questions of that sort should be directed at Web Media Network Ltd., the actual owner of the Guide.
Writing game guides is a complex and time consuming craft that cannot be done well without the help of others. Any guide writer who fails to acknowledge the people that helped them to create their guide is a silly git who is only fooling themselves!
I want to thank the following Gamers for their help with many small areas of this guide, and for being there to chat, compare notes, and when needed, play co-op!
Rich -- a very patient bloke and editor who provides encouragement and assistance whenever it is needed -- Thanks mate!
YvonneBF -- who did most of the formatting, editing, and who kept me sane through the really nasty parts of this game... She provided a constant stream of encouragement and that helped, and any time it got really bad, she was at my elbow with a cup of tea and a biscuit and a few kind words, and you have no bloody idea how much that helped.
Finally I need to thank you, because without you this guide would never have been commissioned. Thanks mates!

 Hearthstone Guide: Best Paladin Cards
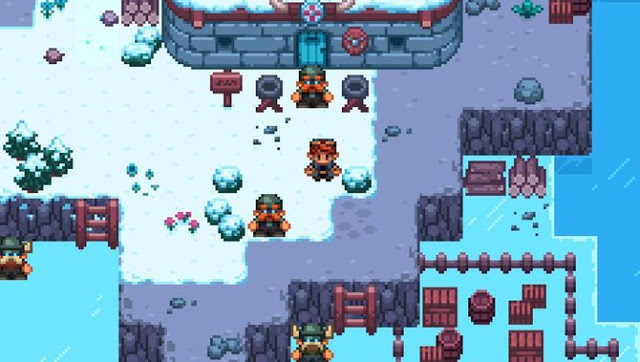 Evoland 2 (PC) walkthrough
 How to Get Infinite Money in The Sims 4
 These Simplicities: A Suikoden Retrospective
 World of Warcraft: Legion Artifact weapons, expandable arms