Roadmap
Stage 1: Story Mode Delete
Play through the story, get all the missables while working on grinding trophies. Below are trophies you should get either way during story and a few missable Limit Break ones (certain side quests will get locked off after a point in the game).
While the guide's time is set to 40 hours. It can take much less time than that. 40 hours is what it should take for someone who isn't as experienced in the game.
Where you should be mindful of the permanently missable trophies:
Missing any of these will require you to either load a previous save (if you have one!) OR
restart the entire game. You can check what the current location is called in the menu, by pressing

.
- Almost immediately after starting to play the game you will have to pick the right dialogue options that are required for
 Best Bromance. It's recommended to either; 1. Follow the trophy guide until you have acquired this trophy. 2. Use the glitch to gain enough affection with Barret.
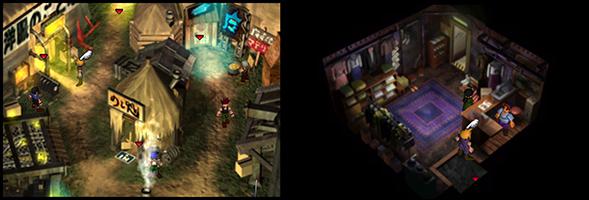
- At the Wall Market section in Midgar, you have to obtain Comsummate Cross-dresser. This section is in the beginning of the game, you will recognize it by the amount of shops there are.
- When you visit the Shinra Mansion in Nibelheim, after obtaining the Key to the Basement, pick the right dialogue options when talking with Vincent. This ensures that you will not miss Won't You be My Valentine? along with the
 Inner Demons trophy.
- Before moving on to the Temple of the Ancients and after getting the Tiny Bronco from Rocket Town, you need to obtain
 See the Light.
- When you are inside the Temple of the Ancients, you need to get Waiting in the Wings. Don't forget to grab the materia after killing the boss.
- Stop the train going towards Corel, to ensure you can obtain Loose Cannon. Contrary to popular belief, you do not need Barret in your party for this. The girl will give you the item either way. You just won't get as much of a cutscene.
- There are four Huge Materia missions, don't fail any of them or you'll miss Bahamutype-0. These missions are located in; Corel, Fort Condor, Junon Underwater Reactor, Rocket Town.
It's recommended that you make multiple save files. At least make a different save at the end of each part, and especially when you are doing the Huge Materia quests. Make a different save before you start any of them in the case where you may fail them.
Trophies you should work towards in Stage 1
-
 First Blood
Emerge victorious from your first battle
-
Breaking New Ground
Use a Limit Break
-
Consummate Cross-dresser
Get Don Corneo to choose Cloud over the two females
-
Fledgling Summoner
Use a summon Materia in battle
-
Best Bromance
Go on a date with Barret in the Gold Saucer
-
Chocochampion
Win the Chocobo Racing mini-game
-
Shuriken Join Us
Have Yuffie join your party
-
Won't You be My Valentine?
Have Vincent join your party
-
Waiting in the Wings
Obtain the Bahamut Materia
-
 Bahamutype-0
Obtain the Bahamut ZERO Materia
-
Loose Cannon
Learn Catastrophe—Barret's last Limit Break
-
See the Light
Learn Great Gospel—Aeris's last Limit Break
-
A Universe of Pain
Learn Cosmo Memory—Red XIII's last Limit Break
-
Inner Demons
Learn Chaos—Vincent's last Limit Break
-
 A Feat of Meteoric Proportions
Complete FINAL FANTASY VII
-
Diamond Disintegrator
Defeat the Diamond Weapon
Stage 2: Limit Breaks Delete
Finish off whatever Limit Breaks you have yet to obtain. Take a look at each individual trophy listed below for more information on those Limit Breaks.
Trophies you should work towards in Stage 2
-
The Slash to End All Slashes
Learn Omnislash—Cloud's last Limit Break
-
Loose Cannon
Learn Catastrophe—Barret's last Limit Break
-
Packing a Punch
Learn Final Heaven—Tifa's last Limit Break
-
A Universe of Pain
Learn Cosmo Memory—Red XIII's last Limit Break
-
Meet Your Maker
Learn All Creation—Yuffie's last Limit Break
-
Wheel of Fortune
Learn Slots—Cait Sith's last Limit Break
-
Inner Demons
Learn Chaos—Vincent's last Limit Break
-
Gale Warning
Learn Highwind—Cid's last Limit Break
Stage 3: Weapons Delete
This can really be done before Stage 2, whatever order you feel like doing it in is up to you. During this stage you will be working towards fighting the Weapons.
Trophies you should work towards in Stage 3
-
Ruby Render
Defeat the Ruby Weapon
-
Emerald Eviscerator
Defeat the Emerald Weapon
Stage 4: Materia Delete
This is for getting the last Materia items. One of these will require you to do Stage 3 first (Master Summon), while the other (Knights of the Round), it does not matter when you decide to do it.
Trophies you should work towards in Stage 4
-
Materia Mastermind
Raise a Materia to Lv. 5
-
Making Waves
Obtain the Leviathan Materia
-
Roundtable Destruction
Obtain the Knights of the Round Materia
-
Transcendant Convoker
Obtain the Master Summon Materia
Stage 5: Finish Delete
This stage is where you simply just get those trophies you have left. These should be easy trophies if not requiring a bit of a grind to do, but this is why it's recommended to leave these until last.
Trophies you should work towards in Stage 5
-
 Gaia's Guardian
Obtain all trophies
-
Corel's Angel
Score 10,050 points or more in G-Bike at the Gold Saucer
-
Coming Up All Nines
Obtain 99,999,999 gil
-
Liege of Leveling
Reach Lv. 99 with one character
-
Failure IS an Option
Have your whole party fall in battle
Tips & Strategies
While the guide is written without boosts in mind, this is how to use them. You'll see this as you start the game anyway. This allows you to fly through the game and obtain an easy platinum.
Final Fantasy VII for PS4 has cheats which you can toggle. Enabling cheats
does not prevent trophies from unlocking.

Toggles 3x Speed

Toggles God Mode
+
Toggles No Encounters
Tip: If you're playing Final Fantasy VII for the first time and you want to enjoy it to its full potential, don't enable God Mode.
W-Item Duplication Glitch Guide
W-Item is found during your second visit to Midgar, instead of fighting the Turks straight away or after fighting them, turn back and take a bit of a long journey all the way to a dead end, this will have a save point and the W-Item materia will be next to it, if you did not pick it up then, you can dig for it in Bone Village.
One of the most important reasons why you'll want to pick up this Materia is because of the glitch it has, you can take any item you have 2 of, and get up to 99 of that item in a minute, this includes Source items, but best of all, it also includes Elixer (which are very good if you want to grind out EXP/AP against the Magic Pots in Northern Cave).
To get the trick to work, simply equip the W-Item to any character, have 2 or more of the item you want to get 99 of, and then enter battle, W-Item allows you to select 2 items, so select the first item, then on the second one, select it, but when it comes to selecting which character to use it on, press

to cancel, you should notice you have an extra one, do this until you have 99, then you can back out of the whole thing, defeat the enemies, then check your inventory from the menu, and you’ll have 99 of that item.
The glitch works also for source items, but it is a little bit different with these (since they cannot be used during battle). What you want to do is go to an area where an enemy can be morphed into a Source item (Yuffie with Conformer is best for this). Before going into battle, find an item you only have one of and arrange your item list so it is on the top that is usable. Also have an usable item below it.
This requires 2 or more enemies to be in a battle for it to work. What you want to do is have Yuffie Morph the enemy into the source item. Very quickly, before the move is done, navigate over to W-Item on the character you have that set to, select the first item, wait for Yuffie to do the move, the source item is now in the first slot. What you want to do is select the second item down, and cancel when it asks you which character to use it on. You'll notice your Source item quality has increased. Repeat this until you have 99. This is a good way in maxing out your character's stats which will help towards defeating the Weapons early on.

Gaia's Guardian
Obtain all trophies
11.80%
Rare

First Blood
Emerge victorious from your first battle
94.67%
Common
StoryUnmissable
This trophy will unlock after you have won your first battle. It is related to the story and cannot be missed.

Breaking New Ground
Use a Limit Break
91.11%
Common
Unmissable
Each character has it's own unique special attack called a Limit Break. While in combat, for every hit the Limit Break gauge slowly increases. Once it is full, you cannot use 'Attack' but instead of it you can use 'Limit Break'.
After using a Limit Break for the first time the trophy will unlock.

Consummate Cross-dresser
Get Don Corneo to choose Cloud over the two females
48.68%
Uncommon
Missable
This trophy requires a bit of preperation. Make sure that you've done all 5 steps below before heading in Don Corneo's lair.
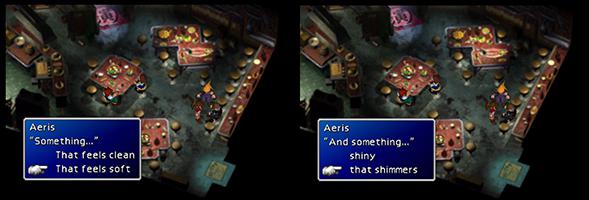
1 - Dress
The dress is acquired from the dress boutique, go there and talk to the girl behind the counter. She will tell you that you need to talk to her dad, who usually sits at the bar. Go there and enter the bar in the northern part of Wall Market and talk to the drunk man near the entrance. Ask him to make you a dress and choose something that
"feels soft" and that
"shimmers". Go back to the dress boutique to get your dress. This will give you a
Silk Dress.
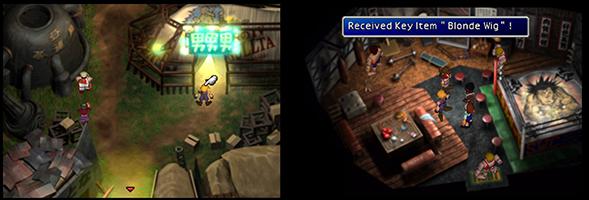
2 - Wig
As the wig, you will want a
Blonde Wig. You obtain this by going to the gym and winning the squatting competition. The competition is really easy, just keep hitting


. Repeat this sequence over and over until the timer runs out.
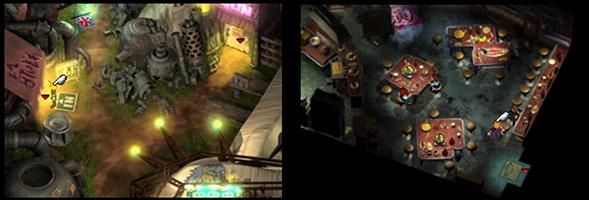
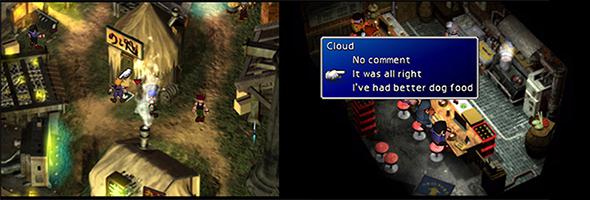
3 - Cologne
To obtain the cologne, you need to have dinner at the restaurant. It doesn't matter which food you order, but after you're done eating, you'll be asked to say something about the food. Pick "
It was all right" to obtain a
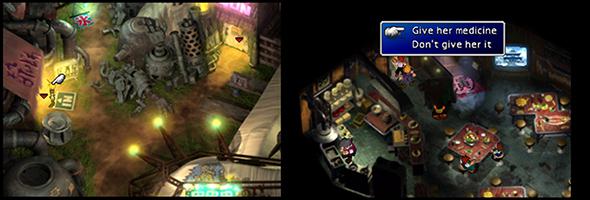
Pharmacy Coupon. This coupon can be exchanged at the pharmacy for a
Digestive medicine. Give the medicine to the woman in the bathroom and she will reward you with a
Sexy Cologne.

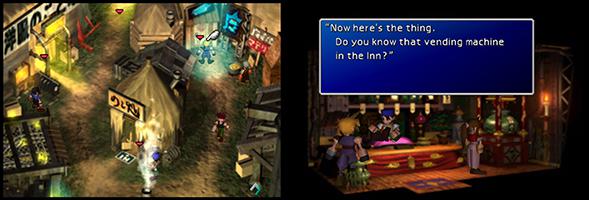
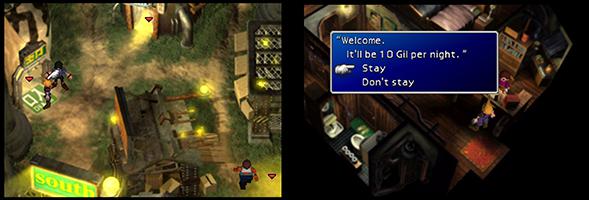
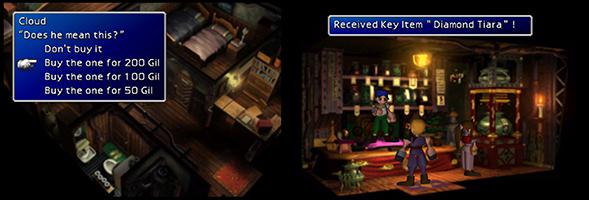
4 - Tiara
The tiara is obtained in the materia store. The store's owner wants to know what is inside the vending machine in the Inn. Go to the Inn and stay there for the night, you will wake up during the night. Spend
200 gil on the vending machine and bring the item to the owner of the materia store. He'll reward you with a
Diamond Tiara.
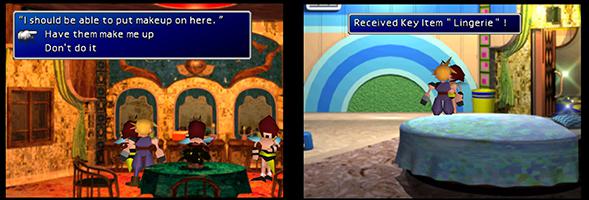
5 - Undergarment
For the last item, you'll need to go to the Honey Bee Inn. On your way there you'll encounter a fat guy running around. He's located towards the south. Talk to him a few times until he gives you his membership card. With the membership card, go inside the Honey Bee Inn. Take the "
&$#%" Room. Think fast and
talk to the Honey Bee lady before she leaves, she doesn't stay around for long. This gives you
Lingerie.

6 - Get Dressed!
After you've obtained all the neccesary key items, go back to the dress boutique and get changed. Now you can go to Don Corneo's mansion, which is located north of Wall Market.

Fledgling Summoner
Use a summon Materia in battle
41.03%
Uncommon
This trophy is obtained after using a summon Materia for the first time. Summon Materia is red and will summon various types of beasts depending on which Materia is used. They will deal various amounts of damage to the enemy.
Probably the first summon Materia you will find is Choco/Mog. You can get this from the Chocobo Farm. Talk to the chocobos, and choose the top dialog option "
Wark". Watch the scene and you will receive it afterwards.
Equip the summon Materia for one of your characters and use it in a battle. The trophy unlocks as soon as a character commences the Summon action.
For a list of all Summon Materia and their locations, please refer to

Transcendant Convoker

Materia Mastermind
Raise a Materia to Lv. 5
21.24%
Uncommon
Grind
During the course of the game, you should have at least raised one materia to Lv. 5. All Summon Materia can reach Lv. 5, but the materia you would really like to reach Lv. 5 and multiple times at that, is the All Materia. It's a highly useful materia too for materia like Restore, Fire, Time, etc... The main reason you want to max All is because the Mastered value is 1,400,000 gil (this will help with
Coming Up All Nines). Summon Materia remains the same value always so it's not really worth it to master unless you plan to use the long route for
Transcendant Convoker.

Best Bromance
Go on a date with Barret in the Gold Saucer
18.76%
Rare
Missable
In order to obtain this trophy, Cloud needs to go on a date with Barret in the Gold Saucer. The character that will go on a date is determined by their affection value. This value is hidden, meaning you have no means of checking who currently has the most affection. The base values are as following.
Aeris
50
Tifa
30
Yuffie
10
Barret
0
In order to get the most affection for Barret you have little room for mistakes, try to follow the dialogue guide below closely. If you do accidentally pick the wrong dialogue, either reload a previous save or use the glitch in Cosmo Canyon to compensate the affection you’ve missed.
If you have saved after the glitch dialogue in Cosmo Canyon and Barrets hidden affection value is not the highest, there is no way to change this value. Making this trophy
missable.
Upon returning to Gold Saucer, the character with the highest points becomes Cloud's date (they knock on the door to Cloud's room in the hotel late at night and ask him out). The trophy will unlock.
Any optional dialogue with Aeris, Tifa, Yuffie or Barret not noted on this page does not affect the date scene. For example, it does not matter what the player says to Aeris upon waking up in the Sector 5 Church, or any of the interaction with the party in Costa del Sol.
Unlimited Barret affection glitch
In Cosmo Canyon you’ll have the change to gain unlimited affection due to a glitch in the game. The party will split up when they first enter the area. If Barret is in the party during this time, Cloud can converse with him about the formation of AVALANCHE in the room behind the weapon shop.
Pick the first option
"Go on" (+3 Barret) and for the second answer pick the second option
“Yeah, whatever..”. The dialogue will reset due to a bug if the room is exited en then reentered. This allows you to repeat this conversation over and over.
Be warned though, some people have reported that the trophy did not unlock for them after using this glitch. A theory behind this is that the game checks for a certain affection value - and that by using the glitch Barrets affection is too high and over that value. Ensure to have a backup safe in case you over do it.
Throughout the game, characters will ask Cloud various questions. How he answers often affects the value that decides the date. No other action will change the values. The action that has been marked green is the one you should pick to maximize Barrets affection.
Dialogue Options Walkthrough
In Midgar
When you meet the Flower Girl,
buy flowers off of her for 1 gil,
you need this later on.
Jessie wants to know what Cloud thinks. When Jessie is talking to Cloud on the train, coming back from the attack on the Sector 1 Reactor:
- "Thanks anyway" (No change)
- "Looking forward to it" (-3 Tifa)
The player can choose whom to give the flower to.
In the 7th Heaven Bar, if Cloud has a flower:
- "Give it to Tifa" (+5 Tifa)
- "Give it to Marlene" (+5 Barret)
If Cloud talks to Tifa while she's behind the bar:
- "I don't feel like it" (No change)
- "Give me something hard" (+5 Tifa)
When Tifa accuses Cloud of leaving her, his childhood friend:
- "How can you say that!" (+5 Tifa)
- "...Sorry" (No change)
Tifa asks Cloud how he slept the next morning:
- "Barret's snoring kept me up..." (+5 Barret)
- "Next to you, who wouldn't?" (+5 Tifa)
Getting through the train to Sector 4 without being caught by the security system (+5 Tifa, +5 Barret)
Cloud is barely hanging on after the explosion in the Sector 5 Reactor:
- "(Be strong)" (+2 Barret)
- "(I don't know if I can hold on)" (-3 Barret, +1 Tifa)
When Aeris is fleeing from Reno in the Sector 5 Church:
- Push a wrong barrel (-3 Aeris)
- Ask her to fight them (-1 Aeris)
- Ask her to run (No change)
- Ask her to run, but she has to fight (-1 Aeris)
- Push the right barrel (+1 Aeris)
Aeris asks Cloud if Tifa is his girlfriend:
- "No way!" (+1 Aeris)
- "Yeah, that's right" (-5 Aeris)
In the Sector 6 playground:
- "See her home." (No change)
- "Go on to to Sector 7" (+1 Aeris)
Check
Consummate Cross-dresser for more information on how to get Don Corneo to choose Cloud over the two females.
If
Cloud is chosen as Don Corneo's date and he rejects his advances, when the Don asks if he has a boyfriend:
- "Yes, his name's Barret..." (+5 Barret)
When the party lands in the sewer:
- Talk to Aeris first (+3 Aeris)
- Talk to Tifa first (+3 Tifa)
Marlene asks if Cloud thinks Aeris is interested in him:
- "I don't know" (+3 Tifa, -3 Aeris)
- "Let's hope so" (-3 Tifa, +3 Aeris)
First meeting Red XIII:
- "Tifa, I'm countin' on you!" (-2 Tifa)
- "Barret, take care of her!" (+2 Barret)
Once the party splits up, if either Barret, Aeris, or Tifa are in the party they get a +2 boost. Pick Barret and Red XIII.
When captured, Tifa asks Cloud if he can break out:*
- "Leave it to me" (+1 Tifa)
- "Kinda hard" (-1 Tifa)
When Cloud is thinking of people, whoever he thinks of first gets +3, whoever he thinks of second gets +1, whoever he thinks of last gets no change. Pick in this order:
- "I wonder how Barret is doing" (+3 Barret)
- "I wonder how Red XIII is doing" (No change for Red XIII)
- "I wonder how Aeris is doing" (No change)
Whoever is in the party for escaping Midgar will get a +1 bonus (No change for Red XIII)
In Kalm
When Barret leaves the inn and asks for Cloud to get a move on, first pick:
- "Wait a sec" (No change)
- "Right" (+1 Barret, but ends dialogue)
Secondly, pick:
- "Beautiful, just beautiful" (+3 Barret)
- "Is that all?" (-1 Barret)
When talking to the woman who mentions that Mako is convenient (values only change if the characters are in the present party):
- "Yeah, maybe" (-2 Barret, -1 Aeris, -1 Tifa, +1 Yuffie)
- "You're full of it" (+2 Barret, +1 Aeris, +1 Tifa, -1 Yuffie)
When talking to the woman who mentions that the old ways were better (values only change if the characters are in the present party):
- "Yeah, maybe" (+2 Barret, +1 Aeris, +1 Tifa, -1 Yuffie)
- "No way" (-2 Barret, -1 Aeris, -1 Tifa, +1 Yuffie)
Meeting Yuffie
For every correct answer Yuffie gets +2 points, for every wrong answer there is no change.
In Fort Condor
When Cloud first talks to the old guy:
- "I guess so" (+5 Barret, +3 Aeris, +3 Tifa, +2 Yuffie)
- "Not interested" (-5 Barret, -3 Aeris, -3 Tifa, -1 Yuffie)
When the old guy tells Cloud about his problem:
- "All right" (+5 Barret, +3 Aeris, +3 Tifa, +2 Yuffie)
- "Not interested" (-5 Barret, -3 Aeris, -3 Tifa, -1 Yuffie)
In the Cargo Ship
When Yuffie asks for Tranquilizers:
- "Here, use this" (+4 Yuffie)
- "Nope" (-2 Yuffie)
Aeris asks to go on an airship:
- "I'll take you someday" (+2 Aeris)
- "I dunno..." (-2 Aeris)
Tifa asks about the war:
- "Yeah..." (+2 Tifa)
- "I don't know" (-2 Tifa)
In Gold Saucer
The first character chosen to accompany Cloud through the amusement park gets a +3 boost. You can't pick Barret, so
pick Red XIII instead. The party members not chosen will give a -2 decrease. Picking Red XIII does nothing, so pick him and Yuffie to be in your party.
In Corel Prison
The character chosen to accompany Cloud and Barret to fight Dyne gets a boost. Aeris gets a +10, Tifa gets a +3, and Yuffie gets a +2. Picking Red XIII or Cait Sith does nothing, pick either of them.
In Gongaga
After meeting with Zack's parents, Cloud can talk to either Tifa or Aeris (if they are in the party).
Ignoring them will cost -3 points each. Talking to Tifa will boost +1, it does not matter what Cloud responds. Talking to Aeris gives a choice. "Poor guy" (+1 Aeris)/"(...jealous...envious...)" (+2 Aeris)
In Cosmo Canyon (Unlimited affection glitch location!)
The party will split up when they first enter the area. If Barret is in the party during this time, Cloud can converse with him about the formation of AVALANCHE in the room behind the weapon shop.
- "Go on" (+3 Barret)
- "Not really" (No change)
The second answer:
- "And then" (+3 Barret) ! Do not pick this if you want to use the unlimited affection glitch !
- "Yeah, whatever..." (No change) Pick this and exit/reenter the room for unlimited affection with Barret
In Wutai Village
Going through the entire Wutai sidequest boosts Yuffie's points +10.

Chocochampion
Win the Chocobo Racing mini-game
29.58%
Uncommon
Story
This trophy cannot be missed as it is related to the story. You will have to win a Chocobo Race at some point in the story. Winning is easy, you just need to know a few tips and tricks.
Right of the bat go to manual controls by pressing on the touchpad. Once you're in manual, press
a couple of times to get up to max speed. Now keep holding

+

to regain stamina and use
to boost.
If this doesn't pop up during the race that you do during story, it can be unlocked later by racing a chocobo you caught.

Corel's Angel
Score 10,050 points or more in G-Bike at the Gold Saucer
25.51%
Uncommon
At the Gold Saucer, in the Wonder Square there is a mini game called "G-Bike". Each time you want to play this minigame you will have to pay 200 gil. The mini game is pretty straightforward, but it can be tricky to get 10,050 points if you haven't got used to the controls.
For each enemy you defeat you gain points, every time an enemy hits the truck - you lose points. So to get 10,050 or more points, you need to defeat the enemy bikes as soon as possible and try to minimize the amount of hits they can land on the truck.
Tip: The enemy bikes will try to dodge your attacks, don't give them a chance to do so. Try driving behind the enemy bike and use an attack while you're still out of range - and then quickly drive forwards and towards the enemy to land your hit.
The video below shows a run with more than 10,050 points - just to give you an idea how fast you need to defeat the enemy bikes.
Corel's Angel Video Guide

Shuriken Join Us
Have Yuffie join your party
36.64%
Uncommon
As soon as you get to the second part of the Open World, you can find Yuffie in any three of the very first forests you find, if you head towards Fort Condor, then go to the east of it, you will find them, it doesn’t matter which forest you find her in. The encouter rates are different for some forrests. It may take a while for her to show up, but once she shows up you will fight her in a battle and eventually she’ll give up during it. After the battle you’ll now be in a different area.
Do
NOT open the menu and do
NOT use the save point in this area, if you do, Yuffie will be gone, you can get her again, but it will be frustrating. So go over and talk to her, now make sure to answer the questions with these answers, if you answer wrongly on any of them, Yuffie will not join and you will have to find her again.
- Not Interested
- Petrified…
- Wait a second!
- That’s right
- Let’s hurry
If you answer with all of these, Yuffie will join and the trophy will unlock on the naming screen.
Make sure if you are going for
Best Bromance in this run, to answer these questions correctly. Answering any wrong is a way to net infinite affection points with Yuffie which can lead to her overtaking Barret.

Won't You be My Valentine?
Have Vincent join your party
29.54%
Uncommon
Missable
Vincent is found in the Shinra Mansion which is found in Nibelheim, you can choose to leave him for later as you will have to fight a secret boss in order to get to him, but it’s possible to do on your first actual visit to Nibelheim (not the flashback), first you can either do this the hard or the easy way, there is a safe in the Mansion (top door to the left in the entrance hall), you need to put in a certain combination of code into it for it to open, you can either find out the code yourself by reading the note that is in the left bottom room of the entrance hall, or simply read it from here, you have 20 seconds to input and it must be done in the directions stated:
- Right 36
- Left 10
- Right 59
- Right 97
You have to be careful not to go past any numbers, make sure to slow down a bit when you are nearing the number you need, press OK (default key for this is
) when on the number, then continue onto the next, do the same for it and so on, if you do this successfully you’ll open the safe and you’ll have to fight Missing Number.
Boss: Missing Number, HP: 7000
This boss isn’t actually that hard, he is a bit advanced if you decide to fight him in your first visit, but if you know what to do or read this guide, you’ll be able to defeat him, the first part of him is really easy, it is recommended having Aeris in your party with her Limit Break "Seal Evil" to temporary stun the boss, the first part of him is weak to physical attacks, so use the "Attack" command or even the "Deathblow" command if you have that materia, this part shouldn't be a problem to anyone, it's the next part that can cause a few problems.
After a while, he'll lose some of his body, now he is weak to magic attacks, so use magic or summons on him, again, Aeris' "Seal Evil" Limit Break is very important, even more so for this part as he has an attack that can wipe out your characters in one hit in this form. So yes, it may require a bit of luck at this point of the game, but it is possible to defeat, if you find him too hard, just return at a later point, preferably when Aeris is still in your party as her "Seal Evil" or even her "Great Gospel" Limit Break is a great help in this battle.
Now once you are done with that boss, it will drop
Cosmo Memory which is the item Red XIII requires to learn his LV. 4 Limit Break (you will need all 6 previous Limit Breaks to use the item), you can now also pick up the Odin Materia and the key for the door that leads to Vincent.
Now, go down to the basement (exact same route as the flashback), you can opt to go and meet Sephiroth first, who will be in the library. When you enter, there will be a short scene. Pick up the materia that is on the floor as soon as the scene finishes.
Now exit the library and in this area, examine the door that is close to the next exit. The key that you've found earlier will open it, now examine the coffin. Vincent will be in it and he will talk, when it comes up, choose to "
Talk about Sephiroth", he’ll go back into the coffin again after a while of speaking. Examine the coffin again and when it comes up, ask "
Who are you?". Vincent will give you his name, eventually he’ll go back into the coffin, this time he’ll ask you to let him sleep if you examine it again so just go towards leaving the Mansion and Vincent will follow you. He'll agree to join your party since you both have similar plans.
If you answer anything wrong to Vincent, you will not be able to recruit him which makes this trophy missable. If you miss this trophy, you also miss
Inner Demons.

Making Waves
Obtain the Leviathan Materia
23.20%
Uncommon
Collectable
You will obtain Leviathan the exact same way you obtain Yuffie's Lv. 4 Limit Break item (see
Meet Your Maker for more information).

Waiting in the Wings
Obtain the Bahamut Materia
25.43%
Uncommon
CollectableMissable
You get the Bahamut Materia after defeating the Red Dragon in Temple of the Ancients, in the Mural Room.
Note: You
can miss this if you do not pick it up. There is absolutely no reason to not pick it up, but this is possible to do. Just make sure to pick it up because once you leave Temple of the Ancients, this will be gone and it is the only Bahamut Materia you can get in the game.

Coming Up All Nines
Obtain 99,999,999 gil
13.29%
Rare
Grind
Triple Growth Weapons
First off, you need Triple Growth weapons if you want to make this go fast. So venture over to the Ancient Forest (area is only available after defeating Ulimate Weapon), complete the puzzles there and obtain Cloud's Apocalypse Sword. The other Triple Growth weapon is actually missable, it's Cid's Scimitar, this can be found in the Underwater Reactor. There is also a variety of Double Growth weapons for the other characters, but these aren't really necessary as the process is already pretty fast. You also have the option of buying Double Growth Armor from the vendor in Bone Village (again, not really required).
Duplicate Elixirs
Now you want to have W-Item equipped to any character and have at least 2 Elixirs (if you don't have any, they can be stolen from a couple of the enemies in the grinding zone mentioned above, mainly the Tonberries). Enter a random battle, and use the W-Item glitch mentioned in the
Tips & Strategies section of the guide.
Buy a couple of 'All Materia'
Then what you want to do is go to Fort Condor (this is considering you did not fail the Huge Materia quest here), buy as many All materia as your characters' Materia slots can hold, keeping in mind to keep a spot or few free for
Gil Plus,
EXP Plus and
W-Item (so you can restock on Elixir as you grind).
Grinding location
The best place to grind for this is in Northern Cave. There will be a point where your party will split up, you want to have your main party take
"Left" and then you will get another option, this time go
"Up".
You are now in the grinding spot. This area is good for both this trophy and
Liege of Leveling. What you want to do, is use the Save Point you picked up and place it on the first split roads where your party first split up.
Start grinding
The enemies you want are the Magic Pots (they require an Elixir to be damaged), they give you decent AP and also the best EXP in the game. The other enemies are Movers. These enemies are much more rare to find, they will always be in groups of 3, they don't give any EXP but give you a lot of AP and Gil. And that is all there is to it.
Sell mastered 'All Materia'
It may take you about 70 mastered All Materia before you reach this amount of gil (could be more and could be less, it all depends on the amount of gil you started with, you can also sell all other Mastered materia because at this point, if this is the last thing you have to do, there is no point holding onto it any longer). A rough estimation with the gear mentioned above is that this takes about 2 hours to do.
It is also recommended to keep an eye that you aren't nearly reaching your cap in Materia as if you have an All materia born when your materia inventory is full, you will lose that, you basically want to be getting a Materia mastered and then switch it to a Lv. 1-4 materia immediately.
Optional: Buy Gil Plus Materia in the Gold Saucer
Tip: Did you know that there is a special Materia called
Gil Plus Materia which doubles the amount of Gil you gain for each battle? This Materia is obtained from the Gold Saucer's Wonder Square. You will need to exchange your GP for Items, when choosing the item pick
????????, the one that costs
1000 GP.
Depending what route you went for the Gold Chocobo, you might be okay for GP, but if you just defeated Ruby Weapon for the Chocobo to be given to you, chances are you don't have very much GP. There is actually a guy that shows up randomly at a 30% chance in the entrance zone of Gold Saucer (just run in and out of the station until he appears). He is behind the save point here, hiding next to one of the buildings. He'll allow you to buy GP off him. It costs about 10,000 gil for 100 GP. Overall, you're looking to spend about 300,000 gil on this guy. While you're saying the trophy is for earning gil, there is really no harm in doing this. You will earn it all back really fast doing the method that has been explained above, this is just a quick way in gaining GP.

Liege of Leveling
Reach Lv. 99 with one character
13.76%
Rare
Grind
Ideally you want to do this as you work towards
Coming Up All Nines since Magic Pots mentioned in that guide are also good for EXP. It really shouldn't take you long to level up if you have the
EXP Plus Materia equipped to your closest to Lv. 99 character.
Tip: Did you know that there is a special Materia called
EXP Plus Materia which doubles the amount of Exp you gain for each battle? This Materia is obtained from the Gold Saucer's Wonder Square. You will need to exchange your GP for Items, when choosing the item pick
????????, the one that costs
2,000 GP.

Bahamutype-0
Obtain the Bahamut ZERO Materia
18.58%
Rare
MissableCollectable
To obtain the Bahamut Zero Materia, you'll have to make sure you don't fail any of the Huge Materia missions and have picked up both the Bahamut and Neo Bahamut materias.
Neo Bahamut Location:
The Neo Bahamut Materia can be found in the Whirlwind Maze (area you visit during the story), it isn't too hard to see, but if you go past this part without picking it up, you'll miss this completely.
There is four Huge Materia to get, this is story related so you'll know what to do if you are paying attention to the story, here is the possible ways of failing them.
- Corel: See Loose Cannon for more information about this Huge Materia quest.
- Fort Condor: It is supposed to be possible to fail this part, but it is really easy and you probably don't have to worry about that. Anyways you’ll be playing a RTS styled game here, if you are terrible at these, then no worries, you can simply just fast forward the whole thing and choose to fight a "semi" boss once any enemy reaches the base, which isn't that hard, after this, you’ll be asked to go up to the roof, you'll find the Phoenix Materia up here, then the NPC will ask you to go down to his dad (the man sitting at the table), he’ll give you the Huge Materia.
- Junon Underwater Reactor: You can fail this one if you fail the submarine mini game, you have up to 10 minutes, and within these 10 minutes you have to defeat the red submarine. It's recommended that you look at the manual before even going through with this, it will explain how this mini game works. Once that is done, you’ll be told Shinra is heading to Rocket Town, you’re to ignore picking up the Huge Materia from the sunken red submarine, and head straight to there, you can come and pick this one up though before you go to Cosmo Canyon.
- Rocket Town: Head to the Rocket, everything is pretty self explainable here, the main thing is when going for the Huge Materia, it will be in this security device which will need a certain key, if you enter a wrong key in, then this is failed, the code you want to place in when asked is , and that’s it, you'll have the Huge Materia easily.
Once you have three of them, you'll decide to go to Cosmo Canyon to speak with Bugenhagen, before you go, make sure to get the Huge Materia from the sunken red submarine first.
When you visit him, you'll be there to discuss what you should do next, after the talk and when everyone else is out, Cloud will ask Bugenhagen if he could store the Huge Materia in a safe place, once they are stored, examine each of them, make sure to choose
"Look Closer" when you do this, after you'll do this with all four, you'll have a short cut-scene and you will have the Bahamut Zero Materia, which is good as it's the second best summon you can get in the game, so the sooner you get him, the better.
If you missed Bahamut Zero, probably due to having failed the Huge Materia quests or not having picked up either Bahamut or Neo Bahamut, there is another way to get him. But it involves relying on chance. You have about a 4% chance of digging him up in Bone Village. Like stated earlier, it relies completely on chance, so you may have good or bad luck for this. If you have say tried to dig him up 100 or so times and still haven't had success. You could just run through a new game with God Mode activated. This is why this trophy is marked as missable.

Roundtable Destruction
Obtain the Knights of the Round Materia
16.11%
Rare
GrindCollectable
You will need a
Gold Chocobo to reach the area which Knights of the Round is located on.
Knights of the Round Materia location
Knights of the Round is found within one of the Materia caves hidden round the map, this cave in is the north east, just a bit north from the Goblin Island, it's not on the map, but it's there, it can only be reached by a Gold Chocobo, the Highwind cannot land down it's covered in forest, and the submarine can't go there as its surrounded by mountains.
Obtaining a Gold Chocobo
There is two ways in getting a Gold Chocobo. The easiest and fastest way would be by defeating Ruby Weapon (for more information, see
Ruby Render).
The other way will take a while which is by breeding the Gold Chocobo yourself. Basically to get a Gold Chocobo, you need to breed all the other kinds first, it's a long process (easily the longest side quest in the game).
You will have to enter battle with a Vlakorados in the North Area, he is found near the Choco Sage location. You will need to make sure to have the Steal Materia equipped to a character, then just keep using Steal until you get the Carob Nut, you’ll need at least three of these. While you're here, buy 80 Sylkis Greens or use the W-Item glitch, where you'll only have to buy two then duplicate the rest, Sylkis Greens can turn out to be very expensive so it may be most players’ choice to just use the W-Item glitch.
After that, travel to an island to the north east (one with the forest on it) and enter battle with Goblins, again make sure to have the Steal Materia equipped to a character, then just keep using Steal until you get the Zeio Nut, you will only need one of these. After this, make sure to buy at least five chocobo stables at the Chocobo Farm, you'll need to go into the house on the left side and talk to the NPC to do so, this can only be done on Part 2 or 3.
So once all of that is done, you can finally start catching chocobos, first you will need to catch Good Chocobos, these are located in the Gold Saucer area, the enemies that will be along with them will be Spencers, anything else and it won't be a Good Chocobo, if you left this til Part 3, you should be a high enough level to not even worry about bringing greens into battle, just kill off the Spencers and you will have a Good Chocobo if it didn't run away.
If chocobos aren't showing up, make sure you are on the foot prints and make sure someone has the Chocobo Lure materia equipped, catch another Good Chocobo, and return to the Chocobo Farm, go to ChocoBilly and move them into the stables, if they both turn out to be the same gender, then you will have to release one and return to the Gold Saucer area and try again.
Now you need to catch two Great Chocobos, these are located in the Mideel area and the enemies that come along with them are Spirals, both of these have to be different genders too so if you ended up getting the same, just release one and go back to the Mideel area and try again.
Back to the Chocobo Farm, once you have two Great Chocobos (both genders) and two Good Chocobos (both genders), you are now ready to start breeding, you can get the Green Chocobo the easiest. The Blue Chocobo can be very rare to get. To increase your success of obtaining a Blue Chocobo, it is recommended to rank up one of your Great- and one Good Chocobo to A-Rank in Chocobo Races. Make sure you have given each chocobo a recognizable name, as you will be releasing them when you get the Chocobos required.
Make sure to save! This could be repeated throughout this guide, but you are better to save before you breed just in case the Chocobo is the wrong gender, or color, do this everytime, if you don’t, you’ll soon see why it's important to save. ChocoBilly will not let you breed when they are just born or have just mated and you will have to wait a while, go do something else until they are ready again. By saving before hand and if a mistake happens, you can reload and try again right away.
When breeding, ChocoBilly will ask you which nut you want to give them, select the Carob Nut. If you get a Blue Chocobo at this point, you're very lucky as it’s harder to get than the Green Chocobo, all you need is the Green Chocobo to be a different gender and you are done, unfortunately this won’t go that way for everyone, if you got a Green Chocobo, release the previous parents, you don’t want to get mixed up.
Now with the two remaining, you could try and see if they get you a Blue Chocobo, but chances are they will all be Green Chocobos, so you are going to need to do some Chocobo Racing, feed both of these Chocobos 10 Sylkis Greens each, this should raise their stats enough, you want to get these both up to A-Rank at least.
Chocobo Racing Guide
Important Controls
- (Speed Up)
- + (regain Stamina)
- Touchpad (enter Manual Mode)
The fastest way in ranking up is to do the following:
- B-Rank: 3 Long Races
- A-Rank: 6 Long Races
- S-Rank: 9 Long Races
It's easy once you get the hang of it, when it comes to choosing the prize, only choose the prize if it's a Materia, everything else, try and get the GP for Battle Square, this is a quick way to gain that, sometimes you can get up to 500GP per race, it just depends on the value of the prize you landed on. Anyways back to the Chocobo Farm, remember to save, and now breed the last remaining Great and Good Chocobo, and hopefully you should have your Blue Chocobo (considering you get the right gender), release the parents and now it's time to rank up both Green and Blue Chocobos up to A-Rank, give both of them 10 Sylkis Greens each and refer to the
Chocobo Racing Guide.
Once that is done, go back to the farm (you may have to wait a bit, everyone's times are different, sometimes it will be fast and sometimes it will take a while before you can breed them), breed them and give them a Carob Nut, and hopefully you'll have your Black Chocobo, now it's back to catching Chocobos, this time you want the Wonderful Chocobo, this chocobo can be found in the North Region, and the only enemies that should come along with it are Jumpings, if it's a mix of enemies or not Jumpings then that's not a Wonderful Chocobo, again it has to be the opposite in gender to your Black Chocobo.
Once you have obtained it and it's the correct gender, feed both the Black and Wonderful Chocobo 20 Sylkis Green each, now you can rank them up, both up to S-Rank is recommended but you can rank the Wonderful Chocobo up to A-Rank and it should be okay. Save before breeding, now when asked about the nut, choose to use the Zeio Nut this time, and hopefully in the next screen you will unlock the trophy and have a Gold Chocobo, which means you can access all of the Materia caves hidden around the map.
You can get a Gold Chocobo handed to you by defeating the Ruby Weapon, but this is no use as you will need to get a Gold Chocobo in order to get some materia required for the Ruby and Emerald fights, so unless you can fight them in a normal way, you are going to need the materia from the caves, most of which can only be accessed by a Gold Chocobo.

The Slash to End All Slashes
Learn Omnislash—Cloud's last Limit Break
18.56%
Rare
Grind
About the Lv. 4 Limit Breaks
You need to have all previous Limit Breaks for each character (Cait Sith is an exception) before you can use the item which unlocks their Lv. 4 and final Limit Breaks. This is really just a thing placed in the game so you don't end up having everyone’s final limit early.
When it talks about kills, this means kills that the character in question has done, and they have to be on that level of Limit Break, so once you have completed a Limit level, go to the next, or just go straight to it if you are more interested in grinding out kills first, a good area to grind out kills would be the Midgar area on the World Map.
A good method of grinding out these kills is to use a Lightning Materia, attach All Materia to it and then while in battle select Defend with everyone except for the character you want to grind kills for. Keep using Bolt on all enemies with the character you want to get more kills with. The enemies around Midgar are weak enough to kill in one attack and you will be getting 2-3 enemies for each battle.
Cloud is probably one of the easier characters to grind out as he is your main all the time nearly, it's the characters you decide not to use much in battle that will seem more like a grind, all your main characters will hopefully be ready for their Lv. 4 Limit by the end of Part 1 or sooner even.
Lv. 1 Limits
- Braver (default)
- Cross-slash (use Braver 8 times)
Lv. 2 Limits
- Blade Beam (kill 120 enemies while on Lv. 1 Limit)
- Climhazzard (use Blade Beam 7 times)
Lv. 3 Limits
- Meteorain (kill 200 enemies while on Lv. 2 Limit)
- Finishing Touch (use Meteorain 6 times)
Lv. 4 Limit: Omnislash
To obtain the Omnislash item, you have to win 32,000 battle points (has to be in one sitting, you cannot exit the room, so make sure you have enough GP before going for this) in the Gold Saucer Battle Square and then purchase the item from the Battle Point Redeemer, it's just a higher leveled Limit Break and will do much more damage compared to the Lv.1 Limit Break.
This is probably the most frustrating Lv. 4 Limit item to get, as Battle Square is based on a huge amount of luck. It is possible to get up to the final round when the handicaps get the better of you. Depending what point of the game you are in, your will get different enemies. It might be best to do this early on if you can as some of the enemies will only get worst (Ghost Ship can become an enemy here, which is an enemy that can remove you from battle, no matter what kind of accessory or level you have).
The best way to gain BP is by completing a set of battles without having to use items. It's recommended that you have Ribbon equipped so half of the handicaps will have no effect on you.

Loose Cannon
Learn Catastrophe—Barret's last Limit Break
18.71%
Rare
GrindMissable
Lv. 1 Limits
- Big Shot (default)
- Mindblow (use Big Shot 9 times)
Lv. 2 Limits
- Grenade Bomb (kill 80 enemies while on Lv. 1 Limit)
- Hammer Blow (use Grenade Bomb 8 times)
Lv. 3 Limits
- Satellite Beam (kill 80 enemies while on Lv. 2 Limit)
- Angermax (use Satellite Beam 6 times)
Lv. 4 Limit: Catastrophe
This can be missable if you fail to stop the train during the Huge Materia quests.
Barret's is one of the easier ones to get, this item is obtained after completing the Corel Huge Materia quest. You'll fail this one if you don't stop the train in time, you have a 10 minute timer on you here, some of this will be used up on battles along the way, it will also be used up in your train catching up with the other train. Quickly alternate pressing

and
during the catch up sequence. Once you've caught up with the train, battle through the enemy encounters as fast as you can. Then, when you get to the locomotive, after going through the dialogue press
+
at the same time. Some more dialogue will follow and you will have to press
+
once more. The train will stop, a scene will play. If you fail, the train will crash into Corel and the townspeople will not give you the Huge Materia.
After some more dialogue, you will sleep in the Inn. When you wake up, go to the house below the Inn. Talk to the woman to receive
Catastrophe.
For more information about the Lv. 4 Limit Breaks, check
The Slash to End All Slashes.

Packing a Punch
Learn Final Heaven—Tifa's last Limit Break
17.48%
Rare
Grind
Lv. 1 Limits
- Beat Rush (default)
- Somersault (use Beat Rush 9 times)
Lv. 2 Limits
- Water Kick (kill 96 enemies while on Lv. 1 Limit)
- Meteodrive (use Water Kick 7 times)
Lv. 3 Limits
- Dolphin Blow (kill 96 enemies while on Lv. 2 Limit)
- Meteor Strike (use Dolphin Blow 6 times)
Lv. 4 Limit: Final Heaven
Tifa's last Limit Break item is located in Nibelheim, return to this area later in the game (after Cloud is back from Mideel), go into Tifa’s house and then go upstairs and into Tifa's room, you’ll have to press these buttons in the right order to complete the melody which will then release the Final Heaven item, Tifa has to be in your party to get this to work.
Melody:
(
+
)(
+
)
(
+
)
Hopefully you'll get a short cutscene, the theme is the main theme of the game, so it will be recognizable if you do it right.
For more information about the Lv. 4 Limit Breaks, check
The Slash to End All Slashes.

See the Light
Learn Great Gospel—Aeris's last Limit Break
24.36%
Uncommon
GrindMissable
Lv. 1 Limits
- Healing Wind (default)
- Seal Evil (use Healing Wind 8 times)
Lv. 2 Limits
- Breath of the Earth (kill 80 enemies while on Lv. 1 Limit)
- Fury Brand (use Breath of the Earth 6 times)
Lv. 3 Limits
- Planet Protector (kill 80 enemies while on Lv. 2 Limit)
- Pulse of Life (use Planet Protector 5 times)
Lv. 4 Limit: Great Gospel
In order to do this, you need over 100 battles at least, as you need two last digits and they also much be the same, you need to get the Mythril from the Northeast in a cave from Junon, you need to have an odd number of battles, so for example, a total of 111 battles (only the last two digits have to be the same, but it has to be an odd number at the end, so for example, you have the option between 1, 3, 5, 7 and 9) will grant you this item. To get the Mythril, you will need to take the buggy (which should be by Nibelheim still) to Costa del Sol, and use the cargo ship for 100 gil to travel back to Junon. Once you get back into town, where you saved Priscilla, you can exit to the world map and drive the buggy to the cave that is close by.
NOTE: If your number of battles do not have matching end digits, you can exit the cave and battle outside of it until you reach the next set of matching digits you need.
Afterwards, return to Junon with the buggy, followed by returning to Costa del Sol via cargo ship, and finally go towards Gongaga and search for a house east to it. Here, you will want to give the Mythril to the man in the house and he will give you an option between two boxes. Take the smallest box which looks like a safe and it’s upstairs, and you’ll have the Great Gospel item.
You must obtain this before you go to the Temple of Ancients. Due to certain events that happen, Aeris will be removed from your party from that point forward which will lock out anymore progress with her.
For more information about the Lv. 4 Limit Breaks, check
The Slash to End All Slashes.

A Universe of Pain
Learn Cosmo Memory—Red XIII's last Limit Break
21.41%
Uncommon
Grind
Lv. 1 Limits
- Sled Fang (default)
- Lunatic High (use Sled Fang 8 times)
Lv. 2 Limits
- Blood Fang (kill 72 enemies while on Lv. 1 Limit)
- Stardust Ray (use Blood Fang 7 times)
Lv. 3 Limits
- Howling Moon (kill 72 enemies while on Lv. 2 Limit)
- Earth Rave (use Howling Moon 6 times)
Lv. 4 Limit: Cosmo Memory
You will get Red XIII's last Limit Break item for defeating the optional boss Lost Number, you get to fight him by opening a safe in the Shinra Mansion, see
Won't You be My Valentine? for more information.
For more information about the Lv. 4 Limit Breaks, check
The Slash to End All Slashes.

Meet Your Maker
Learn All Creation—Yuffie's last Limit Break
19.18%
Rare
Grind
Lv. 1 Limits
- Greased Lightning (default)
- Clear Tranquil (use Greased Lightning 8 times)
Lv. 2 Limits
- Landscaper (kill 64 enemies while on Lv. 1 Limit)
- Bloodfest (use Landscaper 7 times)
Lv. 3 Limits
- Gauntlet (kill 64 enemies while on Lv. 2 Limit)
- Doom of the Living (use Gauntlet 6 times)
Lv. 4 Limit: All Creation
You will unlock this by completing all of the Tower Climbing mission in Wutai, you must defeat all the bosses, it will be dropped after Godo is defeated. You can come to this when you are nearing the end of Part 2, whether or not if you have been using Yuffie doesn't matter, even without using her once you will be able to complete this. All you need to do is equip Bahamut Zero summon to her, the strongest weapon you have for her at that point and that is it. Make sure you have plenty of ethers/turbo ethers before entering as they are needed, as well as Hi-Potions, or just a character with the Restore materia. Hopefully in Godo's battle, Yuffie will have a limit break ready as that’s the only enemy in this whole tower that doesn’t end up dying after one hit from Bahamut Zero.
For more information about the Lv. 4 Limit Breaks, check
The Slash to End All Slashes.

Wheel of Fortune
Learn Slots—Cait Sith's last Limit Break
21.66%
Uncommon
Grind
Cait Sith gets his final Limit Break by defeating 40 enemies, that's all that is required, so it is easy to unlock, this requires no item, and unlike other character's, Cait Sith's max Limit Break level is 2, so this is the easiest and quickest one to obtain in the game.
For more information about the Lv. 4 Limit Breaks, check
The Slash to End All Slashes.

Inner Demons
Learn Chaos—Vincent's last Limit Break
16.92%
Rare
GrindMissable
Lv. 1 Limit Break: Galian Beast (default)
Lv. 2 Limit Break: Death Gigas (kill 40 enemies while on Lv. 1 Limit)
Lv. 3 Limit Break: Hellmasker (kill 56 enemies while on Lv. 2 Limit)
Lv. 4 Limit Break: Chaos
After you acquire the submarine, you will want to use it to find a waterfall between the Gold Saucer and the Nibel area, located in the heart of the western continent. You will want to visit this cave when you have both Vincent and Cloud in your party. When you enter, there will be a scene between Vincent and Lucrecia. Immediately following the scene, leave and fight 10 random encounters. After the tenth battle, return to the cave and pick up the newly available items. Assuming Vincent was already set to his Lv. 3 Limit Break, you can use the item for his final limit break and make this trophy pop.
This must be done during Part 2. If you do not visit the cave in Part 2, Lucrecia will be gone in Part 3. While the rest of it can be done in Part 3, without seeing Lucrecia prior means you will not recieve the items. It is also completely missable if you were not able to recruit Vincent.

Gale Warning
Learn Highwind—Cid's last Limit Break
16.95%
Rare
Grind
Lv. 1 Limits
- Boost Jump (default)
- Dynamite (use Boost Jump 7 times)
Lv. 2 Limits
- Hyper Jump (kill 60 enemies while on Lv. 1 Limit)
- Dragon (use Hyper Jump 6 times)
Lv. 3 Limits
- Dragon Dive (kill 76 enemies while on Lv. 2 Limit)
- Big Brawl (use Dragon Dive 5 times)
Lv. 4 Limit: Highwind
You will find Cid's last Limit Break item inside the room with a wrecked Helicopter in a chest, in the secret area Sunken Gelinka, just a warning, the enemies are very strong in this area, make sure to be at least Lv. 60 or over before entering, you can go out whenever you want, but if you run into an enemy in this area, it can very easily one hit kill everyone, the enemies in here are even hard at Lv. 60, they are only really good for farming "Source" items and nothing else.

A Feat of Meteoric Proportions
Complete FINAL FANTASY VII
14.96%
Rare
StoryUnmissable
This will unlock once you clear the story of Final Fantasy VII.

Transcendant Convoker
Obtain the Master Summon Materia
14.74%
Rare
GrindCollectable
There is two ways in obtaining this materia.
Either you defeat Emerald Weapon first and obtain the Earth Harp. This is an item you can trade in to the Kalm Traveler, he is found in the right most house of Kalm.
Or, you can master all of the 16 Summon materia. This is a much more of a grind though so it is recommended you try and defeat Emerald Weapon first since this list does not require you to master all materia like the PC version did. Also, keep in mind, this second way is only possible if you didn't fail this part of the Huge Materia quests. You examine the Red Huge Materia when you have all of the Summon Materia mastered and this should be given to you.
List of Applicable Summon Materia & Locations
Materia
Location
Can it be missed?
Choco/Mog
Interact with chocobos at ranch after Kalm
No
Shiva
Gift from Priscilla after saving her in Junon
No
Ifrit
Pick it up after defeating Jenova BIRTH on the cargo ship
Yes
Ramuh
Chocobo racing lounge at the Gold Saucer
Yes
Titan
Reactor in Gongaga Village
No
Odin
Defeat Lost Number in Shinra Mansion
No
Leviathan
Defeat Godo in Pagoda Tower in Wutai Village
No
Bahamut
Defeat Red Dragon in Temple of the Ancients
Yes
Kujata
Found in Sleeping Forest after Bone Village
Yes
Alexander
Great Glacier after touching hot springs
No
Phoenix
After second Fort Condor battle on top of mountain
Yes
Neo Bahamut
Found in Whirlwind Maze after Great Glacier
Yes
Hades
Found in the Sunken Gelnika underwater ship
Yes
Typhon
Found in the Ancient Forest
No
Bahamut ZERO
Cosmo Canyon blue huge materia after getting other Bahamuts
Yes
Knights of the Round
Materia Cave on top North-East portion of World map
No

Diamond Disintegrator
Defeat the Diamond Weapon
18.51%
Rare
UnmissableStory
You will fight Diamond Weapon during story, he is easiest out of all the Weapon bosses to defeat, he will rise up from the ocean and be making his way over to Midgar, you have to use the Highwind to get over there then wait for him to make it to land, this is when the battle will start, make sure to be round LV. 40-50 by this point, this battle happens after your second visit to the Forgotten City.
If a countdown begins during this battle, that means he’s going to use his Diamond Flash attack, which will deal great damage to everyone in the party, it can also cause the Silence status.

Ruby Render
Defeat the Ruby Weapon
14.42%
Rare
Ruby Weapon is the hardest out of all the Weapons, he has the highest defense out of everything in the game.
You can either reach the Ruby Weapon by Highwind or Gold Chocobo, either way, doesn't matter, you fight him the same anyway.
METHOD 1
This is easy enough by using Dazers, Dazers are items that temporary stun the enemy, what you want to do is get some Dazers first (you probably have some in your inventory as they are common drops from enemies), then duplicate them with the W-Item trick. One character in the team will have the W-Item materia equipped to them and throw a Dazer at Ruby Weapon and use a Megalixer if needed on the rest of party, the other two characters will concentrate on attacking. This will be how it goes the entire battle, one character is used solely on Dazers and Megalixers (and remaking them during the battle so you don’t run out), you don’t need to be Lv. 99, but if you want this to be quicker, level up to it and use Power Sources (you get these from the morphing dinosaur/car enemy in the Gongaga Reactor ruins) to increase your strength, you can also have the mastered Double Slash materia so your attackers are doing 4 hits at a time each, it's also a good idea to maybe have the attacker's Limit Breaks at the ready, anything to speed up the battle helps.
METHOD 2
Have your party setup to chain some attacks that will focus on dealing lethal damage, while keeping Ruby stopped while also pounding away at his insanely high HP. Use the following Materia setup on your party:
1st Character -- W-Summon, KotR (LV2+) + MP Turbo, Phoenix, Hades (LV2+), Mime + MP Absorb, HP Plus
2nd Character -- Mime, W-Item, HP Plus, Restore + All
3rd Character -- Mime, HP Plus, Time + All
Any additional Materia is up to your discrection.
The first thing to do is to go into random encounters and kill of your second and third characters. Once done, prepare by ensuring your first character equipped with W-Summon is fully healed. You might want to make a save now, so that in case something goes wrong, you can pick up from this point. Get in your Highwind or on your chocobo and charge into this beast!
As soon as the battle begins, Ruby will dig his claws into the ground and spawn two big claws behind you. Ignore them for now! Start by having your character use W-Summon. Start with Hades and use it on Ruby to stop him, and then use Phoenix to fully revive your fallen party members. As soon as they are back up, use your 2nd Character setup to cast Regen on the entire party, and then 3rd Character to caste Haste on the party. It is important to do it in this order!
When those buffs are done, 1st Character should be able to do something now. Once again, use W-Summon. This time, use Hades first which casts Stop on Ruby again, and then use Knights of the Round to unleash hell on him. From here, keep using Mime with each character. You will keep Ruby himself from even moving, all while destroying him little by little. This method is known for taking longer than some others for some players, but it is a safe route to ensuring you slay this beast and earn this trophy.
METHOD 3
Alternatively, you can do this battle with God Mode. Although God Mode grants you infinite health, you can still be instant killed in this mode, so it still will require you level up, use source items or equip the HP Plus materia to your characters. It is recommended to sacrifice everyone apart from the character who has the Master materias if you did Emerald first and just spam Knights of the Round.

Emerald Eviscerator
Defeat the Emerald Weapon
14.87%
Rare
Emerald Weapon can be found near the Junon Docks, you will need a submarine for this, and possibly the Underwater materia as well.
To avoid being instant killed by this Weapon at a point in the battle, make sure not to come equipped with too many materia, one of Emerald's attacks deals 1111 damage per materia that character has equipped, if you have too many equipped, it can easily deal 9999 damage, killing off that member of the party (9999 is the highest you can reach in HP), so it's actually recommended to come into this battle lightly equipped.
There is a very easy way to do this, you are going to have to come heavily equipped with Materia and have use of Cloud's Omnislash Limit Break.
Here's the materia set-up, Cloud is the only one needed for this really, you should give the two other characters W-Item though.
Ultima Weapon
Counter + Mime, Counter + Mime, Counter + Mime, Counter + Mime
Imperial Guard
Counter + Mime, Counter + Mime, HP Plus (mastered) + Luck Plus (mastered)
And about 4 Hero Drinks will be required, this is where W-Item comes into play as it means you can give him them quickly.
Get the Limit up before this battle, just don't use it until all 4 Hero Drinks are given to Cloud at the start, Lv. 99 is recommended for this.
It's also recommended saving just before you attempt, for example, you can have bad luck in the start, once you are past that though and Cloud just starts spamming Omnislash, the battle should be easy and Underwater materia shouldn't even be needed.
You are going to have to master Counter (it's the blue counter - the add on materia) and Mime a few times, but no worries, both of these are very easy to master in the Northern Crater area.
The way the battle goes, is that you give a total of 4 Hero Drinks to Cloud, then once that is done, select Omnislash with Cloud, hopefully if everything is set up okay, Cloud will spam this move and deal 9999 damage with each attack. This is the easiest way to defeat this, may require some grinding, but that's about it. If you have used all of your Hero Drinks, you can win them from any rank of Chocobo Racing, you only will need to win two, then use the W-Item trick.
Alternatively, you can do this battle with God Mode. Although God Mode grants you infinite health, you can still be instant killed in this mode, so it still will require you level up, use source items or equip the HP Plus materia to your characters. You can spam your Limit Breaks. Preferably have everyone at Lv. 4 Limit and have Cloud's Ultima Weapon equipped (you will get this by defeating Ultimate Weapon who is even easy to defeat at Lv. 50-55 outside of God Mode, before you go back to Midgar which is the earliest point of the game you can fight and defeat him in).

Failure IS an Option
Have your whole party fall in battle
47.92%
Uncommon
Unmissable
This trophy is obtained after all of your party members die and you see the game-over screen for your first time. You probably don't have to worry about this one, unless you are really good at the game or have god mode enabled.
Do note that a game-over means that you will have to restart from your last save.
This is actually obtainable in Battle Round, so when grinding for Cloud's Lv. 4 Limit Break item, you may end up getting this trophy here. Dying in Battle Round is completely safe as well as it does not cause a Game Over. It just causes you to lose your BP for that go.


