Roadmap
Stage 1: Complete Game ONLY THROUGH the Start of "The Molecular Level" Quest Delete
Difficulty in this game does not matter, just play and enjoy the game! You will find yourself collecting weapons, armors, building your settlements, etc... When you meet Codsworth after 210 years, you will have an open world to explore! Some of your decisions in this game will have an impact on your ending. You will see that when you meet more than one factions and start doing their quests. That's why this guide was made: to guide you on getting your platinum trophy without having to repeat the game more than one time. Provided in this guide is an outline of the quests that you will need to in order in every Stage. Just follow the outline and you will be done with all story and faction quests in no time!
For this first stage, you will want to play through the game until the start of the quest "The Molecular Level". Once you get here, make at least three additional saves, as this quest will force you to make a decision that will greatly affect which faction you are aligned with and lock you out of some future missions. This way you won't have to replay the entire game to get the other factions' trophies.
Trophies you should work towards in Stage 1
-
 War Never Changes
Enter The Wasteland
-
When Freedom Calls
Complete "When Freedom Calls"
-
Unlikely Valentine
Complete "Unlikely Valentine"
-
Reunions
Complete "Reunions"
-
Dangerous Minds
Complete "Dangerous Minds"
-
Hunter/Hunted
Complete "Hunter/Hunted"
-
The First Step
Join the Minutemen
-
Taking Independence
Complete "Taking Independence"
-
 Old Guns
Complete "Old Guns"
-
Semper Invicta
Join the Brotherhood of Steel
-
Tradecraft
Join the Railroad
-
Sanctuary
Complete "Sanctuary"
-
Community Organizer
Ally with 3 Settlements
-
Gun-For-Hire
Complete 10 Side Quests
-
Future Retro
Play a Holotape Game
-
Touchdown!
Get a Touchdown
-
Born Survivor
Reach Level 5
-
Commonwealth Citizen
Reach Level 10
Stage 2: OPTIONAL: Minutemen Ending Delete
After making your extra save(s), complete "The Molecular Level" while working with your preferred faction. You will be finishing the game with them, so stick it out until the end. While you can do stages 2-5 in any order you want, the Minutemen have been listed first. After the "Old Guns" quest, there are
no other trophies particularly related to the Minutemen, but it is recommended that you go ahead and finish the game with them to get the last few story trophies. It is generally easier to align with settlements and companions if you are working with the Minutemen, as they are generally well liked and respected by much of the Commonwealth, so this playthrough will make some of the miscellaneous trophies a little easier.
Again, finishing the game with the Minutemen is NOT required to get the platinum, but they are a good faction to work with for the trophies related to leveling up and crafting, as the other factions won't necessarily turn against you (aside from the Institute). That way, you can still trade with some of them or get strong followers like Paladin Danse.
Trophies you should work towards in Stage 2
-
The Molecular Level
Complete "The Molecular Level"
-
The Nuclear Option
Complete "The Nuclear Option"
-
Institutionalized
Complete "Institutionalized"
-
 Prepared for the Future
Decide the Fate of the Commonwealth
Stage 3: Brotherhood of Steel Ending Delete
Next up, reload your save from before "The Molecular Level" and replay the game from that point while aligned with the Brotherhood of Steel. The Brotherhood soldiers are considerably overpowered, especially given their power armor and vertibird support. Below is an outline of the Brotherhood of Steel's main quests:
- [The Brotherhood of Steel] Fire Support
- [The Brotherhood of Steel] Call to Arms
- [The Brotherhood of Steel] Semper Invicta (earned in stage 1)
- [The Brotherhood of Steel] Shadow of Steel
- [The Brotherhood of Steel] Tour of Duty
- [The Brotherhood of Steel] Show No Mercy
- [The Brotherhood of Steel] From Within
- [The Brotherhood of Steel] Outside the Wire
- [The Brotherhood of Steel] Liberty Reprimed
- [The Brotherhood of Steel] Blind Betrayal
- [The Brotherhood of Steel] Tactical Thinking
- [The Brotherhood of Steel] Spoils of War
- [The Brotherhood of Steel] Ad Victoriam
- [The Brotherhood of Steel] The Nuclear Option (possibly earned in stage 2 along with
 Prepared for the Future)
Trophies you should work towards in Stage 3
-
The Nuclear Option
Complete "The Nuclear Option"
-
Blind Betrayal
Complete "Blind Betrayal"
-
Ad Victoriam
Complete "Ad Victoriam"
-
Prepared for the Future
Decide the Fate of the Commonwealth
Stage 4: The Railroad Quests Delete
Now, reload a save from before "The Molecular Level" again and finish the game siding with the Railroad. You will not have to complete "The Nuclear Option" again; once you complete "Rockets' Red Glare", you can stop playing this storyline (although its always fun to finish each faction's ending and see how the game ends). Below is an outline of the Railroad's main quests:
- [The Railroad] Road to Freedom
- [The Railroad] Tradecraft (earned in stage 1)
- [The Railroad] Boston After Dark
- [The Railroad] Underground Undercover
- [The Railroad] Operation Ticonderoga
- [The Railroad] Precipice of War
- [The Railroad] Rockets' Red Glare
Note: upon completion of "Underground Undercover you will still be aligned with both the Institute and the Railroad while having completed all but the final three Institute quests. By saving here you won't have to replay much of the game to get the last Institute trophy (you will earn

Mankind-Redefined and
Powering Up while working with either faction).
Trophies you should work towards in Stage 4
-
Mankind-Redefined
Complete "Mankind-Redefined"
-
Powering Up
Complete "Powering Up"
-
Underground Undercover
Complete "Underground Undercover"
-
Rockets' Red Glare
Complete "Rockets' Red Glare"
Stage 5: The Institute Quests Delete
Finally, you will need to complete the game working with the Institute. Reload your extra save from after "Underground Undercover", and then complete the last three missions (in red) of the quest line below. Remember that you will be required to complete everything through "Powering Up" while completing the Railroad's quests and trophies
Note: you won't have to complete "Airship Down" if you already destroyed the Prydwen with the Railroad (as long as you keep the Institute friendly you can finish the Railroad and Institute quests on the same save file).
- [The Institute] Synth Retention
- [The Institute] The Battle of Bunker Hill
- [The Institute] Mankind Redefined
- [The Institute] Mass Fusion
- [The Institute] Pinned
- [The Institute] Powering Up
- [The Institute] End of the Line
- [The Institute] Airship Down
- [The Institute] Nuclear Family
Trophies you should work towards in Stage 5
-
Nuclear Family
Complete "Nuclear Family"
Stage 6: Miscellaneous Trophies Delete
With all the storyline missions completed, all you will have left to do is clean up the remaining miscellaneous trophies. You will certainly have earned at least a few of these trophies in your previous steps, but there will likely still be a few missing, such as the infamous trophy "Benevolent Leader".
Trophies you should work towards in Stage 6
-
Benevolent Leader
Reach Maximum Happiness in a Large Settlement
-
Mercenary
Complete 50 Misc. Objectives
-
Scavver
Gather 1000 Resources Used For Crafting
-
What's Yours Is Mine
Pick 50 Locks
-
RobCo's Worst Nightmare
Hack 50 Terminals
-
Armed and Dangerous
Create 50 Weapon Mods
-
Wasteland D.I.Y.
Craft 100 Items
-
Never Go It Alone
Recruit 5 Separate Companions
-
Lovable
Reach Maximum Relationship Level with a Companion
-
Fix-Er-Upper
Build 100 Workshop Items
-
…The Harder They Fall
Kill 5 Giant Creatures
-
Ranger Corps
Discover 100 Locations
-
Print's Not Dead
Read 20 Magazines
-
Prankster's Return
Placed A Grenade Or Mine While Pickpocketing
-
Masshole
Kill 300 People
-
Animal Control
Kill 300 Creatures
-
Homerun!
Get a Homerun
-
They're Not Dolls…
Collect 10 Vault-Tec Bobbleheads
-
…They're Action Figures
Collect 20 Vault-Tec Bobbleheads
-
Unstoppable Wanderer
Reach Level 25
-
Legend Of The Wastes
Reach Level 50
Tips & Strategies
Below is a fairly extensive list of tips and tricks to help make your wasteland journey a little easier. For fans of the series, the game plays more similarly to New Vegas as well as Skyrim than Fallout 3. There is an extensive crafting system, gear modding, multiple storylines, and a massive open world to explore.
- Intelligence affects the amount of XP gained, so when you start picking your S.P.E.C.I.A.L. stats be sure to put the most points in Intelligence if you want to level up quicker. It's best not to put all 10 points in Intelligence because you should also spend points on Charisma, Agility, and Luck at the very least.
- There are repeatable quests in this game, so don't worry if you think you are running out of quests and won't be able to make it to level 50 without grinding.
- You get plenty of companions in this game, and if you don't have enough points for Strength you will get overencumbered often especially if you are gathering resources. Thankfully your companions can carry the load for you by selecting the "Trade" option when talking to them.
- You can join all of the factions in the game without any consequences. The only turning point will be during the main story quest "The Molecular Level".
- Sell items often for more Caps. While it might take a while to get a lot of Caps, once you start doing quests and selling items you never use then you should be good on Caps, especially since you don't have to get any equipment repaired in this game save for Power Armor.
- Store all Junk at your main settlement hub as much as possible. Junk in the game has weight, so it's best to just store it all at your main settlement or else you will get overencumbered.
- If you like to keep track of things, there are many interactive map online that will tell you locations of legendary weapons, bobbleheads, and magazines. The two most notable ones are IGN and Fallout 4 Map.
- Power armor: suits of power armor are now more like a vehicle, in which you enter the suits and wear them until you run out of power; power is provided by fusion cores, which are uncommon and expensive items. Power armor provides great damage and radiation resistance, and the various pieces of the suit can be mixed and matched, or even customized to include jetpacks, auto stimpacks, and many other advantages.
- Save your fusion cores and power armor for the biggest fights (such as story missions or heavily enemy occupied areas).
- Everyone is going to have greatly different preferences in weapons, chems, armor, exploration, settlement construction, etc, so there is no specifically recommended order to take the perks in. However, it is recommended to have a reasonably high strength, as higher strength allows you to carry more weight, which is very helpful for bringing larger amounts of junk to your settlements.
- In Fallout 4, weapons and apparel no longer deteriorate, meaning that you don't need to carry extra equipment to repair them with. The only items that do take damage are pieces of power armor, which can be repaired and modified at power armor stations.
- The confirmed best power armor in the game is the X-01 armor. Even at mark 1, it is superior to most other types of power armor, and at mark 6 it becomes unbeatable. The armor is obtained from the roof of 35 court (if you are level 28 or higher) or from the National Guard Training Yard (if you are level 35 or higher). Please refer to the video below for more information on how to find this amazing piece of gear.
- While everyone has their own weapon preferences, there is a unique weapon called the "Spray n Pray" that can be bought from the merchant Cricket (often found outside Vault 81). The weapon is a unique submachine gun with a 100 round magazine and suppressor that also fires explosive rounds. This is one of the strongest weapons in the game and despite its expensive price, it is very worth buying.
- Other strong weapons include "Kellog's Pistol", the "Ashmaker" mingun, the Alien Blaster, the Railway Rifle, and quite a few others. Please view this page for more information about many of the rare and unique weapons, as well as where to find them.
- The strength of enemies has been changed around for this game; for example, deathclaws and feral ghoul reavers are still very dangerous but not as tough as they used to be. Super mutants are now among the most dangerous enemies, mirelurks have been buffed, and the bloodbugs are almost as bad as the cazadors of Fallout New Vegas. Oh, and the Brotherhood of Steel soldiers, especially those in power armor, are ridiculously overpowered.
- The hot key system has been greatly improved, with 12 total spots. When you go into your pip boy, hit over an item (weapon or aid) and put it in one of the slots. Then, hit the buttons on the directional pad to select your item quickly while on the move. The system is faster and more efficient then it used to be, so it is highly recommended to use it to your advantage.
- A major part of this game is to build settlements. As you play through the game, you will be sent to lots of locations around the wasteland and once you do a quest for them, they will join you.
- You need to provide your settlements with food, water, defense, and beds, all of which must be crafted and placed. You also should build walls around the settlements to help protect them from various attackers.
- Unfortunately, settlements become very needy; at any time, you will likely have 2-3 settlements that need some kind of help, either to defend the location from an attack, kill a group of enemies, or rescue a kidnapped settler. You don't have to do these miscellaneous repeatable objectives, but they can reward you with caps and XP.
- There is one really good repeatable quest called "Raider Troubles at Tenpines Bluff". This quest will send you to a nearby USAF facility filled with weak raiders. The benefit doesn't necessarily come from caps or XP, but instead from the respawning items within the facility. The location contains large amounts of ammo, chems, a mini nuke, and a fusion core, so it is a decent way to farm these items.
- One last note about settlements: take the "Local Leader" perk. Level 1 requires charisma level 6, and level 2 requires charisma 6 and level 14. The first level of the perk allows you to send settlers from one location to another as supply lines, which allow you to access the workshop content from each connected location. Level 2 allows you to build stores in your settlements.
- Critical hits have been changed in this game, they are no longer luck based and are instead based on hits in VATS mode. Each hit fills the critical bar a little and once its full, you can execute a critical hit by pushing
 while doing a VATS attack. Critical hits are almost guaranteed to hit the target and deal very high damage.
- Sneak attacks always do at least 2x as much damage as standard attacks, and can be executed while you are hidden or even in caution.
- Food, water, and stimpacks all heal over time, so try not to let your health get too low.
- Fallout 4 has no level cap, so you can keep playing and leveling up indefinitely!
- This is a huge game, it suffers from some frame rate issues and crashes occasionally. It is recommend that you save/quicksave fairly often so you don't lose too much progress.
- You can play the game on any difficulty you want depending on how challenging you want your game to be. Survival difficulty makes all enemies very strong and able to take a ton of damage. However, higher difficulties spawn more legendary enemies, who in turn provide better loot.
- Finally, there is far more to this game than I could possibly explain in this guide, and new things are still being found. If you have a specific question, head over to the Fallout Wiki to search for an answer.
Full X-01 Power Armor Suit Location
Credit to Dat Saintsfan for the video.

Platinum Trophy
Collect all other 50 Trophies for this Trophy
8.94%
Very Rare


War Never Changes
Enter The Wasteland
98.08%
Common
StoryUnmissable
This is the tutorial mission for the game. You will start out by making your character and talking to a Vault-Tec representative to assign your S.P.E.C.I.A.L. points. Afterward, the nuclear war will begin and you will be ushered into Vault 111. After an extensive series of events, you will leave the vault and the trophy will unlock at that point.
After entering the vault, your character, spouse, and son Shaun will be ushered into cryogenic chambers and frozen without warning. Many decades later, you and your spouse will be unfrozen by a mysterious group. Your spouse will be shot and your son will be taken away before you are re frozen. In 2287, you will awaken again and escape the vault.

When Freedom Calls
Complete "When Freedom Calls"
91.24%
Common
StoryUnmissable
Once you exit the Vault and explore around, you will encounter Dogmeat. Dogmeat will lead you to the Museum of Freedom (or head into town yourself by following the sound of gunshots) where Raiders are attacking a group of people. Kill the Raiders outside and then head inside to kill more Raiders. Once you kill them all you will meet the Minutemen and will be told there is a suit of Power Armor on the roof but it requires a Fusion Core. Luckily there is one in the basement but you will either need to hack the terminal next to the door or pick the lock. Once you get the Fusion Core head to the roof and insert it in the Power Armor.
Once you insert the Fusion Core in the Power Armor go inside the Power Armor yourself and jump down from the roof after detaching the mini-gun from the Vertibird. Don't worry about fall damage as Power Armor negates it. As you're wiping out the Raiders with the mini-gun a Deathclaw will show up. Fight the Deathclaw by shooting it with your mini-gun. Thankfully your Power Armor also protects from the Deathclaw fairly well.
Once you've killed everything outside, head inside the Musuem and talk to Preston to complete the quest. For the follow up to this, see
The First Step below.
Bobblehead Note: Be sure to grab the Perception Bobblehead on the desk where the Minutemen are for the

...They're Action Figures trophy.

Unlikely Valentine
Complete "Unlikely Valentine"
64.27%
Common
StoryUnmissable
Once you head to Diamond City and ask around about how you could find Shaun, you are told to ask a man named Nick Valentine who runs the Valentine Detective Agency in the city. When you head there however, only his secretary is present and she will tell you that Nick is missing and suspects he was kidnapped by a local gang that resides in Vault 114.
Follow the waypoint towards Vault 114 and kill all the gang members that get in your way. Eventually you will find Nick and you can follow him out of the Vault. But before you do you encounter Skinny Malone and Darla. The dialogue options here can either lead you out of the Vault without violence or you kill Skinny Malone. Either way, once you are done head out and go back to Diamond City and talk to Nick.
GAME BREAKING GLITCH ALERT: There is a known game breaking glitch in this quest in which your character will plug into the terminal to open the vault but it won't work and the terminal will become inaccessible. If this happens, you will need to reload an earlier save and try again.
Bobblehead Note: On the desk behind Nick where you find him in the Vault is a Speech Bobblehead for the
...They're Action Figures trophy.

Reunions
Complete "Reunions"
56.07%
Common
StoryUnmissable
Once you rescue Nick, you will tell him about your search for Shaun and he will name a suspect named Kellogg. You will then head over to Kellogg's house but the door will be locked and you will either have to pick it yourself or convince The Mayor or his secretary to give you the house key. If you are unable to do any for some reason then you can wait until the secretary goes to sleep and pick the lock on her desk. Or you could level up until you get a higher lockpick skill, since Nick waits for you.
Once you get inside Kellogg's house, look under his desk for a button that leads to a secret room. In there, look at the ashtray for the cigars and pick them up. Nick then gets the idea to use Dogmeat to search for Kellogg's scent.
Follow Dogmeat around and you will have to stop a couple times to have him sniff another clue. Do so until you are lead to Fort Hagen. Head inside and fight the Synths along the way. Eventually Kellogg will open a security door so he can talk to you. Regardless of your dialogue choices, you will fight him.
Kellogg is somewhat a tough fight even with a companion. Not only does he have a few Synth's as backup, but he also has a Stealth-Boy and he hides off in the room in different spots, plus while he is invisible you can't just target him in V.A.T.S. However, his Stealth-Boy doesn't last very long and he will momentarily become visible again. Kill him and be sure to loot his cybernetic implants.
Bobblehead Note: A bit before you reach Kellogg you will come across a kitchen area. Head in there and between two refrigerators is the Energy Weapons Bobblehead for the
...They're Action Figures trophy.

Dangerous Minds
Complete "Dangerous Minds"
51.45%
Common
StoryUnmissable
This is a fairly straightforward quest. After fighting Kellogg and grabbing his cybernetic implants, you will be told that you can access his memories by heading to a place called The Memory Den in Goodneighbor. Head there and talk to Doctor Amari and sit in the chair so you can experience Kellogg's memories. There's no fighting during this part, but if you want you can interact with the NPC's to hear Kellogg's personal thoughts about them.
Once you find out where Shaun went, use the television to exit and the quest will complete.

Hunter/Hunted
Complete "Hunter/Hunted"
40.58%
Uncommon
StoryUnmissable
For this quest you will be told that a runaway scientists by the name of Virgil who knows how to get into the Institute is in the Glowing Sea, a heavily radiated part of the Commonwealth. You have two ways of getting to Virgil:
- Stock up on plenty of RadAway and Rad-X. This method makes it much more complicated than it needs to though.
- Use Power Armor to traverse the area and reach Virgil that way. Much simpler, as you should have a suit of Power Armor already. Plus it will be helpful for the enemies you encounter.
Once you reach Virgil, he will tell you that in order to use the Institutes method of getting inside the Institute you will need a Courser Chip. Head to the C.I.T. Ruins and use the signal Virgil tells you about to locate the Courser. Once inside the building fight your way through Gunners until you get to the top where the Courser is.
Now you will have to fight the Courser, and while unlike Kellogg he has no backup, he is a tough opponent and carries a missile launcher and has a Stealth-Boy. Fortunately the room you fight him in doesn't have much places to hide so he is easier to spot. Once you kill him, take the Courser chip and return to Virgil.

The Molecular Level
Complete "The Molecular Level"
34.22%
Uncommon
StoryUnmissable
Hopefully you have already met The Railroad before starting this quest because if not then this quest will be slightly longer than it needs to. If you have not then you will need to do the quest Road to Freedom. For more details, see
Tradecraft
below.
If you have, then talk to Tinker Tom who will be able to decipher the Courser Chip. Once Tinker Tom deciphers the chip, return to Virgil who will give you plans for a teleporter. You can also promise to find the cure for him inside the Institute, but you don't have to unless you want to, so don't worry if it sounds like it's vital.
Now you will have to choose who you want to build the teleporter. You can choose either between the Minutemen, Railroad, or Brotherhood of Steel. In the end it doesn't really matter who builds it. It's probably best to pick the Minutemen though, as you have most likely already started building things in Sanctuary and storing resources there.
In order to build the teleporter though, it will require a flat surface with no objects in the way, and 27 Power with all the wires connecting to each other. Once you build and activate it, you will find yourself inside The Institute beginning the next quest
Institutionalized.

The Nuclear Option
Complete "The Nuclear Option"
20.75%
Uncommon
MissableStory
There are three ways to complete this quest overall:
- The Brotherhood of Steel way: After completing Ad Victoriam the player will need to speak with Elder Maxson and initiate the destruction of the institute, after brief fighting sequences you should reach the reactor and plant the fusion pulse charge. Once completing this step and speaking to a few key individuals you will need to step into the relay where you will be transported to safety, detonating the charge will result in an explosion and Elder Maxson will congratulate you on your efforts.
- The Minutemen way: This mission works similarly to that of the BoS, after talking to Preston and Sturges you will need to relay into the Institute and plant the charge on the reactor, after talking to a few key individuals you will transport back to safety to detonate the charge. Preston will then talk to you and complete the mission.
- The Railroad way: This mission plays out almost exactly like the other two, you will arrive in the Institute and hack Father's terminal resulting in the player having access to go and plant the charge on the reactor, after this the player can safely return to the Commonwealth and detonate the charge, Desdemona will then talk to the player and complete the mission.

Institutionalized
Complete "Institutionalized"
33.60%
Uncommon
MissableStory
This is another straightforward quest with no fighting. Once you arrive in the Insitute a voice on an intercom will instruct you to go down a narrow path leading to him. Once you do, you will meet Father, the leader of the Insitute. After talking with him, agree to join the Institute, as denying will cause you to be locked out of Institute quests.
Once you're done talking, you will be told to meet other members of the Institute. Follow their waypoints and explore around, asking them about the Institute. Once you're done talk to Father again and he will give you another quest.

Mankind-Redefined
Complete "Mankind-Redefined"
24.64%
Uncommon
MissableStory
After completing the mission 'The Battle of Bunker Hill' the player will need to enter the C.I.T building and make their way to the roof access which is immediately to the right of the entry point, on the roof Father will ask the player to attend the next Directorate meeting back in the Institute. Assuming that the player has remained loyal to the Institute thus far they will be able to travel back to the Institute and listen to the board meeting, at the meeting Father will make it known that the player will be given the role of Director when Father ultimately dies from an agressive form of cancer.
After the meetings conclusion the player will momentarily speak to Father about the new information, the mission will then be complete and the player will be tasked with beginning the quest 'Mass Fusion'.
If the player completes 'The Battle of Bunker Hill' by choosing to let the escaped Synths go free their reputation with the Institute may be jeoprodised and the main questline could result in automatic failure, it is recommended that the player make a manual save before completing the mission.

Powering Up
Complete "Powering Up"
20.77%
Uncommon
MissableStory
After returning to the Institute Father will ask the player to record a broadcast message to the Commonwealth to show that the Institute is ready to let themselves be known, after recording the message the player will be tasked with travelling to Diamond City where they will need to enter the Diamond City Radio broadcasting station and place three seperate panels into a transmitter which will amplify the distance that the broadcast will reach, the panels must be placed into the correct cabinets to make sure this occurs.
When the player returns to the Institute they will need to enter the Reactor room where everyone will be waiting, walk up to the reactor and place the core into it, then continue to the terminal nearby to start the sequence. After starting the reactor another board meeting will be held, as the new Directorate the player must decide whether they would like focus put onto either Synth or Weapon production. After the meeting concludes the mission will complete.
If the player has been following the Railroad questline they will most likely be up to a point in 'Underground Undercover' where they are waiting on Z1-14 to speak with them, immediately after the completion of 'Powering Up' Z1-14 will speak to the player and organise the next step of the Railroad's plans. It is suggested that the player make a manual save at this point so that they can continue both questlines to complete both series of trophies.

Nuclear Family
Complete "Nuclear Family"
18.55%
Rare
MissableStory
The Nuclear Family is the ending quest for the Institute. If you reach the ending for the other factions you will not be able to get this trophy and you will get the
The Nuclear Option trophy instead.
This is a very short quest but very important for the story. In the Institute, you will be told to go see Father. You will exchange your final words to each other before he dies from his incurable cancer.

The First Step
Join the Minutemen
79.21%
Common
MissableStory
After finishing the quest
When Freedom Calls follow the Minutemen to Sanctuary and talk to Preston about joining the Minutemen. Once you do so, he will direct you towards a settlement called Tenpines Bluff that is under a threat of Raiders. Go talk to them and they will tell you to clear out the Corvega Assembly Plant down south.
If you are doing this early on you may want to wait until you either have a companion or are leveled up a bit more before going there, as there are lots of Raiders and turrets there. Once you clear it out, head back to Tenpines Bluff and then return to Preston to complete the quest. You will then unlock the trophy.

Taking Independence
Complete "Taking Independence"
53.24%
Common
MissableStory
This trophy can be obtained after you become an ally with the Minutemen. The quest involves helping the Minutemen reclaim their original base, the Castle (in the remains of Fort Independence). Meet the Minutemen nearby and pick your method of attack (charging in or luring the enemies out). The Castle is filled with mirelurks and mirelurk eggs, none of which are particularly difficult to kill. You will have to clear out the courtyard and all of the rooms, as well as the top of the wall. The egg clutches spawn baby mirelurks that are about as dangerous as a radroach, so they aren't a problem.
Once you kill all the mirelurks and destroy most of the eggs, you will be attacked by a mirelurk queen. The queen is the size of a super mutant behemoth and attacks by spraying acid and spawning baby mirelurks. They can take multiple mini nukes to kill, but since you likely won't have a fat man launcher yet, a missile launcher, minigun, or the spray n pray are good alternatives.
Once the queen goes down, take out any other egg clutches around the castle. To finish the quest, you will have to build ten power (two medium generators or four small ones) and connect them to the main antenna. Once the antenna is powered, talk to Preston to finish the quest.

Old Guns
Complete "Old Guns"
45.33%
Uncommon
MissableStory
This trophy can be obtained after you become an ally with the Minutemen. This quest involves finding the schematics to build a special weapon at your settlements: an artillery cannon! Talk to Ronnie Shaw and follow him to a pile of debris that can be cleared while in build mode. Once you go deeper into the castle, you will fight some fairly weak enemies and deal with some mines. There are also a lot of cannonballs down here that can be used for the "Broadsider" special weapon.
Eventually, you will have to fight a strong sentry bot. Use grenades, mines, and your companions to your advantage, as he is very tough to kill. Once you take him down, pick up the schematics for the artillery cannon as well as some smoke grenades. There is also a fat man launcher in here. Head back to the surface and build an artillery cannon (requires 4 oil, 4 screws, 6 gears, 16 springs, 4 concrete, 16 steel, and 4 wood). Once it is built, you will need to test it. Head toward the marker on your map and throw an artillery smoke grenade into the area and step away. Once the artillery strikes, talk to Ronnie and Preston to complete the quest.
Artillery can now be built at any settlement, with a range of 4-5 squares on the pip boy map.

Semper Invicta
Join the Brotherhood of Steel
63.82%
Common
MissableStory
To join the Brotherhood of Steel you will first have to head to Cambridge Police Station and when you get close enough, you will be told that your Pip-Boy has picked up a distress signal. Listen to it and follow the waypoint to find a Brotherhood squad under attack by Ghouls at the police station. Assist the Brotherhood squad and when done talk to Paladin Danse.
Once done, Paladin Danse will want to talk to you inside. Head inside and talk to the other Brotherhood members if you wish, then talk to Danse when you're ready. He will want you to accompany him to the ArcJet Systems building so he can find a Deep Range Transmitter for the Brotherhood. There will be Synths to fight inside the building, so be prepared.
Once inside the building, follow Danse and shoot the Synths that get in the way. Eventually he will cover a door so you can return power to the door he is guarding. Do so but once you do, many Synths will ambush Danse. You have the option to either help him fight them off or activate the engine in the room to kill the Synths. Activating the button will kill all the Synths and allegedly injure Danse, but when you talk to him he will assure you he is fine and that his Power Armor protected him.
Proceed through the door and follow Danse to get the Deep Range Transmitter fighting more Synths along the way. With Danse at your back and possibly another companion they should be no trouble. Once you get the transmitter, talk to Danse and return to Cambridge Police Station. When you return, talk to Danse again and he will offer you to join the Brotherhood. Say yes and the trophy will unlock.

Blind Betrayal
Complete "Blind Betrayal"
19.64%
Rare
MissableStoryBuggy
Glitch Warning: There are two potential glitches for this quest. One is a minor one, the other stops progression.
Phase I: Give the Data to Proctor Ingram & Have Doctor Li Join the Brotherhood
For the first part of this questline, you will be told by Elder Maxson to give the data you took from the Institute to Proctor Ingram and to get Doctor Madison Li from the Institute. If you had the Brotherhood work on the teleporter then ignore the next part, but if you had the Minutemen build the teleporter then please read below to avoid frustration.
Glitch 1
(Progression Stopping): If you had the Minutemen build the teleporter, you would have been asked by Sturges to deliver the data from the Institute and give it to him. However, if you are going for the Brotherhood ending, talking to Elder Maxson during Mass Fusion will have him tell you to deliver the data to Proctor Ingram. What you want to do here is
give the data to Sturges, and then
talk to Sturges again so he can give you the data back. What happens if you go ahead and give Ingram the data is when you are supposed to talk to her about the Brotherhood's secret project your character will keep asking to have the data given back but you will not receive it, and this will keep happening over and over which will make you unable to progress with the quest.
Basically, be sure not to have a save if you gave Ingram the data first. Go see Sturges first and then ask for the data back so you can then give it to Ingram.
The other part of this quest is getting Doctor Madison Li from the Institute. Fast travel to the Institute and find Li with the waypoint marker. You can either pass a high speech check to convince her to leave the Institute and join the Brotherhood or you will have to find her evidence that the Institute is hiding something. This is done by heading into the FEV Labs and getting Virgil's holotape and giving it to her. Once you give it to her, she will be convinced to leave the Institute. Now you will be told to get a High-Powered Magnet at a hospital that is marked for you.
Phase II: Obtain a High-Powered Magnet & Nuclear Stockpile
Glitch 2
(Minor): For this part of the quest you will have to get a High-Powered Magnet at a hospital. Some have had it bug out to where the magnet isn't where the marker is and thus unable to get it. However you can simply buy a High-Powered Magnet from Diamond City Surplus.
After acquiring the High-Powered Magnet, you will then need to get a nuclear stockpile for the secret project. The building in which the stockpile is at is in the Glowing Sea, so you should bring your Power Armor with you. Head to the building and follow the objective marker, fighting some Ghouls along the way. Eventually you will reach a room with a Child of Atom who will try to stop you from getting the stockpile. With a decent speech check you can convince him to stand down and he will give you the passcode for his terminal to unlock the doors. If not then he only has an Assaultron and a Turret to protect him.
Either way, use the terminal to unlock the doors and place the beacon where the stockpile is. If Paladin Danse is with you he will ask to stay while the stockpile is getting secured and picked up. Return to Elder Maxson for the next phase of the quest.
Phase III: Paladin Danse
When you return to Elder Maxson, he will accuse you of hiding something, then reveal a secret about Paladin Danse and that he has gone AWOL. With a speech check you can convince him to back off. Afterwords he will tell you that you need to hunt down and execute Danse. Go talk to Proctor Quinlan and then Scribe Haylen will interrupt and offer a different solution. Follow her below the deck and she will tell you that Danse is most likely located at Listening Post Bravo. Head there and destroy the turrets and Protectron's that get in the way.
Once you reach Danse, you can talk to him, and he will talk about how he has come to terms with who he is and that he agrees he should be made an example of. You can comply and kill him, or persuade him into hiding. If you do the latter, Elder Maxson will show up and you will have to either convince Maxson to spare Danse (with a high speech check) or Maxson will execute Danse personally. If Danse lives then he can then be persuaded to still be your companion, but he will not be able to be around any Brotherhood units as they will shoot him on sight.
Regardless of what happens, return to Boston Airport to initiate the next quest.

Ad Victoriam
Complete "Ad Victoriam"
17.24%
Rare
MissableStory
This is the final Brotherhood quest for their questline. However, like the previous one there are three parts to it.
Phase I: Wipe Out the Railroad & Kill Virgil
You will be told that the Railroad is a threat to the Brotherhood and they are to be dealt with before they can do anything. Your job is to head to their HQ and kill everyone. However unlike the Institute version of this quest, you can't simply fast travel to the HQ and kill everyone. You will have to head to the Old North Church and head in the way you originally found them. Only this time there are Railroad members ready to fight back but you do have Brotherhood backup this time.
Once you get to the secret passage a Brotherhood member will set charges on it, and you will have to activate the timer to blow it open. Once you do, head inside and kill all the members, including Deacon. You will also be instructed to reprogram P.A.M. into joining the Brotherhood. P.A.M. will not attack you so go ahead and access the terminal and upload the Holotape Ingram gave you prior to the quest.
For Virgil, you can convince Captain Kells to spare him with a speech check, or comply and kill Virgil anyway. You are not punished either way.
Once done, return to the Prydwyn for the next part.
Phase II: Mass Fusion Building
Assuming you've already done the Institute ending, then you should be familiar with how this goes down as it's very similar. If not, then it is fairly straightforward. Get on a Vertibird to fly to the Mass Fusion building (Note: Be sure to save beforehand as the game might crash before you get to the Mass Fusion building). You will have Proctor Ingram here to back you up, so you shouldn't have too much trouble.
Once you land on the roof you will fight some Synths. After you kill them all you will then have to head down an elevator. Before you get to the bottom floor an explosion will happen and the elevator will be stuck. You can use a terminal nearby to redirect power back to the elevator fortunately. Once you do, head back on the elevator and continue your descent.
Once you reach the reactor area be sure to pick up a Hazmat suit nearby unless you are already wearing Power Armor as the reactor area is filled with radiation. Grab the reactor core and head out, but before you do a Sentry Bot and a Protectron will try to stop you. Destroy them and take the elevator to the main entrance. Here you will have the option to help the Brotherhood from the Synths or just leave and return to the Boston Airport.
Now for the final part of the quest.
Phase III: Destroy the Institute
Here you will finally get to use the Brotherhood's secret weapon. Once you activate it, you will have to escort it on foot to the Institute's facility. Don't worry about it getting damaged or destroyed and just follow it. The only thing you should do is not get in front of it as it might accidentally crush you or hit you with a nuke.
Once you reach the Institute you will regroup with other Brotherhood members. Stay near them as they know to stay out of the way of the secret weapon. Eventually it will blast a hole into the ground so you can enter the Institute. Enter and the trophy will unlock, even though you didn't fully complete the quest.
If you already did the Railroad ending then it plays just about the same. Fight through the Institute and eventually you will have to unlock a large set of doors. To do so you will have to get access to the main terminal in Father's room. You can talk to Father for the password (requiring a high speech check) or hack the terminal yourself. It's only a Novice level terminal so it isn't hard.
Once you open the doors head down into the reactor room while fighting even more Synths. There are a couple of Legendary enemies but with the Brotherhood at your back they should be no problem. Place the charge given to you on the reactor and you will be teleported out into the relay room. Decide what you want to do with the Synth and then proceed to exit the facility by entering the teleporter.
You will then be teleported onto a roof away from the blast radius along with Elder Maxson and other Brotherhood members. Maxson tells you to arm and press the detonator. Do so and once the explosion happens you will have gotten the Brotherhood ending.

Tradecraft
Join the Railroad
38.44%
Uncommon
MissableStory
While this quest is creative in the way you're supposed to find the Railroad, it's easier to just head to Old North Church located in the picture below.
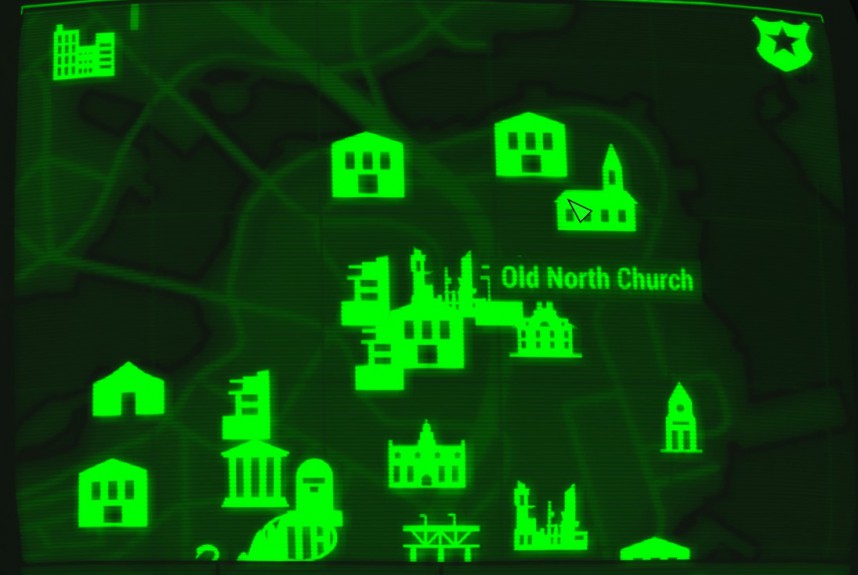
Head inside the church and head to the basement below, killing the ghouls along the way. Eventually you will reach a dead end with a wheel next to it. Turn the wheel so that it will spell out "RAILROAD" and the door will unlock. Head inside and you will meet the Railroad members. Ask to join, and you will then meet Deacon and will be told to go on a quest with him.
Follow Deacon and do as he says. Eventually you will head into a building with other Synths. Either enter the escape tunnel or through the main entrance, it doesn't matter that much. Though you may want to use the escape tunnel anyway since the main entrance is mined.
Once you fulfill the objectives, return to Railroad HQ and talk to Desdemona to complete the quest.

Underground Undercover
Complete "Underground Undercover"
15.46%
Rare
MissableStory
This trophy can be obtained after you become an ally with the Railroad. This quest is extremely long and encompasses a lot of Institute quests. Once you complete
Institutionalized, you will have to meet a synth named Z1-14. You will then have to kill a group of Institute guards so the synths can begin producing weapons and ammo for an upcoming synth rebellion. There are five guards, and you have to kill them quickly or the Institute can turn hostile. Fortunately, the synths in the room will be on your side. From here, you have to continue the Institute storyline and whatever you do,
DON'T piss off the Institute or you will fail this quest too. The quests needed are listed below:
- Synth retention: Simply travel with a courser to retrieve a rogue synth in a raider settlement called Libertalia (a bunch of destroyed ships off the coast of Northhagden Beach). There are a ton of enemies here, but using power armor isn't necessarily a good idea, as falling into water with power armor equipped will cause you to immediately sink to the bottom.
- The Battle of Bunker Hill: This quest isn't very well explained. First, go talk to Desdemona and the Railroad will set up some defenses outside Bunker Hill. Then, travel to the destination and talk to the courser. The goal of the quest is to capture a group of rogue synths with the courser's help. To complete this quest with the Railroad, kill the courser as quickly as possible and then flee the area. Meet Father on the roof of the CIT Ruins and talk to him about what happened. Tell him you were ambushed and the Institute will remain friendly. Now, just return to the Institute to complete the mission.
- Mankind-Redefined
- Mass fusion: Doing this quest will make you permanent enemies of the Brotherhood. You will have to retrieve a beryllium initiator from the Mass Fusion building. Use the relay in the Institute itself to transit there (preferably with a partner and Allie Filmore). You will have to fight your way through the building, which is filled with hostile robots and Brotherhood soldiers. You will eventually reach the reactor level where your quest item lies. Take a rad-x before entering the reactor room and quickly grab the initiator a few levels up. Once you grab it, run back to the airlock and activate it to eliminate your rads and allow you to exit. Kill the sentry bots, protectrons, and assaultrons, then head back to the main floor. You can join in the fight between the Brotherhood and the synths in the main lobby but this isn't required. Once you exit the building, talk to Allie and return to the Institute to complete the quest.
- Pinned: Talk to Father and he will send you to recruit a wastelander named TS-Wallace. When you reach his house, you will find a group of Minutemen waiting outside (they will be gunners if you never worked with the Minutemen). Talk to them and convince them to stand down through one of a few different speech checks. If you fail, you will have to kill them, which will hurt your reputation with some followers. Whatever you do, don't agree to help the Minutemen, as that will fail the quest. Once you deal with the Minutemen, enter the house and talk to the synths and TS-Wallace to convince him to join the Institute.
- Powering up
Once you complete all these quests, a synth will tell you to go help Z1-14. Also, the next Institute quest, "End of the Line" will become available. The Brotherhood will discover the location of the Railroad's main base, so fast travel there and warn Desdemona to complete the quest. You will also recieve a railway rifle for your troubles.
Make an extra save here so you won't have to repeat very much of the game to get the last Institute trophy.
Rockets' Red Glare
Complete "Rockets' Red Glare"
15.16%
Rare
MissableStory
This trophy can be obtained after you become an ally with the Railroad. Upon completing "Precipice of War" (in which you take the Cambridge Police Station) you will take control of a vertibird. Your mission? Destroy the Prydwen, aka the massive Brotherhood airship. Deacon will give you a ton of Brotherhood weapons, ammo, and supplies as well. He will recommend that you try to attack stealthily, but that probably won't work given the massive number of Brotherhood soldiers. There are dozens of them, many of whom wear power armor. Fight your way to the main deck and to the upper levels of the main deck (using the various staircases). Plant the three explosive charges in their respective places and then sprint back to the vertibird.
Along the way, you will encounter Elder Maxson and a couple of guards. They will attack you the second you go down the ladder from the main deck. It would be a good idea to equip a loaded fat man for this situation, as it will take care of all three of them in a single shot. From there, board the vertibird and fly away, taking fire from the airport as well. Once you get far enough away, the charges will be detonated and the Prydwen will be destroyed, killing everyone at the airport as well. Return to the Railroad HQ and talk to Desdemona to finish the quest.

Sanctuary
Complete "Sanctuary"
75.66%
Common
MissableStory
This trophy can be obtained in the begining of the game. The quest will be unlocked after you finish When Freedom Calls. This quest basically serves as a tutorial for crafting items within settlements. The objectives are fairly simple and the quest shouldn't take too long.
- Craft 5 beds (any kind will do)
- Provide 5 water (pumps or purifiers will work, though purifiers require power)
- Plant 5 food worth of crops (any crops will do, make sure to assign someone to them)
- Build defenses (a couple of turrets or manned guard posts will do)
Once you complete these objectives (they can be completed before you even begin the mission), you will get the trophy.

Community Organizer
Ally with 3 Settlements
61.98%
Common
Missable
Help out three Settlements. The easiest way to get this trophy is by doing the minutemen side quests. The first three side quests should do which are:
- The First Step
- Returning the Favor
- Raider Troubles at Oberland Station
Your trophy should unlock after finishing Raider Troubles at Oberland Station.

Benevolent Leader
Reach Maximum Happiness in a Large Settlement
10.80%
Rare
Buggy
This trophy requires a lot of patience, and hopefully you have been gathering resources. For this trophy you have to get a settlement to 100% Happiness. However achieving that requirement is strange, as it requires you to go out of your way to slap things together and wait around for hours.
Method 1:
One of the easiest methods to get this so far is going to Red Rocket Station south of Sanctuary and making a settlement there. From there, you should build the following:
- Six Surgical Stations
- Several Mutfruit Plants bringing the food level to 12
- Enough water to bring the level to 15
- Defense turrets to level 36
Power should not matter. However, you will want to build a bell and a chair next to it to wait in. Now, get 7 settlers from other settlements and assign six to the Clinics and one to the food. Now you will want to ring the bell so they all gather around, and then wait until they all go away. Once they are all away, wait in the chair for 22-24 hours and ring the bell again, and repeat. The Happiness should increase over time, but the higher it goes, the less points it increases. Around the 80-90 level the points will only increase by 1-3 each time but you should keep in mind that as long as you see a green arrow next to the Happiness meter, then you should be fine.
Method 2:
- Build in Sanctuary, use a Recruitment Beacon and go to other settlements to recruit settlers. You'll likely get around 21 settlers by doing this, although by building in Sanctuary you will have useless individuals around such as Mama Murphy and Sturges.
- Have four people on food, make sure to use Mutfruit because if four people are assigned to five each you will have twenty food.
- Have a bit more water than food, enough so that it appears as green, you can build a few large purifiers and stick them in the river nearby.
- Invest into the Local leader perk so that you can build 16 Tier 3 Clinics, for some reason clinics seem to make people much happier so have as many as you can with settlers operating them.
- Build as many turrets as possible, you'll eventually have almost 200 defense and no raiders will every try to attack.
- Build a chair or bed in a position where you can see all the Clinics, place a bell nearby and ring it every 48 hours or so while waiting in between.
- Once you reach 99 happiness you will most likely need to stand and wait for up to an hour, you can just leave the game running while you go and do other things.
Method 3:
It's confirmed that the method in the video below works, but here are the rough steps:
- Go to the red rocket gas station.
- Build a wall around the area so enemies will have a harder time attacking the location (though its unlikely they will attack at all while going for this trophy)
- Place five surgical centers (the highest level of clinics, you need the second level of the perk "local leader" to place stores as well as 1800 caps and materials to build them).
- Place two water pumps so you have 6 water.
- Place 6 mutfruit so you will have 6 food.
- Place 7 beds of any type (one for you and one for each settler).
- Build enough turrets to put the defense at about 80.
- Place dozens of wooden boxes in a corner until the size meter turns yellow (not confirmed to be required).
- Use a radio beacon or send six settlers to the location (shut the beacon off once all six get there).
- Sleep if you need to pass the time until they get there.
- Make an additional save in case something goes wrong.
- Assign one settler to the food and the other five to the clinics.
- Wait for the green arrow to appear next to the happiness.
- Once you see the happiness go up, sleep for 24 hours.
- When you wake up, stand in one position with your workshop interface open until happiness increases again.
- Repeat this process until you reach 100 happiness (should take 1-2 hours).
Benevolent Leader Video Guide
Credit to Vinex for the video.

Gun-For-Hire
Complete 10 Side Quests
41.94%
Uncommon
Side quests are missions given to the player either from members of different factions or from random encounters, side quests are different to main quests due to the fact that they are optional and do not directly affect the progression of the story.
Side quests differ in length and effort but will usually take less time than a standard main mission, the trophy should come naturally if the player focuses on missions as they are given. Missions that are listed under the Miscellaneous category do not count towards the trophy, instead they go towards
Mercenary.

Mercenary
Complete 50 Misc. Objectives
14.69%
Rare
Grind
Miscellaneous Objectives are missions given by random survivors or encounters in the wasteland, they will usually be menial tasks where the player must collect and give an object to someone who has asked for it. There are quite a few available in the major settlements such as Diamond City and the Prydwen.
Some easy Miscellaneous Objectives include:
- Giving chems to Mama Murphy (Warning: She will die if you give her too many).
- Collecting Vertibird signal grenades from the Brotherhood of Steel, and when the Vertibird arrives get into the vehicle. This will count as completing a Misc Objective, and can be done a number of times as long as you continue to stock up on the grenades.

Scavver
Gather 1000 Resources Used For Crafting
63.23%
Common
Unmissable
Keep collecting junk, weapons, armors,.. etc. and keep adding things to your workshop when you reach your carrying capacity. You can also scrap items in your area. Once you have 1,000 items in your workshop this trophy should unlock.

What's Yours Is Mine
Pick 50 Locks
54.02%
Common
Unmissable
Locks are found throughout the Commonwealth, they are usually found on doors, safes, and other types of containers. The difficulty of the lockpick will be shown when you look at the object, the difficulty ranges from Novice to Master (You will need to invest in the Lock Pick Perk to be able to attempt more advanced locks).
To successfully pick a lock you must own a bobby pin and twist it to the left or right while also turning a screwdriver between movements to find a sweet spot where the pin will not bust under the pressure, after successfully opening 50 Locks you will earn the trophy.
Note: You can no longer break locks in this game by trying to force them open. Also, if you take the 4th level of the lockpicking perk (at level 41 or higher), you will no longer break bobby pins.

RobCo's Worst Nightmare
Hack 50 Terminals
25.56%
Uncommon
Terminals can be found throughout buildings in the Commonwealth, when coming up against a locked terminal there are different degrees of difficulty (Similar to that of lockpicking).
When hacking a terminal you must find a the password somewhere inside lines of code, you will be given a number of attempts to find the correct word, failure to do so will lock you out of the terminal for up to 10 seconds or in some cases, permanently.
An example of a novice level hack:
- The password is MEATS.
- If you press on the word LOVES you will be shown 1/5 in the right corner, indicating that one letter is in the correct position.
- Although both words have an 'E' the letter itself must be in the correct positioning to count as a correct guess.
- If you enter the word SEATS you'll be shown 4/5, by this time you should be able to deduct which words have four similar letters to your last guess, resulting in you being able to guess MEATS and unlock the terminal.
When finding difficulty hacking a terminal the player can remove incorrect words or replenish their amount of attempts by clicking on sets of matching brackets, e.g [123] (123) {123}, although this not a necessary part of hacking it can come in handy to those that need assistance when trying to operate a terminal.

Armed and Dangerous
Create 50 Weapon Mods
29.45%
Uncommon
Weapon mods can be crafted on a weapons workbench that can be found in various settlements or built yourself in a settlement, most mods require a number of junk items to be crafted so scavenging and bargaining with traders is valuable to the success and efficiency of earning the trophy.
Some mods require a higher level of the "Gun Nut" or "Science" perk to be crafted, but if you have enough weapons and junk you should be able to get at least 50 mods without having to invest in those skills, although it may be a faster and wiser option. Pipe weapons and common pistols or shotguns also work quite well. The cheapest mods include basic sights and basic magazine upgrades.
Wasteland D.I.Y.
Craft 100 Items
32.60%
Uncommon
Earning this trophy requires you to craft 100 items on either a Chemistry/Cooking/Armour workbench.
One of the simplest methods to obtaining this trophy is to collect as much fertilizer and plastic as possible either through traders or while exploring the Commonwealth, once you find a Chemistry station you will have the option to craft Jet which is one of the many drugs within the game. To craft a Jet you will need 2 Fertilizer and 1 Plastic, seeing as though both items are rarely used elsewhere you should have stocked up on both of them, simply continue to craft Jet until you reach 100 and the trophy should unlock. This is also a good method for farming caps; simply keep making as much jet as you can and then sell it for a decent amount of caps.

Never Go It Alone
Recruit 5 Separate Companions
48.41%
Uncommon
There are thirteen possible companions in Fallout 4, and a couple of them are encountered throughout the main quests. Below is a table that gives their names, locations, likes, and how to recruit them.
Name
Location
Likes
How to Recruit
Cait
Combat Zone
Violence, stealing, and all around criminal acts.
Simply kill all the raiders in the building and then talk to Cait and her manager to get her to follow you.
Codsworth
Sanctuary, your old house
Helping others, being friendly.
Talk to him after you exit the vault and venture around the town with him. Once you create an actual settlement in Sanctuary Hills, you can talk to him again and he will offer to come with you.
Curie
Vault 81, at the end of the quest Hole in the Wall.
Helping others, especially for no reward. Trying to at least avoid combat during dialogue.
In Vault 81, you can be asked to do a quest to find medicine for a young boy in the vault. You will discover an entire hidden section of the vault that was built for the vault's experiment, but was sealed off when the original overseer went against Vault-Tec's instructions. Clear out the area and you will eventually meet Curie. Collect the quest items from her room and then head back to the boy that needs the medicine. Curie will then offer to join you.
Deacon
Railroad HQ/Old North Church
Talking highly of Synths, picking locks, hacking terminals, helping others.
Locate the Railroad in the Old North Church and talk to its leaders. Once you finish talking to them, you will be able to join the Railroad and he will become available as a companion.
Dogmeat
Red Rocket Truck Stop, or Nick will call him during the quest
Reunions
N/A
Dogmeat is almost unmissable, as you are supposed to walk to the gas station after leaving Sanctuary Hills for the first time. Simply talk to him at the gas station and you'll recruit him.
John Hancock
Goodneighbor
Making Settlement buildings, asking if people need help, using Chems, giving others Chems, being naked.
Complete "The Big Dig" side mission in Goodneighbor and side with Fahrenheit to make him available.
MacCready
Goodneighbor, at the Third Rail. Will require you to pay him 250 Caps to have him follow you but can be convinced to lower it to 200.
Asking for more Caps during dialogue choices, picking locks, stealing items, sarcastic responses.
Go to the "Third Rail" in Goodneighbor and talk to him. He will join you for 250 caps (or 200 with a speech challenge).
Nick Valentine
Vault 114 during the story quest
Unlikely Valentine
Helping others, dedicating to helping Synths, helping the Railroad, hacking terminals.
Complete "Unlikely Valentine" and then talk to him about your son in his office. After you search Kellog's house, talk to him again and he will offer to join you.
Paladin Danse
Cambridge Police Station
Helping civilians, being aggressive towards Raiders or other enemies, getting inside Power Armor and modifying a weapon.
Go to the police station and talk to Danse and the two other Brotherhood soldiers there. Do a few side missions for the Brotherhood there and then complete the game through the mission "Reunions". At that point return to the police station, then head to the Prydwen and talk to Elder Maxson. You will be asked to talk to some of the higher-ups on the ship and Danse will offer to come along.
Piper
Diamond City Entrance
Picking locks, helping others, avoiding violence in dialogue.
When you enter Diamond City for the first time, go to Piper's office building near the entrance. Once inside, talk to her and do an interview for her. After that she will offer to join you.
Preston Garvey
Sanctuary
Helping others, giving the Minutemen a good name.
Finish "Taking Independence" and meet Preston in the newly liberated Castle. Now, simply talk to him and he will offer to join you. If he isn't at the castle, you can find him in Sanctuary.
Strong
Trinity Tower
Helping others, fighting and killing enemies, eating bodies with the Cannibal perk, aggressive dialogue choices.
Kill all the super mutants in the building until you reach the top. Rescue Strong from his cage, follow him down the tower, and talk to him to recruit him as your companion.
X6-88
The Institute
Entering Power Armor, threatening dialogue towards others, hacking terminals, modifying armor and weapons.
Complete "Mankind Redefined" and he will offer to join you. This requires you to align with the Institute.

Lovable
Reach Maximum Relationship Level with a Companion
40.46%
Uncommon
This trophy might take a while depending on who you bring with you. The easiest companions to reach a maximum relationship level are
Piper and Nick since they like things such as picking locks, hacking terminals, and helping people which are bound to happen just about anywhere you go.
Another good choice is
Paladin Danse, as he is extremely overpowered and will almost certainly reach maximum relationship with you if you have him as your follower on your Brotherhood of Steel playthrough, though there is a drawback.
During your Brotherhood playthrough, Paladin Danse will be revealed to be a synth. You will be tasked by Maxson to track him down and kill him. With some high level speech challenges it is possible to avoid killing him (or having Maxson kill him), but he will be hostile to all Brotherhood soldiers.

Fix-Er-Upper
Build 100 Workshop Items
63.34%
Common
Unmissable
This trophy should come naturally especially if you start working on the settlements. Simply build structures and defenses for any settlement and this will come in no time. The only obstacle that may be in your way is that you might not have enough resources for some of the structures, but since a lot of resources are common you should not have much problem looting them while on quests or just exploring.
The easiest item to build is a sleeping bag as they only require 2 cloth and cloth is plentiful in the game. So if you have around 200 or more cloth then you should be able to just build beds until the trophy unlocks.
There is also a counter next to each item you can build. So if there is a counter that says you can build 10 of a certain item then you can build 10 of each item so long as you have enough resources.

Future Retro
Play a Holotape Game
81.17%
Common
This trophy is simple, and it could even be the first trophy you get for the game. The earliest you can get this is when you wake up in the Vault, you will see a terminal. While on the terminal you will see an option to load a Holotape, do so and there will be a game resembling Donkey Kong that loads on the terminal. Once the game loads you will unlock this trophy.
Future Retro Video Guide
Credit to PowerPyx for the video.

…The Harder They Fall
Kill 5 Giant Creatures
19.23%
Rare
There are two enemies you can kill for this trophy: super mutant behemoths and mirelurk queens. Behemoths are over-sized human-like mutant creatures found throughout the Commonwealth, while mirelurk queens are giant mirelurks. Although you may come into random encounters with a Behemoth at certain times there are only five specific Behemoths you need to worry about. You will have to kill a behemoth during a Brotherhood of Steel quest (if you are siding with them) and you will have to kill a mirelurk queen during the mission "Taking Independence".
Note: Some players have said that kills don't count unless you deal the killing blow, so it may be wise to go after these creatures without a partner.
Behemoth Locations
Credit to PS4Trophies for the video.

Ranger Corps
Discover 100 Locations
54.41%
Common
Unmissable
Discovering 100 locations is not difficult although it may require a fair bit of exploring, you should naturally find over 100 locations through natural gameplay and story progression.
Note: You do not need to kill every enemy in an area for it to count as discovered, you merely need to get close enough for the name of the location to appear on your screen.

Print's Not Dead
Read 20 Magazines
41.77%
Uncommon
Collectable
Magazines are collectables found throughout the Commonwealth, they are usually found on tables or in special chests. If you are perceptive you should be able to find at least twenty magazines through natural story progression and exploring, some magazines include:
- Astoundingly Awesome Tales
- Grognak the Barbarian
- Guns and Bullets
- Live & Love
- Tumblers Today
Note: Magazines which are 'burnt' or 'ruined' do not add towards the trophy.

Prankster's Return
Placed A Grenade Or Mine While Pickpocketing
20.02%
Uncommon
To complete this trophy you must invest two perk points into the Pickpocket skill. When near an individual, enter sneak mode and enter their inventory while you are [HIDDEN], place any grenade or mine into their inventory and then exit. If done correctly the enemy should be unaware and the grenade/mine will go off a few seconds later.
Note: It's suggested that you find an unaware ghoul or human enemy, although you could attempt this on any person the results may be critical to your playthrough unless you reverse back to a save immediately after the trophy pops.

Masshole
Kill 300 People
44.29%
Uncommon
Unmissable
To earn this trophy you must successfully find and kill 300 human enemies, people are easy to find within the Commonwealth; most non-friendly human enemies will be found in built up city areas or within buildings. This trophy should come easily through natural progression.

Animal Control
Kill 300 Creatures
55.45%
Common
Unmissable
To earn this trophy you must successfully find and kill 300 non-human enemies, some enemies that count towards this trophy include:
- Molerats
- Mirelurks
- Deathclaws
- Mongrels
- Yao Guai
- Bloatfly
- Bloodbug
- Radroach
- Radscorpion
This trophy should be obtained easily through natural gameplay.

Homerun!
Get a Homerun
27.24%
Uncommon
For this trophy you will have to run across the four bases in Diamond City in order and make a "Homerun". Take a look at the video below for a visual on this trophy.
Homerun Video Guide
Credit to PS4Trophies for the video.

Touchdown!
Get a Touchdown
72.28%
Common
Unmissable
For this trophy you will have to die by having a mini-nuke kill you. This can come in three ways:
- Some Super Mutant populated areas have a Super Mutant Suicider that will carry a mini-nuke in their hand and run at you. You will know there is one around when you hear beeping that gets closer and closer.
- Some human enemies are equipped with a Fat-Man and will shoot you with it if you approach them, although these enemies are rarer to find than Super Mutant Suiciders.
- You fire a mini-nuke at your own feet with a Fat Man yourself. This is the easiest method, but be sure to save before doing it obviously.
Its also been rumored that this trophy can pop via any explosive death as long as it sends you ragdolling through the air, though this is unconfirmed.

They're Not Dolls…
Collect 10 Vault-Tec Bobbleheads
20.78%
Uncommon
Collectable
See
...They're Action Figures for more information on Bobbleheads.

…They're Action Figures
Collect 20 Vault-Tec Bobbleheads
13.66%
Rare
Collectable
If you've played the previous Fallout games then you should be familiar with how this trophy goes. For those that haven't, the Fallout games have Bobbleheads for you to collect. The Bobbleheads grant you a specific permanent bonus to whatever type they are labeled as (e.g. Strength Bobblehead gives you +1 Strength). None of these are missable so you can get them whenever you feel like it.
S.P.E.C.I.A.L. Bobbleheads
Name
Location
Where to Find It
Strength
Mass Fusion Building
On a metal sculpture above the lobby desk.
Perception
Museum of Freedom
As seen in the quest
Road to Freedom on one of the desks where the Minutemen are held up.
Endurance
Poseidon Energy Building
Go on the central metal catwalk and it will be on a desk next to a steamer trunk.
Charisma
Parsons State Insane Asylum
On Jack Cabot's desk. Recommended you get this while doing the quest line started by heading towards the Cabot House.
Intelligence
Boston Public Library
Head to the Northeast part of the library in the Mechanical Room and it will be on a desk.
Agility
Wreck of the FMS Northern Star
At the top part of the ship past the turrets and the makeshift shack. It will be on a wooden beam.
Luck
Spectacle Island
Head to the beached boat and it will be on the second level.
Skillpoint Bobbleheads
Name
Location
Where to Find It
Ability
Barter
Longneck Lukowski's Cannery
Go up on the catwalk into a room with a terminal.
+5% Vendor Prices
Big Guns
Vault 95
In the North most room in the living quarters on top of a radio.
+25% Critical Damage with Heavy Weapons
Energy Weapons
Fort Hagen
Can be found during the main quest
Reunions in the kitchen area between two refrigerators.
+25% Critical Damage with Energy Weapons
Explosives
Saugus Ironworks
In the blast furnace area where the enemy in Power Armor is. It's on the panel behind him.
+15% Damage with Explosives
Lockpicking
Pickman Gallery
On the ground in the underground area where you find Pickman.
Easier Lockpicking
Medicine
Vault 81
In the room where you find Curie during the quest Hole in the Wall.
+10% Bonus Stimpak healing
Melee
Trinity Tower
Inside the cage where Rex Goodman and Strong were being held.
+25% Damage with Melee Weapons
Repair
Corvega Assembly Plant
At the very top of the blue colored structure on the roof.
+10% Fusion Core Duration
Science
Vault 75 under Malden Middle School
In the Science Labs is an area overlooking a Training Area. The Bobblehead is on the desk in there.
One extra guess when hacking terminals
Small Guns
Gunners Plaza
West side of the ground floor on top of a radio in a broadcast room.
+25% Critical Damage with Small Guns
Sneak
Dunwich Borers
After heading deep down into the mines, it will be on a table past the fourth terminal.
+10% Harder to be detected while sneaking
Speech
Vault 114
Behind the desk in the room where you find Nick during the main quest
Unlikely Valentine
+100 Vendor Caps
Unarmed
Atom Cats Garage
On the hood of a car in one of the warehouses.
+25% Critical Damage with Unarmed
If you would rather have a visual guide that shows you all bobblehead locations, then feel free to use the video below.
Fallout 4 All 20 Bobblehead Locations Collectibles Guide
Credit to PS4Trophies for the video.

Born Survivor
Reach Level 5
89.70%
Common
Unmissable
You will reach level 5 within the first couple hours of gameplay.
Refer to
Legend Of The Wastes for more information on leveling up.

Commonwealth Citizen
Reach Level 10
78.03%
Common
Unmissable
You will reach level 10 very early during the game.
Refer to
Legend Of The Wastes for more information on leveling up.

Unstoppable Wanderer
Reach Level 25
52.00%
Common
Unmissable
You should reach level 25 about midway through the story, especially if you do a lot of exploration and side missions.
Refer to
Legend Of The Wastes for more information on leveling up.

Legend Of The Wastes
Reach Level 50
19.15%
Rare
To complete this trophy, you must gain enough experience to reach Level 50, there are many methods of gaining experience such as:
- Completing main missions or side quests.
- Defeating enemies.
- Discovering new locations.
- Hacking terminals or lockpicking doors/safes.
- Passing speech checks.
By doing any of these tasks in any order you will eventually reach Level 50. Depending on how many side quests, exploration, and other option stuff you choose to do, you may not get this by the end of the main story. Although this is the last level specific trophy, you can still continue leveling up in-game and collecting perks.
Here are a few tips for gaining more XP:
- Up the difficulty: Higher levels of difficulty will mean enemies can take and deal more damage, but you will get more XP for kills.
- Take the "idiot savant" perk: This perk will randomly give you 3 XP for doing random actions. This can include killing enemies, opening doors, crafting, and talking to people. Higher levels yield more XP.
- The "Well Rested" bonus for sleeping in a rented or owned bed will give you a temporary XP boost, as will the similar "Lovers Embrace" perk.

Prepared for the Future
Decide the Fate of the Commonwealth
24.87%
Uncommon
StoryUnmissable
This trophy will be obtained when you unlock either
Nuclear Family or
The Nuclear Option.


