Labyrinths of the World: Changing the Past Walkthrough, Guide, & Tips
Labyrinths of the World: Changing the Past Walkthrough

Welcome to the Labyrinths of the World: Changing the Past Walkthrough
The past isn’t set in stone. Now’s your chance to change it!
Whether you use this document as a reference when things get difficult or as a road map to get you from beginning to end, we’re pretty sure you’ll find what you’re looking for here.
This document contains a complete Game Name game walkthrough featuring annotated screenshots from actual gameplay!
We hope you find this information useful as you play your way through the game. Use the walkthrough menu below to quickly jump to whatever stage of the game you need help with.
Remember to visit the Big Fish Games Forums if you find you need more help. Have fun!
This walkthrough was created by Nina de Boo, and is protected under US Copyright laws. Any unauthorized use, including re-publication in whole or in part, without permission, is strictly prohibited.
General Tips
- This is the official guide for Labyrinths of the World: Changing the Past.
- This guide will not mention each time you have to zoom into a location; the screenshots will show each zoom scene.
- Hidden-object puzzles are referred to as HOPs. This guide will not show screenshots of the HOPs, but it will mention when a HOP is available and the inventory item you’ll collect from it.
- This guide will give step-by-step solutions for all puzzles that are not random. Please read the instructions in the game for each puzzle.
Chapter 1: A Cure for Debby

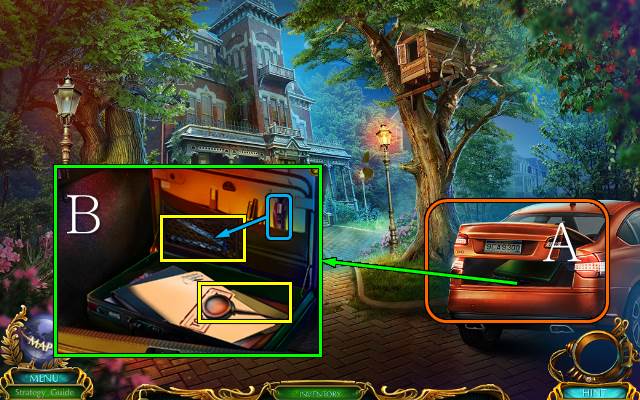
- Open the trunk (A).
- Open the suitcase, take the OILER and read the file; cut the net with the knife and take the FOLDED RULER (B).

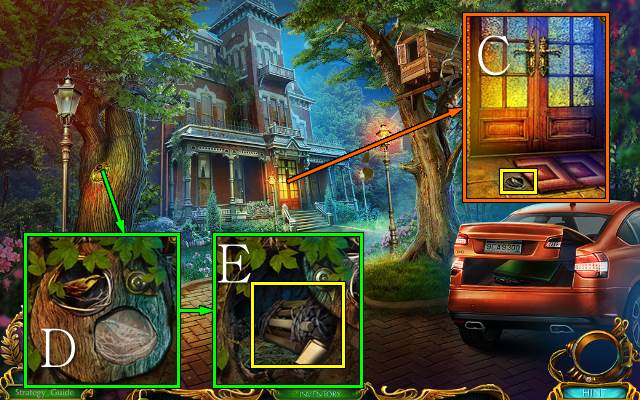
- Move the mat and take the BIRD EMBLEM (C).
- Place the BIRD EMBLEM (D); take the note and ROPE LADDER (E).

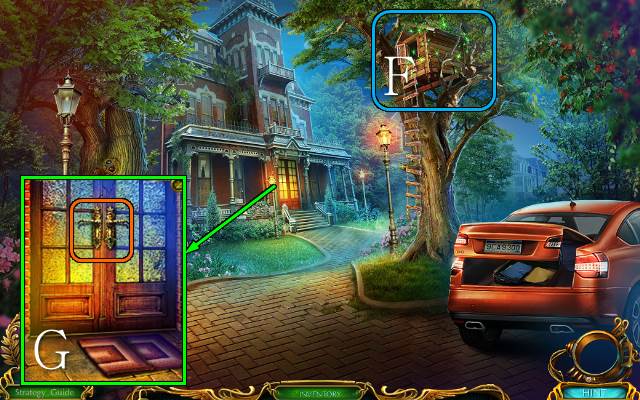
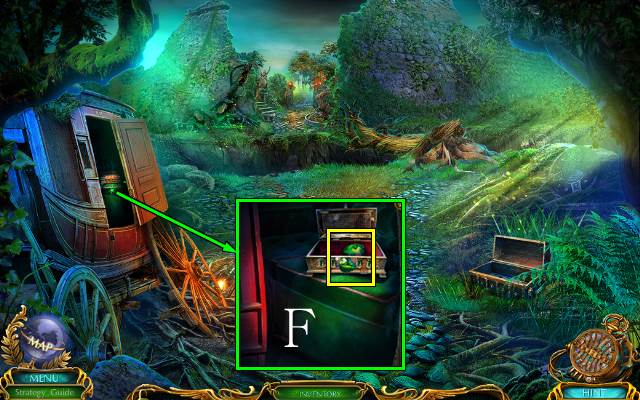
- Use the ROPE LADDER and play the HOP (F).
- You receive a DOOR KEY.
- Use the DOOR KEY (G).
- Go forward.

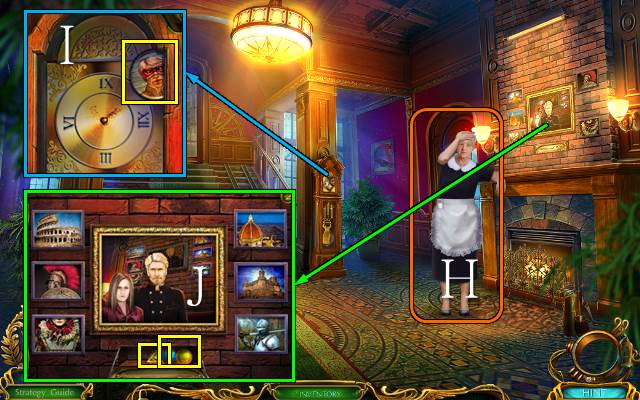
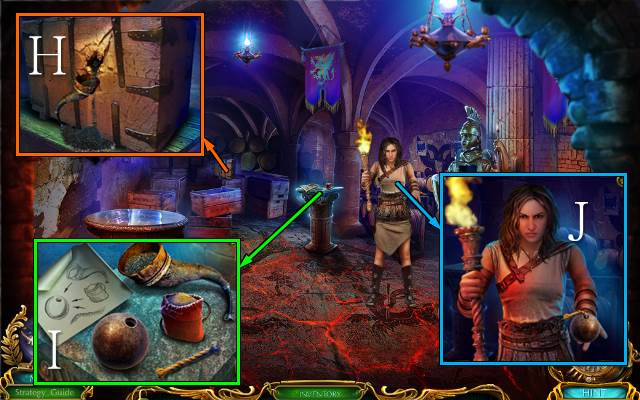
- Talk to Miss Watson (H); you receive a FRAMED PHOTO.
- Take the MASKED TOKEN (I).
- Place the FRAMED PHOTO for a mini-game (J); take the GLASS ORBS and JEWELED TRIANGLE.
- Go forward.

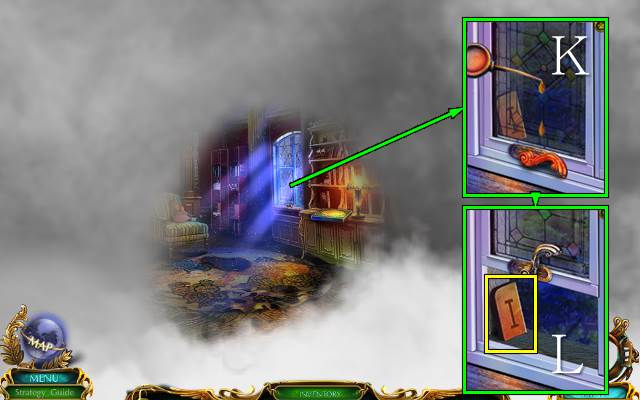
- Use the OILER and open the window (K); take NUMERALS 1/2 (L).
- You receive some LEMONADE.

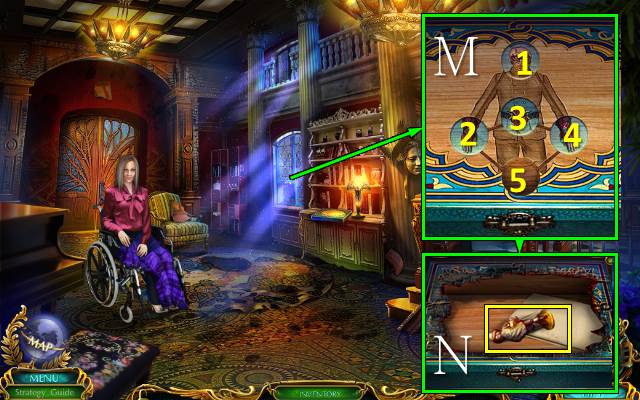
- Place the MASKED TOKEN for a mini-game (M).
- Solution: 4-1-2-3-4-1-2-5.
- Take the MUSKETEER FIGURINE and note (N).
- Walk down.

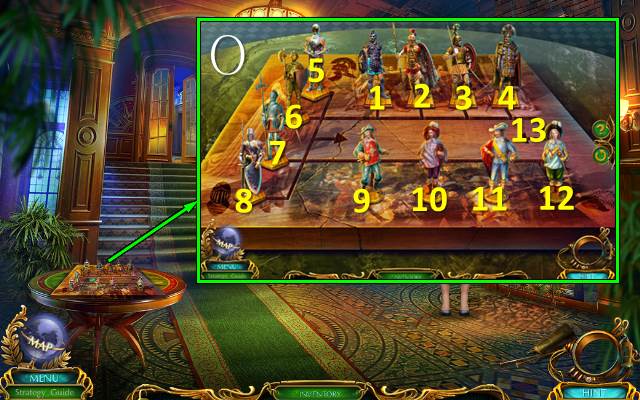
- Place the MUSKETEER FIGURINE for a mini-game (O).
- Solution: 12-13, 8-12, 9-8, 2-9, 5-2, 1-5, 7-1, 3-7, 10-3, 6-10, 13-6.

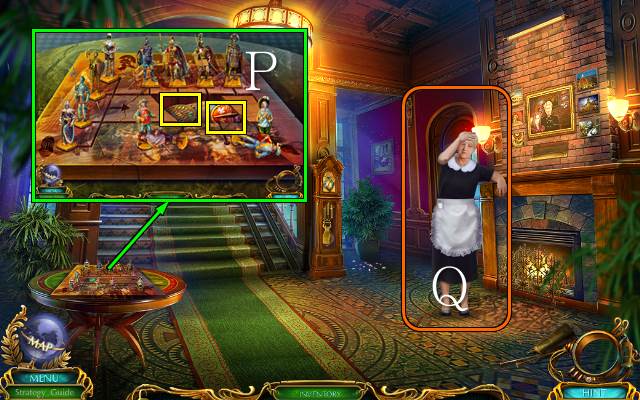
- Take the TIME DEVICE, TINY SHIELD and note (P).
- Give the LEMONADE to Miss Watson (Q); you receive NUMERALS 2/2.
- Go forward.

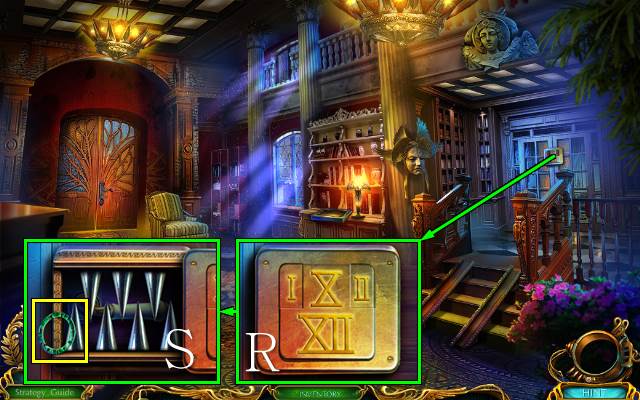
- Place the NUMERALS (R); take the STRANGE RING (S).

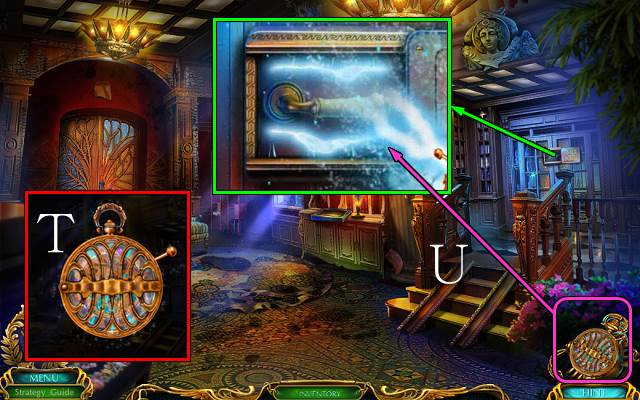
- Access the TIME DEVICE, open it and place the STRANGE RING; you receive your Time Device (T).
- Use the Time Device (U).
- Go right.

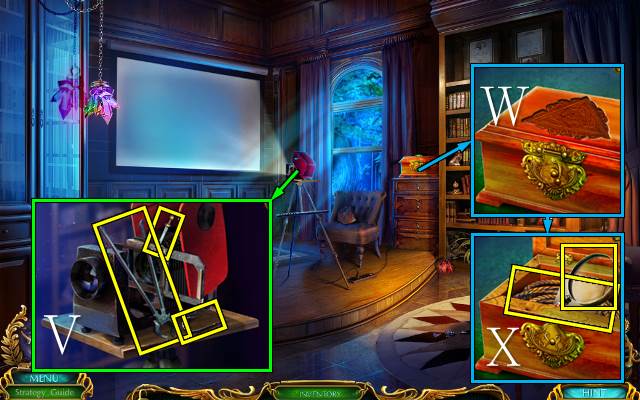
- Take the TONGS, TINY SWORD and HOOK (V).
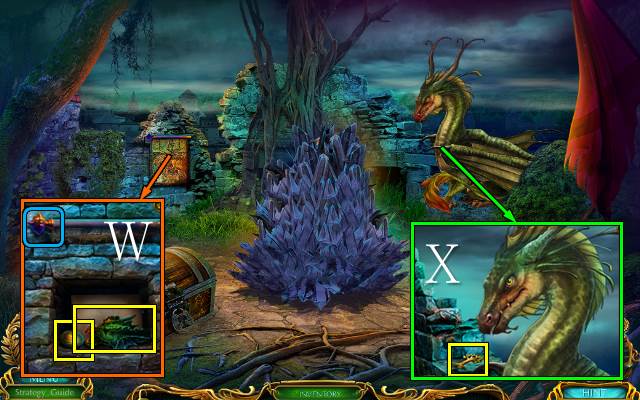
- Place the JEWELED TRIANGLE (W); take the MAGNIFIER, note and ROPE (X).

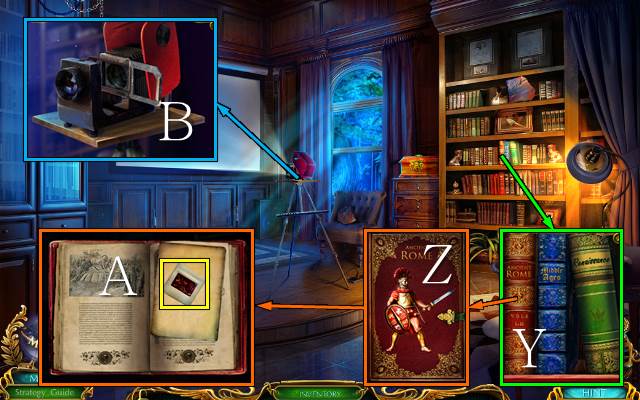
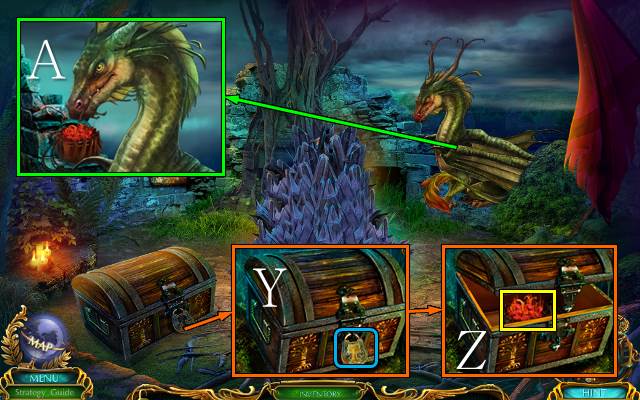
- Pick up the red book (Y) and place the TINY SWORD and TINY SHIELD (Z); take the ANCIENT ROME SLIDE and note (A).
- Place the ANCIENT ROME SLIDE (B).

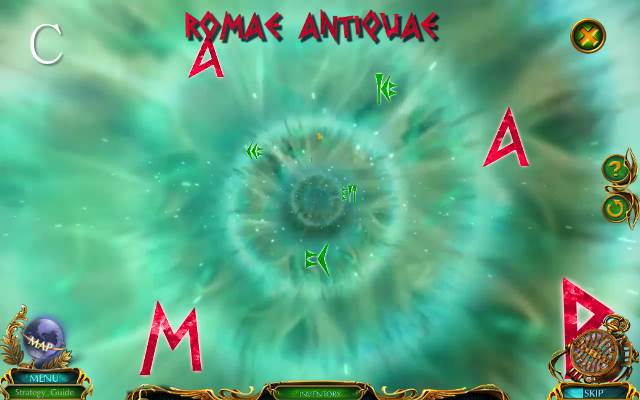
- Catch the red letters (C).

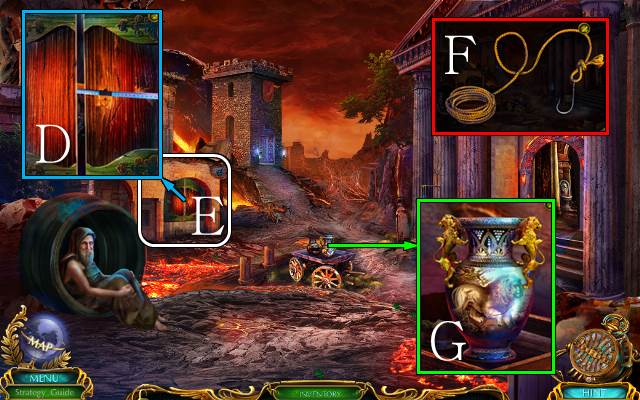
- Use the FOLDED RULER (D).
- Play the HOP (E).
- You receive a LION.
- Access the ROPE and attach the HOOK; take the ROPE WITH HOOK (F).
- Place the LION; take the SWAN HEAD with the ROPE WITH HOOK (G).
- Go right.

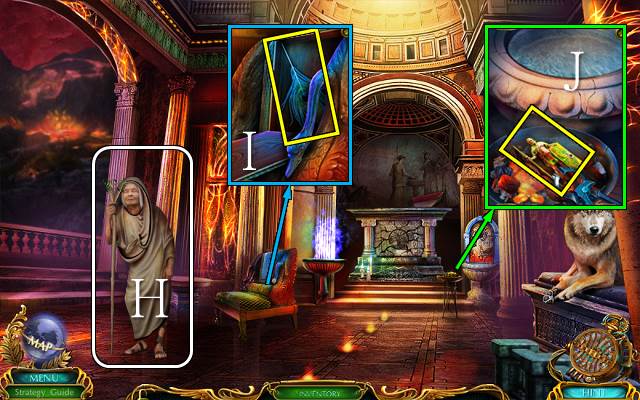
- Talk to the Oracle; you receive BIRD AMULET 1/2 (H).
- Place the SWAN HEAD; take the FEATHER (I).
- Take the LEGIONNAIRE with the TONGS (J).
- Walk down.

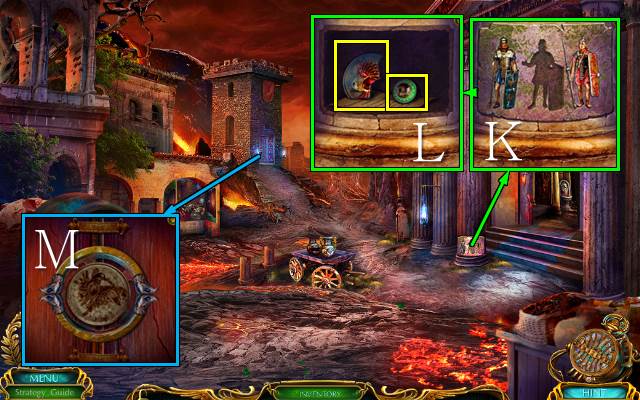
- Place the LEGIONARY (K); take BIRD AMULET 2/2, COLORFUL TOKEN 1/2 and the note (L).
- Place the BIRD AMULET (M).

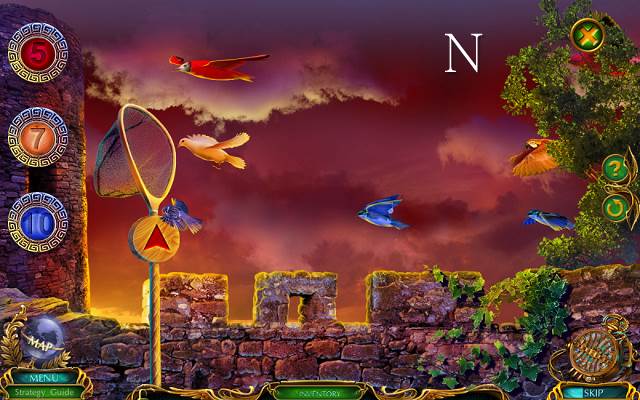
- Play the mini-game (N).
- You receive a PHOENIX.
- Go right.

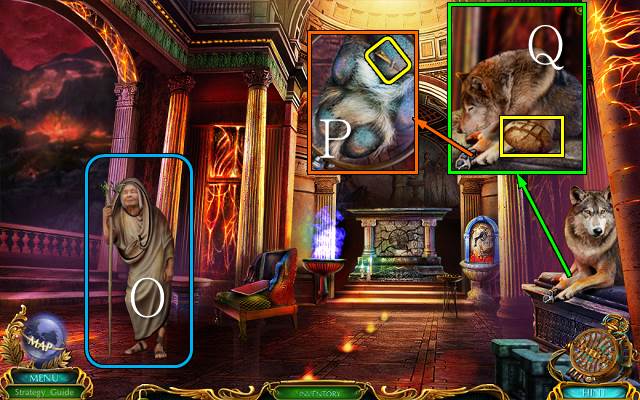
- Give the PHOENIX to the Oracle; you receive some TWEEZERS (O).
- Use the MAGNIFIER and use the TWEEZERS (P); take the BREAD (Q).
- Walk down.

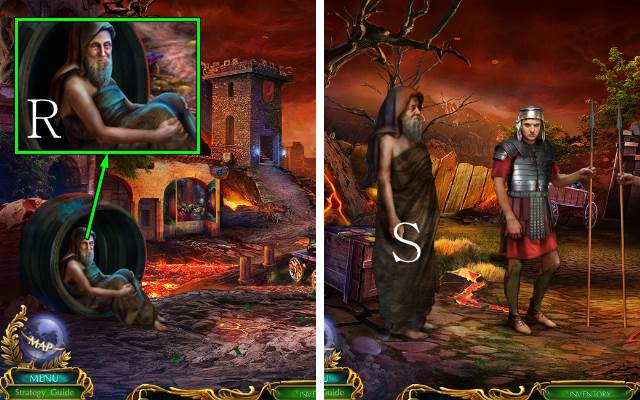
- Give the BREAD to the beggar (R); you receive a WOODEN HELMET.
- Talk to the beggar (S); give the GLASS ORBS to the beggar.

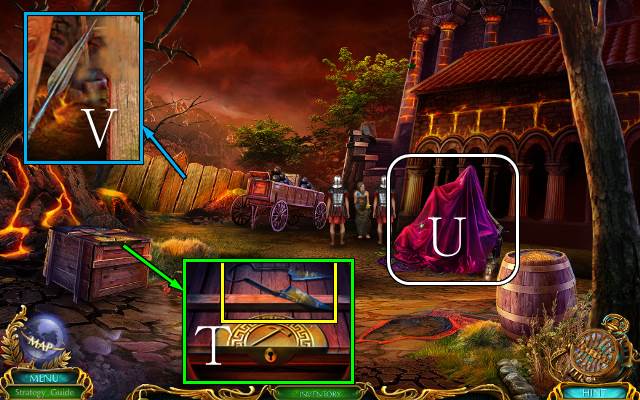
- Take the SHEARS (T).
- Remove the sheet; play the HOP (U).
- You receive a HALBERD.
- Use the HALBERD (V).
- Go left.

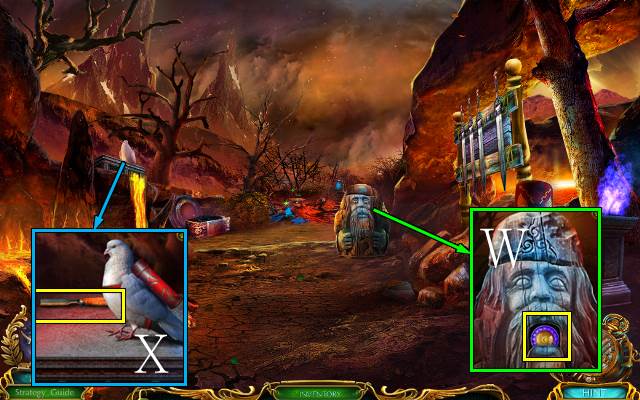
- You receive a MAP.
- Place the WOODEN HELMET and take COLORFUL TOKEN 2/2 (W).
- Take HAMMER AND CHISEL 1/2 (X).
- Go forward.

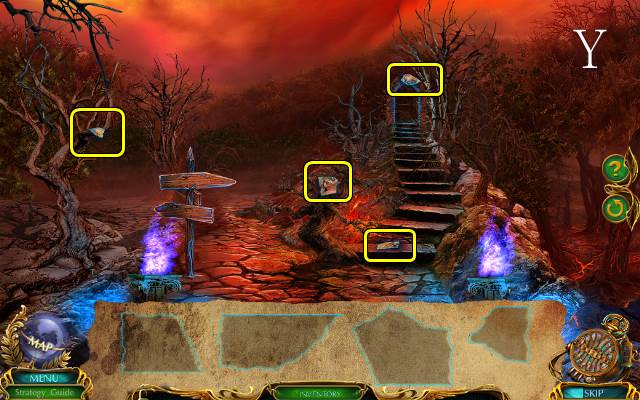

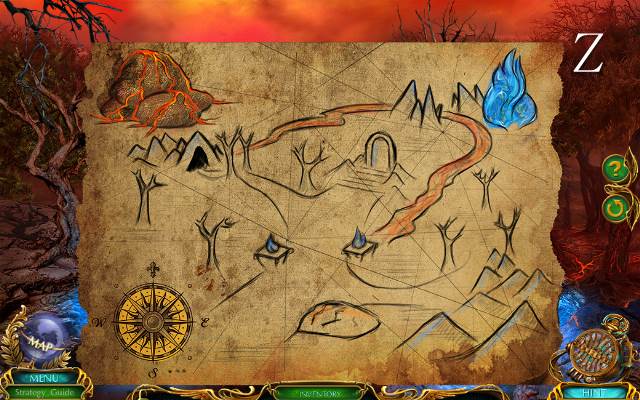
- Play the mini-game (Z).
- Go right.

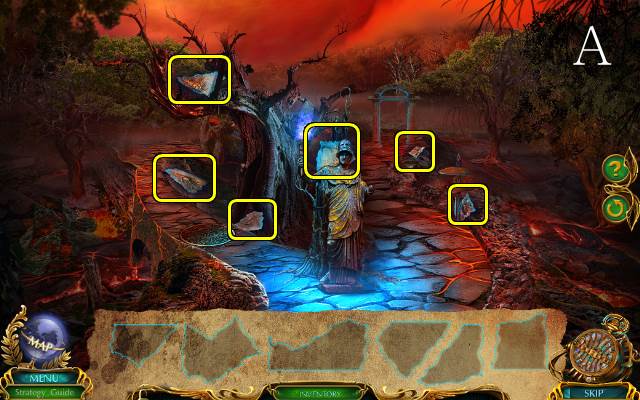

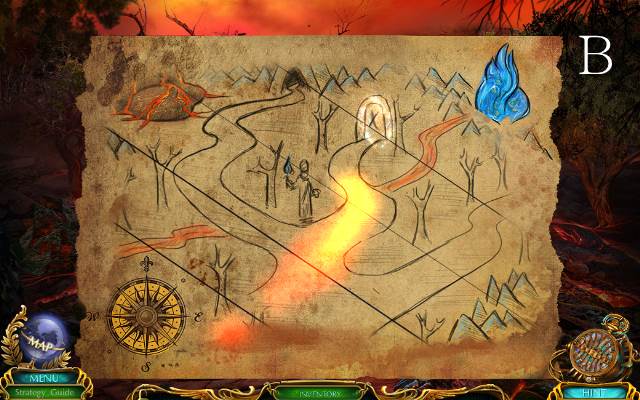
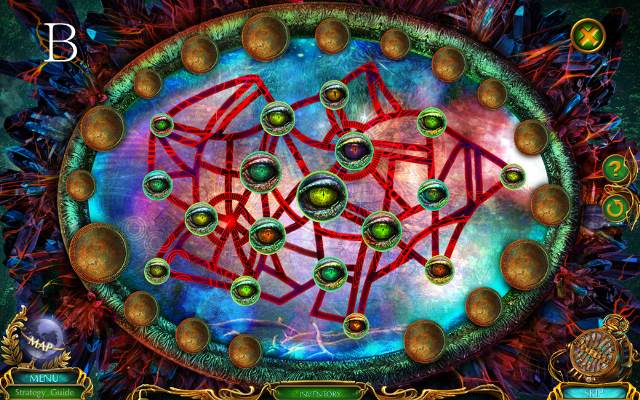
- Play the mini-game (B).
- Go right.

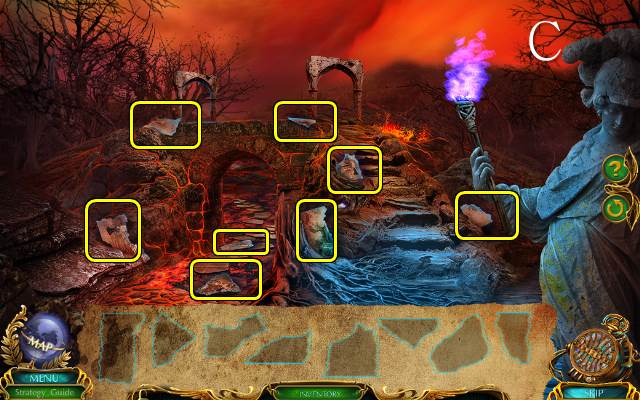

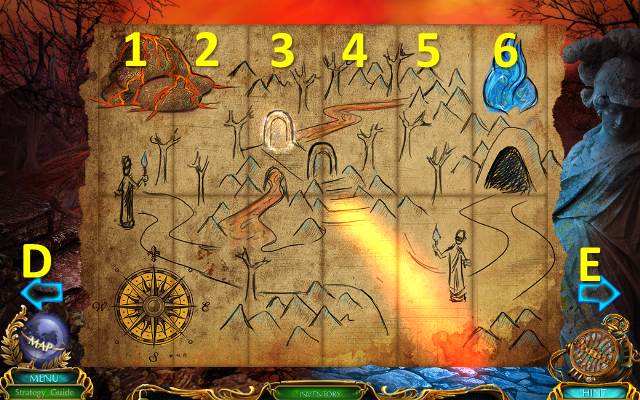
- Play the mini-game.
- Solution: D-1-3-D-2-E-3-D-4-E-E-E-5-E-E-6-D-D-D-2-E-E-2-D-D-2-E-E-3-D-D-3-E-E-3-4-D-D-4-E-E-4.
- Go forward.
Chapter 2: Gunpowder

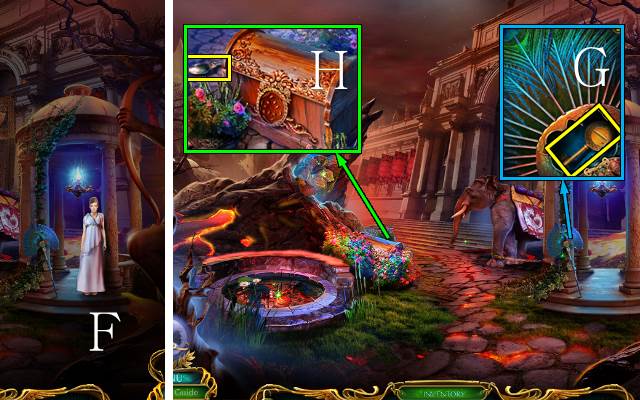
- Talk to Augustine (F); you receive AUGUSTINE’S LETTER.
- Place the FEATHER; take the PICKAXE KEY (G).
- Use the SHEARS and take the SCOOP (H).
- Walk down twice.

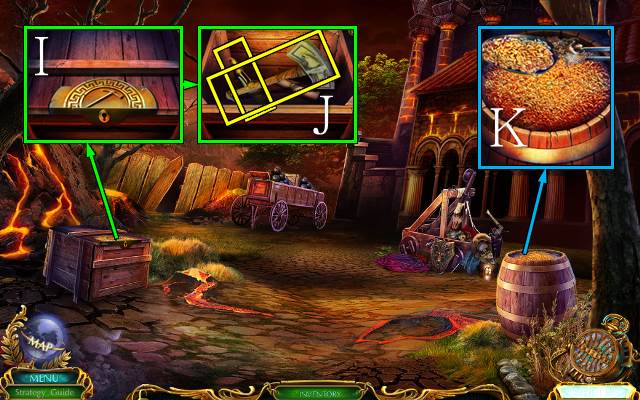
- Use the PICKAXE KEY (I); take HAMMER AND CHISEL 2/2, the KNIFE and the note (J).
- Take some GRAIN with the SCOOP (K).
- Go left.

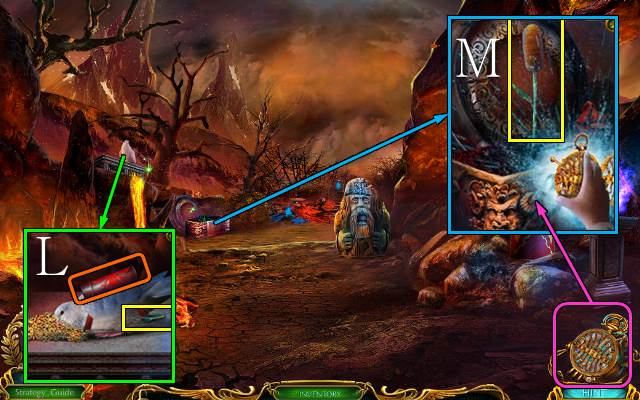
- Feed the bird some GRAIN and place AUGUSTINE’S LETTER; take the SPROUT (L).
- Take the note, place the SPROUT and use the TIME DEVICE; take the REED (M).
- Go forward.

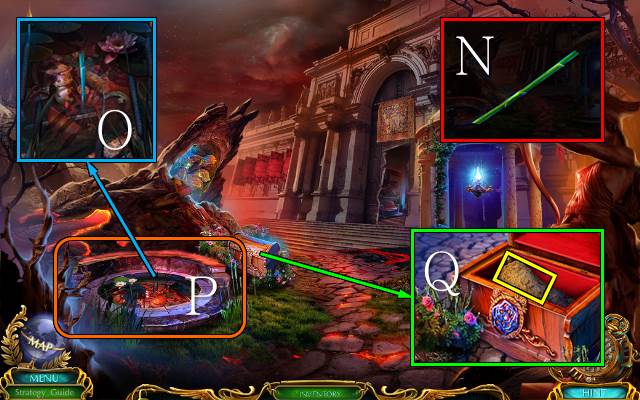
- Access the REED and use the KNIFE; take the REED TUBE (N).
- Place the REED TUBE (O).
- Play the HOP (P).
- You receive a METAL ROSE.
- Place the METAL ROSE and take the SAND (Q).
- Walk down.

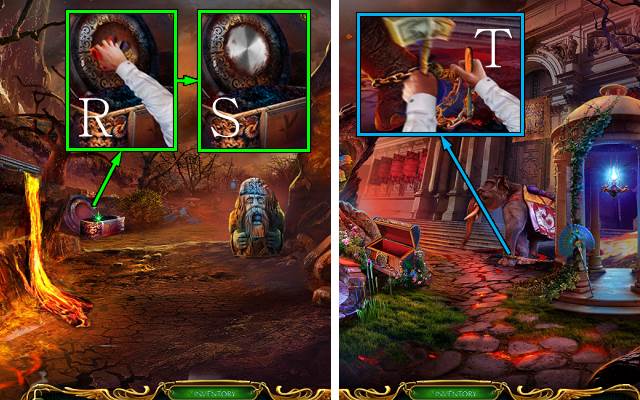
- Use the SAND (R); take the POLISHED SHIELD (S).
- Walk forward.
- Use the HAMMER AND CHISEL (T).
- Go forward.

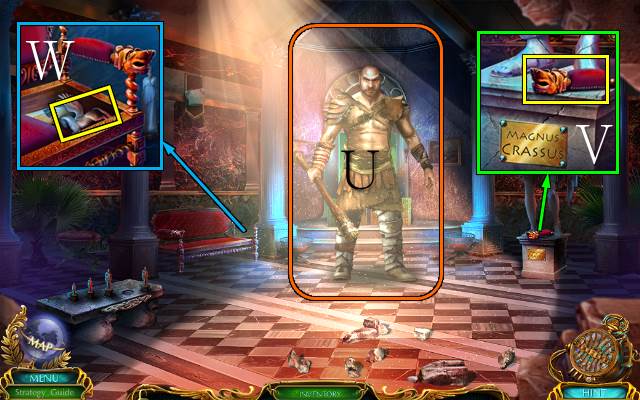
- Use the POLISHED SHIELD (U).
- Take the ARM REST and note (V).
- Place the ARM REST and take the PEGASUS EMBLEM and note (W).

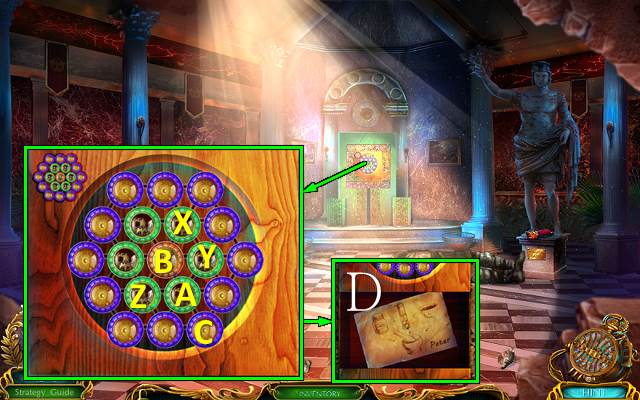
- Place the COLORFUL TOKENS for a mini-game.
- Solution: X2-Y2-Z2-A4-B-C.
- Try to take the note (D).

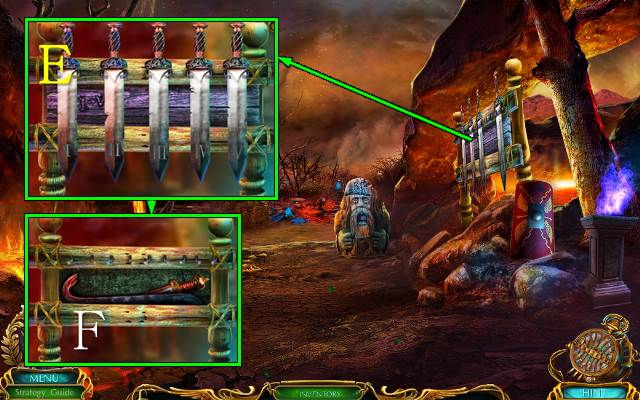
- You receive ANDRA’S SWORD.
- Place ANDRA’S SWORD for a mini-game (E); select the swords in order from I to V.
- Take the CROWBAR and KNIFE (F).
- Walk forward.

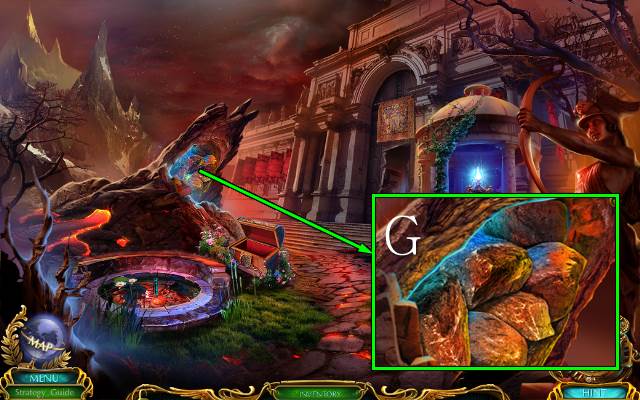
- Use the CROWBAR (G).
- Go left.

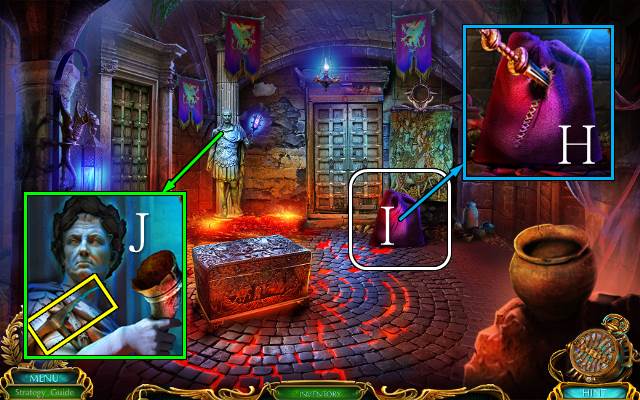
- Use the KNIFE (H).
- Play the HOP (I).
- You receive the TONGS.
- Take the PICKAXE (J).

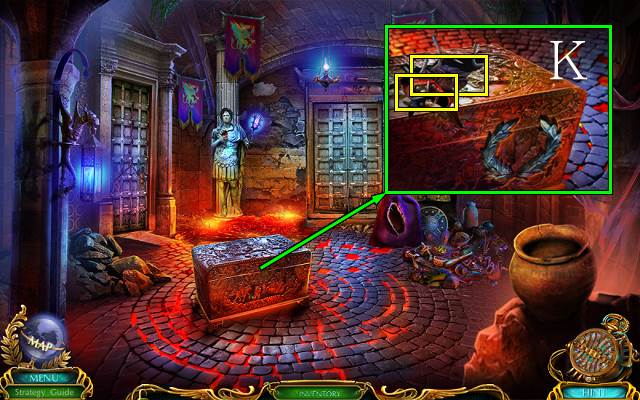
- Use the TONGS; take the GLADIATOR HELMET and CRASSUS STATUETTE (K).
- Walk down and forward.

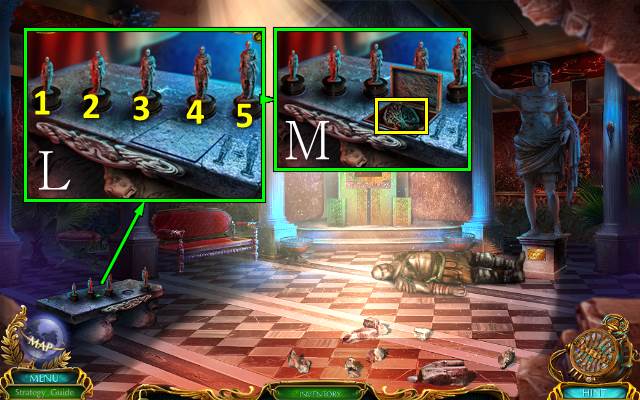
- Place the CRASSUS STATUETTE for a mini-game (L).
- Solution: select 4-2-3-5.
- Take the TREE EMBLEM (M).
- Go to the Sacred Temple.

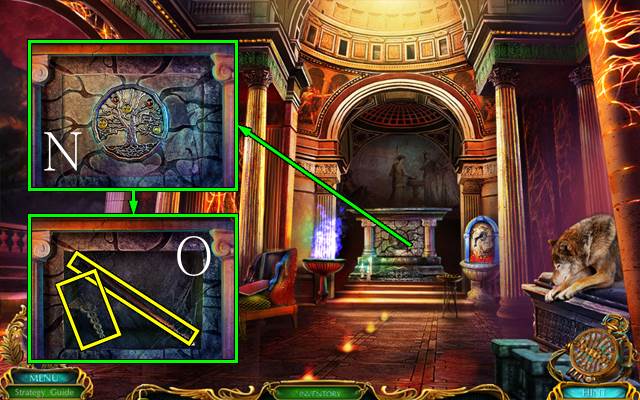
- Place the TREE EMBLEM (N); take the CADUCEUS EMBLEM and HALBERD (O).
- Go to the Palace Basement.

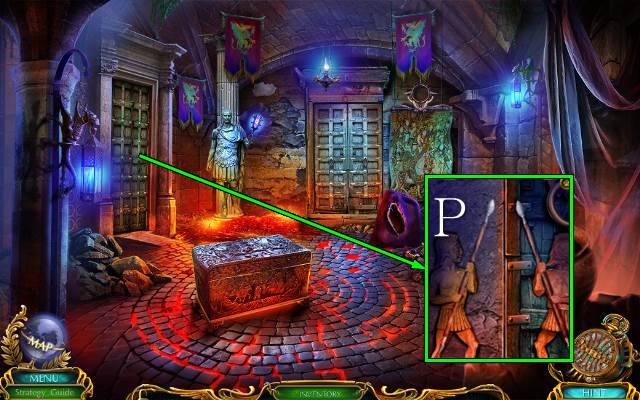
- Place the HALBERD (P).
- Go left.

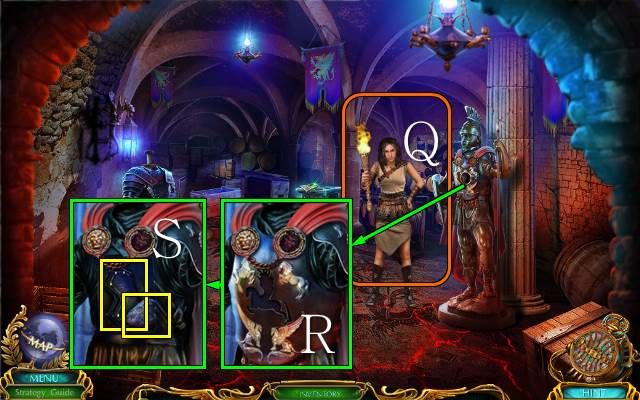
- Talk to Andra (Q).
- Place the PEGASUS EMBLEM (R); take the BOULDER EMBLEM and ARMOR PLATING (S).
- Walk down.

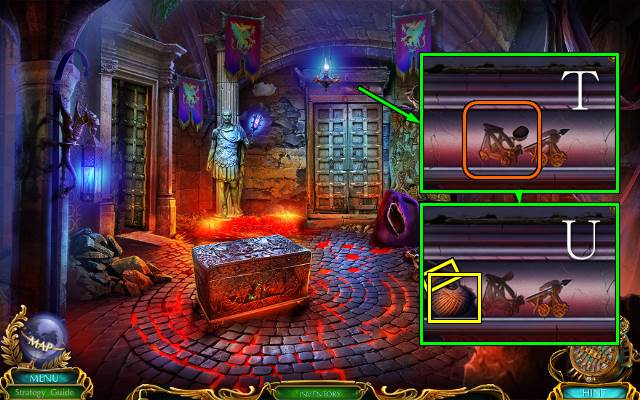
- Place the BOULDER EMBLEM (T); take the TWINE and COIN (U).
- Go left.

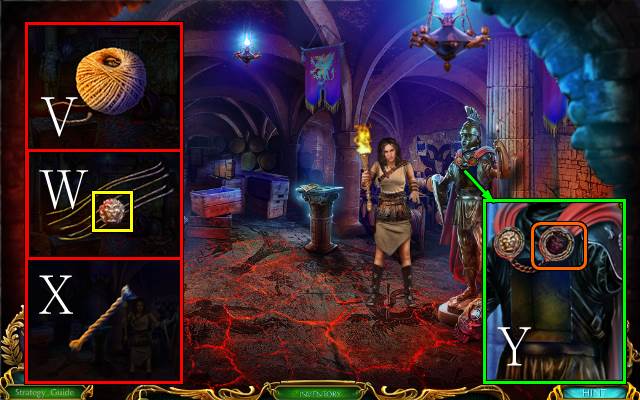
- Access the TWINE (V), unwind it and take the LION BUCKLE (W); turn the fibres into a WICK (X).
- Place the LION BUCKLE to receive a CLOAK (Y).

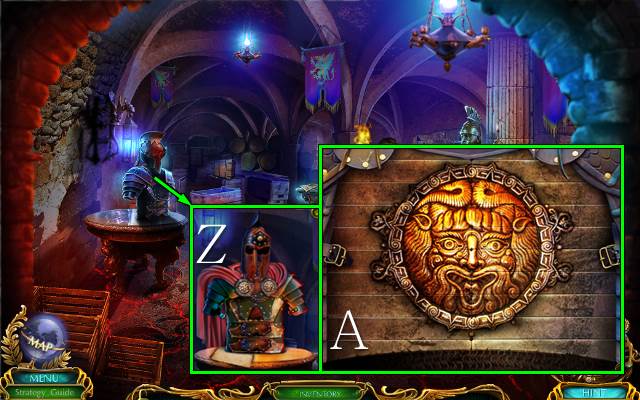
- Place the GLADIATOR HELMET, ARMOR PLATING and CLOAK (Z) for a mini-game (A).

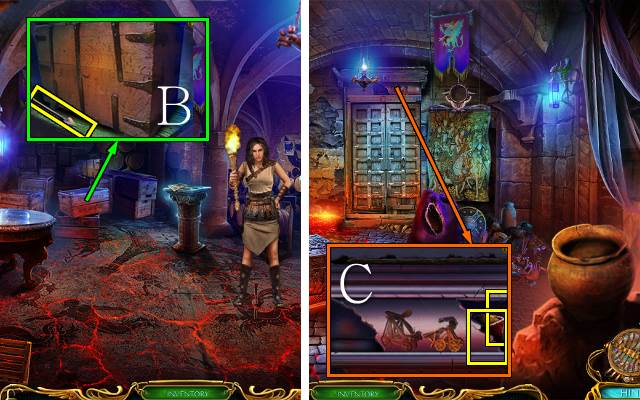
- Take the TREBUCHET BOLT EMBLEM (B).
- Walk down.
- Place the TREBUCHET BOLT EMBLEM; take the SULFUR and CLOCK HANDS (C).
- Walk down and right.

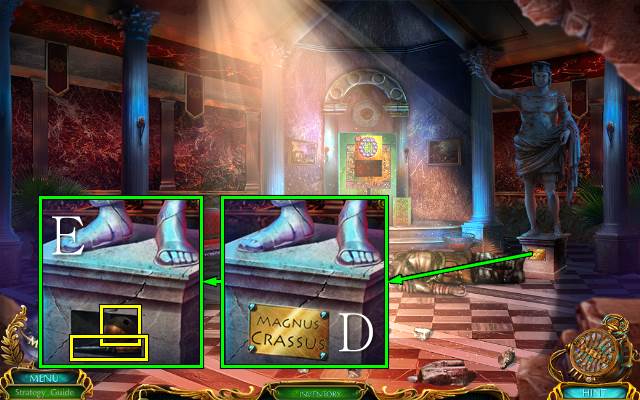
- Use the COIN (D); take the AWL and EMPTY BALL (E).
- Go down and left.

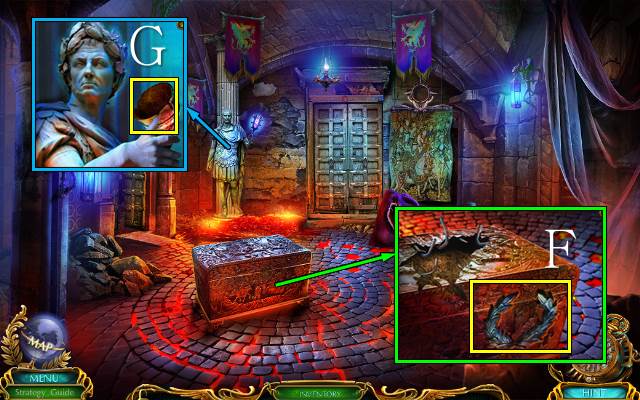
- Take the LAURELS with the AWL (F).
- Place the LAURELS to receive the HORN (G).
- Go left.

- Use the PICKAXE and HORN to get a GUNPOWDER HORN (H).
- Place the EMPTY BALL, WICK, SULFUR and GUNPOWDER HORN; put the gunpowder, sulphur and wick in the ball and take the BOMB (I).
- Give the BOMB to Andra (J).
- Go forward.

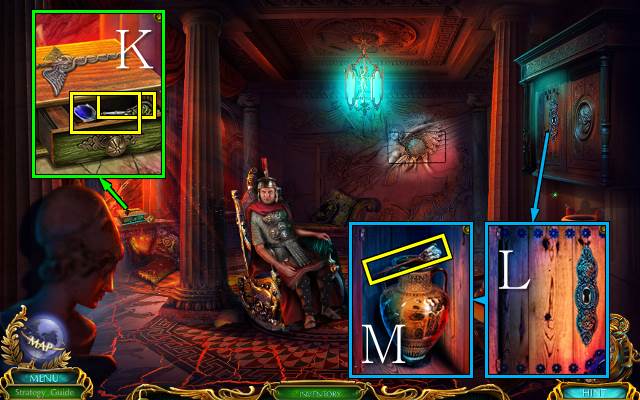
- Take the note and place the CADUCEUS EMBLEM; take the SLUMBER FLOWER and GRAPEVINE KEY (K).
- Use the GRAPEVINE KEY (L); take the HAIRPIN and WINE JUG (M).

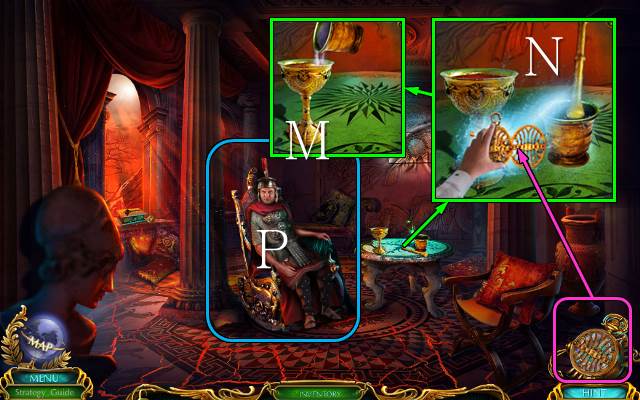
- Use the WINE JUG on the cup, place the SLUMBER FLOWER in the mortar and use the pestle and Time Device (N); put the powder in the wine and take the SLEEPING POTION (O).
- Give the SLEEPING POTION to the Emperor (P).

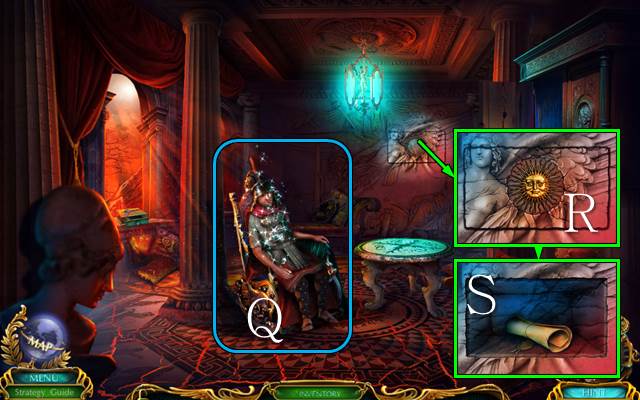
- Play the HOP (Q).
- You receive the EMPEROR’S INSIGNA.
- Place the EMPEROR’S INSIGNA (R) and take the scroll (S).
Chapter 3: The Middle Ages

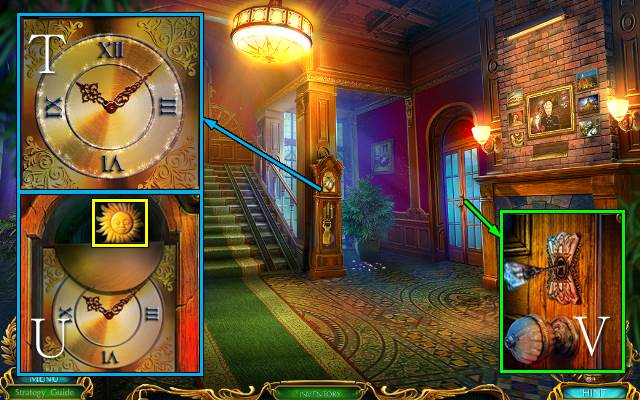
- Walk down twice.
- Place the CLOCK HANDS for a mini-game (T).
- Take the SUN MAGNET (U).
- Use the HAIRPIN (V).
- Go right.

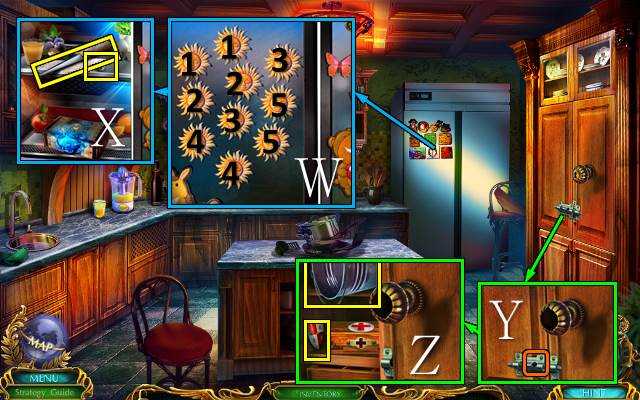
- Place the SUN MAGNET for a mini-game (W).
- Take the KNIFE and METAL KNOB (X).
- Place the METAL KNOB (Y); take the PAIL and TINY SHIELD (Z).
- Go to the Home Theater.

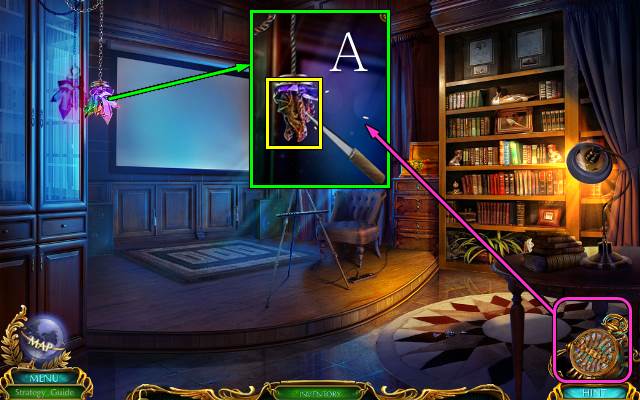
- Use the KNIFE; take the DRAGON HEAD (A).
- Go to the Kitchen.

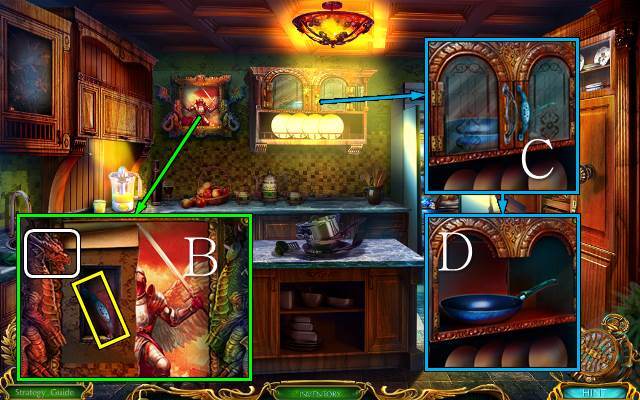
- Place the DRAGON HEAD; take the note and HANDLE (B).
- Place the HANDLE (C); take the PAN (D).

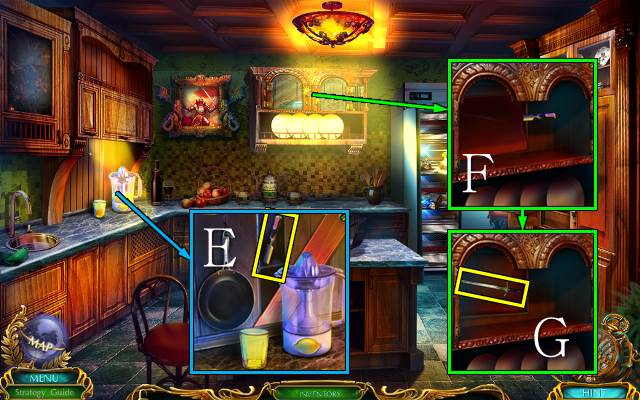
- Place the PAN and take the CHISEL (E).
- Use the CHISEL (F); take the TINY SWORD (G).
- Go to the Home Theater.

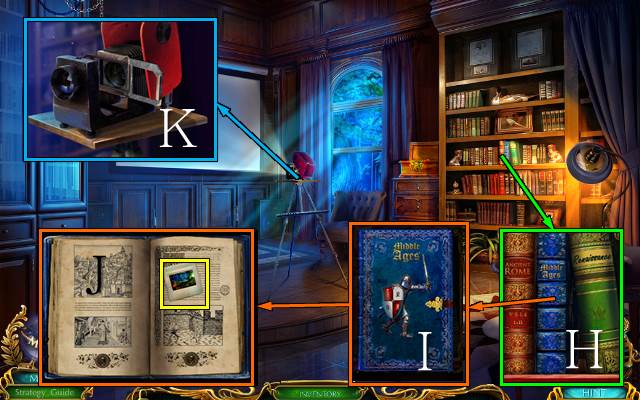
- Pick up the blue book (H) and place the TINY SHIELD and TINY SWORD (I); take the MIDDLE AGES SLIDE (J).
- Place the MIDDLE AGES SLIDE (K).

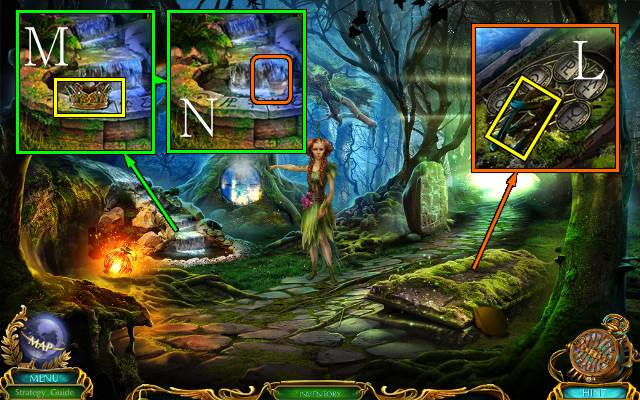
- Take RIDING EQUIPMENT 1/2 (L).
- Take CROWN 1/2 (M); use the PAIL to get a PAIL OF WATER (N).

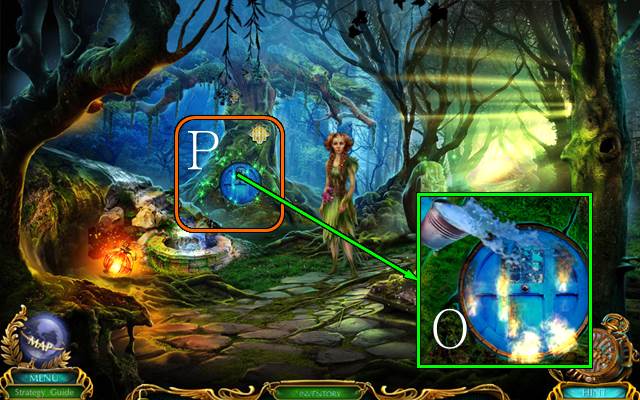
- Use the PAIL OF WATER (O).
- Play the HOP (P).
- You receive a SWORD.
- Go right.

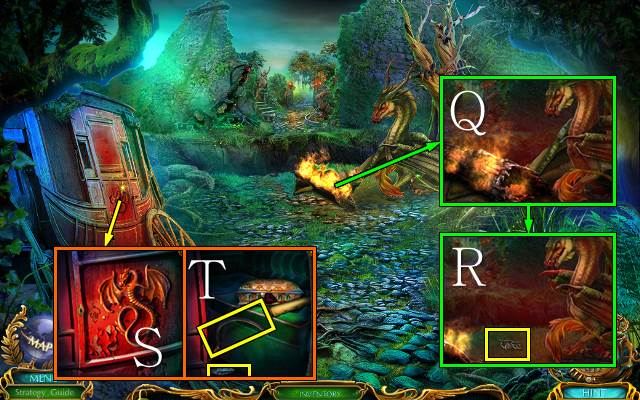
- Use the SWORD (Q); take the DRAGON HANDLE (R).
- Place the DRAGON HANDLE (S); take the SICKLE, CHARCOAL and note (T).

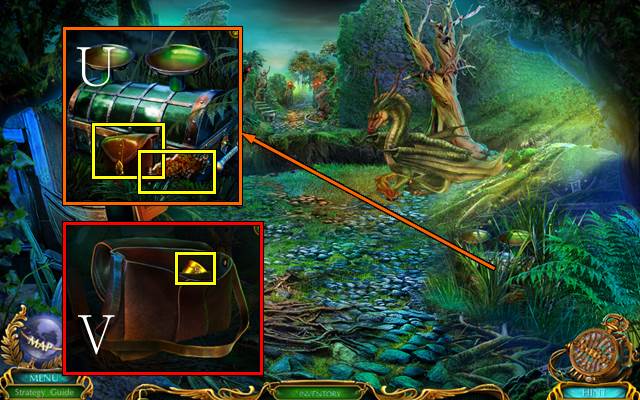
- Use the SICKLE; take the STAINED-GLASS TREE and KNAPSACK (U).
- Access the KNAPSACK and open it; go through the papers and take the PAPER and GOLDEN DECORATION (V).
- Walk down.

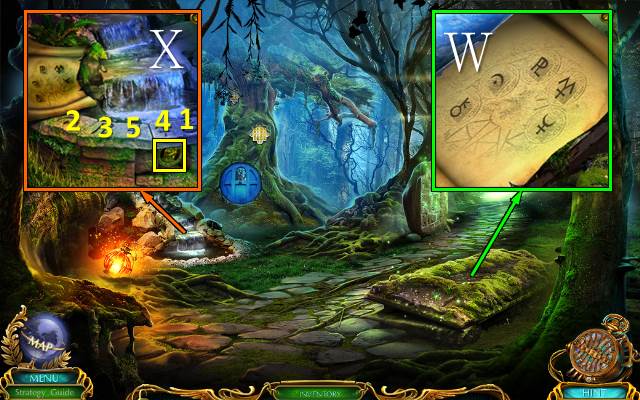
- Use the PAPER and CHARCOAL; take the NOTE WITH CODE (W).
- Place the NOTE WITH CODE for a mini-game (X); take the DRAGON CREST.

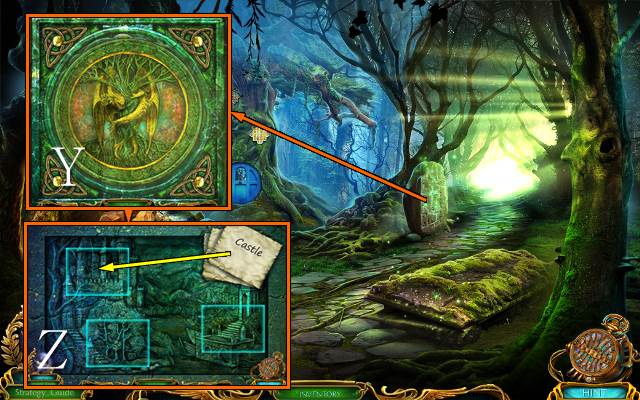
- Place the DRAGON CREST (Y); place the note on the castle for a mini-game (Z).

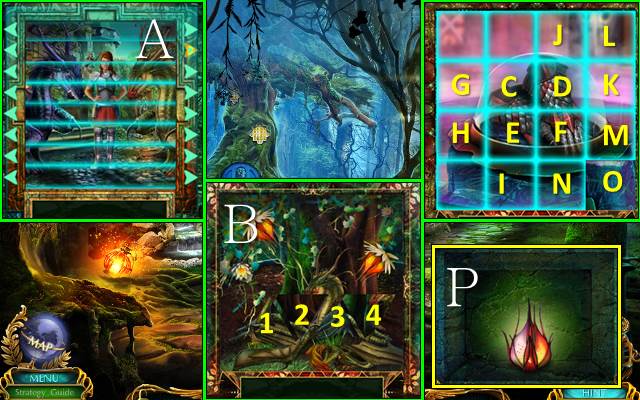
- Solution (A).
- Place the note on the forest for another mini-game.
- Solution: 2-3, 1-2, 3-4, 2-3 (B).
- Place the note on the tower for a third mini-game.
- Solution: C3-D2-E2-F2-G3-H-I-J3-K3-M-N3-O.
- Remove the tile and take the FRUIT OF HEALING (P).
- Go right.

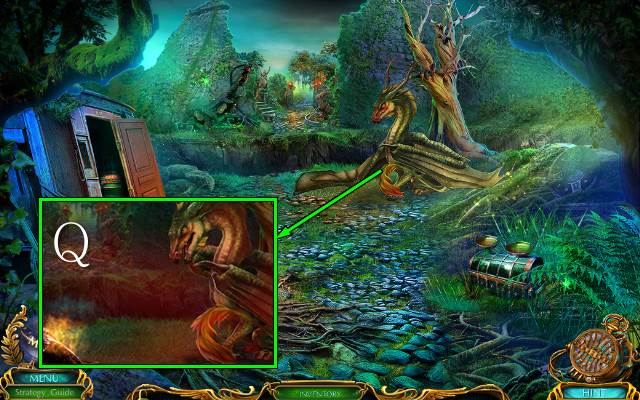
- Give the FRUIT OF HEALING to the dragon (Q).
- Go forward.

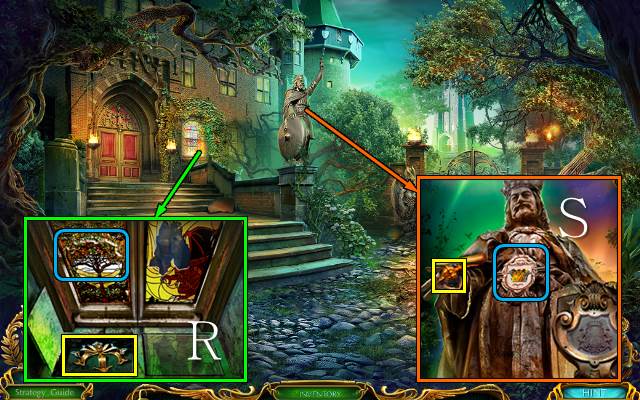
- Place the STAINED-GLASS TREE and take CROWN 2/2 (R).
- Place the CROWN and take the note and CURTAIN ROD CAP (S).
- Go left.

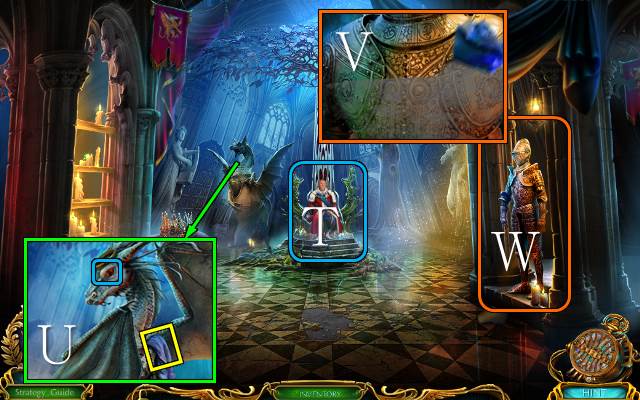
- Talk to the King; you receive a DRAGON’S EYE (T).
- Place the DRAGON EYE’S and take the CLOTH (U).
- Use the CLOTH (V).
- Play the HOP (W).
- You receive the FLINT AND STEEL.

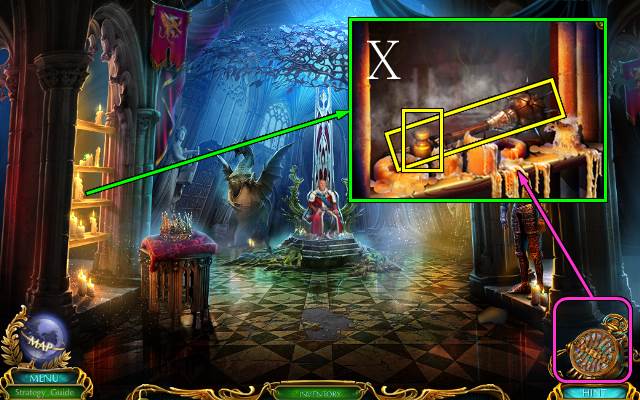
- Use the FLINT AND STEEL and Time Device; take the MACE and WEIGHT 1/2 (X).
- Walk down three times.

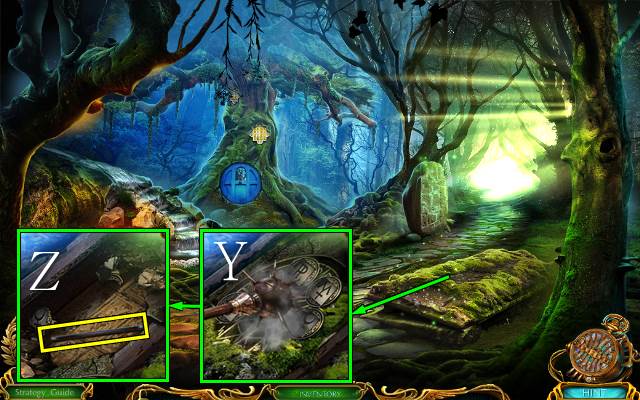
- Use the MACE (Y); take the METAL ROD (Z).
- Go right.

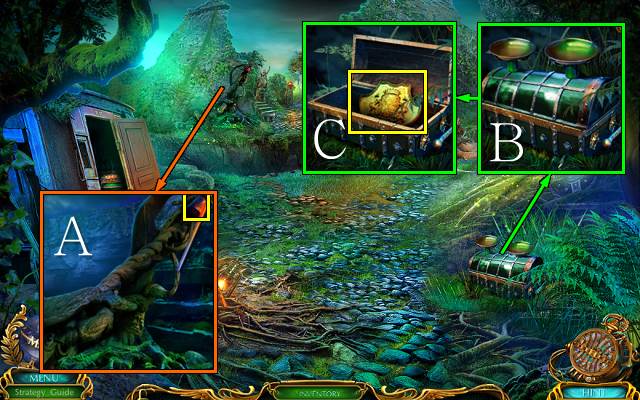
- Take WEIGHT 2/2 with the METAL ROD (A).
- Place the WEIGHTS (B); take the GOLDEN CREST (C).
- Go forward.

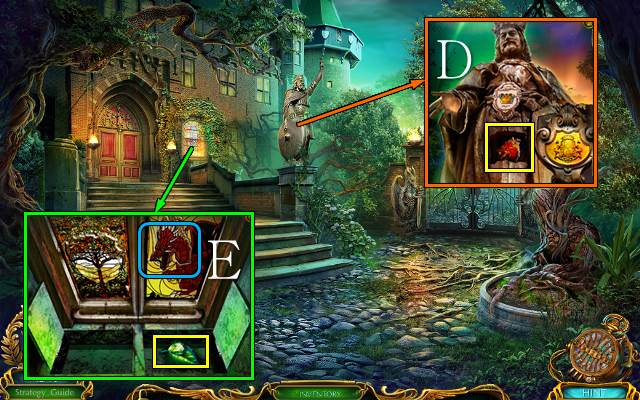
- Place the GOLDEN CREST and take the STAINED-GLASS DRAGON (D).
- Place the STAINED-GLASS DRAGON and take the EMERALD LEAF (E).
- Walk down.

- Place the EMERALD LEAF and take the EMERALD (F).
- Go forward and left.

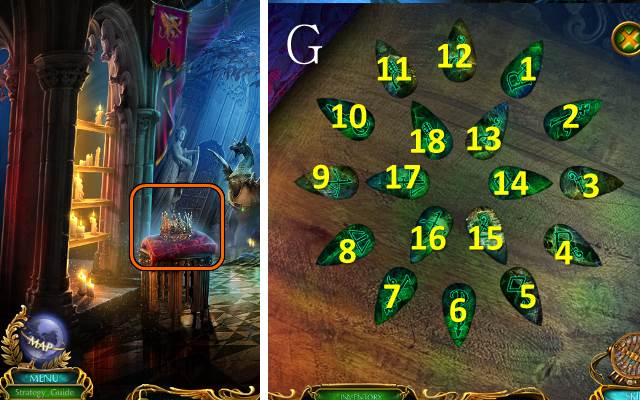
- Place the EMERALD for a mini-game (G).
- Solution: 1-4, 2-7, 3-14, 5-14, 6-10, 8-13, 9-13, 11-16, 12-18.
- You receive the DRAGON WING.
- Walk down.

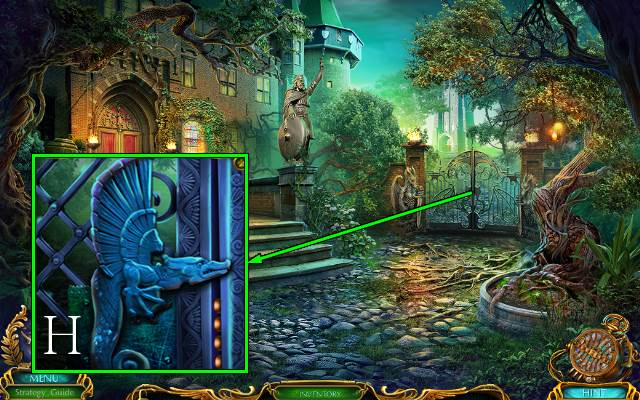
- Place the DRAGON WING (H).
- Go right.
Chapter 4: The Tower

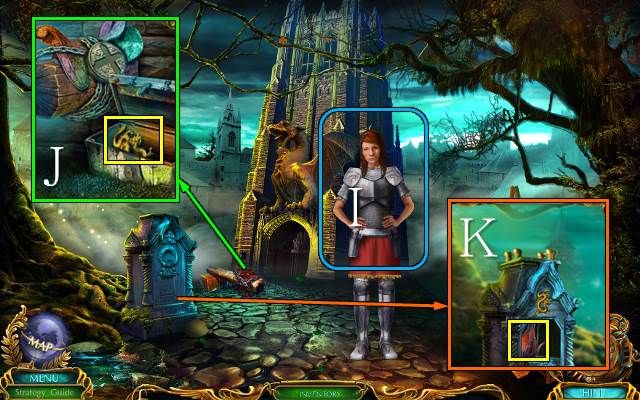
- Talk to Rebecca (I); you receive a LATCHKEY.
- Use the LATCHKEY; take the GOLD DRAGON (J).
- Place the GOLD DRAGON and take the METAL MAGIC FRUIT (K).
- Go down and left.

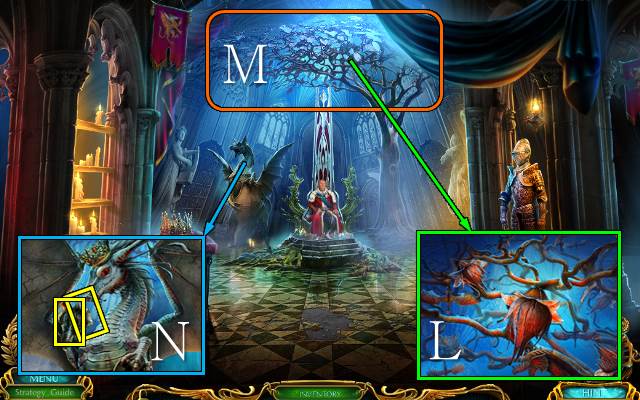
- Place the METAL MAGIC FRUIT (L).
- Play the HOP (M).
- You receive a DRAGON CROWN.
- Place the DRAGON CROWN; take the PURE SILVER and MAGIC POTION (N).
- Go down and right.

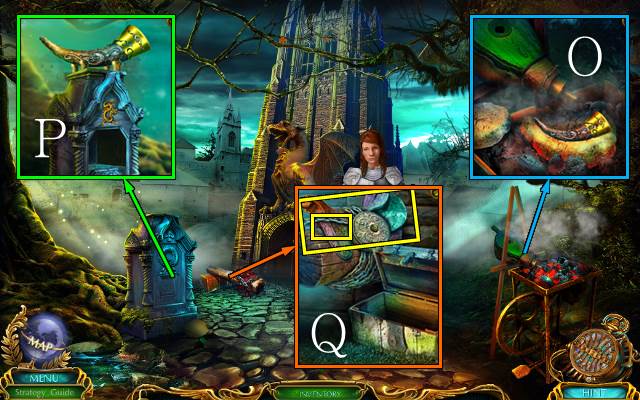
- Read the note, place the PURE SILVER and push the bellows; place the GOLDEN DECORATION and take the SILVER HORN (O).
- Place the SILVER HORN (P).
- You receive the SILVER CROSS.
- Place the SILVER CROSS; take RIDING EQUIPMENT 2/2 and the FLASKS (Q).
- Walk down.

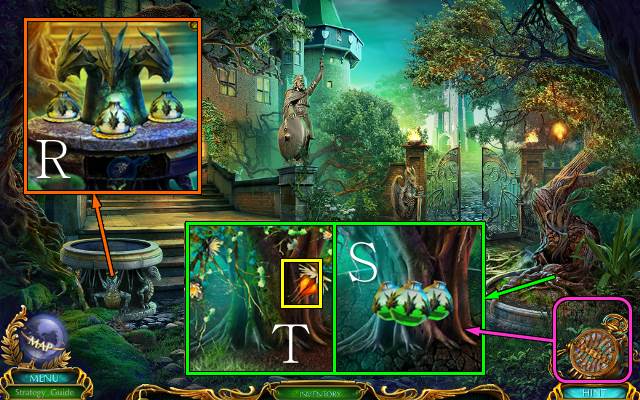
- Place the FLASKS and MAGIC POTION; take the MAGIC POTIONS (R).
- Use the MAGIC POTIONS and Time Device (S); take the MAGIC FRUIT (T).
- Go right.

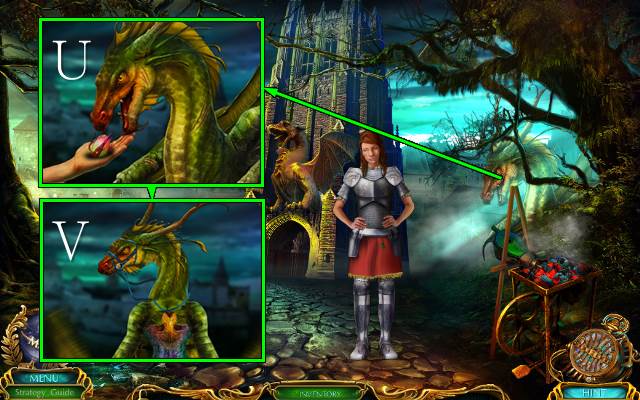
- Give the MAGIC FRUIT to the dragon (U).
- Place the RIDING EQUIPMENT (V).

- Place the CURTAIN ROD CAP; take the DRAGON’S HEAD, WAX EGG and note (W).
- Place the WAX EGG; take the GOLDEN TREE (X).

- Place the GOLDEN TREE (Y); open the pouch and take the FIRE FRUITS (Z).
- Place the FIRE FRUITS for a mini-game (A).


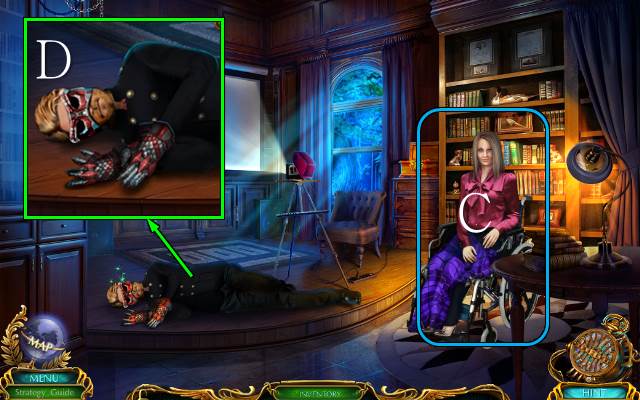
- Talk to Debby (C).
- Remove Peter’s magic costume (D).
- Go to the Kitchen.

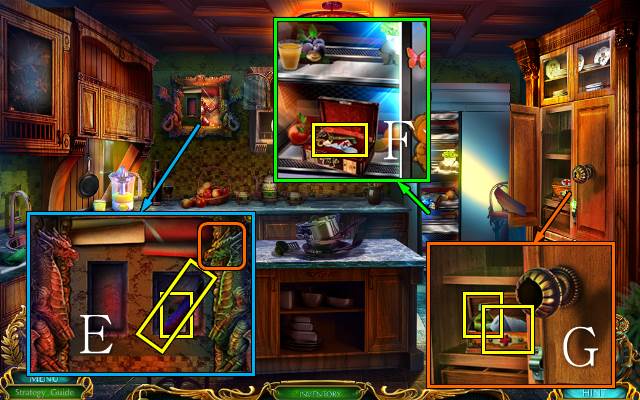
- Place the DRAGON’S HEAD; take the BRUSH and LIGHTER (E).
- Use the LIGHTER; take the GREEN CROSS (F).
- Place the GREEN CROSS and take the BANDAGE and SMELLING SALTS (G).
- Go to the Home Theater.

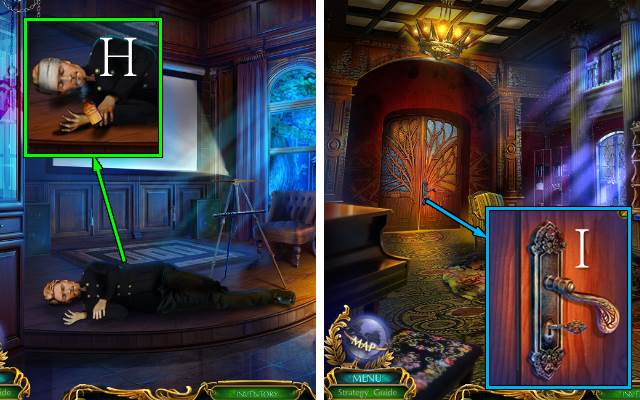
- Use the BANDAGE and SMELLING SALTS; you receive DEBBY’S KEY (H).
- Walk down.
- Use DEBBY’S KEY (I).
- Go forward.

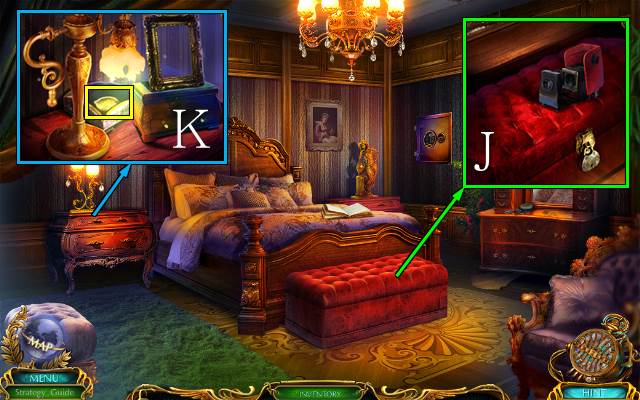
- Take the BROKEN PROJECTOR (J).
- Use the BRUSH; take the LEMON CHARM (K).
- Go to the Kitchen.

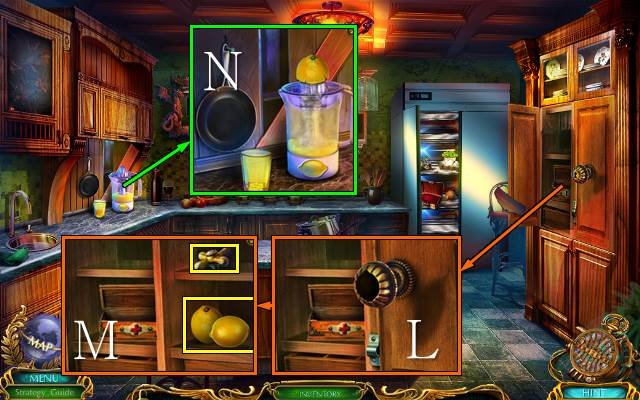
- Place the LEMON CHARM (L); take the LEMON and VALVE (M).
- Place the LEMON, pour the juice and take the LEMON JUICE (N).
- Go to Debby’s Room.

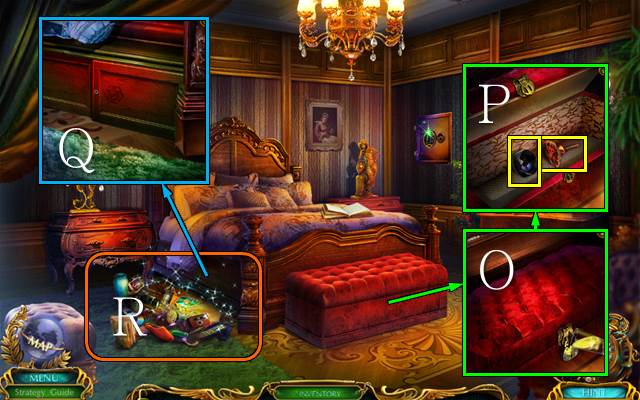
- Use the LEMON JUICE (O) and take the FANCY KNOB and LENS (P).
- Place the FANCY KNOB (Q).
- Play the HOP (R).
- You receive DEBBY’S PHOTO.

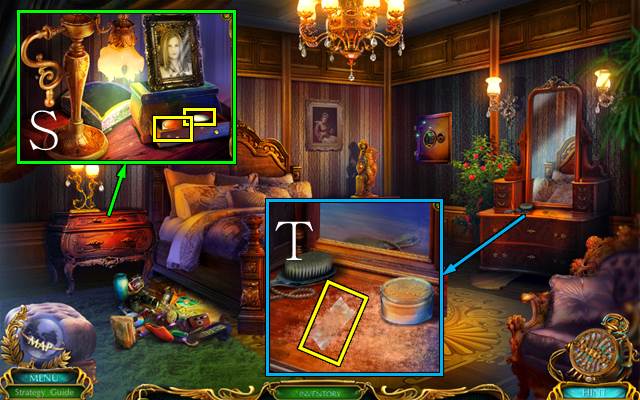
- Place DEBBY’S PHOTO and take the POWDER and CLEAR TAPE (S).
- Use the POWDER and CLEAR TAPE and take the FINGERPRINT (T).

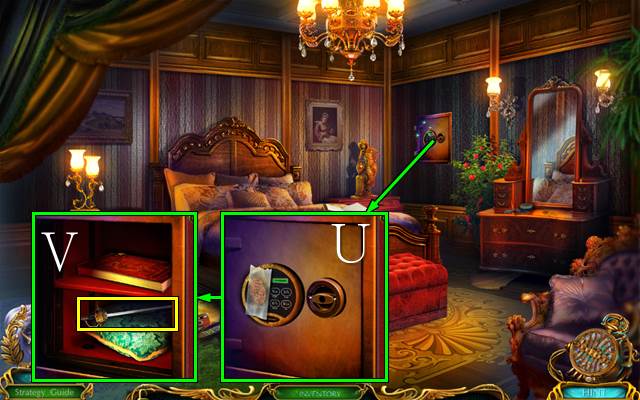
- Use the FINGERPRINT (U); take the TINY RAPIER, open the journal and take the notes (V).
- Go to the Home Theater.

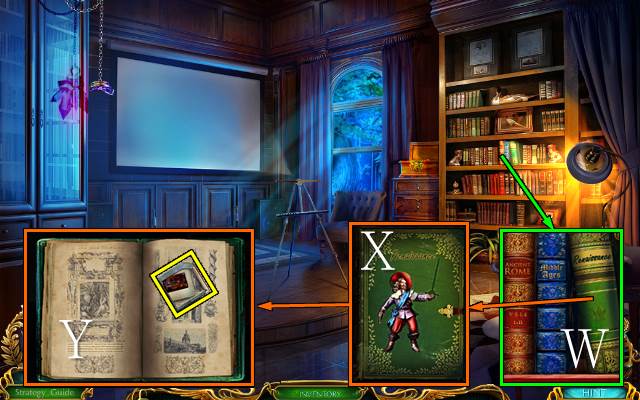
- Pick up the green book (W) and place the TINY RAPIER (X); take the SLIDE FRAME and RENAISSANCE SLIDE (Y).

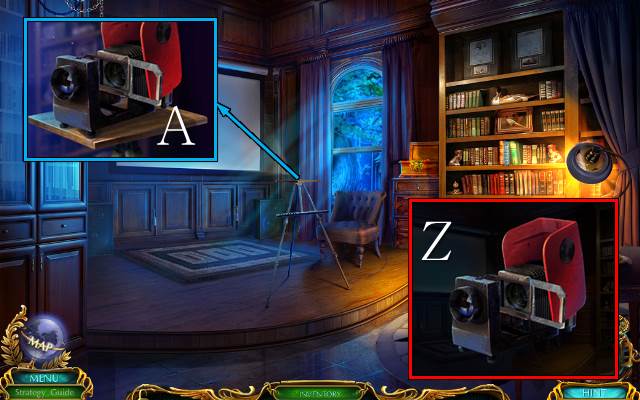
- Access the BROKEN PROJECTOR and place the LENS and SLIDE FRAME; take the SLIDE PROJECTOR (Z).
- Remove the broken projector and place the SLIDE PROJECTOR and RENAISSANCE SLIDE (A).
Chapter 5: Into the Renaissance

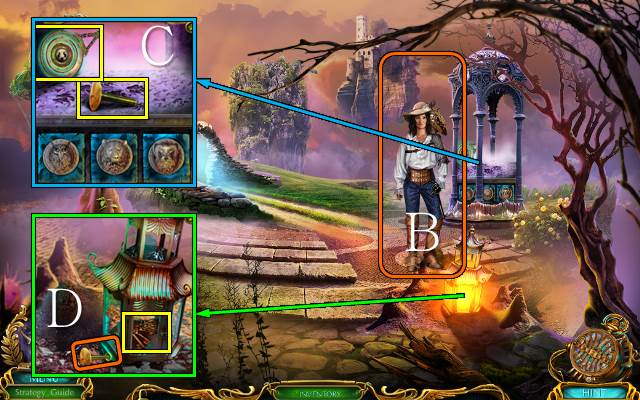
- Talk to Isabel (B); you receive some MAGIC CRYSTALS.
- Take the PANDA DEVICE and BRASS KNOB (C).
- Take the note, place the BRASS KNOB; take the KEYS (D).

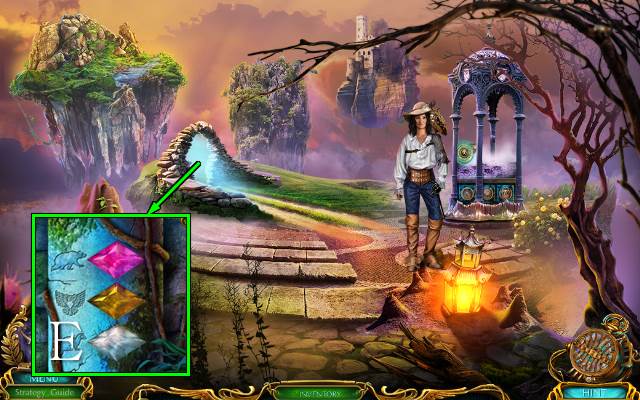
- Place the MAGIC CRYSTALS (E).
- Go forward.

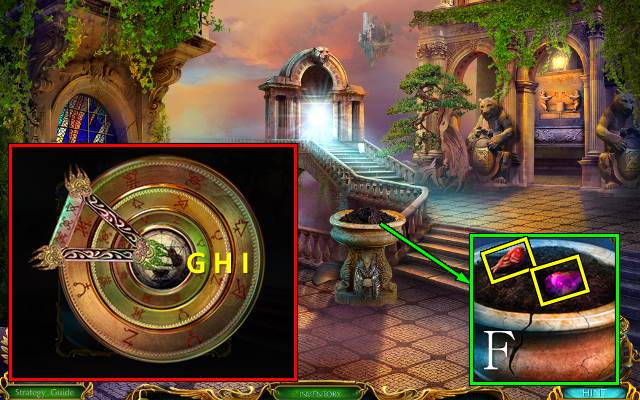
- Take the LITTLE BIRD and AMETHYST CRYSTAL 1/3 (F).
- Access the PANDA DEVICE and activate it for a mini-game.
- Solution: H2-G3-I2.
- Take the PANDA CREST.

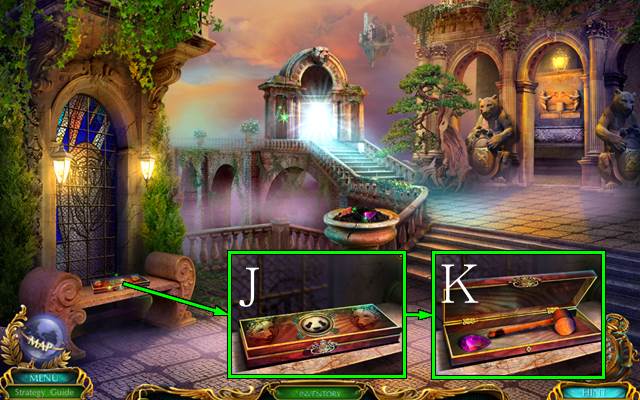
- Read the note and place the PANDA CREST (J); take the HAMMER and AMETHYST CRYSTAL 2/3 (K).

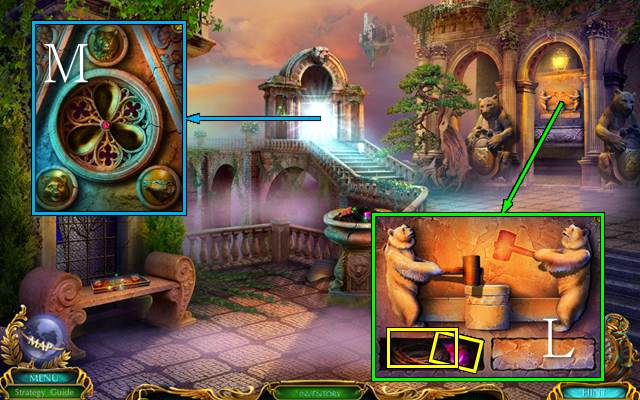
- Place the HAMMER; take the ROPE and AMETHYST CRYSTAL 3/3 (L).
- Place the AMETHYST CRYSTALS (M).
- Go forward.

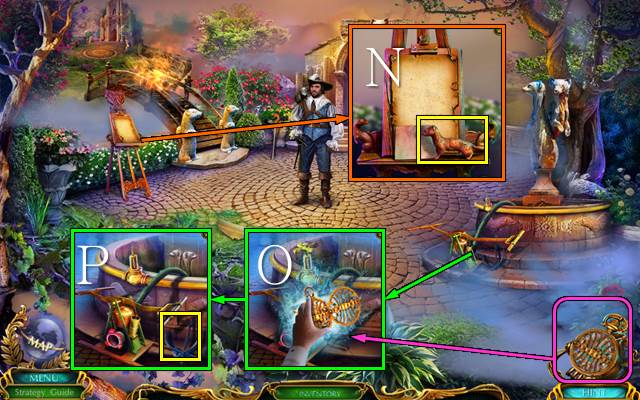
- Take the COPPER FERRET and note (N).
- Place the VALVE and use the Time Device (O); take the HOOK (P).

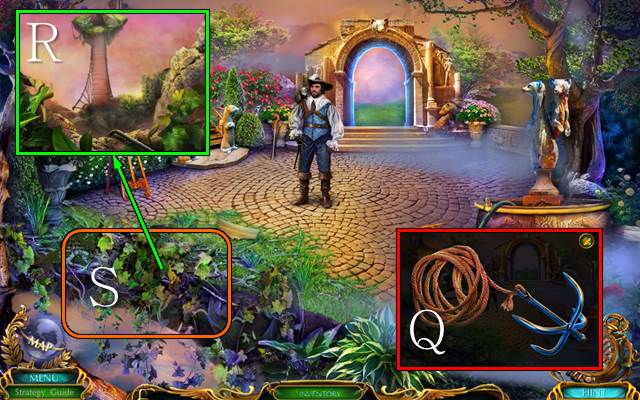
- Access the ROPE and place the HOOK; take the GRAPPLING HOOK (Q).
- Use the GRAPPLING HOOK (R).
- Play the HOP (S).
- You receive a FIRE HOSE.

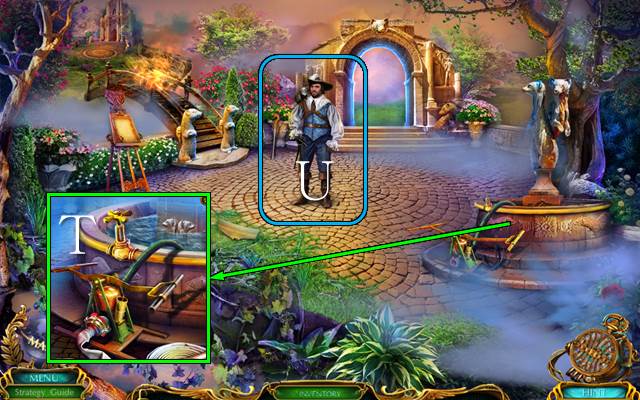
- Place the FIRE HOSE (T).
- Talk to the musketeer (U); you receive DIAMOND CRYSTAL 1/3.
- Walk down twice.

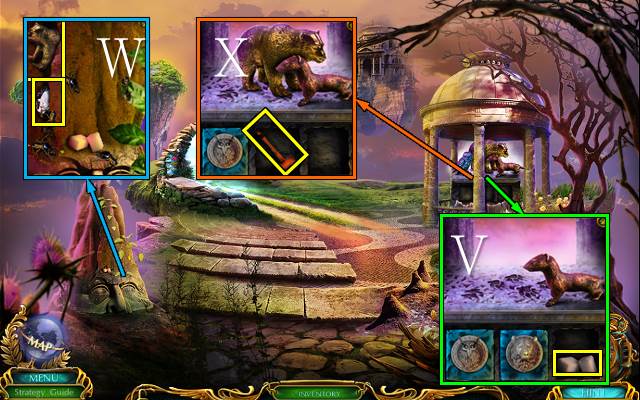
- Place the COPPER FERRET and take the SUGAR (V).
- Place the SUGAR; take the GOLDEN BEAR and DIAMOND CRYSTAL 2/3 (W).
- Place the GOLDEN BEAR and take the HAMMER (X).
- Go forward.

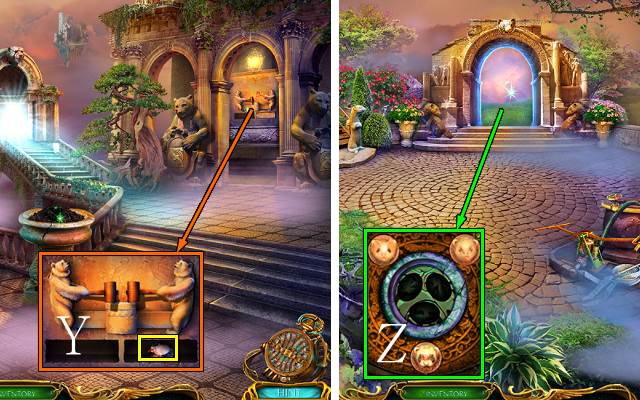
- Place the HAMMER and take DIAMOND CRYSTAL 3/3 (Y).
- Go forward.
- Place the DIAMOND CRYSTALS (Z).
- Go forward.

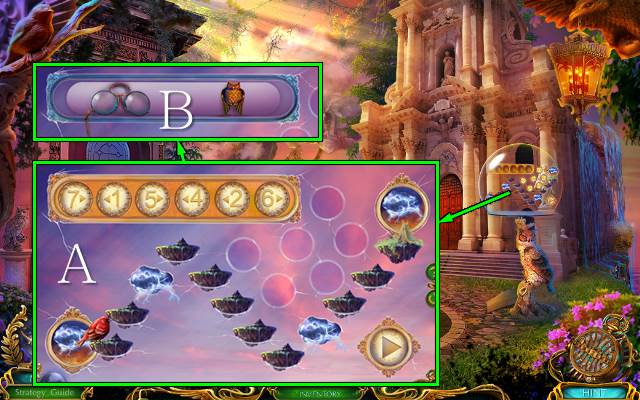
- Place the LITTLE BIRD for a mini-game (A).
- Take the OWL EMBLEM and GLASSES (B).

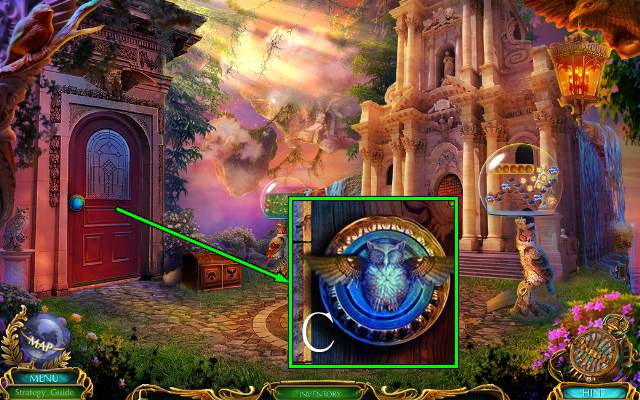
- Place the OWL EMBLEM (C).
- Go left.

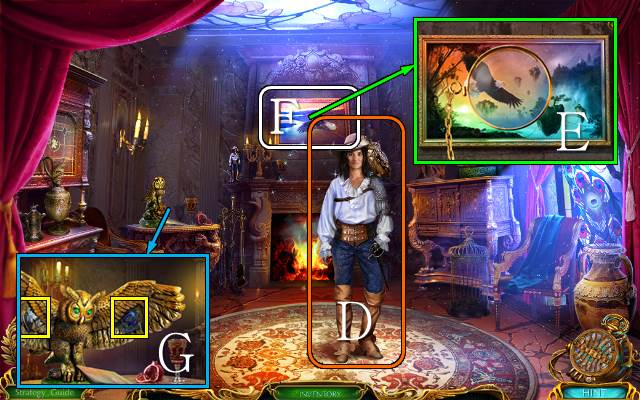
- Talk to Isabel (D); you receive the KEY SKETCH.
- Place the GLASSES (E).
- Play the HOP (F).
- You receive the OWL EARS.
- Read the note and place the OWL EARS; take the SILVER BIRD and BIRD AMULET (G).
- Walk down.

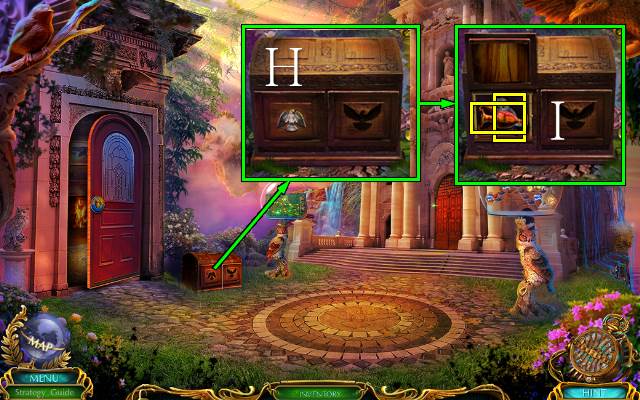
- Place the SILVER BIRD (H); take the JAR and OWL STATUE (I).
- Walk down.

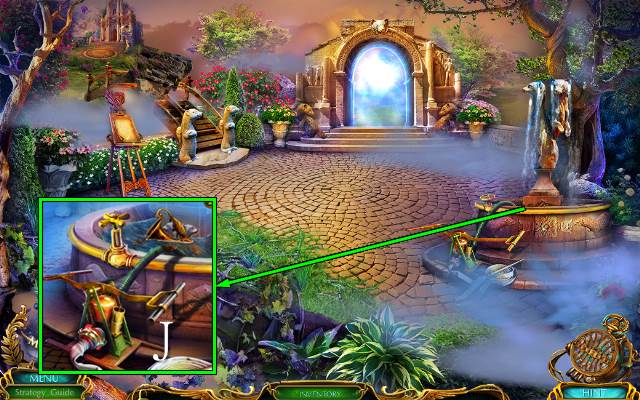
- Use the JAR to get a JAR OF WATER (J).
- Walk down twice.

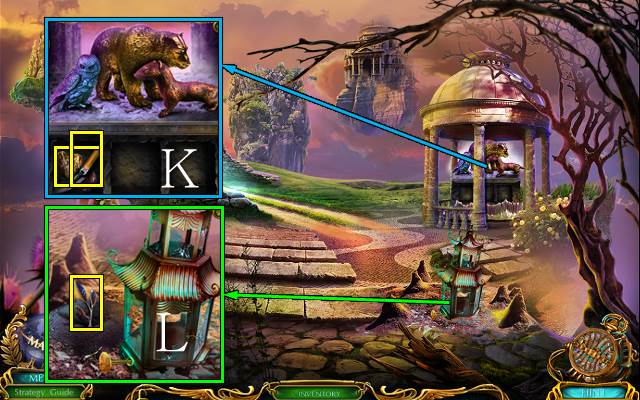
- Place the OWL STATUE; take the SHOVEL and COPPER ORE (K).
- Use the SHOVEL and take the SPROUT KEY (L).
- Go to Isabel’s House.

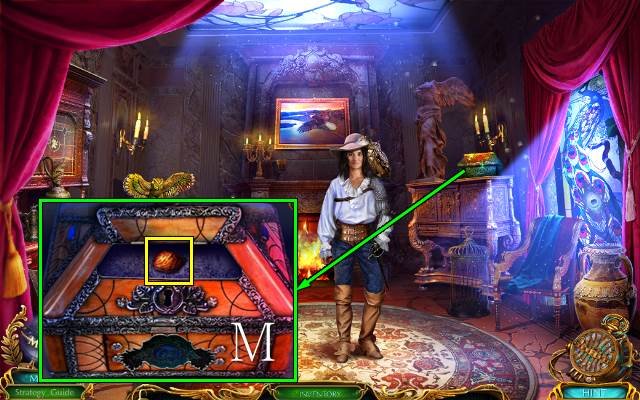
- Use the SPROUT KEY; take the SEED (M).
- Go to Bears Island.

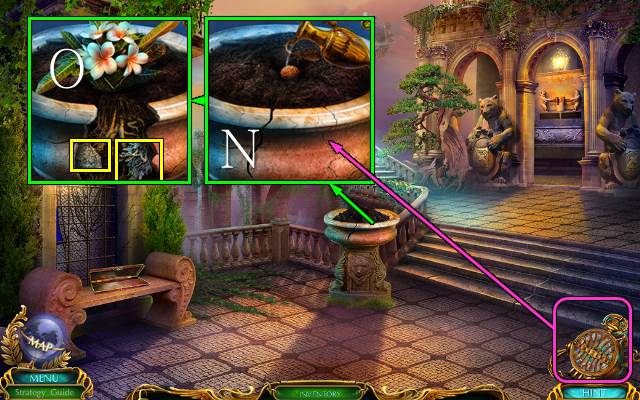
- Plant the SEED, and use the JAR OF WATER and Time Device (N); take the SILVER ORE and METAL FEATHERS (O).
- Go to Isabel’s House.

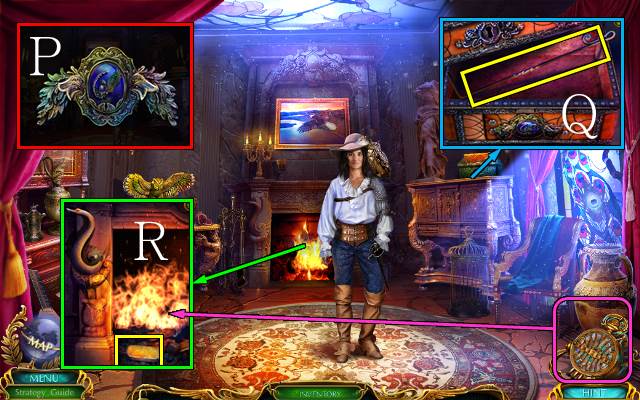
- Access the BIRD AMULET and place the METAL FEATHERS; take the WINGED AMULET (P).
- Place the WINGED AMULET and take the POKER (Q).
- Use the POKER and Time Device; take the GOLD ORE (R).
- Walk down.

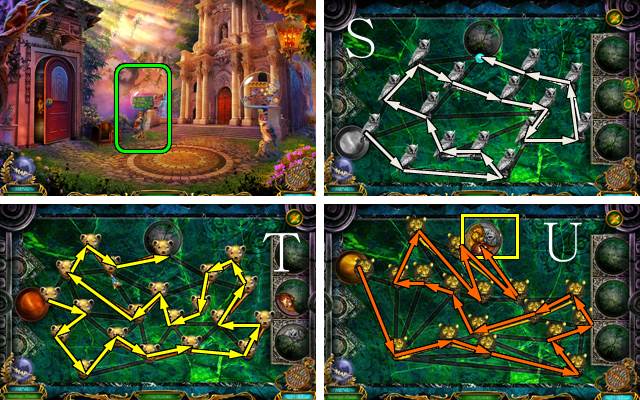
- Place the KEY SKETCH and SILVER ORE for a mini-game (S).
- Place the COPPER ORE for a second mini-game (T).
- Place the GOLD ORE for a third mini-game; take the TEMPLE KEY (U).

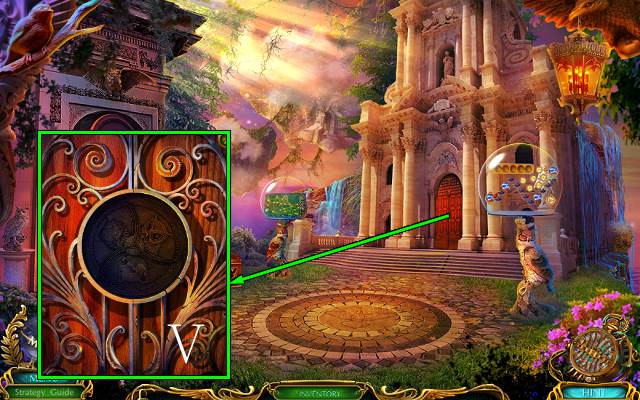
- Use the TEMPLE KEY (V).
- Go right.

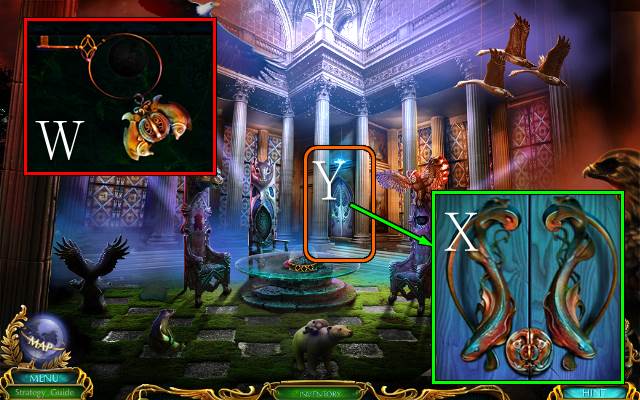
- Access the KEYS, move them all and take the FISH AMULET (W).
- Use the FISH AMULET (X).
- Play the HOP (Y).
- You receive the BEAR EMBLEM.

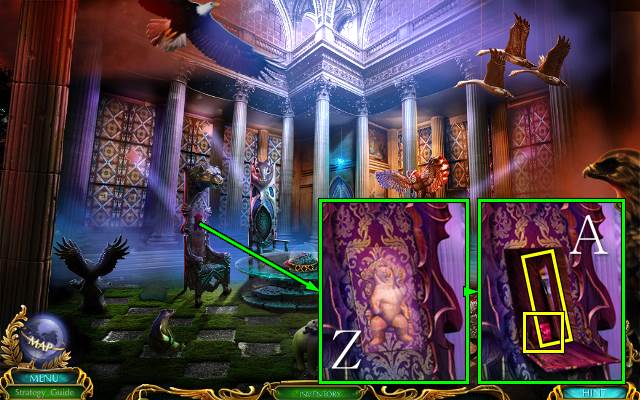
- Place the BEAR EMBLEM (Z); take the BRUSH and RUBY CRYSTAL 1/3 (A).
- Go to Ferrets Island.

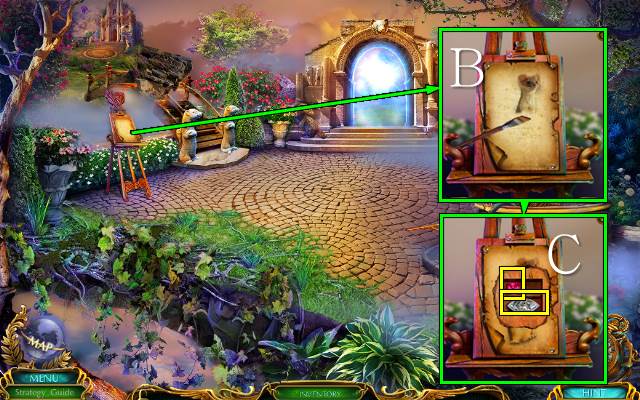
- Use the BRUSH (B); take the FERRET EMBLEM and RUBY CRYSTAL 2/3 (C).
- Go forward and right.

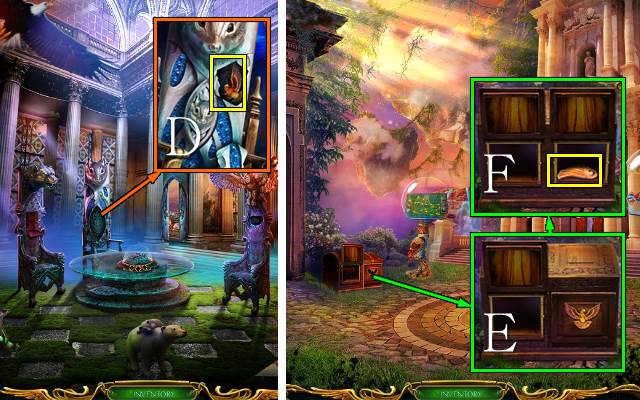
- Place the FERRET EMBLEM and take the GOLDEN BIRD (D).
- Walk down.
- Place the GOLDEN BIRD (E); take the STONE WING (F).
- Go left.

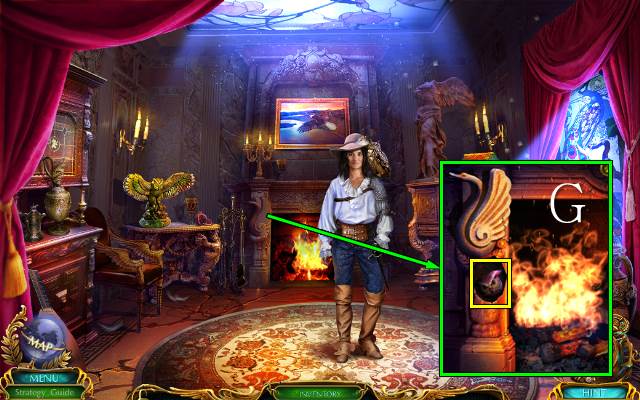
- Place the STONE WING and take the OWL EMBLEM (G).
- Walk down and right.

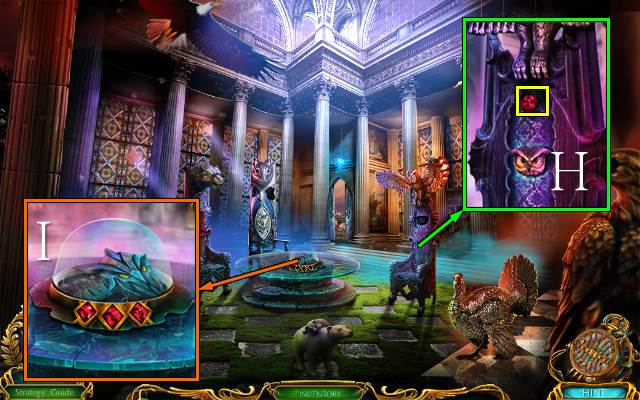
- Place the OWL EMBLEM; read the note and take RUBY CRYSTAL 3/3 (H).
- Place the RUBY CRYSTALS for a mini-game (I).

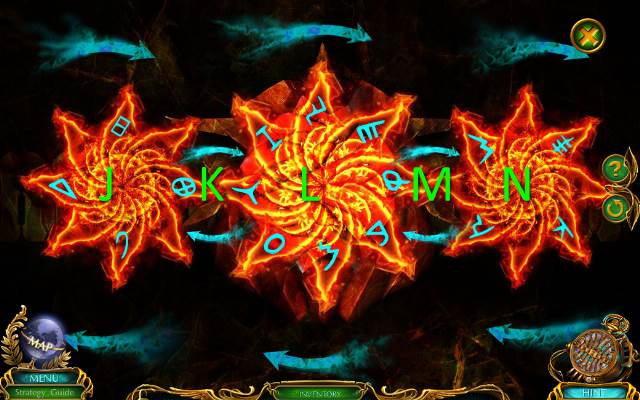
- Solution: J-L5-K-J2-L2-K-J2-L2-K-J2-L2-K-L-M-L2-N2-M-L2-N2-M-L2-N2-M.
- Congratulations, you have completed Labyrinths of the World: Changing the Past.






 Reflections of Life: Tree of Dreams Walkthrough, Guide, & Tips
 Death and Betrayal in Romania: A Dana Kinghtstone Novel Walkthrough, Guide, & Tips
 Snark Busters 2: All Revved Up Walkthrough, Guide, & Tips
 Unfinished Tales: Illicit Love Walkthrough, Guide, & Tips
 Death at Fairing Point: A Dana Knightstone Novel Walkthrough, Guide, & Tips