


This guide to Mass Effect 3 is a compendium, including a throughout description of all missions together with all the necessary and additional information required to complete them. The content is as follows:
GUIDE UNDER CONSTRUCION
Walkthrough is mainly based on a default choices, though it will be updated with differences in completing the mission, resulting from the choices made in Mass Effect and Mass Effect 2.
Notice! This guide is still in progress and its further parts will be successively published.
Jacek "Stranger" Halas
Translated to English by Jakub "cilgan" Lasota
The guide contains the following colour symbols:
The names of all the missions correspond with the ones in Shepard's journal. If you want to find the description of a given quest, you first have to check its name in the game and afterwards find it in the guide. Small quests that don't appear in the journal (e.g. visiting a wounded friend in the hospital) are an exception and you can distinguish them by a star (*).
At the very beginning of each quest description you can find a short info about the quest giver and requirements you need to meet to unlock it. Whereas at the end of the walkthrough you will find a note about the next mission in order (of course only if a given mission belong to a longer series).
I'd definitely recommend choosing the option to import you save from Mass Effect 2, as it will let you keep the choices you have made in the previous games. If you don't have such a save, you will have to create a new one. In such situation, the only choice you can make is decide whether Kaidan Alenko or Ashley Williams died in the previous game. The other choices are automatically selected by the game and the most important ones are:
Received from: none [Earth: Vancouver]
Unlocked by: Received automatically after beginning the game.
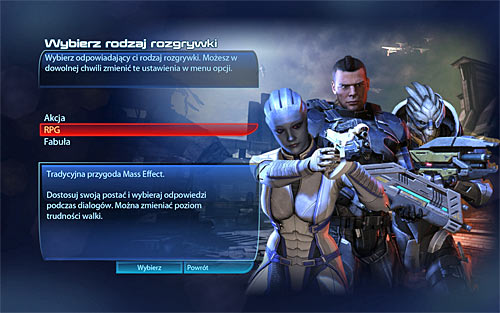
Before beginning the game, you will have to create a hero or import one from z Mass Effect 2. The most "puzzling" step is the window in which you choose the style of gameplay (screen above). It's in fact just a choice of the difficulty level and you should know that the decision isn't final, as you can change it anytime in the menu. If you're creating a new character, I'd also recommend analysing the Virmine Survivor step, as it determines who will accompany you: either Kaidan Alenko (Ashley died) or Ashley Williams (Kaidan died).
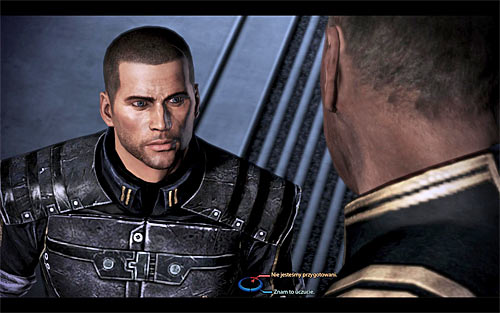
The game will begin with a series of cutscenes, the only thing worth mentioning is the possibility to choose an answer twice. Generally the rules are the same as in previous Mass Effect games, that is choosing the upper dialogue options will normally cause you to gain paragon points, while the lower renegade points. Regardless of the choices, you will also gain reputation points, helpful in unlocking special dialogue options (in some conversations).
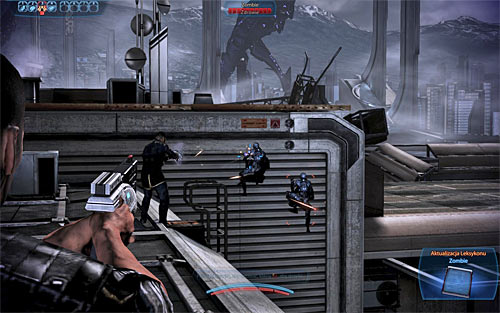
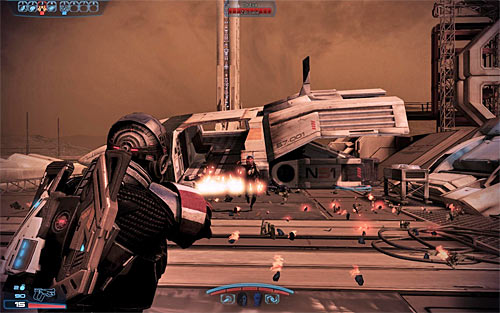
The gameplay itself will begin soon after the Reapers attack the building in which the Council meeting was taking place. Wait for Anderson to give you a pistol [M-3 Predator I] and follow him, learning the basic controls while you're at it (running, basic jumps, using ladders, hiding behind covers and from behind them). You will soon have the chance to test your pistol on the Husks climbing up the wall, though nothing will happen if you won't make it in time with killing all of them.
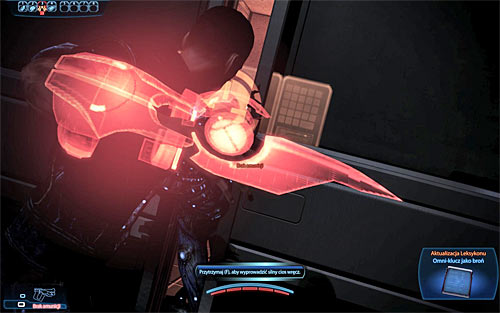
Soon you will reach an area where more Husks are trying to reach a barricaded room. You will be able to hoot only one of them, as the other ones will require melee attacks (F). Look out for the additional Husk that will jump over the balustrade. After the explosion, enter the destroyed room and look around for a Med Kit [100 EXP]. Afterwards approach the locked door and hold down F to perform a strong attack on another Husk.
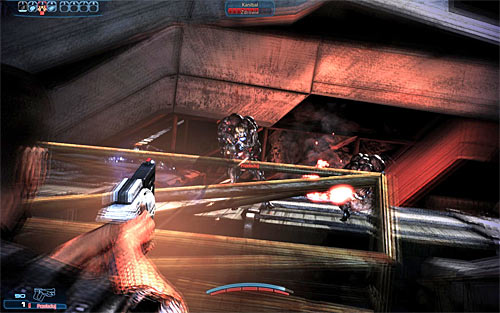
Interact with the partially opened door, which will lead to a few cutscene (new chances to choose how to act). After you regain control, head onwards and pick up ammo (Heat Sinks) on your way. Follow the only possible path until you reach a spot where you have to jump onto a lower ledge. Make sure you're behind cover and start shooting at the Cannibals in the distance, using your starting powers if needed. Eliminating them shouldn't be too difficult.
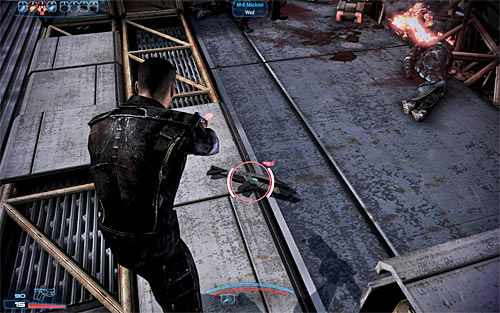
After the fight ends, replenish your ammo and approach the wounded soldiers. Listen to what the has to say and use the newly unlocked path, finding another Med Kit [50 EXP] on your way. Remember to use one of the nearby covers when you come across another group of Cannibals, so that you're not too easy of a target for them. Don't head out of the cover until you're sure that the monsters are dead. Head onwards and afterwards turn right, finding a [M-8 Avenger I] assault rifle on your way. Pick up the weapon and interact with the radio afterwards.
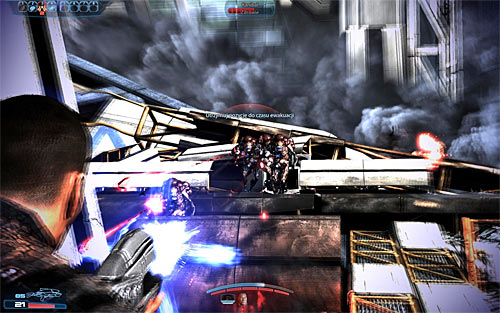
You will now have an easy defence mission. Quickly get behind a cover and start attacking the Cannibals that appear in the distance, remembering not to lean out from behind a cover for too long. Shoot with the rifle at first and afterwards switch to the pistol. Don't worry about the lack of any ammo in the area, as the battle will come to an end soon after you use up your supply. Some more cutscene will play.
Before this quest comes to an end, the game will offer you to test a mechanism that you probably already know. Depending on the choices made thus far, you will be able to use the special option of Paragon (right mouse button) or Renegade (left mouse button) interrupt option. It's important to press the button before the icon in the corner of the screen disappear. Keep in mind that using this option isn't necessary, so you won't fail a conversation if you don't make a decision in time or ignore the possibility (e.g. when an interruption doesn't cover your plan of collecting only Paragon or Renegade points). The next main quest is Priority: Mars which will begin after reaching the title red planet.
Prizes for completing the mission:
Received from: Admiral Hackett [Normandy SR-2]
Unlocked by: Received automatically after completing Priority: Earth.
![Head out of the ship and start exploring [Mars: Prothean Archives], eventually reaching a place where you can jump onto the lower level - Priority: Mars - p.1 - Main quests - Mass Effect 3 - Game Guide and Walkthrough](https://game.lhg100.com/Article/UploadFiles/201512/2015121617403874.jpg)
Head out of the ship and start exploring [Mars: Prothean Archives], eventually reaching a place where you can jump onto the lower level. Check out sergeant Reeves' corpse and take his sniper rifle [M-92 Mantis I], which you should set as your active weapon right away (upper left slot). Head to the opposite direction and soon your will come across Cerberus Assault Troopers attacking innocent scientists. Get behind a cover and attack the enemies by surprise, not letting them alarm their buddies if possible. I'd recommend using the newly obtained sniper rifle here, though it's not absolutely necessary.
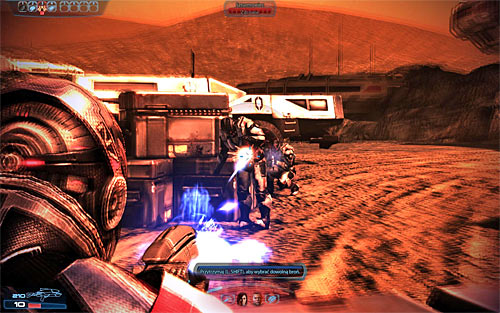
After the battle, continue onwards to the Martian complex. If the Cerberus Troopers managed to raise the alarm, you will come across another group after entering the compound. Just like before, stand behind a cover and don't let the enemies get too close. Secure the area and head to the main entrance, where you have to interact with the elevator control panel. Inside the elevator, you will speak with your party members.
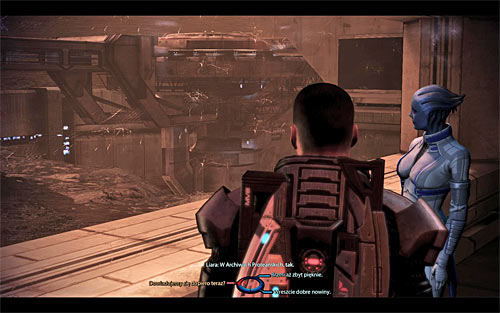
As the elevator reaches the new level, a cinematic with Liara T'Soni - who you can know from the previous installments - will start. Watch her deal with the Cerberus soldiers and speak to her (I'd recommend asking her about details of the device that's supposed to help in defeating the Reapers, though it's not absolutely necessary). The conversation will be interrupted by the appearance of a new group of Cerberus soldiers. Also note that James has been removed from the party and Liara took his place [150 EXP].
![The game will suggest using one of Liara's powers called Singularity and it would be worth to follow that advice (unless you're playing as an Adept yourself and have this power) [150 EXP], as the enemies can become easy targets thanks to it - Priority: Mars - p.1 - Main quests - Mass Effect 3 - Game Guide and Walkthrough](https://game.lhg100.com/Article/UploadFiles/201512/2015121617403875.jpg)
The game will suggest using one of Liara's powers called Singularity and it would be worth to follow that advice (unless you're playing as an Adept yourself and have this power) [150 EXP], as the enemies can become easy targets thanks to it. Use any method you like to deal with the Cerberus Troopers who appeared on the upper balcony, at best staying behind cover pointed by the game. After the battle [150 EXP], look around for a Med Kit [100 EXP] and the elevator control panel (the normal elevator is damaged).

Start climbing where the lift raised one of the machines. Jump onto the machine and from there onto the upper balconies. Head right and you will reach another door [150 EXP]. The game will suggest you try the surprise melee attack. Approach the marked cover and head right after sticking to it [150 EXP]. Stand beside one of the Cerberus soldiers and hold down F to execute him. Quickly deal with the others and don't let them get near Shepard (the rifle or powers that slow down/stop enemies might come in handy here).
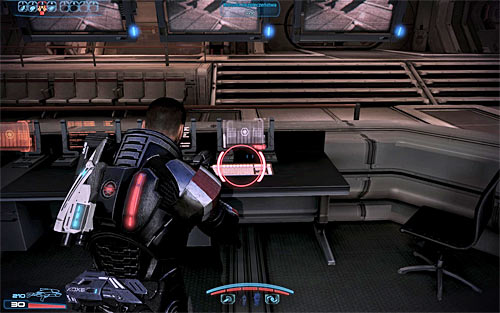
Head to the neighbouring room. Look around for a Datapad [75 EXP] and enter the control room (Liara should already be there). Collect the ammo, armour part [Ariake Technologies Gauntlets], submachine gun [M-4 Shuriken I] and Med Kit [100 EXP]. In the end interact with the console to watch a video recording and unlock the further passage [150 EXP].
![Head onwards until you reach and exit leading to the surface [150 EXP] - Priority: Mars - p.1 - Main quests - Mass Effect 3 - Game Guide and Walkthrough](https://game.lhg100.com/Article/UploadFiles/201512/2015121617403857.jpg)
Head onwards until you reach and exit leading to the surface [150 EXP]. Use the ladder on the left to find a new armour piece [Kassa Fabrication Chestplate]. Head up the ladder, jump onto the neighbouring ledge and go through the open door to reach a dark room [150 EXP]. Start exploring this room and you will find a Datapad on your way [75 EXP]. Go down the stairs and note that the covers went down. The enemies can't see you, so you can attack them by surprise. What's more, you can either eliminate the whole group at once or wait until the conversation comes to an end and some of the Troopers leave this place.
![Before you leave the dark room, look around for a weapon upgrade [SMG Scope] - Priority: Mars - p.1 - Main quests - Mass Effect 3 - Game Guide and Walkthrough](https://game.lhg100.com/Article/UploadFiles/201512/2015121617403841.jpg)
Before you leave the dark room, look around for a weapon upgrade [SMG Scope]. Jump through the destroyed window and head into the environmental control, picking up ammo and interacting with the med station on your way [150 EXP]. After exploring the area, use the console. It will unlock access to the lab, start another cutscene and initiate a conversation with Liara [300 EXP].
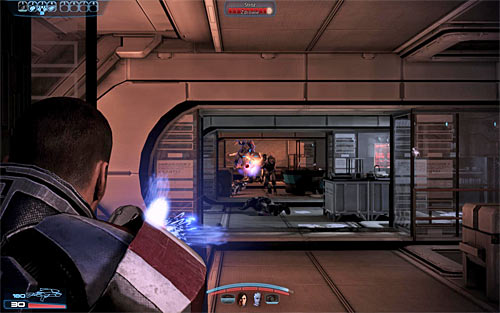
Head to the transport centre. After reaching the new room, look around for the [SMG Ultralight materials] and consider using the weapon bench. Head up the stairs. Open the door, place your subordinates behind covers and start attacking the Cerberus soldiers in the distance. During this fight you will come across two new types of enemies. The first type are Guardians who hide behind metal shields. The best way of eliminating them is using Biotic powers (Liara or Shepard) on them, though you can also try to shoot them with the sniper rifle.
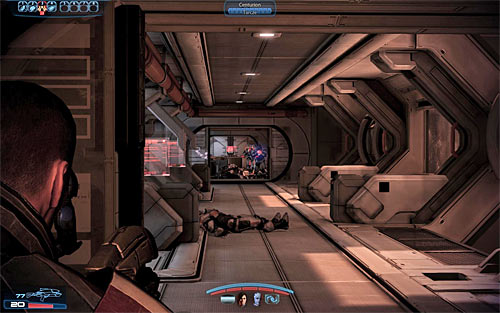
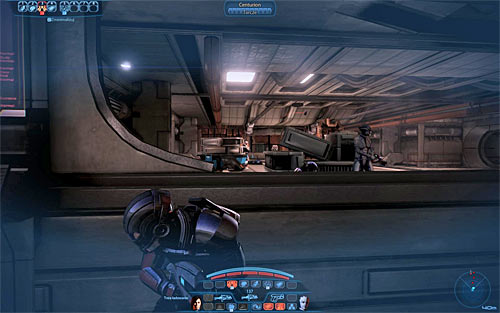
Gradually fight your way through the consecutive rooms, remembering about choosing proper covers for all your party members. Also don't forget to check out the Datapad that you will find on your way [75 EXP]. In the further part the game will let you choose between two corridors. Personally I'd suggest placing your team members by the upper corridors and choose the lower corridors yourself to flank your enemies. You should notice that Centurions armed with shields will participate in this part of the fight. The best way of destroying the type of shields that they're equipped with is using powers like Overload, though you can also help yourself with other skills or grenades and special ammo types.
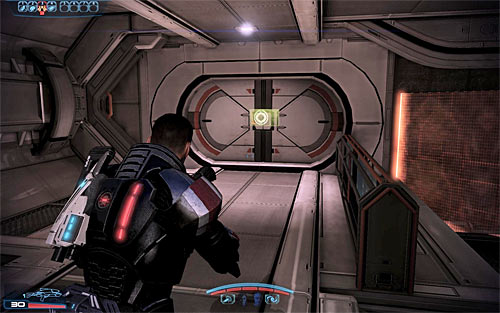
Continue onwards until you reach a room with activated decontamination protocols. You will have to solve a puzzle connected with using two consoles, located to the left and right of the door. Those consoles control the sterilisers and you have to stop them so that you unlock a passage. Head into the room and look for a Med Kit [100 EXP], Datapad [75 EXP] and two weapon upgrades: [Shotgun High Caliber Barrel] and [Sniper Rifle Extended Barrel]. Notice - in the case of the second upgrade, you might have to change the position of the sterilisers again. Once you're finished, create a passage to the door on the right (screen above) [150 EXP].
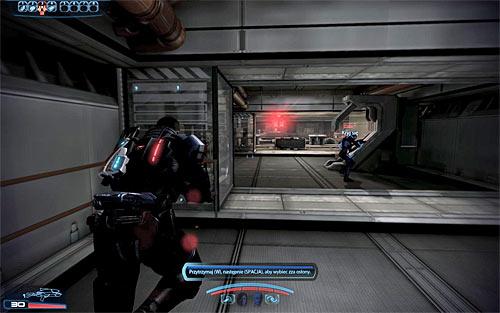
Turn left, heading towards the control centre. There, you will be greeted by a security turret. It cannot be destroyed, the only thing you can do is avoid it, which is directly connected with hiding behind covers. In accordance with the instruction, hold down W and afterwards SPACE to made Shepard run between covers (screen above). Notice - make sure to "aim" well at each cover and note let go of SPACE until Shepard hides behind it.
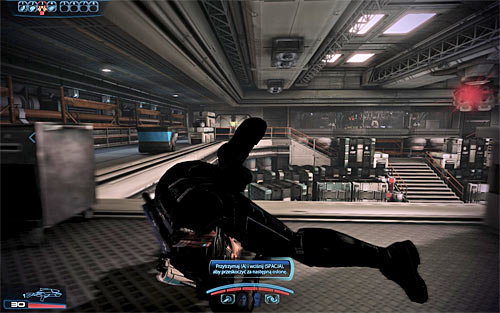
After reaching the turret room, you need to start going left. in this case you need to hold down A and only push SPACE (without holding it down). Additionally you have to press the middle mouse button after reaching a corner. Carefully continue onwards until you reach a spot where the turret cannot reach you anymore.
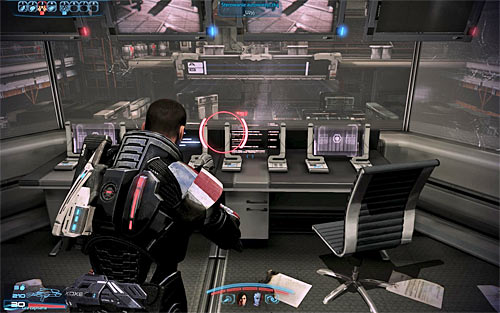
Enter the control room and take care of the Cerberus soldiers found there. They shouldn't cause you too much trouble, though you should look out for the Centurion, remembering about destroying his shields. After the battle, look around for ammunition, a Med Kit [100 EXP], Datapad [75 EXP] and weapon upgrade [Sniper Rifle Concentration Module]. Also in the end interact with the turret control panel, which will pay a new recording and cutscene picturing the Cerberus forces being outsmarted [150 EXP].
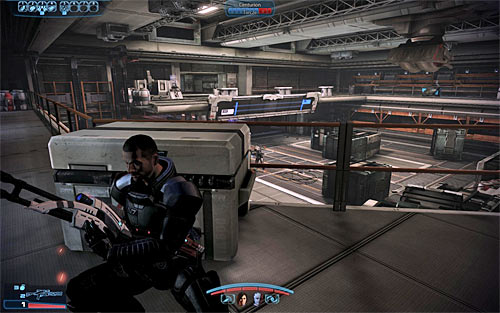
As you wait for the Cerberus forces to arrive, the game will offer you to test the option to give orders to your party members and if you haven't used it until now, it's worth to do it now and send your subordinates (Q and E) behind the marked crates. I'd recommend keeping Shepard on the upper the upper floor or the leading to the ground floor. After the Cerberus soldiers arrive, start attacking them. Don't let them get close and especially look out while fighting the Guardians and Centurions. After the fight, head into the cable car together with your team and interact with its control panel [225 EXP].
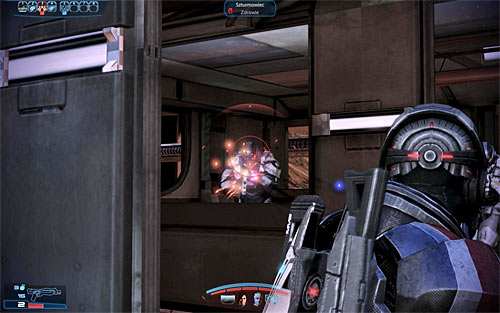
Riding the cable car won't unfortunately go exactly as planned, as will get sabotaged. Note that a second car started coming your way and you should start shooting at the enemies inside as fast as possible. When the two cars are beside each other, I'd recommend switching to the shotgun and eliminate the others using it. Luckily you don't have to worry about them boarding your car. Afterwards jump to the second car and use its control panel.
You will have to fight again right after reaching the new location. I'd recommend ordering your team mates to leave the car as fast as possible and place them by the nearby covers, as the enemies will likely use grenades. Just like before, try eliminating the enemies from a distance, remembering about the "elite" types of Cerberus troops. Also keep an eye on the areas where they used smoke grenades and make sure they don't surprise you. Having dealt with them, examine the area to find ammo, a weapon upgrade [Shotgun Shredder Mod], the [M-15 Vindicator] and a med station [100 EXP].
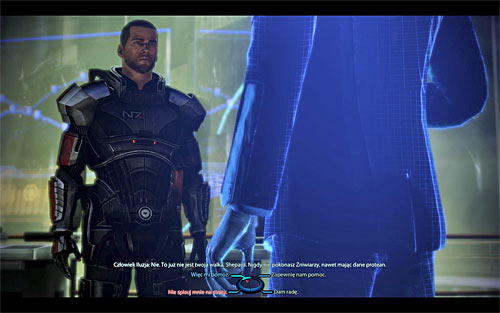
Head to the nearby door and try opening them, which will engage a few longer cutscenes. Most of all, you will "meet" the Illusive Man. Note that during the conversation you will be able to use a special dialogue option: charm (upper left) or intimidate (lower left). It won't change the Illusive Man's attitude in any way, but will let you gain more paragon or renegade points. In the end there will be a scene with doctor Eva, who will start running away upon finishing to download data from one of the computers.
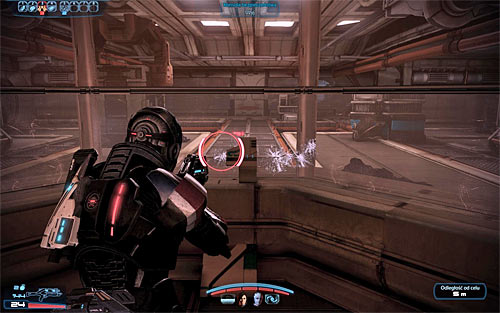
In accordance with the game's hints, hold down SPACE to activate running mode and head after doctor Eva. Throughout the chase you should keep away from any elements of the environment, so that Shepard doesn't come up with the idea of taking cover. Also don't waste any ammo or use your powers, as you won't be able to stop the doctor prematurely in any way. After you reach the already explored room, open the door and use the console to lower the covers and continue the chase.
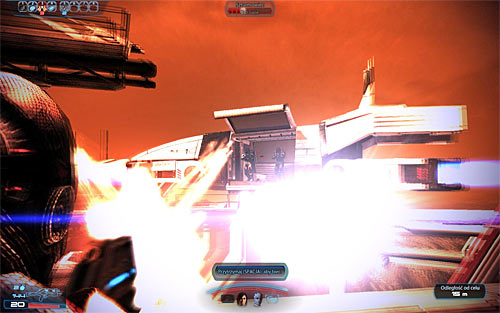
Further on you should try to avoid the probes left behind by Eva, even though getting hit by one won't kill you or even hurt badly. Soon enough you should see a ship with two Cerberus Troopers on board, who you can either kill or ignore and focus solely on the chase. The section will end only after you reach the landing zone.
Now you're in for a whole series of cutscenes. The only important part will be when you will have to finish off doctor Eva after the crash. Use the pistol for that and don't let her get near Shepard (it would cause instant death). Also note that you have (temporarily) lost one of your party members, either Kaidan Alenko or Ashley Williams. After reaching the Citadel, commander Bailey will ask you if you prefer going to the Council or visiting your wounded friend first. The choice doesn't really matter, as you will be able to make the choice on your own anyway, as the game won't automatically move you to the meeting room. You can move on to the Priority: The Citadel I main mission.
Prizes for completing the mission:
Received from: Admiral Hackett [Normandy SR-2]
Unlocked by: Received automatically after completing Priority: Mars.
![You will begin at [Citadel: Bay D24] - Priority: The Citadel - Main quests - Mass Effect 3 - Game Guide and Walkthrough](https://game.lhg100.com/Article/UploadFiles/201512/2015121617404014.jpg)
You will begin at [Citadel: Bay D24]. Examining all locations of the Citadel is of course recommended, though not necessary to complete this mission. Head north, towards the elevator. Interact with its control panel and decide whether you want to visit your friend at the [Citadel: Huerta Memorial Hospital] or focus on the mission and head to [Citadel: Citadel Embassies].
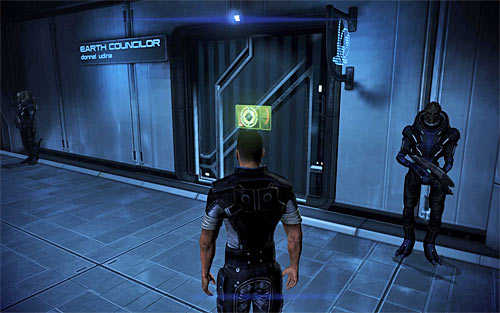
After reaching the next floor head west, towards the office of the human ambassador. Some more cutscenes will start, picturing the meeting of the Council, which will end with failure, as suspected. Meeting with Udina and the Turian councillor who will suggest that you should ask Primarch Fedorian for help is also important. You will also learn that you have regained the status of Spectre. Locacing Fedorian is a part of the next main mission - Priority: Palaven.
Prizes for completing the mission:
Received from: Turian councillor [Citadel: Citadel Embassies]
Unlocked by: Received automatically after completing Priority: Citadel.
![This mission will begin in Udina's office at [Citadel: Citadel Embassies] - Priority: Palaven - Main quests - Mass Effect 3 - Game Guide and Walkthrough](https://game.lhg100.com/Article/UploadFiles/201512/2015121617404109.jpg)
This mission will begin in Udina's office at [Citadel: Citadel Embassies]. Head out of the room and check out the previously unavailable Spectre Requisitions, in which you can use the messaging terminal, shop and shooting range. Head to the lift and go to [Citadel: Bay D24]. Return to the starting area and get on the Normandy.
On board the Normandy, you will witness Shepard's nightmare in which you will have to approach the child twice. Apart from that you will also speak to Liara, Specialist Traynor (reminding you of the most important locations on board the Normandy) and Admiral Hackett (giving a report).
![In order to begin the mission itself, you need to head to the galaxy map room located on board [Normandy SR-2: Combat Information Center] - Priority: Palaven - Main quests - Mass Effect 3 - Game Guide and Walkthrough](https://game.lhg100.com/Article/UploadFiles/201512/2015121617404105.jpg)
In order to begin the mission itself, you need to head to the galaxy map room located on board [Normandy SR-2: Combat Information Center]. Interact with the map and head to the Apien Crest. After getting there (Trebia system), fly the Normandy to the Menae moon. Enter its orbit and land on the surface.
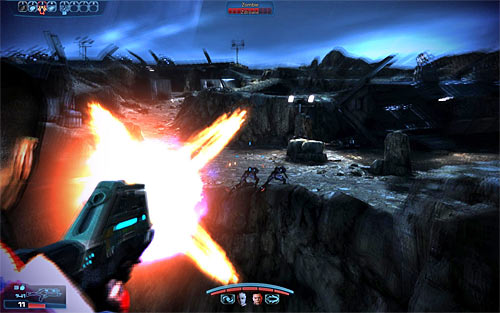
Watch the cutscene picturing the large battle taking place around Palaven and its moon Menae and listen to the conversation. After approaching the landing zone you will be asked to clear it of enemy forces. Start shooting at the Husks and don't worry if you miss some of them. More fights await you after you land at [Menae: Command Base], including, among others, the Husks that you weren't able to kill previously. After the battle, head towards the Turian base visible in the distance, finding some spare parts and [1250 credits] on your way.
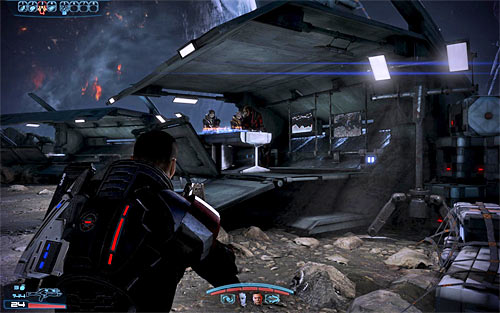
You will be let inside the base without any problem and it would be good to start off by looking around the area. The list of items you can find is as follows: two Med Kits [100 EXP] [100 EXP], the [M-97 Viper I] sniper rifle, four Datapads [1875 credits] [2500 credits] [75 EXP] [75 EXP], three weapon upgrades [Assault Rifle Piercing Mod I] [Pistol Piercing Mod] [Pistol Magazine Upgrade I], the [M-27 Scimitar] shotgun and two armour pieces [Hahne-Kedar Greaves] and [Armax Arsenal Shoulder Guard]. After looting everything there is, head to the command post. General Corinthus will tell you that Primarch Fedorian has gone missing. What's more, in order to contact the headquarters and establish his successor, you will have to repair the Comm Tower.
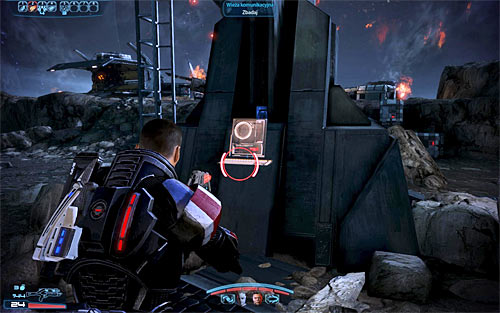
Head towards the marked exit. On your way you will come across a small group of Turians and fight some Husks, who should die pretty easily. You will have to choose who will repair the Tower and Liara seems to be a good choice, as she should be able to do it faster thanks to her skills. In the meantime, together with the other member of your team, you will have to participate in a series of rather easy Husk fights. Remember to keep moving throughout the fight and don't let the monster get near. Continue until you eliminate all of them and receive and order to return to the camp [300 EXP].
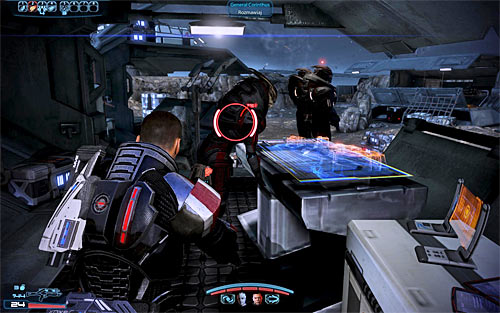
Return to the Turian base and head to where General Corinthus is. Garrus Vakarian (if only he didn't die previously) will arrive at the camp and join the party to replace Liara in the further part of the mission. During the conversation you will learn that the next Primarch is supposed to be General Adrien Victus. The plan of finding him will be brutally stopped by the arrival of the Reapers and as a result you will have to defend the base.
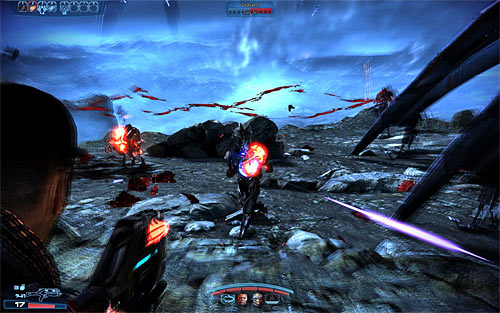
Head towards the landing zone. After getting there, look around for the [Assault Rifle Magazine Upgrade] and place your party behind nearby covers. Not only Husks will take part in this battle, but also Marauders, Turians who have been modified by the Reapers. Just like with Centurions, you have to focus on destroying their shields. If you don't have any powers of such kind yourself, I'd recommend making use of Garrus, who has access to Overload. Keep fighting until you secure the whole area, though before leaving, search for [2500 credits].
![Return to the camp, answering to the call regarding defending the main barricade [450 EXP] - Priority: Palaven - Main quests - Mass Effect 3 - Game Guide and Walkthrough](https://game.lhg100.com/Article/UploadFiles/201512/2015121617404235.jpg)
Return to the camp, answering to the call regarding defending the main barricade [450 EXP]. Head towards it and after getting there use the ladder. On the upper balcony, interact with the mounted turret and start attacking the Husks appearing in the area. Don't worry if some of them manage to reach the base, though you should look around and reload the gun in between waves. Continue shooting until a large creature known as the Brute will appear.
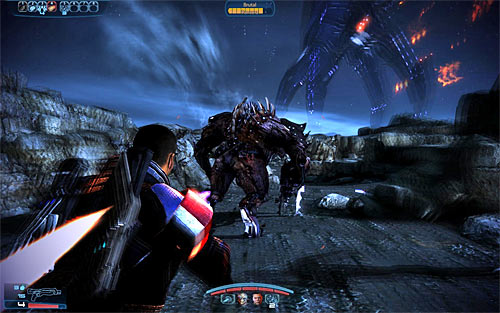
After the second part of the battle behind, focus mainly on attacking the Brute, though you also have to keep an eye on the Husks and eliminate those who get too close to Shepard. I'd recommend using the shotgun to damage the Brute, as well as powers and types of ammo which work well against armoured enemies. Also remember about dodging, especially if the enemy is about to charge at you. After killing the Brute, deal with the Husks who shouldn't pose too much of a threat [600 EXP].
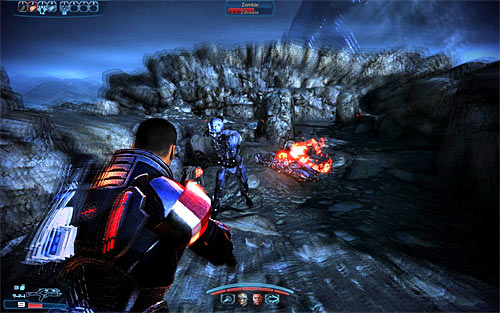
Now you're in for a long travel to where General Victus is, during which you will most of all listen to the conversation between your companions. Don't miss a Datapad [1875 credits] on your way and also be ready to fight a group of Husks, who will appear both in front and behind of your team. After reaching a small Turian post, look for a Med Kit [100 EXP], Datapad [2500 credits] and the [Sniper Rifle Spare Ammo I]. Continue onwards and you will find one more Med Kit [100 EXP] reach the main camp after a couple of minutes.
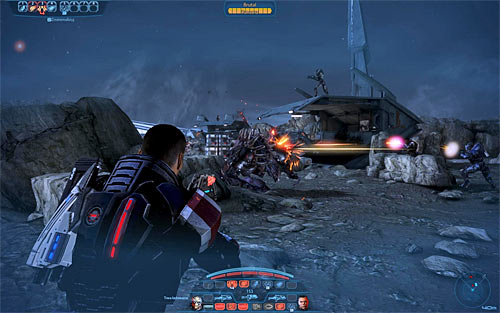
After reaching the camp, start attacking the Cannibals and Marauders, remembering to place your team members behind covers. Also keep in mind that you don't have to hurry, so it's better to carefully eliminate the enemies. After reaching the next part of the camp, another Brute will appear and you should focus mainly on him. Just like before, it's good to use the Shotgun, dodge and help yourself with proper powers and types of ammo.
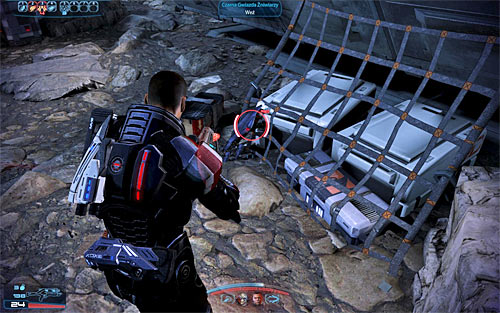
After eliminating the Brute, continue shooting at the other enemies and be ready to deal with TWO more Brutes. Luckily you don't have to deal with them in a conventional way, as on the right you should find the Reapers' unique weapon, the [Reaper Blackstar]. Pick it up and aim at both of them, trying to eliminate them by creating a black hole. After dealing with them, finish off the other enemies.
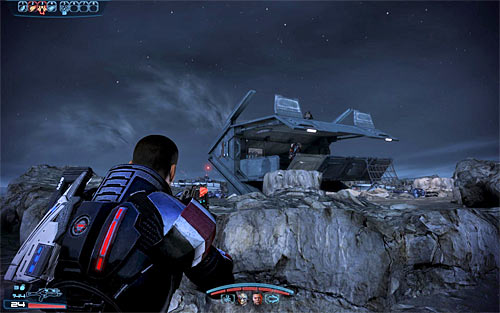
Before approaching the area where General Victus is making his stand, you should look around the camp. To the left of the starting point you will find a Med Kit [100 EXP] and [Sniper Rifle Enhanced Scope]. In the further part of the camp you should find another Med Kit [50 EXP]. After exploring the area, head towards General Victus and watch a cutscene with him. A suggestion of working with the Krogan will appear. After returning onto the Normandy, you will speak with the Asari Councillor, after which you will be able to approach another main mission - Priority: Sur'Kesh. Before moving to that, I'd recommend speaking to Admiral Hackett (communicator) and Primarch Victus, who's also on board the Normandy.
Prizes for completing the mission:
Received from: Primarch Victus [Menae: Command Base]
Unlocked by: Received automatically after completing Priority: Palaven.
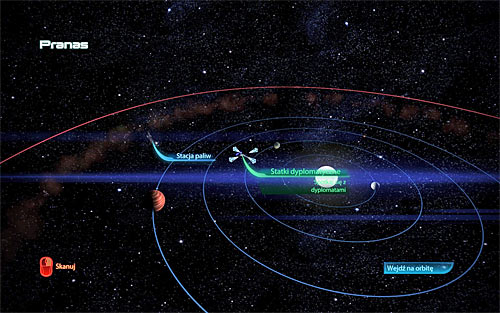
You can theoretically move to the war council held by Primarch Victus, though I'd suggest taking interest in the newly unlocked missions first, especially Normandy SR-2:EDI*, connected with EDI's strange behaviour. In order to begin the new mission, open the galaxy map and travel to Annon Basin. After getting there (Pranas system), fly the Normandy to the Salarians diplomatic ships and land.
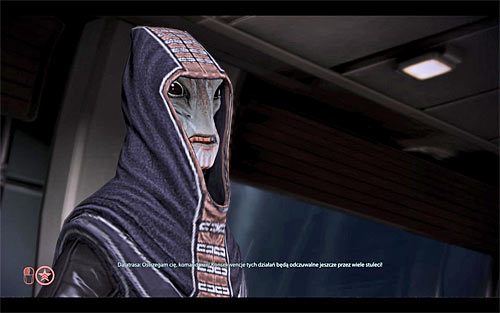
The action will take place on board Normandy, as the Salarian and Krogan representatives will enter it. Notice - If Wrex is still alive, he will represent the Krogan. Otherwise he will be replaced by Wreav. Apart from those two, the summit will also include Shepard and Primarch Victus. The main topic will be the Krogan help, which depends on curing the genophage by the Salarians. Wreav/Wrex will mention the experiments taking place in one of the Salarian bases, which will definitely anger the Krogan representative. You will be able to choose how to react to her aggression and one option implies using the special Renegade behaviour (left mouse button). Regardless of the chosen dialogue option, you will head to the research lab on Sur'Kesh to free the imprisoned Krogan females, resistant to the genophage.
![The game will soon move to [Sur'Kesh: STG Base], where under rather unpleasant circumstances you will be greeted by Padok Wiks (or Major Kirrahe, if he's still alive), who will offer full cooperation in returning the females who were experimented on - Priority: SurKesh - p.1 - Main quests - Mass Effect 3 - Game Guide and Walkthrough](https://game.lhg100.com/Article/UploadFiles/201512/2015121617404364.jpg)
The game will soon move to [Sur'Kesh: STG Base], where under rather unpleasant circumstances you will be greeted by Padok Wiks (or Major Kirrahe, if he's still alive), who will offer full cooperation in returning the females who were experimented on. Regardless of the chosen dialogue options, Wreav/Wrex will stay beside the ship and you with your team will be able to explore the base. You can either head to the lift at once or take a look around the area. In the latter case, I'd recommend speaking with Wreav/Wrex and Lieutenant Tolan. In the end speak to Padok Wiks/Major Kirrahe again and he will grant you access to the underground part of the facility.
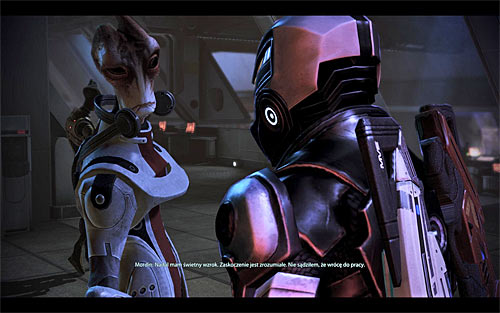
Approach the lift and interact with it to realise that the bas in under Cerberus attack. You won't take part in the fights just yet, so wait for the lift to take you to a new location. Here you will speak with your old friend Mordin (if he didn't die in the previous game), during which it will turn out that he was the one to inform Wreav/Wrex about the imprisoned Krogan females. Mordin will also tell you that only one females has survived the experiments. Listen to the conversation with the female and Wreav/Wrex, who will demand her being taken onto the shuttle.
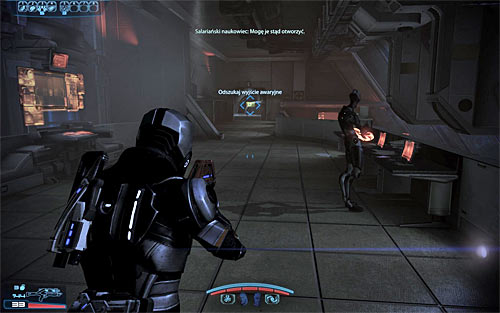
Start off by looking around the lab. You can listen to two Mordin recording left in the Research Log and also take the [Assault Rifle Extended Barrel]. Trying to use the lift again will end with failure, as the Cerberus soldiers have planted a bomb in it. As a result you need to turn around and head to the alternative passage which will get unlocked pretty soon. After reaching the small room, use the ladder.
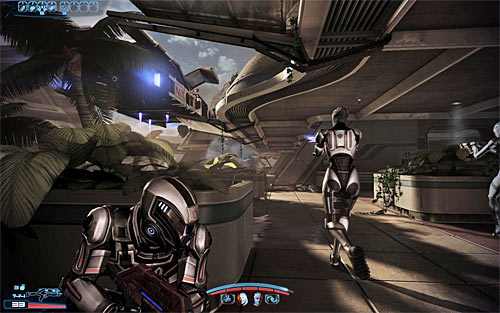
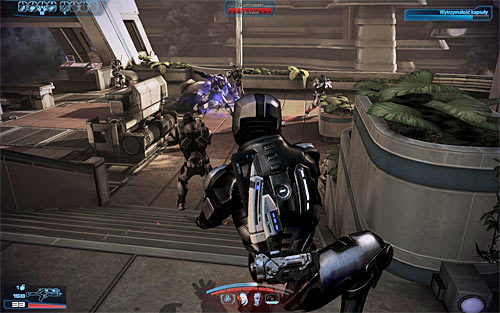
Be ready to come across the first group of enemies soon. Cerberus soldiers will arrive on a shuttle and if you fast enough, you might be able to damage or even kill them before they land. Troopers will participate in this battle, so dealing with them shouldn't be too hard. However look out for the second wave that will appear in the distance eventually. After the battle, examine the area to find the [Shotgun Blade Attachment], med station [150 EXP] and a Research Log with a new recording.
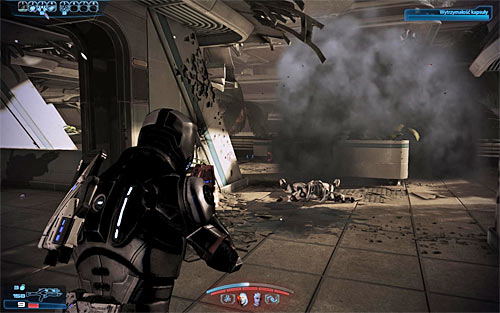
Move onwards, towards the only possible door. Watch a quite interesting cutscene and afterwards head into the room on the left. Jump above the hole and pick up the [Shotgun Spare Ammo] upgrade. Head on, using the stairs. Soon enough you will have defend the pod in which the Krogan is transported for the first time. Don't get fooled by the integrity bar, as it will have to be enough for the whole mission. As a result you have to deal with the nearby Cerberus soldiers very fast (look out for new Troopers who will arrive by shuttle!). The only advantage is that most of the enemies will focus mainly on attacking the capsule.

As I have already mentioned, you need to eliminate all the enemies as fast as possible, especially those attacking the capsule. Afterwards you can take a look around the area, finding a Datapad [2500 credits]. Having explored the area, approach the quarantine checkpoint console and activate it [750 EXP]. The lift with Mordin will head onto the next floor and you will need to fight some more Cerberus soldiers. Just like before, try to kill them before they can jump off the shuttle.
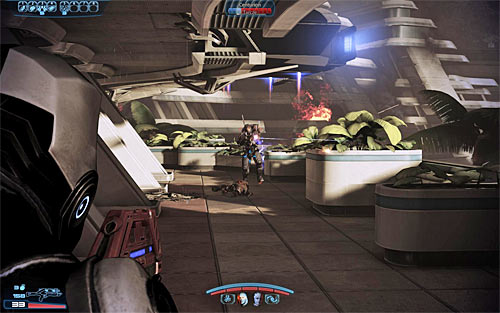
Use the newly unblocked passage, i.e. the hole in the wall. Be ready to eliminate more Cerberus forces here, placing Shepard and the rest of the team in such places so that you cover both paths and no one can surprise you. After eliminating the enemies, look around for another weapon upgrade [Pistol High Caliber Barrel]. Head towards the only possible passage, continuing through the base.
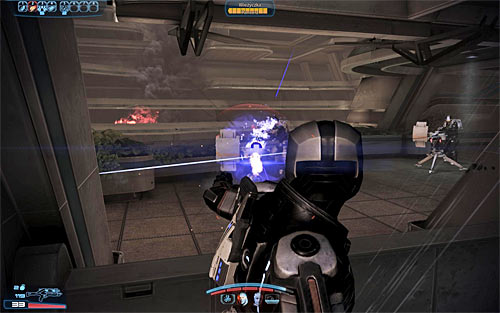
After you reach the new location a cutscene should start, showing the enemy engineers placing turrets in the area. Hide your party members behind covers and follow the game's instructions to flank the enemies. As for the turrets, I'd suggest using the shotgun or the proper type of grenades. Just be sure not to let any of the soldiers surprise you and don't lean out of the cover for too long. Deal with the Cerberus soldiers and traditionally spend some time on exploring the area, as you can find some spare parts [3750 credits]
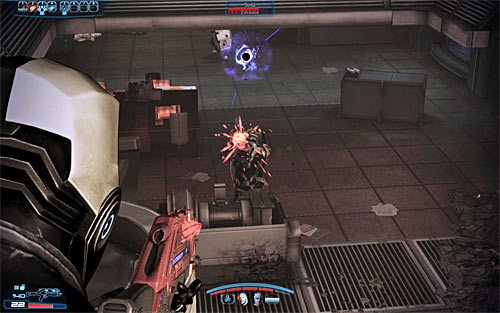
Interact with the terminal to open the passage to another room. Use a med station [150 EXP] on your way and enter the bigger, two-level room. Start off by placing your team members behind covers, while you yourself should head onto the upper floor. It's protected, but defeating the enemies there shouldn't cause you much trouble. Choosing the upper floor will give you a great opportunity to shoot at the enemies on the lower level, especially the ones behind shields. Try to clear out the whole area.
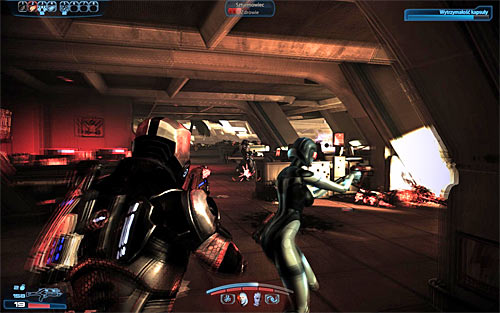
Just like before, I'd suggest carefully examine the location. On the ground floor you will find a piece of armor [Armax Arsenal Greaves] and in the lane below the upper balconies some spare parts [3750 credits] and another piece of armour [Sentry Interface]. Return upstairs and interact with the locked door to bypass its security system. Once again you will have to protect the pod with the female. Quickly place your whole team behind covers and start attacking the Cerberus soldiers, only looking out for your own health bar. Help yourself with grenades and offensive powers, especially that many enemies are standing beside each other.
![Be sure to explore the area, as beside one of the corpses you can find the [M-13 Raptor I] sniper rifle - Priority: SurKesh - p.2 - Main quests - Mass Effect 3 - Game Guide and Walkthrough](https://game.lhg100.com/Article/UploadFiles/201512/2015121617404471.jpg)
Be sure to explore the area, as beside one of the corpses you can find the [M-13 Raptor I] sniper rifle. apart from that there's also a Research Terminal with a recording and the [Pistol Scope] upgrade. Resume the exploration, soon enough reaching a Power Terminal which you have to activate. While you're at it, take interest in the med station [150 EXP] and the [Scorpion] pistol lying on the ground.
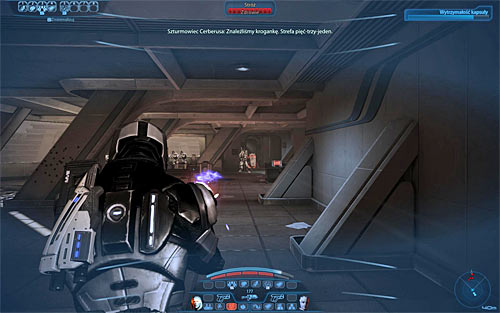
Return to the pod and note that new Cerberus forces have appeared in the area from where you came. As a result you need to act quick, placing your team members behind covers and stopping the enemies from coming near. After the battle, approach the Quarantine Checkpoint terminal and activate it. Listen to a conversation with Mordin [750 EXP] and start attacking the Cerberus forces. Luckily this time you don't have to protect anyone, so you can just focus on consecutively eliminating the enemies. Examine the area where the enemies have been appearing to discover a previously inaccessible door. Use that passage and be sure to save your game, as you're nearing the final battle of this mission.
Jump above the hole and go up the ladder, reaching a landing zone. Once again you will have to protest the pod, though the fact that the enemies should be by default looking into the other direction. It's worth to use grenades here, as well as special ammo types, though I'd recommend keeping some for later on. After the battle, try to quickly reach the Quarantine Checkpoint terminal. It's important, as if you don't make it in time, another shuttle with Cerberus soldiers will arrive, the battle will be prolonged unnecessarily and the pod will get under fire again.
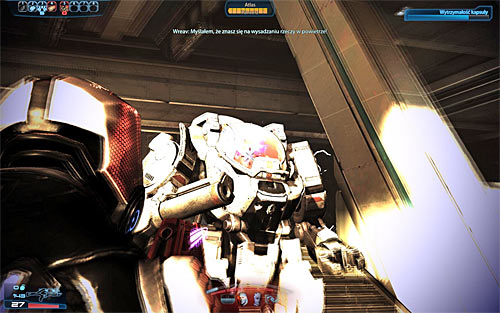
It's not the end, as you're in for one more battle, including the large Atlas Mech. If you have already complete the Grissom Academy: Emergency Evacuation side quest, it should be a familiar sight for you. Otherwise, it will be something completely new for you. Above all you should remember to use covers, as the Mech shoots rockets and getting hit might damage your party member seriously. In this case, you first need to destroy the Mech's shield and only afterwards attack its body. I'd also suggest aiming at the pilot in the glassed cabin, which might lead to a faster victory.
![Apart from the Mech, you will also have to eliminate the last group of Cerberus soldiers, though they shouldn't be too hard for you [1500 EXP] - Priority: SurKesh - p.2 - Main quests - Mass Effect 3 - Game Guide and Walkthrough](https://game.lhg100.com/Article/UploadFiles/201512/2015121617404561.jpg)
Apart from the Mech, you will also have to eliminate the last group of Cerberus soldiers, though they shouldn't be too hard for you [1500 EXP]. Now you just need to watch a series of cutscenes ending this quest. It's worth to notice that the game will unlock a couple of new quests, with Priority: Tuchanka playing the main role. You will be able to begin it after completing two mission for the Krogans (Attican Traverse: Krogan Team and Attican Traverse: The Rachni) or a mission for the Turians (Tuchanka: Turian Platoon). Of course it's in fact worth to complete all three before resuming the main campaign.
Notice - Using this chance, you can visit Mordin and Eva, who are at the med station room on board [Normandy SR-2: Crew's Quarters], though it's purely optional.
Prizes for completing the mission:
Received from: Wreav or Wrex [Normandy SR-2: Combat Information Center]
Unlocked by: Received automatically after completing Priority: Sur'Kesh.
Notice! This mission is unlocked simultaneously with Tuchanka: Turian Platoon. Completing the mission for the Krogans will let you move to the main part of Priority: Tuchanka. If you have already decided to work with the Turians and therefore moved on to the further part of the campaign, you still shouldn't ignore the mission given by Wreav/Wrex. By completing it, you can gain, among others, experience points, new weapon upgrades and precious war assets.
![Following Wreav/Wrex's request, find him in the war room on board [Normandy SR-2: Combat Information Center] and ask him about the problem with the lost Krogan team - Attican Traverse: Krogan Team - Main quests - Mass Effect 3 - Game Guide and Walkthrough](https://game.lhg100.com/Article/UploadFiles/201512/2015121617404534.jpg)
Following Wreav/Wrex's request, find him in the war room on board [Normandy SR-2: Combat Information Center] and ask him about the problem with the lost Krogan team. Wreav/Wrex will inform you of the Rachni relay and send you to the planet Utukku to investigate the matter and meet with the elite Attican Traverse. Notice! The main quest will now change into Attican Traverse: The Rachni, so skip to its description to move on.
Prizes for completing the mission:
Received from: Wreav or Wrex [Normandy SR-2: Combat Information Center]
Unlocked by: Received automatically after completing Attican Traverse: Krogan Team.
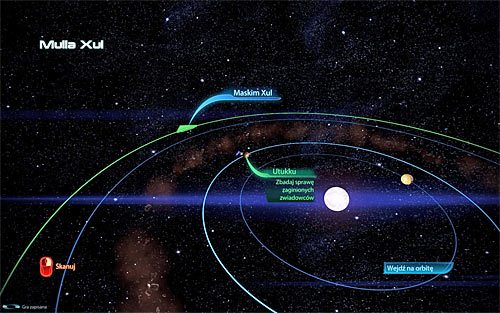
Open the galaxy map and head to the Ninmah Cluster. After getting there (Maskim Xul system), grab some fuel and fly to the neighbouring system of Mulla Xul. Here you need to fly to the planet of Utukku and land on its surface. During a cutscene you will meet the leader of the Krogan commando. It might be either Grunt, or Dagg, if the first one died in the previous game. Regardless of you interlocutor, you will learn of the discovery of a Rachni nest. You can begin to explore [Utukku: Scout camp].
![Start off by examining the small barrack right beside the landing zone to find some spare parts [1625 credits], the [Pistol High Caliber Barrel] and [M-300 Claymore I] - Attican Traverse: The Rachni - Main quests - Mass Effect 3 - Game Guide and Walkthrough](https://game.lhg100.com/Article/UploadFiles/201512/2015121617404565.jpg)
Start off by examining the small barrack right beside the landing zone to find some spare parts [1625 credits], the [Pistol High Caliber Barrel] and [M-300 Claymore I]. Afterwards head to the Krogan camp, where you will find a weapon bench, the [SMG High Caliber Barrel] and spare parts [875 credits]. In the end enter the barrack beside which the Krogans are standing (screen above). The whole construction will collapse and you will have to examine the tunnel network without the help of Dagg/Grunt and his squad.
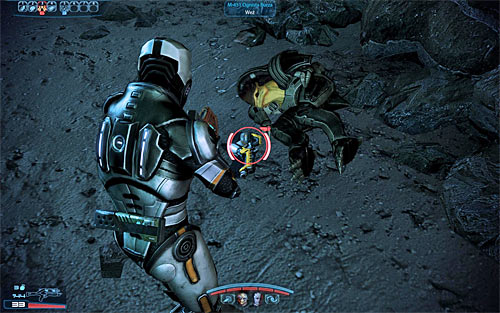
Head onwards. Examine the corpse of the Krogan and pick up the [M-451 Firestorm]. It's a unique weapon which cannot be added to your inventory. What's more you can't even get ammunition for it, though luckily in the further part of the mission you will come across multiple more, so don't worry about running out of fuel. Use any weapon you like to destroy the nearby webs. Further on you will come across spores, which you should destroy from a safe distance as they explode upon contact and can deal high damage.
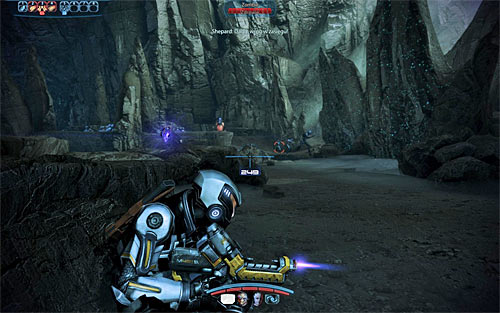
Slowly navigate through the tunnels, destroying the webs and spores. On your way you will find another [M-451 Firestorm], so you don't have to save ammo. Save your game after reaching a bigger cavern and only afterwards jump onto the lower level. You will have to fight not only Husks, but also a Ravager, a Rachni mutated by the Reapers. It's extremely important to place your whole team behind covers, as the Ravager uses ranged attacks which can deal large damage.
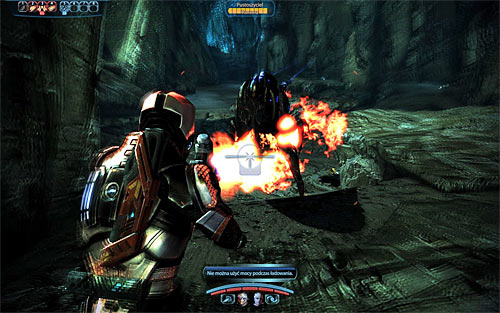
Start off by eliminating the Husks and destroy the barrier generator from a distance. Afterwards head right on your own and follow the unprotected path. That way you will be able to flank or even approach the Ravager from behind. It's of course worth to use the Firestorm against it. Be careful after it dies, as Swarmers might come out of its body. Keep the mat distance, as direct contact might end rather badly for Shepard.
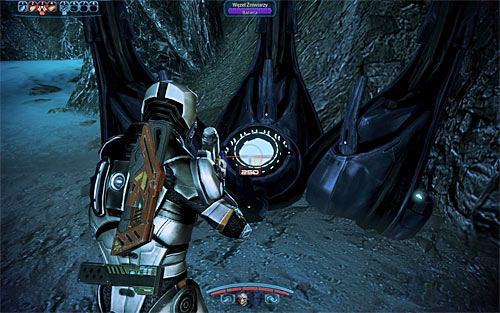
After the battle, I'd recommend taking a good look around the cavern. To the left of the starting point you will find the [Shotgun Shredder Mod], and nearby the place where the Ravager was, a new [M-451 Firestorm]. Choose the upper path, destroying new spores and webs on your way. After reaching a barricaded passage, get rid of the webs on the right. Explore the new area, picking up another [M-451 Firestorm]. Afterwards use a weapon or power of choice to destroy the Reaper node [400 EXP].
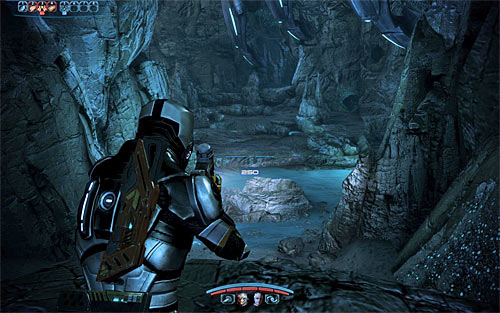
You can renew the exploration of the tunnels and soon a short and unimportant cutscene will start. Whether you choose the lower or upper path doesn't matter really. I'd suggest destroying the webs you come across on your way, as it will let you find the Reaper tech [3750 credits], a corpse of a Krogan scout which can be searched and another [M-451 Firestorm]. Expect trouble after reaching the next big cavern, in which you will have to jump onto the lower level (screen above). It would be good to save your game here.
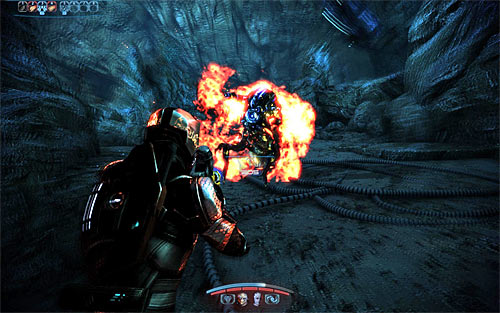
Right after jumping onto the lower level you should place your team behind covers, as there's another Ravager in the area. Also note that apart from Husks, Cannibals will participate in this fight as well, so look out for ranged attacks. Just like before, try to flank the Ravager and at the same time look out for the Swarmers that will appear on the battlefield from the very start. Eliminating the first group of enemies won't do the job however, as the further part of the cavern is occupied by monsters as well. Remember about using covers, focusing your efforts on destroying the barrier and killing the second Ravager. Flanking him isn't possible, so try to attack him from a distance or run to the rocks beside the Ravager.
![You can now explore the cavern to find the [Shotgun Spare Ammo] - Attican Traverse: The Rachni - Main quests - Mass Effect 3 - Game Guide and Walkthrough](https://game.lhg100.com/Article/UploadFiles/201512/2015121617404686.jpg)
You can now explore the cavern to find the [Shotgun Spare Ammo]. Head onwards and be careful, as from now on Swarmers will come out of most spores you destroy. It's of course still worth to keep your eyes open, as you can find Reaper tech [3125 credits], another [M-451 Firestorm] and the [Ariake Technologies Shoulder Guard].

Eventually you will see Krogans fighting in the distance and despite what it might look like, you don't need to rush to help them. Continue onwards through the tunnels until you reach a room with a node. Start off by looking for a [M-451 Firestorm], Med Kit [50 EXP] and [Pistol Piercing Mod] and only afterwards destroy the Reaper node [600 EXP]. It will initiate a short cutscene.
![Use the only possible passage and you will find Reaper tech on your way [3125 credits] - Attican Traverse: The Rachni - Main quests - Mass Effect 3 - Game Guide and Walkthrough](https://game.lhg100.com/Article/UploadFiles/201512/2015121617404638.jpg)
Use the only possible passage and you will find Reaper tech on your way [3125 credits]. Use the narrow passage and you will reach the Reaper nest. Unfortunately you can't end the mission just yet, as there are still Reaper barriers blocking your way. Start off by destroying the Reaper node directly above you (screen above), though saving your game early on would also be a good idea.
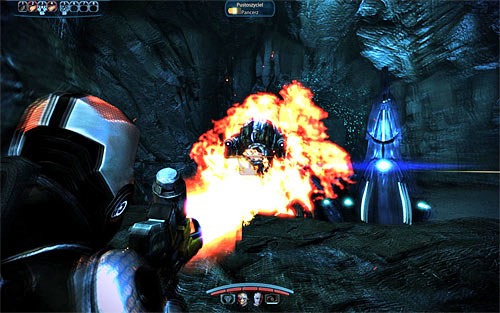
One of the barriers will be lowered and you have to act quick, as enemy forces will attack almost instantly. Don't forget about using covers, as apart from Swarmers, Husks and Cannibals, two Ravagers will take part in this battle as well. Luckily you will be able to approach both of them rather easily and eliminate them using the Firestorm or other weapon effective at short range. Just remember not to rush and check the enemies' location each time before leaning out of the cover. Also don't risk the life of your team members and use them mainly as distraction. After the battle, save you game, pick up the [M-451 Firestorm] and destroy the next Reaper node.
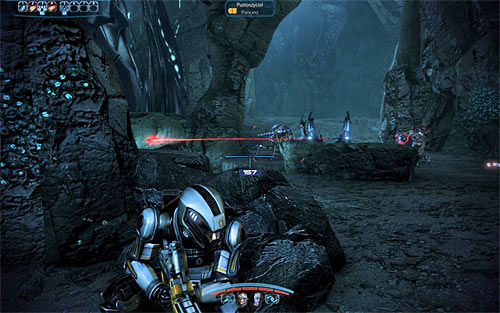
Don't rush it back to the starting point, as new monsters will appear in the meantime. Once again you will most of all have to look out for two Ravagers, trying to flank them if possible. Be careful while moving between covers as well, so that you don't become an easy target. Save your game after eliminating the enemies and head to the recently unlocked are on the right. Fight off more monsters, remembering about the possibility to use the side paths. It will let you flank the Ravagers, though at the same time you should also look out for the other monster types and don't let any surprise you. Also don't forget about destroying the generator fast, as it will make winning the battle much easier.
![Traditionally look around for a new [M-451 Firestorm] and destroy the Reapers node - Attican Traverse: The Rachni - Main quests - Mass Effect 3 - Game Guide and Walkthrough](https://game.lhg100.com/Article/UploadFiles/201512/2015121617404761.jpg)
Traditionally look around for a new [M-451 Firestorm] and destroy the Reapers node. Now you're in for the last battle, including monsters from around the starting point. I don't think I have to remind you that placing your party members behind covers and focusing on killing the Ravagers is essential. You need to keep fighting until you eliminate all the monsters [1000 EXP], which will automatically start a cutscene with the Breeder.
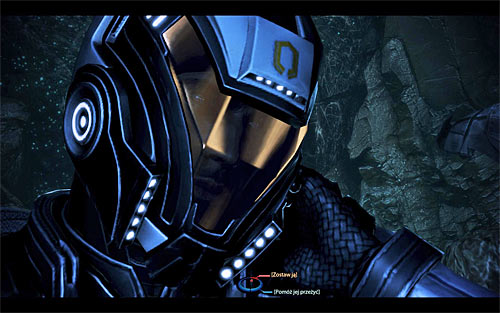
The course of the conversation might surprise you a bit, as you will learn that the Rachni queen wants to breed new children and use them to defeat the Reapers. In the end you will be able to make a choice - you can either refuse to cooperate and leave her imprisoned (upper right dialogue option), or free her (lower right option). If you've been working with Dagg up until now, the decision won't have any influence as he will sacrifice his life while running from the nest in both cases. If on the other hand you were accompanied by Grunt, leaving the Breeder will save the Krogan's life. You will eventually be transported on board the Normandy. If you have left the Breeder in the nest he will be satisfied, as if you've set her free he will be furious, though you don't have to worry about any aggression.
Notice! If you have chosen the Krogan quest to unlock the further part of the campaign, you will be able to move to Priority: Tuchanka. I however wouldn't recommend ignoring the Turian quest completely, you should finish it either way.
Prizes for completing the mission:
Received from: Primarch [Normandy SR-2: Combat Information Center]
Unlocked by: Received automatically after completing Priority: Sur'Kesh.
Notice! This mission will be unlocked simultaneously with Attican Traverse: Krogan Team. Completing the Turian mission will let you move to the main part of Priority: Tuchanka. . If you have already decided to work with the Krogan and therefore moved on to the further part of the campaign, you still shouldn't ignore the mission given by Primarch. By completing it, you can gain, among others, experience points, new weapon upgrades and precious war assets.
![In accordance with what the Primarch said, you will find him in the war room on board [Normandy SR-2: Combat Information Center] - Tuchanka: Turian Platoon - Main quests - Mass Effect 3 - Game Guide and Walkthrough](https://game.lhg100.com/Article/UploadFiles/201512/2015121617404786.jpg)
In accordance with what the Primarch said, you will find him in the war room on board [Normandy SR-2: Combat Information Center]. Ask him about failing to contact with the Turian platoon which has crashed on Tuchanka. Interestingly, if you push the Primarch and ask additional questions, you will learn that one of the platoon's soldiers is the Primarch's son - Tarquin Victus.
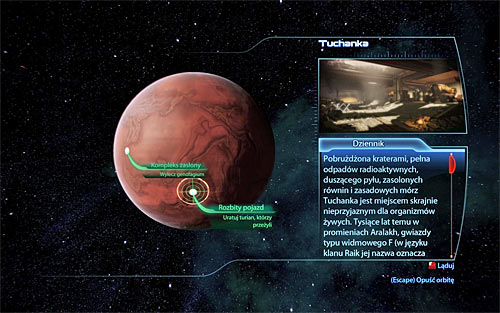
Open the galaxy ma[ and head to the Krogan DMZ. After getting there (Aralakh system), fly to the planet of Tuchanka. Notice - If there are other points of interest on the surface, make sure to choose Downed Vessel (screen above). Wait until you get transported to [Tuchanka: Downed Vessel] and listen to a short conversation with Lieutenant Tarquin Victus. Also ignore the Reaper flying above the location, as you will eliminate him further on in the mission.
![Look around the landing zone for a [SMG Magazine Upgrade] and afterwards use the nearby ladder - Tuchanka: Turian Platoon - Main quests - Mass Effect 3 - Game Guide and Walkthrough](https://game.lhg100.com/Article/UploadFiles/201512/2015121617404793.jpg)
Look around the landing zone for a [SMG Magazine Upgrade] and afterwards use the nearby ladder. Continue onwards and you will eventually reach a spot from where you can attack a group of Husks by surprise. Eliminate the monsters and afterwards look around the area in which they were to find some spare parts [3125 credits]. Approach the new ladder and get onto the upper level. Jump above the hole and examine the crash site to find the [M-9 Tempest].
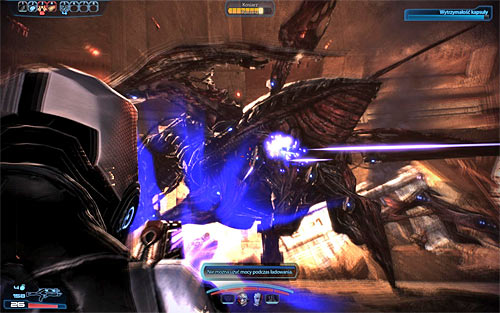
Continue onwards and eventually you will reach a place where monsters are fighting with a group of Turians. Start attacking the Cannibals, following your party members' suggestion to use the element of surprise to your advantage. Be careful, as a Harvester will soon appear in the distance. The monster will mainly focus on attacking the Turians (be sure to keep an eye on the pod health bar!), so you will be able to attack him rather easily. Use ammunition, grenades and powers that are effective against armoured targets and don't worry if you don't make it in time with killing the Harvester, as you will have the chance to fight these monsters later on in the mission/ make sure you've secured the area and receive the Turians' gratitude [300 EXP].
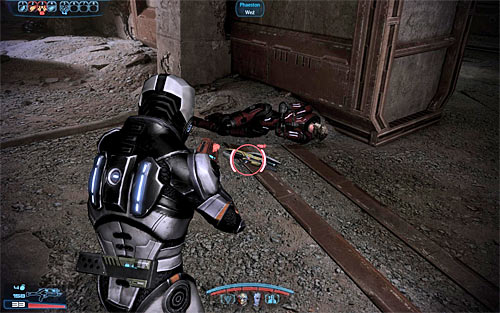
Gather up the ammunition and use the new ladder. Pick up the [Sniper Rifle Spare Ammo] and head onwards. After reaching a new area, look around for spare parts [6250 credits] and only afterwards head into the corridor with Turian corpses visible in the distance. Be sure to check the [Phaeston] and [SMG Ultralight Materials]. Eventually you should reach a new ladder and use it to reach the lower level. Move onwards and you will find a Med Kit on your way [100 EXP].
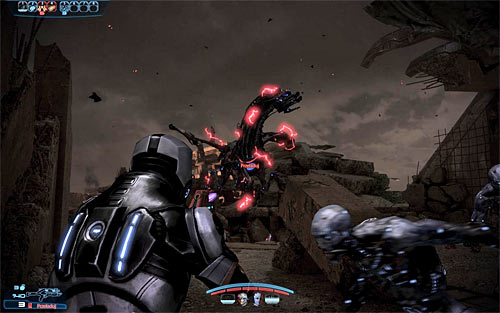
A second battle awaits you and also in this case you will be able to perform a preemptive attack. Start attacking the Cannibals and Marauders, remembering about the need to destroy the shields of the latter ones. Keep an eye open for the arrival of another Harvester, as you will have to move your efforts to eliminating the beast as fast as possible. I'd definitely recommend attacking from behind a cover, as the Harvester shoots projectiles which deal high damage upon hitting. After eliminating the Harvester move to the Husks which have joined the battle in the later part [300 EXP].
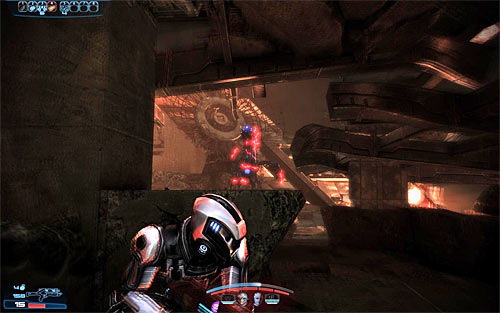
Restock on ammunition and head further through the ruined buildings. On your way you will find the [Hahne-Kedar Chestplate], a Flight Recorder with a recording and the [Shotgun Smart Choke] weapon upgrade. You will also come across a few Husks, but eliminating them will be easy. Look around for spare parts [3125 credits] and in the end use the ladder. Head towards the third battlefields. It's not much different from the previous one, so you will first have to take care of the Cannibals and Marauders and afterwards start attacking the Harvester from behind good covers. Make sure you've eliminated all the enemies.
![Follow the only possible path and you will find a Med Kit [100 EXP] and [Sniper Rifle Extended Barrel] on your way - Tuchanka: Turian Platoon - Main quests - Mass Effect 3 - Game Guide and Walkthrough](https://game.lhg100.com/Article/UploadFiles/201512/2015121617404817.jpg)
Follow the only possible path and you will find a Med Kit [100 EXP] and [Sniper Rifle Extended Barrel] on your way. Save your game before approaching the whereabouts of Lieutenant Victus, as the main battle of this quest awaits you there. Of course place your team behind covers and start attacking the Cannibals and Marauders found in this location. Eventually a single Brute will enter the battlefield. As you probably remember, you need to avoid the charged attacks and attack it with your whole team, as its armour is very resistant.
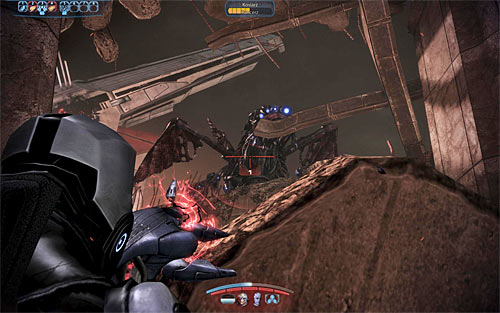
In the further part of the battle the last Harvester will appear, but you don't need to use the standard method to eliminate him this time. Instead, look around the right side of the battlefield and you will find the [Reaper Blackstar]. Pick it up and shoot at the Harvester. If you managed to hit him, he should die instantly. Otherwise, you will have to stick with standard attacks. Get rid of all the monsters and approach Lieutenant Tarquin Victus to speak with him. A series of cutscenes will start, during which you will learn of a bomb found on Tuchanka and unlock the quest connected with it - Tuchanka: Bomb.
Notice! If you have chosen the Turian quest to unlock the further part of the campaign, you will be able to move to Priority: Tuchanka. I however wouldn't recommend ignoring the Krogan quest completely, you should finish it either way.
Prizes for completing the mission:
Received from: Mordin Solus [Normandy SR-2: Combat Information Center]
Unlocked by: Received automatically after completing Priority: Sur'Kesh, however you won't be allowed to start the new mission until you've completed two quests for the krogan (Attican Traverse: Krogan Team and Attican Traverse: The Rachni) or one quest for the turians (Tuchanka: Turian Platoon).
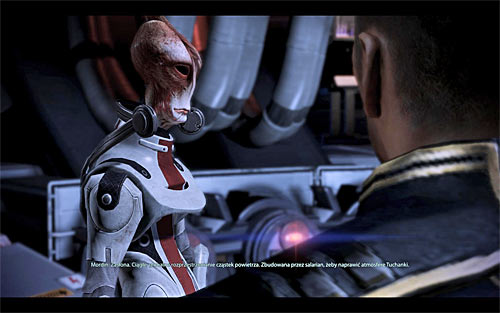
Make sure you've fulfilled all the requirements for this mission, so you must complete either two quests for the krogan or one quest for the turians. Once you've done that wait until you've returned to the Normandy and the game should automatically trigger a cut-scene showing a conversation concerning the genophage cure. Mordin will inform everyone that in order to spread the vaccine he's developed you'll have to travel to a salarian tower on Tuchanka called The Shroud.

Open the galaxy map and plan a trip to the Krogan DMZ. Once you're there (Aralakh system), fly to the planet Tuchanka. Notice - If there are other points of interest on the surface, make sure to choose the correct one which is the Shroud site. The game will force you to take part in two cut-scenes before you leave the Normandy and begin the trip to the planet's surface. The first cut-scene will be about creating a plan of destroying a Reaper found near the Shroud facility and the second cut-scene will be a conversation with a Salarian Dalatrass. She'll try to convince you not to spread the vaccine and she'll want to outsmart the krogan by only simulating this process and not curing them entirely. Thankfully you don't have to make a decision how you want to act right now, so it's not really that important how you'll respond to her proposal.
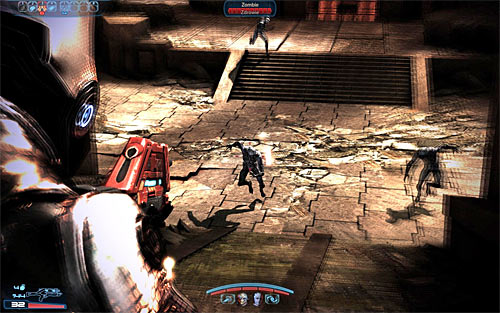
Don't think too much about the first conversation with Eve during the trip, because it's going to be interrupted. Wait until you've made your way to [Tuchanka: Shroud Site] and start the first battle of this quest which will be about defending Eve. I would strongly recommend that you remain where you've started the fight. Begin firing at husks, preventing them from moving too close to your team. Attacking the monsters from the distance is the best option here, because they can't fight back. Once you've won [300 EXP] you'll automatically trigger new cut-scenes.
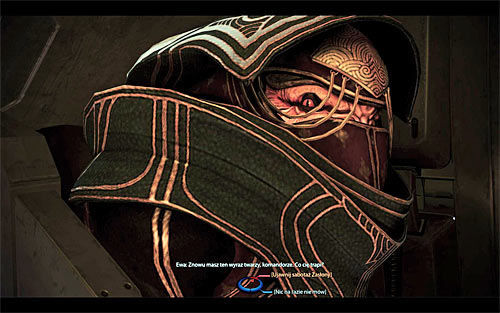
During the second part of the trip you'll have to decide how you want to respond to Eve's question. If you want to score A LOT of paragon points and/or if you want to help the krogan without messing with anything, then you should share the news about the Salarian Dalatrass wanting to convince you to sabotage the cure (upper right dialogue option). It's important to know that choosing this option will prevent you from ending this quest in an alternative way. If you plan on outsmarting the krogan or if you didn't make up your mind about the decision concerning the cure, then you should remain silent (lower right dialogue option).
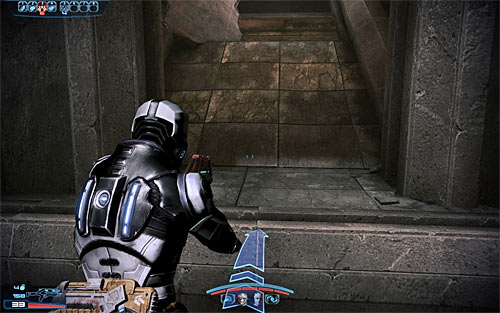
Wait until the convoy has been stopped and take some time to explore this area. You can find three weapon mods [Shotgun Smart Choke] [Pistol Melee Stunner] [Pistol Magazine Upgrade], an armor fragment [Death Mask], two med-kits [100 EXP] [100 EXP] and a shotgun [Graal Spike Thrower]. Finish off by talking to the krogan scout which will trigger a very interesting cut-scene [150 EXP]. Wait until you've regained control over the team and choose the only available passageway leading to the city of the ancients (screen above).
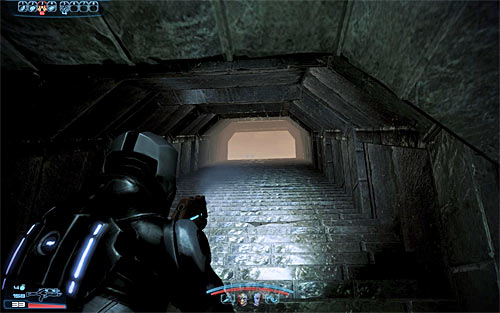
It's important to know that you won't encounter any enemies during the exploration of the underground ruins and you shouldn't also get lost at any point. Make sure to examine a krogan artifact on the wall in one of the first chambers [8500 credits]. Continue exploring the ruins and listen to a comment about a thresher maw queen appearing in the area. There are two other interactive krogan artifacts in the second part of the ruins [8250 credits] [8250 credits], as well as ravager's body. It shouldn't take long for you to locate the exit from the catacombs (screen above), but make sure you've located all mentioned interactive objects before moving on with the mission [300 EXP].
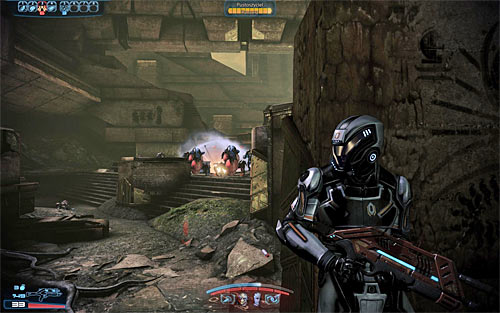
Save your game after you've made your way to topside ruins. Proceed forward, but make sure to take cover as soon as you've noticed enemy units appearing in the area. You'll be fighting mostly against cannibals here, however you'll also encounter two ravagers and assuming you didn't complete the quest for the krogan earlier in the campaign this may be your first encounter these monsters. Don't forget about using proper type of ammunition and to rely on cover, especially since ravagers fire projectiles which can inflict serious injuries. Depending on your preferred style of play you can continue attacking the monsters from the distance or you can use the passageway located to your left to flank them. Don't forget to take care of swarmers as well, preventing them from moving close and injuring you or your squadmates.
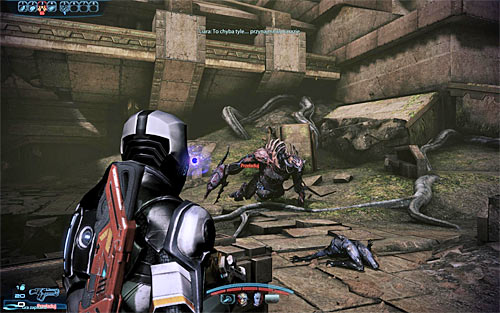
The only way to reach the next section of the ruins is to cross the bridge, performing a small jump along the way. Get ready to take part in a new battle here. The first part of this battle is very simple, because you'll be attacking small groups of cannibals from the distance. The second part of the battle is much more difficult, because aside from a group of husks you'll also have to deal with a single brute. Start using attacks which are effective against armored targets (a shotgun from the beginning of this quest may come in handy here, because it's very powerful) and don't forget to avoid contact with the brute each time it's trying to perform a charging attack. Thankfully this area of the ruins is rather large, so you'll have to plenty of room for manuever. After you've won proceed to the corridor from which the monsters came from.
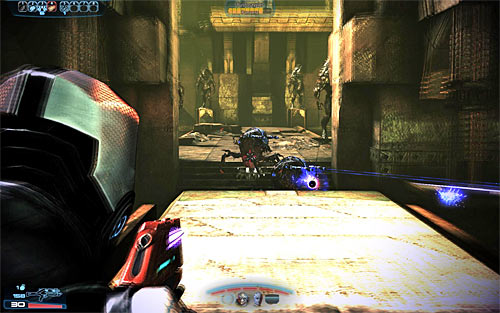
I strongly recommend saving the game on your way to the next area of the ruins, because you're about to take part in a new battle. Start off by eliminating the husks heading your way and as always it's important to avoid melee combat. As soon as you've noticed ravagers order the entire team to take cover. You can remain where you are and start firing right away or you can go to your left to find a better vantage point. Make sure you've eliminated all ravagers before you leave cover. Secure the area and then proceed towards the large statues seen in the distance. You can observe a cool interactive scene along the way showing the krogan units being pursued by a thresher maw Kalros.
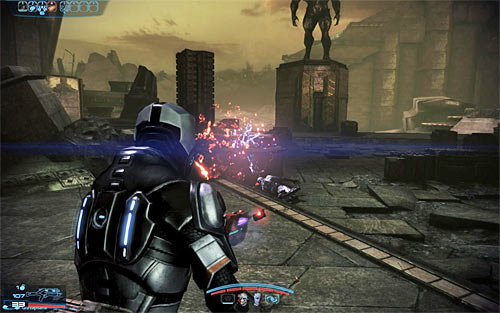
The final battle in this part of the ruins will begin very soon. Thankfully it's going to be much easier than the ones you had to win not long ago, because you'll be dealing only with husks, cannibals and marauders (focus on destroying their shields). Once you've killed all monsters search the area in order to locate two weapon mods [SMG Scope] [Assault Rifle Extended Barrel]. You may now proceed towards the dunes which will trigger a new cut-scene. Wait until you're transported close to where the Reaper is stationed. Listen to a new conversation which will be about implementing a plan of luring the thresher maw to this area using two maw hammers [650 EXP].
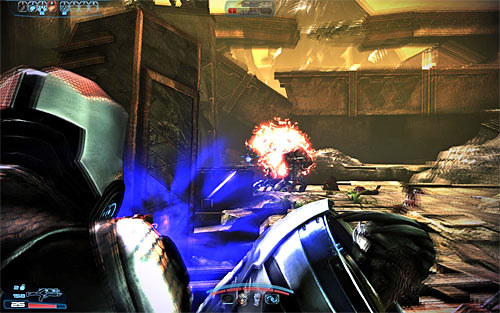
Start off by dealing with a small group of cannibals. Thankfully they won't have any support, so you should be able to eliminate them very quickly. Proceed towards the stairs and make sure to pick up a pistol [M-5 Phalanx] along the way. You will soon find a bridge and don't forget that you were attacked while trying to cross it, because this is all staged and no one from your team will die.
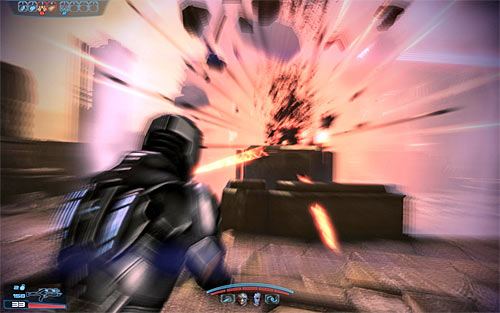
You must now start RUNNING towards the Reaper seen directly in front of you. The Reaper will begin firing, however as long as you don't make any longer stops along the way you shouldn't die. This doesn't mean of course that you shouldn't be careful, so instead of running in a straight line try to use statues on both sides of the path for cover (only while moving). Eventually you should reach a small obstacle and you'll have to cross it which will trigger a cut-scene showing turian ships attacking the Reaper. I would strongly recommend that you save your current progress here, because this is your last chance to do that in this quest and you might want to have a backup save before making a decision about the genophage cure.
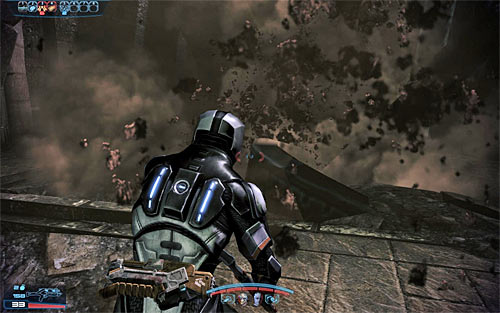
Drop down to a lower level and notice that brutes have begun appearing in the area. DON'T FIGHT these monsters and instead focus on reaching one of the maw hammers. These objects are located to your left and to your right and I would recommend starting with the left hammer. Brutes aren't your only problem during the sprint to the hammer, because you'll also have to avoid the Reaper itself. Notice that the Reaper is trying to use its legs to stop you. Each time you see a shadow appearing near your location immediately jump to the side or stop for a second, so you won't be crushed and receive major injuries or even die.
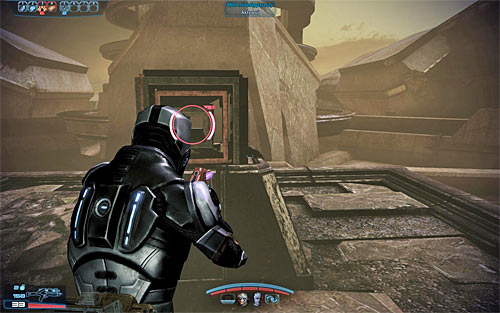
You will probably have to avoid the Reaper's leg twice during your trip to the first maw hammer, so take your time and don't rush this process. Once you've reached the hammer interact with it [300 EXP].

Turn around and start running towards the second hammer. Just as before, aside from the brutes you will also have to avoid being crushed by the Reaper's leg, so be on a look out for shadows appearing on the ground, warning you about upcoming attacks. Don't worry about your allies, because you don't need them and you can finish the task you've been given alone. Approach the second hammer and activate it [300 EXP]. The game will now play a very interesting cut-scene showing a duel between a thresher maw and a Reaper. Once the Reaper has been defeated you'll automatically travel to the Shroud facility.
Notice! Take some time to read the description of the meeting in the Shroud facility, because your decisions there will influence the outcome of the quest and will result in some changes in relations with some of the major Mass Effect universe races!
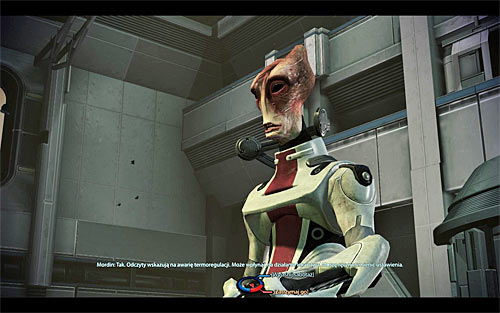
Begin by listening to a conversation with Mordin. If you've created a new character or if you've lost the genophage data in Mass Effect 2, then he will inform you that Eve has died while you were fighting the Reaper forces. Otherwise she'll be alive and well. Get ready, because you'll soon have to decide how you want to end this quest. Here are your choices:
To summarize, choosing option 1 will satisfy the krogan and provide you with a lot of paragon points, but will result in losing Mordin for good and not receiving additional war assets from the salarians. Choosing option 2 will satisfy the krogan and the salarians (both of these races will grant you a sizeable amount of war assets). Choosing option 3 will satisfy the salarians (and the krogan unless Wrex is their leader) and provide you with a lot of renegade points, but will result in losing Mordin for good.
After you've dealt with the situation in the Shroud tower you'll witness a lot of cut-scenes. If Eve died, then you will be attend her funeral. You will talk to Wreav/Wrex, admiral Hackett and Primarch Victus, as well as take part in a new nightmare. The rules of this scene are very similar to the previous one, so you must focus only on locating and approaching the child. Once you've returned to the Normandy talk to Liara and to the salarian Council member. The last conversation will be different if you've followed the instructions provided by the dalatrass or cured the krogan without deceiving them. Either way, you will be informed about the illegal activities of ambassador Udina and asked to show up on the Citadel to meet with the Council member.
Prizes for completing the mission:
Received from: Salarian Council member [Normandy SR-2: Combat Information Center]
Unlocked by: Received automatically after completing Priority: Tuchanka.
Open the galaxy map and return to the Citadel located in the Serpent Nebula. Make an attempt to dock on the Citadel which will result in a failure. You can find out that the Citadel is under attack by Cerberus forces from commander Bailey or from Thane (only if he's still alive and if you've met with him during one of your previous visits to the Citadel). Wait until you're transported to the C-Sec Headquarters area of the [Citadel] where you'll officially begin this new main mission.
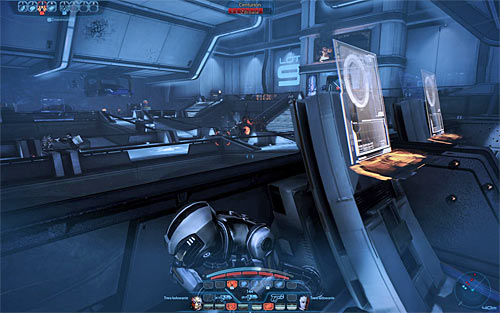
Order your team members to take cover close to the main path leading to the door seen in the distance. Leave your colleagues and proceed towards the left or right balcony. Doing this means having to defeat several Cerberus soldiers, however once they're gone you'll have a much easier job flanking the rest of enemy units. Focus your efforts on eliminating centurions and engineers, preventing them from deploying too many turrets (at least one turret should be active from the beginning of this battle). Don't forget that you can also destroy generators and shield pylons, so that your enemies won't be able to use them for better defense (you can of course rely on their protection as well).
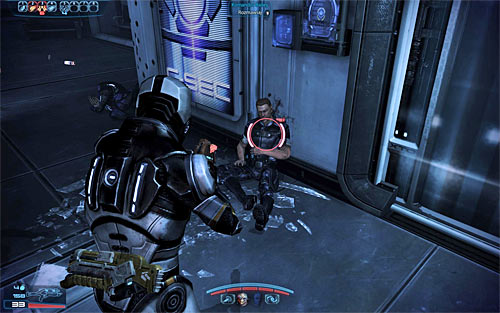
Keep fighting until you've defeated all Cerberus units. Search the area to find a medical station [50 EXP] and wounded commander Bailey. Talk to Bailey in order to find out that the salarian Council member named Esheel should be found in the executor's office and that meeting her is the top priority [600 EXP]. Leave this area after the conversation (it doesn't matter whether you'll choose the left or right corridor, because they both lead to the same door).
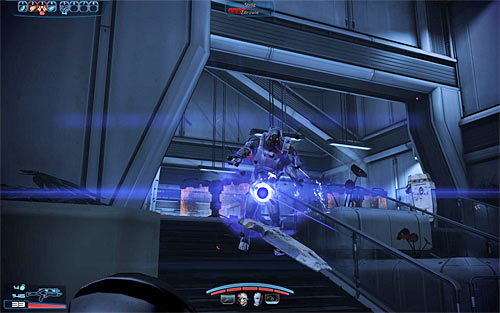
Locate a door and enter the next area. Eliminate two Cerberus troopers seen directly in front of you, however watch out for a much larger group stationed to your left. You'll be dealing with guardians during this battle, so remember to rely on biotic powers of your team in order to make them helpless to standard attacks. Keep fighting until you've secured this area and then proceed towards the stairs. A new group of Cerberus units will attack you here and it would be good to start firing at them before they make their way from the upper balcony.
![Take some time to explore this area after the battle, because you'll find a med kit [100 EXP], a terminal with Bailey's warning, a weapon mod [Assault Rifle Piercing Mod] and a dead C-SEC member - Priority: The Citadel #2 - p. 1 - Main quests - Mass Effect 3 - Game Guide and Walkthrough](https://game.lhg100.com/Article/UploadFiles/201512/2015121617405252.jpg)
Take some time to explore this area after the battle, because you'll find a med kit [100 EXP], a terminal with Bailey's warning, a weapon mod [Assault Rifle Piercing Mod] and a dead C-SEC member. Once you're done exploring proceed to a new door. Save your game before entering the next area. This is a much smaller room, so you should consider using grenades here to your advantage. You can also attempt to reach a small balcony to your right to get a better vantage point. Watch out for at least two turrets during this battle.
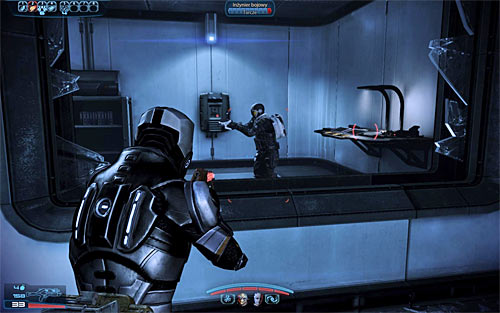
Don't leave this area right away, because you can find a couple of valuable objects here. Make sure to check the toilets so that you'll find an assault rifle [M-76 Revenant] and a locker [6250 credits]. The main room in which the last battle took place contains another dead C-SEC member, as well as an armor fragment [Recon Hood] and a medical station [150 EXP]. You may proceed to the next area. Be ready to quickly eliminate an enemy engineer and then use the broken window to enter a small storage area. There's a weapon bench here, as well as a weapon mod [Sniper Rifle Extended Barrel]. Fire at the box to activate the elevator and use it to travel to a new floor.
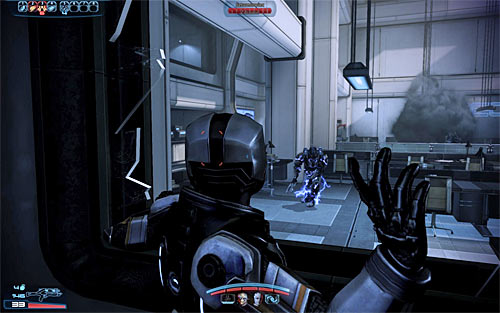
Once you've arrived on a new floor you should take some time to explore your surroundings. You can find two weapon mods [Pistol High-Caliber Barrel] [Pistol Piercing Mod], an armor fragment [Securitel Helmet], a submachine gun [M-25 Hornet] and a terminal. Choose a small passageway located to the right of the malfunctioning door and as soon as you've entered a new office find a control panel. Interact with the panel and then return to the previous area. Notice that you can now explore a small storage space located to the left (screen above). This small rooms contains a pistol [M-358 Talon] and a datapad.

You may resume your journey and this means choosing the right passageway again. Find a terminal along the way [6250 credits] and surprise two Cerberus troopers who shouldn't stand a chance. Save your game once you're close to a large mess hall, because Cerberus units will soon begin landing in this area. Start attacking them, remembering to rely on cover and to prevent them from moving too close. Once it's safe here again take a look around to find two medical stations [150 EXP] [150 EXP], credits [6250 credits] and a weapon mod [Sniper Rifle Piercing Mod].
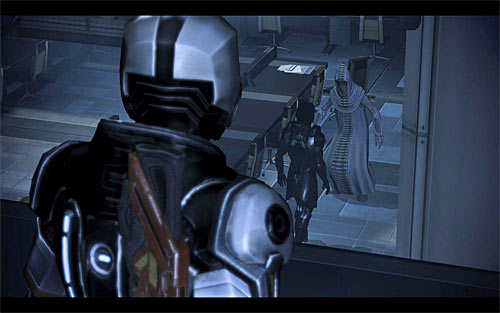
Choose the only passageway leading to the executor's office. The game will trigger a cut-scene here showing the salarian Council member that's been hiding up to this point. The game won't allow you to talk to Esheel right away, because Kai Leng will soon arrive here. The situation downstairs can have one of three endings. The first ending is for Thane to show up, however you can count on this only if he's still alive and if you've met him earlier in the game. Thane will manage to save Esheel's life, however he will be seriously injured. The second ending is for major Kirrahe to show up, however you can count on this only if Thane couldn't help you and if Kirrahe is still alive. The major will save Esheel's life, however he will die doing that. The third ending is the death of Esheel caused by no appearance neither from Thane nor Kirrahe. The next part of this quest is similar for all three endings - Kai Leng will flee and Shepard's team will pursue him, causing a shuttle crash in one of the areas of the Presidium [600 EXP].
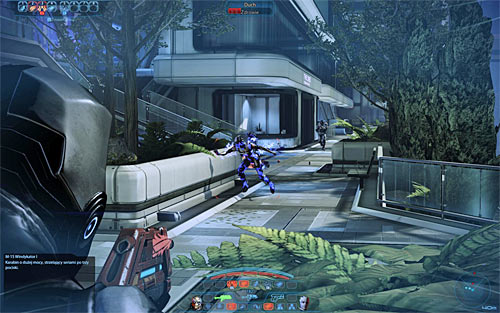
Head towards the Shalmar Plaza, but make sure to take cover as soon as you've noticed the first Cerberus shuttle. You're going to take part in a new battle here and you'll also have to deal with at least one new type of enemy units. I'm mostly talking about elite Cerberus fighters called phantoms and it's crucial to maintain safe distance from them, because they can use their swords in melee combat to instantly kill Shepard or someone else from the team. It's worth knowing that you can try destroying phantom's swords to decrease the level of threat they pose. As for defeating them, notice that they're surrounded by biotic barriers, so you must use proper types of ammunition, grenades and powers to weaken them.
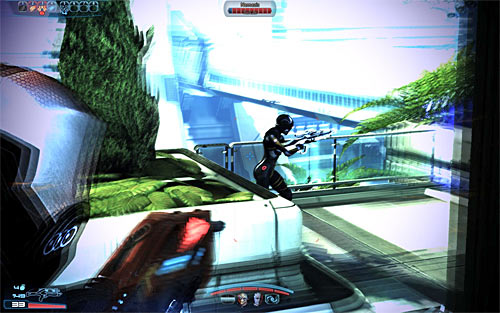
Aside from a single phantom you'll also have to defeat two nemesis units and assuming you didn't finish N7 quests earlier in the game this may be your first encounter with these types of enemies. Nemesis is basically a sniper and you can know that you're being targeted by one when you notice a red laser beam. Avoid getting hit at all costs, because it can result in losing your shields instantly or (in extreme cases) even dying. The safest way to get rid of the first pair of nemesis units is to approach them using the left balcony. They should be occupied with targeting your team members, so you will be allowed to flank them. Secure this entire area before moving on.
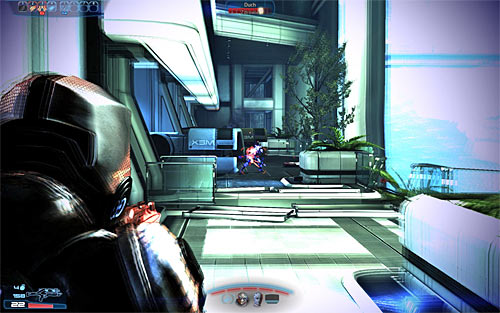
Save your current progress and then proceed towards a small gap where you'll have to perform a jump. Reaching the second part of this area will result in more Cerberus units showing up and the safest way to deal with them is to quickly return to the previous area. This is important, because otherwise you would be exposed from two sides and therefore you'd allow two new phantoms to successfully move close enough to use their swords. Deal with the phantom units and with a single nemesis. Once they're gone focus on "standard" Cerberus troops.
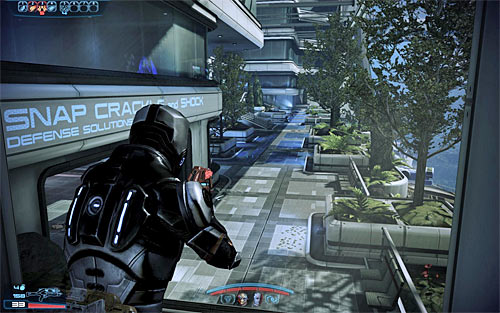
Soon after you've resumed your journey you'll notice that Cerberus troops have blocked a nearby passageway. This means you'll have to turn right and travel through several empty areas, performing jumps and climbing along the way. Don't forget to pick up credits [6250 credits] before choosing a path leading to the Shalmar Plaza. Once you're there (screen above) save the game, because you're about to encounter a new mech.
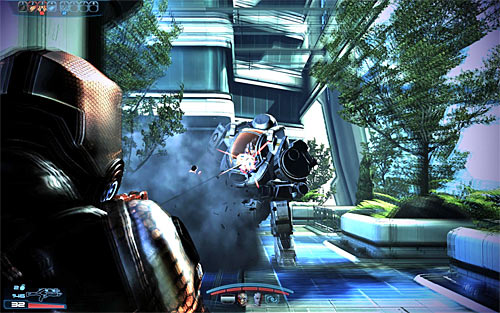
Head down and quickly order your teammates to take cover. Defeat a nearby Cerberus engineer and get ready for a duel with an Atlas mech. Sadly the game won't allow you to use any unique weapons during this battle, so you'll have to rely only on the strength of your attacks. Don't forget about an ammo stash found in the left store in case you run out of supplies. The mech you're fighting has a shield so you must destroy it before you can focus on its armor. Just as with other encounter with mechs, you can also try killing the soldier sitting inside the machine with a precise sniper shot.
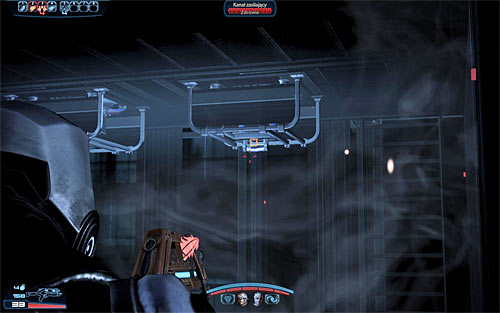
Once you've dealt with the mech you'll also have to eliminate standard Cerberus soldiers and they shouldn't pose a serious threat. Continue fighting until it's safe and then proceed towards a door leading to the Council's elevator (this is your last chance in this mission to save your progress). Open the door to trigger a new cut-scene showing the pursuit after Kai Leng. You'll regain control once you're on a roof of a moving elevator. Wait until you catch the elevator used by Kai Leng and his men and follow the advice by destroying two power conduits located on the bottom of the elevator (you can use a weapon or an offensive power) [60 EXP].
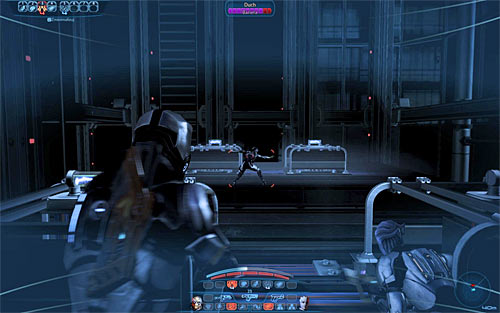
Quickly turn around and wait for a new elevator to catch up to yours. Notice that a phantom is standing on top of that elevator and there are two ways how you can react - you can start attacking the phantom to kill him or (if you're fast enough) you can destroy two power conduits located on the top of the second elevator [60 EXP]. If the phantom has managed to jump to your elevator, then you must quickly eliminate him, preventing him from killing everyone from your team. Otherwise you won't have to worry about him, because he'll go down along with the elevator he was standing on.
![Get ready, because once again you'll have to stop Kai Leng's elevator and this can be achieved using identical methods - by shooting at the power conduits at the bottom of his elevator [60 EXP] - Priority: The Citadel #2 - p. 2 - Main quests - Mass Effect 3 - Game Guide and Walkthrough](https://game.lhg100.com/Article/UploadFiles/201512/2015121617405321.jpg)
Get ready, because once again you'll have to stop Kai Leng's elevator and this can be achieved using identical methods - by shooting at the power conduits at the bottom of his elevator [60 EXP]. The last part of the elevator ride will require you to jump to a roof of the Council members' elevator (screen above). You will now advance to the final part of this quest and I urge you to read the description seen below so you won't make any mistakes and choose the outcome you're interested in.
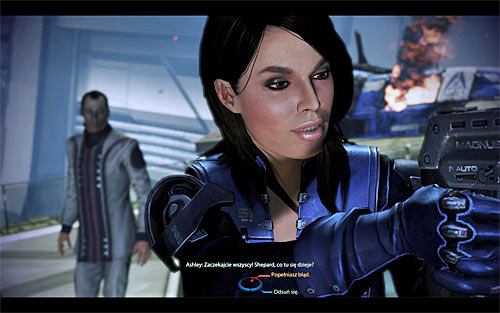
The first part of the finale is about convincing Ashley or Kaidan about your good intentions and it's required only if you weren't close to them (and gained their loyalty) in the previous games. You can choose a standard paragon/renegade option or you can choose a paragon/renegade interrupt (left or right mouse button). Activating the interrupts isn't a key factor to your success and don't worry if you've missed these actions, because you won't fail the negotiations as a result of that.
Ambassador Udina may decide to present some evidence which implicates Shepard in killing the salarian Council member. If you are in good relations with Ashley/Kaidan, then they should take your word and believe in your story. Otherwise you'll have to use a special paragon/renegade dialogue option (upper left and lower left) to convince them, however these dialogue options are only available if you've sufficiently developed your reputation. If you don't care about Ashley's/Kaidan's fate, then you may decide to kill your former ally by choosing the lower right dialogue option. In this case you will be allowed to choose between taking the shot yourself (renegade interrupt - left mouse button) or waiting for someone from your team to perform a kill for you.
The second part of the finale is about stopping Ambassador Udina and this occurs even if you've decided to kill Ashley/Kaidan instead of convincing them to stay on your side. If Ashley/Kaidan is alive, then Udina will most likely take a hostage. Sadly you won't be able to talk him down, so you're left with a choice if you want to shoot him yourself (renegade interrupt - left mouse button) or if someone from your team should take initiative (wait for the interrupt icon to disappear).
![You will now have a chance to talk to some of the Council members and to commander Bailey (after you've returned to [Citadel: Citadel Embassies]) - Priority: The Citadel #2 - p. 2 - Main quests - Mass Effect 3 - Game Guide and Walkthrough](https://game.lhg100.com/Article/UploadFiles/201512/2015121617405469.jpg)
You will now have a chance to talk to some of the Council members and to commander Bailey (after you've returned to [Citadel: Citadel Embassies]). Notice that this quest didn't officially end, so you must go to [Citadel: Bay D24] and decide to return to the Normandy (you can also optionally visit dying Thane in [Citadel: Huerta Memorial Hospital], assuming he provided assistance in saving the salarian Council member). If Ashley/Kaidan is still alive, then you'll automatically meet your ally after opening the bay door. I strongly recommend that you encourage Ashley/Kaidan to become your team member once again, because otherwise that person will be recruited to admiral Hackett's crew and you won't be allowed to rejoin again. Once you've returned to Normandy speak to Liara (she'll have a side quest for you named Mesana: Distress Signal), as well as to admirals Anderson and Hackett. They will mention that you should contact the quarians and this is going to be your next main objective.
Prizes for completing the mission:
Received from: Salarian Council member [Normandy SR-2: Combat Information Center]
Unlocked by: Received automatically after completing Priority: The Citadel #2.
Open the galaxy map and travel to the Far Rim. Once you're there (Dholen system), get closer to the quarian ship (screen above) and begin docking procedures. You will now take part in a long scene during which you'll be interacting with the most important members of the quarian race. Tali'Zorah can be among them as an admiral. If on the other hand she was exiled in the previous game she'll join the meeting as a "civilian consultant". Either way, you'll find out about the geth modified by the Reapers and about the problem with the geth dreadnought. You'll also gain Tali as a team member and unlock a new main mission - Priority: Geth Dreadnought.
Prizes for completing the mission:
Received from: Quarian admirals [Normandy SR-2: Combat Information Center]
Unlocked by: Received automatically after completing Priority: Perseus Veil.
Open the galaxy map and travel to the Perseus Veil. Once you're there (Tikkun system), get closer to the geth dreadnought (screen above) and begin docking procedures (notice that Tali will have to take active part in the upcoming mission). Watch several cut-scenes during which you'll find out that you will have to travel alone through a damaged docking tube in order to secure a safe dock for the rest of your squad.
Start moving towards an entrance to the geth ship seen in the distance. You won't encounter any enemies during this segment and you also don't have to worry about Shepard's magnetic boots to stop working. The only problem are the damaged parts of the tube, because they will be forcing you to move left or right to go past them. You shouldn't have any major problems here and it won't take long to reach your current destination. Watch a new cut-scene which will explain why your team members won't be allowed to use the same tube to join you. As a result you will have to unlock another docking tube for them.
![You may now officially begin exploring the [Geth dreadnought] thanks to the working artificial gravity - Priority: Geth Dreadnought - p. 1 - Main quests - Mass Effect 3 - Game Guide and Walkthrough](https://game.lhg100.com/Article/UploadFiles/201512/2015121617405402.jpg)
You may now officially begin exploring the [Geth dreadnought] thanks to the working artificial gravity. The most valuable find in this area is a weapon mod [Shotgun Smart Choke]. Once you have the mod go in an opposite direction and interact with the ladder. Proceed towards the only available door, performing a single jump along the way. Find a new door and search the area to your left to uncover geth data [1875 credits]. The last task on your list is to use a second ladder and to interact with a docking control terminal [300 EXP].
![Wait until you've regained control over Shepard and pick up a pistol [Arc Pistol] which was left to you by Tali - Priority: Geth Dreadnought - p. 1 - Main quests - Mass Effect 3 - Game Guide and Walkthrough](https://game.lhg100.com/Article/UploadFiles/201512/2015121617405459.jpg)
Wait until you've regained control over Shepard and pick up a pistol [Arc Pistol] which was left to you by Tali. I would suggest that you follow her advice and choose this weapon from your inventory, because it's very effective against the geth. Proceed towards the newly unlocked passageway leading to the operations center, finding GARDIAN data and a weapon mod [Sniper Rifle Enhanced Scope] along the way. Your objective is to get to a new computer terminal which is used to extend a nearby bridge. Save your game before using the terminal, because you're about to meet the first group of geth units.
This is probably your first encounter with the geth in Mass Effect 3, so make sure to change the style of play accordingly (you'll want to become effective in destroying synthetic targets). I would strongly recommend that you rely on Tali's powers, because she can turn the geth on each other, damage them or distract them with a probe. It's important to use cover during this battle, because aside from the standard geth you'll also be dealing with geth rocket troopers and if you get hit by a rocket you can receive major injuries.
Move forward once you've defeated the first group and be ready to deal with more geth. You should still be using cover and rely mostly on tech powers. It's also wise to consider throwing grenades each time you notice a group of geth standing close to each other. Keep moving forward until you've found a ladder. Don't be fooled by seeing only a single geth, because more will come once the battle has started. Watch out for mines while exploring this section of the ship, because they take away a lot of damage. You can avoid the mines or destroy them from a safe distance using a weapon or an offensive power.
Continue moving forward, destroying or avoiding the mines and exploring the area. You'll find geth data [2500 credits] and also after you've entered a small room you'll come across an armor fragment [Archont Visor], and two consoles. The next room of the geth ship contains a third console and an assault rifle [Geth Pulse Rifle]. Save your game before opening a door leading to the operations center (screen above), because you're about to take part in a battle with a very large group of geth [300 EXP].
The biggest challenge of this battle is that you'll have to deal with a new type of enemies called geth hunters. These machines rely on camouflage and this makes them difficult to locate and to track their movements. You must prevent them from moving too close to Shepard and the rest of the team, because most hunters are using shotguns and therefore can inflict serious damage in close combat. The safest way to locate the hunters is to rely on the pause function as often as possible. You should also know that shooting at them can disable their camouflage (permanently or only for a while) and this of course makes the future attacks easier to organize. This isn't of course everything, because other interesting strategies against the hunters include sending out probes to distract them and sabotaging their shields thanks to tech powers. Guard your flanks during this battle and focus on the hunters and you should prevail.
Once you've won proceed to the opposite end of the room, however watch out for new mines along the way. Find a console data, a weapon mod [SMG Scope] and geth data [1250 credits]. Don't forget to save your progress again before interacting with the main console of the operations center (screen above). Listen to a conversation which will be about reaching a room on the geth ship from which the Reaper signal is being broadcasted.
Get ready, because as soon as the conversation has ended more geth will show up in the operations center. I would recommend that you order your team members to defend two ramps leading to the console you've just used. Just as before, focus on locating and eliminating geth hunters, preventing them from moving closer. Keep fighting until you've destroyed geth units and then proceed towards the newly unlocked corridor located on the opposite end of the operations center. Approach a closed door and interact with it to automatically use your omni-tool.
![Explore a few empty corridors, using the ladders along the way and finding geth data [1250 credits] and a med-kit [50 EXP] - Priority: Geth Dreadnought - p. 2 - Main quests - Mass Effect 3 - Game Guide and Walkthrough](https://game.lhg100.com/Article/UploadFiles/201512/2015121617405557.jpg)
Explore a few empty corridors, using the ladders along the way and finding geth data [1250 credits] and a med-kit [50 EXP]. You'll encounter two doors and opening the second door will allow you to get to the main battery tunnel (screen above). From this point of the mission you'll be dealing with an additional complication which are the electromagnetic shockwaves appearing every few seconds. The only way to avoid a wave is to take cover and if you ignore this step you'll immediately lose your shields or (if they're already gone) you'll injure the main character. It's worth knowing that the shockwaves don't affect the rest of your team, so you don't have to constantly worry about your colleagues, because they can take care of themselves.
Keep heading forward. Don't count on the shockwaves to be your only problem, because you'll soon come across a new group of geth. Furthermore, all the geth are invulnerable to the shockwaves, so they won't be taking cover along with you. This means you must prevent them from moving too close before a wave has hit, so they won't surprise you while you're hiding in cover. Just as in previous fights, focus mostly on the hunters, however you will also have to avoid being targeted by rocket troopers. Depending on your preferred style of play you can stay close to the main tunnel or you can choose a smaller left path which will force you to jump over several obstacles. I wouldn't recommend moving too fast, because otherwise you may end up getting surrounded by more than one group of the geth units.
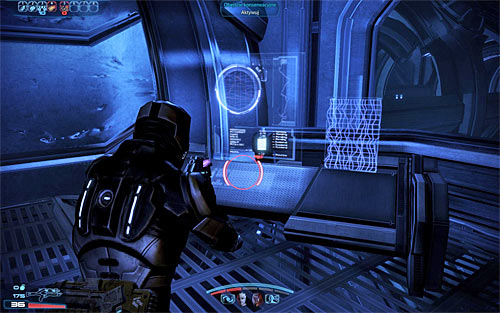
Make sure that you've dealt with the first group of geth before moving on. I would also recommend exploring the area a little, so you'll collect ammunition and geth data [1250 credits]. Your objective is to get to the maintenance console and interact with it. Proceed towards the core, performing a jump along the way. You should be able to leave the endangered area in time even if you're in a lot of hurry and you'll end up standing close to the second battery tunnel. Get ready, because you'll take part in a battle here as well.
I wouldn't recommend choosing the main tunnel in this battle. Proceed with the rest of your team towards the left ramp instead. The ramp leads to the upper balconies, however don't move too fast, because you'll soon encounter new geth. Allow your allies to begin firing at the hostile machines and in the meantime focus on guarding the main tunnel alone, preventing hunters and other geth from organizing surprise attacks. Continue eliminating the geth and move forward each time you've dealt with a larger group. Don't perform any risky actions and also don't forget that also here you must avoid the electromagnetic shockwaves.
The primary objective of this part of the mission is to reach a ladder and in order to do that you must remain on the upper balconies. Interact with the ladder after one of the shockwaves has passed and be ready to immediately begin a new battle with the geth. You can remain on the lower level if you want to and in this case you'd have to choose between defending in the main tunnel or using a small path located to the right (this is also a good idea if you're interested in flanking the geth). The second option is to quickly use the ladder again, so that you would be allowed to attack the geth from an upper balcony. Either way, be on a look out for new hunters, especially since you'll encounter at least a few of them.
Keep fighting until you've defeated all the geth in this area and then find a ramp to your left which leads to an upper level. Open a door there with a help from your omni-tool. Proceed to the next area, finding the geth data [1875 credits] close to the elevator. Once you have the data interact with the elevator panel. The game will now trigger a cut-scene and as soon as it has ended approach Tali (screen above) so that she can grab you and save your life. Important - If you take too long moving towards Tali, then you'll die and be forced to repeat the last battle with the geth!
Continue exploring the dreadnought, using ladders to get to the upper floors. You can also collect a med kit [50 EXP] along the way. Your objective is to reach the main core room. Depending on your decisions from the previous game you can encounter Legion here or (if the geth companion was destroyed) an "anonymous" Geth VI. Listen to the conversation during which you'll find out how to stop the Reapers signal from transmitting [600 EXP].
![Start off by exploring the surrounding area so that you'll come across geth data [2500 credits] and a weapon mod [Assault Rifle Precision Scope] - Priority: Geth Dreadnought - p. 2 - Main quests - Mass Effect 3 - Game Guide and Walkthrough](https://game.lhg100.com/Article/UploadFiles/201512/2015121617405733.jpg)
Start off by exploring the surrounding area so that you'll come across geth data [2500 credits] and a weapon mod [Assault Rifle Precision Scope]. Once you're done looking around stand on an elevator and wait to be transported to an upper level. Your primary task here is to interact with a nearby terminal (screen above). Doing this will allow you to set Legion/Geth VI free and to shut down both the weapons and the defences of the dreadnought. You'll now begin your extraction from the geth ship. Don't think that it's going to be easy, because you're about to take part in the final battle with the geth [300 EXP].
Ignore the transmissions coming from the quarian fleet, because you won't have to race against the clock. You can take your time while leaving the geth ship and nothing important will happen prematurely. Head forward and as soon as you've noticed geth units order your team to take cover. You'll be dealing not only with "standard" geth units during this battle, but also with two very powerful geth primes, so you'll have to be even more careful and cunning than usual. The first geth prime can be encountered soon after the battle has started. Make sure that you're using cover, because the prime's ranged attacks are deadly. As for the means of defeating it, your first job is to take out its tech shields. Once they're gone you can focus on the machine's standard armor. An interesting thing to know is that instead of attacking the prime as soon as possible you can also use it to your advantage by activating Tali's tech powers and forcing the machine to temporarily join your side and begin attacking other geth units.
I wouldn't recommend focusing only on the geth prime, especially since the machine is moving slowly and therefore can't get close to your team in a manner of seconds. It's equally important to watch out for other geths, especially the hunters whom you probably truly hate by now. The second prime is stationed on the other side of this floor and the overall tactics while fighting it remain the same. This means you must use correct types of ammunition, grenades and powers in order to destroy its shields and then its armor.
Keep fighting the geth until they've all been defeated. You must now return to Legion/Geth VI which shouldn't be a problem. Watch a short cut-scene and proceed towards the newly unlocked passageway leading to the hangars (screen above). The escape from the dreadnought is very easy, because you'll be travelling in a linear path and even though you'll witness many explosions you won't be in any danger. Your objective is to reach Legion's/Geth VI's final position. This will result in playing a longer cut-scene and returning to Normandy. Take part in conversations with Admiral Hackett, the quarians and Legion/Geth VI. It's worth knowing that the game will unlock a couple of new quests, with Priority: Rannoch playing the main role. You will be able to begin it after completing Rannoch: Admiral Koris mission or Rannoch: Geth Fighter Squadrons mission. Of course it's worth to complete both quests before resuming the main campaign, because it will allow you to gather additional experience, items and war assets.
Notice - Consider answering to a distress call, warning admiral Raan about the contents of the SOS message and having a longer conversation with Legion/Geth VI. All of these activities can be performed in the war room on board the Normandy.
Prizes for completing the mission:
Received from: Quarian admirals [Normandy SR-2: Combat Information Center]
Unlocked by: Received automatically after completing Priority: Geth Dreadnought. It's worth knowing that the game simultaneously unlocks the quest named Rannoch: Geth Fighter Squadrons. Completing either one of these missions allows to proceed with the Priority: Rannoch mission. If you have already taken care of the geth fighter squadrons and therefore moved on to the next part of the campaign, you still shouldn't ignore the chance of completing this mission. Saving admiral Koris can result in gaining experience points, new weapons/weapon mods and precious war assets.
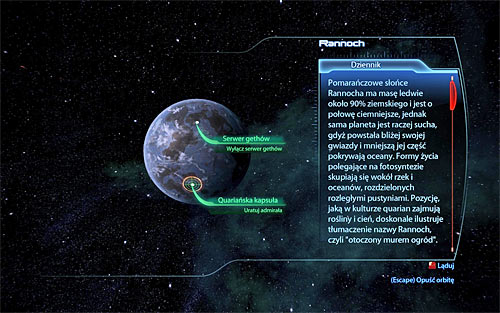
Open the galaxy map and travel to the Perseus Veil. Once you're there (Tikkun system), fly to the planet Rannoch. Notice - If there are other points of interest on the surface, make sure to choose the correct one which is the quarian pod. Wait until you're transported to [Rannoch: Crash site], listening to a conversation and watching a cut-scene which will show the shuttle getting almost shot down by the geth anti-aircraft cannons.
Start moving towards a large geth tower seen on the horizon. You will encounter the first group of enemies once you've reached a small campsite and it's a good idea to take the geth by surprise. This battle is probably going to be your first encounter with pyro geths and since they're armed with flamethrowers the most obvious style of play is to keep them at a safe distance, because they can hurt you only in close combat. Once all the geth have been eliminated take some time to explore the campsite and you'll find geth parts [2500 credits], a wreckage [2500 credits] and a dead quarian.
You may resume your journey, however watch out for landmines found along the way. The solution to the mine problem is identical to one of the previous missions, so you can either avoid them or detonate them from a safe distance. Make sure to pick up a sniper rifle [Javelin] before proceeding to the next area and you should also consider choosing this weapon from your inventory, because it may come in handy very soon. Get closer to a burning wreckage and notice that its surrounded by geth forces. A sniper rifle is an ideal choice here (screen above), but even if you don't have it you should be able to win relatively easy (as long as you use the height difference to your advantage).
Make sure you've destroyed all the geth before moving closer to the burning wreckage. You can't let your guard down here, because a second group will arrive rather unexpectedly. Deal with the geth units and then continue your trip towards the tower. Once you're close enough to your destination order your squad members to take cover. One team member for left and one for right passageway is my recommendation. It's also wise to take the geth by surprise, so that you'll destroy at least 1-2 of them before the main battle starts. Prevent the geth from overwhelming you from the right side and you shouldn't have any major problems winning here.
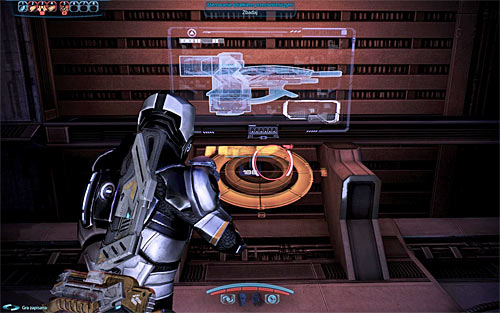
It's a good idea to look around before focusing on the current objective (ignore the path leading to the next area of the map, because you'll explore it later during this mission). You can find geth technology [3750 credits] and a unique geth weapon [Geth Spitfire]. It's a good idea to leave this weapon as an active one (you can't hide it in your backpack), because it will be helpful in the upcoming battle. Once you're done exploring approach a large console which controls the first anti-aircraft cannon. I wouldn't recommend choosing Tali for the job of disabling the cannon, because she'll be a useful ally during the next battle with the geth.
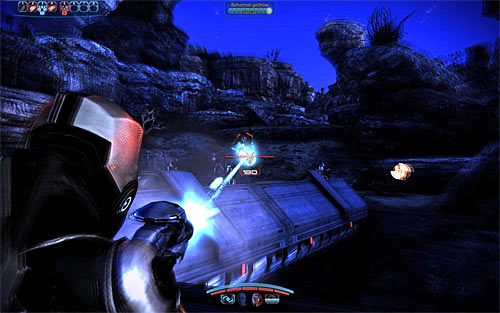
Turn around, find a good cover and start attacking the geth approaching from your right. Prevent the machines from moving too close to the console one of your teammates is trying to hack, however your main concern should be the geth prime. Thankfully Geth Spitfire is a very powerful weapon and if you focus your attacks on the prime it should be destroyed relatively quickly. Eliminating the main group of the geth will also result in disabling the first AA cannon [600 EXP]. Don't leave this area right away, because additional machines may be stationed nearby, including hunters.

Proceed to your right once you know it's safe. You must choose the path mentioned before (the one the geth used to get here). Watch out for new landmines along the way and you should also be on a look out for a weapon mod [Shotgun Shredder Mod] and geth parts [3750 credits]. You will soon encounter a wounded quarian named Dorn'Hazt and you won't be allowed to influence the outcome of the conversation with him in any major way. Resume your journey, finding one additional weapon mod [SMG Magazine Upgrade] and ending up close to a junction (screen above).
The order in which you'll be shutting down the two remaining anti-aircraft cannons is not relevant, however I recommend that you start by heading towards the left cannon. Once you're close enough to the cannon order your team members to take cover (they can also remain on the path leading to this area). As for the main character, you should proceed to your left. Jump down or use the ladder and move closer to the cannon. You should be able to find an opening (screen above) from which you'll be allowed to easily surprise the geth that are focused on attacking the rest of your team (securing the stationary turret is the most important thing).
Exit cover after you've defeated all the geth in this area and take some time to explore your surroundings. The most important find is the jamming tower data needed to complete Citadel: Target Jamming Technology side mission. Finish off by approaching the terminal which controls the AA cannon. Just as before, you will have to decide who should disable the cannon. Make sure not to choose Tali, even though her assistance won't be needed as much as in the previous battle.
As soon as you've made your choice order Tali to take cover somewhere near the console. As for Shepard, it's extremely important that you return to a stationary turret that was occupied by the geth up until not long ago (it's in the middle of this area). Start using the turret to attack the geth appearing close to the passageway you've used yourself to get here. I would recommend firing short bursts, because otherwise you can easily overheat the weapon. A geth prime will join the main group soon enough, however the stationary turret is so powerful that even this machine will be destroyed without any problems. Once you've dealt with the main group of enemies turn left and attack the geth coming out from a previously unaccessible corridor.
There are two ways how you can get to the second anti-aircraft cannon. The first option is to use the corridor from which the last group of geth came from (screen above) and the second option is to return to the junction in order to check the unexplored right path. In both cases you'll have to be ready to deal with a group of machines (watch out for pyro geths!) after reaching a new area. Destroy the geth and then take some time to explore your surroundings in order to find an armor fragment [Armax Arsenal Chestplate]. You should know by now what has to be done next - interact with the cannon's terminal and choose a team member (not Tali) to start the disabling process.
Order Tali to take cover near the console and quickly move towards a nearby stationary turret. This battle is very similar to the previous one, so you'll have to start attacking the geth heading your way. One new geth prime will be among the enemy troops, but it should be destroyed quickly. Prevent the geth from moving too close, because the turret can't turn in a full 360 degree angle. Keep fighting until you've defeated all the geth and turned off the last third anti-aircraft cannon.
The game will now trigger a cut-scene from a radio conversation with admiral Koris who will be under attack by the geth forces. Koris will want you to leave him behind and to rescue the civilians instead. If you don't have anything against that idea, then you may choose one of the standard dialogue options (upper right or lower right), however this will result in admiral Koris getting overwhelmed and being forced to commit suicide. A much better choice is to try to convince admiral Koris to change his mind. This is possible only if you've sufficiently developed Shepard's reputation, because you must use a special paragon (upper left) or renegade (lower left) dialogue option. If you've made a successful attempt, then Koris will agree to help him escape.
The final part of this mission will be about controlling a stationary turret installed on board of the shuttle in order to eliminate geth forces seen on the planet. If you didn't convince the admiral you'll be defending the civilians and if you've successfully used one of the special dialogue options you will be defending Koris himself. Either way, there are groups of geth you must dispose of. Focus mostly on the geth rocket troopers, because they'll be using their rocket launchers to damage the shuttle. Once you've defeated all enemy units you'll witness a new cut-scene, showing the civilians or admiral Koris escaping the planet with the help of Shepard's team. Wait until you're transported back to the Normandy where new conversations will take place.
Notice! If you have chosen this quest to unlock the next part of the campaign, you will now be allowed to start Priority: Rannoch main mission. I however wouldn't recommend ignoring the geth squadrons mission completely, you should finish it either way.
Prizes for completing the mission:
Received from: Legion/Geth VI [Normandy SR-2: Combat Information Center]
Unlocked by: Received automatically after completing Priority: Geth Dreadnought. It's worth knowing that the game simultaneously unlocks the quest named Rannoch: Admiral Koris. Completing either one of these missions allows to proceed with the Priority: Rannoch main quest. If you already have rescued admiral Koris or the civilians and therefore moved on to the next part of the campaign, you still shouldn't ignore the chance of completing this mission. Neutralizing the geth squadrons can result in gaining experience points and precious war assets.
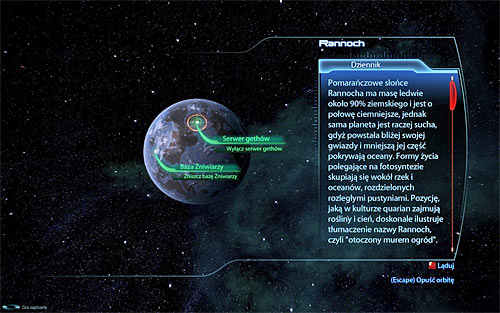
Open the galaxy map and travel to the Perseus Veil. Once you're there (Tikkun system), fly to the planet Rannoch. Notice - If there are other points of interest on the surface, make sure to choose the correct one which is the geth server. Listen to a conversation with Legion/Geth VI, because you'll find out the details of the upcoming assignment. The plan is to connect to a geth consensus in order to be transported to a place that can be called a virtual reality. You'll watch a new cut-scene after you've landed, showing the trip to a pod which allows to connect the virtual world with the real world. It's worth knowing that only Shepard will take part in this mission. Also, you won't find yourself in danger at any point of the quest.
![Listen to the basic principals and rules of your stay in the virtual reality ([Rannoch: Geth Consensus] location) and then begin exploring the area in front of you - Rannoch: Geth Fighter Squadrons - Main quests - Mass Effect 3 - Game Guide and Walkthrough](https://game.lhg100.com/Article/UploadFiles/201512/2015121617410034.jpg)
Listen to the basic principals and rules of your stay in the virtual reality ([Rannoch: Geth Consensus] location) and then begin exploring the area in front of you. Notice that new floor tiles will be appearing automatically in front of you, showing you the available paths. Make a stop once you've noticed red tiles. You'll be informed here about a blockade caused by an infected part of the code. The solution to this problem is to use the weapon you've been given at the beginning of the mission. Aim the weapon at the infection which is represented by orange blocks. It's worth adding that the weapon has "unlimited ammo", however it does require a few seconds to fully recharge.
Continue exploring the geth consensus. You will be forced to repeat the actions explained above each time you've located a new source of the infection (orange blocks). Your current destination is an access point (screen above) and you must step into it in order to be transported to a new place [400 EXP]. Listen to a short transmission from Legion/Geth VI and head forward. This time you'll be moving towards a data cluster.
Approach the data cluster and take some time to listen to a transmission about the infected code which must be destroyed. There are two other activities you should perform before focusing on the data cluster. The first action is to unlock all paths around the cluster. The second action is to find an interactive Reaper code fragment (screen above) which is required to complete Citadel: Reaper Code Fragments side quest.

You may now focus on disposing of the infected code from the data cluster. This is performed by locating large groups of orange blocks (screen above). Each group can be destroyed with a weapon. Approach the cluster from each side to make sure that you've located all infected areas. If you've done everything according to the plan you'll be rewarded with the first recording of the events from the past (you can zoom in the view by holding the V key) [100 EXP] [Intel data (Improved Geth Resistors)].
Start moving towards the second data cluster seen in the distance, using the passageway which was previously blocked by red tiles (screen above). The overall tactics remain the same and this means you must start circling the data cluster to locate and destroy large groups of orange blocks. The reward for destroying the infected code is a chance to watch the second recording [100 EXP].
![Proceed towards the third data cluster, having a conversation with Legion/Geth VI along the way and watching the third recording [100 PD] - Rannoch: Geth Fighter Squadrons - Main quests - Mass Effect 3 - Game Guide and Walkthrough](https://game.lhg100.com/Article/UploadFiles/201512/2015121617410081.jpg)
Proceed towards the third data cluster, having a conversation with Legion/Geth VI along the way and watching the third recording [100 PD]. Once the recording has been played step into the second access point. You'll watch a short scene from the real world and then you'll be transported to a new area of the virtual world [400 PD]. You'll also receive a warning that the Reaper code has begun to spread.
Head forward. An attempt of destroying the orange blocks will end in a failure and at the same time you'll learn that the Reaper code has taught itself how to replicate. This means you'll be dealing with an additional complication from now on. The solution to that problem is locating the infected connections and in this case the connection can be found directly above you (as shown on the screen). Once you've severed the connection you will be allow to deal with the main obstacle without having to worry about it replicating.
Resume the exploration and remember to take some time to look around each time you've found an obstacle capable of self-replication. Your objective is to get closer to a new data cluster. Clearing this cluster won't be easy, because before you'll be allowed to destroy orange groups of blocks you'll have to severe all nearby connections. Keep doing this until you've disposed of all infected elements and just as before this victory will be rewarded with a new recording [100 EXP] [Intel data (Miniaturized Armor Capacitors)].
You may proceed towards the final fourth data cluster. Once you're close enough to the cluster repeat all the actions mentioned above, so start off by severing infected connections found in the area and only after they're gone start destroying the infected groups of blocks (if you start too fast they'll be able to self-replicate). Watch a new recording [100 EXP] and continue the exploration. You will soon come across Legion/Geth VI and you'll also be rewarded with one more recording [100 EXP].
After you've seen the final recording you'll be rewarded with a chance to step into a nearby access point. Watch a new cut-scene from the real world [400 EXP] and once you've regained control over Shepard start moving towards the exit point located in the distance. Thankfully you won't have to deal with any complications along the way. The only thing left to do is to talk go Legion/Geth VI. It's worth mentioning that you'll receive geth prime support even if you react aggressively to the news of them being recruited to fight the Reapers.
Notice! If you have chosen this quest to unlock the next part of the campaign, you will now be allowed to start Priority: Rannoch main mission. I however wouldn't recommend ignoring the admiral Koris mission completely, you should finish it either way.
Prizes for completing the mission:
Received from: Quarian admirals [Normandy SR-2: Combat Information Center]
Unlocked by: Received automatically after completing Priority: Geth Dreadnought, however you won't be allowed to start the new mission until you've completed the quest about saving the quarian admiral (Rannoch: Admiral Koris) or the quest about neutralizing the geth squadrons (Rannoch: Geth Fighter Squadrons).

Make sure you've fulfilled the requirements for this mission, so you must complete either the quest about admiral Koris or the quest about the geth squadrons. Once you've done that wait until you've returned to the Normandy and the game should automatically trigger a cut-scene showing a meeting involving the main character, quarian admirals (+Tali if she's not an admiral) and Legion/Geth VI. During the meeting you'll find out that the Reaper base has been located on the surface of the planet Rannoch. It's important to know that you don't have to make a final decision right now whether you plan on helping the geth or not, however the subject will be mentioned and you'll have to show your "unofficial" support for one of the sides of the conflict.
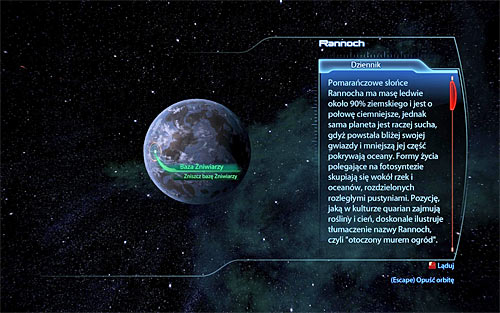
Open the galaxy map and travel to the Perseus Veil. Once you're there (Tikkun system), fly to the planet Rannoch. Notice - If there are other points of interest on the surface, make sure to choose the correct one which is the Reaper base. Tali must take part in this mission, so choose wisely who should accompany her and Shepard in order to ensure that the entire team is versatile and will be able to deal with various threats. Wait until you're transported to [Rannoch: Geth Base], listening to conversations with Tali and Legion/Geth VI in the meantime.
As soon as the main part of the mission has started you'll be forced to attack the first group of geth units. Order your team to take cover behind nearby objects and then begin eliminating the geth, preventing them at the same time from moving too close. You can also consider flanking the geth, however the battle itself isn't too hard (you won't encounter any elite geth units here) so it's not mandatory. Once you've secured this entire area take a look around to find a weapon mod [SMG High Caliber Barrel].
Locate the metal objects and climb on them in order to reach two ladders seen in the distance. I would recommend choosing the ladder located to your right, because once you're on an upper balcony you'll have better choices for cover and therefore won't have to worry about defending against the geth attacks. Watch out for rocket troopers and their ranged attacks mostly from the upper balconies. Rely on Tali's power as much as you can. You should also be ready to defeat an additional geth after making a few steps forward. Keep fighting until you've won and then search the area to find a weapon mod [Mod SMG High Caliber Barrel] and an armor fragment [Kassa Fabrication Gauntlets].
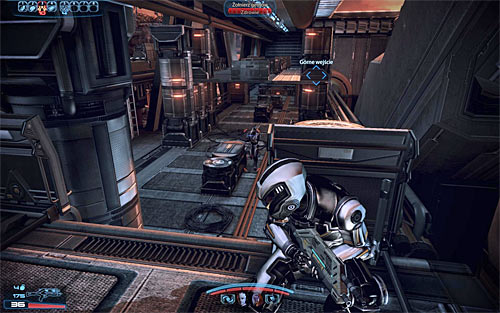
You may now proceed towards a new ladder. Start off by climbing to an upper balcony and then use the nearby balustrades to take cover along with the rest of your team. Attack the geth seen on the lower level, however you must also watch out for machines which will appear in front of you, on the same level you currently occupy. You should know that you'll be allowed to flank that second group by choosing the passageway located to your left. It doesn't matter how you'll act during this battle, because the objective stays the same - you must eliminate all geth opposition. Once it's safe go down to the lower level, because this is the only way to reach a corridor leading to the main part of the base.
![Take a look around to find the Reaper technology [10000 credits] and then proceed to the next part of the complex - Priority: Rannoch - p. 1 - Main quests - Mass Effect 3 - Game Guide and Walkthrough](https://game.lhg100.com/Article/UploadFiles/201512/2015121617410141.jpg)
Take a look around to find the Reaper technology [10000 credits] and then proceed to the next part of the complex. Soon after witnessing a blast shield closing down turn left in order to find a weapon mod [SMG Ultralight Materials]. Once you have the weapon upgrade choose the unexplored right passageway. Order your team to take cover and then attack the geth seen in the distance. Don't perform any risky actions and try to prevent the machines from moving closer if you can. You should also consider throwing grenades each time you notice several geth standing close to each other.
![Deal with all the geth stationed nearby and once it's safe check the area to your right in order to locate a new weapon mod [Assault Rifle Stability Damper] - Priority: Rannoch - p. 1 - Main quests - Mass Effect 3 - Game Guide and Walkthrough](https://game.lhg100.com/Article/UploadFiles/201512/2015121617410282.jpg)
Deal with all the geth stationed nearby and once it's safe check the area to your right in order to locate a new weapon mod [Assault Rifle Stability Damper]. Continue your journey, eliminating all the geth you encounter and eventually finding a door. Look around to find an excellent shotgun [Geth Plasma Shotgun] and some data [5000 credits]. Open the door and proceed to the next section, finding more data [10000 credits] and a med-kit [100 EXP] along the way. Save your progress before opening a second door leading to a much larger area of the base.
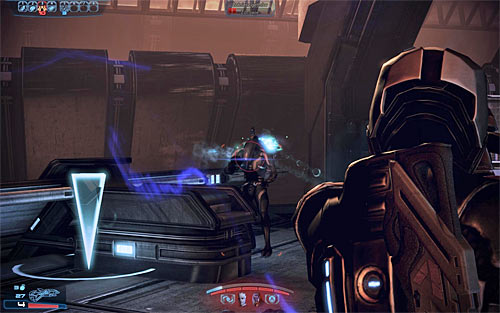
As soon as you've entered a new area of the map you'll find yourself under heavy fire from the geth, so it's important to quickly find cover for Shepard and the rest of the team. Ignore the area to your right, because enemy units can't get to you from there. Focus on the left passageway instead. Depending on your favorite style of play you can wait for the geth to come to you or you can advance aggressively, trying to secure this area in a shorter amount of time. Either way, you must get rid of all geth. Locate a med-kit [100 EXP] and memorize the locations of nearby ammo stashes, because you might need to quickly use the supplies later on in this mission.
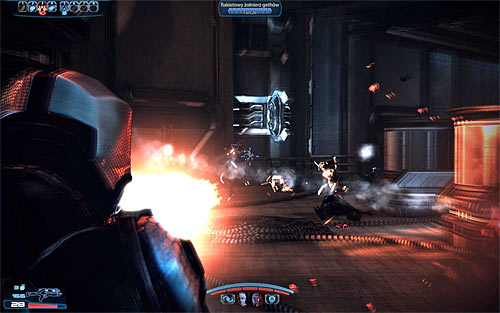
Once you feel you're ready to proceed to the next part of the mission interact with an override console. Quickly position your team near the left corridor, because the geth will start coming out of one of the side rooms. Watch out mostly for geth rocket troopers and for pyro geths. You should also consider throwing several grenades at the beginning of the battle, because that's when all the machines will be standing very close to each other. Continue fighting until you've successfully defeated all geth units.
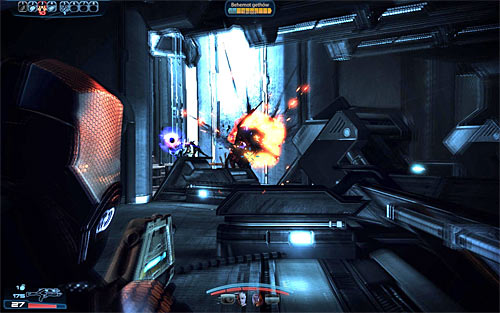
You must now repeat all the actions with the second override console. Doing this will activate a small lift seen in the distance. Don't go towards the lift right away, because new geth will arrive in it, including a geth prime. Focus on keeping the prime at a safe distance and don't forget that Tali's tech powers can make a real difference when it comes to weakening or sabotaging the large machine. Once you've defeated all enemy units collect ammunition and SAVE your game. Make sure you're ready before interacting with the lift's control panel.
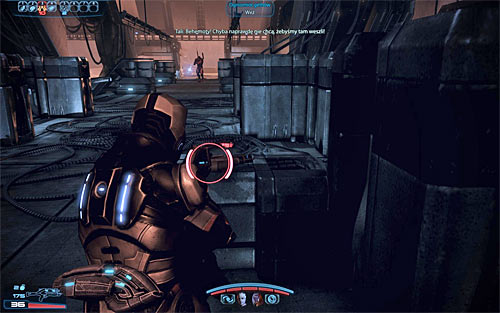
Once you've reached the new level of the base the game will start the most difficult battle of this mission during which you'll be going against THREE geth primes. Thankfully you're not left without help, because you'll find unique geth weapons [Geth Spitfire] in the area which you may already know from the Rannoch: Admiral Koris main quest. One of the weapons can be found in front of the elevator (screen above) and two additional spitfires are hidden to the left and to the right. Pick up the geth spitfire, find a good cover and start attacking one of the geth primes. The good news is that the weapon is very strong, so you won't even have to ask Tali and another team member for help.
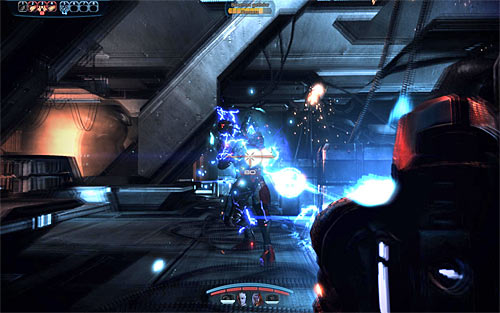
Keep using the spitfire until you've defeated the first geth prime. Heal your allies if they were injured and change your location if you see that other geth primes are heading your way. This is also a good moment to pick up a brand new spitfire, especially since you won't need these weapons later in the mission. Begin attacking two remaining geth primes and make sure that you're focused on a single target. It's also important to heal Shepard immediately after receiving injuries, so you won't die suddenly. You can ignore small geth turrets flying close to geth primes, because each turret will be destroyed along with the prime that has created it.
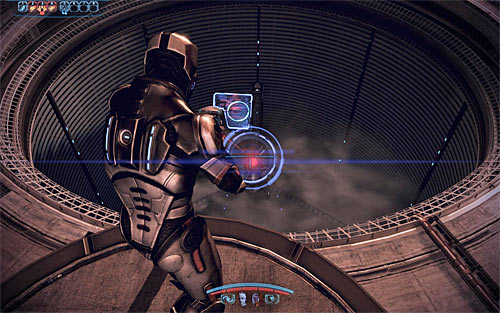
Continue fighting until all three geth primes have been destroyed. There aren't any interesting items in this area, so save your current progress and start moving towards a small platform seen in the distance. Once you're there Shepard will automatically choose a unique weapon [Laser designator] from the inventory in order to assist in calling in an airstrike. Look down, aim at the Reaper and hold the left mouse button until the aiming process has ended.
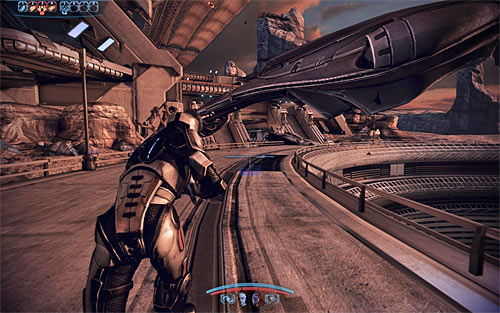
Watch an explosion and once you've regained control over Shepard start moving towards the shuttle. You won't have to sprint here and you also won't have to avoid the Reaper's legs as during the mission on Tuchanka. The shuttle escape is also very easy. Just keep using the stationary turret without having to aim at any specific areas of the Reaper's armor. The game will soon trigger another cut-scene and as soon as it has ended you'll be forced to take part in a duel with the Reaper.
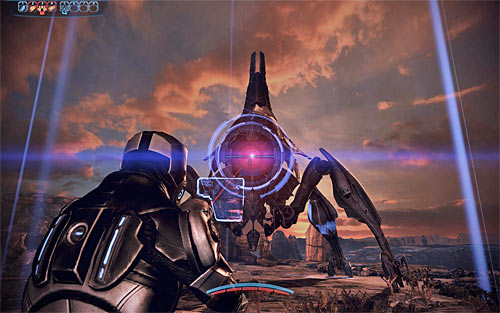
You will be performing two types of actions alternately during this "boss" battle and they're both not that difficult as you could have imagined. The first action is to continue using the laser designator to target the Reaper for airstrike and this is achieved by holding the left mouse button. You can start (or resume) the aiming process after the Reaper has begun to load its primary weapon (screen above).
The moment you see that the Reaper is ready to fire its main gun you'll have to do the second thing. Stop aiming and run either to your left or right. I wouldn't recommend trying to perform a simple dodge maneuver, because that may not be enough. The whole point of running is to move away from the area that was targeted by the Reaper. As soon as you're in the clear start using the designator again (action 1) by holding the left mouse button. An important thing to know is that the aiming process doesn't start from the beginning, but it's resumed, so you don't lose your current progress.
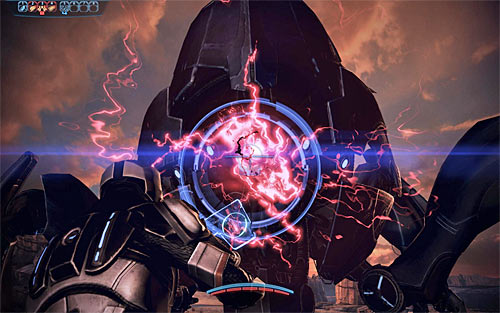
Each time you've managed to complete the aiming process you'll call an airstrike. This means the Reaper will suffer damage and you'll advance to the next stage. The battle can be won after the boss has been targeted several times. The final targeting process is slightly different, because the game will zoom in the camera and initiate slow-motion (screen above). DON'T interrupt the aiming process, because you'll be allowed to finish it before the Reaper has a chance to fire the main weapon.
You will now watch a very interesting cut-scene showing the entire fleet attacking and defeating the Reaper. You'll also have a chance to talk to the Reaper and depending on your choice you can choose a neutral dialogue option (middle left), a paragon dialogue option (upper right) or a renegade dialogue option (lower right). If you didn't choose the neutral question you will also be granted a chance to activate a paragon interrupt (right mouse button) or a renegade interrupt (light mouse button). The choices you make here won't influence the rest of the quest in any major way. The next conversation (with Tali and Legion/Geth VI) is the one you should be interested in, because that's when you'll have to make the most important decision.
Start off by listening to the initial statements made by both parties. Legion/Geth VI will want your approval to send the Reaper code to all geth, "awakening" them and therefore granting them with an intelligence and will to join the war with the Reapers. Tali will be representing the interests of quarians and will be against geth plans, seeing them as a major threat to the quarian race and to all other organic life in the galaxy. Here are three possible ways of resolving this conflict:
After you've made your choices you'll watch several additional cut-scenes. The most important cut-scene will be a conversation with an asari councillor. She will ask Shepard to meet her on the Citadel and this conversation will also unlock a new main quest - Priority: The Citadel #3. Consider talking to admiral Hackett as well before leaving Normandy's war room.
Prizes for completing the mission:
Received from: Asari councillor [Normandy SR-2: Combat Information Center]
Unlocked by: Received automatically after completing Priority: Rannoch.
Open the galaxy map and return to the Citadel located in the Serpent Nebula. Dock on the Citadel and then travel to [Citadel: Citadel Embassies] floor. Your destination is the office that belonged to ambassador Udina (it's located close to the Spectres headquarters). Entire the office and listen to the conversation with the asari councillor. She will share the information about an artifact which may prove to be useful in finding the Catalyst. The artifact is stored on the asari homeworld named Thessia and you're ordered to travel there in order to meet with a group of asari scientists. You may now proceed with the next primary mission - Priority: Thessia.
Notice - If during Priority: Tuchanka mission you've decided to betray the krogan and disperse the false vaccine and if Wrex is the leader of the krogan, then you will stumble upon him while trying to leave the Citadel. During a short conversation with Wrex you'll find out that he is aware of your betrayal and sadly you won't be allowed to resolve this conflict situation in a peaceful way, even if you decide to choose the special renegade dialogue option (high reputation is required). The only choice you're given at this point is whether you want to kill Wrex yourself (two renegade interrupts - left mouse button) or should someone else do that for you. Wrex's death is equal to losing all krogan war assets. You should also know that if Wreav is the leader of the krogan race, then he won't find out about the false cure and therefore you won't have to worry about meeting him and losing krogan assets.
Prizes for completing the mission:
Received from: Asari councillor [Citadel: Citadel Embassies]
Unlocked by: Received automatically after completing Priority: The Citadel #3.

Return to the Normandy, open the galaxy map and travel to the Athena Nebula. Once you're there (Parnitha system), fly to the planet Thessia (screen above) and confirm that you wish to land on its surface. Watch a new cut-scene in order to find out that Thessia has already been attacked by the Reapers and notice that Liara will have to take part in the upcoming mission (thankfully she won't be a burden, because her biotic powers will come in handy). Wait until you're transported to [Thessia: Temple Route], listening to a conversation with Liara during the flight.
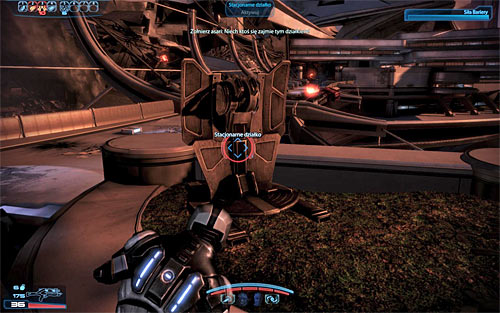
Head towards the asari after you've landed, however your first order of business should be to look around near the landing site. You can find an armor fragment [Umbra Visor] and supplies [4500 credits]. Once you're done exploring approach lieutenant Kurin in order to initiate a conversation with her. Notice that a nearby biotic barrier was attacked and as a result you will be asked for help in defending this camp. Quickly approach a stationary turret found nearby.
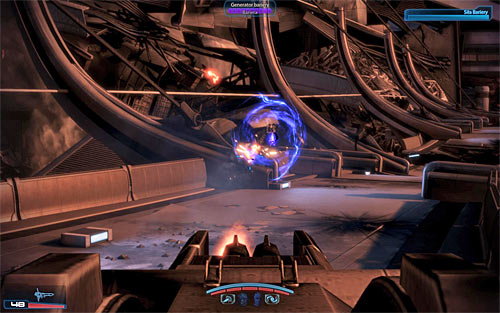
As soon as you've taken control of the turret destroy a nearby barrier engine (screen above) so that enemy units won't receive additional defense. Brutes will begin appearing near the barrier engine very soon. Use longer bursts to kill them and reload your weapon each time you've dealt with a new wave. You must also pay attention to a bridge located to your left, because husks will start using it in the near future and if you ignore them they will have an easy job getting close enough to the defended biotic barrier to weaken it. Continue fighting until you've dealt with the attacking forces and listen to a new conversation with Kurin. You won't be allowed to influence the outcome of this meeting [450 EXP].
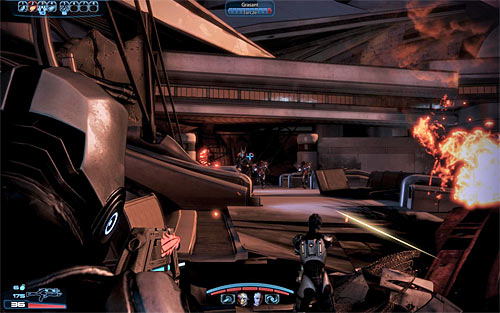
Proceed towards the newly unlocked passageway on the bridge. Ignore the harvesters seen in the distance, because they won't be of any threat to you at this moment. You will on the other hand be forced to eliminate a group of cannibals and marauders. Notice that they've appeared far away from your team, so killing them should be easy. Move on to the next section. You'll be travelling through linear corridors in the building's ruins.
The next battle will take place after reaching a larger and partially destroyed city square. The first part of this battle will require you to go against cannibals and marauders. They shouldn't be a major threat to you, but since this is a large square you must monitor their movements, so that you won't allow any enemy units to make a surprise attack from one of the flanks. Keep pushing towards the designated exit from the square and don't forget about destroying spore pods, because swarmers will be coming out of them and if you ignore them you can suffer major injuries.
A slightly more difficult battle awaits you once you move closer to the exit from this square, because aside from a new group of marauders a single banshee will also join the fight. Thankfully you don't have to use conventional weapons to take out this creature (it is of course possible if you're persistent), because you can find a rocket launcher [M-560 Hydra] on the ground to your left (screen above). One precise hit from the launcher should get the job done and kill the banshee (plus marauders if you're lucky). Once it's safe here again look around to find two med-kits [100 EXP] [100 EXP].
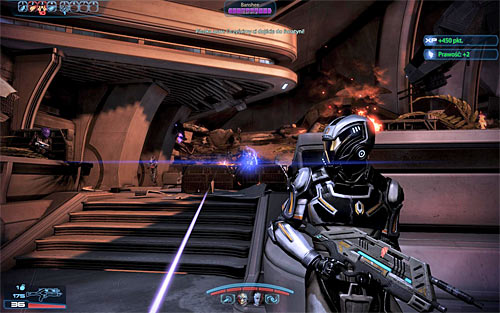
You may proceed towards the passageway where the banshee appeared not long ago. Continue your journey through destroyed buildings and make sure to interact with a terminal [7500 credits] along the way. You'll soon come across a closed door and you must use your omni-tool to unlock it. Ignore the harvester and focus on attacking a small group of cannibals that occupy a nearby square. Once they're gone find a damaged shotgun [3000 credits] and notice that asari snipers are fighting in the area. You should know that you won't be allowed to save them and therefore some of the snipers will die in an upcoming attack.
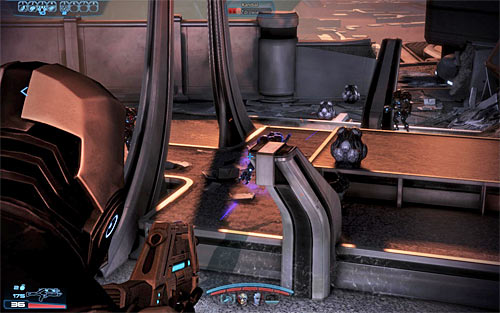
Head towards the balcony where the asari snipers are defending themselves. Start off by searching the area for a weapon mod [Sniper Rifle Concentration Module], a med-kit [100 EXP] and a sniper rifle [M-98 Widow]. You may now take cover near one of the balustrades. Destroy a barrier engine seen in the distance and then start attacking the Reaper forces. The sniper rifle you've just collected may come in handy here, however using it is not mandatory. Don't leave the balcony until you've secured the area below you.

Slide down the ladder and continue your journey to the Kyris outpost. Once you're there you'll automatically watch a longer cut-scene [450 EXP]. As soon as the cut-scene has ended destroy a barrier engine located on the left wall. You should also know that a new rocket launcher [M-560 Hydra] can be found on the ground and I would recommend using this weapon to defeat a banshee heading your way. If you didn't succeed, then you must quickly move back, so that the banshee won't get too close to your team. You don't have to worry about other monsters present in the area (including a ravager), because they should all be eliminated by the asari gunship.
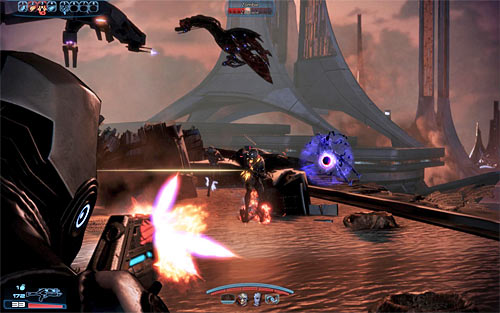
You may resume your journey by heading to your right. Don't forget about destroying spores from a safe distance. You'll also find a new weapon mod [Assault Rifle Extended Barrel]. Get ready to eliminate a group of husks running towards your team (preferably before they move too close). Save your game before moving closer to the temple entrance, because it's going to be a guarded by a large group of Reaper units.
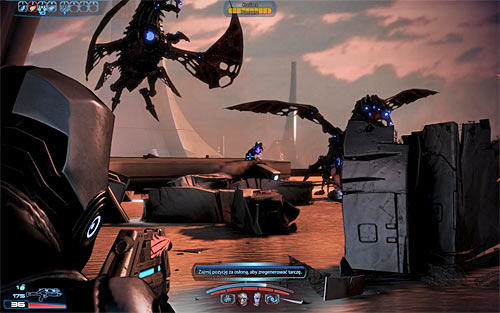
Immediately take cover and make sure that you're far away from enemy units. Just like in all other main battles in this quest, you should begin by destroying a barrier engine seen in the distance (screen above). As for the enemy units, the biggest threat here are the two harvesters and a single ravager. The good news is that you won't have to defeat them yourself, because an asari gunship will join the battle once again and take care of them for you. As a result you should focus on standard monsters heading your way, preventing them from performing melee attacks. Don't forget to keep using cover, because otherwise you'll find yourself under heavy fire and you can die very quickly.
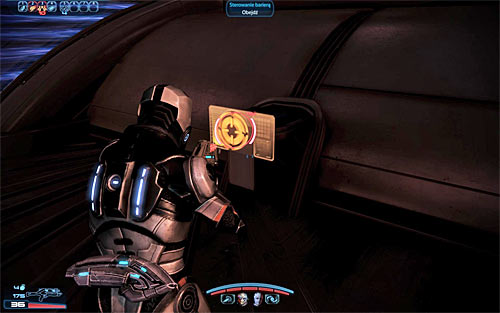
The asari gunship is going to be shot down very soon, however despite what you might think it doesn't mean trouble, because the harvesters will leave this area along with it and the ravager should already be dead. Deal with the remaining Reaper units and once they're gone explore the area to find a weapon mod [SMG Heat Sink]. After you've done exploring interact with the force field terminal and wait for Liara to unlock the entrance to the temple [900 EXP].
Once you're inside the temple you may look around, listening to Liara's comments on some of the artifacts stored here. You'll also find a group of dead asari scientists. The only way to move on with the mission is to examine a plate found in front of the big statue (screen above). Watch a new cut-scene which will reveal the first connection between the right manuscript and the statue. Your next task will be to discover other connections in order to uncover a prothean beacon. The table seen below lists all the objects you must interact with:
1. A manuscript found to the left of the statue.
2. A shield found near the entrance to the temple.
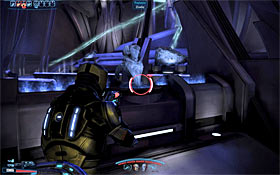
3. A bust found to the right of the statue.
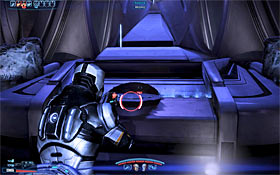
4. A terminal located under the newly uncovered prothean beacon (originally the big statue).
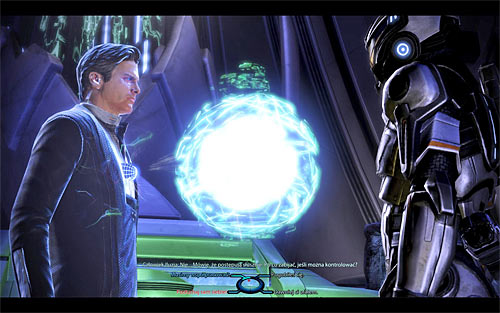
It's VERY IMPORTANT that you save your current progress before interacting with the protean beacon, because doing that will trigger several events. The first one is a conversation with a Prothean VI, however it will be interrupted by Kai Leng's appearance. In this case you'll have to talk to the hologram of the Illusive Man. The game will allow you to act in a similar way to the mission on Mars, so you can choose one of the standard dialogue options or a special paragon/renegade dialogue option (only if you've sufficiently developed your reputation) which won't change the outcome of this meeting. Get ready, because as soon as the final cut-scene has ended you'll be forced to take part in a duel with Kai Leng [1200 EXP].
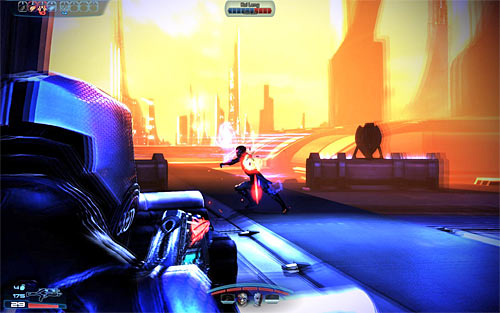
The most important thing you should know about this battle is that you won't be allowed to defeat Kai Leng, because the duel is "only" about destroying his shields (they're very strong and he can regenerate them). This means you should be using ammunition, grenades and offensive powers (Overload!!) which are useful when it comes to weakening tech shields. Obviously you must also avoid Kai Leng's attacks. He can perform ranged attacks by sending out projectiles, but he's even more dangerous in close combat. You should be moving all the time, especially since Kai Leng can "teleport" himself and this means you can't feel completely safe anywhere in the temple.
Each time you've severely weakened Kai Leng he should move back to the entrance to the temple. DON'T pursue him, because he'll order a Cerberus gunship to begin firing. You MUST avoid getting shot and this means staying in cover until the gunship has left the area, resulting in Kai Leng's return. The rest of the battle is the same, so you'll have to continue attacking Kai Leng and avoid the gunship each time he leaves the temple. Keep fighting until you've depleted Kai Leng's shields.
Defeating Kai Leng will trigger a new chain of cut-scenes. Don't worry that Kai Leng has escaped the temple with the data, because you couldn't stop him. Wait until you're transported back to the Normandy and listen to the conversation which will be about figuring out the next step. Specialist Traynor will inform everyone about finding a facility on Horizon which may be used by Cerberus. As you've probably suspected, exploring this base will be your next job. Before you leave the war room area consider contacting admiral Anderson (it's optional, of course).
Prizes for completing the mission:
Received from: Specialist Traynor [Normandy SR-2: Combat Information Center]
Unlocked by: Received automatically after completing Priority: Thessia.
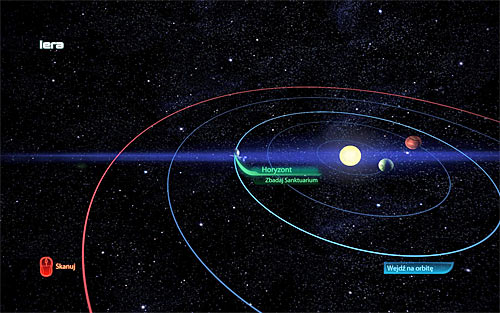
Open the galaxy map and travel to the Shadow Sea. Once you're there (Iera system), fly to the planet Horizon (screen above) and confirm that you wish to land on its surface. Listen to a new conversation while still on board the shuttle which will about the refugees and about losing radio contact with the sanctuary. The second issue will be further explained when you'll listen to a broadcast, informing everyone about the Cerberus presence and ordering to stay away from the facility. It's worth mentioning that the Lawson family will play an important role in this quest. It's good to have Miranda still alive and to take a minute to remind yourself what the previous interactions with her were about (Citadel: Miranda Lawson* side quest). Wait until you're transported to [Horizon: Sanctuary].
Start moving towards the entrance to the sanctuary. The second you notice Cerberus shuttle trying to land order your teammates to take cover behind some obstacles located to your left. You on the other hand should hide somewhere on the right. Observe the shuttle and as soon as Cerberus units have stepped out focus on attacking a single nemesis. It's very important that this enemy dies quickly, because otherwise he would take cover on the upper balcony and start using the sniper rifle to limit your team's actions. That's not all, because two phantoms are also heading your way. Use the fact that the phantoms should be focused on reaching your teammates and attack them from the flank (don't forget that you need to destroy their biotic barriers in the first place!).
![Make sure that you've defeated all enemy units that have left the shuttle and then look around to find some parts [3500 credits] - Priority: Horizon - p. 1 - Main quests - Mass Effect 3 - Game Guide and Walkthrough](https://game.lhg100.com/Article/UploadFiles/201512/2015121617410741.jpg)
Make sure that you've defeated all enemy units that have left the shuttle and then look around to find some parts [3500 credits]. You may proceed towards the main entrance to the facility and you must use an omni-tool to bypass the defences [300 EXP]. Ignore new shuttles, because they're leaving and you won't encounter any new Cerberus units for quite some time. Find a medical station [150 EXP] and an interactive viewpoint. There's a large terminal (screen above) nearby and you should interact with it in order to watch the first recording.
![Continue exploring this floor of the facility, finding three logs, a PDA and some letters [1500 credits] - Priority: Horizon - p. 1 - Main quests - Mass Effect 3 - Game Guide and Walkthrough](https://game.lhg100.com/Article/UploadFiles/201512/2015121617410708.jpg)
Continue exploring this floor of the facility, finding three logs, a PDA and some letters [1500 credits]. Once you've secured the floor find the stairs leading to a lower level. Check the wrecked shuttles seen on your left, because you can collect two new logs here. You may now choose the passageway located to the right of the stairs (screen above). Be careful, because a small group of Cerberus troopers is stationed nearby. They shouldn't be difficult to beat and once they're gone locate a new weapon mod [Pistol Scope].
Choose a small passageway leading to a nearby room and locate an interactive console in order to activate it. If Miranda is still alive you will watch the first part of her recording and if she's dead you'll watch a recording left by her sister Oriana. Search the area to find a safe [1500 credits] and proceed to the next section of the facility. You'll soon enter a larger area and you must interact with a water pump [300 EXP]. Wait until all water is drained from the tanks and then use a ladder to get down to a lower level. Head towards a door seen in the distance.
![Resume the exploration of the sanctuary, finding a new safe with some equipment [1500 credits] and an armor fragment [Rosenkov Materials Shoulder Plate] - Priority: Horizon - p. 1 - Main quests - Mass Effect 3 - Game Guide and Walkthrough](https://game.lhg100.com/Article/UploadFiles/201512/2015121617410856.jpg)
Resume the exploration of the sanctuary, finding a new safe with some equipment [1500 credits] and an armor fragment [Rosenkov Materials Shoulder Plate]. Your current objective is to reach a small command center where you will have to interact with the main console (screen above). Doing this will allow you to uncover that refugees are being turned into husks. Continue your journey, finding a PDA in the next room, as well as a console with a fragment of Miranda's/Oriana's recording.
Order your team members to take cover by the balustrades on the upper floor. Proceed to the door on the lower level alone. Opening the door will start a fight with the husks. Winning this battle shouldn't be difficult as long as you remember about keeping a safe distance from the monsters. Save your game after you've won and then proceed to the next area. Once again order your colleagues to take cover and head forward alone. You can find an ammo stash in this area, as well as two new logs.
An attempt to enter a longer corridor or to open a door located to the right will trigger a second battle. I recommend that you immediately return to the area where your team is stationed, because a banshee is heading your way. Focus on attacking this monster, remember about all the tactical manuevers from the previous encounters with banshees. It's important to use cover while attacking the banshee, because a ravager will join the battle very soon. It would be good if you could attack the banshee without having to worry about the ravager, however you can also act differently and quickly kill the ravager with a help of grenades and best powers.
Once you've killed the banshee and the ravager you'll have the most difficult part of this battle behind you. Move closer to the unexplored area again and start attacking marauders. They should occupy upper balconies, however as the battle progresses they may land on the lower level and try a frontal assault. Prevent them from doing that, because you wouldn't want your team to find itself in a dangerous situation.
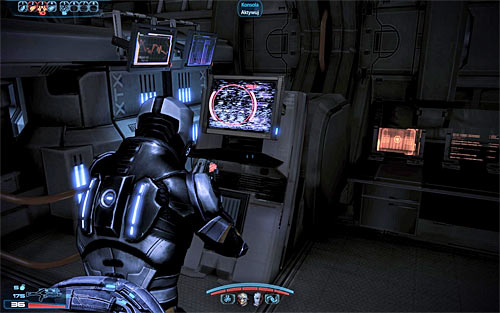
Resupply after you've won the battle and choose the only available passageway leading to the next part of the sanctuary. Look around to find two logs and a med-kit [100 EXP]. You may open a door leading to the next room [600 EXP]. The most important object here is a console with a new recording from Miranda or Oriana. Listen to the recording and to a conversation with the team members. Aside from the console you'll also come across a PDA and research data [1500 credits]. Save your progress before moving towards the stairs, because you're getting close to an area occupied by a large group of monsters.
The room with the monsters has two entrances. I would recommend that you place your teammates close to the lower entrance and proceed to the upper entrance alone (screen above). Destroy all barrier engines you find before proceeding with the main part of the battle. You'll be going against weaker monsters like cannibals and marauders, so winning shouldn't be a difficult achievement.
Obviously you should consider taking some time after the battle to explore the new area, especially since you'll come across several valuable objects. Here's a list of them: two logs, a submachine gun [M-12 Locust], a weapon mod [Shotgun Blade Attachment] and a PDA. Finish off by interacting with a new console (screen above). This will result in showing a new message from Miranda/Oriana. Save your game and then use a ladder that has appeared behind you.
Get ready, because immediately after you've made your way to a new area you'll begin a battle. Eliminate a marauder standing close to the ladder and then order your teammates to take cover near the main corridor. You'll have to be very careful here, because there are several ravagers at the other end of this hallway and you can receive severe injuries as a result of their attacks. I wouldn't recommend trying to storm enemy positions or try using alternative paths (upper one or lower one). It's much better to fortify near the starting area in order to avoid unnecessary risks. Keep firing at enemy units and don't forget to destroy barrier engines at the beginning of the battle (it's not mandatory to dispose of them, so if an engine is in a dangerous spot you shouldn't try reaching it at all cost).
![Remain where you are until you've eliminated all monsters (or at least all ravagers) [600 EXP] - Priority: Horizon - p. 2 - Main quests - Mass Effect 3 - Game Guide and Walkthrough](https://game.lhg100.com/Article/UploadFiles/201512/2015121617410976.jpg)
Remain where you are until you've eliminated all monsters (or at least all ravagers) [600 EXP]. You may finally look around. Collect much needed ammunition, however watch out for new spore pods, destroying them from a safe distance. Enter the next area, finding a medical station [100 EXP], two logs and some research data [3000 credits]. Finish off by choosing the passageway suggested by your allies (screen above).
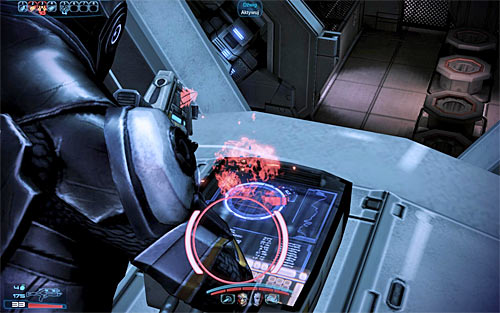
Keep going until you've entered a new area. Perform a jump here and use a weapon to destroy a small metal cover (screen above). Doing this will reveal the crane's controls and of course you must start the machine [300 EXP]. Wait until you're transported to a new area and perform a second jump. SAVE your game here, because you're about to start the final and the most difficult battle of this mission.
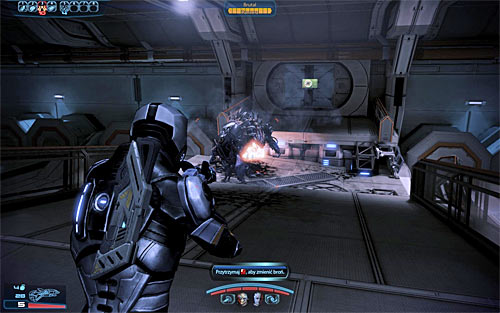
This battle will start as soon as you've entered the new area and landed on a destroyed ramp. Start attacking TWO brutes that will come after you at the same time. Use a shotgun if possible and it's also recommended to throw a lot of grenades and to rely on offensive powers which are effective against armored targets. It's best that you remain close to the start area during this battle, because otherwise you may cause new monsters to join the fights prematurely. It's also worth trying to force the brutes to climb on the second part of the ramp (screen above) as often as possible, because it takes them a few seconds and they can't rely on their charge attack in these types of situations.
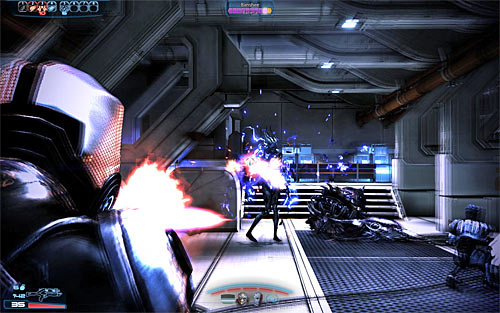
Make sure that you've killed both brutes before heading over to the second part of this area. You'll soon be attacked by a new brute and by a banshee. Start off by eliminating the brute, so that the creature won't interfere in the main duel with the banshee. As for this monster, defeating the banshee should be easier than usual, because it's alone now and since this is a large area you'll be allowed to move around a lot in order to lower the risks of the banshee moving too close.
I strongly recommend that you take some time to explore the area you've just secured. Interact with a pod status terminal and choose the manual override option. Once this is done return to the starting area and find an interactive pod (screen above). Open the pod so that you will be allowed to pick up an assault rifle [M-99 Saber]. Aside from the new weapon you'll also come across a med-kit [100 EXP] and research data [4500 credits]. Once you're done looking around head over to the elevator. It would be a good idea to save the game before using the elevator [900 EXP], because you'll soon take part in the final confrontation.
Wait until you're transported to a new floor and proceed towards the door located directly in front of you. The game will automatically trigger a cut-scene showing Henry Lawson holding his sister Oriana hostage. If Miranda is dead, then she won't take part in this confrontation for obvious reasons. If Miranda is alive and if you've completed her personal mission in Mass Effect 2 (to gain her loyalty), then she will take part in the meeting and she'll be unharmed. If Miranda is alive and if you didn't complete her personal mission in Mass Effect 2 and/or if you didn't warn her about Kai Leng (more on that in the description of Citadel: Miranda Lawson* side quest), then she will take part in the meeting, BUT she will be heavily injured.
The negotiations with Henry Lawson can go in one of two different ways. The first option is to use a special paragon (upper left) or special renegade (lower left) dialogue option, however they're only available if you've sufficiently raised your reputation. If you can choose a special dialogue options, then you will convince Henry to release his daughter Oriana. The second option is to use a standard dialogue option (middle right) and this will result in a failure in negotiations (Henry won't let go of Oriana).
If you've chosen one of the special dialogue options and if Miranda is still alive, then she will murder her father after he releases Oriana. If you've chosen a standard dialogue option and if Miranda is still alive, then you will be allowed to choose whether you want to shoot Oriana to injure her (renegade interrupt - left mouse button) or if Miranda should perform the attack herself. Oriana will be safe no matter what happens. As for Miranda, her fate depends on your previous decisions and actions. If Miranda was heavily injured right from the start (you didn't complete her personal missions or you didn't warn her about Kai Leng's presence), then she will die. Otherwise she'll stay alive and you'll even turn her into a valuable war asset.
Before you leave the sanctuary you'll find out that Kai Leng has a beacon on him and therefore a main headquarters for Cerberus was found. Once you're back on board of the Normandy listen to a conversation with admiral Hackett.
Notice! Theoretically you can start the next main quest, named Priority: Cerberus Headquarters, right now. I however wouldn't recommend doing this right away, because taking part in the next mission is equal to advancing to the final part of the campaign and it will result in blocking some of the features of the game. To be more specific - this is your last chance to explore the galaxy for resources/artifacts/intel data, to complete side quests and to visit the Citadel. You can find out more about these restrictions by reading the guide's page titled How should I prepare for the finale?.
Prizes for completing the mission:
Received from: Admiral Hackett [Normandy SR-2: Combat Information Center]
Unlocked by: Received automatically after completing Priority: Horizon.
Notice! Don't start this quest if you still have some side missions in your journal, because completing them later on in the game won't be possible. The same thing applies to visiting the Citadel and exploring the galaxy, so make sure it's all done. You can find out more about these restrictions by reading the guide's page titled How should I prepare for the finale?.
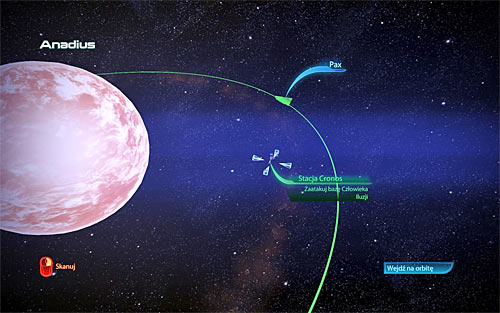
Open the galaxy map and travel to the Horse Head Nebula. Once you're there (Pax system), use the refuelling station if you need to and fly to an adjacent system named Anadius. Here you must hover over Cronos Station (screen above) and confirm that you want to begin docking procedures (which basically means you'll be attacking the Cerberus base). Listen to a new conversation with admiral Hackett during which you'll have to confirm that you're ready (this is your last chance to back down). Before the new mission starts you'll take part in the third dream sequence (all you have to do is run after the child) and you can also share an intimate moment with the person you've chosen as a romance partner. There are a few other conversations you'll have to complete before the attack and you should also notice that EDI must join you in this mission. Watch new cut-scenes, showing an effective way of getting inside the [Cronos Station].
Start off by ordering your team members to find new objects for cover, because the shuttle you've crashed recently is in a bad place from the tactical point of view. My recommendation are the big crates found near the shuttle, however you can also move to your right (screen above). The second option is best done alone and if you're planning on attacking enemy units from the flank. The Cerberus soldiers that are standing close to your position should be the ones to die first.
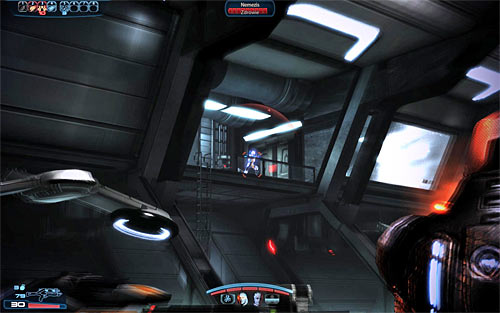
Expect two additional complications soon after this battle has started. The first problem is a nemesis (Cerberus sniper) and he will appear on an upper balcony seen to your left (screen above). The best way to get rid of this enemy is to use Overload and then (once he's helpless) to activate one of the biotic powers or to use your own sniper rifle to finish him off. The second problem is an Atlas mech, however you should focus on the mech only after the nemesis has been taken care of. The best method of approach when it comes to fighting the mech is to kill the soldier sitting inside it. Keep fighting until you've secured this entire hangar.
Despite the fact that you were allowed to ignore all emergency messages earlier in the game, the one that you'll hear after the battle is a real threat. There are no time limiters on the screen, but you'll have about a minute to prevent your team from getting killed. Don't waste time on exploring the hangar, because you'll be allowed to do that after the crisis has been averted. Quickly explore the area to the left from where you've started this mission in order to locate a ladder (screen above). Use this ladder to reach a balcony (the same that was used by the recently killed nemesis soldier).
![Enter a small control room and interact with a terminal to stop the countdown for good [300 EXP] - Priority: Cerberus Headquarters - p. 1 - Main quests - Mass Effect 3 - Game Guide and Walkthrough](https://game.lhg100.com/Article/UploadFiles/201512/2015121617411170.jpg)
Enter a small control room and interact with a terminal to stop the countdown for good [300 EXP]. Get ready, because as soon as a short cut-scene has ended a nearby door will open and you're going to be attacked by a small group of Cerberus soldiers. Quickly take cover along with the rest of your team and don't forget to use biotic powers on guardians in order to take away their shields. Remain on this level and head forward. The next group is station ahead. You should be careful here, because aside from standard troopers you'll also encounter a second nemesis.
![Interact with a medical station [150 EXP] along the way and stop once you've found a second control terminal - Priority: Cerberus Headquarters - p. 1 - Main quests - Mass Effect 3 - Game Guide and Walkthrough](https://game.lhg100.com/Article/UploadFiles/201512/2015121617411166.jpg)
Interact with a medical station [150 EXP] along the way and stop once you've found a second control terminal. Using this console won't result in new enemy units appearing around you, so you may resume your journey right away. Find a ladder, however before you use it check a small room to your left to find a PDA [5000 credits]. Return to the ladder and slide down to return to the main floor of the hangar where you've started this mission. Save your game before interacting with a third console which releases the locks (screen above) [900 EXP].
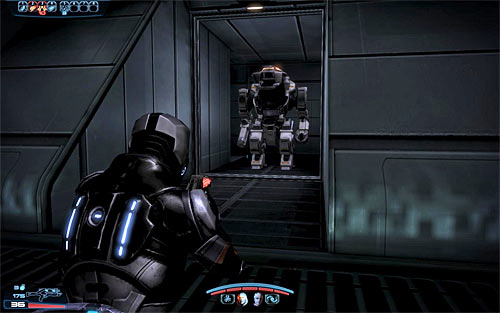
Watch an action-packed cut-scene which will inform you not only about unlocking a path to the laboratories but also about having to deal with a new group of Cerberus units. You can remain near the console you've just activated if you want to, however a much better way to get rid of a new enemy Atlas and Cerberus soldiers is to head towards enemy units in order to occupy one of the vacant mechs. The machines can be found in storage areas on both sides of the hangar (screen above). Continue fighting until you've secured the hangar area of the station for the second time.
You may now explore the hangar in peace if you wish to, however since you won't find anything besides ammunition you can as well proceed towards a large hole which was created as a result of a recent explosion. Make it through the hole and search the area to find an assault rifle [M-37 Falcon] on the ground. You may now approach the locked left door. Listen to a new conversation with EDI and once you've regained control over Shepard save the game and use the ladder to reach a lower level.
Once again you won't be given any time to prepare for the new battle, because as soon as you've used the ladder you'll find yourself under heavy fire. I would recommend that you position your teammates somewhere close to the ladder and plan to flank the enemies on your own. It should be easy, because all the rooms in this part of the station have many side passageways. Keep pushing forward, seeking a single nemesis along the way (you'll probably have to eliminate him from a large distance). Don't forget to keep finding new cover for your squad members, so that they will be allowed to take active role in the fights.
![Eliminate all Cerberus units in the area and then look around a little to find a terminal [5000 credits] and a medical station [150 EXP] - Priority: Cerberus Headquarters - p. 2 - Main quests - Mass Effect 3 - Game Guide and Walkthrough](https://game.lhg100.com/Article/UploadFiles/201512/2015121617411147.jpg)
Eliminate all Cerberus units in the area and then look around a little to find a terminal [5000 credits] and a medical station [150 EXP]. The next area can be accessed by interacting with a ladder. Once you're there you'll automatically trigger a conversation with EDI and it would be a good idea to follow her advice by watching to all three recordings stored in the terminal. Notice that after you've listened to each recording you will be allowed to choose additional dialogue options (upper right or lower right). Once you've watched to all three recordings (or less if you're not interested) close the log and search the area to find an armor fragment [Serrice Council Greaves]. You may now choose the only available passageway.
Walk through several destroyed corridors, finding a moment to save your current progress. The new battle will begin after you've landed on a lower floor. Bear in mind that the fights here are much harder than the ones before, so you'll have to play good and make good tactical decisions. I recommend that you take interest in destroying shield pylons (screen above) and generators, using weapons or Overload tech power. Performing these actions will deprive enemy units of additional defences. It's also important to quickly eliminate every new Cerberus engineer you encounter, because otherwise they may deploy a lot of turrets. Just as before, consider using narrow side passageways in order to organize surprise attacks.
Keep pushing forward, positioning your colleagues correctly and healing them if necessary. Using the side passageways will be very helpful here, especially in avoiding enemy fortifications (screen above). Soon after you've killed all enemy units you should be able to find a new ladder and obviously you must interact with it. I recommend that you listen to EDI's suggestion and activate a new Cerberus video log in order to watch three new recordings.
![Once you're done watching journal entries look around the room to find a PDA [5000 credits] and a medical station [150 EXP] - Priority: Cerberus Headquarters - p. 2 - Main quests - Mass Effect 3 - Game Guide and Walkthrough](https://game.lhg100.com/Article/UploadFiles/201512/2015121617411251.jpg)
Once you're done watching journal entries look around the room to find a PDA [5000 credits] and a medical station [150 EXP]. You may now choose the passageway which was unlocked by EDI. Ignore a hole in the left wall for the time being and instead check the laboratories located to your right (screen above). You can find a med-kit [100 EXP] here, as well as an armor fragment [Delumcore Overlay] and a console with Cerberus video logs. Just as before, the journal contains three recordings and it's up to you whether you want to watch them or not. Return to the blue hole in the wall I've mentioned before and approach it to be automatically transported to a new area of the Cerberus station.
Notice that the remains of the proto-Reaper are being stored in this part of the station and you should also know that you may find different parts of the Reaper depending on the choices you've made in the finale of the previous game. Save your progress and head forward. Get ready, because you'll be suddenly attacked by Cerberus forces. Depending on your preferred style of play you can start moving aggressively towards enemy units or you can keep your distance and play it safe. Focus on eliminating a phantom and a nemesis as soon as possible. You should also look around for new shield pylons in order to sabotage them and weaken enemy forces.
A second phantom will join the battle not long after it has started. He will probably come from your right, performing a long jump towards the balcony where other enemy units are stationed (screen above). Don't forget that each time you're going against the phantoms it's crucial to keep them at a safe distance, so you won't die or lose one of your team members. Get rid of all Cerberus units before moving on. It shouldn't take long until you've reached a ladder connecting this level with a higher one. Use the ladder, save your game and approach a second ladder.
Immediately start firing at a new phantom who should be heading your way, using a balustrade for cover at the same time (you must avoid attacks from other enemies). Once you've dealt with the phantom destroy a nearby shield pylon and then focus on eliminating a nemesis (sniper). Leave cover after you've secured this area and proceed towards a new ladder. Once you're on the top level turn around and go towards the end of the balcony in order to find a PDA [5000 credits] and a med-kit [100 EXP]. You may now choose the door located close to the ladder you've used a few moments ago [900 EXP].
![The next room of the station also contains a PDA [5000 credits] and a med-kit [100 EXP], however it's equally important to locate ammunition and grenade stashes - Priority: Cerberus Headquarters - p. 2 - Main quests - Mass Effect 3 - Game Guide and Walkthrough](https://game.lhg100.com/Article/UploadFiles/201512/2015121617411214.jpg)
The next room of the station also contains a PDA [5000 credits] and a med-kit [100 EXP], however it's equally important to locate ammunition and grenade stashes. You may also interact with the last Cerberus video journal console which will of course contain three recordings. Open a nearby door and use a long path leading to the room with the prothean VI (screen above). This is an excellent moment to save your current progress, because you're about to begin a very difficult boss battle.
Open the door and take part in two conversations. The first conversation will be with the Illusive Man's hologram. Just as before, the game will give you an opportunity to choose a special paragon (upper left) or special renegade (lower left) dialogue option provided that you've sufficiently developed your reputation. Don't worry if your reputation is lower, because even if you use one of the special dialogues you still won't convince Illusive Man to change his mind. The second conversation will be with the Prothean VI and you'll find out that the Citadel is the Catalyst (among a few other interesting things). This meeting will be interrupted by Kai Leng and you'll be allowed to begin a full battle with this opponent in hopes for killing him [300 EXP].
As soon as the duel has started Kai Leng will probably try to approach you and if he succeeds you'll start to struggle. The solution to this problem is identical to close combat encounters with husks, so you must start pressing the F key rapidly. It's worth mentioning that taking part in this melee segment is optional, because you may as well move back and avoid having physical contact with Kai Leng. Similar struggles may also take place in the next stages of the battle and they're always the same.
The main principle of this fight is very similar to your previous encounter with Kai Leng back when you were defending yourself inside a temple on Thessia. This means your primary objective is to weaken his tech shield using proper types of ammunition, grenades and offensive powers (Overload is very helpful and EDI should have this ability). As for Kai Leng's attacks, aside from him using his gun you must also avoid his shockwaves. Damaged floor tiles may come in handy in this situation, because if you'll drop down you'll be allowed to take cover.
Once you've damaged a large portion of Kai Leng's shield he should quickly move back and blow up a new part of the floor (screen above). This event is a sign of additional complications. The first problem is that new Cerberus troops will appear in the area. Thankfully the first wave are only standard troopers, so you shouldn't take too much time worrying about them. The second problem is that Kai Leng will begin to regenerate his shields and you can interrupt that process by using an offensive power or throwing a grenade at him (the grenade must come in contact with Kai Leng!).
After you've successfully interrupted the healing process (or if it ended on its own) you may resume attacking Kai Leng. I recommend that you move around the room a lot, so that you will become a difficult target for the boss himself and for the soldiers he summoned to help him. Continue repeating these actions until Kai Leng decides to regenerate his shields for the second time. In this case you'll have to be much more careful, because aside from standard soldiers a single nemesis (sniper) will also join the battle. Focus on eliminating this opponent as soon as possible, however you shouldn't also forget about stopping Kai Leng's regeneration.
Like I've already said, stopping Kai Leng's regeneration is important, because otherwise he'll regain a lot of shield strength and the next part of the battle will be more difficult. Don't forget that you can use med-kits, not only to heal yourself, but also to revive your team members whom are very likely to die at least once. Keep attacking Kai Leng until he retreats for the third time. Expect even more trouble than before, because a nemesis and several phantoms will join the battle. This means that aside from stopping the healing process you must also focus on eliminating elite Cerberus units.
Once you've defeated the nemesis and the phantoms the situations should calm down a little and it also shouldn't take long for Kai Leng to lose all of his shields. The final part of this duel is very simple, because the boss will be losing health points very quickly and you will be able to kill him in a manner of seconds.
Expect to see new cut-scenes after you've won the battle with the boss. The first cut-scene will show a heavily injured Kai Leng trying to perform a surprise attack on Shepard. Depending on your choice you can either activate a renegade interrupt (left mouse button) or restrain yourself from doing anything (in this case Shepard will dodge Kai Leng's attack to avoid injuries). In both situations Kai Leng will be killed without a chance of taking him alive.
The second cut-scene is a follow-up of the conversation with the Prothean VI. It doesn't matter what your responses will be. The same thing applies to activating a renegade interrupt or (if you wait a little longer) a paragon interrupt, because these actions won't change the outcome of the meeting. Wait until you're transported back to the Normandy and listen to a conversation with admiral Anderson.
Notice! Before you decide to proceed with the final main quest of the game, named Priority: Earth #2, you should meet with all Normandy crew members for the last time. This is also your last chance to make purchases (terminal on the Normandy) and to increase the readiness rating by completing multiplayer co-op missions. You can find out more about the preparations by reading the guide's page titled How should I prepare for the finale?.
Prizes for completing the mission:
Received from: Admiral Anderson [Normandy SR-2: Combat Information Center]
Unlocked by: Received automatically after completing Priority: Cerberus Headquarters.
Notice! Before you decide to proceed with the final main mission of the game you should consider increasing the readiness rating (co-operative multiplayer), so that you'll gather at least 5000 points of the effective military strength. You should also take some time to talk to the Normandy crew members for the last time, to change equipment used by the team members and to spend all the credits (you won't them later in the game) on the weapons, mods and armors you've ignored before (there's a terminal on the Normandy which allows to make long-distance purchases). You can find out more about the preparations by reading the guide's page titled How should I prepare for the finale?.
This quest will begin close to the Cronos Station (Cerberus HQ) located in the Anadius system in the Horse Head Nebula. Return to Pax system and use the mass relay in order to plan a trip to a newly unlocked Local Cluster (screen above). You will now be presented with a series of cut-scenes, showing meetings with admirals Hackett and Anderson, a journey to the Solar System and a shuttle flight to London where the main battles are taking place. Wait until you're transported to [Earth: London].
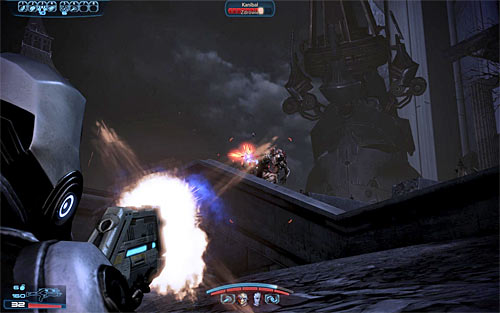
Exit the shuttle and take cover along with the rest of your team near the landing site. Start attacking the cannibals and marauders stationed nearby and ignore the fact that they have a height advantage over you, because an early attempt of storming enemy positions may end very badly. I wouldn't recommend moving forward until you've secured the area around the landing site. You should also remember about performing attacks only when the Hades cannon is not firing, because otherwise the shaking screen will make it very difficult to score precise hits and will also put your entire team in danger.
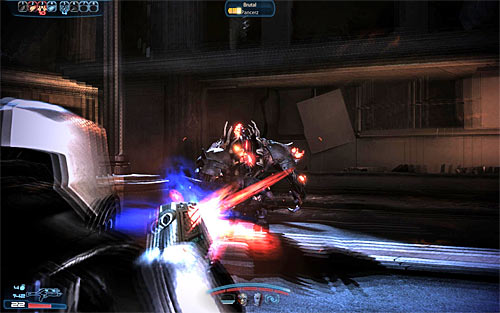
The next part of this battle will take place near a small square. Don't forget that you won't have to reach the Hades cannon within an allotted time limit, so take your time when fighting the monsters, preventing them from performing surprise attack. Two brutes will soon appear to your right and it's highly recommended that you begin attacking them before they move closer to your team. The brutes shouldn't arrive at the same time, so if you're fast enough you should be able to kill the first beast before the second joins the battle. It's also important to hide behind larger obstacles when going against the brutes, because otherwise you may find yourself standing on a path of the brute's charge attack.
Continue fighting the Reaper units until you've secured this entire area and then take some time to replenish ammo supplies. The only way to reach the Hades cannon and the shot-down shuttle is to choose the path leading through a rubble to upper floors of the destroyed buildings (screen above). Don't be surprised when you'll encounter new monsters. You'll soon witness a short cut-scene involving a damaged shuttle piloted by Cortez. The lieutenant will survive the crash only if you've completed his mini-mission earlier in the game (more on that subject in the description of Normandy SR-2: Lieutenant Cortez* side mission).
The next big battle will start after you've reached the upper floors of the destroyed buildings. Don't forget about using cover and observing enemy movements constantly, so that you won't fall a victim to a surprise attack. A ravager will probably join this battle and this means that you must be extra careful, leaning out from cover only for short periods of time and using ammunition effective against armored targets.
Keep fighting until you've secured this area and only then take some time to explore it. You can find ammunition here, as well as a med-kit [100 EXP]. Proceed to the designated area (crashed shuttle) and notice that two unique weapons [M-920 Cain] are lying on the ground. Pick up one of these weapons, aim it at the Hades cannon and HOLD the left mouse button. Don't release the button even when you've noticed that the weapon is fully charged, because the projectiles will be fired automatically and after a short delay. A successful hit should result in destroying the Reaper cannon [400 EXP].
![Quickly return for the second unique weapon [M-920 Cain], because it will be very useful in an upcoming battle - Priority: Earth #2 - p. 1 - Main quests - Mass Effect 3 - Game Guide and Walkthrough](https://game.lhg100.com/Article/UploadFiles/201512/2015121617411492.jpg)
Quickly return for the second unique weapon [M-920 Cain], because it will be very useful in an upcoming battle. Start charging the weapon right away by holding the left mouse button. You'll soon hear a scream informing you about the arrival of a banshee (she may be replaced by Morinth, however it won't change the difficulty of the battle). If you started to charge the gun too late, then the banshee may have enough time to move closer and the situation will become dangerous. Otherwise you'll have a chance to fire very soon after it has joined the battle. Hitting the banshee with the projectiles should kill the creature instantly.
After the banshee (or Morinth) has been killed order your team members to find cover and start attacking "normal" Reaper units. The cannibals and the marauders will be appearing in front of you, however you must prevent them from flanking you. Keep fighting until an evacuation shuttle appears in the distance. Notice that the shuttle has its own energy bar, so eliminating all the monsters stationed in the area may prove to be difficult. As a result you should focus only on clearing the path to the shuttle and then start moving towards it using the sprint key (screen above) and healing yourself along the way if needed.
Once you're on board the evacuation shuttle listen to a new conversation with admiral Anderson and notice that you can trigger a paragon interrupt by pressing the right mouse button. Wait until you're all transported to a large base located in the safe part of the city [200 EXP]. Begin exploring this area by interacting with a ladder. There are a lot of people inside the camp. Some of them are your allies and others are the ones that you've met only as NPC's. You should consider having a final conversation with each person, however it's not required in order to ensure victory in the upcoming battles.
It's also recommended that you explore all the buildings you find, especially since a comm technician is standing inside one of them and he can grant a video chat with all the characters that couldn't show up in the human base in person (including Lieutenant Cortez, Jacob Taylor and Mordin Solus among other people). Pick up a datapad found near one of the parked machines and then choose the rubble path leading to an upper floor of a destroyed building (screen above).
Make your way to a bridge connecting two buildings and get ready for a short action sequence which is about using a stationary turret. This battle is very simple. Just keep firing at the husks and cannibals you see in front of you, remembering about using short bursts so you won't overheat the weapon. Once this scene has ended [100 EXP] you will be allowed to resume the exploration of the base, talking to new people and finding two med-kits [100 EXP] [100 EXP] and a datapad.
![Your current objective is to reach the operations center and aside from new important characters you'll also find a med-kit [100 EXP] and ammunition here - Priority: Earth #2 - p. 2 - Main quests - Mass Effect 3 - Game Guide and Walkthrough](https://game.lhg100.com/Article/UploadFiles/201512/2015121617411516.jpg)
Your current objective is to reach the operations center and aside from new important characters you'll also find a med-kit [100 EXP] and ammunition here. Make sure that you've talked to everyone you wanted to before initiating a new conversation with admiral Anderson. Confirm that you wish to start the final assault (lower right dialogue option) and make a speech in front of your team members (it doesn't affect the future events in any way). You should also notice that you're allowed to choose an entirely new team for the upcoming fights.
Wait until you're transported to a new area of London and surprise the first group of enemies you'll encounter. Once they're gone move further head and focus on eliminating more distant targets. You'll be going against cannibals and marauders, so you shouldn't have any problems winning the battle. Drop down once it's safe and immediately order your team to take cover, because a nearby vehicle will soon be destroyed (screen above). This event means that you're about to be attacked by a new group of Reaper forces. Play it safe, guarding your flanks and using cover when needed.
Resume your journey after you've defeated all enemy units, however be ready to hide again when you'll notice a harvester in the area. Don't attack the harvester yourself, because the flying beast will be focused on exchanging fire with an armored vehicle and will leave this area after the machine has been destroyed. Focus on eliminating standard enemy units instead. A banshee will join the battle in a few moments and obviously you should focus your attention on it. Thankfully this is a large area, so it should be relatively easy for you to keep the banshee in a safe distance from Shepard and the rest of the team.
Continue attacking enemy units until they're all dead and then find a door leading to an underground parking lot. A group of husks will attack you here, however the main danger is yet to come, because after a while two brutes will also show up. Use the pillars not only for cover, but also to avoid brute's charge attacks. You should move around a lot and try focusing on a single brute instead of attacking both beasts at the same time. Monitor the health of your teammates, because they can die easily here. Explore the parking lot after you've won in order to collect ammunition and to find a ladder leading to the next area.
Proceed towards an upper floor of the building and once you're close enough to your current destination surprise Reaper forces stationed in the next room. Killing a single ravager should be your top priority and if you're fast enough you'll eliminate this creature before it manages to target your team. As for the other Reaper units, you may attack them in any order you want to as long as you remember about keeping a safe distance from them. Keep fighting until you've secured this outpost [200 EXP].
![Explore the room where the last battle took place in order to find two med-kits [100 EXP] [100 EXP] and a computer - Priority: Earth #2 - p. 2 - Main quests - Mass Effect 3 - Game Guide and Walkthrough](https://game.lhg100.com/Article/UploadFiles/201512/2015121617411607.jpg)
Explore the room where the last battle took place in order to find two med-kits [100 EXP] [100 EXP] and a computer. You may now proceed towards a damaged door. Get rid of a single husk using a weapon, an offensive power or a strong melee attack and be ready to defeat other beasts. Reach the end of the corridor, drop down and turn left. Order your teammates to start using nearby objects for cover and then attack Reaper units seen in the distance. I would recommend that you focus on precise shots here instead of firing tons of rounds of ammunition.
Watch out for a single ravager that will occupy a small hill located to your left (screen above). The approach is risky, so you should consider eliminating this monster from a large distance. Expect a single brute to join the battle (he will be accompanied by husks). The tactics remain the same, so you should focus on preventing the beast from moving too close and avoid its charge attacks if possible. Keep fighting until your team wins and then proceed towards the entrance to the right building.
Order your team members to take cover next to a destroyed window. You should enter the building yourself and then move to your right. Start using shelves and other large objects for cover, looking for opportunities to surprise enemies located inside the building (screen above). This is how you should be securing the rooms, however don't forget to find new covers for your colleagues every now and then so that they will be able to take active part in the fights. Secure the building, but before you move on explore the area to find a single med-kit [100 EXP].
Enter a large hole in the ground and stay there a while, because you should notice a new group of monsters in the distance. I wouldn't recommend stopping for too long, because you may become an easy target for the Reaper forces. Approach a new building and consider storming it from two sides at the same time. Doing this will allow you to surprise enemy units and therefore to eliminate them much faster (and easier). Make sure you've killed all the monsters stationed inside this new building and then find the only interactive door. Don't enter the new area right away, because it's much better only to open the door and to attack the monsters from the distance.
Decide to enter the new area after you've killed all the monsters you can see from the previous room. Order your colleagues to take cover near the window and you should travel alone to your left, finding a narrow passageway there. Performing this action will allow you to flank a new group of enemies. It's not mandatory, of course, however surprising the enemy units will make killing them much faster. Continue fighting, being ready to engage a single brute later in the battle. Once it's safe here again look around to find ammunition and a medical station [150 EXP].
Head towards the alley that was defended by enemy forces. You must be ready to resume fighting, because when you're close enough to the opposite end of this alley two brutes will storm through a brick wall located to your right. You can deal with this situation by retreating slowly and firing at the brutes without any pauses or you can immediately turn around and sprint towards the previous area. The second option will prolong this battle, but it's safer, giving you a lot of room to defend yourself. Defeat both brutes and once they're dead return to the large hole in the wall. Step through this hole to continue your journey. Find a datapad and some ammunition before proceeding towards a nearby door and triggering a new cut-scene.
Approach the missile battery and start attacking cannibals and marauders stationed nearby. You shouldn't have any major problems with that, however since this is a large area you will have to guard your flanks (in some cases even your rear), preventing the Reaper forces from performing surprise attacks. Keep fighting until you've managed to eliminate all enemy units [100 EXP].
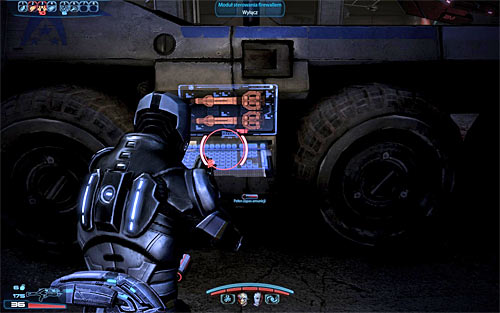
I strongly recommend that you take some time to familiarize yourself with these surroundings, because all remaining battles of this mission will take place here. Notice that there are several buildings here and you'll be allowed to use them for shelter. You can find lots of ammunition, two medical stations [150 EXP] [150 EXP] and a med-kit [100 EXP]. The most valuable treasure is hidden inside the left building, because you may find a unique weapon [Hydra Rocket Launcher]. Don't pick up this weapon just yet, because it can't be added to your inventory. Memorize its location instead, so that you'll return for it later in the game. Once you're ready to proceed with the next battle interact with the battery's firewall module. You'll find out that Reaper forces are heading your way and you'll have to start defending yourself.
There are two ways how you can behave during this battle an upcoming one. The first option is to remain close to the missile battery, placing the team members to cover as much area as possible. The second option is to hide inside the buildings, working as a group and always standing close to each other to eliminate enemy units based on co-operation. My recommendation is the second option, especially since the initial waves of enemy units will appear in different parts of the battlefield and you would have spend a lot of time monitoring their movements instead of just fighting. The first group of enemies will arrive from your right (screen above) and the second group should appear near the place from which you came from. Aside from the cannibals and the marauders you will also encounter husks during these fights and as always it's important to maintain safe distance from them.
The last third group of enemy units will appear to your left and it will occur after hearing a warning about their planned arrival. In this case your top priority are the two banshees. Thankfully there's some good news, because the banshees shouldn't appear at the same time so you might be able to kill or at least injure the first banshee before the second monster joins the fight. DON'T use the Hydra rocket launcher during this battle, because you can fire it only once and it will be more useful later. You don't have to conserve ammunition and grenades on the other hand, because there are tons of stashes nearby.
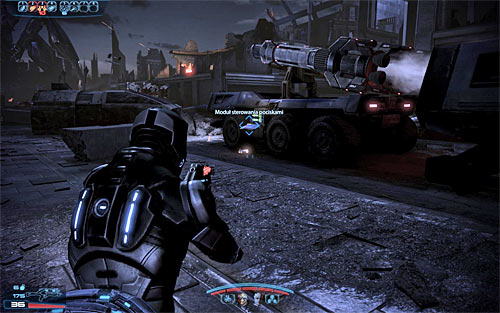
Just as before, you must keep fighting until you've eliminated all Reaper units. Wait for confirmation from EDI, replenish your supplies (ammunition, grenades, med-kits) and return to the missile battery to interact with the console again. The rocket attack against the Reaper will result in a failure. This isn't your only problem, because you'll begin the longest and the most difficult battle of this mission (and probably the entire game).
As soon as you've regained control over Shepard you should return to the left building that was mentioned several times before (screen above). The reason for that is because the Reaper that was unactive in the earlier battles will now join the right and start using its main weapon to destroy everything on its path. This means that staying close to the missile battery would be very dangerous. You would have to spend a lot of time observing the Reaper and avoiding the laser, because coming in contact with the beam means sudden death. Hiding inside the left building on the other hand means that you don't have to worry about the Reaper's attacks at all, because its laser beam can't destroy the building.
As for the battle itself, it should begin with an arrival of an entire group of brutes. Wait until at least several beasts manage to enter the left building in which you're defending yourselves and then quickly pick up the unique weapon [Hydra Rocket Launcher]. It's very important that you time your shot so that the explosion will kill at least two brutes (screen above). You may now start attacking other brutes, using shelves and the long counter for cover and reviving your team members each time they die.
As soon you've dealt with the brutes quickly focus on a harvester. The beast should land in the middle of a nearby intersection (screen above) and I think it's fairly obvious that you should be attacking it while using cover. Choose weapons and offensive powers which are effective against armored targets, so it won't take long for the harvester to die. Replenish your supplies while waiting for new "elite" creatures to show up and don't forget that also standard units are taking part in this battle.
Another unpleasant surprise is an arrival of two new banshees. Remember to focus on attacking one of the banshees instead of both at the same time. Monitor their movements and prevent the banshees from cornering you. Marauders will probably attempt to storm the building at the same time and you should be killing them quickly before they manage to pull off some kind of a surprise attack.
The final part of this battle will feature various types of monsters, however it's most likely that the biggest threat will be the banshees. Just as before, you should attack one banshee at a time and prevent them from moving too close so they won't release the shockwave. Keep using med-kits whenever they're needed, because you won't have any use from them later in this mission.
Keep defending inside the building until you've received a confirmation from EDI that new missiles are ready to be fired. The next part is similar to the shuttle evacuation from the early segment of this quest, so you must stop defending and focus only on clearing a path and reaching the designated area (screen above). Use the sprint key and don't move in a straight line so you won't be an easy target for enemy units. Quickly approach the missile battery and interact with its console [400 EXP].
You'll be rewarded with a bunch of scenes, showing mainly the Reaper's destruction and an attempt to reach the Conduit. Wait until you've regained control over Shepard and head forward. Despite what you might think you won't have to rely on sprint here, because this entire scene is heavily scripted and you can't effect its outcome in any way. Shepard will soon be hit by the Reaper laser beam (screen above).

Wait until you've regained control over a heavily injured Shepard and resume your journey towards the Conduit. Be careful, because a group of husks will soon start moving towards you. Kill the monsters before they move too close, because otherwise you'll automatically die. The same thing applies to a duel with a single marauder. Once you've killed all the monsters approach the white beam and wait to be transported to [Citadel: Return].
Listen to a conversation with Admiral Anderson and proceed forward, staying on a very linear path. Your current destination is a large room with a control panel in the center of it (screen above). Admiral Anderson is here, however you'll soon also meet with the Illusive Man and this time he'll show up in person. The meeting with the Illusive Man can have three endings and each ending has been described below.

The first ending can be unlocked by choosing special paragon dialogue options (upper left) four times. As you probably already know these dialogue options become available to you only if you've sufficiently developed your character's reputation. If you were able to choose all four dialogue options, then you'll successfully convince the Illusive Man to change his mind and a result he'll commit suicide (screen above).
The second ending can be unlocked by choosing special renegade dialogue options (lower left) four times. As you probably already know these dialogue options become available to you only if you've sufficiently developed your character's reputation. If you were able to choose all four dialogue options, then you'll irritate the Illusive Main enough for him to draw his weapon. You MUST perform a renegade interrupt (as soon as the mouse icon appears on the screen) by pressing the left mouse button, because otherwise Shepard will be killed.
The third ending is achieved either by choosing standard paragon dialogue options (upper right) or standard renegade dialogue options (lower right). I would recommend this ending only if you can't choose special dialogue options. In both cases (paragon/renegade) the conversation with the Illusive Man will be very similar and you'll presented with two chances of killing him by activating renegade interrupts (left mouse button). The first opportunity will present itself when the Illusive Man will be aiming at Admiral Anderson (screenshot number 1) and the second opportunity will present itself when the Illusive Man will aim at Shepard after killing Admiral Anderson (screenshot number 2). It's extremely important you use one of these moments to make the kill, because otherwise Shepard will be killed.
After you've dealt with the Illusive Man you'll watch several new cut-scenes. It's worth mentioning that if the Illusive Man didn't finish off Admiral Anderson, then you will be allowed to have a final conversation with a dying friend. You may now proceed to a guide page titled Endings.
It doesn't matter how you've resolved the conflict situation with the Illusive Man, because all three endings lead to the same outcomes - Shepard will be transported to a new place. Here you'll have a chance to talk to the Catalyst that will take a form of a small child. Sadly you don't have any real influence on this conversation, so you should focus only on listening what the Catalyst has to say. The most important moment of this conversation is the explanation of the available game's endings. The most common situation is that you're presented with endings 1 & 2, however if you've fulfilled additional requirements you may also unlock ending 3.
Notice - If you've gathered less than 1750 points of effective military strength, then you won't be allowed to choose the ending on your own. In this case the game will make a choice for you and it depends on the decision you've made in the previous game regarding the Collectors base (whether it was destroyed or not).
Notice - If you want to outsmart the game and watch all three endings without having to repeat the final battles, then after you've talked to the Catalyst you should exit the game for a while, find a catalogue on your hard drive containing saved games and create a backup of a file named AutoSave.pcsav. Once you've watched one of the endings you can exit the game again and replace the current autosave file with the one you've made a backup of earlier on.
If you intend to take control over all synthetic life (including the Reapers), then you must choose the left ramp (screen above).

Approach the control terminal (screen above) and interact with it.
If you intend to destroy all synthetic life in the galaxy (including the Reapers), then you must choose the right ramp (screen above).
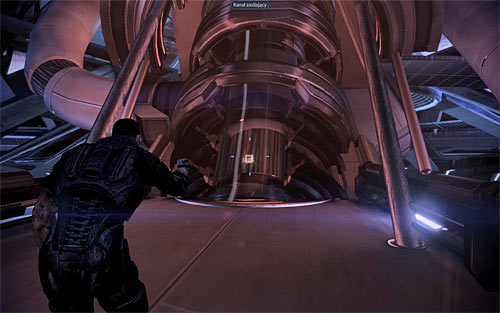
Use your weapon to destroy a power channel (screen above).
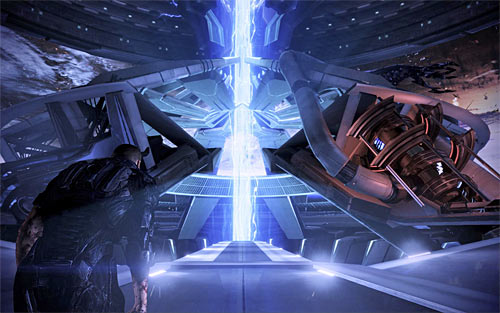
If you intend to perform a synthesis (merge organic and synthetic life), then you must choose a path located directly in front of you (screen above).
Notice - This ending becomes available only if you've gathered at least 2800 points of effective military strength! Otherwise you will be allowed to choose only between endings 1 & 2 and the topic of synthesis won't even be mentioned during the conversation with the Catalyst.
Approach a large beam of white light and Shepard should automatically perform a jump (screen above).
The final cut-scenes played after choosing an ending may be different depending on your previous decisions, however the main factor is how many points of effective military strength you've managed to gather. All posibilities are listed in the table seen below:
NUMBER OF EFFECTIVE MILITARY STRENGTH POINTS
MAIN ENDING 1
MAIN ENDING 2
MAIN ENDING 3
LIST OF CHANGES
less than 1750 points
unavailable
unavailable
unavailable
The game will automatically choose the ending depending on the decision from the previous game regarding the Collectors base (whether it was destroyed or not). The Earth is destroyed and Shepard dies.
between 1750 and 2049 points
available
available
unavailable
The Earth will be destroyed only if choose ending #2. Shepard will die no matter how you'll decide, however the Normandy crew members may be saved if you choose ending #1.
between 2050 and 2349 points
available
available
unavailable
The Reaper attacks leaves Earth devastated no matter how you'll decide. The same thing applies to Shepard, because he can't survive.
between 2350 and 2649 points
available
available
unavailable
The only way to save the Earth from being devastated is to choose ending #1. Shepard will die no matter how you'll decide.
between 2650 and 2799 points
available
available
unavailable
The Earth will be saved and Shepard will die no matter how you'll decide.
between 2800 and 3999 points
available
available
available
2800 points is a minimum required to unlock ending #3. The Earth will be saved and Shepard will die no matter how you'll decide.
between 4000 and 4999 points
available
available
available
The Earth will be saved no matter how you'll decide. Shepard can survive only if you choose ending #2 and only if Anderson wasn't executed by the Illusive Man.
more than 4999 points
available
available
available
The Earth will be saved no matter how you'll decide. Shepard can survive only if you choose ending #2.

The next time you'll try to a start a new game you should notice that a new option has appeared on the list - Importing a character from ME3. This function has very similar principals to New Game Plus modes found in many other games, so you're allowed to replay the campaign using a highly developed character. The game allows you to keep your experience level, your powers, your reputation, your equipment and your credits. There's also one more important change - you can upgrade your weapons up to level 10 (level 5 is the maximum when you're completing the game for the first time).
Starting two final missions of the game, named Priority: Cerberus Headquarters and Priority: Earth #2, automatically blocks access to some of the other functions of the game. For example, you won't be allowed to visit the Citadel anymore in order to meet with NPC's, shop and complete side missions. As a result you should read the contents of the table seen below very carefully, so that you'll find out when is your last chance to perform certain types of activities.
ACTIVITY TYPE
LAST CHANCE TO PERFORM AN ACTIVITY
COMMENTS
Completing side missions
Before starting Priority: Cerberus Headquarters main quest.
All side missions (including the ones provided by the DLC's) become blocked. The only exception are the multiplayer co-operative missions.
Visiting the Citadel
Before starting Priority: Cerberus Headquarters main quest.
This restriction is only about meeting with certain characters on the Citadel, using the Spectres office and finishing side quests, because you can shop even after the Cerberus HQ mission using a terminal located on the Normandy.
Exploring the galaxy
Before starting Priority: Cerberus Headquarters main quest.
This restriction is about exploring the galaxy for new resources, intel data and rare artifacts. After the Cerberus HQ mission only the newly unlocked Solar System will be available on the galaxy map.
Talking to Normandy crew members
Before starting Priority: Earth #2 main quest.
This restriction is only about meeting with other people on board the Normandy, because most of the important characters can be encountered or contacted for the last time after reaching the safe haven in London.
Increasing the readiness rating
Before starting Priority: Earth #2 main quest.
This restriction is about completing multiplayer co-operative missions, because this is the only way to increase the readiness rating. I recommend that you focus on increasing it to its maximum value which is 100%.
Buying new equipment
Before starting Priority: Earth #2 main quest.
Visiting shops on the Citadel is blocked much earlier so this restriction is only about shopping using a terminal found on the Normandy.
You will be gathering war assets throughout the entire campaign and they represent the strength of the fleet that will take part in the final battle with the Reapers. The easiest way of obtaining new war assets is by completing quests and you can unlock the best ones by finishing primary missions which are about convincing various races (like the krogan or the turians) to join the cause. This isn't of course the only way, because you can also obtain war assets by recruiting new crew/Normandy members, by doing favors for important characters and by scanning the galaxy for interactive spots.
Sadly the mechanism works both ways. This means that you also must think about the consequences of your actions, because in the worst case scenarios you may weaken your war assets or even lose some of them for good. This usually occurs when you've angered an entire civilization or didn't save someone in time (like for example - didn't disarm the bomb found on Tuchanka). As a result it's very important that you read the descriptions of all quests found in this guide so you'll know about the existence of these danger situations, you'll know how to avoid them and you'll also know how to make the best decisions when it comes to receiving new assets.
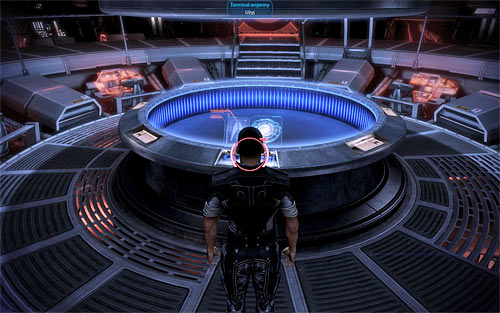
The game allows you to track your progress and this means you can always find out how much war assets you've gathered. This is achieved by interacting with a console in the war room (screen above), located on the Combat Information Center (CIC) deck. The war assets are divided into several groups and you're also told about the new additions to the list.
Notice - War assets can be gathered up to the moment when you start the final quest of the game - Priority: Earth #2. Focus on having as much of them as possible before proceeding with the finale of the campaign.
Gathering war assets isn't the only thing you must know about, because raising the readiness rating is equally important. This factor tells how much effective military strength you have at your disposal and only this value is taken under consideration in the finale of the game. The default value of the readiness rating is 50% which means that all war assets you acquire are divided by 2. For example, gathering 550 points of war assets (it's named total military strength) and having the readiness rating at 50% results in receiving 275 points of effective military strength (550x0.5=275).
The only way of raising the readiness rating is to take part in the co-operative multiplayer missions of the Galaxy at War mode. The map of the multiplayer mode is divided into five sectors (screen above). Engaging in missions in a certain sector result in increasing the readiness rating in it, however it also raises the "global" readiness rating (this is the one that's important to you). This means that if you achieve 100% readiness in one of the sectors you should switch to a different one, because otherwise you won't be able to continue raising the global rating value.
The game will inform you about the increase of the readiness rating each time you've finished a multiplayer mission. It's worth knowing that the percentage increase depends on how well you've fought and how big was the challenge (bronze, silver or gold mission).
Obviously you should try increasing the global readiness rating to its maximum value which is 100%. You should however know that the readiness rating declines overtime and if you run the game after a few days you'll notice that it may have dropped even by more than 10 percent. If you're not interested in engaging in multiplayer missions just for the fun of it, then there's a way of avoiding this problem. After you've raised the rating to 100% you should switch Origin to offline mode, preventing the game from connecting to EA servers. Doing this will keep the rating at the same value even if you play it after a long period of time. I personally wouldn't recommend ignoring the Galaxy at War mode, because you're allowed to transfer the characters you've created to singleplayer mode, making them valuable war assets.
Notice! If you don't want to watch the worst versions of the game's endings, you should gather at least 1750 points of the effective military strength. If you want to secure a chance of seeing the best possible versions of the game's endings, you should gather at least 5000 points of effective military strength (or at least 4000 points if your character has developed high reputation). You can find out more about the endings and about additional factors that may change the final cut-scenes in the Endings section.
Notice! This mission doesn't appear in Shepard's journal!
Received from: Diana Allers [Citadel: Bay D24]
Unlocked by: You will have the chance to complete this quest during your first visit to the Citadel, i.e. after completing Priority: Mars.
![Diana Allers is a war reporter who can be met at the passenger lobby in [Citadel: Bay D24] - Citadel: Diana Allers* - Quests on the Citadel - Mass Effect 3 - Game Guide and Walkthrough](https://game.lhg100.com/Article/UploadFiles/201512/2015121617412143.jpg)
Diana Allers is a war reporter who can be met at the passenger lobby in [Citadel: Bay D24]. The woman will ask you for a place on board Normandy, so that she can give relations from it. You can of course refuse, though if you agree, you will receive a new war asset [Diana Allers].
Prizes for completing the mission:
Notice! This mission doesn't appear in Shepard's journal!
Received from: Doctor Chakwas [Citadel: Huerta Memorial Hospital]
Unlocked by: You will have the chance to complete this quest during your first visit to the Citadel, i.e. after completing Priority: Mars.
![Doctor Chakwas can be met in the patient lobby at [Citadel: Huerta Memorial Hospital], though only if she didn't die in the previous game - Citadel: Doctor Chakwas* - Quests on the Citadel - Mass Effect 3 - Game Guide and Walkthrough](https://game.lhg100.com/Article/UploadFiles/201512/2015121617412194.jpg)
Doctor Chakwas can be met in the patient lobby at [Citadel: Huerta Memorial Hospital], though only if she didn't die in the previous game. During the conversation she you can ask you of the state of Ashley/Kaidan and also decide whether to add her to the Normandy crew. I'd suggest thinking it over twice, as by doing so you will block the possibility of asking doctor Michel as part of Citadel: Doctor Michel*.
Prizes for completing the mission:
Notice! This mission doesn't appear in Shepard's journal!
Received from: Doctor Michel [Citadel: Huerta Memorial Hospital]
Unlocked by: You will have the chance to complete this quest during your first visit to the Citadel, i.e. after completing Priority: Mars.
![Doctor Michel can be found in the patient lobby at [Citadel: Huerta Memorial Hospital] and she can be spoken to after you're done talking with doctor Chakwas - Citadel: Doctor Michel* - Quests on the Citadel - Mass Effect 3 - Game Guide and Walkthrough](https://game.lhg100.com/Article/UploadFiles/201512/2015121617412160.jpg)
Doctor Michel can be found in the patient lobby at [Citadel: Huerta Memorial Hospital] and she can be spoken to after you're done talking with doctor Chakwas. During the conversation you can ask doctor Michel about the state of Ashley/Kaidan and also ask her to join the Normandy crew. It's only available by using the special paragon (upper left) or renegade (lower left) dialogue option. You probably won't be able to do it if you're just starting the campaign, but you can always ask her again later on in the game. I'd definitely suggest thinking it over, as doing so will block the possibility of asking doctor Chakwas, as part of Citadel: Doctor Chakwas*.
Prizes for completing the mission:
Notice! This mission doesn't appear in Shepard's journal!
Received from: Khalisa al-Jilani [Citadel: Citadel Embassies]
Unlocked by: You will have the chance to complete this quest during your first visit to the Citadel, i.e. after completing Priority: Mars.
![Khalisa can be met for the first time while trying to enter the office of Commander Bailey at [Citadel: Citadel Embassies] - Citadel: Khalisa al-Jilani* - Quests on the Citadel - Mass Effect 3 - Game Guide and Walkthrough](https://game.lhg100.com/Article/UploadFiles/201512/2015121617412113.jpg)
Khalisa can be met for the first time while trying to enter the office of Commander Bailey at [Citadel: Citadel Embassies]. After the meeting with Bailey, return to the elevator and look for the reporter. During the conversation with Khalisa, you can act in one of three ways: ignore her and do nothing, use the renegade option twice to knock her down to the floor (left mouse button) or the paragon option (right mouse button) to talk sense into her. In the latter case, you will earn a new war asset [Khalisa Bint Sinan al-Jilani].
Prizes for completing the mission:
Notice! This mission doesn't appear in Shepard's journal!
Received from: Aethyta [Citadel: Presidium Commons]
Unlocked by: You will be able to approach this mission after completing Priority: Sur'Kesh.
![Aethyta can be found at the Apollo caf in [Citadel: Presidium Commons] and you will be able to speak to her during one of the later visits to the Citadel - Citadel: Aethyta* - Quests on the Citadel - Mass Effect 3 - Game Guide and Walkthrough](https://game.lhg100.com/Article/UploadFiles/201512/2015121617412134.jpg)
Aethyta can be found at the Apollo caf in [Citadel: Presidium Commons] and you will be able to speak to her during one of the later visits to the Citadel. During the conversation you will learn that Aethyta is Liara's father. Note that you will be able to use a special paragon (right mouse button) or renegade (left mouse button) dialogue option. Afterwards you should peak with Liara by one of the tables. Curiously, she will know about her father, though you can either leave the decision regarding meeting Aethyta to her or persuade her to meet her relative.
Prizes for completing the mission:
Received from: Jondum Bau [Citadel: Citadel Embassies]
Unlocked by: You will be able to approach this mission after completing Priority: Palaven.
You will learn of this mission after reading a message using the terminal on board the Normandy. Its sender, the Salarian Spectre Jondum Bau can be found by the entrance to Commander Bailey's office in [Citadel: Citadel Embassies]. Speak to him and you will learn that Jondum needs help in investigating the activity of a certain Hanar official. Jondum fears that he might be indoctrinated by the Reapers.
Start off by heading to the Spectre Terminal found right of here and using it. Read the Hanar Embassy Tracking message and afterwards Activate it to start tracing the data.
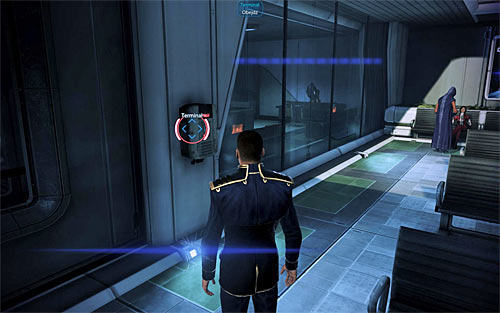
Return to the elevator. The first terminal you can check can be found to the left of it (screen above). Interact with it to bypass the security and listen to a conversation with Jondum.
![Use the elevator and head to [Citadel: Port - Holding Area] - Citadel: Hanar Diplomat - Quests on the Citadel - Mass Effect 3 - Game Guide and Walkthrough](https://game.lhg100.com/Article/UploadFiles/201512/2015121617412232.jpg)
Use the elevator and head to [Citadel: Port - Holding Area]. The second terminal can be found soon after getting out of the lift. Listen to the conversation and continue the search.
![Stay at [Citadel: Port - Holding Area] and head to the western-most area, i - Citadel: Hanar Diplomat - Quests on the Citadel - Mass Effect 3 - Game Guide and Walkthrough](https://game.lhg100.com/Article/UploadFiles/201512/2015121617412280.jpg)
Stay at [Citadel: Port - Holding Area] and head to the western-most area, i.e. Bay E28. Search for the next terminal and bypass its security. In the end return to the second terminal located by the elevator and interact with it once again. Listen to Jondum's request to meet with you.
![Use the elevator and head to [Citadel: Citadel Embassies] - Citadel: Hanar Diplomat - Quests on the Citadel - Mass Effect 3 - Game Guide and Walkthrough](https://game.lhg100.com/Article/UploadFiles/201512/2015121617412280.jpg)
Use the elevator and head to [Citadel: Citadel Embassies]. Find Jondum to the left of the entrance and speak to him to initiate a cutscene with the indoctrinated diplomat. Further on in the conversation there will be a fight and you will be able to act in two way. If you want to fulfill Jondum's request (paragon), do nothing and let Shepard stop the virus from being sent.
If on the other hand you prefer to ignore Jondum's request, you need to help him get out of oppressions by choosing the special renegade option (left mouse button). Doing so will save Jondum's life, but will also doom the Hanar.
Notice! There's also a third option, but it's available only if you have recruited Kasumi in one of the previous games. In such case you can rush to the terminal at once to stop the virus and ignore the renegade option, as Kasumi will save Jondum's life.
Prizes for completing the mission:
Notice! This mission doesn't appear in Shepard's journal!
Received from: Aria T'Loak [Citadel: Purgatory Bar]
Unlocked by: You will be able to approach this mission after completing Priority: Palaven.
You will learn of this mission after interacting with the terminal on board Normandy and reading the message from Aria T'Loak. She can be found at the VIP section in [Citadel: Purgatory Bar]. Speak to her to learn that Aria wants to help you in mobilizing three groups of mercenaries to fight with the Reapers, giving you advice how you can convince each of them to cooperate. Note that as much as three side missions will appear in your journal.
Prizes for completing the mission:
Received from: Aria T'Loak [Citadel: Purgatory Bar]
Unlocked by: Received automatically after completing Citadel: Aria T'Loak*.
![You can begin this mission after meeting with Aria T'Loak in [Citadel: Purgatory Bar] and it concerns convincing the Blue Suns to support the war with the Reapers - Aria: Blue Suns - Quests on the Citadel - Mass Effect 3 - Game Guide and Walkthrough](https://game.lhg100.com/Article/UploadFiles/201512/2015121617412238.jpg)
You can begin this mission after meeting with Aria T'Loak in [Citadel: Purgatory Bar] and it concerns convincing the Blue Suns to support the war with the Reapers. The plan implies meeting with the Blue Suns leader - Darner Vosque - at the Citadel and for that you need to head to [Citadel: Port - Holding Area]. Darner can be found west of Bay A and during the conversation you will learn of his problems with the Turian General Oraka. The Blue Sun leader will want to eliminate him, but you don't have to make the decision just yet. Before leaving the location, speak to Aria T'Loak.
![General Oraka can be found at [Citadel: Presidium Commons], nearby the Apollo caf to be precise - Aria: Blue Suns - Quests on the Citadel - Mass Effect 3 - Game Guide and Walkthrough](https://game.lhg100.com/Article/UploadFiles/201512/2015121617412292.jpg)
General Oraka can be found at [Citadel: Presidium Commons], nearby the Apollo caf to be precise. Initiate the conversation to learn more of the conflict. If you want to finish the mission now (renegade), demand him to stop harassing the Blue Suns and order the General to be executed (lower right dialogue option). You don't need to kill him on personally, as the mission will automatically end.
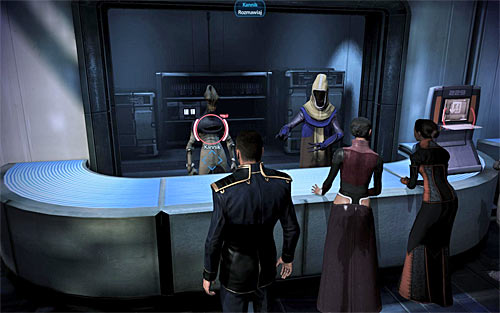
If on the other hand you plan on helping the General in obtaining new weapon transports (paragon), choose the upper right dialogue options. In this case you need to head to the merchant Kannik found in the same location (eastern part of the Presidium). Kannik however won't want to sell you any weapons for credits, as he's only interested in rare artifacts.

In order to obtain the artifact for Kannik, you will of course first of all have to return on board Normandy and head to the galaxy map. Fly to Kite's Nest. After getting there (Harsa system), fly to the neighbouring Vular (make sure you have enough fuel!). Approach planet Vana (screen above) and press the right mouse button to scan it. Afterwards choose it and hold down the right mouse button to scan it more precisely. You need to find the white dot and send a probe (left mouse button to obtain the [Black Market Artifacts]. Return to Kannik in [Citadel: Presidium Commons] and give him the artifacts to receive an assurance that he will deliver the weapons in return. In order to finalize this mission, you need to meet with General Oraka once again.
Prizes for completing the mission:
Received from: Aria T'Loak [Citadel: Purgatory Bar]
Unlocked by: Received automatically after completing Citadel: Aria T'Loak*.
![You can begin this mission after meeting with Aria T'Loak in [Citadel: Purgatory Bar] and it concerns convincing the Blood Pack to support the war with the Reapers - Aria: Blood Pack - Quests on the Citadel - Mass Effect 3 - Game Guide and Walkthrough](https://game.lhg100.com/Article/UploadFiles/201512/2015121617412341.jpg)
You can begin this mission after meeting with Aria T'Loak in [Citadel: Purgatory Bar] and it concerns convincing the Blood Pack to support the war with the Reapers. The plan implies meeting with Narl, Aria's agent. For that you need to head to [Citadel: Presidium Commons], to the apartments zone. Try entering room 86 to initiate a cutscene. You don't have to do anything here, as your attempt to trick the Blood Pack leader - Kreete - will end with success.
Prizes for completing the mission:
Received from: Aria T'Loak [Citadel: Purgatory Bar]
Unlocked by: Received automatically after completing Citadel: Aria T'Loak*.
![You can begin this mission after meeting with Aria T'Loak in [Citadel: Purgatory Bar] and it implies convincing the Eclipse to support the war with the Reapers - Aria: Eclipse - Quests on the Citadel - Mass Effect 3 - Game Guide and Walkthrough](https://game.lhg100.com/Article/UploadFiles/201512/2015121617412375.jpg)
You can begin this mission after meeting with Aria T'Loak in [Citadel: Purgatory Bar] and it implies convincing the Eclipse to support the war with the Reapers. The plan implies freeing Jona Sederis - Eclipse leader - from prison. Start off by heading to Commander Bailey's office in [Citadel: Citadel Embassies]. Regardless of whether you stay neutral or demand Jona being freed, he will send you to the C-Sec outpost so you can speak with Jona and make a decision yourself.
![Head to [Citadel: Presidium Commons] and to the C-Sec outpost in the south-east part of the location - Aria: Eclipse - Quests on the Citadel - Mass Effect 3 - Game Guide and Walkthrough](https://game.lhg100.com/Article/UploadFiles/201512/2015121617412310.jpg)
Head to [Citadel: Presidium Commons] and to the C-Sec outpost in the south-east part of the location. Speak with the C-Sec assistant and wait until he sets up a video-conference with Jona. How you act during the conversation doesn't matter, though you will have to make a decision after it ends. If you don't mind the psychopath being released (renegade), choose the lower right dialogue option to finish this mission immediately.
If you don't intend to free Jona (paragon), choose the upper right dialogue option during the conversation with Bailey. In such situation you will need to head to [Citadel: Port - Holding Area] and speak with Sayin in Bay A. During the conversation you will have to convince him to take over the Eclipse. Your interlocutor will promise to speak with Aria about it. Note that the mission won't end immediately in this case, but only after some time (probably as you try to leave the port), with Commander Bailey contacting you.
Prizes for completing the mission:
Notice! This mission doesn't appear in Shepard's journal! If Kaidan Alenko was your partner in the early parts of the game, then you should read the description of the quest titled Citadel: Kaidan Alenko*.
Received from: Commander Bailey [Citadel: Bay D24]
Unlocked by: You will be able to start this mission during your first visit to the Citadel after completing Priority: Mars main quest.
You will be allowed to visit a heavily injured Ashley as soon as you've arrived on the Citadel for the first time and she will be mentioned during a short conversation with commander Bailey. Proceed towards the elevator and travel to [Citadel: Huerta Memorial Hospital]. Once you're there head to the area where the injured are being treated. Ashley's room is the first one to the right. It's worth knowing that before you visit Ashley you can find out about her condition from doctor Chakwas and doctor Michel. You may also purchase a gift for her in the Sirta shop found in the hospital (paragon points). The visit itself doesn't any have important moments.
After you've completed Priority: Palaven main mission you should receive a text message from Ashley (private terminal) from which you'll find out that Udina wants her to become a Spectre. It would be good to grant Ashley's wish and to visit her again in the clinic in [Citadel: Huerta Memorial Hospital] in order to give her advice about the proposal and to wish her a swift return to full health.

You should receive the next message from Ashley (private terminal) not long after the previous meeting. Just as before, you must travel to the Citadel in order to talk to her in [Citadel: Huerta Memorial Hospital]. Congratulate Ashley on receiving a Spectre status. You should also inquire if she wants to return to the Normandy as a crew member, however you won't be making any final decision just yet.

The finale of this quest will take place near the end of the Priority: The Citadel #2 main quest. If you didn't shoot Ashley during the cut-scene with ambassador Udina, then you will meet her while trying to return to the Normandy and you will be presented with a choice. You can allow Ashley to join admiral Hackett's team (she will become a war asset) or you can ask her to return to the Normandy as a crew member.
Prizes for completing the mission:
Notice! This mission doesn't appear in Shepard's journal! If Ashley Williams was your partner in the early parts of the game, then you should read the description of the quest titled Citadel: Ashley Williams*.
Received from: Commander Bailey [Citadel: Bay D24]
Unlocked by: You will be able to start this mission during your first visit to the Citadel after completing Priority: Mars main quest.
You will be allowed to visit a heavily injured Kaidan as soon as you've arrived on the Citadel for the first time and he will be mentioned during a short conversation with commander Bailey. Proceed towards the elevator and travel to [Citadel: Huerta Memorial Hospital]. Once you're there head to the area where the injured are being treated. Kaidan's room is the first one to the right. It's worth knowing that before you visit Kaidan you can find out about his condition from doctor Chakwas and doctor Michel. You may also purchase a gift for him in the Sirta shop found in the hospital (paragon points). The visit itself doesn't any have important moments.
After you've completed Priority: Palaven main mission you should receive a text message from Kaidan (private terminal) from which you'll find out that Udina wants him to become a Spectre. It would be good to grant Kaidan's wish and to visit him again in the clinic in [Citadel: Huerta Memorial Hospital] in order to give him advice about the proposal and to wish him a swift return to full health.
You should receive the next message from Kaidan (private terminal) not long after the previous meeting. Just as before, you must travel to the Citadel in order to talk to him in [Citadel: Huerta Memorial Hospital]. Congratulate Kaidan on receiving a Spectre status. You should also inquire if he wants to return to the Normandy as a crew member, however you won't be making any final decision just yet.
The finale of this quest will take place near the end of the Priority: The Citadel #2 main quest. If you didn't shoot Kaidan during the cut-scene with ambassador Udina, then you will meet him while trying to return to the Normandy and you will be presented with a choice. You can allow Kaidan to join admiral Hackett's team (he will become a war asset) or you can ask him to return to the Normandy as a crew member.
Prizes for completing the mission:
Notice! This mission doesn't appear in Shepard's journal!
Received from: Miranda Lawson [Citadel: Bay D24]
Unlocked by: You will be able to start this mission after completing Priority: Palaven main quest.
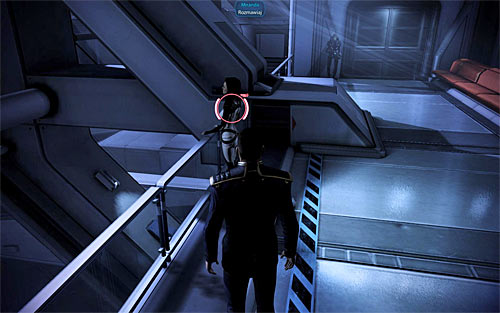
A chance of starting this quest should present itself after completing Priority: Palaven main quest, because you will receive a text message (private terminal) from Miranda Lawson (naturally this will only occur if Miranda didn't die in the previous game). Grant Miranda's wish by travelling to the Citadel. She can be found in [Citadel: Bay D24] and during the conversation you'll find that Miranda has some problems with her sister Oriana. Miranda won't ask you for your help in this matter, however this isn't the last time this topic will be mentioned.
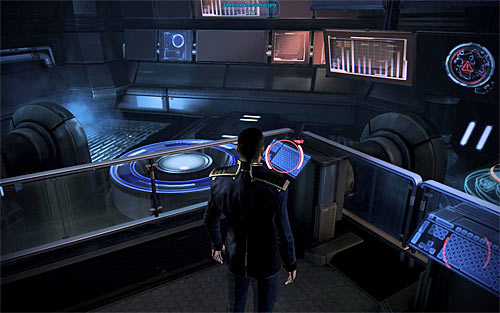
Miranda should send you another text message (private terminal) some time after you've completed Priority: The Citadel #2 main quest. Aside from reading the message from Miranda it's also very important that you use the same private terminal to read the info on Kai Leng sent by admiral Hackett. Once you've read both messages travel to the Spectres Office in [Citadel: Citadel Embassies] and interact with the previously inactive left terminal (screen above). Listen to the conversation with Miranda. If you've followed my advice and read the information about Kai Leng, then Shepard should automatically warn Miranda about him.
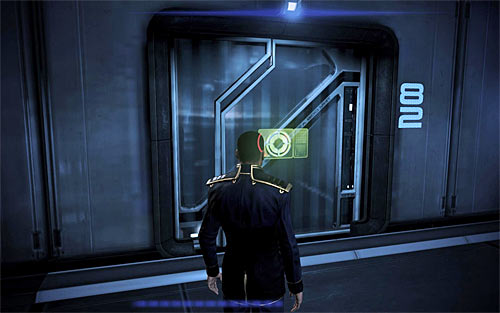
A third meeting with Miranda can take place very soon after the previous one described above. Travel to [Citadel: Presidium Commons] and you should notice that room 82 has been unlocked in the apartments district (screen above). Enter this room in order to initiate a conversation with Miranda (and a possible romantic moment with her). That's all you can do for now. The final meeting with Miranda will occur while completing Priority: Horizon main mission.
Notice! This mission doesn't appear in Shepard's journal!
Received from: Thane [Citadel: Huerta Memorial Hospital]
Unlocked by: You will be able to start this mission after completing Priority: Palaven main quest.
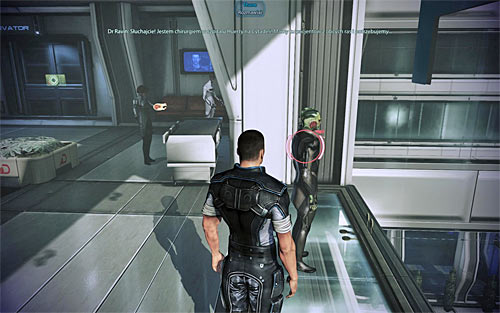
A chance of starting this quest should present itself after completing Priority: Palaven main quest, because you will receive a text message (private terminal) from Thane Krios (naturally this will only occur if Thane didn't die in the previous game). Grant Thane's wish by going to the Citadel. Thane can be found near the elevator in [Citadel: Huerta Memorial Hospital] and the conversation with him is mostly about his fatal disease (there's also a chance for a romantic scene). It's worth mentioning that meeting with Thane is required in order for him to provide assistance while completing Priority: The Citadel #2 main quest.
Notice! This mission doesn't appear in Shepard's journal!
Received from: Kelly Chambers [Citadel: Port - Holding Area]
Unlocked by: You will be able to start this mission after completing Priority: Palaven main quest.
![Kelly can be found in cargo hold B [Citadel: Port - Holding Area], however you will be allowed to meet her only if you've asked her to your private quarters for a romantic dinner in the previous game and only if she didn't die in the Collectors base - Citadel: Kelly Chambers* - Quests on the Citadel - Mass Effect 3 - Game Guide and Walkthrough](https://game.lhg100.com/Article/UploadFiles/201512/2015121617412528.jpg)
Kelly can be found in cargo hold B [Citadel: Port - Holding Area], however you will be allowed to meet her only if you've asked her to your private quarters for a romantic dinner in the previous game and only if she didn't die in the Collectors base.
The most important moment during the conversation with Kelly is the last dialogue option choice. Going with the upper dialogue option is equal to allowing Kelly to continue helping the refugees. Sadly this means that she will be tracked down by Cerberus forces in the near future and she'll die while completing Priority: The Citadel #2 main quest (there's no way of stopping that). As a result it's much better to go with the lower dialogue option in order to convince Kelly to change her identity. In this case she'll avoid detection and you'll be allowed to meet her several more times after defeating the Cerberus forces attacking the Citadel.
Received from: Solik Vass [Citadel: Port - Holding Area]
Unlocked by: You will be able to start this mission after completing Priority: The Citadel #2 main quest.
![Solik can be found near the elevator in [Citadel: Port - Holding Area] - Citadel: Inspirational Stories - Quests on the Citadel - Mass Effect 3 - Game Guide and Walkthrough](https://game.lhg100.com/Article/UploadFiles/201512/2015121617412508.jpg)
Solik can be found near the elevator in [Citadel: Port - Holding Area]. Initiate a conversation with him in order to find that he needs someone to shoot a few movies from the refugee camp for his documentary. Solik will ask you to use your omni-tool to create the footage.
Your task is to interact with three interactive spots. The first spot can be found near the memorial wall (screen above).
The second spot is located in cargo hold B (screen above).

The third spot is located to the west of dock E28. It's a table where James and a few other characters should be playing poker (screen above). You may return to Solik to give him the footage and to receive a reward.
Prizes for completing the mission:
Received from: Angry veteran [Citadel: Presidium Commons]
Unlocked by: You will be able to start this mission after completing Priority: The Citadel #2 main quest.
This quest can be activated by overhearing a conversation between an angry veteran and one of the civilians. Both characters are standing in a corridor near the elevator in [Citadel: Presidium Commons] and the conversation they're having is about a batarian who is most likely a terrorist and who was wounded during the Cerberus attack on the Citadel.
![Go to the Spectres Office in [Citadel: Citadel Embassies] and interact with the messages console - Citadel: Wounded Batarian - Quests on the Citadel - Mass Effect 3 - Game Guide and Walkthrough](https://game.lhg100.com/Article/UploadFiles/201512/2015121617412641.jpg)
Go to the Spectres Office in [Citadel: Citadel Embassies] and interact with the messages console. Find the message which is about the wounded batarian patient and you'll find out that this person is being treated in the refugees camp.
![You may now go to cargo hold C [Citadel: Port - Holding Area] - Citadel: Wounded Batarian - Quests on the Citadel - Mass Effect 3 - Game Guide and Walkthrough](https://game.lhg100.com/Article/UploadFiles/201512/2015121617412625.jpg)
You may now go to cargo hold C [Citadel: Port - Holding Area]. Talk to the nurse to find out how the patient is doing and then approach the batarian named Ghorek in order to trigger a conversation with him. You will be present with a choice at the end of this conversation - you can either grant Ghorek's last wish and let him die (upper right dialogue option) or you can prolong his sufferings by calling the nurse (lower right dialogue option).
Prizes for completing the mission:
Received from: Officer Noles [Citadel: Presidium Commons]
Unlocked by: You will be able to start this mission after completing Priority: The Citadel #2 main quest.
This quest can be activated by talking to Officer Noles. She should be standing close to the C-SEC office in [Citadel: Presidium Commons]. During the conversation with Officer Noles you'll find out that she needs assistance in tracking down a saboteur who is currently on the Citadel. She will suggest that you should use your Spectre authorization to take a closer look at the illegal use of batarian diplomatic codes.
![Go to the Spectres Office in [Citadel: Citadel Embassies] and interact with the messages console - Citadel: Batarian Codes - Quests on the Citadel - Mass Effect 3 - Game Guide and Walkthrough](https://game.lhg100.com/Article/UploadFiles/201512/2015121617412620.jpg)
Go to the Spectres Office in [Citadel: Citadel Embassies] and interact with the messages console. Find the message which is about the batarian codes and click on a button located in the lower right corner of the screen so that you'll start monitoring how the batarian codes are being used.
Your task is to inspect three consoles in various areas of the Citadel. Travel to [Citadel: Huerta Memorial Hospital] in order to locate the first console. It can be found in the right room of the laboratory section (screen above). Listen to a short conversation with Noles after you've examined the console.
![You must now go to [Citadel: Bay D24] - Citadel: Batarian Codes - Quests on the Citadel - Mass Effect 3 - Game Guide and Walkthrough](https://game.lhg100.com/Article/UploadFiles/201512/2015121617412711.jpg)
You must now go to [Citadel: Bay D24]. The second console can be found in the passenger lounge (screen above). Just as before, you must interact with the console and listen to a short conversation.
![Return to the elevator and travel to [Citadel: Port - Holding Area] - Citadel: Batarian Codes - Quests on the Citadel - Mass Effect 3 - Game Guide and Walkthrough](https://game.lhg100.com/Article/UploadFiles/201512/2015121617412739.jpg)
Return to the elevator and travel to [Citadel: Port - Holding Area]. The last third console can be found in dock E28. When you'll attempt to interact with this console you'll automatically trigger a meeting with the batarian captain named Balak (he may be replaced by someone else if he died in Bring Down the Sky DLC in the first Mass Effect). The game will allow you to choose between two endings - you can either shoot Balak (right dialogue option) or you can convince him to join you in the fight against the Reapers (special paragon or special renegade dialogue option). The second ending is much better, because you'll gain stronger war assets, however it's available only if you've sufficiently increased Shepard's reputation.
Prizes for completing the mission:
Received from: Ill-tempered civilians [Citadel: Presidium Commons]
Unlocked by: You will be able to start this mission after completing Priority: The Citadel #2 main quest.
![This quest can be activated by finding ill-tempered civilians in [Citadel: Presidium Commons] - Citadel: Cerberus Retribution - Quests on the Citadel - Mass Effect 3 - Game Guide and Walkthrough](https://game.lhg100.com/Article/UploadFiles/201512/2015121617412781.jpg)
This quest can be activated by finding ill-tempered civilians in [Citadel: Presidium Commons]. Listen to the conversation between the civilians in order to find out that they want a revenge on a traitor that's being held in the prison. It's worth adding that you can find out about the traitor by overhearing other conversations in the Presidium area, however they won't unlock this quest on their own. Join in on the conversation and you should be able to hear a communication sent by Aaron Sommers, informing everyone that he plans to murder the prisoner.
Head down the stairs and enter a nearby C-SEC office. Captain Aaron Sommers can be found near the entrance and obviously you must talk to him. Sommers will confirm that the conflict is about a traitor that helped Cerberus units during the attack on the Citadel and now wants an immunity in exchange for his statements. This quest has four endings. If you want to earn paragon points, then you can order Sommers to leave this place (upper right dialogue option) or talk some sense into him (special upper left dialogue option). If you want to earn renegade points, then you can pretend like you didn't hear anything (lower right dialogue option) or force the C-SEC officer to hand over the prisoner (special lower left dialogue option). The quest will end no matter how you've reacted, however it's important to know that both special dialogue options become available only if you've sufficiently developed your reputation.
Prizes for completing the mission:
Received from: none [Normandy SR-2: Combat Information Center]
Unlocked by: You will be able to start this mission after completing Priority: The Citadel #2 main quest.
This quest can be activated by interacting with Shepard's private terminal on the Normandy after completing Priority: The Citadel #2 main quest and reading a message sent by Primarch Victus. The message will be about the Primarch's suspicions concerning volus ambassador Din Korlack. Victus thinks that Korlack is a Cerberus spy and he asks you to use your Spectre authorization to find out more about the ambassador's actions.
![Go to the Spectres Office in [Citadel: Citadel Embassies] and interact with the messages console - Citadel: Volus Ambassador - Quests on the Citadel - Mass Effect 3 - Game Guide and Walkthrough](https://game.lhg100.com/Article/UploadFiles/201512/2015121617412789.jpg)
Go to the Spectres Office in [Citadel: Citadel Embassies] and interact with the messages console. Find the message which is about Din Korlack's current whereabouts. Follow the suggestion from the message and inspect the area to the left of the elevator. Talk to the embassy guard in order to find out that Korlack isn't currently here. Initiate the conversation with the guard for the second time and you'll be allowed to check Korlack's office.
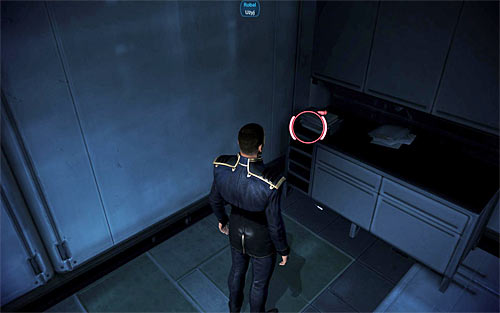
Once you're inside the ambassador's office Shepard should automatically interact with one of the terminals and I strongly recommend that you view all three recordings. Doing this will allow you to establish Korlack's past connections with the Cerberus, to find out about the threat to a turian colony and to discover Korlacks' current standing with Cerberus that will suggest he may have been kidnapped by bounty hunters. Close the terminal and find a small ear piece in one of the corners of the office (screen above).
![Shepard will automatically travel to [Citadel: Presidium Commons] and your job will be to find out where the ambassador is being held based on the hints he'll be providing - Citadel: Volus Ambassador - Quests on the Citadel - Mass Effect 3 - Game Guide and Walkthrough](https://game.lhg100.com/Article/UploadFiles/201512/2015121617412821.jpg)
Shepard will automatically travel to [Citadel: Presidium Commons] and your job will be to find out where the ambassador is being held based on the hints he'll be providing. Head towards the apartments district of the Presidium (it's located in the southern area of the map). Check either of the doors located on two opposite ends of the main corridor. After you've established that the first door is locked turn around and proceed towards the second door. In this case you'll successfully open the door.
Opening the door will automatically trigger a cut-scene and it may play out differently based on your previous decisions. If Zaeed died in Mass Effect 2, then Shepard will automatically kill all the bounty hunters. If Zaeed survived the events of Mass Effect 2 and if you didn't complete his personal quest, then he will be critically injured while trying to save the ambassador's life. If Zaeed survived the events of Mass Effect 2 and if you've completed his personal quest, then he will kill all the bounty hunters prior to your arrival.
The most important conversation is the one with Din Korlack himself, especially since it has several different endings. Two endings are always available, however if you manage to fulfill additional requirements you may also unlock two additional endings. The first standard ending is to force the volus ambassador to give you a name of a turian colony that is about to be destroyed (upper right dialogue options). Doing this will result in earning paragon points, however you won't gain the volus fleet as a war asset. The second standard ending is to agree to the ambassador's proposal which will be about handing over a volus bombing fleet as a war asset in exchange for not sharing the name of a turian colony that is in danger (lower right dialogue option). Doing this will result in earning renegade points and a valuable volus war asset. You will however weaken one of the existing war assets (Turian Sixth Fleet), because a part of the turian fleet will be destroyed as a result of not being prepared for the attack on the colony.
The first additional ending is to use a special paragon dialogue option (upper left) and it's only available if you've sufficiently developed your reputation. The second additional ending is to ask Zaeed to take charge in this conversation by activating the special renegade dialogue option (lower left) and it's only available if Zaeed is still alive and if you've sufficiently developed your reputation. In both cases you'll find out the name of the turian colony AND receive a volus fleet as a war asset.
Notice - If you've met Zaeed while completing this quest, then you should consider meeting him once again in [Citadel: Port - Holding Area], because you may turn him into a valuable war asset [Zaeed Massani].
Prizes for completing the mission:
Received from: Doctor [Citadel: Port - Holding Area]
Unlocked by: You will be able to start this mission after completing Priority: Geth Dreadnought main quest.
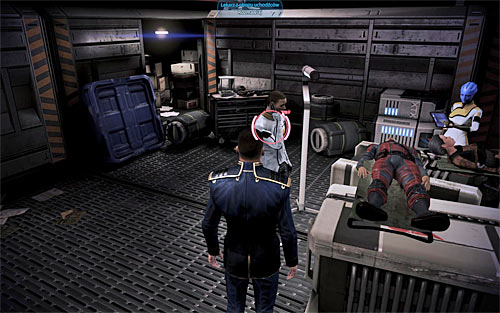
This quest can be activated by initiating a short conversation with a doctor that's helping out the refugees. The person you're looking for can be found in cargo hold B in [Citadel: Port - Holding Area]. The doctor will inform you that someone has deliberately sabotaged nearby medi-gel dispensers and you're going to be asked for assistance in this matter.
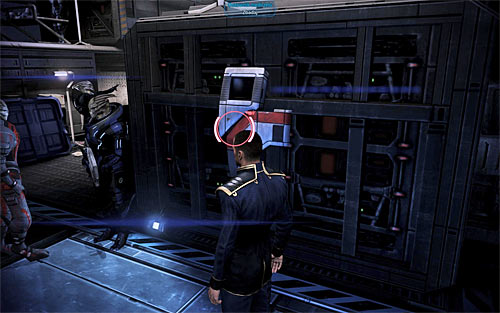
If you've talked to Conrad Verner both in Mass Effect 1 as well in Mass Effect 2, then you may decide to search for him near dock E24. Initiate a conversation with Verner during which Shepard will explain to him what the Cerberus is doing and will find out how the dispensers were sabotaged. If you don't want to meet with Verner or if you can't find him, then you may focus on finding the dispensers without additional delays. Your objective is to repair three of them. Two dispensers can be found near cargo hold A and the third dispenser is near cargo hold C.
Return to the doctor after you've repaired the dispensers. If you've talked to Conrad, then an additional cut-scene will be played and Verner will save Shepard's life. Conrad himself can die unless he's rescued by Jenna and this will occur only if you've helped Jenna as a part of one of the side quests in Mass Effect 1. If you didn't meet with Verner, then the quest will end right away and you won't have to fear for your life.
Prizes for completing the mission:
Received from: Specialist Traynor [Normandy SR-2: Combat Information Center]
Unlocked by: You will be able to approach this mission after completing Priority: Palaven.
![After returning from the Menae moon and solving the problem with the AI (Normandy SR-2: EDI*), go meet with Specialist Traynor found in [Normandy SR-2: Combat Information Center] - Grissom Academy: Investigation - Quests outside the Citadel - Mass Effect 3 - Game Guide and Walkthrough](https://game.lhg100.com/Article/UploadFiles/201512/2015121617412853.jpg)
After returning from the Menae moon and solving the problem with the AI (Normandy SR-2: EDI*), go meet with Specialist Traynor found in [Normandy SR-2: Combat Information Center]. One of the topics should refer to the problems of the title Grissom Academy, which as Traynor suspect is under Cerberus attack.
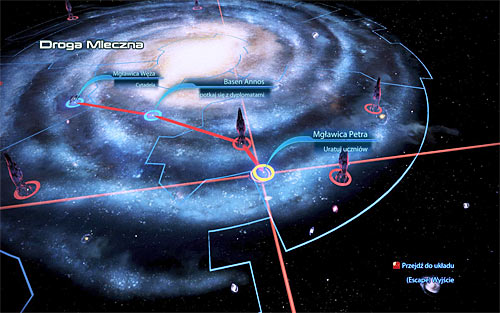
In order to begin this mission, use the galaxy map and fly to Petra Nebula. After getting there (Vetus system), fly to Grissom Academy and dock. As you fly towards the Academy, the fear concerning the Cerberus forces will be confirmed. Listen to Kahlee Sanders message and wait to be transported to [Grissom Academy]. A new quest will be therefore activated - Grissom Academy: Emergency Evacuation.
Prizes for completing the mission:
Received from: Kahlee Sanders [Grissom Academy]
Unlocked by: Received automatically after completing Grissom Academy: Investigation.
![Start exploring [Grissom Academy] and you will learn that Kahlee has locked herself in the server room - Grissom Academy: Emergency Evacuation - Quests outside the Citadel - Mass Effect 3 - Game Guide and Walkthrough](https://game.lhg100.com/Article/UploadFiles/201512/2015121617412931.jpg)
Start exploring [Grissom Academy] and you will learn that Kahlee has locked herself in the server room. Head onwards, stand by the door and deal with the group of Troopers. Afterwards turn right and try to interact with the partially opened door. It will start a cutscene with Kahlee, during which you will be asked to save the students. Once outside again [200 EXP], head onwards and wait until Kahlee unlocks a new passage.
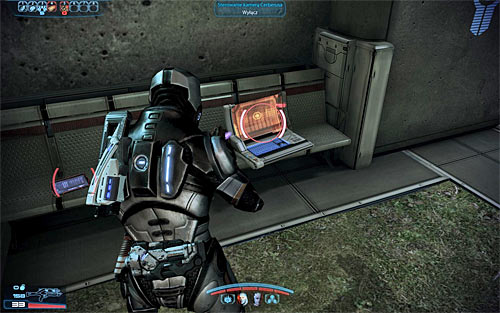
Ignore the scene taking place behind the window, as you cannot destroy it and help the student. Instead, head to the neighbouring room. After reaching the new area, jump over the obstacle and pick up [Assault Rifle Stability Damper] lying on the stairs. Continue exploring the facility and you will eventually come across two Troopers and Reiley Bellarmine hiding himself inside a force field. Kill the enemies and approach the student to learn of his lost sister Seanne. While you're at it, look around the area to find a datapad [1250 credits].
![Jump over the new obstacle and look around the computer terminals room to find the tactical analysis review [20 EXP] and [SMG Heat Sink] - Grissom Academy: Emergency Evacuation - Quests outside the Citadel - Mass Effect 3 - Game Guide and Walkthrough](https://game.lhg100.com/Article/UploadFiles/201512/2015121617412976.jpg)
Jump over the new obstacle and look around the computer terminals room to find the tactical analysis review [20 EXP] and [SMG Heat Sink]. Move onwards. After reaching another room with terminals, quickly place your team members behind covers and be ready to attack the Cerberus soldiers who will appear in the distance. I'd suggest destroying the generator as fast as possible, thanks to which the enemies won't be able to hide behind shields. Afterwards head to the other end of the room and turn left. In the barricaded corridor you will find the [M-22 Eviscerator].
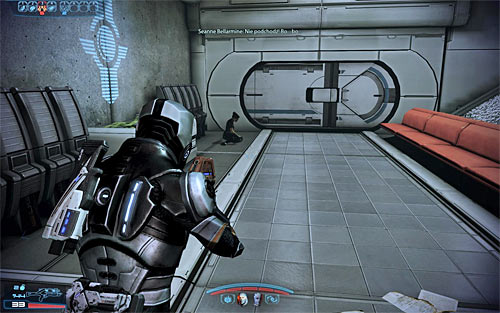
Return to where you fought the last battle and choose the previously ignored right passage. Temporarily forget about the mission objective, head forward and afterwards turn left to find Seanne Bellarmine. Speak to her [100 EXP] and also look around to find the [Mnemonic Visor], [M-96 Mattock] and [1250 credits] behind the locker. Only now should you head to the door leading to the Orion Hall. Destroy the generator on the right, thanks to which Kahlee will be able to jam the Cerberus signal and start broadcasting herself.
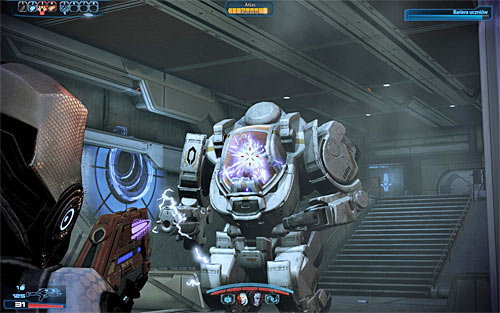
Opening the second door will initiate a cutscene showing students fighting off the Cerberus forces. It's worth to notice that if Jack hasn't died in the previous game, she will be in command. Your team will automatically join the fight. During it the biggest threat will be of course the large Atlas Mech. If it's the first time you come across such a machine, it's worth to remember about using the right type of powers and ammunition. This specific Mech doesn't have a shield, only armour. Look out for its rocket attacks and try to aim at the operator sitting inside the glassed cabin, as therefore you might be able to destroy it faster.
Apart from the Mech, there are also Cerberus soldiers stationed in the room. Eliminating the first group will be very easy, though I'd suggest looking out for the second which will appear on the stairs on the right. Also note that you can fail this battle if the students' barrier becomes depleted completely. It's however not likely to happen, as the Mech will mainly focus on you and the attacks on the normal soldiers shouldn't cause as much damage. After the fight speak with the students, Cortez and Kahlee.

Begin exploring the area. Above all look to the left of the starting point (ground floor) for the Cerberus camera control laptop [500 EXP] to fulfill Kahlee's request and give her back access to all cameras on the station. Apart from that you can find a Med Kit [100 EXP] and a Data Log [20 EXP]. Now head to the upper floor, where the students are. Search for the [Assault Rifle Precision Scope] and Datapad [1875 credits]. In the end use the terminal to bypass the door lock and gain access to the atrium [500 EXP].
Return to the ground floor and choose the corridor above the balcony on which the adepts are. Trying to open the door will launch a cutscene featuring them, though whether you advice them to keep out of danger or participate in the fights doesn't really matter. I'd however suggest you save your game, as soon a long two-part battle in the atrium will begin.
The first part of the battle will begin right after you open the new door. Start off by placing you team behind covers, at best beside the ramp leading onto the upper level. Begin attacking the enemies, focusing on destroying the Atlas Mech in the first place (it doesn't have shields as well). Only after the Mech blows up should you move to fighting the other enemies. I'd especially suggest you look out for the Guardians (don't let them get close) and Engineers (stop them from placing turrets), but also Trooper who will appear on the upper level, right of the starting point. Try to restock on ammo during calmer moments, looking beside the bodies of dead enemies.
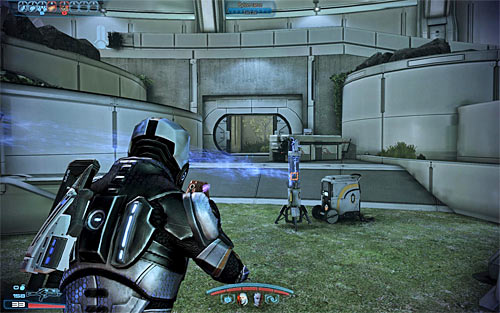
Keep fighting until you eliminate each enemy. Afterwards look around the area and head onto the lower level to locate the only possible passage (screen above) leading to the second part of the atrium. Restock on ammo on your way, take the Med Kit [100 EXP] and interact with the computer [3750 credits].
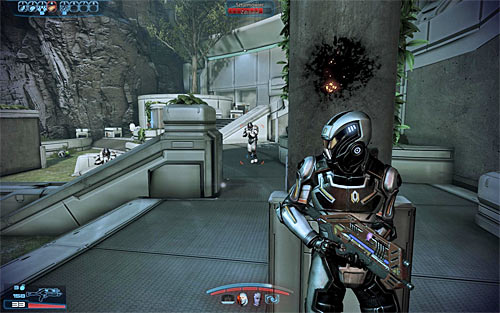
More battles will start right after you reach the further part of the atrium. Note that the door behind your back wasn't blocked this time, so you can use it in case of danger. I'd suggest making your stand beside the door to the second part of the atrium or by the ramp leading onto the upper level. No Mech will participate in this battle, though on the other hand you will have to stop the Cerberus Engineers from placing turrets. After the battle, examine the area and choose the only possible passage leading to Cerberus shuttles.
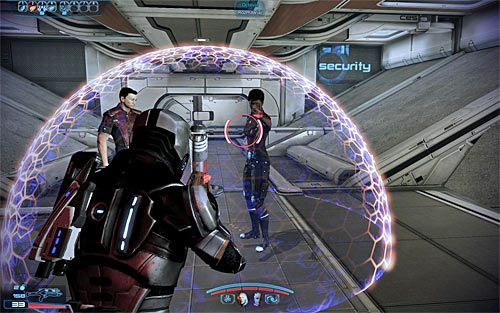
Head onwards and turn left to reach more students attacked by Troopers. Perform a preemptive attack on the Cerberus soldiers and speak with Octavia. You can convince her to your good intentions in two ways - by letting Kahlee speak or by turning off the force field behind which the students are hiding. Regardless of the chosen option, don't forget to examine the area to find a computer terminal [4375 credits]. Move onwards afterwards.
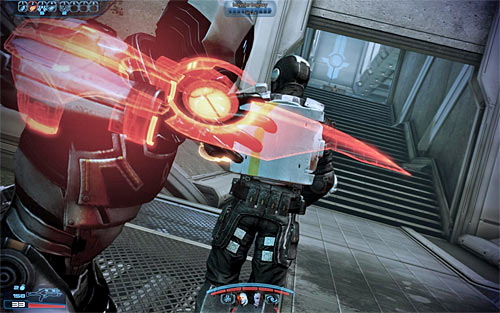
On your way to the shuttles, be sure to check the Biotic Amp Interfaces, as it's connected with the Citadel: Biotic Amp Interfaces mission. continue onwards, finding an armour piece [Serrice Council Chestplate] on your way. Open the door and quickly deal with the Engineer. Afterwards, search for a Med Kit [100 EXP] and Data Log [20 EXP]. Depending on your liking, you can now either head to the shuttles on foot or interact with the Atlas Mech to take control of it.
It's much easier to deal with the enemies using the Mech, as the machine is very resistant and has large fire power. Don't forget about being able to perform melee attacks, especially against those enemies who have approached the machine. Focus on the enemies closest to the students, as once again a bar showing the durability of their barrier will be displayed on screen. An enemy Mech will also appear in the area in the last part of the fight and its best do defeat it from a big distance.
If you don't want to use the Mech, you need to be ready for a rather hard fight. First of all take care of the enemies who are attacking the students (remember about keeping an eye on the barrier durability bar!). After eliminating the enemy soldiers you should head there with your team, placing them behind pillars or other solid covers. After further battles break out, keep listening to the comments regarding where enemies appear and focus on eliminating those who approach you dangerously close. It's also good to destroy the generators, so that the enemies have problems with hiding behind shields. Leave the Atlas Mech for the very end and look out for its rocket attacks.
Keep fighting until you eliminate every enemy. BEFORE leaving this area, look around the starting point for the [SMG Magazine Upgrade]. Only after collecting it should you head to the door leading to the shuttles. A cutscene will start, during which Prangley might die (only if Jack isn't among the students). The others will be saved, so you will be praised by Admiral Anderson.
Notice - After returning to the Citadel you should use the Spectre Terminal in [Citadel: Citadel Embassies] and authorize giving access the rooms to the Grissom Academy teachers.
Prizes for completing the mission:
Received from: Lieutenant Tarquin Victus [Tuchanka: Downed Vessel]
Unlocked by: You will receive this mission automatically while completing Tuchanka: Turian Platoon main quest.
Notice! You must finish this mission before completing more than two other quests, because otherwise you'll fail the assignment (the bomb will be detonated)! My recommendation is to take interest in it as soon as you've rescued the turian platoon.
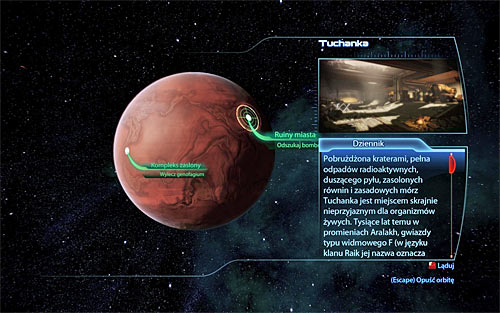
You will find out about the Cerberus bomb on Tuchanka that's ready to be detonated at the end of Tuchanka: Turian Platoon main quest and that's the moment when this mission will be added to your journal. Open the galaxy map and plan a trip to the Krogan DMZ. Once you're there (Aralakh system), fly to the planet Tuchanka. Notice - If there are other points of interest on the surface, make sure to choose the correct one which are the city ruins. Wait until you're transported to the battlefield in [Tuchanka: City ruins].
Leave the shuttle after you've landed and immediately find cover for the entire team. Start attacking Cerberus units seen in the distance. You will be dealing mostly with troopers and centurions during this mission, so it shouldn't be too difficult. I recommend that you move ahead after defeating each group of enemy units, because doing this should prevent reinforcements from showing up. You should also consider destroying generators along the way, so that enemy units won't be able to use additional cover (the only exception is if you want to hide behind energy barriers yourself). Keep pushing forward until you've reached a large ramp leading to a higher level.
![Use the ramp, finding a sniper rifle [M-29 Incisor] and a weapon mod [Shotgun Blade Attachment] along the way - Tuchanka: Bomb - Quests outside the Citadel - Mass Effect 3 - Game Guide and Walkthrough](https://game.lhg100.com/Article/UploadFiles/201512/2015121617413168.jpg)
Use the ramp, finding a sniper rifle [M-29 Incisor] and a weapon mod [Shotgun Blade Attachment] along the way. You'll soon reach a new area. It's important to take cover quickly, because there at least two active turrets nearby. Attack enemy units, focusing on a quick elimination of Cerberus engineers. You can also increase your chances by destroying generators/shield pylons and moving to your right in order to organize a surprise attack from a flank. Keep fighting until you've won and then search the area for an armor fragment [Rosenkov Materials Gauntlets].
Choose the only available passageway leading to the next area of the map. Don't move too fast so that you'll find a console [5000 credits] and a weapon mod [SMG Heat Sink]. A new battle will begin soon after picking up the weapon upgrade, but since you'll be dealing with the weakest kind of soldiers you should score an easy win. Continue moving forward and don't forget to always explore your surroundings, so that you'll collect a med-kit [50 EXO] and a weapon mod [Pistol Scope].
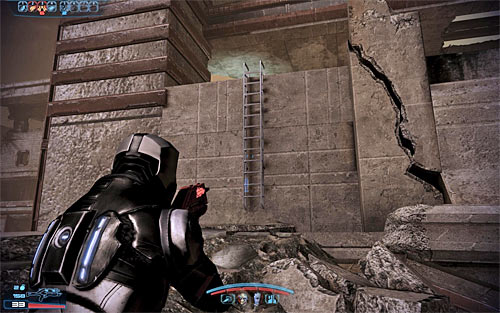
Ignore enemy forces evacuating from the planet, however if you're fast enough you may be able to score a few kills before they manage to board shuttles. Check the area where enemy units were stationed to find a datapad [5000 credits]. Get ready for a longer battle. It shouldn't be too hard to win here as long as you'll remember about using cover. Head forward once it's safe. Ignore the bomb and find a ladder instead (screen above). Reach an upper balcony and look around to find a weapon mod [Sniper Rifle Concentration Module]. Another weapon upgrade [Pistol Melee Stunner] can be found a little further ahead.
Once again, you should ignore enemy soldiers. Don't move forward right away, because one of the engineers has left a turret here and it must be destroyed. Search this area to find turian technology [2500 credits], a med-kit [100 EXP] and a terminal with turret control schematics (they're needed to complete Citadel: Cerberus Automated Turret Schematics side mission). Save your game after finding a new ladder (screen above), because interacting with it will trigger a cut-scene and you'll soon begin the final battle of this quest [600 EXP].
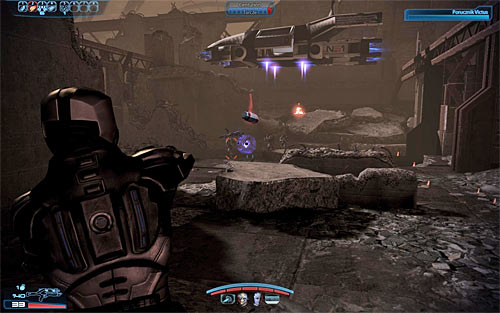
The main purpose of this battle is to keep defending lieutenant Victus while he's trying to disarm the bomb (his energy bar is displayed in the top right corner of the screen). Place one team member near the left passageway and one team member near the right passageway and wait for the battle to start. Your allies will be shouting each time a Cerberus shuttle has arrived, informing you where the next attack will take place. That's where you must go in order to assist your colleague in defeating enemy units. Don't worry about ammunition or grenades too much, because this isn't a long battle and defending Victus is very important.
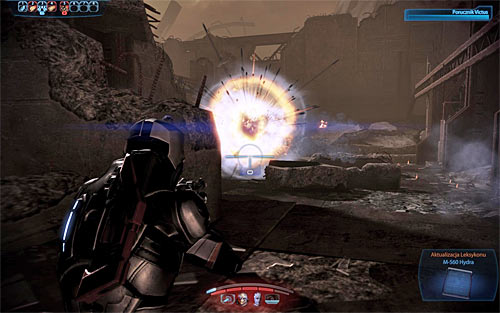
The final phase of this battle will feature an arrival of an enemy Atlas mech. As soon as this has happened check the area to your right in order to find a unique weapon [M-560 Hydra Rocket Launcher]. Use the launcher to destroy the mech and of course remain close to the cover while you're aiming, so you won't become an easy target. Once you've destroyed the mech you'll have to deal with several other groups of soldiers, but it shouldn't be too hard. The mission will end with a cut-scene showing a heroic death of lieutenant Victus while trying to disarm the bomb. Wait until you return to Normandy where you'll talk to admiral Hackett, the Primarch and Wreav/Wrex.
Prizes for completing the mission:
Received from: Liara T'Soni [Normandy SR-2: Combat Information Center]
Unlocked by: You will be able to start this mission after completing Priority: The Citadel #2 main quest.
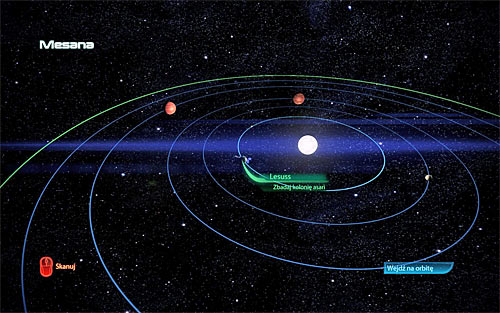
A chance of starting this mission will present itself immediately after completing Priority: The Citadel #2 main quest. Return to the Normandy and you should automatically trigger a conversation with Liara. She will ask you to investigate one of the asari colonies in order to find out the reason for sending a distress signal. Open the galaxy map and plan a trip to the Nimbus Cluster. Once you're there (Pelion system), fly to an adjacent system named Mesana. Here you'll have to hover over the planet Lesuss and confirm that you want to land on its surface. Wait until you're transported to [Lesuss: Monastery], listening to a conversation about the Ardat-Yakshi asari during the flight (it's recommended to take Liara for this mission). The game will soon unlock a new quest -Kallini: Ardat-Yakshi Monastery.
Prizes for completing the mission:
Received from: none [Lesuss: Monastery]
Unlocked by: Received automatically after completing Mesana: Distress Signal.
![You may begin exploring the Ardat-Yakshi monastery located in [Lesuss: Monastery] - Kallini: Ardat-Yakshi Monastery - Quests outside the Citadel - Mass Effect 3 - Game Guide and Walkthrough](https://game.lhg100.com/Article/UploadFiles/201512/2015121617413292.jpg)
You may begin exploring the Ardat-Yakshi monastery located in [Lesuss: Monastery]. Start off by examining the area around the landing site and you'll find a weapon mod [Assault Rifle Stability Damper]. Once you have the upgrade enter the monastery. Perform two jumps and use several ladders in order to make your way to a dark and large room. You won't encounter any enemies here, but you will find a lot of loot - a console, a computer, a palmtop [20 EXP], two weapon mods [Pistol Melee Stunner] [Sniper Rifle Spare Ammo], a safe [7500 credits] and a terminal [Intel data (Gallae's Electronic Signature)]. After you're done exploring choose the passageway where a dead asari can be found (naturally you should examine the body before leaving) [600 EXP].
Continue exploring the monastery. It will be very easy, because you still won't be bothered by any enemies. Use your Omni-tool to open one of the doors and make sure to pick up a palmtop found near a dead asari (this item is needed to complete Citadel: Asari Widow side mission) [20 EXP]. If Samara didn't die in the previous game, then you may also have your first encounter with her, but it's not that important. SAVE your game before entering a large square (screen above), because the first battle of this quest is about to begin.
A single banshee will soon appear at the square and assuming that you've started this mission soon after receiving it this will most likely be your first encounter with an Ardat-Yakshi asari mutated by the Reapers. The most important thing you should know is that it's very important to maintain a large distance from the banshee. Don't be fooled by a very slow walk, because the banshee can also teleport itself, rapidly decreasing its distance to your team. Thankfully this is a very large square, so you shouldn't have major problems staying away. As for attacking the banshee, the monster is surrounded by a biotic barrier, so it's crucial to use ammunition, grenades and powers that can weaken it. Focus on avoiding the banshee's attacks which will include homing projectiles and a powerful shockwave. The second attack needs a few seconds to charge and this means you'll always have some time to quickly move away. One last thing to remember is that the banshee can regenerate itself in a small way, so you shouldn't leave it alone but try to defeat it in a single long attack.
Once you've defeated the banshee a group of cannibals should appear in the area and thankfully killing them is going to be very easy. Secure this entire square, collect much needed ammunition and then proceed towards the only available door. Use your Omni-tool to open the door. The game will automatically start a conversation with Falere, one of the surviving sisters of the Ardat-Yakshi monastery. It doesn't matter how you respond to her appearance and whether Samara will take part in this meeting or not, because Falere will soon flee hoping to save her sister Rili in time.
![Explore the area to find a computer with a recording [20 EXP] and then go towards the only interactive door - Kallini: Ardat-Yakshi Monastery - Quests outside the Citadel - Mass Effect 3 - Game Guide and Walkthrough](https://game.lhg100.com/Article/UploadFiles/201512/2015121617413346.jpg)
Explore the area to find a computer with a recording [20 EXP] and then go towards the only interactive door. Attack a single marauder that's going to be accompanied by a group of cannibals. Make sure to use proper types of ammunition and powers during this fight and the upcoming ones, because some monsters may be protected by additional biotic barriers. Explore this entire floor after the battle, including side rooms. You can find an armor fragment [Serrice Council Shoulders], a shotgun [Disciple], a medical station [150 EXP], two computers [20 EXP], a safe [5000 credits] and a weapon modification station.
Save your game before trying to use one of the stairs to reach the ground floor. A new battle will soon begin and your top priority should be a new banshee. The rules of killing the banshee and avoiding its attacks haven't changed since the last time. I recommend using the balustrades on the upper floor for cover and to prevent the banshee at all cost from using the stairs. Once you've killed the banshee you may start attacking the cannibals. There aren't a lot of them so this battle should end quickly.
Check the area and then go to the only available door. Use the Omni-tool on the door, enter the next room and look around to find a dead asari and a weapon mod [Assault Rifle Precision Scope]. Once you've finished exploring head to the exit and interact with the lift controls [400 EXP]. Save your game after entering the Great Hall (screen above), because the final battle of the quest will soon take place here.
![Explore the Great Hall (you won't encounter any hostile creatures just yet) in order to memorize the locations of all ammo stashes and to find two medical stations [150 EXP] [150 EXP] and one med-kit [100 EXP] - Kallini: Ardat-Yakshi Monastery - Quests outside the Citadel - Mass Effect 3 - Game Guide and Walkthrough](https://game.lhg100.com/Article/UploadFiles/201512/2015121617413387.jpg)
Explore the Great Hall (you won't encounter any hostile creatures just yet) in order to memorize the locations of all ammo stashes and to find two medical stations [150 EXP] [150 EXP] and one med-kit [100 EXP]. If you have a full supply of medi-gels you can ignore the healing supplies for now, because you might need them more during the battle and you'll be allowed to return for them after defeating all hostile beings. Approach the bomb (screen above) and examine it to trigger a cut-scene involving the sisters and to start the final battle.

The biggest problem of this battle is that you'll have defend yourself from TWO banshees at the same time. Focus the attention of your entire time on one of the banshees, trying to kill it as fast as possible. You also have to worry about husks heading your way, preventing them from moving close enough to trigger melee attacks. Don't forget that you can move freely around this hall, because the bomb doesn't have any energy bars and therefore you won't have to defend it. Try keeping the banshees at a safe distance and avoid their shockwaves at all costs. Once you've killed the first banshee attack the other one and leave the standard monsters for last.
![Once you've won the battle [400 EXP] make sure to collect the supplies again (including medical ones if you've ignored them before) and approach the bomb for the second time in order to find its detonator - Kallini: Ardat-Yakshi Monastery - Quests outside the Citadel - Mass Effect 3 - Game Guide and Walkthrough](https://game.lhg100.com/Article/UploadFiles/201512/2015121617413315.jpg)
Once you've won the battle [400 EXP] make sure to collect the supplies again (including medical ones if you've ignored them before) and approach the bomb for the second time in order to find its detonator. This will result in triggering a very effective cut-scene during which Rila will sacrifice her own life to ensure that her sister and your team will leave the monastery in time. Wait until you're back outside where you'll have to engage in at least one more conversation. If Samara is still alive she'll try to commit suicide and you can stop her from doing that by activating a paragon interrupt (right mouse button). The second conversation (or the only one if Samara died in the previous game) is with Falere and it has two endings - you can kill the Ardat-Yakshi (renegade interrupt - left mouse button) or you can believe in her promise and leave her alive in the monastery. The team will return to the Normandy where you'll talk to the asari councillor.
Prizes for completing the mission:
Received from: Specialist Traynor [Normandy SR-2: Combat Information Center]
Unlocked by: You will be able to start this mission after completing Priority: The Citadel #2 main quest.
![Specialist Traynor will inform you about the possibility of starting this quest some time after completing Priority: The Citadel #2 main quest and it will occur when you'll approach her station in [Normandy SR-2: Combat Information Center] - Arrae: Ex-Cerberus Scientists - p. 1 - Quests outside the Citadel - Mass Effect 3 - Game Guide and Walkthrough](https://game.lhg100.com/Article/UploadFiles/201512/2015121617413300.jpg)
Specialist Traynor will inform you about the possibility of starting this quest some time after completing Priority: The Citadel #2 main quest and it will occur when you'll approach her station in [Normandy SR-2: Combat Information Center]. Initiate a proper conversation with Traynor to find out the details and she'll inform you about a group of Cerberus scientists that have deserted and might be useful in the upcoming battle with the Reapers. Open the galaxy map and plan a trip to the Minos Wasteland. Once you're there (Fortis system), fly to an adjacent system named Arrae. Here you'll have to hover over the planet Gellix and confirm that you want to land on its surface.
![Watch a cut-scene showing fights between the scientists and Cerberus soldier and once you've reached your destination begin exploring [Gellix: Science laboratory] - Arrae: Ex-Cerberus Scientists - p. 1 - Quests outside the Citadel - Mass Effect 3 - Game Guide and Walkthrough](https://game.lhg100.com/Article/UploadFiles/201512/2015121617413469.jpg)
Watch a cut-scene showing fights between the scientists and Cerberus soldier and once you've reached your destination begin exploring [Gellix: Science laboratory]. Start moving towards the scientists, eliminating soldiers standing in your way. A new group of Cerberus units should appear close to the entrance to the base and you'll have to be more effective than usual, because they'll be protected by additional tech shields. Destroying the shield pylons isn't required, however it may be help you in your cause. If you can't find the pylons you can also wait for enemies to come to you, forcing them to forfeit the protection. Continue fighting until you've killed all Cerberus soldiers [500 EXP].
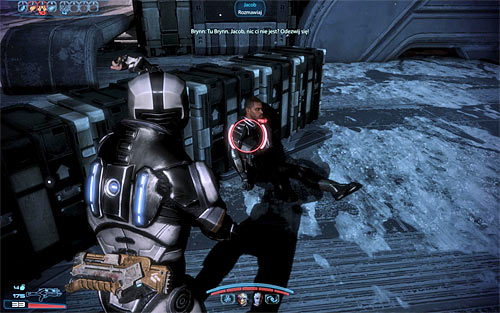
Collect the ammunition and then head towards the place where the scientists were defending. You'll encounter Jacob Taylor here, however if he died in the previous game he may be replaced by doctor Webber. Initiate a conversation with Jacob/Webber and wait to be transported to the base. Here you'll have a chance to talk to doctor Brynn Cole and you'll find out that the scientists can't escape until the anti-aircraft cannons have been disabled. As you probably suspect shutting down the AA guns will be up your main task in this mission.
The game will give you some time to explore the first part of the base and there are plenty of things here to do. Talk to doctor Brown and to doctor Archer (only if he didn't die in the previous game), find a datapad [2500 credits] and open a nearby door. Here you'll find a weapon upgrade station and a weapon mod [Assault Rifle Magazine Upgrade]. Continue your exploration, using the stairs and finding a medical station [50 EXP] along the way. Head towards the new stairs. Once you've reached the second part of the base you'll trigger a conversation which will be about the evacuation plans. You'll be informed that your task will be to reach a satellite console.
You don't have to go to your new objective right away, because you should spend some time to explore the second part of this base. You can find five datapads [2500 credits] [1250 credits], data on a turian poison (it's needed to complete Citadel: Cerberus Turian Poison side mission), a weapon mod [Shotgun High Caliber Barrel], an armor fragment [Kassa Fabrication Greaves] and a medical station [150 EXP]. You should also consider talking for the second time to doctor Brynn and to Jacob/Webber. Once you're done here proceed towards the only available door (screen above).
![You'll be travelling through narrow and linear corridors, however you shouldn't be moving too fast, because otherwise you may miss an opportunity of picking up a new heavy pistol [M-6 Carnifex] - Arrae: Ex-Cerberus Scientists - p. 1 - Quests outside the Citadel - Mass Effect 3 - Game Guide and Walkthrough](https://game.lhg100.com/Article/UploadFiles/201512/2015121617413479.jpg)
You'll be travelling through narrow and linear corridors, however you shouldn't be moving too fast, because otherwise you may miss an opportunity of picking up a new heavy pistol [M-6 Carnifex]. It shouldn't take you long to reach the first area occupied by Cerberus forces. I strongly recommend that you surprise enemy units by throwing a grenade or using one of the offensive powers to destroy a shield pylon. Get rid of Cerberus soldiers and head on to the next section of the map.
Remain on the upper level and send your team members to the lower level. More Cerberus troops can be seen in the distance and of course you should start attacking them. Just as before, consider using offensive powers and grenades to shut down nearby generators and therefore to prevent enemies from using additional defences. Reinforcements will soon arrive and you should remember that if you're fast enough you can kill enemies before they even touch the ground. Keep fighting until it's safe here again and then search the area to locate a weapon mod [SMG High Caliber Barrel]. Approach the satellite console, finding a datapad [2500 credits] and a med-kit [100 EXP] nearby.
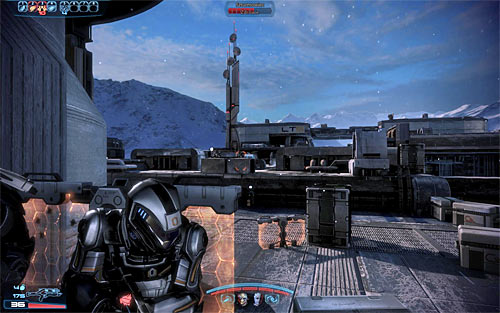
Consider reactivating nearby generator, because the additional defences will soon come in handy. Interact with the satellite console and wait for the entire procedure to end [300 EXP]. Quickly turn around and take cover behind the barriers which are supported by the generator. New enemies will appear to your left and you shouldn't leave cover until they're all dead. Proceed towards the unexplored part of the map.

Get ready to start a fight with a new group of soldiers who will arrive in Cerberus shuttles. Obviously you should try killing them before they land on the ground or on the roof. It's also a good idea to destroy nearby generators and shield pylons. One of the Cerberus soldiers may attempt to take control over a stationery turret found on the roof to your right (screen above) and if he succeeds you'll have to deal with this additional complication. There are two solutions to this problem - you can try avoiding the turret fire by using cover and sprinting towards nearby obstacles or you can attack the Cerberus soldier in hopes of killing him. Sniper rifle is a good idea in this situation, however you can also rely on some of the offensive powers of your team members to kill that person.
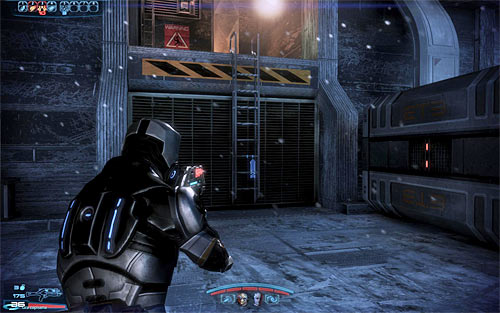
Keep pushing towards the large building seen in front of you and don't forget to use cover if you didn't kill the turret operator. You'll have to climb several times along the way and you'll also find a med-kit [100 EXP] and a weapon mod [Sniper Rifle Piercing Ammo]. The ladder seen to your right is damaged, so you must proceed towards the left ladder (screen above). Once you're on the roof don't forget to quickly kill the soldier operating the turret (assuming he's still alive). Take some time to explore the roof and you'll locate a datapad [3750 credits] and a med-kit [100 EXP]. I also recommend checking a small ledge that was previously unaccessible due to the damaged ladder (you'll have to land on it to reach it), because you'll collect an additional weapon mod [Shotgun Spare Ammo].
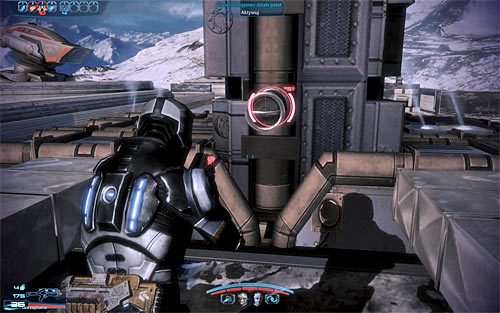
There are two interactive panels on the roof and you should approach the control panel that is located further away from the stationary turret (screen above). Interact with it [200 EXP], watch a short cut-scene and then head towards the second control panel (the one that's closer to the turret) to repeat this action. Make sure that at least one biotic will take part in the upcoming battle (one of the team members must do some repairs), because that will make it easier. Start off by sprinting towards the stationary turret in order to start using it.
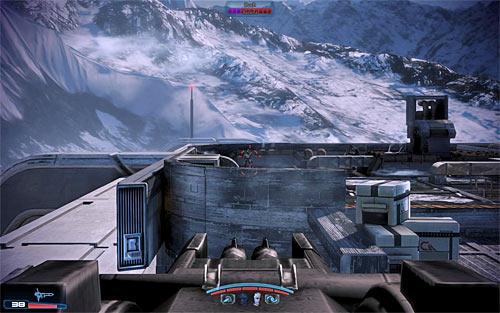
Enemy forces will soon start arriving in shuttles and of course it'll be up to you to kill them. Don't forget to fire short bursts, because otherwise the turret can easily overheat. Focus on eliminating enemies that heading your way, preventing them from moving too close (otherwise they may be able to leave your line of fire). It's also important not to miss the moment when a phantom will join the battle (screen above), eliminating it as soon as possible. New enemies will soon appear on the lower square and you also shouldn't ignore them, because they have jetpacks and therefore can easily make their way to the roof area.
Continue fighting until you've managed to kill all Cerberus forces. Return to the repaired control panel and interact with it again [200 EXP]. You'll soon be transported to the safe part of the base and you're going to be asked if you want to evacuate straight away (lower right dialogue option) or if you want to wait (upper right dialogue option). Waiting doesn't give you anything, because it's only about receiving the last chance to collect the items you may have ignored before. If you chose this option, then you can resume the mission by interacting with an evacuation console (this is also an ideal moment to save your progress).
A new battle will start as soon as the cut-scene has ended and you'll have to quickly eliminate the troopers that have landed inside this room. Once they're gone proceed towards the stairs leading to the lower level, because your job will be to return to the area where you've started this mission. New enemies are stationed in the room in which the shuttles are being preparing for flight, however the main battle awaits you outside, close to the landing site.
I strongly recommend that you storm the enemy positions and there are two reasons for that kind of behavior. First of all, there aren't any obstacles that you could use as cover inside the hangar. Second of all, it's important to start destroying shield pylons found outside, because otherwise most enemy units would have additional protection. Secure the area close to big hangar door and order your entire team to take cover. Continue attacking enemy soldiers, remembering about finding and destroying shield pylons. You'll also have to be careful while fighting elite Cerberus units, especially a single phantom that should join the fights in the near future.
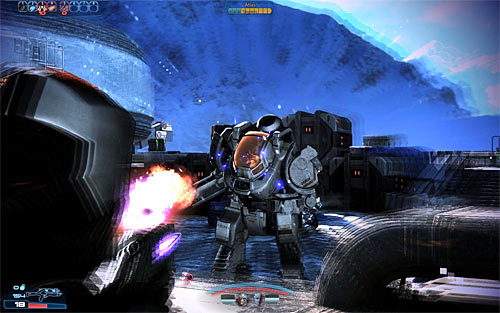
Shuttles will continuously fly away from the hangar during this battle, but despite what you might think you won't have to directly protect them. The final phase of this battle will feature an arrival of an Atlas mech. Quickly resupply and focus only on attacking the mech. Don't forget about using cover, because otherwise the mech's rocket attacks can inflict serious injuries. It's important to know that you won't have to kill other enemies, because destroying the Atlas [800 EXP] should result in the end of this battle. There are only a few minor conversations you'll have to take part in.
Prizes for completing the mission:
Received from: none [Sanctum: Cerberus Labs] or doctor Ravin [Sanctum: Cerberus Labs]
Unlocked by: You will be able to complete this mission during N7: Cerberus Labs or when visiting the Citadel as part of Priority: Palaven.
This mission can be activated in two ways. The first one implies exploring [Sanctum: Cerberus Labs] a part of N7: Cerberus Labs. You need to find the room with one of the non-interactive artifacts inside. Examine the Failed Medi-Gel Experiment (screen above) to activate the quest. Notice - Cerberus Labs cannot be returned to later on in the game, so you have to obtain the formula before leaving it.
The second option is meeting with doctor Ravin during one of you visits to the Citadel. The doctor can be found nearby the lift at [Citadel: Huerta Memorial Hospital]. Regardless of the chosen option, you need to return to doctor Ravin and give her the recipe.
Prizes for completing the mission:
Received from: Barla Von [Citadel: Presidium Commons]
Unlocked by: You will be able to approach this mission after completing Priority: Palaven.
![Barla Von works at the bank in [Citadel: Presidium Commons], but at first he won't want to speak with you - Citadel: Barla Von - Small quests - Mass Effect 3 - Game Guide and Walkthrough](https://game.lhg100.com/Article/UploadFiles/201512/2015121617413676.jpg)
Barla Von works at the bank in [Citadel: Presidium Commons], but at first he won't want to speak with you. The only way of changing his attitude towards Shepard is meeting with Liara T'Soni in the nearby Apollo caf. In the end Liara will suggest to met with Volus regarding recruiting new mercenaries.
Only now should you return to Von and speak to him to learn of the mercenaries who can join the army if only you rescue them from the area controlled by Reapers. Afterwards you can leave the Citadel and head on board the Normandy.
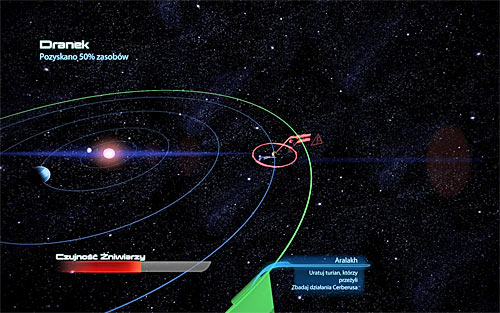
Open the galaxy map and head to the Krogan DMZ (it becomes available after completing Priority: Sur'Kesh). After reaching the destination (Aralakh system), fly to the neighbouring system of Dranek. Scan the area (right mouse button), but be careful as you can draw the Reaper's attention. You need to take interest in the planet of Rothla (screen above). fly to the marked planet and start scanning it (hold down the right mouse button). You need to find the white spot and send the probe (left mouse button) to find the War Asset [Shadow Broker Wet Squad]. Afterwards you can return to the quest giver to give him the report.
Notice - If you have recruited the mercenaries before beginning this mission, you will be able to complete it right after it begins, as you cannot lose any War Asset which you have obtained.
Prizes for completing the mission:
Received from: none [Tuchanka: Cerberus Attack] or Alison [Citadel: Purgatory Bar]
Unlocked by: You will have the chance to begin this mission during N7: Cerberus Attack or during your visit to the Citadel after completing Priority: Palaven.
This quest can b activated in two ways. The first one is exploring [Tuchanka: Cerberus Attack] as part of N7: Cerberus Attack. Inside the room with the control terminal you can find the Old Grid Schematics which you can of course download and therefore activate this quest. Notice - you cannot return to where the N7 quest takes place, so you have to obtain the schematics before leaving the location.
![The second option is hearing Alison's conversation during one of the further visits to the Citadel in [Citadel: Purgatory Bar] - Citadel: Improved Power Grid - Small quests - Mass Effect 3 - Game Guide and Walkthrough](https://game.lhg100.com/Article/UploadFiles/201512/2015121617413763.jpg)
The second option is hearing Alison's conversation during one of the further visits to the Citadel in [Citadel: Purgatory Bar]. The conversation will concern the desire to bring more power to the Purgatory. Regardless of the chosen option, you need to bring Alison the schematics.
Prizes for completing the mission:
Received from: none [Grissom Academy] or an Asari [Citadel: Huerta Memorial Hospital]
Unlocked by: You will have the chance to begin this mission during Grissom Academy: Emergency Evacuation or while visiting the Citadel after completing Priority: Palaven.
This quest can be activated in two ways. The first one implies exploring [Grissom Academy] as part of Grissom Academy: Emergency Evacuation. Soon after meeting with Octavia you should come across the improved biotic amp interfaces (screen above). interact with it to activate this quest. Notice - Grissom Academy cannot be returned to further on in the game, so you need to obtain the interface before leaving this location.
![The second option is hearing the conversation of an Asari in [Citadel: Huerta Memorial Hospital] - Citadel: Biotic Amp Interfaces - Small quests - Mass Effect 3 - Game Guide and Walkthrough](https://game.lhg100.com/Article/UploadFiles/201512/2015121617413746.jpg)
The second option is hearing the conversation of an Asari in [Citadel: Huerta Memorial Hospital]. It will concern her desire to obtain the biotic interfaces from Grissom Academy. Regardless of the chosen option, you need to give her the schematics.
Prizes for completing the mission:
Received from: Diplomat [Citadel: Citadel Embassies]
Unlocked by: You will have the chance to complete this quest during your first visit to the Citadel, i.e. after completing Priority: Mars.
![You can activate this mission by hearing the conversation between a diplomat and two other characters taking place beside the elevator in [Citadel: Citadel Embassies] - Shrike Abyssal: Prothean Obelisk - Small quests - Mass Effect 3 - Game Guide and Walkthrough](https://game.lhg100.com/Article/UploadFiles/201512/2015121617413742.jpg)
You can activate this mission by hearing the conversation between a diplomat and two other characters taking place beside the elevator in [Citadel: Citadel Embassies]. From it, you will learn of the lost Prothean artifact.
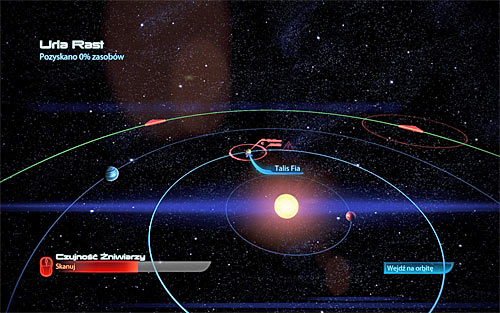
Return to Normandy, open the galaxy map and head to Shrike Abyssal. After getting there (Xe Cha system), fly to the neighbouring system Urla Rast. Scan the area (right mouse button), but be careful as therefore you can draw the Reapers' attention. Your point of interest should be planet Talis Fia (screen above). Approach the planet and hold down the right mouse button to scan it precisely. You need to find the white dot and send a probe (left mouse button) to obtain the [Prothean Obelisk]. With it, return to [Citadel: Citadel Embassies] and give the artifact to the diplomat.
Notice - If you have found the artifact before unlocking this quest, you will be able to finish it at once as a once obtained artifact cannot be lost.
Prizes for completing the mission:
Received from: none [Benning: Cerberus Abductions] or Ambassador Dominic Osoba [Citadel: Citadel Embassies]
Unlocked by: You will have the chance to begin this mission during N7: Cerberus Abductions or while visiting the Citadel after finishing Priority: Palaven.
This mission can be activated in two ways. The first implies exploring [Benning: Cerberus Abductions] as part of N7: Cerberus Abductions. Around the area where the first fight took place you should find a Dog Tag on the ground (screen above). Notice - you cannot return to where the N7 mission takes place later on in the game.
![The second option is speaking to Ambassador Dominic Osoba found in [Citadel: Citadel Embassies] during one of the further visits - Benning: Evidence - Small quests - Mass Effect 3 - Game Guide and Walkthrough](https://game.lhg100.com/Article/UploadFiles/201512/2015121617413835.jpg)
The second option is speaking to Ambassador Dominic Osoba found in [Citadel: Citadel Embassies] during one of the further visits. Dominic would tell you of his son Bilal, who he hasn't had contact with since he since he travelled to plant Benning. Regardless of the chosen variant, give the Dog Tag to the Ambassador.
Notice - If you have missed the chance to obtain the Dog Tag during N7: Cerberus Abductions, you can head to the Spectre Requisitions found in [Citadel: Citadel Embassies] and buy it for 1000 credits.
Prizes for completing the mission:
Received from: Scientist [Citadel: Huerta Memorial Hospital]
Unlocked by: You will be able to approach this mission after completing Priority: Palaven.
![During one of your further visits to the Citadel, find the scientist in [Citadel: Huerta Memorial Hospital] and listen to him speaking of obtaining prototype components from the Ismar Frontier - Ismar Frontier: Prototype Components - Small quests - Mass Effect 3 - Game Guide and Walkthrough](https://game.lhg100.com/Article/UploadFiles/201512/2015121617413872.jpg)
During one of your further visits to the Citadel, find the scientist in [Citadel: Huerta Memorial Hospital] and listen to him speaking of obtaining prototype components from the Ismar Frontier. It will therefore activate this mission.
Return to Normandy, open the galaxy map and head to Ismar Frontier. After getting there (Aquila system) scan the area (right mouse button), but be careful as therefore you can draw the Reapers' attention. Your point of interest should be planet Metaponto (screen above). Approach the planet and hold down the right mouse button to scan it precisely. You need to find the white dot and send a probe (left mouse button) to obtain the [advanced biotic implants]. With them, return to [Citadel: Huerta Memorial Hospital] and hand them over to the scientist.
Notice - If you have found the implant before beginning this mission, you will be able to complete it right after it becomes unlocked, as a once found artifact cannot be lost.
Prizes for completing the mission:
Received from: Turian officer [Citadel: Purgatory Bar]
Unlocked by: You will be able to approach this mission after completing Priority: Palaven.
![During one of your further visits to the Citadel, find the Turian officer in [Citadel: Purgatory Bar] and listen to his conversation with two other soldiers - Apien Crest: Banner of the First Regiment - Small quests - Mass Effect 3 - Game Guide and Walkthrough](https://game.lhg100.com/Article/UploadFiles/201512/2015121617413819.jpg)
During one of your further visits to the Citadel, find the Turian officer in [Citadel: Purgatory Bar] and listen to his conversation with two other soldiers. It will concern obtaining the title banner which can be found on one of planets in the Apien Crest system and would be helpful in raising the morale.
Return to Normandy, open the galaxy map and head to Apien Crest. After getting there (Trebia system) fly to the neighbouring system of Castellus. Start scanning the area (right mouse button), but be careful as you can therefore draw the Reapers' attention. Your point of interest should be planet Digeris (screen above). Approach the planet and hold down the right mouse button to scan it precisely. You need to find the white dot and send a probe (left mouse button) to obtain the [Banner of the First Regiment]. With the banner, return to [Citadel: Purgatory Bar] and give it to the officer.
Notice - If you have obtained the artifact before beginning this mission, you will be able to complete it right after it becomes unlocked, as a once found artifact cannot be lost.
Prizes for completing the mission:
Received from: Batarian preacher [Citadel: Port - Holding Area]
Unlocked by: You will be able to approach this mission after completing Priority: Palaven.
![During one of your further visits to the Citadel, find the batarian preacher in [Citadel: Port - Holding Area] (Bay C) - Kite's Nest: Pillars of Strength - Small quests - Mass Effect 3 - Game Guide and Walkthrough](https://game.lhg100.com/Article/UploadFiles/201512/2015121617413834.jpg)
During one of your further visits to the Citadel, find the batarian preacher in [Citadel: Port - Holding Area] (Bay C). Listen to his speech concerning the title Pillars of Strength which can be found on one of the Kite's Nest system planets and would be helpful in raising the morale of the batarian refugees.
Return to Normandy, open the galaxy map and head to Kite's Nest. After getting there (Harsa system) scan the area (right mouse button), but be careful as therefore you can draw the Reapers' attention. Your point of interest should be planet Khar'shan (screen above). Approach the planet and hold down the right mouse button to scan it precisely. You need to find the white dot and send a probe (left mouse button) to obtain the [Pillars of Strength]. With the artifact, return to [Citadel: Port - Holding Area] and give it to the preacher.
Notice - If you have obtained the artifact before beginning this mission, you will be able to complete it right after it becomes unlocked, as a once found artifact cannot be lost.
Prizes for completing the mission:
Notice! This mission doesn't appear in Shepard's journal!
Received from: Joker [Normandy SR-2: Combat Information Center]
Unlocked by: You will be able to approach this mission after completing Priority: Palaven.
After returning from the mission which took place on the Menae moon (finding the Turian Primarch) you should receive a message from the Joker regarding EDI shutting down suddenly. The Normandy pilot will suggest that you should check what's going on. Head to the elevator and you will be transported to [Normandy SR-2: Crew's Quarters]. Go to the med station and try to open the door leading to the AI core.
A very interesting cutscene will start, during which you will learn that EDI decided to transfer a part of her conscience to the murdered doctor Eva. Therefore EDI will also join the team. Using this chance you can also visit the other characters on board Normandy to listen to their opinions about the "new" party member.
Prizes for completing the mission:
Notice! This mission doesn't appear in Shepard's journal!
Received from: Specialist Traynor [Normandy SR-2: Combat Information Center]
Unlocked by: You will be able to approach this mission after completing Priority: Palaven.
![You should be informed of the possibility to begin this mission by Specialist Traynor after you approach her on board [Normandy SR-2: Combat Information Center] - Normandy SR-2: Lieutenant Cortez* - Small quests - Mass Effect 3 - Game Guide and Walkthrough](https://game.lhg100.com/Article/UploadFiles/201512/2015121617413921.jpg)
You should be informed of the possibility to begin this mission by Specialist Traynor after you approach her on board [Normandy SR-2: Combat Information Center]. She will tell you that it would be good to meet with Lieutenant Cortez. For that, head to [Normandy SR-2: Shuttle Bay] and find the pilot. During the conversation you will learn that has died on Ferris Fields.
It's worth to meet with Cortez again after completing Priority: Sur'Kesh. The conversation will concern convincing the Lieutenant to take some free time. Shepard will suggest that the Lieutenant should take a look around the Citadel. You will be able to use the special paragon option, though it isn't necessary in order to convince Cortez to head to the Citadel.
Use the galaxy map and fly to the Citadel. Cortez should be found in [Citadel: Bay D24], watching the ships flying off. Speak to him and this time convince that he should visit the Memorial Wall. You will also be able to use paragon dialogue option, though it won't be necessary.
![The last place you have to visit is [Citadel: Port - Holding Area] - Normandy SR-2: Lieutenant Cortez* - Small quests - Mass Effect 3 - Game Guide and Walkthrough](https://game.lhg100.com/Article/UploadFiles/201512/2015121617413943.jpg)
The last place you have to visit is [Citadel: Port - Holding Area]. Find Cortez by the Memorial Wall (if he's not here, return to the Citadel further in the game) and speak to him. You will be able to use the paragon dialogue option this time as well. After returning on board the Normandy, you should receive a message from Cortez.
Prizes for completing the mission:
Received from: Angry accountant [Citadel: Presidium Commons]
Unlocked by: You will be able to start this mission after completing Priority: Palaven main quest.
Locate an angry volus accountant during one of your visits to the Citadel. He can be found near the bank in [Citadel: Presidium Commons] and you must overhear his conversation with another person. The meeting will be about the accountant wanting to raise morale thanks to a rare book found on Irune.
Return to the Normandy, open the galaxy map and plan a trip to the Aethon Cluster (this area of the galaxy is unlocked after completing Priority: The Citadel #2 main quest). Once you're there (Aru system) begin scanning the area (right mouse button), but be careful as therefore you can draw the Reapers' attention. Your point of interest should be a planet named Irune (screen above). Hover over the planet, zoom in and start scanning its surface more precisely by holding down the right mouse button. You need to find a white dot and send a probe (left mouse button). Doing this will allow you to obtain [Book of Plenix]. Once you have the book return to [Citadel: Presidium Commons] and give it to the accountant.
Notice - If you have found the book before starting this mission, you will be able to complete it right after it becomes unlocked, as a once found artifact cannot be lost.
Prizes for completing the mission:
Received from: none [Noveria: Cerberus Fighter Base] or Sellea [Citadel: Presidium Commons]
Unlocked by: You will be able to start this mission while completing N7: Cerberus Fighter Base side quest or while visiting the Citadel after Priority: Palaven main quest.
This quest can be activated in two ways. The first one implies exploring [Noveria: Cerberus Fighter Base] as a part of N7: Cerberus Fighter Base side quest. After you've dealt with the first group of enemies you must find a terminal a with a schematic of a heating unit (screen above). The terminal is in the same room as the security console, however it's easy to miss, because it's located a little higher than usual. Downloading the schematic will activate this quest. Notice - The Cerberus base cannot be returned to further on in the game.

The second option is to overhear Sellea's conversation during one of your visits to the Citadel after completing Priority: Palaven main quest. Sellea is standing next to the C-SEC outpost in [Citadel: Presidium Commons] and you'll find out that she is searching for a solution to a problem with the heating unit stabilizers. Give the schematic to Selena in order to finish this quest.
Notice - If you've missed the terminal with the schematic during N7: Cerberus Fighter Base side quest, then you can complete this mission in an alternative way by going to the Spectres office located in [Citadel: Citadel Embassies] and purchasing the schematic with credits.
Prizes for completing the mission:
Received from: Engineer Adams [Normandy SR-2: Engineering Deck]
Unlocked by: You will be able to start this mission after completing Priority: Sur'Kesh main quest.
![Specialist Traynor will inform you about the possibility of starting this mission some time after completing Priority: Sur'Kesh main quest and it will occur when you'll approach her station in [Normandy SR-2: Combat Information Center] - Citadel: GX12 Thermal Pipe - Small quests - Mass Effect 3 - Game Guide and Walkthrough](https://game.lhg100.com/Article/UploadFiles/201512/2015121617414076.jpg)
Specialist Traynor will inform you about the possibility of starting this mission some time after completing Priority: Sur'Kesh main quest and it will occur when you'll approach her station in [Normandy SR-2: Combat Information Center]. Follow her advice by going to [Normandy SR-2: Engineering Deck] in order to have a conversation with engineer Adams about a potential technical issue he reported.
Adams will inform you that it would be recommended to install a thermal pipe and in order to do that you must travel to the Citadel. Use the elevator to go to [Citadel: Presidium Commons]. The object you're looking for is named E-Gel Thermal Conduit and it's being sold for 1000 credits by Elkoss Combine Arsenal Supplies shop located close to the bank. Make a purchase and return to the Normandy. Wait for Traynor to give you a new message before going to the engineering deck again. Talk to engineer Adams to receive a confirmation that the new part has been installed.
Prizes for completing the mission:
Received from: none [Utukku: Scout camp]
Unlocked by: You will be able to start this mission while completing Attican Traverse: The Rachni main quest. It's worth mentioning that it will appear in your journal only after it's been completed.
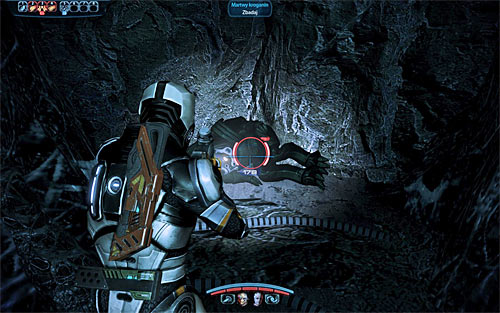
This mission can be added to your journal while completing Attican Traverse: The Rachni main quest. You must locate an interactive body of a dead krogan (screen above) and examine it in order to collect a recorded message. The body can be found soon after destroying the first Reaper node ad before entering a new cave occupied by ravagers.
You can resume this mission after completing the Rachni quest and this can be achieved by travelling to the Citadel. Go to the Meridian Place market in [Citadel: Presidium Commons] and locate Nos Astra Sporting Goods shop. Talk to the shop's owner Ereba in order to give her the recording.
Prizes for completing the mission:
Received from: none [Tuchanka: City ruins] or C-SEC officer [Citadel: Presidium Commons]
Unlocked by: You will be able to start this mission while completing Tuchanka: Bomb side quest or while visiting the Citadel after Priority: The Citadel #2 main quest.
This quest can be activated in two ways. The first one implies exploring [Tuchanka: City ruins] as a part of Tuchanka: Bomb side quest. You must find a terminal with the turret schematics (screen above) and it's located close to the ladder used to initiate the final battle of the quest. Notice - The city ruins cannot be returned to further on in the game. You should also remember that completing more than two other missions since receiving Tuchanka: Bomb quest will result in detonating the bomb and an automatic failure.
The second option is to overhear C-SEC officer's conversation during one of your visits to the Citadel after completing Priority: The Citadel #2 main quest. The officer can be found on one of the balconies to the south of the main courtyard in [Citadel: Presidium Commons] and you'll find out that he is searching for a solution to a problem with detecting and disarming Cerberus equipment. Give the schematic to the officer in order to finish this quest.
Notice - If you've missed the terminal with the schematic during Tuchanka: Bomb side quest, then you can complete this mission in an alternative way by going to the Spectres office located in [Citadel: Citadel Embassies] and purchasing the schematic with credits.
Prizes for completing the mission:
Received from: none [Ontarom: Communication hub] or Officer Dellk [Citadel: Citadel Embassies]
Unlocked by: You will be able to start this mission while completing N7: Communication Hub side quest or while visiting the Citadel after Priority: The Citadel #2 main quest.
This quest can be activated in two ways. The first one implies exploring [Ontarom: Communication hub] as a part of N7: Communication Hub side quest. Begin the search after winning the first battle and before interacting with the first main console. You must explore the square to the left of where you've started and you'll located a terminal with Cerberus ciphers (screen above). Notice - The communication hub cannot be returned to further on in the game.
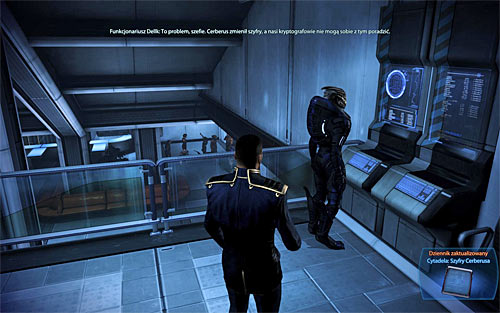
The second option is to overhear Officer Dellk's conversation during one of your visits to the Citadel after completing Priority: The Citadel #2 main quest. The officer can be found near ambassador Udina's office in [Citadel: Citadel Embassies] and you'll find out that he is searching for a solution to a problem with cracking improved Cerberus ciphers. Give the codes to the officer in order to finish this quest.
Notice - If you've missed the terminal with the ciphers during N7: Communication Hub side quest, then you can complete this mission in an alternative way by going to the Spectres office located in [Citadel: Citadel Embassies] and purchasing the schematic with credits.
Prizes for completing the mission:
Received from: none [Rannoch: Geth Consensus] or Asari war strategist [Citadel: Citadel Embassies]
Unlocked by: You will be able to start this mission while completing Rannoch: Geth Fighter Squadrons main quest or while visiting the Citadel after Priority: The Citadel #2 main quest.
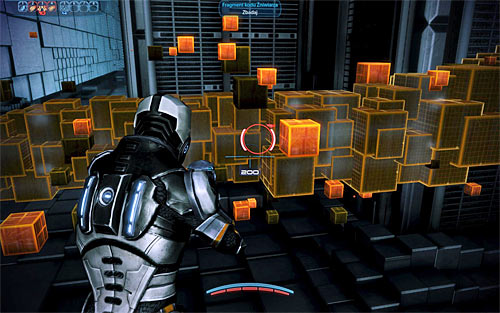
This quest can be activated in two ways. The first one implies exploring the virtual reality in [Rannoch: Geth Consensus] as a part of Rannoch: Geth Fighter Squadrons main quest. You must reach the first data cluster and before you make attempt to destroy orange blocks you'll have to look around in order to find an interactive Reaper code fragment (screen above. Notice - The geth consensus cannot be returned to further on in the game.
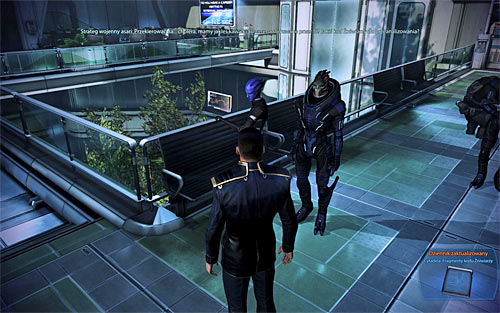
The second option is to overhear asari war strategist's conversation during one of your visits to the Citadel after completing Priority: The Citadel #2 main quest. The asari is standing close to the elevator in [Citadel: Citadel Embassies] and you'll find out that she is searching for fragments of the Reaper code in order to improve the fleet's effectiveness in combat. Give the fragments of the code to the strategist in order to finish this quest.
Notice - If you've missed the Reaper code fragments during Rannoch: Geth Fighter Squadrons main quest, then you can complete this mission in an alternative way by going to the Spectres office located in [Citadel: Citadel Embassies] and purchasing the codes with credits.
Prizes for completing the mission:
Received from: Refugee [Citadel: Port - Holding Area]
Unlocked by: You will be able to start this mission after completing Priority: The Citadel #2 main quest.
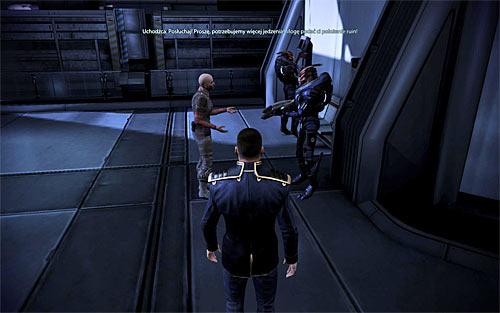
This quest can be activated by overhearing a conversation between one of the refugees and the C-SEC officer. The meeting takes place in dock E28 in [Citadel: Port - Holding Area] and you'll find out that the refugee wants someone to explore Prothean ruins in the Hades Nexus in order to find a valuable artifact.
Return to the Normandy, open the galaxy map and plan a trip to the Hades Nexus (this area of the galaxy is unlocked after completing Priority: Rannoch main quest). Once you're there (Hekate system) fly to an adjacent system named Sheol. Begin scanning this system (right mouse button), but be careful as therefore you can draw the Reapers' attention. Your point of interest should be a planet named Gei Hinnom (screen above). Hover over the planet, zoom in and start scanning its surface more precisely by holding down the right mouse button. You need to find a white dot and send a probe (left mouse button). Doing this will allow you to obtain [Prothean sphere]. Once you have the sphere return to [Citadel: Port - Holding Area] and give it to the refugee.
Notice - If you have found the sphere before starting this mission, you will be able to complete it right after it becomes unlocked, as a once found artifact cannot be lost.
Prizes for completing the mission:
Received from: Angry elcor [Citadel: Purgatory Bar]
Unlocked by: You will be able to start this mission after completing Priority: The Citadel #2 main quest.
Locate an angry elcor during one of your visits to the Citadel. He can be found near the elevator in [Citadel: Purgatory Bar] and you must overhear his conversation with another person. The meeting will be about the elcor wanting to raise morale thanks to a rare codex found on Dekuuna.
Return to the Normandy, open the galaxy map and plan a trip to the Silean Nebula. Once you're there (Kypladon system) fly to an adjacent system named Phontes (this system becomes available after completing Priority: Rannoch main quest). Begin scanning this system (right mouse button), but be careful as therefore you can draw the Reapers' attention. Your point of interest should be a planet named Dekuuna (screen above). Hover over the planet, zoom in and start scanning its surface more precisely by holding down the right mouse button. You need to find a white dot and send a probe (left mouse button). Doing this will allow you to obtain [Code of the Ancients]. Once you have the codex return to [Citadel: Purgatory Bar] and give it to the elcor.
Notice - If you have found the codex before starting this mission, you will be able to complete it right after it becomes unlocked, as a once found artifact cannot be lost.
Prizes for completing the mission:
Received from: Military trainer [Citadel: Purgatory Bar]
Unlocked by: You will be able to start this mission after completing Priority: The Citadel #2 main quest.
Locate an asari military trainer during one of your visits to the Citadel. She can be found near the stairs leading to the dance floor in [Citadel: Purgatory Bar] and you must overhear her conversation. The military trainer will want to obtain sacred texts from the library of Asha located in the Nimbus Cluster.
Return to the Normandy, open the galaxy map and plan a trip to the Nimbus Cluster. Once you're there (Pelion system) fly to an adjacent system named Agaiou. Begin scanning this system (right mouse button), but be careful as therefore you can draw the Reapers' attention. Your point of interest should be a planet named Carcosa (screen above). Hover over the planet, zoom in and start scanning its surface more precisely by holding down the right mouse button. You need to find a white dot and send a probe (left mouse button). Doing this will allow you to obtain [Library of Asha]. Once you have the sacred texts return to [Citadel: Port - Holding Area] and give them to the asari.
Notice - If you have found the sacred texts before starting this mission, you will be able to complete it right after it becomes unlocked, as a once found artifact cannot be lost.
Prizes for completing the mission:
Received from: Consultant [Citadel: Huerta Memorial Hospital]
Unlocked by: You will be able to start this mission after completing Priority: The Citadel #2 main quest.
Locate an asari consultant during one of your visits to the Citadel. She can be found near the elevator in [Citadel: Huerta Memorial Hospital] and you must overhear her conversation. The consultant will want to obtain rings of Alune from the Silean Nebula in order to announce a cultural crisis and to encourage more asari to join the cause.
Return to the Normandy, open the galaxy map and plan a trip to the Silean Nebula. Once you're there (Kypladon system) fly to an adjacent system named Teyolia (this system becomes available after completing Priority: Rannoch main quest). Begin scanning this system (right mouse button), but be careful as therefore you can draw the Reapers' attention. Your point of interest should be a planet named Nevos (screen above). Hover over the planet, zoom in and start scanning its surface more precisely by holding down the right mouse button. You need to find a white dot and send a probe (left mouse button). Doing this will allow you to obtain [Rings of Alune]. Once you have the rings return to [Citadel: Huerta Memorial Hospital] and give them to the asari.
Notice - If you have found the rings before starting this mission, you will be able to complete it right after it becomes unlocked, as a once found artifact cannot be lost.
Prizes for completing the mission:
Received from: none [Cyone: Fuel reactors] or doctor Silon [Citadel: Huerta Memorial Hospital]
Unlocked by: You will be able to start this mission while completing N7: Fuel Reactors side quest or while visiting the Citadel after Priority: The Citadel #2 main quest.
This quest can be activated in two ways. The first one implies exploring [Cyone: Fuel reactors] as a part of N7: Fuel Reactors side quest. Search the area where the mission has started and you should be able to locate a palmtop containing a treatment plan (screen above). Notice - The fuel depot on Cyone cannot be returned to further on in the game.
The second option is to overhear a conversation between doctor Silon and doctor Kerry after completing Priority: The Citadel #2 main quest. Both doctors can be found in the left laboratory room in [Citadel: Huerta Memorial Hospital] and you'll find out that they're searching for a way of treating a patient with serious chemical burns. Give the treatment plan to doctor Silon in order to finish this quest.
Notice - If you've missed the palmtop with the treatment plan during N7: Fuel Reactors side quest, then you can complete this mission in an alternative way by going to the Spectres office located in [Citadel: Citadel Embassies] and purchasing the plan with credits.
Prizes for completing the mission:
Received from: none [Gellix: Science laboratory] or Doctor [Citadel: Huerta Memorial Hospital]
Unlocked by: You will be able to start this mission while completing Arrae: Ex-Cerberus Scientists side quest or while visiting the Citadel after Priority: The Citadel #2 main quest.
This quest can be activated in two ways. The first one implies exploring [Gellix: Science laboratory] as a part of Arrae: Ex-Cerberus Scientists side quest. You must reach the upper floor of the scientists base. This area is visited at the beginning of the mission and it's the one where you won't encounter any enemies (only friendly scientists). Find a microscope (screen above) and interact with it in order to obtain data on a turian toxin. Notice - The science facility cannot be returned to further on in the game.
The second option is to overhear the doctor's conversation during one of your visits to the Citadel after completing Priority: The Citadel #2 main quest. The salarian is standing in one of the patient treatment rooms in [Citadel: Huerta Memorial Hospital] and you'll find out that he is trying to save a turian general who was poisoned with a rare toxin. Give the data to the doctor in order to finish this quest.
Notice - If you've missed the microscope with the data during Arrae: Ex-Cerberus Scientists side quest, then you can complete this mission in an alternative way by going to the Spectres office located in [Citadel: Citadel Embassies] and purchasing the data with credits.
Prizes for completing the mission:
Received from: Scientist [Citadel: Presidium Commons]
Unlocked by: You will be able to start this mission after completing Priority: The Citadel #2 main quest.
Locate an asari scientist during one of your visits to the Citadel. She can be found near the bank in [Citadel: Presidium Commons] and you must overhear her conversation. The scientist will want to obtain the statue from Athena Nebula, because it contains prothean inscriptions which may be helpful in building the Crucible.

Return to the Normandy, open the galaxy map and plan a trip to the Athena Nebula. Once you're there (Parintha system) fly to an adjacent system named Vernio. Begin scanning this system (right mouse button), but be careful as therefore you can draw the Reapers' attention. Your point of interest should be a planet named Polissa (screen above). Hover over the planet, zoom in and start scanning its surface more precisely by holding down the right mouse button. You need to find a white dot and send a probe (left mouse button). Doing this will allow you to obtain [Hesperia-period statue]. Once you have the statue return to [Citadel: Presidium Commons] and give it to the asari.
Notice - If you have found the statue before starting this mission, you will be able to complete it right after it becomes unlocked, as a once found artifact cannot be lost.
Prizes for completing the mission:
Received from: War strategist [Citadel: Presidium Commons]
Unlocked by: You will be able to start this mission after completing Priority: The Citadel #2 main quest.
Locate a salarian war strategist during one of your visits to the Citadel. He can be found in the apartments district (near the apartment number 90) in [Citadel: Presidium Commons] and you must overhear his conversation. The war strategist will want to obtain a preserved kakliosaur fossil in order to create a technology which would allow the krogan to fight on worlds with a toxic atmosphere.
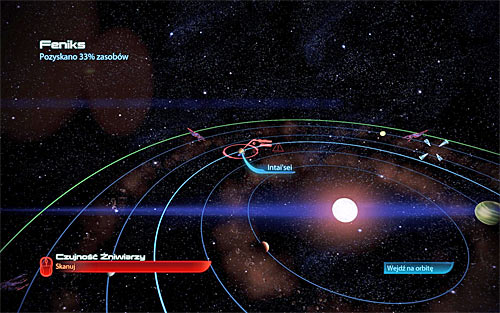
Return to the Normandy, open the galaxy map and plan a trip to Argos Rho (this area of the galaxy is unlocked after completing Priority: Geth Dreadnought main quest). Once you're there (Hydra system) fly to an adjacent system named Phoenix. Begin scanning this system (right mouse button), but be careful as therefore you can draw the Reapers' attention. Your point of interest should be a planet named Intai'sei (screen above). Hover over the planet, zoom in and start scanning its surface more precisely by holding down the right mouse button. You need to find a white dot and send a probe (left mouse button). Doing this will allow you to obtain [Kakliosaur fossil]. Once you have the fossil return to [Citadel: Presidium Commons] and give it to the salarian.
Notice - If you have found the fossil before starting this mission, you will be able to complete it right after it becomes unlocked, as a once found artifact cannot be lost.
Prizes for completing the mission:
Received from: none [Rannoch: Crash site] or C-SEC officer [Citadel: Presidium Commons]
Unlocked by: You will be able to start this mission while completing Rannoch: Admiral Koris main quest or while visiting the Citadel after Priority: The Citadel #2 main quest.
This quest can be activated in two ways. The first one implies exploring [Rannoch: Crash site] as a part of Rannoch: Admiral Koris main quest. You must make a stop after you've reached the second (left) anti-aircraft cannon. Get rid of all the geth and then explore the area to find a large console with jamming tower data (screen above). Notice - The crash site cannot be returned to further on in the game.
The second option is to overhear the C-SEC officer's conversation during one of your visits to the Citadel after completing Priority: The Citadel #2 main quest. The turian is standing in the Apollo Cafe in [Citadel: Presidium Commons] and you'll find out that he is trying to obtain a target jamming technology developed by the geth. Give the data to the C-SEC officer in order to finish this quest.
Notice - If you've missed the console with the data during Rannoch: Admiral Koris main quest, then you can complete this mission in an alternative way by going to the Spectres office located in [Citadel: Citadel Embassies] and purchasing the data with credits.
Prizes for completing the mission:
Received from: Researcher [Citadel: Presidium Commons]
Unlocked by: You will be able to start this mission after completing Priority: The Citadel #2 main quest.
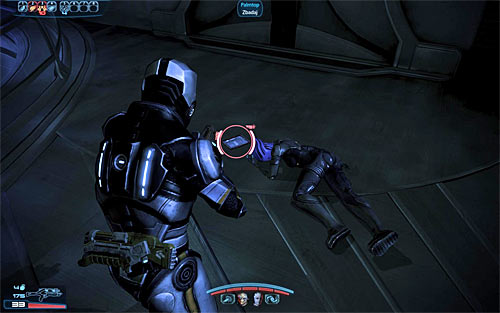
Locate a human researcher during one of your visits to the Citadel. He can be found in the courtyard in [Citadel: Presidium Commons] and you must overhear his conversation. The researcher will want an Obelisk of Karza from Hades Nexus since it can be helpful in building the Crucible.
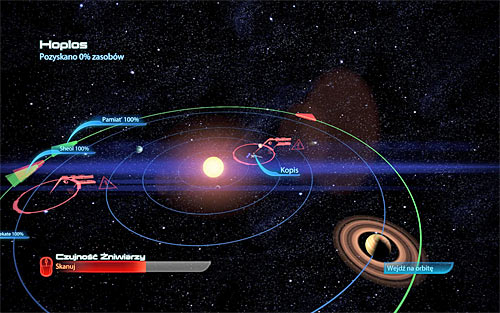
Return to the Normandy, open the galaxy map and plan a trip to Hades Nexus (this area of the galaxy is unlocked after completing Priority: Rannoch main quest). Once you're there (Hekate system) fly to an adjacent system named Hoplos. Begin scanning this system (right mouse button), but be careful as therefore you can draw the Reapers' attention. Your point of interest should be a planet named Kopis (screen above). Hover over the planet, zoom in and start scanning its surface more precisely by holding down the right mouse button. You need to find a white dot and send a probe (left mouse button). Doing this will allow you to obtain [Obelisk of Karza]. Once you have the obelisk return to [Citadel: Presidium Commons] and give it to the researcher.
Notice - If you have found the obelisk before starting this mission, you will be able to complete it right after it becomes unlocked, as a once found artifact cannot be lost.
Prizes for completing the mission:
Received from: Soldier [Citadel: Bay D24]
Unlocked by: You will be able to start this mission after completing Priority: The Citadel #2 main quest.
Locate a human soldier during one of your visits to the Citadel. He can be found near the exit to the Normandy in [Citadel: Bay D24] and you must overhear his conversation. The soldier will want the Prothean data drives from the Valhallan Threshold, because they could be helpful in building the Crucible.
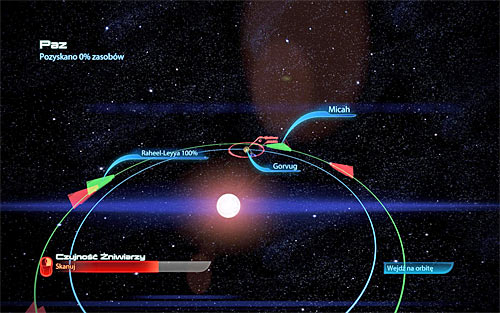
Return to the Normandy, open the galaxy map and plan a trip to the Valhallan Threshold. Once you're there (Raheel-Leyya system) fly to an adjacent system named Paz. Begin scanning this system (right mouse button), but be careful as therefore you can draw the Reapers' attention. Your point of interest should be a planet named Gorvug (screen above). Hover over the planet, zoom in and start scanning its surface more precisely by holding down the right mouse button. You need to find a white dot and send a probe (left mouse button). Doing this will allow you to obtain [Prothean data drives]. Once you have the drives return to [Citadel: Bay D24] and give them to the soldier.
Notice - If you have found the data drives before starting this mission, you will be able to complete it right after it becomes unlocked, as a once found artifact cannot be lost.
Prizes for completing the mission:
Received from: Doctor Chakwas or doctor Michel [Normandy SR-2: Crew Deck]
Unlocked by: You will be able to start this mission after completing Priority: The Citadel #2 main quest.
![Specialist Traynor will inform you about the possibility of starting this mission some time after completing Priority: The Citadel #2 main quest and it will occur when you'll approach her station in [Normandy SR-2: Combat Information Center] - Citadel: Medical Supplies - Small quests - Mass Effect 3 - Game Guide and Walkthrough](https://game.lhg100.com/Article/UploadFiles/201512/2015121617414446.jpg)
Specialist Traynor will inform you about the possibility of starting this mission some time after completing Priority: The Citadel #2 main quest and it will occur when you'll approach her station in [Normandy SR-2: Combat Information Center]. Follow her advice by going to the medical station in [Normandy SR-2: Crew Deck] to have a conversation with doctor Chakwas or doctor Michel (it depends who was invited to join the Normandy crew - more on that in the descriptions of side quests Citadel: Doctor Chakwas* and Citadel: Doctor Michel*). One of the doctors will ask you for help in trading Normandy's civilian medical supplies for much needed military medical supplies.
![Return to the Citadel and use the elevator to travel to [Citadel: Port - Holding Area] - Citadel: Medical Supplies - Small quests - Mass Effect 3 - Game Guide and Walkthrough](https://game.lhg100.com/Article/UploadFiles/201512/2015121617414421.jpg)
Return to the Citadel and use the elevator to travel to [Citadel: Port - Holding Area]. Go to cargo hold B, locate Tactus and initiate a conversation with him. The turian will refuse to exchange the medical supplies on equal terms and it'll be up to you how to resolve this situation. The worst solution by far is to hand over the civilian medical supplies for free (upper right dialogue option), unless you only care about scoring a lot of paragon points. You won't succeed trying to convince the turian to renegotiate their deal (lower right dialogue option) and instead you'll end the conversation. The best endings are only available if you've sufficiently raised Shepard's reputation, because either one of them can convince Tactus to change his mind (upper left special dialogue option or lower left special dialogue option). It doesn't matter how you've ended the meeting, because you must report back to doctor Chakwas/Michel to officially end this quest.
Prizes for completing the mission:
Received from: none [Lesuss: Monastery]
Unlocked by: You will be able to start this mission while completing Kallini: Ardat-Yakshi Monastery side quest.

This mission can be added to your journal while completing Kallini: Ardat-Yakshi Monastery side quest. You must enter the monastery in [Lesuss: Monastery] and locate a dead asari with a palmtop lying next to her body (screen above) [20 EXP]. The body can be found soon after leaving a large dark room and before entering a large square where the first battle with an enemy banshee takes place. Read the message from the palmtop to find out that the asari wanted to say goodbye to her partner living on the Citadel.
![Return to the Citadel after you've ended the mission in the monastery and use an elevator to travel to [Citadel: Presidium Commons] - Citadel: Asari Widow - Small quests - Mass Effect 3 - Game Guide and Walkthrough](https://game.lhg100.com/Article/UploadFiles/201512/2015121617414567.jpg)
Return to the Citadel after you've ended the mission in the monastery and use an elevator to travel to [Citadel: Presidium Commons]. The asari widow can be found to the north of the courtyard (screen above) and you must start a short conversation to deliver her the sad message.
Prizes for completing the mission:
Received from: Ambassador [Citadel: Citadel Embassies]
Unlocked by: You will be able to start this mission after completing Priority: Rannoch main quest.
Locate an elcor ambassador during one of your visits to the Citadel after completing Priority: Rannoch main quest. The elcor can be found near the elevator in [Citadel: Citadel Embassies] and you must start a short conversation with him. The ambassador will ask for your help in rescuing the warriors and the civilians from the elcor homeworld.
Return to the Normandy, open the galaxy map and plan a trip to the Silean Nebula. Once you're there (Kypladon system) fly to an adjacent system named Phontes. Begin scanning this system (right mouse button), but be careful as therefore you can draw the Reapers' attention. Your point of interest should be a planet named Dekuuna (screen above). Hover over the planet, zoom in and start scanning its surface more precisely by holding down the right mouse button. You need to find a white dot and send a probe (left mouse button). Doing this will allow you to obtain a war asset [Elcor Flotilla]. Once you have discovered the fleet return to [Citadel: Citadel Embassies] and inform the ambassador about saving members of his race.
Notice - If you have found the flotilla before starting this mission, you will be able to complete it right after it becomes unlocked, because you can't lose this war asset.
Prizes for completing the mission:
Received from: Specialist Traynor [Normandy SR-2: Combat Information Center]
Unlocked by: You will get a chance to begin this mission after visiting the Citadel for the first time, i.e. after completing Priority: Citadel.
![You will be informed of the possibility to approach this mission by Specialist Traynor after you approach her on board [Normandy SR-2: Combat Information Center] - N7: Cerberus Labs - N7 quests - Mass Effect 3 - Game Guide and Walkthrough](https://game.lhg100.com/Article/UploadFiles/201512/2015121617414514.jpg)
You will be informed of the possibility to approach this mission by Specialist Traynor after you approach her on board [Normandy SR-2: Combat Information Center]. Before beginning the quest, become familiar with its details by using the nearby computer terminal and reading the message. To begin, interact with the galaxy map and travel to Sigurd's Cradle. After getting there (Skepsis system), fly to the neighbouring system of Decoris (make sure you have enough fuel). There, approach planet Sanctum and land on it.
![Hear out Admiral Hackett - he will ask you to obtain samples of Reapers technology - and begin the exploration of [Sanctum: Cerberus Labs] - N7: Cerberus Labs - N7 quests - Mass Effect 3 - Game Guide and Walkthrough](https://game.lhg100.com/Article/UploadFiles/201512/2015121617414566.jpg)
Hear out Admiral Hackett - he will ask you to obtain samples of Reapers technology - and begin the exploration of [Sanctum: Cerberus Labs]. There are two Reaper artifacts which you have to obtain in total and I'd suggest you follow the left path to reach the first. You of course need to be ready to encounter Cerberus soldiers around, though you can attack them by surprise. Try to eliminate the Guardians, Centurions and Engineers in the first place. The last ones are especially important, as they can mount turrets if left alone.
![Before deciding to obtain the artifact marked by the game, you should take a look around the area to find some funds [3000 credits] [4000 credits], [Sniper Rifle Enhanced Scope], Med Station [50 EXP] and a journal entry [18 EXP] - N7: Cerberus Labs - N7 quests - Mass Effect 3 - Game Guide and Walkthrough](https://game.lhg100.com/Article/UploadFiles/201512/2015121617414539.jpg)
Before deciding to obtain the artifact marked by the game, you should take a look around the area to find some funds [3000 credits] [4000 credits], [Sniper Rifle Enhanced Scope], Med Station [50 EXP] and a journal entry [18 EXP]. After exploring the area, approach the containment console, use it and take the Reaper Artifact [150 EXP]. Return with it onto the shuttle [150 EXP], though be sure to restock on ammo.
The second artifact can be found to the right of the landing zone and can be accessed by following the path by the shuttle or one of the corridors located nearby where the first artifact was. Regardless of the chosen path you will have to deal with lots of Cerberus soldiers on your way. Don't let them surprise you, once again especially looking out for the elite kinds.
![Just like last time, before you pick up the artifact you should look around the other part of the facility to find: [3000 credits], failed medi-gel experiment (new side mission Citadel: Alien Medi-Gel Formula) and a journal entry [18 EXP] - N7: Cerberus Labs - N7 quests - Mass Effect 3 - Game Guide and Walkthrough](https://game.lhg100.com/Article/UploadFiles/201512/2015121617414673.jpg)
Just like last time, before you pick up the artifact you should look around the other part of the facility to find: [3000 credits], failed medi-gel experiment (new side mission Citadel: Alien Medi-Gel Formula) and a journal entry [18 EXP]. In the end head to the second artifact and use the containment console. Deal with two more Troopers and pick up the Reaper Artifact [150 EXP].
Listen to Cortez as he will inform you of the arrival of Cerberus reinforcements and the need to defend from their attacks. Be sure to place your team mates in such places that they can cover both paths leading to you position. I'd suggest not moving from here and successively eliminating the enemy forces, the more that there's an ammo depot nearby.
![Run only after getting a confirmation of the possibility to evacuate [112 EXP] - N7: Cerberus Labs - N7 quests - Mass Effect 3 - Game Guide and Walkthrough](https://game.lhg100.com/Article/UploadFiles/201512/2015121617414695.jpg)
Run only after getting a confirmation of the possibility to evacuate [112 EXP]. I'd suggest choosing the left path and try not to stop anywhere for longer, as the game will regularly send in new enemy forces. After reaching the landing zone, deal with the highest placed enemies and afterwards quickly run to the shuttle to get on board and finish the mission.
Prizes for completing the mission:
Received from: Specialist Traynor [Normandy SR-2: Combat Information Center]
Unlocked by: You will be able to approach this mission after completing Priority: Sur'Kesh.
![You should be informed of the possibility to begin this mission by Specialist Traynor after you approach her on board [Normandy SR-2: Combat Information Center] - N7: Cerberus Attack - N7 quests - Mass Effect 3 - Game Guide and Walkthrough](https://game.lhg100.com/Article/UploadFiles/201512/2015121617414695.jpg)
You should be informed of the possibility to begin this mission by Specialist Traynor after you approach her on board [Normandy SR-2: Combat Information Center]. She will tell you that it would be good to examine the old military plant on Tuchanka which has been taken over by Cerberus forces. For that, use the galaxy map and head to the Krogan DMZ. After getting there (Aralakh system) and fly to planet Tuchanka. If you haven't completed the main mission connected with this planet, make sure you're chosen Cerberus Attack.
![Listen to the conversation with Admiral Hackett and start exploring [Tuchanka: Cerberus Attack] to regain control over the large artillery gun - N7: Cerberus Attack - N7 quests - Mass Effect 3 - Game Guide and Walkthrough](https://game.lhg100.com/Article/UploadFiles/201512/2015121617414693.jpg)
Listen to the conversation with Admiral Hackett and start exploring [Tuchanka: Cerberus Attack] to regain control over the large artillery gun. Head towards the building with the control panel. On your way you will of course come across Cerberus forces and you should most of all attack them from behind covers. Nothing complicated here, though you should look out for the Guardians, Centurions and Engineers. Also be sure to keep an eye on the left side, as enemy force can also come from there.
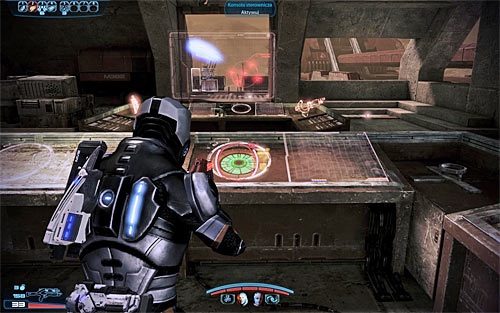
Keep fighting until you eliminate all of the Cerberus soldiers. I'd suggest exploring the whole area, especially that it won't take you much time. You will find, among other: spare parts [3000 credits] [3500 credits], the [Armax Arsenal Gauntlets], Med Kit [100 EXP] and the Old Grid Schematics (needed for Citadel: Improved Power Grid). In the end try to use the control panel. It will end with failure, as the Cerberus forces will cut off the power supply.
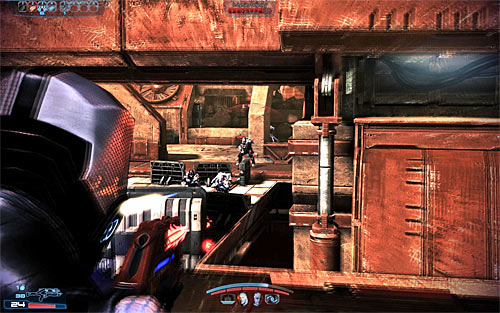
A new battle awaits you, this time of the defence kind. I'd suggest placing one team mate by one of the windows of the control room and the second by one of the passages located at the back of the hall. Shepard himself should change his position frequently and not let enemies reach the room. Especially look out for Nemesises - Cerberus snipers - as even one hit can cause serious damage. Try to watch what your enemies are doing and head where you will be most useful.
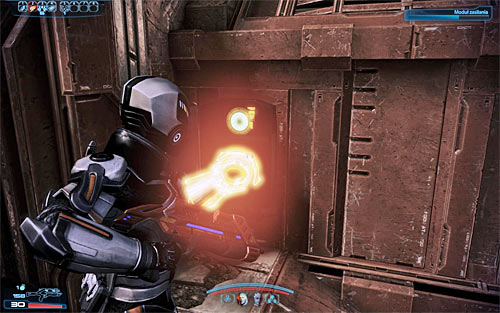
After initially cleaning the area, head towards the two marked power modules. They should be guarded by Cerberus Troopers who won't be too much of a challenge. With each of them, you first need to destroy the lock and then interact with the device [150 EXP] [150 EXP].
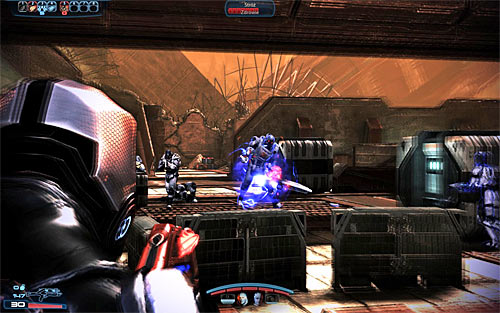
The last part of this mission implies returning to the control room, though you will be faced by numerous Cerberus units in this case as well. Many elite units will take parts in this battle, so it would be good to create an alternative plan of reaching the destination, for instance by following one of the passages in the back. Regardless of the chosen option, look out for the Nemesises and don't let the enemies surprise you. Once again interact with the control panel, this tie destroying the enemy ship [450 EXP]. In the end hear out a conversation with Hackett.
Prizes for completing the mission:
Received from: Specialist Traynor [Normandy SR-2: Combat Information Center]
Unlocked by: You will be able to approach this mission after completing Priority: Sur'Kesh.
![You should be informed of the possibility to begin this mission by Specialist Traynor after you approach her on board [Normandy SR-2: Combat Information Center] - N7: Cerberus Abductions - N7 quests - Mass Effect 3 - Game Guide and Walkthrough](https://game.lhg100.com/Article/UploadFiles/201512/2015121617414722.jpg)
You should be informed of the possibility to begin this mission by Specialist Traynor after you approach her on board [Normandy SR-2: Combat Information Center]. The Normandy crew member will tell you that it would be good to examine the case of the supposed Cerberus attacks on the civilians on Planet Benning. To begin this mission, open the galaxy map and fly to the Arcturus Stream. After getting there (Arcturus system), fly to the neighbouring system of Euler. Approach planet Benning and land on it.
![Listen to the message from Admiral Hackett and start exploring [Benning: Cerberus Abductions] - N7: Cerberus Abductions - N7 quests - Mass Effect 3 - Game Guide and Walkthrough](https://game.lhg100.com/Article/UploadFiles/201512/2015121617414733.jpg)
Listen to the message from Admiral Hackett and start exploring [Benning: Cerberus Abductions]. Your first objective is saving the civilians from the upper streets, so head right (you don't need to hurry). I'd suggest going through the buildings, as you can become an easy target if you stay out in the open. After reaching the battle zone, place your team behind covers and start attacking. Remember the place where tie first enemies appear, as reinforcements will also appear in the same area. Don't forget about destroying the turret and quickly eliminating the enemy engineers so that they cannot place any more turrets. You need to keep fighting until you defeat all the Cerberus forces in the area [225 EXP].
Restock on ammo (there's at least one weapon depot in the area) and head towards the group marked by the game. You will only meet a couple enemies where the civilians are, so you don't need to worry too much. After the battle, approach one of the civilians and inform him about the possibility to run onto the shuttle [75 EXP].
The main part of the battle will now begin, so be sure to choose good covers for your team. Your companions should monitor the main square, though you must be ready to eliminate enemies who will come from the previously secured upper streets. It's important that they don't surprise you, as otherwise you might die easily. Just like before, eliminate the Engineers first and don't let them place turrets. Keep fighting until you eliminate all of the enemies [375 EXP].
Only now should you use the free moment to examine the whole map. The most important finding should be the Dog Tag found on the ground where the first battle took place (upper streets), as it's connected with the side mission Benning: Evidence. Apart from that you can also find two PDAs, spare parts [2500 credits] [2500 credits] [2500 credits] [2500 credits], two Med Stations [50 EXP] and a computer. After finishing everything, return onto the shuttle once on Normandy listen to the conversation with Admiral Hackett which will end this mission.
Prizes for completing the mission:
Received from: Specialist Traynor [Normandy SR-2: Combat Information Center]
Unlocked by: You will be able to start this mission after completing Priority: Tuchanka main quest.
![Specialist Traynor will inform you about the possibility of starting this mission some time after completing Priority: Tuchanka main quest and it will occur when you'll approach her station in [Normandy SR-2: Combat Information Center] - N7: Cerberus Fighter Base - N7 quests - Mass Effect 3 - Game Guide and Walkthrough](https://game.lhg100.com/Article/UploadFiles/201512/2015121617414786.jpg)
Specialist Traynor will inform you about the possibility of starting this mission some time after completing Priority: Tuchanka main quest and it will occur when you'll approach her station in [Normandy SR-2: Combat Information Center]. Initiate a proper conversation with Traynor to find out the details and she'll tell you about admiral Hackett asking for help in disabling the defences of a Cerberus base located on Noveria. You can start this mission by opening the galaxy map and planning a trip to Horse Head Nebula. Once you're there (Pax system) fly to the planet Noveria and confirm that you want to land on its surface. Wait until you're transported to the Cerberus outpost in [Noveria: Cerberus fighter base], listening to a new conversation with admiral Hackett during the flight.
You'll start fighting Cerberus soldiers as soon as you've left the shuttle. I recommend that you remain close to the landing site, especially since you'll find an ammo stash here. Guard two main paths leading to your position and watch out for enemies occupying inaccessible upper levels of the base. As for the types of soldiers you'll be fighting, target centurions and engineers in the first place.
There are two ways of securing the main part of the Cerberus base. I wouldn't recommend choosing either one of the lower entrances, because they're heavily guarded. A much better idea is to choose the upper entrance (screen above) which is located near the landing site where you've started this mission. You don't have to travel as an entire team and you can also divide your squad to perform attacks from several sides, but the upcoming battles aren't too difficult and it shouldn't be required. Get rid of all Cerberus soldiers stationed inside the base. Grenades will come in handy in the sweeping process, because most fights will take part inside narrow corridors and small rooms.
Once you've secured the entire base you should definitely explore it, because it won't be possible later on. Here's a list of things you will be allowed to find: four spare parts [2000 credits] [2000 credits] [2000 credits] [2000 credits] a med-kit [100 EXP], two medical stations [150 EXP] [150 EXP], a weapon mod [Pistol Magazine Upgrade], a computer console, a datapad [2000 credits] and a terminal a with a schematic of a heating unit (it's needed to complete side mission named Citadel: Heating Unit Stabilizers). The last thing you need to do is to interact with a security console (screen above).
![The game will force you to pick someone of your team members for the task of disabling the console [150 PD] and obviously your choice should be based on Shepard's class and on your preferred style of play, however it's important to have at least one character with biotic powers ready to engage in th - N7: Cerberus Fighter Base - N7 quests - Mass Effect 3 - Game Guide and Walkthrough](https://game.lhg100.com/Article/UploadFiles/201512/2015121617414886.jpg)
The game will force you to pick someone of your team members for the task of disabling the console [150 PD] and obviously your choice should be based on Shepard's class and on your preferred style of play, however it's important to have at least one character with biotic powers ready to engage in the upcoming battle. As soon as the fights have started take cover along with one of your colleagues behind a nearby console. You must guard an entrance located to your right and the one seen further away. Focus on eliminating the guardians, using biotic abilities to make them vulnerable. Don't worry about ammunition and grenades, because you'll be allowed to resupply later the mission and it's more important to keep enemy units away.
![Be ready to leave cover, because you will be asked by one of your team members to interact with a previously inactive left security console [225 EXP] - N7: Cerberus Fighter Base - N7 quests - Mass Effect 3 - Game Guide and Walkthrough](https://game.lhg100.com/Article/UploadFiles/201512/2015121617414800.jpg)
Be ready to leave cover, because you will be asked by one of your team members to interact with a previously inactive left security console [225 EXP]. Listen to a radio transmission from lieutenant Cortez to find out that you may return to the landing site for extraction. I wouldn't recommend using any of the exits on the lower level of the base. Return to the upper exit instead (the one you've used before to enter the base). Order your squad mates to take cover before leaving the Cerberus base and focus mostly on eliminating a single nemesis unit (sniper).
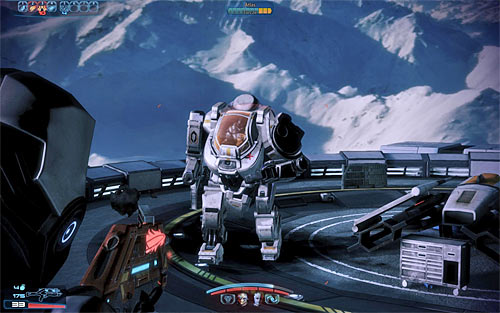
Don't move towards the extraction point too soon, but you also don't have to wait until you've killed all soldiers. Take cover near the landing site and wait for the Cerberus forces to drop an Atlas mech near your location. Start attacking the mech as a team and don't forget that your first task is to destroy the mech's tech shields. Once they're gone you may focus on damaging its armor or killing its operator. After the mech has been destroyed or disabled [375 EXP] wait for a friendly shuttle to arrive and board it. There's one more thing left to do and that is to talk to admiral Hackett.
Prizes for completing the mission:
Received from: Specialist Traynor [Normandy SR-2: Combat Information Center]
Unlocked by: You will be able to start this mission after completing Priority: Geth Dreadnought main quest.
![Specialist Traynor will inform you about the possibility of starting this mission some time after completing Priority: Geth Dreadnought main quest and it will occur when you'll approach her station in [Normandy SR-2: Combat Information Center] - N7: Fuel Reactors - N7 quests - Mass Effect 3 - Game Guide and Walkthrough](https://game.lhg100.com/Article/UploadFiles/201512/2015121617414804.jpg)
Specialist Traynor will inform you about the possibility of starting this mission some time after completing Priority: Geth Dreadnought main quest and it will occur when you'll approach her station in [Normandy SR-2: Combat Information Center]. Initiate a proper conversation with Traynor to find out the details and she'll tell you about losing contact with a turian fuel depot on the planet Cyone and that someone should investigation the problem. You can start this mission by opening the galaxy map and planning a trip to the Silean Nebula. Once you're there (Kypladon system) fly to the planet Cyone and confirm that you want to land on its surface. Wait until you're transported to the Cerberus outpost in [Cyone: Fuel reactors], listening to a new conversation with admiral Hackett during the flight.
![Once you've landed talk to Nyrk and take some time to explore this area, because you may find an armor fragment [Rosenkov Materials Chestplate] and a palmtop containing a treatment plan (it's needed to complete Citadel: Chemical Treatment side mission) - N7: Fuel Reactors - N7 quests - Mass Effect 3 - Game Guide and Walkthrough](https://game.lhg100.com/Article/UploadFiles/201512/2015121617414943.jpg)
Once you've landed talk to Nyrk and take some time to explore this area, because you may find an armor fragment [Rosenkov Materials Chestplate] and a palmtop containing a treatment plan (it's needed to complete Citadel: Chemical Treatment side mission). It's very important to stay away from the toxic area, because entering it will result in a very quick death. After you're done exploring find captain Railey and talk to her in order to find out what needs to be done so that the facility could start functioning properly again [75 EXP].

Choose the newly unlocked passageway and turn right the first chance you get. Locate spare parts [4000 credits] and then interact with a large console which controls a nearby crane. The console has three buttons and here's what you have to do:
1) Move the crane right (button 3)
2) Put the first object on the ground (button 2)
3) Move the crane left (button 1)
4) Pick up the second object from the ground (button 2)
5) Move the crane right (button 3)
If you've done everything according to the plan (moving two obstacles towards Riley), then you will be allowed to proceed to a previously unaccessible part of the facility. Once again you should take some time to explore the new area in order to find ammunition and a PDA [3000 credits]. Once you're done locate a ventilation console for sector A and interact with it [75 EXP].
![Notice that toxic gases have been vented from the facility and this means it's a good moment to check all areas that were previously unaccessible and doing that will allow you to obtain a PDA [3000 credits] and a med-kit [100 EXP] - N7: Fuel Reactors - N7 quests - Mass Effect 3 - Game Guide and Walkthrough](https://game.lhg100.com/Article/UploadFiles/201512/2015121617414936.jpg)
Notice that toxic gases have been vented from the facility and this means it's a good moment to check all areas that were previously unaccessible and doing that will allow you to obtain a PDA [3000 credits] and a med-kit [100 EXP]. Finish off by interacting with a new terminal which controls fuel rods [75 EXP]. This will allow you to advance to the next part of the mission, but it will also trigger a monster battle. During the battle you should focused mostly on killing marauders, however you must also prevent the husks from moving too close to your team. It's also important to find a good defensive spot where the team can't be surrounded and to remember about destroying barrier engines, because they provide additional protection for enemy units.
After the fights has ended you'll receive a new objective which will be about sealing two tanks. Start by moving towards the tank which is closer to your position and then travel to the other one [150 EXP]. Before you decide to restart the reactor (screen above) [150 EXP] you should definitely save your game, because a new long battle is about to begin.
As soon as the fights have started you should do two different things. The first thing is to order the team to take cover near the terminal (there's a lower path there) and the second thing is to quickly destroy all nearby barrier engines so that the monsters heading your way won't receive additional biotic shields. The rest stays the same, so you must prevent the husks from moving too close in order to avoid having to struggle with them and you also must be careful while attacking marauders. Notice that some of the monsters will be appearing near the roof of the facility and this means you can kill them if you're fast enough before they manage to descend.
Continue fighting until you've killed all monsters, however before you eliminate the last one you should try and make a run to the supply stash, because collecting ammunition might be more difficult later on. Listen to a new conversation with captain Riley during which you'll have to make an important decision. I strongly recommend that you send one of your team members (the one that's less useful to you) to help, because this is the only way to ensure the well being of Riley.
As soon as you've made the decision about sending backup (or not) you'll begin the final battle of this quest and aside from standard monsters you're also going to be attacked by a single brute. It's easier to win this battle if you have two squad members with you, however having only one ally doesn't necessarily mean major trouble. Make sure to avoid brute's powerful charges and to use a shotgun and good grenades while trying to kill the beast. Deal with other monsters AFTER you've eliminated the brute.
![Don't leave this area just yet, because you must interact with one more console to start the final sequence [225 EXP] - N7: Fuel Reactors - N7 quests - Mass Effect 3 - Game Guide and Walkthrough](https://game.lhg100.com/Article/UploadFiles/201512/2015121617415005.jpg)
Don't leave this area just yet, because you must interact with one more console to start the final sequence [225 EXP]. Use the passageway where the last group monsters appeared and return to the area where you've started this mission. If you've sent one of your team members to help captain Riley, then she'll still be alive (screen above). If you didn't send anyone as backup, then Nyrek will be the only one alive. Open a nearby door and wait to be transported to the Normandy. Talk to admiral Hackett before ending this quest.
Prizes for completing the mission:
Received from: Specialist Traynor [Normandy SR-2: Combat Information Center]
Unlocked by: You will be able to start this mission after completing Priority: Thessia main quest.
![Specialist Traynor will inform you about the possibility of starting this mission some time after completing Priority: Thessia main quest and it will occur when you'll approach her station in [Normandy SR-2: Combat Information Center] - N7: Communication Hub - N7 quests - Mass Effect 3 - Game Guide and Walkthrough](https://game.lhg100.com/Article/UploadFiles/201512/2015121617415093.jpg)
Specialist Traynor will inform you about the possibility of starting this mission some time after completing Priority: Thessia main quest and it will occur when you'll approach her station in [Normandy SR-2: Combat Information Center]. Initiate a proper conversation with Traynor to find out the details and she'll tell you that a communication hub on Ontarom has been taken over by Cerberus forces and that someone should deal with this situation. You can start this mission by opening the galaxy map and planning a trip to the Kepler Verge. Once you're there (Newton system) fly to the planet Ontarom and confirm that you want to land on its surface. Wait until you're transported to the communication facility in [Ontarom: Communication hub], listening to new conversations with admiral Hackett and technician Grace Soto during the flight.
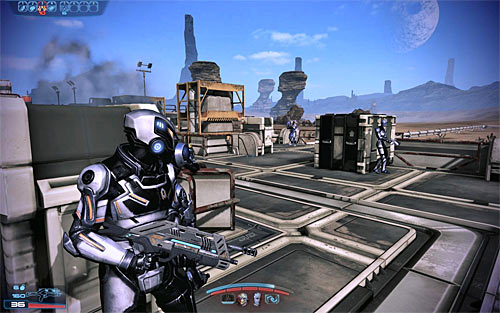
You will be forced to start fighting as soon as you've left the shuttle, so don't forget about choosing good cover for Shepard and the rest of the team. Start attacking enemy units and focus on eliminating Cerberus engineers, because otherwise they'll deploy additional turrets. You should also guard your right flank, because enemy units might take cover there and start initating attacks which are hard to stop. Continue fighting until you've eliminated all enemy units.

I strongly recommend that you ignore your current objective for the time being and explore this ENTIRE map, because you won't encounter any new enemies at this moment and you won't be allowed to look around after you've completed all primary tasks. Here's a list of objects that can be found: three med-kits [100 EXP] [100 EXP] [100 EXP], a medical station [150 EXP], three Cerberus technologies [4000 credits] [3000 credits] [3000 credits], an armor fragment [Ariake Technologies Greaves] and a terminal with Cerberus ciphers (they're needed to complete Citadel: Cerberus Ciphers side mission). Once you're done exploring go towards the designated terminal and interact with it [150 EXP].
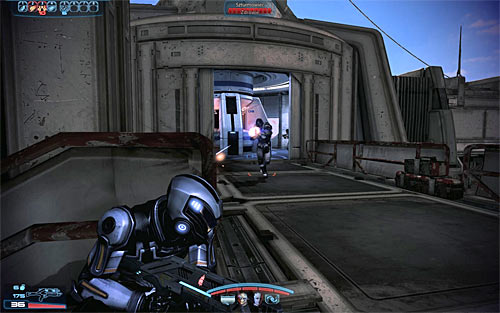
The game will add the location of a second terminal to your HUD, however for now you should focus on eliminating a new group of Cerberus soldiers. Order your team members to take cover near the passageway leading to the start area and use a nearby ramp yourself to start guarding the entrance to the main building (screen above).
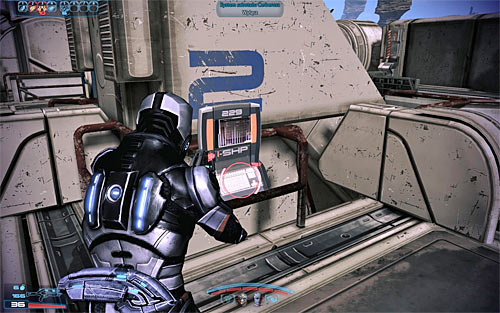
You should start playing offensively after you've killed most of the Cerberus units. There are a few paths leading to your destination, however I'd recommend entering the upper floor of the building and turning right. Don't move too fast, because otherwise you may get overwhelmed and be on a look out for nemesis units (snipers), killing them before they manage to target someone from the team. Proceed to the new terminal after you've secured the area and interact with it [150 EXP]. You will now have a chance to contact Grace Sato, but your answers won't change the outcome of this conversation.
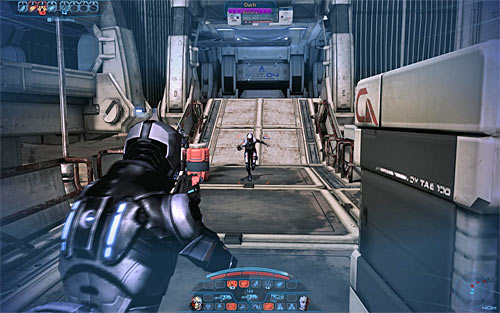
You must now act the same as you did before. Don't rush towards your new destination and instead focus on eliminating enemy units heading your way. Start moving forward after you've killed most of the enemies and watch out for Cerberus elite soldiers, especially since you'll encounter several nemesis units and a single phantom (screen above). As you probably member it's crucial to keep a safe distance from the phantom and to use proper types of attacks to destroy his biotic barrier.
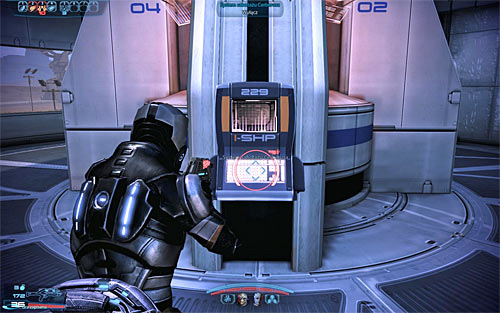
The final third terminal can be found inside the large building and you've probably noticed it earlier on in the mission. Proceed towards the terminal, choosing one of the available passageways and dealing with the remaining Cerberus troops. Interact with the terminal [150 EXP] and wait for this mission to end [300 EXP]. There's only one more thing to do and that is to talk to admiral Hackett after returning to the Normandy.
Prizes for completing the mission:
You will be gathering war assets throughout the entire campaign and they represent the strength of the fleet that will take part in the final battle with the Reapers. The easiest way of obtaining new war assets is by completing quests and you can unlock the best ones by finishing primary missions which are about convincing various races (like the krogan or the turians) to join the cause. This isn't of course the only way, because you can also obtain war assets by recruiting new crew/Normandy members, by doing favors for important characters and by scanning the galaxy for interactive spots.
Sadly the mechanism works both ways. This means that you also must think about the consequences of your actions, because in the worst case scenarios you may weaken your war assets or even lose some of them for good. This usually occurs when you've angered an entire civilization or didn't save someone in time (more info on the most dangerous situations can be found in a section titled Possible conflicts of interests). It's very important that you read the descriptions of all quests found in this guide so you'll know about the existence of these danger situations, you'll know how to avoid them and you'll also know how to make the best decisions when it comes to receiving new assets. You should also consider playing based on a savegame imported from the previous game, because this is the only way to guarantee yourself access to some of the war assets or to lower the difficulty of getting them.
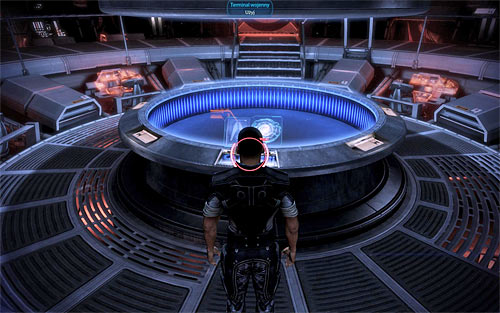
The game allows you to track your progress and this means you can always find out how much war assets you've gathered. This is achieved by interacting with a console in the war room (screen above), located on the Combat Information Center (CIC) deck.
The war assets are divided into nine different groups:
I recommend that you regularly check how many assets you've gathered, especially since the game won't inform you about each addition via a message displayed in the bottom right corner of the screen. You should also know that most assets can be updated many times, resulting in an increase or a decrease of their overall strength.
Notice! This part of the guide lists only two most important scenes of the game that involve important choices and may result in losing a lot of war assets if a wrong decision has been made.
Notice! All the hints contained on this page have SPOILERS, so you should read them only if you know the storyline of the game or if you don't care about spoiling the main plot and want to gather as many war assets as possible.
The first important conflict of interests occurs at the end of Priority: Tuchanka main quest, because you're asked during a conversation with Mordin to make a decision what you want to do with the genophage cure (screen above). If Wrex is leading the krogan race then you shouldn't disperse the false cure, because he will find out about your treachery over time and it will lead to a confrontation with him which will result in losing all krogan assets. If Wreav is leading the krogan then dispersing the false cure is a much better idea, because he won't find out about your deception and you'll gain support of both the krogan and the salarians (don't forget that using the false cure is only possible if you didn't tell Eva about the plan).
The second important conflict of interests occurs at the end of Priority: Rannoch main quest (screen above), because you're forced to support the geth or the quarians. It's highly recommended that you fulfill the requirements needed to form a truce between both parties, because this is the only way to gain support from both of them (otherwise you'll lose quarian war assets or geth war assets).
Notice! The bold font is used to mark war assets which grant at least 100 points of military strength. This means that unlocking them should be your priority, because they'll provide big help in scoring a good final result.
ASSET NAME
WAY OF OBTAINING / UPDATING THE ASSET
COMMENTS
Batarian fleet
Completing Citadel: Batarian Codes side quest [100 points].
Convincing Balak to cooperate at the end of Citadel: Batarian Codes side quest [15 points].
Completing Kite's Nest: Pillars of Strength side quest [40 points].
The main war asset (100 points) is obtained no matter how the quest about the batarian codes has ended. Convincing Balak to provide help is only possible by using one of the special dialogue options and only if he didn't die in the Mass Effect 1.
Citadel Defense Force
Supporting a C-SEC officer (Citadel: Port - Holding Area) [7 points].
Completing Citadel: Biotic Amp Interfaces side quest [8 points].
Granting rooms on the Citadel for the teachers from the Grissom Academy (Spectre office) [5 points].
Deporting a fraud (Spectre office) [7 points].
Completing Priority: The Citadel #2 main quest [10 points].
Supporting a bank teller (Citadel: Presidium Commons) [5 points].
Completing Citadel: Cerberus Automated Turret Schematics side quest [8 points].
Supporting a store owner (Citadel: Presidium Commons) [5 points].
Sending medical supplies to Huerta hospital (Spectre office) [7 points].
Authorizing a civilian militia (Spectre office) [7 points].
Authorizing surveillance (Spectre office) [7 points].
Completing Irune: Book of Plenix side quest [40 points].
Completing Citadel: Target Jamming Technology side quest [8 points].
Completing Dekuuna: Code of the Ancients side quest [40 points].
Completing Silean Nebula: Rings of Alune side quest [40 points].
This asset will probably appear on the list after completing the main quest about the Cerberus attack on the Citadel. It contains a lot of simple actions like solving arguments, finding rare items or responding to messages left on the Spectre terminal. Be careful, because wrong decisions may result in losing a few points (the second column of this table lists only the actions that allow to earn points).
Elcor flotilla
Scanning the Oltan moon (Phontes system in the Silean Nebula) [40 points].
-
Hanar and drell forces
Completing Citadel: Hanar Diplomat side quest [50 points].
Completing Citadel: Alien Medi-Gel Formula side quest [8 points].
You can receive the points during the hanar diplomat quest only if you've stopped the virus from being uploaded (it doesn't matter if Shepard or Kasumi is responsible for that).
Rachni workers
Setting the rachni queen free at the end of Attican Traverse: Rachni main quest [100 points].
You can receive the points only if you've also saved a rachni queen in Mass Effect 1.
Shadow Broker support team
Scanning the Hagalaz planet (Sowilo system in the Hourglass Nebula) [40 points].
-
Shadow Broker wet squad
Scanning the Rothla planet (Dranek system in the Krogan DMZ) [25 points].
-
Spectre unit
Completing Citadel: Hanar diplomat side quest [40 points].
You can receive the points only if Jondum didn't die.
Terminus fleet
Completing Aria: Blue Suns side quest [50 points].
Completing Aria: Blood Pack side quest [50 points].
Completing Aria: Eclipse side quest [50 points].
Completing all three Aria's side quests that are about recruiting mercenaries [50 points].
The points for each quest are obtained no matter how it ended.
Volus bombing fleet
Completing Citadel: Volus Ambassador side quest [75 points].
You can receive the points only if you agree to take the volus fleet (in exchange for not asking about the turian colony or along with that information if a special dialogue option was used).
Volus dreadnought Kwunu
Scanning the Solu Paolis planet (Esori system in the Aethon Cluster) [50 points].
-
Notice! The bold font is used to mark war assets which grant at least 100 points of military strength. This means that unlocking them should be your priority, because they'll provide big help in scoring a good final result.
ASSET NAME
WAY OF OBTAINING / UPDATING THE ASSET
COMMENTS
103rd marine division
Automatically after boarding the Normandy SR-2 for the first time [100 points].
Scanning the Nonuel planet (Plutus system in Hades Gamma) [20 points].
Choosing paragon dialogue options at the end of Grissom Academy: Emergency Evacuation side quest [50 points].
Having an interview with Diana Allers after completing Priority: The Citadel #2 main quest [5 points].
Scanning the Yamm planet (Kalabsha system in the Nubian Expanse) [25 points].
The main war asset (100 points) may be reduced to 50 points if you didn't complete The Arrival DLC for Mass Effect 2. The Grissom Academy requirement is about the conversation that takes place during a shuttle flight after leaving the academy. You must choose a special paragon dialogue option during an interview with Diana Allers to gain the points.
Admiral Mikhailovich
Automatically after boarding the Normandy SR-2 for the first time [25 points].
You can receive the points only if you didn't save the Alliance Council in Mass Effect 1.
Alliance cruiser Shanghai
Scanning the Terra Nova planet (Asgard system in the Exodus Cluster) [40 points].
-
Alliance engineering corps
Automatically after boarding the Normandy SR-2 for the first time [130 points].
Completing Athena Nebula: Hesperia-Period Statue side quest [40 points].
Completing Valhallan Threshold: Prothean Data Drives side quest [40 points].
Completing Hades Nexus: Prothean Sphere side quest [40 points].
Completing Hades Nexus: Obelisk of Karza side quest [40 points].
You can lose 100 points if you've killed the rachni queen in Mass Effect 1 and you'll decide to set free another rachni queen while completing a main mission in the Attican Traverse.
Alliance fifth fleet
Automatically after boarding the Normandy SR-2 for the first time [90 points].
Warning the businessmen (Citadel: Presidium Commons) [5 points.
Completing Citadel: Improved Power Grid side quest [8 points].
Authorizing a civilian consultant (Spectre office) [7 points].
Having an interview with Diana Allers after completing Priority: The Citadel #2 main quest [5 points].
Scanning the Asteria planet (Hekate system in the Hades Nexus) [15 points].
Completing Citadel: Cerberus Ciphers side quest [8 points].
The main war asset (90 points) may be reduced to 65 points if you've used this fleet in Mass Effect 1 to save the Alliance Council. You must choose a special renegade dialogue option during an interview with Diana Allers to gain the points.
Alliance first fleet
Automatically after boarding the Normandy SR-2 for the first time [90 points].
Scanning the Juntauma planet (Farinata system in the Hades Gamma) [15 points].
Completing Citadel: Chemical Treatment side quest [8 points].
Scanning the Dobrovolski planet (Pamyat system in the Hades Nexus) [15 points].
The main war asset (90 points) may be reduced to 65 points if you've used this fleet in Mass Effect 1 to save the Alliance Council.
Alliance frigate Normandy SR-2
Automatically after boarding the Normandy SR-2 for the first time [50 points].
You can receive additional points if you've installed Normandy upgrades in Mass Effect 2: +15 points for the Thanix Cannon, +25 points for the heavy armor and +25 points for the cyclonic shields.
Alliance naval exploration flotilla
Scanning the planet Tyr (Asgard system in the Exodus Cluster) [75 points].
-
Alliance sixth fleet
Completing Priority: Horizon main quest [90 points].
-
Alliance spec ops team Delta
Scanning the Loki planet (Asgard system in the Exodus Cluster) [35 points].
-
Alliance third fleet
Automatically after boarding the Normandy SR-2 for the first time [90 points].
Scanning the Parag planet (Ming system in the Gemini Sigma) [25 points].
Killing Balak at the end of Citadel: Batarian Codes side quest [15 points].
Scanning the Dakka planet (Quertassi system in the Nubian Expanse) [15 points].
The main war asset (90 points) may be reduced to 65 points if you've used this fleet in Mass Effect 1 to save the Alliance Council. Don't authorize the transfer or private Talavi, because you can lose some points.
Arcturus first division
Completing N7: Cerberus Abductions side quest [60 points].
-
Ashley Williams
Completing Priority: The Citadel #2 main quest [25 points].
You can receive the points only if Ashley didn't die in the previous games, didn't die while completing the Citadel mission and if you agree for her to join admiral Hackett's team (instead of welcoming her back to the team).
Biotic company
Choosing renegade dialogue options at the end of Grissom Academy: Emergency Evacuation side quest [75 points].
The requirement is about the conversation that takes place during a shuttle flight after leaving the academy.
Communications Arrays
Completing N7: Communication Hub side mission [50 points].
-
Diana Allers
Completing Citadel: Diana Allers* side quest [5 points].
You can receive the points only if you agree for Diana to join the Normandy crew.
Doctor Karin Chakwas
Meeting doctor Chakwas as a part of Citadel: Doctor Chakwas* side quest [10 points].
You can receive the points only if you don't ask doctor Chakwas to join the Normandy crew.
Eden Prime support
Completing Priority: Eden Prime DLC quest [25 points].
Finding all intel data during Priority: Eden Prime DLC quest [75 points].
You must collect the intel data before leaving Eden Prime. You won't receive all 75 points right away, because you will gain 25 points for each piece you've located (there are three of them).
Jack
Completing Grissom Academy: Emergency Evacuation side quest [25 points].
You can receive the points only if Jack didn't die in the previous game and if you've gained her loyalty.
Kahlee Sanders
Completing Grissom Academy: Emergency Evacuation side quest [20 points].
You can lose 5 points if Prangley will die near the end of the quest (no Jack among the teachers). You can gain 5 points if all the students have been saved and another 5 points if you've been choosing paragon actions while completing Overlord DLC for Mass Effect 2.
Kaidan Alenko
Completing Priority: The Citadel #2 main quest [25 points].
You can receive the points only if Kaidan didn't die in the previous games, didn't die while completing the Citadel mission and if you agree for him to join admiral Hackett's team (instead of welcoming him back to the team).
Kasumi Goto
Completing Citadel: Hanar Diplomat side quest [25 points].
You can receive the points only if Kasumi didn't die in the previous game and if you've gained her loyalty.
Khalisa Bint Sinan al-Jilani
Completing Citadel: Khalisa al-Jilani* side quest [5 points].
You can receive the points only if you'll activate a paragon interrupt during an interview with Khalisa. You can gain 5 additional points if you weren't aggressive towards Khalisa in the previous games.
Mineral resources
Automatically after boarding the Normandy SR-2 for the first time [10 points].
You can receive the points only if you've imported a save from Mass Effect 2. 100 points is the maximum value and if you didn't gather a lot of resources in Mass Effect 2 you can receive only 10 or 25 points.
N7 special ops team
Transferring a character from the multiplayer mode (Galaxy at War) to the singleplayer campaign [75 points].
The game allows to make the transfer after a character has reached the 20th experience level. Once the transfer has been finalized you are no longer allowed to use that character in future co-op missions.
Rogue fighter pilots
Convincing lieutenant Cortez to visit the Memorial Wall as a part of Normandy SR-2: Lieutenant Cortez* side quest [20 points].
-
Zaeed Massani
Meeting Zaeed after completing Citadel: Volus Ambassador side quest [25 points].
You can receive the points only if Zaeed didn't die in the previous game, if you've gained his loyalty and if you've met him in the holding area of the Citadel.
Zhu's Hope colonists
Automatically after boarding the Normandy SR-2 for the first time [30 points].
You can receive the points only if you saved Shiala in Mass Effect 1.
Notice! The bold font is used to mark war assets which grant at least 100 points of military strength. This means that unlocking them should be your priority, because they'll provide big help in scoring a good final result.
ASSET NAME
WAY OF OBTAINING / UPDATING THE ASSET
COMMENTS
Armali sniper unit
Scanning the Yasilium planet (Loropi system in the Silean Nebula) [30 points].
-
Asari commandos
Completing Kallini: Ardat-Yakshi Monastery side quest [20 points].
The points are obtained no matter how you've handled the conversations with Samara and Falera at the end of the quest.
Asari cruiser Cybaen
Scanning the Tevura planet (Parnitha system in the Athena Nebula) [30 points].
-
Asari cruiser Nefrane
Scanning the Pronoia planet (Tomaros system in the Athena Nebula) [30 points].
-
Asari engineers
Scanning the Trikalon planet (Ialessa system in the Athena Nebula) [30 points].
-
Asari research ships
Scanning the Egalik planet (Orisoni system in the Athena Nebula) [35 points].
-
Asari science team
Completing Priority: The Citadel #2 main quest [90 points].
-
Doctor Jelize
Scanning the Hanalei planet (Kypladon system in the Silean Nebula) [25 points].
-
Samara
Completing Kallini: Ardat-Yakshi Monastery side quest [25 points].
You can receive the points only if Samara didn't die in the previous game, if you've gained her loyalty and if you've and if you've stopped her from comitting suicide by activating a paragon interrupt.
Second asari fleet
Convincing Liara to meet her father while completing Citadel: Aethyta* side quest [25 points].
Completing Priority: The Citadel #2 main quest [90 points].
Completing Citadel: Reaper Code Fragments side quest [8 points].
This asset will probably appear on the list after completing the main quest about the Cerberus attack on the Citadel.
Serrice guard
Scanning the Hyetiana planet (Nahuala system in the Silean Nebula) [30 points].
-
Sixth asari fleet
Completing Priority: The Citadel #2 main quest [90 points].
Completing Nimbus Cluster: Library of Asha side quest [40 points].
-
The Destiny Ascension
Automatically after boarding the Normandy SR-2 for the first time [70 points].
You can receive the points only if you saved the Alliance Council in Mass Effect 1.
Notice! The bold font is used to mark war assets which grant at least 100 points of military strength. This means that unlocking them should be your priority, because they'll provide big help in scoring a good final result.
ASSET NAME
WAY OF OBTAINING / UPDATING THE ASSET
COMMENTS
Advanced AI relays
Supporting Admiral Xen during all of her meetings with Tali [45 points].
-
Advanced power relays
Scanning the Camaron planet (Gorgon system in Argos Rho) [50 points].
-
Advanced starship fuel
Completing N7: Fuel Reactors side quest [75 points].
-
Dark energy dissertation
Meeting Conrad Verner as a part of Citadel: Medi-gel Sabotage side quest [55 points].
You can meet Conrad only if you've talked to him in Mass Effect 1 and Mass Effect 2. You may receive less points if you didn't complete quests tied to dark energy or if you didn't buy the Elkoss Combine license in Mass Effect 1.
Element zero converter
Scanning the Farlas planet (Micah system in the Valhallan Threshold) [ 50 points].
-
Emergency fuel pods
Scanning the Elohi planet (Micah system in the Valhallan Threshold) [30 points].
-
ExoGeni scientists
Scanning the Feros planet (Theseus system in the Attican Beta) [40 points].
-
Haptic optics array
Scanning the Canrum planet (Hydra system in Argos Rho) [50 points].
-
Interferometric array
Scanning the Eletania planet (Hercules system in the Attican Beta) [45 points].
-
Javelin missile launchers
Scanning the Watson planet (Skepsis system in Sigurd's Cradle) [50 points].
-
Optimized eezo capacitors
Completing Citadel: GX12 Thermal Pipe side quest [15 points].
-
Prothean data files
Scanning the Zion planet (Utopia system in the Exodus Cluster) [75 points].
-
Reaper brain
Completing Priority: Cerberus Headquarters main quest [110 points].
You can receive the points only if you didn't destroy the Collectors base in the previous game.
Reaper heart
Completing Priority: Cerberus Headquarters main quest [100 points].
You can receive the points only if you've destroyed the Collectors base in the previous game.
Shadow Broker starship tech
Scanning the Alingon planet (Faryar system in the Hourglass Nebula) [50 points].
-
Terminus freighters
Scanning the Zanethu planet (Ploitari system in the Hourglass Nebula) [30 points].
-
Volus engineering team
Scanning the Nalisin planet (Satu Arrd system in the Aethon Cluster) [50 points].
-
Volus fabrication units
Scanning the Cherk Sab planet (Aru system in the Aethon Cluster) [45 points].
-
ASSET NAME
WAY OF OBTAINING / UPDATING THE ASSET
COMMENTS
Advanced fighter squadron
Completing N7: Cerberus Fighter Base [75 points].
-
Cerberus research data
Completing N7: Cerberus Labs side quest [50 points].
-
Doctor Brynn Cole
Completing Arrae: Ex-Cerberus Scientists side quest [25 points].
-
Doctor Gavin Archer
Completing Arrae: Ex-Cerberus Scientists side quest [25 points].
You can receive the points only if you've saved doctor Archer from death while completing the Overseer DLC for Mass Effect 2. It's also required to meet him earlier on during the Grissom Academy side quest.
Ex-Cerberus engineers
Meeting Kelly Chambers (Citadel: Port - Holding Area) [10 points].
You can meet Kelly only if you've invited her for dinner, if she didn't die and if you've gained her loyalty in Mass Effect 2. It's also required to convince her to change identity and not to be aggressive towards her during the conversation in the holding area.
Ex-Cerberus scientists
Completing Arrae: Ex-Cerberus Scientists side quest [25 points].
-
Jacob Taylor
Completing Arrae: Ex-Cerberus Scientists side quest [25 points].
You can receive the points only if Jacob didn't die in the previous game and if you've gained his loyalty.
Miranda Lawson
Completing Priority: Horizon main quest [25 points].
You can receive the points only if Miranda didn't die in the previous game, if you've gained her loyalty and if you've kept her alive during the Horizon mission (it's only possible if she's been warned about Kai Leng during earlier encounters on the Citadel).
Notice! The bold font is used to mark war assets which grant at least 100 points of military strength. This means that unlocking them should be your priority, because they'll provide big help in scoring a good final result.
ASSET NAME
WAY OF OBTAINING / UPDATING THE ASSET
COMMENTS
Aralakh company
Completing Attican Traverse: Rachni main quest [25 points].
You can gain 25 points if Grunt is still alive and additional 25 points if he's loyal towards Shepard.
Clan Urdnot
Completing Priority: Tuchanka main quest [300 points].
You can lose this asset if you decide to disperse the false vaccine during the Tuchanka mission, however it will happen only if Wrex is leading the krogan.
Grunt
Completing Attican Traverse: Rachni main quest [25 points].
You can receive the points only if Grunt didn't die in the previous game and if you've gained his loyalty.
Krogan clans
Completing Priority: Tuchanka main quest [300 points].
Having an interview with Diana Allers after completing Priority: Tuchanka main quest [5 points].
Completing Citadel: Kakliosaur Fossil side quest [40 points].
The main war asset (300 points) may be reduced to 250 points if you've lost the genophage data in Mass Effect 2 and therefore caused Eva to die. You can lose this asset if you ignore the side mission about a bomb found on Tuchanka. You must choose a special paragon dialogue option during an interview with Diana Allers to gain the points.
Krogan first division
Completing N7: Cerberus Attack side quest [50 points].
-
Krogan mercenaries
Dispersing the true genophage cure during Priority: Tuchanka main quest [75 points].
You can receive the points only if Wrex is leading the krogan.
Urdnot Wreav
Completing Priority: Tuchanka main quest [25 points].
You can receive the points only if Urdnot Wrex died in Mass Effect 1 and as a result was replaced by Urdnot Wreav.
Urdnot Wrex
Completing Priority: Tuchanka main quest [30 points].
You can receive the points only if Urdnot Wrex didn't die in Mass Effect 1. You can lose this asset if you decide to disperse the false vaccine during the Tuchanka mission.
Notice! The bold font is used to mark war assets which grant at least 100 points of military strength. This means that unlocking them should be your priority, because they'll provide big help in scoring a good final result.
ASSET NAME
WAY OF OBTAINING / UPDATING THE ASSET
COMMENTS
Geth corps
Completing Priority: Rannoch main quest [300 points].
Having an interview with Diana Allers after completing Priority: Rannoch main quest [5 points].
The main war asset (300 points) is received only if the geth fleet isn't destroyed in the battle with the quarians at the end of the Rannoch quest. You must choose paragon dialogue options during an interview with Diana Allers to gain the points.
Geth fleet
Completing Priority: Rannoch main quest [300 points].
Having an interview with Diana Allers after completing Priority: Rannoch main quest [5 points].
The main war asset (300 points) is received only if the geth fleet isn't destroyed in the battle with the quarians at the end of the Rannoch quest. You can gain 150 additional points if you've agreed to reprogram the heretics in the previous game and if you've convinced the quarians and the geth to form an alliance after defeating the Reaper on Rannoch. You must choose paragon dialogue options during an interview with Diana Allers to gain the points.
Geth prime platoon
Completing Priority: Geth Fighter Squadrons main quest [60 points].
You can lose this asset if the geth fleet is destroyed by the quarians at the end of the Rannoch quest.
Notice! The bold font is used to mark war assets which grant at least 100 points of military strength. This means that unlocking them should be your priority, because they'll provide big help in scoring a good final result.
ASSET NAME
WAY OF OBTAINING / UPDATING THE ASSET
COMMENTS
Doctor Mordin Solus
Completing Priority: Tuchanka main quest [25 points].
You can receive the points only if Mordin didn't die in the previous game and if he didn't die at the end of the Tuchanka mission (he must be convinced to leave the krogan planet without being noticed).
Major Kirrahe
Completing Priority: The Citadel #2 main quest [20 points].
You can receive the points only if Kirrahe didn't die in Mass Effect 1 and if he wasn't killed during the Cerberus attack on the Citadel (Thane's intervention is required).
Salarian first fleet
Completing Priority: Tuchanka main quest [150 points].
You can receive the points only if you decide to disperse the false vaccine (it's possible only if Eva wasn't informed about the plan).
Salarian special tasks group
Completing Priority: Sur'Kesh main quest [35 points].
You can gain 70 additional points if you didn't prevent Destiny Ascension ship in Mass Effect from being destroyed and if you save the salarian Council Member during the Cerberus attack on the Citadel.
Salarian third fleet
Saving a salarian Council member as a part of Priority: The Citadel #2 main quest [125 points].
Completing Citadel: Heating Unit Stabilizers side quest [8 points].
The main war asset (125 points) is received only if you managed to save Destiny Ascension ship in Mass Effect from being destroyed.
Notice! The bold font is used to mark war assets which grant at least 100 points of military strength. This means that unlocking them should be your priority, because they'll provide big help in scoring a good final result.
ASSET NAME
WAY OF OBTAINING / UPDATING THE ASSET
COMMENTS
Turian 43rd marine division
Completing Priority: Tuchanka main quest [90 points].
-
Turian 79th flotilla
Scanning the Pheiros planet (Gemmae system in the Apien Crest) [40 points]
-
Turian blackwatch
Completing Tuchanka: Bomb side quest [75 points].
Remember that the mission about the bomb on Tuchanka can be failed if you'll wait too long after receiving it.
Turian engineering corps
Completing Priority: Tuchanka main quest [110 points].
-
Turian seventh fleet
Completing Priority: Tuchanka main quest [90 points].
Having an interview with Diana Allers after completing Priority: Tuchanka main quest [5 points].
Completing Apien Crest: Banner of the First Regiment side quest [40 points].
Completing Citadel: Medi-gel sabotage side quest [5 points].
You must choose a special renegade dialogue option during an interview with Diana Allers to gain the points.
Turian sixth fleet
Completing Priority: The Citadel #2 main quest [135 points].
Completing Citadel: Cerberus Turian Poison side quest [8 points].
You can lose 10 points if you won't find out the name of an endangered turian colony while completing a side quest about locating a volus ambassador.
Turian spec ops team
Scanning the Pinnacle Station planet (Phoenix system in Agros Rho) [40 points].
-
Notice! The bold font is used to mark war assets which grant at least 100 points of military strength. This means that unlocking them should be your priority, because they'll provide big help in scoring a good final result.
ASSET NAME
WAY OF OBTAINING / UPDATING THE ASSET
COMMENTS
Admiral Daro'Xen
Completing Priority: Rannoch main quest [25 points].
You can receive the points only if the quarian fleet isn't destroyed in the battle with the geth at the end of the Rannoch quest.
Admiral Zaal'Koris
Completing Rannoch: Admiral Koris main quest [25 points].
You can receive the points only if you convince admiral Koris to save him by choosing a special dialogue option.
Quarian civilian fleet
Completing Priority: Rannoch main quest [200 points].
You can receive the points only if the quarian fleet isn't destroyed in the battle with the geth at the end of the Rannoch quest. You can gain 50 points if you've destroyed the heretics base in the previous game and if you've convinced the quarians and the geth to form an alliance after defeating the Reaper on Rannoch. You can lose 75 points if you don't save admiral Koris.
Quarian heavy fleet
Completing Priority: Rannoch main quest [200 points].
Having an interview with Diana Allers after completing Priority: Rannoch main quest [5 points].
The main war asset (200 points) is received only if the quarian fleet isn't destroyed in the battle with the geth at the end of the Rannoch quest. You can gain 50 points if you've destroyed the heretics base in the previous game and if you've convinced the quarians and the geth to form an alliance after defeating the Reaper on Rannoch. You can gain 25 points if you decide to support admiral Gerrel and lose 10 points if you decide to support admiral Raan. You must choose a special paragon dialogue option during an interview with Diana Allers to gain the points.
Quarian patrol fleet
Completing Priority: Rannoch main quest [200 points].
You can receive the points only if the quarian fleet isn't destroyed in the battle with the geth at the end of the Rannoch quest. You can gain 50 points if you've destroyed the heretics base in the previous game and if you've convinced the quarians and the geth to form an alliance after defeating the Reaper on Rannoch.
There are five main categories of weapons in Mass Effect 3 plus one additional category of unique guns that are used only in special situations and can't be added to the inventory. The main categories are sniper rifles, assault rifles, submachine guns, shotguns and heavy pistols. Each group of weapons has several models and you should take some time to read about all the weapons you find or plan to buy, because they have different weight, ammo capacity, rate of fire, damage value and precision. I also recommend that you carry weapons that suite your style of play, so that you'll find each of them useful. You can change your current equipment mostly by interacting with weapon modification stations. One of the stations can be found on board the Normandy (screen above), however you may also find stations while completing main missions. This isn't the only way, because the game allows you to change weapons each time you've found a new one, so you won't have to wait until you've located a station in order to test the newly obtained gun.
A very important thing you should know about weapons is that each gun has its own weight. As a result it's recommended that you don't take all five weapons with you, because the more weight you carry the slower your active powers recharge. The game displays the power regeneration bar while changing the equipment, so you can always know how much time you'll how to wait for Shepard's abilities to recharge. It's best to maintain a positive or at least a neutral value, because most active powers which you unlock during the game are very useful and you'll want to keep using them as often as possible. My recommendation is to always have two weapons in the inventory, because the regeneration bar won't suffer too much and you'll have a spare gun in case if you run out of ammo or encounter a different type of an enemy.
A good way of resolving the "weight problem" is to upgrade the weapons you're using and it can be done by interacting with one of the terminals found on the Normandy (screen above). The game allows to upgrade each weapon to level five (V), however if you're replaying the campaign (New Game Plus Mode) the limit is raised to ten levels (X). Each time you've upgraded a weapon you'll increase the damage it inflicts and how much ammunition it can have in the magazine, so it can make a difference on the battlefield. I don't recommend upgrading all the weapons. It's best to improve only the ones you like to have with you, because each upgrade costs credits and you'd be wasting money on something you don't necessarily need.
Notice! The table seen below is only about the weapons you may find during the singleplayer campaign. In the multiplayer mode (Galaxy at War) the only way to obtain new weapons is to keep purchasing crates with random equipment, hoping for good luck. The last column of the table explains how you can receive/find/buy a certain weapon.
Notice! The prices aren't displayed in all rows of the third column, because only some weapons can be purchased and the rest must be found or received while completing missions. If you don't see the weapon on the store's list make sure that you don't already have it or try visiting the same store later in the campaign (after completing one or more main quests).
WEAPON NAME
WEAPON CATEGORY
PRICE
WAY(S) OF OBTAINING THE WEAPON
Geth pulse rifle
assault rifle
-
The weapon is lying on the crates and it can be found while travelling to the operations center (Priority: Geth Dreadnought main quest).
M-15 Vindicator
assault rifle
The weapon is in a locker and it can be found soon after using a tram (Priority: Mars main quest).
M-37 Falcon
assault rifle
-
The weapon is lying on the ground and it can be found soon after going through a large hole in the hangar wall (Priority: Cerberus Headquarters main quest).
M-76 Revenant
assault rifle
7000
The weapon is lying on the ground in the toilet (Priority: The Citadel #2 main quest).
Sold by Kassa Fabrication store (Citadel: Presidium Commons).
M-8 Avenger
assault rifle
-
The weapon is lying on the ground and you should pick it up before starting the final battle of the prologue (Priority: Earth main quest).
M-96 Mattock
assault rifle
-
The weapon can be found on a bench near Seanne's hideout (Grissom Academy: Emergency Evacuation side quest).
The weapon is hidden inside a small room which can be explored after meeting Octavia, but only if David Archer was present during the conversation (Grissom Academy: Emergency Evacuation side quest).
M-99 Saber
assault rifle
-
The weapon is inside a large pod found in the area where the last battle of the quest takes place and the pod can be opened only by interacting with a nearby terminal (Priority: Horizon main quest).
Phaeston
assault rifle
-
The weapon is lying on the ground on a path leading to the second harvester (Tuchanka: Turian Platoon main quest).
Arc pistol
heavy pistol
-
The weapon is given by Tali, however it doesn't occur automatically and it must be picked up (Priority: Geth Dreadnought main quest).
M-3 Predator
heavy pistol
-
Automatically after starting the game.
M-358 Talon
heavy pistol
-
The weapon is lying on the ground inside a closed room that can be accessed by interacting with a computer terminal (Priority: The Citadel #2 main quest).
M-5 Phalanx
heavy pistol
-
The weapon is lying on the ground in the second part of the ruins, near the Reaper (Priority: Tuchanka main quest).
M-6 Carnifex
heavy pistol
10000
The weapon is lying on the pipes near a path leading to the satellite console (Arrae: Ex-Cerberus Scientists side quest).
Sold by Kassa Fabrication store (Citadel: Presidium Commons).
M-77 Paladin
heavy pistol
200000
Sold by Spectre Requisitions store (Citadel: Citadel Embassies).
Scorpion
heavy pistol
-
The weapon is lying on the ground near a power terminal (Priority: Sur'Kesh main quest).
Disciple
shotgun
-
The weapon is lying on the ground in one of the areas near the Great Hall (Kallini: Ardat-Yakshi Monastery side quest).
Geth plasma shotgun
shotgun
-
The weapon is lying on a shelf inside an observation point (Priority: Rannoch main quest).
Graal spike thrower
shotgun
7000
The weapon is lying on the ground near a destroyed part of the road (Priority: Tuchanka main quest).
Sold by Cipritine Armory store (Citadel: Presidium Commons).
M-11 Wraith
shotgun
250000
Sold by Spectre Requisitions store (Citadel: Citadel Embassies).
M-22 Eviscerator
shotgun
7000
The weapon can be found in the corridor to the left of the area where the first large battle with Cerberus units takes place (Grissom Academy: Emergency Evacuation side quest).
Sold by Batarian State Arms store (Citadel: Port - Holding Area).
M-23 Katana
shotgun
-
Depending on Shepard's class you may receive this weapon automatically at the beginning of the quest or you'll be forced to find it later on (Priority: Mars main quest).
M-27 Scimitar
shotgun
7000
The weapon is lying on the ground near one of the exits from the first turian campsite (Priority: Palaven main quest).
Sold by Kassa Fabrication store (Citadel: Presidium Commons).
M-300 Claymore
shotgun
-
The weapon is lying on a bed inside a small barrack located near the landing site (Attican Traverse: Rachni main quest).
Black Widow
sniper rifle
250000
Sold by Spectre Requisitions store (Citadel: Citadel Embassies).
Javelin
sniper rifle
-
The weapon is lying on the ground and it can be found while travelling to the second geth campsite (Rannoch: Admiral Koris main quest).
M-13 Raptor
sniper rifle
10000
The weapon is lying on the ground near a checkpoint (Priority: Sur'Kesh main quest).
Sold by Batarian State Arms store (Citadel: Port - Holding Area).
M-29 Incisor
sniper rifle
10000
The weapon can be found soon after leaving the first battlefield (Tuchanka: Bomb side quest).
Sold by Kassa Fabrication store (Citadel: Presidium Commons).
M-92 Mantis
sniper rifle
-
The weapon is lying on the ground next to sergeant Reeves' body (Priority: Mars main quest).
M-97 Viper
sniper rifle
-
The weapon is lying on the crates in the first turian outpost (Priority: Palaven main quest).
M-98 Widow
sniper rifle
-
The weapon is lying on the ground on the balcony that's occupied by asari snipers (Priority: Thessia main quest).
M-12 Locust
submachine gun
10000
The weapon is lying on a table inside a large room where you must lower a ladder (Priority: Horizon main quest).
Sold by Kassa Fabrication store (Citadel: Presidium Commons).
M-25 Hornet
submachine gun
7000
The weapon is lying on the ground in the corridor near the elevator (Priority: The Citadel #2 main quest).
Sold by Batarian State Arms store (Citadel: Port - Holding Area).
M-4 Shuriken
submachine gun
-
Depending on Shepard's class you may receive this weapon automatically at the beginning of the quest or you'll be forced to find it near a guard's body in the control room (Priority: Mars main quest).
M-9 Tempest
submachine gun
-
The weapon is lying on the ground next to a rescue pod (Tuchanka: Turian Platoon main quest).
Geth Spitfire
unique weapon
-
This is a unique weapon that is found during specific missions and that can't be added to Shepard's inventory.
Laser designator
unique weapon
-
This is a unique weapon that is found during specific missions and that can't be added to Shepard's inventory.
M-451 Firestorm
unique weapon
-
This is a unique weapon that is found during specific missions and that can't be added to Shepard's inventory.
M-560 Hydra
unique weapon
-
This is a unique weapon that is found during specific missions and that can't be added to Shepard's inventory.
M-920 Cain
unique weapon
-
This is a unique weapon that is found during specific missions and that can't be added to Shepard's inventory.
Reaper Blackstar
unique weapon
-
This is a unique weapon that is found during specific missions and that can't be added to Shepard's inventory.
Each weapon you posses has two slots for weapon mods. There are several types of upgrades and naturally you should be using the ones that suit your style of play and allow you to make the weapon even more useful. I recommend that you carefully explore all areas during the course of the game, because only a small number of weapon modifications can be purchased in stores and the rest you must find on your own. The easiest way to upgrade a weapon is to interact with a special weapon modification station. One of the stations can be found on board the Normandy (screen above), however you may also find stations while completing main missions. Once you've interacted with the station you must choose the weapon you plan on upgrading and then click on the modification button.
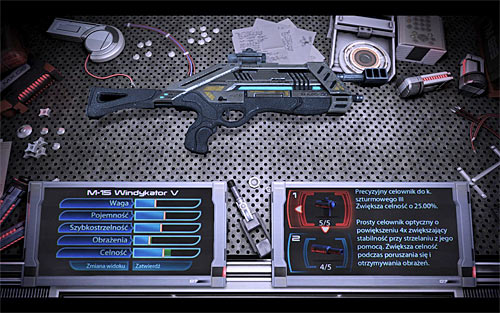
The game will always inform you what you can expect by installing a certain upgrade and you'll also see the difference on five bars that are about the weapon's properties. It's worth adding that if you've found a new upgrade of the same kind you won't have to use the modification station again, because it's going to be improved automatically.
Notice! The table seen below is only about the weapon mods you may find during the singleplayer campaign. In the multiplayer mode (Galaxy at War) the only way to obtain new upgrades is to keep purchasing crates with random equipment, hoping for good luck. The last column of the table explains how you can receive/find/buy a certain weapon mod.
Notice! The stores always offer better versions of upgrades, so for example if you have Assault Rifle Extended Barrel I and you'll purchase the same upgrade from the store you'll automatically transform your modification into Assault Rifle Extended Barrel II. If you don't see the weapon mod on the store's list make sure that you don't already have all of them or try visiting the same store later in the campaign (after completing one or more main quests).
UPGRADE NAME
UPGRADE CATEGORY
PRICE
WAY(S) OF OBTAINING THE WEAPON UPGRADE
Scope
heavy pistol
4000
In the shop Aegohr Munition (Citadel: Presidium Commons).
Scope
heavy pistol
-
Upgrade lies on the desk nearby the second control point (main quest Priority: Sur'Kesk).
Scope
heavy pistol
-
Upgrade lies on the chest found after the third battle with Cerberus soldiers (secondary quest Tuchanka: Bomb).
Scope
heavy pistol
-
Upgrade lies on the ground in one of the sanctuary's rooms (main quest Priority: Horizon).
High caliber barrel
heavy pistol
4000
In the shop Elkoss Combine Arsenal Supplies (Citadel: Presidium Commons).
High caliber barrel
heavy pistol
-
Upgrade lies on the shelve in the area behind the first control point (main quest Priority: Sur'Kesk).
High caliber barrel
heavy pistol
-
Upgrade lies on the bed in the barrack nearby the airstrip (main quest African Traverse: Rachni).
High caliber barrel
heavy pistol
-
Upgrade lies on the shelve in one of the rooms by the elevator (main quest Priority: Citadel #2).
Piercing mod
heavy pistol
4000
In the shop Kassa Fabrication (Citadel: Presidium Commons).
Piercing mod
heavy pistol
-
Upgrade is left in the first turian camp (main quest Priority: Palaven).
Piercing mod
heavy pistol
-
Upgrade lies on the ground by the second Reapers' bound (main quest African Traverse: Rachni).
Piercing mod
heavy pistol
-
Upgrade lies on the table in one of rooms nearby the elevator (main quest Priority: Citadel #2).
Melee stunner
heavy pistol
4000
In the shop Kassa Fabrication (Citadel: Presidium Commons).
Melee stunner
heavy pistol
-
Upgrade lies on the ground and you find it a while after reaching the place from which you can see the bomb (secondary quest Tuchanka: Bomb).
Melee stunner
heavy pistol
-
Upgrade lies on the ground in the place where the road is broken (main quest Priority: Tuchanka).
Melee stunner
heavy pistol
-
Upgrade lies on the ground in the shady part of the monastery (secondary quest Kallini: Ardat-Yakshi Monastery).
Magazine upgrade
heavy pistol
4000
In the shop Kassa Fabrication (Citadel: Presidium Commons).
Magazine upgrade
heavy pistol
-
Upgrade lies in the chests behind the first turian camp (main quest Priority: Palaven).
Magazine upgrade
heavy pistol
-
Upgrade lies on the ground in the place where the road is broken (main quest Priority: Tuchanka).
Magazine upgrade
heavy pistol
-
Upgrade lies on the bench outside the base (secondary quest N7: Cerberus Fighter Base).
Concentration mod
sniper rifle
4000
In the shop Kanala Exports (Citadel: Presidium Commons).
Concentration mod
sniper rifle
-
Upgrade is in the cupboard in the center of railway steering (main quest Priority: Mars).
Concentration mod
sniper rifle
-
Upgrade lies on the boxes just near the ladder (secondary quest Tuchanka: Bomb).
Concentration mod
sniper rifle
-
Upgrade lies on the balcony which is defended by the asari snipers (main quest Priority Thessia).
Piercing mod
sniper rifle
4000
In the shop Cipritine Armory (Citadel: Presidium Commons).
Piercing mod
sniper rifle
-
Upgrades is in the locker and you can unlock it only if David Archer participated in a meeting with Octavia (secondary quest Grissom Academy: Emergency Evacuation).
Piercing mod
sniper rifle
-
Upgrade lies on the ground in a section with a dining room (main quest Priority: Citadel #2).
Piercing mod
sniper rifle
-
Upgrade lies nearby the place you have to use the ladder (secondary quest Arrae: Ex-Cerberus Scientists).
Extended barrel
sniper rifle
4000
In the shop Cipritine Armory (Citadel: Presidium Commons).
Extended barrel
sniper rifle
-
Upgrade lies in the room behind the sterilizer (main quest Priority: Mars).
Extended barrel
sniper rifle
-
Upgrade lies on the ground on the path leading to the meeting place with the lieutenant Victus (main quest Tuchanka: Turian Platoon).
Extended barrel
sniper rifle
-
Upgrades lies on the cupboard in the room with the steering panel of an elevator (main quest Priority: Citadel #2).
Enhanced scope
sniper rifle
4000
In the shop Kanala Exports (Citadel: Presidium Commons).
Enhanced scope
sniper rifle
-
Upgrade lies on the ground nearby the place where the ship landed (secondary quest N7: Cerberus Laboratory).
Enhanced scope
sniper rifle
-
Upgrade lies on the ground in the last camp (main quest Priority: Palaven).
Enhanced scope
sniper rifle
-
Upgrade lies by the console and you find it during the way to the operating centre (main quest Priority: Geth Dreadnought).
Spare thermal clip
sniper rifle
4000
In the shop Kassa Fabrication (Citadel: Presidium Commons).
Spare thermal clip
sniper rifle
-
Upgrade lies in the turian camp on the path leading to the meeting place with the lieutenant Victus (main quest Priority: Palaven).
Spare thermal clip
sniper rifle
-
Upgrade lies on the rocks (main quest Tuchanka: Turian Platoon).
Spare thermal clip
sniper rifle
-
Upgrade lies on the ground in the shady part of the monastery (secondary quest Kallini: Ardat-Yakshi Monastery).
Piercing mod
assault rifle
-
Upgrade lies on the ground by the exit from the first turian camp (main quest Priority: Palaven).
Piercing mod
assault rifle
4000
In the Batarian State Arms (Citadel: Docks - Holding Area).
Piercing mod
assault rifle
-
Upgrade lies on the table in the room where you meet first group of guards (main quest Priority: Citadel #2).
Piercing mod
assault rifle
-
Upgrade lies on the metal balcony and you find it on your way to the main entrance to the Reapers' base (main quest Priority: Rannoch).
Precision scope
assault rifle
4000
In the shop Cipritine Armory (Citadel: Presidium Commons).
Precision scope
assault rifle
-
Upgrade lies on the cupboard in the Orion's hall (secondary quest Grissom Academy: Emergency Evacuation).
Precision scope
assault rifle
-
Upgrade lies on the ground in one room next to the Great Hall (secondary quest Kallini: Ardat-Yakshi Monastery).
Precision scope
assault rifle
-
Upgrade lies by the console in the core's room (main quest Priority: Geth Dreadnought).
Extended barrel
assault rifle
4000
In the shop Cipritine Armory (Citadel: Presidium Commons).
Extended barrel
assault rifle
-
Upgrade is in the first room of underground facility (main quest Priority: Sur'Kesk).
Extended barrel
assault rifle
-
Upgrade lies on the ground in the last area in the first part of ruins just before going to the vicinity of the Reaper (main quest Priority: Tuchanka)
Extended barrel
assault rifle
-
Upgrade lies on the path leading to the temple (main quest Priority Thessia).
Stability damper
assault rifle
4000
In the shop Kassa Fabrication (Citadel: Presidium Commons).
Stability damper
assault rifle
-
Upgrade lies on the stairs, and you find it before reaching the Orion's hall (secondary quest Grissom Academy: Emergency Evacuation).
Stability damper
assault rifle
-
Upgrade lies on the boxes nearby the beginning place (secondary quest Kallini: Ardat-Yakshi Monastery).
Stability damper
assault rifle
-
Upgrade lies on the ground nearby the place in which you see a closing cover (main quest Priority: Rannoch).
Magazine upgrade
assault rifle
4000
In the shop Kassa Fabrication (Citadel: Presidium Commons).
Magazine upgrade
assault rifle
-
Upgrade lies nearby the landing field (main quest Priority: Palaven).
Magazine upgrade
assault rifle
-
Upgrade lies on the ground nearby the weapon modification bench (secondary quest Arrae: Ex-Cerberus Scientists).
High caliber barrel
submachine gun
4000
In the Nos Astra Sporting Goods (Citadel: Presidium Commons).
High caliber barrel
submachine gun
-
Upgrade lies on the ground in the barrack in the krogan's camp (main quest African Traverse: Rachni).
High caliber barrel
submachine gun
-
Upgrade lies on the chest nearby the place where you find a satellite console (secondary quest Arrae: Ex-Cerberus Scientists).
High caliber barrel
submachine gun
-
Upgrade lies on the boxes nearby the beginning place (main quest Priority: Rannoch).
Scope
submachine gun
4000
In the shop Aegohr Munition (Citadel: Presidium Commons).
Scope
submachine gun
-
Upgrade lies on the table in the shady room (main quest Priority: Mars).
Scope
submachine gun
-
Upgrade lies on the ground in the last area in the first part of ruins just before going to the vicinity of the Reaper (main quest Priority: Tuchanka)
Scope
submachine gun
-
Upgrade lies by the console in the operation center (main quest Priority: Geth Dreadnought).
Heat sink
submachine gun
4000
In the shop Aegohr Munition (Citadel: Presidium Commons).
Heat sink
submachine gun
-
Upgrade lies on the desk, nearby the meeting place with Reiley (secondary quest Grissom Academy: Emergency Evacuation).
Heat sink
submachine gun
-
Upgrade lies on the ground by the place of the third battle (secondary quest Tuchanka: Bomb).
Heat sink
submachine gun
-
Upgrade lies nearby the entrance to the temple (main quest Priority: Thessia).
Magazine upgrade
submachine gun
4000
In the shop Kanala Exports (Citadel: Presidium Commons).
Magazine upgrade
submachine gun
-
Upgrade lies nearby the Cerberus spaceships (secondary quest Grissom Academy: Emergency Evacuation).
Magazine upgrade
submachine gun
-
Upgrade lies on the boxes nearby the beginning place (main quest Tuchanka: Turian Platoon).
Magazine upgrade
submachine gun
-
Upgrade lies on the ground; you find it on your way to the two last anti-aircraft cannons (main quest Rannoch: Admiral Koris).
Ultralight materials
submachine gun
4000
In the Nos Astra Sporting Goods (Citadel: Presidium Commons).
Ultralight materials
submachine gun
-
Upgrade lies on the ground nearby the weapon modification bench (main quest Priority: Mars).
Ultralight materials
submachine gun
-
Upgrade lies on the path leading to the battle with the second Reaper (main quest Tuchanka: Turian Platoon).
Ultralight materials
submachine gun
-
Upgrade lies on the ground nearby the place from which you watch the closing cover (main quest Priority: Rannoch).
Blade attachment
shotgun
4000
In the Batarian State Arms (Citadel: Docks - Holding Area).
Blade attachment
shotgun
-
Upgrade lies on the shelve near the place where you meet first group of enemies (main quest Priority: Sur'Kesh).
Blade attachment
shotgun
-
Upgrades you find just after the first battlefield (secondary quest Tuchanka: Bomb).
Blade attachment
shotgun
-
Upgrade lies on the table in the area which you lower the ladder (main quest Priority: Horizon).
Smart choke
shotgun
4000
In the Batarian State Arms (Citadel: Docks - Holding Area).
Smart choke
shotgun
-
Upgrade lies on the path leading to the battle with the third Reaper (main quest Tuchanka: Turian Platoon).
Smart choke
shotgun
-
Upgrade lies near the damaged road (main quest Priority: Tuchanka)
Smart choke
shotgun
-
Upgrade lies on the boxes nearby the beginning place (main quest Priority: Geth Dreadnought).
High calliber barrel
shotgun
4000
In the Batarian State Arms (Citadel: Docks - Holding Area).
High calliber barrel
shotgun
-
Upgrades is in the room with the sterilizer (main quest Priority: Mars).
High calliber barrel
shotgun
-
Upgrade lies on the ground in the second part of scientists' base (secondary quest Arrae: Ex-Cerberus Scientists).
Shredder mod
shotgun
4000
In the Elkoss Combine Arsenal Supplies (Citadel: Presidium Commons).
Shredder mod
shotgun
-
In the cupboard you find after using the second railway (main quest Priority: Mars).
Shredder mod
shotgun
-
Upgrade lies in the cave in which you meet the first ravager (main quest African Traverse: Rachni).
Shredder mod
shotgun
-
Upgrade lies on the ground; you find it on your way to the two last anti-aircraft cannons (main quest Rannoch: Admiral Koris).
Spare thermal clip
shotgun
4000
In the shop Kassa Fabrication (Citadel: Presidium Commons).
Spare thermal clip
shotgun
-
Upgrade lies on the ground nearby the place where flames appear (main quest Priority: Sur'Kesh).
Spare thermal clip
shotgun
-
Upgrade lies in the cave in which you meet the second and the third ravager (main quest African Traverse: Rachni).
Spare thermal clip
shotgun
-
Upgrade lies on the shelve by the damaged ladder (secondary quest Arrae: Ex-Cerberus Scientists).
We begin the game with the N7 armor, but during the campaign you can buy or find new elements or even the new complete armors. To change the armor your hero is using, you have interact on the armor locker. On the Normandy you find two such things: in the Captain Cabin and Hangar (screen above).
As I mentioned, due to your liking for, you can wear complete armor or various individual parts (helmet, torso, arms, legs). In the second case, I recommend to look for things from the one producer. Before putting something on get to know about its bonuses (e.g. to health or regeneration) to choose the best armor for your gamestyle.
Remark! Choice of the normal clothes, during being on the Normandy or in the Citadel, doesn't matter.
Remark! Prices of armors and its part are given only to those items which you can buy in the shops. If you don't see an armor in the particular shop, make sure you don't have it already or go there back later.
ARMOR NAME
ARMOR TYPE
PRICE
WAY(S) OF OBTAINING THE ARMOR
Capacitor Helmet
helmet
5000
Lies on the ground nearby the one of buildings secondary quest N7: Cerberus Abductions).
In the shop Aegohr Munition (Citadel: Presidium Commons).
N7 Helmet
helmet
-
Initially available.
N7 Breather Helmet
helmet
-
Initially available.
Kestrel Helmet
helmet
5000
In the Batarian State Arms (Citadel: Docks - Holding Area).
Helm Securitel
helmet
-
Helmet lies on the cupboard in one of the rooms by the elevator (main quest Priority: Citadel #2).
Sentry Interface
helmet
-
Interface lies on the bench in the destroyed, two-level area (main quest Priority: Sur'Kesh).
Recon Hood
helmet
-
Hood lies in one of the SOC post beginning rooms (main quest Priority: Citadel #2).
Death Mask
helmet
-
Mask lies near the damaged road (main quest Priority: Tuchanka)
Delumcore Overlay
helmet
-
Overlay lies on the chest in one of destroyed laboratories (main quest Priority: Cerberus Headquarters).
Archon Visor
helmet
-
Visor lies on the cupboard; you find it on a way to the operation center (main quest Priority: Geth Dreadnought).
Kuwashii Visor
helmet
5000
In the shop Aegohr Munition (Citadel: Presidium Commons).
Mnemonic Visor
helmet
5000
Visor is left nearby the place where Seanne is hiding (secondary quest Grissom Academy: Emergency Evacuation).
In the shop Aegohr Munition (Citadel: Presidium Commons).
Umbra Visor
helmet
-
Visor lies nearby the beginning location (main quest Priority: Thessia).
Ariake Technologies Greaves
legs
-
Greaves lie nearby the beginning location (secondary quest N7: Communication Hub).
Armax Arsenal Greaves
legs
-
Greaves lie on the bench in the destroyed, two-level area (main quest Priority: Sur'Kesh).
Hahne-Kedar Greaves
legs
-
Greaves are left in the first turian camp (main quest Priority: Palaven).
Kassa Fabrication Greaves
legs
-
Greaves lie on the chest in the clinic (secondary quest Arrae: Ex-Cerberus Scientists).
N7 Greaves
legs
-
Initially available.
Serrice Council Greaves
legs
-
Greaves lie on the chest in the room with the first recording console (main quest Priority: Cerberus Headquarters).
Rosenkov Materials Greaves
legs
5000
In the Spectre Office (Citadel: Citadel Embassies).
Ariake Technologies Shoulders
shoulders
-
Shoulders lie on the path with hatch chambers (main quest African Traverse: Rachni).
Armax Arsenal Shoulders
shoulders
-
Shoulders are left in the first turian camp (main quest Priority: Palaven).
Hahne-Kedar Shoulders
shoulders
5000
In the shop Elkoss Combine Arsenal Supplies (Citadel: Presidium Commons).
Kassa Fabrication Shoulders
shoulders
5000
In the shop Cipritine Armory (Citadel: Presidium Commons).
N7 Shoulders
shoulders
-
Initially available.
Serrice Council Shoulders
shoulders
-
Shoulders lie on the table in one of area next to the Great Hall (secondary quest Kallini: Ardat-Yakshi Monastery).
Rosenkov Materials Shoulders
shoulders
-
Shoulders lie on the metal shelve; you find it just after activation of the water pump (main quest Priority: Horizon).
Ariake Technologies Gauntlets
arms
5000
Gauntlets lie on the shelve in the control room (main quest Priority: Mars).
In the Batarian State Arms (Citadel: Docks - Holding Area).
Armax Arsenal Gauntlets
arms
-
Gauntlets lie on the ground at the back of the building with the steering console (secondary quest N7: Cerberus Attack).
Hahne-Kedar Gauntlets
arms
5000
In the shop Kanala Exports (Citadel: Presidium Commons).
Kassa Fabrication Gauntlets
arms
-
Gauntlets lie on the metal balcony; you find it on your way to the main entrance of the Reapers base (main quest Priority: Rannoch).
N7 Gauntlets
arms
-
Initially available.
Serrice Council Gauntlets
arms
5000
In the Nos Astra Sporting Goods (Citadel: Presidium Commons).
Rosenkov Materials Gauntlets
arms
-
Gauntlets lie in the place of the second battle (secondary quest Tuchanka: Bomb).
Ariake Technologies Chestplate
chest
5000
In the shop Kassa Fabrication (Citadel: Presidium Commons).
Armax Arsenal Chestplate
chest
-
Chestplate lies on the metal construction by the third (on the right side) anti-aircraft cannon (main quest Rannoch: Admiral Koris).
Hahne-Kedar Chestplate
chest
-
Chestplate lies on the ground, by the path leading to the third Reaper (main quest Tuchanka: Turian Platoon).
Kassa Fabrication Chestplate
chest
-
The chestplate is in the open and it can be found next to a ladder (main quest Priority: Mars).
N7 Chestplate
chest
-
Initially available.
Serrice Council Chestplate
chest
-
Chestplate lies on the bench in the corridor leading to the Ceberus spaceships (secondary quest Grissom Academy: Emergency Evacuation).
Rosenkov Materials Chestplate
chest
-
Chestplate lies on the boxes nearby the beginning location (secondary quest N7: Fuel Reactors).
Blood Dragon
armor set
50000
In the shop Kanala Exports (Citadel: Presidium Commons).
Cerberus Armor
armor set
50000
In the shop Elkoss Combine Arsenal Supplies (Citadel: Presidium Commons).
Inferno Armor
armor set
50000
In the shop Kassa Fabrication (Citadel: Presidium Commons).
N7 Armor
armor set
-
Initially available.
Terminus Armor
armor set
50000
In the Batarian State Arms (Citadel: Docks - Holding Area).
Collector Armor
armor set
50000
In the Nos Astra Sporting Goods (Citadel: Presidium Commons).
Table below contains all items that you can find or buy during the game. I recommend strongly to look for additional medi-gel capacity, so you can carry more units of medi-gel.
ITEM NAME
PRICE
WAY(S) OF OBTAINING THE ITEM
The Collected Alfred Tennyson
1000
In the Sirta Supplies (Citadel: Huerta Memorial Hospital).
Aquarium VI
25000
In the shop Elkoss Combine Arsenal Supplies (Citadel: Presidium Commons).
Belan Jellyfish
1000
In the shop Kanala Exports (Citadel: Presidium Commons).
And Love Fell
1000
In the Sirta Supplies (Citadel: Huerta Memorial Hospital).
Khar'shan Snapping Eel
10000
In the shop Kanala Exports (Citadel: Presidium Commons).
Striped Dartfish
1000
In the shop Kanala Exports (Citadel: Presidium Commons).
Flowers
1000
In the Sirta Supplies (Citadel: Huerta Memorial Hospital).
Tear-songs of the Plains
1000
In the Sirta Supplies (Citadel: Huerta Memorial Hospital).
Candy Assortment
1000
In the Sirta Supplies (Citadel: Huerta Memorial Hospital).
Model - Destiny Ascension
-
Model is hid in the Life Support (Normandy SR-2: Crew Deck).
Model - Normandy SR-1
-
Model is hid nearby the James (Normandy SR-2: Shuttle Bay).
Model - Sovereign
-
Model is hid in the narrow corridors below the place where engineer Adams is working (Normandy SR-2: Engineering).
Model - Turian Cruiser
-
Model is hid in the narrow corridors below the place where engineer Adams is working (Normandy SR-2: Engineering).
Model - Liveship
1000
In the shop Elkoss Combine Arsenal Supplies (Citadel: Presidium Commons).
Model - Citadel
1000
In the Nos Astra Sporting Goods (Citadel: Presidium Commons).
Model of Alliance Kodiak
1000
In the shop Kassa Fabrication (Citadel: Presidium Commons).
Model of Geth Fighter
1000
In the shop Elkoss Combine Arsenal Supplies (Citadel: Presidium Commons).
Model of Alliance Fighter
1000
In the shop Kassa Fabrication (Citadel: Presidium Commons).
Model of Alliance Dreadnought
1000
In the shop Kassa Fabrication (Citadel: Presidium Commons).
Prejek Paddle Fish
-
Importing the saved game from the ME 2 (with already bought fish).
Medi-Gel Capacity
3000
In the Sirta Supplies (Citadel: Huerta Memorial Hospital).
Medi-Gel Capacity I
6000
In the Sirta Supplies (Citadel: Huerta Memorial Hospital).
Medi-Gel Capacity II
10000
In the Sirta Supplies (Citadel: Huerta Memorial Hospital).
Medi-Gel Capacity III
16000
In the Sirta Supplies (Citadel: Huerta Memorial Hospital).
Medi-Gel Capacity IV
25000
In the Sirta Supplies (Citadel: Huerta Memorial Hospital).
Among the Multitude
1000
In the Sirta Supplies (Citadel: Huerta Memorial Hospital).
Rumi: His Remembrance
1000
In the Sirta Supplies (Citadel: Huerta Memorial Hospital).
Koi Fish
1000
In the shop Kanala Exports (Citadel: Presidium Commons).
Illium Skald Fish
1000
In the shop Kanala Exports (Citadel: Presidium Commons).
Thessian Sunfish
1000
In the shop Kanala Exports (Citadel: Presidium Commons).
Chart below contains list of shops where you can buy. Remarkable is a fact, that you don't have to move back to them, because you can use a terminal in the Normandy's Shutter Bay. After launching the terminal, the list of unlocked shops appears (screen above). But remember that items bought by the terminal are 10 percent more expensive.
SHOP NAME
SHOPE LOCALIZATION
TYPES OF ITEMS IN THE STOCK
REMARKS
Sirta Supplies
Citadel: Huerta Memorial Hospital
Others
-
Spectre Office
Citadel: Citadel Embassies
Weapons
You can use it only after getting a title of the Spectre (main quest Priority: Citadel).
Kassa Fabrication
Citadel: Presidium Commons
Weapons, Upgrades, Armors, Others
It's worth to wait with buying in this shop, until unlocking an access to the Presidium Commons. In other ways the items are 10% more expensive, because of buying on the Normandy.
Elkoss Combine Arsenal Supplies
Citadel: Presidium Commons
Upgrades, Armors, Others
To buy in this shop you have to wait until the game unlock an access to the Presidium Commons in the Citadel.
Kanala Exports
Citadel: Presidium Commons
Upgrades, Armors, Others
To buy in this shop you have to wait until the game unlock an access to the Presidium Commons in the Citadel.
Nos Astra Sporting Goods
Citadel: Presidium Commons
Upgrades, Armors, Others
To buy in this shop you have to wait until the game unlock an access to the Presidium Commons in the Citadel.
Cipritine Armory
Citadel: Presidium Commons
Upgrades
To buy in this shop you have to wait until the game unlock an access to the Presidium Commons in the Citadel.
Aegohr Munition
Citadel: Presidium Commons
Upgrades
To buy in this shop you have to wait until the game unlock an access to the Presidium Commons in the Citadel.
Batarian State Arms
Citadel: Docks - Holding Area
Upgrades, Armors
To buy in this shop you have to wait until the game unlock an access to the Docks - Holding Area.
Chart below contains list of inscriptions you can unlock in your codex during the game. I recommend to get to know especially the information from the last column, which are the circumstances in which you obtain every entry.
Remark! If the entry is connected with the person that died earlier it isn't possible to unlock it in the most of cases.
ENTRY NAME
SECTION
CATEGORY
UNLOCKING THE ENTRY
Blackstar
Codex
Weapons, Armor and Equipment
Finding the Blackstar weapon (main quest Priority: Palaven).
M-560 Hydra
Codex
Weapons, Armor and Equipment
Finding the rocket launch Hydra.
M-920 Kain
Codex
Weapons, Armor and Equipment
Finding the M-20 Kain (main quest Priority: Earth #2).
Geth Spitfire
Codex
Weapons, Armor and Equipment
Finding the Geth Spitfire (main quest Rannoch: Admiral Koris).
Omni-Tool Weapon
Codex
Weapons, Armor and Equipment
First use of Omni-Tool to make a strong hit (main quest Prologue).
Citadel
Codex
Citadel and Galactic Government
Listening the speak with Anderson (main quest Prologue).
Spectres
Codex
Citadel and Galactic Government
Listening the speak with Anderson (main quest Prologue).
Systems Alliance
Codex
Humanity and the Systems Alliance
Initially available.
Councilor Donnel Udina
Codex
Humanity and the Systems Alliance
Completing the main quest Priority: Citadel.
Rise of the Alliance
Codex
Humanity and the Systems Alliance
Completing the main quest Priority: Mars.
Earth
Codex
Humanity and the Systems Alliance
Initially available.
Thresher Maws
Codex
Aliens: Non-Sapient Creatures
Automatically during going through the catacombs (main quest Priority: Tuchanka).
Batarians
Codex
Aliens: Non-Council Races
Initially available.
Drell
Codex
Aliens: Non-Council Races
Initially available.
Elcor
Codex
Aliens: Non-Council Races
Initially available.
Get
Codex
Aliens: Non-Council Races
Initially available.
Hanar
Codex
Aliens: Non-Council Races
Initially available.
Krogan
Codex
Aliens: Non-Council Races
Initially available.
Keepers
Codex
Aliens: Non-Council Races
Initially available.
Quarians
Codex
Aliens: Non-Council Races
Initially available.
Volus
Codex
Aliens: Non-Council Races
Initially available.
Asari
Codex
Aliens: Council Races
Initially available.
Salarians
Codex
Aliens: Council Races
Initially available.
Turians
Codex
Aliens: Council Races
Initially available.
Praetorians
Codex
Aliens: Extinct Races
First dialogue with Liara (main quest Priority: Mars).
Cerberus
Codex
Organizations
First dialogue with Liara (main quest Priority: Mars).
Cerberus: The Illusive Man
Codex
Organizations
First dialogue with The Illusive Man (main quest Priority: Mars).
Grissom Academy
Codex
Planets and Locations
Automatically when unlock the secondary quest Grissom Academy: Investigation.
Gellix
Codex
Planets and Locations
Automatically when unlock the secondary quest Arrae: Ex-Cerberus Scientists.
Lesuss
Codex
Planets and Locations
Completing the main quest Priority: Citadel #2.
Menae
Codex
Planets and Locations
Completing the main quest Priority: Citadel.
Palaven
Codex
Planets and Locations
Completing the main quest Priority: Citadel.
Rannoch
Codex
Planets and Locations
Completing the main quest Priority: Geth Dreadnought.
Sur'Kesh
Codex
Planets and Locations
Automatically when reach the salarian's lab (main quest Priority: Sur'Kesh).
Thessia
Codex
Planets and Locations
Automatically when unlock the main quest Priority: Thessia.
Tuchanka
Codex
Planets and Locations
Completing the main quest Attican Traverse: The Rachni or Tuchanka: Turian Platoon.
Normandy SR-2
Codex
Ships and Vehicles
Completing the main quest Prologue.
UT-47A Kodiak
Codex
Ships and Vehicles
First dialogue with Liara (main quest Priority: Mars).
Biotics
Codex
Technology
Initially available.
Genophage
Codex
Technology
Listening the conversation with Garrus (main quest Priority: Palaven).
The Genophage Cure
Codex
Technology
Completing the main quest Attican Traverse: The Rachni or Tuchanka: Turian Platoon.
Medi-Gel
Codex
Technology
Initially available.
Omni-Tool
Codex
Technology
Initially available.
Element Zero ("Eezo")
Codex
Technology
Initially available.
Mass Effect Fields
Codex
Technology
Initially available.
Mass Relays
Codex
Technology
Initially available.
The Crucible
Codex
Technology
Completing the main quest Priority: Sur'Kesh.
Ashley Williams
Codex
Known Associates
Initially available (only if she is alive).
David Anderson
Codex
Known Associates
Initially available.
Doctor Karin Chakwas
Codex
Known Associates
First dialogue with doctor Chakwas (Citadel: Huerta Memorial Hospital).
Doctor Liara T'Soni
Codex
Known Associates
First dialogue with Liara (main quest Priority: Mars).
Doctor Mordin Solus
Codex
Known Associates
First dialogue with Mordin (main quest Priority: Sur'Kesh).
EDI
Codex
Known Associates
Taking over the doctor's Eve body by the EDI (secondary quest Normandy SR-2: EDI*).
Garrus Vakarian
Codex
Known Associates
First dialogue with Garrus (main quest Priority: Palaven).
Grunt
Codex
Known Associates
First dialogue with Grunt (main quest Attican Traverse: The Rachni).
Jack
Codex
Known Associates
First dialogue with Jack (secondary quest Grissom Academy: Emergency Evacuation).
Jacob Taylor
Codex
Known Associates
First dialogue with Jacob (secondary quest Arrae: Ex-Cerberus Scientists.).
Jeff "Joker" Moreau
Codex
Known Associates
Completing the main quest Prologue.
Kaidan Alenko
Codex
Known Associates
Initially available (only if he is alive).
Kelly Chambers
Codex
Known Associates
First dialogue with Kelly (Citadel: Docks - Holding Area).
Legion
Codex
Known Associates
First dialogue with Legion (main quest Priority: Geth Dreadnought).
Miranda Lawson
Codex
Known Associates
First dialogue with Miranda (secondary quest Citadel: Miranda Lawson*).
Samara
Codex
Known Associates
First dialogue with Samara (secondary quest Kallini: Ardat-Yakshi Monastery).
Steven Hackett
Codex
Known Associates
Initially available.
Tali'Zorah
Codex
Known Associates
First dialogue with Tali (main quest Priority: Perseus Vail).
Thane Krios
Codex
Known Associates
First dialogue with Than (Citadel: Huerta Memorial Hospital).
Zaeed Massani
Codex
Known Associates
First dialogue with Zaeed (secondary quest Citadel: Volus Ambassador).
Banshee
Codex
The Reapers
First meeting with a Banshee.
Brute
Codex
The Reapers
First meeting with a Brute (main quest Priority: Palaven).
Marauder
Codex
The Reapers
First meeting with a Marauder (main quest Priority: Palaven).
Indoctrination
Codex
The Reapers
First meeting with a soldier changed into a Husk (main quest Priority: Mars).
Cannibal
Codex
The Reapers
First meeting with a Cannibal (main quest Prologue).
Harvester
Codex
The Reapers
First meeting with a Harvester (main quest Tuchanka: Turian Platoon).
Reaper Variants
Codex
The Reapers
Completing the main quest Priority: Citadel.
Ravager
Codex
The Reapers
First meeting with a Ravager (main quest Attican Traverse: The Rachni).
Sovereign
Codex
The Reapers
Initially available.
Husk
Codex
The Reapers
First meeting with a Husk (main quest Prologue).
Banshee
Codex
The Reapers
Initially available.
Reapers
Codex
The Reapers
Initially available.
Mass Accelerators
Secondary Codex
Weapons, Armor and Equipment
Initially available.
Kinetic Barriers ("Shields")
Secondary Codex
Weapons, Armor and Equipment
Initially available.
Small Arms
Secondary Codex
Weapons, Armor and Equipment
Initially available.
Body Armor
Secondary Codex
Weapons, Armor and Equipment
Initially available.
Tech Armor and Fortification
Secondary Codex
Weapons, Armor and Equipment
Initially available.
Citadel Space
Secondary Codex
Citadel and Galactic Government
Completing the main quest Priority: Citadel.
Citadel Council
Secondary Codex
Citadel and Galactic Government
Completing the main quest Priority: Citadel.
Timeline
Secondary Codex
Humanity and the Systems Alliance
Initially available.
Systems Alliance: Special Operations
Secondary Codex
Humanity and the Systems Alliance
Completing the main quest Prologue.
Alliance News Network
Secondary Codex
Humanity and the Systems Alliance
Talk with a Diana Allers (Citadel: Dock D24).
First Contact War
Secondary Codex
Humanity and the Systems Alliance
Initially available.
Krogan: Ancient History
Secondary Codex
Aliens: Non-Council Races
Listening the conversation with Garrus (main quest Priority: Palaven).
Krogan: Krogan Rebellions
Secondary Codex
Aliens: Non-Council Races
Listening the conversation with Garrus (main quest Priority: Palaven).
Varren
Secondary Codex
Aliens: Non-Council Races
Initially available.
Vorcha
Secondary Codex
Aliens: Non-Council Races
Initially available.
Yahg
Secondary Codex
Aliens: Non-Council Races
Initially available.
Collectors
Secondary Codex
Aliens: Non-Council Races
Initially available.
Asari: Ardat-Yakshi
Secondary Codex
Aliens: Council Races
Automatically when unlock the secondary quest Kallini: Ardat-Yakshi Monastery.
Rachni
Secondary Codex
Aliens: Extinct Races
Initially available.
Cerberus: Atlas
Secondary Codex
Organizations
Destroying first Atlas mech.
Cerberus: Centurion
Secondary Codex
Organizations
First meeting with a Centurion (main quest Priority: Mars).
Cerberus: Phantom
Secondary Codex
Organizations
First meeting with a Phantom (Priority: Citadel #2).
Cerberus: Engineer
Secondary Codex
Organizations
First meeting with an Engineer.
Cerberus: Nemesis
Secondary Codex
Organizations
First meeting with a Nemesis.
Cerberus: Guardian
Secondary Codex
Organizations
First meeting with a Guardian (main quest Priority: Mars).
Cerberus: Trooper
Secondary Codex
Organizations
First meeting with a Trooper (main quest Priority: Mars).
Mercenaries: Blue Sun
Secondary Codex
Organizations
Completing the secondary quest Citadel: Aria T'Loak*.
Mercenaries: The Blood Pack
Secondary Codex
Organizations
Completing the secondary quest Citadel: Aria T'Loak*.
Mercenaries: Eclipse
Secondary Codex
Organizations
Completing the secondary quest Citadel: Aria T'Loak*.
Aeia
Secondary Codex
Planets and Locations
Initially available.
Benning
Secondary Codex
Planets and Locations
Automatically when unlock the secondary quest N7: Cerberus Abduction.
Cyone
Secondary Codex
Planets and Locations
Automatically when unlock the secondary quest N7: Fuel Reactors.
Feros
Secondary Codex
Planets and Locations
Initially available.
Haestrom
Secondary Codex
Planets and Locations
Initially available.
Illium
Secondary Codex
Planets and Locations
Initially available.
Ilos
Secondary Codex
Planets and Locations
Initially available.
Korlus
Secondary Codex
Planets and Locations
Initially available.
Perseus Vail
Secondary Codex
Planets and Locations
Initially available.
Noveria
Secondary Codex
Planets and Locations
Initially available.
Omega
Secondary Codex
Planets and Locations
Initially available.
Ontarom
Secondary Codex
Planets and Locations
Automatically when unlock the secondary quest N7: Communication Hub
Freedom's Progress
Secondary Codex
Planets and Locations
Initially available.
Pragia
Secondary Codex
Planets and Locations
Initially available.
Rakhana
Secondary Codex
Planets and Locations
Initially available.
Sanctum
Secondary Codex
Planets and Locations
Automatically when unlock the secondary quest N7: Cerberus Lab.
Terminus Systems
Secondary Codex
Planets and Locations
Initially available.
Virmir
Secondary Codex
Planets and Locations
Initially available.
The Migrant Fleet
Secondary Codex
Planets and Locations
Initially available.
Military Ship Classifications
Secondary Codex
Planets and Locations
Initially available.
FTL Drive
Secondary Codex
Planets and Locations
Initially available.
Normandy SR-1
Secondary Codex
Planets and Locations
Initially available.
Space Combat
Secondary Codex
Planets and Locations
Initially available.
Artifacts
Secondary Codex
Technology
Initially available.
Computers: Artificial Intelligence (AI)
Secondary Codex
Technology
Initially available.
Computers: Virtual Intelligence (VI)
Secondary Codex
Technology
Initially available.
The Shroud
Secondary Codex
Technology
Completing the main quest Attican Traverse: The Rachni or Tuchanka: Turian Platoon.
The Battle of Palaven
Secondary Codex
The Reaper War
Listening the conversation with Garrus (main quest Priority: Palaven).
The Battle of Rannocha
Secondary Codex
The Reaper War
Completing the main quest Priority: Rannoch.
The Miracle at Palaven
Secondary Codex
The Reaper War
Completing the main quest Priority: Geth Dreadnought.
Desperate Measures
Secondary Codex
The Reaper War
Making an interview with a Diana Allers after completing the main quest Priority: Rannoch.
The Fall of Khar'shan
Secondary Codex
The Reaper War
Initially available.
The Fall of Taetrus
Secondary Codex
The Reaper War
Completing the main quest Priority: Citadel.
The Fall of Thessia
Secondary Codex
The Reaper War
Completing the main quest Priority: Thessia.
The Fall of Earth
Secondary Codex
The Reaper War
Completing the main quest Prologue.
The Cerberus Coup
Secondary Codex
The Reaper War
Completing the main quest Priority: Citadel #2.
Reapers Capabilities
Secondary Codex
The Reapers
Completing the main quest Priority: Citadel.
Reapers Vulnerabilities
Secondary Codex
The Reapers
First meeting with a new type of the Reapers (main quest Priority: Tuchanka).
Harvesting
Secondary Codex
The Reapers
Completing the main quest Priority: Tuchanka.
Galaxy exploration in Mass Effect 3 looks little different than in previous parts. The basic difficulty is a fact, that during searching the astral constellation which are attacked or seized by the Reapers, you can be detected by them. Reapers watchfulness increase with each scan of the vicinity you do which is seen as a fulfilling the bar in the left bottom corner of the screen. When it's full, flying Reapers units appear which force you to leave the constellation by using the Mass Relay or flying to the edge of a system (better option). In the second case there is nothing against moving back immediately to this system. Watchfulness bar doesn't reset at once, so this trick's aim is to provide us few additional seconds before Reapers arrive.
The second important change in relation to Mass Effect 2 is a fact, that game doesn't let you scan every single planet and moon but only locations that were shown as an interactive during the scan (screen above). After marking an interactive location you have to fly there immediately. Depending from the type of this object/location, you can get some resources at once (wreck) or only after exact scan of the planet/moon, which aim is to find white point for releasing the probe.
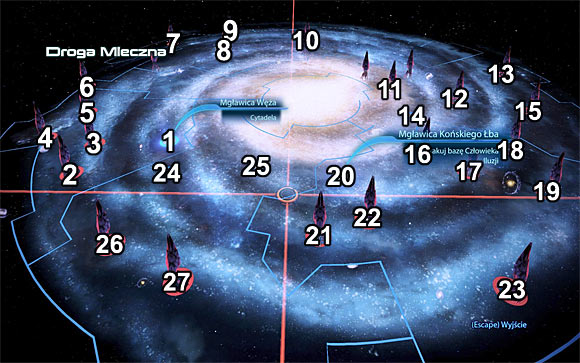
Marked on the map:
1. Serpent Nebula [systems: Widow]
2. Silean Nebula [systems: Kypladon, Loropi, Nahuala, Phontes, Teyolia]
3. Athena Nebula [systems: Ialessa, Orisoni, Parnitha, Tomaros, Vernio]
4. Nimbus Cluster [systems: Agaiou, Kallini, Mesana, Pelion]
5. Minos Wasteland [systems: Arrae, Fortis]
6. Ismar Frontier [systems: Aquila, Elysta, Faia]
7. The Shrike Abyssal [systems: Urla Rast, Xe Cha]
8. Hourglass Nebula [systems: Faryar, Osun, Ploitari, Sowilo]
9. Valhallan Threshold [systems: Micah, Paz, Raheel-Leyya]
10. Sigurd's Cradle [systems: Decoris, Skepsis]
11. Ninmah Cluster [systems: Maskim Xul, Mulla Xul]
12. Kepler Verge [systems: Newton]
13. Hades Nexus [systems: Hekate, Hoplos, Pamiat', Sheol]
14. Shadow Sea [systems: Iera]
15. Nubian Expanse [systems: Dakka, Kalabsha, Qertassi]
16. Argos Rho [systems: Phoenix, Gorgon, Hydra]
17. Gemini Sigma [systems: Han, Ming]
18. Attican Beta[systems: Hercules, Theseus]
19. Hades Gamma [systems: Antaeus, Cacus, Dis, Farinata, Plutus]
20. Horse Head Nebula [systems: Anadius, Pax]
21. Arcturus Stream [systems: Arkturus, Euler]
22. Exodus Cluster [systems: Asgard, Utopia]
23. Kite's Nest [systems: Harsa, Untrel, Vular]
24. Krogan DMZ [systems: Aralakh Dranek, Nith]
25. Annos Basin [systems: Pranas]
26. Apien Crest [systems: Castellus, Gemmae, Trebia]
27. Aethon Cluster [systems: Aru, Esori, Nura, Satu Ardd]
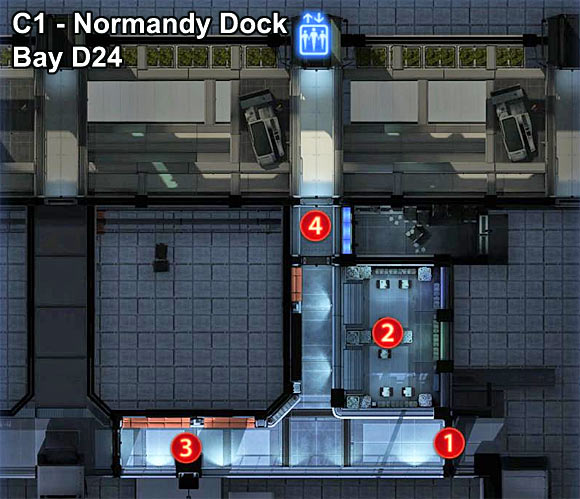
Marked on the map:
1. Normandy Airlock (the only exit from the Citadel)
2. Passenger Lounge
3. Viewing Deck
4. Security Checkpoint
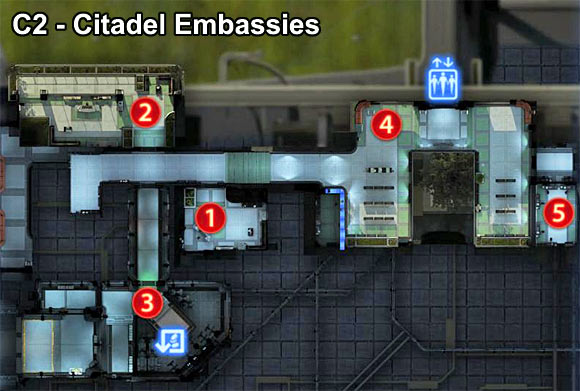
Marked on the map:
1. C-Sec Office
2. Earth Councilor's Office
3. Spectre Office (it's available after you reach the status of a Spectre; it contains shop, terminal with news and shooting gallery).
4. Embassy Offices
5. Office Suit
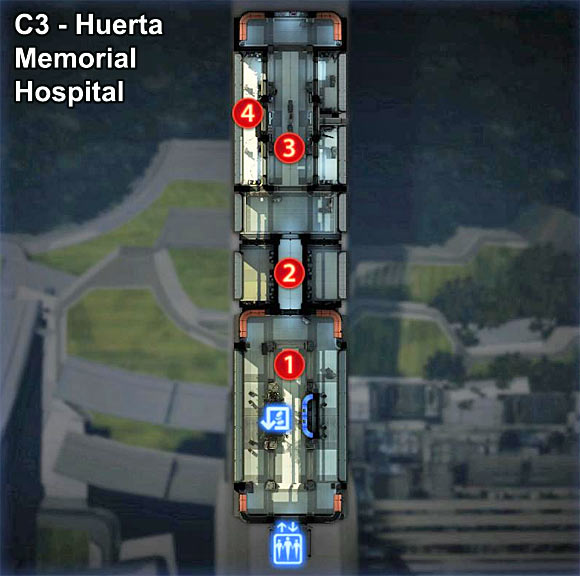
Marked on the map:
1. Patient Lounge (with shop in it)
2. Lab Services
3. Inpatient Wing
4. Examination Rooms
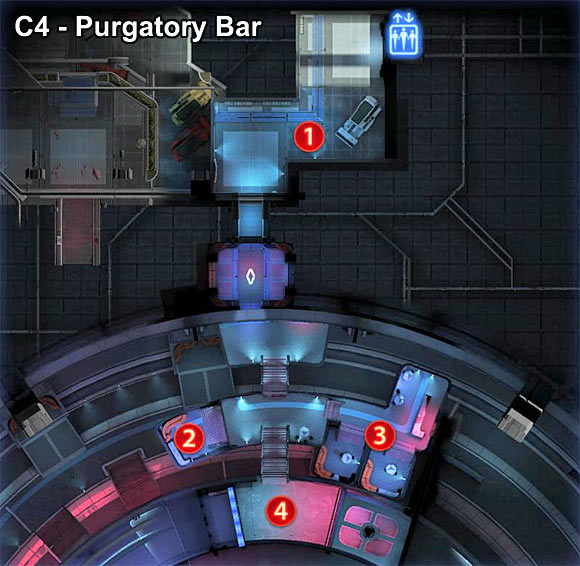
Marked on the map:
1. VIP Entrance
2. VIP Lounge
3. Lower Bar
4. Dance Floor
Remark! This area is unlocked after completing the main quest Priority: Palaven!
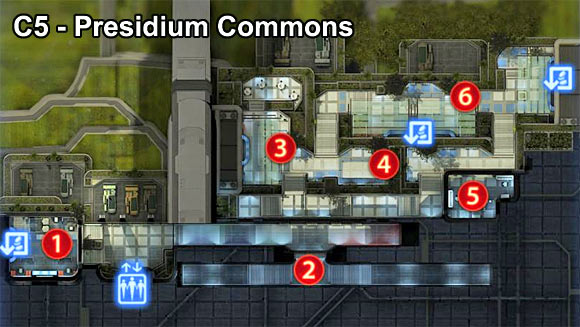
Marked on a map:
1. Bank (shops in here)
2. Apartments
3. Apollo's Cafe
4. Courtyard
5. C-SEC Outpost
6. Meridian Place Market (shops in here)
Remark! This area is unlocked after completing the main quest Priority: Palaven!
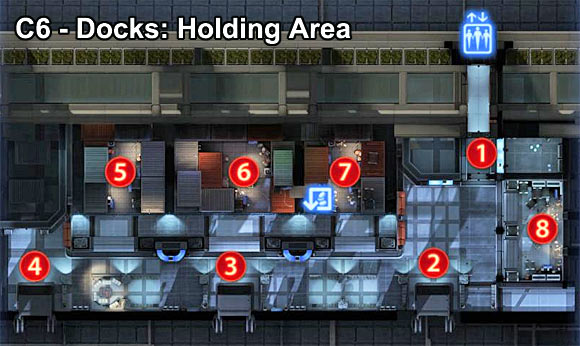
Marked on a map:
1. Security Checkpoint
2. Bay E24
3. Bay E26
4. Bay E28
5. Cargo Hold: A
6. Cargo Hold: B
7. Cargo Hold: C (shop in here)
8. Memorial Wall
Remark! This area is unlocked after completing the main quest Priority: Palaven!
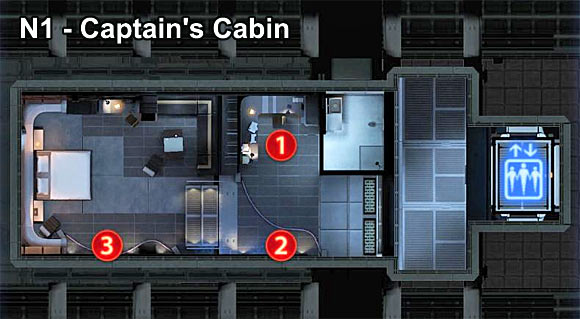
Marked on a map:
1 - Private Terminal (besides receiving the news, you can also invite guests by it)
2 - Aquarium
3 - Armor Locker
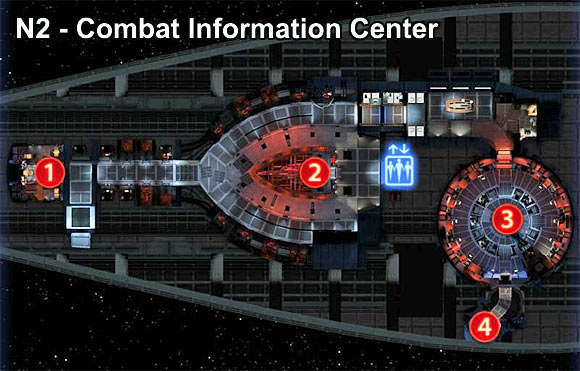
Marked on a map:
1 - Bridge
2 - Galaxy Map (also terminal can be found here)
3 - War Room (the most important place in this room is a terminal to look through war resources and multiplayer game progress)
4 - Conference Room
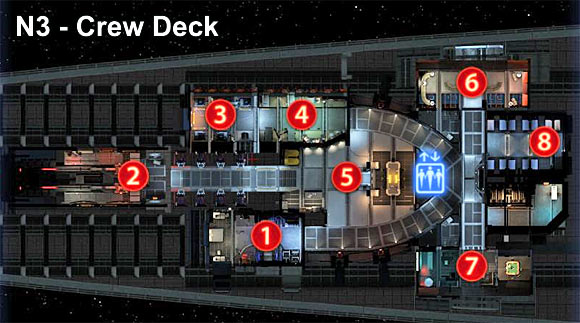
Marked on a map:
1 - Liara's Office
2 - The Main Battery
3 - Server Room
4 - Life Support
5 - Kitchen
6 - Observation Deck A
7 - Medical Bay
8 - Crew Sleeping Quarters
Marked on a map:
1 - Engineering
2 - Stairs on the Subboard
3 - Starboard Cargo
4 - Port Side Cargo
Marked on a map:
1 - Armory (you find here a weapon modification bench, armor locker and terminal for shopping)
Table below presents list of resources, artifacts, war assets and intelligence report which you can obtain during exploration certain constellations. It's worth to mention, that part of them is unlock in the particular moments of the campaign:
CONSTELLATION
SYSTEM
INTERACTIVE PLACE
TYPE OF FINDING / REMARKS
Argos Rho
Phoenix
Planet Intai'sei
[Fossil Kakliosaur] // Item is needed to complete the quest Citadel: Fossil Kakliosaur.
Argos Rho
Phoenix
Planet Pinnacle Station
War asset [Turian Spec Ops Team]
Argos Rho
Phoenix
Wreck
[450 fuel units]
Argos Rho
Gorgon
Planet Camaron
War asset [Advanced Power Relays]
Argos Rho
Hydra
Planet Canrum
War asset [Haptic Optic Array]
Argos Rho
Hydra
Wreck
[270 fuel units]
Attican Beta
Hercules
Planet Eletania
War asset [Interferometric Array]
Attican Beta
Hercules
Wreck
[370 fuel units]
Attican Beta
Theseus
Planet Feros
War asset [ExoGeni Scientists]
Attican Beta
Theseus
Wreck
[240 fuel units]
Gemini Sigma
Han
Planet Mavigon
[10000 credits]
Gemini Sigma
Han
Wreck
[470 fuel units]
Gemini Sigma
Ming
Planet Parag
War asset [Nairobi Alliance Cruiser]
War asset [Alliance Third Fleet]
Gemini Sigma
Ming
Wreck
[320 fuel units]
Nimbus Cluster
Agaiou
Planet Carcosa
[Library of Asha] // Item is needed to complete the quest Nimbus Cluster: Library of Asha.
Nimbus Cluster
Kallini
Wreck
[300 fuel units]
Nimbus Cluster
Pelion
Planet Trategos
Intel [Intact Reaper Weapon]
Nimbus Cluster
Pelion
Wreck
[650 fuel units]
Nimbus Cluster
Pelion
Wreck
[750 fuel units]
Nimbus Cluster
Pelion
Wreck
[750 fuel units]
Kite's Nest
Harsa
Planet Khar'shan
[Pillars of Strength] // Item is needed to complete the quest Kite's Nest: Pillars of Strength.
Kite's Nest
Harsa
Planet Verush
Intel [Weapon Upgrade Kit]
Kite's Nest
Harsa
Wreck
[300 fuel units]
Kite's Nest
Untrel
Planet Adek
[10000 credits]
Kite's Nest
Untrel
Wreck
[100 fuel units]
Kite's Nest
Vular
Planet Vana
[Black Market Artifacts] // Items are needed to complete the quest Aria: Blue Suns (only if you don't kill the General Oraki).
Kite's Nest
Vular
Wreck
[150 fuel units]
Aethon Cluster
Aru
Planet Cherk Sab
War asset [Volus Fabrication Units]
Aethon Cluster
Aru
Planet Irune
[Book of Plenix] // Item is needed to complete the quest Irune: Book of Plenix.
Aethon Cluster
Aru
Wreck
[200 fuel units]
Aethon Cluster
Esori
Planet Solu Paolis
War asset [Volus Dreadnought Kwulu]
Aethon Cluster
Esori
Wreck
[300 fuel units]
Aethon Cluster
Nura
Planet Oma Ker
Intel [Volus Intelligence Archives]
Aethon Cluster
Nura
Wreck
[250 fuel units]
Aethon Cluster
Satu Arrd
Planet Nalisin
War asset [Volus Engineering Team]
Aethon Cluster
Satu Arrd
Wreck
[200 fuel units]
Exodus Cluster
Asgard
Planet Borr
Intel [Remains of Reaper Destroyer]
Exodus Cluster
Asgard
Planet Loki
War asset [Alliance Special Ops Team Delta]
Exodus Cluster
Asgard
Planet Terra Nova
War asset [Alliance Cruiser Shanghai]
Exodus Cluster
Asgard
Planet Tyr
War asset [Alliance Naval Exploration Flotilla]
Exodus Cluster
Asgard
Wreck
[250 fuel units]
Exodus Cluster
Utopia
Planet Zion
War asset [Prothean Data Files]
Exodus Cluster
Utopia
Wreck
[200 fuel units]
Hades Gamma
Antaeus
Planet Trebin
[10000 credits]
Hades Gamma
Antaeus
Wreck
[300 fuel units]
Hades Gamma
Cacus
Planet Chohe
[10000 credits]
Hades Gamma
Cacus
Wreck
[400 fuel units]
Hades Gamma
Dis
Planet Klensal
[10000 credits]
Hades Gamma
Dis
Wreck
[200 fuel units]
Hades Gamma
Farinata
Planet Juntauma
War asset [Alliance Frigate Agincourt]
War asset [Alliance First Fleet]
Hades Gamma
Farinata
Wreck
[200 fuel units]
Hades Gamma
Plutus
Planet Nonuel
War asset [Special Ops Team Zeta]
War asset [103rd Marine Division]
Sigurd's Cradle
Decoris
Wreck Laena
[10000 credits]
Sigurd's Cradle
Decoris
Wreck
[350 fuel units]
Sigurd's Cradle
Skepsis
Planet Watson
War asset [Javelin Missile Launchers]
Sigurd's Cradle
Skepsis
Wreck
[200 fuel units]
Apien Crest
Castellus
Planet Digeris
[Banner of the 1st Regiment] // Item is needed to complete the quest Apien Crest: Banner of the 1st Regiment.
Apien Crest
Castellus
Wreck
[350 fuel units]
Apien Crest
Gemmae
Planet Pheiros
War asset [Turian 79th Flotilla]
Apien Crest
Gemmae
Wreck
[800 fuel units]
Apien Crest
Gemmae
Wreck
[750 fuel units]
Athene Nebula
Ialessa
Planet Trikalon
War asset [Asari Engineers]
Athene Nebula
Ialessa
Wreck
[500 fuel units]
Athene Nebula
Orisoni
Planet Egalic
War asset [Asari Research Ships]
Athene Nebula
Orisoni
Wreck
[350 fuel units]
Athene Nebula
Parnitha
Planet Tevura
War asset [Asari Cruiser Cybaen]
Athene Nebula
Tomaros
Planet Pronoia
War asset [Asari Cruiser Nefrane]
Athene Nebula
Tomaros
Wreck
[200 fuel units]
Athene Nebula
Vernio
Planet Polissa
[Hesperia Period Statue] // Item is needed to complete the quest Athene Nebula: Hesperia Period Statue.
Athene Nebula
Vernio
Wreck
[400 fuel units]
Hourglass Nebula
Faryar
Planet Alingon
War asset [Shadow Broker Starship Tech]
Hourglass Nebula
Faryar
Wreck
[600 fuel units]
Hourglass Nebula
Osun
Planet Erinle
[10000 credits]
Hourglass Nebula
Osun
Wreck
[100 fuel units]
Hourglass Nebula
Ploitari
Planet Zanethu
War asset [Terminus freighter]
Hourglass Nebula
Sowilo
Planet Hagalaz
War asset [Shadow Broker Support Team]
Hourglass Nebula
Sowilo
Wreck
[200 fuel units]
Silean Nebula
Kypladon
Planet Hanalei
War asset [Dr Jelize]
Silean Nebula
Loropi
Planet Yasilium
War asset [Armali Sniper Unit]
Silean Nebula
Loropi
Wreck
[300 fuel units]
Silean Nebula
Nahuala
Planet Hyetiana
War asset [Serrice Guard]
Silean Nebula
Nahuala
Wreck
[250 fuel units]
Silean Nebula
Phontes
Moon Oltan
War asset [Elcor Flotilla] // Item is needed to complete the quest Dekuuna: Elcor Extraction.
Silean Nebula
Phontes
Planet Dekuuna
[Code of the Ancients] // Item is needed to complete the quest Dekuuna: Code of the Ancients.
Silean Nebula
Phontes
Wreck
[175 fuel units]
Silean Nebula
Teyolia
Planet Nevos
[Rings of Alune] // Items are needed to complete the quest Silean Nebula: Rings of Alune.
Silean Nebula
Teyolia
Planet Quirezia
[10000 credits]
Silean Nebula
Teyolia
Wreck
[375 fuel units]
Hades Nexus
Hekate
Planet Asteria
War asset [Alliance Frigate Hong Kong]
War asset [Alliance Fifth Fleet]
Hades Nexus
Hekate
Wreck
[380 fuel units]
Hades Nexus
Hoplos
Planet Kopis
[Obelisk of Karza] // Item is needed to complete the quest Hades Nexus: Obelisk of Karza.
Hades Nexus
Hoplos
Wreck
[250 fuel units]
Hades Nexus
Pamiat'
Planet Dobrovolski
War asset [Alliance Frigate Leipzig]
War asset [Alliance First Fleet]
Hades Nexus
Pamiat'
Wreck
[100 fuel units]
Hades Nexus
Sheol
Planet Gei Hinnom
[Prothean Sphere] Item is needed to complete the quest Hades Nexus: Prothean Sphere.
The Shrike Abyssal
Urla Rast
Planet Talis Fia
[Prothean Obelisk] // ] Item is needed to complete the quest The Shrike Abyssal: Prothean Obelisk.
The Shrike Abyssal
Urla Rast
Wreck
[300 fuel units]
The Shrike Abyssal
Xe Cha
Planet Zada Ban
[10000 credits]
The Shrike Abyssal
Xe Cha
Wreck
[150 fuel units]
Ismar Frontier
Aquila
Metaponto
[Advanced Biotic Implants] // Item is needed to complete the quest Ismar Frontier: Prototype Components.
Valhallan Threshold
Micah
Planet Elohi
War asset [Emergency Fuel Pods]
Valhallan Threshold
Micah
Planet Farlas
War asset [Element Zero Converter]
Valhallan Threshold
Micah
Wreck
[340 fuel units]
Valhallan Threshold
Paz
Planet Garvug
[Prothean Data Drives] // Item is needed to complete the quest Valhallan Threshold: Prothean Data Drives.
Valhallan Threshold
Paz
Wreck
[160 fuel units]
Valhallan Threshold
Raheel-Leyya
Wreck
[95 fuel units]
Nubian Expanse
Dakka
Planet Pragia
Intel [Research Data From Pragia]
Nubian Expanse
Dakka
Wreck
[350 fuel units]
Nubian Expanse
Kalabsha
Planet Yamm
War asset [Alliance Marine Recon Unit]
War asset [103rd Marine Division]
Nubian Expanse
Kalabsha
Wreck
[300 fuel units]
Nubian Expanse
Qertassi
Planet Dakka
War asset [Alliance Frigate Trafalgar]
War asset [Alliance Third Fleet]
Nubian Expanse
Qertassi
Wreck
[50 fuel units]
Minos Wasteland
Fortis
Planet Pietas
[10000 credits]
Minos Wasteland
Fortis
Wreck
[200 fuel units]
Krogan DMZ
Dranek
Planet Rothla
War asset [Shadow Broker Wet Squad] // Item is needed to complete the quest Citadel: Barla Von.
Krogan DMZ
Dranek
Wreck
[200 fuel units]
Krogan DMZ
Nith
Wreck
[300 fuel units]
Arcturus Stream
Arcturus
Arcturus Station
Intel [Intel from the battle of Arcturus]
Arcturus Stream
Arcturus
Wreck
[350 fuel units]
Arcturus Stream
Euler
Wreck
[100 fuel units]
Serpent Nebula: Citadel
Quest name:
None (Citadel: Diana Allers*)
Customer:
Diana Allers in Citadel: Bay D24
Detailed localization:
Citadel: Bay D24, Passenger Lounge [2]
Reward:
War Asset [Diana Allers] [EMS: 5]
Remarks:
It's worth to visit Diana in the Engineering on the Normandy, because after well played talks you can obtain additional War Assets.
Quest name:
None (Citadel: Doctor Chakwas*)
Customer:
Dr Karin Chakwas in Citadel: Huerta Memorial Hospital
Detailed localization:
Citadel: Huerta Memorial Hospital, Patient Lounge[1]
Reward:
War Asset [Dr Karin Chakwas] [EMS: 10] / New member of the crew [Dr Karin Chakwas]
Remarks:
Do before the quest: Priority: Tuchanka
Dr Chakwas adds 10 EMS points only if we decide to not join her to the Normandy's crew. We can take on the board dr Chloe Michel instead.
Quest name:
None (Citadel: Doctor Michel*)
Customer:
Dr Chloe Michel in Citadel: Huerta Memorial Hospital
Detailed localization:
Citadel: Huerta Memorial Hospital, Patient Lounge[1]
Reward:
New member of the crew [Dr Chloe Michel]
Remarks:
Do before the quest: Priority: Tuchanka
To recruit dr Michel, you have to refuse first to dr Chakwas.
Quest name:
None (Citadel: Ashley Williams* / Kaidan Alenko*)
Customer:
Commandor Bailey in Citadel: Bay D24
Detailed localization:
Citadel: Bay D24, Citadel: Huerta Memorial Hospital
Reward:
War Asset [Ashley Williams/Kaidan Alenko] [EMS: 25] / New member of the crew [Ashley Williams/Kaidan Alenko]
Remarks:
Final of this quest takes place during the quest Priority: Citadel #2, during which Ashley/Kaidan has to survive. Ashley/Kaidan adds 25 EMS only if we decide to not join her/him to the Normandy's crew.
Quest name:
None (Citadel: Khalisa al.-Jilani*)
Customer:
Khalisa Bint Sinan al-Jilani in Citadel: Embassies
Detailed localization:
Citadel: Embassies, Embassy Offices [4]
Reward:
War Asset [Khalisa Bint Sinan al-Jilani] [EMS: 10]
Remarks:
If we hit Khalisa in the previous parts of the game, she'll give us only 5 EMS.
Quest name:
Citadel: Hanar Diplomat
Customer:
Jondun Bau in Citadel: Embassies
Detailed localization:
Citadel: Embassies, Citadel: Docks - Holding Area
Reward:
War asset [Forces of Hanars and Dells] [EMS: 50] [210 PD] / [unit of Spectres] [EMS: 40] [210 PD]
Remarks:
Mission is available only after finishing the quest: Priority: Palaven
Do before the quest: Priority: Tuchanka
If in Mass Effect 2 you joined Kasumi and she survived the last mission, you can obtain both assets. In other case you have to choose.
If in Mass Effect 2 you have made the Kasumi's loyalty mission, she join the works with the Crucible, what gives you additional 25 EMS.
Quest name:
None (Citadel: Aria T'Loak*)
Customer:
Aria T'Loak in Citadel: Purgatory Bar
Detailed localization:
Citadel: Purgatory Bar, VIP Lounge [2]
Reward:
War Asset [Terminus Fleet] [EMS: 50], unlock the quests: Aria: Blue Suns, Aria: Blood Pack, Aria: Eclipse
Remarks:
Mission is available only after finishing the quest: Priority: Palaven
Do before the quest: Priority: Tuchanka
After talk with Aria three quests become unlocked, which lie on gaining the support of Blue Suns, Blood Pack and Eclipse. Together, you can earn 200 EMS (additional 50 for every mercenary group).
Quest name:
Aria: Blue Suns
Customer:
Aria T'Loak in Citadel: Purgatory Bar
Detailed localization:
Citadel: Docks - Holding Area, Citadel: Presidium Commons
Reward:
Actualization of the War Asset [Terminus Fleet] [EMS: 50] [210 PD] [5000 credits]
Remarks:
Mission is available only after finishing the quest: Priority: Palaven
Do before the quest: Priority: Tuchanka
Quest name:
Aria: Blood Pack
Customer:
Aria T'Loak in Citadel: Purgatory Bar
Detailed localization:
Citadel: Presidium Commons
Reward:
Actualization of the War Asset [Terminus Fleet] [EMS: 50] [210 PD] [5000 credits]
Remarks:
Mission is available only after finishing the quest: Priority: Palaven
Do before the quest: Priority: Tuchanka
Quest name:
Aria: Eclipse
Customer:
Aria T'Loak in Citadel: Purgatory Bar
Detailed localization:
Citadel: Embassies, Citadel: Docks - Holding Area, Citadel: Presidium Commons
Reward:
Actualization of the War Asset [Terminus Fleet] [EMS: 50] [210 PD] [5000 credits]
Remarks:
Mission is available only after finishing the quest: Priority: Palaven
Do before the quest: Priority: Tuchanka
Quest name:
None (Citadel: Miranda Lawson*)
Customer:
Miranda Lawson in Citadel: Bay D24
Detailed localization:
Citadel: Bay D24, Viewing Deck [3]
Reward:
War Asset [Miranda Lawson] [EMS: 25]
Remarks:
Mission is available only after finishing the quest: Priority: Palaven
Final of the quest takes place during the quest Priority: Horizon. If we earlier warned Miranda against Kai Leng, she'll live through and offer her help to the Alliance, what gives us 25 additional EMS points.
Quest name:
None (Citadel: Thane Krios*)
Customer:
Thane Krios in Citadel: Huerta Memorial Hospital
Detailed localization:
Citadel: Huerta Memorial Hospital, Patient Lounge [1]
Reward:
None
Remarks:
Mission is available only after finishing the quest: Priority: Palaven
Final of this quest takes place during the quest Priority: Citadel #2. If we met Thane earlier, he'll be able to help save a salarian member of the Council.
Quest name:
None (Citadel: Kelly Chambers*)
Customer:
Kelly Chambers in Citadel: Docks - Holding Area
Detailed localization:
Citadel: Docks - Holding Area Cargo: B [6]
Reward:
None
Remarks:
Mission is available only after finishing the quest: Priority: Palaven
During conversation with Kelly it's worth to persuade her to change her personality. Thanks to that you'll meet her again in the quest Priority: Citadel #2.
Quest name:
None (Citadel: Aethyta*)
Customer:
Aethyta Citadel: Presidium Commons
Detailed localization:
Citadel: Presidium Commons, Apollo's Cafe [3]
Reward:
Actualization of the War Asset [Second Asari Fleet] [EMS: 25]
Remarks:
Mission is available only after finishing the quest: Priority: Palaven
Do before the quest: Priority: Tuchanka
If after the conversation with Aethyta, we won't make Liara talk to her, we won't get the War Asset.
Quest name:
None (Normandy SR-2: Lieutenant Cortez*)
Customer:
Traynor in Normandy SR-2: Combat Information Centre
Detailed localization:
Normandy SR-2: Hangar, Citadel: Bay D24, Citadel: Docks - Holding Area
Reward:
War Asset [Pilots-renegades] [EMS: 20] [375 PD]
Remarks:
Mission is available only after finishing the quest: Priority: Palaven
This quest contains few stages, you have to talk to the Lieutenant Cortez four times after quests Priority: Palaven, Priority: Sur'Kesh.
Quest name:
Citadel: GX12 Thermal Pipe
Customer:
Engineer Adams in Normandy SR-2: Engineering
Detailed localization:
Citadel: Presidium Commons, Bank [1]
Reward:
War Asset [Eezo condensators] [EMS: 15] [375 PD]
Remarks:
Mission is available only after finishing the quest: Priority: Sur'Kesh
Do before the quest: Priority: Tuchanka
Quest name:
Citadel: Inspirational Stories
Customer:
Solik Vass in Citadel: Docks - Holding Area
Detailed localization:
Citadel: Docks - Holding Area, Memorial Wall [8], Cargo: B [6], Bay E28 [4]
Reward:
[210 PD] [5000 credits]
Remarks:
Mission is available only after finishing the quest: Priority: Citadel #2
Do before the quest: Priority: Cerberus Headquarters
Quest name:
Citadel: Wounded Batarian
Customer:
Angry veteran in Citadel: Presidium Commons
Detailed localization:
Citadel: Embassies, Citadel: Docks - Holding Area
Reward:
[210 PD] [5000 credits]
Remarks:
Mission is available only after finishing the quest: Priority: Citadel #2
Do before the quest: Priority: Cerberus Headquarters
Quest name:
Citadel: Batarian Codes
Customer:
Officer Noles in Citadel: Presidium Commons
Detailed localization:
Citadel: Embassies, Citadel: Huerta Memorial Hospital, Citadel: Bay D24, Citadel: Docks - Holding Area
Reward:
War Asset [Batarian Fleet] [EMS: 100] [210 PD]
Remarks:
Mission is available only after finishing the quest: Priority: Citadel #2
Do before the quest: Priority: Cerberus Headquarters
To get a Batarian Fleet, we have to persuade its leader to co-operation.
If this leader is a Balak (he didn't die in the Bring Down the Sky), we obtain additional 15 EMS.
Quest name:
Citadel: Cerberus Retribution
Customer:
Angry citizens in Citadel: Presidium Commons
Detailed localization:
Citadel: Presidium Commons, C-SEC Outpost [5]
Reward:
[210 PD] [5000 credits]
Remarks:
Mission is available only after finishing the quest: Priority: Citadel #2
Do before the quest: Priority: Cerberus Headquarters
Quest name:
Citadel: Volus Ambassador
Customer:
None
Detailed localization:
Citadel: Embassies, Citadel: Presidium Commons
Reward:
War Asset [Volus Bomb Fleet] [EMS: 75] [210 PD] [5000 credits]
Remarks:
Mission is available only after finishing the quest: Priority: Citadel #2
Do before the quest: Priority: Cerberus Headquarters
If in the Mass Effect 2 Zaeed Massani lived through and we've made his loyalty mission, he'll help us during this quest. If we talk to him later in the Citadel: Docks - Holding Area, we receive additional 25 EMS.
Quest name:
Citadel: Medical Supplies
Customer:
Dr Chakwas/dr Michel in Normandy SR-2: Crew Deck
Detailed localization:
Citadel: Docks - Holding Area, Cargo: B [6]
Reward:
[375 PD] [Medi-Gel Capacity] Intel [Operation in the Medical Station]
Remarks:
Mission is available only after finishing the quest: Priority: Citadel #2
Do before the quest: Priority: Cerberus Headquarters
Quest name:
Citadel: Medi-Gel Sabotage
Customer:
A doctor form the refugee camp in the Citadel: Docks - Holding Area
Detailed localization:
Citadel: Docks - Holding Area, Cargo: A [5], Cargo: C [7]
Reward:
Update of the War Asset [7th Turian Fleet] [EMS: 5] [210 PD] [5000 credits]
Remarks:
Mission is available only after finishing the quest: Priority: Citadel #2
Do before the quest: Priority: Cerberus Headquarters
Apien Crest: Castellus
Quest name:
Apien Crest: Banner of the 1st Regiment
Customer:
None or Turian Officer in the Citadel: Purgatory Bar
Detailed localization:
planet Digeris
Reward:
Update of the War Asset [7th Turian Fleet] [EMS: 40] [15000 credits]
Remarks:
Mission is available only after finishing the quest: Priority: Citadel #2
Do before the quest: Priority: Tuchanka
Kite's Nest: Harsa
Quest name:
Kite's nest: Pillars of Strength
Customer:
None or the Batarian Preacher in the Citadel: Docks - Holding Area
Detailed localization:
planet Khar'shan
Reward:
Update of the War Asset: [Batarian Fleet] [EMS: 40] [15000 credits]
Remarks:
Mission is available only after finishing the quest: Priority: Palaven
Do before the quest: Priority: Tuchanka
Sigurd's Cradle: Decoris
Quest name:
Citadel: Alien Medi-Gel Formula
Customer:
None or dr Ravin in Citadel: Memorial Huerta Hospital
Detailed localization:
planet Sanctum
Reward:
Update of the War Asset [Forces of Hanars and Dells] [EMS: 8] [30 PD] [1000 credits]
Remarks:
Do before the quest: Priority: Tuchanka
Required object you may get during completing the quest: N7: Cerberus Lab or buy in the Spectre Office.
Quest name:
N7: Cerberus Lab
Customer:
Traynor in Normandy SR-2: Combat Information Centre
Detailed localization:
Sanctum: Cerberus Lab
Reward:
War Asset [Cerberus Research Data] [EMS: 50] [10000 credits]
Remarks:
Do before the quest: Priority: Tuchanka
Petra Nebula: Vetus
Quest name:
Grissom Academy: Investigation
Customer:
Traynor in Normandy SR-2: Combat Information Centre
Detailed localization:
Grissom Academy
Reward:
Unlock the quest Grissom Academy: Emergency Evacuation
Remarks:
Do before the quest: Priority: Tuchanka
Quest name:
Grissom Academy: Emergency Evacuation
Customer:
Kahlee Sanders in: Grissom Academy
Detailed localization:
Grissom Academy
Reward:
War Asset: [Kahlee Sanders] [EMS: 20] [Biotic Squad] [EMS: 75] [12500 credits]
Remarks:
Do before the quest: Priority: Tuchanka
If during the mission we won't save all students, Kahlee gives us 5 EMS less.
To get the Biotic Squad you have to choose an egoist option at the end of the mission.
IF Jack lived through the last mission in the Mass Effect 2 she'll provide us additional 25 EMS.
Quest name:
Citadel: Biotic Amp Interfaces
Customer:
None or Asari in Citadel: Huerta Memorial Hospital
Detailed localization:
Grissom Academy
Reward:
War Asset [Citadel Defence Force] [EMS: 8] [30 PD] [1000 credits]
Remarks:
Do before the quest: Priority: Tuchanka
Required object you may get during the quest Grissom Academy: Emergency Evacuation or buy in the Spectre Office.
The Shrike Abyssal: Ulra Rast
Quest name:
The Shrike Abyssal: Prothean Obelisk
Customer:
Volus Diplomat in Citadel: Embassies
Detailed localization:
planet Talis Fia
Reward:
[20000 credits]
Remarks:
Do before the quest: Priority: Tuchanka
Minos Wastelands: Arrae
Quest name:
Arrae: Cerberus Ex-Scientists
Customer:
Traynor in Normandy SR-2: Combat Information Centre
Detailed localization:
Planet Gellix: Laboratory
Reward:
War Asset [Ex-Cerberus Scientists] [EMS: 25] [Dr Brynn Cole] [EMS: 25] [12500 credits]
Remarks:
Mission is available only after finishing the quest Priority: Citadel #2
Do before the quest: Priority: Cerberus Headquarters
If Jacob Taylor lived through the last mission in Mass Effect 2, he gives us additional 25 EMS.
Quest name:
Citadel: Cerberus Turian Poison
Customer:
None or doctor in the Citadel: Huerta Memorial Hospital
Detailed localization:
Planet Gellix: Laboratory
Reward:
Actualization of the War Asset [6th Turian Fleet] [EMS: 8] [30 PD] [1000 credits]
Remarks:
Mission is available only after finishing the quest Priority: Citadel #2
Do before the quest: Priority: Cerberus Headquarters
Require item you may get during the quest Arrae: Ex-Cerberus Scientists or buy in the Spectre Office.
Ismar Frontier: Aquila
Quest name:
Ismar Frontier: Prototype Components
Customer:
Salarian Scientist in the Citadel: Huerta Memorial Hospital
Detailed localization:
planet Metaponto
Reward:
[90 PD]
Remarks:
Do before the quest: Priority: Tuchanka
Krogan DMZ: Aralakh
Quest name:
Tuchanka: Bomb
Customer:
Lieutenant Tarquin Victis in Tuchanka: Crushed Vehicle
Detailed localization:
Tuchanka: City Ruins
Reward:
War Asset [Turian Blackwatch] [EMS: 75] [12500 credits]
Remarks:
Mission is available only after finishing the quest Tuchanka: Turian Platoon
Do before the quest: Priority: Tuchanka
If you do more than two quest from the moment you unlock this one, it'll be cancelled.
Quest name:
Citadel: Cerberus Automatic Turrets Schematics
Customer:
None or the C-SEC Officer in the Citadel: Presidium Commons
Detailed localization:
Tuchanka: City Ruins
Reward:
War Asset [Citadel Defence Force] [EMS: 8] [30 PD] [1000 credits]
Remarks:
Do before the quest: Priority: Cerberus Headquarters
Required item you may get during the quest Tuchanka: Bomb or buy in the Spectre Office.
Quest name:
Citadel: Improved Power Grid
Customer:
None or Alison in the Citadel: Purgatory Bar
Detailed localization:
Tuchanka: Cerberus Attack
Reward:
War Asset [Fifth Alliance Fleet] [EMS: 8] [30 PD] [1000 credits]
Remarks:
Do before the quest: Priority: Tuchanka
Required item you may get during the quest N7: Cerberus attack or buy in the Spectre Office.
Quest name:
N7: Cerberus Attack
Customer:
Traynor in Normandy SR-2: Combat Information Centre
Detailed localization:
Tuchanka: Cerberus Attack
Reward:
War Asset [Krogan First Division] [EMS: 50] [10000 credits]
Remarks:
Do before the quest: Priority: Tuchanka
Krogan DMZ: Dranek
Quest name:
Citadel: Barla Von
Customer:
None or Barla Von in the Citadel: Presidium Commons
Detailed localization:
planet Rothla
Reward:
War Asset [Shadow Broker Wet Squad] [EMS: 25] [120 PD]
Remarks:
Do before the quest: Priority: Tuchanka
Horse Head Nebula: Pax
Quest name:
Citadel: Heating Units Stabilizers
Customer:
Sellea in the Citadel: Presidium Commons
Detailed localization:
Noveria: Cerberus Fighter Base
Reward:
Actualization of the War Asset [Salarian Third Fleet] [EMS: 8] [30 PD] [1000 credits]
Remarks:
Do before the quest: Priority: Cerberus Headquarters
Required object you may get during the quest N7: Cerberus Fighter Base or buy in the Spectre Office for 1000 credits.
Quest name:
N7: Cerberus Fighter Base
Customer:
Traynor in Normandy SR-2: Combat Information Centre
Detailed localization:
Noveria: Cerberus Fighter Base
Reward:
War asset [Advanced Fighter Squadron] [EMS: 75] [10000 credits]
Remarks:
Do before the quest: Priority: Cerberus Headquarters
Ninmah Cluster: Mulla Xul
Quest name:
Citadel: Krogan Dying Message
Customer:
None
Detailed localization:
planet Uttuku
Reward:
[90 PD]
Remarks:
Do before the quest: Priority: Tuchanka
Required item you may get only during the quest Attican Traverse Rachni.
Arcturus Stream: Euler
Quest name:
Benning: Evidence
Customer:
None or ambassador Dominic Osoba in the Citadel: Embassies
Detailed localization:
Benning: Cerberus Abductions
Reward:
[90 PD]
Remarks:
Do before the quest: Priority: Tuchanka
Required object you may get during the quest N7: Cerberus Abductions or buy in the Spectre Office for 1000 credits.
Quest name:
N7: Cerberus Abductions
Customer:
Traynor in Normandy SR-2: Combat Information Centre
Detailed localization:
Benning: Cerberus Abductions
Reward:
War Asset [First Arcturus Division] [EMS: 60] [10000 credits]
Remarks:
Do before the quest: Priority: Cerberus Headquarters
Aethon: Aru
Quest name:
Irune: Book of Plenix
Customer:
None or angry volus accounter in the Citadel: Presidium Commons
Detailed localization:
planet Irune
Reward:
Actualization of the War Asset [Citadel Defence Force] [EMS: 40] [15000 credits]
Remarks:
Do before the quest: Priority: Cerberus Headquarters
Nimbus Cluster: Agaiou
Quest name:
Nimbus Cluster: Library of Asha
Customer:
None or the military trainer in the Citadel: Purgatory Bar
Detailed localization:
planet Carcosa
Reward:
Actualization of the War Asset [Sixth Asari Fleet] [EMS: 40] [15000 credits]
Remarks:
Do before the quest: Priority: Cerberus Headquarters
Nimbus Cluster: Mesana
Quest name:
Mesana: Distress Signal
Customer:
Liara T'soni in Normandy SR-2: Combat Information Centre
Detailed localization:
planet Lesuss
Reward:
Unlock the quest Kallini: Ardat-Yakshi Monastery
Remarks:
Do before the quest: Priority: Cerberus Headquarters
Quest name:
Kallini: Ardat-Yakshi Monastery
Customer:
None
Detailed localization:
Lesuss: Monastery
Reward:
War Asset [Asari Commandos] [EMS: 20] [12500 credits]
Remarks:
Do before the quest: Priority: Cerberus Headquarters
If Samara lived through the Mass Effect 2 and during the last mission we prevent her from a suicide, she'll join us and give additional 25 EMS.
Quest name:
Citadel: Asari Widow
Customer:
None
Detailed localization:
Lessus: Monastery
Reward:
[90 PD]
Remarks:
Do before the quest: Priority: Cerberus Headquarters
Required object you may get during the quest Kallini: Ardat-Yakshi Monastery
Athene Nebula: Vernio
Quest name:
Athene Nebula: Hesperia Period Statue
Customer:
A scientist in the Citadel: Presidium Commons
Detailed localization:
planet Polissa
Reward:
Actualization of the War Asset [Alliance Engineering Corps] [EMS: 40] [15000 credits]
Remarks:
Do before the quest: Priority: Cerberus Headquarters
Valhallan Threshold: Paz
Quest name:
Valhallan Threshold: Prothean Data Drives
Customer:
None or a Soldier in the Citadel: Bay D24
Detailed localization:
planet Gorvug
Reward:
Actualization of the War Asset [Alliance Engineering Corps] [EMS: 40] [15000 credits]
Remarks:
Do before the quest: Priority: Cerberus Headquarters
Silean Nebula: Kypladon
Quest name:
N7: Fuel Reactors
Customer:
Traynor in Normandy SR-2: Combat Information Centre
Detailed localization:
Cyone: Fuel Reactors
Reward:
War Asset [Advanced Starship Fuel] [EMS: 75] [10000 credits]
Remarks:
Do before the quest: Priority: Cerberus Headquarters
Quest name:
Citadel: Chemical Treatment
Customer:
None or dr Silon in the Citadel: Huerta Memorial Hospital
Detailed localization:
Cyone: Fuel Reactors
Reward:
Actualization of the War Asset [First Alliance Fleet] [EMS: 8] [30 PD] [1000 credits]
Remarks:
Do before the quest: Priority: Cerberus Headquarters
Required object you may get during the quest N7: Fuel Reactors or buy in the Spectre Office.
Silean Nebula: Phontes
Quest name:
Dekuuna: Code of the Ancients
Customer:
Angry elcor in the Citadel: Purgatory Bar
Detailed localization:
planet Dekuuna
Reward:
Actualization of the War Asset [Citadel Defence Force] [EMS: 40] [15000 credits]
Remarks:
Mission is available only after finishing the quest Priority: Rannoch
Do before the quest: Priority: Cerberus Headquarters
Quest name:
Dekuuna: Elcor Extraction
Customer:
None or elcor ambassador in the Citadel: Embassies
Detailed localization:
Moon of Dekuuna, Oltan
Reward:
War Asset [Elcor Flotilla] [EMS: 40] [120 PD]
Remarks:
Mission is available only after finishing the quest Priority: Rannoch
Do before the quest: Priority: Cerberus Headquarters
Silean Nebula: Teyeolia
Quest name:
Silean Nebula: Rings of Alune
Customer:
None or the Consultant in the Citadel: Huerta Memorial Hospital
Detailed localization:
planet Nevos
Reward:
Actualization of the War Asset [Citadel Defense Force] [EMS: 40] [15000 credits]
Remarks:
Mission is available only after finishing the quest Priority: Rannoch
Do before the quest: Priority: Cerberus Headquarters
Perseus Nebula: Tikkun
Quest name:
Citadel: Reaper Code Fragments
Customer:
c
Detailed localization:
Rannoch: Geth Consensus
Reward:
Actualization of the War Asset [Second Asari Fleet] [EMS: 8] [30 PD] [1000 credits]
Remarks:
Do before the quest: Priority: Cerberus Headquarters
Required item you may get during the quest Rannoch: Geth Fighter Squadrons or buy in the Spectre Office.
Quest name:
Citadel: Target Jamming Technology
Customer:
None or the C-SEC Officer in the Citadel: Presidium Commons
Detailed localization:
Rannoch: Catastrophe Place
Reward:
Actualization of the War Asset [Citadel Defense Force] [EMS: 8] [30 PD] [1000 credits]
Remarks:
Do before the quest: Priority: Cerberus Headquarters
Required item you may get during the quest Rannoch: Admiral Koris or buy in the Spectre Office.
Argos Rho: Phoenix
Quest name:
Citadel: Kakliosaur Fossil
Customer:
None or the war strategist in the Citadel: Presidium Commons
Detailed localization:
planet Intai'sei
Reward:
Actualization of the War Asset [Krogan Clans] [EMS: 40] [15000 credits]
Remarks:
Do before the quest: Priority: Cerberus Headquarters
Hades Nexus: Sheol
Quest name:
Hades Nexus: Prothean Sphere
Customer:
None or the refugee in the Citadel: Docks - Holding Area
Detailed localization:
planet Gei Hinnom
Reward:
War Asset [Alliance Engineering Corps] [EMS: 40] [15000 credits]
Remarks:
Do before the quest: Priority: Cerberus Headquarters
Hades Nexus: Hoplos
Quest name:
Hades Nexus: Obelisk of Karza
Customer:
None or the Searcher in the Citadel: Presidium Commons
Detailed localization:
planet Gei Hinnom
Reward:
War Asset [Alliance Engineering Corps] [EMS: 40] [15000 credits]
Remarks:
Do before the quest: Priority: Cerberus Headquarters
Kepler Verge: Newton
Quest name:
Citadel: Cerberus Ciphers
Customer:
After completing the mission Priority
Detailed localization:
Ontaron: Communication Hub
Reward:
War Asset [Fifth Alliance Fleet] [EMS: 8] [30 PD] [1000 credits]
Remarks:
Do before the quest: Priority: Cerberus Headquarters
Required item you may get during the quest N7: Communication Hub or buy in the Spectre Office.
Quest name:
N7: Communication Hub
Customer:
Traynor in Normandy SR-2: Combat Information Centre
Detailed localization:
Ontaron: Communication Hub
Reward:
War Asset [Communications Arrays] [EMS: 50] [10000 credits]
Remarks:
Do before the quest: Priority: Cerberus Headquarters




 Mortal Kombat Game Guide & Walkthrough
 Men of War: Vietnam Game Guide & Walkthrough
 Mass Effect 3: Leviathan Game Guide & Walkthrough
 Minecraft Game Guide & Walkthrough
 Mass Effect 3 Game Guide & Walkthrough