

Max Payne 3 game guide contains detailed description of all fourteen chapters of the singleplayer campaign. In description of each chapter you can find information about:

In the guide you can find following colours:
Jacek "Stranger" Halas
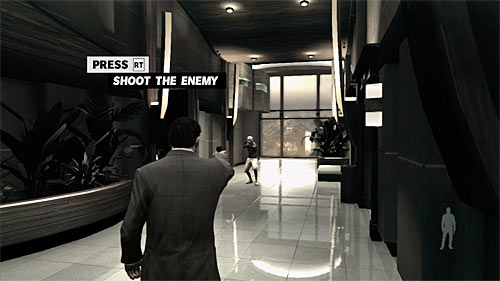
At the very beginning of the mission you'll be forced to eliminate few bandits in which help you very short tutorial. Start from pressing the analog stick for slow motion, then aim at the bandit in front of you (head is the beast). After that fire once or few times (right trigger).

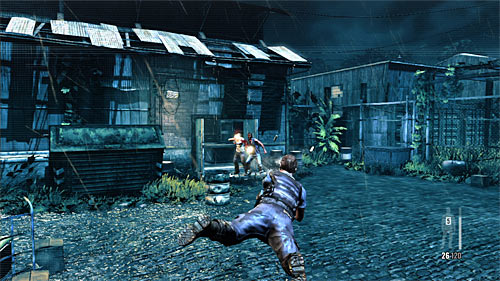
The second part of the tutorial is making a jump in the slow motion. To do so, lean the left analog stick up and push the RB button. During the flight turn left and try to eliminate two enemies running out of the apartment. If you miss, you'll have to get rid of them after touching the ground and off the slow motion.
Remark! If you play this mission again, the tutorial is skipped and you fight with all three enemies at once.

Now, move closer to the entrance to the apartment. You can behave in two ways. First one is "sticking" to the wall by the entrance and using it as a cover (X button). Second variant is rushing into the room with the slow motion jump (button RB). Regardless of the choice, remember that there are two person to eliminate: one at the front of the entrance, and the other on the left side.

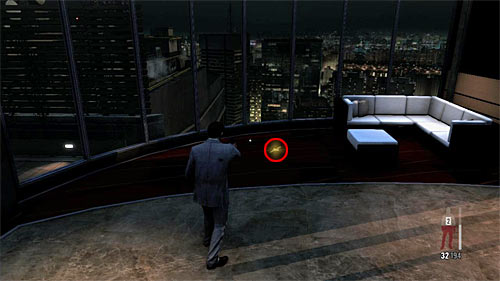
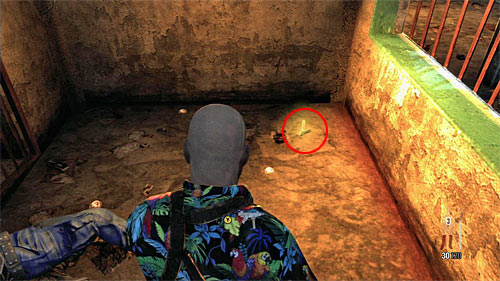
After eliminating all bandits consider picking up the second pistol (menu of the weapon choice is call with LB button) and go back to the place where you get rid of the first group of enemies. Turn left and go to the end of the corridor. Check the floor nearby the window. You will find first part of the weapon [Golden Gun - Pistol PT92 1/3].

Return to the apartment and spare few minutes to check it. You can interact with the piano, what is optional. Find the table on which painkillers and the first clue [Clue 1/2 - magazine] lie. At the end head to the doors leading to the balcony.
Remark! Make sure that you collect all items before leaving the apartment, because return won't be possible.
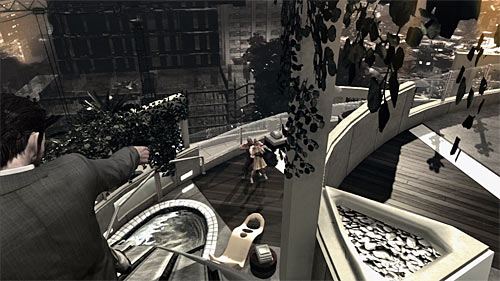
Just after Max started slipping, aim carefully at the head of the bandit standing on the bottom. Be careful, because you can't hurt the hostage. One clean shot should be enough.

After getting on the new roof, turn left and eliminate the first enemy. Now it is recommended to listen the game's advice and hide behind one of the big pillars (X button). Three remaining bandits you can kill like you want, but in case shooting behind the cover, don't let any thug reach Max (but if so you can eliminate him in a scuffle).

Make sure you finish off all enemies and then look around. Firstly, move back nearby the place when you start and check and corner shown on the screen - you find new part of the weapon [Golden Gun - Pistol PT92 2/3]. Also, pick up an ammo and consider taking with you a M500 Shotgun.
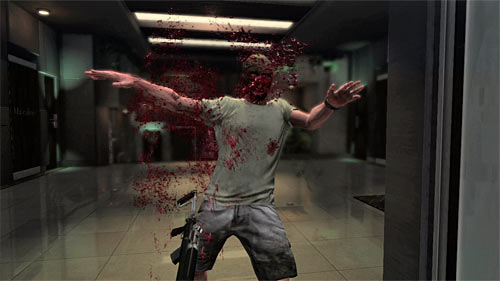
Go to the second end of the corridor and be prepare to do in another single bandit who suddenly opens the door. Also here small tutorial waits for you: this time about camera work showing the kill in a slow motion. Press the right trigger, optionally hold A button and press the right trigger again and again. After the encounter search the corps and consider picking up the Ruger Mini-30.
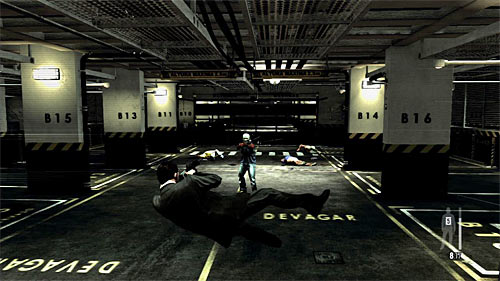
Use the passage to the underground parking. You'll be attacked there by a bunch of thugs. It's wise to use covers at the beginning and, again, don't let them get to close to you. Effective slow motion jumps may wait until there will be only 2 enemies.

Pick up ammo and go to the marked switch and interact with him (Y button). Go straight and stop after reaching the ending of this level of parking. Check the right corner, the parking place B01 (screen above) where you find the last weapon part [Golden Gun - Pistol PT92 3/3]

Turn left and go to the ramp leading to the upper level. Stop more or less in the middle of the way and find the clue lying on the ground [Clue 2/2 - Dropped Photo]. After that continue your march.
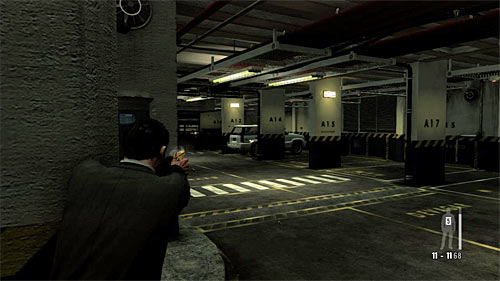
After reaching the new level you should spot that you have a chance to attack your opponents from the surprise. I propose to stand by the left wall and attack first enemies standing away on the right side, firing at them or at the car and hoping it'll blow up.
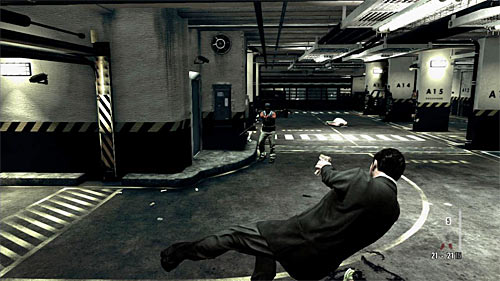
Be prepared, because another enemies are running from the left. You can wait for them and fire behind the cover or make an effective slow motion jump with several accurate shots.
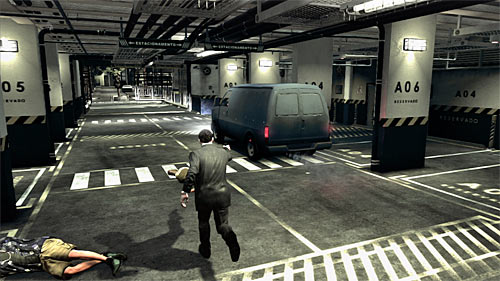
Wait until you regain partial control over the Max, aim at the left rear tire of the car (screen above) and make a single shot causing a crash.
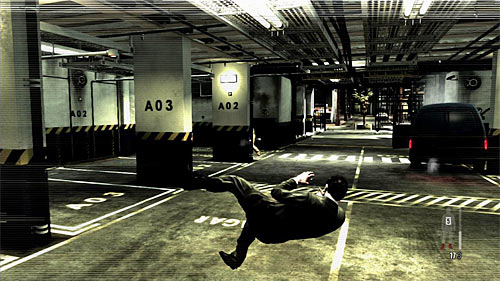
Three new bandits jump out the van. I recommend to get rid of the person from your right at first and then with two remaining thugs. Regardless of your liking you can risk in the slow motion or hide behind the pillars.
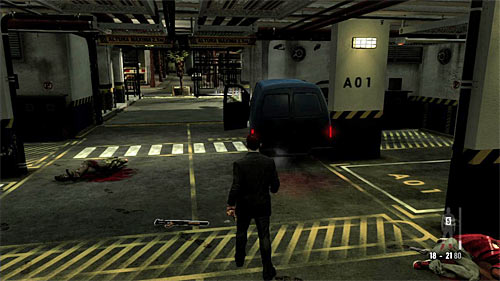
After the won encounter go to the rear doors of the van.
Remark! Don't try go to the exit from the underground parking or the mission will be failed.
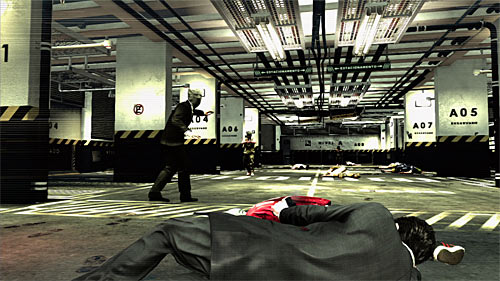
The last part of this mission is eliminating two bandits running at you. Despite the slow motion do not wait too long before you fire because you can help Rodrigo dies.

This chapter begins with very effective scene of a slow motion. During the flight try to kill as many enemies as you can, aiming firstly at those standing very close. Simultaneously try not to fire at civilians.
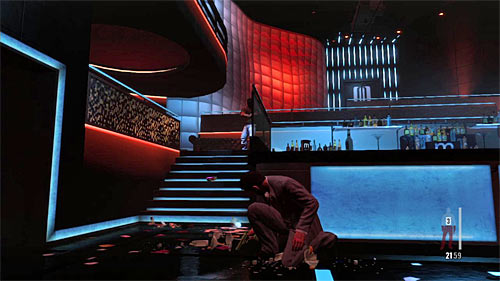
After landing on the lower level get up and hide behind the closest cover. I recommend firing behind the cover and protecting the stairs from the left and right, from which enemies will be running down. Eliminate all bandits in here.
Remark! During this stage you can't stay longer in any particular place because it may lead to the fail of the mission caused by the bandit's escape with the hostages. After every encounter pick up items quickly and move on to the next location.
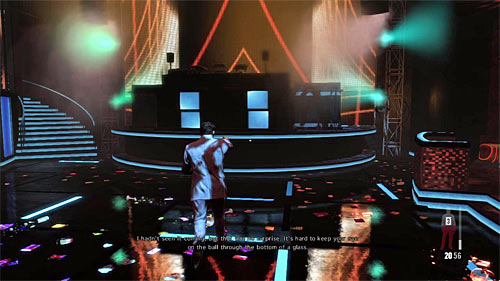
After the encounters, turn to the abandoned DJ station. Try to climb on it, helping yourself with the button A. After reaching the target look around for the part of the weapon [Golden Gun - .38 Revolver 1/3].
Remark! Remember about picking up collectibles before leaving every location because you can't return there.
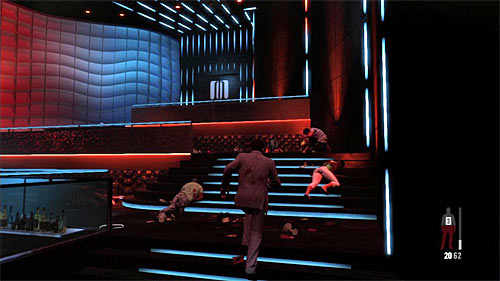
Try to use double doors shown on the screen above, which bandits use to escape. You get to know that this passage is barred.
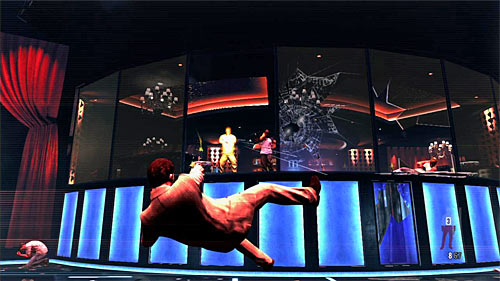
Firstly, eliminate the single bandit standing on the dance floor and then do in his fellows by the left windows. To the second ones use slow motion jump. Unless you're not self-confident, then use cover.
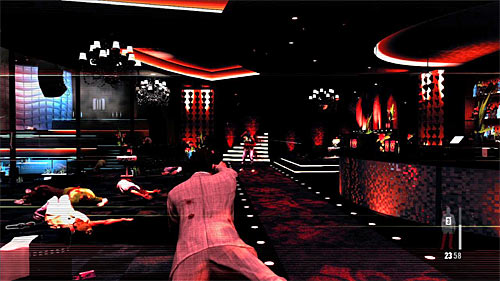
After the encounter check the bodies quickly in case of need picking up one or two Micro 9mm. At the end choose the stairs leading to the VIP room. Only one enemy waits here for you.
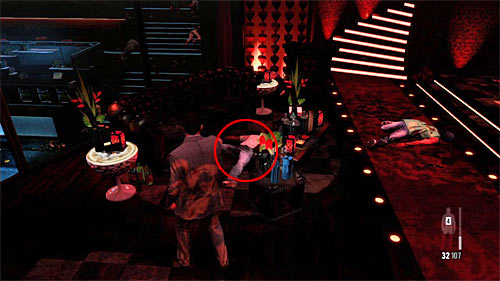
I recommend to look carefully in the VIP room. On the left from the stairs seen far away, you find a body of the dead man which is a clue [Clue 1/6 - Dead Soccer Star].
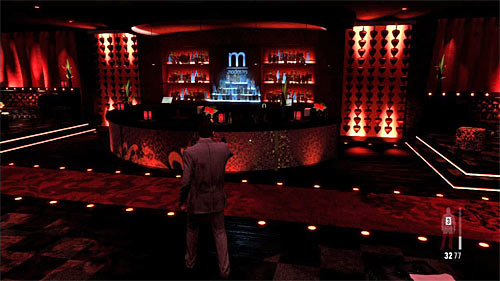
Then check the bar on the right (screen above). You'll find painkillers, new Clue [Clue 2/6 - Nightclub Flyer], and a piece of a weapon behind the bar [Golden Gun - Mini-30 1/3]. After all that head to the stairs.
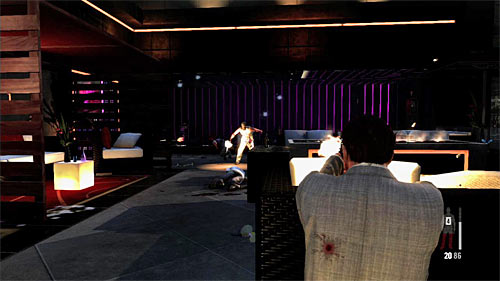
After getting into the new location, jump forward and hide behind the sofa or the other good cover and fire from that place. Make sure that all enemies are dead and proceed to the next area.

After regaining a control over the Max, begin from eliminating the single bandit behind the corner. Go closer to the next big part of the night club. I recommend to put yourself by the stairs shown on the screen above and from this place fire safely. But you can also play more aggressive and jump over the stairs eliminating enemies in the flight. Irrespective of your choice watch out on a bandit hiding behind the DJ station.
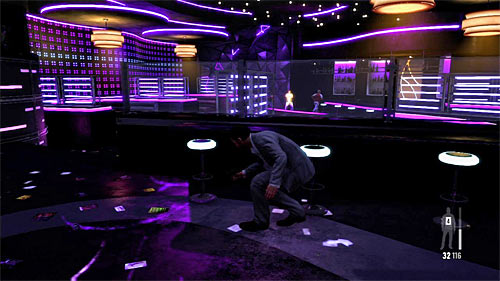
Watch out on new bandits which start to appear far away, running from the left. Many of enemies will hide behind the bar so you have to be alert and don't let them surprise you.
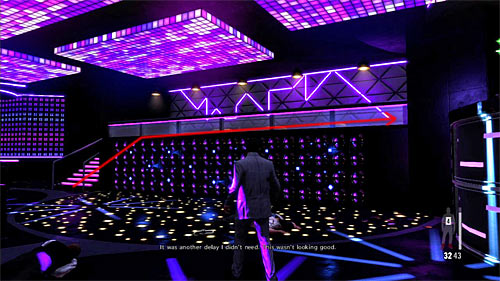
Like always look around - get interested in the mentioned above DJ station. To reach it, you have to go upstairs as on the screen above. After reaching the balcony run to the doors and turn right. By the stand you'll find painkillers and new piece of weapon [Golden Gun - .38 Revolver 2/3].
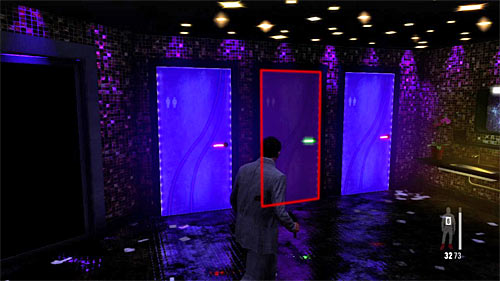
Return to the main dance floor and check the round bar - you find another painkillers. Choose the passage to the toilers which was used by the enemies from the second group. After getting inside, go to the middle station (screen) and find a hiding civilian, what gives you another clue [Clue 3/6 - Ex-Cop].
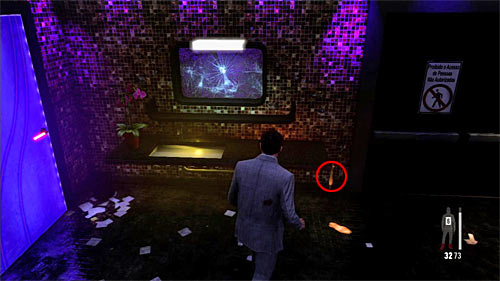
Stay in the toilet and look around. On the shelf at the right from the broken mirror you find another clue [Clue 4/6 - Torn Dress Piece]. Now you can go out.
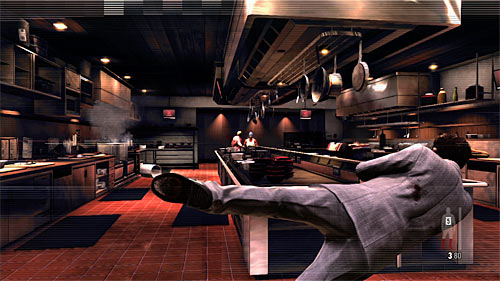
After getting into small room, find the locker in which two painkillers are hidden. Then go to the kitchen. First group of bandits eliminate by jumping in the right and firing or you can just run to the cover or fire at the cooker and hoping it'll explode.
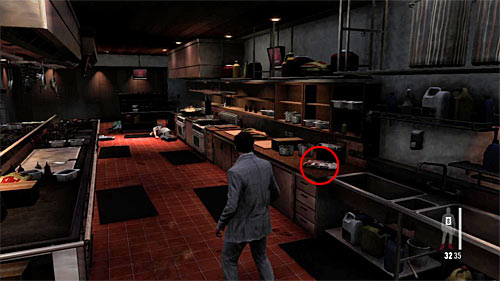
Stay behind the cover and eliminate another enemies which should appear in the kitchen. After the encounter check the area on the right and find clue lying on the table top [Clue 5/6 - Portugues Newspaper]. Head to the exit from the kitchen.
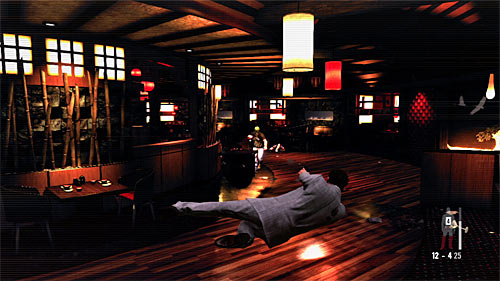
New encounter begin from the eliminating a bandit standing on the left side. After that move forward, making lot of jumps and kills. Look out on enemies nearby the bar on the left.
![After that encounter go to the mentioned bar and find a piece of weapon on one of the tables [Golden Gun - Mini-30 2/3] - Chapter II - p. 2 - Walkthrough - Max Payne 3 - Game Guide and Walkthrough](https://game.lhg100.com/Article/UploadFiles/201512/2015121617422615.jpg)
After that encounter go to the mentioned bar and find a piece of weapon on one of the tables [Golden Gun - Mini-30 2/3]. Go to the exit from the location. Don't fire to the running bandits but move closer to the elevator.
Remark! In this area game is very restrictive about things that delay the chase after the kidnappers so interest the secret after the encounter and do not put off leaving this location too long.
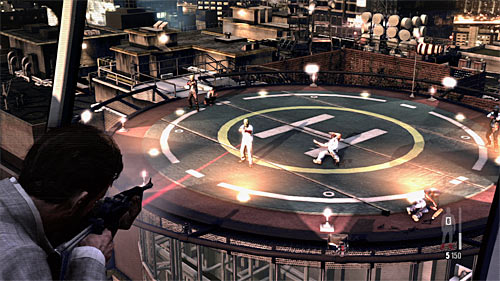
When you regain control, start attacking enemies on the landing field. It shouldn't be difficult, especially when your rifle has a laser sight.
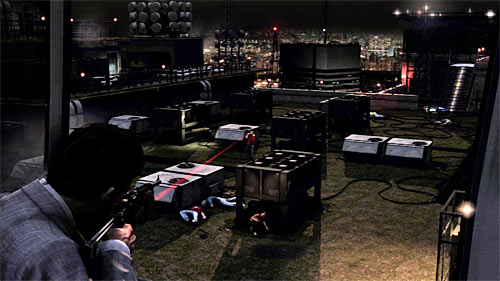
After a while you'll be securing running Giovanna. Begin with eliminating a single bandit and when Giovanna hides behind the cover attack another ones approaching to her. Eliminate firstly those who get too close.
Remark! If you hit Giovanna or let the bandits kill her, the mission is failed.
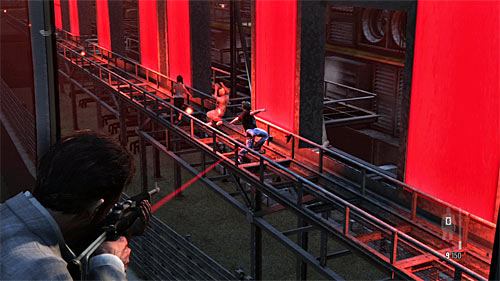
Continue the fire until the moment Giovanna start running again. Be prepared to quickly eliminate a bandit who runs into her. The same about the later part of this scene (screen above). You have to eliminate quickly all those who'll try to stop the woman.
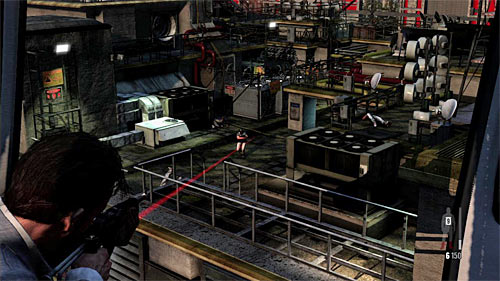
After a while Giovanna hides again and you have to again kill enemies approaching her. At the end eliminate the last bandit who runs out of the building.
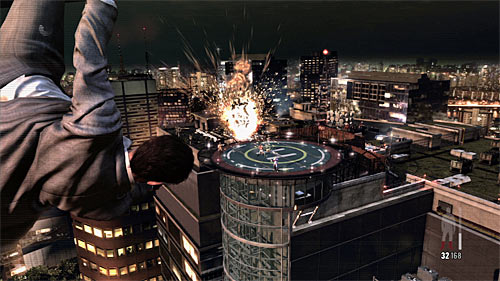
After getting into the next scene, start from destroying the rocket heading into the helicopter. Then take care of opponents standing on the land stripe, helping yourself with a slow motion. Keep steady, because at the end you'll be forced to destroy the second rocket.
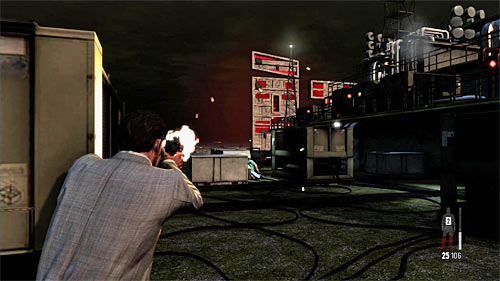
When you find yourself on the landing strip, begin from collecting weapons of the dead enemies, especially that you've lost part of yours. Use stairs and pick up two painkillers by the way. Stay concentrate, because there are at least two enemies nearby. It'd be good to eliminate them now.

You'll run into next enemies a little further (screen). I recommend fire behind the cover. For this choice stands a fact that you'll eliminate bandits one after the other, not all at once.
After the encounter go back to the place where you found painkillers. Check the are on the right, you'll find doors. After getting inside you'll see a fragment of weapon [Golden Gun - Mini-30 3/3].
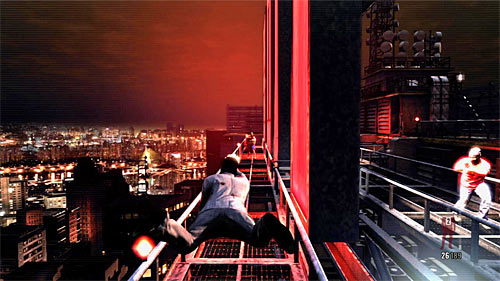
Again, go on the roof on which you've fought against the group of bandits and move to the red neon. After reaching the iron footbridge, you'll start rush in new enemies. Of course, using the slow motion is a good idea, but be careful, because it's easy to fly over the barrier and die. Enemies will appear in front of you and on the right.
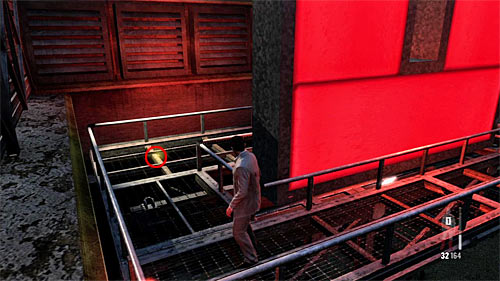
Go to the other end of the footbridge and look carefully, you'll find the last fragment of the weapon in this chapter [Golden Gun -.38 Revolver 3/3].

Return to the ignored a while ago passage. I advise to move forward and hide behind the cover at every turn of the path and eliminate bandits safely.
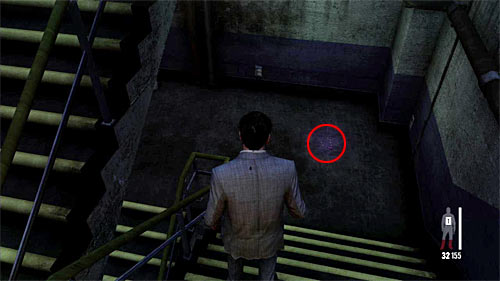
You have to reach the entrance to the building. Go downstairs and stop in the place shown on the screen, you'll find the last one clue [Clue 6/6 - Giovanna's Necklace]. Opening the door at the lowest floor ends this chapter.
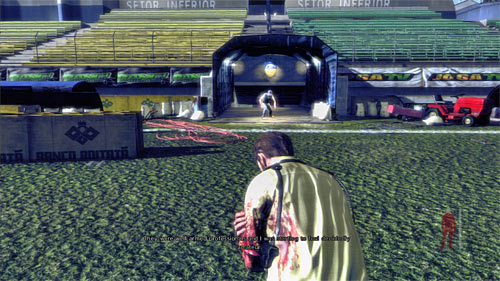
When you regain control, move forward, to the main exit from the stadium pitch. Don't bother about the sniper and nearby enemies. Go through the following corridors and rooms. This scene ends when you reach the medical station.
Remark! During this mission you have a companion, Raul Passos. Remember not to fire at him and don't count on that he'll eliminate enemies himself.
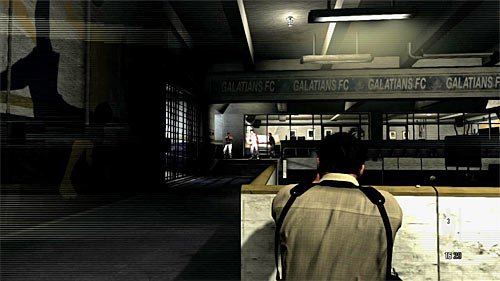
Wait until enemies appear nearby and decide how you want to eliminate them. First variant is attacking them behind the cover. Unfortunately, you have to take into consideration, that you'll have also the second team to kill (they'll run from the right).
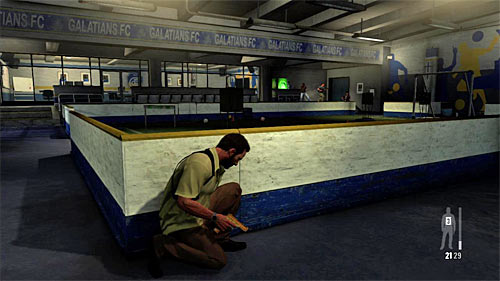
Second way is to become hidden. If you are not spotted by the thugs, they'll leave a place after a while. It'll let you save some painkillers, but you won't get some new weapons and ammo.
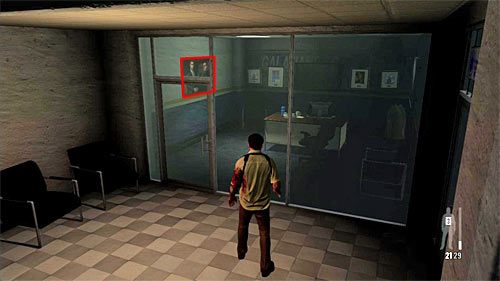
Regardless of your choice, look around. In the medical station you'll find painkillers. Search also the next office and the photo hanging on the wall, which is the first clue [Clue 1/4 - Picture of Victor]. At the end go to the conference room, where you can watch some programs in TV.
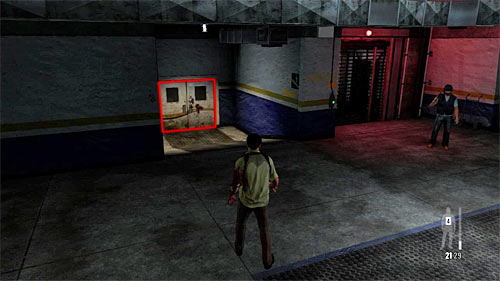
After that, use the passage by which the first group of bandits appeared. Before you go to the elevator approach to the white door on the left and examine the blood traces. You'll get a new clue [Clue 2/4 - Blood Stained Door]. Now move back to the elevator and use the control panel.
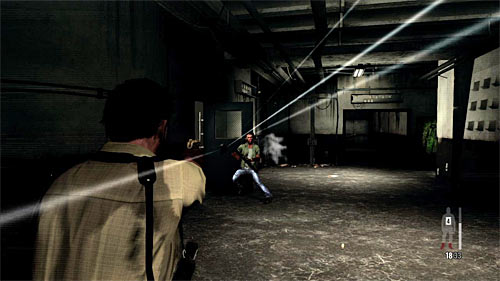
After reaching the new floor, go to the next room. Regardless of your likenesses, you can wait until Raul ends the investigation or shoot that person. The second way fail the mission, because investigated person has some important information.
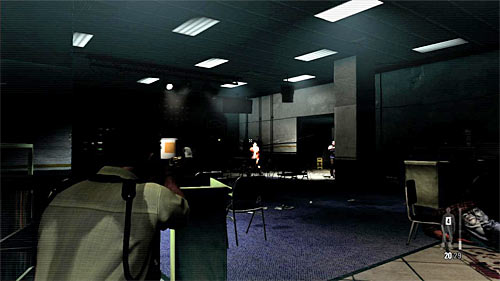
Immediately hide behind the cover and start attacking bandits who appears at the other end of the room. Do not risk too much, because they're much better equipped than you. Fire until you eliminate them.
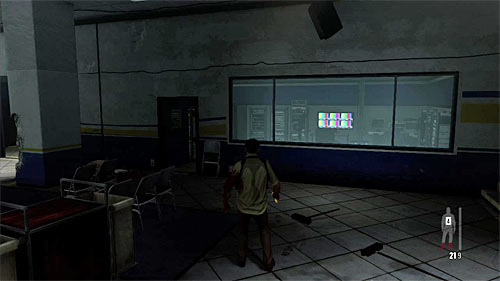
After the battle check shown on the screen above part of the recording room. You'll find a fragment of weapon [Golden Gun -M10 1/3]. Collect also weapons and ammo from the defeated enemies.

Go to the passage to the next location and be prepared to quickly kill an enemy with a shotgun who'll run from the left room (use slow motion). Consider taking a mentioned shotgun and look in to the side room where you find painkillers. Move on using the staircase.
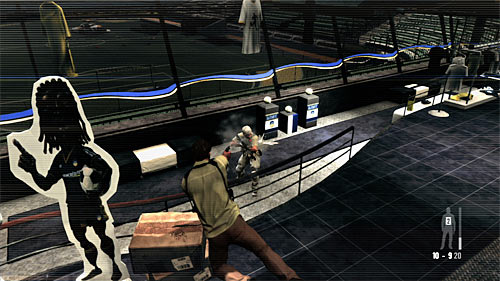
Don't go out behind the cover but try to eliminate the closest enemies from the safe position. In the next phase of a battle protect your left flank and don't let an enemy attack you and Raul from surprise.
Remark! Don't run after the Raul immediately or you'll miss one collectible.
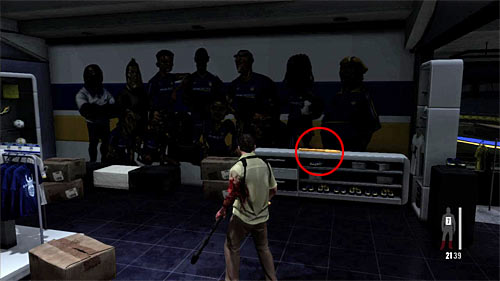
After the encounter check the area to the left from a table from which you were hiding at the beginning. You'll find another fragment of weapon [Golden Gun -M82A1 1/3]. Look also for two painkillers (at main table and in the toilet) and semi-machine guns MPK which dead mercenaries had. After that go into the shop in which Raul waits.
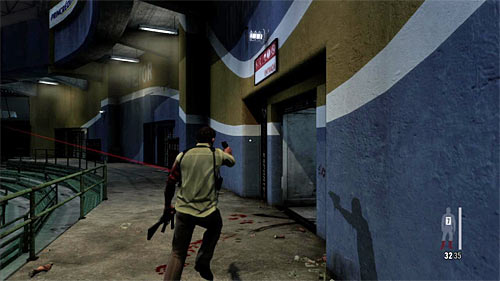
Follow Raul without hesitation and stops. It should be enough to avoid sniper's bullets, but if you'd like to secure additionally, you can make one or few somersaults (press A twice).
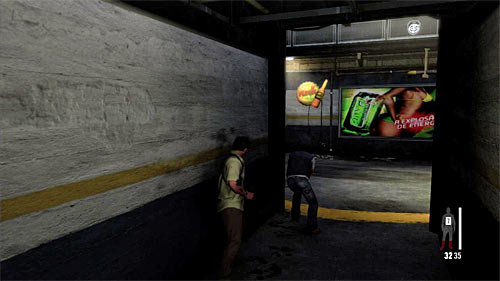
Get closer to the new group of enemies. Similarly to the bandits from the beginning stage of this chapter, you can wait until they go away or attack. First option is much better because otherwise you'll get under the concentrated fire.
![Regardless of your choice, continue your march and check the right wall of the corridor where you find painkillers and a clue shown on the screen [Clue3/4 - Blood Stained Hallway] - Chapter III - p. 2 - Walkthrough - Max Payne 3 - Game Guide and Walkthrough](https://game.lhg100.com/Article/UploadFiles/201512/2015121617423011.jpg)
Regardless of your choice, continue your march and check the right wall of the corridor where you find painkillers and a clue shown on the screen [Clue3/4 - Blood Stained Hallway].
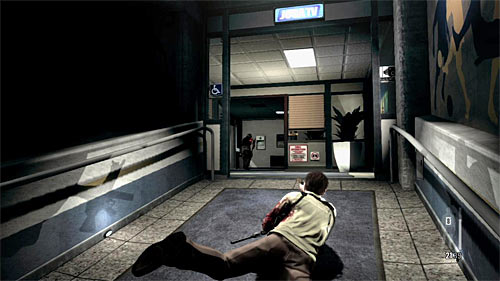
Go to the other end of the corridor and turn right. Be prepare to kill quickly another enemy and after that choose the ramp leading on the upper level. Pick up painkillers and enter the controlling room.
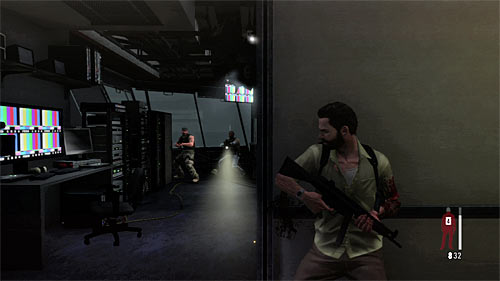
Place yourself by the entrance and attack three enemies inside (two should be in front of you and the third one on the right). After the fight you'll be automatically proceeded to the further part of the chapter.
First group of enemy is best to get rid of by using a slow motion with accurate shots. Pros of this solution is a fact that they'll be standing very close to each other what makes them very easy targets.
Remark! Do not move to much forward, because it'll start a cut scene and an arrival of a new group of enemies. It'll make finding the collectible described below harder.
![After encounter move to the beginning place, turn left and go downstairs to the lowest part of a tribune where you find another part of weapon [Golden Weapon - M10 2/3] - Chapter III - p. 2 - Walkthrough - Max Payne 3 - Game Guide and Walkthrough](https://game.lhg100.com/Article/UploadFiles/201512/2015121617423070.jpg)
After encounter move to the beginning place, turn left and go downstairs to the lowest part of a tribune where you find another part of weapon [Golden Weapon - M10 2/3]. After collecting it, move back to the eliminated enemies. After the cut scene another group will arrive.
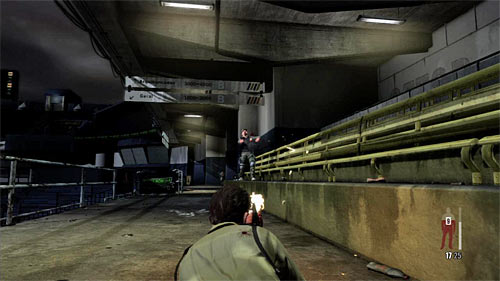
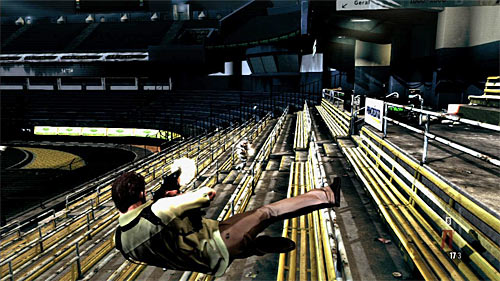
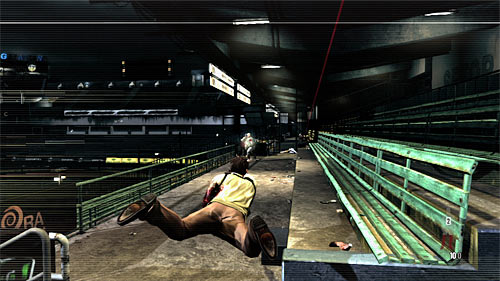
This battle is much more difficult, because enemies appear in few groups and not in the same place. If you want to count only on slow motion I recommend make jumps with few seconds staying in a lying position (1st screen) or longer jumps connected with flying over the seats (2nd screen).
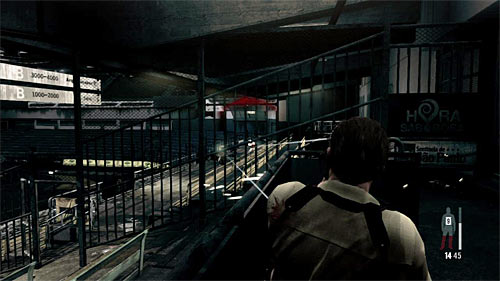
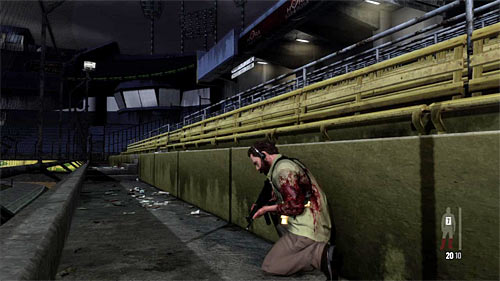
But if you prefer covers, get interested in the highest part of a tribune, located on a right from the beginning place (1st screen) or hide behind a wall in the lower part of a tribune (2nd screen). In both cases you have to watch out on grenades thrown by the enemies.
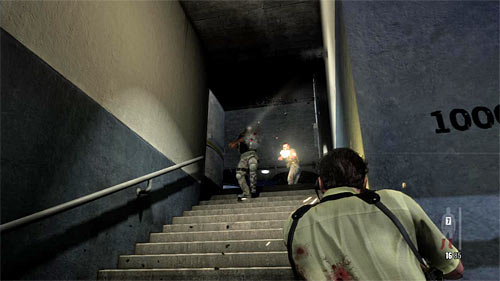
After eliminating all enemies get closer CAREFULLY to the stairs shown on the screen above and kill the last two enemies. Use the stairs, find two packs of painkillers and go to the double doors, reaching the trophy hall.
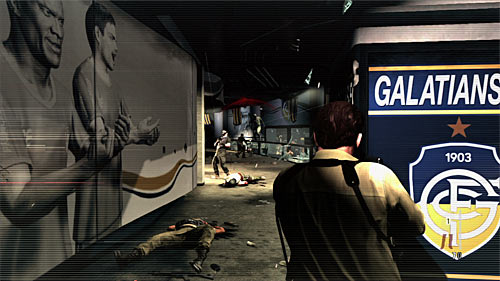
Also in this area exhausting battles wait for you, but enemies are unaware of your presence. So attack them from a surprise and move alternately on the left and right (staying behind the big pillar) and don't let anyone get closer.
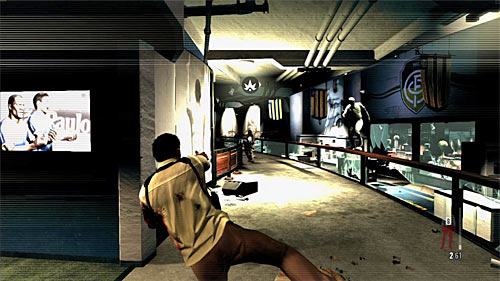
In the further part of a battle you can still count on the covers or use slow motion. The second variant shouldn't be that risky, because enemies will appear far from the Max and in regular time intervals. Irrespective of your choice try eliminate all of them and remember, that doing in last of them is signalized by the kill-cam.
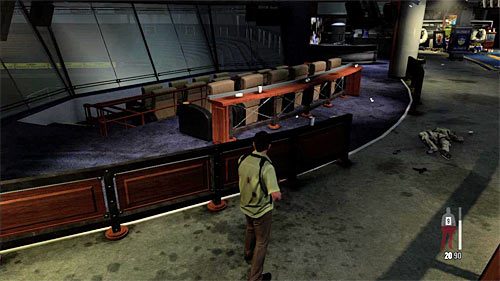
Traditionally spare few moments for searching this area. Get interested in the VIP's armchairs shown on the screen above. Behind the first row of them you find a fragment of weapon [Golden Gun -M10 3/3]
![Look around for two painkillers and watch a memorial for the soccer player shot down in the night club (screen above) unlocking the last clue in this chapter [Clue 4/4 - Soccer Star Memorial] - Chapter III - p. 3 - Walkthrough - Max Payne 3 - Game Guide and Walkthrough](https://game.lhg100.com/Article/UploadFiles/201512/2015121617423133.jpg)
Look around for two painkillers and watch a memorial for the soccer player shot down in the night club (screen above) unlocking the last clue in this chapter [Clue 4/4 - Soccer Star Memorial]. At the end go to the right passage and use the control panel in the elevator.
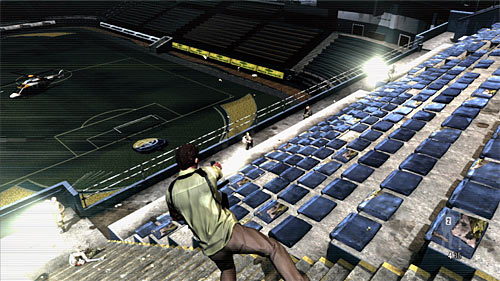
When you regain control, I propose to make a long jump forward. During the flight try to eliminate two bandits standing in front of you and as many as possible from the right side.
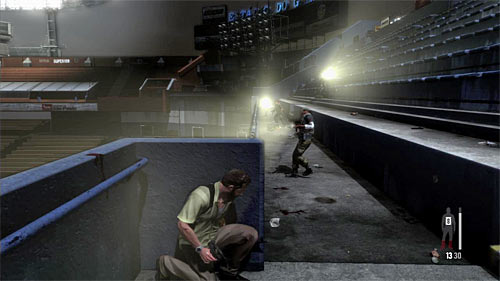
When you land, place yourself by the cover shown on the screen above and kill the rest of enemies. Don't stay there long, because probably opponents will start throwing grenades at you. So leave the cover quickly and do another jump to do in remaining mercenaries.
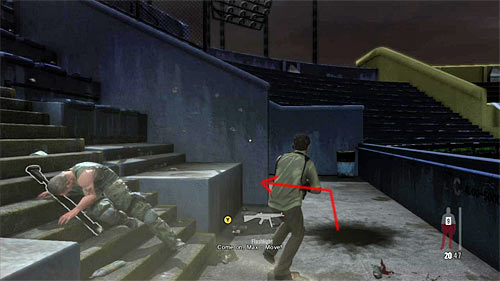
After the encounter return to the place you land after the long jump and go to the place shown on the screen above. Do few steps forward and turn left. You'll find new weapon fragment [Golden Gun -M82A1 2/3]
Remark! You have to hurry with the collectible because Raul can't secure you for eternity before the enemy sniper.
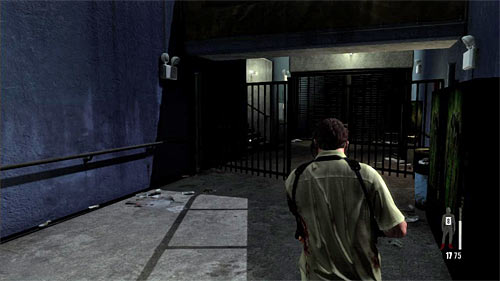
When you get the collectible, return again to your landing place and move forward, staying in the bottom part of the tribune. You have to reach the passage shown on the screen above before Raul run out of ammo.
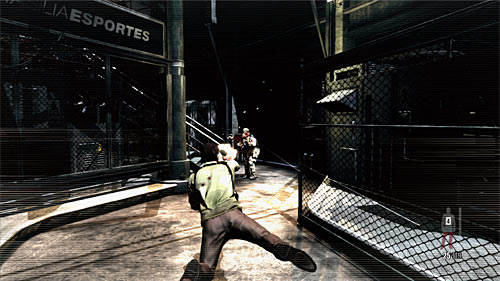
Take two painkillers and move on. Prepare to eliminating two new enemies in the area, starting from the one standing in front of you. Securing this region let you proceed to the next scene of the chapter.
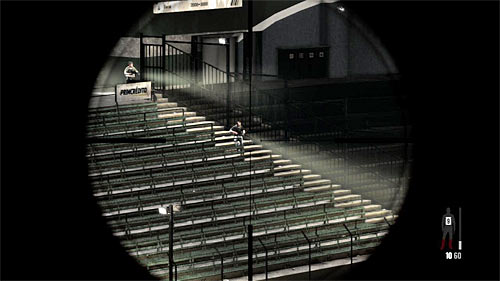
Before you a quest connected with securing Raul using the sniper rifle. Start from eliminating few enemies running downstairs. I remind you to use slow motion in the hardest moments.
Remark! You can't hit Raul or let any of enemies get close enough to fire at him because it fails the mission.
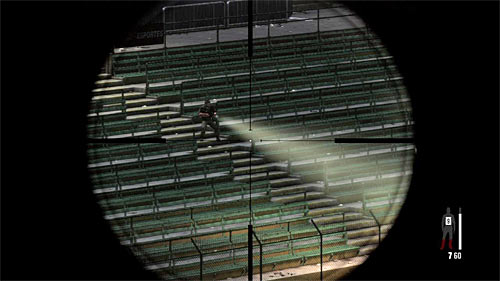
Raul should turn left so eliminate enemies according to his advices. Some difficulty is a fact that they won't appear in the same place.
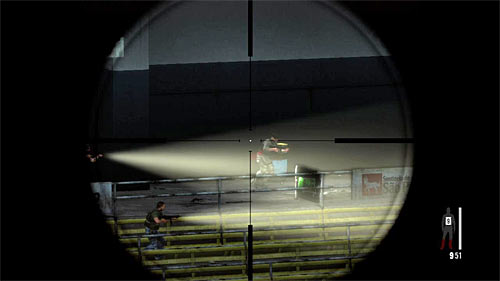
When Raul hides behind the cover, exterminate bandits running from the left and right. The last enemy will arrive from the bottom part of a tribune.
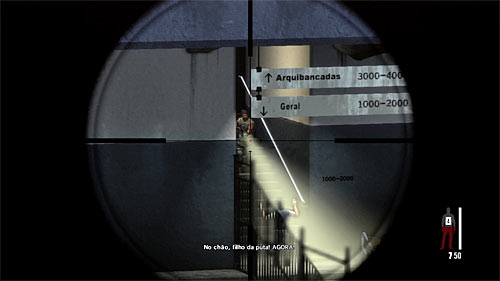
At the very end prepare to kill single enemy who'll appear just in front of Raul.
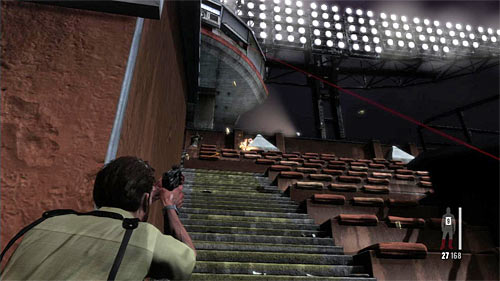
After regaining control wait until two mercenaries appear in the upper part of tribune and fire at them quickly, before they reach covers or fire you back. Make sure they died and go upstairs, holding to the left side of the stairs.
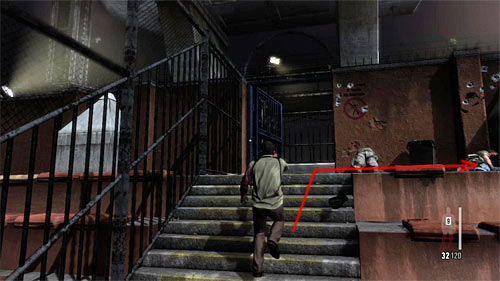
After reaching the upper part of tribune turn right in the place shown on the screen above. Move forward and avoid sniper bullets so make many somersaults and hide behind covers. All those activities are needed to reach the last collectible in this chapter [Golden Gun -M82A1 3/3]
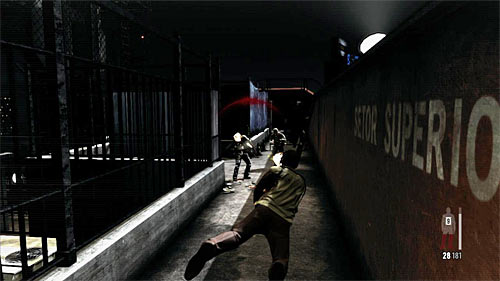
Now CAREFULLY return to the place where killed enemies appeared (stop at the covers). Prepare to eliminate three another opponents, attacking them behind the cover or using the slow motion. After that collect the ammo and use the ladder.
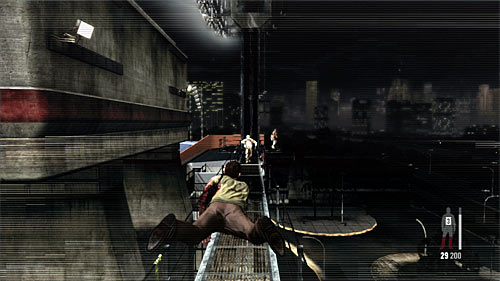
When you get on the metal footbridge, jump forward and fire at new enemies, but try not fly over the barrier. Look out also for the single bandit who may be hiding in the ladder seen in the far away. Secure the vicinity and use this ladder.
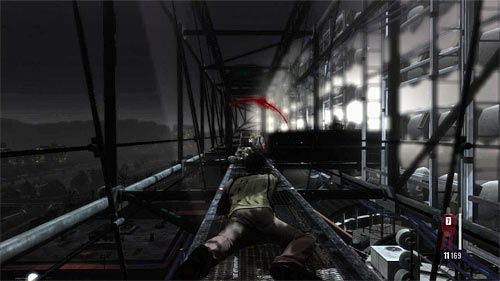
Also in this place use slow motion but be even more careful because a footbridge here has no barriers. Watch out also on the single enemy on the right because he can be easily missed.
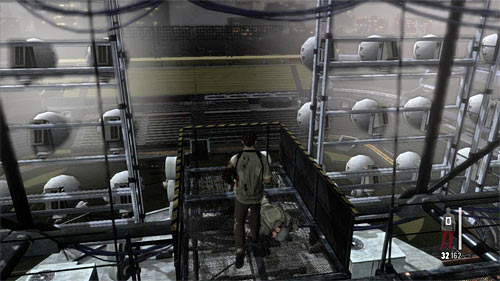
After the encounter move forward and turn right halting in the place where one of enemies was standing (screen above).
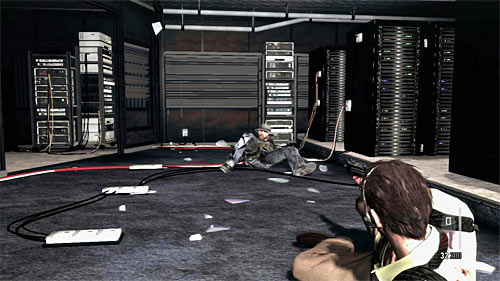
When you land in the box which was occupied by the enemy sniper aim random part of his body and fire what ends this chapter.
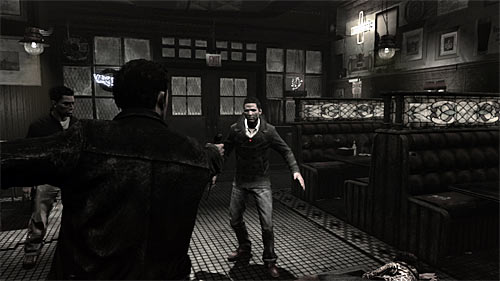
This chapter begin from killing the Tony De Marco. It's enough to make a single shot and you don't have to aim in any special part of his body.
Remark! In the following part of this chapter it's worth to be careful and not fire at your companion, Raul Passos. Despite the pretences it's hard, because he'll often stand nearby you or even block you the line of fire.
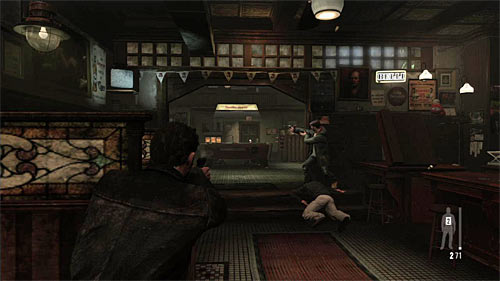
Start attacking remaining enemies in the bar beginning from those closest ones. Only when they died, eliminate bandits hiding behind the pool billiard-table. At the end leave the one who'll appear on the upper balcony. I recommend to stay all time behind the cover.
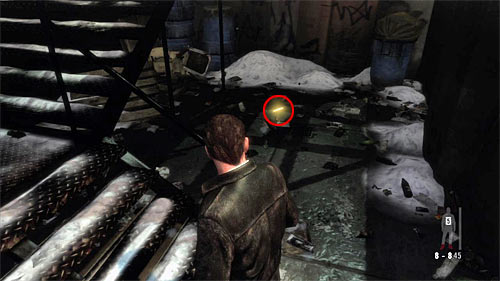
After the encounters search the room in which you began the mission. Behind the bar you'll find two painkillers and by the exit from the bar first fragment of a weapon [Golden Gun - 1911 Revolver 1/3]. Collect also ammo and guns from the dead enemies.
Remark! On the contrary to the mission in the night club, you don't have to hurry to follow the Raul. It's worth to search carefully every location before moving on.
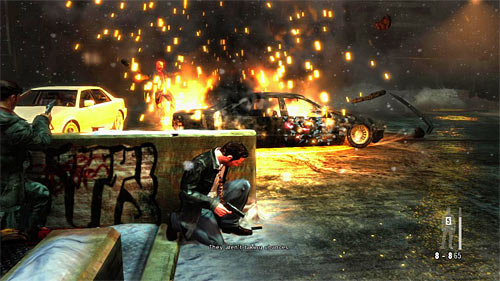
Now move to the room with the pool billiard table BUT do not head to the exit, use the left stairs instead. After reaching the first floor turn right, then left and you get to the place shown on the screen above here you find another fragment of a weapon [Golden Gun - 1911 Revolver 2/3].
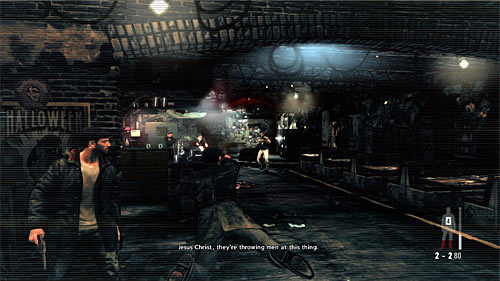
Return to the ground floor and go to the next area. After reaching the basement I recommend to begin from the slow motion jump aiming at the closest enemies.
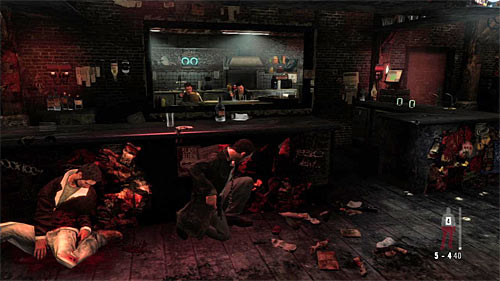
After the jump it's wise to hide behind the bar or any other good cover and start exterminate enemies. You shouldn't have to much problems with that but do not let anyone get close to you. After securing the vicinity pick up two another packs of painkillers and go through the kitchen heading to the bar exit.

Notice that you have an opportunity to surprise enemies nearby. I suggest starting from the firing at one of cars because explosion will kill or just hurt few opponents.
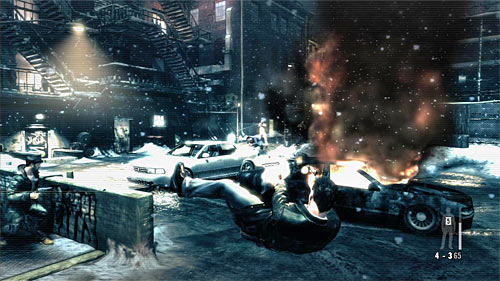
Only now start attacking bandits directly. As the wall is a rather poor cover, you have to base mainly on slow motion jumps.

After encounters ignore Raul for a while and return to the stairs leading to the bar, at which you began the previous battle. Go downstairs, turn left and you'll find the next fragment of a weapon [Golden Gun - 1911 Revolver 3/3]. Now you can return upstairs and follow the Passos.
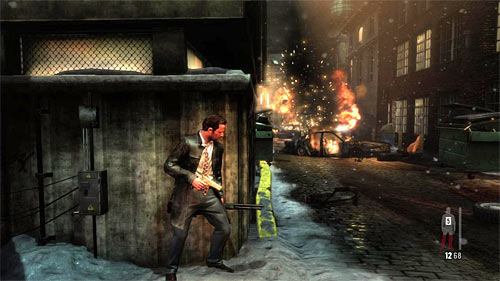
Wait until you regain control and make sure, that you're standing behind the cover. Again, I suggest to fire at vehicles by which gangsters are standing because it's very effective way of eliminating them. Aim following enemies joining this encounter and use more risky moves at the end of it.
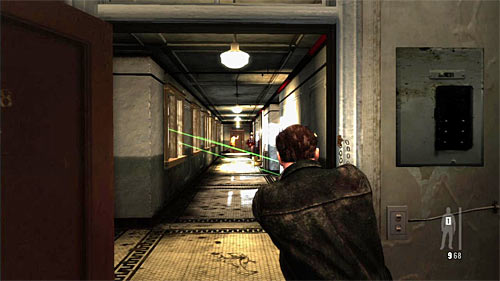
After the game move to the inside of the building begin from eliminating few enemies who will appear in the main corridor. Later, stay in the beginning location because it's a good idea to take a look in the hero's apartment.
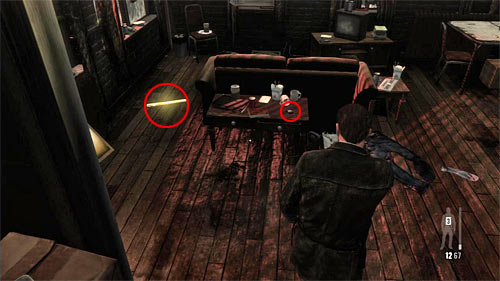
In the flat you'll find among other things two painkillers and M4 Super 90 Shotgun, but two most precious items are shown on the screen above. The clue [Clue 1/3 - Max NYPD Badge] and fragment of a weapon [Golden Gun -M500 Shotgun 1/3]
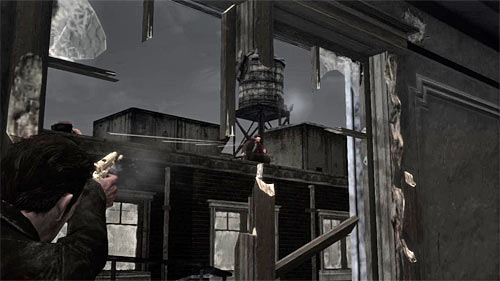
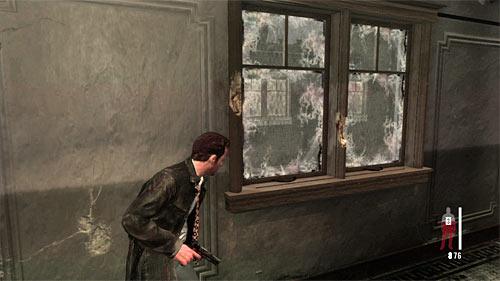
Now you can go out of Max's flat, but be careful because the neighbouring corridor is monitored by two enemy snipers. You can act in two ways. First variant is a breaking the window and start firing at enemies (1st screen). The other is to stick to the left wall and move right, avoiding the bullets in such way (2nd screen).
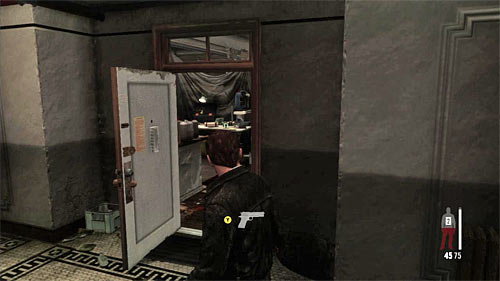
Regardless of your choice, you have to reach the place where the cut scene with Max's neighbour, Brewer, will be displayed. After watching it enter his flat.
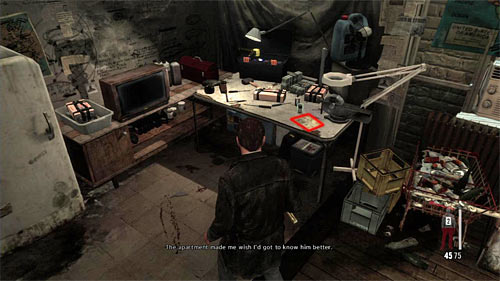
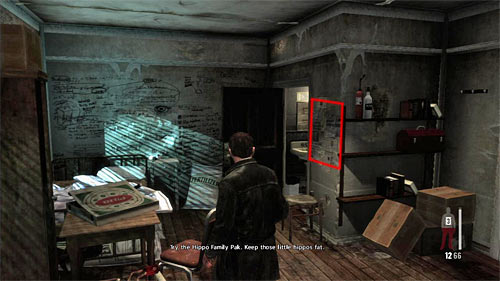
In the Brewer's flat you find painkillers and a TV, but two most important things are shown on the screen above. First clue [Clue2/3 - Brewer's Journal] lies on the table by the TV and the second clue [Clue 3/3 - Newspaper Clippings] is an area on the wall by the entrance.
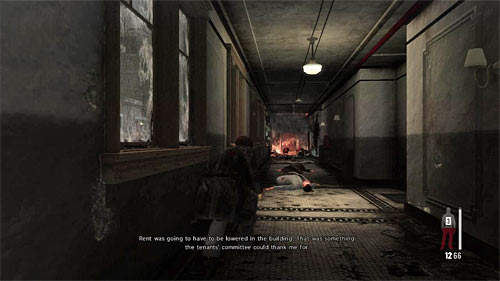
Exit the apartment and move on. If you didn't kill snipers before now you have to avoid them again by sticking to the left wall. And if you did them, you can move forward. Stop when you reach the corridor corner which is the most damaged because of explosion.
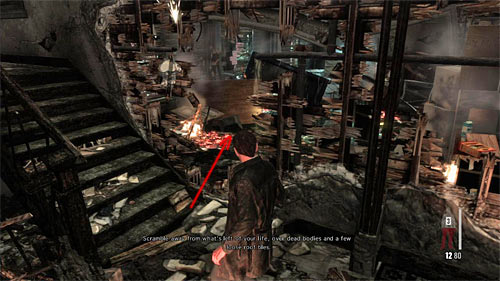
Come to the destroyed stairs BUT before you go up, turn right and go through the hole in the wall shown on the screen above. After getting into the burning flat pick up another fragment of a weapon lying on the floor [Golden Gun -SAF 40 CAL SMG 1/3] and after that go upstairs to the roof.
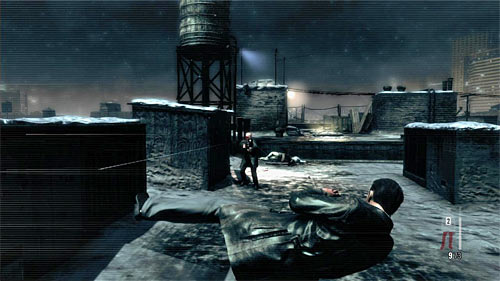
After reaching the roof fire at gangsters at once. Depending on your likenesses you can hide behind the chimneys and other big obstacles or make a lot of slow motion jumps. Watch out on two persons on the right, because it's easy to skip them and be flanked by them.
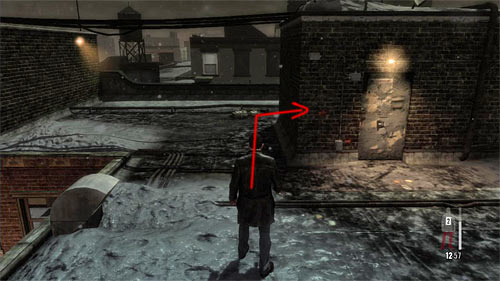
Make sure you secured the vicinity and return to the doors leading on the roof. Place yourself as on the screen above and turn right. You'll find another piece of a weapon [Golden Gun - M500 Shotgun 2/3].
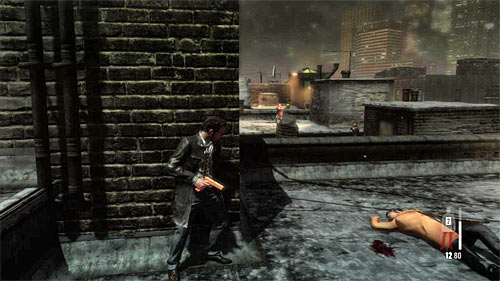
Return to the encounter place and move forward, turning right after a while. Set yourself behind one of covers on the left and notice that next roofs are occupied by the enemies. I recommend to start from the attacks behind the cover and use slow motion at the end. After the battle pick up ammo and weapons, choosing some good, one handed gun. You can continue a march.
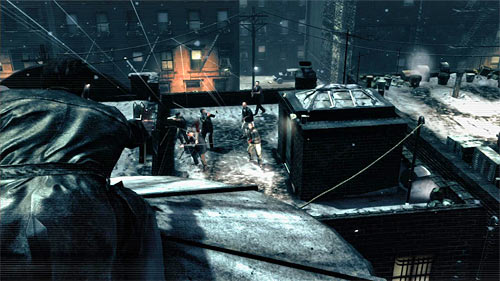
Game will display cut scene soon and force you to make a longer slow motion jump. You'll need a good gun because you have to eliminate all enemies located under you. With a powerful weapon you don't have to aim only in enemy's heads but it's enough to make two-three less accurate shots.
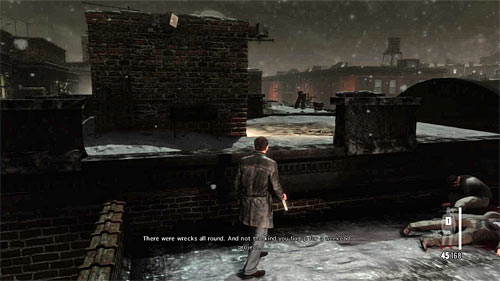
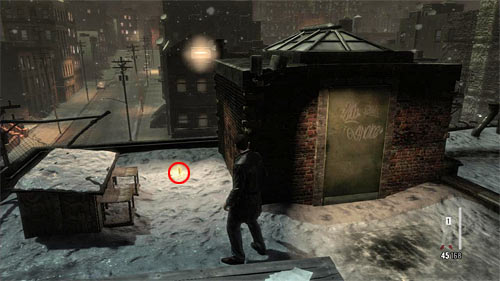
Ignore your partner, turn left (1st screen) and explore this part of a roof. It'll let you reach the hideout of another weapon fragment (2nd screen) [Golden Gun -SAF 40 CAL SMG 2/3]. You can return to the beginning place and follow Raul (by the way kill take a MPK SMG). Be careful, you'll reach a battle zone in a while.
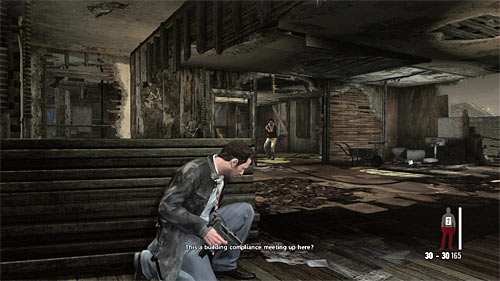
Use the tunnel to get inside the building in which fight takes place. I propose two variants of eliminating enemies. First one is to firing behind the wall or the wooden cover shown on the screen above.
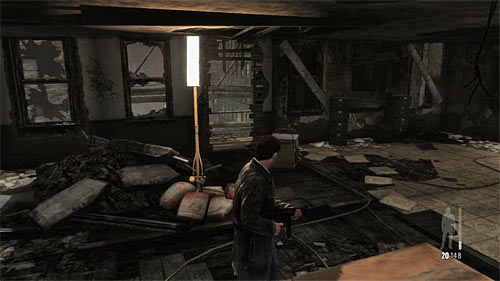
The other variant is to use exit shown on the screen above, which is on the left from the beginning place. After reaching the outside balcony, you have to get to its second end what will allow you to attack enemies from the flank (through one of the shutters). Regardless of your choice pick up ammo after the battle and find stairs leading to the higher floor (Raul should be standing by them).
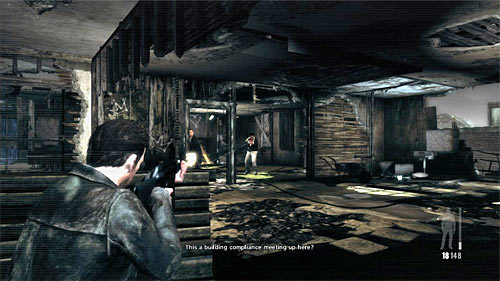
Also on this floor you'll have harsh encounters with enemy's forces. I recommend to act similarly to the previous one, so find a cover and eliminate enemies in a safe way. They shouldn't use grenades so you won't be forced to change your position.


After the encounter look around for two painkillers and return to the vicinity of the stairs you used to get on this floor. In the corner find narrow passage (1st screen) reaching the weapon fragment (2nd screen) [Golden Gun -M500 Shotgun 3/3]
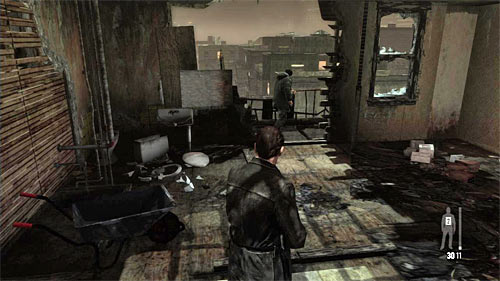
Before you leave this place, search the bodies of dead enemies: one of them should've a Kalashnikov. Go to the Raul and you'll be got to the brand new place.
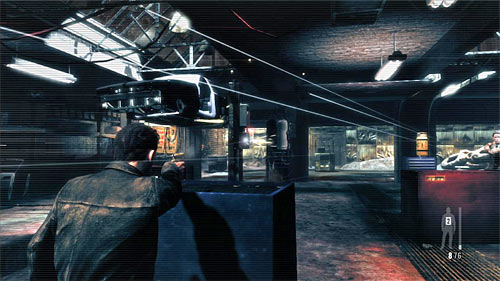
When the encounter in the garage begins, I recommend to aim at two interactive objects which are the left jack (should lower the car on the bandit) and in the gas cylinder at front of you, which will explode.
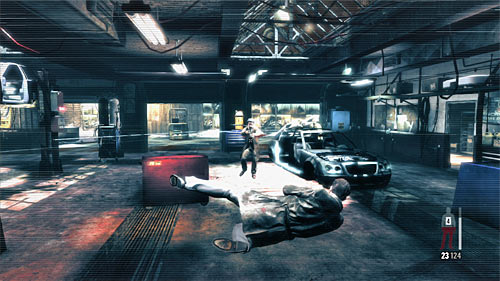
After that, I recommend to do at least one slow motion jump. But when enemies with machine guns appear it's better to use covers. Continue firing until eliminating enemies.
Remark! Don't get close to the exit because it'll initiate another encounter. As a result you may not have enough time to find the collectible, because Raul will die if you don't join the fight quickly.
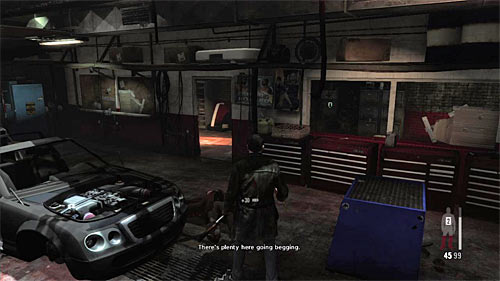
After the encounter go to the right office room (screen above). Opposite the entrance you will find painkillers and on the desk on the left the last one fragment of a weapon [Golden Gun -SAF 40 CAL SMG 3/3]. Only then reach the exit from the garage and run to the Raul. It'll begin the last battle.
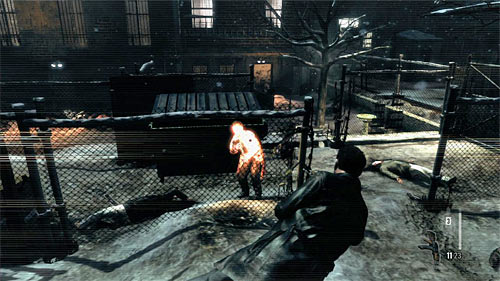
Start attacking new group of bandits. Depending on your favorite style you can stand by the Raul and fire behind the cover or use side passages (best the right one) attacking bandits from the flank and helping yourself with slow motion jumps. This battle ends the chapter.
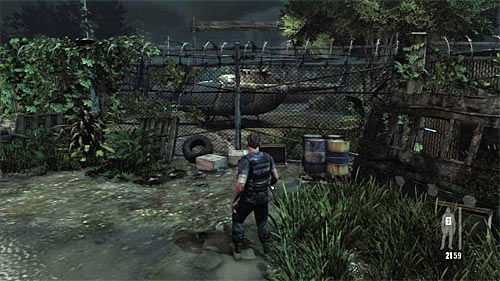
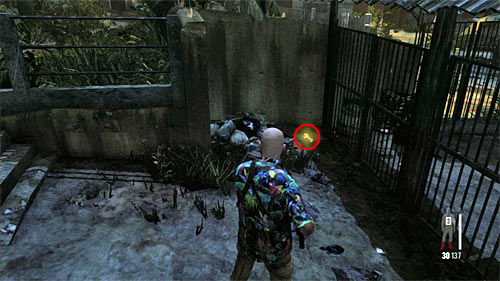
Move forward but stop in the place shown on the screen above. Go to the fence and interact with it, unlocking the first clue [Clue 1/6 - Parked Helicopter].
Remark! You don't have to stealth during this mission at all. At the beginning you will not run into anyone and in the further part causing an alarm won't fail the mission.
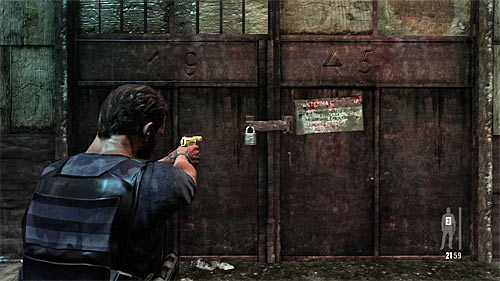
Continue march, following the path. After getting by the big storehouse use the pistol to destroy the padlock (screen). You can move on.
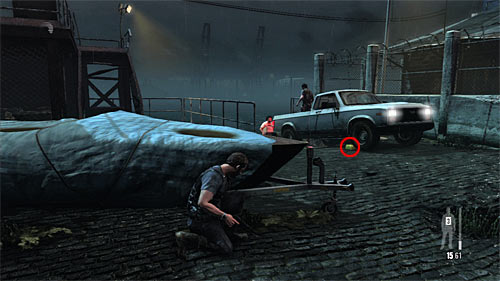
After finding enemies you can act in two ways. If you'd like to stay hidden, you can wait until enemies won't be looking in your direction (you can't wait too long!), quickly lean out and fire at the brick shown on the screen. As a result the car should go downhill killing both bandits.
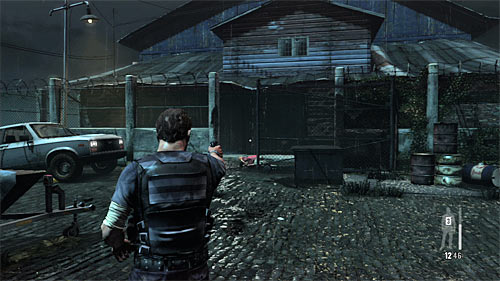
If you don't want to wait or you've been spotted, eliminate opponents by the car and the new group which will run from the right. Remember about covers or making lot of jumps in slow motion.
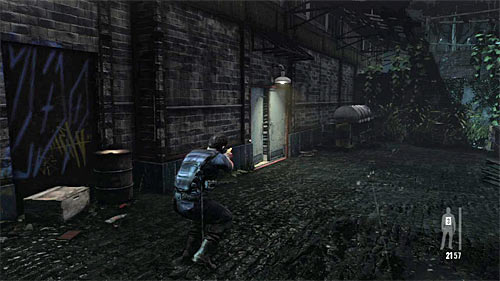
Regardless of your choice, you have to use the only possible passage to the new location, getting to the new storehouse. After entering it, the cut scene begin.
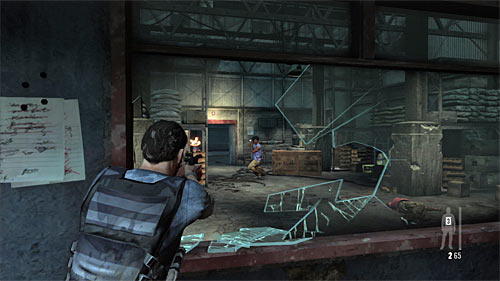
Being inside the storehouse you have only a frontal attack in your perspectives. Break the glass and start firing. I recommend to secure the left entrance to the room in which you are. N the further part of an encounter you can also make a few slow motion jumps.
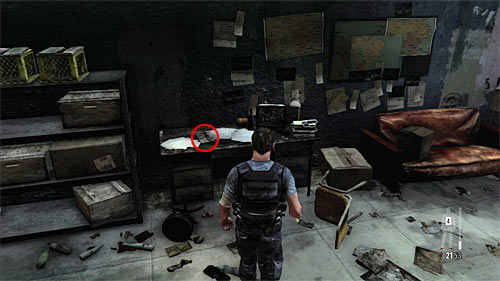
After the encounter search the all storehouse carefully. You'll find new weapons, two painkillers and a clue, lying on one of desks and shown on the screen above [Clue 2/6 - Ransom Note]. Go to the exit gate.
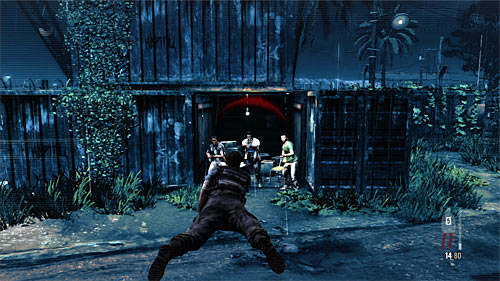
After regaining control, make a jump forward trying to eliminate all three enemies there before the slow motion stops. Search their bodies, you may find, among other things, a Kalashnikov.
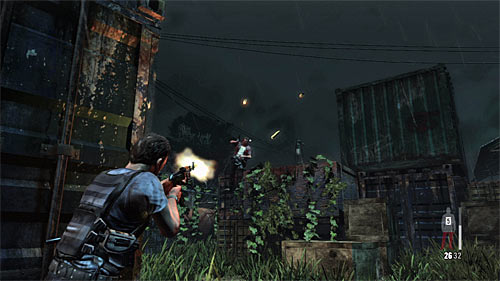
Quickly hide behind the right container and find for the next enemies. As they will be running at you, you have eliminate them ably. Try to clean up whole area (watch out on the bandit by the container, screen above) ignoring enemies standing farer.
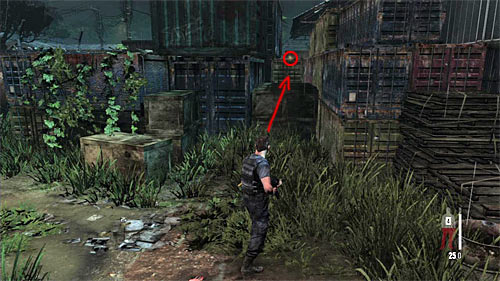
Now place yourself as on the screen above, on the right to the first eliminated bandit group. Far away you should see the collectible and to get it you have to climb on the containers. This item is a fragment of gun [Golden Gun -Micro 9mm SMG 1/3]. After that return to the start place.
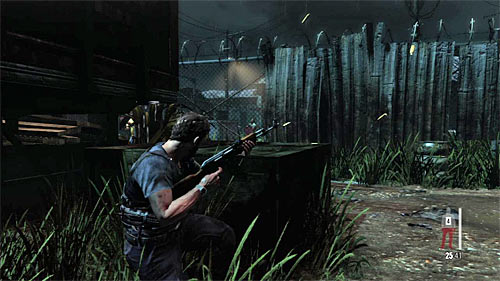
Choose the path between the containers and do not hurry, because there are enemies in this area. Little further you'll meet another opponents and this time it's worth to use the covers, especially that because of narrow corridors your field of sight is limited.
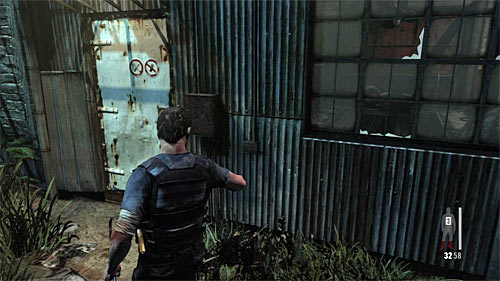
Go through the small square, making sure, that you've eliminated all enemies there. You have to reach the entrance to the another storehouse where next cut scene will be displayed.
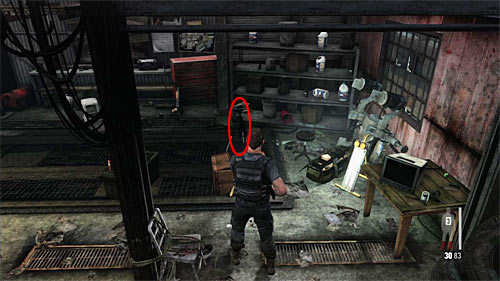
Search the warehouse carefully and find new weapons painkillers, TV and chest which allow you to supply your ammo regardless of your equipment. The most important find is a video camera which is a clue [Clue 3/6 - Video Camera].
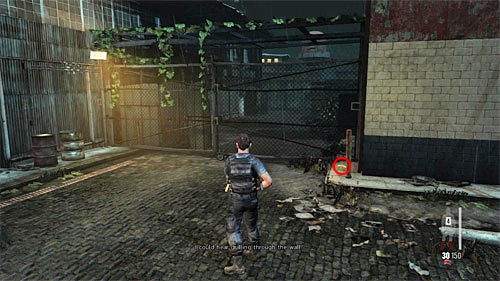
Move to the exit from the warehouse. After getting outside, make few steps forward and slightly turn right - you should spot another fragment of a gun [Golden Gun -Micro 9mm SMG 2/3]. You can now go to the next storehouse, using the stairs leading to the entrance.
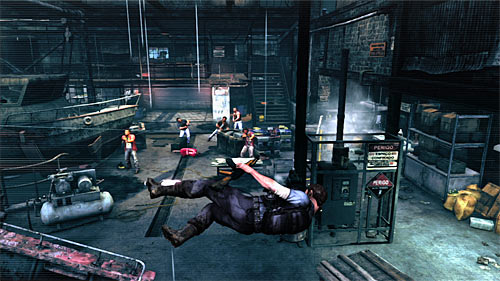
When you regain control, it's good to attack at least one bandit because you will be noticed whatsoever. Wait until you jump and eliminate enemies, starting from those standing the closest and with shotguns.
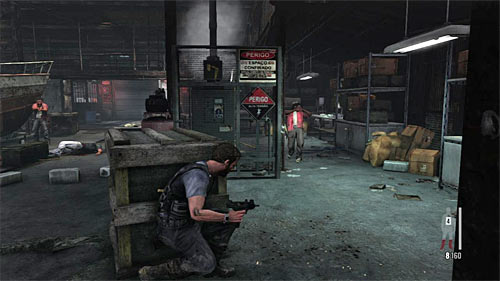
Just after the landing hide behind the chest or any other good cover and fire at remaining enemies, guarding both left and right flank. Luckily, thugs shouldn't use grenades so theoretically you can stay in the one place for the entire encounter (or you may make slow motion jumps). Fight until there will be no one left.
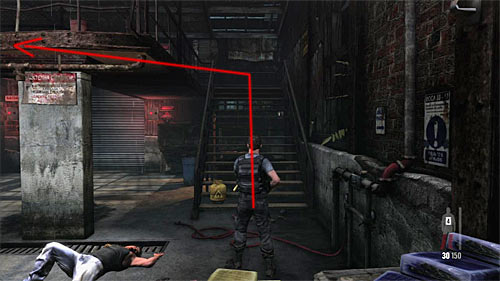
Traditionally, I recommend to spare few moments for searching this warehouse. First, go to the stairs shown on the screen above and after getting on the floor go to the other end of a balcony where you find a weapon [Golden Gun -Micro 9mm SMG 3/3].
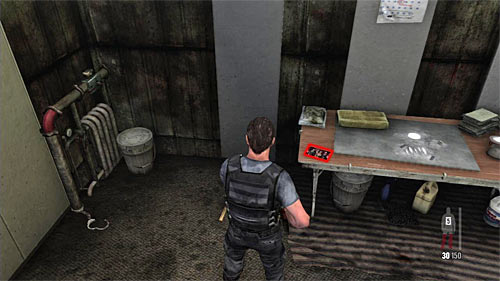
Go back to the ground floor and enter the control room in the one of storehouse's corners. Pick up painkillers, examine a new clue [Clue 4/6 - Branco Family Photo] and press a button to unlock the exit.
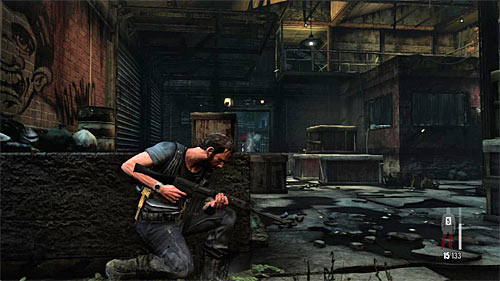
Be careful, because from the next storehouse at least few bandits will run out after a while. Use slow motion and kill them. After that look for the guns (FAL Assault Rifle) and chest with the "universal" ammo.
Get closer to the entrance to the storehouse and firstly eliminate enemies running upstairs to the balconies or already are there. Then hide behind one of the left covers (screen) and fire at opponents appearing far away (ground floor and floor). Continue until the area is cleared.
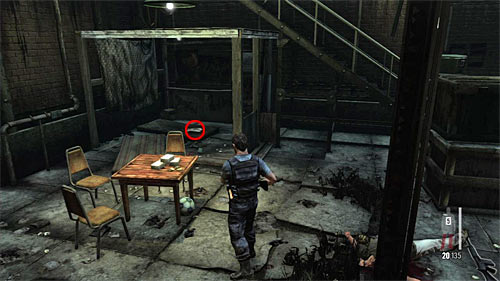
It would be good to search the storehouse carefully now, because there are three collectibles in here. At first approach to the poker table on the ground floor. Turn right and check the cage to find the clue shown on the screen above [Clue 5/6 - Boathouse Newspaper].
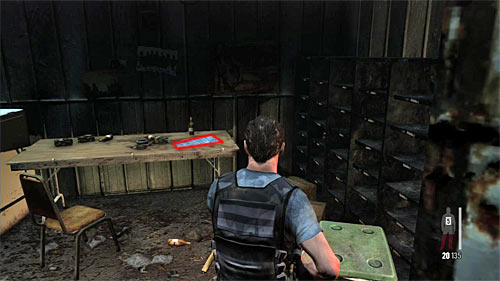
Now, enter the small room also on the ground floor. You'll find here two painkillers and the last clue in this chapter [Clue 6/6 - Nightclub Floor Plans].
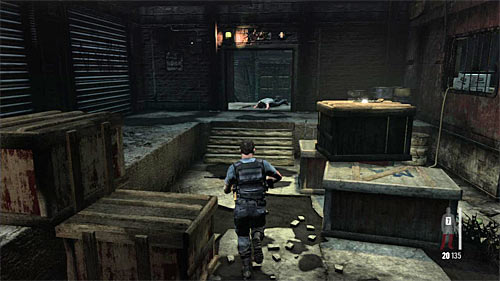
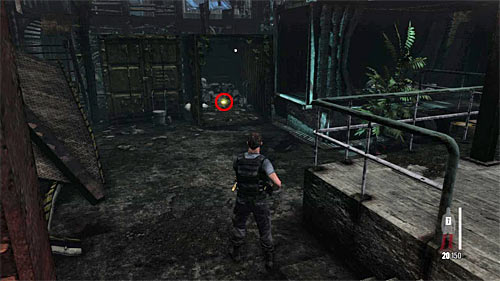
At the end go to the passage in the ground floor, at which in the previous encounter enemies appeared (1st screen). After getting outside move forward and locate the fragment of a gun, lying on the ground (2nd screen) [Golden Gun - LMG .30 Rifle 1/3].
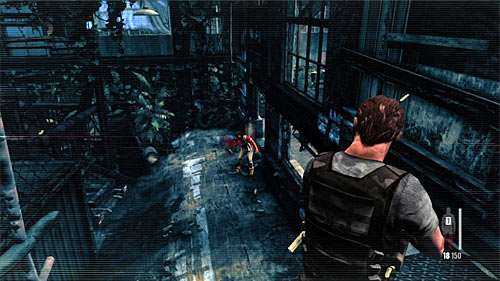
Return to the storehouse and use the stairs leading on the floor (same on which bandits tried run up). Approach to the balcony and after reaching the new area start from killing the single bandit who'll appear in front of you. Then jump down.
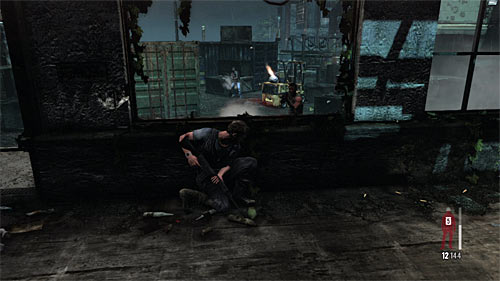
The next encounter is rather difficult, because you have a lot of enemies to kill and they'll use grenades. First, set yourself up by the shutter and fire at enemies. I recommend to aim at the container installed on the fork-lift truck (of course when there will be enemies nearby).
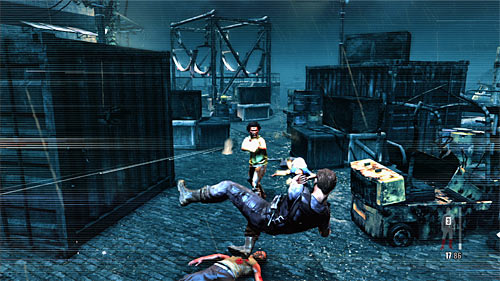
When you notice a grenade flying at you, go out and begin more aggressive actions, basing mostly on the slow motion jumps; use the covers only when it's safe. The biggest group of enemies stands on the left and you have to get rid of all of them.
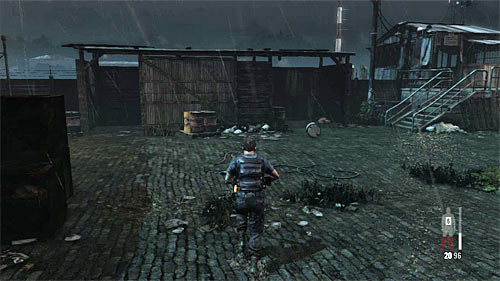
Pick up an ammo and head to the gate seen far away. For a while you won't run into new enemies. After opening the gate search the building on the right (painkillers) and then go to the hut (screen) in which you find another piece of a gun [Golden Gun - LMG .30 Rifle 2/3]
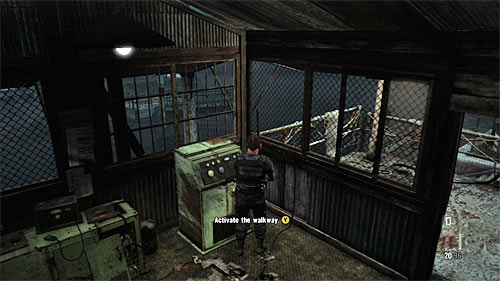
Now go to the larger building located on the right (this with aerials on the roof). After entering pick up two painkillers and use the consol to slide out the bridge.
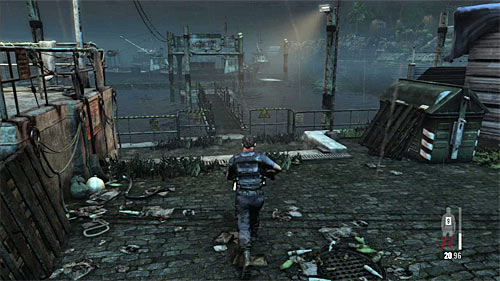
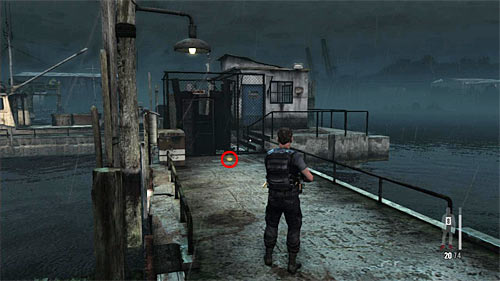
Go outside and use the unlocked passage which leads to the docks.
Remark! During moving through the docks limit to the minimum an amount of the slow motion jump because falling into the water means a death of Max. Eventually, you can jump, but only forward, and when it's completely safe.
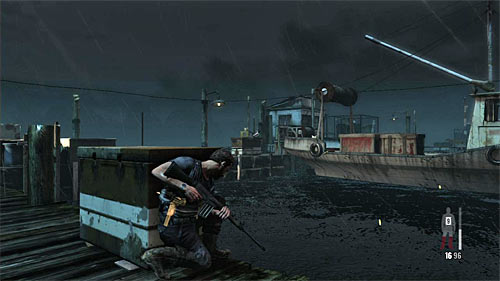
Turn left and hide behind the cover (screen) and wait for the first enemy, who wants to be eliminated from a distance.
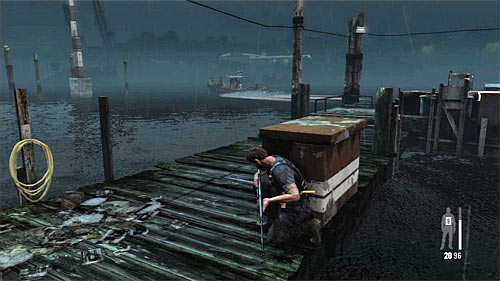
WAIT HERE, because patrol boat will flow over soon. I do not recommend attacking people on it, because it's connected with a risk of losing lot of health and, what is more, you will have to be very accurate. It's much better to wait until the boat flows away.
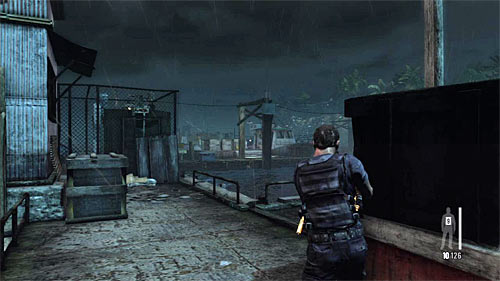
Move on. Search a body of the killed thug, he had a good rifle with the laser sight. Put yourself again behind the chest and start eliminating enemies in this area. Especially, interest in bandits placed on the left because they have a good position for making an effective attacks. Don't go out until there'll be safe.
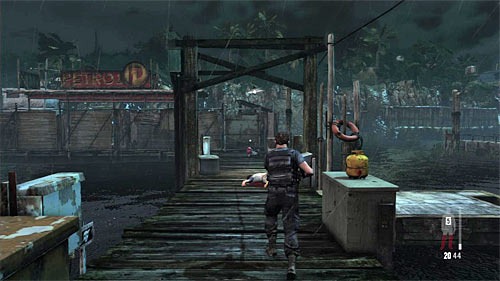
Continue marching through the docks. After reaching the crossroads (1st screen) ignore the right gate and turn left. Follow the main path until you reach the last collectible (2nd screen) [Golden Gun - LMG .30 Rifle 3/3]
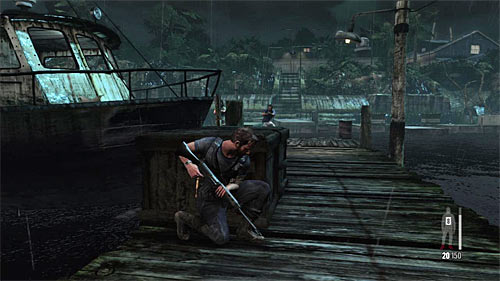
Only then go back to the mentioned gate but before you open it, kill the single bandit hiding behind the cutter on the left. After going through the gate, hide behind the closest chest and eliminate another two bandits.
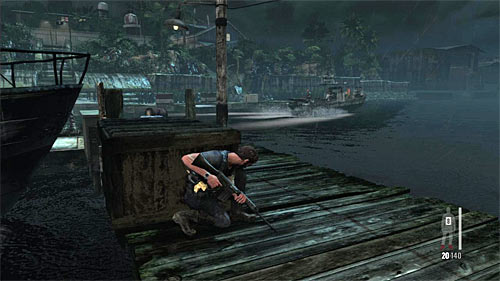
Again, I do not recommend moving, unless there appear a patrol boat. As previously, you don't have to care about damages if you don't lean out behind the cover.
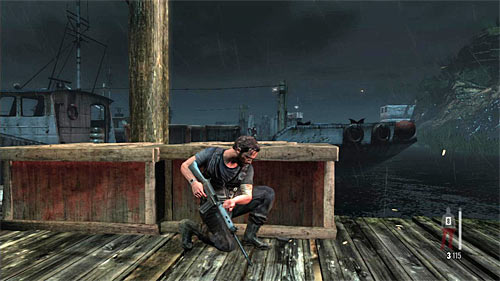
Wait until the boat flow away and move on. Try quickly get to the chests seen in the far away, because otherwise you'll have no place to hide. Calmly eliminate enemies, but watch out on few thugs, which can appear on your path too soon.
After cleaning the area, move left. Interest in mentioned before bandits (if they're still alive). After that enter the hut, in which you find guns and painkillers.
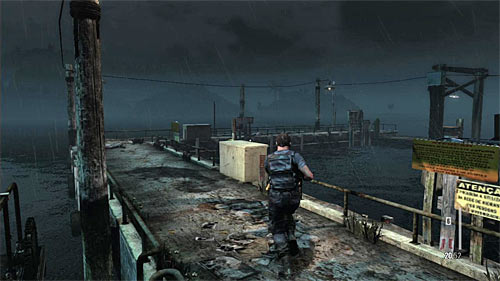
Choose the platform leading to the next part of docks. After reaching the place shown on the screen above, move little forward and then quickly move back, hiding behind the chests. Wait until the patrol boat flow over.

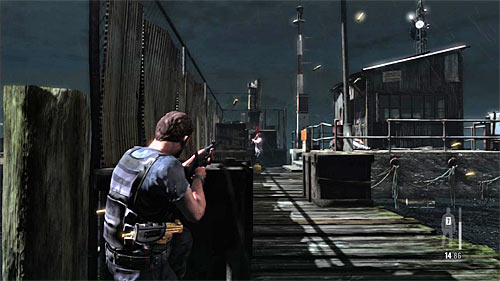
You just need to reach the gasoline station at the end of docks eliminating enemies you will run into.
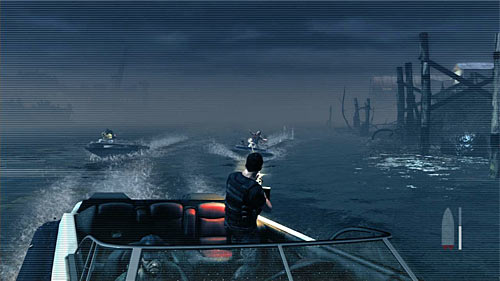
But it's not an end of this chapter, there is a long chase before you in which you'll have to attack bandits and simultaneously protect boat run by the Raul. Start firing at thugs chasing you aiming at their heads (slow motion is a good addition).
Remark! Remember, that during this scene you don't have to bother about the ammo, so always make longer series.
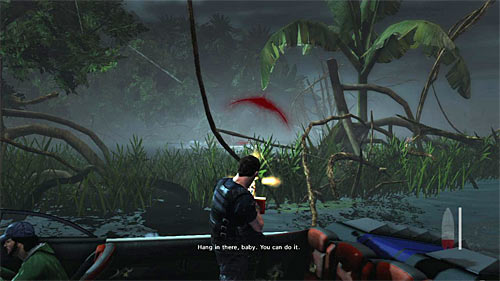
Continue the firing even if there are obstacles between you and the chasers.
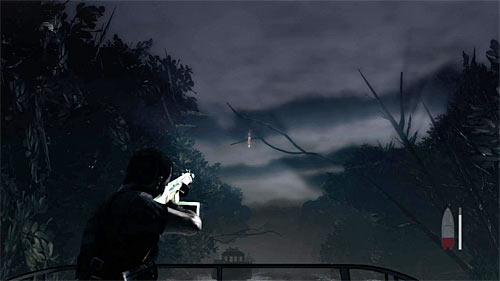
After the change of direction focus on the destroying Molotow cocktails throwing by enemies. In the free time aim at bandits in the big boat. Be also prepare to fire at those on smaller boats.
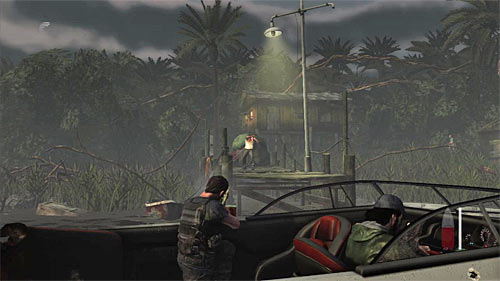
After reaching the village and receiving the message about compulsory stop, focus on destroying grenades, but also eliminate people standing on the shore. When the engine is launched again, continue firing.
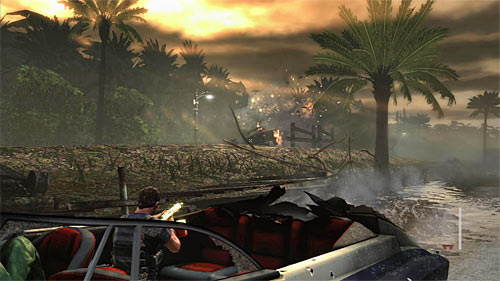
Further part of the chase will force you to get rid of enemies in the vehicles. To do so, aim not at enemies directly but at their cars.
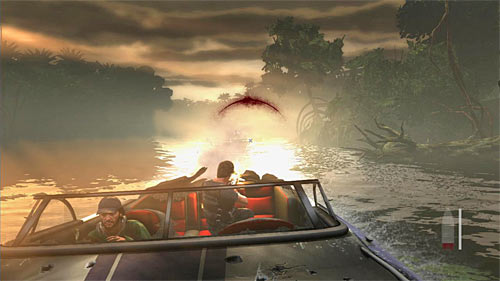
Soon Raul will be forced to take a new route and you have to kill enemies on the enemy boats once again. Listen to Passos' advices and watch the bars on the screen which inform you about new places where new opponents appear.
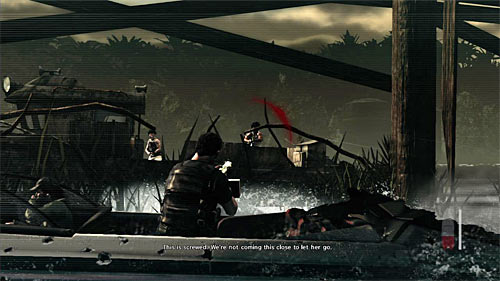
When the boats catch up with you, fire at crew on the biggest one, ignoring a fact that you'll get into a tunnel. After that get rid of smaller motorboats.
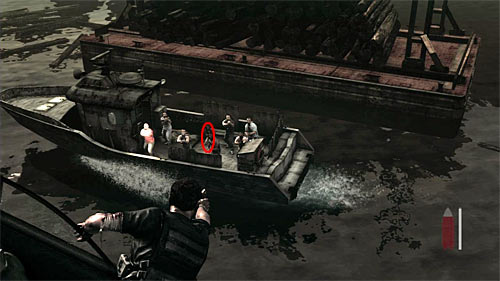
The last one action you have to do is fire from the air at thugs on the main boat. DO NOT AIM AT Fabiana (marked on the screen), because it'd mean failing the mission. Attack remaining enemies. The chapter ends.
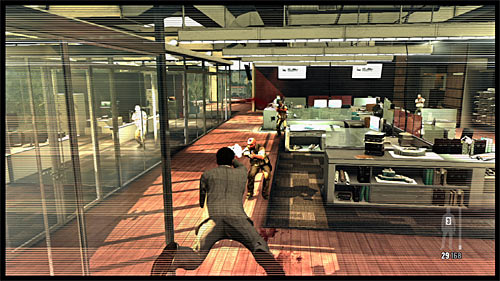
Prepare yourself because you'll be fighting at once. Game suggests to use the slow motion at the beginning and it's a good choice. Your further tactics (covers vs slow motion jumps) depends on your preferences. Regardless of this watch out on the attack from the flank and the bandit standing in the left office.
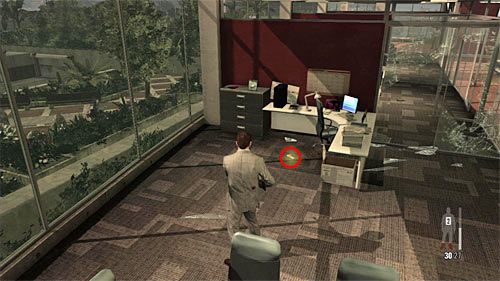
Ignore the IT expert and go to the next location to collect weapons (I recommend taking MD-97L Rifle) and search carefully this area. Begin from the left office where you find painkillers and a part of weapon on the floor [Golden Gun -MD-97L 1/3]
Remark! In the further part of a mission you'll be accompanied by the IT expert. Remember to not fire at him accidentally because it fails the mission. You don't have to protect him in any other way because enemies won't be interested in him.
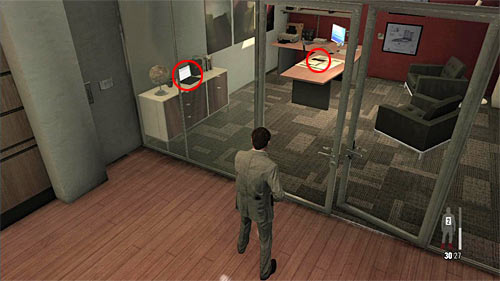
Now go to the office in the right corner which belongs to Victor Branco. You'll find two clues here [Clue 1/5 - Rodrigo's Emails] [Clue 2/5 - File on Fabiana]. At the end join the TI expert for going to the next area of the office building.
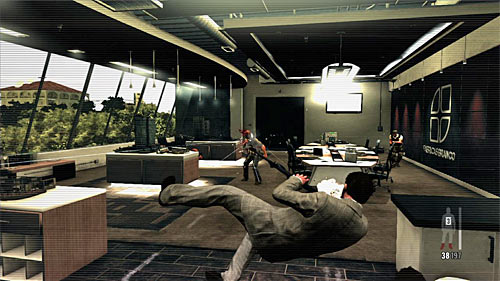
New encounter isn't too difficult, because you have only 4 bandits to kill. Play it as you like.
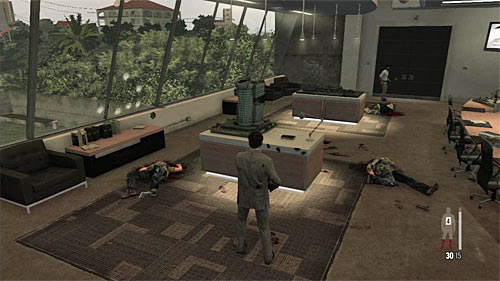
Similarly as previously don't run after the IT expert but search the area carefully. Get interested in the models (screen) among which you'll find another clue [Clue 3/5 - Architectural Models]. Now you can join the IT guy.
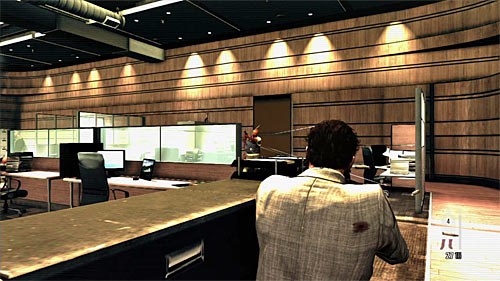
More difficult battle waits for you. But you can attack enemies from a surprise, what is your advantage. I recommend to do in the man walking on the right, so he won't harm you later.
Remark! During this and the next battle do not leave the area by approaching the stairs, because it'll cause the IT guy death and fail of the mission.
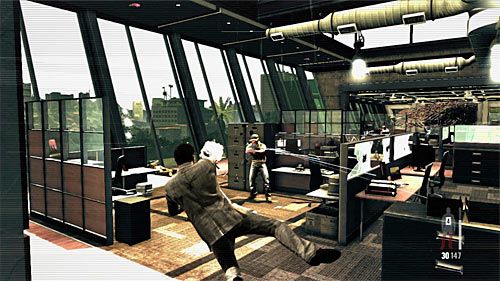
When the battle begins, focus on eliminating enemies who'll try get closer to you and watch out for their grenades. Simultaneously try not to hide behind the wooden covers, because they're very easily destructible. Remember to pick up ammo and weapons from the dead opponents. You will find also two painkillers (in the desks in the central part of the room).
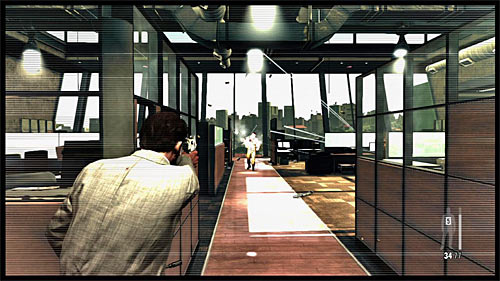
After short cut scene another encounter awaits you. The problem is a fact that you begin in it the central part of them, behind the wooden cover. So try fire at the enemies standing in the main passage firstly.
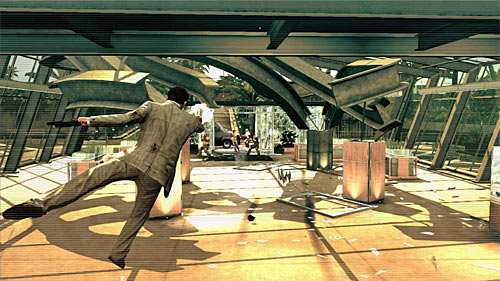
In the further part of this encounter you can make lot of slow motion jump or back to the starting position (screen) and hide behind one of more endure covers. Regardless of your tactic, do not act risky, choose your targets carefully and do not let them surprise you.
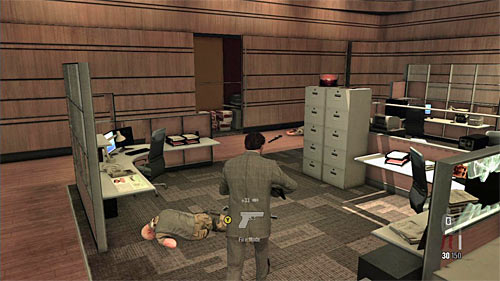
After the battle collect the ammo. At the end go where the IT guy stands to see another cut scene.
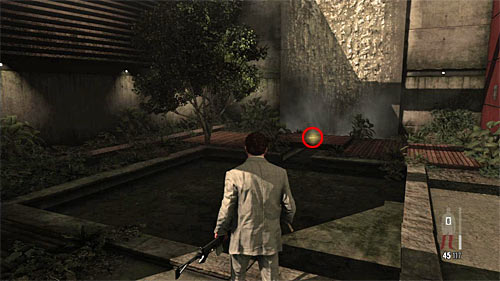
Only now use the stairs leading to the atrium and Rodrigo Branco's office. After getting there, listen the conversation with your employer. Stay there and check the wooden footbridge at the small waterfall (screen) to find a new part of weapon [Golden Gun - MD-97L 2/3].
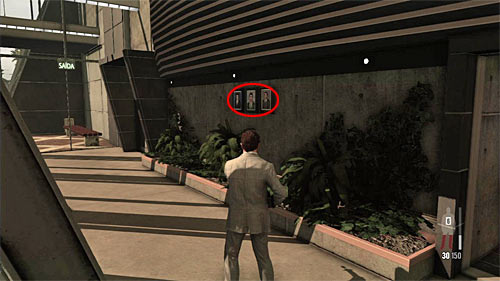
Go through the passage to the lobby. By the way go into the toilet (painkillers) and look at the photos hang up on the right (screen) to unlock new clue [Clue 4/5 - School Pictures].
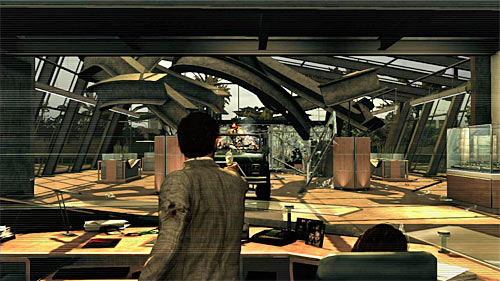
Be prepared, because after the cut scene you regain control. Aim at the pick up driver, because his death is enough to interrupt the scene.

Use the "free" bullet time and try to kill as many enemies as you can before landing. Even before Max hide behind the cover, it's worth to make another slow motion jump (the best solution is make him in a way which make you land by the another cover).
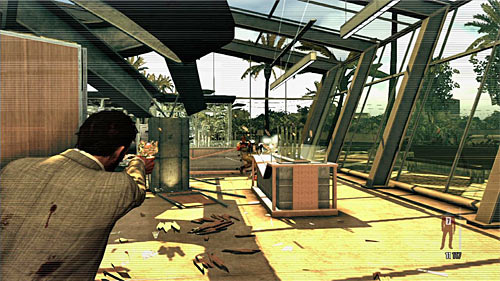
When you proceed to the next part of an encounter, slow down a bit, use pillars as covers and eliminate approaching enemies.
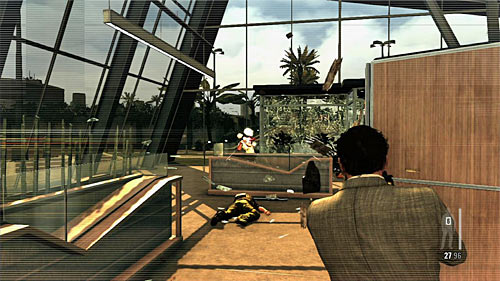
After the battle cut scene will be displayed which informs about an "elite" enemy and his two helpers. Firstly I recommend to eliminate those two thugs.
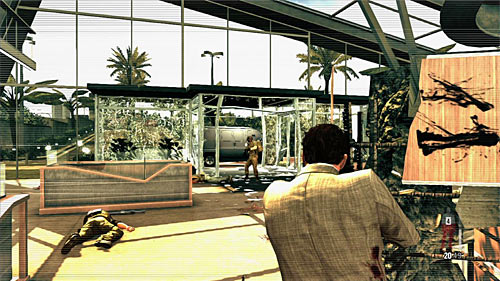
After that focus on the elite soldier. He uses the LMG machine gun, so it's important to stay behind the cover. Use bullet time and try aim at his head, make short series.
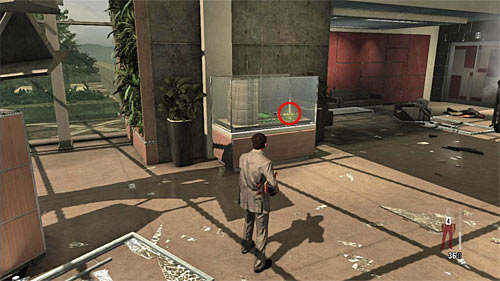
After the battle go to the dead enemy and take his weapon. Go to the lobby, but by the way destroy the marked on the screen exhibition and pick up the last fragment of a weapon [Golden Gun - MD-97L 3/3]. Then go to the elevator on the left from the destroyed desk.
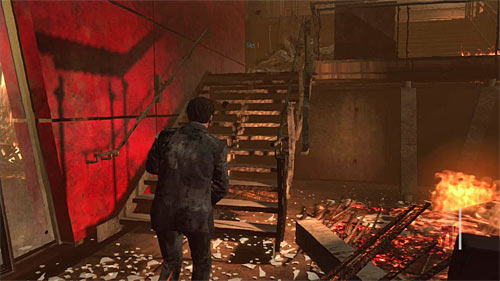
Go forward and don't bother that you don't have any weapons. Use the stairs leading to the office you searched before. Go through the gate.
Remark! During the final scene you shouldn't stop anywhere longer because Max may die because of CO poisoning or the building collapse.
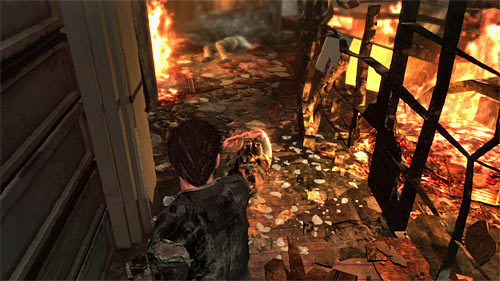
When you meet an enemy, do as the advices on the screen say, so first disarm him (right trigger) and do in (also right trigger).
![Go to the IT guy body lying little further and search it, what gives you the last clue [Clue 5/5 - Dead IT Guy] - Chapter VI - p. 2 - Walkthrough - Max Payne 3 - Game Guide and Walkthrough](https://game.lhg100.com/Article/UploadFiles/201512/2015121617424717.jpg)
Go to the IT guy body lying little further and search it, what gives you the last clue [Clue 5/5 - Dead IT Guy].
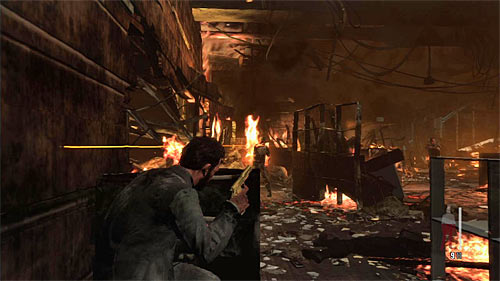
Move on. After reaching the corner place yourself behind the cover and eliminate two enemies. Approach them and pick up ammo (and the second pistol if you want to).
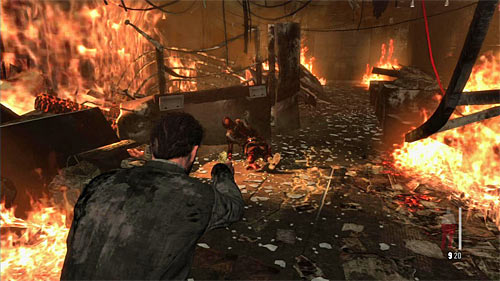
Continue your march through the burning building. Watch out on the single enemy who you have to finish after reaching the destroyed room (screen above).
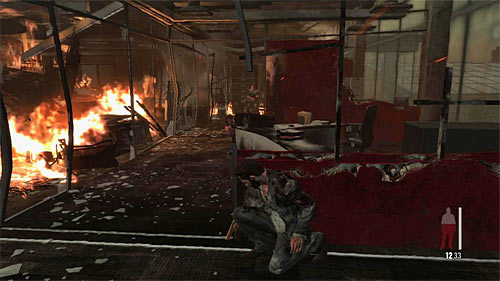
You will run into the last group of enemies in the next part of building. As you don't have any painkillers, attack them from behind the cover.
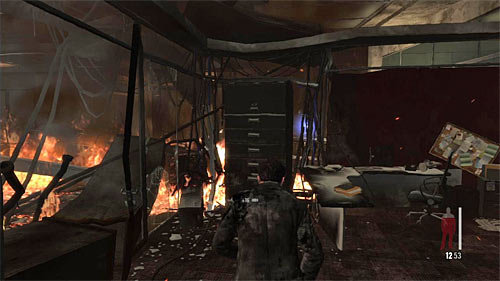
Make sure you kill enemies and move on. Go to the locker shown on the screen and press Y button rhythmically to turn it over.
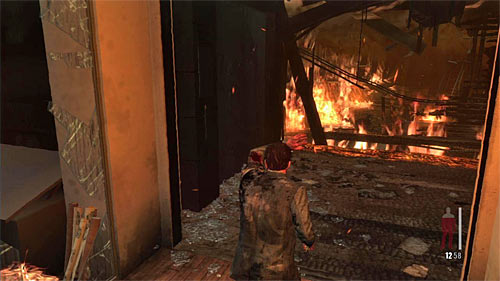
Use the unlocked passage and follow the path. After a while you get to the place where this chapter ends.
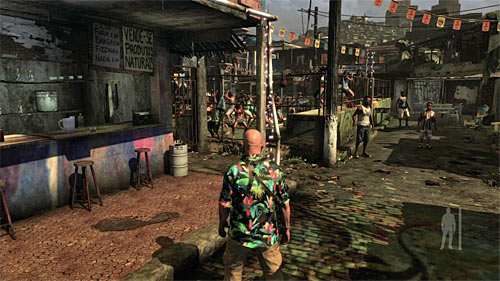
In the first phase you have no encounters. Follow the path, reaching the party place. Game will display a cut scene.
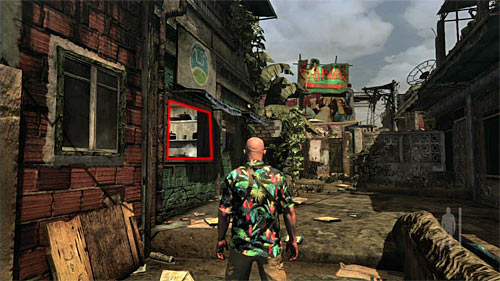
Don't bother that you've lost weapons and continue exploration of the slums. After a while you should reach a bigger path leading to the nightclub. By the way check the green stall, making a conversation with the Anders Detling what unlocks the first clue [Clue 1/9 - Ex-Cop].
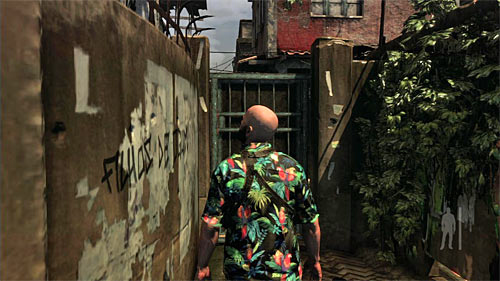
Move on. Your target is a gate to the nightclub. Another cut scene appears.
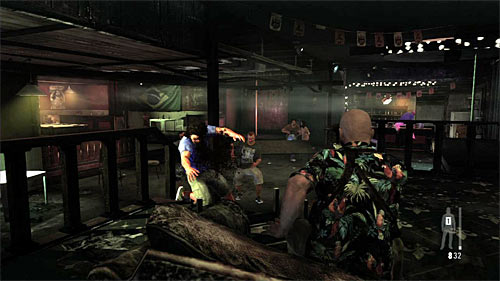
After regaining a control try to kill three enemies in front of you and the barman hiding on the right. If you didn't, eliminate them after the end of bullet time.
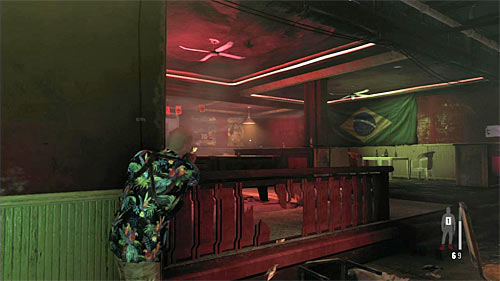
Now, go quickly left. I propose to hide behind the left wall (screen), because from this place eliminating appearing enemies is simple. Save the ammo, unless you picked up a new gun from one of dead enemies.
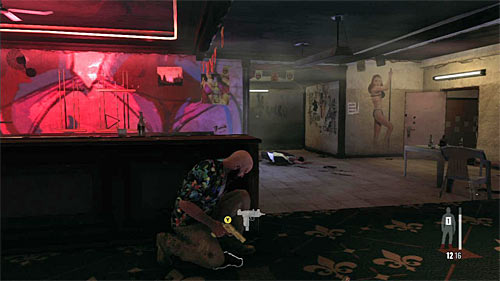
After eliminating enemies move to the billiard table and start firing at an enemy hiding in the passage to the backs of the night club (screen).
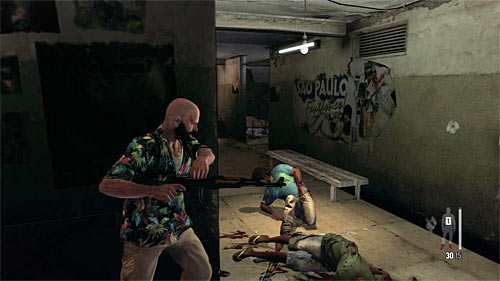
Make sure you did in the mentioned thug and go to the passage he guarded. Be careful, because there will be at least two more enemies. It's best to wait until they move in your direction.
Remark! Don't go to early to the exit doors, because it's good idea to search the building carefully before.
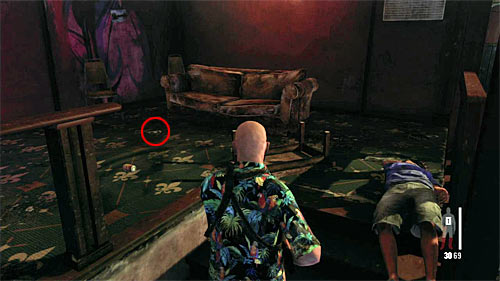
After securing the area, start searching it. Return to the starting position, to the corner where Max talked with Da Silva. On the floor lies a photo which is a new [Clue 2/9 - Photo of Serrano].
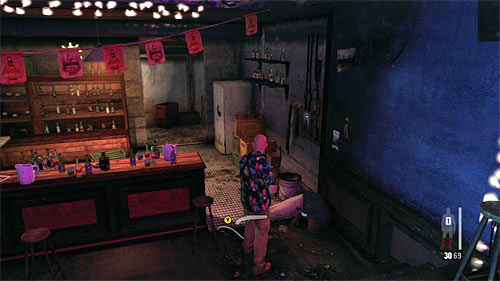
Use the spare time to check the main part of the club. I recommend to pick up at least one good weapon (Kalashnikov, sawed-off shotgun and few other candidates). Also, interest in the place where the barman was standing (screen). You'll find there two packs of painkillers (behind the bar and on the back).
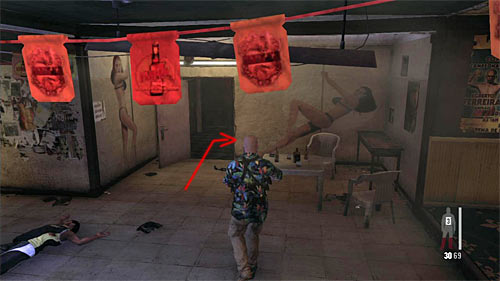
Go again to the billiard table but this time choose the marked on the screen entrance to the toiler. Check the middle cabin where you find a part of weapon [Golden Gun - Sawed-Off Shotgun 1/3].
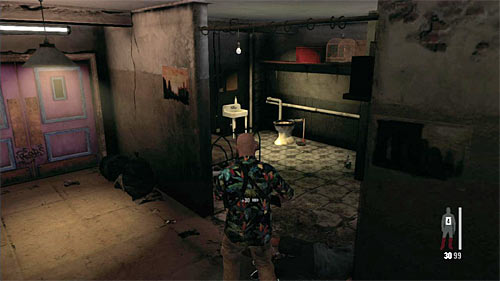
Go again on the backs of the building, search all room you will pass. In the first on the right you find painkillers. Go to the third on the right (screen) and approach to the bed. It should begin a cut scene with a hiding tourist and unlock a clue [Clue 3/9 - Tourist Clue]. You can exit the bar (double pink door).
Remark! If the cut scene isn't loading it may mean that the tourist died during the encounter. In such case you need to load the game and try again.
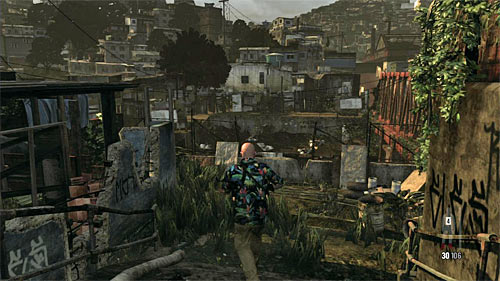
Follow the path. Initially you won't run into anyone so you can walk carelessly. Approach to the wall and wait until the cut scene ends.
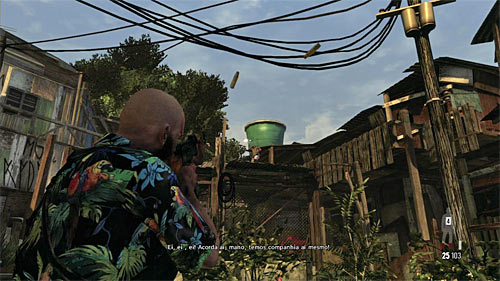
After being placed in the new place, go forward. When you get closer to the new area, hide behind the cover and start eliminating enemies appearing in the vicinity. Especially watch out on the one standing in front of you (screen). Slowly go forward, doing in ably next gangsters.
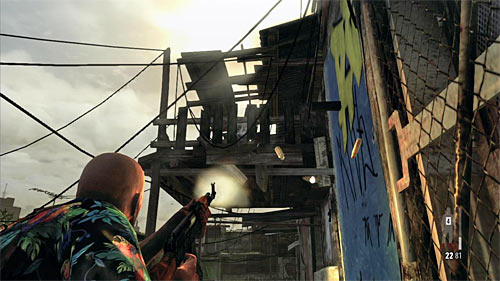
After the encounter use stairs. Quickly turn left and be prepared to eliminate at least two ne thugs. One of them will be probably standing on the upper balcony.
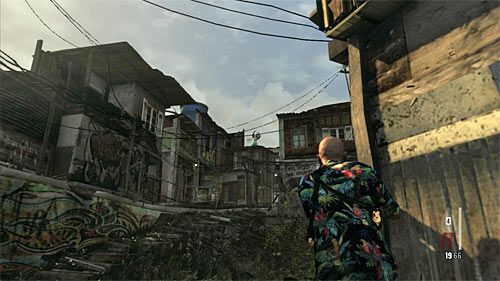
Move on and prepare to kill another two bandits who will be set on the shelves over you. After cleaning up, jump down and fire at new enemies. It's worth to use the cover (screen).
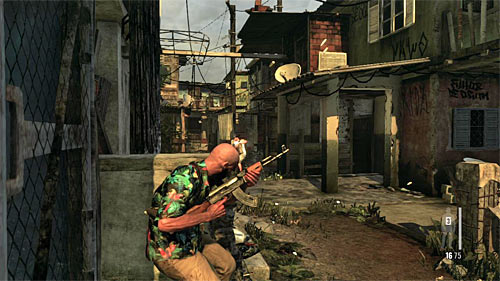
Use the stairs. After reaching the new path, hide behind the left wall and fire from there. Don't go out too early because at least several gangsters will appear far away and you may not spot them at once. Before you leave the place, interest in painkillers on the table, on the right.
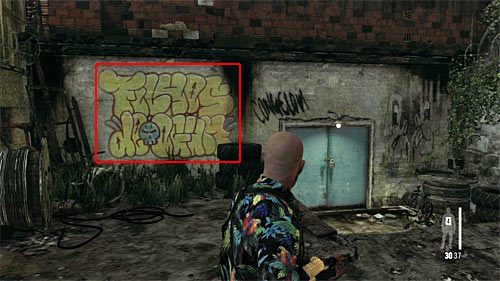
Slowly move forward and eliminate following enemies. After securing the doors continue your march through the slums. You need to get to the blue doors, but before you go through them check the graffiti on the left, what gives you another clue [Clue 4/9 - Lower Gang Spray Tag]. After that, go to the doors and destroy the paddle.
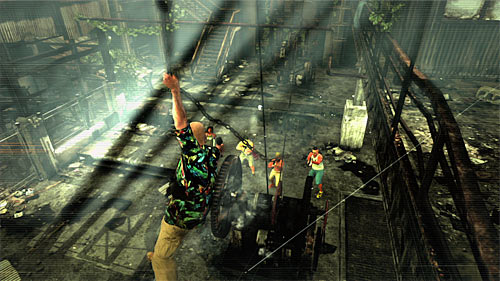
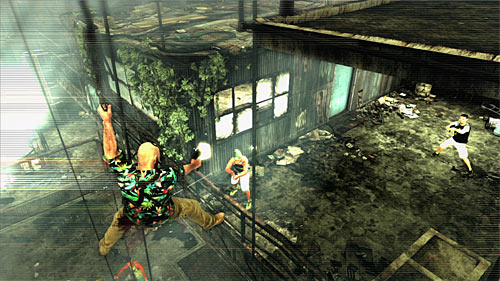
Prepare yourself because it'll be a partially interactive scene and the perfect occasion to get rid of enemies in the warehouse. Firstly fire at those on the very bottom (1st screen ) and then thugs placed on the middle balcony (2nd screen).
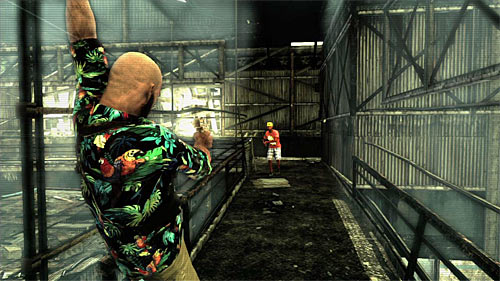
It's not an end because when you reach the upper balcony, it'd be good to kill at least one opponent (screen) before the bullet time will be turned off.
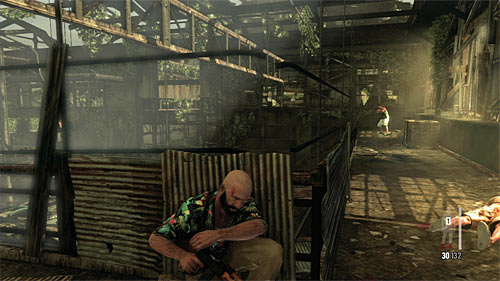
When you regain control run straight. Hide behind one of metal balustrade and take care of remaining enemies on this balcony. Try not to lean out during the encounter, because you may be fired at also by the bandits from the other parts of the warehouse.
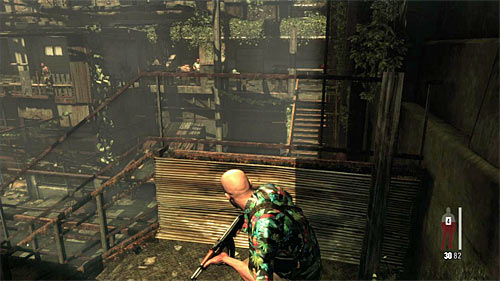
Now you have to reach the other end of the upper balconies. On the way you may make jumps or hide behind balustrades. Stop in the place shown on the screen above and start firing at enemies standing far away. Try to be accurate and not lean out too long.
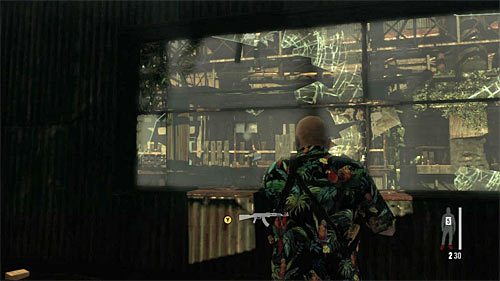
After killing all enemies go to the small room on the left. Get interest in two packs of painkillers and Mini-30 rifle with a laser sight. Break one of glasses and continue firing, helping yourself with the sight.
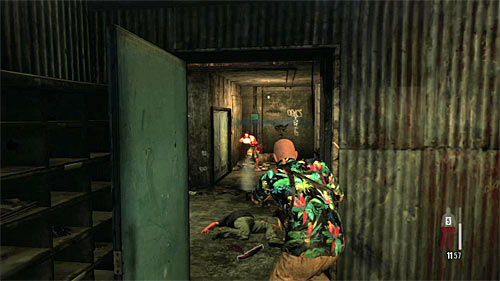
I recommend to be very careful, because during this battle enemies will surprisingly rush into your room. When you notice them, kill them using the bullet time. After that action go back to the shutter and continue firing.
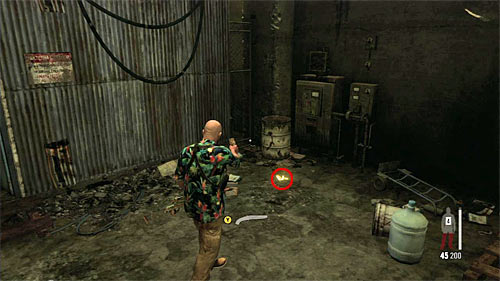
Continue until you eliminate all bandits. Go to the door through which killed thugs rushed in, and when you leave the room turn left and you'll see the fragment of a weapon [Golden Gun - Sawed-Off Shotgun 2/3].
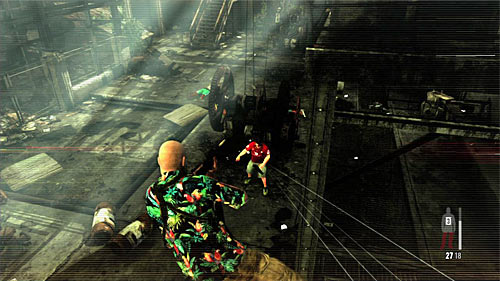
Go to the stairs but take into consideration that there may be opponents downstairs. So it's a good idea to make a jump in the left before you reach the bottom to get rid of them.
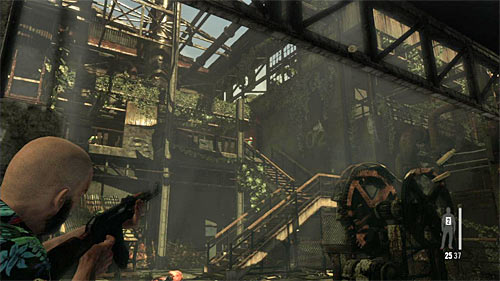
Very carefully start moving to the stairs seen in the far away. It's worth to hide behind every cover because you'll be regularly attacked by the new enemies. Do not risk too much.
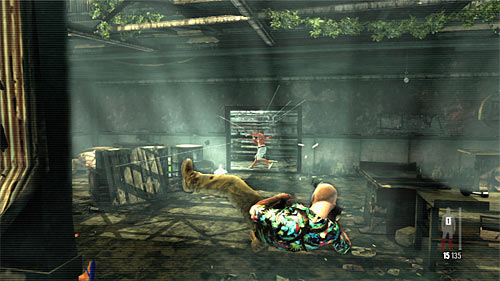
Use the mentioned doors and prepare to do in the last group of bandits who will appear in the passage in front of you (screen). Depending on your likenesses you can wait for their arrival or face them. Regardless of the choice, use the bullet time to not get hurt and not use the collected painkillers too early.
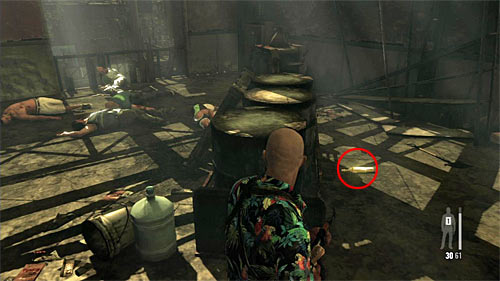
Don't head to the exit at once, but return to the vicinity of the stairs you've used recently. Check all the balcony and you'll find a part of gun behind the chests [Golden Gun - SPAS-15 Shotgun 1/3].
Remark! Similarly to the situation with a nightclub, do not leave until you collect all collectibles and other precious items.
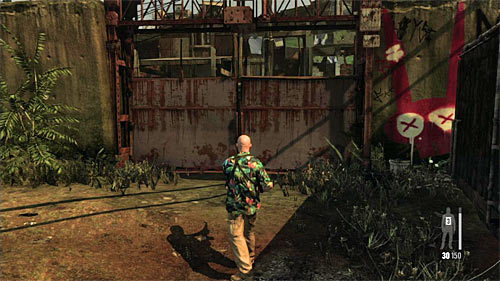
Go to the corridor in which the last group of enemy was and check the right room where you find two painkillers and two sawed-off shotguns. Only then use the stairs and exit the warehouse. After that go through the wagon and approach to the rusty gate (screen).
![Check the vicinity of a beginning location and find painkillers and a part of gun (1st screen) [Golden Gun - SPAS-15 Shotgun 2/3] - Chapter VII - p. 3 - Walkthrough - Max Payne 3 - Game Guide and Walkthrough](https://game.lhg100.com/Article/UploadFiles/201512/2015121617425236.jpg)
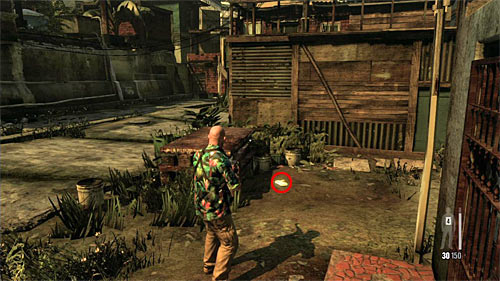
Check the vicinity of a beginning location and find painkillers and a part of gun (1st screen) [Golden Gun - SPAS-15 Shotgun 2/3]. Go little further and look at the graffiti on the wall on the right what gives you another clue (2nd screen ) [Clue 5/9 - Middle Gang Spray Tag].
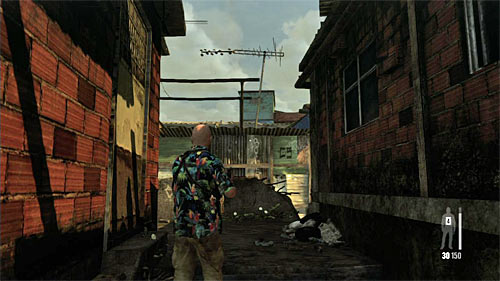
Use the stairs and follow the path to the next are. Stop when you reach the balcony shown on the screen above. Start from killing the running thug (on the left).
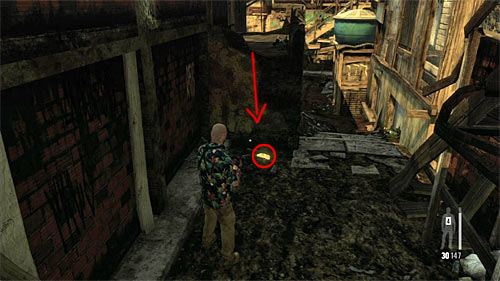
Place yourself on the balcony, turn right and jump down. You should land by the next piece of a gun [Golden Gun - SPAS-15 Shotgun 3/3].
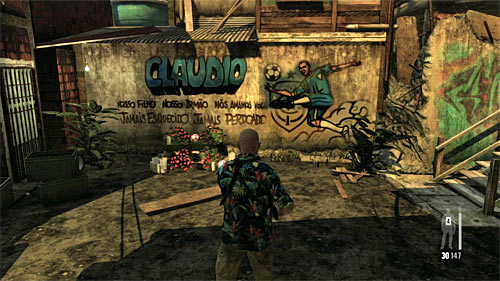
Go on the nearby square. Before you use the stairs, which were guarded by the killed bandit, look at the shrine dedicated to the murdered soccer player, what gives you another clue [Clue 6/9 - Shrine to Claudio]. You can go to the stairs.
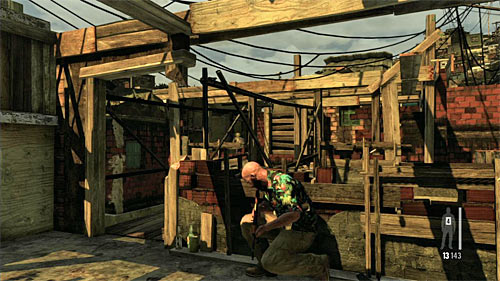
After getting upstairs, quickly set by the wooden bridge and start attacking "elite" gangsters appearing far away. As in the previous encounters, try to lean out only for a quick shots and aim at heads.
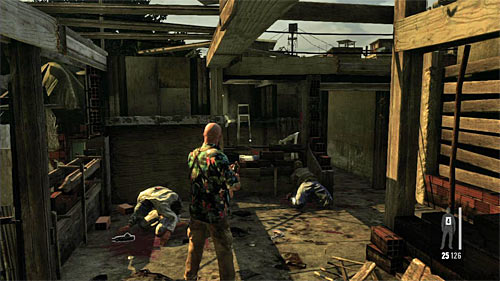
After eliminating bandits use the bridge but watch out on the thug with the sawed-off shotgun who suddenly appears on your left. To decrease the risk of damages, use the bullet time. Search the room in which he was hiding and pick up painkillers.
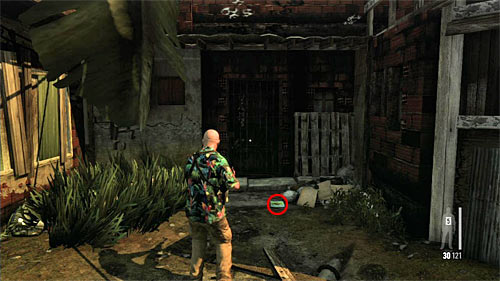
Find the place where you can jump down and continue march. When you reach the entrance to the new building STOP and check the area on your right. You'll find a new clue [Clue 7/9 - Flyer of Giovanna]. Only now enter the building.
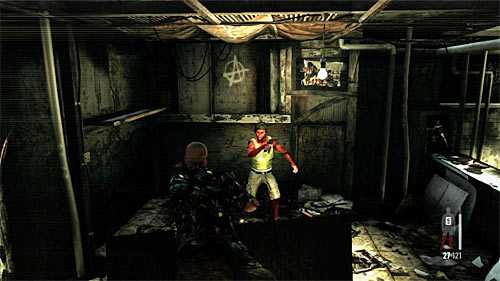
Quickly kill the bandit hiding behind the table opposite to the entrance and then stand by the passage to the left room and eliminate his fellows. After the encounter find painkillers and go to the exit.
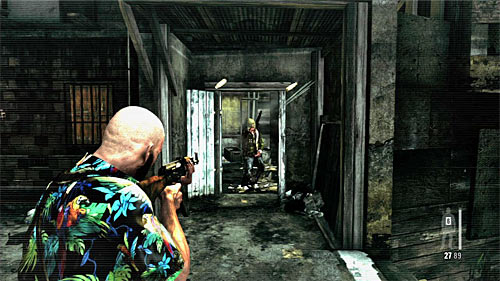
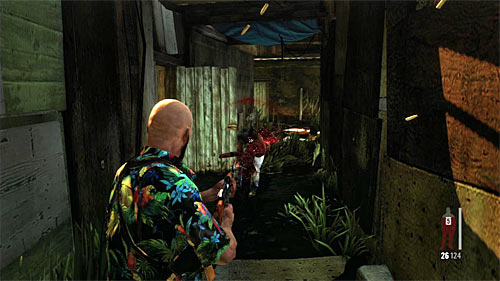
Watch out on the new enemy, who'll try to surprise you jumping out at you (1st screen). After killing him choose the path between the buildings and be prepared to eliminate another bandit who'll sun out from the left building (2nd screen).
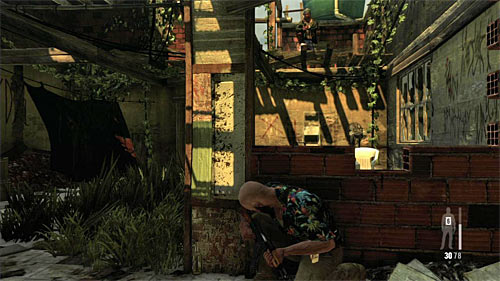
After reaching the new doors do not try to hide behind the shutter but enter the next area at once. Only then hide behind the right wall and start the battle. Be careful because enemies can appear over you (screen). After cleaning up resume the exploration of the slums.
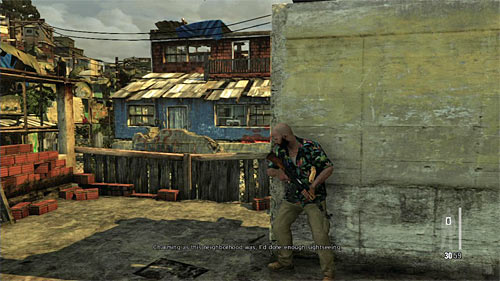
Stop when you reach the bigger balcony. Initially I recommend to stay behind the right wall (screen) and in the further part of the encounter run to the balustrade. Eliminate enemies appearing by the building seen far away.
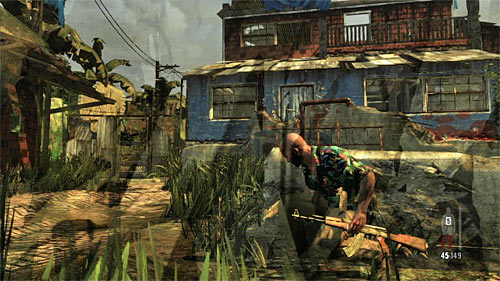
Jump through the balustrade when you get rid of all enemy you see. This time I suggest to crouch by the wall and fire safely. Especially interest in the bandit hid behind the metal gate on the left. After eliminating all enemies, go to the main entrance to the building.
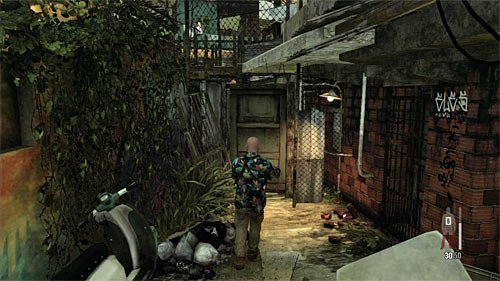
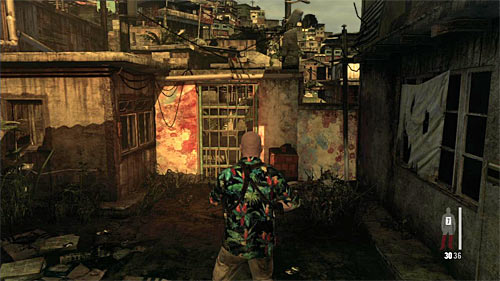
Check the building and find the painkillers then use the left exit. You have to reach the gate shown on the screen. Its opening begin the new cut scene.
When you regain control, start from eliminating the gangster standing close to the door. Only then eliminate the remaining ones inside the building.
![After the encounter look around and find painkillers and the drags which are another clue [Clue 8/9 - Bag of Oxidado] - Chapter VII - p. 5 - Walkthrough - Max Payne 3 - Game Guide and Walkthrough](https://game.lhg100.com/Article/UploadFiles/201512/2015121617425421.jpg)
After the encounter look around and find painkillers and the drags which are another clue [Clue 8/9 - Bag of Oxidado]. You can go to the opposite exit from the building.
Remark! Do not go to early to the exit because it launches the cut scene and after that picking up the collectible won't be possible.
![When you regain control, check the graffiti in front of you (screen) to get the last clue [Clue 9/9 - Upper Gang Spray Tag] - Chapter VII - p. 5 - Walkthrough - Max Payne 3 - Game Guide and Walkthrough](https://game.lhg100.com/Article/UploadFiles/201512/2015121617425483.jpg)
When you regain control, check the graffiti in front of you (screen) to get the last clue [Clue 9/9 - Upper Gang Spray Tag]

Choose the only possible path and reach the gate shown on the screen. Prepare to the last encounter in this chapter.
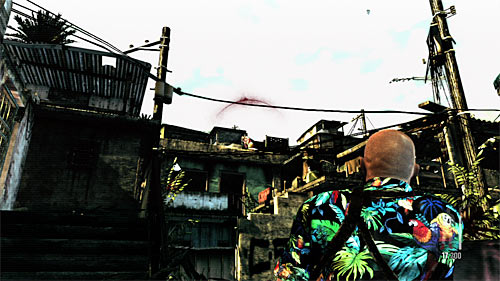
As far as possible start attacking new bandits, firstly those on the roofs because they'll throwing Molotov's cocktails at you. You can, of course, destroy those cocktails during the flight using a slow motion.
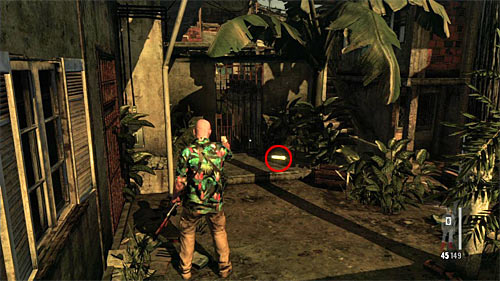
In the further part of the encounter kill also those thugs standing closer, running at Max from the stairs. After initial securing the area check the region on the left from the mentioned stairs where you find the last part of a weapon [Golden Gun - Sawed-Off Shotgun 3/3].
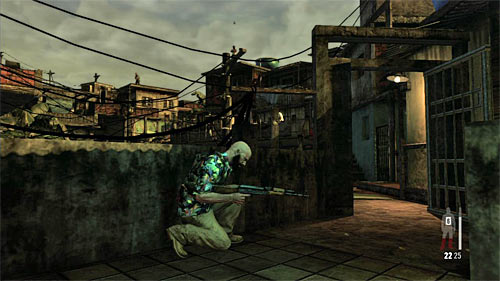
You can use the stairs now but you shouldn't hurry too much. The most important is to focus on successive eliminating thugs, especially those on the roofs and higher parts of buildings. During the march use walls, parapets and other as covers.
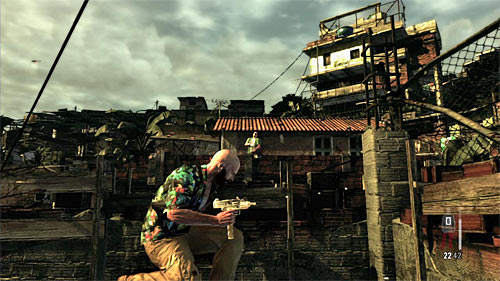
After reaching one of the higher balconies, prepare to another attack of the bandits who will appear on your left (screen). When you did them in, pick up painkillers.
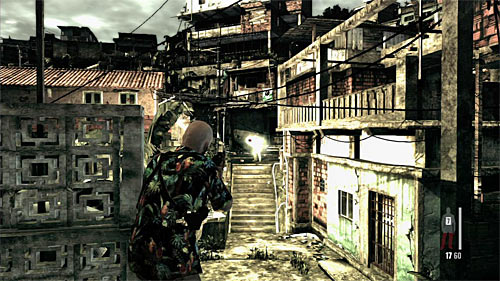
At the end you meet an enemy with the rocket launcher. When the game turns on the slow motion aim at the rocket flying at you and destroy it. The explosion will kill the gangster.
Jump down and head to the highest building, because you won't meet any enemies. This chapter ends when you reach the new gate.
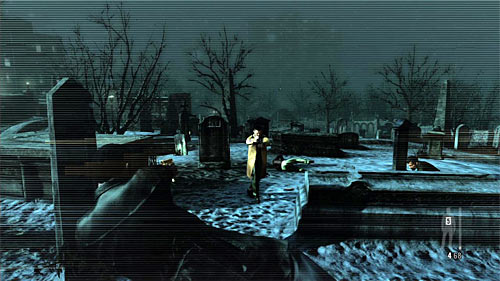
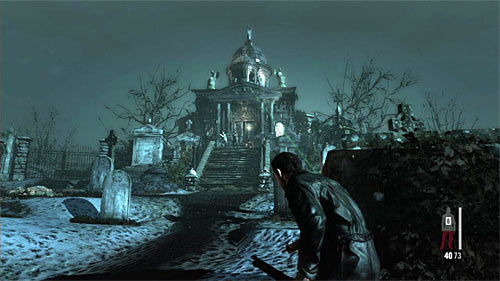
First group of enemies you can eliminate on two ways: firing behind the Payne's family tombstone or making a single bullet time jump and shooting at enemies heads.
This location has no exit, you'll be automatically moved to the new area after all battles. What means that you can defend nearby the beginning place all the time.
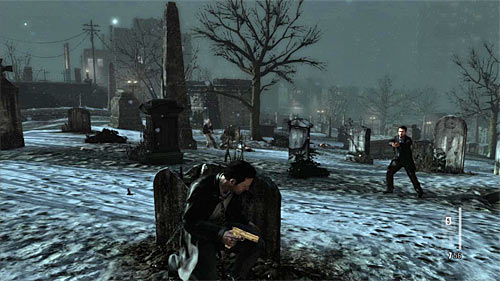
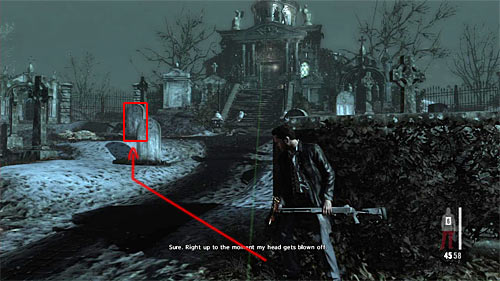
After the encounter move little forward, but when you hear running enemies hide behind one of tombstones. I recommend to fire behind the cover, precisely following enemies' moves and not let anybody attack you from the flank. Continue the battle until you secure this part of a graveyard.
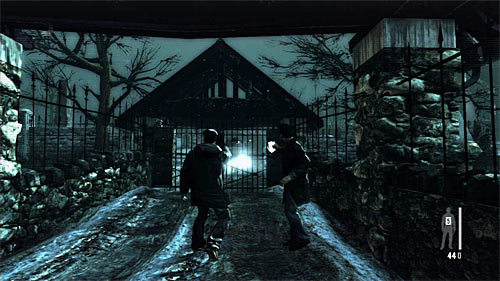
Be ready, because after the cut scene you'll be forced to kill the driver of a truck. It should make the truck hit the wall and decrease a danger for you.
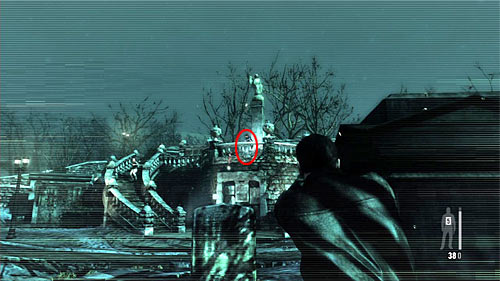
Another difficult encounter waits for you. I recommend to begin from eliminating the enemy with a grenade launcher. It's important, because if you don't hurry you may die in an explosion (but you can destroy grenades during their flight).
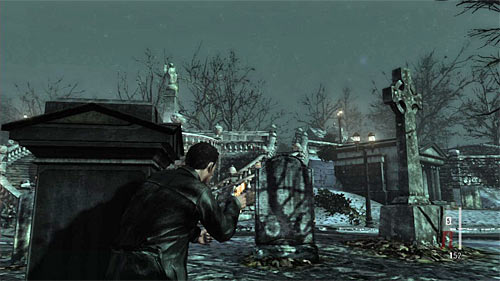
Only now attack "normal" enemies, standing on the stairs and the upper balcony. Don't go out behind the cover too early, because some enemies may hide waiting for an opportunity to attack.
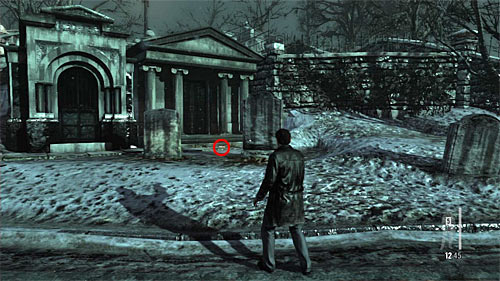
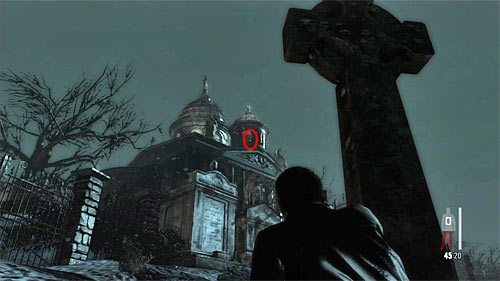
Make sure that there are no enemies and go right. Look around by the crypt shown on the screen and you'll find a part of a weapon [Golden Gun - Auto 9mm 1/3]. You can go back to the stairs and use them.
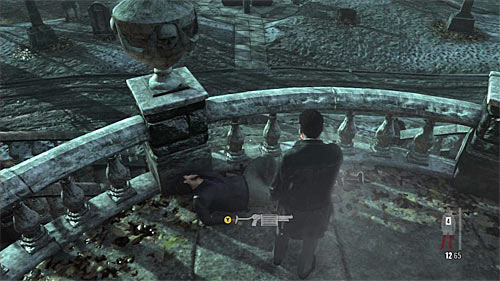
After getting upstairs, kill immediately bandits standing there. I suggest also picking up the grenade launcher (screen). If you killed thug who had it very fast, it'll have still 4-5 missiles.
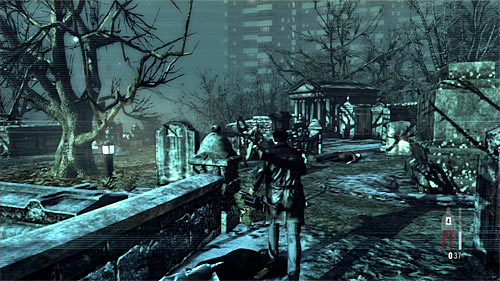
I recommend choosing the right passage leading to the another part of a graveyard. Firstly, use the grenade launcher to eliminate the main group of enemies. Then begin more standard attacks, hiding behind small parapets and tombstones or making lot of slow motion jumps.
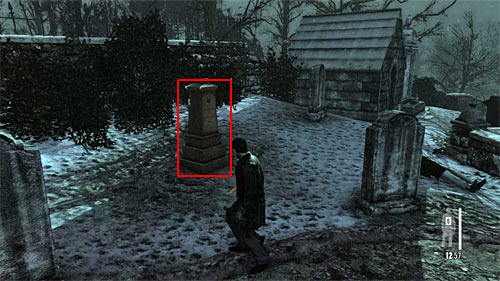
After the fights, pick up ammo and search for the small building in which you find two painkillers. Examine also tombstone shown on the screen to unlock the new clue [Clue 1/3 - Valerie's Tombstone].
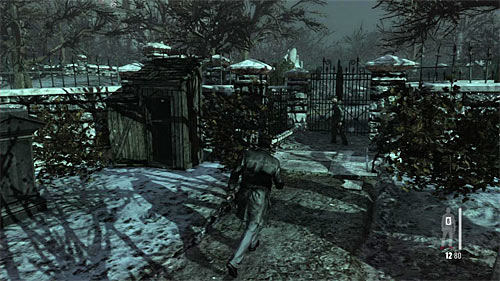
Only then approach the gate by which Passos is standing (screen).
Remark! Remember to not leave the particular area too early (it happens mostly when you approach some gate), because game won't let you go back.
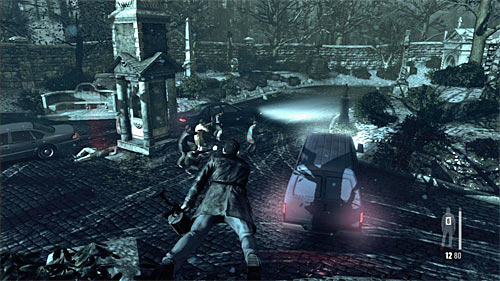
After regaining control you can quickly run to the vehicle or (the better solution) make a bullet time jump to eliminate nearby thugs.
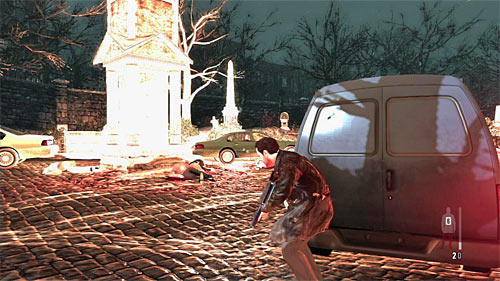
After proceeding to the proper battle, use the van as a cover. You can use grenade launcher or aim at the remaining vehicles and try to blow them out and kill gangsters. Eliminate all of them.
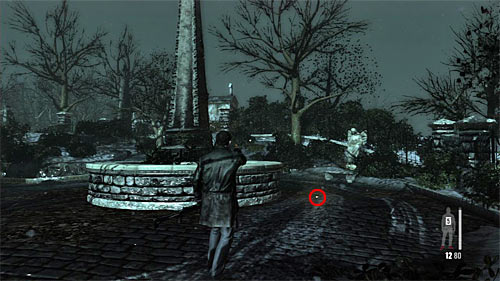
After the encounter ignore the main path to the mausoleum and choose the side one, by the one of the parked vans. You have to reach small, round square and find a fragment of weapon [Golden Gun - 608 Bull 1/3].
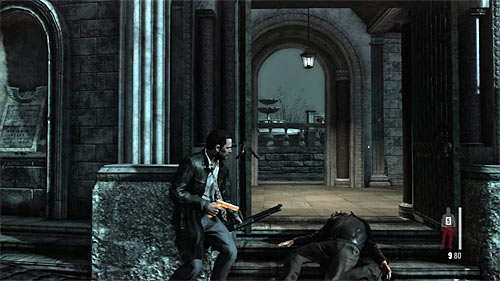
Only then go to the mausoleum seen in the far away. Quickly eliminate the first bandit who'll run into you. Then place yourself by the entrance and begin to fire at his fellows. At the end of battle you can enter the new area and eliminate the remaining thugs.
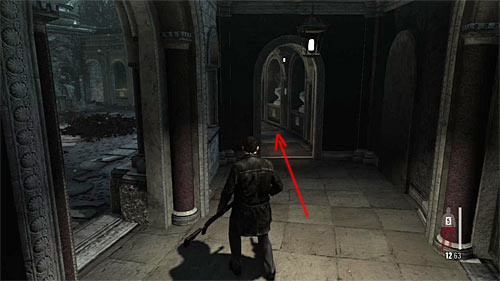
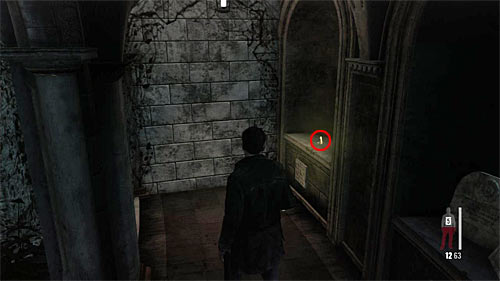
Choose the narrow path on the right from the entrance (1st screen). At its end check the last niche on the right (2nd screen). It'll give you another piece of a weapon [Golden Gun - Auto 9mm 2/3].
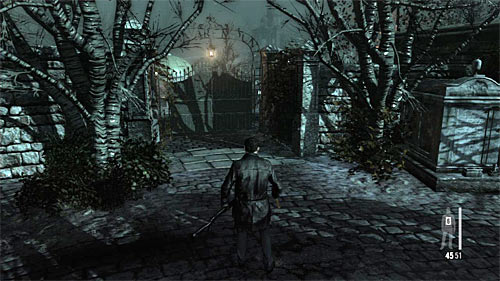
Pick up weapons and ammo from defeated enemies and go the only possible path to the next location. As the previous time, search the small shed in which you find two painkillers. Approach the gate (screen) only when you pick up the medicaments.
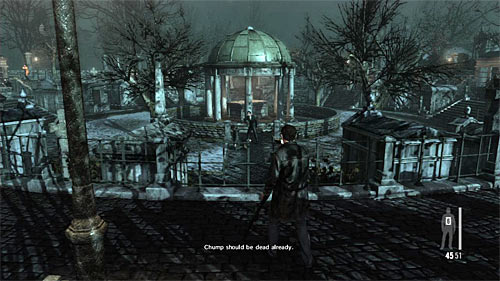
After the cut scene kill the bandit aiming at Raul in the bullet time.
Remark! During the next encounter you have to theoretically cover the Passos, but you don't have to make anything special to protect him. What is more, enemies will be interested mostly in him what makes your task even easier.
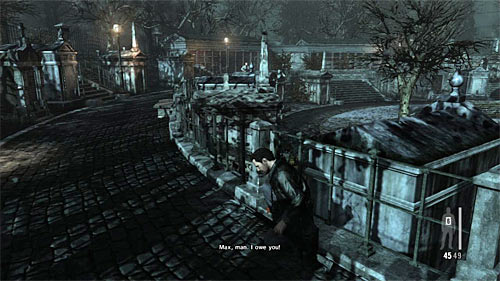
Start firing at enemies gathered here, starting from those on your left (screen above).
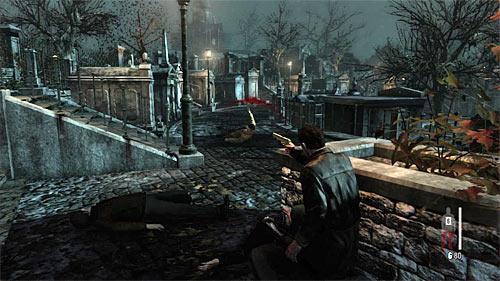
In the further part of the encounter I recommend to move clockwise. Eliminate next bandits, but be especially careful during attacking those with the better weapon. As I mentioned before, most of them will be interested in Raul thanks to which the victory will be a piece of cake.
Remark! I remind again not to approach the gate at which Passos will stand immediately after the encounter.
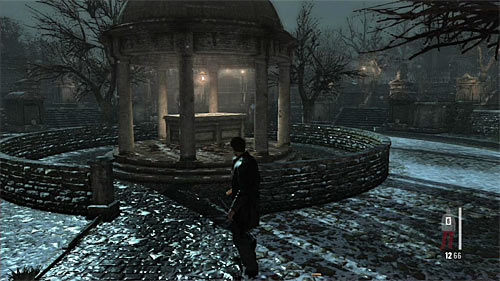
![Go to the sarcophagus in the central part of this area and search for the fragment of a weapon (1st screen) [Golden Gun - 608 Bull 2/3] - Chapter VIII - p. 2 - Walkthrough - Max Payne 3 - Game Guide and Walkthrough](https://game.lhg100.com/Article/UploadFiles/201512/2015121617425855.jpg)
Go to the sarcophagus in the central part of this area and search for the fragment of a weapon (1st screen) [Golden Gun - 608 Bull 2/3]. Stay in the lowest part of this location and find the tombstone which can be examined (2nd screen) [Clue 2/3 - Nicole Mausoleum].
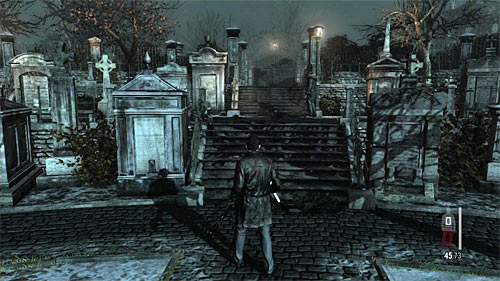
You can go to the gate (screen) at which Passos waits for you.
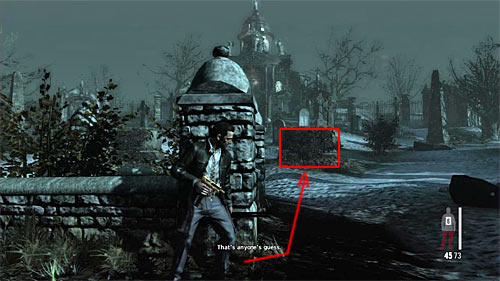
Wait until Raul starts distract the sniper at run to the right tombstone marked on the screen.
Fire several enemies who'll run out of the building. As the sniper will interest in you again in the meantime it's good to lean out only for a short time even if because of that the particular enemy will be only hurt not killed.
Prepare to repeat activities described above. This time run to the left tombstone (screen) and after hiding behind it eliminate the new group of enemies.
The last time wait until Raul start firing at the sniper. DON'T RUN to the building's entrance, but, following the Passos' advice, go on the left. You have to place yourself in the place which allow you reach the sniper (screen). Fire at him (pistol is enough) and kill him, what launches the longer cut scene.
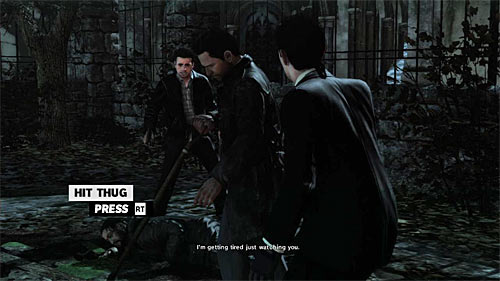
After receiving the proper information (screen) quickly press the right trigger to attack the thugs with the shovel. If you fail for the first time, you will be able to try again.
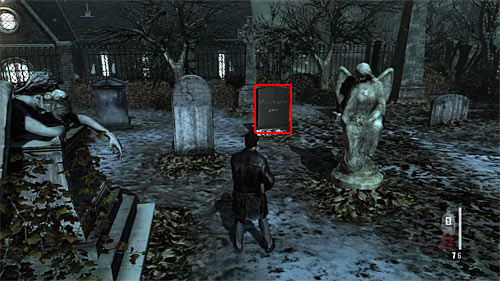
Wait until you regain full control and prepare for arrival of an enemy with the shotgun who you need to kill immediately. Before you leave this place search the cemetery on the right, specifically in the tombstone marked on the screen to collect the last clue in thus chapter [Clue 3/3 - Vinnie's Tombstone].
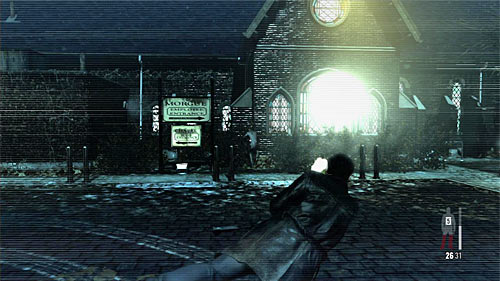
Now you can choose the path leading to the funeral home. Be careful, because this path is guarded by the guy with shotgun. Get rid of him and then attack next enemies placed on the left. I recommend to use the left building as a cover.
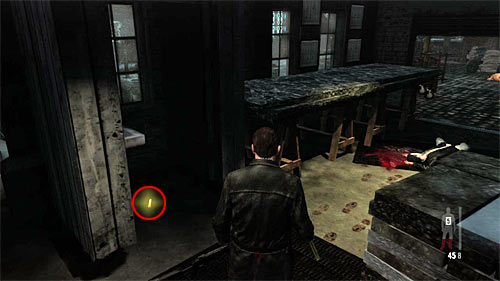
Make sure you eliminate all bandits and then search the mentioned left building. Inside you'll find painkillers and well hidden part of a weapon (screen above) [Golden Gun - Auto 9mm 3/3].
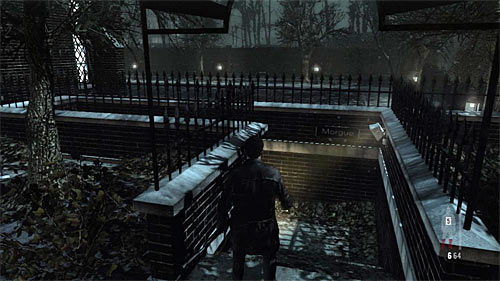
Exit the building and go right. You have to find shown on the screen stairs which lead to the mortuary.
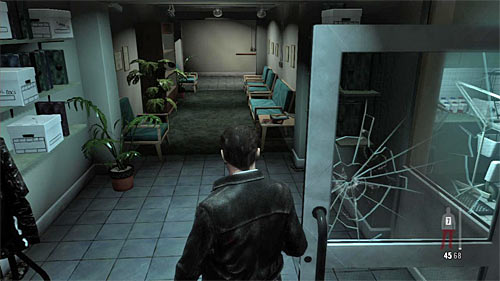
After getting there, move left and choose the good cover because after a while enemies start appearing. Depending on your likenesses use bullet time or covers. It's also worth to aim at the explosive objects what may make the encounter easier.
After the battle ends, search the whole mortuary. You'll find an interactive TV and two packs of painkillers. Go to the chapel of the funeral house.
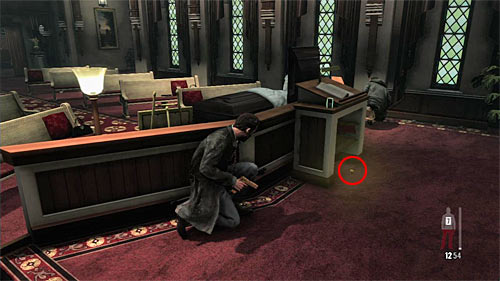
The final battle in the chapel is good to start with moving right. It let you pick up the painkillers and the last part of the gun [Golden Gun - 608 Bull 3/3].
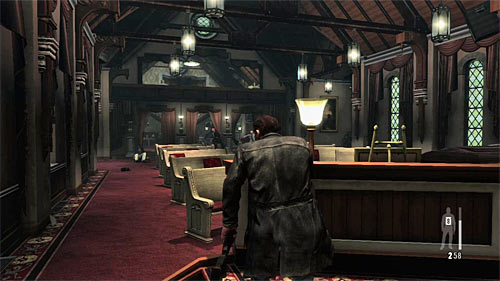
Only then attack enemies appearing in your field of vision. Eliminate all but one - ignore the guy with the shotgun standing on the upper balcony.
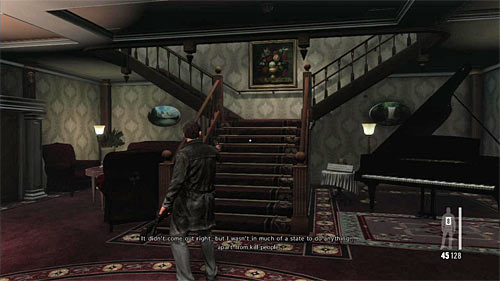
Wait until he starts reloading gun and run into him. Check the piano and choose the stairs leading to the upper balcony.
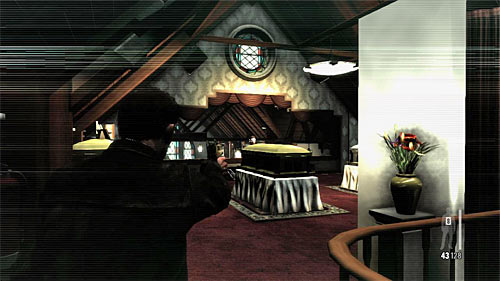
After getting there turn on the slow motion and eliminate the thug. Pick up SPAS-15 Shotgun from his dead body.
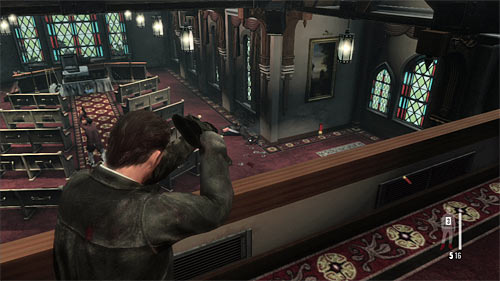
Now begin firing at thugs showing up downstairs, starting from those closest to the hiding Raul. It's also worth mentioning that hiding behind the balustrade isn't obligatory, because enemies should be focused on reaching your partner. Killing all of opponents ends the chapter.
Remark! You can't let any of thugs stay by the rostrum too long, because Raul will be killed automatically and you fail the mission.
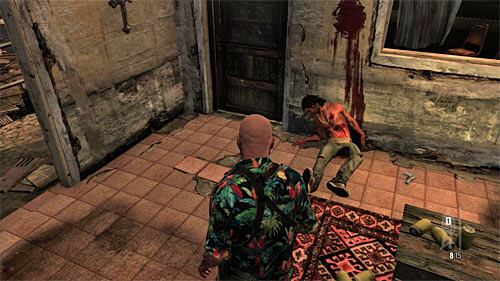
Initially you won't run into anyone so follow the path. After using the first stairs look for the painkillers. Stop when you reach the inside of the building. Examine the body (screen above) what unlocks the first clue [Clue 1/3 - Dead Gang Members].
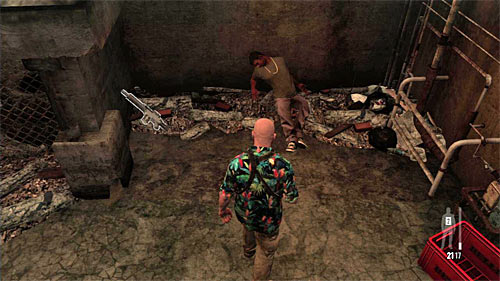
Pick up another painkillers and exit the building. Go downstairs but before you move one, turn left and search the area under the stairs. It let you find G6 Commando Rifle shown on screen. Now you can go to the next location.
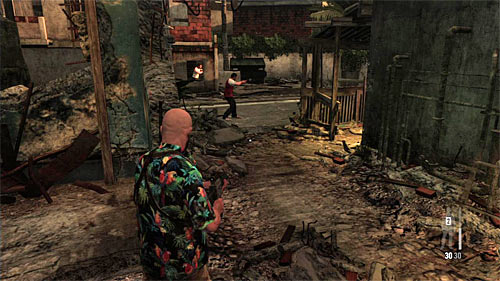
Jump down and head to the main street of the quarter where people are fighting. When you get close to this street the cut scene launches.
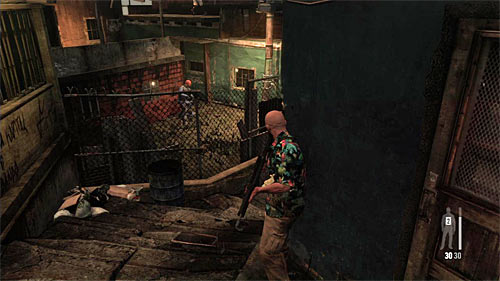
Wait until you regain control and move forward. It's better to not attack the enemies behind the wire because you can got hurt and gain nothing in return. Just wait until they go away.
Remark! During this chapter you'll meet mostly armored enemies. It's essentially to aim at their heads because otherwise even empting the whole magazine may not eliminate a single opponent.
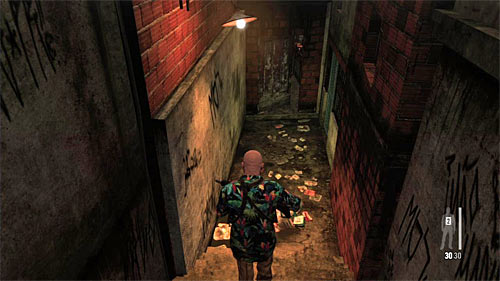
Continue the march in the narrow lanes, looking after dead thugs from which you can take ammo and guns. There'll be a cut scene on the way and the first serious encounter in this chapter begins a moment after you reach the door shown on the screen above.
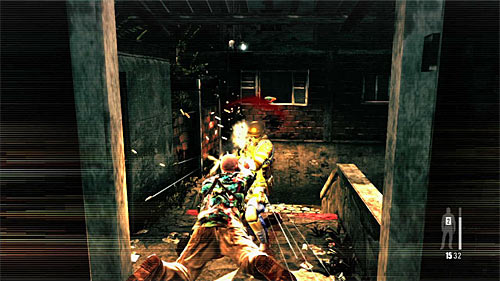
Begin from the jump at the enemy who's rushing into you. Try also eliminate his fellow, who should stand somewhere by the stairs. At the end finish off the thug on the balcony, on the right. In this case you can use covers.
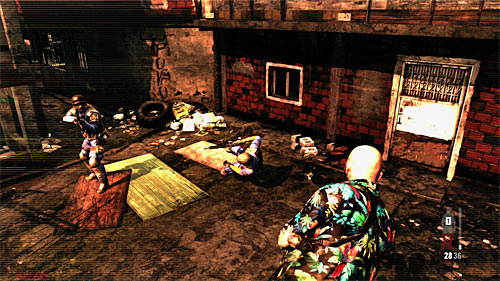
Go on the lower level and prepare for the arrival of two enemies and use the bullet time. After that search their bodies especially if you omitted my hint and didn't pick up the rifle. Additionally it's worth to pick up the M972 SMG because it won't replace the main weapon.
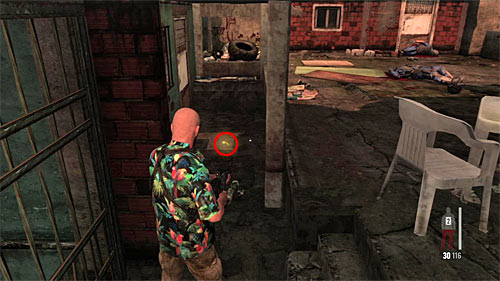
Before you move on, search the left building, there were one of the eliminated thugs on the floor. In the place shown on the screen above, you'll find the first fragment of a weapon [Golden Gun -DE .50 Pistol 1/3]. Now you can choose the lane between buildings.
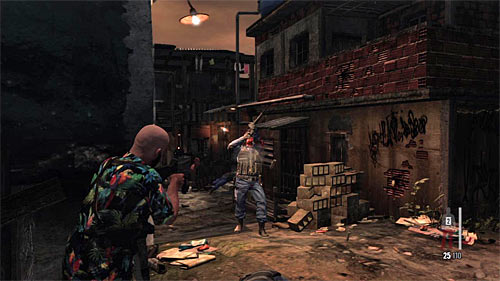
Be careful when you reach the place where the path turns left. There are two new guardians nearby. You can wait until they run at you or fire behind the cover.
![Resume the slums exploration but stop after making several steps and search the body on the right, what gives you another clue [Clue 2/3 - Dead UFE Member] - Chapter IX - p. 1 - Walkthrough - Max Payne 3 - Game Guide and Walkthrough](https://game.lhg100.com/Article/UploadFiles/201512/2015121617430266.jpg)
Resume the slums exploration but stop after making several steps and search the body on the right, what gives you another clue [Clue 2/3 - Dead UFE Member]. You can move on.
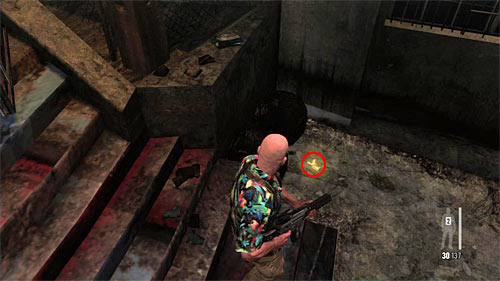
Stop when you reach the apartment in which you meet the harmless women. Enter the first room on the right (screen) which is a toilet. You will find here painkillers and a piece of a gun [Golden Gun - M972 SMG 1/3] lying on the floor. Turn on the TV and leave the apartment.
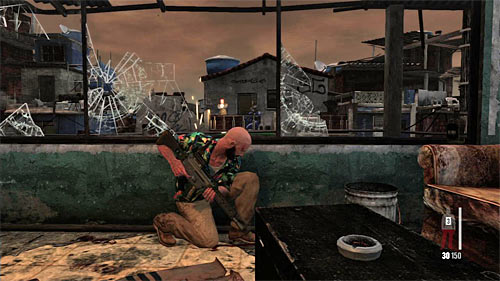
Ignore the helicopters and the mercenaries seen away and head to the stairs. After getting to the room on the lower floor hide by the shutters, because you'll come under fire. Carefully eliminate enemies without too much risk.
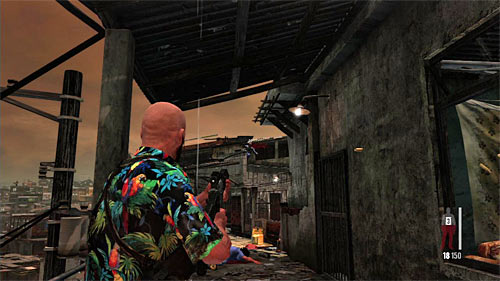
After eliminating all of enemy's units jump through the destroyed shutter and go right. Watch out on the single enemy who will suddenly appear in front of you (screen).
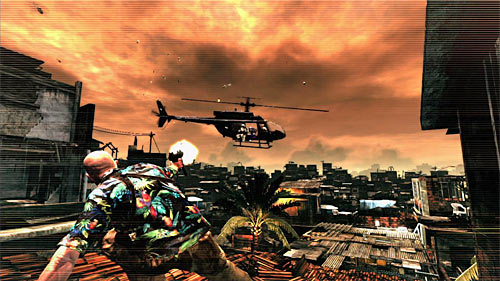
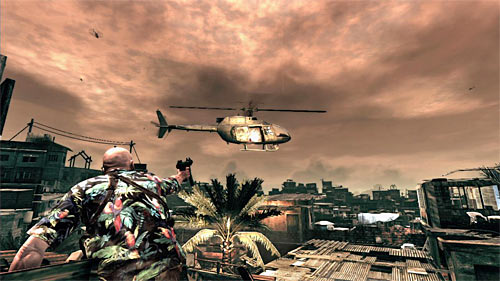
There will be a cut scene with the enemy helicopter soon. When you regain control, start attacking enemies standing on its board, using the bullet time (1st screen). After that destroy the rocket flying at you (2nd screen) - bullet time again would be helpful.

Go forward, following the path. After a while you reach the open gate and when you pass it, turn left and pick up the fragment of a gun lying by the stairs (screen above) [Golden Gun - M972 SMG 2/3]. You can move on.
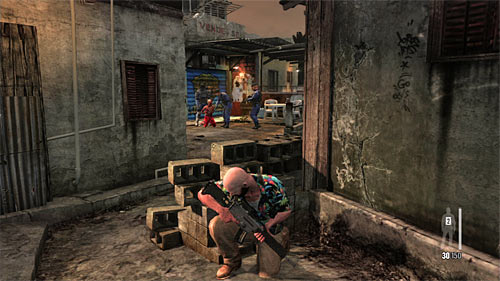
After reaching the next area, hide behind the bricks. There are 3 enemies nearby and you can attack them at once. Use the surprise and support yourself with the slow motion.
![After the encounter approach to the dead civilian and unlock the last clue [Clue 3/3 - Dead Residents] - Chapter IX - p. 2 - Walkthrough - Max Payne 3 - Game Guide and Walkthrough](https://game.lhg100.com/Article/UploadFiles/201512/2015121617430464.jpg)
After the encounter approach to the dead civilian and unlock the last clue [Clue 3/3 - Dead Residents]. Pick up painkillers from the table and go to the next location. Game will display a new cut scene.
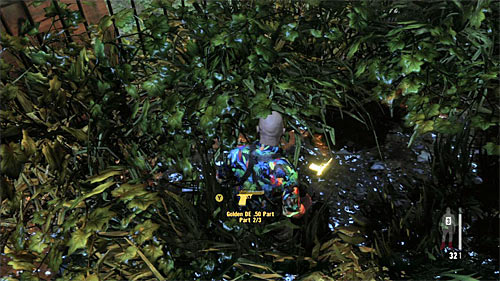
Stay in the beginning location and search the area on your left finding another fragment of a gun hid in the shrubs (screen) [Golden Gun - DE .50 Pistol 2/3].
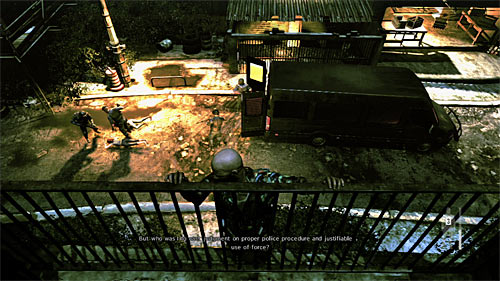
Go little further and before you use the stairs turn left (1st screen), passing the building. Another fragment of a gun is hidden by the metal gate, on the left (2nd screen) [Golden Gun -M972 SMG 3/3]. Only now return to the stairs and go up.

When you get upstairs, the game will display a new cut scene. Wait until you regain control and lean the analog stick, slowly moving to the new balcony (luckily, you don't have to bother about being spotted).
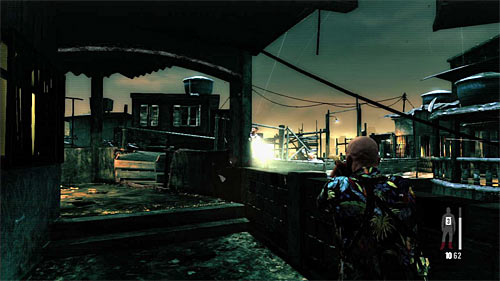
Be careful because the game will be resumed nearby the group of the "elite" enemies. Start from attacking two persons standing on the wooden bridge on the left.
Remark! Try to save ammo, because during the previous scene you've lost your main gun. I do not recommend risking and searching the dead enemies unless you have the full bullet time bar.
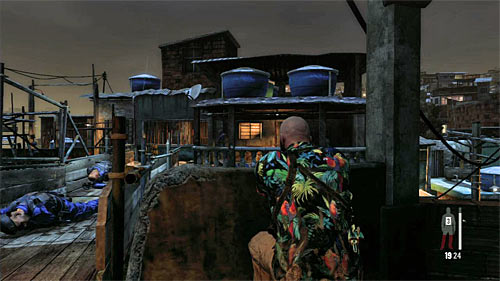
After eliminating enemies from the bridge start firing the remaining ones. Try to lean out behind the cover only for the short time, making an accurate headshots. Resume the march after securing the vicinity and necessarily pick up one of rifles.
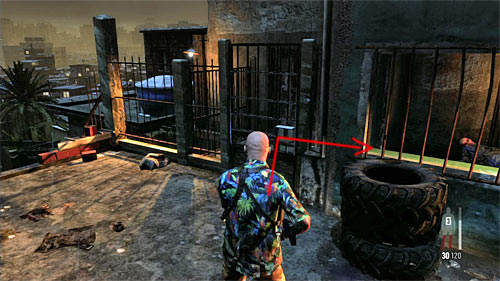
Cross the wooden bridge and stop in front of the building at which enemies were defending. Find the metal gate on the left which you can open (1st screen). After entering the building turn right and you should spot the last part of a weapon (2nd screen) [Golden Gun - DE .50 Pistol 3/3].
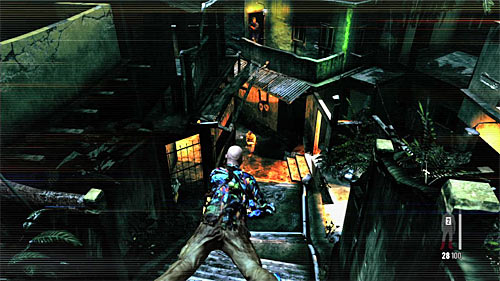
Exit the building and head to the stairs. As you can imagine, enemies will show up. After cleaning up the area resume the walk reaching an interactive door.
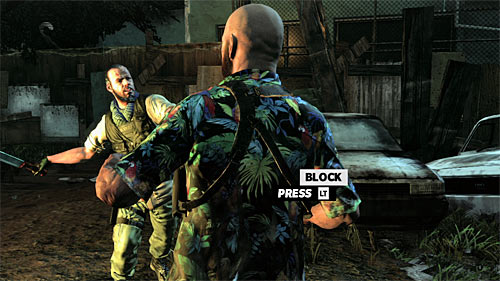
At the very end of this chapter you have a "boss fight" which means pushing the buttons in the order they will be displayed on the screen. The proper sequence: left trigger, right trigger, Y, A.
Remark! You can't wait too long with pushing the buttons, because Max will die.
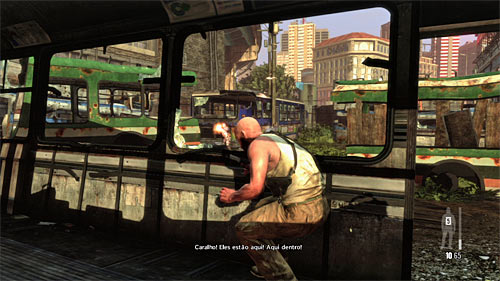
This chapter you begin inside the bus. Don't count that enemies who showed up on the square will leave it soon. What is more, if you delay too long, one of them will spot Max. So it's best to attack first.
Remark! During this chapter you can't shoot accidentally Giovanna or let any of enemies to do so because it means a failure. Luckily, besides few situations (like this with snipers, which is described below) enemies will be interested in the main character.
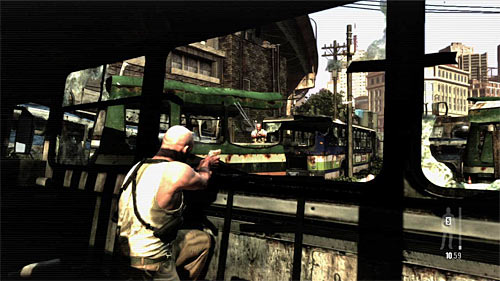
When the main battle begins, watch out on single enemies who will appear in the left bus (screen above). But opponents won't use grenades, so you can, if you want, stay in the bus all the time.
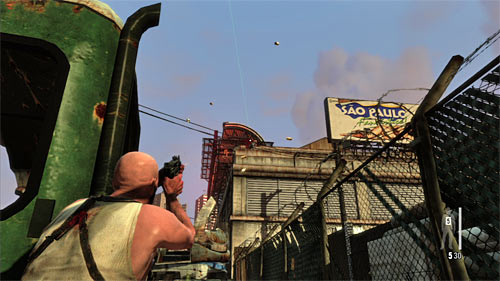
After the cut scene run forward and try to eliminate ASAP two snipers on the roof of the right building. Luckily, you don't have to search for the new weapons, because the pistol is enough to do that.
Remark! It's important to eliminate snipers within few seconds, otherwise they'll kill Giovanna.
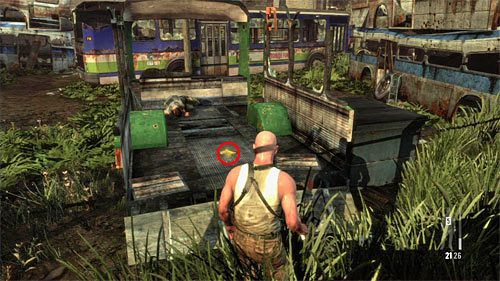
After the encounter stay for a while in the starting location. Pick up ammo and weapons and search one of the buses' wreck on the right. You will find fragment of a gun [Golden Gun - FAL Rifle 1/3].
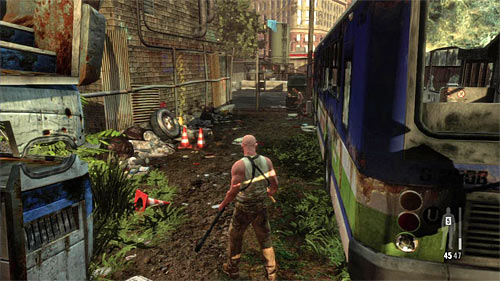
You can choose the left path between the buses. Join the Giovanna to enter the next area.
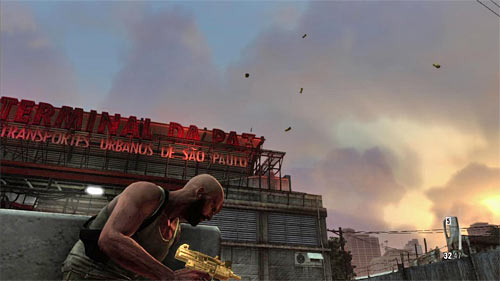
Begin the new encounter from eliminating another sniper standing on the roof of the right building (screen).
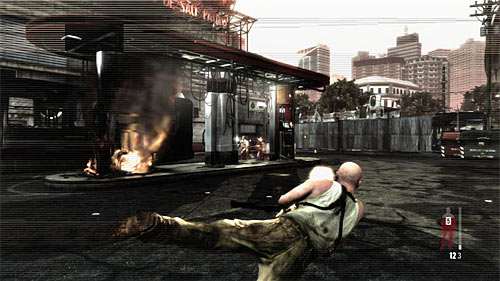
You can act on two ways. If you choose lot of bullet time jumps, use the left part of the square. In danger, use the parapets as covers. It's worth also to fire at the gasoline station, of course when there will be enemies nearby.
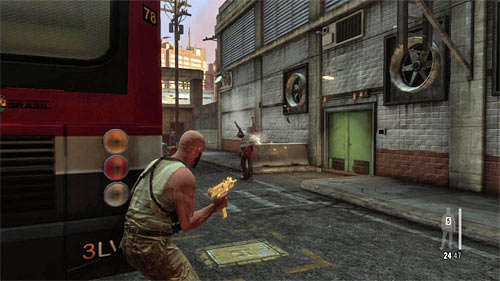
If you prefer using the safe covers, I recommend to not choose those parapets, because enemies use grenades very eagerly. Instead of that, it's much better to run to the bus parked on the right from the gasoline station and use the vehicle as a cover. Remember to observe the station and go away in case of explosion.
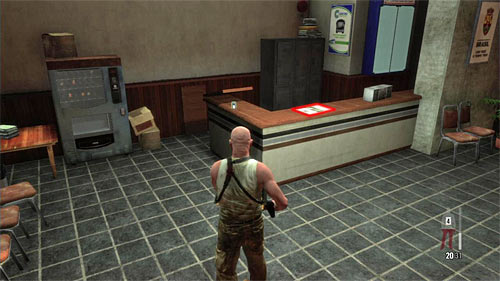
After the encounter run to the closed gate and check the small lodge on the left. Inside you'll find painkillers and the first clue [Clue 1/2 - Office Newspaper].
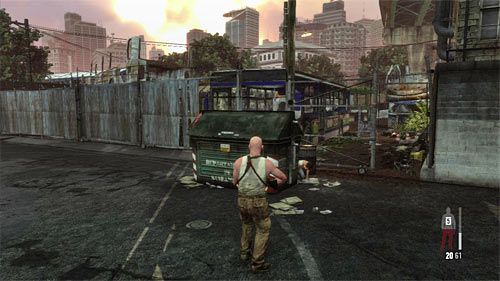
Pick up ammo and return to Giovanna, who should hide behind the container nearby the beginning location (screen above). Now the game displays long cut scene.
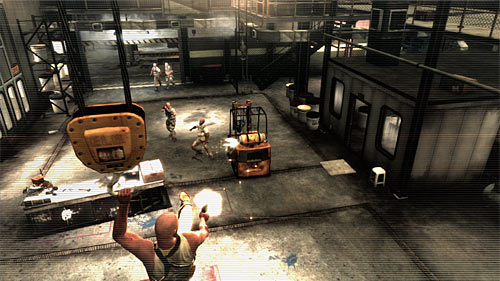
Be ready to begin fire and try to eliminate as many enemies as possible before Max touches the ground. You can get rid of opponents in the first row easily, if you aim at the tank fuel of the fork-lift truck. After landing kill the remaining thugs.
![Pick up ammo and guns (remember that in the previous scene youve lost your main gun) and search for a small room (screen) where you find a fragment of weapon [Golden Gun -M4 Super 90 Shotgun 1/3] - Chapter X - p. 1 - Walkthrough - Max Payne 3 - Game Guide and Walkthrough](https://game.lhg100.com/Article/UploadFiles/201512/2015121617430797.jpg)
Pick up ammo and guns (remember that in the previous scene you've lost your main gun) and search for a small room (screen) where you find a fragment of weapon [Golden Gun -M4 Super 90 Shotgun 1/3].
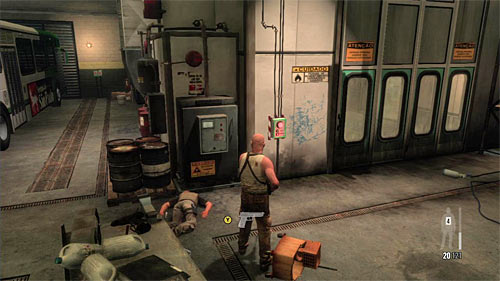
Make sure you've searched all the warehouse carefully and find an interactive button (screen). After unlocking the passage, go to the next location where another cut scene waits.
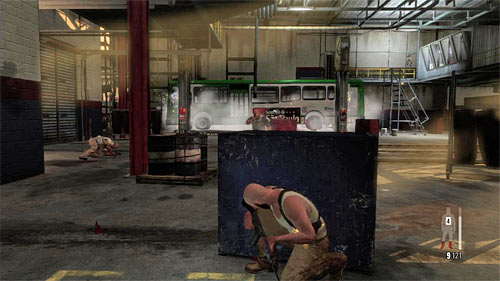
When you get there, start firing at enemies. Especially, get interest in the switch seen in far away, because hitting it make the bus fall down. Of course wait with that, until there'll be enemies under.
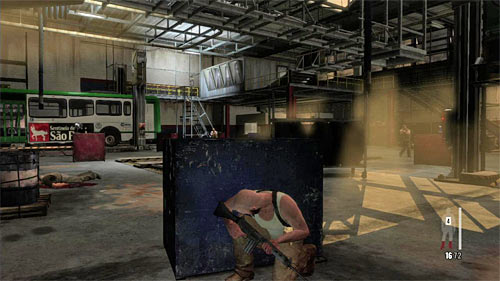
Watch out for new enemies, who will appear in the further part of the encounter on your right. Make sure they won't surprise you.
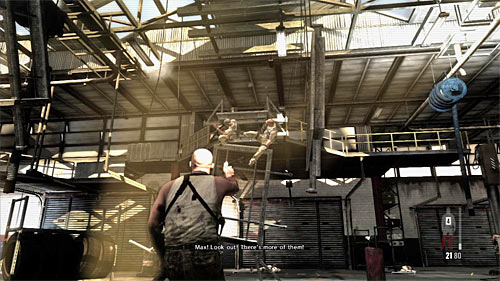
After the main battle, you'll be forced to save Giovanna. When you regain control, aim at the unstable construction on which two enemies are standing and fire what will cause a collapse.
Remark! If you don't make it in the time you have, the Giovanna will die.
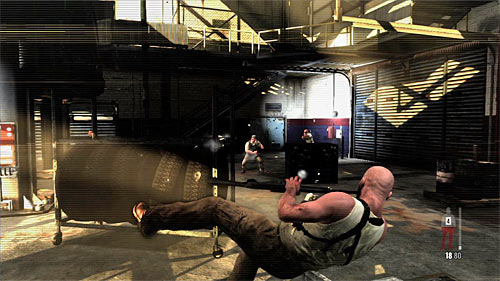
At the very end there is a short encounter with the mercenaries who will appear in one of the warehouse's corners (screen). Similarly to previous battles - you have to decide if you want to make bullet time jumps, or use covers.
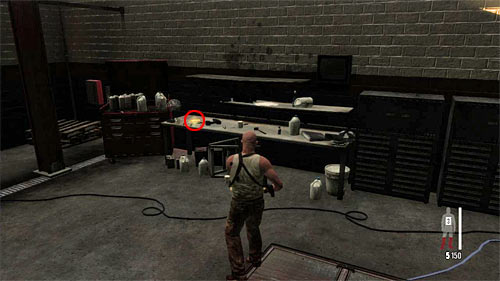
Ignore the stairs for a while and search around, picking up the painkillers (inside the small office), guns and ammo. Find also a fragment of a weapon, lying on the workshop's table (screen) [Golden Gun - M4 Super 90 Shotgun 2/3].
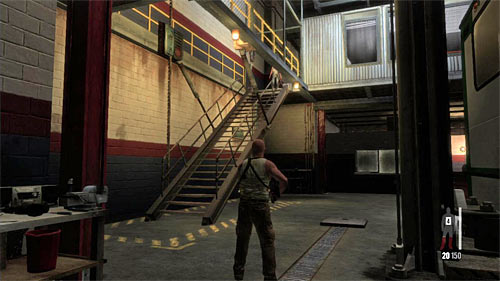
Only now go upstairs to the upper balconies (screen). On the way check the right room in which you find an interactive TV and painkillers. Return to the main corridor and resume the march to the neighboring warehouse.
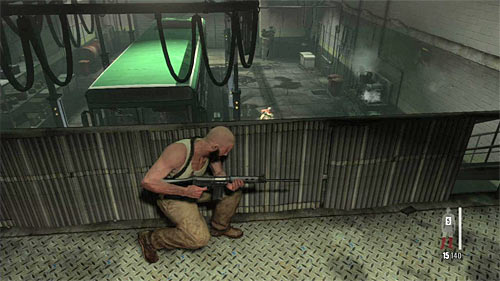
Place yourself on the balustrade and attack enemies downstairs. During the encounter guard the right stairs and don't let anyone get on your floor. Don't care about grenades, because none of them should reach your place.
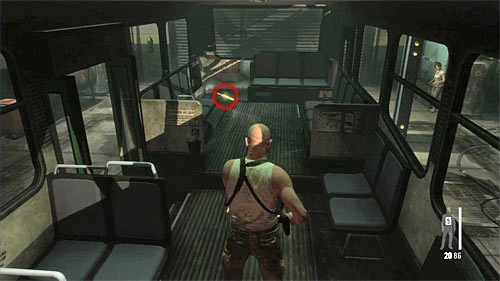
After the encounter watch the cut scene and go downstairs. Enter the bus parked in the central part of this warehouse and find the piece of a weapon (screen) [Golden Gun -FAL Rifle 2/3]. You can go to the exit doors at which Giovanna is standing.
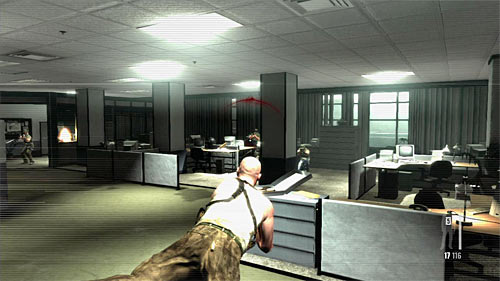
Go to the next floor. Here you will have very difficult encounters and theoretically you can make slow motion jumps, but they are very risky in here. Nevertheless, if you want to do so, make sure that you land behind the cover every time.
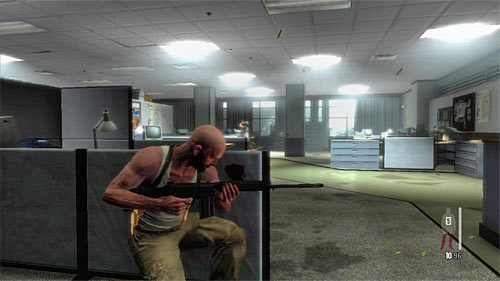
I recommend to turn left twice just after using the stairs and hide behind the furniture (screen). Notice, that on the left you have a wall, so enemies will be running only from the front. And as they won't use grenades, the elimination should be easy.
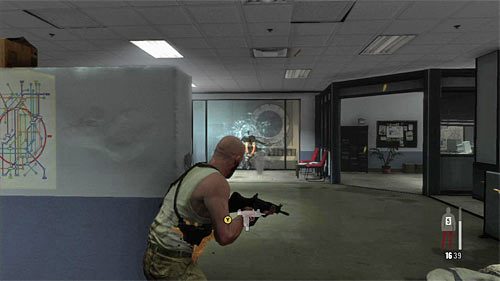
In the further part of the encounter go little forward and hide behind the left wall (screen). At the end get rid of the enemy standing before the glass wall and the mercenary at the left stairs.
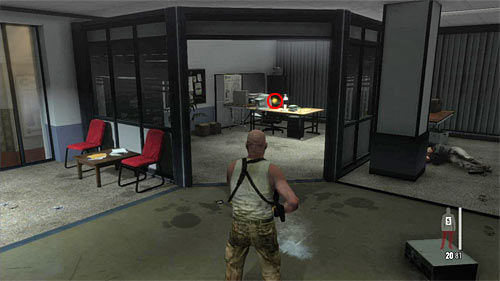
As usual, it's good to search this area. Go to the office in the right upper corner of the main room (screen) and pick up painkillers and the new fragment of a weapon [Golden Gun - M4 Super 90 Shotgun 3/3].
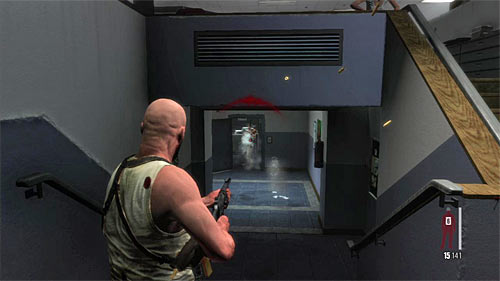
Now you can head to the stairs at which Giovanna should stay. After getting on the ground floor be ready to quickly do in single enemy, who will appear in front of you.
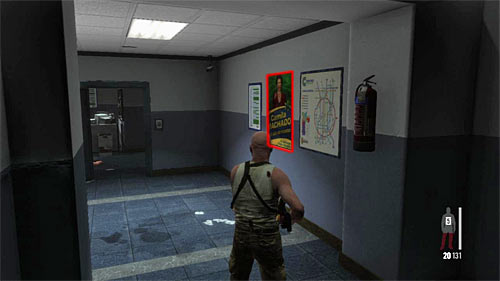
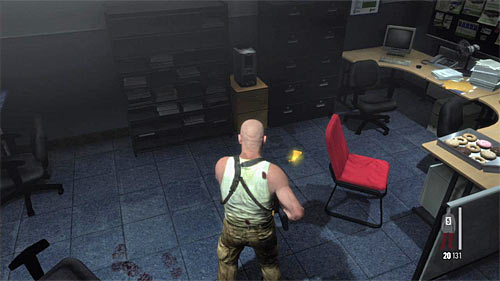
I propose to collect now two remaining collectibles in this chapter. Start from examining the poster on the right wall (1st screen) [Clue 2/2 - Ad Campaign Poster]. Then enter the room where the last enemy was hiding and pick up the last part of a weapon from the ground [Golden Gun -FAL Rifle 3/3].
Push the button in the room with the last collectible and get ready to save Giovanna once again, quickly killing thug aiming at her.
Remark! You have to kill the thug before he fires or the woman dies and you fail the mission.
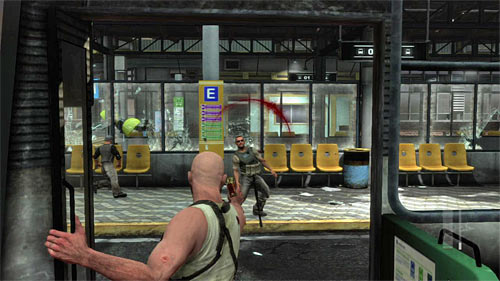
Now you there will be rather long scene with the bus escape, very similar to the chase on the river from the fifth chapter. Make yourself busy with eliminating passing enemies using the bullet time. Don't care if you can't kill all of them - it's not required to success.
Remark! Remember, that during this and the next scene you don't have to bother about ammo so always make a longer firing. Also the bar of bus' durability is big - you would have to fight very badly to make it destroyed.
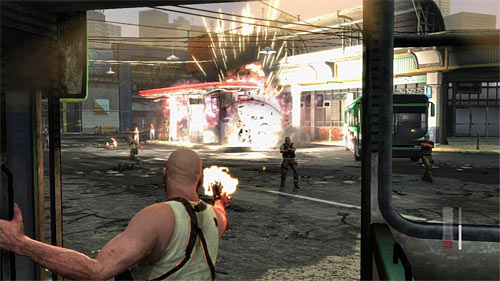
Bus conducted by the Giovanna will pass the gasoline station, so it's worth to aim at the petrol pumps to cause an explosion!
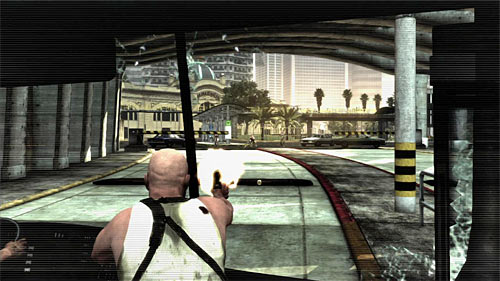
Be careful, because at the exit from the tunnel enemy with the rocket launcher appears. Make sure that you have bullet time turned on and fire at the missile.
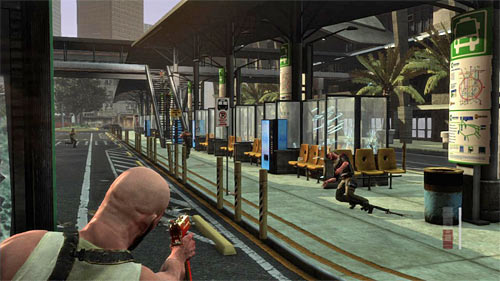
At the ending part of the ride eliminate enemies standing on one of the platforms, remembering also about those running downstairs.
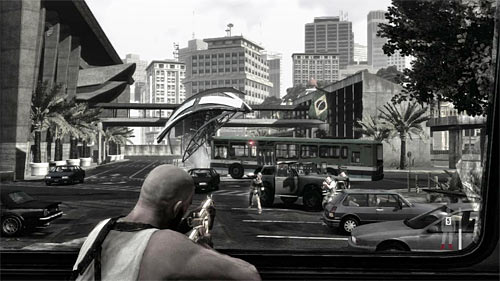
Final battle of this chapter (after the Giovanna's escape) isn't too difficult, but very important is to lean out behind the cover only for a short time and heal the Max every time he loses more than a half of his life bar. Begin from destroying the grenade thrown at you.
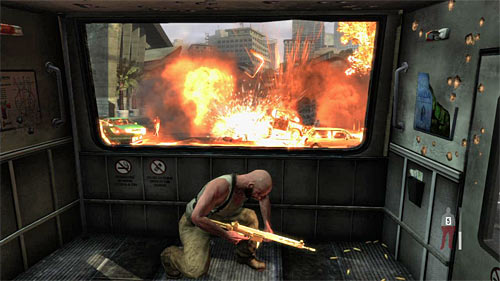
Begin eliminating enemies. Focus on the area in front of you, because only there enemies with grenades will appear. Try not let them make throws or destroy grenades before the bombs reach the bus. Encounter will end soon.
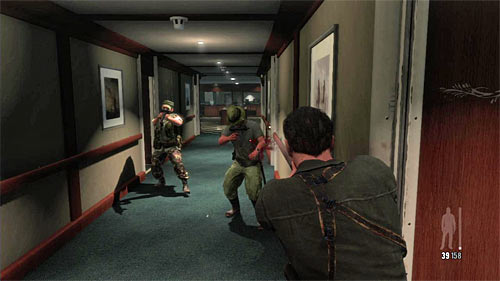
Wait until two enemies show up in the main corridor and only then lean out to eliminate them.
Remark! During this chapter it's worth to save painkillers, because you'll find less of them than in the previous missions. And more often you'll get into situations in which you can easily lost lot of health.
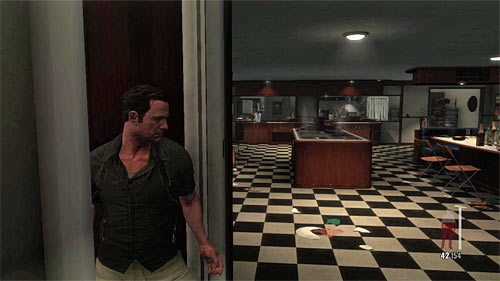
Start attacking next enemies. The good idea is to move little forward and hide by the entrance to the other cabin. What is more, it's worth to aim at the extinguishers at both entrances to the kitchen, what will blind your enemies for a while. At the end approach to the kitchen and eliminate the rest thugs. After the encounter pick up ammo and weapons.
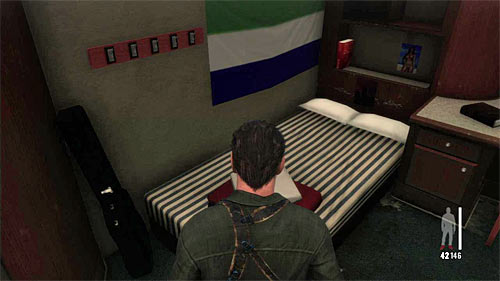
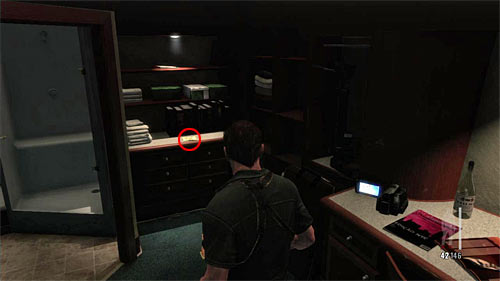
I suggest now return to the beginning location to search all six cabins nearby. What you can find:
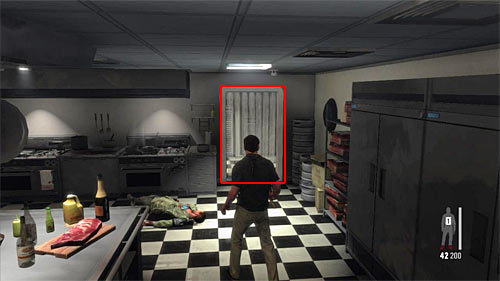
Now you can return to the kitchen. Firstly choose the passage shown on the screen above which leads to the freezer. Inside you will find fragment of a weapon on the ground [Golden Gun -Super Sport 1/3].
Exit the freezer and choose the left exit from the kitchen. After an unsuccessful attempt use the radio and head to the passage which was shown in the short film. It'll let you reach the engine room.
After regaining control, make a fast jump forward and try eliminate all thugs in a flight. If you can't, finish them off after landing, before Max stands up.
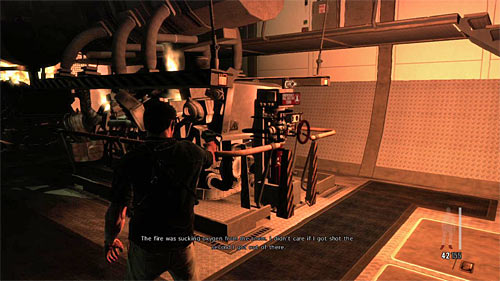
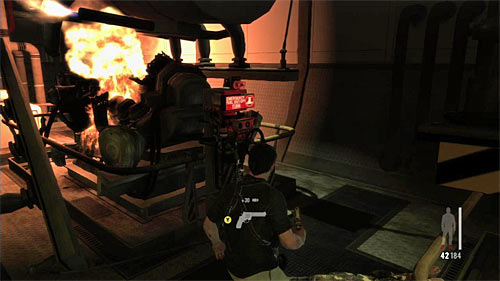
Now you have to quickly reach two valves shown on the screens above and use them (Y button). First valve (1st screen) is on the right (you have to move back a little) and the second one (2nd screen) is placed in the middle part of the engine room on the left.
Remark! You have to turn off both valves before the air run out. In other case, Max will die.
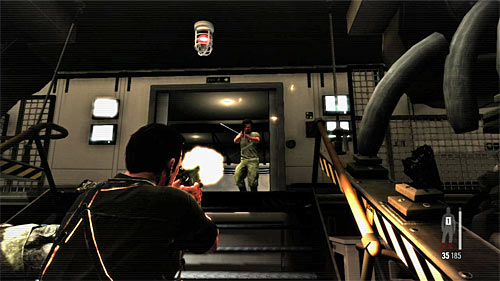
Be careful, because when the doors visible far two enemies will rush at you. Try to eliminate them without losing health.
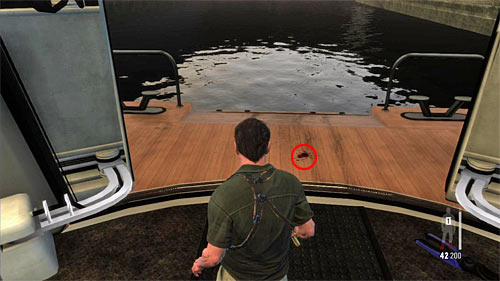
Move forward. Wait until the hatch opens and before you move on, check the stain of blood (screen) what gives you an another clue [Clue 3/8 - Blood Trail].
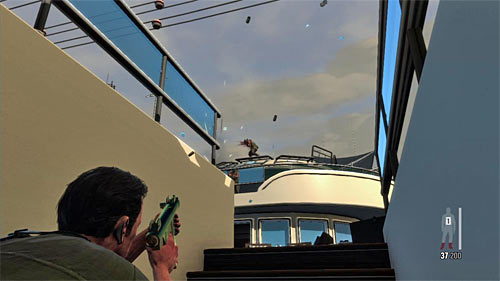
Choose random stairs leading on the upper board, but stop in the middle of the way and crouch (press left analog stick). From such position try eliminate new enemies who will show up over you (screen). You can also try to make few slow motion jumps, but it would be very risky (no good covers).
![Go upstairs but before you use the main entrance, check the are on the right, noticing another fragment of a weapon (screen) [Golden Gun - Super Sport 2/3] - Chapter XI - p. 1 - Walkthrough - Max Payne 3 - Game Guide and Walkthrough](https://game.lhg100.com/Article/UploadFiles/201512/2015121617431182.jpg)
Go upstairs but before you use the main entrance, check the are on the right, noticing another fragment of a weapon (screen) [Golden Gun - Super Sport 2/3].
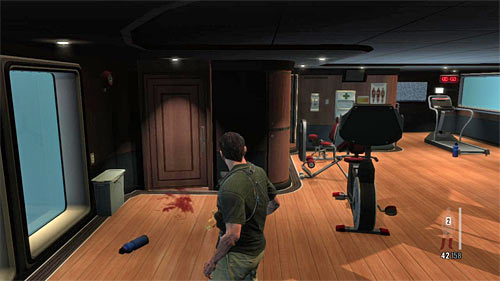
Only now enter the room similar to the gym. Look for the painkillers and then approach the doors at which stains of blood are noticeable (screen).
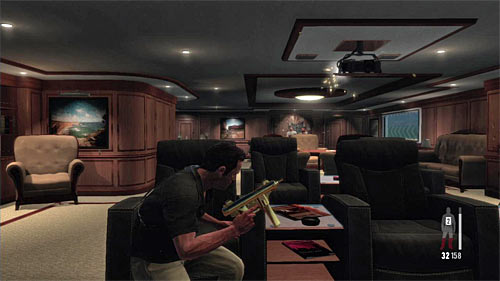
Attack enemies who were looking for something in one of the walls but be prepared that reinforcements can arrive from the left. You can use covers or make a slow motion jumps.
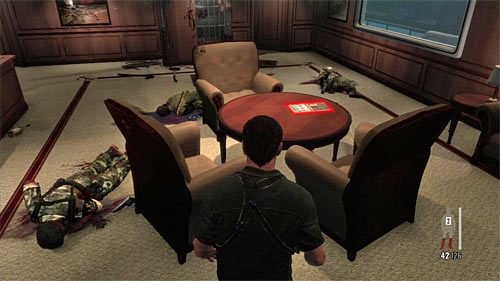
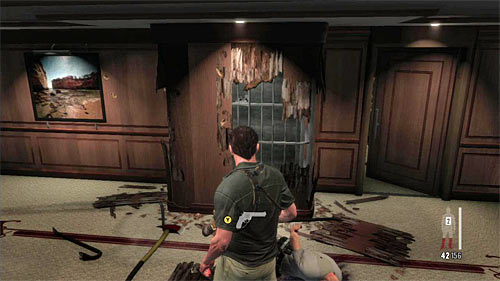
Now I recommend to search all this room and find two clues. Look at the newspaper on the round table (1st screen) [Clue 4/8 - Discarded Newspaper] and the wall which was searched by the shot thugs (2nd screen) [Clue 5/8 - Pried Wall]. Now you can use the right exit and go through the bedroom.
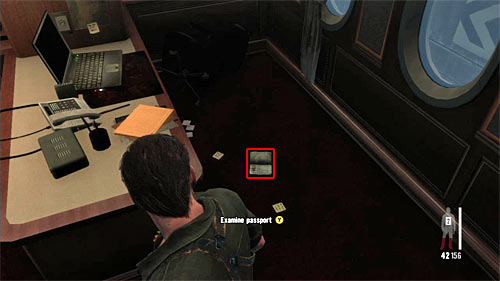
Three new cabins in front of you. In the first one you find a passport by the desk, which is another clue [Clue 6/8 - Daphne's Passport]. Second cabin contains only painkillers.
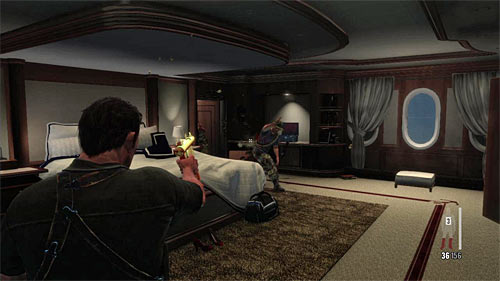
Inside the third one, you find three enemies, so when you enter the room, you have to kill them. Be careful, because not all enemies will attack you at once. The third one should be hid in the toilet, so don't let him surprise you.
![After eliminating all enemies, look at the jewelry box shown on the screen, what is an another clue [Clue 7/8 - Daphnes Jewelry Box] - Chapter XI - p. 2 - Walkthrough - Max Payne 3 - Game Guide and Walkthrough](https://game.lhg100.com/Article/UploadFiles/201512/2015121617431279.jpg)
After eliminating all enemies, look at the jewelry box shown on the screen, what is an another clue [Clue 7/8 - Daphne's Jewelry Box]. You can exit the cabin and resume your march.
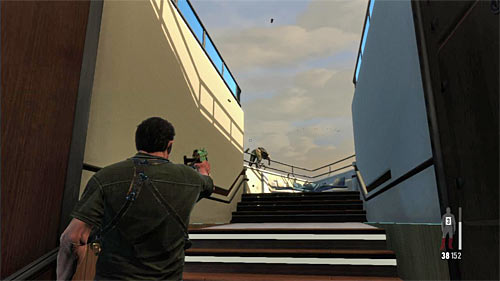
Be prepared because few enemies arrive on the board soon, and it'd be good to attack them before they notice Max.
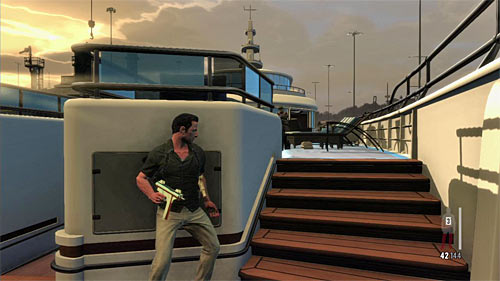
Go forward, turn and place yourself in the place shown on the screen and try to eliminate all opponents visible in the far. Simultaneously look at the left stairs so no one attack you from the flank.
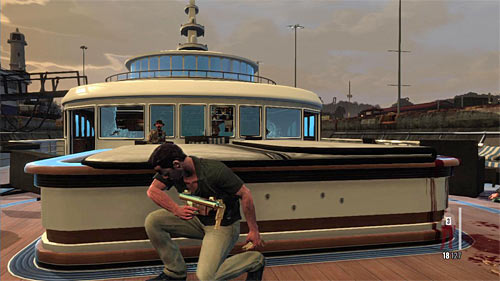
After initial cleaning up, approach the jacuzzi shown on the screen, and continue firing from this place, aiming also at enemies inside the room. You can make bullet time jumps, but as I mentioned, it's risky.
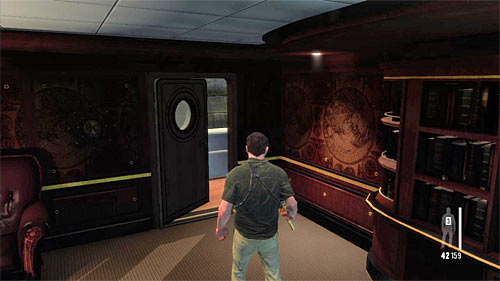
Enter the mentioned room and move forward finding painkillers on the way. Regenerate, replenish ammo and open the hatch shown on the screen.
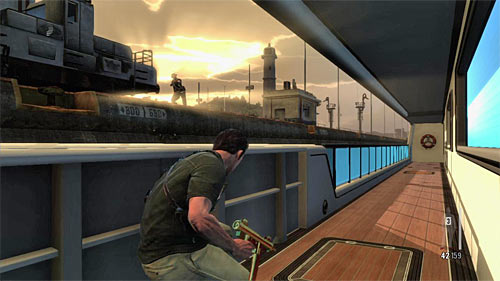
Quickly hide behind the left balustrade and start from eliminating the single opponent who will show up on the left side.
Remark! Don't run to the exit on the other end of this balcony, because the further part of the balustrade is glazed and you'll be an easy target. What is more, you'd have to get rid of those thugs standing on the ground later too.
Then fire at enemies who will arrive in a vehicle. Good idea is to fire at the vehicle, which explosion kills all passengers and some passers-by.
At the end eliminate enemies who appear far. It's worth to use good SMG or the rifle and lean out behind the balustrade only for a while with the slow motion. Don't leave this place until you'll be sure that all enemies are eliminated.
After reaching the new room, you can examine the piano, but more important is picking up two packs of painkillers from the table. Carefully approach to the random stairs leading to the highest board.
Unfortunately, in this area, you can't use the tactic of slow elimination. So after using the stairs I recommend to make a well aimed slow motion jump. Try to kill enemies during the flight and land in some safe place.
Remark! Make sure you won't die in here, because you'll be forced to retake the previous encounter (those with hiding behind the balustrade).
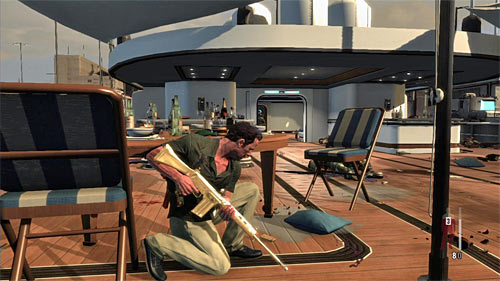
Watch out for doors, which opens after a while. You don't have to kill enemies in the next room, because the doors will shut again, and you can prepare calmly to the next encounters.
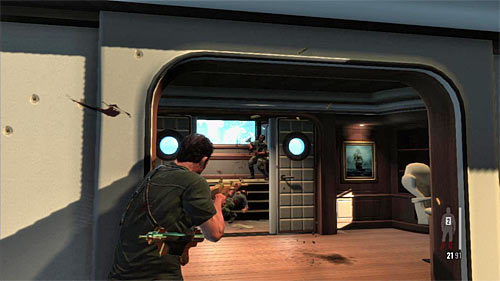
Approach the automatic doors, stand by them and eliminate the remaining enemies. Repeat with the second doors, firing at opponents standing on the captain's bridge (screen).
Remark! Don't head to the captain's bridge too early, because there is a one more secret to discover.
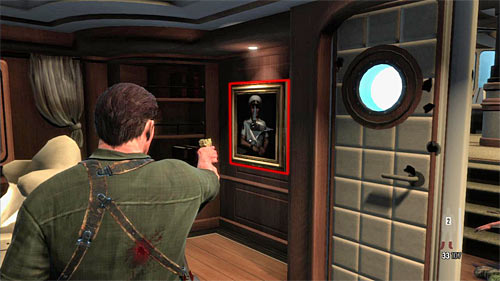
Stop in the small room next to the captain's bridge. Find two packs of painkillers and then destroy the painting, marked on the screen above. It reveals the safe, from which you can take fragment of a weapon [Golden Gun -AK-47 1/3]. Only then enter the captain's bridge, what launches the longer cut scene.
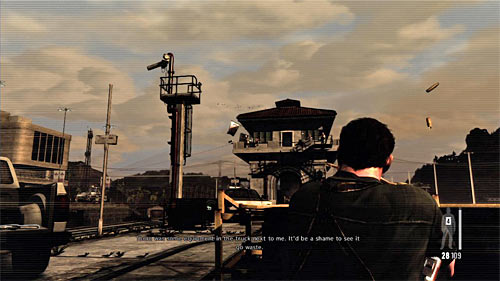
After regaining control, you can act on two ways. If you have good weapon to long distance fight (any rifle) you can attack enemies on the far balconies at once.
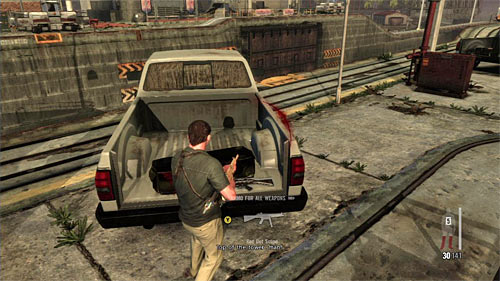
But if you don't, consider quick run to the pickup on the left, from which you can take MPK SMG with the laser sight. What is more, at the pickup you find ammo and painkillers. Very important is to immediately return to the start location, avoiding any serious wounds.
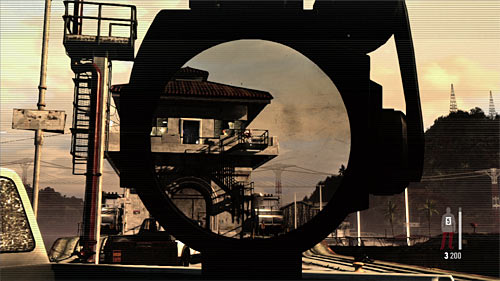
After eliminating the first group, game display the cut scene with the Passos' charge. Don't join him, for now it's too dangerous. Much better is to stay where you are and continue firing.
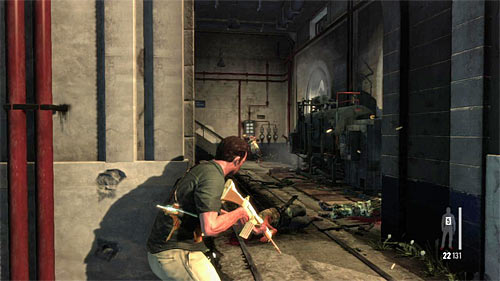
Only after securing the upper balconies move forward, on the way finding the second pickup with the supplies (new weapons, ammo, two packs of painkillers). Get rid of enemies standing by the entrance to the building. After watching another cut scene eliminate another group of enemies (screen).
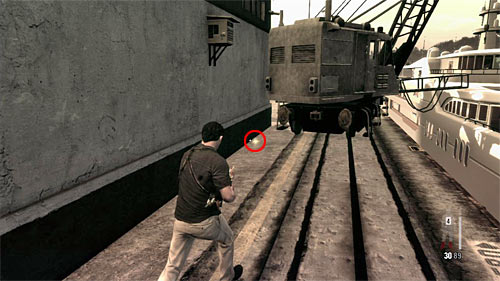
Now return to the beginning location and move left. In the place shown on the screen above, you find another part of a weapon [Golden Gun - AK-47 2/3].
Remark! Theoretically, you could pick up this collectible during the previous fights but then you'd have to move under the great fire and, probably, reload the checkpoint after getting the fragment of a gun.
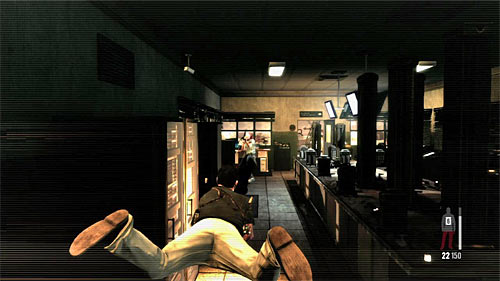
Now you can return to the building which is your actual goal. Pick up painkillers and choose the stairs leading on the top of a tower. After getting there, use the slow motion and eliminate all enemies. Make sure it's safe now and go on the balcony.
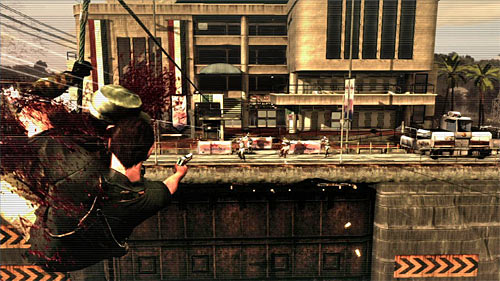
After regaining control start attacking enemies visible in far. As in the similar sequences, try to do in all of them before Max lands, because otherwise it'll be much more difficult.
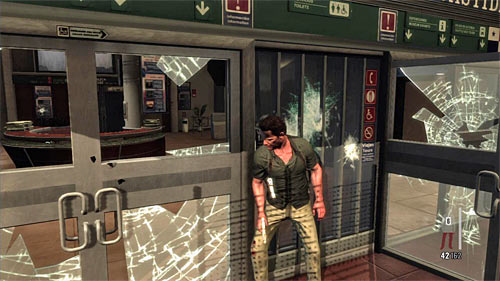
Secure the area around the "landing zone" and head to the main building. I recommend to set yourself by one of the entrances and eliminate enemies inside behind the safe cover. But you can also jump inside with the bullet time on and do them in.
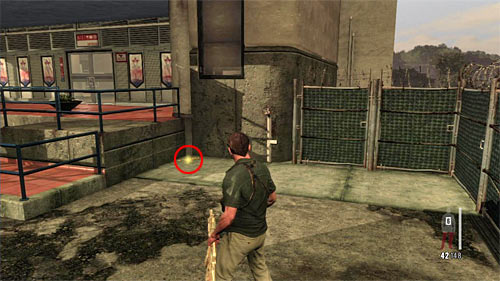
Make sure you're outside the building and check the area on the right from your landing place. In the place marked on the screen you find a part of weapon [Golden Gun - Super Sport 3/3].
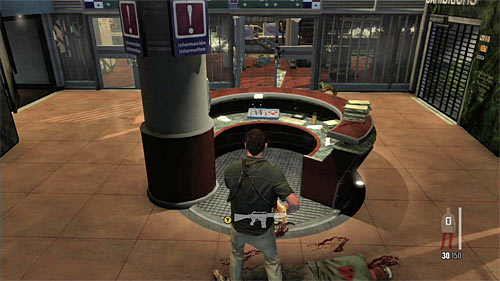
Search dead bodies for ammo and guns (remember that you've lost your main gun), enter the building and look around, what gives you two packs of painkillers. Then move to the control panel shown on the screen.
Now you can use the unlocked right passage, reaching the stairs leading upstairs. Do not hurry, because you'll run into a single enemy you have to do in immediately.
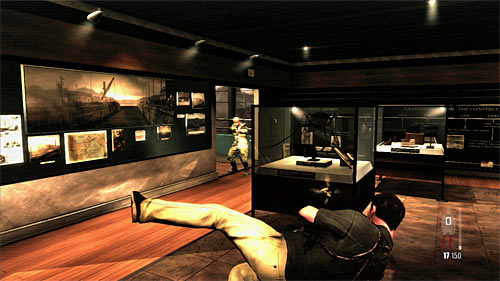
Fire from the distance enemies standing on the floor and move forward. Approach carefully to the hall with exhibits and get rid of next enemies. At the end secure the path leading to the next floor, but don't go there now.
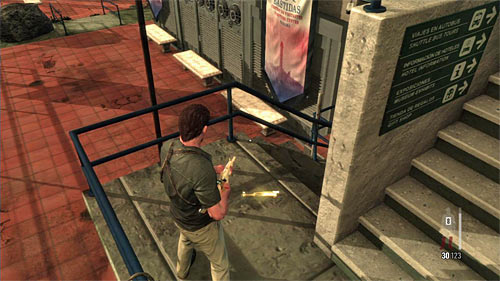

Return to the stairs you use to get here. Find the smaller stairs with the blue balustrade (1st screen) and go down. After a while look for the part of a weapon (2nd screen) [Golden Gun - AK-47 3/3].
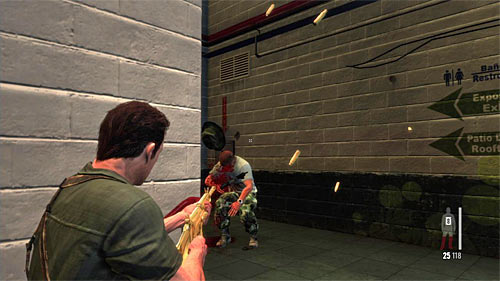
Return to the exhibit hall and go upstairs. Ignore the empty cinema hall and head to the stairs. Again watch out for a single bandit.
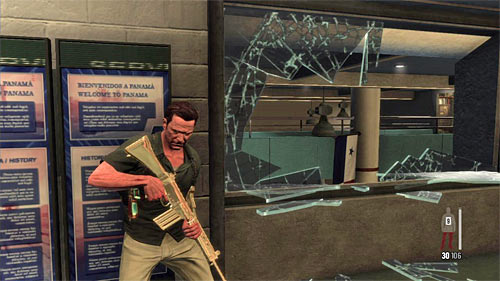
Check the side corridor for painkillers and only then finish the climbing up on the new floor. As the previous time, start from firing at enemies visible far. Be careful also after reaching the glazed corridor, because on the left balcony (screen) enemies may hide.
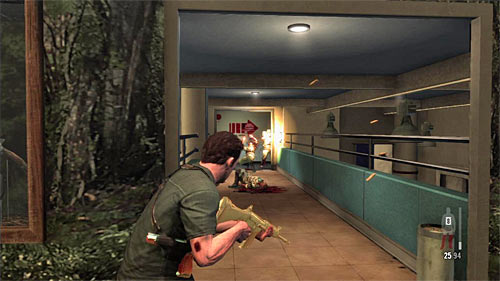
For a while ignore the hall dedicated for the tourists and secure the path (screen) leading on the roof. Traditionally don't choose it immediately, but examine the floor first.
![Return to the main hall on this floor and look at the exhibition (screen), what unlocks the last clue [Clue 8/8 - Visitor Center Display] - Chapter XI - p. 4 - Walkthrough - Max Payne 3 - Game Guide and Walkthrough](https://game.lhg100.com/Article/UploadFiles/201512/2015121617431720.jpg)
Return to the main hall on this floor and look at the exhibition (screen), what unlocks the last clue [Clue 8/8 - Visitor Center Display].
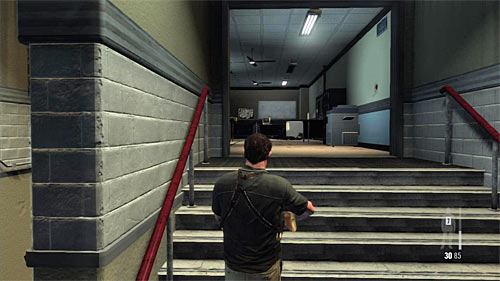
You can return to the secured path. Use the stairs. When you reach the highest floor, the game displays a cut scene and ends this chapter.
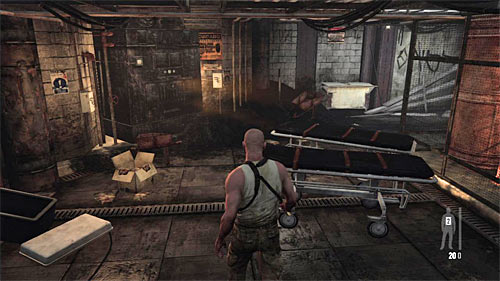
Move forward. Initially you won't run into any enemies. After the cut scene with enemies throwing the bags to the stove examine the gurneys shown on the screen, what gives you the first clue. [Clue 1/6 - Gurney].
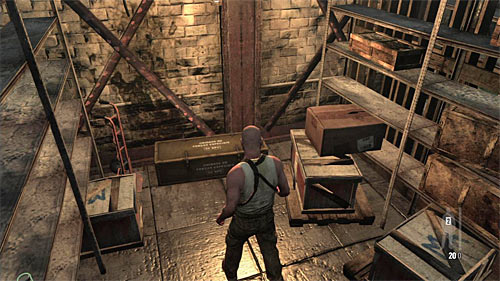
Use the doors, and after getting into the small room open the first metal chest on the left. Pick up painkillers. The chest is another clue [Clue 2/6 - Ammo Crate]. You can move on. Max will automatically use the elevator to reach the new floor of the hotel.
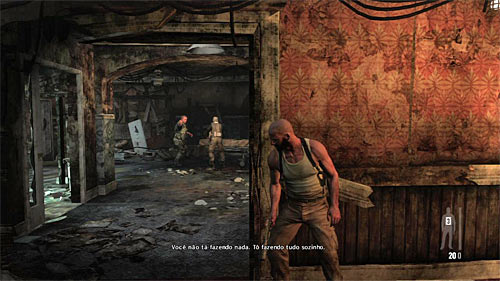
Place yourself by the entrance to the room where you see the first enemies. You can attack them at once or wait until one of them get closer to you.
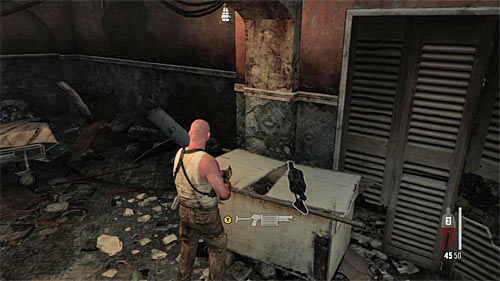
Of course, you have to take into consideration that the fight noises will encourage other enemies to run here. You can pick up a rifle from the dead enemy of interest in the grenade launcher lying on the table on the right (screen above). During the battle use covers and do not risk too much.
Move slowly forward, reaching the hole in the wall (screen). You have to be careful, because besides enemies noticeable far some additional may use the left passage. I don't recommend to choose this path for yourself because there are no covers.
Continue firing until you secure this part of the floor. Last enemies will appear probably by the narrow passage (screen).
Remark! You should know by now that you shouldn't leave the area of fights too early. So search carefully the floor.
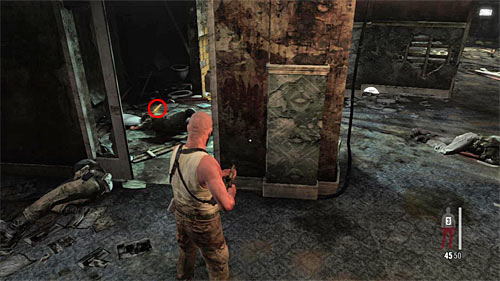
Pick up ammo and return by the beginning location. You have to find the broken toilet in which fragment of a gun is hidden [Golden Gun - RPG 1/3].
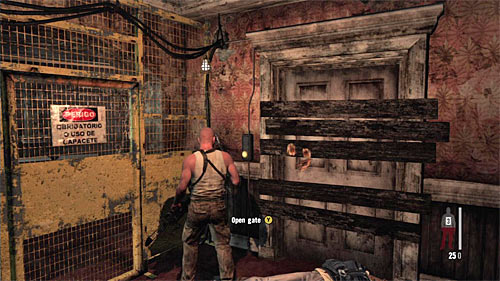
Go to the passage mentioned before, at which last enemies appeared, and after reaching the closed gate push the button on the right. Prepare good gun and open the gate, reaching the new region.
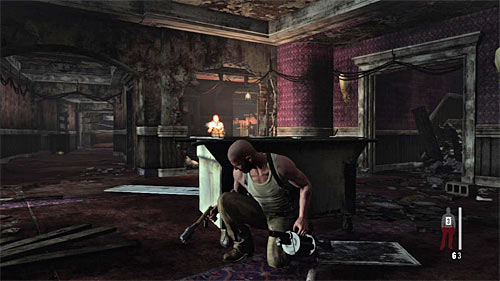
Stay behind the default cover and eliminate thugs running at you. Then fire at their fellows staying far with the rifle or grenade launcher.
Stand CAREFULLY by the left corridor and attack the enemy standing far. As this opponent use the LMG rifle you have to be very cautious and use the bullet time to lean out and fire.
![Choose the corridor which was guarded by the thug you killed a while ago and search it what gives you piece of a gun [Golden Gun - FMP G3S Rifle 1/3] - Chapter XII - p. 1 - Walkthrough - Max Payne 3 - Game Guide and Walkthrough](https://game.lhg100.com/Article/UploadFiles/201512/2015121617431929.jpg)
Choose the corridor which was guarded by the thug you killed a while ago and search it what gives you piece of a gun [Golden Gun - FMP G3S Rifle 1/3].
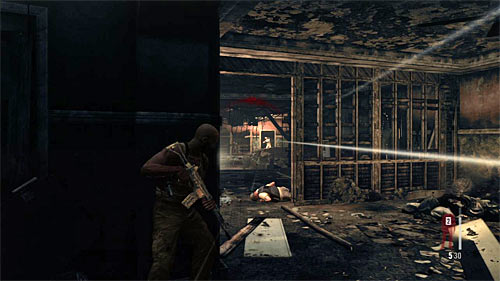
Return to the start location and choose the passage leading to the right area. Start attacking enemies standing on the other side of the big hole. Also now be cautious, because one of the opponents has LMG rifle.
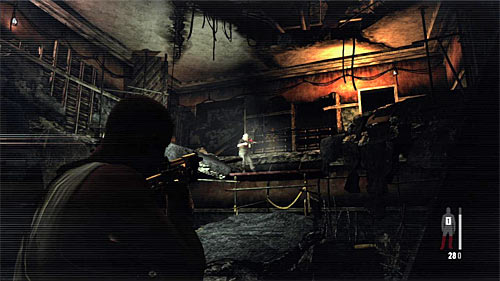
Make sure you've eliminated all enemies and jump down to the hole. Prepare to quick do in 2-3 enemies who'll suddenly show up in front of you.
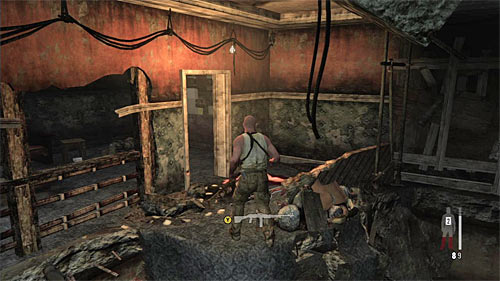
After killing them, approach the shelf in front of you and push A button to climb on it. Take from the dead enemy a LMG rifle and then go to the small room on the right (screen).
![In this room you find two clues: a wall [Clue 3/6 - Wall] and the photocopy [Clue 4/6 - Passos ID Card] - Chapter XII - p. 2 - Walkthrough - Max Payne 3 - Game Guide and Walkthrough](https://game.lhg100.com/Article/UploadFiles/201512/2015121617431911.jpg)
In this room you find two clues: a wall [Clue 3/6 - Wall] and the photocopy [Clue 4/6 - Passos' ID Card].
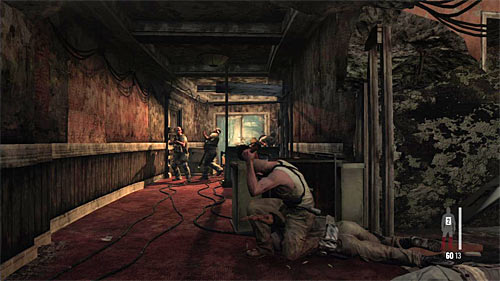
Exit the room and choose the left passage. IMMEDIATELY hide behind the cover (screen) because you get under the fire of three enemies. Use the LMG to eliminate them and do not lean out.
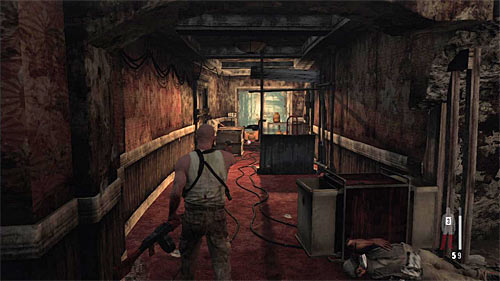
After eliminating them, search the corridor behind your back. Pick up ammo and look for the small room with the painkillers. Return to the place of the last encounter at fire at one of the containers what causes explosion and unlocks the new passage.
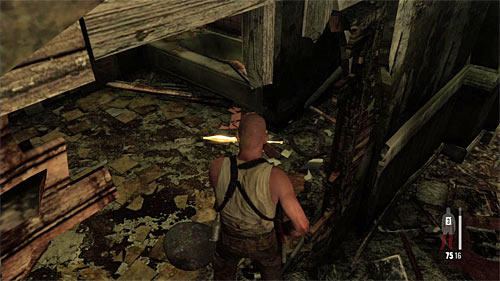
Go upstairs. After reaching the new corridor move forward but stop when you notice a big hole in the right wall. Examine this place what gives you another part of a weapon [Golden Gun -RPG 2/3]. Resume the march. Reaching the interactive doors equals displaying a new cut scene.
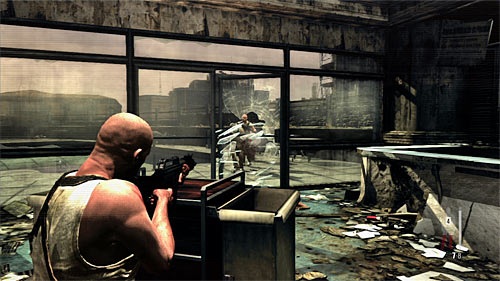
Notice, that when you regain control, you received two packs of painkillers. It's worth to pick up the SPAS-15 shotgun standing nearby. Use it to get rid of enemies noticeable far. You ca do it at once or wait until they get closer to you.
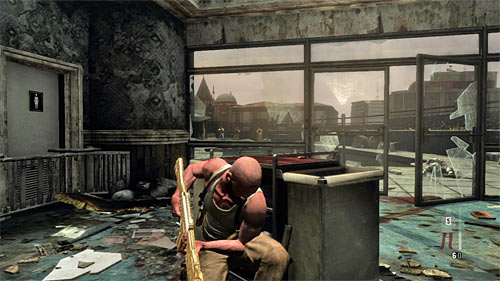
Next to elimination should be enemies standing at the empty swimming pool. Against the pretences, shotgun will work, but you can use the pistol also.
![After eliminating enemies, stay by the beginning location and check the area on the right, what gives you a piece of a gun [Golden Gun - FMP G3S Rifle 2/3] - Chapter XII - p. 2 - Walkthrough - Max Payne 3 - Game Guide and Walkthrough](https://game.lhg100.com/Article/UploadFiles/201512/2015121617432054.jpg)
After eliminating enemies, stay by the beginning location and check the area on the right, what gives you a piece of a gun [Golden Gun - FMP G3S Rifle 2/3]. Search the corpses and move forward.
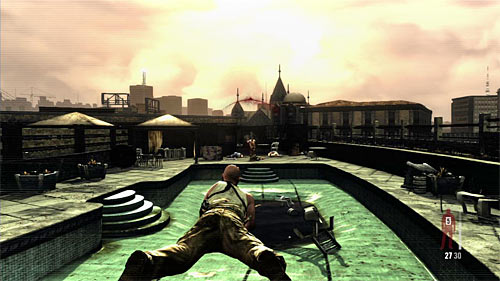
Be ready to eliminate new enemies, who'll show up in front of you. The best way is to make a slow motion jump forward but if you have a lot of time, you can run to the pool edge. Don't forget to collect ammo from dead enemies.
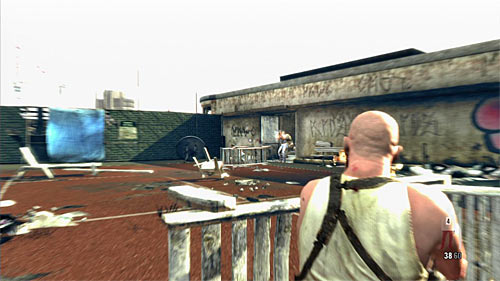
Enter the new area. Initially, it's good to hide behind the upset deckchairs and then make a slow motion jump with effective elimination of enemies.
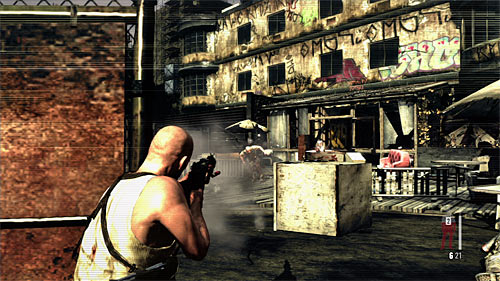
Move on, placing yourself by the entrance to the restaurant (screen). Begin from attacking the closest enemies and remember to not lean out for too long.
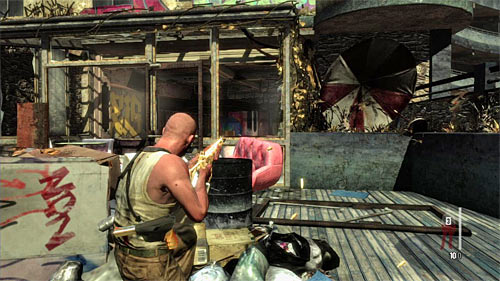
The last group of enemies is hiding in the restaurant. You can attack them from a distance or get closer to them, by moving from the cover to the cover (screen). Continue the firing until you clean up the area.
![Enter the restaurant in which you find painkillers and a clue on the table top [Clue 5/6 - Newspaper article] - Chapter XII - p. 2 - Walkthrough - Max Payne 3 - Game Guide and Walkthrough](https://game.lhg100.com/Article/UploadFiles/201512/2015121617432108.jpg)
Enter the restaurant in which you find painkillers and a clue on the table top [Clue 5/6 - Newspaper article]. Move on, on the way finding the interactive piano. When you reach the interactive door, the cut scene will be displayed.
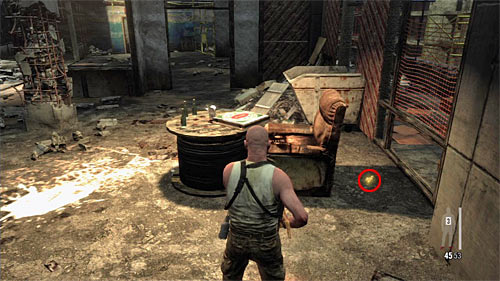
Open the door in front of you and move on. Stop when you reach the bigger room and search its right side. Behind the armchair (screen) you find another fragment of a gun [Golden Gun - FMP G3S Rifle 3/3].
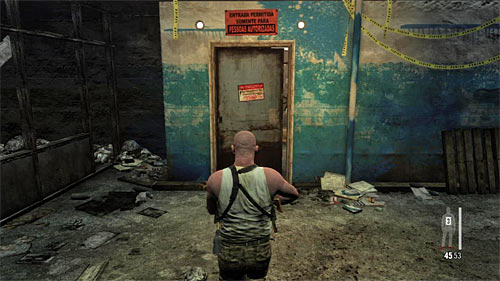
You have to get to the doors leading to the armory (screen). It displays the cut scene in which Max takes C4 and plants the first charge.
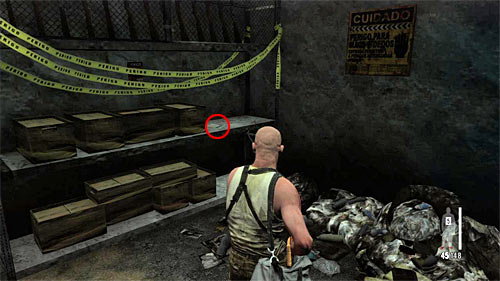
After the cut scene ignore the mission objective and return to the armory. You'll find here the RPD rifle, ammo and two packs of the painkillers. Examine also a document shown on the screen above what gives you the last clue [Clue 6/6 - Donation Receipt].
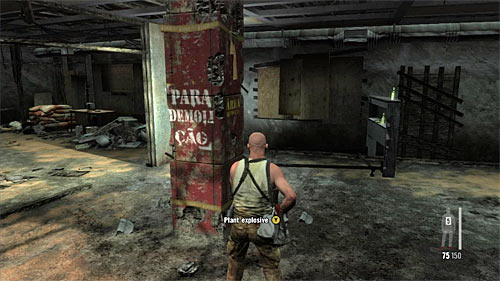
Exit the armory and get back to the mission, which is a planting of the explosives on the pillars. Objects can be recognized by the red color. On this floor you find two more. Approach each and press the Y button.
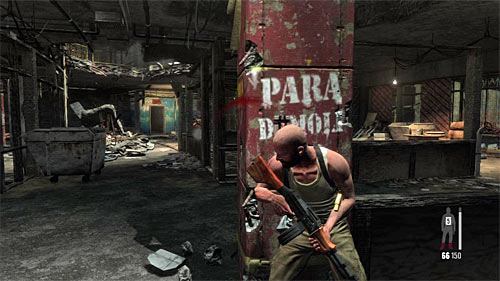
Prepare to eliminate a big group of enemies. Your advantage is a fact that you can take them by a surprise, but when the encounter begins you have to secure your flanks.
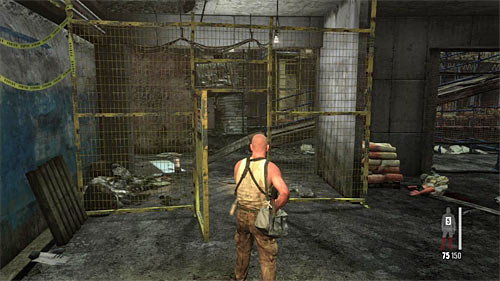
After the battle use the unlocked metal gate, through which enemies run. Ignore the laser beams and go upstairs what displays the short cut scene.
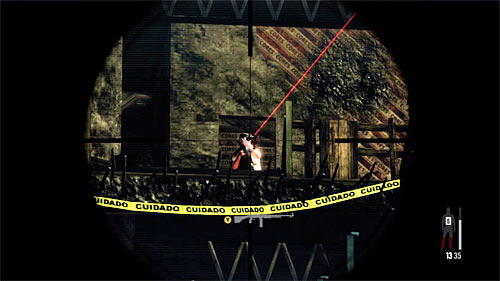
Stay behind the cover and switch the RPD rifle on the M82A1 rifle. Start from eliminating enemies in the neighboring building, who have the laser sights in guns. Too make it easier use the bullet time and aim at their heads.
After killing them, pick up the RPD rifle. Replenish ammo (chest) and go to the metal gate on this floor (screen), what reveals another group of enemies.
Theoretically you could play aggressive with lot of jumps but in my opinion, the better solution is to move back on the previous balcony. Stand behind the wall (screen) and wait for enemies.
NECESSARILY search the ramp through which you get on this floor because enemies will run from the lower part of the hotel soon. The best idea is to make a jump at them and kill them In the flight. After that go back upstairs and finish off the remaining enemies.
![Go right from the mentioned metal gate and on the one of balconies you should notice the last fragment of a gun [Golden Gun - RPG 3/3] - Chapter XII - p. 3 - Walkthrough - Max Payne 3 - Game Guide and Walkthrough](https://game.lhg100.com/Article/UploadFiles/201512/2015121617432264.jpg)
Go right from the mentioned metal gate and on the one of balconies you should notice the last fragment of a gun [Golden Gun - RPG 3/3].
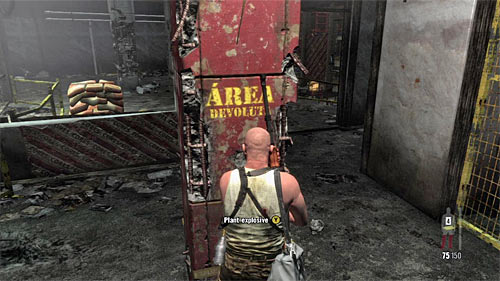
As the previous time, you have to plant C4 charges on the new pillars. Be careful, because after planting the first one group of enemies appears. Get rid of them. Plant another two charges what displays the cut scene and proceeds you to the final part of this chapter.
When you regain control, start attacking enemies standing by the landing strip. During this and the following encounters it's good to use the RPD rifle, which is very effective.
Remark! From now on you can't stop anywhere for a longer time because it makes the hotel collapse and Max dies. You have to play aggressively and don't bother about the ammo and wounds you get.
After eliminating enemies move forward and do in a single thug who'll appear.
On two next enemies you'll run into when you turn left. After they death go upstairs and quickly turn right what gives you two packs of painkillers in the narrow corridor.
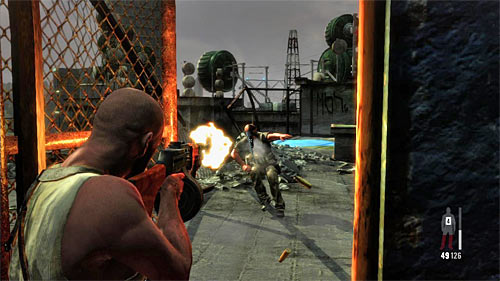
Resume marching, eliminate another thug on the way (screen)
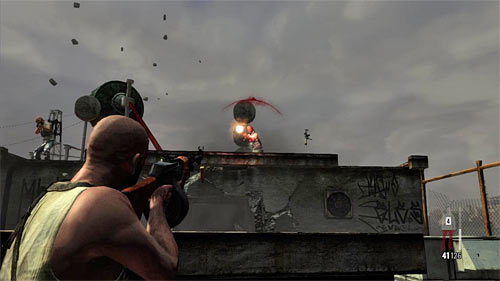
When you get on the last roof, approach to the green doors. Move back when you notice three enemies over you and fire at them behind the cover.
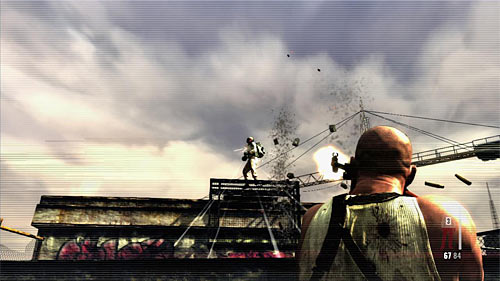
At the end the fight with the heavy armored enemy waits for you. Notice, that you don't begin behind a cover, so you have to find one. During the encounter aim at the head continuously and heal yourself regularly. Chapter ends when you kill the thug.
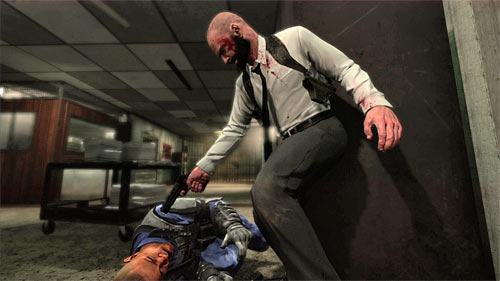
Wait until the first policeman reach you and do in him in a melee fight. After that return behind the cover or make a jump to the lodge on the left, because another policemen will run out from there.
Remark! During this chapter remember to aim at the heads, because the majority of your opponents will use kevlars and other armors.
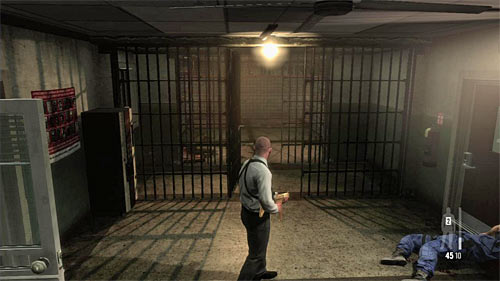
After the encounter pick up the SAF .40 SMG and search the mentioned lodge in which you find two packs of painkillers. Approach to the entrance to the prison (screen) what displays the cut scene.
![Use the entrance at turn left at the first possibility, what gives you a part of a gun [Golden Gun -MPK SMG 1/3] - Chapter XIII - p. 1 - Walkthrough - Max Payne 3 - Game Guide and Walkthrough](https://game.lhg100.com/Article/UploadFiles/201512/2015121617432413.jpg)
Use the entrance at turn left at the first possibility, what gives you a part of a gun [Golden Gun -MPK SMG 1/3].
Go right. When you reach the corner, "stick" to the left wall. You have to decide if you want to take the policemen by a surprise or wait until they go away. In the second case you have to wait enough to not alarm them.

Stay where you find the mentioned enemies, and enter the right cabin with the showers. Pick up the fragment of a gun in here [Golden Gun - LAW 1/3]. You can resume the march.
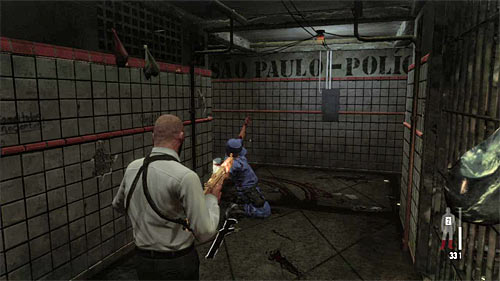
Go through the one of cells and initially go right, prepared to eliminate few another enemies. Do not rush, because it's easy to die here. Try to secure whole prison by killing all policemen patrolling the main corridors.
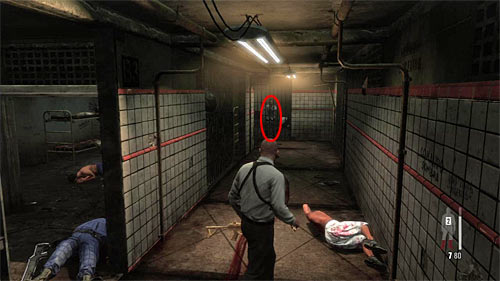
Now return to the place in which you went through the one of cells earlier. Now, choose the left way - you should spot a tourist (screen) which is locked. Go to him and start a conversation which unlocks the clue [Clue 1/7 - Tourist].
Remark! You can't talk with the prisoner unless you kill all the policemen in the area. It may happen that he'll die in the firing, so you will be forced to load the game.
At the very end, start exploring the second part of the prison, which was guarded by the recently killed policemen. In one of the open cells you find painkillers. Make sure, that you've collected all precious items and head to the exit from the prison ( screen).
During the new encounter it's worth to stay behind one of the pillars, but watch out for the policemen who can reach you, especially from the right (screen). You can use the bullet time jumps in the further part of the battle.
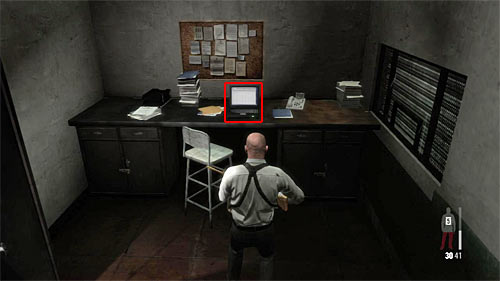
Search the right room for the painkillers and then go to the office on the other end of the secured area. Also here you'll find painkillers and after checking the laptop (screen) you get an another clue [Clue 2/7 - Prison Log].
At the end take some good gun and use the opening door button which leads outside. Go there, what displays another cut scene.
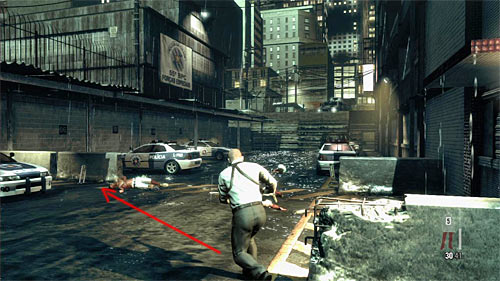
Wait until the armored vehicle stops firing for a while, turn on the bullet time and quickly move left, using sprint and somersaults. You have to reach the left parapet shown on the screen.
Remark! You have to avoid fires from the armored vehicle, because even a single hit may kill Max. Try also not to move during hiding behind the parapets, because it also may ends up with the serious wounds or death.
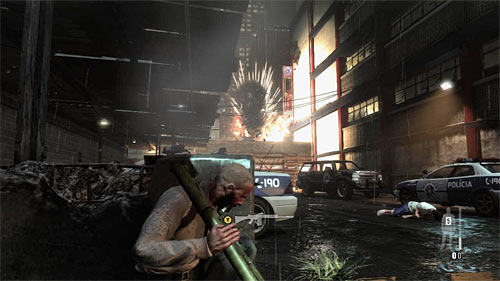
Notice, that behind the parapet you are, there is a rocket launcher. Pick it up, turn on a bullet time and aim at the armored vehicle. Single hit should destroy the car.
Remark! If you miss, use the left ammo stock. You will also find a rocket launcher in few other places, for example by the shot prisoner and the right police car.
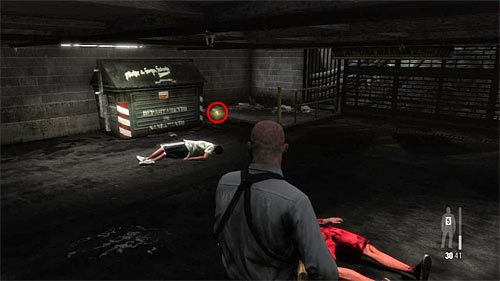
Now, quickly, pick up the grenade launcher from the left and start killing running policemen. Don't save an ammo, because you'll replenish it very easily. Try also aiming at the vehicles nearby, because their explosions make secure the vicinity easier. After the encounter pick up your previous main gun and head to the underground parking.
![After getting there, turn left and pick up a fragment of a gun nearby the skip [Golden Gun - LAW 2/3] - Chapter XIII - p. 2 - Walkthrough - Max Payne 3 - Game Guide and Walkthrough](https://game.lhg100.com/Article/UploadFiles/201512/2015121617432610.jpg)
After getting there, turn left and pick up a fragment of a gun nearby the skip [Golden Gun - LAW 2/3].
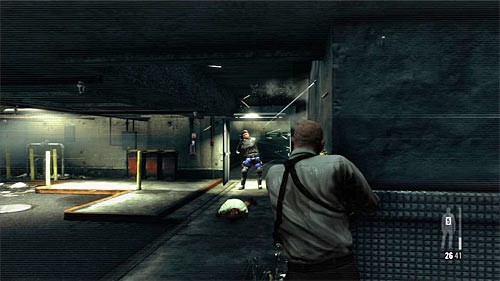
Turn right, to the doors. But be prepared, because they'll be soon open and you'll be forced to kill the single officer. After that, go upstairs.
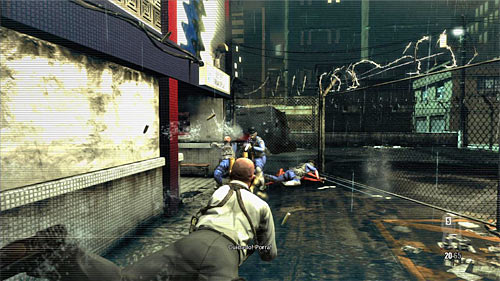
Exit the building again and take the policemen, who are kicking the armless prisoners, from surprise. It's worth to make a slow motion jump.
Remark! If you have to use the cover, use the parapet described below.
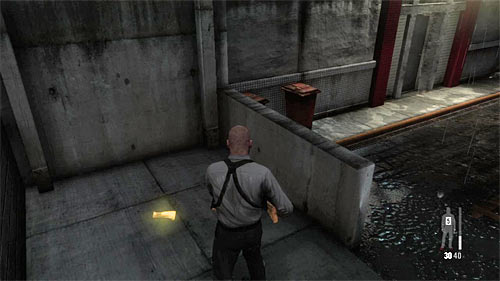
Return to the place where you exit the building and check the right alley. Behind the parapet (screen) you find the fragment of a gun [Golden Gun -G6 Commando Rifle 1/3]. Go where the dead policemen lie and use the new entrance to the building.
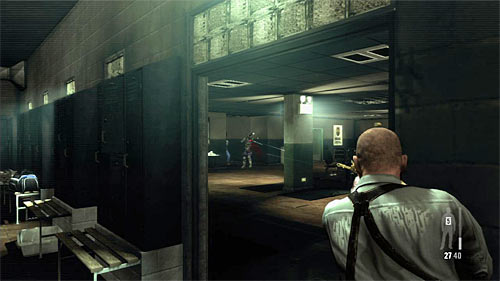
Find painkillers in the changing room and carefully approach to its exit. Initially fire at the closest enemy without making too risky actions.
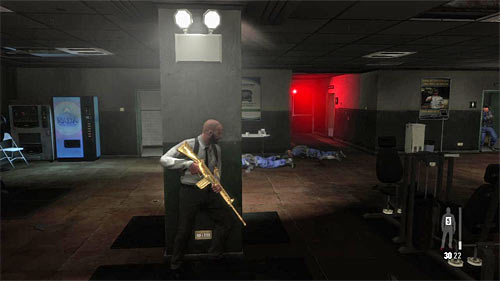
Try to reach the pillar shown on the screen above, because it's a good cover. Fight until you secure this area.
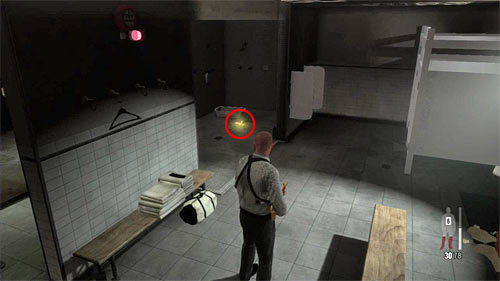
After the encounter pick up weapons and ammo. It's also worth to search the sides toilets. In the men's one you find part of a gun (screen) [Golden Gun - MPK SMG 2/3] and in the painkillers. At the end go through the double red doors, leading to the next location.
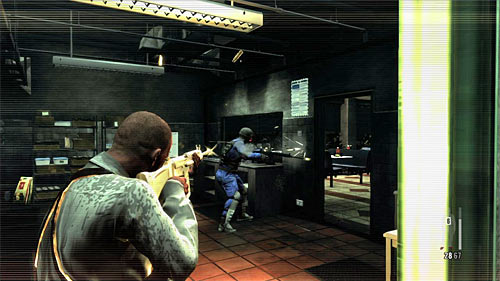
Turn left, pass the pillar at go to the kitchen in front of you as fast as you can, eliminating enemy there (screen). It's very important, because otherwise he could surprise you during the next phase of an encounter.
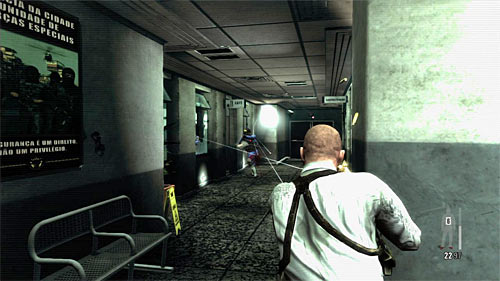
Only now decide how you gonna play the following encounters. You can stay in the kitchen, return to the main corridor and hide behind the mentioned pillar or start attacking with the bullet time. Secure the vicinity.
![After the encounter return to the kitchen and pick up another fragment of a gun (screen) [Golden Gun - G6 Commando Rifle 2/3] - Chapter XIII - p. 2 - Walkthrough - Max Payne 3 - Game Guide and Walkthrough](https://game.lhg100.com/Article/UploadFiles/201512/2015121617432732.jpg)
After the encounter return to the kitchen and pick up another fragment of a gun (screen) [Golden Gun - G6 Commando Rifle 2/3].
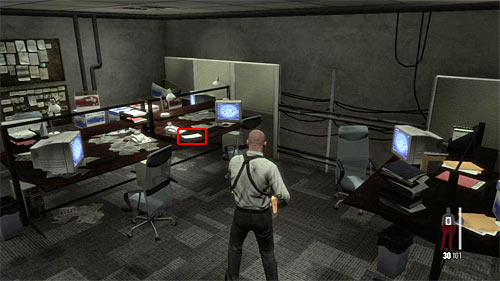
Now return to the main corridor and search the small office on the right, in which at least one enemy hid before. You have to look at the document on the desk what gives you another clue [Clue 3/7 - Promissory Note]. At the end go to the double doors at the end of the main corridor.
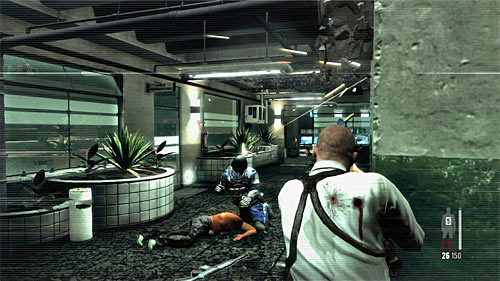
After getting into the new area I suggest to use the covers. Be careful, because enemies will rush at you immediately, so do not let them reach you. At the end finish off enemies hiding in the far rooms.
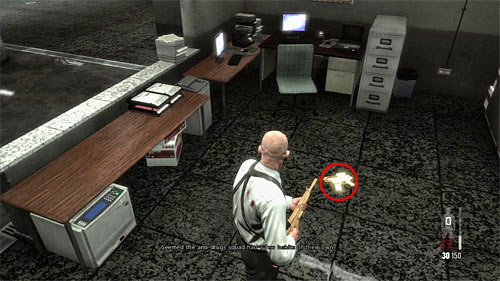
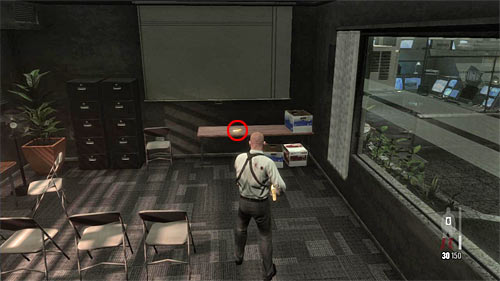
I recommend to search the area carefully and you will find two collectibles. First part of a gun is in one of the right, open offices (1st screen, also painkillers in here) [Golden Gun - G6 Commando Rifle 2/3] and the second fragment you may find in the small conference room, on the table under the projection screen (2nd screen) [Golden Gun - MPK SMG 3/3].
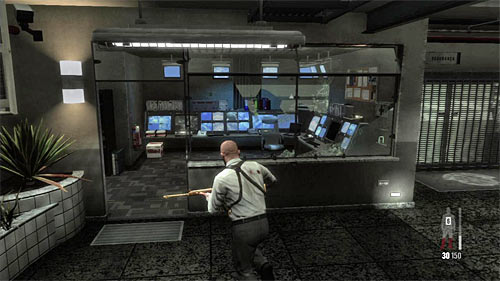
At the end go to the security room (screen) in which few enemies was hiding. Game will display a cut scene informing you about an arrival of the elite policemen unit.
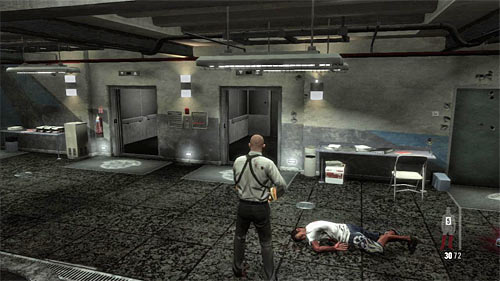
I recommend stay in the security room, wait until enemies close a bit and then take them from a surprise.
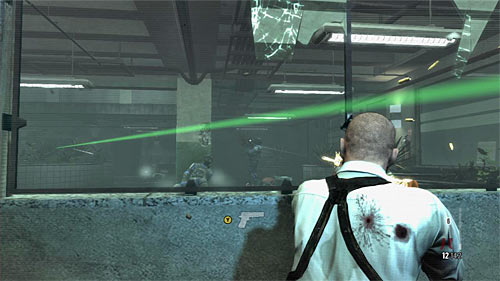
After the encounter begins, you can stay in the same place or exit it to place yourself behind one of pillars or start making jumps in the bullet time. Remember to aim at heads, because opponents are armored. Use also laser beam for easier targeting.

After the encounter pick up ammo and possibly the SMG's. Go to the elevator which was used by the enemies and press the Y button to take Max on the fifth floor.
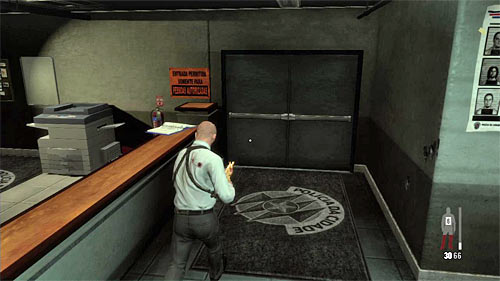
Move forward and prepare for eliminating the armed enemy who will appear in front of you. After that check the left room for painkillers and then approach the entrance to the right room (screen).
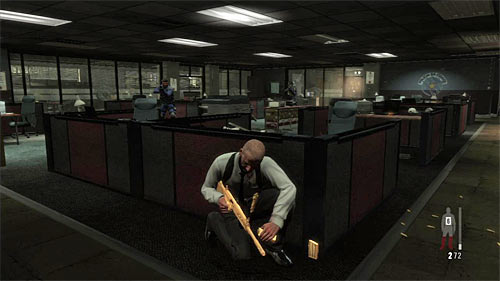
Another encounter is difficult, because you'll begin it in not very good position and you'll have all big office room to secure, with small amount of covers. I recommend to clear ASAP the area on your right and left and then hide behind the furniture.
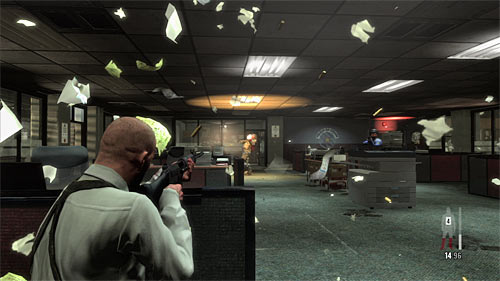
Continue firing at enemies. As usual, do not let anyone reach you and secure especially the sides office rooms from which new enemies may approach.
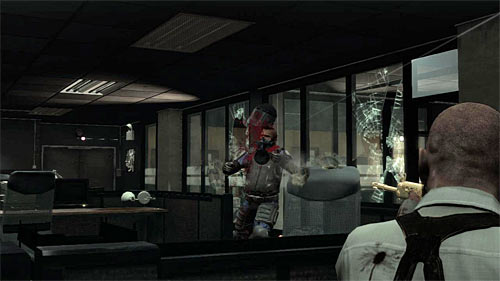
At the very end you'll have a duel with the policeman equipped in the LMG rifle. Make sure that you're still behind the cover and start firing, trying to aim at his head. After the encounter you have to decide whether you want to pick up the LMG rifle with the limited number of bullets or keep one of your guns.
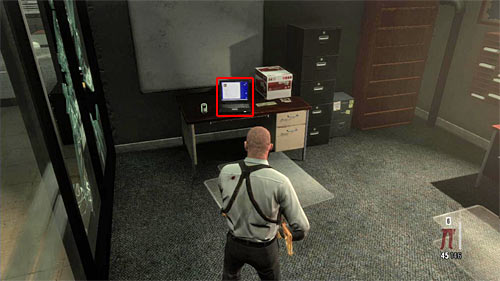
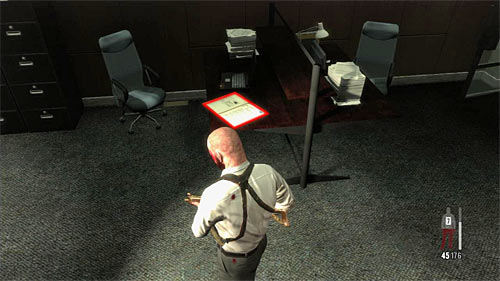
As usual, spare a moment for searching the area, what gives you, among others, the painkillers. But much more important is to get two collectibles. One is a laptop in one of the left rooms (1st screen) [Clue 4/7 - E-File on Da Silva] and the second is a folder in the middle room on the right (2nd screen) [Clue 5/7 - Political Folder].
Make sure that you've checked the area and only then use the exit (screen) what causes another cut scene.
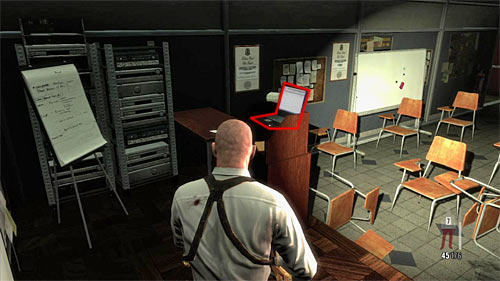
After getting to the new place, move to the rostrum and interact with the laptop (screen). What is curious, you won't get a clue immediately but only after displaying all five slides (press Y) [Clue 6/7 - Slide Show]. Close the slide show (B button) and go to the proof store.
After getting there, start from killing two policemen. It shouldn't be problematic.
In the further part of the encounter place yourself behind the locker (screen) thanks to which enemies will move to you only from the right. Eliminate them without too risky actions.
After eliminating the main group of enemies, look for the small room in which you find painkillers. Move little forward and prepare to eliminate the last policemen who appears at the exit from the proof storehouse just after the metal bar moved.
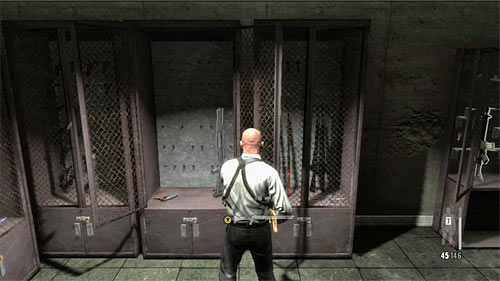
Spare a few moments to look around. Especially get interested in the armory (screen), but do not care about the main gun - you'll lose it soon. Find the doors leading to the staircase.
Notice, that sb threw a grenade to the staircase so you have to act quickly. Go upstairs, but stop when you spot bars on the landing (screen). Destroy it and go to it - Max will automatically get to one of the ventilation shaft.
Remark! You can't wait too long with the localization and destroying the bars, because Max will die.
After landing in the small room, kill the single guard quickly and check his body for ammo. Go left, what will display the cut scene.
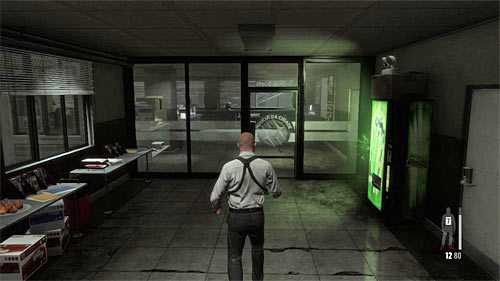
Now you can exit the room. After getting in the bad lit corridor, go forward reaching a new office room (screen). Prepare, because there is another series of demanding encounters in front of you.
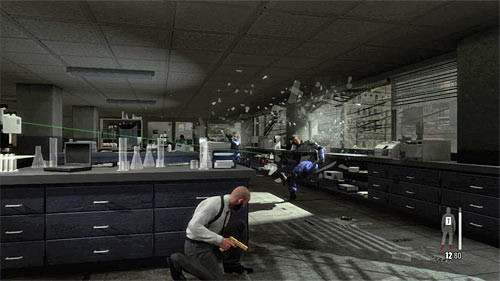
After getting into the new room, hide behind the left table because a group of enemy will rush into it through the window. The main difficulty in this encounters is a fact that you don't have your main gun, which you lost during going through the ventilation shift. So use the additional guns, making a long series and not letting anyone reach Max. Continue the fire until you do in all enemies.
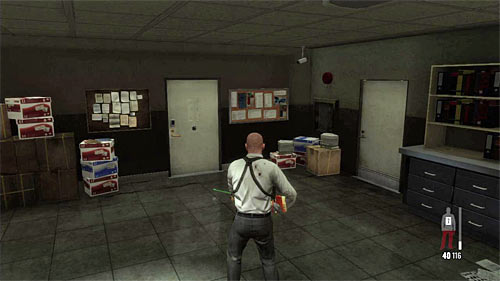
After the encounter obligatory collect the better guns (my favorite is a G6 Commando Rifle). Go to the left exit (screen) what unlocks the new cut scene.
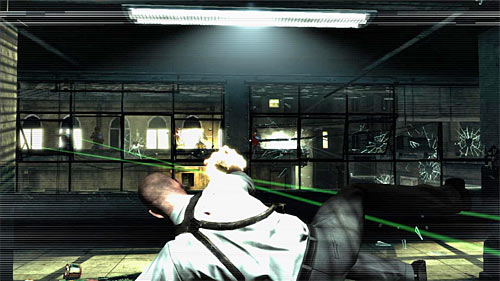
In front of you another scene during which you have a limited control. Aim and eliminate next enemies, and don't worry if you won't kill all of them. Continue the firing until Max lands and hides behind the cover.
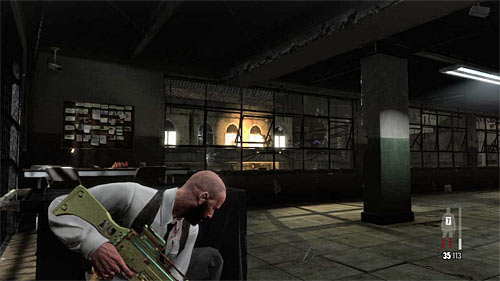
Switch your gun on main and star attacking snipers who survived. Like in the one of the previous battles, aim them mainly thanks to their laser sights. The best idea is to make fire from the one place, but if you have problems with targeting policemen, you may get closer to the shutters or the closest pillar.
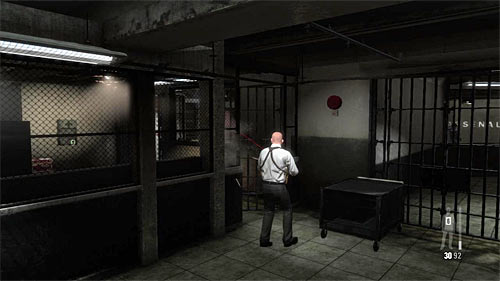
Be careful, because when you finish off snipers, a passage opens behind you. You have to go there immediately.
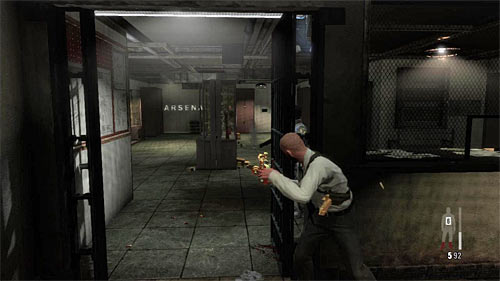
I recommend to place by one of the armory entrances and from this place attack enemies. But take into consideration fact that someone may reach you and you will have to melee fight.
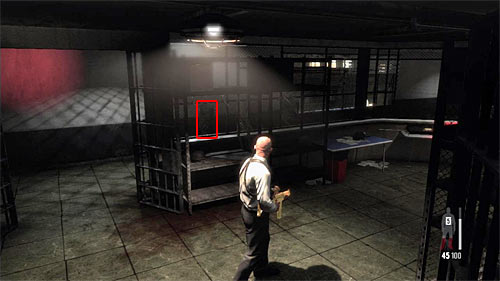
After the encounter find the painkillers and enter the bigger armory. Go through all of it, picking gun which you like. Also, get interest in the kevlar (screen) [Clue 7/7 - Flak Vest] because it's a clue and provides an additional protection for Max.
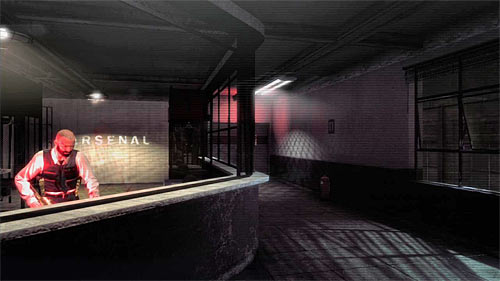
Turn right and find the control panel which you must use. Go to the newly unlocked passage, finding the painkillers on the way and reaching the training room.
Remark! During going through the training room patience is recommended. Look around carefully to not miss anything and don't receive any stupid wounds (it's worth to collect painkillers for the final battle of this chapter).
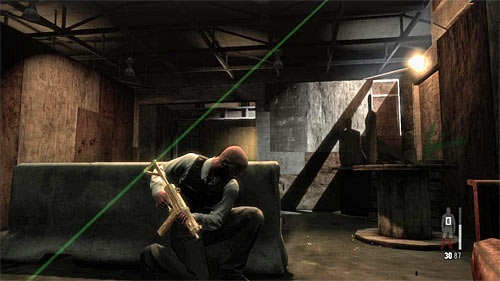
Go downstairs and turn left, stopping behind the parapet (screen). Attack those enemies who will appear in front of you and the single opponent sitting over you in the watch tower.
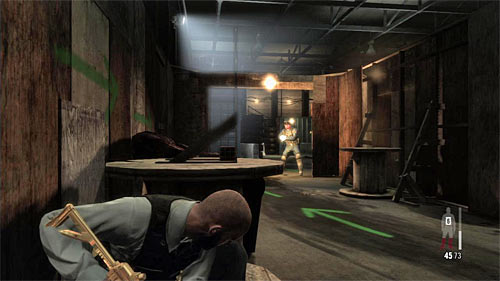
You'll run into the next enemies where the path turns perpendicularly right. I recommend to run at the cover (screen) and only after eliminating closest policemen move forward. Especially watch out for the sniper behind the wire.
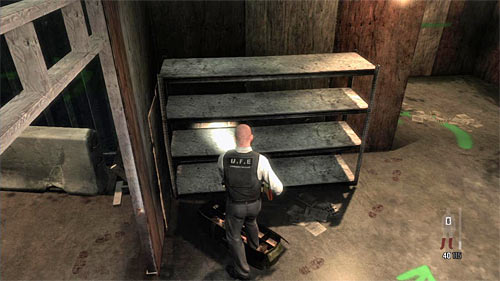
Make sure that you've eliminated all enemies and only then go to the exit from the training room. On the way necessarily use the ammo stock (screen). Go upstairs (you may meet an enemy here) and go through the balcony reaching the painkillers.
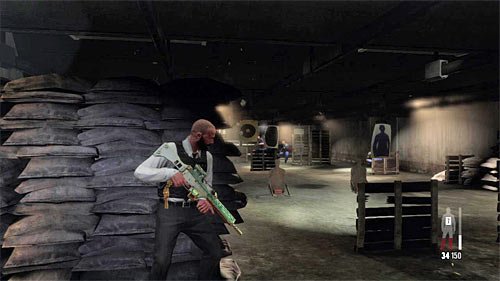
Another room is a shooting gallery and the best solution is to stand behind the biggest stack of bags with the sand (screen). Start attacking enemies and continue until the area is secured.
![Walk round the bags with sand, and youll find the last part of a weapon in this chapter [Golden Gun - LAW 3/3] - Chapter XIII - p. 5 - Walkthrough - Max Payne 3 - Game Guide and Walkthrough](https://game.lhg100.com/Article/UploadFiles/201512/2015121617433259.jpg)
Walk round the bags with sand, and you'll find the last part of a weapon in this chapter [Golden Gun - LAW 3/3].
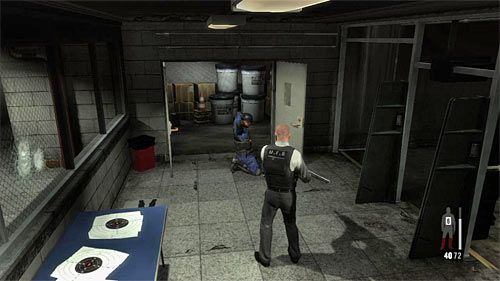
Go to the exit from the shooting gallery. You'll meet a single policeman, who'll surrender. It doesn't matter whether you kill him or not. If you kill him, you're sure he won't betray you.
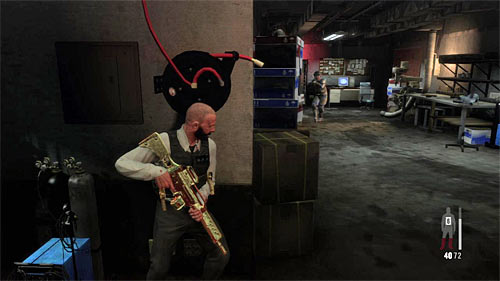
Go through the few narrow corridor, killing a single enemy on the way and finding two packs of painkillers. At the end use stairs - you'll reach the place of a final battle.
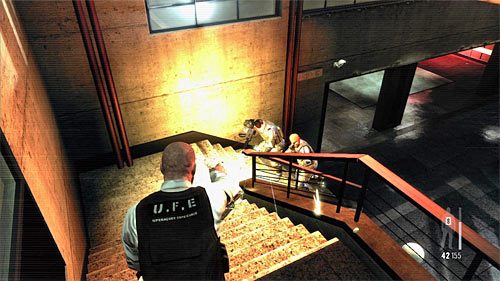
After regaining control, make a slow motion jump aiming at the policemen going upstairs.
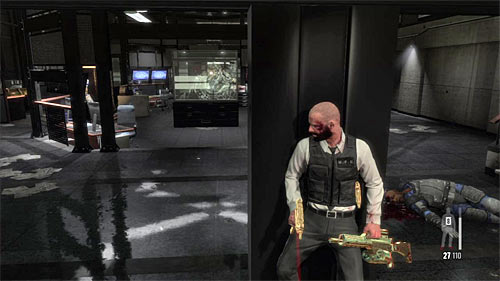
Stand up and hide behind the pillar (screen) which is a very good cover because it lets you observe the whole area. Carefully eliminate enemies and try not use the painkillers too fast, because you'll need them later.
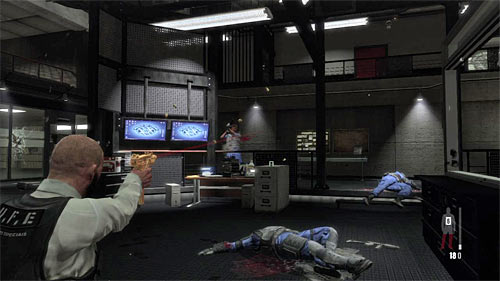
After eliminating all policemen listen to the conversation with the boss and begin the new part of the encounter. Try to do in ASAP two normal opponents, especially those on the right, preventing them from the effective attack from the flank.
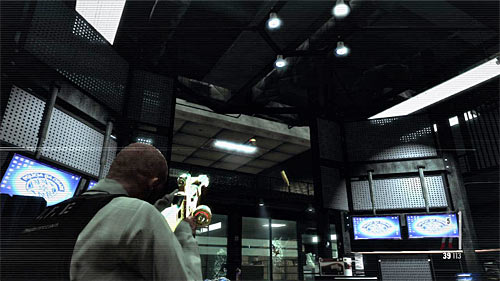
According to the Max comment you can't eliminate the boss now, because he's hiding on the upper balcony. So begin fire at the part of the ceiling (screen above). You have to make it collapse.
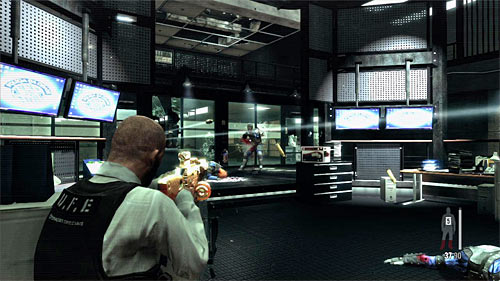
Watch the cut scene and IMMEDIATELY hide behind the closest cover. As the previous time begin from attacking two normal enemies. After that check an amount of the painkillers and if you're in need jump for the next ones (you'll find them on the left and right).
Change slightly your position to have a left part of the balcony in your field of vision (screen). As previously, fire at the ceiling. You should make the metal object to detach and land on the balcony. Fire during the gaps between the boss' attacks and monitor the Max's health.
At the end eliminate the boss. Aim at his head and do in, what ends this chapter.
When you regain control I recommend to jump down from the platform, because further ride would be connected with getting under the massive fire without any chance for the escape. I also recommend to stand on the left from the conveyor belt and start firing at enemies.
Depending on your preferences, you may stay behind the initial cover or get closer to the conveyor belt. Eliminate the closest enemies and then make a decision to go right for a better cover. Regularly check what is happening on the upper balconies, because enemies will appear there.
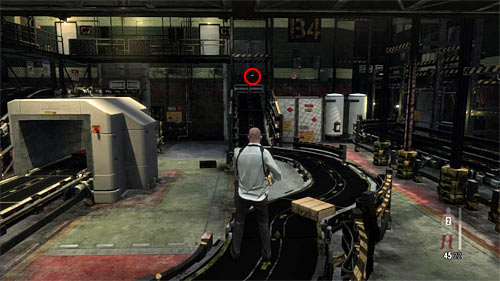
Fight until you clean up the area and then search it. Pick up ammo and guns (you've started this chapter without the main gun) and jump on the conveyor belt. After a while it'll take you to the part of a gun (screen) [Golden Gun - Rotary Grenade Launcher 1/3].
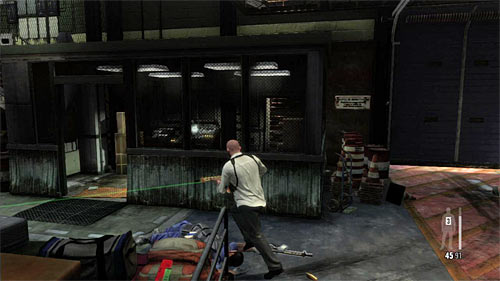
Return to the battle place and go through the small room (screen). Prepare a good gun before you go upstairs.
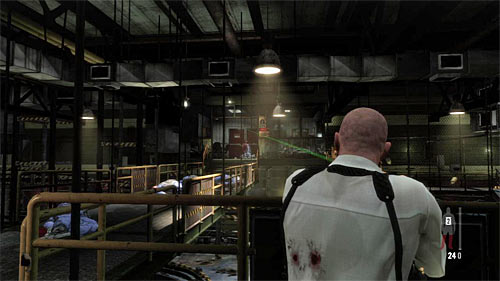
After getting on the balconies IMMEDIATELY turn left and hide behind the balustrade (screen). New enemies appear and you wouldn't be able to attack them from the entrance safely.

Eliminate enemies. Try also not to use all the medicaments you have, because later on you'll have to save them. After killing all visible enemies, move little further and do in next opponents, who should appear by the lodge on the right (screen).
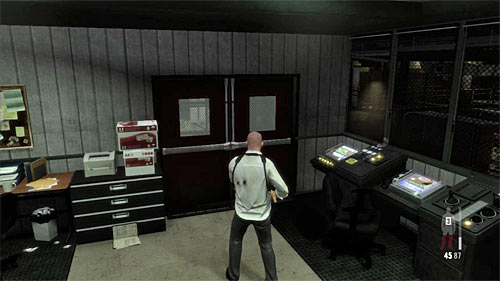
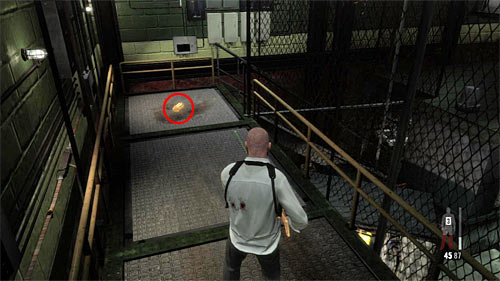
After the encounter pick up ammo and go to the lodge. Collect painkillers and choose the right passage (1st screen): after a while you should notice another piece of a gun (2nd screen) [Golden Gun - Rotary Grenade Launcher 2/3]. Return to the lodge and then enter the elevator what displays the cut scene.
Remark! Do not go to the elevator at once, because you'll miss the collectible.
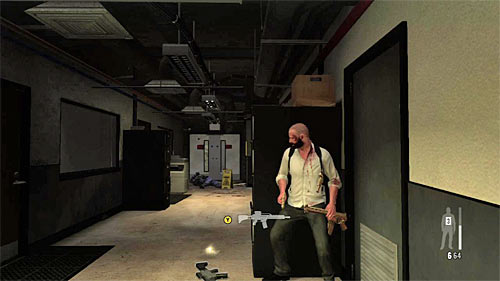
Start from killing the single guardian patrolling the next corridor. If you like you can wait for enemies here or run upstairs and stay behind the right cover (screen). Don't rush and fire accurately because enemies are armored.
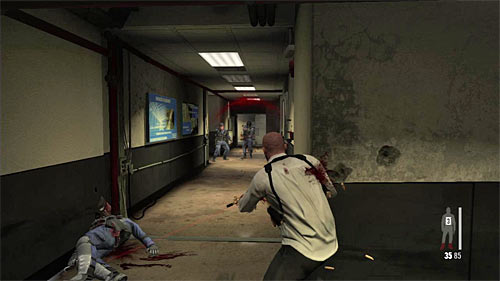
After eliminating opponents, start searching the area, but wait at the closest corner for the next enemies. Kill them as you like.
Remark! As usual don't choose the corridor leading to the terminal too fast, or you'll miss the supplies and collectibles.
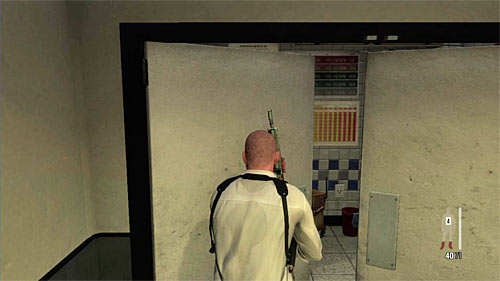
After the encounter collect ammo and guns (at least one thug had a perfect G6 Commando Rifle) and go in the rooms you passed earlier, in one of them you'll find painkillers. Go also to the toilet (screen) where two collectibles awaits.
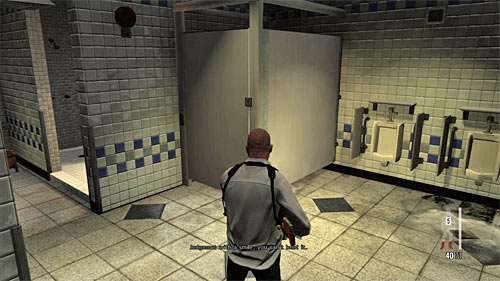
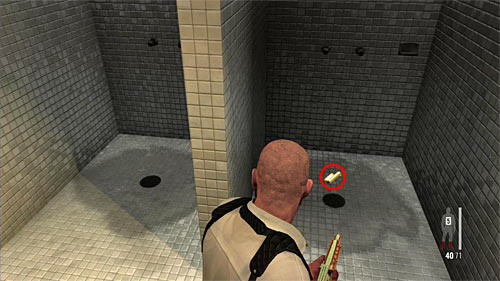
In the toilet you'll find another painkillers but focus on the two collectibles. Search the cabin in which Anders Detling is hiding (1st screen) [Clue 1/1 - Ex-cop] and the small room with the showers in which the fragment of a weapon is left (2nd screen) [Golden Gun - Rotary Grenade Launcher 3/3].
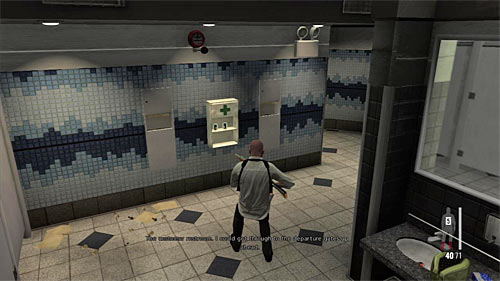
Exit the toilet and resume marching. After getting in the new toilet pick up two packs of painkillers and after that go to the one of the main airport terminals (new cut scene).
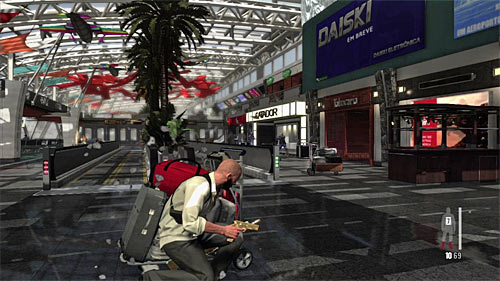
There is a long encounter ahead, but, thanks to the largeness of the terminal, shouldn't be a problem for you. It doesn't mean that you shouldn't be careful. Start from attacking the closest thugs using the default cover.
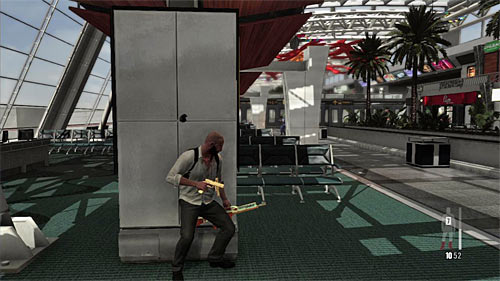
Terminal has two parts and the first one is best to travel via the left path (screen). Here you'll find lot of good covers (pillars).
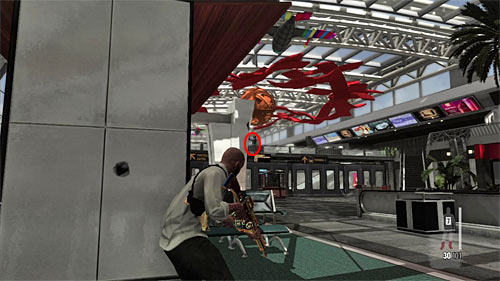
During travelling the first part of a terminal watch out for an enemy standing on the far bridge (screen). You have to also into consideration that at least one enemy occupies the left balcony under which you're moving. It's worth to take him down ASAP, so he won't surprise you later.
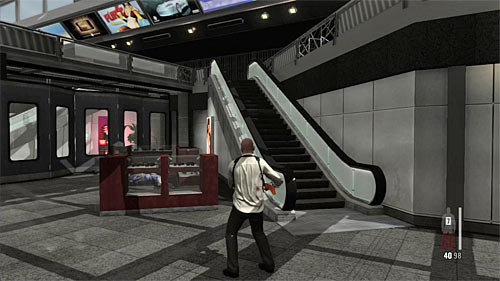
The other part of the terminal is insulated by the barrier and although you can walk it around from the left I recommend to use the escalator on the right (screen) to get on the upper balconies.
Remark! Don't try to make long jumps from the upper balconies (flying over the balustrade) because you'll lose lot of health or die.
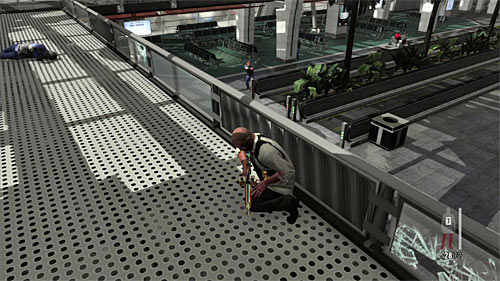
For the balconies stands also the fact that your field of vision will be much better. Begin from eliminating the thugs also standing on the upper level of the second part of the terminal. Then approach to one of the balustrades and fire at those standing under you.
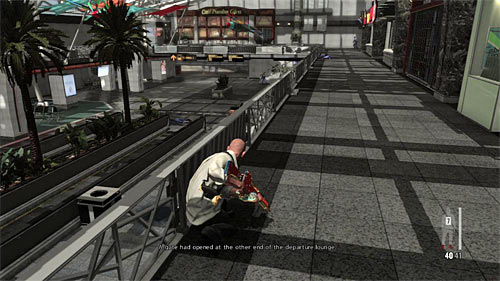
You have to take into consideration that after eliminating the majority of thugs in the first part of the terminal the reinforcements for them will arrive. Quickly react and this time begin cleaning from the upper level. Resume securing this area what shouldn't be too problematic for you. After all fights, search this place, what let you find 4 packs of the painkillers (one on the first floor, three on the ground floor).
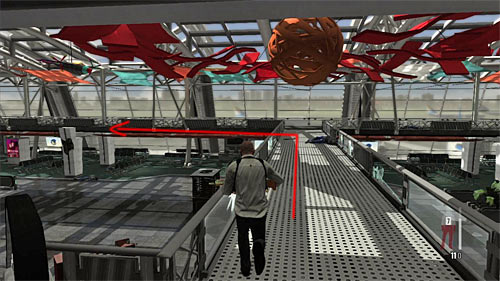
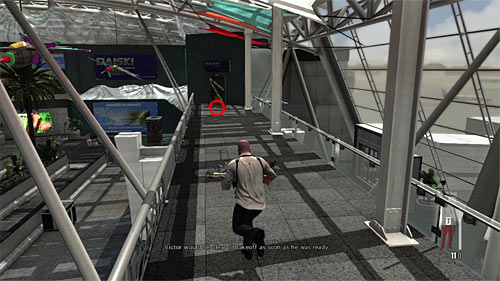
Besides medicaments you may also find two secrets here. Begin by the escalator and turn left, choosing the bridge linking the upper balconies (1st screen). Turn left again and you should spot the piece of a gun (2nd screen) [Golden Gun - RPD 1/3].
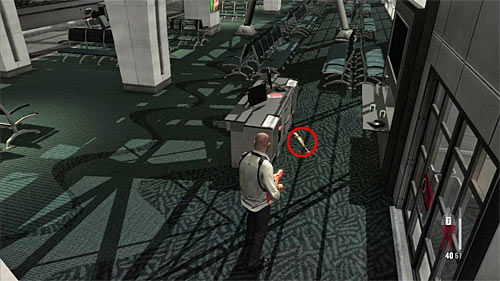
Second fragment of a gun is on the lower level in the second part of the terminal. It's hidden behind the small desk, by the painkillers [Golden Gun - RPD 2/3].
You just need to exit the terminal. Go to the big gate (screen) and use the switch on the right of it.
Be ready to attack immediately new enemies from the small cover or with the bullet time. Watch out for the enemy who'll try to hide on your left. After the encounter move little further and do in the thugs who will appear by the stairs.
Take painkillers and go to the stairs. The safest solution is to place yourself like on the screen above, but if you like risk, you may also jump over the escalator. When it's finished go downstairs to the platform.
Hide behind the first pillar and don't bother that enemies cut off the electricity, it won't affect your accurate. Start attacking running foes.
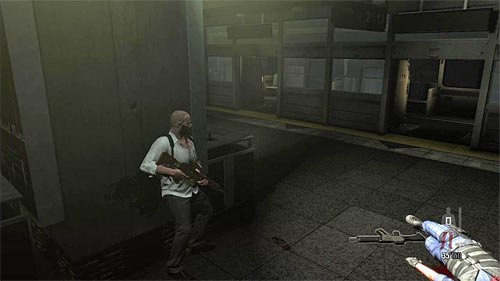
During this battle to have to be very careful, because some enemies will attack you from the flank , from the train on right (screen). You can also use it to move safely to the control room. But it isn't necessary Fight until you secure the whole platform.
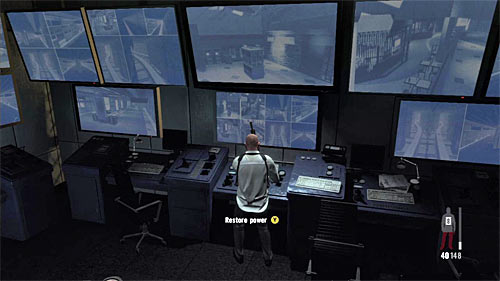
Pick up ammo and enter the control room. Collect the painkillers and use the consol to restore the electricity. Another difficult encounter in front of you.
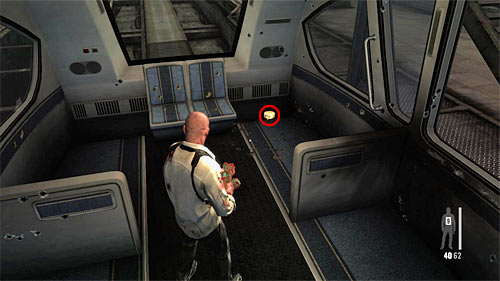
Stay by the main shutter of the control room and start firing. It's worth to know, that enemies will run out from the wagons on the both sides of the platform so you have to look around a lot. Don't care about the smoke grenades but make sure that no one enters the control room.
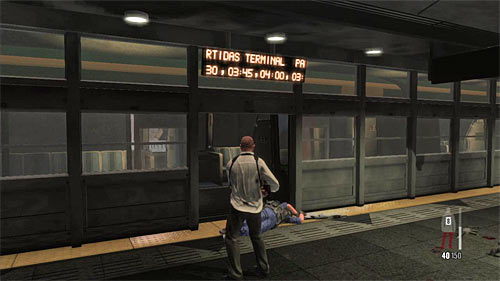
Do not leave the control room during this encounter. When it ends pick up ammo and enter the random wagon from the left train.
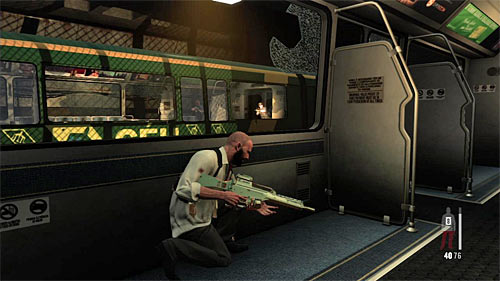
After regaining control brake the glass and start firing at the enemies in the next train. Try not to lean out for too long and don't care if you miss anyone, because the second train will slow down and let you correct yourself. So you can stay in the same wagon.
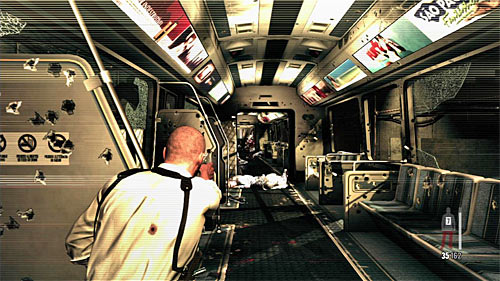
Fight until the cut scene will display, make sure you're behind the cover and attack foes who get into your train. The best idea is to stay where you are, especially when no one will appear behind your back. Go out behind the cover only when you notice that you're run out of ammo.
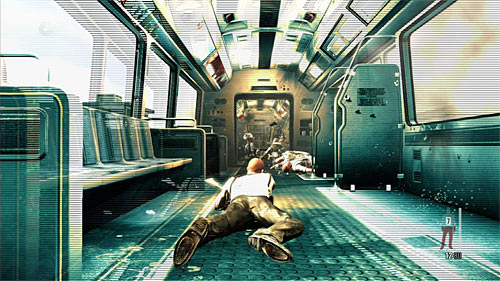
The last part of a voyage is connected with the effective jump to the left wagon. After landing do not stand up but eliminate enemies while lying on the ground.

Wait until the train reach the new platform, stay inside and look for the three packs of the painkillers. Go to the last wagon where you find the last piece of a gun [Golden Gun - RPD 3/3]. Only now reach the random exit from the train what causes the longer cut scene and proceeds to the final battle.
Remark! Don't reach the exit until you pick up the medicaments and the secret because later you won't be able to return for them (cut scene display automatically when you leave the wagon).
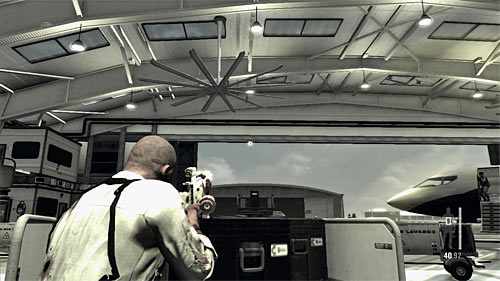
Final battle begin from destroying the grenade that Becker fire at you.
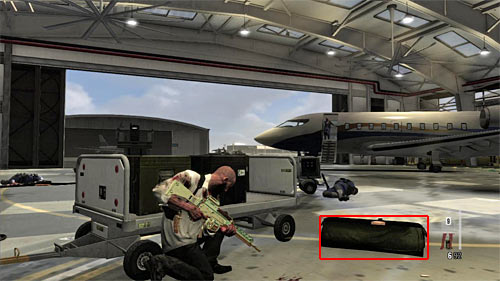
After that, eliminate normal enemies in this area. You don't have to save ammo, because on the right (screen) there is a bag with the supplies. What is more, on the left and right you'll find painkillers.
During eliminating opponents try to monitor what Becker does behind the shield. Every time you see he is preparing to fire, use the bullet time and destroy grenades in the air. If you don't, Max will be besmeared and lose little health (screen) but it doesn't mean lose.
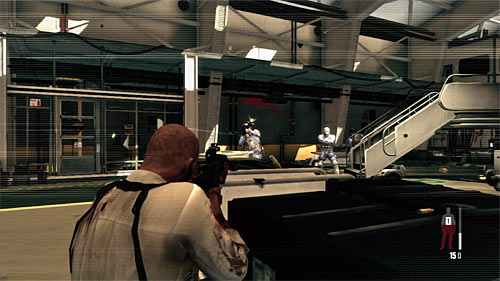
Focus only on attacking the standard enemies because you have to kill all of them to proceed to the next part of the encounter. Firstly eliminate those who will try attack you from the flank.
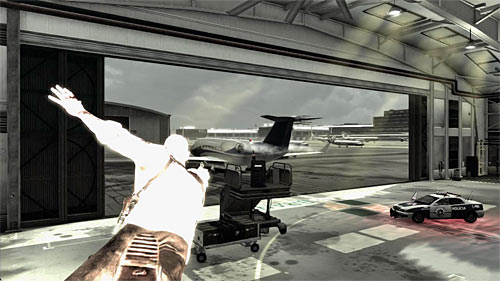
After doing in all normal enemies, game will display the cut scene. Wait until Max jumps and destroy the grenades in the air (screen) what will hurt Becker.
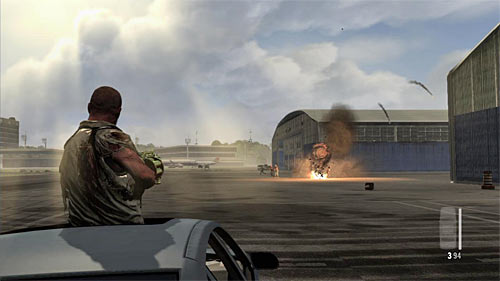
Becker is out, now it's Victor's time. A new scene of chase in front of you during which Max will use the grenade launcher. Firstly attack enemies standing on the airport. Remember that grenades don't fly strictly forward, so aim a little higher.
Remark! During the scene don't bother about the ammo, but reloading the grenade launcher takes a while, so try to be accurate. At the screen you see the energy bar of the Da Silva's vehicle, but you'll have to fight very badly to make it seriously damaged.
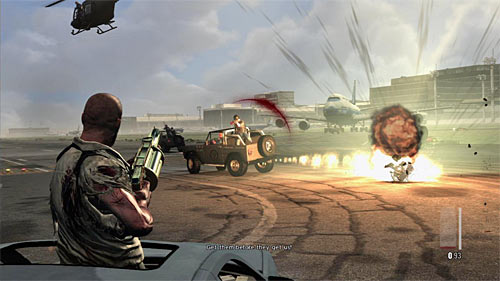
When enemies in jeeps appear, focus on them. Single hit at the vehicle should be enough to blow it up.
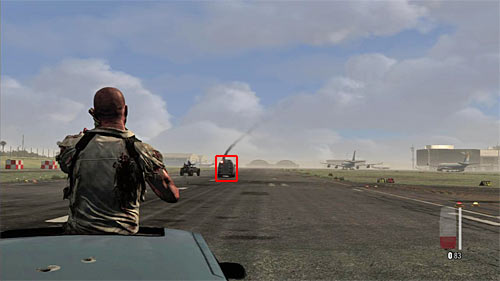
Soon you'll get on the landing strip and here you can also destroy the police cars blocking the way. The most important is to blow up the black truck (screen).
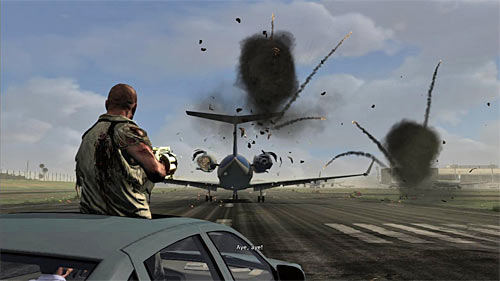
After the short cut scene, wait until you get closer to the jet and fire at him, aiming at the engines. Destroying the machine will end this chapter and all game. Congratulations!
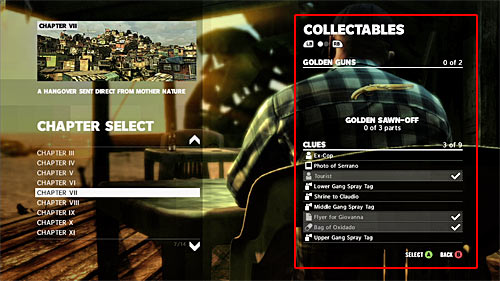
Collectables in the Max Payne 3 can be divided on three categories:
Remark! Information about localization and the moments of finding all clues and golden guns is in the walkthrough. This chapter of the guide I recommend to use when you miss some collectible and you can't find it. You can check which collectibles you have found by choosing the Chapter Select in the main menu. Proper information are displayed on the right (screen above).
Remark! Following list shows secrets in the order you meet them. Remember, that in most of cases game won't let you return to the location you've left. In case you miss any collectible, you don't have to repeat all chapter but you can start from the random Checkpoint.
NUMBER OF CLUES: 2
NUMBER OF GOLDEN GUNS: 1 (PT92 Pistol)
TOTAL NUMBER OF COLLECTIBLES: 5 (2 clues + 3 fragments of gun)
![SECRET 1 [Golden Gun - PT92 Pistol 1/3]: You find it at the end of the starting corridor, by the windows - Clues and Golden Guns - Chapter I - Collectibles - Max Payne 3 - Game Guide and Walkthrough](https://game.lhg100.com/Article/UploadFiles/201512/2015121617434069.jpg)
SECRET 1 [Golden Gun - PT92 Pistol 1/3]: You find it at the end of the starting corridor, by the windows.
![SECRET 2 [Clue 1/2 - Celebrity Magazine]: You find it on the table in the apartment - Clues and Golden Guns - Chapter I - Collectibles - Max Payne 3 - Game Guide and Walkthrough](https://game.lhg100.com/Article/UploadFiles/201512/2015121617434073.jpg)
SECRET 2 [Clue 1/2 - Celebrity Magazine]: You find it on the table in the apartment.
![SECRET 3 [Golden Gun - PT92 Pistol 2/3]: You will find it in the glassed corner by the elevator (after using it) - Clues and Golden Guns - Chapter I - Collectibles - Max Payne 3 - Game Guide and Walkthrough](https://game.lhg100.com/Article/UploadFiles/201512/2015121617434029.jpg)
SECRET 3 [Golden Gun - PT92 Pistol 2/3]: You will find it in the glassed corner by the elevator (after using it).
![SECRET 4 [Golden Gun - PT92 Pistol 3/3]: Youll find it in the underground parking, on the B01 parking place - Clues and Golden Guns - Chapter I - Collectibles - Max Payne 3 - Game Guide and Walkthrough](https://game.lhg100.com/Article/UploadFiles/201512/2015121617434045.jpg)
SECRET 4 [Golden Gun - PT92 Pistol 3/3]: You'll find it in the underground parking, on the B01 parking place.
![SECRET 5 [Clue 2/2 - Dropped Photo]: On the way leading to the upper part of the underground parking - Clues and Golden Guns - Chapter I - Collectibles - Max Payne 3 - Game Guide and Walkthrough](https://game.lhg100.com/Article/UploadFiles/201512/2015121617434144.jpg)
SECRET 5 [Clue 2/2 - Dropped Photo]: On the way leading to the upper part of the underground parking.
NUMBER OF CLUES: 6
NUMBER OF GOLDEN GUNS: 2 (.38 Revolver)(Mini-30 Rifle)
TOTAL NUMBER OF SECRETS: 12 (6 clues + 6 fragments of guns)
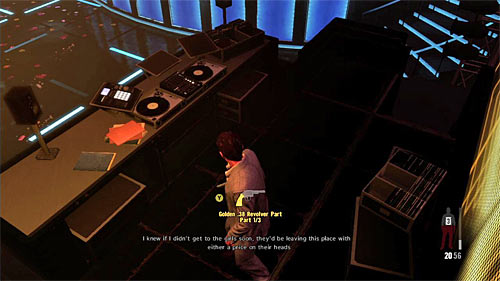
SECRET 1 [Golden Gun - .38 Revolver 1/3]: In the starting location, by the abandoned DJ's console.
![SECRET 2 [Clue 1/6 - Dead Soccer Star]: In the VIP section, on the left from the stairs leading to the next area - Clues and Golden Guns - Chapter II - Collectibles - Max Payne 3 - Game Guide and Walkthrough](https://game.lhg100.com/Article/UploadFiles/201512/2015121617434171.jpg)
SECRET 2 [Clue 1/6 - Dead Soccer Star]: In the VIP section, on the left from the stairs leading to the next area.
![SECRET 3 [Clue 2/6 - Night Club Flyer]: In the VIP section, on the bar - Clues and Golden Guns - Chapter II - Collectibles - Max Payne 3 - Game Guide and Walkthrough](https://game.lhg100.com/Article/UploadFiles/201512/2015121617434112.jpg)
SECRET 3 [Clue 2/6 - Night Club Flyer]: In the VIP section, on the bar.
![SECRET 4 [Golden Gun - Mini-30 Rifle 1/3]: In the VIP section, behind the bar - Clues and Golden Guns - Chapter II - Collectibles - Max Payne 3 - Game Guide and Walkthrough](https://game.lhg100.com/Article/UploadFiles/201512/2015121617434126.jpg)
SECRET 4 [Golden Gun - Mini-30 Rifle 1/3]: In the VIP section, behind the bar.
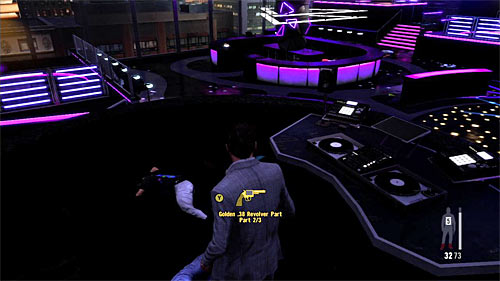
SECRET 5 [Golden Gun - .38 Revolver 2/3]: In the part of the night club with the violet lights. It's by the DJ's abandoned console and to reach it, you have to go through one of the upper balconies.
![SECRET 6 [Clue 3/6 - Ex-cop]: In the toilet, where you have to search the middle cabin - Clues and Golden Guns - Chapter II - Collectibles - Max Payne 3 - Game Guide and Walkthrough](https://game.lhg100.com/Article/UploadFiles/201512/2015121617434199.jpg)
SECRET 6 [Clue 3/6 - Ex-cop]: In the toilet, where you have to search the middle cabin.
![SECRET 7 [Clue 4/6 - Torn Dress Piece]: In the toilet, on the right from the mirror - Clues and Golden Guns - Chapter II - Collectibles - Max Payne 3 - Game Guide and Walkthrough](https://game.lhg100.com/Article/UploadFiles/201512/2015121617434245.jpg)
SECRET 7 [Clue 4/6 - Torn Dress Piece]: In the toilet, on the right from the mirror.
![SECRET 8 [Clue 5/6 - Portuguese Newspaper]: In the kitchen - Clues and Golden Guns - Chapter II - Collectibles - Max Payne 3 - Game Guide and Walkthrough](https://game.lhg100.com/Article/UploadFiles/201512/2015121617434277.jpg)
SECRET 8 [Clue 5/6 - Portuguese Newspaper]: In the kitchen.
![SECRET 9 [Golden Gun - Mini-30 Rifle 2/3]: In the round bar with the red lantern - Clues and Golden Guns - Chapter II - Collectibles - Max Payne 3 - Game Guide and Walkthrough](https://game.lhg100.com/Article/UploadFiles/201512/2015121617434230.jpg)
SECRET 9 [Golden Gun - Mini-30 Rifle 2/3]: In the round bar with the red lantern.
![SECRET 10 [Golden Gun - Mini-30 Rifle 3/3]: In the small room next to the helicopters airstrip - Clues and Golden Guns - Chapter II - Collectibles - Max Payne 3 - Game Guide and Walkthrough](https://game.lhg100.com/Article/UploadFiles/201512/2015121617434212.jpg)
SECRET 10 [Golden Gun - Mini-30 Rifle 3/3]: In the small room next to the helicopters' airstrip.
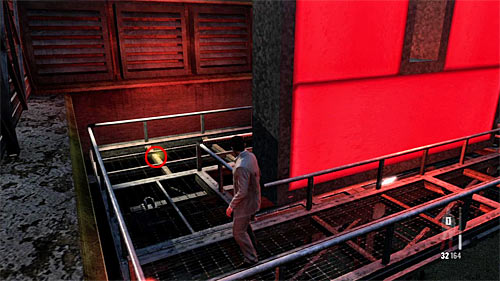
SECRET 11 [Golden Gun - .38 Revolver 3/3]: On the metal balcony surrounding the big, red neon.
![SECRET 12 [Clue 6/6 - Giovannas Necklace]: On the staircase at the end of the mission - Clues and Golden Guns - Chapter II - Collectibles - Max Payne 3 - Game Guide and Walkthrough](https://game.lhg100.com/Article/UploadFiles/201512/2015121617434252.jpg)
SECRET 12 [Clue 6/6 - Giovanna's Necklace]: On the staircase at the end of the mission.
NUMBER OF CLUES: 4
NUMBER OF GOLDEN GUNS: 2 (M10 Rifle)( M82A1 Sniper Rifle)
TOTAL NUMBER OF SECRETS : 10 (4 clues + 6 fragments of guns)
![SECRET 1 [Clue 1/4 - Picture of Victor]: In the small office next to the place where you meet the first group of enemies - Clues and Golden Guns - Chapter III - Collectibles - Max Payne 3 - Game Guide and Walkthrough](https://game.lhg100.com/Article/UploadFiles/201512/2015121617434278.jpg)
SECRET 1 [Clue 1/4 - Picture of Victor]: In the small office next to the place where you meet the first group of enemies.
![SECRET 2 [Clue 2/4 - Blood Stained Door]: On the white door on the left from the elevator - Clues and Golden Guns - Chapter III - Collectibles - Max Payne 3 - Game Guide and Walkthrough](https://game.lhg100.com/Article/UploadFiles/201512/2015121617434386.jpg)
SECRET 2 [Clue 2/4 - Blood Stained Door]: On the white door on the left from the elevator.
![SECRET 3 [Golden Gun - M10 1/3]: In the small recording room, next to the place in which one of the bandits is interrogated - Clues and Golden Guns - Chapter III - Collectibles - Max Payne 3 - Game Guide and Walkthrough](https://game.lhg100.com/Article/UploadFiles/201512/2015121617434301.jpg)
SECRET 3 [Golden Gun - M10 1/3]: In the small recording room, next to the place in which one of the bandits is interrogated.
![SECRET 4 [Golden Gun - M82A1 1/3]: In the room with the souvenirs - Clues and Golden Guns - Chapter III - Collectibles - Max Payne 3 - Game Guide and Walkthrough](https://game.lhg100.com/Article/UploadFiles/201512/2015121617434367.jpg)
SECRET 4 [Golden Gun - M82A1 1/3]: In the room with the souvenirs.
![SECRET 5 [Clue 3/4 - Blood Stained Hallway]: In the hallway examined after avoiding the first sniper - Clues and Golden Guns - Chapter III - Collectibles - Max Payne 3 - Game Guide and Walkthrough](https://game.lhg100.com/Article/UploadFiles/201512/2015121617434317.jpg)
SECRET 5 [Clue 3/4 - Blood Stained Hallway]: In the hallway examined after avoiding the first sniper.
![SECRET 6 [Golden Gun - M10 2/3]: In the bottom part of tribunes, by the net - Clues and Golden Guns - Chapter III - Collectibles - Max Payne 3 - Game Guide and Walkthrough](https://game.lhg100.com/Article/UploadFiles/201512/2015121617434302.jpg)
SECRET 6 [Golden Gun - M10 2/3]: In the bottom part of tribunes, by the net.
![SECRET 7 [Golden Gun - M10 3/3]: In the Trophy Room, on one of VIPs section armchairs - Clues and Golden Guns - Chapter III - Collectibles - Max Payne 3 - Game Guide and Walkthrough](https://game.lhg100.com/Article/UploadFiles/201512/2015121617434389.jpg)
SECRET 7 [Golden Gun - M10 3/3]: In the Trophy Room, on one of VIP's section armchairs.
![SECRET 8 [Clue 4/4 - Soccer Star Memorial]: At the very end of the Trophy Room, by the passage leading to the second part of tribunes - Clues and Golden Guns - Chapter III - Collectibles - Max Payne 3 - Game Guide and Walkthrough](https://game.lhg100.com/Article/UploadFiles/201512/2015121617434393.jpg)
SECRET 8 [Clue 4/4 - Soccer Star Memorial]: At the very end of the Trophy Room, by the passage leading to the second part of tribunes.
![SECRET 9 [Golden Gun - M82A1 2/3]: In the bottom part of the second part of tribunes, in the alley by the stairs - Clues and Golden Guns - Chapter III - Collectibles - Max Payne 3 - Game Guide and Walkthrough](https://game.lhg100.com/Article/UploadFiles/201512/2015121617434490.jpg)
SECRET 9 [Golden Gun - M82A1 2/3]: In the bottom part of the second part of tribunes, in the alley by the stairs.
![SECRET 10 [Golden Gun - M82A1 3/3]: In the upper part of the third part of tribunes, in the place which is monitored by the second sniper - Clues and Golden Guns - Chapter III - Collectibles - Max Payne 3 - Game Guide and Walkthrough](https://game.lhg100.com/Article/UploadFiles/201512/2015121617434469.jpg)
SECRET 10 [Golden Gun - M82A1 3/3]: In the upper part of the third part of tribunes, in the place which is monitored by the second sniper.
NUMBER OF CLUES: 3
NUMBER OF GOLDEN GUNS: 3 (1911 Pistol)(M500 Shotgun)(SAF 40 Cal SMG)
TOTAL NUMBER OF SECRETS: 12 (3 clues + 9 fragments of weapons)
![SECRET 1 [Golden Gun - 1911 Revolver 1/3]: At the closed entrance to the bar, at the very beginning of the chapter - Clues and Golden Guns - Chapter IV - Collectibles - Max Payne 3 - Game Guide and Walkthrough](https://game.lhg100.com/Article/UploadFiles/201512/2015121617434455.jpg)
SECRET 1 [Golden Gun - 1911 Revolver 1/3]: At the closed entrance to the bar, at the very beginning of the chapter.
![SECRET 2 [Golden Gun - 1911 Revolver 2/3]: On the bars floor in the beginning stage of the chapter - Clues and Golden Guns - Chapter IV - Collectibles - Max Payne 3 - Game Guide and Walkthrough](https://game.lhg100.com/Article/UploadFiles/201512/2015121617434463.jpg)
SECRET 2 [Golden Gun - 1911 Revolver 2/3]: On the bar's floor in the beginning stage of the chapter.
![SECRET 3 [Golden Gun - 1911 Revolver 3/3]: Under the stairs linking the back exit of the bar with the parking - Clues and Golden Guns - Chapter IV - Collectibles - Max Payne 3 - Game Guide and Walkthrough](https://game.lhg100.com/Article/UploadFiles/201512/2015121617434408.jpg)
SECRET 3 [Golden Gun - 1911 Revolver 3/3]: Under the stairs linking the back exit of the bar with the parking.
![SECRET 4 [Clue 1/3 - Maxs NYPD Badge]: On the table in the Maxs flat - Clues and Golden Guns - Chapter IV - Collectibles - Max Payne 3 - Game Guide and Walkthrough](https://game.lhg100.com/Article/UploadFiles/201512/2015121617434421.jpg)
SECRET 4 [Clue 1/3 - Max's NYPD Badge]: On the table in the Max's flat.
![SECRET 5 [Golden Gun - M500 Shotgun 1/3]: On the floor in the Maxs flat - Clues and Golden Guns - Chapter IV - Collectibles - Max Payne 3 - Game Guide and Walkthrough](https://game.lhg100.com/Article/UploadFiles/201512/2015121617434407.jpg)
SECRET 5 [Golden Gun - M500 Shotgun 1/3]: On the floor in the Max's flat.
![SECRET 6 [Clue 2/3 - Brewers Journal]: In the Brewers (suicide) flat - Clues and Golden Guns - Chapter IV - Collectibles - Max Payne 3 - Game Guide and Walkthrough](https://game.lhg100.com/Article/UploadFiles/201512/2015121617434515.jpg)
SECRET 6 [Clue 2/3 - Brewer's Journal]: In the Brewer's (suicide) flat.
![SECRET 7 [Clue 3/3 - Newspaper Clippings]: On the wall in the Brewers (suicide) flat - Clues and Golden Guns - Chapter IV - Collectibles - Max Payne 3 - Game Guide and Walkthrough](https://game.lhg100.com/Article/UploadFiles/201512/2015121617434583.jpg)
SECRET 7 [Clue 3/3 - Newspaper Clippings]: On the wall in the Brewer's (suicide) flat.
![SECRET 8 [Golden Gun - SAF 40 Cal SMG 1/3]: In the destroyed apartment to which entrance is nearby the staircase - Clues and Golden Guns - Chapter IV - Collectibles - Max Payne 3 - Game Guide and Walkthrough](https://game.lhg100.com/Article/UploadFiles/201512/2015121617434583.jpg)
SECRET 8 [Golden Gun - SAF 40 Cal SMG 1/3]: In the destroyed apartment to which entrance is nearby the staircase.
![SECRET 9 [Golden Gun - M500 Shotgun 2/3]: On the roof of the first building after you use the staircase - Clues and Golden Guns - Chapter IV - Collectibles - Max Payne 3 - Game Guide and Walkthrough](https://game.lhg100.com/Article/UploadFiles/201512/2015121617434572.jpg)
SECRET 9 [Golden Gun - M500 Shotgun 2/3]: On the roof of the first building after you use the staircase.
![SECRET 10 [Golden Gun - SAF 40 Cal SMG 2/3]: On the roof of the building searched just after the meeting with Raul - Clues and Golden Guns - Chapter IV - Collectibles - Max Payne 3 - Game Guide and Walkthrough](https://game.lhg100.com/Article/UploadFiles/201512/2015121617434534.jpg)
SECRET 10 [Golden Gun - SAF 40 Cal SMG 2/3]: On the roof of the building searched just after the meeting with Raul.
![SECRET 11 [Golden Gun - M500 Shotgun 3/3]: On the second floor in the destroyed building secured with Raul, in the narrow passage on the left from the stairs - Clues and Golden Guns - Chapter IV - Collectibles - Max Payne 3 - Game Guide and Walkthrough](https://game.lhg100.com/Article/UploadFiles/201512/2015121617434551.jpg)
SECRET 11 [Golden Gun - M500 Shotgun 3/3]: On the second floor in the destroyed building secured with Raul, in the narrow passage on the left from the stairs.
![SECRET 12 [Golden Gun - SAF 40 Cal SMG 3/3]: In the office room in the garage secured in the ending part of the chapter - Clues and Golden Guns - Chapter IV - Collectibles - Max Payne 3 - Game Guide and Walkthrough](https://game.lhg100.com/Article/UploadFiles/201512/2015121617434524.jpg)
SECRET 12 [Golden Gun - SAF 40 Cal SMG 3/3]: In the office room in the garage secured in the ending part of the chapter.
NUMBER OF CLUES: 6
NUMBER OF GOLDEN GUNS: 2 (Micro 9mm SMG)(LMG .30 Rifle)
TOTAL NUMBER OF SECRETS: 12 (6 clues + 6 fragments of weapons)
![SECRET 1 [Clue 1/6 - Parked Helicopter]: Behind the net at the very beginning - Clues and Golden Guns - Chapter V - Collectibles - Max Payne 3 - Game Guide and Walkthrough](https://game.lhg100.com/Article/UploadFiles/201512/2015121617434683.jpg)
SECRET 1 [Clue 1/6 - Parked Helicopter]: Behind the net at the very beginning.
![SECRET 2 [Clue 2/6 - Ransom Note]: On the desk in the first storehouse occupied by the enemies - Clues and Golden Guns - Chapter V - Collectibles - Max Payne 3 - Game Guide and Walkthrough](https://game.lhg100.com/Article/UploadFiles/201512/2015121617434647.jpg)
SECRET 2 [Clue 2/6 - Ransom Note]: On the desk in the first storehouse occupied by the enemies.
![SECRET 3 [Golden Gun - Micro 9mm SMG 1/3]: On the strip on the right from the exit of the first storehouse - Clues and Golden Guns - Chapter V - Collectibles - Max Payne 3 - Game Guide and Walkthrough](https://game.lhg100.com/Article/UploadFiles/201512/2015121617434695.jpg)
SECRET 3 [Golden Gun - Micro 9mm SMG 1/3]: On the strip on the right from the exit of the first storehouse. To reach it, you have to climb on the smaller skips.
![SECRET 4 [Clue 3/6 - Video Camera]: Inside the storehouse in which Fabiana was kept - Clues and Golden Guns - Chapter V - Collectibles - Max Payne 3 - Game Guide and Walkthrough](https://game.lhg100.com/Article/UploadFiles/201512/2015121617434666.jpg)
SECRET 4 [Clue 3/6 - Video Camera]: Inside the storehouse in which Fabiana was kept.
![SECRET 5 [Golden Gun - Micro 9mm SMG 2/3]: You find it after exiting the warehouse in which Fabiana was kept - Clues and Golden Guns - Chapter V - Collectibles - Max Payne 3 - Game Guide and Walkthrough](https://game.lhg100.com/Article/UploadFiles/201512/2015121617434609.jpg)
SECRET 5 [Golden Gun - Micro 9mm SMG 2/3]: You find it after exiting the warehouse in which Fabiana was kept. It lies on the ground, on the right, by the net.
![SECRET 6 [Golden Gun - Micro 9mm SMG 3/3]: On the upper balcony, occupied by the enemies - Clues and Golden Guns - Chapter V - Collectibles - Max Payne 3 - Game Guide and Walkthrough](https://game.lhg100.com/Article/UploadFiles/201512/2015121617434698.jpg)
SECRET 6 [Golden Gun - Micro 9mm SMG 3/3]: On the upper balcony, occupied by the enemies.
![SECRET 7 [Clue 4/6 - Branco Family Photo]: On the table in the small room of the storehouse which is occupied by the thugs - Clues and Golden Guns - Chapter V - Collectibles - Max Payne 3 - Game Guide and Walkthrough](https://game.lhg100.com/Article/UploadFiles/201512/2015121617434625.jpg)
SECRET 7 [Clue 4/6 - Branco Family Photo]: On the table in the small room of the storehouse which is occupied by the thugs. It lies by the switch.
![SECRET 8 [Clue 5/6 - Boathouse Newspaper]: Inside the smaller storehouse, nearby the poker table on the ground floor - Clues and Golden Guns - Chapter V - Collectibles - Max Payne 3 - Game Guide and Walkthrough](https://game.lhg100.com/Article/UploadFiles/201512/2015121617434714.jpg)
SECRET 8 [Clue 5/6 - Boathouse Newspaper]: Inside the smaller storehouse, nearby the poker table on the ground floor.
![SECRET 9 [Clue 6/6 - Nightclub Floor Plans]: Inside the smaller storehouse, on the table on the ground floor - Clues and Golden Guns - Chapter V - Collectibles - Max Payne 3 - Game Guide and Walkthrough](https://game.lhg100.com/Article/UploadFiles/201512/2015121617434769.jpg)
SECRET 9 [Clue 6/6 - Nightclub Floor Plans]: Inside the smaller storehouse, on the table on the ground floor.
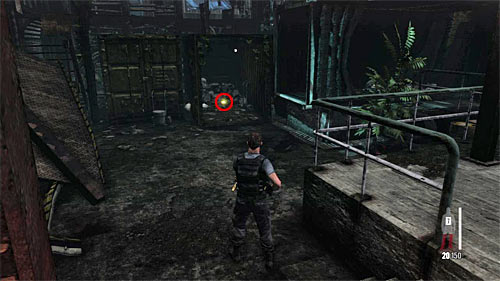
SECRET 10 [Golden Gun - LMG .30 Rifle 1/3]: On the backs of the storehouse, by the containers.
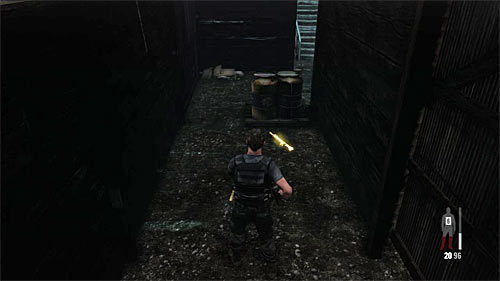
SECRET 11 [Golden Gun - LMG .30 Rifle 2/3]: In the small hut, just before you enter docks.
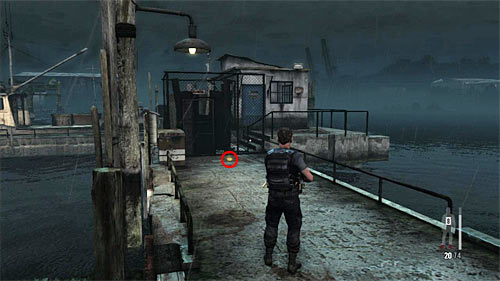
SECRET 12 [Golden Gun - LMG .30 Rifle 3/3]: In the docks, on the path by the one of smaller building.
NUMBER OF CLUES: 5
NUMBER OF GOLDEN GUNS: 1 (MD-97L Rifle)
TOTAL NUMBER OF SECRETS: 8 (5 clues + 3 fragments of guns)
![SECRET 1 [Golden Gun - MD-97L Rifle 1/3]: In one of the side office rooms in the area you begin the chapter - Clues and Golden Guns - Chapter VI - Collectibles - Max Payne 3 - Game Guide and Walkthrough](https://game.lhg100.com/Article/UploadFiles/201512/2015121617434783.jpg)
SECRET 1 [Golden Gun - MD-97L Rifle 1/3]: In one of the side office rooms in the area you begin the chapter.
![SECRET 2 [Clue 1/5 - Rodrigos Email]: On the table in the Victors Branco office (area where the chapter begins) - Clues and Golden Guns - Chapter VI - Collectibles - Max Payne 3 - Game Guide and Walkthrough](https://game.lhg100.com/Article/UploadFiles/201512/2015121617434708.jpg)
SECRET 2 [Clue 1/5 - Rodrigo's Email]: On the table in the Victor's Branco office (area where the chapter begins).
![SECRET 3 [Clue 2/5 - File on Fabiana]: On the table in the Victors Branco office (area where the chapter begins) - Clues and Golden Guns - Chapter VI - Collectibles - Max Payne 3 - Game Guide and Walkthrough](https://game.lhg100.com/Article/UploadFiles/201512/2015121617434838.jpg)
SECRET 3 [Clue 2/5 - File on Fabiana]: On the table in the Victor's Branco office (area where the chapter begins).
![SECRET 4 [Clue 3/5 - Architectural Models]: In the conference room linking the first and the second section of the offices - Clues and Golden Guns - Chapter VI - Collectibles - Max Payne 3 - Game Guide and Walkthrough](https://game.lhg100.com/Article/UploadFiles/201512/2015121617434891.jpg)
SECRET 4 [Clue 3/5 - Architectural Models]: In the conference room linking the first and the second section of the offices.
![SECRET 5 [Golden Gun - MD-97L Rifle 2/3]: In the atrium, by the small waterfall - Clues and Golden Guns - Chapter VI - Collectibles - Max Payne 3 - Game Guide and Walkthrough](https://game.lhg100.com/Article/UploadFiles/201512/2015121617434836.jpg)
SECRET 5 [Golden Gun - MD-97L Rifle 2/3]: In the atrium, by the small waterfall.
![SECRET 6 [Clue 4/5 - School Pictures]: On the wall of the corridor leading to the lobby - Clues and Golden Guns - Chapter VI - Collectibles - Max Payne 3 - Game Guide and Walkthrough](https://game.lhg100.com/Article/UploadFiles/201512/2015121617434858.jpg)
SECRET 6 [Clue 4/5 - School Pictures]: On the wall of the corridor leading to the lobby.
![SECRET 7 [Golden Gun - MD-97L Rifle 3/3]: In the destroyed lobby, inside the glass exhibition - Clues and Golden Guns - Chapter VI - Collectibles - Max Payne 3 - Game Guide and Walkthrough](https://game.lhg100.com/Article/UploadFiles/201512/2015121617434836.jpg)
SECRET 7 [Golden Gun - MD-97L Rifle 3/3]: In the destroyed lobby, inside the glass exhibition.
![SECRET 8 [Clue 5/5 - Dead IT Guy]: You find it during going through the burning building, after you took a gun from the thug - Clues and Golden Guns - Chapter VI - Collectibles - Max Payne 3 - Game Guide and Walkthrough](https://game.lhg100.com/Article/UploadFiles/201512/2015121617434869.jpg)
SECRET 8 [Clue 5/5 - Dead IT Guy]: You find it during going through the burning building, after you took a gun from the thug.
NUMBER OF CLUES: 9
NUMBER OF GOLDEN GUNS: 2 (Sawn-Off Shotgun)(SPAS-15 Shotgun)
TOTAL NUMBER OF SECRETS: 15 (9 clues + 6 fragments of guns)
![SECRET 1 [Clue 1/9 - Ex-Cop]: At the main path to the bar - Clues and Golden Guns - Chapter VII - Collectibles - Max Payne 3 - Game Guide and Walkthrough](https://game.lhg100.com/Article/UploadFiles/201512/2015121617434899.jpg)
SECRET 1 [Clue 1/9 - Ex-Cop]: At the main path to the bar.
![SECRET 2 [Clue 2/9 - Photo of Serrano]: In the bar, in the place where encounter began - Clues and Golden Guns - Chapter VII - Collectibles - Max Payne 3 - Game Guide and Walkthrough](https://game.lhg100.com/Article/UploadFiles/201512/2015121617434876.jpg)
SECRET 2 [Clue 2/9 - Photo of Serrano]: In the bar, in the place where encounter began.
![SECRET 3 [Golden Gun - Sawn-Off Shotgun 1/3]: In the middle cabin in the bars toilet - Clues and Golden Guns - Chapter VII - Collectibles - Max Payne 3 - Game Guide and Walkthrough](https://game.lhg100.com/Article/UploadFiles/201512/2015121617434967.jpg)
SECRET 3 [Golden Gun - Sawn-Off Shotgun 1/3]: In the middle cabin in the bar's toilet.
![SECRET 4 [Clue 3/9 - Tourist]: On the backs of the bar, in the last room on right (by the exit) - Clues and Golden Guns - Chapter VII - Collectibles - Max Payne 3 - Game Guide and Walkthrough](https://game.lhg100.com/Article/UploadFiles/201512/2015121617434981.jpg)
SECRET 4 [Clue 3/9 - Tourist]: On the backs of the bar, in the last room on right (by the exit).
![SECRET 5 [Clue 4/9 - Lower Gang Spray Tag]: On the wall, on the left from the blue, closed door - Clues and Golden Guns - Chapter VII - Collectibles - Max Payne 3 - Game Guide and Walkthrough](https://game.lhg100.com/Article/UploadFiles/201512/2015121617434916.jpg)
SECRET 5 [Clue 4/9 - Lower Gang Spray Tag]: On the wall, on the left from the blue, closed door.
![SECRET 6 [Golden Gun - Sawn-Off Shotgun 2/3]: In the first storehouse, nearby the small room on the floor - Clues and Golden Guns - Chapter VII - Collectibles - Max Payne 3 - Game Guide and Walkthrough](https://game.lhg100.com/Article/UploadFiles/201512/2015121617434991.jpg)
SECRET 6 [Golden Gun - Sawn-Off Shotgun 2/3]: In the first storehouse, nearby the small room on the floor.
![SECRET 7 [Golden Gun - SPAS-15 Shotgun 1/3]: In the first storehouse, just after you get on the balconies in its second part - Clues and Golden Guns - Chapter VII - Collectibles - Max Payne 3 - Game Guide and Walkthrough](https://game.lhg100.com/Article/UploadFiles/201512/2015121617434967.jpg)
SECRET 7 [Golden Gun - SPAS-15 Shotgun 1/3]: In the first storehouse, just after you get on the balconies in its second part.
![SECRET 8 [Golden Gun - SPAS-15 Shotgun 2/3]: On the ground, just after passing the train station and entering territory of the new gang - Clues and Golden Guns - Chapter VII - Collectibles - Max Payne 3 - Game Guide and Walkthrough](https://game.lhg100.com/Article/UploadFiles/201512/2015121617434934.jpg)
SECRET 8 [Golden Gun - SPAS-15 Shotgun 2/3]: On the ground, just after passing the train station and entering territory of the new gang.
![SECRET 9 [Clue 5/9 - Middle Gang Spray Tag]: On the wall, just after passing the train station and entering territory of the new gang - Clues and Golden Guns - Chapter VII - Collectibles - Max Payne 3 - Game Guide and Walkthrough](https://game.lhg100.com/Article/UploadFiles/201512/2015121617434924.jpg)
SECRET 9 [Clue 5/9 - Middle Gang Spray Tag]: On the wall, just after passing the train station and entering territory of the new gang.
![SECRET 10 [Golden Gun - SPAS-15 Shotgun 3/3]: In the dark alley, just after entering territory of the new gang and before the battle - Clues and Golden Guns - Chapter VII - Collectibles - Max Payne 3 - Game Guide and Walkthrough](https://game.lhg100.com/Article/UploadFiles/201512/2015121617434997.jpg)
SECRET 10 [Golden Gun - SPAS-15 Shotgun 3/3]: In the dark alley, just after entering territory of the new gang and before the battle.
![SECRET 11 [Clue 6/9 - Shrine to Claudio]: On the small square just after entering territory of the new gang and before the battle - Clues and Golden Guns - Chapter VII - Collectibles - Max Payne 3 - Game Guide and Walkthrough](https://game.lhg100.com/Article/UploadFiles/201512/2015121617435023.jpg)
SECRET 11 [Clue 6/9 - Shrine to Claudio]: On the small square just after entering territory of the new gang and before the battle.
![SECRET 12 [Clue 7/9 - Flyer of Giovanna]: On the ground, during moving along the narrow and short path between buildings - Clues and Golden Guns - Chapter VII - Collectibles - Max Payne 3 - Game Guide and Walkthrough](https://game.lhg100.com/Article/UploadFiles/201512/2015121617435033.jpg)
SECRET 12 [Clue 7/9 - Flyer of Giovanna]: On the ground, during moving along the narrow and short path between buildings.
![SECRET 13 [Clue 8/9 - Bag of Oxidado]: Inside the building, which exploration begins with the watching the cut scene - Clues and Golden Guns - Chapter VII - Collectibles - Max Payne 3 - Game Guide and Walkthrough](https://game.lhg100.com/Article/UploadFiles/201512/2015121617435046.jpg)
SECRET 13 [Clue 8/9 - Bag of Oxidado]: Inside the building, which exploration begins with the watching the cut scene.
![SECRET 14 [Clue 9/9 - Upper Gang Spray Tag]: On the wall, just after destroying the reserves of drugs - Clues and Golden Guns - Chapter VII - Collectibles - Max Payne 3 - Game Guide and Walkthrough](https://game.lhg100.com/Article/UploadFiles/201512/2015121617435087.jpg)
SECRET 14 [Clue 9/9 - Upper Gang Spray Tag]: On the wall, just after destroying the reserves of drugs.
![SECRET 15 [Golden Gun - Sawn-Off Shotgun 3/3]: You find it on the ground during the last series of encounters, on the left from the stairs leading to the upper balconies - Clues and Golden Guns - Chapter VII - Collectibles - Max Payne 3 - Game Guide and Walkthrough](https://game.lhg100.com/Article/UploadFiles/201512/2015121617435034.jpg)
SECRET 15 [Golden Gun - Sawn-Off Shotgun 3/3]: You find it on the ground during the last series of encounters, on the left from the stairs leading to the upper balconies.
NUMBER OF CLUES: 3
NUMBER OF GOLDEN GUNS: 2 (Auto 9mm)(608 Bull)
TOTAL NUMBER OF SECRETS: 9 (3 clues + 6 fragments of guns)
![SECRET 1 [Golden Gun - Auto 9mm 1/3]: In the second part of the graveyard, by the crypt located on the left from the stairs leading to the enemy with the grenade launcher - Clues and Golden Guns - Chapter VIII - Collectibles - Max Payne 3 - Game Guide and Walkthrough](https://game.lhg100.com/Article/UploadFiles/201512/2015121617435005.jpg)
SECRET 1 [Golden Gun - Auto 9mm 1/3]: In the second part of the graveyard, by the crypt located on the left from the stairs leading to the enemy with the grenade launcher.
![SECRET 2 [Clue 1/3 - Valeries Tombstone]: You find it in the second part of the graveyard after killing the thug with the grenade launcher and before reaching the gate to the next area - Clues and Golden Guns - Chapter VIII - Collectibles - Max Payne 3 - Game Guide and Walkthrough](https://game.lhg100.com/Article/UploadFiles/201512/2015121617435036.jpg)
SECRET 2 [Clue 1/3 - Valerie's Tombstone]: You find it in the second part of the graveyard after killing the thug with the grenade launcher and before reaching the gate to the next area.
![SECRET 3 [Golden Gun - 608 Bull 1/3]: Nearby the big square occupied by the thugs - Clues and Golden Guns - Chapter VIII - Collectibles - Max Payne 3 - Game Guide and Walkthrough](https://game.lhg100.com/Article/UploadFiles/201512/2015121617435087.jpg)
SECRET 3 [Golden Gun - 608 Bull 1/3]: Nearby the big square occupied by the thugs.
![SECRET 4 [Golden Gun - Auto 9mm 2/3]: In one of the right lanes in the big mausoleum - Clues and Golden Guns - Chapter VIII - Collectibles - Max Payne 3 - Game Guide and Walkthrough](https://game.lhg100.com/Article/UploadFiles/201512/2015121617435159.jpg)
SECRET 4 [Golden Gun - Auto 9mm 2/3]: In one of the right lanes in the big mausoleum.
![SECRET 5 [Golden Gun - 608 Bull 2/3]: In the central sarcophagus in the round area, where you defended Raul - Clues and Golden Guns - Chapter VIII - Collectibles - Max Payne 3 - Game Guide and Walkthrough](https://game.lhg100.com/Article/UploadFiles/201512/2015121617435104.jpg)
SECRET 5 [Golden Gun - 608 Bull 2/3]: In the central sarcophagus in the round area, where you defended Raul.
![SECRET 6 [Clue 2/3 - Nicole Mausoleum]: In the lower part of the round area, where you defended Raul - Clues and Golden Guns - Chapter VIII - Collectibles - Max Payne 3 - Game Guide and Walkthrough](https://game.lhg100.com/Article/UploadFiles/201512/2015121617435121.jpg)
SECRET 6 [Clue 2/3 - Nicole Mausoleum]: In the lower part of the round area, where you defended Raul.
![SECRET 7 [Clue 3/3 - Vinnies Tombstone]: On the small graveyard, which you examine just after killing the sniper on the tower - Clues and Golden Guns - Chapter VIII - Collectibles - Max Payne 3 - Game Guide and Walkthrough](https://game.lhg100.com/Article/UploadFiles/201512/2015121617435189.jpg)
SECRET 7 [Clue 3/3 - Vinnie's Tombstone]: On the small graveyard, which you examine just after killing the sniper on the tower.
![SECRET 8 [Golden Gun - Auto 9mm 3/3]: In the small building next to the funeral home - Clues and Golden Guns - Chapter VIII - Collectibles - Max Payne 3 - Game Guide and Walkthrough](https://game.lhg100.com/Article/UploadFiles/201512/2015121617435108.jpg)
SECRET 8 [Golden Gun - Auto 9mm 3/3]: In the small building next to the funeral home.
![SECRET 9 [Golden Gun - 608 Bull 3/3]: By the rostrum in the chapel of funeral home - Clues and Golden Guns - Chapter VIII - Collectibles - Max Payne 3 - Game Guide and Walkthrough](https://game.lhg100.com/Article/UploadFiles/201512/2015121617435107.jpg)
SECRET 9 [Golden Gun - 608 Bull 3/3]: By the rostrum in the chapel of funeral home.
NUMBER OF CLUES: 3
NUMBER OF GOLDEN GUNS: 2 (DE .50 Pistol)(M972 SMG)
TOTAL NUMBER OF SECRETS: 9 (3 clues + 6 fragments of guns)
![SECRET 1 [Clue 1/3 - Dead Gang Members]: Inside the building, at the very beginning - Clues and Golden Guns - Chapter IX - Collectibles - Max Payne 3 - Game Guide and Walkthrough](https://game.lhg100.com/Article/UploadFiles/201512/2015121617435183.jpg)
SECRET 1 [Clue 1/3 - Dead Gang Members]: Inside the building, at the very beginning.
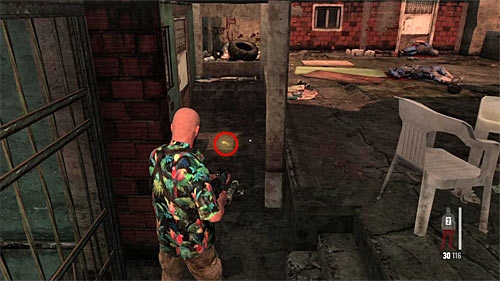
SECRET 2 [Golden Gun - DE .50 Pistol 1/3]: by the wall of the building in the area where you have a first encounter with police.
![SECRET 3 [Clue 2/3 - Dead UFE Member]: During the exploration of long, narrow alley - Clues and Golden Guns - Chapter IX - Collectibles - Max Payne 3 - Game Guide and Walkthrough](https://game.lhg100.com/Article/UploadFiles/201512/2015121617435228.jpg)
SECRET 3 [Clue 2/3 - Dead UFE Member]: During the exploration of long, narrow alley.
![SECRET 4 [Golden Gun - M972 SMG 1/3]: In the toilet in one of searched houses - Clues and Golden Guns - Chapter IX - Collectibles - Max Payne 3 - Game Guide and Walkthrough](https://game.lhg100.com/Article/UploadFiles/201512/2015121617435268.jpg)
SECRET 4 [Golden Gun - M972 SMG 1/3]: In the toilet in one of searched houses.
![SECRET 5 [Golden Gun - M972 SMG 2/3]: By the long stairs leading to the lower level of slums - Clues and Golden Guns - Chapter IX - Collectibles - Max Payne 3 - Game Guide and Walkthrough](https://game.lhg100.com/Article/UploadFiles/201512/2015121617435256.jpg)
SECRET 5 [Golden Gun - M972 SMG 2/3]: By the long stairs leading to the lower level of slums.
![SECRET 6 [Clue 3/3 - Dead Residents]: In the place where you watched an execution of the innocent civilians - Clues and Golden Guns - Chapter IX - Collectibles - Max Payne 3 - Game Guide and Walkthrough](https://game.lhg100.com/Article/UploadFiles/201512/2015121617435203.jpg)
SECRET 6 [Clue 3/3 - Dead Residents]: In the place where you watched an execution of the innocent civilians.
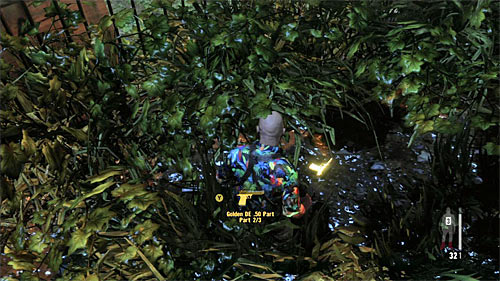
SECRET 7 [Golden Gun - DE .50 Pistol 2/3]: In the bushes.
![SECRET 8 [Golden Gun - M972 SMG 3/3]:By the closed gate, on the left from the stairs leading to upper balconies - Clues and Golden Guns - Chapter IX - Collectibles - Max Payne 3 - Game Guide and Walkthrough](https://game.lhg100.com/Article/UploadFiles/201512/2015121617435360.jpg)
SECRET 8 [Golden Gun - M972 SMG 3/3]:By the closed gate, on the left from the stairs leading to upper balconies.
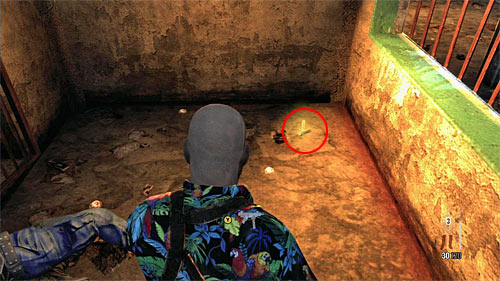
SECRET 9 [Golden Gun - DE .50 Pistol 3/3]: In the place where you meet one of the last numerous group of enemies, in the building next to the wooden bridge.
NUMBER OF CLUES: 2
NUMBER OF GOLDEN GUNS: 2 (FAL)(M4 Super 90 Shotgun)
TOTAL NUMBER OF SECRETS: 8 (2 clues + 6 fragments of guns)
![SECRET 1 [Golden Gun - FAL 1/3]: Inside the wreck of a bus in the beginning zone - Clues and Golden Guns - Chapter X - Collectibles - Max Payne 3 - Game Guide and Walkthrough](https://game.lhg100.com/Article/UploadFiles/201512/2015121617435380.jpg)
SECRET 1 [Golden Gun - FAL 1/3]: Inside the wreck of a bus in the beginning zone.
![SECRET 2 [Clue 1/2 - Office Newspaper]: Inside the lodge on the first square - Clues and Golden Guns - Chapter X - Collectibles - Max Payne 3 - Game Guide and Walkthrough](https://game.lhg100.com/Article/UploadFiles/201512/2015121617435337.jpg)
SECRET 2 [Clue 1/2 - Office Newspaper]: Inside the lodge on the first square.
![SECRET 3 [Golden Gun - M4 Super 90 Shotgun 1/3]: In small room in the first storehouse - Clues and Golden Guns - Chapter X - Collectibles - Max Payne 3 - Game Guide and Walkthrough](https://game.lhg100.com/Article/UploadFiles/201512/2015121617435351.jpg)
SECRET 3 [Golden Gun - M4 Super 90 Shotgun 1/3]: In small room in the first storehouse.
![SECRET 4 [Golden Gun - M4 Super 90 Shotgun 2/3]: On table in the storehouse in which you have a bigger battle with enemies - Clues and Golden Guns - Chapter X - Collectibles - Max Payne 3 - Game Guide and Walkthrough](https://game.lhg100.com/Article/UploadFiles/201512/2015121617435336.jpg)
SECRET 4 [Golden Gun - M4 Super 90 Shotgun 2/3]: On table in the storehouse in which you have a bigger battle with enemies.
![SECRET 5 [Golden Gun - FAL 2/3]: In the storehouse, in the room where the bus is parked - Clues and Golden Guns - Chapter X - Collectibles - Max Payne 3 - Game Guide and Walkthrough](https://game.lhg100.com/Article/UploadFiles/201512/2015121617435457.jpg)
SECRET 5 [Golden Gun - FAL 2/3]: In the storehouse, in the room where the bus is parked. The item is inside this bus.
![SECRET 6 [Golden Gun - M4 Super 90 Shotgun 3/3]: In the corner of big office room on the floor of building - Clues and Golden Guns - Chapter X - Collectibles - Max Payne 3 - Game Guide and Walkthrough](https://game.lhg100.com/Article/UploadFiles/201512/2015121617435432.jpg)
SECRET 6 [Golden Gun - M4 Super 90 Shotgun 3/3]: In the corner of big office room on the floor of building.
![SECRET 7 [Clue 2/2 - Ad Campaign Poster]: On the wall, on the ground floor of building by the stairs - Clues and Golden Guns - Chapter X - Collectibles - Max Payne 3 - Game Guide and Walkthrough](https://game.lhg100.com/Article/UploadFiles/201512/2015121617435418.jpg)
SECRET 7 [Clue 2/2 - Ad Campaign Poster]: On the wall, on the ground floor of building by the stairs.
![SECRET 8 [Golden Gun - FAL 3/3]: In small office room on the ground floor of building, by the switch - Clues and Golden Guns - Chapter X - Collectibles - Max Payne 3 - Game Guide and Walkthrough](https://game.lhg100.com/Article/UploadFiles/201512/2015121617435495.jpg)
SECRET 8 [Golden Gun - FAL 3/3]: In small office room on the ground floor of building, by the switch.
NUMBER OF CLUES: 8
NUMBER OF GOLDEN GUNS: 2 (Super Sport)(AK-47)
TOTAL NUMBER OF SECRETS: 14 (8 clues + 6 fragments of guns)
![SECRET 1 [Clue 1/8 - Passos Bed]: In the Rauls cabin, nearby the beginning place - Clues and Golden Guns - Chapter XI - Collectibles - Max Payne 3 - Game Guide and Walkthrough](https://game.lhg100.com/Article/UploadFiles/201512/2015121617435451.jpg)
SECRET 1 [Clue 1/8 - Passos' Bed]: In the Raul's cabin, nearby the beginning place.
![SECRET 2 [Clue 2/8 - Notes on Max]: In the Marcels cabin, nearby the beginning place - Clues and Golden Guns - Chapter XI - Collectibles - Max Payne 3 - Game Guide and Walkthrough](https://game.lhg100.com/Article/UploadFiles/201512/2015121617435412.jpg)
SECRET 2 [Clue 2/8 - Notes on Max]: In the Marcel's cabin, nearby the beginning place.
![SECRET 3 [Golden Gun - Super Sport 1/3]: In small freezer at the back of the kitchen - Clues and Golden Guns - Chapter XI - Collectibles - Max Payne 3 - Game Guide and Walkthrough](https://game.lhg100.com/Article/UploadFiles/201512/2015121617435466.jpg)
SECRET 3 [Golden Gun - Super Sport 1/3]: In small freezer at the back of the kitchen.
![SECRET 4 [Clue 3/8 - Blood Trail]: At the back of yacht, just after getting out from engine room - Clues and Golden Guns - Chapter XI - Collectibles - Max Payne 3 - Game Guide and Walkthrough](https://game.lhg100.com/Article/UploadFiles/201512/2015121617435598.jpg)
SECRET 4 [Clue 3/8 - Blood Trail]: At the back of yacht, just after getting out from engine room.
![SECRET 5 [Golden Gun - Super Sport 2/3]: On one of the lower decks of yacht - Clues and Golden Guns - Chapter XI - Collectibles - Max Payne 3 - Game Guide and Walkthrough](https://game.lhg100.com/Article/UploadFiles/201512/2015121617435595.jpg)
SECRET 5 [Golden Gun - Super Sport 2/3]: On one of the lower decks of yacht.
![SECRET 6 [Clue 4/8 - Discarded Newspaper]: On the round table in room where enemies tried to break through the wall - Clues and Golden Guns - Chapter XI - Collectibles - Max Payne 3 - Game Guide and Walkthrough](https://game.lhg100.com/Article/UploadFiles/201512/2015121617435599.jpg)
SECRET 6 [Clue 4/8 - Discarded Newspaper]: On the round table in room where enemies tried to break through the wall.
![SECRET 7 [Clue 5/8 - Pried Wall]: In room where enemies tried to break through the wall - Clues and Golden Guns - Chapter XI - Collectibles - Max Payne 3 - Game Guide and Walkthrough](https://game.lhg100.com/Article/UploadFiles/201512/2015121617435546.jpg)
SECRET 7 [Clue 5/8 - Pried Wall]: In room where enemies tried to break through the wall.
![SECRET 8 [Clue 6/8 - Daphnes Passport]: On the floor in the first searched side cabins - Clues and Golden Guns - Chapter XI - Collectibles - Max Payne 3 - Game Guide and Walkthrough](https://game.lhg100.com/Article/UploadFiles/201512/2015121617435588.jpg)
SECRET 8 [Clue 6/8 - Daphne's Passport]: On the floor in the first searched side cabins.
![SECRET 9 [Clue 7/8 - Daphnes Jewelry Box]: On the cupboard in the last searched side cabins (with enemies) - Clues and Golden Guns - Chapter XI - Collectibles - Max Payne 3 - Game Guide and Walkthrough](https://game.lhg100.com/Article/UploadFiles/201512/2015121617435576.jpg)
SECRET 9 [Clue 7/8 - Daphne's Jewelry Box]: On the cupboard in the last searched side cabins (with enemies).
![SECRET 10 [Golden Gun - AK-47 1/3]: In the safe, hid behind the painting, on the left from passage to the captains bridge - Clues and Golden Guns - Chapter XI - Collectibles - Max Payne 3 - Game Guide and Walkthrough](https://game.lhg100.com/Article/UploadFiles/201512/2015121617435591.jpg)
SECRET 10 [Golden Gun - AK-47 1/3]: In the safe, hid behind the painting, on the left from passage to the captain's bridge.
![SECRET 11 [Golden Gun - AK-47 2/3]: On the left from where the battle in the port begins - Clues and Golden Guns - Chapter XI - Collectibles - Max Payne 3 - Game Guide and Walkthrough](https://game.lhg100.com/Article/UploadFiles/201512/2015121617435592.jpg)
SECRET 11 [Golden Gun - AK-47 2/3]: On the left from where the battle in the port begins.
![SECRET 12 [Golden Gun - Super Sport 3/3]: You find it just after the ride on a line, on the right from entrance to the new building - Clues and Golden Guns - Chapter XI - Collectibles - Max Payne 3 - Game Guide and Walkthrough](https://game.lhg100.com/Article/UploadFiles/201512/2015121617435686.jpg)
SECRET 12 [Golden Gun - Super Sport 3/3]: You find it just after the ride on a line, on the right from entrance to the new building.
![SECRET 13 [Golden Gun - AK-47 3/3]: On one of external buildings balconies - Clues and Golden Guns - Chapter XI - Collectibles - Max Payne 3 - Game Guide and Walkthrough](https://game.lhg100.com/Article/UploadFiles/201512/2015121617435691.jpg)
SECRET 13 [Golden Gun - AK-47 3/3]: On one of external building's balconies.
![SECRET 14 [Clue 8/8 - Visitor Center Display]: In the second searched room with exhibits - Clues and Golden Guns - Chapter XI - Collectibles - Max Payne 3 - Game Guide and Walkthrough](https://game.lhg100.com/Article/UploadFiles/201512/2015121617435673.jpg)
SECRET 14 [Clue 8/8 - Visitor Center Display]: In the second searched room with exhibits.
NUMBER OF CLUES: 6
NUMBER OF GOLDEN GUNS: 2 (RPG)(FMP G3S Rifle)
TOTAL NUMBER OF SECRETS: 12 (6 clues + 6 fragments of guns)
![SECRET 1 [Clue 1/6 - Gurney]: Where you find first thugs - Clues and Golden Guns - Chapter XII - Collectibles - Max Payne 3 - Game Guide and Walkthrough](https://game.lhg100.com/Article/UploadFiles/201512/2015121617435679.jpg)
SECRET 1 [Clue 1/6 - Gurney]: Where you find first thugs.
![SECRET 2 [Clue 2/6 - Ammo Crate]: In the side stock, on the way to elevator - Clues and Golden Guns - Chapter XII - Collectibles - Max Payne 3 - Game Guide and Walkthrough](https://game.lhg100.com/Article/UploadFiles/201512/2015121617435612.jpg)
SECRET 2 [Clue 2/6 - Ammo Crate]: In the side stock, on the way to elevator.
![SECRET 3 [Golden Gun - RPG 1/3]: In the toilet in area where you fight enemies - Clues and Golden Guns - Chapter XII - Collectibles - Max Payne 3 - Game Guide and Walkthrough](https://game.lhg100.com/Article/UploadFiles/201512/2015121617435647.jpg)
SECRET 3 [Golden Gun - RPG 1/3]: In the toilet in area where you fight enemies.
![SECRET 4 [Golden Gun - FMP G3S Rifle 1/3]: In the left corridor monitored by the person with LMG Rifle - Clues and Golden Guns - Chapter XII - Collectibles - Max Payne 3 - Game Guide and Walkthrough](https://game.lhg100.com/Article/UploadFiles/201512/2015121617435615.jpg)
SECRET 4 [Golden Gun - FMP G3S Rifle 1/3]: In the left corridor monitored by the person with LMG Rifle.
![SECRET 5 [Clue 3/6 - Wall Photos]: On the wall in the right room, to which you get through big hole - Clues and Golden Guns - Chapter XII - Collectibles - Max Payne 3 - Game Guide and Walkthrough](https://game.lhg100.com/Article/UploadFiles/201512/2015121617435758.jpg)
SECRET 5 [Clue 3/6 - Wall Photos]: On the wall in the right room, to which you get through big hole.
![SECRET 6 [Clue 4/6 - Passos ID Card]: On the floor in the right room, to which you get through big hole - Clues and Golden Guns - Chapter XII - Collectibles - Max Payne 3 - Game Guide and Walkthrough](https://game.lhg100.com/Article/UploadFiles/201512/2015121617435729.jpg)
SECRET 6 [Clue 4/6 - Passos' ID Card]: On the floor in the right room, to which you get through big hole.
![SECRET 7 [Golden Gun - RPG 2/3]: In the destroyed room at one of higher floors of the hotel - Clues and Golden Guns - Chapter XII - Collectibles - Max Payne 3 - Game Guide and Walkthrough](https://game.lhg100.com/Article/UploadFiles/201512/2015121617435787.jpg)
SECRET 7 [Golden Gun - RPG 2/3]: In the destroyed room at one of higher floors of the hotel.
![SECRET 8 [Golden Gun - FMP G3S Rifle 2/3]: Behind the counter, in the room next to the empty swimming pool - Clues and Golden Guns - Chapter XII - Collectibles - Max Payne 3 - Game Guide and Walkthrough](https://game.lhg100.com/Article/UploadFiles/201512/2015121617435741.jpg)
SECRET 8 [Golden Gun - FMP G3S Rifle 2/3]: Behind the counter, in the room next to the empty swimming pool.
![SECRET 9 [Clue 5/6 - Newspaper Article]: On counter in the destroyed restaurant - Clues and Golden Guns - Chapter XII - Collectibles - Max Payne 3 - Game Guide and Walkthrough](https://game.lhg100.com/Article/UploadFiles/201512/2015121617435762.jpg)
SECRET 9 [Clue 5/6 - Newspaper Article]: On counter in the destroyed restaurant.
![SECRET 10 [Golden Gun - FMP G3S Rifle 3/3]: Behind the armchair in the lower sector, where you plant C4 on red pillars - Clues and Golden Guns - Chapter XII - Collectibles - Max Payne 3 - Game Guide and Walkthrough](https://game.lhg100.com/Article/UploadFiles/201512/2015121617435798.jpg)
SECRET 10 [Golden Gun - FMP G3S Rifle 3/3]: Behind the armchair in the lower sector, where you plant C4 on red pillars.
![SECRET 11 [Clue 6/6 - Donation Receipt]: In small armory from which Max took C4 charges - Clues and Golden Guns - Chapter XII - Collectibles - Max Payne 3 - Game Guide and Walkthrough](https://game.lhg100.com/Article/UploadFiles/201512/2015121617435780.jpg)
SECRET 11 [Clue 6/6 - Donation Receipt]: In small armory from which Max took C4 charges.
![SECRET 12 [Golden Gun - RPG 3/3]: On the external balcony in the upper area where you plant C4 on red pillars - Clues and Golden Guns - Chapter XII - Collectibles - Max Payne 3 - Game Guide and Walkthrough](https://game.lhg100.com/Article/UploadFiles/201512/2015121617435783.jpg)
SECRET 12 [Golden Gun - RPG 3/3]: On the external balcony in the upper area where you plant C4 on red pillars.
NUMBER OF CLUES: 7
NUMBER OF GOLDEN GUNS: 3 (MPK SMG)( LAW)( G6 Commando Rifle)
TOTAL NUMBER OF SECRETS: 16 (7 clues + 9 fragments of guns)
![SECRET 1 [Golden Gun - MPK SMG 1/3]: Nearby the entrance to the jail, on the left - Clues and Golden Guns - Chapter XIII - Collectibles - Max Payne 3 - Game Guide and Walkthrough](https://game.lhg100.com/Article/UploadFiles/201512/2015121617435770.jpg)
SECRET 1 [Golden Gun - MPK SMG 1/3]: Nearby the entrance to the jail, on the left.
![SECRET 2 [Golden Gun - LAW 1/3]: In jail, in the room with showers - Clues and Golden Guns - Chapter XIII - Collectibles - Max Payne 3 - Game Guide and Walkthrough](https://game.lhg100.com/Article/UploadFiles/201512/2015121617435821.jpg)
SECRET 2 [Golden Gun - LAW 1/3]: In jail, in the room with showers.
![SECRET 3 [Clue 1/7 - Tourist]: In one of the closed cells in jail - Clues and Golden Guns - Chapter XIII - Collectibles - Max Payne 3 - Game Guide and Walkthrough](https://game.lhg100.com/Article/UploadFiles/201512/2015121617435802.jpg)
SECRET 3 [Clue 1/7 - Tourist]: In one of the closed cells in jail.
![SECRET 4 [Clue 2/7 - Prison Log]: In small room next to the jail - Clues and Golden Guns - Chapter XIII - Collectibles - Max Payne 3 - Game Guide and Walkthrough](https://game.lhg100.com/Article/UploadFiles/201512/2015121617435859.jpg)
SECRET 4 [Clue 2/7 - Prison Log]: In small room next to the jail.
![SECRET 5 [Golden Gun - LAW 2/3]: On the underground parking, behind container - Clues and Golden Guns - Chapter XIII - Collectibles - Max Payne 3 - Game Guide and Walkthrough](https://game.lhg100.com/Article/UploadFiles/201512/2015121617435827.jpg)
SECRET 5 [Golden Gun - LAW 2/3]: On the underground parking, behind container.
![SECRET 6 [Golden Gun - G6 Commando Rifle 1/3]: Behind the small parapet, in area linking different entrances to the police station - Clues and Golden Guns - Chapter XIII - Collectibles - Max Payne 3 - Game Guide and Walkthrough](https://game.lhg100.com/Article/UploadFiles/201512/2015121617435879.jpg)
SECRET 6 [Golden Gun - G6 Commando Rifle 1/3]: Behind the small parapet, in area linking different entrances to the police station.
![SECRET 7 [Golden Gun - MPK SMG 2/3]: In the left (mens) toilet - Clues and Golden Guns - Chapter XIII - Collectibles - Max Payne 3 - Game Guide and Walkthrough](https://game.lhg100.com/Article/UploadFiles/201512/2015121617435889.jpg)
SECRET 7 [Golden Gun - MPK SMG 2/3]: In the left (men's) toilet.
![SECRET 8 [Golden Gun - G6 Commando Rifle 2/3]: In the kitchen next to the polices cafeteria - Clues and Golden Guns - Chapter XIII - Collectibles - Max Payne 3 - Game Guide and Walkthrough](https://game.lhg100.com/Article/UploadFiles/201512/2015121617435862.jpg)
SECRET 8 [Golden Gun - G6 Commando Rifle 2/3]: In the kitchen next to the police's cafeteria.
![SECRET 9 [Clue 3/7 - Promissory Note]: In office room, next to the polices cafeteria - Clues and Golden Guns - Chapter XIII - Collectibles - Max Payne 3 - Game Guide and Walkthrough](https://game.lhg100.com/Article/UploadFiles/201512/2015121617435898.jpg)
SECRET 9 [Clue 3/7 - Promissory Note]: In office room, next to the police's cafeteria.
![SECRET 10 [Golden Gun - G6 Commando Rifle 2/3]: Behind the desk in small area with elevators and security room - Clues and Golden Guns - Chapter XIII - Collectibles - Max Payne 3 - Game Guide and Walkthrough](https://game.lhg100.com/Article/UploadFiles/201512/2015121617435830.jpg)
SECRET 10 [Golden Gun - G6 Commando Rifle 2/3]: Behind the desk in small area with elevators and security room.
![SECRET 11 [Golden Gun - MPK SMG 3/3]: In the conference room in small area with elevators and security room - Clues and Golden Guns - Chapter XIII - Collectibles - Max Payne 3 - Game Guide and Walkthrough](https://game.lhg100.com/Article/UploadFiles/201512/2015121617435947.jpg)
SECRET 11 [Golden Gun - MPK SMG 3/3]: In the conference room in small area with elevators and security room.
![SECRET 12 [Clue 4/7 - E-File on Da Silva]: In one of the left rooms in big office area, where you have a long fight with policemen - Clues and Golden Guns - Chapter XIII - Collectibles - Max Payne 3 - Game Guide and Walkthrough](https://game.lhg100.com/Article/UploadFiles/201512/2015121617435920.jpg)
SECRET 12 [Clue 4/7 - E-File on Da Silva]: In one of the left rooms in big office area, where you have a long fight with policemen.
![SECRET 13 [Clue 5/7 - Political Folder]: In one of the right rooms in big office area, where you have a long fight with policemen - Clues and Golden Guns - Chapter XIII - Collectibles - Max Payne 3 - Game Guide and Walkthrough](https://game.lhg100.com/Article/UploadFiles/201512/2015121617435910.jpg)
SECRET 13 [Clue 5/7 - Political Folder]: In one of the right rooms in big office area, where you have a long fight with policemen.
![SECRET 14 [Clue 6/7 - Slide Show]: In conference room with big screen for slides - Clues and Golden Guns - Chapter XIII - Collectibles - Max Payne 3 - Game Guide and Walkthrough](https://game.lhg100.com/Article/UploadFiles/201512/2015121617435909.jpg)
SECRET 14 [Clue 6/7 - Slide Show]: In conference room with big screen for slides.
![SECRET 15 [Clue 7/7 - Flak Vest]: In the second part of big armory, by the switch - Clues and Golden Guns - Chapter XIII - Collectibles - Max Payne 3 - Game Guide and Walkthrough](https://game.lhg100.com/Article/UploadFiles/201512/2015121617435986.jpg)
SECRET 15 [Clue 7/7 - Flak Vest]: In the second part of big armory, by the switch.
![SECRET 16 [Golden Gun - LAW 3/3]: In the shooting gallery, next to the bags of sand - Clues and Golden Guns - Chapter XIII - Collectibles - Max Payne 3 - Game Guide and Walkthrough](https://game.lhg100.com/Article/UploadFiles/201512/2015121617435974.jpg)
SECRET 16 [Golden Gun - LAW 3/3]: In the shooting gallery, next to the bags of sand.
NUMBER OF CLUES: 1
NUMBER OF GOLDEN GUNS: 2 (Rotary Grenade Launcher)(RPD)
TOTAL NUMBER OF SECRETS: 7 (1 clue + 6 fragments of guns)
![SECRET 1 [Golden Gun - Rotary Grenade Launcher 1/3]: In the beginning area at the end of the conveyor belt - Clues and Golden Guns - Chapter XIV - Collectibles - Max Payne 3 - Game Guide and Walkthrough](https://game.lhg100.com/Article/UploadFiles/201512/2015121617435901.jpg)
SECRET 1 [Golden Gun - Rotary Grenade Launcher 1/3]: In the beginning area at the end of the conveyor belt.
![SECRET 2 [Golden Gun - Rotary Grenade Launcher 2/3]: On upper balcony in the beginning zone - Clues and Golden Guns - Chapter XIV - Collectibles - Max Payne 3 - Game Guide and Walkthrough](https://game.lhg100.com/Article/UploadFiles/201512/2015121617435991.jpg)
SECRET 2 [Golden Gun - Rotary Grenade Launcher 2/3]: On upper balcony in the beginning zone.
![SECRET 3 [Clue 1/1 - Ex-Cop]: In one of toilets cabins - Clues and Golden Guns - Chapter XIV - Collectibles - Max Payne 3 - Game Guide and Walkthrough](https://game.lhg100.com/Article/UploadFiles/201512/2015121617440068.jpg)
SECRET 3 [Clue 1/1 - Ex-Cop]: In one of toilet's cabins.
![SECRET 4 [Golden Gun - Rotary Grenade Launcher 3/3]: Under shower in the bathroom - Clues and Golden Guns - Chapter XIV - Collectibles - Max Payne 3 - Game Guide and Walkthrough](https://game.lhg100.com/Article/UploadFiles/201512/2015121617440050.jpg)
SECRET 4 [Golden Gun - Rotary Grenade Launcher 3/3]: Under shower in the bathroom.
![SECRET 5 [Golden Gun - RPD 1/3]: On upper balcony in the first part of main terminal - Clues and Golden Guns - Chapter XIV - Collectibles - Max Payne 3 - Game Guide and Walkthrough](https://game.lhg100.com/Article/UploadFiles/201512/2015121617440074.jpg)
SECRET 5 [Golden Gun - RPD 1/3]: On upper balcony in the first part of main terminal.
![SECRET 6 [Golden Gun - RPD 2/3]: Nearby the desk on ground floor in the second part of main terminal - Clues and Golden Guns - Chapter XIV - Collectibles - Max Payne 3 - Game Guide and Walkthrough](https://game.lhg100.com/Article/UploadFiles/201512/2015121617440076.jpg)
SECRET 6 [Golden Gun - RPD 2/3]: Nearby the desk on ground floor in the second part of main terminal.
![SECRET 7 [Golden Gun - RPD 3/3]: At the end of train in which you get to the place of final battle - Clues and Golden Guns - Chapter XIV - Collectibles - Max Payne 3 - Game Guide and Walkthrough](https://game.lhg100.com/Article/UploadFiles/201512/2015121617440044.jpg)
SECRET 7 [Golden Gun - RPD 3/3]: At the end of train in which you get to the place of final battle.
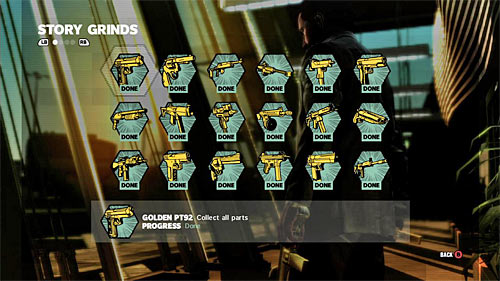
As I mentioned in the introduction, Grinds differ from the rest of secrets that they are not inscribed in particular phases of game. So you can complete them in the way you like, for example repeating your favourite missions or choosing additional game modes, because all your killings and other important actions have a common pool. List of grinds and your actual progress you can watch by choosing the Story Mode in the main menu (Arcade Mode has limited number of achievements) and then Grinds (1st screen). Game will display list of grinds (2nd screen), which you can read carefully.
Table below contains list of all grinds with information what you have to do to complete them. Remark! If particular grind has few levels (copper, silver, gold, platinum), requirements are always are given for the platinum level.
NAME OF THE GRIND
DETAILS OF THE GRIND
Arms Dealer
250 hits in arms.
Artful Dodger
You have to spent 50 minutes in bullet time mode.
Back from the Dead
You have to do 250 Last Man Standing actions, which is killing an enemy who hit Max.
Below the Belt
250 hits in groin.
Bloodbath
You have to kill 2500 enemies.
Blow Out
You have to explode 25 enemies. It's easiest to do with grenade and rocket launchers, but also environmental explosions (vehicles etc) count in.
Bullet River
You have to fire 25000 bullets.
Cam Lover
You have to watch 750 bullet-cams (they are usually displayed at the end of every battle).
Dodge Brawl
You have to kill 1000 enemies during Shootdodges.
Double Damage
You have to kill 1000 enemies during using two weapons at once.
Eagle Eye
You have to kill 100 enemies with the sniper rifles.
Fall Guys
You have to throw 250 enemies over the balustrades and other obstacles.
Fire Works
You have to destroy 250 grenades or Molotov's Cocktails flying at Max.
Golden .38 Revolver
You have to find all three parts of Golden .38 Revolver
Golden 1911
You have to find all three parts of Golden 1911
Golden 608 Bull
You have to find all three parts of Golden 608 Bull
Golden AK-47
You have to find all three parts of Golden AK-47
Golden Auto 9mm
You have to find all three parts of Golden Auto 9mm
Golden DE .50
You have to find all three parts of Golden DE .50
Golden FAL
You have to find all three parts of Golden FAL
Golden FMP G3S
You have to find all three parts of Golden FMP G3S
Golden G6 Commando
You have to find all three parts of Golden G6 Commando
Golden LAW
You have to find all three parts of Golden LAW
Golden LMG .30
You have to find all three parts of Golden LMG .30
Golden M10
You have to find all three parts of Golden M10
Golden M4 Super 90
You have to find all three parts of Golden M4 Super 90
Golden M500
You have to find all three parts of Golden M500
Golden M82A1
You have to find all three parts of Golden M82A1
Golden M972
You have to find all three parts of Golden M972
Golden MD-97L
You have to find all three parts of Golden MD-97L
Golden Micro 9mm
You have to find all three parts of Golden Micro 9mm
Golden Mini-30
You have to find all three parts of Golden Mini-30
Golden MPK
You have to find all three parts of Golden MPK
Golden PT92
You have to find all three parts of Golden PT92
Golden Rotary Grenade Launcher
You have to find all three parts of Golden Rotary Grenade Launcher
Golden RPD
You have to find all three parts of Golden RPD
Golden RPG
You have to find all three parts of Golden RPG
Golden SAF 40 Cal
You have to find all three parts of Golden SAF 40 Cal
Golden Sawn-Off
You have to find all three parts of Golden Sawn-Off
Golden SPAS-15
You have to find all three parts of Golden SPAS-15
Golden Super Sport
You have to find all three parts of Golden Super Sport
Guesswork
You have to kill 250 enemies at blind, what is firing behind the cover without leaning out.
Head Master
You have to make 1000 headshots.
If It Ain't Broke
You have to kill 1000 enemies with rifles.
Keep It Simple
You have to kill 1000 enemies with pistols.
Leg Payne
You have to make 250 hits at legs.
Pharmacist
You have to use 500 painkillers.
Rapid Fire
You have to kill 1000 enemies with SMG-s.
Scrapper
You have to defeat 150 enemies in melee fighting (pressing right trigger when Max stands by the enemy).
Shotgun Dues
You have to kill 1000 enemies with shotguns.
Slow Dive
You have to make a Shootdodge lasting 8 seconds.
Take a Load Off
You have to kill 250 enemies while Max is lying.
Take Your Time
You have to kill 1000 enemies during the bullet time.
The Lounger
You have to kill 250 enemies while Max is lying on his back.
The Turtle
You have to kill 1000 enemies behind the cover.
Wreckage
You have to destroy 200 vehicles.
You can elongate your adventure with single player on two ways. First one is to complete campaign on additional difficulty levels. There are three default levels (Easy, Medium Hard). I don't recommend Easy, because it's too simple, and there are no special rewards. Completing game on Medium gives you not only an additional achievement, but also let you unlock an option of changing your look in the Arcade Mode.
The best idea is to complete the game on the Hard (it contains bonuses from Medium). It means not only another achievements to the pool, but also unlocking two difficulty levels: Hardcore and Old School. More difficult from those is Hardcore in which Max can easily die. Old School is as difficult as Hard but you can use Last Man Standing in it. To sum it up, I recommend to begin from the Hard, then choose Old School and Hardcore at the end. Remark - on all three mentioned levels aiming assistant is forbidden, so it's worth to spare few moments on adjusting analogs according to your skills.
1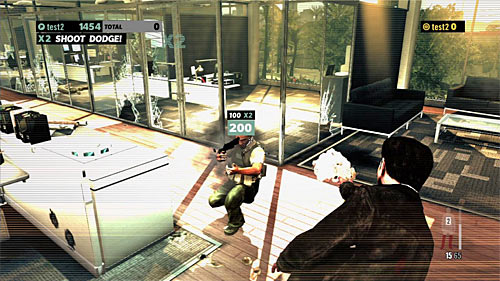
Max Payne 3 contains two different Arcade Modes, and they are completing the singleplayer campaign in more agile way. First one is Score Attack what lies in collecting points granted for encounters.
About what you should remember?
What you should avoid?
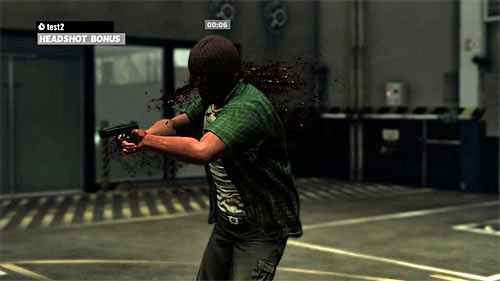
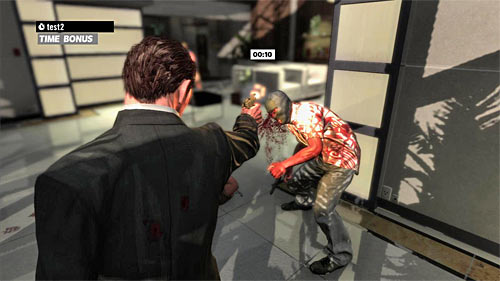
The other Arcade Mode is New York Minute. In this one, you begin every stage with one minute time and the only way to get additional seconds is to get to the end of mission and eliminate enemies. Initially, game let you play only in the standard type of this mode, and when you finish it, the Hardcore version is unlocked. The crucial different is fact that in Hardcore you can't use an aimer assistant.
About what you should remember?
What you should avoid?
Remark! List below was created basing on the Xbox 360 version, but the version on PlayStation 3 has identical trophies.
NAME OF ACHIEVEMENT
POINTS
HOW TO GET IT?
You Play, You Pay, You Bastard
20
100 Kills With Melee. Such actions you make by pressing right trigger after getting nearby the enemy.
Payne In The Ass
20
Game completed on Hardcore.
The Fear Of Losing It
20
Survive the chpater without using painkillers.
Sometimes You Get Lucky
5
Get a headshot during the rooftop tremors (chapter 12).
Part I Complete
20
You have to complete fifth chapter.
Part II Complete
20
You have to complete tenth chapter.
Part III Complete
20
You have to complete fourteenth chapter.
Man Of Many Weapons
25
Unlock all weapons in multiplayer. You make it by leveling up.
Man Of Many Faces
25
Unlock all faction characters in multiplayer. You make it by leveling up.
Sweep (hidden achievement)
10
Flawless team Gang Wars victory.
It Was Chaos And Luck
10
Get 6 kills during riding the push cart (13th chapter). Additionally you have to choose the Free Aim mode.
Colder Than The Devil's Heart
15
Kill 30 enemies in less than 2 minutes.
Trouble Had Come To Me
15
Kill everyone during the bus ride (10th chapter).
An Echo Of The Past
35
Find all Clues.
The Gambler
15
Won a wager in multiplayer.
Grave Robber
5
Loot a body in multiplayer (press B).
The One Eyed Man Is King
10
Cover Passos (3rd chapter) with perfect aim - every shot has to kill.
The Only Choice Given
10
Kill 8 enemies when dangling from a chain. Additionally you have to choose the Free Aim mode.
A Few Hundred Bullets Back
20
Use all weapons in the game.
One Bullet At A Time
20
Make 300 headshots.
A License To Kill
40
Find all fragments of Golden Guns.
Maximum Payne
80
Complete game on Old School.
Max Payne Invitational
5
Invite someone to play through the in-game contact list.
Along For The Ride
10
Trigger a bullet-cam on the Zipline (11th chapter). Additionally you have to choose the Free Aim mode.
You Might Hurt Someone With That
20
Shoot 10 airborne grenades. The best way is to repeat final battle with Becker or boat chase from 5th chapter.
You Push A Man Too Far (hidden achievement)
5
You have to not kill Becker in the 14th chapter (just don't press any buttons during the cut scene).
Something Wicked This Way Comes
10
Get 7 kills during jumping from the boat (end of the 5th chapter). Additionally you have to choose the Free Aim mode.
Dearest Of All My Friends
10
Kill someone from your friend list.
Serious Payne
50
Complete game at least on Hard.
All Of The Above
100
Finish all singleplayer Grinds.
Full Monty
10
Complete at least one game in every multiplayer mode.
Feel The Payne
30
Complete game at least on Medium.
Past The Point Of No Return
10
Take 100 painkillers.
The Shadows Rushed Me
10
Complete New York Minute Hardcore (Arcade).
So Much For Being Subtle
10
Kill 9 enemies while being pulled by a chain (7th chapter). Additionally you have to choose the Free Aim mode.
It's Fear That Gives Men Wings
20
10 bullet time kills in a row.
Training Complete
25
Achieve 50 level rank in multiplayer.
Payne Bringer
30
Kill 100 players in multiplayer.
That Old Familiar Feeling
10
Clear the Hallway of Lasers (4th chapter).
Sure Know How To Pick A Place
10
Discover all tourists locations - it's connected with finding Clues.
A New York Minute
100
Finish New York Minute (Arcade).
Amidst The Wreckage
5
Destroy all architectural models in the second searched area in 6th chapter.
Deathmatch Challenge
20
Win any public Deathmatch.
With Practiced Bravado
20
100 kills during Shootdodge.
Out The Window
10
Kill 6 enemies while driving through the VIP window (2nd chapter). Additionally you have to choose the Free Aim mode.
The Road-Kill Behind Me
10
Aim and destroy all targets on the airport (14th chapter).



 Medal of Honor Game Guide & Walkthrough
 Mass Effect 2 Game Guide & Walkthrough
 Murdered: Soul Suspect Game Guide & Walkthrough
 Mass Effect Game Guide & Walkthrough
 Men of War: Vietnam Game Guide & Walkthrough