
Welcome to the unofficial guide to "F.E.A.R. 2: Project Origin" PC video game. This guide consists mainly of a very detailed walkthrough of all seven chapters (fourteen levels) of the singleplayer campaign of the game. I've focused my efforts on explaining how to survive battles with hostile units. There's going to be a lot of them and you'll need a lot of practice to win most of them. I've also added a lot of hints on how to interact with the environment and how to complete main mission goals. Aside from the walkthrough, you'll also find a bonus section in my guide. This chapter contains lists of all bonus items (documents, CD's and injectors) and achievements (PC version). Good luck and have fun playing the game!
Stranger
Don't be frightened when you see Alma for the very first time. Wait for your main character to stand up. Now you must start following the little girl towards the burning objects seen in the background. Eventually you'll have to take a dive into a burning hole [#1] which is located next to a destroyed bridge. You'll end up inside a moving armored vehicle.
![[#1] - Interval 01 - Premonition - part 1 - Interval 01 - Premonition - F.E.A.R. 2: Project Origin - Game Guide and Walkthrough](https://game.lhg100.com/Article/UploadFiles/201512/2015121518441089.jpg)
[#1]
You'll now take part in an interactive cut-scene. Listen to what other squad members have to say about the situation. The first group of soldiers will leave the vehicle early and you'll be tasked to begin your journey with Jankowski. Wait for the main character to leave the armored vehicle. You'll be given hints by the game from time to time. Most of them are about movement and interaction, so you should be reading them to understand what's happening around you. Each time you want to read a hint, you must press the TAB key to activate your PDA. Proceed to the main entrance to the building. You'll find out that it's blocked and as a result you must proceed to the cafeteria [#2].
![[#2] - Interval 01 - Premonition - part 1 - Interval 01 - Premonition - F.E.A.R. 2: Project Origin - Game Guide and Walkthrough](https://game.lhg100.com/Article/UploadFiles/201512/2015121518441069.jpg)
[#2]
You don't have to explore the inside of the cafeteria. Instead proceed directly to the back door which can be found to your left. Ignore the staircase, because the only route leading to the upper floor is blocked. Jump over the railing [#3] by approaching it and pressing the SPACE key. Ignore the fuse box, because if you'd destroy it you would probably suffer some major injuries. Proceed to the left door.
![[#3] - Interval 01 - Premonition - part 1 - Interval 01 - Premonition - F.E.A.R. 2: Project Origin - Game Guide and Walkthrough](https://game.lhg100.com/Article/UploadFiles/201512/2015121518441079.jpg)
[#3]
I would recommend that you follow the instructions shown on your screen. Activate your flashlight by pressing the F key, however remember that you shouldn't be using it all the time, because enemy units may locate you that way. Thankfully you won't encounter any hostiles right now, so you can keep using it for a few more minutes. Proceed to the door with the green EXIT sign. Once you're inside a new room go to your right. You'll have to crouch here [#4] by pressing the C key. Your colleague will do the same thing, so don't worry about him.
![[#4] - Interval 01 - Premonition - part 1 - Interval 01 - Premonition - F.E.A.R. 2: Project Origin - Game Guide and Walkthrough](https://game.lhg100.com/Article/UploadFiles/201512/2015121518441096.jpg)
[#4]
Go to your left and rejoin with the rest of your squad. Your colleagues will be standing next to a large desk with a killed guard. Once you've listened to the plan you could follow your superior, but I would recommend that you spend some time exploring this area. You'll find your first document [#5] - Security concern. You can also access a nearby computer terminal and you'll witness the execution that took place here not long ago.
![[#5] - Interval 01 - Premonition - part 1 - Interval 01 - Premonition - F.E.A.R. 2: Project Origin - Game Guide and Walkthrough](https://game.lhg100.com/Article/UploadFiles/201512/2015121518441072.jpg)
[#5]
Proceed to a passageway which was already used by some of your colleagues. Ignore a new vision presented to you by Alma. Watch out for a single soldier who will exit the elevator [#6]. He'll probably injure you before your colleagues kill him, but you don't have to worry about it too much. Don't forget to inspect his body for ammunition. You may enter the elevator. Wait for it to take you to another floor. You should also choose a submachine gun from your inventory if it's not your active weapon at the moment.
[#6]
Once you've reached a new floor take cover behind the nearest cover before you're noticed by all enemy units. Also - don't forget that you can move some of the objects from the environment to increase your protection against enemy fire. Prevent enemy units from surprising you from the right [#7] and you should be just fine. Once the battle has ended check all the bodies for additional ammunition.
![[#7] - Interval 01 - Premonition - part 2 - Interval 01 - Premonition - F.E.A.R. 2: Project Origin - Game Guide and Walkthrough](https://game.lhg100.com/Article/UploadFiles/201512/2015121518441182.jpg)
[#7]
Proceed to the only available exit. Just as before, focus on finding a good cover as soon as possible. Don't forget that you can zoom in the view for better aim and focus on eliminating soldiers appearing on the upper balconies [#8]. Once they're gone explore this area and you'll find a few health syringes. Collecting those will allow you to replenish health. Proceed to the next section.
![[#8] - Interval 01 - Premonition - part 2 - Interval 01 - Premonition - F.E.A.R. 2: Project Origin - Game Guide and Walkthrough](https://game.lhg100.com/Article/UploadFiles/201512/2015121518441165.jpg)
[#8]
Locate Stokes - she should be standing next to a small gate. Go to her and look around to find a new document [#9] - I.M. transcript #1. Notice that you'll have to explore the building alone from now on. Proceed towards the main gallery. Explore the left table and you'll find a CD with some data on it - Bad news. Keep going straight and ignore a body you'll encounter along the way.
![[#9] - Interval 01 - Premonition - part 2 - Interval 01 - Premonition - F.E.A.R. 2: Project Origin - Game Guide and Walkthrough](https://game.lhg100.com/Article/UploadFiles/201512/2015121518441115.jpg)
[#9]
Once you've reached a large glass corridor you'll be given an opportunity to test out how the sprinting option (ALT key) works, because an allied gunship is patrolling this area. Thankfully you won't have to worry about the helicopter. Allow the gunship to attack the corridor in front of you and don't move unless it's gone. Don't miss a small stash along the way [#10]. Collect armor and some ammunition. Proceed to a new large door.
![[#10] - Interval 01 - Premonition - part 2 - Interval 01 - Premonition - F.E.A.R. 2: Project Origin - Game Guide and Walkthrough](https://game.lhg100.com/Article/UploadFiles/201512/2015121518441141.jpg)
[#10]
Once you're inside a new room you may explore the balcony, but you wouldn't find anything of interest there. Instead focus on getting your hands on a new document [#11] - Good luck. You may now proceed to a small door and you'll end up standing inside a relatively dark corridor. Head down to the lower level and take a medkit. Remember that all medkits work differently than syringes, because it's up to you to decide when to use them (Z key). You should also know that you will be allowed to carry up to three medkits at a time. Proceed to the next section of the map.
![[#11] - Interval 01 - Premonition - part 2 - Interval 01 - Premonition - F.E.A.R. 2: Project Origin - Game Guide and Walkthrough](https://game.lhg100.com/Article/UploadFiles/201512/2015121518441116.jpg)
[#11]
Find a new door with an EXIT sign. Make a few steps forward and collect frag grenades before you're noticed by hostile units. I would recommend that you use at least one grenade right away. Enemy soldiers will appear in front of you [#12]. You can approach them if you're confident about your success or you can keep hiding near the previously used door. Don't enter this new room unless you're absolutely sure that you've killed all enemy soldiers. Collect the ammunition from their bodies before moving on.
![[#12] - Interval 01 - Premonition - part 2 - Interval 01 - Premonition - F.E.A.R. 2: Project Origin - Game Guide and Walkthrough](https://game.lhg100.com/Article/UploadFiles/201512/2015121518441140.jpg)
[#12]
You can explore the gallery more thoroughly if you want to and you can destroy some of the exhibits as well. Search for a new armor. There are two ways for you to reach a new area - you can use the outside balcony or you can proceed to your right. Eventually you'll have to find a new corridor [#13].
![[#13] - Interval 01 - Premonition - part 3 - Interval 01 - Premonition - F.E.A.R. 2: Project Origin - Game Guide and Walkthrough](https://game.lhg100.com/Article/UploadFiles/201512/2015121518441155.jpg)
[#13]
Proceed to a small room. Ignore the information about the possibility of changing your rate of fire and keep heading forward. Approach a new door and make sure that you've turned off your flashlight. Open the door, press the crouch key and head outside. Take your time to find new grenades. Notice that a new gunship has arrived in the area [#14]. Start throwing grenades at enemy units and prevent them from finding a good cover. A second group of hostile units will appear to your right. You can keep shooting at enemy soldiers from here or you may use the stairs to get to the large plaza area. Either way, prevent enemies from getting too close to your current position.
![[#14] - Interval 01 - Premonition - part 3 - Interval 01 - Premonition - F.E.A.R. 2: Project Origin - Game Guide and Walkthrough](https://game.lhg100.com/Article/UploadFiles/201512/2015121518441198.jpg)
[#14]
Just as before, you should consider spending some time looking around and collecting valuable items (ammo and armor). When you're done find an exit and go there. Once again, make sure that your flashlight is turned off. Collect grenades and proceed to your right. New enemy soldiers are waiting for you inside the kitchen. Start by eliminating the closest target [#15] and after that use grenades to kill other soldiers.
![[#15] - Interval 01 - Premonition - part 3 - Interval 01 - Premonition - F.E.A.R. 2: Project Origin - Game Guide and Walkthrough](https://game.lhg100.com/Article/UploadFiles/201512/2015121518441194.jpg)
[#15]
Proceed to the main area of the kitchen carefully. Look around and you'll find a new medkit. Head over to the next section of the map. Open the door, press the crouch key and approach the windows slowly. Wait for an enemy guard to appear on a roof of a nearby building [#16] and use your submachine gun to kill him. You'll find a new medkit here, as well as some ammunition.
![[#16] - Interval 01 - Premonition - part 3 - Interval 01 - Premonition - F.E.A.R. 2: Project Origin - Game Guide and Walkthrough](https://game.lhg100.com/Article/UploadFiles/201512/2015121518441202.jpg)
[#16]
Destroy the first window from the right and head over to the ledge. A moving platform is located in front of you [#17] and obviously you must get to it. Don't be surprised by the fact that the platform has collapsed a little. Move forward and make a jump towards a nearby ledge. Now you must move slowly to your left. Enter a large ventilation shaft and start moving forward. Thankfully you won't be attacked by Alma while inside the vents. :-)
![[#17] - Interval 01 - Premonition - part 3 - Interval 01 - Premonition - F.E.A.R. 2: Project Origin - Game Guide and Walkthrough](https://game.lhg100.com/Article/UploadFiles/201512/2015121518441208.jpg)
[#17]
Eventually you should be able to get to a small dark supply room. Ignore image distortions and proceed to a much larger room with a pool in the middle of it. Take a dive in the bloody water [#18] and you'll be awarded with a new vision. You'll soon be returned to the exact same room, however this time everything will return to normal. Use the stairs to get out of the water.
![[#18] - Interval 01 - Premonition - part 3 - Interval 01 - Premonition - F.E.A.R. 2: Project Origin - Game Guide and Walkthrough](https://game.lhg100.com/Article/UploadFiles/201512/2015121518441209.jpg)
[#18]
Locate a passageway with a life buoy hanging on the wall. Get to the stairs and proceed to the upper level. Don't use the nearest door just yet. Instead head over to your right. Collect a new armor. You should also proceed to a small balcony [#19]. There are syringes here, as well as some ammunition. Go back to the previous door and proceed to a new corridor.
![[#19] - Interval 01 - Premonition - part 4 - Interval 01 - Premonition - F.E.A.R. 2: Project Origin - Game Guide and Walkthrough](https://game.lhg100.com/Article/UploadFiles/201512/2015121518441214.jpg)
[#19]
Go to your right and make sure that you have chosen a submachine gun from your inventory. Lean out carefully and take out a single guard [#20]. Wait for a few seconds and throw a couple of grenades. This should allow you to eliminate some of his colleagues. Deal with the rest and go there. Be careful - one more soldier may be hiding on an upper balcony. Find a good cover and eliminate him before moving on.
![[#20] - Interval 01 - Premonition - part 4 - Interval 01 - Premonition - F.E.A.R. 2: Project Origin - Game Guide and Walkthrough](https://game.lhg100.com/Article/UploadFiles/201512/2015121518441298.jpg)
[#20]
You should now take some time to explore your surroundings. Collect medical supplies and ammunition for your primary weapon. You'll also find a new document here [#21] - Termination notice. Eventually you'll have to locate the stairs. Proceed to the upper floor and eliminate a soldier who will appear in front of you.
![[#21] - Interval 01 - Premonition - part 4 - Interval 01 - Premonition - F.E.A.R. 2: Project Origin - Game Guide and Walkthrough](https://game.lhg100.com/Article/UploadFiles/201512/2015121518441244.jpg)
[#21]
Keep moving forward. A new document is lying on the floor - To-Do list. Proceed to the next room without making any preparations. Witness a new vision with Alma and go to the music box [#22]. Press the action key and you'll uncover a hidden entrance. Get to a small room and collect two documents - Info: SGT Becket and Info: SFC Keegan.
[#22]
Turn right and you should be able to notice a new door [#23]. Proceed to that location. Open the door and you'll be given a chance to talk to Genevieve. Wait for your display to change colors and you'll notice that Genevieve has disappeared. Go back the same way you've used before. Eventually you'll have to get to the bedroom.
![[#23] - Interval 01 - Premonition - part 4 - Interval 01 - Premonition - F.E.A.R. 2: Project Origin - Game Guide and Walkthrough](https://game.lhg100.com/Article/UploadFiles/201512/2015121518441203.jpg)
[#23]
Keep moving forward and use the stairs to return to the ground floor of the penthouse. Turn right and try making a few steps towards the balcony [#24]. You'll witness a cool explosion. Sit back and enjoy the cut-scene, because you won't have to save yourself. The game should begin loading a new level shortly.
![[#24] - Interval 01 - Premonition - part 4 - Interval 01 - Premonition - F.E.A.R. 2: Project Origin - Game Guide and Walkthrough](https://game.lhg100.com/Article/UploadFiles/201512/2015121518441281.jpg)
[#24]
This level (and also this entire chapter) is going to begin with another interesting cut-scene. This time you'll witness a lot of strange occurrances while your character is being treated on an operating table. Wait for Becket to stand up. Notice that you've been given an ability to slow down the flow of time (CTRL key). You won't have to use bullet-time feature right now. Don't worry - you'll be given more instructions when the time is right. Start off by collecting a new document [#25] - Memo: M. Becket.
![[#25] - Interval 02 - Isolation - part 1 - Interval 02 - Isolation - F.E.A.R. 2: Project Origin - Game Guide and Walkthrough](https://game.lhg100.com/Article/UploadFiles/201512/2015121518441353.jpg)
[#25]
You may exit this room and you should also know that for the next few minutes you'll witness a lot of scary situations, but on the other hand you won't have to worry about being attacked by anyone nor anything. I would also recommend that you visit side rooms along the way in order to find more supplies. Ignore the left room and proceed forward. Once you've reached the junction choose the left corridor [#26]. There's a medical kit in the supply closet and you'll find a document called Info - 1SG: Griffin in Recovery 104.
![[#26] - Interval 02 - Isolation - part 1 - Interval 02 - Isolation - F.E.A.R. 2: Project Origin - Game Guide and Walkthrough](https://game.lhg100.com/Article/UploadFiles/201512/2015121518441394.jpg)
[#26]
Go back to the main corridor and keep heading forward. You can visit nurse's station if you want to. Make sure to listen to a TV broadcast, because the reporter will be covering the recent explosion in the city. Ignore both bathrooms - you can't go inside any of them. Instead choose a corridor located next to vending machines [#27].
![[#27] - Interval 02 - Isolation - part 1 - Interval 02 - Isolation - F.E.A.R. 2: Project Origin - Game Guide and Walkthrough](https://game.lhg100.com/Article/UploadFiles/201512/2015121518441337.jpg)
[#27]
Keep heading forward, but make a left turn when you have the chance. Enter Recovery 106. I would recommend that you go to the bathroom which will allow you to get to Recovery 105. This is a relatively important task, because you'll be allowed to take a new document [#28] - Info: SGT Jankowski. Go back to Recovery 106 and proceed to a door leading to a new large corridor of the hospital.
![[#28] - Interval 02 - Isolation - part 1 - Interval 02 - Isolation - F.E.A.R. 2: Project Origin - Game Guide and Walkthrough](https://game.lhg100.com/Article/UploadFiles/201512/2015121518441357.jpg)
[#28]
Go straight ahead and ignore a large room for the time being when you get to a new area of the map. Proceed to the right corridor. Eventually you'll be able to get to a much smaller reception [#29]. Look around and you'll find a new document called Surgical notes. You may now proceed to a large room. Don't be scared by a falling body. Head on to the stairs and proceed to the upper floor.
![[#29] - Interval 02 - Isolation - part 1 - Interval 02 - Isolation - F.E.A.R. 2: Project Origin - Game Guide and Walkthrough](https://game.lhg100.com/Article/UploadFiles/201512/2015121518441373.jpg)
[#29]
You can visit the men's restroom if you don't have anything against being scared a lot. Otherwise remain here and keep moving forward. There's a small room nearby [#30] and you should take a look inside, because you'll gain possession of a new document - Check the news. Go to your left and eventually you'll find a passageway leading to an unexplored hospital wing.
![[#30] - Interval 02 - Isolation - part 1 - Interval 02 - Isolation - F.E.A.R. 2: Project Origin - Game Guide and Walkthrough](https://game.lhg100.com/Article/UploadFiles/201512/2015121518441352.jpg)
[#30]
Ignore a young woman who is going to be shot in a nearby room, because the soldiers you saw won't get to you right now. Keep following the bloodstains on the floor. There's a security outpost to your left, but you may as well ignore it. Eventually you'll get to a lab where you'll have a chance to talk to Genevieve [#31]. Go to your left once the conversation has ended and leave this room.
![[#31] - Interval 02 - Isolation - part 1 - Interval 02 - Isolation - F.E.A.R. 2: Project Origin - Game Guide and Walkthrough](https://game.lhg100.com/Article/UploadFiles/201512/2015121518441363.jpg)
[#31]
You'll find yourself standing inside a very dark corridor. You can inspect the left corridor if you want to. This would allow you to get to a medical kit [#31] which you've probably noticed before. Go back to the main corridor and keep moving forward. Take a disk with some interesting data (Urgent warning) after reaching a new room.
![[#31] - Interval 02 - Isolation - part 1 - Interval 02 - Isolation - F.E.A.R. 2: Project Origin - Game Guide and Walkthrough](https://game.lhg100.com/Article/UploadFiles/201512/2015121518441317.jpg)
[#31]
You'll probably notice an enemy with a flamethrower, but you may as well ignore him. Head over to the exit. Read a hint concerning the proper usage of your new slow-motion feature. Enter the nearest room, press the crouch key and wait for the guards to move away from your position. Get to the guns quickly [#32]. Don't forget to take grenades as well.
![[#32] - Interval 02 - Isolation - part 2 - Interval 02 - Isolation - F.E.A.R. 2: Project Origin - Game Guide and Walkthrough](https://game.lhg100.com/Article/UploadFiles/201512/2015121518441318.jpg)
[#32]
I would strongly recommend that you activate slow-motion, because it'll make this fight a lot easier [#33]. Use the submachine gun and the grenades to take out enemy units. Make sure that you're moving all the time, so you won't be an easy target. Take an armor after you've killed enemy units. You should also inspect their bodies for grenades and ammunition. Go to the exit.
![[#33] - Interval 02 - Isolation - part 2 - Interval 02 - Isolation - F.E.A.R. 2: Project Origin - Game Guide and Walkthrough](https://game.lhg100.com/Article/UploadFiles/201512/2015121518441361.jpg)
[#33]
You should be able to find new supplies nearby. Be careful, because a nearby door is going to be destroyed by hostile units [#34]. Activate bullet-time quickly and take cover behind the nearest cover. Throw at least one grenade at enemy soldiers. I would recommend that you stay here and kill anyone who decides to get closer to your position. Use grenades and slow-motion to increase your chances of winning. I would recommend hiding behind a wall, however you can also interact with one of nearby objects.
![[#34] - Interval 02 - Isolation - part 2 - Interval 02 - Isolation - F.E.A.R. 2: Project Origin - Game Guide and Walkthrough](https://game.lhg100.com/Article/UploadFiles/201512/2015121518441435.jpg)
[#34]
Inspect a room located to your left. You'll be encountering other soldiers along the way. Make sure to use some of the objects from the environment (for example - fire extinguishers) to get rid of them quickly. There are some syringes in the middle room, but you probably won't need them. Get closer to a larger room to your right [#35] and get ready to get rid of new enemy units.
![[#35] - Interval 02 - Isolation - part 2 - Interval 02 - Isolation - F.E.A.R. 2: Project Origin - Game Guide and Walkthrough](https://game.lhg100.com/Article/UploadFiles/201512/2015121518441442.jpg)
[#35]
Obviously you should start moving towards the room with a lot of glass. Be careful, because two additional soldiers may appear in front of you. Look around and you should be able to find new syringes. Proceed to a corridor with two vending machines [#36]. Make sure that the submachine gun is your active weapon and wait for your reflex bar (bullet-time) to be fully regenerated.
![[#36] - Interval 02 - Isolation - part 2 - Interval 02 - Isolation - F.E.A.R. 2: Project Origin - Game Guide and Walkthrough](https://game.lhg100.com/Article/UploadFiles/201512/2015121518441443.jpg)
[#36]
You should be able to notice a few soldiers standing just around the corner. They are trying to get to a room with one of the civilians. Break the glass, activate slow-motion and attack them from here [#37]. Use a submachine gun, but you should also throw at least one grenade at them. Make sure they've been eliminated and proceed to the lower level. Pick up ammunition and grenades. As for the armor, you should ignore it for the time being, because you'll need it in the near future.
![[#37] - Interval 02 - Isolation - part 2 - Interval 02 - Isolation - F.E.A.R. 2: Project Origin - Game Guide and Walkthrough](https://game.lhg100.com/Article/UploadFiles/201512/2015121518441456.jpg)
[#37]
Turn around and proceed to the right corridor. You should be able to reach new restrooms in a short while. This time you should visit women's restroom. Open the last cabin [#38]. Aside from the unpleasant views, you will be given a chance to pick up a new document - Info: 1LT Stokes. Go back to the corridor with the civilian.
![[#38] - Interval 02 - Isolation - part 2 - Interval 02 - Isolation - F.E.A.R. 2: Project Origin - Game Guide and Walkthrough](https://game.lhg100.com/Article/UploadFiles/201512/2015121518441477.jpg)
[#38]
Ignore the civilian (you don't have to get to him) and proceed towards the elevators. Notice new syringes along the way. Press the button to call an elevator. Now you must turn around quickly. Take cover behind the left wall and wait for enemy forces to show up. Try to eliminate hostile units before they'll get to your floor [#39]. Use slow-motion and grenades whenever they're needed. Prevent enemy soldiers from moving too close to your position.
![[#39] - Interval 02 - Isolation - part 2 - Interval 02 - Isolation - F.E.A.R. 2: Project Origin - Game Guide and Walkthrough](https://game.lhg100.com/Article/UploadFiles/201512/2015121518441412.jpg)
[#39]
Once the battle has ended take your time to collect much needed supplies. Proceed to the elevator, turn around and use a control panel [#40]. Sadly, the elevator is going to be stopped in a few seconds, because enemy units will find out that you're inside. You've got two options here - you can stay inside the elevator and eliminate hostile soldiers from here or you may press the crouch key and enter a ventilation shaft without even engaging them in an open combat.
![[#40] - Interval 02 - Isolation - part 3 - Interval 02 - Isolation - F.E.A.R. 2: Project Origin - Game Guide and Walkthrough](https://game.lhg100.com/Article/UploadFiles/201512/2015121518441451.jpg)
[#40]
Ignore the fact that an elevator cable has snapped, sending the huge thing to the ground. Go to your left and keep moving forward until you've left the shaft. Ignore the steam coming out of the pipes, because you won't sustain any injuries here. Use the stairs to get to an upper floor. Turn off your flashlight and approach the door carefully. Use grenades to disable some of the closest targets [#41] and activate slow-motion to deal with more distant threats. You can choose to stay near the staircase or you can enter the room and take cover behind a large object.
![[#41] - Interval 02 - Isolation - part 3 - Interval 02 - Isolation - F.E.A.R. 2: Project Origin - Game Guide and Walkthrough](https://game.lhg100.com/Article/UploadFiles/201512/2015121518441441.jpg)
[#41]
Enter the room and take all the syringes (only if you need them). You should also spend some time searching for grenades and ammunition. Proceed forward and then turn right. Go to the end of the hall and choose a room located to your left [#42]. Activate your flashlight, because it's dark inside. Find Morgue keycard. Obviously you must take it.
![[#42] - Interval 02 - Isolation - part 3 - Interval 02 - Isolation - F.E.A.R. 2: Project Origin - Game Guide and Walkthrough](https://game.lhg100.com/Article/UploadFiles/201512/2015121518441452.jpg)
[#42]
Go back to the large room where you fought the last group of enemy soldiers. Inspect the surrounding area and you should be able to find a door with a card reader next to it [#43]. Use your newly acquired keycard to gain access and go to Storage 211. There's a Reflex Injector inside the storage room. Collecting this item will make your reflex bar bigger, so you'll be allowed to use slow-motion for a longer period of time.
![[#43] - Interval 02 - Isolation - part 3 - Interval 02 - Isolation - F.E.A.R. 2: Project Origin - Game Guide and Walkthrough](https://game.lhg100.com/Article/UploadFiles/201512/2015121518441541.jpg)
[#43]
Return to the main corridor and start moving the same path you've used while trying to find the keycard. You can visit a Surgery room along the way, however you'll only find ammunition there. Proceed to a new door [#44] and use your Morgue keycard for the second time to unlock access to a new hospital wing.
![[#44] - Interval 02 - Isolation - part 3 - Interval 02 - Isolation - F.E.A.R. 2: Project Origin - Game Guide and Walkthrough](https://game.lhg100.com/Article/UploadFiles/201512/2015121518441592.jpg)
[#44]
Collect ammunition and grenades when you reach a new junction. Choose the left path. You'll notice a hospital employee just around the corner. Approach him and you'll notice that the civilian has been killed by an enemy soldier [#45]. Kill him and get ready to get rid of his colleagues. You can stay here or you can advance to their positions if you're feeling confident. Make sure to use walls and pillars for cover and activate slow-motion whenever you encounter hostile units.
![[#45] - Interval 02 - Isolation - part 3 - Interval 02 - Isolation - F.E.A.R. 2: Project Origin - Game Guide and Walkthrough](https://game.lhg100.com/Article/UploadFiles/201512/2015121518441572.jpg)
[#45]
You should be able to notice that one of your enemies was carrying a new type of weapon. It was a combat shotgun. Take this weapon, but don't use it right away, because you'll want to keep fighting at a large distance. Watch out for a new group which will appear near a Central supply room [#46]. You will be fine as long as you prevent enemy units from making surprise attacks.
![[#46] - Interval 02 - Isolation - part 3 - Interval 02 - Isolation - F.E.A.R. 2: Project Origin - Game Guide and Walkthrough](https://game.lhg100.com/Article/UploadFiles/201512/2015121518441579.jpg)
[#46]
Make sure that you've killed all enemy soldiers. Take your time to look around. As always, you should focus on collecting ammunition. You'll also find a medkit on a nearby wall. Proceed to a darker passageway. Explore one of the nearby rooms, because you'll find a CD with some data on it [#47] - Diode implants. Go to the next room.
![[#47] - Interval 02 - Isolation - part 3 - Interval 02 - Isolation - F.E.A.R. 2: Project Origin - Game Guide and Walkthrough](https://game.lhg100.com/Article/UploadFiles/201512/2015121518441501.jpg)
[#47]
You finally found your way to the morgue. Don't be scared when you see Alma. Instead follow the wraith to a side room. Once again - keep your cool, especially since you won't be attacked by the undead. Turn left and notice a platform in front of you [#48]. Jump onto the platform and get to an elevator shaft. Now you must turn around. Aim at the platform and press the action key to push it away.
![[#48] - Interval 02 - Isolation - part 4 - Interval 02 - Isolation - F.E.A.R. 2: Project Origin - Game Guide and Walkthrough](https://game.lhg100.com/Article/UploadFiles/201512/2015121518441538.jpg)
[#48]
Notice that your actions have resulted in the elevator moving again. Wait for the elevator to reach its designated floor. The game will now require you to press and hold the action key in order to open elevator doors [#49]. Head on to a new corridor and pick up some ammunition for the combat shotgun. There's also a new armor in this area.
![[#49] - Interval 02 - Isolation - part 4 - Interval 02 - Isolation - F.E.A.R. 2: Project Origin - Game Guide and Walkthrough](https://game.lhg100.com/Article/UploadFiles/201512/2015121518441561.jpg)
[#49]
Keep heading forward. Proceed to Office 201 and you should be able to find a new CD - Admitting patients. You may now proceed to Office 202. Approach the opposite exit carefully. There are a lot of enemy units near the desk [#50], so the most obvious solution to get rid of them is to use grenades. You can also use a combat shotgun to eliminate the closest target. Don't exit the room unless you've killed all targets.
![[#50] - Interval 02 - Isolation - part 4 - Interval 02 - Isolation - F.E.A.R. 2: Project Origin - Game Guide and Walkthrough](https://game.lhg100.com/Article/UploadFiles/201512/2015121518441590.jpg)
[#50]
Check the men's restroom if you're interested in surprises, but don't expect to find something useful there. Locate a door leading to the next room [#51] if you want to get to an exit as soon as possible. Watch out, because one of the enemy soldiers may be hiding near a second door. Prevent him from surprising you. Move forward and collect a new medkit along the way.
![[#51] - Interval 02 - Isolation - part 4 - Interval 02 - Isolation - F.E.A.R. 2: Project Origin - Game Guide and Walkthrough](https://game.lhg100.com/Article/UploadFiles/201512/2015121518441525.jpg)
[#51]
You will have to defeat a new large group of hostile units once you've reached a much larger lab [#52]. Try maintaining a safe distance and prevent enemy forces from surprising you. Don't forget to use some of the carried grenades, especially since you'll be finding a lot of those here. Don't move forward until you've killed all soldiers.
![[#52] - Interval 02 - Isolation - part 4 - Interval 02 - Isolation - F.E.A.R. 2: Project Origin - Game Guide and Walkthrough](https://game.lhg100.com/Article/UploadFiles/201512/2015121518441521.jpg)
[#52]
The next group of enemy soldiers will appear on the opposite end of a nearby corridor [#53]. Use a submachine gun to kill them from a very large distance. Make sure they're gone and go that location. Don't forget to take a new armor before leaving this area. You'll also find syringes, ammunition and grenades.
![[#53] - Interval 02 - Isolation - part 4 - Interval 02 - Isolation - F.E.A.R. 2: Project Origin - Game Guide and Walkthrough](https://game.lhg100.com/Article/UploadFiles/201512/2015121518441640.jpg)
[#53]
Keep heading forward. Use the Morgue keycard for the third time in order to unlock passageway to a new room. Take your time to explore your surroundings (there are even more syringes here). Inspect all the walls and you should find an entrance to a ventilation shaft [#54]. Press a crouch key and head inside. Eventually you'll get to a small storage area where you'll find a new document - Evaluation report. Go back to the area with the elevators.
![[#54] - Interval 02 - Isolation - part 4 - Interval 02 - Isolation - F.E.A.R. 2: Project Origin - Game Guide and Walkthrough](https://game.lhg100.com/Article/UploadFiles/201512/2015121518441631.jpg)
[#54]
Proceed towards the unexplored corridor. You should be able to reach an unguarded room in a short while. Make sure that you've collected a medkit and some ammunition, but ignore a new armor for the time being. Once you feel you're ready for the next challenge, step into a large tube [#55]. You'll have to watch a longer cut-scene. When you're transported to a new area try approaching the little girl.
![[#55] - Interval 02 - Isolation - part 4 - Interval 02 - Isolation - F.E.A.R. 2: Project Origin - Game Guide and Walkthrough](https://game.lhg100.com/Article/UploadFiles/201512/2015121518441692.jpg)
[#55]
You'll have to get ready for a new fight the second you've left the tube. Notice that enemy soldiers are moving towards your position [#56]. Start off by throwing a couple of grenades at them and then finish off the rest with the help of your slow-motion feature. Don't forget to use nearby pillars for much needed cover. Once you've won the battle pick up the armor unless you already took it earlier. Scout the area for ammo and grenades.
![[#56] - Interval 02 - Isolation - part 5 - Interval 02 - Isolation - F.E.A.R. 2: Project Origin - Game Guide and Walkthrough](https://game.lhg100.com/Article/UploadFiles/201512/2015121518441633.jpg)
[#56]
You must now go back to the room with the elevators. Be careful as you'll encounter at least two new groups of enemy units along the way. Take it slow and use your arsenal and your reflex ability to prevail. Notice that a passageway leading to the staircase [#57] is now accessible. Proceed there and take a new document - T.A.C. overview. Use the stairs to get down to a lower floor, open the door and wait for the game to load a new level.
![[#57] - Interval 02 - Isolation - part 5 - Interval 02 - Isolation - F.E.A.R. 2: Project Origin - Game Guide and Walkthrough](https://game.lhg100.com/Article/UploadFiles/201512/2015121518441678.jpg)
[#57]
Head on to a new door. Read a hint concerning the possibility of changing grenade types. One of the enemy soldiers should be standing in front of you [#58]. Try killing him from here. As for his colleagues, it would be a good idea to use incendiary grenades against them. You'll find those to your left and in the next room.
![[#58] - Interval 02 - Isolation - part 5 - Interval 02 - Isolation - F.E.A.R. 2: Project Origin - Game Guide and Walkthrough](https://game.lhg100.com/Article/UploadFiles/201512/2015121518441658.jpg)
[#58]
I would strongly recommend that you look for exploding objects (fire extinguishers and yellow tanks with C4 charges attached to them) during the battle, mostly because each explosion [#59] will allow you to get rid of nearby enemy troops easily. Watch out for the upper balconies and prevent enemy units from making any surprise attacks against you.
![[#59] - Interval 02 - Isolation - part 5 - Interval 02 - Isolation - F.E.A.R. 2: Project Origin - Game Guide and Walkthrough](https://game.lhg100.com/Article/UploadFiles/201512/2015121518441667.jpg)
[#59]
If you try getting closer to the central area of this room you'll probably notice that new enemy soldiers have exited the elevators [#60]. Get ready to engage them in an open combat. Continue exploring the surrounding area once they're gone. You'll find grenades, ammunition and a fresh armor. One of the side rooms also contains a medkit. Use the stairs when you're ready to explore the balconies.
![[#60] - Interval 02 - Isolation - part 5 - Interval 02 - Isolation - F.E.A.R. 2: Project Origin - Game Guide and Walkthrough](https://game.lhg100.com/Article/UploadFiles/201512/2015121518441687.jpg)
[#60]
Be careful, because a second elevator will probably open and obviously this means you'll have to defeat a new group of enemy soldiers. New hostile units will show up later on [#61] and you should rely on the zoom feature while trying to kill them with a submachine gun. Keep moving, so you won't be an easy target.
![[#61] - Interval 02 - Isolation - part 5 - Interval 02 - Isolation - F.E.A.R. 2: Project Origin - Game Guide and Walkthrough](https://game.lhg100.com/Article/UploadFiles/201512/2015121518441662.jpg)
[#61]
It's very important that you take a look inside the security station, because you will be able to find a new document here [#62] - Demolition plan. You must now use the balconies to reach the elevators which have recently been opened. You're probably going to be attacked by one more group along the way, but you may get rid of enemy forces easily by aiming at the explosive canister. There's a new armor at the end of this corridor. Take it, go back to the elevator and confirm that you want to travel to a higher floor.
![[#62] - Interval 02 - Isolation - part 5 - Interval 02 - Isolation - F.E.A.R. 2: Project Origin - Game Guide and Walkthrough](https://game.lhg100.com/Article/UploadFiles/201512/2015121518441791.jpg)
[#62]
Go to your right and start moving towards your current target. Make a stop once you're close enough to the burning rooms. Your first action should be to eliminate a small group of enemy soldiers [#63]. Once they're gone focus on attacking other hostile units. Guard the left window if possible, because reinforcements may show up there. Don't forget to use slow-motion. I wouldn't recommend using grenades, because the corridors are relatively large.
![[#63] - Interval 02 - Isolation - part 5 - Interval 02 - Isolation - F.E.A.R. 2: Project Origin - Game Guide and Walkthrough](https://game.lhg100.com/Article/UploadFiles/201512/2015121518441728.jpg)
[#63]
You'll have to watch out for the flames and for the burning objects from now on. Thankfully it's a very easy task, because you'll be allowed to travel to your primary locations without having to worry too much about how to get past them. There's a medkit in Admitting. Once you've taken it go to Nurse, avoid the flames and proceed forward. You will finally come across a large entrance to a ventilation shaft [#64]. Use it to get inside.
![[#64] - Interval 02 - Isolation - part 6 - Interval 02 - Isolation - F.E.A.R. 2: Project Origin - Game Guide and Walkthrough](https://game.lhg100.com/Article/UploadFiles/201512/2015121518441734.jpg)
[#64]
Keep heading forward and ignore the first junction entirely. Eventually you'll get to an exit from the shaft. Head down and take a second to find out what's happening in front of you. Notice that an armored opponent is using a flamethrower to hunt down the civilians. Use grenades to injure him [#65] and travel to your right quickly before he's able to injure your character. Attack him from the front, but prevent him from moving too close or he may use his weapon.
![[#65] - Interval 02 - Isolation - part 6 - Interval 02 - Isolation - F.E.A.R. 2: Project Origin - Game Guide and Walkthrough](https://game.lhg100.com/Article/UploadFiles/201512/2015121518441726.jpg)
[#65]
Once you've won the battle take a new weapon. It's going to a napalm cannon which basically works as a flamethrower. Notice that two enemy soldiers have appeared in the area [#66]. There's a large distance separating you from them, so should switch over to a submachine gun quickly. Kill them, but make sure that you don't get too close to the flames. Remain here for a few more seconds.
![[#66] - Interval 02 - Isolation - part 6 - Interval 02 - Isolation - F.E.A.R. 2: Project Origin - Game Guide and Walkthrough](https://game.lhg100.com/Article/UploadFiles/201512/2015121518441749.jpg)
[#66]
You may go back to the exit from the shaft, because you'll find a medkit there. It shouldn't be necessary as you probably have a lot of those. You should also look for a new armor. I would recommend that you visit the restrooms [#67]. There's a new Reflex Injector there and obviously you should take it. Head on to a passageway located near the killed soldiers.
![[#67] - Interval 02 - Isolation - part 6 - Interval 02 - Isolation - F.E.A.R. 2: Project Origin - Game Guide and Walkthrough](https://game.lhg100.com/Article/UploadFiles/201512/2015121518441720.jpg)
[#67]
Once you've reached a new room take your time to collect ammunition, as well as incendiary grenades. Keep moving forward and use the bloodstains to find a way to your current destination. There's a new document nearby [#68] - I.M. transcript #3. Take it and proceed to a room to your right. Avoid the flames and get to the only exit.
![[#68] - Interval 02 - Isolation - part 6 - Interval 02 - Isolation - F.E.A.R. 2: Project Origin - Game Guide and Walkthrough](https://game.lhg100.com/Article/UploadFiles/201512/2015121518441769.jpg)
[#68]
New enemy units are waiting for you just around the corner. Use the grenades to get rid of closest targets and then use one of your primary weapons to eliminate anyone who decides to advance towards your position [#69]. Watch out for some of the windows, because they can't be destroyed. One you've won proceed to the room where enemy troops were stationed. There's a new medkit on the wall.
![[#69] - Interval 02 - Isolation - part 6 - Interval 02 - Isolation - F.E.A.R. 2: Project Origin - Game Guide and Walkthrough](https://game.lhg100.com/Article/UploadFiles/201512/2015121518441719.jpg)
[#69]
You should be able to find an armor nearby, however I wouldn't recommend taking it right away. The main reason is that you'll soon be attacked by a second group [#70]. Try getting closer to enemy units and use a combat shotgun or a napalm cannon to get rid of them quickly. Once they're gone, proceed to a burning room. Locate a passageway leading to a new area of the lab complex.
![[#70] - Interval 02 - Isolation - part 6 - Interval 02 - Isolation - F.E.A.R. 2: Project Origin - Game Guide and Walkthrough](https://game.lhg100.com/Article/UploadFiles/201512/2015121518441745.jpg)
[#70]
New enemy soldiers will appear in the distance, however getting rid of them should be relatively simple. Keep going straight. Listen to a short radio transmission about Alma and proceed to the nearest door. You'll find yourself standing next to a staircase and you must travel to a lower floor. Go to the left door. Enter a room to your right and get rid of a single soldier [#71].
![[#71] - Interval 02 - Isolation - part 6 - Interval 02 - Isolation - F.E.A.R. 2: Project Origin - Game Guide and Walkthrough](https://game.lhg100.com/Article/UploadFiles/201512/2015121518441775.jpg)
[#71]
It's very important that you explore a small server room [#72]. The main reason is that you'll find a bonus CD inside - I.M. transcript #2. There are also a few grenades in the area, but you probably have a lot of those in your possession. Proceed to a new corridor. Ignore the restrooms. Instead go to a new room and surprise one of the enemy soldiers.
![[#72] - Interval 02 - Isolation - part 7 - Interval 02 - Isolation - F.E.A.R. 2: Project Origin - Game Guide and Walkthrough](https://game.lhg100.com/Article/UploadFiles/201512/2015121518441879.jpg)
[#72]
You will witness a lot of strange things from now on. In many cases you will be allowed to ignore enemy soldiers, because they're going to be ripped apart by strange creatures. Proceed to the nearest exit and notice that a soldier has been dragged away by someone (or rather something!). Exit this room and collect his ammo. You should take a look inside the washing machine. :-) Approach the left door, leading to Cleaning 211 [#73].
![[#73] - Interval 02 - Isolation - part 7 - Interval 02 - Isolation - F.E.A.R. 2: Project Origin - Game Guide and Walkthrough](https://game.lhg100.com/Article/UploadFiles/201512/2015121518441846.jpg)
[#73]
Before you open the door you should choose a napalm cannon or a combat shotgun from your inventory, because enemy soldiers are standing nearby [#74]. Don't leave the room unless it's absolutely necessary and prevent enemy forces from surprising your character. Explore the surrounding rooms, but you won't find many useful items. Find large bloodstains on the floor and proceed to that corridor.
![[#74] - Interval 02 - Isolation - part 7 - Interval 02 - Isolation - F.E.A.R. 2: Project Origin - Game Guide and Walkthrough](https://game.lhg100.com/Article/UploadFiles/201512/2015121518441867.jpg)
[#74]
New enemy soldiers are taking cover just around the corner. Prevent them from surprising you and use a shotgun to get rid of them quickly. Go to the Staff Only room and find an exit [#75]. Get closer to the left window and notice that one of the monsters is attacking a soldier. Thankfully you won't be attacked by this beast.
![[#75] - Interval 02 - Isolation - part 7 - Interval 02 - Isolation - F.E.A.R. 2: Project Origin - Game Guide and Walkthrough](https://game.lhg100.com/Article/UploadFiles/201512/2015121518441845.jpg)
[#75]
Don't exit this room just yet. Instead focus on exploring the surrounding area. There's a new document [#76] called Op guidelines. You'll find it between two large shelves. Once you've taken the document proceed to the only available exit. You don't have to act quietly here. Find the stairs leading to the lower floor.
![[#76] - Interval 02 - Isolation - part 7 - Interval 02 - Isolation - F.E.A.R. 2: Project Origin - Game Guide and Walkthrough](https://game.lhg100.com/Article/UploadFiles/201512/2015121518441892.jpg)
[#76]
You may take your time exploring the surrounding and you'll find grenades among other things. Proceed to a bloody passageway [#77] and notice new enemy soldiers being attacked by the strange creatures. Wait for one of the soldiers to be killed before attacking his colleague. Collect ammunition once you're done with all hostile targets. You'll soon be attacked by a second group, but it shouldn't pose a great threat.
![[#77] - Interval 02 - Isolation - part 7 - Interval 02 - Isolation - F.E.A.R. 2: Project Origin - Game Guide and Walkthrough](https://game.lhg100.com/Article/UploadFiles/201512/2015121518441810.jpg)
[#77]
Eventually you should be able to get to a reception area. Proceed towards the elevators. Press the button to call for an elevator, enter it and use a control panel to travel to a different floor. You may exit the elevator. There's a medkit inside this small storage area. Go to the bigger room and notice new weapons in front of you [#78]. Take them and go to your left.
![[#78] - Interval 02 - Isolation - part 7 - Interval 02 - Isolation - F.E.A.R. 2: Project Origin - Game Guide and Walkthrough](https://game.lhg100.com/Article/UploadFiles/201512/2015121518441806.jpg)
[#78]
Try getting closer to a large round room and you'll witness a new vision. I'm sure that you'll be more interested in the fact that you're going to be grabbed by one of the creatures [#79] and forced to land on the ground. Make sure that you have a powerful gun as your active weapon, because you'll have to defend yourself against the monsters.
![[#79] - Interval 02 - Isolation - part 7 - Interval 02 - Isolation - F.E.A.R. 2: Project Origin - Game Guide and Walkthrough](https://game.lhg100.com/Article/UploadFiles/201512/2015121518441864.jpg)
[#79]
Each time you're trying to kill new creatures you should be using slow-motion, mostly because all the monsters are very agile. Thankfully they die after a few successful hits. If you're caught by one of the monsters, you must keep pressing the right mouse button rapidly [#80] in order to push it back. You can't stop pressing the button, because you'll lose energy. Make sure that you're standing near the wall and reload your weapon after each wave of attacks.
![[#80] - Interval 02 - Isolation - part 8 - Interval 02 - Isolation - F.E.A.R. 2: Project Origin - Game Guide and Walkthrough](https://game.lhg100.com/Article/UploadFiles/201512/2015121518441811.jpg)
[#80]
Try leaving this room and you'll have to dispose of a new group of mutated beings. Thankfully you'll be moving more freely, so it shouldn't be difficult to find a good spot from where you can open fire. Scout the area for syringes and medkits when you're done. Proceed towards the only available passageway [#81]. Kill a new creature, collect the ammunition and press the action key a few times to move the table out of the way.
![[#81] - Interval 02 - Isolation - part 8 - Interval 02 - Isolation - F.E.A.R. 2: Project Origin - Game Guide and Walkthrough](https://game.lhg100.com/Article/UploadFiles/201512/2015121518441812.jpg)
[#81]
You may now proceed towards a newly unlocked passageway. You should be able to reach a new operating room in a short while. Notice one of your colleagues. Sadly you can't rescue him. Instead focus your efforts on finding an entrance to a new ventilation shaft [#82]. Head down and wait for the game to load a new map.
![[#82] - Interval 02 - Isolation - part 8 - Interval 02 - Isolation - F.E.A.R. 2: Project Origin - Game Guide and Walkthrough](https://game.lhg100.com/Article/UploadFiles/201512/2015121518441918.jpg)
[#82]
You don't have to go to Exam 201, because you wouldn't find anything of interest there. Instead proceed to a room located in front of the start area [#83]. Ignore the body of a dead man and search for a new document - Info: SGT Fox. You may exit this room. Proceed towards the next section of the main corridor.
![[#83] - Interval 02 - Isolation - part 8 - Interval 02 - Isolation - F.E.A.R. 2: Project Origin - Game Guide and Walkthrough](https://game.lhg100.com/Article/UploadFiles/201512/2015121518441904.jpg)
[#83]
Now you must go to the second control room. Once inside, take your time to find a control panel [#84]. You must press the action key once in order to unlock access to the room you see on the other side of the window. Go there now - this means you must exit the room and find a double door. Proceed to the left and you'll witness a very cool cut-scene. Thankfully you're not in any danger, so sit back and enjoy.
![[#84] - Interval 02 - Isolation - part 8 - Interval 02 - Isolation - F.E.A.R. 2: Project Origin - Game Guide and Walkthrough](https://game.lhg100.com/Article/UploadFiles/201512/2015121518441989.jpg)
[#84]
Head on towards the corridor where one of your colleagues was taken. Ignore a small storage facility along the way and keep going straight. You'll go through a third control room, but this time you won't have to use the panel. Check the second store room, because there's a medkit inside and you might need it. Go to Exam 204 and find a new document [#85] - Info: SGT Morales.
![[#85] - Interval 02 - Isolation - part 8 - Interval 02 - Isolation - F.E.A.R. 2: Project Origin - Game Guide and Walkthrough](https://game.lhg100.com/Article/UploadFiles/201512/2015121518441966.jpg)
[#85]
You should be able to reach a new junction in a short while. Ignore bodies of dead civilians and proceed towards the left passageway. You'll notice an armor nearby, but don't pick it up, because there's a group of enemy soldiers nearby and you should deal with them in the first place. Enemy troops are stationed just around the corner. Make sure to aim for yellow canisters [#86] to get rid of them quickly. You should also prevent them from surprising you from the left. Go back for the armor once you've won. Inspect bodies of fallen enemies for grenades and ammunition.
![[#86] - Interval 02 - Isolation - part 9 - Interval 02 - Isolation - F.E.A.R. 2: Project Origin - Game Guide and Walkthrough](https://game.lhg100.com/Article/UploadFiles/201512/2015121518441960.jpg)
[#86]
If you decide to leave the lab you're going to be attacked by two other groups of enemy units. Each time you should use slow-motion and take cover behind nearby objects to gain advantage over them. Proceed towards the corridor where enemy troops have been seen for the first time. Eventually you should be able to get to a decontamination chamber [#87]. Wait for the process to end.
![[#87] - Interval 02 - Isolation - part 9 - Interval 02 - Isolation - F.E.A.R. 2: Project Origin - Game Guide and Walkthrough](https://game.lhg100.com/Article/UploadFiles/201512/2015121518441999.jpg)
[#87]
You'll be seeing a few monsters in the distance, but you may as well ignore them for now, because they'll be out there only to scare you. There's only one narrow passageway here, so you can't get lost. Ignore enemy troops on the left ledge, because they won't see you. Defeat a single monster shortly after that [#88]. Don't forget to activate bullet-time, because the creature is very fast and it will only take a second for it to get to you. Use a combat shotgun to succeed.
![[#88] - Interval 02 - Isolation - part 9 - Interval 02 - Isolation - F.E.A.R. 2: Project Origin - Game Guide and Walkthrough](https://game.lhg100.com/Article/UploadFiles/201512/2015121518441971.jpg)
[#88]
You may proceed to the next section. Make sure to collect a CD before moving on [#89] - Harbinger failures. There's also a new medkit in the area if you need one. Proceed to the upper floor and open the left door. Explore the left room once you've reached a junction. Use the stairs and pick up a Reflex Injector.
![[#89] - Interval 02 - Isolation - part 9 - Interval 02 - Isolation - F.E.A.R. 2: Project Origin - Game Guide and Walkthrough](https://game.lhg100.com/Article/UploadFiles/201512/2015121518441991.jpg)
[#89]
You may go back up. Start moving forward. You'll notice a few soldiers using the elevator, but you don't have to attack them right now. Explosions will take place near your position, but thankfully you don't have to be moving fast. This only applies to using the elevator [#90] when you must enter it and press a button on the control panel before the flames consume your character. Choose a submachine gun and wait for the elevator to reach its destination.
![[#90] - Interval 02 - Isolation - part 9 - Interval 02 - Isolation - F.E.A.R. 2: Project Origin - Game Guide and Walkthrough](https://game.lhg100.com/Article/UploadFiles/201512/2015121518441935.jpg)
[#90]
You have to be ready to engage enemy forces when the lift stops. They will appear behind you [#91], so you may have some problems spotting them. Use slow-motion and zoom to make this fight a lot easier. I would also recommend maintaining a large distance, especially since some of the foes are using shotguns. Make sure to secure upper balconies in the first place.
![[#91] - Interval 03 - Recognition - part 1 - Interval 03 - Recognition - F.E.A.R. 2: Project Origin - Game Guide and Walkthrough](https://game.lhg100.com/Article/UploadFiles/201512/2015121518442088.jpg)
[#91]
Collect ammunition once you've taken care of all hostile troops. You may now proceed to a small tunnel. Make sure that you check the surrounding area thoroughly. You'll gain possession of a new armor, as well as ammo and grenades. Don't forget to check the upper balconies for additional supplies. Eventually you'll have to get to a new ladder [#92]. Use it.
![[#92] - Interval 03 - Recognition - part 1 - Interval 03 - Recognition - F.E.A.R. 2: Project Origin - Game Guide and Walkthrough](https://game.lhg100.com/Article/UploadFiles/201512/2015121518442018.jpg)
[#92]
You'll now have to take a long walk. There aren't any immediate threats for you to worry about, but you also won't find any interesting items. Make a stop once you're closer to the lab building [#93]. There are some enemies in front of you. Attack them or wait for them to leave. Keep heading downwards.
![[#93] - Interval 03 - Recognition - part 1 - Interval 03 - Recognition - F.E.A.R. 2: Project Origin - Game Guide and Walkthrough](https://game.lhg100.com/Article/UploadFiles/201512/2015121518442089.jpg)
[#93]
You'll soon have to avoid a nasty fire trap [#94]. I would recommend that you remain here for at least 10 seconds to observe the pattern of the flames appearing in front of you. Now you must use the slow-motion in the right moment to travel safely to the next part of the balcony. Keep moving forward. Avoid the flames once again and turn left to return to the balcony.
![[#94] - Interval 03 - Recognition - part 1 - Interval 03 - Recognition - F.E.A.R. 2: Project Origin - Game Guide and Walkthrough](https://game.lhg100.com/Article/UploadFiles/201512/2015121518442040.jpg)
[#94]
You should be able to get to a darker tunnel in a short while. Turn off your flashlight, because there are enemy troops nearby. You may use grenades against hostile units [#95] or you can only focus on using your submachine gun. Start moving towards them, but choose the corridor on your right when you have the chance.
![[#95] - Interval 03 - Recognition - part 1 - Interval 03 - Recognition - F.E.A.R. 2: Project Origin - Game Guide and Walkthrough](https://game.lhg100.com/Article/UploadFiles/201512/2015121518442014.jpg)
[#95]
Choosing the side corridor will allow you to surprise enemy soldiers and you'll also find a new armor here [#96]. Take it right away or deal with all nearby targets in the first place. You should also scout this area for a new document, titled Schedule change. Collect ammunition and grenades before moving on.
[#96]
A new group of hostile soldiers is waiting for you just around the corner, however eliminating them should be relatively easy. Proceed to the balcony. Start off by going right and eventually you'll find shock grenades [#97]. Take them, go back to the junction and proceed left. Keep moving forward until you've reached a ladder. Use it to get to the lower ledge.
![[#97] - Interval 03 - Recognition - part 1 - Interval 03 - Recognition - F.E.A.R. 2: Project Origin - Game Guide and Walkthrough](https://game.lhg100.com/Article/UploadFiles/201512/2015121518442043.jpg)
[#97]
Before you decide to take a new armor you should consider eliminating new enemy soldiers from here [#98]. Most of them will appear near an armored car. It shouldn't be difficult, because you have a great view of the surrounding area from here. Take the armor and use the second ladder to get to the ground floor.
![[#98] - Interval 03 - Recognition - part 2 - Interval 03 - Recognition - F.E.A.R. 2: Project Origin - Game Guide and Walkthrough](https://game.lhg100.com/Article/UploadFiles/201512/2015121518442004.jpg)
[#98]
Sadly when you get to the ground new enemy troops will appear in front of you and you'll have to defeat them without going back to the ladder. Try moving towards them, because it's going to be much easier to surprise them. Make sure to inspect all the bodies after the battle and you'll notice that at least one soldier was using an assault rifle. Exchange this weapon for a useless pistol. Proceed to a large gate [#99] and use your reflex ability to get through to the other side safely.
![[#99] - Interval 03 - Recognition - part 2 - Interval 03 - Recognition - F.E.A.R. 2: Project Origin - Game Guide and Walkthrough](https://game.lhg100.com/Article/UploadFiles/201512/2015121518442171.jpg)
[#99]
Ignore the flames and deal with a new group of enemy soldiers. Be careful, because some of them will appear on an upper balcony [#100]. There's also a large group to your left, on the other side of the gate. Get rid of them now and from a much larger distance. Check the area for medical supplies, ammunition and grenades.
![[#100] - Interval 03 - Recognition - part 2 - Interval 03 - Recognition - F.E.A.R. 2: Project Origin - Game Guide and Walkthrough](https://game.lhg100.com/Article/UploadFiles/201512/2015121518442172.jpg)
[#100]
There are two ways for you to get to the next tunnel. You can use the lever to open the main gate (it's located to the right) or you can travel through the balcony. Ignore the fact that a large ceiling has collapsed in the area. Instead move forward [#101] and head down to the ground level safely. Read a new hint and pick up a medkit.
![[#101] - Interval 03 - Recognition - part 2 - Interval 03 - Recognition - F.E.A.R. 2: Project Origin - Game Guide and Walkthrough](https://game.lhg100.com/Article/UploadFiles/201512/2015121518442145.jpg)
[#101]
You must be extremely careful here, because you're going to be attacked by an armored opponent [#102]. He's carrying a napalm cannon, so it's very important that you attack him from a large distance and keep it that way. Other enemy soldiers will appear on the upper balconies. Use slow-motion and zoom to get rid of them easily. Proceed forward.
![[#102] - Interval 03 - Recognition - part 2 - Interval 03 - Recognition - F.E.A.R. 2: Project Origin - Game Guide and Walkthrough](https://game.lhg100.com/Article/UploadFiles/201512/2015121518442154.jpg)
[#102]
Keep heading forward and eliminate anyone who stands in your way. Don't forget that new enemy units may have appeared on the balconies in the meantime. Thankfully there are TWO armors nearby, so you shouldn't worry about being killed or seriously injured. Proceed towards a large metal construction [#103] and use two ladders.
![[#103] - Interval 03 - Recognition - part 2 - Interval 03 - Recognition - F.E.A.R. 2: Project Origin - Game Guide and Walkthrough](https://game.lhg100.com/Article/UploadFiles/201512/2015121518442115.jpg)
[#103]
You're going to be attacked by one more opponent when you reach the top level. Get ready to kill him. Move forward and secure the ladder [#104]. Before you decide to use the ladder secure this entire balcony and you'll come across a medkit, as well as new grenades. Use the ladder to get down to a lower level and proceed to the nearest tunnel. You're safe for now, so you don't have to move slowly.
![[#104] - Interval 03 - Recognition - part 2 - Interval 03 - Recognition - F.E.A.R. 2: Project Origin - Game Guide and Walkthrough](https://game.lhg100.com/Article/UploadFiles/201512/2015121518442140.jpg)
[#104]
You'll find an armor in the next warehouse, however I wouldn't recommend taking it unless it's absolutely necessary. Use the stairs to get to the upper balcony. Go to the next warehouse and prepare to defeat a large group of enemy forces [#105]. Start off by throwing a couple of grenades at enemy soldiers and after that use an assault rifle. Don't forget to activate slow-motion whenever possible. Prevent enemy units from surprising you from the back.
![[#105] - Interval 03 - Recognition - part 3 - Interval 03 - Recognition - F.E.A.R. 2: Project Origin - Game Guide and Walkthrough](https://game.lhg100.com/Article/UploadFiles/201512/2015121518442117.jpg)
[#105]
Once you've won go back to the previous warehouse. Now you may pick up the armor. Proceed to the area where enemy forces showed up for the first time. You can inspect both platforms, but you would only find a medkit. Focus on getting to a new corridor [#106]. Choose an assault rifle or a submachine gun from your inventory before moving on.
![[#106] - Interval 03 - Recognition - part 3 - Interval 03 - Recognition - F.E.A.R. 2: Project Origin - Game Guide and Walkthrough](https://game.lhg100.com/Article/UploadFiles/201512/2015121518442187.jpg)
[#106]
You'll have to defeat a few soldiers along the way, however it shouldn't be a problem. Notice that one of the pipes has been damaged [#107] and as a result you can't use the ladder just yet. Turn right and eliminate enemy forces from a large distance. Start moving towards them. Don't go in a straight line. Instead enter a warehouse to your right.
![[#107] - Interval 03 - Recognition - part 3 - Interval 03 - Recognition - F.E.A.R. 2: Project Origin - Game Guide and Walkthrough](https://game.lhg100.com/Article/UploadFiles/201512/2015121518442129.jpg)
[#107]
You'll find a new armor inside the warehouse. Just as before, I wouldn't recommend taking it right away unless your current armor has been badly damaged. Make sure to collect ammunition, grenades and medical supplies. You will also find a new document inside this warehouse [#108] - Info: P. Fettel. Go back to the main tunnel and deal with remaining enemy troops. One of the soldiers will appear above you - prevent him from making a surprise attack.
![[#108] - Interval 03 - Recognition - part 3 - Interval 03 - Recognition - F.E.A.R. 2: Project Origin - Game Guide and Walkthrough](https://game.lhg100.com/Article/UploadFiles/201512/2015121518442100.jpg)
[#108]
Take a closer look at my screen [#109] if you're having some difficulties finding the valve. Don't forget to hold the action key for a few seconds instead of just pressing it once. As you've probably suspected, shutting the flow has resulted in new enemy soldiers appearing in this area. Attack them from here and then start moving towards the ladder. Prevent anyone from surprising you and don't forget to take the armor from the warehouse.
![[#109] - Interval 03 - Recognition - part 3 - Interval 03 - Recognition - F.E.A.R. 2: Project Origin - Game Guide and Walkthrough](https://game.lhg100.com/Article/UploadFiles/201512/2015121518442208.jpg)
[#109]
The final group of enemy soldiers will appear on an upper balcony. Kill them and then use the ladder to get to the balcony [#110]. Proceed towards a new corridor and travel upwards. You'll find a new armor along the way. Now you must use the crouch key to avoid the flames and to get to a new room. You will finally reach a new balcony where your main character will lose balance and fall. Wait for the game to finish loading a new level.
![[#110] - Interval 03 - Recognition - part 3 - Interval 03 - Recognition - F.E.A.R. 2: Project Origin - Game Guide and Walkthrough](https://game.lhg100.com/Article/UploadFiles/201512/2015121518442215.jpg)
[#110]
You don't have to explore the flooded area, because there aren't any interesting items here. Instead proceed directly to the ladder. Exit the small room. Ignore a burning balcony and proceed left. Go to a new door and then turn right. You should be able to find a new document called Replica upgrades inside a small room [#111]. There's also a medkit in this area. Now you must start following Alma. She'll reveal her position to you from time to time.
![[#111] - Interval 03 - Recognition - part 3 - Interval 03 - Recognition - F.E.A.R. 2: Project Origin - Game Guide and Walkthrough](https://game.lhg100.com/Article/UploadFiles/201512/2015121518442237.jpg)
[#111]
Move towards the sliding door and keep heading straight. You're going to be attacked by Alma just around the corner. You must start pressing the right mouse button rapidly [#112] to defend yourself. You'll probably lose some health here, so consider going back for the medical kit. Thankfully you won't have to worry about Alma's other attacks for now.
![[#112] - Interval 03 - Recognition - part 4 - Interval 03 - Recognition - F.E.A.R. 2: Project Origin - Game Guide and Walkthrough](https://game.lhg100.com/Article/UploadFiles/201512/2015121518442233.jpg)
[#112]
Turn left and then enter a large room which can be found to your left (sliding doors and a green lamp). Ignore the surrounding area, because you won't find any items of interest here. Instead proceed directly to the exit. You'll have to crouch here [#113] in order to get through a hole in the door. Go left.
![[#113] - Interval 03 - Recognition - part 4 - Interval 03 - Recognition - F.E.A.R. 2: Project Origin - Game Guide and Walkthrough](https://game.lhg100.com/Article/UploadFiles/201512/2015121518442217.jpg)
[#113]
You might want to listen to a new radio transmission, because you'll find out a lot of interesting things about Alma. Go towards the sliding door. Check the stairs located in front of you. There are some syringes and mines waiting for you on the lower floor. You should now choose a large corridor located to your right [#114]. Jump over the boulders along the way. Proceed to the end and use the stairs to get to the lower level.
![[#114] - Interval 03 - Recognition - part 4 - Interval 03 - Recognition - F.E.A.R. 2: Project Origin - Game Guide and Walkthrough](https://game.lhg100.com/Article/UploadFiles/201512/2015121518442285.jpg)
[#114]
You don't have to worry about being attacked here, so take your time to look around. Find a control panel and press the action key to unlock cells and a passageway to a new section of the compound. Go back to the stairs, travel to the upper floor and turn right. Find a large hole in the glass wall [#115]. Going through it will allow you to get to the cells, because a nearby door is now inaccessible.
[#115]
Make a few steps forward and notice that a monster has left the last cell to your right. Defeat the beast, travel to the other side of this corridor and open the left door. Keep heading forward, but take notice of the flames, because you'll want to return here in a short while. Turn right and get ready to defend yourself against new attacks [#116]. I would recommend retreating to the previous corridor and waiting for the monsters to get to you. One of the creatures is strapped to a metal chair. Kill it if you want to.
![[#116] - Interval 03 - Recognition - part 4 - Interval 03 - Recognition - F.E.A.R. 2: Project Origin - Game Guide and Walkthrough](https://game.lhg100.com/Article/UploadFiles/201512/2015121518442256.jpg)
[#116]
You may now use the stairs. Defeat new creatures and inspect a small room which is located to your left. Find a valve, approach it and hold the action key for a few seconds. You may now go back to the previous corridor. Notice that the flames aren't there anymore and as a result you may explore a small storage room [#117]. There's a Reflex Injector inside. Take it, go back to the large room and proceed towards the left balcony.
![[#117] - Interval 03 - Recognition - part 4 - Interval 03 - Recognition - F.E.A.R. 2: Project Origin - Game Guide and Walkthrough](https://game.lhg100.com/Article/UploadFiles/201512/2015121518442276.jpg)
[#117]
You should be able to get to a new door in a short while. Open the door and you'll find yourself standing inside a small tunnel. Proceed forward. You will finally reach a new control room. Take a medkit [#118] and a new document - Testing reminder. Proceed towards the sliding door. One of the monsters is hiding just around the corner, so be careful. You'll also be attacked inside a larger room. Watch out for the ceilings, because the creatures won't remain on the ground.
![[#118] - Interval 03 - Recognition - part 4 - Interval 03 - Recognition - F.E.A.R. 2: Project Origin - Game Guide and Walkthrough](https://game.lhg100.com/Article/UploadFiles/201512/2015121518442335.jpg)
[#118]
Make sure that you've defeated all monsters and pick up a new armor. Go to your right. Be careful, because you're going to be attacked by one more beast while trying to get closer to the staircase. Head on to the lower floor. You'll probably find one more armor along the way, as well as ammunition. You're going to be attacked by a new group of monsters after reaching a large hall [#119].
![[#119] - Interval 03 - Recognition - part 5 - Interval 03 - Recognition - F.E.A.R. 2: Project Origin - Game Guide and Walkthrough](https://game.lhg100.com/Article/UploadFiles/201512/2015121518442338.jpg)
[#119]
Proceed to your right and notice that there are explosive canisters in the vicinity. Wait for the monsters to show up and blow them up [#120]. This should make your progress a lot easier. Keep going straight. Collect syringes if you've lost some health and go to your right (between large pillars). Before you'll be allowed to use the ladder you must kill one more monsters. Get to the upper balcony.
![[#120] - Interval 03 - Recognition - part 5 - Interval 03 - Recognition - F.E.A.R. 2: Project Origin - Game Guide and Walkthrough](https://game.lhg100.com/Article/UploadFiles/201512/2015121518442305.jpg)
[#120]
Enter a room located to your right. Proceed to the center of the room and get rid of a new group of monsters. Just as before, choose a good weapon for close range combat and use slow-motion to increase your chances of success. Take an armor after the battle, as well as a new document [#121] - Combat testing. Go to the exit.
![[#121] - Interval 03 - Recognition - part 5 - Interval 03 - Recognition - F.E.A.R. 2: Project Origin - Game Guide and Walkthrough](https://game.lhg100.com/Article/UploadFiles/201512/2015121518442350.jpg)
[#121]
You may proceed to a nearby room. You won't find anything of interest inside, so you may go towards the elevator [#122] without making any additional stops. Call the elevator, enter it and use the control panel. Wait to be transported to a new floor. One of the monsters will appear on top of the elevator, but you may as well ignore it, because the creature is going to be torn apart by a large fan.
![[#122] - Interval 03 - Recognition - part 5 - Interval 03 - Recognition - F.E.A.R. 2: Project Origin - Game Guide and Walkthrough](https://game.lhg100.com/Article/UploadFiles/201512/2015121518442330.jpg)
[#122]
Exit the elevator and proceed forward. Make sure to check a small storage facility along the way. You'll find medical supplies, ammunition and a new armor inside. Ignore the stairs and proceed directly to your left. You'll end up standing inside a huge dome [#123]. Listen to the speech, however you should familiarize yourself with the surroundings in the meantime. Get ready for a battle!
![[#123] - Interval 03 - Recognition - part 5 - Interval 03 - Recognition - F.E.A.R. 2: Project Origin - Game Guide and Walkthrough](https://game.lhg100.com/Article/UploadFiles/201512/2015121518442366.jpg)
[#123]
Your job will be to defeat several groups of Replica soldiers. They won't appear on the battlefield using doors or other passageways. Instead, they'll be coming out of large tubes [#124]. Thankfully you'll be dealing with a couple of them at a time, but you should still remain careful. Use slow-motion wisely, because you wouldn't want to deplete it in a crucial moment. Choose your most powerful guns for this battle, including an assault rifle.
![[#124] - Interval 03 - Recognition - part 5 - Interval 03 - Recognition - F.E.A.R. 2: Project Origin - Game Guide and Walkthrough](https://game.lhg100.com/Article/UploadFiles/201512/2015121518442391.jpg)
[#124]
It's important that you use nearby objects for cover, but you must acknowledge the fact that you won't receive maximum protection and that you won't be allowed to stay in one place for a longer period of time. Search for supplies between the waves. A large stash of ammunition, grenades and medical supplies can be found next to a car [#125].
![[#125] - Interval 03 - Recognition - part 5 - Interval 03 - Recognition - F.E.A.R. 2: Project Origin - Game Guide and Walkthrough](https://game.lhg100.com/Article/UploadFiles/201512/2015121518442308.jpg)
[#125]
You'll have to keep attacking Replica soldiers for a few more minutes, until Alma decides to kill them. Thankfully you won't have to worry about her attacking your character. Notice that some of the soldiers are now frozen. You can kill them with a melee hit, however it's optional. Collect the ammunition and consider exchanging your current shotgun for a better model. In order to proceed with your current assignment you must find a hole in the ground [#126]. Slide down carefully and you'll end up standing in a new part of the factory.
![[#126] - Interval 03 - Recognition - part 6 - Interval 03 - Recognition - F.E.A.R. 2: Project Origin - Game Guide and Walkthrough](https://game.lhg100.com/Article/UploadFiles/201512/2015121518442394.jpg)
[#126]
Head down and go to your left. Watch out, because you're going to be attacked by new Replica soldiers along the way. You have to be ready to repel their assault at any time, because you never know which sarcophagus is going to be opened next. You'll find an armor nearby [#127]. Take it and fight your way to a new ladder. Use it to get to a small balcony.
![[#127] - Interval 03 - Recognition - part 6 - Interval 03 - Recognition - F.E.A.R. 2: Project Origin - Game Guide and Walkthrough](https://game.lhg100.com/Article/UploadFiles/201512/2015121518442332.jpg)
[#127]
Start moving forward. New tubes can be found just around the corner, so you'll have to be ready to defend yourself against enemy attacks. Be on a look out for a new armor and proceed to a second balcony. Choose a larger corridor [#128] and defeat new Replica soldiers before moving on. There's going to be a lot of them here, so consider retreating and using grenades to take them out faster.
![[#128] - Interval 03 - Recognition - part 6 - Interval 03 - Recognition - F.E.A.R. 2: Project Origin - Game Guide and Walkthrough](https://game.lhg100.com/Article/UploadFiles/201512/2015121518442438.jpg)
[#128]
Read content of a new hint if you want to and find a large hole. Proceed down there to collect medical supplies, mines (you must destroy canisters located near the ventilation shaft) and grenades. Go back up and approach a large object blocking the way to the control station [#129]. Follow the instructions and hold the action key to move it aside.
![[#129] - Interval 03 - Recognition - part 6 - Interval 03 - Recognition - F.E.A.R. 2: Project Origin - Game Guide and Walkthrough](https://game.lhg100.com/Article/UploadFiles/201512/2015121518442430.jpg)
[#129]
Pick up a new medkit if you need one and proceed forward. Eventually you should be able to reach an area where two groups of enemy units are fighting each other. You may want to wait for some of the soldiers to die or you can attack both groups without any delays. It shouldn't be difficult as long as you're careful and using your reflex ability. Explore the surrounding area and you'll find a large stash [#130]. Take ammo, armor, medkit and a CD - Threat report.
![[#130] - Interval 03 - Recognition - part 6 - Interval 03 - Recognition - F.E.A.R. 2: Project Origin - Game Guide and Walkthrough](https://game.lhg100.com/Article/UploadFiles/201512/2015121518442454.jpg)
[#130]
The only route to your current destination leads through a new staircase. Eventually you'll end up inside a dark tunnel. Ignore other battles taking part in the vicinity and keep moving forward. Be careful, because you're going to be attacked by one of the beasts soon [#131]. Go to the stairs and collect ammo found nearby.
![[#131] - Interval 03 - Recognition - part 6 - Interval 03 - Recognition - F.E.A.R. 2: Project Origin - Game Guide and Walkthrough](https://game.lhg100.com/Article/UploadFiles/201512/2015121518442457.jpg)
[#131]
You shouldn't be surprised by the fact that enemy soldiers will be waiting for you in the next warehouse. You'll have to take them out from a large distance, so make sure that you're using an assault rifle or a submachine gun. Focus on securing one of the upper balconies [#132] and watch out for your left flank.
![[#132] - Interval 03 - Recognition - part 6 - Interval 03 - Recognition - F.E.A.R. 2: Project Origin - Game Guide and Walkthrough](https://game.lhg100.com/Article/UploadFiles/201512/2015121518442421.jpg)
[#132]
Take your time to look around for ammo and armor once you're done killing enemy troops. Go to the stairs and read a new hint. Find a padlock on the gate [#133]. Fire one round at the padlock or use a melee hit to unlock access to a small storage. You will find a few interesting items here, including grenades and ammunition to most common weapons.
![[#133] - Interval 03 - Recognition - part 7 - Interval 03 - Recognition - F.E.A.R. 2: Project Origin - Game Guide and Walkthrough](https://game.lhg100.com/Article/UploadFiles/201512/2015121518442470.jpg)
[#133]
Now you'll have to make a few successful jumps, because it's the only way to reach the far side of the left platform. Start off by jumping onto a crate [#134]. Now you'll have to reach larger crates and finally the platform. Collect ammunition, use the ladder and proceed towards a new tunnel. You'll soon arrive at a very large warehouse.
![[#134] - Interval 03 - Recognition - part 7 - Interval 03 - Recognition - F.E.A.R. 2: Project Origin - Game Guide and Walkthrough](https://game.lhg100.com/Article/UploadFiles/201512/2015121518442456.jpg)
[#134]
Approach the barrier slowly and use the assault rifle to dispose of enemy troops from here. Naturally you'll be attacked by more soldiers when you reach the ground floor and this can only be done if you use the ladder. Check the side room [#135] and you'll find mines, armor, grenades and a new document - Lift problems. Go back to the main area of the warehouse.
![[#135] - Interval 03 - Recognition - part 7 - Interval 03 - Recognition - F.E.A.R. 2: Project Origin - Game Guide and Walkthrough](https://game.lhg100.com/Article/UploadFiles/201512/2015121518442427.jpg)
[#135]
Follow your current instructions and try using the control panel to activate a huge lift [#136]. Sadly the lift will stop after a short while and you'll receive further orders. Choose a combat shotgun from your inventory and locate all three valves. Don't approach them unless you're ready for a fight.
![[#136] - Interval 03 - Recognition - part 7 - Interval 03 - Recognition - F.E.A.R. 2: Project Origin - Game Guide and Walkthrough](https://game.lhg100.com/Article/UploadFiles/201512/2015121518442488.jpg)
[#136]
Each time you decide to get close to a valve you'll notice that several nearby tubes have been opened. This means you'll have to deal with Replica soldiers [#137]. Try using your reflex abilities to their full potential in order to prevent armor points losses. The main reason is that you'll need a lot of fresh armors soon. Approach each valve and hold the action key.
![[#137] - Interval 03 - Recognition - part 7 - Interval 03 - Recognition - F.E.A.R. 2: Project Origin - Game Guide and Walkthrough](https://game.lhg100.com/Article/UploadFiles/201512/2015121518442504.jpg)
[#137]
Once you've interacted with two out of three valves you'll notice that a large mechanical opponent has appeared inside the warehouse [#138]. This machine is very difficult to destroy. Make sure that you have shock grenades in your inventory and choose a combat shotgun, because it's the most effective weapon against the robot.
![[#138] - Interval 03 - Recognition - part 8 - Interval 03 - Recognition - F.E.A.R. 2: Project Origin - Game Guide and Walkthrough](https://game.lhg100.com/Article/UploadFiles/201512/2015121518442511.jpg)
[#138]
Each time you plan on attacking your enemy activate slow-motion and throw at least one shock grenade at the robot. Wait for the machine to be stunned [#139], leave the cover quickly and fire a few rounds from your shotgun. Return to cover the second your opponent regains full power (and a shield). If you're out of shock grenades look around and you'll find plenty of those inside small crates. Furthermore, near each crate you'll come across medical supplies and armors.
![[#139] - Interval 03 - Recognition - part 8 - Interval 03 - Recognition - F.E.A.R. 2: Project Origin - Game Guide and Walkthrough](https://game.lhg100.com/Article/UploadFiles/201512/2015121518442562.jpg)
[#139]
Keep firing at the robot until it's destroyed (there won't be any explosions). You may finally move towards the remaining third valve. I would recommend that you now use some of your free time to rearm yourself. Go back to the large lift and wait for it to begin moving [#140]. Listen to a radio transmission and wait for the game to load a new map.
![[#140] - Interval 03 - Recognition - part 8 - Interval 03 - Recognition - F.E.A.R. 2: Project Origin - Game Guide and Walkthrough](https://game.lhg100.com/Article/UploadFiles/201512/2015121518442510.jpg)
[#140]
Obviously you must wait for the lift to reach its current destination. Ignore the rats you'll notice in the area, because they won't attack you and you won't gain nothing over killing them. Proceed forward and try to find a ladder [#141] which will take you to an upper room. Keep heading upwards. Make sure not to miss a shotgun and some grenades along the way. Proceed to the red door when you're ready to move on with the mission.
![[#141] - Interval 03 - Recognition - part 8 - Interval 03 - Recognition - F.E.A.R. 2: Project Origin - Game Guide and Walkthrough](https://game.lhg100.com/Article/UploadFiles/201512/2015121518442540.jpg)
[#141]
Turn right and approach a metal balcony. Notice a large airplane crashing into the city (you'll have a chance to get a closer look at the wreckage later on). Proceed forward and then turn left. Approach a new door. Don't forget to collect a document [#142] titled Replica activity. Hop onto the table, press the crouch key and use the window to get through to a new section.
![[#142] - Interval 03 - Recognition - part 8 - Interval 03 - Recognition - F.E.A.R. 2: Project Origin - Game Guide and Walkthrough](https://game.lhg100.com/Article/UploadFiles/201512/2015121518442563.jpg)
[#142]
You can inspect the left corridor if you want to. You would be able to find new grenades there [#143], as well as a medical kit. Go back to the window and this time check the right corridor. Use the stairs to reach the lower floor and proceed to the end of the hall. Open the door and you'll finally end up standing outside the building.
![[#143] - Interval 03 - Recognition - part 8 - Interval 03 - Recognition - F.E.A.R. 2: Project Origin - Game Guide and Walkthrough](https://game.lhg100.com/Article/UploadFiles/201512/2015121518442581.jpg)
[#143]
Go to your left. You will encounter a lot of frozen civilians and soldiers along the way. They won't be able to harm you and you can turn them into dust by hitting them. Keep heading forward but turn left after a short while to enter a new building. Jump over a barrier and continue moving straight. You'll have to destroy a new padlock very soon [#144]. Inspect the right side of the corridor and you'll find an armor among other things.
![[#144] - Interval 04 - Devastation - part 1 - Interval 04 - Devastation - F.E.A.R. 2: Project Origin - Game Guide and Walkthrough](https://game.lhg100.com/Article/UploadFiles/201512/2015121518442555.jpg)
[#144]
Jump over destroyed furniture and continue moving forward. Open a door and after seeing a short cut-scene you'll end up standing outside the building. Go to your right and choose a good weapon from your inventory. Jump over a small brick wall [#145] and wait for a new type of monster to show up in front of you.
![[#145] - Interval 04 - Devastation - part 1 - Interval 04 - Devastation - F.E.A.R. 2: Project Origin - Game Guide and Walkthrough](https://game.lhg100.com/Article/UploadFiles/201512/2015121518442529.jpg)
[#145]
The creature you're about to attack operates a lot like a typical shaman which means it's able to resurrect nearby soldiers. You can know which soldiers have been brought back to life by the red tentacles coming out of its body. Your objective will be to hunt down the monster, shooting at it constantly [#146]. Ignore the resurrected soldiers entirely, because you can only kill them by getting rid of the monster. The creature is very tough, so you'll have to be shooting at it from a close distance and using a powerful weapon. I would recommend attacking it with a shotgun or an assault rifle.
![[#146] - Interval 04 - Devastation - part 1 - Interval 04 - Devastation - F.E.A.R. 2: Project Origin - Game Guide and Walkthrough](https://game.lhg100.com/Article/UploadFiles/201512/2015121518442635.jpg)
[#146]
Once you've disposed of the creature take your time to inspect bodies of fallen soldiers. You may now proceed towards the nearest building. Find new items - a medical kit, an armor, ammunition and a new document [#147] - Civilian threat. You may now move towards the passageway where you've seen the first ghost. Press and hold the action key to move a large obstacle out of the way. Now press the crouch key and enter a new room.
![[#147] - Interval 04 - Devastation - part 1 - Interval 04 - Devastation - F.E.A.R. 2: Project Origin - Game Guide and Walkthrough](https://game.lhg100.com/Article/UploadFiles/201512/2015121518442621.jpg)
[#147]
You'll find even more supplies here, but the bad news is that you'll be dealing with wraiths from now on. You will be forced to defend yourself against most of them and this can be done by shooting single rounds at the ghosts. If you ignore it you'll have to acknowledge the fact that you'll be losing small portions of health, even if you're carrying an armor. You can also try storming through ghost-filled rooms, but this won't necessarily work in the future. Eventually you'll get to a staircase. Go through two office rooms and find an entrance to a shaft [#148].
![[#148] - Interval 04 - Devastation - part 1 - Interval 04 - Devastation - F.E.A.R. 2: Project Origin - Game Guide and Walkthrough](https://game.lhg100.com/Article/UploadFiles/201512/2015121518442639.jpg)
[#148]
Thankfully you won't be attacked by any ghosts inside the ventilation shafts, so you may proceed directly to the exit which is going to be a large hole in the building wall. Head down and start moving forward. You'll come across a plane wreckage just around the corner [#149]. Keep heading straight, but make sure you've chosen an assault rifle from your inventory.
![[#149] - Interval 04 - Devastation - part 1 - Interval 04 - Devastation - F.E.A.R. 2: Project Origin - Game Guide and Walkthrough](https://game.lhg100.com/Article/UploadFiles/201512/2015121518442683.jpg)
[#149]
Once you've entered a new area you're going to be attacked by several groups of enemy units. Try maintaining a large distance, especially when trying to take down a guy equipped with a napalm cannon [#150]. Remember that armed opponents are more difficult to kill, so use grenades and powerful guns against them. Check the area for medical supplies and a new armor.
![[#150] - Interval 04 - Devastation - part 1 - Interval 04 - Devastation - F.E.A.R. 2: Project Origin - Game Guide and Walkthrough](https://game.lhg100.com/Article/UploadFiles/201512/2015121518442625.jpg)
[#150]
Larger groups of enemy units will be arriving inside a bus located in front of your current position [#151]. Obviously you should focus on killing them before they touch the ground and change their position radically. Also - new enemy soldiers will appear to your right. Thankfully it's going to be much easier to kill them. Make sure to explore the area once you've won the battle.
![[#151] - Interval 04 - Devastation - part 2 - Interval 04 - Devastation - F.E.A.R. 2: Project Origin - Game Guide and Walkthrough](https://game.lhg100.com/Article/UploadFiles/201512/2015121518442676.jpg)
[#151]
Proceed to the right building (that's where the last group showed up). Find the stairs leading to an upper floor and throw a couple of grenades once you've reached your destination. Deal with the remaining troops using an assault rifle. A new group of enemy units will appear to your left [#152]. Kill them from here before moving on. Explore this room and you'll find two very valuable items - Reflex Injector and a new document titled Powered Armor.
![[#152] - Interval 04 - Devastation - part 2 - Interval 04 - Devastation - F.E.A.R. 2: Project Origin - Game Guide and Walkthrough](https://game.lhg100.com/Article/UploadFiles/201512/2015121518442694.jpg)
[#152]
You may now approach a large hole in the wall. You'll have to make two jumps here. The first jump will require you to land on top of a destroyed plane [#153] and the second jump will allow you to get to the balcony of an opposite building. Notice that one of your enemies was carrying a rocket launcher. Exchange this weapon for one of less useful guns. I would recommend getting rid of a napalm cannon.
![[#153] - Interval 04 - Devastation - part 2 - Interval 04 - Devastation - F.E.A.R. 2: Project Origin - Game Guide and Walkthrough](https://game.lhg100.com/Article/UploadFiles/201512/2015121518442656.jpg)
[#153]
Proceed to the next room. You should be able to reach a room with serious electrical discharges. Obviously you can't proceed before resolving the situation. Aim at the fuse box [#154] and you'll have one problem less to worry about. Go to the next corridor. Take an armor, shock grenades and rockets for your newly acquired weapon.
![[#154] - Interval 04 - Devastation - part 2 - Interval 04 - Devastation - F.E.A.R. 2: Project Origin - Game Guide and Walkthrough](https://game.lhg100.com/Article/UploadFiles/201512/2015121518442678.jpg)
[#154]
Proceed to your left and find a hole in the ground. Notice a large mech in the background. Don't attack it. Instead see what happens next, because you'll have to copy these moves soon enough. Use your assault rifle to dispose of a soldier armed with a rocket launcher [#155] before he sees you. Additional enemy forces may arrive from the right. Kill them before moving forward.
![[#155] - Interval 04 - Devastation - part 2 - Interval 04 - Devastation - F.E.A.R. 2: Project Origin - Game Guide and Walkthrough](https://game.lhg100.com/Article/UploadFiles/201512/2015121518442651.jpg)
[#155]
You should now choose a rocket launcher from your inventory. Make a few steps forward and notice that a new machine has arrived in the area and this it'll be up to you to destroy it. The tactics stay the same to the previous "robot battle". Start off by using shock grenades to stun the robot and then keep firing at it using the rocket launcher [#156]. Keep repeating these actions until you've won and don't forget to use cover whenever you're not using your reflex ability.
![[#156] - Interval 04 - Devastation - part 2 - Interval 04 - Devastation - F.E.A.R. 2: Project Origin - Game Guide and Walkthrough](https://game.lhg100.com/Article/UploadFiles/201512/2015121518442794.jpg)
[#156]
A new rocket launcher soldier may appear on a nearby balcony in the meantime and obviously you must kill him as soon as possible. You should also go there to collect the rockets, especially since it's difficult to find them anywhere else. Electrical discharges are blocking passageway to the next sector, so once again you must destroy a fuse box [#157]. One of enemy soldiers will probably appear near the pond. Kill him and go there. You can also inspect the area for medical kits, armors and grenades.
![[#157] - Interval 04 - Devastation - part 2 - Interval 04 - Devastation - F.E.A.R. 2: Project Origin - Game Guide and Walkthrough](https://game.lhg100.com/Article/UploadFiles/201512/2015121518442753.jpg)
[#157]
Proceed towards the alley which can be found to your right. A second soldier should be standing there and obviously he must die as well. Once he's gone focus on finding an entrance to a new building [#158]. Proceed towards a dark corridor and eventually you'll get to an area where the game will begin loading a new level.
![[#158] - Interval 04 - Devastation - part 3 - Interval 04 - Devastation - F.E.A.R. 2: Project Origin - Game Guide and Walkthrough](https://game.lhg100.com/Article/UploadFiles/201512/2015121518442745.jpg)
[#158]
Start moving forward and listen to a radio transmission along the way. Take your time to collect grenades and ammunition for the shotgun. Enemy soldiers are waiting for you in the next room [#159]. I would recommend using a shotgun here, because you'll be fighting at a close distance. Remain behind the grating, so they won't be able to get to you, however watch out for your left flank, because one of the soldiers may arrive there.
![[#159] - Interval 04 - Devastation - part 3 - Interval 04 - Devastation - F.E.A.R. 2: Project Origin - Game Guide and Walkthrough](https://game.lhg100.com/Article/UploadFiles/201512/2015121518442718.jpg)
[#159]
Check the entire surrounding area once you've won. You'll find a new document here [#160] titled EPA manual #1. Take it and proceed to the next section. You'll soon be allowed to exit the building. Listen to what Stokes has to say. Apparently she can't move, because she's being attacked by enemy snipers. Enter the adjacent building and go to the top.
![[#160] - Interval 04 - Devastation - part 3 - Interval 04 - Devastation - F.E.A.R. 2: Project Origin - Game Guide and Walkthrough](https://game.lhg100.com/Article/UploadFiles/201512/2015121518442746.jpg)
[#160]
You must get to the top floor of the building. Press the crouch key, go to the stash and take a sniper rifle [#161]. I would recommend that you exchange this weapon for a submachine gun, especially since you shouldn't have any problems gathering enough ammunition for the assault rifle. Kill the first enemy sniper from here and go to the roof area.
![[#161] - Interval 04 - Devastation - part 3 - Interval 04 - Devastation - F.E.A.R. 2: Project Origin - Game Guide and Walkthrough](https://game.lhg100.com/Article/UploadFiles/201512/2015121518442716.jpg)
[#161]
You'll now have to eliminate other enemy snipers [#162]. It shouldn't be too difficult, because each time you'll have to be on a look out for red laser beams. Make sure that you're moving constantly and don't forget to activate bullet-time each time you plan on attacking one of your enemies. This will increase your chances of success greatly.
![[#162] - Interval 04 - Devastation - part 3 - Interval 04 - Devastation - F.E.A.R. 2: Project Origin - Game Guide and Walkthrough](https://game.lhg100.com/Article/UploadFiles/201512/2015121518442762.jpg)
[#162]
Other groups of enemy soldiers can be found in front of the exit which you've used before. I guess you should know that after a short while they'll start coming your way. Eliminating all of them before they get to you is going to be very difficult, so you'll have to be ready to kill them at a smaller distance. Enemy soldiers will be arriving to your right [#163]. Watch out for their grenades and use explosive devices of your own to get rid of them.
![[#163] - Interval 04 - Devastation - part 3 - Interval 04 - Devastation - F.E.A.R. 2: Project Origin - Game Guide and Walkthrough](https://game.lhg100.com/Article/UploadFiles/201512/2015121518442768.jpg)
[#163]
You should soon notice that an enemy armored vehicle has arrived in the area. You've got a few choices here. You can kill the gunner with your sniper rifle or you can use a rocket launcher to get rid of him quickly [#164]. Don't worry about the ammunition for the launcher, because you'll find new rockets soon enough. Keep securing the area but prevent other soldiers from surprising you in the meantime.
![[#164] - Interval 04 - Devastation - part 3 - Interval 04 - Devastation - F.E.A.R. 2: Project Origin - Game Guide and Walkthrough](https://game.lhg100.com/Article/UploadFiles/201512/2015121518442769.jpg)
[#164]
Once you've disposed of the gunner get rid of new enemy soldiers. They will try leaving the vehicle and that's your best chance to eliminate them. Notice that new snipers have arrived in the area. Kill them and spend some time searching for medical supplies and grenades. Choose an assault rifle and proceed towards nearby rooms [#165].
![[#165] - Interval 04 - Devastation - part 4 - Interval 04 - Devastation - F.E.A.R. 2: Project Origin - Game Guide and Walkthrough](https://game.lhg100.com/Article/UploadFiles/201512/2015121518442883.jpg)
[#165]
If you've been thorough with securing the area you shouldn't encounter any enemy units while exploring this floor. Instead be on a look out for rockets. You don't have to go to the nearest staircase, because you would only find a medkit. Instead proceed to the end of the corridor and find a second staircase [#166]. Be careful, though. Getting closer to the stairs will result in new enemy units arriving in the area.
![[#166] - Interval 04 - Devastation - part 4 - Interval 04 - Devastation - F.E.A.R. 2: Project Origin - Game Guide and Walkthrough](https://game.lhg100.com/Article/UploadFiles/201512/2015121518442806.jpg)
[#166]
Use the stairs but go back up when you hear enemy units coming your way. Remain on the higher floor while trying to get rid of them. Just as before, you must prevent enemy units from surprising your character. Eliminate a few additional snipers, but you'll be dealing mostly with standard soldiers from now on. When you're ready go to the lower floor. There's a large stash nearby [#167]. Take a new armor, as well as ammunition and explosives.
![[#167] - Interval 04 - Devastation - part 4 - Interval 04 - Devastation - F.E.A.R. 2: Project Origin - Game Guide and Walkthrough](https://game.lhg100.com/Article/UploadFiles/201512/2015121518442866.jpg)
[#167]
Go to the lower floor. You'll be getting closer to a large square where the armored vehicle was parked. The first group of enemy soldiers is hiding near the debris, but more enemy soldiers will arrive from the left. Each time you notice a new group go back to the previous building and eliminate them from a safe distance using a sniper rifle [#168]. Eventually you'll have to get to a new passageway. Collect medkits, ammo and grenades before you decide to leave this area.
![[#168] - Interval 04 - Devastation - part 4 - Interval 04 - Devastation - F.E.A.R. 2: Project Origin - Game Guide and Walkthrough](https://game.lhg100.com/Article/UploadFiles/201512/2015121518442879.jpg)
[#168]
Notice that you can't go up, so instead proceed to the lower floor. Keep heading towards your current destination and finally you'll reach a much larger area. Approach the railing carefully and get rid of all enemy units from here [#169]. Make sure you're not standing in the open, so you won't be an easy target for them.
![[#169] - Interval 04 - Devastation - part 4 - Interval 04 - Devastation - F.E.A.R. 2: Project Origin - Game Guide and Walkthrough](https://game.lhg100.com/Article/UploadFiles/201512/2015121518442882.jpg)
[#169]
Proceed to the ground level. I would recommend that you approach the Powered Armor right away [#170]. You don't have to explore any of the surrounding buildings, because you wouldn't find any bonus items. Once you're inside the mech read some of the basic hints on how to operate it. Basically you have unlimited ammo but there are two restrictions - your primary guns can't overheat and you'll have to wait for the rocket launchers to reload each time you've fired some rockets.
![[#170] - Interval 04 - Devastation - part 4 - Interval 04 - Devastation - F.E.A.R. 2: Project Origin - Game Guide and Walkthrough](https://game.lhg100.com/Article/UploadFiles/201512/2015121518442893.jpg)
[#170]
Start moving forward and eliminate anyone who stands in your way [#170]. Remember that you can still zoom in the view for better aim and you can also use termovision to help you in locating enemy troops. I didn't find it too useful, but maybe you'll like it. Enemy soldiers will appear mostly inside buildings. You can fight them or you can ignore them as long as they're not carrying rocket launchers.
![[#171] - Interval 04 - Devastation - part 4 - Interval 04 - Devastation - F.E.A.R. 2: Project Origin - Game Guide and Walkthrough](https://game.lhg100.com/Article/UploadFiles/201512/2015121518442841.jpg)
[#171]
Don't exit the armor once you've disposed of all nearby groups, because you'll have to travel a long way to get to your destination. Start off by finding a small tunnel [#172]. You should be moving slower here. One of the enemy soldiers will be standing on top of a large structure and he's carrying a rocket launcher.
![[#172] - Interval 04 - Devastation - part 5 - Interval 04 - Devastation - F.E.A.R. 2: Project Origin - Game Guide and Walkthrough](https://game.lhg100.com/Article/UploadFiles/201512/2015121518442852.jpg)
[#172]
Keep pushing forward and eliminate anyone you can find. Eventually you'll have to get to a large entrance which leads to the warehouse [#173]. Keep shooting at enemy soldiers while inside. It shouldn't be difficult to kill them, especially since there are a lot of cars and other explosive objects here. Watch out for a new bazooka troop. This soldier will appear on the left balcony. Kill all hostile units and hold the action key to leave the Powered Armor for a few seconds.
![[#173] - Interval 04 - Devastation - part 5 - Interval 04 - Devastation - F.E.A.R. 2: Project Origin - Game Guide and Walkthrough](https://game.lhg100.com/Article/UploadFiles/201512/2015121518442846.jpg)
[#173]
Proceed to the stairs and take a rocket launcher from the recently killed opponent. You may now enter a small room. Make sure you've checked it thoroughly, because you'll find two interesting items here [#174] - a Reflex Injector and a new document - EPA manual #2. You should take grenades and wear a new armor.
[#174]
You'll have to get to a small lever [#175] and pull it before you'll be allowed to explore a new area of the map. Go back to your Powered Armor and start moving towards your current destination. New enemy troops will be waiting for you just around the corner. Eliminate them from here and proceed to that location.
![[#175] - Interval 04 - Devastation - part 5 - Interval 04 - Devastation - F.E.A.R. 2: Project Origin - Game Guide and Walkthrough](https://game.lhg100.com/Article/UploadFiles/201512/2015121518442902.jpg)
[#175]
You'll now have to cross one of the main streets of the city. Aside from enemy soldiers you're also going to be attacked by an enemy mech [#176]. Use the rockets as soon as possible and continue shooting at the robot until it explodes. Watch out for a destroyed tram, because a large group of hostile units is holed up inside. Kill them before moving on.
![[#176] - Interval 04 - Devastation - part 5 - Interval 04 - Devastation - F.E.A.R. 2: Project Origin - Game Guide and Walkthrough](https://game.lhg100.com/Article/UploadFiles/201512/2015121518442998.jpg)
[#176]
Keep heading towards an underground parking lot, located on the opposite end of the street. Attack enemies hiding inside the lot and then proceed to that structure. You'll now have to get to the top level of the parking lot. Obviously you're going to be attacked by a lot of soldiers along the way, but you should only be interested in killing opponents equipped with rocket launchers [#177]. Thankfully for most of the time it's easy to spot them.
![[#177] - Interval 04 - Devastation - part 5 - Interval 04 - Devastation - F.E.A.R. 2: Project Origin - Game Guide and Walkthrough](https://game.lhg100.com/Article/UploadFiles/201512/2015121518442910.jpg)
[#177]
Once you've reached the top level you're going to have to destroy a second robot [#178]. Just as before, start off by firing the rockets and then use your primary weapons to do the trick. Make sure you've killed all hostile units and leave your Powered Armor. Proceed to the nearest door and you'll get to a staircase. Head on to the lower floor and ignore new visions which are going to be presented to you from time to time.
![[#178] - Interval 04 - Devastation - part 5 - Interval 04 - Devastation - F.E.A.R. 2: Project Origin - Game Guide and Walkthrough](https://game.lhg100.com/Article/UploadFiles/201512/2015121518442977.jpg)
[#178]
Once you've reached a large gate use one of your weapons in order to destroy the padlock [#179]. You may proceed forward. Keep going straight and open a few doors along the way. You'll also have to jump over a small barrier. Eventually you'll get to an area where you'll fall down. Watch an interesting cut-scene.
![[#179] - Interval 04 - Devastation - part 5 - Interval 04 - Devastation - F.E.A.R. 2: Project Origin - Game Guide and Walkthrough](https://game.lhg100.com/Article/UploadFiles/201512/2015121518442953.jpg)
[#179]
Wait for the main character to regain consciousness and proceed to the nearest door. Use the stairs and go back up. You'll witness a new cut-scene. Once it's over go towards a nearby corridor [#180]. Exit to a small balcony and use the ladder to get to the ground. In order to end this chapter you must get on board of an armored vehicle.
![[#180] - Interval 04 - Devastation - part 5 - Interval 04 - Devastation - F.E.A.R. 2: Project Origin - Game Guide and Walkthrough](https://game.lhg100.com/Article/UploadFiles/201512/2015121518442981.jpg)
[#180]
You'll witness a new vision while you're still inside the armored vehicle. Notice that you'll be accompanied by Stokes during the initial stage of this chapter. The armored vehicle will make a stop in front of the school and obviously you must proceed to the main entrance. You'll soon find out that the entrance has been barricaded. As a result you must go right. Destroy a new padlock [#181]. Proceed to a large hole and destroy the window to get to the cellar area.
![[#181] - Interval 05 - Provocation - part 1 - Interval 05 - Provocation - F.E.A.R. 2: Project Origin - Game Guide and Walkthrough](https://game.lhg100.com/Article/UploadFiles/201512/2015121518442962.jpg)
[#181]
It's very important that you take your time to look around the room, because you'll find a new document here titled Conference request. Now you must approach a large shelf [#182]. Hold the action key to move it out of the way. You may finally proceed towards one of the main corridors of the school. Head forward and ignore the second room to your right, because you wouldn't find anything of interest inside.
![[#182] - Interval 05 - Provocation - part 1 - Interval 05 - Provocation - F.E.A.R. 2: Project Origin - Game Guide and Walkthrough](https://game.lhg100.com/Article/UploadFiles/201512/2015121518442973.jpg)
[#182]
Turn left once you've reached a partially flooded section of the corridor. Eventually you should be able to get to the stairs. Go to the upper floor and turn right once you've reached a new area. Proceed to the other end of this hall. Ignore Stokes and other classrooms you'll find along the way. Don't be scared by one of the dead bodies [#183]. Scout the area for a new document - Status report. You'll also find mines, grenades and ammunition here.
![[#183] - Interval 05 - Provocation - part 1 - Interval 05 - Provocation - F.E.A.R. 2: Project Origin - Game Guide and Walkthrough](https://game.lhg100.com/Article/UploadFiles/201512/2015121518442961.jpg)
[#183]
You may go back a few steps. One of the classrooms contains a document titled School attendance. Proceed to a small passageway located in one of the larger rooms [#184]. That's where Stokes went when you were still exploring the area. Be careful not to fall in the next corridor. Thankfully even if you make a mistake you'll be allowed to return here quickly and retry.
![[#184] - Interval 05 - Provocation - part 1 - Interval 05 - Provocation - F.E.A.R. 2: Project Origin - Game Guide and Walkthrough](https://game.lhg100.com/Article/UploadFiles/201512/2015121518443096.jpg)
[#184]
You may proceed to the next section. Be careful while passing through a partially destroyed section of the corridor. Head down. Once you've reached the ground go to a new room [#185] where you'll witness a strange vision. You can try moving towards the girl, but it won't do you any good. Wait for the main character to regain consciousness and notice that you'll have to travel alone from now on, because Stokes has mysteriously disappeared.
![[#185] - Interval 05 - Provocation - part 1 - Interval 05 - Provocation - F.E.A.R. 2: Project Origin - Game Guide and Walkthrough](https://game.lhg100.com/Article/UploadFiles/201512/2015121518443042.jpg)
[#185]
Exit the room you've started in. There are a few additional rooms and corridors you'll have to pass through, including a music room with a lot of instruments. Eventually you'll have to get to an area where one of the monsters is standing. Use the rocket launcher to get rid of the creature [#186]. Just as before, it's very important that you kill the monster before it resurrects too many nearby soldiers and sends them against you.
![[#186] - Interval 05 - Provocation - part 1 - Interval 05 - Provocation - F.E.A.R. 2: Project Origin - Game Guide and Walkthrough](https://game.lhg100.com/Article/UploadFiles/201512/2015121518443022.jpg)
[#186]
Obviously you should take your time to explore the area once you've defeated the creature. Notice that resurrected soldiers were carrying good weapons. You'll also find an armor here, as well as a medkit. When you're ready to move on proceed to a large obstacle [#187] and hold the action key to push it. Enter a small room.
![[#187] - Interval 05 - Provocation - part 1 - Interval 05 - Provocation - F.E.A.R. 2: Project Origin - Game Guide and Walkthrough](https://game.lhg100.com/Article/UploadFiles/201512/2015121518443017.jpg)
[#187]
You should be able to reach a new room very soon. Slide one of the smaller objects [#188] in order to unlock the only passageway. You can do this by using the action key. Press the crouch key and go through a small hole. Get to the exit and you'll return to the main corridor. Keep going straight.
![[#188] - Interval 05 - Provocation - part 2 - Interval 05 - Provocation - F.E.A.R. 2: Project Origin - Game Guide and Walkthrough](https://game.lhg100.com/Article/UploadFiles/201512/2015121518443083.jpg)
[#188]
You'll witness a lot of scary moments during the rest of your stay in the school, but thankfully you won't be attacked by the monsters right away. You can go to Art Room if you want to see interesting paintings. Make sure that you visit Study Hall. Move a large projector [#189] out of the way and you'll be allowed to collect a new Reflex Injector. Go back to the main corridor and proceed forward.
![[#189] - Interval 05 - Provocation - part 2 - Interval 05 - Provocation - F.E.A.R. 2: Project Origin - Game Guide and Walkthrough](https://game.lhg100.com/Article/UploadFiles/201512/2015121518443099.jpg)
[#189]
Things will soon become more complicated, because you won't be allowed to use your flashlight and you're going to be attacked by ghosts frequently [#190]. Remember about two things. First of all - in order to get rid of each ghost you must fire at least one round at it. In addition to that you shouldn't make any unnecessary stops. Focus on getting to the next area as soon as possible, especially since you won't find any bonus items in this particular section of the school.
![[#190] - Interval 05 - Provocation - part 2 - Interval 05 - Provocation - F.E.A.R. 2: Project Origin - Game Guide and Walkthrough](https://game.lhg100.com/Article/UploadFiles/201512/2015121518443028.jpg)
[#190]
You'll have to make a left turn very soon and this means you'll enter a new room through a destroyed glass wall. Make a few steps forward and then turn right. Here's where everything should return to normal [#191]. You can go back to previously explored corridors if you want to, however you would only find supplies (syringes, grenades, ammunition for the assault rifle) in the computer room.
![[#191] - Interval 05 - Provocation - part 2 - Interval 05 - Provocation - F.E.A.R. 2: Project Origin - Game Guide and Walkthrough](https://game.lhg100.com/Article/UploadFiles/201512/2015121518443050.jpg)
[#191]
Open the nearest door and proceed forward. There's going to be a corridor to your right but that passageway is blocked. Keep going straight and eventually you're going to be attacked y Alma again. The "tactics" here stay the same - keep pressing the right mouse button rapidly to get rid of her [#192]. Once she's gone return to the main corridor and collect medical supplies. You may finally leave this wing of the school.
![[#192] - Interval 05 - Provocation - part 2 - Interval 05 - Provocation - F.E.A.R. 2: Project Origin - Game Guide and Walkthrough](https://game.lhg100.com/Article/UploadFiles/201512/2015121518443082.jpg)
[#192]
Enough with the scaring part - get ready for a serious battle. You'll notice that enemy soldiers have begun appearing in the surrounding area. Use your sniper rifle [#193] or an assault rifle to get rid of them from a larger distance. I wouldn't recommend throwing grenades, because the area is too big and you'd have to be very precise. Collect ammunition and grenades when it's all over. Proceed to the only available passageway (that's where most of the troops showed up).
![[#193] - Interval 05 - Provocation - part 2 - Interval 05 - Provocation - F.E.A.R. 2: Project Origin - Game Guide and Walkthrough](https://game.lhg100.com/Article/UploadFiles/201512/2015121518443061.jpg)
[#193]
You'll have to be careful here, because one of the enemy soldiers should be hiding just around the corner. Scout the area for shock grenades, armor and rockets [#194]. I guess you know by now what this all means. :-) Proceed to the next corridor and you'll notice that flames are blocking your only path. Wait for new orders and go back to a large square. Choose rocket launcher and shock grenades from your inventory along the way.
![[#194] - Interval 05 - Provocation - part 2 - Interval 05 - Provocation - F.E.A.R. 2: Project Origin - Game Guide and Walkthrough](https://game.lhg100.com/Article/UploadFiles/201512/2015121518443140.jpg)
[#194]
Make a few steps towards the central area of the square and you'll notice that an enemy robot has appeared near your position. Take cover behind the nearest pillar. Throw a shock grenade at the mechanical opponent and use the rocket launcher to finish it off [#195]. Notice a new passageway to your right. Go there and step through a destroyed window.
![[#195] - Interval 05 - Provocation - part 3 - Interval 05 - Provocation - F.E.A.R. 2: Project Origin - Game Guide and Walkthrough](https://game.lhg100.com/Article/UploadFiles/201512/2015121518443143.jpg)
[#195]
I would recommend that you listen to a new radio transmission. Proceed to a nearby room and find a new document on the floor [#196] - Event flyer. You may head towards a new corridor. Notice that you're standing above the flames, but you can't get to a shot down helicopter from here. You should be able to notice a staircase along the way. Ignore it, because you would only find a medkit. Head towards a new destroyed window.
![[#196] - Interval 05 - Provocation - part 3 - Interval 05 - Provocation - F.E.A.R. 2: Project Origin - Game Guide and Walkthrough](https://game.lhg100.com/Article/UploadFiles/201512/2015121518443107.jpg)
[#196]
Head over to a small ledge and start moving forward. Take cover behind the nearest object, because new enemy units will appear in front of you [#197]. A sniper rifle seems like the best choice here, however you can also use an assault rifle. Prevent enemy soldiers from getting too close to your position. Collect their ammunition when they're gone and head towards a new room. Eliminate one additional hostile before moving on.
![[#197] - Interval 05 - Provocation - part 3 - Interval 05 - Provocation - F.E.A.R. 2: Project Origin - Game Guide and Walkthrough](https://game.lhg100.com/Article/UploadFiles/201512/2015121518443156.jpg)
[#197]
Try finding a new armor before you decide to leave this area. Just as before, you must get to the windows in order to use a small ledge [#198]. Keep heading forward, but be careful not to fall. New enemy soldiers will appear in front of you. Try killing them before they even touch the ground and respond to your attacks.
![[#198] - Interval 05 - Provocation - part 3 - Interval 05 - Provocation - F.E.A.R. 2: Project Origin - Game Guide and Walkthrough](https://game.lhg100.com/Article/UploadFiles/201512/2015121518443142.jpg)
[#198]
Get to the nearest cover quickly. More enemy soldiers will appear in the distance and you should use grenades this time to eliminate at least some of them. Keep pushing forward. Go to your right and eventually you'll end up on the first floor. Continue your approach until you've reached an area with a large red valve [#199]. Approach the valve and hold the action key for a few seconds. The flames are gone, so you can head down immediately.
![[#199] - Interval 05 - Provocation - part 3 - Interval 05 - Provocation - F.E.A.R. 2: Project Origin - Game Guide and Walkthrough](https://game.lhg100.com/Article/UploadFiles/201512/2015121518443113.jpg)
[#199]
Approach a destroyed gunship carefully. You'll now have to focus primarily on avoiding large helicopter blades. Obviously this means you should be using slow-motion. Start off by running towards the gunship and then move towards one of the corners of this room [#200]. Pick up a medkit and wait for a good moment to run towards a large hole in the wall.
![[#200] - Interval 05 - Provocation - part 3 - Interval 05 - Provocation - F.E.A.R. 2: Project Origin - Game Guide and Walkthrough](https://game.lhg100.com/Article/UploadFiles/201512/2015121518443174.jpg)
[#200]
Keep going forward. You'll soon have to jump into a large hole in the ground [#201]. Take a syringe if you need one and go forward. You'll meet up with the rest of your team soon enough. Sadly you won't be able to cherish this moment, because you'll witness a new vision. Once again, keep pressing the right mouse button to defend yourself against Alma's attacks. Wait for the game to load a brand new level.
![[#201] - Interval 05 - Provocation - part 3 - Interval 05 - Provocation - F.E.A.R. 2: Project Origin - Game Guide and Walkthrough](https://game.lhg100.com/Article/UploadFiles/201512/2015121518443141.jpg)
[#201]
You'll start the game near your teammates, but sadly you can't rely on them helping you in getting rid of enemy troops. You won't find any valuable items in this corridor, so you can proceed to a new door right away. Go to the large square and choose an assault rifle from your inventory. One of the enemy soldiers will be hiding to your left [#202].
![[#202] - Interval 05 - Provocation - part 4 - Interval 05 - Provocation - F.E.A.R. 2: Project Origin - Game Guide and Walkthrough](https://game.lhg100.com/Article/UploadFiles/201512/2015121518443136.jpg)
[#202]
You should soon notice other enemy soldiers heading your way. Try maintaining a large distance between you and them. Don't leave the cover unless you're absolutely sure they've all been eliminated. Use this free time to collect ammunition. You can also inspect the entrance to your right [#203], but you would only find assault rifle ammo there. Proceed towards the corridor located in front of the start area.
![[#203] - Interval 05 - Provocation - part 4 - Interval 05 - Provocation - F.E.A.R. 2: Project Origin - Game Guide and Walkthrough](https://game.lhg100.com/Article/UploadFiles/201512/2015121518443282.jpg)
[#203]
Other enemy soldiers are waiting for you just around the corner. A good way of getting rid of them is to use grenades [#204]. Keep heading forward and use your must powerful guns to deal with hostile units. There are some rooms around you, but you don't have to explore them, because you wouldn't find anything of interest. Turn left once you've reached a new junction.
![[#204] - Interval 05 - Provocation - part 4 - Interval 05 - Provocation - F.E.A.R. 2: Project Origin - Game Guide and Walkthrough](https://game.lhg100.com/Article/UploadFiles/201512/2015121518443218.jpg)
[#204]
Continue moving forward. Once you've reached a new corner you should choose a rocket launcher from your inventory (that is - if you have the ammunition). Ignore the first group of soldiers, because they're going to be killed in an explosion. Approach the windows and use the rocket launcher to get rid of an armored opponent [#205]. There's an armor nearby and you should take it if you've suffered major injuries.
![[#205] - Interval 05 - Provocation - part 4 - Interval 05 - Provocation - F.E.A.R. 2: Project Origin - Game Guide and Walkthrough](https://game.lhg100.com/Article/UploadFiles/201512/2015121518443260.jpg)
[#205]
Switch to an assault rifle and use this weapon to get rid of a few standard soldiers. Watch out for a nearby roof [#206], because enemy units often use that location to organize surprise attacks. Use similar methods to get rid of a second armored opponent. If you don't have any rockets, use grenades against him.
![[#206] - Interval 05 - Provocation - part 4 - Interval 05 - Provocation - F.E.A.R. 2: Project Origin - Game Guide and Walkthrough](https://game.lhg100.com/Article/UploadFiles/201512/2015121518443231.jpg)
[#206]
Once you've killed enemy units you should inspect all the bodies. Notice that two armored foes were carrying a new type of weapon called Hammerhead. Basically it's an upgraded version of the Penetrator known from the first game. Hammerhead fires huge nails at the target. This comes in handy when you want to get rid of someone in a very effective manner (also - check the achievements list!). I would recommend that you exchange the Hammerhead for a sniper rifle. Take your time to explore a nearby corridor [#207]. You'll find ammo and mines there.
![[#207] - Interval 05 - Provocation - part 4 - Interval 05 - Provocation - F.E.A.R. 2: Project Origin - Game Guide and Walkthrough](https://game.lhg100.com/Article/UploadFiles/201512/2015121518443288.jpg)
[#207]
Go back to the main square and proceed towards a basketball court. Make sure that you're not dealing with any additional snipers and use one of your primary weapons to destroy a new padlock [#208]. Open the crate and proceed to a new room located in the basement area of the school.
![[#208] - Interval 05 - Provocation - part 4 - Interval 05 - Provocation - F.E.A.R. 2: Project Origin - Game Guide and Walkthrough](https://game.lhg100.com/Article/UploadFiles/201512/2015121518443268.jpg)
[#208]
You may start moving towards the only available exit. Turn left and ignore the bloodstains on the ground. Go through a destroyed section of the corridor and keep moving forward. I would recommend that you choose a good gun from your inventory. Attack enemy positions [#209]. It would be a good idea to keep this fight at a close distance, especially since you're going to be attacked from at least two directions.
![[#209] - Interval 05 - Provocation - part 5 - Interval 05 - Provocation - F.E.A.R. 2: Project Origin - Game Guide and Walkthrough](https://game.lhg100.com/Article/UploadFiles/201512/2015121518443255.jpg)
[#209]
Proceed towards a new section of the library. In this case you should rely on being able to kill enemy units from a larger distance. Be on a look out for medical supplies and ammunition. Once you've secured the area proceed towards a dark passageway [#210]. Ignore the left corridor unless you want to listen to a short conversation. Go to women's restroom to collect grenades and medical supplies.
![[#210] - Interval 05 - Provocation - part 5 - Interval 05 - Provocation - F.E.A.R. 2: Project Origin - Game Guide and Walkthrough](https://game.lhg100.com/Article/UploadFiles/201512/2015121518443248.jpg)
[#210]
You should now pay a visit to men's restroom. Go towards the last cabin and you'll soon notice that you can go through a large hole in the wall. Proceed to the next room and take your time to explore the surrounding area. Collect a new data CD [#211] - Updated schedule. Exit the room and ignore new spirits, because you won't become an object of an attack. Go to your right.
![[#211] - Interval 05 - Provocation - part 5 - Interval 05 - Provocation - F.E.A.R. 2: Project Origin - Game Guide and Walkthrough](https://game.lhg100.com/Article/UploadFiles/201512/2015121518443219.jpg)
[#211]
I wouldn't recommend going to a new floor right away. Instead remain here and explore some of the surrounding rooms. Make sure you've been to a room located at the very end of this hallway. There's a new document inside [#212] titled Student essay. Take it and return to the stairs. Go to the upper floor and ignore soldiers being attacked by Alma.
![[#212] - Interval 05 - Provocation - part 5 - Interval 05 - Provocation - F.E.A.R. 2: Project Origin - Game Guide and Walkthrough](https://game.lhg100.com/Article/UploadFiles/201512/2015121518443205.jpg)
[#212]
Proceed directly to your left. Don't forget to collect armor, mines and incendiary grenades along the way. Pay a visit to a nearby women's restroom. The main reason is that you will find a Reflex Injector inside [#213]. Eventually you'll have to get to a small storage area. Open a new door and you'll find yourself standing outside. Choose a good weapon for long distance hits and head down.
![[#213] - Interval 05 - Provocation - part 5 - Interval 05 - Provocation - F.E.A.R. 2: Project Origin - Game Guide and Walkthrough](https://game.lhg100.com/Article/UploadFiles/201512/2015121518443397.jpg)
[#213]
The first group of enemy soldiers will attack you from the left [#214] and other soldiers will arrive in a flying machine. Ignore the machine and focus on preventing them from getting too close to your character. Thankfully there's only one passageway leading to your position, so it should be relatively easy. Aim for their heads and don't forget to use nearby objects for cover.
![[#214] - Interval 05 - Provocation - part 5 - Interval 05 - Provocation - F.E.A.R. 2: Project Origin - Game Guide and Walkthrough](https://game.lhg100.com/Article/UploadFiles/201512/2015121518443325.jpg)
[#214]
Don't leave your cover unless you've been able to get rid of all enemy units. Naturally during the further exploration of the area you'll be attacked by other soldiers, including a sniper (rooftop), but killing them should be easy. Proceed towards the stairs and get to a railing [#215]. Jump on top of a metal platform and proceed forward. Eventually you'll be allowed to enter a new warehouse through one of the windows. Pick up a medkit.
![[#215] - Interval 05 - Provocation - part 5 - Interval 05 - Provocation - F.E.A.R. 2: Project Origin - Game Guide and Walkthrough](https://game.lhg100.com/Article/UploadFiles/201512/2015121518443390.jpg)
[#215]
Move to the main stage carefully. You'll be given an excellent opportunity here to surprise enemy soldiers [#216]. Throw at least one grenade at them. You may now proceed to the stage. Take cover behind the wooden cover and start firing at enemy troops. Don't leave the stage until they've been all eliminated. Explore the area and you'll find a few interesting things, including an armor, grenades and medkits.
![[#216] - Interval 05 - Provocation - part 6 - Interval 05 - Provocation - F.E.A.R. 2: Project Origin - Game Guide and Walkthrough](https://game.lhg100.com/Article/UploadFiles/201512/2015121518443361.jpg)
[#216]
Watch out, because if you try moving towards a nearby passageway you are going to be attacked by a new group of enemy soldiers. Hostile units will use ropes to get to you through a glass roof [#217]. It's important that you kill at least some of them before they even touch the ground. Proceed towards the kitchen area. There are a few soldiers out there, but it should be easy to kill them. Don't forget to use mines and grenades.
![[#217] - Interval 05 - Provocation - part 6 - Interval 05 - Provocation - F.E.A.R. 2: Project Origin - Game Guide and Walkthrough](https://game.lhg100.com/Article/UploadFiles/201512/2015121518443356.jpg)
[#217]
One more soldier is hiding just around the corner. Kill him and wait for his colleagues to show up. Enemy soldiers will force open a nearby door [#218]. I would recommend planting a mine near the door or at least throwing grenades at them. Go to a new room and take your time trying to find a new document titled Supplements. Approach the reinforced door and enter cold storage. Find a hatch in the floor and travel to a new area.
![[#218] - Interval 05 - Provocation - part 6 - Interval 05 - Provocation - F.E.A.R. 2: Project Origin - Game Guide and Walkthrough](https://game.lhg100.com/Article/UploadFiles/201512/2015121518443345.jpg)
[#218]
For the next few minutes you'll have to remain in dark sewers and this means you'll be dealing with a lot of corridors and fighting off various types of ghosts. Start moving forward. Go through a small room [#219]. You'll probably notice bodies of fallen enemy soldiers. Ignore them, because they are already neutralized by the monsters. You'll encounter your first ghosts when you reach a long tunnel.
![[#219] - Interval 05 - Provocation - part 6 - Interval 05 - Provocation - F.E.A.R. 2: Project Origin - Game Guide and Walkthrough](https://game.lhg100.com/Article/UploadFiles/201512/2015121518443377.jpg)
[#219]
Keep pushing towards your current destination. As for the ghosts, there's nothing new you should be made aware of. Fire at each ghost at least once to get rid of it for a short period of time. Be on a look out for syringes and armors. Eventually you'll get to the shaft [#220]. Sadly, as you probably see, the flames are blocking your path. It's time to figure out how to get rid of them.
![[#220] - Interval 05 - Provocation - part 6 - Interval 05 - Provocation - F.E.A.R. 2: Project Origin - Game Guide and Walkthrough](https://game.lhg100.com/Article/UploadFiles/201512/2015121518443334.jpg)
[#220]
Turn left, pick up new syringes and proceed forward. Watch out for new ghosts - they will appear in front of you and to your left. You must take the longer route to the valve [#221], so you won't have to deal with the flames. Once you've interacted with the valve try going back the same way you came before, but you'll soon notice that the main path has been blocked.
![[#221] - Interval 05 - Provocation - part 6 - Interval 05 - Provocation - F.E.A.R. 2: Project Origin - Game Guide and Walkthrough](https://game.lhg100.com/Article/UploadFiles/201512/2015121518443360.jpg)
[#221]
I would strongly recommend that you act quickly, so you won't be attacked by too many ghosts. Focus all of your efforts on finding and destroying a new padlock [#222]. Go through the metal gate and move to the corridor where you saw the flames. You didn't solve the problem entirely, but all you have to do right now is to push the desk by pressing the action key.
![[#222] - Interval 05 - Provocation - part 6 - Interval 05 - Provocation - F.E.A.R. 2: Project Origin - Game Guide and Walkthrough](https://game.lhg100.com/Article/UploadFiles/201512/2015121518443485.jpg)
[#222]
Head down but try to avoid landing on a burning desk, because you would suffer unwanted injuries. Keep heading forward and eliminate a single ghost in the next corridor. Thankfully that's all the ghosts for now. Be on a look out for a new armor, as well landmines. Stop once you've reached a new junction [#223]. Enemy units are stationed just around the corner and it would be a good idea to throw a couple of grenades at them.
![[#223] - Interval 05 - Provocation - part 7 - Interval 05 - Provocation - F.E.A.R. 2: Project Origin - Game Guide and Walkthrough](https://game.lhg100.com/Article/UploadFiles/201512/2015121518443451.jpg)
[#223]
Eliminating enemy units seen in the distance is going to be much easier, but watch out for single soldiers, because they may appear closer to your position [#224]. Collect the ammunition after the battle. Proceed forward and enter the first room to your right. You'll have to defeat a much smaller group here. Go to the stairs once enemy soldiers have been eliminated.
![[#224] - Interval 05 - Provocation - part 7 - Interval 05 - Provocation - F.E.A.R. 2: Project Origin - Game Guide and Walkthrough](https://game.lhg100.com/Article/UploadFiles/201512/2015121518443466.jpg)
[#224]
Keep heading towards the area where you've seen the previous group of enemy soldiers. Take incendiary grenades and a new document titled Updated orders. You may finally proceed towards a new elevator [#225]. Call the elevator, enter it when it arrives and press the button to travel to a different floor. This is a good moment to choose the most powerful weapon from your arsenal.
![[#225] - Interval 05 - Provocation - part 7 - Interval 05 - Provocation - F.E.A.R. 2: Project Origin - Game Guide and Walkthrough](https://game.lhg100.com/Article/UploadFiles/201512/2015121518443494.jpg)
[#225]
Exit the elevator SLOWLY. Throw a grenade at the closest targets and then begin firing at enemy troops with your primary weapon. It shouldn't be difficult to kill them, especially since they weren't prepared for your attack. Take grenades, armor and ammunition after the battle. You will also find a new document inside a small room [#226] titled Info: Ladybugs. Go back to the main corridor and proceed towards a new door.
![[#226] - Interval 05 - Provocation - part 7 - Interval 05 - Provocation - F.E.A.R. 2: Project Origin - Game Guide and Walkthrough](https://game.lhg100.com/Article/UploadFiles/201512/2015121518443435.jpg)
[#226]
Keep heading straight. I would strongly recommend that you visit a side Finance room. There's a new collectible document inside - Info: Bluebirds. You should also know that Office room contains a medkit if you need one. Inspect the right corridor once you've reached a junction and you'll find out that you need a keycard to open it. As a result proceed to the left corridor [#227].
![[#227] - Interval 05 - Provocation - part 7 - Interval 05 - Provocation - F.E.A.R. 2: Project Origin - Game Guide and Walkthrough](https://game.lhg100.com/Article/UploadFiles/201512/2015121518443489.jpg)
[#227]
Watch out, because the only passageway leading to principal's office is being guarded by a few soldiers. Use grenades and a good weapon to get rid of them [#228]. Once they're gone proceed forward. There are a few rooms nearby, but you can avoid them entirely. Go to the elevator and travel to a different floor.
![[#228] - Interval 05 - Provocation - part 7 - Interval 05 - Provocation - F.E.A.R. 2: Project Origin - Game Guide and Walkthrough](https://game.lhg100.com/Article/UploadFiles/201512/2015121518443443.jpg)
[#228]
There are a lot of supplies to the left of the elevator, but don't go there unless you're in desperate need of them. The same thing goes to all other valuable items you may find during your exploration of this floor (including incendiary grenades, ammunition and medical supplies). Eventually you'll have to get to a large corridor leading to principal's office [#229]. Make sure to take an armor along the way.
![[#229] - Interval 05 - Provocation - part 7 - Interval 05 - Provocation - F.E.A.R. 2: Project Origin - Game Guide and Walkthrough](https://game.lhg100.com/Article/UploadFiles/201512/2015121518443488.jpg)
[#229]
Once you've reached the office ignore the glass room and turn left. You shouldn't have any problems finding the keycard [#230]. Take it and you'll soon notice that the principal has become one of the monsters. Don't pursue him just yet. Instead go to his office through a hole in the glass wall. Collect two documents - Dress code and Strange nightmares. You may now begin moving back towards the elevator.
![[#230] - Interval 05 - Provocation - part 8 - Interval 05 - Provocation - F.E.A.R. 2: Project Origin - Game Guide and Walkthrough](https://game.lhg100.com/Article/UploadFiles/201512/2015121518443497.jpg)
[#230]
You'll encounter the monster just around the corner. Notice that it can revive enemy soldiers, so obviously you'll have to hunt it down and kill it before it resurrects too many of them [#231]. Don't forget to take all the necessary equipment after the battle, including medical supplies and a new armor. Go back with your newly acquired keycard to the elevator.
![[#231] - Interval 05 - Provocation - part 8 - Interval 05 - Provocation - F.E.A.R. 2: Project Origin - Game Guide and Walkthrough](https://game.lhg100.com/Article/UploadFiles/201512/2015121518443546.jpg)
[#231]
As you've probably noticed the elevator hasn't opened. Approach the elevator doors and hold the action key [#232]. I guess you won't be surprised to see Alma again. Nothing will change here, so you must keep pressing the right mouse button rapidly to get rid of her. Once you're free notice that the elevator has moved. Go to the shaft and land in the right spot.
![[#232] - Interval 05 - Provocation - part 8 - Interval 05 - Provocation - F.E.A.R. 2: Project Origin - Game Guide and Walkthrough](https://game.lhg100.com/Article/UploadFiles/201512/2015121518443585.jpg)
[#232]
You should be able to return to the previously explored floor without any problems. You must now go to the door protected by a card reader [#233]. If you're having problems finding it, be on a look out for signs leading to Nurse's Office. Obviously you must use the keycard to gain access to the new section of the facility. Use the stairs and proceed to the left door. There are a few enemies waiting for you inside, but eliminating them is a fairly easy task. Aim for their heads and activate slow-motion whenever needed. You can also use grenades if you have a lot of them in your possession.
![[#233] - Interval 05 - Provocation - part 8 - Interval 05 - Provocation - F.E.A.R. 2: Project Origin - Game Guide and Walkthrough](https://game.lhg100.com/Article/UploadFiles/201512/2015121518443562.jpg)
[#233]
Keep heading towards the brighter area of the room. You should be able to find a new document here [#234] titled Info: Treefrogs. Search the room for grenades and a new armor. Now you must locate a door with an EXIT sign. Proceed to that location and get rid of the final group of enemy units. Just as before, you should be using grenades and slow-motion to your advantage.
![[#234] - Interval 05 - Provocation - part 8 - Interval 05 - Provocation - F.E.A.R. 2: Project Origin - Game Guide and Walkthrough](https://game.lhg100.com/Article/UploadFiles/201512/2015121518443533.jpg)
[#234]
Once you've won don't forget to search the area for a new armor and ammunition. You must also collect a new document - PARAGON manual. Find a second door protected by a card reader. Use your keycard and enter a small room. You must approach a computer terminal here [#235]. Notice that the entire room has begun moving. Wait to be transported to a new location.
![[#235] - Interval 05 - Provocation - part 8 - Interval 05 - Provocation - F.E.A.R. 2: Project Origin - Game Guide and Walkthrough](https://game.lhg100.com/Article/UploadFiles/201512/2015121518443521.jpg)
[#235]
It's going to take a while for the elevator to reach its destination, so be patient. You'll end up standing inside a very large control room. Observe the conversation on the monitor if you wish to. Search the area for landmines and a new armor. You'll also find a CD with some data on it [#236] - Elevator checklist.
![[#236] - Interval 05 - Provocation - part 8 - Interval 05 - Provocation - F.E.A.R. 2: Project Origin - Game Guide and Walkthrough](https://game.lhg100.com/Article/UploadFiles/201512/2015121518443538.jpg)
[#236]
I would recommend that you spend some time planting landmines near two entrances to this control room. You can find them by the red lights shining above them [#237]. Place one or two landmines near each entrance or even further back into the control room, especially since you'll be allowed to recollect them if they won't blow up during the course of the upcoming battle.
![[#237] - Interval 05 - Provocation - part 9 - Interval 05 - Provocation - F.E.A.R. 2: Project Origin - Game Guide and Walkthrough](https://game.lhg100.com/Article/UploadFiles/201512/2015121518443584.jpg)
[#237]
You may now find the stairs and proceed to the upper room. Find a new computer terminal and use it to lift lockdown to this section of the facility. Make sure that you're standing near one of the windows [#238] and wait for enemy troops to show up. The first wave should be killed by the landmines, so it'll be up to you to deal with the rest. Prevent enemy units from leaving your line of fire and you should be fine.
![[#238] - Interval 05 - Provocation - part 9 - Interval 05 - Provocation - F.E.A.R. 2: Project Origin - Game Guide and Walkthrough](https://game.lhg100.com/Article/UploadFiles/201512/2015121518443565.jpg)
[#238]
You may now proceed to the area where you've started exploring this control room. Collect new items and proceed to one of two available passageways. It doesn't really matter which one it's going to be, because eventually you'll get to a small room guarded by enemy units [#239]. Kill them and proceed to a new exit.
[#239]
You should be able to reach laboratories very soon. Go to the left room and step through a destroyed glass wall. Now you must go to the stairs. Head down [#240], but watch out for a room to your right - enemy units may be stationed there and it'll be up to you to kill them. Throw a couple of grenades, enter that room and deal with the rest yourself.
![[#240] - Interval 05 - Provocation - part 9 - Interval 05 - Provocation - F.E.A.R. 2: Project Origin - Game Guide and Walkthrough](https://game.lhg100.com/Article/UploadFiles/201512/2015121518443684.jpg)
[#240]
You'll soon find out that you'll have to gain access to the fourth sector before you'll be allowed to continue your main assignment. Exit the laboratory and spend some time exploring the area. You should be able to find an opened hatch nearby [#241]. Head down and explore the tunnels in order to find a new document titled Supplement notes. You may also go to the second laboratory through one of the windows. You'll find a CD inside - Cancellation.
![[#241] - Interval 05 - Provocation - part 9 - Interval 05 - Provocation - F.E.A.R. 2: Project Origin - Game Guide and Walkthrough](https://game.lhg100.com/Article/UploadFiles/201512/2015121518443695.jpg)
[#241]
You don't have to explore the second laboratory thoroughly, because you'll return there later on. Proceed to the main corridor of the lab complex. Keep going straight and once you've reached a large oval room turn right. Just as before, you must be on a look out for a hatch leading to an underground passageway [#242]. Use the ladder and go forward.
![[#242] - Interval 05 - Provocation - part 9 - Interval 05 - Provocation - F.E.A.R. 2: Project Origin - Game Guide and Walkthrough](https://game.lhg100.com/Article/UploadFiles/201512/2015121518443604.jpg)
[#242]
You should be able to reach a new ladder in just a few seconds. Use the ladder to get to a secured room. Once inside, take your time to find a large control panel on the wall [#243]. Approach the panel and press the action key to use it. You may also take ammunition and medical supplies. Exit this room (through the door - not the tunnel).
![[#243] - Interval 05 - Provocation - part 9 - Interval 05 - Provocation - F.E.A.R. 2: Project Origin - Game Guide and Walkthrough](https://game.lhg100.com/Article/UploadFiles/201512/2015121518443639.jpg)
[#243]
I would recommend that you start off by going back to the second laboratory (where you found one of the collectible CD's). Find a large hole and use the ladder to get down there [#244]. Wait one of the devices to reveal a Reflex Injector and activate slow-motion to take it without being crushed. You'll also find landmines here. Go back up and return to the main corridor.
![[#244] - Interval 05 - Provocation - part 10 - Interval 05 - Provocation - F.E.A.R. 2: Project Origin - Game Guide and Walkthrough](https://game.lhg100.com/Article/UploadFiles/201512/2015121518443608.jpg)
[#244]
You must now travel to a passageway leading to the oval room. Listen to a warning about monsters being released from their cells and proceed forward. Take notice of a small room with an electric chair [#245]. You can get there through one of the windows or the main door. Find a new document titled PARAGON findings. Proceed to the only exit and you'll find yourself standing inside a dark tunnel. Pick up a new armor before moving on to the next section of the compound.
![[#245] - Interval 05 - Provocation - part 10 - Interval 05 - Provocation - F.E.A.R. 2: Project Origin - Game Guide and Walkthrough](https://game.lhg100.com/Article/UploadFiles/201512/2015121518443648.jpg)
[#245]
Eventually you'll get to an area where you'll notice enemy troops on the other side of a reinforced window. Listen to a statement made by an enemy officer and get ready for a new battle. Enemy troops will appear to your left [#246]. Use the fact that you're standing on the balcony and so that you have a great view of the surrounding area. Don't leave this balcony until you've disposed of all enemy units. Use the stairs and find a new medkit.
![[#246] - Interval 05 - Provocation - part 10 - Interval 05 - Provocation - F.E.A.R. 2: Project Origin - Game Guide and Walkthrough](https://game.lhg100.com/Article/UploadFiles/201512/2015121518443679.jpg)
[#246]
More enemy troops are waiting you just around the corner. This time you're going to be the one standing in a bad spot, but you can wait for enemy units to jump over balconies and attack them when they're vulnerable [#247]. Proceed to the stairs and throw a grenade to the nearest room to get rid of new enemy troops. Search the area for supplies (especially armor) and proceed to a staircase leading to an upper floor.
![[#247] - Interval 05 - Provocation - part 10 - Interval 05 - Provocation - F.E.A.R. 2: Project Origin - Game Guide and Walkthrough](https://game.lhg100.com/Article/UploadFiles/201512/2015121518443635.jpg)
[#247]
I guess you won't be surprised to hear that you'll be greeted by more enemy troops when you reach a new level. Fire at the canisters or throw grenades at them. The final group is taking cover around the corner [#248]. Maintain a large distance and use nearby objects for cover. Collect ammo, grenades and syringes along the way.
![[#248] - Interval 05 - Provocation - part 10 - Interval 05 - Provocation - F.E.A.R. 2: Project Origin - Game Guide and Walkthrough](https://game.lhg100.com/Article/UploadFiles/201512/2015121518443616.jpg)
[#248]
You'll find a small security outpost along the way, but you may as well ignore it and proceed directly to the stairs. Turn left and get ready to defend yourself against new attacks inside the morgue. Once you've disposed of all enemy units explore the morgue and you'll find a new CD [#249] - Recommendations. Proceed towards the exit.
![[#249] - Interval 05 - Provocation - part 10 - Interval 05 - Provocation - F.E.A.R. 2: Project Origin - Game Guide and Walkthrough](https://game.lhg100.com/Article/UploadFiles/201512/2015121518443673.jpg)
[#249]
You will finally catch up to colonel Vanek, but thankfully you don't have to prepare for this battle in any special way. Start off by using a computer terminal located to your left and wait for the decontamination procedure to end. You may now approach the door. Turn right and press a button on a smaller panel [#250].
![[#250] - Interval 05 - Provocation - part 10 - Interval 05 - Provocation - F.E.A.R. 2: Project Origin - Game Guide and Walkthrough](https://game.lhg100.com/Article/UploadFiles/201512/2015121518443702.jpg)
[#250]
You'll now have to take part in a relatively simple mini-game. This game is divided into several parts, but if you're a good player you'll be able to defeat Vanek in less than 20 seconds. Your task will be to start pressing the right mouse button rapidly, so it's going to be very similar to confrontations with Alma. Only the final part is different, because you'll be forced to press the left mouse button a few times [#251]. Witness a gruesome execution and proceed forward.
![[#251] - Interval 05 - Provocation - part 11 - Interval 05 - Provocation - F.E.A.R. 2: Project Origin - Game Guide and Walkthrough](https://game.lhg100.com/Article/UploadFiles/201512/2015121518443770.jpg)
[#251]
Keep going straight and ignore smaller rooms along the way. I would recommend that you choose one of the shotguns from your arsenal before moving on, because you'll be dealing with mutated beings very soon. Get to a new exit [#252] and collect medical supplies from this area. Press the crouch key and enter a large prison block.
![[#252] - Interval 05 - Provocation - part 11 - Interval 05 - Provocation - F.E.A.R. 2: Project Origin - Game Guide and Walkthrough](https://game.lhg100.com/Article/UploadFiles/201512/2015121518443737.jpg)
[#252]
You should know that you'll be trapped inside the prison block, because the door will close the second you enter this new area. You'll also going to be attacked by the first group of monsters [#253]. Don't forget to keep using slow-motion during the fight, because all the beasts are very agile and so they can get to you in a manner of seconds. You should also remember to look around a lot, because the monsters may be using ceilings and walls to get to you.
![[#253] - Interval 05 - Provocation - part 11 - Interval 05 - Provocation - F.E.A.R. 2: Project Origin - Game Guide and Walkthrough](https://game.lhg100.com/Article/UploadFiles/201512/2015121518443752.jpg)
[#253]
Keep pushing forward and take notice of a fact that new monsters will be coming out of nearby cells (including those on the first floor). You won't have to explore any of the cells by yourself, because you wouldn't find anything of interest inside. You can now use the closer staircase [#254] or you can proceed to the opposite end of the cell block. I would recommend that you explore this entire area and defeat all beasts, because you'd have to do it anyway.
![[#254] - Interval 05 - Provocation - part 11 - Interval 05 - Provocation - F.E.A.R. 2: Project Origin - Game Guide and Walkthrough](https://game.lhg100.com/Article/UploadFiles/201512/2015121518443740.jpg)
[#254]
You won't notice any differences when you get to the upper balconies. Move slowly and be ready to defeat monsters whenever nearby cells open. Eventually you'll have to get to a large control room [#255], but I would recommend that you secure this entire area before proceeding to a nearby door.
![[#255] - Interval 05 - Provocation - part 11 - Interval 05 - Provocation - F.E.A.R. 2: Project Origin - Game Guide and Walkthrough](https://game.lhg100.com/Article/UploadFiles/201512/2015121518443776.jpg)
[#255]
Enter the security checkpoint and notice that a new monster has appeared outside. Kill the creature now or later. Your main objective here is to find a new control panel [#256]. Approach it and press the action key. This will allow you to gain access to a new section of the facility. Don't forget to take incendiary grenades and a new document (Test results) before you leave.
![[#256] - Interval 05 - Provocation - part 11 - Interval 05 - Provocation - F.E.A.R. 2: Project Origin - Game Guide and Walkthrough](https://game.lhg100.com/Article/UploadFiles/201512/2015121518443768.jpg)
[#256]
You may head back outside. Proceed to a new large door located on the ground floor [#257]. Bear in mind that new cells will open in the meantime, so you'll have to be extremely careful in order to survive these attacks. Press the crouch key and exit this area. Go to your left. I would recommend visiting one of side rooms, because you'll find a large armory. Take a new armor, as well as grenades and ammunition (only if you're still using a submachine gun).
![[#257] - Interval 05 - Provocation - part 11 - Interval 05 - Provocation - F.E.A.R. 2: Project Origin - Game Guide and Walkthrough](https://game.lhg100.com/Article/UploadFiles/201512/2015121518443700.jpg)
[#257]
Proceed to the next section. Thankfully you won't encounter enemies along the way. Memorize this path, because you'll be going in the opposite direction soon enough. Eventually you should be able to get to Snake Fist's hideout. Talk to him and he'll present you with a very interesting reward - a pulse rifle [#258]. It would be a good idea to exchange this weapon for a rocket launcher, especially since you haven't found any rockets recently, so you'll probably very low on ammo.
![[#258] - Interval 05 - Provocation - part 12 - Interval 05 - Provocation - F.E.A.R. 2: Project Origin - Game Guide and Walkthrough](https://game.lhg100.com/Article/UploadFiles/201512/2015121518443797.jpg)
[#258]
Sadly you won't have a chance to escort Snake Fist out of the building, because he's going to be murdered by an invisible creature [#259]. The only good news is that you won't have to fight the monster yourself. Spend some time exploring Snake's office. Take a medkit and a new bonus CD - I.M. transcript #4. Choose your newly acquired pulse rifle from the inventory and start going back the same way you came before.
[#259]
You will encounter a large group of enemy forces just around the corner [#260]. Use the pulse rifle against them and throw a couple of incendiary grenades to deal with the rest. It shouldn't be difficult to get rid of them. Proceed forward and visit the armory once again if you need to collect supplies. Be careful, because additional enemy units will occupy a nearby balcony. Keep moving towards the prison block.
![[#260] - Interval 05 - Provocation - part 12 - Interval 05 - Provocation - F.E.A.R. 2: Project Origin - Game Guide and Walkthrough](https://game.lhg100.com/Article/UploadFiles/201512/2015121518443846.jpg)
[#260]
As you've probably suspected new enemy soldiers will be waiting for you in the prison area. Use a standard assault rifle to get rid of most of them and fire from the pulse rifle only at the armored targets [#261]. You shouldn't have any problems recognizing stronger foes from the rest. Eventually you'll have to return to the security checkpoint where you've used the terminal the last time you were here.
![[#261] - Interval 05 - Provocation - part 12 - Interval 05 - Provocation - F.E.A.R. 2: Project Origin - Game Guide and Walkthrough](https://game.lhg100.com/Article/UploadFiles/201512/2015121518443895.jpg)
[#261]
Explore the back area of the security outpost and you'll notice a large hole in one of the doors [#262]. You may step through the hole to get to a new area of this research complex. Be careful - you're going to be attacked by a monster near the door. If it comes to melee battle, don't forget to press the right mouse button a few times to get it off.
![[#262] - Interval 05 - Provocation - part 12 - Interval 05 - Provocation - F.E.A.R. 2: Project Origin - Game Guide and Walkthrough](https://game.lhg100.com/Article/UploadFiles/201512/2015121518443894.jpg)
[#262]
Proceed to the lower floor quickly. New enemy units have appeared inside a nearby lab and I would recommend using a few grenades to flush them out [#263]. You must remain cautious here, because enemy forces will be coming from two different directions (not only from the main door but also from your left). Go to the lab when you're done killing enemy soldiers and proceed to the only available exit. Pick up a new armor when you get to the balcony. There's also going to be a napalm cannon here, but you shouldn't take it.
![[#263] - Interval 05 - Provocation - part 12 - Interval 05 - Provocation - F.E.A.R. 2: Project Origin - Game Guide and Walkthrough](https://game.lhg100.com/Article/UploadFiles/201512/2015121518443865.jpg)
[#263]
You should notice by now that you're standing above a large oval room which you have visited in the past. There are new enemy soldiers below you and it would be a good idea to kill them from here [#264]. Sooner or later you'll have to jump over a small barrier. Keep heading towards the exit. Don't stop and use slow-motion to gain advantage over your foes. Eventually you'll have to return to the main corridor located near two labs.
![[#264] - Interval 05 - Provocation - part 12 - Interval 05 - Provocation - F.E.A.R. 2: Project Origin - Game Guide and Walkthrough](https://game.lhg100.com/Article/UploadFiles/201512/2015121518443828.jpg)
[#264]
Start moving forward. New enemy soldiers will come out of adjacent labs, but killing them should be fairly easy. Watch out for a new armored opponent. He will appear in front of you, near the unlocked passageway. I'd strongly recommend that you use a pulse rifle to get rid of him [#265]. Proceed to his corpse and continue your journey. Take a medkit and an armor from a small room.
[#265]
You'll have to be extremely careful from now on, because you'll be an object of constant attacks from the invisible creatures [#266]. Thankfully you'll be dealing with one monster at a time. Prevent the creatures from getting too close to your character. Use a combat shotgun and slow-motion to get rid of them without taking any unnecessary risks. Remain near the entrance for as long as possible.
![[#266] - Interval 05 - Provocation - part 13 - Interval 05 - Provocation - F.E.A.R. 2: Project Origin - Game Guide and Walkthrough](https://game.lhg100.com/Article/UploadFiles/201512/2015121518443816.jpg)
[#266]
Go to a small room located on this floor and you'll gain possession of a new armor. You may now proceed towards the stairs leading to the lower floor. Watch out, because you'll most probably going to be attacked by new creatures here. Proceed to the ground floor and deal with a new group. Don't forget that you don't have to be in a lot of hurry. Get to the elevator and get ready to get rid of the final creature [#267].
![[#267] - Interval 05 - Provocation - part 13 - Interval 05 - Provocation - F.E.A.R. 2: Project Origin - Game Guide and Walkthrough](https://game.lhg100.com/Article/UploadFiles/201512/2015121518443893.jpg)
[#267]
You may enter the elevator. Use the control panel to get to a new area of the map. Exit the elevator and get closer to a glass wall [#268]. You should now notice that enemy soldiers are standing on the other side and that they can't see you. Plan your attack carefully. Get rid of them and head over to the second room.
![[#268] - Interval 05 - Provocation - part 13 - Interval 05 - Provocation - F.E.A.R. 2: Project Origin - Game Guide and Walkthrough](https://game.lhg100.com/Article/UploadFiles/201512/2015121518443867.jpg)
[#268]
Keep pushing forward. You'll have to get rid of one more group just around the corner [#269]. I would recommend using grenades here, however you can also use an assault rifle. Notice your colleagues in the background. Join them and listen to new orders. In order to end this level you must get on board of an armored vehicle.
![[#269] - Interval 05 - Provocation - part 13 - Interval 05 - Provocation - F.E.A.R. 2: Project Origin - Game Guide and Walkthrough](https://game.lhg100.com/Article/UploadFiles/201512/2015121518443953.jpg)
[#269]
Listen to a revised plan while still inside the armored vehicle. You'll soon find out that the vehicle has been attacked by enemy forces. Get ready to mount a heavy machine gun in order to repel enemy attacks. The first large group of enemy soldiers will appear in front of you, near a large hole [#270].
![[#270] - Interval 05 - Provocation - part 13 - Interval 05 - Provocation - F.E.A.R. 2: Project Origin - Game Guide and Walkthrough](https://game.lhg100.com/Article/UploadFiles/201512/2015121518443996.jpg)
[#270]
Turn the turret to your left and continue shooting at enemy troops. It's very important that you focus on eliminating armored opponents [#271], because they're the ones that can injure your character significantly. Prevent other soldiers from surprising you from the left, especially near the carriage. One of your colleagues will begin moving towards enemy troops in the meantime, but you may as well ignore him. Keep fighting until you've been able to defeat all enemy forces. You'll automatically end up outside the armored vehicle.
![[#271] - Interval 05 - Provocation - part 13 - Interval 05 - Provocation - F.E.A.R. 2: Project Origin - Game Guide and Walkthrough](https://game.lhg100.com/Article/UploadFiles/201512/2015121518443914.jpg)
[#271]
Start moving forward. There's no need to explore the surrounding area, because you wouldn't anything of interest. Instead rejoin with Stokes and notice that Keegan has begun to act strangely. Your objective will be to follow him and your first assignment is to get through a large gate [#272]. It's very simple - press the crouch key, stand up when you're on the other side and go to your right.
![[#272] - Interval 05 - Provocation - part 13 - Interval 05 - Provocation - F.E.A.R. 2: Project Origin - Game Guide and Walkthrough](https://game.lhg100.com/Article/UploadFiles/201512/2015121518443961.jpg)
[#272]
Keep moving forward and ignore all image distortions along the way. Proceed directly towards a door where you see a bright light. Open the door and go to the train tracks. Thankfully you won't have to worry about any trains heading your way. Keep moving through a dark tunnel and you'll soon notice a parked carriage in the distance. Once you've arrived at a new location go to your left [#273].
![[#273] - Interval 06 - Deterioration - part 1 - Interval 06 - Deterioration - F.E.A.R. 2: Project Origin - Game Guide and Walkthrough](https://game.lhg100.com/Article/UploadFiles/201512/2015121518443962.jpg)
[#273]
I would strongly advise that you choose a shotgun or a Hammerhead from your inventory, because for the next 5-10 minutes you'll be dealing with a lot of invisible creatures [#274]. Thankfully they're not entirely invisible and you'll also be able to predict most of the attacks by their distinct sounds. Don't forget to collect an armor along the way. Two invisible monsters are guarding the stairs. Kill them before moving on.
![[#274] - Interval 06 - Deterioration - part 1 - Interval 06 - Deterioration - F.E.A.R. 2: Project Origin - Game Guide and Walkthrough](https://game.lhg100.com/Article/UploadFiles/201512/2015121518443966.jpg)
[#274]
Before you decide to use the stairs make sure that you've searched the surrounding area for ammunition and a new document [#275] - Auburn woes. You may now proceed to the upper level of the structure. You'll have to kill two additional mutants here. Collect grenades and get ready to deal with a new group of monsters. One of the creatures will probably surprise you from the back, so you must be ready to repel that attack.
![[#275] - Interval 06 - Deterioration - part 1 - Interval 06 - Deterioration - F.E.A.R. 2: Project Origin - Game Guide and Walkthrough](https://game.lhg100.com/Article/UploadFiles/201512/2015121518443912.jpg)
[#275]
Go to the main area and proceed to your right. Locate the stairs and travel to the lower floor [#276]. The main reason is that you'll be allowed to collect two valuable items - a new armor and a Reflex Injector. Go back up. Locate a destroyed vending machine and hold the action key to move it out of the way.
![[#276] - Interval 06 - Deterioration - part 1 - Interval 06 - Deterioration - F.E.A.R. 2: Project Origin - Game Guide and Walkthrough](https://game.lhg100.com/Article/UploadFiles/201512/2015121518443944.jpg)
[#276]
Eventually you should be able to get to a new platform of the train station. Inspect the area around the pillars and you'll find a new CD [#277] - Electrical hazard. Proceed to the train tracks. There's a new armor in the area if you need one. Go towards a large tunnel. You won't encounter any new monsters along the way. Instead make sure you've chosen an assault rifle or a sniper rifle from your arsenal.
![[#277] - Interval 06 - Deterioration - part 1 - Interval 06 - Deterioration - F.E.A.R. 2: Project Origin - Game Guide and Walkthrough](https://game.lhg100.com/Article/UploadFiles/201512/2015121518443968.jpg)
[#277]
You will encounter a new group of enemy soldiers not far from here [#278]. Attack them from a larger distance or try moving closer to them and finish them off with a Hammerhead. You should also consider using grenades but only against larger groups. Eventually you'll have to get to a small balcony.
[#278]
You need to be ready to kill a soldier equipped with a Hammerhead [#279]. Use an assault rifle and grenades to get rid of him and his colleagues quickly, especially since you'll be fighting at a close range. You can also consider using a pulse rifle if you have some spare rounds. Proceed towards a new corridor.
![[#279] - Interval 06 - Deterioration - part 1 - Interval 06 - Deterioration - F.E.A.R. 2: Project Origin - Game Guide and Walkthrough](https://game.lhg100.com/Article/UploadFiles/201512/2015121518444042.jpg)
[#279]
There are several corridors and smaller rooms nearby. You won't have to explore all of them, but you should prevent enemy units from making surprise attacks. You'll encounter a group of enemy soldiers when you get to a new large room [#280]. Don't forget to use grenades - they'll be very effective in confined space.
![[#280] - Interval 06 - Deterioration - part 2 - Interval 06 - Deterioration - F.E.A.R. 2: Project Origin - Game Guide and Walkthrough](https://game.lhg100.com/Article/UploadFiles/201512/2015121518444059.jpg)
[#280]
Take interest in ammunition, as well as in a new medkit. Get ready to defend yourself against attacks of a second group of enemy units [#281]. Most of them will be standing on an upper balcony and you have to be ready to kill them when they try to hop over the railing. Keep pushing forward and leave no one behind.
![[#281] - Interval 06 - Deterioration - part 2 - Interval 06 - Deterioration - F.E.A.R. 2: Project Origin - Game Guide and Walkthrough](https://game.lhg100.com/Article/UploadFiles/201512/2015121518444054.jpg)
[#281]
Be on a look out for signs. They will help in getting to your current destination which is going to be a Pump Room. Watch out for upper balconies and eliminate additional enemy units when they arrive. A large group will be also waiting for you near the stairs [#282]. Kill them and take your time to find ammunition, as well as a new armor. Head over to a long balcony leading to a new section of the sewers.
![[#282] - Interval 06 - Deterioration - part 2 - Interval 06 - Deterioration - F.E.A.R. 2: Project Origin - Game Guide and Walkthrough](https://game.lhg100.com/Article/UploadFiles/201512/2015121518444044.jpg)
[#282]
Eventually you'll have to get to a large hole in the ground. Use the ladder to go further into the sewers. You'll see Keegan very soon, but you don't have to pursue him at all costs. Watch out for electrical discharges and go to your left. There's going to be a lever here [#283] and you must pull it in order to shut down power supply to this section of the sewers.
![[#283] - Interval 06 - Deterioration - part 2 - Interval 06 - Deterioration - F.E.A.R. 2: Project Origin - Game Guide and Walkthrough](https://game.lhg100.com/Article/UploadFiles/201512/2015121518444076.jpg)
[#283]
Get ready to defend yourself against new ghosts. Remember not to stay in one place for a longer period of time and to fire at the wraiths with short but controlled bursts. Your first objective will be to get down to an area where you saw the discharges [#284]. Go to your right and continue moving forward. Search for medical supplies, but sadly there aren't going to be a lot of them.
![[#284] - Interval 06 - Deterioration - part 2 - Interval 06 - Deterioration - F.E.A.R. 2: Project Origin - Game Guide and Walkthrough](https://game.lhg100.com/Article/UploadFiles/201512/2015121518444079.jpg)
[#284]
There's only one narrow passageway leading to your current destination, so you shouldn't get lost. Keep firing at the ghosts to scare them away, but you must acknowledge the fact that you'll probably lose a lot of health here. Eventually you'll get to a new carriage. Explore the area and you'll find a small stash [#285]. Take the ammunition and much needed syringes.
![[#285] - Interval 06 - Deterioration - part 2 - Interval 06 - Deterioration - F.E.A.R. 2: Project Origin - Game Guide and Walkthrough](https://game.lhg100.com/Article/UploadFiles/201512/2015121518444018.jpg)
[#285]
You may proceed towards a second carriage located in the distance. I'd strongly recommend that you take a peek inside, because you will find a new document [#286] - Line extension. You may finally head towards the stairs. Collect ammunition for your primary weapons along the way. Proceed to the end of the balcony and you'll find grenades and armor. Go back to a staircase and head down to a lower level.
![[#286] - Interval 06 - Deterioration - part 2 - Interval 06 - Deterioration - F.E.A.R. 2: Project Origin - Game Guide and Walkthrough](https://game.lhg100.com/Article/UploadFiles/201512/2015121518444029.jpg)
[#286]
You should be able to reach a partially flooded room and this is where you'll engage a large group of enemy units in a battle [#287]. I would recommend using a Hammerhead here, as well as recently collected grenades. Go to your left when you'll deal with the first group. Kill other soldiers - they will appear near the stairs. Make sure to use bullet-time wisely, so the bar won't run out of "juice" in a crucial moment.
[#287]
Explore this entire area when you're done getting rid of enemy troops and then proceed towards the stairs. Thankfully you won't have to worry about any other soldiers attacking the main character. Instead look for supplies. Eventually you'll have to get to a new ladder [#288]. Use it to travel to a higher floor.
![[#288] - Interval 06 - Deterioration - part 3 - Interval 06 - Deterioration - F.E.A.R. 2: Project Origin - Game Guide and Walkthrough](https://game.lhg100.com/Article/UploadFiles/201512/2015121518444184.jpg)
[#288]
You will find yourself standing on a large terminal and surrounded by groups of enemy soldiers. Obviously you'll have to defeat all of them and it's not going to be easy task. Start off by killing closest targets and then focus on securing the upper passageway [#289]. Notice that you shouldn't get too close to the train tracks. Visit a small booth in your spare time and you'll find a new armor. You can also return here later on if your current armor is in good shape.
![[#289] - Interval 06 - Deterioration - part 3 - Interval 06 - Deterioration - F.E.A.R. 2: Project Origin - Game Guide and Walkthrough](https://game.lhg100.com/Article/UploadFiles/201512/2015121518444128.jpg)
[#289]
Sadly you can't use the upper balcony to get to the opposite terminal of the train station. Instead you'll have to go towards one of the carriages [#290]. Watch out, because when you get close enough to the carriage you'll attract other enemy soldiers (including snipers on the upper balcony). Ignore a dark tunnel to your left and proceed to a new terminal right away.
![[#290] - Interval 06 - Deterioration - part 3 - Interval 06 - Deterioration - F.E.A.R. 2: Project Origin - Game Guide and Walkthrough](https://game.lhg100.com/Article/UploadFiles/201512/2015121518444101.jpg)
[#290]
Keep heading forward. You'll have to get to one of the corners of the terminal and you'll be able to find a large switch there [#291]. Using it not only will shut down power to the tracks but will also result in enemy units arriving near the station. Use your purse rifle to get rid of hostile units. It's very important that they die quickly, because one of the enemy soldiers was carrying a laser cannon. Exchange this weapon for your pulse rifle and proceed to an unexplored tunnel.
![[#291] - Interval 06 - Deterioration - part 3 - Interval 06 - Deterioration - F.E.A.R. 2: Project Origin - Game Guide and Walkthrough](https://game.lhg100.com/Article/UploadFiles/201512/2015121518444108.jpg)
[#291]
You won't encounter any additional hostile units along the way. Instead search for a large hole in the left wall. Head over there without making any unnecessary stops. Collect a new document titled Supply report. When you reach the gate [#292] go to an exit, head down and take cover by the right wall. This will allow you to avoid being smashed by a falling bus.
![[#292] - Interval 06 - Deterioration - part 3 - Interval 06 - Deterioration - F.E.A.R. 2: Project Origin - Game Guide and Walkthrough](https://game.lhg100.com/Article/UploadFiles/201512/2015121518444109.jpg)
[#292]
You'll have to circle the entire bus to get through. Keep heading forward and choose the passageway located to your left. Pick up a medkit along the way. Eventually you'll get to a new carriage. Ignore a new fiery vision [#293], because you won't have to fight with Alma. Instead move forward and you'll end up standing on a new platform.
![[#293] - Interval 06 - Deterioration - part 3 - Interval 06 - Deterioration - F.E.A.R. 2: Project Origin - Game Guide and Walkthrough](https://game.lhg100.com/Article/UploadFiles/201512/2015121518444180.jpg)
[#293]
I would strongly recommend that you choose your newly acquired laser cannon from the arsenal. You should notice new enemy soldiers arriving in the distance [#294]. Kill them and don't forget to use bullet-time for more precise hits. If you deplete your cannon switch to an assault rifle and use grenades to deal with the remaining enemy forces.
![[#294] - Interval 06 - Deterioration - part 4 - Interval 06 - Deterioration - F.E.A.R. 2: Project Origin - Game Guide and Walkthrough](https://game.lhg100.com/Article/UploadFiles/201512/2015121518444143.jpg)
[#294]
Your current task is to secure this entire area. Now you can focus on collecting additional supplies, including ammunition, a new armor (it can be found on top of the carriage) and medkits. Proceed to a small door located in the back [#295]. Explore a new stash along the way and you'll find an armor and some landmines. You must get to a new train platform.
![[#295] - Interval 06 - Deterioration - part 4 - Interval 06 - Deterioration - F.E.A.R. 2: Project Origin - Game Guide and Walkthrough](https://game.lhg100.com/Article/UploadFiles/201512/2015121518444177.jpg)
[#295]
You'll take part in difficult fights here, mostly because one of enemy soldier is equipped with a laser cannon identical to yours [#296]. Use your cannon to get rid of him and don't stay in one spot for more than a few seconds, because you'd be an easy target. There are some medkits and landmines in the area. Head on to the next section. Go to your right and you'll find an armor and a few grenades.
![[#296] - Interval 06 - Deterioration - part 4 - Interval 06 - Deterioration - F.E.A.R. 2: Project Origin - Game Guide and Walkthrough](https://game.lhg100.com/Article/UploadFiles/201512/2015121518444123.jpg)
[#296]
You may finally move towards a small door located to your left. Go through a short corridor and you'll end up standing close to a new train platform. Proceed towards the train tracks. Ignore nearby hostiles, because they're going to be crushed by a train [#297]. Duck to your right in order to avoid being hit.
![[#297] - Interval 06 - Deterioration - part 4 - Interval 06 - Deterioration - F.E.A.R. 2: Project Origin - Game Guide and Walkthrough](https://game.lhg100.com/Article/UploadFiles/201512/2015121518444214.jpg)
[#297]
Proceed towards the survivors and begin shooting at them from a larger distance. Inspect the ground floor of the platform and you'll find valuable items (ammo and mines). You may now proceed to the stairs. Enter a small checkpoint building and watch out for new enemies. They will appear on a nearby balcony, so you probably won't notice them right away. Collect additional stuff when they're gone - landmines, armor and a document [#298] - Laser manual.
![[#298] - Interval 06 - Deterioration - part 4 - Interval 06 - Deterioration - F.E.A.R. 2: Project Origin - Game Guide and Walkthrough](https://game.lhg100.com/Article/UploadFiles/201512/2015121518444271.jpg)
[#298]
You must now go to a small balcony surrounding the room you've just explored [#299]. The game will require you to perform two jumps here. Start off by jumping on top of a train and then make a jump towards a nearby platform. Proceed to the stairs, but watch out, because one more opponent will appear in front of you. Kill him quickly and go to a new corridor. Enter the room to your left and keep heading towards the subway exit. Wait for the game to load a new map.
![[#299] - Interval 06 - Deterioration - part 4 - Interval 06 - Deterioration - F.E.A.R. 2: Project Origin - Game Guide and Walkthrough](https://game.lhg100.com/Article/UploadFiles/201512/2015121518444213.jpg)
[#299]
Choose a good weapon for close combat from your arsenal. I'm recommending a shotgun, especially since you'll want to get rid of this weapon in the near future. The first group of enemy units can be found near the parked truck [#300]. Kill them before they notice you heading their way. Once they're gone choose an assault rifle or Hammerhead and begin firing at more distant targets.
![[#300] - Interval 06 - Deterioration - part 4 - Interval 06 - Deterioration - F.E.A.R. 2: Project Origin - Game Guide and Walkthrough](https://game.lhg100.com/Article/UploadFiles/201512/2015121518444224.jpg)
[#300]
You should be able to find an ammo stash nearby [#301]. It's very important that you take a sniper rifle, because you'll want to eliminate a lot of targets from a large distance during the exploration of the surrounding area. Leave three guns intact - assault rifle, Hammerhead and laser cannon. This gives as a shotgun and that's the weapon you should exchange for the sniper rifle. There are also grenades here - don't forget to pick them up.
![[#301] - Interval 06 - Deterioration - part 5 - Interval 06 - Deterioration - F.E.A.R. 2: Project Origin - Game Guide and Walkthrough](https://game.lhg100.com/Article/UploadFiles/201512/2015121518444291.jpg)
[#301]
Choose the sniper rifle from your inventory right away and proceed forward. The first enemy sniper will appear on top of the left building [#302]. Get rid of him before he's able to locate your position. Obviously you should be using slow-motion for more precise hits. Keep heading forward and pick up an armor along the way. New enemy soldiers will appear near a large hole in the road. Keep using the sniper rifle and prevent enemy units from moving too close to your character.
![[#302] - Interval 06 - Deterioration - part 5 - Interval 06 - Deterioration - F.E.A.R. 2: Project Origin - Game Guide and Walkthrough](https://game.lhg100.com/Article/UploadFiles/201512/2015121518444211.jpg)
[#302]
Keep pushing forward and watch out for enemies leaving the cinema building. There are going to be a few of them, so use your bullet-time wisely and reload your weapon each time you get rid of more than one individual. A new sniper is hiding on the roof of the left building and also his colleague can be found above the entrance to the cinema [#303]. Kill them both.
![[#303] - Interval 06 - Deterioration - part 5 - Interval 06 - Deterioration - F.E.A.R. 2: Project Origin - Game Guide and Walkthrough](https://game.lhg100.com/Article/UploadFiles/201512/2015121518444232.jpg)
[#303]
Avoid a large hole in the ground and proceed to the left building. You'll have a great view of the surrounding area from here and you'll also find a lot of useful items [#304], including a laser cannon, syringes and grenades. Approach the cinema entrance, but watch out for additional hostile units. Enemy soldiers may appear near the windows. Use a Hammerhead and grenades to neutralize them.
![[#304] - Interval 06 - Deterioration - part 5 - Interval 06 - Deterioration - F.E.A.R. 2: Project Origin - Game Guide and Walkthrough](https://game.lhg100.com/Article/UploadFiles/201512/2015121518444216.jpg)
[#304]
You should now choose a laser cannon or some equally powerful weapon from your arsenal. Enter the cinema building through the main door. Notice that an armored soldier has appeared in front of you [#305]. He'll also be using a laser cannon, so it's important that he dies quickly. Go to your right when he's gone. Find a Reflex Injector near the windows. You can also take an armor and new landmines.
![[#305] - Interval 06 - Deterioration - part 5 - Interval 06 - Deterioration - F.E.A.R. 2: Project Origin - Game Guide and Walkthrough](https://game.lhg100.com/Article/UploadFiles/201512/2015121518444239.jpg)
[#305]
Proceed to the corridor where the armored opponent showed up. Ignore image distortions and short visions. Proceed to the next room. Ignore the area around you and keep heading towards the exit. Turn left and then go to your right when you reach the truck. Pick up a new armor along the way if you need one. Eventually you should be able to get to a new Powered Armor. Destroy the fuse box [#306], because otherwise you'd be electrocuted.
![[#306] - Interval 06 - Deterioration - part 5 - Interval 06 - Deterioration - F.E.A.R. 2: Project Origin - Game Guide and Walkthrough](https://game.lhg100.com/Article/UploadFiles/201512/2015121518444222.jpg)
[#306]
You may finally approach the Powered Armor. Take a seat inside and get ready for similar battles to one of the previous levels of the game. The main difference this time is that you'll have to pay more attention to enemy troops, because a lot of them will be capable of damaging your armor. Be on a look out for bazooka troops [#307]. You can distinguish them quite easily, because their weapons are leaving green trails behind. Remember not to stay in one spot for more than a second and allow your armor to recharge each time you've suffered some hits.
![[#307] - Interval 06 - Deterioration - part 5 - Interval 06 - Deterioration - F.E.A.R. 2: Project Origin - Game Guide and Walkthrough](https://game.lhg100.com/Article/UploadFiles/201512/2015121518444304.jpg)
[#307]
Aside from soldiers equipped with rocket launchers you'll also have to watch out for smaller robots [#308]. The tactics here remain the same, so you should begin by firing the rockets and then use the main cannons. Use termovision if you want to, however I think you shouldn't have any problems locating enemy troops on your own.
![[#308] - Interval 06 - Deterioration - part 6 - Interval 06 - Deterioration - F.E.A.R. 2: Project Origin - Game Guide and Walkthrough](https://game.lhg100.com/Article/UploadFiles/201512/2015121518444353.jpg)
[#308]
The toughest mechanical opponent will show up when you get to the opposite end of the street [#309]. Fire your rockets and start moving back quickly in order to avoid receiving a lot of damage. If your armor is about to be destroyed leave it quickly and use your standard weaponry to get rid of the robot. Otherwise recharge your armor in a safe area and go back to finish off the hostile unit. Either way, you'll have to travel on foot from now on.
![[#309] - Interval 06 - Deterioration - part 6 - Interval 06 - Deterioration - F.E.A.R. 2: Project Origin - Game Guide and Walkthrough](https://game.lhg100.com/Article/UploadFiles/201512/2015121518444381.jpg)
[#309]
Proceed to an entrance of a destroyed building found to your right [#310]. Eventually you should be able to get to a hole in the left wall. Ignore new visions along the way, as well as ghosts, because you won't be attacked by them. You must get to a new exit. Proceed towards the epicenter of the explosion that took place in the city earlier on.
![[#310] - Interval 06 - Deterioration - part 6 - Interval 06 - Deterioration - F.E.A.R. 2: Project Origin - Game Guide and Walkthrough](https://game.lhg100.com/Article/UploadFiles/201512/2015121518444312.jpg)
[#310]
Just as before you may ignore Keegan's actions, because you won't catch up to your him no matter what you do. Proceed to a large pipe [#311] and continue moving downwards. Make sure to aim each jump carefully, so you won't lose any health by mistake. When you land inside a destroyed building look for a hole in the next room.
![[#311] - Interval 06 - Deterioration - part 6 - Interval 06 - Deterioration - F.E.A.R. 2: Project Origin - Game Guide and Walkthrough](https://game.lhg100.com/Article/UploadFiles/201512/2015121518444327.jpg)
[#311]
Jump over a small window and find a second hole in the ground [#312]. Travel forward and after that go to your right. You should once again see Keegan in front of you. Eventually you should be able to get to the epicenter. Ignore it and go to a hole found to your right. Wait for the game to begin loading a new level.
![[#312] - Interval 06 - Deterioration - part 6 - Interval 06 - Deterioration - F.E.A.R. 2: Project Origin - Game Guide and Walkthrough](https://game.lhg100.com/Article/UploadFiles/201512/2015121518444309.jpg)
[#312]
Slide down carefully in order to avoid sustaining any major injuries. You will find yourself standing inside a room with a large generator. Search the area for a new armor and proceed towards a dark passageway [#313]. When you get to a larger area proceed directly to your right. Ignore a collapsing balcony, because you'll have plenty of time to get to it and to make a new jump.
![[#313] - Interval 06 - Deterioration - part 6 - Interval 06 - Deterioration - F.E.A.R. 2: Project Origin - Game Guide and Walkthrough](https://game.lhg100.com/Article/UploadFiles/201512/2015121518444307.jpg)
[#313]
Keep heading forward. When you get to an area with new devices focus your efforts on finding a small hole in the ground [#314]. Head down there and you'll gain possession of useful items, including an armor, ammunition, grenades and mines. Proceed to the outer balcony and head on towards the debris. Head on to the ground level and proceed forward.
![[#314] - Interval 06 - Deterioration - part 6 - Interval 06 - Deterioration - F.E.A.R. 2: Project Origin - Game Guide and Walkthrough](https://game.lhg100.com/Article/UploadFiles/201512/2015121518444345.jpg)
[#314]
You should be able to get to the stairs. Travel to a different floor and don't forget to collect a new document along the way [#315] - Replica brochure 1. Enemy units are waiting for you just around the corner. You should be using an assault rifle, a sniper rifle or a laser cannon here. Don't forget to throw a couple of grenades at enemy units. Make sure that you've killed all of them and go to the stairs.
![[#315] - Interval 06 - Deterioration - part 7 - Interval 06 - Deterioration - F.E.A.R. 2: Project Origin - Game Guide and Walkthrough](https://game.lhg100.com/Article/UploadFiles/201512/2015121518444361.jpg)
[#315]
You will finally find your way to the upper balcony. Proceed to a large platform located in front of you [#316]. Find a new document on the ground titled STS guidelines. Explore the area in the search for medical supplies and armors, BUT don't take anything just yet. The main reason is that you may need these items in the near future. The only exception is when you've damaged your current armor badly, but I'm sure it's still in good shape.
![[#316] - Interval 06 - Deterioration - part 7 - Interval 06 - Deterioration - F.E.A.R. 2: Project Origin - Game Guide and Walkthrough](https://game.lhg100.com/Article/UploadFiles/201512/2015121518444482.jpg)
[#316]
You can start this platform by going to your left and finding a large control panel in one of the corners [#318]. At first you'll be safe here, so you should take this time to familiarize yourself with the layout of the platform. Notice a small passageway to your left. It's closed now, but it will soon open. You'll have to wait for a second platform to arrive in the area and this means you'll have to deal with enemy troops.
![[#317] - Interval 06 - Deterioration - part 7 - Interval 06 - Deterioration - F.E.A.R. 2: Project Origin - Game Guide and Walkthrough](https://game.lhg100.com/Article/UploadFiles/201512/2015121518444444.jpg)
[#317]
This is going to be the most difficult battle of the entire game. Your job will be to defend yourself for a few minutes. You'll be dealing mostly with distant targets, however some of the enemy soldiers will try getting closer to your position. I wouldn't recommend staying close to the panel, because you would have been trapped there. Instead move to your left. The first group can be found on the opposite platform [#318]. Use an assault rifle or (even better) a sniper rifle to dispose of them.
![[#318] - Interval 06 - Deterioration - part 7 - Interval 06 - Deterioration - F.E.A.R. 2: Project Origin - Game Guide and Walkthrough](https://game.lhg100.com/Article/UploadFiles/201512/2015121518444432.jpg)
[#318]
You'll have to be ready for two things. First of all, enemies from the nearby platform will try to board yours and obviously you should prevent them from doing that. Second of all, new hostile units will appear on your platform and they'll use a passageway mentioned before [#319]. I would recommend throwing grenades at them, however you can also switch to an assault rifle or Hammerhead if you have a free moment.
![[#319] - Interval 06 - Deterioration - part 7 - Interval 06 - Deterioration - F.E.A.R. 2: Project Origin - Game Guide and Walkthrough](https://game.lhg100.com/Article/UploadFiles/201512/2015121518444481.jpg)
[#319]
Try to stay as far away from the control panel as possible. Pick up medical supplies and a new armor when you've been badly injured. You will soon hear a warning about an upcoming collision, but you may ignore it for the time being. Notice that new groups of enemy soldiers will use ropes to get to you [#320]. In addition to that some of them will try jumping towards your platform and they'll have to die in the first place.
![[#320] - Interval 06 - Deterioration - part 7 - Interval 06 - Deterioration - F.E.A.R. 2: Project Origin - Game Guide and Walkthrough](https://game.lhg100.com/Article/UploadFiles/201512/2015121518444446.jpg)
[#320]
Keep firing at enemy troops and don't forget to look around a lot, so you won't be surprised by any hostile units. Continue using grenades and landmines to defend yourself against enemy attacks. You should also notice that an enemy sniper has appeared to your left [#321]. Kill him before he's able to inflict injuries to your character. Wait for a second collision warning and proceed to a small passageway located near the control panel.
![[#321] - Interval 06 - Deterioration - part 7 - Interval 06 - Deterioration - F.E.A.R. 2: Project Origin - Game Guide and Walkthrough](https://game.lhg100.com/Article/UploadFiles/201512/2015121518444426.jpg)
[#321]
Obviously you should collect additional supplies on your way to a second panel. You'll find ammunition, medicine and grenades. There's also a second armor in the area. Watch out, because the only route to the second control panel is going to be blocked by enemy troops [#322]. Kill them, go to their location, turn around and deal with a second group that tried to surprise you.
![[#322] - Interval 06 - Deterioration - part 8 - Interval 06 - Deterioration - F.E.A.R. 2: Project Origin - Game Guide and Walkthrough](https://game.lhg100.com/Article/UploadFiles/201512/2015121518444403.jpg)
[#322]
Keep defending yourself against enemy attacks and don't leave this area until you've eliminated all of them. You may now proceed to the opposite end of the platform. When you get there focus your efforts on finding a similar control panel [#323] to the one used before. Obviously you must use the panel to initiate safety brakes. You'll now witness a large collision and you'll also notice that you've found your way to a completely new area of the map.
[#323]
As I've mentioned before you won't have to pursue Keegan at all costs, but at least you'll know where to go next. Ignore the large platform and proceed to the stairs located in front of you [#324]. Head down carefully and move forward. There's a corridor to your right, but you don't have to explore it. Instead go to a ladder and use it to travel to a higher floor.
![[#324] - Interval 06 - Deterioration - part 8 - Interval 06 - Deterioration - F.E.A.R. 2: Project Origin - Game Guide and Walkthrough](https://game.lhg100.com/Article/UploadFiles/201512/2015121518444469.jpg)
[#324]
You should now spend some time exploring the nearby area, because you'll find a new document titled Transfer notice. Proceed towards the stairs and use a second ladder. Be careful, because you're going to be attacked by an invisible creature here [#325]. Use Hammerhead or combat shotgun to eliminate these beasts.
![[#325] - Interval 06 - Deterioration - part 8 - Interval 06 - Deterioration - F.E.A.R. 2: Project Origin - Game Guide and Walkthrough](https://game.lhg100.com/Article/UploadFiles/201512/2015121518444521.jpg)
[#325]
Proceed towards the nearest passageway. When you get to a new area ignore the balcony located in front of you and go to your right. You should be able to find a new ladder here [#326]. It's important that you use it, because you'll find a new document - Replica brochure 1. Go back up and start moving towards Keegan.
![[#326] - Interval 06 - Deterioration - part 8 - Interval 06 - Deterioration - F.E.A.R. 2: Project Origin - Game Guide and Walkthrough](https://game.lhg100.com/Article/UploadFiles/201512/2015121518444506.jpg)
[#326]
You now have two choices - you can either go straight ahead or you can turn left. If you choose the left corridor you'll have to go through a large ventilation shaft [#327]. After a long walk you'll get to a balcony with ammunition, landmines and a medkit. Watch out for invisible creatures there. You can go back the same way you came before or you can find a hole and make a jump. It shouldn't result in your character losing any health points.
![[#327] - Interval 06 - Deterioration - part 8 - Interval 06 - Deterioration - F.E.A.R. 2: Project Origin - Game Guide and Walkthrough](https://game.lhg100.com/Article/UploadFiles/201512/2015121518444576.jpg)
[#327]
Proceed towards the only unexplored corridor and you'll end up moving inside a small tunnel. Keep going straight and eventually you should be able to get to a new ladder [#328]. Use it to get to a higher level of the structure. Pick up new grenades. You'll also find a pulse rifle here, as well as a new document titled Project roster. Go to the left hall.
![[#328] - Interval 06 - Deterioration - part 8 - Interval 06 - Deterioration - F.E.A.R. 2: Project Origin - Game Guide and Walkthrough](https://game.lhg100.com/Article/UploadFiles/201512/2015121518444538.jpg)
[#328]
Make a stop before you decide to explore this area. Memorize Keegan's moves, because you'll have to copy them in a few minutes. You may now proceed with the exploration process. Just as before, it's a good idea to use a new ladder [#329], because this will allow you to get to a document titled Replica brochure 3.
![[#329] - Interval 06 - Deterioration - part 9 - Interval 06 - Deterioration - F.E.A.R. 2: Project Origin - Game Guide and Walkthrough](https://game.lhg100.com/Article/UploadFiles/201512/2015121518444552.jpg)
[#329]
Eventually you'll have to get to a large control panel located in the middle of the room [#330]. Use the panel and notice that a huge platform has begun moving. You'll have to wait for it to stop. Enter the platform, however you can also head over to the left balcony and wait for it to reach its final position. Either way, you're going to be attacked by a large group of invisible creatures. Use your close combat weapons to get rid of them and don't forget to reload after you've dealt with each wave.
![[#330] - Interval 06 - Deterioration - part 9 - Interval 06 - Deterioration - F.E.A.R. 2: Project Origin - Game Guide and Walkthrough](https://game.lhg100.com/Article/UploadFiles/201512/2015121518444586.jpg)
[#330]
You'll now have to copy Keegan's moves and this means you must jump over to a nearby balcony. Defeat a new invisible creature and go to your right. Eventually you should be able to get to two ladders [#331]. Use them and you'll find a Reflex Injector. You may now go back to the area where you've landed after the jump from the moving platform.
![[#331] - Interval 06 - Deterioration - part 9 - Interval 06 - Deterioration - F.E.A.R. 2: Project Origin - Game Guide and Walkthrough](https://game.lhg100.com/Article/UploadFiles/201512/2015121518444511.jpg)
[#331]
Find Keegan again and start moving towards him. I guess you won't be surprised to hear that you'll have to defeat a few monsters along the way. You'll also find a new stash [#332]. Make sure to take an armor, because your current one is probably worn out by now. Eventually you'll have to get to a new control panel. Use it to lower the second platform.
![[#332] - Interval 06 - Deterioration - part 9 - Interval 06 - Deterioration - F.E.A.R. 2: Project Origin - Game Guide and Walkthrough](https://game.lhg100.com/Article/UploadFiles/201512/2015121518444558.jpg)
[#332]
Step on the moving platform and wait for it to transport you to a new location. You'll have to make a jump towards the second platform [#333]. Be careful, though - it will result in a new monster attacking the main character. Kill the beast and make a second jump towards a small balcony located to your right.
![[#333] - Interval 06 - Deterioration - part 9 - Interval 06 - Deterioration - F.E.A.R. 2: Project Origin - Game Guide and Walkthrough](https://game.lhg100.com/Article/UploadFiles/201512/2015121518444568.jpg)
[#333]
Start moving towards the bright light (where you've seen Keegan before). Watch out for other monsters and kill them before moving on. Once you're there [#334] step into the light and you'll witness a new vision. You'll finally end up standing in front of the passageway, but this time you'll be facing a door. Open the door and go to the next corridor.
![[#334] - Interval 06 - Deterioration - part 9 - Interval 06 - Deterioration - F.E.A.R. 2: Project Origin - Game Guide and Walkthrough](https://game.lhg100.com/Article/UploadFiles/201512/2015121518444614.jpg)
[#334]
Proceed towards the stairs and eventually you'll get to a ladder. Kill a new monster before using the ladder and then travel to a new tunnel. Be on a look out for a new armor in this area. You should also check the area under the stairs [#335] and you'll find a bonus CD - Replica brochure 4. Go back to the stairs and proceed to the upper platform. Take a sniper rifle and use the nearby lever to open a huge gate.
![[#335] - Interval 06 - Deterioration - part 9 - Interval 06 - Deterioration - F.E.A.R. 2: Project Origin - Game Guide and Walkthrough](https://game.lhg100.com/Article/UploadFiles/201512/2015121518444631.jpg)
[#335]
I would strongly advise that you remain here for at least 20-30 seconds. There are a few snipers in front of you [#336] and you should get rid of them from here. Thankfully you shouldn't have any major problems locating them even if they move, because they'll be using red laser pointers. Enter this new area carefully. Search your surroundings for sniper ammo and grenades.
![[#336] - Interval 06 - Deterioration - part 10 - Interval 06 - Deterioration - F.E.A.R. 2: Project Origin - Game Guide and Walkthrough](https://game.lhg100.com/Article/UploadFiles/201512/2015121518444678.jpg)
[#336]
You may now begin moving towards a new huge platform, similar to the one used before. A new sniper should appear to your left, so you'll have to eliminate him as soon as possible. Listen to a radio transmission and you'll find out that you can't start the platform just yet. Instead approach the railing and get to a small balcony [#337]. Take supplies (medkit & armor) and use a nearby ladder.
[#337]
I guess you won't be surprised to hear that more snipers will reveal their positions when you get to the top. Keep moving and use bullet-time wisely to hunt them down. Most of them will appear near the stairs [#338]. Check one of the side corridors for a rocket launcher. You don't have to take this weapon, because you won't be fighting any robots anytime soon.
![[#338] - Interval 06 - Deterioration - part 10 - Interval 06 - Deterioration - F.E.A.R. 2: Project Origin - Game Guide and Walkthrough](https://game.lhg100.com/Article/UploadFiles/201512/2015121518444624.jpg)
[#338]
Eventually you'll have to get to a small control booth [#339]. You can spend some time trying to secure this entire area or you can enter the booth right away using a ladder. It doesn't really matter how it's going to play out. Use a new control panel and notice a large container dropping on the platform. Return to the balcony quickly and choose a sniper rifle from your inventory.
![[#339] - Interval 06 - Deterioration - part 10 - Interval 06 - Deterioration - F.E.A.R. 2: Project Origin - Game Guide and Walkthrough](https://game.lhg100.com/Article/UploadFiles/201512/2015121518444622.jpg)
[#339]
You must now defend yourself against new enemy attacks. Thankfully enemy soldiers won't respawn endlessly and sooner or later you'll get rid of all of them. Monitor the balcony you're standing on but you should also know additional soldiers will appear near the moving platform [#340]. Use slow-motion whenever possible and find a good cover.
[#340]
Go to the other end of the upper platform when you manage to get rid of all enemy troops. Notice a small passageway to your right. Go there and eventually you'll find a new armor [#341]. You may go back down. Deal with the remaining enemy troops and proceed directly towards the moving platform.
![[#341] - Interval 06 - Deterioration - part 10 - Interval 06 - Deterioration - F.E.A.R. 2: Project Origin - Game Guide and Walkthrough](https://game.lhg100.com/Article/UploadFiles/201512/2015121518444632.jpg)
[#341]
You shouldn't have any problems figuring out what to do next. Use the control panel [#342] to activate the platform. Thankfully this time you won't be attacked by any soldiers. Instead listen to a radio transmission about Alma. Move forward when you get to your destination. You're going to be attacked by the girl, so don't forget to keep pressing the right mouse button rapidly to get rid of her.
![[#342] - Interval 06 - Deterioration - part 10 - Interval 06 - Deterioration - F.E.A.R. 2: Project Origin - Game Guide and Walkthrough](https://game.lhg100.com/Article/UploadFiles/201512/2015121518444673.jpg)
[#342]
Inspect the left section of the warehouse. You won't find anything of interest, but when you return to the platform you'll have to defeat Alma again. Notice that you can now go to the right section of the warehouse. There's a small passageway here [#343].
![[#343] - Interval 06 - Deterioration - part 11 - Interval 06 - Deterioration - F.E.A.R. 2: Project Origin - Game Guide and Walkthrough](https://game.lhg100.com/Article/UploadFiles/201512/2015121518444625.jpg)
[#343]
Proceed to the end of the corridor and then turn left. There's a medkit here [#344] and you should take if you've suffered some injuries while fighting Alma. You may now enter a new elevator. Use a panel on the wall and get ready to dispose of Alma for the last time. When she's gone you'll have to wait for the game to load a new map.
![[#344] - Interval 06 - Deterioration - part 11 - Interval 06 - Deterioration - F.E.A.R. 2: Project Origin - Game Guide and Walkthrough](https://game.lhg100.com/Article/UploadFiles/201512/2015121518444796.jpg)
[#344]
You don't have to pay too much attention when you leave the elevator, but you'll take part in a new vision and no matter where you go you'll still witness the exact same events [#345]. Thankfully all will return to normal soon and you'll start off in the elevator. Leave it (this time for real) and go to your right.
![[#345] - Interval 06 - Deterioration - part 11 - Interval 06 - Deterioration - F.E.A.R. 2: Project Origin - Game Guide and Walkthrough](https://game.lhg100.com/Article/UploadFiles/201512/2015121518444706.jpg)
[#345]
Keep heading forward, but be on a look out for a hole in the left wall. Get on top of the wooden planks and then travel to the other side. When you'll end up outside make a few steps forward and open a gate. Go inside and find an opened hatch in the ground [#346]. Use the ladder here to get to the sewers.
![[#346] - Interval 06 - Deterioration - part 11 - Interval 06 - Deterioration - F.E.A.R. 2: Project Origin - Game Guide and Walkthrough](https://game.lhg100.com/Article/UploadFiles/201512/2015121518444708.jpg)
[#346]
Get to the flooded chamber and go to your right, because it's the only available passageway. Keep going straight when you'll end up in a long tunnel. Choose an assault rifle or (even better) a sniper rifle from your arsenal. Exit the tunnel and use your current weapon to get rid of a guard [#347]. Head down. Take the sniper rifle (or only a large pack of ammo). You should also pick up a Reflex Injector and a new armor.
![[#347] - Interval 06 - Deterioration - part 11 - Interval 06 - Deterioration - F.E.A.R. 2: Project Origin - Game Guide and Walkthrough](https://game.lhg100.com/Article/UploadFiles/201512/2015121518444754.jpg)
[#347]
Enemy soldiers will begin showing up in front of you. Sadly you have nowhere to hide, so you must be lucky and precise in want to get rid of them without suffering any major injuries [#348]. Remain here until you've defeated the first group. Proceed towards the pillars and get rid of other enemy soldiers. This time you'll have more space to move around. Don't forget to use grenades to eliminate closer targets.
![[#348] - Interval 06 - Deterioration - part 11 - Interval 06 - Deterioration - F.E.A.R. 2: Project Origin - Game Guide and Walkthrough](https://game.lhg100.com/Article/UploadFiles/201512/2015121518444783.jpg)
[#348]
You should soon notice that an allied armored vehicle is providing assistance in neutralizing enemy units, however this doesn't mean you should feel safe. New groups will appear both to your left as well as to your right [#349]. Keep shooting at enemy troops from a large distance and go to your right when they're all gone. Find a new passageway leading to large factory buildings seen in the distance.
![[#349] - Interval 06 - Deterioration - part 11 - Interval 06 - Deterioration - F.E.A.R. 2: Project Origin - Game Guide and Walkthrough](https://game.lhg100.com/Article/UploadFiles/201512/2015121518444795.jpg)
[#349]
You should consider collecting a new armor along the way. New enemy soldiers will appear in front of you and to your right [#350]. You should be using a sniper rifle here, however you must also prevent enemy units from getting too close to your position. Keep pushing towards an allied machine. You'll probably notice a hole in the ground along the way. Ignore it, because you would only find some ammo fro the assault rifle.
![[#350] - Interval 06 - Deterioration - part 12 - Interval 06 - Deterioration - F.E.A.R. 2: Project Origin - Game Guide and Walkthrough](https://game.lhg100.com/Article/UploadFiles/201512/2015121518444734.jpg)
[#350]
Approach a door where one of your teammates is standing and you'll find out that this entrance is locked. You'll also receive a warning about an upcoming counterattack. Run towards the armored vehicle quickly. Take the armor and the medkit right now [#351], because it won't be possible later on. Go towards the driver's seat and you'll automatically mount the weapon.
![[#351] - Interval 06 - Deterioration - part 12 - Interval 06 - Deterioration - F.E.A.R. 2: Project Origin - Game Guide and Walkthrough](https://game.lhg100.com/Article/UploadFiles/201512/2015121518444760.jpg)
[#351]
This scene is going to be very similar to a battle from one of the previous missions of the game, however this time it's going to be slightly more difficult to survive. The first phase of the battle will require you to focus most of your attention on nearby buildings. Remember to eliminate armored targets [#352] before dealing with other troops. New enemy soldiers will arrive from the left and you should be careful, because some of them will be carrying bazookas. Still, winning here should be an easy achievement.
![[#352] - Interval 06 - Deterioration - part 12 - Interval 06 - Deterioration - F.E.A.R. 2: Project Origin - Game Guide and Walkthrough](https://game.lhg100.com/Article/UploadFiles/201512/2015121518444788.jpg)
[#352]
You'll automatically end up outside the armored vehicle when you manage to get rid of all enemy troops. You can proceed to the door, because this entrance has been unlocked in the meantime. Find a button on the wall [#353] and press it to begin a decontamination procedure. Wait for this scene to end and proceed to a newly unlocked passageway.
![[#353] - Interval 06 - Deterioration - part 12 - Interval 06 - Deterioration - F.E.A.R. 2: Project Origin - Game Guide and Walkthrough](https://game.lhg100.com/Article/UploadFiles/201512/2015121518444866.jpg)
[#353]
Enter a slightly bigger room. Ignore Stokes for the time being and head on to the main terminal located in the center of the room. Find a new document [#354] titled Containing Alma. You may now rejoin with your colleague. Use a new control panel to transport you both to a new area of the facility.
![[#354] - Interval 07 - Union - F.E.A.R. 2: Project Origin - Game Guide and Walkthrough](https://game.lhg100.com/Article/UploadFiles/201512/2015121518444827.jpg)
[#354]
Explore the central area of this room and you'll gain possession of a new document titled Situation update. You may now proceed to the next section [#355]. There's one more document for you to find - Power flow. Head on forward and take part in a new decontamination procedure. Wait patiently for it to end.
![[#355] - Interval 07 - Union - F.E.A.R. 2: Project Origin - Game Guide and Walkthrough](https://game.lhg100.com/Article/UploadFiles/201512/2015121518444893.jpg)
[#355]
You may finally go through a long corridor. At the end of it you'll find a document titled Music box. Go to the final decontamination chamber and allow the system to start the procedure. Exit the room and collect the last document [#356] - Emergency shutdown. Proceed to a much larger room.
![[#356] - Interval 07 - Union - F.E.A.R. 2: Project Origin - Game Guide and Walkthrough](https://game.lhg100.com/Article/UploadFiles/201512/2015121518444847.jpg)
[#356]
Listen to what Stokes has to say and go to your left. There's a large control panel here [#357] and you must allow the main character to pull all three levers. You may now start moving towards the chair. Press the action key to strap yourself to the chair. You'll now witness a very interesting cut-scene involving Stokes and Genevieve.
![[#357] - Interval 07 - Union - F.E.A.R. 2: Project Origin - Game Guide and Walkthrough](https://game.lhg100.com/Article/UploadFiles/201512/2015121518444808.jpg)
[#357]
When you regain control over Becket you'll notice that you're in a very strange area. You won't have to worry about being attacked here. Instead proceed directly to a similar control panel to the one you've used before [#358]. Memorize how this device looks, because you'll have to perform similar actions in just a moment. Watch a new cut-scene with mutated Keegan.
![[#358] - Interval 07 - Union - F.E.A.R. 2: Project Origin - Game Guide and Walkthrough](https://game.lhg100.com/Article/UploadFiles/201512/2015121518444829.jpg)
[#358]
The second phase of this battle is going to be more difficult, because you're going to be an object of many attacks made by Keegan's clones. Don't even think about fighting the ghosts, because they would be replaced by new ones almost instantly. Instead keep using slow-motion as often as possible (collecting a lot of Reflex Injectors really helps here) and focus on getting to the control panel [#359]. Use the device and you'll advance to the next phase.
![[#359] - Interval 07 - Union - F.E.A.R. 2: Project Origin - Game Guide and Walkthrough](https://game.lhg100.com/Article/UploadFiles/201512/2015121518444889.jpg)
[#359]
The third phase is going to be very similar to the second one, however this time you'll be dealing with more targets. Start off by going left and then keep moving straight. Pull the levers before you're killed. The final fourth phase is by far the most difficult one. Look at my screen [#360] if you're having difficulties finding the control panel. You'll have to go around a large oval structure to get to it.
![[#360] - Interval 07 - Union - F.E.A.R. 2: Project Origin - Game Guide and Walkthrough](https://game.lhg100.com/Article/UploadFiles/201512/2015121518444803.jpg)
[#360]
There's only one more thing you have to do before you can end the game and that is to defeat Keegan in close combat. This is a very similar mini-game to the duel with colonel Vanek. Keep pressing the right mouse button and at the end press the left mouse button instead [#361]. Congratulations! You've just finished the game! Sit back and enjoy the ending.
![[#361] - Interval 07 - Union - F.E.A.R. 2: Project Origin - Game Guide and Walkthrough](https://game.lhg100.com/Article/UploadFiles/201512/2015121518444892.jpg)
[#361]
Important! In each case I've added information on where to look for a more detailed description of the whereabouts of each item. In order to find what you're looking for you must connect the number to the actual screen in the main guide.
LEVEL 1 - SANCTUARY
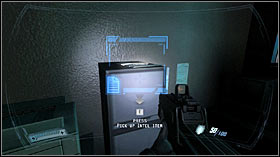
First out of eight
Security Concern
Screen #5
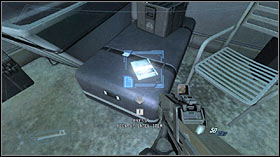
Second out of eight
I.M. transcript #1
Screen #9
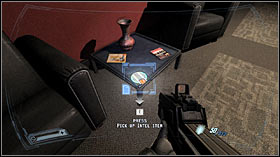
Third out of eight
Bad news
Screen #9
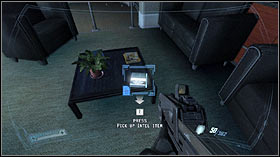
Fourth out of eight
Good luck
Screen #11

Fifth out of eight
Termination notice
Screen #21
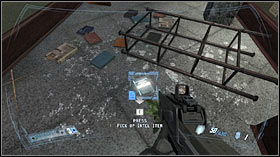
Sixth out of eight
To-Do list
Screen #22
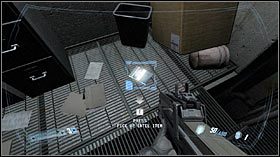
Seventh out of eight
Info: SGT Becket
Screen #22
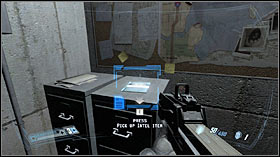
Eighth out of eight
Info: SFC Keegan
Screen #22
LEVEL 2 - AWAKENING
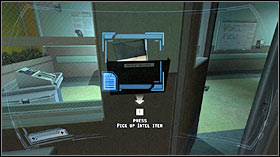
First out of eleven
Memo: M. Becket
Screen #25
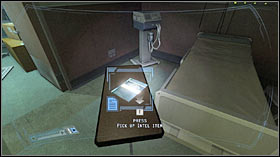
Second out of eleven
Info: 1SG Griffin
Screen #26
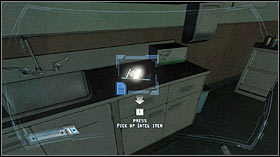
Third out of eleven
Info: SGT Jankowski
Screen #28
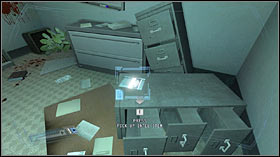
Fourth out of eleven
Surgical notes
Screen #29
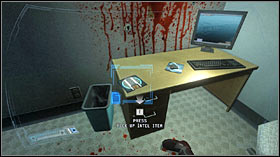
Fifth out of eleven
Check the news
Screen #30
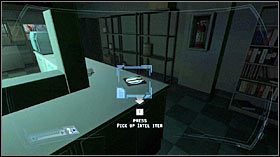
Sixth out of eleven
Urgent warning
Screen #31
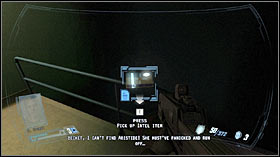
Seventh out of eleven
Info: 1LT Stokes
Screen #38
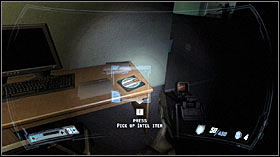
Eighth out of eleven
Diode implants
Screen #47
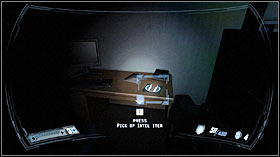
Ninth out of eleven
Admitting patients
Screen #50
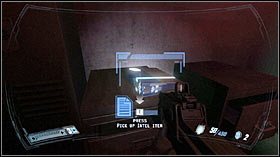
Tenth out of eleven
Evaluation report
Screen #54
Eleventh out of eleven
T.A.C. overview
Screen #57
LEVEL 3 - DISCOVERY
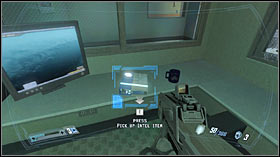
First out of four
Demolition plan
Screen #62
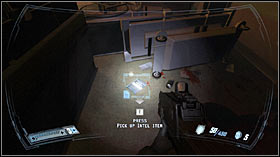
Second out of four
I.M. transcript #3
Screen #68
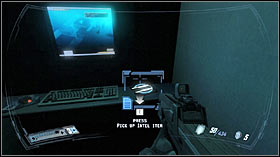
Third out of four
I.M. transcript #2
Screen #72
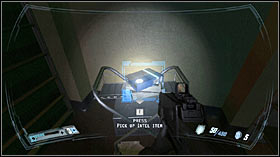
Fourth out of four
Op guidelines
Screen #76
LEVEL 4 - WITHDRAWAL
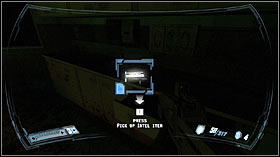
First out of five
Info: SGT Fox
Screen #83
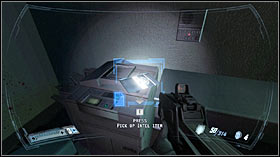
Second out of five
Info: SGT Morales
Screen #85
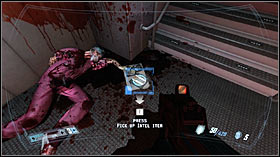
Third out of five
Harbinger failures
Screen #89
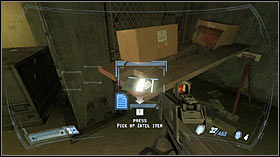
Fourth out of five
Schedule change
Screen #96
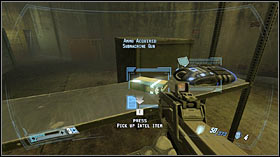
Fifth out of five
Info: P. Fettel
Screen #108
LEVEL 5 - REPLICA

First out of five
Replica upgrades
Screen #111
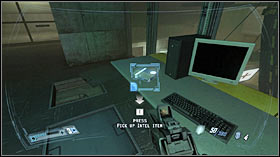
Second out of five
Testing reminder
Screen #118
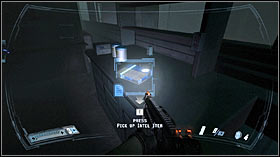
Third out of five
Combat testing
Screen #121
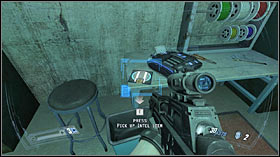
Fourth out of five
Threat report
Screen #130
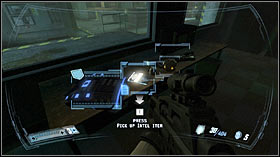
Fifth out of five
Lift problems
Screen #135
LEVEL 6 - RUIN
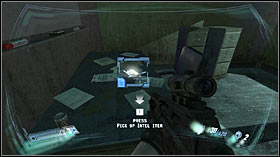
First out of three
Replica activity
Screen #142
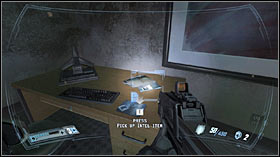
Second out of three
Civilian threat
Screen #147
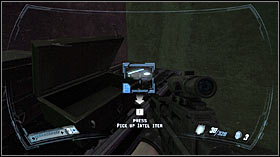
Third out of three
Powered Armor
Screen #152
LEVEL 7 - TOP
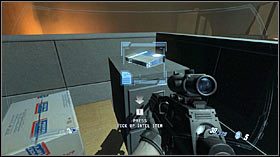
First out of two
EPA manual #1
Screen #160
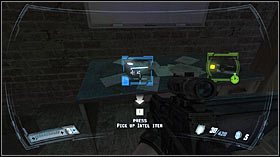
Second out of two
EPA manual #2
Screen #174
LEVEL 8 - ELEMENTARY
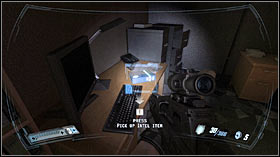
First out of four
Conference request
Screen #182
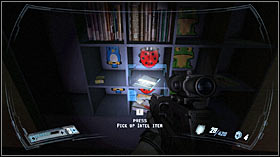
Second out of four
School attendance
Screen #184
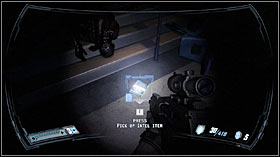
Third out of four
Status report
Screen #183
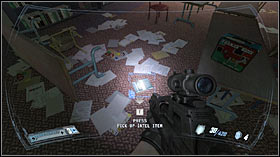
Fourth out of four
Event flyer
Screen #196
LEVEL 9 - NURSE'S OFFICE
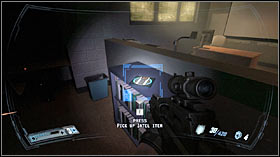
First out of ten
Updated schedule
Screen #211
Second out of ten
Student essay
Screen #212
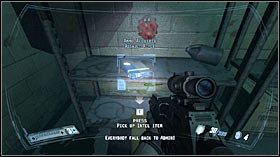
Third out of ten
Supplements
Screen #218
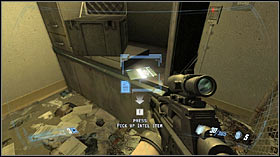
Fourth out of ten
Updated orders
Screen #225
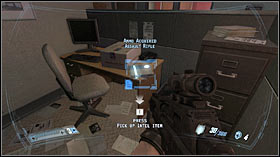
Fifth out of ten
Info: Ladybugs
Screen #226
Sixth out of ten
Info: Bluebirds
Screen #227
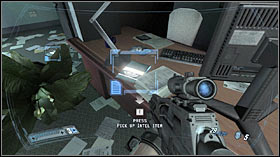
Seventh out of ten
Dress code
Screen #230
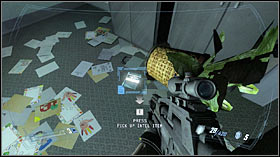
Eighth out of ten
Strange nightmares
Screen #230
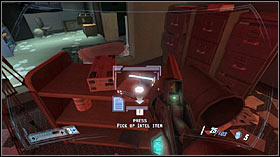
Ninth out of ten
Info: Treefrogs
Screen #234
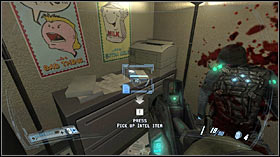
Tenth out of ten
PARAGON manual
Screen #235
LEVEL 10 - SNAKE FIST
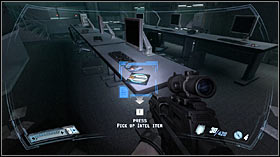
First out of seven
Elevator checklist
Screen #236
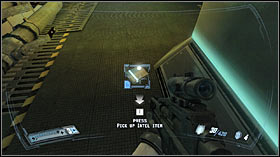
Second out of seven
Supplement notes
Screen #241

Third out of seven
Cancellation
Screen #241
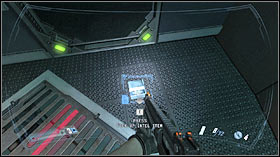
Fourth out of seven
PARAGON findings
Screen #245
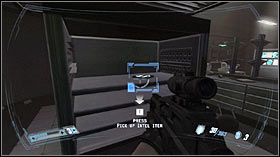
Fifth out of seven
Recommendations
Screen #249
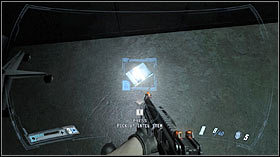
Sixth out of seven
Test results
Screen #256
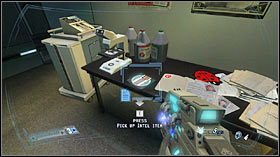
Seventh out of seven
I.M. transcript #4
Screen #259
LEVEL 11 - KEEGAN
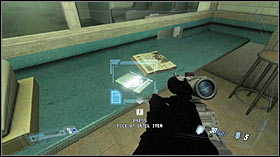
First out of five
Auburn woes
Screen #275
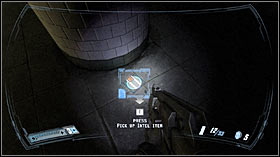
Second out of five
Electrical hazard
Screen #277
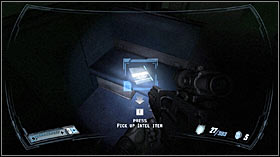
Third out of five
Line extension
Screen #286
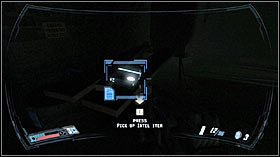
Fourth out of five
Supply report
Screen #292
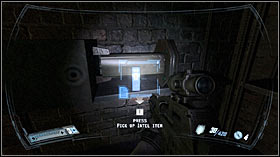
Fifth out of five
Laser manual
Screen #298
LEVEL 13 - APPROACH
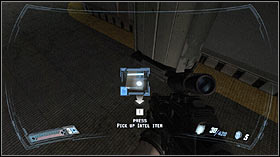
First out of seven
Replica brochure 1
Screen #315
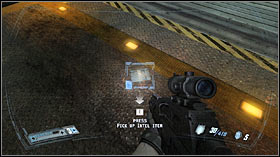
Second out of seven
STS guidelines
Screen #316
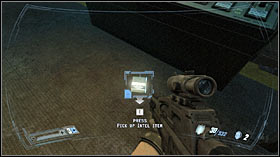
Third out of seven
Transfer notice
Screen #325
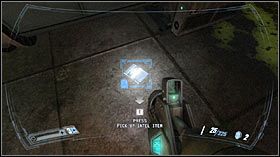
Fourth out of seven
Replica brochure 2
Screen #326
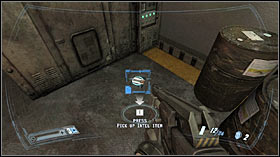
Fifth out of seven
Project roster
Screen #328
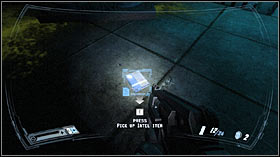
Sixth out of seven
Replica brochure 3
Screen #329
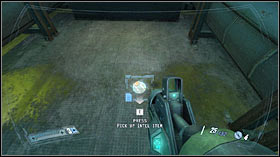
Seventh out of seven
Replica brochure 4
Screen #335
LEVEL 14 - CLIMAX
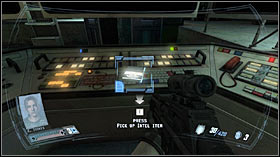
First out of five
Containing Alma
Screen #354
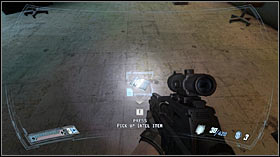
Second out of five
Situation update
Screen #355
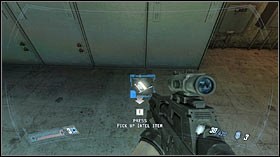
Third out of five
Power flow
Screen #355
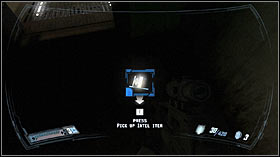
Fourth out of five
Music box
Screen #356
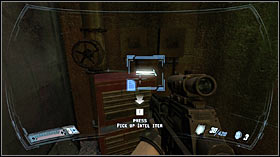
Fifth out of five
Emergency shutdown
Screen #356
Thirteen syringes can be found in the game world, so this means there's one Reflex Injector per level. The only exception is the introductionary first mission, because that's when you don't have special powers (slow-motions) yet. In order to find missing syringes you must connect the number to the actual screen in the main guide.
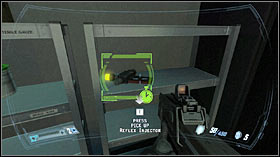
First out of thirteen
Level 2 - Awakening
Screen #43
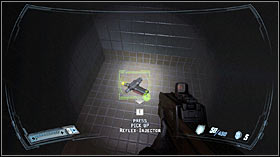
Second out of thirteen
Level 3 - Discovery
Screen #67
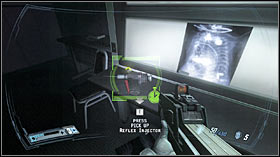
Third out of thirteen
Level 4 - Withdrawal
Screen #89
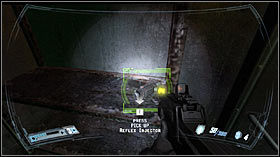
Fourth out of thirteen
Level 5 - Replica
Screen #117
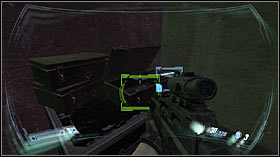
Fifth out of thirteen
Level 6 - Ruin
Screen #152
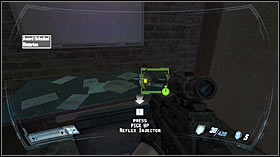
Sixth out of thirteen
Level 7 - Top
Screen #174
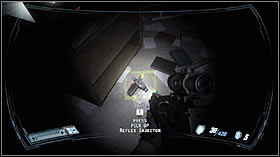
Seventh out of thirteen
Level 8 - Elementary
Screen #189
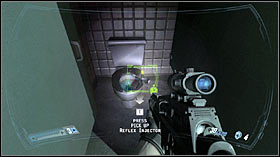
Eighth out of thirteen
Level 9 - Nurse's office
Screen #213
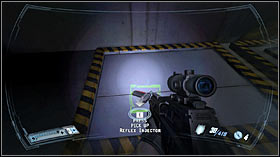
Ninth out of thirteen
Level 10 - Snake Fist
Screen #244
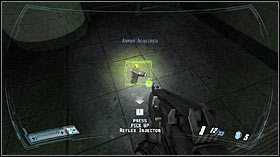
Tenth out of thirteen
Level 11 - Keegan
Screen #276
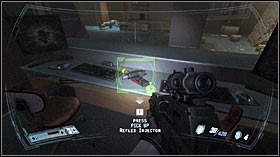
Eleventh out of thirteen
Level 12 - Epicenter
Screen #305

Twelfth out of thirteen
Level 13 - Approach
Screen #331
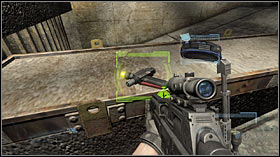
Thirteenth out of thirteen
Level 14 - Climax
Screen #347
ACHIEVEMENT NAME
REQUIREMENTS AND ADDITIONAL COMMENTS
ALL JUICED UP
Collect all 13 Reflex Injectors. Read the description in Reflex Injectors section if you can't find all of them on your own.
BAD ROBOT
Destroy two Power Armors during the same round (multiplayer, ranked matches).
BANK SHOT
Kill 10 enemy soldiers using special occasions. This can be achieved if you blow up a barrel or a canister, but you must make sure that it was the explosion that killed your foes. You shouldn't have any problems collecting this achievement during your first try in the singleplayer campaign, but you should know that there aren't too many exploding objects in the game world.
BLINDING TRUTH
Slice ten enemy soldiers with a laser cannon.
BLOODBATH
Kill 20 players during a ranked match (multiplayer).
CITY PLANNER
Destroy 100 targets with a Powered Armor suit (multiplayer, ranked matches).
COMPLETE: APPROACH
Complete Approach (thirteenth mission of the game).
COMPLETE: AWAKENING
Complete Awakening (second mission of the game).
COMPLETE: CLIMAX
Complete Climax (fourteenth mission of the game).
COMPLETE: DISCOVERY
Complete Discovery (third mission of the game).
COMPLETE: ELEMENTARY
Complete Elementary (eighth mission of the game).
COMPLETE: EPICENTER
Complete Epicenter (twelfth mission of the game).
COMPLETE: KEEGAN
Complete Keegan (eleventh mission of the game).
COMPLETE: NURSE'S OFFICE
Complete Nurse's Office (ninth mission of the game).
COMPLETE: REPLICA
Complete Replica (fifth mission of the game).
COMPLETE: RUIN
Complete Ruin (sixth mission of the game).
COMPLETE: SANCTUARY
Complete Sanctuary (first mission of the game).
COMPLETE: SNAKE FIST
Complete Snake Fist (tenth mission of the game).
COMPLETE: TOP
Complete Top (seventh mission of the game).
COMPLETE: WITHDRAWAL
Complete Withdrawal (fourth mission of the game).
CONTROL FREAK
Defend an outpost ten times (multiplayer, ranked matches).
DASTARDLY DISARMER
Disarm three C4 charges during a FailSafe match (multiplayer).
DEAD EYE
Score ten shots to the head using a sniper rifle.
DEADLY BALLET
Kill four enemy units during a single slow-motion session. I would recommend using a very powerful weapon. Also - try to earn this achievement only when fighting a larger group of hostile units.
DEMOLITIONS EXPERT
Plant three C4 charges during a FailSafe match (multiplayer).
ENLISTED
Advance to the rank of Private (multiplayer).
FINISHING FIRST
Become the best player three times in a row (rounds in a multiplayer match of your choice).
FIVE STAR GENERAL
Advance to the rank of Five Star General (multiplayer).
FLASH DANCE
Kill three players while being stunned by a shock grenade (multiplayer mode, ranked matches).
FOUR STAR GENERAL
Advance to the rank of Four Star General (multiplayer).
GOTTA CAP 'EM ALL
Take over an enemy outpost ten times (multiplayer, ranked matches).
HISTORIAN
Find 50% of all bonus items. Check the description in Items section if you want to find out where to look for them.
HOME WRECKER
Use 50 objects for cover. This applies to some of the objects from the explored areas, including desks, tables and sofas. Each time you want to use an object for cover you must approach it, wait for an icon to appear on your screen and press the action key to move it to a new position.
I'LL TAKE THOSE ODDS
Score more frags than deaths (multiplayer, ranked matches).
KISS THE COOK
Roast 10 enemy units with a napalm cannon.
MVP
During a ranked Blitz match be the only player in your team to capture a PHLAG (multiplayer).
MONOGAMOUS FRAGGER
Kill the same player five times (multiplayer, ranked matches).
OFFICER AND GENTLEMAN
Advance to the rank of Second Lieutenant (multiplayer).
ORACLE
Find all 76 bonus items. Check the description in Items section if you want to find out where to look for them.
PAPARAZZI
Find 25% of all bonus items. Check the description in Items section if you want to find out where to look for them.
RAINING MEN
Kill four enemy units using a single grenade. I would recommend trying to earn this achievement in confined spaces.
SNAKE FIST!
Kill ten enemy soldiers using hand combat. You should also try this one in smaller rooms, because it's going to be easier to get to your foes without getting shot. Don't forget to use slow-motion to increase your chances of a successful approach.
STALKER
Find 75% of all bonus items. Check the description in Items section if you want to find out where to look for them.
STICK AROUND
Pin ten enemy soldiers to a wall using a Hammerhead.
SUICIDAL TENDENCIES
Commit suicide five times.
THE MAD CAPPER
Capture a PHLAG ten times (multiplayer, ranked matches).
TIME WELL SPENT
Spend eight hours playing in multiplayer mode (ranked matches).
UNTOUCHABLE
Survive the entire deathmatch (multiplayer, ranked matches).
VETERAN
Finish all fourteen levels of the singleplayer campaign on the highest difficulty setting.


 Farming Simulator 2013 Game Guide & Walkthrough
 Final Fantasy XIII Game Guide & Walkthrough
 FIFA 14 Game Guide & Walkthrough
 Farming Simulator 15 Game Guide & Walkthrough
 Fallout 3: The Pitt Game Guide & Walkthrough