

This Bloodborne guide will contain the walkthrough over the main single player campaign and the description of all the side quests as well. You will also find here the description about abilities and the armament available to the character which you may control. Additionally the guide will also describe all the playing modes, essential to complete the game tips, all the enemies and bosses which you will meet during the game with their advantages and disadvantages. The final part of this book will be the illustrated description of all the secrets and the list of achievements enriched with the instructions how to unlock them. Bloodborne is an action RPG with the third person perspective view. The game was developed by the From Software studio known for the few parts of Armored Core and best known for the Dark Souls series or the Demon's Souls game. Bloodborne is spiritual successor to the Dark Souls series. It has a heavy fantasy setting focused on Yharnam, a place possessed by a mysterious plague which transforms human beings into monsters. Just like the Dark Souls games this game has an extremely high difficulty and punishes a player for even the tiniest mistake. Even though this game is focused on its action elements it still has a very strong RPG taste.
The Bloodborne guide contains:
Norbert "Norek" Jedrychowski ()

Moving

Controlling the camera

Quick attack

Mighty attack (hold to charge)

Transform a weapon / Transformation attack

Attack with a weapon from your left hand / Attack with firearm

Recover a Quicksilver Bullet (uses Hit Points)

Choose a left-hand weapon

Choose a right-hand weapon

Choose an item

Use a Blood Vial (recover Hit Points)

Use a selected item (throw)

Interact

Dodge/turn/bounce
Hold = Sprint

Lock the camera on an enemy

Gestures/Personal effects

Equipment/Statistics/Options
Bloodborne is a difficult and complicated game and its path branches out in many ways. Because of that it is rather impossible to choose one perfect way to complete the game. You may visit some areas earlier than I have described describe although this guide was constructed in a way which allows you to visit every location and every place in every area and to help you unlock the best shortcuts which will allow you to travel fast if you will die.
The walkthrough has been divided based on the areas and in the next order on the key plot events which will unlock for you the further part of the game such as defeating the boss. The description of defeating the main opponents was located in a dedicated chapter. Specific game mechanics have also been divided among the subchapters.
Items described in the guide are mostly related to the loot which can be found next to the bodies located in every location. The items which will reward you for defeating your enemies are mostly random and are related to one of the character's attributes.
In the Bloodborne game guide the following color indications has been used:
 The character creator.
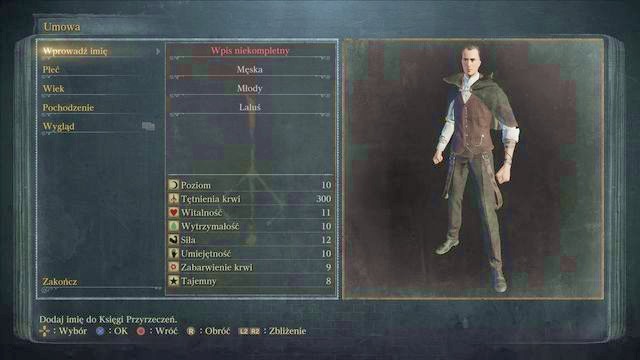
Right after the beginning of the game you will be able to create your character. You may choose its name, sex, appearance or age although these features will not change the gameplay. The first important choice is its origin which will result in some of the character's stats. Read carefully every origin which you are interested with since during the first few hours of the game it may have a great influence on the gameplay (for example because if increasing your durability or Hit Points). In the further part of the game you will be able to increase every attribute you want by collecting the Blood Echoes.
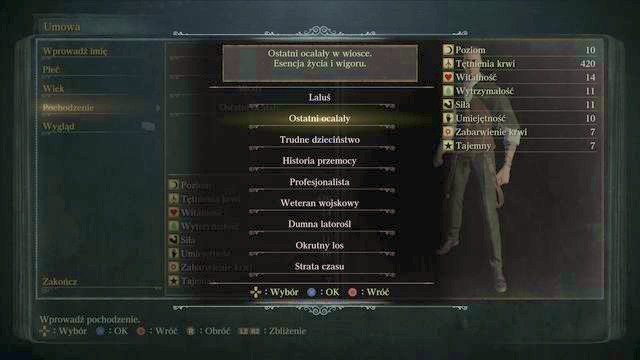 At the beginning of the game your attributes will be modified by the origin which you will choose.
 Troublesome wolves
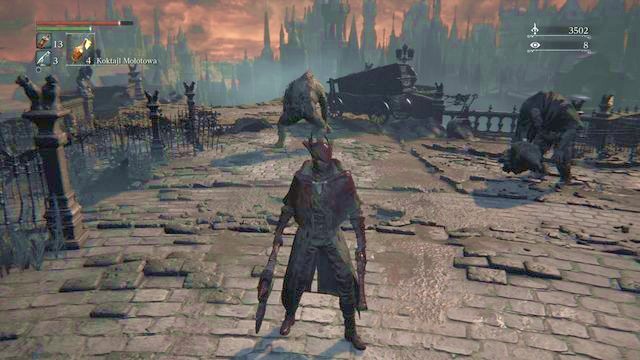
Shortly after beginning the game, you will reach a place where two Wolf Beasts are blocking your way across the bridge. At this stage, fighting them may cause you a lot of trouble. The thing is, the enemies are on your way to a gate that will provide a nice shortcut if you open it. However, there are two ways of going past them.
 The ladder in the sewers, leading to the lift.
1. Going through the sewers (a longer and more dangerous way). When standing before the bridge, you can turn left (down). Destroy the crates on the left to unlock the way and jump down into the sewers using a few wooden platforms. Now you have to walk quite a long way straight forward, then left (in the place where you jump to the bottom). There is a Giant Boar in the tunnel so choose the ladder on the right. Go up and use the lift to the left of the bridge. Now walk straight, go past the enemies and open the door at the end of the path. Run through the building and open the gate to unlock a shortcut. To get to the other side of the bridge again, you just have to go back to the building, to the first floor and use the stairs on the left to go higher. You should have the Wolf Beasts on your right.
2. Go past the Wolf Beasts (a much easier way). A bit farther, turn left (an enemy will jump out) and enter the house. Downstairs, open the door on the left and leave the building not minding the enemies. Go up the stairs (to the right) and open the gate. Now you can go back to the building that you've seen before and eliminate the enemies. On the first floor, you will find stairs leading to the bridge and the Wolf Beasts shouldn't attack you. If the Beasts are aggressive, go back to Hunter's Dream, teleport to the lantern near the shortcut that you've unlocked and run to the bridge through the building. You will have the Wolf Beasts on your right and the path on the left should be clear. This strategy is a lot easier. You just have to quickly run past the enemies.
 The werewolves have a tendency to block in tight passageways
3. This tactic is connected to the previously mentioned way. When the werewolves will run after you, they will lock in the door of the house below. Now you can easily finish both monsters.
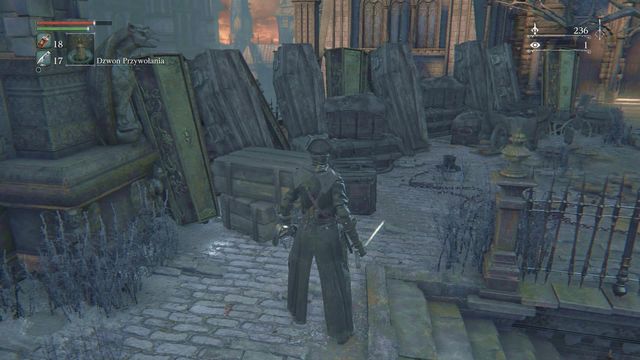
4. On the previous court with a fountain you can get off the main path. To do it, before the road to the fountain walk to the group of coffins seen on the screen. Destroy them to unlock passage below. There kill dogs, including the ones in cages (they can get out of it) and turn left. A while further you can walk to the stairs on the left or stay on the right side - pick the second option and go directly to the building. Open the door and quickly walk out through the next one, then use the stairs to get up - from this side, you can open the gate that leads to the Central Yharnam lamp.
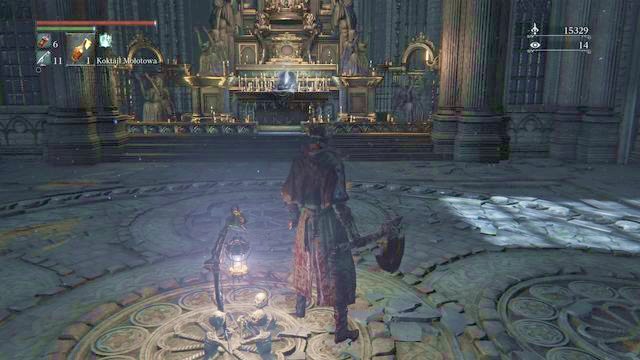 Walking to the altar will change the day time and will give you access to the Forbidden Woods.
After defeating the Vicar Amelia and walking to the altar you will push the story forward. You will be able to go to many different places, including Lecture Hall and then Nightmare Frontier. But to safely travel to those places, you will require a special item called Tonsil Stone.
Important: You can reach the lower part of Lecture Hall from above, you will be given access near the end of the game, but visiting this location is possible without having the Tonsil Stone.
 One of the houses in which you can receive the Tonsil Stone.
To receive the Tonsil Stone you must defeat Vicar Amelia and visit the Forbidden Woods - at least open the passage. Then you will receive this item in each house in front of which door or window a red lantern is placed. But there is one condition: you won't receive the stone in house in which there were NPC's whom you have sent to safe place ("no response" dialogue). It means that, for example, if you have sent the old woman to the chapel you won't find anyone in her window.
You shouldn't worry about it too much as there is more than enough of such houses. Here is a few examples (you will receive the Tonsil Stone always during your first conversation):
- Cathedral Ward - turn right before the Grand Cathedral, to the spot where two hunters are fighting.
- Forbidden Woods - after reaching the village (before the gate) move slightly to the left, up, where a single house is standing.
- Hemwick Charnel - house between the first elevator and the fire.
In addition to these location, you can search for the stone in places where you haven't sent anyone to the safe spot: Gilbert, Viola's Daughter, Lonely Old Woman, Arianna or Skeptical Man.

With the stone in your pocket move to the Grand Cathedral and then turn maximally to the right. At the end of the road you will enter a building and find yourself in a large room. With the Tonsil Stone you can get close to the door and enter the portal seen on the screen (it moves near the door) - only if you have the stone you will be transported to the Lecture Hall (otherwise don't enter the portal as you will simply die).
Important: If you have 40 Insight you can see who is transporting you to the Lecture Hall. It is a creature that looks similar to the boss from the Nightmare Frontier.
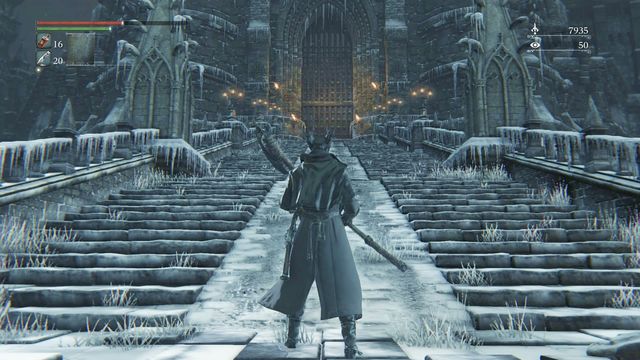 Entrance to the castle.
Castle Cainhurst is a very climatic and well hidden location. It is not mandatory but every hunter should visit it. To reach the castle two things are needed:
- defeating a boss, Witch of Hemwick in Hemwick Charnel
- having the Cainhurst Summons found in Iosefka's Clinic
To be able to visit Iosefka's Clinic again you must defeat Vicar Amelia so in fact you can get to the Castle Cainhurst only after that.
 Road that leads to the cave.
First you must get the Cainhurst Summons. After the battle with Vicar Amelia go to the Forbidden Woods. Inside, after some exploration you will reach the village (a small wall and gate, trap in front of it). Then go slightly up, to the left. Then, after some cages with dogs you will find a turn that leads to the cave. In front of the entrance (at the bottom), on the other side you will find exit and a ladder. It leads to the Central Yharnam and then to the Iosefka's Clinic.
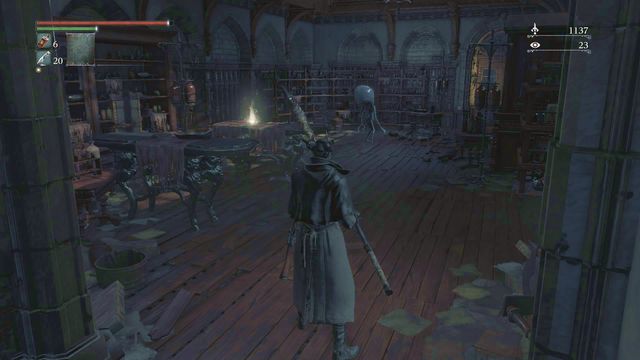 Invitation can be found at the place where you begin, ahead from the window entrance.
When you're inside (after entering via window), turn right. You will go to the place where the game begun. There you will find a single enemy and Cainhurst Summoning lying on the bed, addressed specifically to you.
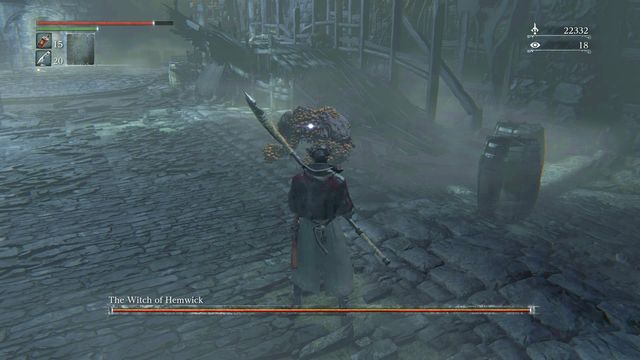 Witch of Hemwick must be defeated in order to activate the possibility to travel to Castle Cainhurst.
Next step is to move to Hemwick Charnel. It can be found on the left side of Grand Cathedral in Cathedral Ward, after you pass through the forest. Explore the location and then kill the boss, Witch of Hemwick.
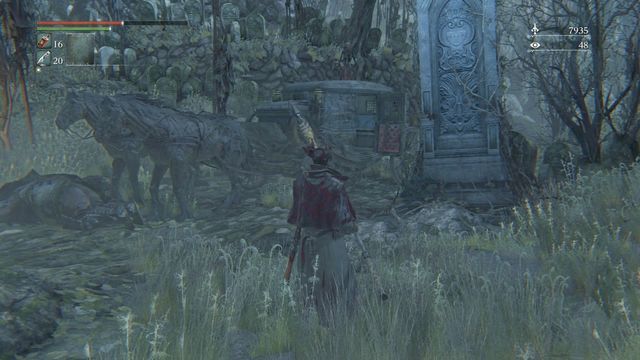 Place from which the carriage rides in Hemwick Charnel.
After you met all requirements return a bit back from the place where you fought the boss. You will find yourself on a large plane where two-three enemies with cleavers are. After defeating them walk to the obelisk in the middle. You will activate a cutscene during which a carriage will arrive. Enter it and you will be transported to the Forsaken Castle Cainhurst.
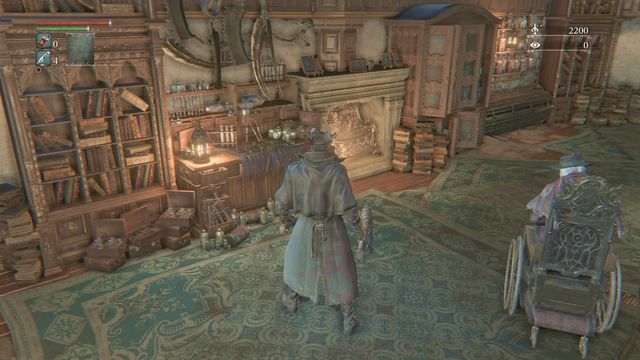 Weapon upgrades, including to the final level, are done in Hunter's Dream.
Each weapon can be upgraded up to level 10. To increase the amount of damage dealt to maximum level you will need a special item. There is only one in the game, so think a lot about which weapon you like the most and upgrade that one.
Important: You should equip a lot of Sedatives, additionally it will be much easier with Deep Sea Rune which greatly improves frenzy resistance.

Start with moving to the Mergo Loft: Middle lamp. Then use the exit ahead and go upstairs. At the end you will find two elevators. The one on the right is interesting you, the one with damaged cage. When you use it to ride down you can go out of it and get to a small window (screen). You must do it accurately, when you're almost at the level of that window (it seems to be easier done when riding up). If you jump too early or too late you will fall down and die.
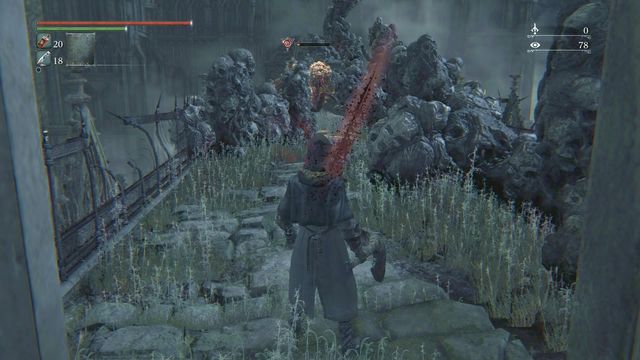 Immediately after entering the bridge you must watch out for your frenzy.
After a successful jump you will get to a small corridor. Walk a while and take Inflicted Organ. Now your task is to run through the bridge, between rocks where a "brain" is that increase frenzy. If you will be quick enough and have large frenzy resistance, you can try killing it. Otherwise it will be too hard as you probably won't manage to drink Sedatives and you will be captured by enemy (he spreads his hands trying to catch player). It is possible to quickly run near him (look around for Kin Coldblood in the body under the barrier on the right). When you reach the round tower on the wall you will be safe for a while.
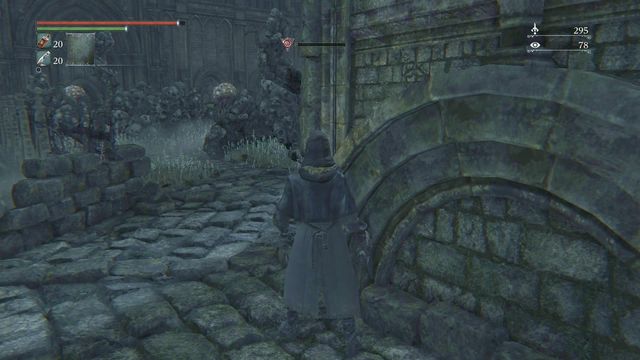 It is easier to bypass enemies.
But only for a while as not far further you will find two similar enemies. This time it is much easier to run near them as at the end there is a chamber to which they won't follow you.
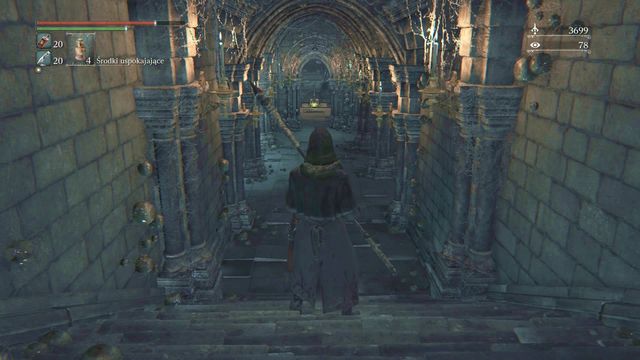 Use the lever to throw the brain down.
You're not alone inside - few spiders will attack you. Luckily, if you're not moving too fast, you can kill some of them one after another. Finally jump down (another spider on the way) and use the lever at the end if the road. A short cutscene will start, after you regain control of your character jump to the lower chamber through the hole in the wall.
 You're safe on the bridge, collect many items.
At the bottom go back a little and exit the chamber. On the bridge you will find some bodies and inside them Arcane Damp Bloodgem and 4x Great One's Wisdom. Then walk down the stairs - here you will find (on the left) another Damn Bloodgem and (ahead) Madman's Knowledge.
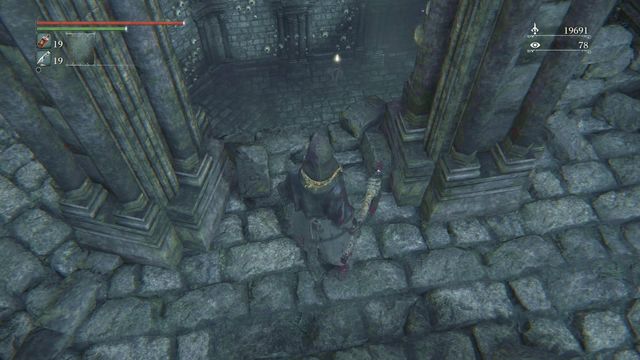 Carefully jump to lower level to acquire Blood Rock.
Most interesting item can be found on the right, behind columns. At the bottom you will see a stone platform on which you can jump (more to the left side). You will lose some health points but it is worth it - in the body under the wall you will find the Blood Rock you're looking for that allows for maximum weapon upgrade.
You will leave the room through the hole in the wall, from the bridge you can go to the castle.
Important: If at the beginning you haven't thrown the brain down now he will be here, blocking the way.
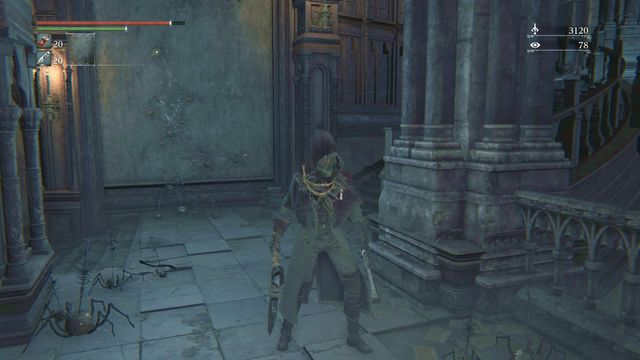
You can get to the bridge from which you get to the body with Blood Rock also from inside the castle. In that case, from the Mergo Loft: Middle lamp go to the place where you fought Micolash and to the mirror behind the bridge. Then walk down (to the left near the mirror) and then straight to the exit from the fogged territory. On the bridge you will face two enemies. Then in the place shown on the screen (crossroad) don't walk down, instead from the stairs go down the corridor.
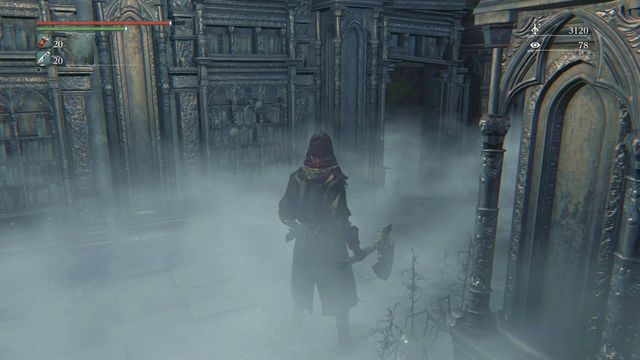 Small corridor that leads to the bridge.
Through the fog you will go twice to lower level. Then at the bottom you can turn right and or left. Choose right and them go along the wall on the left. After a short while behind the turn you will see a small alcove and a gate at end of it. You will open it with the Iron Door Key.
Important: If you don't have that key go to the place where you fought Micolash (three clouded levels, mirror on each) and walk to the bottom where you will find the key.
 Closed door leading to Upper Cathedral Ward.
After the battle with Blood-Starved Beast you unlock the passage to Healing Church Workshop. There, at the top, you will face locked door. To unlock it, a key is needed. You will find it in Yahar'gul - move to the Yahar'gul Chapel lamp (after defeating Rom, the Vacuous Spider).
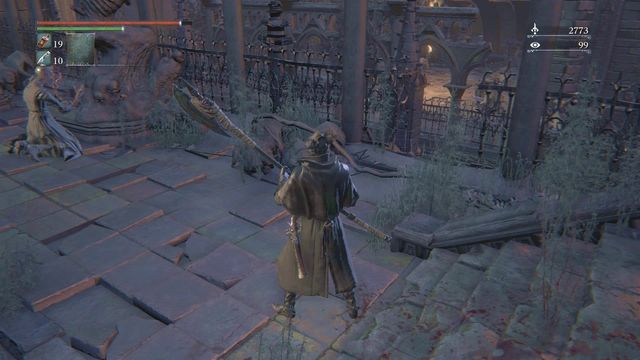
Then, in the chapel, return towards the stairs. Use them, avoid the laser shot by a monster similar to Amygdala. Then go near the left side of the fence. You will find a gap in the place shown on the screen, there you can jump down (carefully).
 Near the body you will find the key you need.
On the balcony you can take the Frenzied Coldblood. Walk inside (two enemies) and then jump to the locked cage at the bottom. Near the body you will find Key to Upper Cathedral and from the inside you will easily open the gate.
With the key you can return to the top of Healing Church Workshop and open the previously locked gate.

As you are playing, each weapon that you use will wear with time. There is a special statistic to each one of the weapons (Durability), whose value depends on the weapon type. While you are killing opponents, the durability of the weapon declines. At some point, if you forget to repair your weapon, you receive a message that the weapon is worn. From now on, you will be dealing much less damage that gradually keeps going down, if you do not fix the weapon.
 The workshop in the Hunter's Dream
To do that, you need to return to Hunter's Dream. There, approach the workshop (at the wall on the right), and pick the "Fix a Weapon" option. Depending on the damage made to the weapon, this will cost you a varying number of Blood Echoes. Durability of the weapon will be restored to its initial value and you will be able to deal maximum damage with that weapon. Weapons are automatically repaired after the weapon is upgraded.

IN the very same location, you can upgrade your weapons. The first type of upgrades is leveling the weapon up. This means that, e.g. in the case of the Threaded Cane, the most immediate upgrade is Threaded Cane +1, Threaded Cane +2 and so on, up until level 10. You need to pay Blood Echoes and several stones that allow upgrades, for each upgrade. With higher level comes higher damage dealt. This is why, weapons should be upgraded on a regular basis, with your progress into the game.
Required stones:
At levels 0-2, you need Blood Stone Shards
At levels 3-5, you need Twin Blood Stone Shards
At levels 5-9, you need Blood Stone Shards
For level 10, you need the unique Blood Stone Chunk
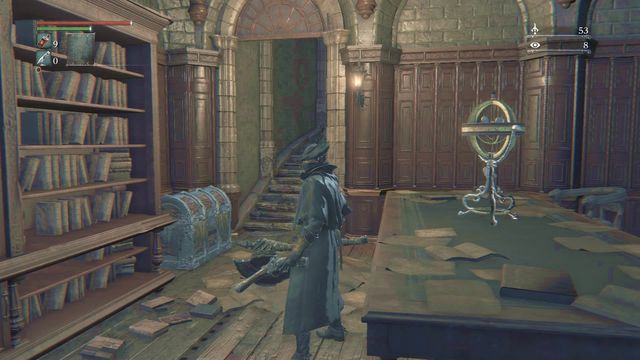 This is where you find the Blood Gem Workshop Tool .
Apart from leveling weapons up, you can also fortify them with Blood Gems. For this to e an option, you first need to defeat father Gascoigne and gain access to Cathedral Ward. Along your path to Oedon's Chapel, from the arena, in the chest you find the Blood Gem Workshop Tool. With the tool in the workshop, you can implement upgrades.
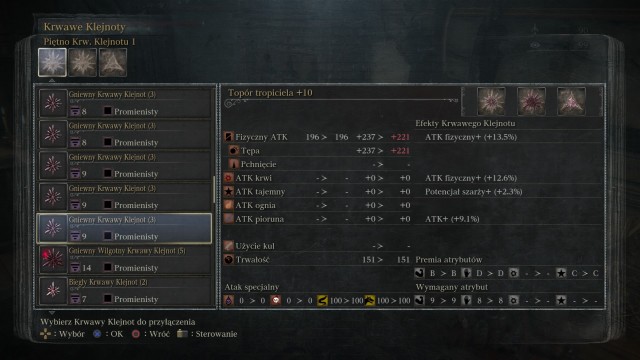 The weapon upgrade screen for Blood Gems
You obtain Blood Gems in various locations around the game world, in chests or after you defeat On the lower levels of Chalice Dungeons, you can also find the strongest of gems. Characteristic elements for gems are, mainly, the type (one of five, you can place a different gem combination in every weapon, e.g. two radiant and one triangle - you can tell the difference by the icon that represents each gem), level (1-20, the higher the level, the more potent the gem), effect (e.g. increased physical attack, decreased endurance cost of an attack, or adding the effect of slow poisoning to the weapon).
To use the gem, go to the workshop and pick the "Fortify with Blood Gem". Then, pick the weapon and the gem slot (their number depends on the level of the weapon (+1, +3, +5), up to three slots). Then, from the list of the available gems, pick the one that you want to use and pay attention to the effects (they appear on the right side) as well as the effect on the individual statistics (they appear in blue or in red - depending on the gem that you applied earlier). Then, accept the gem and it will be combined with the weapon automatically. At each point, you can change gems in the slots. They o not wear and replacing them does not cost you Blood Echoes.
Some gems can only be used for right-hand weapons, whereas others can only be used with left-hand ones. Also, there are universal ones.
 With 1 Insight point, you animate the doll, which allows you to level up.
Regardless of the Origin that you pick at the very beginning, you receive a character at level 4 or 10. To progress to the next level, you need, at least, 1 Insight point- the fastest way to obtain it is find Cleric Beast (you need to enter the arena) . This animates the doll in Hunter's Dream, who you can talk to (the "Blood Echoes Transfer" option). This will allow you to level up your character. The level goes up by 1, each time you fortify your abilities - this means that it is not the level that goes up and the individual abilities. Your level represents the sum of all the abilities. This means that each successive fortification is going to cost you more, regardless of whether you are raising the level of the ability from 5 to 6, or from 30 to 31. You need to remember that you should not spend too many points on abilities that may not be as useful in this build.
 Due to the "Soft cap" you never get much stronger than your opponents.
While upgrading, you need to remember about "Soft cap" and "Hard cap". They represent the individual boosts that you receive, while upgrading the specific ability. This means that from a certain moment, for each point that you spend on a specific ability, you receive maximum boost (e.g. +25 health points). From a certain point (at which you reach the level of the "Soft cap"), for each point that you spend, the number of health points will be lower, up until you reach the "Hard cap" level, which is the maximum level for the statistic. In Bloodborne, there are two "Soft cap" levels. After you reach the second one, it becomes completely unprofitable to invest in the ability.
Statistic
"Soft cap" 1
"Soft cap" 2
"Hard cap"
Vitality
30
50
99
Endurance
40
50
99
Strength
25
50
99
Skill
25
50
99
Bloodtinge
25
50
99
Arcane
25
50
99
Remember - up to the level "Soft cap" 1, you receive maximum bonuses for upgrading a given ability. Between "Soft cap" 1 and "Soft cap" 2, this boost will be lower, and above "Soft cap" 2, it will be nearly imperceptible. "Hard cap" means the maximum level of a given ability.
At the beginning of the game, it vital to own an appropriate number of Blood Vials. They are dropped by various opponents, in Yharnam, however, there are locations, where you can farm vials, i.e. obtain a larger number of them, relatively quickly. Later into the game, it should be easy for you to obtain them but, in at least two initial locations, it is a good idea to spend some time on getting the right amount, before you head on.
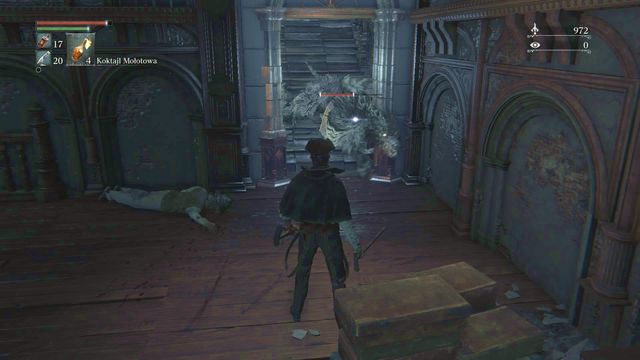 Werewolves tend to get stuck in narrow passages
To obtain Blood Vials, you first need to unlock the gate to the left of the lantern in central Yharnam (see the Walkthrough to learn how to do that). Then, with this point as the starting point, you can go down to the building below, and kill two opponents along your path. Then, above (two more opponents), you find a bridge access. On the right, there are two werewolves. Attract their attention and escape back into the house. The opponents will get stuck in the doorway, where you can kill them easily. You receive several vials for that. Then, exit and go left - there, among crows, you find another bigger opponent that drops vials. Finally, return to the house and cross the exit to the right. As you go down, go left a bit, where you find two more such opponents, in the yard.
 Allow the rolling ball to squash the opponents and dodge to the side, at the right moment
After you kill them, if you have unlocked the lift, you can enter the bridge, where you can have the flaming ball kill the opponents. Then, deal with the bigger opponent at the other end of the bridge. Climb up the stairs, on the left, where you encounter two, quite strong, opponents. For killing them, you receive more vials. This route, depending on your current level, should last 5-8 minutes and the number of the Blood Vials that you receive is going to be 15-20. If you find it difficult, you can focus on the werewolves at the beginning, which you will easily defeat, after they get stuck in the doorway. Taking the route several times will allow you to amass quite a few vials.
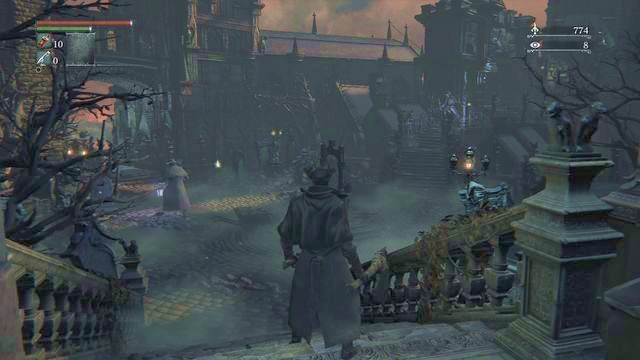 The beginning of the route.
Another location, where you can quickly get a higher amount of vials, and also quite a few Blood Echoes, is Cathedral Ward. The path is as follows:
1. Exit the chapel through the door on the left, two opponents in the yard.
2. Climb up, defeat the giant.
3. Go left, where you find two bigger opponents, one of them turned away.
4. Then, on the right, you find another giant, with a ball.
5. Return to the stairs and go to the main yard - there, you find two more giants, you can fight them one-by-one.
6. Cross the gate, at the foot of the stairs, kill two opponents and the vicious dog.
7. Then, take the stairs to the right, kill two more opponents past the gate, who are standing next to the bonfire.
8. Climb down and walk into the chapel.
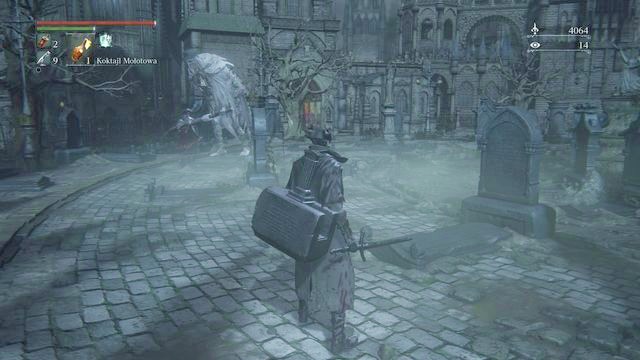 The giants at the beginning are the most difficult to defeat, but they also drop 3 vials.
Thanks to this route you can obtain quite a few Blood Echoes, as well as blood vials, which are dropped mainly by the bigger opponents and giants. At first, you may have problems defeating all of the opponents, but after you master the way to fight them, you can do the beat within several minutes and collect valuable supplies.
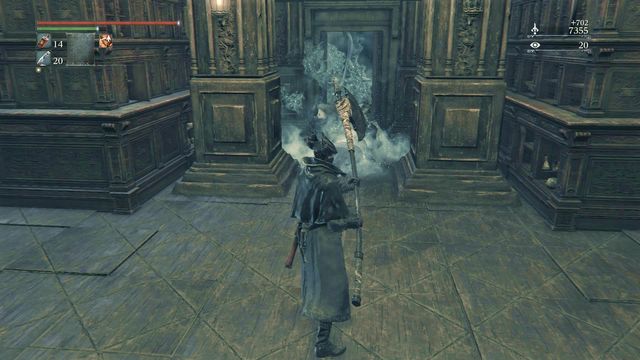 Keep the opponents at the door, which makes them easier to defeat.
You can obtain some Quicksilver bullets in one place, after you defeat Vicar Amelia, obtain the Tonsil Stone and go to Lecture Building. There, in the lecture room on the left, find the Lecture Room Key, which opens the door opposite, on the right of the main corridor. Inside, there are a plethora of opponents, but they get stuck in the doorway, which will make it easier to defeat them. Thanks to this, you obtain several bullets and many Blood Echoes.
With your progress, obtaining Blood Echoes will become more difficult. Although the locations mentioned here are perfect for that, for the majority of time, due to the ease to defeat the opponents (later), this may be not enough, later into the game.
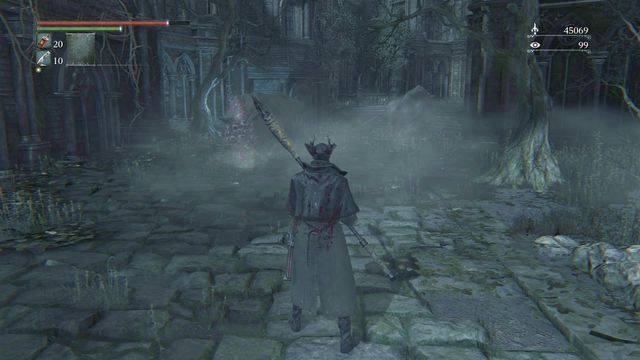 It is necessary that you time well the moment, at which you can lure one of the pigs away, and remain out of the other one's reach.
You can then visit Mensis Nightmare. Starting with the lantern Mergo Flat: Center climb up and go left, then. You encounter three opponents that resemble Shadows of Yharnam. Climb up the stairs and in a moment, you run up into a wild pig. After you kill it, go ahead, where you are attacked by two more (it is possible to lure one of them away and fight them one-by-one, which makes things easier). Finally, at the end, defeat more "Shadows". There are 4 groups of enemies to defeat, in the case of this route. For this, you will be rewarded with several Blood Vials and quite a few Blood Echoes.
There are two ways, in which you can get to Yahar'gul, The Unseen Village. The first one is visiting the village earlier than it is required by the plotline. You can then only access the part of the village called the Underground Jail.

For this to be possible, you need to defeat the boss at the Old Yharnam, Blood-starved Beast. After you do that, in several locations, you will encounter opponents of a new type ((the screenshot), with bags on their backs. These bags are used for capturing you and the opponents are very strong. At an early stage into the game, they will easily kill you. And this is the point! Unusually, after you are killed by the opponents, you do not respawn in the location of the last lit lamp. Instead, you will respawn in the cage inside the Underground Jail.
Some of the locations, where you can encounter the "catchers":
- after you leave Odeon's Chapel (the entrance is across) go right before the stairs, as much as possible, towards the building. The catcher is lurking in the corner,
- at the Cathedral ward, on the right side of the chapel where there is the entrance to the Old Yharnam,
- in the lower part of the workshop, in the Healing Church,
- in the Forbidden Woods, in the upper part of the village.
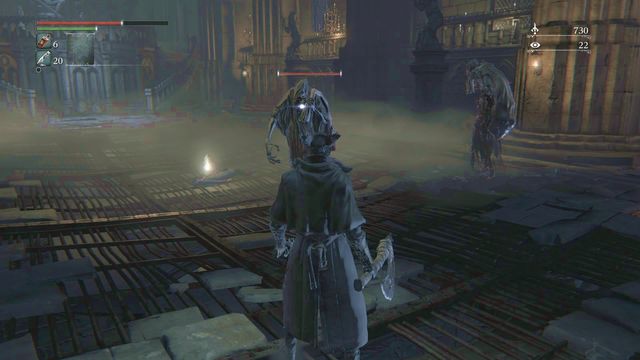 In groups, catchers are immensely strong, in case of any problems, you can return here later.
This location is swarming with strong opponents. If you have traveled to the village early into the game, you may have hard time here. To be able to return here, it is a good idea to exit the cage, right after you wake up, and climb up the stairs, where you can light the lamp at the altar. It remains lit, up until you have killed Rom, the Vacuous Spider. After you defeat him in Byrgenwerth, you will not be able to use it anymore.
Note: In the village, you can find Adella, who is connected with a side quest. If you want to save her, by telling her about the safety, you need to do this, before you fight Rom, the Vacuous Spider. Some of the items that you find here, during the first visit, are the same as the ones that you find later on - if you miss something, you will still have one more opportunity to visit here.
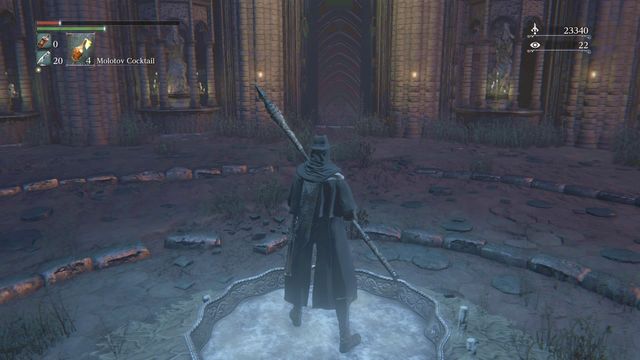 After the fight with Rom, The Vacuous Spider, approach the lakeside and you will be teleported directly to the Yahar'gul, The Unseen Village entrance.
The location itself will not be much different - all the some opponents disappear and they are replaced with other. After you defeat Rom, the Vacuous Spider, you gain access to the entire Yahar'gul, The Unseen Village. The entrance is on the right-most side, in Cathedral ward, you need to take a turn before the Church. In the spot, where you could earlier access the Lecture Building, there will now be opened door - this is the actual entrance to Yahar'gul.
 The gate across which you access the main yard.
After you defeat Father Gascoigne you will walk into the Cathedral ward. As you exit the cathedral through the left exit, and turn right, you make it to the large locked gate, after you climb the big stairs. Opening it is necessary to access the main yard and then, the rest of the locations. There are two different ways to open the gate.
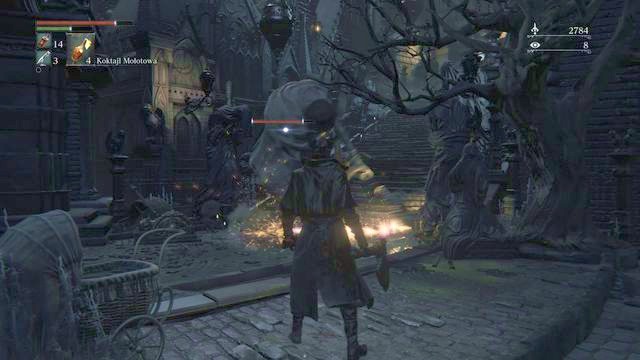 The bigger the opponents, the more Blood Echoes.
The first one is not too demanding, nor time consuming. First of all, you need to defeat the Cleric Beast, the boss on the Great Bridge. You then receive the option to buy the Sword Hunter Badge from Messengers, in the Hunter's Dream. After you buy it, you can use it to open the gate. The only problem at this stage, is the price of the badge (10000 Blood Echoes). If you run out of opponents, you can respawn them, by returning to the Hunter's Dream, and back to Cathedral ward. You also receive lots of cocktails for killing the large opponents, which is why killing them is highly profitable. After you have collected the amount, effect the purchase.
 The balcony that you get to, after you use the lift - by jumping off it, you open all the gates.
As a matter of fact, you do not need to open the gate at this side, which would require you to spend your Blood Echoes. This method is the easiest and the fastest, but there also is an option to open the gate at the other side. To do this, you need to visit Old Yharnam, where you need to defeat the Blood-starved Beast. This is when, at the Odeon's Chapel the door on the right will swing open - it leads to the Healing Church Workshop. After you jump off it, o the very bottom, and go left at the intersection (after you leave the building) you find a lift to Cathedral ward. Climb down from the balcony that you get to and open the nearest gate, and then another two, including the one leading up to the central yard.
Losing your life in Bloodborne is something natural and does not mean that you will lose the game. Death causes some annoying consequences although they are not cumbersome enough to significantly hinder your game.
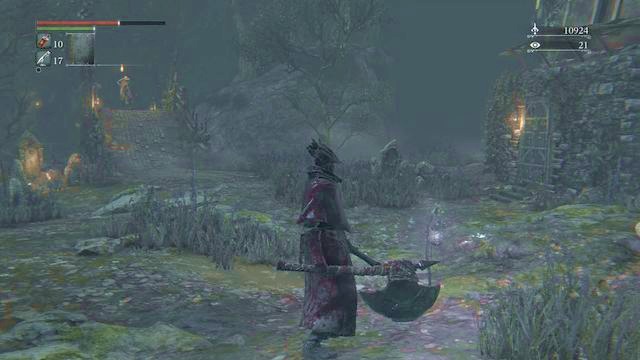 The place where you turn on a lamp allows you to both respawn here and to use the fast travel option.
You will die every time when you will lose your Hit Points (the red bar in the upper left corner) irrespective if it will be caused by the damage dealt by your enemies or if you will fall from a high altitude. You may restore your Hit Points by fighting with the enemies ("Regaining") or by using the Blood Vials. If you will die you will reborn in the last place in which you have turn on the lamp. Lamps are in many places in the areas where you will visit. You can fast travel from them and to them from the Hunter's Dream area. While visiting a place remember to always turn on a lamp to unlock the fast travel option.
 You will find the Blood Echoes in a blood stains on the ground in a place where someone died earlier on.
Your death will also affect your collected Blood Echoes which are the in-game currency (thanks to it you may receive new items and increase your character's level). Echoes reflect your progress in developing your character however if you will die you will lose all the Echoes you have gathered. It doesn't mean (yet) that you can't get them back. In a place where you have died you may find a stain of blood. Interact with it to receive all the Echoes which have belonged to you. If you will succeed you may consider your death unimportant since you will not suffer any special penalty from it.
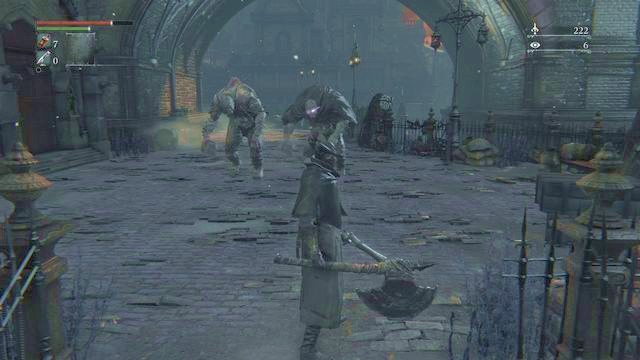
This process may get a little bit more complicated since some of the blood stains may not appear in a place where you have died. It will happen when the enemy responsible for your death will take the stain over. To receive your Blood Echoes you have to take revenge and kill the enemy which eyes have a specific purple light (compare to the screenshot above). Sometimes it will be quite difficult especially if you will have to find him in an area located far away from your respawn point since every enemy (beside bosses and hunters) will face you again. If you will die again without collecting your Blood Echoes you will lose the previous amount for ever. That's why it is beneficial to return sometimes to the Hunter's Dream area and use your extra currency to buy some items or to level up.
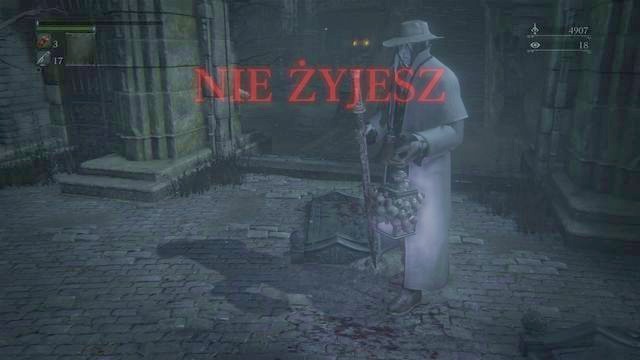 Death is not that scary.
In conclusion the death will result in:
In Bloodborne, you can perform several special attacks. These actions are not only nice looking, but also make the gameplay easier for you in a lot of situations. You should learn when can you use the attacks to quickly and more effectively kill the enemies.
A very useful move that allows you to immediately stop an enemy attack and stun him. You can perform it on enemies that are of similar size as the hero. In the case of larger enemies, stunning them using guns may be impossible. A rifle is better for doing that than a pistol, because of the shot dispersion. In both cases however, the action is the same.
1. Approach the enemy from the front and aim at him.
2. Wait until he starts to prepare his attack. It is usually signalized by raising the weapon above the head.
3. Shoot ([L2]). If the enemy kneels down, it means that the attack was successful and if he continues to attack, you were slightly late. It is important to shoot when the enemy is in the process of performing his attack.
4. Quickly come close to the enemy and perform a quick attack ([R1]). When you do it perfectly in time, a short animation will appear and the enemy will receive a lot of damage. In the case of weaker enemies, they will be killed instantly. As for stronger hunters, it will surely not be enough to finish the fight.
You can also perform a finishing move on a stunned enemy of bigger size. This type of enemies can be stunned using strong attacks or other factors, individual to some bosses (for example in the case of Darkbeast Paarl, you can stun the opponent by hitting his legs). Just remember to approach the enemy from the head because you can perform a finishing move only from this side.
This attack is similar to the previous one and it also ends with a finishing move. To perform this action, you only need a weapon and an enemy facing his back at you.
1. Slowly (!) approach the enemy facing his back at you. You cannot be seen or heard by the opponent (hold left analog button lightly when walking towards the enemy).
2. When you're close (do not come too close, because touching the opponent will ruin your plan), charge your attack to the maximum ([hold R2]). After a while (the edge of your weapon will start glowing), the attack will be performed automatically.
3. The enemy will kneel down. You can approach him and use a quick attack ([R1]) to perform the finishing sequence.
Remember that you can use this technique on moving enemy as well. You just have to lock the target, slowly come close to it and attack with full power. It will stun the enemy and allow you to perform execution. You should use this strategy as frequently as you can, because of the high damage it provides.
This move will also be helpful when you want to shorten the distance between you and the enemy and to break their protection (shields). Using this technique, you can very quickly cover quite a long distance and attack the enemy. The hero jumps forward and strikes with his weapon above his head.
1. Lock the target.
2. Move forward and perform strong attack ([R2]) simultaneously.
Learning this technique requires to move the left analog and press the button responsible for attack simultaneously. You can use this attack when you want to finish an enemy without coming close to him and risk being hit.
Note: In most cases, hunters dodge this move and counterattack.
Have you ever wanted to transform your weapon during the fight and risked being attacked during the process? There is a quick way of doing this which doesn't require you to stop your sequence of attacks. The weapon will be transformed and you will perform the next hit.
1. Perform an attack. If you are transforming the weapon from short to long, it can be both quick or strong attack. Otherwise, this technique won't work every time (use a quick attack in this case).
2. When attacking, transform your weapon ([L1]). Thanks to such move, the hunter will finish the first attack, the weapon will be changed and another strike will follow.
You can also transform your weapon fluently a few times in a row. Just keep performing quick attacks ([R1]) and switching weapons one after another ([L1]). This way, the hero will keep attacking and switching weapons.
In some situations, you find yourself above the opponent, e.g. a cliff or atop a ladder. Normally, you take damage after you jump off, but you can kill two birds with one stone by jumping off on the opponent below.
1 Lock the camera on the opponent below.
2. Jump off, while having a weapon equipped.
3. While in mid-air, execute a quick attack ([R1]). Your hunter drops onto the opponent and kills him.
Situations, in which such attacks can be used are rare but, familiarity with such attack can make exploration easier and allows you to attack by surprise.
Combat is the most important part of Bloodborne. In every location you will find a huge amount of enemies which you will need to defeat. Obviously your enemies will deal you some damage what in result will decrease your Hit Points bar. However there is a way to regain at least some part of your Hit Points.
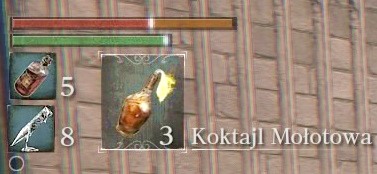
If you will take any damage a part of your health bar will become "frozen". It is symbolized by turning the basic dark red color into a slightly lighter kind of red. You will also see on your health bar a tiny white line which separates both colors. The damage which you have just taken may result in shortening your health bar to this very line. However you have few moments to reduce the damage income or even cancel the damage taken and return your health bar to its previous state.

To regain your Hit Points you have to act quick. The life bar will stay lighter only for a few moments and if you will miss the opportunity to cancel your damage taken you will be able to heal yourself only with a Blood Vial. To regain your frozen Hit Points you have to attack any opponent as fast as you can. If your attack will succeed for a short time you will see an orange sphere (see screenshot above) what means that you have regain some part of your Hit Points. This way game definitely supports an aggressive playstyle.
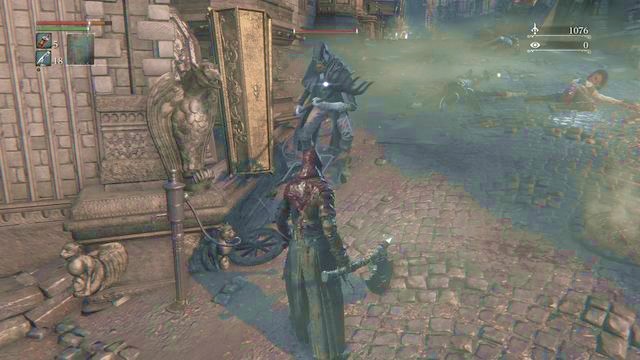 When you fight with weaker or isolated enemies you should always try to regain your Hit Points.
However there is one difficulty connected to this mechanic. During the regaining process you can get even half of your health bar if you have taken a strong punch however you can't be hit again while you try to heal. Taking another hit will lock the regaining possibility and will add some more damage to it. Also using a Blood Vail when you could regain your health cancels this opportunity. Another thing is that you can never get more health than you have lost before the last hit. And now something very important: you can regain health only after taking a melee hit. It means you can't use the regaining option after taking a shot from a gun or after taking a damage from a Molotov Cocktail.
All these things are very important during your battles since attacking in a good moment will help you save some Blood Vails and in result you will be able to survive longer fights. From the other hands this mechanic is very dangerous if you try to defeat a group of enemies. Don't try to regain health in these situations since one hit will interrupt your attempts and you will take even more damage without any benefit.

Insight is a special statistic that represents your familiarity with the rules that govern the world of Yharnam. To a major extent, Insight points are connected with online game (ringing the bells), and they also affect the surrounding and the opponents, to a slight extent. From Messengers in the fountain next to the door of the house in the Hunter's Dream you can buy items for Insight points, as long s you have, at least, 10.
The way Insight affects individual game elements:
- animation of the doll in the Hunter's Dream, which allows you to improve on your character,
- the amount of Insight that you have affects the effectiveness of the "Beast" mode (the more Insight, the weaker the effect),
- the more Insight, the lower the resistance to being frenzied,
- some opponents receive new attacks, which makes the game more difficult,
- you can summon other players, by using the Beckoning Bell or invade other worlds, after you use the Sinister Resonant Bell,
- the limit of Insight to be attained is 99 points.
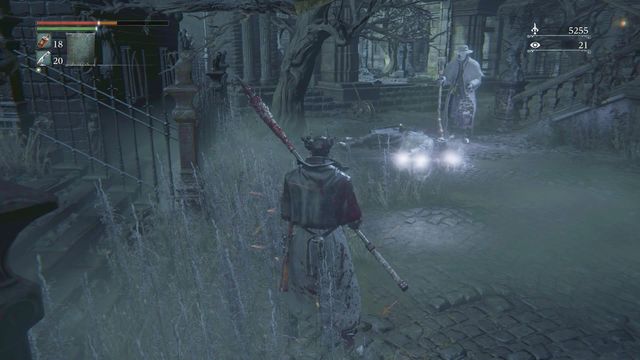 The looks affects the attacks of the opponents.
Additionally, after you reach a certain value, you can note the following:
1 point - in the Hunter's Dream the doll comes to life; you can then raise your level using Blood Echoes. Next to you, there appears a group of Messengers , who give you the Beckoning Bell and the Silencing Blank, thanks to which you can summon help.
10 points - in the Hunter's Dream there appears a shop, where you can buy items for Insight. If the amount of your 10 points drops below, the shop disappears and it reappears, after that value is reached again.
15 points - some of the opponents receive new attacks. Opponents with lanterns in the Cathedral Ward may now fire projectiles and the opponents with crosses and a scythe now have stronger attacks.
40 points - the opponents start resembling Amygdala in their looks and appear outside of the Oedon's Chapel and the room that you cross on your way to Yahar'gul.
50 points - the melody in Hunter's Dream changes.
60 points - you can sometimes hear a baby's cry in the background.
 You can view Amygdala's kin after you have obtained enough Insight
You attain Insight automatically, with your progression. It reflects your familiarity with the world, so you receive it for finding bosses and defeating them. Each instance of walking into a new location, encountering a special kind of an opponent, or talking to some NPCs is also rewarded with Insight points. On corpses, you also find items such as Madman's Knowledge and Great One's Wisdom, which additionally provides you with one, or two points respectively.
You can also lose Insight, if only you use it to summon help or die in the world of another hunter. In the game, there also is an opponent that drains Insight - if he catches you and a cutscene, where he is trying to reach your brain with his tentacles, starts, not only does it mean losing health, but also the permanent loss of two Insight points (after you kill the opponent, you do not receive them back).
- The first encounter with any boss in the game (+1)
- killing any boss in the game (+3)
- helping to kill a boss, in the world of another hunter (+1)
- sending an NPC to Iosefka Clinic or the Odeon's Chapel (+1)
- taking the back door to enter (+1)
- Entering the Old Abandoned Workshop(+2)
- entering Yahar'gul the Unseen Village after you are killed by Death Dealer (+1)
- entering the Cainhurst castle (+2)
- killing another player in his world (+1)
- talking to Annalise, the Queen of the Vilebloods, the Talking Spider (Lecture Building- floor 1) and Master Willem (the NPC that shows you the path down to the boss Rom, the Vacuous Spider in Byrgenwerth) (+2)
- seeing the child delivered by Arianna (+3)
- consuming Madman's Knowledge (+1), Great One's Wisdom (+2), One Third of Umbilical Cord (+3)
- by ringing the Beckoning Bell (-1)
- by dying after you invade the world of another hunter (-1)
- by losing it to the opponent that "sucks the brain out" (-2)
- buying items from Messengers (various values)
 One of the best sets.
Below, you can find the names of all the sets available in the game, along with the location where you obtain them, or the way to get them. In the case of a reference to a specific location, you can find the exact whereabouts in the Game's walkthrough, as specified.
Name
Way to obtain
Ashen Hunter set
The top floor of the hidden building in Old Yharnam.
Tomb Prospector set
You can buy it after you obtain the Radiant Sword Hunter Badge (Healing Church Workshop).
White Church set
Forbidden Woods, in the upper part of the village.
Cainhurst set
You can buy it after you obtain the Cainhurst Badge (after you join the Vileblood Covenant).
Choir set
Upper Cathedral ward, inside the cathedral.
Black Church set
Cathedral Ward, in front of the gate to the main yard, you need to go left, down.
Executioner set
The corpse in the Forbidden Cainhurst Castle. The cap (Golden Ardeo) can be bought after you kill Alfred or obtain Queenly Flesh (after he kills Annalise).
Gascoigne set
You can buy it with Insight after you defeat father Gascoigne
Bone Ash set
You can buy it with Insight after you defeat the second boss, in the Chalice Dungeons that you generate using the Central Pthumeru Chalice.
Doll set
Inside the Old abandoned Works.
Knight set
Cainhurst Forgotten Castle, on the roof, the rest of the set is in the library, the room at the bottom level.
Graveguard set
Forbidden Woods, right after you encounter the spitting snakes with several heads. Jump over onto the ledge to the far left.
Student set
Lecture Building/chest in Byrgenwerth, right before the boss encounter (the first floor in the building).
Madman set
After you kill the second boss in the Chalice Dungeons generated with the Lower Hintertomb Chalice.
Hunter set
Central Yharnam - the Aqueduct/Cathedral Ward, right after you exit the Oedon's Chapel, to the left,.
Gehrman's Hunter set
You can buy it after you defeat Gehrman, the First Hunter in NG+ (if you have fought him) or during the next game, if this battle leads to another one, with Moon Presence.
Henryk's Hunter set
You can buy it with Insight after you defeat Henryk during Eileen's quest.
Yharnam Hunter set
You can buy it in Hunter's Dream, there re no additional requirements that you should meet.
Peasant set
The bottom part of the Healing Church Workshop, the corpse.
Crowfeather set
You can buy it after you obtain the Crow Hunter Badge in Eileen's quest.
Yahar'gul set
In Yahar'gul, the Unseen Village - the corpse on the cart, while you are on your way to the boss, The One Reborn.
Overseas set
The starting set of the game
Name
Way to obtain
Arianna' Shoes
Connected with Arianna's quest, after you kill her.
Crown of Illusions
After you kill the boss, Martyr Logarius.
Mensis Cage
After you kill the boss, Micolash, Host of the Nightmare.
Noble Dress
The chest in the Cainhurst Forgotten Castle.
 Weaponry is the most crucial element in the hunter's gear.
In this chapter, you can find the list of all the weapons available in the game, long with the way to obtain them. In the case of a reference to a specific location, you can find the exact whereabouts in the Game's walkthrough, as specified.
Name
Way to obtain
Beast Claw
Chalice Dungeon, after you generate them with the Ailing Loran Chalice. After you kill the first boss, enter the room on the right and take the lift to the lower level.
Chikage
You can buy it after you obtain the Cainhurst Badge (Vilebloods covenant).
Threaded Cane
You can choose it at the very beginning. Also, you can buy it after you find the Saw Hunter Badge in central Yharnam - Aqueduct (in the tunnel past the giant hog).
Logarius's Wheel
You can buy it after you obtain Wheel Hunter Badge (Executioners covenant).
Kirkhammer
You can buy it after you obtain Sword Hunter Badge, for defeating the Cleric Beast.
Blade of Mercy
You can buy it after you obtain Crow Hunter Badge (Hunters' Hunters covenant).
Burial Blade
You can buy it after you defeat Gehrman, the First Hunter.
Reiterpallasch
In the chest in the Forgotten Cainhurst Castle.
Saw Cleaver
You can choose it at the very beginning. Also, you can buy it after you find the Saw Hunter Badge in central Yharnam - Aqueduct (in the tunnel past the giant hog).
Ludwig's Holy Blade
You can buy it after you find the Radiant Sword Hunter Badge in Healing Church Workshop (upstairs).
Tonitrus
In Yahar'gul, the Unseen Village or you can buy it after you obtain the Spark Hunter Badge, for defeating Darkbeast Paarl.
Hunter Axe
You can choose at the very beginning. Also, you can buy it after you find the Saw Hunter Badge in central Yharnam - Aqueduct (in the tunnel past the giant hog).
Rifle Spear
You can buy it after you obtain the Powder Keg Hunter Badge (connected with Djura).
Saw Spear
You can buy it after you find the Saw Hunter Badge in central Yharnam - Aqueduct (in the tunnel past the giant hog).
Stake Driver
You can buy it after you obtain the Powder Keg Hunter Badge (connected with Djura).
Name
Way to obtain
Hunter Pistol
You can choose at the very beginning. Also, you can buy it after you find the Saw Hunter Badge in central Yharnam - Aqueduct (in the tunnel past the giant hog).
Wooden Shield
The corpse in the Cathedral Ward -the Oedon's Chapel exit ahead and up the stairs, to the right.
Cannon
In the Forbidden Woods, in the building past the cannon being fired in your direction.
Evelyn
The chest in the Forgotten Cainhurst Castle, you can also buy it after you obtain the Cainhurst Badge (Vilebloods Covenant).
Hunter Blunderbuss
You can choose at the very beginning. Also, you can buy it after you find the Saw Hunter Badge in central Yharnam - Aqueduct (in the tunnel past the giant hog).
Repeating Pistol
You can buy it after you obtain Sword Hunter Badge, for defeating Cleric Beast.
Torch
Central Yharnam, past the square with the bonfire.
Hunter's Torch
Old Yharnam.
Rosmarinus
You can buy it after you find the Cosmic Eye Watcher Badge in the Upper Cathedral Ward (inside the cathedral).
Flamesprayer
You receive it from Gilbert or buy it after you kill Vicar Amelia.
Ludwig's Rifle
You can buy it after you find the Radiant Sword Hunter Badge in the Healing Church Workshop (upstairs).
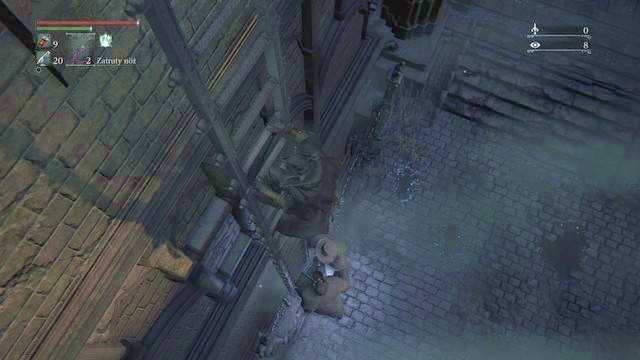 Running away on a ladder will usually work... but not always.
1. Move carefully. If you're in a location for the first time, don't run all over it - sooner or later you will get attention of too many enemies or will fall in a trap. Only if you know a location well you can avoid some enemies, especially if your objective is to fight a boss.
2. Use various support items during combat - frequently Antidote will prove itself useful by removing poison effects. Other useful items are Molotov Cocktail, Quicksilver Bullets and Blood Vials.
3. Learn enemy behavior. Each of them has unique weapon, size, style and attack type. It will allow you to know when you should dodge and when you can safely attack. It is especially important when planning a tactic for defeating boss. Knowledge of his attacks might decide of life and death.
4. Enemies change their position. Some enemies will always remain in same place, but most of them are walking through various places. Some weaker enemies sometimes additionally group themselves and patrol a territory together.
5. There is no pause in the game. Combined with the previous advice, it means you are safe only in Hunter's Dream or wherever you have defeated all nearby enemies.
6. Items can be found only in shining bodies, large chests/boxes and in defeated enemies' bodies. You don't need to destroy barrels in order to find treasures, although...
7. ...sometimes you can find a hidden passage behind them, leading to previously unavailable part. Sometimes you should look for hidden doors or paths going beneath obstacles.
8. Items can be found only once. It means that after a death and respawn you won't find anything else in once looted bodies. In that case, you can count only on loot dropping from enemies. Remember about saving your items and not wasting them when it is not needed. You never know when they will be really useful.
9. Blood echoes is game's currency. They are given for defeating enemies, you lose it when you die. Because of that, if you have many of them, you should travel to Hunter's Dream and spend them on items or increasing character level.
10. Further in the game you will gain special runes that make you stronger. You should use them before fighting a boss, for example by increasing condition, health points or magic resistance if enemy is using magic attacks.
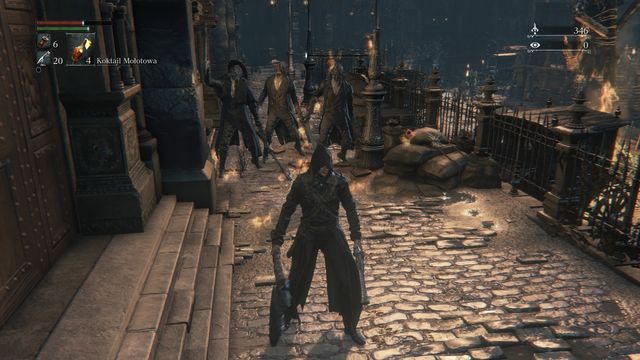 Well aimed cocktail might knock down few enemies at once.
11. There is a limit of quantity of items you have. For Blood Vials and Quicksilver Bullets its 20 pieces, for Antidotes - 10. Surplus is automatically transferred to your stock in Hunter's Dream. You can increase the maximum quantity, for example with runes.
12. If you're stuck at some point, don't force yourself to go forward. Instead, spend some time on fighting enemies. It will give you more items and Blood Echoes. The latter can be used, for example, to increase character level. That, and items obtained will make you stronger and will make beating the harder level easier.
13. Always have some supplies of Blood Vials. You will face some enemies that will force you to use this item very often. Quicksilver Bullets are very useful as well, just as Molotov Cocktails and Antidotes.
14. Remember about unlocking shortcuts. Sometimes there is only one or two respawn points in a very large area. By unlocking shortcuts (opening doors from other side, using elevators, unlocking mechanisms) in case of death it will be much easier to return to previously visited territory.
15. After you leave the game, you return in the same place you left. It's not a way to run away from enemies. If it gets dangerous, you can always travel to Hunter's Dream, even if enemies are nearby.
16. Plan your character's development. You can use a strong character that has slower, but powerful weapons or specialize in much faster, but weaker build. It means you must plan spending your attributes on further levels - you receive only one point per level, it would be a waste to spend it on useless abilities.
17. In darker places you can use a torch. It is used as a weapon held in left hand.
18. Keep upgrading your weapon, even if you don't like to fight. During the game you will find shards and Blood Gems that give you additional boost to various statistics.
19. The further in the game, the more Blood Echoes you receive for combat. But remember that prices of items increase as well. If you have many Blood Echoes you can sometimes make some savings for later.
20. Fighting a group of enemies is never easy. Most important thing that you must remember is not allowing enemies to surround you. It's hard to avoid hits from every direction (it's easy to block yourself when trying to make a dodge). Don't underestimate even the weakest units in a group. You can lure enemies away one after another using the Pebbles or deal damage to few of them at once with Molotov Cocktails.
21. Talk to NPCs. You usually find the hiding in the houses with lanterns lit in front of. From some, you learn information about the game world, whereas the others will reward you, with an additional item. Some of the NPCs are also connected with side quests.
22. Always perform one attack too much. Often, it may seem as though the enemy is already dead, whereas he still has some health left. It is better to land an unnecessary attack than to take additional damage.
23. Take care, while using lifts. In several spots, you can note holes in walls, a secret passage or wide windows. Usually, you can jump out of the lift, in such a spot, and discover a secret passage.
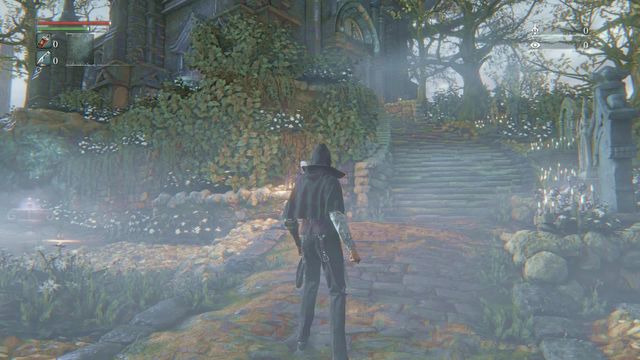 For the first time you visit Hunter's Dream quickly after you start the game, when you die or light the lamp.
Hunter's Dream is a very special location. You go there after your first death, this is also where you transport when you use one of many lamps found in the game world. This place is a base and hub from which you move to other locations, here you will find needed merchants, you will increase your abilities level and upgrade your weapons. It is also a place where you are safe and from which you can transport to any previously unlocked location (lighting the lamp activates a "teleportation" point).
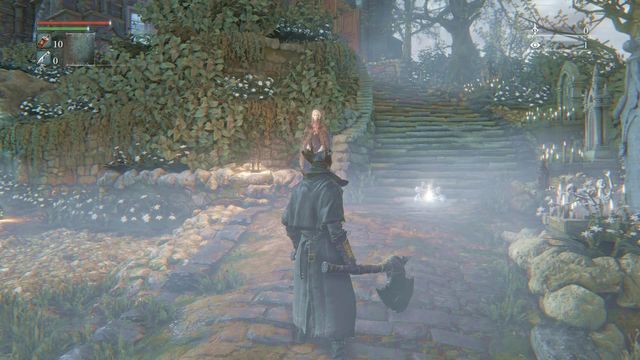 If you have one Insight point you will animate the doll, it will allow you to upgrade your abilities.
During your first visit on stairs on the right side you will meet Messengers sticking out from the ground. This is when you receive your first weapons. Doll, with which you can talk, will be animated when you receive one Insight point. After you collect 10 Insight new Messengers will show behind the house. Inside you will find Gehrman who for some time will give you various advices, a stock, forge and memory altar. In this place you can upgrade your weapon and character, after collecting Caryll runes and special Rune workshop tool (after defeating Witch of Hemwick).
Hunter's Dream is a place where player can rest and prepare for exploring other locations.
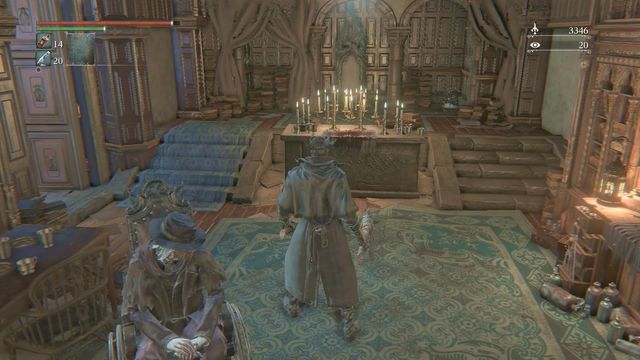 Memory altar allows you to strengthen your character with Caryll runes.
- Bath Messengers - main merchants at whom you can buy consumables such as Quicksilver Bullets or Blood Vials. You can also buy new weapons (usually after meting certain conditions or obtaining weapon unlocking badge) and clothes. You can also sell items and receive Blood Echoes for them. Messengers prices change as the game progresses and you get new levels.
- Stump Messengers - this one can be found behind the house, in a trunk. These messengers allow you to change the skin of all messengers, including merchants and the ones holding notes. If you have a special item you can, for example, give them a hat or bloody bandage which will permanently change their look.
- Insight Messengers - another merchants, you will find then near the door on the left side of the house. They become visible when you have 10 Insight, they disappear if your stocks become lower than that. For Insight you can buy by them various items, like clothes of bosses (Gascoigne) or more important NPCs (Djura) after you kill them.
- Headstone of Awakening - on the right you will find four gravestones. They allow you to move to previously visited locations. The condition is to light the lamp in them, which activates respawn and teleportation point.
- Tomb altars - on the other side you will find altars that allow you to create, share and travel to partly random generated dungeons. For the ritual you need a chalice (you will receive the first one after killing Blood-Starved Beast) and other resources found in the dungeons (the ones needed for the first depth level can be bought by the Bath Messengers).
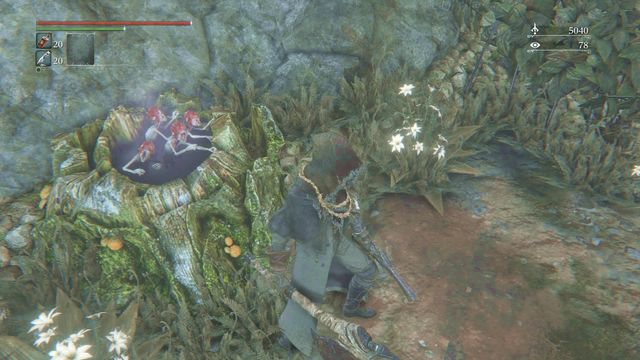 Behind the house, in the stump, you can change the look of your Messengers.
- Doll - after collecting at least 1 Insight point a doll will be animated and you will be able to talk to it, use gestures (it responds with similar gestures) and, most of all, increase your abilities by paying for them with Blood Echoes. Sometimes doll can't be found in her default place, in that case you must search for her around the tombstones or reload the location.
- Stock - inside the building, on the right, you will find a shelf for items. You can stock there items that aren't currently needed and you can take them back whenever you want. If during the game you exceed the maximum limit of specific item (for example, you will find more Blood Vials than you can currently drag) the surplus will go to the stock. Blood Vials and Quicksilver Bullets are automatically added to equipment after player dies if there are enough of them in the stock.
- Forge - in the desk behind the fire you can upgrade and repair your weapon. Specific resources are needed for that, different for each level - you will find them during the game or buy them at Messengers. After defeating Father Gascoigne and obtaining access to Cathedral Ward you will additionally find Bloodgem Workshop Tool that allows you to place special stones in weapons that improve some of their stats.
- Memory Altar - after defeating Witch of Hemwick and obtaining Rune Workshop Tool at the table in the middle of the room you will be able to choose active runes which improve your hunter. Various runes has various effects. The runes can be found in various places during the game, including chalice dungeons.
Combat is an inseparable element of Bloodborne. In every location, you encounter many opponents, that are represented in multitudes, all around Yharnam. The regular afflicted, larger creatures, giants, hunters, spiders are just a few. At the top of the food chain, there are bosses, which are unique in their attacks, higher strength and lots of health points.
Regardless of the types of opponents that you encounter, there are several useful hints that you need to keep in mind, and which will make it easier for you to survive. First of all, carry around a supply of Blood Vials. With slight exceptions, health in Bloodborne does not regenerate spontaneously so, you need to replenish it on your own.
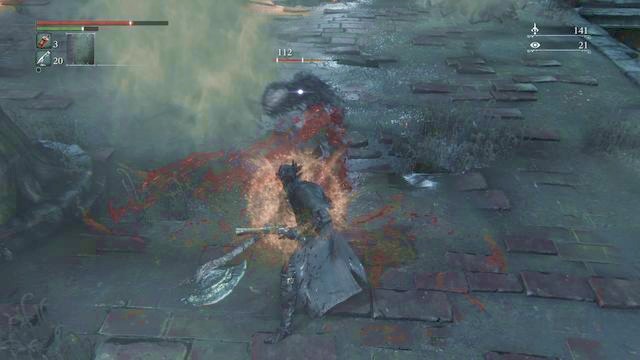 A quick counterattack allows you to retrieve some of your health.
Another issue is exploiting combat mechanics to your advantage. The most important thing is to remember about the wide variety of tricks and hits that you can use. Using the same pattern of attack, over and over again, does not work in the majority of cases. You need to use combos with skill, combine attacks with dodges and stun opponents with shots. All of the combat elements are useful, there is no useless or unnecessary move here. Mastering the mechanics and controls, timing stuns well, timing attacks or dodges takes some time. Still, the reward is the ease, with which you defeat more and more opponents, as well as the satisfaction from the fight.
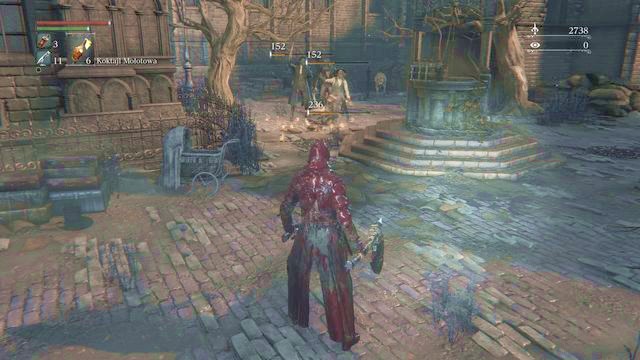 An accurate Molotov's Cocktail may kill several weaker opponents.
In fight, you should remember about the items that you can use to your aid, not only Blood Vials. Pebbles can be used to lure opponents away from the rest of the group, where you can deal with them only. Molotov's Cocktails will allow you to drive down the boss's health bar, or to eliminate weaker of the opponents (the burning effect is additionally increased with Oil Urn that you throw beforehand). Poison knives can cause slow poisoning and drop in your opponent's health, where you can protect yourself with Antidotes against this effect. Interrupt the healing process of the enemy hunter, by using the Numbing Mist, and apply Bolt Paper to your weapon, to increase damage dealt. There are many options, when it comes to the choice of items and various things are good for various occasions. It is a good idea to remember about the wide variety of gadgets.
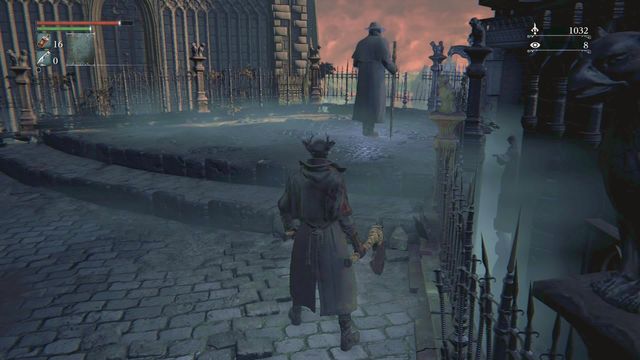 If you can get the opponent from behind, do it.
Do not ever underestimate your opponent. Vicious dogs deal little damage, but they are very fast. The bigger opponents are easier to walk around, but they deal much more damage, after they hit you. Each opponent that you encounter is dangerous, in his own respect and underestimating them may end in losing lots of health. Of course, you can avoid some of the opponents, especially while traveling towards an arena with a boss but, watch out because they do not give up that quickly and they chase you for some time.
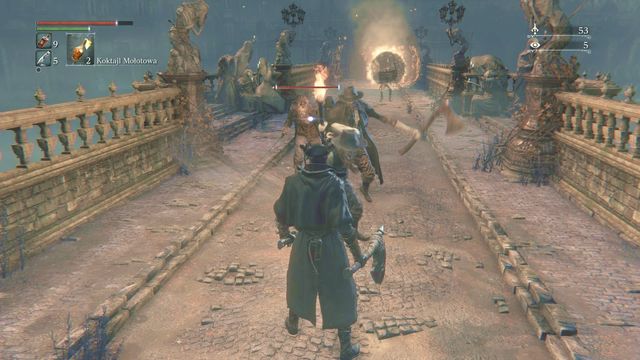 Sometimes, there are unconventional ways of dealing with opponents.
Fighting against a group is a different pair of shoes. Even the weakest of opponents may quickly kill you, if you let yourself be surrounded. This is due to the fact that they can interrupt your attacks, if these have not been charged beforehand. Taking hits from several sides at a time, combined with the temporary interruption of an attack, ends in your death, in 99% of the cases. For this reason, try to lure single opponents away from the rest of the group and, if this is not an option, focus on eliminating one of the opponents, as quickly as possible, and take to another one, after he dies.
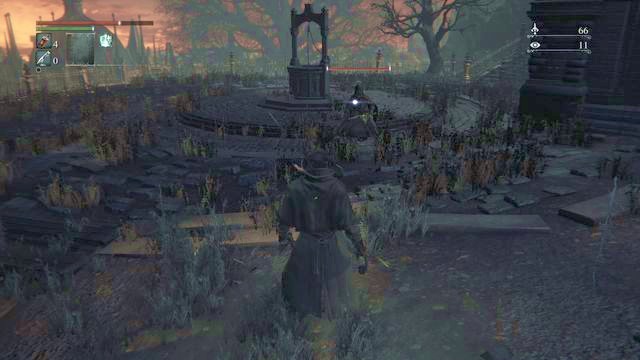 While fighting hunters, watch out for firearms and their quick attacks.
Hunters are much like yourself and you encounter them in several locations. Some of them are hostile towards you, by default, whereas the others need to be provoked first. Fighting them is different than fighting other opponents - they usually are much faster, can land a quick combo, dash away quickly and counter your attacks. Also, they can use attacks that temporarily stun the opponent. On the other hand, they are just as vulnerable to such attacks so, you can often use your firearm to stun a hunter. Then, you can execute a stronger finishing attack. In the game, you encounter weaker and stronger hunters, much depends on the weapons that they are using and their attacks. Ones packing a pistol or a blunderbuss seem to be especially dangerous, because they can easily interrupt your attack with a single shot.
A bit different is fighting against the living hunters, while invading the other worlds, or if your own has been invaded. There is no one set rule here - you do not know what type of opponent you are going to fight, nor what is his weapon, nor how his character has been developed. However, in such fights, try not to use Blood Vials. It is an unwritten rule that not everybody follows, though. For this reason, remember about the Numbing Mist, which you can cast at the opponent, to prevent him from healing himself. Taking a bow before the fight is also a welcome kind of behavior.
 Using the Tiny Music Box temporarily stuns Father Gascoigne .
Bosses are the most dangerous opponents that you encounter in Yharnam. Fighting them is often quite a challenge. However, there is a pattern to deal with each of the opponents and things are no different in the case of bosses. All of them, with no exceptions, have their patterns of behavior and attacks that they land during the fight. Learning them allows you to dodge them at the right moment and dealing damage, while the boss is regaining his strengths after the attack, or is getting prepared for another one. Learning those patterns is the most important thing, during boss fights. Also, keep in mind that boss battles have been divided into phases, in which the boss's behavior changes. Usually, the transition depends on how much health the boss still has left. The lower the health, the higher the odds that the boss enters another phase, where he uses new and more powerful attacks.
In many situations, you can try certain tricks with bosses - using the Numbing Mist while fighting Vicar Amelia, or the Tiny Music Box while fighting Father Gascoigne are just some of the options. In case of continuous failing, change your tactics, put on a different attire (e.g. Henryk's attire (it protects you against lightning and will do the job in the combat against Darkbeast Paarl) and pick appropriate runes. In critical situations, some of the (optional) bosses can be defeated later into the game, after you have progressed in your experience.
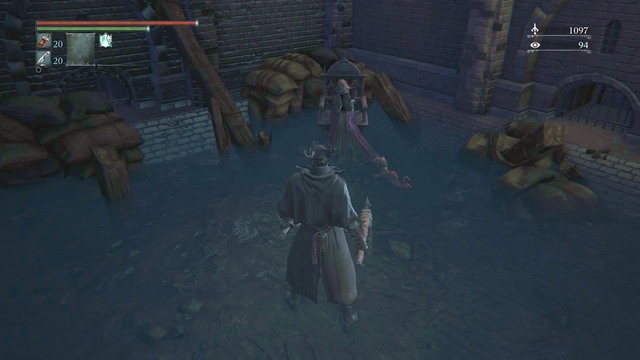 The Memory Altar allows you to reinforce the form of the Caryll runes.
In Bloodborne, there are special runes that can aid you in certain situations. The runes play the role of gadgets and allow you to reinforce some of your attributes, attacks that you collect with the Blood Echoes or resistances against given types of attacks. You can find runes in several locations and each has a different effect.
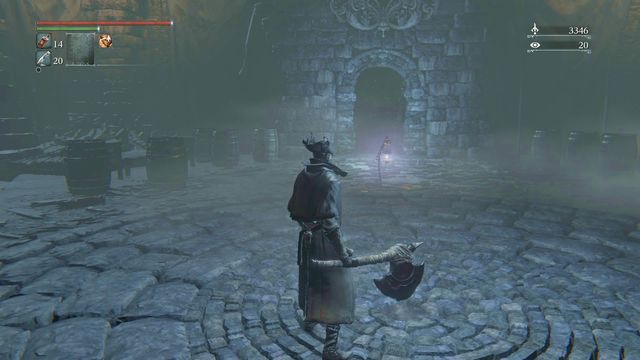 After the fight with the Hemwick Witch, remember to collect the Rune Workshop tool, in the room at the end of the corridor, past the lit lamp.
To use runes, you require the Rune Workshop Tool. You can obtain the items quite early into the game, after you reach Cathedral ward and open the gate to the man yard. You can then go to Hemwick Charner Lane and fight the boss - the Hemwick Witch. After you kill her, enter the room that you unlocked and collect the item from the skeleton.
After that, you can use runes in Hunter's Dream, in the chapel, at the table in the center (Memory Altar).

There are for available rune slots. Three of them correspond to the runes that affect your character and his statistics, whereas the last rune corresponds to the oath (they are different in color and they are connected with the covenant you choose; in general, you cannot find them and you can only obtain them, by meeting certain requirements, regarding certain characters). Runes come in varieties - for example, a rune may have three different types of reinforcements, (e.g. to constitution by 10, 15 or 20 per cent). Some of the runes, especially the more potent ones, can be found in Chalice Dungeons.
You can change the active rune at any time, also the one connected to the covenant - however, to do his, you need to return to Hunter's Dream.
 The opponent driving you mad? Us an appropriate Caryll Rune.
Matching Caryll Runes may help you out in many situations. If you have any problems with the enemy that causes frenzy - use the Deep Sea, which provides you with more resistance to this type of attack. You need more Blood Vials - put on Communion, for more loot from opponents - Eye. Completing a set of runes, before a boss battle may make it a bit easier - by increasing constitution, health or resistance to poison will help you many times.
The below list includes all of the Caryll Runes that you can find, as well as the effects of the individual runes.
Name
Effect
Location
Counter-clockwise Metamorphosis
1. Constitution bonus (+10%)
2. Constitution bonus (+15%)
3. Constitution bonus (+20%)
1. Forbidden Woods
2. The talking spider in Lecture Building - 1st floor
3. Chalice Dungeon
Arcane Lake
1. Resistance to arcane attacks bonus (+5%)
2. Resistance to arcane attacks bonus (+7%)
3. Resistance to arcane attacks bonus (+10%)
1. Yahar'gul, The Unseen Village
2. Byrgenwerth
3. Chalice Dungeon
Beast
1. Bonus to the transformation effect (+20)
2. Bonus to the transformation effect (+20)
3. Bonus to the transformation effect (+20)
1. Healing Church Workshop
2. NPC in Forbidden Woods
3. Chalice Dungeon
Blood Rapture
1. Visceral attacks restore HP (+200)
2. Visceral attacks restore HP (+250)
3. Visceral attacks restore HP (+300)
1 Shadow of Yharnam
2. Chalice Dungeon
3. The last hunter in the Grand Cathedral, Eileen's quest
Clawmark
1. Stronger Visceral attacks (+10%)
2. Stronger Visceral attacks (+20%)
3. Stronger Visceral attacks (+30%)
1. The hunter at the Yahar'gul chapel
2. Gilbert after he transforms, Central Yharnam
3. Chalice Dungeon
Clear Deep Sea
1. Resistance to gradual poisoning bonus (+100)
2. Resistance to gradual poisoning bonus (+200)
3. Resistance to gradual poisoning bonus (+300)
1 Forbidden Woods
2. Nightmare Frontier
3. Chalice Dungeon
Clockwise Metamorphosis
1. HP bonus (+5%)
2. HP bonus (+10%)
3. HP bonus (+15%)
1 Forbidden Woods
2. Nightmare Frontier
3. Chalice Dungeon
Communion
1. Higher vial capacity (+1)
2. Higher vial capacity (+2)
3. Higher vial capacity (+3)
4. Higher vial capacity (+4)
5. Higher vial capacity (+5)
1. The path to the Healing Church Workshop
2. Lecture Building
3. Iosefka Clinic
4. Celestial Emissary
5. Chalice Dungeon
Deep Sea
1. Resistance to frenzy bonus (+100)
2. Resistance to frenzy bonus (+200)
2. Resistance to frenzy bonus (+300)
1. Chalice Dungeon
2. Forbidden Woods
3. Chalice Dungeon
Dissipating Lake
1. Lightning resistance bonus(+5%)
2. Lightning resistance bonus(+10%)
1. Forbidden Woods
2. Chalice Dungeon
Eye
1. More loot from the defeated opponents (Revealing +50)
2. More loot from the defeated opponents(Revealing +70)
3. More loot from the defeated opponents(Revealing +100)
1. Nightmare of Mensis
2. NPC Byrgenwerth, pointing the path to Rom, The Vacuous Spider
3. Chalice Dungeon
Fading Lake
1. Resistance to fire bonus (+5%)
2. Resistance to fire bonus (+10%)
1. Nightmare Frontier
2. Chalice Dungeon
Formless Oedon
1. Increases the capacity of Quicksilver Bullets (+3)
2. Increases the capacity of Quicksilver Bullets (+4)
3. Increases the capacity of Quicksilver Bullets (+5)
1. NPC at the Oedon Chapel (the one that mentions safety)
2. The upper part of Odeon Chapel
3. Chalice Dungeon
Great Deep Sea
1. All resistances bonus (+100)
2. All resistances bonus (+150)
1. Nightmare Frontier
2. Chalice Dungeon
Lake
1. Resistance to physical attacks bonus (+3%)
2. Resistance to physical attacks bonus (+5%)
3. Resistance to physical attacks bonus (+7%)
1. Hemwick Charner Lane
2. Chalice Dungeon
3. Chalice Dungeon
Heir
1. More Blood Echoes for kills with Visceral attacks (+20%)
2. More Blood Echoes for kills with Visceral attacks (+40%)
3. More Blood Echoes for kills with Visceral attacks (+60%)
1. Kill Henryk, the hunter in Eileen's quest
2. Yahar'gul, The Unseen Village
3. Chalice Dungeon
Great Lake
1. Resistance to all types of attacks bonus (+4%)
2. Resistance to all types of attacks bonus (+5%)
1. Upper Cathedral ward
2. Chalice Dungeon
Moon
1. More Blood Echoes for kills (+10%)
2. More Blood Echoes for kills (+20%)
3. More Blood Echoes for kills (+30%)
1. Underground Jail
2. Nightmare of Mensis, while fighting Micolash
3. Nightmare of Mensis, throwing the Brain down and using the gesture "Make contact"
Oedon Writhing
1. Visceral attacks provide Quicksilver bullets (+1)
2. Visceral attacks provide Quicksilver bullets (+2)
3. Visceral attacks provide Quicksilver bullets (+3)
1. Kill Adelia in the Underground Jail
2. Kill Iosefka in Iosefka Clinic, before you fight with Rom, The Vacuous Spider
3. Chalice Dungeon
Stunning Deep Sea
1. Rapid poisoning resistance bonus (+200)
2. Rapid poisoning resistance bonus (+300)
1. Nightmare Frontier
2. Chalice Dungeon
Hunter
Faster regeneration of constitution
The covenant of Hunters of Hunters
Corruption
Near death healing (+1)
The covenant of Vilebloods
Radiance
Increases the amount of HP that regenerated after you consume Blood Vials
The covenant of Executioners
While playing, you might have found an item called One third of Umbilical Cord. These items are among the items that you use often, such as Blood Vials or Quicksilver bullets. For this reason, you may view them as artifacts of little significance. However, you need these items, if you want to change the game ending and defeat the "truly last" boss- Moon Presence.
 Pick the "Decline" option, during the last meeting with Gehrman.
You can find 4 umbilical cord fragments but, this does not affect the ending in any way - you only need to consume three of them, the fourth one changes nothing. Remember that you do that before the fight with Gehrman, whose offer to give him your life you need to refuse. This starts a fight with a single boss and, right after you win, a cutscene starts, after which you fight another one - Moon Presence.
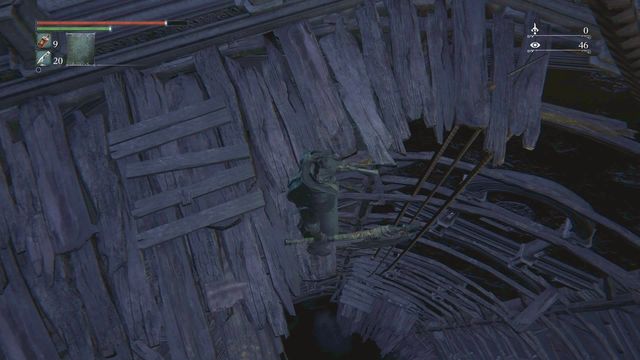
You find the first fragment at the Abandoned Old Workshop. To get there, you first need to defeat the Blood-starved Beast at the Old Yharnam,. Then, in the Odeon Chapel to the right of the lamp, there opens a new passage to the Healing Church Workshop. There, climb downstairs to the round room full of wooden platforms.
While standing on the main beam, you can jump down, to a location hidden below. You need to keep in mind that you lose some of your health points, as a result. You need to take two jumps, where the first one is more important. First of all, approach the edge on the left, right after you enter, right next to the ropes (the screenshot). Your goal is to jump over to the small platform a bit below (take a small step to aim the jump well). From there, you can jump over to the small platform right below this one (remember to use Blood Vials beforehand), a bigger one this time, and you will have reached a small door to the Abandoned Old Workshop.
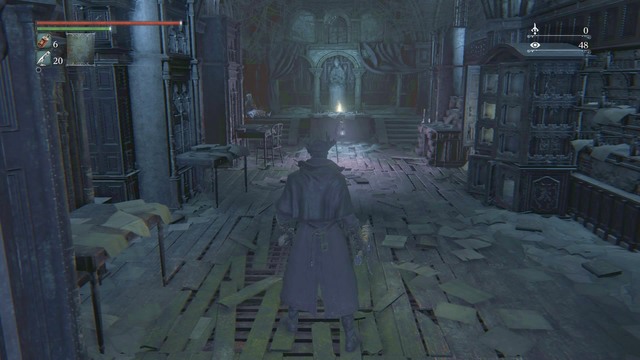 You find the umbilical cord in the center of the chapel.
Right after you enter, walk into the chapel, nearly identical with the one you found in the Hunter's Dream. On the altar in the center of the room, you find One Third of Umbilical Cord.
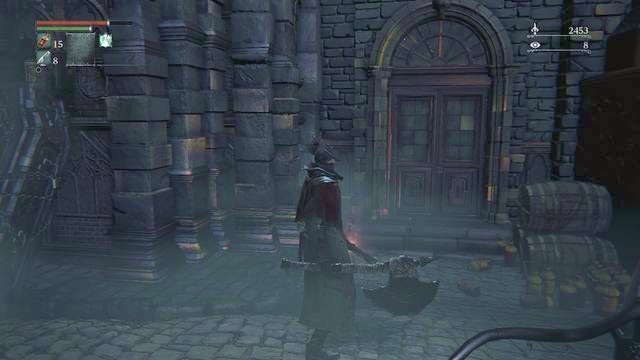 The door with Arianna behind it.
To get another fragment, quite early into the game (starting with the moment of killing Vicar Amelia) you need to talk to courtesan Arianna and send her to the Odeon Chapel. You find her at the Cathedral ward. While in front of the gate to the main yard, climb down on the left. After you defeat the opponents, talk to the person behind the door on the left. As soon as you kill the three bosses, she asks you about safety.
 Arianna, after she has the "child".
Then, return to the Odeon Chapel after you defeat Micolash, Host of the Nightmare. You will not find Arianna at the chapel then. Therefore, go towards the Oedon Tomb. After you climb down the ladder, into the flooded room on the left, you find the courtesan sitting on the chair, with a strange-looking "child" next to her. Kill the little monster (you automatically kill Arianna as a result) and collect the One Third of Umbilical Cord.
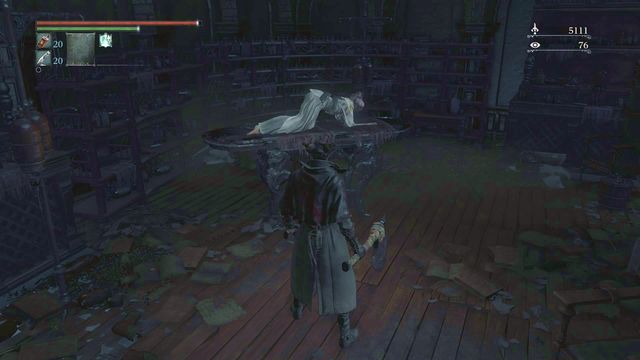 Iosefka in the clinic, after you have killed Rom, the Vacuous Spider.
You find another fragment in Iosefka Clinic. You need to make it there by crossing the cave in Forbidden Woods. Then, after you cross Central Yharnam and enter the clinic through the window, go left. You find a closed door there. Behind the door, climb up the stairs. You find Iosefka lying on the bench, defenseless and neutral. After you kill her, you can pick up One Third of Umbilical Cord.
Note: Make sure that you go to the clinic after you kill Rom, the Vacuous Spider. If you do that earlier Iosefka will be hostile towards you and you will have to fight her. After you kill her, you lose the opportunity to obtain the umbilical cord fragment.
 After you kill Mergo's Wet Nurse, you can pick up One Third of Umbilical Cord.
If you have missed any of the abovementioned fragments, you still can get them. You receive one of them after you defeat the Mergo's Wet Nurse main boss.
Note: If you killed Iosefka before and failed to save Arianna/she was killed by Adella, you will be unable to get the rest of the cord fragments, up until you start New Game+.
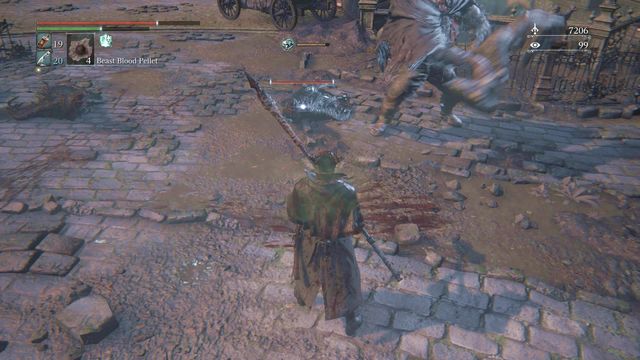 The bar in the middle of the screen lets you know about the multiplier that increases damage dealt and received.
The Beast mode is a special mode that resembles "berserk". In this mode, in the middle of the screen, a bar is displayed, which informs you of the current state. The more of the bar is filled up, the more damage you deal to the opponents. Each successive attack fills the bar so, the more you attack, the stronger each successive strike is. The bar keeps declining so, if you want to deal more damage, you need to keep attacking, which keeps the bar at a high level. To keep things balanced, the more damage you deal, the more damage you receive from the attacking opponents. This means that the price for increased attack strength is lower defense, decreased by the same value. By becoming more dangerous, you become more vulnerable to enemy attacks
This factor depends on the Insight points. The more of them you have, the weaker your bestiality is - the attack increase is lower, but also the drop in defense is lower. With lots Insight points, on the other hand, you will be able to increase the strength of your attack. Remember though that you will decrease your defense, at the same time.
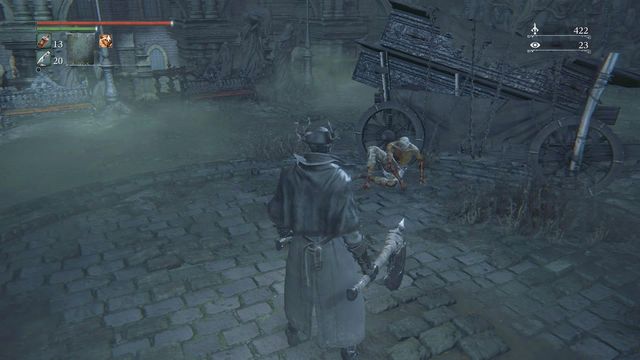 The NPC in the Forbidden Woods will give you Beast Blood Lump after you kill each survivor at the Odeon Chapel.
In general, there are two ways in which to initiate the Beast Mode.:
1. The first one is to own the Beast Claw weapon. You can find it in Chalice Dungeons. For this, you will have to defeat Amygdala and obtain the Low Loran Chalice. After the dungeon is created and the first boss defeated, take the lift down and, before you light another lantern, in the middle of the corridor, turn into the vast network of rooms (across the door on the right).
Then, with your weapon equipped, you can transform ([L1]). Your character's hands turn into werewolf paws and you will enter the beast mode. The effect is permanent, until you un-equip the weapon or equip another one. Each attack with the paws fills the bestiality bar. This weapon is perfect for this mode, because it allows you to land very quick attacks.
2. If you do not have this weapon, entering the beast mode becomes possible after you have used a Beast Blood Lump. You can find them during your explorations, in various locations. Sometimes, you also receive them after you kill a werewolf. After you defeat Mergo's Wet Nurse, you can buy them for Insight from Messengers.
Note: If you have sent to Odeon Chapel, the mysterious man that you have met on the rooftop, he will start killing gradually the survivors at the Forbidden Woods. From him, you receive a Beast Blood Lump after each kill you make.
After you use a lump, the beast mode will last for around a minute. During this time, each attack fills the bestiality bar, just like in the case of the Beast Claw. In this respect, there is no difference: the more the bar is filled, the more damage you deal and the lower your resistance to damage. After you use a Beast Blood Lump, you can use any weapon. However, note the difficulty to fill the bar wit swift attacks - it is best to use several strong, preferably fully charged, attacks. Swift attacks, on the other hand, should be sufficient to maintain the level of the bar. After the time has expired, the mode deactivates automatically.
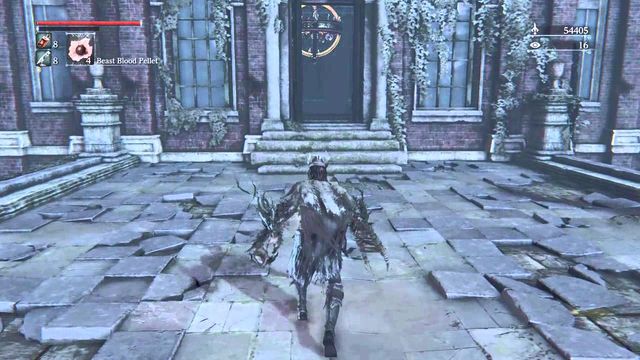 Each attack with the Beast Claw increases bestiality.
If you want to use this mode often, it will be necessary to get an appropriate weapon. Thanks to this, you will be able to load up attacks, without the necessity to own special items. Just remember to avoid the enemies' strong attacks, which may quickly end the beast mode, and you will be a real killing machine.
 The tombstones for doing Chalice Dungeons.
In Hunter's Dream, opposite the graves, you can find 4 tombstones. They are used or generating Chalice Dungeons, i.e. randomly generated (to a large extent) locations with high difficulty level and various opponents, items to find and several new bosses. You can generate 4 dungeons at the same time, without the necessity to close a previously formed one.
To form a dungeon of a given type, you need, first of all, a chalice that allows you to perform the ritual. There are three types of dungeons:
- Pthumeru (you receive the first chalice after you have defeated the Blood-starved Beast)
- Loran (you receive the first chalice after you have defeated Amygdala)
- Hintertomb (you find the first chalice in the dungeons, created with the Central Pthumeru Chalice, at the second depth, in the chest. After you descend to that depth, in the corridor, tale the second door on the left. Then, in the middle, make your way to the drawbridge. On the ladder to the right, there is a switch that lowers the bridge, as well as a door to a large chamber. (note - there are lots of opponents inside) Clear the room and in the chest at the wall, you find the chalice).
- Isz (you receive the first chalice after you have defeated Ebrietas, daughter of the Cosmos)
 Each level requires you to unlock the door, in the first place.
1. They are generated with the chalices that you find, with Blood Echoes, Ritual Blood and other materials.
2. They have their own difficulty levels, depending on the depth (1-5).
3. They have four Depths, where you can encounter various opponents and bosses.
4. Descending to a lower level requires opening the gate, by pulling the lever.
5. The Root Chalices always generate random dungeons, the rest always generate the same dungeons. "Sinister" , "Defiled" and "Cursed" provide you with a negative effect for the duration of the exploration (e.g. a decrease in health points by a half).
6. The materials required to generate dungeons of higher difficulty levels can be found in lower dungeons. Starting with the first level of the Pthumeru dungeon, you can get to higher and higher levels, by searching for the necessary materials and Ritual Blood. The latter has its level, which corresponds to the depth of the dungeon -e.g. you can find Ritual Blood (3) in dungeons of the depth of 2 and 3. You can buy the first Ritual Blood from Messengers.
7. In the dungeons, there are lots of rewards and items, as well as treasures hidden in secret chambers. The most valuable items are locked in chests.
8. You can do a dungeon created by someone else - for this, you require a special code (glyph). You can find them using the Makeshift Tomb or by searching them out on the Internet.
9. With root chalices, you can generate dungeons with the most valuable items in them. During the ritual, you can add various materials to them, which alter the interior of the dungeon and, e.g. make it open to an invasion, or strengthen the opponents.
10. The materials that you need can be found in dungeons. Search through chests, kill opponents visit various types of dungeons - some of them can only be found in, e.g. Loran.
 The lever for the boss arena door.
Chalice Dungeon is nothing else than dungeons underneath Yharnam. You can generate them with the chalices that you find. The ones with the "Root Chalice" in their name always generate a different type of dungeons, with different opponents, bosses and items. The rest of the chalices generate the same dungeons each time they are used. Difficulty level of the individual Chalice Dungeons is not scaled to match your progress in the main storyline. Dungeons have their own difficulty levels, which depend on the tier of the chalice (1 - 5, easy to extremely hard).
Random dungeons have been divided into several different parts:
- Starting room - this is where you can light the lantern and get to a lower level, on the lift
- main arena - this is here that you find the lever for the door to the boss arena, there are many branches here, also up and down. The gate glowing in blue needs to be opened with the lever that you can, usually, close to it, surrounded by opponents. Also, you can find secret rooms with treasures here.
- the corridor leading up to the boss - the passage to the boss, sometimes, you can also find a side room with treasures here.
- arena - this is where you fight the boss,
- final room - if you have not got to the lowest level, you can take the corridor to where you light the lantern. Along your path, keep an eye out for door on the left or on the right.
In spite of their diversity, each one of the dungeons comprises the above elements.
 Nobody says there only is one boss...
- bosses that cannot be found anywhere else (or at least some of them) in the main storyline. Each dungeon has three depths with a different boss on each.
- special opponents (red halo). They are summoned by the mages around. Killing the mages kills the opponents automatically. They keep being summoned for as long as the mage is alive.
- several checkpoints lanterns identical with the ones that you find all around Yharnam,
- levers for doors to boss arenas and for doors to lower levels,
- traps, such as blades, projectiles from walls or crushing balls in narrow corridors,
- messengers from whom you can buy, just like in Hunter's Dream. Also, they can sell special items that cannot be found anywhere else.
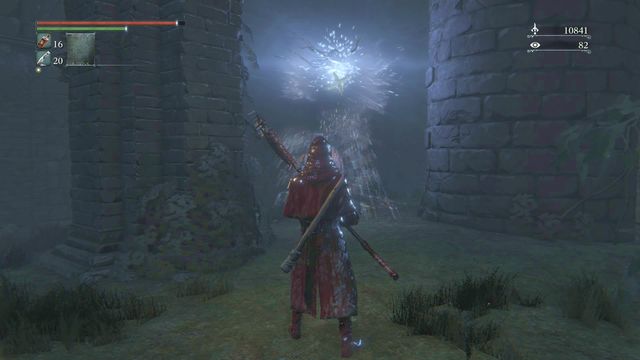 Some items are dropped by specific opponents (e.g. Arcane Mist).
- ritual materials. It is only here that you can get Ritual Blood of the tier higher than tier one. Apart from that, in the dungeons, there are many commonly found, and some of the rare, items that you need for crafting the highest tier dungeons,
- rewards that cannot be obtained anywhere else (e.g. better weapon types, strong runes or Blood Gems). Exploring Chalice Dungeons is often a good way of strengthening your character.
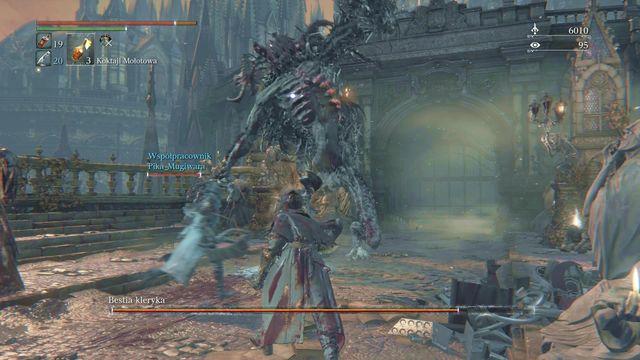 Remember to kill the opponents that summon red creatures.
In Chalice Dungeons, you can cooperate with other players. For this to be possible, you need to meet several conditions:
- create, at least, one dungeon with the chalice that you would like to join. It is impossible to join the dungeon that you have not visited, at least, once..
- in dungeons, it is possible to join in cooperation and to invade the other hunters. It is only possible in Root Chalices and "Sinister".
- dungeons only save the host's progression. The summoned players disappear each time after the enemy boss is killed.
- you can share your dungeon with the other players, using a special code (glyph)that you receive after you generate the dungeon. Also, you can explore dungeons, with lots of treasures, which have been generated by other players.
- after you defeat the last boss in the dungeons, after you use the Hinterlands Chalice, you receive a Short Ritual Root Chalice. You can use it on the Makeshift Tomb to search out dungeons available for cooperation or invasion.
At the end of the Pthumerian Dungeons, you encounter a special boss, for the defeat of which you receive a special trophy. To reach the boss in the first place, you first need to cross several levels that need to be generated with the following chalices:
1. Pthumeru Chalice
2. Central Pthumeru Chalice
3. Low Pthumeru Chalice
4. defiled Chalice
5. Pthumeru Ihyll Chalice
Additionally, you may have to visit other dungeons to complete the required rituals in the first place (e.g. you need Bastard of Loran that you can find in the dungeon that you generate with the Ailing Loran Chalice).
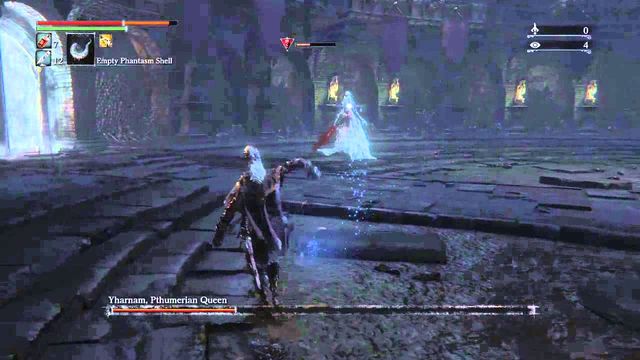 The last boss is the final of the Pthumerian dungeon.
Before you start fighting with the Pthumerian Queen boss, you first need to obtain Antidotes. Her bloody attacks poison you, which is why a quick way to eliminate this effect will be useful. In the first phase, the Queen attacks with blood projectiles. After her health drops to around 2/3, she starts also using melee attacks. She can near you very quickly and attempt a thrust at you. Dodging this attack allows you to attack her from behind. As soon as her health drops to a half, the third phase starts, where the Queen stats summoning her doubles that are slightly different, through (e.g. they fire one orb of blood, instead of three). You can kill them in one blow. The more important attack is the one that the opponent starts using then - by placing her hand on the ground, she summons blood daggers from below the ground, which deal immense damage. At such a moment, dash up to the queen and attack. While doing that, remember one more thing - as soon as you hear a baby crying, dash away from the boss or you will be caught within a magic ring and you will be unable to move, for a moment. Also, poison daggers are good against the Queen - 4 hits poison her and this may make it easier to win the battle.
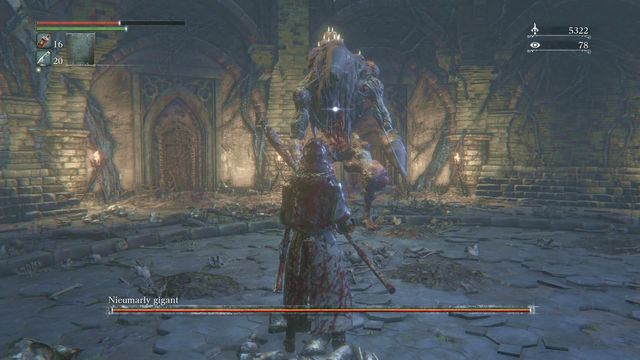 You encounter unique bosses only in Chalice Dungeons.
The below list provides all of the available chalices, as well as locations where you can find them. The names in brackets are the names of the dungeons that you can create with them.
To make things easier, names of dungeons, created with a given chalice, have been used.
Name
Location
Pthumeru Chalice (1)
After you defeat the Blood-starved Beast
Pthumeru Root Chalice (1)
After you defeat the second boss in the dungeon of the Pthumeru Chalice
Central Pthumeru Chalice (2)
After you defeat the third boss in the dungeon of the Pthumeru Chalice
Central Pthumeru Root Chalice (2)
After you defeat the second boss in the dungeon of the Central Pthumeru Chalice
Low Pthumeru Chalice (3)
After you defeat the third boss in the dungeon of the Central Pthumeru Chalice
Chalice Root Lower Pthumeru (3)
After you defeat the third boss in the dungeon of the Lower Pthumeru Chalice
Sinister Lower Pthumeru Root Chalice (3)
Sold by the messengers behind the illusory wall, the fourth depth of the Lower Pthumeru Chalice
Defiled Chalice (4)
After you defeat the fourth boss in the dungeon of the Lower Pthumeru Chalice
Cursed and defiled Root Chalice (4)
After you defeat the second boss in the dungeon of the defiled Chalice
PthumeruIhyll Grand Chalice (5)
After you defeat the third boss in the dungeon of the Defiled Chalice
PthumeruIhyll Root Chalice (5)
After you defeat the second boss in the dungeon of the PthumeruIhyll Grand Chalice
Sinister PthumeruIhyll Root Chalice (5)
Sold by the messengers, the third depth of the dungeon of the Grand PthumeruIhyll Chalice
Name
Location
Hintertomb Chalice (2)
The chest in the room above the bridge, to the right, second depth in the dungeon of the Central Pthumeru Chalice
Hintertomb Root Chalice (2)
After you defeat the second boss in the dungeon of the Hintertomb Chalice
Lower Hintertomb Chalice (3)
After you defeat the third boss in the dungeon of the Chalicea Hintertomb
Chalice Root Lower Hintertomb (3)
After you defeat the second boss in the dungeon of the Chalicea Lower Hintertomb
Sinister Hintertomb Root Chalice (3)
Sold by the messengers, third depth of the Lower Hintertomb Chalice dungeon
Name
Location
Ailing Loran Chalice (4)
After you defeat Amygdala
Ailing Loran Root Chalice (4)
After you defeat the second boss in the dungeon of the Ailing Loran Chalice
Lower Loran Chalice (5)
After you defeat the third boss in the dungeon of the Ailing Loran Chalice
Lower Ailing Loran Root Chalice (5)
After you defeat the third boss in the dungeon of the Lower Loran Chalice
Sinister Lower Loran Root Chalice (5)
Sold by the messengers, third depth of the Lower Loran Chalice dungeon
Name
Location
Great Isz Chalice (5)
After you defeat Ebrietas, Daughter of the Cosmos
Isz Root Chalice (5)
After you defeat the third boss in the dungeon of the Great Isz Chalice
Sinister Isz Root Chalice (5)
Sold by the messengers, third depth of the Great Isz Chalice
You can also play Bloodborne online, where you can receive help from the other player5s, render such help yourself or invade worlds of the other hunters. Multiplayer is different from a classic one, in at least several places, which you need to know about, if you want to use it efficiently.
Insight is the only statistic present in the multiplayer mode. It represents your familiarity wit the world.
Insight is not connected with multiplayer only:
- the amount of Insight that you have affects the effectiveness of the Beast mode (the more Insight, the weaker the effect),
- the more Insight, the lower the resistance to berserk,
- the Insight limit is 99 points.
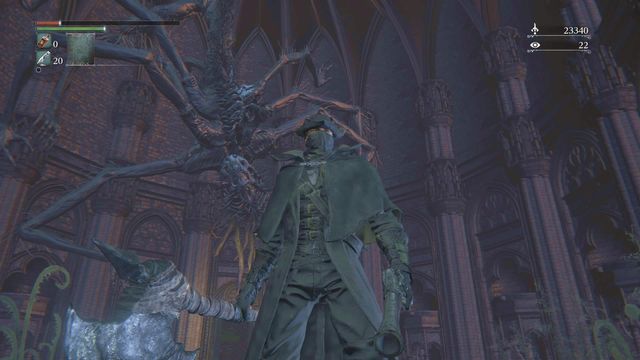 You see Amygdala's kin either after you have accumulated enough Insight, or after you kill Rom, the Vacuous Spider.
Additionally, you can note several things, after you have amassed enough Insight:
1 point - in Hunter's Dream the doll comes to life, and you can raise your level with Blood Echoes.
10 points - in Hunter's Dream, there appears a shop, where you can buy items for Insight points. If their amount drops below 10, the shop disappears and appears again, after 10 is reached again.
15 points - some of the opponents receive additional attacks.
40 points - opponents start resembling Amygdala and you can encounter them outside the Odeon Chapel and in the room, from which you enter Yahar'gul.
50 points - the tune in Hunter's Dream changes.
60 points - occasionally, you hear a baby cry.
You gain Insight automatically, with your progress into the game. It reflects your familiarity with the world so, you receive it for finding bosses and defeating them. Each time you enter a new location, encounter a special opponent or talk to some of the NPCs, your number of Insight point goes up. On the corpses, you can also find items, such as Madman's Knowledge and Great One's Wisdom, whose consuming provides you with one and two Insight points, respectively.
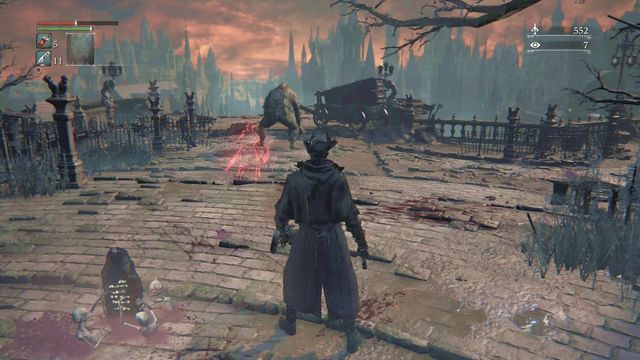 Watching ghosts of the dead players allows you to avoid making their mistakes
Apart from Insight points, you can use several items that have been designed for multiplayer only, and which allow you to summon other players, or to travel to their worlds.
Beckoning bell - you receive it after you gain 1 Insight point, from Messengers in Hunter's Dream. Use the bell only when you need help and you want someone to aid you in your world. Ringing the bell costs 1 Insight point.
Small Resonant Bell - you can buy it from Messengers after you have attained 10 Insight points in Hunter's Dream. You use this bell each time you want to help someone and travel to their world. Ringing the bell does not use up Insight.
Sinister Resonant Bell - you can buy it from the Messengers after you have attained 10 Insight points in Hunter's Dream. You use this bell whenever you want to invade another player's world and to fight them. Ringing the bell does not use up Insight.
Silencing Blank - you receive it after you obtain 1 Insight point, from Messengers I Hunter's Dream. After you use it, you end the multiplayer cooperation and return to your world, or send the other player to theirs. If you have found nobody yet, using the item allows you to end your search.
Notebook - you receive it from Messengers at the beginning of the game. It allows you to leave notes in various places. They can then be found and read by other players.
To be able to cooperate with someone, you need to meet several conditions:
- the distance between the player, who used the Beckoning bell, and the players who used the Small resonant bell (or the Sinister Resonant Bell in some cases) must be around 100 (in-game) meters. For this reason, you can most frequently connect by searching out players near lanterns and near entrances to boss arenas.
- the difference in levels cannot be higher than 10, both directions. Therefore, there is no option of teaming up a person at level 25 with a person at level 120.
- make sure that you have used the right bell. If it is active, every now and then, there will be rings appearing around your character and you will also receive an appropriate text message to let you know.
- there is a high-priority connection option. In game options ("Web") you can enter a password. If there are two players with identical passwords, they then meet the conditions for priority connection.
 Fighting a boss in a duo is a real pleasure.
To summon help, you need the Beckoning Bell that you receive after you have attained 1 Insight point. Ringing the bell uses up one point and you will be marked as a players that needs help. If cooperation conditions are met, you can expect that another player will appear in your world. You can explore a given arena together, up until either you (the host) or the summoned player (guest) die. Also, the cooperation is ended by the death of the boss of a given location, i.e. after the Silencing Blank is used (the summoned player returns to his world).
The summoned player appears as slightly weakened - he deals less damage, has less constitution and health points. This does not make the boss battle any more difficult (remember to use the bell before you enter the arena). The cooperation ends in the event of the host's death so, allow the other player do the majority of the work and attack after a dash. Surely, it would be very annoying for the summoned player, if you died right after you have summoned him.
To fight the boss, the host needs to cross the mist as the first, then the guest.
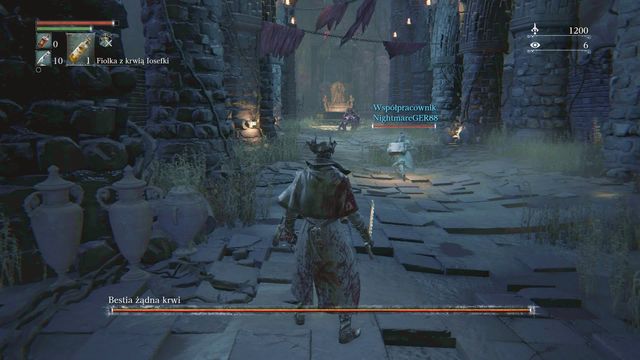 The guest attacks the boss and the host stays slightly behind.
To render help, you need the Small Resonant Bell. It is free to sound it and it starts searching for the person that called for help. After conditions are met, you will travel to the summoner's world.
The main advantage of helping the other players is that you do not lose your Life echoes after you die. Therefore, you can easily fight in someone else's world, to keep the Echoes that you have obtained. In the world of another hunter, you cannot pick up other items. Also, remember that it is you, in the first place, who should bear the burden of the fight, to prevent exposing the host to any death threat.
 Remember to take a bow, before the fight.
Apart from rendering help, it is also possible to invade the other worlds. This is what you use the Sinister Resonant Bell for. After you ring it, you can travel to the player that wants to fight, but also, in some cases, to one that wants help. You can then attack without worry. At this moment, your world is also marked as ready to be invaded. So, it is possible that it will be invaded by another player, while "at home".
In some locations (e.g. Hemwick Charner Lane, Nightmare Frontier, Nightmare of Mensis) after the bell is rung, also the Beckoning Bell, you receive information about a woman that is ringing a bell. It is the opponent (priest/mage, identical as while fighting The One Reborn), who summons enemies to your world. This means that even if you want help, what you get is a player that wants to fight. Therefore, you can end up with a friend or a foe, or even both, at the same time. Finding and killing the ringing woman (usually, she is well hidden) makes your world impossible to be invaded.
There is an unwritten rule, in 1 vs. 1 battle, about not using any healing, because this unnecessarily makes the battle longer. If your opponent is using Blood Vials, you can cast Numbing Mist on him to make that impossible.
In the game, there are three covenants. Two of them (Executioners and Vilebloods) are the opposing ones. If a member of either makes it into your world and you put on the rune that activates the other covenant, battle ensues. Even though the other player is here to help you. While in the third covenant Hunters of Hunters, as a priority, you will be joining the other players in invasions and killing the other hunters.
Regardless of the option that you picked, the ending of the game starts the game over. However, this is not a completely new start - there are some other rules, if you start the game again, as the same character. Although the game world itself is reset, you retain some of your progress and items. This advantage that you have from the very beginning is alleviated with a boost to the opponents, who now have more health, stronger attacks and generally higher resistance. This is especially discernible in the case of boss battles, who seem to be smarter and more aggressive. The hardships of the battle will be rewarded with the number of Blood Echoes that you receive after defeating them.
 After the last battle, you automatically start New Game +.
- opponents deal more damage and have more health,
- you receive more Blood Echoes from killing opponents, the difference is more pronounced in the case of stronger opponents and bosses,
- bosses seem to be stronger, smarter and more aggressive, they now receive discernibly more health points,
- if you meet the requirements concerning the level of your character, a player that plays the game for the first time, may join your game; this is also true the other way around,
- all of the unlocked shortcuts and lanterns lit are now reset to their initial state, you start again at Iosefka Clinic,
- you lose key items, e.g. the key to the gate in Cathedral Ward,
- chests containing some if the item that you already have now contain different items, usually family death Blood,
- you lose all of the One Thirds Of Umbilical Cords that you have not consumed.
- your experience level, you start the game at the same level at which you ended the previous game,
- quick items in your inventory (Blood Vials, Quicksilver bullets, etc.)
- Blood Echoes and Insight,
- the majority of your equipment, with items needed for weapon upgrades, Chalices, or gems,
- runes previously obtained and your level in the covenant,
- badges and the option to buy weapons that you have previously unlocked but not bought,
- owned weapons and clothes,
- the option to use Caryll Runes and blood gems, from the beginning of the game,
- Chalice Dungeons already generated and your progress in them.
 Difficulty level in Chalice Dungeons is not that much higher because they have their own difficulty
Starting the game over (NG+) allows you to make a quicker start, mainly thanks to the weapons that you own at the very beginning. Also, you can complete the missions that you missed earlier, or solve them in a different way. All this combined allows you to experience the beauty of Yharnam again, while retaining the items that you have earlier strived to obtain, and the progress that you have made in Chalice Dungeons.
 With the chapel blazing, you need to make your final choice.
After numerous hardships, it is finally the time to end. The fate of your character will finally be decided after you enter the Nightmare of Mensis and defeat Micolash, Host of the Nightmare and Mergo's Wet Nurse. Then, return to Hunter's Dream. There, you find the blazing chapel and Gehrman who is waiting for you. Take the service of the Messengers and go to meet the old hunter, whom you find on the vast glade, to the right of the chapel. It is on the last conversation that the ending depends on. If you meet the additional requirements, you get to unlock another game summary.
 Talk to Gehrman and decide about the ending.
Talk to Gehrman and pick the option to sacrifice your life. This choice ends the game and is followed by a short cutscene. Your character will be decapitated to reborn in the place free of the beasts.
 The refusal to defeat Gehrman.
You can simply refuse to grant Gehrman's request. This is followed by a battle, in which he takes on the role of the boss. In case of your failure, you can still take the services of the Messengers, or even keep exploring Yharnam. Only defeating the enemy, in the case of your failure to meet the additional condition, ends the game. Then, on the arena Moon Presence appears, whom you need to surrender to, to remain at the other side of the Hunter's Dream.
 "Oh, good hunter..."
This ending becomes available after you have met additional conditions - before you defeat Gehrman, you need to consume 3x One Third of Umbilical Cord. Then, refuse Gehrman and defeat him in battle. Right afterwards, the fight with Moon Presence starts. In the event of a failure, you can replenish your supplies, or even keep visiting various locations and raising your experience. Defeating that boss ends the game and a cutscene ensues, in which the last possible ending is shown. Fortunately, you will be take care of by the good, old doll.
In Bloodborne, there are a dozen-or-so new locations. In each, you can light several lanterns, which allow you to respawn in a given location. All of the lanterns, once lit, are available via the tombs in Hunter's Dream and they are used as fast travel landmarks. However, to light a lantern, you need to visit the location first. The above map presents all of the locations that you can visit and where you can light lanterns. To get to some of the locations, you first need to meet certain conditions (e.g. own the Tonsil Stone or Cainhurst Castle Beckoning), while the others become available after you kill certain opponents. Locations of bosses have been marked with a separate icon, just like the presence of hunters (not necessarily hostile ones).
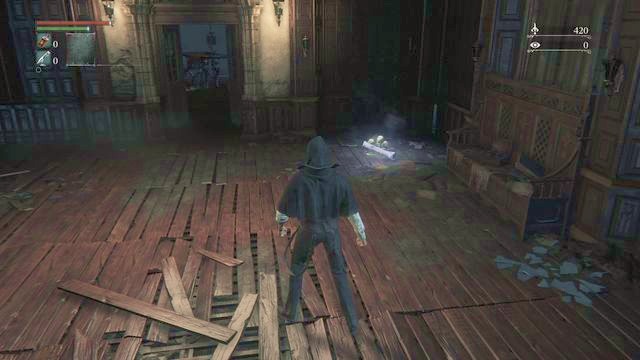 Reading the notes will help you get some knowledge about controls and fighting.
When the game will begin walk through the only open door which you can see it in the left part of the room. Here you can read the notes left by the Messengers (they are focused mostly on the controls).
 The first enemy will kill you pretty fast.
In the next room you will meet your first enemy. You don't even have to try and fight him since he will kill you instantly because you don't have any weapon.
Note: It is possible to avoid this death and reaching the first lantern that carries you over to the Hunter's Dream. However, you gain nothing this way, the effect will be the same as if you died.
 Later on you may choose either the melee weapon or a firearm. You will also receive a Notepad.
You will be transferred to the Hunter's Dream. It is a buffer place which allows you to perform several actions such as upgrading your weapons, trading, fast travelling and so on. While you are walking through this area you can read some notes which will reveal some information about control and fighting.
Your main goal, though, is to get a weapon. To do so you need to walk down through the stairs on the right side of the building. You will see the little skeletons called the Messengers. You will receive from them a weapon (you may choose between three melee weapons and two firearms) and the Notepad. When you will gather your supplies you may return to the game by using the Yharnam Headstone which you can find on the bottom of the stairs. Use it to travel to the place called 1st Floor Sickroom.
 When you have a weapon you may stand against the first enemy.
You will return to the room where you were killed by a beast before. You should notice few things. First of all fighting in this game is not so easy and every battle will require you to be focused. You can't just rely on one type of attack and smash a button in hope that it will help you defeat an enemy. Even though the beast is already weakened you need to watch out for its claw strikes.
Note: After you return from the Hunter's Dream, you can return to the stairs at the top of which, there is a locked door now. Talk to Iosefka and you will receive a Iosefka Blood Vial. You can use it to replenish health points that you lost in the battle.
Use the whole bunch of options. You may interrupt the enemy attacks in a right moment ([L2]) or dodge them ([wheel]), use your fast attacks ([R1]) or the strengthened ones ([R2]) however the second type of attacks requires you to channel your action and in result it makes you more vulnerable to damage. Don't forget about locking the camera on your enemy ([press the right analog stick]). Try to attack after your successful dodge. If you will take a hit you will see that your life bar will be reduced and your lost Hit Points will be marked with a white line. In this case you need to make a counterattack to "regain" a part of your health bar. If you will be to late you will be unable to heal in other way than by using some Blood Vials.
 Don't forget about collecting the Blood Echoes.
After the fight you should notice that somewhere around (in the place where you have died earlier on) will be a stain of blood highlighted with red color. Remember to collect these blood stains since they are the Blood Echoes left after your death. If you will be unable to collect them and you will die again - you will lose them permanently.
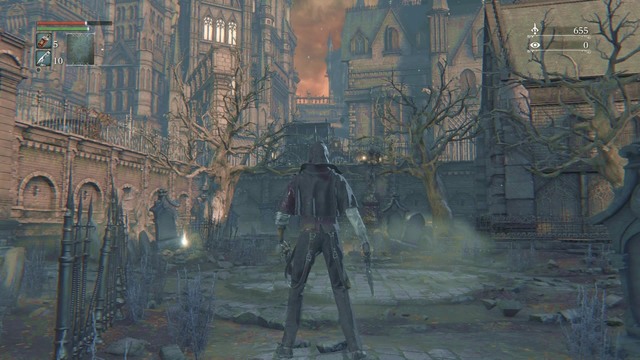 You will find various items next to the highlighted bodies.
After you will defeat a beast you may loot its body to find some Blood Vials and collect another one in the passage leading to the next room. You should notice that you can find items only where are the highlighted bodies of your enemies and some humans as well. These corpses are in many places. Finally you can go outside. You will see a body in the middle of round square which you can loot to find few Quicksilver Bullets. Open the gate on your left.
 Look around the place where you've started the game - to the right from the window entrance.
You can return to the Clinic after defeating Vicar Amelia (you will gain access to the Forbidden Woods, from where you will head to Central Yharnam and eventually to the Clinic). After going in through the window, turn left and you will reach the place where the game has begun (a single enemy, Cainhurst Summons).
 You will find a chest in the room at the end of the corridor.
In a room at the end of the corridor, to the left from the window through which you go in the first time, you will find a chest with a Communion Rune. When leaving this place, you can turn left and open the door. You will be at the bottom of a flight of stairs (you will also hear a warning from somebody upstairs).
 You can avoid some of the attacks by standing behind the table, but you also risk getting stuck when dodging.
When going up the stairs, you will meet the person that warned you. The fight that awaits you is going to be difficult, but you can make it easier by focusing on avoiding one special attack that the enemy always signals. Your opponent will throw snakes from her hand, but if you dodge this attack, she will be stunned for a moment, leaving her body vulnerable to your attacks. As for the whip and the gun attacks - you can avoid them by standing behind the table or chair (note - being hit by the whip several times in a row takes you a lot of HP). However, when performing dodges, be careful not to get stuck somewhere, because it is difficult to control the hero in this small room. It is better to go outside and fight near the stairs, where there is slightly more space. For winning the battle, you will receive 3200 Blood Echoes and Oden Writhe Rune.
If you want to obtain One third of Umbilical Cord, do not attack Iosefka - come back here after the fight with Rom, the Vacuous Spider.
 Avoiding an attack will allow you to hit the stunned enemy.
Note: Your opponent can heal herself, just like you, so don't be surprised when her HP starts rising. Moreover, if you get hit by the missile that she shoots at you as you enter the room, you can forget about winning the battle - it prevents you from using Blood Vials.
 Iosefka, as you meet her later into the game.
Iosefka, after the fight with Rom, the Vacuous Spider, can be found in the same location. As you climb up the stairs, you receive no warning and, after you enter the room, you note Iosefka lying on the bench. She is neither talkative, no dangerous. Kill her to receive One third of Umbilical Cord.
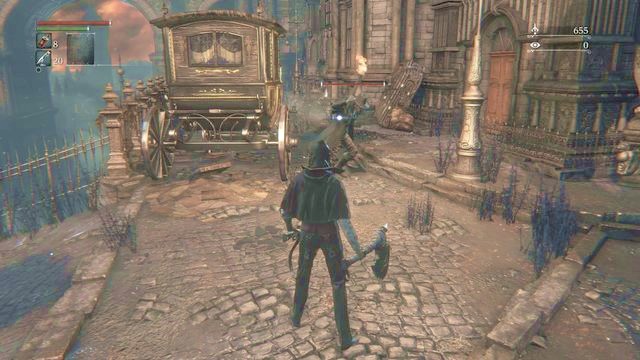 The enemies with torches may painfully set your her on fire.
Once outside you can turn towards a small balcony ahead of you. You will find a body with Blood Vials. Turn right and go higher. You will see there the first of many local enemies who use axes and torches. Watch out for his attacks and attack him right after your successful dodges. Remember that if you will stand to close to him he may set you on fire what will result with huge damage taken.
On the other side of the balcony you will find next two enemies who will stand up when you will get closer. Remember to lock the camera on one of them and try to kill him even before he will notice you by getting close to the overturned wagon. In the corner you will find a Molotov Cocktail.
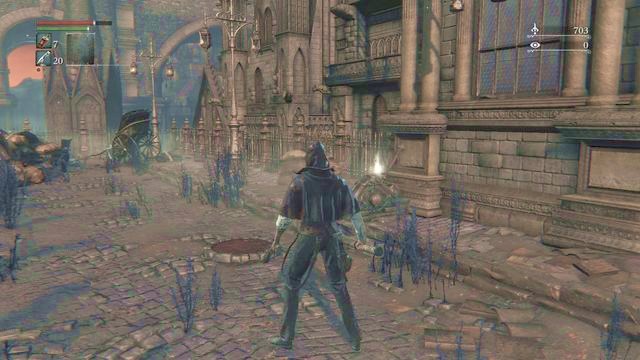 Using the mechanical devices usually helps you unlock some new paths and shortcuts.
In the middle of the square you will find another Blood Vial and you will be able to use a device which will make the ladder fall out. Climb on it and go to the lamp and light it up what will let you travel to the Hunter's Dream and will become your after-death respawn point.
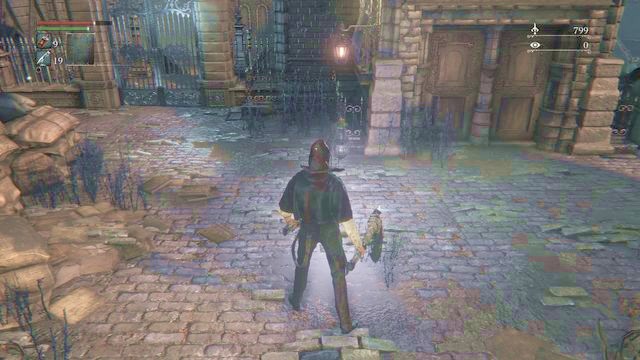 If you will die you will reborn next to the lamp which you have lighten up.
Now you can teleport to the Hunter's Dream to, for example, buy some cloths which will provide you a better defense. However you need to remember that every opponent will respawn when you will return to this area. In the window opposite, there is Gilbert - talk to him to learn some interesting information. Look around for windows and doors with lit lanterns in it, because there usually are people inside, who can be connected with a side quest.
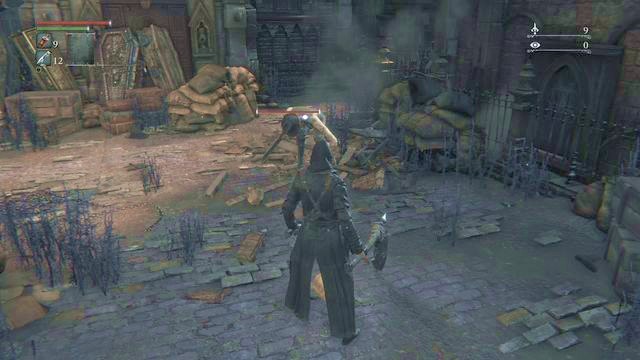 After a series of attacks your enemy will falter. It is a perfect moment to strike him with a lethal blow.
When you will pass the lamp you may turn right. You will find here Pebbles which you can throw around to lure your enemies from their groups and fight them in duels. Now you may both jump down or go right although the better way to choose is the second one.
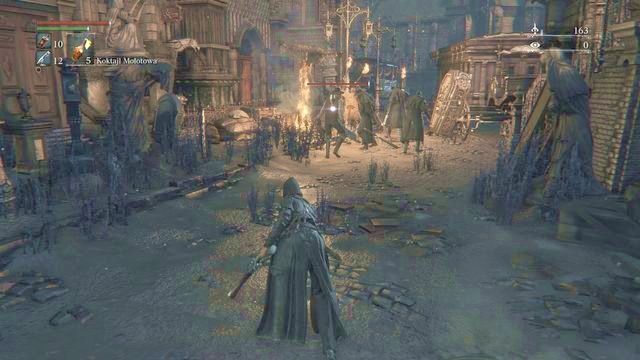 An accurate throw with a Molotov cocktail will allow you to eliminate even an entire group of enemies at once.
Go lower until you will see an enemy who is turned back to you and another one who sits next to the crash barrier (he will stand up when you will get closer). Kill them and climb down to notice your first larger group of enemies. If you prefer to avoid fighting with all of them at the same time you may want to use the Pebbles which you have found before to lure them out singly or the Molotov Cocktails to kill few of them at the same time. You should especially watch out to never get between few enemies at the same time since in result you may take hits from every side at the same time and in result you will probably die pretty fast.
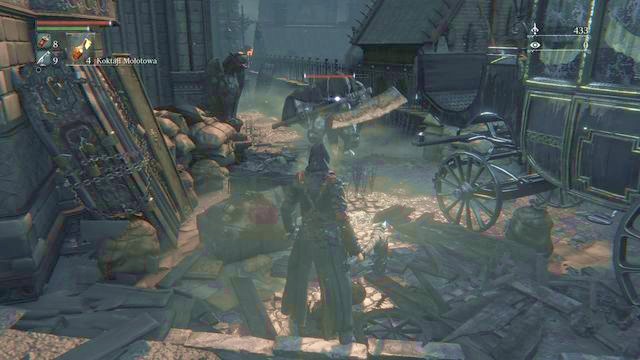 You may avoid some of the enemies however sometimes it is beneficial to fight them anyway since you may be rewarded with bonus items and Blood Echoes.
When you will take care of the patrol you may go down towards left. You will see a locked gate which you may open with a device located right next to it. This passage will allow you to travel faster in the future. On your left you will see few boxes behind which you may see a bigger enemy who holds a chopper. If you feel strong enough you may destroy these boxes and face him however his attacks deal really a lot of damage and if he will be able to hit you with his attack series you will basically just die. Beware of his swings and following them fist strikes. Keep a long distance with a long-range weapon and attack mostly as a counter attacks. After the fight go further on slightly uphill.
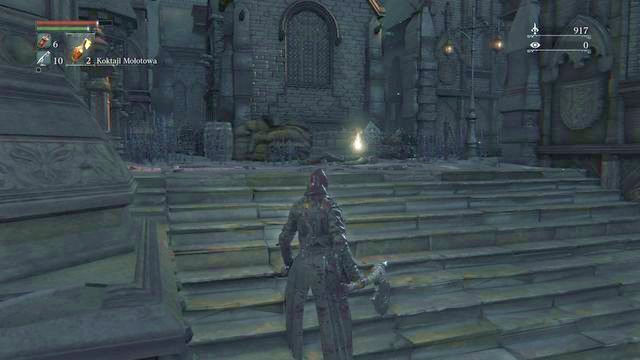 Beware of the enemies jumping out from behind the corners.
During your way there you will probably see another group of enemies. Just like before try to avoid them, fight with smaller groups or burn them with Molotov Cocktails. Behind the wagon you will see an enemy with a firearm. When you will kill him you may loot his body for few bullets. Climb up the balcony.
Use the stairs and go to the highlighted body. Watch out for an enemy jumping out on your right and dodge his strike. When you will kill him get the Blood Stone Shard (you will be able to use it to upgrade your weapon later on). Keep walking through the balcony and watch out for another enemy ambush.
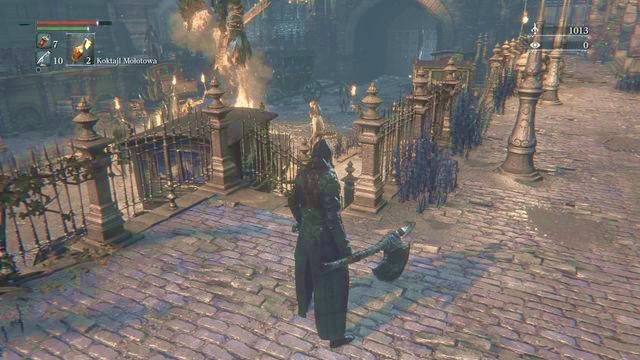
After a while you will get to the place shown on the screenshot above. If you will go downstairs you will see a huge amount of enemies and you need to lure some of them on the balcony on which you are already since going downstairs is a pretty wrong thing to do. Clean the area and go to the end of the balcony where you will find an enemy which body will give you few Quicksilver Bullets.
You may go downstairs only if you will leave there a single group of enemies. If you want to fight them watch out for two enemies shooting at you with guns. A good way would be letting them notice you and lure the melee fighters out. Since it will allow you to fight with the shooters later on this battle will be much easier for. You should also watch out for enemy patrols if you had not deal with them earlier on. Next to the gate you will also find the Blood Vials.
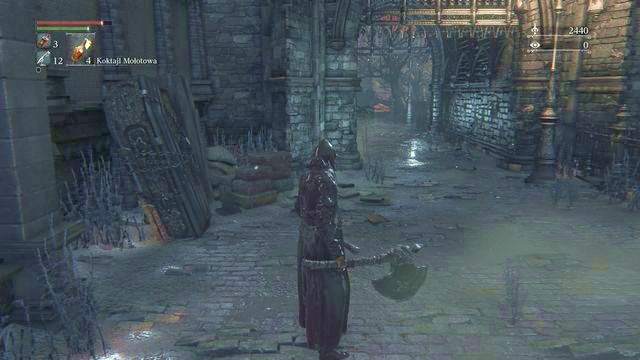 The further path leads through the gate.
After the fight go to the balcony on the left side. You will find here a body containing the Coldblood Dew which may give you some extra Blood Echoes. On one of the wagons you will also find a shooting enemy who will attack you in a company of a wild dog. A few steps behind the gate you will find a body next to the stairs which you can loot for new Blood Vials. Go to the small square.

On the yard, you can divert from your path. To do that, before you go down towards the fountain, head towards the coffins shown in the screenshot. Smash them, which will reveal a passage down. There, kill the dogs, also the ones in cages (they may break free) and go left. A bit ahead, you can take the stairs on the left, or keep to the right side - pick the latter and head towards the building. Open the door and leave across the other one, quickly. Then, climb up the stairs - on this side, you can open the gate to Central Yharnam.
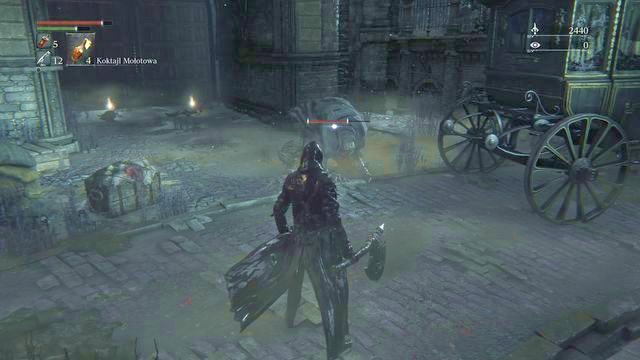 A moment after the enemy's swing you will have a good moment to counterstrike him.
Go now to the gate where you will find a knocking enemy which is quite strong. You should at least try to defeat him since you can loot the bodies around him to get the Torch (which is a weapon) and some Molotov Cocktails. This enemy is pretty coarse however he may use a fast jump attack which you should especially watch out for. If you want to defeat him fast you may want to use the Molotov Cocktails. Now you can go through the stairs on the other side and go through the balcony to turn towards the gates where you will find a Coldblood Dew.
Note: You can get around the opponent, but he attack you anyway, as you are fighting a group of opponents above. Therefore, it is better to deal with him now, because it is easier.
 You can easily eliminate a group of enemies with the well-aimed Molotov Cocktail.
Passing the next stairs you will find an enemy patrol and three wild dogs which are not very durable although they are capable of striking with devil-like speed what may be very dangerous since you have to deal with a whole group of them. You should use a cocktail here and immediately eliminate an entire group of enemies. Gather the items and on the - on a bench next to the wall you will find six Blood Vials in total.
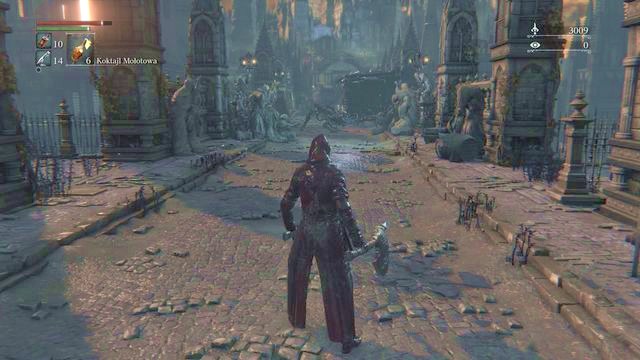 The monsters on the bridge are very durable and fast. You should help yourself by using some firearms and cocktails.
These Blood Vials will be very useful just a moment later since when you will exit the stairs you will get to the bridge which is patrolled by two strong beasts. Try to throw at them a cocktail from far away since they will almost surely attack you both at the same time. Try to focus only one of them first. If you will destroy it fast enough this battle will become much easier. The beasts are very fast and if you will be hit by his claws you will instantly lose some Hit Points. You can try to keep them on distance by spreading out your weapon ([L1]). In the case of the Hunter's Axe, you will not be able to use your pistol this way and striking will take some time to succeed.
Note: Due to the difficulty level, you can simply get around those opponents, dash quickly ahead and, behind the corner on the left, climb the stairs into the small house. Inside, kill the two opponents and kill the werewolves stuck in the doorway. As you get lower and leave through the door on the left, you reach a gate and find a shortcut towards the lantern.
Notice: To this point there was basically one path to follow however from now on you may choose one of at least three different ways. The order presented in this guide will let you go to every area and in the end you will find the arena with bosses.
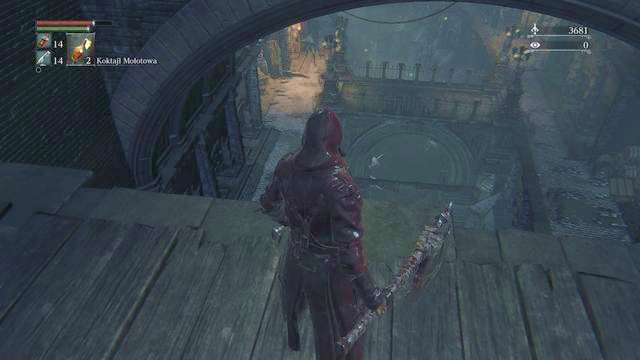 Descent to the sewers.
When you will defeat your enemies you may pass the bridge and get to the boss or go down to find a body hanging out of the edge which contains the Pebbles and the Blood Stone Shard behind the bags. When you will turn toward the barrels in the niche on the left you may clear the patch by destroying the crates. It will allow you to visit the hidden sewers.
 The exit from the cave in Forbidden Woods.
After defeating Vicar Amelia, you will gain access to the Forbidden Woods. From the higher part of the village, you can go to Central Yharnam. You will find yourself in front of the square that you know from the beginning of the game, after leaving Iosefka's Clinic (you will find some Coldblood Dew near the body). Open the gate to unlock a shortcut to the square.
 A single enemy will stand on your way to Iosefka's Clinic.
Go through the gate that you've opened before, to the left of the place where you've climbed the ladder. Use the stairs to reach a small square. You will be attack by a single enemy (Madman's Knowledge near the body). Climb the ladder to the roof of the building and find the window of Iosefka's Clinic.
 On both balconies you will find some isolated enemies.
If you want to jump down watch out to not fall on the very bottom or for safety just use the ladder. There are two balconies and both of them are populated by enemies you have already seen on the streets. The only difference is their weapon - if they will hit you your character will be pinned to the ground and you will take more damage than before. You can take these enemies one by one and a lot of them will drop Blood Vials so you will be able to heal yourself in need.
 It is difficult to jump on the wooden bar although it is both possible and beneficial.
On the top you will find three enemies in total. When you will defeat them find a ladder (somewhere in the middle) and go to the bottom of the sewers. You may also try to jump down on the wooden bar first and then jump to the sewers. Next to the corpse on the bar you will find the Thick Coldblood. Here you need to watch out for few mutated rats which are weak although fast.
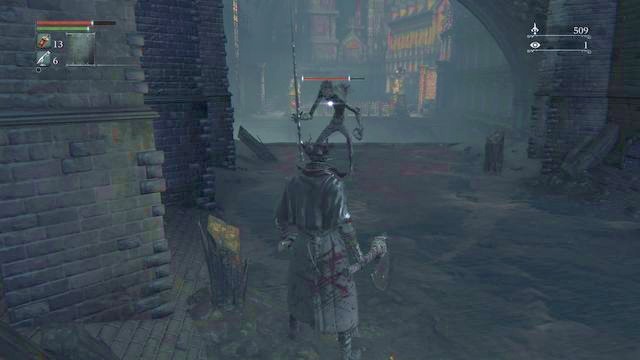
When you will defeat them you may go deeper into the sewers. When you will get to the edge shown on the screenshot above you need to prepare for the attack from your left. You will ambushed from there by an enemy who really well fights with a long staff. Keep your distance and don't let him knock you down or he will hit you multiple times while you will be unable to defend yourself. Attack after your dodge or from behind. In a place where this creature was hidden you may find an entire Hunter armor set.
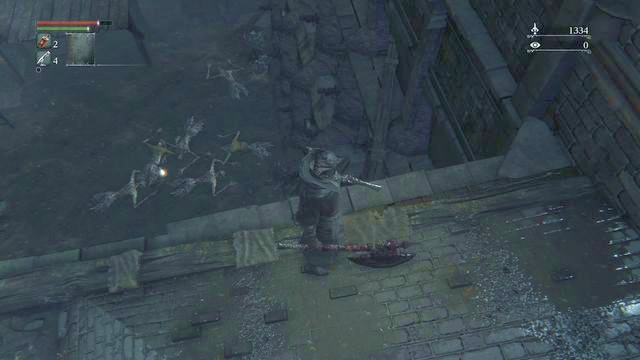 Carefully jump down.
Now you can jump on a ledge below and go on to the bottom. It will help you save some Health Points. Still though you need to be careful since there is few crawling enemies around. Even though their attacks are not very strong it is better to run away from there since they can attack very fast. A Molotov Cocktail will be perfect here. From this point you may keep exploring the sewer in two directions. Right now you should stay on the bottom and turn left, even deeper into the sewers.
 Lure the pig out of the sewer since it will greatly help you dodge its attacks.
When you will get to the bottom you will be attacked by few enemies including some squawking birds which are rather harmless as long as they are not in the air. In a small niche on your right you will also find a Blood Stone Shard. Finally you will get to the tunnel where you will find a gigantic pig. If you want to defeat it you need to lure it out of its lair. Get close enough to it and then run away. The pig's most dangerous and most damaging attack is its charge. It will do it for the first time when it will exit the tunnel. If you will dodge it you will be able to attack the pig from behind. You should also watch out for its kicks (which initiates when the pig slightly rises) and the poisonous breathe which will gradually damage you over the few seconds. The pig will drop the Blood Vials and you will be able to enter the tunnel. Here you can find the Saw Hunter Badge (thanks to this, you can buy all the weapons offered by the Messengers) and a Coldblood Dew.
Note: If you dash into the tunnel quickly enough and avoid the toxin spit by the pig, you can attack its behind (fully charged attack) to stun the animal and perform the finishing attack.
Note2: After you return the Red Jeweled Brooch toViola's daughter (side quest) or tell her about the safe place (Oedon Chapel only), go to the sewers again to claim the reward for defeating the pig Red Messenger Ribbon.
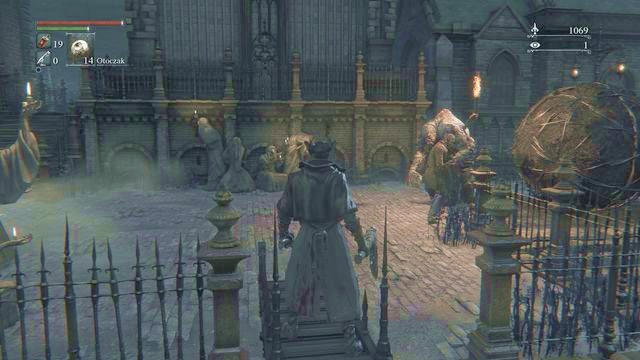 When you will exit the tunnel you need to watch out for two enemies. The path on your left leads to two sets of stairs who will let you go to an arena with boss.
In the end of the tunnel on the left side you may find a way outside. If you will use the ladder on your right you will meet two enemies. One of them uses a brick although you should focus the weaker one who uses a shield. Remember to stay away from the bigger one when he starts to swing out his brick. If he will hit you it will result with a rain of painful strikes. After you will defeat these two you may go upstairs where you will find another two enemies, this time using long sticks. Try to kill one of them as fast as you can. Since they stand back to you so you can hit them pretty hard at the beginning to increase your chances. If they will start punching you together you will probably die. Their corpses will drop some Blood Vials and the Brave Hunter Badge. Exiting through the next stairs will lead you to the locked square where you will find a boss named Father Gascoigne.
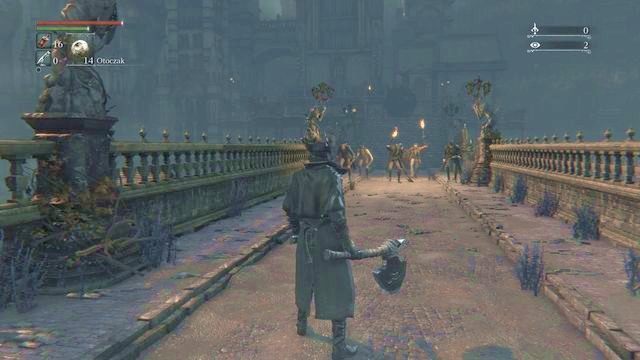 If you will exit the sewers you will see that the bridge is guarded by a group of enemies. You need to also watch out for the burning ball.
You can get to the boss with another way as well. You may return through the tunnel in which you have found the pig. On your right you will find a ladder leading outside. You will get to the bridge. If you want you can also turn on the elevator on your left which you can use if you will fail to defeat the boss and you would like to take a shortcut to return here. There are five enemies at the end of the bridge although you may just avoid them and wait for the burning ball which will soon roll over this place and probably kill some of your enemies anyway at least unless you will dodge it. Later on you will find the same type of enemies as you could see after defeating the pig. The further path will lead you to the same boss.
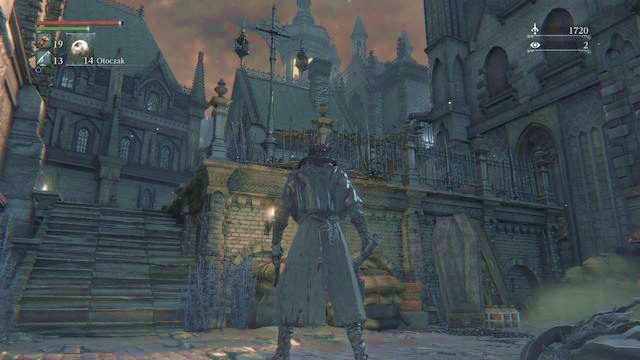 The birds become dangerous only when they start flying.
From the crossroad in the sewers you may go straight to the exit (go to the top through the either of the two ladders) or explore the paths ahead (choose the first ladder and go deeper into the tunnel). When you will go out to the top you may turn right or left. The left path will lead you to a little balcony with few aggressive birds. Defeat them to loot from a nearby corpse the Madman's Knowledge.
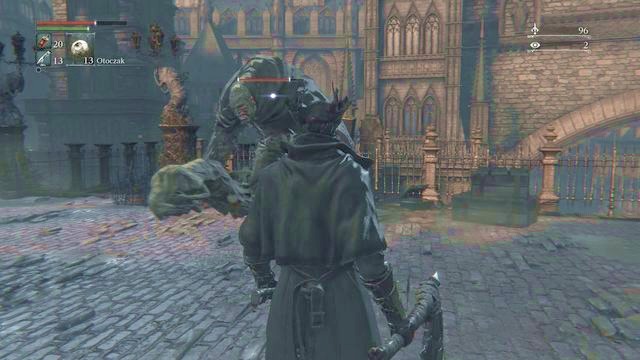 If you will walk to the enemy very slow you will get an element of surprise. In other way it will attack you almost instantly.
Now go from the left to the area where you can find one of the bigger enemies. It is turned back to you what gives you an opportunity to get closer to him very slowly and attack him from behind with your strongest attack. Now you can use the ladder to get to the top and open the gate which will allow you to get to the square which you have passed before. If you will explore the Central Yharnam later on you will be able to use this shortcut.
 Behind the boats you will find few rats and the Madman's Knowledge.
When you are in the sewers you may take the path behind the next ladder to turn left and then go to the end where you will find few boats. Behind them you may defeat two big rats and then loot a corpse nearby to get the Madman's Knowledge. Now you can return to the main tunnel and use the ladder to go up.
 When you are on the bridge you will see two enemies with firearms.
Even when you will be just climbing the ladder you will already be fired by two enemies who are hidden on both sides of the bridge. The third enemy is even more dangerous since he uses a long staff and if you will not protect yourself from the series of his attacks you will be in big problem. At first you should not run to the room in front of the ladder but instead you should fight with the enemies in your sight. After that go ahead through the balcony to the closest end where you will find the Coldblood Dew and to the second end where you will be attacked by the birds. On the other side, behind the coffins, you will find the Oil Urn.
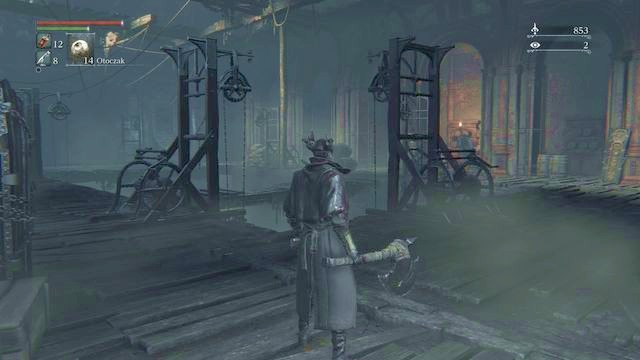 You need to take care of the enemies in the next room one by one.
Return towards the ladder and go to the big chamber behind it. Right behind the entrance beware of an enemy with a gun on the left and another one with a torch on the other side. In the opposite corner you will also find an enemy with a long staff. All of these enemies you can take one by one so take advantage of the stealth option and try to attack them as strong as you can from behind. When you will clear this area you can also jump down although you will not find here anything interesting beside a bunch of rats. That's why you should go upstairs where you will find one isolated enemy with a torch.

Upstairs, right before you leave the sewers, it is a good idea to visit the upper part. To do that, in the spot shown in the screenshot, smash the barrels and jump down onto the wooden platform, carefully. Take a look around and you find two hanging bodies here - cut the ropes to make them drop. It is a good idea to turn towards the spot that the bodies dropped onto to find a weapon - Saw Spear and 2x Blood Stone Shard. Above, on one of the corpses, you can also find Coldblood Dew.
Finally, enter the small passage to the right of the window that you took to enter here. Outside, there is hunter Eileen. Talk to her and you will receive 4x Bold Hunter Mark. Repeating the conversation will be rewarded with a gesture - Shake Off Cape.
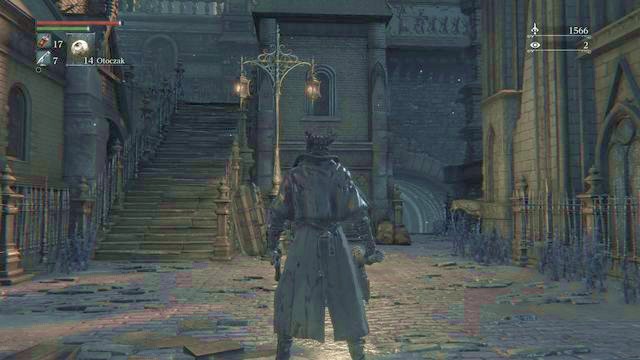
After you exit the sewers, on the right, you can spot a dog baying by the house. Inside, there is an Old Lady, who you can tell about safety (side quest).
A bit ahead, you will enter the square with few angry dogs (few of them are locked in the cages and you can kill them if you want). Turn towards the balcony on you right. You will find a Coldblood Dew nearby the barrier. Now you need to go upstairs and get to the location shown on the screenshot above.
The left path leads to the bridge although you can use it only to get from the bridge to the bottom. That's why you should choose the right path to get to the dark building. You will be attacked inside by an enemy and the second opponent will sit in a wheelchair in the left part of the building (he will not attack you at first but when you will get closer to him he will shoot towards you from a gun). You will also find a Pungent Blood Cocktail and, on a shelf on your left, a note which you can read.
 On the top of the stairs you will open the gate behind which you may unlock the respawn point.
Now you can exit the building through the passage located opposite to the entrance. When you will be outside you should watch out for the one more enemy and loot the body nearby to get the Blood Stone Shard. When you will get to the top of the stairs you will find a lever which will open quite useful shortcut which will help you to get to the lamp which you may use as a respawn point.
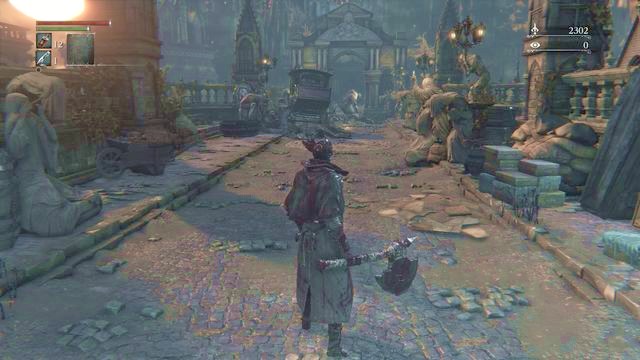 The first boss is located in the end of the bridge.
In this moment you should decide to try your strength against one of the bosses. You may start with Cleric Beast at the end of the bridge and then Father Gascoigne who is not so far from the exit of the sewer's tunnel where you could face the charging pig. If you have followed this guide you should have already visit every possible area.
Before the fight you should also unlock all the passages (if you haven't done it yet) and if you want to you may also go to the Hunter's Dream to purchase some useful equipment. The further part of Yharnam will be unlocked after you will defeat Father Gascoigne, killing Cleric Beast is rewarded with a badge that allows you to buy the key to the gate in Cathedral ward (this is not the only way, although it is the easiest and fastest one).
Note: When you will be killed for the first time on the arena you will be transported to the Hunter's Dream. From now on you may talk with the woman in dream and increase your level and statistics by using the Blood Echoes.
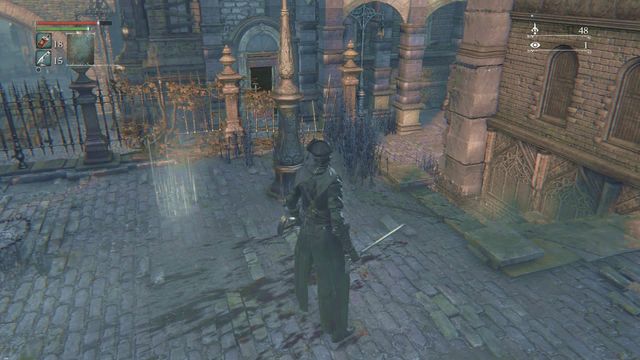 The place where you can summon Father Gascoigne for help
Note 2: It may be much easier to fight Cleric Beast if you lose the fight first. You will then receive Insight, which allows you to summon other players into your world. In the case of this boss, you can summon Father Gascoigne, as long as you have not defeated him earlier. From the Central Yharnam point (the lantern) go down, across the gate on the left. Opposite the opponent with the torch, there is a note - read it. Here, you can summon Father Gascoigne, who will follow you into the arena and help you with the fight. Cleric Beast will mainly focus on attacking the summon, thanks to which you will be able to deal damage yourself, without any problems.
If you have already defeated Father Gascoigne as the first one, you will not be able to use his help. Instead, you receive from Gilbert a free weapon (visit Cathedral ward before that) - Flamesprayer. You find Gilbert in the window, across the lantern in Central Yharnam. Use the weapon, because the beast is vulnerable to fire.
Also, you receive this weapon after you kill both bosses, regardless of the order, and after you visit Cathedral ward.
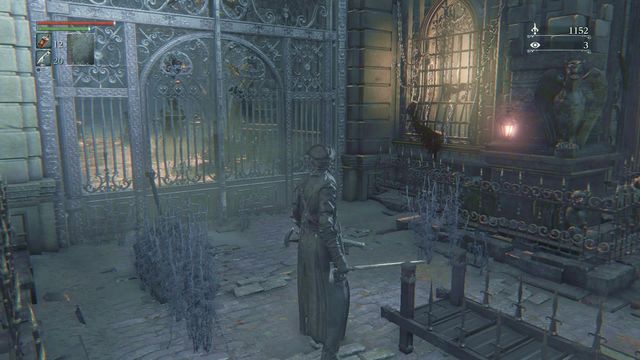 The window, where you find the girl looking for her mother.
Note3: Before the fight with Father Gascoigne, it is a good idea to talk to Viola's daughter. You find her after you climb the ladder in the main fork in the sewers. Then, on the surface, go left and next to the opponent with a brick, you will find another ladder. There, you can open the gate to the square with the fountain and talk to the girl in the window. From her you will receive the Tiny Music Box, which you can use during the boss fight.
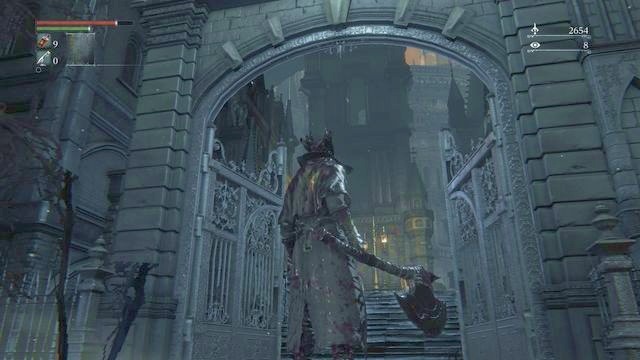 Through this gate you will enter the Cathedral Ward.
After the fight with Father Gascoigne you will receive a key which will allow you to open the gate located right behind the arena where your battle has happened. When you will stand in front of it you should turn to the balcony on your left from where you can jump on a building's roof where you will find a body with a Red Jeweled Brooch (this item is connected with the quest to find Viola). Now you can open the gate and enter the tomb.
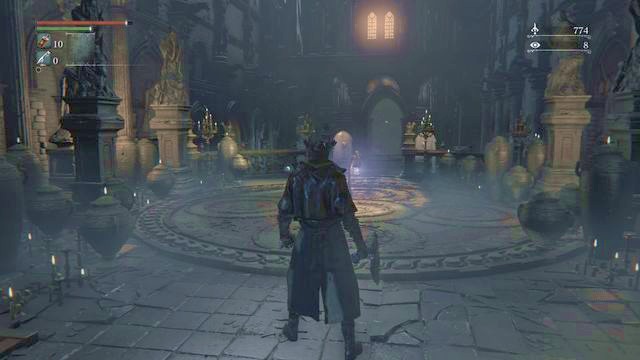 From the Tomb of Oedon chapel you may go straight forward or turn left.
In the next room you need to use the ladder to enter the room above which reminds a library and open the chest there which contains a Blood Gem Workshop Tool. Go down the stairs to get to the Tomb of Oedon. Talk to the NPC on the right twice. You will learn about a safe place - you can give this piece of information to several people you meet (this is connected with a side quest). For the first person that you send to the chapel, you will receive a gesture - Triumph.
Light up the lamp and exit the chapel. You may choose between two paths although the best way is to use the path in front of you first.
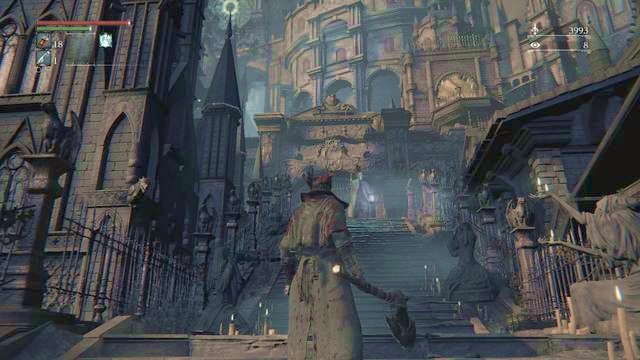 On the top of the stairs you will be attacked by two enemies.
When you will get to the square you need to beware of the enemy who will wait for you right behind the wagon that is in front of you. At the end of this area, next to the tree, you will see few wild birds and you will find a Madman's Knowledge. Go up through the huge stairs. In the end you will be attacked by two more enemies. You may find here yet another Madman's Knowledge. There is nothing more to do here right now since you need to open the gate from the other side later on so you may return to the Tomb of Oedon.
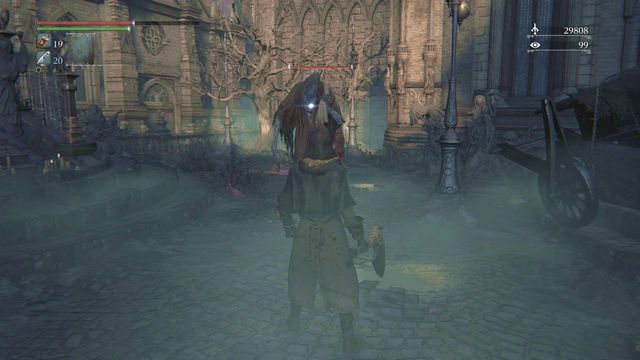 After you are killed by the opponent shown In the screenshot, unusually you wake up in a different location.
After you defeat the Blood Starved Beast on the right, once you exit, there is an opponent with a bag on his back, in the corner of the building. Let him kill you (and any other opponents of this type also), if you want to visit the Underground Jail in the Unseen Village Yahar'gul.
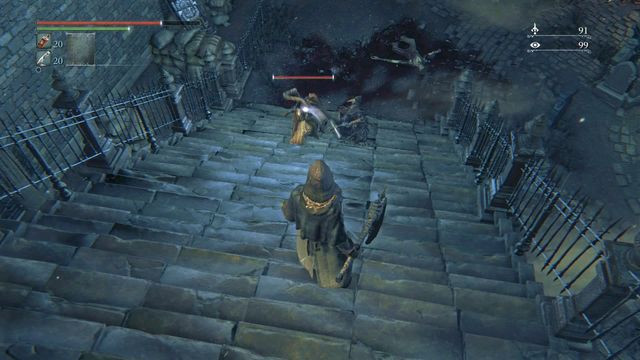 Talk to Eileen and help her fight in the Odeon Tomb.
Note: Right after you open the gate to the main yard (two larger opponents with axes) after you leave the chapel, on the left, there is Eileen (if you have already talked to her in the aqueduct in Central Yharnam). From her, you receive gesture Shhh! and an advice not to go to Odeon Tomb. After you reload the location, this is where you find Eileen (the lantern in Hunter's Dream will be temporarily inactive, travel to the chapel and return to where you fought Gascoigne). She is now fighting another hunter. Help her (make sure that you do not hit her too much or she becomes hostile towards you). From the body of the dead Henryk pick up the rune Successor, talk to Eileen, and you will receive yet another gesture - Approval.
Note2: During the fight, Eileen may die, which makes completing her quest impossible. After Henryk arrives in the arena (he appears as the first one) attack him immediately and deal as much damage as possible, before Eileen joins the fight.
 On the first square defeat two enemies and go to the stairs from where you need to go left.
When you are leaving the tomb choose the left exit. It will lead you to the bigger square where you will find two wandering enemies (next to the barrier on the right, you can find the Hunter attire (without head gear - use the Top Hat instead). Be careful not to enter into a moving vortex - it will cause an immediate death. If you have 40 points of Insight, you can see the reason for that: the monster which looks like boss Amygdala. The enemies are using long staffs just as the previous enemies. Try to engage the fight when they are far one from the other. Under the crash barrier in the left part of this area you will find a body which contains the entire Hunter's armor set however you need to beware of the swirl which you will instantly kill you in a direct contact. After the fight you may go to the gates ahead of you. In a body hidden there you will find six Blood Vials. Go downstairs.
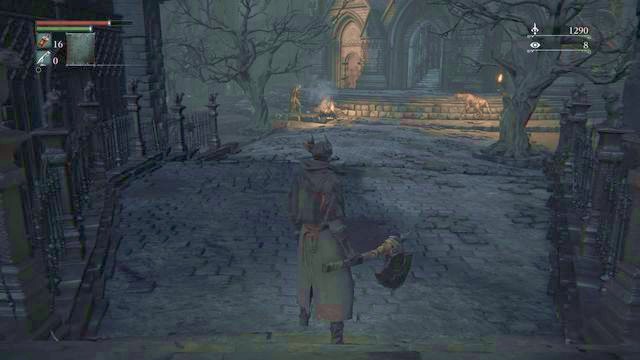 Watch out for the group of three or four enemies standing next to the campfire.
You will get to a square with a campfire next to which you will see few enemies. The main problem may be small but fast and quick-attacking dogs. If you have a Molotov Cocktail you may want to use it now. Walk around the building on the right side and collect some Molotov Cocktails and a Coldblood Dew. Go to a chapel where you will find a Madman's Knowledge and a single enemy.
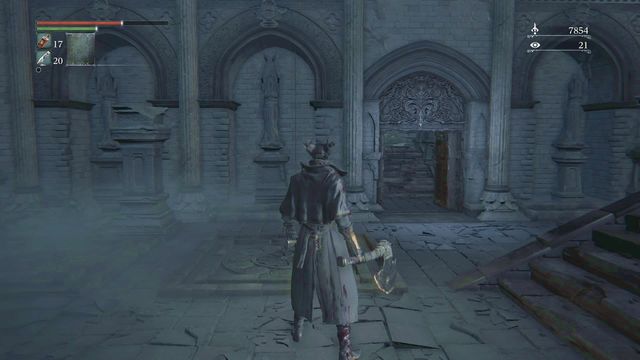 Allow the dogs to run downstairs and stay out of the range of the sniper to defeat them.
Walk around the chapel on the left side to enter another square. On your way watch out for two mad dogs which will charge on you. The best way to deal with them is to go downstairs and this way save yourself from the firing of the third enemy with a gun. Defeat the dogs and run upstairs fast. Dodge the bullets and deal with the shooter. Open the door in the right part of this area. Enter the next room and go further towards right. You will get to a balcony with a view on the chapel which you have visited not so long ago. Take a Madman's Knowledge from a corpse and turn on the device.
 Praying Alfred. A conversation with him will shed light on the story.
Exit the building and turn right. In the end of the road you will find an NPC named Alfred. You may agree or disagree to cooperate with him. If you will agree you will receive 3x Fire Paper and the Pray emote. Speak to him once again to reveal some information about the game's world.
Note: If you complete the quest connected with him, you find Alfred's corpse here.
Finally return to the place on which you have appeared after you left the Cathedral Ward (with a fountain in the center).
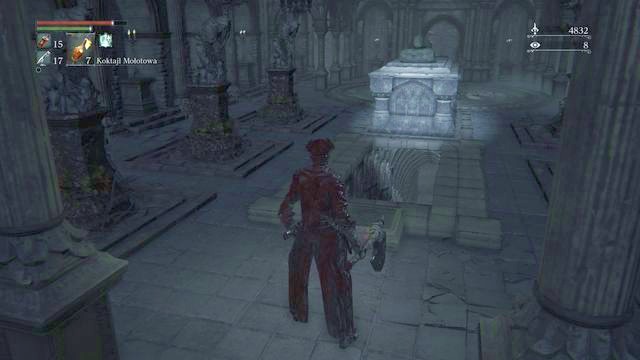 The corridor which leads to the Old Yharnam.
Notice: Turning on the device in the upper balcony reveals the passage in the chapel (the tomb in the middle will reveal the stairs). When you will go downstairs you will find a Tempering Blood Stone in the first chamber. In the next room is a single beast. Go down through the ladder and you will pass a corpse with an Antidote. In the bottom you may activate another respawn point. Open the door on the left if you want to enter the Old Yharnam right now.
 The attack range of this enemy is quite long and sometimes a one jump may be not enough to avoid it.
Go upstairs and in the end you will find a huge enemy who uses a gigantic axe. He has two types of attacks. He may swing it (it gives him a significant range) or stick it into the ground (it is signaled by rising the weapon above his head). The best moment to dodge is when he rise his axe. Walk around him and attack him from behind or from the side. If he attacks with a swing jump way back from him and attack once he will finish his attack animation. When you will defeat him his body will drop a Blood Stone Shard. Now you can go down.
 Lure out the first enemy and deal with him before you take care of the second one.
In the next square you will see two bigger enemies with melee weapons. One of them is turned back towards you and you will see him right next to you after you will get there and the other one is wandering quite few steps away on the right. Give an attention of the first enemy and try to fight right next to the stairs. When you will defeat him (watch out for the attack series) get closer to the second one and attack him with your strongest attack as soon as you can. In the end of the square, right behind the wagon, you will find a Monocular. Now you may go forward and on your way deal with a group of birds. A corpse under a tree contains a Blood Stone Shard).
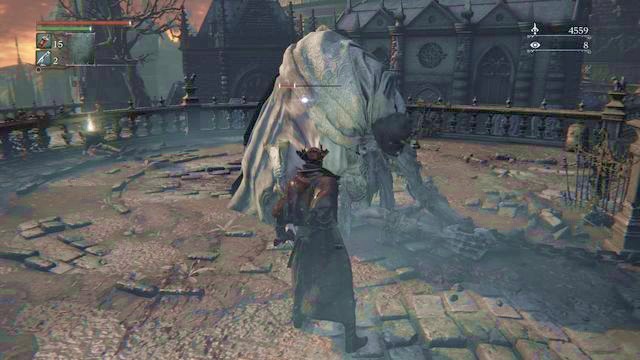 The perfect moment to use your full-charged attack will happen when the enemy will slowly raise his orb.
When you will enter the next small square you will also find another big enemy. Unlike the previous one he uses an orb instead of an axe although he uses it almost in the same way. The most damage will deal his attack from above the head since it will stick your character into the ground. When will you dodge this attack you will have a great opportunity to counter-attack since your enemy needs to take some time to raise his orb and attack you again. Remember to watch out for his big attack range and to attack him when he charges his strike. After the fight you may loot a corpse nearby a barrier to receive five Blood Stone Shards. Behind the small building turn left and then go downstairs. Pass the corridor filled with amphoras and open a chest which contains a Tempering Blood Stone.
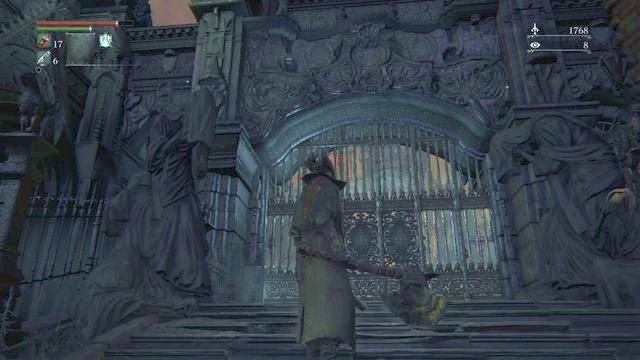 To open the gate you need an emblem which you can buy for 10000 Blood Echoes or you can open it at the other side, after you meet several more conditions.
Finish exploring this area and return to the big stairs. On the top of them you will see the closed main gate. Better remember where it is. If you have visited every area you have access to you may respawn your enemies by returning to the Hunter's Dream and then return to the Cathedral Ward. Your goal is to gather 10000 Blood Echoes. You will get more Echoes for bigger enemies so the most beneficial is to focus on hunting those. When you will collect the amount you need you may return to the Hunter's Dream and then go to the Messenger. Spend 10000 Echoes to buy the Hunter Chief Emblem. It is a key which will open the gate to the Cathedral Ward.
Note: Hunter Leader Medallion - which is also a key - can be bought only if you have defeated Cleric Beast.
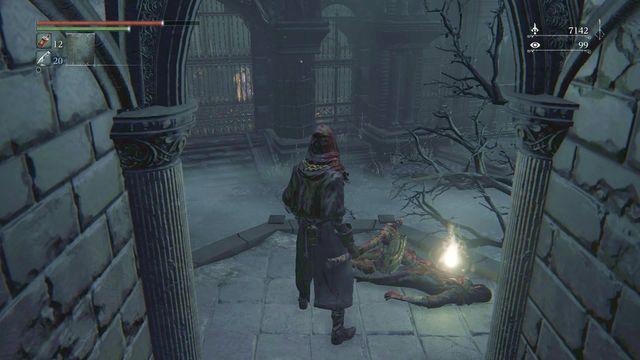 The balcony that you can enter after using the elevator - if you jump down from this place, you can open all the gates.
Note2: As a matter of fact, you do not need to open the gate at this side and spend your Blood Echoes. This is the easiest and fastest way, but there is an option to open the gate at the other side. To do that, you need to visit Old Yharnam, where you need to defeat Blood Starved Beast. Then, in the Oedon Chapel door on the right opens - this way, you get to Healing Church Workshop. While there, jump down to the very bottom, go left at the intersection (after you exit the building) and take the lift to Cathedral ward. From the balcony that you get to, climb lower and open the nerby gate and then, two more, including the one that leads to the main yard.
 The door that opened after the boss battle.
After the fight with Blood Starved Beast in Oedon Chapel, there opens a door on the right side of the room. Walk inside and take the lift up.
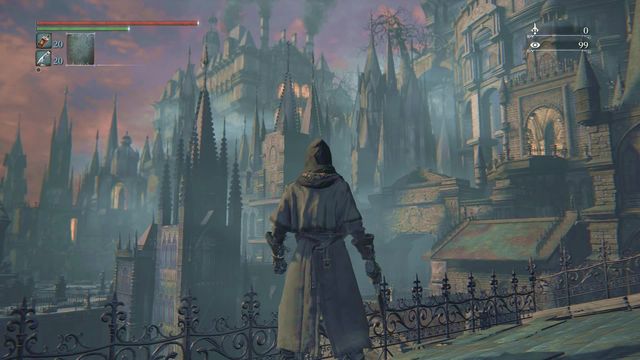 The view outside the window, right after you jump out of the lift; On the left, there is a passage to the upper part of the Oedon Chapel.
During the ride on the lift, you can note a small window in the wall (turn back after you walk onto the platform). At the right moment (it is easier to do that, while going up) you can jump out of the window. On the balcony, turn left and take the narrow passage between buildings. You will get to the upper part of the Oedon Chapel. Loot the chest for the rune Formless Oedon. In the corpse, there is an item for Messengers (which changes their looks) - Messenger Urn Festival. Jump down into the chapel, and go to the lift again.
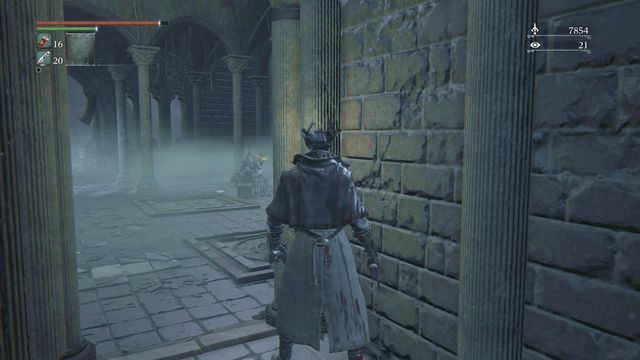
In the next room (the screenshot), watch your step right past the passage. In the room, there is a guard with a machine gun. To prevent being killed, jump into the room quickly, get around the opponent and kill him swiftly (low resistance). In the chest, you find rune Communion - it increases your maximum capacity of Blood Vials.
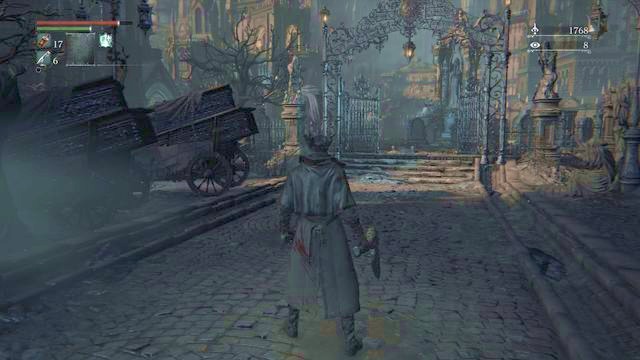 In front of the gate turn left.
When you will open the gate you may go to the central square. Before you will do that you should at first walk around it and unlock a patch which you may use as a shortcut later on. To do so you need to turn right after you will pass the first gate (even before you will get to the central square). You will find a body containing a Thick Coldblood. Now go in an opposite direction, for now on passing a round plaza.
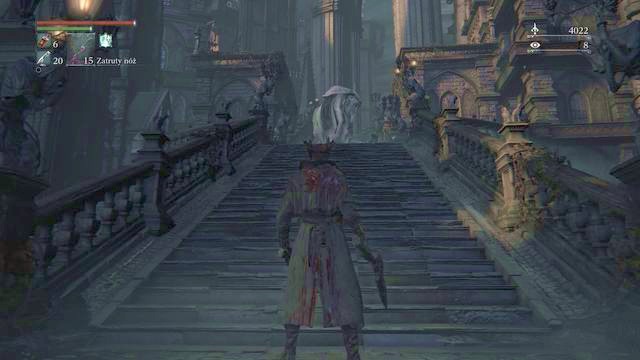 Don't approach this enemy when he sprays out the flames.
Right behind the wagon on the opposing site you will be attacked by an enemy which you shall not underestimate. He possesses a "flamethrower" and in result one of his attacks allows him to spray fire towards you. If you will be catch by his flames or even worse stay in it for a moment you will instantly lose a lot of Hit Points. Better just patiently wait with your attack until the flame will extinguish or try to dodge the flame and interrupt his attack. Behind a tree you will find another Thick Coldblood. Now go ahead of you and pass a small gate where you will find another enemy. Go down and collect the Poison Knifes from a corpse nearby.
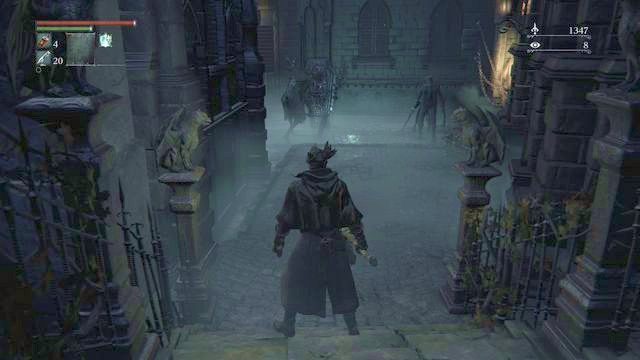 When you will get downstairs better prepare for a fight.
Downstairs (in the windows on the left, there are two NPCs that you can tell about the safe place- side quest) you will face a patrol of two enemies. If you can't not find them right next to the stairs, they will be not so far away deeper in the corridor. Especially watch out for the one who attacks from a closer range since he may initiate a powerful attack series. In the further part of the alley you will be attacked by another two common enemies however you still need to be careful since they will raise behind your back. In the niche on your left you will find few parts of Black Church attire (the garb, the hat, the trousers) and the Surgical Long Gloves. In the end, behind the fog, right after the stairs you will also find some more Poison Knifes.
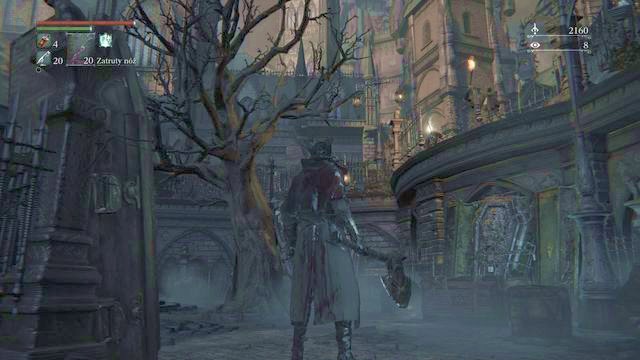
From the place shown on the screenshot above you will be noticed from above by few enemies. Try to lure few of them out and defeat them on the lower level. After that enter the higher level and take care of the rest of the enemies. Watch out for the nailing attack of the biggest of them and for the bullets firing towards you. After the fight remember to collect the Blood Vials and the Thick Coldblood. From the small use a ladder to get higher and while doing that you may also read a note on the balcony on your right. Finally jump down on the roof below.
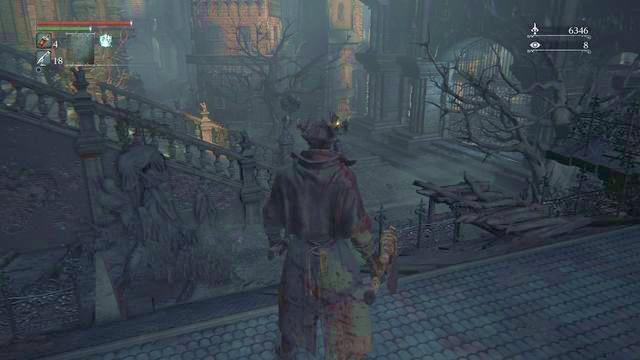
You will appear in a place shown on the screenshot above. Before you will jump down collect the Quicksilver Bullets from a corpse. Look for your next opponents and the gate, which shall be your main target since left from it is a special device which will unlock for you a passage for the central square which you have ignored before.
Right after jumping down you will be attacked by a wild dog who is hidden close to a house. His body will drop a Thick Coldblood. After that go toward the gate. If you have not find a patrol of two enemies yet better open the gate fast however if you did you may just take care of enemies around. Watch out for their attacks which are both fast and strong at the same time. Your last step should be opening the gate.
Now you can choose one of two paths. Go toward the stairs or turn right to stay down. The best choice is to turn right since it will allow you to open a new gate.
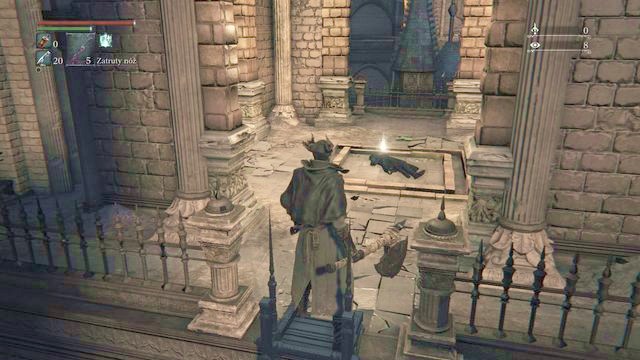 While going outside you really should pick the Numbing Mist.
If you will turn right you will find a small square. On your right you may see a locked gate and a device right next to it. If you will open the gate it will allow you to use the shortcut (an exit ahead of the respawn point in the Oedon's Tomb). After all you may use the ladder to get up where you will find a body with a Numbing Mist which will help you a lot during a battle with the next boss which is Vicar Amelia). Jump down toward right and land on the roofs where you will find a Black Messenger Black Hat. Now you may return to the stairs.
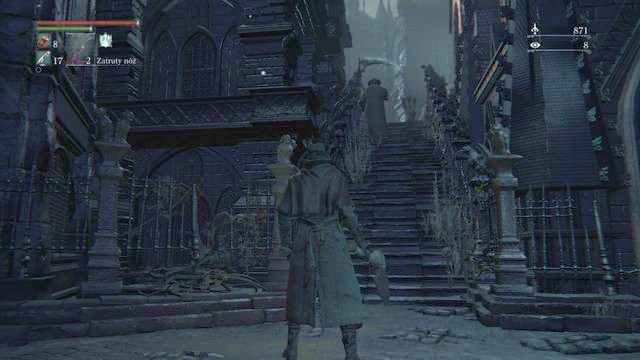 You may get to the main stairs from the side as well what will help you to strike one of the enemies from behind.
Notice: On a square with an opening device there is also a path leading towards the main stars (a small stairs behind a tree) where you will also find a Thick Coldblood. It will also reward you with a possibility to sneak behind the enemy with a scythe and to eliminate him while he is isolated. This path will also allow you to avoid some other enemies if you will run fast enough. You will also pass a corpse containing six Blood Vials.
 On the main stairs you need to watch out for three enemies.
Now look toward the big stairs. Right from theme there is a corpse in a corner containing a Thick Coldblood. You will notice a huge enemy with an axe and a smaller one with a scythe and also the third one with a firearm. This battle will be quite a challenge. At first try to eliminate the enemy with a scythe to prevent you from his attacks when you will engage the giant. There is a big chance that the enemy with a gun will not go toward you so you should try to keep the battle on the top of the bottom of the stairs. Only after you will deal with the axe-fighter (remember to avoid entering the round plaza since there is two more giants to kill) go up the stairs. The shooter is also very dangerous. He shots few quick bullets one after another in a short sequence so you should make a fast dodge immediately after you will see a weapon turned towards you.
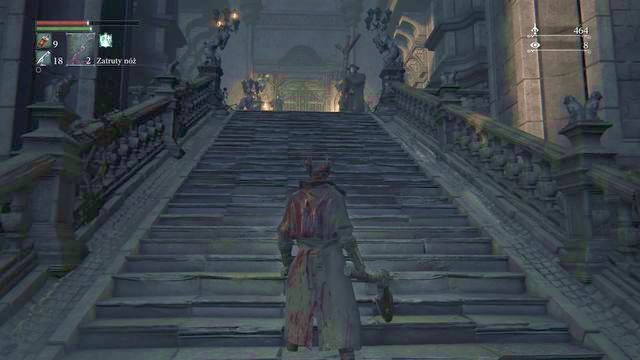 The final group of enemies guards the entrance to the building with the boss.
When you will get to the top of the stairs (on your way you may collect the six Blood Vials from the corpse on your right if you haven't done it before) you will meet two last enemies who guard the entrance to the next boss (the bar that fills up after they deal damage leads to frenzy; once it is full, it ends in death in majority of cases). They are very difficult to defeat since they both have long range and their weapons deal a lot of damage. The most dangerous attacks are the knock up into the air and the thrust. The good solution will be using the items which you have gathered before such as Molotov Cocktail. When you will defeat these enemies you may open the gate and enter the building in which you will find the boss named Vicar Amelia waiting for you in the main hall.
 Go to the alter and observe the item there to unlock the password necessary to enter the Forbidden Woods.
After the fight (get closer to the item on the alter) and replenishing your supplies you may visit the areas located in the right part of the Grand Cathedral and after that you may go to the Forbidden Woods or the Hemwick Charnel Lane. From the Cathedral Ward you may get to three different areas and you may read about them in the following chapter.
Note: Defeating Vicar Amelia drives the storyline forward and changes the time of the day. It is a good idea to take care of the unfinished side quests (e.g. let people know about the safe place in the chapel or in the clinic), because some of them will become unavailable.
 An example of the door where you obtain Tonsil Stone
Note: To prevent having to backtrack, before visiting the Grand Cathedral, go down towards the locked door to the Forbidden Woods. Provide the password that opens the door. Only after that can you obtain the Tonsil Stone. You can get it in every house with a red lantern in front of the door.
Note2: In some cases, you can receive "no response". This is due to the occupant having been sent to the clinic or the chapel, in search of a safe place. In such cases, try elsewhere.
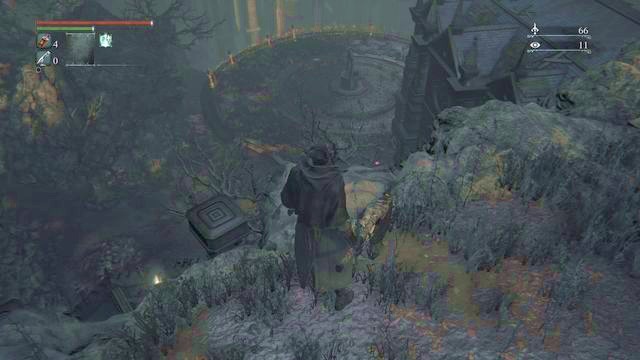 At the bottom you will face a difficult battle. Better try to deal with the enemies one after another.
When you are in front of the building in which you have fought with Vicar Amelia you need to turn right in front of the last stairs. In the end of the road (you may find Frenzied Coldblood on the roof) or go downstairs. Your first try should begin with the stairs since on the bottom there is two almost immortal enemies (hunters) which you may consider mini-bosses. If you don't want to fight both of them at the same time (since it is almost impossible to win with them like that) you should take them down one at a time.
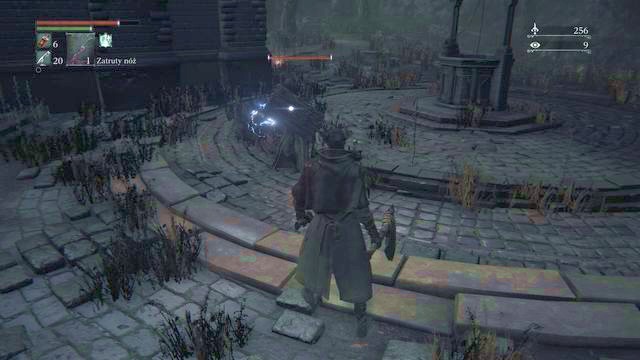 The first enemy has a weapon which deals a bonus electrical damage...
To accomplish that you should go through the stairs and bait the first enemy who has a weapon which deals a bonus electrical damage. This battle is very difficult and it is still easier than the duel with the second enemy. Try to keep the same strategy which you used during the battle with Father Gascoigne - make a lot of dodges and watch out for the full charged attack of your enemy. Attack him right after your successful dodges. If this fight is too difficult for you try to collect a big supply of Blood Vials to heal yourself during the fight. For the victory you will receive a Bolt Paper and 3400 Blood Echoes. This enemy will disappear just as the bosses.
 ... and the second one uses a basic melee weapon although he often uses a frustrating firearm.
The second gentleman requires a different strategy. First of all you need to get an advantage by not approaching him from the stairs but instead jumping from the top on a roof below and from this place jumping on the ground. Now you can slowly get to the enemy and try to take him down by your strongest, fully charged attack. It will make him falter and will allow you to attack him again with your basic attack. It will help you damage him well even before the battle will begin. The fight itself is very difficult since this enemy has an access to a firearm which deals not a lot of damage if you will keep a long distance however it interrupts all the attempts of making a dodge or getting close enough to strike with a melee weapon. Because of that try to engage him only when he will try to recharge his weapon and will not be able to fire with it. You should also try to keep your distance and use only fast attacks since he may easily dodge the charged attacks. These tips will allow you to win although the entire fight will take quite some time. If you will use a ranged weapon and hide from his own bullets behind a tree or a well or even the Molotov Cocktails it will surely help you greatly. Killing this hunter will reward you with 3420 Blood Echoes and ten Quicksilver Bullets.
 If you will run fast enough you may avoid the local enemies and (if you want) kill them of later on one at a time.
If you will keep going downstairs you will get to the tunnel where on the other side you will see an enemy with a chopper and the second enemy will fire at you from above. Few steps later you will meet another guy with a chopper. A good way to deal with this bunch will be avoiding the first two and get to the building seen in front of you (the enemies will not enter this place and you will find a Lead Elixir). Later on when these enemies will move away from the building you may take care of the enemy with a chopper and then with the second one. It will allow you to avoid fighting two enemies at the same time and will keep you in a spot safe from the sniper.
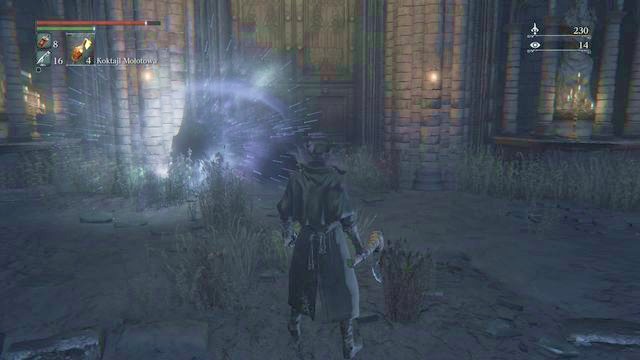
Inside the building you will find a big hall. If you have the Tonsil Stone you may get closer to the door and enter the portal shown on the screenshot above (it moves along the door). Only if you have the Stone you will be moved to the Lecture Hall (if you don't have the Stone, entering the portal will kill you instantly).
Note: In the same location, after you defeat Rom, the Vacuous Spider, a door to Yahar'gul, the Unseen Village will open.
When you will be in front of the Grand Cathedral choose the path on the left. Following this path you will get a Bloodshot Eyeball (from the first corpse you will pass by) and the Brave Hunter Badge (from the second one). Pass the tunnel and get to the clearing.
Note: The witches mentioned here appear after you have defeated Vicar Amelia. If you visit the Hemwick Charner earlier, this will be easier because there will not be as many opponents here.
 The witches will appear in few places.
This place is filled with the three kind of enemies. The main kinds are the gentlemen with the firearms, the wild beasts and the witches from the other dimension which you will recognize by the red sparkles which will appear when they will materialize. At first try to fight with one of the witches which will appear when you will get close to a campfire on your right and then attack the second one which will appear few steps further. Try to methodically clean this entire area by taking down the isolated shooters and their dogs. The corpses around will contain the Pebbles and the corpse hidden behind the rock in the right part of this area will give you the Twin Blood Stone Shards.
In the end go towards the campfire from the side shown on the screenshot above. The open attack may easily lead to your death since all the enemies nearby will fire at you at the same time. If you want to try that move anyway you need to act fast and kill the two enemies on your left instantly. However the best way will be to use a Molotov Cocktail which will take almost all of the enemy Hit Points and you may easily just shoot them down. This way you may eliminate the two enemies on the left of the campfire and you may go to the campfire much safer. The bodies nearby will contain the Bone Marrow Ash and two Thick Coldbloods.
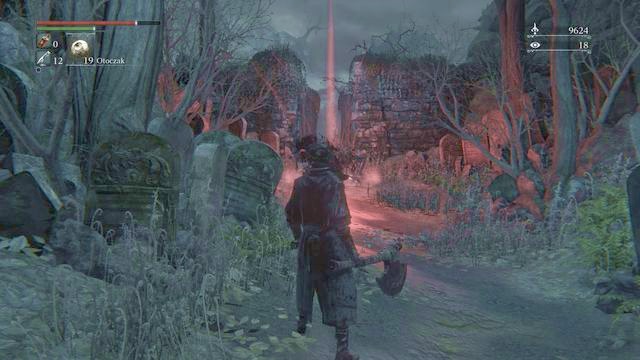 In the end of the road you will find the third witch. Few steps later you will get an access to the new location.
Go deeper into the forest and take down the shooter nearby as well as the two wild dogs and the witch which will appear in front of the gate. Behind this gate you will get to the new location called Hemwick Charnel Lane where you may activate the respawn point by lightning up the lamp.
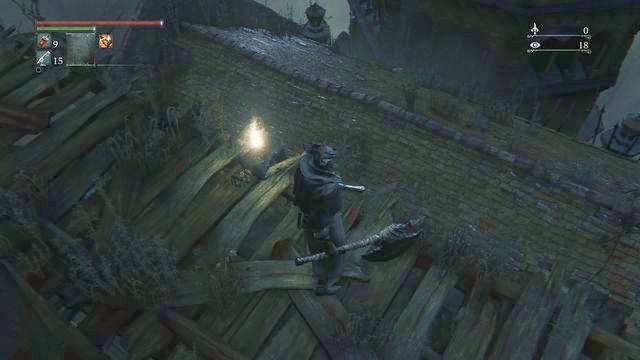 If you want to climb down you should beware of falling to the very bottom of the area.
You will get to the Old Yharnam from the Cathedral Ward. At first you should choose the path ahead of you which is behind the burning cross. Your destination is the bottom of this area where you can get by jumping from roof to roof. During your travel you may gather Blood Stone Shard and if you will kill the running away creature you will also receive a Twin Blood Stone Shards. On the bottom of the area you will be attacked by two hooded characters. In a small niche in the left side you will find the Hunter's Torch. After defeating them you may jump down from the edge.
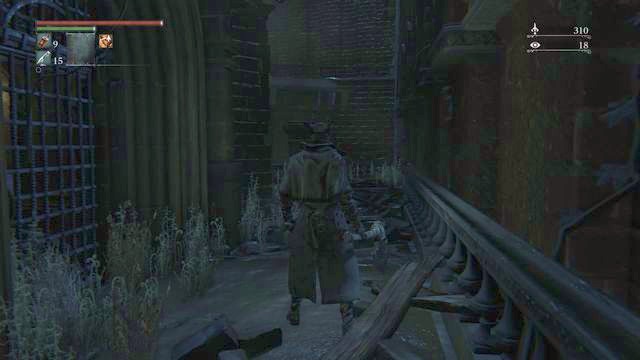 In the next part you will unlock the shortcut (the grilles in the left part).
You will not find anything else what would be interesting here (although in the next part you will unlock the shortcut here) so you may pass the building and climb up the ladder to the top where you will find a Thick Coldblood. Now you may head to the main part of the Old Yharnam.
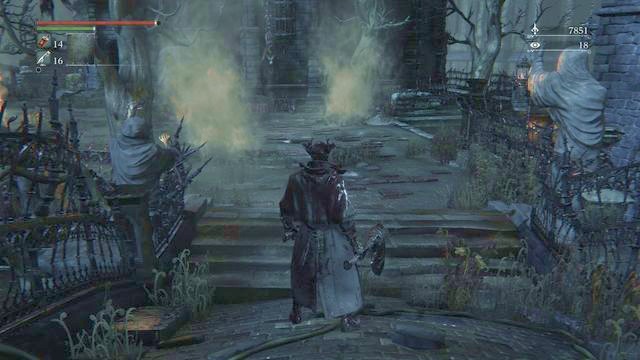 You will be attacked right behind the bridge.
From the place where you will enter this location (at the very top) go to the barrier on your left where you will find a corpse with six Blood Vials. Now you can pass the bridge where on a small square you will be attacked by two fast although at the same time quite weak enemies. On your left you will find a building behind which you may find a single hooded enemy and a body with a Thick Coldblood.
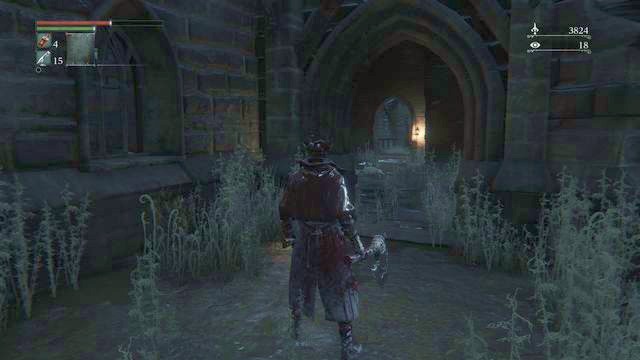 You may run away from the firing or hide yourself behind the sculpture.
Go down to another square. You will be attacked there by four minor enemies and two hooded characters. When you will go even lower a mysterious hunter will give you a warning and right after that you will be under fire. You need to instantly hide behind the firing since if you will be shot by a series of bullet you will instantly die. You may return to the stairs where you will be out of the bullet's range or hide behind the sculpture.
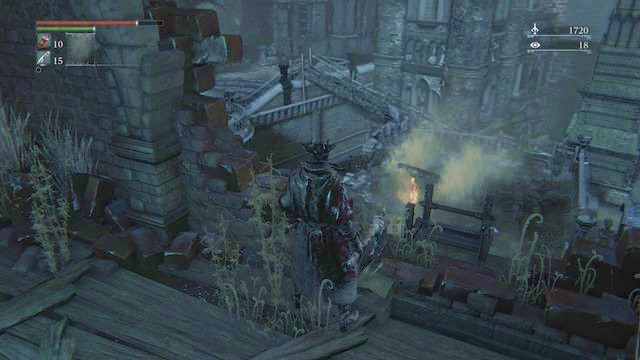
There are short breaks during the shooting. Go to the right edge and jump down. Use the stairs to go to a place shown on the screenshot above. There is a ladder leading to the bottom of the area. Right now hide behind the wall and go deeper into the room where you will find an isolated enemy and corpses with Antidotes and one corpse on the balcony with a Blood Stone Shard. Instead of climbing down and taking the risk of being shot you may slightly walk around the danger zone. To do so you need to leave the room and in the end turn right.
 On your way you will pass a few rooms with some enemies inside.
In the next room you will meet few enemies although you should especially watch out for the bullets from the outside and the exploding dishes. After taking care of them you may pass the bridge and behind a building turn left into the corner where you will see four birds and a Blood Stone Shard.
Here, right behind the entrance to the next hall, you will see how a hooded enemy will run out from the room on your right. Two minor enemies will attack you deeper inside the building. Watch out to not show yourself too much next to the open entrance or you will be shot. After eliminating the bodies you may collect some Antidotes from the corpses next to the door and get out of here still watching out for the firing. Once outside you still have to defeat few minor enemies although better keep fighting while standing next to the wall of a building ahead of you to stay out of the shooting range.
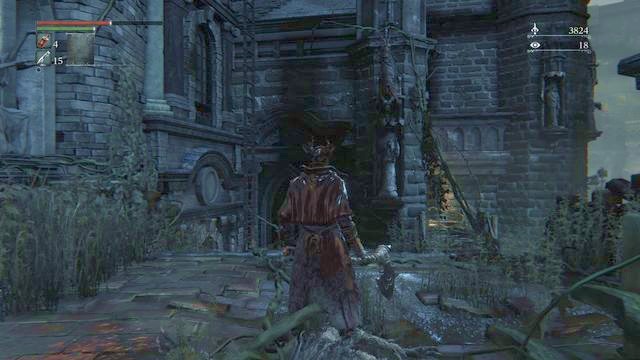
Regardless of whether you enter the square straight away via the ladder, or by walking around it on the left side, it is a good idea to explore this location. To the right of the ladder, by the statue (crows are nearby) you can jump down (the screenshot), first onto the balcony and then onto the stairs below. Once there, enter the dark building.
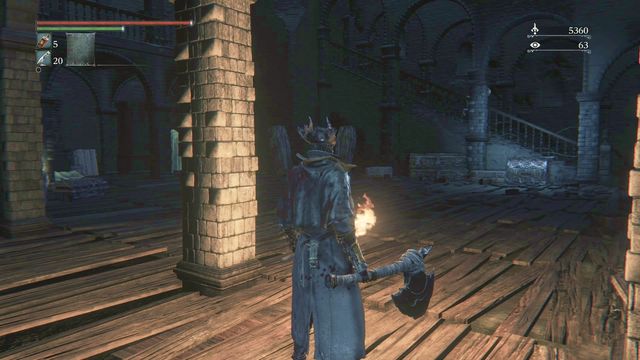 Before you open the chest, kill the opponents to prevent being surprised from behind.
Inside, clear the rooms one-by-one, kill several hooded opponents (watch out for the poisoning) and several smaller opponents. On the corpse to the left, you will find 6x Blood Vial; in the chest, there is Tempering Blood Gem.
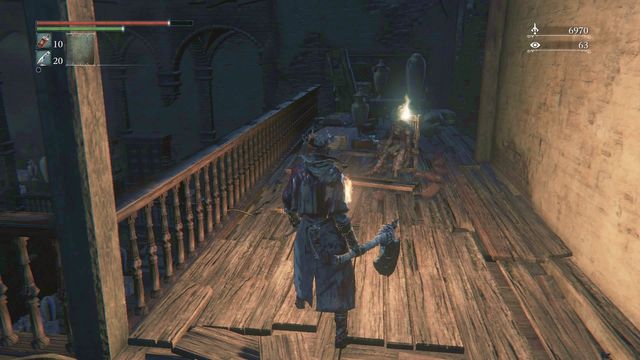 On the corpse upstairs, you will find an interesting set
Finally, climb upstairs. Along your path, to the right, behind the coffins, there is a corpse and on it, a weapon - Rifle Spear. At the very top, read the note and collect the Charred attire, gloves and Hunter's Pants from the body on the chair (they ensure quite a protection against fire). Your hunter will take an automatic bow and you can now exit the room - you will exit at the other side of the square.

After all you may pass the bridge to get to the place shown on the screenshot above. From here you may go up through the ladder on your left or use the wooden entrance to the big chamber by the broken window.
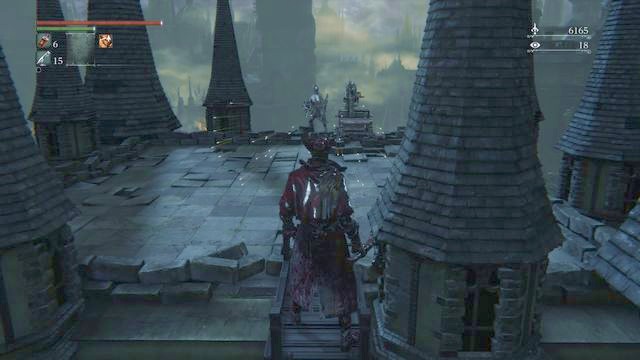 At the top, you are going to fight hunter Djura. However, you can avoid that.
When you will use the ladder and then the second one to get on the top of the building you will find the hunter which was so desperate to fire at you until now. To defeat him you must focus on dodging his shooting since his firearm deals you the most damage especially if you will get close enough to him. You may also try to outsmart him by forcing him to step back a few times by a series of attack and push him out of this little area although you need to watch out to don't fall by yourself. Defeating him will permanently clear this area from the sniper's shooting and you will receive 875 Blood Echoes and Powder Keg Hunter Badge.
Note: If Djura falls down, you will be unable to pick up the badge dropped by him. To do that, you need to load this location again, climb the ladder and find the item next to the weapon that the hunter fired.
Note2: After defeating the shooting hunter you should return to the square which you have ignored earlier on (the area below the place in which you have been under fire). You will find here few enemies among which the strongest one will be a weaker version of a hunter (who will permanently vanish once defeated although you need to watch out for his series of attacks and the close-range firearm). On the bottom, under the balcony, on the left side from the ladder, you will also find two enemies and a Coldblood Dew.
You do not necessarily need to fight Djura. To talk to him, during your initial stay in Old Yharnam, do not attack him (do not climb up the ladder), and leave the other hunter alone as well. Instead, deal with the Blood Starved Beast. Then, let yourself be killed by one of the opponents with a bag on his back - you will then end up in the Underground Jail in Yahar'gul, The Unseen Village. There, find the location where you can fight Darkbeast Paarl - there is no need to kill it, you only need to visit the boss.
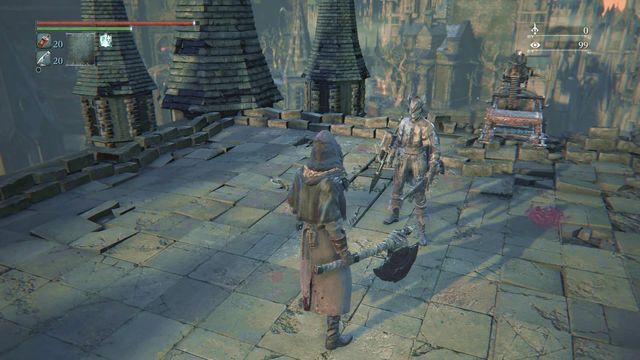 A conversation with the neutral Djura, after several conditions have been met.
Then, get back to the location Church of the Good Chalice. Return to Djura from behind, thanks to which he does not spot you and does not start shooting. Climb up the ladder - instead of attacking you, the hunter stands in the center and it will now be possible to talk to him. For Djura to remain neutral, it is necessary that you pick the "Spare the Beasts of the Old Yharnam". You will then receive the Powder Keg Hunter Badge (if you already have one, you will also receive Bold Hunter Mark) and a gesture Brush Off Dust. Djura will not fire at you anymore if you do not attack anyone within his sight (the opponents in the front of the tower will attack you anyway).
Djura becomes hostile (permanently) when:
- you attack the hunter,
- during the conversation, you pick the "Hunt the Beasts of the Old Yharnam" dialogue option,
- you agree to spare the beasts, but you attack the opponents in front of the tower (this does not go for crows).
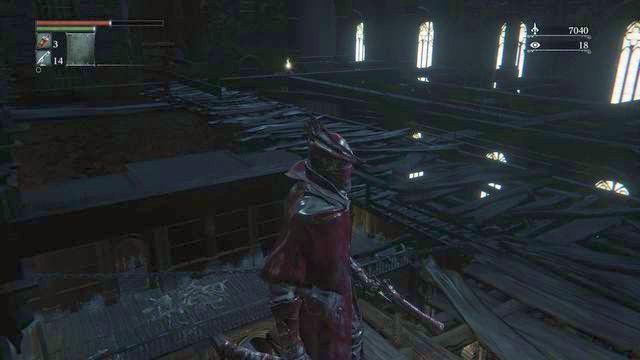 You may get to the main hall from upstairs however better watch out since it is easy to fall and break your neck.
Now go to the very bottom or use the first ladder and then jump to the higher part of the chapel where you will find Madman's Knowledge if you will carefully walk over the bars. Jump down to appear in an area filled with enemies. The better way will be to quickly run through the stairs and eliminate the enemies in the entrance since they cannot surround you there. On your way to the bottom you should watch the platforms carefully since you may find there corpses with Molotov Cocktails, a Thick Coldblood and on the very bottom in a niche a Madman's Knowledge).
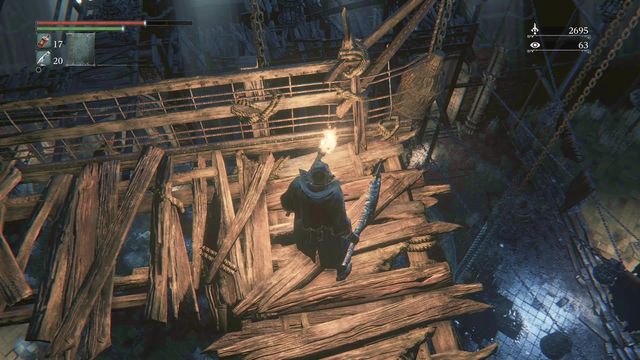 The rope that you can cut to set the opponents below on fire.
Note: By cutting the rope at the very top, you can clear the area below a little - the demon hanging below bursts in fire and kills several opponents.
Along your path, you may have some difficulty getting onto one of the platforms. For this to be possible, you need to run up, by sprinting, and press [circle] to jump. The jump needs to be perfectly aimed at the edge of the planks - difficult but possible. For this, you will be rewarded with the item that you find on the corpse - Sullied Bandage.
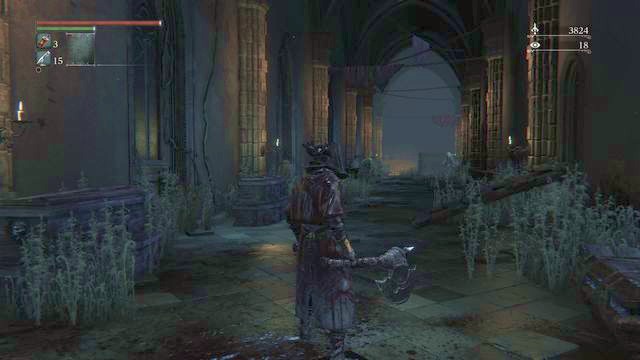 A hooded enemy will jump on you from above.
You can get to the alter also with a different path. When you will be in front of the ladder which may get you to the sniping hunter you may turn right and go through the broken window to the room in which you will find two hooded enemies although you should watch out since right after your entrance you will be see how the third enemy jumps on you from above. You can easily deal with them all by fighting with one at a time. A corpse in the of the road contains an Antidote. Now you can go below.
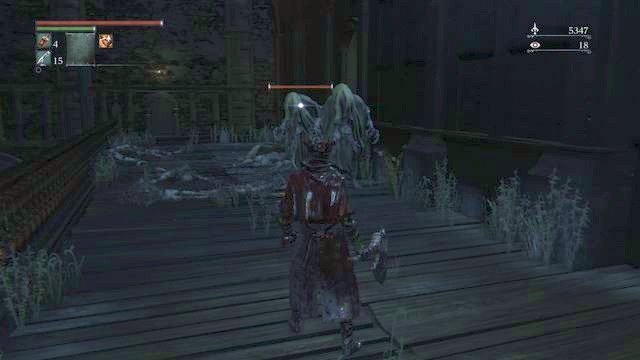 Even on the stairs you will be attacked by a group of enemies.
When you will be on the stairs you should prepare yourself for a small storm. On your way turn towards right to a small balcony and enter this place as soon as you can. A hooded enemy is hidden behind the door. If you will wait he will jump on you and poison you what will deal you damage over time. Additionally you will be attacked by a few other hooded and minor enemies. A good way is to eliminate them one by one while staying in the entrance to prevent yourself from being surrounded on the balcony. After your victory collect from a corpse a Blood Stone Shard and then go down. Take from the alter a Ritual Blood and leave the chapel with the passage after the alter.
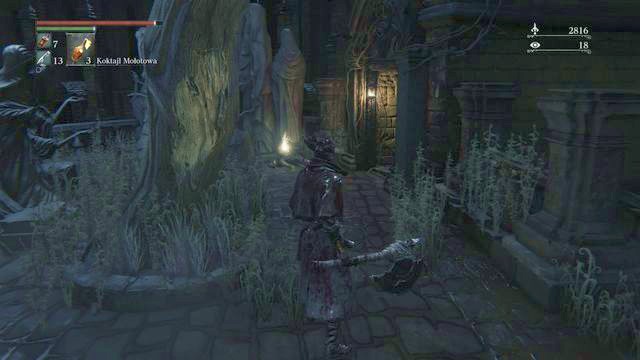 Behind the corpse on the right you will find a ladder. If you will use it you will unlock a shortcut.
Turn left and get to the end of the balcony. Watch out for the big group of birds since they may become dangerous if a big group of them will start flying around. You may collect a Blood Stone Shard and go to the second balcony where you will find a corpse containing six Blood Vials. Use the ladder to go up and to unlock a shortcut. Now you may turn right.
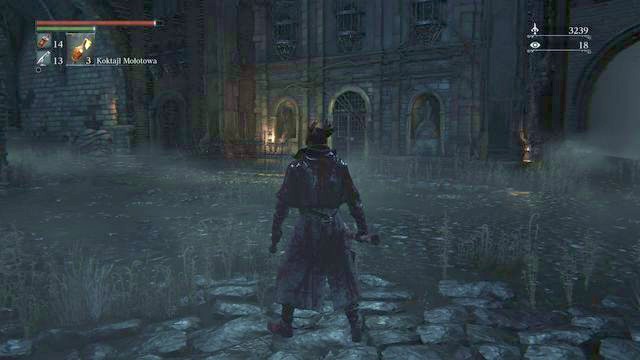
On the bottom you will be attacked by three weaker enemies however avoid being surrounded since they may interrupt your attacks. Go down. From the place shown on the screenshot above you may go on in one of the two ways. You may find in front of you only a Blood Stone Shard and a locked gate (you will be able to open it only after you have defeated the Darkbeast Paarl) so you should turn left. On your way you have to defeat two beasts who guard this passage. You should use a Molotov Cocktail when the beasts will be next to each other and then kill them with a few quick strikes.
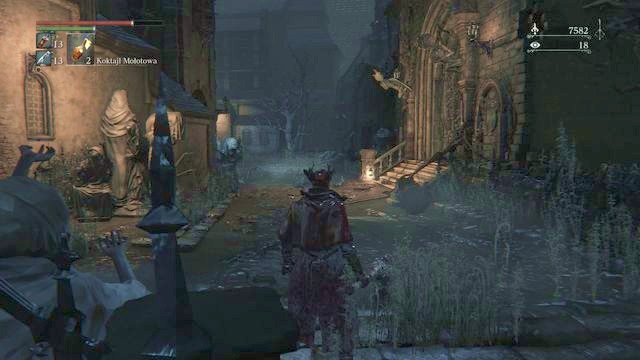 From the right side a beast will jump on you and unlock the entrance to the building.
Right behind the bridge you will be attacked by a beast which will jump on you from a building on the right. Kill it but also watch out for its fast claw attacks. Turn towards left where behind the building in the end of the road you will find a corpse with a Beast Blood Pellet. Now return to the building which entrance was blocked by a beast which have jumped on you (on the right side).
 On the top of the stairs you will find the grills which you may unlock to open quite a big shortcut.
When you will be inside you will find a corpse with an Antidote and when you will pass the next threshold you will be attacked by a single enemy. Go upstairs and in the middle of the road turn to the balcony on the left where is another enemy and a Blood Stone Shard. On the next level open the door which unlocks a big shortcut which allows you to just jump down from the respawn point on the roofs, then go straight ahead, then to the very bottom and through the winding stairs also to the bottom. On the top you will ultimately find a Fire Paper. After that return to the level below.
 In the last church you will find the boss.
After exiting the building go further through the path toward right. In the next square you will meet again a single beast. Defeat her and go uphill slightly toward left. In the right side of the road you will find a corpse containing Quicksilver Bullets. Going further you will find between the statues a Bold Hunter Mask. Finally, go downstairs (if you do it quickly enough, you note an escaping little creature; after you kill it, you receive 3x Blood Stone Shard), and toward the building behind a square with a bunch of burning crosses. Look around to find 2x Coldblood Dew and watch out for three hooded characters. In the end go to the building where you will fight the boss named Blood-starved Beast. Before the fight, make sure that you have an ample supply of Blood Vials, antidotes and several Molotov Cocktails on you.
Note: On the stairs, you can get Alfred help you (search for the appropriate note to the right) if only you remained neutral towards him.
Note2: After you defeat this boss, this opens the door in Oedon Chapel to Healing Church Workshop. Also, the special opponents with bags on their backs start to appear here and there. After you die in the course of the battle, you wake up in Underground Jail in Yahar'gul.

To get to Yahar'gul, The Unseen Village earlier, it is necessary that you defeat the Blood-starved Beast in Old Yharnam,. After you have killed the boss, in several locations you will find new type of opponents (thee screenshot), who carry bags on their backs. It is used to capture your character. Those opponents are very strong and at an early stage into the game, they will easily kill you. And this is the point! Unusually, after you are killed by the opponents, you do not respawn in the location of the last lit lamp. Instead, you will respawn in the cage inside the Underground Jail.
Some of the locations, where you can encounter the "catchers":
- after you leave Odeon's Chapel (the entrance is across) go right before the stairs, as much as possible, towards the building. The catcher is lurking in the corner,
- at the Cathedral ward, on the right side of the chapel where there is the entrance to the Old Yharnam,
- in the lower part of the workshop, in the Healing Church,
- in the Forbidden Woods, in the upper part of the village.
 The location, where you start after the abduction
After you get to a new location, you wake up in a cell. The door is open and you can leave the cell. First, turn right because it is there that you encounter no opponents. Behind the bars, you find Thick Coldblood or Frenzied and a descent to a lower level.
 Put on appropriate garments to talk to Adella.
Once you get down, collect the Frenzied Coldblood. Then, face the corner to the right. There, between the pottery, you note a kneeling woman. At first, she will not be too eager to talk to you, but there is a away to remedy that. You need to have the garb of the Healing Church (e.g. White Church Garb, Black Church Garb, Gascoigne Garb) Then, Adella agrees to talk to you and you receive Madman's Knowledge. Talk twice more to her and you will be able to tell her about safety (Oedon Chapel or Iosefka Clinic).
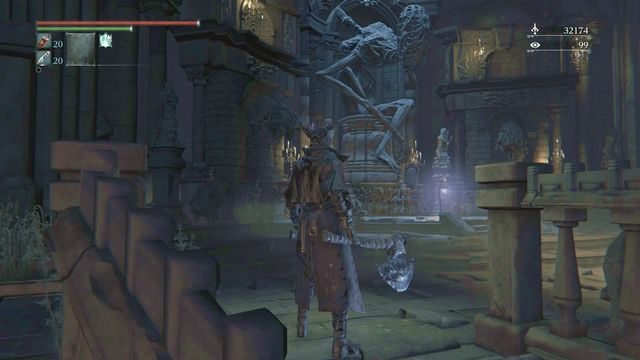 The respawning point is atop the stairs.
Note: Before you continue exploring, it is a good idea to light the lantern atop the stairs. The opponents here are very strong and it is possible that you want to return here later into the game. To light the lantern, dash to the very top, after you climb the stairs. In the big chapel chamber, you can dash up to the podium above, where you find the lantern, under the strange-looking statuette. After you use it, you can either return to Hunter's Dream, or keep exploring the Underground Jail.
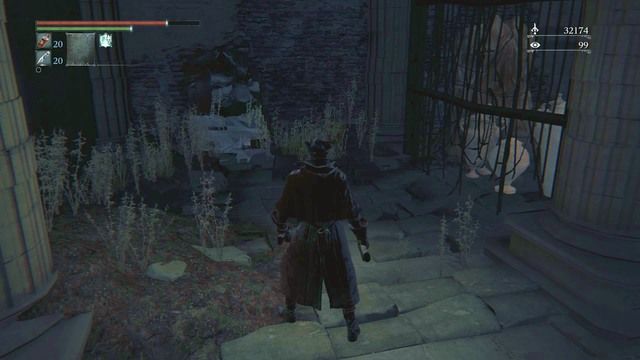 Watch out for the two inconspicuous and dangerous witches.
Then, from where you met Adella, return upstairs and exit through the second exit to the winding stairs. Along your path, you can also visit the room halfway through. Inside, you need to watch out because there are several opponents to defeat here. Right after you cross the door, you will be attacked by two witches. Be careful, because they can easily dash up to you and grab you, which ends in cutting your throat and losing a large part of your health. Then, you can walk over to the cage on the left, where you wake up the opponents - they will be getting up, as soon as you pass them by. However, you can target them beforehand and kill them. The most difficult opponent here is the catcher with the bag on his back. He does not use any special weapon, but his blows deal quite a lot of damage so, eliminate the weaker opponents quickly and deal with the stronger one. After the battle, you can collect 6x Blood Vials and 10x Quicksilver bullets. In the cage on the right, you also find three opponents that get up, as soon as you approach them.
 The exit to the boss arena
As you go deeper, into a bigger room, you encounter another catcher. In the bigger room, he can use dashing attacks and bag hits more frequently - watch out for the wide range of the attack. If you want to, you can also walk around this opponent and dash towards the last wall, quickly. To your right, you will then spot a hole that you can leave through. The way down leads up to the boss Darkbeast Pearl.
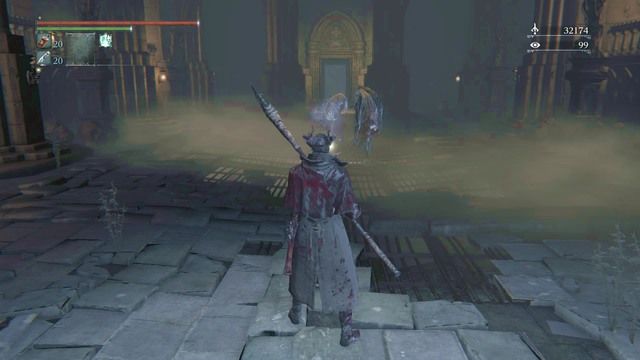 The two catchers are high-end opponents.
Finally, after you climb the stairs to the very top, you walk into the chapel. If you have not lit the lantern before, you can find it on the highest platform. In the center, there are two catchers here. Fighting them is nothing short of a challenge so, remember about extending your weapon and keeping the right distance. Also, watch out for the dashes of the individual opponents and do not let yourself be gotten from both sides. If possible, try to eliminate, at least, one of the opponent, as quickly as possible, which makes fighting the other one much easier. From the corpse, after the battle, you can pick the Moon rune (a greater amount of Blood Echoes for killing opponents). Then, head towards the exit, lean out from behind the pillar, carefully, behind which there is a witch.
Note: If you cannot defeat the catchers, try to walk around them and dash outside. However, keep in mind that you encounter opponents that are no easier to defeat, there.
Note2: The odds are high that you catch one of the catchers on the stairs, after you respawn by the lantern. In such a case, a one-on-one fight is possible.
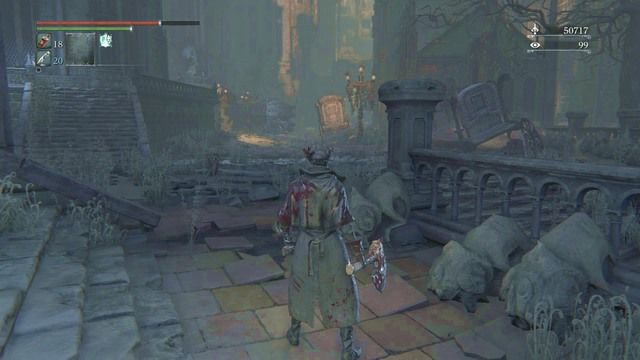 You can go two ways, outside.
After you leave the chapel, it is a good idea to take interest in opening the passage. You should focus on the ones to the left, first. Do not walk into the main yard and walk around the building, glued to its walls. Get along the building and open the door into the chapel - this will allow you to walk around the catchers inside, in the future.
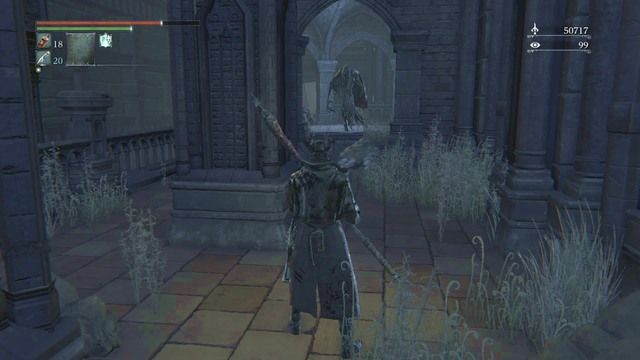 At the end of the corridor, eliminate the dogs jumping out from behind the catcher
The second door to open is on the right of the chapel. Just like before, stick close to the building. At the end of the balcony, you find opponents - two vicious dogs and a catcher. First of all, dash away from the patrol and lure dogs your way, to be able to kill them away from the stronger opponent. Then, fight this one. Climb down the stairs to the small square. On the left, at the corpse, you find 2x Twin Bloodstone Shards. On the right, there is a door and another corpse before it (Frenzied Coldblood). If you have not killed the witches inside, before, watch out because they attacks you immediately after you open the door. This place leads up to the room halfway up the stairs.
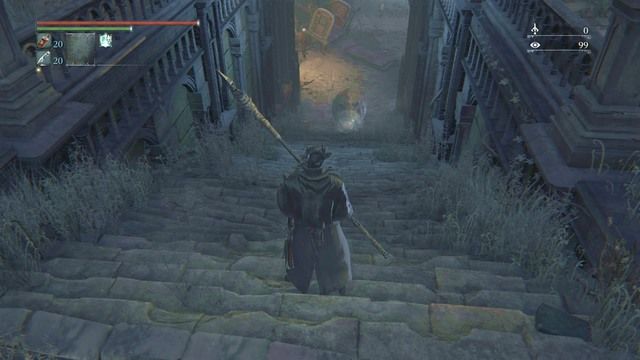 The pig on the stairs welcomes you with a charge.
Finally, you get to the square in front of the chapel. First, go right. On the stairs, you encounter a big pig. The charge and crushing attack (it stands on its hind legs), deal lots of damage and, in extreme situations, they can even end in your death. Defeat the pig to get downstairs. At the game, apart from two vicious dogs, you also find 3x Madman's Knowledge. Loot the corpse on the cart for the Black-hooded Iron Helm and a black robe, gauntlets and Yahar'gul Leggings.
Note: The big gate swings open only after the fight with Rom, The Vacuous Spider.
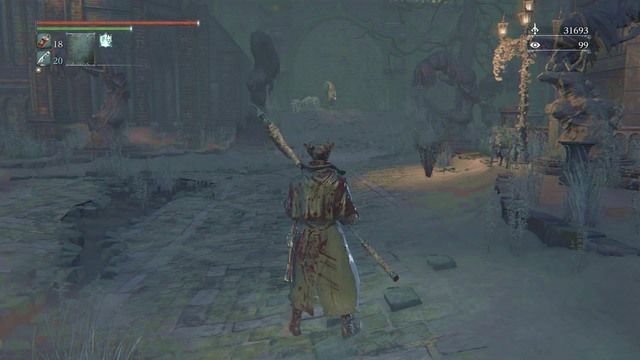 At the end of the road, you encounter lots of vicious dogs, a catcher and find an interesting weapon.
Now, return towards the chapel and cross to the other side. On the balcony to the left, there is Frenzied Coldblood. Then, jump down at the end, onto the cart. Immediately you will be attacked by three vicious dogs. As a pack, they are incredibly strong, because all of them attack swiftly. After you kill them, head towards the wall at the end of the square. You will be attacked by two more dogs and a bit ahead, by a catcher and again, two vicious dogs. First of all, while heading onwards, eliminate the dogs and deal with the catcher at the end. On his boy, you find a weapon - Tonitrus.
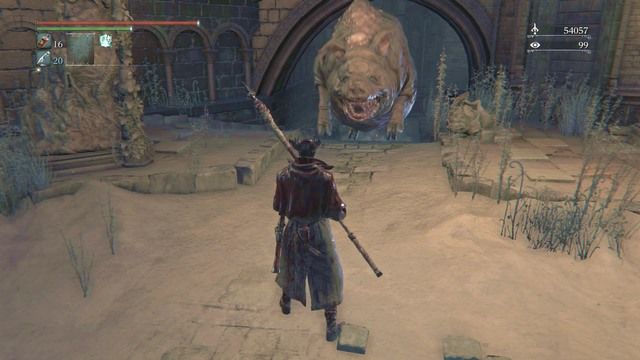 Dodging the charges allows you to attack the pig's behind.
While returning to the chapel, take the path below. In the recess on the right, you find a body guarded by a huge pig. If you have defeated the vicious dogs earlier and the pig, you do not need to worry about attacks of other opponents so, you have lots of room to maneuver. Otherwise, you need to make sure that you do not stray away from here, too far, because you may attract the rest of the opponents. The pig comes out from the recess and charges in your direction - dodge, which allows you to land several blows. Then, finish the beast off and watch out for the crushing attack and the spits (it causes frenzy that, after the bar fills up, kills your character, or leaves a tiny amount of health). On the corpse, there is 5x Bolt Paper which temporarily ends your exploration of this location.
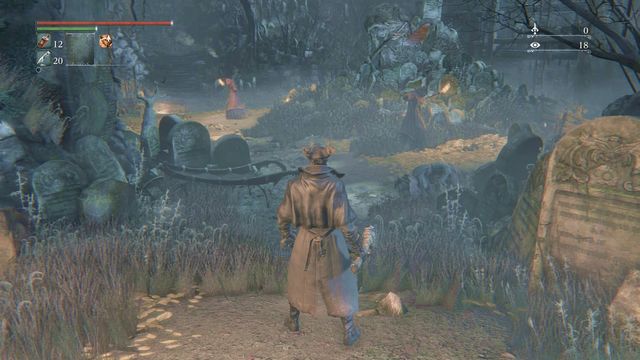 The entrance to this location and the first enemies.
You can reach the Hemwick Charnel Lane from the Cathedral Ward (turn left before the Cathedral and go through a small forest). Once you enter the location, go down. You will encounter few enemies at a small square. Behind the tombstones on the right, you will find 2 Twin Bloodstone Shards and a bit further - Madman's Knowledge. At the end of the road, there is a lift which you will unlock soon.
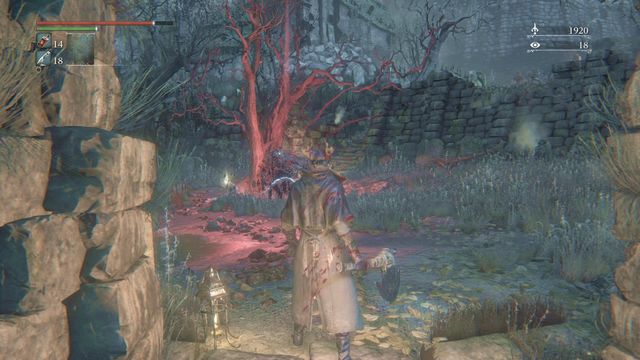 Sometimes you will encounter witches that materialize in front of you.
Stick to the left side (a corpse behind the carriage - Bloodshot Eyeball) and go up the stairs. You will see a witch materializing near the tree and a patrol that will join her (an enemy + a dog). Stay close to the stairs, as it will be easier to kill the enemies and avoid the Molotov Cocktails falling from above. Near the body under the tree, you will find Thick Coldblood. A bit higher, there is an enemy throwing the cocktails.
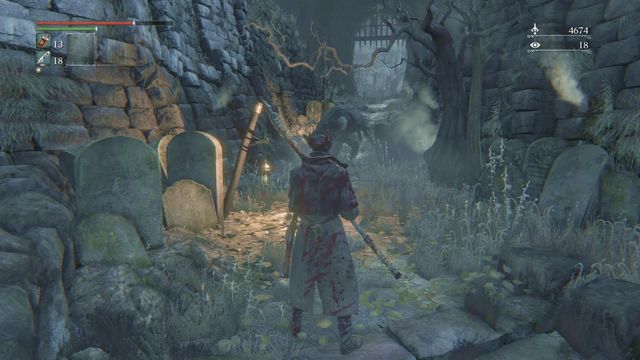 The gate (opened in the picture) is a shortcut unlocked later in the game.
Head up the stairs towards a gate (behind the tombstones, to the right, you can find Twin Bloodstone Shards). Near the gate, you will be attacked by one bigger enemy. Step back a bit, because another enemy is throwing cocktails at you from above. You will open the gate later - now, head right into a narrow passage between tombstones, near a lantern lying on the ground. When going down, watch out for an enemy that will run out from the left - he will either ambush you or run out right after you pass.
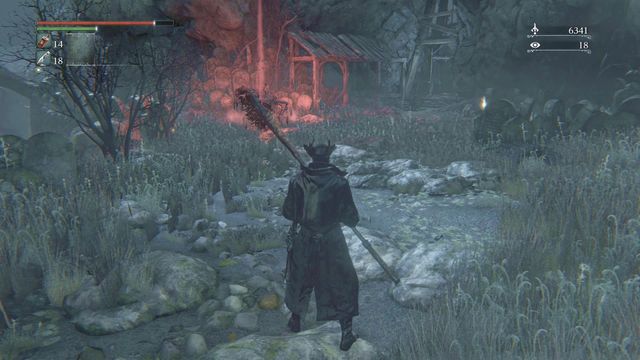 You will notice another witch on the glade. After defeating her, unlock the lift on the right.
Downstairs, on the glade, another witch will materialize. Notice the body on the right (Pebble) and also the lift - use it to unlock the mechanism. From there, go left and walk towards the bridge (watch out for a single enemy - he won't cause you much trouble, but you can fall down). Notice a body behind the tombstones (8x Bone Marrow Ash).
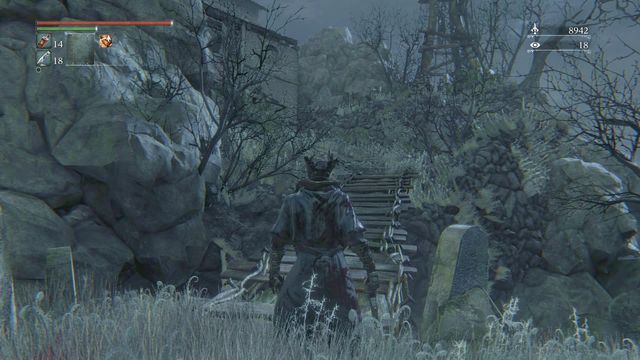 Another two enemies waiting behind the bridge.
Go across the bridge behind which you will encounter a bigger enemy - kill him quickly, because a second one will appear from the building in front of you and he will be throwing some cocktails. After going inside, watch out for an opponent on the right and an Afflicted Dog. At the end, you will find a ladder - use it to go up.
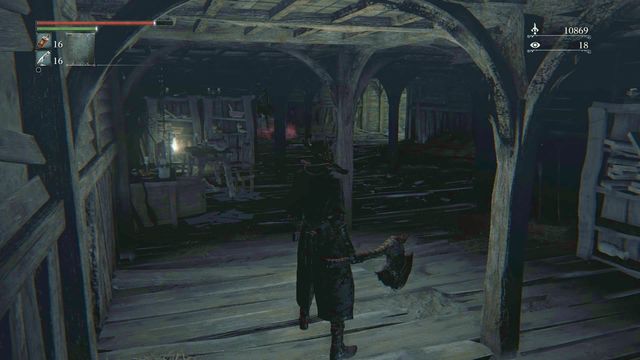 Inside the building, you can turn right after going up the ladder. You will find a few items at the end.
Turn right and head back towards the entrance. Go across the beams (in the next room, you will encounter an old man with a machine gun, sitting on a wheelchair). Notice a body lying on the hay to the left. You will find an Adept Blood Gemstone and Madman's Knowledge at the end. Go back towards the ladder and collect a Bloodshot Eyeball as you go. Head towards the exit on the right - a single witch will materialize in front of you.
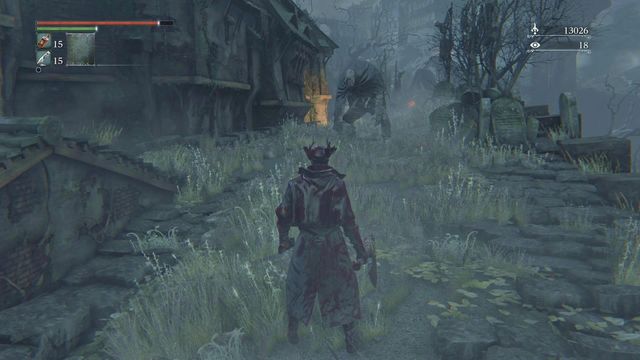 After going across the rooftops, you will reach a place where you will be attacked by a few enemies in a row.
Go outside to see that you're now on the rooftop. Near the edge, head left (carefully locate the enemy so that he doesn't throw you off the edge) and walk along, towards the bonfire (you will find some Coldblood Dew behind the tombstones). Now you have to face three enemies one by one. Once you defeat them, get close to the bonfire, where another opponent awaits you (you can see him to the left of the building that you pass). There is also one more enemy throwing cocktails. Try to quickly run to the guy with cocktails and eliminate him first. You will also find 2 Twin Blood Stone Shards behind the tombstones.
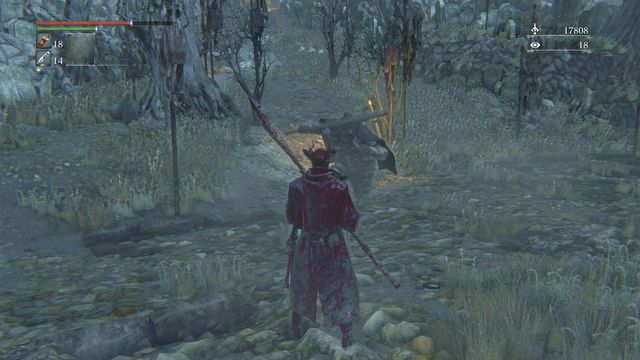 Enemies with choppers are strong, fast and their weapon has long range - be very careful.
Now, go down. When walking through the church, don't get caught by the enemy that's hidden inside (quickly run inside). Downstairs, behind the tombstones, you will find some Thick Coldblood and a mechanism that opens the gate that you've seen earlier. Moreover, there are two large enemies with choppers near the bonfire. Watch out for the long range of the weapon and for their jump attack that deals a lot of damage. It is best to defeat them one after another.
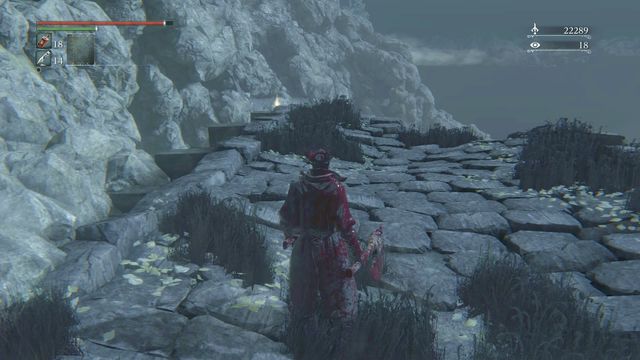 You will find a rune at the end of the bridge.
Head straight from the bonfire. A bit further, you will notice a bunch of Afflicted Dogs - perform a few strong blows as quickly as you can or use Molotov Cocktails. You will find some Bone Marrow Ash in the body. You will be attacked by another dog and a cocktail thrower. Behind the tombstones on the left, you can find some Thick Coldblood. At the end of the bridge, pick up Lake rune, which lowers the damage received.
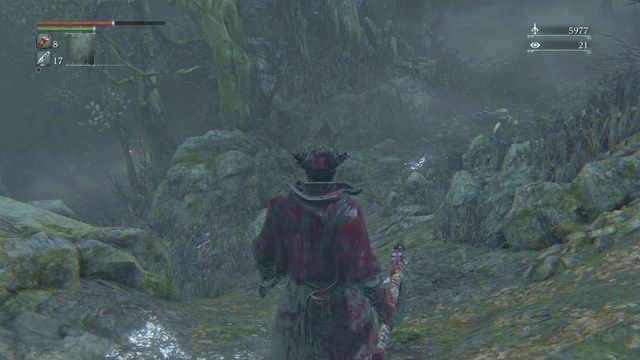 The path forks frequently in the Forbidden Woods.
After entering the Woods, head down the path. After a while, near bonfires, you will be attacked by two enemies. One of them will be shooting missiles at you. After defeating them, search the bodies nearby (Twin Blood Stone Shards and Pebbles). From here, you can go either down or up, slightly to the right - head in this direction first.
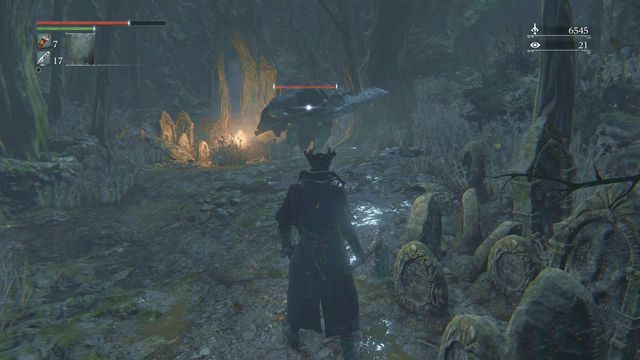 Watch out for the long range of attack.
After going past three bonfires, you will encounter a single enemy near the third one. Defeating him shouldn't a big problem for you but watch out not to be hit by a burst of blows. Behind the eliminated enemy, you will find the entrance to a small cave - inside, there is an Adept Blood Gemstone and Madman's Knowledge.
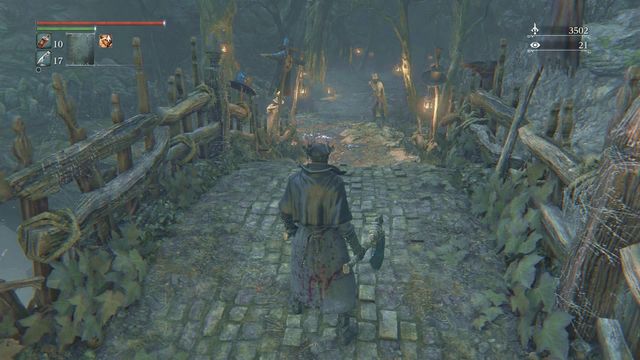 Behind the bridge, there are two enemies and a trap set on the tree to on the right side of the road.
Now, head back down and after a while, you will reach a square with a lantern, which you should of course light up (there is an Antidote behind the closed gate, by the wall - you will later unlock a shortcut here). Go across the bridge - behind it, near some tombstones on the left, you will find Twin Blood Stone Shards. When on the bridge, watch out for two enemies, one carrying a gun. Walk along (watch out for a trap on the tree, you will activate it by walking across the planks - perform a quick dodge or don't stomp onto a plank) and defeat another single enemy on the right.
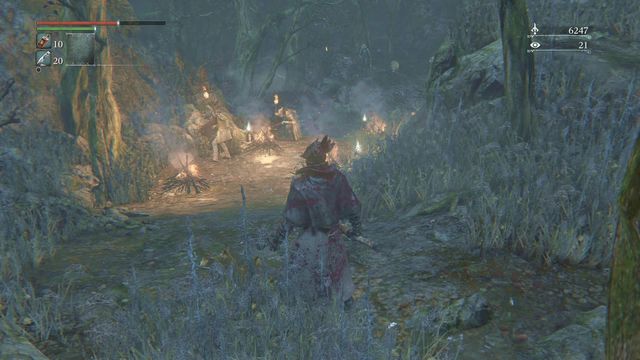 There are a lot of enemies around the bonfires. Watch out not to be burned, because a lot of Oil Urns will fly in your direction.
Walking down, you will be attacked by a dog (collect Thick Coldblood from the body nearby). There are also two enemies with torches near the bonfire. When heading towards the bonfires, watch out for a patrol consisting of two enemies and for the opponents throwing Oil Urns at you (you will receive more damage when on fire) from the rocks on the right. You can either lure the patrol away from them or run quickly to the rocks and eliminate them. Near the bodies, you will find some Blood Vials, 2 Twin Blood Stone Shards and 10 Quicksilver Bullets).
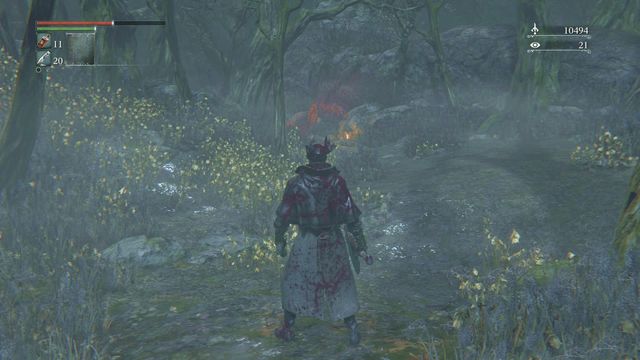
You will reach a place where you can see a red tombstone (screen). Turn slightly to the right to catch an enemy running away (near the ground). You will obtain 3 Twin Blood Stone Shards for killing him. Turn left near the tombstone and head between the rocks. You will fall down to the center of the village.
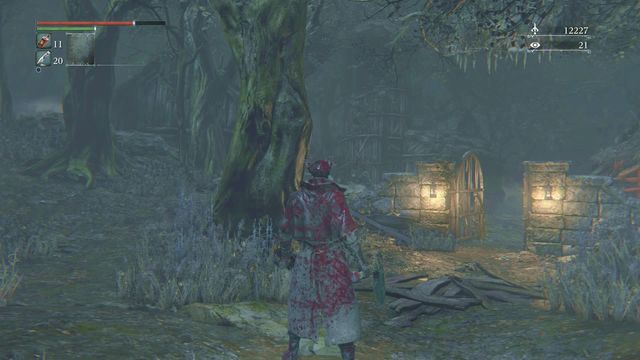
You can reach the same village by turning left earlier before the tombstone. On the way, you will be attacked by a single enemy and you will find some Beast Blood Pellets in the shed and some Thick Coldblood below. Form the glade outside, you will notice the gate leading to the village (screen).
Note: There is a trap in front of the entrance to the village, which will kill you instantly if you trigger it. Notice the planks on the ground near the tree. If you step on one of them, a huge spike will fall down on you. Go past the tree from the left or head left (up) to safely enter the village.
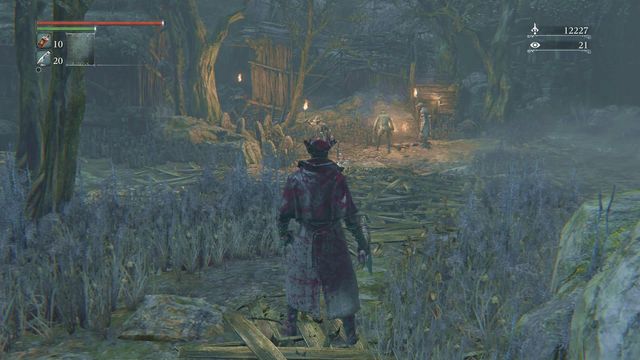 When approaching the enemies, watch out not to fall down into the pit in the middle.
As you enter the village, you will be attacked by three enemies. Another one will be shooting to you from the shed on the right. In the shed, you will find 4 Pungent Blood Cocktails and near the building on the left - 5 Blood Vials. There are a few enemies in the middle. Be careful not to step on one of the planks, because you will fall down into a pit, where some birds will attack you (an Antidote near the body). Search all the houses to find more Pungent Blood Cocktails and Beast Blood Pellets. You can move along, heading towards the water. When you pass the bonfire, you will be attacked with Molotov Cocktails, so it's a better idea to go from the other side (go back behind the gate and turn right).
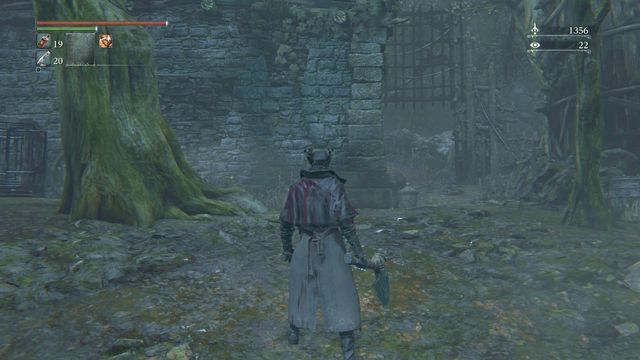 You can open the gate by going past the building from the left, between the dog cages.
When you make a turn before the gate, you will reach the higher part of the village. There are some Quicksilver Bullets near the body. Watch out for the dog - if you jump down, you will go back to the lower part. As you approach the big gate, it will close before you (go collect Blue Elixir from the building on the left). Circle the gate going between the cages (you can kill the dogs to obtain extra Blood Echoes) and kill an enemy standing right behind it. After opening the gate, go on the roof of the building on the right (there are two crows on top and White Church Set).
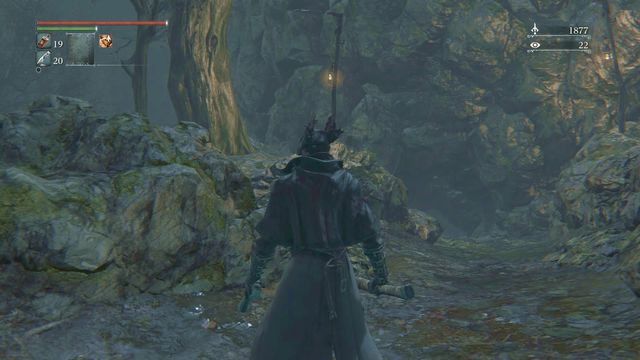 The path leading to the cave.
When in the higher part of the village, you can go left from the place where the cages are. Following the path, you will reach a small cave (beneath the first rock shelf, there is a body and an Antidote).
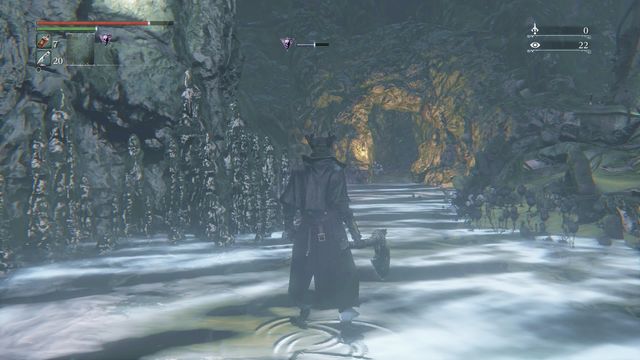 The water in the cave poisons the hero.
At the very bottom, you will find a flooded area. Be careful, as the water is contaminated - staying in it too long will hurt the hero. There are three bigger enemies in this territory and plenty of smaller snakes, which you will encounter mostly deep in the cave. Behind the first rock, in front of the entrance, you will find Frenzied Coldblood. Head towards the rock in the middle (green light) to find a Dirty Blood Gemstone near it and a Nourishing Blood Gemstone.
 The exit, leading to a part of Central Yharnam that was inaccessible before.
From here, go to the small island that you can see behind one of the enemies (watch out for the snakes). Go through the narrow passage (it is best to kill the snakes that block your way - you can do it gradually). At the end, you will find an Arcane Blood Gemstone. Go back to the center of the cave and head to another part of it, in front of the large rock. You will find a ladder leading to Central Yharnam.
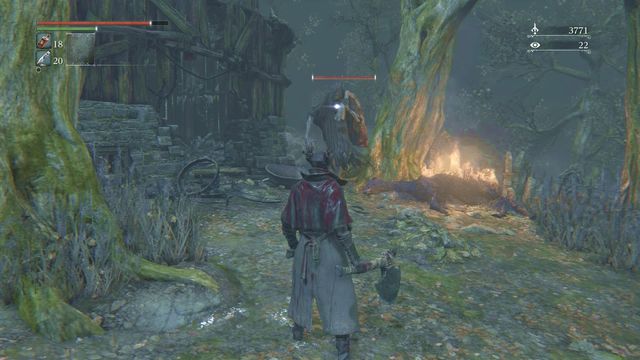 Watch out for the opponent's strong attacks. Getting killed will result in being teleported to another location.
Walk along, towards the building with a lantern on top and you will encounter a special kind of enemy (near the bonfire). It doesn't carry any weapon - only a sandbag, but be careful, as its attacks are very strong and it may quickly kill you. The kick and jump kick are the most dangerous attacks. If you die, you will be teleported to Yahar'gul Unseen Village, to a sort of a prison. Remember this enemy, because you will encounter him in other locations as well. In the house, you will find a Beast Roar and 6 Blood Vials near the tree behind the building.
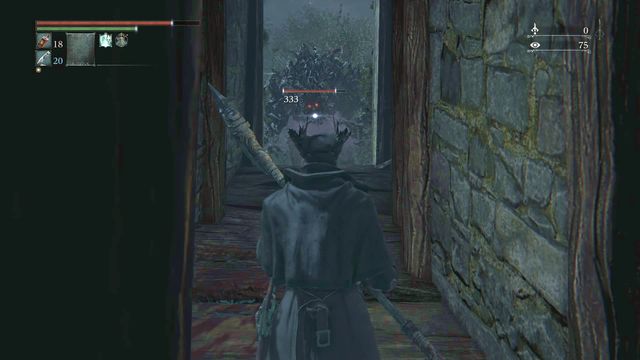
Behind the bonfire, you will reach the place that you can see on the screen. There are a lot of enemies on the bridge, among them a few throwing Molotov Cocktails (they are the ones that attacked you if you travelled to the village downstairs). From the roof, where the last enemy is, jump down and collect 10 Molotov Cocktails from the body.
Head through the water, quickly going past the enemies in it. After reaching the land, go to the small cave on the right. Inside, near two bodies, you will find Twin Blood Stone Shards and you will unlock a passage leading to the lower part of the village (the hole in the middle).
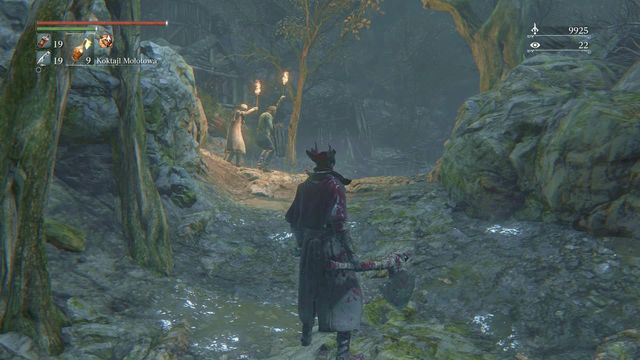 Walking along, you will encounter a few enemies.
Go back to the exit from the small cave and head right. On the left, you will notice an enemy facing his back at you - take the opportunity to ambush him with a fully charged attack and collect 2 Twin Blood Stone Shards from the body. A bit further, there are two weaker enemies, but you need to watch out for the third one shooting at you from the roof on the left (you can quickly run to the top and eliminate him first). You will find some Quicksilver Bullets near a body outside the house.
 The cannonball can hit you very hard so try to run as fast as you can (you can temporarily hide in the houses on both sides of the road).
A little later, you will reach a narrow passage between the buildings. At the end of the road, there is a cannon shooting missiles at you (deals a lot of damage). Once it fires, run quickly towards the cannon and then hide in one of the buildings to avoid another cannonball (there are two enemies in the house on the left). When you reach the cannon, kill the man arming it and enter the building in front of you.
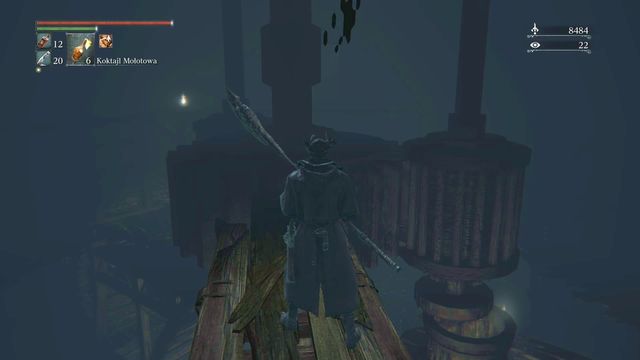 Visit the upper part to find a few items and a character connected to one of the side quests.
Note: If you want to collect the items located on the beams above, you first have to leave the room. Jump down onto a wooden platform. Turn left, where a single enemy will attack you (watch out not to fall down). After the fight, go up the ladder and carefully walk across the mechanism onto another platform. You will find some Poison Knives. Go outside to find more Poison Knives on the rooftop and Suspicious Beggar that you can talk to (connected with one of the side quests). Inside, jump all the way down, where you will find a weapon - Cannon, near the last body.
 The opponent gets stuck In the passageway, which makes it easier for you to deal damage.
Note2: As a matter of fact, he is not who he seems to be. You can tell him about the safe place but, at Iosefka Clinic, the Beggar turns into a monster, whereas in the Oedon Chapel, he will be murdering the other survivors (for this, you will be receiving Beast Blood Pellets). The reason for that is the actual form of the beggar - he is a huge monster, a miniature version of Darkbeast Paarl. To see that for yourself, attack him several times on the rooftop and you will witness his transformation.
Fighting this monster in normal conditions is very difficult so, it is a good idea to use a ruse. First of all, the opponent is vulnerable to poisoning - two Poisoned daggers should result in his gradual health loss, by around 1/3 of the initial value. The other issue is avoiding his attacks. Take advantage of the beast's size and hide in the corridor that you took to climb the roof. The opponent may attack you there, but much fewer attacks will actually deal damage to you. To sum up: Use poison and hide in the passage, where you can extend your weapon and attack the opponent stuck in the passage. For defeating him, you will receive quite a few Blood Echoes, and a strong rune Beast.
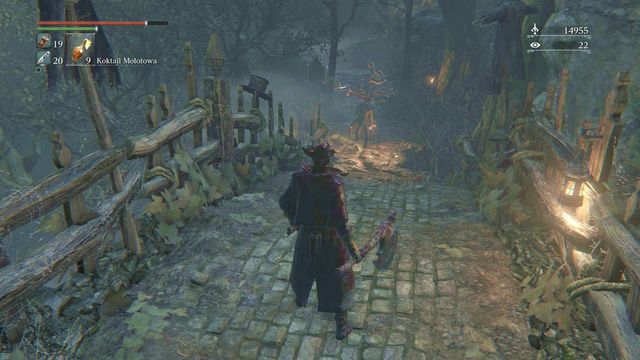 There is another enemy behind the bridge. Turn right and go up to unlock a shortcut.
Go all the way to the bottom. On the right, you will see a single enemy with snakes growing out of his head. Watch out for his attack, as it causes poisoning. In the room on the right, there is a broken lift which you will unlock later. Leave using the opposite passage, on the left of the room. Go up (you will find Twin Blood Stone Shards), to a place where you can see a lift (4 Antidotes near the body). You can unlock a shortcut here (the gate), leading to the respawn point.
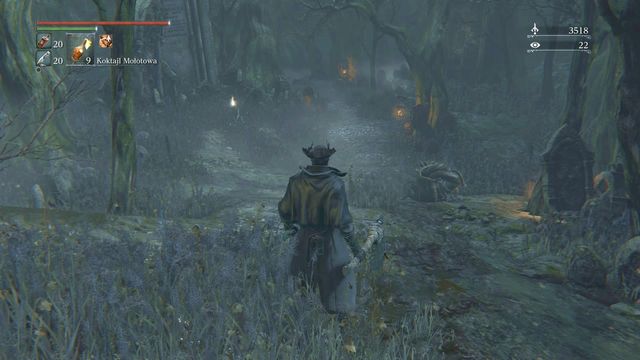 If you don't want to get lost, follow the lanterns.
Go back down and head deeper into the woods (you will find some Frenzied Coldblood on the way). The lanterns near the path will lead you, but it is good to sometimes go off the track and explore both sides. Watch out for plenty of smaller enemies and a few bigger ones (they can poison you). If you search this area well, you can find some Shining Coins, a lot of Twin Blood Stone Shards and Madman's Knowledge. After you explore the forest, follow the path to the other part of it, where you will see an enemy standing on the right, near a tree.
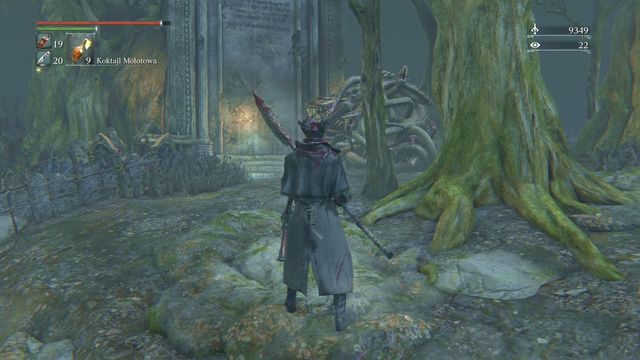
A bit further, where you can turn right, make that turn, towards the enemy that you can see in the screen above. Get a longer weapon and kill it as fast as you can, as it can use a very powerful attack, also with poisoning effect. On the hill, you will find Thick Coldblood and Twin Blood Stone Shards. The most interesting item is hiding behind the large tombstone/altar - near the body, you can see Murky Deep Sea rune, which increases your resistance to poisoning. Lastly, go back on the track and head down the path.
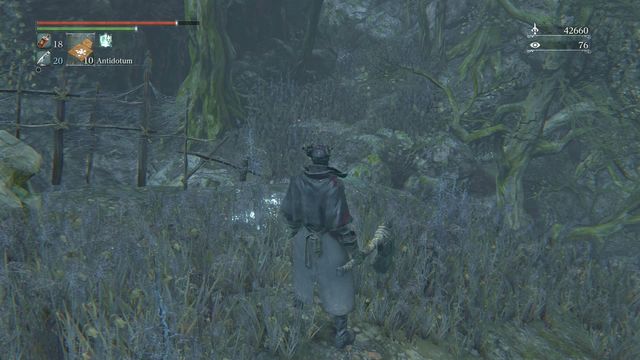
Along your path, you encounter scores of opponents. Before you head along the main path by the big cluster of snakes (including a bigger one), you should take a left turn. Approach the escarpment shown in the screenshot. From here, you can jump over to the other side. Remember to run up (sprint) and to take the jump only when you are on the edge of the escarpment. If you do that, you can collect a Graveguard Mask from the corpse. After you jump down to the escarpment to the right, you can collect another item for your set - Graveguard Garb, Manchettes and Kilt.
Note: If you fall down, do not worry about that. You can use the situation to your advantage and unlock a passage. For this, run ahead, ignore the opponents and head for the cave exit. There, across a small swamp, proceed ahead and then take the path upwards (watch out for the opponent hiding behind the tree). Eventually, you unlock a lift.
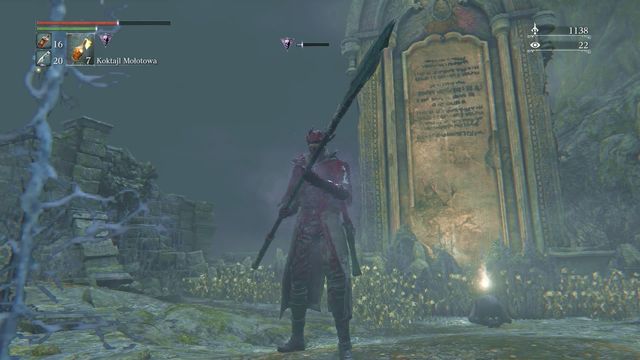 Down the path, you will find an enemy and a rune (you can unlock the gate later).
Choose the path on the right (the rightmost path will lead you to a close gate which you will unlock later and a Clockwise Metamorphosis rune which increases your HP). On the way, you will find some Frenzied Coldblood and Shining Coins. Watch out for a poisonous enemy near the big tombstone (a bigger version of the monsters that you've met earlier in this area).
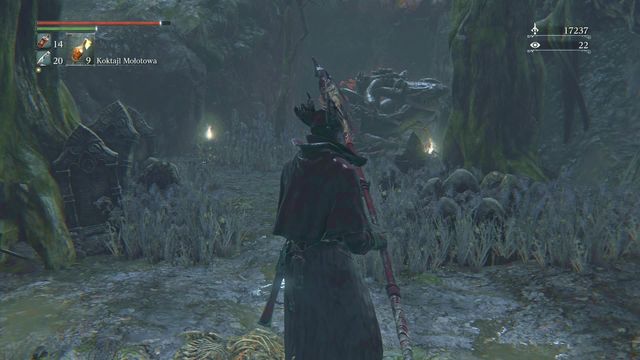
At the very bottom, it is good to locate the niche that you can see in the screen above. If you search the bodies, you will find 3 Twin Blood Stone Shards and Deep Sea Rune. There is a problem though, because two beasts are guarding the passage. Get a longer weapon and use Molotov Cocktails to make the fight easier and eliminate the first enemy as fast as you can. Don't waste Antidotes during the fight, but use them once everything is over. After the battle, head down the path again (on the way, behind the tombstones, you will find Frenzied Coldblood).
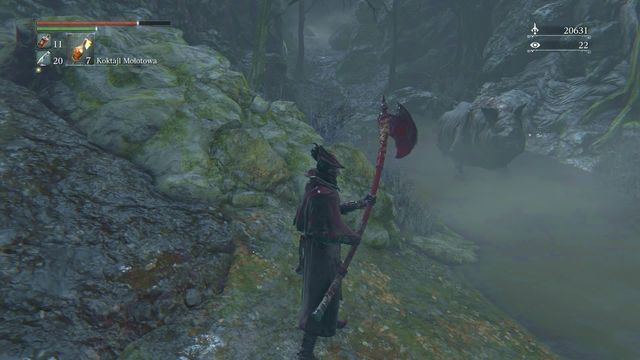 From this place, you can go two opposite ways.
You will reach a flooded area and you will be attacked by a Giant Boar that you know from the sewers in Central Yharnam. Watch out for its charge and frontal attack (dodge and attack from behind). From here, you can go either left or right.
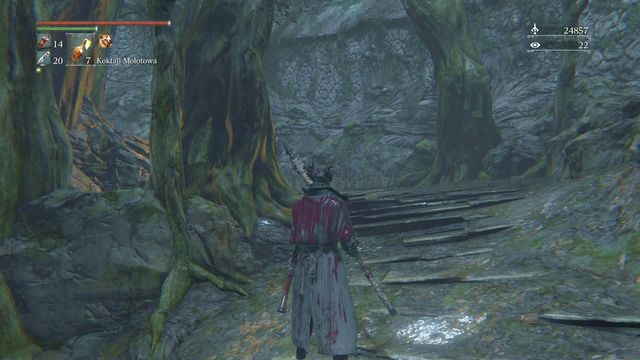 There is an enemy hiding behind the tree.
If you choose to turn left, you will enter a small flooded cave (will-o'-the-wisps floating in the air). From here, turn right first. Watch out for an enemy behind the tree (don't run past it, because you will be caught from behind). After killing it, you can go all the way to the end and unlock a lift.
 Watch out for the enemies' strong attacks - the fastest way to deal with them is using Molotov Cocktails.
From the cave, you can turn left again. After going outside, you will encounter a new type of enemy (don't let its size mislead you - a series of quick attacks coming from them can be fatal). You will find Madman's Knowledge near a tree and two enemies will attack you a little further. They are not very resilient, but their "laser" attack deals a lot of damage. Try to eliminate at least one of them as fast as you can and focus on melee fight (they cannot use the laser when close to you and their melee attacks are weaker). The battle is very easy if you have Molotov Cocktails - one such weapon can eliminate both opponents right away. Notice a rune near the body (Anti-Clockwise Metamorphosis - boosts stamina). At the end of the road, you will encounter another two enemies and you will find 2x Madman's Knowledge.
 If you turn right and go up the stairs, you will unlock a gate.
After defeating the Giant Boar, you can go right as well. Near the bonfire, you will find Sharp Blood Gemstone and another Boar blocking your way. You can circle it if you want to. After a while, you will reach some stairs and the path will fork - head right first, to unlock a gate (There is Clockwise Metamorphosis Rune near the monument, if you haven't acquired it earlier).
 The path leading to the bosses.
The left turn will take you through a watery area at the end of which there is a boss - Shadow of Yharnam.
 The path leading to Byrgenwerth
After the fight, head through the newly unlocked passage. On the way, you will be attacked by a monster resembling a fly. Watch out for its strong attack - jump back when it flies up or you will be caught. Collect Madman's Knowledge from the body and head straight to Byrgenwerth.
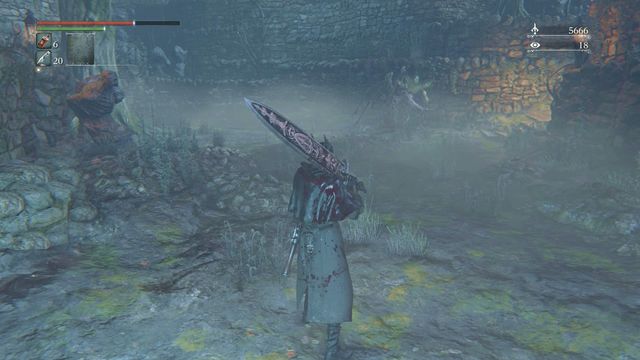 Wait until the second enemy goes up if you want to kill them one by one.
Behind the lantern, go down. You will be attacked by an enemy (be careful not to get caught by the strong attack). In front of you, there is a gate which you will unlock later. Turn left and watch out for another two enemies. Keep them at a distance, preferably using an extended weapon. If you're not in a hurry, you can wait until one of the enemies goes up the stairs and you can fight them one by one.
 You can ambush the enemy from behind by slowly going around the tree.
A bit higher, you will reach a place from where you can see a building below you. However, first turn left, where you will find a single enemy behind a tree (watch out for a blue missile that will stun you if you're hit). You can ambush the enemy by going around the tree, thus gaining advantage at the beginning of the battle. In the body, you will find Arcane Lake rune which reduces damage received from Arcane attacks.
 Quickly come close to the enemy to make it stop shooting fire missiles.
Go down towards the building. You will be attacked by two enemies (step back and keep your distance from the opponents all the time). After killing them, you will encounter a large monster. Approach it as quickly as you can - otherwise, it will continue shooting fire missiles at you. When you're close to the enemy, it will only attack you by spitting out some goo, which you can notice before the attack (an opening hole in the center of the body). After defeating the beast, you will obtain Numbing Mist and you will also find Great One's Wisdom in a body near the barrier on the left.
 Don't forget to unlock the gate.
Now head straight towards the monument (you will be attacked by a single enemy). Near the edge, on the left, you will find 5x Sedative. Go up the stairs and unlock the gate at the end of the road. Turn right and head into the building. On the left, you will find a Pearl Slug and you can open another door. Head down the stairs, where you will be facing a hunter.
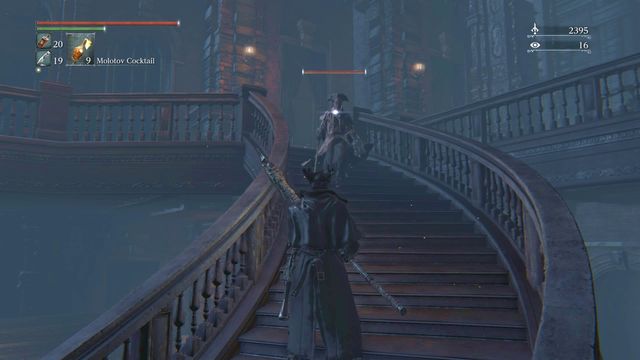 When going down, you can hit the hunter a few times.
Drag the enemy downstairs as soon as the battle starts. He fights using a sword and sometimes a whip. Also, watch out for the attack when he throws some powder at you (it happens when you stand too long in front of him), because it's the one that deals the most damage. Another special attack starts with the enemy crossing his weapons and summoning electric projectiles. What's the most important, try to avoid the attacks described above, focus on keeping your distance from the enemy and attacking by jumping towards him. When the hunter throws "tentacles" in front of him, it is a good moment to attack - if you dodge this special attack, you will have a moment to jump close to the enemy and strike a few blows.
 The ladder leading up.
After the battle is over, head upstairs. In the place from which the hunter came, you will find a note lying on the sofa. You will also find Student Uniform and Student Trousers in the chest. Now turn around and walk to the end of the room to read another mysterious note. From below the shelves, head left and go up the ladder.
 The key that you need to open the door.
Upstairs, pick up the Lunarium Key from the table. Walking up the stairs, to the top, you will encounter another enemy. Open the chest to find the Empty Phantasm Shell. Go downstairs and open the door located on the left side of the room.
 If you are ready to fight the boss, jump into the water.
Outside, "talk" to the bishop on the wheelchair. He will point at the edge of the balcony. Jump into the water and you will be teleported to Moonside Lake. The only thing that you will do here is fight a boss - Rom, the Vacuous Spider.
Note: For killing the sitting NPC, you will receive a rune - Eye; this killing has no further consequences.
Note2: Defeating Rom, the Vacuous Spider will result in a day time change. Some quests may become unavailable, because of, e.g. the disappearance of the character from their regular location. On the other hand, moving the story forward will result in some new quests becoming available.
 To begin the battle, you have to attack the enemy first.
After you win the battle, the time of the day will change. You will also unlock a passage to Yahar'gul Unseen Village (after the fight, approach the edge of the lake).
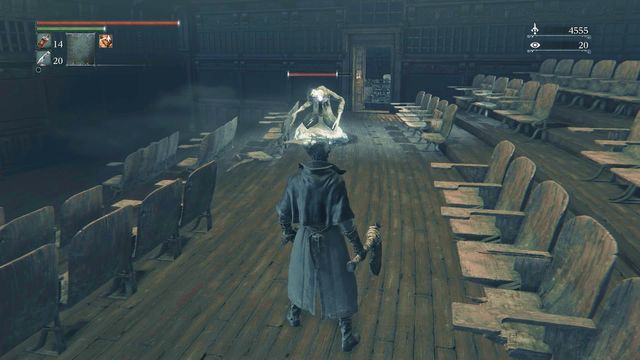 The enemy will jump down as soon as you enter the hall.
Note: It is possible to visit this location later on, without the Tonsil Stone. This happens when you gain access to the upper floor, from which you can climb down to the lower one, described in this chapter.
You can access the Lecture Building from the Cathedral Ward. After going inside, light the lamp and head to the main corridor. Choose the second door on the left. The door will lead you to one of the parts of the hall. When entering the hall, watch out for the enemy falling from above (quickly run inside). Near the body behind the desk, you will find Lecture Theatre Key. Look for Student Uniform and Student Trousers near the body lying between the chairs.
 When you come close to the body, an enemy will ambush you from above.
Now, leave through the second door into another corridor. Choose the first door on the left. You will get into a round room. Look for the Madman's Knowledge near the two bodies (again, watch out for the enemy falling down). Next, go to the other side to another room, where there is a chest with Red Jelly inside.
 Keep the enemies near the door - it will make it easier to eliminate them one by one.
The last place that you should visit is the room behind the door located more or less in the middle. You can open it using the Lecture Theatre Key. After opening the door, don't go inside, but step back towards the main corridor instead. You will see a large number of enemies coming out of the room. Extend your weapon and keep the opponents crowded near the door (watch out for the projectiles). Once you defeat all the enemies, go inside. There will still be a few enemies left there.
 The door at the end of the corridor lead to another location.
Finally, leave through the door to the right. In the chest, you will find an item called Augur of Ebrietas. Approach the main door, at the end of the corridor and you will be teleported to Nightmare Frontier.
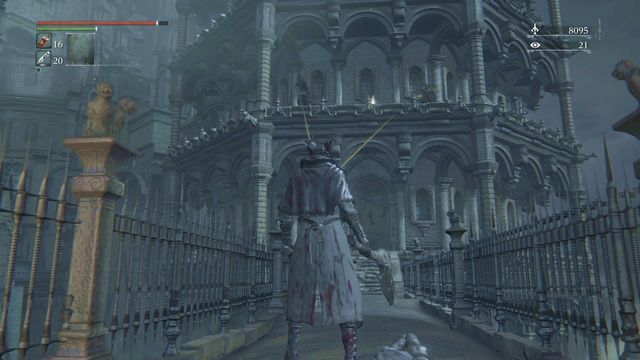 After entering the new area, be quick because you can be hit by one of the shooters.
You can access the Healing Church Workshop from the Cathedral Ward; specifically, from the Tomb of Odeon (the door to the right of the respawn point will unlock after defeating Vicar Amelia). After going across the bridge, you will be attacked by the shooters and a single enemy will attack you downstairs. Head inside the building. Behind the door, there are enemies on both sides and one archer by the wall to the left. Eliminate them quickly or drag some of the opponents outside to deal with them one by one. In the chest by the wall, you will find a Radiant Blood Gemstone. After collecting it, head upstairs.
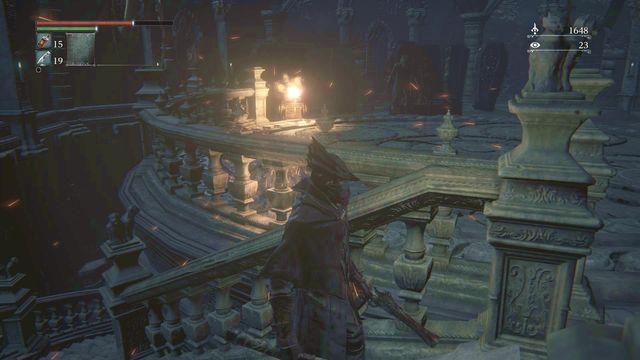 Watch out for the machine gun when walking up.
In the next room, right after going upstairs, step back onto the stairs because you will draw the attention of the enemy with a machine gun. When the burst stops, quickly run up and kill the enemy on the wheelchair. Next, go to the outer part - there are two shooters here and a larger enemy with a brick. Go back to the room and the last one will follow you. Kill him first, then deal with the shooter that is closer to you and then the one on the wheelchair (approach him when he is reloading; you can make him shoot by standing by the wall, which will also protect you from damage). Be careful, because it is easy to fall down here. You will find some Thick Coldblood near the body. Circle the wall and climb the ladder.
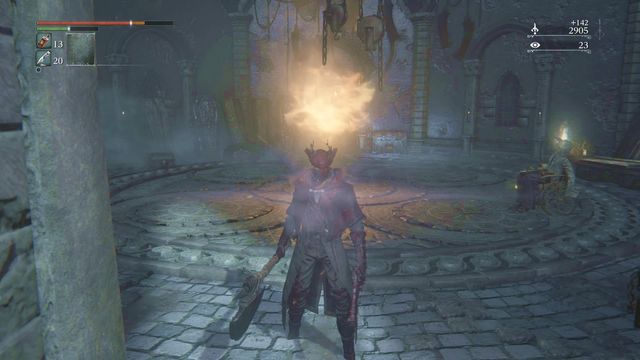 Old guys with flamethrowers can deal a lot of damage.
Turn right first and examine the mysterious thing under the window. Collect Thick Coldblood from the body on the other side. Watch out for three enemies inside. Enemies on wheelchairs will be using flamethrowers, but you can easily go past them. You will find Radiant Sword Hunter Badge in the chest. The gate will remain closed for now so go back to the bottom.
Note: The door leads up to Upper Cathedral ward. You can unlock it after you find the key in Yahar'gul, Unseen Village.
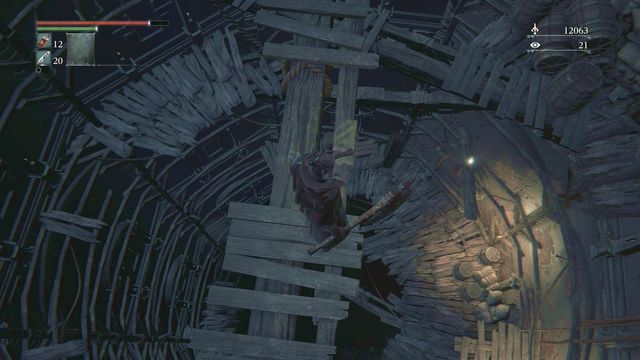 There is a spiral way leading down. Carefully jump from one platform to another.
Turn right from the bridge, where the path ends. Jump down, kill the crawling enemy and collect 2 Twin Blood Stone Shards. Next, go inside and go down from the wooden platform. Carefully jump from one beam to another, collecting one Madman's Knowledge and Messenger Hat. You can walk down slowly, just be careful when jumping down from narrow beams. The key moment is when you have to jump down from a platform where the body with the hat is. There is a hard-to-notice beam below you, slightly to the right, under the place where you stand. The fall will cost you a small amount of HP.
Note: As you go down, you can find a secret location - Abandoned Old Workshop.
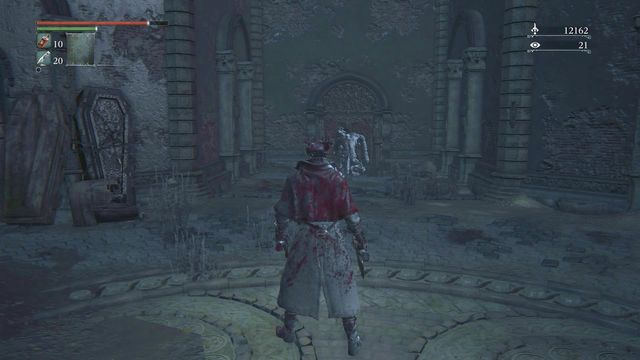 Ambush the enemy.
At the very bottom, near the door, you will see a beast with its back directed at you. Take the advantage of the situation and prepare a strong attack. During the battle, watch out for the claw attack and the push that deals quite a lot of damage. After the fight, you will obtain a Beast rune that strengthens transformation effects. Go outside.
 You can ambush the strong enemy coming from the second street if you head to the first one, on your left.
You will find yourself on a small courtyard. If you go straight ahead, an enemy will ambush you from the second street on your left - it is quite a challenging opponent. Therefore, it is better to use a trick. Right after you step onto the courtyard, head left. You will find a body at the end (Rumpled Yharnam Hat, Sweaty Clothes), guarded by several birds. You can ambush the enemy from behind by walking through the small alley on the right (kill the dog on the stairs). Begin with a fully charged attack and then a quick one to finish the opponent. Otherwise, be careful, because if you die, you will be teleported to Yahar'gul, Unseen Village (if you want to go there, just allow the enemy to kill you).
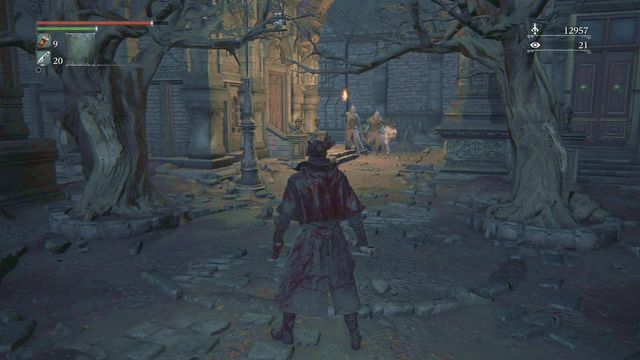 The enemy patrol downstairs.
On the courtyard, you will be facing a few weaker enemies. In the body on the right, you can find Madman's Knowledge. At the end of the road, you can go either right or left. Choose the right turn first. It is a blind alley.
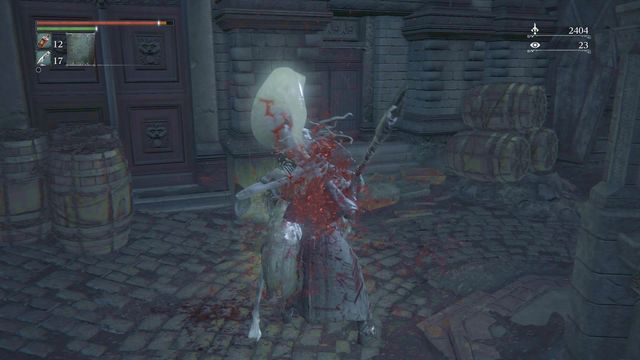 If you fail to dodge the attack, you will suffer some unpleasant consequences.
You will find a single enemy there - watch out for his magic attack, which freezes the hero and deals a lot of damage. Near the body, you will find a Fire Blood Gemstone.
There is nothing more to find here, so go to the other end of the alley. You will find a lift leading to the Cathedral Ward (Thick Coldblood on the balcony.
Note: If you came here before opening the gate to the central yard in Cathedral ward (you need to buy the medallion for 10000 Blood Echoes), you can open it from the other side. You get there if you use the abovementioned lift.

At the bottom of the Church Workshop, when standing on the main beam, you can jump down to the hidden location. By doing so, you will lose a fair amount of health points. Two well jumps are required, the first one more important than second. First go to the edge on the left side, not far from the entrance, near the ropes (screen). Your target is a small platform slightly below (make a small step to avoid jumping over it). From there you can jump on another, bigger one (remember about using Blood vial before the jump) below, and you will be standing in front of doors that lead to the Abandoned old workshop.
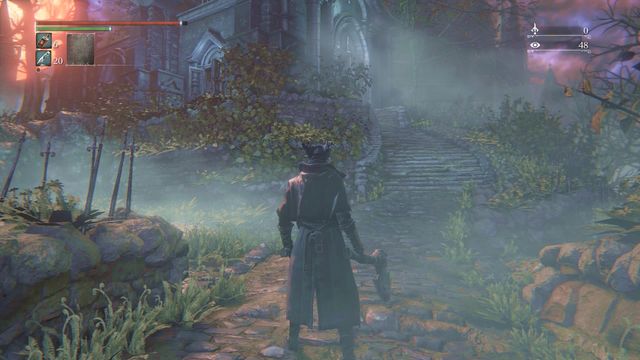 You will find a replica of the building from the Hunter Dream here.
The room looks similarly to the Hunter Dream. You will find here doll set (at the messenger spot) and an Old hunter bone (at the left side of the building). Inside you can turn on the lamp, see an abandoned doll, pick up Small hair ornament from the shelf and One third of Umbilical cord from the altar. Give the ornament to the doll in Hunter Dream and you will be rewarded with Tear Stone. You can use it to get the Tear Blood Gem, which will be slightly regenerating your health once you upgrade the weapon. It makes no difference in combat, but you will be able to regenerate your health at the moment's respite.
Note: One third of Umbilical Cord is an important item connected with game endings. Remember to take it.
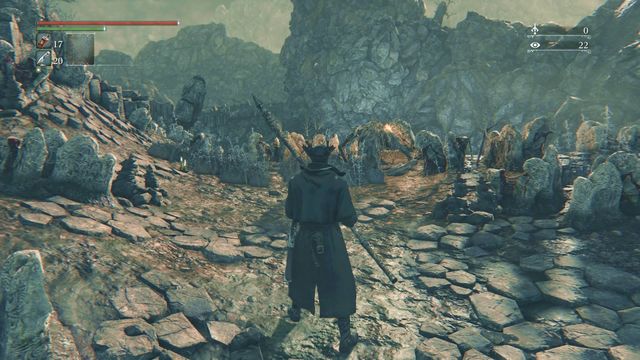 Even the first encountered enemy will be dangerous.
Immediately after entering the location from Lecture Hall you can turn the lamp on. Then go slightly to the left, up. A moment later you will meet your first enemy in this place - a "werewolf" holding torch. Watch out for the attack that deals fire damage (enemy is blowing flames). You will get to the body on the rocks if you run from the right side and jump down near the wall. You will find there 2x Lead elixir. Slightly below there is a road to the right that leads to an elevator that is currently locked, so instead go left, still down.
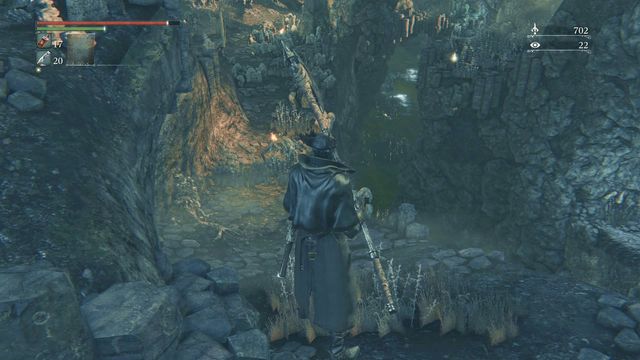 On your road down, you will face few more enemies.
While on the road, you will face another enemy, and not far away another one. You might notice some running away, crawling creatures near them - for killing them you receive 3x Twin Blood Stone Shards and 2x Blood Stone Shards.
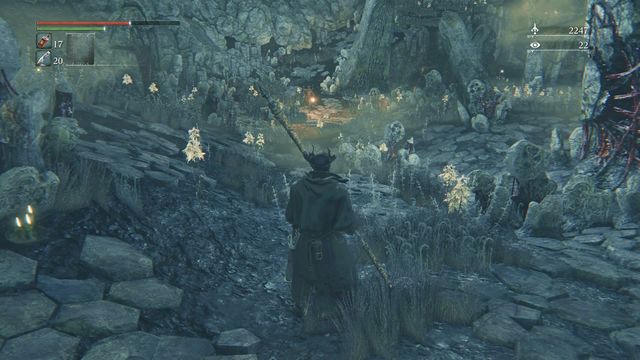 Place where hunters will attack you.
Slightly below a battle with two hunters awaits you. First of them has an axe, second has a whip (watch out for his long range). The second enemy will run to you after a short while, so use that time to deal as much damage as possible to the first one. During the battle keep attention to dodging as you can fall to the cave below. When walking down in an alcove on the left you will find a body with Madman's Knowledge, and slightly below, this time on the right, 2x Blood Vial and an enemy jumping from the cave. Now you can enter that cave or go to the green swamp ahead.
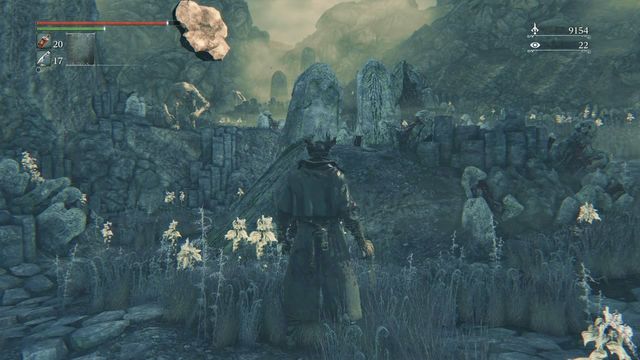 Watch out for rocks flying towards you.
Immediately after walking through the cave kill a small creature (2x Blood Stone Shard). Notice the enemy throwing rocks towards you that can be found on the left (behind him another crawling creature - once again 2x Blood Stone Shard). You must avoid the thrown rocks at all costs as being hit takes great amount of hit points. When you run near him, he will stop throwing the rocks - now you must watch out for his strong physical attacks, and for the second enemy, which is throwing rocks from the hill on the right (if you lure your enemy down, you will get out of the reach of rocks).
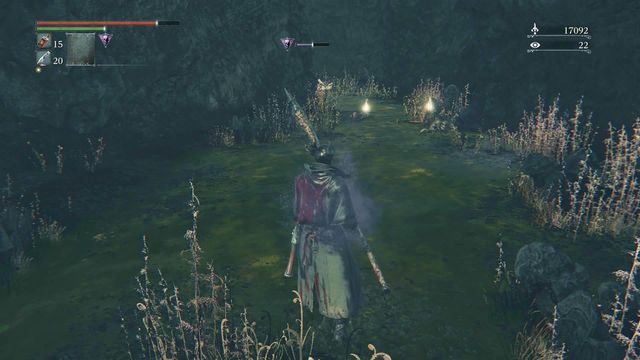 At the bottom you will find some items.
Then kill the previously mentioned enemy on the right and jump down. Here you must be careful as you remain in the reach of enemy that you can't take down. Additionally, the slime in which you walk is poisonous, and there are many enemies in groups around here.
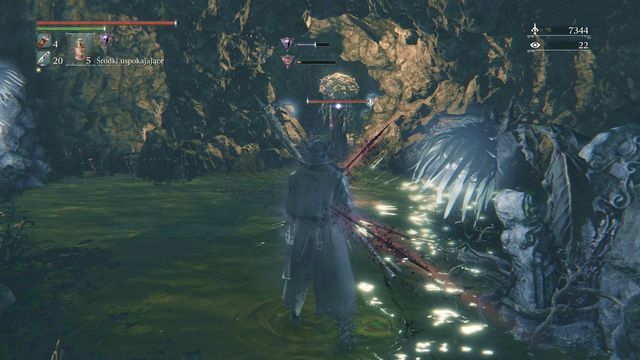 Prepare some sedatives to avoid going into frenzy caused by your enemy.
If you want to get the Messenger's Gift, go to the right at the bottom. Before entering the small cave, kill all enemies around. Inside you will find a special enemy that makes your character go into frenzy (it usually ends with massive damage or death). You must kill him as quickly as possible. Sedatives will protect you from going into frenzy. Near the body you will find the Messenger's Gift.
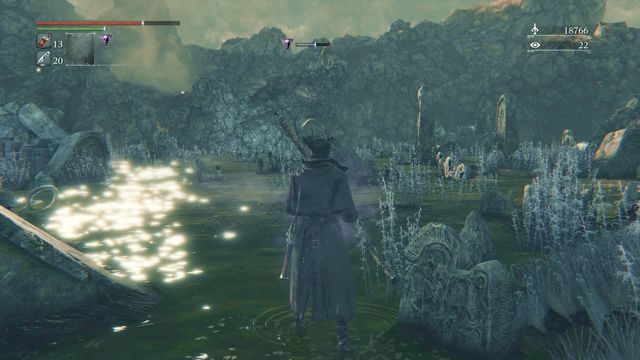 Exit leads to the main swamp.
Now you can walk to the exit on the left (watch out for few enemies on your road). Near the bodied you will find the creature you should be already familiar with you (2x Blood Stone Shard), 3x Antidote and 2x Lead Elixir (watch out for two more enemies). After collecting it all, you can leave the cave and you will find yourself on a large, green swamp.
While wandering through the swamp territories, remember that you will keep walking through a poisonous slime. There are many enemies around, but it is wise to avoid them and not wasting time and slowly depleting hit points. In a small cave on the left you will find Frenzied Coldblood.
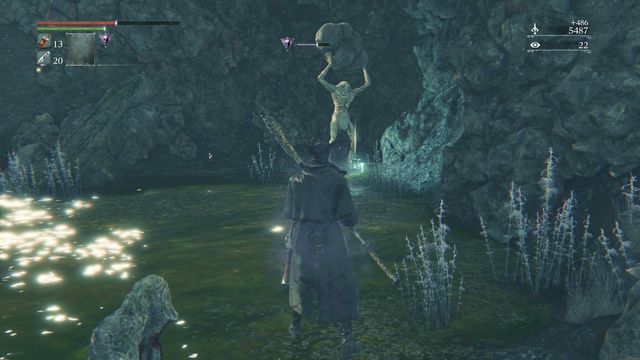 Don't get hit when you run towards enemy.
Then you should move towards the end of the swamp, as far to the left as possible. There, in a passage, you will find an enemy that throws rocks - quickly run towards him while avoiding being hit. Watch out for a strong physical attack that enemy is capable of doing.
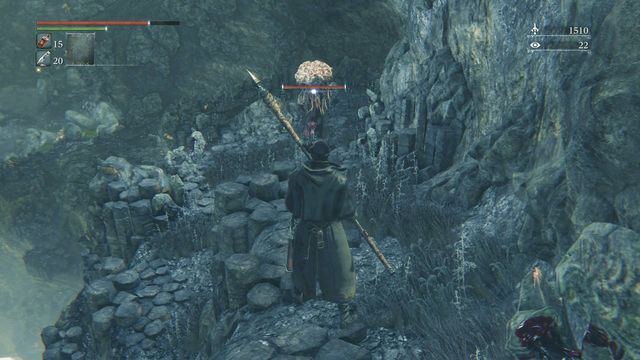 Wait a moment, then attack the enemy from the back and kill immediately.
Through the cave you will get to the upper part. There don't run too fast, instead stand behind the rocks and observe the enemy that walks through the road on the right side. When he turns around, start sneaking up behind him (move slowly) - it will save you the trouble with frenzy and the necessity to use Sedatives. When you will walk down, on the left you will meet another enemy (he attacks with his tail), and in his body you will find Blood Stone Shard. Finally, go to the bottom, on the way collect Madman's Knowledge (body on the right, watch out not to fall from the edge).
 Behind the werewolf you will find an elevator that unlocks shortcut.
While you're below, go to through the narrow rock passage on the left - at the end of it you will find a body with 3x Lead Elixir. Then, avoid the slime by using the bridges. You will find Madman's Knowledge near a body on the way, and then notice a werewolf above, on the right side. After defeating him you can walk out up, where you will find an elevator - use it to unlock a shortcut. Then, in a body nearby you will find 3x Blood vial, and below (you must get dirty) Frenzied Coldblood and, hidden on the right side between rocks, 3x Bold Hunter's Mark.
 Battle awaits you behind the bridge.
Finally, walk through the large bridge that leads to the ground where you will fight boss called Amygdala.
 This is from where the carriage rides in Hemwick Charnel.
To go to this location two conditions must be met:
- you must have Cainhurst Summons found in the Iosefka's Clinic after defeating Vicar Amelia (the spot where you begin the game, passage to Yharnam through the cave in Forbidden Woods),
- you must defeat Witch of Hemwick.
If both requirements are fulfilled, from the place where you battled the Witch go to the large plane, where you can find two enemies with cleavers. Defeat them, then walk to the obelisk/monument in the middle. A cutscene will start. Then enter the carriage and it will ride you to the Forsaken Castle Cainhurst.
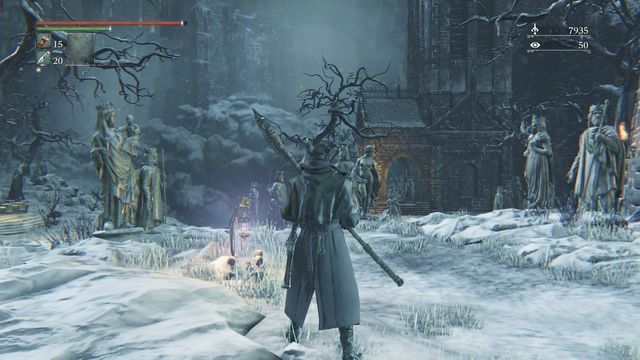 The main court - on the left main road, on the right elevator activated later.
Immediately after entering the location walk ahead - the gate will open. Light up the lamp. Then explore the right side of this place.
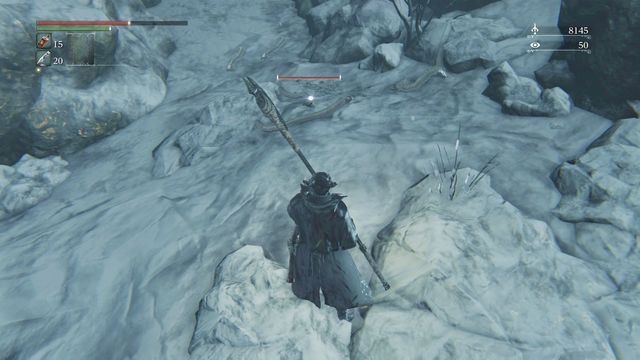 Don't underestimate snakes - they are quick, and in larger group they might be troublesome.
There you will find, for now not working, elevator. Immediately behind you can find a body with Frenzied Coldblood. Now walk below. Maximally on the right, between rocks, Tempering Blood Stone can be found. When you go for it, watch out for snakes, they are fast and they often change their position, which makes it harder to hit them. The best option will be to walk around them and taking the item.
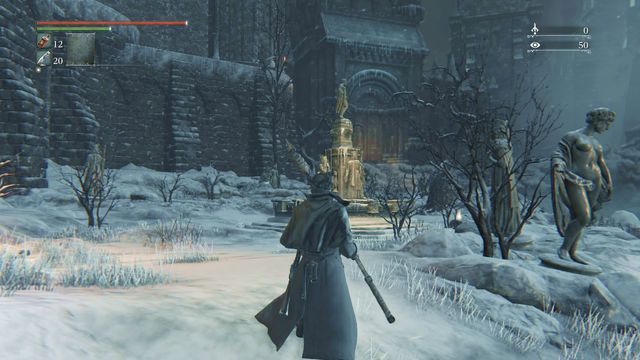 First enemies will attack you behind the fountain - mosquitoes.
Next step will be to go to the large gate that can be found on the left side from the lamp that you lighted at the beginning. While walking, you will be attacked by few mosquito-like enemies. Watch out - these creatures are very dangerous, they can use a quick and strong attack (a series of hits) and, what's even worse, they can jump. This attack stops player's preparations and temporary stuns him - usually immediately after the first one, another jump occurs. And another. If you won't dodge it, such combo might quickly lead to character's death. When you walk from the ground, you must jump to the side, as enemy's reach will easily get to you if you move to the back. Behind the fountain you will find 2x Numbing Mist.
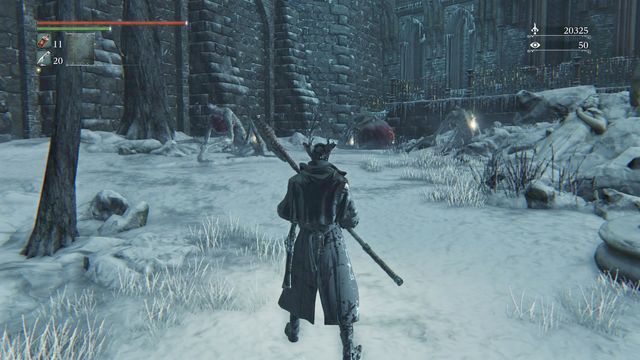
Before getting to the gate, go slightly to the right. There you will meet a single enemy, and near the body 4x Numbing Mist. Now look at left from the gate. Here you will see few mosquitoes (precisely 3), you should avoid fighting with all of them at once. Instead use the old, good Pebbles to lure away enemies one after another (start with the one on the right). Gradually kill them and then loot their bodies - you will find 2x Frenzied coldblood and 4x Numbing Mist. Finally, walk through the gate which will open before you.
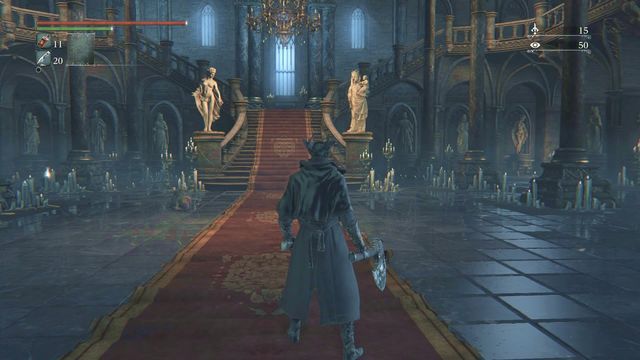 Phantoms will show themselves after you walk closer.
Immediately after you enter the room, start exploring the bottom. You will find here 2x Madman's Knowledge and Repterpallasch weapon in a chest, in the right corner of the room. Watch out for few phantoms appearing here, you will see their silhouettes after you get close to them. Then walk up - on the right side you will find Blood Stone Shard, and on the other side some more phantoms and passage to next room.
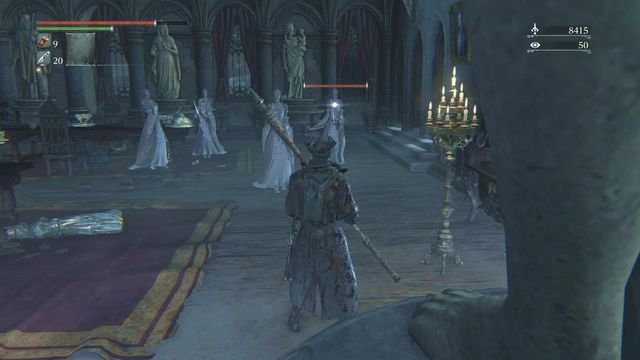 Lots of phantoms in the middle of the room.
In the body in the middle you will find Quicksilver Bullets. Then explore the chest on the right side of the dining room (Noble dress inside). Except for few more phantoms (watch out - they are slow, but as group they can make some serious damage) you won't find anything more there - so walk out to the balcony on the left side and then walk upstairs.
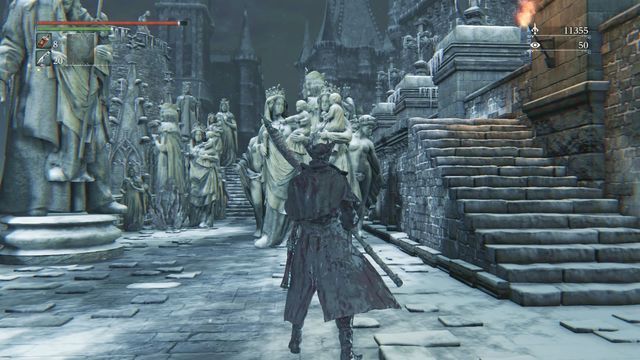 Gargoyle hides behind the monuments.
You will walk outside. When walking between the monuments prepare to jump back, as the gargoyle on the left side will try to catch you. Those enemies aren't strong, you just mustn't allow them to catch you (with both hands) as this attack deals lots of damage. A while further you will face a crossroad - first use the stairs to enter the tower (on the left) - you will find Blood Stone Shard there and a gargoyle facing opposite direction.
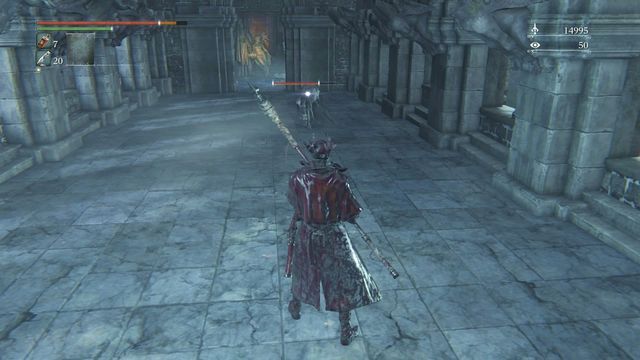 Inconspicuous, but dangerous enemy.
The main road leads through the right side of the wall. Not far behind the stairs you will find a single enemy, and a while further another two (when fighting, keep them away from you to avoid being scratched). When walking through the covered part of the wall don't be fooled by a small, unimpressive character - he can attack you with a very quick hits.
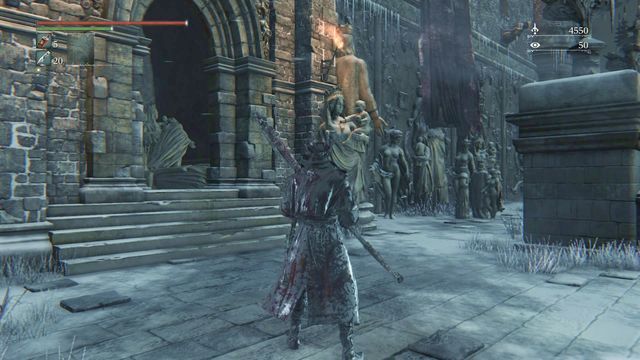
After a short while you will find yourself in the place shown on the screen. The cozy entrance can be tempting, but before you use it, go to the right, behind the statues. At the end of the balcony you will find Clothes, Gauntlet and Executioner set. Two gargoyles might be troublesome, they will become alive immediately after you walk to the body. If you don't want to be bothered with them, it is possible to quickly collect the clothes and run away inside the library. Otherwise, be careful, enemy can not only catch you, but they can spit at you as well.
 After you enter the room, open the chest and unlock the elevator.
Inside, first go to the left. Open the chest (Vileblood Register) and unlock the elevator. Then slowly walk towards the chairs at the end of the room, kill all phantoms on your way. If you won't lure too much of them at once, you should easily take care of them. At the end use the stairs (later you will unlock a passage to this place from the right side).
 A small window, through which you can walk outside.
At the first floor, on the left side (the other side) you will find Blood Stone Shard. Another interesting place here is an exit (a small, open window) that can be found at the left side. Watch out for fencers appearing from the air (they are very quick) and for enemies that shoot at you from the moving stairs. When you walk outside through the window, do it slowly to collect 6x Quicksilver Bullets from the body below (walk near the wall, to avoid jumping over the small platform).
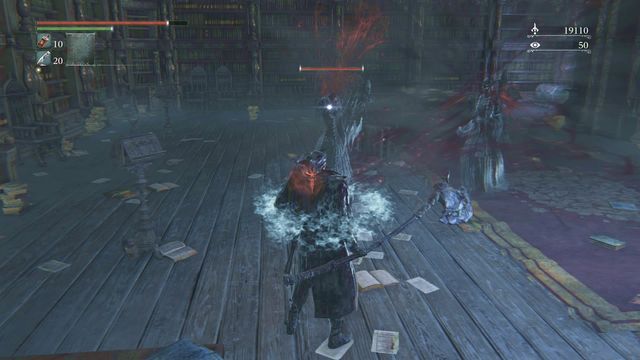 Remaining for too long in attack's reach might have bad consequences.
At the bottom you will be immediately attacked by two gargoyles (they will show separately, so use the time to quickly kill one of them). Then walk inside the room. There are many enemies inside. A few phantoms will appear, if you remain for too long in the range of their scream, they might temporary immobilize you. Although the differences, you should visit this place - you will find two chests here, and inside Executioner Gauntlets and Set, Knight Gauntlets and Dress/trousers.
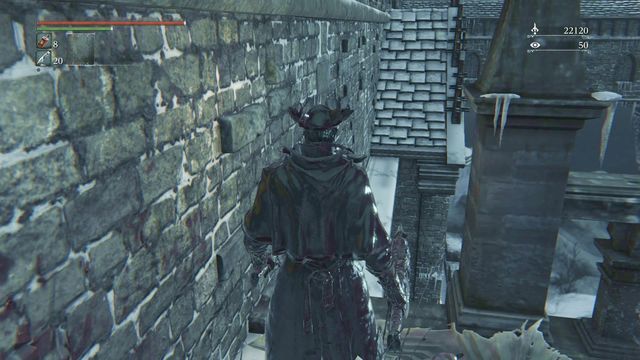
Then you can return to the balcony and go to the left - there, near the wall, you will see a hole in the barrier (screen). Immediately behind it, you can use the narrow ledge to get to the roof. Then, don't jump to the window that you will see on the road. Instead of that, walk to the end of the roof. Move around to the tower side - below you will find a body with Kin Coldblood, a gargoyle will attack you if you get close. When dodging his attacks, watch out not to fall down.
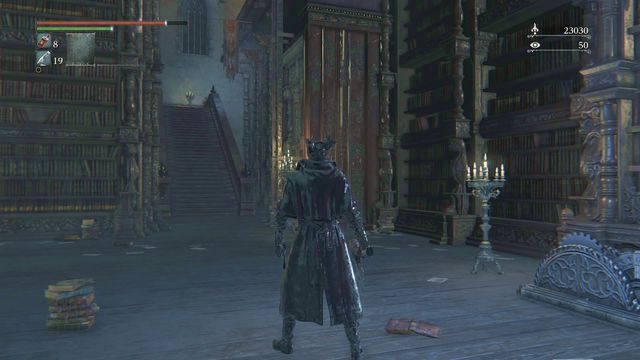 Using the mechanism will unlock both the shortcut and a road to the top.
Then return through the ledge to the window and jump inside. Use the mechanism to unlock the passage. A ladder will show as well, it will allow you to get to the second floor of the library. In the chest on your left you will find Warm Blood Gemstone, and if you explore the level you will find an crawling creature on the other side (2x Blood Stone Shard).
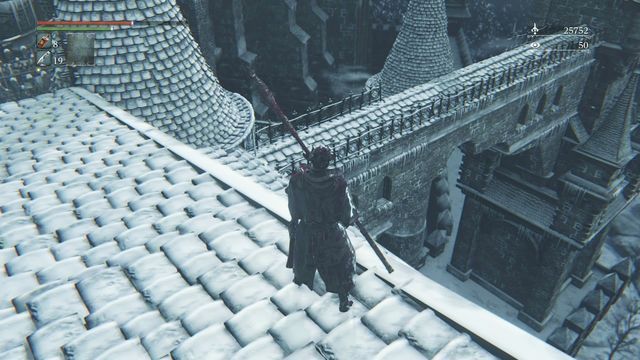
Then go out through another stairs to the frozen roof. Go to the body (Knight's Wig). You will be attacked by three gargoyles. Jump to the sides, attack them with a strong hit, with longer weapon.
Finally, walk to the place shown on the screen. Slowly jump down, walk around the top of the tower and jump to the lower bridge. A while ahead repeat the process (collect Kin Coldblood on your way). Finally, walk up (2x Bold Hunter's Mark ahead) and go through the gate to the end of the roof, where you will face Martyr Logarius.
 Equip the crown and walk towards the throne.
After the battle wear the collected Crown of Illusions (you will find it between other headgear) and walk towards the throne. A short cutscene will start after which the passage behind the throne will open. Walk upstairs, where in another room on the left you will find a lamp to light it up (Queen's Chamber), and on the right on a table Unopened Summons. If you want to join the Vileblood Covenant, walk to the queen and kneel. After you give the oath you will receive a Caryll Rune, Cainhurst Badge and respect gesture.
Important: Queen is related to Alfred quest. If you will return to him with found Unopened Summons, he will kill the queen.
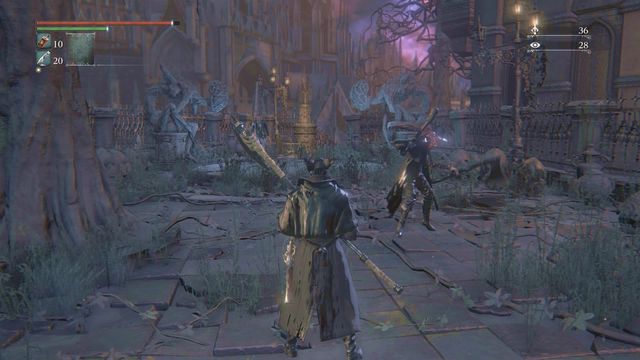 Enemies are stronger and more resistant, and they respawn after some time.
Immediately after entering location you will be attacked by two enemies looking just like the ones you met at the beginning of the game, but stronger and more resistant. Important thing that you must remember is that they will respawn after some time, so it is impossible to completely clean the location. A short while later walk down through the stairs (single enemy, on the right side under the stairs you will find Frenzied coldblood) and on the square light the lamp to activate respawn point.
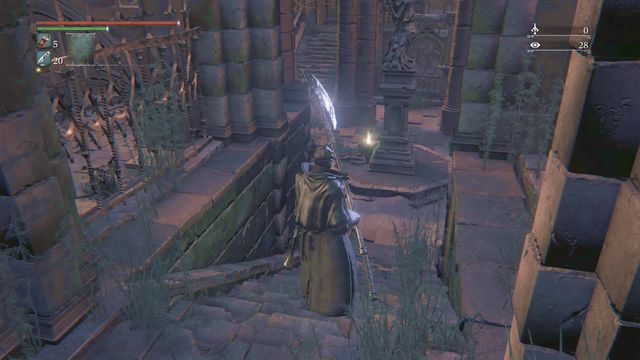 Later you will unlock an elevator on a small square.
If you turn right, behind the statue you will find Blood Stone Shard. While going further, watch out for two enemies on a small square, one of them is an old man shooting a rifle (on the left). Near the monument you will find Yahar'gul Helmet, and slightly above, in front an inactive elevator (later you will unlock a shortcut).
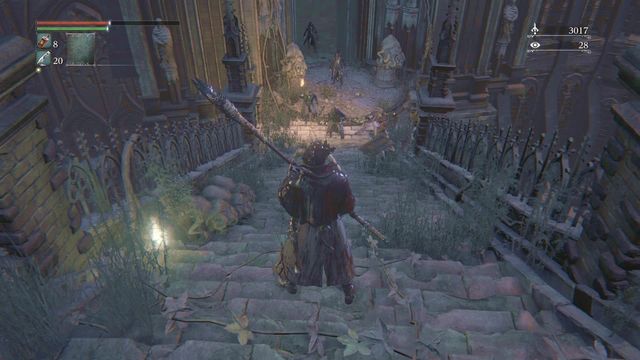 Stairs are full of enemies, it is wise to quickly avoid them.
The main road leads to the left. On the stairs you will face lots of enemies. You can try to quickly avoid them, although remember not to run into the magic whirlwind (large damage, transportation to the top of the stairs). If you want to defeat them, you must lure them one after another and watch out for few enemies with gunfire at the bottom. Finally you will get to a closed room - there you will face a single enemy (watch out for purple circles he creates, wait till the attack ends and walk to him after that) and, behind the bars, you will find Bolt Damp Bloodgem.
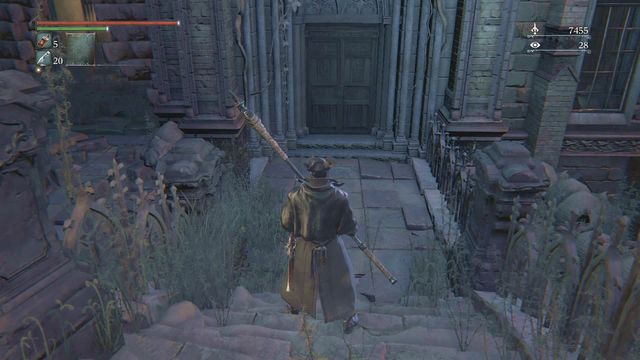 You will unlock the door from the other side.
Now walk outside. The doors ahead will be unlocked in a moment, in meantime walk through the hole in the wall on the left side (by jumping to the right before the doors you can miss that passage, on balcony unavailable in other way you will find Bolt Paper).
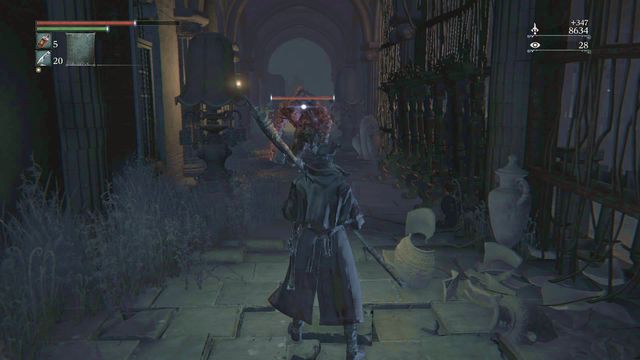 Inside you will be attacked by two enemies.
When you enter inside, you will meet an enemy facing the other direction. Further inside, lure the larger enemy from the shooter and take care of them one after another. At the end of the corridor turn right, where near the body you will find Heir rune (brutal attacks give you more Blood echoes). Immediately after that, on the left side you will see door that lead beyond the bars. After opening them watch out for shooting enemy on a wheelchair, another one with a shield can be found slightly on the left side. After defeating them walk up - directly ahead you can open the door that unlocks shortcut, and on the left watch out for another enemy. In the last cell you will find Frenzied coldblood, finally walk outside.
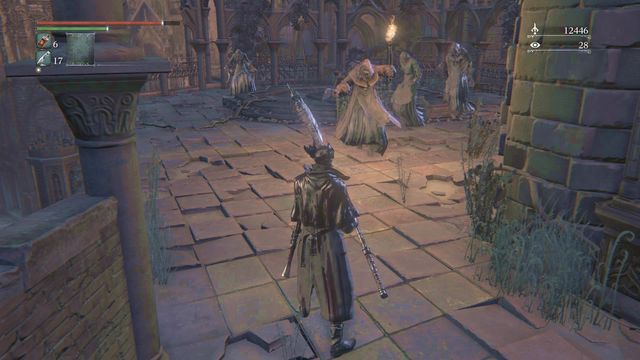 Lure enemies away from the one that throws flaming bottles.
Main road leads through the bridge on the left. But it is a good idea to first go lower, to the right - here, on a court watch out for few enemies, including one that throws Molotov cocktails. Try to lure enemies away from the reach of exploding bottles and leave throwing enemy to kill him as last.
Go down through the only available road and you will reach the room shown on the screen. Near the chest a sleeping enemy resides - if you go close, you will wake him up, and another one as well. Additionally an old man on a wheelchair that uses machine guns will show nearby.
 Keep your enemies at distance, you can hide from their shoots behind a pillar.
It will be hard to face two enemies at once, try to have both of them in front of you to avoid being hit from many directions. You can also walk outside and attack them near the door, where you will hide from machine gun fire (you can do the same behind pillars). After cleaning the territory collect the Tiny Tonitrus from the chest and then return to the bridge you previously bypassed.
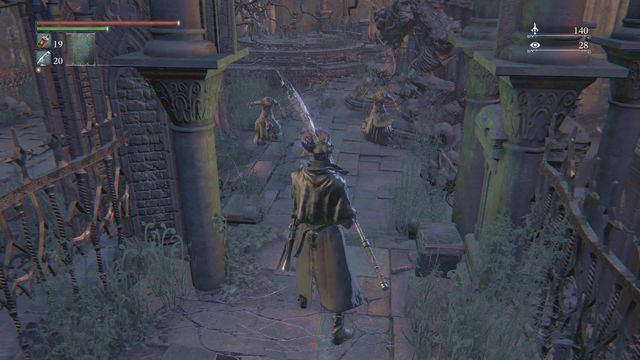 Before you enter the center of the court, defeat enemies that can be found on both sides.
At first, get attention of enemies that stand on both sides of the bridge as it is quite crowded here (walk closer and let few enemies see you, then retreat from the court). By the monument, there is a corpse with Bloodstone Fragment. When situation becomes relatively safe, notice laser attack of the creature standing behind the bridge. You must run down the stairs in such way that you won't get hit - the spot, where the laser was aimed explodes after a short while. So wait before the bridge for the bullets to explode and then quickly run down, where you can light the lamp (Yahar'gul Chapel).

Note: Before you enter the chapel, on the big square, to the right of the fence (the screenshot) there is a gap that you can jump down across (carefully). On the balcony, there is Frenzied Coldblood. Walk inside (two opponents), and jump into the locked cage below. At the corpse, you find Upper Cathedral Key, which allows you to get to the Upper Cathedral ward. You can open the gate from the inside without any problems.
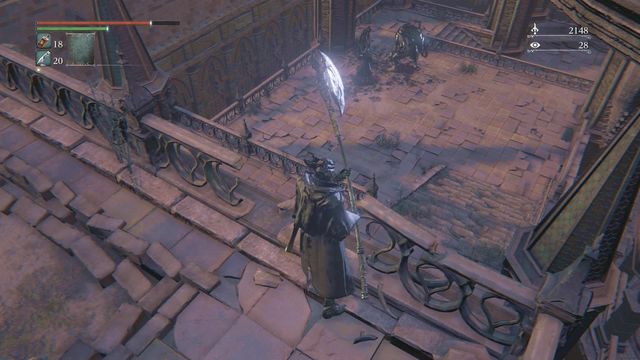 Place where you jump down.
There is only exit from the chapel, on the left of the lamp (if you do it quickly you will have a chance to kill crawling creature - 2x Blood Stone Shard). When walking through this road, instead of running down the stairs first go slightly to the right (next to the hanging creature), then jump down - here you will find a single enemy and Frenzied Coldblood).
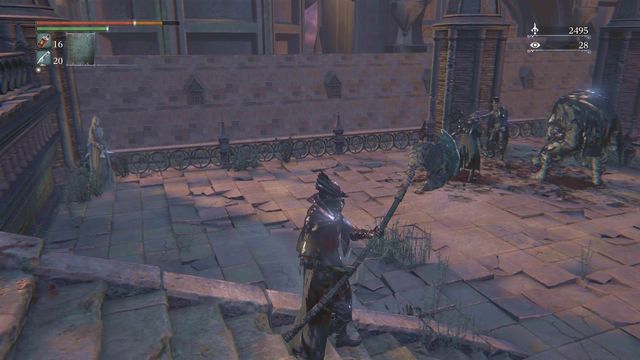 Enemies are in a strong group, but if you move fast you can bypass them.
When you go lower, two dogs will attack you and on the court ahead you will see a large group of enemies (one larger, one shooter, two using melee weapon and one with magic attack). If you want to defeat them without losing life, first eliminate the weaker ones to slightly change the odds (watch out for bullets, in close they deal great damage). You can easily bypass this group as well - no matter the choice you made run down the stairs (two enemies will probably follow you to the chapel anyway). On the way, in a body on the left you will find 8x Blood Vial. At the end of the road open the door that leads inside the building (inside another door ahead, they will become unlocked later).
 Enemy turned back must be attacked with a finishing blow.
Note: If you let yourself be killed by the catchers earlier in the game, and woke up in the Underground Jail, you could collect some of the items that, for obvious reasons, you will not find again. If, however, there is something that you missed - you can find it now.
Inside walk down and prepare yourself for fighting three hunters at once. One of them is using whip and pistol, second iron sword with a cannon, and the third has claws. Additionally, enemies can use flame thrower and electric attack. All of that combined makes battle very difficult and you should divide it into smaller phases, focusing on defeating single enemies.
 After killing any of the hunters fighting after death will be easier - you won't met again enemy that you have already defeated.
First focus on the enemy that has his back turned on you, in the middle of the hall. You can easily sneak up on him, then make a strong hit and finishing blow (strong hit loaded to maximum and after him a quick one) - by doing so, you will start the battle with weakening your enemy from the beginning. The rest of the battle is unpredictable, enemies will jump to you from many sides. It is a good idea to remain in the middle of the hall, where you have more place to act than, for example, on the stairs. Try to focus on attacking one enemy (at first you should eliminate the one with claws) - if you kill any of them, after you die and return next time will be easier as you will have one less enemy to worry about. Fighting two hunters will be much easier, you will only have to watch out for their strongest attacks (cannon shot, flames, electrical bullets).
After the battle, you can collect from the bodies Moon Rune (more Blood Echoes for killing enemies). Additionally for the hunters you will receive 3x 5198 Blood Echoes, Clawmark Rune, Bone Marrow Ash, Quicksilver Bullets and Madman's Knowledge.
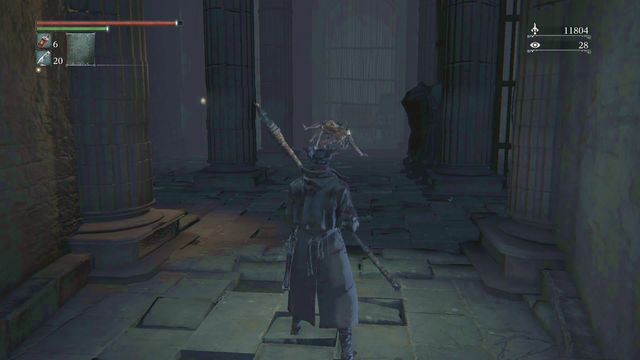 Immediately after walking down a strong enemy will attack you - a werewolf.
Before walking outside it is a good idea to explore the lower parts of the chapel. To do so, walk down the stairs, to the very bottom, for now ignore the passage that you bypass on the road. On the lowest level you will find a werewolf, strong and fast opponent (dodging to the sides and quick attacks). Search the room thoroughly, and you will find Thick Coldbloods and a passage below - there you can collect Frenzied Coldblood and 2x Blood Stone Shard.
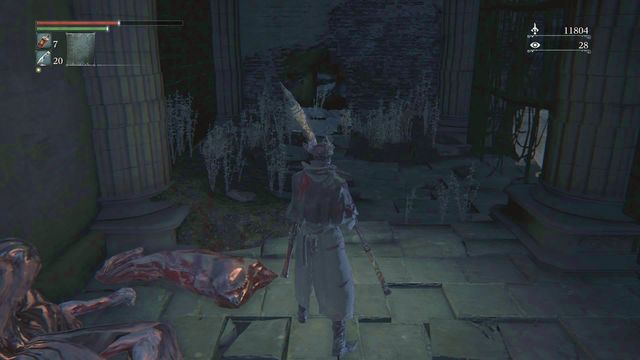 Exit through the hole in the wall will lead you straight to the boss.
Now return back to the previous level between the upper and lower part. Immediately after the passage you will find another werewolf (door on the left that you will open later from other side). Search the room to collect 6x Blood Vial, 10x Quicksilver Bullets and in the werewolf at the end 2x Blood Stone Shard. On the right you will notice a hole in the wall - this road leads directly to the boss, the Darkbeast Paarl.
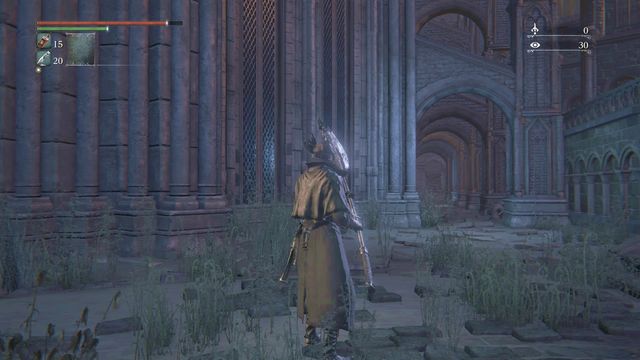 Road to unlocking door.
Immediately after leaving outside you should unlock the shortcut to the chapel. To do so, turn to the left and walk along the building. On the road you can kill the crawling creature and at the end open the door to chapel.
Then return to the bigger court. Now you can go to the right or left. First focus on the left side. Walk upstairs and at the end, on the left, you will find Frenzied Coldblood (two enemies nearby).
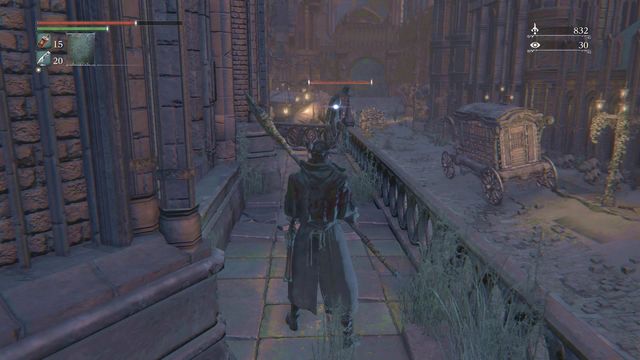 Immediately behind the spot where a shooter stands on a balcony, on the left you will find elevator.
Further, while still remaining on the upper balcony, go forward, defeating one shooter on the way. Behind him move to the left (one enemy in the room) where you can unlock elevator that leads up, near the lamp (Yhar'gal, Unseen Village).
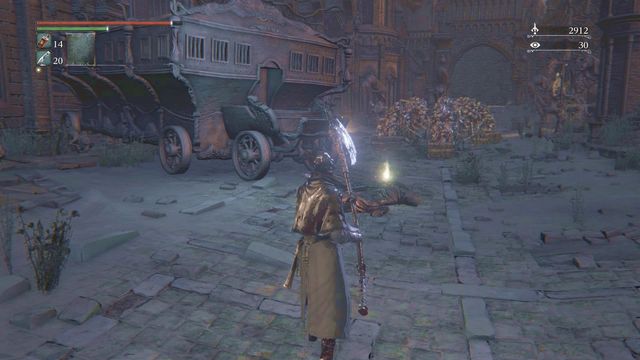
Finally jump down. When you go towards the place seen on the screen, you can turn to the alcove on the left side of the road - there you will find enemy turned back to you (use the opportunity and eliminate him quickly as he has strong physical attack) and two bodies (5x Bolt Paper, 2x Blood Stone Shard). In the spot seen on the screen you will find 2x Blood Stone Shard in the body, but when you get close watch out for enemy jumping out of the carriage (make a quick dodge). When fighting that type of enemy watch out for being crushed and his quick series of attacks, try to attack enemy from the back and quickly jump away (enemy can quickly turn around).
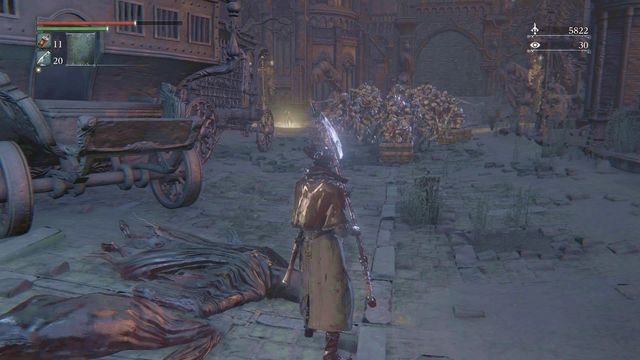 Attack enemies from the back.
The final place you should visit is the end of the court, behind the carriage from which enemy jumped. Now three enemies are standing there, luckily they are all turned to the other side. You can sneak up on them and with a strong attack with long weapon deal damage to all three of them or try to lure one of them (for example, the one on the right). No matter what tactic you use, don't let them get too close to you as with strong attack being surrounded by them might be fatal for you. Tonitrus weapon in a body near the wall will be reward for defeating them - now you can return to the chapel and pick the other road.
This road leads to the boss. But before that, you should unlock the passage to the second level of the chapel (the lower one, where the werewolf was). To do it, turn to the right, go along the building (don't use the stairs), then rest of the road to the end. You will enter a small court (Twin Blood Stone Shards), where you will find the door you look for (Frenzied Coldblood nearby).
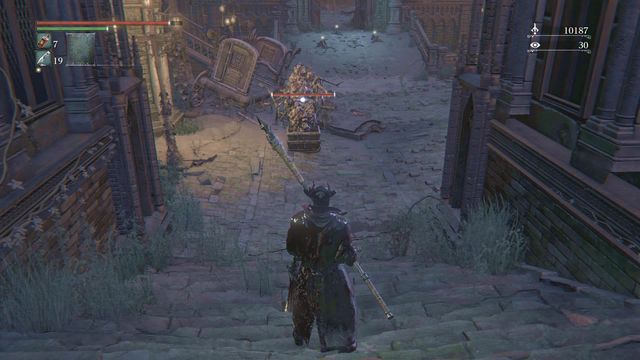 If you wait for a moment, enemy will turn his back to you.
If you want to go straight to the boss, immediately after leaving the chapel go down the stairs. Then kill the enemy from behind (if you wasn't in too much hurry with leaving, in other situation he might still be walking down the stairs), and from the carriage on the right take Black Hooded Iron Helmet and Black Robe, Yahar'gul gauntlet and trousers. From the bodies at the gate collect 4x Madman's Knowledge.
 Walk to the other side of the bridge.
Then walk through the gate. There, behind the carriage on the left side, go upstairs (Frenzied Coldblood and one enemy). Through the balcony (single shooter) you will get to the building on the other side (werewolf in the entrance, 6x Blood Vial in the body).
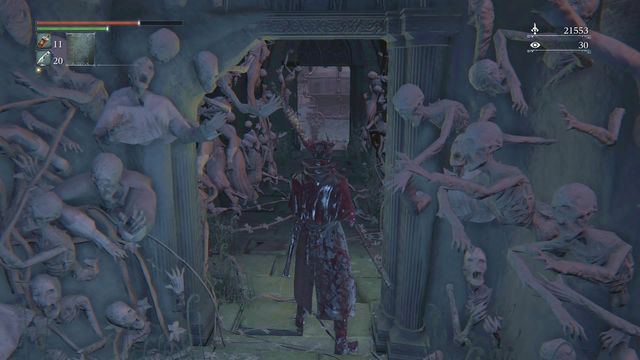 Exit to the street.
Inside, go to the bottom. Now you can walk out to the street through a strangely decorated passage, but before that you should turn towards the stairs, where on the left a werewolf stands. After killing him you can collect Tempering Damp Blood Gem and leave this room.
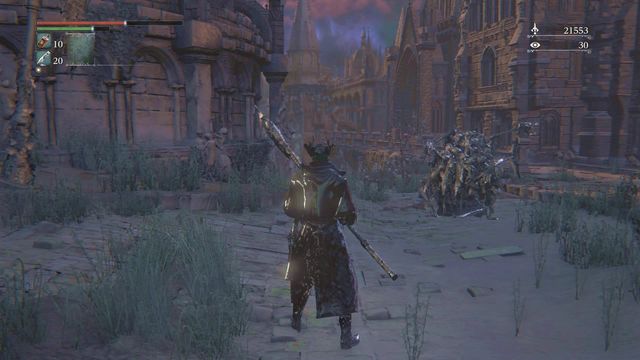 It will be easier to bypass enemies - behind the fog their bullets can't reach you.
Now it will be best to quickly avoid two enemies that shoot at you, as not far ahead at the bottom is the place where you will fight the boss. Before that check the balconies on both sides, where you will find 2x Madman's Knowledge, and after that face The One Reborn.
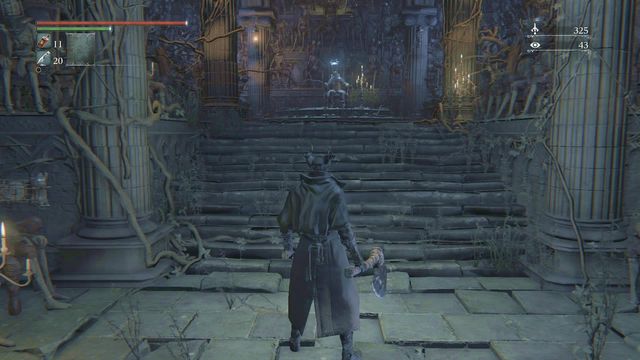 Touching the mummy transports you to a new location.
After the battle enter the open building and investigate the mummy - you will be transported to the Lecture Building - 1st floor.
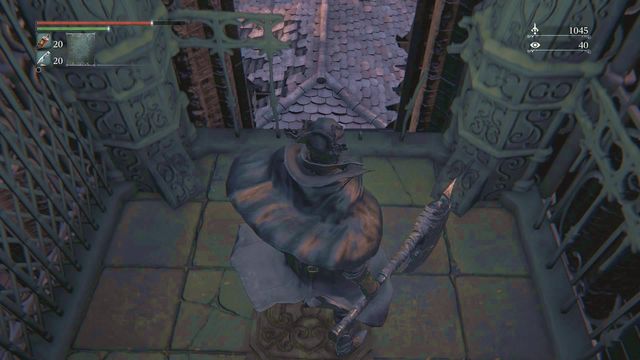 Jump off half the road.
No matter if you start from the respawn point in the chapel or on top, the road to the boss is rather long and dangerous. But there is a clever shortcut which will allow you to avoid taking damage. Most of all, when you're in the Yahar'gul Chapel, after you leave it, unlock the elevator (subchapter Chapel exit - left). Now get to the top, from where you can use this elevator.
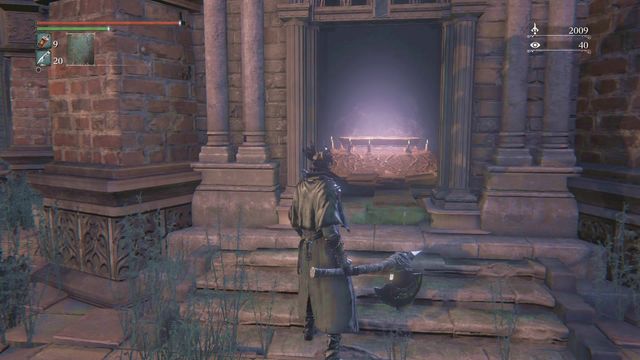 Entering the bowl will move you to another place.
The trick is not to ride to the bottom. More or less halfway you can jump out of the elevator without worrying about damage. You will get yourself to the roof - walk a few steps and move to the building on the right (one dog will attack you). Inside enter the glowing bowl.
 Avoid the enemy, walk down the ladder and turn to the left.
You will be teleported to another place - choose the exit ahead, bypass the enemy and walk down the ladder. Now turn left and after a while you will find yourself on the arena.
 Closed door leading to Upper Cathedral Ward.
At the top of Healing Church Workshop you will find locked door. To open it, you will need a key. You will find it in Yahar'gul - move to the Yahar'gul Chapel lamp.

Then, in the chapel, return towards the stairs. Use them, avoid the laser shot by a monster. Then go near the left side of the fence. You will find a gap in the place shown on the screen, there you can jump down (carefully).
 Near the body you will find the key you need.
On the balcony you can take the Frenzied Coldblood. Walk inside (two enemies) and then jump to the locked cage at the bottom. Near the body you will find Key to Upper Cathedral and from the inside you will easily open the gate.
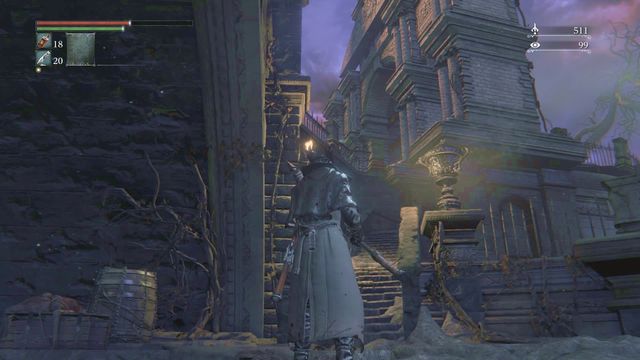 Entrance to Upper Cathedral Ward.
After entering the location go forward, then up the stairs on the left (you will bypass some small larvae on your way, they aren't dangerous but CAREFUL: one bite increase your frenzy and so up to maximum level if you won't use Sedatives).
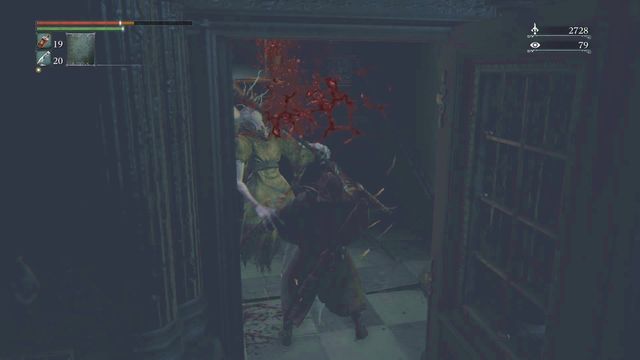 You will face first real enemies on the bridge.
Under the gate, on the left you will find Blue Elixir. Then walk through the bridge where you will face two "standard" enemies. A while after the bridge light the lamp, you will bypass some small larvae on the way (run near them). When you will stand in front of a large closed gate go to the right (again lots of larvae, act normally) where you will find Great Lake Rune - it lowers all received damage.
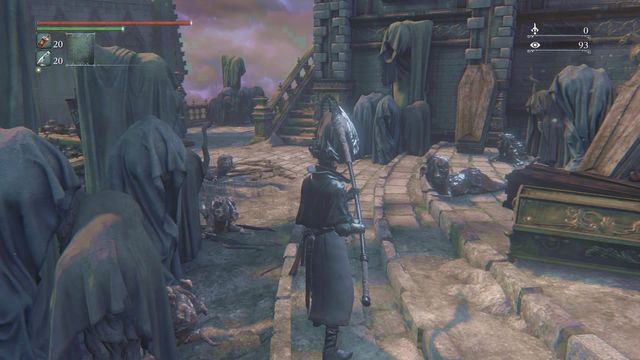 Don't waste your time on unnecessary fights as you can be easily bitten by aggressive larvae.
Further road leads through the left side of the large gate. Some larvae will jump at you on the way, this time aggressive ones - fighting them is pointless, so simply bypass them and run forward. Before the stairs you can turn left - at the end of a balcony full of crows you will find Frenzied Coldblood.
 Immediately after entering the room you can attack the witch on the left - she protects parts of Choir set (gloves, trousers, garb).
Then walk upstairs. At the end of the stairs, behind a fire, first enemy with a scythe is standing, watch out for long reach of his attack (if you run towards him and quickly deal a series of hits you have a chance of knocking him down). Further inside a battle with not pleasant enemy awaits you, a witch that can catch player or immobilize him by throwing a blue ball. Both attacks ends in the same way - with a great loss of hit points. The best tactic is not allowing her to catch you, running to the sides from magic bullets and attacking with quick series of hits that cancel enemy's ones. After the battle collect the Garb, Trousers and Gloves from the Choir set and go to the long corridor.
 At the end of the corridor prepare for the first attack of the werewolf.
On the right side at the end you will find Madman's Knowledge. When you will be leaving a werewolf will attack you. Werewolves are very hard and requiring adversaries, but there is a good way to deal with them - rarely do they fit in doors. So run to the passage, shorten your weapon and strike enemy as he is almost powerless.
 Werewolves blocked in doors won't make much trouble.
After the battle it's time to open the door on the other end. Immediately after that walk down and, when the chandelier will start breaking, quickly run behind the door. You will be attacked by three werewolves at the same time. You shouldn't even think about fighting, instead quickly hide behind door where you will be able to easily attack the creatures. Damage that you will receive will be incomparable to ones that you would receive in open battle.
 A single werewolf can be defeated in conventional battle, in case of trouble you can lure him up.
Then walk down. Near the gate ahead of the stairs you will find 3x Ritual Blood. Below on both sides you will find small corridors. First pick the one on the right - prepare to be attacked by a witch immediately after entering (very fast series of hits, not avoiding any of them will be very unpleasant). At the end you will find Cosmic Eye Watcher Badge.
Next you should explore the corridor on the left side of stairs. When you walk closer a single werewolf will attack you. You can risk fighting him, but it will be easier to run behind stairs and once again use the "help" of door.
 Lure the witch from the corridor to the large room, where it will be easier to avoid being catch and shot.
Then enter the corridor. You can kill crawling creature on the way (2x Blood Stone Shard). Not far further a witch will attack you. It is better to run from the corridor and lure her to the large room, as in narrow passage it is hard to maneuver and avoid her bullets and capture attempts - very strong attacks. After defeating her you can calmly walk to the end and use the ladder to exit up.
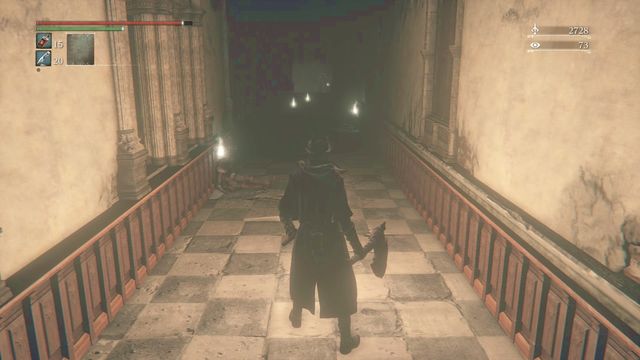 Corridor full of treasures.
Above first go to the corridor full of bodies, directly ahead from the ladder. You can collect Blue Elixir, 2x Madman's Knowledge and Blindfold Cap there. At the end of the corridor a witch facing other direction stands - seize the opportunity to easily kill her and take 2x Pearl Slug. Open the door, then return to the ladder and pick the exit at the end of the corridor, on the right.
 If you enter the room carefully you have a chance of luring only one witch.
Inside there are two strong and life "sucking" witches. At the end you can open door to unlock shortcut. You must kill both witches to receive Orphanage Key. Fighting two of them at once would be very difficult, so it is better to lure one enemy and take care of the second only after you eliminate the first one. When you stand behind the door you can hide from the bullets and between them jump out and attack the witch. At the end open large door on the left.
Important: To receive Orphanage Key you must do it only once, every next time you can simply bypass those enemies.
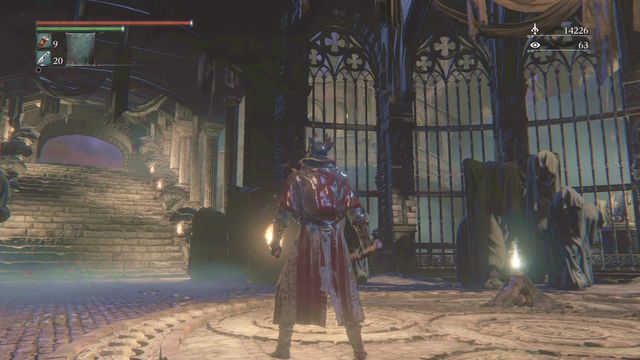 "Make contact", collect frenzied coldblood, open the gate and through the stairs go to the boss.
Behind the door "talk" with the body and you will receive "Make contact" gesture. Then walk down and open the gate ahead of the stairs (in large room where the chandelier fell during your first visit). Collect Frenzied Coldblood on the courtyard and use the device to unlock gate leading to the chapel (ahead from the respawn point). Finally use the stairs (one weak enemy on the way) to meet the boss, Celestial Emissary.
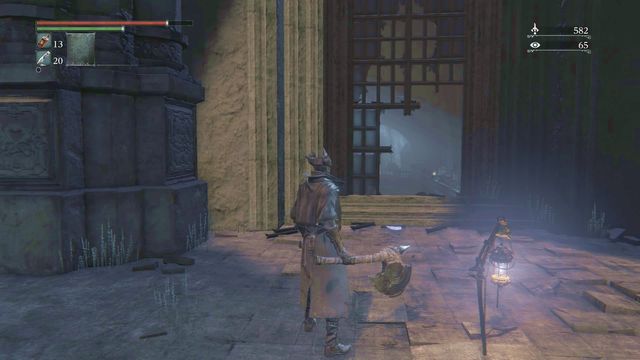
One could assume it is the last boss in this location - but he isn't. After the battle you can break the large window (attack) ahead of the lamp (Lumenflower Gardens, screen). It leads to the inside of the chapel.
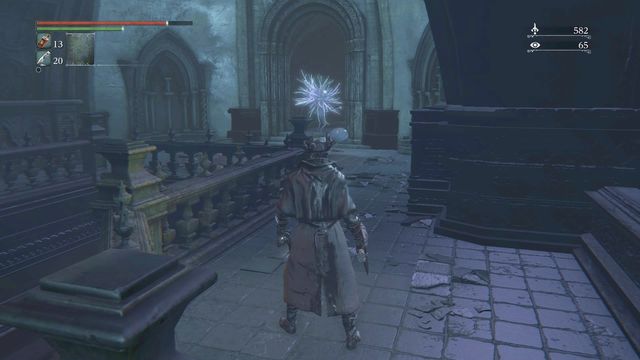 Only two enemies stand on the way to the elevator.
You will find yourself on a balcony. Choose the right side where near the barrier you can pick A Call Beyond. At the end you will find a door behind which two blue enemies are waiting.
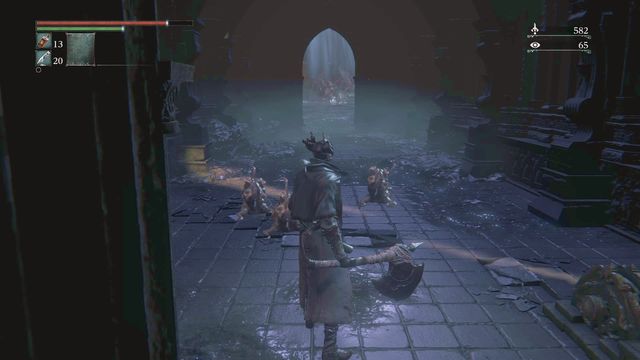 Bypass crawling enemies at the bottom.
After defeating them you can use the elevator that leads to the very bottom, to a location named Altar of Despair. Before entrance there are few larvae whose attacks increase frenzy up to critical level - don't even bother with them, instead go directly to the large arena. At its end there is a boss, attack Ebrietas, Daughter of Cosmos to initiate the battle.
 Altar that will resurrect the Queen of the Vilebloods, Annalise
After the battle you can walk towards the altar at the end (highlighted place). If you defeated Martyr Logarius you might have already met Queen Annalise (connected to the Vileblood Covenant). Additionally if you have given the Unopened Summons to Alfred, he went to kill her. In that case, you can take Queenly Flesh (in Queen's Chamber) from her body. Take it to this altar to resurrect Annalise.
After defeating the One Reborn and touching the mummy in the place that has been unlocked after the battle (the court ahead) you will be automatically transported to the Lecture Building - 1st floor. It is a level connected to the previously visited lower part, but first you must unlock that connection.
 Enemy will jump on you if you won't leave the room quickly enough.
First, light up the lamp and open the door to the corridor. There, first go to the round room ahead. Near the body you will find 6x Sedatives. When you leave, watch out for the enemy hanging above the exit.
 More than a dozen enemies await in the main corridor.
Then, deeper in the corridor defeat few "students". On the right, on the other side you will find Blood Stone Shard. On the left you can open the door and walk through the upper part of the hall, where you will read a note at the end. Similarly in the room maximally at the left.
 The best moment to attack is after dodging, when enemy is getting up.
In the right part you will face a larger enemy. He fight similarly to enemies with axe, but his attacks are much stronger, and enemy is very resistant. Try to attack mostly when the colossus is temporary uncovered, after he locks his fists in the ground. Attacks are powerful but slow, so avoiding them shouldn't be hard. After the battle, open the door on the right, then walk above the hall and in the room at the end you will find a chest with Communion Rune (increase the maximum amount of Blood Vial you can have at the same time).
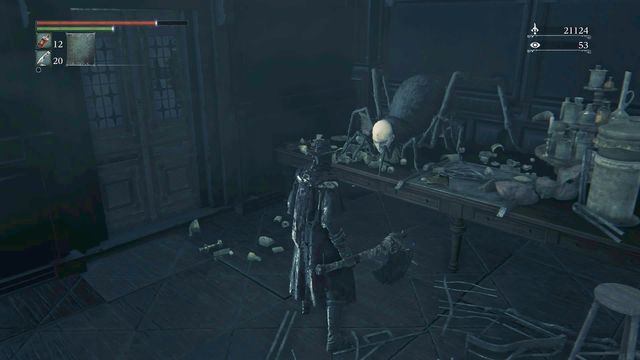 After the talk don't forget to open the door.
Return to the place where you fought the giant enemy. Under the wall, more to the right, you will see a ladder. When you walk down, you can talk to the "spider" that was previously blocking the door below. Talk to him once (you will receive "Beg for Life" gesture, open the door to unlock the passage to the lower part of Lecture Building), then second time - if you confirm that you don't have anything against the spider (second dialogue option), you will receive Anti-Clockwise Metamorphosis Rune which improves your condition by 15%. You can find the spider in some parts of Chalice Dungeons. He sells the item at much higher prices than Messengers in Hunter's Dream.
Finally, you can attack the spider if you are not interested in what he has to offer - if you do this quickly enough, he will not even have the time to react. Otherwise, watch out for the attack similar to the ones that the spiders used while you were fighting Rom, the Vacuous Spider. For killing the spider, you receive 5 443 Blood Echoes and Great One's Knowledge.
 Exit door from the location can be found at the end of the corridor.
Finally return up. Through the door at the end of the corridor you can get to the Nightmare of Mensis location.
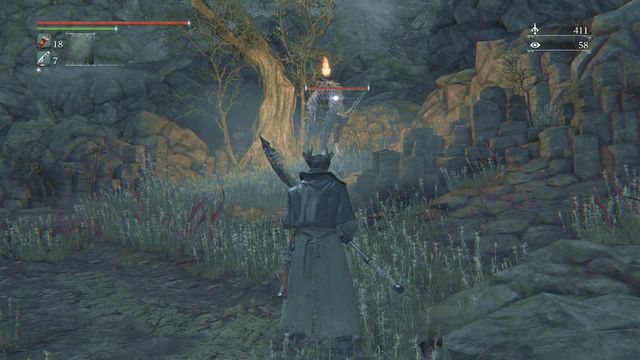 Hit as strongly as possible from the back.
Immediately after traveling from Lecture Hall - first floor go through the cave. After leaving you will find yourself on a plane, where near a tree a werewolf turned back to you stands. When you go to him you can make a surprise attack, though stunning probably won't work (enemy will turn around). Watch out as this enemy types are stronger, more resistant and faster than the ones previously met. Additionally they have few other attacks (like releasing snakes from their head or electricity attacks). These enemies, after they lose around half of their health, start moving on four legs, which makes them even more dangerous. After their death two snakes are shot from their bodies - it happens in case of all further enemies.
Important: If you will use a weapon with fire effect (for example, after using Fire Paper) to kill Werewolves, snakes won't appear after their death.
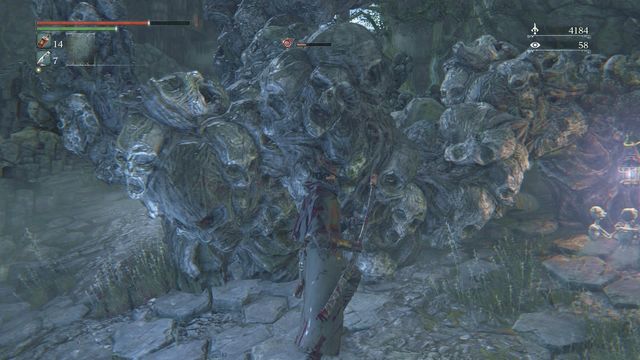 You can wait behind the rocks until your frenzy reduces to zero.
A while further you will find crawling creature (3x Blood Stone Shard), and in the body passed by Frenzied Coldblood. Then you will find yourself on a larger territory where you should light the lamp.
Now you must be very careful. Whenever you walk out from caves someone is shooting at you which increases your frenzy (filling the bar usually ends with your death). If you remain behind the rocks you're temporary safe, so it is a good idea to move from cover to cover to reduce the negative effect before you stand out again. Sedatives protect you from frenzy as well.
Important: Throwing a Brain from the bridge down (described at the end of this chapter) will "release" the arena from his influence. Bullets that generate frenzy will stop hitting you.
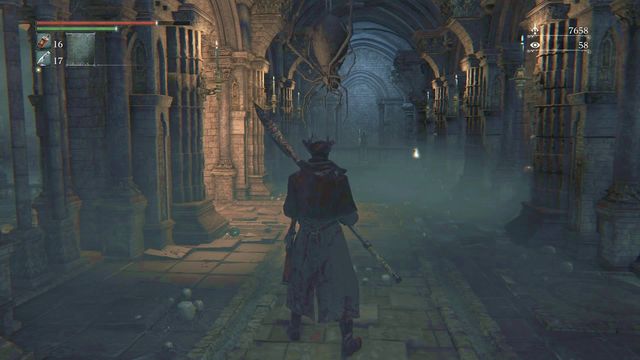 Enemies, if they are under frenzy influence, are receiving damage as well, until they die.
On the left side you will find two werewolves, it is possible to fight with them one after another - it is easier way, remember about hiding behind rocks when frenzy bar fills up (it is safer to walk out only after it reaches zero). After defeating them you can collect 8x Blood Vial from their bodies, then, for now, ignore the bridge and walk through the rocks maximally to the right of that location.
Important: If you can't deal with enemies, you should lure them to the same bullets that are hitting you. Wear something with maximum frenzy resistance, prepare some Sedatives, then run on open territory. Enemies will receive damage until they die.
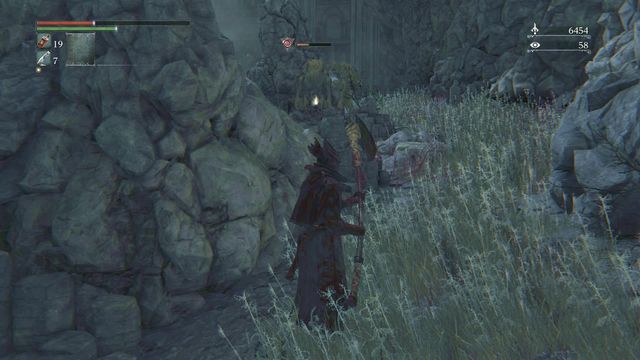 Defeating trolls might be too hard, but it is possible to quickly collect runes and activate the lamp.
Hide behind the larger rock on your way. Now ahead of yourself you will see two colossus, another one a bit further. Fighting here is very difficult as enemies are strength in numbers and frenzy is constantly rising. It is additionally easy to accidentally fall down. At the end of the road there is a lamp and, currently inactive, elevator.
Near the body you will find Eye rune that increase loot from fallen enemies. It is definitely better to bypass enemies, quickly collect rune and then light up the lamp (Mergo Loft: base). Later it will allow you to use shortcut, but for now return to the bridge you previously ignored.
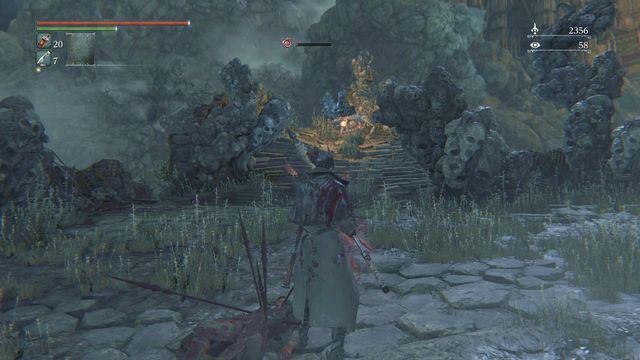 Behind the bridge you will be no longer threatened by increasing frenzy.
Walk through the bridge. At its end you will find a single werewolf. You can walk slightly above, there you will no longer be in reach of bullets that increase frenzy. Kill the enemy and then go forth, up.
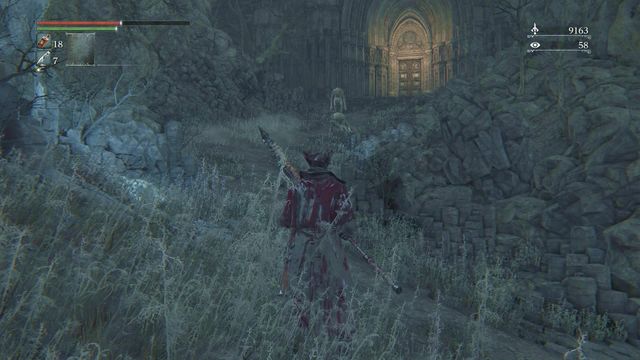 Watch out for thrown rocks, you can quickly run near hard enemies as well.
Collect Frenzied Coldblood from the body on the left. On your way you will face three giants, at the end of the road there is a door that lead to large building. Behind one of the giants you can find Blood Stone Shard. If you want to defeat enemies, do it gradually, with the second one you must watch out for rocks thrown at you or lure the enemy down. Before the gate two final giants await. If you run near them, you can after a while (when they lose interest in you) attack them from the back. If you don't want to fight at all simply run ahead and open the door - inside you are safe.
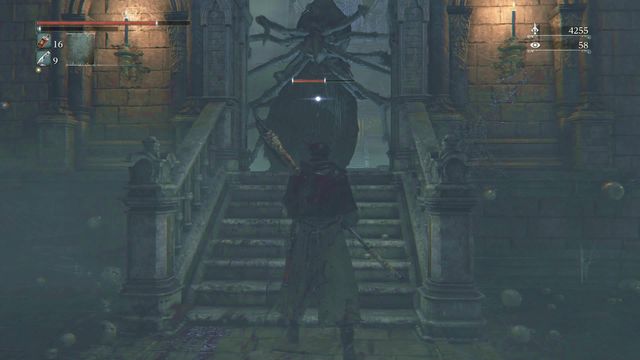
After entering another room be prepared to face a giant spider which will fall from the ceiling with few smaller ones. Necessary fall back beyond exit, from where you will easily kill smaller spiders. Only after dealing with them you should focus on the giant one. He will lock himself in the door (screen) which will make your job much easier. Make your weapon longer, use attacks loaded to maximum and heal yourself if he hits you (there is a great possibility that it won't happen at all). By doing so, you will defeat the creature with no trouble.
 If you don't want to be surprised, shoot the hanging spider.
After you enter the room go right, to the small alley. At the balcony (on the right) you will find Kin Coldblood, and at the end (behind the hanging spider, shoot at him so he falls earlier) Madman's Knowledge. Finally, jump down and from the body in the center collect 6x Shaman Bone Blade. Further road leads to the right.
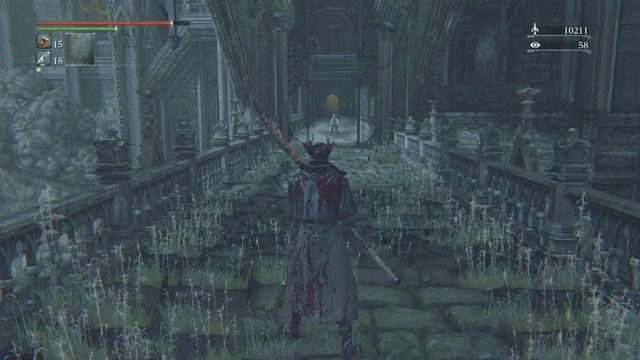 Single hunter won't be a great challenge.
A while ahead you will enter bridge where a single hunter will attack you. He uses mostly melee weapon, but sometimes he helps himself with throwing snakes or magic powder. You must watch out especially for latter as not canceling this attack and remaining in its reach means constant lose of health points. For the battle you will receive 10635 Blood Echoes and 3x Sedatives.
After you enter another room, first explore the balcony on the left - you will find there a chest, and inside 2x Yellow Backbone. Then walk down - few harmless creatures are there (temporary or until you attack them). Walk to the right, where you will find body with Frenzied Coldblood and elevator (unlocks shortcut near the lamp in Mergo Loft: Base).
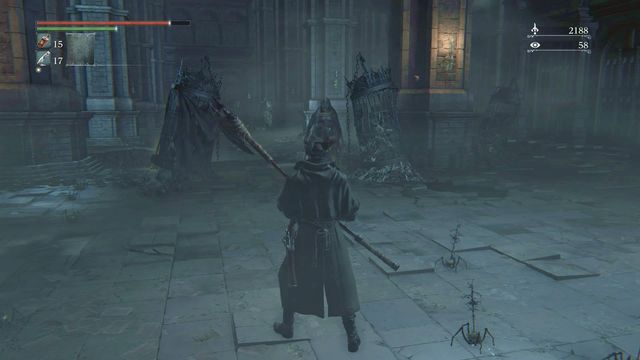 Watch out for powerful axe attacks.
Then go deeper to the room. On the right, behind a screen you will find Beast Blood Pellet and, on the left, near stairs, a passage to balcony, where you can collect 2x Blue Elixir. Finally, walk down.
You will be attacked by a "strong and independent" woman using chain and axe. Her attacks aren't fast, but they deal large damage. Additional hardness will be previously neutral creatures that now will attack you. Try to attack in a way so that you kill as many of them as possible. Quick elimination of your main enemy will return the small creatures (including ones not touched by player) to neutral state. A while ahead, behind a curtain you will find Madman's Knowledge.
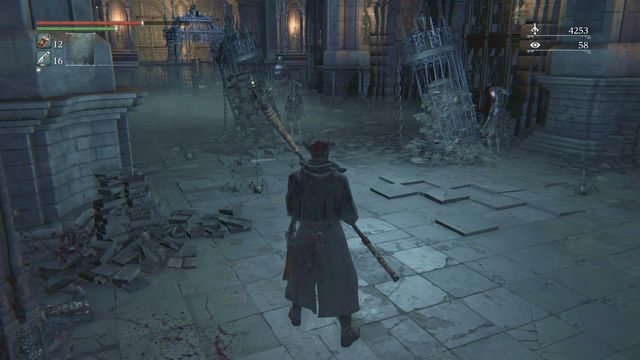 Small crossbowmen can be attacked from the back, on the right side.
While avoiding not falling to the holes on both sides of the path walk to the closest pillar. A single enemy will jump out from it, he can push you down, so you should take caution. Then you can either quickly go to the elevator, thus avoiding stronger opponents (quick sprint on the left side), or walk around them from the right. The second option will allow you to attack them from their back and eliminating at least two of them one after another (they are standing behind curtain) - it is a pretty good facilitation as small enemies with crossbows deal pretty large damage. The final opponent is once again a huge woman with chains and axe. Watch out especially for her attacks done with the second weapon (crush to the ground, very large damage). In the body near the pillar you will find 2x Lead Elixir, after that you can ride the elevator up.
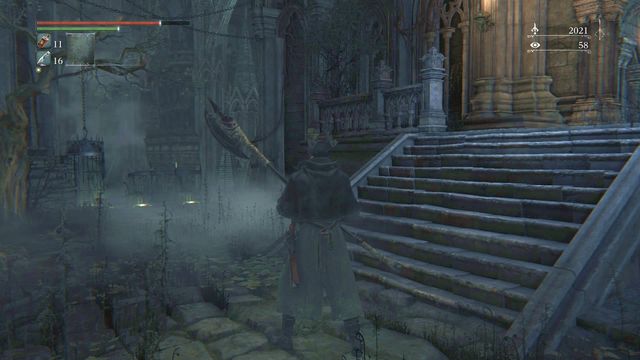 At the end you will find two elevator, the big door on the right lead to the boss.
Outside you should turn left. Near the tree you will meet interesting creatures - 3 crows with dog heads and a dog with... crow head. These enemies aren't tough. After killing them walk out through stairs. When you're up, go right, gain some speed (sprint) and jump to the cage - kill single enemy and take Tempering Damp Blood Gem. Then go maximally to the left (while having entrance to the building on your right), walk slightly down and kill two mutated dogs. In bodies you will find Frenzied Coldblood and Blood Stone Shard. After that, unlock the elevator, ride down (green shining points, at the end, near the barriers - a cage on the left) and enter the building.
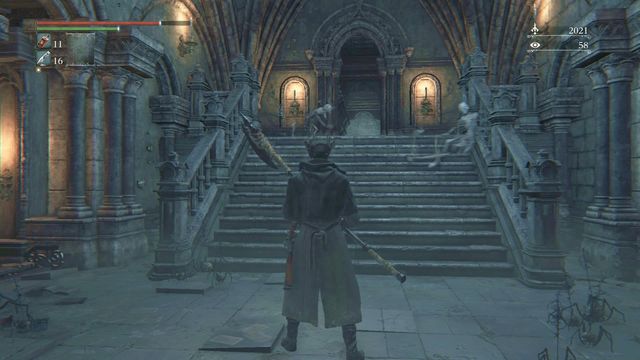 In the room behind two skeletons the battle will start.
Then go ahead to the end. Kill two skeletons on your way, they will appear on stairs. Enter the fogged room and a battle with Micolash, Host of the Nightmare will start.
Important: During the battle you can collect many items, they have been shown in boss fight description ("Boss Fights" chapter of this guide).
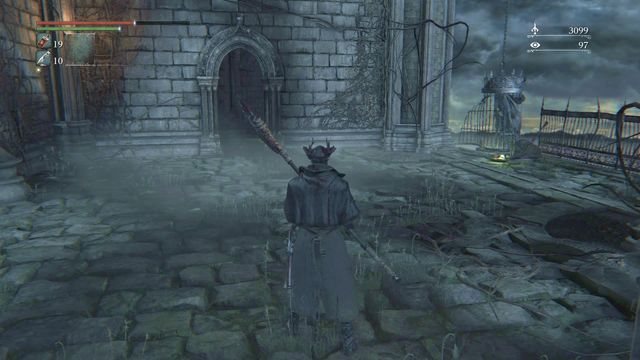 Immediately after leaving you will unlock another elevator.
After the battle walk through the bridge and light up the lamp. Behind it you will find exit from the building. Behind the stairs, turn on the first balcony to the right. Here you will be attacked by a dog and two crows. Under the tree you will find 2x Blood Stone Shard. Then, at the top of the stairs you can either turn right or left. For now, unlock the elevator on the right (you will find another one later) and pick the left way.
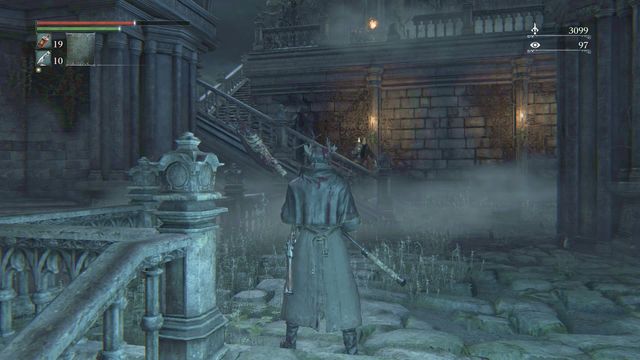 Lure two enemies out of reach of bullets shot by third one.
A while ahead you will see two enemies similar to Shadows of Yharnam. Lure then away from the stairs as at top of it there's a third one shooting fire bullets. Enemies have strong and fast attack, but you must be especially cautious not of their melee attacks but of flames created by one of "Shadows". After defeating those two go up the stairs and deal with the third one. Dividing them makes things much easier. Under another stair go near the barrier to the left where you will find 2x Blood Stone Shard.
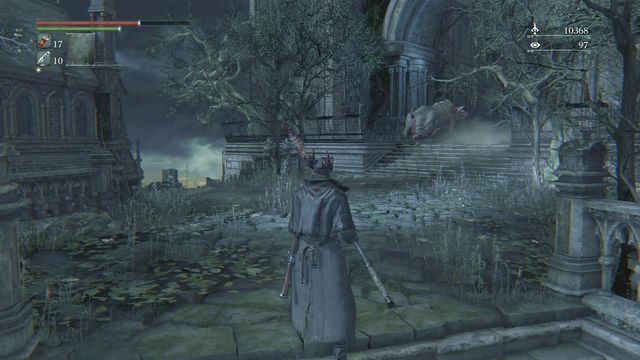 Calmly walk to the pig and attack it from the back.
At another court you will find a big facing opposite direction. Walk to it slowly and attack it with fully loaded hit. This enemy is much stronger than previously met pigs so avoid at all cost its charge or standing on back legs and hitting the ground (this attacks might even kill you, depending on your character's level). But with one pig it is easier, especially if you use the advantage of back attack and deal maximum damage.
Important: Pig can spit some muddy slime, in quickly increase your frenzy. This attack isn't frequent but it is wise to have some Sedatives just in case.

Two pigs that you face a while further might be more trouble. You shouldn't try fighting two at once as risk of death is much greater then. It is better to split the monsters, which is quite possible. After a while pigs will walk down and, after a short walk, will return back above. A perfect moment is to let one pig see you when the other has already turned (screen). There is a great probability that the pig will start charge (watch out), but thanks to this maneuver defeating those pigs one after another will be much easier. It will pay off as in three bodies lying on the court you will find 2x Frenzied Coldblood and Nourishing Damp Blood Gem.
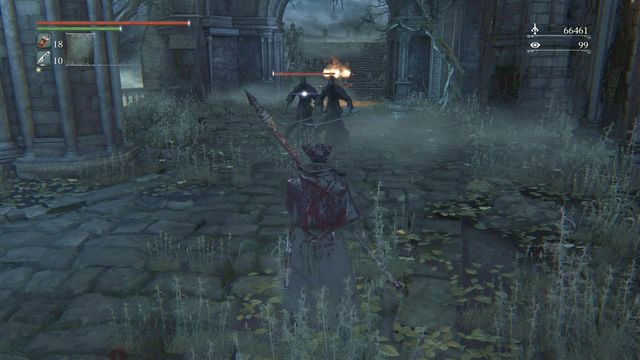 Don't let enemies surround you, always slowly fall back.
After the pigs another strong opponents await you, this time four of them. Just as previously, lure away three of them from the fourth one that shoots fireballs. During the battle you should have all enemies in front of you, make your weapon longer and try to knock down three of them at once (it will be much harder if you let them surround you and they will attack you from many sides). After dealing with them, kill the last one, but be careful when you're running towards him.
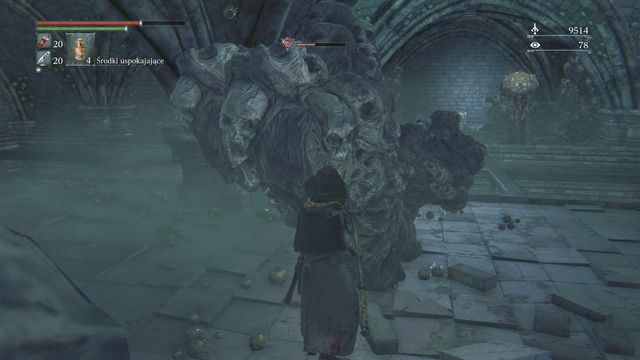 Stairs leading to the place where you will find some Blood Stone Shards.
Before you go to the main stairs fill walk to the left (turn back a bit) and go down. Here watch out for enemy with a sword behind a pillar. Eliminate him quickly, if needed hide behind wall from bullets shot by enemy standing near the barrier. From the bodies take 2x Blood Stone Shard and walk through the muddy slime to the end, kill crawling creature on the way and take another 3x Blood Stone Shard.
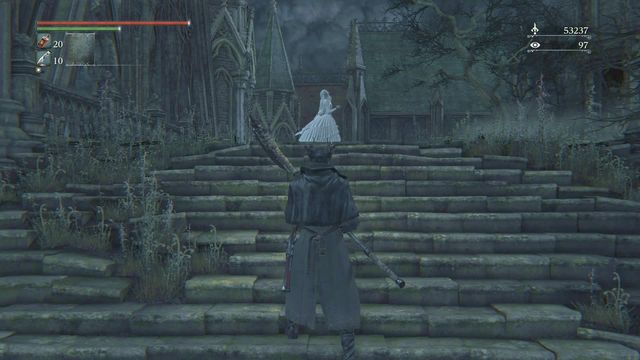 Behind the phantom you will find elevator and a chest, road to the right leads to another elevator, this time to the boss.
Finally, return to the main stairs (where you defeated 4 "Shadows". At the top you will find a white phantom, not far ahead you can unlock elevator (near the stairs there is a chest, inside Iosefka's Blood Vial). In the building at the top there is another elevator, this one leads straight to the boss, Mergo's Wet Nurse.
Important: You should equip lots of Sedatives, Deep Sea Rune makes things much easier by increasing your frenzy resistance.
After unlocking all elevators, before or after fighting Mergo's Wet Nurse (it doesn't matter) you should go for some exploring and get few very valuable items.
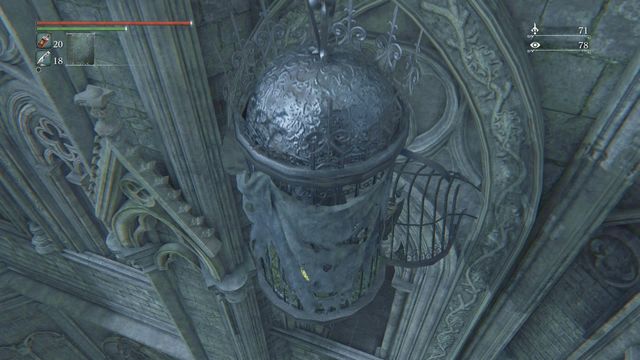
Start with moving to the Mergo Loft: Middle lamp. Then use the exit ahead and go upstairs. At the end you will find two elevators. The one on the right is interesting you, the one with damaged cage. When you use it to ride down you can go out of it and get to a small window (screen). You must do it accurately, when you're almost at the level of that window (it seems to be easier done when riding up). If you jump too early or too late you will fall down and die.
 Immediately after entering the bridge you must watch out for your frenzy.
After a successful jump you will get to a small corridor. Walk a while and take Inflicted Organ. Now your task is to run through the bridge, between rocks where a "brain" is that increase frenzy. If you will be quick enough and have large frenzy resistance, you can try killing it. Otherwise it will be too hard as you probably won't manage to drink Sedatives and you will be captured by enemy (he spreads his hands trying to catch player). It is possible to quickly run near him (look around for Kin Coldblood in the body under the barrier on the right). When you reach the round tower on the wall you will be safe for a while.
 It is easier to bypass enemies.
But only for a while as not far further you will find two similar enemies. This time it is much easier to run near them as at the end there is a chamber to which they won't follow you.
 Use the lever to throw the brain down.
You're not alone inside - few spiders will attack you. Luckily, if you're not moving too fast, you can kill some of them one after another. Finally jump down (another spider on the way) and use the lever at the end if the road. A short cutscene will start, after you regain control of your character jump to the lower chamber through the hole in the wall.
 Behind the rock you can wait until your frenzy drops (if you have high resistance, otherwise use Sedatives.
At the bottom immediately hide behind a rock. On the other side there is a chest with a very valuable item, so you should try reaching it. It might be harder due to enemy guarding it that increase your frenzy. When he will walk as far to the left as possible, you go slowly through the bar, be careful not to fall. On the other side kill the enemy as fast as possible and immediately after take Sedatives (you must act quickly so that your frenzy bar won't load itself, it depends on your frenzy resistance). Take Choir Bell from the chest.
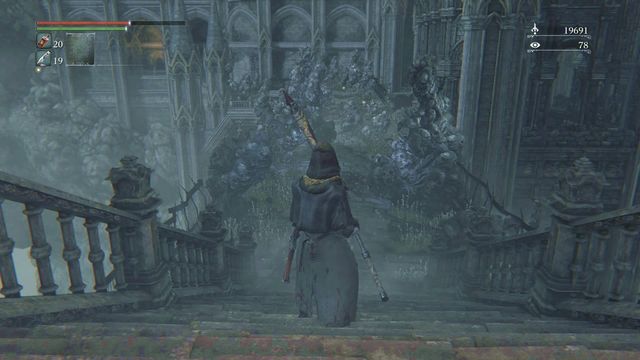 You're safe on the bridge, collect many items.
At the bottom go back a little and exit the chamber. On the bridge you will find some bodies and inside them Arcane Damp Bloodgem and 4x Great One's Wisdom. Then walk down the stairs - here you will find (on the left) another Damn Bloodgem and (ahead) Madman's Knowledge. At the end of the road a gate blocks the passage - you will open it with Iron Door Key acquired during the battle with Micolash. Passage back leads to the inside of the castle.
 Carefully jump to lower level to acquire Blood Rock.
Most interesting item can be found on the right, behind columns. At the bottom you will see a stone platform on which you can jump (more to the left side). You will lose some health points but it is worth it - in the body under the wall you will find the Blood Rock you're looking for that allows for maximum weapon upgrade.
You will leave the room through the hole in the wall, from the bridge you can go to the castle.
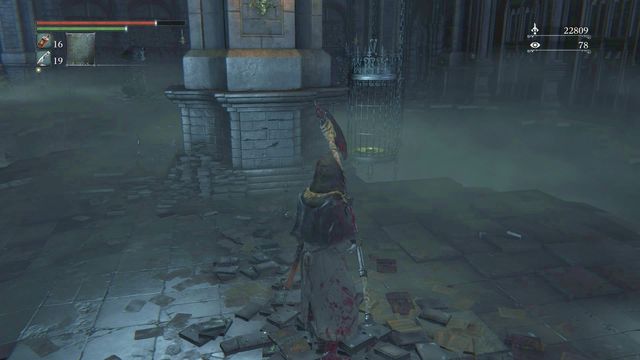 Elevator leads down, another enemy behind the pillar.
At the end go to Mergo Loft: base and pick the elevator on the right side that leads to the castle. At the top turn right and down stairs, to the hall full of places where you can fall down. Here you will be attacked by a woman with cleaver. Not far ahead you will find a pillar (enemy behind, watch out) and elevator that you should use.
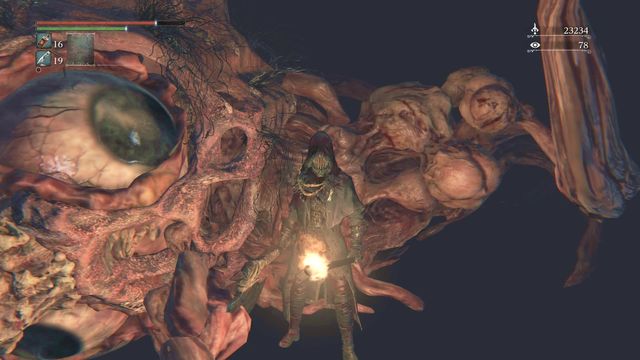 Pinky and the brain - souvenir photo.
You will ride down. Don't worry about complete darkness. After the elevator stops run ahead. On the ground there lies a massive brain. It is harmless and you can easily kill it. For that you will be rewarded with rare item - Living String.
At the end use the elevator again to return above.
 The chapel is on fire, but you still can use the services of Messengers.
Last thing that remains is returning to Hunter's Dream and battle with Gehrman, the First Hunter (decision about ending).
 Cleric Beast is a big-sized boss.
- swipe - this attack is signalized by a swing, the enemy attacks you with his hand and most probably will strike you again the same way
- claw attack - when his life bar will be shortened by about a half the boss will start attack with his second arm which may nail the player's character down
- attack sequence - the enemy makes over a dozen attacks in a row staying in one position and reacting only when the player's character will get close to him
- claw catch - in the final phase of the battle the enemy may catch the player's character between his arms and his attack deals a lot damage although it is preceded by folding his hands (like during the clapping)
The first boss which you will meet at the end of the bridge (first you have to take care of two beasts and some minor enemies). This boss has quite a big size and long attack range what makes his attacks hard to dodge even though the bridge is very wide. The first difficulty may be avoiding the enemy.
 A swing signalizes the incoming strike.
In the beginning watch out for the swipes who are the boss's main type of attack. If you are close enough the enemy will try to swipe you at least two times in a row. Dodge them by jumping away or run fast when he raises his hands to attack him from behind although you want have a lot of time to do so. You may also think about increasing the range of your weapon to make a better use of your time by allowing you to deal damage from a longer distance.
 The leaned down beast will become an easy target.
If you have a few Throwing Knives you may aim the enemy's head. It will make his head bleeding and he will lean down a little what will allow you to deal him a lot of damage by attacking his head which is more vulnerable to damage. Firing the pistol or the blunderbuss will do the job just as well.
 In the last phase the beast will mostly attack you statically from one place.
When you will take down about the half of the enemy Hit Points he will stop moving around the area but instead he will stay in one place and keep attacking you. If you will get closer to him he will also use the second hand to try to nail you to the ground. The best way is to turn off the camera lock and to run around him to attack his back. He will obviously turn around to catch you although you should be able to jump away. Repeat the entire process few times to defeat the enemy.
 Cleric Beast focuses on your ally
It may be much easier to win the fight if you lose first. You will then receive Insight, which allows you to summon other players into your world. In the case of this boss, you can get help from Father Gascoigne, if only you have not defeated him earlier. You need to climb down from the Central Yharnam landmark (the lantern), across the gate to the left. Next to the opponent with a torch, there is a note - read it. Here, you can summon Father Gascoigne who will help you with the battle. Cleric Beast focuses mainly on attacking your ally, thanks to which you will have the time to attack the opponent yourself.
Note: To help you with this boss, you can also summon Alfred, whom you meet in Cathedral ward.
If you defeated Father Gascoigne as the first one, you will not be able to summon him. Instead, you receive a free weapon from Gilbert- Flamesprayer. Gilbert himself is in the widow opposite the Central Yharnam lantern. Use the weapon, because the beast is vulnerable to fire.
Reward: Sword Hunter Badge, 4000 Blood Echoes, lamp which you may use (Great Bridge respawn point).
 Father Gascoigne has a familiar fighting style to a player's character.
- axe strike - the enemy attacks you with his axe making a series of strikes familiar to the one that player's character deals
- gunshot - the boss shots a few bullets mostly when he will be knocked up by the player's character by a charged mighty attack
- swinging with a longer axe - when the enemy will lose about the one-third of his Hit Points he will increase his weapon's range
- punching and kicking - after losing about two-third of his Hit Points the enemy will change and will attack you mostly with his hands making few punches one after another
- squeeze (after the change) - as the attack which will finish his attack series or his jumping toward the player's character the enemy may nail the character to the ground what will make him more vulnerable to the following attacks
 Allow the enemy to get closer and treat him with your fully-charged attack.
The battle with this boss is divided into three parts. In the first part you he fights similar to the player while he uses a short axe and a firearm. Watch out especially for his attack series since taking all his strikes at once will be very painful. He does not uses a gun unless you will knock him down on the ground and because of that you need to jump away from him instead of trying to keep attacking him. Try to focus on using the mighty charged attacks after making a successful dodge. The boss will get close to you mostly when the attack will be prepared. He will take a significant damage and will be knock down.
 The enemy has increased his weapon's range? You may do the same.
The second phase is rather similar to the first one and will begin when the enemy will lose about one-third of his Hit Points. He will increase the length of his weapon what will make getting close to him more difficult. However just as before you need to use the mighty attack since the enemy really likes to get close to you. Dealing few strong hits just after the dodge will lead you to the phase number three.
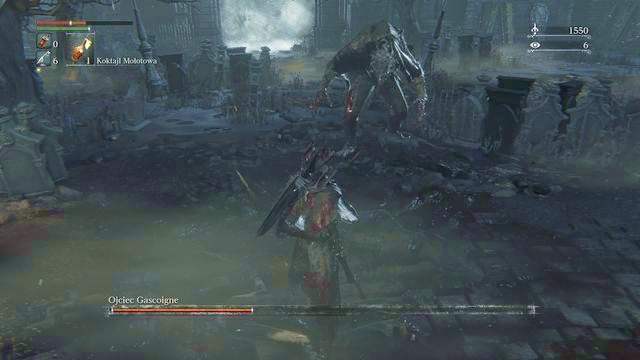 After the change the boss will become slightly faster.
At the end of the battle (when you will take down about two-third of the enemy Hit Points) the boss will completely transform and will attack you mostly with his bare hands and sometimes with kicking. He may also treat you with a knock down what is signalized by a short jumping charge. Try to dodge it to prevent yourself from the first hit what will allow you to attack his back in response. You will easily attack him when he spits out the blood what allows you to charge your strongest attack. Beside this moment in this phase you should be more focused on striking with quick attacks since you will not have enough time to charge most of the time.
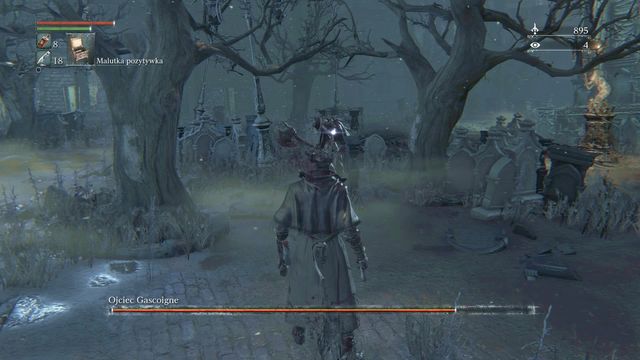 Using the music box temporarily stuns Father Gascoigne
If you have talked to Viola's daughter earlier and you agreed to help her mother, in your equipment you now find the Tiny Music Box. Using it allows you to stun, temporarily, Father Gascoigne, which results in the opportunity to land attacks with impunity. However, you cannot do this all the time - 2-3 times tops (it is possible that with the last use, the boss transforms into his strongest final form, from the last phase of the battle) and once right after the opponent transforms. Later on, the music box simply ceases to take any effect. Remember that cranking it up takes some time, which leaves you exposed to the enemy attacks.
Reward: Oedon Tomb Key, 1800 Blood Echoes, lamp which you may use (Tomb of Oedon respawn point).
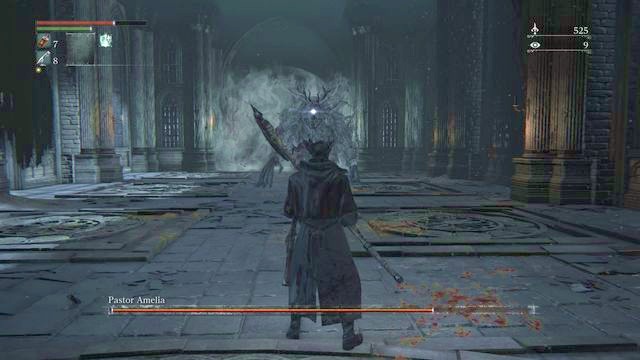 Running Amelia most of the times jumps on the player's character and attacks him at the same time.
- claw strike - the enemy draws her claws over the floor for a moment making the orange sparkles and then making few strikes with them
- attack series - Amelia attacks you with her hand and if she will hit you she will instantly attack you with another even faster attack
- vertical swipe - boss folds her hands for a moment as she would like to pray what makes her vulnerable for the player's attacks and then attacks the player's character with an air blast
- jump and strike - the enemy attacks from a longer distance by running towards you and making a jump which will nail your hunter to the ground
- claw catch - an attack preceded by raising the boss's both hands which then drop together to squeeze the player's character
- heal - in the middle of the fight Amelia folds her hands to pray and starts regenerating her Hit Points while she is surrounded by an orange aura. Instead of attacking you may cancel this effect by using a Numbing Mist
Vicar Amelia is a big sized enemy so you should take with you a weapon with a long range. Remember to take with you a lot of Blood Vials and, if you want, Molotov Cocktails. An absolute must-have is a Numbing Mist which you may take from a corpse in front of the stairs leading to the arena. Turn right and from a small square use the ladder to get up and collect a small amount of Mist.
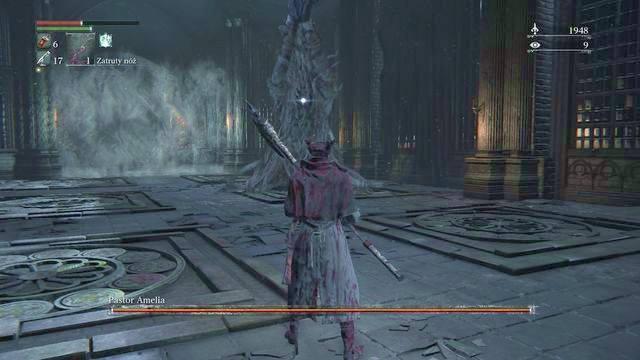 The vertical swipe is preceded by raising the hands what makes it easier to dodge it.
The entire battle will keep the same scheme. When you will try to keep your distance from the boss she will attack you with an air blast. She will raise her hands what will let you take a time to find a way to dodge a tornado "going" towards you. He may also try to jump on you (dodge towards right). After both these attacks you will have a moment to attack her although you will not have enough time to make a fully charged attack since Amelia may attack you with her claws and interrupt the charge. Especially brutal will be the melee attack series preceded by drawing the enemy claws on the ground what will create the orange sparkles. When it will begin move away to a safe distance and patiently wait.
 Interrupt the boss's healing as fast as you can.
When you will shorten the enemy health bar by a half she will try to heal herself by a big amount of Hit Points. You need to cancel this process by using the prepared Numbing Mist (throw it in your enemy while she heals). If you will allow Amelia to heal herself the battle will prolong quite a bit. Because of that you should use the Mist only if you are sure that you are ready for the final battle since you can't buy it and if you will not have it you will not have other way but to allow her to heal. Because of that you should wait with the battle for the moment when you are sure that you are ready for a battle and, for example, you have enough Blood Vials to face her. Otherwise keep Numbing Mist for later on.
Note: If you do not have Numbing Mist, it is still possible to interrupt the healing process. Try to attack mainly Amelia's legs, which may stun her and buy you time to land a finishing attack. If this fails, attack her anyways which will - at least partially - alleviate the effects of the healing.
 If you will be too close to the enemy you are in danger of a huge amount of fast attacks.
The key to victory is to keep moving and attacking while jumping while the enemy will turn his back to you after your successful dodge. If you will stay next to Amelia for too long you may suffer from the attack series. Use a long weapon, make fast attacks and jump away from her as fast as you can.
Reward: Gold Pendant, 15 000 Blood Echoes, lamp which you may use (Grand Cathedral respawn point).
 Prepare yourself for a battle with Beast. Don't forget to take big supplies of Antidotes with you.
- claw attack - few attacks which you may easily dodge although in the second part of the battle are lethal and poisonous
- strike and bite - whenever the beast is close to you she may catch your character and bite it after a few melee attacks what will instantly poison you what makes necessary to bring some Antidotes with you
- charge with a strike - boss runs towards the player's character and makes a huge swing what may be prevented sometimes even by a little jump without a full dodge
- poisoning - from the half of the battle every enemy attack will poison you what make even the slightest scratch quite difficult
- poisonous spit - in the last phase of the duel, when the enemy will have about one-third of his Hit Points he may spit with poison after standing motionless for a moment and the best way is to wait for its end in a safe distance
The first phase of the battle is easy and not really challenging. The boss will mostly attack you with his claws. Use a long weapon to keep him on distance. Use the fully-charged attack when he will get close to you what will both deal him a lot of damage and keep him away from you. Try to not use any Blood Vials or Molotov Cocktails since they will be useful later on when your enemy will drop to about half his basic Hit Points.
 When the enemy gets close to you better be prepared for a mighty attack.
The second phase will be much more difficult. It will be dictated by the fact that after dropping to half his Hit Points Beast will start to poison your character with every attack. He may also catch you and gradually deal you damage. You should wear an attire with a poison protection suck as the Black Church set from the Cathedral Ward. Don't forget to bring a big supply of Antidotes as well as some Molotov Cocktails which will help you to finish the duel faster.
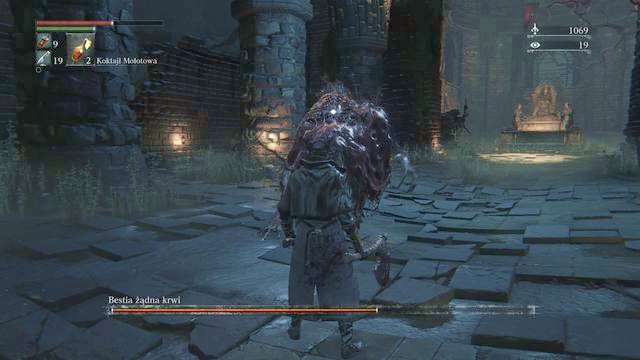 When the enemy will start to poison the player's character he will attack much more often and more aggressive.
Both phases of the battle are fairly similar although in the second phase the enemy will be more aggressive. Focus on striking Beast with the strongest attacks when he will get closer to you. In the first phase of the battle it will be rather easy however in the second phase you may try to focus on dodging since the enemy attack will be also poisonous. The most dangerous attack is a strike and bait. Attack mostly after the successful dodge. In the last part of the battle when Beast will have only one-third of his Hit Point sit will also start attacking with a poisonous spit. When he will stay in a place and start charging his attack go on a safe distance to keep you safe.
Remember to take with you a big supply of Antidotes and to take an armor with poison-protection. In the first phase use the mighty attacks and in the second phase the quick attacks to avoid being poisoned. Use some Molotov Cocktails. If you don't have at least 3 Antidotes you may find them laying with the corpse behind the alter. Remember to neutralize the negative effect of a poison before you will use a Blood Vial (the other way is viable only when you are really desperate). If you have the Pungent Blood Cocktail on you, you can try and lure the beast away, which buys you several seconds to attack or to heal yourself.
Note: As you climb down the stairs towards the chapel, you can spot a note to the right. If you have not fought Alfred, you can now summon him to help you in battle.
Reward: Pthumeru Chalice - you will use it with the Ritual Blood to make a Pthumerian Labyrinth Chalice Dungeon in the Hunter's Dream (Ritual Altar), 5600 Blood Echoes, lamp which you may use (Church of the Good Chalice respawn point).
 You can attack the Witch of Hemwick from behind.
- disappearing - it is not an attack but one of the Witch's moves that she performs once in a while. The witch becomes invisible and teleports to a different place on the arena. She remains this way until the player comes close to her.
- summoning allies - the boss summons lesser witches, of which there are quite a few in the last phase. They are slow and easy to avoid, but it is good to get rid of them once they start to form a serious force.
- projectile - the Witch can shoot a blue orb towards the hero, which will stun him if the attack connects (this attack is performed rather rare if the hero stands close to the boss).
- physical attack - a normal strike (performed rarely if the hero stands close to the Witch).
- exploding circle (high damage) - the only "real" attack that the Witch can perform. She spreads a red circle around her which then explodes, dealing a lot of damage.
This battle is not very challenging. However, finding the enemy may sometimes cause you some trouble. Search for the Witch in the corners of the arena, as she rarely teleports to the central part of it. Remember to dodge the only strong attack - the exploding circle. Use your extended weapon and do not allow a situation when there are too many lesser witches on the arena.
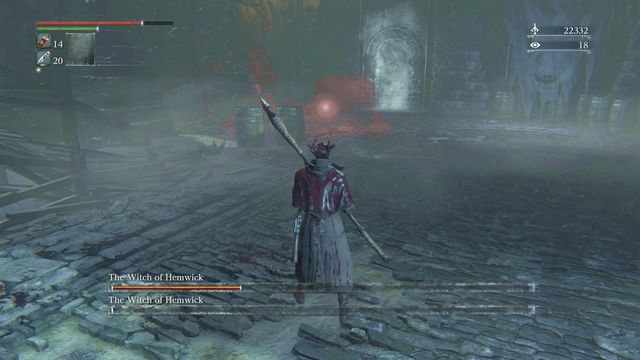 The red aura will help you locate the boss.
The battle looks similar throughout the whole fight. Witch of Hemwick remains invisible until the player comes close to her. The arena is not very big so it is not difficult to find the boss. If you have any trouble locating the opponent, kill the allies that she's summoned and then keep running in circles. You can sometimes notice an orange circle that the Witch is making.
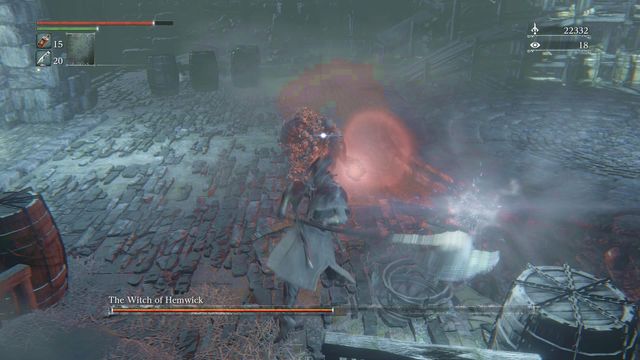 The Witch disappears after every hit so try to strike as strongly as you can.
When you come close to her, the Witch will be visible to you and you will be able to lock the target. Use this moment to perform a burst of blows, as strong as you can (she disappears after being hit so you can use a fully charged attack and then a quick finishing move). The Witch will disappear and summon another enemy.
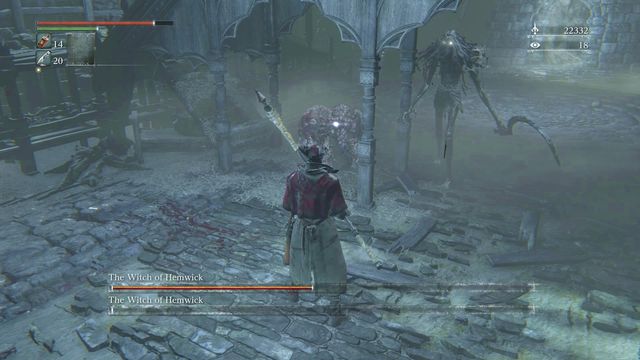 The HP bar of the second Witch will be different, depending on how many times you've hit her before.
Repeat this pattern until the Witch dies (at the end, she will summon several enemies one after another - deal with them first). When her HP bar falls to zero, a second Witch of Hemwick will appear. What is really happening, is that there are two Witches of Hemwick on the arena the whole time. If you notice that you don't deal any damage when hitting a Witch, you are dealing it to the second one. Her HP bar appears only after defeating the first opponent. The strategy is identical - kill her allies, locate the Witch and attack her fast and strong. When the second boss is dead, the fight is finally over.
Reward: 6x Bloodshot Eyeball, 11800 Blood Echoes, a lantern that you can light (respawn point called Witch's Abode), Rune Workshop Tool - after the fight, at the end of the corridor, behind the lantern (allows you to use runes in the Hunter's Dream).
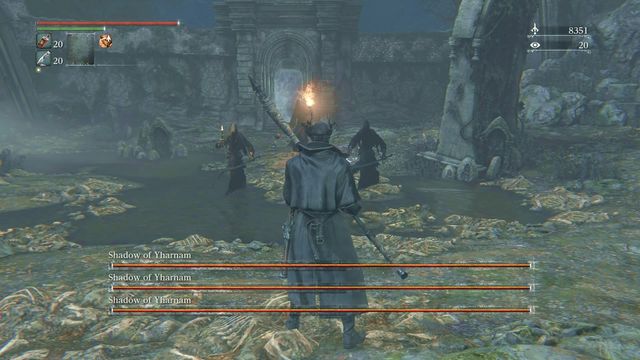 Three opponents, each one uses different attacks.
- a series of sword strikes - this attack is performed by one of the enemies, who quickly approaches the hero and performs a series of very fast blows with his sword (interrupts the hero's attack).
- sword attack + fire attack - the second enemy uses his sword rarely (the attack is not very dangerous), but he frequently tries to burn the player using a flamethrower (jump back immediately).
- fireballs - the last opponent keeps his distance from the hero, shooting three fireballs at him. It is best to dodge them or hide behind a tombstone.
- snake attack - in the second phase, the sword fighter grows snakes on his head, which he can shoot towards the player.
- fire sword - the second enemy enhances the power of his weapon by setting it on fire.
- rain of fire - during the second phase, the last opponent can fire missiles at the player, which this time will fall from the sky.
- summoning - the most dangerous attack that can occur during the second phase of the battle; the enemies can summon huge snakes that attack from the water (a red circle around one of the bosses). It is best not to let it happen by interrupting the summoning.
This battle is slightly different from the usual boss fights, because you are facing three opponents at the same time. Therefore, don't forget to bring as many buffing items as you can (some Fire Paper to put on your weapon).
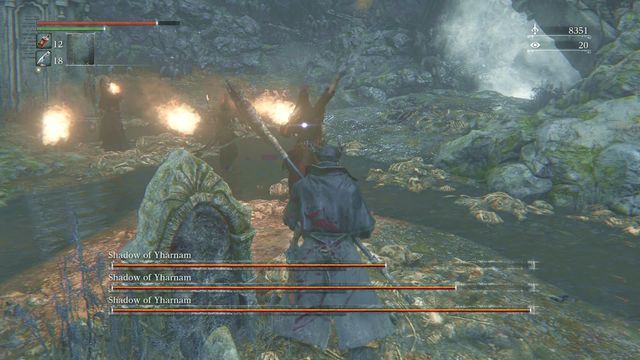 You can hide behind the tombstone to avoid the mage attacks.
During the first phase, it is best for you to deal with the enemies that keep coming close to you. The most annoying and dangerous at the same time is the sword fighter, who can attack you with a series of very fast blows. Focus on him first and lower his HP bar to about a half of it. You can back away from the enemies and charge a strong attack (with the extended weapon).
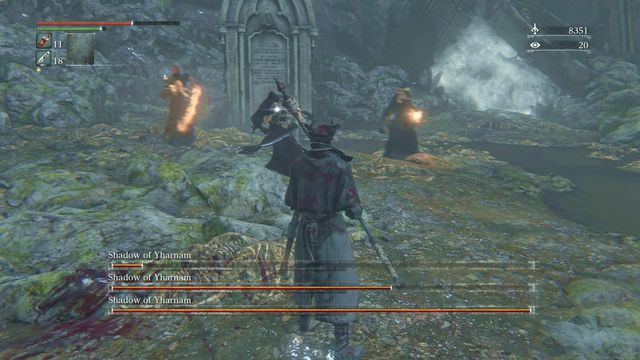 The enemies obtain new abilities after the transformation.
Next, deal with the second enemy and lower his HP bar to a half of it as well. The reason why you should do that instead of killing one after another it's because when the HP of one of the enemies falls to about 1/3 of it, the battle enters phase two and the opponents can use their most dangerous attack - summoning. Therefore, during phase two, you should try to reach a 1 vs. 1 situation as quickly as you can. Take a half of both the enemies that attack you on short distance and then kill the sword fighter fast. After that, finish the second boss and deal with the mage.
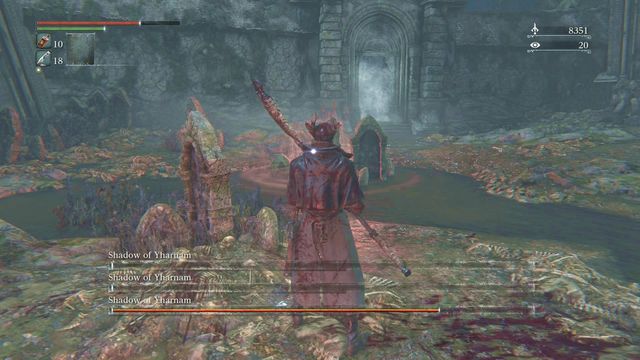 You must interrupt the summoning spell.
1 vs. 1 fight is not much of a challenge. The most important thing that you should have in mind is not to allow the enemy to cast the summoning spell. If he starts to cast it (red aura), approach him as quickly as you can and attack him to interrupt. After that, you can strike a series of blows.
To sum up: First, deal with the two Shadows that keep coming close to you. Watch out for the series of blows, the flamethrower and for the fireballs. When the fight enters phase two, kill the sword fighter as quickly as you can, then the second Shadow. At the end, remember to interrupt the summoning spell and avoid being hit by fireballs (dodge or hide behind a tombstone).
Reward: Blood rapture Rune (finishing attacks restore HP), 18600 Blood Echoes, a lantern that you can light (respawn point - Forbidden Grave), unlocking the way to Byrgenwerth.
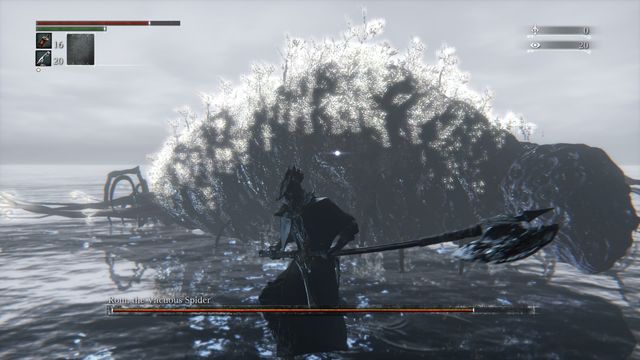 The Spider has a few bodyguards.
- summon spiders - every time the boss disappears and then reappears, it summons a group of spiders.
- ranged ice barrage - the boss raises its torso and moves its limbs. After a while, a rain of ice blocks falls down on the player.
- upward ice barrage - the Spider rolls on his back and ice blocks shoot from the water, hurting the hero.
- lying on the back and explosion - an attack similar to the previous one; the Spider rolls on his back and then the explosion happens around him.
- disappear and change position - occurs twice, when Rom's HP bar falls to a certain amount. The boss disappears and changes its location, appearing with a group of spiders.
- body slam attack - near the end of the battle, be careful when coming close to the boss because it will attack you with its head, dealing a lot of damage.
 The first time, you have to start the fight yourself.
When you get into the arena for the first time, Rom will not be moving. However, if you fail during the first attempt, the boss will attack you each time you enter the location again. Use the moment while Rom is still to examine his structure. The boss's body can be divided into two parts - a well-protected head and a vulnerable torso.
 The torso is the best place for you to attack.
When you're ready, start the fight by hitting the enemy in the torso. You will see the boss's HP bar and a dozen-or-so smaller spiders. You should remember two things about them: their head is also well-protected (you will not deal a lot of damage by attacking their front side) and they can quickly perform two types of attacks (sinking into the ground or attacking with their pincers). During the first phase of the battle, Rom practically won't attack you, but you need to watch out for the poison that appears when you hit the torso. Try to drag the spiders away from the boss, then approach Rom and attack. After you take about 1/3 of the main opponent's HP, it will teleport to another place on the arena (you can still attack the shape, dealing some damage).
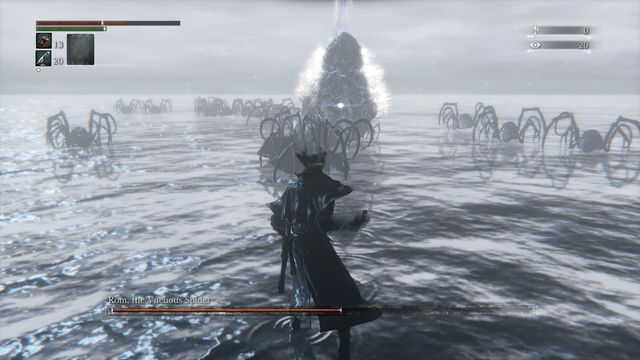 The boss getting ready to attack.
The next phase means new spiders. Despite there being a lot of them, they are not worth fighting with. You will only lose a lot of HP, because, as you know, "nec Hercules contra plures" (another difficulty are the boss's attacks, which start during phase two). Try to lure the enemies away from the boss, then approach it and attack its torso (don't try to attack the head because you will hardly deal any damage at all). Mind also the main opponent's stance, as it will tell you about the attacks that are bound to follow - it is especially harmful to be caught by the rain of ice blocks or the explosion. These attacks are both signalized with a two-seconds stance change. When Rom's HP bar falls to 1/3 of the maximum value, the boss will change its position again and the battle will enter phase three.
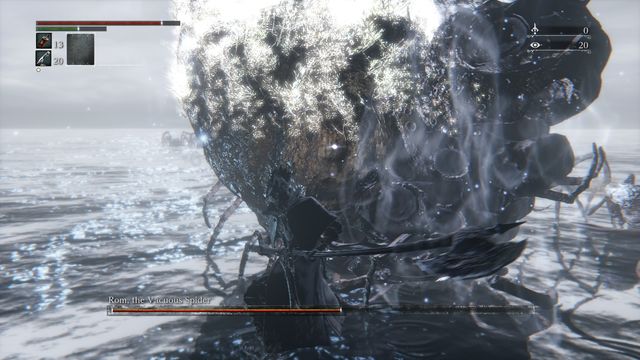 The spider is about to explode - quickly jump back.
The opponent will appear for the last time with a fresh portion of smaller spiders. You will notice that getting to the boss is very difficult now. However, the best strategy is still to go past the spiders or maybe kill one or two of them. If you're away from the boss, you will force the spiders to be on the move. You can use the fact that you are faster than them and approach Rom to attack its torso. In this phase, you have to be particularly careful, because Rom starts to attack with its head. It is good to save some Molotov Cocktails for this part, as they will allow you to defeat the enemy faster.
When the fight is over, approach the edge of the lake and watch a cut-scene.
Reward: 12x Kin Coldblood, 24860 Blood Echoes, a lantern (respawn point - Moonside Lake), a door opens in Cathedral Ward (the last one to the right, from the Cathedral - you will be teleported here automatically) - they lead to Yahar'gul Unseen Village.
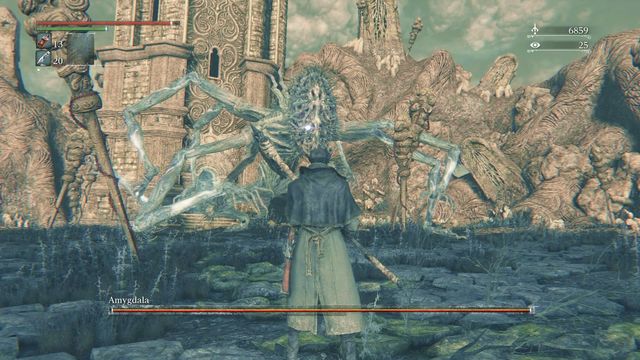 Amygdala attacks has long reach.
- laser - boss shoots few exploding bullets, deals lots of damage, avoid by running to the sides
- hitting with arms/swinging arm forward - few physical attacks with long reach, after the final one Amygdala is leaning forward, it is a good time to attacks her head
- jump and crush - when you will stand at the back of the boss for long, the boss will try to change his position by jumping and crushing you
- crushing with legs - again when you will stand at the back, boss will try to crush you with his back limbs.
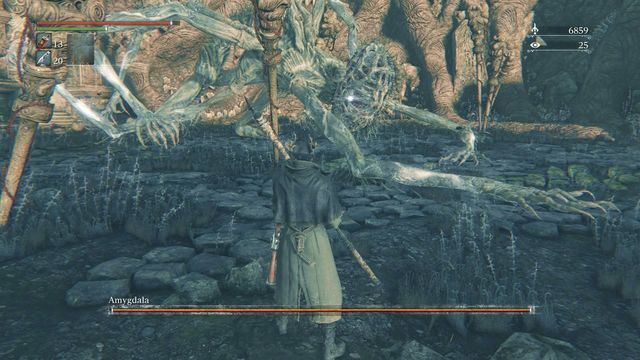 A good time to attack the head is after you dodge, when Amygdala is "recovering" after her own attack.
Amygdala has few strong attacks. Her head is her main weakpoint, legs are the second one - this body parts are volatile to attacks, a strongly loaded attack to the head might even stun the enemy, which will give you chance to make a finishing blow (quick attack). Good time to attack the head is when Amygdala is leaning to the ground. It happens after physical attacks (arm swinging). You have a moment then to run towards her and deal a strong attack (remember about making your weapon longer).
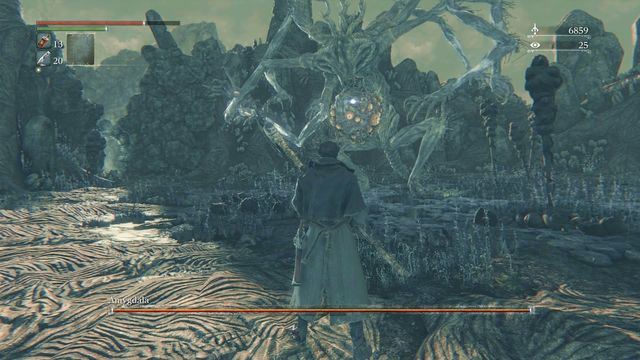 Watch out for the laser attack that deals great damage.
During the first phase of the battle enemy will mostly attack you physically, in the second phase he will add more frequent crushing and laser. From around 30% of life bar Amygdala will greatly improve the reach of her physical attacks. At that point you should keep yourself as close to her as possible, it will allow you to avoid them. When you fight under Amygdala you additionally have a good position to attack her head and arms.
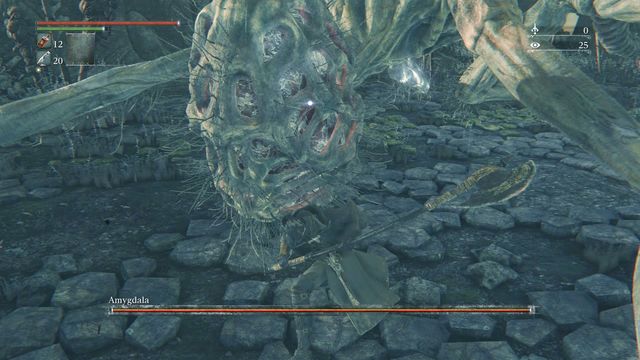 Immediately after the jump you can quickly roll towards the boss's head.
Another tactic, that is much safer, but takes more time, is focusing on attacking back legs. When you stand behind the boss you are relatively safe as you avoid all front attacks. You must only watch out for crushing and jumps. The later can be used by you to quickly roll towards Amygdala head (for a while it is close to the ground). Enemy will often jump wanting to have the player ahead, it will give you an opportunity to deal more damage. Only weakness of that tactic is that the battle takes more time as back of Amygdala is more resistant and damage dealt there is smaller (but when connected with rolling when enemy jumps and head attacks this tactic might prove to be very effective).
Reward: Ailing Loran Chalice, 21000 Blood Echoes, lamp which you may use (Amygdala's Chamber respawn point).
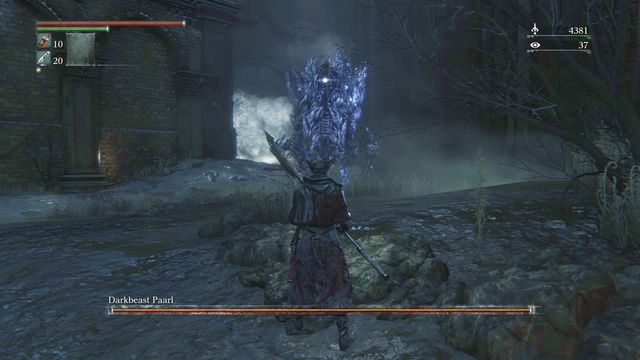 Darkbeast Paarl is one of optional bosses.
- arm hit - most common attack, combined into series - enemy makes few consecutive arm moves, attack has long reach, avoiding it allows you to get under the boss and deal some hits
- explosion - remaining too long under the Beast might end with an explosion, damage is large, but the attack is signalized before (charging of electrical ball around the boss), so you will have a moment to jump away
- jump and hit - it's a strong move forward combined with a hit, used usually when you go too far from the boss
- electrical attacks - in second phase of the combat all enemy attacks are additionally strengthened with electrical bolts, which greatly improve their damage, additionally they have area of effect, direct hit is not required
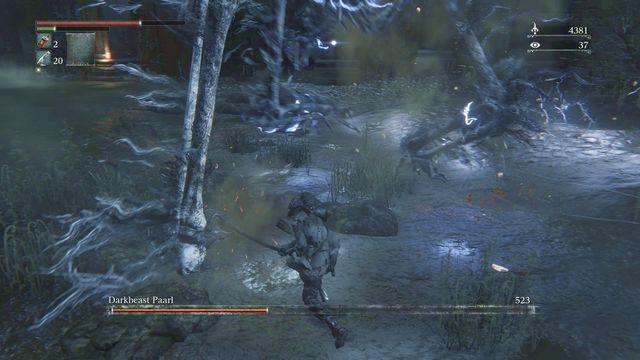 Hitting the legs might make the Beast fall.
This boss is an optional adversary that might be troublesome. His advantage is long range of physical attack that becomes additionally strengthened by electrical charges (in the second phase of the battle). His weakness are his thin legs that should be, along with head, your main target - few hits throw the Beast off-balance and gives you an opportunity to deal a finishing blow.
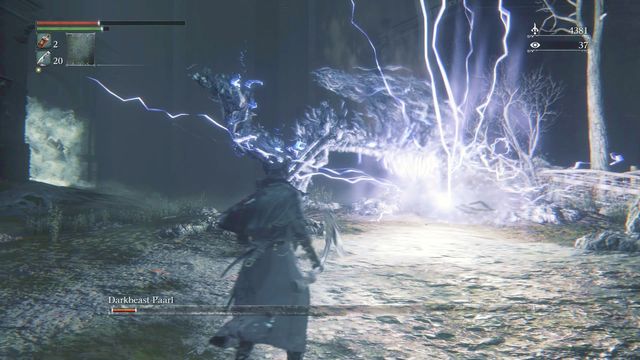 Explosion deals very large damage on large territory.
During the battle observe your enemy, as dodging in the right time is hard, but it will be rewarded with opportunity to deal a blow to the legs or head. The latter is most vulnerable, but you can hit it mostly after you throw the enemy down or when he bends down after an attack. When you search for opportunity you should remain under the boss (although you must watch out for electrical explosion) from where you can attack legs and the head. Attacking the legs is hard as you can't lock the camera on them, so if you want to use the tactic of making the enemy fall down and deal him finishing blows it will be easier for you if you fight without locking the camera on boss's head.
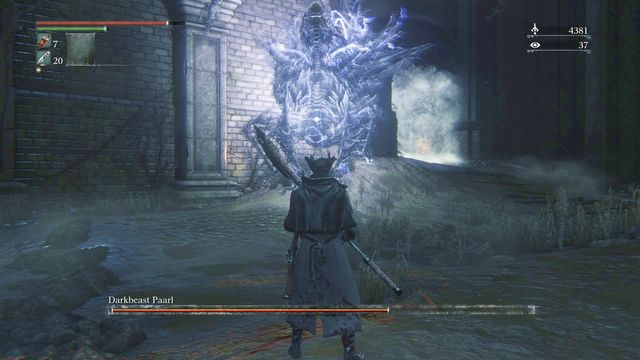 Second phase means stronger enemy attacks.
In the second phase of the battle (around 50% of life bar) the boss will additionally strengthen his attacks with electricity, mostly the attacks of his claws. The tactic doesn't change, but enemy will be bit more aggressive and his attacks will deal more damage. Try to jump away for long distance and attack when enemy is regenerating after a series of attacks. You will have a perfect position if you manage to walk under the boss.
If during the battle you have trouble with feeling the right time for dodging and attacking the head it will be better if you use the tactic of jumping forth and back and you will aim the legs. It will give you the change to knock down the enemy few times and make a killing blow when he will lie down stunned. Beast protects himself from that with explosion, so when you see that lightning are gathering around him quickly jump away.
Reward: Spark Hunter Badge, 21000 Blood Echoes, lamp which you may use (Darkbeast Cemetery respawn point), shortcut to Old Yharnam unlocked
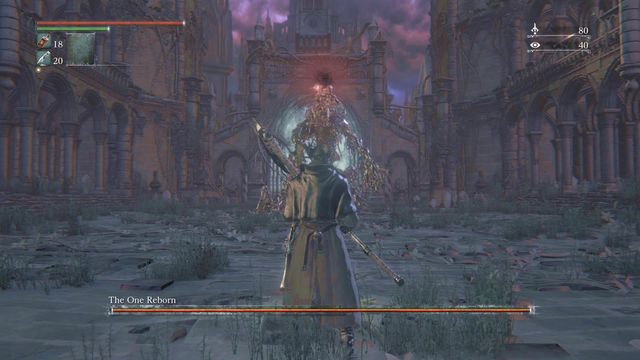 Boss attacks (bullet) immediately after you enter the court.
- trampling/crushing - boss is trying to crush the player when he is standing in front of him or behind him, in that case kicks from the side limbs are added
- squirting poison - when you hit enemy back legs a poison might spit from there (violet slime) that deals damage if you won't move back
- drowning the arena with slime - boss is spiting poisonous slime, almost whole arena is drowned in it, you must hide under the balcony and watch out as walking on the drowned territory reduces your health points
- body rain - when enemy above is spreading his hands, you can expect a rain of falling limps
- explosion - an orange aura is created around the boss which quickly after changes into a big explosion with great range
- single bullet - the boss sometimes spit a single bullet towards the player, usually when you're far from the One Reborn
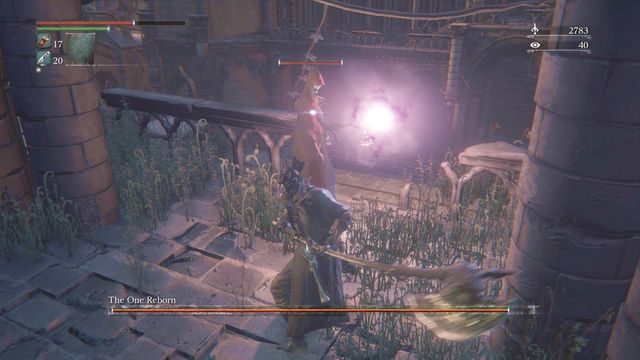 Before the main battle, eliminate the mages standing on the upper balconies.
Immediately after the battle starts dodge the bullet shot at you, and then... bypass the boss and run to the end of the arena where on both sides you will find an exit to the upper balcony. You will find 6 priests/mages there, three per each side (connected with a bridge at the end, you don't need to run down). Start the battle with killing them, as they help the main boss and shoot fireballs at you. Watch out when you're up, enemy's attacks might reach you.
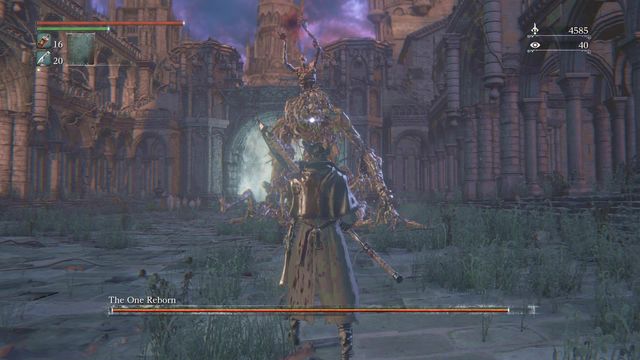 Preparations for attack are signalized with raising both hands.
Enemy has few dangerous attacks, mostly magical ones that you must be careful of. It includes body rain, explosion and flooding the arena. These attacks are signalized before and it takes some time for the boss to do them. Thanks to that, avoiding them shouldn't be hard, just remember to keep attention to what enemy is currently doing - when you hit his "lower part", you can easily miss the moment when he is preparing an attack.
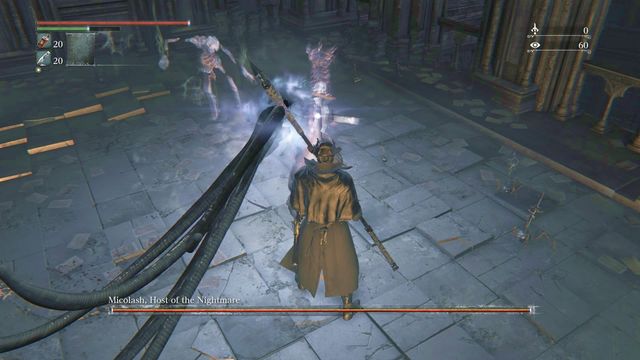 You will hide from the poisonous slime under a balcony.
Attack him mostly in his back legs. Enemy is turning rather slowly and clumsy, so you will have some time to hit those parts (you might attack the tail as well). From behind you are less vulnerable to physical attacks which the boss is using less frequent than magical ones. Additional advantage of hitting legs is a chance for stunning the boss - then he will fall to the ground and it will give you a while to hit him with no worries. So attack mostly legs and jump away when he will prepare an attack or when a slime will start squirt from his legs.
Reward: 3x Yellow Backbone, 33000 Blood Echoes, lamp which you may use (Advent Plaza respawn point).
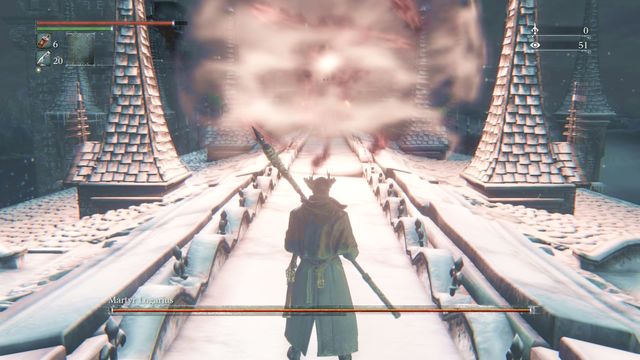 Watch out for magical attacks when you get close to the boss.
- magical explosion - the boss is creating an orange ball around him which then he throws at the player, remaining in the reach of the attack deals great damage
- shooting bullets ("skulls") - Logarius throws few smaller skulls, you can avoid them by hiding behind sticking roof parts, you can also run between them (after a while, the skulls are "branching", making a gap between them
- shooting one, explosive skull - a dangerous attack, if player is close it has only one phase - immediate hit; in case of long distance first a small skull is hit and it detonates into a larger one after a while
- series of physical attacks - slow swing of Logarius weapon, they create a good chance for stun and dealing finishing blow, in the second phase these attacks are improved with much faster hits with shorter weapon
- levitation and attack - enemy flies above the roof, then quickly flies toward the player, this attack can be avoided with a single jump away, it is possible to stun enemy if you shoot gunfire at him the moment when he is coming
- placing a post on the ground - in the second phase enemy might place a post on the ground that shoots bullets in all direction; you can hide from it behind sticking roof elements or walk closer and destroy the post
Martyr Logarius is an optional and quite hard enemy. He has many magic attacks that can quickly kill the player. His physical attacks are strong as well, though slow, so they create a good opportunity for a counterattack or stun. When you go at this enemy, you should take all Quicksilver bullets, Blood vials and Fire Paper will be useful as well for increasing weapon damage.
Single shot skulls explode after they get close to player.
Immediately after entering the arena you will see that enemy is making few consecutive magic attacks. He will continue it until you get close to the throne. You should do it in a way that will save you damage - avoid the bullets and/or wait for the orange explosion, then quickly run towards Logarius that will stop his attacks for a short while. Then the real battle starts.
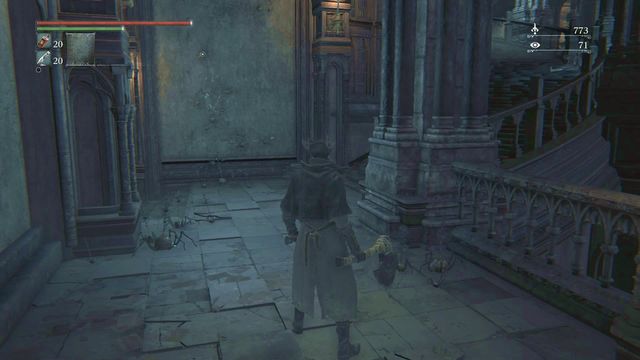 After a post is placed you can be hit with a bullet, no matter where you stand (sometimes even behind a cover).
During the first phase enemy will use mostly shooting skulls and physical attacks. The best tactic is to force him to use the latter - so stay as close to Logarius as possible, it will allow you to avoid much stronger magical attacks. The boss will try to get away from you by jumping, so keep running towards him, though watch out for skulls shot during such a jump. In this phase you should search for opportunity to stun enemy and deal a finishing blow. To do so, shoot in the right moment (weapon swing).
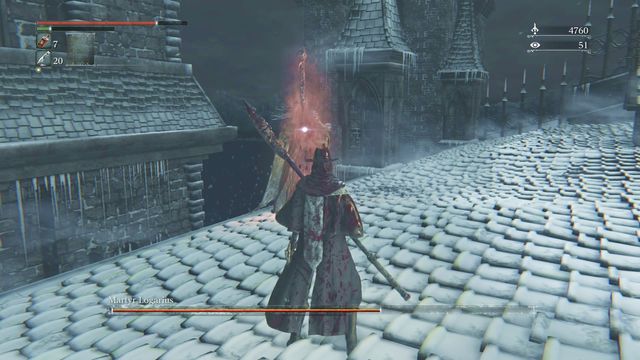 A moment when you can attack enemy for a while - after short time explosion occurs and the second phase starts.
When Logarius health bar drops to around 2/3, he will kneel and start glowing. This is your chance to deal him some damage, but it won't take long - make one series, then jump away as the boss will explode. During the second phase enemy starts using attack from the sky and he places post that shoots bullets. You should dispose of the post in first order - being hit doesn't deal much damage, but it cancels your current activity. In this phase Logarius will use physical attacks more often, which gives you chance to stop his attacks and stun him. But watch out for much faster attack that he will do simultaneously with slow swings of his axe.
So, in summary: get as close to him as possible so he won't use magic. Physical attacks are easier to stop, they give you chance for stun and make a finishing blow.
Reward: Crown of Illusions, 25600 Blood Echoes, lamp which you may use (Logarius' Seat respawn point), the possibility to join the Vilebloods covenant.
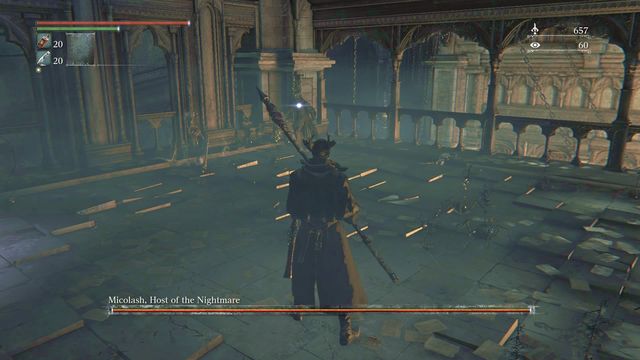 Battle with Micolash is divided into two phases fought on almost identical, small balconies.
- release of snakes - virtually the only attack during the first phase during which the boss throws three snakes in front of him (there might be few quick attacks, one after another), it gives you opportunity for a strong hit
- magic bullet - it deals heavy damage, it is a good tactic not to allow enemy to use it (remaining close to him, canceling his attacks), during the first phase almost not used or used very rarely
- fist attack - few hits, they don't harm you too much
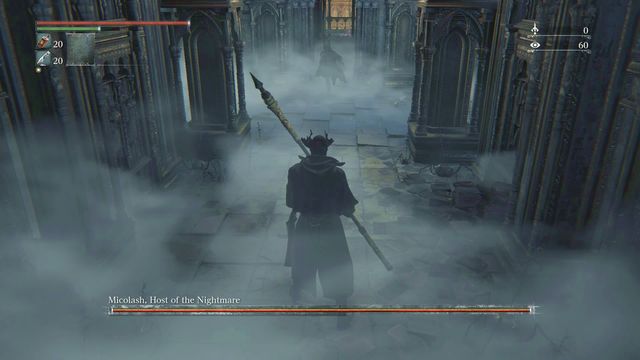 Boss will quickly run to the first balcony.
After the battle start you must find the boss. To do so, at the end of the corridor turn right, then upstairs and again to the right. Micolash will run to a small balcony where the true battle will start.
On your way you shouldn't bother too much with skeletons. If you quickly run (sprint) in the right direction you won't receive any damage. On the stairs you can find 6x Quicksilver bullets.
Important: Items can be collected after the battle by returning to that spot.
 Most frequent and almost only attack used in first phase gives you a great chance for counterattack.
The first phase of the battle is mostly about avoiding attacks of two skeletons backing up Micolash and jumping away from his only attack (releasing snakes). A good solution is to quickly kill skeletons (they can be lured away from the boss) which will allow you to focus on Micolash. It will save you from dodging right under the weapon of skeleton. It will make battle with Micolash very easy, as long as you remain aggressive (quick attacks) you can attack him by standing behind him, the boss won't be fast enough to make another attack.
Remember that skeletons will respawn after a while, and it is better to jump to side from Micolash attack (if he manages to make one), as when you fall back the snakes can still reach you.
 Crossroad, you can return for the items at the bottom after the battle.
After you reduce boss's health by half he teleports from the balcony. Run through the only exit, then turn right and upstairs. You will find yourself in a place where you can either go to the bottom or follow the boss up.
At the bottom you will find crawling creature (3x Blood Stone Shard), 3x Sedatives and two enemies. If you go even lower, you will find a woman with cleaver and a small crossbowmen. Fighting them will be rewarded with Moon Rune found under the wall at the end.
When you run up to the right you will find 8x Blood Vial near the body so you should stop for a moment. Then run without stopping, pass near two enemies. Then run into fogged territory where you will see Micolash at the top. Run after him to the very top, where he will use mirror to disappear. Then walk back down and through the alcove on the right (Frenzied Coldblood near the body). By now, Micolash should be at the bottom. Jump down and he will run ahead. Follow him (two skeletons, on the window on the left a body hangs with 6x Quicksilver bullets) and you will face a closed gate.
Now return to the top. In the place shown on the screen, when you have the mirror behind you, walk to the balcony on the right side (Blood Stone Shard near the body). Then through the hole in the window enter a room, at its end jump down (hole in the ground).
By doing so, you will once again face Micolash. Battle with him goes similar as previously (though enemy will be more aggressive). Boss will sometimes hit you with his fists, but this attacks aren't very dangerous. You must be especially cautious of magic bullet which he will now try using more often. The best tactic is not to allow him doing that - if you remain close to Micolash all the time he will prefer to use fists and snakes. Preparations of magic bullet can be also cancelled with accurate hit.
 Corridor at the end of which you can easily hit the boss.
Important: During the battle it might happen that Micolash won't want to run to a dead end. In that case he will be constantly running away from you through windows (there are three of them, one on each level). In that case, you must hit him few times, after that he should enter the balcony. It is easier to do it when, from the room with upper window you jump to the place where the battle should take place. From there, through the corridor, you will be able to attack Micolash from his back and hit him before he starts running. Then follow him (again up, he will run through the window) go left, to the place, where the level with middle mirror will be below. Jumping should force Micolash to return and run into the balcony. If it won't happen, hit him few times or run after him.
Important: Micolash can be as well killed by the tactic shown above, without jumping down from the mentioned balcony at all, instead by running after him, hitting him and forcing him to run through the window.
Important: At the bottom (level with mirror) you will find Iron door key and Kin Coldblood so you should visit that place.
 Micolash likes to run through mirrors.
In summary: you must twice run after enemy to make him go to the balcony where the real battle takes place. During this game you can ignore the skeletons that will constantly respawn on your way. If you have trouble with forcing enemy to enter the balcony try to hit him few times and make sure that you're not running from the balcony side (Micolash is running away from you, so if you run from the direction where he should go, it will make a conflict for him and he will run in the opposite direction).
Reward: Mensis Cage, 48400 Blood Echoes, lamp which you may use (Mergo Loft: middle respawn point).
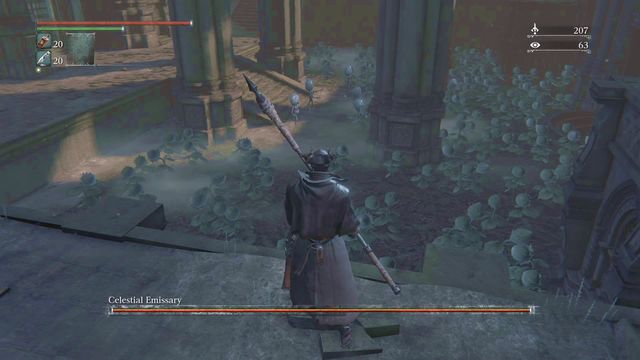 Boss is surrounded by enemies that look exactly like him.
- summon minions - during both phases in the lower part of the arena smaller enemies will constantly show, when you kill some - new will appear
- fist attack - occurs in both phases, in first (small size of enemy) it's rather harmless, in second it's much more devastating
- treading - in second phase enemy might tread the player, especially if he is very close
- quick series of hits - few hits one after another, very dangerous attack if you won't dodge first hits
- laser - when the boss spreads his "tentacles" around his head it means that he might use this magic attack, it is signalized by a circle spreading above his head, you can hide behind pillars, it is most dangerous attack of Celestial Emissary.
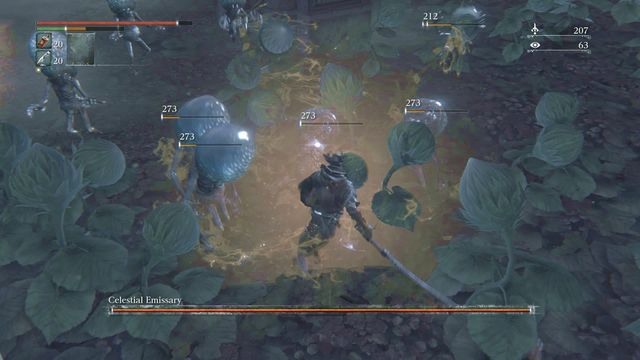 Attacks that remove all enemies at once are good choice.
In first phase of the battle you can't guess which of blue enemies showing on the arena is the boss. You can recognize him by attacking while group with an attack with greater reach and keeping attention when boss is receiving damage. Then you should focus on him and ignore other enemies.
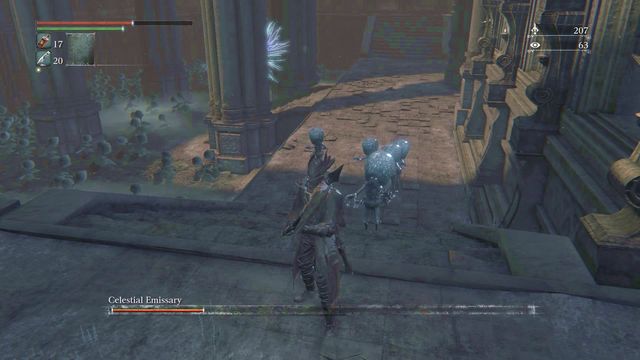 Small enemies can be lured to stairs and then left there by jumping down - they will return around.
If Celestial Emissary's minions give you trouble, you can lure them to the stairs and then to the pillars. When enemies will be getting close jump down - they won't do the same, instead they will return around, giving you some time for 1 vs 1 battle. It is a good way to check who is the true boss - in first phase he won't run after you, instead he will remain on the lower part of the arena.
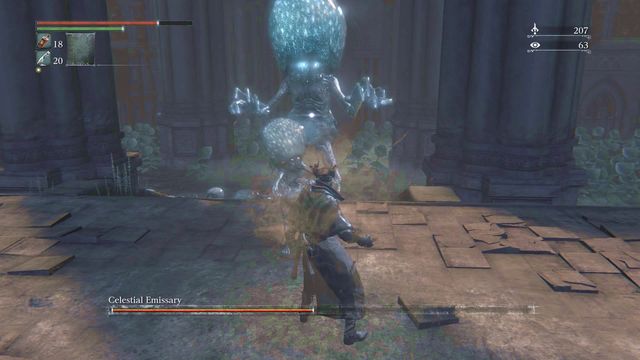 After growing, boss gains some new attacks.
When boss receives some damage (about half of his health bar) he will become much larger, so you won't have trouble with recognizing him anymore. When that happens, he will gain some new attacks, from which a series of quick fist attacks is especially dangerous. Try to eliminate smaller enemies (at least of them so that they won't surround you) or lure them away by using the tactic described above. His attacks are mostly well signalized and easy to avoid, so you should be able to make some quick hits.
 Tentacles means that he is ready to attack you with laser.
At the end of the battle boss will gain ability to use laser. It will be signalized by spreading tentacles around his head. Tactic doesn't change too much, but from now you must observe Celestial Emissary's behavior more thoroughly. If he spreads his hands around his head and starts forming a bullet, focus on him and make few dodges, one after another. You can also try to hide from this attack behind one of pillars.
Rewards: Communion Rune, 22400 Blood Echoes, lamp which you may use (Lumenflower Gardens respawn point).
 Ebrietas has many strong attacks but her back is not well protected.
- head smash - boss raises her head and then lowers it crushing the player
- tentacle hit - sweeping move that deals lots of damage; after a successful dodge it allows you to attack the boss from the back which is the best position for attacking
- charge - used mostly when player is away, this attack is hard to avoid so it is wise to remain close to Ebrietas
- blood spit - a brown liquid appears around boss head, then Ebrietas spits (twice) blood towards player, attack has long reach and increase frenzy to critical level
- catch and bite - increase frenzy, it can immediately kill you, it is signalized by widely spreading limbs
- laser shoot - one of most powerful attacks, it can be used in second phase of the battle (around 50% health points). Ebrietas shoots few lasers, three in a row; attack is done from above her head, it can be avoided only by making quick side dodges, if you fail to avoid it, it deals massive damage
- flying, air strike - head smash, similar to standard one, only difference is basic distance that enemy is flying through to get closer to player
- aura - in second phase Ebrietas can create aura that deals damage if you remain close to enemy for some time
 Use starting position to deal some strong hits.
When you move to the boss for the first time he will be neutral, the battle starts when you attack her. During successive tries Ebrietas is standing back to the player which allows you to easily get close to her and deal a fully loaded hit. Remember about this advantage, take some Sedatives as well as some of her attacks might increase your frenzy.
 Try to attack enemy from the back as frequently as possible.
Ebrietas is a large enemy which means she has long reach of her attacks. And the amount of those attacks is impressive as well. He physical attacks deal lots of damage and sometimes it is hard to avoid them. And there is frenzy and deadly laser attack in second phase of the battle. All those attacks are connected with one thing that you should take advantage of - all of them are done "in front". It means that if you find yourself behind boss you can easily deal some strong hits without worrying about taking damage.
 After stunning don't forget about some strong attacks into fragile head.
Although head is the weakest point of the boss, it is hard to hit it unless enemy will leap in a good for you way. Because of that and frontal attacks you must do whatever you can to get to the back of enemy where you will be relatively safe. Not locking your camera on Ebrietas head might help you with that. When you're behind her, deal strong hits at her torso. There is a great chance that by doing so you will stun the boss - she will automatically turn in front of you, which will give you an opportunity for finishing blow or attacking her head. Few such strong hits might again stun her, in perfect scenario you will be able to deal a series of few stuns, one after another, which will greatly reduce boss' health bar.
 Laser attack can be avoided with a series of quick, consecutive side jumps.
In second phase of the battle Ebrietas will gain some new attacks, most often she will try to catch player or spit blood. If you're frenzy is quickly increasing, use Sedatives, unless you want to say goodbye to almost whole (or whole, depending on your remaining HP) health bar.
Additionally, Ebrietas can use laser in this phase. From below, when you have only back of the boss in front of you, you might not see this attack coming, which will probably cost you your life. Additionally, watch out not to block yourself in some point of the arena. If you will stand in front of the boss making a correct dodge won't be hard - when you see attack is charging (blue aura), start dodging. Remember, there will be three shoots one after another, so it is better to make one dodge too much than get hit by this very strong attack. Then remember about returning to the back of the enemy, another laser attack won't occur too fast.
Reward: Great Isz Chalice, 28 800 Blood Echoes, lamp which you may use (Altar of Despair respawn point).
 Mergo's Wet Nurse is a living tank.
- frontal hit with blades - boss raises two of her many hands above head and then hits them to the ground, giving you a moment for attack; this attack can be also avoided by remaining in front of Mergo's Wet Nurse, perfectly between two blades
- series of hits - boss walks ahead and makes few consecutive swings; despite long reach of attack it is easy to avoid it and get to the back of the enemy, which is a perfect spot to deal few hits
- spreading blades - this attack usually occurs after series of hits, it might deal damage to player standing behind enemy
- a wide swipe from behind - used usually on the right side of the player, very strong and with long reach, easiest way to avoid it is keeping long distance
- sticking knifes - one of attacks that usually ends series, all blades are knocked in one point ahead of boss
- fog - most powerful attack, the boss is creating a violet fog on the arena, then starts walking forward and keeps attacking. Though it is easy to get to the back of Mergo's Wet Nurse (a small chance of being hit, potential small damage), the difficulty is that another enemy shows during the fog, an impostor. Take notice that he usually attacks from your left. The easiest way to avoid this attack is to run around the arena for about one minute, but it will be more effective to combine moving with hitting Mergo's Wet Nurse back.
- disappear - boss disappears for a moment and then shows on the edge of the arena
Mergo's Wet Nurse is a resistant enemy that attacks mostly in the same, repetitive way - a series of hits, sticking knifes/hit in front, then a wide spread. Learning this pattern will allow you to dodge (usually on the left) and get to enemy back.
 Getting to enemy back gives great possibilities for attack.
You should take position at enemy back especially when he is making a series of blade swings and walk ahead not taking too much interest in player. Avoiding her shouldn't be hard then, move back a bit and make two-three dodges under the blades. It will allow you to get to Mergo's Wet Nurse back, where most of attacks won't reach you and you can deal a few of them yourself. Despite that, still watch out for blades and for enemy turning around after she ends her combo.
 After each attack there is a while when you can quickly run towards enemy and deal one, two hits.
There is another way to defeat enemy, slightly longer, but safer. If you're not good at getting to Mergo's Wet Nurse back, you can fight while keeping her in front of you. After each of her attacks there is a short moment when you can run towards her and attack her. Just remember about making your weapon longer, deal one, maybe two hits and quickly dodge away. Best effects can be achieved by combining two methods: get to enemy back when it is possible, jump forward and attack after every completed attack when there is no chance for getting to enemy back.
 Battle in fog is the hardest part but it gives you opportunity to deal lots of damage.
Things get more difficult when enemy summons fog to the arena. It usually happens after depleting around 1/3 of hit points, fog is usually used 2-3 times (if you deal damage quickly, you will reduce the amount of such attacks by killing boss quicker). Mergo's Wet Nurse at that point starts to walk forward and keeps doing the attack you well know. It creates a great opportunity to get to her back, what you should immediately do. Impostor might give you some trouble, he will attack you from time to time - sadly, his attacks are as deadly and strong as the normal ones, done by main boss. Running around the arena might be solution to them as enemy won't be fast enough to get to you (run opposite to clock direction, enemy shows always on the left, if you will have the border of the arena on the right you will avoid all his attacks), but in that case you will lose a great opportunity to deal lots of damage. A good solution is to combine this tactic by both attacking Mergo's Wet Nurse and making lots of dodges while running around.
This is definitely the hardest part of the battle, if you're stuck in it it will be better to focus on avoiding attacks by running. The fog will disappear after around one minute and the impostor will fade away. The battle will take more time, but if "normal" part of it doesn't give you any trouble in might be a better way to win.
Reward: One Third of Umbilical Cord, 72 000 Blood Echoes, lamp which you may use (Wet Nurse's Lunarium respawn point).
 Gehrman attacks immediately after you enter the arena (in case of failure during first encounter).
- wide scythe swing - enemy will make a wide scythe swing and move for a long distance at the same time. The moment when Gehrman prepares for attack gives you a chance to give a shot and stun him
- drag player with a scythe - boss drags the player towards himself with a scythe, if (when being close to Gehrman) you won't make a dodge, boss will throw you to the air and immediately crush you (very large damage)
- roll and shot - after making his weapon shorter (around 3/4 health bar) boss will make faster attacks, his rolling is usually ended with a swing or shot (it cancels your current activity)
- series of hits - few fast attacks finished with a shot
- explosion - from about half of the battle Gehrman will gain a green aura, when he spreads his hands after that a powerful explosion occurs, you must get to safe distance
- swing in the air - another powerful attack, Gehrman jumps to the air and makes a powerful swing with his scythe, you should move as far out of reach as possible or in the opposite direction, under the boss
- stun and finishing blow - in third phase boss can stun player and then make finishing blows
You start the battle with Gehrman if in final conversation with him you refuse to give away your life. Final ending depends on that, if you sacrifice your life this battle won't occur.
Boss is mostly using physical attacks so wear adequate clothing. If you want to focus on stuns and dealing finishing blows, don't forget about bullets and runes that increase brutal attacks damage.
 Scythe on the back? An attack will occur in a moment, and if you shoot before that you can stun the boss for a moment.
During the first phase boss is using long scythe. Gehrman moves slowly, but don't let it fool you - when he gets close to player one of two very fast attacks occurs: scythe swings or dragging enemy. Remember about dodging immediately before the swing, it will also allow you to go around enemy and deal one or two attacks. Scythe swing also gives a perfect opportunity to stun enemy with a shot and then make a finishing blow. Such tactic might give you lots of profits if you shoot at right time. Otherwise you risk an attack that you won't be able to dodge.
 When boss shortens his weapon, be ready for frequent rolls ended with a shot.
In second phase Gehrman shortens his weapon. His attacks becomes slightly faster, he will come to the player slowly and in final moment he will roll. After the roll a quick hit will occur or shot that cancels your current activity. It is still possible to stun Gehrman but it is harder (faster attacks), if you have trouble with that you should make your weapon longer and make fully loaded attack in the right moment so that enemy receives damage immediately after rolling. By doing so you can, by moving constantly back, deal single hits and Gehrman won't have a chance to deal serious damage.
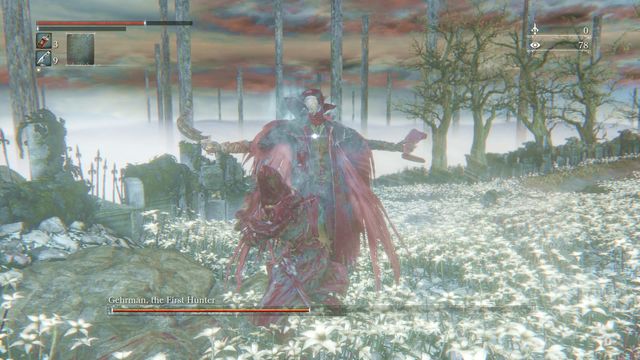 During the change to third phase of the battle you can safely deal some damage to boss.
In third phase of the battle (about half of boss health bar) he will stand for a moment (you should attack him then, he is powerless) and gain a green aura around himself. Now he will have some new deadly attacks added to the previous ones (he will use both long and short weapon and attacks from previous phases). One of them, easier to avoid, is explosion - Gehrman will spread his hands (as at the beginning of this phase) and load his energy for a moment. After that a powerful explosion occurs - you better be out of its reach. During the load time you can attack enemy but you risk being hit by explosion. Second attack is jumping and releasing airflow at player. It's much harder to avoid that attack, it is better to be away from the boss than run in the opposite direction, behind his back. Both attacks deal massive damage and might be decisive for the outcome of battle.
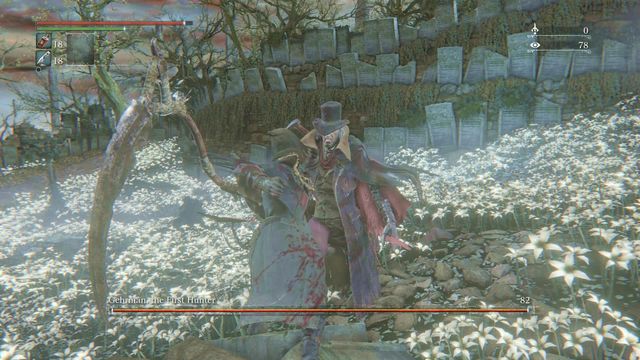 Right timing will give you a chance for dealing a finishing blow.
The battle is similar as before, when boss is holding scythe watch out for dragging and attacks with long reach, and now for air jumps as well. When he shortens his weapon you must additionally watch out for his rolls and shots as he can stun you and make a finishing blow. The tactic doesn't change, it is still possible to stun enemy and make a finishing blow.
During the battle you can choose two tactics. First one focuses on stunning and dealing finishing blows. It might be very profitable, but you must learn the moment when the bullet stuns enemy (short time when he prepares to swing). Second tactic is to keep enemy at distance and fully loading attacks when he gets close. With Hunter Axe it is possible to throw away and knock down enemy almost with each attack. After knocking him down you additionally have some time to quickly deal more hits. It is slightly safer and more time consuming (distance to enemy), but effective tactic.
Reward: Old Hunter Badge, 128000 Blood Echoes, game ending or (after meting certain conditions) battle with another, final boss.
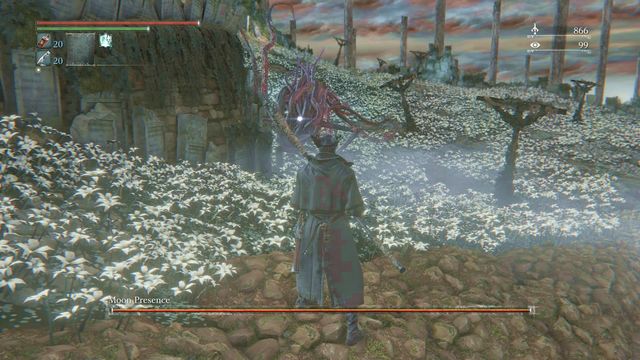 You fight Moon Presence on the same arena as Gehrman.
- paw attack- the opponents executes three successive attacks in a combo; it is relatively easy to avoid those attacks and dodging the third one allows you to get behind the boss's back and land your own two, or three.
- jump and crush - if you get away from the boss, he tries nearing you by taking a long jump; the damage it deals is high but, the attack is signaled beforehand and you only need a single dash to the side to dodge it
- tentacle lash - the opponent lies his left hand on the ground, takes a swift turn, attacks the player with tentacles and tips you over; you can dodge the attack by dashing back.
- white orbs and dripping blood- the boss summons several white orbs that pop. Then, in their place, blood starts dripping from the sky. If you are hit, you will be unable to use Blood Vials for around 20 seconds, which is represented by the icon in the upper-left corner (right next to quick items).
- red blast - a powerful AoE attack that leaves you with ONE health point. Although this sounds threatening, things are not that bad - after the attack, there are several seconds, for which the boss remains motionless. If you dash up to the opponent right after you take damage, there is a high chance of replenishing all of the lost health and deal lots of damage, at the same time. After the boss's health drops to a third, the attack, additionally, makes it impossible to use Blood Vials (for around 20s). You can try to dodge this attack by getting away from the boss, to the other end of the arena, or by dashing behind his back but, if you take damage, try to replenish as many health points as possible.
The fight with this boss takes place only if you have consumed 3x One Third of Umbilical Cord beforehand. Then, after you refuse to give your life to Gehrman and defeat him, the fight starts automatically. It is easier than fighting the hinter, but the depleted Blood Vials after the previous fight makes it definitely harder. Still, you can easily let yourself be killed and start the battle over, after you have replenished your supplies- you will not have to fight Gehrman any more.
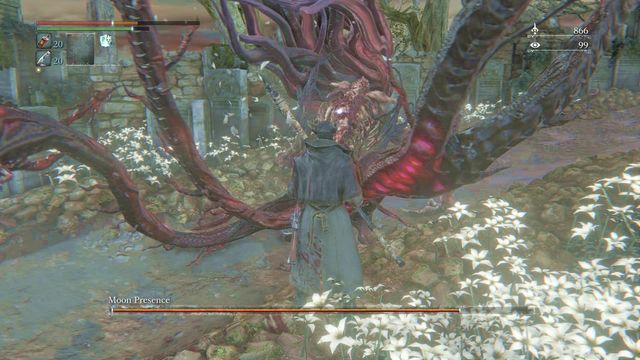 Dodging at the right moment allows you to attack the boss's back.
During the final fight, it is a good idea to remain within medium distance of the boss. He attack mainly with his paws and these are not difficult to dodge. Especially good opportunity for you presents itself after you have dodged the third attack in the row. Thanks to this, you get behind the boss's back and he walks a bit forward, which exposes his back to your attacks. You can use this tactic effectively, throughout the entire battle, because Moon Presence keeps using this attack, even though he receives some new ones.
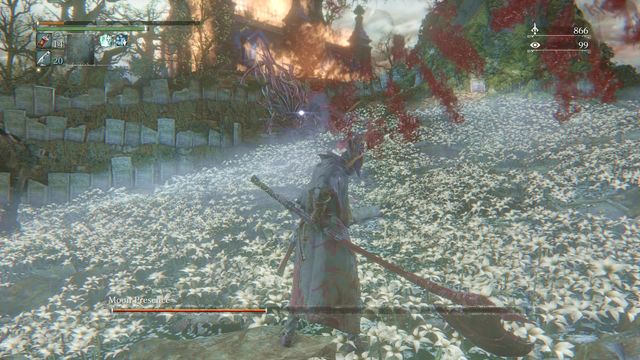 If you get hit with blood, you cannot use Blood Vials.
More or less, starting with the middle of the fight, you will have to watch out for two more AoE attacks. The first one is the white orbs that pop after a while. Then, the arena is rained with blood and you cannot use Blood Vials temporarily. You then need to rely on regaining your health or, without taking the risk, keep escaping from the boss to avoid taking damage.
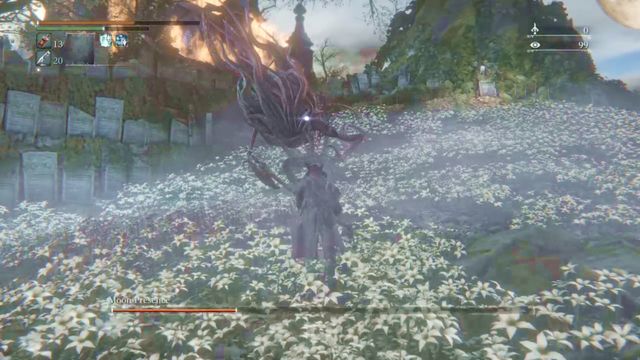 After the powerful AoE attack, you still have a moment to dash up to the boss and replenish some of your health.
The other attack is the powerful blast that covers the better part of the arena. For this reason, dodging this attack may be impossible. Therefore, it is best to get prepared for what follows the blast. - the boss's inactivity for 4-5 seconds. You can then easily dash up to him and land several blows, which will restore some (or even all) of the lost health. This becomes especially important when the boss only has a third of his health left. Taking damage then makes it temporarily impossible to use Blood Vials. Therefore, it is important that you dart towards the enemy and regain your health.
Summary: try to avoid the boss' physical attacks, which gets you behind his back. This is an ideal position for attacking. Repeating the dodge- dodge-attack pattern will suffice to win the battle. In the case of magical attacks, make sure that you are not near the white orb and replenish your health after each red blast. If you are low on health, and you temporarily cannot use Blood Vials, wait through the moment and get away from the boss, as far as possible. Wait until the negative effect wears off and allows you to heal.
Reward: 230000 Blood Echoes.
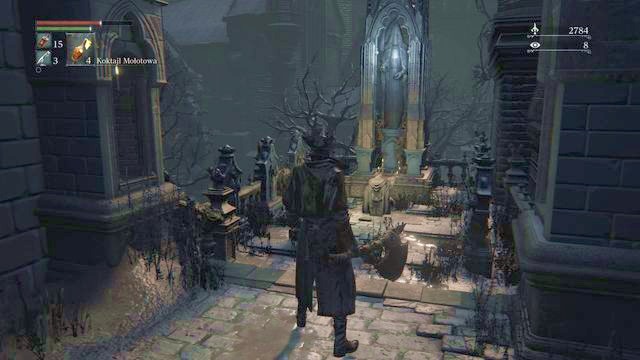 The praying Alfred, the first meeting.
You meet Alfred for the first time at the Cathedral ward. You find him when you exit the Oedon Chapel through the exit on the left. Then, a bit ahead, you will walk into a smaller chapel, where you can open the passage to the Old Yharnam. Walk around that building on the left side and climb up the stairs and go a bit ahead. Cross the chapel and turn right to find the kneeling Alfred.
While talking to Alfred and after you agree to work for him, you receive 3x Fire paper and a new gesture Pray.
Note: If you have not fought Cleric Beast yet, you can summon Alfred to help you. You find the appropriate spot opposite the lantern in central Yharnam, after you climb down the stairs, across the gate ahead (there is an opponent with a torch next to it). Under the barrier on the left, there is a not and, after you read it, you can summon the ally by ringing the Beckoning Bell. Alfred can also help you in battle with the Blood Starved Beast, before you descend into the chapel, find the spot on the stairs.
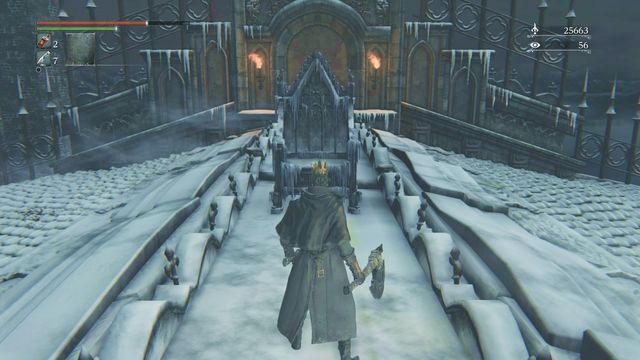 Put the crown o and approach the throne.
After you get to the Lost Cainhurst Castle and defeat Martyr Logarius, pick up his crown and approach the throne. After the cutscene, at the end of the rooftop, a passage reveals. Inside, you find the Vileblood queen Annalise. From the table to the right, you can pick Unopened Summons.
 You meet Alfred while going down to the Forbidden Woods.
Return to Alfred with the summons. You meet him next to the descent into the Forbidden Woods, on the balcony. Give him the item back and you will receive the Wheel Hunter Badge and a gesture Church Bow (male).
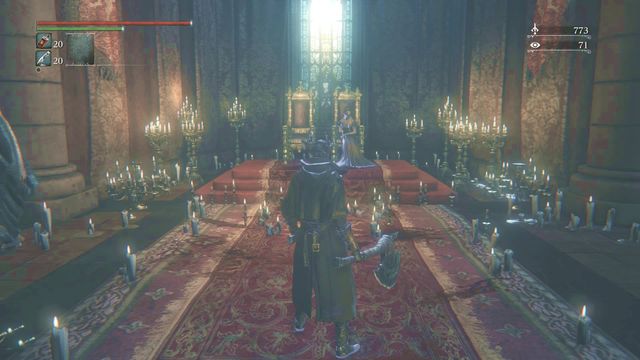 Although Alfred kills the queen, you can still revive her.
Alfred goes now to Queen's Chamber - do the same and get there quickly, using the tomb in Hunter's Dream. In the chamber, there is Alfred over the corpse of the queen. Talk to him and you receive a gesture Roar.
Note: If you want to revive the queen, from her remains, collect Queenly flesh.
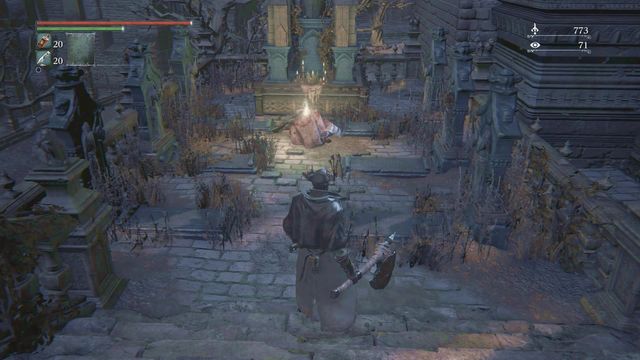 The man in this quest commits suicide. There is nothing left for you but go search for his corpse.
Finally, return to the location, where you first met Alfred, in Cathedral Ward. There, you find his corpse that you can loot. This way, you obtain a rune - Radiance Caryll Rune, connected with the Executioners covenant.
 Put the crown on and approach the throne.
Annalise is the Vilebloods leader. To talk to her, after you visit the Cainhurst Castle and defeat Martyr Logarius, pick up his crown and approach the throne. After the cutscene, at the end of the rooftop, a secret passage will be revealed. Inside, you encounter the Vileblood queen on the throne.
If you want to join the covenant, approach the queen. After you make the oath, you receive Contamination rune (the covenant symbol), Cainhurst Castle Badge and Respect gesture.
Note: While Vileblood (with the rune on) for killing hunters and some NPCs (e.g. Alfred) you receive blood dregs. Take one of them to the queen to receive the Deep Respect gesture
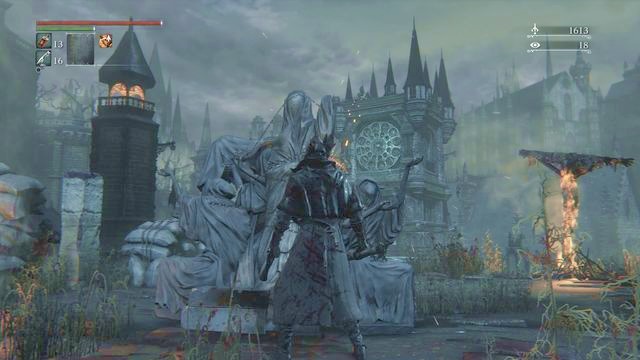 The death of the queen can be averted.
Annalise intertwines with Alfred, who kills her after he gets the Unopened Summons, that you find in the chamber. Then, after you go to the Queen's Chamber, you find him over the remains of the queen. Approach the throne and pick up Queenly Flesh from the corpse.
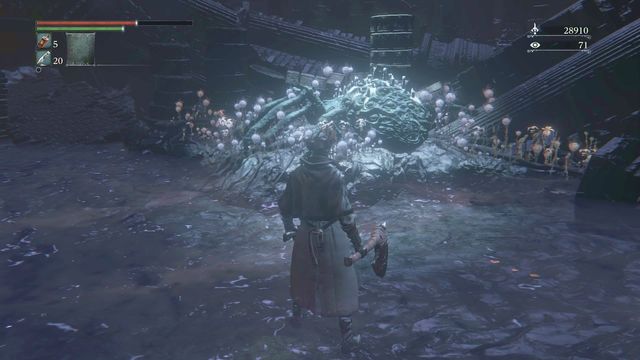 The altar that revives the queen of the Vilebloods, Annalise.
After the fight with Ebrietas, Daughter of the Cosmos in Upper Cathedral ward, you can approach the altar at the end of the location (the highlighted spot). After the queen is killed, bring here the corpse and lay it on the altar (if you have it in your equipment, appropriate option appears). Then, return to the Queen's Chamber to find out that Annalise is fine.
 Remember to take cover from the hail.
Djura is a hunter that you meet in the Old Yharnam. Each time you walk under the tower, atop of which he is, you will be fired at. Djura is, therefore, by default, hostile towards you but, after you meet certain requirements, he will be neutral towards you.
 Atop the tower, you will fight Djura.
After you climb the ladders to the top of the tower, you will meet the hunter that fired at you. The fight is mainly about dodging his shots, because they deal the highest damage (if you come too close). Also, you can try a little ruse and push the opponent out of the small area, with a combo of blows (make sure that you do not fall yourself). Thanks to defeating the opponent, you will not be fired at, the next time you are around. Also, you receive 875 Blood Echoes and Powder Keg Hunter Badge.
Note: If Djura falls down and you are unable to pick the badge he dropped, it is possible that you need to load this location once again and climb the ladder again. The item is next to the weapon that the hunter used.
You do not really need to fight with Djura. For this to be possible, talk to him the first time you are in Old Yharnam and do not attack him (do not climb the ladder), also, leave the other hunter alone. Instead, deal with the Blood Starved Beast. Then, let yourself be killed by one of the opponents with a bag on his back - you will then end up in the Underground Jail in Yahar'gul, The Unseen Village. There, find the location, where you can fight Darkbeast Pearl - there is no need to kill it, you only need to visit the boss.
 A conversation with the neutral Djura, after several conditions have been met.
Then, get back to the location Church of the Good Chalice. Return to Djura from behind, thanks to which he does not spot you and does not start shooting. Climb up the ladder - instead of attacking you, the hunter stands in the center and it will now be possible to talk to him. For Djura to remain neutral, it is necessary that you pick the "Spare the Beasts of the Old Yharnam". You will then receive the Powder Keg Hunter Badge and a gesture Brush Off Dust. Djura will not fire at you anymore, if you do not attack anyone, within his sight (the opponents in the front of the tower will attack you anyways).
Djura becomes hostile (permanently), when:
- you attack the hunter,
- during the conversation, you pick the "Hunt the Beasts of the Old Yharnam" dialogue option,
- you agree to spare the beasts, but you attack the opponents in front of the tower (this does not go for crows).
You start at the clinic that takes its name after Iosefka, who offers shelter here. At the very beginning, after the first visit at the Hunter's Dream, and up until you visit Cathedral ward, you can return here to talk to Iosefka at the door, and receive a Iosefka Blood vial each time (only if you have used up the previous one). After you have been to Cathedral ward, return here to get to know about a safe place that you can then tell the dwellers of Yharnam about.
 The road to Forbidden Woods into the cave.
To meet with z Iosefka, you need to gain access to Forbidden Woods. There, in the upper part of the village, past the dog cages, you find a cave entrance. As you cross the cave, you find a ladder to Central Yharnam, and a bit ahead, to Iosefka Clinic. You can do this at two moments into the game:
- before fighting Rom, The Vacuous Spider,
- after you defeat Rom, the Vacuous Spider.
If you need One Third of Umbilical Cord you need to wait and visit the clinic after the boss fight.
In the clinic, in the corridor on the left (from the window that you climb to enter for the first time), you find a door on the right . Iosefka is up the stairs but, she warns you against climbing the stairs. After you get upstairs, a fight ensues immediately.
 While behind the bench, you can avoid some of the attacks, but you are then vulnerable to getting stuck, while performing dodges.
The fight with the opponent is difficult but you can make it easier, if you watch out for the signaled attack that deals lots of damage. Your opponent releases snakes from her hand and, if you manage to avoid them, the opponent remains motionless, for a moment, which exposes her to attacks. As for the whip and bullets, you can avoid taking a hit by remaining behind a bench or a chair (the whip combo deals lots of damage). Still, you need to watch out while dodging, because you may get stuck, because it is especially difficult to maneuver the character in this narrow room. It is much better to exit the room and fight by the stairs, where there is a bit more room. For winning the fight, you receive 3200 Blood Echoes and Oedon Writhing rune.
 Iosefka during a meeting later into the game.
Iosfeka, after the fight with Rom, The Vacuous Spider, can be found in the same place as before. However, while climbing the stairs, you will not receive any warning and after you enter the room, you note Iosefka lying on the bench. She is neither talkative nor dangerous. Kill her to receive One Third of Umbilical Cord.
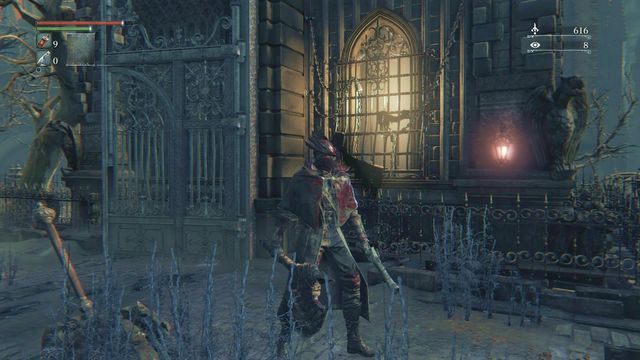 The window to the girl's room.
In Central Yharnam, on the square with the fountain, there is a gate, from behind which you can hear a music box playing. In the window, you can talk to a small girl. To get there, you need to visit the Aqueduct and exit at the other side. During the conversation, agree to find her mother and you receive a Tiny Music Box (you can use it while fighting Gascoigne).
 In front of the gate to Cathedral ward, turn left to find the brooch
After the fight with Father Gascoigne, approach the closed gate, over the stairs, the key for which you receive. While in front of the gate, go left and reach the end, where you can jump down to a roof below. On the corpse, you find a Red Jeweled Brooch.
Take the item back to the window. It would be best if you kept the brooch for yourself, which you can trade for the red Gem to upgrade your weapon with. Tell the girl about a safe place, i.e. Oedon Chapel. After you give information about Iosefka Clinic you receive from Iosefka (after you visit her) Lead Elixir. However, you do not find the cloth in the sewers, then, which results in the quest being ended prematurely.
 After the conversation with the girl, return to the sewers and kill the giant pig.
Then, reload the location and go to the sewers. In there, find the wild pig in the final tunnel. If you have returned the brooch, or told the girl about the safe chapel, after you defeat the pig, you find the Red Messenger Ribbon.
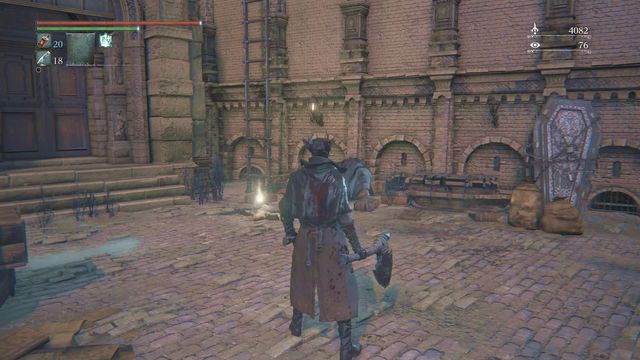 However, you find the other girl dead.
Your next step is to return to the window, where you have talked to the girl. Do this after you have defeated Rom, the Vacuous Spider. In the window, this time, you find the girl's older sister. Give her the Red Messenger Ribbon, and load the location again (e.g. by using the Hunter Badge). All in all, go to the same location, climb down the ladder, where you find a single opponent and the dead girl. Loot her body for the White Messenger Ribbon.
 You can talk to Gilbert after you leave Iosefka Clinic, at the beginning of the game.
Gilbert is one of the first, if not the first dweller of Yharnam, who you can talk to across the window. You find him in front of the first lit lantern. By talking to him several times, throughout the entire game, you will learn several hints and curiosities about the game world. After you defeat Father Gascoigne (before the fight with Cleric Beast) or after you defeat both of them, Gilbert will also act on your side - you receive Flamesprayer from him.
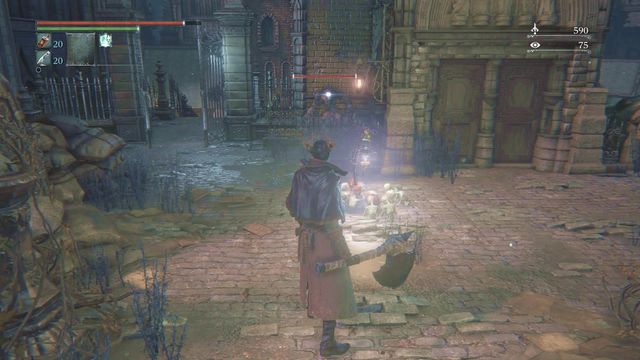 After you return here, you find Gilbert turned into a beast.
Gilbert cannot be saved. You will see it, after you have defeated Rom, the Vacuous Spider. Gilbert breaks out the bars in his window and will be around as a beast, which attacks you. For defeating the opponent, you will be rewarded with Clawmark rune.
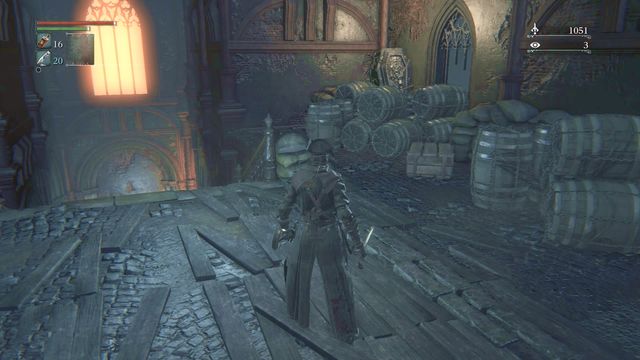
In the Aqueduct in Central Yharnam, around several dog cages, you can enter sewers from the side presented in the screenshot. Right after you enter the building, smash the crates and jump don, carefully, onto the wooden platform below. Take a look around and you find two hanging corpses here - cut the ropes to get them down (you can return for them later on). However, your destination is the small room to the right of the window that you climbed to get here. Outside, you find hunter Eileen. Talk to her and you will receive 4x Hunter Badge. After you talk to her again, you will also be rewarded with a gesture Shake Off Cape.
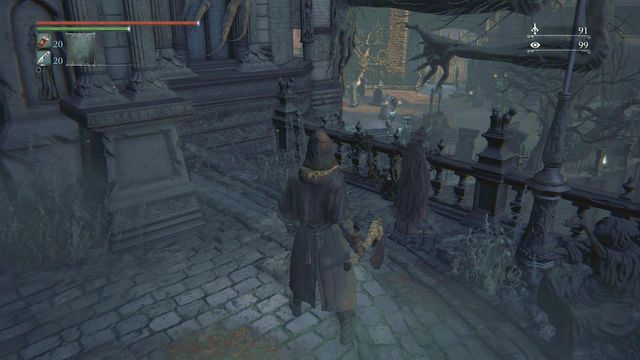 You find Eileen right after you leave Odeon Chapel.
After you open the gate to the central yard (two larger opponents with axes) right after you cross the exit across Odeon Chapel, on the left, you find Eileen (if you have already talked to her in the Aqueduct). You receive a gesture from her and information that advises you against going to Oedon Tomb.
 Help Eileen during the fight in Oedon Tomb.
After you reload the location, that is where you find Eileen (the lantern in Hunter's Dream is currently disabled, return to the chapel and return to where you fought Gascoigne). She is fighting other hunter. Help her (make sure that you do not hit your ally too often or she will turn against you)/ From the corpse of Henryk, pick up the Heir rune, talk to Eileen and you will receive an additional gesture Approval.
Note: During the fight, Eileen may die, which makes completing her quest impossible. After Henryk arrives here (he appears as the first one) do not wait and attack him. Deal as much damage as possible, before Eileen joins the fight.
 Eileen on the stairs in front of the Grand Cathedral.
The last time that you meet Eileen is after you deal with Rom, The Vacuous Spider. She is lying wounded atop the stairs to the Grand Cathedral. Talk to her to learn about an enemy hunter. Also, you receive a gesture Wait.
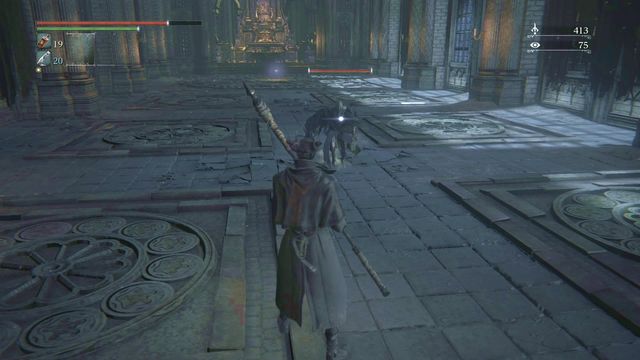 The fight with the hunter in the Grand Cathedral is very demanding.
Inside, you find the hunter. The opponent slowly approaches you but, right before the attack, he has the tendency to disappear for a moment and appear on one of your sides to deal damage with a shot. For this reason, throughout the entire battle, you should keep him at a distance and hit when he is dashing towards you or, if your weapon is fast enough, do not get too far away and try for a short distance fight. He opponent like jumping away and using his powerful firearm - make sure that you do not take two bullets in a row, or you will also be exposed to a powerful finishing attack, which may be the final nail in your coffin. The hunter once uses Blood Vials, unless you cast Numbing Mist first. He can do the same so, be careful - if you are affected, you will temporarily be unable to use Blood Vials. It is best to dart out of the Grand Cathedral then and wait through the moment - the hunter should let you go at the door. Then, after it is possible to heal yourself, return inside and continue fighting. This trick can also be used, when the opponent is transforming his weapon, while losing health points - it is possible that if you disappear from his sight, he forgets to transform the weapon again and will have lost health in vain, or die without you intervening.
After the fight, collect the rune Blood Admiration. Then, in front of the Grand Cathedral, talk to Eileen - from her, you receive Crow Hunter Badge and rune Hunter (connected with joining the Hunters of Hunters covenant).
Note: If you miss any of the quest's stages, you will be attacked by Eileen if you visit the Grand Cathedral after the fight with Rom, The Vacuous Spider.
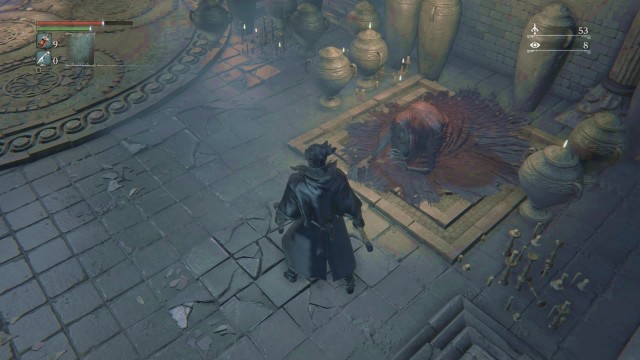 The questgiver may die also - he drops the Formless Oedon rune.
After you enter Cathedral ward, talk to the NPC there (to the right). Do this twice and you receive information on safety in Oedon Chapel. The other safe place is in Iosefka Clinic - get back to her and talk to her, across the locked door. From now on, you can mention either of the places to the NPCs that you meet during your exploration.
Note: After you send the first person to the Odeon Chapel, talk to the NPC inside again, to receive the gesture Triumph. In general, it is much more profitable to send people to the Odeon Chapel, because at Iosefka Clinic you only receive the Blue Elixir/Lead Elixir. The other thing, a much more important one, is that the heroes turn into blue opponents, because Iosefka conducts experiments on survivors. After you visit the clinic again (across the cave in Forbidden Woods), you will be able to kill them for items that they would normally drop after their death.
Note2: remember to talk to NPCs as soon as possible. Defeating some of the bosses (e.g. Vicar Amelia, Rom, the Vacuous Spider) makes this impossible later on.
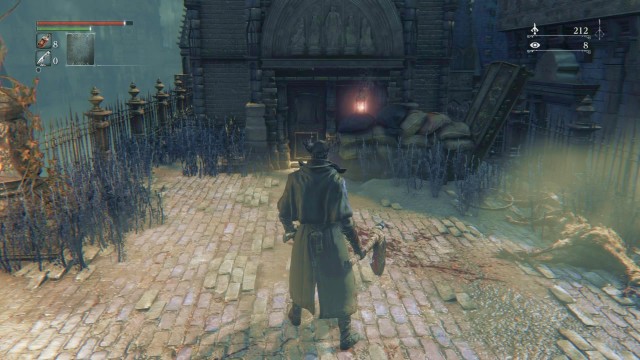 In front of the old lady's house, you find a baying dog.
You can find the Old Lady in Central Yharnam. You get to her either after you exit the sewers, or from the other side, as you head towards the lantern, across the house (the gate on the left)m and ahead, among dog cages.
After you send her to the chapel, you first receive nothing from her but, later on, she will be nicer towards you. After you talk to her, you receive 1, 2 and 3 Sedatives respectively. Then, the lady disappears for a moment and leaves a letter behind. After she is back, you can receive more Sedatives, but this time she disappears or good. You can find her body in the chapel, with more Sedatives.
 The door with Arianna behind it.
Arianna is in Cathedral ward. While facing the gate to the main yard, climb to the very bottom, on the left. After you defeat the opponents, talk to the person behind the door on the far left. As soon as you kill the three bosses, he asks you about safety.
In Odeon Chapel, you receive gesture Bow from the person. Also, you can use the blood that you receive from the person, which has healing abilities (up until you kill Rom, the Vacuous Spider). After you kill Micolash, you can take the NPC to Oedon Tomb, where Arianna is having a child (right after you climb down the ladder into the flooded room). Kill the child (she also dies, automatically), and you receive Bury Arianna and One Third of Umbilical Cord.
The Skeptical Man is in the window, opposite the door in which you talked to Arianna. If you told her about safety, talk to the window twice and the man will return the question. Tell him about the lace, where you do not want him do go, because he will then go to the other one (if you tell him about Iosefka Clinic, you will then met him in the Odeon Chapel and the other way around). There are no interesting events, connected with the man, After his death, you only find 3x Pungent Blood Cocktail.
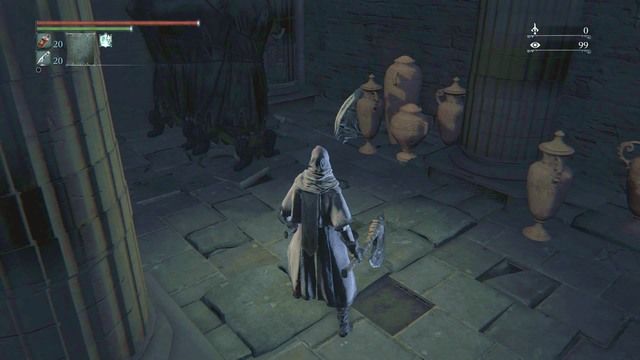 Put appropriate outfit on to talk to Adella.
To meet Adella, you need to defeat the Blood-starved Beast in Old Yharnam. Thanks to this, new opponents - catchers- appear around the location. After you are killed by an opponent of this type, you will get to the Underground Jail. Adella is at the very bottom so, exit thee cage and go right, where you find stairs. To talk to her, you need to have the outfit from the Healing Church (e.g. White Church Garb, Black Church Garb, Gascoigne's Garb). Talk to her twice and she asks you if you know of any safe place.
In the chapel , you receive from her a gesture Church Bow (female). Also, you can take advantage of her blood treatment, whose functioning is similar to Arianna's blood.
Note: Adella may kill Arianna, out of jealousy, if you use Arianna's Blood more than three times. For safety, you may either not use the blood, or kill Adella after you receive the gesture.
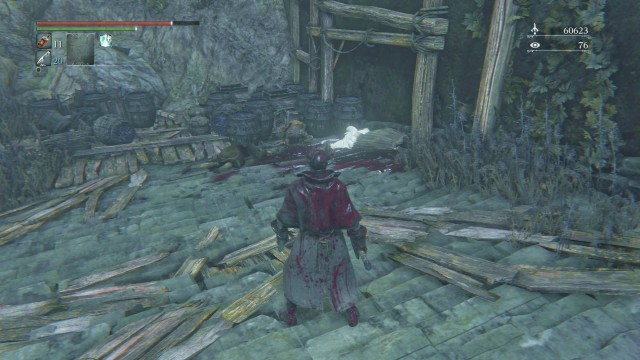 You meet the man on the roof, among corpses.
You meet him in the woods, on the roof of the house right past the opponent, who fires his cannon at you. To get to the top, jump down, to the roofing below, right after you enter the dark room. There, on the left, you find a ladder over which you get to the top. The next passage leads to the roofing on which you find the man.
You can send him to the chapel, but he will then wait in front of the entrance and kill every survivor, one after another. For this, you receive a Beast Blood Lump.
 If you take several steps back, on the rooftop, the enemy will get stuck in the door and make it easier for you to deal damage.
As a matter of fact, the man is not who he seems to be. The reason, for which he kills others is that he is a powerful beast - a miniature version of Darkbeast Pearl. To find this out, attack him on the rooftop, several times, to see the transformation.
Also, you can attack him after you send him to the chapel, where he will be taking quite a damage, after his transformation. For the fight, you receive the rune Beast.
In Bloodborne, there are three covenants that you can join. Each one has its leader and they all follow different rules. This is mainly important for multiplayer mode. The players may rise in ranks of their covenants by fighting each other, if they happen to be members of enemy groups.

To join a covenant, you need a special rune and to make an oath, by putting the rune on. Covenant runes occupy the last, fourth, slot in rune slots and they are different from the other runes with a much brighter background. Activating a rune for a given covenant means that you automatically become a member of the group. However, at any point, you can go to Hunter's Dream, to change the rune, which results in changing the active covenant.
After you meet certain requirements, you receive badges from leaders, which allow you to buy special weapons or outfits.
 Queen Annalise.
The leader of the covenant is Annalise, the Queen of the Vilebloods. To find her, after you defeat Martyr Logarius in Cainhurst Castle, you can put on his crown to reveal a secret passage. By kneeling in front of the queen, you can make an oath and receive rune Contamination (if you are at the brink of dying, it increases the rate of health regeneration).
Vilebloods are enemies towards Executioners - two members of different covenants, after they appear in the same world, become hostile.
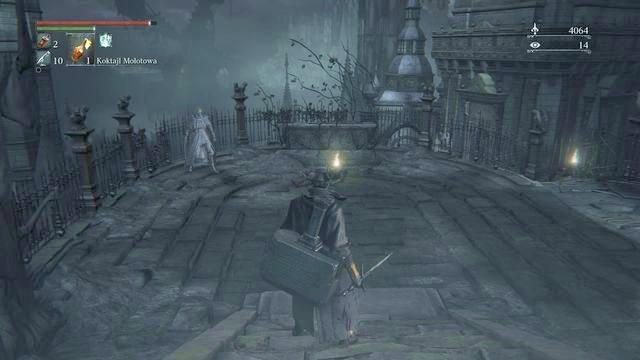 Alfred, along his path to Forbidden Woods.
A covenant that you can access via Alfred (the quest connected with him). You find him, for the first time, in Cathedral ward, behind the chapel which you cross to enter Old Yharnam, and then while coming down to Forbidden Woods. After you complete his quest (which is connected with Annalise), Alfred gives you rune Radiance (it increases the number of health points restored by Blood Vials).
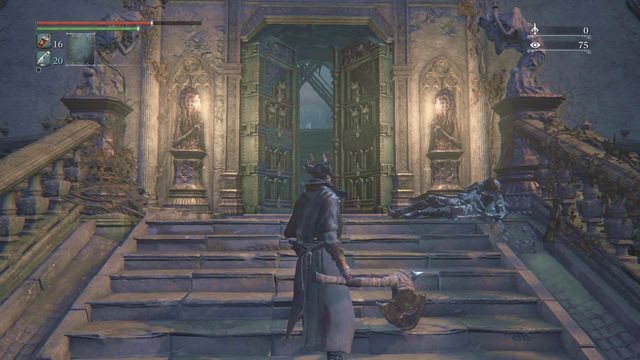 Eileen, in front of the Grand Cathedral.
The last covenant is led by Eileen. To obtain the rune, you need to complete her quest that consists of four stages. Remember not to miss any one of them or Eileen will then be hostile towards you, in Grand Cathedral. Hunter Rune, which is the covenant rune, increases the rate of constitution regeneration.
In the case of two players, of the same covenant, being present in one world, there is a chance that they will become enemies.
 Put on women's clothes - achievement unlocked.
In total, there are 34 trophies that you can obtain in Bloodborne. These are 20 brown, 7 silver and 6 gold ones, as well as a platinum one. Below, you can find a comprehensive list of all of them, along with descriptions of how to obtain them. 25 of all rewards are hidden.
Name
Way to obtain
Chalice of Isz (hidden)
Obtain Chalice of Isz (defeat Ebrietas, Daughter of the Cosmos)
Ailing Loran Chalice (hidden)
Obtain Ailing Loran Chalice (defeat Amygdala)
Chalice of Pthumer
Obtain Chalice of Pthumer (defeat Blood-Starved Beast)
Rune Contact
Obtain any Caryll rune
Blood Gem Contact
Obtain any Blood Gem
Ebrietas, Daughter of the Cosmos (hidden)
Defeat the boss
Celestial Emissary (hidden)
Defeat the boss
Matyr Logarius (hidden)
Defeat the boss
Amygdala (hidden)
Defeat the boss
Darkbeast Pearl (hidden)
Defeat the boss
Hemwick Witch (hidden)
Defeat the boss
Blood Starved Beast (hidden)
Defeat the boss
Cleric Beast (hidden)
Defeat the boss
Mergo's Wet Nurse (hidden)
Defeat the boss
Micolash, Host of the Nightmare (hidden)
Defeat the boss
The One Reborn (hidden)
Defeat the boss
Rom, Vacuous Spider (hidden)
Defeat the boss
Shadow of Yharnam (hidden)
Defeat the boss
Vicar Amelia (hidden)
Defeat the boss
Father Gascoigne (hidden)
Defeat the boss
Name
Way to obtain
Nightmare Lecture Building (hidden)
Get to the Lecture Building
The Source of the Dream (hidden)
Find the hidden entrance to the Abandoned Old Workshop
The Choir (hidden)
Gain entrance to the Upper Cathedral ward
Cainhurst Castle (hidden)
Visit The Lost Castle Cainhurst Castle
Rune Master
Obtain an extremely precious Caryll Rune
Blood Gem Master
Obtain a gem of, at least, level 15
Weapon Master
With Blood Rock, upgrade any weapon to the top level
Name
Way to obtain
Hunter's Craft
Obtain all of the items that allow you to use magical effects (e.g. Tiny Tonitrus, Choir Bell, etc.)
Hunter's Essence
Obtain All weapons
Yharnam, Pthumerian Queen (hidden)
Defeat the boss, you find her at the bottom level of the Pthumeru Chalice Dungeon
Childhood's Beginning (hidden)
Defeat Gehrman after you have consumed all three pieces of the One Third of Umbilical Cord
Honoring Wishes (hidden)
Defeat Gehrman without consuming the One Third of Umbilical Cord bits.
Yharnam Sunset (hidden)
Agree to Gehrman's last request and give your life
Name
Way to obtain
Bloodborne
Obtain All of the previous trophies


 Broken Sword: The Serpents Curse Game Guide & Walkthrough
 Banished Game Guide & Walkthrough
 Batman: Arkham Origins Game Guide & Walkthrough
 Bulletstorm Game Guide & Walkthrough
 Batman: Arkham Asylum Game Guide & Walkthrough