

Welcome to the unofficial guide to the 360 version of Bionic Commando action game. This guide consists mainly of a very detailed walkthrough of all three acts of the singleplayer campaign of the game. You'll find a lot of important things on how to complete mission objectives, how to eliminate enemy units and how to survive in the dangerous environment. I've also added clues on where to look for hidden collectible items. The second chapter of my guide contains a lot of hints written mostly for less experienced players. It also describes available challenges and presents a list of all achievements.
Good luck and have fun playing the game!
Stranger
THE BASICS
- Bionic Commando is a rather challenging game, so if you don't think of yourself as an experienced player you should consider playing on normal difficulty level. This will allow you to avoid plenty of stressful situations and you won't have to repeat large sections of the game several times. Sadly if you decide to choose these settings you'll lose a chance to grab at least 175 achievement points.
- I would strongly recommend that you spend a lot of time practicing how to use your bionic arm and how to swing on a rope properly. It may not seem that important at first, but later on you'll have to be very precise while trying to survive or collect bonus items.
- It's always a good idea to defeat enemy units by throwing objects at them, so you should consider using these moves as soon as they've been unlocked. If you want to use firearms at all costs HIKER is always a good idea, however you should also be on a look out for grenade launchers, rocket launchers and standard grenades.
- Remember to STAY AWAY from irradiated zones, even if the radiation is weak. One false step or one big jump can change that in a manner of seconds and in some cases you won't have enough time to escape to safety.
- Each time you've entered a new area of the map take your time to look around. Doing this will allow you to find valuable supplies, eliminate additional enemy units or to complete optional challenges.
- Find a compromise between eliminating enemy units and completing new challenges. I would also recommend that you go through the list of available assignments each time you've started playing the game after you took a long break from it.
SAVING THE GAME
Sadly Bionic Commando uses user-unfriendly save system, mostly because you won't be allowed to collect hidden bonuses and complete unfinished achievements by replaying certain levels. You'll have to collect and win everything as you progress for the first time, so it's always important to play well and to be very thorough. Make sure not to leave certain areas until you did everything that could have be done. Thankfully the exits are always easy to spot, because the game will use mostly tunnels to transport you between levels.
Early during the course of the campaign mode you shouldn't complain about how often your status is saved, however later on this becomes an issue. Bear in mind that each time you die you'll not only have to start playing from the last checkpoint. You'll also have to collect bonus items again, as well as win optional challenges (even if you've already won achievements tied directly to them). I would recommend to be extra careful while exploring areas with a lot of water, cliffs and radiation. The same goes with collecting some of the bonus items. Notice that in some levels you can control when you want the game to be saved by using relay stations right away or after you've explored the area, killed all enemy units and collected all hidden items.
BONUSES FOR BIONIC COMMANDO REARMED OWNERS
Bionic Commando gives you a chance to gain access to a bonus content, however you must have Bionic Commando Rearmed installed on your hard drive. Here are the requirements:
Prototype gun (it will replace your standard pistol in Bionic Commando) - start Bionic Commando Rearmed and during the game find the FSA icon (Area A level).
Purple matrix - start Bionic Commando Rearmed and during the game collect twelve Yashichi's. Afterwards go to Area 0 sector and head through an opened door.
Retro costume (it will replace Spencer's standard costume in Bionic Commando) - make sure that you've installed Bionic Commando Rearmed on your hard drive.
You can acquire codes in Bionic Commando Rearmed by going through the Database section in the main menu. Write the codes on a card or memorize them. Start Bionic Commando, go to Options -> Extras -> Unlock Features and enter the codes QUICKLY (otherwise they won't work).
Hidden bonuses: 5
Level walkthrough: Start the game by moving forward. You'll soon get to a corridor which is being patrolled by one of the guards. Press the right trigger on your joypad to zoom in the view. Move to the left and eliminate the guard with a single shot to his head. Inspect the left corridor once he's gone and you'll find the first bonus item.
You may proceed to the next corridor. Be careful, because you'll soon encounter a new guard. Keep heading forward and eventually you'll get to a room occupied by several enemy units. Once they're gone use a nearby staircase to get to an upper floor. Turn right and explore the area in front of you to find the second bonus item.
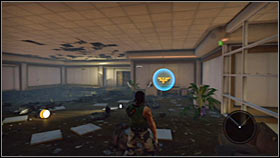
Return to the lower floor either by using the stairs again or by jumping down. Ignore the fact that the lights will go down when you enter a new room, because you won't be surprised by new guards. Take your time to find the third bonus item. Get to a new corridor and attack enemy units from a larger distance. Head forward once they've been eliminated.
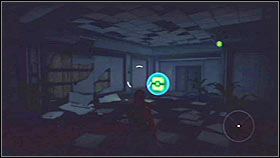

The fourth bonus item can be found in the next room and it'll be located to your left. Aside from the collectible don't forget to collect ammunition as well, especially if you've already fired a lot of bullets. Find a new staircase and proceed to a lower level. Kill a guard there.
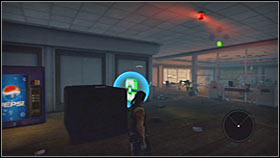
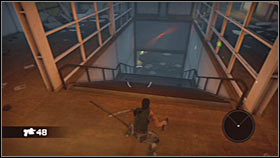
The fifth bonus item can be found to the left of the final staircase. Make sure to collect this item before moving on, because you won't be allowed to return for it. Use the stairs and you'll be rewarded with a cut-scene.
Hidden bonuses: 4
Level walkthrough: The first training lesson will be to swing three times. Locate a metal pole above your position and attach yourself to it by pressing the left trigger. Don't release the trigger until you've finished the lesson. Your next challenge will be to get to a small platform located in the distance. Start swinging on the rope and don't wait to the last second with the release. Thankfully you'll receive small clues from the game on when to make the jump.
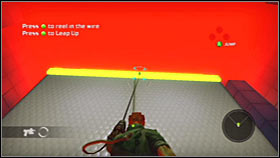
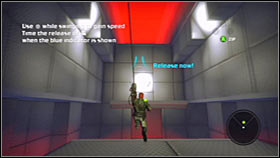
You'll now have to make a series of jumps and your objective will be to reach a small platform using two horizontal poles. Each time you're swinging focus on releasing the trigger at the right moment and don't forget to attach yourself to a new pole right away. Once you've succeeded you'll advance to the fourth lesson. Approach the wall and attach yourself to the upper platform. Press the A button to leap up.
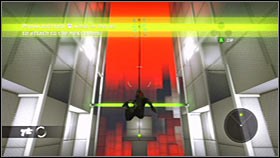

Keep running forward and make sure to listen to some useful hints about the negative effects of radiation. Grab the nearest metal bar and swing properly to get closer to the second one. The third pole can be found to your left and reaching it shouldn't be a problem. Eventually you'll have to land on a small platform. Turn right and leap up once again.
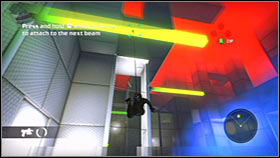
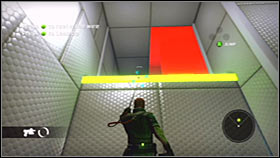
Make a jump towards the lower floor. Ignore the hard landing, because your improved boots will protect you from any health losses and this will also apply to the rest of the game. Get to the upper platform, turn right and make a jump towards the abyss. Grab the shining element once you're in the air and reel yourself in. Use a nearby pole to get to the checkpoint.
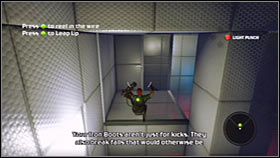
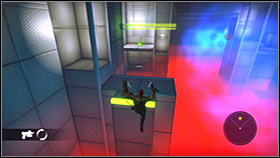
Listen to a few hints on how the relay stations work in the game world. Follow the instructions of the narrator and perform a couple of Zip Kick attacks. This should allow you to get rid of three red objects. Ignore the relay station for the time being and instead turn around. Locate a metal pole leading to an unexplored area of the training zone.
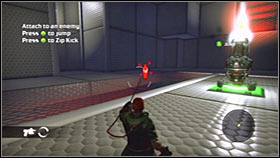
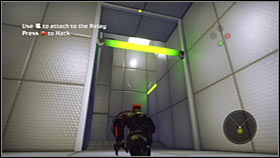
Keep heading upwards and once you're at the top use a metal pole to reach a new platform safely. Proceed to your right and carefully approach the ledge. You should notice the first bonus item in the middle of the shaft. Make a jump and try to grab it once you're in the air. If you fail use the hook quickly and go back up to retry.
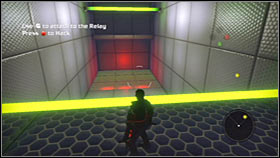
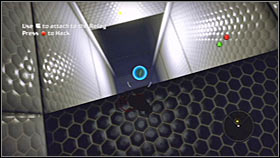
You may return to the big room with the relay station. This time fire a hook at the station and press the B button to hack into the system. Start off by choosing Rip action from the list. Ignore the training lesson and go to your left. Attach yourself to a yellow pole and use this pole to get to the second bonus item.
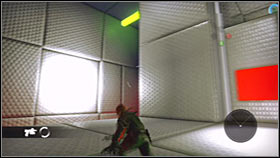
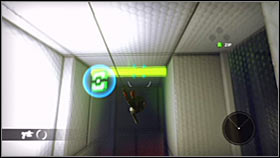
Go back to the area with the relay station and this time follow the instructions of this lesson. As a result you'll have to attach yourself to the red object. Press the B button to rip it. Return to the relay station, hack into the system and choose Death from Above. Approach the ledge and notice the third bonus item directly under your position. Grab the object when you're in the air and press the Y button a couple of times to complete the landing.
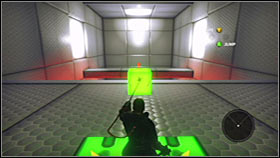
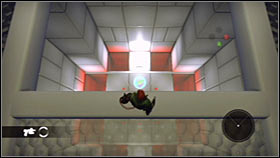
Hack into the relay station and this time choose Punch Up from the list. Wait for the game to load this new lesson and look up. You shouldn't have any problems collecting the final fourth bonus item. Once it's in your possession you can complete the lesson by punching the box in the air (Y), jumping (A) and hitting it (B).
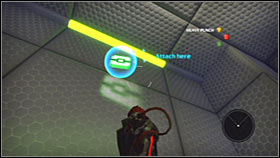

Use the relay station and choose Throw from the list. In this case you must grab the box by pressing the Y button and throw it at your target by pressing the B button. In order to end the tutorial you must hack into the system and choose Exit Tutorial from the list. Watch a cut-scene.

Hidden bonuses: 1
Level walkthrough: Exit the building using the moves presented to you during the training session. Once you're outside make a jump towards the main street. Don't worry, because you won't die, however you can attach yourself to one of the objects before the landing has occurred.
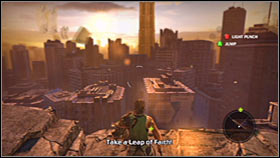
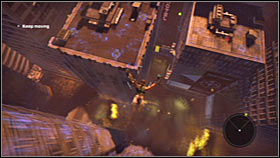
Notice the first bonus item in your vicinity. In order to get to it you should climb on top of a nearby neon sign, however you can also attach yourself to a wall of one of the buildings. This should allow you to make a successful jump towards the item.
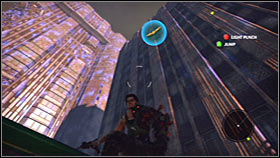
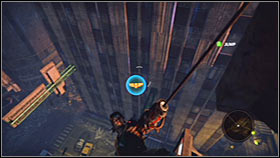
There aren't any enemy units in this area, so you can proceed to the designated area of the map right away. Once you've arrived at your new destination head into a small tunnel located to your right.
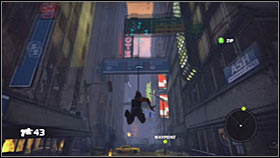
Hidden bonuses: 4
Mission walkthrough: Start off by moving forward. Climb on top of a nearby object and you'll find yourself standing next to the first bonus item. Lower yourself using the rope and start swinging in order to catch this object while you're still in the air. I would recommend that you wait with this jump until a small earthquake has ended, so you won't lose balance and fall.
Keep going straight until you get to a relatively large crater. Proceed to your left and make sure to avoid radiation. Eventually you'll find the second bonus item. Head on to your right. Don't forget to use the hook to move freely, but be careful not to fall. Attach yourself to the train tracks and you'll be allowed to collect the third bonus item.
You may proceed to the next section. Use the bionic arm frequently, so it won't take a lot of time for you to reach other areas. You'll soon encounter a small group of enemy guards and it would be a good idea to complete some of the basic combat challenges while trying to get rid of them.
Make sure it's safe and get on top of a large metal structure located in front of the tunnel. Grab the metal pole and start swinging in order to land on a small platform. You'll have to be very precise, because otherwise you'll fail. You should also know that you can't use the buildings to get there. Take the fourth bonus item and use the tunnel to leave this area.
Hidden bonuses: 5
Level walkthrough: Keep heading forward. Consider using your bionic arm along the way, however watch out for large holes in the ground and other tricky areas. Turn left when you get to the corner and make your way to a destroyed section of the freeway. Get ready to dispose of a small group of enemy guards.

Approach the ledge once it's safe and make a jump towards the metal bar. You can now start swinging on the bar or you can make a standard jump. Either way focus on getting your hands on the first bonus item. RETREAT from the irradiated area once this object is in your possession, because it's going to be very easy to die here by mistake.
There's a relay station nearby and obviously you'll have to get to it. Start off by eliminating a small group of hostile troops. Once they're gone use the hook to hack into the station. Close the new window and go back to the destroyed section of the freeway. Take your time, because you'll have to listen to new orders. Use your bionic arm to attach yourself to a train and rip it by pressing the B button rapidly.
Make a jump towards the large hole of the building. Attach yourself to this structure once you're close enough and leap up to find yourself standing inside the building. Get ready to eliminate new guards along the way. I would strongly recommend using a firearm here, especially since you had a chance to collect a lot of ammunition. A large group is waiting for you near the stairs.
Kill all enemy units and make sure to explore smaller rooms along the way, because one of the rooms will contain the second bonus item. Exit the building and land on the ground level (remember that you won't lose any health). The third bonus item can be found behind one of the huge pillars.
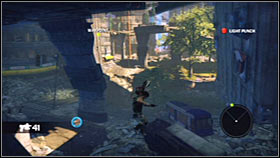
Proceed towards the next checkpoint, however make sure to explore the ground level in order to defeat nee enemy troops. Make sure to fulfill a few challenges while trying to kill them. The second group is waiting for you on the bridge and they have to die as well.
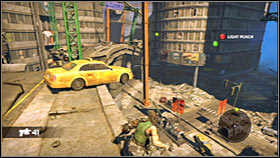
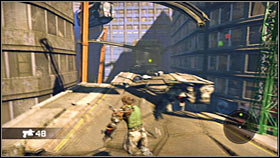
Explore the area above your current position and use the rip ability to take down a new train. Notice that doing this has unveiled the location of the fourth bonus item. Get to the train tracks and pick up this object.
You should now return to the area where you've defeated the first group of enemy soldiers. Get on top of a very large metal structure and you'll notice the fifth bonus item in the distance. Take it, go back to the freeway and head forward until you get to an entrance to a new tunnel.
Hidden bonuses: 5
Level walkthrough: There are some mines located in front of you, but you must stay away from them for the time being. Head on to your left and make a jump towards the metal structure. Use this structure to reach the first checkpoint which is going to be the entrance to the subway.
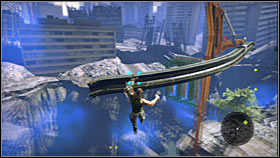
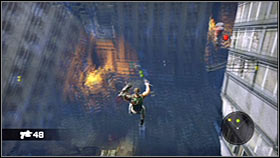
You'll encounter a small group of enemy soldiers in front of the building. Kill them before going inside. The next group can be found near the stairs and it would be a good idea to surprise them. Eventually you'll get to the exit. Go to your right. Collect the first bonus item and use your hook to grab a new train. Notice that the train has landed on enemy guards. :-)
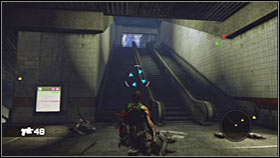
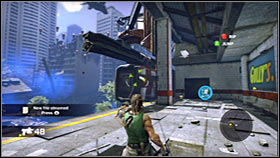
Proceed to the ground level and focus on securing the area in the vicinity of the relay station. Once it's safe hack into the system and notice that you've automatically disabled some of the nearby mines. You'll now have to return to the start area in order to collect a previously unaccessible object. In order to do that return to the balcony where you've found the train.
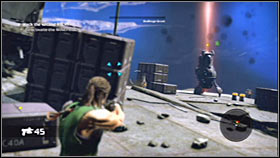
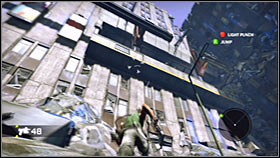
Head on to the corridor with the stairs. Thankfully you won't encounter any new soldiers along the way. Eventually you'll get back to the minefield. Start using the mines to get closer to the second bonus item. Make sure to be very precise, so you won't die here. Return to the relay station once the new object is in your inventory.
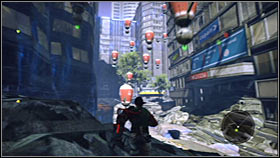
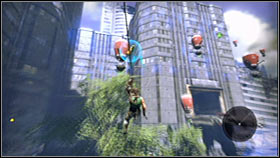
This time you should head on to your left and eventually you'll find a new minefield. Use the mines to travel quickly, but avoid falling into the abyss. Examine the large building to your left and use the opening to head inside. Take the third bonus item before moving on.
Remain inside the building and use the stairs to get to the upper floor. You should be able to find a larger opening. Notice a train in front of you and use your hook to send it crashing into enemy guards. Proceed to your left and don't forget to use your bionic arm whenever possible. Land on a new section of the freeway and take your time killing nearby soldiers.
There's a second relay station in this area, but first you should get to the roof of a large building located to your right. Doing this will allow you to get your hands on the fourth bonus item. Head down, kill other enemy soldiers and hack into the relay station. Doing this will disable the second minefield.
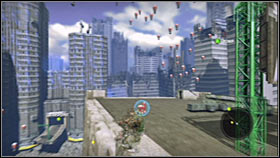
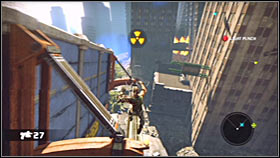
Inspect the area to the left of the relay station and you should be able to locate the fifth bonus item. Notice that in order to get to it you must proceed to an upper platform. Make a jump towards the nearest mine and start using other mines to get closer to the bonus object.
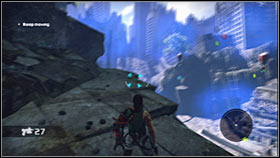
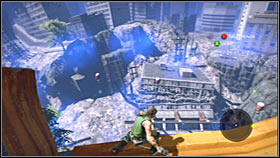
There are three mines in the vicinity of the bonus item and they're far away from each other, so each jump has to be very precise. In addition to that you'll also have to watch out for radiation. Once you've collected the object return to the main section of the minefield and proceed towards the large buildings. Use the tunnel to leave this area.
Hidden bonuses: 6
Level walkthrough: Proceed forward and listen to a short radio transmission along the way. Stay away from the left building, because otherwise you would have to deal with large doses of radiation. Instead get to the metal structure. Use the beam to get closer to a new building and make a jump towards it. Use your bionic arm to get to the roof.

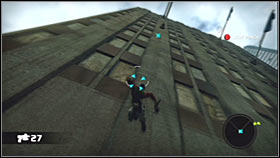
Notice that a pod has landed on the roof of the building and you should use your hook here. Doing this will allow you to get your hands on a HIKER which basically works like a powerful shotgun. Test this new weapon on a nearby group of enemy soldiers. You can reach them by landing near their position.
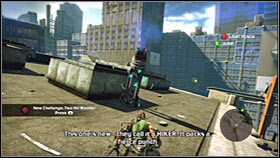
Your next objective will be to get to a new building located in the distance. I would recommend using other buildings located to your left by attaching yourself to them with a bionic arm. Once you've reached the entrance get rid of a small group of enemy soldiers. Head inside and get ready to kill other enemy units along the way.
Inspect the first staircase you encounter during your exploration of the building. Go to the upper floor and you'll find the first bonus item. Head back down and proceed to a second staircase. Eventually you'll exit this building. Take your time to watch a new tutorial movie. Instead of testing this new move right away make a jump towards the right building wall.
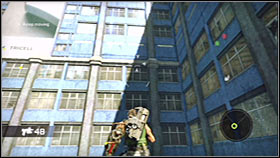
Notice that you can't go up because of high radiation levels. As a result you'll have to begin moving left until you've reached a new section of the roof. Explore your surroundings to find the second bonus item. You may finally test how Death from Above move works. Keep pressing the Y button when you're in the air and you'll land on a large pipe made out of concrete.
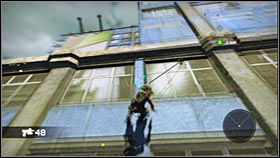
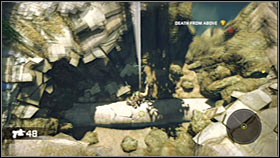
Enter the tunnel and start moving towards the first relay station. Once you've reached the exit use the hook to get to an upper level. Ignore the station for the time being and instead proceed to your left. You should be moving next to the abyss. It shouldn't take you too long to find the third bonus item.
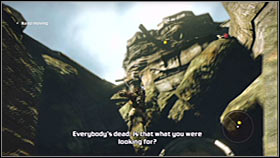
You may finally use your bionic arm to get to the relay station. I guess you won't be surprised to encounter enemy troops in this area. Use a HIKER or a standard pistol to get rid of them and hack into the station once they're gone. Head down and don't forget to collect a new HIKER from a nearby pod.
You'll have to go through the tunnel again. Be careful, because at least two guards are going to be standing inside the tunnel. Kill them from a large distance before going back outside. Proceed to the upper level and finish off a new group (don't forget to complete some of the HIKER challenges).
You'll now have to reach a new tunnel located in front of you and this can only be done using the previously disabled mines. Take it slow and each time you make a new jump focus on grabbing a new mine. Notice the fourth bonus item floating in the air. Perform a jump from the nearest mine and make sure that you'll be able to grab the ledge afterwards, because otherwise you'll die and you'll have to start over again.
Enter the tunnel after you safely land on the other side. You'll encounter a large group of enemy soldiers just around the corner and I would recommend using grenades to kill them. Exit the tunnel. Ignore the new cut-scene and instead turn around. Leap up to find the fifth bonus item.
You may now begin fighting the Biomechs. Start off by attacking the mech found on the upper platform. The first step is to keep running while remaining near the machine. Wait for the mech to begin setting up a stationery gun. Approach the machine from the back (quickly!) and attack it using the zip kick. Repeat this action a few more times and you'll succeed.
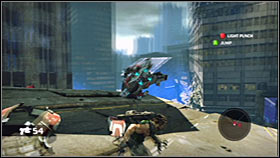
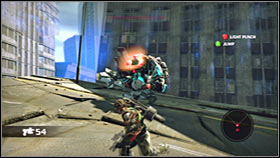
Before you begin firing at the second mech you should take some time trying to acquire the last sixth bonus item. Approach the entrance to the museum and use your bionic arm to get to the top. Avoid radiation and land inside a small alcove to find this object.
Once the object you were looking for is in your inventory head down and start attacking the second mech. The tactics here stay the same, however you may consider fulfilling a couple of side challenges. Head into the tunnel when you're victorious.
Hidden bonuses: 5
Level walkthrough: Keep moving forward and don't forget to continue using your biotic arm. Notice that your character has serious problems getting out of the water, so your main concern from now on will be to walk only on stable surfaces. You'll soon hear a warning about enemy snipers. Head forward and then turn left. The first bonus item can be found near the water.

There are two passageways leading to the area occupied by the snipers. You may choose the main path or you can proceed to your right to find an alternative route. Either way, you should now focus on eliminating all snipers. Start off by getting on top of the nearest building.
Each time you plan on eliminating a new sniper you should approach him quickly and perform a melee hit. Doing this not only will allow you to save ammo, but you'll also complete side challenges. Try securing this entire area and jump between buildings using your bionic arm to avoid drowning.
Once you've taken care of all the snipers return to the building where you saw the first sniper. He's probably still alive, so you'll have to use one of the holes in the wall to reach him. Neutralize him quickly and notice the second bonus item in one of the rooms. You'll have to go through a smaller hole to get to this object.
Don't leave this area just yet. Instead locate a beam hanging out of the wall of the building you're standing in. Attach yourself to this object and start swinging in order to reach the third bonus item. Remember to prevent the main character from landing in the water!
The fourth bonus item can be found near one of the smaller buildings located on the right side of the main street. I would recommend that you acquire it by landing on the small platform from the roof. Continue moving towards your current destination.
Watch out, because you may end up being attacked by a few additional snipers. Make a leap towards the building located closest to the checkpoint. Ignore the bridge for the time being and inspect the area under it. You shouldn't have any problems finding and collecting the final fifth bonus item. Get on top of the bridge and notice that you're being attacked by a new sniper.
Start heading towards the last sniper and make a few jumps along the way, so you'll remain on the destroyed bridge. Once you've arrived at the final area deal with the sniper by throwing a few swift blows and enter the tunnel to end this mission.
Hidden bonuses: 5
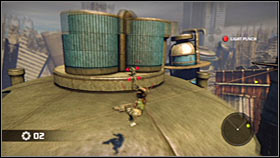
Level walkthrough: Start off by heading forward. Ignore new snipers and focus on getting closer to the reservoir. Head on to your right and perform a few jumps. This will allow you to get to the partially flooded first bonus item. Exit the water quickly, avoiding unnecessary complications.
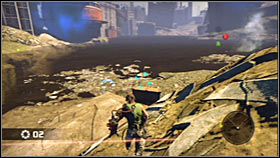
You'll now have to take part in a series of jumps and leaps. Each time you must attach yourself to a new structure, because ending up in the water in most cases will result in the main character dying after a few seconds. I would recommend that you inspect building roofs and other high areas in order to eliminate as many snipers as possible.

The second bonus item can be found near the large green tank. Before you decide to take it make sure to kill all nearby snipers, because their presence would make this process a lot more difficult. Return to the green tank once they're gone and attach yourself to a small pipe. Swing on the pipe a few times in order to reach the object you were looking for. Make sure to grab on to something before you touch the water!
Keep heading towards your current destination. The third bonus item is located under the large pipe connecting two huge cylinders. Use the pipe to get to the second tank and then head down to collect your reward.
You may proceed to the next section of the map. Don't forget to eliminate other snipers along the way, so you won't have to worry about them later on. Watch out for a sniper sitting on a large pipe, because he may be difficult to spot. Eventually you should be able to get to a large warehouse with a green roof.
Your current destination is located to your left, but for now you should move to your right. Focus on reaching a large red tank. Explore all the balconies of the tank and you'll come across one of the snipers. Proceed to his location, turn around and you'll notice the fourth bonus item. Take it and return to the warehouse area.
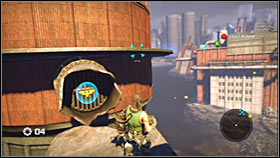
The final fifth bonus item is floating in the air near the warehouse and sadly getting it is going to be extremely difficult. Start off by finding a small pipe in one of the corners of the warehouse. Lower yourself and start swinging. Make the jump once you're in the optimal position. The next step is even more challenging - not only you'll have to grab the object, but you'll also have to avoid landing in the water by grabbing the warehouse wall as soon as possible. Good luck! ;-)
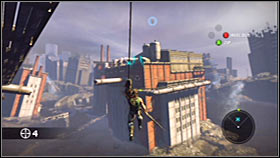
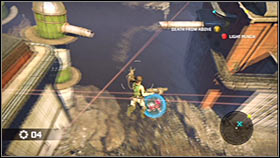
Return to the warehouse roof and this time proceed to your left. Make a jump towards the first pipe and from there you should be able to get to the second pipe. Get to a new roof and find the pod to collect a sniper rifle.
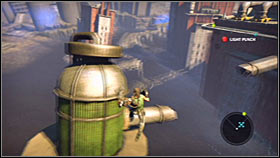
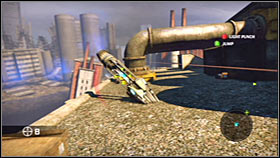
I would recommend that you test your new toy as soon as possible, especially since new enemy snipers have appeared in the area. Each time you plan on hitting something you must press the right analog to zoom in the view. Once it's safe proceed to the upper section of the roof and eliminate one more sniper from a large distance. He's located near the exit.
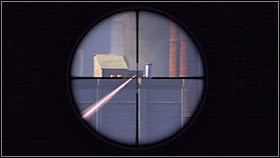
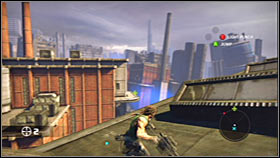
You can now decide that you want to keep using the sniper rifle or you can return to the pod to take HIKER again. Start moving towards the exit. This means you'll have to perform several long jumps along the way. Get to the freeway and make sure not to land in the water.
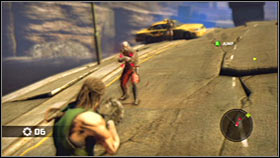
Start moving forward and avoid touching the water. You're soon going to be attacked by a new Biomech. Use the method described earlier to disable the machine. Once this is done focus on killing remaining enemy troops. I would recommend that you get to the tunnel as soon as possible, because new snipers may arrive in the area in the meantime.

Hidden bonuses: 3
Level walkthrough: Head forward and keep moving towards a large building located in front of the entrance. Make a jump towards the scaffolding and head upwards. Make sure not to lose balance and fall, because ending up in the water could result in the main character dying. Approach the entrance to the building.
As you've probably noticed by now, the first bonus item is floating above your character. Stand under the object and reel yourself in to collect it. Head on to the next section and take a moment to watch a tutorial movie. Once it's over approach a fork-lift truck. Lift the machine in the air (Y), jump (A) and punch it (B).
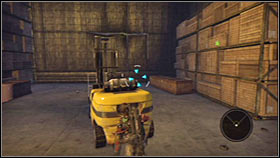
If you've done everything according to the plan you'll see that a large hole has appeared in one of the nearby walls. Obviously you'll be allowed to jump through the hole to get to the next section of the map. If you've missed, perform the exact same actions with one of other blinking objects. Make sure to choose grenades from your inventory before moving on.
A large group of enemy soldiers is stationed just around the corner and I would recommend using grenades to get rid of them. Ignore a new bonus object seen along the way, because you'll return to it later on during the game. Keep heading forward and eliminate single enemy units as you go. Retreat behind the corner when you encounter a larger group.
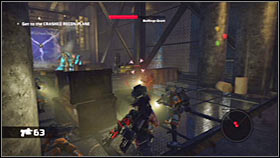
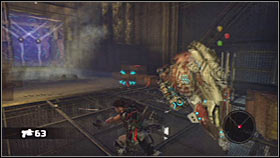
Make sure to eliminate all enemy troops before moving on, because a Biomech is waiting for you in the next corridor and you'll want to focus your attacks on the metal beast. Thankfully winning shouldn't be a problem. Once the mech has been eliminated inspect the area in front of you and gain access to the upper balconies.
Locate a passageway next to large pillars and eventually you'll find the second bonus item. Once this object is in your possession return to the main corridor. Head down and begin moving forward until you reach a new warehouse. You'll now have to throw a fork-lift truck at the wall, so you'll unlock the exit.
Make sure to use your bionic arm to attach yourself to metal bars along the way. Eventually you should be able to get to the crane and from there you'll be allowed to jump to the third bonus item. You must release the hook at the very last second and you also have to prevent the main character from drowning. Once you've taken the item proceed towards a nearby tunnel.
Hidden bonuses: 8
Level walkthrough: Make a few steps forward and watch a short cut-scene. Start heading towards the bus and you should be able to reach a metal bar from there. Keep heading towards your destination, but make sure to get to the building with a pod which is going to be located to your right. From there head on to the second building and you'll find the first bonus item.
Return to the roof of the previous building and interact with the pod. This will enable you to recharge ammunition for the HIKER. Start moving towards three carriages seen in the distance. Make a jump towards the left metal beam and rip all three trains. Doing this will allow you to collect the second bonus item. Take a leap towards the object and grab on to something to take it.
Keep heading towards your current destination. For now focus on getting to a building occupied by enemy troops. In order to do that you must use a new crane and start swinging. You can begin attacking enemy troops right away or you can take your time and get to the roof of this building. Doing this would allow you to collect the third bonus item.
If you've decided to explore the roof you should consider getting rid of soldiers stationed below you by using Death from Above attack. During the fight watch out for snipers, because they're capable of killing Spencer on the spot. Be on a look out for additional supplies.
Your current objective is to reach a partially destroyed building and this can be done using a nearby pillar. Time your jump carefully, because if you fail and end up in the water you'll have to start the level from scratch. Move forward once you've landed and you'll locate the fourth bonus item above your position. Rip a few smaller signs from the metal structure before making the jump.
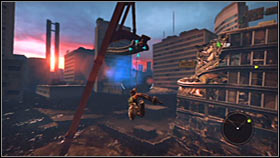

Attach yourself to the metal structure. You'll have to perform a very dangerous acrobatic move here. Your objective will be to grab the bonus object while you're in the air. You'll have to avoid touching the water AND you'll also have to reach the next building at the same time. Once you're there locate a small opening in order to enter the building.
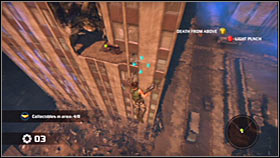
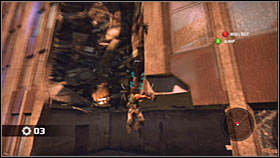
Make sure to choose a good weapon from your arsenal before moving on. The building is being guarded by 2-3 large groups of enemy units. Don't forget to explore smaller rooms along the way and you'll find a lot of ammunition. Also - the last room to your right will contain the fifth bonus item.
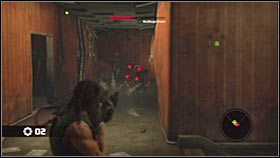
Approach the exit from the building. Turn left and attach yourself to a new beam. Use this object to gain access to a second building located in the distance. Make a jump, leap up and watch a short cut-scene.
Turn around, so you'll be facing a new checkpoint. Start off by heading towards a lower building. You can proceed to the other end right away or you can try reaching a lower ledge to find the pod. Gaining access to the pod would allow you to pick up a sniper rifle.
Keep heading forward, but make sure to explore the roof of the building to your right. Doing this will allow you to get your hands on the sixth bonus item. Arrive at a much larger area and use your sniper rifle to defeat enemy troops.

I would recommend that you also spend some time securing the lower balconies. There are more enemy units down there and you can use Death from Above ability to kill them quickly. Notice the seventh bonus item floating in the air. You'll have to start swinging from one of the nearby balconies to get it. Just as before, avoid landing in the water, because it would be very hard to prevent Spencer from drowning.
Notice that two flying machines have appeared near your position. They're called Polycrafts and there are a lot of ways for you to destroy them. The first good method would require you to discard guns and use only your bionic arm. You would have to wait for the polycraft to hover near your position and attach yourself to it. Performing a zip kick would allow you to damage the machine, so you would have to repeat this action a few more times.
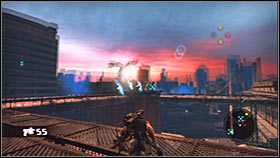
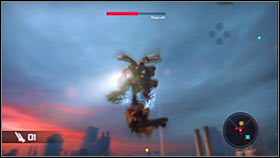
If you don't plan on using your bionic arm you can start using weapons. Bear in mind that you should stay on the move, because flying machines will use miniguns and rockets to hunt you down. You can use a pistol against each Polycraft or you can wait for a pod to land nearby. The pod will contain a rocket launcher. Once you've taken it make sure to fire a few rockets at the same time by holding the trigger for a few seconds. Use this weapon to get rid of both Polycrafts.
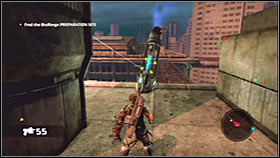
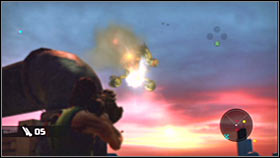
Once you've won you may consider heading towards the second pod which has landed in the area. Doing this will allow you to replenish supplies for your rocket launcher. It's an important thing if you plan on completing all side challenges. Proceed to the relay station when you're ready, secure the area and hack into the system to disable a nearby minefield.
You can now start using some of the nearby mines. I guess you won't be surprised to encounter a new hidden object along the way. Attach yourself to one of the mines and lower Spencer to acquire the final eighth bonus item. You must reach a new tunnel in order to leave this area.
Hidden bonuses: 6
Level walkthrough: You'll have to be making difficult jumps right from the start. Begin by moving forward and take a leap towards a destroyed section of the freeway. Turn left and notice a new flooded building in front of you. Get to the roof of this building. Don't forget to stay away from the water!
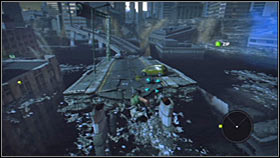
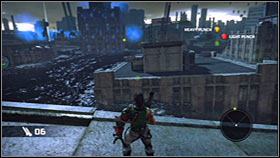
Your next objective will be to land on a roof of a much smaller building and it may be difficult. Make sure to be very precise and swing a few times, so the jump itself is going to be long enough to succeed. Head right and grab a billboard using your bionic component.
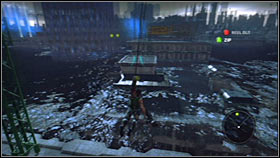
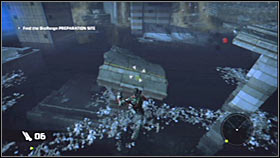
Start swinging on the rope, so you'll be able to land on the roof of a nearby building. Doing this will allow you to get your hands on the first bonus item. Once this object is in your possession head on to the other end of the roof and make a jump towards a small section of the bridge. Don't forget to attach yourself at the very last second, so you won't end up in the water.

Turn right and attach Spencer to a much larger fragment of the freeway. Reel yourself in and make a few steps forward in order to find the second bonus item. You'll now have to return to the area where you found the first hidden object. Take a leap and land on a small object floating in the water.
Go to your right and make a jump towards an unexplored building. Head on to your left after the landing. Eliminate enemy soldiers from a larger distance and then take a leap towards the building they were stationed in.
I would strongly recommend that you choose grenades from your arsenal, because you're going to be attacked by a very large group of enemy soldiers once you're close enough to the stairs. Eliminate hostile units before they surround Spencer. You can also use other powerful weapons to kill them if you have any. Head on to the upper floor and find a pod with a HIKER.
Get closer to the exit and you should notice that a new flying machine has arrived in the area. Obviously you'll have to get rid of the Polycraft. You can use a rocket launcher, a HIKER or perform several zip kicks. Once you've won locate a small metal beam and attach yourself to it.
As you've probably noticed by now, the third bonus item is located nearby. Start swinging and release when you're close to the target to grab this object. Don't worry if you fail, because you'll return here soon enough. For now focus on landing on a small platform surrounded from all four sides by the water.
There are some enemy troops on the platform and they're guarding a new relay station. Get rid of them and use the station once it's safe. Doing this will allow you to disable some of the nearby mines. Return to the water and grab a metal platform located above Spencer. You must now return to the area where you've collected the last bonus item.
If the bonus item is already in your inventory you may proceed to your right. Notice several metal beams in this area and you'll have to start grabbing them in order to find your way to a small floating platform. This will allow you to acquire the fourth bonus item. Once the object is in your inventory go back to the relay station CAREFULLY.
You shouldn't have any problems figuring out your next move. Hacking into the relay station allowed you to disable the mines, so you must now use them to leave this area. Don't forget to collect the fifth bonus item along the way by lowering yourself while being attached to one of the mines. Eventually you'll get to several flooded platforms. Make sure to land properly, so you won't drown.
You must now start using your bionic arm to reach other large vehicles. Eventually you'll end up close to a new minefield, so you'll be allowed to continue your approach. Keep heading towards a rocky beachhead. Land near the water and explore this entire area to find the final sixth bonus item.
Proceed towards the designated building and you'll be rewarded with a much longer and a more interesting cut-scene. Once the cut-scene has ended approach the cliff and... jump!
Hidden bonuses: 6
Level walkthrough: Don't leave the start area upon your arrival in the fissure. Instead make sure to explore platforms above you. Use the hook a few times and each time attach yourself to the cliff. Eventually you should be able to find a small platform with the first bonus item. Drop down when you have it and proceed to the next cavern.

Eventually you should be able to get to the abyss. Stand near the ledge and you shouldn't have any problems noticing the second bonus item. Drop down and grab this object while you're still in the air. If you've missed use the hook and return to the top to try again. Head down once you've have the object.
You'll now have to travel through several very large caverns. Try using your bionic arm to grab the ceiling and swing a lot to speed up this process. Slow down once you've reached a set of glowing rocks. Drop down to a ledge located to your right and take the third bonus item.
You may continue your approach. There aren't any enemy units inside these caves, so you won't have to make any unnecessary stops. Ignore a large red gate, because you won't have to open it. You'll soon get to a larger section, so you should consider using the hook more often.
Keep heading towards the area filled with a lot of waterfalls. Make a stop once you've reached the largest waterfall. Get to a small ledge located to your right and notice that the fourth bonus item is being covered by the water. Take it and head on to the next section. It shouldn't take you too long to reach a new large cave complex.

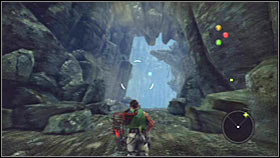
Take your time to locate the fifth bonus item (it's above Spencer). There are two ways for you to gain possession of this object - you can perform a jump from an upper ledge or you can swing on a rope. Either way once you have it you may proceed to the next section. Use your bionic arm, so it won't take a lot of your precious time.
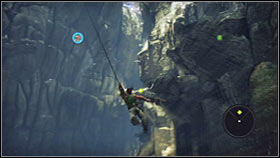
Keep heading forward until you're rewarded with a new cut-scene. Once the cut-scene has ended turn around and return to the area with a few "glowing" rocks. You'll have to copy the moves shown to you during the tutorial (left trigger - grabbing a boulder, Y - throwing it in the air; B - punching the boulder). If you've done everything according to the plan, you'll destroy a part of the wall.
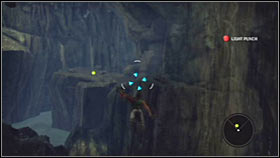
Get to the destroyed section and you'll find the sixth bonus item. You may now return to the area where you saw the movie. Perform similar actions, however this time you'll want to destroy a larger barricade. Proceed towards a new tunnel and it won't take too long for Spencer to get to the exit.
Hidden bonuses: 4
Level walkthrough: Start off by moving forward. Use your bionic arm to reach some of the upper platforms. It shouldn't be a problem, especially since you won't receive any penalties if you fall. One of the platforms hides a wreck and the first bonus item can be found in the vicinity. Swing on the rope to collect this object.
Keep heading towards your current destination. You're going to be attacked by an enemy Polycraft upon your arrival in a new large cave. I would recommend that you use your new ability and start throwing objects at the flying machine. Watch out for its attacks, because you can die if you get hit by a rocket.
Go to your right after you deal with the Polycraft and try to remain in the upper sections of the cave, because the second bonus item is located nearby. It shouldn't be too difficult to capture it. Keep going towards your current destination until you get to areas occupied by enemy troops.
Don't forget that you should be killing all encountered enemy units if you plan on completing side challenges. I would recommend that you start throwing objects at them, especially bigger wrecked cars. You can also perform a few Death from Above moves if you want to. There are two groups here and the second group will be larger.


Keep heading towards your current destination. You'll probably encounter one more group along the way and it's up to you how you want to get rid of the guards. Explore a small concrete structure when it's safe and you'll find the third bonus item.
You may continue your approach. Make sure not to skip on the last fourth bonus item which is going to be floating in the air. Swing on a rope after attaching yourself to one of the rocks to collect this object. Eventually you'll leave the caverns. Head upwards to return to the city and wait for the game to begin loading a new area.
Hidden bonuses: 0
Level walkthrough: Keep heading upwards and notice that two flying machines have appeared in this area. I wouldn't recommend attacking them from the ground level. Instead use your bionic arm to get to the top of the bridge.
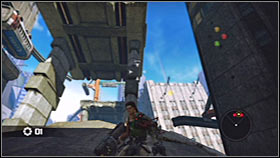
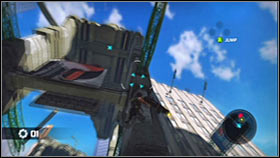
It would be a good idea to use throw ability to get rid of both Polycrafts, however you can also perform zip kicks and use your weapons. Make sure to keep attacking only one machine until it's fully destroyed and avoid the missiles at the same time if you can.
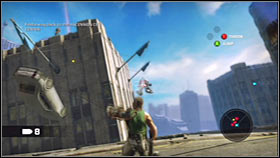

Make sure that both Polycrafts have been destroyed and proceed towards a new pod which has landed here not long ago. Interact with the pod to collect a grenade launcher. Familiarize yourself with new Bulldog challenges and after that head towards the roof of the nearest building. Notice enemy troops waiting for you there.
Obviously you must secure the roof by eliminating all hostile units. Notice that if you use a grenade launcher you'll also fulfill some side challenges. Get ready, because new paratroopers will show up in the area. If you've used all ammo for the grenade launcher consider going to the second pod to pick up a HIKER.
Make sure you've killed all enemy units and then approach the relay station to hack into the system. Head down and start moving towards your current destination. Wait for a large gate to open and enter a new area to advance to the next mission.
Hidden bonuses: 3
Level walkthrough: Turn left the second you've started this level and go through a large hole in the wall to find the first bonus item. Proceed to the main tunnel and it won't take long before you're attacked by a stronger version of a Biomech.
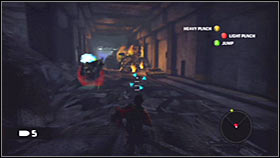
Notice that this new mech is much more agile than the machines you've been encountering so far. You'll also have to avoid its new attacks, including a leap attack. Don't get too close to the mech or otherwise it'll use a heavy weapon to kill you with two shots. There are two ways for you to get rid of the mech - you can start using heavy weapons yourself or you can keep throwing objects at it. Don't forget to retreat to safety each time you've suffered a few hits.
Head forward after you've defeated the mech. It shouldn't take you too long to find an area with the second bonus item. Attach yourself to the ceiling and reel yourself in to take this object. Proceed to the next section which is being occupied by enemy troops. Choose grenades or a grenade launcher before you get close enough for them to see you.
Try eliminating larger groups at the same time and prevent enemy soldiers from surrounding Spencer. Be on a look out for more supplies as you advance towards enemy positions. You should also consider throwing nearby objects at enemy troops.
You'll have to deal with three more groups. Don't forget to move back to a safe area if Spencer is about to die, because otherwise you'll have to start over from the last checkpoint. The final third bonus item can be found behind the bus. Take the object and move to the tunnel on your right to leave this area.
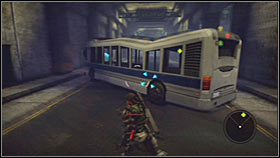
Hidden bonuses: 5
Level walkthrough: Exit the tunnel and keep heading forward. A new pod will in front of you. It would be a good idea to examine it, because you'll collect a machine gun. Notice that you're being targeted by an enemy sniper, so you shouldn't be moving in a straight line. You can also use your bionic arm to make yourself a difficult target.
I would strongly recommend that you eliminate the sniper as soon as possible. Use the hook to get to the platform he's standing on and kill him before he kills Spencer. Pick up ammunition and grenades and inspect the area to your right to find the first bonus item.
Notice that a large group of enemy soldiers is stationed under the bridge. This is a great opportunity to fulfill optional challenges by performing Death from Above moves or by throwing grenades. Make sure to go back up if you haven't killed all the soldiers with one attack and keep returning until you're the only one alive.
You may start moving towards your current destination. Make sure to explore buildings located to your left, because you'll be allowed to enter one of them. Use the stairs to get to the second bonus item. Exit the building and continue your approach.
Get ready when you get closer to a small hill, because you're going to be attacked by a group of paratroopers. Defeat them without moving any objects from this area. It shouldn't be too difficult, especially if you'll decide to use a machine gun. Head forward after the battle and wait for new Biomechs to appear in front of you.
There are two ways for you to resolve the Biomech situation - you can approach a nearby pod to pick up a grenade launcher or you can start throwing objects at the machines. If you decide to use the throw ability, make sure to focus only on one target. Each time you're critically injured use the hook to retreat quickly.

Keep fighting until both mechs have been defeated. Proceed to the area where you saw the machines for the first time. Look up and you'll notice the third bonus item floating in the air. Once you've taken it head to the junction and go left to find the fourth bonus item.
Go back to the junction and this time choose a passageway located to your right to find the fifth bonus item. You may finally proceed towards the designated area which is going to be a skyscraper. Go to the entrance to end this level.
Hidden bonuses: 2
Level walkthrough: Don't worry, because you won't have to start the boss fight right away. You'll have plenty of time to look around. Start off by trying to get to the top of a large structure located in front of you. The first bonus item is floating in the air, so in order to get to it you must start swinging using the beam found to the left of the object.
The second bonus item is also located near the scaffolding, however in this case you won't have to pull any stunts. Go to other side and you'll find it near the balcony. Drop down when you've collected both objects and hack into the relay station. Get ready to defeat the first boss!
This duel will be split into several phases, however they're going to be very similar. At the start of each phase you'll be forced to pick up a rocket launcher. These object will be hidden inside the pods and the pods will be crashing into the upper balconies, so you'll have to use your bionic arm to get to them.
Each time you've collected a rocket launcher you should go back down. Use the targeting mechanism to select weaker spots of the boss. Fire a few rockets at the same time and wait for the explosions to occur. Also - notice that the Buraq fighter will move away from the tower once it's been damaged.
When the boss has retreated you'll be forced to deal with Polycrafts. At the beginning of the duel you'll be attacked by a single unit, but later on you'll have to take down two Polycrafts at the same time. Keep using a rocket launcher against them and continue attacking the boss until the machine has been destroyed. Watch a new cut-scene.
Hidden bonuses: 3
Level walkthrough: Ignore new skyscrapers located near your position. Move forward and jump into the abyss. Wait for Spencer to reach the ground floor and you should notice that you've ended up inside a partially destroyed tunnel. Thankfully there aren't any enemy units nearby. Head forward and stop upon your arrival in a much bigger area.
A huge walker will appear above the canyon and it's going to start sending out smaller drones to hunt you down. I would strongly recommend that you get to a nearby pod as soon as possible, because it contains a machine gun. This weapon is by far the best choice when fighting the drones, so make the exchange when you get to the pod.
Use your newly acquired weapon to get rid of about a dozen of drones and the rest should leave you alone. Instead you'll notice that enemy paratroopers have landed inside the cave. Ignore them for the time being and focus on getting to the first bonus item. In order to do that you must swing a few times while being attached to the closest ledge.
The second bonus item can be found on an upper ledge, located to the left of the exit from the tunnel. It shouldn't take you too long to find it. Once you have it you may finally focus on getting rid of enemy soldiers. Throw objects at them or use the machine gun if you have spare ammunition.
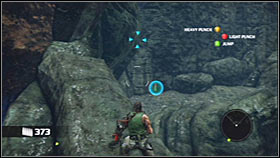
The final third bonus item is safely hidden on a lower ledge, so you should climb to an upper platform to locate it. Take the object and proceed towards the designated area of the map. Take ammunition and approach the blue gate. Go to other side.
Get ready to defend yourself against a new upgraded Biomech. Make sure to use rocks from your vicinity to damage the mech. You should also consider staying on an upper ledge, because the mech may have problems reaching your position, so it's going to be an easy target. Keep attacking the mech until it's destroyed.
You may proceed to the next section. Make sure to watch a new tutorial movie along the way, because you'll want to test your new move on some of the nearby enemy soldiers. Remember to keep completing challenges as you go. Once it's safe proceed to a new tunnel which will lead you to the exit.
Hidden bonuses: 5
Level walkthrough: Keep heading forward and make a jump towards the left platform in order to get closer to the train station. The first bonus item can be found to your left. Notice that enemy guards have appeared to your right. You can attack them from here or you can surprise them from the back.
Once you've won make sure to explore the area where the guards were standing. You'll find a large hole here and you can jump inside to grab the second bonus item. Once the object is in your possession return to the train station and proceed to the next area. Find a second hole and go to the lower level.
You'll encounter at least two other guards along the way, however killing them shouldn't be a problem. Approach the cliff and make a jump towards a larger area located in front of you. Getting there shouldn't be a problem as long as you use your bionic arm. Go to your left to find the third bonus item.
Return to the cliff area. Look up and notice a new ledge. You'll have to reach that platform using your hook. Get ready to defeat a new large group of enemy soldiers. Once they've all been eliminated choose the corridor where you see the flames and you'll uncover a passageway leading to the next area.
You should be careful here, because you'll soon encounter two heavily equipped soldiers. They'll be harder to kill and they'll be using powerful guns, so it'll be extremely important to kill them using your best moves and weapons. Turn right and this time get ready to defeat a small group of standard guards.
Keep heading towards a small ramp seen in the distance. Use the ramp to get to a higher area and of course take your time eliminating enemy troops. Eventually you'll have to get to the top. Your primary objective there will be to secure a relay station. Hack into the station once it's safe again.
Start off by moving to your left and it shouldn't take you too long to find the fourth bonus item. Return to the cliff area and look down. The fifth bonus item is located beneath your current position. You'll have to grab the nearest mine to get to it. Notice that you won't be allowed to return to the relay station from here, so you'll have to take the same path as before.
You must start using some of the nearby mines to get to your current destination. Ignore the fact that you'll have to land on a small ledge, because you'll get to the second set of mines from there. End this level by heading towards a new tunnel.
Hidden bonuses: 5
Level walkthrough: Exit the tunnel. Turn around quickly and use your bionic arm to get to the top of the concrete structure. The first bonus item can be found in the center of the platform. Head down and deal with a small group of enemy soldiers. Enter the tunnel once they're gone.
You'll encounter a new group of enemy troops when you reach a larger cave. Use your hook and some of your weapons to eliminate closer targets. As for more distant threats, consider throwing objects at enemy soldiers. Keep heading towards the relay station. I would recommend that you remain on the main path and on the ground instead of using your bionic arm.
You'll have a chance to collect the second bonus item along the way which will be hidden to your right. Make a jump towards a red platform seen in the distance and get rid of a new group of enemy soldiers. You should now consider climbing to an upper ledge to take the third bonus item. Head back down and use the relay station to disable the minefield.
Watch out, because an enemy Polycraft will arrive here shortly. You can destroy the flying machine using the special adrenaline move you've unlocked not along go. Aside from the Polycraft you'll also have to deal with several paratroopers.
Start moving towards the minefield. Look around to find the fourth bonus item and the fifth bonus item. Reaching the first object is going to be a little tricky, because you'll have to a make perfect jump using one of the mines. Getting the other item will only require you to lower yourself while being attached to the closest mine. Use other mines to exit this level.
Hidden bonuses: 7
Level walkthrough: Turn right and start heading upwards. Make sure to look around a lot, because you'll find the first bonus item on an upper ledge. Start using your bionic arm once you've taken the object and continue heading towards the current checkpoint.
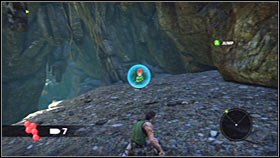
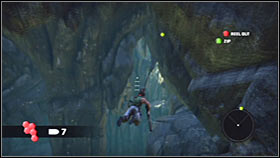
You'll have to find the exit from the caverns, so you'll get to the park. Thankfully there aren't any enemy units in the vicinity, so you may take your time and look around. Make a stop once you've reached a much larger area of the park.
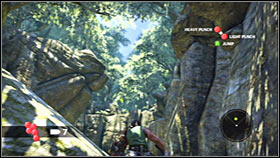
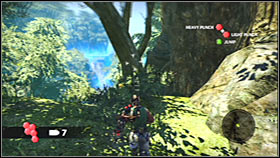
If you look closely you should notice that the second bonus item is floating in the air. Reaching this object isn't going to be easy. You'll have to attach yourself to one of the tree branches, start swinging and release at the right moment to make a perfect jump. Thankfully you won't die if you make a mistake and you'll be allowed to try again.
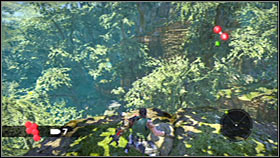
Explore the area to the left of where you've started. The third bonus item is located next to a small ammunition stash. It can be found easily if you take your time to listen to noises, because there's a radio next to it. As for the fourth bonus item, you'll find it floating near the reservoir and it can be collected without having to make difficult jumps. Just make sure that you're swinging properly and it'll be yours for the taking.
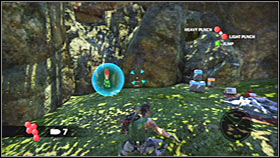
You may now start moving towards the current checkpoint. There's a small group of enemy soldiers there and it would be a good idea to take them by surprise and to attack them from a larger distance. Collect ammunition and proceed towards a new canyon.
You'll get to a new large area with a small island in the center. Proceed to your left. Use your bionic arm and remain close to upper sections. Eventually you should be able to find the fifth bonus item. Approach it carefully, so you won't lose balance and fall. You could also collect this item after the upcoming fight, however it shouldn't be necessary.
As you've probably noticed by now, the central island is being occupied by enemy guards and you should consider eliminating them from a larger distance. Once they're gone get ready to defeat two upgraded Biomechs!
There are a few different methods for you to win this fight. You can kill the first mech by activating the special adrenaline move. Don't forget that in order for this move to work you must first grab the mech with your hook. As for the second machine, you should consider using grenades, a grenade launcher or objects from the environment. Head on to the next zone.
Check the area under the coastal road and you'll find the sixth bonus item. Get to the road and proceed to your right. The final seventh bonus item is hidden next to a collapsed tunnel. Go to the opposite tunnel when you're ready to begin the next mission.

Hidden bonuses: 4
Level walkthrough: Exit the tunnel and proceed to your left. It shouldn't take you too long to find the first bonus item. Grab the nearest tree branch and swing a few times to add it to your list of collectibles. You may now begin moving towards your current destination.

Make sure to choose the main path as you're getting closer to the clearing, because you'll be dealing with large doses of radiations here. Watch a new cut-scene and explore the surrounding area once it's ended. Collect the second bonus item from the ground.

Approach the cliff and make a jump towards a large structure seen in the distance. Grab the ledge and get on top of this structure, because that's how you'll find the third bonus item. Drop down and head forward.
As you've probably suspected, you'll have to get inside a building located nearby. It shouldn't be a problem, especially since you won't be stopped by anyone. Once inside take your time to find the last fourth bonus item. Afterwards proceed towards the large exit.
Hidden bonuses: 5
Level walkthrough: Keep going straight. Get on top of a small platform located to your right in order to collect the first bonus item. Notice that enemy soldiers are stationed under your current position. There are a lot of ways for you to get rid of them - you can use grenades, firearms or Death from Above ability.
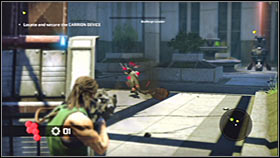
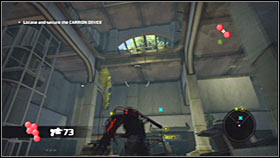
Head down and start pushing forward. Bear in mind that you'll be dealing with large numbers of enemy troops along the way and that heavily armored soldiers will be among them. Each time you've suffered a few hits retreat and hide behind one of the pillars. Don't forget to collect ammunition, as well as the second bonus item which can be found near the ceiling.
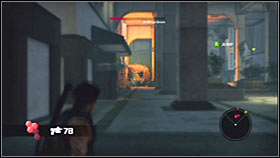
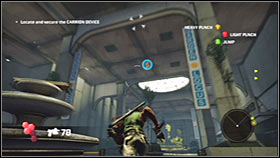
When you reach the opposite end of the corridor you'll have to use your bionic arm to get to a new upper balcony. Watch out for an elite soldier near your position and kill him as soon as possible. Head forward until you reach a relay station where you'll have to eliminate other guards. I would recommend using grenades to kill them. Hack into the system.


Use the hook for the second time in order to get to the upper balcony. Look for an exit and then go to your left. Keep heading towards a small bridge located in the distance. Naturally you don't have to use the bridge, but that's where you'll encounter more enemy troops. Attack the guards from a larger distance and surprise them if you can.
If you like to use firearms to dispose of enemy troops you might want to consider going to a pod which will land near the bridge. Doing this will allow you to pick up a machine gun. Go to the area where you've seen the largest group and take the third bonus item. It's near the cliff.
You may start moving towards the next checkpoint. When you get to a much larger area you should notice that a Biomech is waiting for you on the other side of the cliff. Attack the mech from here and use the fact that the machine can't reach you from where it's standing. Throw a couple of boulders at the mech to damage it.
Head over to the platform occupied by the machine and you'll notice that other Biomechs have arrived in the area. I would strongly recommend that you now focus on finding a pod with a rocket launcher. Go back to the previous ledge where you were safe from the first mech and use your grenade launcher to destroy all metal beasts. If you run out of ammo you'll have to defeat them in direct combat and using objects found in the environment.
Go to the ledge with the mech once again, but this time turn right. You shouldn't have any major problems spotting the fourth bonus item. Notice that it's hidden near the water, so you'll have to be very careful while trying to get to it.
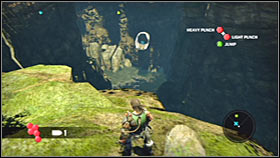
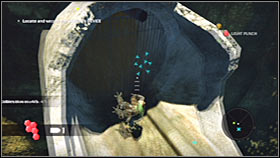
Take the hidden object, turn around and stop near the ledge. Turn right and you should notice the final fifth bonus item near the rocky beachhead. Go there and add this object to your inventory. Once this is done proceed to a ramp leading to a new building.
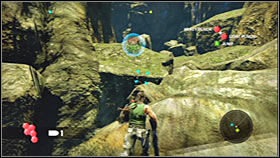
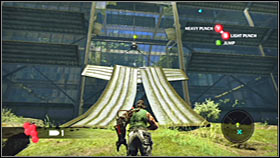
Hidden bonuses: 5
Level walkthrough: Turn around and make a few steps forward. The first bonus item is located directly in front of you, so you won't have to look for it on your own. Proceed towards the first checkpoint. Ignore a new cut-scene, because you won't have to defeat any mechs here.
As you've probably noticed by now, this entire dome is being occupied by several snipers and it'll be up to you to eliminate them. Use your bionic arm frequently and prevent Spencer from being targeted by more than one sniper at a time. Once you've won explore the upper section of the dome to find the second bonus item.
Proceed towards the passageway leading to a new area of the map. Use the ramp to get to the upper level. Get ready, because upon your arrival in the next dome you're going to be greeted by a Biomech equipped with a powerful gun. Notice that during the fight you can grab the weapon, so the mech won't be able to use it anymore. I would recommend that you allow him to use the gun and instead focus on performing successful zip kicks each time the boss tries to stop.
Get ready to defeat a large group of standard soldiers once the mech has been eliminated. They will appear near the passageway used by Spencer to get to this dome. Once they're gone focus on finding a new relay station. Hacking into the system will unlock a new passageway, even though you can't see it from here.
You should focus on finding new collectibles before you decide to leave this dome. The third bonus item can be found under one of the balconies. As for the fourth bonus item, look for it near the water and prevent Soencer from drowning. You must now start moving back to the first dome where you've defeated the snipers. Be careful, because you'll encounter one new group of enemy units along the way.
When you return to the first dome you should focus on reaching an upper balcony. Notice that a pod has landed in the area. Examine it in order to find the HIKER. New enemy soldiers will show up on the ground floor and it would be a good idea to use Death from Above ability to kill them. Proceed to the corridor they were guarding so fiercely.
Go to a similar ramp to the one you've encountered before and you'll end up standing inside a dome that's being guarded by two heavily armed Biomechs. I would strongly recommend that you focus on a single target. Use the same tactics as before, however you can also throw grenades to stun mechs, allowing you to perform adrenaline finishers on them.
One of the upper balconies contains the final fifth bonus item and you can take it right away or after you deal with the mechs. Proceed to the designated area to be rewarded with a cut-scene. Turn around and head inside a large hole in the ground. Eventually you'll have to go inside a tunnel where you've seen a strange creature escape.
Hidden bonuses: 6
Level walkthrough: Exit the cavern and keep going straight. Ignore the comment, because Spencer will be far from safe here. Turn left once you've reached a small junction and eventually you'll get to the first bonus item. Continue moving forward to find a pod with a sniper rifle. You can start using this weapon right away or you can wait for Spencer to get closer to his enemies.
I would strongly recommend that you stay close to the river where you've collected the rifle. Head forward and inspect the area to your right. Punch several rocks with your bionic fist (Y button) to uncover the second bonus item. Take the object and start moving towards a nearby building.
It would be good idea to reach one of the balconies of the building as soon as possible and this can be done if you use the cliff to the left. Eliminate a new sniper upon your arrival and prevent Spencer from being attacked by several snipers at the same time. Hide behind pillars and other large objects if you're in need of healing.
Make sure that you've killed all enemy snipers before moving on! Continue climbing to the top of the building. Once you're there look around to find the third bonus item. Notice that you can attack new enemy soldiers from here. Eliminate all of them, drop down and hack into the relay station.
Approach the ledge carefully and you should notice a new minefield in front of you. Naturally you must start using the mines to get to your destination, however you'll also have a chance to collect the fourth bonus item along the way. Eventually you'll end up inside a new cavern. Collect the ammunition and proceed to the exit.
Keep running towards your current destination. Thankfully in this case you won't be bothered by any difficult fights. There are enemy guards stationed near a new relay station and obviously you'll have to get rid of them. Hack into the station once they're gone to disable the mines.
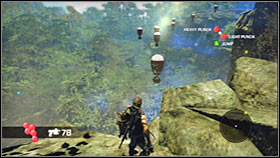
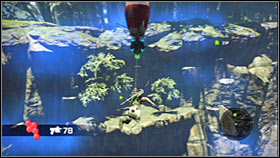
I would recommend that you now spend some trying to reach two remaining bonus objects. In order to find the fifth bonus item you must get to the top of a nearby cliff. The object is located in plain sight, so you won't have to spend too much time searching for it.
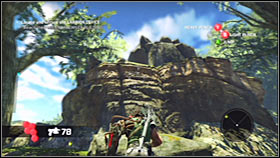
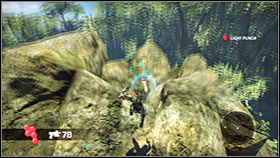
The sixth bonus item is more difficult to find. You would have to backtrack a little bit to locate an unexplored cliff to your right. Make sure to avoid irradiated zones while trying to find the collectible. The object you're looking for is located near the abyss and from there you can also see the building you've explored at the beginning of this level.
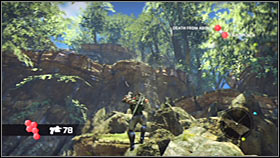
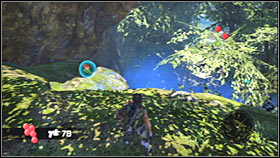
Return to the relay station once you're done exploring. Go to your right and you should notice a new minefield in front of you. Make sure to be very precise, because all the mines are far away from each other, so it'll be easy to make a mistake. Get to a new ledge and head to the exit.
Hidden bonuses: 5
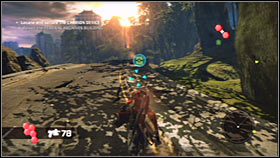
Level walkthrough: Start moving forward, but turn left when you have the chance. You'll soon get to an area with the first bonus item. Continue heading towards the designated area of the map. Turn right when you reach an asphalt road and you'll soon locate the second bonus item.
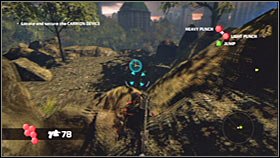
Make sure to explore the area near the cliff. Ignore small amounts of radiation, because if you're thorough you'll find a small rock with the third bonus item. Continue moving towards large structures seen in the distance and listen to an interesting conversation along the way.
There's a very tall monument in front of you. The fourth bonus item can be found on top of it, so you should consider using your bionic arm to get there. Turn left when you're still at the top and you'll notice a new collectible in the distance. Head towards it.
Sadly you can't attach yourself to the large wall, so instead you'll have to attach the hook to a nearby tree branch. Swing a few times and make the jump to collect the fifth bonus item. Return to the monument and turn left to end this extremely short and easy mission.
Hidden bonuses: 2
Level walkthrough: Look up and get to the top of a new monument. Doing this will allow you to add the first bonus item to your inventory. As for the second bonus item, you'll find it nearby. It'll be floating in the air.

Land somewhere near the designated area and you'll automatically trigger a new cut-scene. Notice that you have to defend yourself against an enemy assault. Thankfully you'll be dealing with fairly small groups and you won't have to defend this area to succeed. All you have to do is to survive.
I would recommend that you keep attacking enemy troops mostly from the upper balconies. You should be using the throw ability by catching some of them and throwing them at other guards. Return to the ground floor only if you see a larger group and if you can't kill them from a larger distance.
As always, you'll have to watch out for heavily armed opponents. I would recommend grabbing them as soon as possible. Notice that pods will land in the middle of the building from time to time. Examine them if you like using standard weapons. The pods will contain machine guns and grenade launchers.
The final phase of this battle will also require you to deal with about 20 drones. Use the machine gun to destroy all drones easily. Once you've won approach the area where the battle has started. Watch a cut-scene, return to the pods and locate a large hole in front of you. Proceed to a lower level to end this mission.
Hidden bonuses: 3
Level walkthrough: Just as before, the game will allow you to collect all three bonus objects before you're attacked by a new boss. Start off by moving forward and then head right. Be on a look out for the first bonus item which is going to be hidden by one of the boulders. Proceed towards the abyss and eliminate enemy soldiers from a large distance.
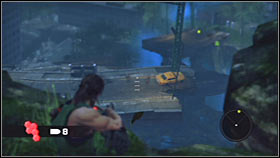
Head on to your left and make a jump towards a destroyed section of the freeway. Check the area under the bridge to find the second bonus item. Once this is done get on top of the bridge and proceed to the designated area. Perform a perfect swing to catch the third bonus item.
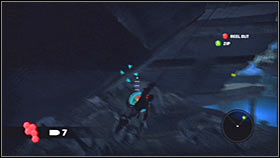
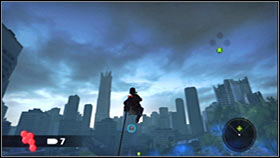
Attach yourself to a metal beam and swing a few times to land near the parking lot seen in the distance. Once you're there you'll be rewarded with a new cut-scene, informing you that it's time to defeat a new boss. You'll be going against Mohole and the machine looks like a large worm.
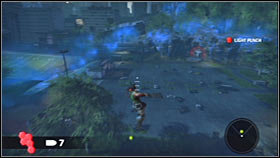
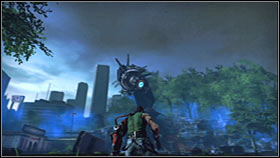
This bossfight has two main phases. The first phase is by far easier and your task will be to drain boss of its energy by about a half. Let's start off by saying a few things about the attacks you'll have to avoid during this phase. Mohole will mostly use his laser eye to set nearby objects on fire. Remember to keep moving back from the area that's being attacked by the boss. The second type of Mohole's attacks may remind you a movie called Tremors. Mohole will be moving underground, trying to hit Spencer. Thankfully this attack can be avoided easily by pressing a dodge button or jumping to the side.
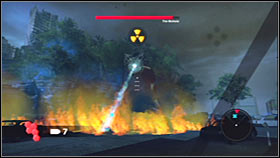
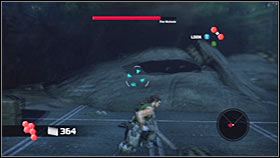
You can attack the boss only when it's powering up its laser, getting ready to attack you. There are two ways to do that. You can throw parked cars at the boss or you can use one of your weapons. If you decide to rely on firearms, make sure to use a grenade launcher which you may have brought from the previous mission. Otherwise you would have to visit one of the pods.
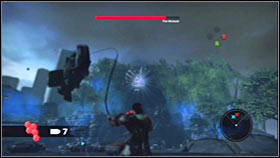
Keep fighting until Mohole has lost half of its energy. Notice that the boss has collapsed and this is your chance to make a move. Otherwise Mohole will be able to heal, extending this fight. Approach the laser eye quickly, aim at it and attach your bionic arm by pressing and holding the left trigger.
Notice that Spencer has been catapulted into the air. Don't release the trigger and don't touch the left analog, because you'll want everything to stay the same. Instead start pressing the Y button, so the main character will initiate Death from Above attack, preventing Mohole from regenerating. If you've done everything according to the plan Mohole will remain with only half of the energy bar and you'll advance to phase two.
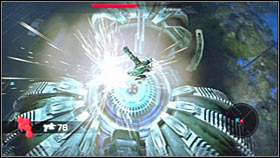
The biggest problem of this phase is that you'll have to avoid a very unpleasant attack and if you fail you'll have to start over again. You can notice this attack when Mohole is sending a beam to the sky. There's only one way to avoid his shockwave attack - you must press the jump key whenever one of the waves is close to Spencer. You can't be too late, because even a single wave can kill you. At first you'll be dealing with only one wave, but later on you'll have to avoid sequences of even five waves. Good luck! ;-)
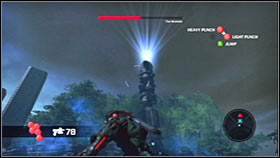
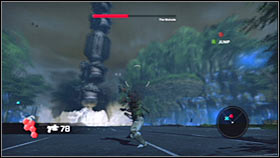
Be patient and wait for the boss to make preparations for a laser eye attack. Start firing at Mohole using some of the best weapons you've got. Sadly as the battle progresses you'll have to spend more time avoiding his shockwave attacks than actually inflicting injuries. It 's a good thing to work on your rhythm, so you won't have to restart this whole fight too many times.
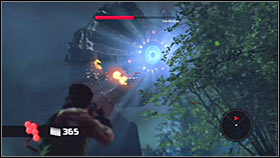
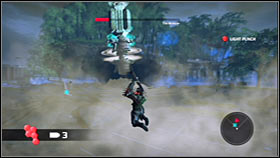
The final phase of this duel is very similar to what you've already experienced. Wait for Mohole to collapse, approach the boss quickly and attach yourself to its eye. Perform Death from Above attack when you're in the air and wait for Mohole to explode. You can now rearm yourself (pods) after which proceed towards a red gate.
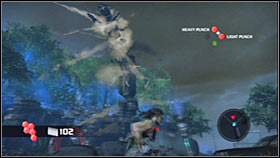
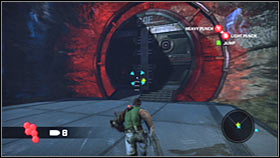
Hidden bonuses: 3
Level walkthrough: Head forward. During your stay in the tunnel you'll be dealing with large groups of enemy soldiers. This is an excellent opportunity to fulfill some of the optional challenges, especially those that require several targets to be killed at the same time. If you've already completed them consider throwing cars and other objects at enemy units.
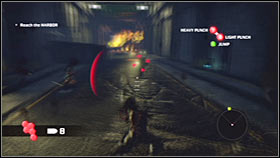
You probably won't be too surprised to hear that you'll have to kill a few heavily armored soldiers along the way. Eliminate them from larger distances and be on a look out for supplies (especially grenades - don't use them just yet). Make a stop once you've reached a destroyed section of the tunnel. Explore you surroundings to find the first bonus item.
Proceed to the next section and attack new guards before they see you coming. Once they've been killed scout the area for supplies and approach the force field. Doing this will attract the attention of a nearby Biomech. I would recommend that you use grenades to slay the metal beast, however you can also try performing zip kicks.
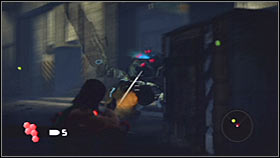
Notice that defeating the mech has disabled the force field. Get closer to a new passageway, BUT watch out for a new group of enemy soldiers. Use grenades to kill them all if you can. When you get to a new area turn right and explore a small tunnel in order to find the second bonus item.
Eliminate all nearby guards before moving on. Proceed towards a tunnel located to your right and don't forget to be on a look out for grenades and for the ammunition to your grenade launcher. Make sure to inspect the ceiling as you go, because one of the corridors will contain the last third bonus item. Head forward and you'll soon reach an exit.
Hidden bonuses: 6
Level walkthrough: Ignore enemy flying machines passing by, because you won't be attacked by any of them. Approach a huge structure located in front of the entrance and start using your bionic arm to get on top of it. Once you're there you shouldn't have any problems finding the first bonus item.
Make a jump towards one of the lower buildings. Try landing on a small roof and look around a little to find the second bonus item. You can now proceed towards a nearby warehouse. Land on the small platform and then enter the building.
I guess you won't be surprised to hear that there are enemy guards inside the warehouse. Use the rifle or your bionic arm to kill them. I wouldn't recommend using grenades on them, because you'll need a lot of explosives soon enough. Explore the area for additional supplies and attach yourself to the right wall when it's safe. Pull yourself up to find the third bonus item.
Approach the exit and attach yourself to a metal beam, so you'll be allowed to reach a nearby balcony. Proceed to your left quickly and pick up additional supplies. Notice that enemy Biomechs have appeared in the area. You'll have to defeat three machines, but you won't be fighting with more than two at a time.
The mechs will use new moves to hunt you down. Their primary attack relies on them using their jetpacks to remain in the air. All the machines will use balls of energy to inflict injuries to Spencer. Each hit will heavily injure your character, so you'll have to be moving all the time and using nearby objects for cover. Additionally your opponents will ram you from time to time, so you'll have to dodge these attacks as well.
There are a few ways to get rid of each mech. When they're still in the air you should consider using a grenade launcher to damage them and when they land you should start throwing grenades. You can also try performing zip kicks and adrenaline finishers, however it would be risky.
As you've probably noticed by now, you won't have enough ammunition to destroy all three mechs. Once you run out of ammo start moving towards the current checkpoint. A new pod will land on a roof of a nearby building. Go there now and pick up a grenade launcher. Use this new toy to eliminate all remaining mechs.
You've probably noticed the fourth bonus item when you were trying to get to the pod. You can go after it right now, however I must warn you that it's not going to be easy to get it. Start swinging while being attached to the balcony. You'll have to make a perfect jump and grab the balcony again before Spencer hits the water. Once you have this item in your possession proceed towards the checkpoint which is going to be the first cannon.
New enemy guards are stationed to the right of the cannon and I would strongly recommend that you eliminate them right now, especially since you'll find a lot of supplies nearby. Make sure to look behind the building to find the fifth bonus item.
Proceed towards the designated area. Approach the cannon and attach your hook to a small control panel. Afterwards press the B button several times to rip it. You may finally hack into a nearby relay station. Notice a new pod landing in the area. It contains a machine gun, so you should only take it if for some reason you don't like the grenade launcher.
You must now return to the warehouse where you've found one of the collectibles during your initial approach. This time you won't encounter any guards inside the warehouse. Instead, enemy units will be waiting for you outside. Deal with them by attacking them from a large distance or get to the roof and engage them in direct combat.
Eliminate all enemy troops and then use a nearby metal structure to make your way to your current destination. Keep heading forward and each time you make a new jump attach your bionic arm to nearby buildings and other large objects. Eventually you should be able to reach a minefield.
Obviously you must start using some of the nearby mines to get to the next area. I wouldn't recommend trying to explore building roofs along the way, because these areas are highly toxic. Keep heading towards a large brown building seen in the distance and land on its roof.
Notice that you're standing close to the second cannon. Sadly this means you'll find yourself in a lot of trouble, because new Biomechs are guarding the area. For now reach the cannon on foot and deal with all standard guards, so they won't bother you anymore. Use your hook frequently and stay on the move, so you won't be an easy target.
It would be a good idea to use the grenade launcher against the mechs, however you can also throw standard grenades at them. Prevent Spencer from falling, because he would drown easily. You could also try performing zip kicks, but you would have to be lucky to succeed.
Keep attacking the mechs with everything you've got and in about one minute you'll notice that a new pod has landed in the area. Go there and collect a rocket launcher. Start using this new weapon to get rid of all Biomechs. Once this is done approach the second cannon and destroy the panel with your hook.
As you've probably noticed, there's a new relay station nearby. Hack into the system to disable the mines. Proceed towards the minefield right away and start swinging. Just as before, each jump has to be perfect, so you won't find yourself in the water.
Eventually you'll reach a new flooded building. Ignore the exit for the time being and head forward. Approach the ledge and you should notice the final sixth bonus item directly under your current position. Take the object you were looking for, go back up and enter the warehouse through a hole in the roof.
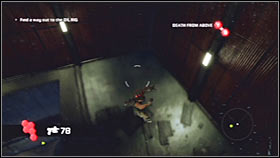
Hidden bonuses: 7
Level walkthrough: Start running forward and turn right when you get to a collapsed section of the tunnel. Use you bionic arm to reach the warehouse which is located directly above your current position. Explore the warehouse to find the first bonus item and use one of the beams to go outside the building.
Notice that an enemy Polycraft has appeared above the warehouse. Use one of your primary weapons to destroy the machine, wait for the Polycraft to hover to perform several zip kicks or ignore it entirely for the time being.
Proceed to your right and use nearby pipes and other large structures to remain where it's safe. Notice that you'll be targeted by enemy snipers, so you shouldn't make any unnecessary stops along the way. The second bonus item will be floating in the air. You can try taking it right now or you can wait until you've eliminated all hostile units.
You'll soon notice that a new pod has landed in the area and it'll contain a sniper rifle. Take this weapon and spend some time eliminating enemy snipers. Once it's safe proceed towards a huge bridge.
There are new enemy guards standing next to the bridge, however I wouldn't recommend using the rifle to kill them, because you may need the bullets soon. Make a jump towards the bridge, kill all enemy units and proceed to a huge pillar with a number 2 painted on the side.
You shouldn't have any major problems reaching the top of the bridge as long as you're careful enough. Head forward and you'll soon find the third bonus item. Your current objective is located to your right. Head down there and approach the force field. It won't be a surprise that you're going to be attacked by new Biomechs.
Obviously you should rely mostly on the usual methods of defeating the mechs, however there's also a way to outsmart both machines. You would have to go back to the bridge and start aiming at the glowing spots on their armor. Either way both machines must be eliminated, because only then the force field will be disabled. Proceed towards a new warehouse.
Go to your right and get ready to defend yourself against a large group of enemy guards. They will appear once you're close enough to an upper platform and it would be a good idea to kill them without losing any ammunition. Once they're gone proceed to the designated area of the map and hack into a relay station.
Make a few steps forward and start using your bionic arm, grabbing mines as you progress. Ignore some of the nearby snipers and instead head on to a large blue cylinder located to your left. The fourth bonus item can be found on one of the balconies of the tank.
You must use a large beam to get to other cylinders seen in the distance. This of course means you'll have to use your hook and start swinging. Once you've landed on a new cylinder eliminate the nearest sniper quickly. Approach the pod and interact with it to collect a grenade launcher.
Notice that new Biomechs have appeared in the area. Defeating them is not going to be easy, because you'll have a lot of problems finding a stable platform from where you can start firing. Make sure to use a grenade launcher. You can also consider throwing bodies of fallen enemies at them, as well as perform adrenaline finishers.
The fifth bonus item can be found floating in the air and you should consider grabbing it once you've dealt with the mechs. I would also recommend securing a cylinder with a few guards standing on top of it. Keep heading towards your current destination. Eliminating the last sniper should allow you to gain access to a new building.

Proceed towards the exit. Turn around when you've arrived and use your bionic arm to get to the upper level. Explore a nearby roof section to find the sixth bonus item. You can now start moving towards the current checkpoint. Watch out for enemy units along the way, including new snipers.
You should be able to find a new pod in the area, however it contains a machine gun, so I would recommend ignoring it if you're carrying a grenade launcher or a rocket launcher. In order to get to the last seventh bonus item you must get to a large structure located to your right. You can reach that area easily using one of the balconies.
Make sure that you've been able to eliminate all enemy units and get to a large conveyor belt. Start moving forward. Thankfully you won't have to perform any additional jumps along the way. Just get to the exit and you'll be rewarded with a new cut-scene. Get ready for the final act of the game.
Hidden bonuses: 0
Level walkthrough: This is going to be a very short mission and you shouldn't have any problems finishing it. Notice that you start the game while standing on a Buraq, similar to the machine you've destroyed at the end of the first act. Move forward and perform two actions - use the hook to grab a small control panel and rip it. This will allow you to gain control over the Buraq by aiming at it with the left trigger.
Notice that the game has displayed icons, informing you that you control the Buraq. Don't release the left trigger and instead focus on getting closer to a new flying machine seen in the distance. Ignore other vessels in the vicinity, including Polycrafts. You won't have to destroy them and they won't inflict too many injuries with their attacks.
Once you're close enough to a new Buraq fighter release the left trigger, quickly make a few steps forward and jump towards a new flying machine. Obviously you'll have to attach yourself to it using the bionic arm before you land in the water.
If you've done everything according to the plan you'll be allowed to take control over this new Buraq by hacking into the control panel. Keep repeating these actions until you get to the last Buraq in the armada. This will trigger a new cut-scene.

Hidden bonuses: 2
Level walkthrough: Take your time to watch a new cut-scene and begin this level by heading upwards, because you'll have to return to the city again. When you're at the top look around to locate the first bonus item. It'll be floating in the air and you'll have to start swinging using one of the nearby street lamps to get to the object.
You may now start moving towards your current destination. I would recommend that you remain on the main road, because you'll be dealing with a lot of radiation here. Enter the tunnel and deal with a relatively large group of enemy soldiers. Proceed to the exit once they've been eliminated.
I guess you won't be too surprised to encounter new guards when you exit the tunnel. Eliminating them shouldn't be a big problem. Keep heading towards the designated area which is going to be a large red platform.
Head to a lower level and defeat the last group of enemy soldiers. Explore the area near the abyss and you shouldn't have any problems finding the second bonus item. Once the object is in your possession proceed to the red platform. Stepping on it will trigger a cut-scene and you'll automatically advance to the next mission.
Hidden bonuses: 2
Level walkthrough: Ignore a small landing pad located in front of you, because you'll return here later on. Instead turn around and get to the top of a red platform. Doing this will allow you to collect the first bonus item.
Head down and approach the ledge. You should notice the second bonus item floating in the air. Make a suicidial jump and catch the object. Once you've taken it quickly attach yourself to a wall and return to the upper levels.
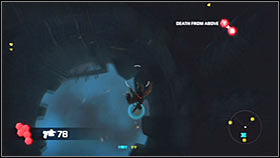
There are three cooling mechanisms in the area and it'll be up to you to decide in what order you want them to be destroyed. I would recommend that you start off by heading towards the device where several pods have landed. Make sure to eliminate hostile troops along the way and drop down to a new platform. Approach the pods and choose a HIKER or a machine gun. Leave the grenade launcher for later.
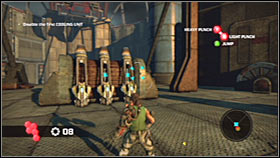

The device itself is being guarded by other soldiers, however you'll have to be ready to destroy a new Polycraft as well. Your newly acquired machine gun should do the trick as long as you avoid missiles being fired by the Polycraft. Secure the area and use your bionic arm to destroy a control panel. Watch a short cut-scene, informing you about your success.
It would now be a good idea to return to the pods in order to collect a grenade launcher. There are two more panels for you to destroy and in both cases aside from standard guards you'll also be dealing with Biomechs. Make sure to use the grenade launcher or normal grenades to destroy all the mechs.
Destroying all three panels will allow you to proceed to the bossfight. Return to the area where you've started exploring the Constructor. Notice that you can now head towards a landing pad. Watch a cut-scene upon your arrival, informing you that you'll have to defeat Groeder in order to advance to the next level.
Let's start off by saying a few things about the possible ways of the boss attacking your character. Thankfully his moves can be easily avoided. During the first phase he'll mostly try to jump. The idea here is to force Spencer to jump before Groeder touches the ground, so you won't be affected by his shockwave.
The second of Groeder's attack is a dashing sprint. You can prepare yourself for this attack when you notice a red fog gathering around the boss. All you have to do here is to perform a dodge move by pressing the LB button and by turning the left analog stick to either left or right.
In both cases you should notice that after the attack Groeder needs a moment to rest and that you can see his back. This is your opportunity to perform a counterattack by grabbing him with your hook and performing a zip kick.
Watch out, because after Groeder loses about a half of his energy new drones will show up near the helipad. You don't have to destroy the drones. Instead keep running, so you won't become an easy target for them. Keep attacking the boss with your zip kick moves and eventually he'll die. Watch a new cut-scene.
Hidden bonuses: 3
Level walkthrough: Get ready, because you'll have to defeat a few Biomechs at the start of this new level. All the mechs will appear in standard versions, however you'll still have to be very careful. I would recommend that you remain near the area where you've started, but watch out not to step into irradiated zones.
Don't worry if you run out of ammunition for your grenade launcher, because there are A LOT of pods in the area. Reaching them shouldn't be a big problem, even though you'll have to kill a couple of guards. I would recommend taking a rocket launcher and using it right away on the mechs.
Once you've won inspect the area to the left of the pods. Get to an upper ledge using your bionic arm and you'll find the first bonus item. Drop down and proceed towards a small canyon located next to the pods.

There are about ten guards separating you from the second set of the pods. You won't encounter any other mechs, so you may use your most powerful weapons to secure the area. Once you've won inspect the area near the cliff to find the second bonus item.
Obviously you can rearm yourself again using the second set of the pods, but it won't be absolutely necessary. Keep heading towards the mountain. Before you enter the complex make sure to check all boxes, because the final third bonus item will be hidden under one of them.
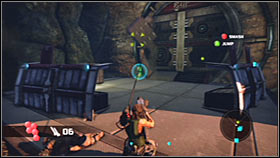
Proceed to the underground complex. You'll find pods here as well, so you're free to choose the weapon you like the most. Go to the room located to your right and you'll be rewarded with a cut-scene. Go back to the main corridor and head further into the complex. The first group of enemy soldiers will greet you near a new passageway. Use a HIKER or a machine gun to kill them.
When you get to a large dome travel to your right. Spencer will encounter other enemy units along the way, however killing them is going to be very easy. You don't even have to use your guns, because there are plenty of throwable objects in your vicinity. End this level by heading towards the door.
Hidden bonuses: 0
Level walkthrough: Thankfully the final level of the game is going to be very easy. Your opponents are going to be "angels" and your objective will be to eliminate them. Notice that you'll be racing against time, preventing Spencer from being crushed. Each time you've grabbed a new angel follow the instructions on the screen by moving the left analog stick in one of four directions and by repeatedly pressing the B button.

If you've done both attacks according to the plan Spencer will automatically kill the angel. When you're in the air focus on using your bionic arm to grab the next opponent. Don't release the trigger and wait for Spencer to reel himself in.
There are about five angels for you to kill, but in each case the tactics stay exactly the same, so you won't be surprised by anything. Finish off the last opponent and you'll be rewarded with the final cut-scene. Congratulations on finishing the game!

Here's a list of all challenges from Arm and Wire Action category:
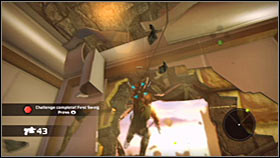
First Swing
Requirements: Swing on a rope.
Comments: You can complete this first challenge right after you've received it by grabbing the nearest object and swinging once.
Reward: New challenge.
Kick in the Back
Requirements: Perform a Zip Kick move twice on a single opponent.
Comments: This is also a very easy achievement - you can complete it by attacking the first opponent you meet.
Leap Up!
Requirements: Perform a Leap Up move.
Comments: Fulfill this side challenge right away, while you're still inside the building.
Hand-to-Hand
Requirements: Defeat an opponent in hand-to-hand combat.
Comments: Use melee hits activated by pressing the B button on one of the first opponents you meet.
Reward: Light Armor.
Reel In
Requirements: Reel yourself in three times.
Comments: Similar difficulty level to First Swing and Leap Up! challenges. Reel yourself in right away, while you're still inside the building.
Swinger
Requirements: Swing three times in a row.
Comments: I would recommend that you complete this challenge while you're still in Ascension City Downtown I.
Reward: New challenge.
Speed Swinger
Requirements: Swing five times in a row.
Comments: Just as before, do this while you're still in Ascension City Downtown I Continued, because otherwise you would have problems finding a good spot.
Reward: New challenge.
Monkey Man
Requirements: Swing longer than 30 meters without touching anything.
Comments: Remember that you won't be allowed to touch other objects, not just the ground.
Train Block!
Requirements: Pull down the train.
Comments: You won't have to think too hard, because completing this challenge is mandatory if you want to continue with the mission.
Reward: New challenge.
Train Wreck
Requirements: Pull down three trains.
Comments: Notice that you will have to pull down only two trains, because the first one is from the previous objective. Also - you'll encounter more trains than the required three, so you won't have to spend too much time searching for them.
Incoming!
Requirements: Kill a single enemy unit using Death from Above ability.
Comments: You don't have to complete this objective right away. Wait for a good moment before you land on someone else's head.
Rewards: New challenge, Ammunition Upgrade 2.
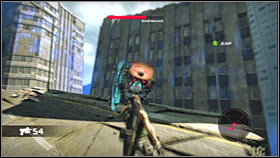
Worthy Foe
Requirements: Kill three mechs in hand-to-hand combat.
Comments: I guess you may feel confused, because zip kicks are also part of hand-to-hand combat and that's how you should eliminate all three mechs. I would recommend completing this assignment as soon as possible, before you start encountering upgraded Biomechs.
Reward: The Bullet Hoser.
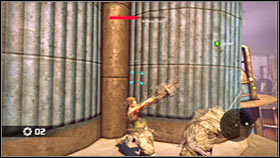
Jabber Man
Requirements: Kill 10 enemies using hand-to-hand combat.
Comments: The good moment to complete this objective is the industrial zone where you'll encounter a lot of enemy snipers.
Reward: New challenge.
Feel the Beat, Y'all!
Requirements: Kill 30 enemies using hand-to-hand combat.
Comments: Very similar assignment to Jabber Man. Keep attacking enemy units, focusing on eliminating the snipers using hand-to-hand techniques.
Reward: Bionic Armor.
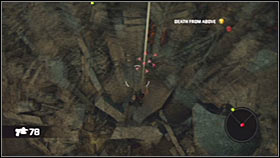
Barrage
Requirements: Kill three guards using a single Death from Above attack.
Comments: Once again - you shouldn't be in a lot of hurry. Be patient until you encounter a larger group of enemy soldiers.
Reward: New challenge.
Receiving End
Requirements: Throw an object at the opponent.
Comments: A simple assignment you have to accomplish if you plan on receiving harder challenges. I would recommend to fulfill it during the Polycraft duel or when you enter the caves.
Reward: New challenge.
The Pinball Effect
Requirements: Kill two enemies with a single throw.
Comments: You shouldn't have problems completing this challenge during your stay in the caves. Collect a rock and throw it at a small group of enemy soldiers and if you're lucky at least two of them will die instantly.
Reward: New challenge.
Pull!
Requirements: Destroy a Polycraft using a Throw ability.
Comments: Sadly this won't apply to the first flying machine you've destroyed prior to receiving this assignment. As a result you'll have to wait until you leave the cave complex.
The Pitcher
Requirements: Kill 50 soldiers using the Throw ability.
Comments: Keep using objects from the environment and eventually you won't have to worry about this task anymore.
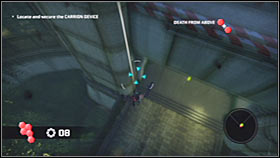
Shellshock
Requirements: Kill 5 soldiers using a single Death from Above attack.
Comments: This is a successor to Barrage assignment. Make sure to choose your spot carefully and land in the middle of the group. You can also try injuring enemy soldiers prior to attacking them with this ability.
Whoo-paah!
Requirements: Kill a guard using a Whip Spin attack.
Comments: This is a very easy challenge and the sole purpose of it is to familiarize you with this move works. Press Y+B when your adrenaline bar is fully charged and while standing next to an enemy.
Rewards: New challenge. Super Charges.
Lash Out
Requirements: Eliminate four guards with a single Whip Spin attack.
Comments: You don't have to complete this assignment right away. Find a larger group, stand in the middle of it and initiate the attack.
Reward: New challenge.
Go To Heaven
Requirements: Use the Kite ability to eliminate a single enemy unit.
Comments: This is a very simple achievement. All you have to do is to grab the opponent, lift him up in the air and use your firearm to kill him before his body touches the ground.
Reward: New challenge.
Down To Earth
Requirements: Use the Kite ability to throw an opponent at an another guard.
Requirements: This challenge has a similar start to Go To Heaven, because you will have to grab one of the opponents. The next step is to throw him at one of the other guards, like you did with the objects from the environment.
Reward: New challenge.
Shoot 'Em Up!
Requirements: Use the Kite ability to eliminate 15 enemy guards.
Requirements: Very similar objective to Go To Heaven, aside from you having to eliminate more enemy units. A good idea to hunt them down is while you're inside the caves.
Reward: Faster Reload 2.
Crowd Control
Requirements: Eliminate six guards with a single Whip Spin attack.
Comments: You can wait until you've advanced to the final levels of the game, because that's when you'll be encountering large groups while exploring small rooms.
Reward: New challenge.
Whip 'Em Good
Requirements: Kill 50 guards with Whip Spin attacks.
Comments: This is the final assignment from this group. You shouldn't have any problems completing it as long as you don't forget to use this attack whenever your adrenaline bar is fully charged.
Here's a list of all challenges from Enemy Combat category:
Blood Trial
Requirements: Kill 10 guards (Grunts).
Comments: Piece of cake, especially since you won't have to perform any other moves while killing them.
Rewards: New challenge, Hip Shot.
Slayer
Requirements: Kill 25 guards (Grunts).
Comments: This is also a very easy assignment. Keep attacking the guards using your favorite moves.
Reward: New challenge.
Headshot Bonanza
Requirements: Kill 50 guards with headshots.
Comments: I would recommend that you start completing this objective right away. Each time you attack a new group aim at the heads of your opponents, especially when you're going after single guards.
Nemesis
Requirements: Kill 350 guards (Grunts).
Requirements: I guess you won't be surprised to hear that you'll spend a lot of time trying to complete this objective. It shouldn't be a problem as long as you'll explore all levels and kill anyone you encounter. You should be done with this task while still playing the second act of the game.
The Bold Approach!
Requirements: Damage a Biomech with a Death from Above attack.
Comments: I would strongly recommend that you fulfill this assignment during your first encounter with the Biomechs. Attack the mech located below. Remember that you must only damage it, not destroy it.
Reward: New challenge.
Fair Fight!
Requirements: Defeat a single Biomech.
Comments: This is a very easy assignment, because sooner or later you'll have to defeat a Biomech in order to advance with the mission.
Rewards: New challenge, Faster Reload 1.
Cracker
Requirements: Defeat five Biomechs.
Comments: Another easy assignment, because you'll have to defeat a lot more than five Biomechs during the course of an entire game.
Reward: New challenge.
Anti-Air Measures!
Requirements: Destroy a single Polycraft.
Comments: You can follow the instructions given to you by the game (zip kick attacks) or you can use your firearms, preferably a rocket launcher.
Rewards: New challenge, Hollow Point.
Torn Into Pieces
Requirements: Destroy a Polycraft while still in the air.
Comments: Easier than it sounds. You can complete two challenges (this one and Anti-Air Measures!) at the same time by attacking the first Polycraft with zip kicks.
Poly Cruncher
Requirements: Destroy 10 Polycrafts.
Comments: It shouldn't be a problem, as long as you don't avoid any Polycrafts. There are more of them to be found during the course of the game.
Biomech Sweeper
Requirements: Defeat 15 Biomechs.
Comments: This is also an easy challenge, especially since you won't be allowed to avoid any mechs. Also - notice that you're starting with five destroyed biomechs from the previous assignment from this group (Cracker).
Spence is in the Air
Requirements: Destroy a Polycraft using the adrenaline move (finisher).
Comments: Make sure that your adrenaline bar is fully loaded. Attach yourself to a flying machine and perform a "fatality" by pressing Y+B.
Come Out and Play
Requirements: Destroy a Biomech using the adrenaline move (finisher).
Comments: Similar challenge to Spence is in the Air. Stun the mech, attach yourself to it by pressing the A button and perform an adrenaline move by pressing Y+B buttons.
Reward: Medium Armor.
Here's a list of all challenges from Weapon Usage category:
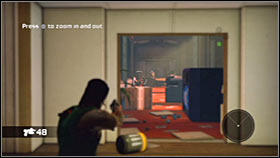
Close Up
Requirements: Kill a guard with a camera zoomed in.
Comments: I would recommend that you complete this objective on the first guard you meet (corridor with the red carpet). Press the right analog to zoom in the view and eliminate him with a single round or a few shots to the chest.
Reward: Precision.
Two Hit Wonder
Requirements: Kill two enemy guards with a single HIKER round.
Comments: When you get your hands on the HIKER make sure to wait until you come across a larger group of enemy soldiers.
Rewards: New challenge, In Your Face.
Drive-by
Requirements: Kill three guards while swinging and using the HIKER.
Comments: Don't worry if you fail to finish this challenge while fighting the first group, because you'll have other opportunities to use the HIKER later on during the game.
Rewards: New challenge, Sledgehammer.
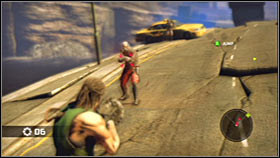
Lead Sprayer
Requirements: Kill 30 guards with a HIKER.
Comments: Thankfully the game will start counting them for you right away, not after you've unlocked this challenge.
Kaboom
Requirements: Kill an enemy guard using a grenade.
Comments: Easy assignment which will unlock other challenges for you.
Rewards: New challenge, Ammunition Upgrade 1.
The Turn
Requirements: Kill four enemies with a single grenade.
Comments: I would recommend that you try completing this objective once you're inside a tunnel with four guards nearby, however you can also wait for a better opportunity. Surprise the enemies while trying to throw the grenade, so they won't have enough time to scatter.
Rewards: New challenge, Grenadier.
The River
Requirements: Kill five enemies with a single grenade.
Comments: Be patient and wait until Spencer has encountered a larger group of enemy soldiers.
Rewards: Master Blaster.

Man Locked Up
Requirements: Kill a soldier using Tarantula's targeting system.
Comments: I would recommend waiting until you've dealt with the Polycrafts. Target one of the soldiers by pressing and holding the right trigger and fire a single missile at him.
Rewards: New challenges, Four the win.
Rocket Man
Requirements: Eliminate 10 targets using a Tarantula rocket launcher.
Comments: Notice that you don't have to focus only on killing soldiers, even though it's going to be easier. You can also use the rocket launcher to destroy Polycrafts and Biomechs.
Air to Surface
Requirements: Kill six soldiers using a Tarantula rocket launcher and while swinging on a rope.
Comments: You've fulfilled a similar assignment before, however this time you must use a rocket launcher. Keep trying each time you've found new rockets and aim at larger groups of enemy units.
Stroke of Luck
Requirements: Kill an enemy guard with a Bulldog grenade launcher.
Comments: Obviously this the easiest challenge from the "Bulldog group". Use this new weapon to kill one of the soldiers.
Reward: New challenges.
Explosive Delivery
Requirements: Kill two guards with a grenade launcher while swinging on a rope.
Comments: You shouldn't have any major problems completing this challenge. I would recommend that you choose a roof area where you found the Bulldog for the first time. Be precise to eliminate both guards with a single hit.
Reward: Reloaded.
Let the Dog Out
Requirements: Kill three enemies with a single hit using a grenade launcher.
Requirements: Get closer to a group you plan on eliminating and attack them before they move away from each other.
Rewards: New challenge, Firestorm.
Bulldog's Eye
Requirements: Kill two guards at the same time with a grenade launcher and from 120 meters.
Comments: A lot of requirements, however the task itself isn't that hard. I would recommend fulfilling it when you're in the first area of the park. Land on an upper ledge and attack the first camp from a large distance.
Reward: Sharpshooter Calm.
Here's a list of all challenges from Bosses category:
Out of the Bush
Requirements: Defeat Buraq.
Comments: Defeat the fighter to win this challenge (first act boss).
Reward: Six Shooter.

Can you dig it?
Requirements: Defeat Mohole.
Comments: Defeat the worm to win this challenge (second act boss).
Rewards: No Clipping, Red Matrix.

The Constructor
Requirements: Destroy the Constructor by defeating Groeder.
Comments: Defeat Groeder to win this challenge (third act boss).
Reward: White Matrix.
Here's a list of all achievements available in Bionic Commando with additional information about their value and clues how to get them. For more info on the optional assignments make sure to go to Challenges section in my guide.
ACHIEVEMENT
POINTS
REQUIREMENTS
Blood Trial
5
Complete challenge: "Blood Trial".
Close Up
5
Complete challenge: "Close Up".
Kaboom
5
Complete challenge: "Kaboom".
Leap Up!
5
Complete challenge: "Leap Up!".
Man Locked Up
5
Complete challenge: "Man Locked Up".
Stroke of Luck
5
Complete challenge: "Stroke of Luck".
Swinger
5
Complete challenge: "Swinger".
Train Wreck
5
Complete challenge: "Train Wreck".
Down to Earth
10
Complete challenge: "Down to Earth".
Explosive Delivery
10
Complete challenge: "Explosive Delivery".
Fair Fight
10
Complete challenge: "Fair Fight".
Incoming!
10
Complete challenge: "Incoming!".
Jabber Man
10
Complete challenge: "Jabber Man".
Kick in the Back
10
Complete challenge: "Kick in the Back".
Receiving End
10
Complete challenge: "Receiving End".
Rocket Man
10
Complete challenge: "Rocket Man".
Slayer
10
Complete challenge: "Slayer".
Spence is in the Air
10
Complete challenge: "Spence is in the Air".
The Pinball Effect
10
Complete challenge: "The Pinball Effect".
The River
10
Complete challenge: "The River".
Torn into Pieces
10
Complete challenge: "Torn into Pieces".
Two Hit Wonder
10
Complete challenge: "Two Hit Wonder".
Whoo-paah!
10
Complete challenge: "Whoo-paah!".
Worthy Foe
10
Complete challenge: "Worthy Foe".
Barrage
15
Complete challenge: "Barrage".
Cracker
15
Complete challenge: "Cracker".
Let the Dog Out
15
Complete challenge: "Let the Dog Out".
Pull!
15
Complete challenge: "Pull!".
Shoot 'Em Up!
15
Complete challenge: "Shoot 'Em Up!".
Air to Surface
20
Complete challenge: "Air to Surface".
Come Out and Play
20
Complete challenge: "Come Out and Play".
Crowd Control
20
Complete challenge: "Crowd Control".
Drive-By
20
Complete challenge: "Drive-By".
Biomech Sweeper
25
Complete challenge: "Biomech Sweeper".
Feel the Beat, Y'all!
25
Complete challenge: "Feel the Beat, Y'all!".
Headshot Bonanza
25
Complete challenge: "Headshot Bonanza".
Nemesis
25
Complete challenge: "Nemesis".
Poly Cruncher
25
Complete challenge: "Poly Cruncher".
Shellshock
25
Complete challenge: "Shellshock".
The Pitcher
25
Complete challenge: "The Pitcher".
Whip 'Em Good
25
Complete challenge: "Whip 'Em Good".
Out of the Bush
30
Complete challenge: "Out of the Bush".
Can you dig it?
40
Complete challenge: "Can you dig it?".
Bionically Challenged
50
Complete all challenges in the game.
Choke on that
50
Hidden achievement. Complete challenge: "The Constructor".
End Game
50
Finish the game on normal difficulty setting.
The Collector
50
Collect all hidden items. Check the main section of my guide for detailed instructions on where to find all 150 of them.
I Got Hard
75
Finish the game on hard difficulty setting.
I Went Commando
100
Finish the game on commando difficulty setting.



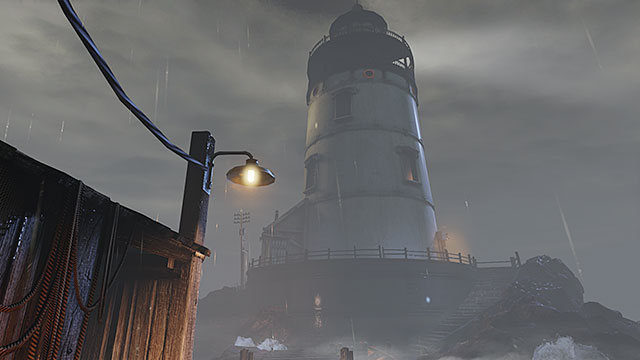 BioShock: Infinite Game Guide & Walkthrough
 Bioshock Game Guide & Walkthrough
 Brothers in Arms: Hells Highway Game Guide & Walkthrough
 Borderlands: The Pre-Sequel! Game Guide & Walkthrough
 Borderlands 2 Game Guide & Walkthrough