


Hi. Welcome to our comprehensive BioShock strategy guide. We've done all we could to make it one of the most complete and reliable sources of information about this amazing game *in the world* (tadah!). We have detailed maps of all the levels, as well as complete lists of plasmids, tonics, diaries, weapons - all that followed by a exhaustive walkthrough, of course. We give you hints on using each and every feature of the game. It doesn't matter if you're a beginner or an experienced player. We bet you'll find a lot of useful stuff in here.
Have fun!
Krzysztof "Lordareon" Gonciarz & Wojciech "Soulcatcher" Antonowicz
Please keep in mind: To make the guide as useful as possible, we use colored text to indicate certain types of objects. All the items that you should find on a given level (plasmids, tonics, weapons) are written in blue. Green text indicates locations corresponding to numbers on our maps. Bronze is the color for all the audio diaries.
LEVEL SUMMARY:
# of audio diaries: 2
# of weapon upgrade stations: 0
New weapon types: Wrench, Pistol
Plasmids
Tonics
Electro Bolt
none
The game begins with a plane crash scene. When you are floating in the ocean, head towards the lighthouse and get inside. Get on the bathysphere and pull the lever in there. You'll be on your way to Rapture.
After the Splicer gets away, pick up the radio. You'll come to know Atlas - you'll be getting objectives from him for quite a long time now.

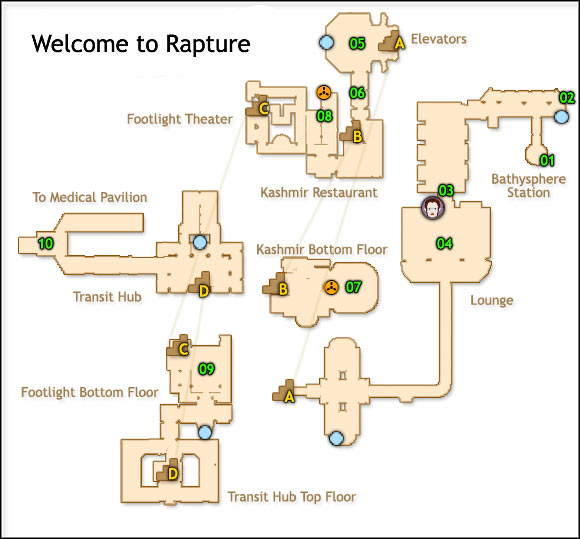
01 - Here is where we really start our adventure. To make the best use of our guide, try to look on our maps as often as necessary. Also, try to walk around the levels in the order we suggest with our green numbers.
Get to higher ground - this is your first objective n the game.
02 - A Vita-Chamber to be found here. Vita-Chambers are sort of respawn locations for our protagonist. Each time you're defeated, you'll be reborn in the nearest Vita-Chamber, no consequences whatsoever.
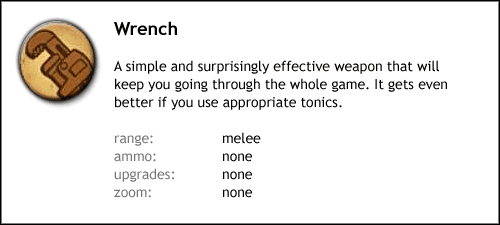
03 - Pick up the wrench. It will serve you as a weapon of choice during most parts of the game. Why? Simple: ammo doesn't come in numbers in BioShock, and the wrench doesn't require any. Use the wrench to smash the rubble and crouch to get further.
HINT: Remember to search everything and everyone in the game. Each body and each container can contain some useful items, such as ammo, health packs or EVE hypos. Your inventory is unlimited in space so don't hesitate to collect lots of junk. Some of it might come in handy once you start using U-Invent stations later in the game.
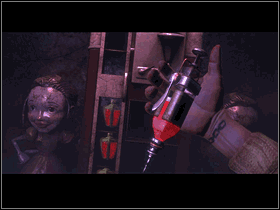
04 - You'll meet your first adversary here. It's a Thuggish Splicer. Defeat him using the Wrench and go up the stairs. Search through trash cans in there for some hypos, then pick up your first plasmid - Electro Bolt. After a short scene use your newly acquired power to open the door (hit the controls to the left). Grab some snacks from the table before you go.
HINT: Possibly the best combo in the game is to hit an opponent with an electro bolt and then smash him with the wrench.
HINT: Use right mouse button to switch between weapon and plasmid attacks.
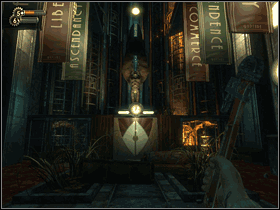
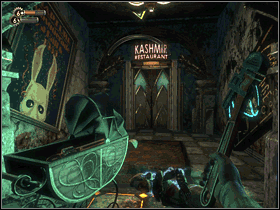
Go through the passage and run along the corridor, through the destroyed plane fragment. Once you're on the other side, defeat another Splicer. There are some health packs and EVE hypos in here. Go through the door, defeat a Splicer and go further. Enter the elevator and go up.
05 - Atlas asks you to help him rescue his family. Well, you don't have anything better to do, do you?
06 - Kill the Splicer and take a pistol from the pram.
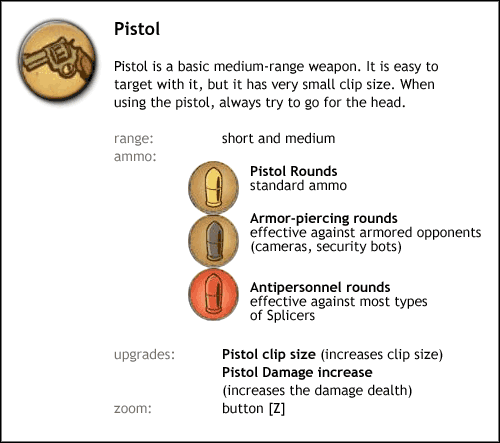
HINT: There are a few types of ammo for each weapon. Press [Shift] to check out which ammo types you can equip.
07 - Go down the stairs to the bottom floor. You'll meet a Lead Splicer in here. The difference between them and the Thugs is that they can use firearms. Don't use pistol for now, these enemies can be easily dealt with using the wrench. Also, try out shooting an Electro Bolt into enemies who are standing in water (there's an Achievement for that).

You'll find your first Audio Diary here. These are the recordings that contain the essence of the game's story. Try not to miss them.
AUDIO DIARY: [New Year's Eve Alone] - Diane McClintock.
Head back up and go towards the toilets. Enter the right toilet first.
08 - AUDIO DIARY: [Hole in the Bathroom Wall] - Steve Barker.
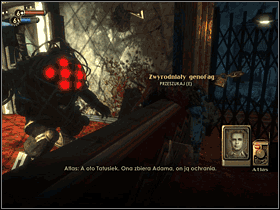
09 - Here you'll see a Big Daddy showing off for the first time. Remember: Big Daddies are always neutral towards you, unless you attack them first.
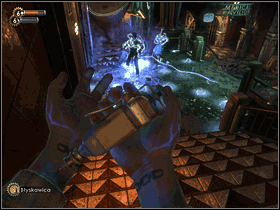
Destroy the padlock and go further. When you see three Splicers in water, shoot them with an Electro Bolt.
When you approach the passage to Neptune's Bounty, a security alarm will sound. Defeat all the Splicers (again, notice that they're jumping into water!) and go towards the Medical.
10 - After a short speech from Andrew Ryan go through the hatch.
LEVEL SUMMARY:
# of Audio Diaries: 17
# of weapon upgrade stations: 0
# of Little Sisters: 2
New weapon types: Machine Gun, Shotgun
Plasmids
Tonics
Incinerate!
Hacker's Delight
Telekinesis
Security Expert
Enrage (for sale)
Speedy Hacker
Wrench Jockey
Static Discharge
Armored Shell (for sale)
EVE Link (for sale)
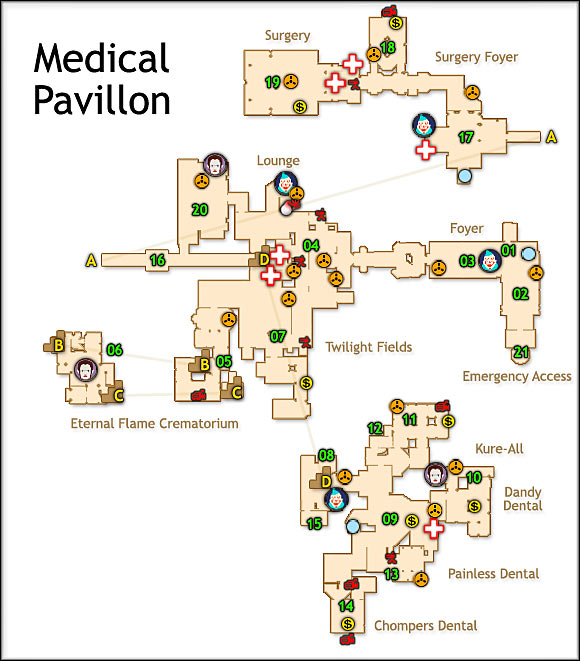
01 - Leave the hatch and head towards the foyer. Hack the security bot that blocks the door to the South. When you succeed, this bot will fight by your side until it's destroyed.
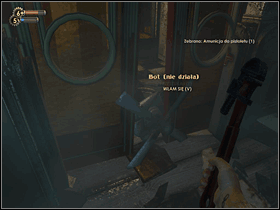
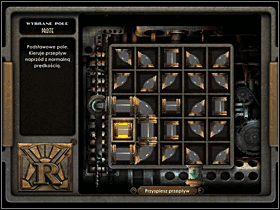
HINT: A detailed description of hacking can be found in an appropriate section of the guide.
02 - There's an Audio Diary in here.
AUDIO DIARY: [Adam's Changes] - Steinman
Go up the stairs and use the lever. A few Splicers will appear. A door opened behind your back so turn around and go through it. There's a Machine Gun at the other end.
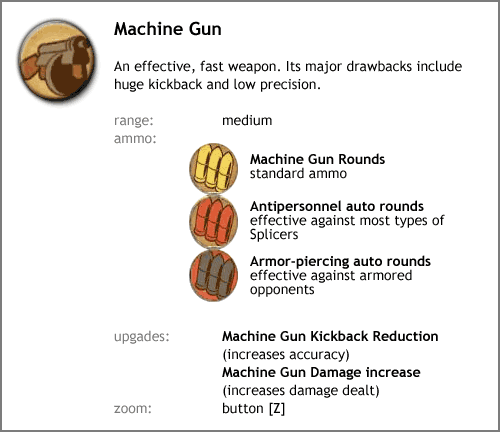
03 - Use another switch and a few new enemies appear. Defeat them and collect another Audio Diary.
AUDIO DIARY: [Released Today] - Diane McClintock
Go through the door into Medical Pavillon. You'll have another vision along the way - you'll see some girl's ghost. Use the switch to open the door at the end.
04 - There are two turrets here (check out the map), as well as 5 audio diaries. To make things easier, strike both turrets with the electro bolt and try to hack them [press V to hack]. This way they will help you eliminate your opponents around here.
AUDIO DIARY: [Higher Standards] - Steinman
AUDIO DIARY: [Parasite Expectations] - Andrew Ryan
AUDIO DIARY: [Vandalism] - Andrew Ryan (it is next to the machines to the north)
AUDIO DIARY: [Love for Science] - Tenenbaum
AUDIO DIARY: [Limits for Imagination]- Steinman
Go South, through the door that says Eternal Flame.
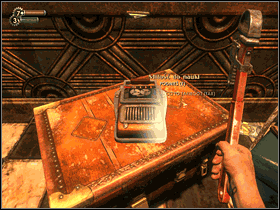
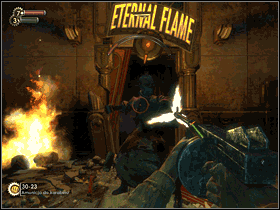
05 - Take an audio diary (it's below the portrait) and go further due South. You'll meet a new type of enemy here - a Nitro Splicer. These folks mostly use grenades to bomb you from a distance.
AUDIO DIARY: [Surgery's Picasso] - Steinman
When you see the furnace, press the button nearby to burn the body and you'll get your first tonic: Hacker's Delight. For more information on tonics check out the appropriate section of the guide. For now, go up the stairs.
06 - Crouch and go through the opening in the wall into the office of sorts. Here you find your second plasmid - Incinerate! Take it and use it on a nearby oil patch to dispose of all the enemies around.
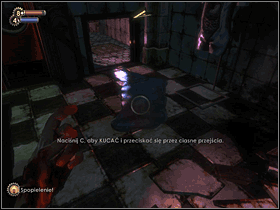
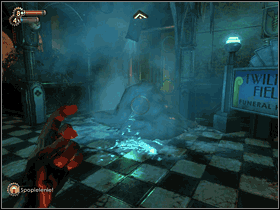
07 - You can now use your Incinerate power to melt the ice that blocks entrance to Twilight Fields. In the western part you'll see a door that's code protected. The code is 0451. There's some ammo inside. Go further south and swim across the canal. Here's another tonic: Security Expert. When you head back, you'll be attacked by a Thug.
08 - Go back to the main hall and go back the stairs to the dental section. Use Incinerate to melt the ice again. There's an audio diary.
AUDIO DIARY: [Freezing Pipes] - McDonagh
09 - You'll see a shotgun in the middle of a room. Take it and the lights will go out for a moment. You now have to hold back a few Splicers that come at you. Near the entrance to Dandy Dentals you'll see another audio diary.
![AUDIO DIARY: [Useless Experiments] - Tenenbaum - Medical Pavillon - p. 2 - Walkthrough - Bioshock - Game Guide and Walkthrough](https://game.lhg100.com/Article/UploadFiles/201512/2015121216504271.png)
AUDIO DIARY: [Useless Experiments] - Tenenbaum
10 - In Dandy Dental you'll see a room with a "tennis" look to it. Enter and grab another plasmid - Telekinesis.
HINT: You now only have 2 plasmid slots so you have to get rid of one of the plasmids for some time. We strongly suggest you stick to Electro Bolt and Telekinesis. By the way, Telekinesis is used by clicking the mouse button and holding it to grab objects, then releasing to throw them. You can use this power in combat (throw explosive barrels), to destroy rocket turrets, or to solve some minor puzzles.
AUDIO DIARY: [Testing Telekinesis] - Suchong
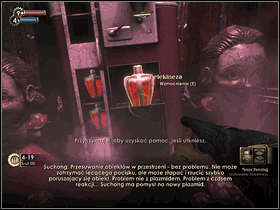
11 - Enter Kure-All. There's a rocket turret here - it's a good opportunity to get acquainted with your Telekinesis ability. Grab its projectiles and throw them back at it. Go further to look around the clinic.
AUDIO DIARY: [Enrage trial] - Suchong
12 - Near the audio diary you'll see a small air vent. Smash it and get inside. You'll find a secret room containing a great tonic to have: Wrench Jockey.
13 - To get to Painless Dental you have to smash the window and jump through it (crouching). It's good to get rid of the turret first (you can use Electro Bolt to stun it, but remember it will last but a couple of seconds). Inside you'll see an audio diary and a tonic: Speedy Hacker.
AUDIO DIARY: [Plasmids are the paint] - Suchong.
14 - To get inside Chompers, you have to use Telekinesis to grab the key that you can see through the window. When you have it, use it to open the door. There's some ammo and a safe in there.
15 - When you head back up, use the Electro Bolt on the door mechanism near the last room you haven't visited yet.
16 - Go westwards through the corridor.
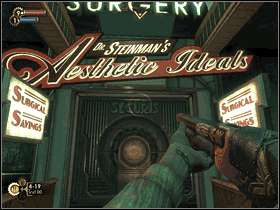
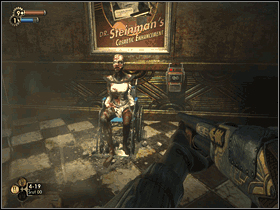
17 - Some Nitro Splicer will block your way from here. When he starts throwing grenades at you from the balcony, grab one of them with Telekinesis and throw it into the rubble that blocks the way. Go through. You'll find another tonic along the way - Static Discharge.
AUDIO DIARY: [Symmetry] - Steinman
18 - There's a safe and an audio diary in here.
AUDIO DIARY: [Aphrodite Walking] - Steinman
19 - Here is where you finally face doctor Steinman. He's quite resistant to blows and can cause you a little problem. The best way to kill him is to stun him with an Electro Bolt and then shoot him with a Shotgun (short range). Try to take cover whenever you are under heavy fire. When you see him running into the watery section of the arena, use an Electro Bolt to electrify the water.
When you defeat him, grab the key from him body. Also, search the body that's laying on his table for another audio diary.
AUDIO DIARY: [Not what she wanted] - Steinman
20 - When you head back to the main section, Ryan will blow up one of the corridors. Take left and you'll see a scene with a Little Sister. You now have to decide whether you want to harvest her (160 ADAM) or rescue her (80 ADAM). This choice, well, matters. If you want some advice on what to choose, please read the "Little Sisters and Big Daddies" section of our guide. Beware of the spoilers, though.
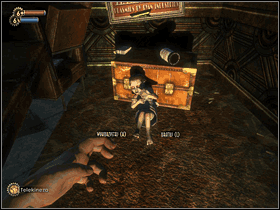
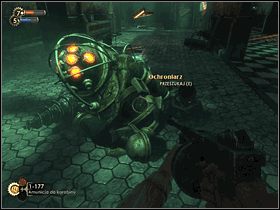
Use the nearby Gatherer's Garden vending machine to spend your ADAM. At this level we think it's best to buy some upgrades to health and EVE - Enrage plasmid that can be found here didn't really impress us in terms of deadliness. Notice the audio diary near the machine.
AUDIO DIARY: [Gatherer's Vulnerability] - Steinman
21 - Once you go back to the central part of the level, you'll see another Little Sister. This one is protected by a Big Daddy. You shouldn't skip the Big Daddy fights in the game, you know. This might seem a little tough at first, but saving/killing the Little Sisters is essential to the game. Your weapons are quite weak now, but remember that you have infinite number of "lives" in the game, and Big Daddy's health doesn't regenerate. You do the math. Well, for now it'd be best for you to use Electric Bucks to deal with him.
When you kill Big Daddy and get the ADAM, you'll be done with this level. Head towards the emergency exit and use the lever once more. The alarm will be turned off and your passage to Neptune's Bounty will be finally open.
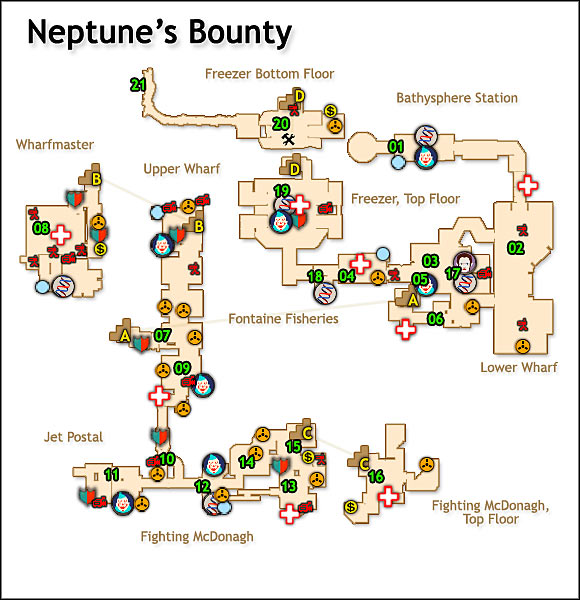
LEVEL SUMMARY:
# of Audio Diaries: 19
# of weapon upgrade stations: 1
# of Little Sisters: 3
New weapon types: Grenade Launcher
Plasmids
Tonics
Hypnotize Big Daddy (a reward for saving 3 Little Sisters, to be collected by the Gatherer Garden)
Medical Expert
Target Dummy(for sale)
Shorten Alarms
Winter Blast (for sale)
Wrench Lurker
Security Bullseye
Focused Hacker
Extra Nutrition (for sale)
01 - Go along the corridor up to the big room.
02 - There's a Little Sister here, altogether with her Big Daddy. This one's a little bit different from the one you've fought before. He's mostly using firearms (this type of Big Daddy is called Rosie). There's an audio diary in here as well, it's at the southern end of this room (you have to crouch and get near the turret there). Also, notice a tonic around the center of the room: Medical Expert.
AUDIO DIARY: [Bathysphere Keys] - Sullivan
03 - In this Gatherer's Garden you can buy some new plasmids and tonics (Winter Blast, Target Dummy, Extra Nutrition). May we suggest buying an extra plasmid slot?
HINT: When you rescue 3 girls, Tenenbaum will send you a gift that can be collected right here. It will contain 200 ADAM and a Hypnotize Big Daddy plasmid.
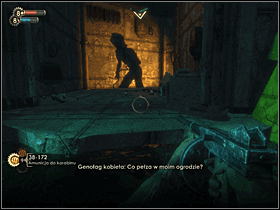
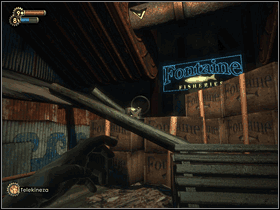
04 - Jump over the crates and "knock" on the door. Peach Wilkins will talk to you. He won't let you in unless you bring him 3 photos of Spider Splicers. One of these unpleasant types will attack you in a few seconds. Try to hold her off for a while and Atlas will help you by sending in a security bot. The damage you deal is too low for you to hurt her, but luckily enough she will run off after a while. Peach will send you a Grenade Launcher through the conveyor belt.
05 - Go down the stairs and go through the watery corridor until you see a code lock. The code is 5380 (you can also hack it if you like). There's an audio diary here.
AUDIO DIARY: [Timmy H. Interrogation] - Sullivan
06 - In this corridor you will see another Audio Diary. In order to get it, you have to enter the hole in the floor and go under it.
AUDIO DIARY: [Fontaine Must Go] - Andrew Ryan
07 - Head North through this corridor. Collect all the diaries along the way.
AUDIO DIARY: [Finding the sea slug] - Tenenbaum
AUDIO DIARY: [Picked up Timmy H.] - Sullivan (it's by one of the bodies in the middle)
AUDIO DIARY: [Masha come home] - Mariska Lutz (it's near the Little Sister vent)
AUDIO DIARY: [Watch Fontaine] - Andrew Ryan (it's by the Circus of Value)
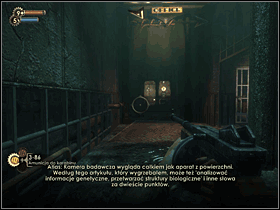
08 - Go through the vent near the turrets to grab yet another audio diary and some munitions.
AUDIO DIARY: [Have my badge] - Sullivan
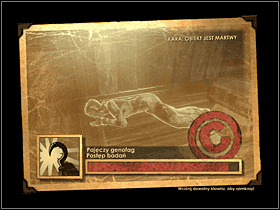
When you smash through the turrets, go through a hole in the wall and head along the corridor until you find a research camera. Take it and take a photo of a nearby Spider Splicer
HINT: You can find more info on using your camera (conducting research) in an appropriate section of the guide. Notice that it's best to start researching right from the start - meaning: now.
09 - After an explosion jump down through the window (notice the Security Bullseye plasmid here!). Grab two audio diaries as you progress.
AUDIO DIARY: [Adam Discovery] - Tenenbaum
AUDIO DIARY: [Eden Leaking] - McDonagh

10 - There's an Audio Diary at the junction.
AUDIO DIARY: [Fontaine's Smugglers] - Tenenbaum
11 - In Jet Postal you can see another Spider Spicer. Kill it and take its photo. Notice that when a Spider Splicer grabs the ceiling and starts walking around it, you can use Electro Bolt to bring it down. If you run out of "ammo" for the camera, you can buy some more film in most Circuses of Value. Grab an audio diary before you leave.
AUDIO DIARY: [Death Penalty in Rapture] - Andrew Ryan
12 - To find the audio diary hidden here, you must go into the water near the vital chamber and enter the vent. Once you're there, head to the other side of the tunnel.
AUDIO DIARY: [Meeting Ryan] - McDonagh
13 - There's another Audio Diary here, as well as a safe with some minor items. You can get into the hidden room by smashing the crates that block the entrance.
AUDIO DIARY: [Rapture changing] - McDonagh
14 - When going back from point [13], use Electro Bolt on the door mechanism to get here.
AUDIO DIARY: [Smuggling Ring] - Sullivan (table at the middle)
AUDIO DIARY: [Working late again] - Andrew Ryan (table by the window)
15 - In the toilet you can find a few proximity mines. To enter, you have to put in 5$.
16 - Go up the stairs. There's the last Spider Splicer you have to photograph in here. Before you head back to Peach's, look around the area here. In room nr 6 there's an audio diary (use Electro Bolt on the door). The code to room nr 7 is 7533. There's also an audio diary in there, as well as a tonic: Shorten Alarms. Before you leave the tavern, you might come across a Little Sister for some ADAM.
AUDIO DIARY: [Arresting Fontaine] - McDonagh
AUDIO DIARY: [Saw Masha today] - Mariska Lutz
17 - A new tonic appeared by the Gatherer's Garden: Wrench Lurker. Buy some upgrades if you have the currency and head to Fontaine's Fisheries. Knock on the door again. This time he will open it for you.
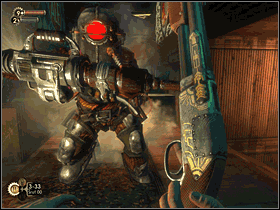
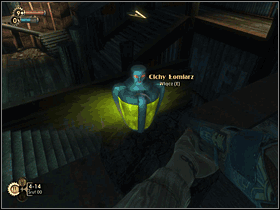
18 - There's a tonic frozen in the ice here: Focused Hacker. Use Incinerate to get to it. If you don't have this plasmid in any of your slots, use the nearby gene bank to enable it. You now have to place all your firearms into the pneumotube.
19 - Not surprisingly, you have to fight Peach in here. The difficulty about this fight is that you don't have any regular weapons: only your plasmids. Notice some security cameras around the area. You can hack them for some serious support. This way Peach will be under heavy fire at all times. You, meanwhile, can try to throw explosive barrels at him using Telekinesis. It's the best thing to do here as he's quite resistant to Electro Bolt and Incinerate. Of course, you can always try to chase him with a wrench. It isn't as stupid as it sounds.
After you beat him, take your weapons from another pneumotube. Take a look around - you can melt any pile of ice here for some additional items.
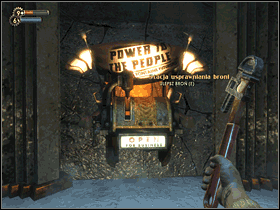
20 - In here you will see your fist weapon upgrade station. These ones are called Power to the People. Each of them gives you one free upgrade of choice, then shuts down irreversibly. Choose wisely, then. Before you leave, melt the ice to enter the storage to the right for another audio diary.
AUDIO DIARY: [Putting the screws on] - Peach Wilkins
21 - Once you're ready, head for the exit.
LEVEL SUMMARY:
# of Audio Diaries: 3
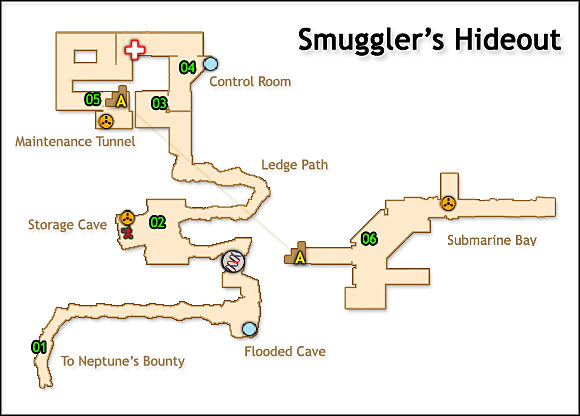
01 - Go along the corridor.
02 - Destroy the turret and take an audio diary.
AUDIO DIARY: [Meeting with Fontaine] - Peach Wilkins
03 - Smash the padlock and go through the gate.
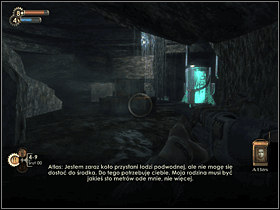
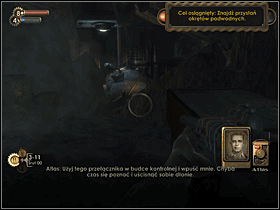
04 - Use the submarine control panel.
05 - Smash another padlock by the stairs and take an Audio Diary from there.
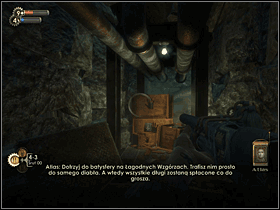
AUDIO DIARY: [Kraut Scientist] - Fontaine
06 - After the explosion head east to the exit. Yet another audio diary to be found.
AUDIO DIARY: [Offered a deal] - Peach Wilkins
LEVEL SUMMARY:
# of Audio Diaries: 16 (+ 1 after visiting Farmer's Market)
# of weapon upgrade stations: 1
# of Little Sisters: 2
New weapon types: Chemical Thrower
Plasmids
Tonics
Cyclone Trap (for sale)
Security Evasion
Electro Bolt 2 (for sale)
Hacking Expert
Safecracker (for saving 6 girls)
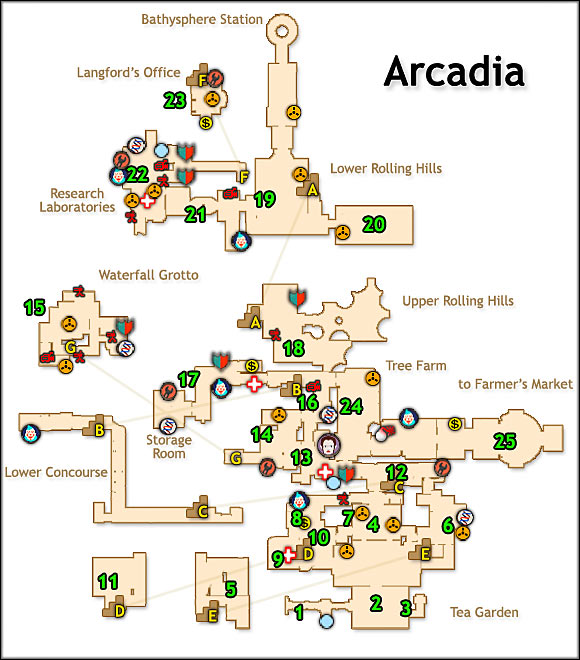
01 - Go along the corridor up to the end. Shoot the padlock to open the door.
02 - You're now in the Tea Garden.
AUDIO DIARY: [Seeing Ghosts] - McDonagh
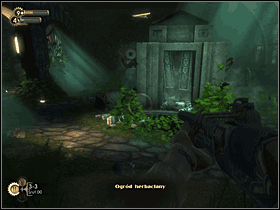
03 - Use Incinerate to light one of the torches here. That will open a way to some ammo.
04 - 2 audio diaries here.
AUDIO DIARY: [Mass Producing Adam] - Tenenbaum
AUDIO DIARY: [Big Night Out] - Dieter Sonnekalb
05 - Go through the door here. You'll go down the stairs labeled on our map by the letter E. Approach the desk with a wooden mask on it. You'll be attacked by a Houdini Splicer. Chase him until he stops running and kill him.
06 - A gene bank and an audio diary. When you're ready, head east.
AUDIO DIARY: [Arcadia Closed] - Langford
07 - Go along the plank to the other side.
08 - In here you'll find a turret and some Splicers. Defeat them and go through the hidden door into a room with safe in it. You can also open a door with broken lock by using Electro Bolt on it. The last secret room is behind the little door by the turret.
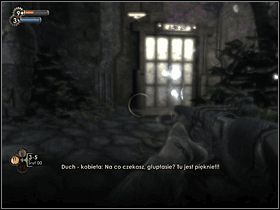
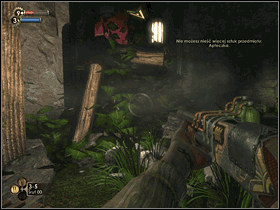
09 - This is the first time you come across these troublesome electric wires. To get rid of them, throw objects through them using Telekinesis, or shoot their heads using a pistol.
10 - When you're done with this part of the level, go through the door labeled by a letter D.
11 - Look around this room and you'll see a passage that will take you behind the blocked gateway that you've seen before.
12 - If you go right at the junction you will see a U-Invent station. To know how things work in there, check out the appropriate section of the guide.
13 - In here you'll see a Little Sister with her Big Daddy and a Gatherer's Garden. In the latter you can buy some new plasmids: Cyclone Trap and Electro Bolt 2.
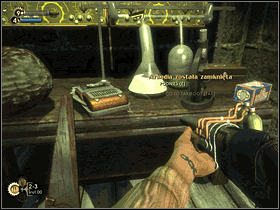
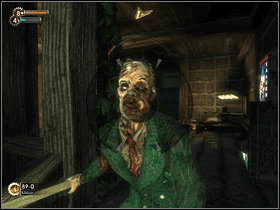
14 - You're now in the Waterfall Grotto. There's an audio diary here. Look around and go down the stairs.
AUDIO DIARY: [The Market is Patient] - Andrew Ryan
15 - Things can get hot in here: a few turrets and some splicers can ruin your day.
AUDIO DIARY: [Offer a Better Product] - Andrew Ryan
AUDIO DIARY: [Early Tests Promising] - Langford
AUDIO DIARY: [Heroes and Criminals] - Diane McClintock (behind a locked door; use Electro Bolt to enter)
16 - When you're back up, head to Arcadia Glens.
17 - There's some ammo around here. In the northern wall there's a hidden door that can lead you to a safe.
18 - Go to Rolling Hills. There's a Houdini shrine to the right. You can get some items from there. When you ready, go down the A-labeled stairs.
![AUDIO DIARY: [Shouldn't Have Come]- Mariska Lutz - Arcadia - Walkthrough - Bioshock - Game Guide and Walkthrough](https://game.lhg100.com/Article/UploadFiles/201512/2015121216504624.png)
AUDIO DIARY: [Shouldn't Have Come]- Mariska Lutz
19 - You're in lower Rolling Hills. When you approach the bathysphere station, Ryan will release a poison through the vents and the whole Arcadia will virtually drop dead. That will block your way out, due to emergency procedures.
20 - Another Houdini shrine. An audio diary to be found here, as well as some other minor gadgets (including chlorophyll that will be necessary in a while).
AUDIO DIARY: [The Saturnine] - Langford
21 - You might see another Little Sister in the gardens here. When you get her ADAM, head west, towards Langford's offices. She will speak to you through the radio and order you to get a rosa galica for her. It can be found in the waterfall grotto (point [14]). When you're on your way there, you'll see three Splicers desecrating a body - defeat them and grab the Security Evasion tonic. Go to the grotto and grab the rose. Head back to the lab and use the pneumo tube to send it to Langford. She will open the door for you.
22 - Look around to find a Hacking Expert tonic, as well as two diaries.
AUDIO DIARY: [What Won't They Steal] - Langford
AUDIO DIARY: [Teaching an Old Hound] - Langford
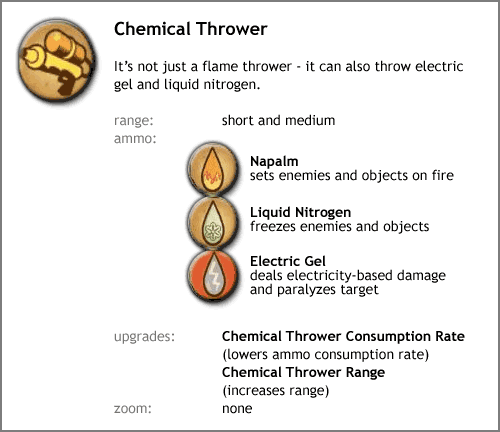
23 - No, you don't get to fight Langford, haha. This time the twist is that she gets killed by Ryan. Enter her office and grab the Chemical Thrower from the table. By her body you'll see an audio diary. Move the picture on the wall and open the safe (9457). Another diary in there. It will tell you what to do next.
AUDIO DIARY: [Lazarus Vector]- Langford
AUDIO DIARY: [Lazarus Vector Formula] - Langford
24 - Head to the tree farm. You'll find two audio diaries and a Power to the People station along the way.
AUDIO DIARY: [Arcadia and Oxygen] - Langford
AUDIO DIARY: [Maternal Instinct] - Tenenbaum
25 - Go to Famers Market.
LEVEL SUMMARY:
# of Audio Diaries: 8
# of weapon upgrade stations: 1
# of Little Sisters: 1
Plasmids
Tonics
Insect Swarm (for sale)
EVE Link II
Photographer's Eye
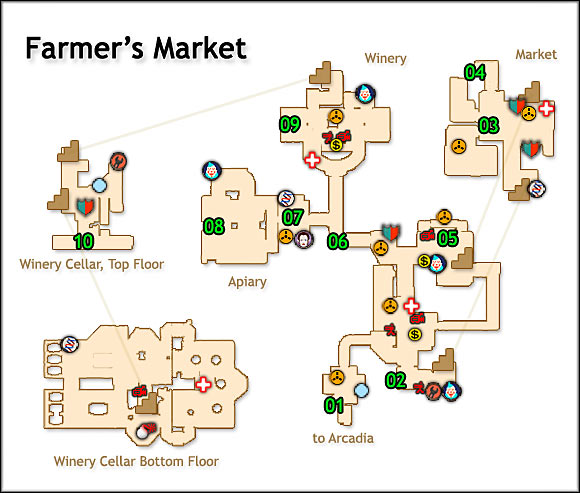
01 - Go North. Grab all the audio diaries from the area. You'll also see a Little Sister here.
AUDIO DIARY: [Bee Enzyme] - Tasha Denu
AUDIO DIARY: [Pulling Together] - Andrew Ryan
02 - In here you find a tonic: EVE Link 2.
03 - Two audio diaries here.
AUDIO DIARY: [First Encounter] - Andrew Ryan
AUDIO DIARY: [Hatred] - Tenenbaum
04 - The pump room door is closed with a code lock - the combination is 0512. There's some valuable ammo inside.
05 - There's a small door in the wall behind one of the shops. You'll get to an audio diary thanks to it.
AUDIO DIARY: [Desperate Times] - Andrew Ryan
06 - Head towards the corridor.
AUDIO DIARY: [Water in Wine] - Pierre Gobbi
07 - You can buy a new plasmid here: Insect Swarm.
AUDIO DIARY: [Adam Explained] - Tenenbaum
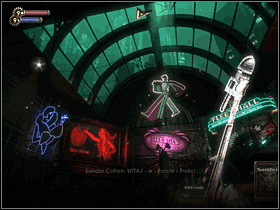
08 - You have to find 7 samples of the bee enzyme in the Apiary here. There's even more than 7 in here, so don't be afraid you miss something. 3 samples are in a safe to the left. Use the lever here to release the smoke. It will keep the bees away for some time - quickly go down and start searching through the hives. Some splicers will appear and make it even tougher for you. When you hear that the smoke is nearly off, retreat and turn it on again. Leave once you have all the necessary samples.
09 - When you're inside the winery, get rid of the turrets and the cameras, then search for an audio diary. Go down the stairs to the cellar.
AUDIO DIARY: [Functional Children] - Tenenbaum
10 - In this cellar you must find 7 bottles of distilled water. It's simple, just keep your eyes open and they will eventually fall into your hands. You'll see an opening in one of the western walls. Jump down to grab a lot of ammo and a tonic: Photographer's Eye. The lowest level is quite a big area, but the only thing worth searching for in there is the Power to the People station. When you have all the bottles you need, head back to Arcadia [01].
Before you can invent the Lazarus Factor, you'll need 7 bottles of chlorophyll. There's a chance that you already have enough (check your in-game objectives). If you don't just walk around and kill some Houdini Splicers. Each of them has a bottle of it.
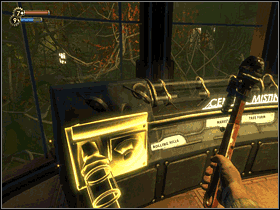
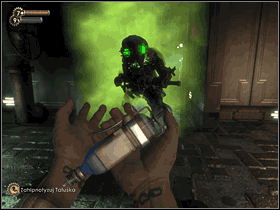
Go back to Langford's lab and use the U-Invent station to create the Lazarus Factor. Go to late scientist's office and use the Central Misting Control. As suggested by Atlas, run to the lab's entrance and close it by hitting the switch. You now have to hold off a number of Ryan's thugs. The best way to win here is to use Hypnotize Big Daddy plasmid on the giant that's neutrally walking around the lab. With his help there should be no problem.
When Atlas says that it's time to release the factor, run back to the office and use another lever. The forest will be brought back to life. When you feel ready, head to the Bathysphere station. There's one last audio diary on this level there.
AUDIO DIARY: [The Great Chain] - Andrew Ryan
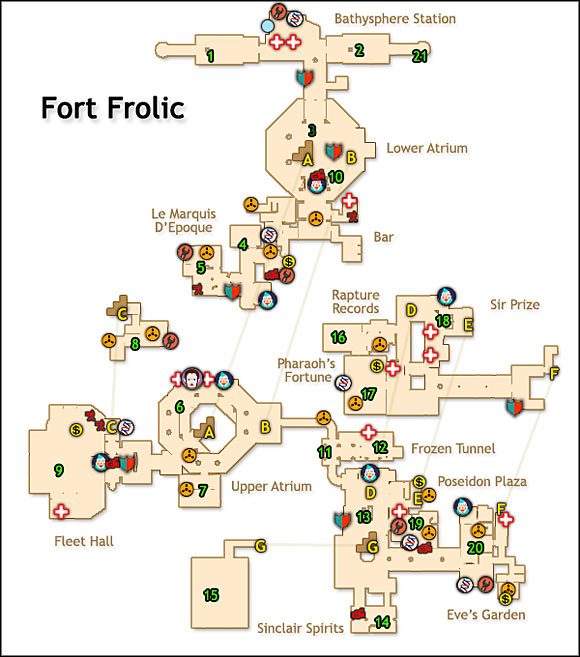
LEVEL SUMMARY:
# of Audio Diaries: 15
# of weapon upgrade stations: 2
# of Little Sisters: 3
New weapon types: Crossbow
Plasmids
Tonics
Hypnotize Big Daddy II (for saving 9 girls)
Extra Nutrition II
Incinerate! II (for sale)
Electric Flesh
Winter Blast II (for sale)
Alarm Expert
Insect Swarm II
Medical Expert II
Frozen Field
Hacking Expert II (for sale)
Bloodlust (U-Invent)
Booze Hound (U-Invent)
Hacker's Delight II (U-Invent)
01 - Go towards the bathysphere station. There's a fortune teller in here, and a slot machine - you can have fun with them.
02 - When you reach the station, the bathysphere will be blocked by Sander Cohen. Go back to the main corridor and defeat all the Spider Splicers he sends at you. When you're done, head south.
03 - Wait for Cohen to finish speaking, then head south to Le Marquis D'Epoque.
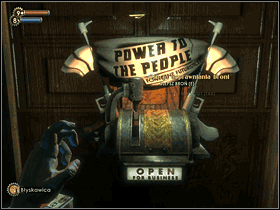
04 - Look around this area. There are 3 diaries here and Power to the People station.
AUDIO DIARY: [Come to the Record Store] - Cobb
AUDIO DIARY: [The Wild Bunny] - Sander Cohen
AUDIO DIARY: [Artist's Feud] - Sullivan

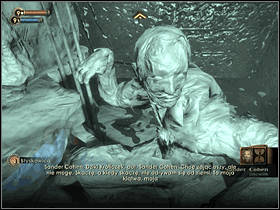
05 - Here's the weapon upgrade station, as well as another diary.
AUDIO DIARY: [Fancy Cigarettes] - Milonakis
06 - Go back to the main hall and go up the stairs [A]. Grab an audio diary and check out the Gatherer's Garden. There are a few new things to be bought: Hacking Expert 2, Incinerate 2, Winter Blast 2, Insect Swarm 2.
AUDIO DIARY: [Stood Up Again] - Diane McClintock
07 - It's a gallery of Cohen's twisted artworks. Grab an audio diary and take some ammo from the three safes in here.
AUDIO DIARY: [The Doubters] - Sander Cohen
08 - Fleet Hall. Go up the stairs to get to the storage. Take an audio diary. You can't enter the projector room, so go back down. Press the elevator button and ride up.
AUDIO DIARY: [Musical Insult] - Sander Cohen
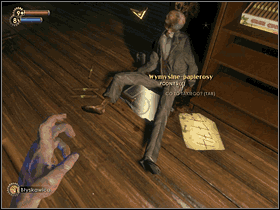
09 - When the piano blows up, take a photo of Fitzpatrick's body. Before you head back to the Atrium, take another engineering tonic: Alarm Expert. It's on the balcony in the southern part of the theater. In order to get to it, you have to jump from the balcony next to it.
10 - Here you will see Cohen's "masterpiece". Place Fitzpatrick's photo on it and you'll get a crossbow as a reward.
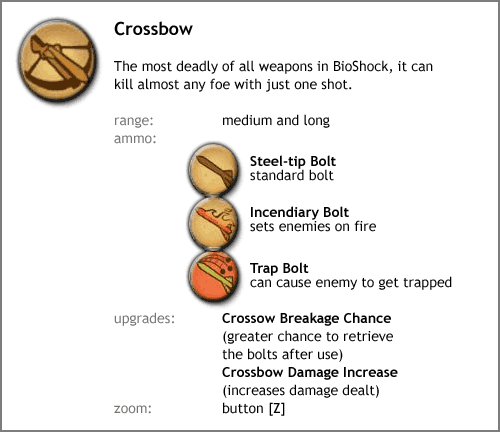
11 - The Frozen Tunnel. Take an audio diary and go further to meet Finnegan.
AUDIO DIARY: [The Iceman Cometh] - Finnegan
12 - You'll be frozen for a while now. When you regain your ability to move, find Finnegan and kill him (a single headshot from a crossbow sees the job done). Take his body's photo (also search it for a Frozen Field tonic) and take it back to the masterpiece. This time you will get some ammo. Look around for a Little Sister if you hear Big Daddy's steps somewhere.
13 - Go to Poseidon's Plaza. To get through the frozen tunnel, just use Incinerate on the ice that blocks your way. There should be another Little Sister wandering there.
14 - Sinclair's Spirits. Press the button behind the bar to open the door. Enter the cellar for a Power to the People station.
![15 - Go down the stairs [G] (they are closed unless you press the button from point [14]) - Fort Frolic - Walkthrough - Bioshock - Game Guide and Walkthrough](https://game.lhg100.com/Article/UploadFiles/201512/2015121216504868.png)
15 - Go down the stairs [G] (they are closed unless you press the button from point [14]). You'll find another tonic: Extra Nutrition 2.
16 - Go up the stairs [D] and enter Rapture Records. There's an audio diary behind the counter. Drop down from the ledge. You'll see Cobb running away. Defeat all the Spider Splicers and then go through the small vent to get back up. Kill Cobb using your trustworthy crossbow. Remember to photograph his body.
AUDIO DIARY: [Ryan's Stableboy] - Culpepper
Take the photo back to the masterpiece. This time Cohen will loose his temper for some reason and send a group of Splicers on you. Defeat them to get your reward and a last quest from this mad artist.
17 - Pharaoh's Fortune Casino. There's an audio diary here.
AUDIO DIARY: [Bomb Culpepper?] - Sullivan
18 - Sir Prize. Another audio diary on the lower level.
AUDIO DIARY: [Fontaine's Army] - McDonagh
19 -Robertson's Tobacco shop. Another audio diary and a code-protected door (7774).
AUDIO DIARY: [Guns Blazing] - McDonagh
20 - Eve's Garden. After seeing the ghost go behind the stage.
AUDIO DIARY: [Pregnancy] - Jasmine Jolene
When you're going back to the bar, you'll see Rodriguez in there. He'll start running as soon as he sees you, so chase him with your crossbow equipped, waiting for a good moment to take him down. As always, take a snapshot of his body and take it back to Sander's piece of art. Before you go back, though, check out Eve's Garden again - there will be another audio diary.
AUDIO DIARY: [It's All a Grift] - Rodriguez
When you're back to Cohen's domain, he will finally appear in person before you. You can now either kill him and take his muse (a chest containing a few pretty worthless items), or keep him alive to deal with him later (it's a lot better, trust us on this). Your reward for helping Cohen will be Medical Expert 2.
HINT: Before you leave this level, once again go up the stairs [C]. This time you can enter the projector room to grab an audio diary and a tonic: Electric Flesh.
AUDIO DIARY: [Requiem for Andrew Ryan] - Sander Cohen.
21 - Once you're ready, head to the Bathysphere Station and go to Hephaestus. Remember to look for the third Little Sister if you haven't come across her already (you can always find a Big Daddy and wait for him to summon her).
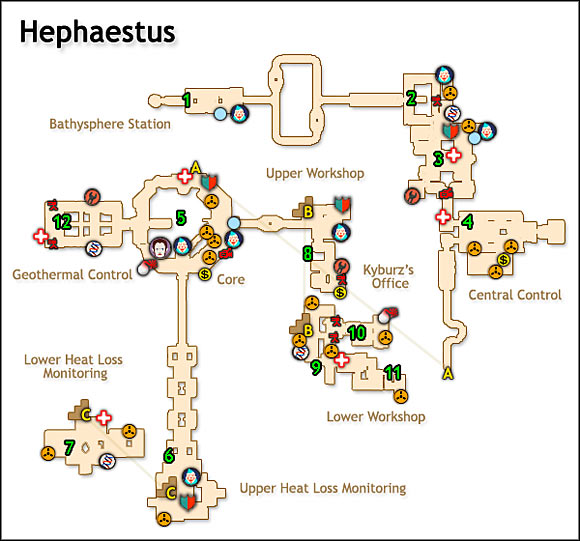
LEVEL SUMMARY:
# of Audio Diaries: 17
# of weapon upgrade stations: 2
# of Little Sisters: 3
Plasmids
Tonics
Electro Bolt III (for sale)
Frozen Field II
Cyclone Trap II (for sale)
Wrench Lurker II (for sale)
Security Evasion II
Damage Research
Shorten Alarms II
01 - Go east.
02 - Grab an audio diary. It's by the vending machine.
AUDIO DIARY: [Ryan Takes Fontaine Futuristics] - McDonagh
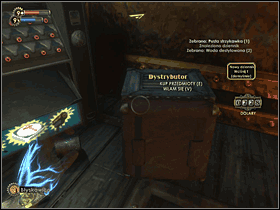
03 - In here you can find a grenade launcher and some ammo. When you pick it up, you will have to fight some Spider Splicers. There's an audio diary by the vita-chamber.
AUDIO DIARY: [Scoping the Gate] - Kyburz
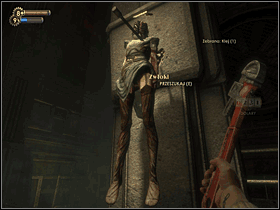
04 - Here's where Ryan keeps his former opponents' bodies, huh. Search through them to find 2 audio diaries.
AUDIO DIARY: [Stopping Ryan] - McDonagh
AUDIO DIARY: [Going to Heat Loss] - Andersdotter
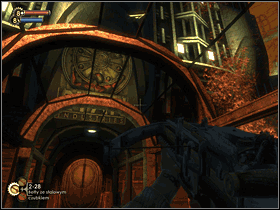
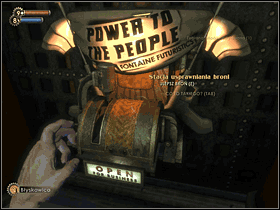
Ryan will send some Splicers at you after a while. Defeat them and take the next audio diary from a room a little bit to the south. Also, notice the tonic in there: Frozen Field 2. Go further to the south to find yourself by the core.
AUDIO DIARY: [A Man or a Parasite] - Andrew Ryan
05 - The first Little Sister wanders around here. There's one audio diary on the top level of the core.
AUDIO DIARY: [Fontaine's Legacy] - McDonagh
There's also one diary on the middle level.
AUDIO DIARY: [Running Short on R-34s] - Pablo Navarro
On the bottom level there's an audio diary and a Gatherer's Garden. Notice new plasmids in there: Electro Bolt 3, Wrench Lurker 2, Cyclone Trap 2. Just by the Garden there's a Power to the People station as well.
AUDIO DIARY: [Assassin] - Andersdotter
Also, find the passage that leads to the very bottom of the core to find yet another diary.
AUDIO DIARY: [Impossible Anywhere Else] - Andrew Ryan
Now turn south and head to Heat Loss Monitoring.
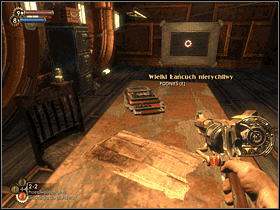
06 - Upper Heat Loss Monitoring. Find an audio diary and deal with a Little Sister here. When you're done, go down the stairs.
AUDIO DIARY: [Kyburz Door Core]- Pablo Navarro
07 - Look around. There are 2 diaries here and a tonic: Security Evasion 2. To get to one of these diaries you will have to hack the power supply (as suggested by a vision).
AUDIO DIARY: [Getting a Break] - Pablo Navarro
AUDIO DIARY: [Genetic Arms Race] - McDonagh
08 - Head to the Workshops now. Go down the stairs [B].
09 - There's a few items to be found here. The entrance to Kyburz's office is protected by two turrets. Near the left one there is a barely visible passage (wooden door) that can take you to an audio diary below the stairs. The other diary is on the desk in one of the rooms in the eastern part of the workshops.
AUDIO DIARY: [Market Maintenance Code] - Pablo Navarro
AUDIO DIARY: [Device Almost Finished] - Kyburz
AUDIO DIARY: [The Dream] - Kyburz
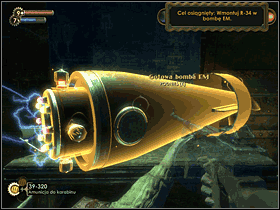
10 - Kyburz's office door code is 0126. Inside, there's a Power to the People station and an audio diary.
AUDIO DIARY: [Great Chain Moves Slowly] - Andrew Ryan
11 - Go through the hidden tunnel to find a secret room where Kyburz was preparing his bomb. Grab a tonic: Damage Research, as well as an audio diary. You'll now know what to collect in order to finish the bomb.
AUDIO DIARY: [Assembling the Bomb] - Kyburz
You need the following ingredients:
1x Nitroglycerine Charge: Head back to Kyburz's office and press a button on his desk. You can now grab the charge from the wall.
4x R-34 Wire Cluster: You have to search through 4 Big Daddies' bodies to find these. One of them lays dead in the workshops, so it's an easy shot, but the other three will require you to actually kill the monsters once more (well, if you're lucky, there's a chance that the bodies of the ones you've already killed haven't disappeared already).
2x Ionic Gel: If you looked closely around this area, you must have noticed strange blue canisters that you couldn't pick up. These are the ones you want now. Two of them, to be precise. You can find them around the core area.
When you have all the ingredients, head back to Kyburz's secret room and place them all inside the bomb, then take the thing with you.
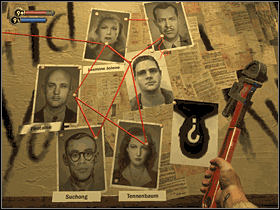
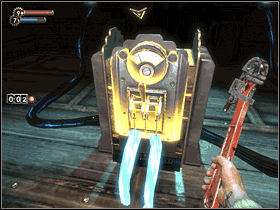
12 - Go to Geothermal Control and reach the end of the room. It'd be wise to hack the two turrets instead of destroying them, they will come in handy in just a few seconds. Start turning the valve. Some Splicers will burst into the room. Fight them or rely on your turrets - one way or another, you must turn the valve to make the lava flow. Once it's done, turn around and take the elevator down.
Go along the corridor. There's a tonic in here: Shorten Alarms 2. Reach the end and go up, using another elevator. Place the bomb on the core. When all hell breaks loose, run back to Ryan's Office. Hit the circuit breaker near the armored gate to make it open at last.
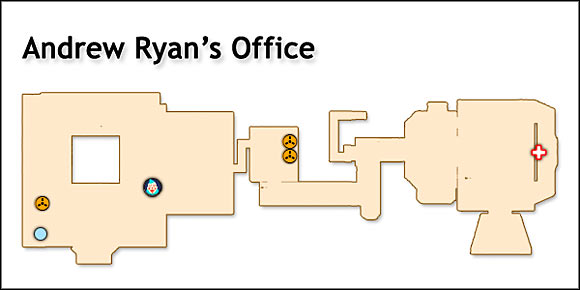
LEVEL SUMMARY:
# of Audio Diaries: 3
Grab the audio diary near the vita chamber. When Ryan initiates the auto-destruct procedure, go up the stairs and through the vent.
AUDIO DIARY: [Vital Chamber] - Suchong
AUDIO DIARY: [Mind Control Test] - Suchong
AUDIO DIARY: [Baby Status] - Suchong
HINT: If you miss any of the above diaries now, there will be no way to get back here and collect them, mind you.

You'll see a long scene featuring Andrew Ryan. Enter his chamber when you're asked to. When he is dead, approach the big machine in his office and use the genetic key you acquired. After another scene follow the Little Sisters out of here.
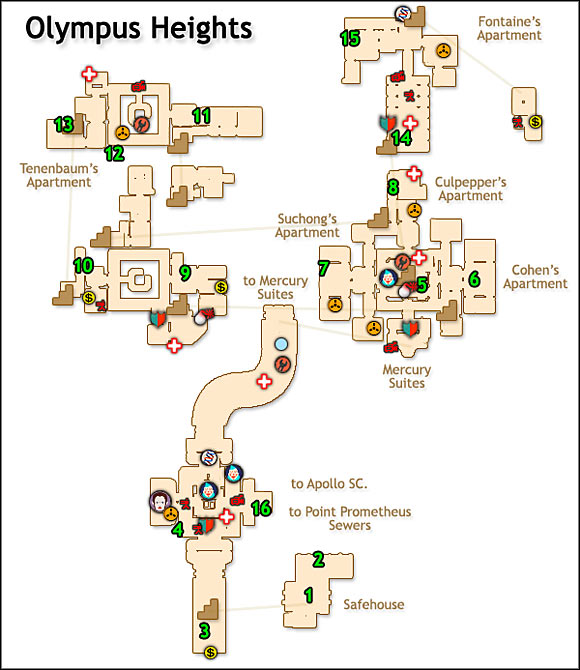
LEVEL SUMMARY:
# of Audio Diaries: 6
# of weapon upgrade stations: 2
# of Little Sisters: 2
Plasmids
Tonics
Winter Blast III (for sale)
Armored Shell II (for saving 15 girls)
Incinerate III (for sale)
Speedy hacker II (for sale)
Insect Swarm III (for sale)
Clever Inventor
Electric Flesh II
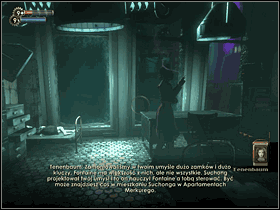
01 - You're in Tenenbaum's hideout. When she is done talking, follow one of the sister who will show you the exit.
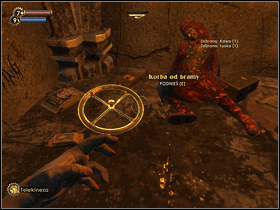
02 - When you are outside, Fontaine will lower your maximum health. Pick up the valve laying somewhere around here and place it on the mechanism near the gate. Turn it to open up the passage.
03 - There's a safe with some ammo to the south. When you have it, head north. You'll see the first Little Sister somewhere around here.
04 - Fontaine will lower your health again. No matter. There's a Gatherer's Garden here, where you can buy Winter Blast 3, Incinerate 3, Insect Swarm 3. Grab the audio diary from the central part of this plaza. Head north to reach the Mercury Suites.
AUDIO DIARY: [Mozart of Genetics] - Suchong
05 - Use the Power to the People station that' right in the middle of the plaza. Notice the Little Sister wandering around with her Big Daddy.
06 - Cohen's Apartment. This place will be closed if you killed Cohen in Fort Frolic. You'll see two Houdinis tanking in there. They won't attack you unless you disturb them. Well, that the heck - do so, then kill them. Sander will show himself and fight you. He can be easily eliminated using the crossbow. You can photograph his body for an Achievement, and then go up the stairs to reach his secret room. In there you will find a Power to the People station, and unlock another Achievement.
HINT: If you collect Sander's key from his body, you can grab his Muse back from Fort Frolic (take a bathysphere there). The priceless treasure is approximately 69 dollars, 8 bolts and 3 spider splicer hearts. Wow, just wow, Sander.
07 - Suchong's Apartment. Take the two diaries and a tonic: Clever Inventor.
AUDIO DIARY: [Fontaine's Human Jukeboxes] - Suchong
AUDIO DIARY: [Mind Control Antidote] - Suchong
08 - Apartment Culpepper. One audio diary here.
AUDIO DIARY: [Artist Woman] - Sullivan
09 - Deserted apartment. Nothing of particular to be found here.
10 - Tenenbaum's door is closed here, so you have to try the upper level.
11 - Another deserted apartment.
12 - Grab an audio diary near Tenenbaum's apartment.
AUDIO DIARY: [Fontaine's Breakup] - Paparazzi
13 - Enter Tenenbaum's flat through a hole in the wall. Look around. It turns out that Fontaine's men have beaten you to it. Go all the way down to the ground level again and enter the code to Fontaine's apartment: 5744.
14 - Defeat all the enemies in the hall and go further. To the right there's a small room with an audio diary in it. Go up the stairs and to the left.
AUDIO DIARY: [Sad Saps] - Fontaine
15 - You'll find a combat tonic in here: Static Discharge 2. Besides, grab the antidote you seek: Lot 192.
HINT: Until you find a second dose of Lot192, you will be unable to choose which plasmid you want to use. Active plasmid will be changed randomly once in a while.
16 - That's all for this level. When you're ready, go to Apollo's Square.
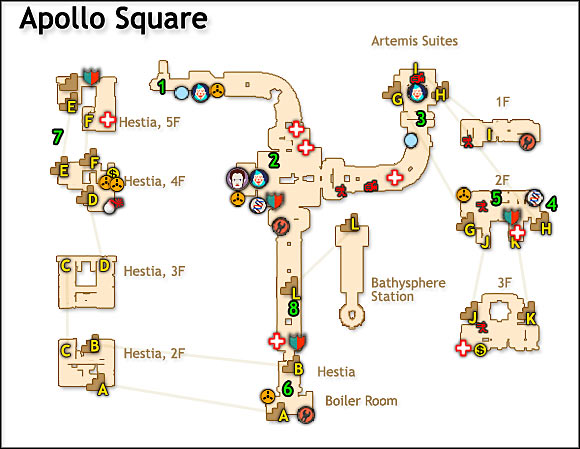
LEVEL SUMMARY:
# of Audio Diaries: 6
# of weapon upgrade stations: 1
# of Little Sisters: 2
Plasmids
Tonics
Focused Hacker II
Medical Expert III
Prolific Inventor (for saving 18 girls)
01 - Head east. There's an audio diary by the vending machine.
AUDIO DIARY: [What's Happening Here?] - Diane McClintock
02 - There's an audio diary by the Gatherer's Garden. A little bit further you will see a Little Sister.
AUDIO DIARY: [Atlas Lives] - Diane McClintock
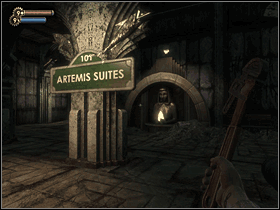
03 - Having no control over your plasmids is quite an annoyance, so don't take long before you decide to reach Artemis Suites. Suchong's lab is on the second floor.
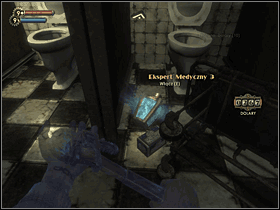
04 - Grab a physical tonic here: Medical Expert 3
05 - In Suchong's office you will find the antidote you seek and an audio diary. When you drink the antidote, your plasmids will be back to normal. You can now go back to the central part of the level. You won't find anything in particular on 1F and 3F, but you can always look around. Take care of another Little Sister when you see her.
AUDIO DIARY: [Protection Bond] - Suchong
06 - Head south, to Hestia. Look right as soon as you enter the building - search the crate for an audio diary.
AUDIO DIARY: [Meeting Atlas] - Diane McClintock
07 - Get to the 4F and enter Atlas' headquarters. In here you will find a tonic: Focused Hacker 2. Go down the stairs to find a Power to the People station and two audio diaries. If you have problems with beating all the guards in Hestia, use the Hypnotize Big Daddy plasmid to get some help.
AUDIO DIARY: [The Longest Con] - Frank Fontaine
AUDIO DIARY: [Today's Raid] - Diane McClintock
08 - After leaving Hestia head to the Metro Station and enter the bathysphere.
WARNING: Now is the last time you can visit all the previous levels!
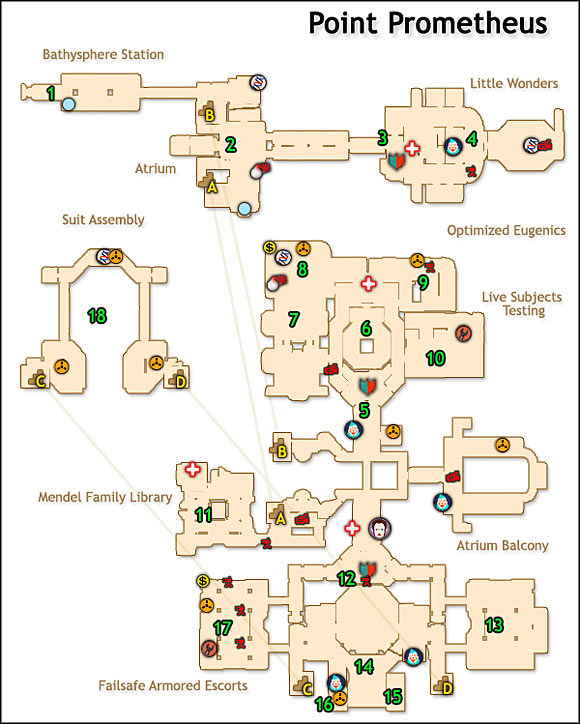
LEVEL SUMMARY:
# of Audio Diaries: 9
# of weapon upgrade stations: 2
# of Little Sisters: 3
Plasmids
Tonics
Safecracker II
Alarm Expert II
Hacker's Delight III
Damage Research II
01 - Go east, chasing Fontaine.
02 - When Fontaine runs away, search the nearby Big Daddy's body. Take the Suit Control System. Notice the Power to the People station nearby.
03 - Head east, to Little Wonders. When you're attacked by a turret, destroy it and jump through the window.
04 - You have to find 3 samples of Big Daddy pheromone. Search through all the rooms and the Autopsy room at the end (you'll find Safecracker 2 in there). One sample is in room nr 5, one in Autopsy room, and two are on the upper level (you can access it by the stairs). Near one of the samples upstairs you'll find an audio diary. When you're done, head to Optimized Eugenics.
AUDIO DIARY: [Why Just Girls?] - Tenenbaum
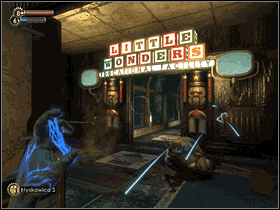
05 - Optimized Eugenics. Before you enter, notice the frozen storage room to the right - use Incinerate to get inside. You'll find an audio diary in one of the trash cans. When you enter the Eugenics, use Electro Bolt to get inside the guard room and use the level to turn off the power in the room you can see through the glass.
AUDIO DIARY: [Changing Employers] - Suchong
06 - Quickly run around the corridor to enter the room where you just turned off the power. You'll find some ammunition and a safe.
07 - An audio diary to be found here.
AUDIO DIARY: [Marketing Gold] - Andrew Ryan
08 - A Power to the People station is here.
09 - Another audio diary.
AUDIO DIARY: [Extra Munitions] - Suchong
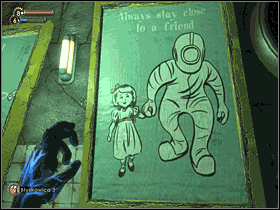
10 - In here you will find a tonic: Alarm Expert 2 (just about time, huh) and a device that will modify your voice so that you sound like a Big Daddy. When you're done with that procedure, head to the southern part of the level.
11 - Mendel Family Library. From here you have to grab a tonic: Damage Research 2, and Big Daddy Boots.
12 - Security Room. In here you can find some inactive security bots that you can activate for your case.
13 -Grab a Hacker's Delight 3 and a Big Daddy Helmet.
HINT: Putting on the helmet will limit your vision a little.
14 - In here you will finally find a Big Daddy Suit.
15 - Storage room. The code is 1921. There's a considerable amount of ammo inside.
16 - Storage room. Use Incinerate to get inside and grab an audio diary.
AUDIO DIARY: [Cheap Son of a Bitch] - Suchong
17 - An audio diary to be found here.
AUDIO DIARY: [Missing Shoes] - Suchang
18 - Three diaries here.
AUDIO DIARY: [Protector Smell] - Suchang
AUDIO DIARY: [Mistakes] - Andrew Ryan
AUDIO DIARY: [Protecting Little Ones] - Suchong
19 - When you complete your Big Daddy's outfit, head back to the Atrium and use the wrench to hit the Little Sister vent. One of them will come out and enable you to go after Fontaine.
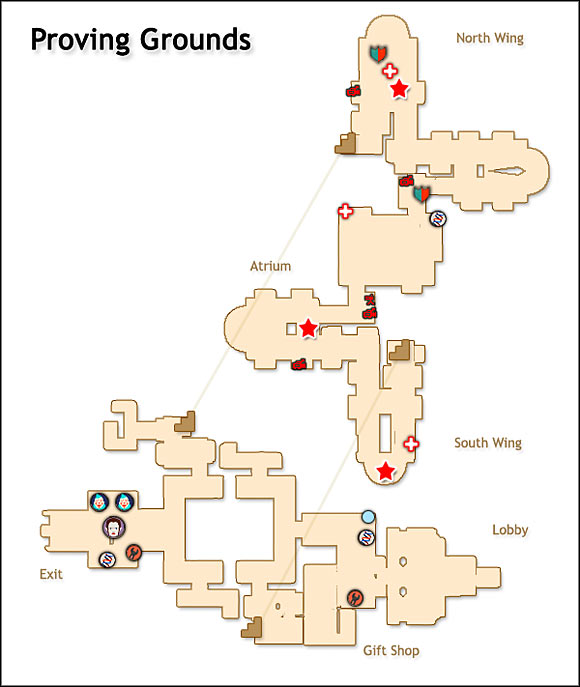
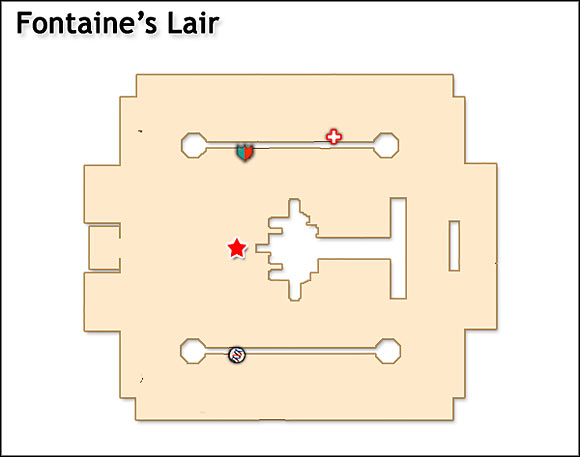
Well, it's not a fully-scaled level as those you've seen so far. Basically, the idea is: you are the Big Daddy and you have to protect your Little Sister. She is to collect ADAM from three bodies (marked by stars on our map above). It's not an easy task, really. Splicers will come at you most of the time, and to make things worse the Little Sister triggers all the security systems (they don't react to your presence, for a change). If your girl is defeated, you have to go back to the nearest vent and hit it with a wrench to summon another one. Don't be afraid, though: the outcome of this level doesn't influence the game's ending. If you saved the girls, you can still get the good ending - even if you let some of them die here.
A few hints to keep you going:
- Hack all the security systems instead of destroying them!
- Use your surroundings. There's a lot of spilled oil here and there.
- A good plasmid to use here is Winter Blast. You might suppose why.
- Your weapons don't deal damage to the Little Sister, so don't hesitate to throw grenades all over her if she's surrounded by enemies.
Near the end of the level a Bouncer will blast through the wall and attack you. When you bring it down, you'll be done with assisting the girl. Take the Hypo that's given to you by one of the Little Sisters. Look around the vending machines here. Now is the time to do your shopping one last time. When you're ready, enter the elevator to meet your destiny (or whatever).
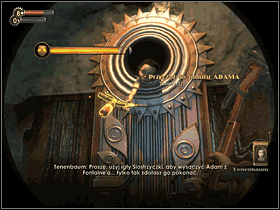
Fontaine got a little spliced up since you've seen him just a while ago in Point Prometheus. Well, would you kindly kill the bastard? Run up to him and use the ADAM Collecting Hypo on him to drain some of his power. He'll hit you back and begin the battle.
The battle consists of three separate phases. Fontaine has three forms: fiery, icy and electric. Despite all your possible thoughts on how to beat elemental-based bosses in video games, you don't have to use anything specific against him. Just hit him hard. Grenades can make your day in this duel, as well as explosive ammo for the shotgun. Don't fight the Splicers he summons from time to time - they are pretty harmless compared to the big man himself anyway. In order to survive here, you have to keep moving! Strafe, strafe, strafe like there's no tomorrow, I tells ya. Fontaine attacks you by long-range energy missiles and by melee thrusts (he kinda sums up the Bouncers with the Rosies). His attacks are not very difficult to dodge, as long as you keep MOVING!! If you don't, you'll die anyway - make that a lesson. Always keep in mind your health and use the 9 health packs you have (you do, right?) wisely.
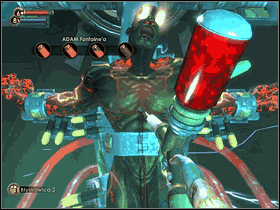
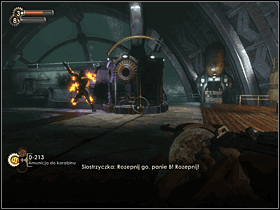
After each phase you have to approach Fontaine when he's trapped in his machine and use the hypo on him. If you don't make it fast enough, you will have to repeat a given phase - and that sucks, believe me. After you defeat him in all three forms, a heartwarming (or not) ending will commence.
So, you're done with BioShock. Did you like it?
Playing on highest difficulty setting - Hard - doesn't change the game's story in any way, but makes all opponents considerably more difficult to kill. You have to show some creativity and courage to live up to that challenge. Mind that the game might actually begin to resemble a sneaking title like Splinter Cell. The hints we summed up below can be obviously used on lower difficulty settings as well - they will be equally effective.
So, you want to sneak? Then be sure to use tonics like SportBoost, Wrench Lurker and Natural Camouflage. They should keep you going for the most part.
Big Daddies - these guys are creme de la creme of tough opponents in this game. Despite being tough, scary and all, they have one major weakness: they don't attack you on sight. You can freely choose when and where to battle a Big Daddy. You have all the time in the world to choose the proper ammo (armor-piercing! electric gel! grenades!) and prepare the arena. Until you come to posses a Chemical Thrower with an Electric Gel (that's a standalone Big-Daddy-Killer), you should try to find a proper cover for the battle (a wide column, a big tree, whatever suits you best). It will serve you as a mean to hide and to slow down the enemy (try running around it). It's always good to throw a few Proximity Mines between you and the Big Daddy. You might also use explosive barrels or canisters (move them using Telekinesis). Once you have the Chemical Thrower, Big Daddies cease to be such a great threat. Just produce as much Electric Gel as you can (U-Invent) and fry the beasts.

Big Daddy as a bodyguard - the Hypnotize Big Daddy plasmid is extremely useful. There are lots of Big Daddies in the game and they always tend to appear where the action is. Remember that they respawn after some time from being defeated (even if there are no more Little Sisters on that level). The plasmid's basic limitation is that Big Daddy doesn't attack any enemy before he deals damage to us or we deal damage to him. Besides, watch out so that you don't hit the Big Daddy by accident. If you do, he will turn against you. Knowing that, restrain from using weapons ammo such as explosives, napalm or grenades when you hypnotize a Big Daddy. The good thing to do in such situation it to hide behind a corner, shoot a group of enemies with a short series, then retreat and wait for the Daddy to do the job. If you're a perfectionist, you can use Hypnotize to weaken the Big Daddy before you actually fight him. Remember that Big Daddies don't regenerate their health - ever.
Cameras and turrets - they are every bit as essential as Big Daddies. Always try to hack instead of destroying them. Since turrets can be quite easily destroyed by the enemies, cameras become even more important (they are often placed too high for a certain enemy to reach them) on hard difficulty setting. If a camera is too high for you to hack, use Telekinesis to get a crate below it - or something equally helpful in climbing to higher places.
Effective ADAM spending. Especially when you decide to save the Little Sisters, spending ADAM becomes an issue to be solved. In each Gatherer's Garden you can buy only one enhancement of health and EVE levels - if you don't want to backtrack, that should be your priority. Apart from that, invest in additional plasmid and tonic slots. Don't buy tonics or plasmids if you don't really need them - they become cheaper as the game progresses!
The Crossbow - our weapon of choice in the later parts of the game. Why? Well, one headshot takes out every single enemy of the game, except for the Big Daddies - even the sub-bosses!. And how do you perform headshots since the Splicers are always on the move? By electrocuting them! Buy yourself an Electro Bolt 3 as soon as possible (Hephaestus), things will become a lot easier. Works for everyone, except Splicers who are resistant to electricity (which means, unfortunately, majority of Thuggish splicers in the last few levels). Also, the possibility to retrieve ammo from the bodies is of great importance.
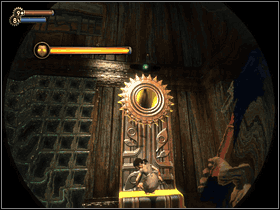
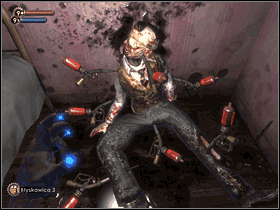
Researching - an important feature on all difficulty settings. On Hard you may have to focus on taking photos of dead enemies. Make sure that every time you take a photo there are at least two objects on screen - you'll get some bonus points for multiple targets. The same thing goes with taking photos of Little Sisters and Big Daddies, who always come in pairs.
Playing on high difficulty setting gives a lot of satisfaction. If you're hardcore enough, you might also restrain from saving your game too often. If only there was a way to turn off all the vita-chambers... Anyway, good luck out there.
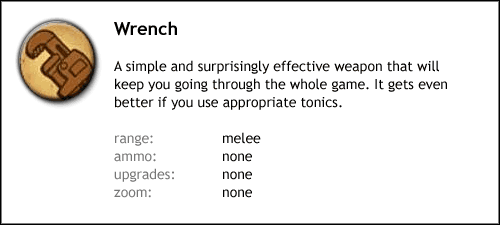
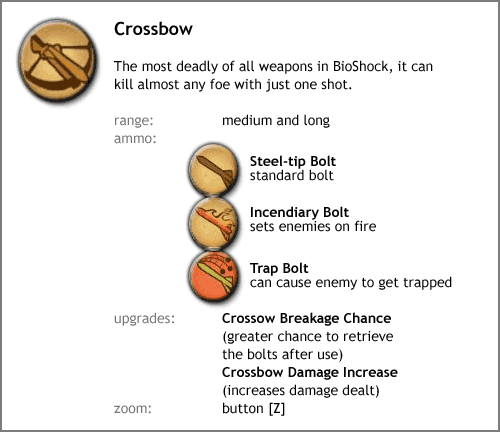
There are 7 different weapons in BioShock. Here are their descriptions.
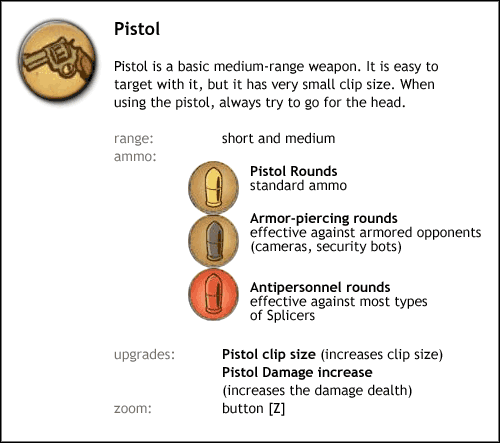
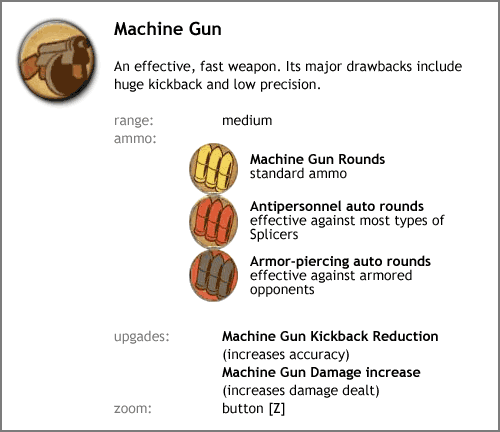
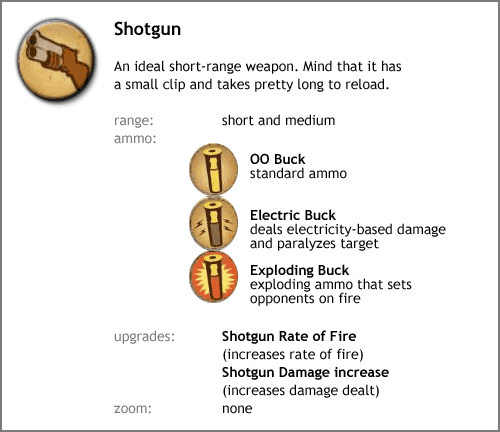

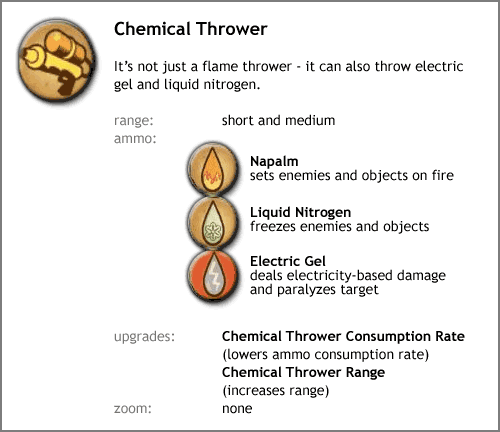
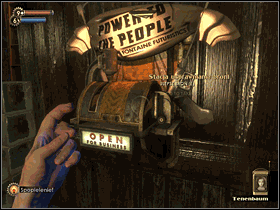
There are only 12 Power to the People stations in the game. Each one gives you one free upgrade to choose. All the upgrades are cool to have, but concentrate on the ones that boost weapons you use most often.
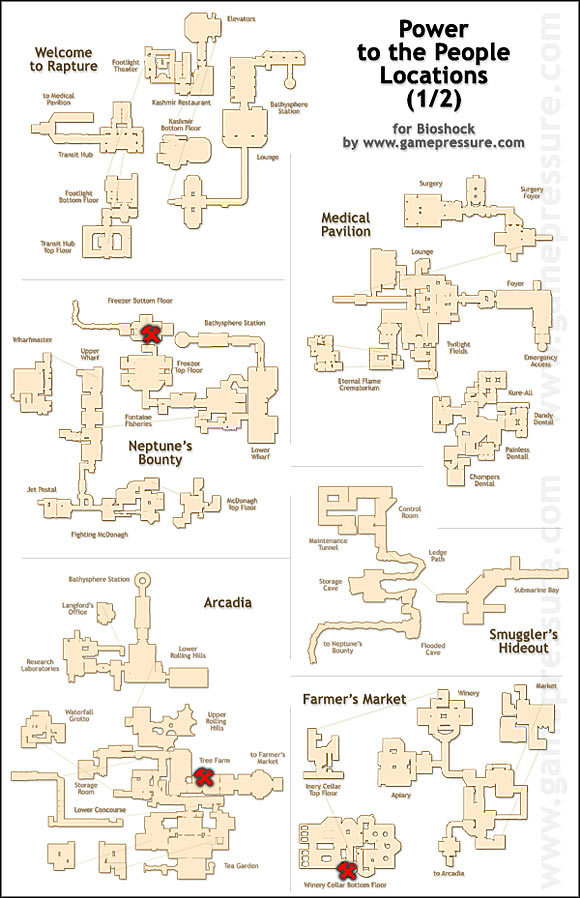
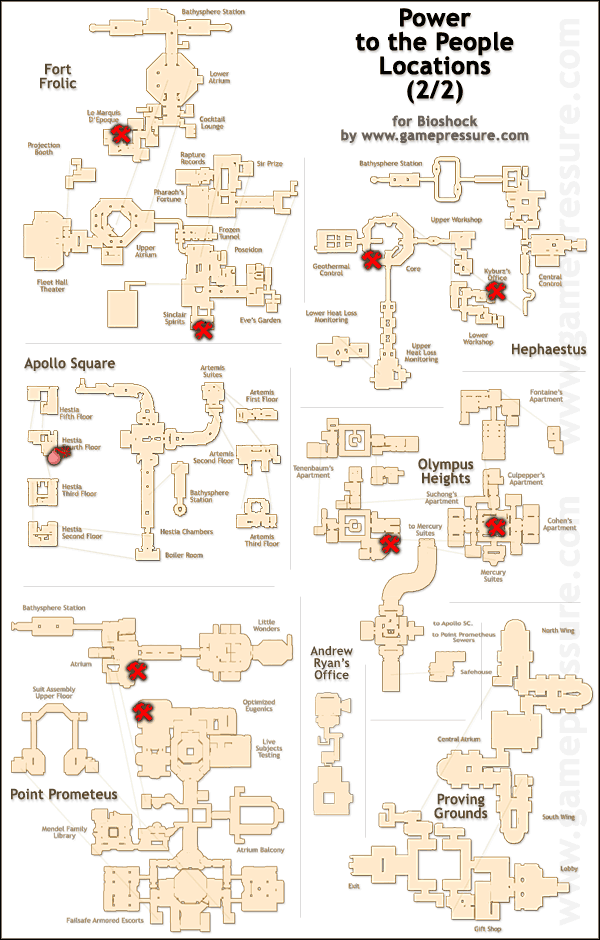
NOTE: Locations given below are just bookmarks for the appropriate sections of the walkthrough, where they are described in greater detail. In case a certain tonic is available for sale in Gatherer's Garden, the below list indicates the location of its first appearance. In case of Tenenbaum's rewards for saving the girls, we assume that you save all of them and thus indicate the first level that you can get the reward on. In case that a tonic is a research bonus, its location on this list is "(research)". Details can be found in an appropriate section of the guide.
There are 3 tonics in the game that can only by obtained by producing them at U-Invent stations. Their location below is "U-Invent".
Physical Tonics
Description
Where to find

Natural Camouflage
One of the best tonics in the game - grants you invisibility when you stand still!
1 - (research)

SportBoost
Increases damage dealt with a wrench and movement speed.
1 - (research)
2 - (research)

Bloodlust
Regenerates a little bit of health and EVE every time you deal damage with a wrench.
1 - U-Invent

Scrounger
If you don't like random loot that you found in a container, search it again - it'll be something else!
1 - (research)

Medical Expert
Increases the amount of health regenerated by the medpacks.
1 - Neptune's Bounty
2 - Fort Frolic
3 - Apollo Square

Hacker's Delight
Brings back a little health each time you perform a successful hack.
1 - Medical Pavillon
2 - U-Invent
3 - Point Prometheus

Security Evasion
Cameras take longer to notice your presence.
1 - Arcadia
2 - Hephaestus

Booze Hound
Alcohol brings back your EVE instead of depleting it.
1 - U-Invent

Extra Nutrition
Snacks and drinks bring back more health and EVE.
1 - Neptune's Bounty
2 - Fort Frolic
3 - (research)

EVE Link
Causes the health packs to regenerate EVE as well.
1 - Medical Pavillon
2 - Farmers Market
Engineering Tonics
Description
Where to find

Speedy Hacker
Slows down the liquid when hacking.
1 - Medical Pavillon
2 - Olympus Heights

Security Expert
Slows down the liquid when hacking cameras, bots and turrets.
1 - Medical Pavillon
2 - (research)

Focused Hacker
Decreased the number of overload fields by 2 (then 4).
1 - Neptune's Bounty
2 - Apollo Square

Prolific Inventor
Doubles the number of items created at U-Invent stations.
1 - Apollo Square

Clever Inventor
Decreases the required number of each ingredient in U-Invents by 1 (with minimum of 1).
1 - Olympus Heights

Shorten Alarms
Duuuuh.. Shortens alarms?
1 - Neptune's Bounty
2 - Hephaestus

Hacking Expert
Decreases the number of alarm and overload fields by 1 (then 2).
1 - Arcadia
2 - Fort Frolic

Safecracker
Decreases the difficulty when hacking safes.
1 - Arcadia
2 - Point Prometheus

Alarm Expert
Decreases the number of alarm fields by 2 (then 4).
1 - Fort Frolic
2 - Point Prometheus
Combat Tonics
Description
Where to find

Photographer's Eye
Speeds up the research process.
1 - Farmers Market
2 - (research)

Wrench Jockey
Increases damage dealt with a wrench - a great tonic to have!
1 - Medical Pavillon
2 - (research)

Static Discharge
Releases an electric field each time you're hit by a melee weapon (can cause problems with neutral Big Daddies!).
1 - Medical Pavillon
2 - (research)

Damage Research
Increases the research bonuses to damage.
1 - Hephaestus
2 - Point Prometheus

Electric Flesh
Increases resistance to electricity and the power of our own electrical attacks.
1 - Fort Frolic
2 - Olympus Heights

Armored Shell
Considerably increases our defense.
1 - Medical Pavillon
2 - Olympus Heights

Wrench Lurker
Increases wrench damage to unsuspecting enemies.
1 -Neptune's Bounty
2- Hephaestus

Frozen Field
Increases our ice attack's power.
1 - Fort Frolic
2 - Hephaestus
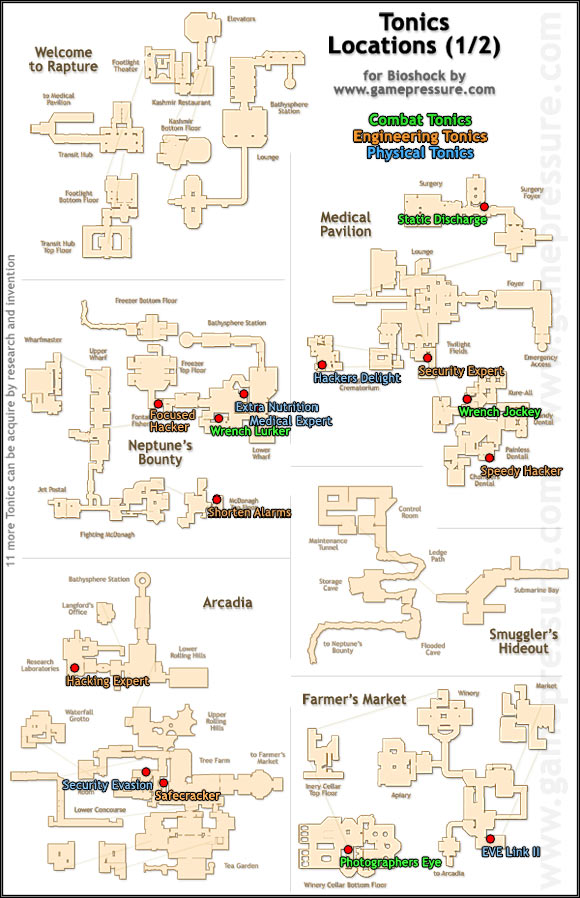
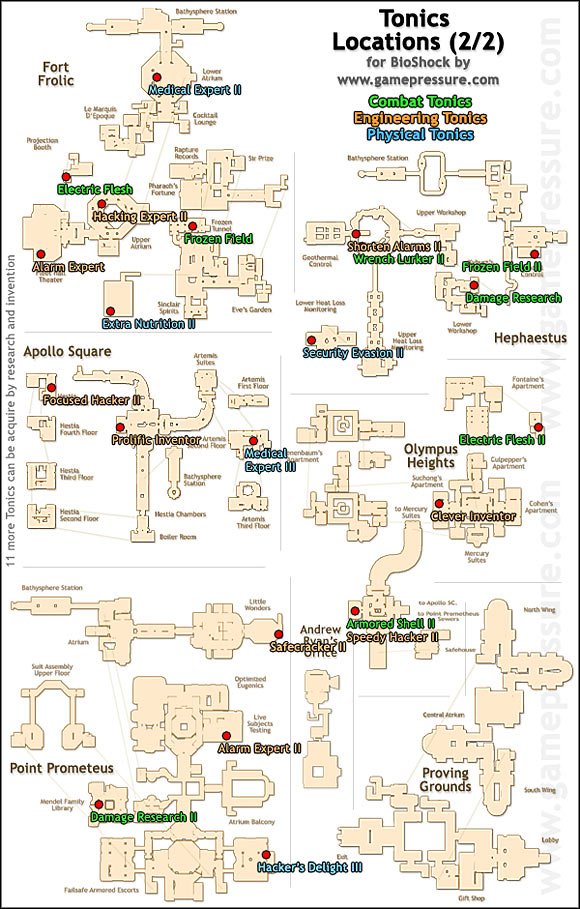
NOTE: Locations given below are just bookmarks for the appropriate sections of the walkthrough, where they are described in greater detail. In case a certain tonic is available for sale in Gatherer's Garden, the below list indicates the location of its first appearance. In case of Tenenbaum's rewards for saving the girls, we assume that you save all of them and thus indicate the first level that you can get the reward on.
Description
Where to find

Electro Bolt
The most important plasmid in the game. Paralyzes enemies, enabling you to deal extra damage.
1 - Welcome to Rapture
2 - Arcadia
3 - Hephaestus

Incinerate!
Sets enemies and objects on fire (use it on spilled oil).
1 - Medical Pavillon
2 - Fort Frolic
3 - Olympus Heights

Telekinesis
Enables you to lift and throw any object in the game. Comes in handy in a number of situations.
1 - Medical Pavillon

Enrage
Attacked enemy becomes furious and attacks everyone in sight. Barely usable.
1 - Medical Pavillon

Hypnotyze Big Daddy
Fools Big Daddy into thinking that we are the Little Sister, forcing him to protect us.
1 - Neptune's Bounty
2 - Fort Frolic

Target Dummy
Creates a dummy that grabs the enemies' attention. Didn't use it a single time on 3 playthroughs - makes you think.
1 - Neptune's Bounty

Winter Blast
Freezes enemies and objects. If you freeze a hackable object, the liquid will float a little slower. If you smash a frozen enemy to bits, he won't leave any loot behind.
1 - Neptune's Bounty
2 - Fort Frolic
3 - Olympus Heights

Security Eye
Makes a target trigger all the security systems. Can be useful when used on Big Daddies.
1 - Neptune's Bounty

Cyclone Trap
Creates a small cyclone that can grab any enemy and throw him into the air. Didn't find it useful at all.
1 - Arcadia
2 - Hephaestus

Insect Swarm
Sends a swarm of bees towards a group of enemies to distract them. Nothing special.
1 - Farmers Market
2 - Fort Frolic
3 - Olympus Heights
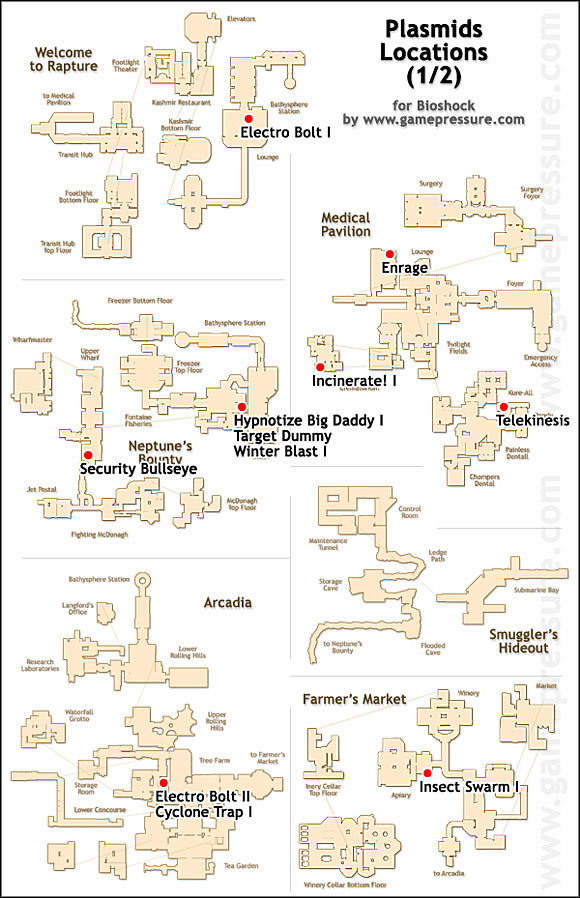
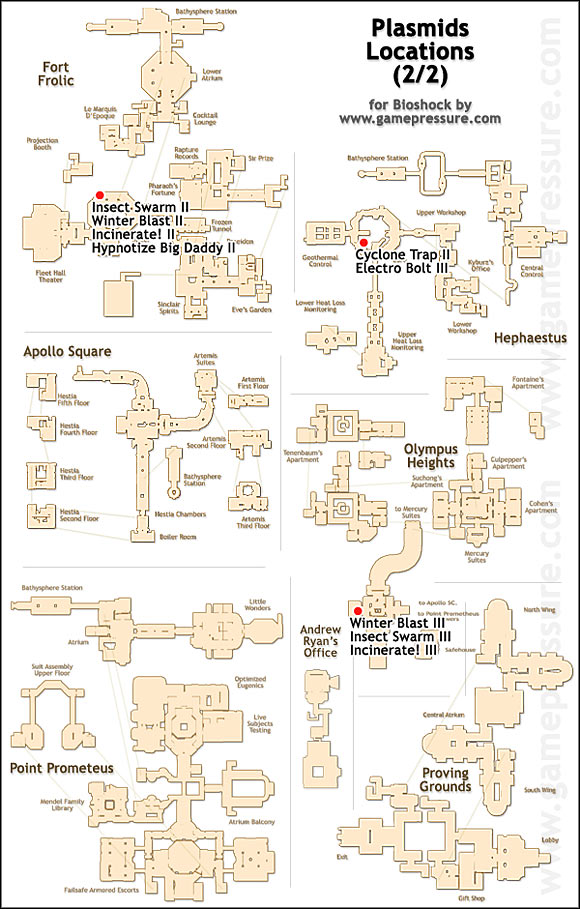
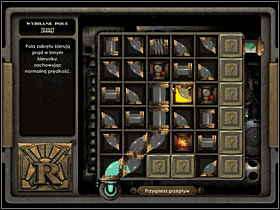
When you decide to hack something, you have to complete a simple (not to be confused with 'easy') mini-game, in which you are to move the puzzles around so they form a "pipe". This pipe must connect input and output of the board, enabling some sort of liquid to flow from one end to another. There are different types of pieces on the board, and they have different impact on the liquid's behavior. For details see below.
If you don't want to play this mini-game, in most cases you can buy out the machine (amount of money vary from very cheap to very expensive), or just use an auto-hack, which is a disposable item to be found in some vending machines.
You can make hacking a bit easier by freezing the mechanism before you perform it.
Hacked object
Successful hack outcome
Turret
Fights by your side until it's destroyed.
Security Bot
Fights by your side until it's destroyed.
Security Camera
When it sees our enemy, it will summon security bots to attack him.
Safe
Becomes open (these are the toughest objects to hack!).
Lock
Becomes open.
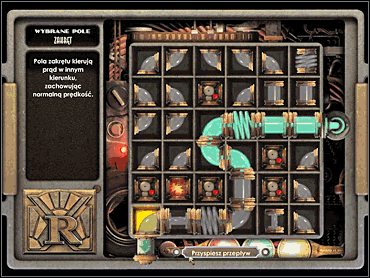 Hacking screen.
Pieces description:

Normal piece - you move these to form a pipe.

Occupied piece - this piece has already been taken by the liquid that flows in the machine and you can't move it any further.

Overload piece - if the liquid reached it, you will be electrocuted.

Alarm piece - if the liquid reaches it, security alarm will go off.

Slowdown piece - it slows down the flow, giving you more time to think.

Speedup piece - speeds up the flow. Don't use these unless necessary!
U-Invent stations enable you to process the junk you found into something of use. In most cases you can create ammo here. The only exceptions are Auto-Hackers and 3 types of tonics: Bloodlust, Boozehound and Hacker's Delight 2.
We can't really give you any advice on using U-Invent station. The stuff you find is mostly random, so just play the game without thinking about it and once in a while visit this machine to process the things you found. There's no point to taking the things any further with U-Invent.

Heat-Seeking RGP

Trap Bolt

Electric Gel

Auto-Hacker

Armor-piercing machine gun ammo

Explosive buck

Anti-personnel pistol ammo
You'll come across a research camera for the first time on Neptune's Bounty level. You can use it to take photographs of your enemies, thus researching them and gaining certain bonuses. The better the pictures are, the faster you get the bonuses. Here are the factors that determine your score:
In plus:
In minus:
+ Target is fighting (with you or with any other object)
- Target is dead (you can also photograph dead bodies)
+ Multiple targets (more than one target on one shot)
- Target already photographed (if you take multiple shots of a single enemy)
Apart from above, the quality of your photo depends on how centered is the target on it - the closer it is to the middle, the better.
Practice shows that it pays to take at least 3-4 photos of each enemy you fight, before even engaging him in combat. This is the fastest way to get all the bonuses. Don't feel bad about wasting photos - they are cheap and for sale in most Circuses of Value. It's best to start researching enemies as soon as you get the camera. There's really no point to wait. It's good to research Rosies as fast as possible, as they will grant you a bonus tonic: Photographer's Eye 2, which will increase the speed of your research.
Thuggish Splicer

Description:
These are the first enemies you encounter in the game. They use melee weapons such as wrenches, pipes, crowbars etc. The best way to deal with them is to electrocute them and then hit them with a wrench.
Research bonuses:
1. Increased damage + (vulnerable to anti-personnel ammo)
2. Physical tonic: [SportBoost]
3. Increased damage ++
4. Physical tonic: [SportBoost 2]
5. Increased damage +++
Lead Splicer

Description:
Lead Splicers are the only human-like enemies in the game who use firearms. In most cases they use pistols, but sometimes upgrade to machine guns. Again, electro bolt + wrench works fine for them.
Research bonuses:
1. Increased damage + (vulnerable to anti-personnel ammo)
2. Physical tonic: [Scrounger]
3. Increased damage ++
4. Combat tonic: [Static Discharge 2]
5. Increased damage +++
Nitro Splicer

Description:
Nitro Splicers use grenades in combat. They can create smoke covers for themselves, which sometimes makes them troublesome. Treat them like you treat other Splicers.
Research bonuses:
1. Increased damage + (vulnerable to anti-personnel ammo)
2. 15% chance that their grenade will be a dud
3. Increased damage ++
4. 15% chance that their grenade will be a dud
5. Increased damage +++
Spider Splicer

Description:
Spider Splicers are quick and deadly. They can walk around the ceilings. It's good to use Incinerate against them - just target them once, fire, and watch them burn to death.
Research bonuses:
1. Increased damage +
2. Spider Splicers' hearts can be used as health packs.
3. Increased damage ++
4. Physical tonic: [Extra Nutrition III]
5. Increased damage +++
Houdini Splicer

Description:
Houdinis are the "wizards" of the lot; they use plasmids to strike you. In most cases they're not a real threat - provided you know how to handle them. Their constant teleportation may be irritating, but they are easily dealt with by ice attacks. Just freeze them so that they can't escape and smash them to bits.
Research bonuses:
1. Increased damage + (vulnerable to anti-personnel ammo)
2. Physical tonic: [Natural Camouflage]
3. Increased damage ++
4. It's easier to tell where the Houdini is going to appear after teleportation.
5. Increased damage +++
Security Camera

Description:
Cameras are not a real threat in BioShock. In fact, they can be of great use to you, as long you have the patience to hack them. In most cases it's not a problem to destroy a camera, but you shouldn't do so without thinking. Perhaps it's better to have the security on your side?
1. Increased damage + (vulnerable to anti-armor ammo and electricity)
2. You find twice as much film in destroyed cameras
3. Increased damage ++
4. Decreased difficulty when hacking cameras
5. Increased damage +++
Security Bot

Description:
Security Bots come at you whenever you trigger a security alarm - in most cases that is caused by getting spotted by a security camera. The research of Security Bots can be dealt with quite fast, because there are more and more bots attacking you during each alarm. After reaching the 4th level of research you won't have to beat the hacking mini-game when hacking a security bot - you success will be automatic.
Research bonuses:
1. Increased damage + (vulnerable to anti-armor ammo and electricity)
2. Engineering tonic: [Security Expert 2]
3. Increased damage ++
4. Automatic success when hacking a security bot
5. Increased damage +++
Turret

Description:
There are 3 types of turrets in the game. The most common one is a machine gun turret. Rocket launchers and flamethrowers are much, much rarer. Basically: it's best to hack turrets, not to destroy them. In order to do so, first stun a chosen turret using electro bolt (or any other electricity-based instrument). The best way of destroying rocket turrets is to grab their missiles with Telekinesis and throw them back.
Research bonuses:
1. Increased damage + (vulnerable to anti-armor ammo and electricity)
2. You find twice as much ammo in destroyed turrets.
3. Increased damage ++
4. Automatic success when hacking a turret
5. Increased damage +++
Big Daddy

Description
A detailed description of Big Daddies can be found in a separate section of the guide. Here let's stick to research bonuses.
HINT: Notice that Big Daddies respawn after being defeated. You can use it to speed things up with your research.
Research bonuses - Rosie:
1. Increased damage + (vulnerable to anti-armor ammo)
2. Combat tonic: [Photographer's Eye II]
3. Increased damage ++
4. You always find rare U-Invent ingredients in dead Rosies.
5. Increased damage +++
Research bonuses - Bouncer:
1. Increased damage + (vulnerable to anti-armor ammo)
2. Combat tonic: Wrencher 2 [Wrench Jockey II]
3. Increased damage ++
4. Wrench damage +50% (constant effect, not a tonic!)
5. Increased damage +++
Little Sister

Description
A detailed description of Little Sisters can be found in a separate section of the guide. Here let's stick to research bonuses.
Research bonuses:
1. Slight increase in maximum health and EVE levels.
2. Slight increase in maximum health and EVE levels.
3. Slight increase in maximum health and EVE levels.
4. Slight increase in maximum health and EVE levels.
5. Slight increase in maximum health and EVE levels.
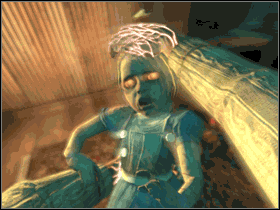
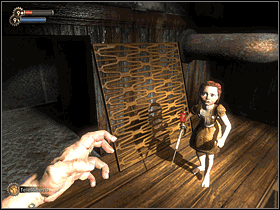
Little Sisters are genetically modified girls who were trained to produce and process ADAM. Their bodies were induced by Sea Slugs which give them virtual immortality. Despite even that, they are quite defenseless against any greedy Splicer. That's why they need Big Daddies to watch over them. These powerful bodyguards live and breathe only to ensure that Little Sisters are safe.
The girls are the only source of ADAM in the game. And what do we need ADAM for? It's a currency that we use to buy genetic upgrades in machines called Gatherer's Gardens. The more ADAM we have, the easier the game gets: we can afford buying more health, more EVE, more plasmids, tonics, more slots. Hence the dilemma: should we harvest Little Sisters for Sea Slugs, killing them in the process (160 ADAM each), or rescue the girls for a lot less cash (80 ADAM each)? The choice is yours, really - but it determines the ending you'll see in the game. There are three possible endings:
- Good: you saved all the girls and in the end decide to rescue them from the underwater city, give them a new life on the surface.
- Bad: you saved some girls, but also killed some of them; you decide to take over the city and create your own army of Splicers to take over the world.
- Very Bad: you killed all the girls; the same as bad, the only difference is the narrator's tone of voice (a little more angry, so to say).
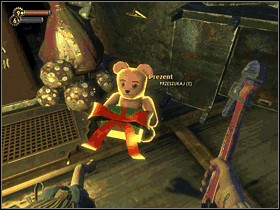
HINT: If you decide to rescue the girls, each time you save three of them Tenenbaum will send you a gift. It will wait for you inside a teddy bear in the nearest Gatherer's Garden. It's the only way to get some types of plasmids. Additionally, there's 200 ADAM in each reward.
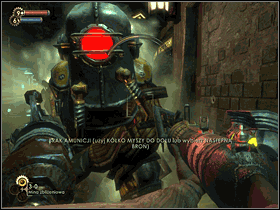 Rosie
Rosie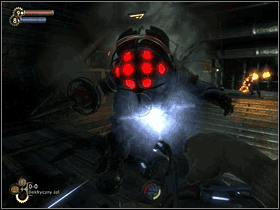 Bouncer
To get the ADAM - one way or another - we have to dispose of the Big Daddy first. There's no real state-of-the-art way to do this, at least not until late in the game. Big Daddies are the toughest opponents in the game. Generally: you should always use anti-armor ammo and electricity. At the beginning of the game you may want to accumulate some Electric Bucks for the shotgun especially for Big Daddy fights.
The best weapon against Big Daddies is the Chemical Thrower with Electric Gel ammo. The ammo itself is difficult to come by, but results are more than satisfactory. A little more common way to eliminate Big Daddies is to use "classical" heavyweight arms, such as grenades, proximity mines and other types of explosive ammo. Also, forget about using pistol (even with anti-armor ammo) and wrench. It's just a waste of time.
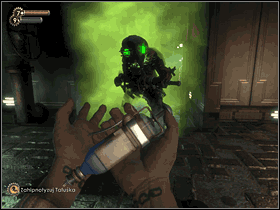
There are two types of Big Daddies in the game: Bouncers and Rosies, each in two versions: standard and elite. Altogether they use 5 different attacks: melee punching, throwing mines, shooting their guns, stunning, and charging.
Notice that in order to get the "Tonic Collector" achievement you have to rescue at least 18 Little Sisters. When you save the girls you might not have enough ADAM to buy everything you want (you'd have to cut down on slots and plasmids, mostly). Due to this fact you might not want to rise up to this challenge during your first playthrough. It limits your possibilities and can bias your gameplay - not necessarily the best thing in such a game as BioShock.
Name
Description
# of points
Ammo Inventor
Invent all the ammo types in U-Invent.
25
Avid Inventor
Invent 100 items in U-Invent.
10
Basic Inventor
Invent at least 1 item in U-Invent
5
Became a Big Daddy
Part of the story
30
Bough One Slot
Buy one extra tonic or plasmid slot at Gatherers Garden
5
Broke Fontaine's Mind Control
Part of the story
30
Completed Cohen's Masterpiece
Part of the story
30
Completed Welcome
Part of the story
10
Deal with every Little Sister
Save or kill every Little Sister in the game (there are 21)
40
Defeated Andrew Ryan
Part of the story
30
Defeated Atlas
Part of the story
100
Defeated Dr Steinman
Part of the story
15
Defeated Peach Wilkins
Part of the story
15
Five Fully Upgraded Weapons
Install all upgrades for 5 weapon types
10
Found Cohen's Room
Enter Sander Cohen's room (it's hard to miss, as long as you don't kill Cohen in Fort Frolic; the room is in Olympus Heights)
10
Four Fully Upgraded Weapons
Install all upgrades for 4 weapon types
10
Fully Researched Bouncer
Finish the research on Bouncer.
10
Fully Researched Houdini Splicer
Finish the research on Houdini Splicer
10
Fully Researched Lead Splicer
Finish the research on Lead Splicer
10
Fully Researched Little Sister
Finish the research on Little Sister
10
Fully Researched Nitro Splicer
Finish the research on Nitro Splicer
10
Fully Researched Rosie
Finish the research on Rosie
10
Fully Researched Spider Splicer
Finish the research on Spider Splicer
10
Fully Researched Thuggish Splicer
Finish the research on Thuggish Splicer
10
Hacked a Safe
Hack a safe
10
Hacked a Security Bot
Hack a security bot
10
Hacked a Security Camera
Hack a security camera
10
Hacked a Turret
Hack a turret
10
Hacked a Vending Machine
Hack a vending machine
10
Historian
Find all the audio diaries [check out our walkthrough]
50
Irony
Take a photo of Sander Cohen's body (it's better to let him be in Fort Frolic and deal with him in Olympus Heights)
10
Little Sister Savior
Save all the Little Sisters (there are 21 in the game)
100
Lucky Winner
Hit a jackpot at the casino (Fort Frolic)
10
Maxed All Tracks
Buy out all the plasmid and tonic slots
50
Maxed One Track
Buy out all the slots in one category
20
One Fully Upgraded Weapon
Install all upgrades for 1 weapon type
5
One Successful Hack
Just hack anything!
5
Prolific Photographer
Take at least one photo of each type of enemy (see our Enemies section)
5
Quality Research Photo
Take an A-grade photo.
20
Research PhD
Finish all the research
20
Researched a Splicer
Part of the story
5
Restored the Forest
Part of the story
15
Seriously Good at This
Beat the game on highest difficulty setting
40
Skilled Hacked
Successfully hack 50 times
40
Three Fully Upgraded Weapons
Install all upgrades for 3 weapon types
10
Toaster in the Tub
Use Electro Bolt on an enemy that's standing in water.
10
Tonic Collector
Gather all 53 Tonics in the game
50
Two Fully Upgraded Weapons
Install all upgrades for 2 weapon types
5
Upgraded a Weapon
Install at least one weapon upgrade
5
Weapon Specialist
Install all upgrades in the game (you have to find all 12 Power to the People stations, see the appropriate section of the guide for maps)
20




 Burnout Paradise: The Ultimate Box Game Guide & Walkthrough
 Bionic Commando Game Guide & Walkthrough
 Bioshock Game Guide & Walkthrough
 Battlefield: Bad Company Game Guide & Walkthrough
 Battlefield Hardline Game Guide & Walkthrough