
This guide to Bulletstorm contains a thorough walkthrough, together with many screens and comments on effective enemy extermination. The Skillshot system has been precisely analysed. As an effect, you can find tens of hints on the special kills, both in the descriptions of the levels as well as in the separate part dedicated only to Skillshots. That however still isn't everything. I also included the locations of all hidden items, i.e. Newsbots, Electro Flies and Nom Juice bottles.
Lukasz "Crash" Kendryna ()
Translated to English by Jakub "cilgan" Lasota
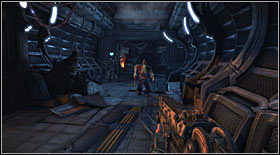
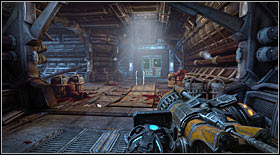
You begin the game onboard a spaceship. At first you won't have full control over the character. You'll have to follow the orders to familiarize with the controls.
This way you will move your head, fire a gun for the first time and use the kick.
Once you properly complete all the orders (instruction will appear in the middle of the screen), the interactive cutscene will end and you will get full control.
Follow your companion towards the airlock and try to open it. You will start another cutscene.
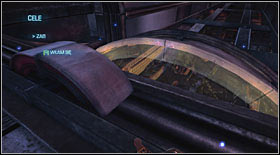
Afterwards alternate between pressing the left and right mouse buttons to move along the pipe.
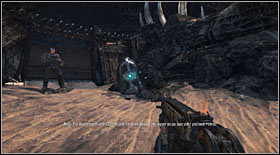
At its end there's a switch - interact with it (R by default).
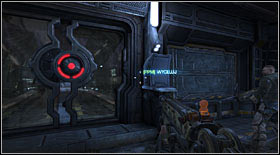
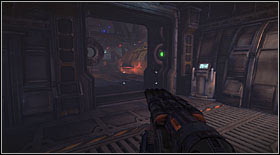
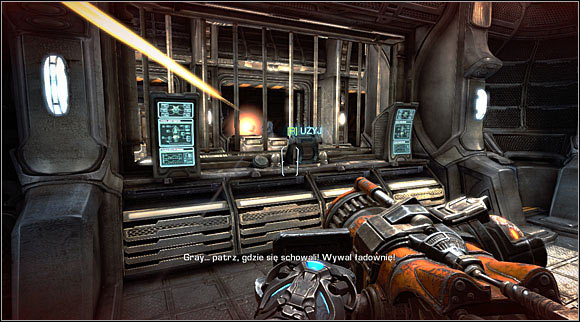
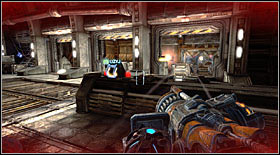
Afterwards head forwards once again, clearing the path with a kick. At some point you will have to crouch to get through the last part between you and the airlock. Once you reach it, shoot the control panel.
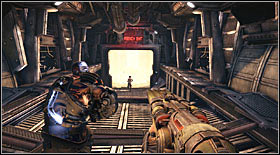
After the passage opens, go through it and follow your companions (holding down the spacebar) onto the spaceship bridge.
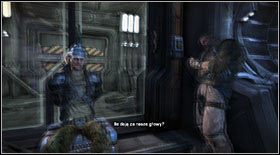
After you get there, a long cutscene will start.
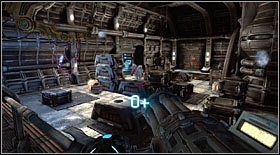
 The only such sequence in the game... Don't get accustomed.
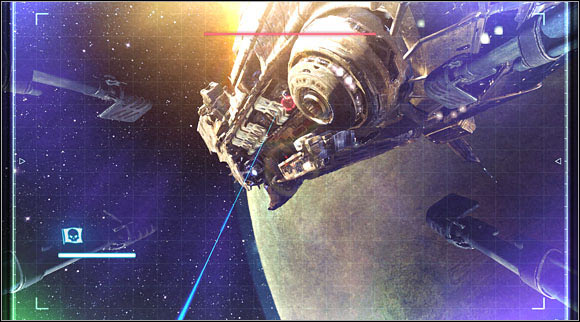
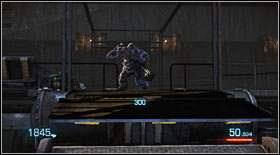
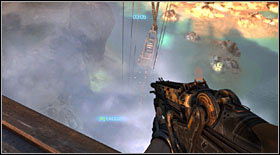
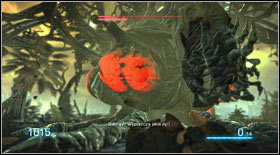
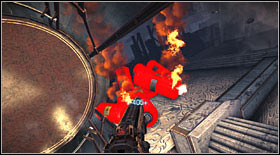
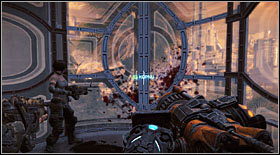
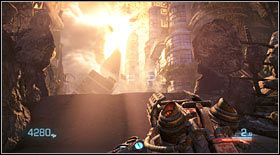
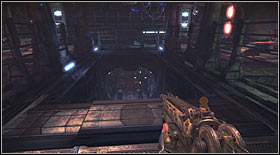
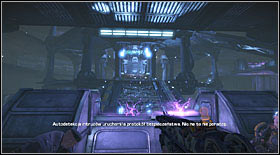
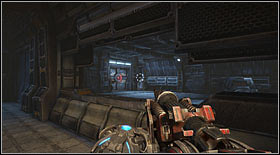
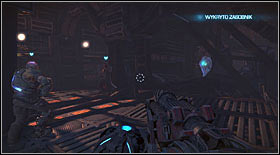
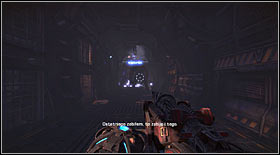
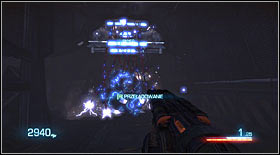
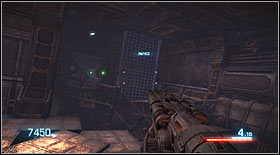
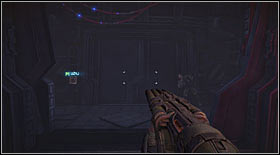
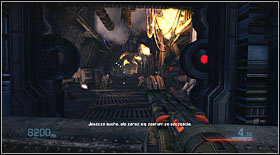
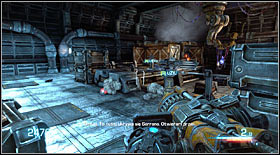
It will end with you gaining control over the spaceship's guns. While the ship will be moving automatically, your task is to shoot. Targets will be marked with red spots (well visible). The whole sequence is more of an interactive cutscene and isn't very demanding.
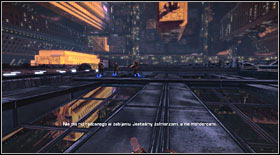
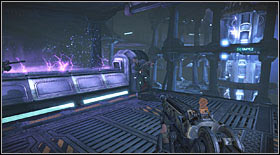
After the space sequence ends, the action will go into a flashback and you with your team will land on a vertical wall of a large skyscraper. Follow your companions until you reach an elevator. Kick it and it will fall down, unblocking a passage.
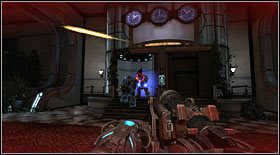
At the end of the path there's another attraction waiting for you. Activate it to start an interactive cutscene. At the very beginning you will have to shoot (without the need to aim, just click the mouse button).
A longer cutscene will start.
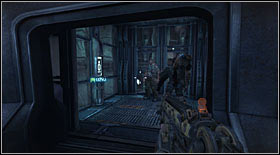
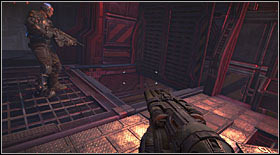
After it ends, a few enemies will enter the room. Get rid of them while keeping your distance.
During the fight, the action will move back to present times.

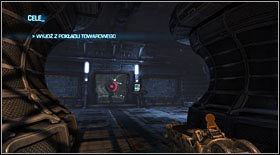
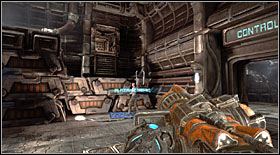
Once you regain control over your character, head to the elevator. Enter it and interact with the control panel.
After getting out, you will have to follow your squad and unblock the passage by kicking the obstacles. This way you will reach a medical room. There you will receive a mission of recovering the batteries.
 Remember that Skillshots still aren't active.
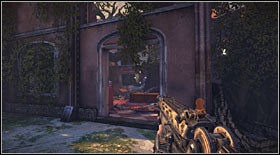
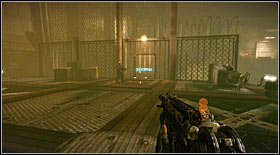
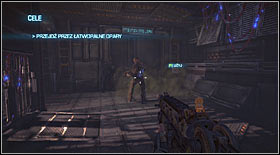
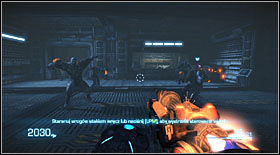
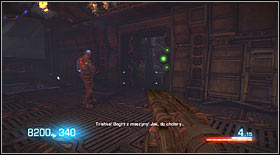
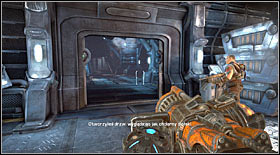
Leave the room and head towards the exit. Before you can go through it, you will be attacked by enemies. They won't shoot, instead trying to get rid of you in close combat (kicking them is by far the best solution).
The exit you wanted to use will turn out to be blocked. Head to the next one, while looking out for the enemies - this time they will shoot. You can slide (2x spacebar) to reach them fast.
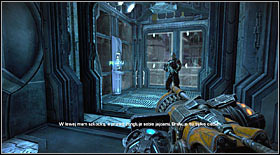
Slid below the low passage leading down before heading out.
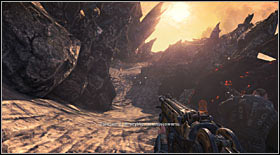
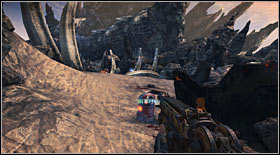
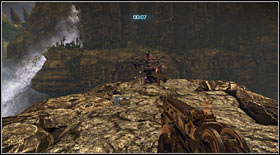
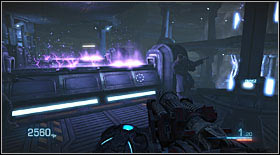
Outside you will be attacked by more shooting enemies. They will be coming from behind the rocks. Use slides to deal with them (safely decreasing the distance between you and them).
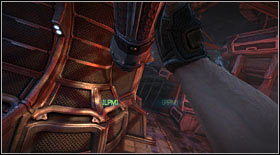
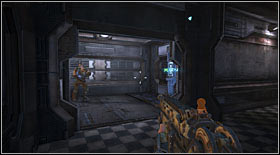
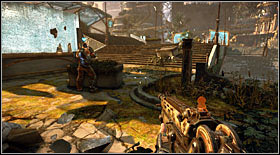
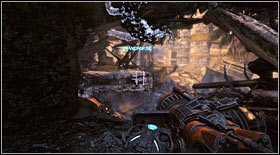
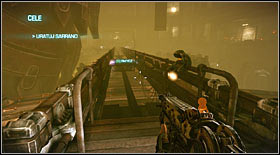
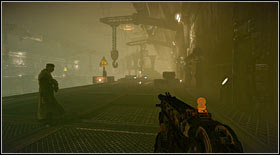
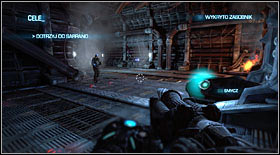
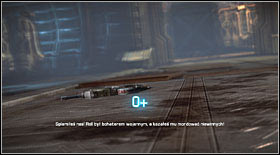
 First contact with the leash.
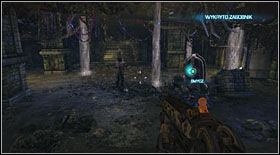
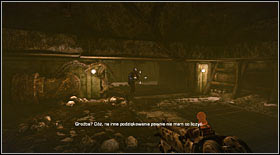
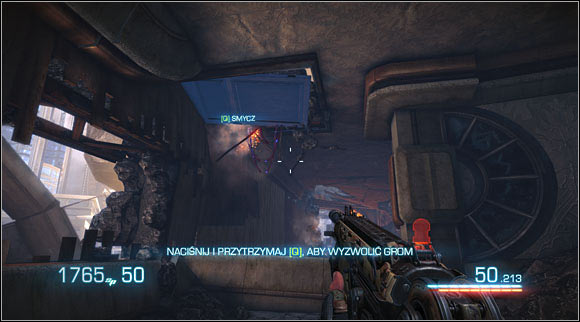
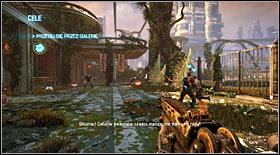
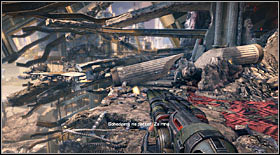
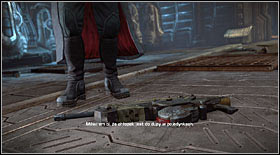
Go up the sand hill and a cutscene will start. After it ends, approach the dead soldier General Sarrano's soldier and pick up the leash.

Afterwards use it on the capsule's airlock (Q by default).
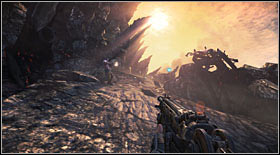
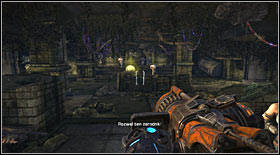
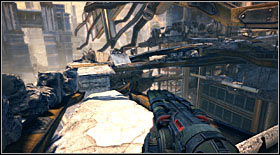
Afterwards head towards the rocks and repeat the action, unblocking a passage.
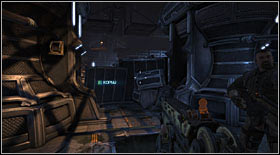
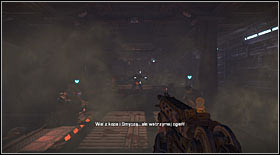
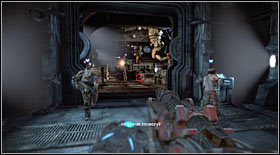
A bit further you will come across spiky crates. Behind them there will be enemies. Use your leash to throw them onto the objects blocking your way (destroying it in effect).
The leash will always pull items or enemies towards you, penetrating some objects. That way you can easily pull enemies onto interactive objects in the environment, completing Skillshots (in this case the enemies will die from being spiked).
Continue going up the hill, using the leash to pull away the obstacles. You will also come across more enemies.

After getting rid of everyone, go into the ship.

Head to the medical room with the obtained battery and initiate a scripted cutscene.
During it you will be asked out of the room. Leave it and you will be attacked soon afterwards. The enemies will keep appearing from every side.
At some point you will get surrounded and a cutscene will start. During it you will have to fire a single shot. Do it and the chapter will end.
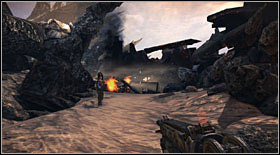
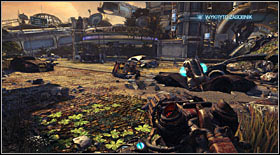
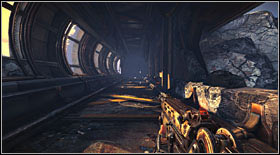
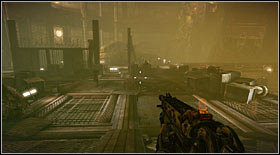
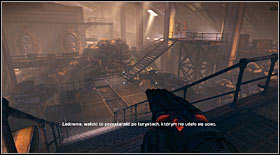
After regaining control over the character, head forward.
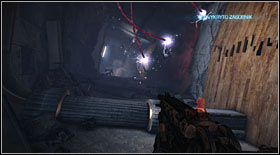
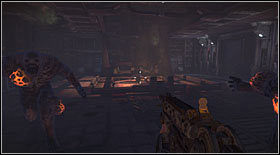
That way you will reach a Quick Time Event - you will have to kick an exploding barrel towards the enemies (and afterwards shoot it so that it explodes).
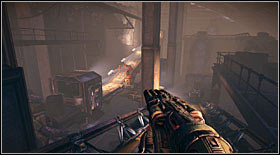
A bit further more enemies will appear. You will have to kick a barrel at them as well.
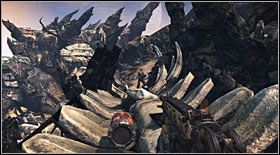
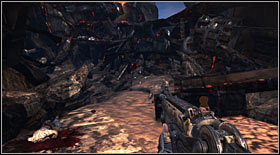
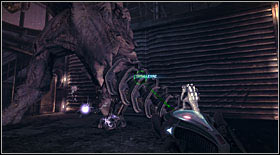
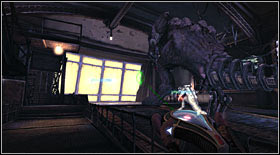
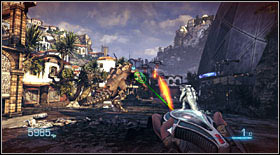
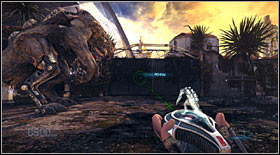
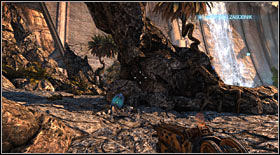
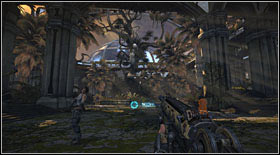
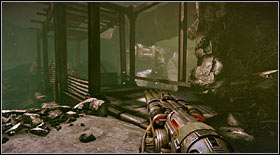
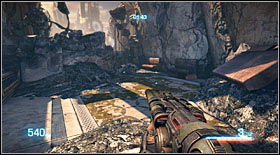
Once they're all dead, walk along the monstrous skeleton and head along the path up the hill.
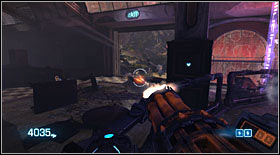
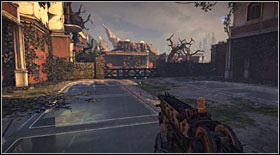
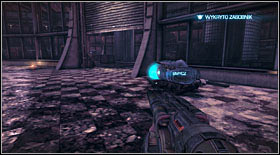
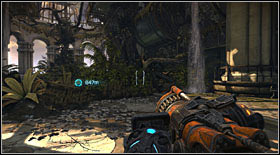
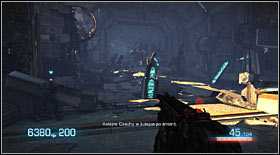
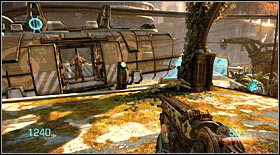
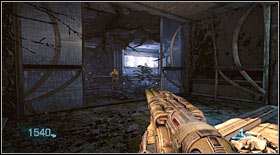
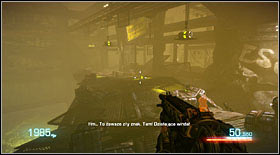
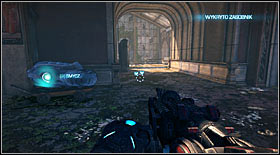
At the end of the path you will find a dropkit which serves as a shop in which you will be able to spend your Skillpoints to unlock new weapons, upgrades and buy ammunition.
From now on until the end of the game you will be able to perform Skillshots. There are more than 130 of them (a full list in the separate part of the guide). Performing any of them for the first time will give you a considerable amount of points. Repeating them over and over again will reward you with much less (by pressing N and in the dropkits you can access a full list of Skillshots, together with the amount of points they give).
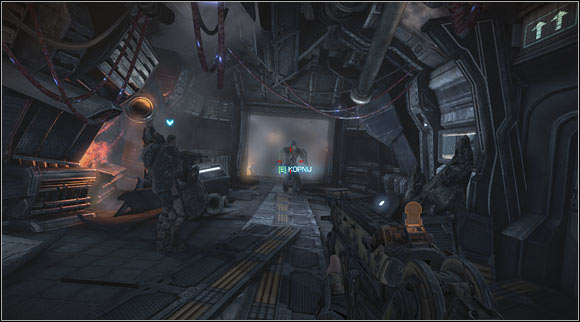
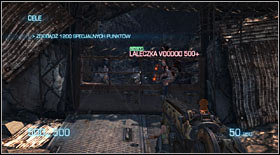
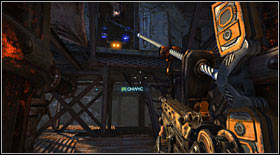
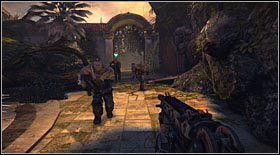
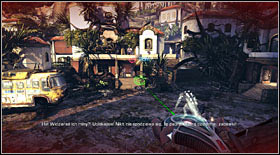
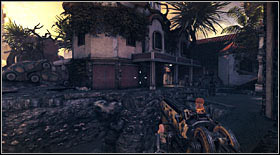
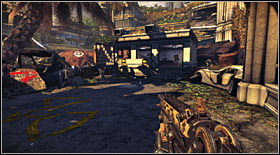
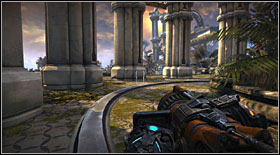
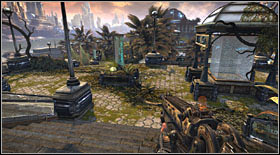
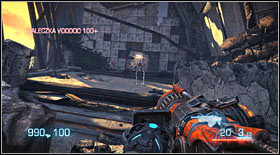
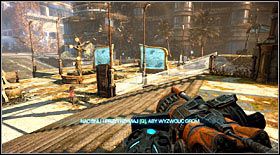
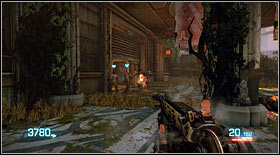
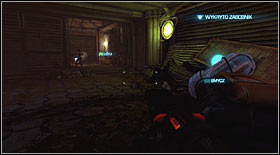
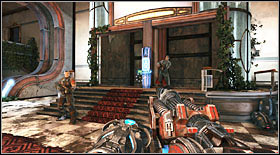
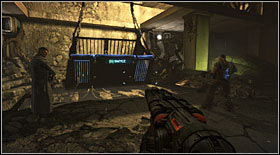
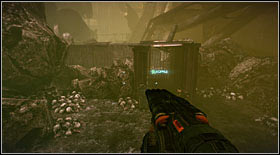
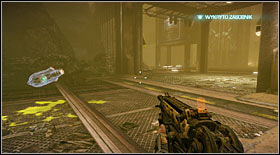
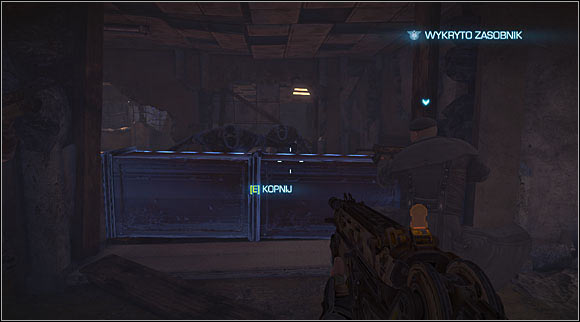
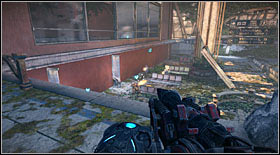
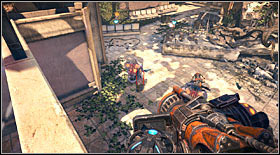
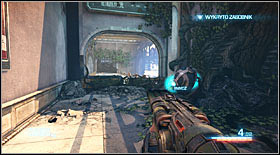
After you finish familiarizing with the dropkit, move forwards towards the locked crate. On the other side there will be enemies waiting for you.

STRATEGY: in order to gain as much points as possible, kill everyone by performing VOODOO DOLL. You just need to fling an enemy onto the spiked crate with the leash (it penetrates obstacles).
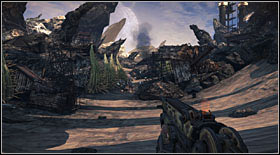
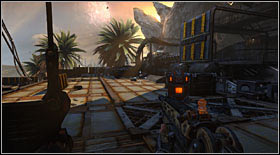
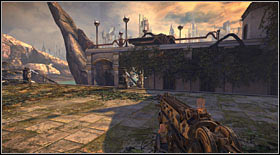
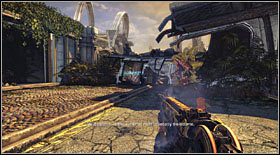
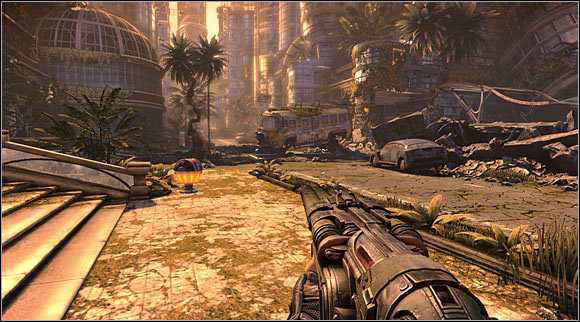
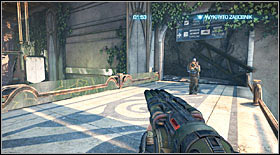
After the gate automatically unlocks, go through it and move forward.
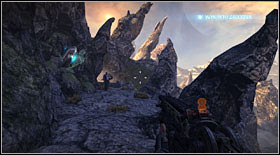
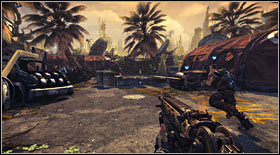
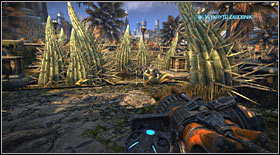
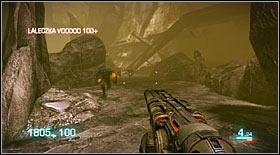
You will reach more enemies.
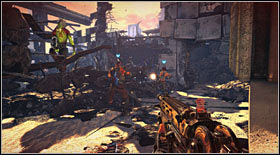
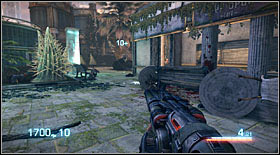
STRATEGY: enemies will be running beside cactuses. Fling enemies onto them and you will unlock PRICKED, earning quite a lot of points.
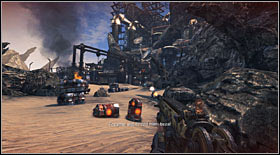
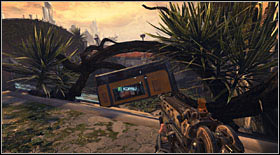
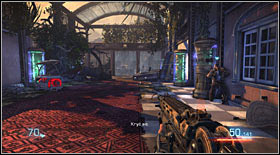
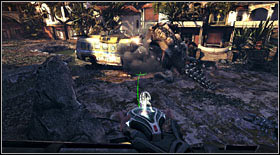
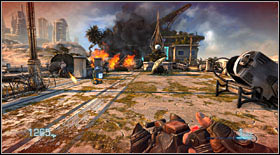
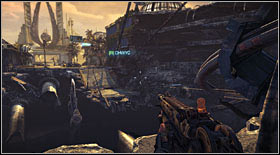
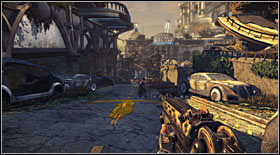
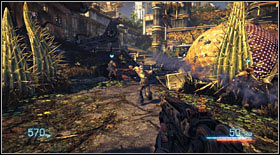
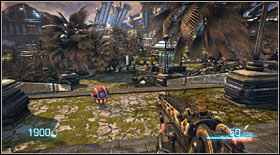
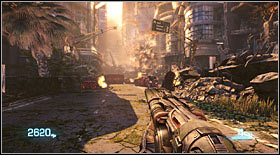
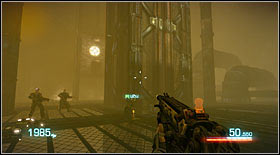
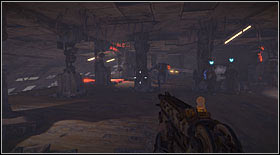
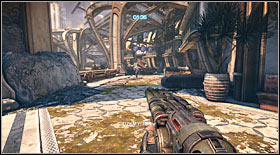
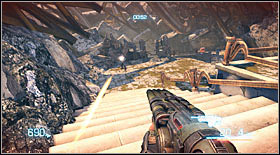
A bit further there will be an open space. While going through it, you will come across more enemies and exploding barrels.
STRATEGY: kick a barrel towards an enemy and detonate it. This way you will receive the ENVIRO-MENTAL Skillshot.
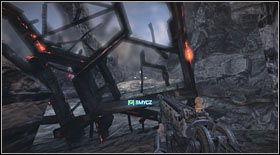
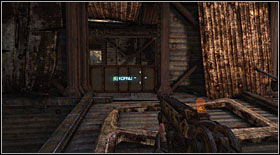
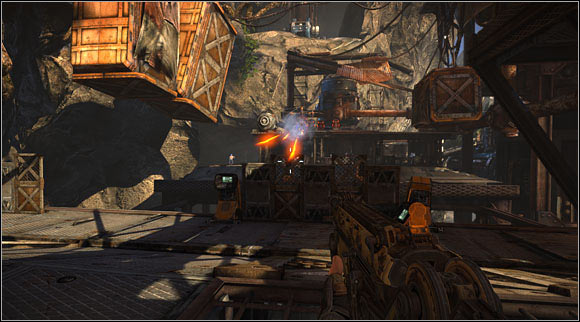
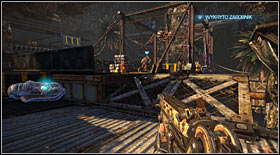
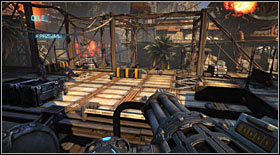
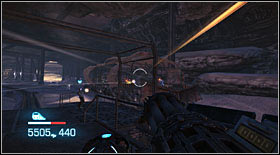
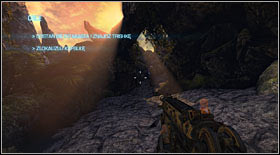
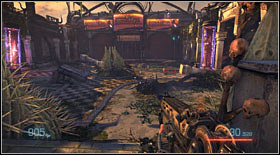
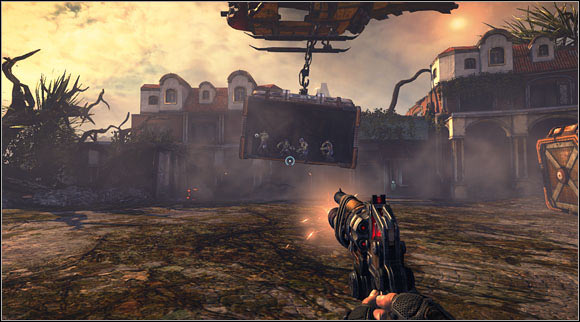
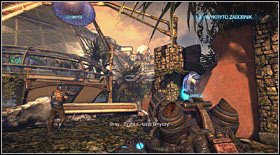
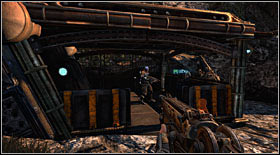
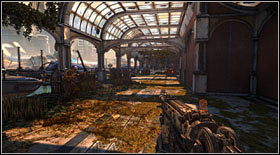
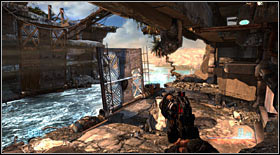
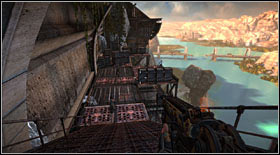
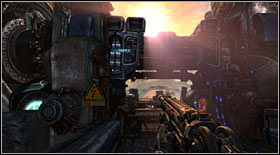
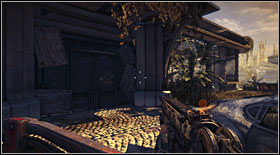
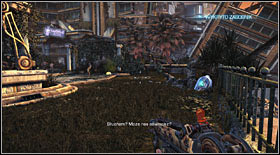
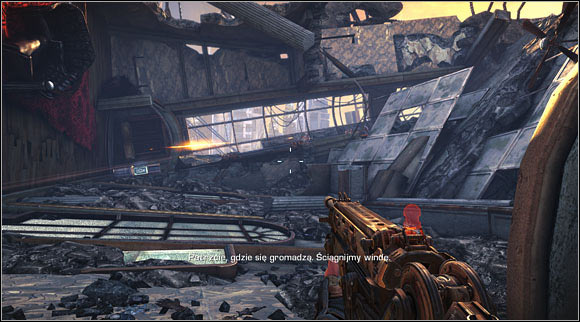
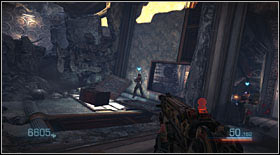
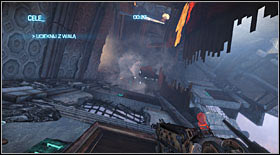
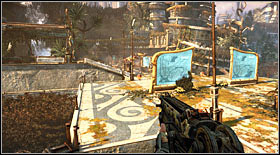
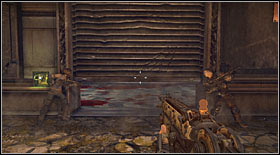
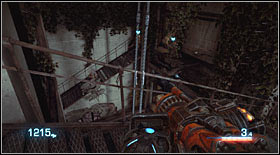
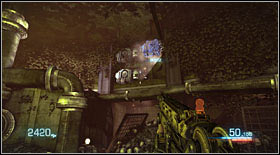
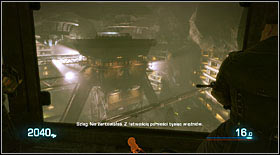
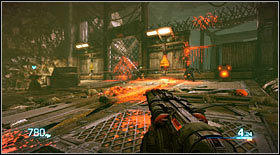
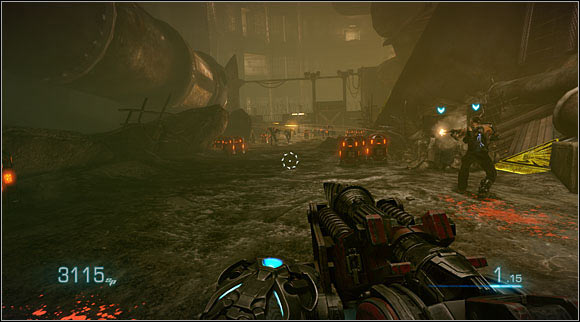
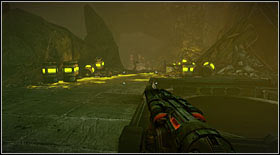
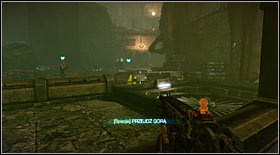
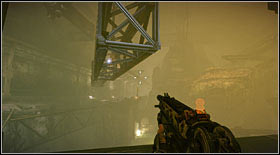
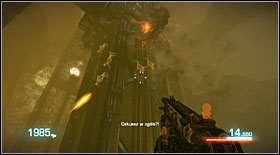
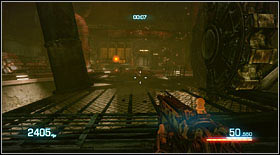
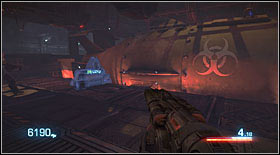
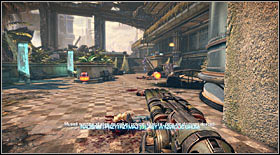
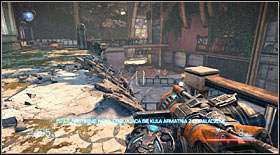
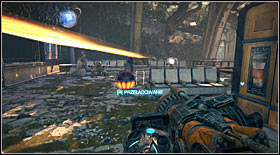
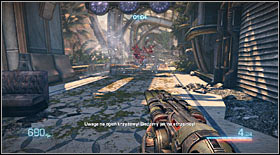
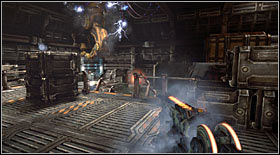
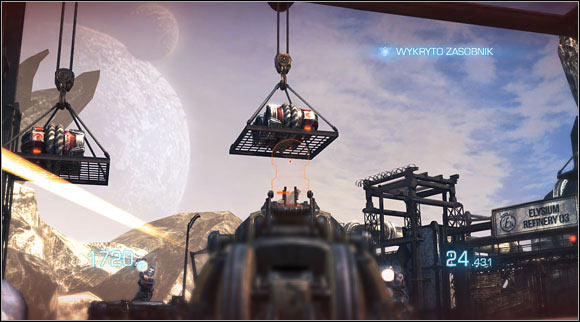 Hanging platforms with explosive materials.
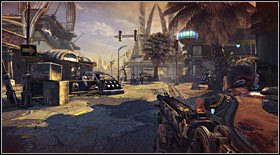
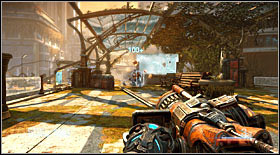
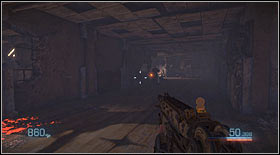
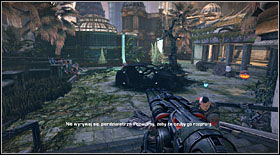
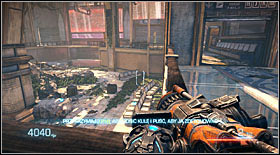
You will be under constant fire. The deeper you go into the location, the more enemies you will encounter.

STRATEGY: you can get rid of some of them by shooting the exploding barrels on the hanging platforms. It will result in a multiple ENVIRO-MENTAL (the number is the multiplier).

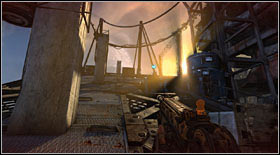
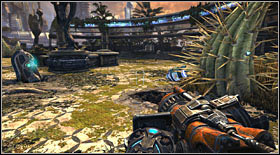
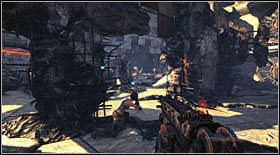
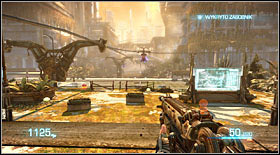
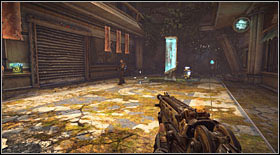
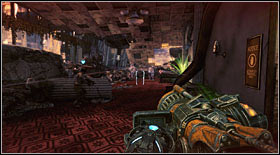
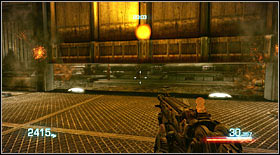
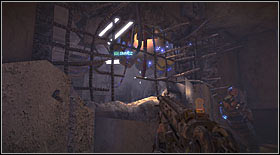
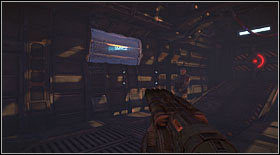
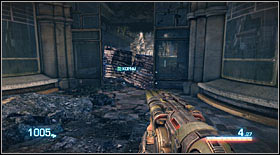
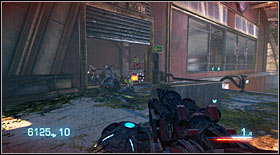
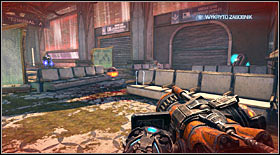
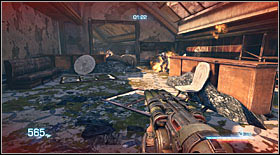
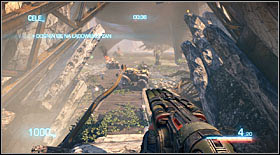
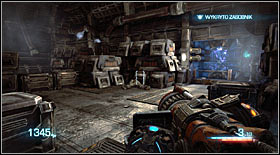
A bit further, after getting to the wall with a locked gate, get ready for another wave of enemies.
More are waiting inside.
STRATEGY: You will find more barrels, which let you get an easy ENVIRO-MENTAL.

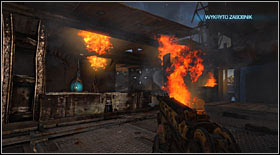
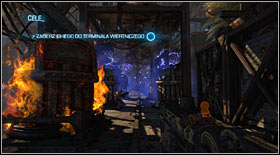
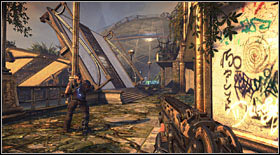
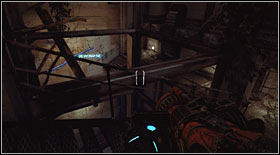
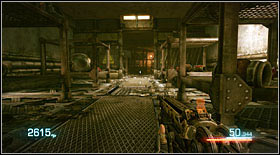
Once they're all dead, go up the scaffolding and to the right. On your way you will be able to activate a scripted camera, pressing RMB when asked to. If you react fast enough, you will receive bonus points (up to 500).
After going down, go forward towards the locked door. On the way a few enemies will rush onto you - get rid of them. Interact with the elevator (after kicking out the door) to end this level.
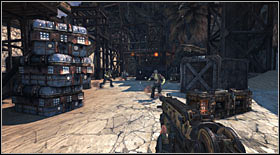
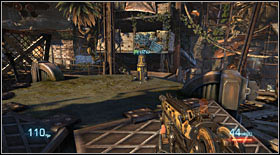
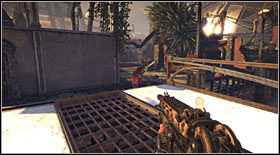
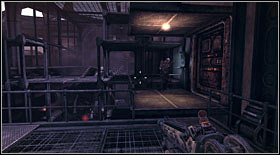
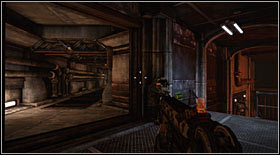
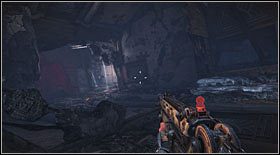
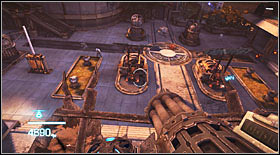
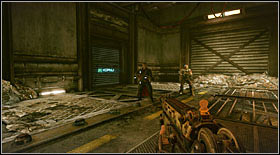
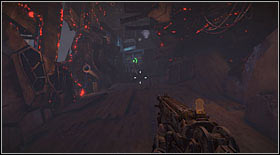
You will begin the level in a mine. It's a rather safe place with not many enemies.
Move forwards until you reach the first dropkit. You will be able to buy your first improvement (which also involves a new set of Skillshots). Afterwards approach the crate, break it out with a kick and jump into the water.
That way you will ride down. After landing, move forwards. On your way you will come across one/two enemies.
STRATEGY: there are spikes on the nearby wall. You can use them to get VOODOO DOLL.
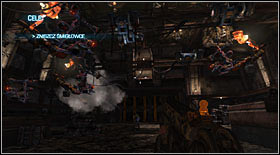
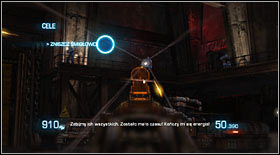
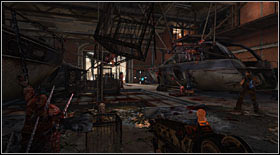
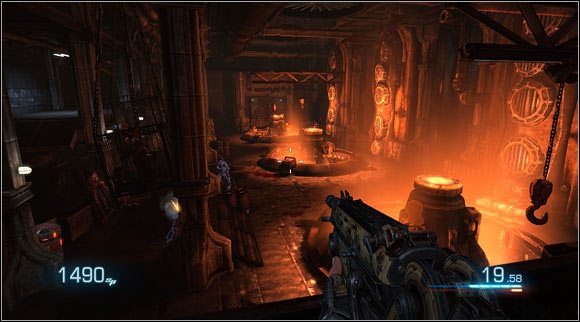
Eventually you will reach a hangar. Begin destroying the gyrocopters found there. That way you will lure out the enemies. They will attack you from the balcony on the right (pull them down with the leash).

Once they're all dead, a gyrocopter will join the fun. Even though it's an ordinary enemy, the fight can cause more problems than usually. A machinegun series drains health quickly.
STRATEGY: attack the gyrocopter with the leash, which will initiate a mini-game. You have to press Q at the right time to fling the pilot out of the cockpit. If you manage to pull it off (it's not too hard), finish him off before he hits the ground. This way you will get PARASHOOT.
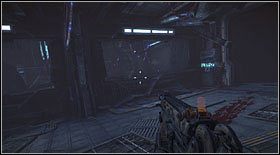
Once the enemy is dead, use the leash on the mechanism in the upper left corner of the exit. That way you will be able to go out.
Outside you will find a dropkit. Use it and head down the scaffolding.
On your way you will be attacked by more enemies. You can get rid of them using the nearby barrels.
At the end of the path there's an elevator - finish off another gyrocopter before using it.

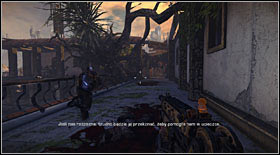
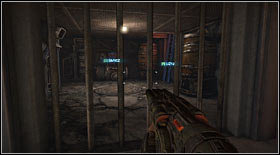
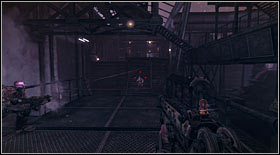
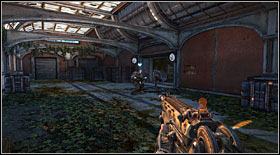
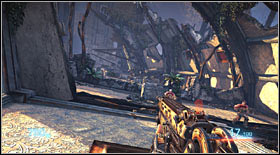
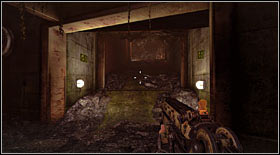
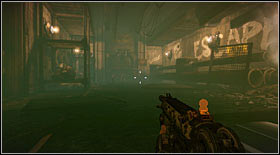
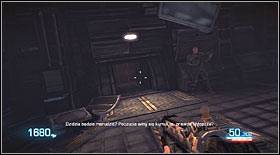
After going down you will be attacked by multiple enemies hiding behind covers. Once you approach them, they will run to a nearby building and barricade inside.

STRATEGY: run to the barricade and kick it to crush the enemy and unlock a unique Skillshot (hard to get elsewhere) - PANCAKE.
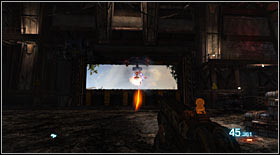
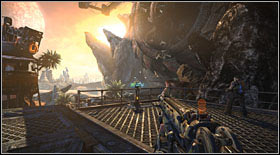
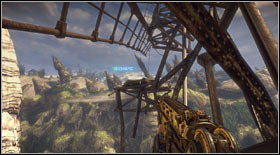
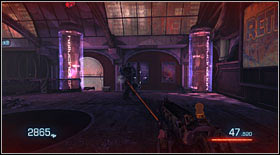
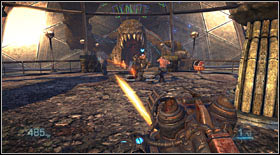
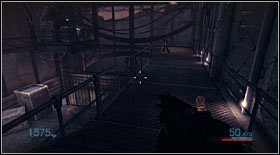
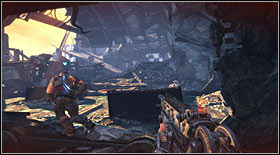
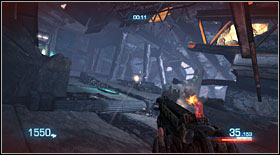
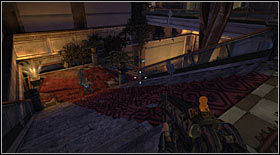
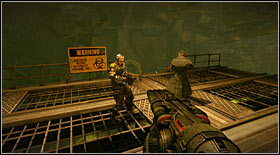
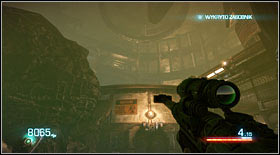
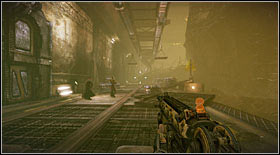
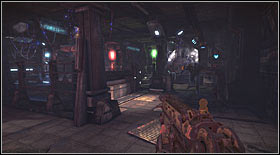
 A gyrocopter and explosive materials in the background.
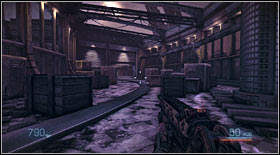
Go through the barracks and get out on the other side, being ready for another gyrocopter and ground troops.
STRATEGY: don't shoot the flying enemy. Instead, shoot the barrels behind him. This way you will unlock the unique FLAK and a couple ENVIRO-MENTALS.
That way you will set the building on fire. It however won't stop you from entering it. Inside you will find a dropkit.
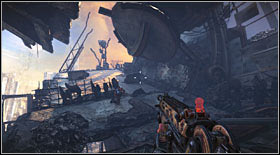
Exit through the other side of the room and quickly run to the very top, towards the dazzling light.
A turret enemy will be waiting there. Kill him quickly and use his weapon.
A group of gyrocopters will appear in the area - kill them before the newly-gained weapon's battery runs out (it's time-limited, not by ammo).
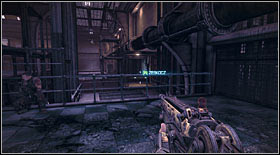
Afterwards head towards another barrack. Inside you will have to press a switch. It will set a metal object into motion. Follow it, killing enemies on your way.

STRATEGY: the fight will take place on a platform hanging in the air. If you throw someone down into the pit (which isn't really hard) with, for example, a kick, you will get the VERTIGO.
On the other side of the platform you will reach another barrack. Kill the enemies inside and a scripted cutscene will start - the floor will crumble.
After landing you will find yourself nearby a dropkit - don't hesitate to use it.
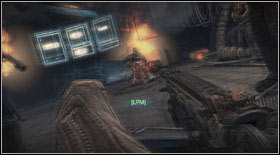
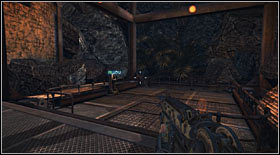
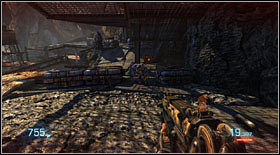
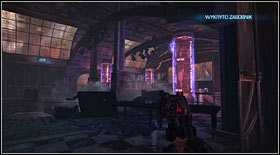
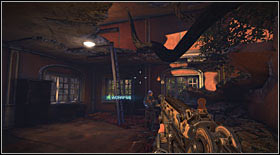
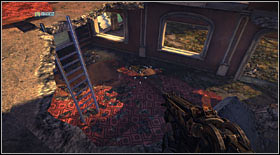
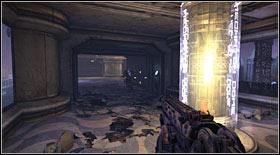
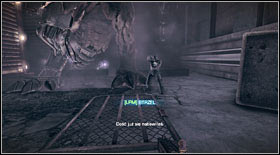
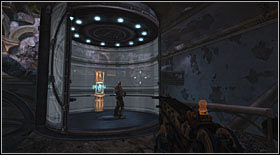
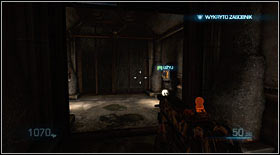
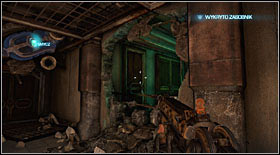
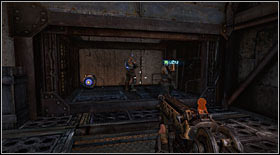
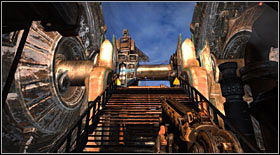
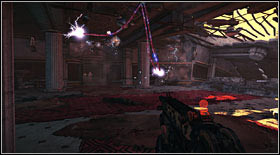
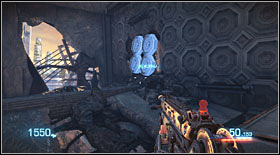
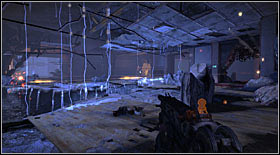
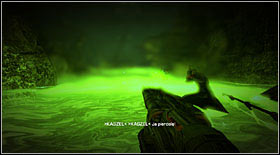
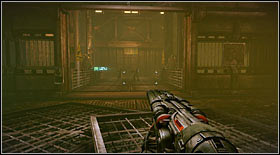
 Electrical machines, perfect for a Skillshot.
In the next room, filled with electrical devices, a few enemies will attack and your companion will perform a brave action.

STRATEGY: if you manage to fling one of the attackers onto an electrical object, you will get SHOCKER.
Once your companions causes a short-circuit, quickly leave the room while running along exploding generators.
In the end there will be a line - jump onto it by pressing R and cross to the other side.
There you will find another dropkit and a group of enemies.
STRATEGY: you can get rid of them in various ways: throwing them into the pit, shooting the barrels or flinging them onto the electrical cables.
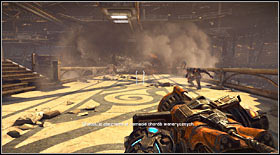
On the upper floor - after crossing the platform - you will be attacked by more enemies. Once they're all dead, a miniboss will enter the arena (killing him will unlock a special Skillshot - check the general list. Attack him with charged Peacemaker shots, which will speed up stunning and killing him (the stun is crucial for unlocking the Skillshots).
Once he's dead, go to the very top (from where the attacker came) and pick up the minigun found there.
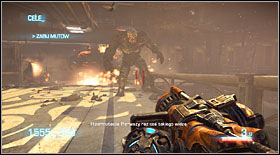
That way a massive enemy attack will begin.
STRATEGY: killing two or more enemies without releasing the trigger will reward you with FULL-THROTTLE (it can be combined with HEADSHOT, which is self-explanatory).
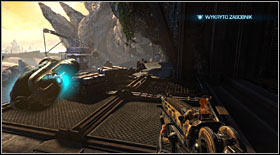
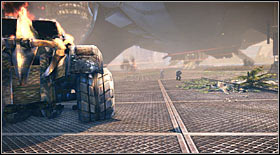
Killing everyone will initiate a cutscene and afterwards one of the flashiest moments in the game - the train ride.
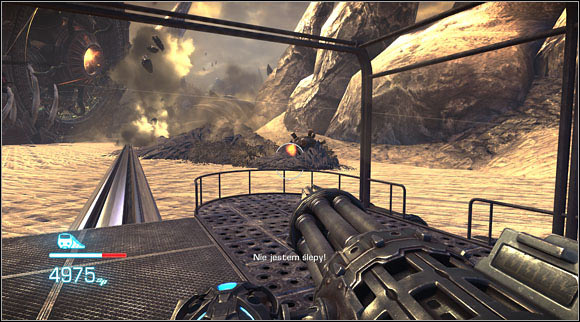
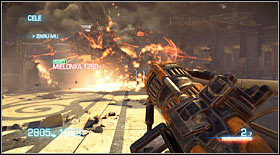
On the train itself, you will have access to a minigun with unlimited ammo. At first you will be attacked by enemies in rather weak cars.
A bit later another enemy wagon will appear, with a big group of enemies on it (together with a miniboss).
STRATEGY: onboard the enemy wagon there are exploding barrels, perfect for an ENVIRO-MENTAL.
Be fast with killing them as gyrocopters will appear in just a minute. There will be really a lot of them, so you need to be quite efficient with eliminating them (it's easy to die at this part).
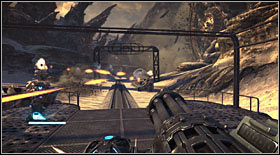
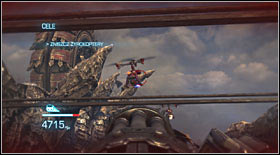
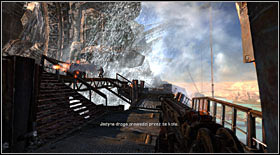
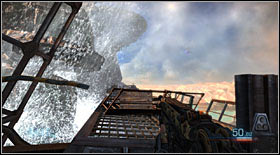
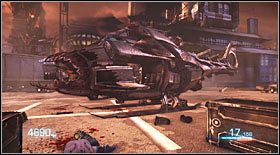
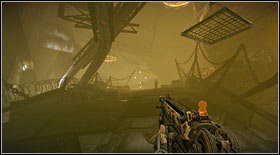
 Land-torpedoes.
Once they're all gone, a helicopter firing land-torpedoes will appear. You need to detonate them before they reach you (there will be only two of them).
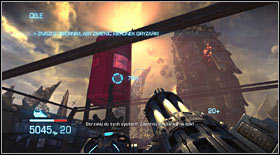
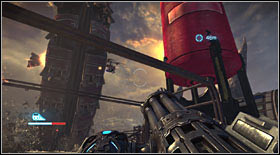
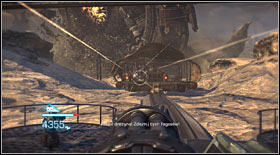
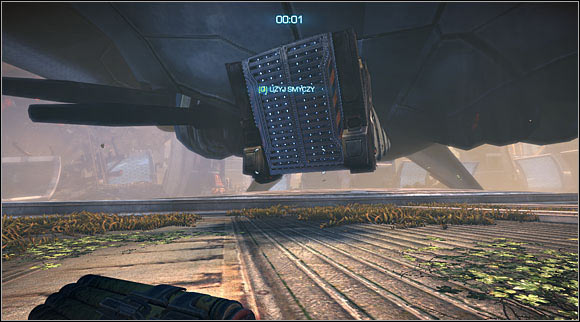
Once the enemies are dead, the rushing wheel will become a threat. In order to avoid death, you will have to blow out the red containers (two) once the wheel is beside them.
If everything goes according to plan, you will reach a tunnel. While going through it, an enemy wagon will appear on the right side (looking opposite to the direction in which the train is going). Shoot it and an effective cutscene will launch, ending the chapter.

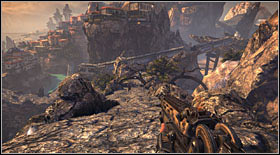
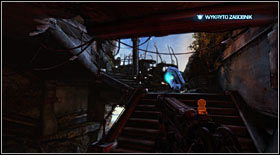
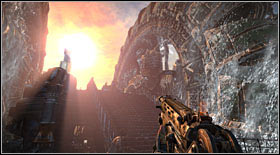
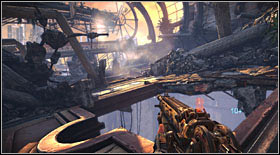
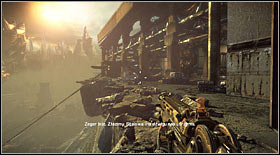
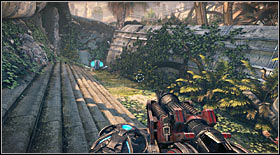
You will begin on a ruined bridge. To leave it first use the metal lever and then the line (pressing R twice).
This way you will land on the ground, beside the dropkit. Use it and follow your companion, up the hill.
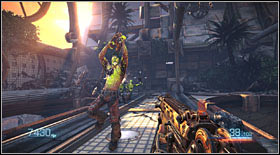
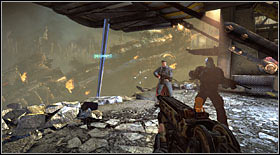
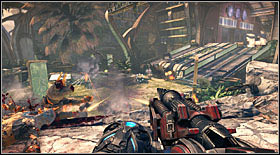
In a moment you will be going down, where enemies will attack. They will use new weapons - shooting flares at you.
STRATEGY: each flare causes a flash and short blindness. If you manage to kill someone while being blinded, you will get BLIND FIRE.
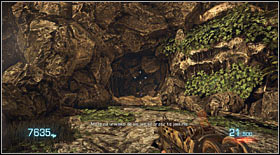
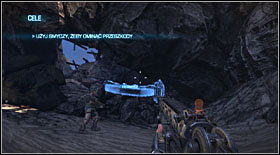
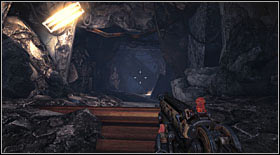
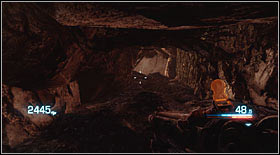
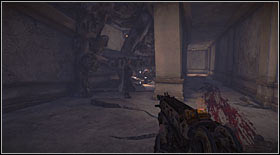
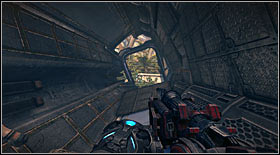
At the bottom of the rock path you will find a cave entrance - use it.
Once inside, you can stop worrying about enemy attack, as there won't be any until the end of the level. Go forward until you reach a pit. Cross it by climbing the root.
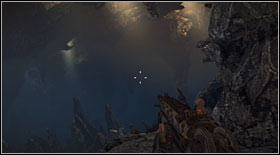
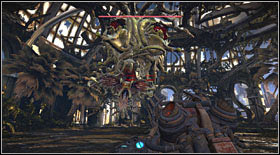
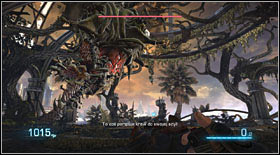
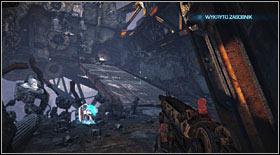
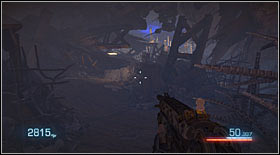
On the other side go across the rock path towards the precipice (following your companion) to initiate a cutscene and end up inside the nest of a giant monsters.
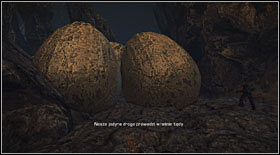
You need to destroy the eggs to move on. The paths will branch off, but it doesn't matter which you choose, you will reach a dead end either way (a game mechanism). It will also cause the eggs' "mother" to arrive and a counter to appear. You will have one and a half minute to leave the cave.
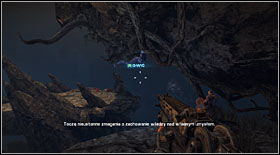
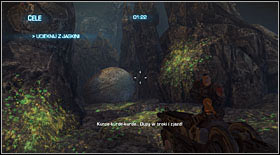
Quickly choose the second path with eggs (constantly destroying them) and continue your escape with the spacebar pressed down (which activates sprinting).
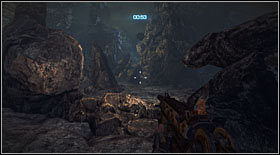
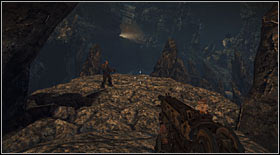
Run up the stone path, towards the light - the cave exit will be there.
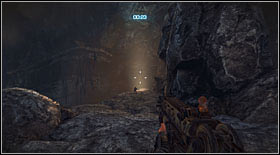
You will find a broken gyrocopter there. Fixing it will take some time, so you can't arrive there at the very last moment.
Once the machine is fully operation again, you will be informed about it. Run to it and press R to save yourself.
You will initiate the final cutscene of this chapter. During it the action will slow down at some point and you will be asked to perform one shot. It will end the level.
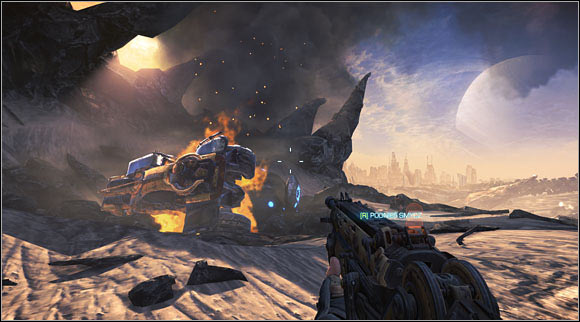
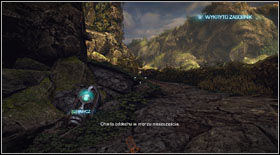
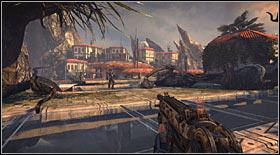
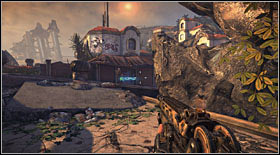
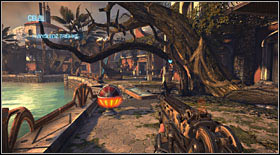
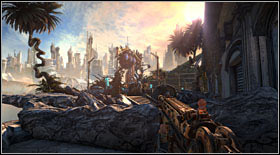
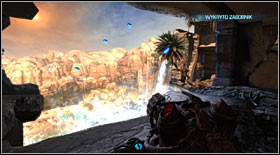
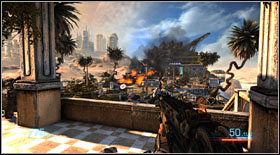
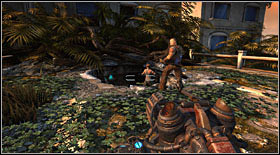
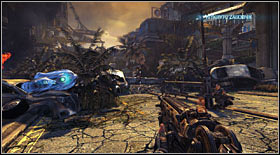
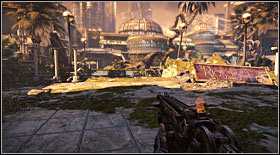
You will begin the level at a completely safe moment, beside a pond. After you gain control over your character, go up the hill following the only possible path. On your way you will come across a dropkit.
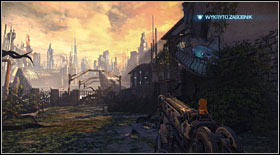
After getting to the place from which you will see a big metropolis in the distance, make a slide and go down the hill.
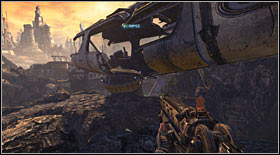
This way you will end up beside the wreck. Knock it down with the leash and walk across it to the other side of the pit.
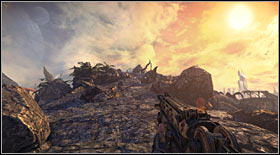
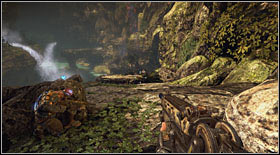
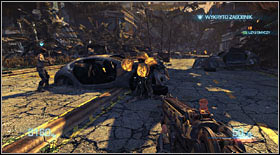
Heading up the hill again, you will be attacked by a few enemies (they will run out from behind the rocks).
STRATEGY: you can push them off the rocks to get VERTIGO.
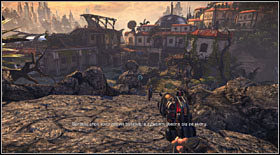

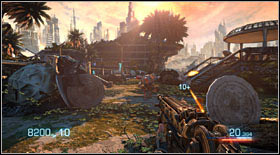
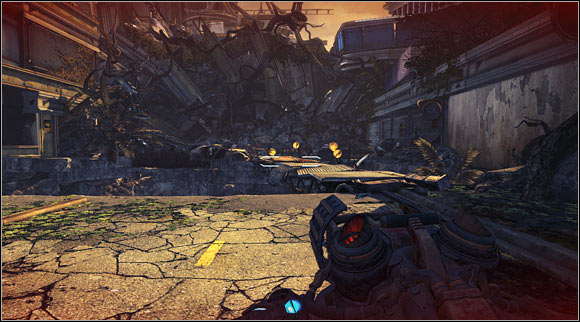
Once they're all dead, go down the hill towards the first buildings. There you will get attacked.

STRATEGY: there won't be a lot of enemies, but nevertheless you can earn a few unique Skillshots. The first is FISH FOOD, unlocked after pushing an enemy into the water. The second, very hard to obtain (you need to be lucky) is FLY GUY. To get it, you have to fling an enemy into the bugs flying above the pond. You can do it by using the leash on the enemy on the other side of the water. The last unique Skillshot is EXTERMINATOR. Kill all the electro bugs to get it.
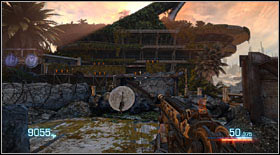
Once all the enemies are dead, head towards the further buildings.
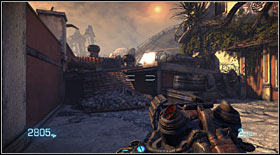
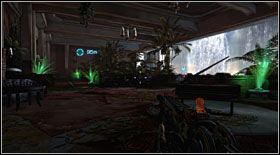
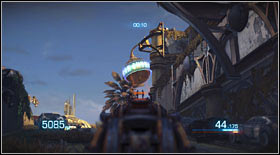
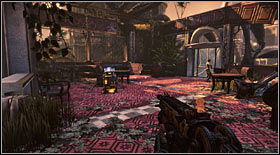
That way you will reach another battle "arena", with more enemies waiting for you.

STRATEGY: as there are a few interactive environment elements in the area, you will be able to earn new Skillshots. Apart from the well-knows cactuses (PRICKED) and electric pole (SHOCKER), you will come across a hot-dog stand. Hit an enemy with it (by kicking it) to earn FAST FOOD and blow it up for SAUSAGE FEST.
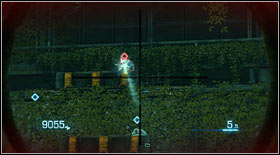
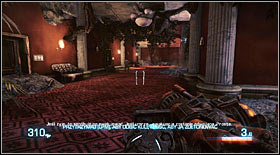
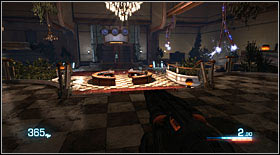
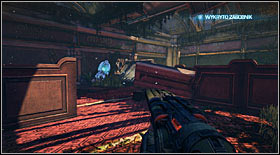
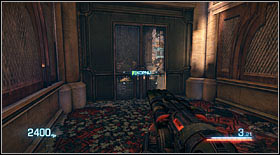
Once they're all dead, go inside the disco. Go through it and you will be attacked by a few enemies, including a miniboss (if you kill all of them without leaving the dance floor, you will receive a bonus achievement/trophy).
STRATEGY: by the disco entrance you can find two bottles (they're collectibles, a full list can be found in a separate section). If you drink once of them and kill an enemy while drunk, you will get INTOXICATED.
After killing the miniboss, pick up his gun and use it to deal with the wave of enemies (as well as with the one waiting outside the building).
Go outside, get rid of everyone there including the reinforcements and go left.
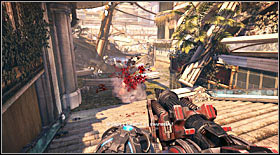
That way you will reach a passage below a stone arch. Before you use it, more enemies will attack you. A hot-dog cart can be found nearby, so use it to annihilate them.
On the other side of the passage you will find an open square, which is in fact completely safe. Cross it to the other side and head to the ambulatory.
You will reach a blocked passage. Unblock it by kicking the object on the road.
Afterwards head to the next building. Before you enter it, you will have to use the switch to the right of the door.
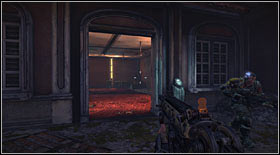
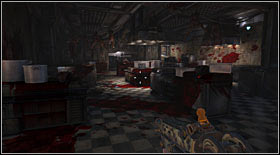
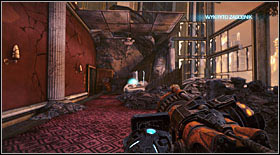
Right behind there is a dropkit and a way down. Restock on ammo and guns and continue on. In the room below (with two bottles) you will be attacked by a few daredevils.
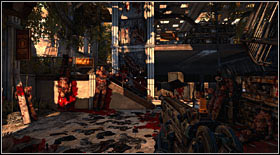
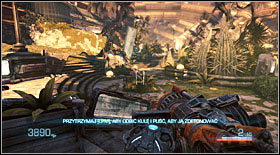
 Such a group of enemies at one place is a perfect chance for a Skillshot.
More will be waiting outside. Some of them will arrive in a container onto the square which you will reach after raising the bolt.
STRATEGY: it's a very unique moment in the game which will allow you to unlock one of the hardest Skillshots - FIREFIGHTER. To get it, you need shoot inside the container (before it lands; you need to be ready) with a charged Screamer shot. That way you will set all of them on fire. Once they're burning, finish them off with normal attacks.
Once all the container enemies are dead, more will appear, equipped with a new weapon - the Flailgun. They will try to fight with you in close combat, throwing an explosive charge at you.
STRATEGY: if you happen to be hit with an explosive, run between the enemies. The explosion will still hurt you, but also kill the enemies unlocking BOMBSHELL and GANG BANG.
Once they're all dead, go to the building on the other side of the square and exit it through the other side.
Once outside again, you will come across another dropkit.
Check it out and afterwards head up the stairs to the next room and from it to the distant buildings (going across the ruined roofs). This way you will reach a barricaded passage. Unblock it with a kick and jump inside. More enemies will attack you there.
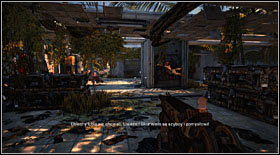
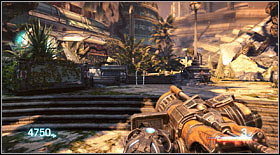
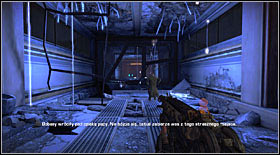
 Unique environment elements (ventilation fans in the above screen) can give unique Skillshots.
After running to the upper part of the roof, get ready for another wave of enemies attacking at close range. They will be aided by a few enemies in the distance, standing on a balcony.

STRATEGY: at this spot you will be able to unlock a unique Skillshot - SUCKER. Just fling whichever enemy into the nearby ventilation fan.
On the next roof you will be attacked by a miniboss. He will be inside a room filled with explosive barrels. Get rid of him quickly by blowing up the whole room.
Afterwards go down the nearby stairs.
More enemies will appear right behind the corner (before you get to the bottom).
STRATEGY: you can kick them onto the nearby electrical cables.
Outside, no one will attack you for a while.
Behind the corner there's another dropkit, use it to replenish ammo.
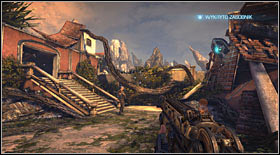
After reaching another courtyard, the characters will start a conversation. Listen to it and go up the stairs while you're at it.
That way you will reach an open "corridor" filled with wild flora and enemies waiting at its end.
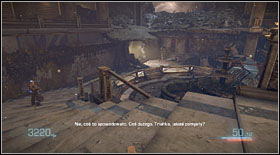
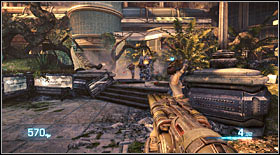
 Trishka herself.
At its end you will also meet Trishka - one of the main characters - for the first time.
After the exchange of views, head right while being ready to fight a couple enemies.
STRATEGY: there's a pond nearby, perfect for getting FISH FOOD.
Once everybody's dead, head to the nearby room on the left and use the ladder found there to climb up.
Afterwards breach in the wall and cross the branch found there to the neighbouring building (with an enemy waiting there - kick him so that he hits the spikes). Once he's head, jump down by interacting nearby the ladder and go outside.

You will find a moment of peace and a dropkit there.
Once you restock on ammo, go inside the nearby room and cross it to the other side.
You will be attacked by a big group of enemies by the exit. Be ready for a long fight.
STRATEGY: electrical poles as well as hot-dog stands can be found nearby. Quite some ways for a flashy kill.
Being outside, go to the right and lower the bridge there (pressing the button on the right).
Cross it and Flailgunners will attack you.
STRATEGY: the Flailgun can be used to get a few Skillshots, like GANG BANG or BOMBSHELL.
Move on and you will come across the last dropkit here. Refill your supplies and move on, knocking down the ball hanging by the ceiling (using the leash).
After moving to the next room, be ready for a longer fight. At first you will be attacked by a few shooting enemies.
STRATEGY: you can easily kill them by flinging them onto the nearby cactus.
Once you start going up the stairs, the miniboss will appear. This time there aren't any spectacular ways of eliminating him. You will have to kill him traditionally, using up lots of ammo.
Move towards the next room (the entrance resembles a mouth of a monster) and you will b attacked by a big group of enemies.
STRATEGY: they will move in a tight formation, which makes using Thumper (leash upgrade) the perfect choice.
Enter the room and make a few steps to end the level.
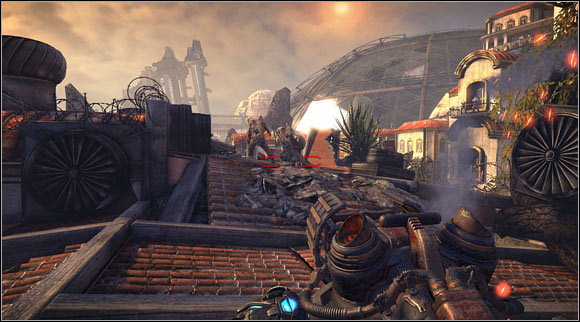
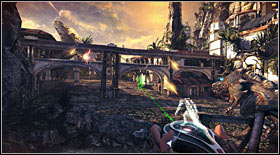
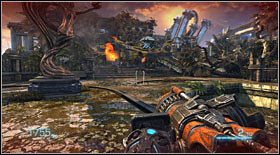
You will begin the level in a building which you should quickly leave. Check out the first dropkit on your way, with a new gun to unlock.
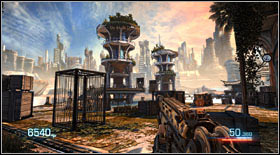
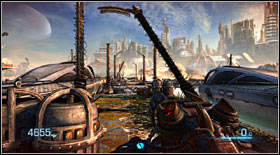
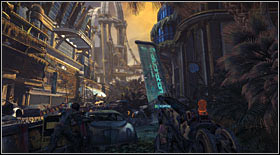
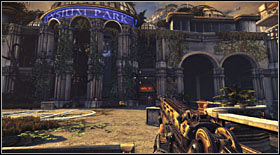
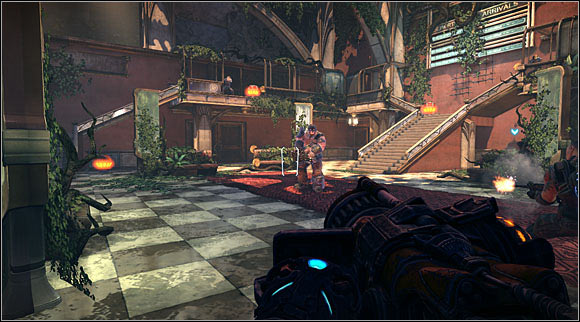
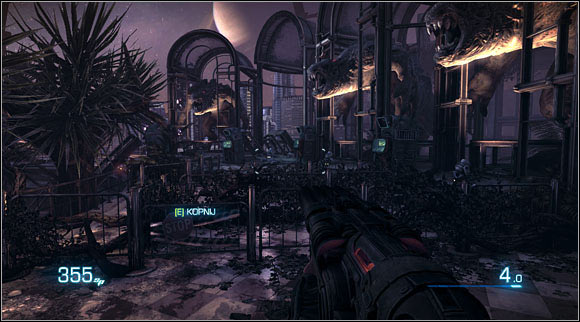 Welcome to the amusement park.
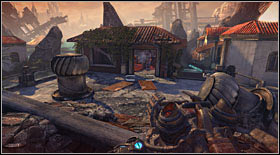
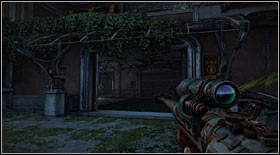
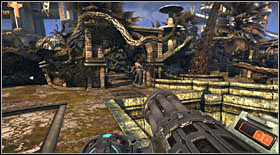
Outside you won't be attacked by anyone apart from the beautiful views, so you can feel safe. Go between the gates and the monster statues...
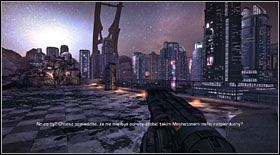
... and afterwards head to the vast square. Cross it heading towards the big city model.
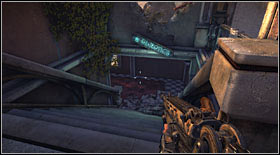
Enter it by interacting beside the fence.
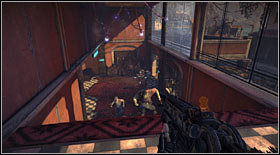
After jumping down, the first enemy will appear. He however will be just an appetizer. More are waiting a few steps ahead, to the left.

STRATEGY: at this spot (even with the very first enemy) you can unlock a unique Skillshot - KILL-O-WATT. You just need to kick an enemy onto one of the nearby electric buildings.
There will be a lot of opponents and some of them (the bigger, more resistant) will have shotguns. Don't rush, as it's easy to die.
Once all enemies are dead, approach the nearby switch pointed by your companion and interact with it.
You will launch a cutscene, during which you will have to make one action.
As a result you will end up in an underground tunnel. Go to its very end.
You will find a locked crate there. In order to open it, use the leash on the switch on the other side.
Once its' opened, go inside and use the ladder.
Upstairs you will find a dropkit - use it to refill ammo.
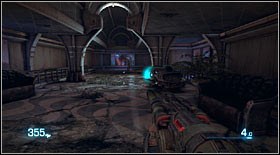
Afterwards go to the neighbouring room filled with supply crates. You will be attacked by a few enemies there. As there aren't any environment elements, you have to use the weapons' specific Skillshots to get some points.
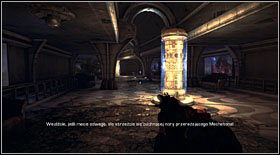
Once you reach a bigger room with scaffoldings, a mechanic monster will enter the scene. Run from it to the neighbouring location, through the door on the right. You will come across a few lonely enemies on your way.
In the next room, go down the metal scaffolding and cross the gate. That way you will launch an interactive scene (you will have to make a shot during it). Afterwards you will take control over the mechanical creature.
Use it to destroy the giant gate and go into the next warehouse.
Afterwards go outside, destroying the windows blocking your way once again.
Once in open space, you will be in for a real massacre. There will be lots of enemies (including three minibosses), but you shouldn't have problems thanks to the robot.

STRATEGY: steer the robot onto enemies to crush them and unlock MASS EXTINCTION. If you kill a few enemies on one clip, you will get FULL-THROTTLE.
In order to direct the robot deeper into the level, point it at the vehicle on the left and push it down the abyss
On the other side you will have to face numerous enemies on a bridge. Be careful while fighting them, as some will aim directly at you.
They will be aided by gyrocopters and after you destroy the bridge a dangerous vehicle will appear.
One the car is history, join the robot on the ground and move on together. Enemies will be hiding in the nearby buildings...
... and more gyrocopter will appear in a bit.
Attacker will also appear from the side from which you came. You will have to turn around for a moment because of that.
Once they're all dead, head towards the locked gate at the top of the street and order it to be destroyed. The robot will explode during it. Ride down the line to end the level.
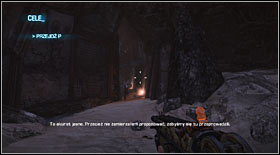
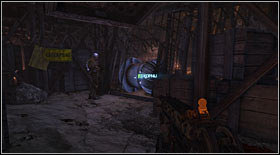
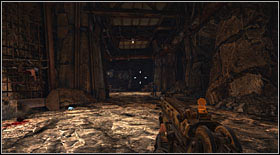
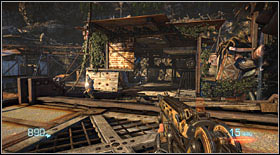
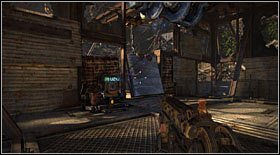
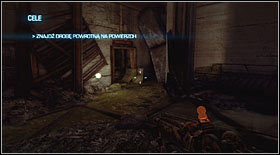
You will begin the level underground. When only you regain control over the character, head forward. You won't be attacked by anyone here. At some point you will get to a blocked passage. Kick to make yourself a way.
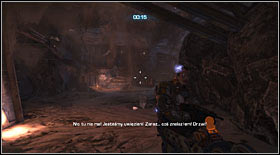
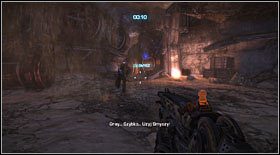
The kick will cause quite a fuss, making part of the cave to collapse and brining the vision of death. In order to survive, you have to leave this place in 15 seconds. Run forwards and to the right. Use the leash to throw away the object. That way you will unlock an escape route. Just run into the uncovered tunnel and make a slide.
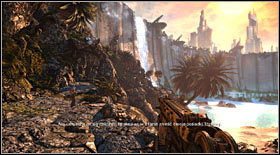
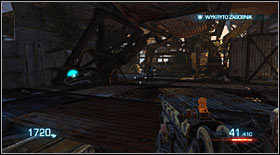
That way you will end up on the surface of the plant, around the big dam. You won't be attacked by anyone for the next couple minutes.
Move on along the rock precipice to reach another dropkit. Use it and continue forward.
That way you will reach an elevator. Enter it and use the switch.
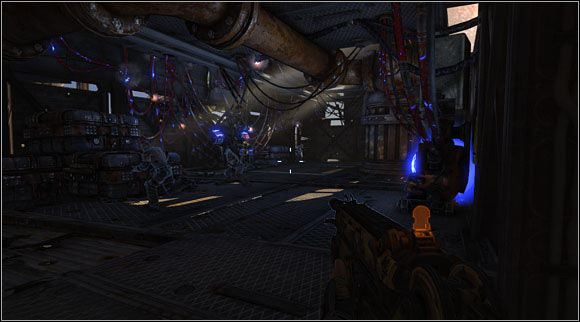
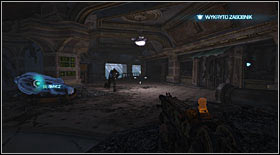
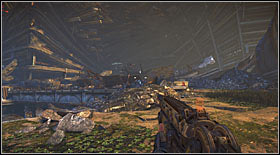
After going up, go out and go to the next room. You will find lots of massacred bodies there, which can be taken as a sign of the forthcoming battles.
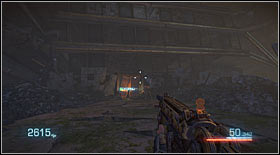
They in fact will begin in the next room (after going up the stairs). The new enemies will be resistant to kicking and grabbing with the leash. Slides are most effective here.
STRATEGY: the environment won't provide you with many opportunities of successful extermination, but you can find some handy spikes perfect for a VOODOO DOLL.
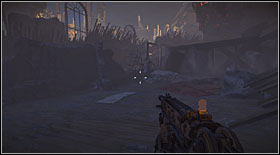
After getting to open space, be ready for another fight with a group of enemies bigger than before.
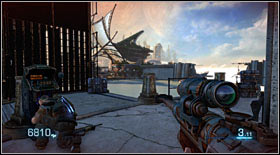
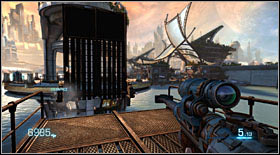
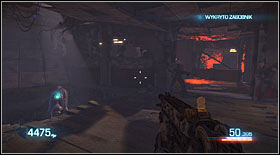
At the end of the square there's a building with several balconies. Be very cautious, as there will be snipers on them. Take care of them using a sniper rifle as well. You can find one beside the knocked over table, a few steps before the building.

STRATEGY: during the fight you will have a chance to easily earn a few Skillshots. Just shoot an enemy's head (in zoom) to get HOT SHOT. If you hit the throat, you will get GAG REFLEX.
Once all the enemies are dead, go to the nearby building and head to the other side (no one will attack you inside).
On your way you will come across a boat hangar, with another dropkit (with a sniper rifle available for unlock).
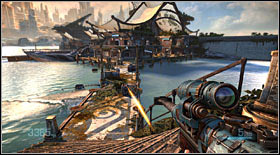
Outside there will be another sequence during which you'll have to fight snipers. They will be on balconies of a distant building. Crouch behind the nearby crates and start shooting their heads off.
STRATEGY: at this spot you can earn BLUFF. Aim at one enemy and then direct the bullet into another one (he can't be too far from the first target).
As the last head explodes, go towards the buildings on which the enemies were.
That way you will reach a raised bridge. Lowering it will take your companion a moment. While he's at it, focus on eliminating the enemies in the distance (at the same time look out for your health, as the opponents will keep shooting relentlessly).
Once the bridge is lowered, lower its second part using the leash and move on. You will find another dropkit there.
Step onto the platform leading towards the buildings you were shooting at a moment ago and you will be attacked by a few enemies.
STRATEGY: if you still are in possession of the sniper rifle, use it to kill an enemy without zooming (he has to be at least 10 metres from you). That way you will unlock SHOW OFF.
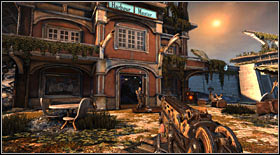
More opponents will appear between the buildings. They will be high in numbers, but there are a few interactive environment elements which will make the fight easier (including water, about which you shouldn't forget). After killing everyone, go into the most distant building with a blue sing over the entrance.
Inside it you will find another dropkit. Use it and go outside. There you will have to fight a few more enemies.
The fight will take place above the covered alley as well as on the piers. Go across them while killing the enemies.
Going park across the pier towards the buildings, more enemies will run out of them (some will also shoot at you from inside the nearby room).
Kill all of them and afterwards head inside the buildings. The door will be opened at the end of the alley, on the right side. Go through them and to the elevator at the end of the corridor.
After using it you will find yourself on the lower level, beside another dropkit.
Use it and cross the long corridor with big windows on the left.
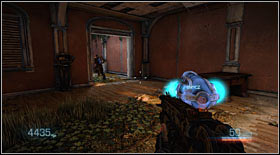
Eventually you will reach a restaurant with a terrace. There you will have to fight a few enemies.
STRATEGY: there will be a Newsbot in the area. If you manage to blow it up beside an enemy (I'd really suggest making this here), you will complete KILLER NEWS.
Once everyone's dead, go across the room and into the kitchen at the back.
Manoeuvre between the tables and you will reach a corridor with an elevator. Use it to end this level.
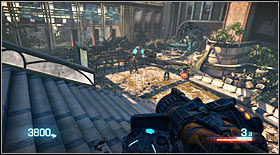
The chapter will begin with a cutscene and enemies will attack afterwards. At first they will only attack from the balconies surrounding the arena. Attack them while keeping an eye on your health, as it's easy to die here. Once the first wave is dead, a wall on the ground floor will explode and more opponents will run out.
Kill them, use the dropkit and go through the gap in the wall.
On the other side you will come across a raised bridge. Lower it by pressing the nearby panel and get ready for another attack. The enemies will be waiting for you.
Finish them off (or ignore at first) and run up to more opponents (passing by a dropkit on your way).

STRATEGY: there will be a few enemies on the upper floor. If you can throw them down into the waterfall on the left (by the electro flies), you will gain a unique Skillshot - FLOATER.
If all the enemies are dead and you've used the nearby dropkit, you can go into the elevator inside the building, on the upper floor.
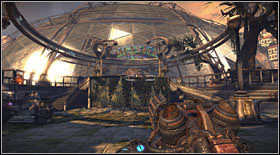
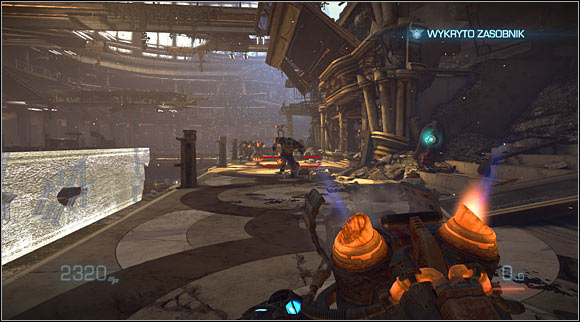
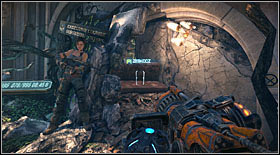
 A quite big arena, giving a chance of unlocking unique Skillshots.
This way you will reach a vast room, with a demanding fight waiting for you. However before it begins, you will see Trishka fall into danger on the other side.

STRATEGY: during the fight in the lower part of the arena you will have the chance to get a unique Skillshot - MAN TOAST. You just need to throw an enemy into the burning tank in the middle of the room.
Before going to the ground floor, kill a few enemies on the upper floor and afterwards use the elevator at the end.
Once everyone's dead a cutscene will start. After it ends, together with your new companion go up the stairs and head deeper into the room.
After a few feet, right before a hole in the wall, you will find a dropkit. Replenish ammo and move on.
This way you will reach a vast open space. Start off by using the sniper rifle from the balcony's level. One the first wave of enemies falls, go down and move forward through the big square. There you will come across - amongst others - enemies with shotguns. Keep an eye on them, as you can easily die.
At the end of the path there will be a hole in the ground - use it.
You will end up on a metal scaffolding. Enemies will try to stop you from crossing it, but eliminating them won't be especially difficult considering you can easily throw them down the cliff.
STRATEGY: on the lower part you can use Thumper to get the FLY SWATTER.
At the end there will be an elevator. Go inside and use the switch.
You will end up beside water-powered turbines. A pretty much relentless attack of enemies will begin. As long as you're around the giant wheels, enemies will keep on appearing.

STRATEGY: in order to get another unique Skillshot - in this case GRINDER - you have to throw an enemy into one of the moving wheels.
Going between the large wheels, you have to destroy their mounting using the leash (remember that enemies will appear right after you do it).
At the end of the road (after you destroy the second object with your leash), enemies will attack from a distance (including a gyrocopter).
Try to get closer to them and the machines will break down.
To get out of this in one piece, you have to follow Trishka (you won't miss it thanks to her) and jump onto the lines leading down the dam in 10 seconds.
After landing on the moving platform, you will be attacked by a few gyrocopters.
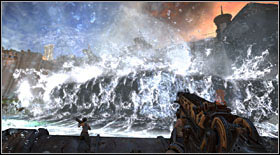
You don't have to fight them, as just in a moment a huge wave will engulf everything on its path.
As it hits your character, the level will end.
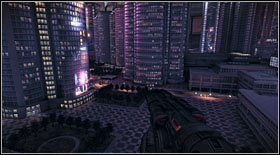
After regaining control over your character, head towards the skyscrapers, going up the nearby stairs.
Afterwards approach the hole in the street and interact with the blue sign, kicking it. Falling down, it will create a passage.
Cross it to reach the first dropkit. Use it and go along the street. You will get attacked by the first in the level group of enemies.

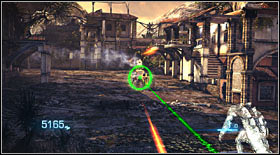
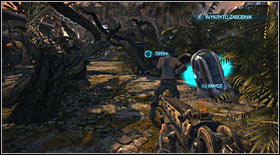
STRATEGY: in the area you will come across Nom plants for the first time (yellow balls growing on trees and bushes). You can kick them at an enemy (hitting the target isn't hard) to immobilize him for a moment and kill him during that time. You can unlock a couple new Skillshots that way.
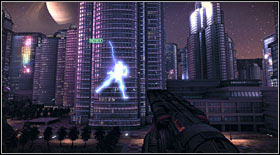
 Dangerous enemies with sniper rifles.
A bit further you will have to face opponents with sniper rifles. Run to them quickly (well, unless you have a rifle yourself) and exterminate. It's easy to die here, so keep cautious.
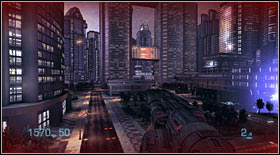
After the fight, head to the left and approach the building. You will find a narrow pass there - use it while crouching.
On the other side of the building you will find the second dropkit. Use it and cross the street without having to fear any attacks.
A cutscene will play, during which you will be introduced to the flytrap. Look out for it, as if you come too near it will grab you with its tongue. Keep pressing the kick button quickly to free yourself (if you fail, you'll die).
Beside the flytrap there's a blocked passage. Open it with a kick and cross to the other side.
Afterwards grab the line stretched across the vast abyss and get to the other side of the street.
Enemies will attack upon your landing. There won't be many of them, so you shouldn't have problems with eliminating them. Killing the last one will start another cutscene.
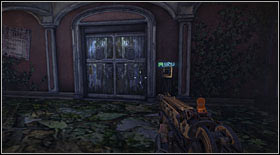
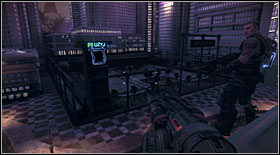
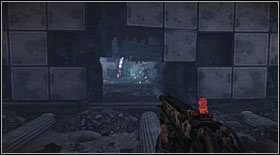
On the left side of the street (while turned back to the place from which you got there) there is a closed room (right screen). Open it through the window, using the leash on the distant switch. Inside you will find only ammo.
Once the cutscene ends, go down the street to the very bottom. You will be able to unlock the further path and another achievement/trophy. Just fire a few shots at the sphere at the top of the street. It will cause her to fall down and create a passage.
Use it to get to a safe spot with a dropkit. Unfortunately the safeness is only temporary, as by moving on through the small building on the right (you'll have to jump through the window) ...
... you will end up at a place controlled by opponent. The fight won't be too hard, as there aren't many of them.
STRATEGY: there are a few cactuses in the area, so pulling off a profitable PRICKED seems tempting.
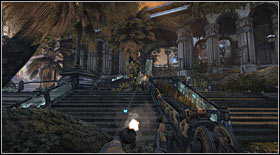
The further path will lead between cactuses, towards the stairs leading into a big building. On your way there, you will be under constant fire.
After going up the stairs, get rid of the couple enemies there and get ready for a miniboss. He will come out of the building equipped with a Bouncer (a gun firing exploding cannonballs).
Kill him and enter the building from which he came to end the level.
STRATEGY: if you kill the enemy by kicking back the cannonball he launches at him, you will earn the KICK OF DOOM.
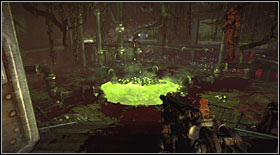
You will begin the level inside sewers. After regaining control over the hero, run forward until you reach locked crate. Interact with the panel beside to open it. Inside the room you will see a cutscene with a new plant - the puffball. Kill it to make poisonous green gas to appear. Killing someone infected with it or while being infected yourself, you can earn special Skillshots.
The next room has the first dropkit of this chapter. Get ready for a fight by replenishing ammo and move on. That way you will be attacked for the first time. They however won't be high in numbers.

STRATEGY: you can unlock new Skillshots during this fight. There is a puffball in the area. Blow it up when the enemies are nearby and go into the green cloud yourself. Killing an enemy in this state will result in getting TOXIC LOVE and ANTIDOTE.
Once everyone's dead, head to the next locked crate. After it gets opened by Ishi, go up the stairs. Upstairs a cutscene will play, during which your Asian friend will be eaten by a huge plant.
Follow it, heading left towards the building exit (using the passage unblocked by Trishka).
The exit is quite distinctive, with a couple large pillars.
As only you reach open space, an enemy attack will begin. There will be lots of them and more will keep on appearing as you go down the stairs.
STRATEGY: on your way you will come across various helpful extermination tools: bombs, hot-dog cart, cactuses and puffballs. Use them to your advantage and to gain more points.

At the very bottom you will find another dropkit, right beside a narrow path leading to another arena.

Another fight, similar to the previous one, with many enemies taking part.
STRATEGY: there are flytraps in the area. Use them to unlock special Skillshots. Kicking an enemy into one of them will reward you with FEEDER.
The further path will be once more narrow, but this time filled with enemies as well. Eliminating them can reward you with lots of points, thanks to the cactuses.
After going out of the cactus alley, you will end up at another square with a dropkit.
There won't be a direct fight there, but there will be an enemy helicopter flying above the area for a while. Hide behind it to avoid getting shot.
You will get to the next location using the demolished part of the concrete construction, opposite to the entrance through which you got there. Another fight awaits you there as well. In the beginning in will be easy, as the enemies will be easy. However after a while a miniboss will come out of the wrecked flying machine.
STRATEGY: there is a small pond in the area (to the right, looking in the burning helicopter direction). Throw someone there to earn FISH FOOD.
Kill everyone and go along the alley on the right to get to another dropkit. Use it and afterwards move on to a more vast space.


While going up the long stairs you will be under constant enemy fire. They will keep you occupied until the very top.
At the top there will also be a fight, luckily there won't be many enemies this time.
STRATEGY: there are a few flytraps in the area. Look out for them. Also try to use them for unlocking Skillshots.
Killing everyone will let you freely access the nearby building. Look out for the gluttonous plants inside. There will be quite a bit of them. Destroy them from afar (some of them will spit out ammo after dying).
At the end of the road you will reach a destroyed corridor.
That way you will reach the last dropkit in this chapter. Be sure to replenish ammo and take the Flailgun, as you're in for a boss fight in just a moment.
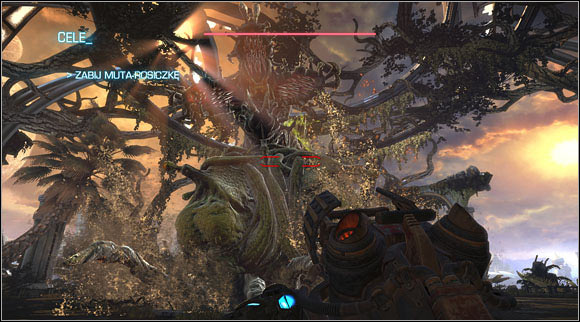 One of the most spectacular bosses.
The fight, if only you know how to play it out, isn't really demanding. Start off by attacking the monster's mouth, while trying not to be eaten. When the enemy starts bending down - getting ready to devour - slide to the side of the arena (it's unlimited here). If you won't manage to do it, you will have a few seconds to free yourself.
Keep attacking the enemy with the Flailgun until you run out of ammo (you can find some inside the crates).
Once you deplete the enemy's first health bar, he will unveil the red blisters. Destroy them, using slides to move fast. If you manage to blow up all of them, the next phase of the fight will begin. Otherwise you will have to go through the first once again until all the blisters are destroyed.
In the second phase, the enemy will be hanging down from the ceiling. His attacks won't change however. Shoot from the Flailgun and once you deplete his health bar...
... move to destroying the red tentacles (the phase will change under the same circumstances as before).
Once all the tentacles are destroyed, the final phase will begin.
During it you will only have to attack the boss' "neck" (of course trying to avoid getting devoured at all times). Draining the health bar will end the fight and the level.
STRATEGY: winning over the overgrown flytrap will unlock a unique Skillshot - WEED KILLER.
You will begin the third chapter in sewers. Leave them by heading towards the light.
Outside turn left and go through the narrow part to the metal construction elements. Grab them and get to the other side.
Afterwards cross the wild river and head towards the nearby building. On your way there you will come across a dropkit.
Once you refill ammo, go inside the nearby hotel through the front door.
For now you don't have to worry about any attacks. Keep going through the corridors, enjoying the nice views on your way.
At some point you will reach a place where you will have to make a long slide down the building.
Once landing downstairs, you will find yourself in the area known from the demo. Go through the hole in the wall to reach the first enemies.
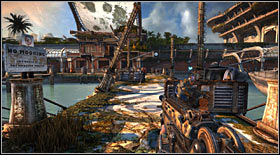
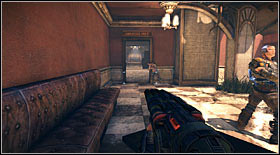
 A nice trap waiting for the enemy.
One of them (the more distant one) will be standing by a blocked door. The further path is also there, requiring you to jump over a concrete block and go down to the very bottom.

STRATEGY: if you manage to kill the mentioned enemy by grabbing the door with the leash, you will unlock a unique Skillshot - DING DONG (just remember not to grab the enemy by accident).
Move on and you will come outside, where enemies will attack. Get rid of them manoeuvring the destroyed walls.
STRATEGY: there will be metal spikes sticking out of the walls; it's a perfect chance to get VOODOO DOLL, giving 100 points for each kill.
In the distance there will be an enemy with a turret. Kill him from afar (I'd suggest using the Thumper, as it's by far the fasters and safest method).
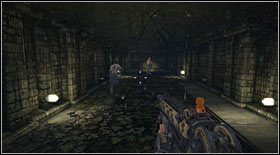
 Another chance for a unique Skillshot - a vertical elevator shaft.
Afterwards, from the turret (which you can use) head to towards the next enemies, standing inside an elevator shaft.

STRATEGY: you can kill them by calling in the elevator (the button in on the left). That way you can unlock the unique TENDERIZER. I'd suggest getting some other ones by killing a couple of enemies using your basic weapons, as there are many standing next to each other. Once there's one/two left, press the button.
Once they're all dead, hop into the shaft and go up. Afterwards turn left and go outside.

After a couple steps the floor will crumble under your feet and you will land inside a building (there's a dropkit nearby).
Go through the first corridor by jumping over the concrete pillars and keeping an eye on the electrical cables.
You will reach a big room and a group of enemies will attack you (some of them won't be shooting, trying close combat instead). Get rid of all of them and move forward, to the tight passage requiring you to crouch.
STRATEGY: there's a hole in the floor in the area. If you make someone fall down through it, you will earn VERTIGO.

After getting through the tight passage, you will reach another corridor filled with enemies. Keep killing them and jumping over the pieces of walls until you reach an open area (with more opponents).
STRATEGY: there are many metal spikes and electrical wires in the area. You can use them during the fight.
Move on until you get to an arena filled with sunlight. There will be lots of enemies here, but some of them won't have weapons.
At the end of the vast area you will find a tunnel - use it to access the lower part of the building.
Going between the ruins, you will reach another dropkit. Use it and go up the cracking window (don't worry about falling down).
Afterwards go through the next corridors of the crumbling, reaching the bathrooms. Kill two enemies there.
A bit further you will find yourself in an open area filled with opponents again. Fight your way forward, eliminating groups of enemies on your way. Eventually you will find a way up the crumbled wall.
Upstairs there will be more enemies waiting for you. The hardest will however appear as the last. It will be a miniboss equipped with a minigun. Get rid of him (being cautious while at it) and go through the breach in the wall from which the enemy came a moment before.
Once inside, pass the walls by kicking in the interactive, highlighted elements blocking the passage.
At some point you will reach another timed sequence. This time you have to get out of the building before it crumbles completely. Run forward as fast as you can, avoiding the falling elements (try to keep going to the right while you're at it). At some point you will also come across two opponents - ignore them.

Keep running forward until you reach an elevator. Inside of it there will be a switch. Use it to stop the counter and start a cutscene. During it you will have to shoot one time. As the cutscene ends, so will the level.

You will begin the level in a ruined building resembling an underground parking lot. Don't waste time and start going forward, towards the elevator. Go inside and use the switch.
Once the elevator stops, leave it and head down the alley to the stairs. On your way check out the dropkit, as you will get attacked in a moment.
The enemies will attack around the stairs. At first there won't be many of them, but it will get more complicated once a helicopter arrives. A miniboss with a Bouncer will lean out - look out for him. A strong enemy between small and still living ones is potentially deadly.
STRATEGY: in the area you will find Nom plants (on the trees) as well as exploding balls. Use them to make the fight more spectacular. You can also kick the balls at the enemy to earn KICK OF DOOM.
Once the miniboss is no more, use the next stairs (to the left from the helicopter landing zone). Kill the enemies there and wait until Trishka open the nearby train cart.
However before she will be able to do it, three gyrocopters will appear in the distance. There is a dropkit in the area in case you need it.
STRATEGY: choose the sniper rifle from the dropkit and shoot (with zoom) the gyrocopter pilot. That way you will gain SKYJACK.

A while after the gyrocopters arrive, more ground units will show up as well. There will quite a lot of them.
STRATEGY: there are puffballs in the area. Use them to unlock further Skillshots.
The last wave will attack from where you came. There will be another miniboss amongst them, apart from regular ones.

As the last enemy dies, you will be able to enter the train cart. A cutscene will start and as it ends, so will the chapter.
The level will begin with a fight with a new enemy - the Burnouts - strong and fast mutants with orange blisters on their skin. The quickest way to kill them is shooting those blisters.
STRATEGY: the attack will be massive and the enemies will be numerous, often a few at one place. Use it to earn Skillshots requiring a few kills at the same time.
Once they're all dead, go inside the nearby room and a few more opponents will run out. Get rid of them, use the dropkit and interact with the nearby switch.
That way you will be able to partially open the next passage. Slide under the garage door.
You will end up in a room, with a bigger and more demanding fight waiting for you. At the beginning, while being cut off from your companions, only a few enemies will attack you.

Only after you open the door (press the switch beside it), the all-out attack will begin. There will be lots of opponents, frequently many of them at once. Attack with heavy and explosive weapons.
STRATEGY: you can find a Nom bottle on the middle concrete block. Empty it to make the fight more entertaining and earn a few different Skillshots.
The fight will in fact end with another one. After the explosion caused by the helicopter, you will be able to move to the next location.
The place of the massive attack.
A large number of opponents will attack you there. They will run at you, often in one line or right next to each other. It's a unique chance to earn some serious points.

STRATEGY: equip the Flailgun and Bouncer for this fight. Attack with charged shots and you will be able to earn CHAIN REACTION, FRENCH REVOLUTION or SLEDGEHAMMER.
Move forward and at some point you will have to turn right and go through rubble (a bunch of enemies will also appear).
After a while you will be back on the main arena, where there will be another massive enemy attack.
STRATEGY: you will be able to earn the Skillshots listed above once again.
At some point, a helicopter with a mutant will appear at the end of the road in front of you. Attack him quickly - without hesitation, so he won't be able to get too close to you - with an explosive weapon. That way you will stun him for a while and make it possible to kick him. It will end his life on the edges of the propellers.

STRATEGY: killing the boss will give you the MINCED MEAT.

Now you just have to go down the stairs, check out the nearby dropkit and head to the elevator. By switching it on, you will end the level.
The level will begin inside an elevator. Get out by destroying the door with a kick. That way you will get onto a narrow ledge. Move along it to the end and grab the branch to get inside the ruined hotel.
At first you won't be attacked, so you can move freely.
On your way, inside the room with a large hole, you can find a dropkit.
Move on and enter the staircase. Go down and you will be attacked by a few enemies. Nothing to be worried about.
Below, inside another corridor, more enemies will show up. Once again their numbers won't require dire actions.
Make a few steps and a cutscene will start.
Once it ends, go forward to reach another staircase. Go down and you will have to grab the metal construction. During the sequence you will fall down, landing in the basement.
Now you will have to cross a few dark corridors, crouching under pipes included. Only one enemy will appear in the meantime.
At some point you will get to a bigger room with a tank filled with green liquid. As you get to the other side of the location, a big enemy will join you. He however (without any help) will fall into the mentioned tank and die.
In order to get outside, take a look around the area. At one place, by the ceiling, there will be an electric device which you can pull down with the leash.
You will create a platform, thanks to which you will reach the tunnel. Go through it to the very end (without having to feat any attacks) and you will reach a more illuminated part of the building.
Go through a couple corridors (killing a bunch of enemies on your way) and leave the building.
More enemies will be already waiting for you there, on a big arena. There will be more of them this time, so try not to rush.

STRATEGY: Norm plants can be found in the area, as well as cactuses. Using both you can complete SCARE CROW (place a Nom parasite on the enemy's head and then impale him).
Keep moving forward and eliminating the enemies you meet on your way (there's also a dropkit in the area). Opponents will also run out of the building where you should be headed.

STATEGIA: you will come across electrified information poles. Using them you can unlock HALLOWEEN. Throw a Nom parasite onto an enemy and then electrocute him (kicking onto the post).
Go inside (killing everyone beforehand) and head forward, without having to worry about new attacks for the time being.
At some point you will reach another locked door. Open it with the switch and go outside.
 Battle arena with interactive elements in the background.
You will end up on one of the biggest streets of the city and enemies will attack you. There however won't be much of them. Once they're all gone, approach the bigger vehicle at the end of the road and push it into the breach in the street.
Cross it to the other side and fight some mutants once again. There won't be many of them, but they will keep on appearing for some time. After killing everyone, head forward and jump onto another part of the street.
Continue your journey (and extermination) and you will reach an interactive car. Kick it to create a passage and move on.
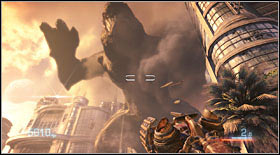
At the end of the path a cutscene involving a giant monster will start and the level will reach the end.
After the cutscene ends, you will land on top of a skyscraper, in the very middle of the fight. Once you regain control over you character, run to the helicopter (you'll enter it automatically).

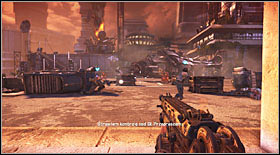
During the flight you won't be able to steer the helicopter itself, just aim the gun. Focus on shooting the enemies on roofs, ignoring the giant beast for now. Aim mainly at the explosive barrels and gyrocopters, which will join the fun.
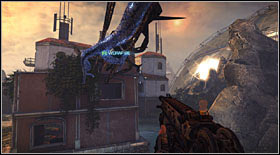
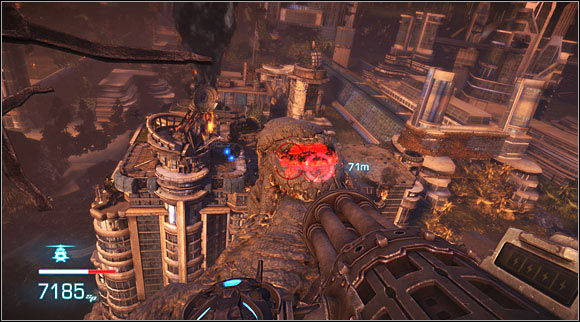 The enemy's weak point.
From time to time the pilot will fly round the monster's head. Your task then will be to shoot the red point at its neck - it's the only way to slay him. In the meantime you should also pay attention to the various obstacles interrupting your flight, like enemy machines or elements of the environment (windows, billboards etc.).

STRATEGY: by accurately attacking the main boss' neck, you will unlock DINO-SORE.
Two flights over the enemy's head are required to kill him. Everything's scripted, so you don't really need to worry too much about shooting well. However do look out on the roof enemies. The chapter will end as the cutscene begins.
You will begin this chapter inside a demolished building, beside the stairs. Go down them (no one will attack you on your way).
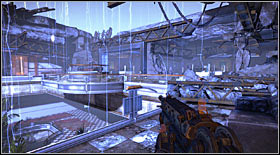
That way you will come closer to the spot from where you can take a closer look at the storm outside.
There you will also come across the first dropkit in this chapter.

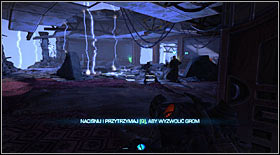
STRATEGY: from now on, during pretty much every fight during the chapter, you will have the chance to throw an enemy into the electrical storm, earning OUTBURST in return.

In the corridor behind the dropkit you will be attacked by the first opponents. Some of them will be fast enough to dodge your leash.
Move to the next room and be ready for another fight.
In the place with destroyed roof, there will be a more demanding fight with much more enemies to take care of. Try not to charge and run forward too fast.
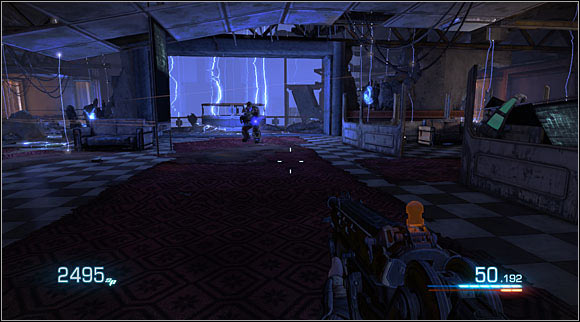 Miniboss with a new weapon.
A new miniboss will also appear, carrying the Penetrator (it shoots drills). Avoid his attacks and shoot the blue points on his body. Apart from that, the extermination method ain't much different from other enemies of such type.
Once everyone's dead, go to the next room (shown by Ishi). More enemies will attack you there.
The situation won't change too much in the further part of the level.
STRATEGY: remember that for the most time you can kill enemies in a fast and spectacular way, by throwing them into the storm.
At the end of the path you will find a metal pipe. Slide it down.
After landing, head to the next room and you will be attacked by a big group of enemies. Amongst them there will also be a miniboss (he will appear while the lesser opponents are still around).
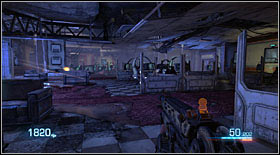
Keep moving on. You will be under constant enemy attack.
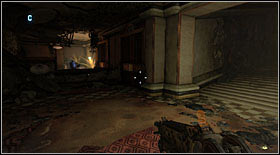
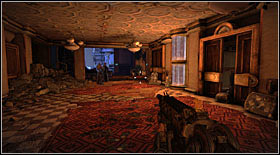
The situation will change for a bit after you head onto the stairs with a red carpet. The enemies will stop appearing for a bit.

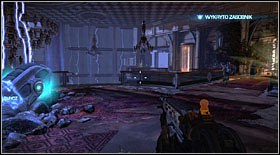
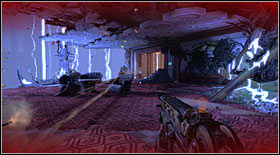
Downstairs, go past the lobby and head to the electrified corridor.
Get across it in slow motion (it will be scripted) and use the dropkit on the other side.

Hell will break loose behind the next door. You will be attacked by a large group of enemies - explosive weapons and Thumper will come in handy. Try to grab a few points with spectacular kills. It's very easy to die here.
Once they're all gone, approach the elevator at the end of the room and use the switch. That way two minibosses will appear at the same time. Eliminate them using charged shots from your best weapons. Don't focus on getting Skillshots.

After the situation calms down, use the elevator to get to the underground. Go through the ruined parking lot and you will get to another elevator. Set it with the leash and enter it afterwards. Now just use it to ride down and the level will end.
The chapter will begin onboard an elevator. Wait till it arrives at the very bottom and go out to the room with a dropkit. Once you refill you ammo, you can use the door.
On the other side you will land on a faulty platform, which will crumble beneath you and your companions.
As a result you will land in a river of toxic waste. Run forward as fast as you can.
Eventually you will reach another fight. Enemies (mutants) will be high in numbers, but they will appear in waves. However keep in mind to that you have to eliminate them quickly, so they don't outnumber you.
Move on and you will have a moment to catch your breath. Go across the metal platform and...
... head down, to the narrow corridor with a locked gate.
On the other side there will be more enemies waiting for you. Their number will be a bit higher than normal.
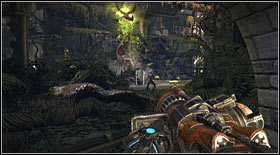
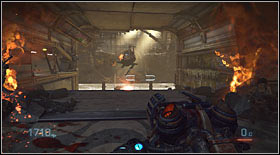
 A convenient place for unique Skillshots.
Move on and you will reach a place with numerous exploding barrels. A large group of mutants will attack you there, rushing from the other side (giving you some time to think of a tactic).

STRATEGY: it's a perfect spot to unlock one of the hardest Skillshots - FERTILIZER. Once the enemies approach the barrels, Thump them into the air along with the barrels. Afterwards just shoot one of them and the Skillshot will be yours.
As you move on, the General will get attacked during a cutscene and end up separated from you. Your task will be to rescue him. Begin by heading to the nearby switch to open the further path.
On the other side you will find a moving platform. Pull it toward yourself with the leash, step onto it and use the switch. That way you will get to the other side of the location. Once there, head to the next locked gate (a kick will open it).
On the other side, go down and head towards the enemies in the distance.
Before you get to them, they should die of sniper fire. Get rid of them by picking up your own rifle from the ground (the enemies will appear in different spots in three waves). Also don't forget to use the nearby dropkit.
STRATEGY: some enemies will be standing beside barrels. If you manage to shoot them so that they fall onto them and destroy them (some luck is required), you will unlock ACCIDENT.
As the last enemy dies, the General will join you and you will be able to move on, down the path with toxic barrels.
That way you will reach an elevator. Go inside and activate it.
You won't have to worry about getting attacked upon leaving it. Go through the nearest corridor and head to the exit.
The next location will be really large. Its size could suggest a massive enemy attack, but it's just a deception. Nothing will happen.

Head towards the main bridge. Use your leash to pull down its parts and cross it. At some point you will have to use your hands to pull up.
On the other side (once you're on your feet) you still won't get attacked by anyone. Go forward and then a bit to the right, up the hill.
That way you will reach another location. Before entering, use the nearby dropkit. At the beginning of the next room, there will be a turret. Quickly unfix it and go towards your companions.
There you will find a rather big elevator. Use the nearby switch to call it.
As the elevator moves, you will have to shoot mutants climbing up the nearby pillar towards the lift mechanism. If you won't manage to kill enough of them, you will die.
After getting to the top a counter will appear and you will have around 10 seconds to run. Follow your companions and slide under a partially closed gate in the end.
That way you will find yourself in a safe place and no one will attack you until the end of the chapter.
Cross the room filled with pipes.
That way you will reach a locked gate.
On the other side there will be an open area with quite the view. Enjoy it and head towards the line leading down. Approach and interact with it to end the chapter.
You will begin the level in a safe place. Head forward towards the stairs, go through the "greenhouse" and turn right. You will find the dropkit there.
After refilling your supplies and make essential purchases, go up the stairs to the demolished building (coming across the bodies of the General's ex-crew).
At the end of the road there will be a wooden door. Kick it and go inside.
That way you will get into a narrow, twisting corridor. Two mutants will attack you as go through it.
STRATEGY: the narrow path creates a great opportunity to unlock the DRILLDO. Charge the Penetrator and slide into them.
A bit further you will get to an even more demolished place, with a devastated roof. In the first phase you will get attacked by a big group of mutants. They will keep on appearing gradually, for a rather long period of time.
Move on and you will have to manoeuvre between crumbling pieces of the building.

At some point you will reach a crumbled floor part, which will allow you to go to the upper level. Upstairs you will find another dropkit.
 A convenient situation to earn a Skillshot.
More enemies will also appear here (in the room on the right). Before you go there however, you will have to break the drawer blocking the entrance.

STRATEGY: if you kick the object blocking the entrance while enemies are standing behind it, they will be crushed against the wall and you will unlock the unique PANCAKE.
Go further and be ready for a constant attack of mutants. They will keep on appearing behind pretty much every corner. In order to be able to continue, you will have to unblock the passage. In order to do it, use the leash on the electric device visible behind the reinforcements.
That way you will get to another, bigger room filled with mutants.
STRATEGY: on the left there will be a pit, so you can quickly push down enemies into it.
At the end of the path you will find an entrance onto the General's ship.

Go inside and head towards the switch on the right. That way you will unlock the door to the next room... well, partially. Unfortunately the door won't function properly. In order to get to the other side, you will have to block them with a crate. Leash the object behind the door and make it possible to get through them.
On the other side, head towards the shaft pointed by the General and head through it to the next room.
For a bit for the next passage to be unlocked (by Sarrano, automatically).
Cross it to another door, with a room filled with flammable gas behind it. Once inside, you won't be able to fire a single shot (doing so will end up with death).
While you're inside, you will get attacked by a big group of enemies. Kill them by using Thumper and kicks.

STRATEGY: in the area there will be big fans (in the floor). Kick enemies into them and you will unlock the unique SUCKERS.
Move to the next room and you will come across a generator. The energy from the main machine will make it impossible to jump over the multiple obstacles emitting a dangerous purple energy. In order to be able to continue, you have to switch off the generator with the leash. That way - for a couple seconds - you will be able to jump over the barriers.

STRATEGY: on the upper floor, mutants will appear. Flinging any of them onto the purple force field will give you FORCED.
After getting past a few barriers you will reach a spot where a larger number of enemies will appear (some of them will run out of the room in the distance).
You will also have to jump over two barriers close to each other. You can pretty much do them both during one generator shutdown.
At the end of the road jump through the window to the neighbouring room and wait for the general to open another door.
Thanks to Sarrano you will find yourself in a location with another dropkit. Get an explosive weapon, as it might come in handy in just a moment.
Afterwards you will reach a long corridor, where you will have to fight with a large mutant. Attack with powerful guns to push him back. At the back there's an electric device - push him onto the cables and finish off with the leash (it will make the device fall down).

STRATEGY: killing with the electric device will unlock a unique Skillshot - GRILLED MEAT.

Move on and you will reach another long location. At the same time you will be also attacked by a dense group of mutants, running from the other side.
STRATEGY: because of the low ceiling, a single Thumper use will solve the case, giving lots of points.
Move on and you will reach the room opened by Sarrano.
You will find a giant DNA bomb there and will have to disarm it.
Approach the control panel and follow the orders given by the game.
The whole thing will turn out to be Sarrano's trick. You will have to run for your life. Start off by pulling out the vent pointed by Ishi (with the leash).
After getting to the other side, use the leash on the distant platform.
Afterwards head to the locked door with a switch on the left. It will turn out to lead to nowhere.
Jump into the vent in the floor and return to the bomb room. After a bit Trishka will come with help and the level will end.
You will begin the level onboard a ship. Leave it by following Trishka. You won't be attacked for quite some time.
Upon going outside, you will once again find yourself around the ruined building. Keep moving on and kicking the pieces of pillars blocking your way.
At some points you will get to a platform. At its end you will have to pull up during a QTE (R button).
The further road will lead down the building, towards the elevator and the first dropkit. Be sure to use it before using the nearby switch, as the first enemies are waiting for you.
Opponents the moment you get out of the building. Thos with flares on top of the stairs will be by far the most dangerous ones.
STRATEGY: quite a lot of interactive environment elements can be found in the area (puffballs, cactuses or electrical information poles).
Go up the stairs and go towards the blocked passage - unblock it with a kick.
Below you will be attacked by more opponents (there will be quite a lot of them, use Thump to your advantage). Some of them will attack from behind the nearby cover.
STRATEGY: in the middle part of the arena you will find a tree with Nom plants. Use them to make the fight more attractive.
Make a few steps (and defeat more enemies, including ones running out of the nearby building) and you will be once again under a roof. You will find another dropkit there. Use the shop and go to the exit, opening the door with a kick.

Outside there will be more enemies waiting for you. They will however attack only once you go down the stairs and there won't be many of them.
The situation will become worse once you get to another, longer set of stairs leading down. You will be attacked by heavily-armoured miniboss. Shoot at him with explosive weapons (taking care of the lesser enemies beforehand).
Go down and you will reach the third dropkit. Make any necessary purchases, go across the nearby wreck to the other side and head towards the battlefield.
You will reach a place where two hostile fractions are fighting. It however won't last long, as just in a moment both will focus solely on you. Most of them (including the ones who will arrive with the second wave, running down the escalator) will stick to a group. It's a perfect occasion to use the leash's Thumper.
After killing everyone, go up the stairs. You companions separate from you and take the lower path. Your task will be to help them fight. Begin with the first two enemies who will appear downstairs.
Killing them will make the door beside you to open and a few enemies will come out of it. Feel free to use Thumper to eliminate them.
At the end of the corridor you will find another dropkit (replenishing ammo isn't necessary).
Move on and you will reach the station's main room. New enemies will appear downstairs.
It won't last too long, as after a few steps new ones will appear, this time on your level (beside the caf and tables with chairs). Take care of them, aiding your companion downstairs in the meantime.
STRATEGY: on the nearby tables as well as in the rooms on the left you will find alcohol. Thanks to it you will be able to earn INTOXICATED.
Afterwards move on across the platform above your companions. That way you will reach a miniboss with a Penetrator. There's also a dropkit in the area
You will also have to aid your friends below. They will get attacked by two minibosses. Shoot them from above, without having to worry about a counterattack - they will focus on Ishi and Trishka.

Go through the next door and you will come across another enemy group, this time without stronger enemies. Just some plain cannon fodders. At the end of the road you will have to go down and join with your companions. You will also find another dropkit there. In a moment a demanding fight will start, so be sure to equip powerful weapons and lots of ammo. Buying some Thumpers seems like a good idea as well.
The further road will lead you across a sofa on a demolished elevation part.
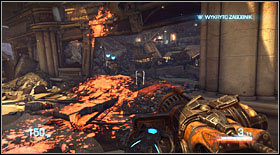
 The place of a demanding fight.
The room is rather small, so most enemies will move in tight groups. On the sides there are stairs and balconies. Head there first and eliminate the enemies with Screamers. Besides, staying upstairs to the end of the fight seems like a good idea. Being there, you will be able to crouch behind the barriers and regenerate health.
Pretty much every enemy type has its appearance during the fight (apart from mutants). The minibosses will be of course by far the most dangerous. At some point, near the end, two will appear at the same time.

STRATEGY: it's a real mine of Skillshots. Various environment elements can be found here and enemies will appear on groups (letting you use Thumpers effectively). Be creative and complete different Skillshots.
After the fight, head towards the open door leading to a large baggage sorting room. Move freely, no one will attack you there.
Eventually you will have to enter the vent. Go through it and you will once again be outside, right next to another dropkit. Make necessary purchases and jump over the nearby stone block.
A 2-minute counter will appear. Your task will be getting to the landing field before Sarrano's ship flies away. Run forward as fast as you can, successively passing through rooms (most of the time you will have to turn right).
On your way you will encounter a big number of enemies - don't fight them, there's no time for that. Shoot only as a last resort, when someone crosses your path.
Once you get to the landing zone (after going down some stairs), you will have to pass a parked car on the left. A scripted explosion will take place there.
 Last second to run.
It will knock your character over and you'll lose control over him for a moment. Once you regain it, you will only have 10 second left to get to the shuttle. Move towards it, fighting with the difficult controls caused by the headache. After getting close (around the last second), use the leash. The level will therefore end.
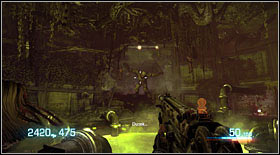
The level begins onboard the ship, nearby the first dropkit. Replenish ammo in it and head to the next room. You will be attacked by a new enemy type there - Sarrano's minions - Final Echoes. They use the same machinegun as you, together with the charged shot - a powerful shot with a specific orange glow. Be careful while fighting them, as it's easy to die.

STRATEGY: fighting with the new enemy type, you will be able to unlock a special Skillshot - DISCHARGED. Just kill one of the enemies with a charged Peacemaker shot whilst he's charging his own (characteristic orange glow).
Inside the room that you will enter there will be numerous enemies, some of them will appear later on.

Inside the next room - after a corridor filled with opponents - you will find another dropkit. Before you use it, get rid of the nearby enemies.
 Unique environment interaction spot.
In the next location you will also have to fight incoming enemies. Keep an eye on the crates on the right, as there are more enemies behind them.

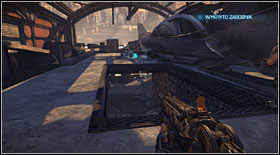
STTRATEGIA: in the area you can find a switch which will send the enemies on the right (in the capsules) back onto the planet. Use it to unlock EJACULATED.
Go through the next door and for a while you won't have to fight with anyone. You will however come across a blocked door. Trishka will ask you to help her get up into the vent.
Once you do it, it will turn out that she's not coming back to get you. Luckily Ishi will open the door.
On the other side you will find an elevator - use it. After going up, you will find yourself in another corridor leading to an elevator.

Take another ride and you will end up in a big room with multiple enemies. Some of them will be inside capsules on the right. Get rid of them by pressing the nearby switch.
Go into the next corridor and you will find a turret at its very beginning. Unfix it and move on. Using it you will be able to easily clear your path (just remember to be quick, as the batteries won't last long.
You will eventually reach a big warehouse filled with crates. You will also find two more turrets there. First of all eliminate the enemies mounting them.
Once everyone's dead, t will be your turn to fight off an attack. While Ishi will be busy opening the door, you focus on shooting the incoming enemies using the turrets. The number of opponents will be really large and they will keep on appearing for quite a while. You might have to crouch behind the crates to regenerate your health.


The door will be unlocked as you kill the last enemy. It will also start a long cutscene with many interactions. Firstly you will have to keep pressing the kick button to avoid being strangled. Afterwards there will be pressing the mouse buttons alternatively (crawling towards your weapon).
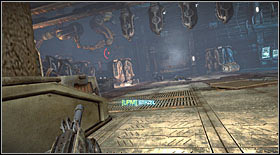
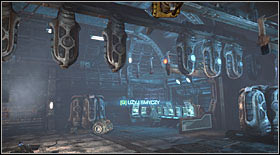
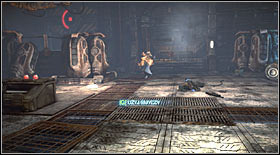
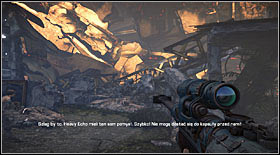
Afterwards you character will take the initiative and start kicking, using the leash and shooting. You will have lots of time to react and not completing an interaction won't change anything in fact (apart from receiving no points).
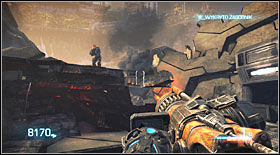
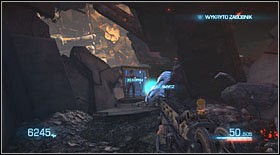
After the QTE sequence, you will land on the planet once again. After regaining control over your character, kill the first three enemies and head towards the dropkit. Right behind it there will be a door. Open it with a kick.
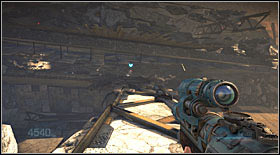
You will reach a big rubble. At first no one will attack you ...
... so go across the ruined buildings (crouching and jumping included) until it will be possible to zoom the camera on the running opponents.
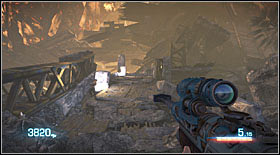
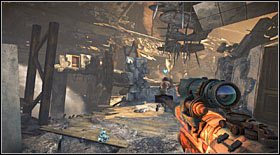
Follow them up the debris and a fight will start. The best solution is to get rid of them using a sniper rifle.

STRATEGY: if you decide on the sniper rifle, you will be in a convenient situation to unlock EARLY RETIREMENT. Just kill an enemy with a charged shot in zoom, without detonating the bullet. Instead just have him die conventionally.
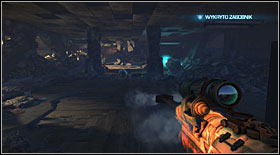
The further road will lead towards the ruined skyscraper. By getting there (beforehand you will be forced to fight all the time), you will find the last dropkit in the game.
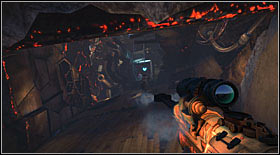
Equip a strong, explosive gun and head towards the airlock leading onto Sarrano's airship.
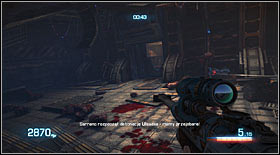
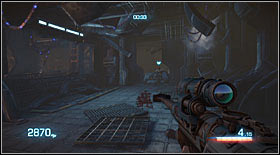
After it open, a 45 seconds counter will appear. During that time you have to get to the escape pod before the enemies do. While you're running, shoot everyone trying to one-hit-kill for the most time (the Flailgun is the most effective here).
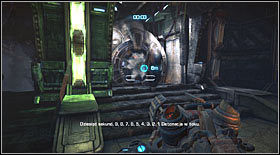
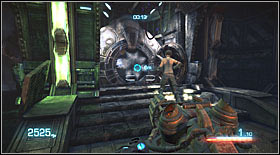
You need to get to the pod (the road isn't complicated, you always know which way to go and just need to follow the opponents) before the counter runs out. Otherwise one of the enemies will start closing the escape route and you will be in for a quick death.
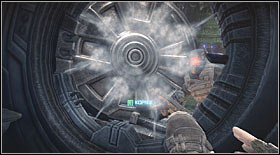
Upon getting to the capsule, you will have to kick out an enemy, which will be the last interaction in the game.
 The finale ain't as romantic as it looks.
Afterwards a cutscene will begin and the game will end. As a side note, after the credits there will be a conversation between general Sarrano and Ishi - I'd recommend listening to it, it's really worth it (skipping the credits won't take the chance away, so you don't need to watch it them to the end).
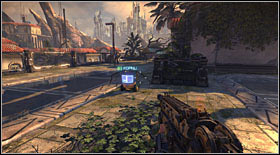
Newsbot #1: the first bot can be found in an enemy-free area right after the first fight (beside a passage, well-visible).
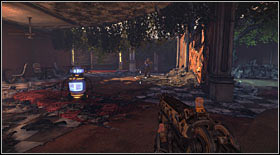
Newsbot #2: the second is also in a passage, in a building with the dropkit (right behind it).
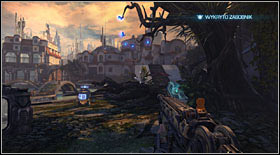
Newsbot #3: the next bot is beside a dropkit, around 2 minutes after meeting Trishka.
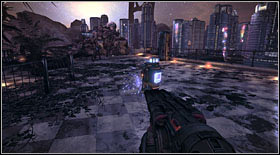
Newsbot #4: you will be able to destroy it at the beginning of the subchapter. You will find it right behind the place with "stuffed" monsters (with one missing, which will be pointed out by the characters).
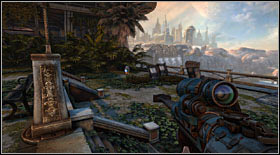
Newsbot #5: the first bot of the 3rd chapter is hidden to the right of the spot where you will use the sniper rifle for the first time.
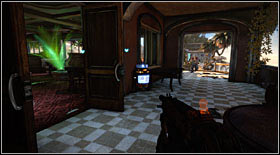
Newsbot #6: it can be found in the room in which the opponent which you were shooting at (using the sniper rifle) have hidden, while your companion was lowering the bridge.
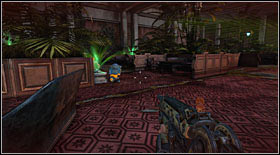
Newsbot #7: it's driving around the restaurant with a terrace and a characteristic waterfall.
Newsbot #8: he's hidden right at the beginning of the big fight which you will reach by coming down from the balcony. The robot is on the balcony as well, but on its second wing (unused during a normal playthrough).

Newsbot #9: placed nearby the last, on the field of the battle mentioned above, beside a burning helicopter.

Newsbot #10: it's inside an elevator which you have to enter - missing it is impossible.
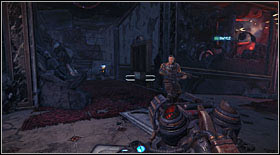
Newsbot #11: you will find it inside a ruined building, which you will reach after the fight with enemies equipped with sniper rifles (you will have to use the leash on an environment element beside the robot).
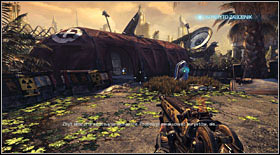
Newsbot #12: it's hidden inside a tent, beside the second dropkit (right beside the passage unblocked by pushing down a ball).
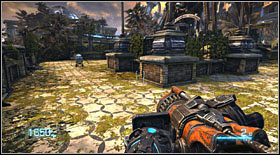
Newsbot #13: the first robots of the 2nd chapter has been hidden to the left of the metal tower, in a place where you will fight enemies on a vast arena (around the middle of the chapter)

Newsbot #14: placed nearby the last one, right beside the exit of the alley filled with cactuses (there's also a dropkit in the area and an enemy helicopter will be flying around).
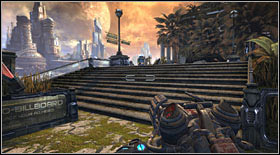
Newsbot #15: the last is hidden right to the left of the big stairs leading to the final building.

Newsbot #16: you will find it in a small room beside the spot where you will be asked to slide down a crumbled building (not long after entering the hotel).
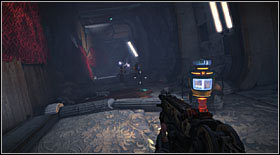
Newsbot #17: the next one is inside a passage around the middle of the chapter (hard to miss). You will get there by falling down through the floor.
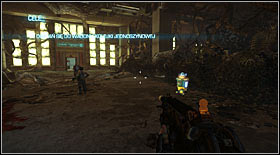
Newsbot #18: located at the beginning of the chapter, beside the starting point. It will be on your main path, so it's hard to miss.
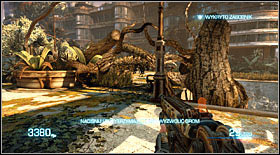
Newsbot #19: hidden behind the tree roots not far from the place where you are to enter a cart to end the chapter. Very easy to miss.
Newsbot #20: in the first room which you will reach after the beginning of the chapter. It's driving beside the dropkit and is rather hard to miss.

Newsbot #21: inside the demolished part of the hotel (right before the exit) which you will reach soon after getting out of the basements (with a room with a big tank of green liquid).
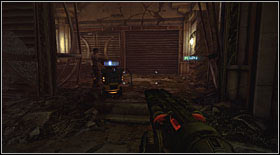
Newsbot #22: found beside the exit of the building, from which you will access one of the main streets of the city by the end of the level. Beside a passage, hard to miss.
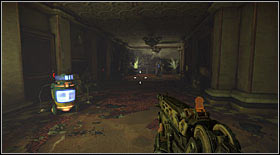
Newsbot #23: can be found at the beginning of the level, by going down the stairs (on the passage, hard to miss).
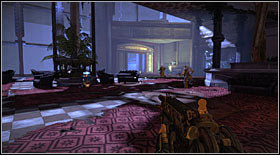
Newsbot #24: placed in a rather big and a rather (considering the overall conditions there) not demolished room, which you will get to around the middle of the level by going down the stairs. There will be a characteristic piano in the area. The robot is rather easy to spot.
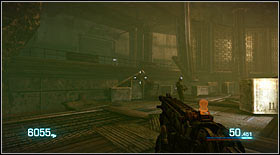
Newsbot #25: hidden on the side (on the left) platform/balcony which is in fact inaccessible. You will be only able to destroy him by shooting. The place is nearby the spot where general Sarrano gets attacked and separated from his companion.
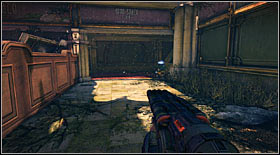
Newsbot #26: inside a building, beside the second dropkit.
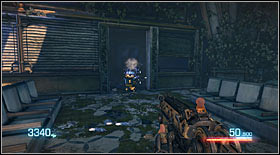
Newsbot #27: can be found on the upper floor of the railway station, on which you will be separated from your companions. Inside one of the cafes, beside the place where the first tables will be.
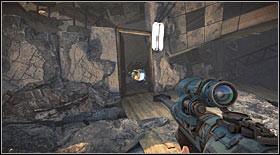
Newsbot #28: the last is hidden behind the door of an almost completely demolished room. You will get there by climbing up the rubble, once more heading towards Sarrano's ship.
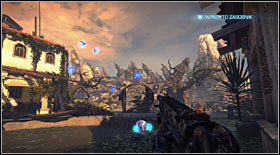
Electro Flies #1: you will come across the first electro flies upon reaching the building. they will be flying above a pond.
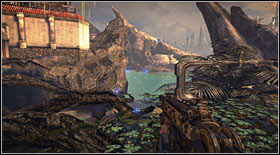
Electro Flies #2: the next ones are hidden out of your character's reach, nearby the second dropkit (it's a safe area where no one will attack you and you will reach it soon after leaving the disco)
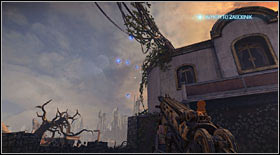
Electro Flies #3: the third group of flies are above the passage in a place where no one will be attacking you. In the area you will have to jump over a wooden fence.

Electro Flies #4: the fourth group is flying beside the dropkit which you will come across soon after meeting Trishka for the first time.
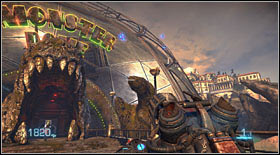
Electro Flies #5: the last bugs can be found right before the end of the first chapter. They are to the right of the entrance resembling jaws of a monster.
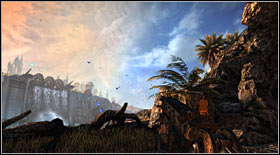
Electro Flies #6: can be found right a t the beginning of the level, after leaving the cave. They will be flying nearby the first dropkit.
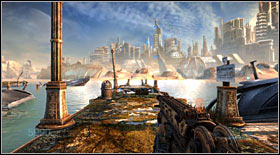
Electro Flies #7: the next ones are flying above the last pier, where there will be a couple of them (also a fight will take place there). The last pier is placed in such a way that you don't need to get onto it. Check it before entering the nearby building.
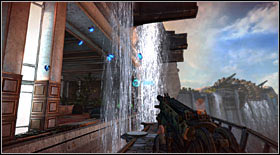
Electro Flies #8: they will be flying on the terrace adjoining the restaurant (beside the waterfall falling down the ram).
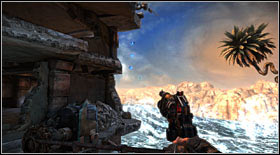
Electro Flies #9: the first group of chapter 2 is flying above the waterfall, to the right of the first drawbridge.
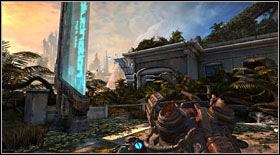
Electro Flies #10: the last in chapter three are above the crater in the ground (on the left), at the end of the big square with a lot of opponents.

Electro Flies #11: you will find them flying beside the place where the flytrap is introduced for the first time.
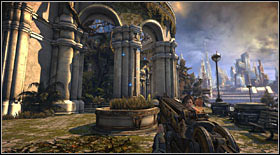
Electro Flies #12: they are flying beside the large pillars. You can get to them by going out of the building inside of which Ishi will get eaten.
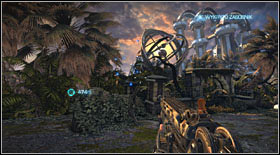
Electro Flies #13: more are flying at the very bottom of the multi-level stairs beside the third dropkit. There was a fight nearby.
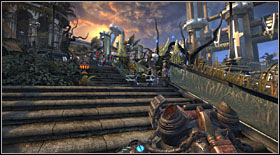
Electro Flies #14: go up the long set of stairs, towards the final building.
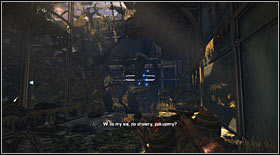
Electro Flies #15: the last ones in this chapter are flying inside the final building, a moment before the last dropkit (on the right side of the corridor that you will pass through).
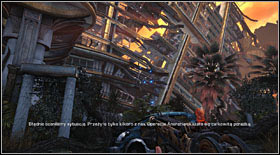
Electro Flies #16: can be found beside the first dropkit at the beginning of the chapter (right before the hotel entrance).
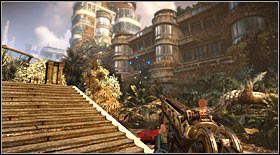
Electro Flies #17: they are flying in a hidden part of the location, a bit beyond the point where you should enter a cart and end the chapter (you will need to go below the tree roots).
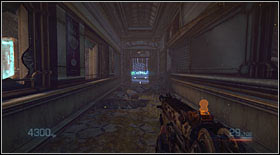
Electro Flies #18: inside a small, hidden room, where you will get by passing through the side corridor on the right (beside the first dropkit, at the very beginning of the level).
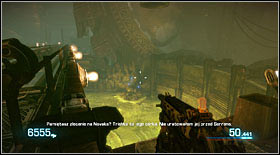
Electro Flies #19: they are flying over the toxic waste (in the distance) above which you will pass on a platform.
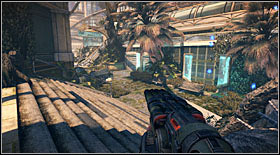
Electro Flies #20: beside a fight spot where you will get by leaving the building with the second dropkit of the level.
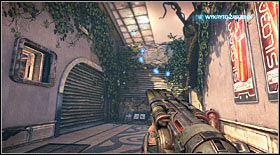
Electro Flies #21: the last group in the game, placed by the end of the level. You will get there by going out of the vent which you will enter in the room filled with tourist baggage.
The bottles are a sort of collectibles. You will be able to either destroy or drink them. Destroying 20 of them will reward you with an achievement. Drinking the same amount will give you another award. They also serve to unlock Skillshots (more info in the "Skillshots: General" section).
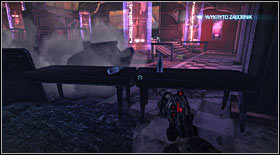
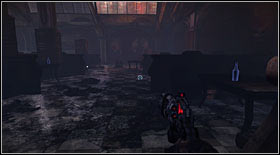
Bottles #1, #2, #3, #4: two first will be on a table, right by the disco entrance (you will have to jump over it). Two more are in the same room, but you will get there from the other side, after going through the battle (on the tables in the dark part).
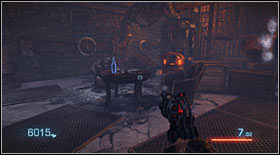
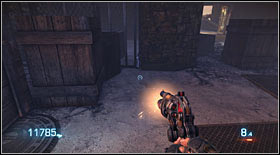
Bottles #5 , #6: two next ones are also placed right next to each other. You will find them in a room which you will reach by going down the stairs right behind the dropkit. You will have to fight a couple enemies there. One of the bottles is on the table and the second to the right by the crates, behind the bars (poorly visible).
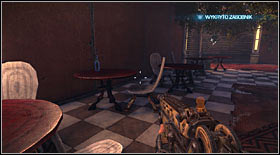
Bottle #7: the next one will be standing on the table inside the corridor of the demolished building, where you will find the Newsbots and dropkit.
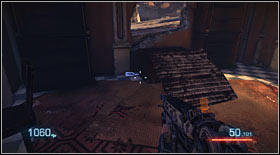
Bottle #8: after you will have to kick a metal sheet to access the building while going through the roofs, you will find yourself directly beside the item. It's hidden under the hole through which you will jump into the room (a few enemies will attack you there).
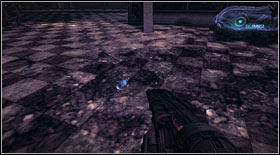
Bottle #9, #10: the next bottles will be hidden next to each other. You will come across them after going out of the underground tunnel (which you will get to during running away from the robot). One is beside the dropkit and the second to the right, behind the barrier next to the crates (it cannot be reached, you can only destroy it).
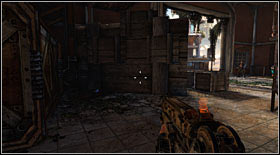
Bottle #11: the first bottle of the 3rd act is hidden by the boat hangar exit (between wooden crates, on the floor). Outside there's the second snipers sequence waiting for you.
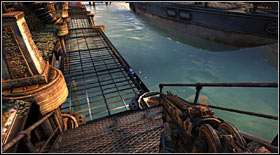
Bottle #12: the next bottle can be found in a very characteristic place: on the side platform of the first pier, which you will reach while playing the level normally.
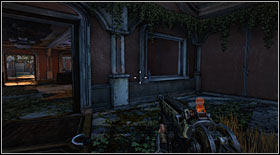
Bottle #13: after leaving the second pier, you will find yourself in direct neighbourhood of the room from which enemies were attacking just a moment ago. The bottle will be standing on one of the windows (beside the door).
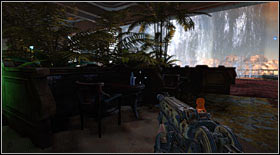
Bottle #14: the last bottle lies on the table inside the restaurant with a terrace (separated from the room with a waterfall). There will be a fight there.
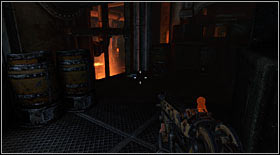
Bottle #15: it can be found at the very beginning of the platform (upper floor) inside the building with characteristic burning tanks. Destroy it before going down with the elevator.
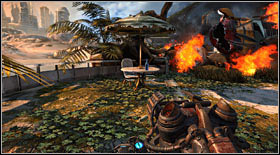
Bottle #16: the last bottle of the 3rd act is on the table beside the burning helicopter, nearby some heavy fights.
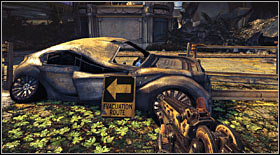
Bottle #17: can be found inside a wrecked car which you will come across during the chapter.
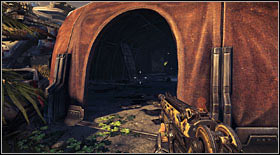
Bottle #18: inside a tent beside a fight spot. You can get there by jumping out the window of a small building.
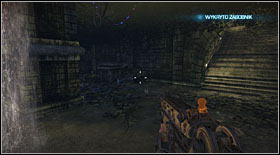
Bottle #19: can be found beside a chest in the first room with a dropkit.
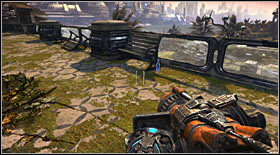
Bottle #20: after exiting the building where Ishi gets eaten (before going down the stairs), look to the left. The bottle is beside the bench.
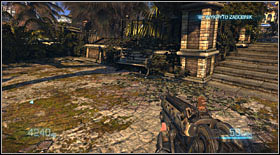
Bottle #21: the next one can be found on the nearby bench, beside the gap in the concrete construction (serving as a passage to the next fight spot) created by the enemy helicopter.
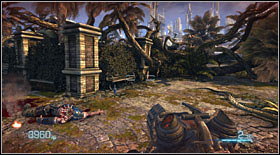
Bottle #22: the last of this chapter is beside a bench as well, at the beginning of the biggest set of stairs towards the end of the chapter.
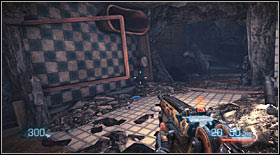
Bottle #23: you will find it right after getting back on your legs after a long slide down a crumbled building, at the beginning of the chapter.
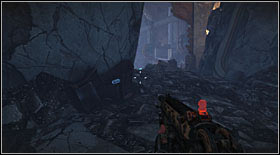
Bottle #24: it's lying on a chair, at the end of a ruined corridor filled with electrical cables.
Bottle #25: the last bottle of the chapter can be found in a characteristic ruined bathroom, which you will reach by the end of the chapter (beforehand going across a glass bridge). There will be two opponents in the area.
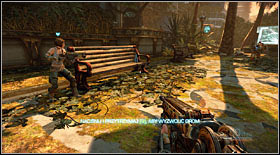
Bottle #26: it's lying on a bench beside the elevator exit, which you will ride at the beginning of the chapter.
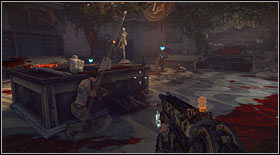
Bottle #27: on the concrete pedestal of the sculpture in the middle of the room which you will reach after sliding under a partially-opened door.
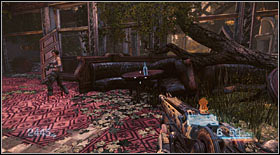
Bottle #28: it's standing on a table in the destroyed part of the hotel. You will reach it right after going out of the basement (where you visited a room with a tank filled with green liquid).
Bottle #29: can be found on the right side of the elevator shaft, by the beginning of the level (right before the entrance to the first room with a visible storm; after all the stairs).
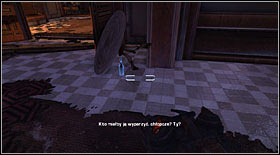
Bottle #30: can be found behind the table by the door. You will get there not long after finding the first dropkit (after a corridor with a couple enemies).
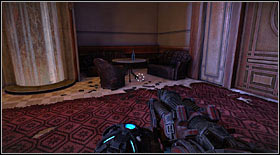
Bottle #31: hidden on a table in a location which you will reach after sliding down a characteristic rod to the lower floor.
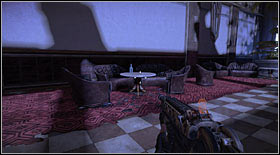
Bottle #32: it's standing on a table inside a big, only slightly destroyed room. You can also find a Newsbot (well visible) and a characteristic piano in the distance there.
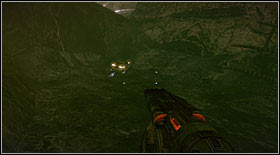
Bottle #33: can be found beside the ammunition, at the place where you will fight the mutants (in a rocky environment) with many explosive barrels in the area (you will get there around 3-4 minutes after the first fight, after getting out of the toxic waste river).
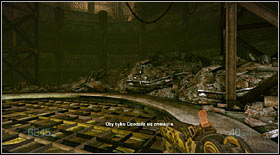
Bottle #34: it's lying on the rubble, where the General has been imprisoned after splitting with his companions (you will be able to go there after a sniper rifle sequence).
Bottle #35: on a metal scaffolding, to the left of the elevator which you will reach by going down the path filled explosive barrels with shiny toxins.
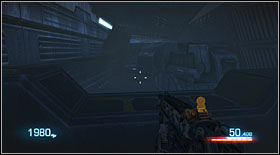
Bottle #36: on the metal scaffolding in a location which you will reach by going out the elevator mentioned above.
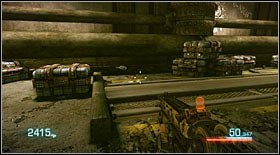
Bottle #37: opposite to the partially raised passage, which you will use by the end of the chapter (sliding below it) while running from death with a 10-seconds counter.
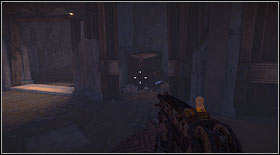
Bottle #38: inside a small, side niche (on the right) inside a location which you will reach by using the leash on an electrical device (through the metal reinforcements in the wall).
Bottle #39: hidden below the partially destroyed footbridge in the room with a characteristic generator in the middle (and numerous barriers emitting purple energy).
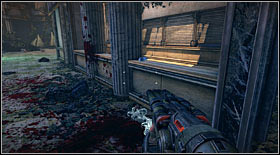
Bottle #40: on the windowsill beside the place where you will fight a couple enemies. You will get there by kicking a metal sheet and going down the stairs.
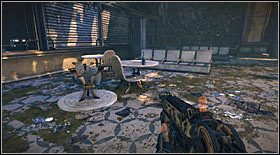
Bottle #41: can be found on a caf table, on the floor of the large train station. You will be separated from your companions there.
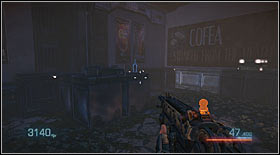
Bottle #42: next the last, on a shelf of the nearby caf.
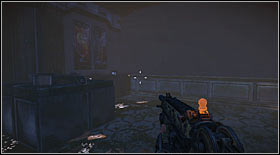
Bottle #43: also beside the last one (in the neighbouring room), on a shelf inside the caf.
NAME
DIFFICULTY LEVEL
DESCRIPTION
POINTS
Graffiti
Easy
Kill an enemy by kicking him against a surface so that he leaves a bloody stain.
25
Shocker
Trivial
Kill an enemy by flinging him into an electrical source.
100
Pricked
Trivial
Kill an enemy by impaling him on a cactus.
100
Voodoo Doll
Trivial
Kill an enemy by impaling him (barbed wire, rebar, etc.)
100
Vertigo
Easy
Kick an enemy off a cliff or building.
50
Flyguy
Very hard
Kill an enemy by flinging them into a swarm of electro flies (their location can be found in a separate chapter). It's the hardest Skillshot. I managed to get it by the first group in the game. More details in the walkthrough.
100
Afterburner
Demanding
Kill an enemy who is on fire (you can ignite with the Screamer's charge shoot).
50
EnviroMental
Trivial
Kill an enemy that is on fire.
50
Feeder
Demanding
Kill one or more enemies with an environmental effect (usually explosive barrels)
100
Bad Digestion
Hard
Feed an enemy to a Venus Maneater.
100
Antidote
Easy
Cause a Venus Maneater to eat an explosive.
50
Toxic Love
Easy
Kill an enemy infected by toxic waste or puffball gas.
50
Nominated
Demanding
Kill an enemy while infected with green mutant toxin or puffball gas.
50
Scare Crow
Hard
Kill an enemy with a Nom Parasite on his head.
100
Leak
Demanding
Put a Nom Parasite on an enemy's head and then impale him.
50
Heads Up
Hard
Put a Nom Parasite on an enemy's head, and then kill him with a headshot.
100
Fast Food
Hard
Put a Nom Parasite on an enemy's head, and then decapitate him.
100
Sausage fest
Demanding
Kill an enemy using a hot dog cart explosion. Treat it as an exploding barrel.
50
Exterminator
Easy
Kill an entire swarm of electro flies. Their locations can be found in a separate chapter.
100
Killer News
Hard
Kill someone with the explosion of a Newsbot. It's not easy, as they rarely can be seen beside fight zones. Their locations can be found in a separate chapter.
100
Intoxicated
Easy
Kill an enemy while drunk on Nom Juice. Their locations can be found in a separate chapter.
100
Slam Dunk
Easy
Smash an airborne enemy into the ground using the Thumper.
50
Trap Shooting
Easy
Kill a Thumped enemy with bullets.
50
Fly Swatter
Easy
Thump an enemy into the ceiling.
50
Fertilizer
Hard
Explode two or more thumped enemies using an environmental explosive. The Skillshot itself is easy, finding the place to make one is harder. Description of one such in chapter 6.
100
Touchdown
Demanding
Thump a stunned miniboss to his death.
100
Bossed
Easy
Kill a miniboss.
250
Fire in the Hole
Hard
Kick a stunned miniboss from behind, then shoot him in the ass.
100
Kick off
Hard
Leash a miniboss's helmet off, stun him again, and then kick his head off.
250
Whiplash
Hard
Leash a miniboss's helmet off, stun him again, and then leash his head off.
250
Stomach pump
Hard
Kill a miniboss by firing a charged drill into his stomach and then kicking it. The hard part is not killing the miniboss before that.
100
Friendly Fire
Easy
Kill an enemy by flinging them into the fire of another enemy. The best way is to throw someone under a flare.
50
Bombshell
Easy
Kill two or more enemies from an exploding Flailgunner or Flail Gun shot. They always walk in groups, so it won't be hard.
25
Assplosion
Demanding
Kill a Burnout by shooting its ass growth.
50
Blind Fire
Easy
Kill an enemy while blinded by an enemy flare. In bigger groups with enemies equipped with Screamers it's pretty much random, but almost always doable.
100
Discharged
Easy
Kill a Heavy Echo with a charged PMC shot while he is charging his own.
50
Skyjack
Demanding
Kill a Gyrocopter pilot while the vehicle is airborne. Normally impossible to complete, unless you have a sniper rifle and headshot the pilot.
100
Parashoot
Easy
Leash the pilot out of a Gyrocopter and kill him before he lands.
50
Flak
Hard
Destroy a Gyrocopter using an indirect explosion Normally impossible to complete, but there is a certain spot in Act I where you can get it very easily (more info in the walkthrough).
100
Gotcha
Easy
Leash a Creep or Flare Shooter and kill him in mid air. They are fast enemies, so you have to knock them down to the ground before using the leash.
50
Full Throttle
Trivial
Use bullets to kill two or more enemies without letting go of the trigger. Easy as pie with a fast-shooting gun.
50
First In Last Out
Demanding
Get an enemy airborne, kill a different enemy, then kill the airborne enemy before he lands. The best way is to Thump a big group of enemies.
100
NAME
DIFFICULTY LEVEL
DESCRIPTION
POINTS
Headshot
Trivial
Kill an enemy with a shot to the head.
25
Bullet Kick
Easy
Kill an enemy with bullets after kicking him.
25
Bullet Slide
Easy
Kill an enemy with bullets after sliding into him.
25
Gag Reflex
Demanding
Kill an enemy with a shot to the throat.
50
Rear Entry
Demanding
Kill an enemy by shooting him in the ass.
50
Trip Wire
Demanding
While an enemy is running, shoot his legs or feet to trip him, and then quickly finish him off.
50
Mercy
Demanding
Shoot an enemy in the balls, then shoot or kick his head off while he kneels in pain.
100
Boned
Demanding
Kill an enemy with a charge shot from a PMC as soon as he gets in your sights.
25
Overkill
Easy
Shoot an enemy in the head with a charged PMC.
50
X-Ray
Hard
Kill two or more enemies with a single charged PMC shot.
100
NAME
DIFFICULTY LEVEL
DESCRIPTION
POINTS
One Hit Wonder
Easy
Kill an enemy with one Screamer shot.
25
Surgeon
Easy
Kill an enemy with the Screamer by shooting one limb repeatedly.
25
Fast Draw
Easy
Kill an enemy with the Screamer the moment you have them in your sights.
50
Snapshot
Demanding
Kill an airborne enemy with the Screamer the moment you have them in your sights.
50
Gunslinger
Demanding
Score two or more Fast Draws or Snapshots in a row. Just keep shooting while fighting a big group of weak enemies and you will get it eventually.
100
Enlightnment
Easy
Shoot an enemy in the head with a charged Screamer and have it detonate.
50
Misfire
Easy
Shoot an enemy with a charged Screamer and have them die from something else before it explodes.
50
Fireball
Easy
Shoot an enemy with a flare so that it explodes and kills another enemy. Easy with big enemy groups.
50
Fireworks
Demanding
Shoot an enemy with a charged Screamer shot, and have them explode 20 meters or higher in the air.
50
Firefighter
Very hard
Ignite three or more enemies and kill them while they are burning. It's a hard mission and you need a good occasion to complete it. Such can be found in the description of Act II.
100
NAME
DIFFICULTY LEVEL
DESCRIPTION
POINTS
Grenade Gag
Easy
Wrap a flail around an enemy's neck or head.
25
Gang Bang
Easy
Kill multiple enemies with a Flail Gun or Flailgunner explosion.
25
Minefield
Easy
Kill an enemy by detonating a Flail attached to a surface.
25
Sadist
Easy
Wrap an enemy with the Flail Gun and kill him by some other means before it explodes.
50
Meat Slicer
Hard
Slice an enemy in half with the Flail Gun by wrapping a charged shot around an object.
50
Head Slicer
Very hard
Decapitate an enemy with the Flail Gun by wrapping it around an object.
100
Homie Missile
Demanding
Use a flail-wrapped airborne enemy to kill another enemy.
100
Smart Mine
Demanding
Use a flail-wrapped standing enemy to kill an airborne enemy.
100
Chain Reaction
Demanding
Slice two or more enemies in half using a charged Flail Gun shot.
50
French Revolution
Hard
Get a minimum of two headshots with one of the Flail Gun's charge shots.
100
NAME
DIFFICULTY LEVEL
DESCRIPTION
POINTS
Topless
Trivial
Blast away the top half of an enemy using the Boneduster.
25
Legless
Easy
Blast the legs off an enemy using the Boneduster.
25
Splatterpunk
Demanding
Kill a downed enemy by blasting him against the floor with the Boneduster.
50
Pump Action
Demanding
Blast an airborne enemy into an environmental hazard with the Boneduster.
50
Torpedo
Easy
Kill an enemy with the Boneduster while sliding.
50
Piledriver
Demanding
Use the Boneduster to smash an airborne enemy into a surface to kill him.
100
Juggler
Hard
Blast an airborne enemy at least twice with the Boneduster then kill him before or upon landing.
100
Slugfest
Demanding
Kill two or more enemies with one standard shot from the Boneduster.
50
Burn
Demanding
Vaporize two or more enemies with one charged shot from the Boneduster.
25
Acid Rain
Hard
Vaporize two or more airborne enemies with a charged Boneduster.
50
NAME
DIFFICULTY LEVEL
DESCRIPTION
POINTS
Show Off
Easy
Kill an enemy from at least 10 meters away without using the Head Hunter's scope.
25
Broken Wings
Easy
Kill a Thumped enemy with a guided bullet.
50
Accident
Hard
Shoot an enemy with the Head Hunter and have him die from hitting an environmental hazard. It ain't easy and it requires a specific spot. One can be found (as mentioned in the proper chapter) during Act VI.
50
Bluff
Demanding
Kill an enemy with the Head Hunter who is not the chosen target of the bullet. The second target cannon be too far away from the other.
50
Nutcracker
Demanding.
Guide a bullet into an enemy's balls using the Head Hunter. It's not easy, as enemies often turn around.
50
Hotshot
Demanding
Kill a dodging enemy with the Head Hunter by shooting them in a weak spot, such as the head or throat.
100
Premature
Demanding
Explode a charged bullet from the Head Hunter to kill your target before it hits him.
50
Letter Bomb
Demanding
Kill multiple enemies with a single charged Head Hunter shot.
50
Shrapnel
Hard
Explode two or more airborne enemies using a charged bullet from the Head Hunter. You can make it easier by Thumping multiple enemies.
100
Early Retirement
Demanding
Kill an enemy controlled by the charged Head Hunter bullet before it explodes. Easy during the last chapter, with Sarrano's minions.
100
NAME
DIFFICULTY LEVEL
DESCRIPTION
POINTS
Direct Hit
Easy
Kill an enemy with a direct hit from the Bouncer. Having him in the air after being kicked helps.
25
Money Shot
Demanding
Kill an enemy with the Bouncer by launching a cannonball at him and detonating it before it hits anything.
25
Boom
Easy
Kill two or more enemies with one cannonball from the Bouncer.
50
Carpet Bombing
Hard
Bounce a cannonball from the Bouncer at least twice before killing an enemy with it (hard, as the ball tends to act unpredictably).
50
Bully
Hard
Detonate a cannonball from the Bouncer to kill an enemy just after knocking him over with it.
50
Trickshot
Demanding
Kill an enemy with a cannonball from the Bouncer bounced off a wall or obstacle.
50
Lucky Shot
Demanding
Kill an enemy with a cannonball from the Bouncer that traveled over 100 meters without bouncing. Despite what it might seem, 100 meters ain't far (so don't try to shoot enemies too far away).
100
Meat Fountain
Demanding
Kill two or more airborne enemies with one charged cannonball from the Bouncer. Thump them beforehand.
100
Kick of Doom
Demanding
Kill an enemy by kicking a charged cannonball from the Bouncer. You will have a chance to get it while fighting with minibosses (there will be a few) equipped with the Bouncer.
50
Sledgehammer
Demanding
Kill three or more enemies with one charged cannonball from the Bouncer. It will keep bouncing off and killing enemies.
100
NAME
DIFFICULTY LEVEL
DESCRIPTION
POINTS
Breakdance
Easy
Drill an enemy into the ground with the Penetrator .
25
Fan-Tastic
Demanding
Drill an enemy into the ceiling using the Penetrator.
50
Root Canal
Get a headshot with the Penetrator.
50
Twisted
Demanding
Fire a drill from the Penetrator into an enemy but have him die through other means.
50
Mile High Club
Demanding
Send an enemy into the sky using the Penetrator.
50
Air Strike
Hard
Impale a thumped enemy into a standing enemy with a Penetrator shot. A good situation is required for this, fighting a mini boss will do well. First attack him (there have to be lesser enemies in the area) with the Thumper and then attacked the launched enemies with a charged shot. That way you will be able to guide the enemy onto the miniboss on the ground.
100
Shishkebab
Demanding
Impale two or more enemies with a single drill from the Penetrator.
100
Wingmen
Hard
Impale two or more Thumped enemies with a charged drill from the Penetrator.
100
Stinger
Hard
Use a charged drill from the Penetrator on an enemy, then kick him into another enemy.
100
Drilldo
Demanding
Slide into multiple enemies while holding a charged Penetrator.
100
Secret Skillshots are unique and attainable only at certain parts of the game. Below there's a short description of each of them, together with the place where you can get them. More detailed information can be found in the walkthrough itself.
NAME
DIFFICULTY LEVEL
DESCRIPTION
LOKACJA
POINTS
Pancake
Easy
Crush an enemy between a wall and a heavy object
Act 1
50
Mass Extinction
Easy
Stomp someone to death with the MechaTon
Act 2
50
Kill-o-Watt
Easy
Push an enemy into an electric building in Mechaton's mini-city
Act 2
50
Fish Food
Easy
Feed the fish with an enemy
Act 2
50
Floater
Demanding
Kick an enemy into the streaming water
Act 3
100
Grinder
Demanding
Kill an enemy on the big water wheel
Act 3
100
Man Toast
Easy
Kill enemies using the reactors
Act 3
100
Tenderizer
Easy
Kill an enemy using an elevator
Act 4
50
Ding Dong
Demanding
Kill an enemy by opening the doors in the "ceiling" in the collapsed building
Act 4
100
Halloween
Hard
Nom on head, then kick him into an electric object
Act 5
100
Steady Hand
Hard
Only hit the weakspot of a burnout and kill him
Act 5
100
Dino-Sore
Easy
Get a successful hit on Hekaton's neck wound
Act 5
50
Outburst
Easy
Push an enemy into the storm
Act 6
50
Sucker
Demanding
Kill enemies using the giant fans
Act 6
(Act 2)
100
Forced
Demanding
Kill an enemy by flinging them into an electromagnetic pulse barrier
Act 6
100
Ejaculated
Easy
Jettison the Heavy Echoes in Cargo Hold
Act 7
25
Weed Killer
Demanding
Kill the Flytrap Boss
Act 3
350
Minced Meat
Easy
Kill the 1st Burnout miniboss
Act 5
250
Grilled Meat
Easy
Kill the 2nd Burnout miniboss
Act 6
250

 Battlefield: Bad Company Game Guide & WalkthroughBurnout Paradise: The Ultimate Box Game Guide & Walkthrough
 Battleline: Steel Warfare Game Guide & Walkthrough
 Battlefield 2142: Northern Strike Game Guide & WalkthroughBroken Age Game Guide & Walkthrough