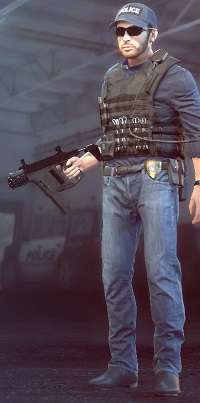
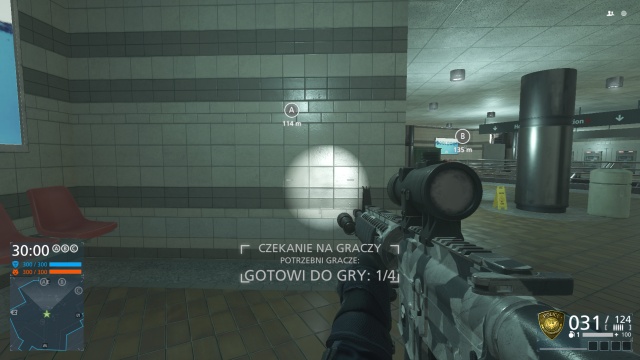
Battlefield Hardline is the first installment in a subseries of first person shooters, created by Visceral Games studios - creators of the Dead Space series. They have decided to abandon war setting, which is traditional for the Battlefield series, and focus on a conflict of different caliber - police fighting organized crime. It is followed with reduction of map sizes in comparison to the previous installments. In Battlefield Hardline infantry is much more important than vehicles, which is different from the previous games. The game take place in modern times, which means that both sides of the conflict can use modern gadgets, like tasers. As usually in Battlefield series, the main focus has been placed on the multiplayer mode. A different approach to gameplay allowed creators to prepare modes typical for cops and villains, like robbing bank. In this guide you will find information both about the single player campaign and multiplayer mode.
Battlefield Hardline guide - Single player campaign contains:
Battlefield Hardline guide - multiplayer contains:
Grzegorz "Cyrk0n" Niedziela (www.gry-online.pl)
Move

Crouch

Prone

Jump

Sprint

Fire

Aim

Reload

Mark
Throw grenade

Interaction

Accessories (for example, flashlight)

Switch fire mode

Changing seats in vehicle

Battlelog

Pick up weapon
(hold)
All chat

Team chat

Squad chat

Scoreboard

Move

Look

Sprint

Crouch

Prone (hold)

Changing seats in vehicle

Jump

Pick up weapon
(hold)

Change weapon

Reload

Interaction

Shoot

Aim

Mark

Throw grenade

Change accessory

Accessories (for example, flashlight)
Switch fire mode

Move

Look

Sprint

Crouch

Prone (hold)

Changing seats in vehicle

Jump

Pick up weapon
(hold)

Change weapon

Reload

Interaction

Shoot

Aim

Mark

Throw grenade

Change accessory

Accessories (for example, flashlight)

Switch fire mode

Character development in Battlefield Hardline is based mostly on virtual money. Player receives one dollar for each point gained on the battlefield. What's important, player have access to all weapons and gadgets since the beginning of the game. He doesn't need to unlock each weapon one after another. But before he will be able to use a weapon, he must first buy it for earned money.

Some weapons are available from the beginning only for one side of the conflict. To unlock it for both sides, you must make 1250 kills with it and pay 50000%.
Only thing that must be unlocked are weapon accessories - for frags with a specific weapon, and accessories to vehicles - for points gained with a specific vehicle.
Operator in Battlefield Hardline plays the role of a field medic. He can use SMGs and assault rifles, which are especially effective on short and medium distances. What is most important, he has been equipped with gadgets, such as the first-aid pack and the defibrillator. Thanks to this, he can heal and revive teammates. This is why, this class is the most important on maps where infantry fights.

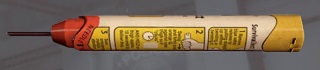
The first-aid pack
Once thrown, the first-aid pack cannot be picked up again. The soldiers within a short range of the first-aid pack replenish their health at a rate of 10 health points per second. The player that throws the first-aid pack receives $10 per second of healing. The first-aid pack can be simultaneously used by several allies, and opponents alike. Each operator can deploy one first-aid pack at a time. After he throws another one, the previous one disappears. Apart from that, this takes a 15 seconds cooldown, before another one can be deployed.
If a player is equipped with a first-aid pack and does not deploy it, teammates can heal by pressing the interaction button, on the operator.
Usability: sentiments aside, in the battlefield and blood is shed on a regular basis. This is why, the first-aid pack is a huge advantage for the team and an easy source of points and cash. The should be present in the equipment of each operator.
Survivalist
Thanks to this gadget, you will be able to revive yourself, after a death from explosion or after you die under the wheels of a vehicle. However, it is useless after the death from enemy fire, gas, a melee attack, a fall from a height, burns and electric shock.
Usability: this gadget is useful only in specific and rare situations, which makes it a disposable choice for the equipment.
Defibrillator/Revive
This gadget allows you to revive any ally after his death. Before it is used, the defibrillator needs to be charged. If you use it right after you equip it, the revived player will have regained 20 health points. If, you hold down the fire key instead, which charges the electrodes, he will receive more health back. The amount of health is directly proportional to the amount of cash that the player receives for the revival. The defibrillator is only available for the cops. Revive is its counterpart available for the criminals.

As soon as the player with the defibrillator stands over the dead players, such icons appear. The bar on the circle is a meter that counts down 10 seconds, for which the dead ally can be revived.
Usability: in the battlefield, death happens all the time. Thanks to the defibrillator, you can restore health to the player, who may return the favor in a moment. Apart from that, your team receives back a ticket, which may prove the key to winning the match. Also, reviving allies is an excellent way to gain cash and points.
Operators is a highly aggressive class. Often, they form the first line of defense. This is why, the best gadgets they can use as the first-aid kit and defibrillator/revive. If the opponent attacks a group of operators with such equipment, they will be able to heal, or even revive each other. A team, where cooperation is well-orchestrated, is difficult to kill out. Apart from that, healing and reviving is a good way of gaining points and money, with little investment of work.
Deploy first-aid kits whenever you see allies around you. Healing a wounded player will sustain him for longer and you receive free points. If, however, you have already deployed the first-aid kit, and you are now receiving the points, this means that a teammate is using the first-aid kit right now. Therefore, do not deploy another one, because the previous one disappears automatically. <br>try to revive as many allies, at a time, as possible. By reviving them, you provide your tem with a huge advantage, in the battlefield, and you receive lots of points and cash. If possible, charge the defibrillator beforehand, or fill the syringe, for the revived player to receive 100 HP instantly. If you do not have the time to do that, deploy the first-aid kit.
Do not attempt to revive anyone, if you have doubts that you survive it yourself. In such a situation, not only will you be incapable of helping the team, but also you make it weaker, by dying yourself. However, if the ally happens to be lying in a dangerous spot, but you can revive him, while being reasonably safe yourself, do it. Even if he dies immediately afterwards, his death will not be added to the statistics, and the chance exists that he kills an opponent, or distracts him, thanks to which you will be able to kill him.
SMGs and assault rifles are best at short and medium distances. If you have such a weapon equipped, do not try your luck against the sniper and try to hide away, from him, as quickly as possible. Also, do not try to be too aggressive, because what is more effective, over the distance below 10 meters, are shotguns and machine pistols.
Match the weapon with the situation. Remember that the higher the firerate, the more difficult it the weapon to handle. Therefore, weapons of higher firerate (850-1200 round per minute) are more effective at short distances, whereas the slower ones (600-700), are better for the distance of 30-50 meters.
The most often that you see Mechanics around the battlefield is in vehicles. This class has been equipped with tools that are perfect for repairing and destroying vehicles. The man weapons of this class are machine pistols that deal high damage over short distance. However, they are not too effective over longer distances. This is why, as a mechanic it is better to stay in a vehicle and fight others, or repair it, from there.
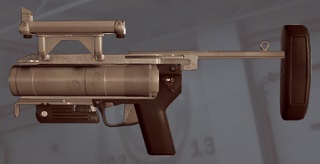
M79/M320
Grenade launchers that fire 40 mm grenades, which explode on impact. They are very useful for destroying vehicles, in the "hotwire" mode. Also, they can be used against infantry, although this is not their primary purpose. The downside of these weapons is low ammo capacity. Grenade launchers deal around 40% damage to cars.
Usability: Grenade launchers are mostly useful in the "hotwire" and "Conquest" modes. They are not too much use against infantry.
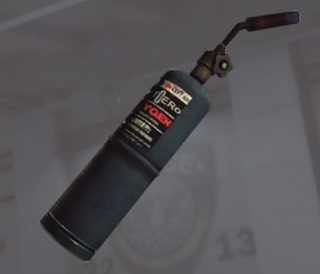
Repair tool
It is a indispensable tool in the equipment of each good mechanic. Its main purpose is to repair allied cars, but in some situations it can also be used for destroying enemy vehicles, or killing an enemy infantryman. To repair a vehicle completely, you need 10 - 30 seconds, depending on the vehicle's armoring and damage. While you are repairing a vehicle, a progression icon appears, that represents how much repairing still needs to be done. The Repair tool overheats after 15 seconds so, it is a good idea to count 10 seconds, in your head, and follow it with a short break in repairing, thanks to which the tool does not overheat.

Usability: each mechanic in a car should own one. It is an immensely useful tool, thanks to which you can return the vehicle to the functional state, even after a fire breaks out.
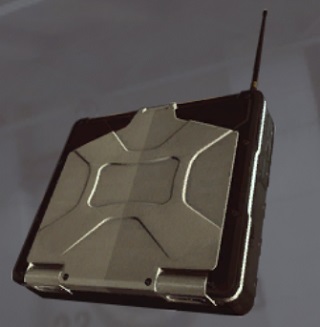
Satellite phone
It provides an additional respawn point to you and to your teammates. An example use is deploying it behind the enemy lines.
Usability: There is a variety of uses to the satellite phone, in various modes. On the maps, with high numbers of infantry, you can deploy it behind enemy lines and in the "hotwire" mode, one of the ways to use it is to deploy it near one of the points, thanks to which the entire team will be able to return there quickly, after dying, and seize the car again.
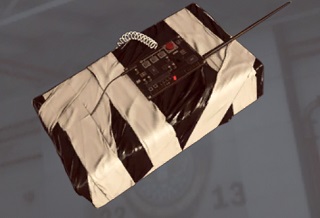
Sabotage
A bomb for planting on cars and interactive points. It goes off automatically, whenever the enemy wants to interact with the object that the bomb is on. It may be a car lying on the ground, an element of gear, a button or door. For example, in the "hotwire" mode, you can plant the explosive on the car, which explodes after it is entered by the enemy. Sabotage can even be planted on cash, in the Blood Money mode. However, it can be disarmed with the repair tool, a shot or another explosion.
 Sabotage is not easily spotted
Usability: sabotage is a perfect trap in the "hotwire" mode. You can score lots of kills, by turning cars to be seized, into traps. However, this is not that helpful, while trying to score points for your team.
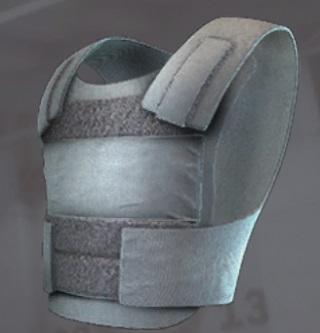
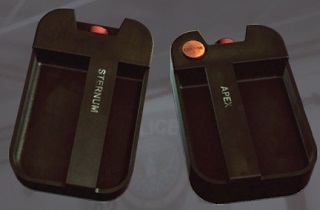
Armored insert
An additional plate that ensures chest protection. It allows you to absorb 50% more damage to the chest, before you die. This is much, especially that the majority of players aim at the chest mainly. This is why, where the initial number of survivable hits to the chest is 3, the armored insert can increase the figure to 6. The longer the distance, the more effective is the gadget.
Usability: the armored insert is the most effective, if used by the mechanic, who decides to engage into combat, where there is infantry fighting.
For sure, each mechanic should own a repair tool. As for the second gadget, the choice is not that obvious. Definitely, what is useful in the battlefield is the grenade launcher, because you will be mostly playing, as the mechanic, on maps with lots of vehicles. A useful gadget, in the "hotwire" mode, may also be Sabotage. Planting it on neutral cars is a very good easy of scoring a kill. If, however, you are planning on driving, you can do with the skill of the stunt driver.
Repair the vehicles of your allies, if they need it. This way, you can ensure the driver in your team, with advantage of the one in the enemy ream. Remember that some of the vehicles can be repaired from the inside,. You simply change seats to the passenger seat, equip the repair tool and use it on any part of the vehicle. Apart from that, repairing is an excellent way of getting more money.
Use your gadgets to destroy enemy vehicles. Regardless of whether it is a grenade launcher or Sabotage. The mechanic is the only class that can use the grenade launcher so, he plays a vital role in the "hotwire" mode.
Whenever getting into a car, and you want to use it for longer, than just for traveling to a different point, make sure that you have the Repair tool on you. Even if you are only going to be a passenger or the gunman.
The weapons available for the mechanic are not so good over medium range. This is why, if your plan for the round is to run around the map and seize points, it is better to pick the class of the operator or the enforcer, because they pack better weapons.
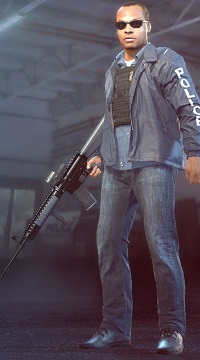
The Enforcer is a class of high versatility in the battlefield. He packs shotguns, which are effective up to several meters, as well as assault rifles, which deal lots of damage, at the cost of low firerate and recoil that is difficult to control. If you take the shotgun, you obviously need to fight as close to the frontline as possible. If, however, you pick an assault rifle, you fight further away from the frontline behind the backs of the operators.
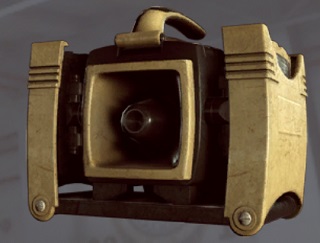
Ammo box
A bag that replenishes yours and your teammates' ammo. For replenishing ammo in your teammates, you receive points. In the box, you can find ammo for all types of weapons, all gadgets and grenades.
Usability: each player in the battlefield, sooner or later, runs out of ammo. This is when they start searching for the enforcer, around the map, who ads such a player with the ammo box. This is why, each enforcer should spare one gadget slot for this item.
Ballistic shield
You can shield yourself from bullets. However, after it absorbs a certain number of bullets, the item gets destroyed. You can use it for melee attacks.
Usability: due to the fact that you cannot fire even the pistol, while holding one, decreases the usefulness of the shield.
C4 explosive
A plastic explosive that can be planted on majority of surfaces. It is detonated remotely, thanks to which it is perfect for ambushes or car bombs. You can deploy, up to, 3 explosives at a time, around the map. Lightweight cars can be destroyed with one explosive, vans require two and armored cars require 3 charges. Also, you can set traps for infantry, e.g. in vaults.
Usability: a smart player can put the C4 explosive to a lot of use, which he helps his team with. This gadget may prove useful both on maps that cluster infantry together, as well as on ones, where you conduct vehicular combat.
Inarguably, each enforcer should come with an ammo box. Often, you run out of ammo in the battlefield and there is no other way around it. Apart from that, it is an easy source for points. What is useful as the second gadget, is the C4 explosive, which you can put to many uses. You can set traps in vaults, plant it on an enemy car or even drop it from aboard the chopper. Depending on the enemy's laying style, also gas mask and grappling hook may be useful and, if you are going to drive a car, also the stunt driver ability.
While playing as an enforce, it is a good idea to match your playing style to the weapon that you pick. If you pick the shotgun, you of course need to assault the enemy, because this type of weapon is effective over short distances only. Assault rifles, on the other hand, are effective over slightly longer ranges so, you need to keep that in mind, while planning on an attack.
Deploy as many ammo boxes around you as possible. Additional supplies will surely help your teammates and you will receive a certain amount of points, without breaking too much sweat. Also, pay attention to team chat and to verbal messages that your allies use. If they need ammo, they may let you know about that.
If you are using a C4 explosive and you plant it, take cover and replenish the amount that you have on you, because you may need it again, at the least expected moment.
Specialist plays the role of the sniper, in the battlefield. His gear and weapon work best over long distances. The players playing as this class will usually be occupying positions far away from the front line. Their primary role is to support their teammates from afar.
Laser tripmine
You can attach it to any surface. It goes off at the moment at which an opponent crosses the laser beam. It is an ideal tool for securing flanks, which will let you eliminate opponents from a safe distance. The mine can be defused, by shooting at it, or by holding down the reload key. The mines of the allies have been marked with green beam, whereas the enemy's with red.
Usability: if properly deployed, laser tripmines can effectively secure the sniper that scores a kill after another, and ensure him with several more, which he does not need to apply himself to, too much.
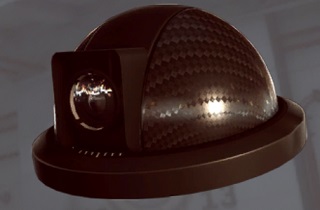
Camera
It works like a motion detector. It marks all targets around the map, within the range of 90 degrees. Simultaneously, you can deploy 3 cameras, if only you have access to the ammo box. It is a perfect gadget that you can deploy in the way that prevents the opponent from surrounding your team. Additionally, you receive points for marking opponents.
Usability: if deployed properly, the camera may be a huge facilitation for the team, thanks to which you will know where the opponent is approaching from. In the right spot, it can ensure the specialist with quite a few additional points.
Decoy
It produces noise and creates false markers on the enemy's minimap, in the spot of deployment. It is a very good way of luring the enemy and shooting him in the back.
Usability: you need to be smart to score several kills with decoy. It needs to be deployed in the way that makes opponents turn away, in search of the object marked on the minimap. If you combine that with a suppressed weapon, you can be sure that you score several kills. However, you need to remember that nobody falls for the same trick twice.
Stealth training
Thanks to this ability, your footsteps and actions, such as door opening, become quieter. This would be useful for getting behind the enemy lines, but a sniper rarely has the opportunity to do that. Apart from that, there is no point in playing with this ability, if you do not apply the suppressor to your weapon, which decreases the muzzle velocity of the bullet, and this is recommended against, in the case of sniper rifles.
Usability: specialist is usually the class that is deployed far away from the opponent, which means that he rarely sneaks and this makes this gadget useless.
The laser tripmine and camera make very good gadgets. They allow you to secure, e.g. an access to the rooftop that you are on. This makes it impossible for the opponent to get around you. A good way to lure out the enemy from hiding is the decoy. If, however, you want to get to a spot, where you are not expected, you can use the grappling hook or the zipline.
As specialist, position yourself, around, 50-150 meters away from the heat of the action, find a safe rooftop or other spot, deploy mines and the camera around, to avoid getting hit with a baton or stabbed.
The specialist class uses automatic pistols (other than machine pistols), which are highly effective over short distances. This is why, if you are close to the enemy, do not hesitate to use the pistol. For example, the G17 deals, at best, 34 damage to the chest, with one shot, at the firerate on 900 rounds per minute.
If the opponent is on the move and you are not sure if you can hit him, do not shoot. This way, you will only give away your position and the enemy will escape. Remain in hiding and mark him. Maybe, this way, some of your teammates will kill him and you get the points.
Pay attention to the enemy movements. If he is running, you need to shoot in front, as if, of him. How much in front of him you shoot, depends on the muzzle velocity of the bullet, the speed of the opponent's movement and the distance, from the opponent that you are at. With time, you will be able to time your shot well and hitting moving objects will become mare natural.
If you are at a long distance from the opponent, reset your scope. You do that with the firerate change button. You need to determine the distance from the opponent and reset the scope for that distance. Then, the bullet will be shot a bit higher than the spot you are aiming at, with provision for the bullet drop.
Gas mask
It protects you from all sorts of chemical weapons. It comes in handy, if the opponents, or the hacker, use tear gas, which blurs the vision, and makes you lose health points, due to poisoning, if you are not wearing the mask.
Usability: it is not a good idea to use the gas mask for the whole time. The majority of players do not use tear gas grenades too often. It is a good idea to equip yourself with one only during the round, in which you know what the opponents are using. A good tactic is to get a gas grenade yourself and enter gassed over rooms, while wearing the mask, where doing this gives you an edge over your opponents.

Grappling hook
You can hook it by a smooth surface and climb over the rope. Also your teammates may use it, as well as your enemies. It is very useful if you want to climb to a rooftop and the enemies are watching over the stairs, or any other access, or simply when you want to get there faster. The gadget can be destroyed by shooting at it, or by cutting the rope.
Usability: grappling hook, usually, comes in handy at the beginning of the round and is useful for snipers also. You can use it to climb to a rooftop, still before you are expected there.
Zipline
It allows you to get to a lower point quickly, e.g. an neighboring rooftop. Also, it can be used by your allies and opponents. It can be destroyed by removing the hook itself, or by cutting through the rope. It is highly useful if your target to attack has changed (e.g. in the heist mode). You can then change your positions quickly, without climbing down, or up, a rooftop.
Usability: zipline comes in handy only at the specific points in the game. It does not offer too much versatility, because there usually is some other way to get to the point below and in the spots that require zipline, you can pick it up.
Stunt driver
This gadget equips your car with nitrous oxide (commonly known as nitro boost). It allows you to accelerate immediately. Apart from that, stunt drivers take less damage as a result of vehicle accidents.
Usability: stunt driver is the best gadget in the "hotwire" mode.
Conquest is a customary mode for the entire Battlefield franchise. The goal of both squads is to capture flags. Their number ranges from 4 to 7. To capture a flag, you need to get within the reach of a given point. The capturing areas are always marked on the map. Capturing a flag takes 20 seconds. If the flag has previously been captured by an opponent, you first need to neutralize it. This also takes 20 seconds to complete. The more allies are present within the reach of a given point, at the same time, the less time it takes to capture it. If, at the same moment, there are several players, of opposing teams, on the flag, numbers is what decides. This means that if there are three players, from the police squad, and a criminal, present within the reach of a flag, at the same time, the speed of capturing the flag lasts as long as if there were two cops present there.
Flags captured by your squad are marked in blue, neutral ones are marked in white, whereas the red ones have been captured by your opponent. If there is a blinking flag visible, this means that it is being neutralized at this very moment.
Due to the default settings of the server, each squad begins with 800 tickets, in the big conquest mode, and 500 in the small conquest mode. This number, however, can be modified, by the administrator of the individual server.
In the Conquest mode, the squad to lose their ticket first, loses the match. Each death of a player results in the number of available tickets being decreased by one. This is not the most important thing, though. A squad loses its points when it holds less flags than the opponent. If one of the squads is holding 3 flags, and the other one is holding 2, the number of the latter will keep dropping, but not as fast as in the case of the 4-1 ratio. Capturing flags is much more important than caring about single points that a squad loses after the death of a player. Therefore, this is what should be your priority in the battlefield.
If, after time determined by the server's administrator, elapses, and both teams still have some tickets left, the one with the majority of tickets wins.
In the conquest mode, all classes serve a purpose and to a large extent, cooperation is the thing that wins the match. On big maps, where many of the players are using vehicles, it is the Mechanic class that is going to be especially useful, whereas on small maps, where only infantry is present, classes of Operator and Enforcer are what you find the most use for.
It is no use to try to get to the most crowded flag, in the Conquest mode. It is much better to try and seize the flags with the fewest players on. The effectiveness of your actions increases if you attack in a group.
 A pursuit, typical for the Hotwire mode
Hotwire is a mode that relies mostly on car pursuits. It can be compared to a typical Conquest, where the points to seize are cars. To seize a car, you need to simply drive it. You cannot stay put in one spot. If the opposing team destroys the vehicle, it respawns where it used to be at the very beginning. Apart from car-points, on the map there also are regular cars and motorcycles, which you can only use for pursuits.
The rules that govern tickets and the terms of victory are exactly the same as in the case of the abovementioned Conquest.
The most important class here is the Mechanic, who can both repair the allied vehicles and destroy the enemy's. The mechanic can repair a vehicle also in movement, by welding a given part of the vehicle. If there is such a player onboard the vehicle, it is difficult to destroy it.
In the Hotwire mode, use the regular vehicles for transporting flags, and for Hotwires, only. Remember however, that you will be unable to harm the opponent, if you are on your own. Therefore, take several squad members along. If the player in the passenger seat presses the button for lying down, he leans out of the window thanks to which he will be able to fire at the enemy units.
If you are driving a car that is the checkpoint, stick close to your deployment point and try to stay away from the opponent. Apart from that, you can get more points if you drive in a wavy line. You will be then receiving more points for maneuvering.
Remember to make use of the gadgets that are available for the mechanic, such as the blowtorch, the grenade launcher and sabotage. These are the ideal tools against the enemy vehicles, in this mode.
In this mode, the goal of the criminals is to steal money bags from the vault and deliver them to the point, where they are collected by the chopper.
 Blowing up of the vault wall
However, in the first place, the criminals need to blow up the wall, to gain access to the vault. In itself, this is not difficult, because their route to the vault is much shorter, than in the case of the police. It is a facilitation, because they can pick the access point into the vault. If they make a good choice, the police may not be fast enough to react in time. If a cop gets to the charge, they may disarm it.
 Handing over of the loot to the chopper
Then, the criminals enter the vault, they need to collect the bags there and retreat to the points that the chopper comes to, in order to give the bags over. These points have been marked as A, B and C. The player carrying the bags needs to head towards the zone, which the chopper arrives in. If the player looses a bag, along the route, the rest of the criminal squad may pick it up. If they fail to do that, the police may intercept the bags. To do that, they need to be standing next to the bag, just like in the case of capturing a flag. The default time to pick up a bag is 30 seconds. It can be shorter, depending on how many cops are standing next to it. If they are successful, the bag returns to the vault, where the criminals need to steal it from again and return to the marked zone. The more cops are standing next to the dropped bag, the faster it returns to the vault.
When the criminals, with the delivery, are nearing one of the marked zones, a chopper arrives. However, if the police manage to kill a criminal with a bag, and take care of it, the chopper leaves and the criminals cannot return to that point anymore.
 The criminals win
By default, the criminals have 100 tickets. For each death, they lose a ticket. The police win if the criminals run out of their tickets, or the allotted time elapses. The round ends in the victory of the criminals if they manage to deliver all of the bags to retrieval zones.
In the Heist mode, all of the classes are equally important and the success may depend, to a large extent, on cooperation. On the police side, things may rely on the efficient use of Specialists, who can defend key points on the map, from a safe distance.
Always, during the Heist mode, many players are flocking in the center of the map, near the vault. Crooks should prepare their escape route, to the point where the chopper lands, still before they steal money from the vault. Also the police should not deploy the entire squad in one spot, or else, in case they die, they leave a free route for the criminals to follow. The key to success, for both sides, is to split and take key points of the map and the given point. Often, such a key point is a rooftop and it is controlling the rooftop that decides about the victory in the given match.
In the Blood Money made, the goal of both squads is to steal more money than the opponent.
To steal money from the vault, you need to approach it, which is usually not too easy, and seize the loot by holding down the interaction button. Seizing a loot unit takes 4 seconds. A player can contain up to 10 loot units. If the player with the loot in the backpack dies, the money can be picked up by a player from either of the squads.
Also, you can steal money from the vault of the opposing team, which is usually more difficult, than stealing it from the neutral vault. There are more opponents there and the route that you need to cover is twice as long. In exchange for that, the reward for such an action is the dwindling tickets of the opposing team.
For bringing back one unit of the loot, the squad is rewarded with one ticket. The winning squad is the first one to win 150 tickets, or the one that has more of them, after 20 minutes elapse.
In the "Blood Money" mode, the squad should consist of all of the classes. The most important ones, for the attack, are the operator and the mechanic, because both of them pack rifles that are effective over short ranges, and they also have the gadgets that come in handy, during an onslaught. On the other hand, the enforcer and the specialist are very good for defending own vault, or for covering the squad member running with loot.
The onslaught on the vault should be a common endeavor, but not all of the players should participate it. Several of the players, equipped with defensive gadgets, such as laser tripmines, or C4 explosives, should be defending the squad's own vault. The goal of one of the teams should also be harassing the opponent near his vault.
What comes in handy, while attacking the vault, is smoke grenades, which ensure the players with protection, while collecting the money inside the vault.
It is a difficult task to survive 30 seconds in the very center of the map. Often, it is much more effective to pick up the cash dropped by the others, and to deliver it into own vault. This provides the player with just as many points and the team with just as many tickets.
"Rescue and Crosshair" is a mode where two squads, of five players each, compete. Each one of the players has only one life, per round and you cannot respawn. The team to win the match is the one to win 5 rounds as the first one.
Each round, a random cop becomes the VIP. The task of the rest of the cops is to escort him into one of the marked zones, near the point where criminals are deployed.
The VIP comes equipped with the Bald Eagle, a frag grenade and a knife only. The rest of the squad may use whatever they wish to. The criminals win a round whenever they kill the VIP, or 3 minutes elapse. For the police to be victorious, the VIP needs to get to the marked area, or all of the criminals need to be killed.
Inarguably, the most useful class, in the "Rescue and Crosshair" mode is the operator, who is equipped with a defibrillator. This is so, because each player has one life only, per round, and reanimation provides the squad with much more advantage, than in a mode where respawns are possible.
What is important for both squads is not to lose a player too soon. Here, where you cannot respawn automatically, this is a handicap for the team.
This mode is, predominantly, based on cooperation within the team. The players should move around the map in twos or threes, thanks to which, in case of any trouble, they will be able to revive each other. Apart from that, you always should provide plentiful information in the teamspeak.
Crooks do not need to define too high a line of defense. It suffices that they defend well-defined zones and this will ensure that the VIP will not pass by unnoticed.
The VIP should stick close to his squad, although lagging behind, a bit, to prevent being spotted too early, by the lurking opponent. He needs to be very cautious, because his death ends the round, even if the four remaining players are still alive.
"Rescue " is also a mode, where two teams, of five players, compete. Each player has one life per round. The match is won by the team that is the first one to win 5 rounds.
On the map, there are two hostages present. The goal of the police is to make it over to one of them and to escort him to a safe zone. If the player, who is carrying the hostage, dies the hostage is dropped at the spot. He can then be picked up by another cop and carried over to the destination.
The police win the round, if they rescue and carry over to the safe zone, at least, one of the hostages, or if they manage to kill all of the opponents. The criminals win if the allotted time, of 3 minutes, elapses, or they kill all the cops.
Just like in the case of the "Rescue and Crosshair" mode, the most useful class is the operator, who comes equipped with the defibrillator. This is so, because each player has only one life, per round. Therefore, reanimation provides a higher advantage, than in the case in which the player can respawn.
The criminals should be deployed in a line, across the map, thanks to which all of the routes to the hostages will be well-secured. The police, on the other hand, should split into two teams and attack from several directions, at a time.
The police should not be too hasty to attack. It is best to take up the available time to check out on all the hiding places, one after another. Too much of a haste may result in getting into the criminals' ambush.
Team DM is the easiest mode in Battlefield Hardline. It consists, simply, in killing each other. There are no other goals to achieve here. One kill equals one ticket for the team. It is possible to get the ticket back by means of a successful reanimation. The round ends as soon as one of the teams gathers 300 tickets. If the allotted time, of 30 minutes elapses, the team to gather the most tickets wins.
The main purpose of the Team DM is training and testing new weapons. Therefore, it is impossible to say that one class is more useful here, than the other. Also, there is no specific way to win the round, here. Simply, the team that wins direct exchange of fire, wins.
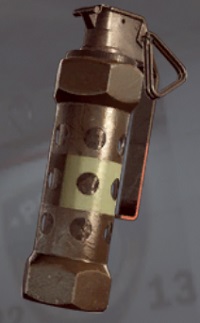
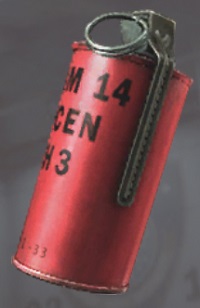
A standard frag grenade with time fuze which you are given at the beginning of the game. It deals direct damage to enemy that is in its range. It deals 100 damage after explosion in distance smaller than 1 meter. It is able to destroy a light vehicle. At the beginning of the round you are given one such grenade.
Smoke grenade creates a smoke cover for 20 seconds, making it impossible for enemy to see through it. At the beginning of round you are given one of those.
Flashbang grenade creates a piercing noise and a dazzling flash. If thrown correctly can make the enemies see a white screen for even 5 seconds. It can be used for disorienting enemies that, for example, guard a safe. You must be careful not to flash yourself.

Grenade with time fuse that emits a cloud of tear gas. It works for 25 seconds. All players, including allies and yourself, can be affected by it. The screen fuzzes and aiming is harder. Enemies that are close to the grenade receive small (up to 5) damage as well. If you take this grenade to the battlefield, don't forget about gas mask as gadget.
A hand grenade that when exploding creates a burning obstacle. Fire burns out after about 10 seconds. It deals lots of damage to enemies. Enemy that stays in the fire dies after 1 second. It can get a vehicle on fire. At the beginning of the round you are given two such grenades.
Chapter about general advices will describe rules that are used not only in Battlefield, but in any other multiplayer shooter as well. Most focus will be placed on leaning out and positioning. There will be also chapter about shooting with automatic rifles, damage multipliers will be described, thanks to which you will learn how much damage will you deal by shooting at different body parts of enemy. Additionally, you will find here most commonly made mistakes and will learn how to avoid them. At the end of this chapter you will learn, which settings can give you advantage on the battlefield.
When playing Battlefield, right position of the player on the map has great importance. Shooting is usually the final stage of killing, which should be earned by correctly positioning yourself on the map. Very often it is position that decides about the result of a duel. In this chapter you will learn about positioning behind obstacles and limiting the dangerous angles.
When you're standing in open area, you are threatened from all directions: front, back, left and right side. Let's talk about which directions are greatest threats for player. Front is the side you see, so there is no point in hiding from that side. We assume that the territory from which you have walked is clear, so you shouldn't cover it as well. Now two sides remain. Securing them should be priority, as you don't see that area and the probability that enemy is there is large. The basis is to position yourself in a way so that you are uncovered from two sides - front and back.
The easiest way to eliminate any threat from one direction is to position yourself at the edge of the map. It doesn't matter if it is sea, wall or artificial border of the map. By positioning yourself like that, only three sides from which you can be attacked remain. To neutralize second side, all you need to do is stand behind any obstacle and all that's left are two sides.
Now you can start looking for some cover that will partially hide you from the front and it will make killing you harder for enemy. An often mistake is to start by searching for cover from the front and leaving one side completely unprotected. If you won't stay in that position for more than few seconds, then the threat is minimal. But with each second risk increase that enemy will show there and kill you before you manage to turn around.
For everyone to understand it better, let's take an example situation. A player stays in one edge of the map. Only thing that he has in front of him is a booth. Let's assume that there is no one on the right. It's not obvious, but the risk that someone will appear there is smallest.
If the player hides behind it, he will partially cover himself from the front and he will have greater chance of winning a duel with enemy lurking from that side. But he will be visible from the left side, which means the center of the map.
If he hides on the right side of the booth instead, then he will be visible only from the front that he sees and back, from where he run. It is best that option he has in that situation.
Obviously, there are many other places on the map to hide. If it is possible, you should search for places that allow you to be covered from the front as well. Best situation is when only player head is visible from behind the obstacle, which makes him a very hard target. Despite that, it shouldn't be always a priority.
In this subchapter you will learn the basic information about controlling weapon, that will allow you to quickly kill enemy. At first general terms linked to weapon stats will be explained, it will make the guide easier to understand.
Recoil makes your weapon pushed up and to the sides. Very frequently weapon has an unbalanced horizontal recoil, it means that it can "kick" itself more to the left or right side. This factor that influence weapon accuracy is visible and can be controlled.
Spread is a factor that makes weapon fly not precisely where you aimed. It increase with each given shot. It is larger, when you're moving and much larger when you're shooting from the hip. It is smaller when you shoot while crouching or lying on the ground.
First shot factor is a value that multiply weapon recoil during the first shot. Always after giving the first shot the rifle "kicks" slightly harder than during next ones. Usually, it is from 1,5 to 3 times stronger. You should keep that in mind when shooting with series.
Muzzle velocity is a speed with which the bullet leaves the barrel. It is important when shooting moving targets or ones that are far away.
Each weapon has their constant recoil values that are always the same. To keep your scope on the enemy, you must make a move with your mouse that is precisely opposite to the recoil. If an rifle is recoiling up and to the right, then you should move your mouse to yourself and to the left when shooting. How much millimeters and how quickly depends on the recoil value of a weapon and its rate of fire. The best way to learn a weapon is entering an empty server and shooting few clips at the wall, and then try to control the recoil until you succeed. That is how you control the recoil. For beginners it might seem difficult, but it will stop being a trouble after you gain some experience. However, it requires a lots of precision, and precision requires low mouse accuracy. Because of that, it is wise to play with low precision setting, but more about that can be learn in the section about settings.
In theory spread control sounds much easier, but on the battlefield it is much more troublesome. Spread is more unpredictable than recoil, the player doesn't see it and must decide based on his experience whether the bullet will hit enemy or not. You control spread by making short breaks in shooting, which means shooting in bursts. Depending on distance and weapon you're using, length and time between bursts can differ.
Rapid fire - this term doesn't require explanation. Use it on distance up to 20 meters. It is most effective when enemy is completely behind a cover.
Long bursts - you're shooting with fusillades of 7-10 bullets, then you're releasing the trigger for as short as possible and you again start shooting with a burst. By doing so, you reset the weapon spread during shooting and won't waste too much time. This method can be used on distance from 10 to even 40 meters.
Regular bursts - you shoot with short, accurate bursts of 3-5 bullets. Differently to previously described method, break between bursts is rather long and before each you must make sure that the scope is in right place. During a break you can hide behind cover. Distance for using this method is 30-50 meters.
Single fire - used on long distance. You can either doze the bullets by yourself, or switch to single fire mode. Shooting with single bullets is effective only if you're aiming at head.
You should remember that values above are rather theoretical and they also varies depending on weapon you use. Your decisions on the battlefield should be based mostly on your own experience, not only the knowledge from the guide, which can be only a help. Because of that, it is good to pick two rifles for each class and gain as much experience with them as possible to have them controlled perfectly. Team DMs are best place for accuracy practice, you shouldn't be lacking targets to shoot there.
Each time you lean out from a cover you risk being killed. You do it all the time, so it is wise to learn how to lean out in such way that enemy waiting for your move will have minimal advantage. You will learn this in this chapter.

When leaning out, you must assume that enemy is waiting for you. It means that you must always have your scope near the eye. You must check all positions, by placing the scope before you lean out of cover, but you don't have to move your mouse while leaning out (look at the graphic). You slowly lean out while checking all places where enemy can hide. If you know exactly where he is, lean out in a way so that you will see only one enemy and only half of your body will not be covered. Don't walk too far away as it is very likely that you will be forced to return in a short while. Don't try to lean out on few enemies at once, as when shooting you're able only to shoot one of them at a time.
If you have leaned out but didn't succeed in killing your enemy, hide back but don't lean out at him from the same spot. If it is possible, change your position, this will allow you to surprise your enemy and give you additional milliseconds to kill him. If you're in a spot where you must lean out from the same place, use prefire described in next subchapter.
Prefire is a technique that can give a great advantage to the player on the battlefield. It is based on shooting before you see enemy. It allows you to kill enemies waiting for you to walk out from a corner.
Prefiring is useful when you must lean out and you suspect that enemy is waiting for you on other side. Nothing bad will happen if he won't be there. Much worse assumption is thinking that enemy isn't there while he is. In theory prefiring isn't hard. You lean out and start shooting before you see enemy, so that first two bullets hits the cover from which you're leaning. Most important factor, that will decide about success or failure of action is knowledge of the map and scope position. You must place it in a way so when you lean out you don't need to move your mouse but instead you already have enemy on sight. Such ability is gained with experience and it require lots of hours played on a specific map. When placing your scope, remember for it to be on the head altitude.
If you find yourself in the middle of battle, enemy can be everywhere and when leaning out you must check all position, just as it was described in one of previous subchapters. But if you're in a safe position, there is no need to waste your time. In such cases, you lean out twice. First, you lean out without aiming and try to only mark your enemies. You don't try to shoot yet. When you will see enemies, hide again behind a cover. Then lean out and use prefiring described in previous subchapter.

If you're in a situation when you're alone and must check two sides at once, then you must pick one side which you will check first. You walk to the wall that is on the opposite side from the one you have picked (for example, when you want to check left side, then you walk to the right side of passage from which you're leaning out). Then you slowly check out the left, in such way that player standing on your right won't be able to see you. If this side seems to be clear, then you move back, walk to the left wall and check the right side.
Battlefield Hardline is a game in which team work is very important, usually it is the key to victory. Playing with other people is also much more interesting and gives much more fun. You should find yourself some friends with whom you will be able to play. They doesn't necessary have to be people you really know. You can join one of many platoons that gather around themselves people wanting to play for fun. To find such platoon, all you need to do is scroll the Battlelog board.
No matter if you're playing alone or with friends, you always must be with someone in squad. Squads consist of maximally six players. In a team (teams are cops or criminals) there are few squads that must cooperate. Squads allow player to participate in various squad actions and gain reputation points which give you access to various perks, about which you will learn more in further part of the guide. When you're playing in squad, you become an additional respawn point for your friends. Because of that, always when you are the last alive squad member, hide somewhere and survive, thanks to that your colleagues will be able to quickly return to the battlefield. Game developers decided to give additional points for actions done in the team, Because of that, you should especially often heal and equip your squad members. A good way to earn additional points is following commander orders. If he, for example, marks some target, like flag, then squad members receive more points for killing on that point territory or for reclaiming it. It doesn't require any additional work and can greatly fasten your level gaining.
Very often players forget about a very handy function which is picking up equipment of killed soldier. You can use it in few very frequent situations.
First situation is picking up operator set. When he dies next to you and you don't have a defibrillator, pick up his equipment and start reanimating him. It will allow you to bring him back to life no matter what gadgets you had with yourself at the beginning of the round.
Picking up equipment can save your life if you're running out of ammo. If you find a body of enforcer, pick his equipment and quickly throw an ammunition box someplace safe. Then you can get your own weapon back and replenish the ammunition.
Personal weapon in Battlefield Hardline is very strong on short distance. Obviously, it is worse in accuracy than main weapons, but it doesn't deal less damage in melee combat. Because of that, next time when you will know that you hit enemy for about 80 health points and you're out of ammo, don't hide to reload, but instead quickly draw your pistol or revolver and finish your enemy. If you will hide, he will probably do the same and heal himself, which would take away your advantage.
Creators of the game has a great thought about what personal weapon give to which class. Because of that, an enforcer, that is running with a shotgun useful on distance smaller than 10 meters, has received revolvers, which allow him to fight on larger distance. Professional has automatic pistols, deadly effective on small distance. Operator and mechanic has pistols, that aren't special in any way and they are best for finishing enemies.
Mini-map is a very useful backup for a player that uses it well. Your allies and enemies marked by your friends are shown on it, just as players that shoot with weapon without suppressor. Markers take form of arrows that not only show you where enemy is, but in which direction he is looking as well. Player should look at the map as often as possible. It should become a habit for a good player. But remember, that it works both ways. Enemy will know where you are if you're not using suppressor. To remain undetected, you should use suppressor, knife or other melee weapons.
To mark an enemy, you must aim at him and press the right button (if you forgot what it is, return to the chapter about controls). After that, enemy will be marked on the screen with red triangle showing above his head and on mini-map - yours and of all your squad members. It is a great help for your whole squad. Additionally, you receive points if someone kills enemy that was marked by you.
If you're in a situation in which you see enemy from far away, but you lack weapon effective on that distance, then don't try to shoot at him as you will only show him your location and waste bullets. In that case, mark him and run to your destination. You should act similarly, when you see the back of enemy hiding behind a cover and you're sure you won't be able to kill him. Mark him and based on the mini-map see control he is up to.
Very frequently when playing on foot 80% of players is focused in the center of the map, where a mindless shootout occurs. It definitely isn't most effective way of fighting, especially on more crowded servers. Usually even if you manage to kill someone, quickly a medic will arrive and will reanimate him, so your squad won't gain any advantage. At the same time, flanks, roads around the center, are usually unprotected. Because of that, much more effective way to fight is to ring enemies and eliminate them when they are turned in the opposite direction. Usually, on the edges of the map there are only few soldiers and after killing them you have a clear path to getting behind enemy lines and eliminating disoriented enemies.
A very common habit is to reload your weapon after each frag. It isn't a good habit. Usually you are capable to kill two, or even three enemies with one clip. If you have more than 10 bullets in your clip, wait with reloading. First check if there are no other enemies around and only after hiding in a safe spot reload your weapon.
Almost each mode in Battlefield Hardline forces one team to assault a specific point. A common mistake is one player mindlessly attacking few enemies at once. It is a big mistake, and players that make it usually add some vulgar words to the chat, saying that other team members lack the courage for attacking. In each mode you should use all available time for slowly, but effective killing defenders one after another.
If you move while shooting, weapon spread increase. It isn't troublesome on distance up to dozen meters, and when fighting on short distance it is even recommended. But very often, players move even when shooting from long distance, which forces them to shoot more bullets at enemy direction. Especially snipers should avoid moving before taking a shot.
First person camera is placed in the middle of player's model. It means, that when he is leaning out, enemy first will see his arm, and only after half of his body will be visible from the cover, he will be able to see that enemy. Because of that, the slower he is leaning out, the greater advantage he gives to his opponent. The player is slower when he moves while crouching or lying. Because of that, when player is leaning out in that way, enemy has more time to kill him, even before the player will be able to see him.
In this subchapter few most important settings will be described, that can help everyone playing Battlefield Hardline.
Usually players set the maximum sensitivity, thinking that it can help them. It is a very common mistake that has great impact on the battles. As you know from the chapter about recoil, it is easier to play with smaller sensitivity. Because of that, player should find himself smallest possible sensitivity that will allow him to play. It mostly depends on the working space for your mouse and how player likes to play. With the most popular mouse sensitivity - 800 DPI, sensitivity in the game should be at level 5-15%.
Speakers very frequently allow you to hear enemy before you see him. For the best quality and volume of the sound, you should set the "war tapes" option.
In online shooters it is very important to have as much frames per second as possible. Their number mostly depends on performance of players computer. You can check it by typing this command in the console: PerOverlay.drawfps 1
Playing with less than 30 frames is much harder. 60 FPS is comfortable for an average player.
So, if you have less than 60 frames, change your graphic settings to low, it should help you increase FPS. It will greatly improve your effectiveness on the battlefield. But you should keep net quality on ultra. It won't reduce the amount of FPS, but it will allow you to spot enemies from larger distance.
You should turn off in graphic options: V-sync, motion blur amount, weapon DOF.
For completing squad actions you receive reputation points. They reset each round. You can select additional perks for them. There are four perk levels, and on each level you must pick one of two perks.
But before you can receive a perk, first you must unlock it. It is done by gaining stars of specific class.
Level 1
Extra Magazines. Increases the number of primary weapon magazines carried.
Fast Climb. Climb ropes, ladders, and walls faster.
Level 2
Fast Ready. Practice allows you to bring your weapons to bear faster after sprinting.
Healing Upgrade. An improved First Aid Pack increases the rate of healing.
Level 3
Fast Aim. Reduces aiming time.
Revive Upgrade. Allows reanimating to full health level without complete preparations.
Level 4
Fast Reload. Reduces reload time.
Fast Swap. Reduces weapons and gadgets changing time.
Level 1
Extra Grenade. Allows you to carry an additional grenade of any type.
Flak Jacket. Reduces explosion damage.
Level 2
Extra 40mm Grenades. Increase the amount of carried 40mm.
Fast Repair. Increase Repair Tool effectiveness.
Level 3
Fast Aim. Reduces aiming time.
Delayed Trigger. Laser mines and sabotage have a delay before activating.
Level 4
Fast Reload. Reduces reload time.
Fast Swap. Reduces weapons and gadgets changing time.
Level 1
Fast Throw. Reduces grenade throw time.
Reduced Fall. Reduce the amount of fall damage.
Level 2
Fast Ready. Practice allows you to bring your weapons to bear faster after sprinting..
Upgraded Ammo Box. Player receive two ammo boxes.
Level 3
Fast Aim. Reduces aiming time.
Extra Charges. Increase the amount of carried and placed C4 charges.
Level 4
Increased Suppression. Increase enemy suppression effectiveness.
Reduced Suppression. Reduce effectiveness of enemy suppressing player.
Level 1
Fast Climb. Climb ropes, ladders, and walls faster.
Reduced Fall. Reduce the amount of fall damage.
Level 2
Advanced Spot. Target are marked for longer on the mini-map.
Fast Unspot. Reduces the time you are visible on the mini-map.
Level 3
Hold Breath. Player can hold his breath longer.
Low Profile. Until you ran, you're not visible on security cameras.
Level 4
Fast Reload. Reduces reload time.
Delayed Trigger. Laser mines and sabotage have a delay before activating.

Requirements:
7 stars for operator service - you receive them for earning points as an operator class.
25 assault rifle kills
10 teammates healed
5 revive coins - you receive one coin for 5 revives in a round.
Requirements:
7 stars for enforcer service - you receive them for earning points as an enforcer class.
25 Shotgun or Battle Rifle kills
Resupply 10 teammates
250 Points of damage deflected with the Shield
Requirements:
7 stars for mechanic service - you receive them for earning points as a mechanic class.
25 SMG kills
Repair 5 vehicles
Destroy 10 vehicles with Sabotage
Requirements:
7 stars for professional service - you receive them for earning points as a professional class.
25 Sniper Rifle kills
5 Laser Tripmine kills
5 camera coins - you receive one coin for every 10 assists in a round earned by marking enemies with camera.
Requirements:
Unlock G17
Gold star for operator service - you receive them for earning almost 300000 points as operator class.
10 operator specific guns and/or gadgets purchased
200 Assault Rifle kills
Unlock the Operator's tier 4 Reputation track in 10 different matches
15 First Aid Pack Coins - you receive one coin for 8 heal bonuses in one round.
15 Revive Coins - you receive one coin for 5 revives in a round.
Requirements:
Unlock Bald Eagle
Gold star for enforcer service - you receive them for earning almost 300000 points as enforcer class.
10 Enforcer specific guns and/or Gadgets purchased
200 Shotgun or Battle Rifle kills
Unlock the Enforcer's tier 4 Reputation track in 10 matches
15 Ammo Resupply Coins - you receive one coin for 8 supply bonuses in a round.
15 Ballistic Shield Coins - you receive one coin for 100 points of damage deflected with the Shield in a round.
Requirements:
Unlock .410 Jury
Gold star for mechanic service - you receive them for earning almost 300000 points as mechanic class.
10 Mechanic specific guns and or gadgets purchased
200 SMG kills
Unlock the Mechanic's tier 4 Reputation track in 10 matches
15 Repair Tool Coins - you receive one coin for 8 repair bonuses in a round.
15 Anti-Vehicle Coins - you receive one coin for two vehicles destroyed in a round.

Requirements:
Unlock MAC-10
Gold star for professional service - you receive them for earning almost 300000 points as professional class.
10 Professional specific guns and/or gadgets purchased.
200 Sniper Rifle kills.
Unlock the Professional's tier 4 Reputation track in 10 matches.
15 camera coins - you receive one coin for every 10 assists in a round earned by marking enemies with camera.
15 Marksman Coins - you receive one coin for hitting enemy in the head from a distance at least 250m.
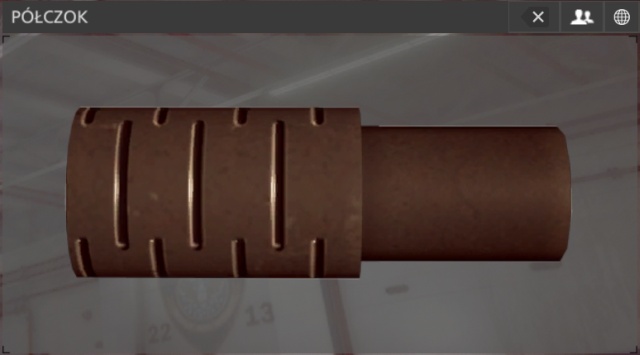
Additional iron sight is mounted under 45 degrees and allows you to aim at close targets, even with weapons with a scope. This addition is especially useful for snipers that have mounted scope of large power.
Additional sight is mounted under 45 degrees and allows you to aim at close targets, even with weapons with a scope. This addition is especially useful for snipers that have mounted scope of large power.
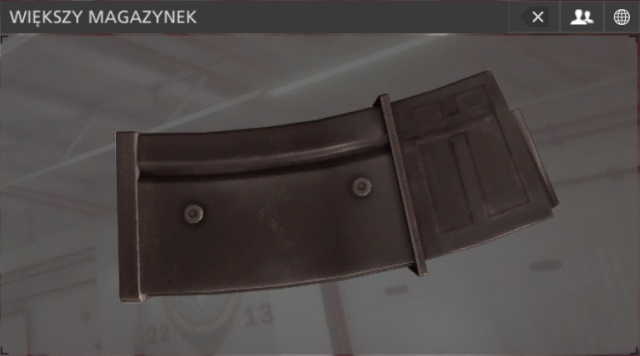
Extended magazine improves its capacity by 5 bullets. It increase weapon spread while moving by 50%.
Flashlight can blind your enemies. But it shows enemies your location.
Tactical light differs from the standard one in that it lights only when you're aiming.
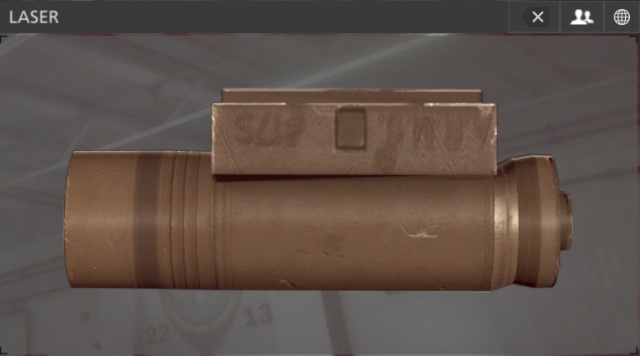
Laser improves weapon accuracy when shooting from a hip by 25%.
Stock is available only for machine guns. It reduces weapon spread by 50% while aiming and by 15% when shooting from a hip.
This attachment is available only for shotguns. Thanks to it, shotguns shoot with a single bullet, not one filled with pellet. It makes weapon deal more damage on medium distance, but much harder to use in close distance.
It is available only for sniper rifles. It allows you to give successive shots without the need to leave the aiming mode.
Muzzle brake is an attachment that reduces vertical recoil by 17,5%, by 50% reduces side recoil and by 50% reduces the time of break between bursts after which spread resets.
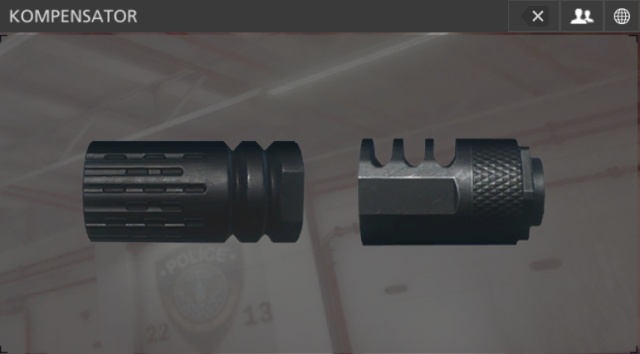
Compensator reduces by 40% vertical recoil, by 17% increase side recoil and increase spread while moving by 30%.
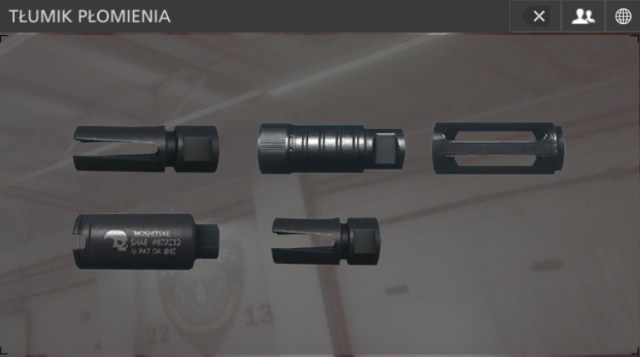
Flash hider reduces shoot blink, but it has no impact on weapon control.
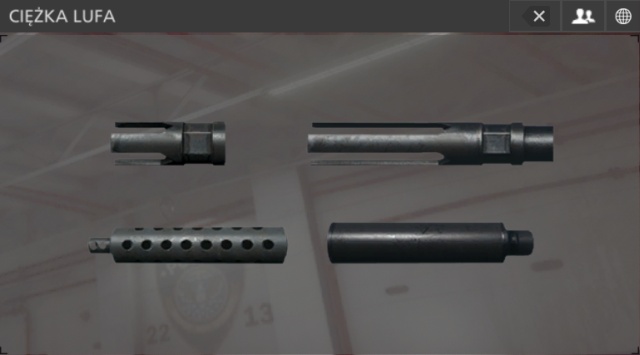
Heavy barrel reduces by 20% up and sides recoil, by 50% reduces spread when shooting while standing and by 50% increase spread when moving.
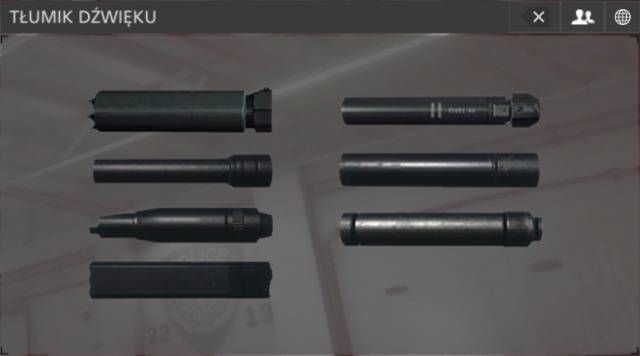
Suppressor silences weapon, thanks to which after you shoot you won't be visible on the minimap. It is a perfect choice for players that like to flank enemies and shoot them in the back. Thanks to the suppressor enemies won't know from where someone is shooting at them for longer. Suppressor has no impact on weapon control.
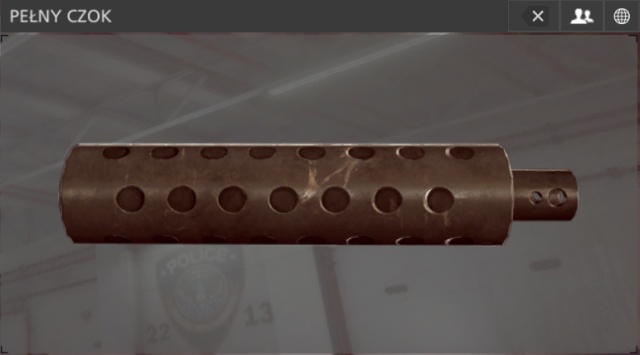
Full choke is an attachment available only for shotguns. It greatly increase the focus of shot pellet, by the cost of hip accuracy reduction. It shouldn't be used with the straight pull bolt.
Half choke works the same as full choke, except that both positive and negative effects are halved.
Angled grip reduces first shot factor by 33%.
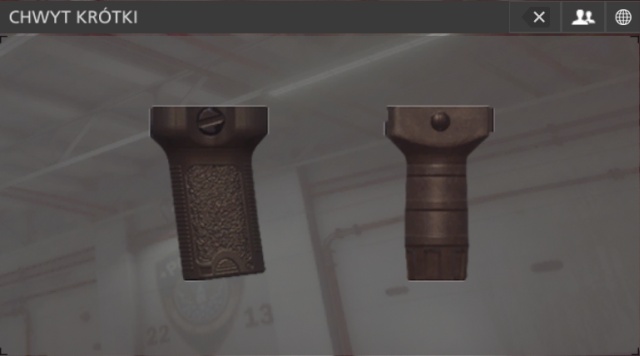
Stubby grip reduces by 50% spread while aiming and reduces by 15% spread when shooting from a hip.
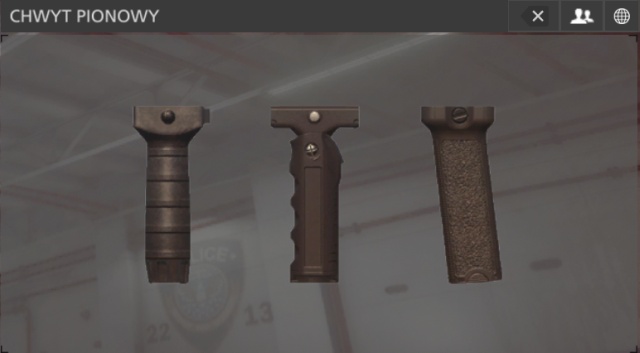
Vertical grip reduces by 50% spread while moving and reduces by 25% spread when shooting from a hip.
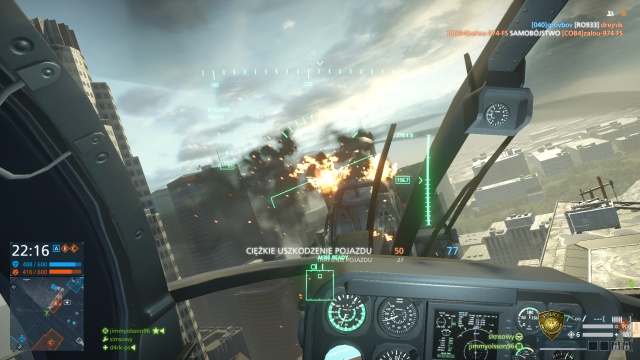
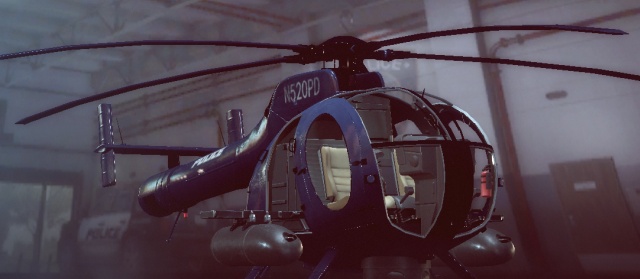 Attack helicopter
The majority of fights, in Battlefield Hardline, are fought by the infantry. The only vehicle designed especially for the purpose of attacking enemy units is the attack helicopter. In the case of criminals, it is called the Rogue Chopper, whereas for the police, it is called the Patrol helicopter. Its characteristics are small size and high maneuverability. The attack helicopter has been armed with a 50mm cannon. These characteristics make this vehicle excellent, both for fighting the enemy infantry and all the enemy vehicles in the game.
The attack helicopter has two seats. Next to the pilot, there is a passenger seat, who also mans the minigun, perfect for eliminating agents and criminals.
It is not too difficult to control the attack helicopter. It is not too fast, but it is lightweight and maneuverable. Thanks to this, even a beginner can quickly learn how to fly it. Mouse sensitivity for vehicles should be a bit higher than for the infantry. Low mouse sensitivity makes it easier to aim, but there sometimes is a need to perform a quick maneuver, at which point it is better to have sensitivity set at a higher level. Each player needs to balance this for himself. It depends on your preferences and your mouse pad.
Keys W and S increase thrust. You use these keys to control the altitude. Keys A and D control yaw of the helicopter. Pushing the mouse away results in pitching the machine nose down, whereas pulling it, pitches the nose up. Moving the mouse to the sides rolls the machine to the left and to the right.
Remaining keys:
Camera change- C,
Free look (cockpit) - PPM,
Fire - LPM,
Weapon swap - F, 1, 2,
Countering system - X.
To fly forward, you need to pitch the vehicle forward. By the same token, if you want to go back, you pitch it back. You change direction with keys A and D. Rolling is not used that often. To learn how to fly the helicopter, it is best to access an empty server with the "Midtown" map and maneuver the helicopter around buildings.
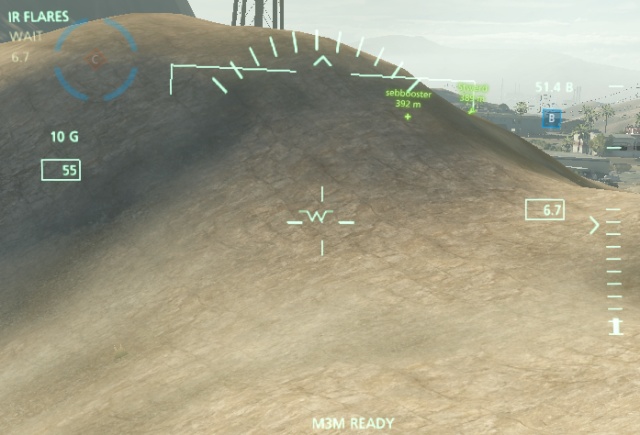
As a matter of fact, there only are two important instruments in the cockpit. One of them is the countering system status in the upper-left corner. "READY" means that the system is ready to be used, whereas "WAIT" means that it is being reloaded. Underneath this status, you can also see the time remaining, until the system is reloaded.
The other important instrument is the altimeter on the right. It is especially useful, while flying backwards.
Upgrade
Slot
Points
Price
Description
HMG
Basic weapon
0
$0
A cal.50 machine gun for AT ammo.
Minigun
Basic weapon
5000
$60000
A minigun of high firerate; it is especially useful against criminals and the police.
M3M
Basic weapon
5000
$83200
A cal.50 machine gun of high firerate; uses AT ammo.
Flares
Counter
0
$0
Flare launchers that interfere with the trajectory of the enemy projectile.
ECM
Counter
10000
$30000
A countering system that makes it temporarily impossible to track your vehicle and interferes with the trajectory of the enemy projectiles.
Fire extinguisher
Counter
10000
$16800
When the vehicle is on fire, you can use the fire extinguisher to put the flames out and restore the machine to functional condition, which allows for starting the regeneration process.
Gyrostabilizer
Upgrade
8500
$1000
This system increases maneuverability when the vehicle is severely damaged.
Counter Surveillance
Upgrade
8500
$1500
Makes shorter the time, for which the vehicle is visible on the minimap, after it is marked.
Proximity Scanner
Upgrade
8500
$61200
Scans the area around the vehicle and marks enemy positions on the map.
Air Radar
Upgrade
8500
$53200
The minimap is replaced by the radar that marks targets flying around your vehicle.
Gunner Zoom Optics
Gunner: optics
0
$0
Zooms in the vision, which allows the gunner to target and eliminate opponents at longer distances.
Gunner INRV Optics
Gunner: optics
9500
$13200
A night vision device that works perfectly in partial lighting or in darkness.
Gunner Thermal Optics
Gunner: optics
9500
$37500
Night vision with black and white image that shows heat signatures at all ranges.
Gunner Aircooler
Gunner upgrade
12500
$2950
An advanced mechanism that allows faster recovering from weapon overheating.
Gunner ammo belt
Gunner upgrade
12500
$4400
An advanced mechanism that increases the vehicle's rate of fire
Gunner Proximity Scanner
Gunner upgrade
12500
$61200
Scans the area around the vehicle and marks enemy positions on the minimap.
The best kit:
Basic weapon: M3M is a machine gun that combines the features of a slow, and strong HMG and of fast minigun. It is the most efficient against the other helicopters.
Counter: Flares are the countering systems that allow the pilot to escape and hide, thanks to which the enemy will not be able to take another shot.
Upgrade: Gyro Stabilizer is the best available Upgrade. It allows the pilot to escape to a safe area and repair the helicopter, if it is severely damaged.
Gunner: optics: Thermal vision is the best upgrade for the gunner's optics. It makes targeting considerably easier and, which follows, eliminating them.
Gunner upgrade: Ammo belt is a Gunner upgrade that increases the rate of fire, which results in shorter times necessary to kill an opponent or destroy a vehicle.
Since attack helicopters have not been armed with any rockets, dogfight is very easy. Always wins the team that starts shooting as the first, or shoots more accurately. The most important thing is that you do not get surprised by the opponent.
The bottom line is that the pilot should look at the minimap every several seconds. The time before another helicopter appears, after the previous one has been destroyed, is 80 seconds. This means that after a helicopter is destroyed, the pilot has roughly around that much time to take a breath. While flying helicopter, it is important not to stray too close to the enemy base. This is the most frequent mistake that causes the death of pilots. You can gain the upper hand,, over the opponent, thanks to the advantage of the height. It is always easier to attack while above the opponent.
As for shooting itself, both the pilot and the gunner should shoot in bursts, in order not to overheat the guns. Also, it is very important that you compensate for the movement of the enemy vehicle. Learning that takes, first of all, experience with the machine and hours in the air.
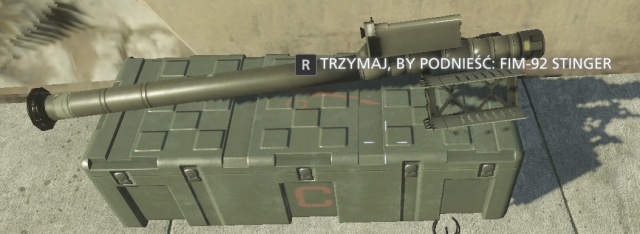
FIM-92 StingerA great threat for the pilots of attack helicopters, in Battlefield Hardline, are shoulder-launched, self guiding FIM-92 Stinger rockets. These are distributed around the map so, they can be picked up by the player of any class. These are the "Fire and Forget" type of rockets and the only thing that the operator needs to do is lock on the helicopter. If practice, the only means of defending against them are flares, but they take, as long as, 25 seconds to reload.
It is due to the threat posed by the rocket launchers that you should keep as close to your base as possible. Immediately after you hear the lock on sound, you should interrupt your attack, and use flares if the rockets have been launched, after which you hide close to your base. You can hide behind a mountain or a building. You should not expose yourself up until flares gave been reloaded. While waiting for that, you can repair the helicopter, if it is damaged.
In Battlefield Hardline, everyone can deal damage to the helicopter. Any weapon can be used for that, also vehicle-mounted machine guns. If the endurance of the helicopter drops to 40 points, maneuverability drops and sometimes flames appear, which makes the vehicle lose even more points, with time.
This should be avoided, because this involves the necessity to land and repair the vehicle. This is why, if there are 50 points left, you should fly to a safety, where the vehicle regenerates automatically. If the place is safe enough, you can repair the vehicle yourself, or let the gunner do that.
Sometimes, when you are flying by yourself, you need to land and repair the chopper. It is then very important to return to the battlefield, as quickly as possible. There is a trick, thanks to which you can start faster. All you need to do is press the F3 key (on PC) to change your position in the cockpit, and return to the pilot's seat with the F1 key. Then, you will take much shorter to take off.
Continuous fire is disadvantageous, both for the pilot and the gunner. You lose much less time while you are shooting in bursts. The breaks between the individual bursts are shorter than the break to cool down the gun. You can use that time on correcting the setting of the optics.
A very important maneuver that needs to be learned by every beginner pilot is the backward flight. To do it, you simply need to pitch the nose of the helicopter up. In itself, this is not too difficult, but you need to keep an eye on the altimeter and be aware of the ground behind you. Thanks to this maneuver, you can return to your base faster, than when you turn the machine, which is frequently done by beginner players.
If you are going to flight a chopper, either as the pilot or the gunner, always have the repair tool on you. Without it, your flight may end quickly, because you will be unable to do anything, if the vehicle is damaged to the level of 40 points. Apart from that, you receive points for repairing the machine, if there is an ally with you.
In Battlefield Hardline, apart from attack helicopters, there also are Transport Helicopters. The icons that appear on the minimap, after they have been marked, are similar.
 The top icon represents the transport helicopter, whereas the bottom one represents that attack helicopter.
The easiest way to tell the difference between them is by the tail. It is much smaller, in the case of the attack helicopter.
The operator class, in Battlefield Hardline, has been supplied with assault rifles and assault rifles. They are very versatile and highly effective, especially at a short and medium distance. Weapons available for the enforcer, and especially assault rifles, are considered to be the best in the game. They do not deal the highest damage possible, nor are they the fastest, and in the majority of academic comparisons they are average. But it is this "average", in combination with the ease to use is what constitutes their strong point. The best assault rifles are the M16A3 and the M416. They are available for both sides, and they are very similar in both versions.
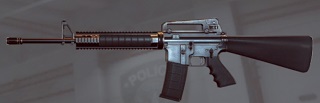 M16A3
M16A3Available for
The police
Rate of fire
800 rounds per minute
Maximum damage (up to 40 meters)
28
Minimum damage (from 60 meters)
18
Bullet's nozzle velocity
650 m/s
Ammo capacity
30 + 1
Reload time, when the clip is empty
2,72 s
Reload time, when chambered
2,38 s
Number of shots to kill
With M16A3, at a distance of up to 46 meters, you need to hit the opponent 4 times, into the chest, for a kill. At a range between 47 and 56, you require 5 shots, above 56 meters - 6.
Recoil
 Recoil of M16A3
The M16A3 has the tendency for climbing and drift to the right. This means that to shoot an opponent, you need to drag the mouser towards yourself and slightly to the left. The best way to learn how to shoot a weapon, is enter an empty server and shoot at a wall.
Spread
The main reason for the M16A3's efficiency is the weapon's low spread. It allows you to conduct continuous fire, even at a distance of 25 meters. Between 25 and 40 meters, you need to take short breaks between the individual bursts and, at a longer distance, you need to fire in short bursts or in single bullets.
Hip shooting
One of the few weak points of the M16A3 is its accuracy, while hip-shooting. It leaves much to wish for and at the distance of 3 meters, it is better to aim. This may be remedied by the use of a laser sight, although even that does not make the weapon fit for a typical close quarters combat.
Attachments
Without any doubt, the M16A3 needs to be mounted with a sight with no increase in zoom. Preferably, this should be one of the collimators, e.g. KOBRA.
As for the accessories, it is best to pick the laser sight, which increases hip accuracy and makes it easier to hit targets over very short distances.
As an attachment for the nozzle, the Heavy Barrel is worth its value, which makes it a nearly flawless weapon, and accurate one over a longer distance, thanks to the decrease in recoil. Heavy Barrel increases recoil in movement, which is already high so, it is going to require you to stop, before you start shooting.
As for grips, two items are noteworthy. The first one is the stubby grip, which decreases recoil even more. The other option is the Vertical Grip, which increases hip accuracy, in movement.
Upsides
The greatest advantage of the M16A3 jest is definitely the narrow spread. Additionally, the easy-to-control recoil and only four shots it takes to kill an opponent make this weapon one of the best ones, if not the best one over medium distance. One of the upsides of the M16A3 is, inarguably, the bullet's nozzle velocity, which makes it easier to hit moving targets.
Downsides
This assault rifle is weak in combat over very short distance. The reason for that is, surely, the average rate of fire and, at close quarters, faster weapons reign the battlefield.
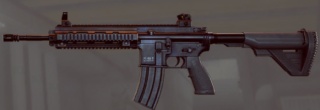 M416
M416Available for
Criminals
Rate of fire
850 rounds per minute
Maximum damage (up to 40 meters)
28
Minimum damage (from 60 meters)
18
Bullet's nozzle velocity
600 m/s
Ammo capacity
30 + 1
Reload time, when the clip is empty
2,6 s
Reload time, when chambered
2,21 s
Number of shots to kill
In many respects, the M416 is similar to the M16A3. It is, among others, that the damage model looks the same. At the distance of up to 46 meters, you need to hit the opponent 4 times, into the chest, to kill. Over the distance between 47 and 56 meters, this requires 5 bullets, whereas over 56 meters - 6.
Recoil
 Recoil of the M416
Firing bullets in a bursts cause the vertical climb and a slight travelling to the right, of the M416. This means that to compensate for that, you need to pull the mouse towards yourself and slightly to the left.
Spread
The spread of the M416 is nearly identical with that of the M16A3. It allows you to conduct continuous fire, even at the distance of 25 meters. At the distance between 25 and 40 meters, you need to take short brakes between the individual bursts, whereas over a longer distance, you need to shoot in short bursts or single shots.
Hip shooting
The spread of the M416, while hip shooting is a bit narrower than in the case of its direct competitor. Still, it is considerably wide and it is, inarguably, one of the downsides of this rifle. This may be remedied with the use of laser sights but, even with that installed, this is a typical short-range weapon.
Attachments
Without any doubt, the M416 needs to be mounted with an RDS. Preferably, one of the collimators, e.g. KOBRA.
As for accessories, the laser sight is the best choice, because it increases accuracy, while hip shooting, and makes it easier to hit targets over very short distances.
As a nozzle attachment, the Heavy Barrel is excellent, which makes it a nearly flawless weapon, and accurate one over a longer distance, thanks to the decrease in spread. Heavy Barrel increases spread in movement, which is already high so, it is going to require you to stop, before you start shooting.
As for grips, two items are noteworthy. The first one is the stubby grip, which decreases recoil even more. The other option is the Vertical Grip, which increases hip accuracy, in movement.
Upsides
The main reason, for which M416 is worth taking on, is the narrow spread. In combination with the easy-to-control recoil, and four bullets it requires for a kill, it makes this lethal weapon one of the best ones in the game.
Downsides
This assault rifle does poorly over short distances. The rate of fire here is a bit above the average but, at short quarters, faster weapons reign the battlefield.. Apart from that, the accuracy in movement and hip shooting, of the M416 is poor.
The Mechanic class can use two machine pistols. These are immensely effective weapons, over short distances. Their features are a high rate of fire and good hip accuracy. Some of the PDWs deal even higher damage than some of assault rifles and carbines. The best ones are K10 - the master of close quarters combat and UMP-45 - a weapon that works a bit better over medium distances.
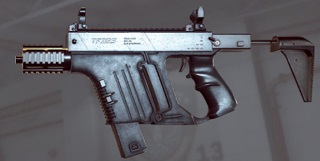 K10
K10Available for
The police
Rate of fire
1200 rounds per minute
Maximum damage (up to 10 meters)
34
Minimum damage (from 30 meters)
12
Bullet's nozzle velocity
310 m/s
Ammo capacity
25 + 1
Reload time, when the clip is empty
2,23 s
Reload time, when chambered
1,5 s
Number of shots to kill
At the distance of up to 10 meters, you only require 3 bullets into the chest to kill, 40 are required for 4 the distance of 18 meters, whereas the number of necessary bullets rises abruptly, at the distance of 30 meters, where you need as many as 9 bullets.
Recoil
 Recoil of the K10
Recoil of the K10 is not too difficult to control. Recoil to the left and to the right compensate for each other and the vertical climb is not too high. To counter it, you simply need to pull the mouse back.
Spread
K10 is a weapon designed for short distances only. Its spread is not too wide and this does not cause problems, while shooting at the distance of up to 10 meters - at such distance, you can fire in continuous fire. At the distance of 20 meters, you need to take short breaks between the individual bursts. The K10 is useless at a distance longer than 25 meters. This is due to the high rate of fire, which empties the clip in no time at all. Also, due to the pattern of damage, it is better to use a revolver, at such distance.
Hip shooting
A great advantage of the K10 is a very good hip accuracy. If you combine this with a laser sight, you can rely on the weapon even at the distance of 5 meters.
Attachments
Definitely, it is best to mount an RDS on the K10. It may be a collimator, or even an iron sight. Over the distance, for which you most frequently use this weapon, this makes not much difference.
Definitely, the best accessory for this weapon is the iron sight. This greatly improves hip accuracy of the weapon.
The K10 does not require any attachments that would increase its accuracy. Over short distances, bullets fly wherever you aim the weapon. This is why, it is best to attach the suppressor, which does not affect the accuracy, and thanks to which you remain unspotted on the minimap.
Upsides
Definitely, the greatest advantages of the K10 are the rate of fire and damage dealt. Thanks to them, the weapon kills enemies, over short distances, very quickly. Also, relatively good hip accuracy, and accuracy in movement, should be remembered.
Downsides
Unfortunately, there also are downsides to the K10. Due to the high rate of fire and ammo capacity of 25 bullets, you run out of ammo in the blink on an eye. This PDW deals very low damage, at the distance of 30 meters. You then require as many as 9 bullets to kill the enemy.
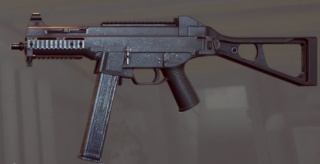 UMP-45
Available for
Criminals
Rate of fire
600 rounds per minute
Maximum damage (up to 15 meters)
34
Minimum damage (from 30 meters)
20
Bullet's nozzle velocity
320 m/s
Ammo capacity
25 + 1
Reload time, when the clip is empty
2,73 s
Reload time, when chambered
2,25 s
Number of shots to kill
With the UMP-45, you need to hit the opponent 3 times into the chest, to kill at the distance of up to 15 meters. Between 16 and 24 meters, you require 4 bullets and, at the distance of 25 meters and higher, you need 5 bullets.
Recoil
 Recoil of the UMP-45
Recoil of the UMP is very easy to counter. You do not need to move the mouse sideways, because recoil to the left compensates for recoil to the right.
Spread
The spread of the UMP-45 is not as narrow as in the case of attack rifles, but the rate of fire of the PDW is quite low, thanks to which spread is not too much of a problem. At the distance of 15 meters, you can conduct continuous fire, but at the distance of 20 meters, it is better to take short breaks, because you need to 4 hits at such a distance and the, ammo capacity is barely 25 bullets. While using the UMP, it is also a good idea to aim, the first shot, to the head.
Hip shooting
UMP-45 has a decent hip accuracy. However, this is a small consolation, because at the rate of fire, of 600 rounds per minute, it is still easy to lose the fight over a short distance. In such a situation, it is a good idea to aim to the opponent's head.
Attachments
You do not need any sight with zoom increase, for the UMP. As an optic device, one of collimators will be best for the weapon.
The UMP-45 is not a weapon designed for close combat so, none of the accessories are required. The laser sight may prove useful sometimes, but it gives away your position.
The composition of attachments, best for the accuracy of fire, is the Heavy Barrel and the stubby grip. They, predominantly, decrease the spread, which makes the weapon more accurate.
Upsides
In comparison with all the weapons in the game, UMP definitely does not hold one of the head positions. However, this is the best machine pistol for medium distances. It is very important because the mechanic needs such a weapon in many situations, e.g. after he leaves the attack helicopter.
Downsides
The greatest disadvantage of the UMP-45 is its low rate of fire. In spite of high damage dealt, it is going to cost you lots of time to kill an opponent at each distance. The UMP also has a small clip, due which you always should have a revolver on you.
The enforcer in Battlefield Hardline uses shotguns and battle rifles. These are completely different weapon types. Shotguns are deadly over very short distances. Using them, you can kill an opponent, in one shot, even at the distance of 15 meters. Battle rifles, on the other hand, are a more accurate type of automatic weapon that deal high damage at low rate of fire. Both of the weapons are difficult to control.
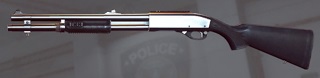 870P MAGNUM
870P MAGNUM is an automatic pump-action shotgun. You can say that there are two faces of this weapon, depending on the amount of used ammo.
870P MAGNUM - shells
By default, your shotgun uses shells that contains small-sized metal pellets. Each one deals 15-fold damage, at the distance of 16 meters. Whether the enemy dies or not, depends on how many pellets hit him. With pellets, you can kill the opponent in one shot, up to the distance of 15 meters. At around 20 meter, you usually need 2 well-aimed shots.
Attachments
While using the 870P, you do not need to pick any sight. At the distances, at which you fight with this weapon, you only require an iron sight.
As an accessory, it is best to use the laser sight, which increases hip accuracy.
A very good attachment is also the full choke, which significantly reduces the spread of pellets and improves the weapon's accuracy. However, it reduces the accuracy of an aimed shot.
Upsides
The greatest upside of the 870P is the immense damage dealt over a short distance. Apart from that, the shotgun has a good hip accuracy and the opponent may receive damage even if the weapon is not perfectly aimed.
Downsides
The obvious downside of the shell-firing 870P is the low range at the distance at which it may be lethal for the opponents. At short distances, everything depends on the first shot and if you miss the target, you may not have another chance anymore.
870P MAGNUM - 12G Slug
If you pick this accessory for your shotgun, it does not fire shells anymore and 12mm slugs instead. At the range of up to 12 meters, it kills in one shot. You deal minimum damage at the range of, at least, 50 meters to 38 meters. Thanks to its damage patters, the weapon can be used both at short and at medium range.
Attachments
The 870P with 12G Slug, should best be used with sight without zoom increase. It is not necessary for distances that you use shotgun at.
The accessory is, of course the 12G Slug. There is no point in combining that with choke or half choke.
Upsides
Definitely, the greatest advantage of the 870P with 12G Slug is its effectiveness, both over short and medium distances. At the distance of 12 meters, it kills in one shot. Over medium distances, it can also deal considerable damage to the opponent.
Downsides
With 12G Slug attached, it is much more difficult to hit the opponent, over short distance. Times between the individual shots, in the case of the pump-action shotgun, is long and you may die, before you take another shot.
Shell vs. 12G Slug
It is impossible to state, authoritatively, which one of the two is better. Thanks to shells, you may be at an advantage, over short distance. With full choke attached, you can kill opponents in a single shot, even at the distance of 15 meters, whereas it deals 100 damage only up to the distance of 12 meters. Apart from that, while using the 12G Slug, you need to be accurate, whereas you can allow yourself less accuracy, in the case of shells. You can easily use it to fight, even at the distance of 40 meters. Shells, on the other hand, become ineffective already at the range of 20 meters.
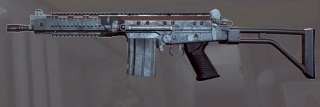 SA-58 OSW
Available for
Criminals
Rate of fire
650 rounds per minute
Maximum damage (up to 20 meters)
43
Minimum damage (from 50 meters)
24
Bullet's nozzle velocity
840 m/s
Ammo capacity
20 + 1
Reload time, when the clip is empty
2,5 s
Reload time, when chambered
1,8 s
Number of shots to kill
Battle rifles deal high damage at a low rate of fire. Using the SA-58 OSW, you need 3 bullets to kill at the distance of 35 meters. Between 36 to 48 meters, you need 4 bullets, whereas at the distance of 49 meters, you need to hit the opponent, on the chest, 5 times.
Recoil
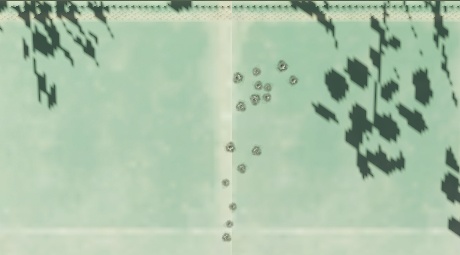 Recoil SA-58 OSW
As you can see in the above screenshot, the recoil of this rifle is quite big. The top shots hit the wall as high as in the case of assault rifles. However, you need to remember that the ammo capacity of the SA-58 is lower by 10, and its rate of fire is much lower. The travel to the right is slightly bigger so, in order to counter it, you need to give the mouse a strong pull back slightly to the left.
Spread
In the case of the SA-58 OSW, spread is much less of a problem than recoil. To maintain accuracy, it is a good idea to take breaks between the individual bursts, even at short distances, thanks to which the crosshair returns to its initial position. At the distance of up to 50 meters, you can easily fire bursts of 3 shots, and at a longer distance, you can easily try firing single shots. It is a good idea to aim at the head then.
Hip shooting
SA-58 OSW does not amaze with its hip accuracy. The weapon can be effective thanks to high damage dealt, in spite of that. If one of the rounds connects to the head of the opponent, you only need another one to the chest to kill them. Over distances longer than 3 meters, though, it is a good idea to aim first.
Attachments
Although the SA-58 OSW is good for medium-range combat, or even for long-range combat, it is not a good idea to take any sight with zoom increase. This will only make it more difficult to control recoil. This is why, as an optics device, it is better to pick one of collimators.
While using the SA-58, short-range encounters should be avoided. For this reason, the weapon requires no accessories. Sometimes, laser sight may prove useful, though, but it often gives away the position of the player.
A muzzle attachment that decreases the vertical climb, and makes it easier to control the rifle, is the compensator. Unfortunately, the price to pay for using it is the increased muzzle climb and decreased accuracy of continuous fire.
The best grip for this rifle is the angled one, which reduces the recoil of the first shot.
Upsides
The greatest advantage of the SA-58 OSW is damage dealt over short and long distances. Also, the spread of the weapon is low, thanks to which you can kill opponents at considerable distances, with appropriate control maintained.
Downsides
The downside of this rifle is, definitely the recoil that is difficult to control. It can overburden beginner players, but the more advanced ones should be able to handle it. Another downside of the rifle is its low ammo capacity.
In Battlefield Hardline, specialists can choose from two types of sniper rifles. One of them is bolt-action rifles, where you need to place a bullet in the chamber, and semi-automatic ones. The former ones deal lots of damage and they have been designed for long distances. Semi-automatic rifles, on the other hand, are very weak in this installment of the game. They deal as much damage as the SA-58, mentioned in the previous sub-chapter, at twice as low rate of fire. This is why none of the semi-automatic rifles has been mentioned in the chapter about the best weapons.
 Scout elite
Available for
Both teams
Rate of fire
85 rounds per minute
Maximum damage (up to 45 meters)
75
Minimum damage (from 90 meters)
51
Bullet's nozzle velocity
640 m/s
Ammo capacity
10 + 1
Reload time, when the clip is empty
4,3 s
Reload time, when chambered
2,85 s
Number of shots to kill
Scout elite deals relatively low damage, as for a bolt-action rifle. At each distance, you need to shoot the enemy twice, on the chest or once on the head.
Attachments
Scout elite is a sniper rifle that is perfect for aggressive combat, side-by-side with enforcers, or operators. For this purpose, the ACOG (4X) or TA 648 (6X) sight is perfect.
The accessory that the sniper is going to find the most useful is the Straight Pull, which allows you to fire two bullets in a row, while remaining scoped in.
The sniper rifle needs no other attachments.
Upsides
Scout elite is the best bolt-action sniper rifle for an aggressive sniper. Its rate of fire is the highest of all and also has the greatest ammo capacity, whereas the bullet's nozzle velocity is the highest. Also, this rifle is highly accurate, as regards hip shooting.
Downsides
The greatest downside of this rifle is relatively low damage dealt. It does not kill in one shot into the chest, at any range. Often, you get only one opportunity and if you miss the head, you do not have enough time left to take another shot.
 .300 KNOCKOUT
Available for
Both teams, after mission "Specialist (Syndicate)" is completed
Rate of fire
60 rounds per minute
Maximum damage (up to 50 meters)
100
Minimum damage (from 80 meters)
50
Bullet's nozzle velocity
480 m/s
Ammo capacity
5 + 1
Reload time, when the clip is empty
4,5 s
Reload time, when chambered
3,2 s
Number of shots to kill
The .300 KNOCKOUT is a weapon that deals the highest damage in the game. Up to the distance of 50 meters, this rifle kills in one shot to the chest. Above that distance, you require two shots to the chest, or one to the head.
Attachments
This rifle has been designed for long-range combat. What is appropriate for it, then, is the Rifle Scope (8X) or the Hunter (14X), depending on the map.
The accessory that the sniper will find the most useful is the Straight pull, which allows you to take another shot, while still scoped in.
The sniper rifle needs no other attachments.
Upsides
The greatest and, actually, the only advantage of this rifle is damage dealt. This is the only weapon in the game that kills the opponent in one shot to the chest, at the range of 50 meters.
Downsides
This rifle is useless in an aggressive game. Its ammo capacity and rate of fire are too low for that. Inarguably, a big disadvantage is also not too high bullet's nozzle velocity, which makes you compensate for the speed, or the distance of the target.

In Battlefield Hardline campaign you play as a cop - Nick Mendoza. Thanks to that, player no longer have to limit himself to killing all encountered enemies. Now he can immobilize them as well, by showing them his badge. He can also stun them with a taser. It allows player to choose in each mission either he wants to play them silently, or shoot enemies in more traditional way. Playing silently is much better scored.
Two additional features have been implemented in the game. They aren't required for completing it, but they make game more interesting. First one is marking some enemies as wanted. For eliminating such enemy without killing him bonus points are given. It is a way to force player to play silently in some parts of the game. Second feature are commonly known collectibles. On the map you can find various evidence linked to cases of main protagonist. Scanner makes finding them easier, as it shows the amount of evidence (in a specific area, between one checkpoint and another), its direction and distance to the closest one.
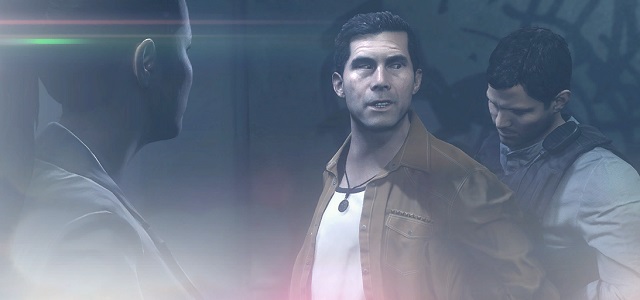 Episode 1: "Back to school"
In first part of this mission the game mostly shows player what he will be able to do during the rest of campaign. From jumping and crouching, to subduing and throwing decoys. Activating the hints will be very helpful, as not all functions that player uses are described in options.
 Mark Tap
Main part of the mission starts after Tap's interrogation. He will be entering the building in which he wants to find Tyson. You must follow him with your scanner. First, locate him and hold the fire button. Then follow him and scan all people in the building.
After, you will have to mark in the same way enemies that will walk out of two trucks. What's important, one of them - Kent Lawrence - is wanted. Such people should be eliminated, but not killed, as it is rewarded.
Before you get the wanted one, first you must arrest two criminals in the building. To do so, pick your badge and both of them will move their hands up. Aim alternately on one and another until you get close to one of them and cuff him.
Eliminate enemies silentlyThen you must get to the building. To remain undetected, first eliminate the enemy on your right. Sneak up on him and subdue him. After that, walk to the door and split enemies with a decoy. You can use a taser to eliminate them.
Inside, another enemy awaits you. He is observing few entrances at once, what can be seen on the mini-map. Wait for him to look somewhere else and eliminate him quietly. After that, join your companion. On the first floor your task will be similar. You must eliminate enemies, one after another. Remember that if you're using taser, each try must be successful as otherwise you will be detected.
You will find collectibles in next two rooms - evidence in a case. For collecting them you are awarded with weapons and combat packs. First two evidence can be found in envelopes on stands in first room, the last evidence is a box in second room.

Few more enemies are waiting for you on the ground floor. Try to eliminate them silently, and if you have killed someone, then change your position as another enemy will come and start looking for you in the place of kill. Enemy that is searching for you has a question mark above his head.
At the end of the mission you will find yourself in Tyson's house. Khai is being shot and you must protect yourself alone. All that time, you must hold the button responsible for stopping bleeding. In second hand you have a revolver. It kills enemies with one shot. They can walk in from various entrances. Key to success is not panicking and calmly aiming before each shot.
 Episode 2 - Checking out
Second mission starts with a short shootout on the parking. Remember that you can find equipment in the back of the car in which you have arrived. You can take bulletproof vest and a first aid kit if you have unlocked them.
Next you will have to quietly eliminate few enemies. Similarly to the first mission, you must surprise your enemies, show them the badge or take them down with a taser. You will find some evidence to further cases here as well.
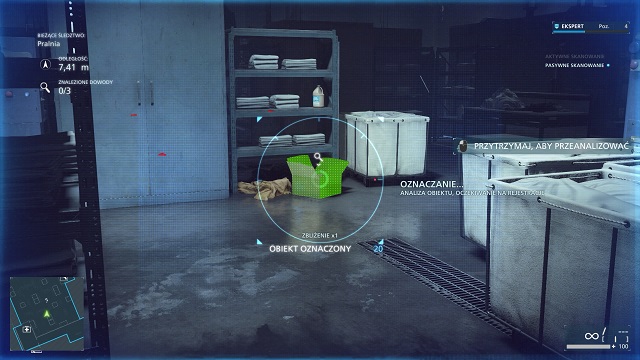
Immediately after entering the room you should see a box lying on the ground. Evidence can be found inside.
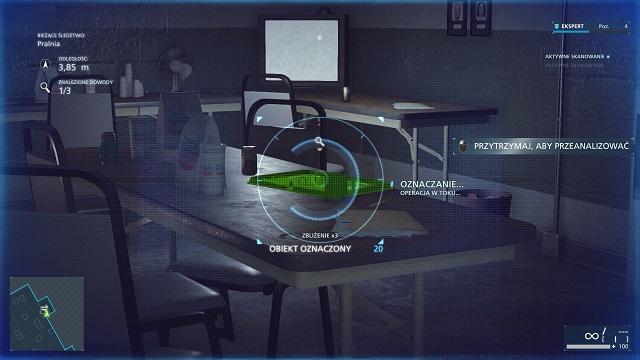
After that, walk up on the starts on the right to the room in which another evidence can be found on the table.
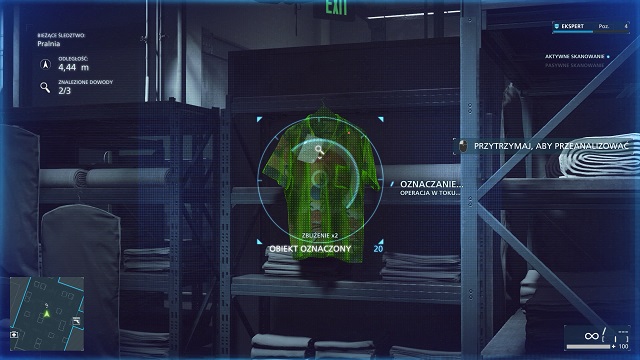
Next one is inside the large room, it is a shirt.
After that you will have to chase Leo. Try to eliminate enemies quietly until you reach the place with two pools. There you must fight few enemies. Remember, that you can pick up weapon dropped by defeated enemy.
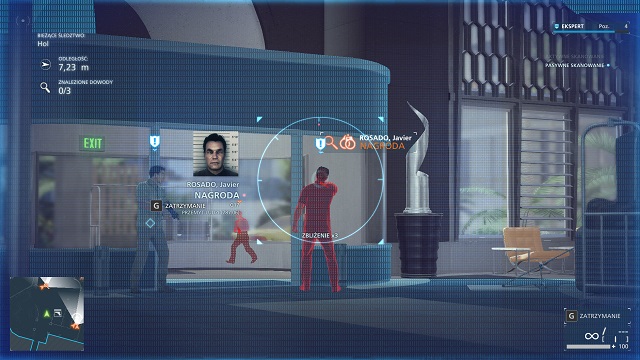 Javier Rosado
Next step is to eliminate enemies in a hotel. While crouching, walk to first two and dispose of them. Then eliminate the ones on your right. You will have to use the badge to avoid them entering dangerous territory. After that, take down the two standing near the exit. The man on the right is Javier Rosado, wanted with a search warrant. When you take him dawn, eliminate the guy standing in front of the hotel. After that, another enemy will come, he will be looking for you. After you eliminate him, walk upstairs.
Here you will find further evidence:
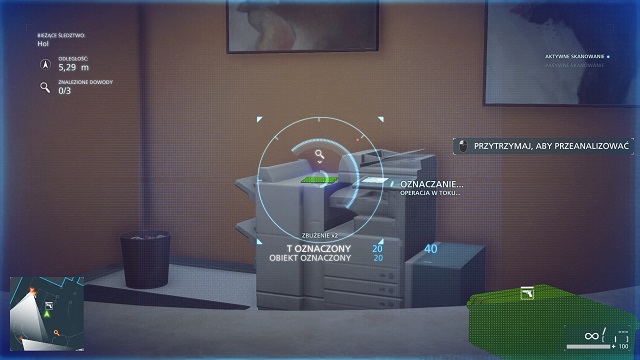
First is in the printer in reception, in front of the entrance.
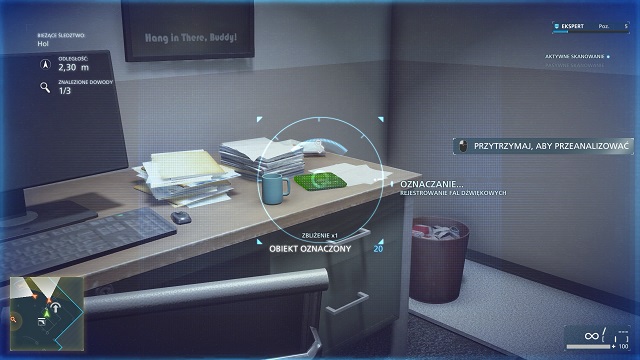
Second is in a small room, to which door can be found in the reception.
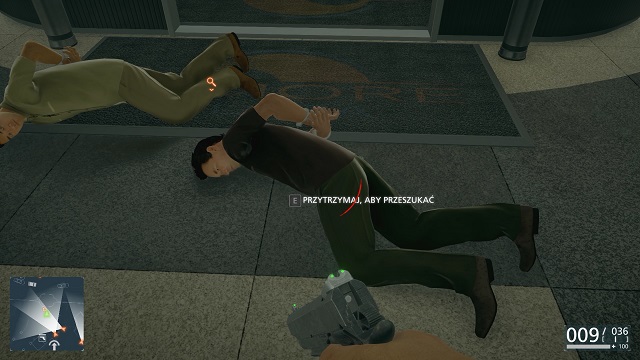
Third is near subdued Javier Rosado. You must walk towards his body and search it.
After you leave the room with Leo, reinforcements will ride to the hotel and they will be looking for you. You can try to eliminate them one after another, but if you're feeling strong enough, you can just attack them directly.
Last phase of the mission is running away in an armored vehicle. It crushes everything on its way, so running away shouldn't be hard.
 Episode 3: "Gator Bait"
Mission number 3 starts with swimming on a boat behind specific points on the lake. After wharfing you must mark a cargo. When you're doing it, you will be attacked by an alligator. While fighting hit, you must press specific buttons quickly.
After that, you will see three enemies. After you scan them, you will find out that one of them is wanted. Eliminate them quietly. Two evidence can be found there. One of them is cocaine that fell out of one of enemies, second is a barrel.
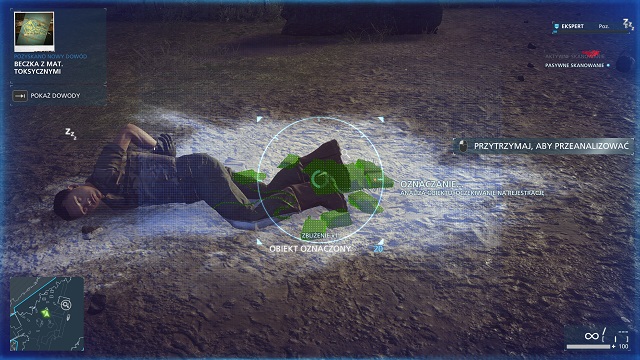
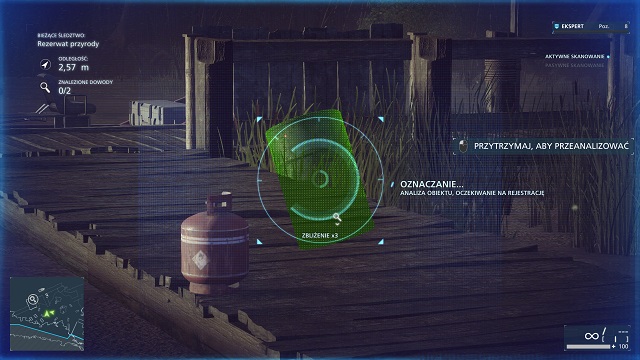
To find another evidence, after entering the boat turn around and then swim ahead until you see a tower. Stop near it and use the hook to walk on it, then get to the smaller tower with a rope. There you will find a map that is another evidence.
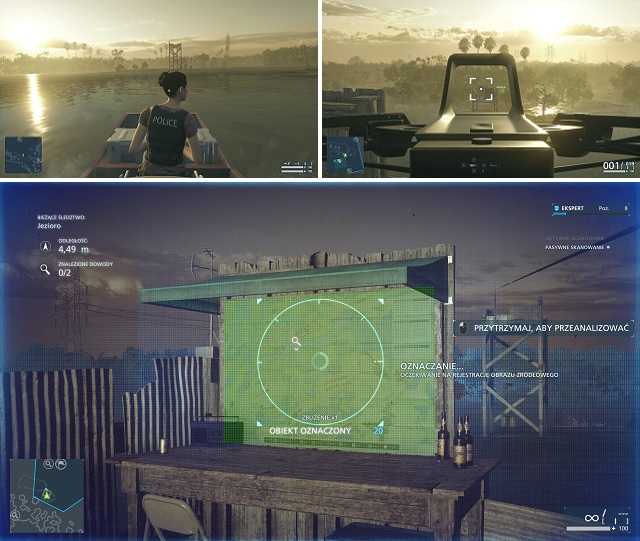
After collecting it, return to the boat and swim to the right. You will see a farm. Walk on the tower and scan all enemies. One of them is wanted. At this point, once again you can choose whether you want to complete the mission by quietly eliminating one enemy after another or frontally assaulting all enemies. Three hidden evidence can be found in the farm. Thomas Bell, the wanted enemy, will have one of them, second are gumboots in the building on the right side, and third is a dead alligator in the middle of the farm.
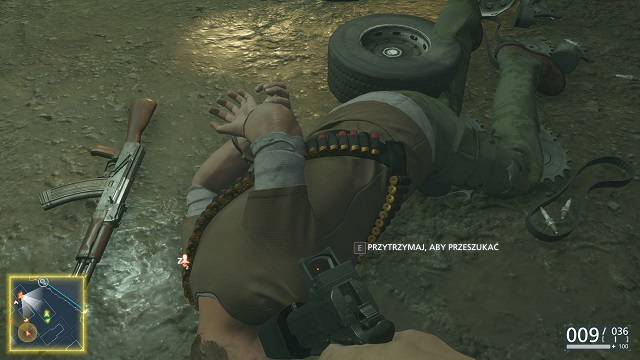
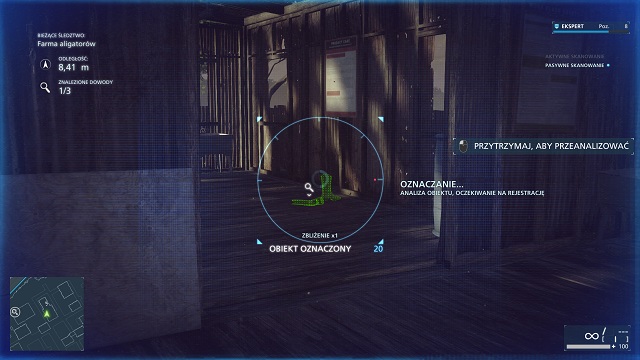
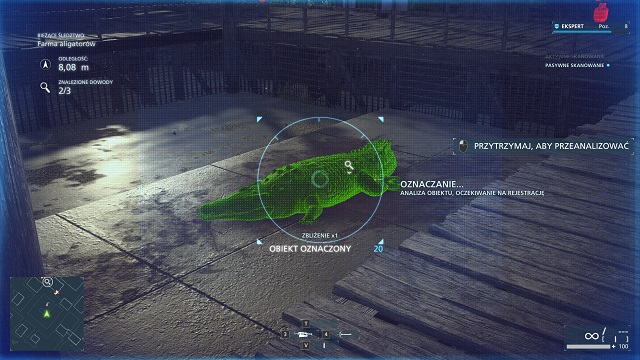
Next step is turning 180 degrees and swimming to a small tower on the right shore. Stop near that tower. Evidence is a barrel that you must scan.
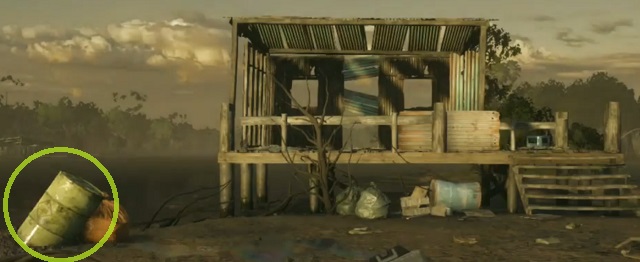
Next, when you return to the boat, swim to your right. Swim until you see another low tower. Get on it with a hook and scan cocaine that is the evidence.
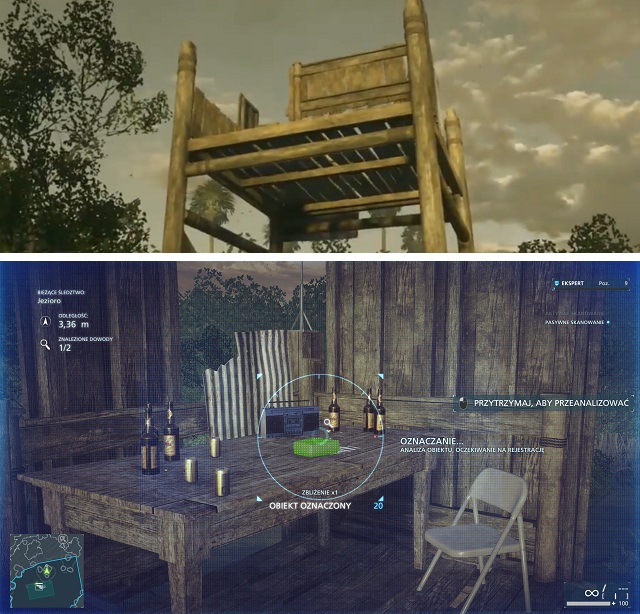
Now you can move to the last place in this mission. From the water tower scan the neighbor. Among the marked people wanted Nathan Brown can be found. As usually, you can decide by yourself whether you want to complete the task quietly or noisy. If you choose the latter, don't forget about deactivating the alarm system.
Four evidence can be found here.
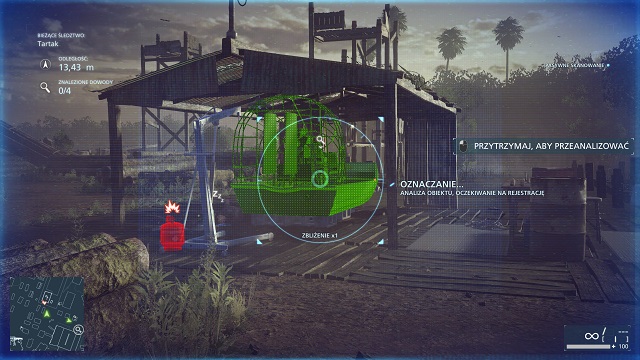
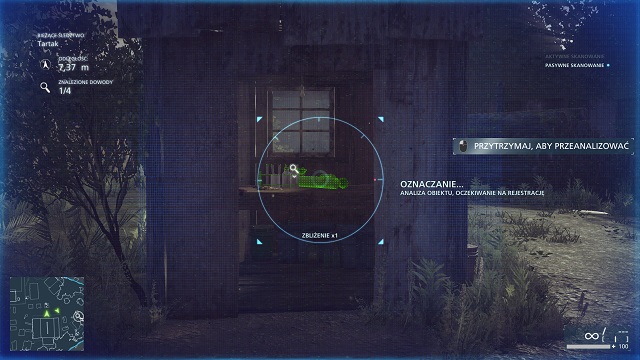
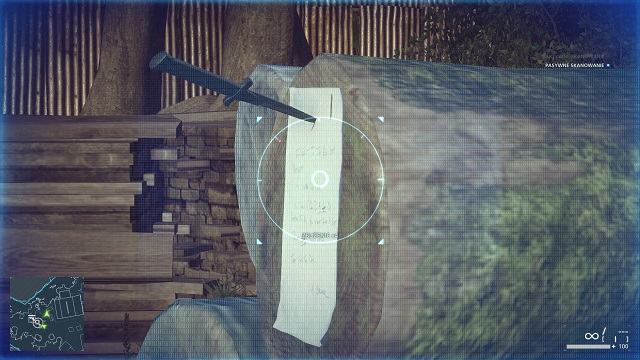
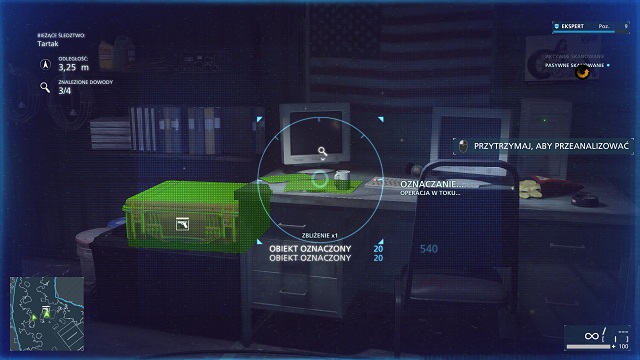
Then you arrive at stadium, where you eliminate enemies. After that, a shootout in the hangar awaits you. Before that try to find AKM which will be much more useful than the weapons available on low level. During the battle itself, don't hurry. Eliminate enemies one after another and try aiming at the head.
 Episode 4: "Case closed"
You start the mission in a large warehouse. There are no enemies inside, but you can find five evidence there. First two are in the room in which the player starts.
Next one is on the first floor, in the second room on the left, and another one in the room ahead from the previous one.
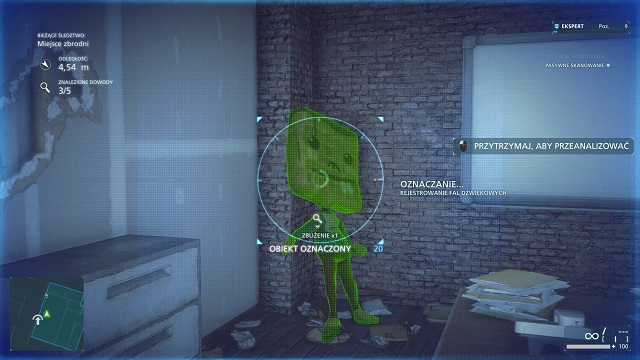
When you get to the office, take the painting from the wall and you will find a safe. Scan it to decipher the code. In the office you will find evidence as well. Then return down the same way you got there.
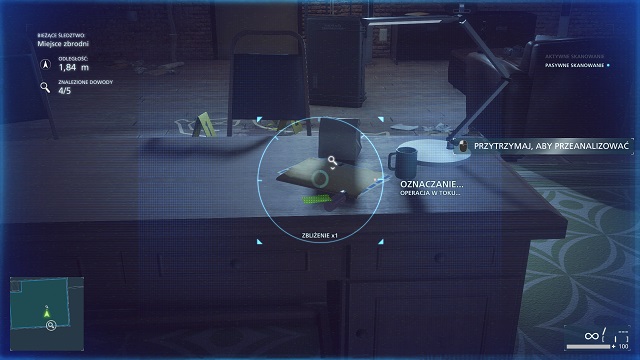
Next phase of the mission will be a hard fight under the warehouse. Enemies are positioned around and on the roof. Inside is the wanted one - Philip Evans. If you want to complete this mission quietly, you will need to be very patient. Shooting at enemies is much quicker solution. But you should leave the wanted one for the end and treat him with a taser.
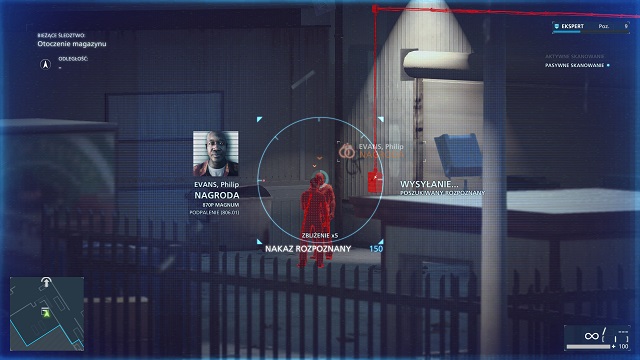 Philip Evans
AKM will be best equipment, and as accessories choose taser and grappling hook. It will be easier to fight from the roof. You can get to the roof on the right side by a ladder at the back, which is to the right from your position. After eliminating enemies below, you can get to the middle roof with a rope. From there, eliminate remaining enemies and get close to the wanted. Eliminate him.
There is a poster in the room in which you're currently - another evidence. From this room, you can also take evidence that is in the room below.
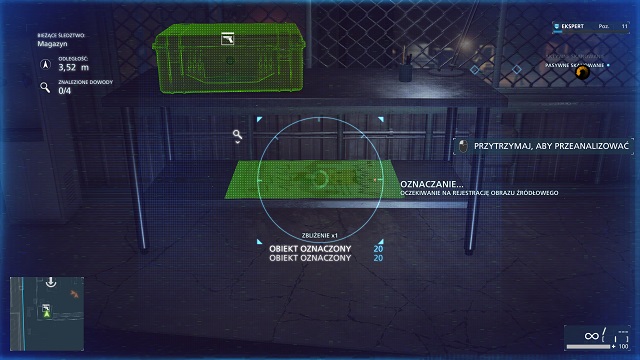
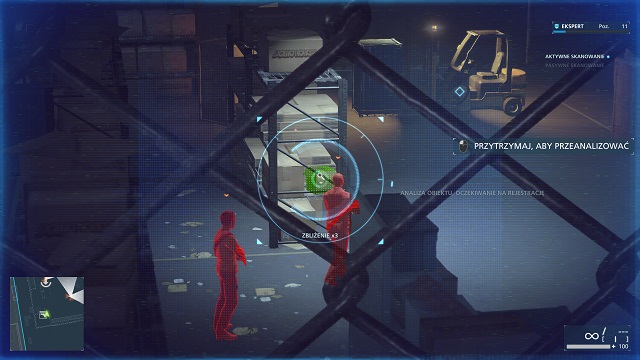
After that, walk to the room that is directly below the one in which you're currently in. There you will find two new evidence. You don't have to take care of enemies yet.
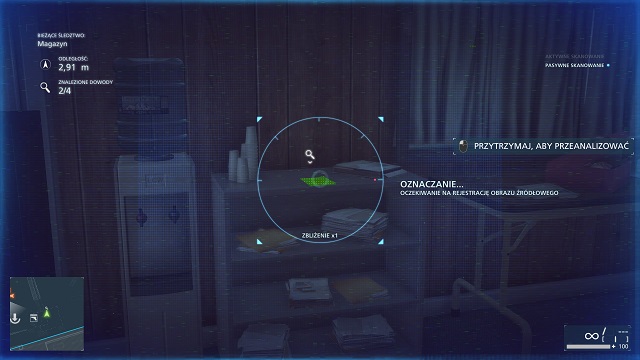
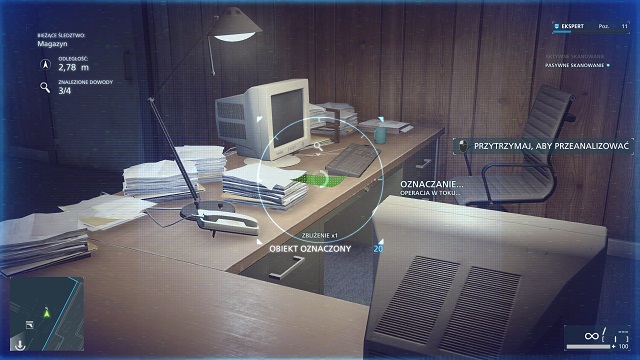
Now you can return to enemies. Dispose of them and get to another point.
Then, you will be on a cannabis field. You can decide whether you want to finish this part quietly or not. Only when the fire starts you won't have any choice and will simply have to kill all enemies. After you're done with it, run in the marked direction.
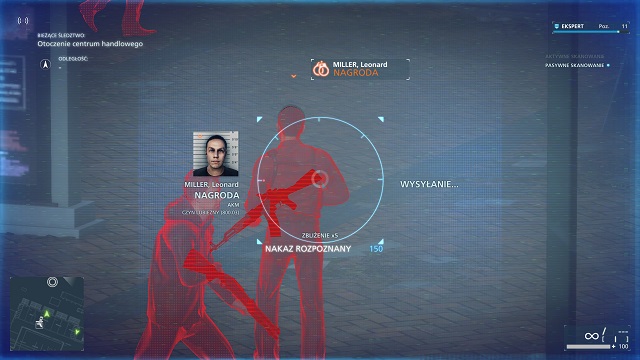 Leonard Miller
In next phase, you will be on a parking. Scan enemies from there, one of them is wanted Leonard Miller.
 Franklin Diaz
After that, you will enter a shopping mall. Franklin Diaz will be there. Eliminate him, then get to Khai and help her.
 Xavier Gonzalez
Now it's time for Xavier Gonzalez - last fugitive in this mission. Eliminate both him and his men, and then run to the spot marked on the map with human icon. A storm will be an obstacle, due to him some buildings are falling on the street. You must make a slalom between them.
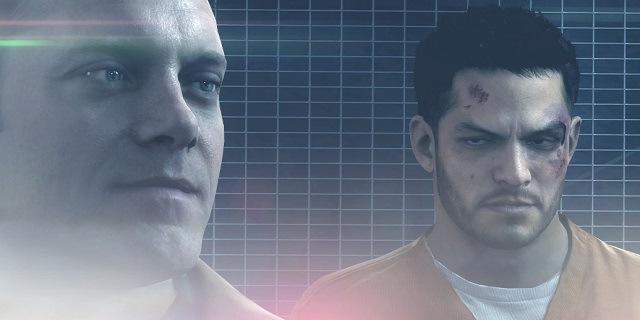 Episode 5: "Gauntlet"
In mission number five our protagonist is a fugitive from the prison. This time, you must get to the other edge of the city without the help of badge or taser. There are no evidence in this mission.
During this mission remember about the mini-map where cops are always marked. Their seeing radius is shown there as well. If you're crouching, they don't hear you and will see you only if they're close. Cops are positioned in random spots, so it is impossible to set a perfect route. In this mission you just need to be patient.
When you meet another prisoner, allow him to walk first. Cops will catch him and one of the roads will open.
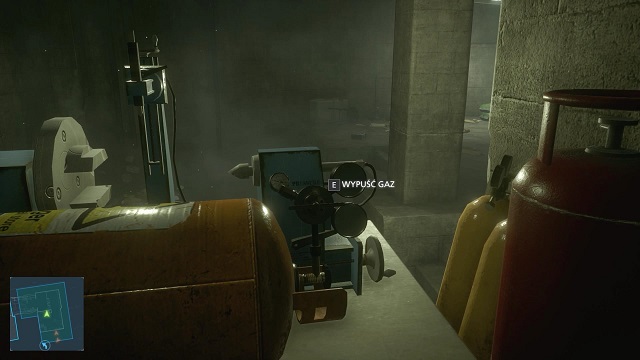
In next part, cops are well positioned and you must distract them. To do it, enter the house marked on the map with green color. Get to the basement, pick up blow torch and unscrew the gas, then run away. After the explosion you will have much easier road.
You will get up with no trouble. But when you will be walking down, you must watch out for unfriendly cops and for helicopter lights.
 Episode 6: "Out of Business"
In the "Out of Business" there is much more shooting that sneaking. During this mission you can find 3 wanted fugitives and 9 evidence.
You start the game with entering a car showroom. During the break-in there is no one inside so you can easily pick two evidence. One of them is lying on the table in the middle, the second is also on a table, but in the room from which you will steal data.
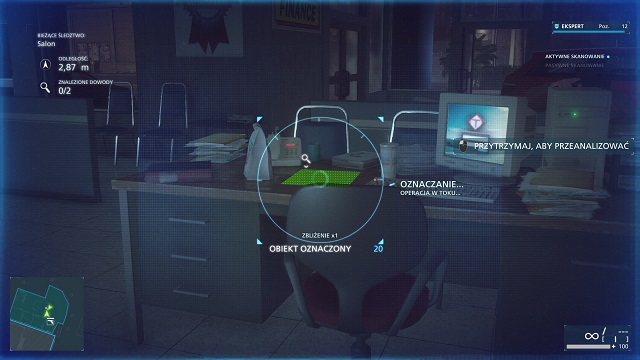
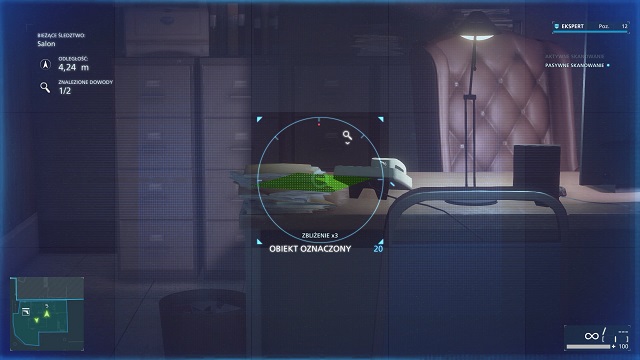
During the data copy, first enemies will arrive. Before they show, walk to the chest with equipment and pick up bulletproof vest and first aid kit. Those gadgets are very useful in this mission. When enemies arrive, hide behind a desk and stick out on single enemies. After copying ends, pick up the data carrier and run through the window to the previously parked car.
Then get to the parking. There you will have to kill few enemies and get a car. Run through the canal forward, until you will see an exit to the road on your right.
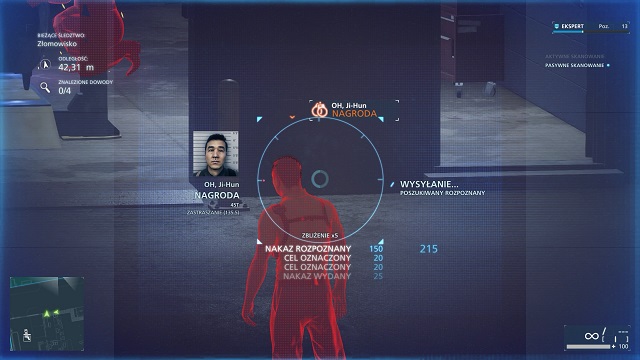 Ji-hun Oh
You will see enemies through the window in the garage in which you currently reside. Scan them, one of them is Ji-hun OH - wanted. What's important, there is another wanted man in the same location - James Mun, whom you don't see yet.
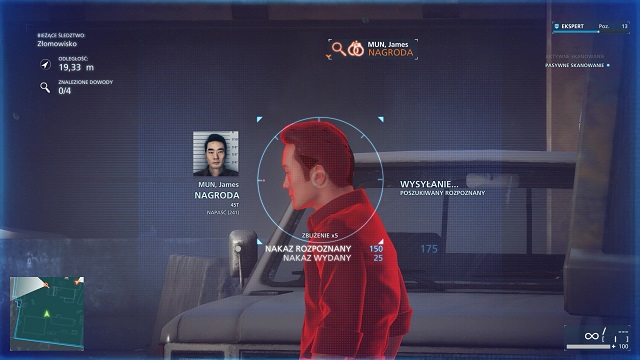 James Mun
You will find new evidence here.
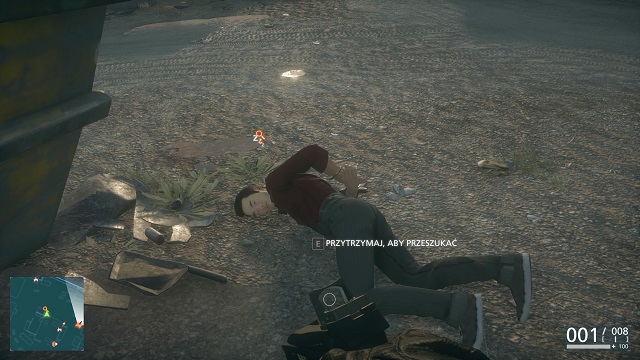
One is near the body of James Mun.
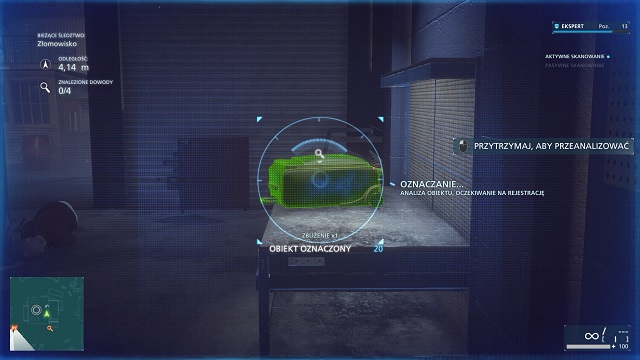
Second is a case lying in the garage.
Next point of the mission is eliminating a crane operator and getting to the back of the car. Then you will have to get to the building ahead of you. You will find few enemies inside, including the wanted Edgar Kwok.
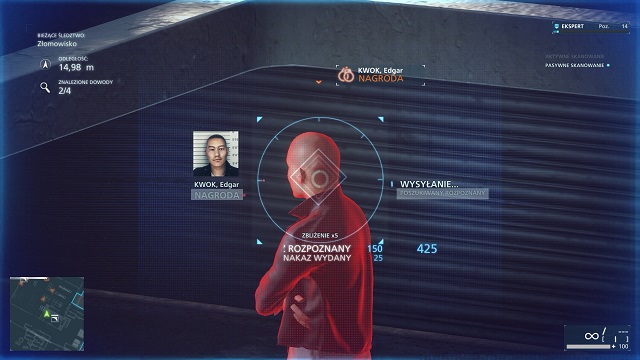 Edgar Kwok
A comfortable way to eliminate enemies is with the use of taser, thanks to which you don't have to be very close to enemies. After you take care of them, you can find two new evidence in here.

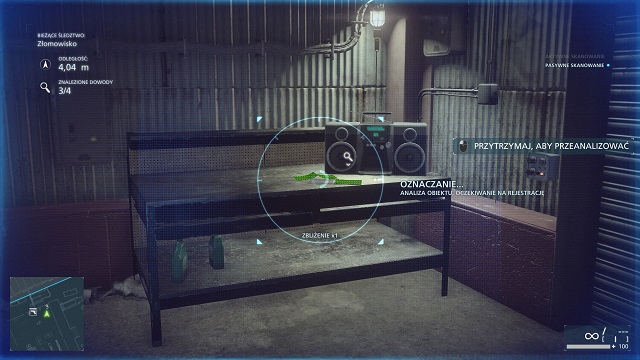
When taking the laptop from the back of the car, someone will attack you. Be ready to press the fire button at the right moment.
When you will return, you will encounter another wave of enemies. This time they will know where you are and silent elimination is not an option.
Then a chase will start. At first turn left, then before the train and straight to the canal. Stay inside until a visible exit will show. If you will be at shooter seat, try to aim at enemy passengers.
Last part of the mission is investigation of the workshop. There is a lot of enemies here. You can choose whether you want to shoot them or eliminate them quietly. After you dispose of them, you can start looking for evidence.
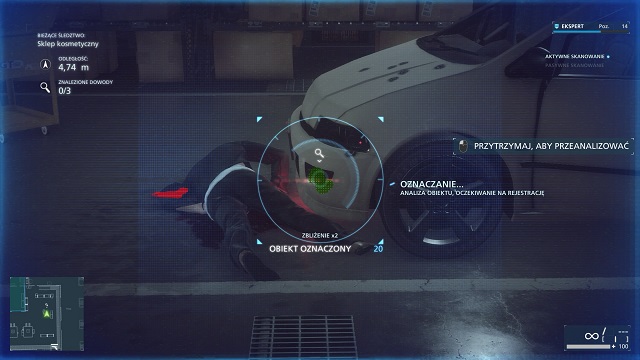
First evidence is in the front bumper of a small, white car.
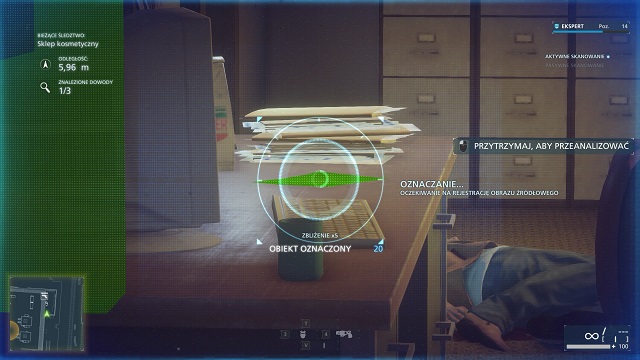
Second is in the room near the entrance to the building, from the railway side.
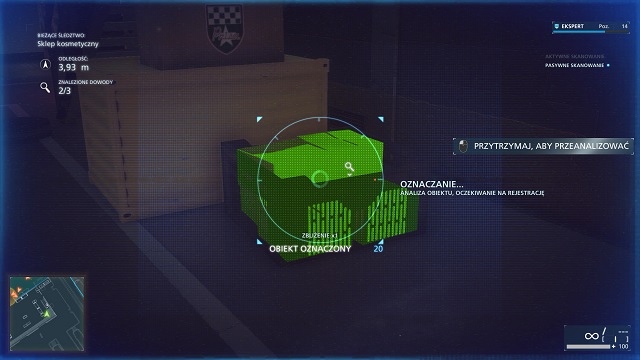
Third is in the corner, behind the car with first evidence.
 Episode 7: "Glass Houses"
Seven mission should be played rather silently. You have pretty much freedom in this one, so if you hurry you can miss some evidence easily. There are total of 9 of them in this level. You can also get rewards for two wanted criminals.
After entering the house you will be in a garage and you will find first evidence. It is a sticker on the side of the truck. When you enter the house, check the first room on the left. On the table you will find further evidence.
Then a long introduction to the mission awaits you. For a long while you won't be facing any enemies.

After you walk out of the room, scan the lounge. One of the people setting below is the wanted criminal - Cameron Briller. Get to him by eliminating his men on the way. When you will be on the stairs show him and his friend your badge. After you cuff the wanted one, search him. He has another evidence.
Now move right and walk through the kitchen. Before you get to next part of the mission, find another evidence. It is located in a hidden room. Instead of opening the door leading outside, walk left. There you will find a hidden passage in the wall, activated with interaction button. On the left side of the hidden room you will find another evidence. Now you can continue outside.

After silently eliminating one enemy on the stairs, walk to the left, down through stairs. One enemy will be waiting in the shooting gallery. Silently cuff him. Collect evidence lying around you.
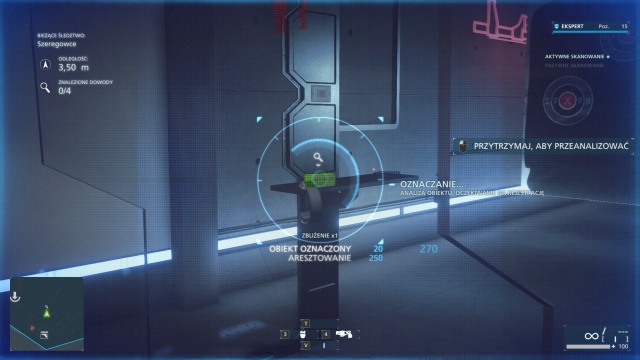
Now go to the tennis field on the other side of the mansion. Wanted criminal will be there - Marvin Thomas. Sneak up on him and show him the badge, then subdue him.
Walk upstairs. Eliminate the gardener and go to the left. There will be a container with tear gas - it's an evidence. After you collect it, you can go to the next part of the mission.
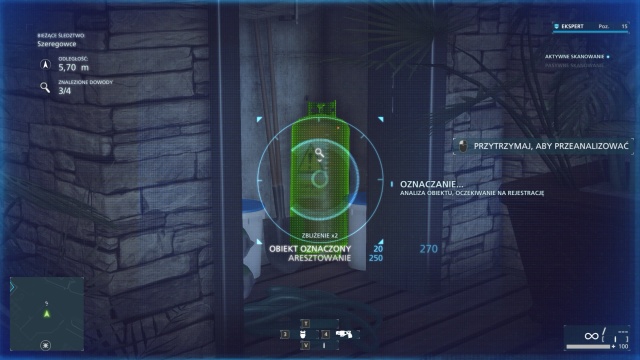
When you will be in the bedroom, don't open the chests lying on the floor yet. First go to the drawer on the left side and open it. Inside you will find the last evidence in this mission.

At the end of the mission there is a shootout in the building. Most important thing is for you not to remain in the middle of the room, instead hide somewhere in the corner so enemies won't be able to attack you from few sides simultaneously.
 Episode 8: "Sovereign Land"
"Sovereign Land" has not only typical for the campaign elements like sneaking up and shooting. In some parts of the mission you will be using some heavy weapons like in Battlefield 3. On this map you will find two wanted enemies and 9 evidence.
Main part of the mission starts after you leave prison. There are no serious trouble at the beginning of severs, as there is only one way. When you get to the crossroads, walk left. Then attack the man near the electricity box, and then another one standing in the sewer. If you get to the bar, try not to eliminate anyone. Just walk through the whole room crouching and no one will see you. Make few more steps and you will get to the fresh air.
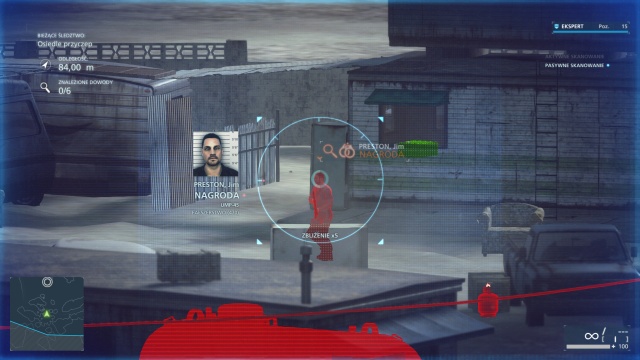
Now use the scanner and find the fugitive - Jim Preston. He is more or less in the center of the complex. What's important, in the trail behind him you will find equipment. You must walk there, as currently you don't have any rifle or gadgets.
To get inside, walk through the tunnel in the ground on the right side. Behind the wall there will be two enemies. Use the badge and arrest them. A taser is lying on the table. Pick it up. Eliminate other enemies standing on your way to the target with it. Do the same with the fugitive.
Now walk to the building with equipment and get all gadgets you need. Bulletproof vest and first aid kit will be most useful. You can eliminate remaining enemies in any way you want.
You will find six evidence in the complex.
First is near the body of chased enemy.
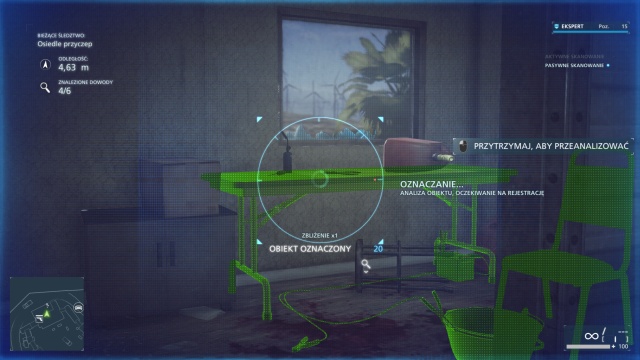
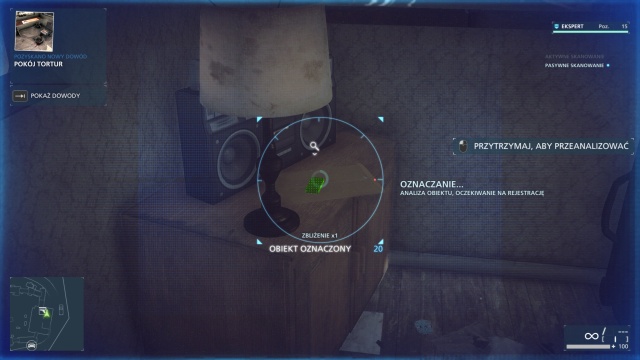
Further two can be found on the upper floor of the building with equipment.
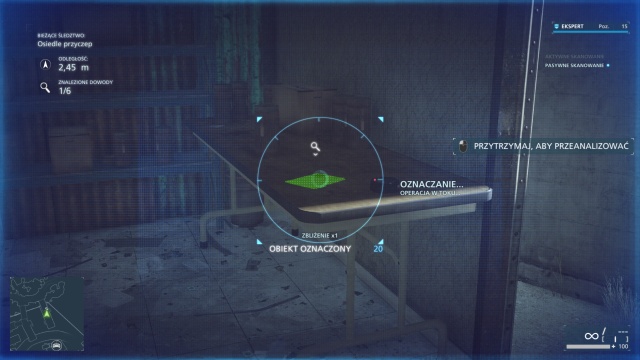
To find another evidence, walk to the building on the edge of the complex, in front of the ground tunnel from which you have entered the complex. Remember that the scanner in the upper left corner show you the direction and distance of the closest evidence
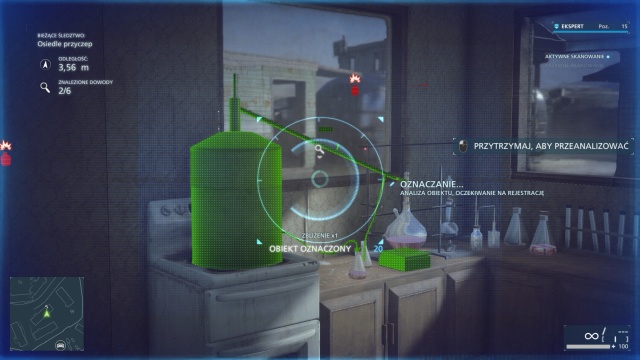
Another proof is in one of three buildings near the tunnel.
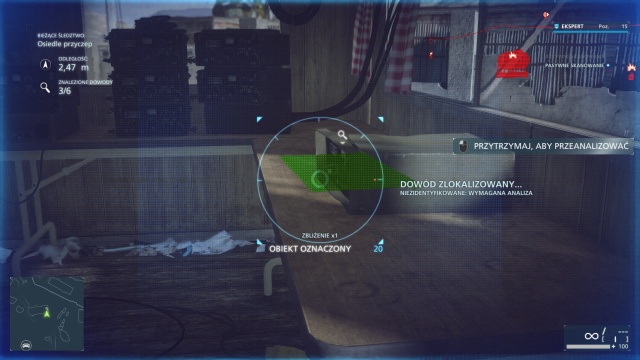
Final proof in this part of the mission can be found in a building outside the complex.
Next part of the mission takes place on a gas station. To survive enemy attacks, hide behind a bulletproof cover and throw yourself a first aid kit. When the enemies arrive, aim at the shooters that are the greatest threat for you. Don't hurry to much, wait until the screen becomes red.
Another two evidence can be found on the station.
First is a license plate on the car parked next to the station.
Second is on a rock near the burned house on the other side of the street.
Next you will travel to the airport. After entering the hangar, when you will see a plane, walk left, you will see another evidence in the corner.
At the end of the mission you take control of a heavy cannon. Destroying enemy cars with it isn't hard. You must only make an adjustment to the direction in which they are moving. It's slightly harder in case of helicopters. To shoot down the ones far away, you must shoot one-two centimeters above them.
After that, you will control a tank. When you will be fighting enemy tank, position yourself in a way so that you will be able to hide after each shoot. When you will be shooting helicopters, always aim slightly above and in front of the target and you will never miss.
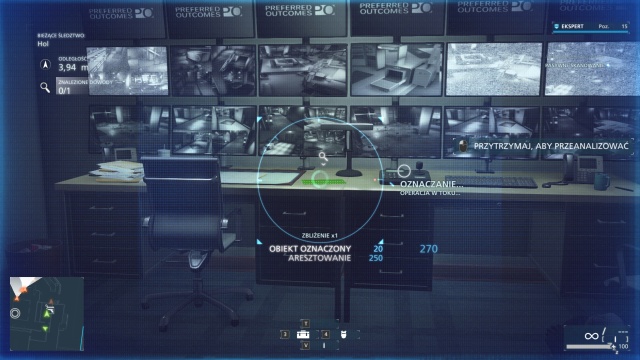 Episode 9: "Independence Day"
In nine mission, your task is to get to the building, steal data from the safe and run away. Of course, there will be few shootouts on the way. You can find nine evidence on the map, and two enemies are wanted.
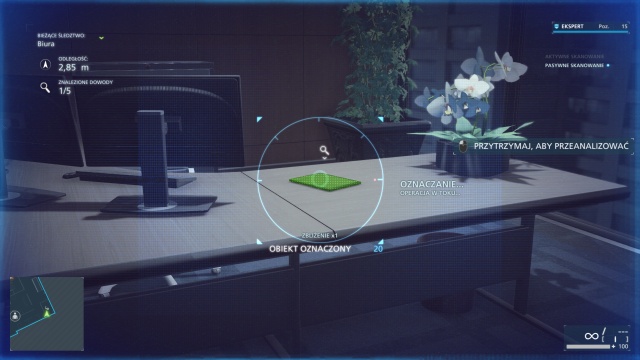
The best way to enter the building is from the left. You will face two enemies there. Use the badge and arrest them. In the cardboard box behind them you will find the first evidence in this mission.
Then you walk through one and another door and eliminate another enemy. On the table an evidence is lying.
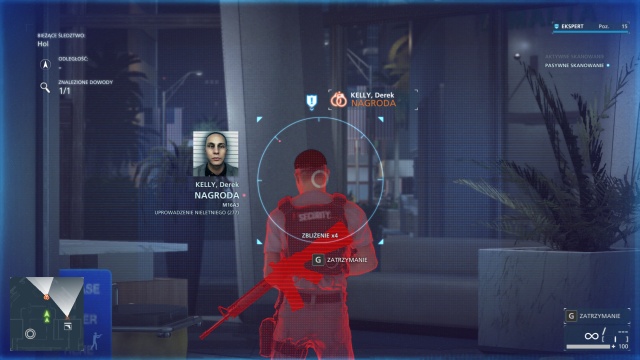
After you leave the room walk straight. In case of trouble, turn off the alarm, then turn right. If you see an enemy, scan him. One of them is Derek Kelly and is on the wanted list. To avoid being detected, show your badge to first three enemies all at once. No you can eliminate Derek Kelly with a taser. Watch out not to walk through the metal detector as you will be unmasked.
Then use the elevator to ride up. Next two evidence can be found in the rooms in the left and right corner.
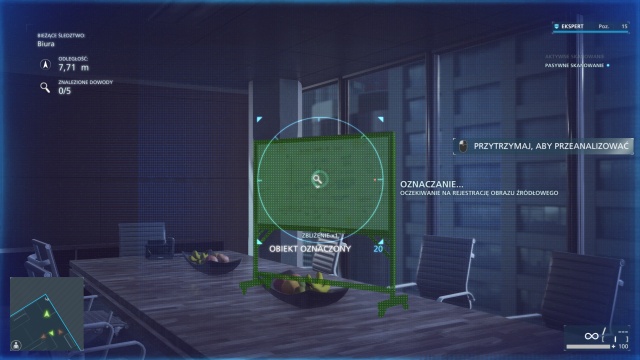
John Starnes will take part in the next part of the mission. All man standing next to him are looking through the window, which allows the player to eliminate them one after another with taser. Another evidence can be found next the fugitive.
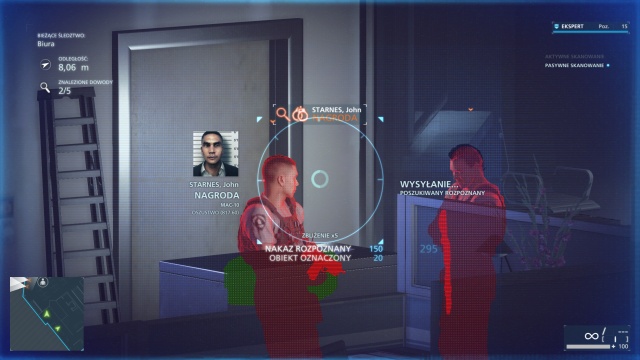
To find the private elevator, walk upstairs. Go through the double door to the left. In the room two evidence can be found.
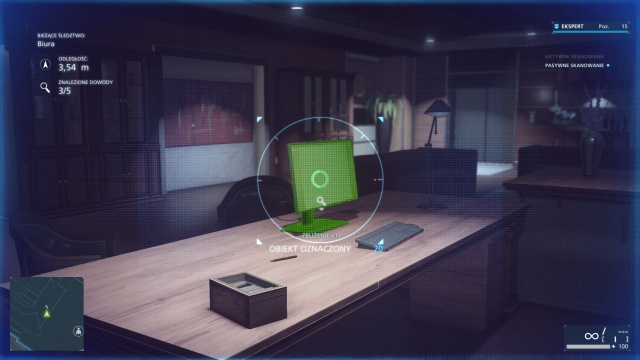
Monitor is one of them.
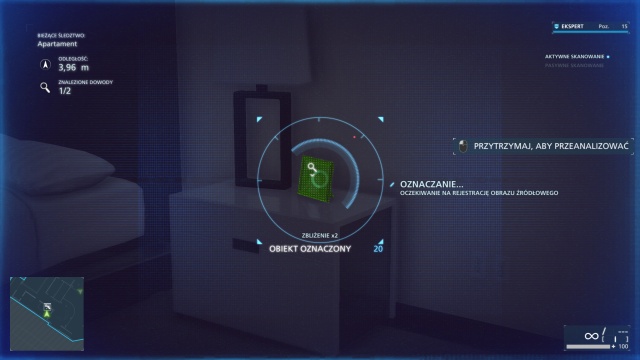
Display frame is the second one.
After you leave the elevator, walk upstairs before the battle starts. There, in the bedroom, you will find another evidence - once again, it's a display frame. Now walk down to the office below the stairs. There you will find the last evidence in this mission - a laptop.
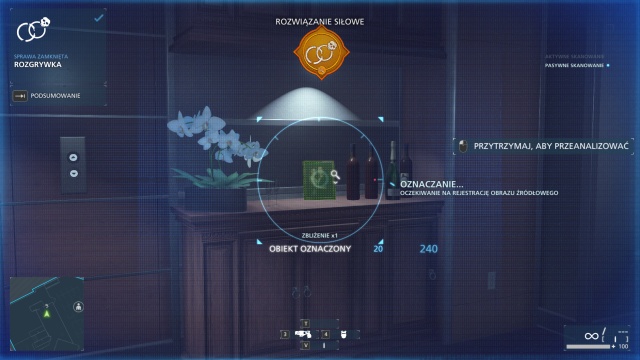
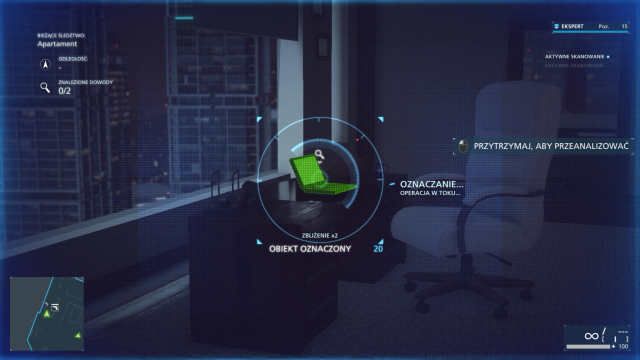
To find the safe, press the button on the torso above the fireplace.
Before you will defend yourself, walk to the office with the equipment and pick laser mines and C4. Place it in the entrances from which enemies will attack in a moment. Then go to the balcony and fight from there. Remember that glasses are bulletproof. Between the attacks, go again to the office and change your scope with night-vision one. M416 is a good weapon for this part of the game.
When the battle in the building ends, there will still be few enemies waiting for you outside, but they aren't hard to defeat.
 Episode 10: "Legacy"
"Legacy" mission is sadly the last one in Battlefield Hardline. There is a lot of sneaking up in this one, although more impatient players can decide to go through it by shooting everyone. There are three wanted criminals and four evidence in this mission.
At the beginning you must eliminate two enemies. Nearby is a booth in which you can change your equipment.
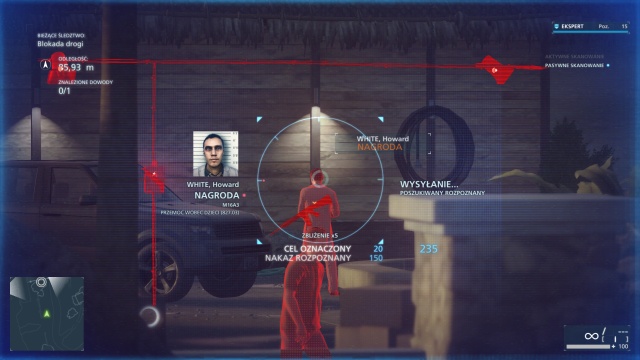 Howard White
Then you face large amount of enemies. One of them is wanted - Howard White. There is a lot of enemies, so if you don't feel like eliminating them quietly one after another, start shooting at them and leave the wanted for the end, when you will walk to him and subdue him with taser.

In the building at the end, on the left side of the truck, you will find first evidence. He can be found in the printer.
To complete next section of the mission, run to the right. You will find few enemies, a wanted criminal and evidence there.
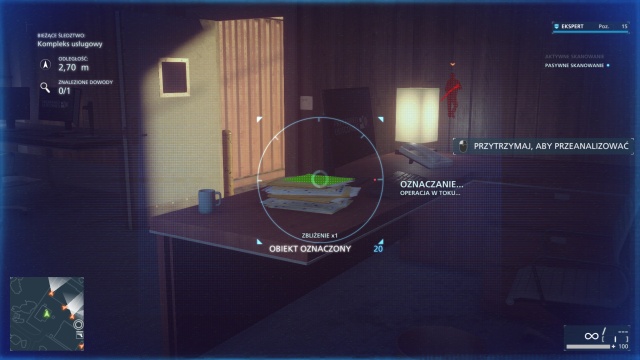
Evidence is on the desk closest to you. A paper is lying on the table in the first room.
Wanted criminal is Craig Foster. He is usually walking in the corner, away from the player. Other enemies are widely spread, so eliminating them shouldn't be trouble.
When you deal with this problem, go to the left, between rocks. You will see another fugitive there - Lyle Feldman. It definitely isn't easy to get him as he is standing precisely in the middle of the complex.
First try to arrest two enemies near the car. Two other will come to see what happened. Then you must walk around the pool and eliminate enemies one after another. When you're done, go to the wanted man and arrest him.
To get the penultimate evidence, walk to the houses on the water. In the last one, there is a paper on the desk that is a valuable evidence.
When you walk further, eliminate two enemies, then equip yourself with a hook. Use it to get up.
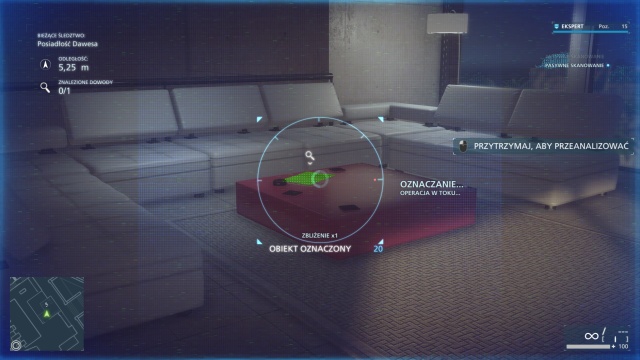
There is no more fugitives in Daws house, so you don't have to do anything quietly there (but you can, of course). When you deal with enemies, use the stairs on the right side (when watching towards next mission point) to walk on the roof, then to a small room. On the table you will find evidence that will allow you to close the last case in Battlefield Hardline.
OS: Windows Vista SP2 64-bit (with KB971512 Update)
Processor: Athlon II/Phenom II 2.8 GHz, Intel Core i3/i5 2.4GHz
RAM: 4 GB RAM
GPU: ATI Radeon HD 5770 (1 GB), NVIDIA GeForce GTX 260 (896 MB)
HDD free space: 60 GB
OS: Windows 8 64-bit (with KB971512 Update)
Processor: four-core Intel or six-core AMD
RAM: 8 GB RAM
GPU: AMD Radeon R9 290, NVIDIA GeForce GTX 760
GPU memory: 3 GB
HDD free space: 60 GB

 Broken Sword: The Serpents Curse Game Guide & Walkthrough
 Battlefield 4 Game Guide & Walkthrough
 Battlefield: Bad Company Game Guide & Walkthrough
 Bulletstorm Game Guide & Walkthrough
 Broken Age Game Guide & Walkthrough