
This unofficial guide to Battlefield 4 is an all-you-need-to-know about the multiplayer mode, but also a complete walkthrough of the single player campaign. Read it to find numerous tips to playing online, character class descriptions, weapons and gadgets info, maps and more - such as gameplay modes and available vehicles. In short, the guide will introduce you to the most important gampeplay elements and prepare you to achieve victories in the online play.
The Battlefield 4 Multiplayer Guide covers:
The Battlefield 4 Single Player Guide covers:
Battlefield 4 - Multiplayer is an all-you-need-to-know guide to the multiplayer mode. Read it to find all the essentials and tips for both beginners and seasoned players. While not a replacement for the practice and experience required to be victorious, it will give you an advantage over less-conscious players and allow you to avoid many mistakes they make. Veteran players, on the other hand, will find here a rich variety of information not clearly available in the game, as well as quick crib sheet to many aspects of Battlefield 4 mechanics.
The consecutive chapters of the Battlefield 4 - Multiplayer guide cover:
We wish you a pleasant reading and a successful transition of theory into practice - because, as they say, it's practice that makes perfect!
Battlefield 4 - Multiplayer is the first part of our enormous guide for Battlefield 4. The second one is Battlefield 4 - Singleplayer. Check it out!
Piotr "MaxiM" Kulka (www.gry-online.pl)

Controlling your character

Jump

Run/Aiming stabilization (Hold)

Crouch (Hold)

Crouch (Turn on/Turn off)

Lie

Fire

Aiming

Weapon change

Reload

Main weapon

Secondary weapon

Sling weapon/Gadget 1

Gadget 2

Grenade

Knife

Melee attack

Grenade throw

Change of fire mode

Torchlight (Turn on/Turn off)
Interaction, Enter/Exit vehicle
Below you will find a set of commonsense tips for every Assault class player that will help you survive on the battlefield and work effectively with your team/squad. Use them to avoid making common mistakes made by many players, save yourself the frustration and, most importantly, avoid harming your team.
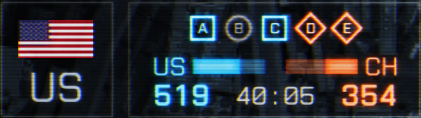 Scoring system and flags.
The main aim of both teams is to extend control over possibly the greatest number of flags which are spread all over the map. The number of flags and the size of the map depends on what mode and what map the combat is taking place on (the Conquest Large mode, as the name suggests, offers an area larger than in the case of the Conquest).
An important element of the Conquest mode are the tickets. At the beginning of each round, both teams start with 300 tickets (in the regular Conquest mode) or 800 (in the Conquest Large mode) - this is, obviously a default number and many servers will have modified the number of tickets by their owners.
When one of the teams is in control of more than a half of the overall amount of flags, the number tickets will start to decline gradually. Furthermore, the team loses a ticket whenever one of the team members dies but, this can be counteracted if the member is reanimated.
The flag that you control will function as a respawn point for you and your team, as well as for the vehicles assigned to it, which are definitely a valuable asset in the battlefield. It is worth noting, however, that these vehicles can also be controlled by the enemy team- even though they constitute a part of the arsenal of the nation that your team represents. this thing itself should serve as an encouragement to defend your own flag.
 Capturing of the flag.
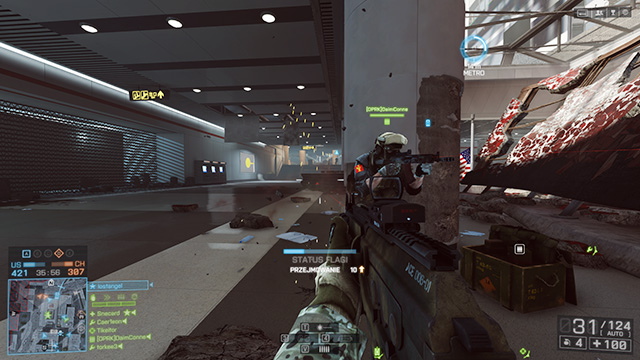
You can recognize the flag's status by the color of the circular marker above that flag. White means that the flag is neutral, orange - seized by the enemy team, whereas the flags already seized by your team are marked with blue.
Capturing of the flags is very important and should constitute a priority for you and your team. To capture a flag, you will have to come within its reach - this will be brought to your attention, when the circular marker with the letter assigned to that flag appears on the screen. When the flag is neutral, the process of capturing will automatically start and both teams will be notified of that.
Capturing of the flag belonging to the enemy team is a bit more difficult and it takes longer because you will have to neutralize it first (remove the enemy team' flag) and capture it for yourself.
The process of capturing the flag can be speeded up, though - the more players of the given team are staying within the reach of the flag, the shorter it will take to capture it. Still, capturing can be interrupted, if the players from the enemy team come within its reach. In this case, the advantage in numbers of the teams within the reach of the flag, works as a decisive factor, when it comes to which team starts the process of capturing the flag. For example: if, around a flag, there are two players that represent both teams, neither of them will be able to seize the flag. Still, if either of them is joined by another member of his team, then thy will be able to seize the flag - even though there is an enemy unit around.
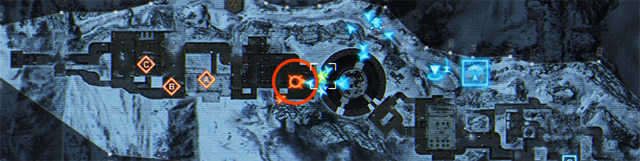
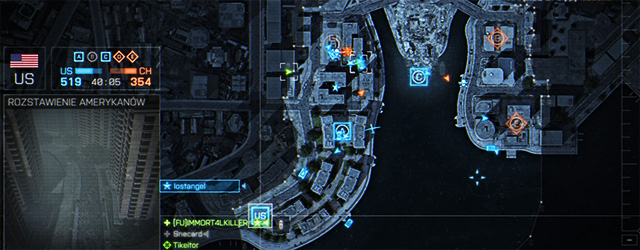 A map in Conquest Large
The process of capturing the flag controlled by the enemy team is a bit more demanding and it takes longer because you will first need to neutralize it (i.e. remove the enemy team's flag) and then capture it.
It is highly recommended that players cooperate within a team. Capturing the flag on one's own is very risky - especially is already under control of the enemy team; then the enemies will be respawning near the flag until the flag is neutralized. In such cases, the other members of your team may prove very helpful. They will be able to respawn next to you and help you capture the flag.
Victory ensues as soon as the tickets of the opposing team drop to zero.
Useful classes: In the Conquest mode, all of the classes are useful and, to a large extent, it is good cooperation of all classes what results in victory. Still, an assault soldier may prove the most valuable asset here, due to his capacity to reanimate and heal his team.
Obliteration is a mode that is new to Battlefield. The team's main aim is to destroy a predefined number of targets, using a bomb. One bomb is assigned to destroying one target, and it appear several seconds after the match begins, and several seconds after a target is destroyed. The targets appear in randomly selected places which cannot be predicted.
Both of the team have three targets to destroy. The end of match ensues after all three targets of one of the teams are destroyed. Still, it is advised against focusing on destroying targets of the enemy team only. It is just as important to protect one's own targets. This is where Engineers and Scouts prove their worth, due to their gadgets (mines, C4 explosives). It is a good idea to deploy some of these around your targets, and especially on the roads that lead up to these targets, so that they stop the enemy vehicles.
 Bomb chase
After you have destroyed one of the targets, there will appear another bomb in 30 seconds, in a random location. A good solution is to split the team into several smaller groups and keep in mind that the location that the bomb appears in is always random. Still, it is worth knowing that, as the bomb carrier, you will be visible for both your team and the enemy's team.
Useful classes: Engineer and Scout - due to their gadgets. Claymores, AT mines may prove very useful and C4 explosives may prove very useful.
To all ends and purposes, Domination is actually Conquest to a much smaller extent and it focuses on playing mainly infantry. Just like in the case of the Conquest mode, your main objective is to capture flags. In the Domination mode, on each map, there are only three maps available and the process of capturing is much quicker than in the case of Conquest.
It does not differ also with respect to tickets - the more flags you capture, the faster the number of enemy's tickets declines and killing an enemy team member also results in subtracting one ticket.
For the reason that, in Domination, the players have no access to any vehicles, and the maps are much smaller, the game is much quicker. The player must to rely only on his skills - cooperation is still very important but, to a large extent, the swiftness of reaction and skills are the deciding factor.
 The layout of flags in Domination.
Staying in constant motion is a key here. Stop only to capture the flag (although, if you consider how fast you can capture the flag, not always is it a good idea) and be on the lookout for a cover which will, temporarily, shield you from enemy.
Useful classes: Assault soldier - the capability to heal and reanimate, which comes in handy very often.
Rush is another, widely known mode in the games of the Battlefield franchise. In Rush,, the players are divided into two teams: attackers and defenders. The objective of the defenders is to protect relays in the best way possible, which the attackers need to destroy. Also in this case, the tickets are present (75, by default), but only the attackers have them.
In the Rush mode, each map has been divided into several sections (the number of sections depends on the type of a individual map, usually it is three to five sections), with relays in each. Once the attackers destroy two relays, their tickets replenish and, after a while, they are ready to assault further relays.
A big advantage of the defending team is that there is no limit set on the number of respawns they may take without the threat of losing, induced by the lack of tickets. Of course, if the players of the opposing teams die too often, the attackers will have an easy access to the relays.
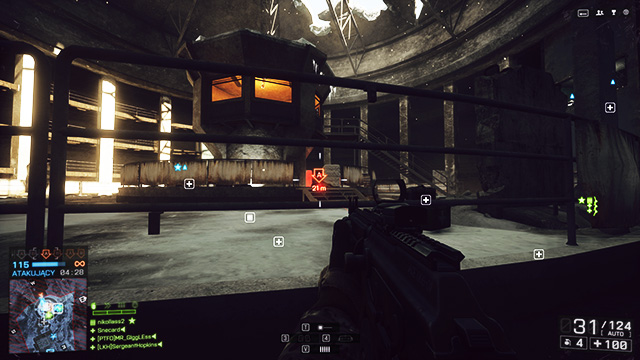 The explosive set on the relay.
The relays cannot be destroyed with grenades, vehicles or just any arsenal. The only way to destroy a relay is to set a bomb to it, by holding down the E key (by default)). While setting the explosive, there will appear a bar on the screen - you need to hold down the key for as long as the bar fills up. Then, both of the teams will be notified the fact that the explosive has been set. The defending team has then the opportunity to defuse the charge, where the process is the same, you simply need to approach the explosive and hold down the E key.
There are two rounds per each map - after the first round the roles, performed by the individual teams, switch.
Hints for attackers: cooperation is extremely important in the case of the attacker team. Often, what proves most difficult, is the destroying of the first two relays, due to the fact that the defender team had some time on their hands to take their positions - for that reason, both of the relays will be heavily guarded. The popular tactic used at this point is the M320 with smoke grenades. It is best to aim at the region of the relay, so that the enemies cannot see it - you should still remember that some of the vehicles may be equipped with thermal vision, at which point you will be easily visible.
If you spot an opportunity to set a bomb on the relay - do that. There is no point in waiting. and every seconds counts in the Rush mode. Setting a bomb on the relay should motivate your team immediately, to prevent the defenders from defusing it.
Hints for defenders: what may prove very important in the defender team is the Engineers or Scouts, due to their gadgets. A good method is to deploy the Claymore mines around the relay, or set C4 explosives directly onto it - all it takes then, is detonate the explosives as soon as someone approaches. In the case of bigger maps, where there are vehicles available, you can also set AT mines onto the roads leading towards the relays - you will then get rid of the enemy vehicles.
Useful classes: In the Rush mode, just like in Conquest, all classes are useful. Assault soldiers, due to their capability to heal, and reanimate, the Engineer has gadgets thanks to which it is easier to eliminate vehicles, Support resupplies ammo and conducts fire, and the Scout - if well positioned, can often save the day.
Deathmatch is a mode that is known not only from the Battlefield games, but also from the other games that allow multiplayer.
The only aim of this mode is to eliminate as many enemies as possible - cooperation is not required in this mode and you can also achieve much while playing solo. Many Battlefield players use the Deathmatch mode to work on their shooting skills, but also as a means of unlocking weapon attachments quickly. There are no vehicles here - the gameplay focuses on infantry only.
Victory ensues whenever any of the team achieves a predefined number of kills - the default number is 100 but you can find servers where the required number is higher.
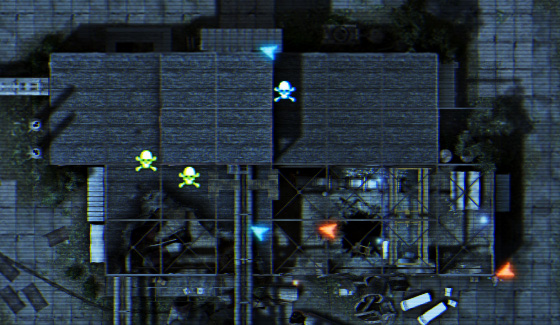 Deathmatch; corpses all over the place...
In this mode, maps are very small, thanks to which the gameplay is fast-paced and dynamic. Individual teams respawn at the opposite points of the maps but, if a player of the opposing team comes too close to such a respawn point, then the point is relocated to the opposite point on the map, just to avoid unfair death right after being respawned.
In the squad DM, the players are divided into four squads and all of them fight against each other. Cooperation here is highly recommended - it pays of to stick to together and communicate with each other over the enemy's actions.
Unlike in the Team DM, maps are here a bit bigger and, additionally,, there appears an NP vehicle, which all four teams can seize.
Respawn points are random. Still, players of an individual squad can respawn on each other.
Useful classes: It is impossible to determine which class is the most useful in the DM. In this case the call s entirely yours.
Defuse is a mode that is completely new to the Battlefield. It stands out as the mode where the player does not respawn after he dies - unless he is reanimated.
The players are divided into two teams here (attackers and defenders) and their main objective is a combination of the objectives from the Obliteration and Rush modes.
The attackers' objective is to set bombs on two relays that are defended by the defender team. The bomb appears right next to the respawn point of the attacker team so, the defender team are incapable of ambushing them. Once the bomb is planted, the defender team will be able to defuse it - you need to hurry, however, because the bombs explode much earlier than in the case of the Obliteration and Rush modes.
Both teams also have tickets and their numbers depend on the number of players in a given team Once one of the players is gunned down, his companions are the only hope. If he is not reanimated early enough, then he dies and respawns in the spectator mode only.
The maps here are sized down and there are no vehicles available there- the gameplay relies on infantry only.
Useful classes: In a nutshell - Assault soldier. It is paramount to keep players, in the Defuse mode, alive, which is why Assault soldier is the most popular choice.
In Battlefield 4 there are also two general modes to play -Normal and Hardcore.
Normal is a default mode and you can find most servers utilizing this one. In the Hardcore mode, the game, and its mechanics, change..
The changes are server-exclusive because their owners can change individual rules. Still, the most frequent settings are:
The Hardcore mode is considered to be the most demanding of all, and the beginner players may be severed a bit here. Still, they can learn a lot here. The Hardcore mode is capable of expanding your swiftness of reaction and improve on your shooting skills.
Due to the fact that you die faster - the player becomes more careful about his steps and pays more attention to the surroundings.
The Assault class is one the most flexible classes in Battlefield 4. Their weapons and gadgets allow them to easily specialize in various roles - from Combat Medic to Grenadier - which are choices that are also supported by their field upgrades. There are no new specializations at the beginning of the game, though, so every new Assault class soldier has to learn how to make do with a limited amount of gadgets.
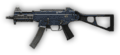
The main advantage of the Assault class is the access to assault rifles, which are perfect for medium range distances and deal substantial damage at a reasonable rate of fire. The diversity of assault rifles allows the Assault class for further specialization in very specific battle tasks.
Quick-firing assault rifles (such as FAMAS) can be used instead of PDW (Personal Defense Weapon), which are ideal for very short distances, while the more accurate ones (such as M16A4) can work perfectly well as anti-sniper weapons. The Assault class may therefore perform as well in offence as in defense.
As Combat Medic, you can do a lot of good by sticking close to your team, reviving fallen teammates and healing the wounded. Even in dire situations, this may very well change the outcome of the battle.
As Grenadier, you can be invaluable against armored vehicles, in "clearing" rooms and hallways, or in making shortcuts, for instance by bringing down walls etc.
If you don't like either of these specializations, you can always make your soldier into a killing machine adapted to fighting infantry in any conditions. All you need to do is give up any gadgets to make room for an underslung shotgun with different types of ammo. This will allow you to eliminate long-range targets and dominate the battlefield at short range.
There's also the option to use everything in bits, but this, as they say, is a case of "Jack of all trades, master of none". Experienced veterans may of course differ, but the exception usually proves the rule.
Further down this chapter you will learn everything about gadgets and field upgrades available to the Assault class, but if you wish to read about assault rifles, go to Weapons and Accessories.
The role of the Assault class is largely determined by the gadgets they use (preferably in combination with a corresponding field upgrade). Contrary to Battlefield 3, the new installment allows for a free configuration of Gadget 1 and Gadget 2 slots. There are no limitations, so you may as well use the standard configuration of "any gadget + defibrillator" or experiment with all unlocked gadgets in any combination. See below for the descriptions.
MEDKIT

The first gadget available to the Assault class right at the beginning is the small, but the ever handy medkit. Drop the medkit to the ground (max. two at a time) and everyone who picks it up will start regenerating health at aprox. 10 HP/s. Each time a teammate heals 10 HP, the player who healed them is rewarded with 10 points (max. 100).
To heal a wounded teammate more efficiently, throw the medkit directly at the target. Due to its light weight, it can be thrown over a much greater distance. Additionally, the BF4 medkits were given a "magnetic" quality and they will reach even those team members who are in constant movement - which is very helpful in healing teammates fleeing from fire.
The medkit affects only a single target and the effects of more than one medkit don't accumulate.
MEDIC BAG

The medic bag is large, heavy and stationary. Once deployed, it cannot be moved and will stay in one place until it disappears. Unlike the medkit, it can't be thrown, but instead regenerates the health of all squad members within its radius, and much quicker. The medic receives max. 100 points for each fully healed teammate.
The Assault class can carry only one medic bad at a time - if they try to carry another, the previous one will disappear. This is to prevent the quick acquisition of experience by deploying several medic bags in strategic spots at once.
The medic bag can be destroyed by enemy fire or explosives and the effects of several medic bags deployed in the same spot (by several medics) don't accumulate.
DEFIBRILLATOR

The defibrillator returns to the battlefield in a somewhat changed capacity. You can use to bring any fallen comrade back to life, but the medic has only several seconds from the time of death to do it.
Using the defibrillator without charging it first (tap [LMB] quickly) will heal 20 HP to the revived teammate. For many reasons, this is not a recommended way to do things. Firstly, the revived teammate will be at risk of an immediate death before even getting back on their feet, and secondly, the effects are worth only 20 points. To use the defibrillator to its full potential, hold [LMB] for several seconds to fully charge the paddles. After 3-4 seconds of charging, release the button, aiming it at the fallen team member, and they will rise fully healed, with 100 points for you as a reward. Naturally, the less you charge, the less HP you heal and the less points you receive. The best way to do it is to start charging several meters ahead of the target, but bear in mind that while doing it you can't run or even move at the usual speed.
A reasonable medic should always be wary of where and when to start defibrillating. The first thing to do is to make sure the surroundings are safe enough to even think of rushing to help. By risking defibrillation under fire, you will not only fail to restore the lost point, but also waste another (by dying). Another sure-fire way to die is to start running from 10-20 meters from the target - you may not only don't make it in time, but lose your life in the process.
The defibrillator can be also used to take life from enemies. In many cases, it's even more effective than the knife (being much quicker and quieter). A short tap will not guarantee that the enemy will die, so you may want to approach them from behind to give you time to charge the paddles. When used in the offensive, the charging time if shortened by half.
After using the defibrillator three times, the power source will need time to re-charge the paddles. What's more, a revived teammate who dies shortly after the reanimation will not be allowed to get back to life again, preventing the "immortal squads" effect.
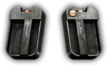
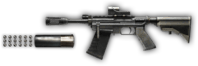
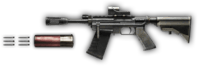
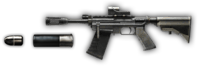
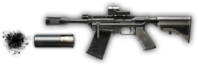
M26 MASS (UNDERSLUNG) SHOTGUN
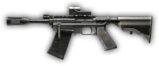
Another gadget in the Assault class' arsenal is the M26 underslung shotgun. Thanks to the Underslung Rail, it can be mounted under the barrel of any primary weapon (not every rifle is compatible) or used as a personal weapon.
The M26 is one of the slowest firing shotguns available, but at close range one shot should be enough to put the enemy down. Firing is also quite loud, which should be helpful when flanking enemies.
Used as an attachment to the primary weapon, it will give you access to most of the accessories that come with it. Used as a stand-alone weapon (and this is a change from BF3), it uses the collimator as default sight system (Reflex).
The M26 MASS can use the following ammo types:
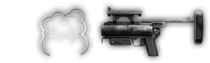
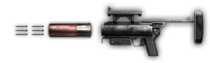
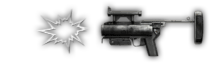
M320 (UNDERSLUNG) GRENADE LAUNCHER
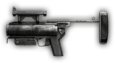
Probably the most devastating gadgets in the Assault class' arsenal, the underslung grenade launcher boats a wide variety of uses. You can use it against both infantry and armored vehicles, blow holes in walls and support any tactical maneuvers. All this thanks to the following 40MM ammo types:
Frag grenades explode immediately upon impact, with great force and a large radius. They're ideal against tight-knit groups of enemies and for destroying vehicles (even tanks). Obviously, they may as well be used to create pathways by blowing holes in walls or to shatter the enemies' defenses. With a frag grenade, you can bring down a whole building.
Smoke and flash grenades are ideal for tactical support. A cloud of smoke or a blinding flash will allow you to confuse and incapacitate your enemies while, for instance, charging at their defensive positions. You can also cover your teammates as they retreat from dangerous locations.
Flechette grenades practically change the grenade launcher into a shotgun - a very slow-firing one, but nonetheless very powerful. It won't perform well to clear rooms with it, but a close range shot guarantees a kill. The specific characteristics of flechette ammunition can also stun enemies (causing blurred vision and destabilizing the hand), which may come in handy while trying to reach a sniper's position.
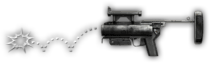
The last type of ammo is the LVG. Unlike the standard frag grenade, the LVD doesn't explode upon impact, but bounces off of the ground to blow up several seconds later. If you can't aim directly at the enemy (who may be hiding around a corner or on the other side of doors/windows), the LVG is the way to go. You can also use it when you see an enemy, but the trajectory of a standard grenade wouldn't allow you to hit them directly.
Being able to use all of these possibilities is a certain form or art - mainly due to the weight of the projectiles and their specific, quickly descending flight trajectory. I recommend training with the M320 on immobile targets.
The other key element in the Assault class specialization are Field Upgrades, which greatly enhance the effectiveness of gadgets and chosen tactics. As you may be guessing, it's best to select both so that they supplemented your chosen specialization and your way of doing things on the battlefield.
Each field upgrade has level 1 by default. To increase the level, cooperate with your team members! Running around the map lone wolf-style will only guarantee you some basic functionalities, but only by sticking close to your team (team, not the whole squad) and performing combined actions will you be able to unlock further levels. Each field upgrade cumulates with the previous one. When the whole team is eliminated, the level of the field upgrade drops by one.
DEFENSIVE

Available at the beginning of the game regardless of the class. Ideal for players who prefer being under heavy fire in the "hottest" battle zones. Probably the best field upgrade for players in the Obliteration game mode, given that it increases the chances of survival of the person carrying the bomb.
SHADOW

Available at the beginning of the game regardless of the class. Dedicated especially to players who prefer moving from one location to the other quickly and without being detected in order to flank enemies or steal their control points right from under their noses. Best used in the Conquest and Rush game modes.
OFFENSIVE

The first unlockable field upgrade for each class. Ideal for players who prefer a quick offensive, but also recommended to those having frequent problems with using up ammo too quickly.
COMBAT MEDIC
Combat Medic is the optimal upgrade for players who specialize in healing teammates. It allows for even more effective healing and reanimation, even when there is not much time and bodies are dropping all over. In the Conquest, Obliteration and Rush game modes, reaching level 4 will allow the medic to heal without even leaving the vehicle!
GRENADIER

Grenadier is other one of the highly specialized upgrades for the Assault class, dedicated to players who prefer to neutralize the enemy with explosives and are exposed to them themselves. Invaluable to all Assault class players who love destroying enemy vehicles and eliminating whole groups at one go.
To gain access to most of the above mentioned gadgets and field upgrades, you're going to need to work hard. It won't be enough to just kill your opponents with assault rifles - these belong to a separate category. To level up in your class, use the available gadgets to their full potential. It doesn't matter whether they are offensive or defensive - each use brings you closer to unlocking another handy tool. Once gained, you can't lose you experience points, unless you're leaving the game before the end of round or due to technical issues (game or server breakdown).

After unlocking the last gadget, the player receives another reward - a star - for service as an Assault class soldier, which is worth 1000 points and a special dog tag.

Additionally, the Assault class is assigned three assignments which completing will grant you special awards:
ASSAULT BASIC
Requirements:
Award:
Assault Basic dog tag
ASSAULT VETERAN
Requirements:
Award:
Crimson Camo (forest)
ASSAULT EXPERT
Requirements:
Award:
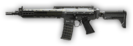
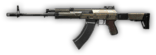
ACE 23 Assault Rifle
Unlocked
Points
Description
First Aid Kit

---
Single-use medkit that slowly heals a single soldier to full health, even on the move. Any damage cancels the heal.
Defibrillator
8000
The automatic defibrillator revives fallen allies and electrocutes enemies. Charging the paddles revives a soldier with increased health. Requires recharging after multiple quick uses.
M26 MASS
18000
A small shotgun that can be mounted below the barrel of cerrain assault rifles. Uses standard buckshot that deals high damage but has weak penetration.
Field Upgrade: Offensive

28 000
LEVEL 1: SPRINT: Increases maximum Sprint Speed by 10%.
LEVEL 2: AMMO: Increases maximum inventory of Bullets by 50%.
LEVEL 3: GRENADES: Increases maximum inventory of Hand Grenades by 1.
LEVEL 4: REDUCED FALL: Increases height you can Fall without Damage.
M320 SMK
40000
40mm grenade that creates a cloud of blinding smoke upon impact, preventing the enemies from spotting their targets.
M26 Dart
51000
Loaded with flechette rounds that deal less damage, but with greater range and penetration.
Field Upgrade: Combat Medic

63 000
LEVEL 1: MEDKIT UPGRADE: Increases maximum deployed Medic Bags and Packs by 1.
LEVEL 2: SPRINT: Increases maximum Sprint Speed by 10%.
LEVEL 3: DEFIB UPGRADE: Increases charge up speed of the Defibrillators by 100%.
LEVEL 4: MEDICAL UNIT: Occupied vehicles will slowly Heal nearby Soldiers.
M320 Dart
76000
40mm grenade packed with flechette rounds that turn the launcher into a shotgun.
M26 Sabot
88000
Loaded with Sabot slug rounds for accurate medium range fire.
Medic Bag
101000
Stationary medic bag. All soldiers within its range will gradually regenerate health, even during battle.
M26 Frag
114000
Loaded with frag ammunition for increased suppressing fire.
M320 Flash
128000
40mm flashbang cartridge that temporarily blinds enemies. Useful in close quarters situations.
Field Upgrade: Grenadier

141 000
LEVEL 1: GRENADES: Increases maximum inventory of Hand Grenades by 1.
LEVEL 2: SPRINT: Increases maximum Sprint Speed by 10%.
LEVEL 3: 40MM GRENADES: Increases maximum inventory of 40mm Grenades by 3.
LEVEL 4: FLAK: Decreases damage from explosions by 15%.
M320 LVG
155000
Anti-personnel 40mm grenade with a timed fuse. Before it explodes, it bounces off of obstacles.
Each engineer in Battlefield 4 can specialize in one of several roles. The engineer's basic role is to repair the ally vehicles, as well as destroying the enemy vehicles. After you unlock the appropriate gadgets, engineer may focus entirely on repairs (and sabotage), on destroying land or water targets or specialize in destroying airborne targets. Of course, there is nothing to prevent you from becoming a typical handyman and do a bit of everything.
A good engineer is a highly valued member of each team that values the support of heavy vehicles. That is why engineers are often tankmen, pilots or boat captains. It is best, however, if the engineer does not control the vehicle and is only a member of the vehicle crew. This will allow him to repair the vehicle without the necessity to leave it defenseless, and even t repair it without getting outside! Only scout helicopters, cargo helicopters and assault boats allow repirs without leaving the vehicle. The only thing that the engineer needs to do then, is use the Repair Tool on the element of the vehicle that is within reach.
The basic weaponry of the engineer is the Personal Defense weapons, i.e. short-range weapons of high firing rate - however, with promotions, engineers get the opportunity to unlock carbines, which belong to the more universal weaponry. What is even more, unlocking carbines allows you to use them while playing classes different than the engineer, which is an innovation in Battlefield 4. Carbines are the medium-ranged weapons with moderate accuracy however, some of them can be used as a replacement for assault rifles
Further in this guide, you will learn everything about the gadgetry, and field upgrades, available for the engineer. To learn more about assault rifles, see the chapter entitled weapons and equipment.
The role that an engineer plays in the battlefield, is decided, to a large extent, by the gadgets that he uses (best in combination with appropriate field upgrades). Unlike in Battlefield 3, in the most recent installment you can freely define the Gadget 1 and Gadget 2 slots, thanks to which you can define your soldier's specialization in a more detailed way. There is nothing to prevent you from equipping two mine types or repair tools only. The only restriction is the one set on using two types of rocket launchers, which would give the engineer too much capability to destroy the enemy vehicles of any kind, in comparison to the other classes. Below, you will find the functioning and use of each of the gadgets.
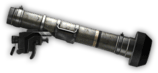
Repair Tool

The first gadget, which is available without unlocking, is the Repair Tool. Using it, you can repair ally and the abandoned vehicles and fully restore them in no time at all. There is more, though - using the tool, you can also sabotage the enemy vehicles and kill the infantry. The repair tool repairs/destroys vehicles at a rate of 10LP/s but, it is impossible to use it incessantly. The repair tool overheats after some time and you need to wait for several seconds before you can use it again. Apart from this restriction, the repair tool can be used as much as you want, because it uses up no asset or fuel. The less known feature of the repair tool is that it is possible to render the explosives, deployed by the enemy, harmless. It suffices to have the repair tool in your inventory and hold down the reload button, after you approach the explosive.
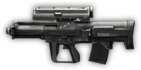
MBT LAW
This rocket launcher is the first element, of the anti-tank equipment, of each engineer and it does not require unlocking. MBT LAW shoots low-power rockets, which are self guided to a limited extent, which makes them easy to use. A projectile travels towards the vehicle that it detects in its way, increases its height and hits the target from above. The self-guiding feature of the LAW projectile is automatic and does not require targeting before the projectile is discharged. However, the enemy vehicle needs to be very close to the projectile's trajectory (which is a low-angled one), or it misses. MBT LAW works with laser markers, thanks to which it can be used against moving vehicles and against vehicles that stay behind some of the obstacles. It can be used to destroy land vehicles, boats and aircraft. Vehicle warning systems do not detect the LAW projectile, until the last moment before impact, thanks to which it can be used to surprise the unsuspecting enemies.
M15 AT MINE

The anti-tank M15 mine is used to destroy enemy land vehicles. The engineer can deploy it only in front of him, on a flat surface. The best way to use it is to deploy it on roads and routes frequented by the enemy vehicles, as well as near the critical points on the map (flags, relays). One M15 mine is enough to immobilize a tank, or destroy a vehicle with a lighter armor.
Anti-tank mines can be detonated with explosives and large-caliber firearms (sniper rifles, shotguns loaded with slugs or fragmentation projectiles, and revolvers), and also disarm using the Bot or the repair tool.
The M15 mines are well-visible in infrared, thanks to which they are easier to spot. After it is deployed, the mines remain in the battlefield for as long as they are destroyed, or the engineer deploys more than 6 mines - at which point each consecutive mine that is deployed makes one mine disappear (in the chronological order).
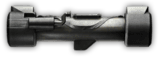
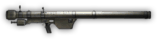
FIM-92 STINGER

Stinger is an anti-aircraft "fire and forget" type of projectile of a relatively short range. After the enemy aircraft is targeted, the rocket self-guides towards the target and there is no need to continue guiding it, thanks to which it is easy to operate and, just as easy to misguide with a flare, effective dodge or by flying quickly out of its range. One hit with a Stinger rocket makes the any target vehicle immobile, where two are sufficient for its complete destruction. To target an enemy aircraft, the operator needs to keep the target within sight for several seconds - any objects within sight, even trees, terminate the targeting process.
RPG-7V2
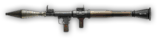
RPG is a projectile of big firepower yet, due to the lack of the guiding system, and the falling trajectory, one of the most difficult to operate. One hit into the side or the back of the enemy vehicle, renders the vehicle immobile. The RPG projectile is also perfect for destroying buildings and eliminating of the enemy infantry - the latter is not welcome, and often overtly forbidden on many servers but, with skillful use, it can be very effective against enemy snipers, who often stay out of range of the conventional weapons.
SA-18 IGLA

Igla is the other kind of a self-guided missile used to neutralize the airborne targets. Unlike the Stinger, Igla requires constant targeting for it to reach the target. Still, it has longer range and it is more difficult to lose without using the flares. If the operator loses the target for a moment (e.g. due to a terrain obstruction), he can reacquire it by following it with the optical instruments, at which point the rocket re-acquires the target.
M2 SLAM

Unlike the M15 AT mine, the M2 SLAM is smaller and not as heavy. Additionally, it can be thrown. M2 clings to any surface, including vehicles, and that is why it can be well-used in the least expected way - also to attach it directly to the enemy vehicles. That is why it can be used in a way similar to the C4 explosives but, it needs to be detonated manually, with explosives or with weapons. The SLAM mine will go off itself after some time has passed but, it is difficult to predict the exact moment of detonation. The more experienced users can attach the SLAM to their own vehicle (preferably a small and fast one, like the ATV), speed it up towards the enemy vehicle and jump off at the last moment before the impact. Three M2 SLAM mines are enough to destroy any vehicle.
THE EOD BOT
The EOD Bot is nothing else than a remotely-controlled track-propelled repair tool, and it can be used to perform the very same actions: ally vehicle repair, enemy vehicle destruction and killing infantry. The Bot's another use is disarming the enemy explosives - also the ones deployed on relays. To use the robot, you need to deploy it on a flat surface and switch into the remote control mode. This leaves the operator defenseless and susceptible to attacks, which is why it is best to use the robot while staying in hiding. The robot can virtually move over any type of surface (also underwater) and it is not damaged by falling from heights. Thanks to the improved stability, it is much easier to use than its counterpart from Battlefield 3, and its controls are similar to that of a tank. The detected Bot can be easily destroyed by the enemy, even with a small-caliber weapon.
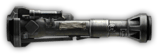
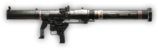
MK153 SMAW

The SMAW projectile behaves in a way similar to that of the RPG projectile, but its trajectory is of a lower angle, thanks to which it is easier to hit distant targets with it. The simplified operation is alleviated, however with its lower firepower, in comparison with the RPG. Apart from the differences in range and firepower, its use is no different than that of the RPG-7V2.
FGM-148 JAVELIN
The JAVELIN projectiles are the most effective (or, at least, the simplest to use) weapon used against the enemy water and land vehicles. The operation of the FGM-148 is similar to that of the SA-18 Igla and it requires to keep the sight of the target. If the shooter stops aiming, the projectile moves in the last-known direction, in a straight line, just like the SMAW or the LAW. The JAVELIN projectiles hit the target from above and they inflict moderate damage, regardless of the angle of impact.
FGM-172 SRAW
The SRAW projectiles are an effective anti-tank wire-guided weapon. This means that the user can guide the projectile for as long, as he remains in the aiming mode. Thanks to this, the launcher can be used to eliminate targets staying behind natural obstacles. When the user leaves the aiming mode, the projectile will follow the flight in the determined direction. FGM0172 works with laser markers - in this case, it is not necessary to guide the projectile manually. The projectile can be well-used against any vehicle however, especially in the case of aircraft, hitting the target requires a lot of skill.
The second key factor (apart from gadgets) that influences the engineer's specialization are field upgrades, which influences the effectiveness of gadgets and the implemented tactics. What follows, is that it is best to select gadgets and field upgrades in such a way, as to make them complement the specialization selected by you, or the method of acting in the battlefield.
Each upgrade acts, by default, on level 1. To increase the upgrade level, you need to play in squad. Running around the map as a lone wolf will ensure you with only the basic functionality but, staying close to your squad (and I mean the squad, not the team) and completing objectives together with them, will allow you to unlock the higher upgrade levels quickly. Each upgrade level cumulates with the previous one. When the entire squad is eliminated, the upgrade level drops by one.
DEFENSIVE

This upgrade is available for everyone at the beginning of the game, regardless of the selected class. It is an ideal solution for those of the players that are under constant enemy fire, or like being in the battlefield's hottest spots. This may be the best upgrade for the proponents of the Annihilation mode, because it increases chances at survival of the player who is carrying a bomb.
SHADOW

This upgrade is available for everyone from the beginning of the game, regardless of the class selected. The Shadow (as the name suggests) is an upgrade for those of the players, who like dashing from place to place undetected and flank the enemy, or steal their control points right in front of their face. The best idea is to use it in the Conquest or Rush modes.
OFFENSIVE

The first unlockable upgrade for each class. It is ideal for the players who prefer a fast-paced assault and pack purely offensive gear. Also recommended for those who have problems with quick depletion of their ammo.
MECHANIC

The Mechanic is the best available upgrade for the players who specialize in repairing and sabotaging vehicles with the repair tool or the EOD Bot. It increases the chances of survival during repairs and speeds the process up considerably. Reaching level 4 will allow the mechanic to repair the allied vehicles even without leaving the one that he is currently occupying.
ANTI-TANK

The above field upgrade is an ideal companion of the proponents of destroying the enemy armored vehicles. It considerably increases the inventory amount of mines and AT ammo, as well as increases the chances of surviving an explosion.
To gain access to most of the abovementioned gadgets and upgrades, killing the enemy is not enough. To be promoted in your class, and unlock each weapon available for the engineer, you also need to perform many repairs. The interesting thing is that, to perform all of the engineer's assignments, and unlock the last PDW weapon, you need to use carbines. You will not lose the points you acquired even if you exit the game before the round ends, regardless of whether for the technical reasons, or of own volition.

After you have unlocked the last gadget, you receive an additional bonus in the form of a start for your service as an engineer, which is worth 1000 points, and a dog tag.

Additionally, there are three assignments allotted to the engineer class, for the completion of which you receive special rewards:
ENGINEER - BASIC
Reward requirements:
Reward:
Dog tag "Engineer - basic".
ENGINEER - VETERAN
Reward requirements:
Reward:
The TTsKO BLUE camo (urban).
ENGINEER - EXPERT
Reward requirements:
Reward:
Personal Defense Weapon (PDW) UMP-9
Unlock
Score
Description
REPAIR TOOL

---
An oxy-fuel torch used for repairing allied vehicles and sabotaging the enemy ones, as well as for eliminating the enemy soldiers.
MBT LAW

---
An automatic defibrillator allows you to reanimate the killed allies and shock the enemies. After the electrodes are charged, it revives a soldier with a larger amount of health. After a multiple, fast use, it requires recharging.
M15 ANTI-TANK MINE

7000
An AT mine of large yield. Explodes whenever there comes a vehicle by. Capable of disabling even the heaviest of machines.
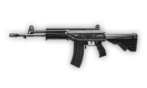
CARBINE
15 000
Unlocks the AK 5C and carbines for all functions. Use the AK5C to unlock further carbines.
FIM-92 STINGER
24 000
An AA, "fire and forget" type of projectile of medium range. Allows immobilizing of most aircraft. After it is fired, it self-guides towards the target.
FIELD UPGRADE: OFFENSIVE

33 000
LEVEL 1: SPRINT: increases the maximum speed by 10%.
LEVEL 2: AMMO: increases the inventory amount of ammo by 50%.
LEVEL 3: GRENADES: increases the inventory amount of grenades by 1.
LEVEL 4: BEZP. REDUCED FALL: Increases the height from which you can fall without damage.
RPG-7V2

43000
Anti-tank rocket launcher of large firepower. Allows for immobilizing of even the heaviest armored vehicles, as long as they are hit on the side or on the back.
SA-18 IGLA
53 000
Anti-air missile of medium range allows you to immobilize most aircraft. Requires maintaining the lock on target.
FIELD UPGRADE: MECHANIC

64 000
LEVEL 1: FAST REPAIR: Increases speed and sabotage of Repairs by 35%.
LEVEL 2: FLAK: Decreases damage from explosions by 15%.
LEVEL 3: COVER: Decreases amount of Incoming Suppression by 50%.
LEVEL 4: REPAIR UNIT: Occupied vehicles will slowly repair nearby vehicles.
M2 SLAM

74 000
M2 SLAM may be used as a traditional mine or an off-road AT mine. Although it is inferior to the M15 mine, in terms of blast damage, it is capable of Mobility Critical on most heavy vehicles.
EOD Bot

85 000
A remote-controlled robot which can repair friendly vehicles, sabotage enemy vehicles, disarm explosives and arm or disarm Rush assets.
MK153 SMAW
96 000
Launches high-speed missiles with flatter trajectory but lower damage than the RPG-7V2. It deals most serious damage after it hits the sides or the rear of the armored target.
FIELD UPGRADE: OFFENSIVE

108 000
LEVEL 1: MINES: Increases maximum deployed Explosives to 6 at mines or M2 SLAM .
LEVEL 2: ROCKETS: Increases maximum inventory of AT and AA ammo to 7.
LEVEL 3: MORE DEPLOYED EXPLOSIVES: Increases maximum deployed explosives to 6.
LEVEL 4: FLAK: decreases damage from explosions by 15%.
FGM-148 JAVELIN
119000
A guided Anti-Tank missiles that lock on to the land vehicles. The warhead does moderate damage to armors at any impact angle. Requires the user to maintain the lock on target.
FGM-172 SRAW

131 000
A wire-guided Anti-Tank missile launcher that may be controlled manually during their flight, for as long as the operator does not exit the aimed mode. Locks on to laser designators.

In Battlefield 4 support soldiers are the second, after the Combat-Medic class, most welcome class in the battlefield - on condition that they do their job well. The support soldier's basic responsibility is to supply the squad members with the unlimited ammo assets, which will be valued by any player that can survive in the battlefield for longer than a minute. There is nothing more irritating, however, than following a soldier, to request for ammo, while he is ignoring him and running around without sound or reason. While playing as a support soldier, you need to realize that often the life of your companions depends on how you perform your duties. This is to say that also the success of your squad depends on that, also.
The role of the supplies officer is not the only specialization available for the support soldier. Their another rile is to help your team, lay barrage fire and to suppress the enemy. There is a reason for which the Light Machine Guns are the basic weapons of the support soldiers, which pack a lot of ammo and are, by default, equipped with bipods. If you want to help your squad cut through a corridor blocked off be an enemy squad, it is sufficient to set the bipod and discharge a clip after clip into the enemy positions. Not only will you score multiple kills and assistance this way, but also suppress the enemy, while decreasing his orientation and accuracy.
Support soldiers also have a variety of explosives at their disposal. You can use them to eliminate the enemy infantry, neutralize and defend the sniper positions as well as to destroy vehicles. The available explosives can be deployed both offensively and defensively, depending on where and when you decide to use them.
Further in this chapter, you will learn everything about the gadgets and field upgrades available for mechanics and, to learn about the LGMs and shotguns, see the chapter entitled Weapons and accessories.
The role of the support soldier is decided, to a large extent, by the gadgets that he uses (best in combination with the appropriate field upgrade). Unlike in Battlefield 3, in this installment you can freely configure the Gadget 1 and Gadget 2 slots and that is why you can highly specialize your soldier to perform various tasks. There is nothing to prevent you from equipping two kinds of explosives or two munitions packs only. The only restriction is that you cannot use two types of grenade launcher ammo. Below, you can find the description of functioning and use of each of the gadgets.
AMMO PACK

The gadget that is available by default is the ammo pack. After you throw the pack onto the ground (2 at the same time, at most) everyone who comes near the pack, receives around 4 clips of ammo. The packs replenish the ammo of each kind, including gadgets, but not every type of weapon is replenished at the same time. First, the ammo supply for the basic weapon is replenished, then for the PDW, next the gadgets and finally the hand grenades. The ammo box (described below) replenishes supplies in the exact same order. All kinds of explosives - ranging from grenades to rockets - replenish very slowly, one unit at a time.
A much better method of helping an ally is to throw the pack directly at him. It suffices to target the ally and throw the ammo pack which, thanks to its weight, reaches much farther than if you threw is simply onto the ground. Additionally, in the BF4, the packs are characterized for certain "magnetism" and reach even an ally that runs in angles.
XM25 AIRBURST
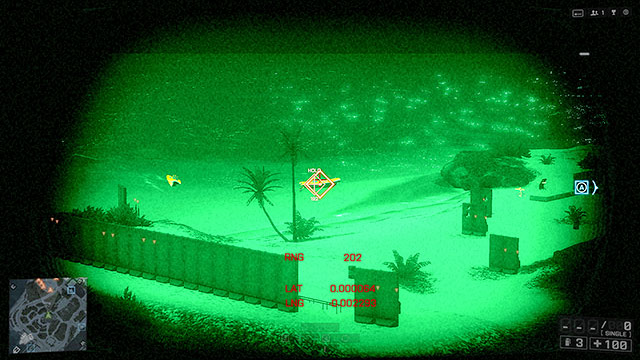
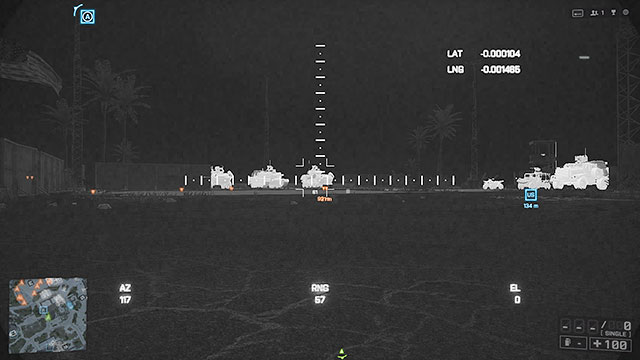
The XM25 grenade launcher is one of the most interesting, and immensely useful gadgets to appear in Battlefield 4. It launches 25mm grenades which may explode not only on impact against the ground, but also in mid-flight! The XM25 is equipped with thermal vision sights with laser range-finder, thanks to which you can easily target the enemies behind smoke screens or in dark rooms. The mechanics of mid-flight detonation, though, requires some explanation, because many Airburst users find it troublesome - and not without a reason, because the game does not go into details.
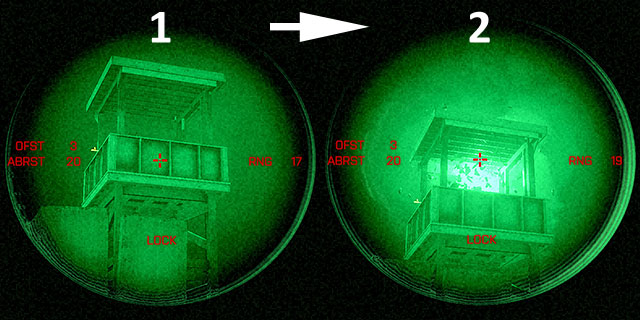
To determine correctly the distance, at which the grenade is supposed to go off, you need to go through the targeting mode. On the infra-red vision, you will notice a number of parameters. On the right of the sights, there is the RNG parameter, which informs you of the range to the obstacle that the crosshair is set on. For the automatic locking of the range to work, it cannot be lower than 15 meters. If the range is correct, at the bottom of the sights you will notice the LOCK, at the bottom of the sights, if the distance is too short, then you will see N/A.
In the above screenshot, in number 1 there is the correctly determined distance, accepted by the launcher's software, which is confirmed by the LOCK notice. Apart from the determined distance (17m in this case), on the left of the sights, there are two other parameters. The OFST informs of the number of meters, by which the distance to detonate remotely increases (in the case of Battlefield 4 it is always 3m), which yields the final distance determined by the ABRST parameter - which is 20m, in this case.
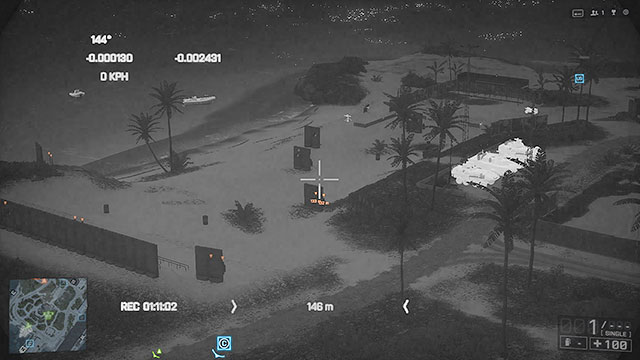
Number 2 in the above screenshot, shows the explosion of the grenade, 3 meters past the cover that has been locked on earlier Thanks to this functionality of the XM25 grenade launcher, you can easily eliminate the enemies that hide behind covers, e.g. the enemy snipers that occupy nests or rooftops. Of course, just like a classical 40mm grenade for the M320 launcher, if it impacts against an obstacle along its flight, it explodes.
In the above example, I have decided for the distance of 17 meters because the programmed grenade arms only after having travelled 20 meters. Therefore, even if you select an obstacle 15 meters away, the grenade will anyways explode after it has travelled the 20 meters, and not 18 meters, as could be assumed. Also, you need to remember that, while locking onto a very distant obstacle, you need to take the falling trajectory of the grenade so, it is best to practice this technique at the training ground.
Additionally, the XM25 can use two different types of ammo:
The smoke grenade is ideal for the support of the tactical maneuvers by the squad. The screen of smoke allows you to disorient the enemy e.g. while forcing his defense structures. This way, you can also make retreat, into safe positions, possible for your ally. It is not as effective as a hand-operated smoke grenade, or its 40mm counterpart for the m320, but you can launch as many as 4 within a narrow time window.
The dart grenade practically turns the launcher into a four-action shotgun of large firepower, which pierces armors and has the suppressive properties. Its range and rate of fire also leave little to wish for.
M18 CLAYMORE

The M18 AP mine returns in BF4, in a little bit altered form, though. After the mine is deployed, it shoots out three wires that attach to the nearby surface.

If there is any vertical surface in front of the mine, this is where the wires will attach. If there are no natural obstacles or walls around, the wires attach to the ground, which decreases the mine's effectiveness a bit. The mines that have been deployed incorrectly (e.g. towards the wall but too close to it) will fail to their purpose, because none of the enemies will be able to trip over any of the wires.
The M18 mines are clearly visible in the infrared, thanks to which it is easier to locate them. After the mine is deployed, it remains in the battlefield for as long as it is destroyed, or the support soldier deploys another one - in this case, each successive deployed mine will make the previous one disappear. The CLAYMORE mines can be destroyed either with weapons or with another explosive.
AMMO
The ammo box works on a principle similar to the assault soldier's medic bag. The support soldier may deploy it on any flat surface and, anyone ho comes close to the box, will be able to replenish fully their supplies of ammo, gadgets (does not work in the case of mortar projectiles) and grenades.
The order of replenishing is the same as in the case of the ammo packs. The box supplies multiple soldiers with ammo simultaneously, on condition that they are within the box's range.
The ammo box remains in the battlefield until its supplies deplete or until it is destroyed.
M224 MORTAR

The mortar is another gadget that is back to Battlefield 4 in a very much altered, and immensely useful, form. The support soldier can unfold the mortar on any flat surface but, it is not manually operated anymore.

After you unfold the M224, in your soldier's hand, there appears a remote control console with which you can operate the mortar from any point on the map. Therefore, it is highly recommended that you find a safe shelter, because the mortar operator is defenseless and susceptible to the enemy attacks. The important piece of information is that the mortar remains in the battlefield even after the operator dies, and he can resume using it after respawning, even from the other end of the map.
The M224 mortar offers the capability for fast rate of fire, which first go up into the air and hit the predetermined point on the map from above. It is an ideal tool for eliminating the enemy snipers staying at high points (rooftop, cranes, etc.), as well as for supporting attacks and defending control points on the map. Of course, the operator's effectiveness depends on the other squad members, to a large extent, who will determine the targets for him (they appear on the remote control console as orange triangles). Otherwise, the only solution is the blind bombardment.
MP-APS

The Man-Portable Active Protection System (MP-APS) may be one of the most interesting, and the most underrated gadgets in Battlefield 4. Without getting into boring technical details, this small device uses an intensive laser beam to neutralize the incoming missiles (including tank projectiles) and grenades (excluding hand grenades).
After you set the system on a flat surface, MP-APS activates after 3 seconds and, from now on, protects the allies behind it, from the incoming enemy missiles. The area that iit protects is lighted in bright green light shed by the device. Five seconds after it neutralizes an incoming missile or grenade, the light starts to blink red for the next 10 seconds. In this time frame, the device prepares for being used again and does not protect soldiers from missiles.
This shortcoming can be circumvented, to an extent, or alleviated rather by immediate deployment of another APS. The new device takes only 3 seconds to activate, as compared to the 10 seconds of reloading.
Just like in the case of the SOFLAM system, the MP-APS devices can be overridden with the remote control console that appears in the operator's hands, after the device is deployed. You can, this way, turn the head of the device to make it defend allies from the side different from the originally determined one. The creative players can use the system as a spy camera, of a kind, by deploying it near the other light-emitting objects (like projectors or reflectors). The obscurity of the system makes the less experienced players confuse it for one of the map's aesthetic features.
MP-APS can, of course, be destroyed but, it is easier said than done, as it has 200LP. The damaged (but not destroyed) APS can be repaired with a repair tool, or simply replaced.
C4 EXPLOSIVE

C4plastic explosive, is a compact-sized explosive of large blast radius, which can be attached to all surfaces. It is ideal for the destroying of enemy vehicles, as well as for setting traps (e.g. on MCOM relays). Simultaneously, you can set as little as (or, as many as) 3 charges. After they are deployed, you only need to use the remote to destroy immediately the object all covered in plastic. For higher effectiveness, the charges should be set on the side or, on the rear of the vehicle.

The innovation in the Battlefield 4 is the ability to set the C4 in water or underwater, to destroy enemy watercraft. The players who wish to remain undetected, may dive and set the explosive at the bottom/chassis of the watercraft.
The set charges are visible in infrared and they can be destroyed, or disarmed by the engineers. If the user decides to remove the deployed charges, it is sufficient to approach them and hold down the reload button.
The key factor (right after gadgets) that influences the support soldier's specialization are the field upgrades, which influence the effectiveness of the gadgets and tactics to a considerable extent. What follows, it is best to match gadgets and field upgrades, so that they complement your specialization or the mode of acting in the battlefield.
Each upgrade acts, by default, on level 1. To increase the upgrade level, you need to play in squad. Running around the map as a lone wolf will ensure you with only the basic functionality but, staying close to your squad (and I mean the squad, not the team) and completing objectives together with them, will allow you to unlock the higher upgrade levels quickly. Each upgrade level cumulates with the previous one. When the entire squad is eliminated, the upgrade level drops by one.
DEFENSIVE

This upgrade is available for everyone at the beginning of the game, regardless of the selected class. It is an ideal solution for those of the players that are under constant enemy fire, or like being in the battlefield's hottest spots. This may be the best upgrade for the proponents of the Annihilation mode, because it increases chances at survival of the player who is carrying a bomb.
SHADOW

This upgrade is available for everyone from the beginning of the game, regardless of the class selected. The Shadow (as the name suggests) is an upgrade for those of the players, who like dashing from place to place undetected and flank the enemy, or steal their control points right in front of their face. The best idea is to use it in the Conquest or Rush modes.
OFFENSIVE

The first unlockable upgrade for each class. It is ideal for the players who prefer a fast-paced assault and pack purely offensive gear. Also recommended for those who have problems with quick depletion of their ammo.
INDIRECT FIRE

The Indirect Fire is the best upgrade available for the players that specialize in supplying the companions and in supporting them in the battlefield with the grenade launcher, or the mortar. Reaching level 4 will allow the support player to resupply the companions with ammo, even without leaving own vehicle.
PERIMETER DEFENSE

The above field upgrade is an ideal solution for the proponents of securing the control points held by the squad. Both actively (by laying fire and suppression) and passively, by setting AP mines and protection of allies against missiles. Immensely improves the effectiveness of the MP-APS.
To gain access to most of the above gadgets and upgrades, it does not suffice to kill enemies with LMGs. To speed up the promotion in your class, and unlock every available weapon, you also need to supply quickly your companions with ammo. You will not lose your points even if you leave the game, regardless of whether for technical reasons or of own volition.

After the last one of the gadgets is unlocked, the player is additionally rewarded with a star, for his service as a support, which is worth 10000, as well as a special dog tag

Additionally, there are three assignments allotted to the support class, for the completion of which you receive special rewards:
SUPPORT - BASIC
Reward requirements:
Reward:
"Support Soldier"- Basic" dog tag.
SUPPORT SOLDIER- VETERAN
Reward requirements:
Reward:
Green Underbush Camo (forest/tropical).
SUPPORT SOLDIER - EKSPERT
Reward requirements:
Reward:
RPK-12 Light Machine Gun
Unlocking
Score
Description
AMMO PACK

---
Disposable ammo pack that, most usually, replenish one soldier's ammo supply.
XM25 AIRBURST

---
Launches the 25 mm grenades, which explode in mid-flight, which allows you to eliminate targets staying behind a cover. After you aim it at the cover and program the distance, the launched grenade explodes 3 meters behind the cover.
M18 CLAYMORE

7 000
The M18 Claymore is an anti-personnel mine that launches three trip wires, whose breaking detonates the mine. A mine with no trip wires is unable to detonate and should be picked up, and redeployed.
SHOTGUN
16000
Unlocks QBS-09 and shotguns for all functions. Use the QBS-09 to unlock more shotguns.
FIELD UPGRADE: RUSH

27 000
LEVEL 1: AMMO BAG UPGRADE: Allows for the deployment of an additional ammo box.
LEVEL 2: AMMO: Increases maximum inventory of Bullets by 50%.
LEVEL 3: INDIRECT FIRE: Increases maximum M224 and XM25 Ammo.
LEVEL 4: RESUPPLY UNIT: Occupied vehicles resupply nearby soldiers.
AMMO

38 000
A stationary ammo box. Resupplies ammo and gadgets in all allies within its range.
FIELD UPGRADE: INDIRECT FIRE

50 000
LEVEL 1: AMMO BAG UPGRADE: Increases maximum deployed Ammo Boxes by 1.
LEVEL 2: AMMO: Increases maximum inventory of Bullets by 50%.
LEVEL 3: INDIRECT FIRE: Increases maximum M224 and XM25 Ammo.
LEVEL 4: RESUPPLY UNIT: Occupied vehicles resupply nearby soldiers.
XM25 SMOKE
63 000
Launches 25 mm grenades that explode in mid-flight and create a smoke screen, which obstructs the visuals of the targets behind it. After you aim it at the cover and program the distance, the launched grenade explodes 3 meters behind the cover.
M224 MORTAR

76 000
A remote-controlled 60 mm mortar firing fragmentation ammo. The grenades are launched in a steep path and may hit objects between the mortar and the intended target. The optimal accuracy is ensured by single-shot fire, with intervals between individual shots.
MP-APS

90 000
Man-Portable Active Protection System, detonates incoming explosive rockets and shells from both vehicles and infantry before they can hit their targets. This gadget will not stop normal bullets nor hand thrown grenades. It can destroy multiple incoming threats in a 180-degree arc, but must recharge between uses.
FIELD UPGRADE: PERIMETER DEFENSE

104 000
LEVEL 1: AMMO: Increases maximum inventory of Bullets by 50%.
LEVEL 2: SUPPRESSION: Increases amount of outgoing suppression by 50%.
LEVEL 3: CLAYMORES: Increases the maximum inventory of Claymores by 3.
LEVEL 4: MP-APS UPGRADE: Increases time MP-APS can deflect incoming explosives.
XM25 DART
119 000
Launches a 25 mm grenade filled with-penetrating Flechettes that transform the launcher into a semiautomatic shotgun.
C4 EXPLOSIVE
134 000
is a plastic explosive that can stick to most surfaces. It's capable of a mobility kill on vehicles, and the remote detonator allows for ambushes
A recon soldier is usually keeps away from the frontline and has the best view over it. Many players confuse a recon soldier for a sniper that does nothing but takes out targets with long range weapons. It is partially true because, even without the specialist gadgetry, a recon soldier can and should detect enemy targets. The optical equipment of the sniper rifles can perform the role of binoculars which such a soldier will easily designate targets (both vehicles and infantry), to help his squad eliminate them. The optical instruments are not the end, though, because a scout has a number of motion sensors at his disposal, which additionally make things easier - and virtually without the scout's hand in it.
In Battlefield 4 scouts have also received access to explosives like C4 and CLAYMORE mine, thanks to which they can be even more effective while helping their team, by destroying vehicles or setting ambushed for the infantry. Gadgets make a scout a very valuable squad member, as long as his help is used correctly. The players that focus mainly on popping off the heads of the enemies and spending whole days among bushes, or spread over a floor like a Persian carpet. THEY DO THAT WRONG and they should not be surprised that the other squad members call them "campers". The scouts who do that do not contribute much to achieving the common aim - well, unless they are such remarkable shooters that they single-handedly retrieve half of the enemy team's coupons. Of course, there also are such players, but only a handful, the rest of them live in a world of illusion. A good scout should not remain in one position for long, even if he is a perfect sharpshooter. Sooner or later, he will be detected anyway and spend the rest of the round exchanging fire with the scouts of the opposing team. At such a point, the scout becomes useless for his squad - well, maybe apart from attracting the attention of the enemy snipers. Another characteristic of a good scout is detecting, detecting and detecting over again. This is not restricted to marking the enemy units, but also to designating the enemy vehicles with laser, for the players with guided missiles. Whenever there is a need, the scout can also sneak up to such a vehicle and blow it up with a C4 explosive. The last, but a very important part of scouting is making it available for the allied soldiers to respawn in the strategic points on the map - even behind the enemy lines. This is possible thanks to the radio beacon which can only be used by the killed members of the squad (not the entire team), whose member the scout is.
To sum up, the scout is - as the name suggests - not only a sniper and, if he makes a proper use of his gadgets, he will be welcome in every squad.
After he unlocks DMRs, they become available for all the remaining classes.
Further in this chapter, you will learn everything about the gadgets and field upgrades available for mechanics and, to learn about the LGMs and shotguns, see the chapter entitled Weapons and accessories.
The role of the scout is, to a large extent determined by the gadgets that he uses (best in combination with the appropriate field upgrades). Unlike in Battlefield 3, in this installment you can freely configure the Gadget 1 and Gadget 2 slots and that is why you can highly specialize your soldier to perform various tasks. There is nothing to prevent you from equipping two kinds of explosives or two munitions packs only . The only restriction is that you cannot use two types of grenade launcher ammo. Below, you can find the description of functioning and use of each of the gadgets.
PORtable DESIGNATOR
The portable designator is one of the innovations in Battlefield 4. It is an extremely useful tool that performs multiple roles and will definitely find its way into the inventory of many scouts.
The designator is binoculars, of a kind, equipped with infrared vision. This allows you to locate even the best hidden enemies in order to gun them down, or at least to designate them. Additionally, the designator comes equipped with a laser rangefinder, which is immensely helpful while resetting the optical instruments of a sniper rifle. While looking through the marker, you will notice the red RNG notice, which means the distance to the targeted object. Apart from that, the designator can be used to designate the enemy vehicles with a laser beam, which allows team members to destroy the target easily, if they are packing the laser guided-missiles- and they usually are. This makes the engineers and players who drive vehicles equipped with this weaponry will welcome the scout in their team.
C4 EXPLOSIVE

C4plastic explosive, is a compact-sized explosive of large blast radius, which can be attached to all surfaces. It is ideal for the destroying of enemy vehicles, as well as for setting traps (e.g. on MCOM relays). Simultaneously, you can set as little as (or, as many as) 3 charges. After they are deployed, you only need to use the remote to destroy immediately the object all covered in plastic. For higher effectiveness, the charges should be set on the side or, on the rear of the vehicle.
The innovation in the Battlefield 4 is the ability to set the C4 in water or underwater, to destroy enemy watercraft. The players who wish to remain undetected, may dive and set the expliosive at the bottom/chassis of the watercraft.
The set charges are visible in infrared and they can be destroyed, or disarmed by the engineers. If the user decides to remove the deployed charges, it is sufficient to approach them and hold down the reload button.
MOTION SENSOR

The compact motion sensor is another gadget that is designed to mark the enemy units, within the radius of up to 25m. The sensor is very simple to use - you only need to throw it, like grenade, in the appropriate direction and it will start to designate the enemies within its reach. Unfortunately, designating of the enemies with this gadget only displays their positions on the map, the orange triangles do not appear above their heads. You can trick the detector by staying immobile around it - still, you can turn around and change your body position. The detector, when thrown into the battlefield, remains there for about 24 seconds and it cannot be destroyed. It is not too visible but it can be recognized by the specific sound that it gives off. Each enemy soldier,. Killed near the sensor, earns the scout points for assist with detection.
RADIO BEACON

The radio beacon is a stationary, alternative, respawn point for all of the members of the squad that the scout is a part of, To deploy the beacon, you need a relatively flat ground and the right amount of free space.

The beacon is marked on the map with a special icon - just like in the case of enemy and detected beacons. Each squad member, after he clicks on to the green icon, may respawn next to the beacon, whose camera is usually panned in the direction opposite to where it has been deployed. The scout can only have one such beacon on him, at a time and, in the case in which another one is deployed, the previous one is destroyed. The important piece of information is that, after the beacon is deployed, the squad member will not be able to respawn on the scout himself, but on his beacon. If the device has been deployed in a room or, on a map, where there are no aircraft, the respawning soldiers appear right next to the beacon. If the beacon, on the other hand, is deployed out in the open, and there are aircraft available on the map, the squad members respawn some 100 meters above the beacon and fall down onto the ground, using parachutes (which automatically open at the appropriate height).
Radio beacons produce a characteristic noise, thanks to which they can be easily located by the enemy. Beacons can be destroyed with any weapon (also a knife), as well as with the help of an electromagnetic projectile that the MAVs are equipped with.
T-UGS SENSOR

T-UGS is the Tactical Unattended Ground Sensor that can be deployed on any flat surface. After being deployed, the sensor emits sounds each time it detects movement within the radius of 25 meters and it reports it to your minimap. The sensor can be tricked by ducking or crawling within that radius, and destroy with any weapon. A scout can only deploy one sensor at a time and, in case another one is deployed, the previous one self-destructs. Otherwise, T-UGS remains on the map for as long as it is destroyed by an enemy or, if the scout changes classes after he dies. Each enemy killed near the sensor rewards the scout with points for assist with detection.
SOFLAM

SOFLAM is a Special Operations Forces Laser Marker, which marks the enemy vehicles and aids their destruction with laser-guided missiles. The device can be deployed on any flat surface (just like the radio beacon) where it will remain until it is destroyed or another marker is deployed.
Using the remote control console, the scout can mark targets manually, or change the marker's orientation, depending on the current situation. Thanks to the infrared vision, you can detect even the vehicles hidden n the map, as well as enemy infantry units. The creative players , may use the SOFLAM in the form of a scouting camera, deployed in the map's strategic points. Additionally, the SOFLAM is equipped with a rangefinder that determines the distance between the device and the target. SOFLAM can be marked and destroyed with the enemy fire from any weapon. What makes it easier to identify is the flash of red that is visible at any distance, on condition that the observer is looking at the front side of the device.
MAV

MAV is a remotely controlled Micro Air Vehicle, thanks to which the scout can detect enemy targets and destroy the enemy equipment, as well as the CLAYMORE mines. The passive motion sensor detects the enemy units within the 35m radius but, the operator can also manually detect targets.
After MAV is deployed into the battlefield, the scout may switch into the remote-control mode, using a special console. In this mode, MAV can move around within the same boundaries of the map as the infantry, even though it is an air vehicle The infrared vision facilitates the detecting of the enemy units and equipment and, apart from that, it comes equipped with a laser rangefinder . the MAV uses the EMP ammo, thanks to which it can destroy the enemy equipment (motion sensors, beacons, EOD Bots, etc), as well as anti-personnel mines - you only need to locate the target and press the firing button. The EMP ammo regenerates spontaneously after several seconds, at which points it is ready to use again.
Each enemy that is killed after being detected by the MAV earns the scout for the assist with detection. Using the MAV, you can also kill the infantry enemies by speeding it up and slamming it into the enemy. The vehicle controls are similar to the controls of an infantryman, where crouching is used for decreasing the altitude and jump for increasing it.
M18 CLAYMORE

The M18 AP mine returns in BF4, in a little bit altered form, though. After the mine is deployed, it shoots out three wires that attach to the nearby surface.

If there is any vertical surface in front of the mine, this is where the wires will attach. If there are no natural obstacles or walls around, the wires attach to the ground, which decreases the mine's effectiveness a bit. The mines that have been deployed incorrectly (e.g. towards the wall but too close to it) will fail to their purpose, because none of the enemies will be able to trip over any of the wires.
The M18 mines are clearly visible in the infrared, thanks to which it is easier to locate them. After the mine is deployed, it remains in the battlefield for as long as it is destroyed, or the support soldier deploys another one - in this case, each successive deployed mine will make the previous one disappear. The CLAYMORE mines can be destroyed either with weapons or with another explosive.
The second key factor (after gadgets) that influences the scout's specialization are field upgrades, which influences the effectiveness of gadgets and the implemented tactics. What follows, is that it is best to select gadgets and field upgrades in such a way, as to make them complement the specialization selected by you, or the method of acting in the battlefield.
Each upgrade acts, by default, on level 1. To increase the upgrade level, you need to play in squad. Running around the map as a lone wolf will ensure you with only the basic functionality but, staying close to your squad (and I mean the squad, not the team) and completing objectives together with them, will allow you to unlock the higher upgrade levels quickly. Each upgrade level cumulates with the previous one. When the entire squad is eliminated, the upgrade level drops by one.
DEFENSIVE

This upgrade is available for everyone at the beginning of the game, regardless of the selected class. It is an ideal solution for those of the players that are under constant enemy fire, or like being in the battlefield's hottest spots. This may be the best upgrade for the proponents of the Annihilation mode, because it increases chances at survival of the player who is carrying a bomb.
SHADOW

This upgrade is available for everyone from the beginning of the game, regardless of the class selected. The Shadow (as the name suggests) is an upgrade for those of the players, who like dashing from place to place undetected and flank the enemy, or steal their control points right in front of their face. The best idea is to use it in the Conquest or Rush modes.
OFFENSIVE
The first unlockable upgrade for each class. It is ideal for the players who prefer a fast-paced assault and pack purely offensive gear. Also recommended for those who have problems with quick depletion of their ammo.
SPEC OPS
Spec ops is a perfect upgrade for scouts that wish to remain invisible and specialize at flanking the enemy and destroying the enemy vehicles. Additionally, it allows for more effective enemy detection by the scout, using all of the available motion sensors.
SNIPER
The above upgrade allows snipers to eliminate the enemy targets more effectively, even when he is under fire. Additionally, it increases the player's effectiveness, while marking the enemy units by spotting them. An ideal choice of every more" stationary" sniper.
To gain access to most of the above gadgets and upgrades, it does not suffice to kill enemies with sniper rifles. To speed up the promotion in your class, and unlock every weapon available for the scout, you also need to serve as a support to your companions by marking vehicles and destroying them. You will not lose your points even if you leave the game, regardless of whether for technical reasons or of own volition.

After the last one of the gadgets is unlocked, the player is additionally rewarded with a star, for his service as a scout, which is worth 10000, as well as a special dog tag

Additionally, there are three assignments allotted to the support class, for the completion of which you receive special rewards:
RECON - BASIC
Reward requirements:
Reward:
Dog tag "Recon - Basic".
RECON - VETERAN
Reward requirements:
Reward:

Duckweed Camo (forest/urban).
RECON - EXPERT
Reward requirements:
Reward:
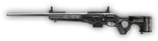
FY-JS Sniper rifle
Unlock
Points
Description
PORtable DESIGNATOR

---
Portable device for painting with laser targets for the rocket launchers that work with laser designators. For the marking to remain active, you need to keep lock on the target.
C4 EXPLOSIVE

---
A plastic explosive that can stick to most surfaces. It's capable of a mobility kill on vehicles, and the remote detonator allows for ambushes
MOTION SENSOR

5000
A throwable motion sensor that recognizes movement for up to 24 seconds and detects the enemy soldiers movement within the radius of 25 meters, after which it reports it to the map.
MARKSMAN RIFLES
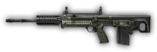
13000
Unlocks the RFB and marksman rifles (DMR) for all functions. Use the RFB to unlock more marksman rifles.
FIELD UPGRADE: RUSH

22 000
LEVEL 1: AMMO BAG UPGRADE: Allows for the deployment of an additional ammo box.
LEVEL 2: AMMO: Increases maximum inventory of Bullets by 50%.
LEVEL 3: INDIRECT FIRE: Increases maximum M224 and XM25 Ammo.
LEVEL 4: RESUPPLY UNIT: Occupied vehicles resupply nearby soldiers.
RADIO BEACON

32 000
A portable radio beacon that works as an additional respawn point for your squad's members. If it is deployed in the open, the soldiers will respawn in the air and fall down using parachutes.
FIELD UPGRADE: SPEC OPS

42 000
LEVEL 1: STEALTH: You are invisible for the motion sensors (unless you sprint).
LEVEL 2: C4 EXPLOSIVES: Increases maximum inventory of C4 Explosives to 6.
LEVEL 3: MOTION SENSORS: Increases maximum inventory of Motion Sensors to 5. Increases range of T-UGS and MAV by 40%.
LEVEL 4: QUCIK UNSPOT: Reduces time you are Spotted by 2 seconds.
T-UGS SENSOR

54 000
(Tactical Unattended Ground Sensor), detects enemy movement in a 25m radius and reports it to your team's minimap.
SOFLAM

66 000
SOFLAM (Special Operations Forces Laser Marker) automatically laser-paints enemy vehicles when deployed in a stationary position. The SOFLAM enables allies with missile systems to lock on to the targeted vehicles. Capable of remote operation.
FIELD UPGRADE: SNIPER

78 000
LEVEL 1: HOLD BREATH: Increases time you can steady your scope by 100%.
LEVEL 2: COVER: Decreases amount of Incoming Suppression by 50%.
LEVEL 3: QUICK UNSPOT: Reduces time you are Spotted by 2 seconds.
LEVEL 4: ADVANCED SPOT: Increases time your targets are spotted by 45%.
MAV

91 000
A remotely-controlled aircraft allows for spotting incoming threats or destroying deployed enemy gadgets. Includes a motion sensor with a 35m radius; active only when the vehicle is remotely controlled.
M18 CLAYMORE

104 000
The M18 Claymore is an anti-personnel mine that launches three trip wires, whose breaking detonates the mine. A mine with no trip wires is unable to detonate and should be picked up, and redeployed.
In BF4 you play with each vehicle differently. Each of them has weapons specific to it. However, some rules apply to all vehicles, so there's no point in repeating them in every section. The same thing applies to weapons. Some of them are available for more than one vehicle, so they will be described below.
We use default controls for most vehicles. In terms of graphics, it is recommended to set "grid quality" to ultra. It doesn't really affect the computer's performance and makes seeing distant enemies easier. Resolution should be high, preferably fullHD, but lower it if your frame rate is too low.
Working time
Reloading time
Active Protection
5 s
25 s
Fire Extinguisher
N/A
25 s
IR Smoke
7,5 s
17,5 s
Smoke Screen
7 s
5 s
Flares
3 s
22 s
ECM
7 s
23 s
Description:
Active Protection - For 5 seconds our vehicle can't be hit with any anti-tank rockets, cannons or artillery. All projectiles explode before hitting the vehicle, without dealing any damage. While it's active, we see a green light on the vehicle, it turns red while reloading. If we see a red light on an enemy's vehicle, we can aggressively lower the distance to it before active protection is loaded. Red light means that the enemy is vulnerable. It's best to use active protection when you see a TV missile heading towards you, a fighter jet, guided missiles and in close combat.
Fire Extinguisher - If your vehicle's armor is below 37%, using the fire extinguisher repairs it to 37%. If its mobility is limited, then the extinguisher will repair it, but armor will stay the same.
IR Smoke - Works against guided missiles. Use it when the missile is already heading towards you. You can also interrupt being targeted before the rockets are shot.
Smoke Screen - Lowers damage dealt by projectiles which damage depends on angle (90 is the biggest damage, for example rocket launchers). It also covers the vehicle, so it's possible to repair it.
Flares (only aircraft) - Work against guided missile. Use it when the missile is already heading towards you. You can also interrupt being targeted before the rockets are shot.
ECM (only aircraft) - interrupts being targeted. It can also be used when the projectiles are on their way and they're close (less than 7 seconds from potential hit). It also have a visual effect - a cloud and we disappear from the radar while it's active.
3x scope - needless to describe. It improves aiming, which is important in case of limited ammo.
IRNV - it would be useful at night, however for now there's no map to use it.
Thermal - you can see all vehicles and soldiers very clearly, but it seems less useful than magnifying scope.
Proximity scanner - it marks all enemy objects within 30 m on the minimap.
Maintenance - Lowers the time you wait for an automatic repair by 30% and increases its speed by 20%.
Thermal camo - it reduces passive spotted time to 1/1000 and active spotting time to 1/3 (passive spotting - after shooting, active spotting - after being seen), it also increases tracking time by 60%.
Belt feeder - reduces reload time by 20%, increases time of automatic fire before overheating by 15%.
Air Radar - instead of a minimap (you can see only a big one after pressing M), it shows all aircraft within 700 m radius.
Stealth coating (only aircraft) - it reduces passive spotted time to 1/1000 and active spotting time to 1/3 (passive spotting - after shooting, active spotting - after being seen), it also increases tracking time by 35%.
Gyro Stabilizer (only aircraft) - while the vehicle has a limited mobility, it improves its handling by 53-54%.
Heat seekers - Fire-and-forget missiles, you just aim and fire. If the enemy doesn't use countermeasures, the missile will hit them.
Passive radar - They work almost like heat seekers, but you have to keep aiming at the target. On short range they might work despite the countermeasures.
Active radar - You fire the missiles towards the target and they find it and head towards it. The error tolerance is around 5.
Heat seekers
Passive radar
Active radar
Maximum tracking range
500 m
500 m
-
Missiles available
2
2
2
Reload time
30 s
30 s
25 s
Damage dealt do aircraft*
21
21
21
Damage dealt to transport helicopters
13
13
13
Damage dealt to gunships
5
5
5
TOW missile - a missile controlled by the player with the mouse, view from the vehicle's cockpit.
Laser guided - a missile guided towards laser designated target. Laser lock must be maintained until the weapon hits the target.
TV guided - a rocket controlled by moving the mouse, view from a camera on the nose of the missile. Learning to aim is really hard. You must not make any sudden movements, and while trying to hit a moving target, imagine that you want to hit a place in front of it. Remember that you can hide behind a cover, fire the missile upwards and then guide it towards the target. You can "abandon" a TV guided missile by pressing E. It will continue moving forward until it reaches the distance of 1 km from the place where it was fired.
Laser guided
TOW
TV guided
Maximum range
-
690 m
1000 m
Maximum aiming range
500 m
-
-
Number of rockets
1/2 (depends on a vehicle)
1
2
Resupply time
30 s
15 s
30 s
Damage dealt to boats
medium/High*
medium*
High*
Damage dealt to armored vehicles
medium/High*
Low/
medium
(depending on a place and angle of impact)
High*
Damage dealt to aircraft
Very high
Very high
High
Damage dealt to infantry
-
High
medium
* - hitting with all missiles, without reloading.
Reload time may vary depending on a vehicle.
ZUNI, HYDRA - unguided rockets.
DAGR - after being fired, they find their way towards the nearest target. Margin of error: 15.
ZUNI
HYDRA
DAGR
Maximum range
2250 m
2250 m
750 m
Velocity
High
High
Low
Rate of fire (RPM)
200
300
300
Rockets available
8
14
10
All rockets
16
28
20
Resupply time
20 s
20 s
20 s
Reload time
4 s
4 s
4 s
Damage dealt to boats
Very high
High
medium
Damage dealt to armored vehicles
High*/Very high**
Very high*
High
Damage dealt to aircraft
medium
Low
Low
Damage dealt to infantry
Low/
medium**
Low/medium**
Low/medium**
* - hitting with all rockets, without reloading.
** - depends on place and angle of impact.
Some of these values change according to a vehicle you're in!
 M1 ABRAMS
Available tanks:
Tank is one of the most useful vehicle on the battlefield. It's incredibly durable and its rounds can penetrate any vehicle's armor. Controlling a tank and other tracked vehicles is very easy. You drive in a selected direction with WASD and control the gun (it can move 360 degrees horizontally, but only 30 degrees vertically) with mouse. As a driver you can access the main gun armed with anti-tank rounds and a machine gun with which you can destroy enemy infantry and light armored vehicles.
Except the driver, also a gunner may be in a tank. He controls the machine gun. A gunner is very useful for eliminating enemy infantry and aircraft. Unlike the driver, he can shoot at a much bigger vertical angle. Obviously, the damage is definitely lower, but it might save you in many situations. It's a good idea to shoot whenever it's possible, especially that the gunner's ammo is unlimited.
Remember that on the battlefield (especially in Conquest), there are usually several tanks and you'll have to face one of them sooner or later. During a fight like that, mobility and cooperation between the driver and the gunner are crucial. If you play alone and you want to spend most of your time in a tank - you should choose Engineer class. You'll be able to repair your tank to stay in the game.
Armor
100
Time until the start of regeneration (from the last damage taken)
14 seconds
Critical damage (temporary strong difficulty in controlling the vehicle)
Shot over 29% of armor
Limited mobility (temporary difficulty in controlling the vehicle)
Shot over 19% of armor
Immobilization (losing control of the vehicle, a fire extinguisher might save you)
10% of armor
Top speed
56 km/h
Seats
2
Default respawn time
90 seconds
Luckily, in case of heavy vehicles like tanks, you don't have to worry about settings too much. You should, however, get some advantage from the very beginning. Graphics are obviously your personal choice, but don't set them too high, because it may negatively affect your performance. Set grid quality to ultra, it will make it easier to see enemies with Q not only for you, but also for your teammates. Relative aim is often being turned off, but it's your decision whether you need it or not. The most important thing is your mouse sensitivity. It should be high enough to turn the turret and gun comfortably, but it can't make aiming at infantry and vehicles hard. Recommended settings:
Sensitivity in the game: 20%-30%
Sensitivity in Windows: 8/10
Sensitivity on mouse: 1200DPI - 2000DPI (You'll find information about your mouse on the bottom of it, in the manual, or on the Internet)
The minimap is an element you should never forget about (you can expand it with M or use it in Battlescreen). It will help you assess the danger and inform about current situation. The role of a tank driver depends on some dynamic factors. First of them is how your team handles tactical places (flags, beacons). When you see that the map is full of red squares, you should focus on taking over the places of tactical importance. It often means 1v1 combat (vehicle vs vehicle) or facing enemy infantry. What if the situation is more balanced? Then think about which places are worth defending or attacking. The same applies to danger assessment. Despite the fact that your tank weighs 50 tons and is armored, it's easy to destroy in the game. Most air and land enemy vehicles are also dangerous, so finding them on the map is essential for evaluating the situation. Remember that engineers, snipers and support just wait for you with their rocket launchers and explosives, therefore you should avoid no-win situations like facing too much anti-tank rounds.
If you decide to play defensively, be sure that your position is correct. You can't be in a open space, but don't get yourself into a cul-de-sac. You have to feel comfortable on your position. Don't forget to keep moving to lower your chances of being hit. Use all structures, buildings and other covers to increase your chance of survival. Such behaviour will give you confidence and make destroying your tank hard. Remember about the map - you'll see the enemy before they see you!
Being an offensive tanker is often harder than defending your tank while surrounded by teammates and buildings. While attacking the enemy, remember that seeing an enemy tank or aircraft may result in a quick transfer to respawn menu. Before you attack, make sure using your map that you won't run into half of the enemy's army on your way. Statistically, the closer you are to a key location, the more anti-tank mines and C4 there is on the ground. There are exceptions, obviously, because experienced engineers know some popular routes used by tanks. Avoiding traps like that requires experience and cooperating with the gunner. On your way, try to press Q from time to time so you don't hear an explosion. Don't forget that you may encounter hostile armored vehicles and engineers who defend their positions.
Unlockable
Icon
Required points
Description
Thermal camo
4 000
A coating that make s your vehicle harder to track.
Guided shell
12 000
Anti-tank rounds that require keeping aim on a target. They can be guided to targets out of your sight with laser.
Gunner: Proximity Scan

17 000
Only for Gunners - it detects enemy units around the vehicle and marks them on the minimap.
IRNV Optics

21 000
Thermal night vision, it will let you spot enemy units on low and medium distance more easily.
HE Shell

25 000
Rounds fired from the main gun - damage dealt is significantly larger, but velocity is lowered.
Smokescreen

29 000
A smokescreen that makes your vehicle impossible to designate as target, moreover the enemy won't achieve shots with critical damage.
Auto Loader
32 000
Significantly reduces reload time.
Gunner: IRNV
36 000
Thermal night vision for the gunner, it will let you spot enemy units on short and medium distance more easily.
Coaxial HMG

39 000
Cal .50 HMG mounted on the turret. Used for eliminating enemy infantry and light armored vehicles.
Thermal Optics
42 000
Black and white thermal vision that lets you see enemies more clearly at any distance.
Canister shell

46000
120mm round with tungsten pellets inside. Used mainly for eliminating infantry.
Fire Extinguisher

49000
Fire Extinguisher that lets you make your tank usable again, therefore making regeneration possible. Using it is possible only when the vehicle is heavily damaged.
Gunner: SOFLAM
52000
For Gunners: it designates targets for laser guided weapons.
Reactive Armor

55000
An armor that significantly reduces the chance to be hit with critical damage.
STAFF Shell
58 000
120mm round that identifies enemy units and explodes right above them, dealing high damage.
Gunner: Thermal Optics

61000
For Gunners: Black and white thermal vision that lets you see enemies more clearly at any distance.
Sabot Shell

64000
A round with no explosive, its velocity is much higher than other 120mm rounds.
Gunner: Incendiary

67000
Creates smoke that deals damage to enemies nearby.
Active Protection
69 000
Active protection detects incoming missiles and eliminates them before they reach your tank. It's deactivated after missiles are eliminated or when it doesn't detect any threat for some time.
Best combination:
Primary weapon: HE Shell. It deals more damage than a regular 120mm round.
Secondary weapon: according to your preferences, LMG or HMG. The former has a higher rate of fire while the latter deals more damage. Alternatively, you can select STAFF Shell that will help you with 1v1 situations but it will make eliminating infantry harder.
Countermeasures:
Duration:
Reload time:
Range:
IR Smoke
7.5 seconds
17.5 seconds
20m
Smoke Screen
7 seconds
5 seconds
4m
Active Protection
5 seconds
25 seconds
N/A
Fire Extinguisher
N/A
25 seconds
N/A - works while the vehicle's armor is below 37%.
IR Smoke will only protect you from guided missiles so it's not the best choice. Active protection will probably be better. Despite having a longer reload time and shorter duration, it will also stop any anti-tank rounds and aircraft.
Optics: according to your preferences, choose either 3x scope that's useful for eliminating enemies from a distance, or thermal optics, helpful while fighting infantry.
Upgrade: Definitely choose reactive armor that will make achieving a critical hit harder for the enemy.
Gunner optics: just like for the driver, choose between 3x scope and thermal optics.
Gunner upgrade: proximity scanner might be the most useful upgrade. With it, enemies near your vehicle will appear on the minimap (often soldiers with C4).
Cooperation between driver and gunner is essential for using a tank successfully. The gunner, who plays as an Engineer, should be best at repairing the tank. Remember that if you leave the vehicle you become an easy target and you might not be able to come back. To avoid it, turn the turret to the side you think is safe. You'll get out of the tank on this side. Moreover, you have to help your driver with your anti-tank launcher. Exit the same way you would to repair the tank. Right after the enemy shoots at your vehicle, get out of it, wait for a good moment and use your anti-tank missiles. Synchronizing these actions requires some experience.
During each round, you'll fight against other land vehicles. The most dangerous are obviously tanks and IFVs (Infantry Fighting Vehicles). Don't forget to keep moving to lower your chances of being hit. Remember to use countermeasures and cooperate with the gunner. Since tanks have the most durable armor in the front, try to keep facing the enemy. Unfortunately, tanks also have a weak spot - armor on the back. You must not let the enemy use it against you. If you use STAFF shells, use them to eliminate vehicles more quickly.
Sometimes you'll be able to spot an enemy vehicle much earlier. In this case it will be hard to hit other vehicles, especially when they keep moving. Perfecting shooting at moving targets is a matter of time. To avoid enemy shots, keep moving and use covers.
Since your vehicle is heavily armored, soldiers of classes other than Engineer should not pose a threat. To kill them effectively you need LMG or HMG. Remember that when you're close to buildings, hostile units might be waiting inside. Use your main gun to get rid of them. Sometimes it's better to tear down one building than avoid combat.
That's where the difficult part starts. Eliminating aircraft might be very difficult or even impossible for a tank driver. It's a skill possessed only by the best tankers and it requires a lot of experience. Your main gun can't shoot at a high angle, 120mm rounds are slow and have a very high drop. Additionally, airborne vehicles are much faster. You'll have to predict where the enemy will fly next. You can use guided shells, but they require aiming at the enemy.
A Gunner will be much more effective in eliminating aircraft (especially helicopters). He'll be much more effective in destroying vehicles with his gun. He can also get SOFLAM upgrade that will let him designate targets.
It might often seem that you should go to a place with many enemies. It's the most common mistake of tankers. Always adjust your location to a situation and avoid too many enemies. You never know if they are cooperating with, for example, an assault helicopter. Moreover, when you use your countermeasures (like active protection), you'll be prone to attacks of engineers and their anti-tank launchers. Don't get tempted by the highest score or K/D balance. Try to support your team with defence and attacking key locations. Remember to cooperate with other vehicles, obey the commander's orders (if you think they're right) and don't pay too much attention to scores.
In Battlefield 4, the developers gave tanks only 5 120mm rounds. Obviously they will regenerate, but you can't run out of them. Sensible use of weapons is a very important aspect of using a tank. Don't waste your rounds on targets that move too fast because the chance of hit is very low. It's a very important matter because if you face a hostile vehicle and you have your last round, you might not be able to defeat your enemy.
When you move in tight places surrounded by building, you'll need to change the view with C. You'll extend your field of view and you'll be able to see what's going on around you. It's quite important because soldiers with C4 often use their advantage over careless tankers.
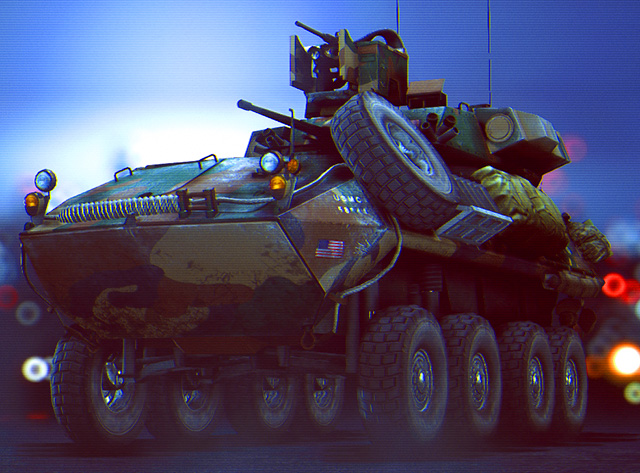 LAV-25
Available models:
IFV (Infantry Fighting Vehicles) are vehicles equipped with anti-tank guns and MGs. Moreover, IFVs can hold up to a few players at once so they're good as transport vehicles.
Controls are not very different from basic tanks - you control the direction with WSAD, while the mouse controls the turret. General movement, combat and positioning are the same as in tanks. IFVs' armor is weaker but their speed, mobility and rate of fire is much higher.
IFVs can destroy any armored vehicle - even tanks. Mobility is essential in fighting against a tank - amount of ammo and rate of fire gives you an advantage despite of dealing less damage than tanks. Your speed can be really helpful, so try to move as much and as fast as possible. Don't forget about cooperating with your mechanic because he'll help you in dangerous situations.
Armor
1000
Time until the start of regeneration (from the last damage taken)
14 seconds
Critical damage (temporary strong difficulty in controlling the vehicle)
Shot above 39% of armor
Limited mobility (temporary difficulty in controlling the vehicle)
Shot above 29% of armor
Top speed
65 km/h
Number of seats
6
Default respawn time
60
In case of vehicles like IFVs, Settings are not very important. Your most important change should be about graphics (playing should be comfortable but without a loss of frame rate). You should set grid quality to ultra because it will let you see enemies with Q more easily. Don't forget about relative aim (Controls tab) that you set according to your preferences. Just like with tanks, mouse sensitivity has to be high enough to turn the turret comfortably but it can't make aiming at infantry hard. Recommended settings:
Sensitivity in the game: 20%-30%
Sensitivity in Windows: 8/10
Sensitivity of mouse: 1200DPI - 2000DPI (You'll find information about it on the bottom of your mouse, in the manual or on the Internet)
Just like with tanks, as an IFV driver you can't forget about the map. You can expand it with M or use a Battlescreen. It will give you information about the danger and current situation. As an IFV driver you must know your strong and weak points. Your role will depend on how your team handles tactical locations (flags, beacons). As a mobile and fast vehicle, support your team when they can't eliminate the enemy in tactical locations. Probably a 1v1 (vehicle vs vehicle) fight and contact with infantry will happen. If the situation is balanced, decide which locations you should defend, but don't forget about attacking. Don't overestimate your abilities, you can be destroyed much faster than a tank by most land and air vehicles. Use your map to avoid it. Remember that many engineers, snipers and support soldiers use explosives and anti-tank launchers. They will use it against you only if you make a mistake. You should therefore avoid situations like too much anti-tank rounds. As a last resort, since your vehicle is quite fast, you might try escaping a fight, but as a good driver you should not let that happen.
When you decide how you want to play, don't forget about your weak and strong points. As an IFV you have a weaker armor than a tank, so fighting one of them with low armor might be a suicide. You have, however, a more diverse weapons (you can shoot more rounds than a tank), you can take more allies with you (like engineers or support who will help you in a dire situation) and you can escape a fight quickly.
While playing defensively, position your vehicle away from open spaces (increased danger from aircraft). Have a way to escape. You have to feel comfortable on your position. Don't forget to keep moving to reduce a chance of being hit. Use all forms of covers like buildings. Acting like that will give you confidence and make your vehicle difficult to eliminate. If you play with engineers, ask them to place some anti-tank mines. You can set a trap for your enemy. Additionally, don't forget about the map - you'll see the enemy before they see you!
If you think it's time to play offensively, remember that it's harder than protecting your flags and beacons. When you leave your position, you lose covers. Before you do it, check the map to be sure that nobody surprises you, especially a vehicle in a better position. Statistically, the closer you are to tactical locations, the more threats may interrupt you. They are mostly anti-tank mines, C4 and engineers with anti-tank launchers. Avoiding them requires experience and cooperation between the driver and the gunner. Try to press Q from time to time so you don' get into an explosive.
Unlockable
Icon
Required points
Description
Thermal Camo

4000
A coating that make s your vehicle harder to track.
TOW missile
6000
Wire-guided anti-tank missile. Deals high damage to armored vehicles and nearby infantry.
Gunner: Proximity Scan

9000
Only for Gunners - it detects enemy units around the vehicle and marks them on the minimap.
IRNV

11 000
Thermal night vision, it will let you spot enemy units on low and medium distance more easily.
APFSDS-T

13 000
A round with no explosive, its velocity is much higher than other rounds.
Smokescreen

15 000
A smokescreen that makes your vehicle impossible to designate as target, moreover the enemy won't achieve shots with critical damage.
Gunner: IRNV
17000
Thermal night vision for the gunner, it will let you spot enemy units on short and medium distance more easily.
Auto Loader
19 000
Significantly reduces reload time.
Thermal Optics

21 000
Black and white thermal vision that lets you see enemies more clearly at any distance.
Gunner: Soflam

23 000
For Gunners: it designates targets for laser guided weapons.
Canister shell

25 000
25mm round with tungsten pellets inside. Used mainly for eliminating infantry.
Fire Extinguisher

26 000
Fire Extinguisher that lets you make your tank usable again, therefore making regeneration possible. Using it is possible only when the vehicle is heavily damaged.
Reactive armor

28 000
An armor that significantly reduces the chance to be hit with critical damage.
Gunner: Thermal Optics

30000
For Gunners: Black and white thermal vision that lets you see enemies more clearly at any distance.
ZUNI Rockets
31 000
Guided rockets. Effective against infantry and armored vehicles.
Gunner: Incendiary

33 000
Creates smoke that deals damage to enemies nearby.
Best combination:
Primary weapon: definitely 25mm shell. Although it deals less damage to vehicles (1%-1.5% less than APFSDS-T) but it's better at eliminating infantry.
Secondary weapon: don't use LMG and canister because they're made for eliminating infantry (for this you have 25mm). Choose between TOW missile and ZUNI rockets.
TOW missile
ZUNI rockets
Resupply time
15 seconds
20 seconds
Number of rounds
2
16
Damage dealt to land vehicles
23%- 50%
4% - 9%
It's your choice. If you prefer higher damage with less shots, choose TOW missile. Remember that missing an enemy usually results in a loss. But if you prefer dealing less damage but having more rockets, choose ZUNI rockets.
Countermeasures:
Duration:
Reload Time:
Range:
IR Smoke
7.5 seconds
17.5 seconds
20m
Smoke Screen
7 seconds
5 seconds
4m
Active Protection
5 seconds
25 seconds
N/A
Fire Extinguisher
N/A
25 seconds
N/A - works below 37% of armor
IR Smoke will only protect you from guided missiles so it's not the best choice. Active protection will probably be better. Despite having a longer reload time and shorter duration, it will also stop any anti-tank rounds and aircraft.
Optics: according to your preferences, choose either 3x scope that's useful for eliminating enemies from a distance, or thermal optics, helpful while fighting infantry.
Upgrade: Definitely choose reactive armor that will make achieving a critical hit harder for the enemy.
Gunner upgrade: proximity scanner might be the most useful upgrade. With it, enemies near your vehicle will appear on the minimap (often soldiers with C4).
Just like with tanks, you have to learn to cooperate with your gunner. It looks the same but I will say it one more time. You have to keep talking. The gunner, who plays as an Engineer, should be best at repairing the IFV. Remember that if you leave the vehicle you become an easy target and you might not be able to come back. To avoid it, turn the turret to the side you think is safe. You'll get out of the IFV on this side. Moreover, you have to help your driver with your anti-tank launcher. Exit the same way you would to repair the IFV. Right after the enemy shoots at your vehicle, get out of it, wait for a good moment and use your anti-tank missiles. Synchronizing these actions requires some experience.
During the game, you'll have to fight against other land vehicles. Tanks and IFVs are most dangerous. Don't forget to keep moving. Protect the back of your vehicle because it has the weakest armor. Don't let the enemy hit your back or you might end up in the respawn menu.
When you fight against other IFVs, use your ZUNI rockets or TOW missiles first. When you do it, activate the active protection so the enemy's counterattack doesn't kill you. Then, while your secondary weapon is regenerating, use your 25mm rounds. When you use all of them, come back to the previous weapon. This will let you eliminate the enemies more quickly and effectively. It's not a golden rule, add something from yourself if you think it's necessary. Cooperate with your gunner who can help you.
If you fight against a tank, it gets more interesting. A tank has a much better armor and weapons. It's best to set an ambush. Like all armored vehicles, tanks are weakest at the back. If you can't hit it and you must fight, don't forget about advantages of your vehicle. Like with fighting the IFVs, use the pattern: ZUNI rockets/TOW missiles => active protection => 25mm rounds => repeat. Avoid hitting the front because of the strongest armor. Don't forget about your gunner and engineers, use their help to eliminate the enemy more quickly.
Considering your light armor and quite good weapons (25mm rounds), fighting against infantry should not be a problem. Your primary weapon, except the direct hits, can harm the infantry even if you shoot next to them. Use this for example when you know that there are enemies in a building.
The difficult part starts here. Airborne vehicles are your biggest threat. Destroying them with your weapons might be impossible because the angle at which you can shoot is too low. Experienced pilots will use it to their advantage and they'll stay above that angle. Even if the enemy is within your range, very low damage of 25mm rounds and ZUNI rockets will make it impossible to destroy them. TOW missiles are your last hope, but using them against aircraft requires a lot of experience.
Gunner's help is the best option. His gun can eliminate hostile planes and helicopters much more quickly.
It often seems that the current situation is favourable and you may leave your position or go into an open area. It's the biggest mistake you can make. Most airborne vehicles will destroy you before you even think about it. Moreover, if you use your countermeasures too fast, engineers will see a red light on your vehicle and will probably fire a salvo of anti-tank rounds. If you evaluate the situation dynamically, you won't fall into an ambush. In the beginning, don't count on a high K/D. Focus on supporting your team and gaining experience more than on your score. K/D is not always equal to your skills.
When you move in tight places surrounded by building, you'll need to change the view with C. You'll extend your field of view and you'll be able to see what's going on around you. It's quite important because soldiers with C4 often use their advantage over careless tankers.
As an IFV driver, you have one big advantage - the option of escaping. It is so because IFVs are faster than tanks, which might be a major advantage. Don't turn your back towards the enemy, your armor is weak there and it might lead to elimination of your vehicle.
It might seem that in the beginning you have a lot of ammo. It's not true. Killing infantry and shooting aircraft is important, but other land vehicles pose the biggest threat. You should always have some spare rockets and rounds. It's better to wait a moment and kill the infantry later than create a situation when you have to leave your vehicle.
 AH-6J Little Bird
Destroying tanks and IFVs is definitely not one of scout helicopters' objectives. They have a light construction so they're easy to destroy. They aren't too fast either. So what's the reason to pilot them? Mainly their agility that allows you to fly between skyscrapers or other buildings. You can also equip them with 25mm cannon that's excellent against infantry.
There are four seats. One for the pilot, two for players on the sides (more about them further in the guide). There's also one seat next to the pilot, but you can't shoot or repair from it, so it's just for transport.
Available models:
Controlling a scout helicopter is the same as with its assault counterpart. Despite what a beginner might think, it's very easy. You control your altitude with W and S, turn with A and D, and tilt with mouse.
Others:
For example, to fly forward, you have to ascend and then tilt the vehicle forward. To turn, you'll mainly use A and D, but there are some situations when you can make it more effectively by tilting the vehicle to the side where you want to fly. maneuvering the helicopter can be very easily learned.
There's no need to change controls in scout helicopters. There are no complicated manoeuvres, you just need a little practice. Mouse sensitivity should not be too high or you will have problems with 1v1 fights. You should have a big mousepad because maneuvering between buildings or with a limited mobility might be very difficult.
Armor
500
Time until the start of regeneration (from the last damage taken)
10 seconds
Critical damage (temporary strong difficulty in controlling the vehicle)
A hit above 29% of armor
Limited mobility (temporary difficulty in controlling the vehicle)
A hit above 19% of armor
Immobilization (losing control of the vehicle, a fire extinguisher might save you)
10% of armor
Number of seats
4
Top speed
120*
Default respawn time
90 seconds
* unit of helicopter speed in the game, not similar to any real unit but it allows you to compare helicopters.
Unlockable
Icon
Required points
Description
Stealth Coating

3000
A special coating that makes your vehicle harder to detect.
Heatseekers
6000
Heat-seeking missiles. After locating the target, they head towards it.
Fire Extinguisher

8000
Fire Extinguisher that lets you make your tank usable again, therefore making regeneration possible. Using it is possible only when the vehicle is heavily damaged.
25mm cannon
12000
Shoots 25mm bullets, effective against light and medium armor, and infantry.
Belt feeder

15000
Significantly reduces reload time.
Proximity scan

18000
It detects enemy units around the vehicle and marks them on the minimap.
ECM

21000
Makes the enemy unable to track you for a short time and disorientates all their missiles.
Radar

24000
Replaces minimap with a long-range radar that marks all airborne targets around your vehicle.
Laser Guided
28000
Laser guided anti-tank missile - also from a distance, towards designated targets out of gunner's sight. Requires aiming at the target.
Best combination:
Primary weapon: 25mm cannon is harder to use because of lower rate of fire and limited ammo. It's stronger than a 7.62 machine gun and hurts infantry even if you don't hit it directly.
Secondary weapon: Heatseekers, they will let you eliminate enemy helicopters. You'll need them because the cannon's range is much lower.
Countermeasures: Flares, because with them you can be sure that they will work, that can't be said about ECM.
Duration:
Reload Time:
Flares
3 seconds
22 seconds
ECM
7 seconds
23 seconds
Fire Extinguisher
N/A
25 seconds
Upgrade: Gyro stabilizer will be very useful. Because of the scout helicopter's low speed you'll be hit with guided missiles quite often and with the gyro stabilizer regaining control of the vehicle will be easier.
The theory is very simple. Unlike with planes, there are no complicated maneuvers. To win these fights you just have to remember a few rules and shoot accurately. First, don't get surprised. To do it, use your minimap and try to see the enemy from a long distance. You should be on a higher altitude but it's not compulsory.
Direct fight starts when two helicopters are closer than 500m from each other. You should start aiming at the enemy vehicle and shoot one rocket. If you're sure that they have used all their flares, fire 2 missiles.
Remember that the 25mm cannon's crosshair is not in the middle of the screen. It's the cross that moves a bit depending on a position. Shoot with bursts and while you reload the cannon, move your helicopter to become a more difficult target. If you're able to aim at a specific part of the vehicle, make it the cockpit or a player repairing it.
Players on the sides of the helicopter give you a huge advantage by repairing it. If you shoot slightly worse than your enemy and you have two players to repair the helicopter, you'll win 10/10 of these encounters. Moreover, from a side seat you can shoot other air vehicles with SA-18 Igla and FIM-92 Stinger heatseeker launchers. The enemy won't be able to fire enough flares. The crew is a big advantage and if to players repair the helicopter at once, you might become a flying fortress.
You might wonder why there's a question mark. Well, helicopters are ineffective against armored vehicles. They're not durable so you'll get killed as soon as you come close to an anti-aircraft vehicle, a tank or a boat. 25mm cannon might penetrate armor of tanks, but you'd have to spend a lot of time to deal any real damage to it. You might try shooting transport vehicles with light armor, nothing more. You can get laser guided missiles if you're sure that someone will keep flying with you to repair the vehicle. Without them, you'll need heatseekers to win fights against other helicopters.
Remember that stationary weapons placed near your base will shoot at every marked vehicle in its range. Use it to your advantage and when you're in danger, lower your altitude and fly between buildings towards your stationary weapons. Then mark the hostile helicopter with Q and wait for its reaction. If it comes after you, it will be in trouble, if not - increase your altitude and start a regular 1v1 fight.
Anti-aircraft vehicles are really strong in BF4. A light-armored scout helicopter is not a problem for them. That's why you should stay away from them and don't even think about attacking them.
When you're done with enemy helicopter, it's time to score some kills on infantry. Remember that you don't have to hit the target directly with 25mm cannon, shooting near them should be enough. Don't fly too close to them, because you might get killed with an RPG or SMAW. Don't stay in one place because you may become an easy target for infantry with SRAW launchers.
Sometimes when you fly by yourself, you have to land to repair the helicopter. The key thing here is to get back as soon as possible. There's one trick that lets you take off more quickly. After entering the helicopter, change seat with F3, F3 or F4, then come back to pilot's seat with F1. Taking off will take much less time Make sure that nobody respawns inside the vehicle and takes your pilot's seat. It also works in mid-air, when you change place to a passenger's seat.
It might seem that killing infantry as a helicopter pilot is easy and relaxing. Remember to always have at least one magazine in case of an approaching hostile helicopter. Sometimes you have to give up some kills, but they won't be worth it if you die. You'd kill the same amount of players while waiting for another helicopter.
We talked a lot about importance of crew. Sometimes, however, nobody will want to fly with you and you'll have to go by yourself. You won't be as effective, but it's better than nothing.
When you finish a fight, get immobilized or simply become damaged, move to the side of the vehicle on a high altitude and start repairing it. You'll start losing altitude so don't go for 100%. When you want to go back to flying, use the "quick take-off" to gain altitude more quickly.
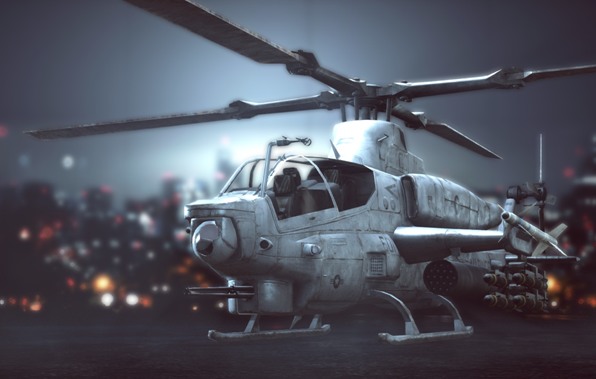 AH-1Z VIPER
Available models:
Assault helicopters are a powerful aircraft that's perfect for eliminating anything that moves because of its variety of missiles and a 30mm cannon for the gunner. Its agility and mobility lets it dominate the airspace. The most important thing in them is pilot-gunner cooperation, but we'll talk about it later.
Controls of an assault helicopter are basically the same as of its scout counterpart. Despite what a beginner might think, it's very easy. You control your altitude with W and S, turn with A and D, and tilt with mouse.
Others:
For example, to fly forward, you have to ascend and then tilt the vehicle forward. To turn, you'll mainly use A and D, but there are some situations when you can make it more effectively by tilting the vehicle to the side where you want to fly. maneuvering the helicopter can be very easily learned.
Just like with scout helicopters, there's no need to change the controls. There are no complicated manoeuvres, you just need a little practice. Mouse sensitivity is quite important if you want to master the TV missiles. Recommended settings:
Sensitivity in the game: 35% - 45%
Sensitivity in Windows: 8/10
Sensitivity of mouse: 800DPI - 1200 DPI (You'll find information about it on the bottom of your mouse, in the manual or on the Internet)
You should have a big mousepad because maneuvering between buildings or with a limited mobility might be very difficult.
Armor
500
Time until the start of regeneration (from the last damage taken)
10 seconds
Heavy damage (temporary strong difficulty in controlling the vehicle)
Shot above 29% of armor
Limited mobility (temporary difficulty in controlling the vehicle)
Shot above 19% of armor
Immobilization (losing control of the vehicle, a fire extinguisher might save you)
10% of armor
Number of seats
2
Top speed
160* (RU, US), 130* (CH)
Default respawn time
90 seconds
* unit of helicopter speed in the game, not similar to any real unit but it allows you to compare helicopters.
Unlockable
Icon
Required points
Description
Stealth Coating

4000
A special coating that makes your vehicle harder to detect.
Gunner: Proximity Scan

7000
It detects enemy units around the vehicle and marks them on the minimap.
Fire Extinguisher

11000
Fire Extinguisher that lets you make your tank usable again, therefore making regeneration possible. Using it is possible only when the vehicle is heavily damaged.
Gunner: IRNV

14000
Thermal night vision for the gunner, it will let you spot enemy units on short and medium distance more easily
ZUNI Rockets

17000
Anti-vehicle rockets. Most effective when they hit armor directly. There are less rockets in each salvo because of bigger warheads.
ECM

20000
Makes the enemy unable to track you for a short time and disorientates all their missiles. Requires reloading
Laser Guided

23000
Laser guided anti-tank missile - also from a distance, towards designated targets out of gunner's sight. Requires aiming at the target.
Radar

26000
Replaces minimap with a long-range radar that marks all airborne targets around your vehicle.
Gunner: Thermal Optics
29000
Black and white thermal vision that lets you see enemies more clearly at any distance.
TOW missile
32000
Wire-guided anti-tank missile. Deals high damage to armored vehicles and nearby infantry.
TV Missile
35000
A missile controlled with a camera. Effective against armored targets.
DAGR Rockets
38000
Rockets that head towards the nearest armored target.
Best combination:
Primary weapon: That part is quite difficult. Why?
ZUNI Rockets
HYDRA Rockets
DAGR Rockets
Maximum Range
2250 m
2250 m
750 m
Rocket Velocity
High
High
Low
Rate of fire (RPM)
200
300
300
Available rockets
8
14
10
Number of rockets
16
28
20
Resupply time
20 s
20 s
20 s
Reload Time
4 s
4 s
4 s
Damage dealt to boats
Very high
High
medium
Damage dealt to armored vehicles
High*/Very high**
Very high*
High
Damage dealt to aircraft
medium
Low
Low
Damage dealt to infantry
Low/
medium**
Low/medium**
Low/medium**
* hitting with all rockets, without reloading.
** depends on place and angle of impact.
There are no specific best rockets. All of them have strong and weak points. ZUNI rockets will be perfect if you need a bit of advantage over hostile helicopters (mainly in 1v1 on short distance). HYDRA Rockets are good for people who can aim at moving targets. DAGR rockets will find their targets, but deal less damage.
Secondary weapon: definitely choose heatseekers because they're perfect for all flying targets.
Countermeasures: Flares, because with them you can be sure that they will work, that can't be said about ECM.
Upgrade: gyro stabilizer is really useful because you'll encounter infantry and vehicles equipped with guided missiles. Sometimes flares won't be enough, gyro stabilizer will let you escape.
Secondary weapon (Gunner) - obviously the TV Missile, the gunner will do most of his job with it. Learning to use it is not easy but it's worth trying.
Optics (Gunner) - 3x Scope useful for shooting at distant targets seems the best.
Upgrade (Gunner) - out of the not too diverse possibilities, you should choose belt feeder.
Before you learn about situations on the battlefield, you should know some facts. As I have already mentioned, constant cooperation between the gunner and the pilot is crucial. It requires some experience so don't worry if it's not perfect from the first time. There are two styles of playing in which both gunners and pilots need different skills. In passive style, the more popular one, the pilot stays on a constant altitude, usually around 250-300m. Doing it lets the gunner look around and shoot infantry and armored vehicles. When you fly like this, you fight on a long distance, mainly with TV missiles. Hostile planes are a big threat and they have to be seen early enough. Watch out for incoming TV Rockets, if you stay in one place for too long, even infantry with SRAW launchers may destroy you. In aggressive style the pilot changes his position dynamically. You have to fly on much lower altitude than in passive style. It's dangerous because your vehicle might be destroyed by tanks and anti-tank launchers. The best pilots will combine both styles and adapt to every situation. It requires experience.
Before you start hunting enemy tanks, aircraft and infantry, focus on localizing and destroying the enemy's assault helicopter. If it's possible, stay away from it. Gunner will use TV missiles. Unfortunately, in the fourth installment of Battlefield you need two TV missiles to destroy an assault helicopter, so accuracy is very important. Practising using them takes hours. While training, focus on moving the mouse slowly, firmly but not chaotically. If you can't hit the helicopter and distance between you decreases, the pilot might help you. Try to shoot the enemy vehicle with rockets and cannons. Don't try to approach the enemy because distance gives you an advantage. While the gunner uses his TV missile, the pilot has too look around for any threat, usually AA vehicle or planes. in aggressive style, distance doesn't matter because you usually encounter other helicopters rather directly, so the Gunner will mostly use his cannon.
After you destroy the hostile helicopter, you and your crew may focus on dominating the airspace. Only pilots of planes might interrupt you. While fighting them, heatseekers are really useful. Use them to scare the enemy away. Wait until the jet is really close and shoot both of them at once. Flares and ECM probably won't work. A gunner might try using TV missiles but it's really hard and only best players can do it. There is one thing that makes it easier. When a jet approaches your vehicle, it has to fly straight for a moment. Then you have a better chance of hitting it with a TV missile. If it comes closer, use your cannon. In aggressive style, planes should not pose a threat because when you keep moving, it's harder to hit you. You can also use trees and buildings as cover.
The pilot's task is to look around the airspace. If it's safe, you can support your team by eliminating tanks and IFVs. Don't forget about AA guns that will wait aimed at the sky. It's easiest to destroy with TV missiles because If you stay far away from the enemy, they won't be able to hit you. When you deal with this problem, look for some armored vehicles. The easiest, in passive mode, is to use TV missiles. Their high range (1 km) gives you a wide range of possibilities. When you master flying them, tankers don't stand a chance. In aggressive style, you have to combine gunner's cannon and pilot's rockets to do as much damage as possible. Remember that when you fly low, you're prone to tanks and anti-tank missiles.
The gunner has to eliminate enemy infantry. It's really simple in both styles of playing because his cannon has a high range and damage. Focus on accuracy and shooting with bursts. 2-3 rounds at a time are recommended against the infantry but you can work out your own method. Don't forget that engineers can use anti-tank weapons, don't give them an opportunity to do so by lowering your altitude.
Except for cooperating with the pilot, the Gunner must learn to use TV rockets perfectly. The fact that you have two of them gives you an advantage against many vehicles, and the missiles' damage is high enough to eliminate most jets or AA vehicles. As a beginner, practise shooting helicopters even on empty servers, you'll need it!
The gunner's cannon is very strong but it doesn't have too much ammo. Sometimes it's better to save one magazine than go for many kills, because you'll never know when a plane or a helicopter will attack you. As a pilot, be careful not to use all your rockets because you'll need them in combat.
It's not easy to see anything when you fly a few hundred metres above the ground. Using your map or the Battlescreen you can see more. When you're in mid-air as a pilot, try to mark targets for the gunner and the whole team with Q. You can see an incoming jet on the map, which is very useful when you must focus on something else.
It's not used very often, but when you perfect it, it might become your last resort. As a gunner, set fire extinguisher as a countermeasure. If your vehicle's armor is below 10%, the pilot leaves it while the gunner moves to his spot and uses the extinguisher. The perfect scenario would be if the pilot could get out and in again. To do it, press E twice very quickly while the gunner moves to the pilot's seat. Then repeat and switch seats again. However, this strategy works only for very coordinated teams. In a easier version, the pilot jumps with a parachute and his teammate flies back to take him. Practise it on an empty server because if you do it properly, it will give your crew an advantage.
Sometimes it seems that you should approach the enemy and strike. It's not true because when you reduce the distance, you increase your vulnerability to other vehicles and anti-tank launchers. Especially when the armor is below 40%, hide near your base or a building so that the vehicle could regenerate to at least 80%. Alternatively, you can land, get out of the vehicle and repair it with a repair tool.
F35Jets are, first of all, to keep controlling the air while infantry and vehicles take map goals. In fact, pilot can't take over the flag, but he can help by eliminating enemy helicopters, planes, vehicles or even infantry. Pilotage isn't easy, but I'd try to make it comprehensible in this guide. In Battlefield 4 we can distinguish two types of planes, each side has one of a kind.
Those are:
1) J-20 (CH)
2) SU-50 (RU)
3) F35 (US)
1) Q-5 Fantan (CH)
2) SU-25TM Frogfoot (RU)
3) A-10 Warthog (US)
In the Battlefield 4 you begin in the air. You don't have to do anything and your plane will fly straight. In default controls, W and S are responsible for opening and closing the throttle. W used only when starting, which is rare. You only sometimes crush into the tree and lose speed. S is used as a brake. Very important in the further stages of learning how to fly. Left shift is an accelerator and used only for speeding up. A and D are used to correct your direction, left or right. Mouse controls the ailerons and height. When you pull, the nose goes up, when you push it goes down. When you move sideways, the plane leans out left and right.
Remaining:
To make a basic movement - a loop - you just need to pull the mouse strongly. To make a horizontal reversion or turn, you need to move mouse sideways, to rotate the plane about 90 degrees and then pull to stabilize the flight. At the beginning it may be difficult, so it's a good idea to train it (Battlelog > tab online > training ground).
Default settings are ok for flying, but if you want to fight other players, you have to bind "nose up" on the keyboard, so you can push this button instead of moving the mouse all around the desk. Sometimes you need to perform several dozens of loops during a single encounter. It's very comfortable to set it on space or somewhere near the WSAD. Remaining controls may stay as they are, but you should look for the setting that suits you best.
Mouse sensibility should be high so you can steer without losing the time. But the higher it is, the harder it's to aim. It's best when the sensibility is controlled on mouse and while fighting the planes set the highest possible and while firing the lowest one.
I'll show my sensibility here, but use it only as a hint.
In-game value: 25%
System value: 8/10 (desktop>RMB>personalize>change mouse indicators>buttons)
Mouse values: 1500 DPI for 1v1, 800 DPI for better aiming (information about your mouse may be found on its bottom, in the manual or in the internet)
For air fights, you should have set the highest possible resolution so you can see the objects from very far away. It's also good to set the mesh quality on ultra what allows you to spot enemies for you and your friends while pressing Q. Mesh quality doesn't use to much of your processor.
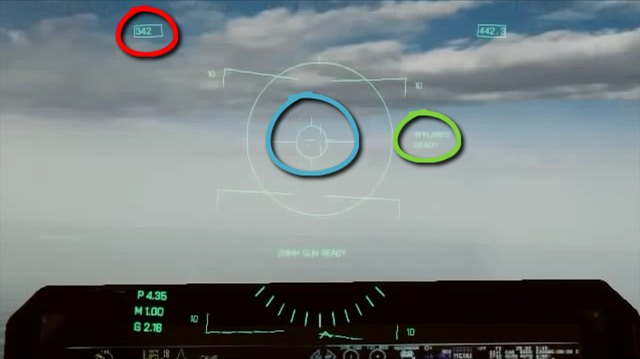 F35 cockpit
In cockpit you should especially care about three elements Those are:
- speed, marked in red and given in knots,
- marked with blue - sight (dot for fighters, cross for jets),
- marked with green - countermeasure system status (ready means that the system is ready, otherwise you can see the counting for the reload).
The general idea of 1v1 fighting is constant loop making. You start when you pass an enemy up to the moment when the direct encounter ends (runaway, shot down etc). Almost all the time you have to keep "nose up" button pressed. Sometimes it may last several minutes. You have to make tighter loops than your enemy. How? By speed control. 313 knots is the perfect one, but don't delude yourself that you'll be able to keep it constant. Best ones keep speed about 311-314, good ones 308-316. At the beginning, you should be content when you have 300-318 knots.
Default speed is about 350 knots and plane wants to keep this speed. To control it as you like, you have to use the accelerator and throttle properly. Keeping this particular speed isn't simple. The fact that you should use the TPP in the air battles won't help you either. You should look into the cockpit 1 to 2 times during the loop for a scratch of the second. That's why you should make a habit of keeping the speed constant. Of course, loops aren't everything, other moves are also important. But we'll discuss them other time.
Keeping the speed in the horizontal loop is rather simple, as the gravity won't matter. So it's enough if you decrease a speed a bit while looking into the cockpit. I can't give you the exact amount, because it has no sense. Enter the training ground and start flying. Make loops and control the speed. After several dozens of loops you'll begin to create a habit and it becomes an automatic action for you.
Vertical loops are more difficult, due to the gravity, which speeds you up and then slows you down during the same loop. So you have to use an accelerator or close the throttle. In case of the assault planes it's even more difficult as they don't have accelerators. Imagine that a loop is a clock - from 3 to 6 use the break twice, then from 6 to 9 nothing and from 9 to 12 press the accelerator thrice and then from 12 to 3 nothing again. Repeat. I give those data in a general way, because you should try to make your own style.
Mastering the speed control requires a lot of practice. Don't depend on the guide only. Base on your own experiences and try to feel, supported by the counters, when use what. Remember also not to get discouraged too soon. Several hours on the training ground is a must for each pilot. And to start doing well you need at least 15-20 hours of flying.
Unlocking
Icon
Required points
Description
Belt feeder
3000
Improved mechanism which speeds up reloading.
Passive radar
6000
Air-to-air missiles which requires spotting an enemy. When you lose the target, pilot may try to spot it again before the rocket fell on the ground.
Proximity Scan

9000
Detects enemies around the vehicle and marks them on the minimap.
25 mm Cannon

12000
25 mm cannon with a medium rate of fire, good against flying vehicles and light armored targets.
ECM Jammer

15000
System which makes locking you impossible for a certain period of time what disorients missiles fired at you. Requires reloading.
Laser guided missiles
18000
Anti-tank, laser guided missiles - also remotely for locked targets out of the sight range of the shooter. It requires spotting an enemy.
Extinguisher

21000
Extinguisher repairs the machine and allows it to begin the regeneration. You can activate it only when the plane is heavily damaged.
30mm Cannon
24000
30 mm cannon with a lower rate of fire and increased efficiency against flying vehicles and light armored targets.
Stealth coating

27000
This upgrade increases the time required for lock in your plane.
Active Radar
30000
Missiles which fly to the closest target just after being fired and explodes when near it.
The best set:
Main weapon: 30 mm cannon It's the slowest one, but also the strongest what increases the elimination of enemies.
Secondary weapon: Active radar missiles, unless you dominate the air. If so, you can take the laser guided missiles what allows you to fire, for example, at tanks.
Countermeasure:
Working time:
Reloading time:
Flares
3 seconds
22 seconds
ECM Jammer
7 seconds
23 seconds
Extinguisher
Not applicable
25 seconds
Each from system above has its own advantages and works fine with different playstyle. I use flares, ECM is great because you disappear for 7 seconds from the radar what is useful in 1v1 fighting. Choose whatever suits you.
Upgrades are strictly connected with the countermeasure system choice, If you choose flares or ECM, you should take Gyro Stabilizer and when an extinguisher, then the best choice is Stealth Coating.
Unlocking
Icon
Required points
Description
Stealth coating

3000
This upgrade increases the time required for lock in your plane.
Heat seekers
7000
Air-to-air missiles which requires locking an enemy. When you lose the target, pilot may try to lock it again before the rocket fell on the ground.
Proximity Scan

10000
Detects enemies around the vehicle and marks them on the minimap.
Hydra rockets
14000
Universal missiles, good against infantry, light, medium and heavy armored vehicles.
ECM Jammer
17000
System which makes locking you impossible for a certain period of time what disorients missiles fired at you. Requires reloading.
Extinguisher

21000
Extinguisher repairs the machine and allows it to begin the regeneration. You can activate it only when the plane is heavily damaged.
TV missile
25000
Missile guided by an operator with a usage of a camera. Good against armored targets.
Belt feeder

28000
Improved mechanism which speeds up reloading.
JDAM bomb
32000
Not-guided bomb with a huge power.
The best set:
Main weapon 30 mm cannon, the only one available.
Secondary weapon: laser guided missiles which are great against boats and armored vehicles. Hydra rockets are also great, because you can also eliminate the infantry with them. For the beginners, who are not feeling well with aiming with the cannon, a better choice are heat seekers which are helpful in air encounters.
Countermeasure: like in the case of stealth jets
Working time:
Reloading time:
Flares
3 seconds
22 seconds
ECM Jammer
7 seconds
23 seconds
Extinguisher
Not applicable
25 seconds
Each from system above has its own advantages and works fine with different playstyle. I use flares, ECM is great because you disappear for 7 seconds from the radar what is useful in 1v1 fighting. Choose whatever suits you.
Upgrades are strictly connected with the countermeasure system choice, If you choose flares or ECM, you should take Gyro Stabilizer and when an extinguisher, then the best choice is Stealth Coating.
Health
500
Time to begin the regeneration (from the last received damage)
10 seconds
Heavy damage threshold (control is temporarily made more difficult)
Shot dealing more than 29% vehicle's health
Light damage threshold (control is temporarily made more difficult)
Shot dealing more than 19% vehicle's health
Disable threshold (you lose control over the vehicle, you can be saved only by the extinguisher or burner)
10% of vehicle's health
Maximum speed
421 knots (780 km/h)
Ideal manoeuvring speed
~313 knots
Default respawn time
90 seconds
Jest are vehicles which are designed mostly to fight other air vehicles, and for that purpose you have many other additions for them. You have 30 mm cannon but its speed is only 600 bullets per minute, so against the armored vehicles it's ineffective. But those jest are vey quick and have laser guided missiles which are great against other planes, helicopters and even the gunboat. It all causes that you can clear the air easily, but it's more difficult to get high K/D ratio.
Health
500
Time to begin the regeneration (from the last received damage)
10 seconds
Heavy damage threshold (control is temporarily made more difficult)
Shot dealing more than 29% vehicle's health
Light damage threshold (control is temporarily made more difficult)
Shot dealing more than 19% vehicle's health
Disable threshold (you lose control over the vehicle, you can be saved only by the extinguisher or burner)
10% of vehicle's health
Maximum speed
344 knots (637 km/h)
Ideal maneouvring speed
~313 knots
Default respawn time
90 seconds
Assault jets have very powerful 30 mm cannon which can destroy everything: infantry, tanks, helicopters and gunboats. Well trained pilot shouldn't need more than one good approach. But don't worry, if you can't do that at the beginning. You have also rockets which allows you to destroy enemies even better.
While creating this game, people from DICE wanted to balance the plane in a way, so the stealth jets rule the air while assault jets will be able to take down ground targets and support infantry and tanks. That's why stealth jets are faster and more mobile, but have less firepower than the assault jets.
The biggest gravity load you can get in the stealth jets is 11.25 G (I give this, because it's the only statistics taken from the game files which defines the mobility, where the higher G, the better), where in assault jets it's only 9.05 G. It means that when two equal pilots will face in the 1v1 fight and one of them will be in the stealth jet, he'll win the encounter. What is more, assault jets don't have an accelerator, so in the vertical loops they will always lose speed and mobility. That's why it's recommended to fly mostly horizontally with them.
Stealth jets are also faster, so if you see that you'll lose, you can just turn on the accelerator and run away. When you're in the range of stationary anti-aircraft weapon, next to the set up place, you can just slide your aim at the enemy and press Q so cannon starts firing.
But, after all, it's hard to tell if the stealth jets are better. They have much less firepower and assault jets may destroy them in about 2 seconds. As I mentioned, the direct battle should be won by the stealth jet. But if there is no other pilot on the server who can take you down, it's better to stay in the assault jet and improve your statistics on infantry and tanks. The best way, of course, would be to fly in two people, where one clears the sky and the other one collects kills. In the next round switch and both of you benefit from cooperation.
If you're a beginning pilot, you watch various gameplays for sure where you can see the high results of pilots. But remember, that not every his/her round looks like that. Everyone posts only his/her best games. You'll also have better and worse moments. Remember also that when you begin flying, don't watch for what's happening on the ground and think that the planes are your only enemies. Practice getting at their backs, firing and various tactics. When you fell confident, make a step forward and eliminate the helicopters also. With time, everything will seem easy.
Option of spotting enemies is very important and helpful. Thanks to that, a red triangle will appear over the spotted enemy (if he is a team leader, there'll be a star next to the triangle). He'll be visible not only for you, but also for all your team. As a pilot, you see much more than regular soldiers. So use the free looking option and press Q as fast as you can. You don't have to see the enemy, to make game thinks that you do.
If you keep pressing the LMB, the cannon in stealth jet will overheated in 3,5 seconds and in assault jet in 3 seconds. Then you will have to wait 2 seconds for stealth and 3 seconds for the assault one.
So the best way is to fire with series. Their length must be adjusted to the distance of firing and the confidence of hitting. Thanks to that, you'll be much more accurate and you'll fire a lot more than with the full-auto mode and waiting for the overheat to pass.
Try not to fly into the regions of enemy anti-aircraft weapons. In 1v1 you have no chances. Keep close to your own base.
When you start flying, you see a radar on the place of the minimap. Its range is only 700 m. When you press M, you'll see a big map in the center of your screen which shows you the whole area of war actions. Thanks to that you can see an enemy plane for farer than 700 m. Remember also, that 90 seconds after killing a jet, another one will appear. You should be able to tell where are enemy units at any given time. You can also use a timer and count the time when the new unit appears in the enemy base.
Cooperation with your team is the most important. In this particular case I mean cooperation of two pilots. It's important to not compete over each kill. When you see that everything is all right and enemy machine will surely burn, watch your friend and control the situation. If any problems appear, fly up and help but don't steal kill. An attempt of that may cause the collision what will weaken your team for 90 seconds. Blaming the other one on the team chat won't help you either.
Remember that learning how to fly is tough work. It requires a lot of practice and even after 100 hours, you'll find something to improve. With time, you'll die less and kill more. But don't be to greedy for kills and don't look at the scoreboard. It will result in negative results. If you make an approach for a tank or infantry, remember that it's better to let it go than late your flying up, because you may hit the lighthouse or something else and die. Don't follow also the enemy plane up to its base, but wait on the safe position.
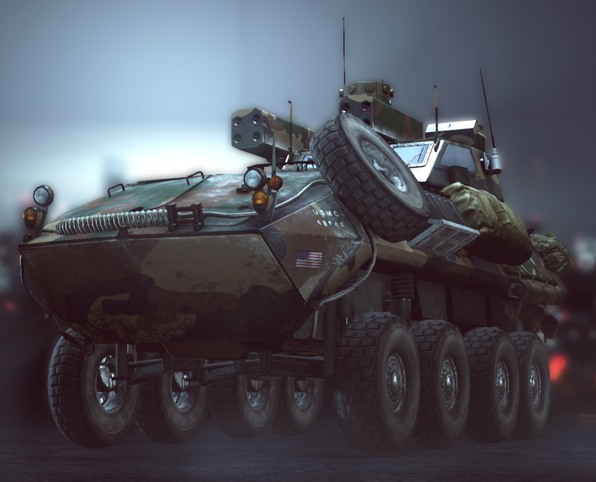 LAV-AD
Available models
Vehicles with anti-aircraft weapons have cannons and rockets and are designed to destroy flying machines. As they have only one seat, there is no turret in them.
You control them just like the other land vehicles. Direction of driving with WSAD and cannons are controlled by the mouse. In general, fight and positioning is a bit different than in tanks or LAVs. Armor is much more thinner so you should move carefully around the map. Lack of additional places makes also dangerous a situation where driver must deal everything alone.
Health
100
Time to begin the regeneration (from the last received damage)
14 seconds
Heavy damage threshold (control is temporarily made more difficult)
Shot dealing more than 39% vehicle's health
Light damage threshold (control is temporarily made more difficult)
Shot dealing more than 29% vehicle's health
Disable threshold (you lose control over the vehicle, you can be saved only by the extinguisher or burner)
10% of vehicle's health
Maximum speed
56 km/h
Number of seats
1
Default respawn time
60 seconds
For drivers of the anti-aircraft vehicle, settings aren't the most important. Graphics should be adjusted in a way so you can play comfortable. Ultra mesh quality won't ballast the graphic processor to much and allow you to spot enemy flying machines with Q. And that's why the elimination will be easier. You should also pay attention for relative aiming, which may be more comfortable. As in the case of other land vehicles, the sensibility should be high enough, so you can keep up with the flying helicopter or plane but can't interfere with precise aiming. Recommendation:
In-game value of sensibility: 20%-30%
System value of sensibility: 8/10 (desktop>RMB>personalize>change mouse indicators>buttons)
Mouse values: 1200 DPI - 2000 DPI (information about your mouse may be found on its bottom, in the manual or in the internet)
During driving in the anti-aircraft vehicles, don't forget about very important and useful map. You can enlarge it with M key or summon it with the option of "Battle Screen". It gives you information about enemy flying machines but also helps you define the danger from other enemy units like tanks or LAV. You shouldn't be interested in taking over the important tactical points (flags, transmitters). It's because your lack of armor and proper anti-tank missiles. Even if your team has little of key points, you'll support it more by eliminating the flying machines. Because of that, there is no need to talk about the offensive or defensive. But don't overestimate your skills, because light armored vehicle may be destroyed much faster than a tank by majority of other vehicles. Use your map to prevent it. Remember also, that many engineers, snipers and soldiers have explosives and rocket launchers. They will use it to eliminate you, but only when you make a mistake and bad moving. So avoid the situation where you for example meet too many anti-tank missiles. Anti-aircraft vehicles are quickly so you can try to flee, but try not to let the danger happen.
In case of anti-aircraft vehicles, finding a good position is a key having a good game. Aggressive drivers riding from the edge of the map to the edge are rarely seen. The most frequent behavior is a passive one, due to the lack of armor and anti-tank weaponry. Finding a good place shouldn't be difficult. It should be next to the map's edge. Don't forget about the proper cover (buildings, rocks, trees). There is more than one such a place on the map, so as the driver you have to decide which to choose. You should also consider switching the place, because enemy pilots will try to hunt you down, as you're their biggest threat. Notice also, that you can set yourself on the water, as this type of vehicle can swim. Remember also about avoiding tanks, which are able to destroy you very quickly. When you see a heavy armored vehicle approaching you, speed up and run away.
Unlocking
Icon
Required points
Unlocking
Thermal camo

2500
This upgrade increases the time required for lock in your plane.
Thermal optics
4500
Upgrade which allows you to identify the thermal traces for small and medium distance.
Autoloader

6500
Improved mechanism which speeds up reloading.
Passive radar
8000
Ground-to-air missiles which requires locking an enemy.
Proximity Scan

10000
Detects enemies around the vehicle and marks them on the minimap.
Smoke screen
11500
Spreads the cloud of thick smoke, masking your vehicle and making impossible to get a critical hit with rockets.
30 mm Cannon

13000
Fires the 30 mm anti-aircraft missiles. They have high rate of fire
IRNV

14500
Black-white vision which show the thermal traces in full range.
Reactive Armor

15500
It disperses the anti-tank missiles what makes more difficult to get a critical hit
Extinguisher

17000
Extinguisher repairs the machine and allows it to begin the regeneration. You can activate it only when the plane is heavily damaged.
ZUNI rockets
18500
Not guided rockets, effective against infantry, light vehicles, armored vehicles and buildings.
Air Radar

19500
Minimap is replaced by the radar with big range, where you can see all nearby flying machines.
Heat seekers

21000
Missiles which fly to the closest target just after being fired and explodes when near it.
Active protection
22500
After activation, the system automatically detects the incoming anti-tank missiles and explodes them before they reach the vehicle. It goes to stand-by after eliminating the danger or after a long time without any danger.
The best set:
Main weapon: 30 mm cannon is a must, much better than 20 mm cannon. Though it has lower rate of fire, it causes bigger damage.
20mm Cannon
30mm Cannon
Damage to flying vehicles
1.1% - 2.6%
3.2% - 8.1%
Damage to infantry
5%
7%
Maximum cannon range
1200m
800m
Rate of fire
2000 bullets/min
600 bullets/min
Time of constant fire to empty the supply belt
6 seconds
3.5 seconds
Secondary weapon: it turns out, that the best are active radar missiles. Although having small damage, they are perfect match for the powerful cannon. You can also consider ZUNI rockets in case of fighting against the heavy armored vehicle.
Heat seekers
Passive radar missiles
Active radar missiles
Maximum targeting range
500 m
500 m
-
Number of available rockets
2
2
2
Time of reloading
30 s
30 s
25 s
Damage to
flying vehicle
21
21
21
Damage to transport helicopters
13
13
13
Damage to gunboat
5
5
5
* - we assume that all missiles before reloading hit
Countermeasure:
Working time:
Reloading time:
Range:
IR smoke
7.5 seconds
17.5 seconds
20m
Smoke screen
7 seconds
5 seconds
4m
Active protection
5 seconds
25 seconds
Not applicable
Extinguisher
Not applicable - works only once
25 seconds
Not applicable - works when the vehicle's health drops below 37%.
IR smoke is great against guided missiles, but they are not a big threat. Active Protection will be much better. It's able to defend you against 30 mm cannons of helicopters, as well as the assault jets.
Optics: I recommend 3x sight, due to the fact that enemy flying machine may be often to far away to use the standard optics.
Upgrades: there is only one choice, Reactive Armor to protect you against critical hits.
Eliminating enemy flying machines isn't difficult with anti-aircraft weapons. Switch between cannon and rockets to destroy enemies quickly and efficiently. Remember not to overheat your main weapon and fire with series at far away targets. Remember also that some vehicles move very fast. On big maps, you have to focus on assault jets because usually those ones will be the greatest threat for you. When you see an enemy pilot preparing to attack, try to slip out of his vision or stay mobile. It should make destroying you a bit harder. Beware also of TV rockets of assault helicopters, assault jets and crafts. Avoiding them is difficult, but possible. When using the active radar missiles, fire at the closest possible range, because those missiles easily lose target.
Although anti-aircraft vehicles are not suited for fighting the land vehicles they can use 30 mm cannon if need arises. Destroying the LAV or a tank is virtually impossible, so you should consider taking ZUNI rockets. Choice should depends on you, but take into consideration which type of vehicles is more present on the map: land or air. When you're surprised by the enemy, exit the vehicle and scare him off with the rocket launcher. You can also set up mines and explosives, what will make your runaway easier.
In case of fighting against the infantry, both 20 mm and 30 mm cannons are great. But don't use all of your ammo against the infantry, to not let the flying machines destroy you.
Each good driver has to focus on finding a good position. Leaving it often ends up in death, so don't play aggressively. Flying vehicles may destroy you very quickly when you're not cautious. You should also remember that after using the Active Protection a red light appears on your vehicle what informs enemies that you're targetable.
If you see an enemy tank nearby, try not to engage. In such an encounter you have no chances. So it's better to run away and wait for someone to deal with him. But you have to remember not to show your backs to the enemy, because your armor is the thinnest there.
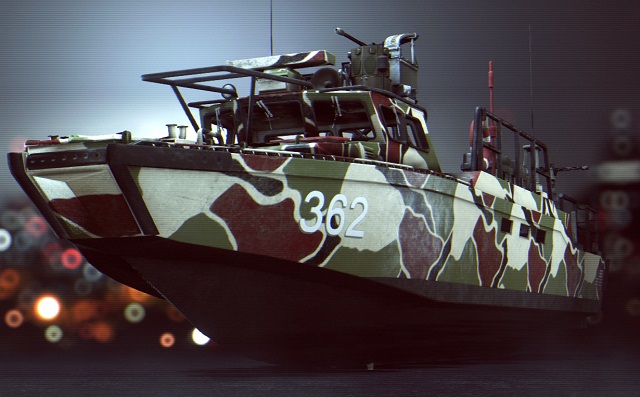 Attack Craft
Attack Crafts are inconspicuous but strong vehicles. They can of course only swim, but with their weaponry they can fight even with the helicopters and planes. They can also easily deal with infantry and armored vehicles, if only they are in range. The role of Attack Crafts will surely be greater after the upcoming DLC, "Naval Strike".
Available models
In the boat, besides the captain, you have two seats for gunners, who may use side miniguns. There is also one seat for a player who can repair the ship, fire with rocket launcher or rifle. So there are four seats in total. In case of need, you can run away with motorboats. You can use them by pressing F5.
Health
1000
Time to begin the regeneration (from the last received damage)
14 seconds
Heavy damage threshold (control is temporarily made more difficult)
Shot dealing more than 39% vehicle's health
Light damage threshold (control is temporarily made more difficult)
Shot dealing more than 29% vehicle's health
Disable threshold (you lose control over the vehicle, you can be saved only by the extinguisher or burner)
10% of vehicle's health
Maximum speed
100 km/h
Number of seats
4
Default respawn time
90 seconds
Maximum tower slope
70
Unlocking
Icon
Require points
Description
Thermal camo
4000
This upgrade increases the time required for lock in your plane.
Passive radar
6500
Ground-to-air missiles which require locking an enemy. When you lose the target, pilot may try to lock it again before the rocket fell on the ground.
Smoke screen

9000
Spreads the cloud of thick smoke, masking your vehicle and making impossible to get a critical hit with rockets.
Proximity Scan

11000
Detects enemies around the vehicle and marks them on the minimap.
Thermal optics

13000
Upgrade which allows you to identify the thermal traces for small and medium distance.
30 mm Cannon
15000
Fires 30 mm missiles with additional charge which is more effective against infantry and armored vehicles.
Belt feeder
17000
Improved mechanism which speeds up reloading.
Laser guided missiles

19000
Anti-tank, laser guided missiles - also remotely for locked targets out of the sight range of the shooter. It requires spotting an enemy.
Air Radar

20500
Minimap is replaced by the radar with big range, where you can see all nearby flying machines.
ZUNI rockets

22500
Not guided rockets, effective against infantry, light vehicles, armored vehicles and buildings.
Extinguisher

24000
Extinguisher repairs the machine and allows it to begin the regeneration. You can activate it only when the plane is heavily damaged.
Burts cannon

25500
Fires 8 missiles 25 mm Especially effective against air forces and other light armored vehicles.
IRNV
27000
Black-white vision which show the thermal traces in full range.
TV missile

28500
Missile guided by an operator with a usage of a camera. Good against armored targets.
Active protection

30000
After activation, the system automatically detects the incoming anti-tank missiles and explodes them before they reach the vehicle. It goes to stand-by after eliminating the danger or after a long time without any danger.
Main weapon 30 mm cannon is the most effective against other boats, infantry and armored vehicles. It's weaker from burst missiles only against air forces.
Secondary weapon:
Passive radar missiles
Laser guided missiles
TOW missiles
TV missiles
ZUNI rockets
Type of guidance
Heat (only air vehicles)
Heat (only ground) or laser (all)
Player controls it (in-cockpit view)
Player controls it (view from the on-rocket camera)
Not guided
Maximum range
-
-
690 m
1000 m
1294 m
Maximum targeting range
500 m
500 m
-
-
-
Number of available rockets
2
1
1
2
8
Total amount of rockets
4
1
2
2
16
Time of supplying rockets
30 s
30 s
15 s
30 s
20 s
Reloading time:
5 s
5 s
3.6 s
0.2 s
3.6 s
Damage to boats
-
Medium
Medium
high*
medium*
Damage to
armored vehicles
-
medium
low/
medium
(depending on the angle and place of hit)
high*
high*
Damage to
flying vehicles
high*
Very high
Very high
high
medium
Damage to infantry
-
-
high
medium
low/
medium
* - we assume that all missiles before reloading hit
The most effective are TV missiles. Using them requires a lot of practice, but it's worth it. After a short time you'll start also hitting other boats and after many hours of training you may even try attacking the air forces.
Countermeasure: Active protection is the best available countermeasure here. It can defend you not only against the guided missiles, but also not-guided and 30 mm cannon.
Optics: Sight 3x makes aiming easier. There is no sense in using the IRNV or Thermal vision on the open see. It only makes spotting enemies more difficult.
Upgrades: choose the one proper for the situation on the map. If you swim alone and there is no one to repair you, choose Maintenance. If you're targeted just after leaving the base, choose Thermal Camo. If you're keep getting destroyed by C4, grab Proximity Scan. If you're constantly attacked from the air, take Radar. If nothing from things listed above happens, you can take belt feeder which speeds up the reloading a bit.
Staying on the map as long as possible, even when you're very passive, it's always better than being dead. The most important rule to make this happen: don't let them surprise you. You can't also swim to close to the enemy set up point. You should always have some hideout in your head also. It may be an island or abandoned aircraft carrier.
Remember also about wise use of Active Protection. It's an upgrade which makes your boat invulnerable for missiles and cannons for 5 seconds. The best moment to use it is when you spot a TV missile heading towards you, an assault jet coming at you, in direct fight between boats on a small distance or when you're being fired at with the guided missiles.
The way you want to fight the enemy is closely connected with the gun you use. I'll show my plan based on TV missile, 30 mm cannon and Active Protection.
The big advantage of the TV missile is its range (1 km). What is more, it has the same accuracy on every distance. Don't save this missile. Fire when only you see an enemy boat. Do it until you succeed and don't shorten the distance without a need. The best way is to swim aggressively up after two direct hits. But if you have a support, don't run away.
So if the enemy boat is damaged, swim close to it. When it fires at you, turn on the Active Protection and fire at the enemy with all you've got. In this moment the Active Protection turns off, but it shouldn't matter - single series from the cannon should be enough to finish an enemy.
Don't use this tactic as a key to the win, but more like a useful hint. Your behavior must change depending on the map or situation. When you get experience, it'll be easier to achieve more on the battlefield.
Flying vehicles may be a real torment for the boat crew. But there are several things that may increase your ability to fight them back.
When it comes to the assault helicopters, which are trying to hit you with the TV missile, you can hide behind a cover and try to take down the enemy with the same type of weapon. Hitting a helicopter with a TV missile isn't simple, but practice makes a master. Remember also that the more unpredictable you are, the harder it is to hit you.
If helicopter wants to take you down in direct firing, it has already lost. Speed of 30 mm bullets isn't overwhelming, but on the short range you take down weakly armored vehicles, like helicopters, very quickly.
Stealth jets are a threat only with laser guided missiles. But information about missiles and Active Protection are already mentioned above. Cannons mounted on those vehicles are to weak to be a threat.
The most dangerous are assault jets. They have a powerful cannon and a good pilot may be a deciding factor in the battle. But to try to do something, he has to fly straight at you. That's why firing with TV missile at plane's nose is simple. Just aim at the nose and fire the missile. You won't destroy it but damage heavily. And if it's low over the water, it may fall into it.
Killing an infantry or destroying armored vehicles shouldn't be your priority. But when you finish cleaning the map from objects which are your direct threat, you can help the ground troops and pick up several kills.
Killing infantry is easy. It's enough to fire 3-4 times under the soldier's feet or one at his body to kill. But spare ammo, fire with short series, so you can kill more people before reloading.
Destroying vehicles in your range, which are on the shore, is also easy. 30 mm cannon pierces the armor easily. You can also use the TV missile if needed.
Remember that the player who is first to spot the enemy, has an advantage over him. So use the minimap and observe it carefully. Remember also that spawn time of a boat is 90 seconds.
Have you been ever wondering why sometimes one side has more vehicles than the other one? It depends on the map and current flag situation. Paracel Storm is one of the most popular maps for boats. There are two respawn points for vehicles. On E point you can find a scout helicopter, on A point an Attack Craft. This one additional vehicle gives you an advantage on the sea, what makes the battle easier. So, if you play in boat, consider flag A as the most important one and protect it.
Killing infantry and flying vehicles is important, but not that much to waste ammo. Don't let to the situation, when you're out of bullets, because someone may attack you. It may be even a motorboat with C4. That's why you should always have at least 15 bullets left. Even if because of that you lose a kill.
As you know, there are four seats in the boat. Your lifetime may be increased thanks to the crew. Soldiers at the miniguns are very direct help at eliminating enemy vehicles. But the most helpful one is the soldier at the backs of boat. He can repair the boat without leaving it. It's enough to "aim" with a burner as on the screen below. It gives you a huge edge on the battlefield. In case of need, this soldier may also use a rocket launcher.
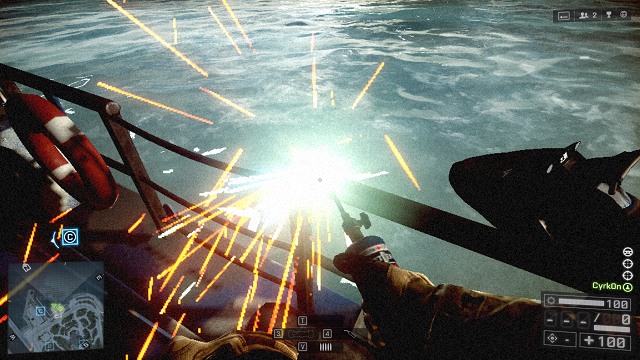 Welding the railing, repairing the boat.

In Battlefield 4 you have access to a variety of weapons that, additionally, come in multitude of variations. It would seem that with such a multitude of weaponry, the differences between the individual models will be rather negligible, due to the balance requirements. And that is what it is like but, the "negligible" difference have a tremendous bearing on the operation of each weapon, which allows the player select a weapon that suits his gaming style and the situation in the battlefield.
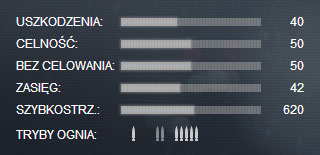
Fortunately enough, in this installment of the series, weapon has been very well described, both in the game on the Battlelog. Thanks to the lucid graphs (that present percentage values) and the numerical data, you can easily figure out the use of each weapon but, these are general graphs and, sometimes, a single bar represents three mean statistics, where the other ones have not been presented at all. The only method to discover, the more or less apparent features of a weapon, is to test it in the battlefield and compare - or by taking a look into our guide. Below, you ill find a simplified description of the hidden features of the weapons, which has been presented as a five-step scale which, for easier identification, has been color-coded in the following manner:
Thanks to the lists presented below, you will easily recognize the upsides and downsides of each weapon, which will allow you to avoid the tiresome and time-consuming process of trials and errors and comparing. Nevertheless, we still encourage you to test each and every weapon that you unlock - best at the proving ground accessible via the Battlelog, where you get access to the perfectly-designed shooting range. There, you will be finally able to find out if statistics that look so well in writing actually suit your preferences. All of the statistics presented below, refer to the default weapons, i.e. without attachments. The statistics presented below are:
Each of the subchapters below is devoted to a given weapon type and all comparisons of their features refer only to that type of weapons. Assessment of various categories using one scale would not make much sense, because you cannot treat, e.g. pistols and sniper rifles on a par. More about this, you can find in chapter "Weaponry Categories" . This statistic shows how much the barrel climbs between the second shot and the last one. where the general features of each weapon, and their use, have been described.
The assault rifles are the most universal type of weaponry. It is a type that works best at medium range but, the features of some allow them to compete with the other weapon types - especially with the use of special attachments. Still, they will never replace dedicated, short-range, or long-range weapon, but some models may effectively blur the dividing line, by allowing equal chances in some situations (e.g. by helping eliminate enemy snipers or increase chances against the users of specialized short-range weapons). In this chapter, you will find listing of the weapons' hidden features, their comparison (described in Explanation) and a few pieces of advice concerning the recommended accessories. You should remember, however, that these are only commonsensical hints, whose purpose is, first of all, not to harm (by decreasing weapons' statistics) but there is nothing to stop you from experimenting to make the weapon suit a more specialized role, which will decrease its universality at the same time. The hints concerning accessories refer only to the ones that have bearing on the weapon's statistics, i.e. barrels, the underslung element and the laser sights. The remaining attachments are completely optional and choosing these depends solely on preferences and experience with the game.
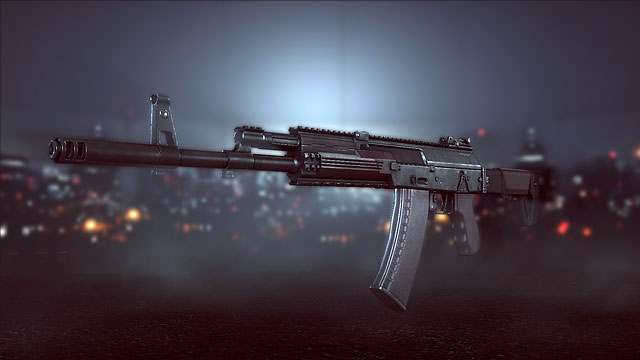
STATISTIC
VALUE
POINTS NECESSARY TO UNLOCK
---
MAXIMUM REACH/EFFECTIVE RANGE
<8~55 meters
TACTICAL RELOAD TIME
Medium
FULL RELOAD TIME
Medium
RECOIL AFTER THE FIRST SHOT
Medium
RECOIL OF SHOTS IN SUCCESSION (BURST, AUTO)
Low
RECOIL TO THE LEFT/RIGHT
Very low/ very low
STABILIZATION TIME AFTER THE LAST FIRED SHOT
Long
AK-12 is one of the easiest-to-use assault rifles (probably due to the fact that it is the assault soldier's default weapon). Thanks to the relatively low rate of fire, the vertical recoil is low and the horizontal recoil barely discernible at a medium range. AK-12 fires discernibly faster in the burst mode, which is a characteristic rarely found in the assault rifles.
Suggested accessories: Laser, the ERGO grip.
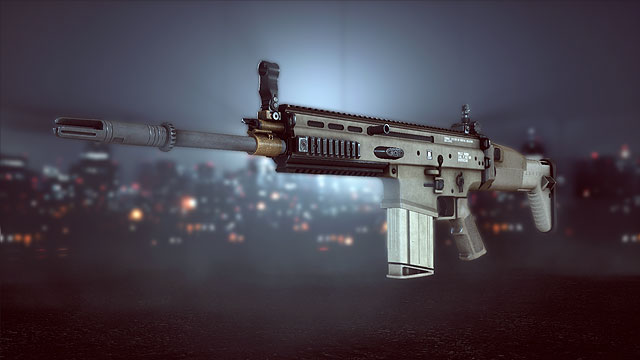
STATISTIC
VALUE
POINTS NECESSARY TO UNLOCK
4 000
MAXIMUM REACH/EFFECTIVE RANGE
<8~55 meters
TACTICAL RELOAD TIME
Short
FULL RELOAD TIME
Very short
RECOIL AFTER THE FIRST SHOT
Low
RECOIL OF SHOTS IN SUCCESSION (BURST, AUTO)
Very high
RECOIL TO THE LEFT/RIGHT
medium/ medium
STABILIZATION TIME AFTER THE LAST FIRED SHOT
Very long
SCAR-H is one of the rifles of the lowest firing rate, high damage and high accuracy. The price for the power and the precision of the first shot is the high vertical recoil, which is why shooting in the AUTO mode requires a lot of control over the weapon. In the SINGLE mode you can use it to nag at snipers.
Suggested accessories: Laser, slanted grip, Muzzle brake.
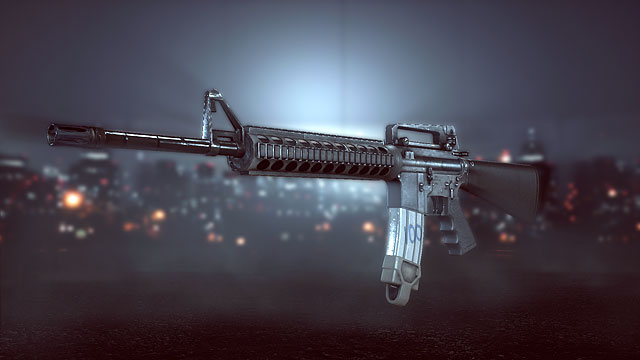
STATISTIC
VALUE
POINTS NECESSARY TO UNLOCK
11 000
MAXIMUM REACH/EFFECTIVE RANGE
<8~55 meters
TACTICAL RELOAD TIME
very short
FULL RELOAD TIME
very short
RECOIL AFTER THE FIRST SHOT
high
RECOIL OF SHOTS IN SUCCESSION (BURST, AUTO)
medium
RECOIL TO THE LEFT/RIGHT
very low / high
STABILIZATION TIME AFTER THE LAST FIRED SHOT
long
M416 is a rifle of a quite high firing rate, which can be well used at nearly any (within common sense) range. During the automatic mode of firing, it discernibly recoils to the right and up, that is why you need to learn how to control it, to keep the sight on the target. The very short reload time makes it unnecessary to switch this weapon to pistol too often, in difficult situations.
Suggested accessories: Laser, angled grip, muzzle break.
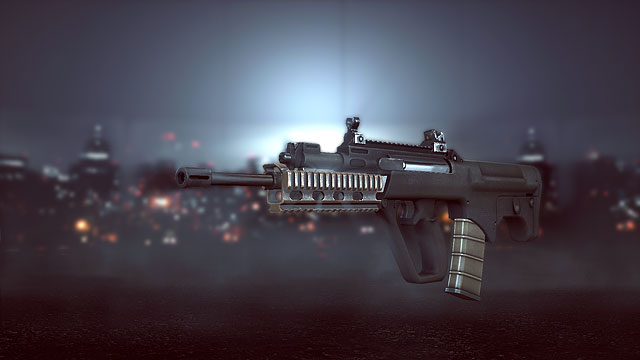
STATISTIC
VALUE
POINTS NECESSARY TO UNLOCK
19 000
MAXIMUM REACH/EFFECTIVE RANGE
<8~55 meters
TACTICAL RELOAD TIME
long
FULL RELOAD TIME
long
RECOIL AFTER THE FIRST SHOT
low
RECOIL OF SHOTS IN SUCCESSION (BURST, AUTO)
very low
RECOIL TO THE LEFT/RIGHT
low / low
STABILIZATION TIME AFTER THE LAST FIRED SHOT
short
SAR-21 is a quite unusual rifle in this category. Its vertical recoil is almost imperceptible in the automatic mode of fire, and the side recoil is easy to correct with an appropriate accessory. Unfortunately, its rate of fire is relatively low so, you need a lot of precision to operate this rifle at short range, to avoid losing to rifles of higher firing rate. Still, it is perfect for longer distances.
Suggested accessories: Laser, ERGO grip, compensator (only in the BURST mode).
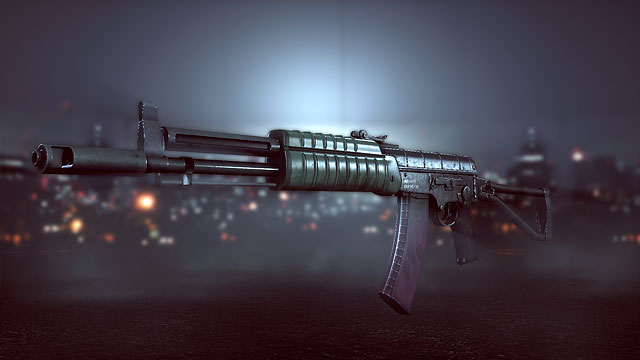
STATISTIC
VALUE
POINTS NECESSARY TO UNLOCK
28 000
MAXIMUM REACH/EFFECTIVE RANGE
<8~55 meters
TACTICAL RELOAD TIME
long
FULL RELOAD TIME
very long
RECOIL AFTER THE FIRST SHOT
very high
RECOIL OF SHOTS IN SUCCESSION (BURST, AUTO)
medium
RECOIL TO THE LEFT/RIGHT
very low / high
STABILIZATION TIME AFTER THE LAST FIRED SHOT
long
AEK-971 is definitely a rifle for fights over shorter distance. It is second when it comes to the firing rate in this category, which results in a large recoil, and also, while conducting fire, it recoils to the right. At short quarters it is a mutilator but, in turn, it empties the magazine in a blink of the eye and the reload time is painstakingly long. So, be prepared to help yourself with the pistol very often.
Suggested accessories: Laser, Angled grip, Muzzle brake.
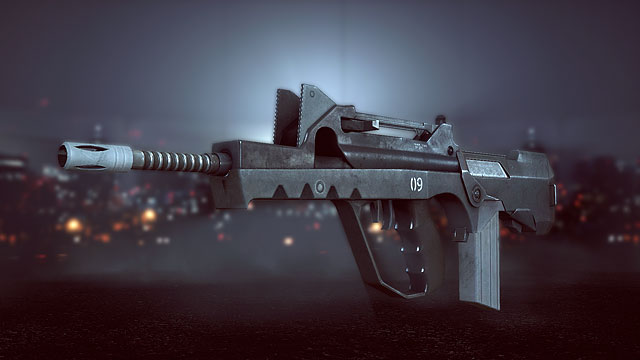
STATISTIC
VALUE
POINTS NECESSARY TO UNLOCK
37 000
MAXIMUM REACH/EFFECTIVE RANGE
<8~55 meters
TACTICAL RELOAD TIME
very long
FULL RELOAD TIME
long
RECOIL AFTER THE FIRST SHOT
high
RECOIL OF SHOTS IN SUCCESSION (BURST, AUTO)
high
RECOIL TO THE LEFT/RIGHT
very high / very high
STABILIZATION TIME AFTER THE LAST FIRED SHOT
long
FAMAS is the fastest in the category of assault rifles Killing an enemy at close quarters with this rifle takes place in a blink of the eye but, just as long takes emptying the very small magazine (25 rounds). It is the more painful that FAMAS takes the longest to reload. Apart from that, the recoil to the sides on this rifle is high, which makes for very difficult handling. It is best to use this rifle in rooms because the spread is similar to that of a shotgun.
Suggested accessories: Laser, short grip.
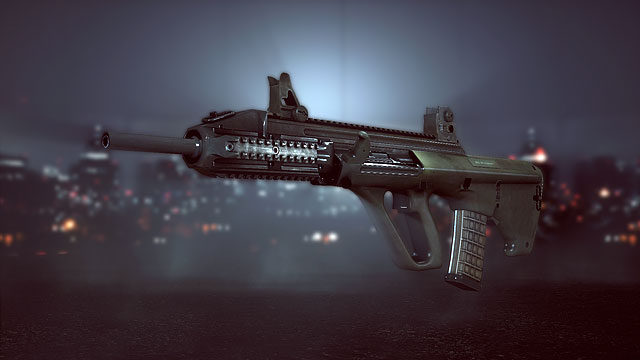
STATISTIC
VALUE
POINTS NECESSARY TO UNLOCK
48 000
MAXIMUM REACH/EFFECTIVE RANGE
<8~55 meters
TACTICAL RELOAD TIME
long
FULL RELOAD TIME
medium
RECOIL AFTER THE FIRST SHOT
high
RECOIL OF SHOTS IN SUCCESSION (BURST, AUTO)
low
RECOIL TO THE LEFT/RIGHT
high / low
STABILIZATION TIME AFTER THE LAST FIRED SHOT
medium
The characteristics of the AUG A3 are somewhat similar to that of the SAR-21 but, it is discernibly faster and, which follows, its horizontal and vertical recoil is higher. While in the AUTO mode, it discernibly recoils to the left, which us unique for assault rifles so, the recoil counteracting requires some practice. Works well over longer ranges but, at close quarters, it is still very useful.
Suggested accessories: Laser, ERGO grip or Short grip.
STATISTIC
VALUE
POINTS NECESSARY TO UNLOCK
59 000
MAXIMUM REACH/EFFECTIVE RANGE
<8~55 meters
TACTICAL RELOAD TIME
very short
FULL RELOAD TIME
very short
RECOIL AFTER THE FIRST SHOT
high
RECOIL OF SHOTS IN SUCCESSION (BURST, AUTO)
high
RECOIL TO THE LEFT/RIGHT
low / high
STABILIZATION TIME AFTER THE LAST FIRED SHOT
medium
M16A4 is a highly-specialized weapon for fighting over long range. Its only firing modes are SINGLE and BURST, which makes this rifle difficult to master in fight over short distance, especially the recoil of each series is strong to the right and up. In return, it can be very quickly reloaded. In the SINGLE mode, it is one of the best weapons against snipers over medium distance.
Suggested accessories: Angled grip, Muzzle brake, Magnifier 2x (especially in combination with the collimator) or the M145 scope (Prisma 3,4x).
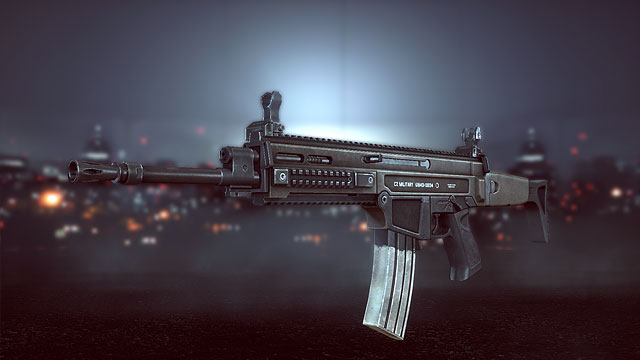
STATISTIC
VALUE
POINTS NECESSARY TO UNLOCK
71 000
MAXIMUM REACH/EFFECTIVE RANGE
<8~55 meters
TACTICAL RELOAD TIME
medium
FULL RELOAD TIME
short
RECOIL AFTER THE FIRST SHOT
medium
RECOIL OF SHOTS IN SUCCESSION (BURST, AUTO)
medium
RECOIL TO THE LEFT/RIGHT
very low / very high
STABILIZATION TIME AFTER THE LAST FIRED SHOT
medium
CZ-805 is a rifle that is universal, but tricky. During automated fire, it recoils to the right but, for a more experienced player, this can be handled. Apart from that, the rifle is quite accurate and its rate of fire can compete with the rifles designed for fighting over short distances. Still, the medium range is optimal one for this rifle.
Suggested accessories: Laser, Short grip, Compensator or Muzzle brake.
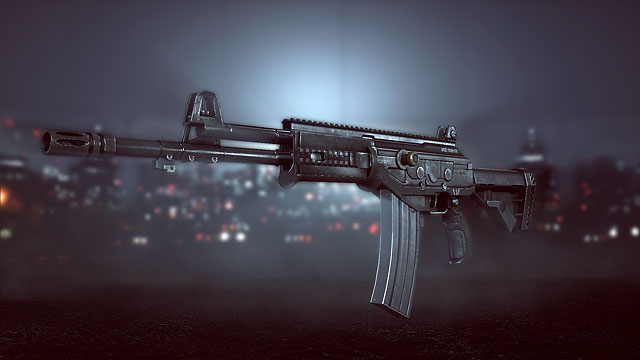
STATISTIC
VALUE
POINTS NECESSARY TO UNLOCK
Complete the "Assault - Expert" gold assignment
MAXIMUM REACH/EFFECTIVE RANGE
<8~55 meters
TACTICAL RELOAD TIME
Short
FULL RELOAD TIME
Medium
RECOIL AFTER THE FIRST SHOT
Low
RECOIL OF SHOTS IN SUCCESSION (BURST, AUTO)
very high
RECOIL TO THE LEFT/RIGHT
medium / low
STABILIZATION TIME AFTER THE LAST FIRED SHOT
Medium
There is a reason to why you receive the ACE 23 after you complete the "Assault - Expert" gold assignment. It is because it is a highly capable rifle and you need to have a lot of experience points under your belt to use it effectively. It is the third assault rifle, when it comes to its rate of fire, which is why it deals perfectly with close-range situations but, you need to be able to handle its recoil that carries the barrel away to the right. Thanks to the high accuracy of the initial shot, and relatively quick stabilization, it can be well used over longer distances but, only while firing in controlled series. Whoever manages to handle this rifle, may surely count himself the ace of the battlefield.
Suggested accessories: Laser, ERGO grip or Short grip, Muzzle brake.
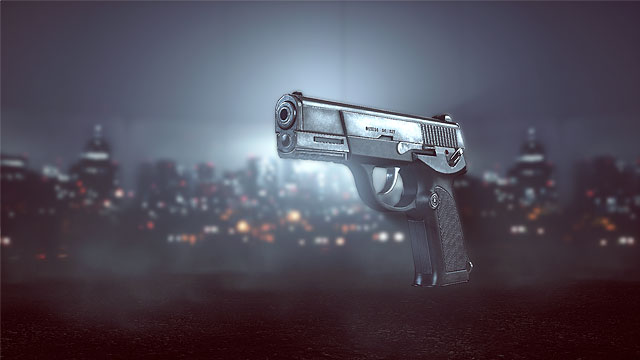
STATISTIC
VALUE
POINTS NECESSARY TO UNLOCK
Complete the campaign mode without sacrificing anyone.
MAXIMUM REACH/EFFECTIVE RANGE
<8~55 meters
TACTICAL RELOAD TIME
very long
FULL RELOAD TIME
very long
RECOIL AFTER THE FIRST SHOT
very low
RECOIL OF SHOTS IN SUCCESSION (BURST, AUTO)
very low
RECOIL TO THE LEFT/RIGHT
medium / very low
STABILIZATION TIME AFTER THE LAST FIRED SHOT
medium
QBZ-95-1 is your typical rifle designed for fights over long distances. Its rate of fire is not too high but it, in turn, has a very low recoil that carries away a bit to the left. Still, controlling it is a child's play. Definitely, it is a weapon that requires a lot of precision of the user, both at close quarters and over longer distances. Its rate of fire is low so, at short distances, any hit is worth its weight in gold but, at long range you can use it to nag at the enemy snipers and the other distant targets. Its arguable downside is that it reloads pretty slowly but, this is not too much of an obstacle for long-range shooters.
Suggested accessories: Laser, ERGO grip, Compensator (only when firing in the BURST mode).
Handguns are the second most important weapons for every player. They're supposed to save us in tight corners, kill wounded enemies and even earn respect while in right hands. The most important thing for them is to fit our style of playing and preferences, and complement our main weapon.
Choosing a handgun is simple: it has to be a gun that's most comfortable for the player. When your primary weapon runs out of ammo and there's no time to reload it, a handgun will provide protection. They won't if you're not comfortable with it.
Secondly, a handgun should (but doesn't have to) compensate downsides of your primary weapon. If your primary weapon has a low rate of fire, then a handgun with a high rate of fire will be a perfect choice.
Finally, some experience will help you choose a handgun. If the enemy was close to you in most cases of using a handgun, choose an automatic weapon or a shotgun. But if you use it to kill enemies from a distance, choose a slow, but powerful revolver.
Luckily, the selection of handguns is so wide and diversified that even the most picky players will find something for themselves. However, each weapon has to be tested, and to do it, you have to unlock it - that's a difficulty for many players. Handguns aren't used very often, so unlocking every model might take ages. Servers that allow only this type of weapons are really useful. If you choose a server with Hardcore mode, because health is limited to 60%, so you can kill enemies more quickly there. Playing on such a server, especially with XP bonus, lets you unlock any handgun in a few hours, instead of days or months.
In this list you'll find a description of hidden properties of weapons, their comparison (described in Explanation) and some advice on recommended accessories. Remember that this is mainly common sense advice that is supposed to keep you from harm (for example by exposing negative properties of a gun). You can experiment with them to adjust your weapon to more specialised conditions. The only accessories described are the ones that affect weapon's stats, that means barrel, under-barrel element and laser sight. All the other accessories are optional and using them depends on your preferences and experience.
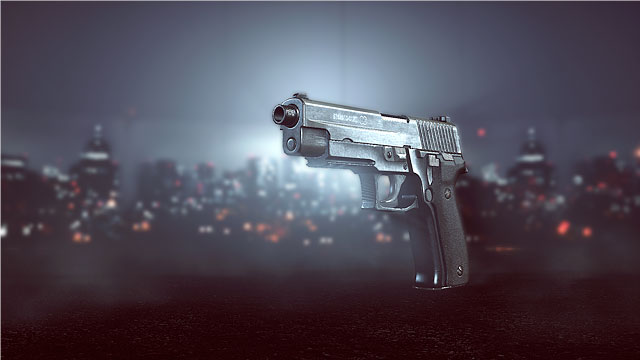
STAT
VALUE
POINTS NEEDED TO UNLOCK
---
OPTIMUM/EFFECTIVE RANGE
<8~55 metres
TACTICAL RELOAD
medium
FULL RELOAD
short
RECOIL AFTER FIRST ROUND
very low
RECOIL OF FOLLOWING ROUNDS (BURST, AUTO)
very low
RECOIL TO THE LEFT/RIGHT
high / medium
STABILIZATION AFTER LAST SHOT
very long
P226 is a really versatile gun that will be used throughout all the game by many players. It has the lowest vertical recoil in its class which makes it very easy to use on a short distance. Unfortunately, it won't help on longer distance because it has a strong horizontal recoil to the left. Aside from that, P226 is an average gun with a decent clip and short reloading time.
Recommended accessories: Laser sight, Compensator.
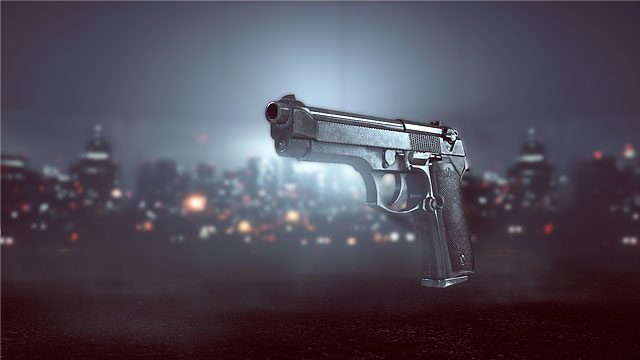
STAT
VALUE
POINTS NEEDED TO UNLOCK
4 000
OPTIMUM/EFFECTIVE RANGE
<8~55 metres
TACTICAL RELOAD
long
FULL RELOAD
long
RECOIL AFTER FIRST ROUND
very low
RECOIL OF FOLLOWING ROUNDS (BURST, AUTO)
low
RECOIL TO THE LEFT/RIGHT
medium / medium
STABILIZATION AFTER LAST SHOT
very long
M9 is even easier to control than its predecessor and has similar downsides. Vertical recoil is easy to control, but horizontal is quite strong on both sides. Such a symmetrical recoil makes it hard to predict where the next round will hit, but it's good on short distance. Long time of reloading is definitely its biggest disadvantage.
Recommended accessories: Laser sight, Compensator.
STAT
VALUE
POINTS NEEDED TO UNLOCK
8 000
OPTIMUM/EFFECTIVE RANGE
<8~60 metres
TACTICAL RELOAD
long
FULL RELOAD
long
RECOIL AFTER FIRST ROUND
very low
RECOIL OF FOLLOWING ROUNDS (BURST, AUTO)
medium
RECOIL TO THE LEFT/RIGHT
very low / very low
STABILIZATION AFTER LAST SHOT
medium
QSZ is a bit better on medium distance. A low, symmetrical vertical recoil makes every bullet hit the target just above the previous one, while horizontal recoil can be easily controlled with a right accessory. It has a high rate of fire, but low damage.
Recommended accessories: Laser sight, Muzzle Brake.
STAT
VALUE
POINTS NEEDED TO UNLOCK
13 000
OPTIMUM/EFFECTIVE RANGE
<8~55 metres
TACTICAL RELOAD
very short
FULL RELOAD
very short
RECOIL AFTER FIRST ROUND
very low
RECOIL OF FOLLOWING ROUNDS (BURST, AUTO)
medium
RECOIL TO THE LEFT/RIGHT
very low / very low
STABILIZATION AFTER LAST SHOT
medium
MP-443 is much slower than guns mentioned earlier, but it does quite a lot of damage and has a bigger clip. In terms of recoil, it's almost the same as QSZ. Lower rate of fire makes it better for medium distance.
Recommended accessories: Laser sight, Muzzle Brake.

Although it's a handgun, technically it's a shotgun, so you'll find more information about it in the chapter about shotguns.
STAT
VALUE
POINTS NEEDED TO UNLOCK
23 000
OPTIMUM/EFFECTIVE RANGE
<8~55 metres
TACTICAL RELOAD
very short
FULL RELOAD
medium
RECOIL AFTER FIRST ROUND
very high
RECOIL OF FOLLOWING ROUNDS (BURST, AUTO)
medium
RECOIL TO THE LEFT/RIGHT
high / high
STABILIZATION AFTER LAST SHOT
very short
Glock 18 is a fully automatic gun - if you hold the trigger, you'll empty its big clip in no time. One of its downsides is that it has a really high recoil - both vertical and horizontal, which makes it useful only on short distance. G18 won't do a lot of damage with a single bullet, but with this rate of fire it won't be a problem for an experienced player.
Recommended accessories: Laser sight, Muzzle Brake.
STAT
VALUE
POINTS NEEDED TO UNLOCK
28 000
OPTIMUM/EFFECTIVE RANGE
<8~60 metres
TACTICAL RELOAD
short
FULL RELOAD
short
RECOIL AFTER FIRST ROUND
very low
RECOIL OF FOLLOWING ROUNDS (BURST, AUTO)
medium
RECOIL TO THE LEFT/RIGHT
very low / very low
STABILIZATION AFTER LAST SHOT
medium
In case of FN57, the first thing that draws your attention is the highest clip capacity in its class. Moreover, it has a high rate of fire (for a semi-auto gun), so vertical recoil is rather high, but horizontal is insignificant. The price you pay for all these things - low damage.
Recommended accessories: Laser sight, Muzzle Brake.
STAT
VALUE
POINTS NEEDED TO UNLOCK
34 000
OPTIMUM/EFFECTIVE RANGE
<8~40 metres
TACTICAL RELOAD
very short
FULL RELOAD
very short
RECOIL AFTER FIRST ROUND
very low
RECOIL OF FOLLOWING ROUNDS (BURST, AUTO)
medium
RECOIL TO THE LEFT/RIGHT
very low / very low
STABILIZATION AFTER LAST SHOT
medium
The legendary Colt M1911 should make your enemies tremble in fear. It's one of two strongest guns in the game (except revolvers). Its huge damage comes with a price. It has a small clip, so you need a bit of experience to use it. Luckily, it's not that hard because M1911 has a very low vertical and horizontal recoil. Perfect for medium distance.
Recommended accessories: Laser sight, Muzzle Brake or no attachment.
STAT
VALUE
POINTS NEEDED TO UNLOCK
39 000
OPTIMUM/EFFECTIVE RANGE
<8~55 metres
TACTICAL RELOAD
medium
FULL RELOAD
medium
RECOIL AFTER FIRST ROUND
very high
RECOIL OF FOLLOWING ROUNDS (BURST, AUTO)
very low
RECOIL TO THE LEFT/RIGHT
medium / medium
STABILIZATION AFTER LAST SHOT
very short
Beretta 93R is an automatic gun as well, but it shoots three bullet bursts. Because of that, it's easier to control and more accurate than Glock 18 with the same rate of fire. It also does little damage, but its low recoil makes it better for players who prefer more precise automatic guns.
Recommended accessories: Laser sight, Muzzle Brake or no attachment.
STAT
VALUE
POINTS NEEDED TO UNLOCK
45 000
OPTIMUM/EFFECTIVE RANGE
<12,5~50 metres
TACTICAL RELOAD
medium
FULL RELOAD
medium
RECOIL AFTER FIRST ROUND
very low
RECOIL OF FOLLOWING ROUNDS (BURST, AUTO)
low
RECOIL TO THE LEFT/RIGHT
very low / very low
STABILIZATION AFTER LAST SHOT
long
This Czech gun is one more option for players who prefer precision. A very "tight" recoil and average rate of fire make it very easy to use. It's perfect on medium distance, but its clip capacity is quite limited.
Recommended accessories: Laser sight, Muzzle Brake or no attachment.

STAT
VALUE
POINTS NEEDED TO UNLOCK
51 000
OPTIMUM/EFFECTIVE RANGE
<12,5~50 metres
TACTICAL RELOAD
very long
FULL RELOAD
very long
RECOIL AFTER FIRST ROUND
very low
RECOIL OF FOLLOWING ROUNDS (BURST, AUTO)
very high
RECOIL TO THE LEFT/RIGHT
medium / medium
STABILIZATION AFTER LAST SHOT
very long
If you've ever wanted to be Dirty Harry, this revolver can make the dream come true. It has an incredibly low rate of fire and a huge recoil, but deals the most damage in its class (except the Shorty). Accuracy of its first shot is above average, so if you combine it with a scope, you'll get a pocket sniper rifle that kills with a single shot to the head (up to ~25 metres). It's really hard to control and might not be enough while fighting on short distance against faster guns.
Recommended accessories: Laser sight, Heavy Barrel or Muzzle Brake.
STAT
VALUE
POINTS NEEDED TO UNLOCK
57 000
OPTIMUM/EFFECTIVE RANGE
<8~40 metres
TACTICAL RELOAD
very short
FULL RELOAD
very short
RECOIL AFTER FIRST ROUND
very low
RECOIL OF FOLLOWING ROUNDS (BURST, AUTO)
medium
RECOIL TO THE LEFT/RIGHT
very low / very low
STABILIZATION AFTER LAST SHOT
short
This inconspicuous, small gun is the hardest to unlock for a reason. It deals most damage in its class, shoots fast and accurately, but it has a small clip. Good for any distance, as long as 11 bullets are enough for you to kill an enemy. H&K Compact 45 is a direct upgrade from Colt M1911.
Recommended accessories: Laser sight, Muzzle Brake or no attachment.
STAT
VALUE
POINTS NEEDED TO UNLOCK
complete "Tombstone Actual"
OPTIMUM/EFFECTIVE RANGE
<15~37 metres
TACTICAL RELOAD
long
FULL RELOAD
long
RECOIL AFTER FIRST ROUND
very low
RECOIL OF FOLLOWING ROUNDS (BURST, AUTO)
very high
RECOIL TO THE LEFT/RIGHT
medium / medium
STABILIZATION AFTER LAST SHOT
long
This exotically looking revolver can be unlocked by completing the first mission of single player campaign. Using the Rex is quite similar to .44 Magnum, but it's a bit faster, less accurate and better for shorter distance. These downsides are compensated by a shorter reload time and faster stabilization. Unlike the Magnum, it can't be equipped with a scope.
Recommended accessories: Laser sight, Heavy Barrel or Muzzle Brake.
The Personal Defense Weapons (PDW) are a type of weapon designed for fight over very short distances and it is available for engineers only. A quite stunning fact is that (apart from completing all engineer assignments ) you first need to kill 200 enemies using Carbines to unlock the last LMG.
The PDW are similar to assault rifles, or carbines, in terms of the damage they deal so, the user of an SMG is not bound to lose if pitted against an enemy with a larger-caliber weapon, on condition that the optimal range is maintained. Apart from that, the PDW weapons are one of the most accurate weapons for the hip-shooting so, sometimes it may even be better not to lose time to lift the optical instruments to the eye, thanks to which you will gain additional fraction of second of advantage over the enemy. This fraction of second can often tip the scales to your side, especially in the "Hardcore" mode.
In this chapter, you will find a list of the hidden characteristics of the weapons, the comparison (described in the Commentary) and a few hints concerning the suggested accessories. Still, you should remember that these are only common-sense hints whose aim is, predominantly, not to bring harm (e.g. by emphasizing the downsides of the PDW) but, there is nothing in your way if you just want to experiment in order to adjust the weapon to a more specialist use, which in turn decreases its universal character. The hints that refer to the accessories concern only those, whose mounting directly translates into altering the weapon's statistics, i.e. the barrel, the underslung element and the laser (although in this case, the laser, which increases the hip-shooting, accuracy is a basic piece of equipment). The remaining accessories are completely optional, dependent on the preferences ad your experience with the game.
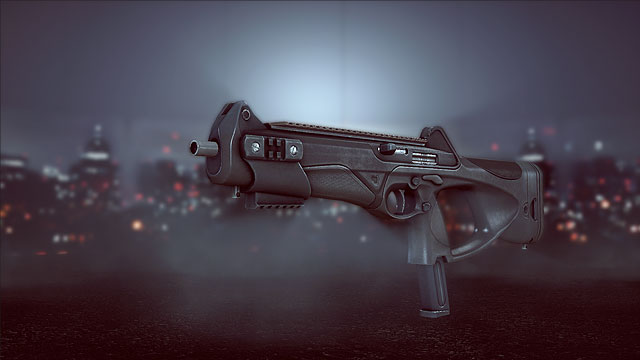
STATISTIC
VALUE
POINTS NECESSARY TO UNLOCK
---
MAXIMUM REACH/EFFECTIVE RANGE
<8~55 meters
TACTICAL RELOAD TIME
medium
FULL RELOAD TIME
medium
RECOIL AFTER THE FIRST SHOT
very high
RECOIL OF SHOTS IN SUCCESSION (BURST, AUTO)
high
RECOIL TO THE LEFT/RIGHT
very high / low
STABILIZATION TIME AFTER THE LAST FIRING
medium
MX4 is the first available SMG and, as such, it does not stand out too much, when compared to the competition. Its rate of fire is relatively high and the first bullet is quite precise to hit the target but, the price to pay for this is low stability and quite a "kickback". Apart from that, it discernibly recoils to the left while in the AUTO mode. It is best for extremely short distances and there probably are few engineers that will find this one useful, after unlocking the next PDW models - unless you prefer to remain faithful to its modern looks.
Suggested accessories: Laser, Angled grip or Stubby grip, Muzzle brake.
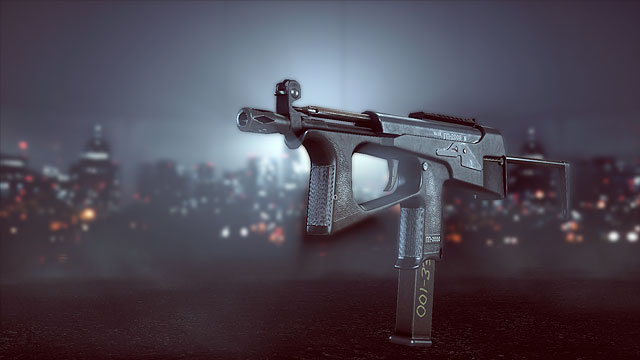
STATISTIC
VALUE
POINTS NECESSARY TO UNLOCK
4 000
MAXIMUM REACH/EFFECTIVE RANGE
<8~55 meters
TACTICAL RELOAD TIME
very long
FULL RELOAD TIME
very long
RECOIL AFTER THE FIRST SHOT
very low
RECOIL OF SHOTS IN SUCCESSION (BURST, AUTO)
very low
RECOIL TO THE LEFT/RIGHT
medium / very low
STABILIZATION TIME AFTER THE LAST FIRING
medium
PP-2000 is a sub machine gun that is very easy to operate. It has low rate of fire but, in turn, its vertical and horizontal recoil is negligible, thanks to which you can conduct precise automatic fire. Also, the accuracy of the initial bullet leaves very little to wish for. The only shortcoming of this weapon is that it has one of the longest reload times, as for, a PDW, which is alleviated by the volume of the magazine.
Suggested accessories: Laser, ERGO grip.
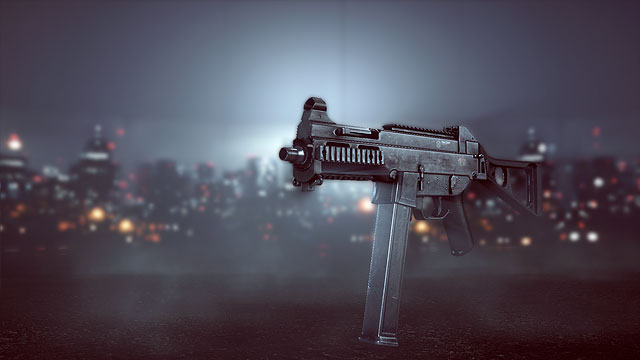
STATISTIC
VALUE
POINTS NECESSARY TO UNLOCK
11 000
MAXIMUM REACH/EFFECTIVE RANGE
<8~40 meters
TACTICAL RELOAD TIME
very short
FULL RELOAD TIME
very short
RECOIL AFTER THE FIRST SHOT
low
RECOIL OF SHOTS IN SUCCESSION (BURST, AUTO)
very high
RECOIL TO THE LEFT/RIGHT
very low / very low
STABILIZATION TIME AFTER THE LAST FIRING
short
UMP-45 is an SMG of the lowest rate of fire but, at the same time, one of the easiest when it comes to controlling of the AUTO fire, ad one that deals most damage in its own class. The accuracy of the initial shot is perfect , thanks to which it can well be used for medium ranges. During the AUTO fire, the vertical recoil lifts the barrel but, it is easy to prevent by lowering the sights. With a bit of practice, it is one of the most precise PDW weapons, but not while hip-shooting.
Suggested accessories: Laser, ERGO grip, Muzzle brake (only if countering the vertical recoil is problematic).
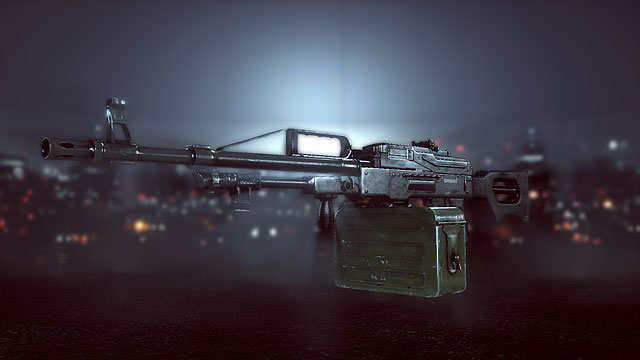
STATISTIC
VALUE
POINTS NECESSARY TO UNLOCK
19 000
MAXIMUM REACH/EFFECTIVE RANGE
<12,5~55 meters
TACTICAL RELOAD TIME
short
FULL RELOAD TIME
short
RECOIL AFTER THE FIRST SHOT
high
RECOIL OF SHOTS IN SUCCESSION (BURST, AUTO)
medium
RECOIL TO THE LEFT/RIGHT
very high / very high
STABILIZATION TIME AFTER THE LAST FIRING
long
CBJ-MS is a very unique UZI variation. The first thing that attracts attention is the capacious drum magazine, which can be surprisingly fast replaced. It gets worse when it comes to the gun's precision, because of the strong horizontal recoil, which results in difficult handling. The accuracy of the initial bullet is also nothing to sweep you off your feet so, the best idea is to use it in narrow corridors, or avoid shooting in very long series.
Suggested accessories: Laser, ERGO grip, Compensator .

STATISTIC
VALUE
POINTS NECESSARY TO UNLOCK
28 000
MAXIMUM REACH/EFFECTIVE RANGE
<8~50 meters
TACTICAL RELOAD TIME
medium
FULL RELOAD TIME
medium
RECOIL AFTER THE FIRST SHOT
medium
RECOIL OF SHOTS IN SUCCESSION (BURST, AUTO)
low
RECOIL TO THE LEFT/RIGHT
very low / high
STABILIZATION TIME AFTER THE LAST FIRING
long
PDW-R is definitely useless for precision use but, it shines at close range. When it comes to the remaining characteristics, it is a relatively well-balanced SMG but, it has a relatively strong horizontal recoil to the right, while shooting AUTO fire. It requires a bit of practice to control its diagonal recoil.
Suggested accessories: Laser, ERGO grip, Compensator .
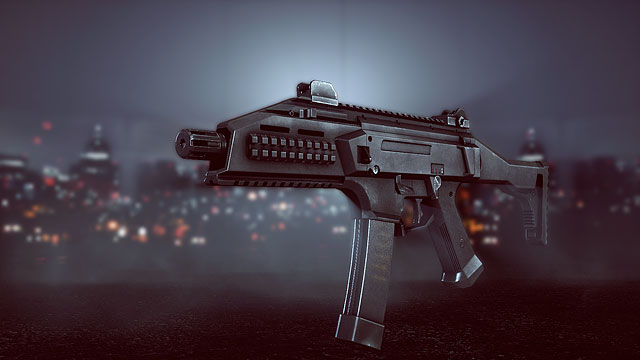
STATISTIC
VALUE
POINTS NECESSARY TO UNLOCK
37 000
MAXIMUM REACH/EFFECTIVE RANGE
<8~55 meters
TACTICAL RELOAD TIME
short
FULL RELOAD TIME
very short
RECOIL AFTER THE FIRST SHOT
very high
RECOIL OF SHOTS IN SUCCESSION (BURST, AUTO)
very high
RECOIL TO THE LEFT/RIGHT
high / very high
STABILIZATION TIME AFTER THE LAST FIRING
medium
The Czech-made SMG CZ-3A1 is the fastest weapon in its class, which results in a strong horizontal recoil to the right. While fighting at close quarters, CZ is a beast, due to its rate of fire. For the same reason, it uses up its ammo very quickly so, if you live long enough, be prepared to use the secondary weapon frequently or for asking the support for additional batches of ammo.
Suggested accessories: Laser, Angled grip, Muzzle brake.
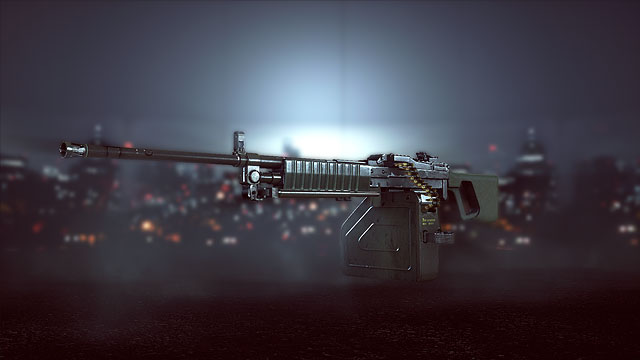
STATISTIC
VALUE
POINTS NECESSARY TO UNLOCK
48 000
MAXIMUM REACH/EFFECTIVE RANGE
<8~55 meters
TACTICAL RELOAD TIME
medium
FULL RELOAD TIME
medium
RECOIL AFTER THE FIRST SHOT
medium
RECOIL OF SHOTS IN SUCCESSION (BURST, AUTO)
high
RECOIL TO THE LEFT/RIGHT
low / medium
STABILIZATION TIME AFTER THE LAST FIRING
medium
JS2 comes second, when it comes to the rate of fire, in the PDW class (joint with the P90) so, as can be expected, its precision is low. Its recoil is not as uncontrollable, though, as in the case of the CZ-3A1, because its horizontal spread is lower, although it spreads a little to the right. In return for this inconvenience, you receive the most capacious magazine.
Suggested accessories: Laser, Angled grip or Stubby grip, Muzzle brake.

STATISTIC
VALUE
POINTS NECESSARY TO UNLOCK
Complete the "Peace Maker" mission (The campaign mode)
MAXIMUM REACH/EFFECTIVE RANGE
<8~60 meters
TACTICAL RELOAD TIME
long
FULL RELOAD TIME
very long
RECOIL AFTER THE FIRST SHOT
high
RECOIL OF SHOTS IN SUCCESSION (BURST, AUTO)
medium
RECOIL TO THE LEFT/RIGHT
very high / very high
STABILIZATION TIME AFTER THE LAST FIRING
medium
P90 is another SMG of high rate of fire and a capacious magazine. Ideal at extremely short distances (although, in theory, its range is a bit longer than that of most PDWs) but, due to a quite strong vertical recoil, and low accuracy of the initial shot, it is useless at longer ranges. Ideal for hip-shooting.
Suggested accessories: Laser, ERGO grip, Compensator .
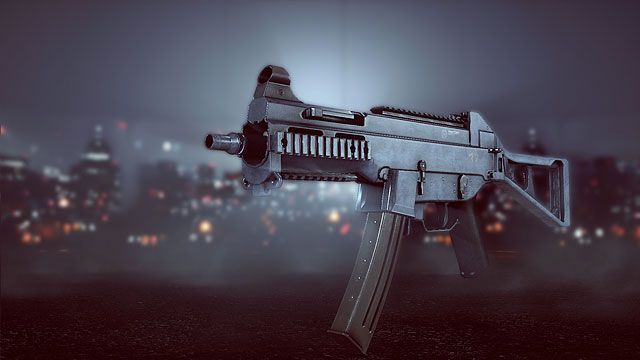
STATISTIC
VALUE
POINTS NECESSARY TO UNLOCK
Complete the "Engineer - Expert" assignment
MAXIMUM REACH/EFFECTIVE RANGE
<8~55 meters
TACTICAL RELOAD TIME
very short
FULL RELOAD TIME
short
RECOIL AFTER THE FIRST SHOT
very low
RECOIL OF SHOTS IN SUCCESSION (BURST, AUTO)
very low
RECOIL TO THE LEFT/RIGHT
low / low
STABILIZATION TIME AFTER THE LAST FIRING
medium
UMP-9 is, not without a reason, a reward for the most demanding assignment to be completed by the engineer. It is much faster than UMP-45, its magazine is bigger, it reloads almost instantaneously and its recoil is negligible. After mounting the appropriate accessories, the weapon feels as if was firing laser beams. The pure precision in the case of aiming through the optical sights and probably, the only PDW weapon that can be used to harry the enemy snipers and the other long-range soldiers.
Suggested accessories: Laser or Magnifier X2, Stubby grip, Compensator or Muzzle brake.
The LMGs are the kind of weapon designed typically to support soldiers in the battlefield. Their characteristics are the relatively long range, large capacity of the magazine and also strong recoil. They are ideal for continuous barrage and for suppressing the enemy. If properly used, they can pose a considerable threat for the enemy snipers, as well as for clusters of enemies. Their greatest downside is their hip-shooting accuracy and the long reload times.
Light machine guns can be used in two ways: mobile and stationary. By using the bipod, the gun improves in terms of stability and that is when it poses the greatest threat to snipers of the opposing squad, as well as for the other distant targets. The cost of using the bipod is the lowered value of the LMGs for a mobile fight at close ranges, because the bipod replaces the front grip. A stationary gunner should also consider mounting the X3,4-4 scope onto the gun, or the Magnifier X2 for maximum effectiveness against distant targets. Fighting in constant movement, with the use of this kind of gun is a far cry. Regardless of the accessories attached to the gun, most LMGs are inferior, when it comes to accuracy, and often the rate of fire, especially to carbines, assault rifles and PDWs. This is not to say, however that the LMG user is without any chances against gunmen using one of the above, at close quarters. Thanks to the high capacity for suppressive fire, and their capacious magazines, a support soldier, equipped with an LMG can pepper the enemy with incessant torrent of lead, which not only inflicts decent damage, but also confuses the enemy and weakens his accuracy, by blurring his vision and causing the sight to wobble. With appropriate attachments, the tremendous recoil of the LMGs can be alleviated, during fights at close quarters, but there is nothing to help while hip-shooting in motion. In such a situation, killing the enemy may prove to be more of a matter of luck (or the enemy's incompetence) than the gunner's skills. While fighting at short and medium ranges, always use the optical sights to target. The only exception if a fight face-to-face, when the enemy is, literally, at hand.
Unlike with most weapons in Battlefield 4, equipping the LMG with laser sight rarely makes sense because increasing the accuracy of the hip shot by the several percent makes not that much difference. Since you should be using the optical sights at close quarters (the laser sights do not influence accuracy in this case), a way better choice is the flashlight, which will blind the enemy who, since he is under fire, will be additionally suppressed. This way, you can strengthen the effect of confusion and make it more difficult for the enemy to fire an accurate shot.
In this chapter, you will find a list of the hidden characteristics of the weapons, the comparison (described in the Commentary) and a few hints concerning the suggested accessories. Still, you should remember that these are only common-sense hints whose aim is, predominantly, not to bring harm (e.g. by emphasizing the downsides of the LMGs) but, there is nothing in your way if you just want to experiment in order to adjust the weapon to a more specialist use, which in turn decreases its universal character. The hints that refer to the accessories concern only those, whose mounting directly translates into altering the weapon's statistics, i.e. the barrel, the underslung element and the laser. The remaining accessories are completely optional, dependent on the preferences ad your experience with the game.
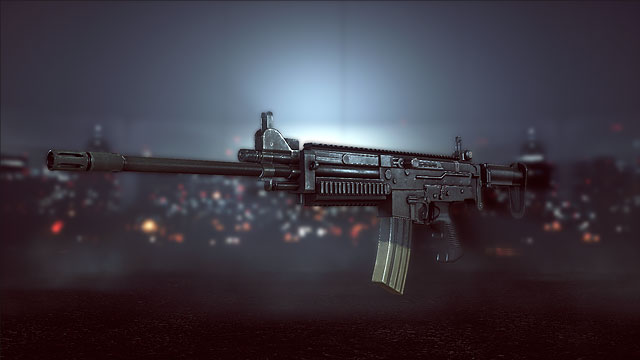
STATISTIC
VALUE
POINTS NECESSARY TO UNLOCK
---
MAXIMUM REACH/EFFECTIVE RANGE
<8~65 meters
TACTICAL RELOAD TIME
very short
FULL RELOAD TIME
very short
RECOIL AFTER THE FIRST SHOT
high
RECOIL OF SHOTS IN SUCCESSION (BURST, AUTO)
low
RECOIL TO THE LEFT/RIGHT
low / low
STABILIZATION TIME AFTER THE LAST FIRING
short
The first LMG that you put your hands on is, basically, a slightly modified assault rifle with larger magazine. As a result, it behaves much like its cousin but, it is an LMG of the lowest rate of fire , of the available ones. Its recoil is relatively easy to counteract because it does not carry away vertically, and the raising of the barrel is easy to correct. The considerable precision of the first round makes it easy to hit distant targets with this weapon.
Suggested accessories: Laser, Angled grip, Muzzle brake.
STATISTIC
VALUE
POINTS NECESSARY TO UNLOCK
4 000
MAXIMUM REACH/EFFECTIVE RANGE
<8~65 meters
TACTICAL RELOAD TIME
very long
FULL RELOAD TIME
very long
RECOIL AFTER THE FIRST SHOT
low
RECOIL OF SHOTS IN SUCCESSION (BURST, AUTO)
high
RECOIL TO THE LEFT/RIGHT
high / high
STABILIZATION TIME AFTER THE LAST FIRING
long
Type 88 is a quick-firing LMG with a huge magazine and low automatic fire accuracy. The vertical recoil is only a bit larger than in the case of the U-100 but, its horizontal recoil is almost twice as large. The accuracy of the initial round is not impressive so, the Type 88 is definitely not for those who prefer precision and it is way better for shorter-range fights.
Suggested accessories: Bipod/ Stubby grip, Compensator .
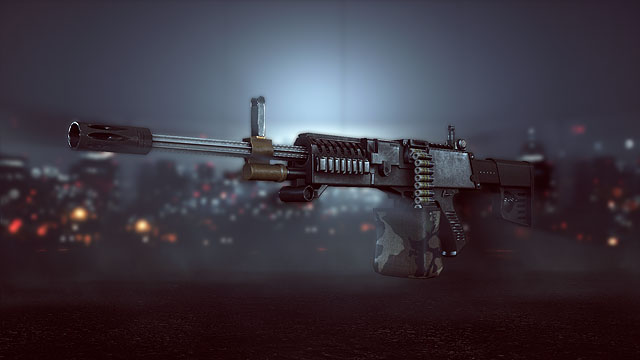
STATISTIC
VALUE
POINTS NECESSARY TO UNLOCK
11 000
MAXIMUM REACH/EFFECTIVE RANGE
<8~65 meters
TACTICAL RELOAD TIME
long
FULL RELOAD TIME
long
RECOIL AFTER THE FIRST SHOT
low
RECOIL OF SHOTS IN SUCCESSION (BURST, AUTO)
low
RECOIL TO THE LEFT/RIGHT
low / low
STABILIZATION TIME AFTER THE LAST FIRING
medium
LSAT is a gun ideal for clearing narrow corridors and laying down barrage at medium distances. The accuracy of the initial shot is rather low but, the relatively low vertical and horizontal recoil make it possible to conduct continuous fire into one point with satisfactory precision. The medium-sized magazine and the long reload times result in the fact that it is better to find a safe place to conduct fire.
Suggested accessories: Bipod/ Stubby grip, Compensator , Flashlight.
STATISTIC
VALUE
POINTS NECESSARY TO UNLOCK
19 000
MAXIMUM REACH/EFFECTIVE RANGE
<8~75 meters
TACTICAL RELOAD TIME
medium
FULL RELOAD TIME
medium
RECOIL AFTER THE FIRST SHOT
low
RECOIL OF SHOTS IN SUCCESSION (BURST, AUTO)
very high
RECOIL TO THE LEFT/RIGHT
high / high
STABILIZATION TIME AFTER THE LAST FIRING
long
PKP is one of the most powerful LMGs, of all the available ones. Additionally, its range is the longest of all. The price that you need to pay for that is a strong recoil, both vertical and horizontal so, it is difficult to say that the automatic fire is precise over medium and long distance. It works better while firing short bursts, at which point its accuracy increases - especially in combination with bipod.
Suggested accessories: Bipod/ Stubby grip, heavy barrel.
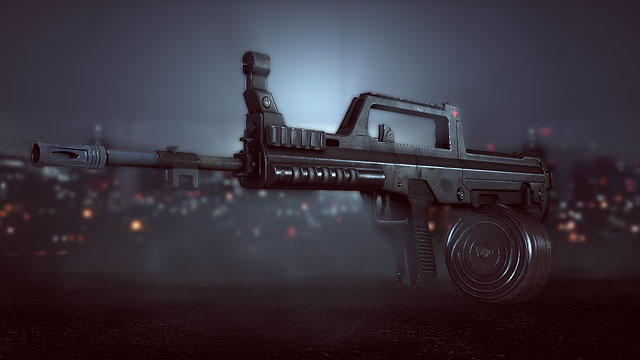
STATISTIC
VALUE
POINTS NECESSARY TO UNLOCK
28 000
MAXIMUM REACH/EFFECTIVE RANGE
<8~65 meters
TACTICAL RELOAD TIME
short
FULL RELOAD TIME
short
RECOIL AFTER THE FIRST SHOT
very high
RECOIL OF SHOTS IN SUCCESSION (BURST, AUTO)
very low
RECOIL TO THE LEFT/RIGHT
low / very low
STABILIZATION TIME AFTER THE LAST FIRING
short
QBB is another assault rifle designed to conduct long, continuous fire at the enemy positions. It is considerably more accurate than the other LMGs and it is easy to control its recoil without using the bipod. It is definitely one of the better choices of the soldiers who advocate mobility and direct fight.
Suggested accessories: Laser, vertical grip, Muzzle brake.
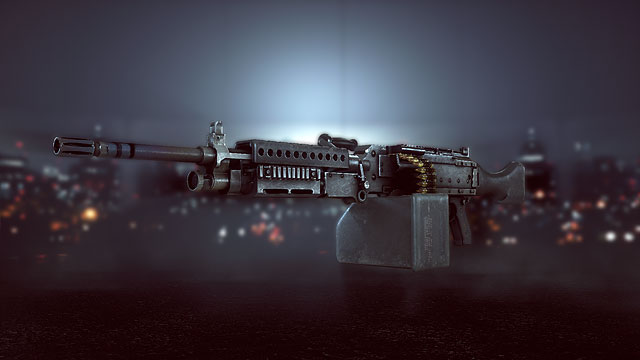
STATISTIC
VALUE
POINTS NECESSARY TO UNLOCK
37 000
MAXIMUM REACH/EFFECTIVE RANGE
<8~75 meters
TACTICAL RELOAD TIME
medium
FULL RELOAD TIME
medium
RECOIL AFTER THE FIRST SHOT
very low
RECOIL OF SHOTS IN SUCCESSION (BURST, AUTO)
very high
RECOIL TO THE LEFT/RIGHT
low / medium
STABILIZATION TIME AFTER THE LAST FIRING
very long
Just like PKP Pecheneg, M240B can be characterized with large damage and long effective range. The low recoil after the initial shot, makes the bursts quite accurate but, the recoil after the successive shots makes it virtually impossible to conduct precise automatic fire, during which the gun carries away a bit more to the right. In return, it is a bit faster than the PKP Pecheneg.
Suggested accessories: Bipod / Stubby grip, Compensator , Heavy barrel.
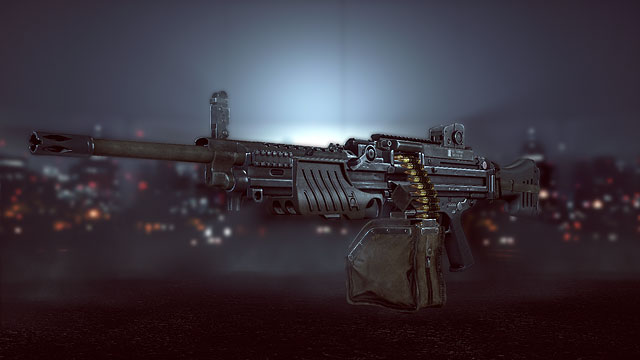
STATISTIC
VALUE
POINTS NECESSARY TO UNLOCK
48 000
MAXIMUM REACH/EFFECTIVE RANGE
<8~65 meters
TACTICAL RELOAD TIME
medium
FULL RELOAD TIME
medium
RECOIL AFTER THE FIRST SHOT
low
RECOIL OF SHOTS IN SUCCESSION (BURST, AUTO)
medium
RECOIL TO THE LEFT/RIGHT
low / high
STABILIZATION TIME AFTER THE LAST FIRING
very long
MG4 is one of the fastest of the available LMGs and, at the same time, surprisingly accurate after fitted with appropriate accessories - even while conducting automatic fire. It is equipped with the largest magazine available in this class and, the reloading times are among the shortest ones. This makes the weapon to fight even against multiple enemies, over short distances. With a bit of luck and skill, you can carry it through a corridor swarming with enemies and leave no one alive - and all of this by holding down the trigger.
Suggested accessories: Laser, Stubby grip / vertical grip, Compensator .
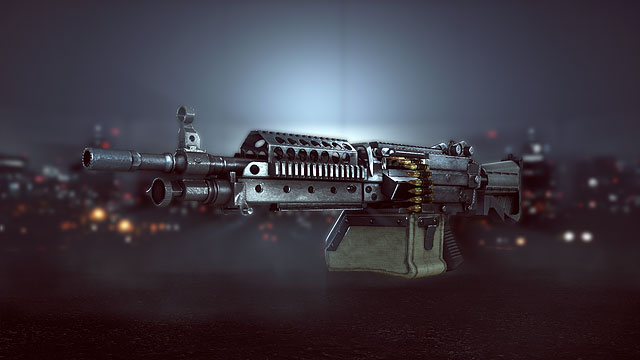
STATISTIC
VALUE
POINTS NECESSARY TO UNLOCK
MAXIMUM REACH/EFFECTIVE RANGE
<8~65 meters
TACTICAL RELOAD TIME
medium
FULL RELOAD TIME
medium
RECOIL AFTER THE FIRST SHOT
low
RECOIL OF SHOTS IN SUCCESSION (BURST, AUTO)
medium
RECOIL TO THE LEFT/RIGHT
high / medium
STABILIZATION TIME AFTER THE LAST FIRING
very long
M249 is another quick-firing LMG with a big magazine and, unfortunately, a considerable horizontal recoil. During the automatic fire, the weapon spreads to the right, still, the fire is more condensed than in the case of the majority of weapons in this class. The low recoil after the initial shot makes the precision of bursts decent.
Suggested accessories: Bipod / Stubby grip, Compensator , Heavy barrel.

STATISTIC
VALUE
POINTS NECESSARY TO UNLOCK
MAXIMUM REACH/EFFECTIVE RANGE
<8~65 meters
TACTICAL RELOAD TIME
very short
FULL RELOAD TIME
very short
RECOIL AFTER THE FIRST SHOT
high
RECOIL OF SHOTS IN SUCCESSION (BURST, AUTO)
low
RECOIL TO THE LEFT/RIGHT
very low / very low
STABILIZATION TIME AFTER THE LAST FIRING
short
The last LMG is another assault rifle which has been altered so, it works in similar conditions but, it has a larger magazine. Immensely accurate, thanks to the barely sensible horizontal recoil and, the large precision of the initial shot makes it ideal for medium and long distances. One of the best choices of aggressive support soldiers who are more like assault soldiers.
Suggested accessories: Laser, Angled grip, Muzzle brake.
Carbines are the shorter versions of assault rifles, which makes for their decreased accuracy, stability and range - which, in the case of the typical uses of both types in Battlefield 4, does not matter that much, unless someone wants to use this kind of weapons as sniper rifles. The upside of these weapons is that, in comparison with assault rifles, they are a bit more accurate, in the case of hip-shooting.
After they are unlocked by the engineer, carbines are available for all classes. In short, it is a quite universal type of weapon for those, who want to keep the gadgets usable only by the given class, but do not like the weapons assigned to their class. In fact, there is no reason for which to replace an assault rifle with a carbine, while playing as an assault soldier - still, if you play as any other class, this kind of weapon is the most "assault" of the available ones.
In this chapter, you will find a list of the hidden characteristics of the weapons, the comparison (described in the Commentary) and a few hints concerning the suggested accessories. Still, you should remember that these are only common-sense hints whose aim is, predominantly, not to bring harm (e.g. by emphasizing the downsides of the carbines) but, there is nothing in your way if you just want to experiment in order to adjust the weapon to a more specialist use, which in turn decreases its universal character. The hints that refer to the accessories concern only those, whose mounting directly translates into altering the weapon's statistics, i.e. the barrel, the underslung element and the laser (which in the case of carbines, emphasizes their only advantage over assault rifles). The remaining accessories are completely optional, dependent on the preferences and your experience with the game.
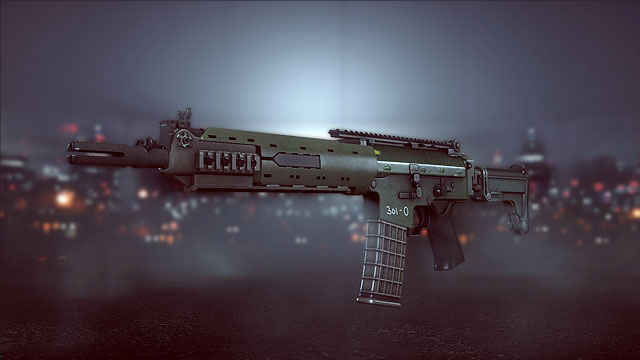
STATISTIC
VALUE
POINTS NECESSARY TO UNLOCK
15000 punktw w klasie Technika
MAXIMUM REACH/EFFECTIVE RANGE
<8~55 meters
TACTICAL RELOAD TIME
short
FULL RELOAD TIME
very short
RECOIL AFTER THE FIRST SHOT
very low
RECOIL OF SHOTS IN SUCCESSION (BURST, AUTO)
medium
RECOIL TO THE LEFT/RIGHT
low / low
STABILIZATION TIME AFTER THE LAST FIRING
medium
The AK 5C will remain the most popular of carbines for long. Not only due to its being the first available weapon of this kind, but also due to its perfect parameters. It is the typical weapon "in the middle of the scale" but, its upsides outweigh the downsides. This is a precise carbine of a decent firing rate and the accuracy of the initial shot, thanks to which it can challenge assault rifles.
Suggested accessories: Laser, ERGO grip.
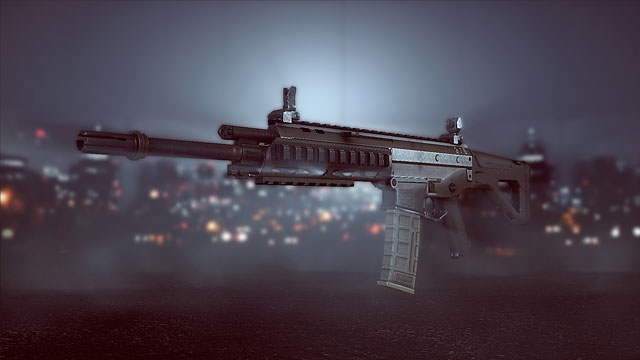
STATISTIC
VALUE
POINTS NECESSARY TO UNLOCK
4 000
MAXIMUM REACH/EFFECTIVE RANGE
<8~55 meters
TACTICAL RELOAD TIME
very short
FULL RELOAD TIME
short
RECOIL AFTER THE FIRST SHOT
very high
RECOIL OF SHOTS IN SUCCESSION (BURST, AUTO)
very high
RECOIL TO THE LEFT/RIGHT
high / medium
STABILIZATION TIME AFTER THE LAST FIRING
medium
ACW-R is a carbine of, arguably, the greatest precision of the initial shot, that is why it is perfect for conducting single fire over long distances. Unfortunately, from then on it is getting worse , because the horizontal and vertical recoil rise fast, during the automatic fire, which is caused by its rate of fire that is the highest for this class. While shooting in long bursts, it has the tendency to spread to the right.
Suggested accessories: Laser, Angled grip, Muzzle brake - then, Compensator .
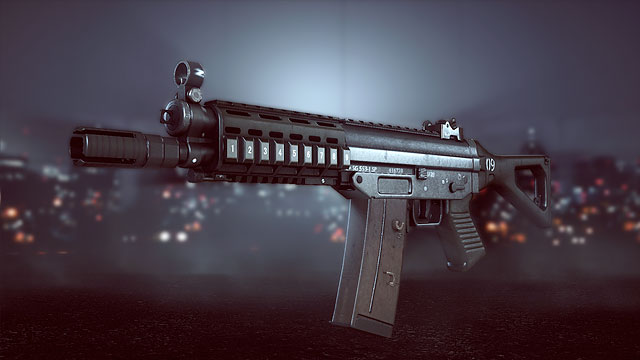
STATISTIC
VALUE
POINTS NECESSARY TO UNLOCK
11 000
MAXIMUM REACH/EFFECTIVE RANGE
<8~55 meters
TACTICAL RELOAD TIME
long
FULL RELOAD TIME
medium
RECOIL AFTER THE FIRST SHOT
high
RECOIL OF SHOTS IN SUCCESSION (BURST, AUTO)
low
RECOIL TO THE LEFT/RIGHT
medium / high
STABILIZATION TIME AFTER THE LAST FIRING
medium
The SG553 comes second in the category if the rate of fire, among all of the carbines. What follows is that it is not too precise over medium distance. Still, at short distance, the weapon works perfectly but, an attempt to reload this weapon in the midst of a fight, may have dire consequences. Due to long reload times, it is better to do that in hiding. While conducting automatic fire, it has high horizontal recoil and it is carried away to the right.
Suggested accessories: Laser, Angled grip, Compensator .
STATISTIC
VALUE
POINTS NECESSARY TO UNLOCK
19 000
MAXIMUM REACH/EFFECTIVE RANGE
<8~55 meters
TACTICAL RELOAD TIME
medium
FULL RELOAD TIME
long
RECOIL AFTER THE FIRST SHOT
low
RECOIL OF SHOTS IN SUCCESSION (BURST, AUTO)
very low
RECOIL TO THE LEFT/RIGHT
very low / low
STABILIZATION TIME AFTER THE LAST FIRING
medium
The AKU-12 stands out as the carbine of varying rate of fire between the AUTO and BURST modes. While in the BURST mode, it fires 70 bullets a minute more, which makes it the preferred mode in which it should work. Additionally, this is also due to the low recoil after the initial shot, thanks to which each consecutive burst reaches its target precisely. The reload times for this weapon are trifle long but, in the case over medium and long distances, this should not be a problem. While in the automatic firing mode, the weapon slightly carries away to the right which, given its overall accuracy, is easy to correct.
Suggested accessories: Laser, ERGO grip.
STATISTIC
VALUE
POINTS NECESSARY TO UNLOCK
28 000
MAXIMUM REACH/EFFECTIVE RANGE
<8~55 meters
TACTICAL RELOAD TIME
very long
FULL RELOAD TIME
very long
RECOIL AFTER THE FIRST SHOT
medium
RECOIL OF SHOTS IN SUCCESSION (BURST, AUTO)
high
RECOIL TO THE LEFT/RIGHT
very high / very high
STABILIZATION TIME AFTER THE LAST FIRING
medium
The A-91 is definitely a carbine designed for fighting over shorter distance. Its characteristic feature is its high rate of fire and a low precision to follow. It has one of the highest horizontal recoils of the weapons in this class but, it is proportional in both ways. Due to the abovementioned characteristics, it works well in narrow corridors and, at short distances, it can be used to eliminate small groups of enemies. This should be done wisely, though, because after ammo depletes, you are up for a tedious process of reloading. In extreme situations, it is better to switch to the secondary weapon and reload the carbine in hiding.
Suggested accessories: Laser, Stubby grip, Compensator .
STATISTIC
VALUE
POINTS NECESSARY TO UNLOCK
37 000
MAXIMUM REACH/EFFECTIVE RANGE
<8~55 meters
TACTICAL RELOAD TIME
long
FULL RELOAD TIME
medium
RECOIL AFTER THE FIRST SHOT
medium
RECOIL OF SHOTS IN SUCCESSION (BURST, AUTO)
very high
RECOIL TO THE LEFT/RIGHT
medium / medium
STABILIZATION TIME AFTER THE LAST FIRING
very long
This carbine has the smallest magazine in its class but, fortunately, it is also one with the lowest rate of fire. Both of these features are made up for by the highest dealt damage in this weapon class. As the name suggests, (CQB - Close Quarter Battle), it is a type of weapon designed for short distances. After the high initial shot recoil, the automatic fire stabilizes quickly and it is relatively easy to correct the horizontal recoil. The considerable recoil to the sides should not be too problematic if the weapon is used in accordance with its purpose.
Suggested accessories: Laser, ERGO grip, Muzzle brake.
STATISTIC
VALUE
POINTS NECESSARY TO UNLOCK
48 000
MAXIMUM REACH/EFFECTIVE RANGE
<8~55 meters
TACTICAL RELOAD TIME
short
FULL RELOAD TIME
short
RECOIL AFTER THE FIRST SHOT
very low
RECOIL OF SHOTS IN SUCCESSION (BURST, AUTO)
low
RECOIL TO THE LEFT/RIGHT
high / high
STABILIZATION TIME AFTER THE LAST FIRING
medium
The G36C is another carbine of low rate of fire, which is better over medium distance. In the BURST mode, it has a very low vertical recoil but, in AUTO it spreads quite a lot horizontally, which is difficult to control. In the BURST mode, it works better than the M4, in which the AUTO mode is unavailable.
Suggested accessories: Laser, ERGO grip or Stubby grip, Compensator .
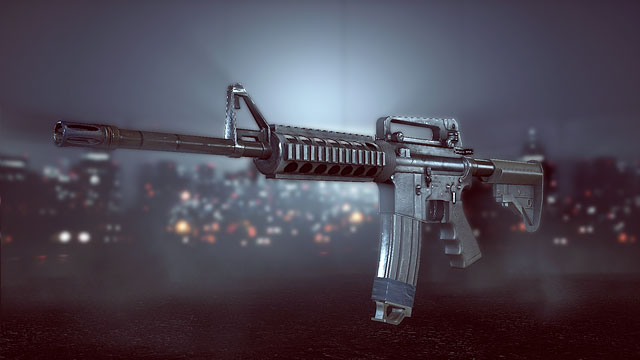
STATISTIC
VALUE
POINTS NECESSARY TO UNLOCK
59 000
MAXIMUM REACH/EFFECTIVE RANGE
<8~55 meters
TACTICAL RELOAD TIME
very short
FULL RELOAD TIME
very short
RECOIL AFTER THE FIRST SHOT
very high
RECOIL OF SHOTS IN SUCCESSION (BURST, AUTO)
medium
RECOIL TO THE LEFT/RIGHT
very low / very high
STABILIZATION TIME AFTER THE LAST FIRING
medium
Another, after the M16A4 weapon without the AUTO firing mode. To some extent, this is made up for by the high rate of fire and precision of the initial shot but, its recoil is a completely different pair of shoes. In the single round mode, the M4 can be used even over long distance and in the BURST mode, it works perfectly over medium distance. Thanks to the short reload times, you can nearly incessantly harry at the enemies.
Suggested accessories: Angled grip or Stubby grip, Muzzle brake, Magnifier 2x (combined with the collimator).
STATISTIC
VALUE
POINTS NECESSARY TO UNLOCK
71 000
MAXIMUM REACH/EFFECTIVE RANGE
<8~55 meters
TACTICAL RELOAD TIME
short
FULL RELOAD TIME
medium
RECOIL AFTER THE FIRST SHOT
low
RECOIL OF SHOTS IN SUCCESSION (BURST, AUTO)
high
RECOIL TO THE LEFT/RIGHT
very low / low
STABILIZATION TIME AFTER THE LAST FIRING
medium
ACE 21 is different from ACE 52 first of all in that its rate of fire is considerably higher and its magazine bigger, which makes up for the moderate damage that it inflicts. Unlike its predecessor, it is designed to achieve larger precision, to eliminate single targets and, contrary to what the name suggests, it is very good over medium distances while shooting short bursts. In the case of face-to-face encounters, it is enough to squeeze the trigger and lower the sight a bit. This will eliminate the threat in no time at all.
Suggested accessories: Laser, Stubby grip, Muzzle brake.

STATISTIC
VALUE
POINTS NECESSARY TO UNLOCK
83 000
MAXIMUM REACH/EFFECTIVE RANGE
<8~55 meters
TACTICAL RELOAD TIME
very long
FULL RELOAD TIME
very long
RECOIL AFTER THE FIRST SHOT
low
RECOIL OF SHOTS IN SUCCESSION (BURST, AUTO)
very low
RECOIL TO THE LEFT/RIGHT
medium / very low
STABILIZATION TIME AFTER THE LAST FIRING
medium
Among the carbines, this one is pretty precise over short and medium distances. Thanks to the low rate of fire, it is very precise in the AUTO mode and does not get carried away horizontally nor vertically. Although it slightly moves away to the left, it is easy to correct that my moving the sight a bit. TYPE-95B-1, however, is not the best choice against target at long distance because, in spite of low initial shot recoil, it is not the prime example of accuracy. Still, you need to watch out for the long reload times, which are typical for "bullpup" weapons.
Suggested accessories: Laser, ERGO grip or stubby grip, Muzzle brake.
The operation and function of sniper rifles is rather obvious: they are used for the elimination of enemies without putting yourself in harm's way - until the enemy discovers the sniper's position, at least. The ideal sniping positions are all kinds of elevations, ranging from hills, through cranes, through skyscrapers' rooftops. A sniper in such a position, not only has a good view of the situation in the battlefield, but is relatively safe s well.
Every rose has its thorns, however. A lurking sniper's worst enemy is his own weapon, a high-powered scope, to be precise. Each scope of the magnification higher than x6 gives off a bright flash of light visible from any distance. It is not a lighthouse, though and the flash is not visible at any angle. It is only visible to the person observed through the scope, as well as anyone within its scope. (on condition that they are looking towards the sniper, of course) It is an early warning system, of a kind which gives a careful player a chance to avoid being sniped down. If you notice, in the distance, a flash similar to a mirror reflecting sunrays, you should know that something is about to happen. If, however, you are a sniper yourself, this should be an opportunity for you to get back at the enemy.
In the case of sniper rifles, it is their muzzle velocity that becomes important, as well as gravitational pull. Both of these factors have bearing on the ballistics of the bullet. This simply means that a fired bullet, sooner or later falls to the ground, depending on its muzzle velocity, which you need to take into account while targeting more distant objects. Of course, the same factors are active in the case of any other weapon in Battlefield 4, but only in the case of long-distance weapons does that gain in importance. You can alleviate this by recalibrating the scope, which you do with the same button as turning the flashlight, or laser sights on and off. Recalibration of the scope, for the proper distance, does not mean that you need to aim several meters above the target to actually hit it. If the target is about 200 meters away from the shooter, you simply need to recalibrate the weapon for this value and the bullet will hit the target pointed to by the optical sights.
In the case of sniper rifles, you are dealing with an exceptional situation that does not concern any other weapon class - i.e. variable gravitation. This may sound silly at first, because the gravitational pull is constant and everything, ranging from people to bullets, falls to the ground with uniform acceleration of 9.81 m/s2. This is what happens in Battlefield 4 also, but, in order to balance some of the sniper rifles, developers have decided to bend the laws of physics a little bit and some bullets behave as if the gravitation of our planet was lower by a third. That is why the fall of bullets fired from some of the rifles drop a bit slower than in the case of the other, in spite of lower muzzle velocity. This is also true the other way round, and the acting of the gravitational pull onto some of the bullets is larger by two thirds than the natural one.
Another unique feature of sniper rifles is swaying of the sights. This concerns the scopes of high magnification (6x up). This results from the character's breathing and it can be stopped by holding down the run/hold breath button. You can hold your breath for a maximum of several seconds after which, everything is back to normal, or (if you hold breath for too long) the crosshair will sway even more for the next several seconds, while your character is trying to stabilize the breath.
In this chapter, you will find the listing of the hidden features of the weapons (described in the chapter entitled Explanation). Unlike in the previous ones, in this chapter you will not find any hints concerning the additional accessories for each one of the rifles because the vertical muzzle climb is identical in the case of each one, horizontal drift does not apply and time to stabilize after a shot is the identical. That is why all of the accessories are a matter of choice and gaming style:
The choice of optics is a matter of personal taste, and you can choose from among scopes of the magnification ranging between 3.4x and, as much as 40x.
STATISTIC
VALUE
POINTS NECESSARY TO UNLOCK
---
MAXIMUM REACH/EFFECTIVE RANGE
<12,5~100 meters
TACTICAL RELOAD TIME
very short
FULL RELOAD TIME
very long
MUZZLE VELOCITY
low
EFFECT OF GRAVITY ON THE BULLET
normal
CL-LR4 is a good starting rifle which many will stay with long after they have unlocked the next ones. It does not stand out with anything in particular, apart from one basic flaw, i.e. low muzzle velocity of the bullet.
STATISTIC
VALUE
POINTS NECESSARY TO UNLOCK
3 000
MAXIMUM REACH/EFFECTIVE RANGE
<12,5~100 meters
TACTICAL RELOAD TIME
short
FULL RELOAD TIME
very short
MUZZLE VELOCITY
very low
EFFECT OF GRAVITY ON THE BULLET
Normal
An ideal rifle for mobile snipers who stay in constant motion. All that thanks to high rate of fire, thanks to which you can pepper the enemy with bullets with high frequency.
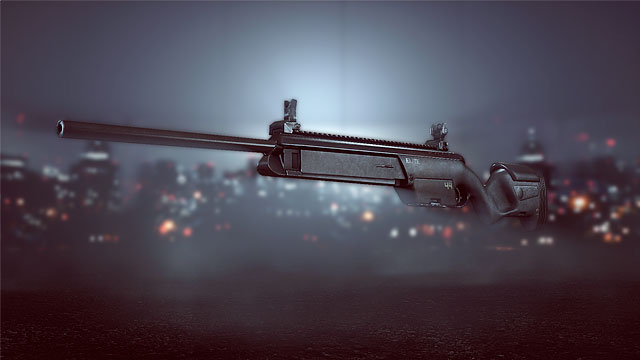
STATISTIC
VALUE
POINTS NECESSARY TO UNLOCK
8 000
MAXIMUM REACH/EFFECTIVE RANGE
<12,5~110 meters
TACTICAL RELOAD TIME
long
FULL RELOAD TIME
medium
MUZZLE VELOCITY
very high
EFFECT OF GRAVITY ON THE BULLET
High
Scout is the fastest sniper rifle in the game. apart from its high rate of fire, it is also the most accurate while hip-shooting, and has an incredibly high muzzle velocity. The price to pay for that is the increased gravitational acceleration of the bullet, which is why it is best for aggressive scouts who prefer using the rifle over short distance, like a shotgun. Unfortunately, a small magazine and high reload times nears this rifle to the slowest shotguns in the game. Apart from that, after the bullet has covered 100 meters, it deals so little damage that even a headshot is not lethal.
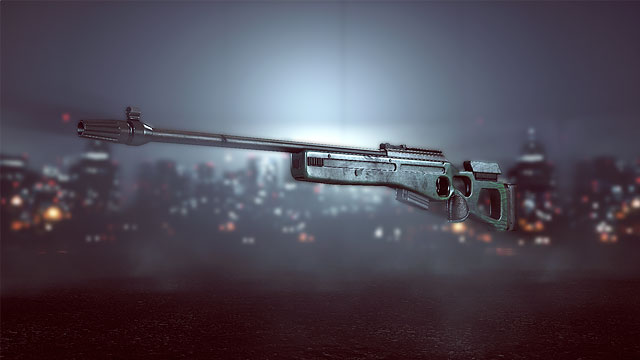
STATISTIC
VALUE
POINTS NECESSARY TO UNLOCK
13 000
MAXIMUM REACH/EFFECTIVE RANGE
<12,5~100 meters
TACTICAL RELOAD TIME
short
FULL RELOAD TIME
short
MUZZLE VELOCITY
low
EFFECT OF GRAVITY ON THE BULLET
high
The SV98 is another rifle with the problem of strong gravitation. If you combine it with low muzzle velocity and a bit improved hip accuracy, you get a rifle more suiting combat over short distances, yet longer than in the case of the Scout.
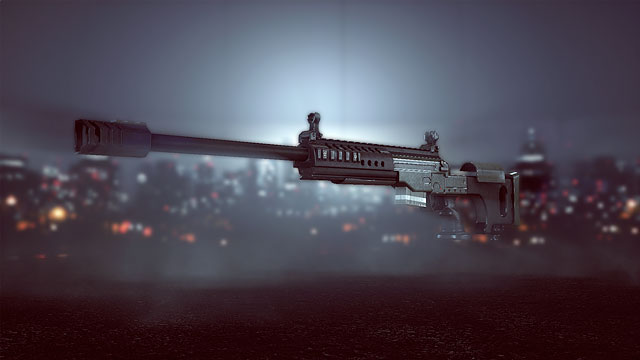
STATISTIC
VALUE
POINTS NECESSARY TO UNLOCK
20 000
MAXIMUM REACH/EFFECTIVE RANGE
<12,5~100 meters
TACTICAL RELOAD TIME
short
FULL RELOAD TIME
very short
MUZZLE VELOCITY
medium
EFFECT OF GRAVITY ON THE BULLET
normal
The JNG is the first worthy descendant of the CS-LR4, for stationary snipers. A decent muzzle velocity guarantees a decently accurate shot at not too mobile targets.
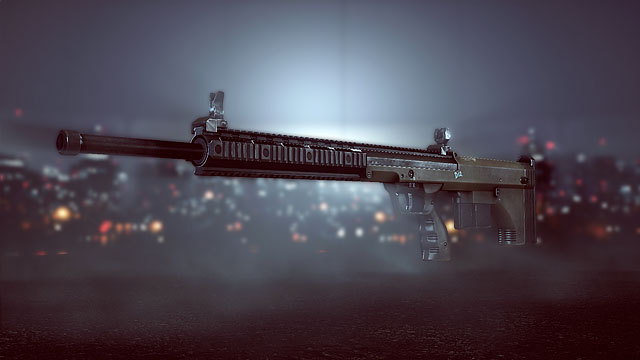
STATISTIC
VALUE
POINTS NECESSARY TO UNLOCK
27 000
MAXIMUM REACH/EFFECTIVE RANGE
<12,5~150 meters
TACTICAL RELOAD TIME
medium
FULL RELOAD TIME
very short
MUZZLE VELOCITY
medium
EFFECT OF GRAVITY ON THE BULLET
normal
Recon is another rifle designed for aggressive scouts, which can just as well serve as a stationary sniper rifle. You can say that it is a perfect middle among all of the sniper rifles. Its basic feature is hip accuracy, which is above average and exceptional, as for a sniper rifle, accuracy in motion. Unfortunately, you need to pay for all these advantages with small magazine.
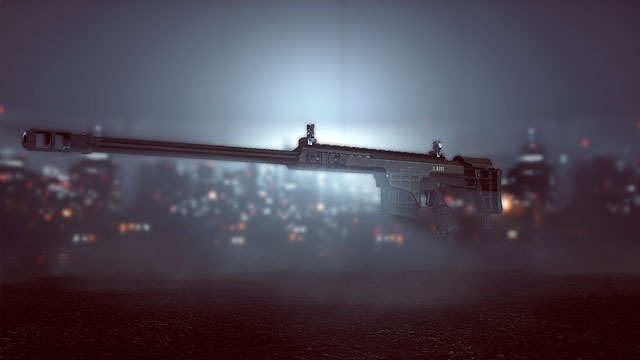
STATISTIC
VALUE
POINTS NECESSARY TO UNLOCK
34 000
MAXIMUM REACH/EFFECTIVE RANGE
<12,5~150 meters
TACTICAL RELOAD TIME
medium
FULL RELOAD TIME
short
MUZZLE VELOCITY
very high
EFFECT OF GRAVITY ON THE BULLET
medium
The M98B is a magnum among sniper rifles. it has incredibly high muzzle velocity, thanks to which it is much easier to hit distant targets in motion. It is ideal for shooting down helicopter pilots.
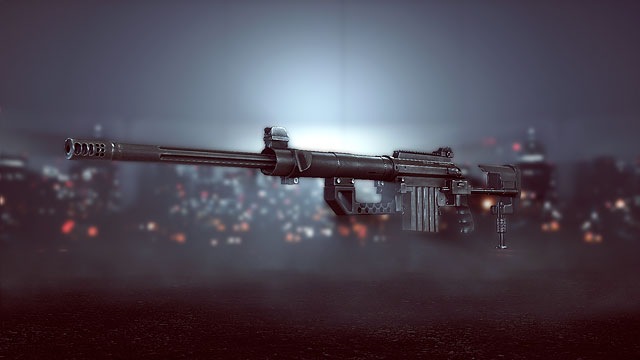
STATISTIC
VALUE
POINTS NECESSARY TO UNLOCK
42 000
MAXIMUM REACH/EFFECTIVE RANGE
<12,5~150 meters
TACTICAL RELOAD TIME
medium
FULL RELOAD TIME
short
MUZZLE VELOCITY
high
EFFECT OF GRAVITY ON THE BULLET
low
The SRR is an exceptional weapon - its muzzle velocity is not much lower than in the case of the M98B, and the operation of gravity on the bullet is lower. Thanks to this, this is probably one of the most accurate sniper rifles and it is ideal for the elimination of enemies at nearly any distance. It is a beast in the hands of a skilled sniper.
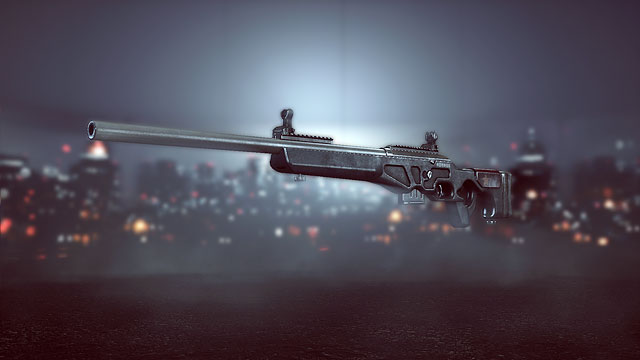
STATISTIC
VALUE
POINTS NECESSARY TO UNLOCK
Complete assignment "Recon - Expert"
MAXIMUM REACH/EFFECTIVE RANGE
<12,5~110 meters
TACTICAL RELOAD TIME
very short
FULL RELOAD TIME
Short
MUZZLE VELOCITY
very high
EFFECT OF GRAVITY ON THE BULLET
Low
The FY-JS is, arguably, the sniper rifle that is the most difficult to unlock. To do that, you need to accumulate headshots from the total distance of 10 kilometers, using sniper rifles! To receive this weapon, you need to complete 50 "Sharpshooter" ribbons - you receive one after you score a headshot from the distance of 250 meters. Fortunately, distances add up so, you can just as well score 5 headshots from the distance of 50 meters and you will also receive a ribbon, on condition that you do that within one round. The question is if the FY-JS is worth of such devotion, and unfortunately, there is, probably, no one answer to this question.
From the point of view of the statistics, it is the most accurate sniper rifle, because it features very high muzzle velocity and the operation of gravity on the bullet is decreased. This means that the trajectory if the bullet is as straight as it can be in Battlefield 4. Unfortunately, as it can be guessed, there is a catch here. Above 100 meters, the FY-JS is half as strong as the other sniper rifles and even a headshot will not be able to kill an enemy in full health. As a result, this means that the optimal distance for this weapon is 90 meters, and not the 110 mentioned by the statistics. Therefore it is a weapon for mobile scouts, rather than for the proponents of killing the enemies occupying the other end of the map.
Shotguns, after being unlocked by a Support soldier, become available for all classes. In case of shotguns, there is a unique division between weapon and ammo stats. Because of that, you can adjust the weapon to your preferences and current situation on the battlefield, however some combinations are more effective than others.
It is so because of a further division of shotguns into two categories: automatic and pump-action. In case of automatic ones, bullets are being loaded automatically, so you can shoot more often, but with lower accuracy. Pump-action shotguns work more slowly, but have a higher accuracy. Another difference is that pump-action shotguns don't have under-barrel attachments.
Shotguns are versatile - they can be used at short range (it works best like that), however it can be as effective as other weapons on medium range with proper ammunition, but it requires a lot of skill and discipline. Anyway, shotguns are rather situational because of the large scale of maps, typical for the series. You won't find many players with shotguns in Conquest mode (except Operation Locker map). In large maps, shotguns are effective while defending targets inside rooms and fighting against single enemies. The best modes for shotguns are Domination are DM, less often Obliteration, Rush and Defuse on defenders' side.
It doesn't mean that shotguns are useless for other things, however average players prefer less specialized types of weapons. The description of ammo and weapons below will let shotgun lovers select a right combination for every occasion.
In this list you'll find a description of hidden properties of weapons, their comparison and some advice on recommended accessories. Remember that this is mainly common sense advice that is supposed to keep you from harm (for example by exposing negative properties of a shotgun). You can experiment with them to adjust your weapon to more specialised conditions. The only accessories described are the ones that affect weapon's stats, that means barrel, under-barrel element and laser sight (which in case of SMGs exposes their only advantage over assault rifles). All the other accessories are optional and using them depends on your preferences and experience.
The behaviour of shotgun ammo depends on a mechanism used in a specific weapon. automatic shotguns are better with buckshot and flechette ammo, while pump-action ones with frag and SABOT (slug). A single type of ammo may deal various damage and have bigger or smaller PENETRATION CAPABILITIES, depending on a type of shotgun.
In the table below you'll find stats for every type of ammo in both types of weapons.
While choosing ammo, you have to pay attention to one important thing - multiply the damage below by the number of pellets/darts shot by a weapon. The effect depends on how many of them reached the target, so it's not a constant value. Shotguns below shoot from 8 to 14 pellets/darts. As you might notice, using the weakest ammo in a weapon that shoots most of them is somewhat equal to using the strongest ammo in a gun that shoots the least.
12 GAUGE - BUCKSHOT
STAT
AUTOMATIC
PUMP-ACTION
DAMAGE (1 pellet)
medium
low
OPTIMUM/EFFECTIVE RANGE
<16~30 metres
<16~30 metres
BULLET DROP
normal
normal
PENETRATION CAPABILITIES
low
low
MUZZLE VELOCITY
medium
medium
LIFESPAN
1s
1s
Buckshot ammo is available for every shotgun from the moment when it's unlocked. It's the most balanced type of ammo with a decent power and low penetration capabilities. It's best for very short distance.
12 GAUGE - FLECHETTE
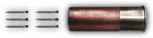
STAT
AUTOMATIC
PUMP-ACTION
DAMAGE (1 dart)
low
very low
OPTIMUM/EFFECTIVE RANGE
<20~50 metres
<20~50 metres
BULLET DROP
normal
normal
PENETRATION CAPABILITIES
medium
low
MUZZLE VELOCITY
very high
very high
LIFESPAN
1s
1s
Flechette ammo is designed for a better penetration of the target. That means that this type of ammo ignores bulletproof vests and is more effective against enemies hiding behind "soft" obstacles (like wooden boards). Flechette has a much higher range and penetration capabilities than standard buckshot, however it deals less damage.
12 GAUGE - FRAG
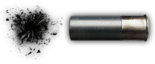
STAT
AUTOMATIC
PUMP-ACTION
DAMAGE
medium
high
OPTIMUM/EFFECTIVE RANGE
<8~40 metres
<8~40 metres
BULLET DROP
very high
very high
PENETRATION CAPABILITIES
high
high
MUZZLE VELOCITY
very low
very low
LIFESPAN
3s
3s
Frag ammo explodes on contact, so it has excellent penetration capabilities and deals more damage than standard buckshot ammo. In terms of range, it's in the middle, but muzzle velocity is very low, so it's best for closed spaces. The range of explosion of each bullet is around 2-2,5 meters. It's the only type of shotgun ammo that can take down an enemy without hitting them directly.
12 GAUGE - SABOT
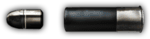
STAT
AUTOMATIC
PUMP-ACTION
DAMAGE
high
very high
OPTIMUM/EFFECTIVE RANGE
<12~50 metres
<12~50 metres
BULLET DROP
high
high
PENETRATION CAPABILITIES
high
high
MUZZLE VELOCITY
medium
medium
LIFESPAN
5s
5s
SABOT ammo has the highest range and damage. Moreover, penetration capabilities are as high as in frag ammo. Range and damage caused by this massive bullet almost turn a shotgun into a short range sniper rifle. Hitting a target that's closer than 12 meters from you with this ammo while using a pump-action shotgun will virtually always result in its takedown.
STAT
VALUE
POINTS NEEDED TO UNLOCK
16000 in Support
MECHANISM USED
automatic
NUMBER OF PELLETS/DARTS PER BULLET
11
RELOAD TIME FOR ONE BULLET
medium
RECOIL AFTER FIRST SHOT
medium
RECOIL OF FURTHER BULLETS (BURST, AUTO)
very low
RECOIL TO THE LEFT/RIGHT
low / low
STABILIZATION AFTER LAST SHOT
very short
QBS-09 as a first shotgun that's available is the most balanced and suitable for new users. The biggest advantage of this shotgun is its rate of fire - the highest in its class. However, you need to reload it quite often, because you can only load it with 6 bullets. Like most shotguns, BQS is loaded bullet after bullet, so reload time above applies to one bullet.
Recommended accessories: laser sight, ergo or angled grip, buckshot or flechette ammo, red dot sight, full choke.
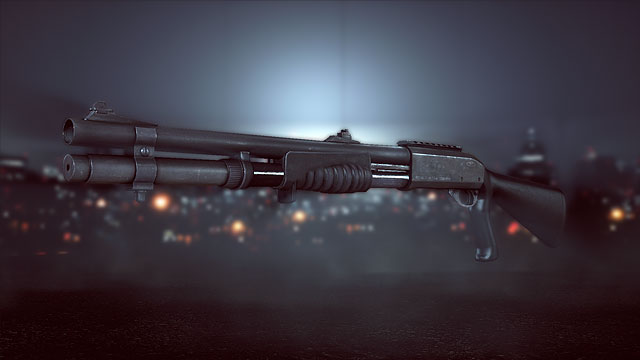
STAT
VALUE
POINTS NEEDED TO UNLOCK
4 000
MECHANISM USED
pump-action
NUMBER OF PELLETS/DARTS PER BULLET
12
RELOAD TIME FOR ONE BULLET
short
RECOIL AFTER FIRST SHOT
medium
RECOIL OF FURTHER BULLETS (BURST, AUTO)
high
RECOIL TO THE LEFT/RIGHT
very low / high
STABILIZATION AFTER LAST SHOT
long
870 MCS is a powerful pump-action shotgun, so its rate of fire is not very impressive, however it has a high accuracy and quite a large magazine (8 shots). Recoil is quite high, but it doesn't really matter because your sight will return to its initial position before you'll be able to take the next shot. It has a high recoil to the right, but it doesn't matter because of the reason stated above.
Recommended accessories: laser sight, frag or SABOT ammo.
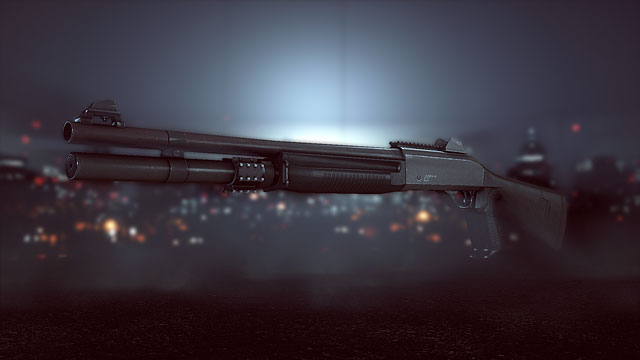
STAT
VALUE
POINTS NEEDED TO UNLOCK
11 000
MECHANISM USED
automatic
NUMBER OF PELLETS/DARTS PER BULLET
9
RELOAD TIME FOR ONE BULLET
very short
RECOIL AFTER FIRST SHOT
medium
RECOIL OF FURTHER BULLETS (BURST, AUTO)
low
RECOIL TO THE LEFT/RIGHT
very low / medium
STABILIZATION AFTER LAST SHOT
short
Benelli M1014 is a shotgun with a second highest rate of fire. It can store more bullets than QBS (8), but it has a higher recoil and goes to the right while shooting fast. It requires a bit more skills than its predecessor, but 2 additional bullets are worth it.
Recommended accessories: laser sight, ergo or angled grip, buckshot or flechette ammo, red dot sight, full choke.
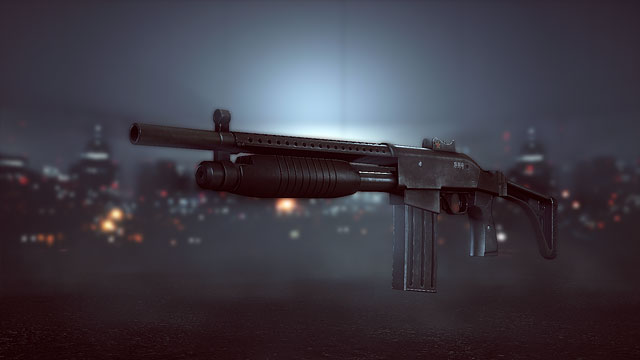
STAT
VALUE
POINTS NEEDED TO UNLOCK
19 000
MECHANISM USED
pump-action
NUMBER OF PELLETS/DARTS PER BULLET
14
TACTICAL RELOAD
very short
FULL RELOAD
very short
RECOIL AFTER FIRST SHOT
medium
RECOIL OF FURTHER BULLETS (BURST, AUTO)
medium
RECOIL TO THE LEFT/RIGHT
very high / very high
STABILIZATION AFTER LAST SHOT
long
Hawk has the lowest rate of fire of all pump-action shotguns. Its biggest advantage is the classic clip, because of which we can have 6 bullets ready to use. It's a unique construction in this type of shotguns. Reload time is so short that the number of bullets should not be a problem. Symmetrical horizontal recoil seems huge, but low rate of fire makes it irrelevant.
Recommended accessories: laser sight, frag or SABOT ammo, red dot sight, compensator.
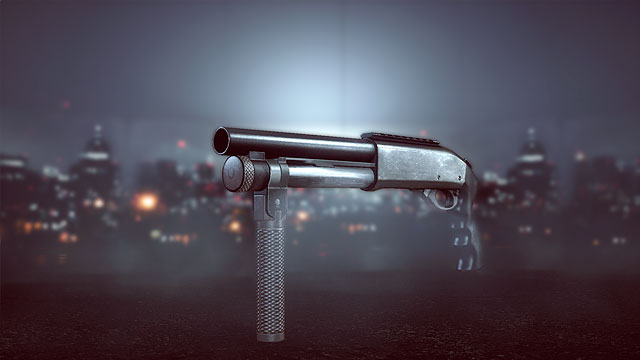
STAT
VALUE
POINTS NEEDED TO UNLOCK
28 000
MECHANISM USED
automatic
NUMBER OF PELLETS/DARTS PER BULLET
9
TACTICAL RELOAD
long
FULL RELOAD
very long
RECOIL AFTER FIRST SHOT
medium
RECOIL OF FURTHER BULLETS (BURST, AUTO)
medium
RECOIL TO THE LEFT/RIGHT
very low / low
STABILIZATION AFTER LAST SHOT
short
Saiga is a classic Russian semi-automatic shotgun with an excellent rate of fire. Classic clip is its biggest advantage, it can store 9 bullets, however reload time is quite long. While shooting with maximum rate, recoil quickly moves the gun upwards and a bit to the right. Luckily, a constant recoil like that can be easily countered.
Recommended accessories: laser sight, angled grip, buckshot or flechette ammo, red dot sight, full choke.
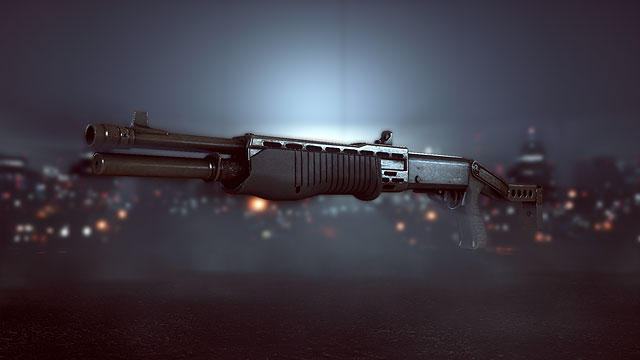
STAT
VALUE
POINTS NEEDED TO UNLOCK
37 000
MECHANISM USED
pump-action
NUMBER OF PELLETS/DARTS PER BULLET
11
RELOAD TIME FOR ONE BULLET
short
RECOIL AFTER FIRST SHOT
medium
RECOIL OF FURTHER BULLETS (BURST, AUTO)
low
RECOIL TO THE LEFT/RIGHT
very low / medium
STABILIZATION AFTER LAST SHOT
long
SPAS might be the easiest to use of all pump-action shotguns. Low vertical and horizontal recoil makes your sight more stable while taking further shots. Its rate of fire is close to 870 MCS. SPAS has a magazine that holds up to 9 bullets, which gives it a big advantage over its pump-action predecessors.
Recommended accessories: laser sight, frag or SABOT ammo, red dot sight.
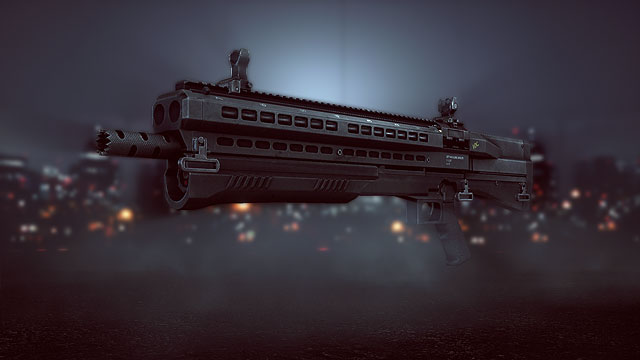
STAT
VALUE
POINTS NEEDED TO UNLOCK
48 000
MECHANISM USED
pump-action
NUMBER OF PELLETS/DARTS PER BULLET
10
RELOAD TIME FOR ONE BULLET
very long
RECOIL AFTER FIRST SHOT
medium
RECOIL OF FURTHER BULLETS (BURST, AUTO)
very high
RECOIL TO THE LEFT/RIGHT
low / low
STABILIZATION AFTER LAST SHOT
long
UTS is unique in every aspect - in terms of both looks and performance. It's big advantage is a magazine that holds up to 15 bullets, which is more than any other shotgun. UTS has two bullet chambers place on both sides, so reload takes more time than in other shotguns, however a large supply of ammo is definitely worth it. Another unique feature is that UTS 15 has the highest accuracy while shooting from the hip and while moving. It has, however, a bit lower accuracy while using optical devices. The biggest disadvantage is its really high vertical recoil that affects further shots despite a low rate of fire. Horizontal recoil is so low that it's barely noticeable.
Recommended accessories: laser sight, frag or SABOT ammo, red dot sight, muzzle brake.
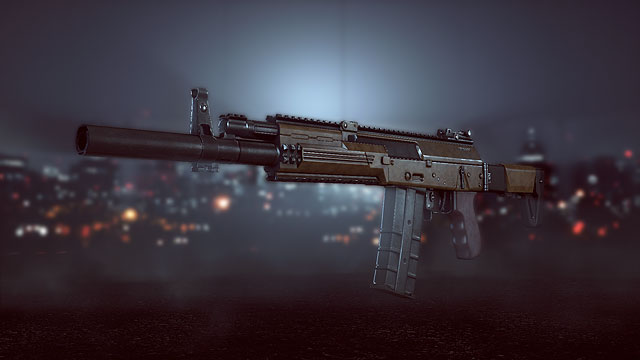
STAT
VALUE
POINTS NEEDED TO UNLOCK
59 000
MECHANISM USED
automatic
NUMBER OF PELLETS/DARTS PER BULLET
9
TACTICAL RELOAD
long
FULL RELOAD
long
RECOIL AFTER FIRST SHOT
high
RECOIL OF FURTHER BULLETS (BURST, AUTO)
medium
RECOIL TO THE LEFT/RIGHT
very low / low
STABILIZATION AFTER LAST SHOT
short
DVB can be treated as a direct upgrade from Saiga described above. Rate of fire and recoil is the same for both, but DVB has a clip that holds up to 11 bullets and a bit lower time of full reload. It's a perfect weapon for dealing with several targets at once.
Recommended accessories: laser sight, ergo or angled grip, buckshot or flechette ammo, red dot sight, full choke.
STAT
VALUE
POINTS NEEDED TO UNLOCK
18000 in Handgun category
MECHANISM USED
pump-action
NUMBER OF PELLETS/DARTS PER BULLET
8
RELOAD TIME FOR ONE BULLET
very long
RECOIL AFTER FIRST SHOT
medium
RECOIL OF FURTHER BULLETS (BURST, AUTO)
low
RECOIL TO THE LEFT/RIGHT
very low / low
STABILIZATION AFTER LAST SHOT
long
SHORTY is quite a unique weapon, because technically it's a handgun, but in every aspect it's just a miniature shotgun. It's perfect for every sniper and marksman who needs a powerful weapon in case of a close combat. Shorty has an excellent accuracy while shooting from the hip, so using optical devices becomes a preference instead of a necessity, especially when combined with a laser sight. As a sidearm, it has some limitations. Its magazine holds only 3 bullets and their type can't be changed. It also uses optical devices typical for handguns, not for shotguns. High rate of fire and low recoil make it really easy to use.
Recommended accessories: laser sight, red dot sight, full choke.
Grenades in Battlefield 4 not only provide you with the opportunity to eliminate the enemy hiding behind a cover (even as many as several of them at once). Thanks to their diversity, and function, they also perform tactical roles, which may dramatically alter the course of combat. At your disposal, there are explosive grenades, incendiary, smoke, flashbang and even flares. Each one of the kinds, even the "harmless" ones, have their purpose and they provide the player with capabilities on a scale unseen earlier. In this chapter, you will find all of the information concerning the available types of grenades - ranging from the BLAST RADIUS to usage in a less conventional way.
One thing worth mentioning at the beginning is the possibility to "boil" the grenade before you throw it. Not many realize that, but you do not need to throw the grenade right after you press the button. To boil the grenade, you need to press the throwing button and hold down the shoot button immediately afterwards. The grenade will remain in your hand for as long as you hold down the shoot button. What are the opportunities it creates? Most grenades explode after a pre-determined period of time, and not as a result of impact. Holding the grenade and throwing it right before it explodes, deprives the enemy of the opportunity to take cover, or escape, before the grenade goes off.
TIME FUSE
yes, 3,5 seconds
DEFAULT NUMBER EQUIPPED
1
RANGE
~35 meters
DAMAGE
100
BLAST RADIUS
Up to 7 meters
A typical "throw and forget" type of grenade, available, so far, in all of the installments of the game. It bounces off obstacles, thanks to which it can be thrown from behind a corner. It eliminates, or maims the enemy at the other side.
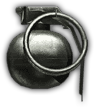
TIME FUSE
yes, 3,5 seconds
DEFAULT NUMBER EQUIPPED
3
RANGE
~45 meters
DAMAGE
80
BLAST RADIUS
up to 7 meters
Just like the frag grenade M67, it bounces off walls and it can be thrown over a bit longer distances. Although it inflicts less damage, everyone by default has three such grenades so, you can pepper the unaware enemy with a hail of explosions.
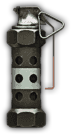
TIME FUSE
no, explodes on impact
DEFAULT NUMBER EQUIPPED
2
RANGE
~35 meters
DAMAGE
67
BLAST RADIUS
up to 7 meters
The RGO is a grenade that deals the least damage but, its arguable advantage is the fact that it has no time fuse - it explodes on impact with a hard surface. Thanks to this one, you can surprise the enemy who has no time to escape from the explosion . The upside is that you have two such grenades on you.
TIME FUSE
yes, 3,5 seconds
DEFAULT NUMBER EQUIPPED
1
RANGE
~32 meters
DAMAGE
99 within 3,5 seconds
BLAST RADIUS
up to 7 meters
The incendiary grenade releases a screen of phosphorus which, while burning, deals damage to anyone within its reach. The damage is the smaller, the further away from the fire the enemy is staying, or the faster he leaves the area near the fire. It is not the type of grenade that you would use for fast elimination of the enemy and it is better to use it to "soften the enemy" and wreak havoc. It is ideal in narrow corridors and tight areas occupied by the enemy. Another situation it can be used in is when it is necessary to stop or slow down pursuit, by throwing the grenade at one's own feet or behind, while escaping. The M34 grenade also offers mild blinding effect and a short-lasting screen of smoke.
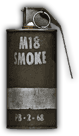
TIME FUSE
yes, 3,5 seconds
DEFAULT NUMBER EQUIPPED
3
RANGE
~37 meters
DAMAGE
None - smoke screen for 17 seconds
BLAST RADIUS
up to 7 meters
This grenade can be used in many different ways to support tactical actions. The smoke screen makes it impossible for the enemy to spot you, but it does not obstruct your squad's vision. For a short period of time, the screen of smoke blocks off the enemy's visuals, thanks to which you can make an onslaught on the enemy positions easier, or cover your tactical retreat. Smoke grenades can be combined with infrared vision or thermal vision, because you can thanks to them completely ignore the screen and surprise the enemy by eliminating them through smoke. This, of course, also works the other way round and the screen will prove useless if the enemy has such a vision on his disposal.
The opponent will usually expect that there will be enemy players trying to get behind the smoke, which is why you should be smart using the grenades. Otherwise, you could encounter a hail of bullets, or grenades, at the other side of the screen. One of the most interesting uses of the grenade is throwing it in a direction completely different than the direction of the intended attack. This will confuse the enemy who will be expecting the player to arrive from the side of the smoke screen, at which point you can surprise him from a completely different direction.
TIME FUSE
yes, 3,5 seconds
DEFAULT NUMBER EQUIPPED
2
RANGE
~37 meters
DAMAGE
5 + blinding for 2,5 seconds
BLAST RADIUS
up to 10 meters - decreases with distance
The flashbang grenade is used to blind and (to a limited extent) deafen the enemy to attack his positions. It comes in handy while clearing the rooms occupied by enemies but, the time of effectiveness is so short that the attack needs to take place right after the bang, otherwise the enemy will regain his sight and will be ready for the player to arrive. It is possible to kill with a flashbang grenade, although this is rare an occurrence, because the enemy would have to have less than 5 health points.
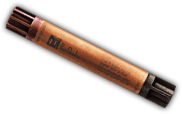
TIME FUSE
yes, 3,5 seconds
DEFAULT NUMBER EQUIPPED
3
RANGE
~43 meters
DAMAGE
None - lights for 1,5 minutes and produces bright light
BLAST RADIUS
---
Flare is an interesting gadget, which is not that popular. The basic problem is its restricted functionality, which is lighting dark areas, or marking enemy targets. Well organized groups may use flares to mark location that a friendly vehicle may collect them from, or to mark locations where the enemy snipers are staying. This is facilitated by the considerable range of the flare. It offers a mild blinding effect but also blinds completely the enemies using infrared or thermal visions.
Accessories are the weapon attachments that you unlock by using a given piece of equipment, or with "Battle Packs". It is thanks to them that you can make your favorite weapons suit your needs and liking. They can be used either to alleviate, or completely eliminate the unwanted side-effects to the using of a given weapon, or to reinforce their strong points. Every attachment, save the optics, the flashlight and the flash hider has a real bearing on the weapon's statistics. Some of the unlocked gadgets differ only in terms of their looks but their effect is the same - e.g. suppressors, which come in multitude, offer precisely the same results and the differences are only cosmetic.
When it comes to the optics, apart from the difference in the magnification scope, the rest also remains a matter of taste. Things are a bit different in the case of collimators - they do not offer any magnification of the target and the differences concern only the size and the color of the reticle but, their construction itself may have an key meaning to the user. The matter here is, mainly the range of viewing, limited by the collimator's housing, as well as they are visible through the lens itself.
Below, you can find descriptions of each of the accessories, as well as a screen printed for the purposes of comparison.
IRON SIGHT

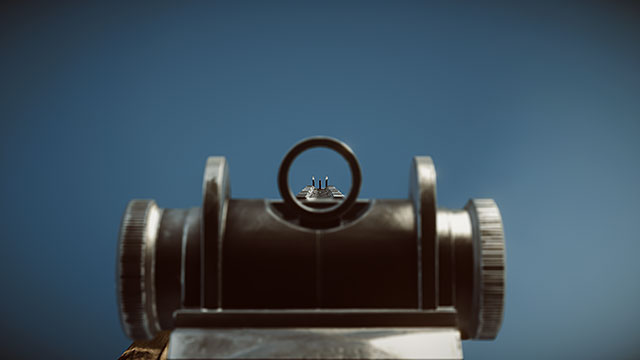
Iron sight is a default targeting system that each weapon is equipped with. Each sight is different in shape, size and the viewing range. Some of the sights are inconvenient and they limit the visuals a lot - the other ones can easily compete with the best of collimators, when it comes to their functionality. The decision of keeping to the default iron sight is a matter of choice.
REFLEX [COLLIMATOR]
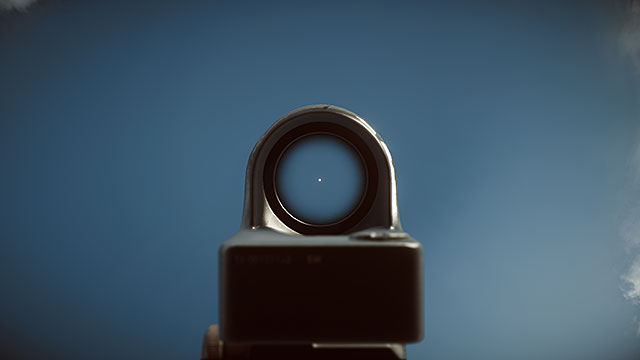
The Reflex collimator is, usually, the first one that unlocks for most weapons originating in the West. Its obvious advantage is the red aiming dot that makes it a lot easier to track the target, which results in the improvement of the comfort of using the weapon. The downside of this collimator is a quite limited viewing angle that is visible through the lens. Additionally, the rim of the lens is dimmed, which obscures the visuals a bit.
COYOTE [COLLIMATOR]
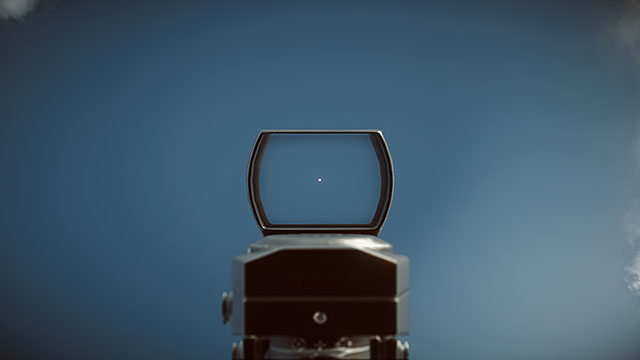
Coyote is the most comprehensible collimator in the game. It offers quite a bit viewing angle and the housing is thin enough not to obstruct the vision around the collimator. There is a quite grave disadvantage to this one - the red dot practically disappears on bright background, which may make precise tracking the target quite difficult. Usually, it is the first collimator that you unlock for the Chinese army.
COBRA [COLLIMATOR]
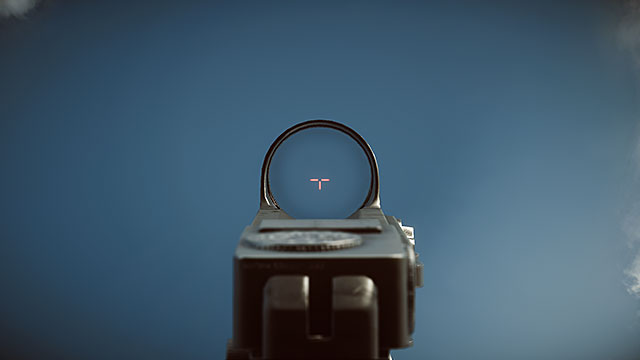
Cobra has been (and not without a reason) one of the most popular collimators since the release of Battlefield 3. It offers a wide and lucid targeting area and it does not obstruct vision around the housing. The additional advantage is the red reticle that imitates notch and bead and does not obstruct the point that you are targeting.
HOLO [1X]
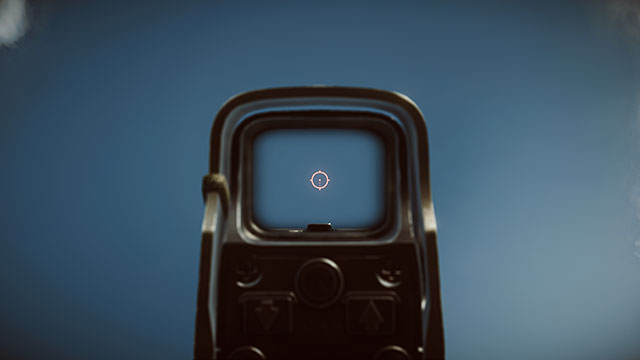
The Holo collimator offers a targeting angle similar to that of the Coyote but, its housing obstruct much of the area around the collimator from seeing. Additionally, the rims of the lens are darkened, which further hinders visibility. In exchange, you receive a perfectly visible reticle that works well with weapon of considerable recoil.
HD-33 [1X]
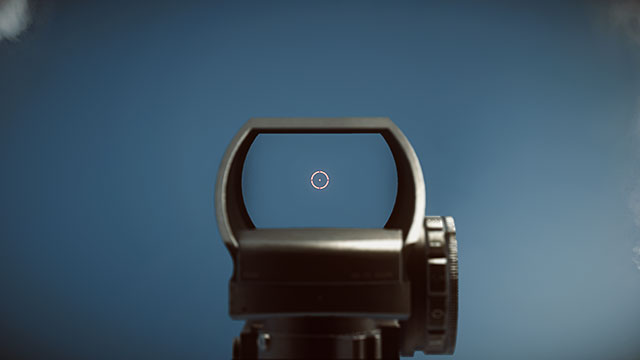
The HD-33 is, in a manner of speaking, a direct upgrade of its predecessor. It offers an incredibly clear targeting area and it does not hinder visuals of the area around the housing. It is perfect with 2x zoom.
PKA-S [1X]
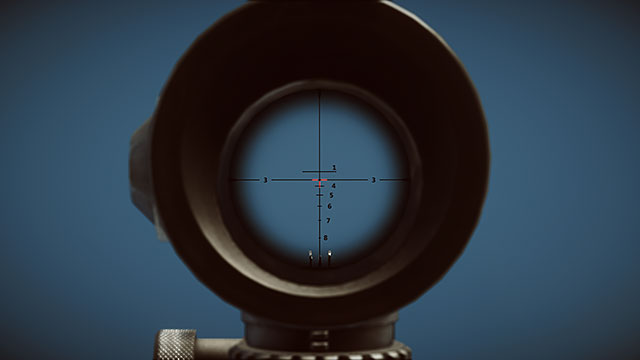
Just like the Reflex, The Russian-made PKA-S is the first collimator that you unlock but, for the Eastern-made weapons. What it has on common with the Reflex collimator, is the poor clarity and the housing that obstruct view around the attachment. It is discernibly "heavier" towards its top part, which may be not too comfortable for the eye.
IRNV [IR 1X]
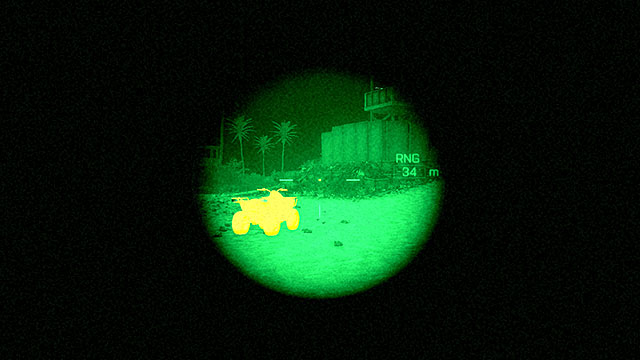
The night vision sights is an excellent solution for combat in the areas of poor visibility. Using it, you can easily locate the enemies hidden in shadows or among thick flora. It is also worth noting that it is equipped with the laser range finder, thanks to which it is easier to implement corrections while aiming at distant targets. Its downside, which is visible at first sight, is its monochromatic, yellowish-green color and noise. Additionally the range of this sight is limited to around 200 meters, outside of which you can see nothing apart from green fog. The effectiveness of this scope can be completely eliminated with tactical flashlight or the flare and it tends to be difficult to use in bright environment. In exchange for that, you can use it to aim even across smoke screen.
FLIR [IR 2X]

Thermal sights are based on a principle similar to that of the night vision sights but, it has a 2x zoom and ballistic reticle that facilitates aiming over longer distances. Thanks to the black and white displaying mode, it makes contrasts more prominent and is more clear than its predecessor. Its range is also longer (around 300 meters). Thermals sights can be rendered useless with tactical flashlight or flare but, thanks to it, you can even see through smoke screens.
M145 [3,4X]
The M145 is a scope medium-range scope of the least clarity, from among the available three. The rims of the lens are dimmed and the housing itself covers quite a lot of the field of vision. In exchange, you receive a perfect ballistic design of the sights itself, which considerably facilitates aiming at distant and moving targets.
PRISMA [3,4X]
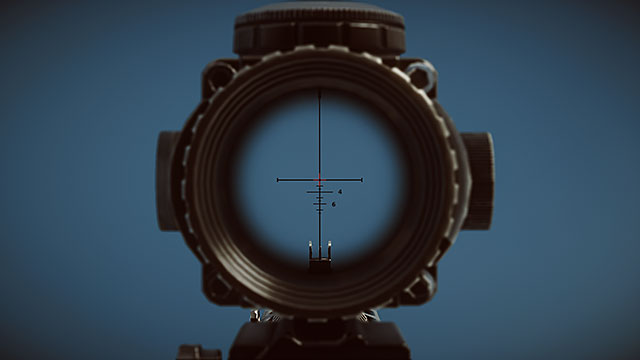
Prisma is a neat and pretty clear scope, whose housing does not cover half of the screens and the crosshairs facilitate firing at distant targets. The Prisma is a happy medium between usability and clarity.
PK-A [3,4X]
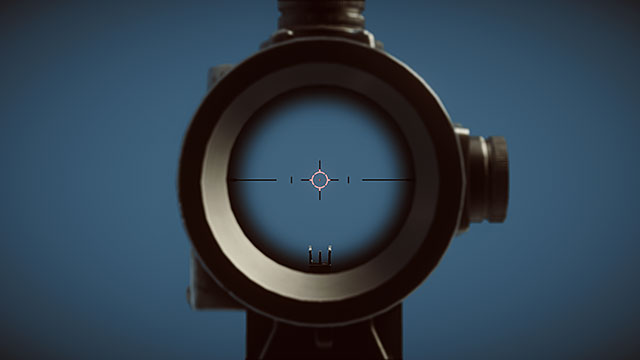
The Russian-made PK-A is the most lucid of all 3.4x scopes and it covers the smallest portion of the screens still, the design itself may be perceived as a disadvantage by some. The red reticle in the middle is perfectly visible but, the scope is lacking the prolonged vertical ballistic line, which forces you to aim, by your felling of the weapon, at the distant targets.
ACOG [4X]
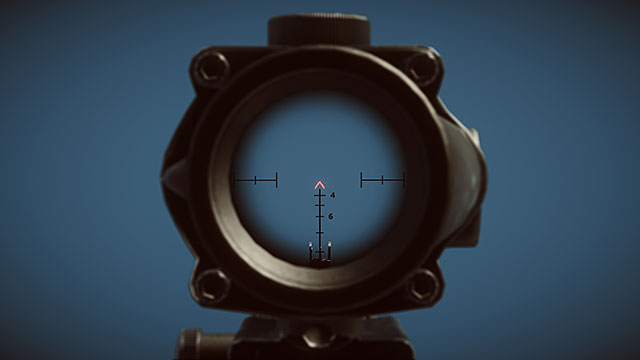
The American ACOG is the most compact scope of the 4x zoom but, some of the players may be turned off by the projecting sun shade, which is a bit less intuitive that the classical crosshairs. Apart from that, the ACOG offers a perfect visibility and does not cover too much of the screen.
JGM-4 [4X]
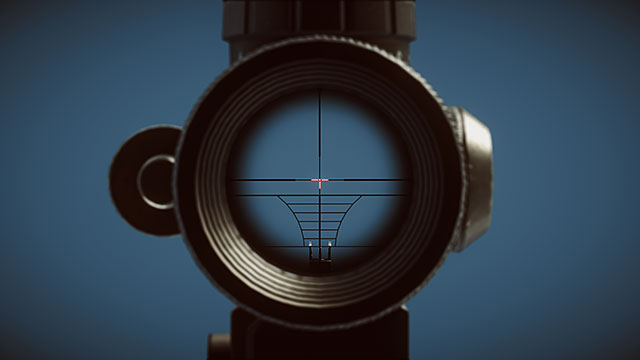
The Chinese sight of 4x zoom, offers a very complex reticle design which, on the one hand may be useful while aiming over long distances but, on the other hand, makes the view a bit les lucid. The perfect solution, however is the red semi-cross in the middle of the sight - it is perfectly visible and does not obstruct the visuals of small targets. A definite downside of this scope is that its housing covers quite a large portion of the screen and the asymmetric design of the housing itself. Many think that the element on the right that is the laser sight which, for some reasons does not work but, this is simply a battery that powers the scope.
PSO-1 [4X]
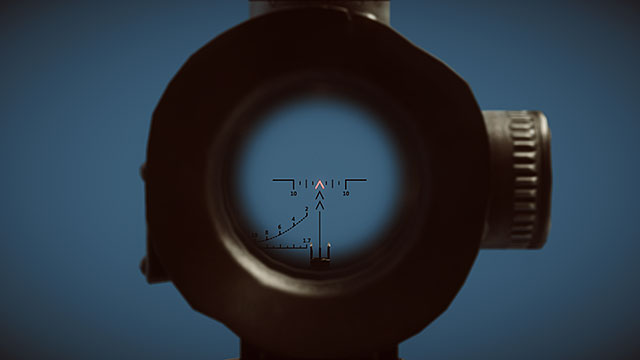
The PSO-1 is one of the scopes that limit the area of vision around the housing the most. The large chunk of rubber that you put against the eye, limits the area of vision around the scope considerably. The rims of the lens themselves are very much dimmed out. Again, we are dealing here with the projecting sun shade, which is typical for the Russian-made scopes, and which many players consider downright impractical. The range finder located on the left of the lens is purely a visual adornment that introduces even more asymmetry and chaos into the targeting area.
There is not much to say about sniper scopes - each one of them offers a big and clear targeting area, a different level of magnification and only cosmetic differences, when it comes to the sights. The most important feature of each is the zoom and it is its magnifying properties of each that will govern the decision on which one to use. Unlike the 3.4x and 4x scopes, you cannot select between scopes of the same magnifying features because the game disallows it. Below, you will find screenshots taken from the same distance (23 meters) of each of the available scopes.
CL6X [6X]
![PKS-07 [7X] - Optics - Long Range - Accessories - Battlefield 4 - Game Guide and Walkthrough](https://game.lhg100.com/Article/UploadFiles/201512/2015121216444295.jpg)
PKS-07 [7X]
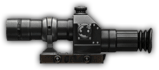
![RIFLE SCOPE [8X] - Optics - Long Range - Accessories - Battlefield 4 - Game Guide and Walkthrough](https://game.lhg100.com/Article/UploadFiles/201512/2015121216444265.jpg)
RIFLE SCOPE [8X]
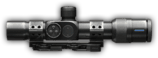
![HUNTER SCOPE [20X] - Optics - Long Range - Accessories - Battlefield 4 - Game Guide and Walkthrough](https://game.lhg100.com/Article/UploadFiles/201512/2015121216444262.jpg)
HUNTER SCOPE [20X]
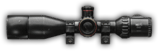
![BALLISTIC SCOPE [40X] - Optics - Long Range - Accessories - Battlefield 4 - Game Guide and Walkthrough](https://game.lhg100.com/Article/UploadFiles/201512/2015121216444288.jpg)
BALLISTIC SCOPE [40X]
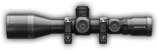
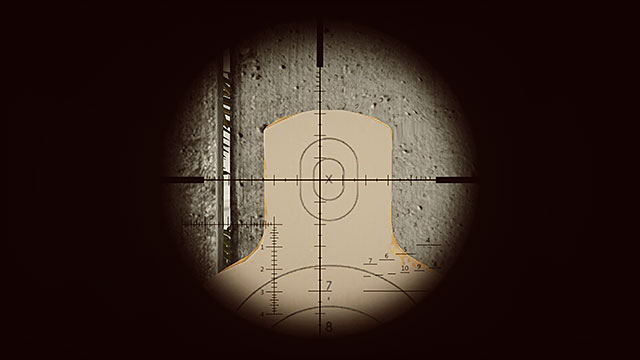
CANTED IRON SIGHTS
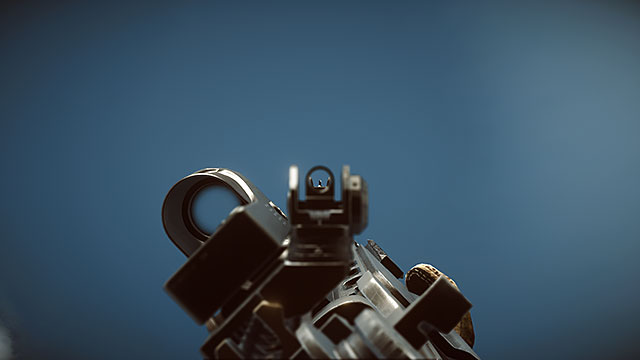
An additional iron sights is an ideal solution for the users of high-powered scopes, who want to be prepared for combat at close range just as well. It is also an accessory that is strongly recommended for the users of thermal and night vision scopes because, thanks to its use, they will not shirk from bright light and enemies with flashlights. The additional iron sights are mounted oriented to the right or to the left, depending on the weapon model and it is activated with the laser activation button.
MAGNIFIER [2X]

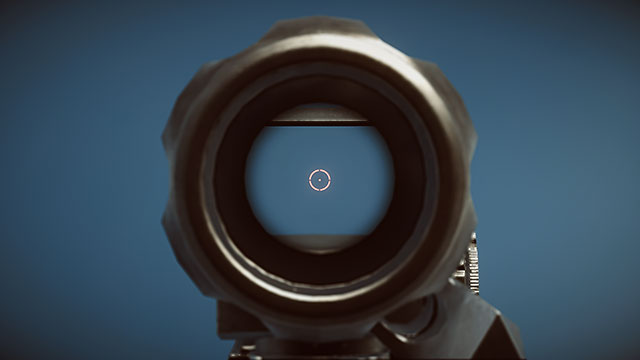
the 2x magnifier is an ideal attachment for those who do not like the scopes of higher power. and at the same time, they would like to be able to use collimators. With the laser button, you can switch between the magnifier and the collimator. The 2x magnifier cannot be combined with the regular iron sights, nor with scopes but, it works with every available collimator.
VARIABLE ZOOM [14X]
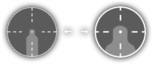
the 14x variable zoom for sniper rifles works on a principle identical to the one in the 2x magnifier for the remaining weapons but, it can only be combined with high-powered scopes. In the case of the 6-8x scopes, it offers an additional magnification, helpful while taking very precise shots. It also works the other way round, in the case of combination with 20x and 40x scopes, which gives the shooter the opportunity to decrease magnification, in order to take shots at nearer and moving targets.
FLASHLIGHT
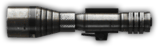
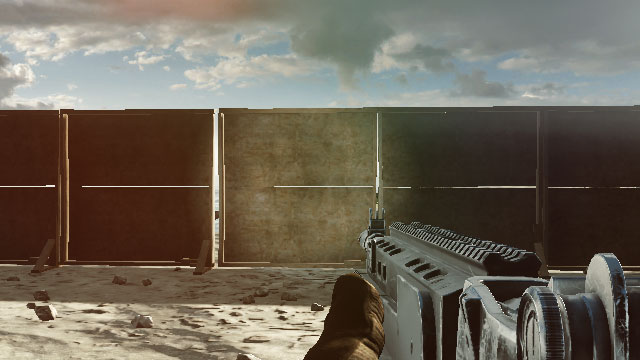
A barrel mounted flashlight that allows you to light dark places and blind enemies at short distance. You can turn it on and off at any moment, which is a recommended thing to d, because the light reveals your position to the enemy. The flashlights are ideal for blinding enemies equipped with night vision and thermal vision. Flashlight do not influence weapon's statistics.
TACTICAL FLASHLIGHT

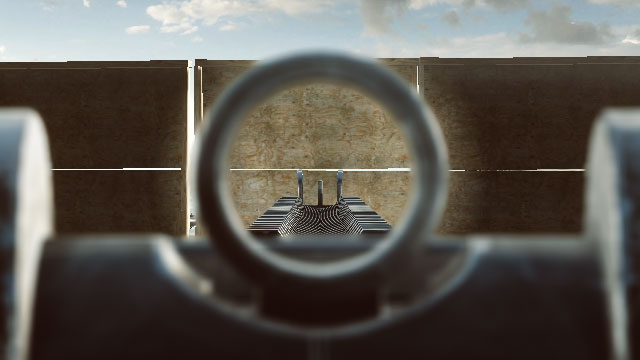
Tactical flashlight is different from the above one, with only one, crucial thing - it turns on automatically, while aiming with the optical instruments, after which it goes off as soon as you lower the weapon. This is immensely useful a solution that eliminates the necessity to turn it on and off to prevent revealing your positions to the enemy. Unfortunately, you cannot turn it off while aiming.
LASER SIGHT
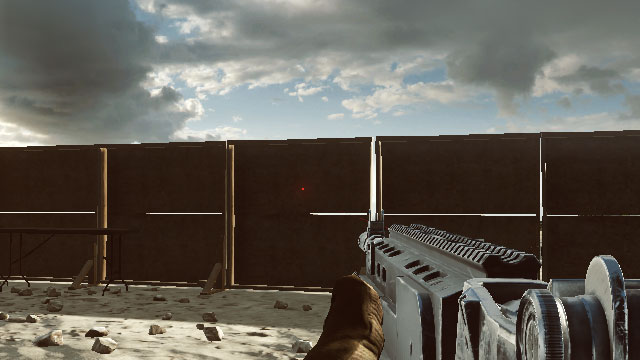
The Laser sights facilitates, to a considerable extent, hip aiming - both in visual terms and by altering weapon's statistics. To a limited extent, it blinds the enemies very close to the shooter but, it also reveals his position. Sometimes, it is a good idea to turn the laser sights off to remain undetected. Laser sights in no way alter the weapon's statistics in a negative way.
TRI BEAM LASER
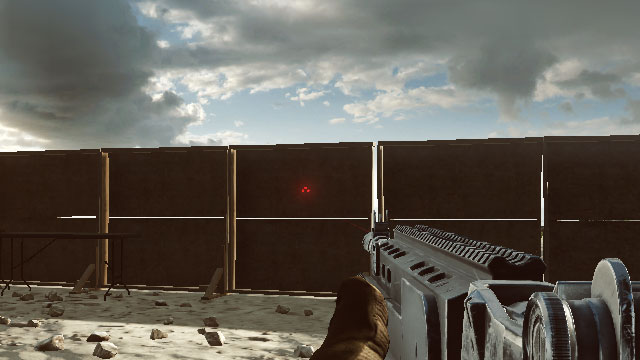
Tri Beam Laser is different from the basic version only in visual terms, by facilitating aiming, a bit, because it is easier to see it. The downside, of course, is that it is also easier, for the enemy, to spot it.
GREEN LASER SIGHT
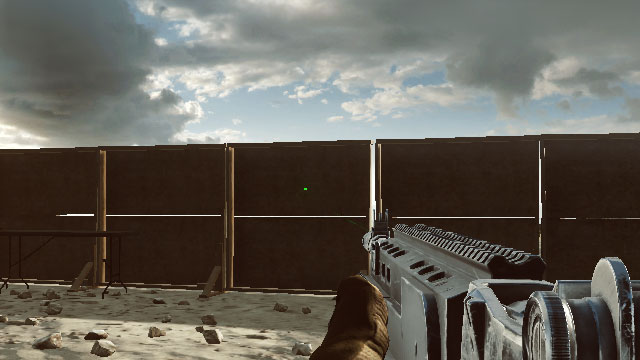
The green laser is another variant that differs from the previous versions only in visual terms and alters the weapon's statistics in the very same way. There are upsides, though, which are less obvious - it is more difficult to lose the green dot while aiming and, it is easier for the enemy to confuse it with something else (especially against a complex background).
LASER/LIGHT COMBO
Laser combined with flashlight is an ideal solution for those who cannot decide between the improved hip accuracy and the ability to blind the enemy during a short-range combat. The laser sight and the flashlight cannot operate simultaneously so, the user needs to switch between both modes, depending on his needs.
MUZZLE BRAKE

The muzzle brake considerably limits the vertical muzzle climb but, this come at a price of decreased accuracy of the automatic fire.
COMPENSATOR

Compensator works on the same principle as the muzzle brake, but it decreases the horizontal muzzle drift.
FLASH HIDER

The flash hider does not alter the weapon's statistics in any considerable way, which is why it is a perfect solution for those of the players that do not need any barrel attachments to the weapon. The hider decreases, considerably, the flash visible while the weapon is being fired, which may prove helpful while attempting to remain unspotted. - especially while conducting fire from a poorly-lit hiding place.
HEAVY BARREL
Heavy barrel improves considerably the accuracy of the first shot, and it turns any weapon nearly into a sniper rifle. This comes at the cost of increased vertical barrel climb
SUPPRESSOR
Suppressor is an ideal solution for players who wish to remain unspotted by the enemy. The gunshot turns into a whistle and, additionally, the player does not appear on the enemy minimap while firing. However, this comes at a price of decreased muzzle velocity by a half and, as a result, of range, as well as of accuracy while hip shooting.
DUCKBILL

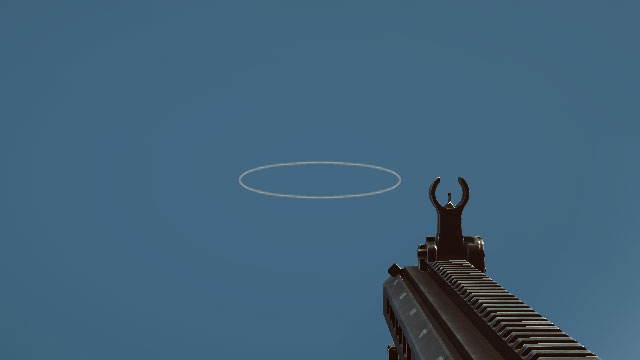
Duckbill is a barrel attachment for shotguns. applying this results in increasing the horizontal spread of buckshot, thanks to which it is possible to hit multi[le targets at once - as long as they are sufficiently clustered together. The usefulness of this attachment is limited and many players are the proponents of the view that it is better kill one enemy for good, instead of hitting five at the same time and die, or have them escape.
MODIFIED CHOKE

Tightens the buckshot spread moderately, thanks to which, with good accuracy, it is easier to knock enemy down with a single shot. The price to pay for this is decreased hip accuracy and the spread increasing a bit faster. An attachment recommended mainly to the more experienced users of shotguns. it is useless in combination with shotgun slugs.
FULL CHOKE
Te full choke tightens the buckshot spread to a larger extent, thanks to which it is even easier to kill an enemy with good accuracy. The price to pay for this is decreased hip accuracy and spread increasing considerably faster. An attachment recommended mainly for the more experienced shotgun users . It is useless in combination with shotgun slugs but, it works perfectly with flechette ammo and increases the chances of killing the enemy even at medium distances.
BIPOD
The bipods fully eliminates swaying of the high-powered scopes, thanks to which it is unnecessary to hold breath. Moreover, to a large extent, it decreases the weapon's recoil and spread considerably. It is a perfect attachment for the more stationary snipers, sharpshooters and support soldiers. The bipod alters the weapon's statistics only if it is unfolded. The bipod has no negative sides
ERGO GRIP / VERTICAL GRIP

The Ergo grip is designed to be used by the shooters who remain in constant movement, and it increases considerably the weapon's accuracy in motion. It works both while aiming through that optics, as well as with hip fire. ideal attachment for assault soldiers. The only difference between the ERGO grip and the vertical grip is the looks. The grips have no negative effects.
ANGLED GRIP/ FOLDING GRIP
The angled grip decreases vertical barrel climb after the first shot, which makes it especially useful in the case of semi-automatic weapons (e.g. designated marksman rifles), as well as the ones shooting in busts (M16, M4). The only difference between the angled grip and the folding grip is their respective looks. The grips have no negative effects.
SHORT GRIP/ POTATO GRIP

The short grip is a perfect option for the automatic weapons of high firing rate, because it decreases the spread during automatic fire. The only difference between the short grip and the potato grip are their respective looks. The grips have no negative effects.
Zavod 311 is an abandoned factory from the Cold War. It contains mostly halls and underground corridors. Next to it you can find a railway station and some buildings. At the edge of the map there are radio tower and underground bunker.
Battles here are a mix of urban fighting and fighting in between the trees. That's why this terrain is very universal and allows you to fight both at very close distance and very long one. Forest gives a lot of opportunities to wing enemies and stay undetected. It makes also easier to hide vehicles, but staying in place for too long will end up in destroying it by enemies hiding in the forest.
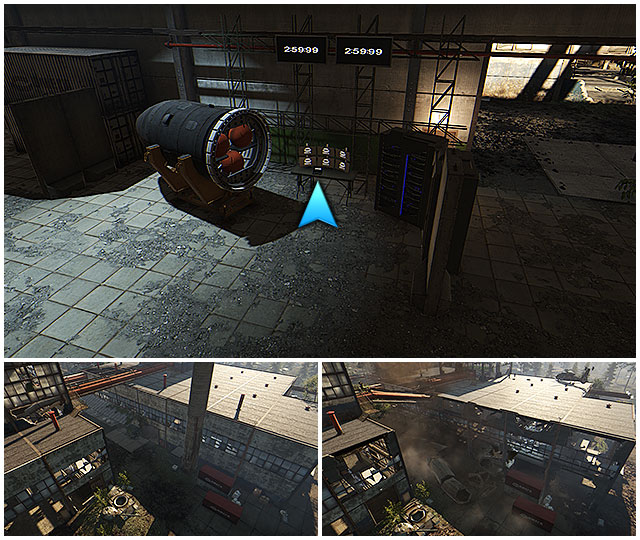
To launch the Levolution on Zavod 311, you have to head to the industrial facility (flag D). There you can find an armed warhead with a laptop as a time detonator. After using a laptop, clock starts counting from 3 minutes to zero. Time remaining to the explosion is displayed on two monitors on the wall and on the laptop itself. After three minutes be somewhere else, because explosion is huge. After the explosion, remaining of the chimney creates additional cover between flags C and D. What is more, underground tunnel connecting nearby buildings gets a new entrance. Nearby appear also USAS-13 and rocket launcher.
Lancang Dam is a very open map with building in critical places. Here you have a full open air and water space and a huge area what makes the dam neighborhood the perfect battlefield for all types of vehicles. Big distances between flags and covers makes moving here on foot very dangerous. Luckily, in many places you can find smaller not-armored vehicles, which will make moving around easier. In the middle of the bay there is an island (flag C) which is a key point giving a huge advantage for the team who keeps it. From this place you have a quick access to each other flag on the land.
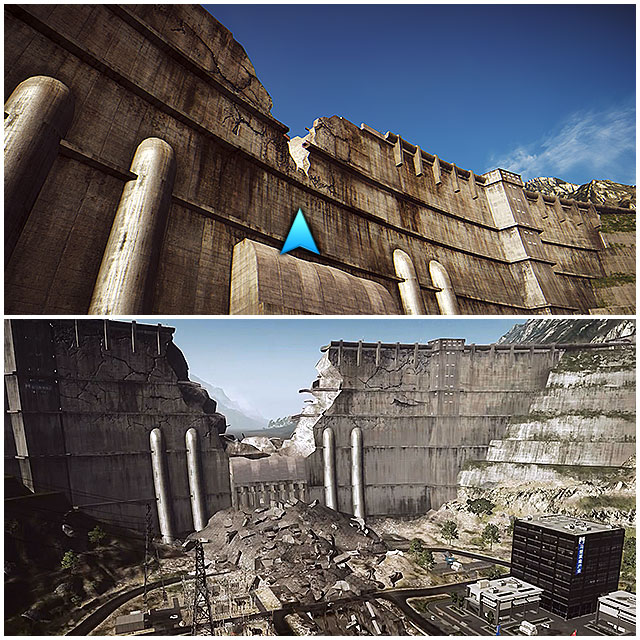
Levolution here doesn't make much and is simple to activate. Use the random explosives and widen the breach in the dam. You can also use rocket launchers, tank missiles, ground-to-air missiles or dropped C4. But to destroy the dam, you need a lot of missiles.
After destroying it, it is possible for vehicles to ride the road in front of the dam. Also, a rocket launcher on the bridge is destroyed. What is more, electricity in all nearby buildings is cut off.
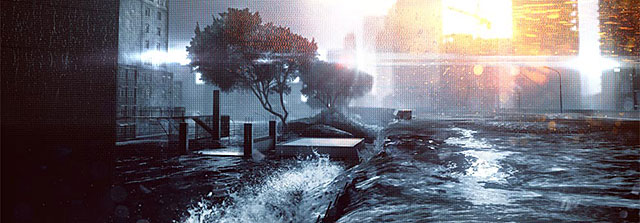
Flood Zone is a very unique map in BF4, because after using the Levolution, the area changes drastically. Level of water rises so much, that it flood the bottom floors of the buildings and except from its insides, roofs and the highway, there is not so much place to go on feet. It forces players to swim or use boats which appear on the map replacing the ground vehicles. Buildings in the Flood Zone creates a labyrinth, which you have to learn quick to move effectively. Each staircase with an entrance on the ground floor ends somewhere on the roof, with many corridors connected with other buildings. After Levolution, players still can get to the staircases by diving nearby the entrance or destroying the walls. For infantry fighting on the roof, snipers are the primary danger. They may be set up on the roof of skyscrapers or even the dome of water tower.
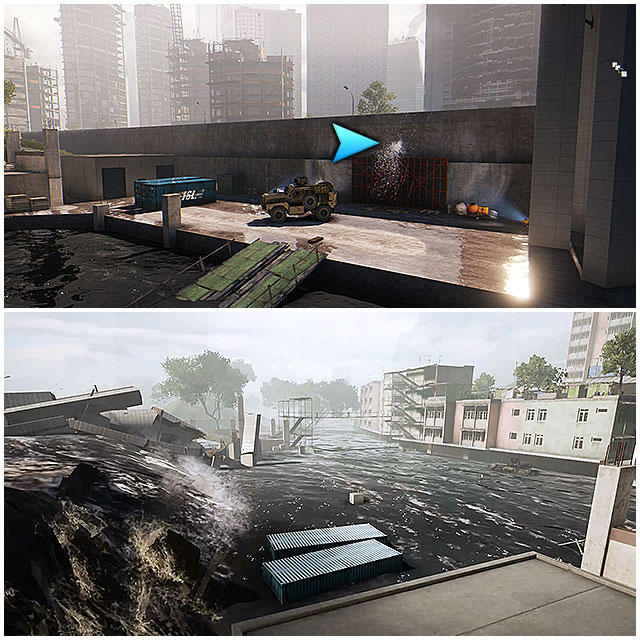
Levolution on this map affects in a greater way than on the other maps. You cause this event similarly to the one on the Lancang Dam: you just need to fire at the dam next to the water tower (north from the flag B) many times with random explosives.
After destroying the dam, all terrain will be flooded what changes the playstyle and moving all around the map. Boats and new weapons will be spawn, which you can pick up from the scaffolds. Water tower next to the dam will be destroyed. One camping place less.
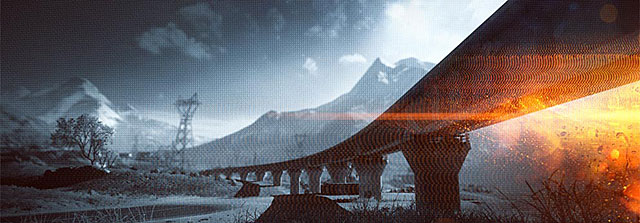
Golmud Railway is another map on which vehicle fighting is important. Here you have a lot of open space, through which walking requires a lot of going between the obstacles and cunningness. Players who want to focus on infantry fighting should stay in the northern part of the map. There is a village which is an ideal place for short and medium distance fights with many hideouts. You can enter each building and fire from it. Each building also may be destroyed so hideouts and covers aren't eternal.
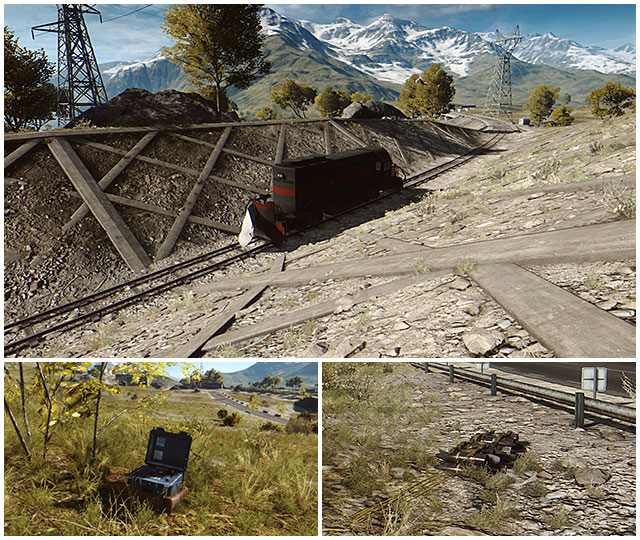
On Golmud Levolution is a bit untypical. First and the most important element is a locomotive, being a flag D. Taking it over moves the railway to the base of team which made it. It gives a huge advantage to this particular time, because locomotive moves slowly and in totally open area, so the enemy team will have to put a lot of effort to get the flag back. To make defensing/taking over the locomotive easier, there are two rifles on the front and back of it.
Other Levolution elements on this map are detonators and IED spread around. IED are just simply gathered together missiles, attached to the visible detonator. IED may be also detonated with a random explosive, from grenade to the rocket missile. Range and power of the explosion is huge and able to destroy any nearby enemy vehicle. List of all IED and detonators can be found on the map.
This is a gathering of small islands, between which you can't move without a boat in most cases. Water battles are the dominating theme in here. The team who gets an access to all quick attack crafts will get a huge advantage. On Paracel Storm there is a Levolution on which players have no impact. It is the title Storm, which begins about the middle of the round. It decreases the visibility on the map and sea wakes up. Huge waves makes the water encounters more difficult but thanks to that players on small boats and water crafts can easily avoid confrontation with attack crafts and move without being detected. Areas next to the flags are full of covers, like buildings and trenches. It makes the infantry's life easier.
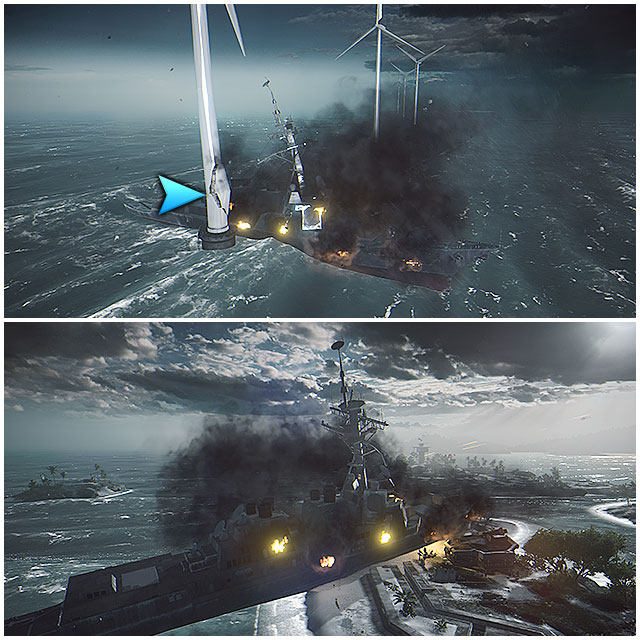
Levolution on Paracel is very effective and has a huge impact onto the game. Next to the shipwreck (flag E) you can notice a row of turbines. A huge Destroyer is blocked at one of them. You can free him after the storm begins. When the ocean becomes rough, it's enough to destroy the turbine with random explosives. Then, the destroyer heads to the shore next to the Flag C and crush into the shore, destroying the building next to the Flag. Team which takes over the flag, gets an anti-aircraft cannon mounted on the ship. It'll automatically attack incoming enemy planes. What is more, you can climb onto the upper deck. There will appear also boxes with USAS-12 and sniper rifle nearby the destroyed building.
Operation Locker is a prison consisting on the labyrinth of corridors and underground. Players who remember the Operation Metro from the BF3 will feel like home here. Most of encounters take place on short distance, so it's the favorite map of those, who prefer shotguns and personal weapon. Narrow corridors and small rooms tempt players to use explosives, what causes a great chaos in crucial areas. More clever players can take the alternative route between the flags on the outside. Visibility outside is limited a bit by the cold and frost gathers on the optics. Sharp sun reflecting from the snow also is a pain, but each stick has two ends. Limited visibility allows player to sneak between entrances more easily.
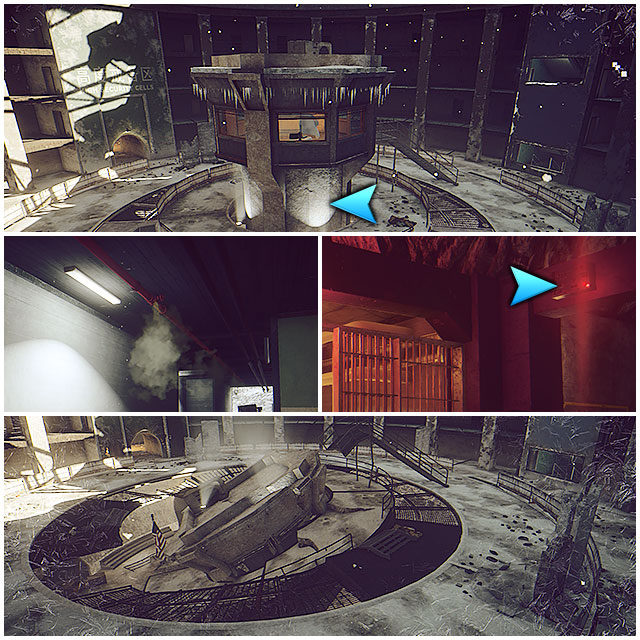
In the prison, you have three types of Levolution. Main attraction is Panoptykon where you can find the flag C. Tower may be destroyed with explosives. It collides and opens new entrance to the underground. Destroying the Panoptykon changes also the location of the flag, which from now on is in the underground. While standing, Panoptykon gives a huge advantage to the team who defends it, because there are two .50 rifles mounted there, aimed at two out of three corridors leading to the flag. Destroying the tower makes easier to take over this point. After destroying the Panoptykon, USAS-12 appears next to the flag.
Another Levolution element are gas leaks in some of corridors. You can notice them by a green cloud going out from the red pipes under the ceiling. Using any explosive nearby the leak will set on fire all the gas, what kills immediately all nearby enemies.
The last and smallest, but important Levolution element on this map are control panels of the gates and light switches. If someone closes the gate, which cannot be unlocked on your side, find a nearby switch (flashing red) and fire at it, to open the gate. Light switches work similarly - you can turn off the light in the certain room. It's very useful while assaulting enemy position.
Resort is a medium map with something for all type of players. Pilots, ground vehicle fans and infantry can have something here for themselves. Fact that the space is open, makes many encounters take place on medium and long distance, so you should consider carefully what weapon to choose. Luckily, there are also urban zones, which are perfect for short distance fighting. Especially inside the hotel. Hotel is the key point on the map and taking it over may give a huge advantage. From the hotel roof, you can see a whole vicinity, what makes it one of the favorite sniper position. It's also easy to protect if a team guards the elevator. Edges of the map aren't free of snipers also, because uneven terrain with trees is a good place for them. Infantry may find here a lot of transport sources, thanks to which quick moving around the map is possible. But going on feet shouldn't be too much problematic. Distance between flags isn't big and terrain is full of various covers.
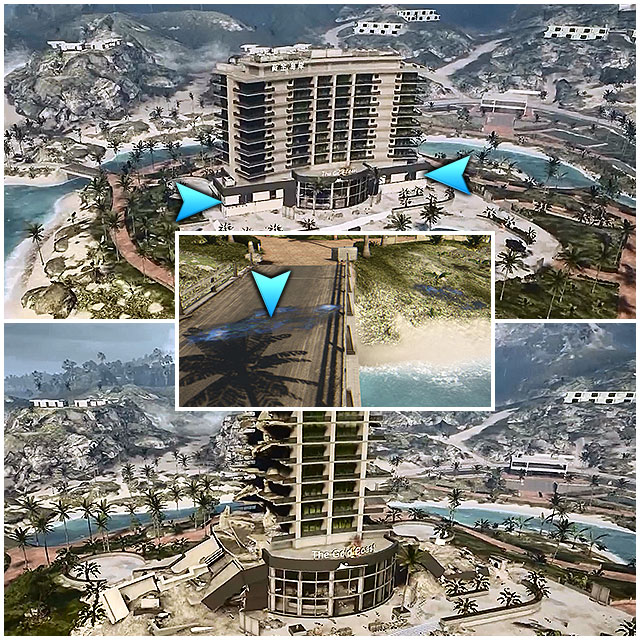
In Resort you have several types of Levolutions. The most important of them is a possibility of destroying two sides wing of the hotel in the point C. To destroy the chosen wing, you have to explode the white walls supporting the construction of the upper part of the hotel. Destroying both wings doesn't cut off an access to the roof, but makes more difficult to defend the flag and limits sniper's possibilities.
Smaller part of Levolution are spots of oil mainly next to the oil ship wreck (flag D). Using the explosives, you can set them on fire, what makes a lot of thick smoke.
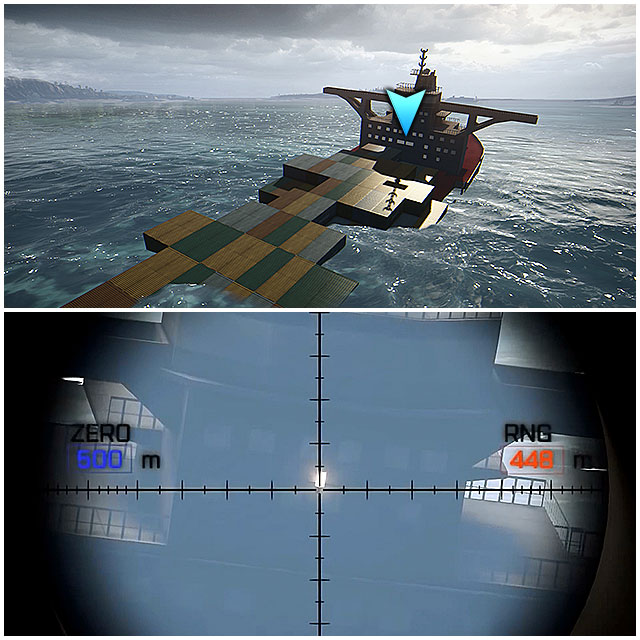
Another, hidden element of Levolution, is the second half of the same ship, which is still on the sea. Aiming at this ship from the hotel's roof (west wing) you can notice a small light. Hitting it causes a chain reaction, what fires several dozens of burning barrels onto the battlefield.
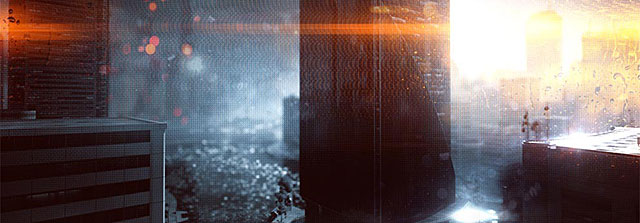
Shanghai is a map where battles take place in the urban area with a little of sea and air fights. At the street level, you can find a lot of buildings to which you can go inside and many smaller covers. Each rooftop is a potential sniper position, but not on majority of them you can get only from the air as only four buildings have elevators. East and west part of the map is thickly built, so moving on feet shouldn't be a problem. Moving on feet in the middle part of the map isn't recommended, because it's a huge open space, where the infantry is very vulnerable. After destroying the skyscraper, players get an access to quick attack craft, what makes give your team an edge if you happen to take and hold it. The boat is able to patrol the vicinity of most of the flags and harass enemy.
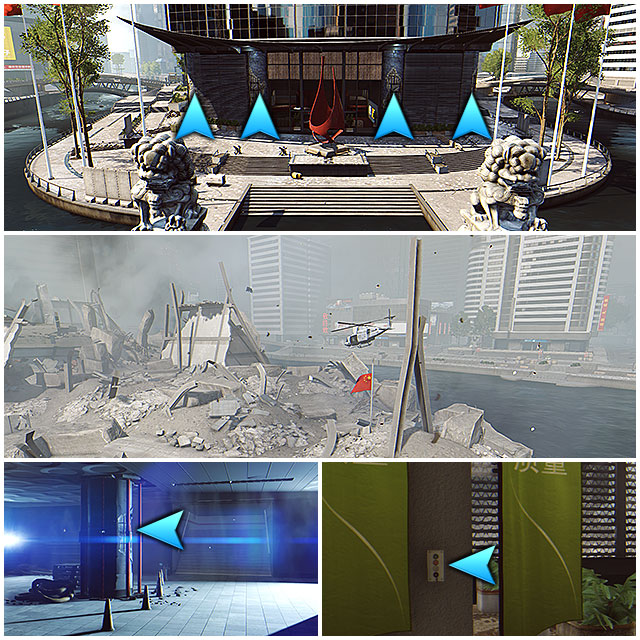
In Shanghai you again have one big and two smaller Levolutions. The most important and significant is colliding the skyscraper in the middle of the map (flag C). To do so, you have to use about six explosives onto cracked pillars shown on the screen above. After colliding, the skyscraper makes a headland, pushing out the flag C and giving an access to the attack craft. Destroying the building increases the dusting nearby it, what makes more difficult to snipe out enemies on the other side of the river.
Smaller Levolution element is a possibility of colliding the part of the road, next to the metro (flag B). To do so, blow up the cracked pillar in the metro corridors. Hole in the asphalt makes more difficult for vehicles to move and opens another entrance to the metro.
The last Levolution element is a possibility of lowering the grating in the northern part (flag D). Switch is inside the car exposition, next to the green standards.
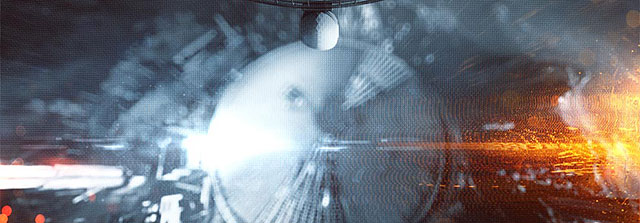
Vicinity of the antenna is the huge open space with rudimentary buildings here and there. Majority of buildings is still under construction, so the cover is very limited. It's a problem for the infantry, especially before the Levolution and destroying the antenna receiver and two pillars. Receiver and pillars are favorite places of snipers, who may control almost the whole vicinity from that place (except for the flag C, which is under the antenna). What is more, on the top of pillars you can find .50 sniper rifles. Destroying the antenna not only takes the best sniping positions away, but also creates additional covers on the ground level. Transmission is a map where armored vehicles and air forces dominate and infantry move around mostly next to the antenna (C) and research center (E). Infantry focusing on the flags A, B and D move mostly under the cover of hills on the south of the map. You can meet there a lot of snipers. Antenna is the point which gives you the biggest advantage. Under the cover of the big dish, players may get quickly to the every flag without being too much exposed.
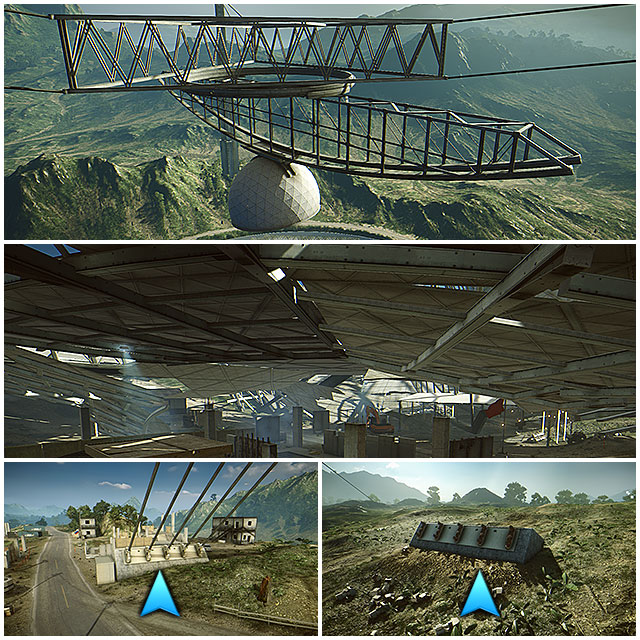
Levolution on this map is not difficult to make. You just need to destroy all steel lines supporting the columns with the antenna receiver. First row of the lines is next to the office (flag A) and the other one on east from the research center (flag E). As usual, to break a rope you need explosives. One for each rope. After breaking all ropes, receiver will fall down, destroying majority of the dish. It also changes the battlefield under it. What is more, also columns collide. Destroying the antenna creates many new covers and takes out three the best sniping position and access to two .50 sniper rifles.
This map offers dense urban zone with many possibilities both for infantry and armored vehicles. Each helicopter pilot will like this map, as it's possible to use numerous buildings as a cover. On the ground level map offers a whole lot of covers too: from insides of the buildings, to the buses on the road. Each rooftop is a potential sniper position, but not on majority of them you can get only from the air as only two buildings have elevators. What is more, almost each building is surrounded by the footbridge, what gives more flexibility in choosing sniping positions. Long, straight streets are perfect for long distance encounters while inside the buildings you can go crazy with shotguns. An element of Levolution you have no impact on is changing the daytime from night to the dawn in the middle of the round. Change of light forces adaptability of the tactics.
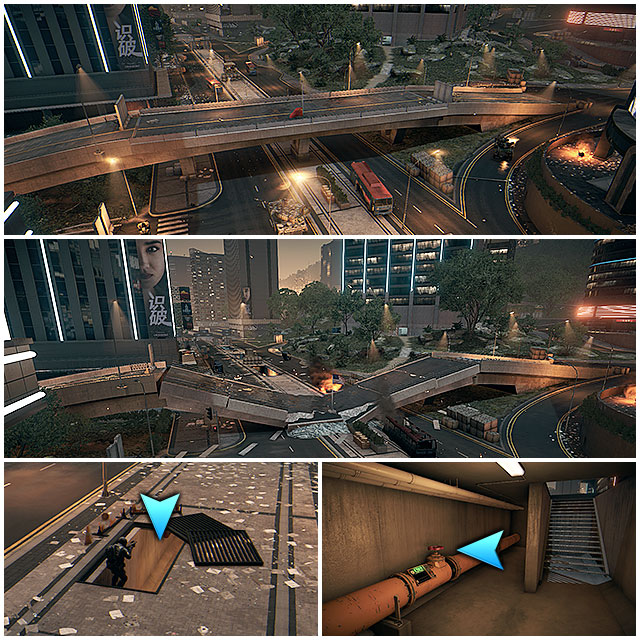
Levolution here is simple and not too exciting, but affects the game. Next to the square and hospital (flag B and D) you can see a sewage entrance. In the room below the pavement there are gas valves which you have to turn off. It increases the pressure in the gaspipes and explosion, going through the whole map. It collides the bridge (flag C), makes something-like-trenches where the pavement was and turns over all buses.
Official requirements for PC. You should check earlier if the game will run on your PC.
This guide includes a complete walkthrough for all the single-player missions in Battlefield 4 and detailed hints, which will help you find all of the hidden elements in the game, i.e. The dog tags or weapons. Additionally, the below text has been enriched with a whole lot of high quality screenshots, whose purpose is to present those of the elements of the game, which are more difficult to describe with words.
In this guide, you will find:
Battlefield 4 is yet another installment of the well-known franchise initiated by the Swedish studio EA DICE. This time, around, we were given a dynamic single-player campaign where we assume the role of Recker, a member of an American task force unit known as Tombstone. The player will have to face the People's republic of China because, certain Tombstone's actions led to a global conflict.
Battlefield 4 - Singleplayer is the second part of our enormous guide for Battlefield 4. The first one is Battlefield 4 - Multiplayer. Check it out!
Bartek "Snek" Duk (www.gry-online.pl)
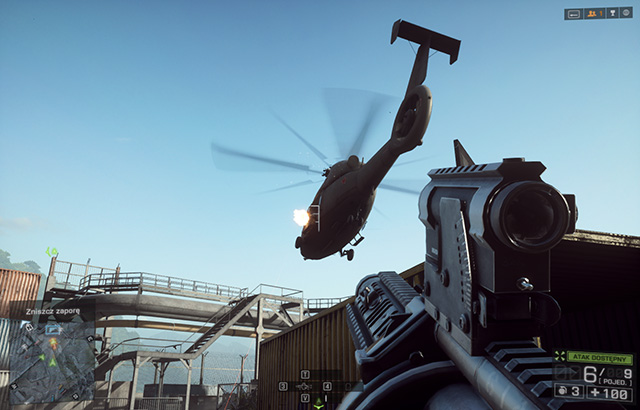
The campaign mode starts with a short cutscene, where the entire Tombstone team is on a sinking car. Unfortunately, Dunn was pinned down by a seat, which makes him unable to get out of the car. After a while, you will receive a weapon and an order to shoot through the windshield. Irish will oppose but, an order is an order - take a shot at the windshield.
Then, you will get back in time by a dozen or so minutes and you will be able to see what events led to this situation. You will gain control over Recker so, walk ahead and perform the basic activities, as instructed by the game. Follow the corridor and walk through the only opened door. You will bump into Pac. After a while, also Dunn will arrive and a short conversation will ensue.
Now, you and Dunn will have to cover Irish. Approach the box and replenish your rifle ammo. Then stand at one of the windows. After a moment, Irish will be attacked by a dog - you will not be able to help that but, a moment later, there will appear three enemies in the building on the right.
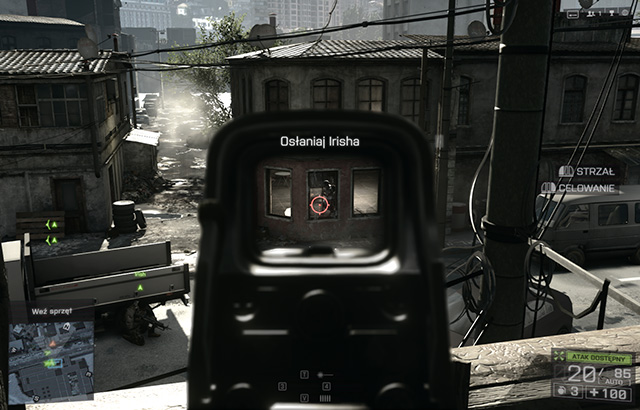 The first rounds to shoot.
Kill them by shooting out of the window. Further enemies will arrive down the street in front of you, then another wave from behind the cars on the left side of the street. Kill them all and wait for Dunn to help Irish climb up.
Follow the rest of the team. After a while, you will stop and you will receive an opportunity to issue an order. Point at the enemies below, with your crosshair, and press [Q] to issue an order. The rest of the team will start shooting at them and you can do likewise to speed up their elimination and receive more points. Jump down and kill the next wave of enemies. Remember to use covers and shoot to the heads - especially of the enemies standing behind the pane of glass.
Once you have eliminate d the threat, follow your companions and jump down the hole into the next room. Approach the gadget box and select C4 and M320, which may come in handy later on.
 Bum!
Bum!Then, select the C4 by pressing [3] and throw one of the charges onto the wall, using the [right mouse button]. Walk away from the wall to a safe distance and detonate the charge by pressing the [left mouse button]. Walk outside and follow the rest of the team ahead.
You will be stopped by Dunn and you will receive the tactical visor from him. It is a useful tool that you are going to be using very often. Press and hold down [Q] to turn it on and look at the enemies, who are marked in white. To zoom in, press [T]. After you have marked all of the enemies, you will have to take a decision.
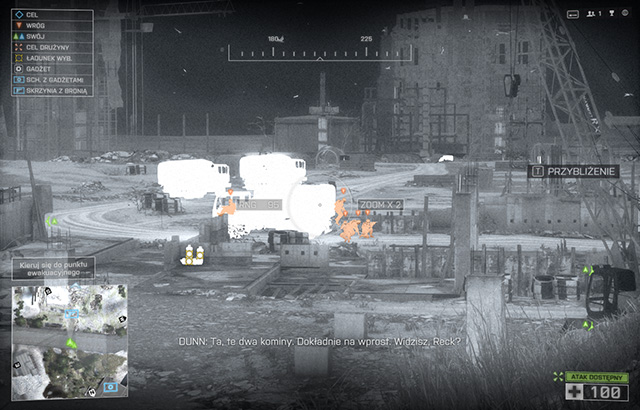 The orange
You can attack at a long range, if you have collected the M39EMR earlier or come closer to attack using the assault rifle. Remember, you do not have the silencer on so, the first shot you take is going to alarm the rest of the enemies and you will be forced into a fire exchange.
Therefore, use the cover to protect yourself against the bullets and try to aim at the heads. Also, use the M320 or grenades, to attack the enemies skulking behind covers.
After you have killed all of them, go ahead. You will now have to repeat the same activity several times, when the another wave of enemies arrives, which is using the tactical visor to mark and eliminate them. Use your surroundings as a cover and remember to issue orders to your team to speed the fight up.
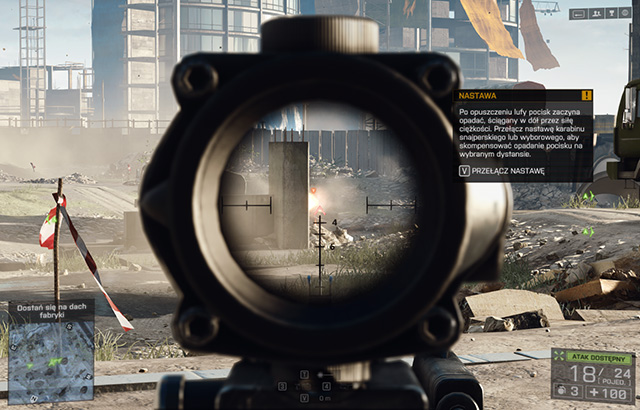 Boom! Headshot!
Then, you will have to walk through a tunnel, after which you will walk out into another field, this time around very close to the factory whose rooftop you need to access. Then, kill the enemies that spear. Some of them will be appearing on the left, on the metal platforms high above the ground. Therefore, you should use the M39 EMR or the Mk11 Mod 0 to take them out, or simply fire the M320 that way.
After you have eliminated all of the enemies, walk into the factory premises and follow the rest to the elevator. The elevator will go up and will start to fail. You will fall onto a platform, where you need to follow the rest onto the rooftop. There are no other pathways so, it is impossible to get lost. Once you are on the rooftop, start running towards the chopper. After a while, the roof will collapse under your feet and you will start falling down. Then, you will see a black screen.
After several seconds, you will return to the game. Things are not too good, because Dunn's leg has been pinned down by rubble. The only way to pull him out is to cut out the pinned down leg, and it is you who is going to take care of that. Approach him, press [E], when you are prompted to by the game. You will do what needed to be done, and your companions will carry Dunn into the car. Now, you will have to evacuate from there - take your seat behind the wheel and drive ahead.
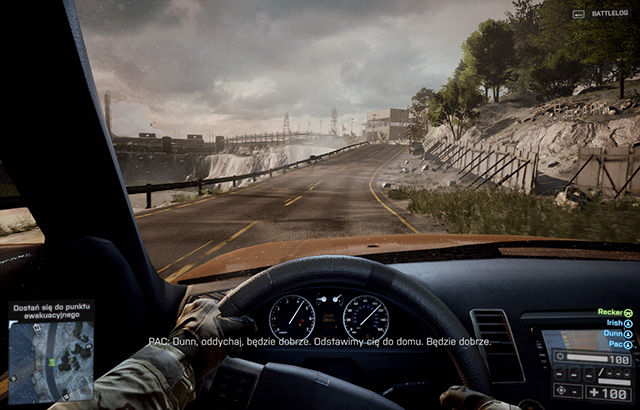 Almost like Need for Speed!
Driving the car is the same as controlling your character so, you should not have any problems with that - there are no slides along the way so, you will not get lost here. A moment later, you will be attacked by a chopper. Unfortunately, you cannot escape from it and, after a while, you will get an M320, into your hands, which you will have to use to destroy the chopper. You only have one projectile so, if you miss the chopper, you will have to start over from the last checkpoint . The chopper will get heat and will retreat as a result. Still, the car will skid and you will end up in water. After a short cutscene, the mission will end.
The mission starts inside the car - you will not be able to do here anything, apart from looking to the sides and listening to conversation. After several minutes, the car will get stuck in an alley and you will have to walk from here. Get out of the car and follow your companions/
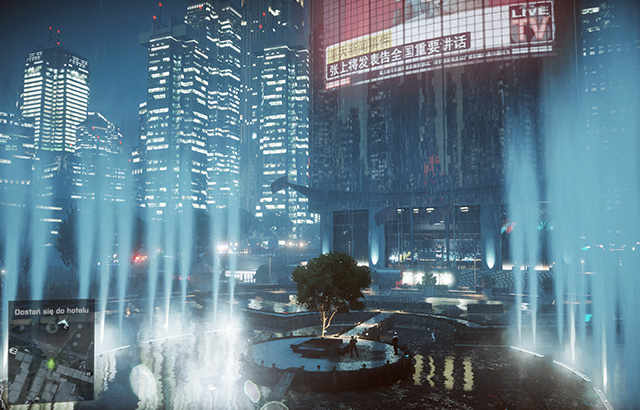 A beautiful sight to behold
Your objective now is to gain access into the hotel. Follow Pac, wait until he opens the gate and go through to follow the others. After a while, you will have to climb the ladder onto a small roof, from which you will have the view of the hotel. After several seconds, climb up another ladder on the right and go down. Wait for Pac and Irish, then start running after them. You will reach the hotel's main vestibule and stop at the elevator, which you will have to open. Do that by pressing the button on the right of the elevator and walk inside.
Inside the elevator, you will receive your gun from Pac - take it by approaching him, and pressing [E]. After a while, the elevator's door will open and you will notice an enemy soldier. Either kill him or let Pac do that. Then, the door will close and you will continue your journey to the upper level. After you get there, exit the elevator and approach the gun box. Select the gun that you prefer most, although it is recommended to stay with the UMP-45. It is a good idea, however, to select an assault rifle, e.g. the SCAR-H as your secondary weapon.
After you have made your choice, follow the corridor and hide behind the nearest counter after you reach the left turn. As you lean out from behind the cover, you will notice a soldier exiting the room. Do not attack him yet, though, and turn your attention to the stairs behind the windows on the right. After a while, you will notice two guards climbing down the stairs. Wait for them to approach the third guard, at which point, you will have the opportunity throw a grenade towards them and kill all three without wasting ammo, which will prove useful in just about a moment. Further enemy waves will start to arrive. The room that you are in Is relatively big so, the fight should not pose a problem to you. Use the counters, armchairs and cupboards in the form of covers. Move whenever a cover becomes too destroyed. Throw grenades where there are several enemies, or into an area in which you cannot reach the enemy with your rifle.
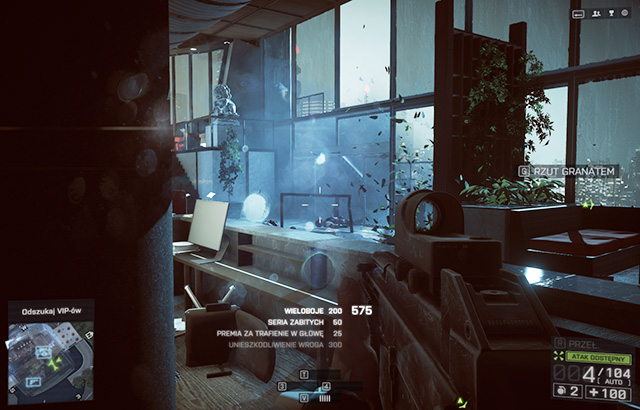 There is nothing better than a grenade
After you have killed every last of them, follow Pac upstairs. Along your way, you will find ammo and gadget boxes. In the ammo box, you can replenish your ammo, and select the M18 Claymore mine from the gadget box. Approach Pac then, at which point the door will turn out to be locked and Pac will have to open it. Your task will be to cover him, because there will appear a chopper here, and further reinforcements will start to arrive soon. Before the enemies arrive, though, select the M18 Claymore that you have collected earlier and plant them at the stairs, which you have taken recently. Return to Pac and position yourself next to the wall, or behind an armchair,. After a moment, the enemies start dashing in from the ground floor and from the direction of the windows. The ones attempting to get upstairs, should be eliminated by the mines that you have planted earlier. If that proves to be insufficient, simply finish off the rest. Then eliminate the soldiers that shoot at you from below and go head. Pac will open the door, walk through it and run ahead. Turn right, into the opened door and climb up the stairs to the next floor. Walk through another door and follow the corridor. After a moment, you will hear an explosion. You will notice two dead guards and a hole in the door. Take a look at the flames and listen to a short conversation, until the door to the next room opens.
Enter the room, listen to the conversations and leave. Dash towards the staircase, which you have already taken, and climb up to the rooftop.
Run towards the chopper and press [E], to open the door. After a while, you will be attacked by enemies. Repel the attack and kill all on the spot. If the area looks clear, and the mission will not continue, you will have to search the rooftop thoroughly. It is highly possible that there is the last enemy somewhere there, who does not attack for some reason.
 A good shot is not bad
After you have killed everyone, follow the rest of the team until you reach the elevator. Open it, walk inside and get to the ground floor.
You will be back to the vestibule. This time, you will have to go the whole way and exit through the main door, which is currently being guarded by several enemies. Some of them are standing at the door itself, and you will be able to take them out through the glass panes. Do that and eliminate the remaining ones. You will then have to dash outside and take the position at the low wall, next to the entrance, to make the enemies start leaving their covers.
The problem is the helicopter, which is circling above you. You cannot destroy it, but you can shoot the enemies aboard and shoot at you. Try to use the assault rifle for that. If you still cannot handle them, return to the vestibule and go to the box next to the lion statue. Select some marksman rifle (M39 EMR or Mk11 Mod 0) and use it to dispose of the helicopter. You can also return to the box also when you run out of ammo.
Once you render the helicopter harmless, kill out the rest of the enemy infantry and dash ahead, after your team. After a while, you will bump into a tank. Run into the alley on the left and follow your companions. Every now and then, along your way, you will be encountering enemies so, eliminate them. You should also remember to stick to the walls - otherwise, the tank that is following you would hit you, which ends in death.
After several minutes, you will lose the tank and you will walk out to the street again. Run towards the two civilians that will open door for you. You will walk into an area with several civilians, who are looking for shelter from the attack.
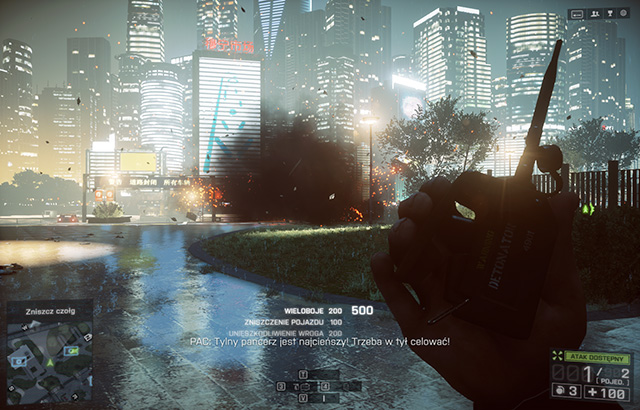 Kaboom!
You need to keep moving so, follow your companions and, after a while, you will walk out into a big square. Here, there are two buildings and you can find boxes that will provide you with tools necessary to destroy the two tanks. I recommend that you use C4 explosives, but you can also use mines. In the case of the C4, you simply need to run up to the tank from behind, throw 3 packs of C4, get away into safety and detonate them. Do the same with the second tank but, return to the box after you have blown up the first one and replenish your resources. If you use the mines, plant them in the tank's path They go on their rout in circles so, there should be no problems.
After you have destroyed both tanks, return to your companions and follow them towards the boat. Wait for it to arrive, get into it and watch a quite interesting cutscene that ends this mission.
The beginning of this mission is, to a large extent, based on listening to conversations and going into certain places. There will be no fight so, the description for this mission is unnecessary
After the long introduction, you will be finally able to get into action. You will get a boat to control. The controls of the boat are easy, steer it in the very same way that you do your character on foot. Steer towards the smoldering ship and, once you are close, you will receive an order to find the entrance into the ship.
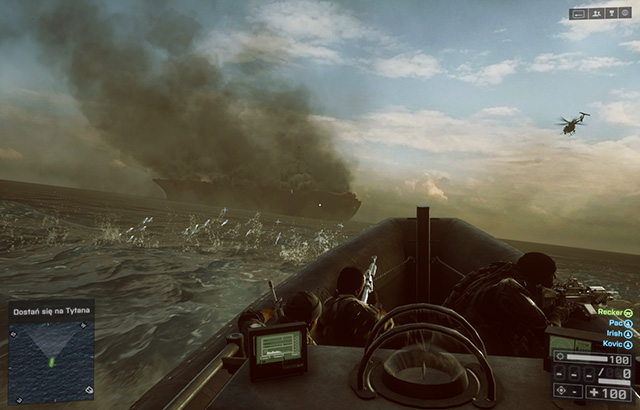 Something must be burning...
Approach the ship on the right and you should notice a hole belching flames and smoke. Steer into that hole and exit the boat. Slowly, follow your team and listen to the conversations along your way, thanks to which you will learn more about the mission's objective.
After a while, you will find the hatch that you are looking for. Unfortunately, after opening it, it will turn out that this part of the ship is flooded. Fortunately enough, you come equipped with diving equipment so, jump into water and follow the rest of the team.
You will not have to cover a large distance in the water though, and after a while, you will walk out onto the ship's board. Follow Kovic and open the locked door, once you reach it. Inside, you will find two sailors trapped under a grate. In spite of Irish's attempts, you will not be above to save them so, it is time to move along. Open the next door and collect the hard drive from the computer marked with the white dot.
A moment later, you will hear voices coming from behind the closed door. Open it and immediately, start fire against the enemies there. Slowly, push forward, eliminate the enemies and try to keep to covers, thanks to which you will limit the damage that you receive.
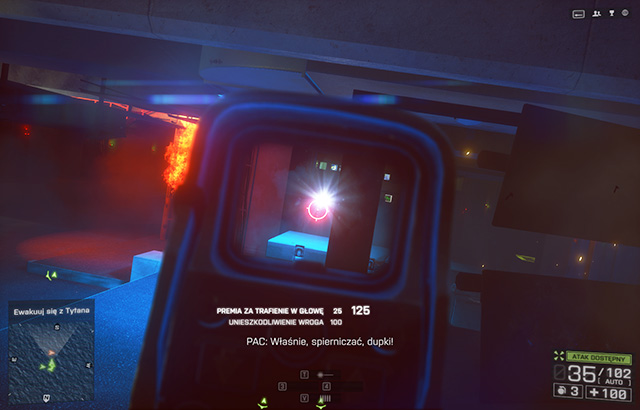 Not into my eyes!
After you have killed all of the enemies, go into the end of the room and open the door. Walk through that door, and the floor will start to crumble. Ahead, there will appear four enemies - kill them and wait for things to go stable again. Then, jump down with the rest of the team. Now you will fight out at the airstrip. On the left, you will find an ammo box so, approach it and replenish your ammo, and take the sniper rifle, which you are going to need now. Most of the enemies will be at a longer distance from you so, kill them using the rifle. Slowly, keep pushing forward, and eliminate further enemies. Also, use the destroyed parts of the ship as covers.
After you reach the end of the strip of land, you will learn that the only available means of escaping is the boat located right underneath. Jump down into water, swim up to the boat and get into it.
You now need to return to Valkyrie. Unfortunately, this is easier said than done, because you will be constantly under attack from the enemy boats. Steer towards Valkyrie and destroy the attackers along your way. Fortunately, your boat is equipped with a big-caliber machine gun so, a few shots is enough to destroy a boat.
Once you are at Valkyrie, there will appear an enemy helicopter here. Wait until it comes closer and start shooting at it. Several shots should be enough to destroy it so, steer towards the stern of the ship and steer inside.
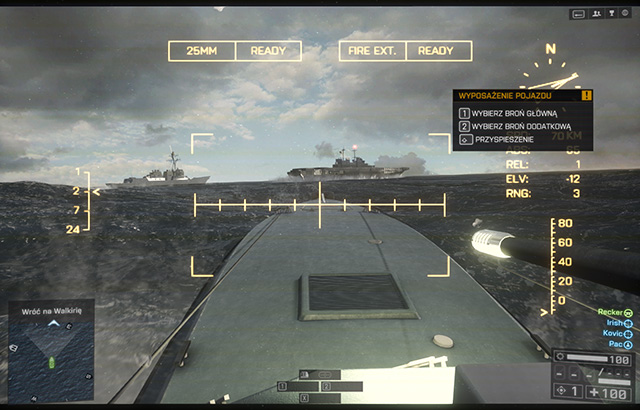 The naval battle.
It turns out, however, that the enemy attacked the Valkyrie and they already are on the board. Get onto a higher level, use the box to replenish your ammo and eliminate the approaching enemies. Some of them will hide behind the cardboard but, it is easy to destroy that even with the rifle.
After you have killed all of the enemies, follow the rest of the team and go ahead.
Run ahead. After a while, you will get outside and you will notice three enemy helicopters to your left. You can either walk around them or try to kill the enemy soldiers onboard - thanks to this, you will receive additional points. Replenish your ammo in the next room and go ahead. Open the next door and walk through it. You will get into the hanger full of enemy units. Eliminate them, using the assault rifle or grenades, if they hide behind covers.
Once you have killed all of the enemies, join the rest of the team. After a moment, you will meet up with Hannah.
You will run, with the entire team, outside. There are boxes there, where you can replenish your ammo and change weapon. Still, it pays off to keep the assault rifle and the sniper rifle.
Start killing off the infantry but, after a while, there will appear helicopters here with reinforcements jumping out of. You can prevent that if you kill the pilot with the sniper rifle - if you fail, though, simply keep eliminating the enemies on the deck.
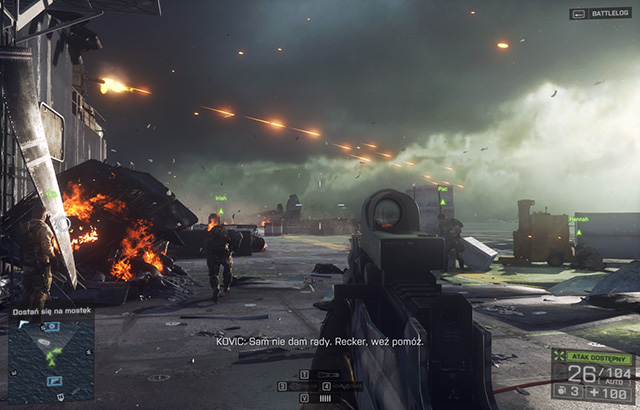 The defense of Valkyrie
Once the landing strip I s clear, Approach Kovic along with the rest of the team. Unfortunately, he is severely wounded and will die in a moment. Now you will have to find Garrison. Climb up the ladder and follow Pac and Irish. A moment later, you will be instructed to open the door so, do that and kill all the enemies in the room.
After that, you will watch a conversation with Garrison, after which the mission ends.
Just like in the case of the previous mission, this one starts with a short cutscene also. After a while, you will take the control of the boat and you will be set to the sea.
Follow the marker on the minimap , until you reach the shore. Get out of the boat and run to the ammo box. Select the appropriate gear. Then, start eliminating the approaching enemies.
The objective of this part of the mission is to follow the ally tank and eliminate the enemy units along the way. They will be jumping out at you from various directions so, if you stick away from the tank, at a long distance, you will be able to mark them with your tactical visor and kill them using the sniper rifle.
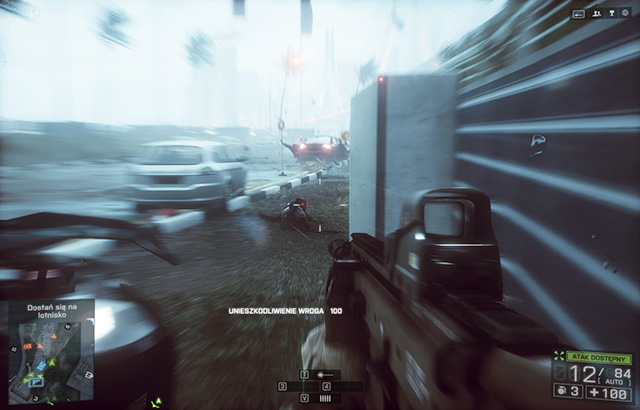 Pew, pew!
After several minutes, you will stop at the road block and now you will take the control over the tank. It is easy to control tanks and it does not require too much training. Using the [W, S, A and D] keys, you control the tank's threads, and the turret, i.e. its cannon, is controlled with the mouse.
For the next several minutes, you will have to follow the marker on the minimap. Along your way, you will encounter the enemy infantry and tanks. Use the anti-armor cannon against the tanks, and the machine gun against the infantry. To switch the firing mode, press [F].
After a while, you will reach the garage, where there are road blocks deployed. You will have to disable them by pressing the button at the garage's main door. Once you do that, get back into the tank and continue along your way.
If your tank is close to being destroyed, take a look around. You can very often find some new abandoned tanks.
 Somebody here requires some serious repair work...
After some time, you will have to get out of the tank and continue on foot. Run after the rest of the team and eliminate the enemies along your way, until you enter a building. Listen to a short conversation and help Irish remove planks that block the door. Simply, approach them and press [E].
You will walk outside onto a bridge. Enter the empty bus. You will notice a group of enemies moving your way. Attack them but remember that the storm and strong wind will have influence on your accuracy.
Kill the enemies and move ahead. A moment later, you will be pinned by a car and your companions will try to save you. There will arrive another group of enemies on the scene. Kill them using the pistol.
Unfortunately, there is some ship steering towards the bridge and it will collide with it in a moment. This will liberate you from the ca, but you will fall into water. For a moment, you will not be able to move but, as soon as you regain control over your character, swim towards the surface and Pac will help you out of water. Keep running ahead, eliminate the two soldiers who are guarding the sewers entrance. Approach the ammo box, replenish your ammo and enter the sewers.
Go ahead. After a while, you will stop so, climb up the ladder right next to Irish. On top, you will find an ammo box. Take the sniper rifle, if you do not yet have one, and walk through the door ahead. You will walk into a small hangar that is guarded by the enemy soldiers. Once you start shooting at them, there will be another wave to arrive from the platform above so, be careful. You should also try to check out the area behind your back, because some of the enemies will be trying to catch you unawares.
Once you have dealt with everyone, run up the stairs onto the platform which used to be occupied by the soldiers you have just fought with and go ahead. After a while, you will see a huge hangar. Use the tactical visor to mark the enemies (you will have to do that several times, because there will be new waves of enemies arriving in the hangar.
Take a good position, best on the platform that you came here from, take the sniper rifle and start popping the enemies. You can also, simply use the assault rifle and fight downstairs. Fortunately, there are many planes and crates here, so you can use them as your covers.
Once you have killed everyone, reach the other side of the hangar and open the door marked with the white dot. You will walk out of the building and soon take control over the machine gun mounted onto the car. Hannah will not be able to start the engine, ad a truck will appear in front of you, which carried several enemy soldiers here. Kill them and then the car should start. A moment later, there will be an explosion and a cutscene will start, which will finish this mission.
Watch the introductory cutscene. You will learn that Hannah betrayed you and now you are in prison. After several-hours long interrogation, you wake up in the cell, where you meet Dima. He will help you get out of the prison
Take the knife from Dima and follow him. Keep climbing over the pipes by using the default movement keys. Then, jump onto the pipes to the side by pressing the [space]. A moment later, both of you will get into the room with a watchtower in the middle. Duck and move towards the tower slowly, while eliminating the guards along your way. Use the knife [F] and try attacking them when they are turned away from you.
Climb up the tower's stairs. You will find another guard at the entrance to the tower but, he will fortunately be turned away from you. Kill him and enter the tower. Activate the switch that opens all cells in the prison, then pick up the JS2 rifle from the table.
The enemy reinforcements will arrive at this point. Take the position on the tower and kill the approaching enemies one by one. Unfortunately, you do not have any grenades so, you will have to do only with the machine gun. The ones hiding behind covers will lean out every now and then so, simply wait for their move and shoot.
 The great escape
After you have killed all of the guards, run ahead with Dima. After some time, you will meet Irish, who will be involved in a fight with one of the guard. Help him by shooting the guard and go ahead. Stop in front of the corridor, where there is another wave of enemies.
Lean out through the hole in the door and kill two guards facing you. Then, keep pushing ahead slowly and kill the rest of them. Watch out for the rooms on the sides of the corridor, out of which further guards may dash.
Keep running until you reach the end of the corridor and walk into the elevator. Wait for Irish to walk inside and pull the activating switch. After you reach the higher level, kill the guards who are involved in a fire exchange with the prisoners. Then approach the ammo box. You can keep the JS2, due to the big amounts of ammo in the clip, but it is also a good idea to take some assault rifle, to deal more damage.
After you have selected your weapon, follow the rest. You will end up in a huge hangar full of guards. There are a lot of objects to use as a cover here, because the hangar is full of cardboard boxes and trucks, which are difficult to destroy. Keep pushing ahead, slowly, and eliminate the guards that run by. You should also pay attention to the platforms above, that you can easily be attacked from.
After you have killed all of the guards, the exit gate will shut, which will make it impossible to continue the escape. Follow Dima into the control room. Collect the M320 from the table and M18 Claymore. Then, leave the control room and deploy the mines around the entrance.
 You will not escape from me!
After a while, helicopters, with new guards to jump out of, will come. The mines that you have just deployed, should stop them from approaching you. Kill the remaining guards with the guns. If you run out of ammo, return to the control room to replenish it.
After you have killed all of the guards, Dima will finally manage to open the gate. Duck to walk under it. Unfortunately, you will be attacked by a guards and you will pass out.
You will wake up after some time - you will notice Hannah who will soon kill the guard watching you. It will turn out that Hannah is on your side after all. After a short argument between Irish and Hannah, there will come the time to move on. Follow the rest until you reach the prison's exit. Hannah will hand you the tactical visor, which you are going to need in a moment.
Exit and approach the ammo box on the right. Select the sniper rifle. Then, use the tactical visor to mark all of the enemies and kill them using the sniper rifle. Keep running ahead and stop after you reach the bridge, where there will appear an enemy vehicle. Use the M320 which you have collected in the control room, to destroy the vehicle.
Slowly, keep pushing forward and mark the enemies that you spot, with the tactical visor. You should also note the huge tower on the mountain top - you will find two snipers there.
Once you are at the foot of the tower, the last enemy wave will arrive. Kill them and dash into the tram. After a short cutscene, the mission will end.
Watch a short introductory cutscene. You are in the car with Irish and Hannah. After a while, you will notice units of the Russian army and you will stop. You will be spotted by the hidden Marine unit, who will take you along to their hideout. From there, you will be able to move on.
Run after Irish and you should notice an ammo box after a while. Take the appropriate equipment and continue the mission. Irish will notice that there are large numbers of the enemy units and patrolling tanks in the area.
In the first place, you will have to destroy the tank but, for the sake of safety, use the tactical visor first, to mark the rest of the units in this location. Next, approach the gadget box, which is marked on the minimap. Take C4 explosives and follow the tank. Just like in the "Shanghai" mission, it is immensely important that you stay out of the range of vision of the tank, and behind it instead.
Run up to the tank, attach two C4 charges, run away and explode the charges once you are at a safe distance. The explosion will alarm the enemy units and the battle will ensue. Hide behind a cover and fire at the approaching enemies. Some of them are in the buildings or on the rooftops so, you need to be careful. Try to push Northwards slowly as well [N on the minimap].
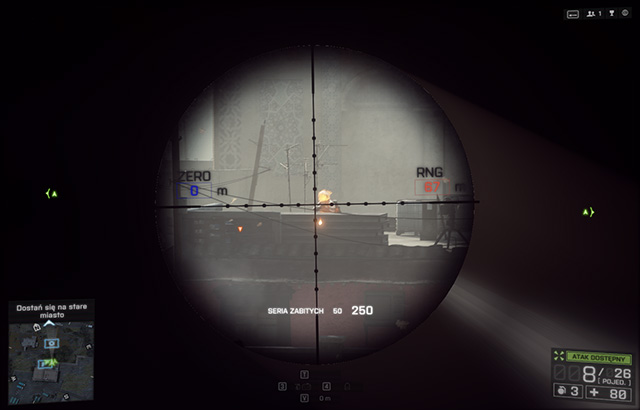 Just a bit more...
After you have killed all of the enemies, you should have already reached the Northern gate., next to which there is a watchtower. You will find a tank here - get into the vehicle and cut though the gate. You can use the onboard guns to kill the enemies.
Follow the marker on the minimap until you get to a place (a tunnel entrance), where you will have to get out of the tank. Do that and walk through the door. Then run ahead.
It is time for another fight with the Russian units. Approach the nearby ammo box and replenish your ammo.
In this stage, it is best to take a position near one of the buildings, at least at the beginning. Dash into the nearby building and kill the enemies there. Then, approach the window and use the tactical visor to mark all of the enemies. You should also notice another tank here. Do not worry, you still have the C4 charges, which you took from the box. As for now, you can ignore the tank because it is at a safe distance and is not focused on you yet. While standing in the window, kill all of the enemies that you can reach from here.
Once the area is clear and free of the enemy units, you can deal with the tank. Select the C4 charge and run towards the tank, while trying not to attract its attention. Plant two C4 charges and explode them once you are at a safe distance.
 You will go no farther, mate.
After you have destroyed the tank, finish off the rest of the enemies and follow Irish and Hannah. You will reach a Marines camp, where you will talk to Major Greenland. She will equip you with a car so, enter it along with the others.
After a nap in the car, it is time to go ahead. Run along the tunnel and approach the ammo box. As your primary weapon, select the assault rifle, and the marksman, or sniper rifle as your secondary weapon. Follow Irish and, after a while, you will bump into a patrol of Russian soldiers. Kill them. This will alarm the soldiers in the camp located beneath. Take a good position behind a cover and start eliminating the enemies using the marksman/sniper rifle.
Once the area below is relatively clear, go there. Kill the remainder of the enemies. After a moment, there should appear a helicopter. You will have to kill the pilot or the soldiers on the chopper's sides. The best idea is to hide in an opened container and stick out just for a moment, to take a shot. Repeat until you succeed.
The chopper will then crash land and you will be able to go ahead. Climb up the stairs onto the white platform and jump onto the colorful containers. Now, go ahead kill the enemies along your way. Turn your attention to the enemies at the heavy machine guns. You will have to deal with them in the first place, because the guns deal a lot of damage.
 A dangerous sort
After a while, you will reach an elevator - walk inside and press the switch to move. Once you are downstairs, approach the ammo box and replenish your ammo. The most useful weapon at this point will be the marksman rifle instead of the sniper rifle.
Turn left and start shooting at the enemies approaching down the corridor. Cover Hannah, who is planting the first C4 charge. Run ahead and eliminate the successive soldiers. A moment later, you will have to plant another charge. Search for the spot marked with the white dot and press [E].
Keep running ahead, until you end up on a scaffolding. Now, you should be using the marksman rifle for the whole time, because the enemies will be appearing at quite a distance, and this will make aiming easier for you. After a while, Irish will plant the last charge so, run along the scaffolding and kill the Russian soldiers along the way. At some point, you will have to jump over to the other side of the scaffolding so, aim at the ladder, otherwise you will fall and you will have to start over from the checkpoint. Once you are almost at the top, it will turn out that further passage is cut off. You will be attacked by another wave of soldiers. You have no other choice but detonate the charges. Select the C4 detonator and press the [LMB], to see a spectacular cutscene.
 What a mess...
After you get out of water, you will notice a helicopter, a friendly one this time around. Run ahead towards the building and take the stairs to reach the rooftop. Major Greenland will offer you transport to the place where your last mission takes place.
Watch the introductory cutscene for the last mission. After a while, you will be on a cargo plane and you will have to take a parachute jump.
Once in the air, aim at the best-lit ship - it is the USS Valkyrie, which you will have to free from the Chinese siege. While already aboard the ship, you will have the rocket launcher. Leave it for later and approach the ammo box. From there, select some more appropriate for this occasion. Your best choice are two assault rifles because you will not get the opportunity to shoot over a long range in this mission.
 All is on fire!
In this stage, you will be going forward and eliminating all of the enemies you encounter. The ship is pretty much damaged and there are airplane and boat elements everywhere, which you can use as a cover. There will also appear an enemy helicopter twice - use the rocket launcher then, to destroy it.
After several minutes, you will meet up with Pac. To your surprise, Pac survived and he is well. There is no time for chitchat though - you need to move ahead and find Garrison.
Follow Pac. After a while, he will instruct you to open the door. Do that and wait until Pac throws in a grenade. Then, dash inside and kill all of the soldiers there. Follow Pac and you will meet Garrison, and the rest, a moment later. Then, watch a quite long cutscene.
Now, there is only one thing left for you to do - destroy Chang's warship. Follow Pac until you reach the boat. Get in and wait for the rest to take their seats, then go. Follow the marker on the minimap. The way will be clear, you will meet no enemies.
Once you get there, Irish will plant an explosive and, using the hooks, you will fly into the air. Now, it is the time to detonate the charge. Unfortunately, it will turn out that the detonator stopped working and you need to plant another C4 explosive. Now you can take your decision:
The decision is yours. After you make the decision, you will watch the final cutscene and the end credits will follow.
Congratulations! You have completed the single player campaign of Battlefield 4!
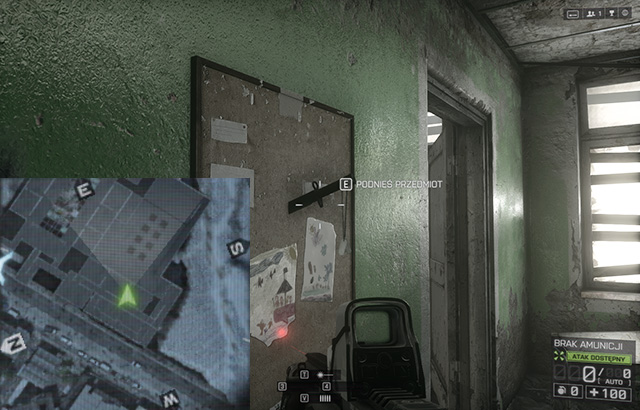
The first The dog tag is at the very beginning of the mission, behind the first door that you open. It is hanging on the knife jabbed into the message board.
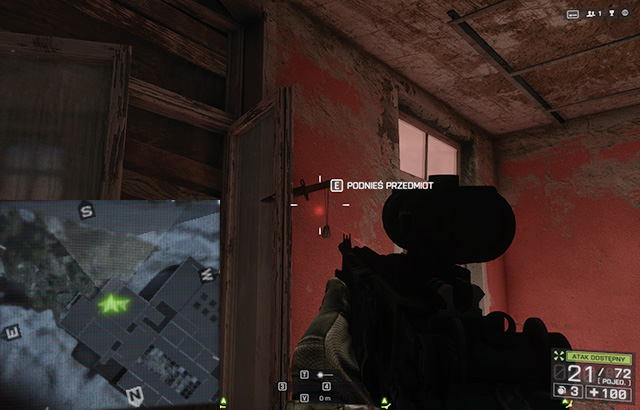
The second The dog tag can be found next to the hole over which you jump into the room where you plant a C4. Note! Do not jump into the hole and try to jump over it, into the room where there is a hole in the floor. The dog tag is hanging on the knife jabbed into the window frame.
The dog tag is stuck in the pilot's armchair in the chopper wreck. You can find it right after the factory's roof collapses. Remember not to help Dunn, pick up the dog tag first.
The weapon is in the room during the stage, where you issued the elimination order for the first time. Jump down and you should notice collapsed floor on the left. Climb over it to the upper floor and note the destroyed metal locker - inside, there is the M39 EMR.
MG4 is, more or less, halfway to the tunnel that you walk through towards the factory premises. You will recognize that location by going along the middle because, this is where there will appear the red blazing barrels that roll down. While in the middle of the road and facing the barrels, you need to turn right to notice three stone pipes or tunnels next to each other. They are stuck into the ground and in the middle one, there is the MG4 among rubble.
The last weapon, CBJ-MS, is on the metal ramp in the factory's premises that you walked into through the tunnel. Climb up the stairs to the platform on the right (its balustrade is yellow) and run along the ramp while looking to the left. Halfway along the ramp, you should notice a rusty ramp bouncing off the platform. Jump onto that ramp and walk slowly ahead, while looking down. After a while, you should notice the weapon lying on it.
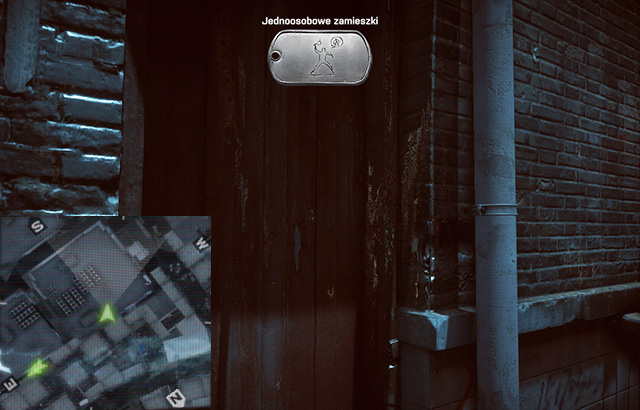
The first dog tag is right at the beginning of the mission. You will be able to pick it up later on throughout the mission but, it is better if done earlier. Right after you get out of the car, Pac and Irish will approach the gate. Do not follow them and turn into the alley on the right. Then, turn right again, left and to the right at the last turn. The dog tag is stuck into the wooden door.
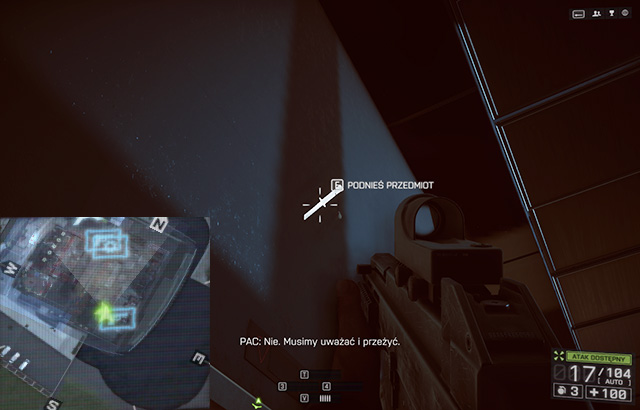
The second dog tag is to be found right after you enter the first elevator, above its door.
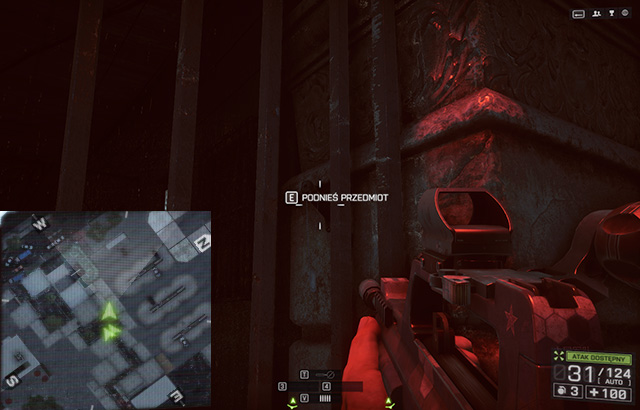
The last dog tag can be found right after the stage with the tank, in the alleys. It is in the last alley, right before the exit to the main road.
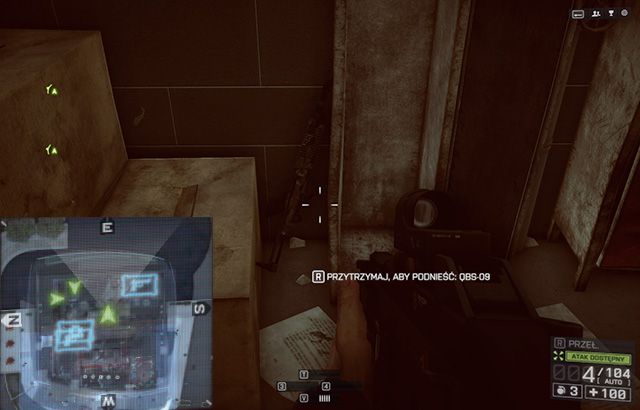
QBS-09 is in the room to which you took the first elevator. It is in the room that the first enemy walks out of.
You can find the second weapon on the statue, more or less, halfway through the mission. It is in the main vestibule after the stage where you had to defend the chopper.
The first dog tag is right at the beginning of the mission. When you get up from the bed, after a short conversation with the soldier, exit the room and go ahead. After a while, you will meet two wounded sailors - next to them, there is a room entrance, and the dog tag is stuck into the wall above the bed on the right.
Another dog tag can be found during the diving stage. Swim into the last room, from which you will swim back up to the surface, and look to the left. There are a lot of collapsed walls, furniture and so forth, among them, there is the dog tag.
Once on the air strip, and will have to protect the Valkyrie, go in the direction opposite to the one that the enemies dash in from. You should notice a blazing helicopter wreck. Go around the wreck to the other side, and you will notice the dog tag on the pilot's seat.
P90 an be found already onboard the Titan. You will receive an order to find G-46 hatch. Once you find the door to the room with this hatch, turn back and go to the room opposite. There you will find the gun on a box.
You can find this weapon on the Titan's upper deck, right after the cutscene where the ship breaks into halves and you jump with your team over to the other side. Right to your left, there are several holes to the lower decks. Jump down there, kill the enemy staying there and take the corridor to the left. The U-100 MK6 should be right in front of you leaning against a wall fragment.
Once you get into the hangar, you should notice a white plane. Its back hatch should be open so, walk inside and pick up the SPAS-12 from the floor.
Right after you moor on the beach, run left. You will notice a white civilian boat, with the dog tag hung on its side.
After you exit the tank for good, you will approach something that resembles a restaurant, or a bar. Kill all the enemies and hop over the counter. You will find another dog tag there.
During the last stage of this mission,, when you are in the large hangar, mount the big white cargo plane. You need to be on its wing, because the dog tag is on its entrance from the wing side.
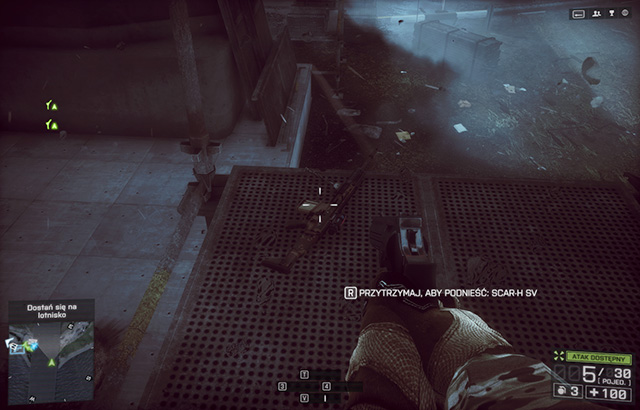
After you receive the order to get into the tank, on your left you will notice a scaffolding. Climb onto the first level of the scaffolding and run ahead. You will have to jump and, at the end of the platform, you will find the SCAR-H SV.
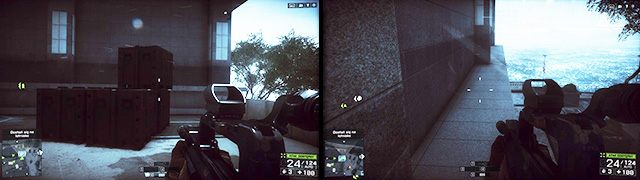
You will get to a garage during the tank ride. The road ahead will be closed and your job will be to lower the barricade in order to be able to move on. Make sure you're inside the garage and proceed to the upper floor. Approach one of the crates found on this floor, climb on top of it and then get to a tiled windowsill located next to the crates mentioned above. Once you've made your way to the windowsill use the narrow path to circle the building. You'll soon reach a larger part of the windowsill and that's where the M240B is hidden.
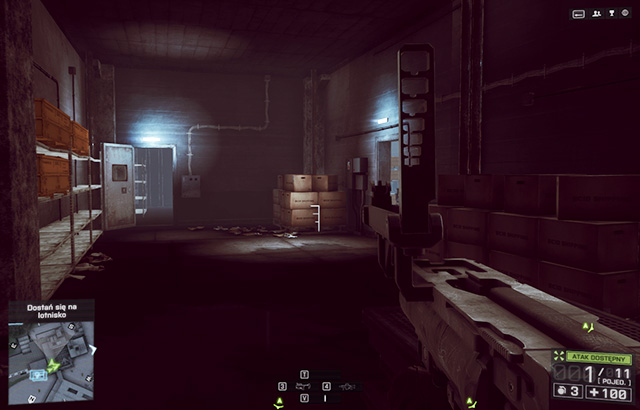
Right after you exit the sewers, you will find a gadget box. Collect the M320 from the box, wait for Irish to open the door and walk through it. Then, enter the first room on the left. Ahead of you, you will notice several cardboard boxes. Use the M320 to destroy them and you will find the M16A4 there.
Right after you meet up with Irish for the first time in this mission, you will get into a room with holding cells. Approach the first one on the right and you will find the dog tag behind the bars.
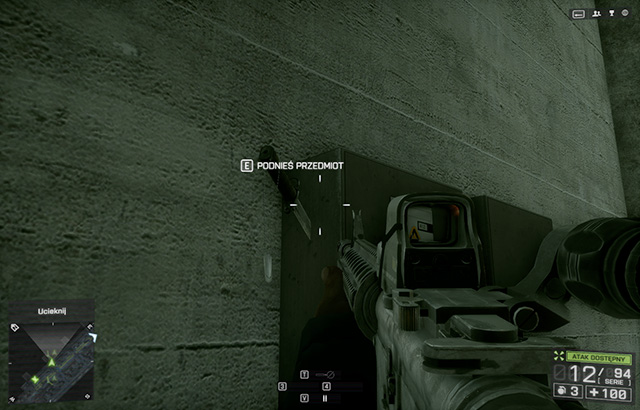
Another dog tag is in a large hall - the same where Dima opens the gate in the control room. You need to access the platform above and keep to the right (relative to the side on which you entered the hall in the first place) and you should soon see a electrical box with the dog tag stuck into it.
Once you are on the top, walk down to the platform right under the tram. Carefully, approach the edge and that is where you should find the last dog tag.
During the final stage of this mission, right under the tram, there is a bridge. On the sides of this bridge, there are metal stairs and a platform running under the bridge. That is where you find the 338-RECON sniper rifle.
The first dog tag is in the location where the enemies, at first, are not focused on you. It is right before you reach the Marines camp. Next to the building with the blue curtains, there is a truck with the blue back, parked. Set the C4 onto the back and detonate it. Enter inside and pick up the dog tag.
While on the dam, right before you enter the elevator, you will be able to go along the lower or the upper level. Run along the upper path and climb up the stairs onto the rooftop of a small building. On the rooftop, there is a white generator. Jump onto it and jump over to the wooden plank connected with the scaffolding at the other end. On the plank, there is the last dog tag nailed to the wall.
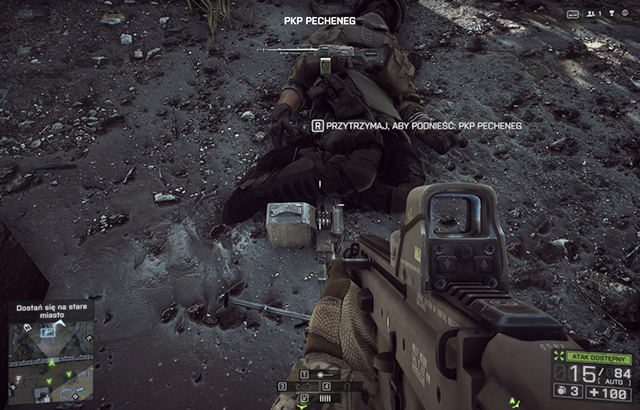
This weapon is not hidden - in this mission you will be attacked by the enemies wearing a quite heavy armor. It is them that have this weapon. One of the enemies is at the exit from a small part of the city, right after the destruction of the second tank.
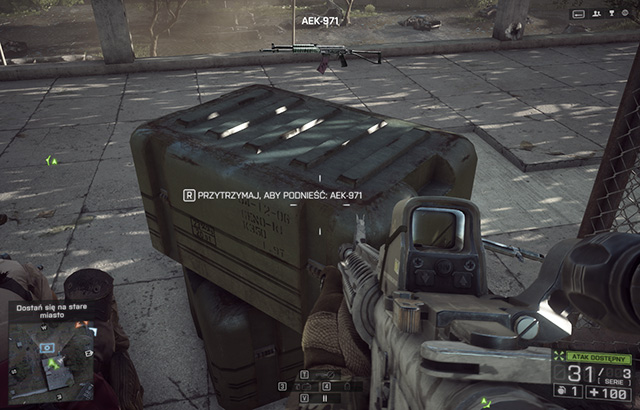
In the very same location, in which you find the enemy mentioned above, there is another weapon. Run towards the trees on the Western side and you should notice a burned down car and several trees. The M249 is between the car and a tree.
On the roof of the building with the blue curtains (the one mentioned in the context of the Destruction Enthusiast dog tag). There are boxes. You will find the AEK-971 on the boxes.
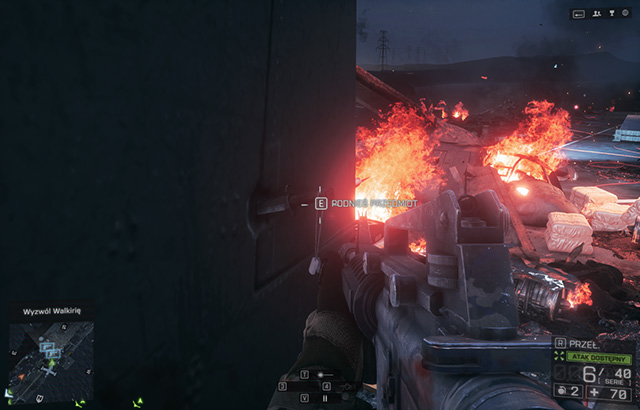
This dog tag can be found, more or less, halfway along the upper deck. On your left, you should notice a white destroyed plane. You will be able to climb onto it by jumping onto the broken wing. The dog tag is nailed to the plane's tail.
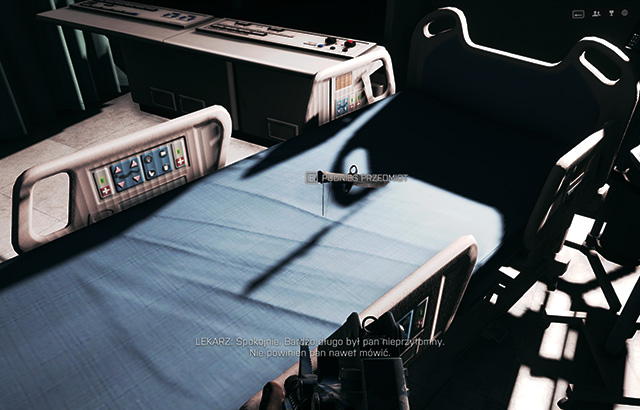
You can find it in the room where you meet Garrison. Jin Jie will be delivering his speech, but you will be able to move freely. The dog tag is on the hospital bed with the green curtains.
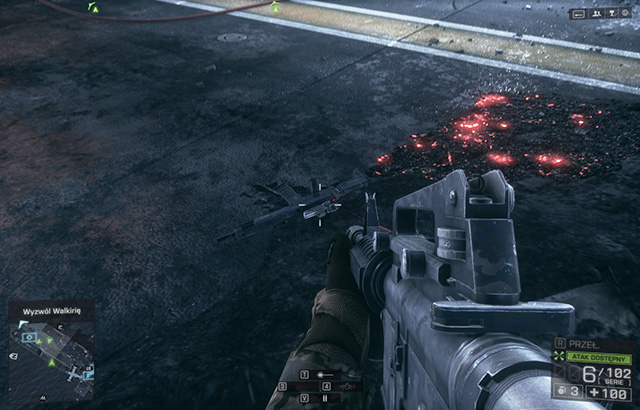
Opposite the plane that you picked up the Rebel dog tag you will notice flames and a pile of rubble. Next to the pile, there is the AK-5C.
 Batman: Arkham Asylum Game Guide & Walkthrough
 Bloodborne Game Guide & Walkthrough
 Battlefield 2142 Game Guide & Walkthrough
 Beyond: Two Souls Game Guide & Walkthrough
 BattleForge Game Guide & Walkthrough