"So long as there are men there will be wars." - Albert Einstein
Welcome in the game guide for Battlefield 2142, recently released online first person shooter made by DICE and Electronic Arts. This article contains analyses of every available maps, descriptions of weapons, kits and vehicles of both sides of the modern conflict presented in the game. In addition, there are information about Titan and Conquest modes, game's rules, tactical and teamplay hints. Vast amount of large pictures and highlighted text parts would definitely help in understanding some of the game elements.
Now, let's get to the game itself. I wish you many successes on the battlefield. Enjoy reading.
In Battlefield 2142, there are:
Synonymous phrases and definitions used in this game guide:
 And you? Which side will you choose?
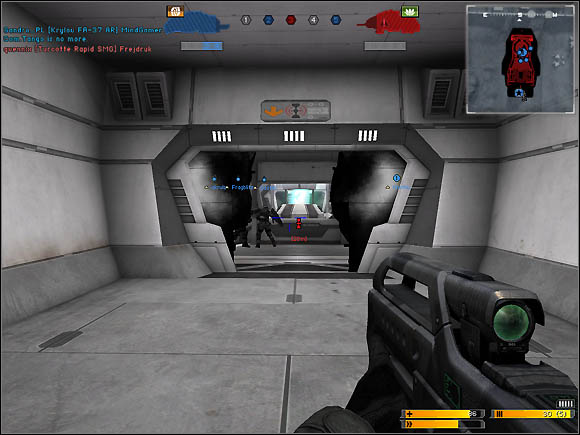
This section of the game guide is about the maps in the BF2142. Here, you'll find their thorough descriptions. In the beginning, I must say that there isn't a universal way of fighting and winning on the particular map. Each round is different and such way doesn't exist. Main task of these analyses is to show things worth attention and present what should be done to avoid death and put team closer to the victory.
Each map has at least two versions - for 16 and 32 players. Some of them have two more types, for 64 and 48 soldiers. The last ones have been prepared for the Titan mode. This section describes only these two versions, because smaller ones doesn't differ from the bigger, except amount of heavy machinery and flags to capture.
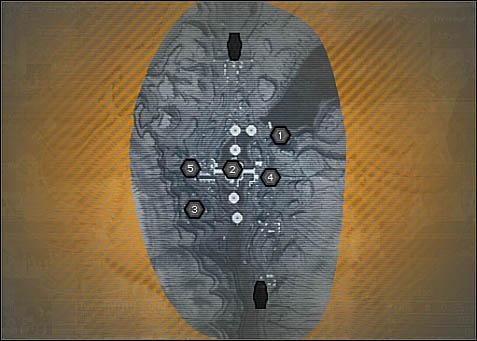
Black circles with ciphers marks main bases of both teams and places, where many heavy vehicles can be found. Details about such places are in the analyses of particular maps. Markers referring to these circles in the text - [Roman cipher].
Green circles and areas marks special places, for example key flags and other strategically important points like narrow passages. Controlling these places results in fast overrunning the enemy and the final total victory. Details about particular significant spaces are in the analyses.
Pink circles with ciphers mark vantage points, which may be used not only by snipers, but also by engineers equipped with anti-tank rocket launchers. Marker in the analysis' text is [cipher].
Each map has been analyzed and tested with regard to:
Always pay attention to the terrain's map and make conclusions - which kit would be the best, where find tanks and battlewalkers and where reinforcements are required the most.
Also, remember that there are Commanders' installations in the main bases of both sides, which can be easily blown up by opponent Recon soldiers equipped with a few RDX DemoPaks. Defend your own base and don't forget to visit the one that belongs to your enemy.
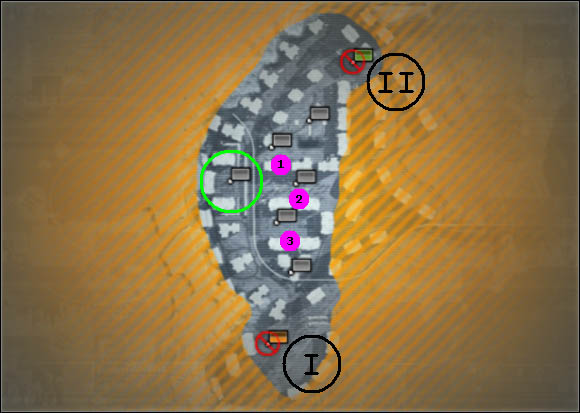
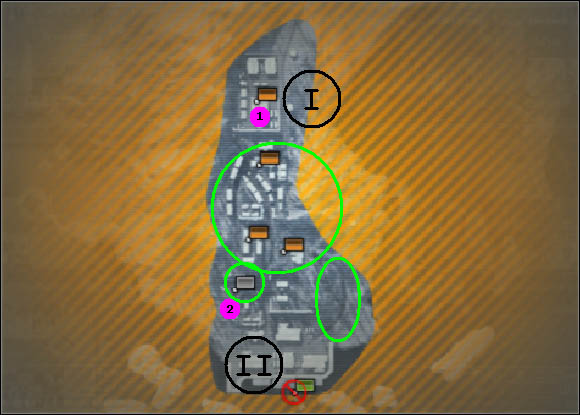
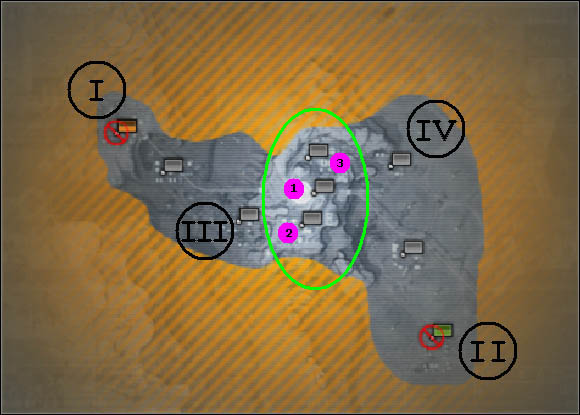
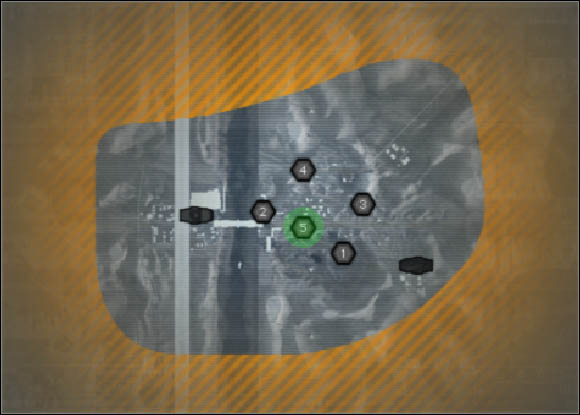
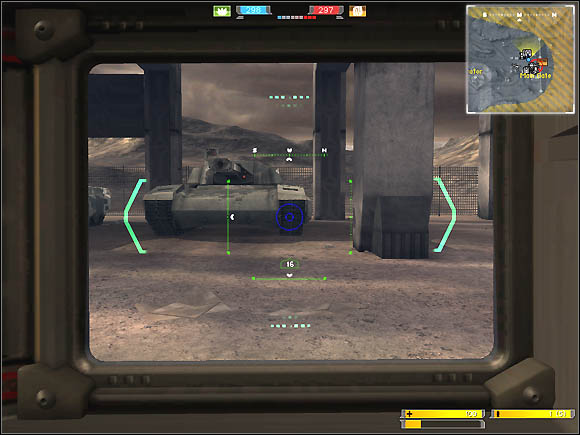
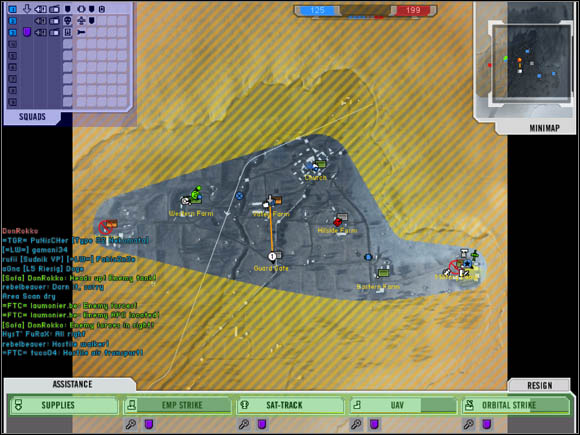
Map name: Belgrade
Location: Belgrade, Serbia
Game mode: Conquest: Head-On
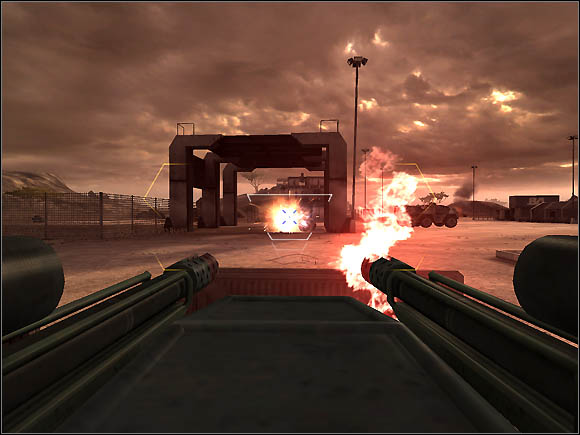
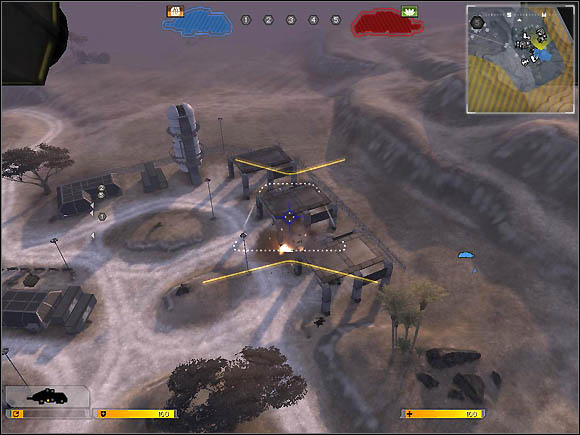
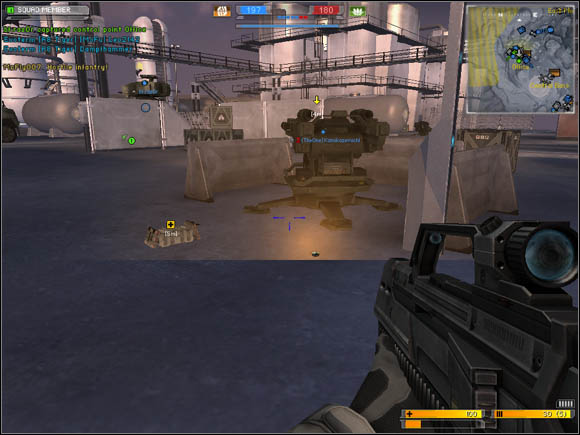
Map description: Urban map, where flags are placed a bit thick and heavy machinery role is quite limited. Terrain here is flat, except the hill in the west, with a spawn on top of it. Buildings with balconies placed among flags provide really good cover and many vantage points. The most popular kits here are Assault and Support. However, Recon soldiers can be spotted from time to time. Armored vehicles like tanks won't be able to do much, thanks to terrain and the general character of Belgrade. APC is better by far - with its antipersonnel bombs, it's a great tool used to kill whole groups of unfriendly soldiers. Battlewalkers may be useful too, mainly as an escort unit for the APC and infantry.
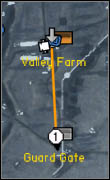
Analysis: Let's start from the hill in the west part of the map. It is marked with a green circle in the picture above. It's a key place because of the flag placed on the top of it. From there, attacking spawns in the east is really easy, because the distance isn't long and team may provide constant inflow of reinforcements. Besides, hill may be a vantage point and the flag provides a battlewalker, if captured. It is also worth saying that only infantry can take this spawn, vehicles cannot access it. Other flags are placed among blocks of flats marked with [1], [2] and [3]. These buildings have balconies that may be used by snipers and engineers in order to defend or attack nearly placed spawns. EU and PAC have got their main bases in points [I] and [II]. Each side has one tank and one APC. Moreover, fast and versatile recon vehicles may be found there too.
Strategy for EU: At the beginning, the team should capture the flag on the western hill. Strong forces should do it - one tank and Bandit vehicle filled with infantry are quite enough. In addition, battlewalker will appear on the hill, so defense won't be as difficult as it may seem. Meanwhile, the rest of the team, I mean infantry and APC, has to attack the eastern part of the map, capturing every single flag on its way. The most embittered fights often takes place in the middle of the city and many spawn points there would help in the battle. That's why I advise creating plenty of squads and using SLSB. In the end of the round, holding the western flag may be a bit difficult, because these forces that captured that point in the first minutes move to the city centre in order to attack other flags. This is why the hill has no defense - enemy can easily take it and launching a counterattack would be necessary.
Strategy for PAC: Similarly to EU strategy, the team has to begin the round with attacking the western hill. Infantry should take care of the flags in the east and the tank with Ocelot ought to move to the spawn point in the west. Luckily for PAC, battlewalker appears in the northern part of the hill, which allows Asian soldiers to occupy it faster than EU soldiers. Fight in the east is always embittered and vast amount of units has to get there in order to capture flags in that region overrun the enemy. PAC has also one little advantage - Asian forces can easily move to and take the point in the south, from where the team can attack the centre of Belgrade. However, that flag is placed close to EU main base, so it is under constant assaults.
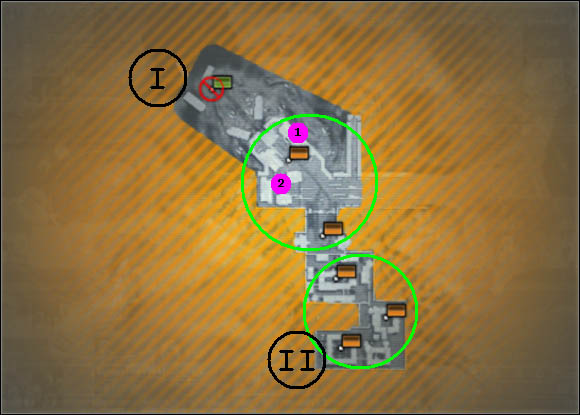
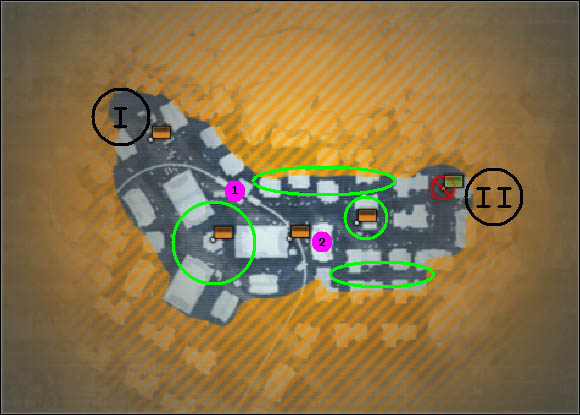
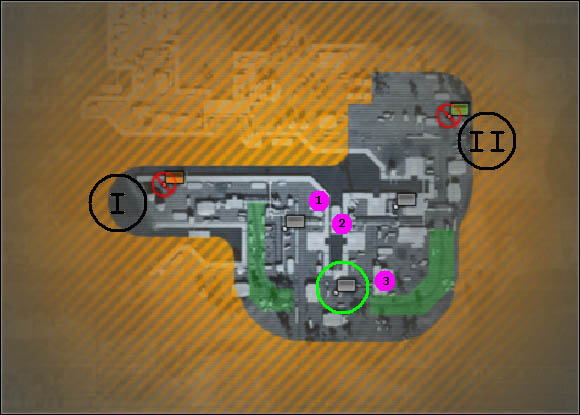
Map name: Camp Gibraltar
Location: North Africa
Game mode: Conquest: Assault
Map description: Camp Gibraltar is a close combat map; we have got here a lot of buildings surrounded by high walls. Northern part is an extensive train yard and the southern one is filled with structures, where infantry fights dominate. Terrain is flat, but plenty of obstacles make maneuvering really difficult. Anyway, there are not so many heavy vehicles on this map; it is mainly an infantry battle. The most popular kits here are Recon (sniper specialization) and Assault. Because amount of machines is small, it is a necessary to go on foot, which takes some time, especially when going from one end of the map to another.
Analysis: Big green circle marks the region where the first fight takes place. Lengths among buildings and other objects are long, so it is possible to use a battlewalker in that terrain. Moreover, snipers dominate in that area. In addition, two flags in there can be taken while being in a vehicle. Green circle in the south marks three spawn points, which can be captured by infantry only, battlewalkers are almost completely useless in that region. For sharpshooters, Camp Gibraltar is a real paradise - whole terrain is surrounded by a high wall with accessible top, which is an extremely good vantage point. There are also points [1] and [2]. These are structures from roofs of which it is possible to observe the nearby flag. In addition, throwing grenades from these buildings could bring a lot of frags. Points [I] and [II] are main bases of both sides. PAC has got a battlewalker and a recon vehicle, while EU has got battlewalker only.
Strategy for EU: Strong defense in the northern part is essential, the team mustn't allow enemy to get deep into the camp, because that will end with loss of the main base and the necessity of launching a counterattack. Anti-personnel weapons of all kinds are recommended, especially APM. Commander should attack groups of enemy infantry with orbital strike and support his own soldiers with constant supply drops. If the enemy manages to capture one of the southern flags, a group of infantry should be sent in there to take it back. Machines are unable to fight there, that is why single soldiers have to fight in that region. I advise to avoid dispersion, because it leads to inefficient work and the enemy will constantly capture flags in the south, and that makes overrunning him nearly impossible.
Strategy for PAC: First of all, EU main base, or any other flag in the south, has to be captured. Ocelot filled with infantry should drive through the train yard, under enemies' noses. Once the vehicle get to the southern part, soldiers has to take as many spawn points as they can. This'll do the job, with additional flags, battle won't be difficult. Battlewalker can be used only in the northern part, while attacking the first flag on its way. There are too many Rosch Mk-S8 stationary weapons in the southern part and, besides, that machine is completely useless in there. After capturing the EU main base, the team has to attack other flags in a traditional way. I advise to form medium and big squads. A lot of obstacles provides really good cover and allows efficient fight in the centre of the camp.
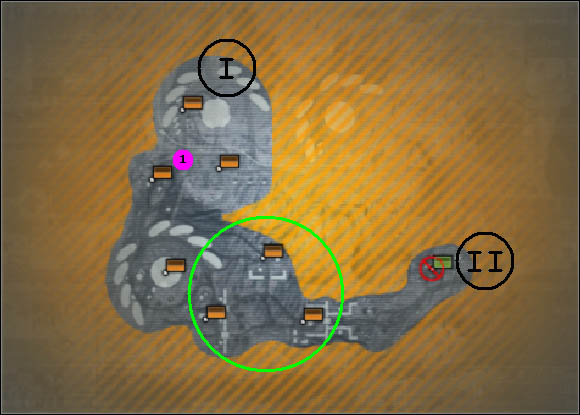
Map name: Cerbere Landing
Location: South Europe
Game mode: Conquest: Assault
Map description: This area includes a little village by the seaside. This is a close combat map, so infantry fights are popular here. Heavy machinery has limited role on Cerbere Landing. Swift movement, forming squads, teamplay and map familiarity are really important are the key to success. Pay attention to buildings disposition. It doesn't allow heavy vehicles to move comfortably, however infantry can use it to prepare anti-personnel traps or to steal through under enemy's nose. Moreover, check the terrain geometry - village is placed on a quite steep slope of a mountain, what can be used by soldiers equipped with sniper and assault rifles. Distances among flags are, in fact, short, but as a result of intensive fights, flags often change owners.
Analysis: Huge green circle marks three flags placed in premises, in the centre of the village. This is the place of embittered infantry fights, especially between two initially EU spawn points in the south. Green circle with neutral flag inside is also a place of intensive struggles, but PAC battlewalker sometimes joins the fight here. Third green circle, or rather oval, localized in the east, marks way through the forest, which PAC may use in order to get to the city without being spotted. Besides the whole slope of the mountain, there are two special vantage points. [1] is a high building in EU main base [I]. [2] is a concrete bunker. Part of PAC main base [II] and initially neutral spawn point can be observed from there. European Union have not got vehicles in their main spawn, PAC have one battlewalker T-39 Bogatyr and a recon vehicle.
Strategy for EU: First of all - teamplay. Forming squads, resupplying and healing other teammates are really essential on Cerbere Landing. The team should concentrate on the southern, initially neutral and EU eastern spawn (it's a church).These points are going to be attacked first and guys from PAC will throw into the battle everything they have, including battlewalker, so prepare for eventual meeting with that machine. I advise to place a lot of SLSB's near menaced flags. Also, keep an eye on the map, because enemy sometimes tries to get through to northern spawn points unnoticed. To prevent your rival from doing it, place SLSB in the north. APM bombs would be a nice idea too. If the enemy takes on of the spawns and performs a strong defense, a good sniper can use the terrain geometry and try to kill a few opponents near the flag. In the end of the round, EU defense should be adjusted to PAC playing style. If rival prefers frontal attack, then European soldiers have to fight with him in a way described above. Nevertheless, if PAC likes actions behind enemy lines, it is necessary to move some of the troops to the northern premises and to fight for lost flags.
Strategy for PAC: Difficult map for the PAC team. There are two ways of attacking the village in the north. First and harder one leads to the initially neutral flag, which must be taken and defended. Only a large group of units, including battlewalker T-39 Bogatyr, can do it. Enemy attacks from a higher position and that's why he can surround the neutral flag, so holding it is not a walk in the park. The second way leads through the forest, it has been marked with a green oval on the map above. EU, in fact, doesn't pay much attention to it, but if you capture the eastern flag (church), the enemy will launch strong counterattack. Church is an important point, because controlling it allows team to attack other flags really swiftly. If PAC manages to control the initially neutral flag and the church, further expansion to the north won't be a big problem. Nevertheless, if the task of capturing these two points would be too difficult, it is also possible to steal through the city in order to capture flags in the northern part of the map. Battlewalker can be useful only while assaulting that initially neutral flag and the church. Premises are too narrow for Bogatyr, machine cannot fight well against enemy troops in this region.
Map name: Fall of Berlin
Location: Berlin, Germany
Game mode: Conquest: Assault
Map description: Battle takes place in the capital of Germany, Berlin. There are many long straight roads, which can be used by snipers and soldiers carrying light machine guns. Sky-scraping blocks of flats with high balconies dominate here, providing great vantage points. Moreover, thanks to these structures, throwing grenades really accurately is possible. Both teams shouldn't forget about short and narrow lateral roads, which allow soldiers to get behind the frontline unnoticed. Terrain in the city is flat, only buildings and other obstacles complicate the geometry of the map. Always pay attention to balconies mentioned above. Groups of infantry placed on them can be a danger as good as a target. Heavy machinery and its many adaptations require using rocket launchers and RDX's by Engineers and Recon soldiers. But on the other hand, participating in intensive infantry fights needs carbines for medium and short distance and that is why Assault and Support kits are the most popular here. Domination of infantry means a lot of work for APC vehicle, which has to use its anti-personnel bombs to clear every single square meter of the city.
Analysis: Two green ovals in the north and south marks lateral roads, which may be used to get from one side of the map to another. Big green circle in the western part marks a circus surrounded by skyscrapers with balconies, which are extremely good vantage points. Soldiers trying to capture the flag placed in the middle of the circus should keep an eye on them. Next green circle, in the east this time, is marking the region of the very first (and very intensive) confrontation in the round. Flag in there can be assaulted from a few different directions and attacking it with grenades is a piece of cake. These two things make defense a bit difficult. Vantage point [1] is an aboveground train station, which can be reached by climbing a ladder. From there, it is possible to see the spawn point on the circus and the wide road placed in the central part of the map. [2] is a building with a balcony, which allows swift and efficient attacks on both nearby flags. EU and PAC have got their main bases in point [I] and [II]. One battlewalker and an APC vehicle respawn there.
Strategy for EU: The game starts with the defense of the eastern flag. It is the region of embittered fights. The longer the flag will be in EU's hands, the later the enemy will assault spawn points in the western part of the map. Battlewalker L-5 Riesig and the APC should eliminate enemy forces and defend their own soldiers. The team should also keep an eye on the lateral roads, which enemy often uses to get through the map and capture flags in the west. It would be a nice idea to play with Support kit and deploy a sentry gun it there. Grenades are a great weapon on this map. Use them to eliminate infantry trying to capture control points and these on the balconies. Building [2] is quite useful while defending eastern flags, because from there, it is possible to shoot at PAC vehicles and soldiers, coming from their main base. If the enemy manages to take a flag in the western or central part of Berlin, it'll be necessary to launch an ordinary counterattack, from the nearest EU spawn.
Strategy for PAC: The strongest unit in the PAC army is definitely the APC vehicle BTR-4 Romanov. There should at least to soldiers in it and an assist of an Engineer who will constantly repair the vehicle. Battlewalker will have to prevent enemy L-5 Riesig from destroying the APC. Swift attack of heavy machinery and infantry on the eastern EU flag will probably do the job and the spawn point will change the owner. Similar strategy should be used while assaulting flags in the western part of the map, but beware of infantry with anti-tank weapons, occupying balconies. Moreover, guard literal roads - EU will try to recover lost points and they'll probably use that route.
Map name: Minsk
Location: Minsk surroundings, Belarus
Game mode: Conquest: Assault
Map description: Battle takes place in an extensive, hilly terrain. From time to time, in flat area, groups of skyscrapers may be spotted. Part of the flags is surrounded by fortifications, however capturing such points is not a big problem. Majority of the spawn points can be taken while sitting in a vehicle, which suits the character of the map, filled with heavy machinery. Distances among flags are quite long, but vehicles are everywhere on this map, so it is not necessary to march through the whole terrain. Infantry role is minimized here. That's why snipers won't find many targets. Engineers are much more important - these guys, with mines and repair devices, can effectively prevent enemies from capturing flags and, in the same time, allow friendly vehicles to drive where they want.
Analysis: Green circle in the south surrounds three flags. It is the region of first confrontation in the round. Spawn points are fortified, bunkers' roofs are good vantage points not only for Recon soldiers with sniper rifles but also for Engineers carrying rocket launchers. [1] is the only place, where large groups of infantry fight. It's on a slope of a mountain, what can be used by sharpshooters in order to kill some tangos. Flag surrounded by skyscrapers, on the white pavement, in the south-west part of the map, is quite important, because of awesome amount of heavy machines that respawn near that spawn point. Attacking northern and eastern terrain from there is really comfortable. However, that point can be captured only by infantry and it's difficult to hold it for long. Main bases with armored and air vehicles are situated in points [I] and [II].
Strategy for EU: Impossible mission at the beginning - EU forces must prevent the enemy from attacking flags situated the western and northern part. Moreover, they have to defend the eastern spawn point situated close to PAC main base. Opponent will try to get through the frontline in a recon or air transport vehicle. It is quite possible that enemy will manage to do it, so EU army will have to prepare a counterattack in order to recover lost flags. I advise to divide into a few squads, in which every single member will drive a tank or a battlewalker. These squads will have to move from one spawn to another and regain control of them. Air machines and the Commander should make their job easier. Chewing off enemy forces will result in a comeback to the initial situation, in which PAC has only their main base. If the round ends in such circumstances, it means a total victory.
Strategy for PAC: First of all, the team has to attack the nearby EU flag swiftly, with heavy machinery (snipers may prove useful too). It is necessary to assault spawn points in the western and northern part in the same time. This can be done by getting through in a recon or air transport vehicle, filled with soldiers. Capturing EU main base and other important flags is the key to success. This will lead to cutting Europeans from heavily armored reinforcements. Final finishing off consists in capturing every single flag, which will decrease the amount of EU tickets. Commander should send supplies to friendly tanks and battlewalkers as often as it is possible.
Titan mode:
Titan mode map doesn't differ much from the Conquest mode battlefield. The only difference can be spotted in northern area, marked by a green rectangle. There's only one missile silo, which belongs to EU nearly all the time. Europeans may move their Titan towards it, there's no danger. Fights take place near silos 1, 2, 3 and 4. That's why PAC should left the Titan in the main base, just for safety.
Map name: Shuhia Taiba
Location: Northern Egypt
Game mode: Conquest: Head-On
Map description: The battlefield is a desert plain and in mountains located in the central par of the map. Right there, among the hills, most of the confrontations take place, because - among others - the control points - are situated in that area. However, these plain terrains also shouldn't be forgotten during the round, for the reason that it is possible to launch efficient assaults on the central flags from there (and vice versa). Heavy machinery, e.g. tanks and battlewalkers dominates on this map. Infantry is able to do something only in the mountains, among these three spawn points. Air transport vehicles should be used to capture flags placed near enemy main base. Shuhia Taiba is a symmetrical battlefield, so chances are quite equal. The most popular kits are Engineer and Recon. Other kits are, in most cases, useless.
Analysis: Green oval marks the most important and that is the mountain range with three control points. If you control these, you control the game. Having power over the hills opens the way to next few spawn points, including enemy main base. Heavy machinery role is awesome on Shuhia Taiba, because of many tanks and battlewalkers, which may be found everywhere (excluding that one placed in the very central part of the map). Air vehicles appear only in the main bases [I] and [II]. Points [III] and [IV] are strategically important, because of reinforcements they may provide. Vantage points can be found only in the mountains, in the central part of the map. Point [1] is a round white building, which roof can be reached only with the use of an air transport vehicle. Nearby flags can be seen from there. [2] and [3] are complexes of structures and reservoirs, connected by footbridges. Quite nice place, allows shooting from various directions and surprising the enemy.
Strategy for EU: Air transporter should go towards the mountain range, in order to capture as many flags in the central part as it is possible. After that, solid defense will be necessary, because PAC will throw into the battle everything they have. Meanwhile, land vehicles should capture control points in the desert, near EU main base and then support colleagues in the mountains with acquired tanks and APCs. Explosives, especially mines, may prove useful there. Also, pay attention to flags situated in the flat area near your main base, because the opponent will probably try to capture them, using Yastreb vehicle. If he tries to do it, one tank with full crew should keep PAC away from that territory. UD-6 Talon patrolling the airspace there won't be a bad idea too. If the enemy manages to take control of the mountains, same tactic may be used - transport your teammates with Shepherd and capture flags near enemy main base. Attacking weakly defended points in the mountains would work too.
Strategy for PAC: The map has been constructed in a way that makes the strategy for both teams the same. Army should divide into two groups - first one takes Yastreb and goes capture the mountain range. Second one captures flags near main base, takes heavy vehicles and engages the enemy in the central part of Shuhia Taiba. Intensive fights for the mountain control points can be quit by taking flags in the west, especially [III]. This will make EU forces unable to send reinforcements.
Titan mode:
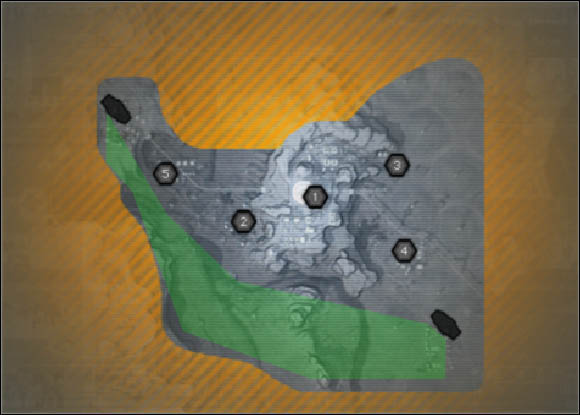
Silos are placed in the same directions as flags in Conquest mode. The most important - and all in all the only - difference is that in Titan mode southern green-marked terrain is accessible. It can be used as a route for air transport vehicles trying to assault enemy Titan. There are no anti-aircraft weapons in that region, so it is a safe way of attack. Moving ships close to silos 5 or 4 would be a nice idea too. This will allow soldiers to defend the silo with Titan's guns.

Map name: Sidi Power Plant
Location: Egypt
Game mode: Conquest: Head-On
Map description: We're fighting in the power plant area. It's a plain terrain, with nice wide roads. Tanks and battlewalkers are popular here, that's why Engineer kit would be the best choice. River in the central part of the map isn't an important obstacle, thanks to shoals and bridges. There's a built upon terrain in the central part of the map. Using heavy machinery may be a bit difficult in there, because of, among others, concrete construction, inaccessible for vehicles. The most intensive fights takes place right there, however. Flags placed extremely in the west and east are assaulted often too.
Analysis: Flags marked with green circles are strategically important because of attacking variety they give. It is possible to assault the central and placed extremely in the east and west flags. Moreover, that control point gives a battlewalker and a recon vehicle. Although the central spawn provides a gunship, it's not so important. [1] and [2] are bridges - it is a place where heavy machinery often appears, so engineers may use their rocket launchers. Recon soldiers with sniper rifles may find there some targets too. Points [I], [II], [III] and [IV] are main flags of both teams. Tanks and APCs respawn there.
Strategy for EU: The team has to divide into two groups. First one starts with capturing point [III]. From there, the group should go to the eastern part and take care of the flag located in that area. Next control points worth capturing are placed in the south, nearer PAC main base. Meanwhile, the second group should take the air transport vehicle and take control of the flag marked with a green circle. The next target is the central spawn, which capturing is a lot easier when acquired battlewalker supports the infantry. The most intensive fights, with the use of heavy machinery, will take place in the central part. If the team manages to send reinforcements (tanks, battlewalker, soldiers with anti-armor weapons) constantly to support forces at the frontline, central spawns will remain under EU control and the team will win. Air transport is being used by both sides to capture flags behind the battlefield, so keep an eye on the map and react when the enemy will take control of some strategically important points.
Strategy for PAC: Strategy for PAC is similar to the one used by EU, but succession of flags is a bit different. First of all, you have to choose one of two ways of attack. Land route leads through point [IV], to eastern flag marked with a green circle. It should be defended at all cost, in order to make yourself able to assault the central and north-east parts of the map. Choosing the air route means attacking the flag in the south-west. From there, go to green spawn point in the west, it's really important for EU, so capturing it may be a bit difficult. It is also possible to assault point [III] with Yastreb vehicle, but remember that your enemy may use the same tactic.
Titan mode:
The most important difference between the map for Conquest mode and the one for Titan is the location of silo 5. It's placed extremely in the west and if a team want to control it, it should have power over the structures surrounding the western (marked with green circle) flag on the Conquest mode map. Placing SLSB there is a good idea. Titans may be moved near battlefield, but try not to exaggerate with that.
Map name: Suez Canal
Location: Suez surroundings, Egypt
Game mode: Conquest: Assault
Map description: Battlefield is divided by the canal. Its west bank is full of buildings, which are the EU main base. Eastern part of the map is a hilly, extensive terrain with a few flags. It is the place, where most of the fights take place. Although this map is adapted to armored battles, infantry has its own little role too. The best kits here are Engineer - destroys vehicles - and Assault - good against enemy soldiers. Gunships and other means of air transport may be used to eliminate unfriendly troops and to attack control points placed behind the frontline. One of the most important things here is to move swiftly. This will allow the team to regain control of the flags fast and that means preventing amount of tickets from decreasing.
Analysis: Main bases of both teams are quite huge. EU has got two flags - [I] and [II]. These points allow the team to use tanks, battlewalkers and means of air transport. In addition, [II] cannot be captured with a caterpillar vehicle or an APC; only infantry and battlewalkers can do it. PAC has got as many as two main bases [III] and [IV]. Thanks to that, they can attack the eastern part of the map from two different directories. Green circle in the middle marks flags, which change the owners very often. It is the result of PAC bases placed near. Moreover, this area is filled with various structures and other objects, so it is the place of infantry fights. Sharpshooters, thanks to numerous hills, can operate in many places on the map, but there are two specific vantage points. [1] is a mountain range, from where EU flag in the west and PAC main base in the east can be seen. [2] is a footbridge. Great place, especially for Engineers, which may destroy every single vehicle on the bridge over the Suez canal.
Strategy for EU: Unfortunately, intensive fight for flags in the eastern part of the map is unavoidable. The enemy, thanks to his location, can attack which flag he wants and at any time he likes, so it is quite difficult to anticipate his moves. That's why it is necessary to place in there as many heavy vehicles as possible. Their task is to move from one flag to another and check whether PAC forces are coming or not. Regaining control of lost spawn points is one of their duties too. In addition, the team must remember about points [I] and [II], because the opponent will probably try to take them, which is always a great stroke. However, a group of infantry will be able to cope with that kind of danger. Reacting fast on enemy moves and - if possible - driving him out of this land is the condition of the success. Nevertheless, if PAC deals with EU forces, the team will have to assault these points, which have the weakest defense. This will at least slow down decreasing the ticket amount.
Strategy for PAC: Attacks on flags in the eastern part of the map have to be really concentrated if we want them to be efficient. A lot of heavy machinery is necessary to crush enemy defense. Our main goal is to take the majority of control points in the central-east part of the map. This can be done by sending large groups of tanks and soldiers with Engineer kits to stop the EU counterattacks. It's not a bad idea to capture the main base of our enemy. In order to that, the team should send a Yastreb or Ocelot vehicle, filled with infantry, to the western part of the map. However, that assault has sense only after few minutes from the beginning of the round, when most of - or even every - EU forces are struggling in the east.
Titan mode:
The only thing worth mentioning here is the fact that missile silos are concentrated in the eastern part of the map, in contradistinction to flags in Conquest mode. As a result, fights take place only in the central-east area. Titans may be moved towards the battlefield, in order to shoot at silos placed extremely out of the way. Silo 5, marked with green color, is a special place, because it is situated in a rarely visited place in the Conquest mode and it may disorientate these players who are playing first time on Suez Canal in Titan mode.
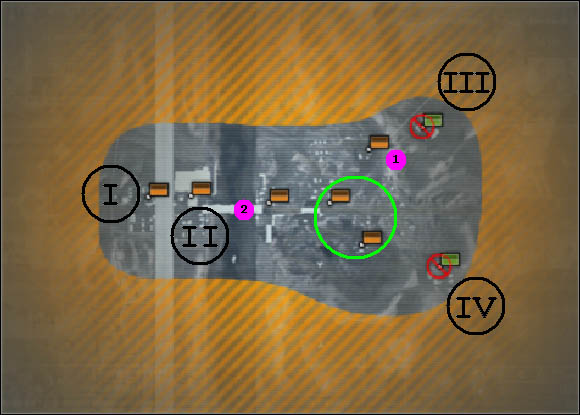
Map name: Tunis Harbor
Location: Tunis, Tunisia
Game mode: Conquest: Head-On
Map description: African harbor is the battlefield here. Numerous obstacles and structures with reachable rooftops, which are great vantage points, and accessibility to flags turn heavy machinery into support units for infantry groups. Every kit, except Engineer, is equally important and popular here. Terrain is flat, with a little water reservoir, which should be avoided by solders, because they're sitting ducks while swimming - they cannot shoot and are a bit slow. Moreover, that pool is placed in the central part of the map, where sniper activity is extremely high. Teamwork, swift movement and familiarity with the map help in succeeding on Tunis Harbor. I advise to create large squads, with six members and an SLSB device placed near the battlefield.
Analysis: Both teams start in their main bases [I] and [II]. Both sides have got one battlewalker and a recon vehicle. Green circle surrounding the central flag is the place of the most embittered fights. Moreover, that control point can be captured from a vehicle. Areas marked with green color are rarely visited - at least at the beginning of the round - routes, which may be used by battlewalkers to get to the central flag. There are many vantage points on this map, but there are a few significant places. [1] and [3] are buildings, from roofs of which nearby spawns can be seen. [2] is a narrow footbridge above the water reservoir, it connects eastern with the western part of the map. Being on it is quite dangerous, but there's no better vantage point on this map.
Strategy for EU: First of all, the team must divide into two groups. The first (smaller) one should take the western flag, while the second (bigger, with battlewalker L-5 Riesig) has to assault the central spawn point. Commander should support the second group by sending supplies and UAV. If the team manages to control the central flag and build strong defense, infantry - with battlewalker's help - should try to attack point [3]. However, it's not necessary. Staying at [1] and [2] and killing enemy soldiers with sniper rifles is a good solution too. Taking eastern spawn point is almost impossible. It's placed near PAC main base and EU forces wouldn't resist constant fight. Moreover, obstacles don't allow the battlewalker to maneuver comfortably, so it's better to stay at the central spawn. If the team sends a lot of men in there at the beginning of the round, defending it should not be a big problem.
Strategy for PAC: Similarly to EU strategy, central flag is the most important. A large group of units should go there, using the green passage. Meanwhile, several soldiers should take care of the eastern spawn point. Unfortunately, PAC have not got a good vantage point, similar to EU's building [1]. Commander has to support friendly battlewalker, fighting near the central control point. Attacking the spawn point placed near point [I] is rather insane - the enemy is able to make a really good defense in that region, so I advise to stay in the middle of the map and try to kill as many enemies as possible and decrease the opponent's ticker amount.
Map name: Verdun
Location: Verdun, France
Game mode: Conquest: Head-On
Map description: Extensive terrains near Verdun are a battlefield adjusted to fights with the use of heavy machines. It's a plain area, with lots of trees and obstacles like low walls. Although tanks and battlewalkers dominate here, drivers should watch, where they are going in order to avoid damaging the vehicle; Many faults and other elements of terrain geometry forces players to use roads; driving through the fields is unprofitable. In addition, there are other obstacles in the way. The first one is a deep river. Vehicles have to use shoals and bridges to get across the stream. Another barrier is a high wall, placed in parallel with the river. Few gates and breaches are the only way of getting on the other side of the battlefield. Infantry is not so important here, the most popular kits are Recon (with RDX DemoPaks) and Engineer.
Analysis: Small green circle is surrounding a village, where vehicles could have problem with maneuvering. In that region, infantry is able to destroy machines and throw accurate grenades at enemy soldiers very easily. Huge green circle surrounding four flags and the high wall, marks the area, where the most embittered fights take place. These control points change owners awesomely often. [1] is a tower, which is a fragment of the wall located in the centre of the map. It's a nice vantage point, especially for engineers equipped with rocket launchers and grenades. From there, southern flag can be seen. Teams start in points [I] and [II], where means of air transport and heavy machinery can be found.
Strategy for EU: First of all, large group of units should move to the central part of the map and take as many flags as possible. Controlling this region leads to making enemy's ticket amount smaller and smaller. Defense could be quite difficult, because the opponent in such situation can attack which point he wants and it may be difficult to anticipate his moves. That's why it is a necessary to gather many armored vehicles in that area. They will have to move from one lost flag to another and regain control of them. There's also a possibility that the enemy will send an air transport with a few soldiers in order to capture a control point behind the frontline. However, one tank with full crew would be enough to cope with that kind of danger. If PAC controls the centre of the map, prepare for a long hard struggle for flags placed in there.
Strategy for PAC: Our main goal is to capture and hold the central part of the map, so it's similar to the EU strategy. If the team would manage to get to the high wall and gather there some armored vehicles, it will be a big success. It is also a good idea to attack western EU flags, with the Yastreb airship. If the enemy would control the central area, that kind of action behind the frontline may turn out to be necessary. Struggling for the flags in the middle will be needed too.
Titan mode:
The most important thing is that EU and PAC may move their Titans towards the battlefield without worrying much. Surroundings of silos 3 and 4 (marked with green color) are perfect for these airships.
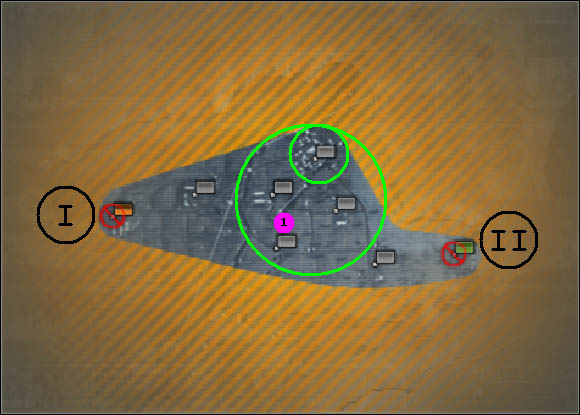
The layout of the Titan
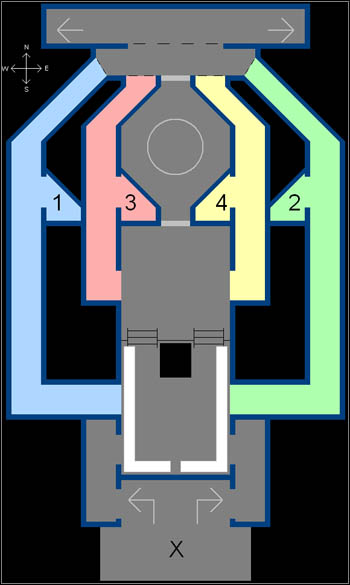
Legend:
Another presentation
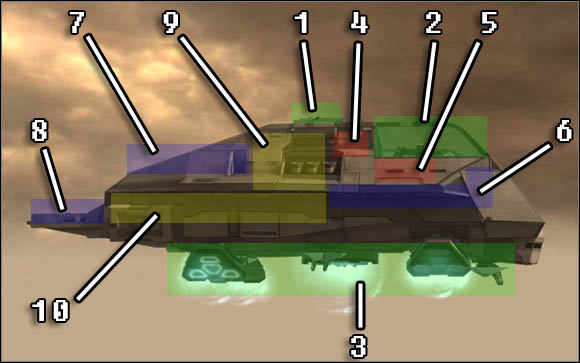
Armament, vehicles:
1 - two anti-aircraft guns;
2 - airships and gunships landing zone;
3 - four guns used to attack hostiles on the ground level.
Steering, assault pods:
4 - control computers assigned to anti-aircraft and anti-tank/personnel guns;
5 - assault pods. Thanks to them, soldiers may get to the landing platforms 7 and 8 and also board nearby enemy Titan.
Platforms, passages:
6 - corridor connecting landing zone w reactor core room;
7 - platform with ventilation shafts, used to get on the gallery placed blow Titan's ceiling;
8 - platform with main Titan entrances, leading to the corridors, consoles and the reactor core room;
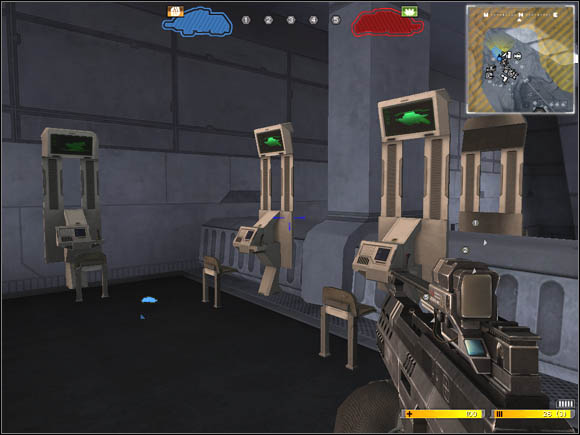
Strategic objects:
9 - Titan reactor core room;
10 - corridors with console rooms.
I advise to check the Fighting inside the Titan chapter.
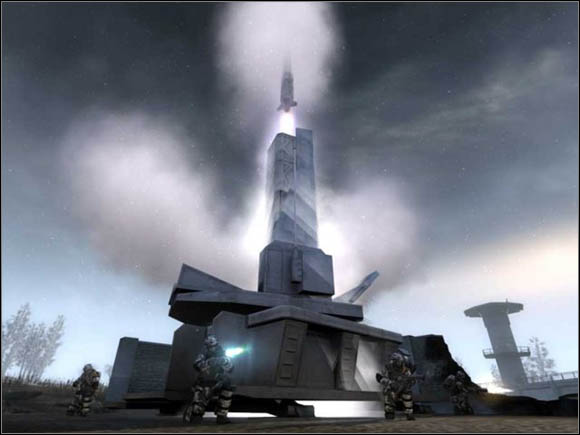
Titan mode is a brand new thing in the Battlefield game series. Its assumptions, successive actions and a few hints are presented below. Following these terms by the team leads to the victory in the round.
What should a team do in order to win?
At the beginning, take a look at the indicators, which are placed at the top of the screen.
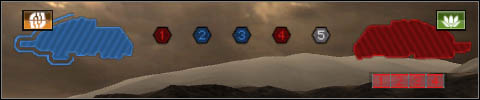
These present conditions of both Titans and affiliation of every BLOC-2 missile silos. Let's talk about the airships first.
Picture above presents two Titans, in the left and right side. Left-hand side airship belongs to European Union, while Pan Asian Coalition owns that in the right. We can see that a thin line in a half surrounds EU Titan. That means its shield is destroyed in 50%. PAC airship doesn't have such shield yet, and that's why there are ciphers from 1 to 4 below it. They symbolize consoles, but we'll talk about them later.
Titan's shield doesn't allow the enemy to board the airship. Once the shield is destroyed, infantry may get into the airship and destroy its consoles and reactor core. Picture below presents how damaged are hulls and cores of both ships after deactivating the shield. EU Titan is damaged in about 30%, while PAC ship is critical.
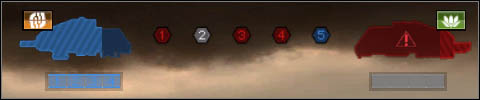
Now, let's get to these ciphers from 1 to 5, in hexagons, between symbols of both airships. They designate BLOC-2 missile silos. If the cipher is red, that means silo assigned to that number is in enemy's hands. Analogically, blue color indicates these silos, which belong to our team. Grey ciphers are assigned to neutral silos.
 BLOC-2 missile silo.
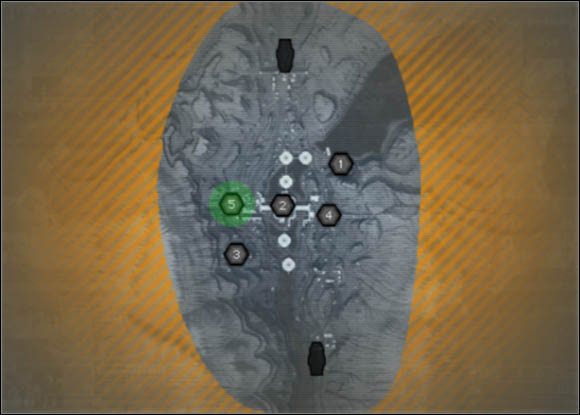
Missile silo arrangement can be checked on the map of a particular battlefield.
 Ciphers in hexagons marks BLOC-2 missile silos.
Why do I have to capture these BLOC-2 missile silos?
Rockets launched from the silos damages enemy Titan's shield. Moreover, after deactivating it, missiles are still being launched at opponent's airship, destroying its hull and reactor core.
Taking silos looks the same as capturing flags in the Conquest mode do. We have to get close to the silo and wait a few seconds for the uplink, reprogramming and retargeting. Similarly to flags, the more people are capturing the silo, the less time it takes. Moreover, silos work like spawns, so vehicle appear near them and infantry may respawn in their location.
Silo launches one missile for two minutes. By pressing [T], we can check, how much time left to the launch of the next rocket.
What should be done after deactivating enemy Titan's shield?
Once the shield is deactivated, there are two ways of destroying Titan's hull are reactor core. The first one consists in further fighting for BLOC-2 missile silos, which will result in launching rockets and damaging enemy airship. However, it's a bit time-consuming. The second solution is faster than the first, and it is based on constant boarding opponent's Titan and attacking its consoles and reactor core.
How can I get inside the enemy airship?
There are two ways too. First consists on taking an air transport vehicle Shepherd or Yastreb and landing on enemy Titan.
The second solution is to take an APC vehicle near enemy Titan and use the assault pod in order to boards the airship.
One more thing - avoid parking exactly under the Titan, because this will lead to an unpleasant surprise, I mean hitting the bottom of the ship and coming back to the ground level.

What should I do inside the enemy airship?
Once inside, we will have to blow up four Titan consoles, which control the reactor core room doors (I advise you to take a look at the airship's map in the Titan chapter in order to check where these consoles are). They can be destroyed with rockets, bullets and RDX DemoPaks.
Three rockets, about 150 bullets from an assault rifle/machine pistol or minimum three RDX DemoPaks are needed to destroy one console.
I have to add that not every console can be destroyed at the beginning. They've got numbers from 1 to 4, blowing up the first console will allow to get to panel 3, and destroying console 2 opens the way to panel 4. (once again, I advise you to check the airship's map, which is in the previous chapter named Titan).
When every panel is destroyed, reactor core room door will blow itself up, making the core accessible for us.
Now, we have to fire at the core as much ammunition as we have. And watch out for enemy infantry, coming here to defend the reactor core.
Reactor core is separated from the entrance by a special window, which stops bullets and rockets. That's why it is impossible to shoot at the core while standing in other room.
When the reactor core is destroyed, better get out of the airship as fast as possible, through the main entrance. Use parachute for a safe jump.
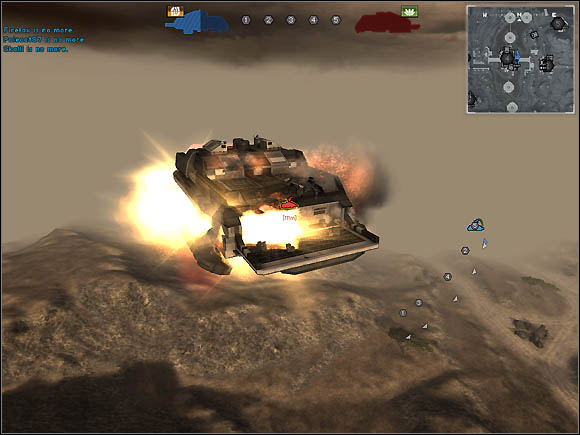
At the end of the round, we can see our (all in all, not only our) job - Titan's destruction.
Conquest mode is present in the Battlefield game series from the beginning. If somebody doesn't know its assumptions, they're presented below.
There are a few flags (control points) on the map, which must be captured. Flags are places, where we can respawn after death if it belongs to our team.
 That's how a flag looks.
We can divide flags into two groups - these, which can be taken and these, which are impossible to capture. The second ones are marked with a prohibitive sign. Arrangement and type of the control points is shown on the map of the battlefield.
 Arrangement and types of flags.
Both teams have a certain amount of respawns - tickets. If a soldier dies on the battlefield and, after that, he respawns, this'll take one ticket. Their sum will decrease constantly when the enemy has more than half of the flags (there are also other assumptions). If a team has no tickets or has fewer tickets than the enemy when the round ends, the team loses.
Conquest mode types:
Assault - one of the sides defends itself, the second one attacks. Attackers must take every flags, this will decrease enemy's ticket amount. Defenders have to control at least half of the spawn points and they have no uncapturable flag. Attackers have at least one such flag and start with more tickets than the defenders.
Head-On - both sides have at least one flag, which cannot be captured and they're fighting for the other, capturable ones. If one of the teams have more than a half of the flags, the opponent loses tickets.
Double Assault - none of the sides has an uncapturable flag. A team loses when it have no tickets or no soldiers alive with no place to respawn.
In this section, you'll find descriptions and analyses of every vehicle in Battlefield 2142. They have been tested with regard to armament, number of seats, main tasks during the battles and other significant features. There are also strong and weak points of vehicles, their pictures and which side uses particular machines.
Analyses of each vehicle type are divided into three parts. The first one contains general information about advantages and disadvantages. Highlighted fragments of the text say about the most important features.
Second part mentions buttons, which may be useful while sitting in a particular mean of transport.
The third and the last one concentrate on the weak and strong points of the machines. There is information about how many damage a particular anti-armor weapon does. The highest values are marked with a highlighted text. This will clearly show where the vehicle should be attacked and what weapon should be used. I hope this will make struggles including armored machines a bit easier.
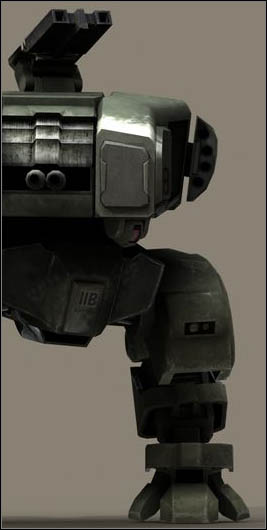
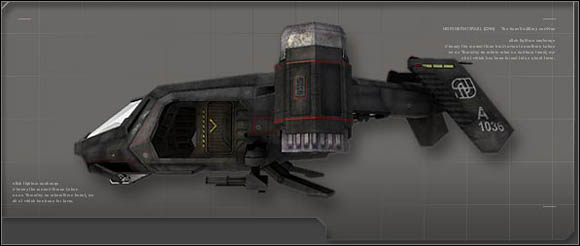
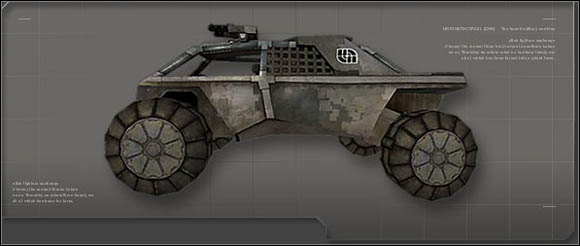
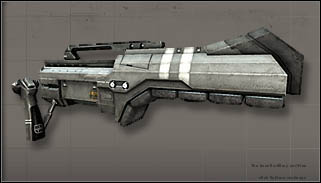
L-5 Riesig (EU)
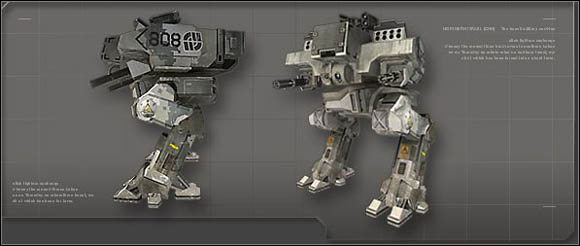
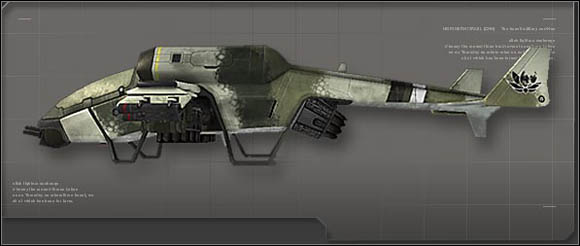
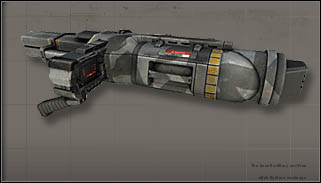
T-39 Bogatyr (PAC)
Vehicle description:
Battlewalker is a brand new type of vehicle in the Battlefield game series. As you can see in the pictures above and conclude from the name, it has two legs. It has two seats. First player steers the whole machine and uses anti-personnel guns and an anti-armor bombs launcher. The second crewmember fires anti-aircraft EMP homing missiles and bullets from a gun mounted on top of the battlewalker's turret.
Battlewalkers are able to walk in a steep terrain and at the bottom of every water reservoir, natural or anthropogenic. Moreover, they're able to walk over low obstacles like boxes, concrete ledge and other vehicles.
Battlewalker is the heaviest machine in the game. There is no other vehicle, which will win with it in a duel on a medium distance. Numerous advantage, air strikes and engineers/tanks attacking from a long distance may be dangerous for a battlewalker.
The greatest disadvantage of that machine is the fact that the turret rocks while walking, and that makes accurate shooting from anti-personnel guns impossible. The pilot has to stop before opening fire. Anti-armor bombs are sometimes quite inaccurate even while standing. Their working fine on a medium range (15-40 meters).
It is also worth adding that the vehicle may stick in narrow passages, for example between trees, and damage itself seriously.
Other important disadvantage is that sometimes the pilot doesn't know how legs are turned in relation to the turret, so he may go not exactly there where he wants.
Controls:
If you want to accelerate, hold [Shift]. This forces the vehicle to move its legs faster, so the speed increases.
Battlewalker can also squat down (button [Z]). Although it may look interesting, it is not so important on the battlefield, because the machine in such condition cannot move, so it's an easy targets for soldiers equipped with anti-armor weapons. It may be useful only while hiding behind a low barrier.
During the fight, the pilot can turn the Active Defense system (button [X]), which makes the vehicle invulnerable for a few seconds.
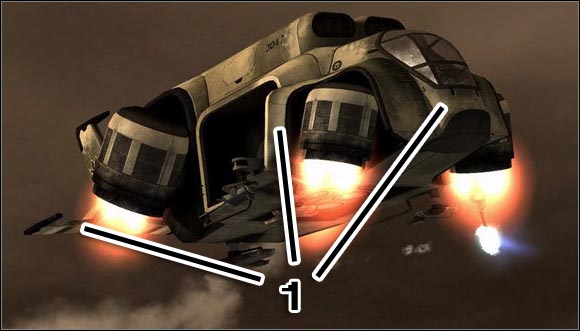
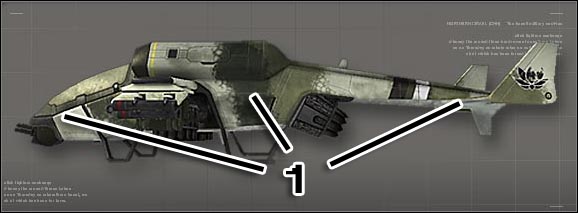
Strong and weak points:
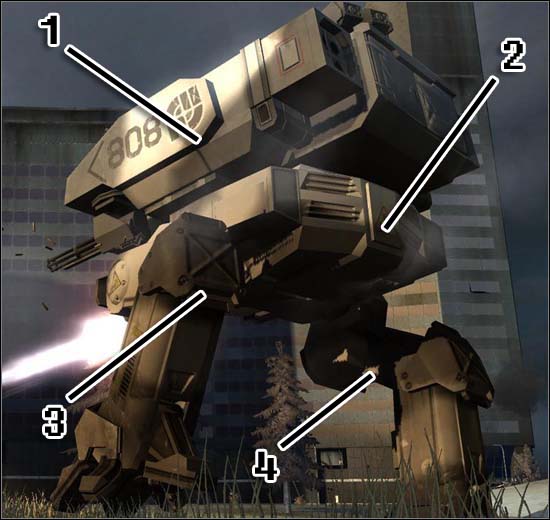
1 - turret. The hardest part of the whole machine.
2 - rear. Place, where legs connect with the turret is the weakest one.
3 - rear of the leg.
4 - front of the leg.
A-8 Tiger (EU)
Type 32 Nekomata (PAC)
Vehicle description:
Tanks are the most popular armored vehicles in the game. They provide great support for the infantry and they're able to fight at a very, very long distance. The crew is composed of two players. The first one steers the whole machine and fires the tank's cannon. The second person uses his mounted gun to eliminate flying objects and infantry.
Tanks have a great zoom. Thanks to that, the pilot can watch and attack targets from a distance of hundreds of meters! In addition, they're well armored.
There is one very important difference between EU and PAC machine. European tank is a caterpillar vehicle and its turret turns without any problems. PAC tank, Type 32 Nekomata, doesn't have caterpillars. Instead of this, it hovers, which has advantages and disadvantages as well. Good news is that it moves a bit faster in hilly terrain than its European equivalent. On the other hand, this tank has bigger inertness, so it drifts every time you turn this machine left or right. Moreover, its turret is fixed, so it is necessary to turn the whole vehicle if you want to aim at targets placed beside you. Although Nekomata hovers, it sinks in water like other vehicles, except battlewalkers.
Controls:
Tanks have nice zoom, which can be turned on and off by pressing right mouse button. Shooting while the zoom is active is possible and sometimes even recommended.
Pressing button [X] turns on the Active Defense system.
Strong and weak points:
1 - front of the turret.
2 - rear of the turret. Quite sensitive place.
3 - front. The hardest armor is right here.
4 - sides and caterpillars.
5 - rear. The weakest part.
Attention!
There is a little difference between European tank A-8 Tiger and its Asian equivalent. Shot at the front of the caterpillar (check picture below) takes as many energy as a shot at the side armor of the tank.
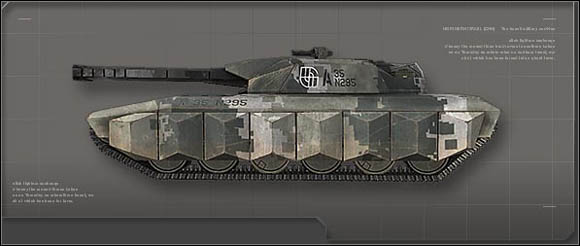
AVM-2 Groundhog (EU)
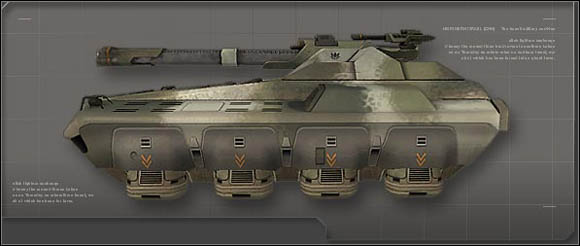
BTR-4 Romanov (PAC)
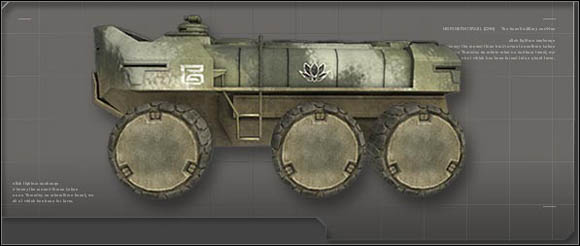
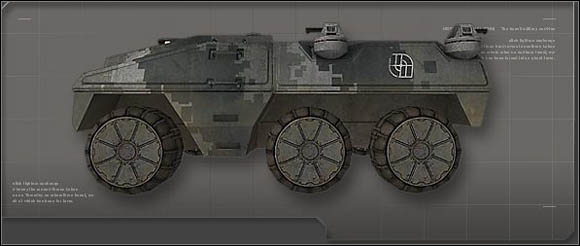
Vehicle description:
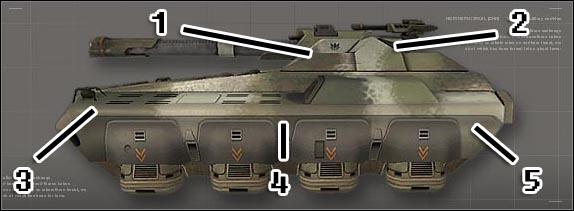
APC vehicles have got seats for a crew composed of six members. The first one is always occupied by the driver, who besides steering uses an anti-personnel machine gun and an EMP bombs launcher. The second place is for the anti-personnel bombs launcher (fires three bombs at once, it reminds soviet Katiusha). The last four seats are for the landing group. Soldiers sitting there fires anti-personnel machine guns and, additionally, they can launch themselves in assault pods. That's why APCs can be used to assault enemy Titan.
That kind of vehicles is projected to fight against large groups of infantry. It hasn't any chances against other armored vehicles. The only way of surviving when we meet a tank or a battlewalker when sitting in APC, is to launch an EMP bomb at the enemy and get away while the opponent can't shoot.
APC vehicles move very, very slow in a hilly terrain. Moreover, as a contrary to similar machines from Battlefield 2, Groundhog and Romanov are not amphibious transport vehicles and they sink in the water.
Controls:
Every function like using weapons and launching in the assault pod, can be activated by pressing left and right mouse buttons. APC vehicles are equipped with Active Defense system, which can be turned on by pressing the [X] button.
Strong and weak points:
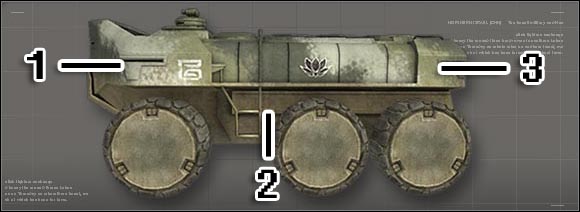
1 - front.
2 - side armor.
3 - rear.
UD-12 Shepherd (EU)
BTR-20 Yastreb (PAC)

Vehicle description:
Air transport vehicles remind a bit helicopters seen in our twenty-first century. They have got as many as seven seats. First one is always being occupied by the pilot, who's only task is to steer. Next two seats are for soldiers who want to use anti-personnel machine guns installed at the sides of the vehicle. Other seats are for the landing group. Players occupying these seats can use - if necessary - their own weapons. In addition, they can repair the vehicle they're sitting in or throw ammo and medic hubs away, so infantry on the ground may resupply and take medicine. Unfortunately, these soldiers have no cover, so there is a risk that a one little bullet may harm or even kill a member of the landing group.
When somebody ejects and leaves Shepherd or Yastreb vehicle, he automatically uses the assault pod. That is the reason, among others, why air transport vehicles are being used for transporting infantry and letting it board the enemy Titan (or attacking and taking control over flags placed behind the frontline as well). The greatest disadvantage of these vehicles is the fact that they're quite slow, so they are also an easy target for the anti-aircraft weapons.
Warning! Jet-propelled engines installed in these machines cannot turn upside down. As a result, air transport vehicles are unable to fly upside down for a longer period.
Controls:
Besides steering, pilot is responsible for activating Active Defense system of the machine, what can be done by pressing the [X] button. Soldiers firing the guns installed at the sides of the vehicle may use zoom, which can be turned on by clicking right mouse button.
Strong and weak points:
1 - whole transporter. Armor of these vehicles is equal everywhere, so it doesn't matter what we're aiming at.
UD-6 Talon (EU)

Type 4 Doragon (PAC)
Vehicle description:
Gunships are used - mainly - against other flying objects and armored ground vehicles like tanks, battlewalkers or APCs. Talon and Doragon have crews composed of only two soldiers. The first one is the pilot. He's task is to steer the machine and fire anti-armor missiles from the rocket pods. The second crew member (second pilot) uses his anti-personnel machine gun and anti-armor guided rocket launcher.
Mentioned rocket pods used by the first pilot have got as many as ten missiles and it is the maximum amount of projectiles in one barrage. It may be a lethal weapon against heavy machinery and other flying objects. In addition, they can be used to destroy guns that Titan is equipped with. Performing efficient air strikes requires some practice, but well-trained pilot is able to support his teammates fighting on the ground with accurate fire.
Second pilot, using the anti-personnel machine gun and anti-armor guided rocket launcher, has a difficult task too. Fighting against enemy infantry with the machine gun is quite easy, by missile launcher is a toy or professionals only. It is an almost exact copy of TV Guided Missile from Battlefield 2. It works like that - you launch the projectile and then aim at the target by moving the mouse. While aiming, camera is placed on the top of the missile, so you know how it moves and what it hits to the last seconds. This weapon has been projected specially for destroying armored vehicles placed on the ground, but it doesn't mean that it is impossible to attack flying objects with it.
Rockets of both pilots should be always launched at the same time. Hardly ever missile barrage fired from the rocket pods completely destroys the target, so the second pilot has to use his own TV guided missile, aim and fire it at the same target as the first crewmember. Thanks to that, one air strike would be enough to destroy every land vehicle available in the game. However, such teamwork requires lots of hours spent on training.
Warning! Jet-propelled engines installed in these machines cannot turn upside down. As a result, air transport vehicles are unable to fly upside down for a longer period.
Controls:
Gunships have got Active Defense system, which can be turned on by the first crewmember by pressing the button [X].
Second pilot activates his TV missile launcher view by pressing the right mouse button.
Strong and weak points:
1 - whole gunship. Armor of these vehicles is equal everywhere, so it doesn't matter what we're aiming at.
MK-15 Bandit (EU)
UAZ-8 Ocelot (PAC)
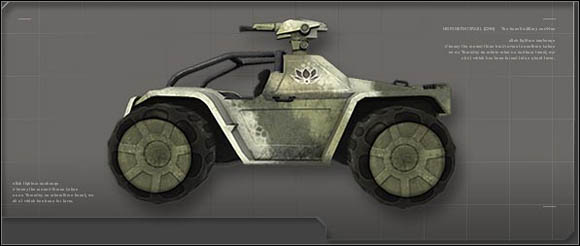
Vehicle description :
Recon vehicles, in spite of their name, are used to transport small groups of infantry. One vehicle has got three seats - the first is occupied by the driver, who steers only. The second soldier uses a machine gun installed at the top of the vehicle. The third guy watches the back and fires his own weapon. He can also throw away ammo and medic hubs, so infantry behind the car may resupply and heal.
Bandit and Ocelot are definitely the weakest vehicles in the whole game. They damages very fast while driving through hilly terrain, they can be even destroyed by a gunfire from a casual assault rifle. However, their indubitable advantage is their speed - they're so fast that they can escape from difficult situation without any problems. Driving right under enemy tanks' and battlewalkers' noses is not anything uncommon for that type of vehicles. Moreover, they're equipped with an additional boost, which may be turned on and off by the driver. It is also worth adding that Bandit and Ocelot cars have not got Active Defense system.
Controls:
Use boost by pressing the [Shift] button.
Strong and weak points:
Every anti-armor weapon can completely destroy a recon vehicle with only one shot (or at least damage it critically), so talking about strong and weak points of these machines doesn't have sense at all.
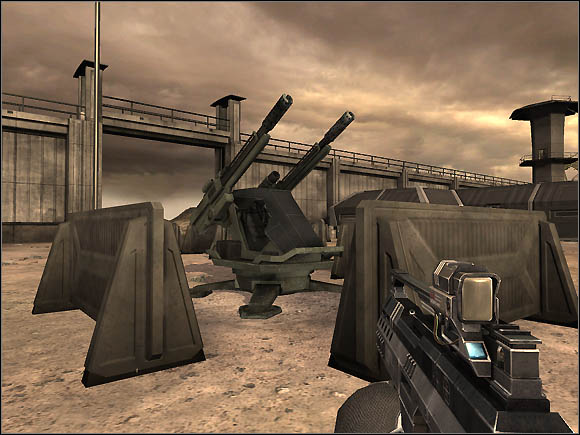
Rosch Mk-S8 is a stationary anti-armor weapon; it can be occupied by only one soldier at a time. It's quite strong and provides really nice cover from enemy infantry fire, excluding grenades and rocket launchers. Its fires a bundle of devastating energy in the directory chosen by the crosshair. After reloading, which lasts about 1,5 seconds, shooter can launch the cannon again. Rosch Mk-S8, unfortunately, characterizes by the fact that after clicking the fire key (left mouse button is set as a default one), weapon needs some time to launch the energy bundle. (about half of a second). There is also a risk, that enemy infantry will attack the cannon from the flank, where there is no armor (take a look at the picture above).
A Rosch Mk-S8 anti-armor cannon has a little zoom, which can be activated by pressing the right mouse button.
Strong and weak points:
Rosch Mk-S8 armor is equal everywhere, so it actually doesn't matter at which part we want to shoot.
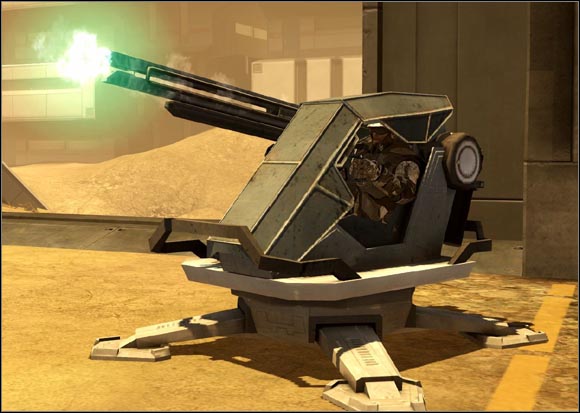
Rosch Kz-27 is a double-barreled anti-aircraft stationary cannon. Similarly to Rosch Mk-S8, it can be occupied by one man at a time. In most cases, it is used against flying objects, but it's possible to shoot at infantry and light-armored vehicles (take a look at the picture below).
A Rosch Kz-27 cannon marks enemy aircrafts with a significant colored border when such vehicles get in our range. The greatest disadvantage of this stationary weapon is the fact that bullets it fires flies very, very slow. That's why the shooter must aim at the space in front of the target - the machine gets into the bullets' trajectory and takes damage. Moreover, this cannon overheats quite fast. On the other hand, Rosch Kz-27 is equipped with the secondary weapon - EMP rockets. These missiles locks on targets and hits its hull directly. Such attack results in turning the hit vehicle off, so it is going back to the ground level, tragically this time, with the surprised pilot on board.
Similarly to Rosch Mk-S8, sides of this stationary cannon have no armor and it can be used by enemy forces.
Strong and weak points:
Rosch Kz-27 armor is equal everywhere, so it actually doesn't matter at which part we want to shoot.
Titan is equipped with two kinds of weapons. The first one is a group of four cannons used against opponents operating on the ground level. Each one needs one soldier, who will aim and shoot. These cannons fire a powerful barrage, which can destroy even the strongest and the heaviest vehicles. However, there is one little disadvantage - reloading takes a lot of time.
The second type is a group of two anti-aircraft miniguns. Quite efficient against incoming air transport vehicles and gunships.
Soldiers can use these cannons by sitting in front of the computers, located near the landing zone for gunship and air transport machine.
These weapons can be destroyed (even before deactivating Titan's shield) by gunships and stationary anti-aircraft cannons Rosch Kz-27. If one of the guns is destroyed, a soldier with an Engineer kit should pull out his repairing device and use it on the computer, which is assigned to the damaged gun.
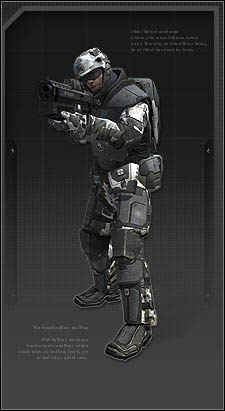
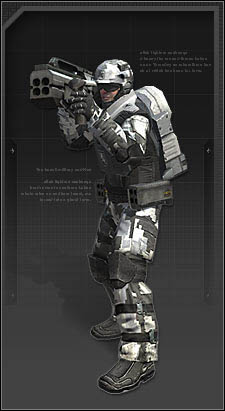
 EU Recon
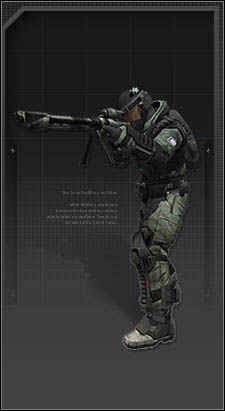 PAC Recon
Kit description:
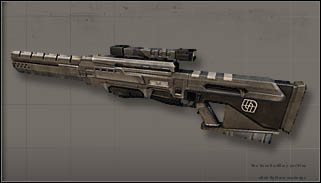
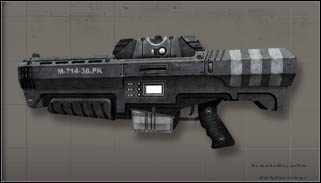
Recon soldier is an infantry unit, which specializes in swift and efficient covert strikes. His standard equipment includes only a pistol, a knife and a sniper rifle, but after unlocking a few pieces of his additional devices and weapons, he's able to perform many other things and make more damage to the opponent. Two kinds of explosives, RDX DemoPaks and APM mines allow Recons to blow up enemy vehicles and soldiers fast and in an efficient way. Lambert carbine is a quite good weapon at short and medium distance. Additions to the sniper rifle increase its accuracy and that allows the shooter to stop whole groups of enemy soldiers.
Other important Recon kit feature is his abilities to make himself invisible. IT-33 Active Camouflage allows the soldiers to get behind the frontline without being seen, attack swiftly and disappear. Sneaking up enemy vehicles in order to blow them up with RDX DemoPaks is possible to. Camouflage may be used while going to a vantage point.
Because Recon soldier has RDX DemoPaks, he's the best unit at destroying enemy Commander's toys.
If you want to play with the Recon kit well, you should learn fast and skillful usage of every kind of sniper rifles. Familiarity with the map and every vantage point in the whole game is very useful too. Moreover, well-trained Recon soldiers are able to anticipate enemy movement. If you prefer to fight on medium distance and destroy the opponent team's vehicles, the abilities of quick turning IT-33 Active Camouflage on and off and accurate throwing RDX explosives are essential. In addition, you should know how much bombs you need to blow up a particular type of a vehicle or any other object. That kind of information is in Explosives chapter.
Standard equipment:
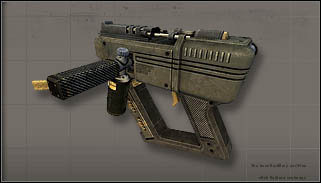
Morretti SR4 (EU)
Clip size: 5
Max. distance: long
Rate(s) of fire: single shot
Accuracy: high
Damage: medium
Mark: 5/6
Park 52 (PAC)
Clip size: 5
Max. distance: long
Rate(s) of fire: single shot
Accuracy: high
Damage: medium
Mark: 5/6
P33 Pereira (EU)
Clip size: 8
Max. distance: short
Rate(s) of fire: single shot
Accuracy: medium
Damage: small/medium
Mark: 2/6
Takao T20 (PAC)
Clip size: 12
Max. distance: short
Rate(s) of fire: single shot
Accuracy: medium
Damage: small
Mark: 2.5/6
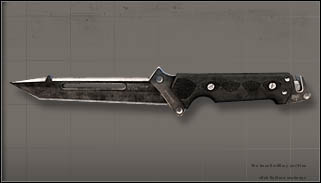
BJ-2 Combat Knife (both sides)
Damage: very high
Frequency of attacks: small
Mark: 4/6
Unlocks:
Equipment for sharpshooters:
Equipment for Spec-Ops solders:
 EU AssaultPAC Assault
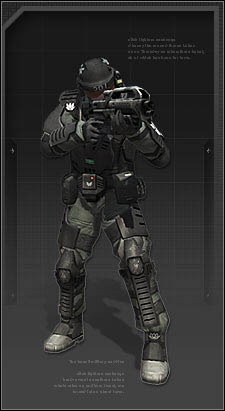
Kit description:
Soldiers with Assault kit are able to perform two kinds of functions on the battlefield. The first one is fighting against enemy infantry with the use of his great weapons at short and medium range. The second function is running with medic hub, healing and reviving hurt teammates. Unlocks for this kit help in performing tasks mentioned above. Herzog shotgun and PK-74 AR Rocket weapons are fantastic weapons, which allow killing enemies more efficient and in various situations. Defibrillators and advanced medic hubs in the team prolong soldiers' lives on the battlefield, when they're in use, of course.
Assault soldier is a unit that must stick to whole friendly infantry groups, because this kit is adjusted to teamplay - supporting others with medicaments and accurate fire. Moreover, this kit is the best one at covering friendly Engineers and killing those from the enemy team.
High accuracy is the most important thing while playing with the Assault kit. Swift moving from one point to another and rapid reviving help too.
Standard equipment:
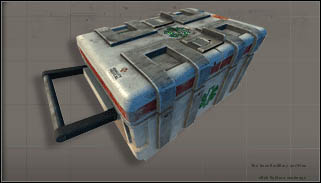
MHUB-21 (both sides)
Box containing medicines. Soldier with Assault kit can pull it out to heal himself and nearby teammates or leave to box on the ground.
SCAR 11 (EU)
Clip size: 30
Max. distance: medium
Rate(s) of fire: full auto, single shot
Accuracy: medium
Damage: medium/high
Mark: 5/6
Krylov FA-37 (PAC)
Clip size: 30
Max. distance: medium
Rate(s) of fire: full auto, single shot
Accuracy: medium/high
Damage: medium
Mark: 5/6

P33 Pereira (EU)
Clip size: 8
Max. distance: short
Rate(s) of fire: single shot
Accuracy: medium
Damage: small/medium
Mark: 2/6

Takao T20 (PAC)
Clip size: 12
Max. distance: short
Rate(s) of fire: single shot
Accuracy: medium
Damage: small
Mark: 2.5/6
BJ-2 Combat Knife (both sides)
Damage: very high
Frequency of attacks: small
Mark: 4/6
Unlocks:
Assault equipment:
Equipment for a medic:
 EU Engineer
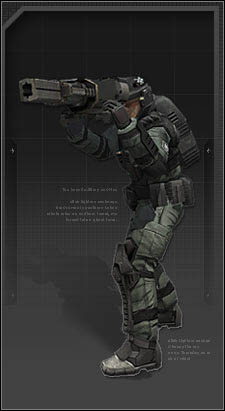 PAC Engineer
Kit description:
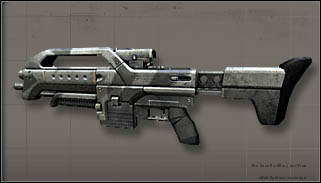
Good engineer is a always a real danger for the enemy heavy and light vehicles. At the same time, he's may be a guardian angel for machines occupied by friendly soldiers. Engineers are equipped with an anti-armor rocket launcher and repair tool HOFF-3000 and a machine pistol. Missiles and HOFF-3000 are often required and really useful on the battlefield, in contrary to the anti-personnel weapons, which is the machine pistol mentioned above. Its accuracy and maximum distance are quite bad, so the gun is, in most cases, useless. That's why Engineers have to ask for cover soldiers with better kits and carbines, Assault units, for example. Engineers are supplemental elements in the squads - they localize and destroy enemy vehicles. Similarly to Recon soldiers with sniper specialization, they should always look for good vantage points. This makes his fight against heavy machinery more efficient.
Unlockable pieces of equipment make Engineer more deadly and allow him to complete his tasks much faster and better. One of his unlockable weapons is anti-aircraft rocket launcher, which in connection with soldier's mobility may give awesome results. Defusing enemy mines and other explosives and planting own ones allow - especially in urban terrain - blocking particular routes and opening some of them for friendly vehicles. However, you must remember about the fact that Engineer soldiers are an easy target for rival Recon and Assault units when they are not supported by teammates.
Good Engineer, above all, should accompany his teammates in order to survive. These teammates may be soldiers and heavy vehicles as well; it doesn't matter if we move with a human being or a machine, enemy tanks, battlewalkers or APC will always get in our way and, of course, it's an opportunity to get a frag. Familiarity with the map is an additional advantage.
Standard equipment:
HOFF-3000 (both sides)
HOFF-3000 is a repair tool, which can be used to fix damaged friendly or unoccupied vehicles as well.
Mitchell AV-18 (EU)
Max. distance: medium/long
Rate(s) of fire: single shot
Accuracy: high
Damage: high
Mark: 4.5/6
Sudnik VP (PAC)
Max. distance: medium/long
Rate(s) of fire: single shot
Accuracy: medium
Damage: high
Mark: 5/6
Turcotte Rapid SMG (EU)
Clip size: 26
Max. distance: short/medium
Rate(s) of fire: full auto
Accuracy: low
Damage: medium
Mark: 3/6

Malkov RK-11 SMG (PAC)
Clip size: 30
Max. distance: medium
Rate(s) of fire: full auto
Accuracy: low
Damage: medium
Mark: 3.5/6

BJ-2 Combat Knife (both sides)
Damage: very high
Frequency of attacks: small
Mark: 4/6
Unlocks:
Equipment for anti-armor units:
Equipment for sappers and anti-aircraft units:
 EU Support
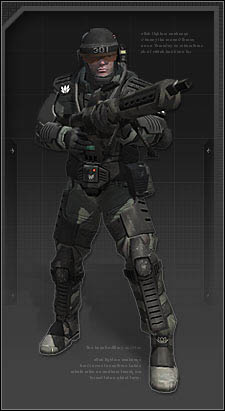 PAC Support
Kit description:
Support units are - mainly - engaged in killing enemy soldiers and rearming teammates. Light machine gun they equip allows them to stop single infantry units, especially in these narrow corridors inside Titan airships. Support soldiers, because of the type of their main weapon, need some time to hit the dirt, aim precisely and fire accurately. That's a great disadvantage - enemy won't wait for you but he'll just shoot.
Besides killing, there is another important function - ammunition giving. Support soldiers with their ammo hubs are often required during struggles, especially while attacking the Titan, where many explosives are needed.
Support kit unlocks allow these soldiers to survive in the fight against enemy vehicles and makes killing opponent troops much easier. EMP grenade turns of machines for a few seconds, portable shield and a device, which seeks enemies through nearby walls help in anticipating enemy moves and fighting against them. Other pieces of equipment are also an automatic tripod anti-personnel machine gun and a shotgun - unfailing weapon, when the opponent stand a few meters away from the shooter.
Good Support soldiers should be able to hit the dirt and pull the trigger fast - this is their main task on the battlefield. Moreover, they have to accompany other infantry units and resupply them constantly, especially those with anti-armor weapons, because ammunition for them runs out very fast.
Standard equipment:
AHUB-31 (both sides)
Box containing every kind of ammunition. Support soldier may pull it out to rearm himself and teammates standing nearby or leave it on the ground.
Bianchi FA-6 (EU)
Clip size: 150
Max. distance: short/medium
Rate(s) of fire: full auto
Accuracy: low
Damage: high
Mark: 5/6
Shuko K-80 (PAC)
Clip size: 200
Max. distance: short/medium
Rate(s) of fire: full auto
Accuracy: low/medium
Damage: high
Mark: 5.5/6
P33 Pereira (EU)
Clip size: 8
Max. distance: short
Rate of fire(s): single shot
Accuracy: medium
Damage: small/medium
Mark: 2/6
Takao T20 (PAC)
Clip size: 12
Max. distance: short
Rate of fire(s): single shot
Accuracy: medium
Damage: small
Mark: 2.5/6

BJ-2 Combat Knife (both sides)
Damage: very high
Frequency of attacks: small
Mark: 4/6
Unlocks:
Defensive equipment:
Equipment useful during short-distance fights:
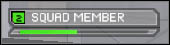
In the army hierarchy, Squad Member is the smallest (but not the least important) gear in the huge war machine. He is subject to the leader of him squad and to the Commander of the team and he cannot call in question these orders that he receive (besides not doing them, naturally). However, Squad Member has many conveniences, thanks to the fact that he joined a particular squad.
Commands sent from Squad Leader or the Commander help create some order in the chaos during the battle. If players try to perform it, Commander's job gets much easier - he is able to support squads with orbital strikes and spy devices, searching for enemies. Orders are marked on the map with a proper symbol (for example, a sword means "attack" and a shield means "defend") and a line, which connects the place the command refers to with our position. Moreover, a little source of light is being placed in the order location.
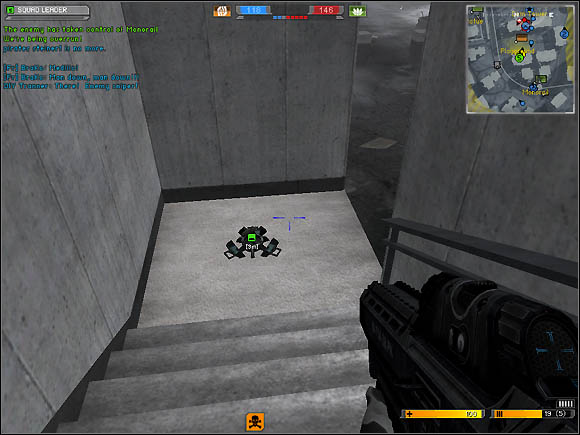
Another important convenience is the fact that Squad Leader is a walking spawn point. In game, it looks like the picture below.

Every Squad Member may respawn at Squad Leader's position and that leads to gathering Squad Members in one place. Thanks to that, they can support themselves with ammunitions, medicines and accurate firing at enemy units. Moreover, squad can use its Squad Leader's unlocks, which are Squad Leader Spawn Beacon and drones RD-4 Otus and SD-8 Accipiter.
There is also the enemy-marking NetBat system. Thanks to it, we know where the location of unfriendly units and other interesting data about them (for more information about NetBat system check the Terrain orientation and communication chapter).
Another important thing worth mentioning is field upgrades. If the squad does its jobs on the battlefield well and contributes to the victory of the whole team, it receives the opportunity to unlock a piece of new equipment after some period of time. Soldiers can use unlocked tools until they leave the server they play on. Field upgrade progress bar is located in the top left corner of the screen.
Soldier, while being in a squad, receives additional points for killing enemies inside the order radius. For example, if we'll receive a command to attack a flag and, while being near it, we'll gun down an enemy, additional point will be given.
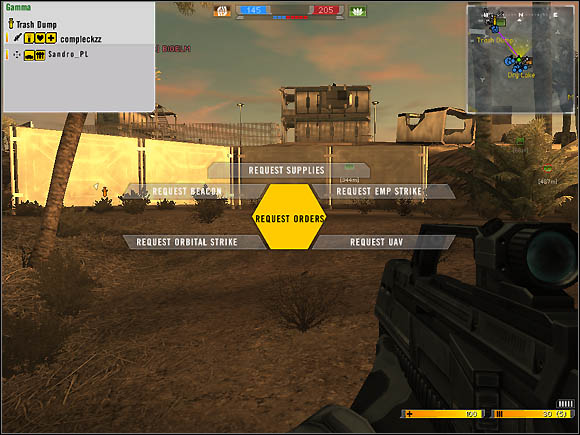
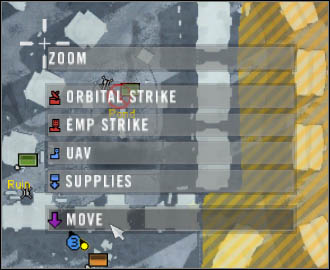
It is also possible to send a request for, let's say, supply drop, UAV or orbital strike. To do such thing, we have to use the convenience called command rose, which can be activated by pressing button [T]. However, I have to warn you that such requests - mainly - aren't noticed by the Commander. They pay attention to requests sent by Squad Leaders.
 s
s
Advices
Squad Leader performs one of the most difficult and, in the same time, the most important tasks on the battlefield. He leads a group of soldiers, trying to command that in a way, in which they will be able to capture strategically significant points, which in most cases are flags.
Sometimes the Squad Leader receives an order from his Commander. He may call in question these commands - accept or decline them. From time to time, Commander does not send orders to Squad Leaders, so they have to make their own commands and send them to Squad Members. This can be done by using the command rose ([T] button). Additionally, progress bars of all Commander's toys appear the bottom of the screen.
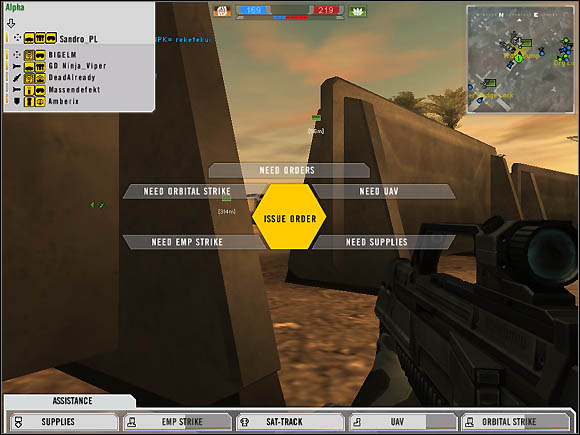
However, nothing prevents Squad Leaders from using the map of the battlefield. This allows him to issue orders that refer to very far locations. Context menu activated by pressing the right mouse button has options used to place a command, send a request to the Commander for, e.g. supply drop, orbital strike or UAV.
Each Squad Leader has to use his unlocked pieces of equipment, used by whole squads. From devices like Squad Leader Spawn Beacon, drones SD-4 Otus and SD-8 Accipiter, he has to choose two, which are the most required on the battlefield and use it.
Squad Leader Spawn Beacon (SLSB) is an exceptional device, because it allows soldiers from the squad to respawn at its position. Therefore, the frequency of attacks and distance from the battlefield sometimes depends on the SLSB location. This device is quite useful, especially on maps, where infantry fights dominates, but soldiers respawning at the SLSB's location free fall inside assault pods, so it is not a stealth method of re-appearing on the battlefield.
 This little device is the SLSB.
It is also worth adding that the Squad Leader is a spawn point for members of his squad too. The Squad Leader must move from one point to another, in most cases near the battlefield, and keep himself alive at the same time, simultaneously allowing soldiers to respawn at his location and join the fight quickly.
Advices
Soldier applying for the Commander function has to remember that he shouldn't participate in regular fights on the battlefield. His task is to support his teammates with spying the movements of the enemy, organizing supply drops and various attacks at opponents' positions and other targets. Moreover, he sends orders to squads, which are composed of other players.
Clicking the [Caps Lock] button activates the Commander's screen.
The chart marked with the blue color, placed in the top left corner of the screen, presents squads, kind of order the soldiers try to perform and members' kits. Place of order (for example a flag, which must be attacked by a particular squad) and distance from that location to the Squad Leader are marked on the map.
Green section marks the progress bars of all things that Commander can (and sometimes even should) perform. All of these functions need some time to reload after using them. Their descriptions are presented below, from the left-hand side:
1. Supplies. Using this function means sending a plane, which airdrops a box filled ammunition medicines and repair tools at the chosen location. Soldiers nearby that package will automatically resupply and heal and vehicles will be repaired.
2. EMP strike. Leads to an attack with an electromagnetic impulse, can be placed at any position. Turns of enemy vehicles for a short period of time, infantry hit with that weapon see the world a bit deformed. For information about EMP, check the EMP weapons chapter.
3. Sat-track. Searches the battlefield for opponents. Enemy units are marked with red dots on the map of the battlefield. These locations are available only for the Commander. Scanning looks like in the picture below.
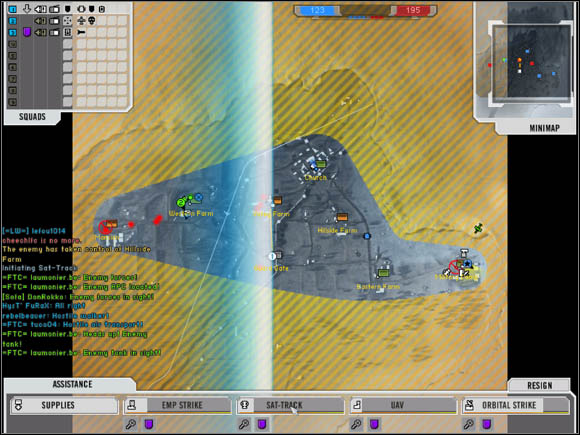
4. UAV. Using this function means sending a little drone, which scans the nearby territory and seeks enemy units. In contrary to sat-track, every soldier in the whole team can check information about enemies' locations. Moreover, UAV gives data about the type of enemy units by placing proper symbols.
5. Orbital Strike. This is nothing else but an artillery attack, which can be placed by the Commander at any position. Range of such strike is quite long, however the barrage does not make much damage. Orbital strike is a great weapon against vehicles, especially when it is used after an EMP strike. Orbital strike is presented in the picture below:
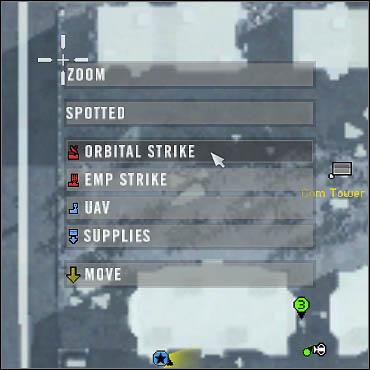
6. Move Titan. This option is available only in Titan mode, instead of the orbital strike. This function allows the Commander to change his airship's position.
Issuing orders and marking places, which for example, must be attacked by the orbital strike or scanned by the UAV drone, can be done by using the context menu activated by clicking the right mouse button.
Advices
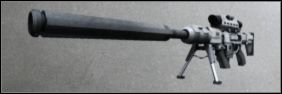
Zeller-H Advanced Sniper Rifle
High-power sniper rifle, kills an infantry unit with one shot at the torso. This weapon cannot be used against enemies sitting in armored vehicles.
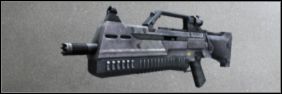
Lambert Carbine
Medium-power assault rifle, quite good at medium range. It's a good alternative for sniper rifles, turns Recon soldier into a unit able to fight in a close-quarter combat.
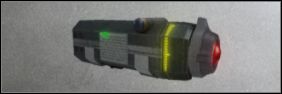
Gruber 5 Stabilizer
Device that allows stabilizing the sniper rifle for a short period of time. Reloads after use, which takes some time.

IT-33 Active Camouflage
Optical camouflage, thanks to that, soldier can be almost invisible for a few seconds. When it is turned on, no other weapon can be used. EMP deactivates it.
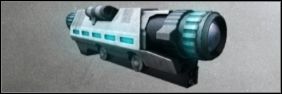
DysTek Hi-Scope x4
Sniper scope. Provides better zoom than the standard scope. Moreover, it allows changing to the zoom level.

Netbat Fade Delay
Device, which marks positions of enemy troops, works even when they hide behind obstacles.
APM
Anti-personnel mine, can be planted on every type of ground. Blows up only when an enemy soldier gets in front of the explosive charge.

RDX DemoPak
Explosive charges, remotely detonated. Sticks to every type of surface. Can be used to blow up enemy infantry, vehicles and Titan consoles.
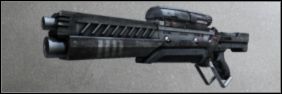
Baur H-AR
Heavy assault rifle, good at medium and long distance. It has a small clip containing 20 bullets. Great weapon in open terrain, reloads fast.
Voss L-AR
Short-distance assault rifle, good in urbanized area. It has a large clip for 40 bullets. Its disadvantage is long reload time.
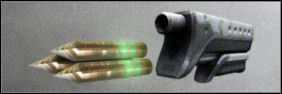
PK-74 AR Rocket
Rocket-grenade launcher attached to the standard weapon. Shooter can set the projectiles for an airburst or explosion while hitting the target.

SG-34 Grenade
Traditional smoke grenade, blows while impact.
Netbat Infantry ID
Device, which allows acquiring and sending to other Squad Members information about enemy soldiers and their kits.
Advanced Medic Hub
Heals faster than the standard hub. Moreover, it allows healing teammates while sitting in a vehicle.
Herzog AR-Shotgun
Shotgun attached to the standard assault rifle. Can shoot only three shells in a burst and reload takes a lot of time, but its power recompenses disadvantages.

AED-6 Defibrillator
Defibrillator is a device similar to shock paddles, used for reviving hurt teammates. However, nothing prevents from using it as a weapon.
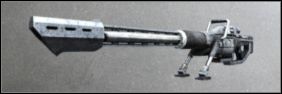
Pilum H-AVR
Weapon used against heavy vehicles. Good at short distance. Unfortunately, the shooter cannot guide the bullets he shoots.
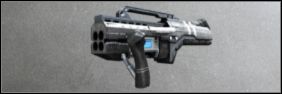
SAAW 86 Anti-Air
Rarely used weapon, however it is a great thing against air transport vehicles and gunships. Two missiles destroy every mean of air transport.

PDS-1
Device searching for enemy vehicles and acquiring information about their types. These data are sent to other Squad Member via the NetBat system.

II-29 Motion Mine
A mine, which seeks and tracks enemy vehicles. Gets close to the machine and goes boom. However, the explosion of this mine is quite weak.
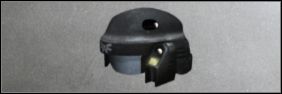
Netbat Vehicle ID
Device allowing sending information about location and type of every enemy vehicle seen to other Squad Members.

DysTek Repair v2.0
Repair tool replacing the standard HOFF-3000. Works faster and allows fixing machines and installations while sitting in a vehicle.
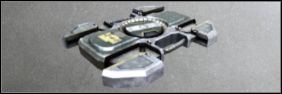
II-14 EMP
EMP mine. Turns off vehicles for a few seconds.

AE Defuser
Device allowing defusing and removing enemy mines and other explosives.
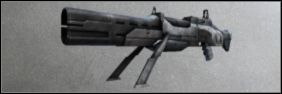
Ganz HMG
Powerful weapon, however it is less accurate than the standard machine guns and overheats faster (after firing about 27 bullets).
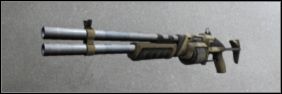
Clark 15B Shotgun
Powerful pump-action shotgun, clip contains 7 shells. I advise to shoot at targets placed closer than 12 meters.
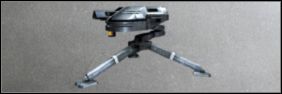
A12 Enforcer Sentry Gun
Tripod sentry gun, good at short and medium distance. Does not need an operator. It has 240 human health points.

DysTek Pulse Meter
Device searching enemy soldiers through nearby walls and other obstacles.
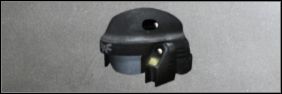
Netbat Active Camo ID
Device allowing sending information about location of these enemy soldiers who actually use the IT-33 Active Camouflage tool.
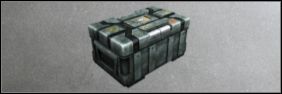
Advanced Ammo Hub
Resupplies faster than the standard hub. Moreover, allows resupplying teammates while sitting in a vehicle.

IPS Shield
Small portable shield. Prevents gunshots, but it cannot stop bullets fired from vehicles.

V5 EMP Grenade
EMP grenade, which turns off vehicles and devices like IT-33 Active Camouflage for a few seconds.
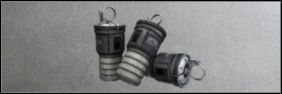
Extra Grenade
Gives one extra fragmentation, smoke or EMP grenade.
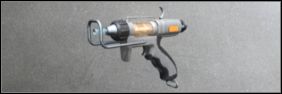
Sprintcor 20 Enhanced Endurance
Injection that allows soldier to run faster. Works all round long.
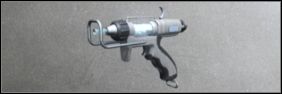
Staminar 9 Recovery System
Injection, which allows recovering stamina faster, after sprint or jumps. Works all round long.
MaxClip
Gives larger clips to pistols (2 more bullets for EU gun, 3 more for PAC gun) and one additional cartridge to Engineer's machine pistol.
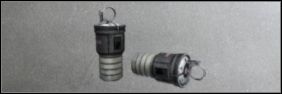
FRG-1 Grenade
Gives two fragmentation grenades, which may be used against enemy infantry and light vehicles. However, some training is required to learn how to throw them accurately.
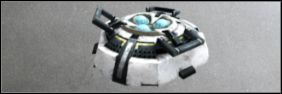
Squad Leader Spawn Beacon
Device, which can be placed in every position, Squad Members may respawn at its location (they fall in assault pods).
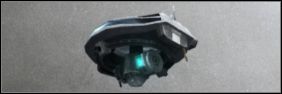
RD-4 Otus
Short-range recon drone. Looks for enemies hidden behind obstacles. Data about their position is sent to Squad Members via NetBat system. Available for squads with Squad Leader and at least two Squad Members.
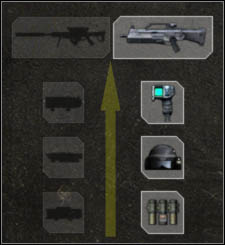
SD-8 Accipiter
Sentry drone, which eliminates enemy troops marked by the NetBat system. SD-8 Accipiter is available for squads, which have a Squad Leader and at least three Squad Members.
Equipment selection
Let's take a look at the picture below.
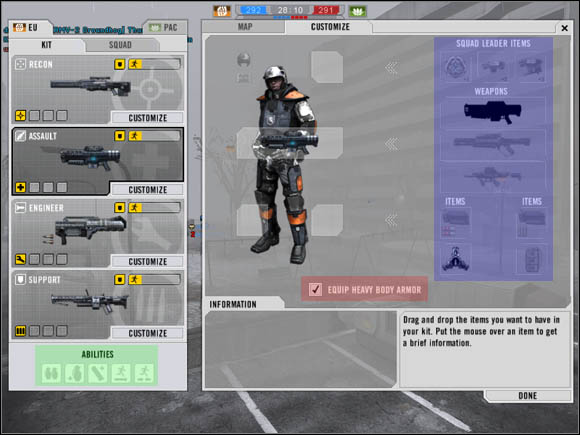
In the section marked with blue color, there are icons of unlocks. To use some of these, drag and drop icons at empty slots in the left part of the customize window, near the picture of a soldier's body.
Red color marks the option of armor selection. In the picture above, we can see that heavy body armor is equipped. It resists gunshots much better than light armor. However, soldiers with such uniform are unable to move swiftly and stamina ends faster. On the other hand, light armor allows sprinting fast, but just as I said, it does not prevent bullets at all.
Green section in the bottom left corner shows, how many abilities have been unlocked.
Press the Customize button located below a particular kit section to show its customization window.
Unlocking succession
First of all, let's take a look at the picture below.
Yellow arrow shows the succession of unlocking the next elements of our equipment. Firstly, we open the access to these pieces, which are at the bottom (in the picture above, these are RDX DemoPaks and APM mines), after that, we can unlock these things, which are higher, so we unlock rifles at the end.
Heavy machinery is very popular on some of the maps in the game. Both sides of the conflict have access to it and fights with the use of tanks and battlewalkers are very popular as well. In some situations, the ability of maneuvering and using all heavy vehicles' advantages can decide of the matter of the driver's life or death.
Rule number 1 - always find some shelter
While sitting in a battlewalker or a tank, every object on the map may prove useful and be used as a cover. Building, container or even a small hill - the most important thing is that it should cover from enemy vehicles' shells.

Rules of the fight with the usage of shelters look like that: first of all, we shoot at an enemy heavy vehicle, which may be a real danger to us. After that, we hide behind a cover nearby and wait for the weapon (for example the tank's cannon) to reload. Then, we repeat the maneuver by sticking the weapon(s) out, shooting again and hiding. Battlewalkers' task is a bit more difficult, because of their height (they can't find such high shelter) and the fact that the efficiency of their anti-armor bombs are dependent of the distance from the enemy, so battlewalkers should rather move towards enemy heavy vehicles, shoot at them and use Active Defense system at the same time. Using this shield refers to tanks too - activating it while there is no shelter around is not a stupid idea.
Moreover, I advise to take a look at the section called Vehicles. Strong and weak points of all vehicles are presented in there. This information may be used to conclude: at which part the shooter should aim and how to orientate the hardest part of the vehicle towards the enemy.
Rule number 2 - use the distance
All tanks have a zoom mode. It allows to observe distant enemies, located a few hundred meters away, and to shoot at them accurately.

It's a fantastic thing against battlewalkers. They are not able to shoot at a distance as long as the tanks can do, so we can feel safe. It's worse, when we fight against other tanks. Just like we, they are able to use the zoom, aim and shoot in our direction. However, we can use the Active Defense system or a shelter.
Moreover, remember that the tank shell's trajectory is a parabola, so while shooting at a long distance, lift the cannon higher.
Rule number 3 - fall back, when your enemy has an advantage
The best way of getting out of trouble is just an escape, and I don't think about the button on the keyboard :) If enemy forces have rocket launchers, RDX DemoPaks, EMP weapons or if they just have the numerical superiority, turn on the Active Defense system and get behind the nearest shelter. It is a good idea to orientate the front of your vehicle towards the opponents, because this part is the hardest.
Rule number 4 - attack enemy gunships and air transport vehicles
Tanks - against all appearances - have some chances to defend themselves against enemy Doragons or Talons. The cannon is hardly ever used to destroy air vehicles, but the machinegun mounted on top of the tank's turret and used by the second tank crewmember prove useful against them and it has quite good firepower. However, its disadvantage is the fact that it overheats very fast, so using this gun requires some training. Shooter must know how to shoot in the highest heat level.
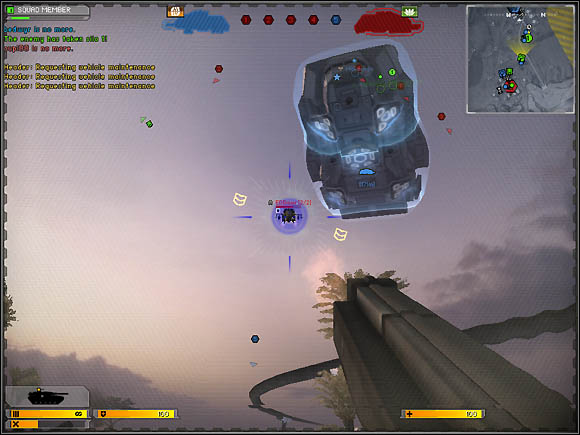
Battlewalkers' struggles against air vehicles look quite similarly, but they're additionally armed with homing EMP missiles.
I advise to look for soldiers, who will operate the anti-aircraft and anti-personnel gun mounted on the turret with pleasure. It makes the vehicle a bit more deadly, it becomes a more difficult opponent.
Role number 1 - there must be at least two crewmembers in the vehicle
APC is useful practically when there are two members of the crew inside. The first one drives the vehicle and uses the anti-personnel machine gun. In the same time, the second person operates the anti-personnel bomb launcher. Only in that situation, the APC vehicle can perform its main task, which is eliminating enemy infantry units.
Rule number 2 - escape, when enemy heavy machinery is coming
APC has practically no chances in a fight against a tank or a battlewalker. The only way is to launch an EMP bomb at the enemy and then escape.

Rule number 3 - use APCs to attack enemy Titan
APC vehicles are equipped with assault pods, which allow soldiers to board enemy Titan airship swiftly. Moreover, APC is a movable target for Titan's guns. Concluding, it's a sin to avoid using such vehicle in the Titan mode.
Rule number 1 - always fly with gunners.
All air transport vehicles have two anti-personnel guns mounted on sides of the machine. Try to fly with two additional soldiers, who will operate these weapons.
While using the gun of this type, turn on the zoom mode and shoot at enemy infantry every time you will spot it.
In gunships, the pilot needs someone, who will operate the anti-personnel machine gun and guided missile launcher.
Rule number 2 - remember that while being the pilot, you are responsible for passengers
There is nothing worse than a pilot, who deliberately crashes the vehicle, killing himself and his passengers (and, occasionally, some enemies). Always try to land nicely and don't be a kamikaze, when there are other people in the machine you pilot.
Rule number 3 - do not exit the machine while the velocity is low
Flying machines in BF2142 characterizes by the fact that when they're brews or fly with low velocity, their jet-propelled engines set vertically, with their nozzles downward. If the pilot will eject in such situation, engines will turn off and the whole machine will fall down, crushing and killing its pilot.
Rule number 4 - avoid EMP rocket launchers
EMP weapons are the worst enemies of all flying machines. They cause a temporary power cut, which makes the machine fall and crash into the ground. That is why, when an appropriate icon appears and a significant voice reverberates, signalizing an EMP weapon locking-on, turn on the Active Defense system and get away from that airspace as fast as it is possible.
Flying high above the ground is a solution too. Thanks to that, even when the machine will be turned off by the electromagnetic impulse, engines may get back on-line before the machine crashes.
Rule number 5 - maneuver and shoot fast
Unfortunately, but swift movement, aiming and launching projectiles are things, which comes with hours of training.
Mainly, during aiming at tanks and APCs, the pilot has to place the crosshair above the target. This will make the air strike more accurate and it will inflict more damage.
During fights against other flying vehicles, always try to get behind and follow them. When it is done, place the crosshair on the enemy's hull and launch a few rockets. Their guidance sometimes doesn't work as it should, however, there is a chance that some of these projectiles will attack the enemy's machine and damage it seriously.
When that's we, who are in the crosshair, it is necessary to turn on the Active Defense system and dodge in order to get away from the opponent. Dodging is essential, but do not turn the machine upside down, because this, in most cases, ends with a crash.
Rule number 6 - let your gunner(s) perform their duty
The gunner sits inside the machine in order to eliminate enemy infantry, so if you pilot the machine, don't try to shoot at opponent single soldiers (or crash the vehicle on their heads), because this is ammunition, time and sometimes ticket wasting. Better get close to enemy troops and let your gunner do the job.
The same refers to fighting against other flying machines. Apart from launching rockets, let other passengers to perforate enemy's hull. Just don't bend the vehicle forward and asides and your opponent will get into the machine gun's range.
Rule number 1 - get familiar with the battlefield's map
Familiarity with every vantage point in the whole game is very important in sniper's job. Rooftops, hills, tops of stairs - in most cases, each high accessible place on the map can be an observation point and - in the same time - potential sniper's position.
Section Maps' analysis in this game-guide contains information about vantage points.
Rule number 2 - often change your position
Changing location is extremely important for a sniper. When you get to a position, from which you will be able to gun down a few enemies, already think about your next vantage point. Necessity of moving comes out of the fact that the sniper has advantage only when the enemy doesn't know where he is.
I advise to change location after about three kills or when the opponent will spot us and open fire. While moving from one vantage point to another, use IT-33 Active Camouflage device in order to sprint more safely.
Rule number 3 - move fast
Speed is life on the battlefield, and it doesn't matter if you play Recon, Assault or any other kit. Do not lose waste time on aiming at the enemy's head, but try to shoot at anything as fast as it is possible. Moreover, swift getting to another vantage point, turning on and off the zoom mode and spotting targets is useful while fighting against enemy snipers.
Rule number 4 - watch your back
When a sniper observes something or rather someone with his scope, the whole world disappears for him. This may be fatal for the sharpshooter, because enemy units can get close to him attack even with a knife. In order to make the vantage point a safe place, deploy anti-personnel APM mines on routes, which may be used be the opponent.
Rule number 1 - attack from surprise
A good Engineer characterizes by the fact that he is able to launch a few rocket before being killed. After launching a rocket, find a hiding place (I prefer containers), reload and then find another place, from which you will be able to launch next rocket without getting hurt by enemy vehicle.
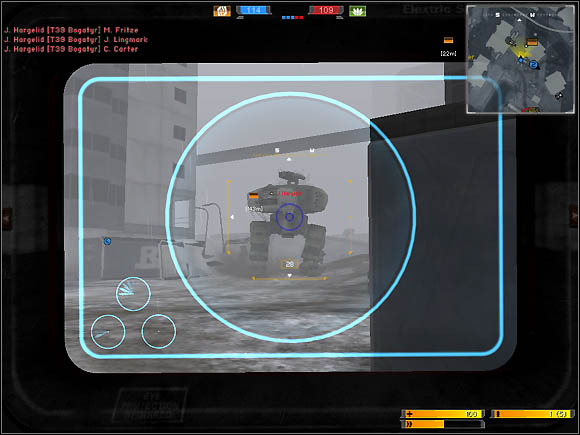
Rule number 2 - know strong and weak points of all vehicles
In the section called Vehicles, in this game guide, there are strong and weak points of all machines listed. Check it to know, at which parts you should aim.
Rule number 3 - guide your anti-armor rockets
If you shoot at a moving target, you can change the trajectory of your projectile. After launching the missile, hold the left mouse button and move the controller. Rockets will fly towards the point showed by the launcher's crosshair, so I advise to keep it on the enemy vehicle all the time.
Rule number 4 - repair vehicles you're sitting in
If the vehicle you are actually sitting in is damaged, go find some quiet place and repair it. However, when you're only a passenger, you may can to get out of the machine and start fixing it, even when the vehicle fights against some enemies.
Air transport and recon vehicles have got seats, which occupying is connected with using the very own weapon and nothing else. These may be used by Engineers to repair the machine, even when it moves.
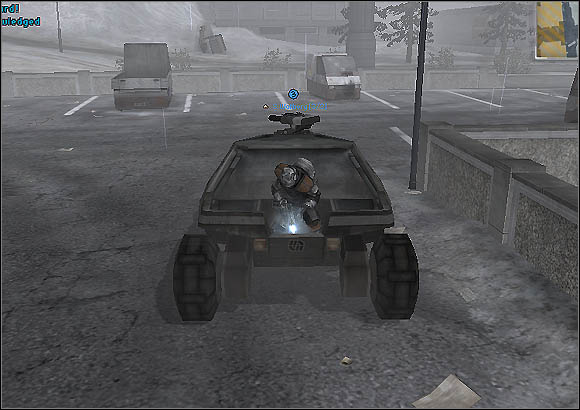
Rule number 1 - give ammunition, heal and revive your teammates
Assault soldiers, as the only one, have medic hubs and Support units carry boxes with practically unlimited ammunition of all kinds. Supporting other soldiers by supplementing the reserve of bullets and healing allows soldiers to live a bit longer and perform duties on the battlefield. This aspect of the teamwork is significantly useful inside Titans, where instantaneous death is the surest thing and ammunition required while attacking consoles and the reactor core runs out extremely fast.
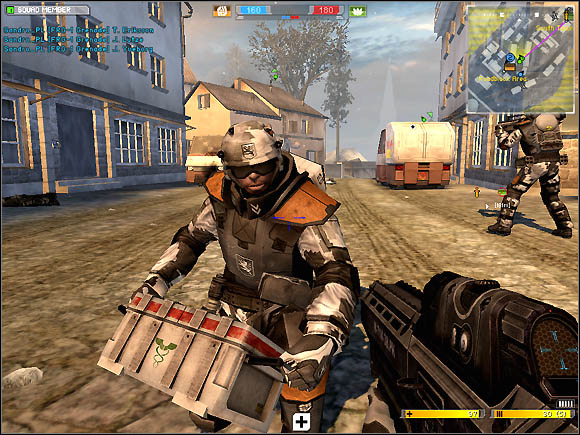 Medic heals us here...
 ...and a Support soldier resupplies us here.
Soldiers playing with the Assault kit are equipped with the defibrillator, which is used - mainly- to revive wounded teammates. If one of the soldiers is down and needs an immediate medical assistance, an Assault unit may get to him and use the device mentioned above to put on him some electroshocks. Teammates requiring reviving are marked with a cross on the map of the battlefield.
Rule number 2 - kill enemy infantry, cover friendly Engineers
Units playing with Assault and Support kits are equipped with weapons, which are excellent during struggles against enemy infantry. That is why they should take care of the soldiers fighting for the opponent team and provide cover for teammate Engineers, which have to attack and destroy enemy heavy vehicles.
Rule number 1 - always be sure
Killing with the use of knife is in BF2142 something, which is being done for fun, not because of lack of ammunition. Moreover, in contrary to Battlefield 2, in BF2142 the highest frequency of knife attacks is much more less, what with the fact that the blade is an inaccurate weapon, can be used by the enemy who will just shoot at us with a traditional firearm. Concluding, if you want to get rid of somebody with a knife, you must be sure for one hundred percent that the first stab will kill your victim.
Knife is a nice weapon against soldiers absorbed with precise aiming like Recon with sniper rifles and Engineers.
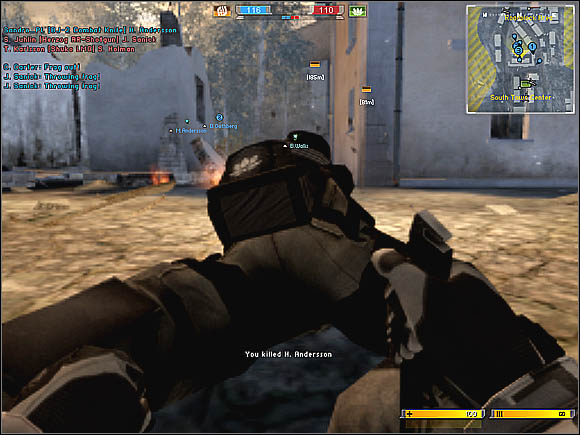
Rule number 2 - use your pistol as a last resort
If you are not trying to get awards requiring a few or several kills with a pistol in one round, try to use your primary weapon in the first order. When you run out of ammunition needed by this rifle, pull out your pistol and continue the fight.
The pistol may also prove quite useful when the enemy suddenly catches us on changing the magazine or waiting for the weapon to get cold. In such situations it is necessary to shoot at him as fast as possible, so the secondary gun should be pulled out. Chances for surviving in such circumstances are faint, but nothing prevents from trying to fight.
EMP weapons, in spite of the fact that they do not inflict damage, can be extremely dangerous. They are based on sending an electromagnetic impulse that turns off every electronic device, which are in the radius of action. Thanks to that, vehicles cannot move and shoot for a few seconds, so they are very easy targets for everyone equipped with anti-armor weaponry.
 EMP attack.
Flying vehicles, after an EMP attack, ordinarily go down and crash. However, if the machine is flying high, there is chance that its engines will get back on-line before the catastrophe.
EMP can be used effectively against infantry too. Some devices, like for example IT-33 Active Camouflage, get off-line as well as vehicles. Moreover, electromagnetic impulse works similarly to flashbangs, well known by Special Forces players - soldier attacked with EMP weapon see the world a bit deformed, blurred, in wrong colors and the crosshair may disappear from time to time.
Although it can be used against infantry, I advise to use the electromagnetic impulse in fight against enemy vehicles. If you will notice that the opponent has the superiority, attack him with an EMP weapon and finish using anti-armor equipment or escape from the battlefield, when there is no such equipment around. Because the second situation occurs much more often, it is necessary to disable enemy vehicles in order to let friendly Engineers destroy them. Moreover, I have to add that heat-seeking EMP missiles launched from Rosch Kz-27 stationary guns are one of the best anti-aircraft weapons.
List of EMP weapons:
In the beginning we have to say that aiming at enemies is not based just on putting the crosshair in the proper place and pulling the trigger. Extremely important is the rate of fire of the weapon we have and use. Assault rifles and machine pistols, in most cases, have the full automatic mode, so the shooter just need to hold the trigger in order to empty the magazine. Sometimes we can use the single shot mode. To change the rate of fire, press the button you use to pull out the weapon, so if you have to push [3] to grab an assault rifle, pressing it again changes the fire rate of this gun.
Rate of fire is presented by a small icon placed in the bottom right corner of the screen.
 The icon shows that the full automatic mode is on.
Aiming at enemies with the firearm can be done in two ways. The first one is based on placing the crosshair and pressing (or rather holding) left mouse button. It is quite a snapshot and that method may be efficient only during fights on short distance, so the best rate of fire would be full automatic. This will allow the shooter to perforate an enemy soldier in a comparatively short period of time.
While fighting on a medium or long distance, use your backsight and muzzle boresight by pressing right mouse button. This will give an additional zoom, which, in connection with single shot mode, allows shooting accurately on medium or even a long distance.
Moreover, remember that the crosshair rocks all the time and that makes the weapon's fire much more inaccurate. Restraining this trembling requires some training. Snipers, however, may use the Gruber 5 Stabilizer device, which brings the rifle to a standstill and allows shooting more accurately.
Light and heavy machine guns, equipped by Support soldiers, are a peculiar kind of weapon. These firearms characterizes by the fact that it the longer you shoot, the more accurate they get. This feature means that HMGs and LMGs can be used in fight on medium distance only after about forty bullets fired. Unfortunately, these weapons overheat fast, so the shooter must use the gun within some moderation.
 Accuracy in the first second of shooting.
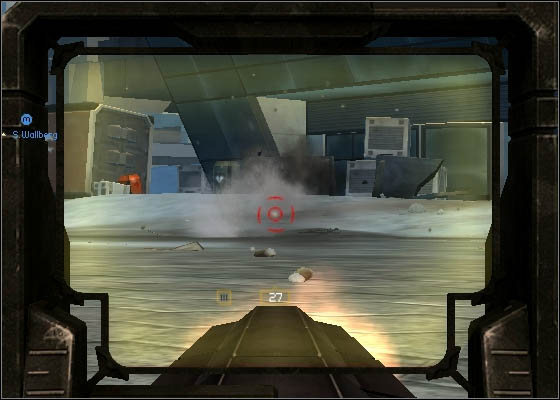 Accuracy in the third second.
By the way - pay attention to a semicircle, which appears near the crosshair. It means that our bullets hit the enemy, so while fighting on a long distance shooter doesn't have to wonder if he's fire is accurate or not.
Semicircle near the crosshair means that our shots are accurate.
RDX DemoPak
RDX charges are one of the pieces of available to unlock equipment for the Recon kit. Soldier can carry at most five bombs of this type. They are really good, they blow with high yield and, moreover, they stick to every kind of surface - walls and vehicles as well. Using RDX DemoPaks is quite simple - firstly, drop them (one or more) by clicking the left mouse button, then press right mouse button to pull out the detonator, and detonate your charges by clicking the left mouse button again.
Two charges are enough to turn a tank or APC into scrap metal. Battlewalker are armored better and three RDXs are required to blow up that kind of a machine. All other vehicles and infantry units can be destroyed/killed with only one bomb.
RDX DemoPaks can be used to blow up consoles and Titan's reactor core too. The only problem is to avoid harming teammates who, just like you, want to destroy these objects.
These bombs can be also used to set traps: for example, leave a few charges near a control point and then hide somewhere and observe the flag. When enemies will come and try to capture the spawn point, detonate your RDXs. I also advise to leave these bombs on a road and wait for an enemy vehicle trying to go that way.
RDX DemoPaks can be collected after dropping them.
Grenades
Grenades are a type of equipment, which must be unlocked first in order to use it on the battlefield. They are in the Abilities group and it means that it does not matter which kit we will choose, we will always be given two grenades after spawn.
Throwing grenades requires some training. You have to learn on your own, how much time takes the throw, how long they fly and at which angle they must be thrown. However, you must remember that it is an anti-personnel, not anti-armor weapon. It proves useful in urban territory, especially when there are some must-be-killed enemies on a rooftop of a building we are standing next to.
We can throw grenades in two ways. The first one consists in clicking left mouse button. This will lead to a full power throw. The second technique is based on holding the right mouse button. This will allow choosing the power of the throw - the longer we hold the key, the further the grenade will fly.
II-14 EMP and II-29 mines
Both types of this equipment must be unlocked first. Mines can be used by Engineers only. II-14 EMP mines are available to unlock at the beginning, then you have to open the access to DysTek Repair v2.0 tool and after that, unlocking II-29 mines will be available.
Using II-14 EMP mines is very, very simple. Just pull it out and let it fall on the ground by pressing the left mouse button. I advise to leave them on important, often used by the enemy roads and near significant control points. Deploying a few of them eliminates the risk of evading the explosives by the enemy, even not deliberately.
II-29 bombs requires another, let's say, way of thinking. Their way of working is based on the special guiding system. When an enemy vehicle drives into the mines' range, they start to fly towards him and explodes while impact. However, they are not so strong, so I advise to leave plenty of them in one place.
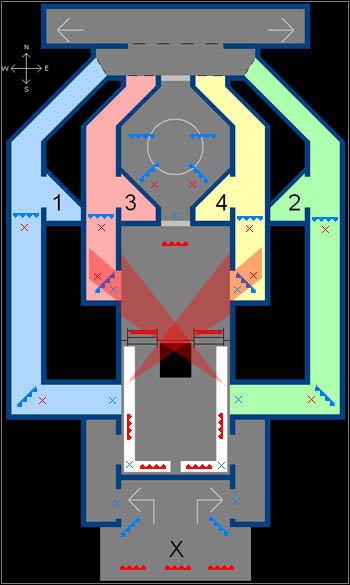
II-29 bombs works best if they are left in places, where it is difficult to spot them, for example in holes or just round a corner. This will lead to an attack from surprise and the enemy will not have much time to react. Only the fastest machines can escape before the mine gets close and explodes and these are recon vehicles.
Anti-personnel mines
APM mines are equipped by the Recon soldiers. It is a weapon that requires unlocking first. Fortunately, it is - beside RDX DemoPaks - a piece of equipment, which access to can be opened at the beginning.
As it can be concluded from the name, this weapon is used against enemy infantry. The best places for APMs are narrow passages, often used by the soldiers fighting for opponent team. Holes in fences, stairways and doorsteps are great for setting traps.

Defusing explosives
To defuse a bomb, an AE Defuser device is essential. It is equipped by the Engineers and it requires unlocking first. It allows deactivating EMP and APM mines, II-29 bombs and RDX DemoPaks. You just need to get close to an explosive charge and use the device mentioned above on it.
There are a few schemes of fighting and plenty of special places, which are sometimes significant during attacking and defending the Titan. I advise to check the Titan chapter and take a look at the map of the airship.
Let's start with describing important places.
Important places in the main room
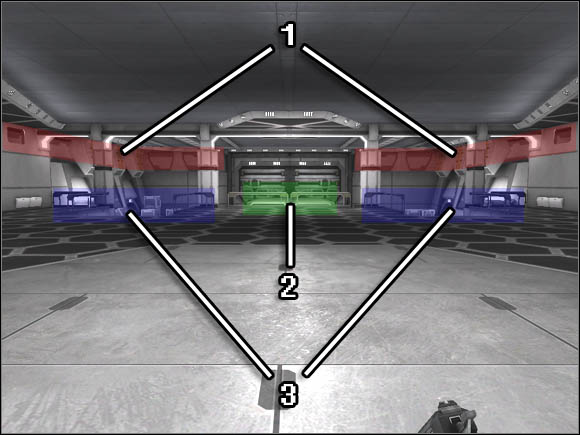
1 - gallery placed right below the airship's ceiling, great location for units equipped with weapons on medium and long distance. Attackers should use it, when defenders are situated near entrances to corridors, where Titan's consoles are placed. Defenders must place A12 Enforcer Sentry Guns and/or APM mines on these galleries;
2 -containers, a vantage point from where entrances to all four corridors and the reactor core room are seen. The disadvantage of this place is the fact that soldiers sitting on the containers have no cover;
3 - ramps, which are used by infantry to get to corridors 3 and 4 and to the reactor core room. They guarantee some cover that can be used by Support units, which can deploy their machine guns at the tops of these ramps.
Defense and assault
Corridors, in which consoles are located, can be defended quite easily. The team must establish solid defense in there, based on soldiers using all kits, except the Engineer. Support kit units have to resupply teammates and open fire at incoming enemy forces. Assault troops must heal other players and the Recon soldiers have to secure the corridors' entrances with explosive charges like APM mines or RDX DemoPaks, detonated when enemy comes close. Grenades may prove quite useful too.
Attackers always have a tough nut to crack, when they must eliminate the consoles' defense forces. The best solution is to throw grenades and hide behind these small partition walls located peripherally inside corridors. However, remember that it is a mistake to place the barrel of your weapon perpendicularly to that wall. The enemy may see the end of the barrel protruding through the wall. This reveals not only the position of a soldier hiding behind the wall, but it also says if he stands, crouches or crawls.
Inside the reactor core room, the situation gets a bit complicated. Soldiers trying to defend the airship should be placed right beside the entrance or behind the core itself. Moreover, I advise to play with these kits, which are used while defending the corridors.
The attacking team should use grenades to get rid of the opponents inside the core reactor room.
Defense and assault showed on the map
Red lines, fields of vision, crosses - important places for the attackers, snipers' fields of vision, explosives and worth-throwing-a-grenade locations.
Blue lines, crosses - defense lines, explosives and worth-throwing-a-grenade locations.
Choosing a proper kit helps survive on the battlefield. Choosing the profession and specialization should be subordinated, among others, to the character of the map we are playing on and to the enemy's playing style. There are a few more aspects, which should be mentioned. Before making the decision, let's take a look and the battlefield's map and answer a few questions:
On foot, by a light or rather heavy vehicle?
If you are sure that you will use a tank, APC or a battlewalker after respawn, choose the Engineer kit. Why? This profession, as the only one, is able to repair vehicles, so if your machine gets damaged during the fight, you will only have to find a comparatively safe place and repair the vehicle.
If you know that you have to fight as an infantry unit or inside a light vehicle, choose the Engineer kit if you expect struggling against enemy heavy machinery.
Extensive fields or urban terrain?
In the cities, where the role of heavy vehicles is limited, the Recon, Assault or Support kit seem to be the best ones. Engineer may prove useful only when the opponent team uses battlewalkers, tanks and so on. Moreover, take into consideration the exact place of the battle. If it is among high buildings, being a sniper may bring lots of frags. Analogically, when the teams fight in an extensive terrain, infantry equipped with anti-armor weapons may find a few nice targets. For more information about choosing the kit on a particular map, check the maps' analyses in the Maps' analyses section.
Titan or ground targets?
If we play in the Titan mode, we have to decide, if we want to play on the ground and fight for the missile silos or to participate in struggles on the airships. In the first circumstance, you will adjust your choice to the terrain where the battle takes place, so it is necessary to come back to the first question. However, if you decide to fight inside a Titan, I advise to check the Titan and fighting inside the Titan chapters, in order to know how fights inside an airship look like.
What the enemy disposes of?
If we have an opportunity, check the enemies' locations and what types of units are incoming. Let's say that our Commander sends a UAV.
If the enemy attacks with infantry units, choose the Assault kit, because this one is equipped with a good assault rifle. Additionally, we know where we should respawn in order to engage the enemy fast.
Similarly, if the UAV shows the tanks' and battlewalkers' presence, it will be necessary to choose the Engineer or - if the worst comes to the worst - Recon kit, but only if you have RDX DemoPaks unlocked.
Map of the battlefield
One of the most important things on the battlefield is its map. We can turn it on by pressing the [M] button. It is very, very useful, because it doesn't show only the location of players fighting for our team, but also enemies' position, when for example the Commander uses the UAV or someone from our team points an opponent via the command rose.

Observation of the map allows orientating to the situation on the battlefield. It helps determining the place of the most embittered fights, where reinforcements are required and where the heavy machinery can be found. Moreover, it helps in choosing the proper kit.
3D map
Apart from a traditional map, we can use the 3D map system, which is based on icons appearing in the screen. These indicate the location of flags and other strategically important objects. Moreover, the 3D map shows the distance from these points. It can be turned on and off by pressing the [Alt] button.
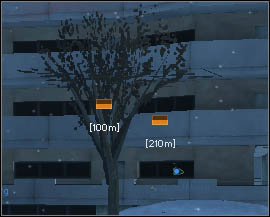
Command rose
Pressing the [Q] button activates the command rose. It can be used not only to send commands, but also to communicate with other members of the team we play in. It allows sending a request for, among others, medical assistance, ammunition, reinforcements or a lift. It also possible to confirm or say 'negative' via the command rose, as a reply to all statements said during the game. Moreover, it allows (by using the Spotted option) to point an enemy. His position will be marked on the map of the battlefield for a few seconds, so every soldier from your team will be able to check it.
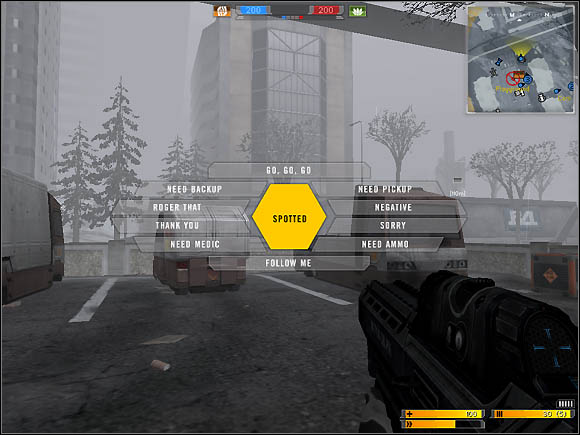
NetBat system
NetBat is a special system, which provides various information about unfriendly forces. During the game, different symbols referring to them appear on the screen, for example, squares mark their position:
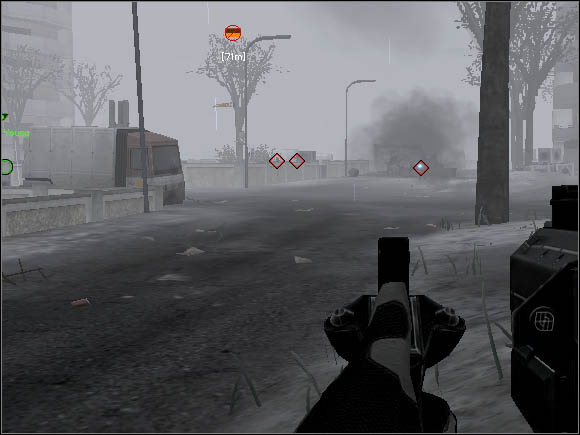
This system may be used by single soldiers, by only squads can make use of its full potential. If one Squad Member spots an enemy and the NetBat system marks him automatically with a square, other Squad Members will receive data about the location of spotted enemy, so the entire squad knows where he is.
In order to send information about enemies, a proper helmet should be unlocked first. I must add that each kit has different type of helmet:
Information about enemy's location is lost when he gets out of range of the NetBat system's helmet.
A number of graphic and sound signals accompanying sitting in a vehicle makes the game a bit easier and raises the efficiency of the crew's actions. A driver should know what these signals refer to.
Undoubtedly, the most important is the warning of acquiring target. If an engineer keeps his rocket launcher's crosshair on our vehicle or somebody tries to shoot at as with and EMP missile launched from a ground stationary anti-aircraft gun, an alarm sounds and a proper icon appear on the screen.

If we get close to some explosive charges (mines or RDX DemoPaks), a proper icon will be shown too.

There is one additional graphic signal, which is assigned to APC vehicles. If there is a green Titan symbol above the crosshair, on the right-hand side, we are able to boards a nearby airship using the vehicle's assault pod. If the symbol is yellow, there may be a problem with landing on the Titan.
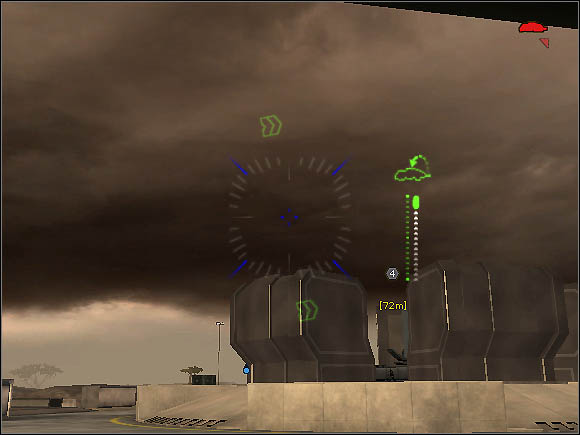
If we fall from a high height, we can use the parachute, on of the elements of a modern soldier's equipment. We can open it after flying about 4-5 meters, so it may be used even while jumping from a rooftop of a medium high structure or wall. It allows saving on time, because we don't have to look for stairs or ladders, which allow to get on the level below - just jump and open your parachute. [Space] is the default button used to do it. Moreover, during the flight we can use our own firearm. However, the parachute cannot be steered.
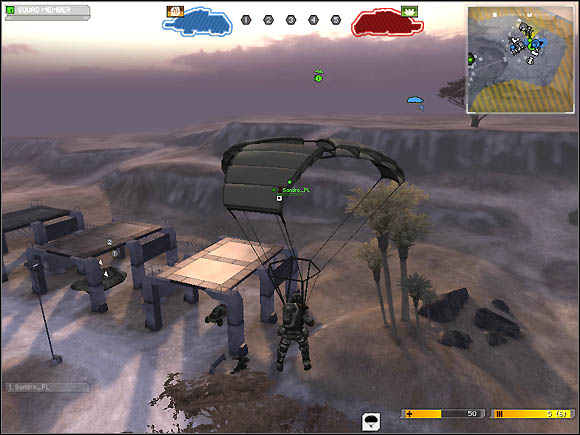
When we are inside an APC vehicle, air transport vehicle or a Titan airship, we may use an assault pod. It is a very interesting mean of transport. Pods are - in most cases - used to reach upper levels like rooftops or Titans. Soldier inside an assault pod moves with an awesomely high velocity, which makes him a difficult moving target, so he may feel quite safely. In contrary to the parachute, assault pod can be steered and the soldier occupying it can decide in which direction he wants to fly. The only exception occurs when we respawn at the SLSB's position - we fall near this device and we are unable to land in other location.

 Blue Dragon Game Guide & Walkthrough
 Batman: Arkham Asylum Game Guide & Walkthrough
 Bioshock 2 Game Guide & Walkthrough
 Battlestations: Midway Game Guide & WalkthroughBattlefield 4 Game Guide & Walkthrough