
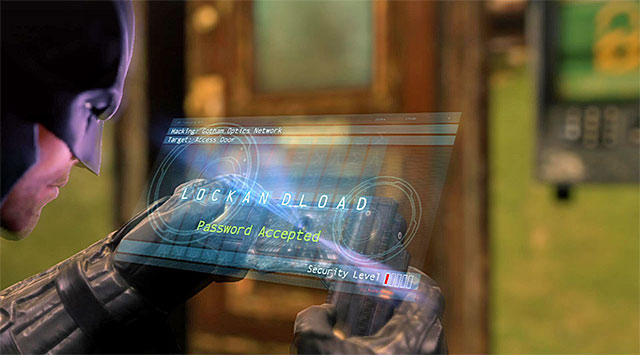
This unofficial guide for Batman: Arkham Origins includes, first of all, a very detailed walkthrough for the main single-player storyline. In the descriptions of the individual missions, tasked to Batman, there is information about, among others, and easy way to access successive locations, solving puzzles and effective elimination of enemies. Especially strong stress has been put on the matter of fighting with fully-fledged bosses, including the characters hired by the Black Mask to eliminate Batman.
The successive chapters to this guide offer walkthroughs for all of the side missions available in the game, information on the whereabouts of collectibles and ways to find them and hints concerning the completion of additional challenges. The entire guide has been supplemented with a list of the achievements available in the game. To help you navigate, in this guide, there have also been included detailed maps of Arkham, and the other main locations.
Batman: Arkham Origins is a prequel for Batman: Arkham Asylum and Batman: Arkham City, where you learn about the beginnings of Batman's activity. The action takes place on the Christmas Eve's night and it concentrates on the dealing with evil-doers hired by the man named the Black Mask. A lot of space in this guide has been devoted to elaboration on the criminals, thanks to which putting them back behind the bars is not going to be that demanding.

This guide for Batman: Arkham Origins includes:
Jacek "Stranger" Halas (www.gry-online.pl)
This guide has been prepared basing on the default, normal, difficulty level but, it will be enriched with the hints that concern playing on higher difficulty levels, on a regular basis.
All of the chapters of this guide which concerning the walkthrough have been color-coded in a following manner:
I strongly recommend that you acquaint yourself with the hints contained below still before you start playing. This will let you learn about a few important dependencies, which will make starting off easier.
1) Although Arkham Asylum is a prequel in relation to the previous installments, from the storyline's point of view, right at the Beginning, Batman can pull off many movements (e.g. attacking armored enemies), and has gadgets (e.g. the Bat Claw or the Explosive Gel) from the very beginning. In the case of the Arkham Asylum and Arkham City these became available only after some time into the game. As a result, it is worthwhile to spend some time to get acquainted with the information in Batman's menu, and more precisely with the descriptions of all the basic movements (the Main Controls tab). The game is trying to describe the attacks and gadgets that you use for the first time, on a regular basis. Still, knowing them beforehand, may speed up the completion of the early stages of the game, or make it easier to fight at the initial stages.
2) One of the innovations in Arkham Origins is the detailed mission rating, displayed by the game after each fight (i.e. the number attacks in a chain, variety of blows, etc.). It is a good idea to read those each time in order to improve on own skills and, which follows, to gain more experience points.
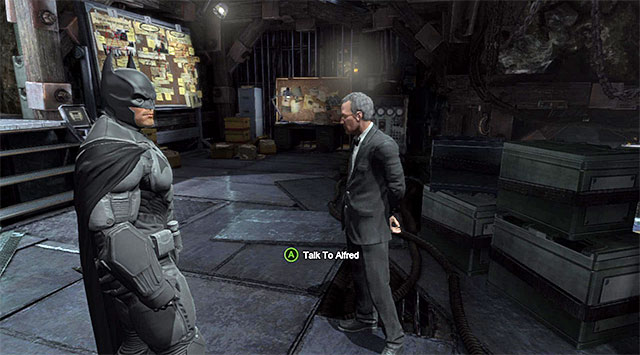
3) In Arkham Origins you can return to the Batcave, which of course performs the role of the Bat's headquarters. I recommend that you talk to Alfred on a regular basis (sometimes it is rewarded with experience points), as well as to unlock the optional challenges throughout the main plot, to the extent it is possible.
4) While exploring Arkham, do not ignore the information on the crimes under way. Dealing with bandits is not too demanding, most of the times, and you will be rewarded, in exchange, not only with additional points for defeating your enemies, but also with a special bonus to your experience (most of the times, this is several thousand points).
5) The exploration of the game world can be made more efficient in two different ways. In Arkham Origins Batman has access to the upgrade to his hook launcher from the very beginning. Therefore, it would be a good idea to catapult yourself in which Batman attaches his hook. Apart from that, I recommend that you unlock al fast-travel points (Batwing drop points) as soon as this becomes a possibility (you need to sabotage Enigma's communication towers).
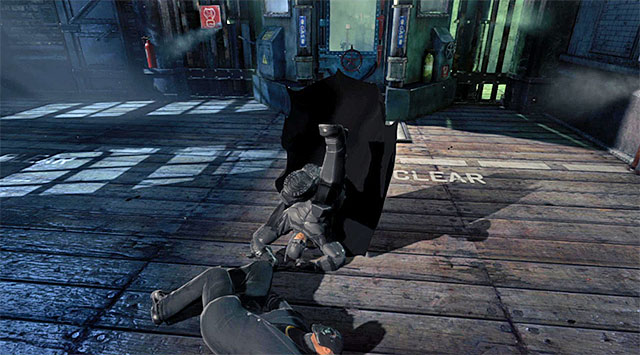
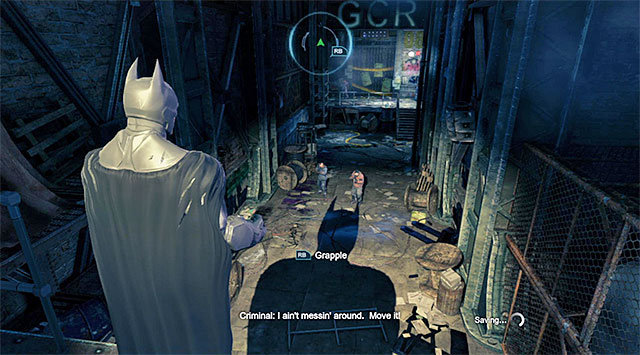
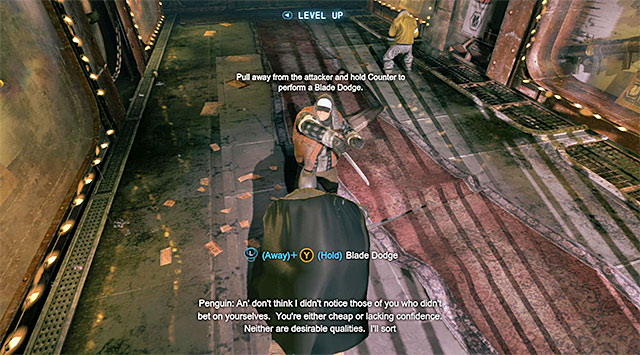
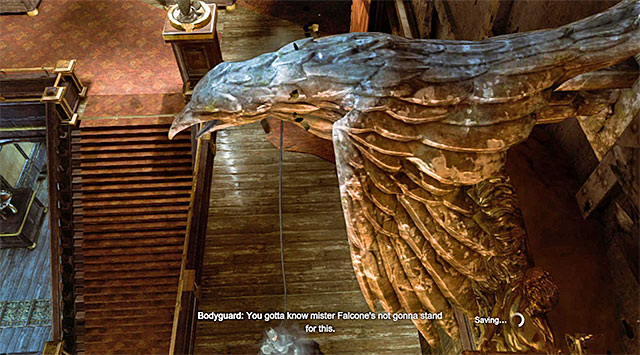
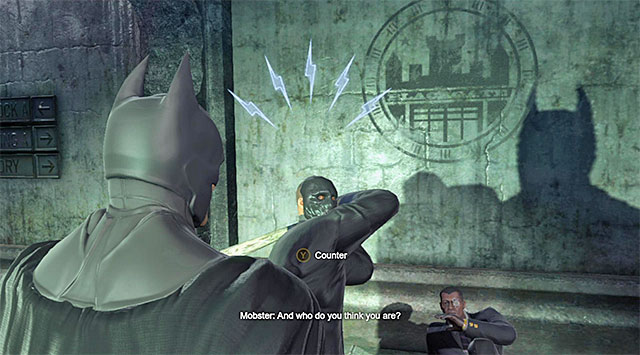 You first need to counter the gangster's attack and the attack on the warden
You start your adventure in the Blackgate Prison, near the Cell Block A Access. Go towards the prison's entrance and duck to walk under the destroyed sign. Follow the linear corridor here to reach eventually the area where you meet Warden Joseph attacked by one of the gangsters. Be prepared to Counter twice, by pressing the appropriate key/button when the moment is right. After the successful action, listen to the conversation with Joseph.
[New Character Profile: Batman]
[New Character Profile: Bruce Wayne]
[New Character Profile: Alfred Pennyworth
[New Character Profile: Black Mask
[New Character Profile: Commissioner Loeb
[New Character Profile: Warden Joseph
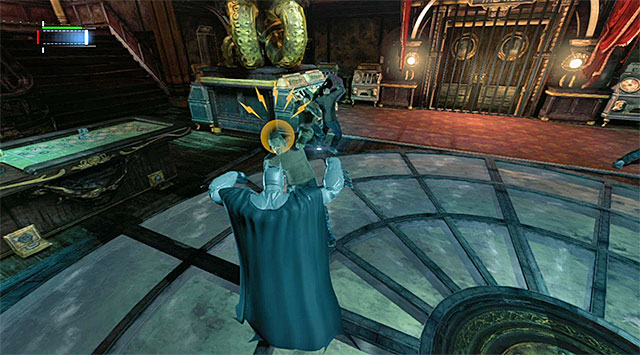
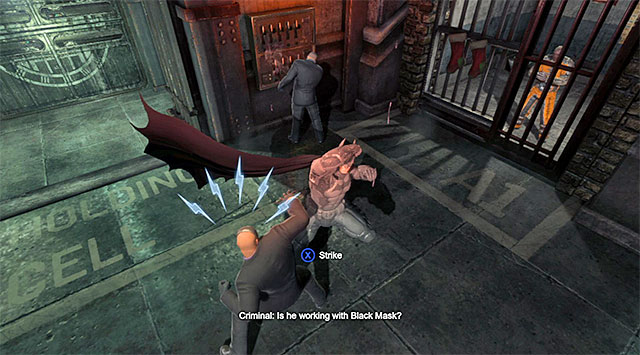 The first fight
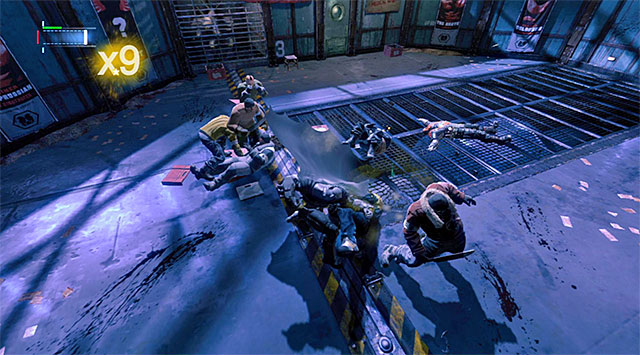
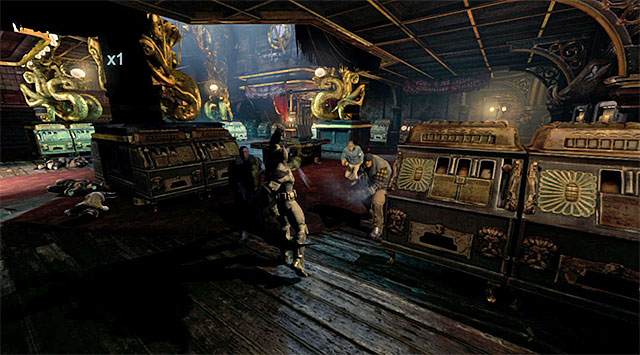
Go towards the door to Cell Block A. Ignore the inmates kept in the side cells and take the stairs to the lower level of this location. Open the door and start a fight with the first group of criminals. During this fight, you can theoretically limit yourself to the standard blows and counter-attacks (initiate them whenever there appear blue symbols above the opponent's head), but it pays off to attempt more advanced tricks from the beginning of the game, known from the previous installments of the game (e.g. cape swipe, slide or batarang throw).
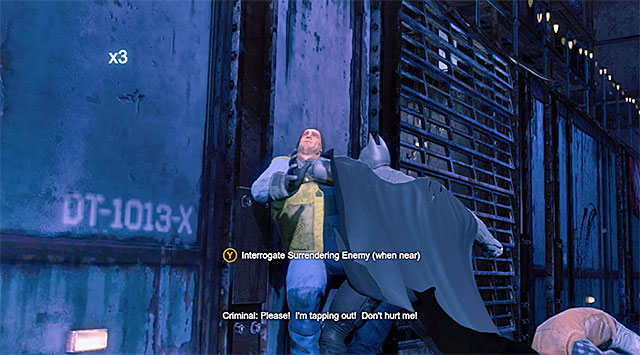
 You need to interrogate one of the gangsters
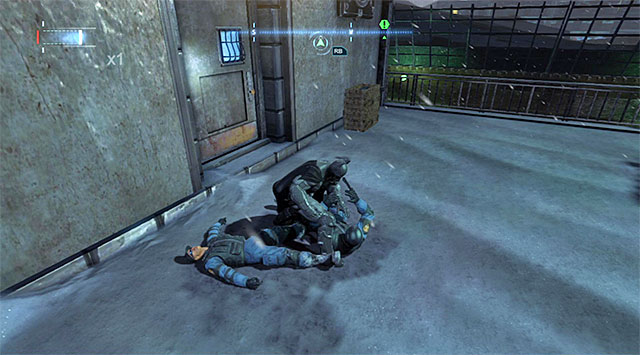
After you are done dealing with the gangsters, approach one of the defeated opponents that is marked by the game, and press the appropriate key/button to interrogate him. At the same time, you can take a look at the statistics for the fight (the game displays this type of statistics after each major battle).
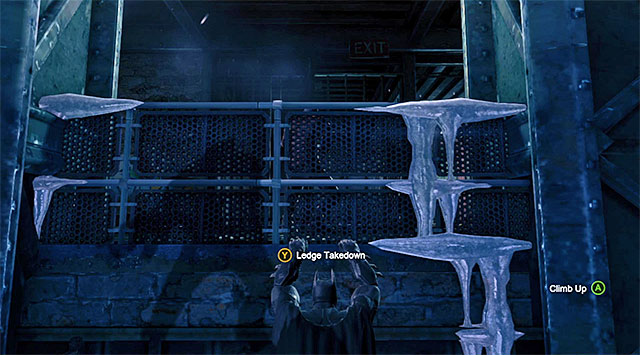
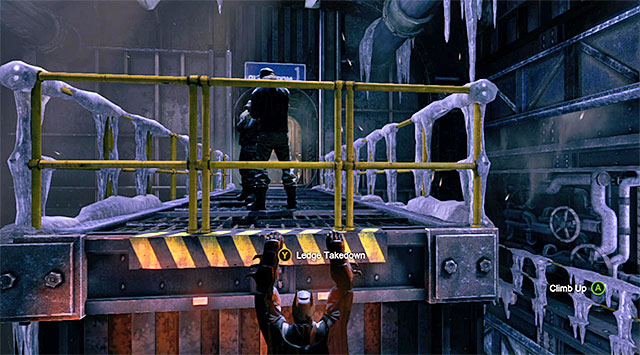
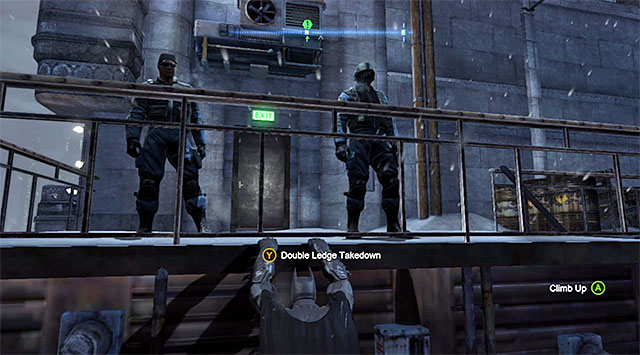
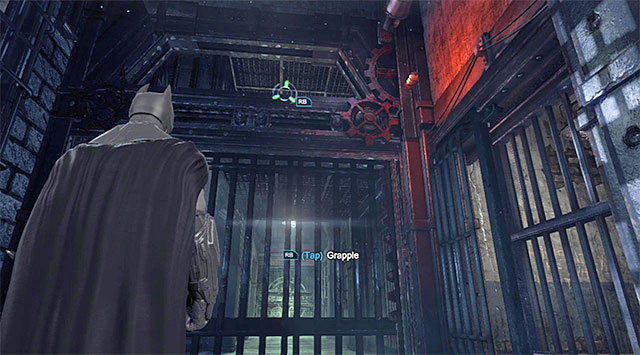 The ledge that you need to grab onto with the grappling hook
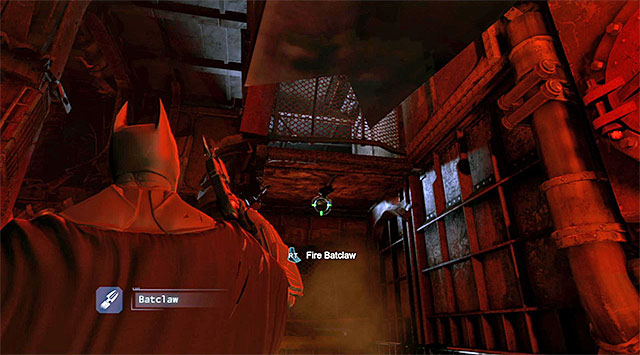
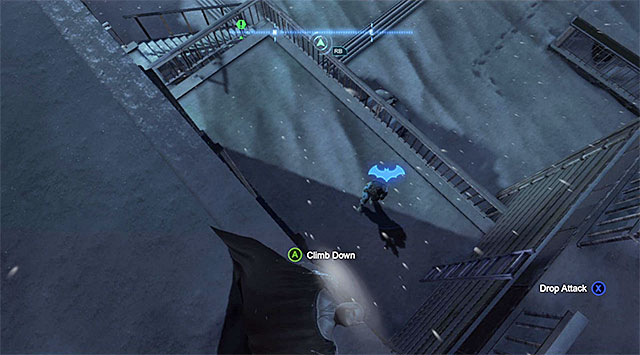
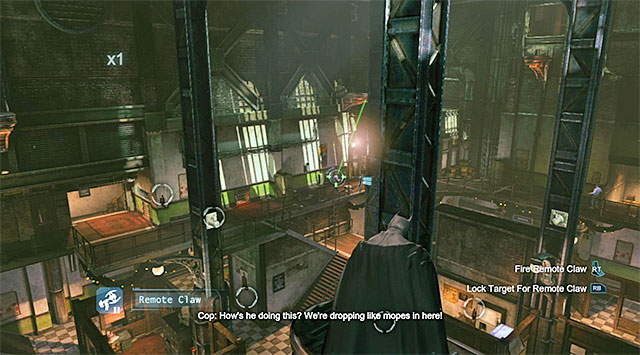
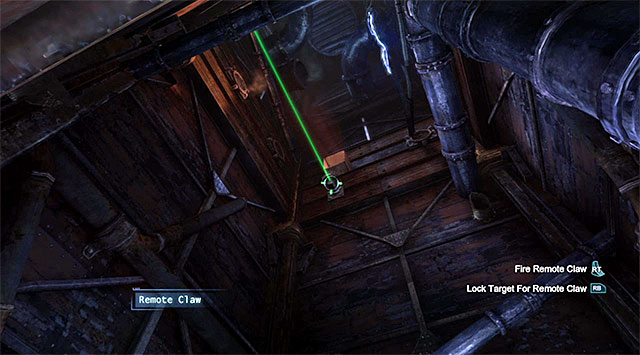
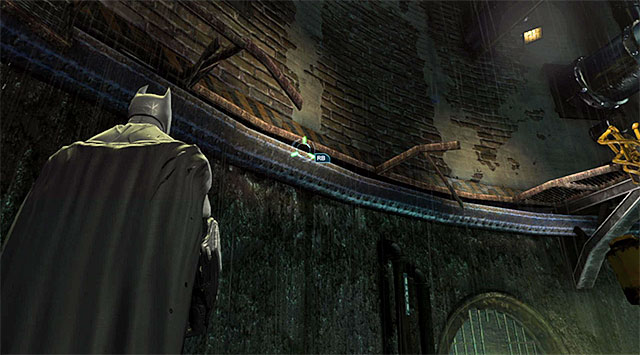
take the door to the corridor with holding cells [Block A Holding Cells], and pay attention at the same time to the reconnaissance drone flying by. Soon after you take a turn to the right, the game will automatically, start another fight, where you will have to beat up the inmates released from the cells on the sides. Deal with all of the prisoners, who fortunately will not be too much of a challenge. After you have dealt with them, follow the game's suggestion and use the hook (Grapple) to reach the narrow passage underneath the ceiling.
![Jump down and take the door to the next area in the prison [Nexus] - Gain access to the Execution Chamber - Main storyline - Batman: Arkham Origins - Game Guide and Walkthrough](https://game.lhg100.com/Article/UploadFiles/201512/2015121216404389.jpg)
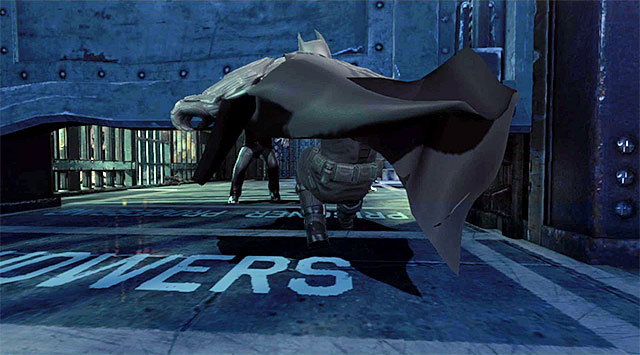
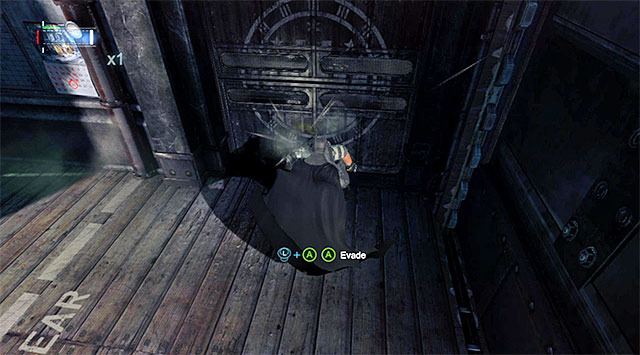
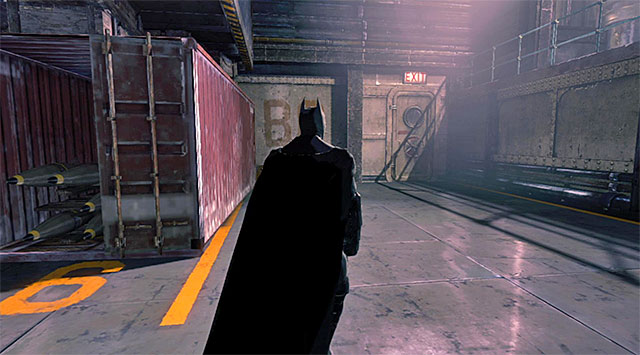
Jump down and take the door to the next area in the prison [Nexus]. Here, you will have to deal with an armored enemy for the first time, whose eliminating is a bit more tricky. you need to swipe your cape first (the above screenshot), which will temporarily stun the enemy. Only after you perform that, lunch the attack by landing quick standard blows, which will result in the elimination of the criminal.
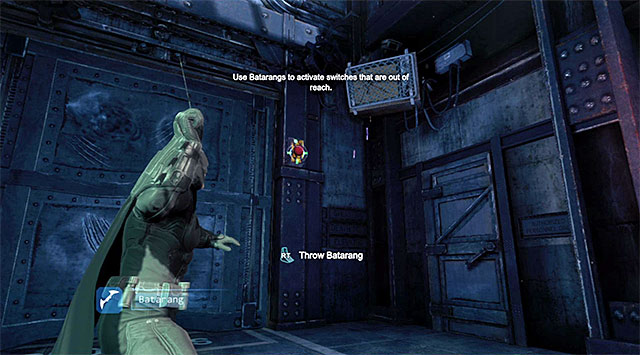
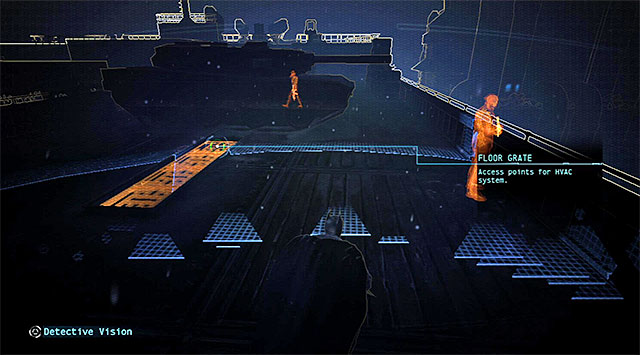
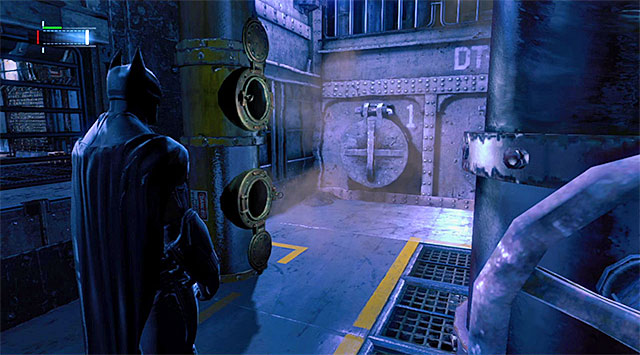
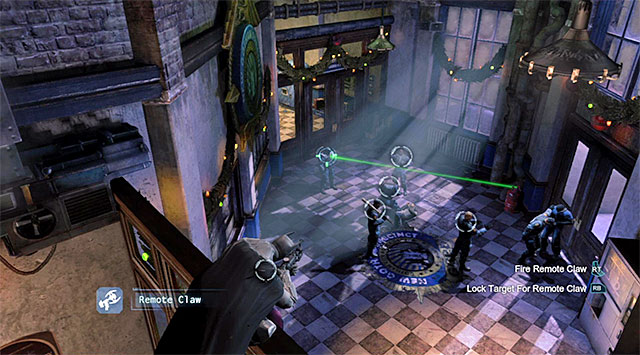
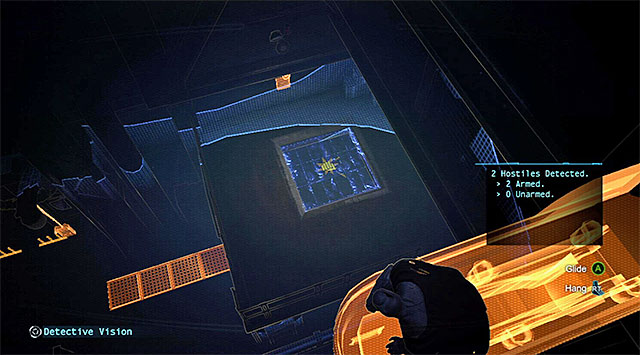
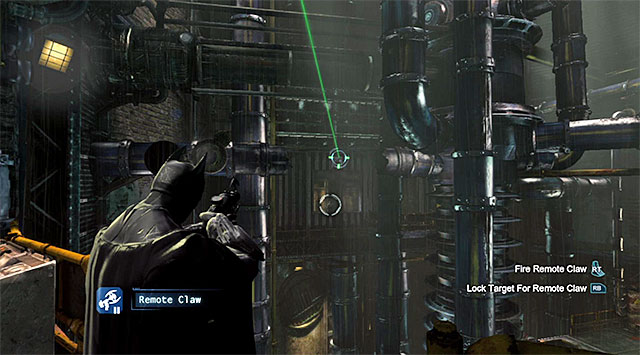
Go ahead and use the hook again to walk around another locked passage and reach the Prisoner Processing room. It is a good idea to activate the Detective Vision here, because this will allow you to figure out what the current situation is. Select from your inventory, the batarangs, initiate the targeting mode and target the button shown in the above screenshot.
 You need to slide here
You might have already noticed that the gate rose just a bit. Run up and press the trigger/key suggested by the game, right in front of the gate. Thanks to this, Batman will perform a slide. After you have eliminated the enemies, turn your attention to Vicki Vale held in one of the side cells, and interact with the new button (this time you do not need to use the batarangs).
[New Character Profile: Vicki Vale]
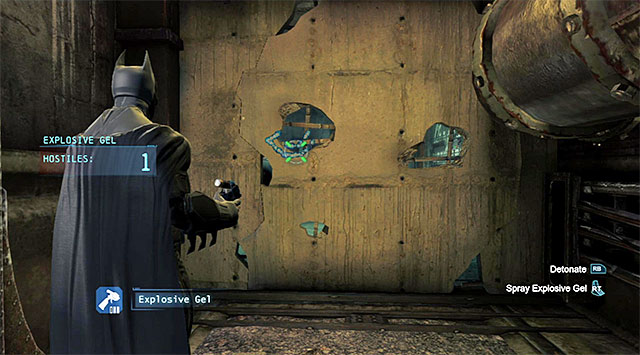
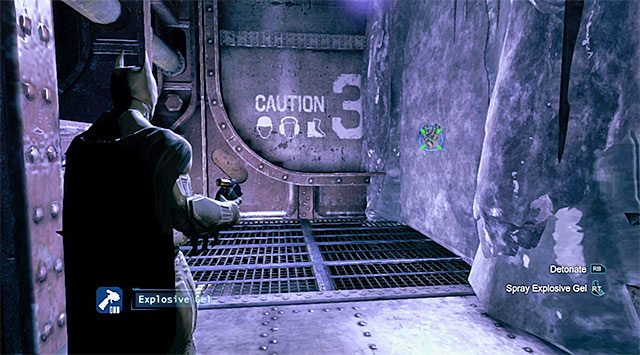
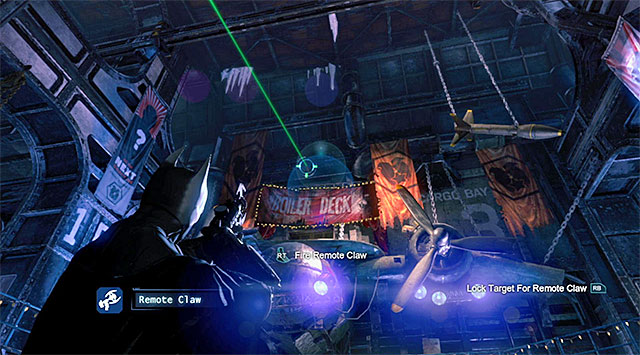
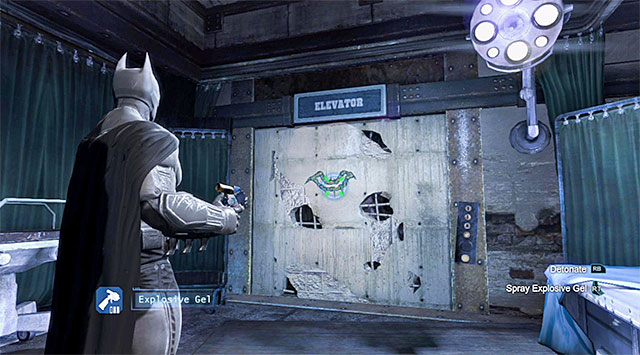
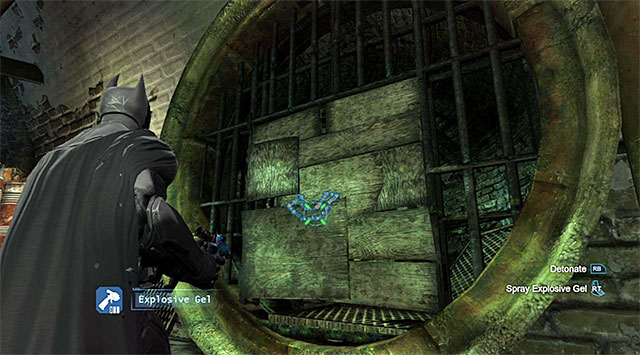
 Spread the gel and detonate it
Enter the inactive elevator shaft and select the Explosive Gel from the inventory. Use the gel onto the unstable fragment of the floor and detonate it. Thanks to this, you will walk into the area with Death Rows. After you watch a cutscene featuring the Black Mask and Killer Croc stop at the grate of the venting shaft on the left and rip it out (by tapping on the action key/button rhythmically).
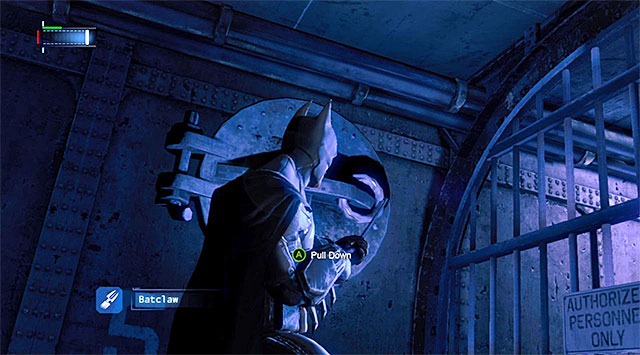
 Use the Bat Claw to grapple onto the grate
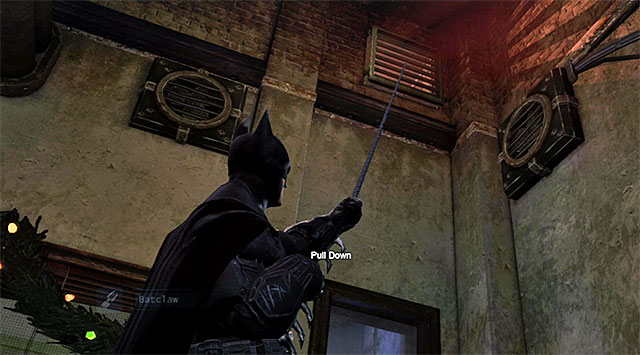
After you have left the shaft, land onto one of the prisoners and start fighting again. This one is nothing out of ordinary, although you can make it slightly easier for yourself by hitting the fire extinguisher with the batarang, which will temporarily blind the enemies. After you have dealt with the criminals, take the passage to the right of the grate with one of the gangsters. Select from the inventory the Batclaw here and use it to rip another grate out, and enter the venting shaft.
 The explosion will kill the single gangster
Run towards the wall, thanks to which Batman will automatically leap towards the shaft's entrance. After you end up in a small corridor, approach the severed fragment of the wall and spread the explosive gel. Detonate the charge, which will kill the gangster at the other side of the wall. You can now take the door to the area neighboring the Execution Chamber.
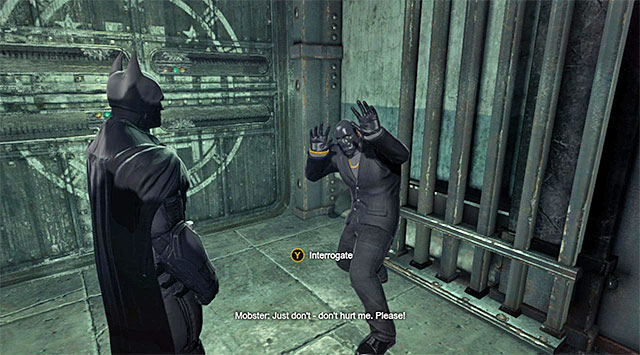
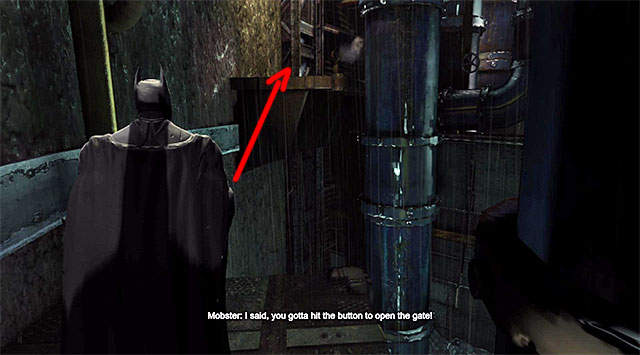
[New Character Trophy: Mobster]
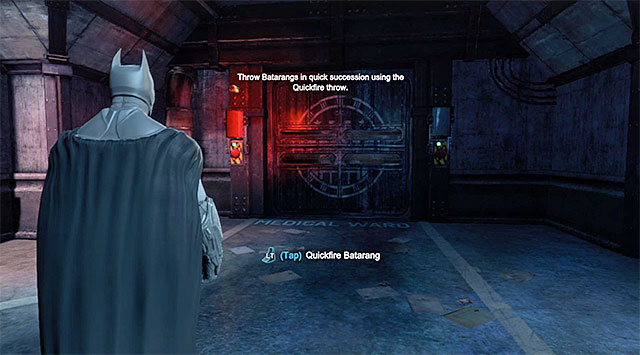
Stop in the spot shown in the above screenshot, i.e. in front of the locked gate. You now need to solve an easy puzzle that consists in hitting the button on the left and on the right, of the gate, simultaneously. You need to do that by using the option of quick throwing of batarangs, i.e. by skipping the process of targeting. Double tap the targeting trigger/key, thanks to which Batman will throw batarangs towards both of the buttons and thus unlock access to the neighboring room.
 You need to ram through the mirror
In the already learned way, use the claw on the grate under the ceiling and reach the shaft. Walk through the shaft to reach the
Execution Chamber after several moments, which will start a cutscene of Commissioner Loeb, Black Mask and Killer Croc. Stand in front of the one-way window and take a leap towards it. This will enable Batman to ram through it over to the other side.
[New Character Profile: Calendar Man]
 watch out for the armored opponent
Right after you get tot the chamber where the most recent cutscene took place, you will start a fight with another group of gangsters sent by the Black Mask. While fighting, you should , first of all, watch out for the attacks of the armored enemy. This bandit is best if left for the end. In the already learned way, first stun him with your cape. After you have dealt with your enemies, take the door to the side corridor [Security Corridor]. Reach the end of that corridor and note that Batman found a Memory Card on a destroyed drone.
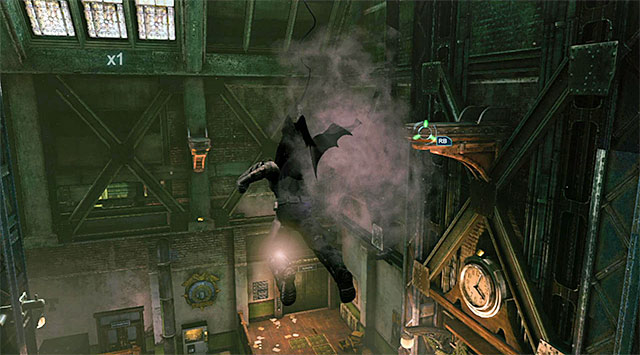
 Keep using the hook on the successive ledges
Start climbing. You need to reach the Watch Tower located at the very top. Along your way, keep using ladders and stairs, and also occasionally help yourself with the hook to reach the less accessible ledges. After you get to the rooftop, you will watch a cutscene and you will have to fight the game's first boss, which is the Killer Croc.
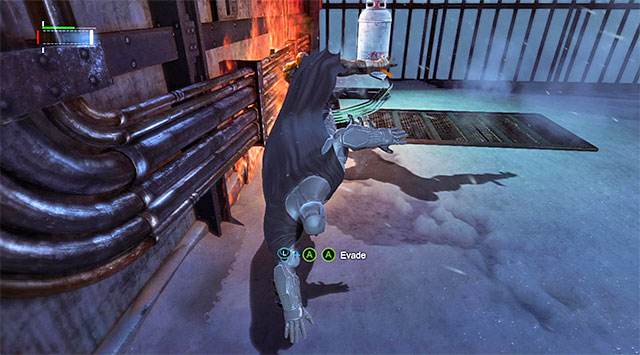
Right after the fight with Killer Croc starts, focus mainly on avoiding his attacks (lean the analog stick to the side and double-tap the button displayed by the game.) thanks to which you will not be taking damage resulting from the enemy's strong attacks (the screenshot).
Right after Killer Croc performs an attack that does not connect, run up to him and implement the same strategy as in the case of the armored enemies. You need to stun the boss with the cape and lunch a series of quick attacks afterwards (the screenshot). once the series of your attacks finishes, jump away from the Killer Croc again and do not allow him to take over the initiative.
 Try to hit the tank with the batarang
On the rooftop, there will soon appear the first group of mercenaries, who will be obstructing you from weakening Killer Croc. Ignore them for a moment and note that the boss picked up a fuel tank. Try to hit the tank with a batarang, either by quick throwing the gadget or by aiming at the tank beforehand. If you are not quick enough, try at least to avoid the explosion to avoid taking damage.
 Do not forget about Killer Croc while attacking his minions
Sooner or later, you still need to get rid of the mercenaries anyways but, the best strategy here is to rely on Killer Croc's blows and hope that they will be weakening and killing the other enemies. Start launching direct attacks only after the boss tries to pull himself together after a failed attack, and do not exaggerate with their intensity.
 Keep tapping the action button rhythmically to free yourself
The next part of the fight with Croc is similar to the previous one. So, you need to stun the boss with your cape and inflict damage, as well as to explode the tanks that he lifts and watch out for his helpers. The only new thing now is that you will have to defend yourself from Croc's bites after a series of blows that you land. The solution to this problem is tapping rhythmically the action key/button, until Batman liberates himself.
 You need to hit, with batarang, the tank that the boss is holding for the last time
Finally, Killer Croc will grab one more tank and to deal finally with the boss, you need to throw the batarang at the tank for the last time. Watch the cutscene, after which you will be automatically transported to the Batcave.
[New Character Trophy: Killer Croc]
[New Concept Art: Killer Croc]
 The Bat-computer
Before you actually use the Bat computer, I recommend that you spend the Upgrade Points that you have earned, to unlock access to Batman's new ability (they have been described at the end of this guide). You can now approach the computer to examine the memory card that you have obtained during your stay at the Blackgate Prison. your character will identify the assassins hired by the Black Mask.
[New Character Profile: Killer Croc]
[New Character Profile: Bane]
[New Character Profile: Copperhead]
[New Character Profile: Deadshot]
[New Character Profile: Deathstroke]
[New Character Profile: The Electrocutioner]
[New Character Profile: Firefly]
[New Character Profile: Shiva]
[Dark Knight Challenges Unlocked]
[New Challenges: Combat Training)]
[Batwing Drop Point Unlocked: Batcave]
[Batwing Drop Point Unlocked: The Bowery]
 Alfred
Before you leave your hangout, I recommend that you turn your interest to two optional activities. First of all, it is worthwhile to talk to Alfred, thanks to which you will receive additional experience points.
[New Character Trophy: Alfred]
 Training console connected with the additional challenge
Apart from that, you can go to the training area and play through the newly-unlocked Combat Training that is a part of the Dark Knight Challenges. Also in this case, you will be rewarded with experience points (more about this in one of the final chapters of this guide).
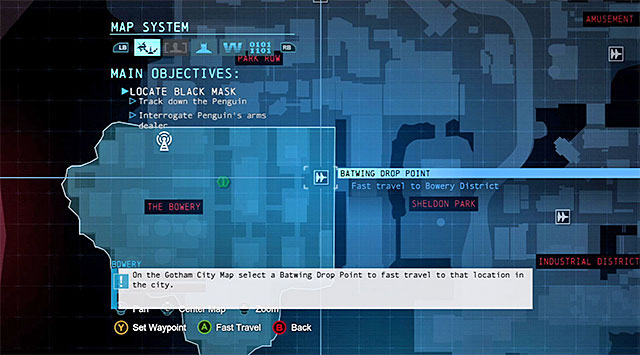
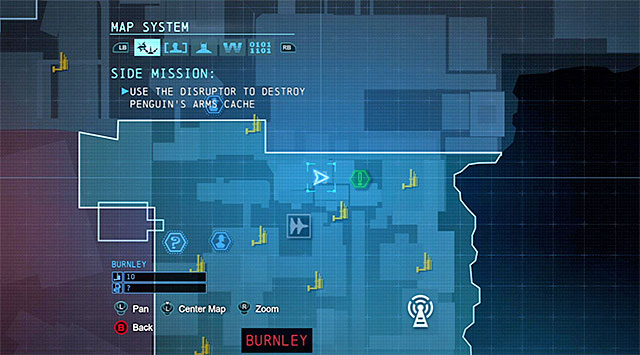
Penguin's arms dealer, who you are currently looking for, is staying in the district called The Bowery, i.e. in the North-Western part of Arkham. You can get there straight away by selecting the fast travel point from the world map (Batwing Drop Point - the screenshot), or by doing that after you interact with the protagonist's airship (Batwing). After you use the option, the game will play a cutscene and you will be transported to the Coventry GCR Tower.
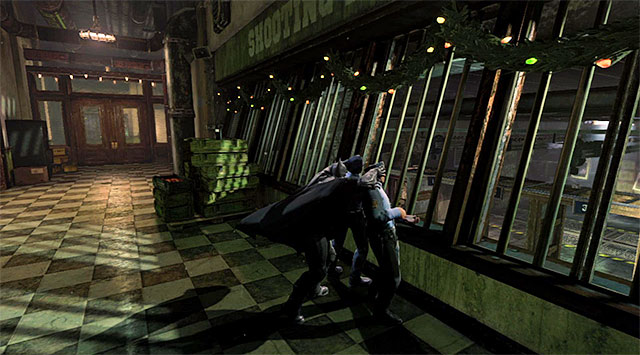
 disappear from the gangsters' sight by using the smoke pellet
Go ahead towards the room where the radio workers are being held. After you get there, it is a good idea to follow the game's suggestion and use the Smoke Pellet, to prevent Batman from being shot by the firearms wielding gangsters. Right after you use the pellet, press the key/button that selects the hook from the inventory and use it to get to the gargoyle above the entrance to this room.
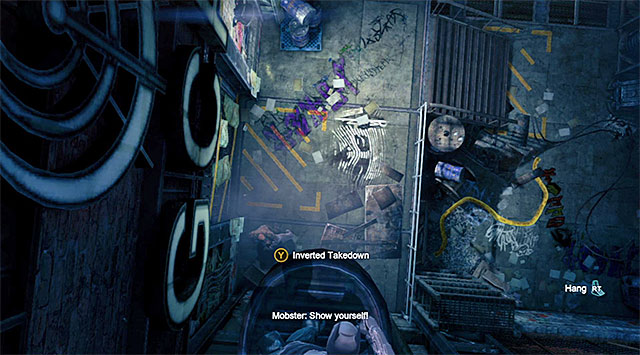 You need to be over the gangster with the hostage
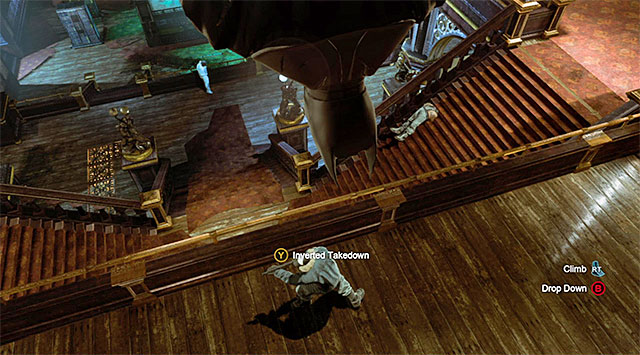
Continue using the hook, to reach successive gargoyles located in front of the protagonist. After you land onto the last gargoyle, you should be directly above the gangster who is holding one of the hostages. Press the Inverted Takedown key/button, which will eliminate the armed enemy.
 Wait for the gangster to turn away and attack him by surprise
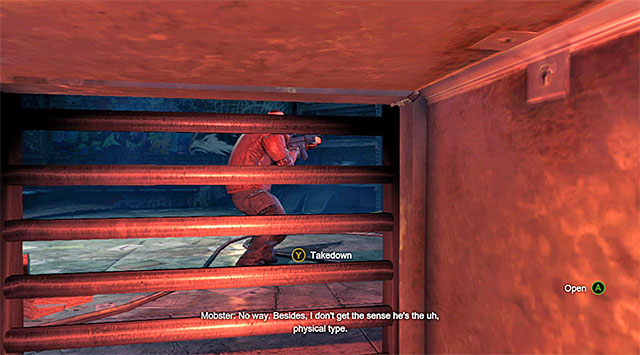
You can now easily glide down, because you will not be targeted by one of the enemies for the time being. After you land, locate the grate to the venting shaft and start squeezing through the shaft. Stop after you reach the shaft's exit and wait for the other one of the gangsters to turn away, and press the silent takedown key/button.
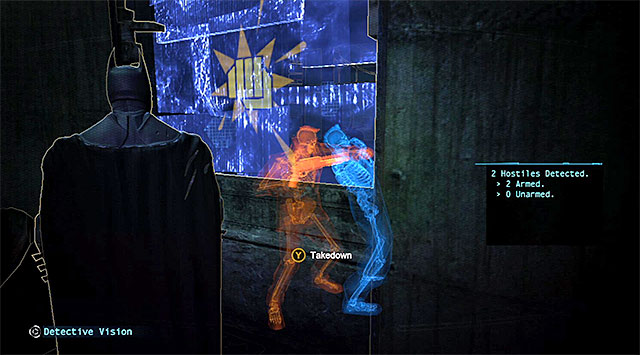
Approach the wall and jump to reach another venting shaft. After you exit this one, stop at the wall shown in the above screenshot and press the appropriate key/button to perform a takedown through the wall (you can use the detective vision to your aid here). After you have saved the hostage, walk over to the other side and take the only available passage to the next part of the tower.
 Attack the gangster once he stops at the balustrade
Stop after you approach the barricaded staircase, look up and use the hook to grapple onto one of the upper balustrades. Do not attempt to climb using the hook and wait for the last gangster to stop at the balustrade. In the way you have already learned, initiate the silent takedown here. You can now climb and take the door to the GCR Tower - Control room.
 The corpse
Turn right to get to the crime scene, which you will have to examine thoroughly. To do that, turn on the Evidence Scanner and start by scanning the victim's body (you need to press and hold down, each time, the key/button displayed by the game. Listen to the commentary concerning the victim's identity.
 The traces of DNA
The next site that you need to scan is the DNA traces located in the Northern part of thee control room. You also need to scan this device.
 The control panel
Stand now in front of the control panel located in the left part of the control room. You need to scan it also.
The final step is to find the access card that belonged to the victim. Allow for reconstruction to display again and influence the replay process by pressing the appropriate keys/triggers and following the red mark that symbolizes the trajectory of the cart. This will allow you to determine that it fell into the venting shaft shown in the screenshot. Disable the detective vision for a moment, open the grate, initiate the scanner again and scan the Access Card.
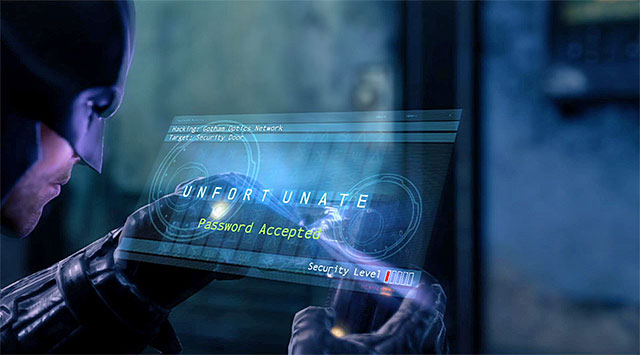
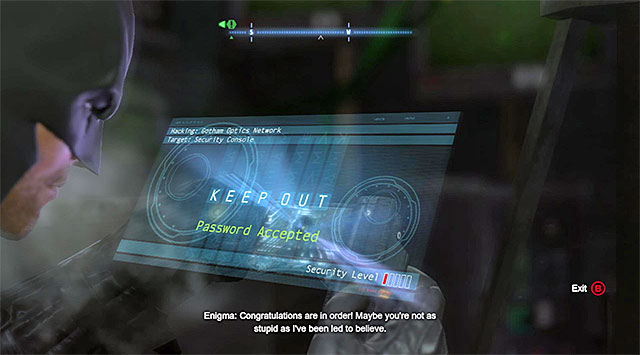
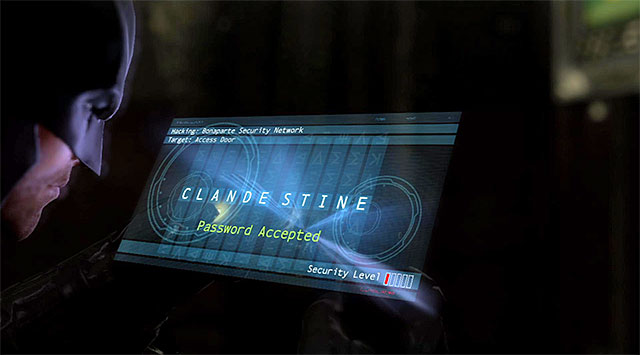
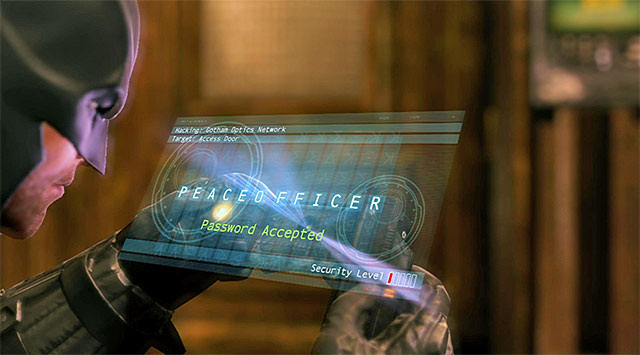
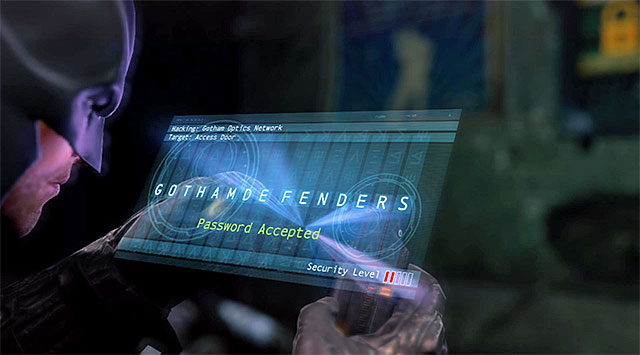
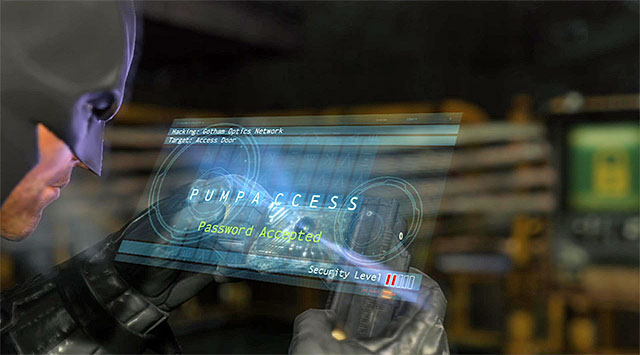
Disable the detective mode for good now and select the Cryptographic Sequencer from the inventory. Initiate the targeting mode, target the control panel and start the hacking process. You now will have to play a mini-game of finding and setting the password by using both analog sticks (or the appropriate keys and the mouse).
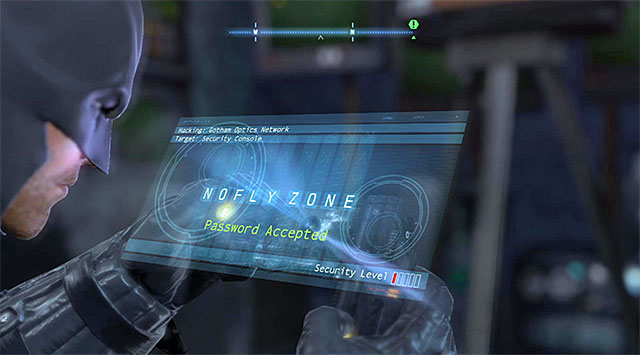
Open the newly-unlocked door and climb up the ladder, by which you will exit the building and enter the Coventry district. Listen to the radio conversation with Alfred, open the next door and approach the terminal of the communications tower assigned to this district of Arkham. Again, use the Cryptographic Sequencer, by which you will determine the password (the screenshot) and deactivate Enigma's security measures (only for the district that Batman is currently staying in).
[Batwing Drop Point Unlocked: Coventry]
[Enigma's Relay Network Unlocked: Coventry]
[New Character Profile: Enigma]
[New Side-mission Unlocked: Enigma]
Note! Before you start this mission, consider starting the Enigma side-mission, thanks to which you will be able to take care of the actions connected with it, on a regular basis. Apart from that, I recommend that you find some spare time to take the journey back to the Batcave, to talk to Alfred about Enigma and gain the valuable experience.
 The Bridge
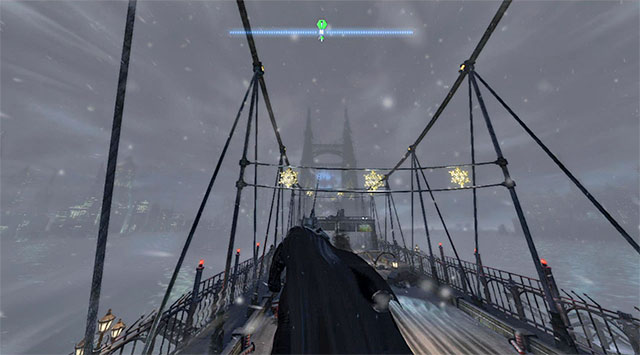
The arms dealer that you are looking for is staying at the same location as previously, i.e. in The Bowery district. the problem is that the fast-travel point in your destination is currently inactive at the moment so, you will have to take a pretty long journey across the major part of Arkham. If you want to take to this mission straight away, you will probably start in the South-Eastern district [Coventry]. In this situation, set out to the North and go over the Gotham Pioneers Bridge.
Further along your path, you will have to walk around the Sheldon Park district from the Eastern, and then from the Northern side. Towards the end turn West. Your destination is the alley shown in the above screenshot, which you can get into by flying through the hole in the glass roof. Watch a cutscene here of the Loose Lips dealer dressed up as a Santa Claus, as well as a few characters hostile towards Batman.
 Take to the arms dealer only at the very end
After you have regained control over your character, bounce off the edge and start falling. On your way down, try to aim at one of the bandits and eliminate him right at the outset. After you start the fights, eliminate the enemies one after another, while remembering about the cape swipe in the case of the armored enemies. Leave the dealer for the very end. Grab him and conduct a quite violent interrogation, thanks to which you will obtain a SIM Card and determine how you can locate the Penguin. .
[New Character Trophy: Gotham criminals]
 The communications tower region
This mission is similar to one of the previously played and it assumes that you disable enigma's communications tower, in order to deactivate the jamming signal. The new tower that you are looking for is in the North-Western part of The Bowery district. Since there is a group of enemies here, I recommend that you bounce off a ledge above and attack them from above. Eliminate all of the bandits deployed around the tower.
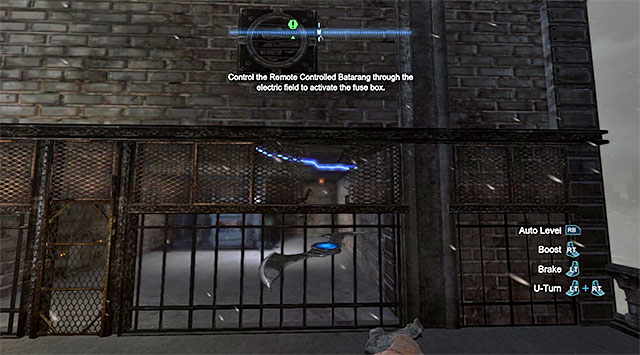
The tower itself is enclosed within an electric fence. Stand somewhere near and select the Remote Control Batarang from the inventory. Throw the batarang and make sure that it flies through the hole shown in the above screenshot. The batarang should charge as a result of coming into contact with the electric field and, to complete the process, you need to steer it into the fuse box.
You can now open the gate and the large door. From the inventory, select the Cryptographic Sequencer, start hacking into the terminal and determine the appropriate password (the screenshot).
[Batwing Drop Point Unlocked: The Bowery]
[Fast-travel Point Unlocked: The Bowery]
[Enigma's Relay Network Unlocked: The Bowery]
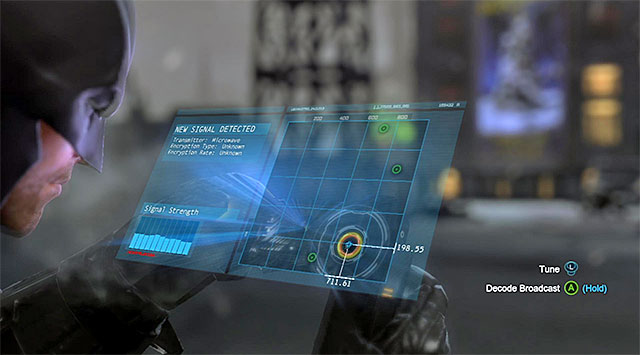 You need to tune the device and decipher the transmission
Exit the tower and wait for Batman to start the process of tracing Penguin again, using the Cryptographic Sequencer so this mini-game is not too difficult. Use the analog stick, or appropriate keys to place the crosshair inside the orange circle. Then, press and hold down the key/button for deciphering the transmission and listen to another conversation with Alfred.
[New Challenge: Custom Challenge]
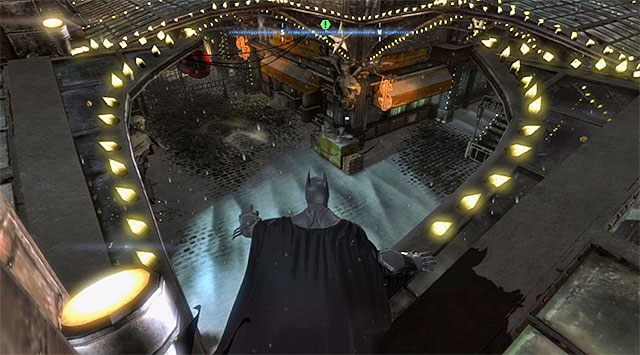
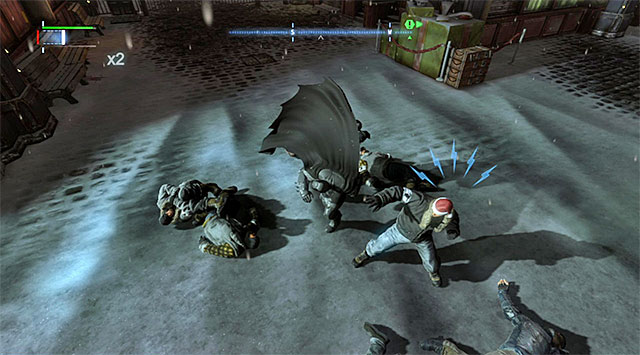
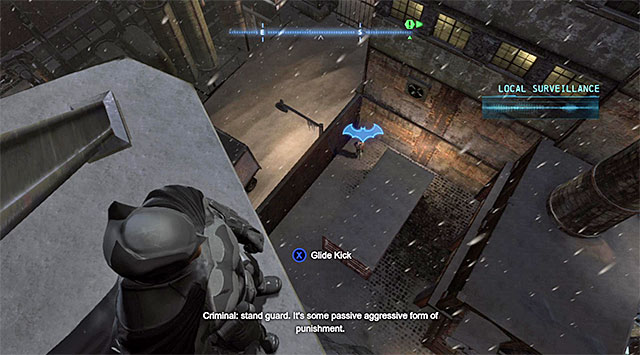
An enemy groupIn order to acquire the first SIM card, you need to go to The Amusement Mile, i.e. into the North-Eastern part of Arkham. Your destination is a quite large balcony of one of the bigger buildings. You will bump into some bandits here. Attack the enemy from above and start a more regular form of fighting, which should cause no problems to you (use the cape on the best armored enemy).
After the fighting ends, locate the radio, which has been left in the location presented in the above screenshot. Interact with it to acquire the SIM Card, and use the Cryptographic Sequencer again. Just like before, you need to put the crosshair inside the orange circle and decipher the transmission then.
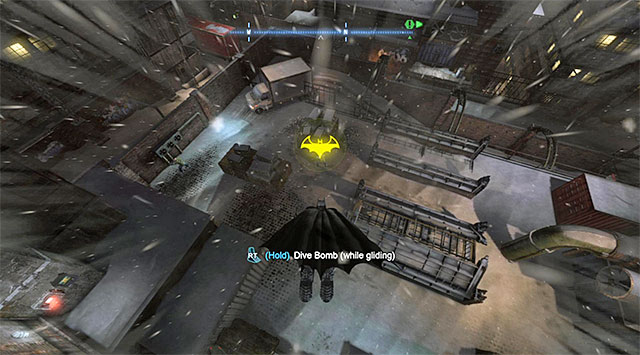
To find the second SIM card, you will have to go to the Industrial District located in central Arkham, to the North of the bridge. After you approach the destination, I recommend that you take a vantage point. That is because this area is being patrolled by three enemies equipped with firearms. I recommend that you take the enemies by surprise, because Batman could quickly die in direct fights. First of all, target the single enemy shown in the screenshot, and attack him from above. I would be good if you already had the Dive Bomb attack unlocked because the enemy will then die on the spot. If you still have not unlocked this one, make sure that you finish off the gangster.
 Eliminate the two remaining enemies
Right after the successful attack, use the hook to leave this place quickly. What is even more, if you have been spotted, drop the smoke pellet, which will allow you to blind the remaining enemies temporarily. There are two more enemies to eliminate. Wait for them to scatter and attack one of them from above. Run away again and end up by eliminating the last one of the bandits.
The radio that you are looking for is in the spot shown in the above screenshot. Wait for Batman to collect the SIM Card and start the Cryptographic Sequencer. Decipher Penguin's transmission, which will allow you to determine that he is staying aboard a ship moored near the Amusement Mile.
![Penguins ship [Final Offer] is moored in the North-Eastern corner of the map, i - Gain access to the Final Offer - Main storyline - Batman: Arkham Origins - Game Guide and Walkthrough](https://game.lhg100.com/Article/UploadFiles/201512/2015121216404993.jpg)
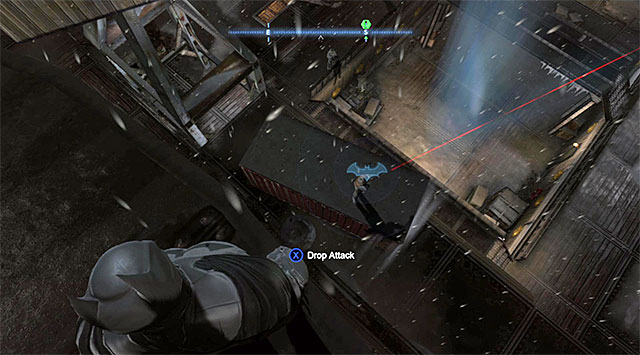
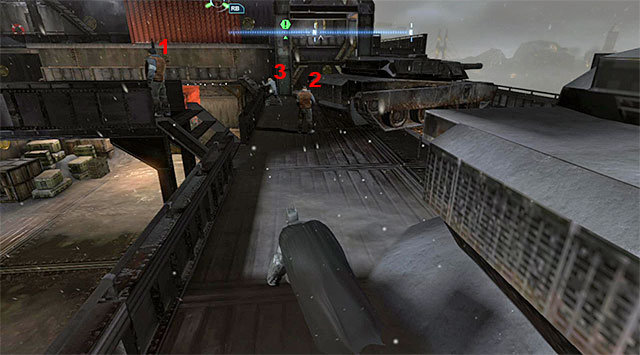
Penguin's ship [Final Offer] is moored in the North-Eastern corner of the map, i.e. to the East of The Amusement Mile. I recommend that you approach the ship from the South-Western side, especially that the area is being observed by two snipers and it would be a good thing to eliminate them quietly. The first one of the snipers is occupying the mast shown in the above screenshot. Glide down towards that person, walk him from behind and perform the silent takedown.
The other one of the snipers is deployed to the North of here. Use the option to glide and the hook to get to the red container hung down, and then to the crane. Eventually, you need to reach the ledge directly above the sniper in question (the above screenshot). Land onto the sniper and stun him before he regains his strengths.
Note! Do not walk away from the area guarded by the enemies, because they can quickly respawn. This is true also for the two snipers that you have just eliminated.
 The first group of enemies
Although the threat from snipers has been eliminated, I would recommend that you also eliminate the remaining enemies by operating from shadows. This is so, because they are equipped with firearms. First of all, focus on the two guards deployed to the right of the place where you have taken down the second one of the snipers. Land behind one of the gangsters, attack him by surprise and eliminate the other one in the same way. Note - if you are spotted while clearing the area, you can leave the ship's board, grapple onto one of the cranes hide in one of the small tunnels.
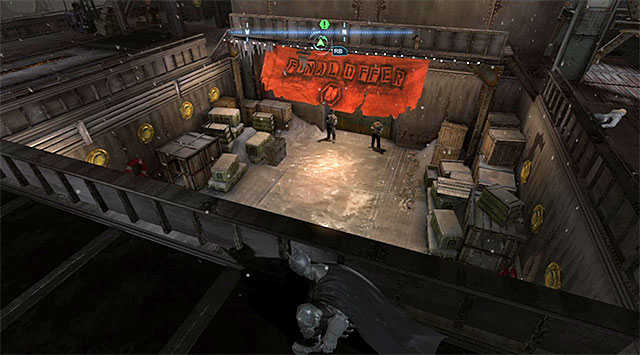
On the opposite side, there are three guards and, since two of them stay put in one spot, eliminating them will be a bit easier. I recommend that you eliminate the enemies in the order presented in the above screenshot so, by starting with the one patrolling the small, central, bridge (only after he stops near the two other enemies).
 The enemies guarding the door
Finally, you need to deal with the two enemies that guard the door below. They are occupying one spot each, which makes it impossible to attack them from above and, apart from eliminating either of them would alarm the other. That is why, it is a way better idea to encourage them to leave their posts. If you have only the standard gadgets, hit one of the guards with a batarang, and hide quickly. If you, on the other hand, have already gained access to some better elements of the equipment, consider using the Sonic Batarang.
 wait for the enemies to separate and then attack them
Regardless of what you choose to do, the enemies should, eventually, leave their default positions. In theory, you could attempt to reach the exit straight away but, since the enemies should pretty quickly separate, it is a better option to eliminate them with effective surprise attacks. After you have dealt with all the business here, take the door to the ship's deck.
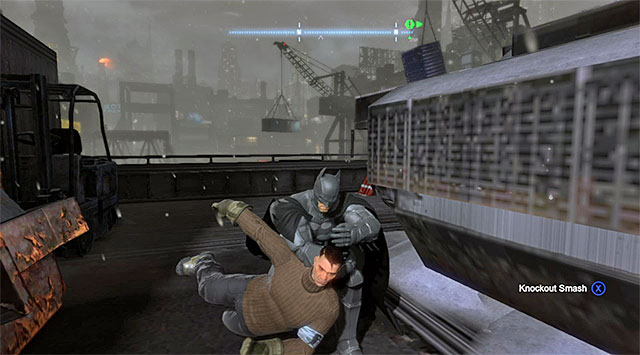
After you enter the new location, you will find yourself in the zone named the Gun Shop where you will be attacked straight away by Penguin's henchmen. As you have probably noticed, the enemies use knives so, you need to avoid their attacks. The best method to do that is to lean the analog stick down and press the counter-attack key/button (the screenshot). Optionally, you can also try to jump over them, stun them with your cape and use some of Batman's offensive gadgets.
 Be on the lookout for the enemies with firearms
After you are done, open the Northern gate and start your exploration of the ship, to reach the area where you will have to put up a fight again. In this case, the most serious threat comes from the enemies armed with guns. Try to attack them in the first place, while performing numerous dodges.
 Stop the enemies from collecting new weapons from the crates
Another important matter is to prevent the enemies from grabbing their own guns. Therefore, you should be stopping the ones that try to collect the weapons from the ground, as well as those that want to collect them from the crates. In the latter case, each time alarm is raised and red lights turn on so, you should not have to many problems with recognizing the moments at which you should attack the person that poses a threat. Apart from the matters described above, you should also mind the enemies tossing crates at Batman from above. Destroy the crates with batarangs or perform dodges.
 Glide towards the enemy with his back turned at Batman
Open the Northern hatch and go ahead to reach Deck 1 after several moments. After you reach a fork, do not attempt to jump into water and take another way round to the destination, and take leaps towards the small ledges along your way, and walk over the small fragment of the structure. After you come close to another group of gangsters, glide towards the first one of them and deal with the remaining ones, who will pose no major threat anymore (you only need to watch out for the big elements thrown at Batman).
After the victorious fight, stop at the edge, select the claw from the inventory and aim at the catches of the floating platform shown in the above screenshot. Start tapping rhythmically the key/button shown by the game to pull the platform. Then, jump onto it.
 Target at the catch under the balcony
You still need to keep using the claw but, from now on you will be interested in pulling yourself towards the catches that you can see in the distance, to set the platform into motion and make it over to the other end of the water reservoir. Finally, aim at the point under the small balcony. This will make some of the structure collapse, which will reveal a ledge which you can reach using the hook.
 Avoid coming into contact with steam
Resume your exploration to reach the door to the Boiler Deck. The attempt to open the door at the edge of the large arena will fail so, after you listen to Penguin's speech, go right. Wait for the steam to stop coming out of the openings and walk ahead only after that, thanks to which you will avoid being burned.
[New Character Profile: Penguin]
 A hatch that you can open
Look up and use the hook to grapple onto the ledge above. Soon, you will reach a new area with steam coming out. wait until it stops escaping from the nearest pipes and dash ahead, trying to coordinate everything perfectly. Use the hook again and, after you reach a new are, change it for the claw, to open the nearby hatch with it. Follow the short tunnel to the very end and jump down to the arena, which will result in the playing of a cutscene with Tracey and Electrocutioner starring.
 The shortest boss fight in the history of Batman's adventures
If you hope that you will play a full battle with the Electrocutioner, forget about it, because you are wrong. The only thing that you need to do is approach the abovementioned enemy and press the standard attack key/button. Thanks to this Batman will knock him down with a strong blow automatically.
 Try to land consecutive blows correctly
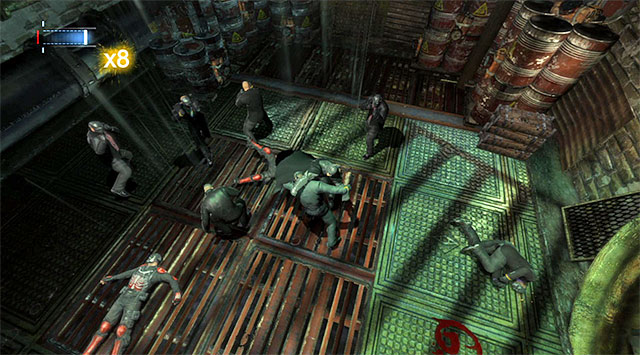
At this moment, the game will start a new fight, where you will have to defeat Tracey's goons. Just like in the case of the other demanding fights, focus mostly on eliminating and avoiding the attacks of those of the enemies that pose the greatest threat, i.e. the ones equipped with knives, heavy armors and the ones that throw heavy objects. Since there are a dozen or so people on the arena at the same time, it is a great opportunity to boost up the combo counter and gain more experience points.
 You need to interrogate the enemy that you defeat as the last one
You need to keep fighting until the moment at which there is only one man left. Weaken him to the extent it is possible and press the counter-attacks key./button, thanks to which you will interrogate the bandit and learn that you need to reach Penguin's office by walking through the casino and the theater.
Note- if you want to, you may examine Electrocutioner's, body, although this is purely optional. Further in the game you will learn that he managed to flee, which means that you will face him again.
[New Character Trophy: The Electrocutioner]
[New Character Profile: Tracey]
 The Boiler Room's exit
Take the Northern exit from the arena and walk up the stairs. Ignore the map's indications, because you can reach the Penguin's office by taking a shorter way. Go towards the Eastern hatch that will take you to the Deck Access Corridor. After you get to a part which you have not explored yet, jump down where there is a destroyed ladder. Then walk ahead.
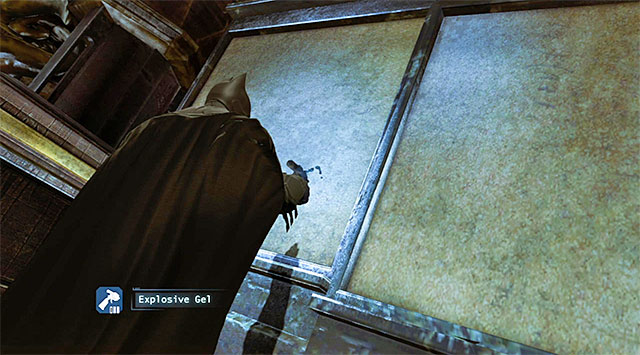
Run up and jump over the hole in the floor, and then slide, which will allow you to get around another obstacle. After you reach the corridor's final part, jump up to reach the ledge above and walk through the shaft. Take one more slide and wait for Batman to land safely in a new area. Stop at the wall on the right, select the explosive gel from the inventory and spread it. Detonate the gel, which will unlock further passage for you.
 The place where you perform the last jump
Approach the edge and use the hook to reach the balcony above. Do that again with the next ledge and start running. Then jump to reach the ledge in front of Batman. Turn left here and take another leap, after you run up, this time to reach the interactive orange ledge that you can see in the distance.
 The guards
After you have reached the final part of the ledge, look up and use the hook again. Turn around and aim at the highest-located balcony, thanks to which you will end up next to two guards that talk to each other. Throw one of them over the balustrade and deal personally with the other one., who will pose no serious threat to you anymore. You can now go towards the hatch to the ship's Upper Deck.
 If you want to, you can attack the armed enemy by surprise
Around the corner, you should notice three enemies and this provides you with a rare opportunity to launch a surprise-attack. I recommend that you use the remote control batarang here, to knock the armed enemy down, or spread the explosive gel in the area (it is especially recommended if you have purchased an upgrade for the gadget which equips it with proximity detonator). Regardless of what action you have taken, deal first with the guard, and take to his colleagues afterwards. you can now walk though the nearby gate and ignore the discharges that you can see above it.
 get the armed bandit from behind
After you reach the final part of the corridor, turn left and unlock access to the venting shaft Enter the tunnel and pry the next grate after you reach its end. Soon, you will reach the restaurant and you may go towards the door to the Casino straight away. It is necessary that you crouch here because there are three enemies around and it would be a good thing if you eliminate all of them by surprise. First of all, focus on the enemy with the gun, and try to reach him without getting detected. (make use of the nearby columns in the form of cover). Perform a silent takedown on this one.
You may now approach the remaining enemies. What is interesting, you do not need to choose which one you want to attack in the first place because, if you stop precisely between them, pressing the silent takedown key/button will cause eliminating both of them simultaneously (the above screenshot). Wait for Batman to obtain another SIM Card and watch a short cutscene featuring Tracey.
 First attack the enemies with knives and firearms
Get ready to fight another battle. Just like in the case of the previous fights, set appropriate priorities for yourself. First of all, eliminate the enemies equipped with knives and firearms. Also, avoid the heavy objects that the enemies throw at Batman (or destroy them with batarang). Finally, take to the armored enemies by stunning them with the cape and initiating a fast combo.
Wait for Batman to decipher Penguin's another transmission and locate entrance to the venting shaft in one of the casino's corners. Walk through a short tunnel here and after you get to a small room, select the Cryptographic Sequencer. Use the sequencer on the control panel to break into the system and determine the password (the screenshot).
 Do not allow the enemies to hit you too often
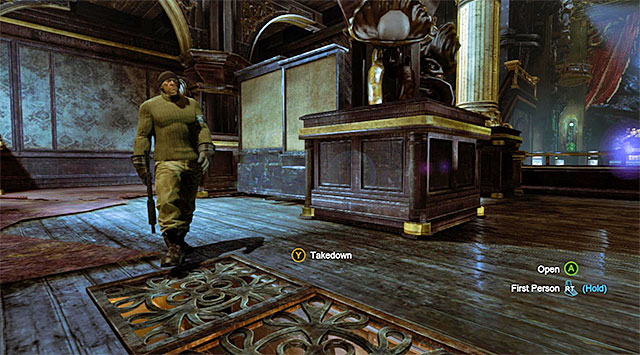
return to the casino and deal with the enemies that you find there. It is worthwhile to act quickly here, and consider using additional gadgets, because two of the bandits use firearms and they pose, as a result, quite a big threat. After you win the fight, go to the room where the enemies that you have just eliminated, used to stay and press the red elevator button.

Take the elevator to reach Tracey's office, and be prepared to press the counter-attack key/button when the moment is right. You need to use the Cryptographic Sequencer once again, this time to hack into the computer that Tracey used to work at. Solve the hacking mini-game by determining the correct password (the screenshot)
[New Character Trophy: Tracey]
[New Character Profile: Candy]
Approach the big glass fragment of the wall, run up and smash through to the other side, to land in the casino's main area again. Try to open the southern door, which will result in another fight with another group of bandits commanded by an elite enforcer. First, deal with the regular enemies and perform numerous dodges to avoid the elite bandit's charges. Focus on eliminating this one as the very last, by stunning him with your cape and landing a series of quick attacks (the screenshot). You can now take the Southern door. Walk through the Foyer, to walk into the Theater.
[New Character Trophy: Penguin's Enforcer]
 The statues will turn out to be helpful while avoiding the guards
The theater is a quite a big location where there are six enemies armed with guns. I recommend that you eliminate the enemies one by one, without haste, while remaining in shadows for the whole time and selecting the ones that walk alone. I absolutely recommend against taking the risk of direct confrontations because, not only will you gain less experience, but also it will be more difficult to keep Batman alive. Still, if confrontation takes place anyways, use smoke pellets and hit fire extinguishers with batarangs in an attempt to lose the enemies. To get around the area, it is best to make use of the statues under the ceiling and reach them using the hook.
 The reverse takedowns are a good method of eliminating the enemies without problems.
You can use the abovementioned statues to your advantage, of course, while eliminating successive gangsters. A good idea is to perform reverse takedowns, which you can perform right after the enemy walks under the protagonist. Right after you perform this kind of attack, remember to get away from the site as quickly as possible (the best idea is to get to a statue located at the opposite end of the theater) because the other enemies will quite quickly appear in this area, and they may notice the lurking Batman.
 Always pick the enemies who patrol the area alone
Another method of using the statues to clear this location, is to glide towards those of the enemies, above whose heads there appears the bat symbol. Once again, I remind you of picking the enemies who walk alone. After you hit the enemy, you need to finish him off and leave the site as quickly as possible. to prevent being spotted.
 You can use the passages under the floor for hiding and while planning silent takedowns
You do not need to restrict yourself solely to planning attacks from above. An attention-worthy idea is using the passages under the floor, which you can reach by raising the interactive grates. You can also use this place not only for hiding, but also to attack by surprise those of the enemies who happen to stand in the vicinity. You should remember, however, that you should not stay in the region after you eliminate a given enemy.
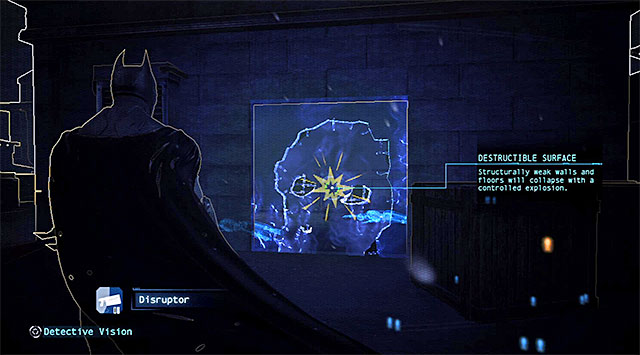
 An example weakened wall
There also are several weakened walls in the theater, which you can explode using the explosive gel. Using this gadget is especially recommendable if you have upgraded it with Proximity Detonator, thanks to which you will not have to monitor the situation personally and wait for the right moment to detonate charges.
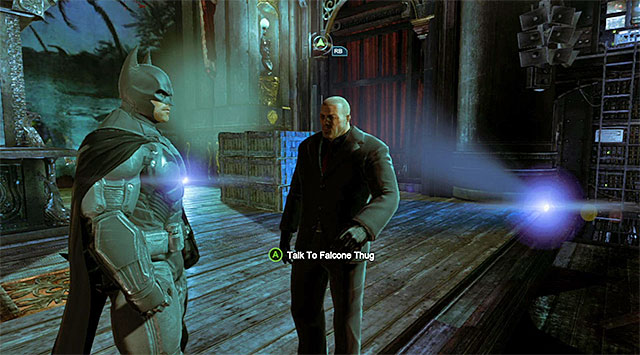 Falcone thug
Continue taking the steps described above which will ultimately result in clearing the theater of all six bandits. Before you leave this place, you may talk to a Falcone thug, although it is not necessary. Go South to reach Penguin's office located in the Boiler Deck, which was inaccessible earlier. This will result in a cutscene being played, featuring Candy and Alberto Falcone.
[New Character Profile: Alberto Falcone]
[New Character Trophy: Alberto Falcone]
 The fight in the Penguin's office is not too demanding
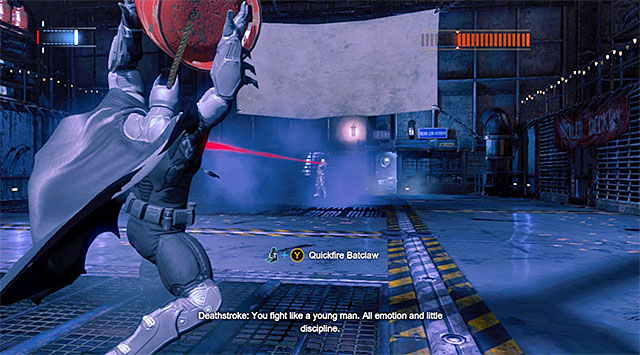
You now need to fight another battle, which is a bit shorter but, this is not to say that you can ignore the enemies. You should mind the enemy with a knife and, due to the small size of Penguin's office, do not let yourself be cornered . After you win the battle, you will see a cutscene and you will get to fight a battle with the next boss, which is Deathstroke.
Deathstroke is an enemy that is way more demanding than the previous one from the storyline, i.e. Killer Croc. The key to success here is a good knowledge of the use of counter-attacks, because otherwise you will fail even in the first phase of the fight, not to mention the following ones. Try to avoid taking damage for as long as possible because it is in the final phase of the fight that it will be very easy to lose health points quickly. Your failure will mean the necessity to repeat the entire fight, and not the its last phase.
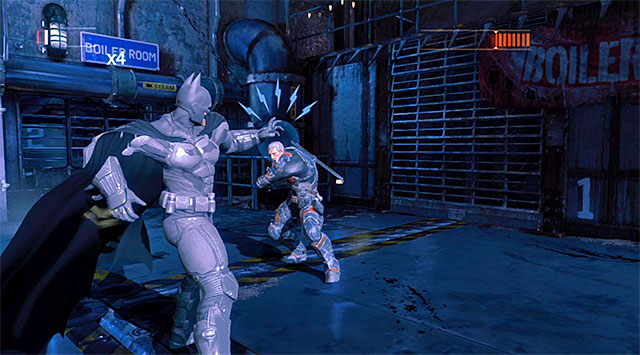
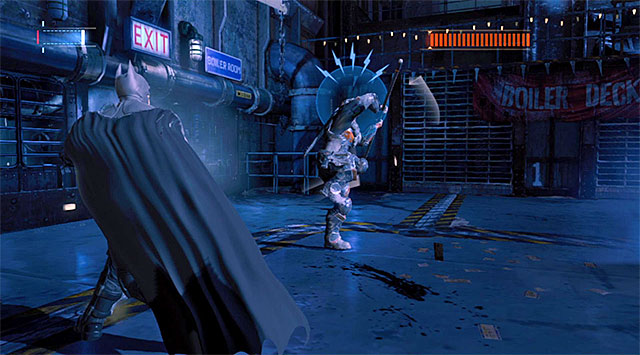 The boss will be trying to attack Batman on a regular basis
The fight with this boss consists of three parts. After the first one starts, you should focus, first of all, on waiting for Deathstroke to attack, thanks to which Batman will be capable to pull off counter-attacks and land his own blows. I recommend that you take the initiative especially further into the battle, once you want to maintain a high multiplier in order to achieve more experience.

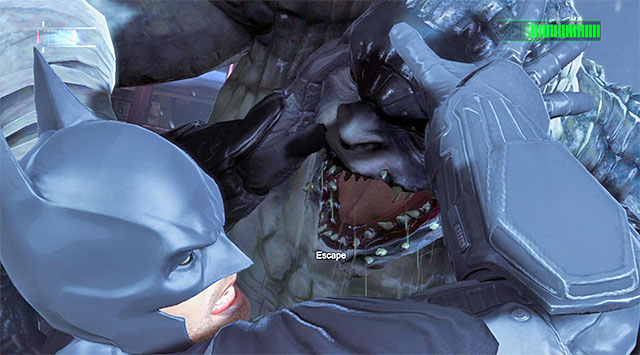
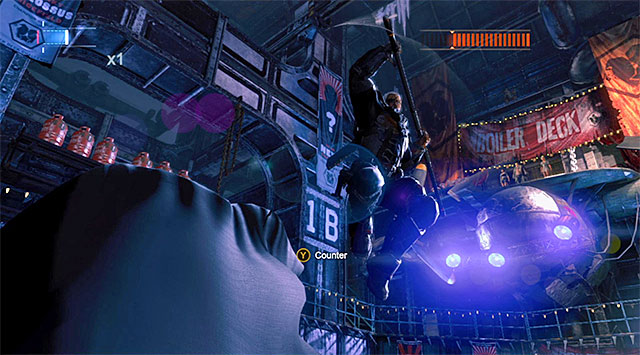
Apart from responding to Deathstroke's regular attacks, you also need to take part in scenes of wrestling with the boss, on a regular basis. Also here, you should make sure that you press the counter-attack button, BUT exactly at the moment at which there will appear a prompt urging you to (the above screenshot). You cannot press it too early nor too late because this will mean losing a given event and taking unnecessary damage. Each time after you have blocked the enemy's attack, you should land your own combination, using the fact that Deathstroke does not start defending straight away.
 Keep pressing the counter-attack button
Perform the action described above until you deprive Deathstroke of sufficient amount of health. After the boss temporarily blinds Batman, prepare for the process of rhytmical tapping on the counter-attack key/button.
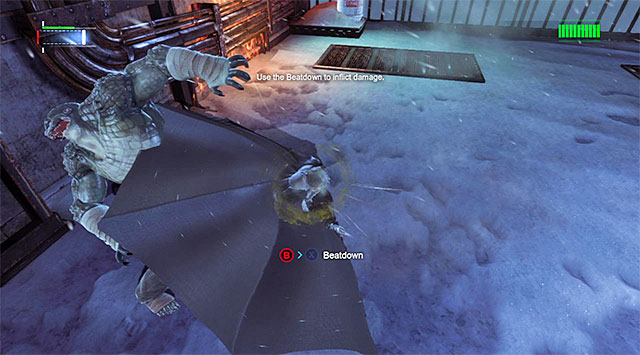
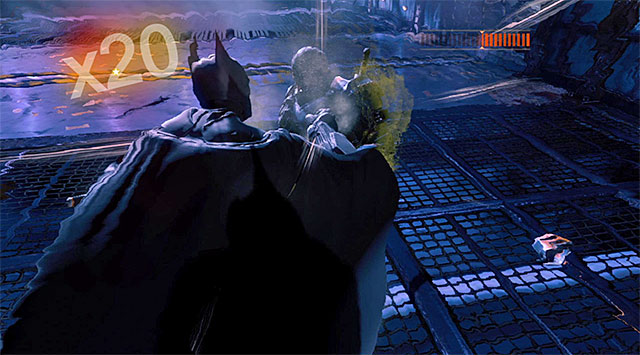
 Land as many blows on the boss as possible
This is not the end yet, because the game will soon allow you to launch a high-intensity attack called Beatdown, which is similar to the one that you have already been using to eliminate armored enemies. Try to land as many blows, in a series, as possible. Batman should take Deathstroke's mask off and get promoted to the second phase.
 You should be very careful at the moments in which you need to avoid the boss's attacks
The basic handicap in this part of the fight is that each time you wrestle with the enemy, you will be required to press the counter-attack key/button at two different moments (with several seconds in between) . As a result, take your time and do not hurry too much to seize the initiative. Do that only after you dodge Deathstroke's second blow.
Another new element to this phase of the fight is the possibility of a situation in which Deathstroke uses his remote claw to attach Batman to an explosive tank. In such a situation, if you want to avoid taking too much damage, you will have press the ideally timed counter-attack key/button to send the charge towards the boss (the screenshot).
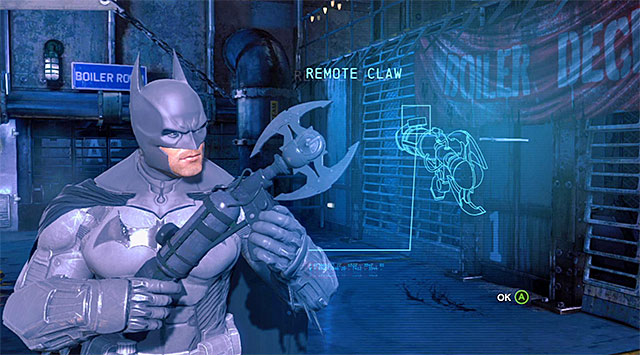
 Pull Deathstroke
Regardless of whether you managed to avoid colliding with the tank or not, it would be a good idea to follow the game's suggestion and initiate the key/button combination displayed on the screen. This will result in selecting the regular claw from the inventory. Using the claw will allow you to pull the boss your way, which will render him incapable of using his gun.
 Land a blow after another in a series
The ending of the second phase is the same as the one of the first phase so, you first need to defend against Deathstroke's blows in close combat (the counter-attack key/button) and seize the initiative and land several quick blows. Batman will deprive the boss off his blade and the third phase of the fight will start.
Avoid the boss's quick attacks with katanaIn the last phase of the fight, Deathstroke, as a result of having lost his primary weapon, will start using katana, which means quite a lot of problems for you. This is so, because he will be capable of initiating faster standard attacks. Therefore, you need to watch out even more and launch precise, well-timed counter-attacks. This is not the only problem, because, from now on, the wrestling scenes consist of three different moments at which you need to defend yourself against taking damage. Do not forget about this and do not attempt to respond to Deathstroke's attacks too early.
 The reward for defeating the boss
The premises of the fight's ending should be already familiar and learned in the previous phases of this fight. You first need to defend against close combat blows and initiate a very long combination of blows. As a reward for winning the fight with the boss, apart from experience points, you receive the Remote Claw.
[New Character Trophy: Deathstroke]
Select the newly-acquired Remote Claw from the inventory and aim it at one of the interactive points above the arena (the above screenshot). Note that both points have been connected with a rope and, thanks to that, you can grapple it with the hook. Using the rope, make it over to the balcony with door to the Penguin's office. Unfortunately, you will fail if you try to make it past the door but, you will have another talk with the Penguin instead.
[New Character Trophy: Penguin]
[New Character Trophy: Candy]
 Walk over the rope, thanks to which you will avoid falling into water
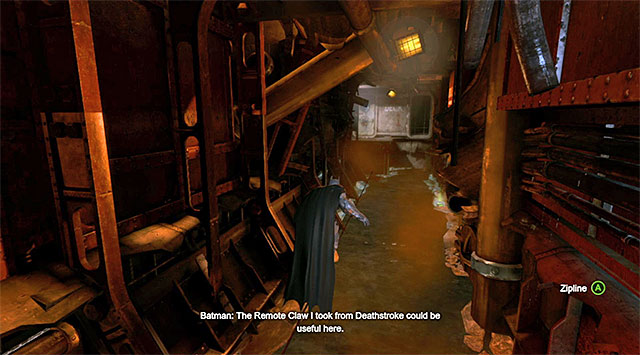
Jump down and walk towards the ship's exit so, take the arena's Southern door to Deck 1. After you have reached the partially flooded corridor again, activate the hook again in order to extend another rope. Jump onto the rope and, after you have reached the opposite ledge, resume along your way. Along your path, listen to the conversation with Alfred and, after you return to the Gun Shop listen to Anarky's speech also, who has a side mission connected with him ( the mission has been described in a separate chapter of this guide). You can now leave The Final Offer.
[Character Profile Update: Deathstroke]
[New Character Profile: Anarky]
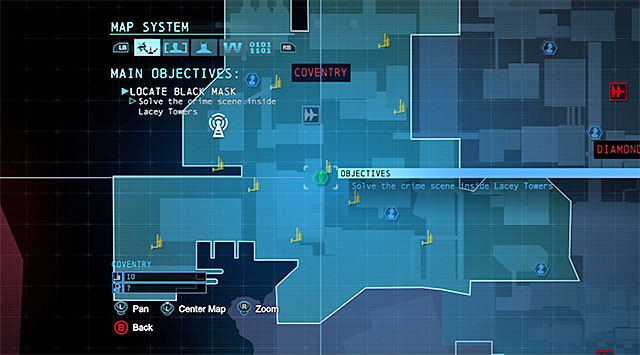
The place that you currently need to reach is the building located in the central part of the Coventry district in the Southern Arkham. Since it may happen that the game will remove the marker from the map, the location of your destination has been marked on the map in the above screenshot.
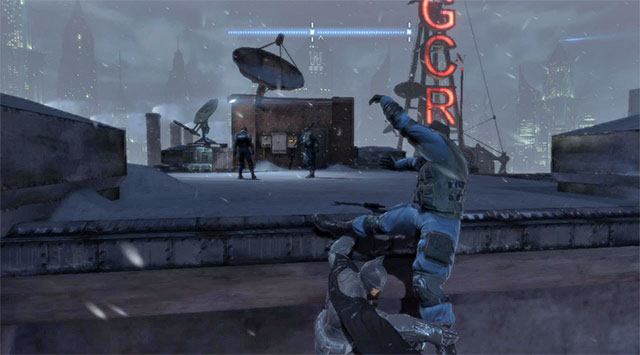 It is worthwhile to throw one of the police officers off the rooftop
Your destination point is a relatively small roof with three policemen on it. I recommend that you grab onto the edge of the roof and throw one of the policemen off. Only then, take to the remaining enemies and deal with them in a direct fight. After you have won the fight, select the Cryptographic Sequencer from the inventory. Just like earlier during the campaign, place the crosshair in the orange circle and decode the transmission (press and hold down the appropriate key/button).
Go east now, i.e. towards the next two policemen who have been marked by the game. I recommend that you attack these ones by surprise as well, especially that grabbing onto the edge below them (the above screenshot) will allow you to throw over the balustrade both of them at the same time. You can now take the entry to the Lacey Towers.
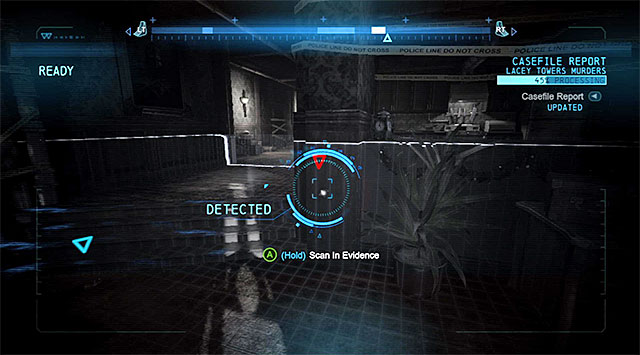
 Corpse at the stairs
Follow the linear corridor to reach Sionis' Safehouse, i.e. a crime site, after several moments, which requires a careful inspection. You should, of course, start with starting the evidence scanner and scanning the victim deemed to be the Black Mask (you need to press and hold down the key/button that the game prompts you to) to analyze the left hand fingertips.
 The murdered woman
Turn around and approach the chandelier to scan the woman hung here, thus learning her personals.
 Traces on the floor
Another area that can be scanned is the floor near the chandelier with traces on it. Performing a scan here will allow you to determine the how the fire spread all around the apartment. Return to Black Mask's corpse. Scanning it once again will start another reconstruction, this time concerning the circumstances of the man's murder.
 Fingerprints
Approach the woman hanging down from the chandelier again and scan the corpse again. Also in this case, you will need to determine the fired bullet's trajectory. turn around and locate a new trace to the right of Black Mask's corpse. It is going to be fingerprints that can be subject to examination. Remain in this area and locate the shoe polish smears and scan them.
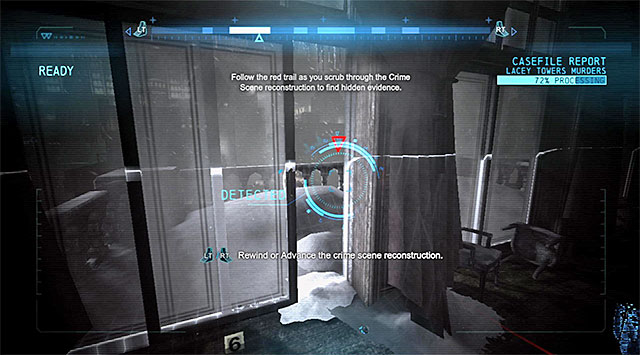
Take a look around the site for possible DNA on the floor, connected this time with the destroyed table. After you see another reconstruction, start holding down the keys/triggers for adjusting the reconstruction. Follow the red line, which will take you to the balcony door. You will find here a fragment of clothing, which you of course need to scan.

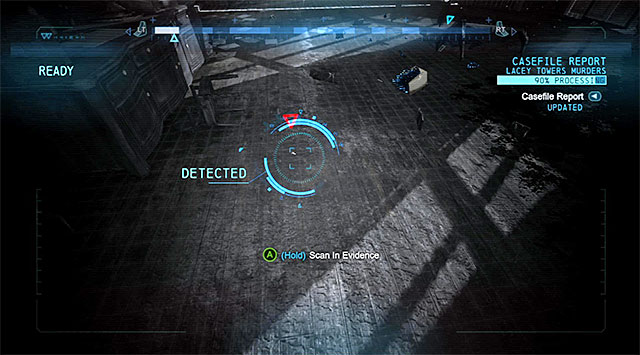
Go now towards the apartment's exit but, after you take the stairs, turn right and examine the counter on the right. Press, and hold down the appropriate key/button after you target the DNA trace shown in the above screenshot, thanks to which you will see another reconstruction.
 the phone
Finally, find the cell phone lying on the floor. Examining it will allow you to read an important message. Watch the final version of events and listen to the conversation with Alfred.
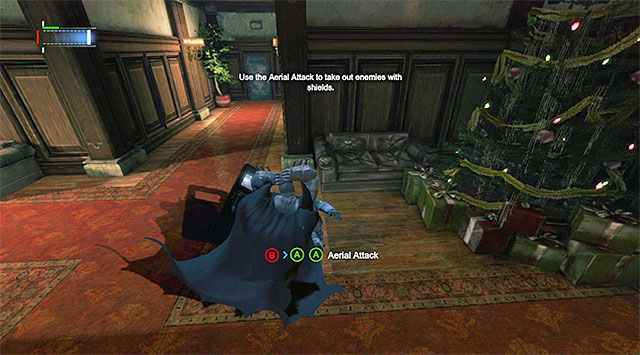
Go towards the Lacey Towers' exit. Take your time because, after several moments, you will encounter, for the first time, an enemy with a shield. To deprive this kind of enemies of their shields, you first need to stun them with your cape and "trample" them by double-tapping the key/button displayed on the screen (the above screenshot). After the policeman loses his shield,, he will become an easy target but, you need to make sure that he does not pick it up again.
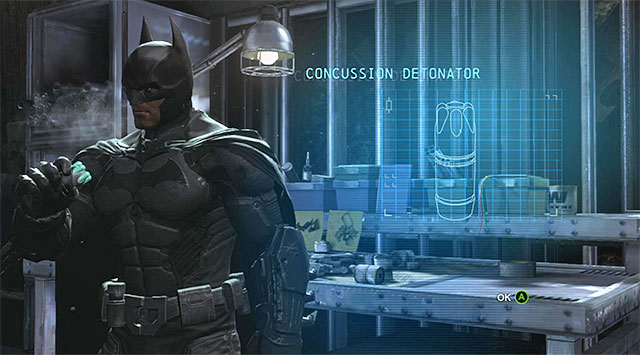 A new gadget
After you leave the skyscraper, fast-travel to the Batcave. Talk to Alfred, and go to the workshop to acquire the Concussion detonator.
[New Challenges: Combat Training]
 The gargoyles provide a good look over the entire rooftop
Fast-travel again. The police precinct is located in the Burnley district, i.e. in the Southern part of the city. If you have not sabotaged the communications tower there, yet you can fast-travel to the Coventry district and go to the South-East. Regardless of your route, approach the precinct from the North and, after you listen to the conversation with Alfred set out towards the rooftop. It is here that you will bump into seven armored policemen and, since they are guarding the only possible entrance, you will have to eliminate them all. I recommend that you plan on all the steps that you take from now on, while remaining near the gargoyles.
For obvious reasons, I recommend against engaging the corrupt policemen into fight because, since they are armed, Batman could die very quickly. It is much better an option to attack them from behind and escape onto the gargoyles, or into any other safe location, after you perform each attack. Start by eliminating the sniper occupying the balcony shown in the above screenshot.
 Perform quiet takedowns on the successive opponents
The roof's main part is being patrolled by three policemen. Each time, wait until the character that you are targeting walks away from the others and strike only then. If you do not want to alert the enemy to your presence, do not attack from above and land somewhere behind them. After you sneak up to them, perform a quiet takedown.
 The guard on the helipad
As the next one for takedown, you should select the enemy patrolling the helipad located to the right of the balcony with the sniper that you have just knocked down. What is interesting, you do not need to worry that the attack will be noticed by the two other guards standing next to the door. Also in this case, I recommend that you perform a quiet takedown only after you have reached the helipad, instead of performing an air attack.
 One of the enemies can walk away from the building's entrance.
Assuming that you have done everything according to the plan, there are only two more guards left to eliminate, who are guarding the building's entrance. The situation may evolve here in two different ways. If you have noticed one of the policemen going left, wait for him to stop somewhere near the ladder, land onto him and eliminate him.
 You can knock down and finish out both of the guards simultaneously
If the guards are, at all times, staying near the building's entrance, then you will have to use one of the gadgets in your inventory. You can encourage the enemies to go out on a patrol by hitting one of them with batarang, or knock down both of them, so you can then run up to them and finish them personally. In the latter case, I recommend that you use the either the concussion detonator or the hook (to pull the enemies towards yourself). Regardless of the variant, end by taking the door to the room in the precinct's attic [Rooftop Maintenance].
[New Character Trophy: SWAT Officer]
 The policeman at the shaft's mouth
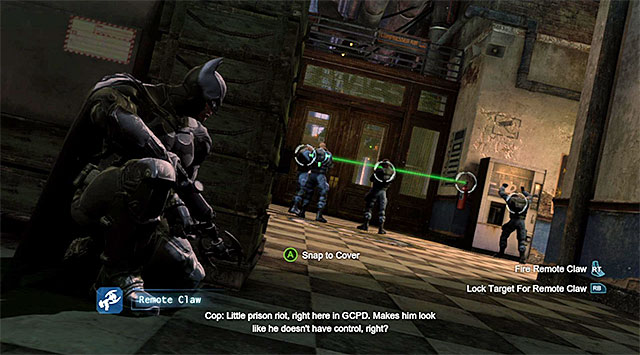
Climb down the stairs. After you reach the locked door, select the explosive gel from the inventory and use it to blow up the weakened fragment of the wall on the right. Take the new passage, land onto the roof of the moving elevator and wait for it to reach one of the lower levels in the precinct. Grab onto a ledge and start circling the precinct's main hall [CPD - Bullpen], which you will be able to explore more thoroughly later on in the game. Along your way, remove the venting shaft's grate and listen to Captain Gordon's speech. Reach the end of the shaft and perform a quiet takedown on the nearby enemy.
[New Character Profile: James Gordon]
 The venting shaft's grate
After you listen to the conversation with Alfred, start your exploration of the SWAT - Storage Room, which ill take to you to the SWAT - Manager's Office. In the neighboring room, there are three unarmed SWAT team members and you need to deal with them (it is a good idea to launch a surprise attack that e.g. assumes using the concussion detonator). After the fight finishes, locate the venting shaft's grate under the ceiling and rip it out, using the claw. Then, use the hook to reach the shaft.
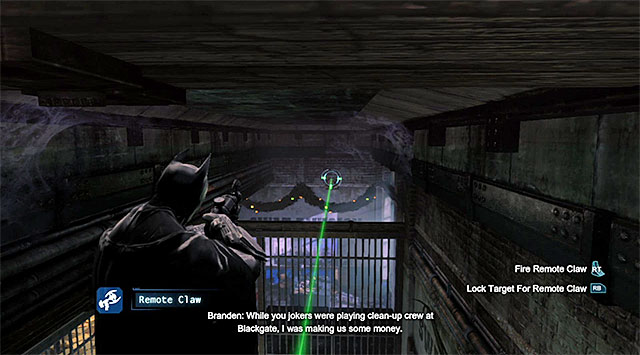 The interactive anchor point
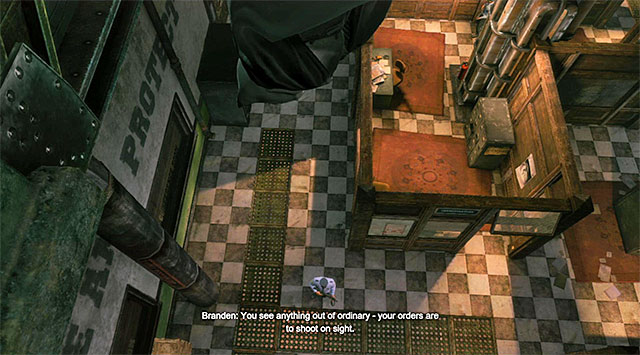
Approach the SWAT - Conference Room and listen, along your way, to Branden's speech, which concerns the plans of capturing the Batman and collecting the reward set by the Black Mask. After you reach the ledge located above the conference room, select the hook from the inventory and aim at the point that you can see in the distance. Jump onto the rope and walk over it to the other side, and land safely in the room neighboring the one with the SWAT members.
[New Character Profile: Branden]
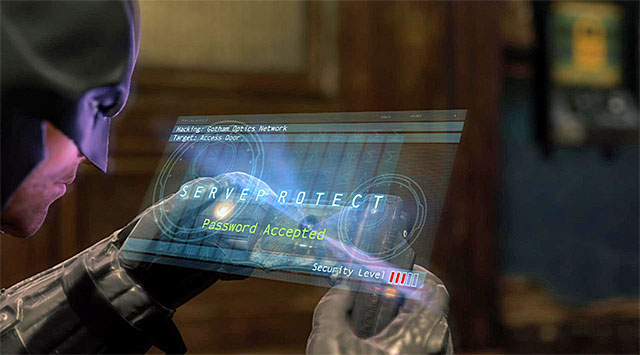
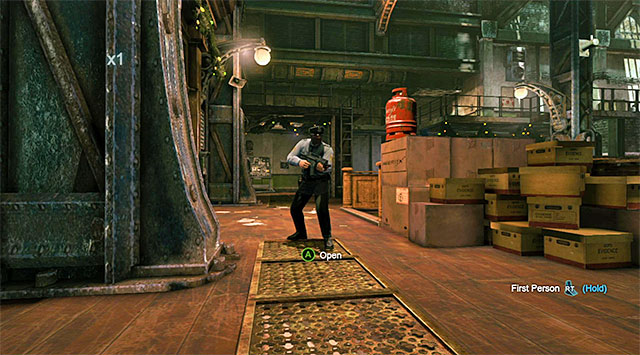
Move ahead and pass the room with the opponent group at a safe distance. Sneak up to the single enemy from behind here and perform a quiet takedown. After you do, turn to the door on the right, which leads to the reception desk. Select the Cryptographic Sequencer and start hacking into the local control panel, which will lead to the password being determined (the screenshot). You can now walk into the SWAT Division room.
 Pull the fire extinguisher towards one of the enemies
After you walk into the next location, Batman should automatically hide behind a cover. Follow the game's suggestion and use the hook to pull the fire extinguisher towards one of the enemies. There are two upsides to this solution - this will lead to inflicting damage to the character that the extinguisher collided with, and will also allow you to blind the enemies temporarily. Use the momentary advantage in the best way you can, and start fighting right after using the abovementioned gadget. After you have secured this area, take the door to the SWAT - Interrogation Room].
 Attack the policeman at the other side of the mirror
Approach the one-way mirror and perform a quiet takedown on the policeman who is interrogating the acquainted arms dealer Ricky "Loose Lips" LeBlanc. After that, jump into the interrogation room and press the appropriate key/button to obtain valuable information from the dealer. Thanks to this you will learn about a gadget called the Disruptor, which is currently being stored in the evidence locker. Exit the interrogation room, and continue along your path for the SWAT Division.
[New Character Profile: Ricky "Loose Lips" LeBlanc]
[New Character Trophy: Ricky "Loose Lips" LeBlanc]
 Pull the tank towards one of the enemies
Once again, go towards the reception desk and use the hook to hoist yourself up above the largest group of the policemen who gathered here. It is a good idea to start also this fight using the grapple to pull one of the propane tanks towards one of the policemen (best at the one wearing a better armor) and to cause an explosion. Additionally, perform an attack from above and start fighting in a more conventional way, which is not going to surprise you anymore with anything new.
 A single enemy
Once the fighting is over look for a barricaded window which separates the main hall from the side room. Use explosive gel here and detonate it so that you'll unlock access to the next area of the police precinct. Begin sneaking here, because this will allow you to surprise a cop who is talking on the phone.
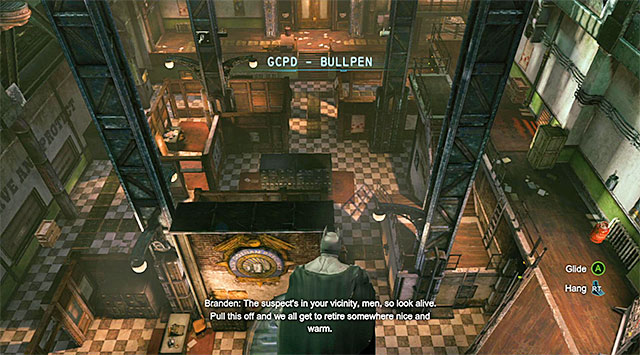
The look over the bullpenrip out the venting shaft's grate and follow the corridors [Maintenance Access], while listening to the between Captain Gordon and his daughter Barbara. force another grate open and use the hook, and reach the ladder, thanks to which you will reach the GCPD - Bullpen occupied by eight armed policemen.
[New Character Profile: Barbara Gordon]
[New Character Trophy: Barbara Gordon]
 Use the vantage points to move around the entire bullpen
Just like in the case of the recent visit to the theater, the best method ids to attack the enemies staying in this area one-by one, while attempting to avoid detection at all costs, and using the smoke pellets, if necessary, to stage an escape. For moving around and quick escaping from the attack sites, use the numerous vantage points under the ceiling.
 Inverted takedowns are a good method for taking the enemies down effectively
Just like before, you can eliminate the policemen in a number of different ways. Strategies worth attention are the attacks from above and inverted takedowns performed at the moment at which a enemy strolls under the vantage point currently occupied by Batman.
 You can hide in the tunnels and attack the policemen by surprise
Another method which you have already learned is hiding in the tunnels under the bullpen. You can wait for the enemy in hiding and attack him straight away, or follow him to eliminate him quietly.
 The interactive ceiling
In the bullpen, there are no weakened fragments of the wall, where you could spread the explosive gel. Still, in one of the corners of the room, you should notice a weakened fragment of the ceiling. You can stand there and wait for an enemy to appear under Batman, after which you perform a (quite loud) takedown.
 It pays off to drag the enemies into explosive items
While securing this area, you can also use the gadgets that you have obtained recently. Especially useful here will prove to be the grapple, which you can use to pull the propane tanks or fire extinguishers towards the policemen, to stun or eliminate them from further action.
 You can hang an enemy directly under a vantage point
If you have purchased an upgrade for the grapple, called Heavy Reel Ammo you can also hoist the enemies up to string them up from vantage points. This technique works on a principle similar to inverted takedowns, but does not require you to wait for the opponent to appear in a given location. Unfortunately, by default, this attack can be activated only twice while clearing a given location.
After you have cleared the entire bullpen, jump down to the lowest level and go towards the Southern door. Activate the Cryptographic Sequencer here, and in the way that you have already learned, solve the hacking mini-game to determine the password (the screenshot).
[New Challenges: Custom Challenge]
 It is possible to eliminate two opponents at once
Walk into the GCPD - Investigations and go South. When it comes to the two standard policemen that you bump into along your way, it would be a good idea to walk them from behind and perform a single special attack on them. After you reach the server room entry, try to break the security by using the Cryptographic Sequencer. This process will fail and you will have to obtain the disruptor from the evidence locker, as a result, mentioned earlier by the arms dealer.
Take the Eastern door and reach the Basement Access. Be careful here, because there will be two enemies to attack Batman here and one of them is using a shield. Just to remind you, you need to stun this enemy with your cape and double-tap the jump key/button to "trample him" and deprive him of any means of defense. After you have eliminated the guards, select the Cryptographic Sequencer from your inventory Use it on the control panel here, which will determine the password (the screenshot) and unlock access to the elevator shaft.
 It pays off to attack the prison wardens by surprise
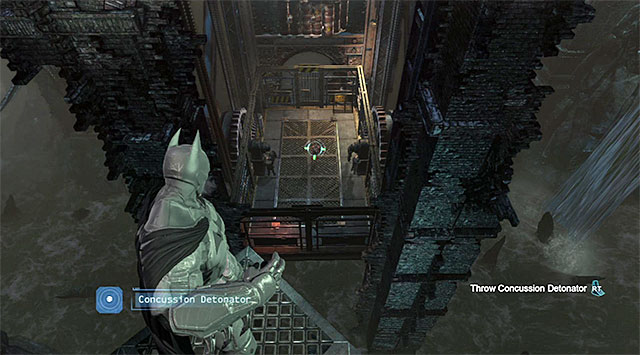
Jump into the shaft and land near the corridor leading up to the prison [Cell Block Access]. Follow the linear path until you reach the area with all of the cells [Holding Cells]. It is a good idea to send the fire extinguisher towards the enemies that you can see in the distance (requires using the grapple) or throw them a concussion detonator, to stun them all at once. While fighting this fight first eliminate the enemies wielding firearms, as well as those trying to pick the guns up from the ground or take one out from a locker.
After you are done fighting, go towards the Western passage and reach the Infirmary. Listen to the conversation with Alfred, and locate the wall shown in the screenshot. Spread explosive gel over the wall, detonate it and enter the Derelict Elevator Shaft.
Look up and use the hook to make it over to one of the ledges above. Now, for a change, select the grapple, target at the interactive point shown in the screenshot and extend the rope. You can now use the hook to make it onto the rope and go towards the entrance to the venting shaft. This will allow you to reach the Evidence Locker, where you will find the Disruptor lying on one of the tables.
You now need to go back towards the server room's entrance, which you now will be able to unlock, thanks to the disruptor. Again, walk through the venting shaft, and reach the area with the Derelict Elevator Shaft. Jump down and walk through the Infirmary, to return to the Holding Cells. Use the disruptor on the device that is blocking the signal, which is located above the control panel (you need to press and hold down the trigger/key for several seconds). Only after you do that, use the , Cryptographic Sequencer and solve the hacking mini-game, which will allow you to determine the correct password. (the screenshot).
 Avoid the charges of the armored enemy
You have probably already noticed that some of the prisoners freed themselves in the meantime and, as a result, you will have to fight them. You should, first of all,, watch out for the armored enemy with the green tubes sticking out of his back. To the extent it is possible, avoid this character's charges (red symbols above the head) because, otherwise, Batman may be caught and sustain damage as a result of attacks of the other prisoners (if this happens, you need to free yourself by tapping rhythmically the key/button appearing on the screen).
 It pays off to detonate the propane tanks, which inflicts a lot of damage to the prisoners
The best method to deal with the abovementioned enemy is to stun him with the cape, and cause successive tubes to be ripped off his armor. In the meantime, avoid the attacks of the other inmates as well, especially the ones armed with knives. Also, you should search for opportunities to hit the enemies with batarangs if they are trying to lift the propane tanks, thanks to which they will be much easier to deal with. Continue fighting until you defeat all of the prisoners.
[New Challenges: Campaign Challenge]
[New Challenges: Custom Challenges)]
[New Challenges: Combat Training Challenge]
![Use the hook to make it over to the balconies above [Cell Block Access] and continue your path along the basement of the precinct - Access the GCPD servers - returning to the server room - Main storyline - Batman: Arkham Origins - Game Guide and Walkthrough](https://game.lhg100.com/Article/UploadFiles/201512/2015121216410273.jpg)
Use the hook to make it over to the balconies above [Cell Block Access] and continue your path along the basement of the precinct. After you get near the elevator shaft, use the hook to your aid and return up to the [Basement Access] [GCPD - Investigations]. stop in front of the server room and use the disruptor to sabotage the device above and then select from the inventory the Cryptographic Sequencer and determine the password (the screenshot). you may now watch the cutscene of the visit to the server room and conversation with Barbara Gordon.
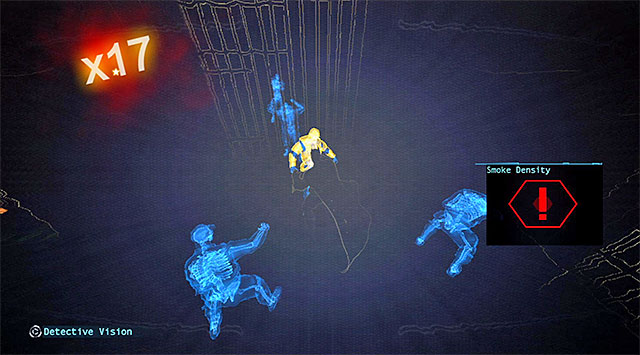
 You can use the disruptor to sabotage the enemy weapons
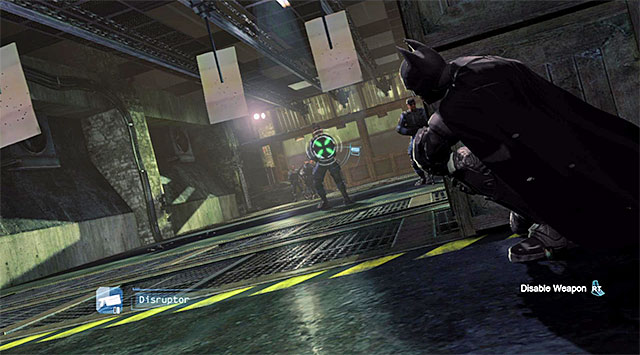
Quickly, locate the venting shaft's grate and rip it out to leave the server room where there is the poison gas spreading. After you reach the Shooting Range, exit the tunnel and take the opportunity to test the disruptor that you have just acquired on the enemies approaching Batman. This gadget can be used also to sabotage firearms, and it is a good idea to deprive, at least, one of the SWAT team members the ability to use this gear.
After you leave your cover, you should, of course, focus on the attacking of these of the opponents, who are using the guns. At the same time, do not forget about the enemy with the shield, as well as about those who may try to throw explosive elements at Batman. After you have dealt with all the opponents, go East and approach the locked door. You, of course, need to unlock your passage here, by using the Cryptographic Sequencer and determining the correct password (the screenshot).
 quickly attack the blinded enemies
After you are back to the GCPD - Investigations turn towards the North and jump into the GCPD - Bullpen again. Here, watch a longer cutscene featuring Commissioner Gordon, after which you will end up near the Rooftop Maintenance. Drop the smoke pellet and attack the last group of the policemen (use to your advantage the fact that they have been blinded by the pellet, and quickly deprive them of their guns). After you have dealt with them, exit the building and return to the Burnley district.
[New Character Trophy: James Gordon]
[New Character Trophy: GCPD Officer]
The entrance to the sewers is in the Northern part of the Burnley district yet, it is not that easy to locate it. Go West of the marker set by the game (screenshot 1), thanks to which you will find a small area between buildings. Reach here the lowest level to find the sewer's entrance shown in screenshot 2. Go ahead and note, after a moment's march, the manhole to the Western sewer section [Burnley Sewers - West].
 Use skill to respond to the attacks of the martial artists
Follow the only possible path and approach, after a while, the area where you will meet, for the first time, apart from the regular enemies, martial artist. They are pretty demanding. You need, first of all, be prepared that they can break some of your attacks and, in such a situation, do not allow them to land their own blows. What is more, they often perform two hits in a series so, it pays off to be prepared to press the counter-attack button twice.
 The destructible wall
It is best to start the fight with the abovementioned enemies by gliding towards one of the martial artists, although you can, just as well, use one of Batman's gadgets. While fighting these enemies, do not let yourself be cornered, especially that the arena is not too big. After the victorious battle, locate the weakened point in the wall and blow it up, using the explosive gel. Go ahead, and reach the door leading up to the Sewers - Water Treatment.
[New Character Trophy: Martial Artist]
[New Challenge: Custom Challenges]
[New Challenge: Combat Training]
Start by using the hook on the ledge located on the left. You can jump to reach the next ledge (the above screenshot) so, in this case you do not need to use any gadgets Turn to face the enemies on the right and pull yourself towards the platform which they occupy. Grab the opponent that is standing closest to the edge and climb to deal with his colleague in a more traditional way.
To continue climbing, you need to use the hook on the side ledge shown in the above screenshot. Shimmy to the right to reach another ledge. Wait for steam to stop leaking and resume shimmying. After you get to the control room, start by pressing the big red button.
 You need to use the grapple to extend the rope
Turn to the big pipe that you can see in the distance, which is leaking steam. Select the claw from the inventory and aim it at the manhole on the left, which will result in its opening. Note that performing this action held steam leakage, You can now use the grapple and extend the rope Of course, you need to catch onto the rope using the hook and allow the Batman to zipline, which will end in tackling down of the enemy occupying one of the upper rooms.
Take a look around this room to find the control panel and hack into the system, using the Cryptographic Sequencer (the above screenshot). Hacking into the system will result in unlocking the grate that you have passed by earlier, at which there is another enemy. Glide towards this character, knock him down and finish him off before he regains his strengths. You may now open the door leading up to the GCPD Telecom Room.
 Attack the enemies on the elevator by surprise
Go North and after you reach the edge, position yourself opposite the enemies that are staying on the large elevator. I recommend that you attack the enemies by surprise, either by gliding towards one of them, or by throwing them some gadget, like the concussion detonator). Regardless of which you choose, try to eliminate the martial artist as quickly as possible and deal with the remaining enemies only then.
 Watch out for the biggest one and avoid his charges
Approach, carefully, another group of enemies and, just like earlier, take advantage of the fact that they are oblivious to Batman's presence, at first. While fighting, watch out not only for the martial artists, but also for the overgrown bandit. Just like in the case of the fight in the precinct prison, try dodging this bandit's charges and do not let yourself be grabbed by him because you will unnecessarily lose some of your health then, and additionally, you will have to free yourself. To deal damage to this enemy, use the quick combo preceded by the cape stun. After you finish the fights, approach the control panel and upload the data to the bat-computer.
 The exit of the room with the police computer
Your first step is, of course, getting out of the sewers. Take the door with the EXIT label above it, near the computer that you have just downloaded the data from. Exit through the hole in the wall and turn right after you return to the main parts of the Burnley Sewers , towards the surface [Burnley]. Watch here a cutscene featuring the goons of The Mad Hatter, which one of the side missions is connected (you can find its description in a separate chapter of this guide).
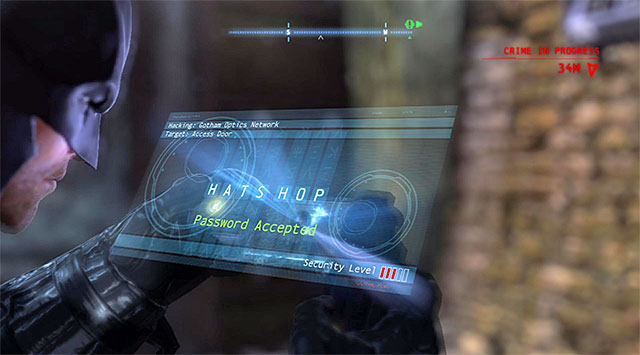
As you have probably noticed, you are now in a closed location so, you need to use the Cryptographic Sequencer on the local control panel. You now need to play a bit more demanding version of the hacking mini-game. This is so, because there are several passwords available and only one of them is the correct one. (the above screenshot). Wait for the door to open and leave to reach the police parking lot.
You may now go towards the bank located in the Southern part of The Bowery. After you reach the location marked by the game, and get to the unguarded bank's rooftop. The rooftop's main access is locked , but you can find a weakened wall fragment shown in the screenshot. You, of course, need to use here the explosive gel.
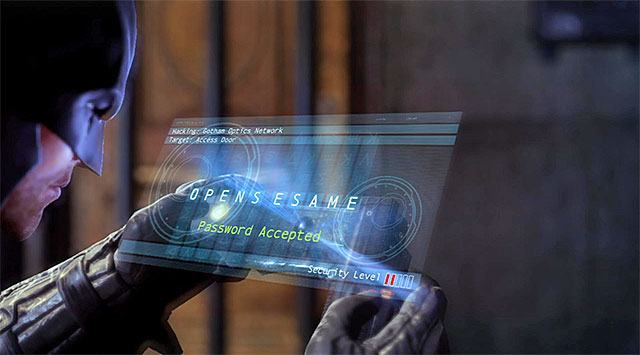
After you have unlocked the access, climb down the stairs and raise the manhole into the Gotham Merchants Bank. First of all, select the disruptor from the inventory and use this gadget to disable the device behind the locked door. You can now use the Cryptographic Sequencer and solve the hacking mini-game of determining the correct password (the screenshot). Open the door to the bank's main area.
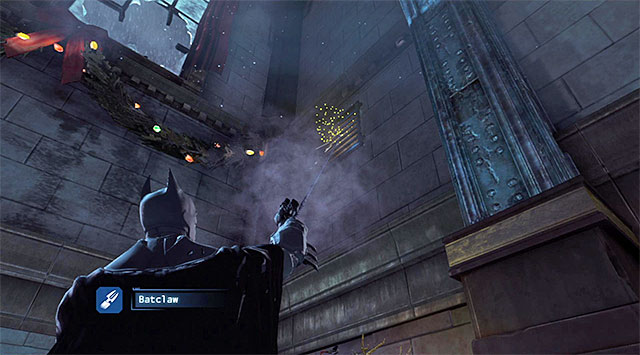 The grate of the venting shaft
I strongly recommend that you now acquaint yourself with the structure of the main hall in the Gotham Merchants Bank, because you will have to play another scene here which involves the elimination of the hostiles. For the time being, walk to the South. Ignore the locked door and turn towards the stairs on the left to find the venting shaft grate. Use the claw, and then the hook, to gain access to the venting shaft.
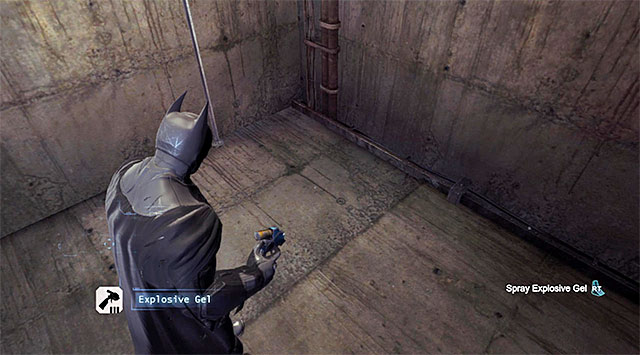 You need to spread the gel over the floor
Walk through the tunnel and use the explosive gel right after you exit it, to blow up the unstable floor. You can now watch an important, from the plotline's standpoint, cutscene.
[New Character Profile: Joker]
[New Character Trophy: Joker]
[New Character Trophy: Bank Manager]
 Use the statues to move around the bank's main hall
Right after you regain control over the Batman, use the hook to get onto one of the statues under the ceiling. Just like in the case of the previous situations of this kind, it pays off to move around the hall by using these vantage points. They can also be useful while performing the inverted takedowns and attaching the enemies using the claw.
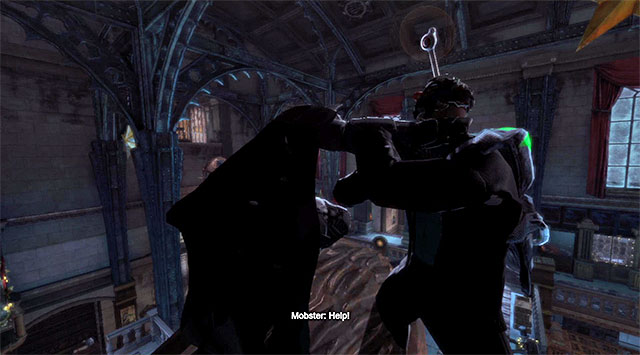
An important new element of this event is that, in the bank, you will meet an enemy using a disrupting device for the first time so, you will not be able to use the detective vision at first, to follow the actions of the other enemies. I recommend, therefore, that you locate this character as quickly as possible (you will recognize hi by the antenna sticking out of the device on the enemy's back) and neutralize him.
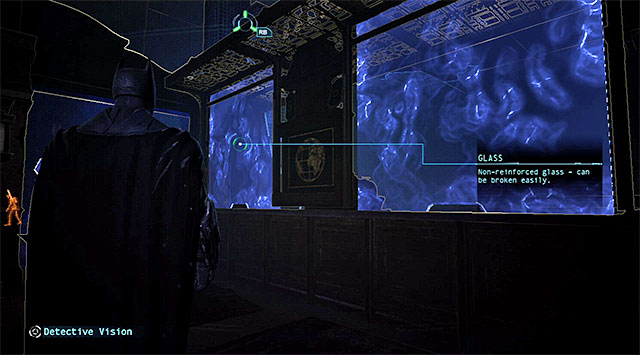 Around, you will find a lot of unstable walls
When it comes to the elimination of the remaining enemies, you can use the proven methods of attack from above and hiding in the venting shafts for quiet takedowns, among others. While clearing the bank's main hall, you can find the explosive gel useful because, both o the ground floor and in the side rooms, located on this upper floor, there are many walls that can be destroyed.
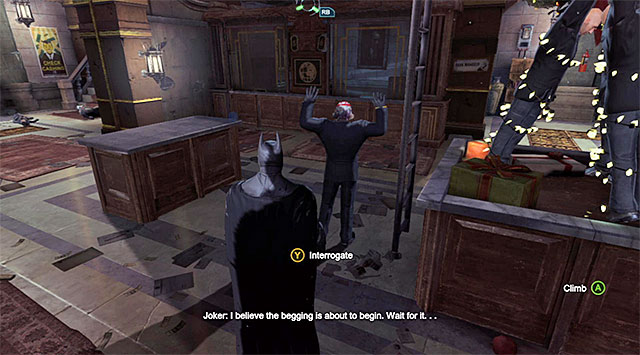 You need to interrogate the last bandit
Continue neutralizing the bandits , until the moment in which there will be only one man standing in the room. This character should give up automatically, so, you need to approach him and press the key/button that the game prompts you to, in order to start interrogation and learn about the possible whereabouts of the Joker.
[New Challenge: Custom Challenges (Custom)]
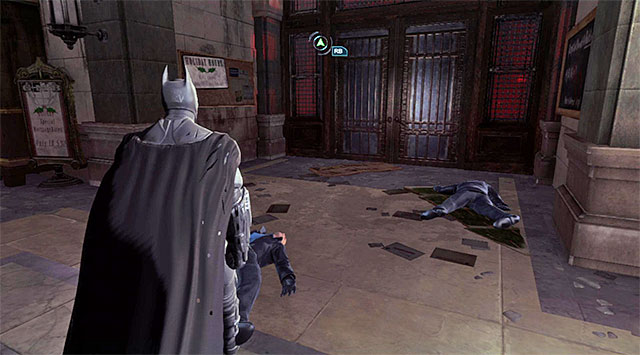 The bank's exit
The first thing you need to do is, obviously, leaving the bank and you do not need to rack your brains too much because you may simply use the main, Northern exit on the ground floor. After you return to The Bowery turn your attention to the corrupt policemen staying around, among whom there are two enemies with guns, among others and a SWAT team member with a shield. You do not need to fight them, though, because you can leave this area by means of, e.g. fast-travel. If you still want to fight them, do not forget about using the disruptor to sabotage their weapons, and also to stomp on the shielded enemy.

The mill is in the Eastern part of the Industrial District and since the entrance is guarded by armed bandits, I recommend that you take appropriate precautions. I recommend that you approach from the West and glide towards the balcony shown in the above screenshot, where there is a single sniper staying. Get this one from behind and perform the quiet takedown.
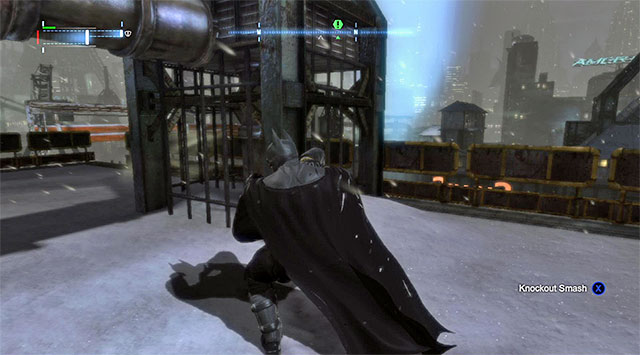 A single enemy
The next one on the elimination list should be the single guard patrolling the top balcony, i.e. the one covered in snow and which is located under the vantage points (you can, by the way, use them to move around efficiently or to avoid taking damage if the alarm is raised).
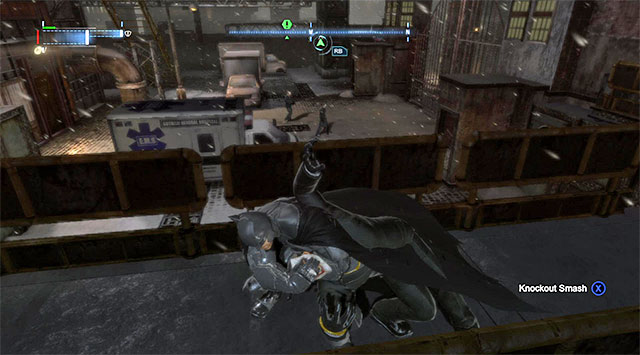 The lower balconies are being patrolled by two enemies
Now, take to the two enemies patrolling the balconies below. You will find one of them near the sniper that you have just taken down, and the second one at the opposite side of the yard.
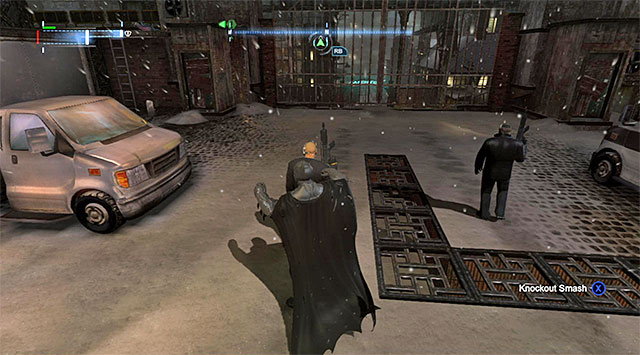
There should only be three more to eliminate, and they are patrolling the main yard. First of all, take to the single guard patrolling the area between the entrance and the gate. What is interesting, if you plan your attack well (the screenshot), you will be able to take down the guards, one after another, without raising the alarm. Make sure that you have secured the area and take the entrance on the lowest floor, which will take you to the Loading Bay.
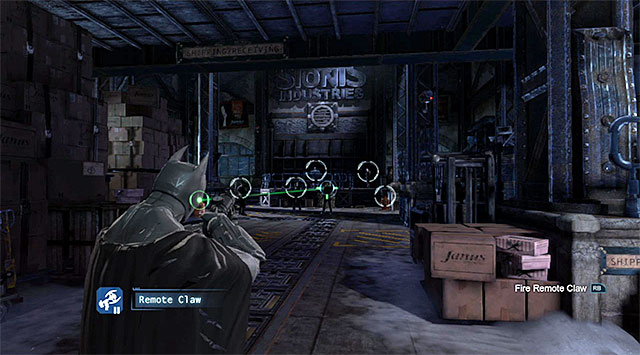 Using the grapple is a good idea to start the fights
Carefully, approach the new enemy group and try attacking the bandits by surprise, for example by knocking them down from the venting shaft below, or by throwing a propane tank towards them, using the grapple. Right after the fights start, start by targeting the enemy with the gun and do not allow the rest to gain access to weapons.
 You need to rip the venting shaft grate off
After you are done with them, walk towards the door located in the North-Western part of the loading bay. Climb up the stairs and use the claw to gain access to the venting shaft above. Jump into the shaft and reach the Sionis' Office. I recommend that you start the fight here by throwing the concussion detonator towards the enemies around the automatic gun aimed at he office entrance.
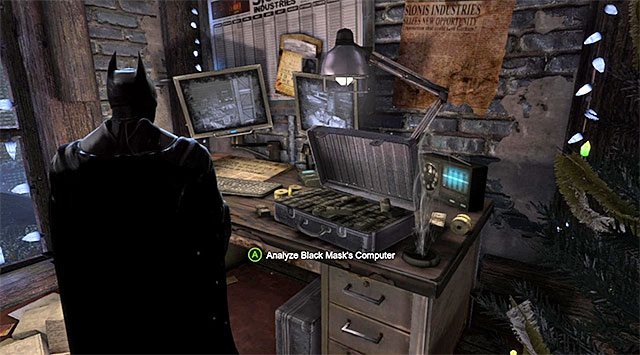 Sionis's computer
Jump down and attack quickly the stunned enemies and focus mainly on the armed enemies. Later into the fight, do not forget about stunning the armored enemy with your cape. After the fights finish, approach Black Mask's computer to analyze it and acquire the Janus security code.
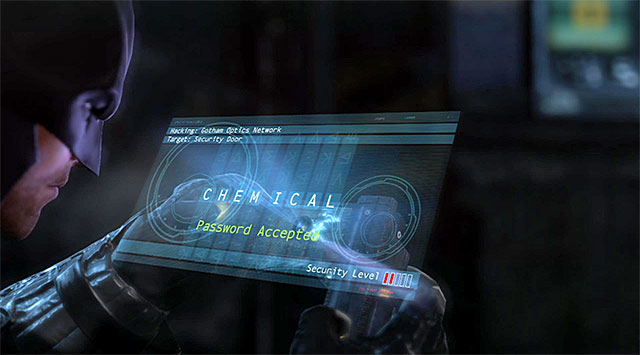
You now need to return to the lower area of the loading bay, where you need to remember to stay out of the range of the automatic gun in the corner so, you need to walk through the venting shaft again. This time, go to the door located in the North-Eastern corner of the loading bay. Select the Cryptographic Sequencer from the inventory and start the hacking mini-game that consists in determining the correct password (the screenshot). You can now open the door to the Loading Bay Depot [Warehouse].
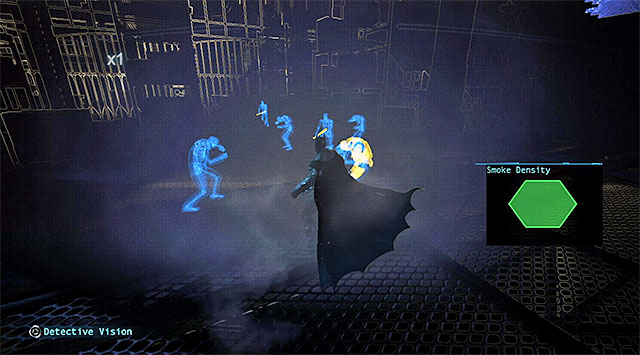 If you want to, you can blind the enemies with the fire extinguisher
After you watch a short cutscene, attack the enemies gathered in the warehouse. Just like in the case of the other fights, it is worthwhile to take the enemies by surprise by, e.g. pulling the fire extinguisher towards the bandits, in order to blind them temporarily. Defeating the first enemy group should not be too demanding for you, although it is worthwhile to make sure that you dodge the elements thrown at you, to prevent losing healthpoints. Problems will arise with the arrival of reinforcements, because there will appear an enforcer, among others, who is heavily armored.
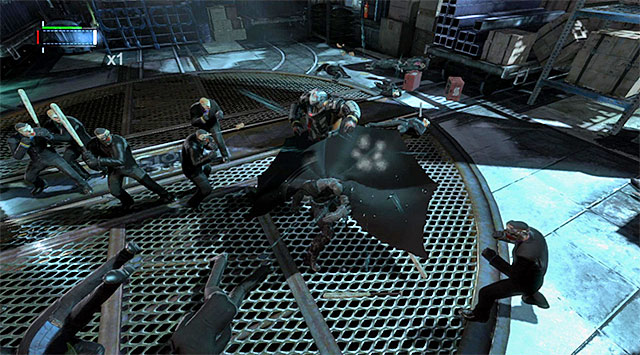 To stun the heavily armored enforcer, you need to use the cape stun attack three times
Focus on the abovementioned enforcer, while remembering to avoid his charges and avoid being grabbed. When it comes to the strategy of weakening this one, you need to use the ultra stun attack so, you need to triple-tap the cape stun key/button. Only then launch a combo of very fast blows. In the meantime, you should watch out for the standard enemies, although they are not too much of a challenge, even as a group. Keep fighting until you have eliminated all of them in the warehouse.
[New Character Trophy: Black Mask's Armored Enforcer]
[New Challenge: Combat Training (Combat Training)]
 Use the claw on the suspended cargo
You now need to solve a relatively simple puzzle. Start by pressing the big red button, which will set the crane in motion. After you watch the cutscene, stop near the cargo suspended from the crane, which has already damage the upper wall a bit. Use the claw on the cargo and slam it against the wall, thanks to which you will open passage, into the next location, for yourself. You can now use the hook and reach the Concealed Room. Walk into the elevator [Elevator Access] and activate the evidence scanner after you have listened to the monologue. You need to scan the corpse, which you have found in the elevator, to learn that the person has been poisoned.
![After the elevator reaches the next floor, walk into the neighboring corridor [Hidden Facility Maintenance] and surprise the bandits there with an attack - Investigate the steel mill - exploring the mill - Main storyline - Batman: Arkham Origins - Game Guide and Walkthrough](https://game.lhg100.com/Article/UploadFiles/201512/2015121216410710.jpg)
After the elevator reaches the next floor, walk into the neighboring corridor [Hidden Facility Maintenance] and surprise the bandits there with an attack. While fighting, watch out for the armored enemy and prevent the enemies from collecting weapons from crates. After you win the fights, approach the locked door, select the Cryptographic Sequencer from the inventory and begin the hacking mini-game. Since you are dealing with a third-level security system, you need to select the correct password from a dozen, or so, of the available ones (the screenshot). You may now enter the Drug Lab.
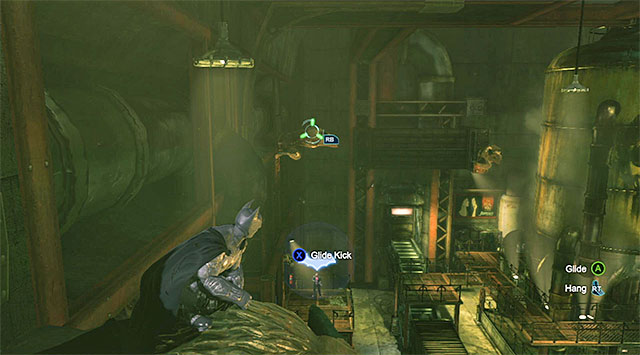 Use the hook, to your advantage, on the statues
Your new objective is to find the Black Mask, who is being kept in the side room. Of course, the Joker's people will be obstructing you from performing this task. Just like before, try to avoid being detected at all costs. While executing the plan and planning on your actions, (inverted takedowns, grapple, gliding) you will find the statues, under the ceiling, very helpful.
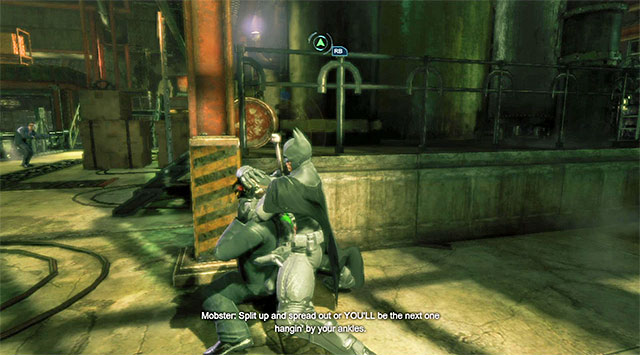 Eliminate the enemy with the disruptor on his back as quickly as possible
Just like in the case of your visit to the bank, in your attempts to locate and surprise the enemy, you will be effectively obstructed by the enemy with the disruptor. Just like earlier, I recommend that you find him soon after this scene starts (the antenna on his back) and eliminate him.
 The Black Masks office's entrance
You can clear the lab in various ways but, it is worth pointing out here that you can hide in the venting shafts and blow up some of the elements of the surroundings, using the explosive gel. Apart from that, I recommend that you use the grapple on the propane tanks and send it towards the enemies. After you have secured the entire area, go towards the South-Western door to reach Black Mask's Office and initiate a series of important cutscenes of the meetings with Black Mask and Copperhead.
[New Character Trophy: Black Mask]
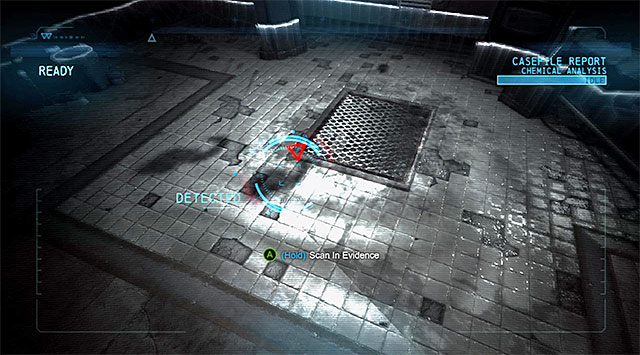 The first trace
Activate the evidence scanner and examine thoroughly the area marked by the game. You will find the first trace right next to the drain grating in the floor.
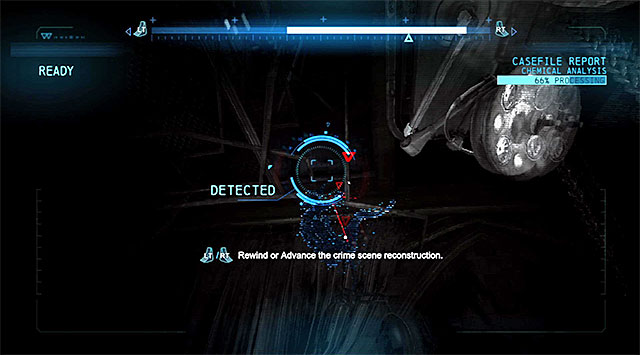
That is not the end yet. Just like in the case of the previous crime scenes analyses, you now need to start using the keys/triggers in order to manipulate the process of replaying of the reconstruction of events. Follow the red line that symbolizes Copperhead's path, and which will take you to the poison sample shown in the screenshot. Scan the sample and listen to the conversation with Alfred that concerns the working out of the antidote.
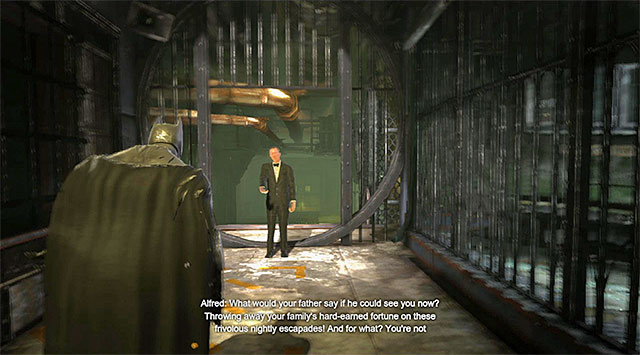 Ignore all the visions
You now need to track back to the warehouse, where you have recently been fighting with the heavily-armored enforcer. First of all, you need to return to the Drug Lab that you have already cleared, and go towards the Eastern door to the side corridor [Hidden Facility Maintenance]. Batman will be experiencing various hallucinations which you can entirely ignore. Reach the Elevator Access and get above on the elevator.
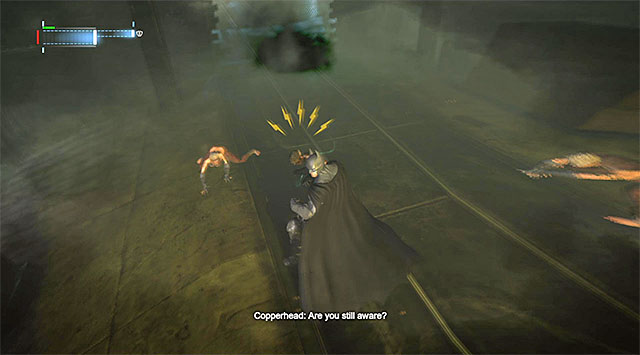 Watch out for the clone with the knife
You need to be prepared because, after you walk into the Concealed Room Batman will be attacked by Copperhead for the first time. Eliminate the clones and remember to hold down the counter-attack key/button to avoid the enemy armed with a knife. Walk into the Warehouse where you will have to fight the abovementioned boss.
 Keep tapping rhythmically the button shown in the screen if you are grabbed by Copperhead
After the fight starts, start attacking the Copperhead clones that gather around Batman. Just like during the fight a couple of moments ago in the Concealed Room, you should especially pay attention to the enemies with knives and remember about the necessity to hold down the counter-attack key/button. Apart from that, be on a lookout for opportunities to respond simultaneously to attacks of one that one character (the blue markings above the heads of several characters) Occasionally, it may happen that Batman is grabbed by Copperhead and you need to tap rhythmically on the interaction key/button to free yourself.
 Attacking the actual boss is going to decrease her health bar
Just like in the case of the other boss battles, try at the outset try to avoid losing too much health, because you may run out of them before the end of this fight. Do not attempt to target the actual boss while fighting the clones because he will be "unmasked" after the end of each successive phase of the battle. Then, land quick combos in an attempt to decrease the boss's health bar, which you can see in the corner of the screen.
After she loses around 2/3 of her health bar, Copperhead will start to pull off a very quick sprint attack, which you of course need to avoid at all costs. Once you notice the flash of light shown in screenshot 1, perform a quick dodge to the side, should will allow you to keep the current state of your health bar.
 Remember to avoid the boss's sprint attacks, while dealing with the clones
Resume the process of attacking the clones and remember that you still need to keep a careful eye on the environment and perform flawless dodges whenever you notice the flash warning you of the imminence of the actual boss. Keep doing that until all of the clones are defeated, which will reward you with the antidote that will restore you to full health.
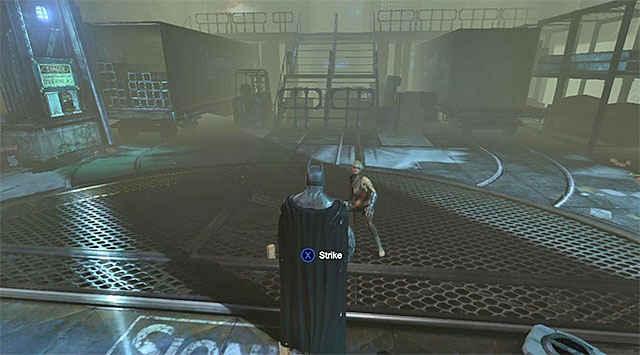 Finishing Copperhead off is a pure formality
The only thing remaining for you to do is finish off the main opponent and so, approach Copperhead and press the standard attack key/button which will result in a cutscene of the boss's capturing.
[Character Profile Updated: Copperhead]
[New Character Trophy: Copperhead]
 You need to blow up the big tank
First of all, you of course need to leave the mill so, go Southwards to return to the Loading Bay Depot [Loading Bay]. Note that there are new enemies in the mill's first location. Just like before, it would be a good idea to organize a nifty surprise attack, e.g. by sending a propane tank towards the biggest enemy group. Remain for one more moment in the loading bay and spread the explosive gel over the big tank located on the right. Detonate the gel, which will unlock a side mission connected with the Black Mask (the description of this mission can be found in a separate chapter of this guide)
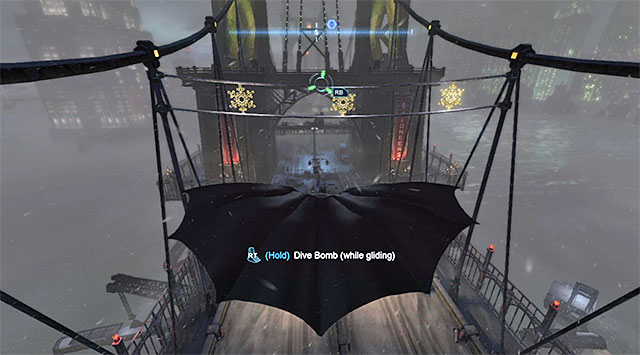 The Pioneers Bridge
You can now return to the Industrial District. After you listen to the conversation with Alfred go towards the Gotham Pioneers Bridge. This mission is exceptionally easy because it requires you to use the hook and the gliding option to reach one of the bridge's upper balconies located on its central pylon. These actions will result in the beginning of the process of tracking the Electrocutioner.
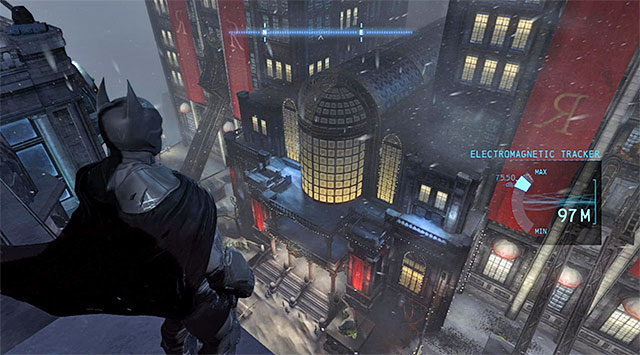 The hotel region
There should appear the readings of the tracking device on the screen, which informs you of the current distance from the target. You do not need to roam for to long, especially that the destination is not too far away from the bridge. You need to get to the Diamond District, to the Gotham City Royal hotel located in the Eastern part of the district. I recommend that you approach the hotel from the South-western side, thanks to which you will bypass the snipers, among others, who are guarding the nearby communications tower (unless you have eliminated them already).
Note! If the readings of the tracking device do not show on the screen, make sure that you have not marked another location for your current destination, e.g. connected with some side- mission.
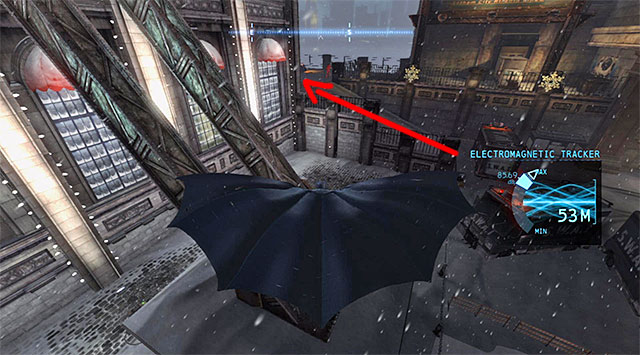
Do not even try coming near the hotel's entrance, because it is heavily guarded by a SWAT team armed to their teeth. What is even more, this area is constantly being monitored by an elite sniper. Instead, go to the South of the main entrance and find the path shown in the screenshot, where there a few police vans parked. The road leads up to the West, towards the building's side entrance.
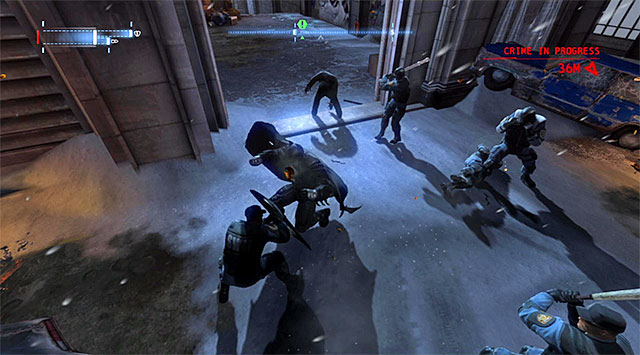 Watch out for the better-armed policemen
You need to keep vigilant because the entrance to the buildings is guarded by a group of corrupt policemen, who are quite well-trained. Attack them by surprise, e.g. using the grapple or the concussion detonator. Right after the fights start, focus in the first place on eliminating the enemy armed with a knife. Furthermore, you should watch out for the SWAT team member wearing a heavy armor, as well as for the enemy with a shield (stun this one with your cape and stomp on him). Continue fighting until you have eliminated all of the enemies.
 Eliminate both of the enemies with a single attack
After the fight, enter the building and reach the door to the Hotel Parking. Also here, follow the linear path, while listening along your way, to the conversation with Alfred. Sneak up to the two bandits that you bump into here and take them both down with a single attack.
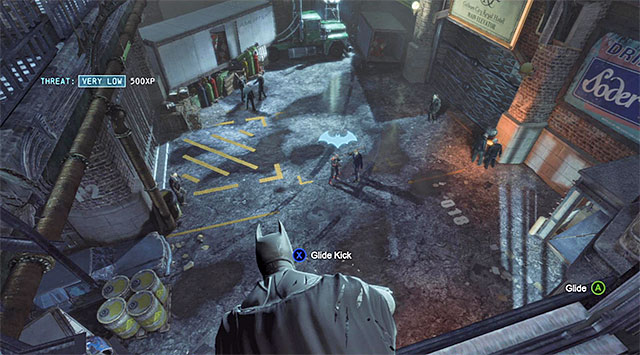
Below, there is a group of ten enemies and I recommend that you glide towards the martial artist shown in the screenshot to eliminate him in the first place. As a result, you will not have to worry anymore about dodging the faster and more demanding attacks. Further throughout the fight, you should pay a lot of attention to the enemies who will be trying to collect a gun from the crates on the sides and try to prevent them from doing that, to the extent possible.
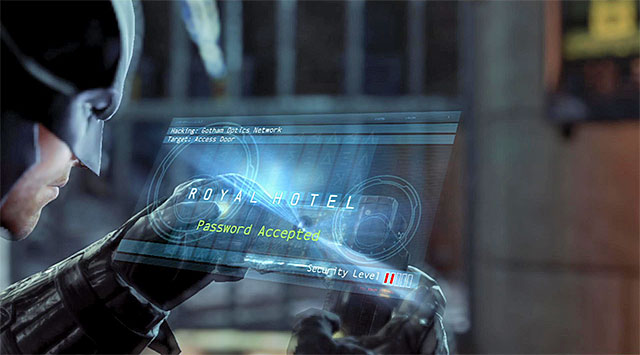
Try to clear the entire area of the enemies and locate the control panel on the Southern wall. Select the Cryptographic Sequencer from the inventory and start the well-known hacking mini-game in order to determine the correct password (the screenshot). Remain where you have just used the sequencer and turn to the red button with the discharges guarding the access. The solution to this problem is simple, because it is enough to use the Remote Controlled batarang and hit the button with it.
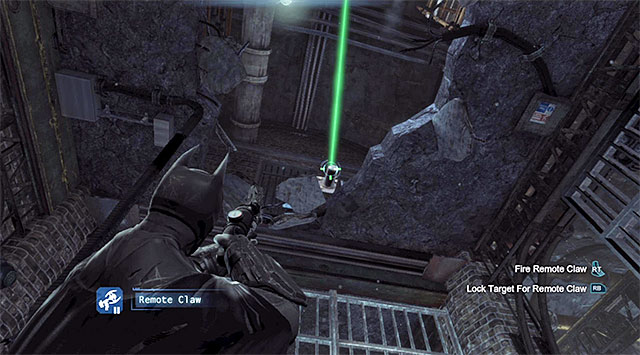 The spot where you extend the rope
Look up now and select the grapple from the inventory, and use it on one of the interactive points to extend the rope. Make it over onto the rope, using the hook, and jump to reach the control panel, which will unlock access to the parking lot. Return down and use the new passage., Locate the generator which you need to restart. You can now enter the Parking Elevator and wait until it takes you to the Royal Hotel Main Entrance.
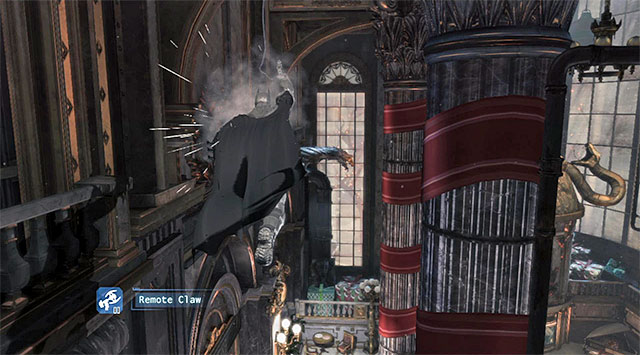 Just like usually, use the vantage points
Take the door into the Hotel Lobby and quickly make it onto one of the statues under the ceiling, using the hook, because this are is being guarded by the Joker's men. Just like in the case of the several such locations earlier, it is a good idea to quickly locate and eliminate the enemy with the disrupting device (the antenna on his back), to ensure yourself with safety while tracking the rest of the enemies.
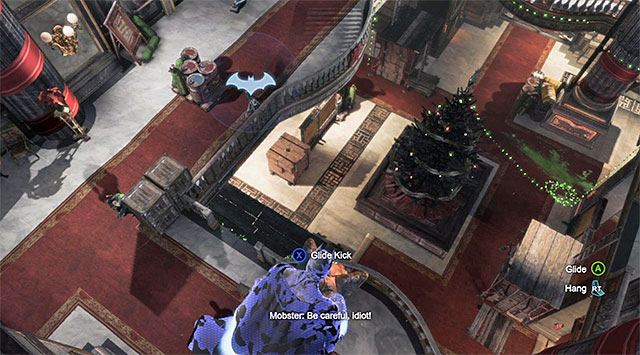 Having bought the armor upgrade, you do not need to worry about scanning performed on statues
For the first time throughout the main campaign, you will have to deal with the enemies equipped with heat detectors. They will be busy with scanning vantage points and you need to avoid being detected in this way in order not to raise the alarm, by escaping onto another statue early enough. The exception is the situation in which you have bought an upgrade to Batman's suit that conceals his heat signature, although you need to watch out even then and stay motionless.
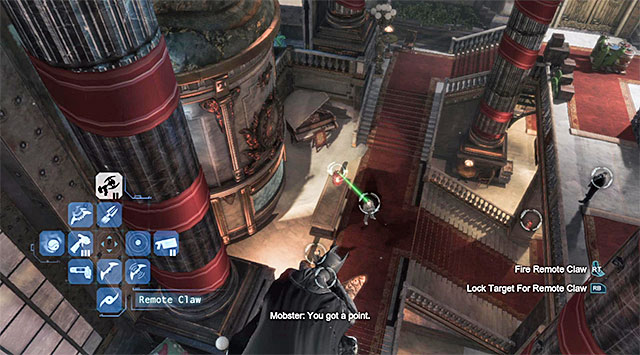 Grabbing the propane tanks is, as always, very helpful
You can eliminate the Joker's people around in a variety of ways. Just like always, remember not to take excessive risk and do not let anybody spot you. I recommend that you use venting shafts, gliding and the inverted takedowns, as well as the grapple to pull the fire extinguishers and propane tanks towards the enemies. Continue eliminating the enemies, one after another, until you secure this area completely.
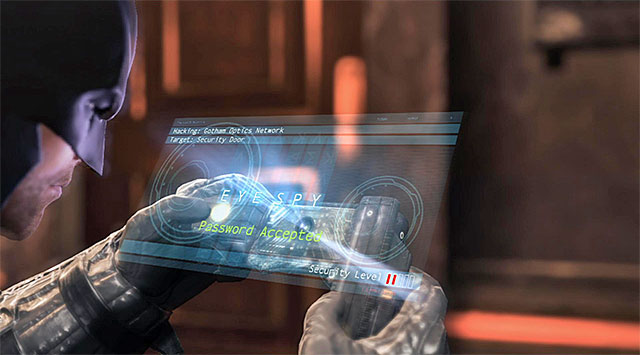
Jump down to a lower level and go West to reach the door to the security room. Since the door is locked, you need to select the Cryptographic Sequencer from the inventory and solve the already learned hacking mini-game (the screenshot). Watch a longer cutscene here, after which Batman will automatically acquire the Electrocutioner's Shock Gloves.
[New challenge: Campaign Challenge)]
[New challenge: Custom Challenge]
[New challenge: Combat Training]
[Character Profile Updated: Electrocutioner]
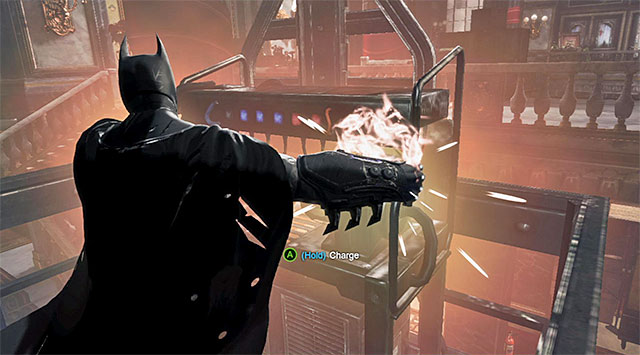 You need to charge the generator
Locate a small catwalk close to the security room that you have just visited. First, use the hook, and the newly-acquired Shock Gloves afterwards (by holding down the interaction key/button), which will start the portable generator and set the entire structure into motion. Wait for the catwalk to change positions into a new place and use the hook again, this time to grab onto the interactive ledge high above.
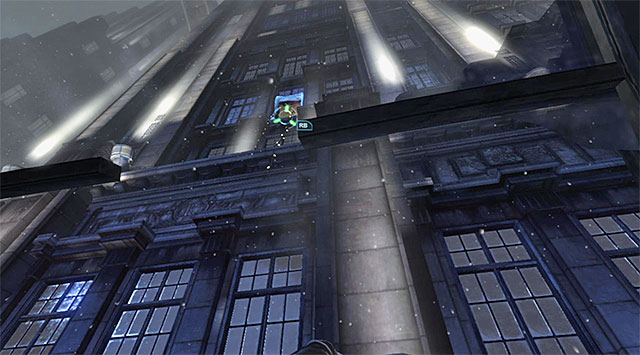 The window
Look up again, aim at the opened window and use the hook to reach this place, which as a result will take you to the East Tower - 10th Floor. Start exploring this floor, listen to the conversation with Alfred and reach the blocked passage separating Batman from another group of bandits. Also here, you need to use the shock gloves, to charge the control panel built into the wall on the right.
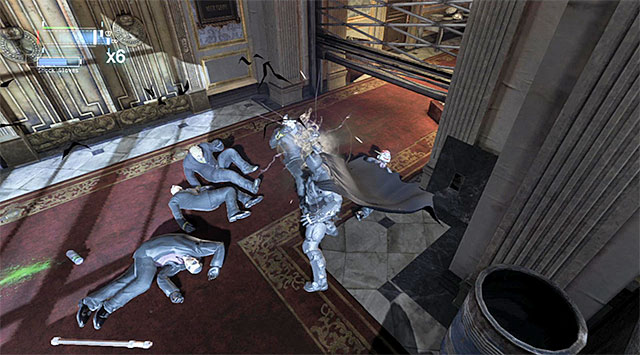 Shock gloves will help you win fights, especially the more demanding ones
Go towards the abovementioned group of bandits and perform a slide under the only, partially-lifted gate. Attack the enemies and keep an eye on the shock gloves gauge that you can see in the upper-left corner of the screen. Each successful attack charges the bar and, after it is fully restored, the possibility to use the gloves in battle becomes available.
 You need to escape quickly from the roof of the first elevator
After the victorious fight, listen to the Joker's speech and go to the 10th Floor - Laundry Room. Select here the claw from the inventory and use this gadget to open the venting shaft. Pull up to the opening and reach a new location with several elevator shafts [East Tower - Elevator Shaft]. Ju8mp down onto the closest elevator and immediately jump onto the neighboring one. This is so, because the first one will soon go loose and go down the shaft.
 Grab the bandit next to the elevator shaft
Use the shock gloves on the second elevator's generator and wait for it to reach the new area. Since it will stop under the shaft's exit, use the hook, to reach the region of the East Tower - 19th Floor. Start here by throwing down the bandit next to the shaft, climb and deal with his colleagues. In this case,, defeating the enemies should be very easy so, you do not really have to wait for the shock gloves to charge.
 The spot where you need to use the grapple
Ignore the civilians and interact with the control panel located next to the locked gate, by using the shock gloves, of course. Explore the linear corridors to reach, the big opened window. Use the grapple here, to extend the rope, slide down the rope, knock down the single enemy at its end and reach the West Tower - 19th Floor.
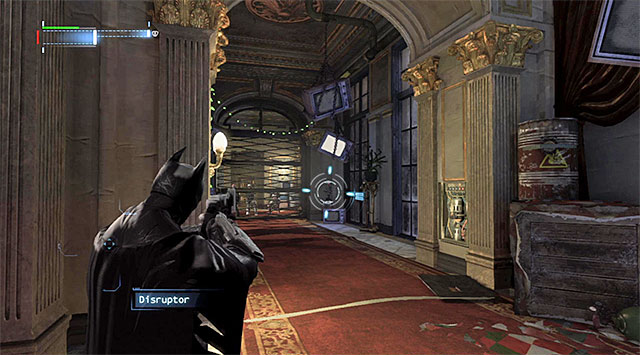
Start your exploration of the Western tower but, you need to stop where you will notice the Joker's goons in the distance. This is so because there is an operating defense cannon here. Select the disruptor from the inventory, target the cannon (the screenshot) and sabotage it (by holding down the appropriate key/button). You can now charge the control panel on the right with the shock gloves and unlock further passage this way.
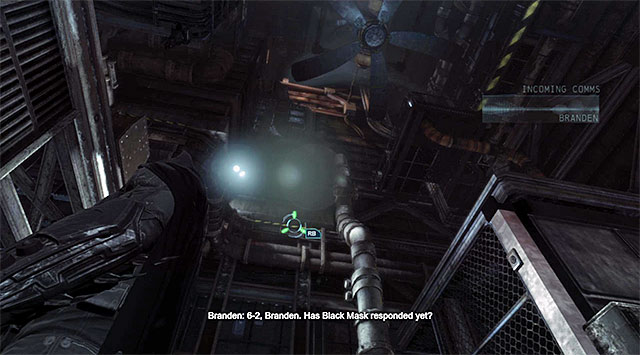 Locate the interactive ledge
Be prepared to deal with the enemies that rush towards your character right after the metal gate is raised. First, deal with the martial artist and with the remaining bandits, who are not going to pose too much threat, afterwards. After you win the fights, go towards the Southern storage [West Tower - Ventilation Shaft]. Walk along several narrow corridors, jump to reach the small ledge and look up to locate the interactive ledge that Batman can pull up to, using the hook.
 The ventilation shaft
After Batman grabs onto the ledge, shimmy to the left and reach the spot where you can pull up. Use the hook once again, reach the balcony's end and extend the rope using the grapple. Walk over the rope, find the control panel and interact with it, which will stop the huge fan. Explore the area above Batman, note the venting shaft and climb up by using the hook on its ledge.
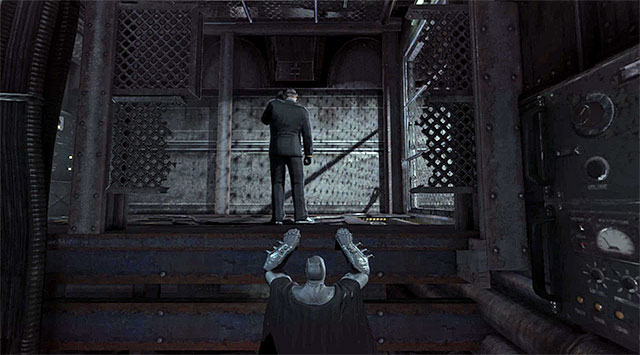 A new enemy
After you exit the shaft, use the claw on the manhole above Batman and go left. Target the ledge above, with a single enemy standing right next to the edge. After you reach the person, throw him off the balcony and, only then, pull up to finish your stroll across the side rooms and reach the door to the West Tower - 25th Floor.
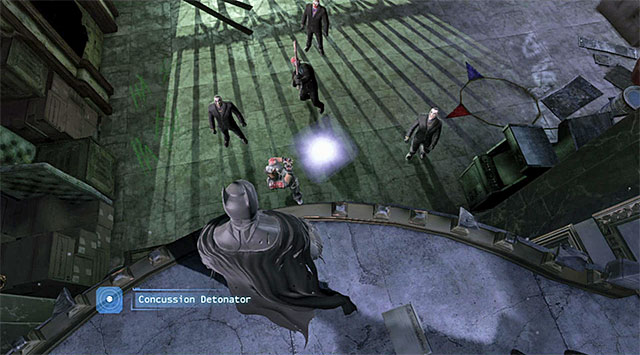 It is a good idea to throw the enemies a concussion detonator
Continue exploring the hotel, deal with the two bandits that you bump into along your way (watch out for one of them who has a knife) and reach the West Tower - Ballroom, which has been turned by the Joker into a devilish amusement park. Jump into the shaft and reach the area where you fight another fight with a group of enemies. It is best to start by throwing the enemies a concussion detonator. Throughout the later phases of the fights, wait for the opportunities to use the shock gloves, especially that you will be able to attack, with them, the armored enemy, without the necessity to stun him with your cape.
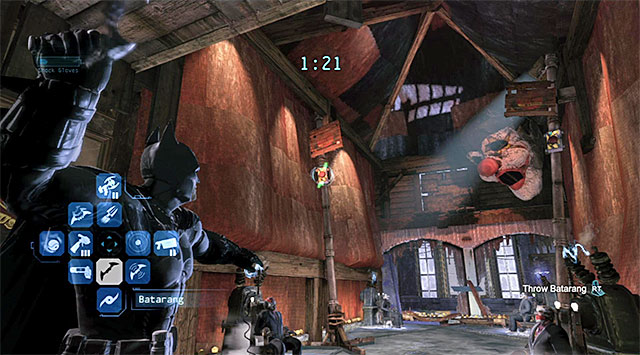 Hit the red buttons with the batarangs
Enter the amusement park and note that the countdown has started. You have, exactly, 90 seconds to free the people held hostage by Joker. You need to start by using the batarangs to hit the red buttons behind the hostages.
 You need to extend the rope and reach it
Use the grapple now, to connect the two poles with the rope. As soon as you do that, pull up to the rope, using the hook and glide towards the small balcony neighboring the weakened fragment of the wall. Blow the fragment up, using the explosive gel, of course.
The last action you need to take within the constraints of the allotted time limit may turn out to be more time-consuming. Therefore, you should make sure that you have enough time left. Select the Cryptographic Sequencer from the inventory, target the control panel and start the hacking mini-game. Unfortunately, Joker has ensured better security measures so, there are many possible combinations and you need to select the correct one (the screenshot).
You may now jump down, because the discharges in the room with the imprisoned disappeared. Turn back and go ahead to find the ladder. Soon, you will reach a place where you need to solve another puzzle. Stop on the pressure plate, turn to face the opening and throw the remote controlled batarang in there. After the batarang makes it through the opening, wait for a moment, turn it by 180 degrees and direct it towards the other opening shown in the screenshot. This is not the end yet, because the controlled batarang needs to hit the fuse box (it is a good idea to decrease its speed here).
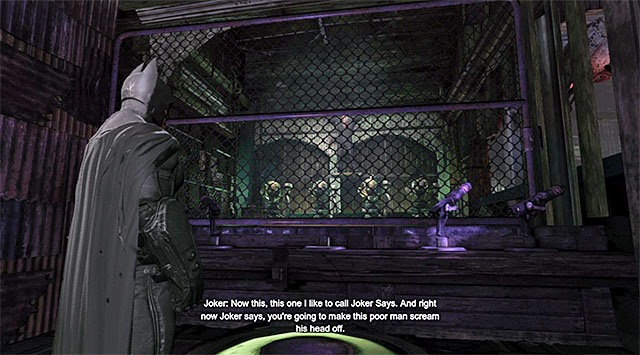 Hit the appropriate balloons with the batarangs
Use the hook to reach the newly opened hole directly above Batman. Soon, you will reach the final puzzle in the amusement park and, to start the trial, stop on the pressure plate. The plan is that you hit the balloons with batarangs in the very same order in which they are highlighted. The first sequence is (from the left): 1, 3, 4, 2. The second sequence is: 4, 3, 1, 2. You can now go ahead and jump down after several moments.
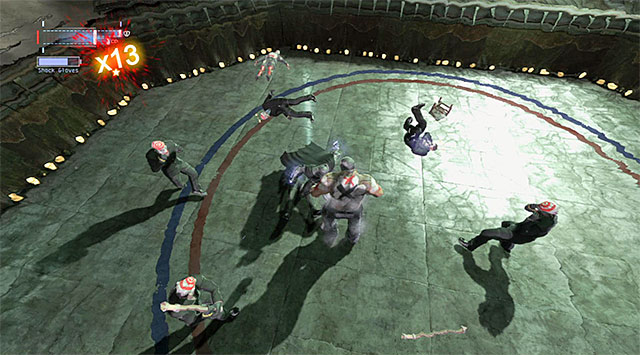 Use the gloves on the enemy in heavy armor
Climb up onto the fence enclosing the arena with Joker's men in it. I recommend that you start this battle by using the concussion detonator and eliminating the martial artist as quickly as possible. Then, take to the weaker enemies and use them to charge the shock gloves. You are going to use the gloves to eliminate the armored enemy, which is going to be easy, given the fact that you will not have to stun him with the cape, as a result, and land heavy blows straight away.

After you have won the fight, locate the balcony with an interactive edge and reach it using the hook. Press the button and use the grapple to extend the rope in the spot shown in the above screenshot. You can now walk over the rope and reach the door to the West Tower - 25th Floor. After you get into the room with the armed bandit in it, duck and sneak up to the enemy to perform the quiet takedown and save the hotel employee, that Batman will have a chat with.
Start the fight by attacking the enemy standing next to the ventilation shaftTake the corridor towards the Overview Bar and lift any of the two available grates. Walk through the ventilation shaft and perform the takedown on the nearest enemy after you reach its final part. Start here another fight, during which you should concentrate on the enemies with knives and stopping the bandits from acquiring firearms. Just like in the case of the previous major battle, you should leave the enemy with heavy armor for the end, and eliminate him in a much easier way with the shock gloves.
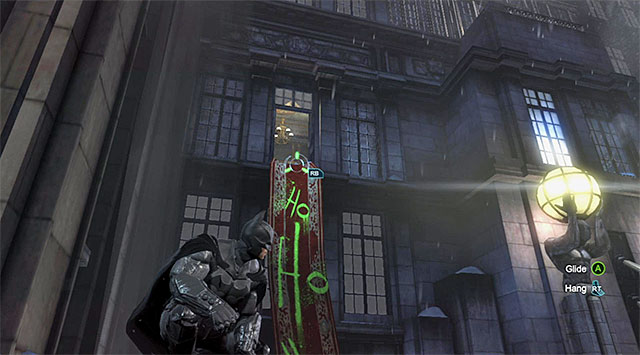 Use the hook to reach the window
You can now take the exit from the bar [East Tower - 25th Floor]. Turn left and spread the explosive gel over the weakened fragment of the wall. Then, detonate. Now, use the hook, to make it over to the East Tower Facade. After your character reaches the vantage point, locate the open window on the left and use the hook again to reach the East Tower - 28th Floor.
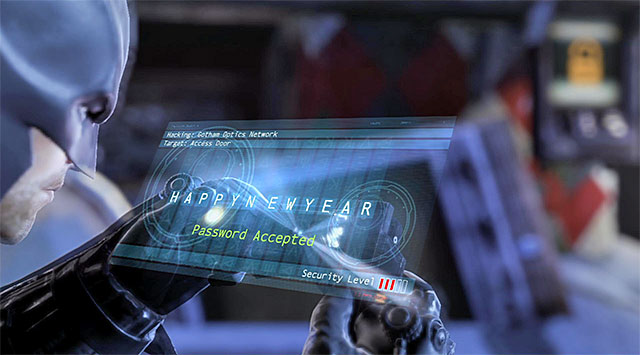
Use the shock gloves to raise the metal gate and walk into the area where Joker has planted a number of bombs. Select the Cryptographic Sequencer from the inventory, target the panel for the disarmament of the charges and start the hacking mini-game. As you can probably figure out, you will have to complete a mini-game of higher difficulty level and so, you need to select the correct password from among the available combinations (the screenshot).
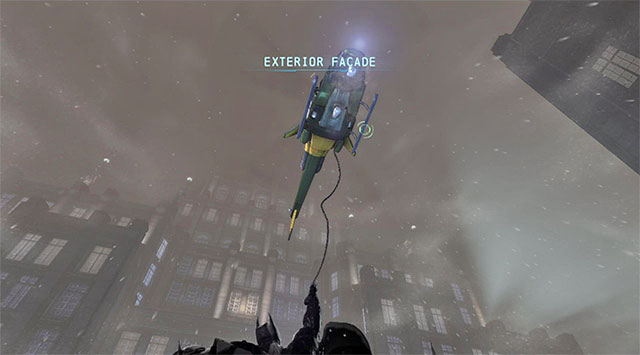 You need to hook onto the chopper flying around the hotel
The attempt to disarm the bombs will, unfortunately, be a failed one so, you need to hop quickly over the big window located on the right of the hacked panel. As a result, you will escape death by the exploding bombs [Exterior Facade]. Apart from that, be prepared to use the hook to catch the local news helicopter, which will transport Batman over to the large East Tower Terrace. Here, you will have to fight another series of battles but first, you will have to let go off the chopper.
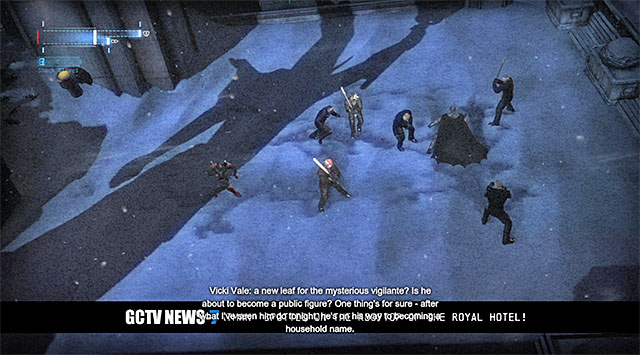 An interesting view over the battlefield
Do not worry that the game is, at first, presenting the battle from the perspective of the cameraman onboard the helicopter. Soon, the situation will change and, as a result, you will not need to bother about this non-standard view. Just like many times before, first take on the martial artist and try to eliminate him as quickly as possible. Avoid taking unnecessary damage because there will be more enemies to come, apart from the ones already present in the battlefield.
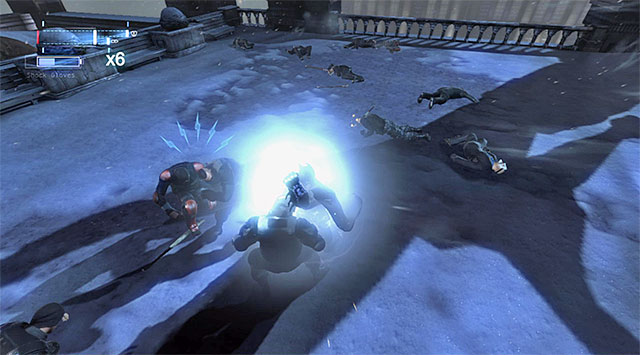 As usual, use the gloves on the stronger enemies
Eliminate the successive, weaker enemies and keep in mind that the fights will soon be joined by new bandits. After you charge Batman's shock gloves use the fact that you are currently capable of landing heavier blows and take on the martial artist and the armored enemy. After you win the fights, use the hook onto the balcony above and go towards the door to the East Tower - 40th Floor. Follow the linear corridors into the East Tower - Swimming Pool, where there is another numerous group of enemies.
[New challenge: Campaign Challenge]
[New challenge: Custom Challenge]
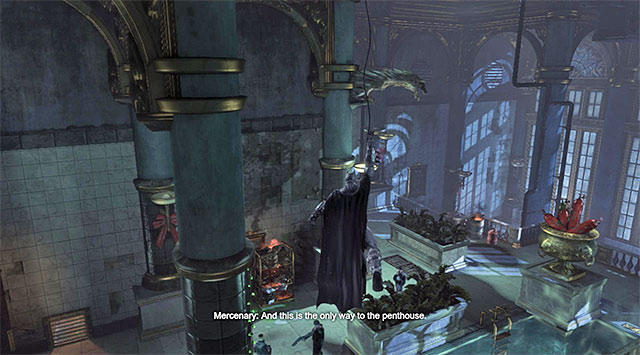 Use the vantage points as long as they are fully accessible
You should, of course, start by making it over onto one of the statues and taking a look at the current situation. In the swimming pool, there currently are eight armored enemies and the good news is that there are no enemies with the disrupting devices among them. You should try to use the vantage points to eliminate the enemies right from the beginning, because it will become impossible later throughout this scene. I recommend, of course, the inverted takedowns and using the upgraded grapple to pull the enemies towards the statues.
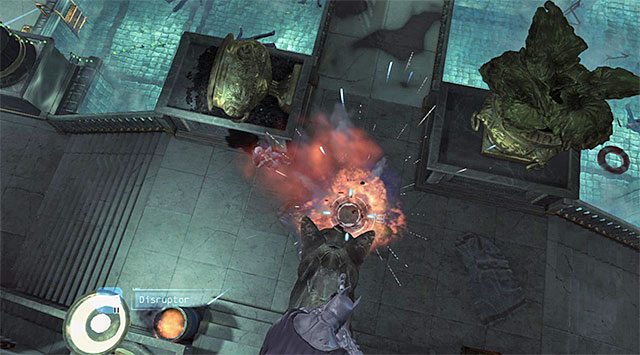
For the first time throughout the campaign mode, you will meet the enemies that carry mines here. After some time, they start planting explosive traps all around the place and it is worth remembering that you cannot step on one. Fortunately enough, mines can be detonated from afar, using the disruptor (the above screenshot), and it is worth doing that whenever there appears an enemy next to such mine.
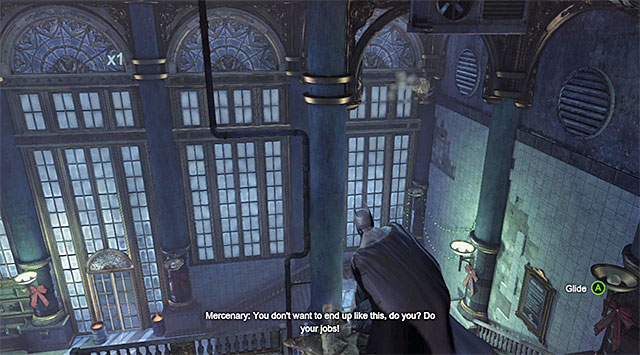 Do not remain atop the statues for too long because batman will start taking damage, and this will draw somebody's attention
Things get complicated at the moment when there are only four enemies left in the battlefield, because they will then arm the charges mounted onto the nearby statues. This means that you will have to give up using vantage points, because landing onto one will make it explode after several seconds.
Note - You can respond to the problem of inaccessible vantage points in a bit different way, and use the grapple to join two of them together with a rope. This will allow you to return to the rope and plan on attacks from there.
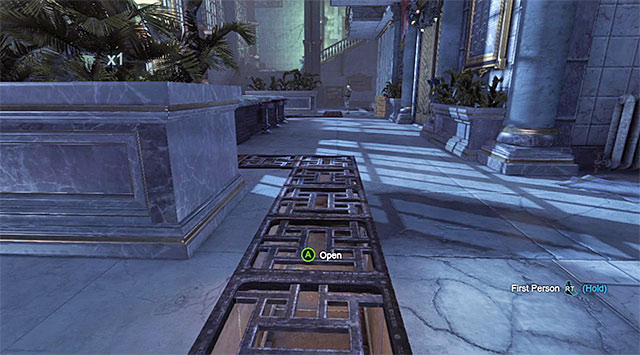 Use the numerous venting shafts to your aid
Blocking your access to the vantage points means, of course that you need to modify your tactics. For the purpose of moving around and planning on your actions, start using the venting shafts, both the ones under the floor and the ones joining individual rooms on the ground floor.
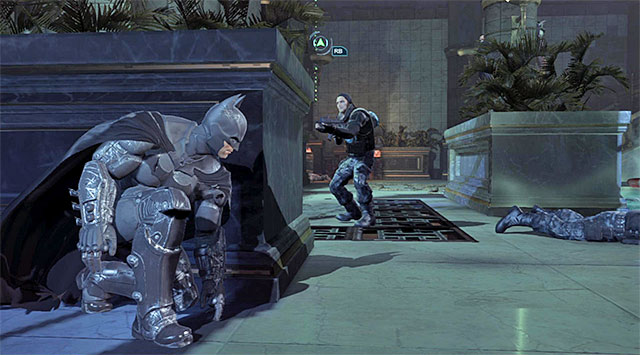 You can wait for the enemies behind covers and wait for opportunities to grab them
Use the detective vision to your aid, on a regular basis, to track the enemies down. When it comes to the recommended methods of their elimination, I suggest using the grapple to pull propane tanks and fire extinguishers towards them. Also you can try sneaking up from behind or waiting, while hidden behind a cover, for them to come, at which point you can press the takedown key/button. Eliminate all of the characters that have been staying at the swimming pool.
[New challenge: Campaign Challenge]
[New challenge: Custom Challenge]
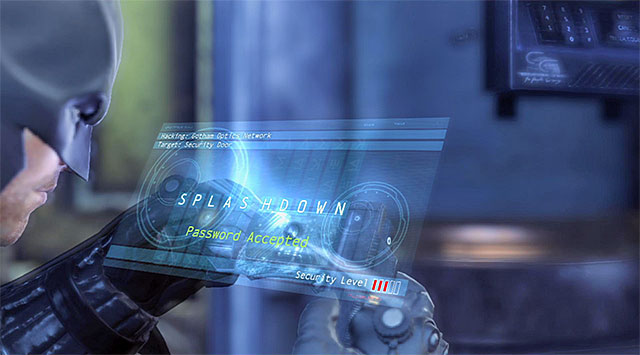
You can now go to the ground floor and stop at the elevator to the apartment. Since the elevator is unavailable by default, use the Cryptographic Sequencer on the control panel and determine the correct password (the screenshot). After you reach the apartment, press the attack key/button several times to hit Joker and prepare to fight a full fight with Bane, which will start in the Penthouse Library.
[New Character Trophy: Bane]
 You can respond to Bane's weakest blows by countering
The beginning of the fight with Bane is quite easy because it is not going to be too different from the fights with the regular, heavily-armored enemies. First of all, do not allow the boss grab you although, if it is a standard attack (the blue symbols) you can try responding to it with countering. If it is on the other hand, a strong attack (the red symbols), after Batman has been grabbed, it is a good idea to attempt using the counter attack, in the form of defense, and avoid taking quite severe damage as a result.
 From now on, Bane will be discernibly stronger
Attack the boss three times by stunning him with the cape, which exposes him and gives you the opportunity to attack with the Beatdown, i.e. a combo of fast blows. After you have performed one, or two series of this attack, Bane should strengthen himself by using the Venom. You will recognize the moment by the exposing of the tubes on his back, with green goo, as well as by the change the looks of his health bar to one that resembles the goo.
[New Character Trophy: Venom Bane]
 If Bane grabs you, try to protect yourself in time against taking damage
Since Bane got even stronger, thanks to the boost in the form of the Venom, you need to attach a lot of attention to avoiding his strong attacks, and dodge at the right moments. If you still get grabbed, keep tapping rhythmically on the key/button that appears on the screen, thanks to which you will avoid taking severe damage.

When it comes to attacking the improved Bane, you should start in the same way as previously, i.e. by tapping the cape stun button three times (make sure, however, that Bane is not preparing to attack himself!). Land a series after another and finish them with the special takedown, i.e. the combination of two keys/buttons (the screenshot). It is the same attack which becomes available, during the regular fight, after you reach the x8 multiplier and in this case, it causes ripping off a tube attached to Bane's back.
 After some time, the fight will relocate to the terrace
The appropriate performance of the entire sequence will make Bane return to his standard state. So, continue landing all of the blows described above, which will make the fight relocate to the terrace that you have already visited [East Tower Terrace].
Note - If you die in the final phase of this battle, you will not have to start over, and only from the moment in which you fall onto the terrace.
 You need to dodge from Bane's charges
The most serious handicap in the final part of the fight is that in his upgraded version (Venom Bane) Bane he will be pulling off formidable charges. AT ALL COSTS try to dodge from them, especially that if you are hit once, it is very likely that Batman will not be able pull himself together before the next charge comes, and he will take more damage as a result.
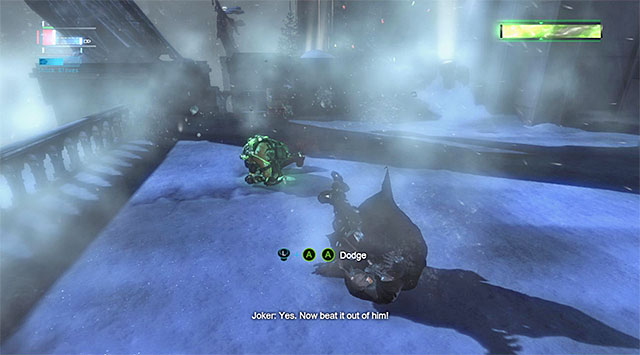 The slam into the ground by the boss
Bane should charge three times, in total and he will bounce off the terrace at the end, and slam into the ground with great energy. Avoiding this attack is, fortunately, easier.
 Shock gloves will help you weaken the boss
Use the same attacks as earlier, to weaken the boss so, start with hitting him with the cape three times, land a series of quick blows and round it up with an appropriate key/button combination to perform the special takedown. Also, wait for the moment when the shock gloves are unlocked, because you will be able to give up, then, the step connected with stunning Bane with the cape.
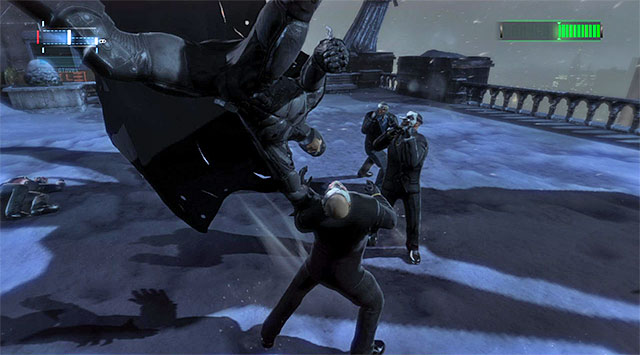 You can use Bane's goons to charge the gloves
Further into the fight, there will appear one more obstacle, because there will appear groups of the regular enemies on the terrace. You can try to ignore the bandits and count on the dying as a result of Bane's charges. You can just as well use them to charge Batman's gloves.
 The end of the fight with Bane
Continue fighting Bane, up until the moment when you deplete his health bar almost entirely. What is interesting, Batman will be incapable of defeating the boss definitively, because there will appear police choppers around and a cutscene will start.
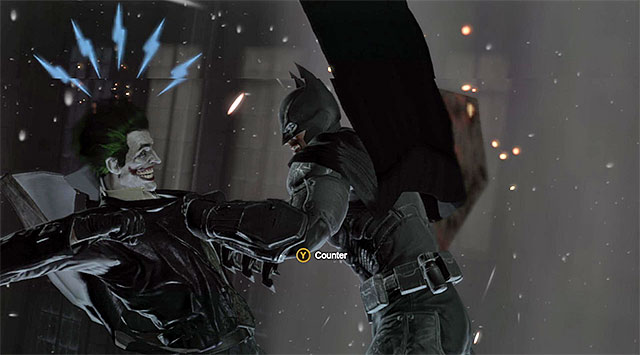 Press the counter-attack button
After the main cutscene, wait for Batman to launch himself into the void after the falling Joker. Be prepared to press the counter-attack key/button at the right moment, which will result in capturing Joker.
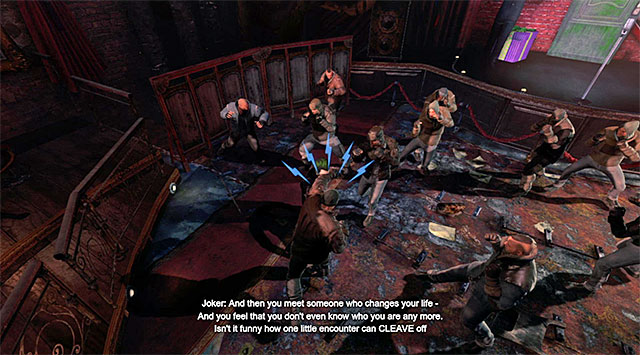 You need to eliminate all of the enemies
After Joker is transferred to the Blackgate Prison he will meet with a psychologist named Harleen Quinzel. Now you have to play a non-standard game taking place inside the Joker's mind and, while playing through this sequence, you are going to switch into the world-known madman. Start attacking the bandits gathered on the stage [Comedy Club]. It pays off, of course, to rely here on counter-attacks, but you do not need to attach too much attention to that, because both the health bar, and experience points are inactive here.
 Avoid the flames
The action will soon turn to the Chemical Plant. Follow a linear path here and stop only whenever there appear flames, at which points you need to wait for further passage to be unblocked. The talk to the future Harley Quinn soon draws to an end and you will regain control over Batman, who will, in the meantime, reach the Batcave.
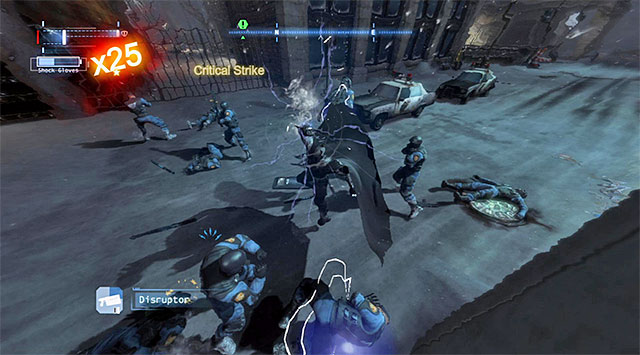 New gadget
Also Batman will initially delve into his mind, but you do not really have to do anything special here and only reach the place where you will witness the scene of Bruce Wayne's parents being murdered. Talk to Alfred and go to the workshop to collect a new gadget - The Glue Grenade.
[New Character Trophy: The Red Hood]
[New challenge: Combat Training]
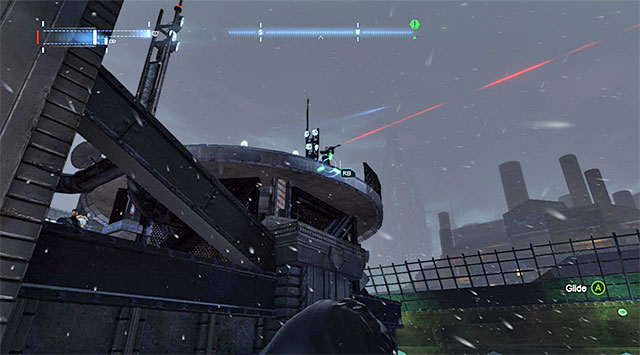 One of the snipers may occupy the helipad
In order to reach the police morgue, you need to walk through the sewers again and the entrance, marked by the game, is in the Western part of the Burnley district. Keep vigilant here, because around (including on the police precinct's rooftop) there may be snipers and if only you notice them (the red laser sight beams) you should deal with them in the first place, by sneaking up from behind and performing a quiet takedown.
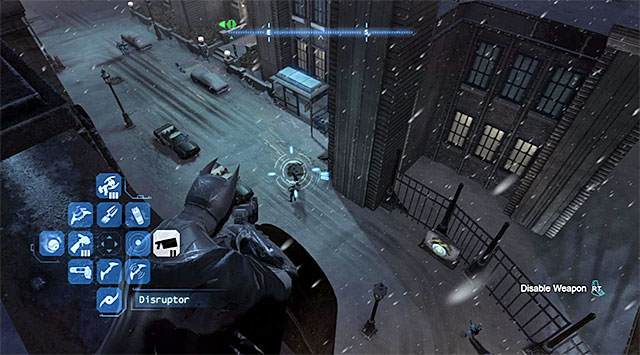 It pays off to use the disruptor to disable firearms
The snipers are not the only problem, because there should be quite a numerous group of the corrupt SWAT team members. I strongly recommend that you plan for the attack from above, by using the disruptor in the first place, to disable the firearms that some of the enemies come equipped with. Apart from that, it pays off to use the concussion detonator or the glue grenade, and also land onto one of the policemen, with large velocity,(e.g. on the one with a shield or the heavy armor) to make the fighting easier for you right at the beginning.
Shock gloves will make it easier to eliminate the best equipped policemenAfter the fights start, focus on attacking the weaker of the enemies, while remembering to prevent them from picking up guns, to the extent it is possible. After Batman's shock gloves have charged, activate them quickly and use them to make it easier for you to deal with the enemies using shields, or wearing heavy armors. After you win the fights, locate the interactive hatch located in the spot marked by the game, and enter the Burnley Sewers.
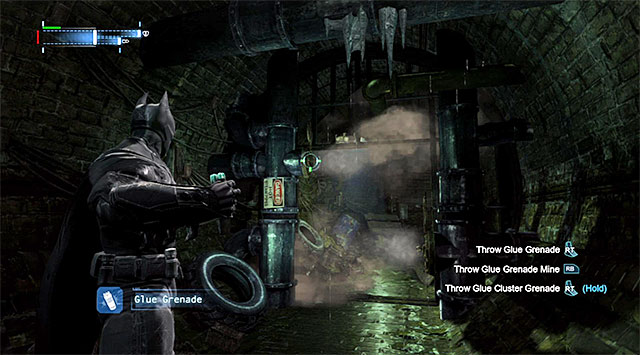 Aim the glue grenades at the spots with the steam escaping
Go West, to reach the crossroads that you have passed by earlier in the game. Turn towards the pipes, on the West, with the steam escaping from them. Use, twice, the newly acquired Glue Grenade to seal both of the ruptures, and unlock at the same time, the alternative passage into the precinct's basement.
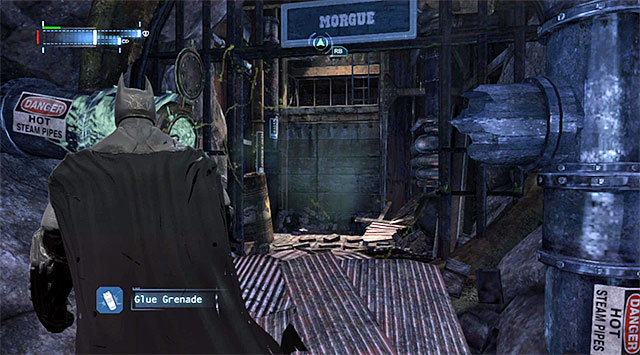 The passage in the location with the inactive shaft, leading to the morgue
After you reach the edge, glide towards the lower ledge that you can see in the distance and locate the door to Burnley Sewers - East. Follow the linear corridors, use the glue grenade on the pipe and reach the Derelict Elevator Shaft. This time around, you do not need to climb and, instead, approach the pipe to the East and use again the glue grenade.
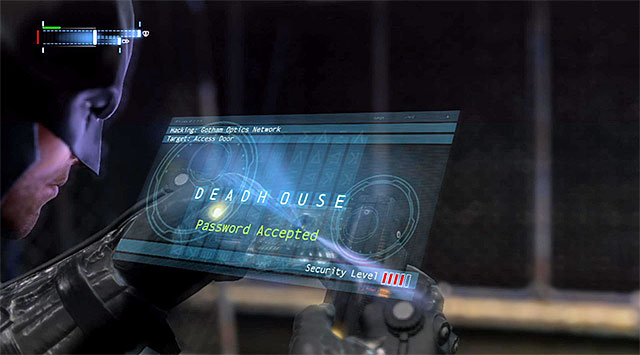
Climb onto the ledge above and select the Cryptographic Sequencer from the inventory. Interact with the control panel. The game will start here a more difficult variety of the hacking mini-game so, from a dozen, or so available combinations, you need to make the correct password.
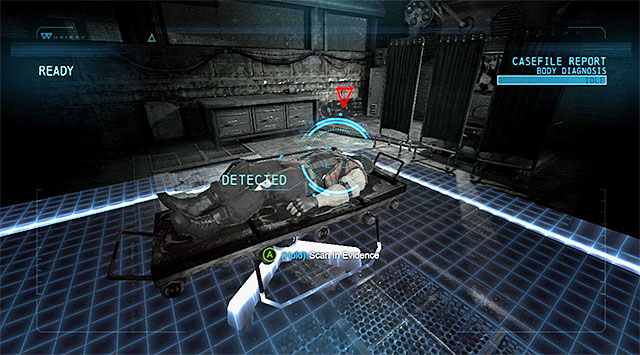 Scan the corpse
You can now use the ladder to the GCPD - Morgue. Start by turning on the evidence scanner and examining the corpse on the table to determine that it is not Bane. Interact then with the nearby computer terminal.
[New Character Trophy: Venom User]
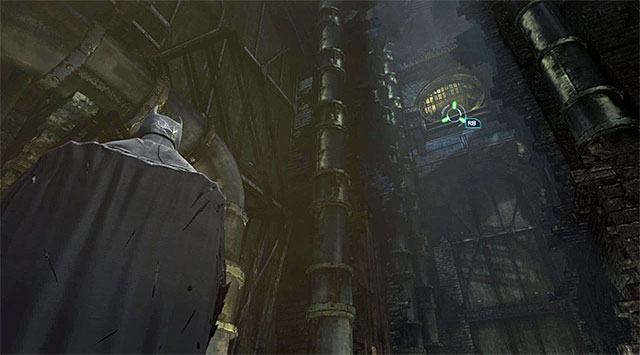 You need to grab onto the ledge above
First of all, you need to return the same way that you took earlier, in to the surface. So, start by lifting the hatch, thanks to which you will be back near the Derelict Elevator Shaft. Go West [Burnley Sewers - East], and listen to the radio communication on the radio, which concerns the gang war, which is connected with Bird's side mission (you can find its description in a separate section of this guide). Return to the main part of the Burnley Sewers and use the hook to return to the ledge in a considerable distance above. Select the glue grenade from the inventory and seal both pipes. Go West and use the hatch, thanks to which you will return to the Burnley district.
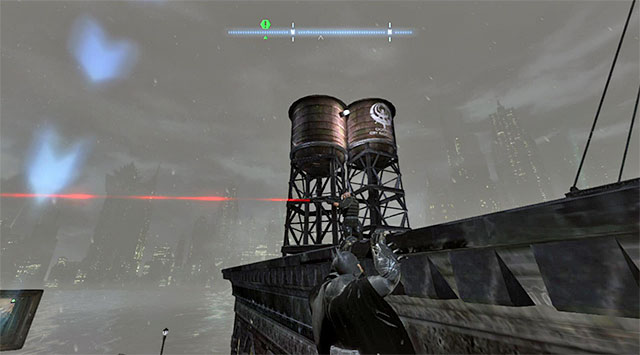
You can now go to the western part of the Park Row district, because that's where Bane's tracker is leading. Approach the destination from the North-Eastern side, deal with the sniper shown in the screenshot, who is occupying the rooftop of one of the taller buildings around.
 Another sniper
This is not the end yet, because directly above the mission's objective, there is another sniper. It is worthwhile to glide towards that bandit, land behind his back and perform the quiet takedown. While you are still here, deal with the enemy patrolling the nearby walls also, and keep necessary precautions, because he is also equipped with a firearm.
 The best solution is to glide towards the enemy with the automatic rifle
Try now to reach one of the small balconies to the East of your destination. Thanks to this, you will notice that the tunnel's entrance is guarded by several bandits. Glide towards the enemy with the gun, knock him down and finish him off. Only then, take to the remaining enemies, who should not obstruct you from performing your mission anymore.
Do not attempt to look around for the locator in the spot marked by the game, because you first need to reach the sewers. Enter the blocked off tunnel, turn right and locate the door shown in the screenshot. Climb down the stairs and unlock the access to the venting shaft, which will take you to the sewers under the Park Row district [Park Row - Sewers Access]. Jump onto the balustrade and surprise the enemies directly in front of Batman with an explosive present. Only then, jump down and start fighting, while minding the enemy with a shield and the enemy wearing the heavy armor. Apart from that, do not allow the remaining enemies to start firing at you, and remember that using the shock gloves will considerably help you win this one.
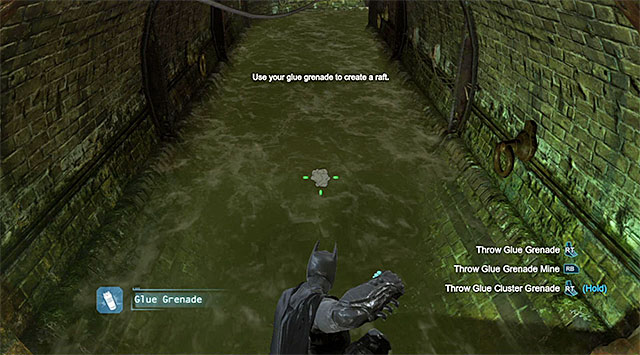
After you have won all the fights, locate the weakened wall fragment and spread the explosive gel over it. Approach the water reservoir [Park Row - Sewers], select the glue grenade from the inventory and target it at the water (the screenshot), which will result in the creation of a floating platform. Jump onto the raft and use the claw on successive anchor points, which will allow you to reach the other end of the reservoir.
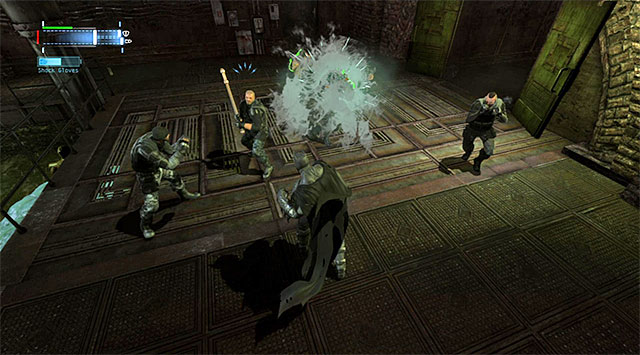 It is a good idea to stop the enemies with the glue grenades
The attempt to open the door will equal starting new fights with Bane's men. You need to watch out in here even more, because you will bump into two heavily armored enemies. At first, avoid fighting them (you can stop them using the glue grenades), and focus on the standard enemies, and on the enemy with shield. Attack the strongest enemies only after the shock gloves have fully charged, which will make them die quite quickly and not threaten Batman too much.
[New Character Trophy: Mercenary]
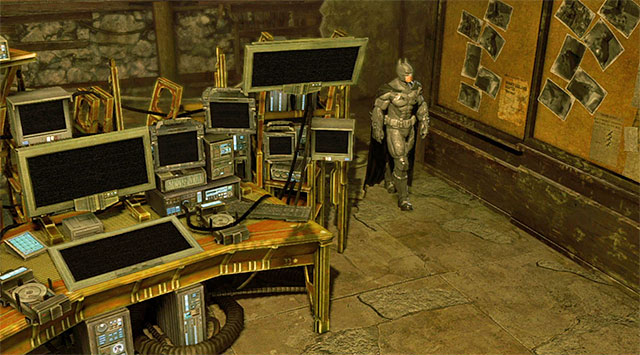 Bane's HQ
Take the entrance to Bane's HQ [Bane's Field HQ - Entrance], walk down the stairs and unlock the armored door. After you reach the main area in the HQ, the game will display a cutscene, during which your character will learn and important thing.
[New Character Trophy: Bruce Wayne]
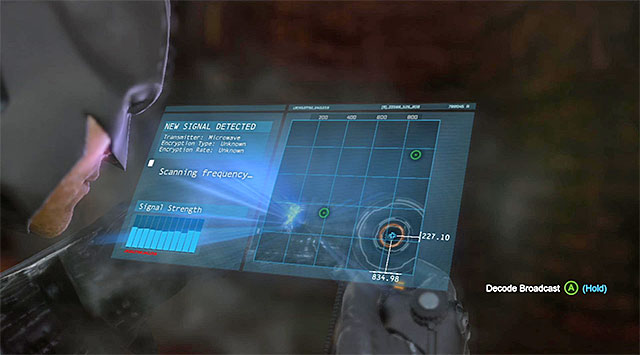 Decode the transmission
After having talked to Alfred follow the same path towards the exit from Bane's HQ. return to the sewers [Park Row - Sewers] and listen to the police communication concerning the appearance of the Firefly near the Pioneers Bridge. Use the glue grenade on the water reservoir again, jump onto the small platform and make it over to the other end of the reservoir, using the claw. After you reach the other end, [Park Row - Sewers Access] your character will automatically select from the inventory the Cryptographic Sequencer. Position the crosshair within the orange circle and hold down the key/button displayed on the screen to decrypt the transmission.
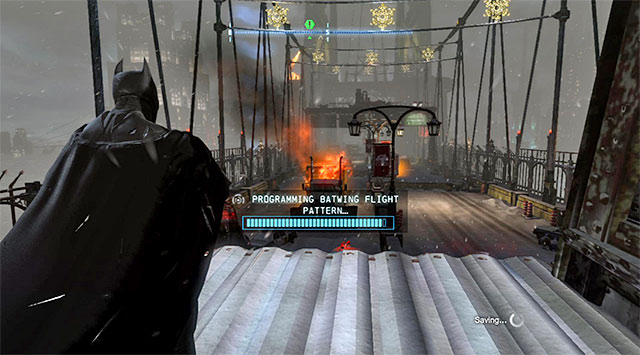 You need to reach the region of the bridge
Look up and target the interactive ledge that you will e able to make it onto, using the hook. Walk through the ventilation shaft again and reach the exit from the sewers to return to the Park Row district. Go towards the Gotham Pioneers Bridge, and listen to the radio communications along your way. After you get there, the game will play a cutscene , during which Batman manages to divert the Firefly's attention.
Note - you do not need to go, straight away, to the point where you fight Firefly. What is even more, Batman may in the meantime go to the batcave (e.g. in order to talk to Alfred, or complete new challenges), because the option to travel there has not been blocked.
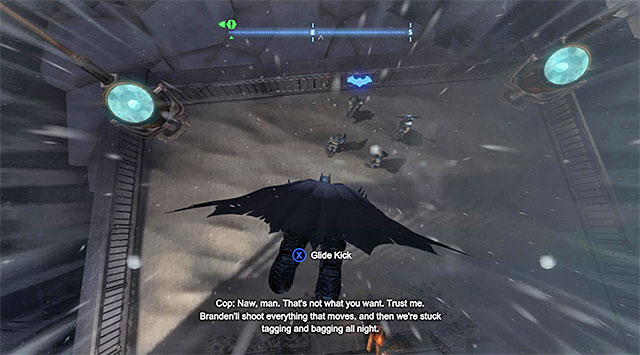 Jump down onto the enemies to attack them from above
After you regain control over Batman, bounce off the vantage point and glide towards the corrupt policemen under Batman, to attack them by surprise. Start the fight and remember, while fighting, to use the cape against the enemy with shield and preventing the policemen from firing at you. Deal with all of them and search out the door to the Maintenance Room. Approach Captain Gordon here to have a short talk with him.
[New character profile: Harvey Bullock]
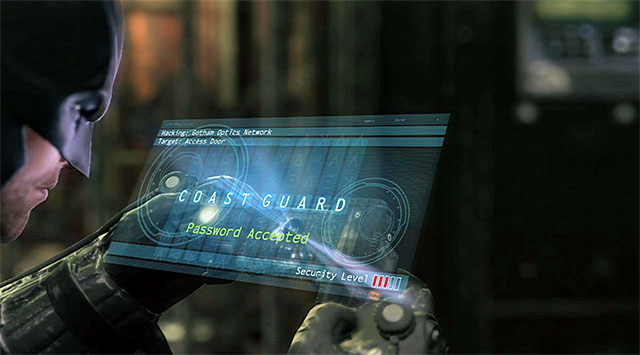
Remain in the maintenance room and go towards the Southern elevator shaft. Select the Cryptographic Sequencer from the inventory and use it on the control panel to start a more demanding hacking mini-game, and to determine the correct password from among several available combinations (the screenshot).
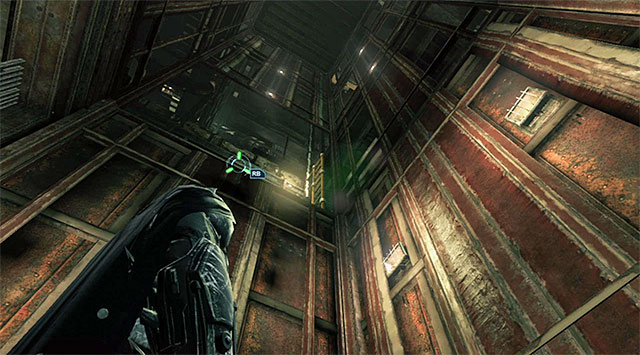 The climbing starting point
Since there is no elevator here, you will have to do with Batman's gadgets and skills. Start by using the hook to reach the ledge above. Shimmy to the ledge's other end, and select from the inventory the claw. You need to use it to rip off the grate of the ventilation shaft. Walk through the tunnel, take the ladder and approach the generator, which you need to activate, using the shock gloves.
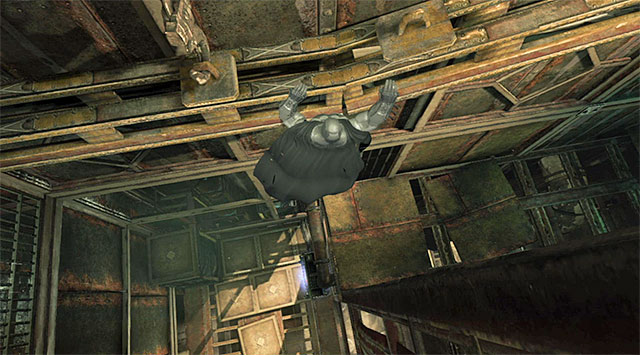 You need to grab onto the interactive ledge
Turn to face the elevator shaft and start using the glue grenades, which will result in sealing the three pipes that you can see in the distance and which leak steam. After you are done with that, jump onto the ledge with the sealed pipes and go right. Use the hook to make it onto the balcony above, run up and jump. Grab onto the interactive ledge and shimmy to the right.
 Exit from the location with the elevator shaft
Climb only after you are next to the next ledge. Look up and aim the hook at another interactive point. After you make it onto the next platform, locate the ladder, thanks to which you will be able to get to the very top of this location. You can now wake the door to the Boiler Room Maintenance Corridor. Use the hook to walk past the locked gate and then use the claw to unlock the venting shaft. The corridor will take you to the Boiler Room, Where you find the first one of the Firefly's four bombs.
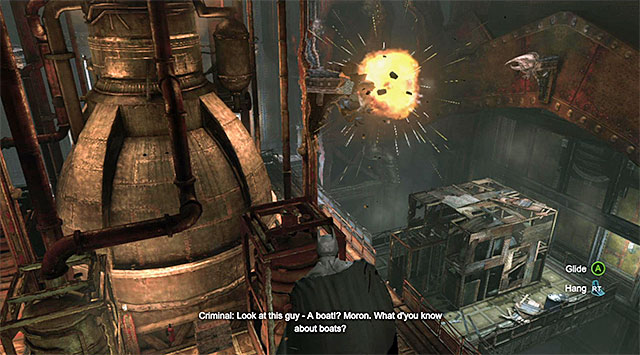
As you have probably figured out, before you can focus on disarming the bomb, it will turn out to be necessary to eliminate all of the bandits gathered around it. The most convenient way of moving around are the vantage points but, you need to watch out for the statues around the main furnace because they are mounted with explosives (example in the screenshot).
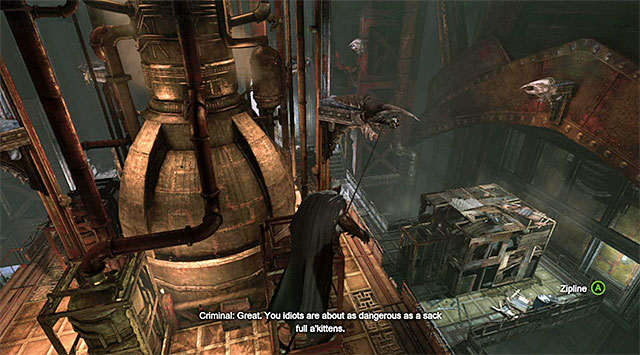 Extending the rope may help you solve the problem of the statues with traps
You can, of course avoid the statues with bombs and it is especially recommendable, while playing the initial part of this scene, i.e. when the enemies do not yet realize Batman's presence and aren't yet trying to locate him. It is also worth reminding at this point that a good way to avoid the threat connected with the statues, is to extend ropes using the grapple. This is so, because attaching a rope to the statue with the C4 on it, prevents premature detonation of the charge.
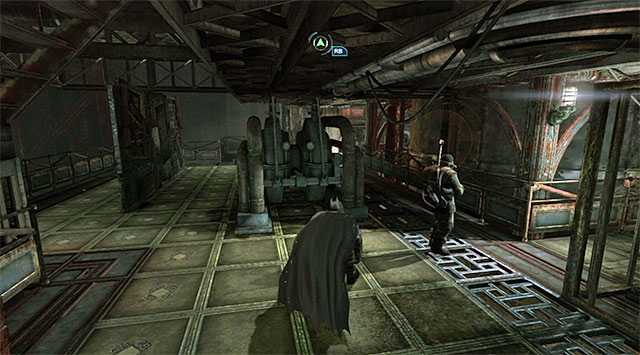 Locate and eliminate the enemy with the disrupting device
When it comes to the enemies, I recommend that you, in the first place, get the one with the disrupting device. This may, however, prove to be very difficult, because the enemy with the antenna on his back, should be patrolling the boiler room's lower level, which means that you will have to break a serious sweat to eliminate him. You should also watch your step around the enemies with heat detectors and escape from the statues that they are currently scanning, or remain motionless if you come equipped with an appropriate upgrade.
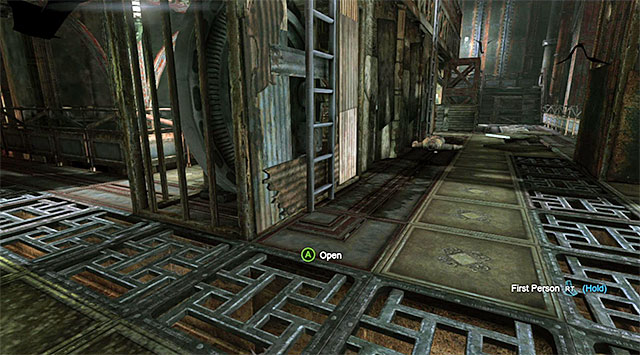 You can hide here in the venting shafts, among others
You can eliminate successive bandits in any order you wish. The easiest way, of course, is to perform the inverted takedowns or hoist them using the grapple. You can also focus on quiet takedowns, using the explosive gel on the weakened surfaces or executing quiet surprise attacks from venting shafts. Continue eliminating enemies until there is only one enemy left in the boiler room. He should give up automatically and you need to interrogate him.

Approach the bomb and press the key/button displayed on the screen to remove the metal casing and reveal the interactive panel. Use the Cryptographic Sequencer here, and get ready to guess the three passwords shown in the above screenshot. To guess each of the passwords, you have a limited amount of time (21 seconds for the first one, 19 for the second and 17 for the third). The good news is that you do not have to choose from among multiple possible combinations and only manipulate with the keys/triggers to lock the device in the only possible position.
[New challenge: Custom challenges]
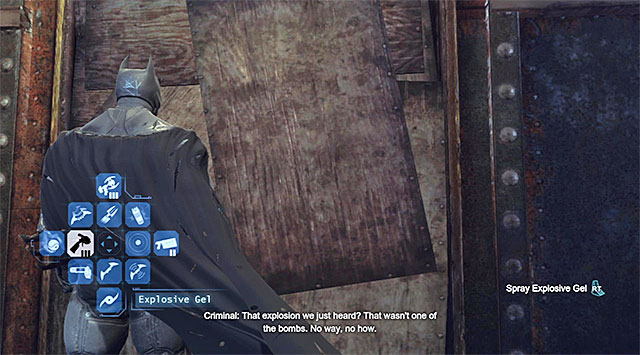 You need to destroy this wall fragment
Go towards the Eastern exit from the boiler room [Maintenance Elevator Access], reach the elevator and set it into motion (the red button) [Train Station Maintenance]. After the ride is over, make it over onto one of the ledges above and use the shock gloves on the local generator. After the elevator changes positions, approach the wall that can be destroyed and spread the explosive gel here. You will now to have to fight the bandits that assailed Branden and his people.
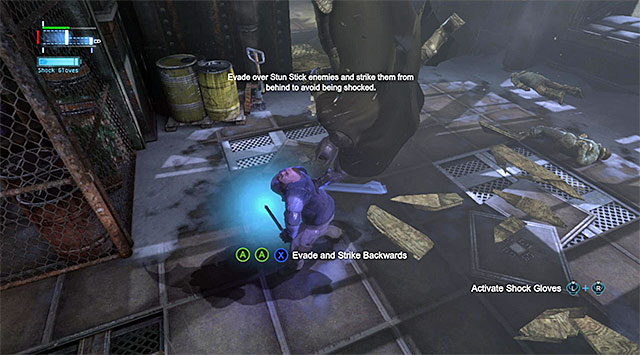
In here, for the first time (save Anarky and his side mission) you will encounter an enemy with stun gun. Follow the game's instruction and avoid this character's attacks (the red symbols above the head) and do not attempt landing standard, frontal, blows because Batman may then be shocked with electricity. Instead, double-tap the jump key/button to jump over that enemy, only then start landing some blows into the bandit's back.
Note- there is also a good alternative to this strategy, which consists in exposing the enemy to Batman's attacks. You can throw glue grenades, which will stop then and provide you with the opportunity to launch a frontal attack.
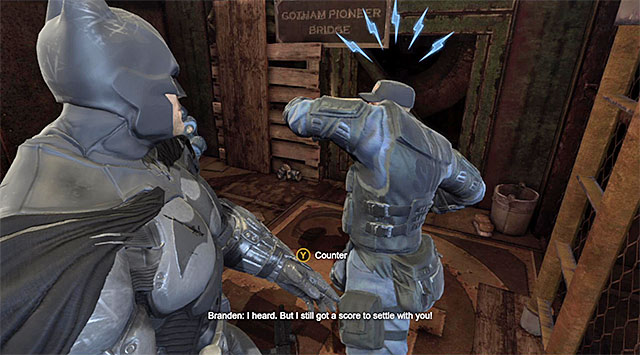 Respond to Branden's attack with a counter attack
When it comes to the remaining enemies, to the extent it is possible, stop them from firing their guns at you. You can, of course, use the disruptor here, and disable everybody's guns. After you have dealt with everybody, approach Branden and listen to the conversation with him, while being prepared to press the key/button to knock the SWAT team leader down. You can now take the ladder and go through the door to the Train Station.
[New character trophy: Branden]
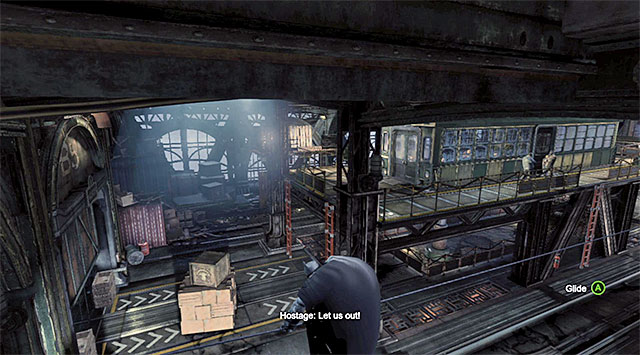 Extending the rope will allow you to plan the attacks and avoid the enemies
Around, there are four armed enemies and, just like in the case of the situation in the boiler room, it would be good if you could eliminate them without raising the alarm. Unfortunately, there are no vantage points in this area, although if you still want to plan on your actions from below the ceiling, you can use the grapple, extend the rope and pull yourself to it, using the hook.
 You can eliminate both bandits simultaneously
A good idea to eliminate the enemies patrolling the upper level of this area, is to grab onto the ledge and throw them over the balustrade. What is interesting, if you hurry, you will be able to eliminate in this way, two enemies that are busy with a conversation. The other, recommended, elimination methods are hiding in the venting shafts that are hidden under the train station and using the grapple to pull propane tanks.
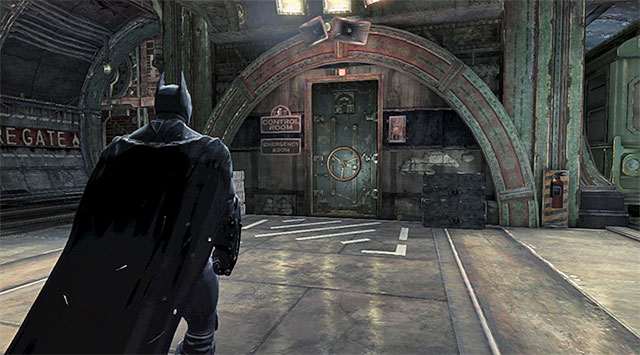 The entrance to the control room
After you have secured the area, go North to reach the door to the Control Room. Climb up the stairs and press the button to lower the railway car with hostages and the bomb inside. Return to the main area, make it over to the car's rooftop, using the hook and approach the bomb.

The general premises of the Firefly's second bomb disarmament scene, remain unchanged so, use the Cryptographic Sequencer to play three hacking mini-games that assume time limits (21 seconds for completing the first one, 19 second for the second and 17 for the third). The correct passwords have been presented in the above screenshot.
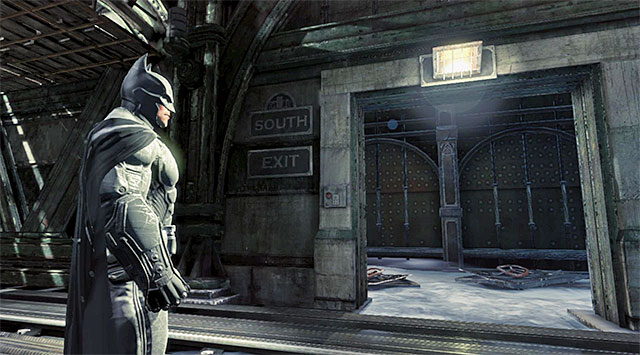 The train station's exit
Listen to another conversation with Captain Gordon and go towards the South-eastern exit from the train station. After you reach the locked door, use the shock gloves, to unlock access to the Maintenance Corridor (South). Walk under the big pipes and explode the explosive gel at the weakened wall fragment. This action will coincide with a bigger explosion that will damage a large portion of the bridge
Start by turning towards the nearest car that has been knocked over, thanks to which you will be able to gain access inside that car, using the hook. Walk through the car, turn left and jump towards the small element of the bridge. Then, use the grapple in the spot shown in the screenshot.
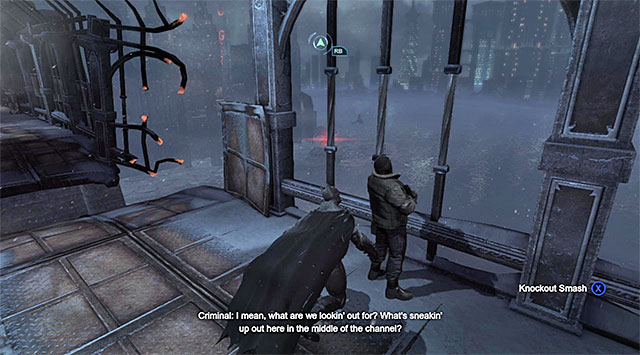 The first sniper
Wait until the rope extends and glide towards it. Turn right and walk to the ropes very end. Look up and locate the interactive ledge that you can use the hook on. Repeat this action on the second ledge, reach the region of a bigger platform. Start by surprise-attacking the sniper here.
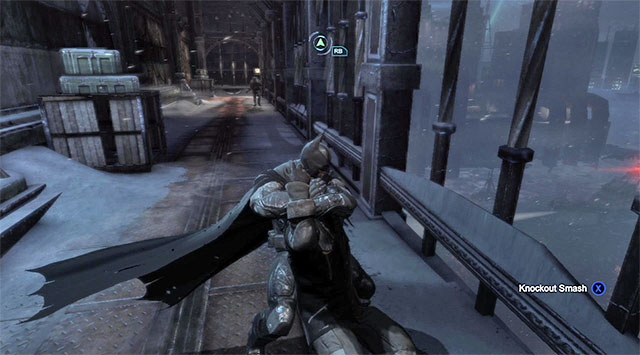 There are two more snipers to eliminate
Use the hook to reach the nearby vantage point and note that there are two more snipers in this area. Wait for the enemies to disperse and get each one from behind to perform the quiet takedown, starting, of course, with the one standing nearer the Batman. Note - if you do not want to take too much risk, you can, after having neutralized the first sniper, return to the vantage point and wait for the right moment to attack the second one. You can now take the door to the South Pillar Electrical Room.
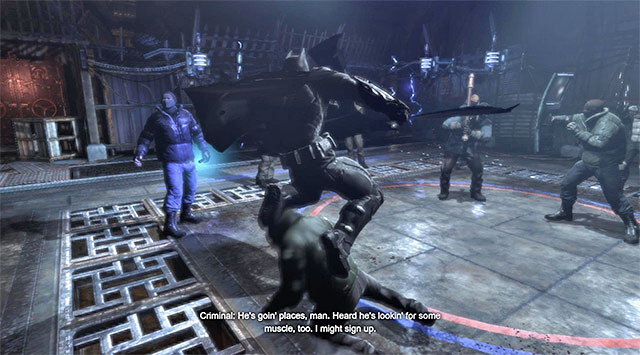 Start by attacking the enemy near the venting shaft
Jump into the venting shaft, walk over to its other end and start another, bigger fight with surprise-attacking the enemy standing the closest to the venting shaft. After the fights proper start, remember that you still need to avoid direct attacks on the enemy carrying a stun gun.
 It is a good strategy to push the enemies off the platform's edge
While fighting, you should notice that it is surrounded by metal elements with electricity flowing through them. Therefore, you should not allow yourself to be pushed off the arena's edge but, on the other hand, you can try pushing them there yourself so that they are shocked with electricity and lose their health. As far as the bandits' gear is concerned, just like usually, you should focus on the enemies with guns and on using the cape, or the shock gloves against the enemies with shields.
After you won the fight, examine the arena's corners to find there the power supply button. You can now open the metal gate, remove the third bomb's casing and use the Cryptographic Sequencer. Just like earlier, you will have to guess three passwords shown in the screenshot and, just like earlier, there is a time limit to determine each one of them (21, 19 and 17 seconds).
[New challenge: Combat Training]
![Exit the electrical room by taking the same door as before [Pioneers Bridge (South)] - Disarm the bomb at the north pillar - Main storyline - Batman: Arkham Origins - Game Guide and Walkthrough](https://game.lhg100.com/Article/UploadFiles/201512/2015121216412334.jpg)
Exit the electrical room by taking the same door as before [Pioneers Bridge (South)]. After you listen to the conversation with Alfred go North. Locate the interactive anchor point shown in the above screenshot and use the hook, then glide towards the portion of the bridge that has been left intact. Jump over two chasms, reach the unstable wall that you can destroy with the explosive gel. Take one more jump, duck under the pipes and use the shock gloves to unlock the nearby door. Take the door and return to the region of the Train Station that you have already explored.
 Get the first enemy from behind
In the meantime, there appeared five new armed enemies at the station. So, you need to start sneaking here. Walk into the side corridor and jump into the venting shaft running under the ground. Wait for a single guard to come here but, do not attack him directly from the shaft, because this would attract the attention of the remaining guards and you would have nowhere to hide from them. Instead, wait until he walks above Batman, jump out of the shaft and then approach the guard to perform a quiet takedown.
 The balcony occupied by a sniper
Carefully, approach the next area at the train station and start by making it over to the balcony, located to the right of the starting point, to eliminate the sniper occupying this place. When it comes to the remaining threesome, you can eliminate them in any way you wish, e.g. by throwing them off the higher level, hiding in venting tunnels or by dragging propane tanks towards them with the grapple.
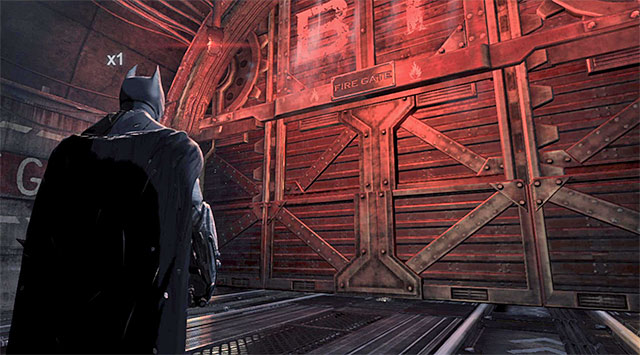 A new exit from the train station
After you win the fights, go towards the Northern hatch and wait for access to the next bridge part to become available, thanks to Alfred. Approach the locked door here and unlock it, using the shock gloves on the nearby generator. You can now take the passage [Pioneers Bridge (North)] and use the hook onto the nearby vantage point. Walk to the left, as far as you can, and leap towards the interactive ledge. Again, shimmy to the left,, pull up and use the hook on the ledge above, which will take you to the main part of the Pioneers Bridge.
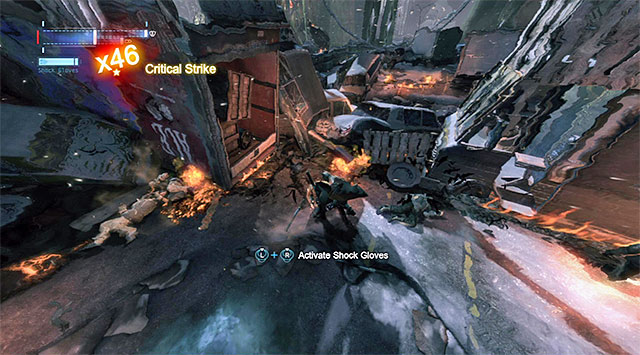 Just like usually, use the shock gloves to your advantage
Do not hurry too much about jumping down, because there is a quite numerous group of bandits around, and it would be good if you start the fight with the concussion detonator or the glue grenade. Right after the fighting starts, deal with the weaker enemies, thanks to which you will charge the shock gloves. Use the gloves to deal with the enemies equipped with shields. As a reward for winning this battle, you will be allowed to face off against Firefly which means that you will not have to disarm the last bomb yourself.
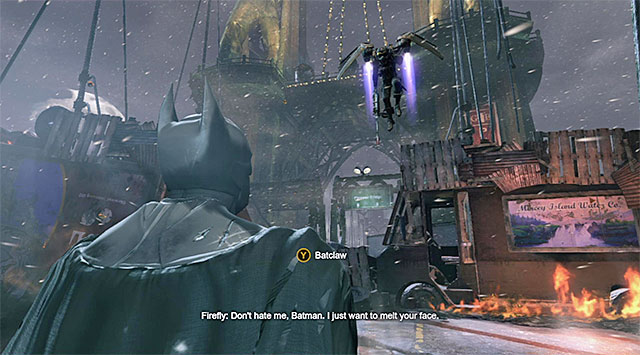 Press the counter-attack button
Start the fight with Firefly by pressing the counter-attack key/button, thanks to which Batman will use the claw and make it over to the fight arena in a quite unconventional way (only then, will the boss' health bar appear).
 Do not stop for anything for longer, keep running around the entire arena
Right after the fight's main part starts, you should spend a few moments learning Firefly's attacks. The boss is predominantly using his flame thrower and to avoid taking damage, you need remain in constant motion. Performance of leaps should not be necessary, although it can be helpful at critical stages and let you avoid losing health.
\
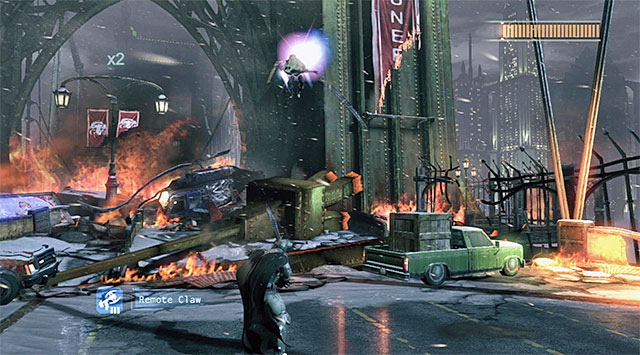
At moments in between Firefly's attacks, you can try throwing the glue grenades at him, and it is best to use the key/trigger combination that allows you to throw one quickly (i.e. by skipping manual aiming). After several attempts, one of the grenades should hit the boss and immobilize him for a moment (the screenshot).
Throw batarangs at FireflyStart now throwing regular batarangs. Just like earlier, rely on the key/trigger combination that allows you to throw them quickly. It is also a good idea to have an upgrade that makes the batarangs-throwing process more efficient. Still, you can do without it.
 You need to use the claw to catch the boss
Continue throwing batarangs up o the moment when the game zooms in on the boss and suggest that he has been stunned temporarily. Quickly, use the combination of keys/buttons for quick use of the claw. After the boss is captured, start tapping the key/button that appears on the screens to pull him towards yourself. Batman will then land a strong blow without your participation.
 It is a bit more difficult to avoid the bombs
From the moment of performing the first combination (glue grenade - batarangs - claw) Firefly will start to use another attack, which is the bombardment of the area. In this case, running around the bridge is not enough anymore and, according to the game's suggestion, you should also perform leaps to the sides. For the whole time, you should be on a lookout for a good opportunity to hit the boss with another glue grenade, to be able to perform the actions described above once again.

The next phase of the fight should start at the moment when the Firefly loses around a half of his healthbar. Start escaping, using the hook. Walk over to the left over the metal element of the bridge. You will reach another interactive point shown in the screenshot (you need to use again the hook).
 Jump onto the vehicle hanging above the chasm
Another part of the escape assumes maneuvering between car wrecks and, do not forget to rely on leaps to the sides at the moments at which Firefly starts bombarding the area. Jump onto the blue vehicle and get towards the truck's trailer, under which you need to perform a slide.
 Wait for opportunities to immobilize the boss again
You can now continue the actions that have been described at the beginning on this page. Keep running around the bridge, avoid Firefly's attacks and wait for opportunities to throw him the glue grenades. Each time that you notice that the Firefly was stunned , pepper him with batarangs, and then, use the claw on him (do not worry if you are not fast enough to shoot the claw, because the batarangs themselves will also deal damage to Firefly).

After the boss' healthbar is nearly depleted, he will start bombardment of the area. After you avoid the first wave of the charges, try to stand, more or less, in the middle of the arena, because this is going to be the only safe place. Wait for the moment in which Batman will be able to catch the Firefly with the hook (screen).
 You need to save yourself from colliding with an obstacle twice
This is not the end, because during the last phase of the fight, you will have to press quickly the counter-attack button, in two different places. This will prevent the boss from smashing Batman against an obstacle. Watch a cutscene of capturing Firefly and, after you return to Batwing, listen to the conversation, from which you will learn that Bane visited the Batcave in the meantime.
[Character profile updated: Firefly]
[New character trophy: Firefly]
[New character trophy: Harvey Bullock district
 Using the detective vision will allow you to locate Alfred
After you reach the Batcave, start by approaching the bat-computer. Interact with the computer, thanks to which you will unlock access to the detective vision. Use the alternative vision mode to locate Alfred, thanks to which you will determine that he is lying on the rocks under the Batcave's balconies.
 You need to reanimate Alfred
Glide towards Alfred and land somewhere nearby. Keep tapping the interaction key/button at the right moments, to throw away the large rocks that trapped him. After you watch the cutscene, start reanimating Alfred, using the shock gloves, by pressing the attack key/button at the right moments. The action will then cut to the Blackgate prison [Blackgate - Main Entrance], which you have already visited at the beginning of the game.
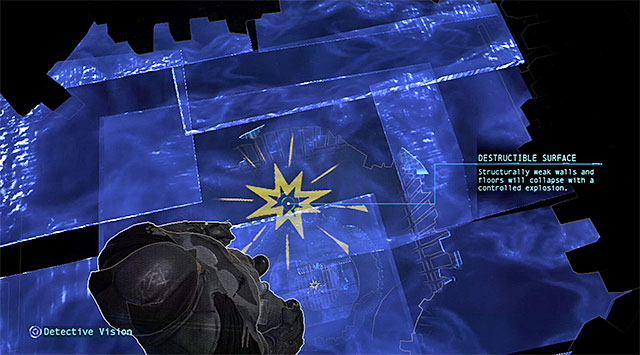 Try to disarm the armored enemy quickly
Go east and use the hook to reach the top of the metal gate. It is a good idea to attacks the prisoners gathered at the nearby yard, from here, by throwing them a concussion detonator or a glue grenade or sabotage the gun one of them has, using the disruptor. After the fights start, try first of all, to knock the weapon out of the armored enemy's hand. Also, later throughout the fight, make sure that nobody is capable of conducting fire effectively.
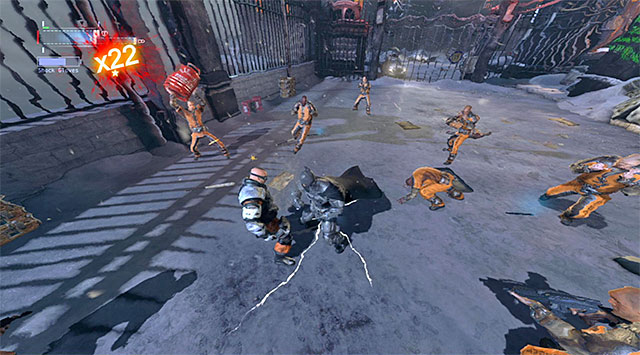 Use the gloves to attack the best equipped enemies
After you disarm this bandit, focus mainly on the weaker enemies, although you should also watch out for the attacks of the enemies equipped with shields and stun guns. To the extent possible, you should also use batarangs to stop the enemies from throwing propane tanks and other big objects at Batman. Attack the better equipped inmates only after the shock gloves charge, because you will then not have to use the stun moves with the cape, nor perform additional leaps (also in the case of the inmate with the stun gun). After the fight, listen to the conversation with the prison wardens that you have just saved.
[New challenges: Campaign challenge]
[New challenge: Custom challenges]
Unstable floorExplore the yard where you have just fought and find the manhole separating this location from the sewers [Blackgate - Sewers Access]. Follow the linear corridors and reach the place where it will be necessary to detonate the floor with the explosive gel. Jump into the hole and, after you land at the bottom of the shaft, look up and locate the interactive ledge that you can use the hook on.
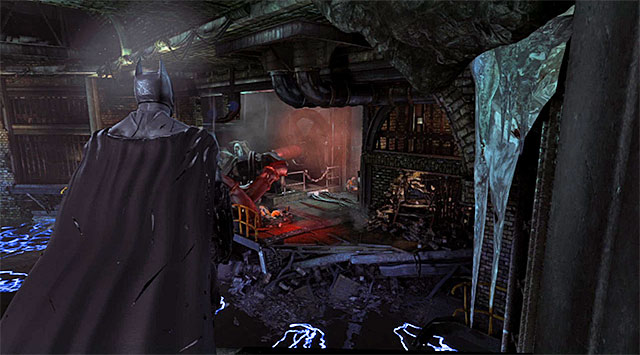 The spot where you tart the flight
Go North, use the grapple along your way to extend the rope. Walk over the rope and reach a new area with discharges. You need to use the grapple twice here, each time to extend another rope and walk over it onto the neighboring platform. Climb onto the ledge above and walk along the narrow corridor to reach the area where you need to use, again, the explosive gel. After you have done that, glide towards a more distant ledge with the murdered guards on.
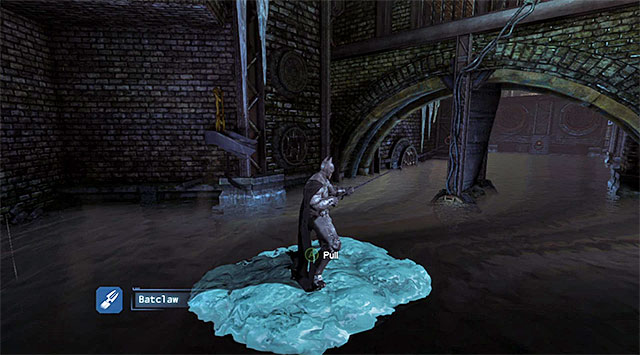 Pull yourself towards the successive anchor points
Approach the power supply device and press the appropriate key/button to sabotage it, which will lead to the disappearance of the discharges. You can now approach the water and create a floating platform, using a glue grenade. Jump onto the raft and start moving, by using the claw on the successive anchor points. After you have sufficiently neared another ledge, use the hook on the balustrade.
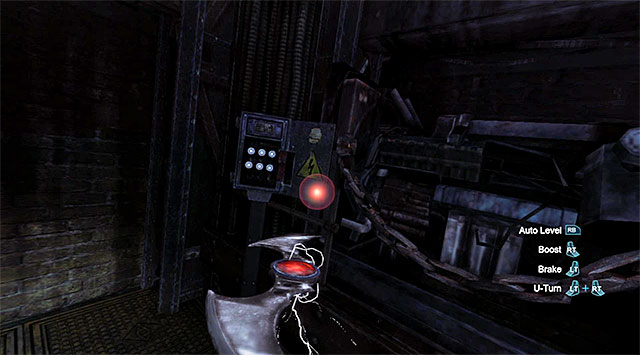
Enter the control room and press the button to make discharges appear in the distance. You now need to select quickly the remote controlled batarang from the inventory and throw it there, which will charge it (if you do not manage to do it in time, press the button again) Right after the batarangs charges, send it towards the fuse box on the left (the screenshot).
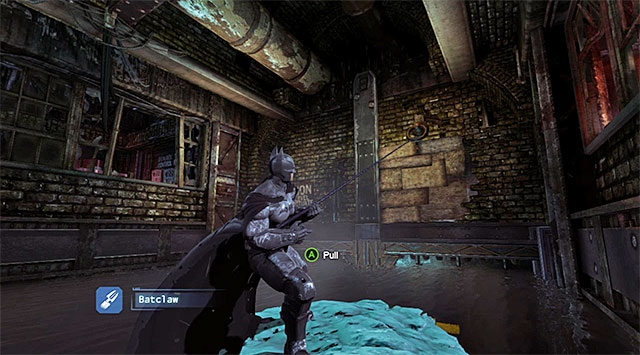 You need to pull yourself towards the weakened wall and smash it
Note that the destruction of the fuse box caused the water level to rise. Return to the previous area and in the way that you have already earned (glue grenade) create a floating platform. Jump onto the platform, pull yourself towards the anchor point, using the claw and spread the explosive gel onto the wall here to destroy it. Climb onto the ledge, go ahead and stuff both holes with glue grenades.
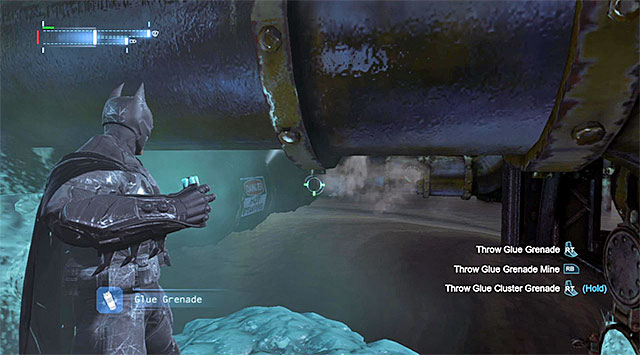
Look down and use glue grenades on the two pipes that you can see in the distance. Only after the process of leaking steam stops, create a new platform onto which you need to jump down. Note that the platform starts moving on its own and you will have to plug the holes in the pipes along the way. Start with the pipe shown in the screenshot and, just as quickly, duck to prevent being pushed off the platform.
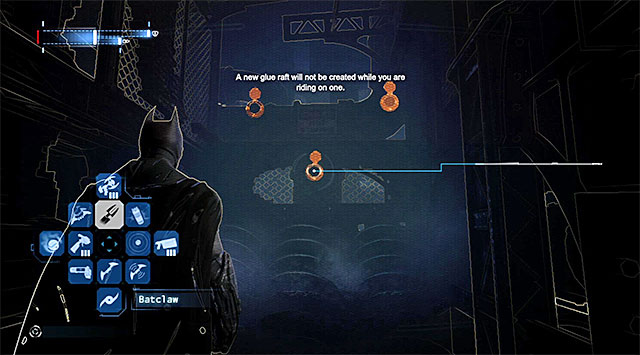
Aim the glue grenades at two other pipes (they are located on the right). Finally, send the glue grenades towards the three pipes above shown in the screenshot. Note - you need to do that before the platform that you are currently standing on, is destroyed by the whirling blades so, be quick about it. Once you have finally stopped the leaking steam, use the hook to reach another ledge above. You can now go through the door to the Prisoner Processing room.
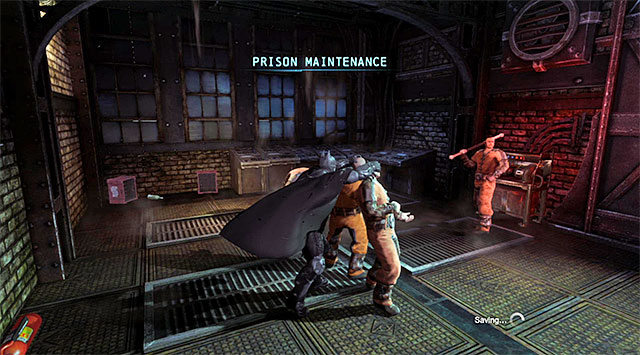 Simultaneous takedown on two enemies
There are four inmates in the room where, if you hurry, and do everything correctly, you can eliminate two of them with a single surprise attack. After you have dealt with the other two, use the shock gloves to charge the local generator. Wait until the elevator arrives, climb onto its top and use the hook to reach the top of the shaft. Take the door to the prison's main area [Nexus].
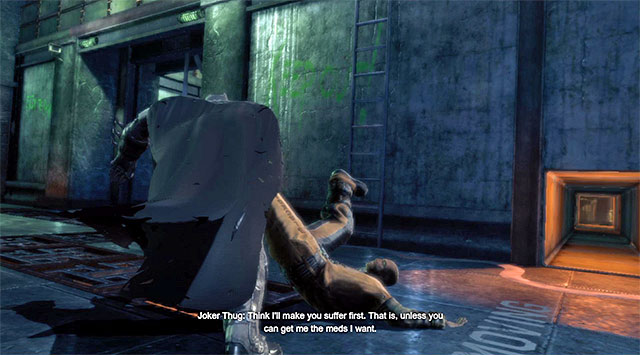 Attack the enemy when he stops near the shaft's exit
In the prison's main area [Nexus] there are ten armed enemies, in total and it would be a good idea to eliminate them one by one silently. Since you are starting in the venting shaft, you could, first of all, surprise attack an inmate that stops near the shaft's exit.
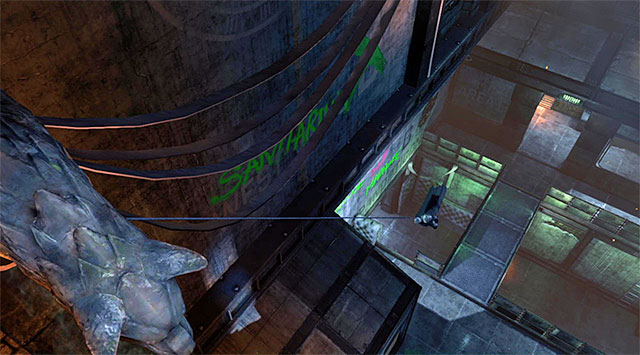 In this location, you can use vantage point without any restrictions
Right after you have disposed of the first enemy, I recommend that you get to the vantage points, as quickly as possible, located under the ceiling. There are two factors that speak for this solution - no bomb has been attached to any of the statues here, and you will have to find the enemy with the disrupting device. There is a handicap here, though - you need to watch out for the enemy with heat detector, which you have already learned. Remember to escape from the statues currently scanned, or to remain motionless (only if you already have the proper masking upgrade).
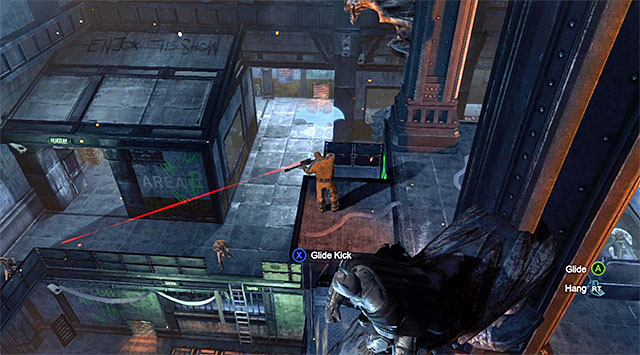 The sniper
The first enemy that you should turn your attention to, after you reach the vantage point, is the sniper staying on the central platform. Land behind his back, get him from behind and perform a quiet takedown.
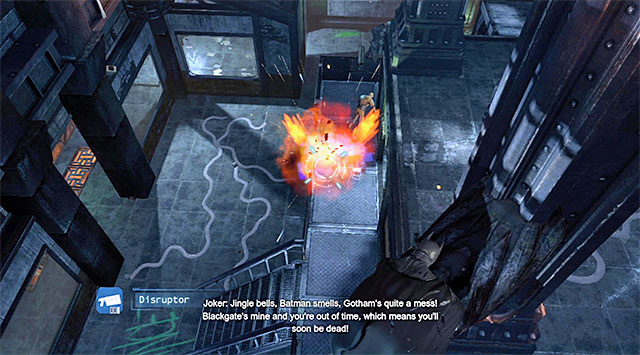 Detonation of the mines with the disruptor is one of the methods of eliminating the enemies
The order of eliminating the remaining enemies is completely up to you so, it does not matter at all. Personally, I recommend that you rely on gliding, quiet takedowns, the grapple (pulling object or hanging them up on the statues) and disruptors (detonation of mines if anyone comes close), inverted takedowns and quiet takedowns from the venting shafts under the floor.
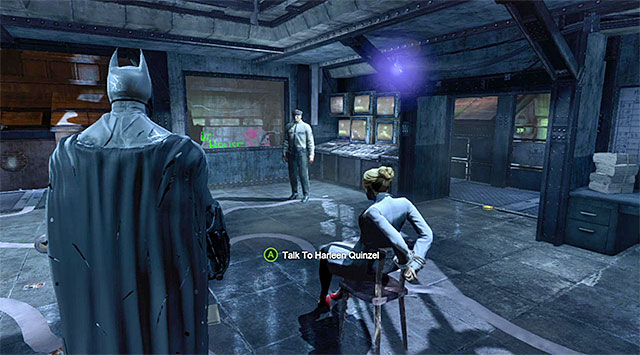 Hostages
Continue attacking until the moment at which you secure this area completely. Go now to the central part of the area, into the small room where there are people held hostage. Talks first to the two prison wardens, and then to Harleen Quinzel. You can now go towards the Northern exit located on the lowest level[Cell Block B Access].
[New character profile: Harleen Quinzel]
[New character trophy: Harleen Quinzel]
[New challenge: Custom challenges]
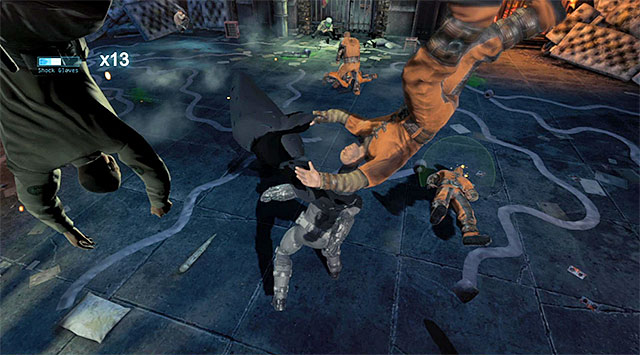 Your first fight in the cell block is very easy
Go North to reach the Cell Block B after a few moments. You will have to fight here several big battles with the freed inmates, and the first one of these is, fortunately, very easy. All in all, you only need to remember to neutralize the enemy with shield (stunning + stomping, or using the shock gloves), because you will be able to eliminate the rest of them without any problems. If you want to, you can blind them temporarily, by hitting a fire extinguisher with the batarang or by pulling it towards the prisoners (grapple).
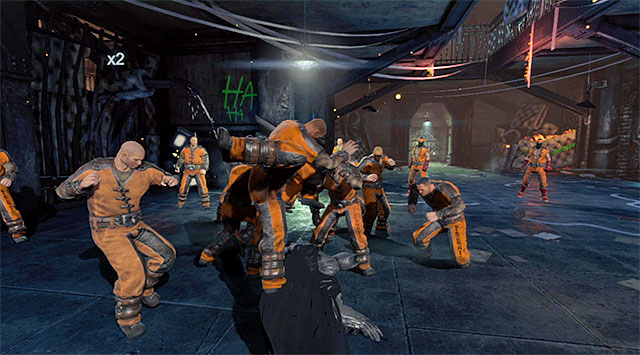 You can start a new fight with a slide
After the fights finish, locate the Western staircase and climb up the stairs onto the higher level of the cell block. Walk along here, until you meet Deathstroke in one of the cells that you pass by. Reach the stairs, climb down and enter the "arena" where there is a WAY larger group of enemies. It is best to start this one of the hardest battles in the game, by using the concussion detonator or the glue grenade but, if you have been spotted, try performing a slide, at least.
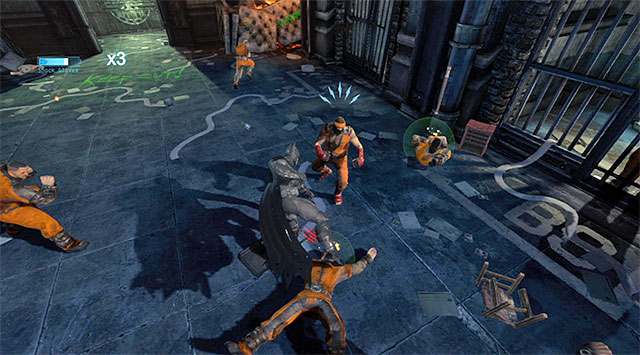 You will recognize martial artists by orange headbands
I recommend that at the initial phase of the fights, you focus on inflicting damage to the martial artists. Do not wait for the gloves to charge because, if you ignore these elite enemies, they will be a considerable nuisance, while attempting to eliminate the remaining enemies.
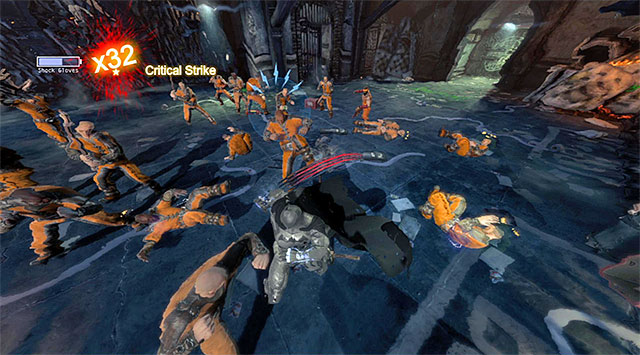 Use the shock gloves to eliminate quickly the inmates one by one
Take to attacking the regular enemies only after you have eliminated, at least. One of the martial artists. Of course, you should try to maintain continuity while landing blows and wait for the moment when the shock gloves become available. The best way to use the gloves is for the elimination of the better-equipped enemies, meaning the ones with shields.
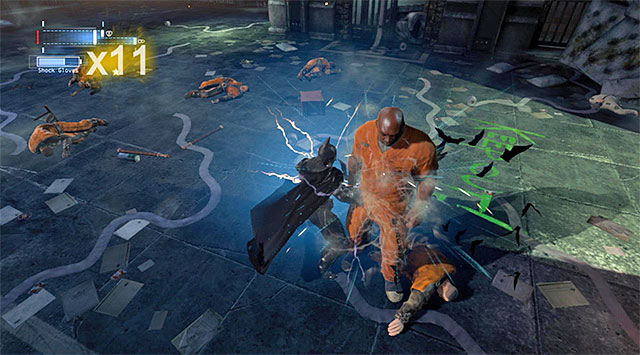 The gloves will also come in handy while eliminating the strongest of the enemies
Towards the end of the battle (probably after you have eliminated the martial artists) there will appear an overgrown enemy around. He will be striving to charge and grab you. To the extent possible, keep away from him and take advantage of the fact that the charges will be knocking down the regular opponents. Before you start inflicting damage to the giant, make sure that the shock gloves are charged, especially that one properly landed combo should be enough to defeat this enemy. The only thing left for you to do is to deal with the inmates who, without the reinforcement of their "elite" mates should be no problem to you.
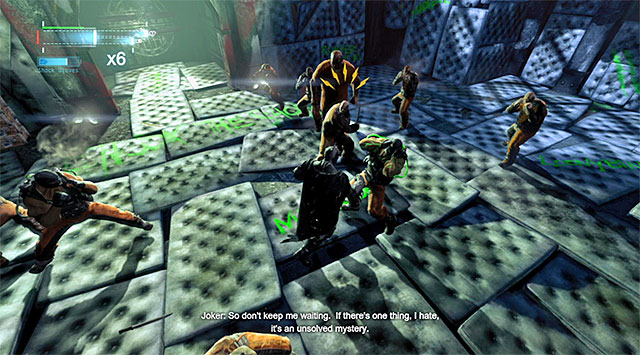 Avoid the attacks of the well equipped enemies
Go now towards the Western door [Panopticon Access], turn North and reach the ,area where you fight another demanding battle. After the fighting starts, deal with the weakest opponents and watch out especially for the ones that are using knives. Occasionally, also attack the martial artist and two enemies with green tubes sticking out of their backs. For the while time, avoid the charges of the overgrown enemy for the whole time.
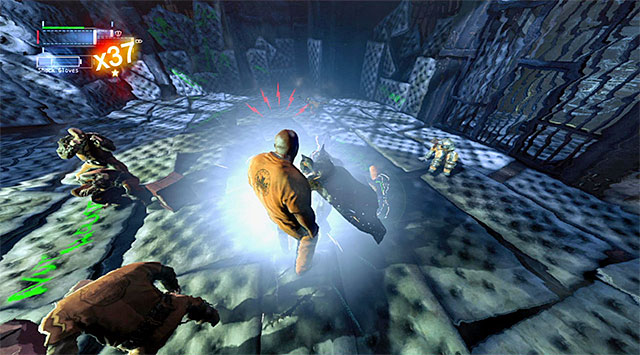 Use the gloves again, thanks to which you eliminate the enemies that pose the major threat
Just like usually, wait for the moment at which the game, for the first time during this fight, will grant you with the access to the shock gloves. The strong attacks with the gloves should be directed mainly against the Venom-propelled enemies, thanks to which you will not have to worry about having to stun them with the cape. For the end, leave the biggest one of the enemies, use the gloves against him or stun him a number of times to implement a combo of standard melee attacks. After you have won the fight, take the door to the North, which will take you to the Joker's hideout [Panopticon]. Be prepared to face off with Bane again.
 Perform flawless dodges and prevent Batman from colliding with Bane
The showdown with Bane consists of two, visible different, phases. Phase one of this fight is very similar to the final phase of the previous meeting with Bane, because he comes already soaked with the Venom and he will be performing formidable charges at you. Remember to avoid Bane's charges at any cost, by performing dodges because, if you are caught by one, you will lose a lot of health points and expose yourself to further attacks. You should also avoid the ground slams (they always end the series of Bane's charges) and the attempts to grab Batman because, in such a situation, you will have to defend yourself against taking heavier damage.
 Start by stunning Bane with the cape
Since you have last fought with Bane at the Gotham Royal Hotel, also tactics of depriving Bane of his health points has not changed. You need to look out for the opportunities to stun the boss with the cape three times (note - Bane can interrupt the cape attacks if you start them too late).
 Do not forget to press the correct button combination at the end
After you have stunned Bane with the cape, start landing quick melee blows that the boss will be incapable of blocking. Round the whole thing up with the special attack initiated by pressing two keys/buttons at the same time (this is not required, but will allow you to deplete the boss' healthbar faster).
 Attack Bane's henchmen to charge Batman's gloves faster
From the moment in which you land one whole series of attacks, there will appear inmates in the arena. Do not ignore them entirely although you may count on the fact that many of them will be swept off their feet with Bane's attacks. It is much better an idea to use them to charge the shock gloves. As you can probably remember, the gloves will help you weaken the boss so, it is worthwhile to activate them as soon as they are available.
 Use the gloves to deprive the boss of his health points on a regular basis
After you have depleted around 1/3 of Bane's health, the game will play a cutscene featuring Joker, Captain Gordon and the Prison Warden Joseph. From now on, the shock gloves will remain active until you have completed this phase of the fight so, you can start ignoring Bane's men on a larger scale. You still need to avoid the boss' charges and wait for opportune moments to launch your offensive. (cape- beatdown - the special button combination).
 Bane's reanimation
Continue fighting until the moment when Bane has only a small portion of health left. The game should soon play another cutscene, after which you need to reanimate Bane so, at the appropriate moments, press the standard attack key/button. After several moments, the second phase of the fight will start, where you will have to face off against the heavily-mutated Bane.
 You can use pellets to help yourself escape Bane
The second phase of the battle requires a completely different approach. Do not attempt any frontal attacks on the boss because, not only will it end in a failure, but also you will be grabbed by Bane and lose some of your health, as a result. Avoid detection for the whole time and, if you are spotted, start running and, of necessary, use additionally a smoke pellet that will blind Bane, or a glue grenade, to stop him for a moment. It is a good idea to use the detective vision, on a regular basis, to determine the boss' current position and adjust the strategy.
 As often as possible, use the venting shafts
The good news is that you do not need to use the main corridors only, because you can just as well hide in venting shafts that surround the entire area, and run under the floor. Batman will not have to lose time to rip the grates off the walls. What is even more, while escaping from Bane, you can perform a slide towards a side-shaft, which considerably diminishes the risk of being caught.
 Remember that Bane can search venting shafts in search of Batman
The venting shafts are a geed way to avoid Bane and plan on further attacks although, you cannot feel completely safe there. In the case of the side-shafts, try to get away from their exits and, in the case of the lower shafts, use mainly the places where the camera changes its position into the first-person mode. The reason is that Bane will be searching the shafts on a regular basis and lift/rip off the grates, especially right after a successful escape.
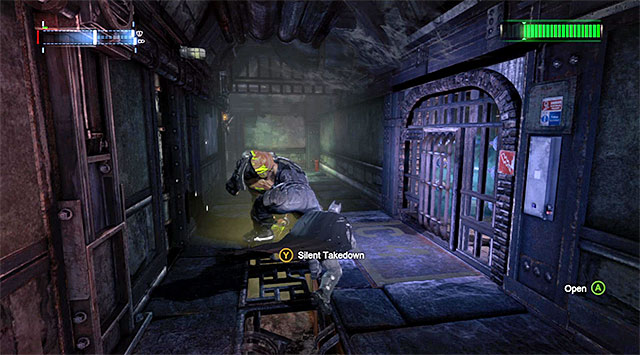 You can sneak up to Bane from behind and land the weaker surprise-attacks
There are two different ways in which you can deal damage to Bane. Variant one assumes that you sneak up to Bane from behind and press the quiet takedown key/button. Batman will then jump onto the boss and direct him towards the nearest wall. Unfortunately, as a result of this type of attacks, Bane will not lose too many health points.
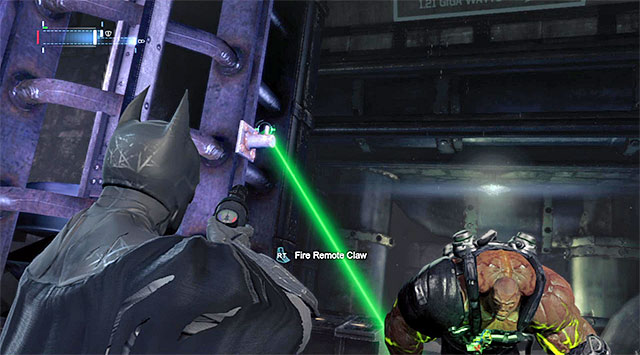

Variant two is way better, and it assumes that you keep pushing Bane onto the electric fence that separates the cages with prisoners from the main corridors. Hide in a lower shaft, close to one of such fences and wait for the boss to appear around (screenshot 1). Press the attack key/button, combined with dashing out of the shaft, and start landing a series of quick blows (screenshot 2). The correct execution of all the actions, should result in Bane's losing many more health points.
Aim at the two interactive pointsRegardless of the tactics, you need to cause the boss to lose nearly all of his healthpoints. Watch a stunning cutscene and use the grapple twice, on the anchor points that the game points you to, to extend the rope and defeat bane definitively.
[Character profile updated: Bane district
[New character trophy: TN-1 Bane district
[New challenge: Campaign challenge district
[New challenge: Custom challenges]
 The hole in the fence
You start in the Control Room. Locate the interactive ledge above and use the hook to get onto it. Walk through the venting shaft and reach the area with the Death Rows. Find a hole in the fence and jump down to a lower level of the cell block, where you will watch a cutscene.
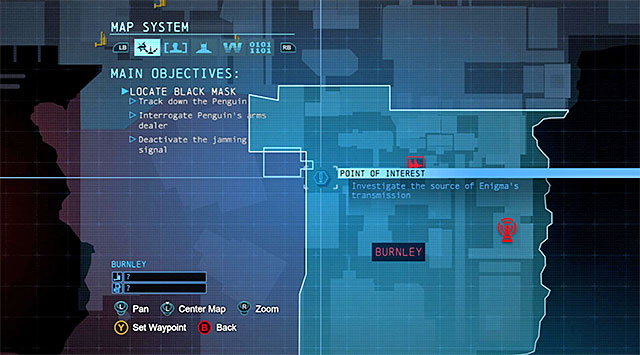 Avoid the martial artists' attacks
Start a new fight, during which you will be able to count on support from Captain Gordon. Just like usually, watch out for the martial artists and do not allow them to land too many blows. After you have charged the shock gloves deal with the enemies with shields, who are not going to be that demanding anymore.
[New character trophy: Warden Joseph]
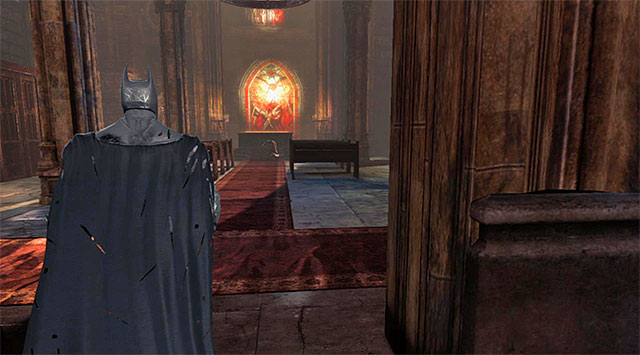 The chapel
Go east and leave the location with Gordon and Joseph [Execution Chamber Access]. Turn to the South-East, and open the door to the Prison Chapel. You can now approach Joker, which will result in another cutscene.
 Wait for the moments at which you are supposed to press the counter-attack button
Be prepared to press the counter-attack key/button and stat landing the standard blows. Perform further counter-attack and start tapping rhythmically on the attack key/button, which will result in defeating Joker.
[New Batman Suit] (you can put it on after you return to the Batcave)
Note - After you watch all of the final cutscenes, you will return to the main map. Depending on your preferences, you can either continue the game and focus on all of the side-activities, or start the game again on a higher difficulty level, by choosing the New Game Plus mode.
Way to unlock the mission: The opportunity to start completing this mission appears after you complete the Deactivate the Jamming Signal mission, i.e. after you sabotage Enigma's first communications tower, located in the Coventry district.
You need to go to Enigma's headquarters located in the South-Eastern part of Arkham, in the Burnley district (screenshot 1). After you get there, ignore the goons occupying the lowest level and locate the catwalk shown in screenshot 2. Initiating the Detective vision here will allow you to locate the weaker fragment of the wall. Spread the Explosive Gel and detonate it.
 The main computer
You can now enter the Enigma's HQ. Use the elevator and make it over to the room at the end of the corridor. The attempt do destroy Enigma's computer will fail but, you will learn instead what you need to do to stop the madman. The plan is that you destroy the Network Relays all around Arkham, interrogate Enigma Data Handlers and obtain Enigma Datapacks. Since you cannot do anything, as for now, leave the HQ.
Note- detailed information concerning all of the abovementioned actions can be found in the following chapters: Comms Towers, Network Relays, Enigma Data Handlers and Enigma Datapacks.
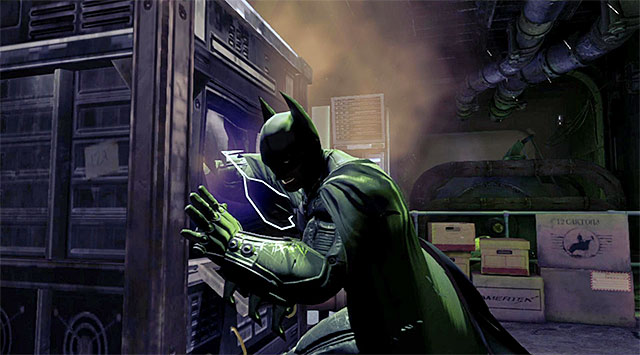 You can now destroy the mainframe computer
Return to Enigma's HQ after you have neutralized all of the 70 Network Relays. You can now destroy the central console to sabotage the madman's main server, for which you will be rewarded with 50000 experience points. This is, of course, not all, because you can still interrogate the Enigma Data Handlers and find Enigma Datapacks.
[New character trophy: Enigma]
[New concept art: Royal - Cards Corridor]
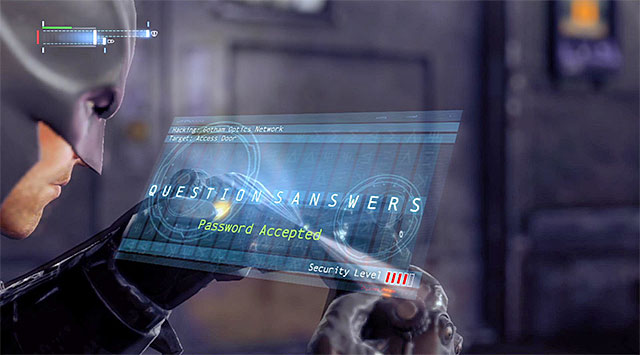
Visit Enigma's HQ for the last time after you have found all two hundred Datapacks, i.e. after you have collected all twenty Extortion Files. Again, go to the area with the main computer, but use the door on the left this time. Use the cryptographic sequencer and determine the password (QUESTIONSANSWERS; the screenshot).
 The first Riddler Trophy
Jump over to the neighboring ledge and examine the wall with the question mark painted on it. Ram through the wall. Your character will find here the first Riddler Trophy, the collection of which completes this mission. The main rewards for the completion of the Enigma side mission are 100 thousand experience points and a new outfit (you can try it on after you return to the Batcave).
Way to Unlock the Mission: You get the opportunity to receive this optional mission after you defeat Deathstroke who is staying onboard Penguin's ship [The Final Offer], soon after you receive the Solve the crime scene inside Lacey Towers mission.
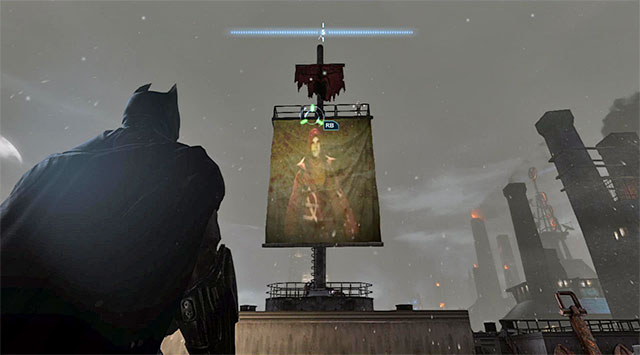
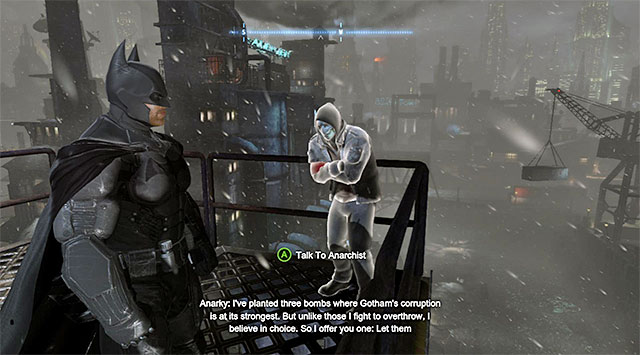
On your way to the ship's exit, stop after you reach the Gun Shop again, and watch the footage displayed on several displays, all at the same time. After you are back outside of The Final Offer acquaint yourself with another footage, addressed to Batman this time (screenshot 1), from which you will learn about bombs being placed in three different points in the city. Use the hook to make it over to the mast, which was earlier occupied by one of the snipers. Talk to the Anarchist here (screenshot 2).
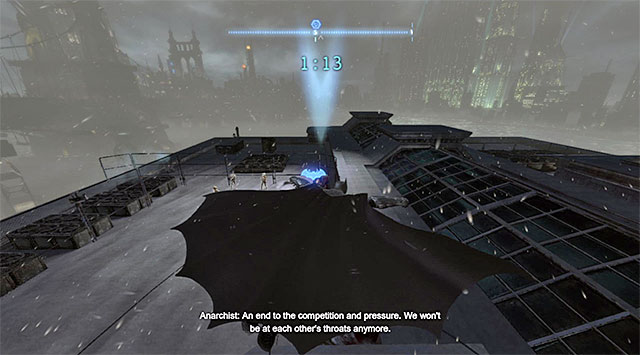 The rooftop where there is the first bomb
You have three minutes to disarm the first bomb. You can find it in the Southern part of The Bowery district, i.e. in the North-Western Arkham. On your way to your destination, it is necessary that you use the grapple launcher reinforcer ,to catapult Batman from ledges and improve the flight speed. You should also remember to fly around the Sheldon Park from the Northern side. Your destination is the roof of one of the taller buildings.
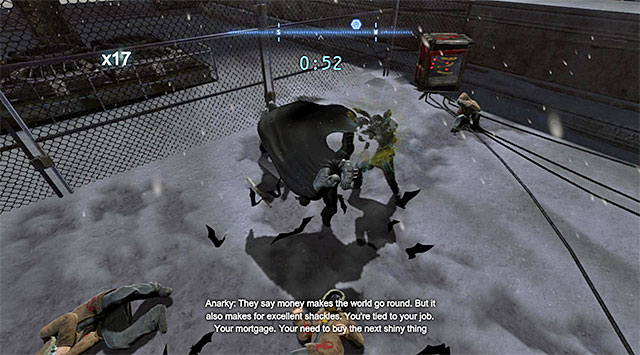 Lunch your best attacks and do not lose your time while waiting for the right moment to launch a counter-attack
Right after you reach the bomb, start eliminating the anarchists staying around and start by eliminating them with attacks from above. I recommend that you use the gadgets that you have on you and strive to eliminate the enemies as quickly as possible. This is so, because the counter does not stop for the duration of this fight. Fortunately enough, you will be dealing only with the weak, and not-too-demanding enemies.
 First bomb
After you have dealt with all the enemies staying on the roof, approach the bomb quickly and press the key/button that appears on the screen to disarm it in a not too subtle way. you can now listen to the conversation with Alfred.
 The second anarchist
You can set out to meet the second anarchist straight away, or leave it for later. The character that you are looking for is currently staying in the Diamond District, close to the Southern part of the Pioneers Bridge.
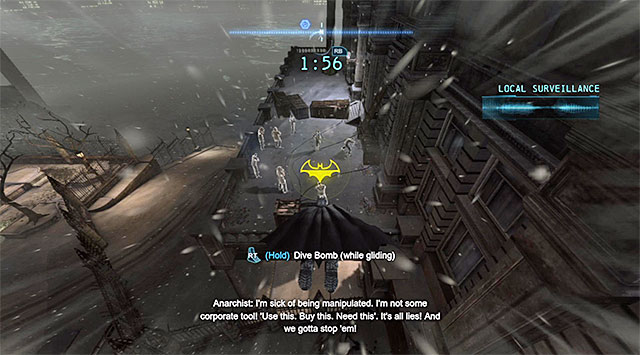
You will be allotted 3 minutes and 50 seconds to disarm this bomb and it is located in [The Amusement Mile district, i.e. in the Northern part of Arkham. Go towards the destination and help yourself with the launcher, especially while crossing the central bridge. After you get there, attack the new anarchists staying on the balcony shown in the screenshot. Watch out for the enemies equipped with knives. After the fight, disarm the bomb.
 The third anarchist
Just like earlier, you do not need to hurry to start the next part of this mission. The next anarchist, that Batman needs to deal with is staying in the Northern part of the Coventry district and he is standing on one of the balconies neighboring the water.
 The vicinity of the place where you disarm the third bomb
You only have 2 minutes and 40 seconds to disarm this bomb so, you need to hurry. As quickly as you can, go South, towards the Southern part of the Burnley district. Get around the police precinct and find the anarchist group in the back alley. While fighting with the anarchists, you should watch out not only for the ones with the knives, but also for those with guns. Deal with the anarchists, disarm the bomb and listen to a short conversation with Anarky.
 The back door to the courthouse
You can go to Anarky's hideout straight away or return to it only later. The staying place of the abovementioned character is the courthouse located in the Park Row district, i.e. in the North-Western part of Arkham. After you get there, get at the back of the building and walk around, or eliminate the regular bandits staying there. Locate the entrance to the Abandoned Courthouse and walk into the large courtroom.
 The first phase of the battle is quite easy
Now you will have to fight a battle that consists of three different phases. In the first phase, Anarky will not take part at all so, you should focus mainly on eliminating his weak goons. Since these opponents are not too much of a threat, try and do not lose too many health points, because you will have to do with the health bar until the end of this mission.
 Avoid taking damage from Anarky's attacks
After you make it over to the second phase, you should change the strategy a bit. Now you should stick with moving around the battlefield and avoiding stopping in one spot for longer. What speaks for this behavior is that Anarky will be trying to toss Batman explosive charges on a regular basis, whose explosion may weaken the protagonist. Also, do not forget about the anarchists with knives and do not let them launch successful attacks.
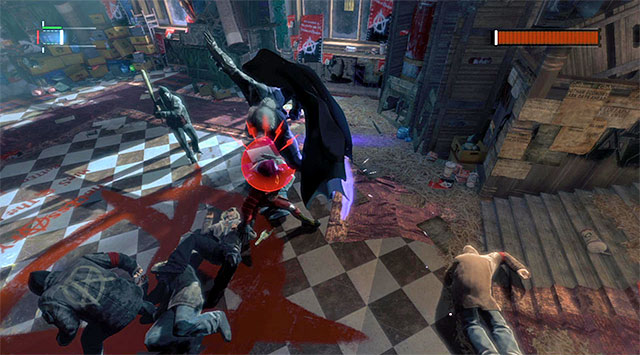
Anarky will jump down to the battlefield at the moment at which the third phase starts. Note that he comes equipped with a stun gun so, it is crucial that you do not let him hit you because you will otherwise lose a lot healthpoints. Unfortunately, you cannot react to the stun gun attacks with counter-attacks so, the only thing that you can do is leaping to the sides (at the moments at which the red symbols appear above the boss's head - the example in the screenshot) or by jumping over Anarky.
 Anarky does not do that well while defending against Batman's attacks
The good news, however, is the fact that Anarky is very susceptible to Batman's attacks, which he is incapable of blocking. Apart from inflicting damage to the boss, remember about his henchmen and try to eliminate them quickly. You do not need to drain Anarky's entire health bar, because the fight should end right after you have dealt with his goons. This is the end of this side mission.
[New Character Trophy: Anarky]
[New Concept Art: Anarky]
Way to unlock the mission: you get the opportunity to start this side-mission right after you leave the police precinct in Burnley and you get to complete during the Escape the GCPD mission.
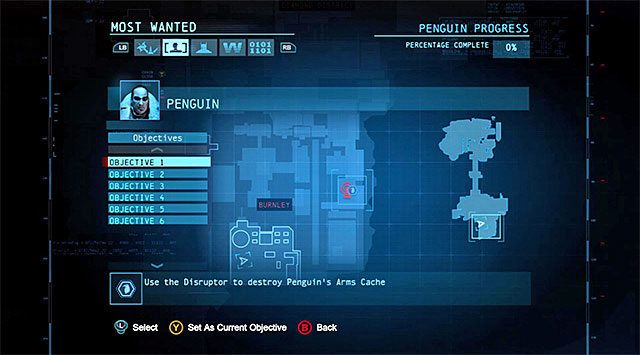
Right after you return to Burnley (the precinct's rooftop) Barbara Gordon should contact Batman, and ask him to stop the Penguin. There are six stolen crates of weapons that you need to destroy. You can reach them in any order. It is a good idea to use the side-missions menu to determine the next destination, because that is where the locations of all the stolen crates are (the above screenshot).

 The first weapons cache
The first cache is in the Eastern part of the Burnley district, at the back of one of the communications towers connected with Enigma. Attack the corrupt policemen from above. Then, continue with more standard modes of fight.
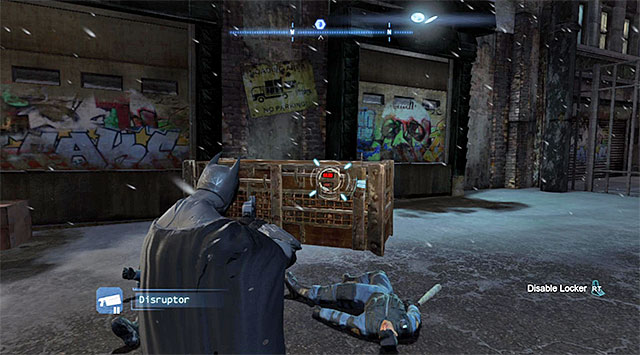
After you have secured the area, select the disruptor from the inventory, target the crate shown in the screenshot and hold down the appropriate trigger/key to compete the process. Listen to Barbara's short comment and locate the next crate.

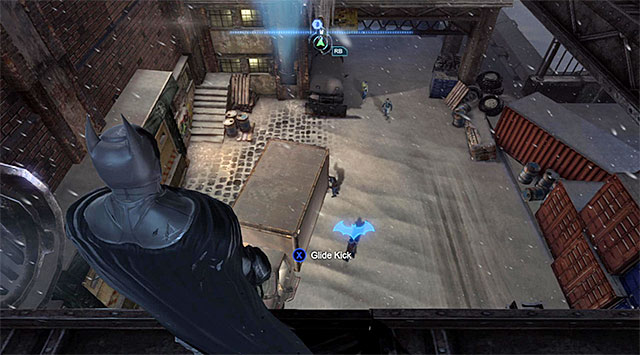 The second arms cache
The second arms cache is in the Northern part of the Diamond District. Just like in the above case, it is worthwhile to attack the Penguin's goons from above and deal with one of them at the very beginning. After you start the fights proper, watch out for the enemy with the shield, stun him with the cape and stomp on him. After you have secured the area, select the disruptor from the inventory, target the crate in the truck and use the gadget.
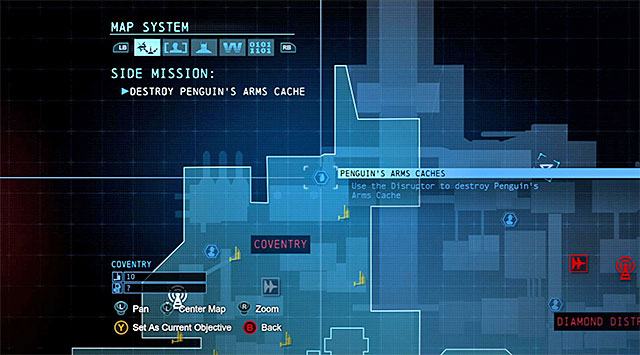
 The third arms cache
The third arms cache is in the Northern part of the Coventry district. Just like before, attack the Penguins goons from above. Right after the main fight starts, watch out for the enemies with shields and the ones with guns. Target them in the first place and, whenever necessary, use the gadgets to your advantage. After you have secured the area, select the disruptor from the inventory, target the crate and use the gadget.
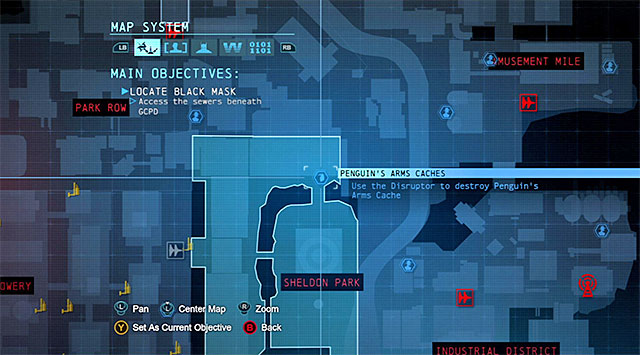
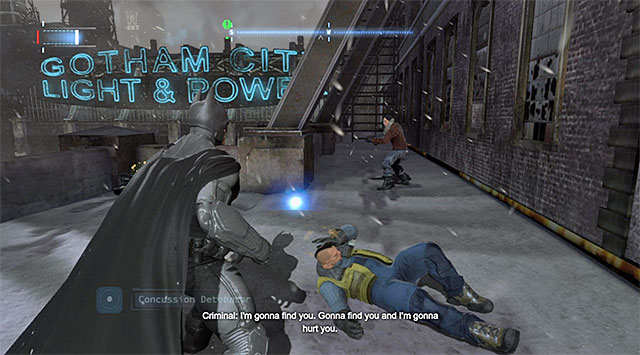 The fourth arms cache
The fourth arms cache is in the northern part of the Sheldon Park district. You need to reach a small balcony where there are three enemies equipped with guns. You necessarily need to use here the smoke pellet or the concussion detonator to make the enemies more vulnerable to Batman's attacks. After that, try to deal with them before they regain their strengths and resume firing at your character. After you have secured the balcony, select the disruptor from the inventory, target the crate and use the gadget.
 the fifth arms cache
The fifth arms cache is onboard The Final Offer - the Penguin's ship, located in the North-Eastern corner of the map. Since you have already secured that area while completing one of the initial main missions, you should meet here no new enemies.

You may find it a bit problematic to find the arms cache. You need to stop in the spot shown in the screenshot and target the container hanging above the ship. Use the claw to open the container's door and use the disruptor afterwards, to be able to complete this part of the mission.
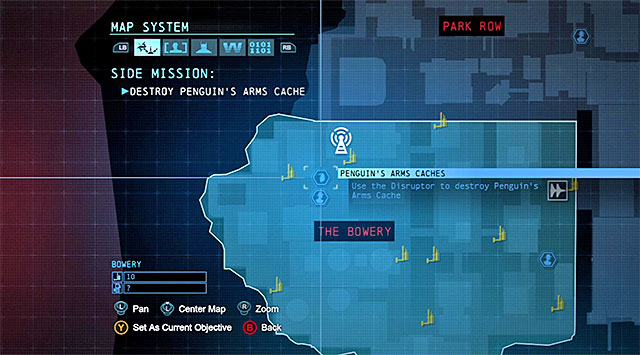 the sixth arms cache
The last, sixth, arms cache is in the North-Western parts of The Bowery.
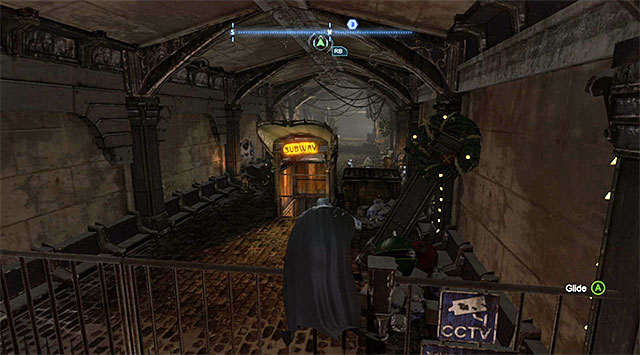
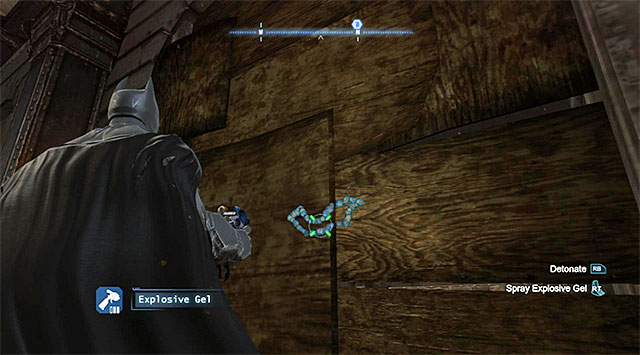
The important piece of information is that you need to make it to the lowest level and jump over the metal fence. Then, reach the tunnel located next to the subway entrance (screenshot 1), where you will meet quite a few enemies. Start the fights, during which you need to watch out for the enemies with knives and not let yourself be cornered. Also, do not allow the armored enemies to pick up the knives, because then they will get really dangerous. After you finish the fights, locate the weakened fragment of the wall shown in screenshot 2 and spread the explosive gel over it. You can now use the disruptor on the last arms cache and listen to the conversation with Barbara.
[New Character Trophy: Penguin Gang Member]
[New Concept Art: Final Offer - Boiler Deck]
Way to unlock the mission: You get the opportunity to start this optional mission right after you leave the Burnley Sewers, soon after you start the Access the Gotham Merchants Bank main mission.
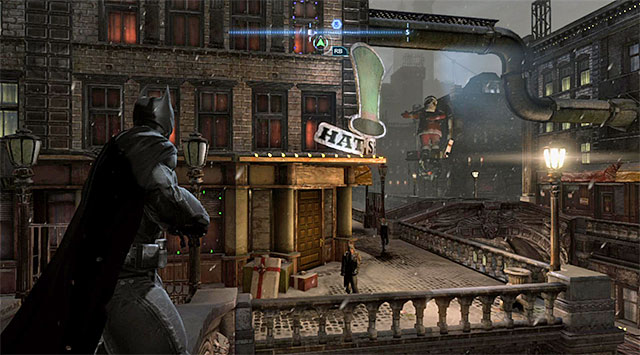 The invitation to meet the Hatter
Right after you exit the sewers, i.e. when you return to the Burnley district, you will automatically meet some criminals controlled by the Mad Hatter. Apart from that, you will get the opportunity to listen to the criminal's speech, from which you will learn that he has abducted an innocent woman.
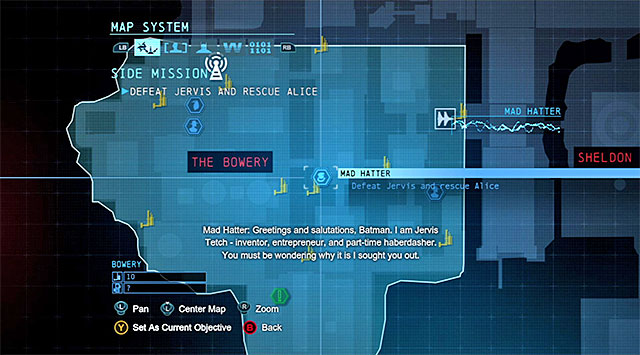
You can now go to the shop that belongs to the madman, which is located in the central part of The Bowery district (the above screenshots). Keep vigilant because the region of the entrance to the Mad Hatter's hideout may be patrolled by several regular bandits and, in such a situation, you of course need to deal with them. After you have cleared the area, enter the Hat Shop.
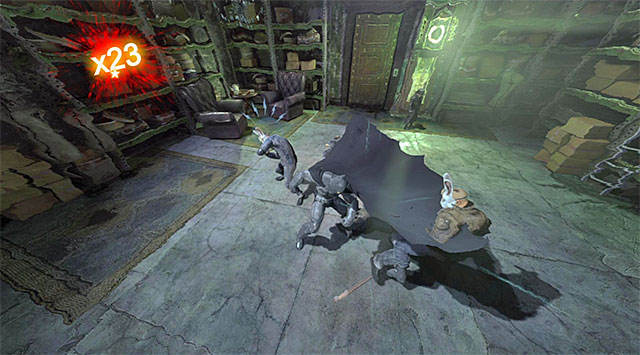 Before you are able to talk to the Hatter, you will have to defeat his men
Start by using the claw on the crate located near the ceiling and run up to the wall, so that Batman can jump into the shaft. Walk through the shaft and, after you reach the room with the Mad Hatter in it, start attacking his goons. They should not be too demanding, although you should not let yourself be cornered. After the fight, approach the Hatter and press the interaction key/button.
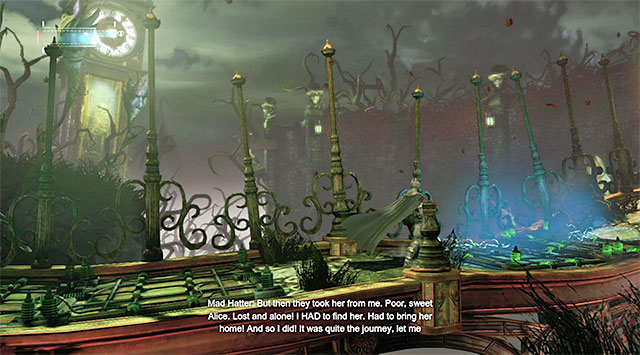 Watch out for the discharges
After you end up in the "Wonderland", go ahead. Do not attempt to catch up with the Hatter t any cost, especially that you will encounter traps along your way. You need to avoid contact with the discharges and run, at the right moment, through the areas in which they appear.

Stop before the plate which, comes under power at regular intervals. Wait for the discharges to disappear, run up to the edge and throw several batarangs, thanks to which they will hit the lampoons on the right (the above screenshot). Retreat quickly to prevent getting an electric shock. Wait for the discharges to disappear again and try again. Keep repeating this actions until you hit all six lampoons, which will lower the drawbridge.
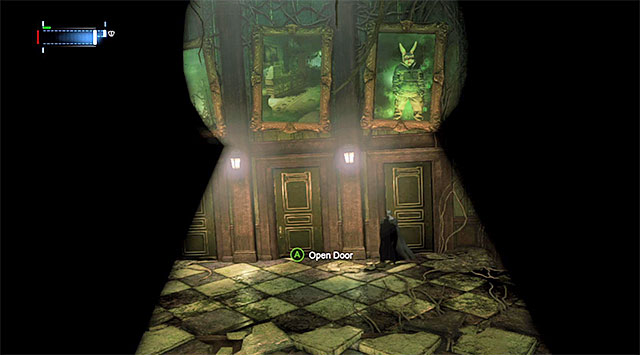 Always take the door with a character above it
You can resume along your path and jump towards the edge at the end. Shimmy to the right as far as you can, and drop down only them. Keep climbing onto the successive ledges to reach an area with three doors in it. You always need to pick the doors at which you can see the Hatter's helper, so: the right, the left, the left.
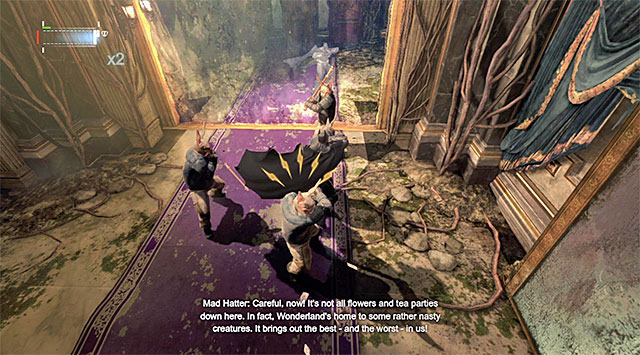 Eliminate all of the enemies one by one and react with counter attacks to their attacks
If you have done everything according to the plan, you will make it into a new location, where there is a big mirror. Be prepared to fight a long fight hare so, you should avoid losing your health points too often, because you might not live to see the end of the fight otherwise. I especially mean the enemies with knives here, which, as it is usually the case, should be eliminated in the first place. After you have dealt with all of the opponents, take the door to the next area.

Go right and focus on avoiding the discharges again. Also here, you will have to coordinate a few actions. Wait until the discharges disappear at the last plate, run up to the wall on the right (the screenshot) and spread the over it the explosive gel. Jump away and detonate the charge. This will unlock your passage to the next location.
 Grab onto the successive anchor points
Mount the small floating platform and select the claw from the inventory and aim it at the interactive point in the central part of the river. After you pull yourself to this point, use the claw again, this time to make it over safely to the other bank. Leave this area and, after you get to another location, grab onto the ledge and shimmy to the right. After you get to a small ledge, crouch and walk in this position along the narrow tunnel.
 You need to avoid falling into the void
Take the ladder and walk onto the rope here. Press the key/button suggested by the game, thanks to which Batman will slide down the rope and, as a result, ram through the obstacle that you can see in the distance. After you land, move quickly towards the exit that you can see in the distance, because fragments of the bridge will soon start to fall off. Perform a single jump and walk through the door, which will take you into a tower with a multitude of operating cogs.
 Cut through the glass housing of the device
First of all, select the grapple from the inventory and use it to extend the rope above the spot where your character is staying. Make it onto the rope using the hook and jump down onto the ledge located a bit under it. Interact here with the device that controls the operation of the entire machine in order to sabotage it.
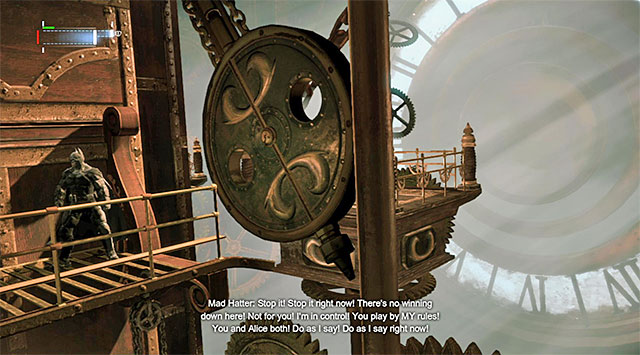 Avoid collisions with the elements of the huge clock
You can now continue climbing up with the use of the grapple on one of the anchor points located above. Use the hook to reach a new rope and glide towards the exit from this location. After you get into a new place, take the ladder and stop at the edge. Wait until the moment is right and jump. Walk over the rope and wait again for the right moment to jump.
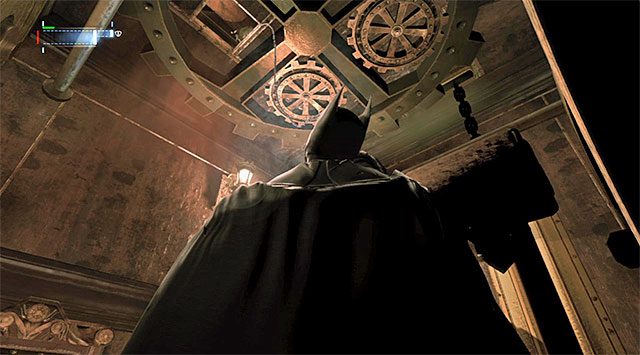 You need to use the hook twice
Climb onto the ledge above and open the door. After you reach a new area, use the hook on the interactive mechanism above and wait for it to come down. You can now use the hook once again, this time to reach the opening in the ceiling that has been inaccessible so far. The only thing left for you to do is walk over several horizontal pipes, which will take you to the manhole. This will conclude this scene.
 Do not release the button until the reverse batarang is fully prepared to use
What is interesting, you are not going to fight any rightful battle with the Mad Hatter, because to defeat him, you are going to use the Reverse Batarang awarded to you by the game. Start by aiming at the madman and hold down the key/button that the game instructs you to. Release the button only after the targeting process finishes . You only need to watch the final cutscene here and leave the Hatter's shop.
[New Character Profile: The Mad Hatter]
[New Character Trophy: The Mad Hatter]
[New Concept Art: The Mad Hatter]
Way to unlock the mission: You get the opportunity to start this optional mission after you complete Case 1224-4: Helicopter Crash. A detailed description of this investigation has been provided in the chapter of this guide, entitled Casefile Report.
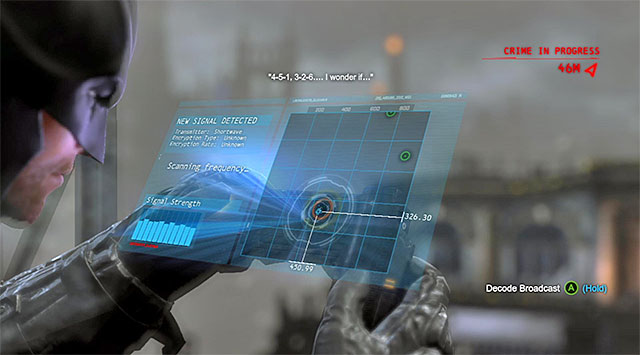 You need to decode Deadshot's transmission
At the very ending of the abovementioned interrogation, Batman will have to use the Cryptographic Sequencer to decode the transmission that the details on the bullet case led you. Position the crosshair within the orange circle, hold down the appropriate key/button and listen to the conversation with Deadshot. The criminal will inform you that he has taken a hostage and that he invites you to meet him at the Gotham Merchants bank.

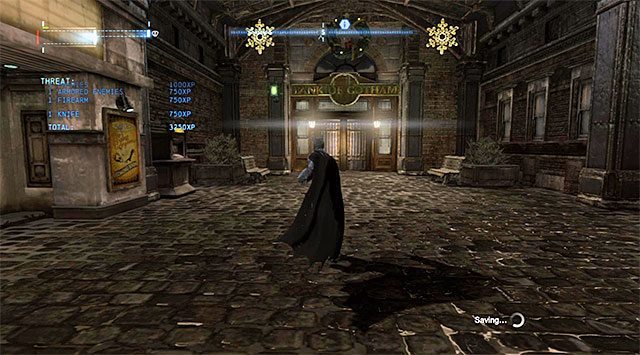 Deadshot is hiding inside the bank
You can now go to Deadshot's hideout, i.e. to the Gotham Merchants Bank, which you have visited earlier while completing one of the storyline missions. By way of reminder, the bank is in the southern part of The Bowery. To access the building, you do not need to enter from the rooftop, because it is way easier to get in through the main entrance .
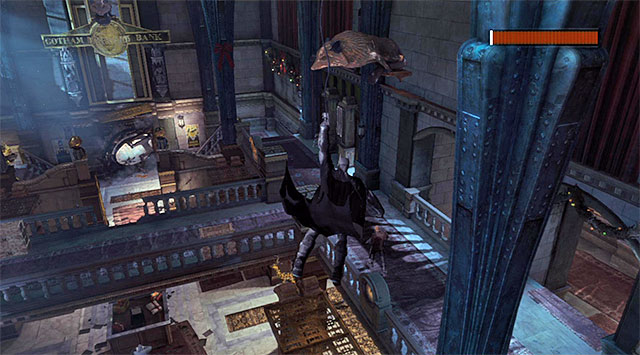 Use the vantage points to plan your attacks and avoid Deadshot
Start by moving quickly to one of the vantage points. Do not worry about Deadshot's healthbar, because you do not need to attack this character straight away, as long as you do not make a mistake, you will not be spotted. Deadshot will, at first, patrol the bank's ground floor and, before you turn your attention to him, it is a good idea to eliminate all of his goons.
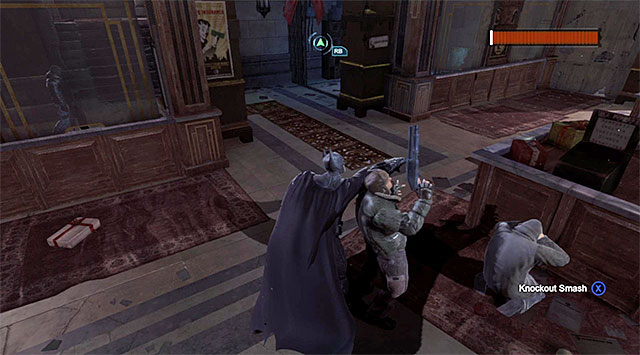 Eliminate the boss's goons methodically
Since the description of the bank's main area has been provided in the chapter devoted to the main storyline, I will only remind you that it pays off to use to your advantage the vantage points, the weakened walls, venting shafts and fire extinguishers, which can be used to blind the enemies. I especially urge you to watch out while attacking the enemies patrolling the upper level, because the boss often turns around unexpectedly and changes positions. This means that without the necessary precautions, you can be easily spotted.

When it comes to Deadshot himself, he is, unfortunately, immune to many of Batman's attacks (e.g. the inverted takedowns), which means that you need to prove yourself with a larger dose of creativity during the attempts to deprive this character of his healthpoints. The best strategy consists in getting the boss from behind after flying down from the vantage point. Still, you should not restrict yourself to the quiet takedowns only , because Deadshot can quickly respond such attacks. Instead, right after you start the quiet takedown, additionally press the standard attack key/button, to initiate the Knockout Smash (the screenshot).
 You can try to throw Deadshot over the balustrade
Since Deadshot is initially patrolling the upper balconies, you can also cling to the edges and grab the boss at the moment at which he is near the balustrade . As a result of a fall from high, Deadshot should lose quite a lot of health points.
 The detonators do their job well
Another good idea is to knock the boss unconscious, best by using a concussion detonator. After Deadshot fall onto the ground, run up and press the combination which finishes off the enemies. Regardless of the strategies that you adopt, always remember to escape, after each successful attack, onto the nearest vantage point, because you are incapable of depriving Deadshot of the entire healthbar at one shot.
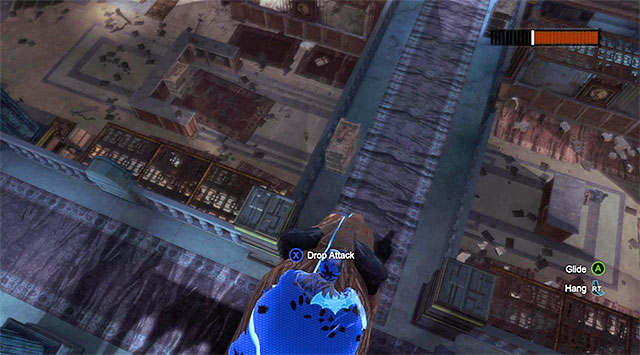
After Deadshot loses around 2/5 of his healthbar, there will appear some more of his goons in the bank. This means that it is a good idea to discontinue the attacks on the boss, for the time being, and focus on eliminating all of the ones who have just arrived. Just like before, keep all precautions and attach care to eliminating the enemies one after another. You should also watch out for the enemies who came into the battle with a device which x-rays the vantage points in search for heat sources (the screenshot). As long as you are not equipped with an upgrade that allows you to hide Batman's presence, you need to run away from the statues when they are being scanned, to prevent being spotted.
 Eliminate quickly the enemy with the disruptor
You will reach the next phase at the moment wt which Deadshot has only 1/3 of his healthbar left. Also in this case, you need to take into account the fact that there will be new obstacles for you to overcome. First of all, try to locate and eliminate the enemy with the disruptor on his back, as quickly as possible (the antenna on his back), thanks to which you will be able to use again the detective vision, for tracking Deadshot and his goons.
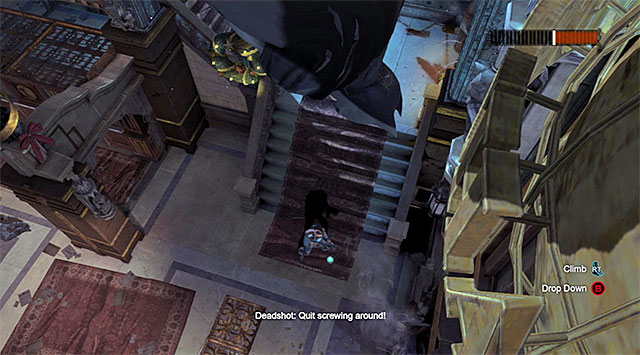 One of the enemies will employ himself with placing mines
Apart from that, you should watch out for the enemies that place mines around. You can ignore these traps or detonate them using Batman's gadgets. Deadshot should be occupying himself with patrolling the bank's ground floor, in the meantime. Unlike in the fight's previous phases, you do not need to wait until you deal with all of his men, although it is a good idea to do so, staying in his closest surroundings.
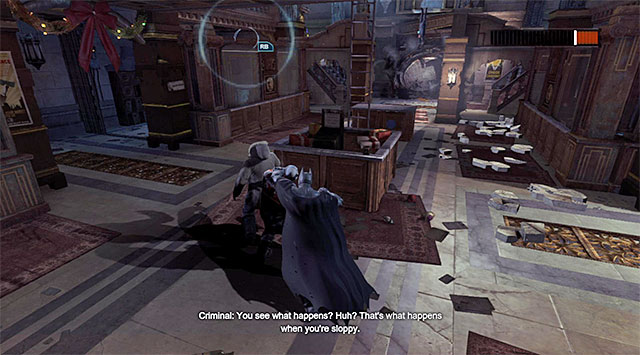
After you nearly deplete Deadshot's health bar, he should grab the hostage and start using him as a human shield. You need to be VERY careful to prevent causing the civilian's death, because this would mean failing the entire mission. Wait for Deadshot to turn back, glide quickly towards him and land somewhere next to him. Approach the boss (the screenshot) and press the quiet takedown key/button. This is the end of this mission.
[Character Profile Updated: Deadshot]
[New Character Trophy: Deadshot]
[New Concept Art: Deadshot]
Way to unlock the mission: You get the opportunity to start this side mission towards the end of your stay in the Sionis's mill, in the [Industrial District], right after you deal with Copperhead.
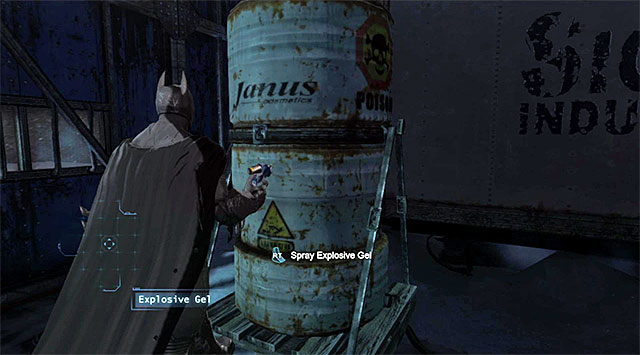
Along your way to the mill's exit (the beginning of the Acquire Electrocutioner's electromagnetic signature mission Batman will have to use the explosive gel to destroy the Black mask's drug stash in the Loading Bay (screenshot 1). Blow up the abovementioned object and exit. In the meantime you will learn that there are six more stashes of this kind. You can reach the stashes in any way you want and, to determine their locations, you can always use the side missions menu, because it includes the locations of all the stashes (screenshot 2).
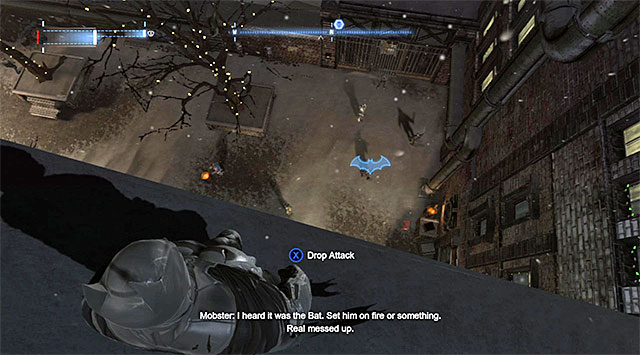 The place of destroying the first stash
The first one of the stashes is in the Northern part of the Park Row district. Since there are bandits gathered around the stash, it pays off to attack them by surprise and use the advantage of height. I recommend that you consider using the concussion detonator and land onto one of the enemies to make things easier for yourself at the outset. Further into the fight, you need to watch out for the enemy with knife, who is actually the only one that is a threat here.
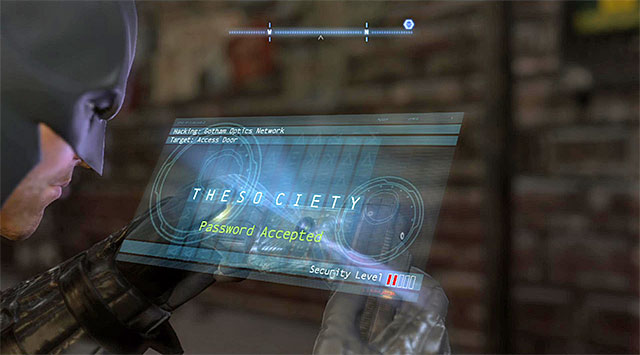
After you have won the fight, take a look around for the control panel and hack into it, using the Cryptographic Sequencer (the screenshot). You can now spread the explosive gel on the stash and detonate it.
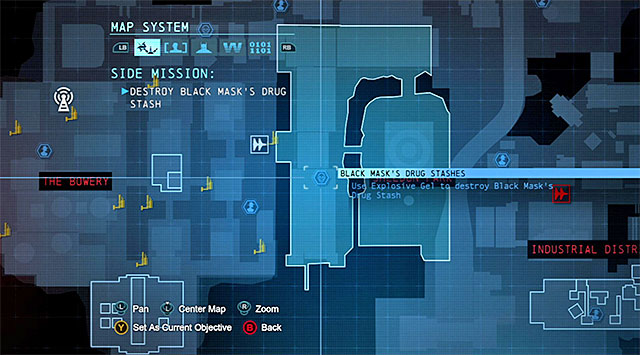 The location of the second stash
The second stash is in the central part of the Sheldon Park district.
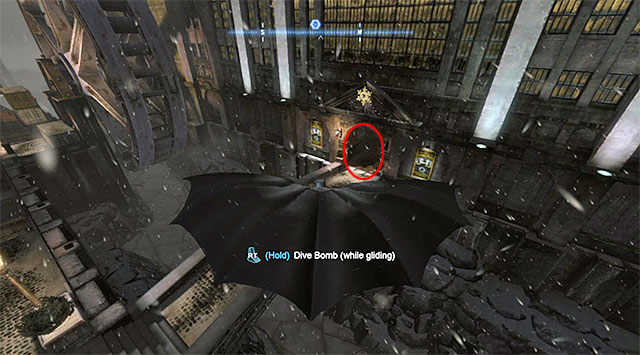
The best way to approach the mission's marker is by approaching the Eastern gate, locating the bridge shown in screenshot 1 and entering the building. Walk inside, deal with the two bandits. Turn left (you need to be facing Southwards) and you should notice the corridor shown in screenshot 2, which leads to the stash. Spread the explosive gel and destroy the stash.
 Location of the third stash
The third stash is in the central part of the Gotham Pioneers Bridge.

I recommend that you approach the mission's marker from the South, by landing onto the cargo hoisted up on the crane (The screenshot) to the left of the main body of the bridge. You should notice a plank under the bridge, which is occupied by several enemies equipped with guns. Use the hook go get there and deal, in the first place, with the armed bandits. After you win the fights, use the explosive gel to destroy the stash.
 The location where you destroy the fourth stash
The fourth stash is in the South-Western part of the Coventry district, where before you go for it, you should first pay a visit to the Gotham Royal, where you obtain the shock gloves, which belonged to the Electrocutioner. Focus on locating the small ledge where there should be two bandits. Glide there and deal with the enemies.
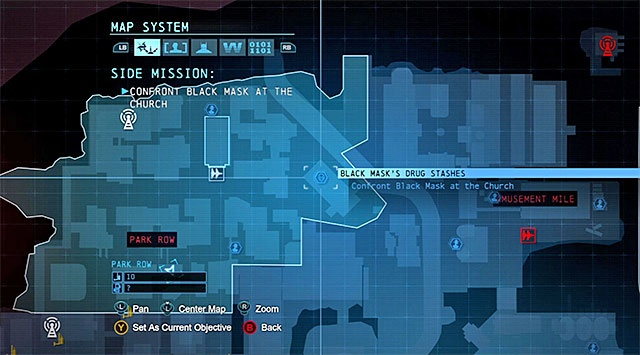 You need to use the shock gloves on the generator
Use the shock gloves on the local generator, which will lift the grate and provide you with access to a small tunnel. Go inside, select the explosive gel from the inventory and use it to destroy the stash.
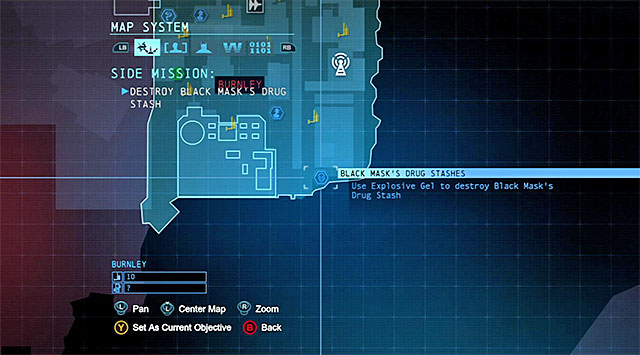 Location of the fifth stash
The fifth stash is in the South-Eastern corner of the Burnley district, i.e. to the East of the police precinct.
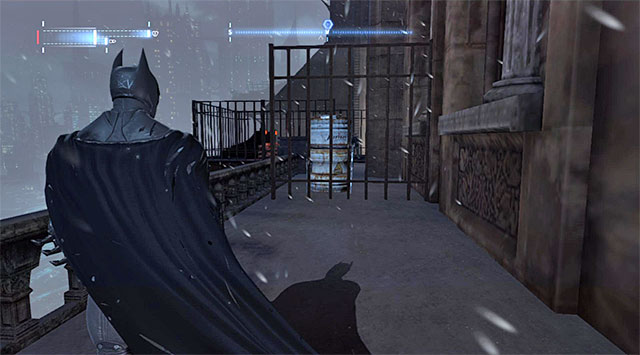
Your target is on the balcony shown in the screenshot, located at the edge. The best way to get there is to approach it from the East, thanks to which you will not alarm the enemies. Otherwise, be prepared to eliminate a small group of bandits. Regardless of which you chose, spread the explosive gel and blow up the stash.
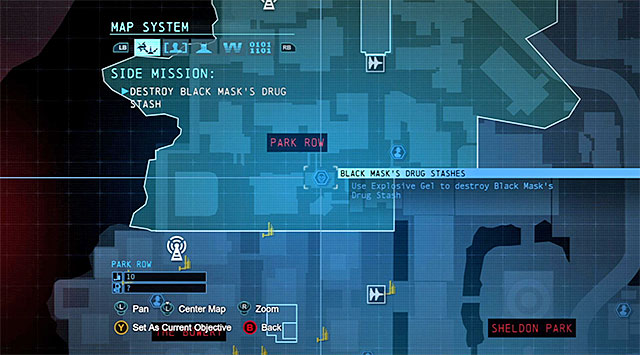 Location of the sixth stash
The sixth stash is in the Southern part of the Park Row district.
Black Mask's goonsAfter you approach the marker, locate the alley guarded by several enemies who are weakly equipped, and take them by surprise. You can now approach the stash in the narrow alley, spread the explosive gel and detonate.
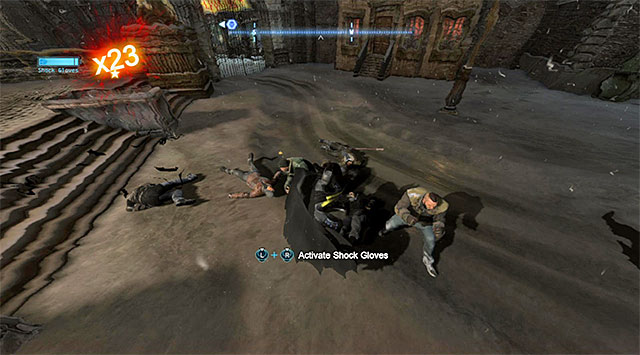 The last stash is in the church
The church is in the Eastern part of the Park Row district. It is worth knowing here that the region of the main entrance to this building is being occupied by quite a numerous group of bandits. You can try and sneak into the church, or deal with those enemies. If you have chosen the latter, you need to keep in mind that it is going to be quite a long fight. Still, the good news is that none of them is going to use any better gear. Regardless of whether you have sneaked past the goons, or defeated all of the enemies, enter the Church.
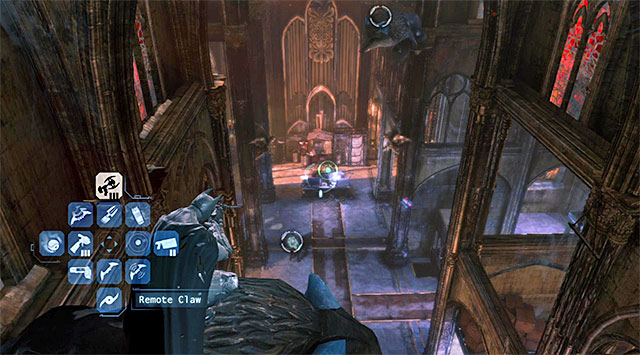 Use mainly vantage points to eliminate the enemies
Inside the church, there are six enemies, who are armed with melee weapons so, it is highly advisable that you remain in hiding at all times, especially that it may be difficult to escape, given the church's limited area. In the church, you will, fortunately, find some gargoyles that will help you eliminate the enemies (gliding inverted takedowns, hanging the enemies up using the grapple).
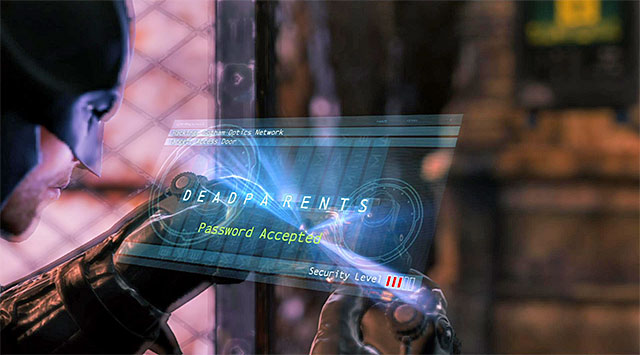
Apart from the gargoyles, you can also make use of the venting shafts. If you want to reach them safely, you should take the side passage located to the right of the starting point. Apart from that, in the church there is a wall with a weakened fragment. After you have secured the area, approach the stash and use the Cryptographic Sequencer on the control panel and determine the correct password (the screenshot). You can now spread and detonate the explosive gel.
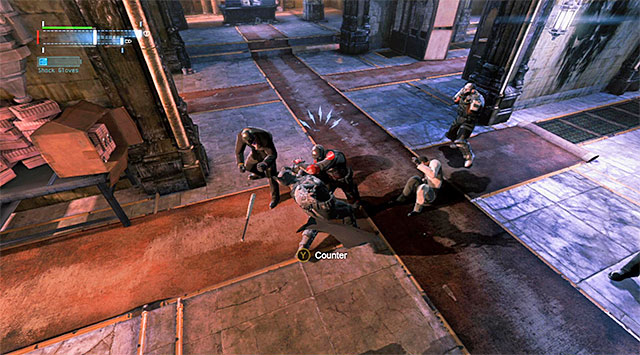 Quickly eliminate the martial artists
The fight with the Black Mask and his goons is easier than it may at first seem. This is because the leader is a regular opponent without any separate health bar or special abilities. After you start fighting, focus on eliminating the two martial artists, because they are the major threat here.
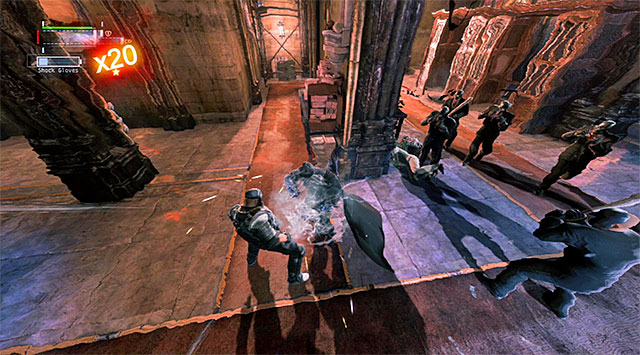 Shock gloves will prove very useful here
Further in the fight, wait for the moment at which the shock gloves become available, because this gear will ensure Batman with quick and easy victory. The only thing remaining for you to do is listen to the final conversation with the Black Mask. [Character Profile Updated: Black Mask]
[New Character Trophy: Roman Sionis]
[New concept art: Steel Mill - Copperhead]
Way to unlock the mission: You get the opportunity to start this mission while exploring freely The Bowery district.
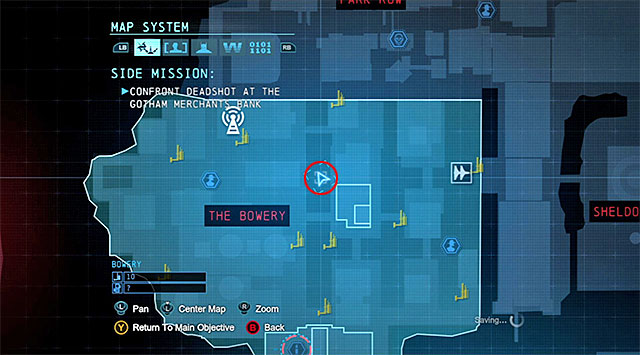
While exploring the central part of The Bowery you should hear a baby crying. Make it over to the lowest level (under the glass dome) and locate the pram shown in the screenshot. A close examination will reveal that it is a trap set by Shiva. Press the counter-attack key/button at the right moment to receive an invitation to participate in the first test.
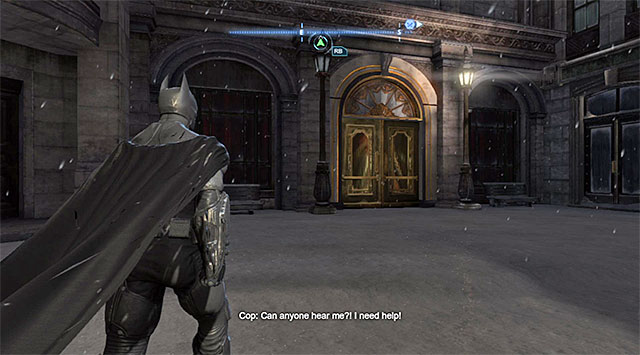 The policeman is imprisoned in the shopping mall
The "innocent" policeman captured by Shiva is being held in the South-Eastern corner of the Coventry district, where it borders with the Diamond District and the Burnley district. After you get there, you should hear the cry coming from the policeman and you need to locate the door to the Shopping Complex.
 The passage to the first generator
Of course, you should not attempt to cut off the cop straight away, because he would die electrocuted. Instead, use the hook to make it over to the ledge on the right, and locate the hole that Batman will be able to squeeze through. After he does, destroy the first generator.
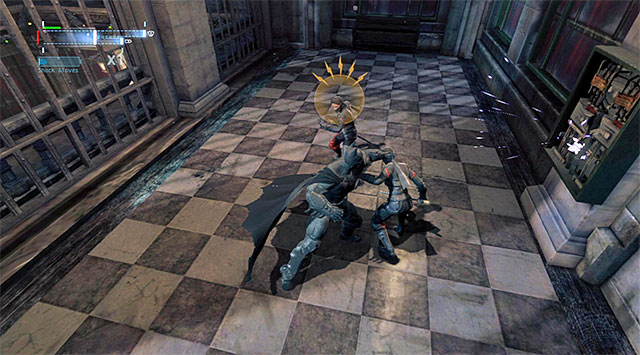 Avoid the female warriors' swift attacks.
Get prepared because there will appear three female warriors, sent by Shiva, right after you disable the generator. During the fights, try to react properly to their attacks, first of all, by pressing (the blue symbols) or holding down (the yellow symbols) the counter-attack key/button. You also should not worry too much if the warrior that you are currently attacking disappears from your sight for a moment. Simply change targets in such a situation. Continue fighting until you have defeated all of the warriors.
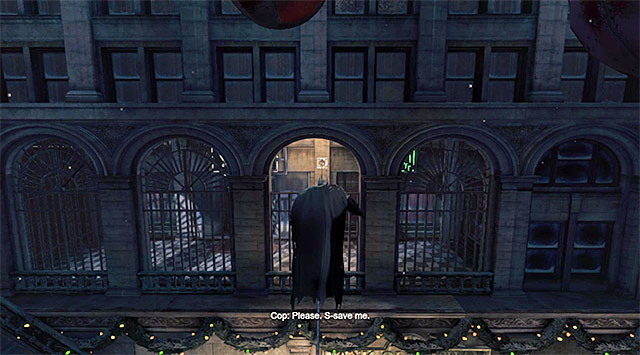 Extend the rope and walk over it
Now you need to reach the generator on the left and you need to start by selecting from the inventory the grapple. Use it to extend the rope, grab onto it and reach the balcony to the left of the hostage policeman. Just like earlier, you need to destroy the generator.
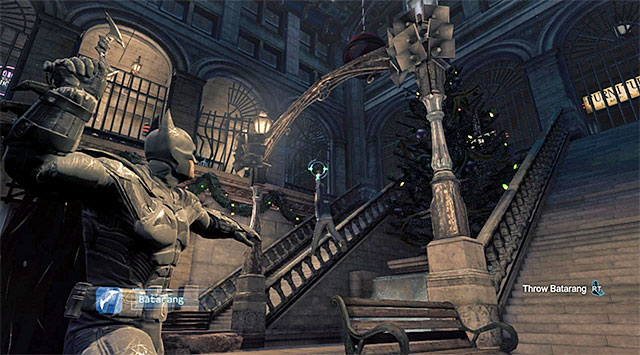 Use the batarangs to free the policeman
Just like in the previous part of this mission, there will be three female warriors for you to defeat and winning should not be too difficult. After you have secured the area, extend the rope again with the grapple and return to the main area. Use the batarang to free the policeman. Talk to him to learn about another law enforcer.
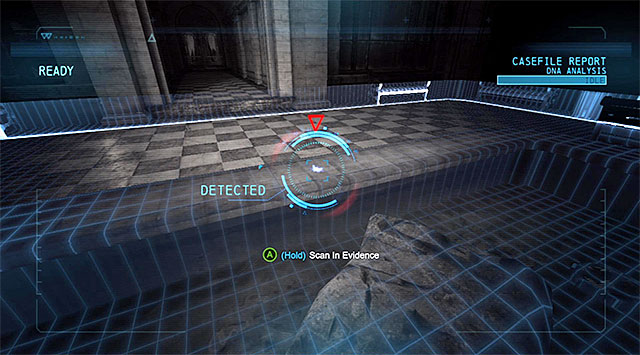 Trace of blood
Turn on the evidence scanner and examine rim of the fountain that used to be connected to the generators, to find a trace of blood that can be scanned. Leave the detective vision on, return to the Coventry district and follow the traces on the ground.
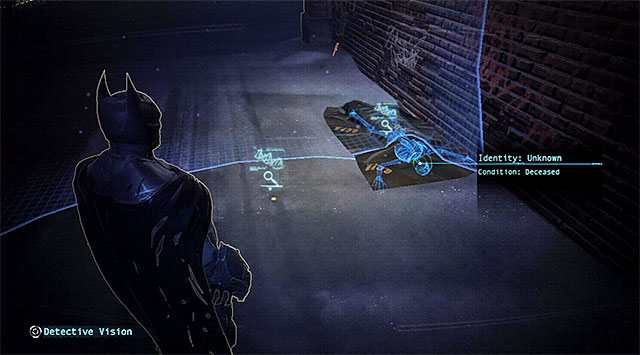 The corpse
Along your way to find the second policeman, you should not encounter any enemies, but you will have to climb onto several ledges above. After you reach your destination, the policeman will turn out to be dead, unfortunately. Examine his corpse and be prepared for Shiva's another attack (the counter-attack key/button).
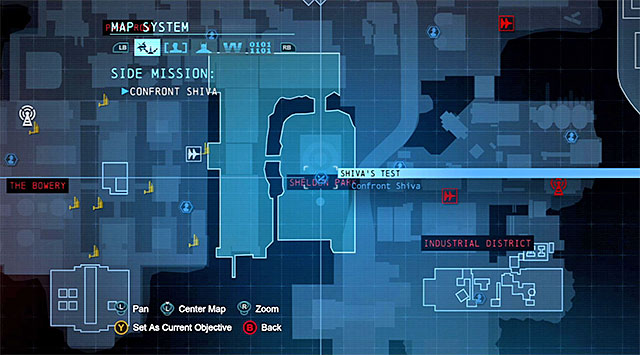
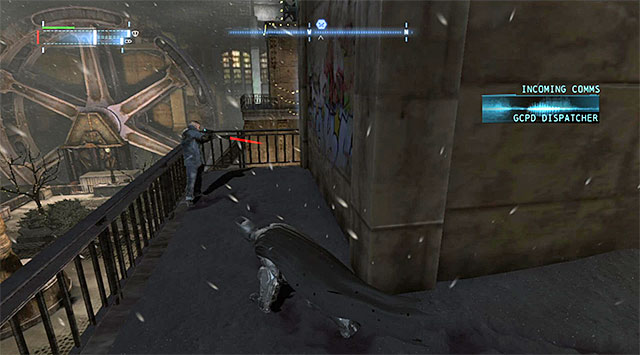 Watch out for the snipers around the entrance to the Wonder Tower
Shiva's hideout is in the lobby o the Wonder Tower in the Sheldon Park district. Approach the tower from the South and note the snipers occupying some of the building's corner balconies. Depending on which you prefer, you can either try sneaking past the snipers, or take them down by surprise. Regardless of which you chose, enter the Wonder Tower - Lobby.
 It pays off to eliminate, at least, two of Shiva's goons
Start the fight with Shiva by pressing the counter-attack key/button to repel the simultaneous attack from all of the Batman's enemies. In the first part of the fight, Shiva will be helped by the female warriors that you have already dealt with in the mall. As a result, you should know already how to react to their attacks.
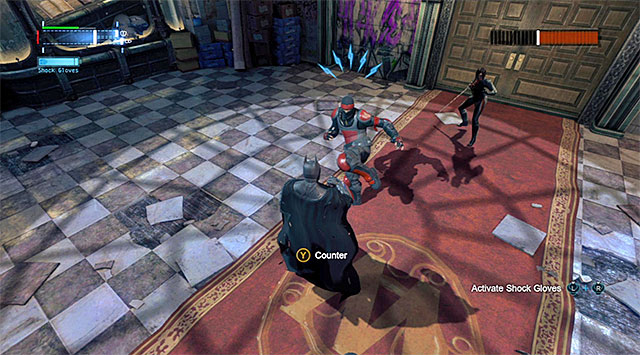 Claim further points from the assassins
To the extent possible, focus on inflicting damage to Shiva, because she will have to lose enough health points for the next phase of the fight to start, instead of eliminating all of her warriors. Also in this case, the key to success is flawless countering the attacks although you do not need to restrict yourself to defensive actions and you can also search for opportunities to deal damage.
Watch out during direct fights with the martial artistAfter Shiva loses around a half of her health bar, the second phase of the fights will start. This time, Shiva will summon martial artists. In case you have forgotten, you need to keep in mind that they are able of countering some of Batman's attacks. As far as countering is concerned, you need to remember to tap the counter-attack key/button twice to counter the entire sequence.
 Press down the counter-attack key/button to avoid the katana slashes
Also in this phase, you do not need to eliminate all of the Shiva's men, although this can be helpful a bit, while attempting to attack the boss. The Assassin will probably start using the katana so, do not forget about the necessity to hold down the counter-attack key/button. Keep depleting Shiva's health bar and be prepared to tap twice the key/button shown on the screen, towards the end of the fight. This will block the last blow with the sword. This is the end of this mission.
[Character Profile Updated: Shiva]
[New Character Trophy: Shiva]
[New concept art: Shiva]
[New challenge: Combat Training]
Way to unlock the mission: You get the opportunity to start this side mission along your way out of the sewers under the Burnley district, right after you visit the police morgue in the Scan the corpse in the GCPD morgue mission. Still during your walk along the sewers, you will listen to a police communication concerning the report of the gang fight.
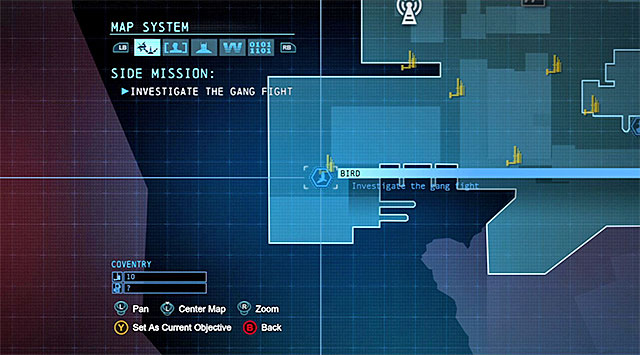
After you return to the Burnley district, you will be able to start completing this optional mission (you can, of course, leave it for later). You need to reach the location where the gang fight took place, in the South-Western part of the Coventry district (the above screenshot).
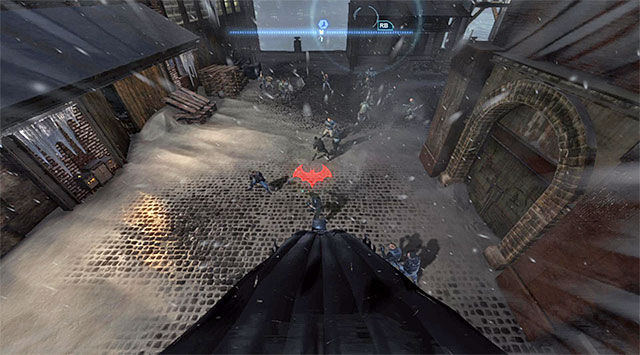 It is worthwhile to attack the bandits from above
After you come close to your destination, you should notice two numerous groups of fighting gang members. Do not hope that the criminals will kill each other because you will have to deal with the majority of them anyways. I recommend that you attack from above with high velocity, although you can also debilitate some of the enemies using the concussion detonator or the upgraded glue grenade.
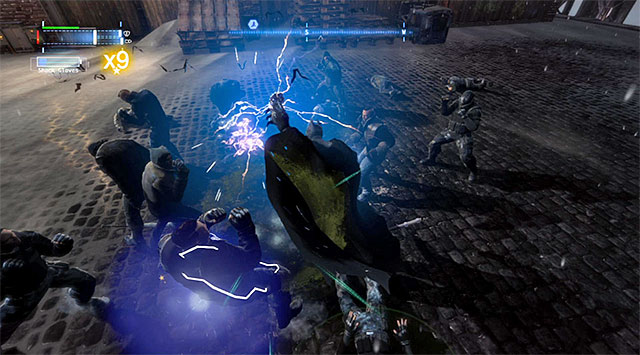 You necessarily need to use the shock gloves to your advantage
Right after you start fighting, try to jump seamlessly between targets, especially that this is a perfect opportunity to gain a up high multiplier. Watch out for the armored enemies and for the ones armed with knives, do not allow them to deplete Batman's health bar. At the same time, wait for the moment when the access to the shock gloves is unlocked, which will allow you to eliminate the enemies even faster. The last one of the enemies will give up automatically so, you can press the appropriate key/button to interrogate him.
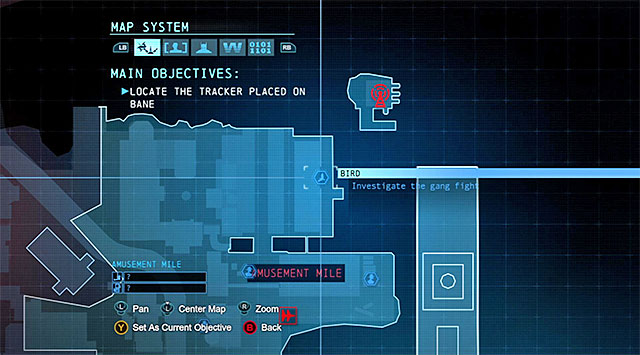 The location where the second gang fight is taking place
The second gang fight is taking place in the North-Eastern part of the Amusement Mile district, close to the harbor and Penguin's ship.
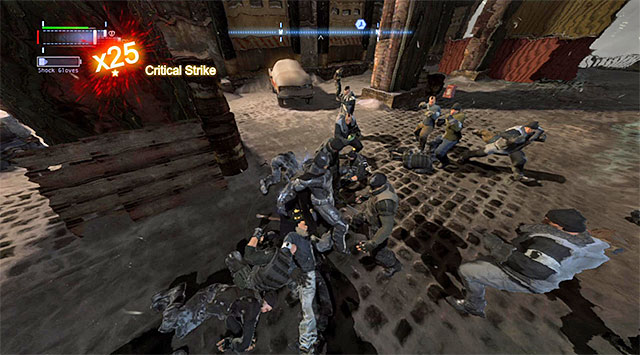 Keep an eye on Batman's health and avoid dying
The overall scheme of action is identical with the previous one so, it is a good idea to attack the enemies from above and, after the main phase of the fight starts, strive for high multipliers and avoid getting hit too frequently. Also in this case, you need to fight until the moment when there is only one hostile left in the battlefield. He will give up and give you the opportunity to interrogate him.
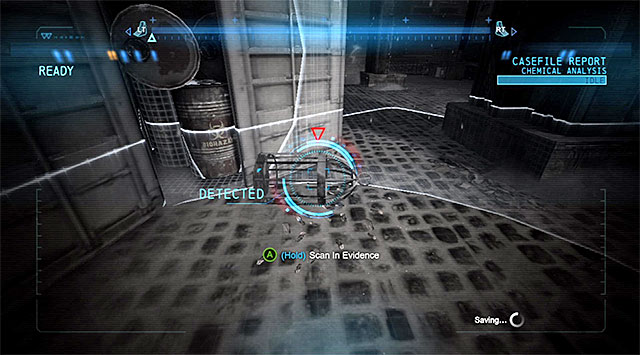 An object that can be scanned
Remain in the location where you have fought the most recent fight and approach the container with chemical weapon stored in it. Activate the evidence scanner and scan the cage right next to the container, which will help you determine Bird's whereabouts.
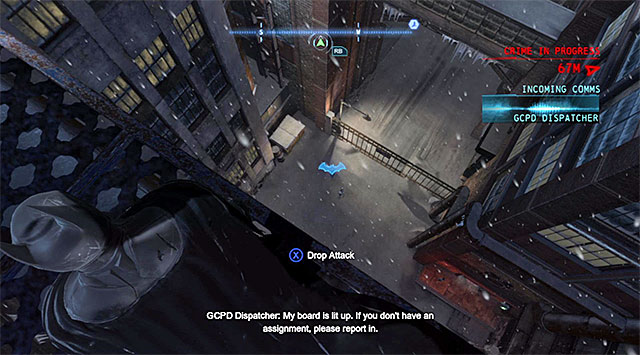 The enemies have gathered around the night club
The night club is in the North-Western part of the Coventry district, and its entrance is guarded by more bandits. Just like in the case of the fights that you have recently fought, consider attacking them from above, thanks to which you will eliminate one of them at the outset, or weaken the enemies using the gadgets that you have. For a change,, winning this one is very easy. After all the fights finish, take the entrance to the club [My Alibi - Entrance].
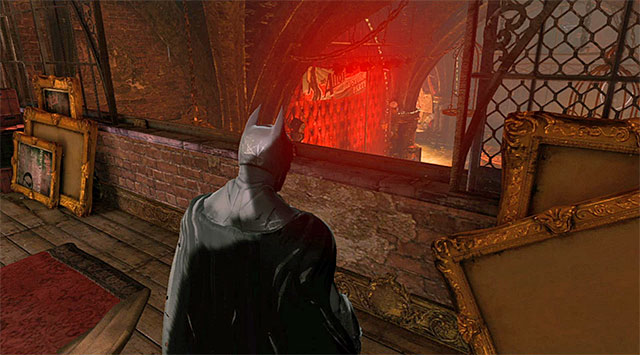 Climb onto the wall on the right
Climb the stairs to the South. After you reach the club's main area, turn left. Go ahead, turn right and jump onto the wall on the right. You are now over the area where Bird and his men are. [Dance Floor].
[New Character Profile: Bird]
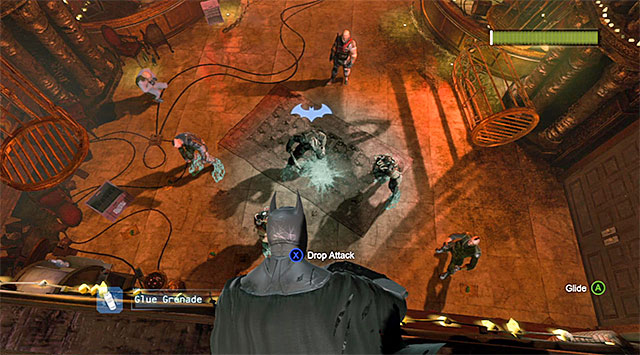 If you have upgraded the glue grenade I strongly recommend that you use them here
You can start the fight with Bird and his people in any way you want. They do not own guns and cannot, as a result, reach Batman. Personally, I recommend using the upgraded glue grenade, to hold the boss's most dangerous men, although you can also consider using the grapple, batarangs or the concussion detonator.
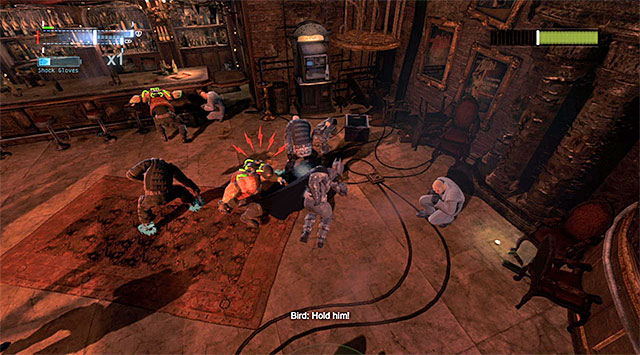 Watch out for the armored enemies and avoid their charges and grapples
After the fighting starts, you should, first of all, note the two enemies wearing very heavy armors, with the green tubes sticking out of their backs. Avoid the charges of this kind of enemies and do not let them grab you. At first, attack then using the cape and a series of quick blows but, only if the shock gloves are available.
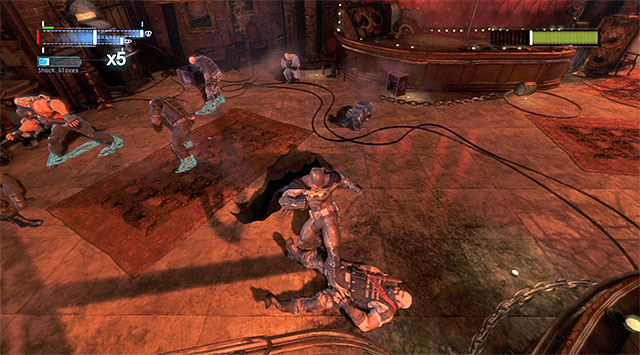 Bird is a weak opponent
A quite useful bit of information is that Bird does not have any unique abilities, nor is he tougher, even though he has a separate health bar. This means that you do not need to pay too much attention to what he is doing and, first of all you should deal with the heavily armored enemies, who have been described above, as well as with the enemies with knives.
 You need to interrogate the boss
Ultimately, you need to eliminate all of the enemies on the dancing floor so, it is best to leave Bird for the very end. After you have depleted his entire health bar, approach him and press the interrogation key/button. This is the end of this quite short, side mission.
[New challenge: Combat Training]
[New Character Trophy: Bird]
[New concept art: My Alibi - Lounge]
Way to unlock the mission: You get the opportunity to unlock this mission some time after you have completed the game's campaign mode. Wait until Captain Gordon calls Batman and asks help arresting twenty criminals who have escaped the prison.
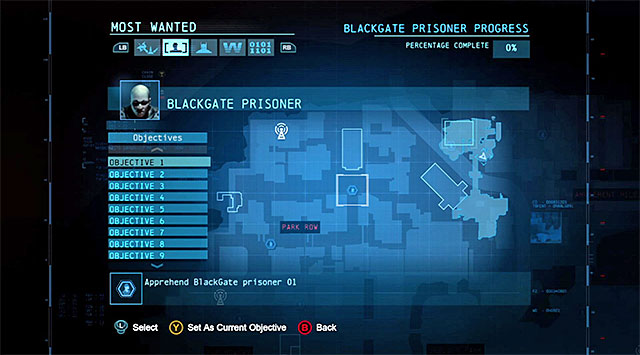
As already mentioned, you need to arrest 20 various people and you can reach them in any order you wish. The whereabouts of the individual inmates are displayed on the world map although, you can just as well use the side0missions menu shown in the above screenshot and "visit them" basing on that list.
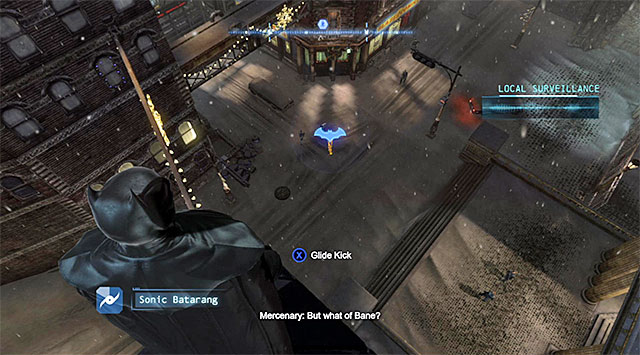 You need to locate each individual prisoner
The individual arrests do not differ in any particular aspect. Each time, you need to reach the place that the game points you to, find the escapee and several of his companions.
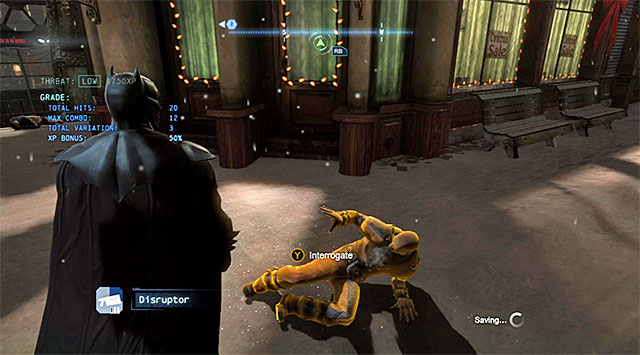 Each one of the escaped prisoners gives up at the end of the fight
To the extent possible, always go for a surprise attack and try to eliminate at least one enemy at the outset. Fortunately, the fights in this mission are not too difficult, especially that Batman already has the shock gloves at his disposal. The prisoner himself is best left for the end because, each one of the escapees gives up after being defeated.
As a reward for arresting each prisoner (apart from the experience points for winning the fight), you receive a bonus of 5000 experience points. Arresting all 20 prisoners means, in turn, a bonus of 50000 experience points. Listen to the final conversation with Captain Gordon, which officially ends this mission.
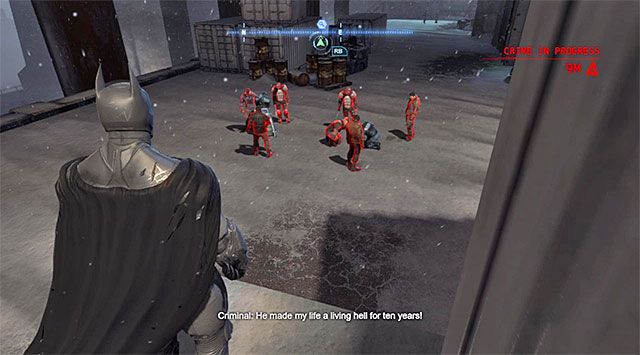 An example crime in progress - an attack on a police patrol
While exploring the game world, you will be, quite often, receiving information of crimes in progress taking place nearby. You will be guided towards the site of a particular crime by means of prompts displayer in the upper right corner of the screens (the arrow and the current distance from the target). It depends on you only if you take up the mission or not. In the latter case you do not need to take into consideration any negative consequences. What is even more, a similar crime may take place in the very same location, later into the game so, you will not miss anything irreversibly.
The crimes appear in various variants. You can be a witness to a gang war, an attack on the police patrol, or an armless civilian, or simply bump into criminals trying to break into one of the local ATMs. Regardless of the crime type, your task is always the same and it is to eliminate all of the enemies marked in red. I need to warn you here that many of the bandits participating in the crimes pack knives, armors, shields or firearms so, eliminating them may be quite a problem.
For stopping each crime, you are rewarded with 3000 experience points for completing an optional mission, plus for experience points for defeating all of your enemies (the score is kept in the same way as in the case of regular fights).
The circumstances of the meeting: Killer Croc is the first boss that you encounter while completing the game's storyline mode. You will fight this enemy towards the end of your stay in the Blackgate Prison, after you complete the Pursue Black Mask mission.

After you start fighting Killer Croc, focus mainly on performing correct dodges (by leaning the analog stick to the side + double-tapping the button that the game tells you to), thanks to which you will avoid taking damage from the boss's strong attacks (the screenshot).

Right after Killer Croc's attack fails, run up to him and initiate the same strategy as in the case of armored enemies. You first need to stun the enemy with your cape and initiate a chain of quick attacks (the screenshot). As soon as the chain of your hits ends, perform another dodge to prevent him from seizing the initiative.
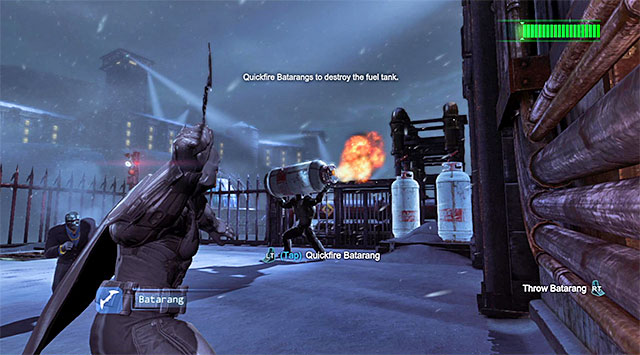 Try to hit the tank using the batarang
On the rooftop, there soon will appear a group of hired goons, who will be obstructing you from weakening the boss. Ignore them for a moment and note that Croc has picked up a fuel tank. Try to hit the tank with batarang, either by using the option of quick throw, or by aiming it manually. If you are too slow and the action fails, at least try to perform a dodge to prevent Batman from taking damage as a result of the tank's explosion.
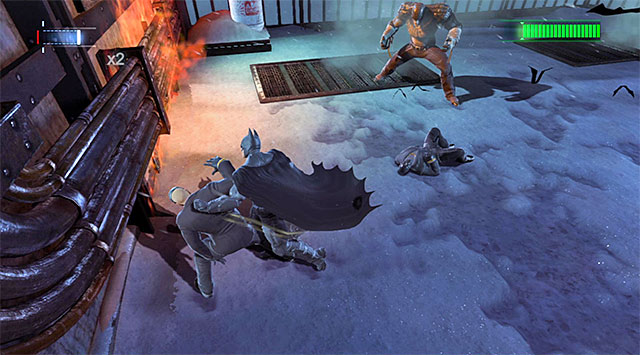 Do not forget about Killer Croc while attacking his helpers
The abovementioned goons need to be disposed of, sooner or later, but the best method is to rely on Killer Croc's attacks and hope that his strong blows will be weakening and killing the goons. Launch direct attacks only when the boss is trying to regain his strengths after a failed attack, and do not exaggerate with these.
 Tap the action button rhythmically to free yourself
The further part of the battle with Killer Croc is similar to the previous one so, you need to stun the boss with your cape and inflict damage to him, and also explode the fuel tanks that he lifts, while minding his goons. The only new thing now is that you will have to defend yourself from Croc's bites after a series of blows that you land. The solution to this problem is tapping rhythmically the action key/button, until Batman liberates himself.
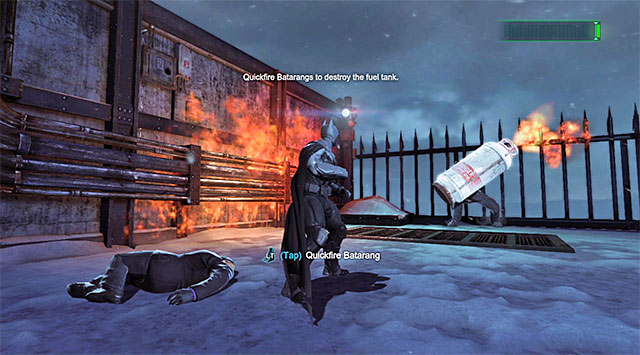 You need to hit, with batarang, the tank that the boss is holding for the last time
Finally, Killer Croc will grab one more tank and to deal finally with the boss, you need to throw the batarang at the tank for the last time.
The circumstances of meeting the boss: Deathstroke is the second boss character that appears while completing the game's storyline. You will fight this enemy towards the end of your exploration of Penguin's ship Final Offer, after you return from the Boiler Deck during the mission entitled Gain access to Penguin's office - Theatre.
Deathstroke is an enemy that is way more demanding than the previous one from the storyline, i.e. Killer Croc. The key to success here is a good knowledge of the use of counter-attacks, because otherwise you will fail even in the first phase of the fight, not to mention the following ones. Try to avoid taking damage for as long as possible because it is in the final phase of the fight that it will be very easy to lose health points quickly. Your failure will mean the necessity to repeat the entire fight, and not the its last phase.
 Boss will be trying to attack Batman on a regular basis
The fight with this boss consists of three parts. After the first one starts, you should focus, first of all, on waiting for Deathstroke to attack, thanks to which Batman will be capable to pull off counter-attacks and land his own blows. I recommend that you take the initiative especially further into the battle, once you want to maintain a high multiplier in order to achieve more experience.
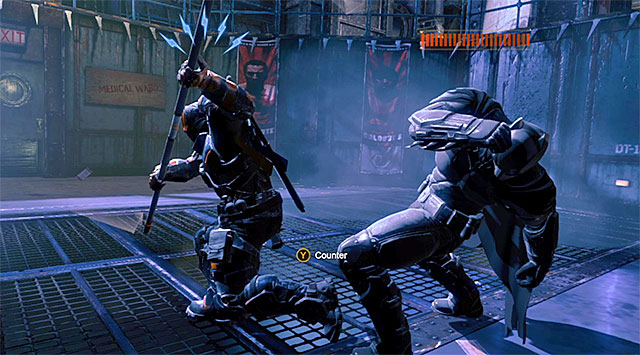
Apart from responding to Deathstroke's regular attacks, you also need to take part in scenes of wrestling with the boss, on a regular basis. Also here, you should make sure that you press the counter-attack button, BUT exactly at the moment at which there will appear a prompt urging you to (the above screenshot). You cannot press it too early nor too late because this will mean losing a given event and taking unnecessary damage. Each time after you have blocked the enemy's attack, you should land your own combination, using the fact that Deathstroke does not start defending straight away.
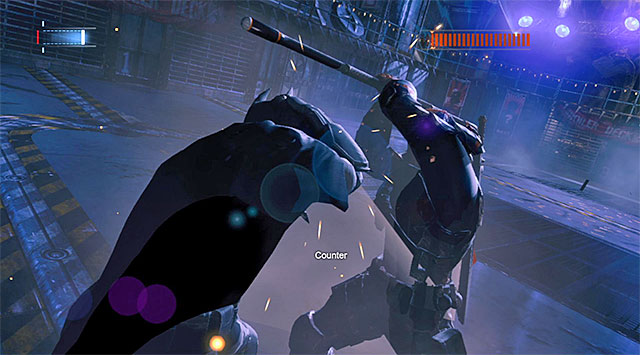 Keep pressing the counter-attack button
Perform the action described above until you deprive Deathstroke of sufficient amount of health. After the boss temporarily blinds Batman, prepare for the process of rhythmical tapping on the counter-attack key/button.
 Land as many blows onto the boss as possible
This is not the end yet, because the game will soon allow you to launch a high-intensity attack called Beatdown, which is similar to the one that you have already been using to eliminate armored enemies. Try to land as many blows, in a series, as possible. Batman should take Deathstroke's mask off and get promoted to the second phase..
 You need to be very cautious at the moments at which you need to dodge the boss's blows
The basic handicap in this part of the fight is that each time you wrestle with the enemy, you will be required to press the counter-attack key/button at two different moments (with several seconds in between) . As a result, take your time and do not hurry too much to seize the initiative. Do that only after you dodge Deathstroke's second blow.

Another new element to this phase of the fight is the possibility of a situation in which Deathstroke uses his remote claw to attach Batman to an explosive tank. In such a situation, if you want to avoid taking too much damage, you will have press the ideally timed counter-attack key/button to send the charge towards the boss (the screenshot).
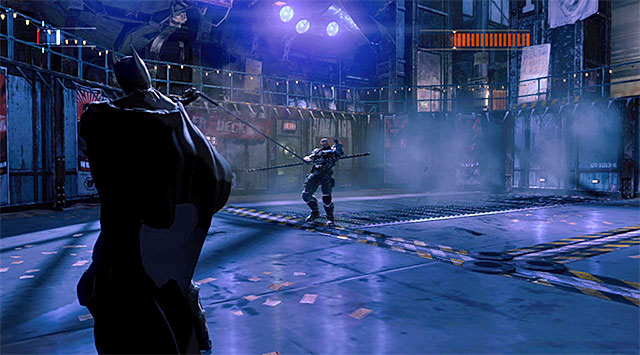 Pull Deathstroke
Regardless of whether you managed to avoid colliding with the tank or not, it would be a good idea to follow the game's suggestion and initiate the key/button combination displayed on the screen. This will result in selecting the regular claw from the inventory. Using the claw will allow you to pull the boss your way, which will render him incapable of using his gun.
 Land a blow after another in a series
The ending of the second phase is the same as the one of the first phase so, you first need to defend against Deathstroke's blows in close combat (the counter-attack key/button) and seize the initiative and land several quick blows. Batman will deprive the boss off his blade and the third phase of the fight will start.
 Avoid the boss's quick attacks with katana
In the last phase of the fight, Deathstroke, as a result of having lost his primary weapon, will start using katana, which means quite a lot of problems for you. This is so, because he will be capable of initiating faster standard attacks. Therefore, you need to watch out even more and launch precise, well-timed counter-attacks. This is not the only problem, because, from now on, the wrestling scenes consist of three different moments at which you need to defend yourself against taking damage. Do not forget about this and do not attempt to respond to Deathstroke's attacks too early.
 The reward for defeating the boss
The premises of the fight's ending should be already familiar and learned in the previous phases of this fight. You first need to defend against close combat blows and initiate a very long combination of blows. As a reward for winning the fight with the boss, apart from experience points, you receive the Remote Claw.
The circumstances of meeting the boss: Anarky is a boss that is connected with the side mission that concerns sabotaging his plans to bomb three buildings in Arkham. You stumble upon this character towards the end of this optional mission, after you reach the Abandoned Courthouse in the Park Row district.
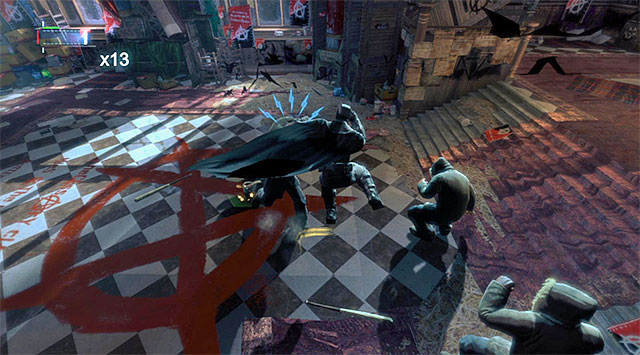 The first phase of the battle is quite easy
The fight with Anarky and his henchmen takes place in the courtroom and it consists of three different phases. Anarky will not take part in the first phases at all so, you should focus mainly on eliminating his weak goons. Since these opponents are not too much of a threat, try and do not lose too many health points, because you will have to do with the health bar until the end of this mission.
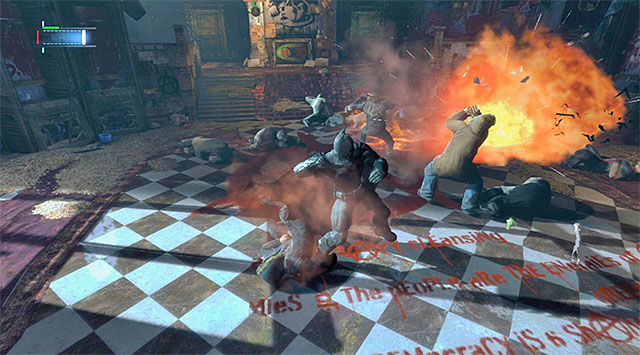 Avoid taking damage from Anarky's attacks
After you make it over to the second phase, you should change the strategy a bit. Now you should stick with moving around the battlefield and avoiding stopping in one spot for longer. What speaks for this behavior is that Anarky will be trying to toss Batman explosive charges on a regular basis, whose explosion may weaken the protagonist. Also, do not forget about the anarchists with knives and do not let them launch successful attacks..

Anarky will jump down to the battlefield at the moment at which the third phase starts. Note that he comes equipped with a stun gun so, it is crucial that you do not let him hit you because you will otherwise lose a lot healthpoints. Unfortunately, you cannot react to the stun gun attacks with counter-attacks so, the only thing that you can do is leaping to the sides (at the moments at which the red symbols appear above the boss's head - the example in the screenshot) or by jumping over Anarky.
 Anarky does not do that well while defending against Batman's attacks
The good news, however, is the fact that Anarky is very susceptible to Batman's attacks, which he is incapable of blocking. Apart from inflicting damage to the boss, remember about his henchmen and try to eliminate them quickly. You do not need to drain Anarky's entire health bar, because the fight should end right after you have dealt with his goons.
The circumstances of meeting the boss: Copperhead is the third main boss during the game's storyline mode. You fight her soon after you leave the Sinos's mill in the Industrial District, i.e. on your way to the antidote drop point - the Reach the antidote drop point mission.
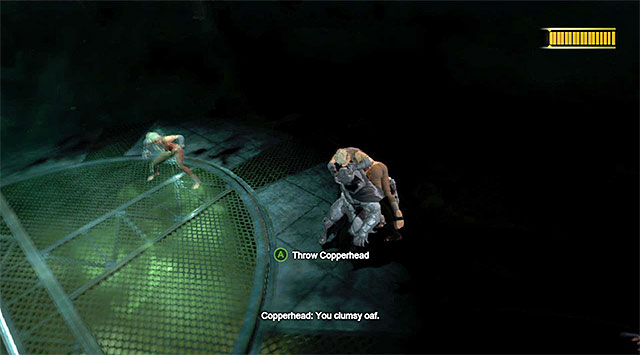 tapping rhythmically the button shown in the screen if you are grabbed by Copperhead
After the fight starts, start attacking the Copperhead clones that gather around Batman. Just like during the fight a couple of moments ago in the Concealed Room, you should especially pay attention to the enemies with knives and remember about the necessity to hold down the counter-attack key/button. Apart from that, be on a lookout for opportunities to respond simultaneously to attacks of one that one character (the blue markings above the heads of several characters) Occasionally, it may happen that Batman is grabbed by Copperhead and you need to tap rhythmically on the interaction key/button to free yourself.
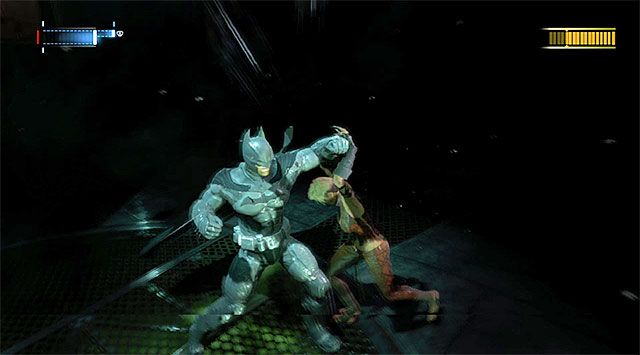 Attacking the actual boss is going to decrease her health bar
Just like in the case of the other boss battles, try at the outset try to avoid losing too much health, because you may run out of them before the end of this fight. Do not attempt to target the actual boss while fighting the clones because he will be "unmasked" after the end of each successive phase of the battle. Then, land quick combos in an attempt to decrease the boss's health bar, which you can see in the corner of the screen.


After she loses around 2/3 of her health bar, Copperhead will start to pull off a very quick sprint attack, which you of course need to avoid at all costs. Once you notice the flash of light shown in screenshot 1, perform a quick dodge to the side, should will allow you to keep the current state of your health bar.
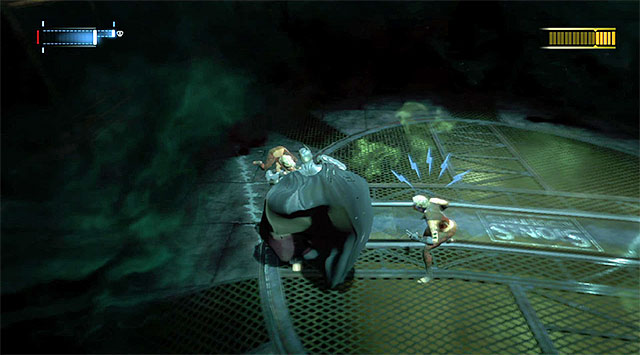 Remember to avoid the boss's sprint attacks, while dealing with the clones
Resume the process of attacking the clones and remember that you still need to keep a careful eye on the environment and perform flawless dodges whenever you notice the flash warning you of the imminence of the actual boss. Keep doing that until all of the clones are defeated, which will reward you with the antidote that will restore you to full health.
 Finishing Copperhead off is a pure formality
The only thing remaining for you to do is finish off the main opponent and so, approach Copperhead and press the standard attack key/button which will result in a cutscene of the boss's capturing.
Circumstances of meeting the boss: Deadshot is a boss connected with a side mission (Most Wanted). You fight this boss after you reach the Gotham Merchants Bank, where the criminal is keeping a hostage.
 Use the vantage points to plan your attacks and avoid Deadshot
Start by moving quickly to one of the vantage points. Do not worry about Deadshot's healthbar, because you do not need to attack this character straight away, as long as you do not make a mistake, you will not be spotted. Deadshot will, at first, patrol the bank's ground floor and, before you turn your attention to him, it is a good idea to eliminate all of his goons.
 Eliminate the boss's goons methodically
Since the description of the bank's main area has been provided in the chapter devoted to the main storyline, I will only remind you that it pays off to use to your advantage the vantage points, the weakened walls, venting shafts and fire extinguishers, which can be used to blind the enemies. I especially urge you to watch out while attacking the enemies patrolling the upper level, because the boss often turns around unexpectedly and changes positions. This means that without the necessary precautions, you can be easily spotted.
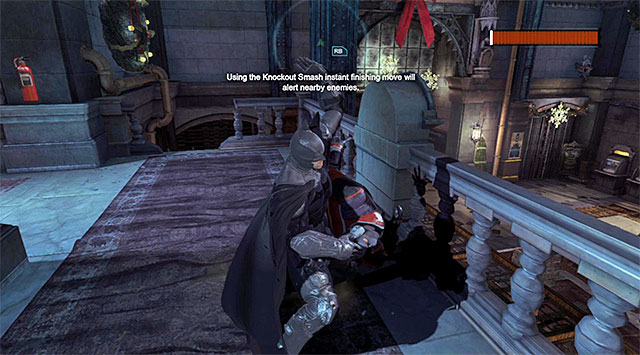
When it comes to Deadshot himself, he is, unfortunately, immune to many of Batman's attacks (e.g. the inverted takedowns), which means that you need to prove yourself with a larger dose of creativity during the attempts to deprive this character of his healthpoints. The best strategy consists in getting the boss from behind after flying down from the vantage point. Still, you should not restrict yourself to the quiet takedowns only , because Deadshot can quickly respond such attacks. Instead, right after you start the quiet takedown, additionally press the standard attack key/button, to initiate the Knockout Smash (the screenshot).
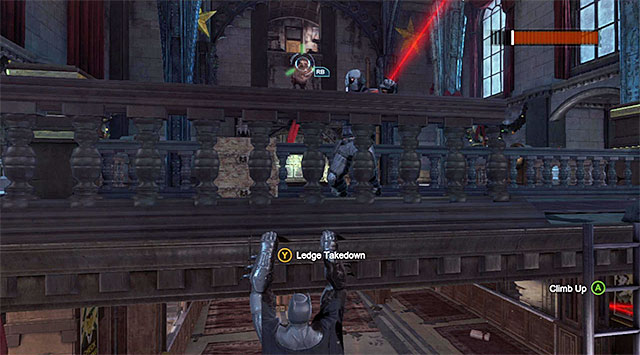 You can try throwing Deadshot over the balustrade
Since Deadshot is initially patrolling the upper balconies, you can also cling to the edges and grab the boss at the moment at which he is near the balustrade . As a result of a fall from high, Deadshot should lose quite a lot of health points.
 The detonators do their job well
Another good idea is to knock the boss unconscious, best by using a concussion detonator. After Deadshot fall onto the ground, run up and press the combination which finishes off the enemies. Regardless of the strategies that you adopt, always remember to escape, after each successful attack, onto the nearest vantage point, because you are incapable of depriving Deadshot of the entire healthbar at one shot.

After Deadshot loses around 2/5 of his healthbar, there will appear some more of his goons in the bank. This means that it is a good idea to discontinue the attacks on the boss, for the time being, and focus on eliminating all of the ones who have just arrived. Just like before, keep all precautions and attach care to eliminating the enemies one after another. You should also watch out for the enemies who came into the battle with a device which x-rays the vantage points in search for heat sources (the screenshot). As long as you are not equipped with an upgrade that allows you to hide Batman's presence, you need to run away from the statues when they are being scanned, to prevent being spotted.
 Eliminate quickly the enemy with the disruptor
You will reach the next phase at the moment wt which Deadshot has only 1/3 of his healthbar left. Also in this case, you need to take into account the fact that there will be new obstacles for you to overcome. First of all, try to locate and eliminate the enemy with the disruptor on his back, as quickly as possible (the antenna on his back), thanks to which you will be able to use again the detective vision, for tracking Deadshot and his goons.
 One of the enemies will be busy deploying the mines
Apart from that, you should watch out for the enemies that place mines around. You can ignore these traps or detonate them using Batman's gadgets. Deadshot should be occupying himself with patrolling the bank's ground floor, in the meantime. Unlike in the fight's previous phases, you do not need to wait until you deal with all of his men, although it is a good idea to do so, staying in his closest surroundings.

After you nearly deplete Deadshot's health bar, he should grab the hostage and start using him as a human shield. You need to be VERY careful to prevent causing the civilian's death, because this would mean failing the entire mission. Wait for Deadshot to turn back, glide quickly towards him and land somewhere next to him. Approach the boss (the screenshot) and press the quiet takedown key/button, which will deal the winning blow to Deadshot.
The circumstances of meeting the boss: Bane is the fourth main boss to appear in the main campaign of the game. You fight this enemy towards the end of your visit to the Gotham Royal Hotel located in the Diamond District, right after you complete the Gain access to the penthouse - swimming pool mission.
 You can respond to Bane's weakest blows by countering
The beginning of the fight with Bane is quite because it is not going to be too different from the fights with the regular, heavily-armored enemies. First of all, do not allow the boss grab you although, if it is a standard attack (the blue symbols) you can try responding to it with countering. If it is on the other hand, a strong attack (the red symbols), after Batman has been grabbed, it is a good idea to attempt using the counter attack, in the form of defense, and avoid taking quite severe damage as a result.
 From now on, Bane will be discernibly stronger
Attack the boss three times by stunning him with the cape, which exposes him and gives you the opportunity to attack with the Beatdown, i.e. a combo of fast blows. After you have performed one, or two series of this attack, Bane should strengthen himself by using the Venom. You will recognize the moment by the exposing of the tubes on his back, with green goo, as well as by the change the looks of his health bar to one that resembles the goo.
[New Character Trophy: Venom Bane]
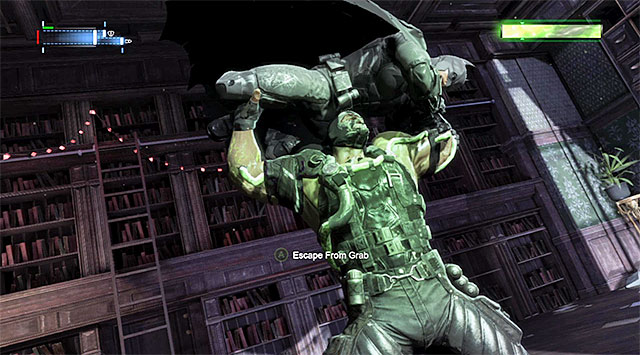 If Bane grabs you, try to protect yourself in time against taking damage
Since Bane got even stronger, thanks to the boost in the form of the Venom, you need to attach a lot of attention to avoiding his strong attacks, and dodge at the right moments. If you still get grabbed, keep tapping rhythmically on the key/button that appears on the screen, thanks to which you will avoid taking severe damage.
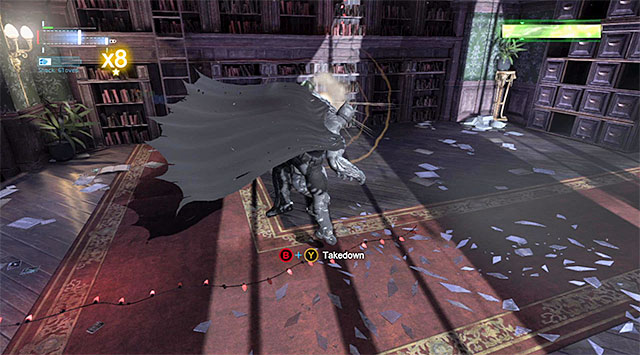
When it comes to attacking the improved Bane, you should start in the same way as previously, i.e. by tapping the cape stun button three times (make sure, however, that Bane is not preparing to attack himself!). Land a series after another and finish them with the special takedown, i.e. the combination of two keys/buttons (the screenshot). It is the same attack which becomes available, during the regular fight, after you reach the x8 multiplier and in this case, it causes ripping off a tube attached to Bane's back.
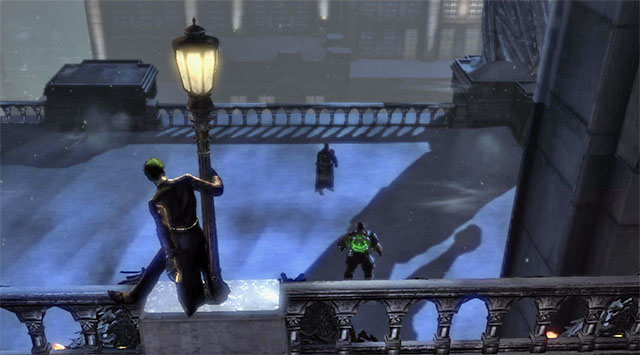 After some time, the fight will relocate to the terrace
The appropriate performance of the entire sequence will make Bane return to his standard state. So, continue landing all of the blows described above, which will make the fight relocate to the terrace that you have already visited [East Tower Terrace].
Note - If you die in the final phase of this battle, you will not have to start over, and only from the moment in which you fall onto the terrace.
 You need to dodge from Bane's charges
The most serious handicap in the final part of the fight is that in his upgraded version (Venom Bane) Bane he will be pulling off formidable charges. AT ALL COSTS try to dodge from them, especially that if you are hit once, it is very likely that Batman will not be able pull himself together before the next charge comes, and he will take more damage as a result.
 The slam into the ground by the boss
Bane should charge three times, in total and he will bounce off the terrace at the end, and slam into the ground with great energy. Avoiding this attack is, fortunately, easier.
 Shock gloves will make it easier to weaken the boss
Use the same attacks as earlier, to weaken the boss so, start with hitting him with the cape three times, land a series of quick blows and round it up with an appropriate key/button combination to perform the special takedown. Also, wait for the moment when the shock gloves are unlocked, because you will be able to give up, then, the step connected with stunning Bane with the cape.
 You can use Bane's goons to charge the gloves
Further into the fight, there will appear one more obstacle, because there will appear groups of the regular enemies on the terrace. You can try to ignore the bandits and count on the dying as a result of Bane's charges. You can just as well use them to charge Batman's gloves.
 The end of the fight with Bane
Continue fighting Bane, up until the moment when you deplete his health bar almost entirely. What is interesting, Batman will be incapable of defeating the boss definitively, because there will appear police choppers around and a cutscene will start.
The circumstances of encountering the boss: Shiva is a boss connected with the side mission concerning ruining her plans of murdering the corrupt police officers. You encounter this character at the very end of this optional mission, after you reach the Wonder Tower - Lobby in the Sheldon Park district.
It is a good idea to eliminate, at least, a few of Shiva's assassins It pays off to eliminate, at least, two of Shiva's goons
Start the fight with Shiva by pressing the counter-attack key/button to repel the simultaneous attack from all of the Batman's enemies. In the first part of the fight, Shiva will be helped by the female warriors that you have already dealt with in the mall. As a result, you should know already how to react to their attacks.
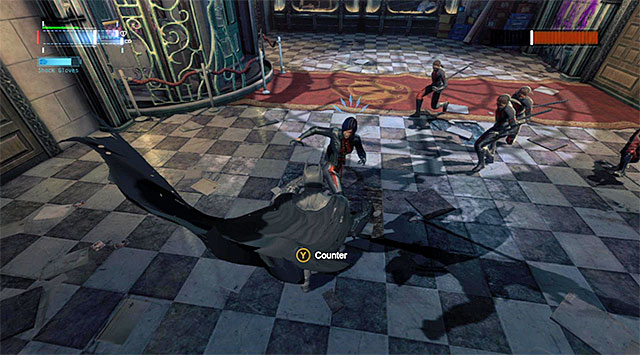 Claim further points from the assassins
To the extent possible, focus on inflicting damage to Shiva, because she will have to lose enough health points for the next phase of the fight to start, instead of eliminating all of her warriors. Also in this case, the key to success is flawless countering the attacks although you do not need to restrict yourself to defensive actions and you can also search for opportunities to deal damage.
 Watch out during direct fights with the martial artist
After Shiva loses around a half of her health bar, the second phase of the fights will start. This time, Shiva will summon martial artists. In case you have forgotten, you need to keep in mind that they are able of countering some of Batman's attacks. As far as countering is concerned, you need to remember to tap the counter-attack key/button twice to counter the entire sequence.
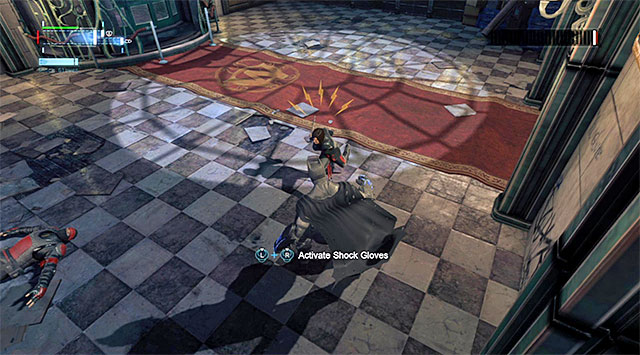 Press down the counter-attack key/button to avoid the katana slashes
Also in this phase, you do not need to eliminate all of the Shiva's men, although this can be helpful a bit, while attempting to attack the boss. The Assassin will probably start using the katana so, do not forget about the necessity to hold down the counter-attack key/button. Keep depleting Shiva's health bar and be prepared to tap twice the key/button shown on the screen, towards the end of the fight. This will block the last blow with the sword.
The circumstances of encountering the boss: Bird is a boss connected with the side mission concerning retrieving chemical weapon and stopping the gangs from fighting any longer. You confront this character at the very end of this mission, after you reach the main area of the My Alibi club [Dance Floor].
 If you have upgraded the glue grenade I strongly recommend that you use them here
You can start the fight with Bird and his people in any way you want. They do not own guns and cannot, as a result, reach Batman. Personally, I recommend using the upgraded glue grenade, to hold the boss's most dangerous men, although you can also consider using the grapple, batarangs or the concussion detonator.
 Watch out for the armored enemies and avoid their charges and grapples
After the fighting starts, you should, first of all, note the two enemies wearing very heavy armors, with the green tubes sticking out of their backs. Avoid the charges of this kind of enemies and do not let them grab you. At first, attack then using the cape and a series of quick blows but, only if the shock gloves are available.
 Bird is a weak opponent
A quite useful bit of information is that Bird does not have any unique abilities, nor is he tougher, even though he has a separate health bar. This means that you do not need to pay too much attention to what he is doing and, first of all you should deal with the heavily armored enemies, who have been described above, as well as with the enemies with knives.
 You need to interrogate the boss
Ultimately, you need to eliminate all of the enemies on the dancing floor so, it is best to leave Bird for the very end. After you have depleted his entire health bar, approach him and press the interrogation key/button.
The circumstances of encountering the boss: Firefly is the fifth main boss that appears during the game's campaign mode. You are going to fight this boss after you defused three bombs on the Gotham Pioneers Bridge, right after the completion of the Disarm the bomb at the north pillar mission.
 Press the counter-attack button
Start the fight with Firefly by pressing the counter-attack key/button, thanks to which Batman will use the claw and make it over to the fight arena in a quite unconventional way (only then, will the boss' health bar appear).
 Do not stop for anything for longer, keep running around the entire arena
Right after the fight's main part starts, you should spend a few moments learning Firefly's attacks. The boss is predominantly using his flame thrower and to avoid taking damage, you need remain in constant motion. Performance of leaps should not be necessary, although it can be helpful at critical stages and let you avoid losing health.

At moments in between Firefly's attacks, you can try throwing the glue grenades at him, and it is best to use the key/trigger combination that allows you to throw one quickly (i.e. by skipping manual aiming). After several attempts, one of the grenades should hit the boss and immobilize him for a moment (the screenshot).
 Throw batarangs at Firefly
Start now throwing regular batarangs. Just like earlier, rely on the key/trigger combination that allows you to throw them quickly. It is also a good idea to have an upgrade that makes the batarangs-throwing process more efficient. Still, you can do without it.
 You need to use the claw to catch the boss
Continue throwing batarangs up o the moment when the game zooms in on the boss and suggest that he has been stunned temporarily. Quickly, use the combination of keys/buttons for quick use of the claw. After the boss is captured, start tapping the key/button that appears on the screens to pull him towards yourself. Batman will then land a strong blow without your participation.
 It is a bit more difficult to avoid the bombs
From the moment of performing the first combination (glue grenade - batarangs - claw) Firefly will start to use another attack, which is the bombardment of the area. In this case, running around the bridge is not enough anymore and, according to the game's suggestion, you should also perform leaps to the sides. For the whole time, you should be on a lookout for a good opportunity to hit the boss with another glue grenade, to be able to perform the actions described above once again. .
The next phase of the fight should start at the moment when the Firefly loses around a half of his healthbar. Start escaping, using the hook. Walk over to the left over the metal element of the bridge. You will reach another interactive point shown in the screenshot (you need to use again the hook).
 Jump onto the vehicle hanging above the chasm
Another part of the escape assumes maneuvering between car wrecks and, do not forget to rely on leaps to the sides at the moments at which Firefly starts bombarding the area. Jump onto the blue vehicle and get towards the truck's trailer, under which you need to perform a slide.
 Wait for opportunities to immobilize the boss again
You can now continue the actions that have been described at the beginning on this page. Keep running around the bridge, avoid Firefly's attacks and wait for opportunities to throw him the glue grenades. Each time that you notice that the Firefly was stunned , pepper him with batarangs, and then, use the claw on him (do not worry if you are not fast enough to shoot the claw, because the batarangs themselves will also deal damage to Firefly).
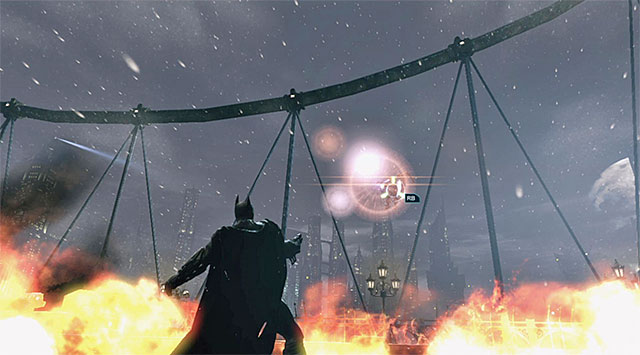
After the boss' healthbar is nearly depleted, he will start bombardment of the area. After you avoid the first wave of the charges, try to stand, more or less, in the middle of the arena, because this is going to be the only safe place. Wait for the moment in which Batman will be able to catch the Firefly with the hook (screen).
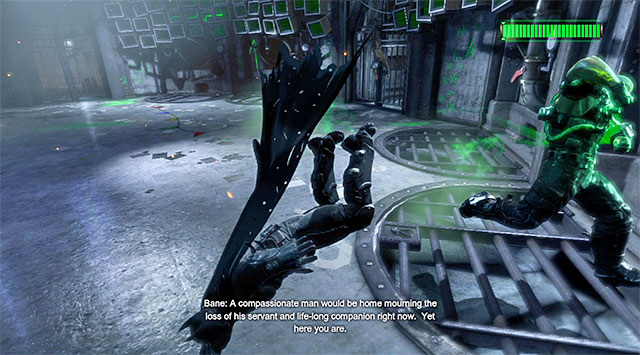 You need to save yourself from colliding with an obstacle twice
This is not the end, because during the last phase of the fight, you will have to press quickly the counter-attack button, in two different places. This will prevent the boss from smashing Batman against an obstacle.
The circumstances of encountering the boss: You get to fight Bane again in the final battle of the game's campaign mode. You meet him towards the end of your second visit to the Blackgate Prison, after you have reached Joker's hideout, i.e. after the completion of the Stop the Joker #2 - cell block B main mission.
Perform flawless dodges and prevent Batman from colliding with BaneThe showdown with Bane consists of two, visible different, phases. Phase one of this fight is very similar to the final phase of the previous meeting with Bane, because he comes already soaked with the Venom and he will be performing formidable charges at you. Remember to avoid Bane's charges at any cost, by performing dodges because, if you are caught by one, you will lose a lot of health points and expose yourself to further attacks. You should also avoid the ground slams (they always end the series of Bane's charges) and the attempts to grab Batman because, in such a situation, you will have to defend yourself against taking heavier damage.
 Start by stunning Bane with the cape
Since you have last fought with Bane at the Gotham Royal Hotel, also tactics of depriving Bane of his health points has not changed. You need to look out for the opportunities to stun the boss with the cape three times (note - Bane can interrupt the cape attacks if you start them too late).
 Do not forget to press the correct button combination at the end
After you have stunned Bane with the cape, start landing quick melee blows that the boss will be incapable of blocking. Round the whole thing up with the special attack initiated by pressing two keys/buttons at the same time (this is not required, but will allow you to deplete the boss' healthbar faster).
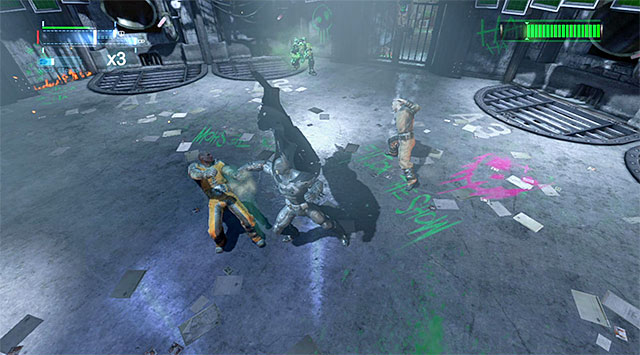 Attack Bane's henchmen to charge Batman's gloves faster
From the moment in which you land one whole series of attacks, there will appear inmates in the arena. Do not ignore them entirely although you may count on the fact that many of them will be swept off their feet with Bane's attacks. It is much better an idea to use them to charge the shock gloves. As you can probably remember, the gloves will help you weaken the boss so, it is worthwhile to activate them as soon as they are available.
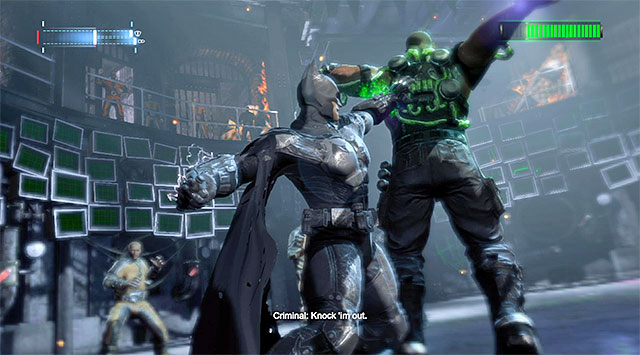 Use the gloves to deprive the boss of his health points on a regular basis
After you have depleted around 1/3 of Bane's health, the game will play a cutscene featuring Joker, Captain Gordon and the Prison Warden Joseph. From now on, the shock gloves will remain active until you have completed this phase of the fight so, you can start ignoring Bane's men on a larger scale. You still need to avoid the boss' charges and wait for opportune moments to launch your offensive. (cape- beatdown - the special button combination).
 Bane's reanimation
Continue fighting until the moment when Bane has only a small portion of health left. The game should soon play another cutscene, after which you need to reanimate Bane so, at the appropriate moments, press the standard attack key/button. After several moments, the second phase of the fight will start, where you will have to face off against the heavily-mutated Bane.
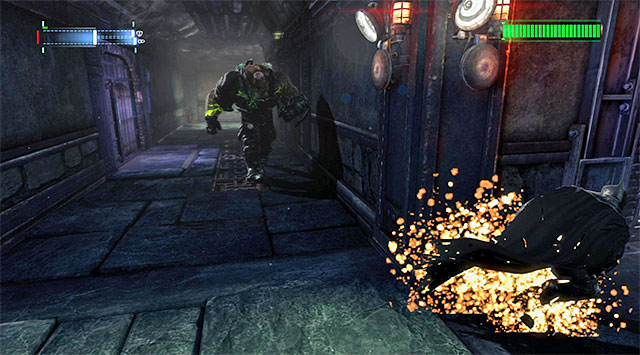 You can use pellets to help yourself escape Bane
The second phase of the battle requires a completely different approach. Do not attempt any frontal attacks on the boss because, not only will it end in a failure, but also you will be grabbed by Bane and lose some of your health, as a result. Avoid detection for the whole time and, if you are spotted, start running and, of necessary, use additionally a smoke pellet that will blind Bane, or a glue grenade, to stop him for a moment. It is a good idea to use the detective vision, on a regular basis, to determine the boss' current position and adjust the strategy.
 As often as possible, use the venting shafts
The good news is that you do not need to use the main corridors only, because you can just as well hide in venting shafts that surround the entire area, and run under the floor. Batman will not have to lose time to rip the grates off the walls. What is even more, while escaping from Bane, you can perform a slide towards a side-shaft, which considerably diminishes the risk of being caught.
 Remember that Bane can search venting shafts in search of Batman
The venting shafts are a geed way to avoid Bane and plan on further attacks although, you cannot feel completely safe there. In the case of the side-shafts, try to get away from their exits and, in the case of the lower shafts, use mainly the places where the camera changes its position into the first-person mode. The reason is that Bane will be searching the shafts on a regular basis and lift/rip off the grates, especially right after a successful escape.
 You can sneak up to Bane from behind and land the weaker surprise-attacks
There are two different ways in which you can deal damage to Bane. Variant one assumes that you sneak up to Bane from behind and press the quiet takedown key/button. Batman will then jump onto the boss and direct him towards the nearest wall. Unfortunately, as a result of this type of attacks, Bane will not lose too many health points.
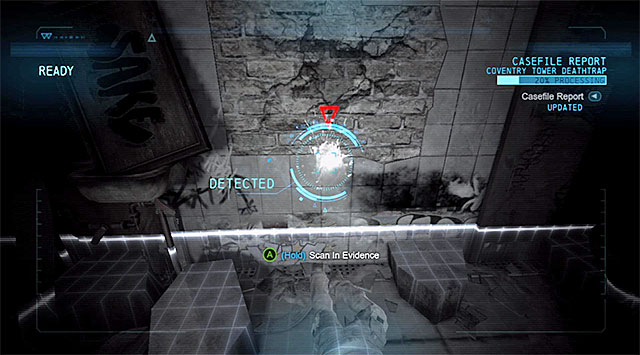
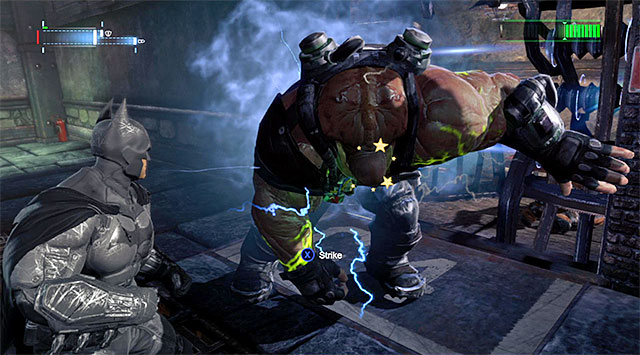
Variant two is way better, and it assumes that you keep pushing Bane onto the electric fence that separates the cages with prisoners from the main corridors. Hide in a lower shaft, close to one of such fences and wait for the boss to appear around (screenshot 1). Press the attack key/button, combined with dashing out of the shaft, and start landing a series of quick blows (screenshot 2). The correct execution of all the actions, should result in Bane's losing many more health points.
 Aim at the two interactive points
Regardless of the tactics, you need to cause the boss to lose nearly all of his healthpoints. Watch a stunning cutscene and use the grapple twice, on the anchor points that the game points you to, to extend the rope and defeat bane definitively.
 The training console connected with the optional challenges
The Dark Knight Challenges become available after you pay a visit to the Batcave for the first time, i.e. right after the fight with Killer Croc in the Blackgate Prison. Find the training zone in the Northern part of the cave, select your character (by default, it is only Batman) and select the challenge category:
Individual challenges have various requirements (e.g. performance of a complicated combo or a series of dodges) and you receive golden cups for meeting these requirements. Apart from that, you can also count on additional bonuses like, e.g. concept art or experience points.
Note! At first, most of the challenge categories are locked, or partially inaccessible. These are unlocked as you progress in the storyline mode so, it is worthwhile to return to the batcave on a regular basis.
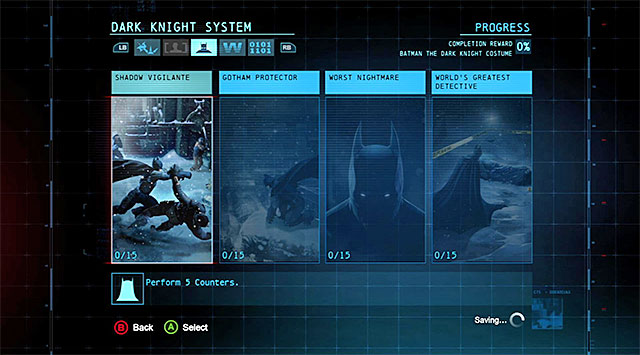 It is a good idea to check on your progress on a regular basis
A separate category of challenges are the ones connected with the game proper, i.e. the ones that you complete directly during the game (regardless of whether Batman is currently completing a mission or just explores the game world freely). These can be found in the third tab in the Dark Knight System, and also here, there are four categories available:
The challenges of each category need to be completed in a specific order so, it is a good idea to take a frequent look into the menu to learn about the requirements. Each one of the challenges is rewarded with experience points, where the ones marked with a star symbol are additionally rewarded with upgrades to Batman's kit.
Circumstances of unlocking the case: You complete this case while playing the storyline mode and you run into it in the initial phase of the campaign, during your visit to the GCR radio HQ, where you need to disable the jamming signal. It is a part of the Deactivate the jamming signal mission.
 The corpse
After you reach the GCR Tower - Control room turn right to find the crime site, which you will have to examine carefully. To do that, turn on the Evidence Scanner and start by scanning the victim's body (you need to press, and hold down, the key/button that the game prompts you to). Listen to the commentary on the victim's personals.
DNA tracesAnother thing that you need to scan is the DNA on the wall near the corpse. Performing this action will allow you to prepare the virtual event reconstruction.
 The control panel
Stop now next to the control panel in the left side of the control room. You need to scan also this device.

The final step is to find the keycard that used to belong to the victim. Allow the reconstruction to play again and influence the events by pressing the appropriate triggers/keys and by following the read trace that symbolizes the card's trajectory. This will allow you to determine that the card fell into the venting shaft on the side, shown in the above screenshot. Deactivate the detective vision for a moment, open the grate, initiate the scanner and scan the Access Card.
The circumstances of unlocking the case: This case counts as a part of the games storyline mode and you receive it after your visit on the Penguin's ship ends. The mission in question is Solve the crime scene inside Lacey Towers.
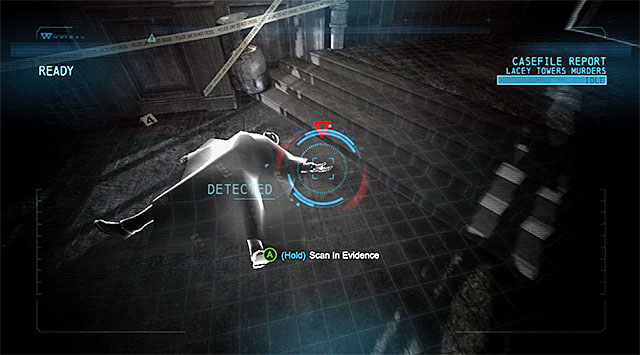 The corpse at the stairs
After you gain access to the Lacey Towers go to the apartment that serves as Sionis' Safehouse, i.e. the crime scene which requires a very detailed scrutiny. Start by switching on the evidence scanner and scan the victim deemed to be the Black Mask (you need to press and hold down the key/button that the game prompts you to) to analyze the left hand fingertips.
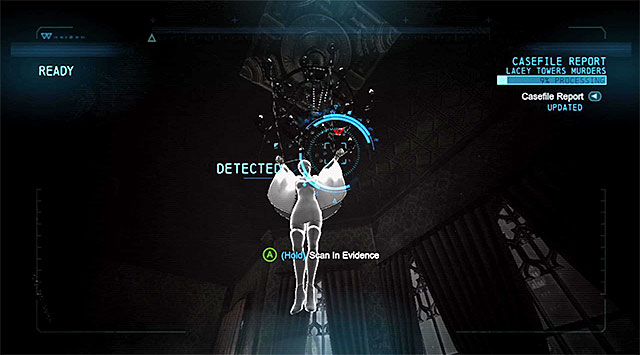 The murdered woman
Turn around and approach the chandelier to scan the woman hung here, thus learning her personals.
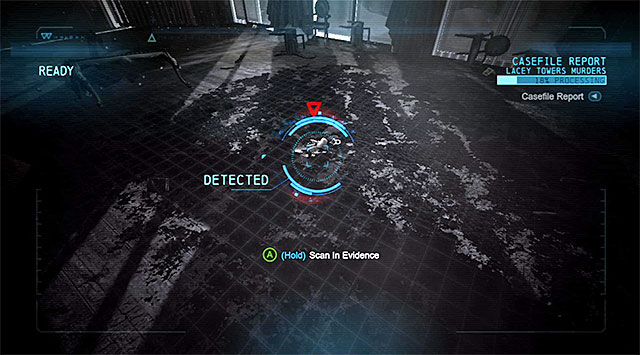 Traces on the floor
Another area that can be scanned is the floor near the chandelier with traces on it. Performing a scan here will allow you to determine the how the fire spread all around the apartment. Return to Black Mask's corpse. Scanning it once again will start another reconstruction, this time concerning the circumstances of the man's murder.
 Fingerprints
Approach the woman hanging down from the chandelier again and scan the corpse again. Also in this case, you will need to determine the fired bullet's trajectory. turn around and locate a new trace to the right of Black Mask's corpse. It is going to be fingerprints that can be subject to examination. Remain in this area and locate the shoe polish smears and scan them.

Take a look around the site for possible DNA on the floor, connected this time with the destroyed table. After you see another reconstruction, start holding down the keys/triggers for adjusting the reconstruction. Follow the red line, which will take you to the balcony door. You will find here a fragment of clothing, which you of course need to scan.
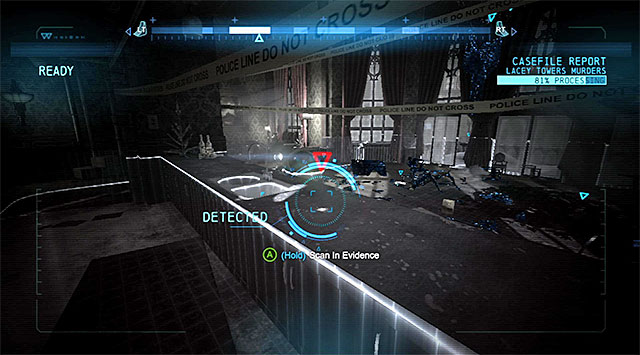
Go now towards the apartment's exit but, after you take the stairs, turn right and examine the counter on the right. Press, and hold down the appropriate key/button after you target the DNA trace shown in the above screenshot, thanks to which you will see another reconstruction.
 The telephone
Finally, find the cell phone lying on the floor. Examining it will allow you to read an important message. Watch the final version of events and listen to the conversation with Alfred.
Circumstances of unlocking the case: The case may become available while exploring the game world freely, in the region of The Bowery district (there will appear an appropriate notification on the screen, and the first entry concerning the case, in Batman's journal).

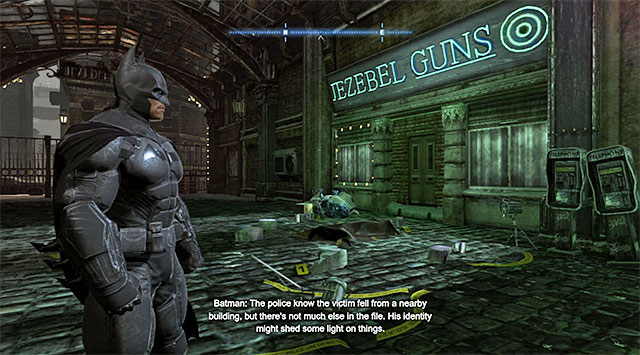
The place where the mission starts is the Jezebel Guns gun store, shown in the above screenshots. It is in the North-Eastern corner of The Bowery district. After you get there, listen to Batman's commentary and turn on the evidence scanner.
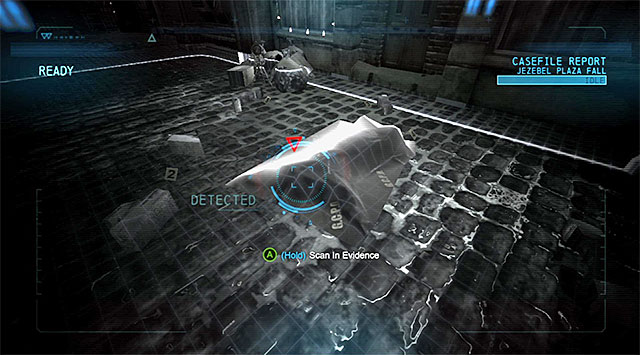 The corpse
Stat by scanning the corpse of the man, who has been thrown off the roof (you need to hold down the key/button that the game prompts you to, each time), thanks to which you will determine his personals. Once again, scan the corpse, which will cause the virtual event reconstruction to be worked out.
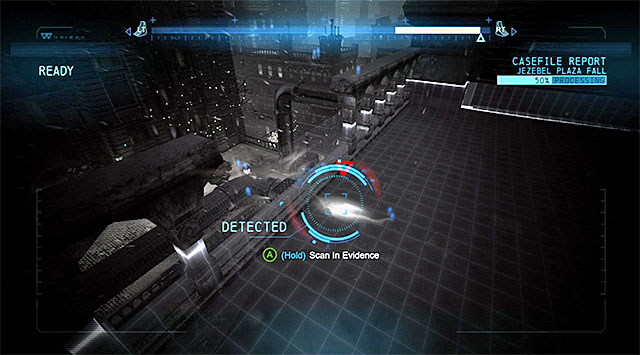 The trace on the rooftop
Use the hook to reach the rooftop directly above the crime site, which has been shown during the reconstruction (you can now turn off the evidence scanner for a moment). Once here, scan the trace next to the destroyed fragment of the balustrade.
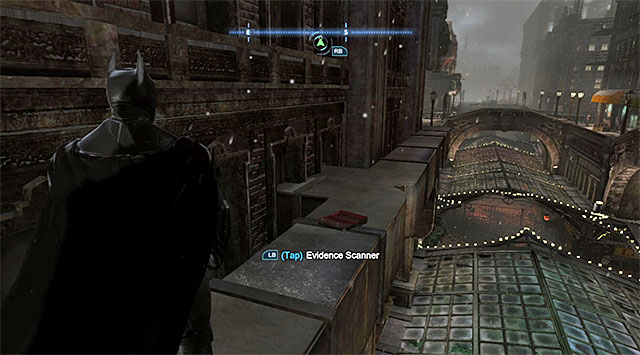
The last step in connection with the crime scene is using the reconstruction to find the suitcase. You need to start influencing the reconstruction's replay process by pressing the appropriate keys/triggers and observing the red line that symbolizes the item's trajectory. The suitcase is in the place shown in the screenshot, i.e. on the ledge below the roof with the destroyed balustrade. Scan the suitcase, thanks to which you will determine the murderer's personals.
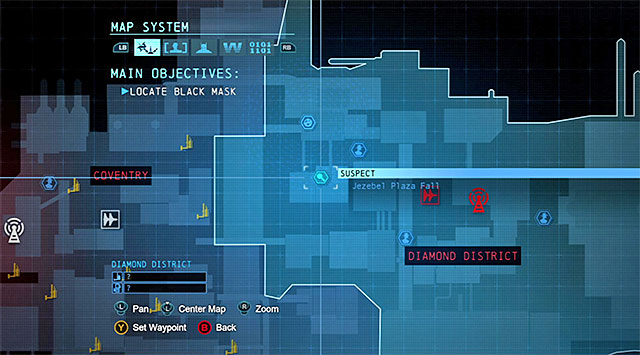
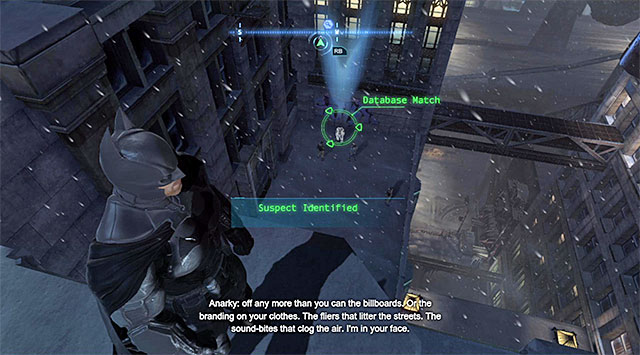
This is not the end yet because, you still need to arrest Robert Hanes, i.e. the perpetrator of the crime. He is currently staying in the Diamond District in the South-Eastern part of the city. Since Hanes is among several of his allies, it is a good idea to preplan everything from above, to eliminate one of the bandits right at the outset.
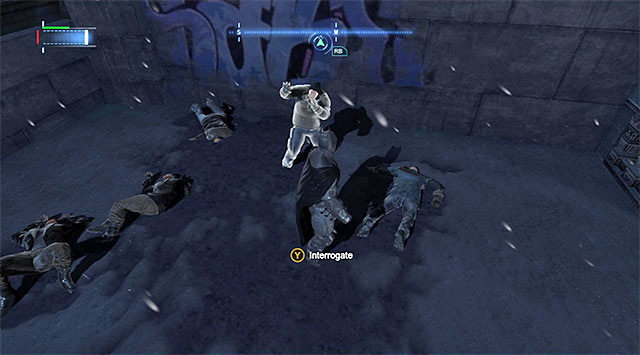 You need to interrogate Hanes
After the fight proper starts, attack all of the enemies, including Hanes. This is, fortunately not too arduous a task. Leave the murderer for the end, because there will appear an option to interrogate him after you have sufficiently weakened him (pressing the appropriate key/button). Hanes will admit his crime and the investigation will be over.
Circumstances of unlocking the case: This case may become available while you are exploring the game world freely. Somewhere around The Bowery or the Industrial District Batman may be contacted by Alfred, who will inform him of the interception of the SOS signal, and will suggest checking it out.
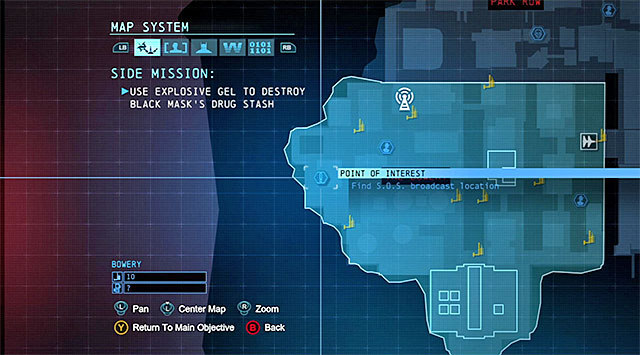

You start this investigation in the tall building (the above screenshots) located in the Western part of The Bowery. You need to make it over to the balcony of the building , and you can do it by approaching it from the North-Eastern side, while using the hook. After you reach your destination, approach the burning flare, thanks to which you will determine that this is a police trap set for you.
 The crash site
The police chopper will soon crash in obscure circumstances and you will, of course, need to examine this in detail. Glide towards the blazing wreck. After the Batman determines that there are no survivors, turn on the evidence scanner.
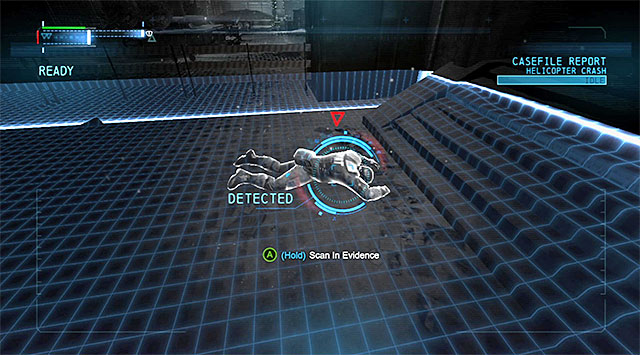 The corpse
Start by scanning the corpse that you have found near the crashed helicopter, which will result in a preparation of the base version of the events.
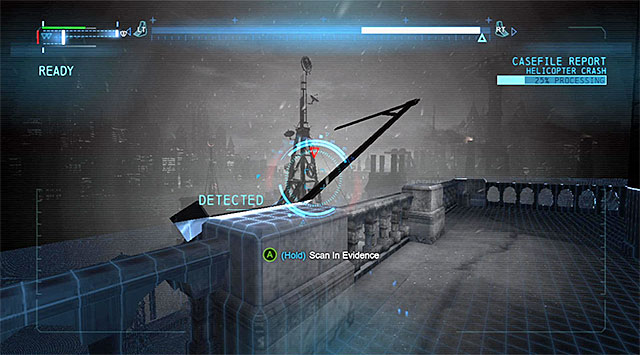 The balustrade
Disable the evidence scanner for a moment a use the hook again, to reach the balcony above, where you have found the burning flare. Scan the area next to the balustrade, thanks to which you will work out an improved reconstruction.
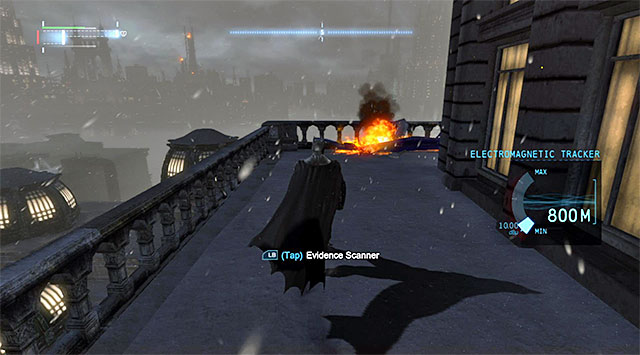
The next step is to find the chopper's tail rotor. Rewind and fast forward the reconstruction using the appropriate keys/triggers. Performing this action will allow you to locate the element shown in the screenshot, which you are occupying at the moment (walk around the main building from any side). Scan the rotor and learn the results of the investigation again.

Now you need to locate the places that the shot has been fired from. Return to the area on the upper balcony, where you have been scanning a bit earlier, climb onto the balustrade and star the process of modifying the reconstruction again. Thanks to this you will notice the red line. Glide along that line, thanks to which you will reach the rooftop of one of the lower buildings, shown in the screenshot.
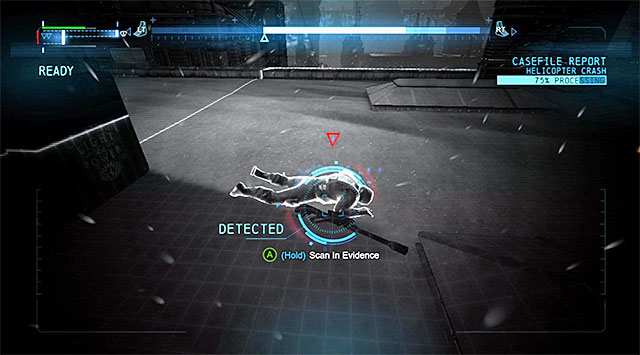 The dead SWAT team member
Enable the evidence scanner again and scan the SWAT team member's corpse. Performing this will lead to an unexpected conclusion, i.e. that the responsible for the chopper crash is, most probably, Deadshot himself.
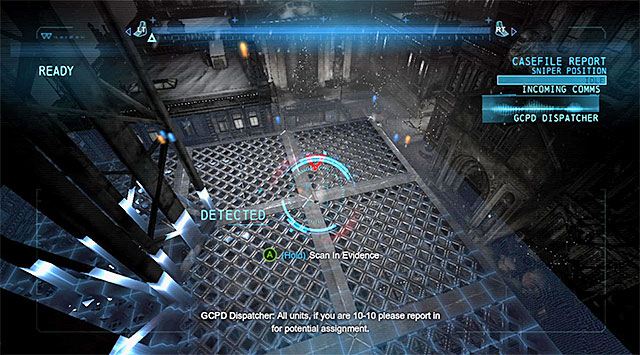 You need to follow the red line again
The next action to perform during this investigation, is to locate the spot from which Deadshot took the shot. Keep the detective vision turned on and follow the line that shows the trajectory of the bullet. Along your way, use gliding and the hook to your aid which will ultimately take you to a small catwalk.
The bullet case on the catwalkScan the bullet case on the catwalk and find the radio frequency written down on it. Finally, use the Cryptographic Sequencer, set the crosshair in the orange circle and hold down the key/button shown in the screenshot to decode the transmission. Listen now for the conversation with Deadshot.
Note! At this point, the game will unlock an additional side-mission connected with Deadshot. You can find its description in the chapter entitled Most Wanted and although you do not need to take to it straight away, it will be possible to complete it without any additional preparations.
Circumstances of unlocking the case: You may get the opportunity to complete this mission while freely exploring the game world, especially the Burnley district. It should unlock automatically right after you have visited the police morgue, and left the sewers after you complete the Scan the corpse in the GCPD morgue mission (you will receive a notification on the screen, and there will appear a new entry in Batman's journal).

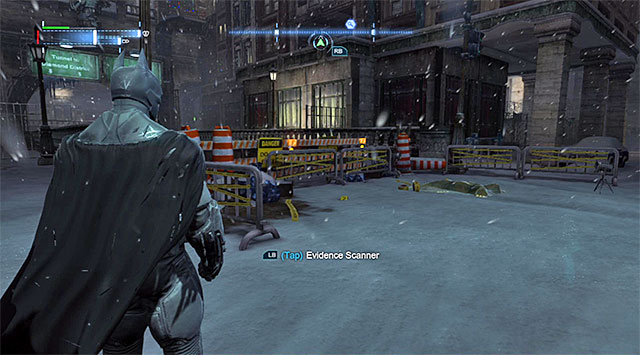
The starting point for this investigation is the crime scene shown in the above screenshots, located in the central part of the Burnley district, to the North of the police precinct. After you get there, listen to Batman's commentary and activate the evidence scanner.
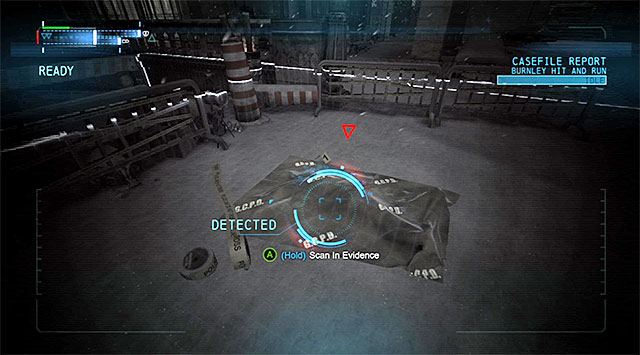 The corpse
Start by scanning the corpse of the man who was run over with a car, thanks to which you will learn that he was a policeman.
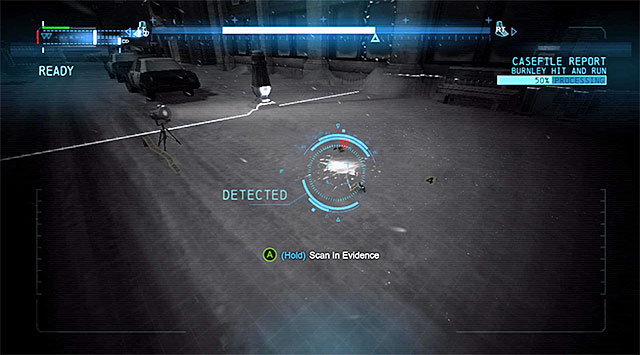 The trace at a distance of the corpse
Take a look around the corpse for traces of blood and scan them, which will result in the preparation of the initial version of events. Another blood trace can be found a bit further and it will help you determine a more detailed version.
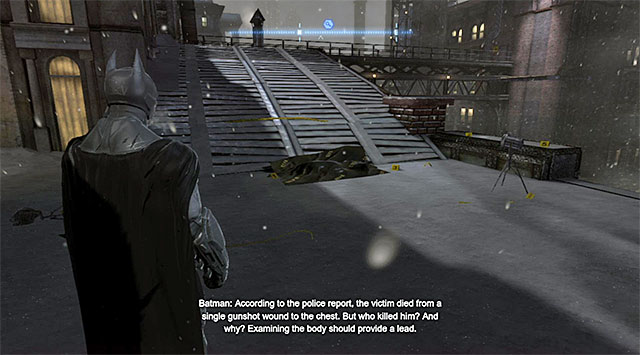
You now need to use keys/triggers to manipulate the reconstruction playing process. Your task is to determine the possible route of the car that ran over the man. This will allow you to locate the trace shown in the above screenshot, which can also be scanned (you need to hop over the barriers to get there). Thanks to having scanned the trace, Batman will determine that the car belonged to a corrupt policeman.
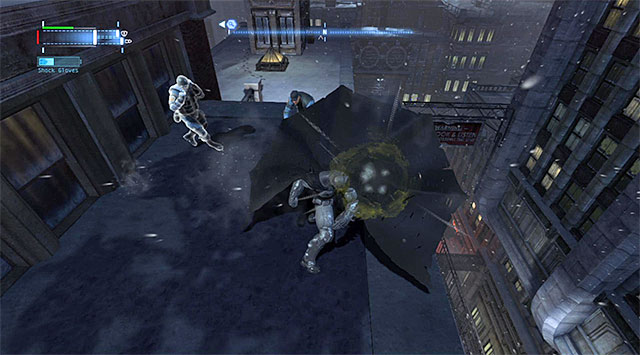 Watch out for the enemy with shield and do yourself be pushed off the roof
This is not the end yet, because you need to arrest John DeMarco, i.e. another SWAT member, responsible for the murder. The man that you are looking for is on the rooftop of one of the buildings in the [Burnley] district, to the North-east of the crime scene. Since John is surrounded by his allies, you need to be careful, especially that the roof where you are going to fight is small.
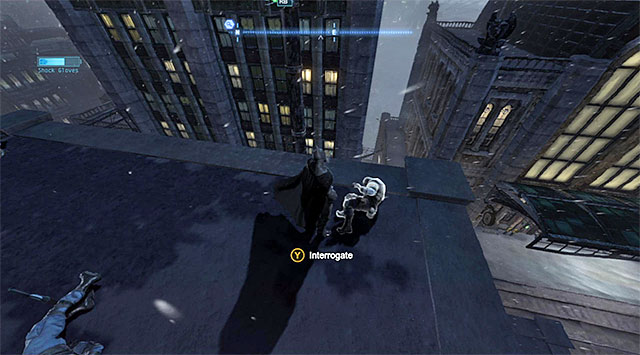 You need to interrogate the policeman who murdered his colleague
DeMarco himself is also using armor so, stun him with the cape or use other attacks that are effective while weakening the armored enemies. Leave this man for the end because there will appear an option to interrogate the policeman after you have weakened him sufficiently (by pressing the appropriate key/button). DeMarco will admit to his deed and the interrogation will end.
Circumstances of unlocking the case: This case may become available while you are exploring the game world freely, around The Amusement Mile district (there will appear an appropriate piece of information on the screen, and a new entry in Batman's journal).

You start this investigation in the crime scene shown in the above screenshot., which is located in the Southern part of The Amusement Mile district. After you get there, listen to Batman's commentary and turn on the evidence scanner.
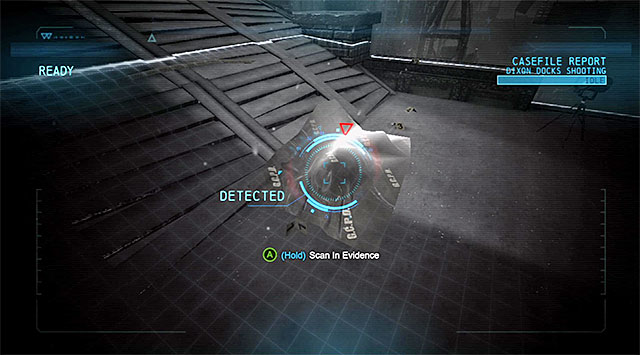 The corpse
Start by scanning the man's corpse to determine, as a result, that he was a reporter. Repeat the scanning, thanks to which you will watch the preliminary version of the events.
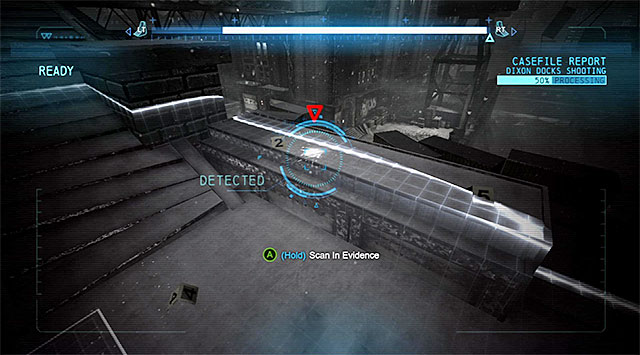 The DNA trace
Now, scan the DNA trace located right next to the edge, which will allow you to expand the current reconstruction by a new piece of information.
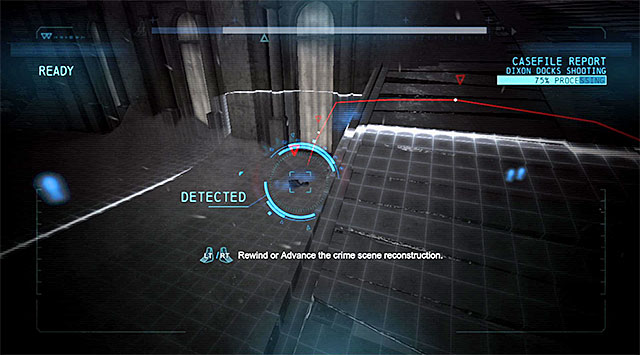
Finally, towards the end of the examination process, you will have to follow the red line that shows the trajectory of the photo camera that belonged to the journalist. To do that, use the appropriate keys/triggers, which will manipulate the reconstruction playing process. The device that you are looking for is lying on the ground, close to the corpse (the above screenshot) and you need to scan it to determine the murderer's personals.
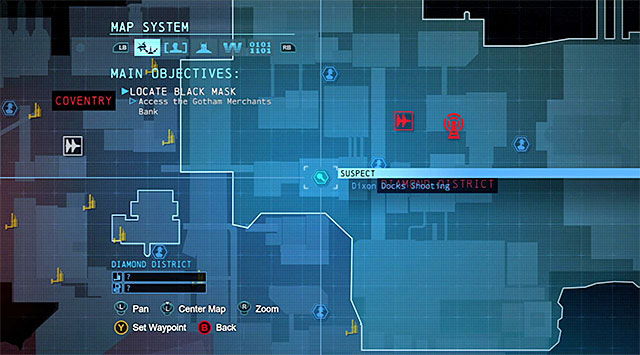
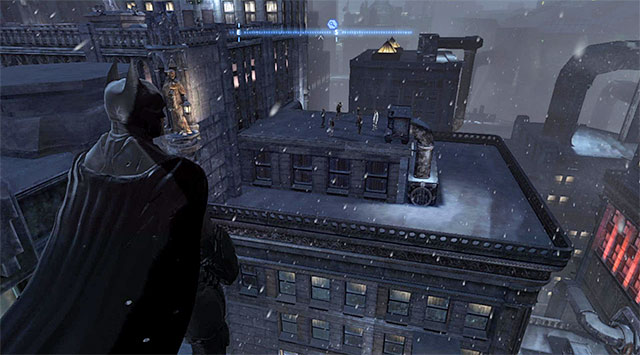
This is not the end yet, because you need to arrest Chucky Berks, i.e. the man responsible for committing the murder. He is staying on the rooftop of one of the buildings in the Diamond District in the South-Eastern part of the city. Since Chucky is surrounded by a few goons, it would be a good idea to attack them by surprise to eliminate one of the bandits right at the outset.
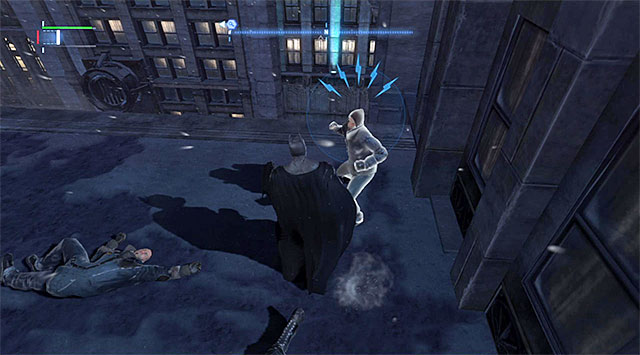 You need to interrogate Chucky
After the fight proper starts, start attacking all of the enemies, including Berks. Eliminating all of them will not be too demanding, fortunately. Leave the murderer for the end, because there will appear the option to interrogate him after you have weakened him sufficiently (pressing the key/button displayed on the screen). Chucky will admit to have committed the crime and the investigation will be over.
Circumstances of unlocking the case: This case may become available during the free exploration of the game world, in the Coventry district (there will appear an appropriate notification on the screen and the first entry, connected with the crime, in Batman's journal).
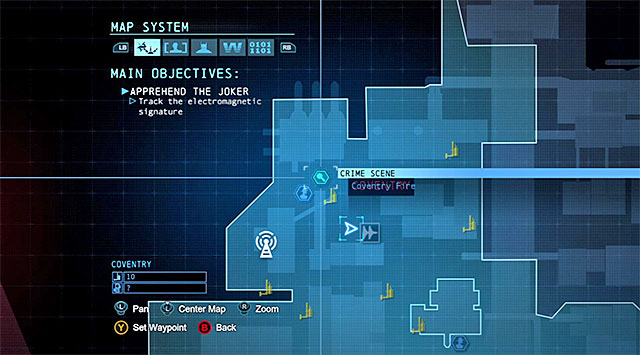
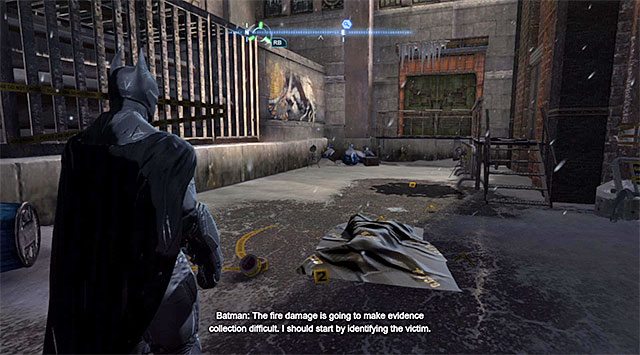
This investigation starts in the location of a recent fire shown in the screenshot), which is located in the North-Western part of the Coventry district. After you get there, listen to Batman's commentary and turn on the evidence scanner.
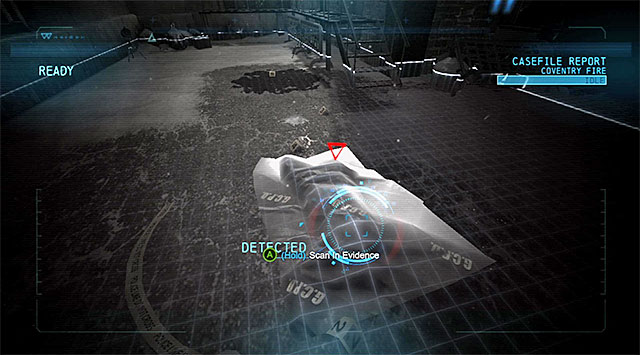 The corpse
Start by scanning the corpse to determine the murdered person's identity on the basis of fingertips.
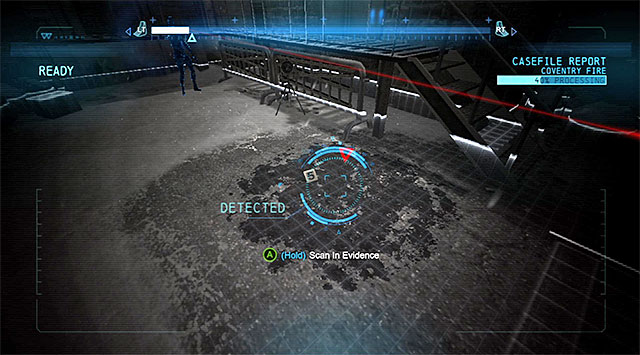 The fire site
Remain at the corpse and scan the DNA trace next to it, which will lead to playing of the preliminary version of the reconstruction. The next step is to scan the area where the fire started.
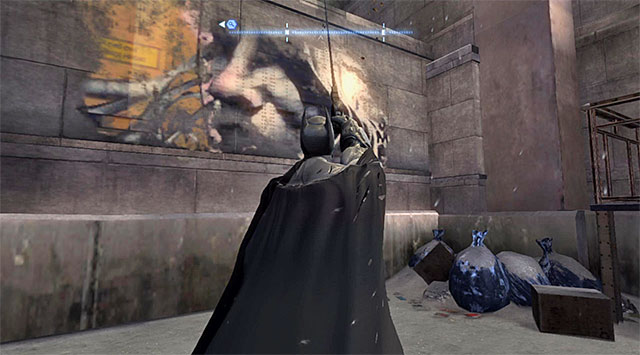 The wall between you and the next portion of traces
You now need to manipulate the playing of the sequence using the appropriate keys/triggers and by following the red trace. Doing this will allow you to determine that you need to climb over a nearby wall using the hook.
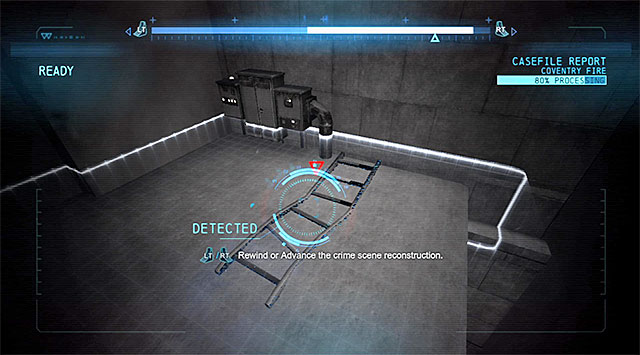 The ladder
After you reach the ledge above, you need to find another trace on one of the walls. Finally, scan the ladder on the ground, thanks to which you will identify the murderer.
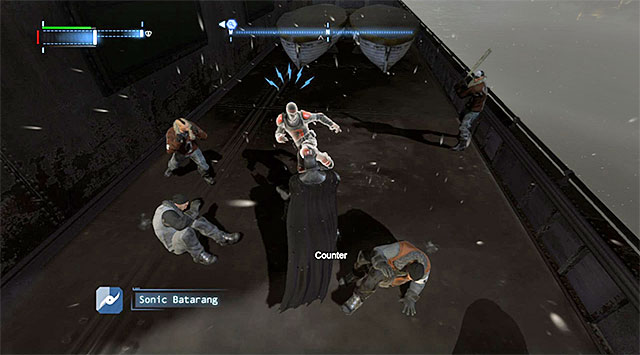 Watch out for the martial artist
This is not the end yet, because you need to arrest Quing Lu, i.e. the hitman responsible for the murder. He is staying aboard the Penguin's ship [The Final Offer], i.e. in the North-Eastern corner of the map. After you get there, access the ship using the hook. Start attacking the characters staying there. You need to take precautions because Quing Lu is a martial artist. As you can probably remember, this kind of enemies are capable of countering some of Batman's attacks and, furthermore, they usually land two blows at a time, which forces you to be more careful while countering these blows.
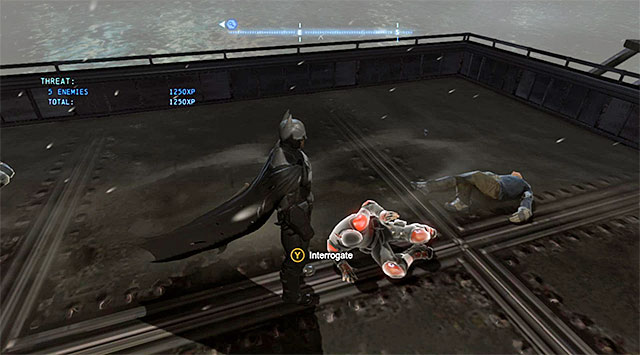 You need to interrogate the hitman
Leave the murderer for the end because there will appear an option to interrogate him, after you have sufficiently weakened him ( pressing the key/button displayed on the screen) Quing Lu will admit to having perpetrated the act and the investigation will be over.
Circumstances of unlocking the case: This case becomes available while exploring freely the game world, and more exactly The Amusement Mile (there will appear a notification on the screens and the entry concerning the mission will appear in Batman's journal). Most probably, this mission unlocks after the completion of the game.
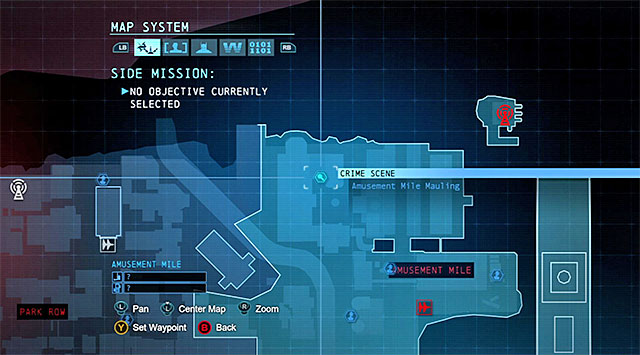
The location where the investigation starts is the crime scene shown in the screenshot, which is located in the Northern part of The Amusement Mile district, close to the Gotham Casino entrance. After you get there, listen to Batman's commentary and activate the evidence scanner.
 The corpse
Start by scanning the corpse, thanks to which you will determine the victim's identity. Remain here and scan the DNA traces, so that Batman can work out the preliminary version of the reconstruction.
You now need to start using the keys/triggers to manipulate the replay process and follow the red line. This will allow you to determine the place that you need to jump down in (the screenshot). After you land in the next location, activate the evidence scanner again and scan the region of the fan, thanks to which you will analyze fingerprints and identify the murderer.
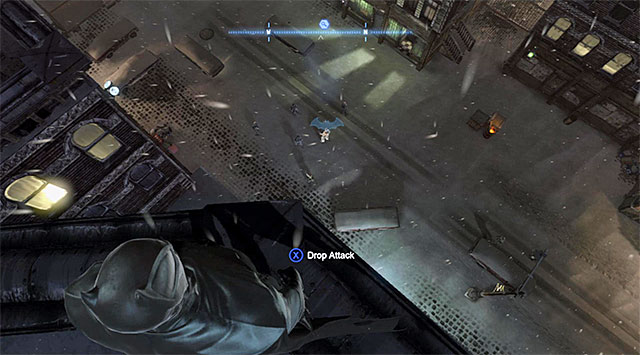
This is not the end, yet because you still need to arrest Andrew Carter, i.e. the perpetrator of the murder. You can find him in the central part of the Park Row district. Since Andrew is surrounded by several allies, it would be a good idea to plan on the attack.
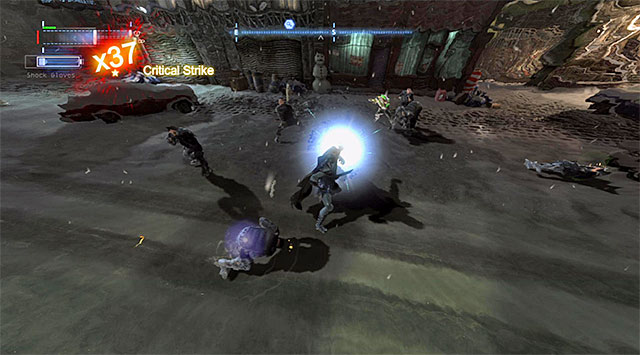 Leave the murderer for the end and deal with his bodyguards first
After the fight proper starts, attack all of the enemies. As you have probably figured out, Carter is an "elite" enemy, which makes it even more considerate to leave him for later and deal with him with a series of quick blows or the shock gloves. As far as the remaining enemies are concerned, they will not be too difficult to defeat but, you should make sure that they do not get the chance to use guns. After you have sufficiently weakened Carter, there will appear an option of interrogating him (by pressing the appropriate key/button). Andrew will admit to having committed the murder and the investigation will close.
Circumstances of unlocking the case: This case may become available while freely exploring the game world, and more precisely the regions of the Park Row district (there will appear a notification on the screens and the entry concerning the mission will appear in Batman's journal). This mission will probably unlock after you have completed the game's campaign mode.
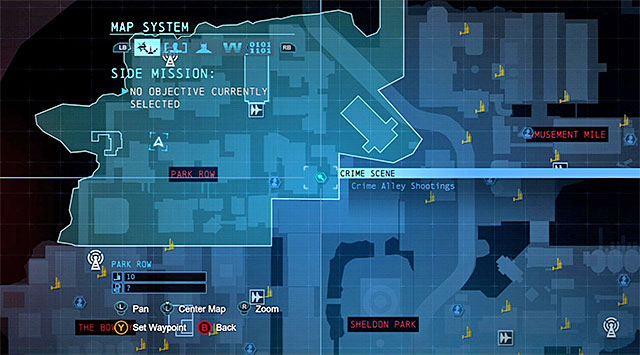
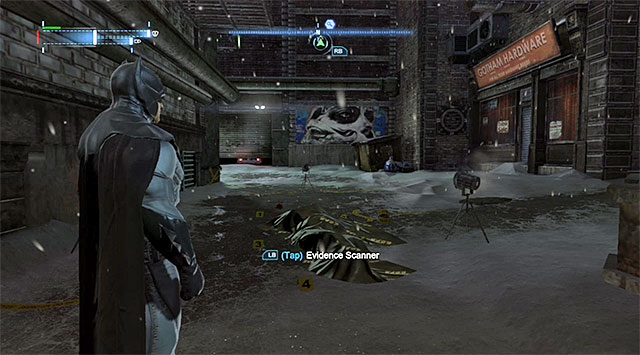
The location that this investigation starts in, is the crime scene, shown in the screenshot, in a small alley in the South-Eastern part of the Park Row district. After you get there, listen to Batman's commentary and turn on the evidence scanner.
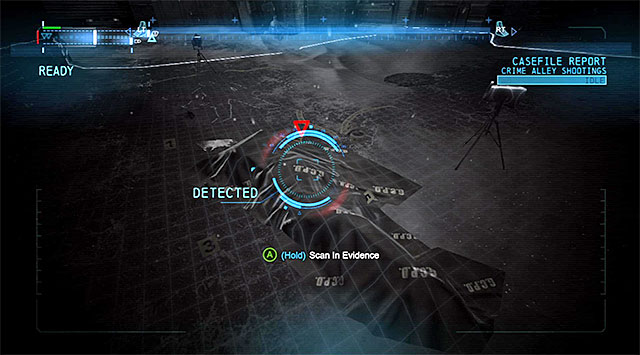 The corpse
First of all, you need to scan the corpses of the two victims, which will allow you to identify them. Remain here, scan the nearby blood trace and prepare the preliminary reconstruction basing on that.
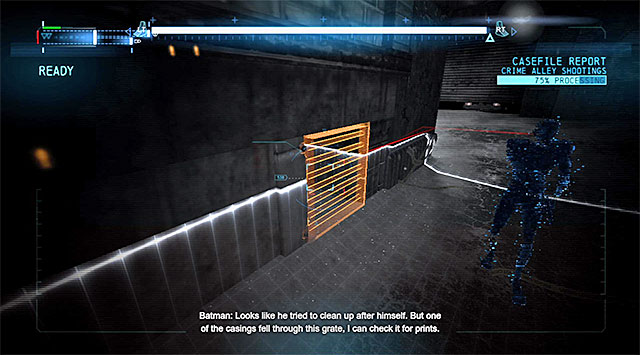
You now need to press the keys/triggers to manipulate the reconstruction replay process and follow the red line that shows the bullet's trajectory. This will lead you to the venting shaft grate shown in the screenshot. Turn off the scanner, rip off the grate, activate the detective vision again and scan the bullet case that you find here.
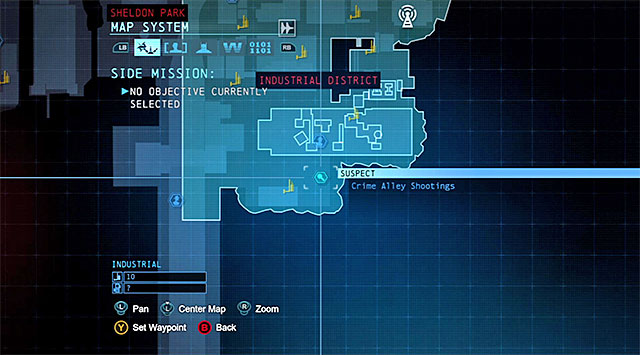
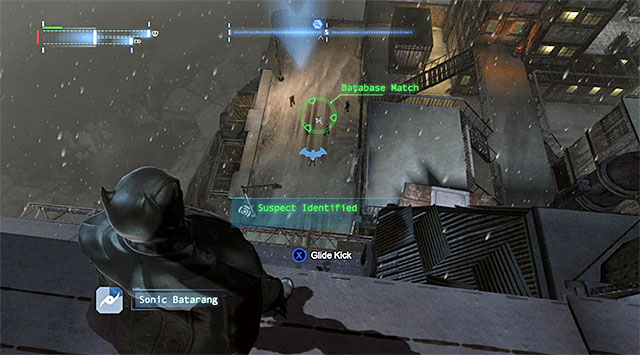
Batman will automatically guess that the victims have been murdered by Ian Chase and you will have to arrest him. The murderer is in the southern part of the Industrial District. Since Ian it would be a good idea to plan the attack beforehand, so that you eliminate one of the bandits right at the outset.
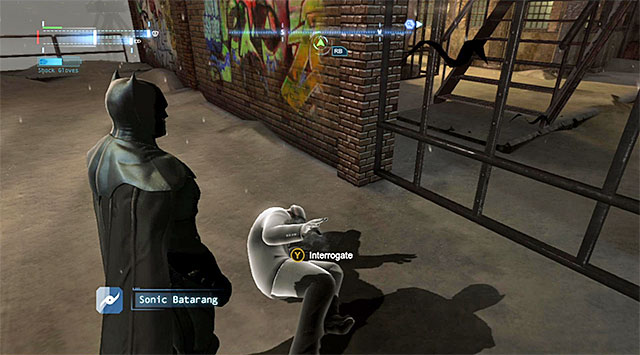 After the fight, interrogate Chase
After the fight proper starts, start attacking all of the enemies, including Chase. Fortunately, eliminating the enemies will turn out not to be too demanding. Leave the murderer for the end, because there will appear an option to interrogate him after you have weakened him sufficiently (press the key/button that appears on the screen). Although Ian does not confess, the case will officially close.
In each of the seven major city districts (with the exception of Sheldon Park and the Gotham Pioneers Bridge), there is a communications tower (the red icons on the world map). All of these are inactive at first and putting them back online is connected with one of the side missions, where you need to deal with Enigma, one of the most famous villains in Gotham.
In most cases, putting a tower back online is not that easy, because Batman first needs to deal with one or several groups of bandits, and also find a way to get to the control panel, in order to hack into the system. In spite of these handicaps, I recommend that you turn your interest to activating, at least, some of the comms towers soon after the game starts. This is so, because activating a tower activates two other items in that district. These are:
Note - some of the towers (e.g. the one in the Amusement Mile ) may be activated only after you obtain the required gadgets so, do not worry if you will not be able to achieve success at first.
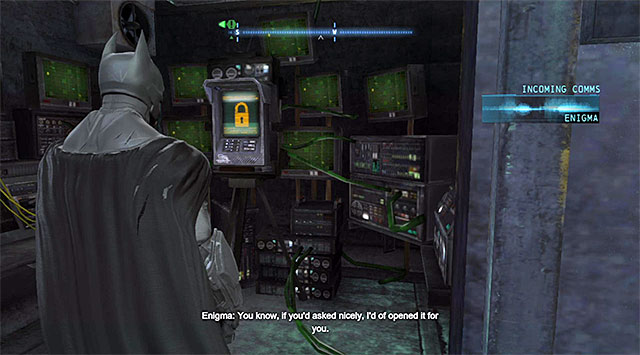 The moment of activating the Coventry district tower
The communications tower in the Coventry district can be activated during the completion of the Deactivate the jamming signal mission that belongs to the game's main storyline. This means that there is no way to miss it and, to learn more, see the first chapter of this guide. At the same time, it is worth pointing out that completing this mission gives you access to a side mission connected with Enigma (it has been described in the Most Wanted chapter).
 The moment of reactivation f the tower in The Bowery district
The tower in The Bowery district becomes available after you start the game although, you lose the access after you complete the Deactivate the jamming signal main mission. As a result, you need to make it available again and, since the unlocking is a part of the main storyline, to learn more, you should see the description of the Deactivate the jamming signal #2 mission.
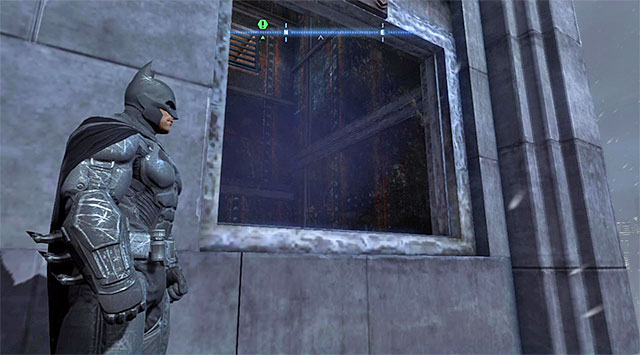
I recommend that you approach the tower in Burnley from the South. Ignore the enemies occupying the balcony above and use the detective vision to locate the window shown in the above screenshot. Unlock your passage by using, of course, the explosive gel.

Jump inside and use the Cryptographic sequencer on the control panel on the left, which will result in determining the password shown in the above screenshot.
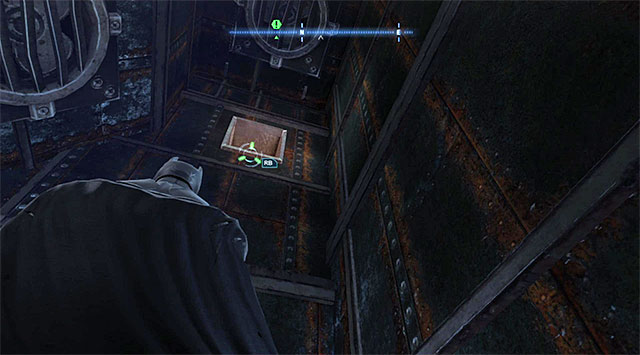 The venting shaft
Use the claw now, to rip off the venting shaft grate below the ceiling. After you succeed, use the hook to grab onto the shaft and follow the venting shaft.
NOTE- If Batman does not want to climb into the shat, this means that you have fallen victim to one of the more serious glitches in the game. In such a situation, try installing the most recent patch or find out, e.g. on the You Tube, about a smart way to take advantage of another glitch in the game (Batman Arkham Origins Burnley glitch fix), thanks to which the Batman will land on the rooftop and will be able to activate the comms tower.
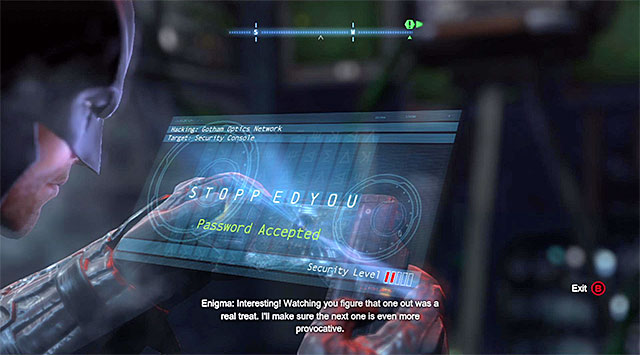
After you reach the shaft's final part, force the grate open, as a result of which you will reach the rooftop of the building with the comms tower. Open the reinforced door, approach the console and use the Cryptographic sequencer again. Just like earlier, you need to determine the correct password (the screenshot).
 One of the snipers that occupy the surrounding rooftops
I recommend that you approach the tower in the Diamond District from the Southern, or South-Western side. You need to be very careful here, because this area is being under scrutiny by, among others, several snipers. Try to eliminate, in the first place, those of the snipers that are occupying the rooftops around the one with the comms tower on it. Do this while attempting to stay hidden.
 Try eliminating the enemy with gun as quickly as possible
Only then, focus o the bandits occupying the main balcony. It is worth using the disruptor here, to deprive some of the enemies of the possibility to use the guns, and also eliminate, at least, one of them using a glue grenade. Attack the enemies and try to knock the guns off their hands, as quickly as possible (in life-threatening situations, also use the smoke pellets). After you have cleared the upper level, jump down and deal with the rest of the bandits, who will not be too much of a challenge anymore.
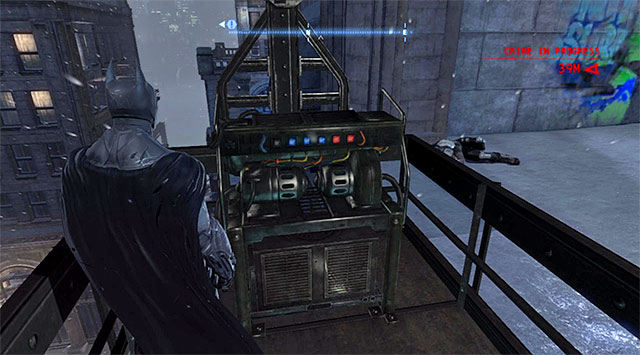 The elevator
After the fights finish, locate a small elevator adjacent to the building's external wall. Jump onto the catwalk and set the elevator into motion, by charging the generator with the shock gloves
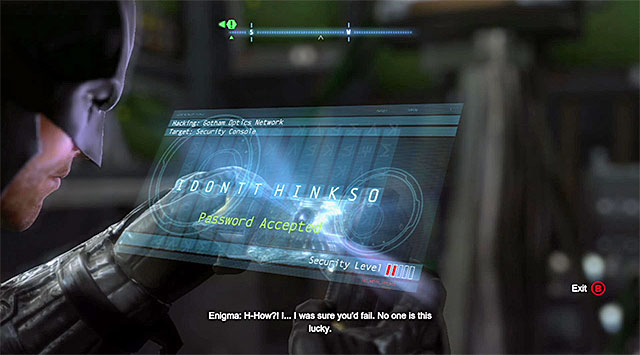 A destructible wall
Wait for the elevator to come down, turn towards the weakened fragment of the wall and spread the explosive gel here. After you detonate it, use the disruptor, which will disable the jamming device.
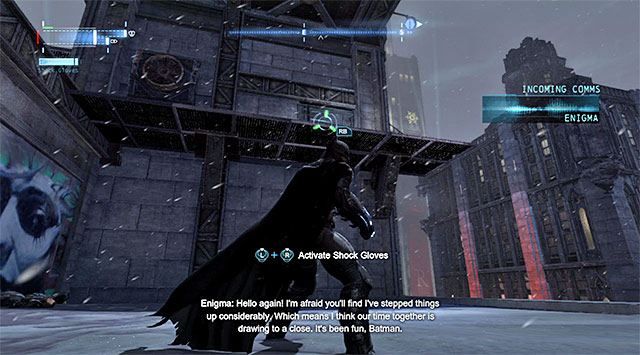
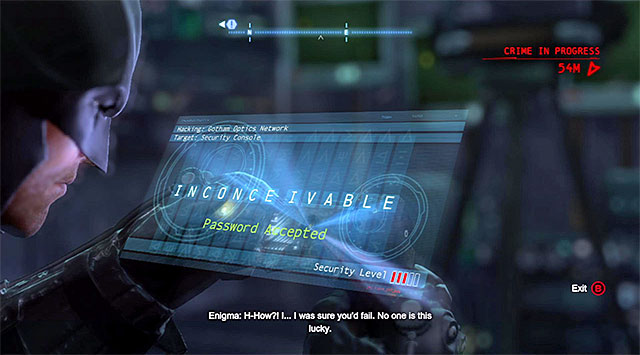
Return to the higher level and make it over to the balcony shown in screenshot 1. Open the reinforced door, select the Cryptographic Sequencer from the inventory and solve the hacking minigame, which will result in the determining of the password.
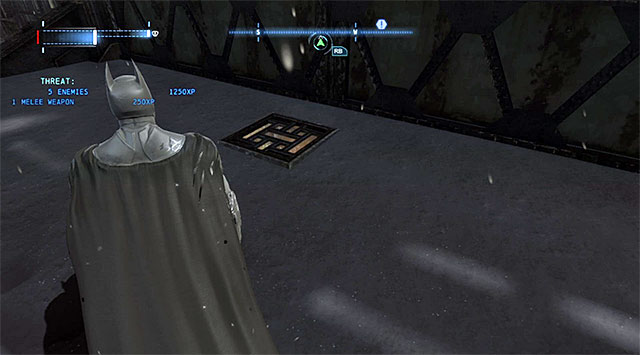 The mouth of the venting shaft
After you reach the vicinities of the comms tower in the Park Row district, locate the bandits staying on one of the big balconies. It is a good idea to sabotage, first, the guns of two of the enemies (disruptor) and stat fighting the pretty easy fights afterwards. Right after the fights, locate the grate of the venting shaft, jump inside and start squeezing through it.
 The fuse box
Do not attempt to open the reinforced door straight away, because there is the electric current flowing through it. Select the remote control batarang from the inventory and turn left. Throw the batarang, make sure that it comes into contact with the discharges and direct it towards the nearby fuse box.
You may now open the reinforced door. Select the Cryptographic Sequencer from the inventory and solve the hacking minigame, to determine the password (the screenshot).
The tower has been erected on a small isle neighboring the Amusement Mile. Still, you can reach it with no problems at all. Explore the lower part of the isle to find the tunnel shown in the above screenshot. Use the glue grenade here to create a floating platform. Jump onto it and start to move, using the claw on the interactive anchor points.
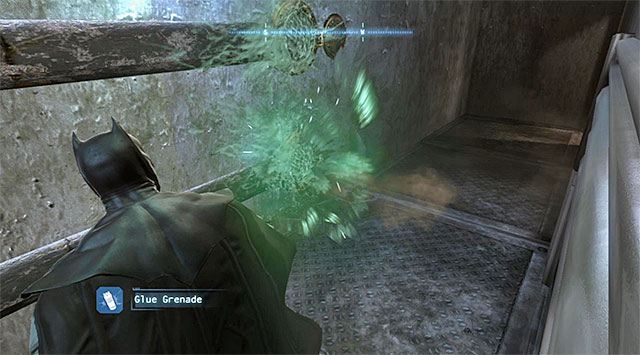 Stop the leaking of the steam
Jump up to reach a small ledge, turn right, open the door and grab onto the ledge above, using the hook. Again, you need to use the glue grenades here, this tie to seal two pipes and stop hot steam from leaking.
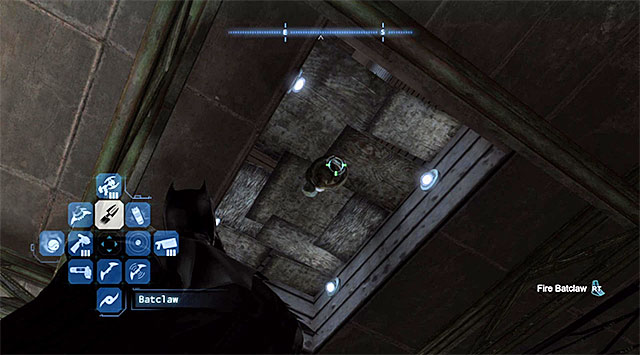
Enter the room with a small group of bandits in, start fighting and try preventing your enemies from using guns and knives, to the extent it is possible. After the fights, examine the ceiling shown in the screenshot and cause it to collapse, using the claw on the interactive anchor point.
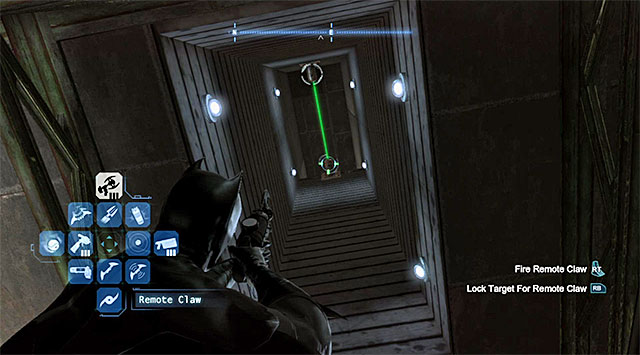 Extend the rope and pull yourself to it, using the hook
Note that you have unlocked access to the vertical shaft. Select the grapple from the inventory and extend the rope. After you do that, use the hook to reach the rope. Go ahead and keep cautious in the corridor with another group of criminals, because one of them is packing a gun. Also, avoid coming into contact with the discharges, although you can push the enemies into them to inflict additional damage to them.
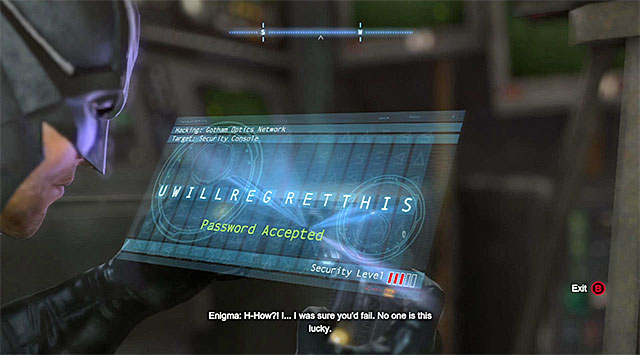
Continue along your path to the top level and open the reinforced door. Use the Cryptographic sequencer on the control panel, which will start the hacking minigame and let determine the correct password (the screenshot).
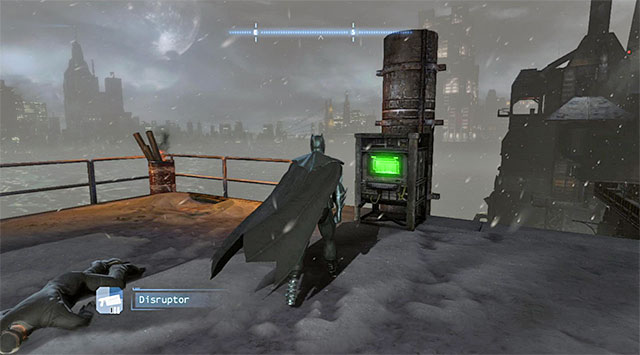 The first relay station
After you get into the tower region in the Industrial District, start by dealing with the enemies on the balcony above. Since one of them is equipped with a gun, it is a good idea to use the disruptor, glue grenade or shock detonator. After you are done with them, destroy the first relay station.
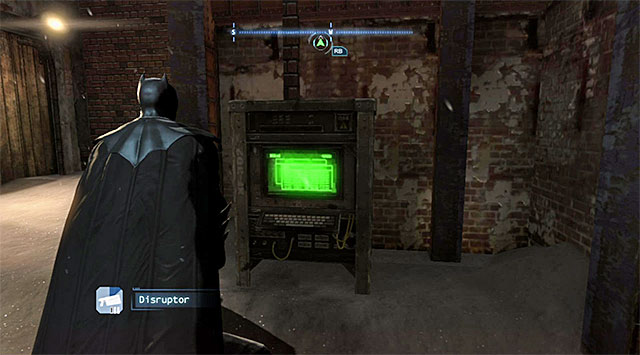 The second relay station
Jump down to the very bottom and start fighting the second group of bandits, while keeping an eye on the actions of the ones with guns. Just like earlier, you need to destroy the relay station after you are done.

Return to the platform where you have fought for the first time and note that there are no discharges anymore, thanks to which you can reach the reinforced door. Open the door and hack into the control panel, using the Cryptographic sequencer, and determine the correct password (the screenshot).
You can set out to find the Network Relays after you have unlocked the Enigma's side mission, which has been described in the Most Wanted chapter. I recommend that you start searching after you have activated all seven of the comms towers described above, because the locations of the active relays will then be added to the world map and, as a result, you will be easily able to mark them as your destinations.
In each of the main city district, there are 10 network relays to destroy. I recommend that you use the above map here, as well as the side missions menu (Enigma). Destroying each one of the relays is rewarded with 2000 experience points, and destroying the entire network of relays (10 relays) in a given district, is rewarded with a bonus of 15000 experience points.
Note- do not worry if a group of relays temporarily disappears from the world map. This is the manifestation of one of the minor glitches in the game. If this is what happened, you can still destroy the relays. You will only have problems marking them as your destination on the world map.
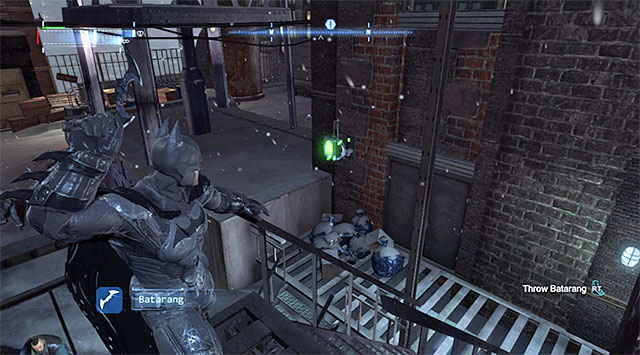 All of the relays should be destroyed with batarangs
After you reach each new relay, you need to do the same thing, i.e. select the batarang from the inventory and use it to destroy Enigma's device. Note - if there is a group of enemies around the relay, and you do not want to fight them, land on some ledge above them and take advantage of the considerable range of batarangs.
You can start hunting the data handlers down after you unlock Enigma's side mission, which has been described in the Most Wanted chapter. The plan is that you interrogate Enigma's men to obtain information about the whereabouts of the Enigma Datapacks. As a result, it will be easier for you to locate collectibles although, to find the items, you can also use this guide.
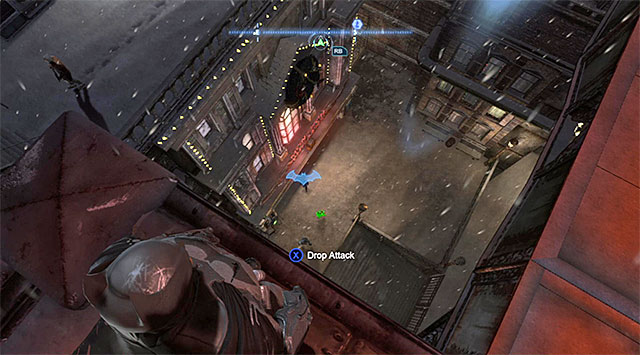 It is easy to find the handlers but, each time, you will have to win a short fight
Almost every data handler is surrounded by several regular bandits so, you need to be prepared to handle a simple fight. Each time you are over with this part, interrogate the handler, thanks to which there will appear new markers on the world map, pointing you to the collectibles themselves.
Note - if you have problems locating an individual handler, you should consider hunting him down some time later into the game.
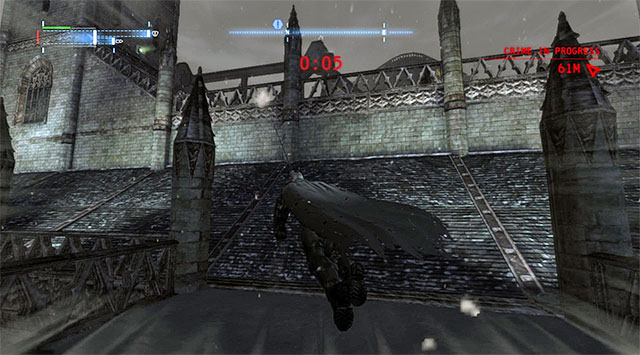 An example collectible
The Enigma Datapacks are the main category of collectibles in Batman: Arkham Origins. Just like in the case of the previous installments, some of the collectibles are, unfortunately, well-hidden. What is even more, some of the datapacks can only be collected after you have unlocked certain gadgets (e.g. shock gloves or the glue grenade). As a result, you will probably find this guide handy, and the more detailed information concerning the whereabouts of the less-accessible collectibles have been included on the pages to follow.
Note - if you want to make it easier to find datapacks, it is advisable that you interrogate all 20 of the data handlers before you get about finding the datapacks. This will result in the tagging of the general whereabouts of the collectibles, on the world map. You will then be able to use this to your advantage while planning on longer searches, as well as at searching for the collectible in the individual spot.
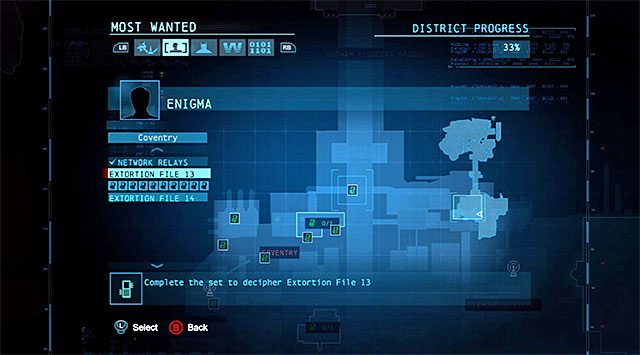 The Enigma's side-mission window informs you of the progress in finding the individual datapacks.
In total, there are 200 datapacks to find and, for finding each one of them, you are rewarded with 2000 experience points. Furthermore, the packs have been put into groups of ten, and the best way to keep track of your progress, in finding the files with extortion data, from the level of the side missions menu, i.e. the menu of the side mission connected with Enigma. Collecting all 10 of the datapacks from a given group rewards you with two things - 10000 experience points, and unlocking the Extortion Files. It is an audio recording, concerning one of important NPCs that appear in the game (e.g. the Penguin), which you can replay at any moment.
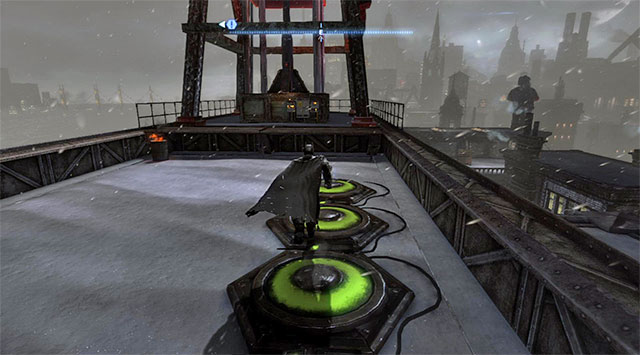 You need to run over the pressure plates before they deactivate again
Land onto the small rooftop neighboring the communications tower, to find here a chest with a collectible in it, a generator and three pressure plates. Start by using the Shock Gloves to charge the generator. You now need to return left, quickly, and run over all of the pressure plates before they deactivate again. You may now turn and use the claw to grab onto the Datapack at a distance.
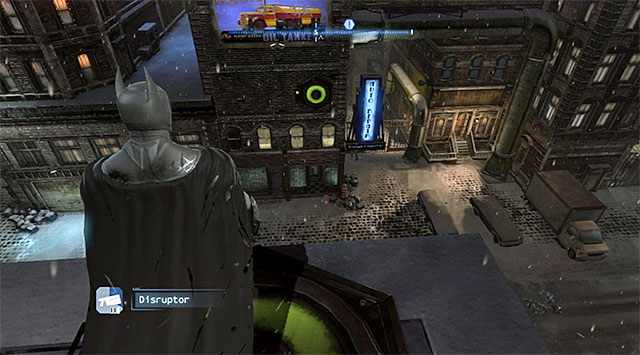
It is quite difficult to obtain this collectible. Start by positioning yourself on the pressure plate on the roof, right above the chest (the screenshot).
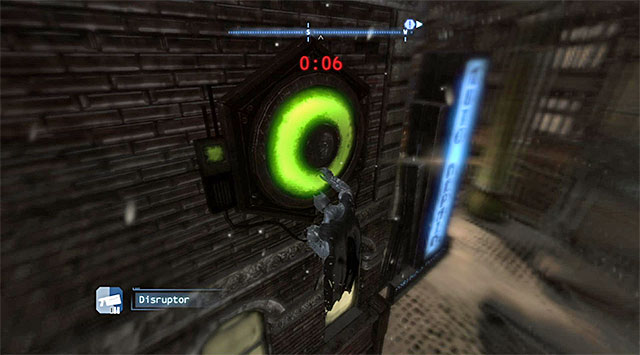
Turn towards the building opposite the street and glide towards that building. In the mid-flight, additionally hold down the attack button and plan the flight in such a way, so as to reach the pressure plate on the building's wall. If you have done everything properly, Batman should lean against the wall for a moment (the screenshot). For a fraction of second, release the flight button, thanks to which your character will bounce off the wall and glide towards the last one of the pressure plates. You need to behave here in the very same way as earlier, i.e. bounce off the wall properly. Land and collect the Datapack from the chest.
Use the hook to reach the roof's main partLocate the chest attached to the church tower, as well as a pressure plate on the ledge below. Land onto the plate and use the hook to pull yourself towards the upper part of the church's rooftop. Just as quickly, use the claw to grab onto the Datapack before the chest shuts again.
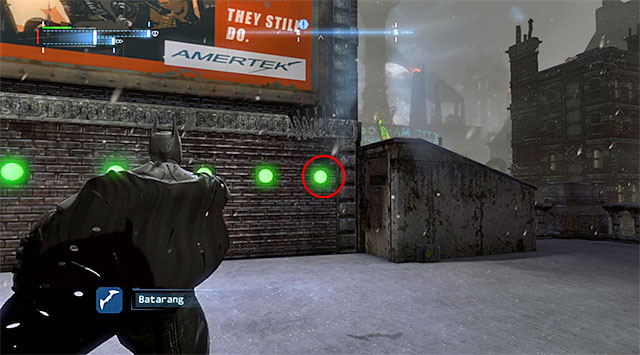 You need to hit the first button on the right, right at the moment at which it activates
Locate the row of five button neighboring the collectible. Take a moment to learn the order in which the buttons go on, and hit the rightmost one, with the Batarang at the moment at which it activates. You may now collect the Datapack from the chest.
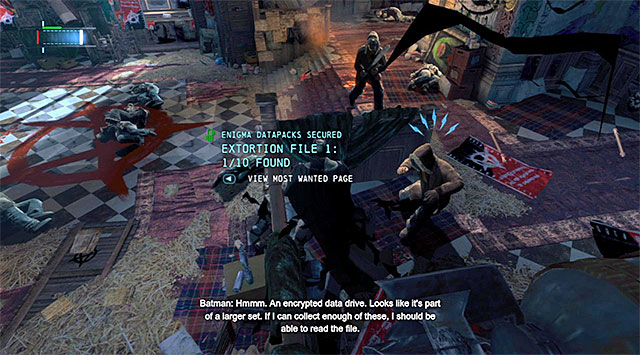 The collectible is in the main courtroom, where you fight Anarky, among others
You visit the Abandoned Courthouse while completing the side mission connected with Anarky, but you can go there at any moment throughout the game. Do not attempt taking through the main entrance, because it is unavailable. Instead, take the Northern entrance located at the building's back and deal with the nearby bandits, if necessary. The Datapack can be found in the main courthouse, to the right of the stairs.
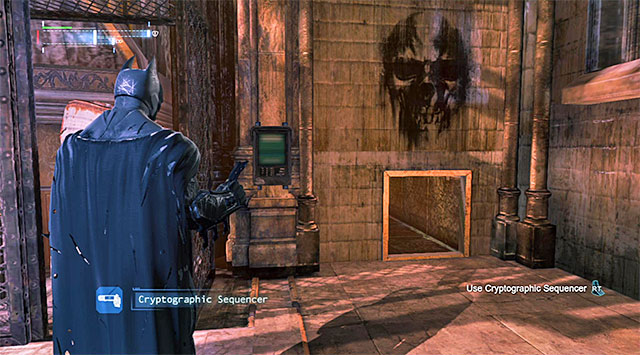
You visit the Church, among others, while completing the side mission connected with the Black Mask, but you can go there at any moment throughout the game. Deal with the nearby bandits, or walk around them, take the main entrance. Go towards the altar and find the venting shaft access shown in the above screenshot. You can find the Datapack inside the shaft.
For finding all 10 Datapacks, you receive the audio file connected with Commissioner Loeb.
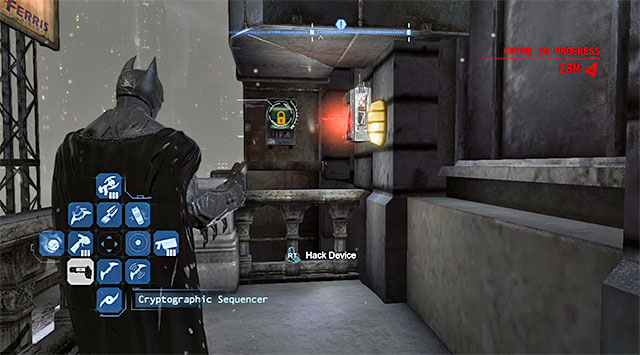 The place where you find the chest and the control terminal
What you are going to have the most problems with, is locating the collectible. You need to land on a small balcony, from which you can see two objects attached to the wall - a chest and a control terminal. Use the cryptographic sequencer onto the terminal to determine the password (QUANDARY). You may now collect the Datapack.
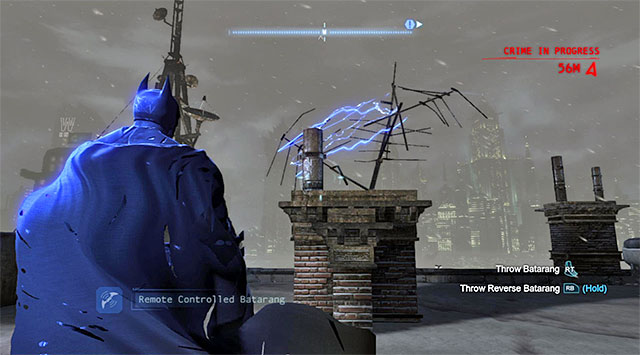
Land onto the rooftop with the chest and the generator on it. Start by using the Shock Gloves on the generator, which will result in its being activated temporarily. Quickly, select the Remote Controlled Batarang from the inventory, turn right and throw it into the discharges shown in the screenshot, which will charge it. You only need to direct the batarangs into the fuse box neighboring the chest with the collectible, and collect the Datapack.
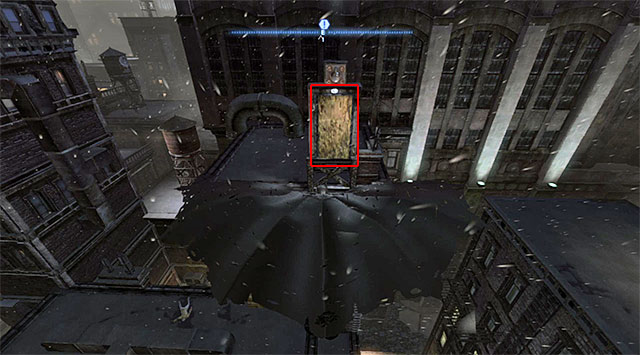
Start to the West of that collectible, jump off the Ace Chemicals rooftop and start to glide. Fly towards the weakened fragment of the wall, shown in the above screenshot, to cut through it. Afterwards, take the Datapack.
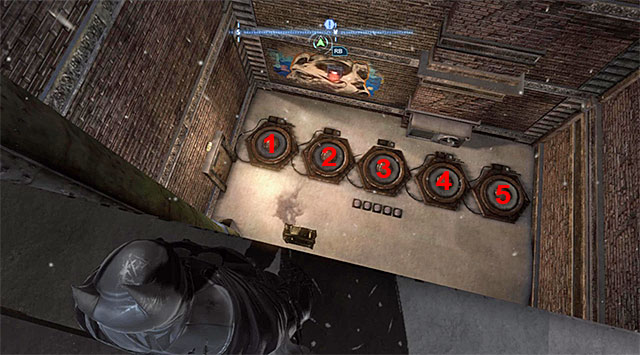
Locate the area with the generator, and the five pressure plates, shown in the above screenshot. Start by charging the generator with the Shock Gloves. You now need recreate the pattern of the green lights so, walk over the pressure plates (counting from the left to the right) 1, 3 and 4. You can now use the claw to collect the Datapack.
Do not follow the map's readings, because the collectible is in the sewers, i.e. in the location that you explore for the first time while completing the Locate the tracker placed on Bane main mission. By way of reminder, the entrance to the Park Row - Sewers is in the Western part of the Park Row district (the above screenshot) and you can get there by taking the door located on the right of the blocked off tunnel.
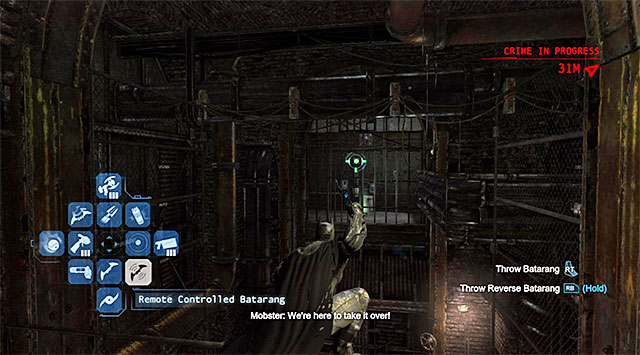
Approach the large vertical shaft shown in the above screenshot, and start by throwing the remote controlled Batarang. Send it towards the hole in the fence and make it hit the green button.
 Walk over the rope
This is not the end, yet, because you additionally need to extend a rope, using the grapple and jump onto it, using the hook. Walk over the rope to reach the Datapack there.
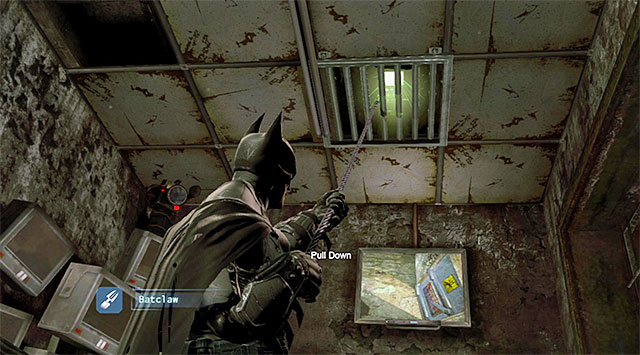
This collectible is in the Bane's Field HQ located in the sewers, which you first visit while completing the Locate the tracker placed on Bane main mission. Read the description of that main mission, including the description of Datapack 9, to learn how to enter the sewers. After you get into the correct HQ, explore the small office in its Southern part and rip off the grate shown in the screenshot. You can now use the claw, this time to obtain the Datapack.
For finding all 10 Datapacks, you receive the audio file connected with Commissioner Loeb.
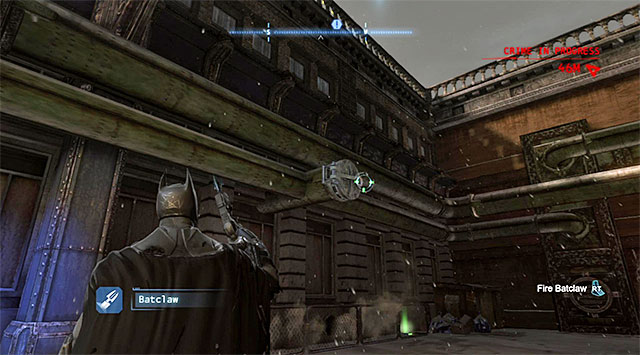
Locate a small yard with a cage and two pipes, with hot steam escaping out of them. Examine the area to the left of the cage and use the Shock Gloves on the local generator. This is not it, yet. You still need to use the claw to open the manhole above. Opening it will stop the steam escaping the pipes so, enter the cage and reach the place where there is the Datapack.
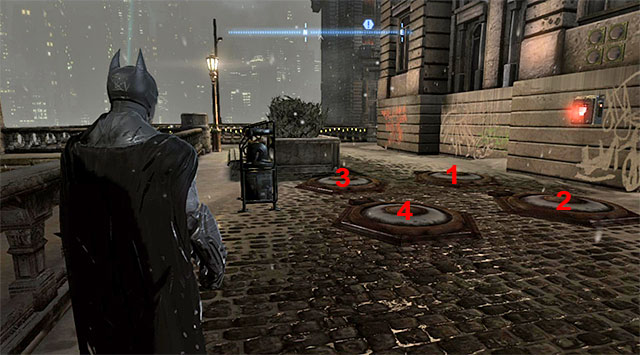
Find the object shown in the screenshot, i.e. the generator and four pressure plates. Start with charging the generator, using the Shock Gloves. Note the combination that is displayed on the wall, above the box with collectibles, and start stepping onto the pressure plates in the same order - 1, 2, 1, 3, 4, 3 (you do not need to run to fit in within the time limit). The correct performance of the entire sequence will grant you access to the box with the Datapack.
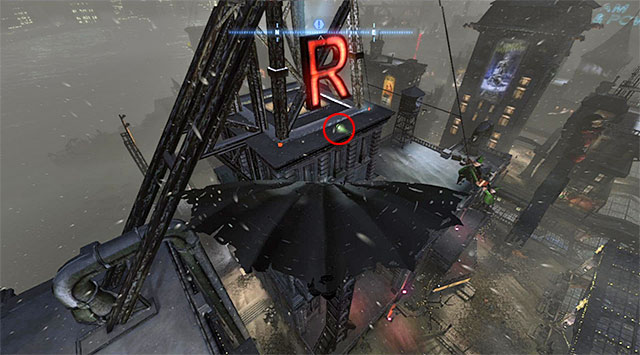
Start on the rooftop of the tall building to the South-West of the collectible. Jump off the roof and remember that you cannot rely on gliding alone. You need to plummet and rise to maintain the altitude. Glide towards the upper balcony of the communications tower, shown in the above screenshot. On the balcony, there is the Datapack.
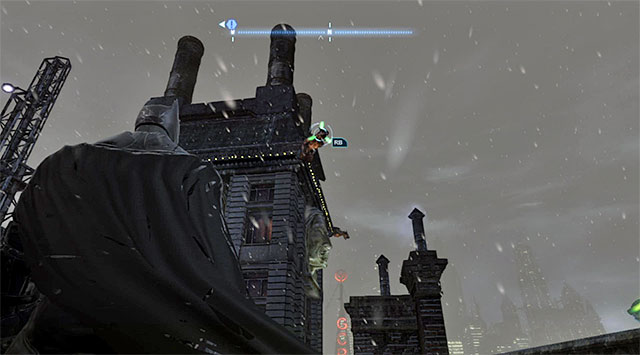
This collectible is on the topmost balcony of the Soder Cola building and reaching it is seemingly impossible. In fact, it is a complicated process. Start from the fragment of the rooftop that is situated below (if there are any enemies here, deal with them), target the gargoyle on the building North of here (the screenshot). Use the hook launcher, pull yourself to the gargoyle at high speed, which will result in the Batman being launched into the air.
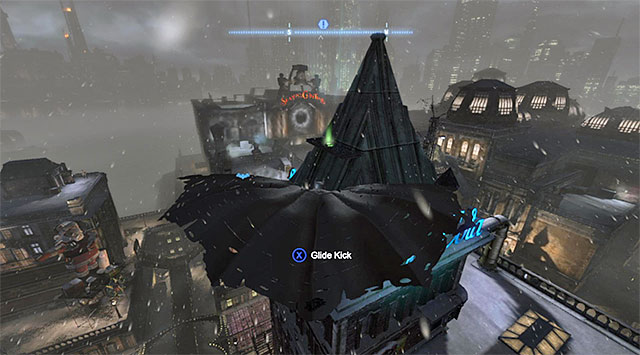
Quickly, make a turn of, about, 180 degrees and start the series of diving and increasing your altitude. All of this is aimed at maintaining the altitude of your flight because, this way you will be able to reach the balcony shown in the screenshot, where there is the Datapack.
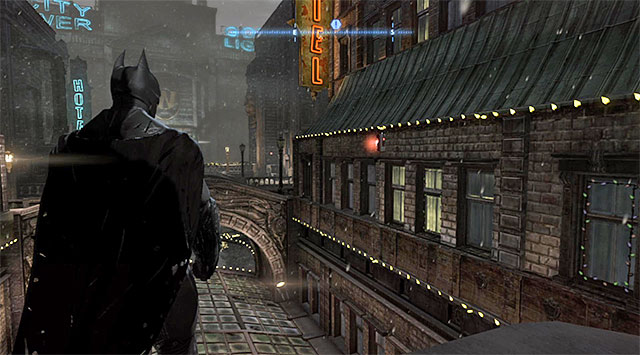 The place where you start solving the puzzle
After you have dealt with the nearby bandits, stop on the bridge to the North-West of the collectible (the box attached to the building's wall).
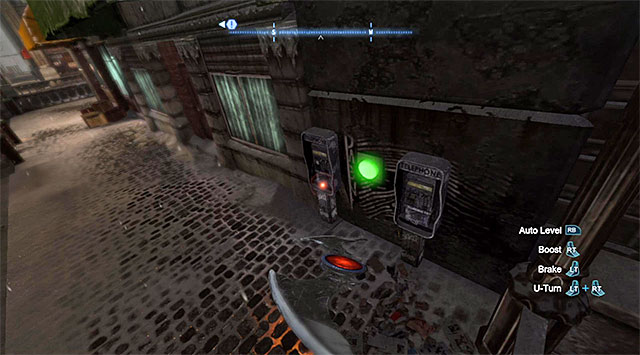
Select the Remote Controlled Batarang from the inventory and send it Eastwards. After it goes past the building, turn Southwards, and to the West then. Direct the batarangs towards the first green button show in the screenshot.
 The second button
From now on, you only have 5 seconds to complete this puzzle so, you need to hurry. Turn Southwards and throw a single Batarang towards the green button.
 The final set of buttons
Finally, throw three Batarangs towards the next set of buttons above the box with the collectible. You can now use the hook to grab the Datapack at a distance.
 The collectible is in the venting haft
You visit the Hat Shop, among others, while completing the side mission connected with the Mad Hatter, but you can go there anytime throughout the game. After you get into the building's first area, use the claw onto the venting shaft grate(unless you have done that already) and jump inside. While exploring the venting shaft, do not take the branch leading to the back room, but the other one instead, which will take you to the Datapack.
This collectible is in the Gotham Merchants Bank, which you visit for the first time while completing the Access the Gotham Merchants Bank mission. By way of reminder, you can access the bank from the side of the blown up wall fragment, or by taking the roof in the roofed area. After you get inside the bank, reach the room in the attic, located in the Northern part of the building (the screenshot), i.e. the one that you have explored on your way from the bank's rooftop to the bank's main area.
 The collectible is attached to one of the cogs
Stop at the machinery and pay attention to the big cogs. Thanks to this, you will determine that the Datapack is attached to one of them. As a result, you need to use the claw at the right moment, to grab it at a distance.
For finding all 10 Datapacks, you receive the audio file connected with the Penguin.
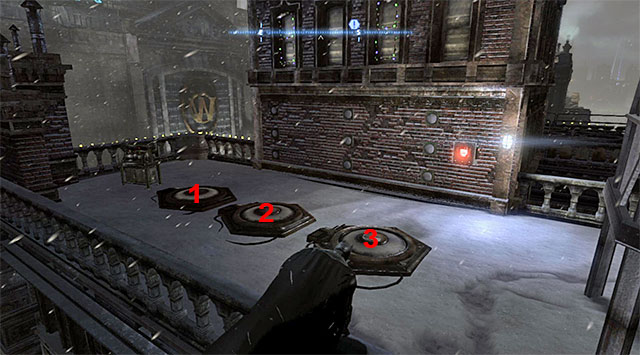
Find the objects shown in the screenshot, i.e. the generator and the pressure plates. Start by charging the generator with the Shock Gloves. You now need to make all the lights in the middle row, i.e. the ones on the same level as the box with the collectible, go on. You can do that by walking onto the plates in the following order: 1, 2, 3, 1, 3. Performing this action correctly will result in gaining access to the Datapack.
 The remote controlled batarangs needs to make it through the opening and hit the button
After you have dealt with the bandits, you need to locate the pressure plate and walk onto it. Select the Remote Controlled Batarang from the inventory and throw it towards the fence, make it fly through the small opening and hit the green button. You may now go that way, slide and collect the Datapack.
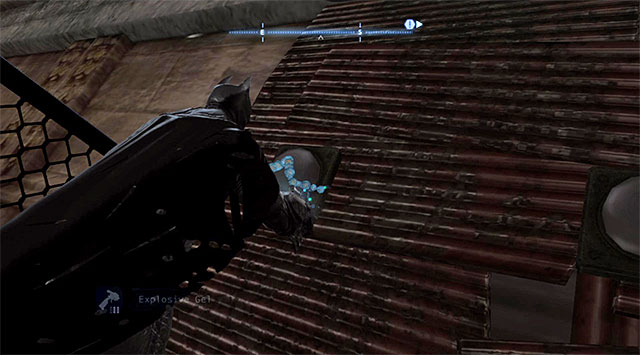 You first need to spread the explosive gel in three places
First, you need to locate the pressure pace and three button over the fence. Reach the buttons and spread the explosive gel over each one of them. Return to the plate, walk onto it and explode all three charges. You now only need to collect the Datapack from the box that you have just unblocked (use the claw).
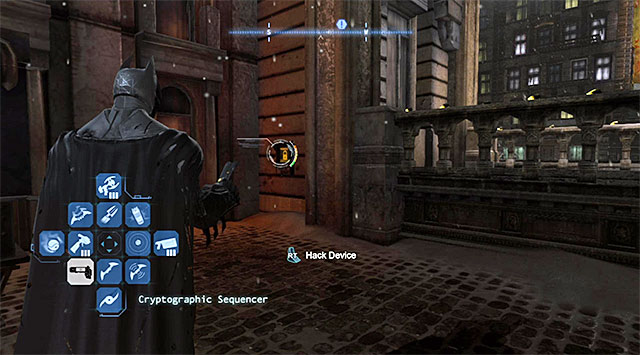
Examine the balcony neighboring the one with the box, with the collectible, on it (it is attached to the wall) and find the terminal that you can hack into, using the cryptographic sequencer. Solve the minigame by determining the correct password (SHELLGAME), return to the box, which is now open, and grab the Datapack at the distance, using the claw.
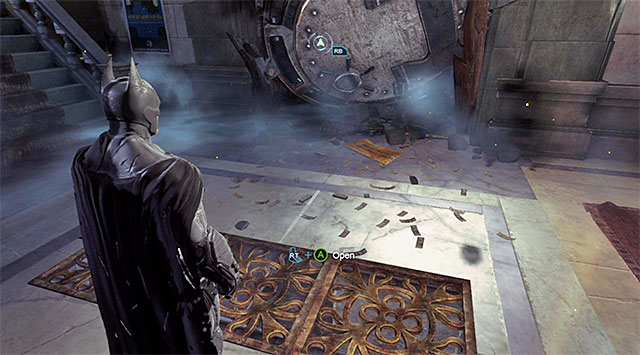
This collectible is in the Gotham Merchants Bank, which you visit for the first time while completing the Access the Gotham Merchants Bank mission. By way of reminder, you can access the bank from the side of the blown up wall fragment, or by taking the roof in the roofed area. After you get inside, go South and find the venting shaft grates shown in the screenshot. Jump down into the shaft and switch to the first-person view, which will allow you to locate the Datapack.
For finding all of the datapacks, you are rewarded with the audio file connected with Shiva.
 The collectible is in the container
The Datapack that you are looking for is inside the container hanging down from the crane. You can get inside the container by gliding towards it, or by standing on the rooftop's edge and dropping down from it.
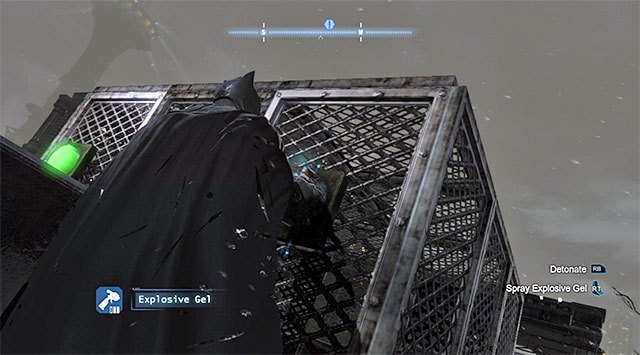
Explore the rooftop, where you will find a big cage. Start by spreading the explosive gel over the inactive button shown in the above screenshot. Use the batarang ,and hit the active button on the left with the gadget.
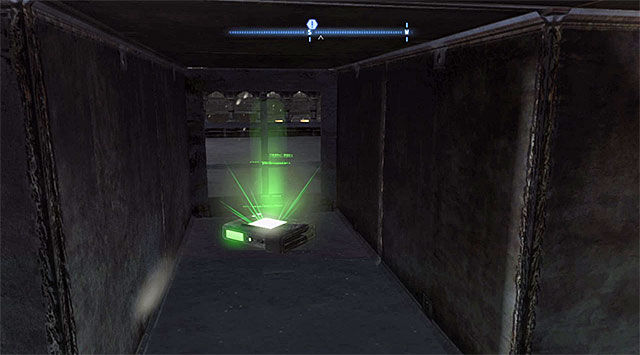 The Datapack
You can now enter the venting shaft, thanks to which you will reach the cage in the center. Detonate the explosive gel now, thanks to which you will unlock another venting shaft. It will take you to the Datapack.
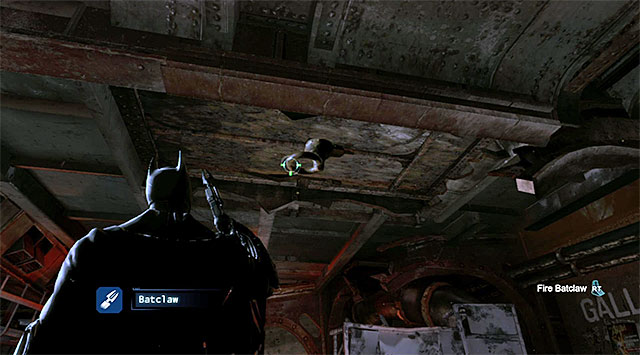
You can obtain the collectible while exploring the Western part of the ship's Deck 1. Stop after you reach the place where, usually, you pull the floating platform that you can see in the distance. Instead of doing that, look up and use the claw on the anchor point shown in the screenshot. After a part of the ceiling collapses, get there using the hook and explore the place, thanks to which you will find the Datapack.
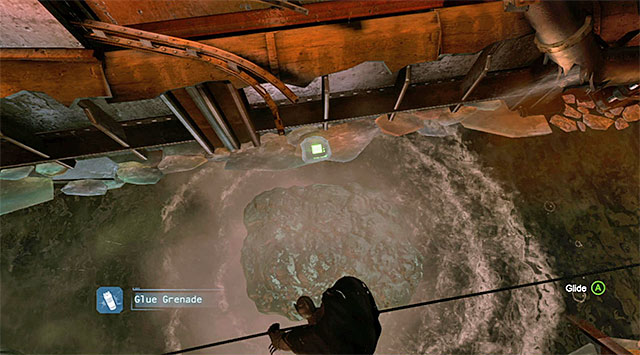
You can obtain the collectible while exploring the Western part of the ship's Deck 1. It is in the flooded part of the corridor which you can get through using the grapple. Extend the rope and jump onto it. Stop after you reach the spot above the collectible shown in the screenshot. Unfortunately, you cannot obtain the Datapack at a distance so, use the glue grenade to create a floating platform. Jump down onto the platform, approach the collectible and collect it.
The collectible is in the Southern part of the Boiler Deck and you can reach it by taking the narrow passage with steam leaking, i.e. the same one that you took the last time you visited this location. Stop after you reach the enclosed area on the higher level (the above screenshot). Use a glue grenade here to insulate the pipe on the right and unlock access to the Datapack.
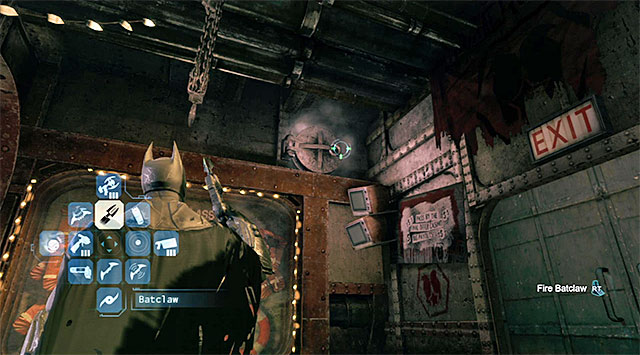
The collectible is in the Gun Shop, i.e. in the first location on the ship that you explore. After you walk under the deck, turn right and locate the manhole shown in the screenshot. Use the claw twice, here - first to open the manhole and the second one to get the Datapack.
For finding all of the datapacks, you are rewarded with the audio file connected with Alberto Falcone.
Start on the rooftop to the East of the collectible and find the interactive anchor point shown in the screenshot. Use the grapple to extend the rope. Grab onto the rope and start your way along it, which will take you to a weakened fragment of the wall, through which Batman will automatically ram. You can now collect the Datapack.
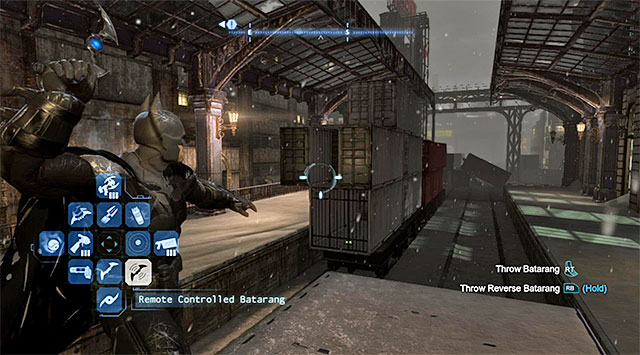
Find the ledge with the box, with the collectible in it, and a pressure plate. Walk onto the plate and wait for Batman to turn towards the Southern container shown in the above screenshot. Throw a remote controlled batarang towards the container and make it fall inside.

Slow down the batarangs flight and fly around the obstacles in your way. After the batarangs reaches the end of the container, turn by 180 degrees and direct it towards the opening shown in the screenshot. Continue the flight and hit the green button. Wait until you cut back to Batman and collect the Datapack.
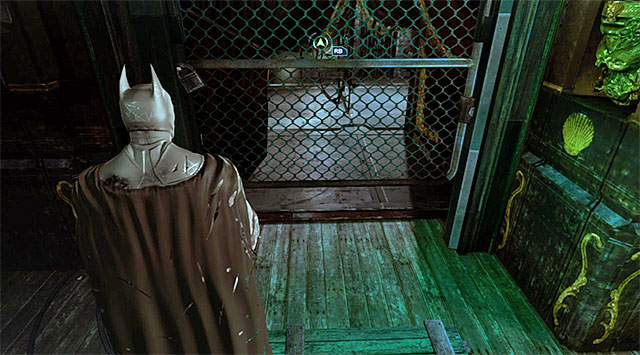
The Datapack is in the South-Eastern part of the Theater and you can collect it without using additional gadgets. You can access the location with the collectible through the passage shown in the above screenshot. (you need to slide here).
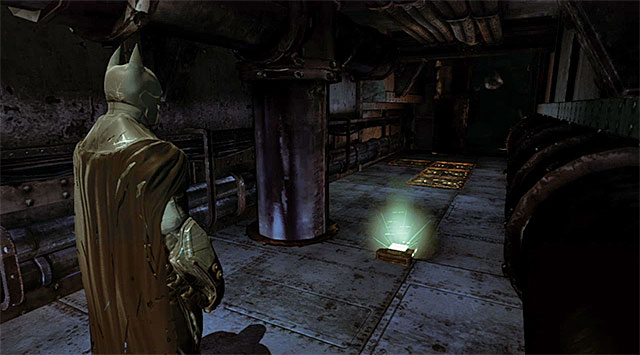
The collectible is in a seemingly inaccessible area in the Northern part of the Theater. Take the venting shafts in the floor and switch to the first-person view. Thanks to this, you will find additional branches. Explore all of the tunnels thoroughly and they will take you to the secret room shown in the screenshot, where there is the Datapack.
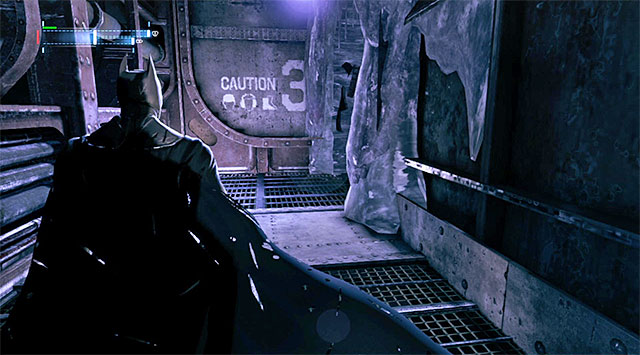
The collectible is in the Deck Access Corridor between the Boiler Deck and the Upper Deck.
Stop after you reach the area shown in the above screenshot, i.e. to the North of the collectible. During your first visit to this place, you have used the gel to blow up the wall on the right.
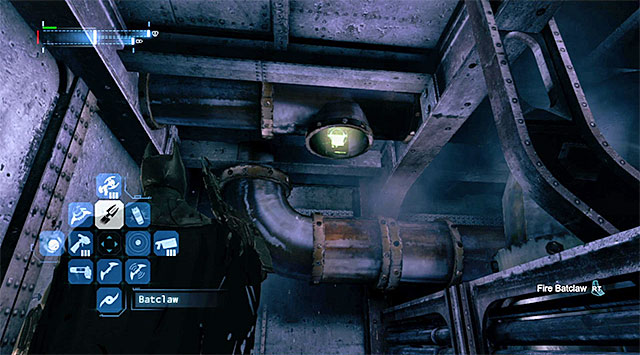 The collectible is inside one of the pipes
Turn by 180 degrees and go South. Crouch along your way, to access a small room. Look up and grab the Datapack using the claw.
 The wall
The collectible is in the Foyer, i.e. in the location between the casino and the theater. Examine the Eastern part of this area, to find a wall that can be demolished with the explosive gel. After you have unlocked the passage, collect the Datapack.
For finding all of the datapacks, you are rewarded with the audio file connected with Warden Joseph.
The collectible is in a cage that is difficult to access. The only opening in it is in its Eastern wall and you cannot use the hook on it. As a result, you need to glide towards one of the nearby, taller buildings and try to glide into the small opening shown in the screenshot. After you do that, collect the Datapack.
Use the Shock Gloves on the generator on the ship's deck and walk onto the first pressure plate. From now on, you have 40 seconds to solve the puzzle. Aim at the mast shown in the above screenshot and use the hook launcher.
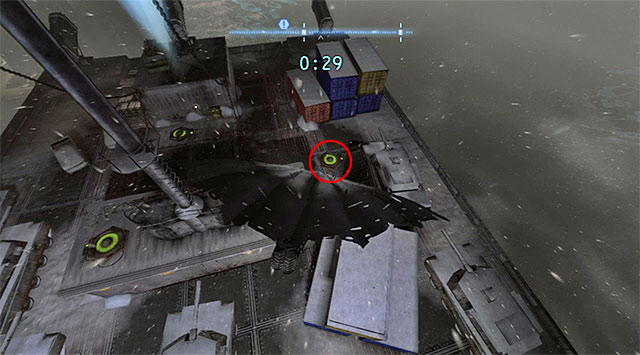
After Batman starts gliding, perform a turn in mid-air and target the second pressure plate shown in the screenshot, which is located in the North-Eastern part of the ship. Land onto the plate.
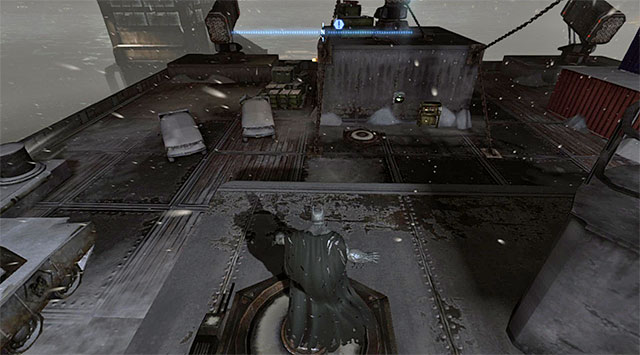
Again, use the hook launcher to catapult yourself. This time, land on the pressure plate on the ledge above (the screenshot). You can now use the claw and grab the Datapack at a distance.
Note- While completing this mission, you cannot walk off the pressure plates! The only thing permissible is using the hook launcher and gliding.
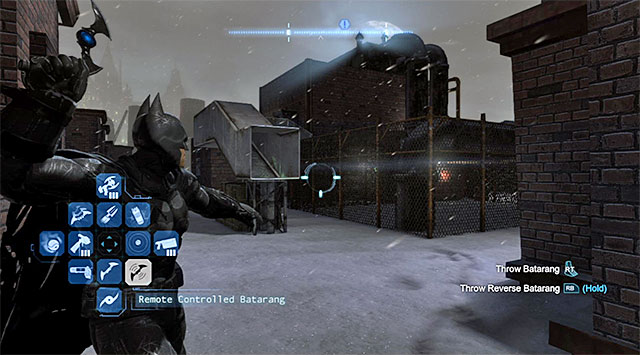
Start to the North-West of the collectible. Target the venting shaft shown in the screenshot and throw the remote controlled batarangs inside. Make the batarangs fly through the entire shaft and press the green button. You can now hop over the fence and collect the Datapack from the newly opened box.
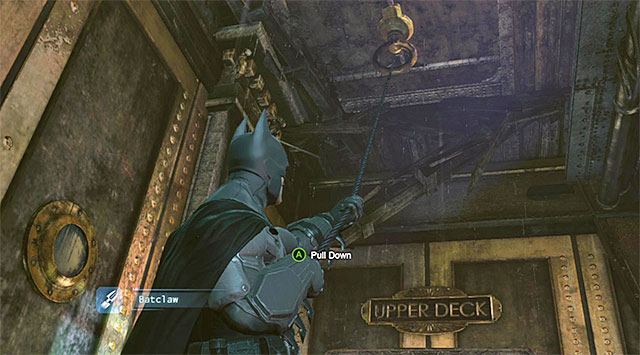
You can find the collectible in the Northern part of the sip's Upper Deck. First of all, make sure that you have ripped off the fragment of the ceiling shown in the above screenshot. It is a step that you cannot miss, because it is a part of the ship exploration during the game's main campaign.
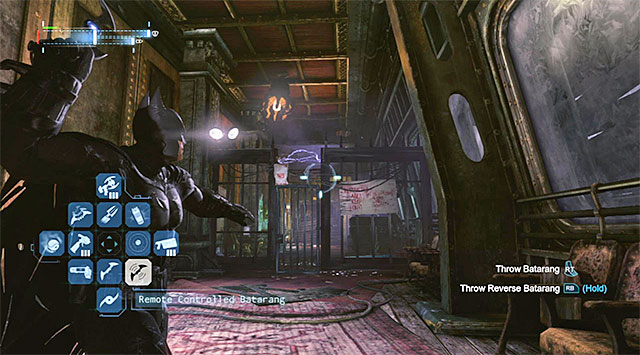
Backtrack to the south now, and stop at the gate shown in the screenshot. Select the remote controlled batarang from the inventory and throw it towards the discharges, thanks to which it will charge. Make the batarangs fly through the hole in the ceiling and hit the fuse box on the level above. You only need now to reach this place and collect the Datapack from the newly-opened box.
The collectible is in the Deck Access Corridor that connects the Boiler Deck with the Upper Deck. You need to reach the big vertical area where you use the hook to reach the ledges above. Stop right after you walk onto the balcony shown in the above screenshot. Use the cryptographic sequencer here, to unlock access to the Pump Room 2 (the correct password is TONNAGE). Walk inside and pick up the Datapack from the ground.
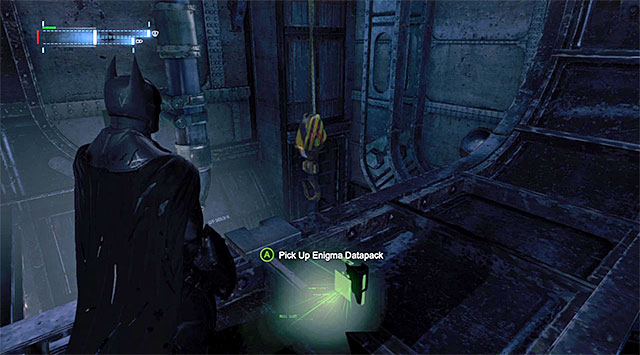
The Datapack is above the Boiler Deck (the first big location that you visit on the ship), on the shelf shown in the screenshot. To reach there, you need to extend either of the two ropes and pull yourself to it using the grapple and the hook.
 The Dollar symbols that you need to hit with the batarangs
The collectible is in the Casino. Explore the Northern part of that location to find three Dollar symbols, which you need to hit with the regular batarangs. Wait for the game to reveal the Datapack and grab it at a distance using the claw.
For finding all of the datapacks, you are rewarded with the audio file connected with Branden.
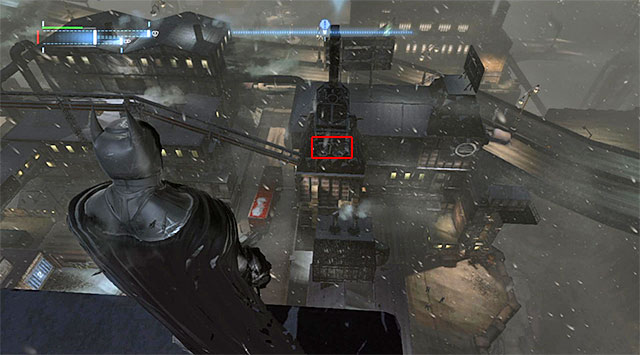
Start on the tall chimney, to the East of the collectible. Glide towards the small opening shown in the screenshot. You need to land on the ledge that is inaccessible in any other way and use the explosive gel to gain access to the location where there is the Datapack.
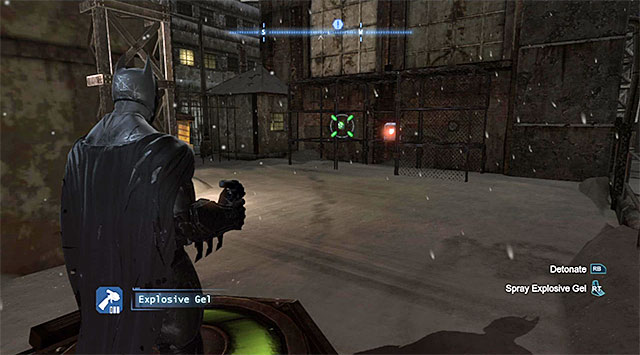
After you have reached the box, spread the explosive gel over the inactive button on the left of the box. Find now the pressure plate, walk onto it and explode the gel (the screenshot).
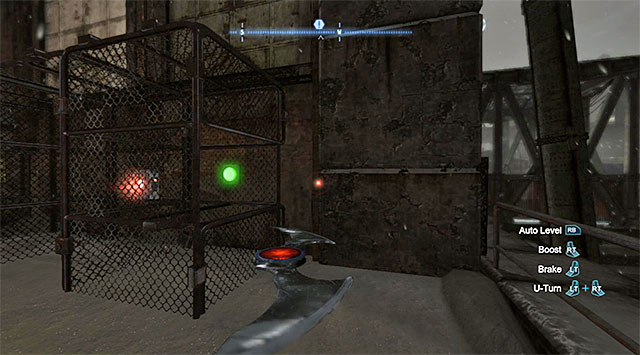 You need to direct the Batarang into the other button
Remain on the plate and select the Remote Controlled Batarang from the inventory. Throw it towards the button on the right, which has just gone one, and maneuver it in such a way, so as to get past the fence. You can now collect the Datapack.
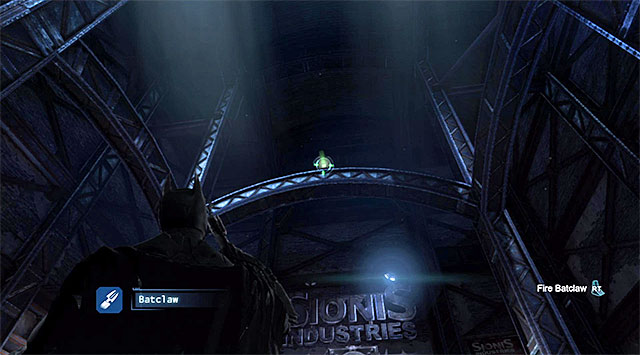 The collectible
You can find this collectible in the first area of the Steel Mill, i.e. in the Loading Bay. Look up and locate the Datapack, which you can grab using the claw.
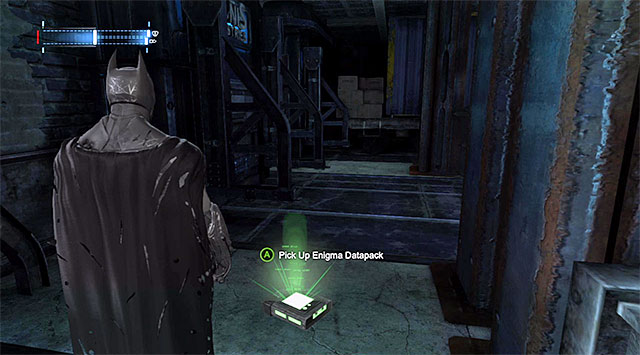
You can find this collectible in the Steel Mill, in the Sionis' Office locate d above the Loading Bay (the mill's first area). After you reach the office, examine its North-Western part to find the weakened wall fragment shown in the above screenshot. Use the explosive gel, to reveal the secret room with the Datapack in it.
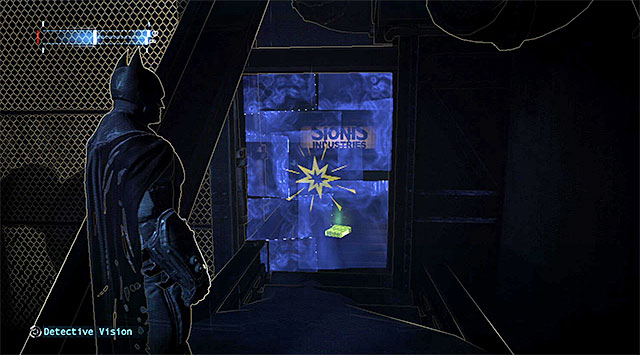
This collectible can be found in the Steel Mill, in the area between the Loading Bay and the Loading Bay Depot. Take a look around to locate the weakened fragment of the wall, shown in the screenshot, and use the detective vision if necessary. Use the explosive gel, which will reveal the secret room with the Datapack in it.
The collectibleYou can find this collectible in the Steel Mill, in the Southern part of the Warehouse. Take one of the narrow passages to make it over to the area under the main balcony, where you will find the Datapack on the ground.
For finding all 10 Datapacks, you receive the audio file connected with Anarky.
The collectible is on the topmost, seemingly inaccessible, balcony of the comms tower in the Industrial District. It is quite difficult to reach this collectible. Search out the tall chimney located North-West of the tower and use the hook launcher (the screenshot), pull yourself towards the chimney at high speed, which will result in the Batman being catapulted.
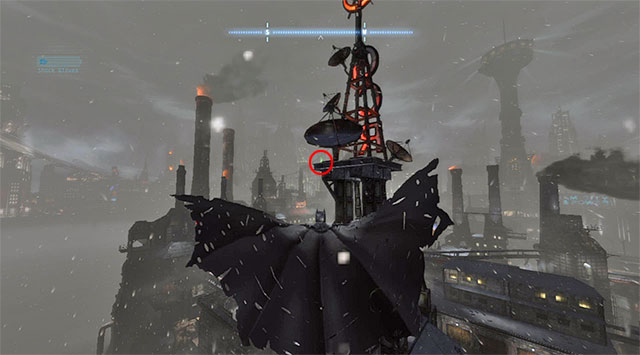
Quickly, turn by, around, 180 degrees and start the series of diving and increasing the altitude. This is aimed at maintaining the altitude of flight, because this is the only way to reach the balcony shown in the screenshot, with the Datapack on it.
 You need to run over all of the pressure plates before the generator goes offline again
Find a very narrow alley with four pressure plates. Around, there also is a generator and you can charge it temporarily, using the Shock Gloves. Quickly, run over the plates now, before the generator goes offline. Finally, slide to get into the location with the Datapack.
You can find this collectible in the Steel Mill, in the Sewers neighboring the Warehouse. Explore the South-Eastern corner of the warehouse to find the locked door shown in the above screenshot. Select the cryptographic sequencer from the inventory and use it on the control panel to determine the correct password (COMPOUND) from among a number of available combination.
 The collectible
You may now jump down through the manhole to reach a small fragment of the Sewers. Use the glue grenades here to insulate all of the pipes that hot steam is escaping from. Then, approach the Datapack on the ground.
You can find this collectible in the Steel Mill, in the Warehouse. Explore the North-Western part of the warehouse and use the grapple in the spot shown above, to extend the rope.
 You need to cut through the wall
Use the hook to grapple the rope and zip down the line, while ramming into the weakened part of the wall, along your way. You can now collect the Datapack.
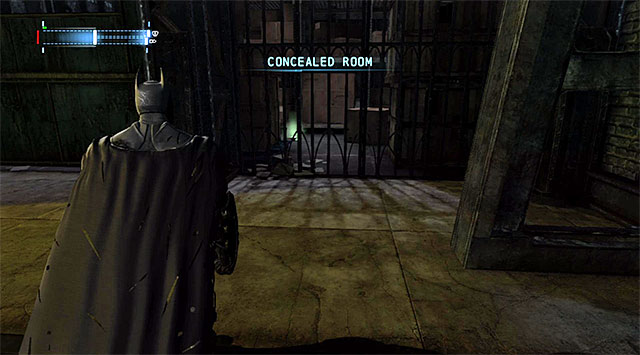
You can find this collectible in the Steel Mill, in the Concealed Room neighboring the Warehouse. The collectible is behind the big grate (the screenshot).
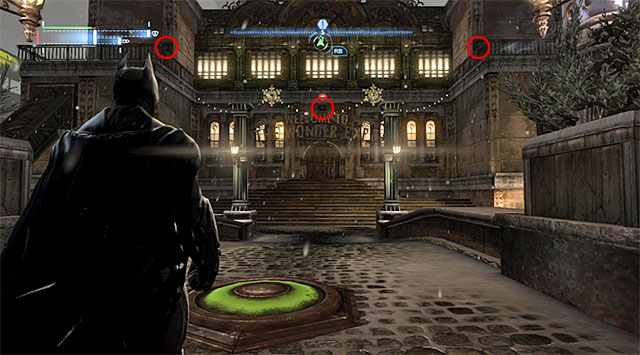
Select the Remote Controlled Batarang from the inventory and throw it towards the opening shown in the screenshot. After the batarangs gets through the opening, turn it back and direct towards the fuse box. Note that the grate raised a bit so, slide underneath. This will allow you to reach the Datapack.
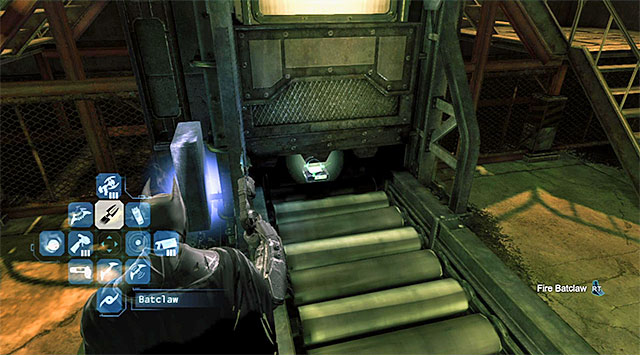
You can find this collectible in the Steel Mill, in the Drug Lab located in the building's basement. Explore the eastern part of the lab to find the generator which you can charge with the Shock Gloves. Note that setting the generator into motion started the nearby conveyor belt. Use the claw to grab the Datapack shown in the screenshot.
For finding all 10 Datapacks, you receive the audio file connected with Branden.
The pressure plate and interactive buttonsStart by dealing with the snipers that occupy the Northern balconies. Walk onto the pressure plate to the North of the building and turn to face it. You need to throw three standard Batarangs towards the buttons that you can see in the distance (one above the balcony on the left, one over the balcony on the right and one over the building's entrance) within 15 seconds. You can now use the claw to grapple the Datapack at a distance.
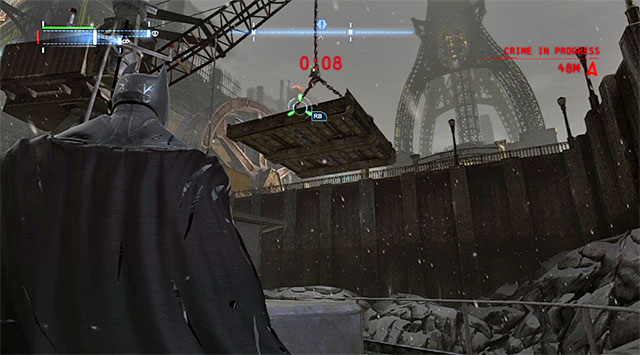 Use the hook to reach the hanging platform quickly
Locate the box attached to the crane and the pressure plate onboard the ship to the South-East of the box. Land onto the plate and use the hook to pull yourself towards the platform suspended down from the crane quickly. Just as quickly, use the claw to grapple the Datapack before the box locks.
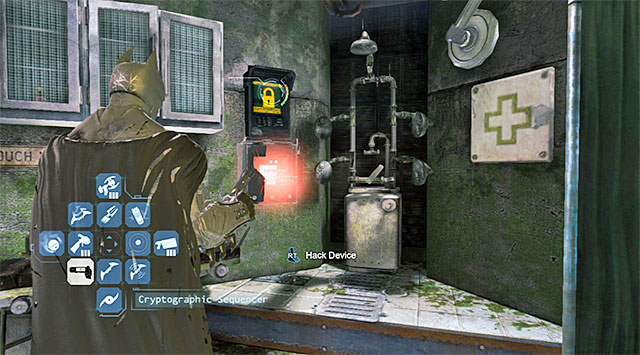
Start to the east of the collectible and locate the area shown in the above screenshot, where you can pull yourself up to the ledge above, using the hook. Approach the generator and charge it, using the Shock Gloves, and collect the Datapack afterwards from the box that you have just opened.
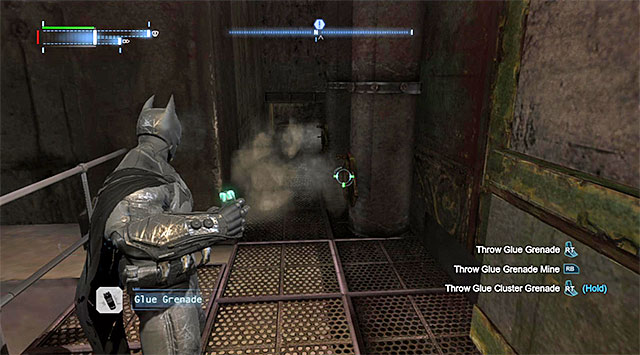
Start to the South-East of the collectible, on a small bridge. Go West and enter the building. Turn Northwards here (the screenshot) and use the glue grenades to insulate the nearby pipes. You can now go further North and reach the place where you find the Datapack.
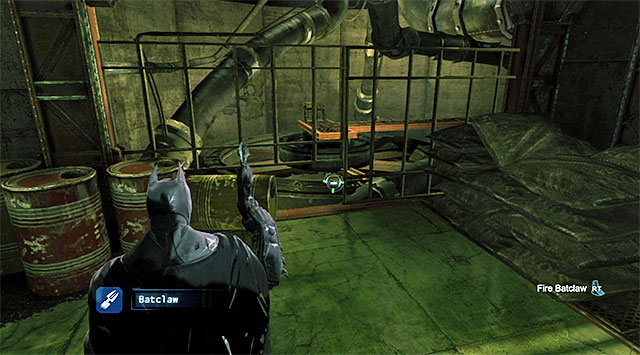
You can find this collectible in the Steel Mill, in the Drug Lab in the building's basement. Explore the South-Eastern part of the lab and find the generator in one of the rooms. Charge the generator with the Shock Gloves. Stop in the position shown in the screenshot and use the claw to grapple the Datapack, at a distance, East of here.
You can find this collectible in the Steel Mill. It is in the Hidden Facility Maintenance neighboring the Drug Lab located in the building's basement, (the screenshot). Unfortunately, it is not that easy to reach the collectible.
![Stop, more or less, halfway through the corridor [Hidden Facility Maintenance] between the elevator and the lab, i - The best hidden datapacks - Extortion File 10 (Industrial District) - Enigma Datapacks - Batman: Arkham Origins - Game Guide and Walkthrough](https://game.lhg100.com/Article/UploadFiles/201512/2015121216422552.jpg)
Stop, more or less, halfway through the corridor [Hidden Facility Maintenance] between the elevator and the lab, i.e. to the east of the collectible. Look up and locate the pipe shown in the screenshot. Pull yourself up o it, using the hook.
The box with the collectible and the control panelWalk through the pipe and reach, this way, the side room that is inaccessible in any other way. Select the cryptographic sequencer from the inventory and use it on the local terminal to determine the password (COMPLICATE). You may now collect the Datapack.
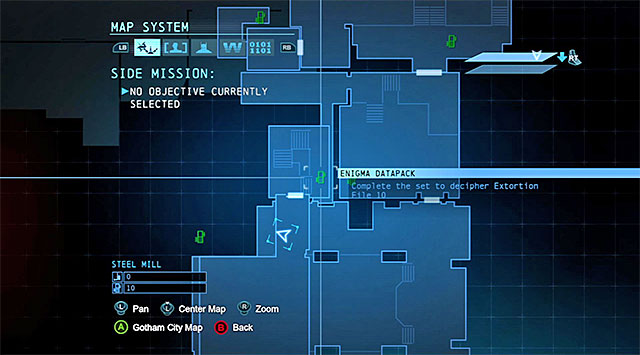
You can find this collectible in the Steel Mill. It is near the staircase of the Loading Bay (the screenshot), where reaching it is not that easy.
You now need to go North-East, to the area connecting the loading bay with the Loading Bay Depot. Explore the North-Western side of this location to find the passage to the West, via which you will reach the venting shaft shown in the above screenshot.
 The collectible
Unlock access to the shaft and walk through it. This will allow you to make it over to the enclosed area with the Datapack.
For finding all 10 Datapacks, you receive the audio file connected with the Penguin.
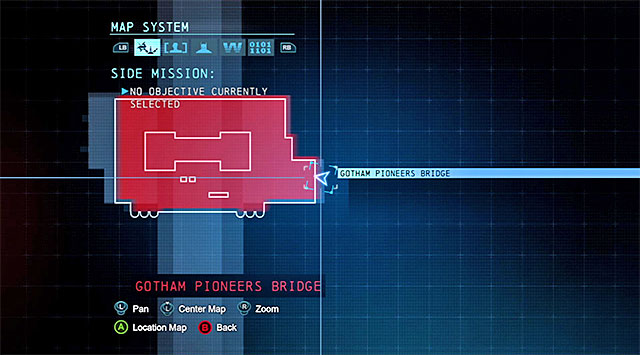
While searching for the collectibles hidden inside the Gotham Bridge (Datapacks 11 and 12) you will have to visit a few rooms inside the main structure of the bridge (e.g. the boiler room and the train station). You visit them for the first time during the Warn Gordon about the bombs an Locate Firefly's bombs main missions. By way of reminder, the entrance into the bridge is in the location shown in the above screenshots, i.e. in the Western side of the central structure.
The box with the collectible is attached to the wall next to a small external balcony. Land underneath, in the location shown in the screenshot.
 The remote controlled batarangs needs to hit the button above the box
Start by selecting the remote controlled batarang , look up and throw it towards the balcony. The batarangs needs to hit the button above the box. You now have 5 seconds to hit three buttons directly in front of Batman and here, you need to use the regular batarangs. After you do so, return to the balcony and collect the Datapack.
Reach the small balconies under the bridge and start on the one shown in the screenshot, which is located to the South-East of the collectible. Jump down onto the pressure plate. From now on, you have 25 seconds to solve this puzzle.
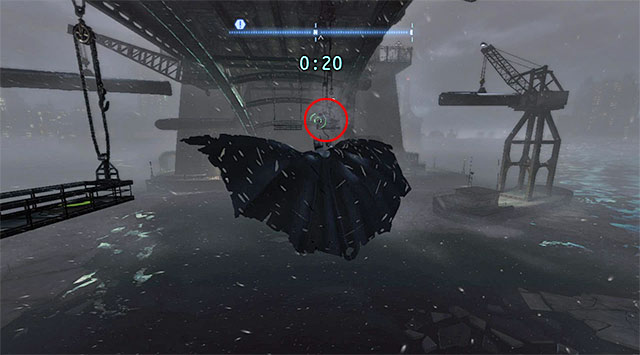
Glide towards the balcony located directly to the North (the screenshot) and pull yourself towards it using the hook. Make sure that you have not touched to the pressure plate.
Finally, glide towards the balcony located to the South-West of your current position (the screenshot). Also here, you need to use the hook and walk onto the pressure plate. You may now collect the Datapack from the box attached to this balcony.
Reach the boat with two pressure plates and a box with the collectible. Stand on the higher plate shown in the screenshot, target the large metal structure located near the second plate and use the hook launcher to catapult Batman towards that plate.
Start gliding, perform a turn in mid-air and land onto the second pressure plate (the screenshot). The key to solving this puzzle is not to touch to any other surface in the meantime. After you are done, collect the Datapack.
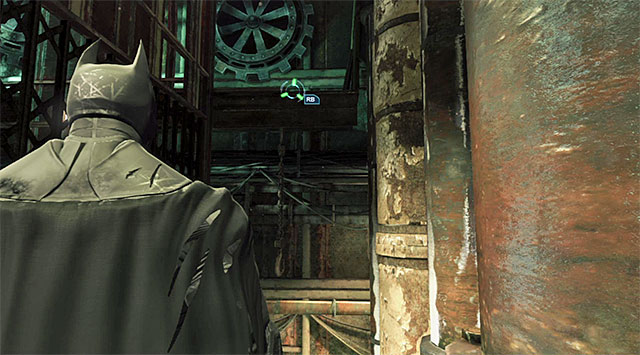
The collectible is close to the Freight Elevator Shaft. Reach the top of the shaft's lower part but, instead of taking the door to the next location, turn back, towards the Northern ledge shown in the screenshot. Make it over to the ledge using the hook.
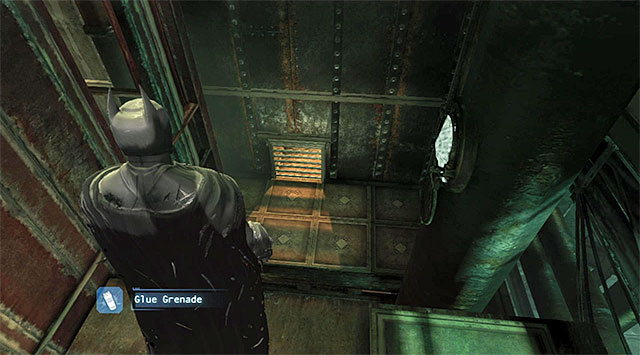 The venting shaft
Start exploring the new part of the shaft and use the glue grenade along your way to insulate the pipe. Ultimately, you need to reach the venting shaft's entrance. Rip off the grate and enter. After a while, you will find the Datapack.
The collectible is in the Train Station Maintenance, , i.e. the area that connects the upper part of the elevator shaft with the train station.
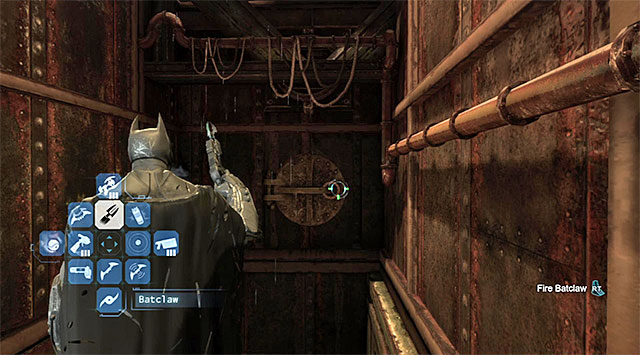
Start on the ledge above, to the South-East of the collectible. Turn to the Northern wall, thanks to which you will locate the manhole shown in the screenshot. Open it with the claw.
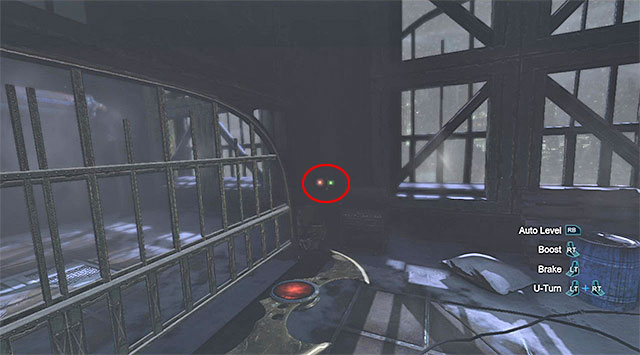
Select the remote controlled batarang from the inventory and throw it into the pipe behind the hatch you have just opened. Make sure that the batarangs reaches the area with the collectible and hit the button shown in the screenshot. You can now return downstairs and slide under the partially risen gate, which will take you to the Datapack.
The collectible is in the Northern part of the Freight Elevator Shaft. Start by making it over to the elevator's roof and climb onto the neighboring ledge. Look up and locate the Datapack (shown in the screenshot) which you need to grapple using the claw.
 The collectible is under the balcony
The Datapack is in the first place that you visit after entering the bridge's central structure. [Maintenance Room]. It is hidden under the main balcony and it is quite easy to access it (you need crouch several times and slide)
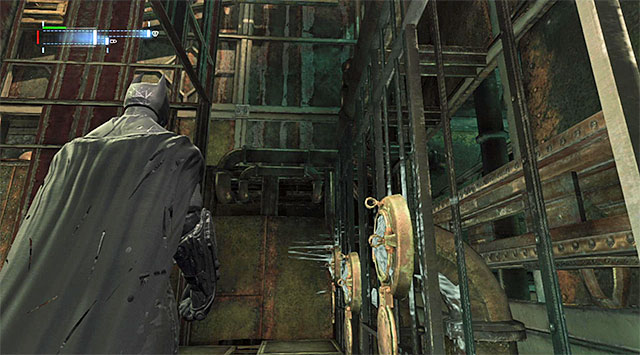
The collectible is in the Freight Elevator Shaft. Start by reaching place where you need to insulate three pipes with the hot steam coming out. After you do that, jump up to reach the ledge that they are on and turn towards the Southern part of the shaft (the above screenshot).
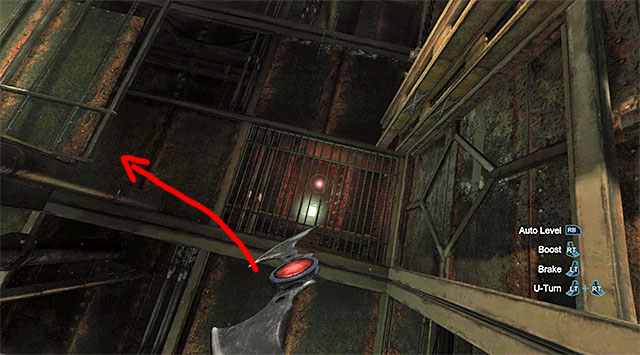
Select the remote controlled batarangs from the inventory, throw it ahead and turn left several times (the batarangs will move in the counterclockwise direction). After the batarangs reaches the cage with the collectible, turn left again (the screenshot) and direct it towards a very well-hidden button.
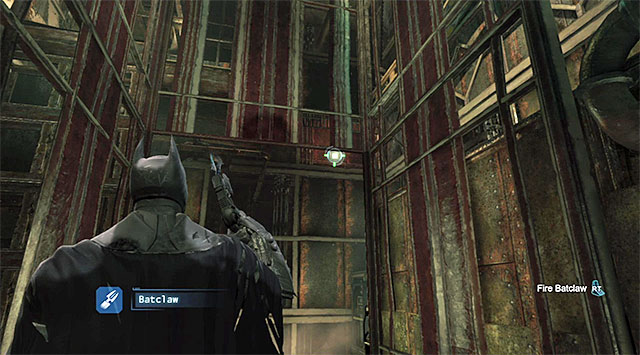 You need to grapple the collectible at a distance
You can now return towards the Datapack located in the South-Eastern part of the shaft. Use the claw to grab it at a distance. .
For finding all of the datapacks, you are rewarded with the audio file connected with Alberto Falcone.
 The pressure plate
Find the pressure plate on the central balcony, on the bridge, and stop on it. Note the combination displayed on the ground, which means the order in which you need the green buttons located on the sides - The South-Western (1), North-Western (2), North-Eastern (3) and the South-Eastern (4). Since some of the buttons are behind obstacles, you need to use the remote controlled batarangs instead of the regular ones. You also should not walk off the pressure plate in the meantime.
 The collectible
After you solve the puzzle, look up and use the claw to grab the Datapack.

Start in an elevated place located discernibly to the North of the collectible. Glide Southwards, towards the derelict side-corridor shown in the screenshot.
 The corridor to the collectible
After you land in a new location, continue to the South. Along your way, you need to use the
explosive gel to make way for yourself. Now, collect the quite well-hidden Datapack.
![The collectible is in the Boiler Room Maintenance Corridor] between the lower part of the freight elevator shaft and the boiler room - The best hidden datapacks - Extortion File 12 (Gotham Pioneers Bridge) - Enigma Datapacks - Batman: Arkham Origins - Game Guide and Walkthrough](https://game.lhg100.com/Article/UploadFiles/201512/2015121216422980.jpg)
The collectible is in the Boiler Room Maintenance Corridor] between the lower part of the freight elevator shaft and the boiler room. After you reach the locked gate shown in the screenshot, stop and use the cryptographic sequencer on the terminal that you can see behind the bars. Determine the correct password (GALVANIZED), which unlocks access to the Datapack.
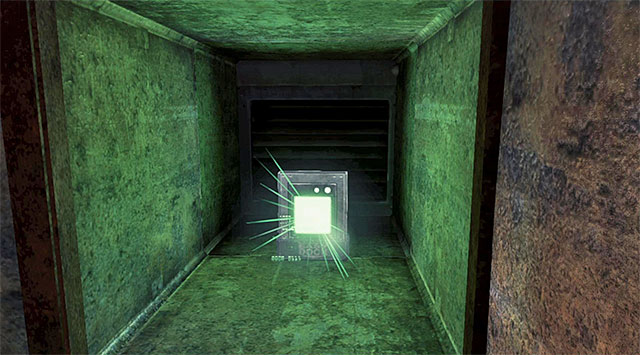 The collectible is in the venting shaft
The collectible is in the Train Station]. Locate the venting shafts worked into the floor, jump into any of them, switch to the first-person view. Explore all of the branches carefully, thanks to which you will locate the Datapack.
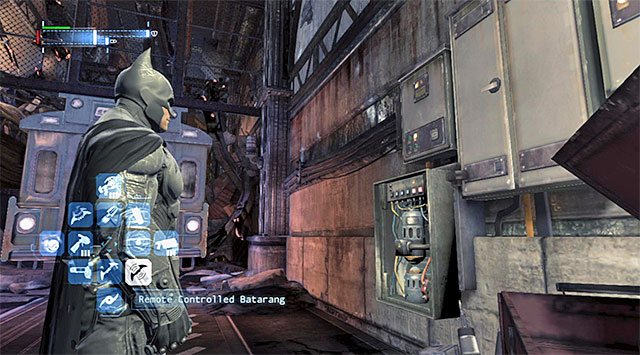 Generator
The collectible is in the Train Depot] located to the North of the main area of the Train Station]. After you get there, start by interacting with the generator located on the right, by charging it with the Shock Gloves.
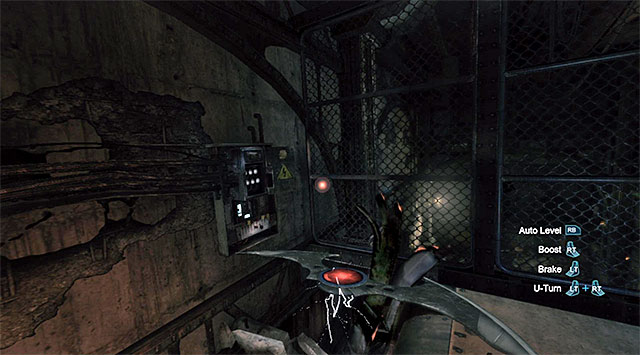
Turn Northwards now and QUICKLY throw the remote controlled batarang. In the first place, direct the batarangs towards the hole on the right of the railway car and then, towards the discharges under the ceiling. Turn the batarangs by 180 degrees now and aim it at the fuse box located on the Eastern wall (the screenshot).
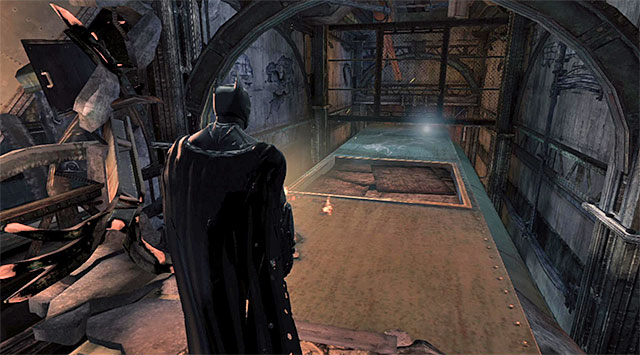 The place where you spread the gel
This is not it, yet. Use the hook to climb onto the car and go North. Locate the weakened fragment of the wall and spread the explosive gel. Detonate the charge and collect the Datapack.
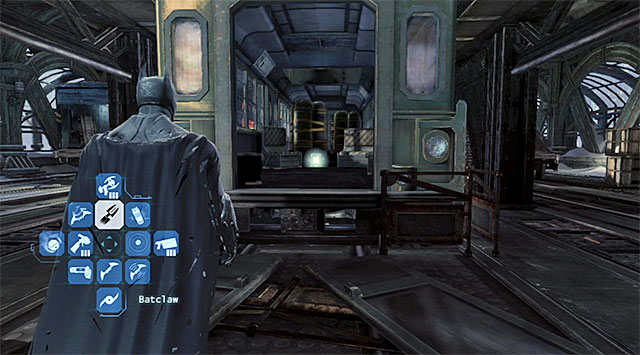 Mount the railway car
The Datapack is inside the railway car in the middle of the Train Station]. The collectible can be collected without using the gadgets.
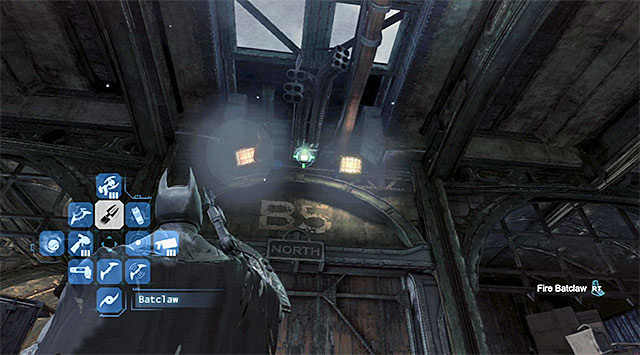 The collectible
The collectible is attached to the wall in the Southern part of the Train Station. Explore the area of the ceiling and use the claw to grab the Datapack at a distance.
For finding all of the datapacks, you are rewarded with the audio file connected with Captain Gordon.
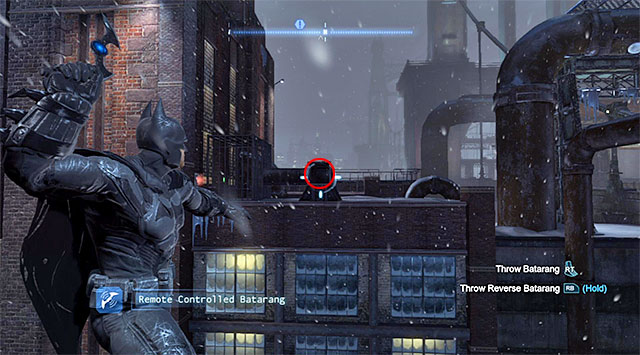
Start on the roof, to the South of the collectible. Select the Remote Controlled Batarang from the inventory and aim it at the ventilation shaft shown in the screenshot. Throw the batarangs, decrease its flight speed and prevent it from being destroyed. After the batarang flies out of the venting shaft, direct it towards the green button. You can now collect the Datapack from the box that you have just opened.
This collectible is in the Lacey Towers, which you visit for the first time while completing the Solve the crime scene inside Lacey Towers main mission. By way of reminder, to make it into the building, you need to reach the small balcony shown in the above screenshot.
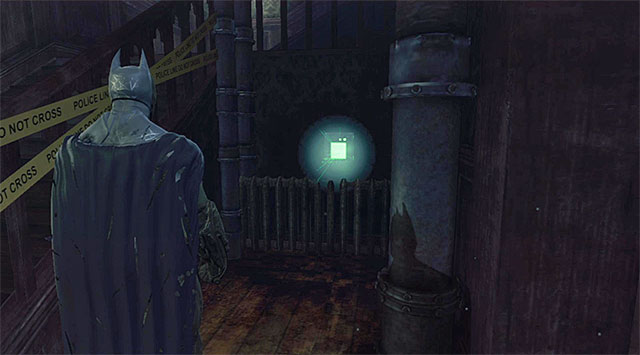 The collectible
After you get there, go to the apartment belonging to Sionis, which is currently the crime scene [Sionis' Safehouse]. The Datapack is behind the radiator in one of the weakly-lit parts of the Eastern part of the apartment.
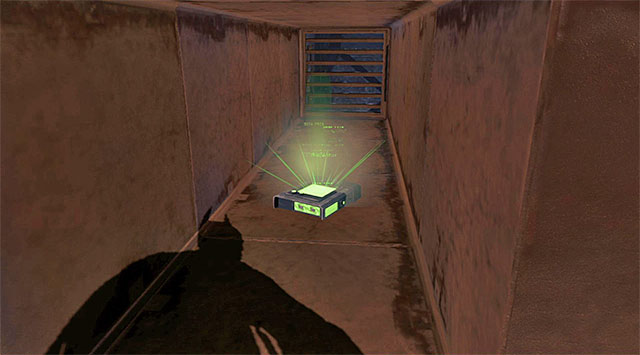 The collectible is in the venting shaft
You visit the My Alibi Nightclub among others, during the side mission connected with Bird, but you can go there anytime throughout the game. You need to reach the Dance Floor, and go to the dressing room through the South-Western door. Locate the venting shaft grate here, rip it off using the claw and jump inside. You will find the Datapack while squeezing through the shaft.
For finding all 10 Datapacks, you receive the audio file connected with Commissioner Loeb.
Reach the factory rooftop shown in the screenshot and walk onto the first pressure plate, i.e. the one that is farthest away from the box with the collectible I it. Look up and use the grapple to extend the rope above Batman it will connect both chimneys). Make it over onto the rope, using the hook, and glide towards the next pressure plate. After you land, return to the rope again, using the hook. Glide again, this time towards the last one of the pressure plates. Wait for the box with the Datapack to open and grapple the collectible using the claw.
Note! Due to the bug present in this game, the access to the collectible can be unlocked without the necessity to use the grapple nor the hook. In such a situation, you will be able to collect it straight away.
Start to the North of the collectible, jump off one of the rooftops and glide towards the weakened wall fragment shown in the screenshot. You need to ram through it. After you do, collect the Datapack.
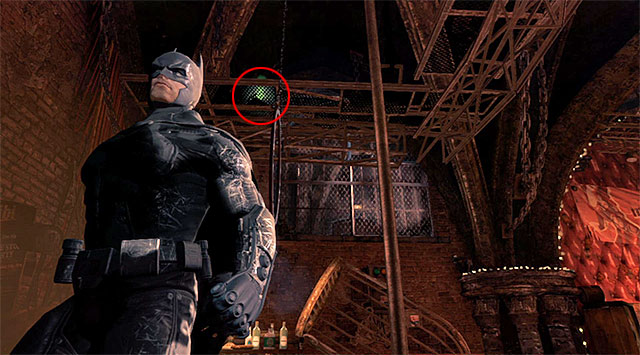
You get to visit the My Alibi Nightclub, among others, during the side mission connected with Bird, but you can go there anytime throughout the game. You need to reach the Dance Floor, and make it over to the small balconies under the ceiling, shown in the screenshot, which are located in the North-Western corner of this area (you need to assume the correct position and use the hook). You can now collect the Datapack.
For finding all 10 Datapacks, you receive the audio file connected with Alberto Falcone.
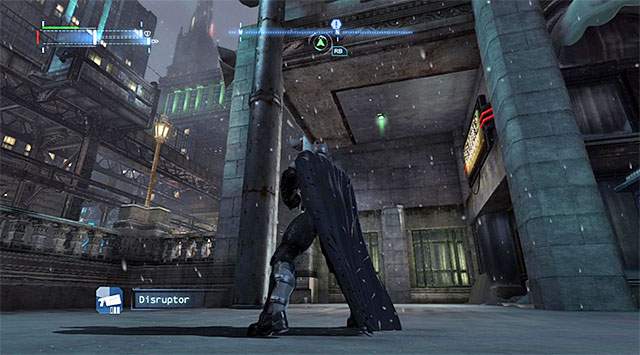 The collectible is attached to the ceiling
Land at the foot of the building on whose rooftop there is a comms tower. Explore its South-Western corner. Locate the Datapack attached to the ceiling and use the claw to collect it.
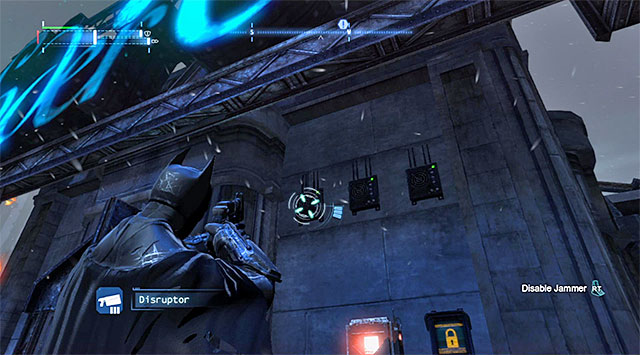 You need to use the disruptor three times
You need to reach the topmost balcony of the Soder Cola building. Find the locked box with the collectible here. First, use the Disruptor three times, on the jamming devices that have been attached to the wall. This is not it, yet. You still need to break into the local control terminal, using the cryptographic sequencer and guess the correct password (ILLICITSECRET). Only then,, can you collect the Datapack from the box.
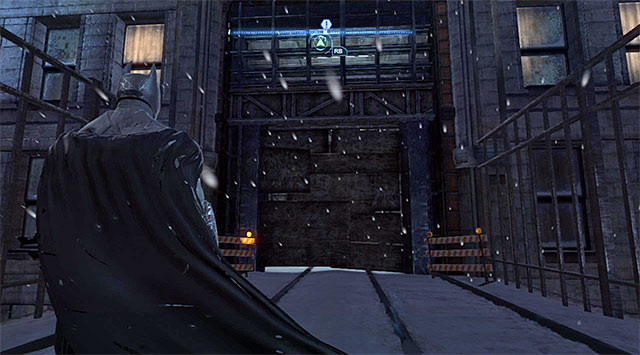
Start on the railway tracks to the South of the collectible and find the wall shown in the above screenshot, using the detective vision. Use the explosive gel on this, and the two other, wall. This will allow you reach a secret room with the Datapack on the ground.
![The collectible can be acquired during the exploration of the Hotel Parking], i - The best hidden datapacks - Extortion File 15 (Diamond District) - Enigma Datapacks - Batman: Arkham Origins - Game Guide and Walkthrough](https://game.lhg100.com/Article/UploadFiles/201512/2015121216423126.jpg)
The collectible can be acquired during the exploration of the Hotel Parking], i.e. the first location that you visit after you take the passage located to the South of the inaccessible main Hotel entrance. Along your path, to the South-West, keep looking around for the weakened fragment of the wall on the right (the screenshot). First, use the glue grenade to insulate the pipe, and then the claw to grab the Datapack at a distance.
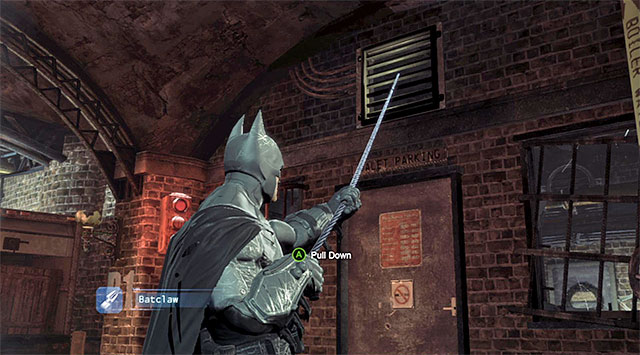
You can find this collectible while exploring the Hotel Parking, i.e. in the first location that you visit after you take the passage located to the South of the inaccessible main Hotel entrance. After you get into the central part of the location, find the venting shaft shown in the screenshot and rip off the grate, using the claw. Jump into the shaft, which will take you to a small room. Use the cryptographic sequencer here, to determine the correct password (CARCRASH). You can now approach the box and collect the Datapack.
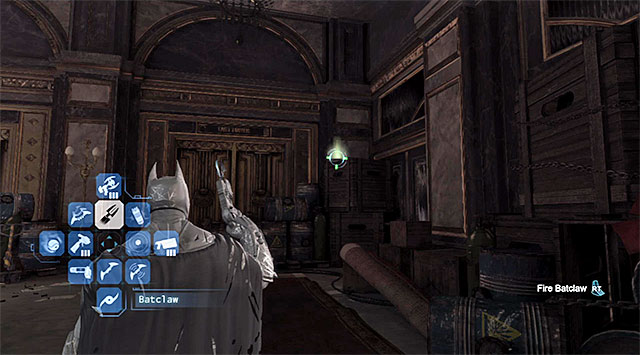 The collectible's location
You can find this collectible after you access the Royal Hotel Main Entrance, i.e. after you take the elevator after you have explored the hotel parking. After you exit the elevator, look ahead and use the claw to collect the poorly-hidden Datapack.
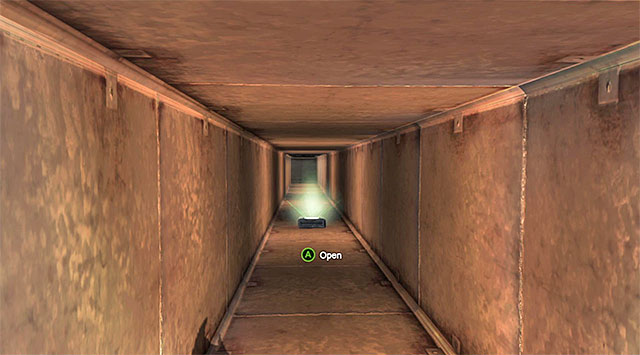
The collectible is in the Hotel Lobby, i.e. in the big area in on the hotel's ground floor. Explore the central part of the lobby, jump into one of the venting shafts in the floor and switch to the first-person view (the screenshot). Thanks to this, you will locate the Datapack without any problems.
For finding all of the datapacks, you are rewarded with the audio file connected with Anarky.
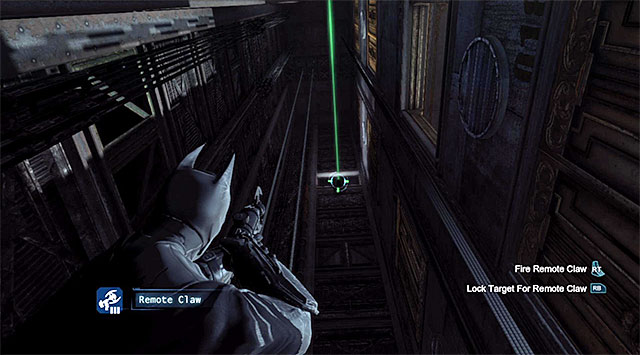
Start on the ledge at the edge, to the South-East of the collectible. Use the grapple in the spot shown in the screenshot, which will result in the rope being extended.
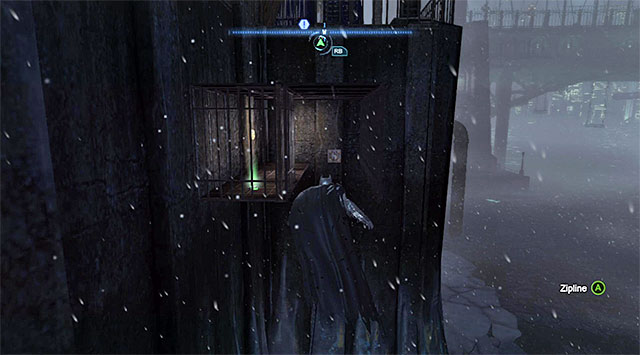 The cage
Glide towards the rope and pull yourself towards it, using the hook. You can now make it inside the cage on the left and collect the Datapack.
You can find the collectible while on the 10th floor of the hotel East Tower - 10th Floor. Right before you leave this area, use the Shock Gloves to charge the generator on the left (the screenshot). Approach now the gate that you can see in the distance, which rose a bit in the meantime. Crouch under the gate (the game should start the first-person perspective view for a moment), thus reaching the Datapack.
You can find the collectible in the East Tower - Elevator Shaft. Start by using the Shock Gloves to set the elevator into motion and, after it reaches the 19th floor, look up and extend the rope (using the grapple). Use the hook to get over to that rope and walk over it to reach a small ledge with the Datapack.
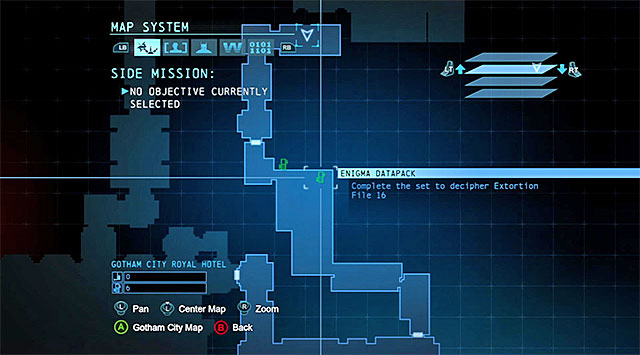
You can find the collectible while exploring the big West Tower - Ventilation Shaft. Your first step is reaching the top of this shaft.
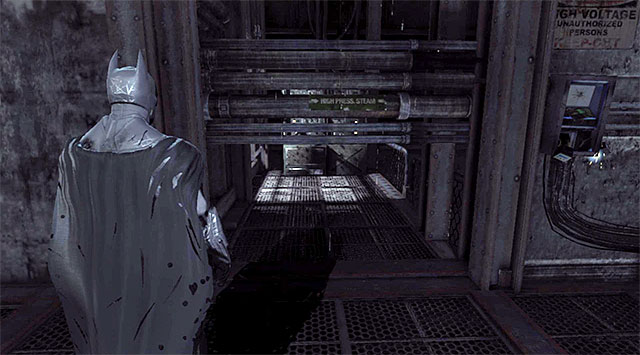
Take a look around the elevator shaft's top level, close the this location's entrance. Your task is to locate the passage shown in the screenshot. You need to crouch and use the hook to pull yourself towards the nearby edge.
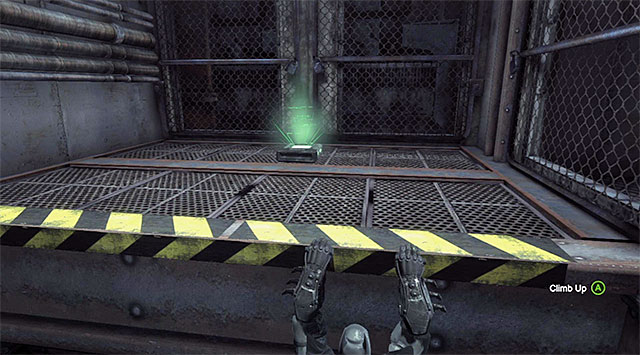 The ledge with the collectible
Shimmy to the right and ignore the operating fans, which are no threat to you. After you make it over to the end of the edge, climb up to the ledge, where you will find a well-hidden Datapack.
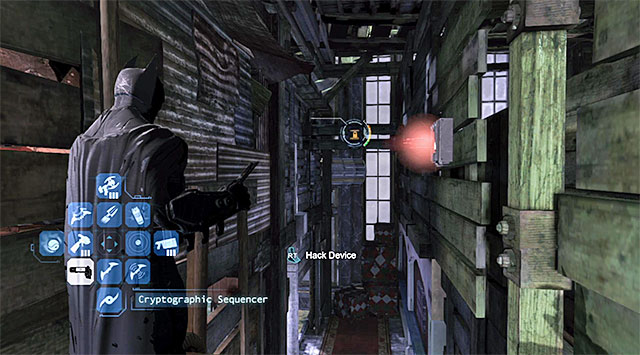
The collectible is in the South-eastern part of the West Tower - Ballroom, i.e. the location where you solve Joker's puzzles during your first visit to the hotel. You need to make it over to the ledge shown in the above screenshot and hack into the control terminal at a distance, by using the cryptographic sequencer. Determine the correct password (SURPRISE) and grab the Datapack using the claw.
For finding all of the datapacks, you are rewarded with the audio file connected with Shiva.
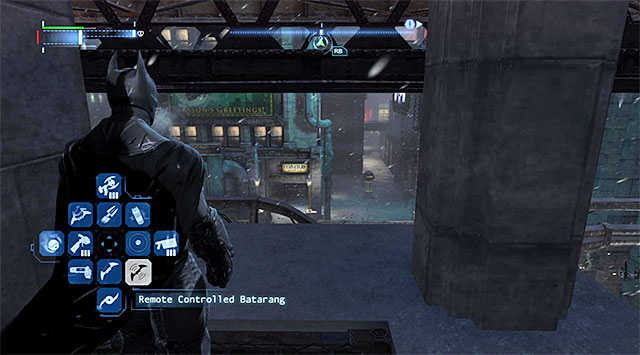
Start to the east of the collectible by standing atop the cage built into one of the ledges above. Turn East, i.e. in the direction opposite to the collectible.
Select from the inventory the remote controlled batarang, throw it ahead and turn it by 180 degrees after a while. You need to make the batarangs fly into the cage that you are standing on and, to do this, you need to make it fly into the opening shown in the screenshot. Make it approach the green button and, after it connects, approach the newly-opened box to collect the Datapack.
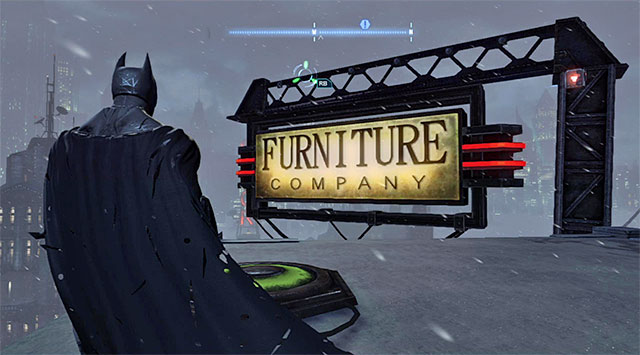
Locate the objects shown in the screenshot, i.e. the pressure plate, six interactive buttons and a locked box with a collectible in it. Walk onto the plate and throw three batarangs towards the buttons on the left. Get off the plate and, quickly, send another three batarangs towards the buttons on the right, this time. You can now use the claw to get the Datapack.
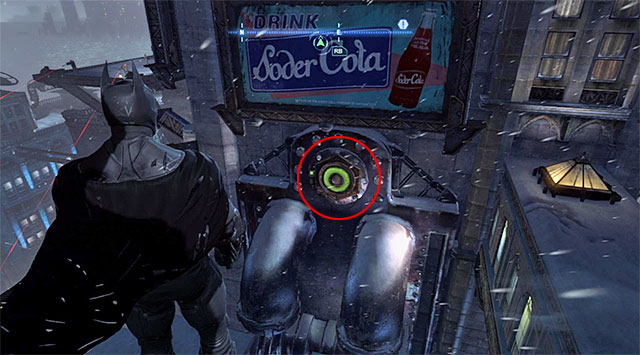
Start by standing on the rooftop, right above the collectible (watch out for the sniper who may occupy it). Turn towards the building across the street (the screenshot) and glide towards it. In the mid-flight, hold down the attack button and plan the flight in a way that will allow you to reach the button in the wall of the building. If you have done everything properly, Batman should lean against the wall for a moment. Release the flight button for a fraction of second then, and press it again, thanks to which your character will bounce off the wall and glide towards the next button. You need to do the same here, i.e. bounce off the wall properly.
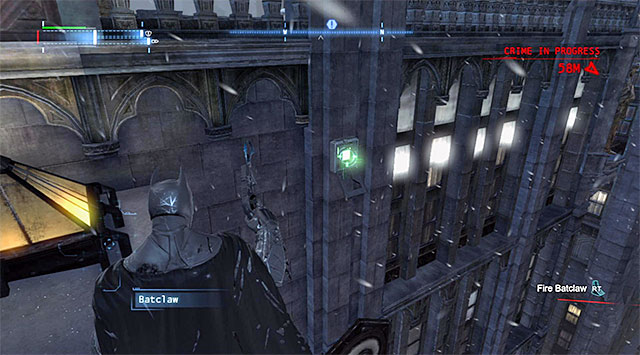 The box with the collectible
Finally, return to the bridge between both buildings and use the claw to collect the Datapack from the box attached to the wall.
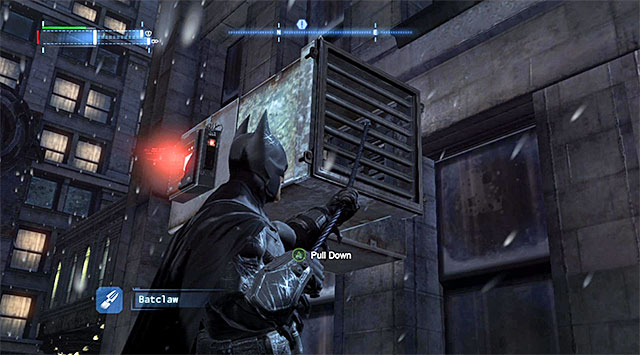 The venting shaft
Land on a small rooftop and use the claw to rip off the venting shaft grate.
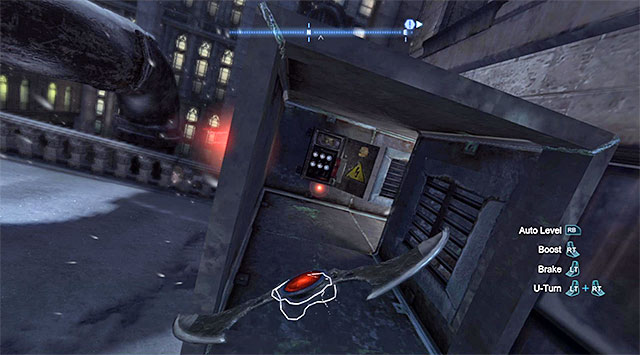
Now, walk onto the pressure plate and send a remote controlled batarang towards the discharges. After the batarangs is charged, direct it towards the venting shaft that you have just opened and have it hit the fuse box (the screenshot). You can now use the claw to collect the Datapack from the newly opened box.
 Make sure that you have spread the gel properly, before you step onto the pressure plate
Deal with the bandits on the roof and find the pressure plate and six buttons. Start by spreading the explosive gel over the three buttons on the right, i.e. within the enclosed area. Walk onto the pressure plate and detonate all three charges quickly. Then, send three regular batarangs towards the buttons on the left. If you have finished within the time limit, you will be able to use the claw and collect the Datapack from the box.
The collectible is in central part of the West Tower - Ballroom, i.e. the location where you solve Joker's puzzles, during your first visit to the hotel.
Extend the rope using the grapple, i.e. the one that you usually use to make it to the next location. Turn towards the ledge shown in the above screenshot and glide towards it.
The collectibleAfter you land, use the cryptographic sequencer to hack into the control panel by determining the correct password (WHYTHELONGFACE). You can now use the claw to grab the Datapack, which used to be hidden behind the clown's nose.
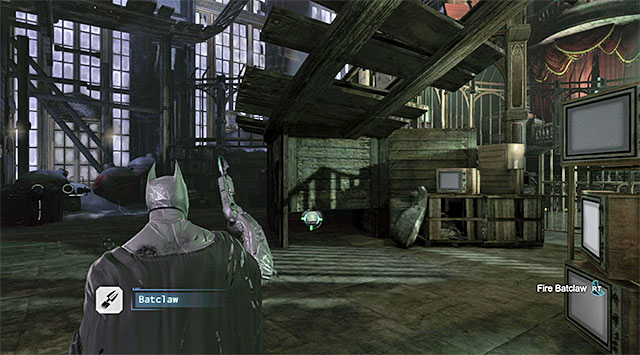
The collectible is in the central part of the West Tower - Ballroom, the location where you solve Joker's puzzles, during your first visit to the hotel. The Datapack is hidden under the wooden railway track, in the place shown in the screenshot. Use the claw to grab the collectible.
You can find the collectible while exploring the big shaft in the West Tower - Ventilation Shaft. Stop after you reach the balcony with the control panel and examine the area to the right of it (the screenshot). Use the glue grenade to insulate the pipe with the escaping steam, crouch and enter the small room. The Datapack is hanging on the wall.
 The collectible is in the venting shaft
The collectible is in the Overview Bar that you visit right after you leave the ballroom. Jump into any of the venting shafts that lead to the oval area in the bar, and examine all of the branches. Thanks to this, you will locate the Datapack.
For finding all of the datapacks, you are rewarded with the audio file connected with Warden Joseph.
With the Burnley district, three extortion files are connected (18, 19 and 20) and, as much as fourteen different Datapacks located in the police station and in sewers underneath. Therefore, it is worth reminding how you can reach the selected areas in the station, or the sewers and the knowledge of that may come in handy especially if you are not going to collect all of the items during your first stay here.

The GCPD main entrance is locked so, you need to take the door shown in the screenshot, located on the rooftop. This entrance is adjacent to the helipad and you take it for the first time during the Gain access to the GCPD via the rooftop main mission. You, of course, can take your time and not hurry so much towards the entrance because it is being patrolled by the corrupt policemen, armed with firearms that you need to eliminate, or walk around.
The best way to reach the Burnley Sewers is through the manhole shown in the screenshot, which you use for the first time during the Scan the corpse in the GCPD morgue maim mission. It is located in the Western part of the Burnley district, to the North of the police station. I recommend that you take this manhole if you are going to explore the Eastern part of the sewers and the GCPD - Morgue.
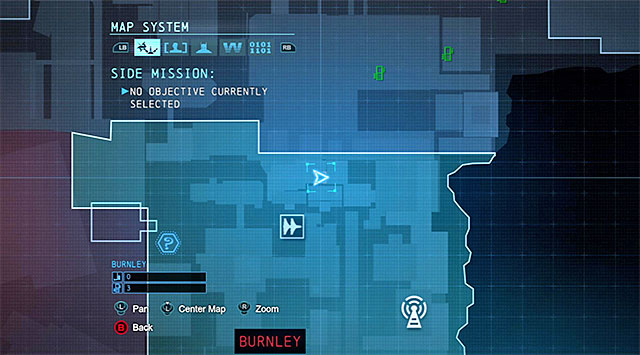
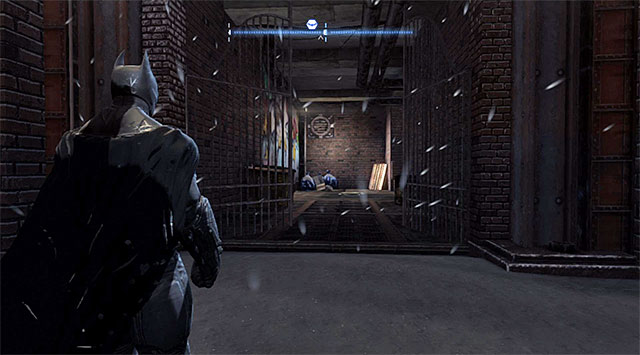
You can also access the sewers through another manhole, shown in the screenshot, which is located in the Northern part of the Burnley district. You took this passage for the first time during the Access the sewers beneath GCPD main mission. It lets you explore the Western part of the sewers [Burnley Sewers - West], the Sewers - Water Treatment as well as the GCPD Telecom Room.
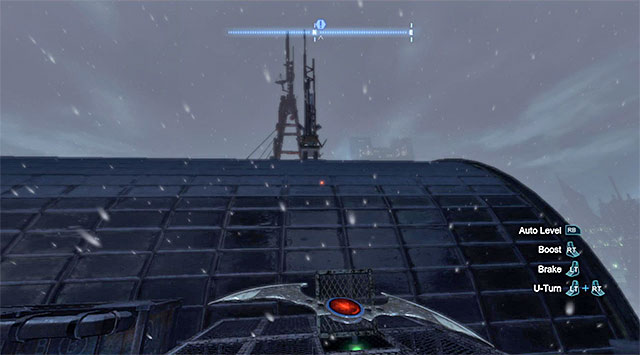 The opening in the cage
Locate the pressure plate on the building's rooftop. Walk onto the pressure plate and use the remote controlled batarang twice, first to hit he button on the left, and then the one on the right (the batarangs must make it through the hole in the cage's roof). Finally, use the claw to grab the Datapack.
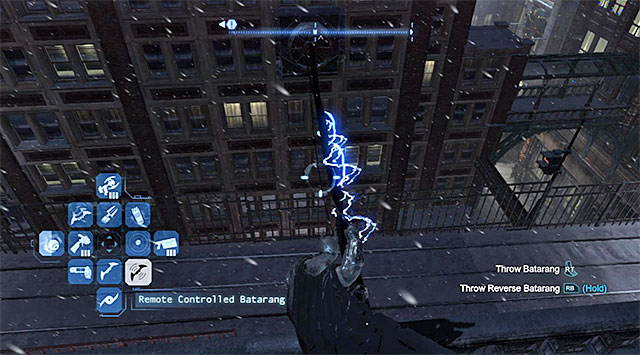
After you reach the region of the locked box with the collectible, climb onto the balustrade and turn towards the discharges shown in the screenshot. Throw the remote controlled batarang and make sure that it is charged. Turn the batarang back and direct it towards the fuse box located above the collectible. You can now collect the Datapack from the box you have just opened.
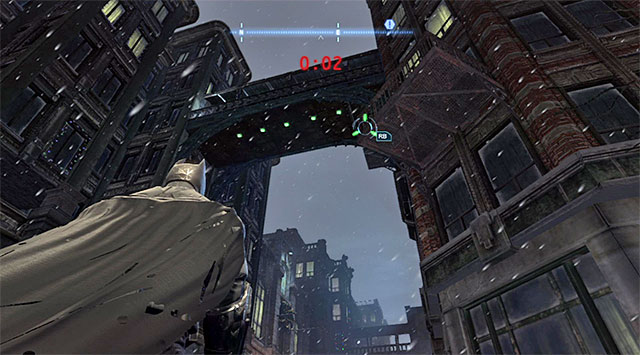
Step onto the pressure plate located on the big balcony and quickly, throw five batarangs towards the buttons shown in the screenshot, which are located under the nearby bridge. You need to do that within the time limit so, do not aim manually. After you succeed, collect the Datapack sing the claw.
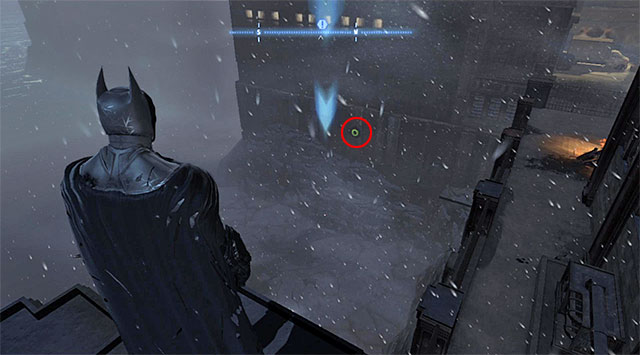
Start on the rooftop of one of the buildings to the North-East of the collectible and glide towards the interactive button shown in the screenshot. In the mid-flight, hold down the attack button and plan the flight in a way that allows Batman reach the button on the wall. If you have done everything correctly, Batman should lean against the wall for a moment. For a fraction of second, release the flight button and press it again, thanks to which your character will bounce off the wall. Land quickly and use the claw to collect the Datapack from the box, before time runs out. .
For finding all of the datapacks, you are rewarded with the audio file connected with the Penguin.
 You can walk through the tunnel only after you have insulated the pipes
Walk onto the pressure plate and note that this causes one of the walls, of the nearby cage, to rise. Use the glue grenade here, there times, which will insulate the pipes. You can now enter the cage and reach the Datapack.
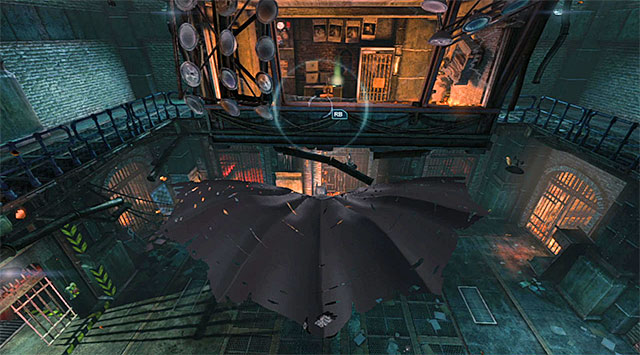 Security room
You can find the collectible in the basement of the police station, in the location with the Holding Cells. Start on the upper level of this location and make it over, using the hook to the security room. The Datapack is on the desk.
The collectible is in that you are looking for is in the GCPD - Morgue and the way to access it has been described in the Scan the corpse in the GCPD morgue main mission description.
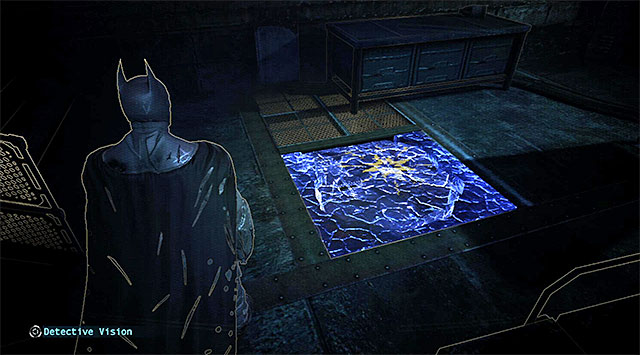 The floor fragment that can be destroyed
After you make it to the morgue, use detective vision to locate the fragment of the floor that can be destroyed with explosive gel. Doing this, will allow you to obtain the Datapack.
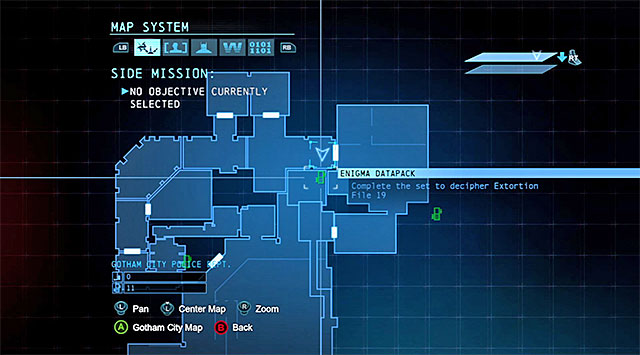
The collectible is in the Northern part of the police station, close to the SWAT conference room and the interrogation room (the above screenshot).
 The window
Start to the North-West of the collectible and locate the big window that you can walk through. This way, you will access a locked office with the Datapack on the floor.
Start in the room neighboring the SWAT - Interrogation Room, which is located in the Northern part of the building. Select the remote controlled batarang from the inventory and throw it towards the interrogation room. After the batarangs flies into the room, turn it back, look up and use the claw quickly to grab the Datapack from the box above the broken one-way mirror.
Start in the SWAT - Manager's Office which is located in the North-Eastern part of the building. Locate the door shown in the above screenshot and open it by charging the generator next to it (use the Shock Gloves). You can now enter the SWAT - Locker Room where there is the Datapack.
The collectible is in the Evidence Locker and the way to reach there has been described in the Acquire the disruptor at the evidence locker main mission description.
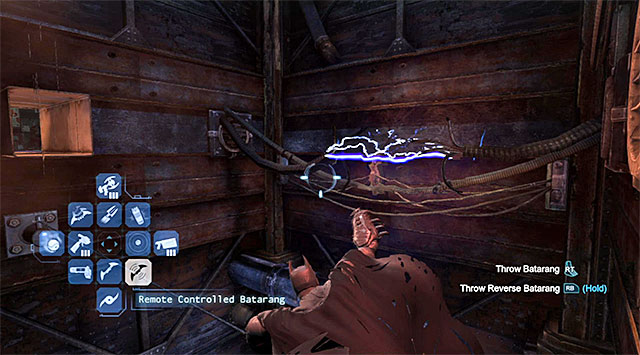
Start in the shaft located to the East of the evidence locker, while on the rope that you extended with the grapple. Turn towards the discharges shown in the screenshot and throw there the remote controlled batarang, which will charge it as a result of contact with the discharges.
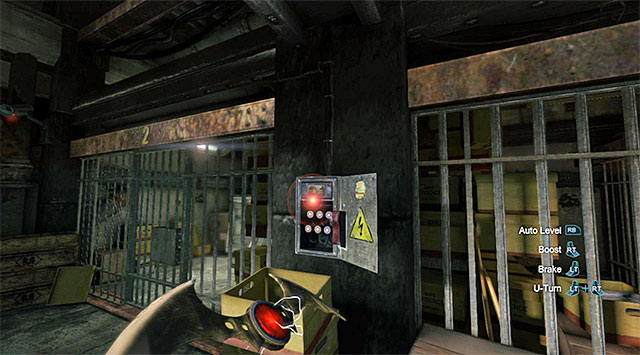 The Batarang needs to hit the fuse box
Direct the batarangs towards the small venting shaft leading to the evidence locker, and then towards the fuse box located to the right. You can now return to the evidence locker and examine the newly-unlocked North-Eastern part. The Datapack is on the floor.
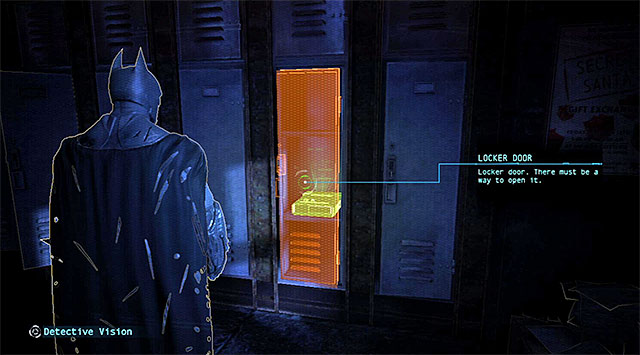 Use the detective vision to find the collectible
Visit the SWAT locker room [SWAT Division], located in the Western part of the police station. Use the detective vision here, to locate the locker containing the Datapack, and open it using the claw.
For finding all of the datapacks, you are rewarded with the audio file connected with Joker.
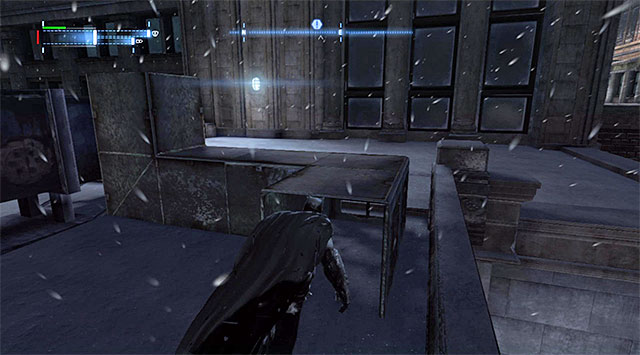
Datapack has been hidden in the venting shaft on the rooftop of one of the buildings and the entrance to this shaft has been shown in the above screenshot. Obtaining the collectible does not require you to use any of Batman's gadgets.
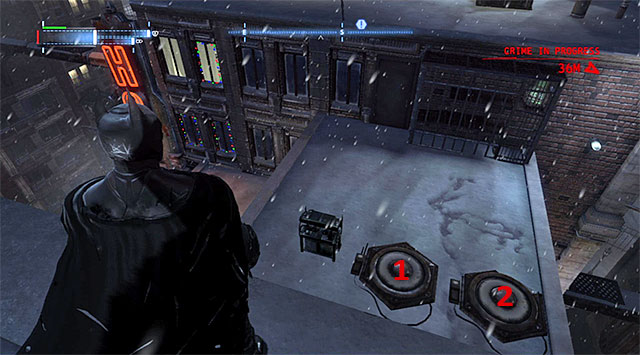
Locate all of the objects shown in the above screenshot, i.e. the cage with the ball, with the collectible, generator and two pressure plates. Start by charging the generator, using the Shock Gloves. Walk onto the plate on the left (1), then onto the one on the right (2) and return to the one on the left (1). You can now approach the cage (do not worry about the fact that it did not open ) and collect the Datapack directly from the ball that you have recently rolled.
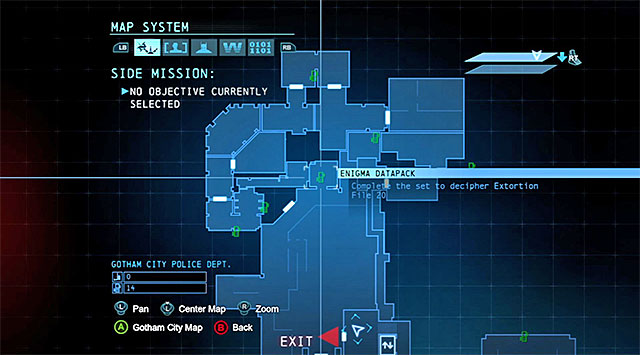
![Start in a small room on the upper floor [Maintenance Access], located to the North of the GCPD - Bullpen - The best hidden datapacks - Extortion File 20 (Burnley) - Enigma Datapacks - Batman: Arkham Origins - Game Guide and Walkthrough](https://game.lhg100.com/Article/UploadFiles/201512/2015121216423863.jpg)
Start in a small room on the upper floor [Maintenance Access], located to the North of the GCPD - Bullpen. You walk through this room the first time you visit the building, right before you enter the abovementioned Bullpen. Find here the manhole, shown in screenshot 2, and open it.
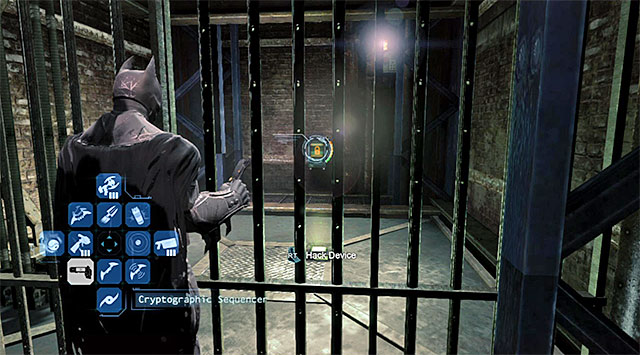 You need to hack into the control panel at a distance
Jump down into the room on the ground floor and approach the locked gate. You need to use the cryptographic sequencer at a distance, here, in order to determine the correct password (CONVICTION), which will unlock access to the room with the Datapack.
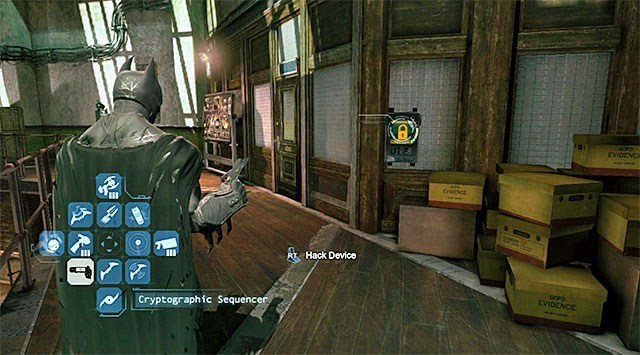
Start in the GCPD - Bullpen and explore the North-Western part of its upper level. This way you will find a locked room shown in the screenshot. Use the cryptographic sequencer onto the control panel to determine the correct password (PROUDTOSERVE). You can now enter Capt. Gordon's Office and detach the Datapack from the wall.
The collectible is in the GCPD Telecom Room which you can access only from the side of the Burnley Sewers - West. You visit this location for the first time during the Uplink the National Criminal Database to the batcomputer main mission .
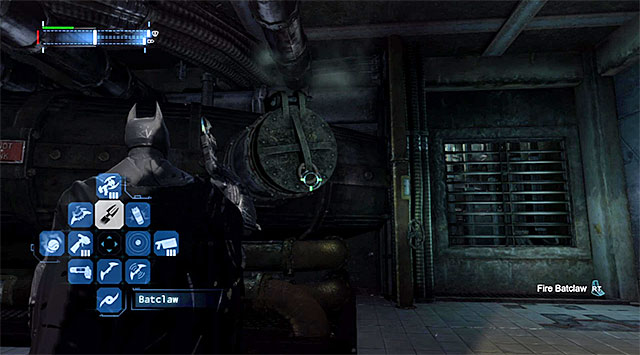 The manhole
After you get into a small room, locate the interactive manhole and open it, using the claw. Use it again, this time to grab the Datapack.
The collectible is in the Burnley Sewers - West under the police station, which you can access by taking the manhole located in the Northern part of the Burnley district. You use this passage for the first time during the Access the sewers beneath GCPD main mission.
 The passage blocked off by the escaping steam
Right after you get into the sewers, stop after you reach the first fork. Turn right and use a glue grenade to insulate the pipe. You can crouch and reach the place where the Datapack is.
The collectible is in the Burnley Sewers - West under the police station, which you can access by taking the manhole located in the Northern part of the Burnley district. You use this passage for the first time during the Access the sewers beneath GCPD main mission).
You need to gain access to the area with the big water reservoir and extend the rope, using the grapple, in the spot shown in the screenshot. Use the hook to reach the rope, turn left and find the Datapack.
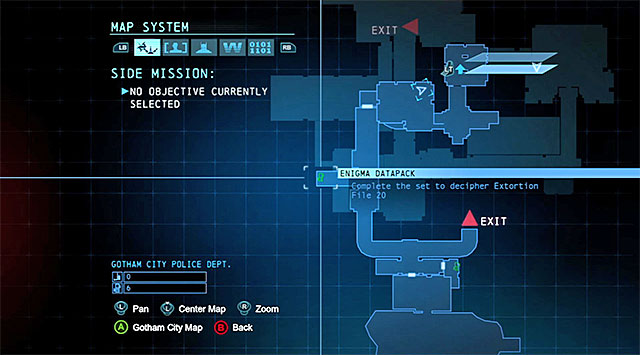
The collectible is in the central part of the Burnley Sewers under the police station. You can reach there either from the building's basement, or by taking the manhole to the North of the police station.
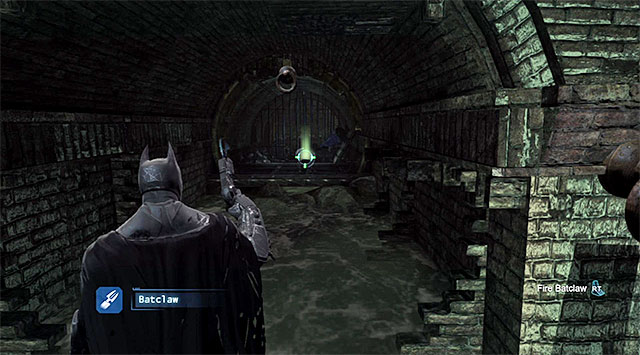
Regardless of the path that you have chosen, you will reach a flooded part of the sewers, which means the necessity to use the glue grenade to make a floating platform. Jump onto that platform and use the claw to hook up to the successive anchor points. Ultimately, you need to reach the tunnel leading to the West and reach out for the Datapack (the screenshot) at a distance.
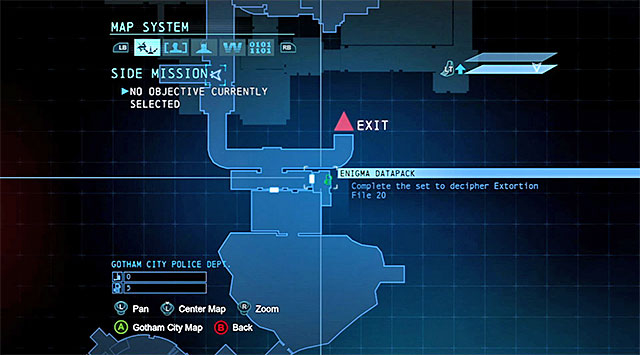
The collectible is in the central part of the Burnley Sewers under the police station, near the sewers descent located to the North of the police building.
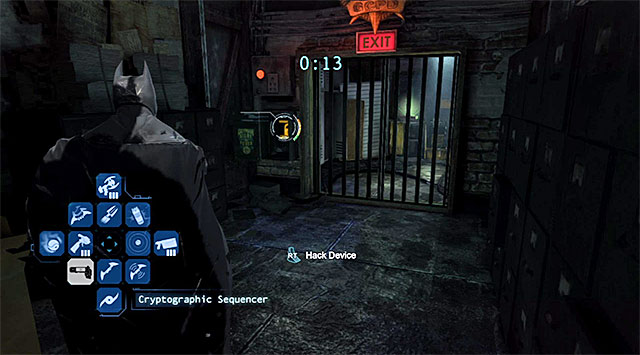
After you come close to the collectible, start by targeting the generator and charge it with the Shock Gloves. QUICKLY run up to the terminal shown in the screenshot and hack into it with the cryptographic sequencer. You only have 15 seconds to determine the correct password (PROFITEERING), but if you didn't make it at the first attempt, you can charge the generator again and give it another try. Enter the storage and collect the Datapack.
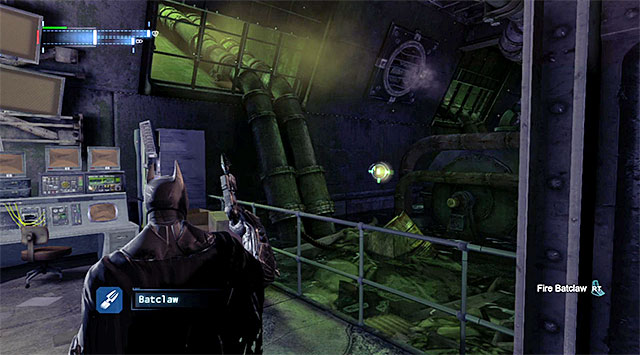 The collectible is to the right of Enigma's computer
You get the opportunity to visit Enigma's HQ, for the first time, after you have unlocked the side mission connected with this character. Of course, you can go there anytime throughout the game. You need to reach the room with the madman's central computer, turn right and use the claw to grab the Datapack that you can see in the distance.
For finding all of the datapacks, you are rewarded with the audio file connected with Joker.
 An example plaque
There is a total of eight various Cyrus Pinkney's plaques to be found throughout the game and their locations have been shown in the above map. After you reach a given plaque, you need to switch into the detective vision and press/hold down the detective vision activating button, thanks to which the object will be scanned. From now on, there will be an entry available in Information about Gotham - Gotham Intel and additionally, you will be able to listen to a recording in the tab with Cyrus Pinkney's profile.
Note - for scanning each one of the plaques, you will be rewarded with, as many as, 15 thousand experience points. Therefore, it is definitely worthwhile to set out to search for these because, in total, you can receive 120000 points!
After you have scanned one of Cyrus's plaques, Batman will be contacted by Alfred, who will inform him about an unsolved case concerning the murder of Pinkney. At this moment, the game also unlocks this character's profile.
There will be another important moment after you have scanned seven out of eight plaques. The game will add a point to the world map (screenshot 1) in the Burnley district. Get to Pinkney's crypt to approach its entrance from the east. (screenshot 2).
The crypt with the eighth plaqueStart exploring the Cyrus Pinkney's Crypt, and you will reach, after a few moments, the crypt with the last one, eight plaque. Scan the plaque and listen to the speech recorded by Cyrus, which will conclude this case.
 An example tag (they are visible only in the detective vision!)
Throughout the game, there is a total of twenty four Anarky Tags, i.e. the one of the criminals that a Most Wanted side mission is connected with. After you get to the place marked on the map, always start by activating the detective vision because this is the only way in which you can notice the tags, which are invisible to the naked eye. Approach the symbol as much as you can, or zoom in on it (if it has been painted on the ceiling or another inaccessible place) and press/hold down the detective vision activating button. Thanks to this, the tag will be scanned.
Note - with the moment at which you perform the first legitimate scanning, in the Information about Gotham - Gotham Intel menu, there will appear an entrance connected with the building or the area in which you found the hidden painting.
Note - for scanning each tag, you are rewarded with 5 thousand experience points so, it is worthwhile to go searching for them, because you can gather a total of 120000 points!
The challenges in Batman: Arkham Origins are divided into two groups, i.e. the tasks within the framework of the so called Dark Knight System and tasks initiated from the level of the Training Console located in the Batcave. Both of these differ from each other considerably, both when it comes to their general premises and ways of completing them.
 It pays off to keep track of your progress
The Dark Knight System challenges are tied with the gameplay itself so, you can complete them directly as you play the game, regardless of whether the Batman is currently completing some other mission or roams about the game world freely.
There are four sub-categories to this category of missions:
The challenges of each of the above categories need to be completed in a predefined order. For example, completing the premises of the third level challenges will not be accepted unless you have correctly completed a second level challenge. Therefore, you should always focus on the active challenge of each of the four categories and ignore the remaining levels entirely.
Completing the challenges is rewarded with experience points where, the entries that have been marked with a star, offer an additional reward of upgrades to Batman's equipment. Completing all 60 challenges (15 in each category) also means receiving an unique Dark Knight outfit (you can put it on after you visit the Batcave).
Personally, I recommend that you take to the challenges as soon as possible, because it will be easier for you to complete some of them at the early stages of the game (e.g. defeating a group of enemies without setting off the alarm). The experience points and new equipment that you get will also help you complete the main storyline in the game.
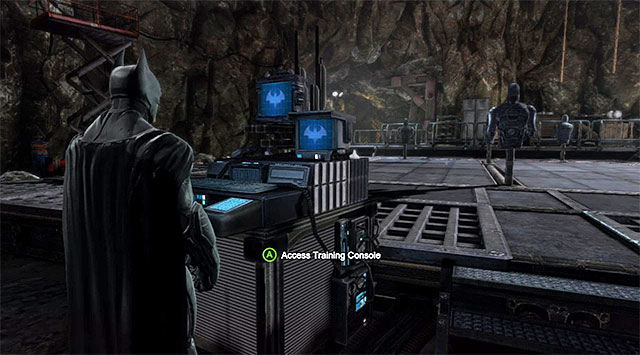 The Training Console connected with optional challenges
The second group of challenges is activated by means of the Training Console and, you can take them up from the moment you visit the Batcave, i.e. after you have fought Killer Croc in the Blackgate Penitentiary. Find the training zone in the Northern part of the cave and choose the character (by default, it is Batman) and select the challenge category.
The challenges available within the framework of this category are:
The individual challenges have different premises (e.g. performing a complex combo or a series of counter-attacks) and golden cups are awarded for meeting the requirements. Apart from that, you can also hope to receive some other bonuses, like unique concept art or experience points.
Note - Many of the challenges are locked, or partially unavailable, at first. The successive entries are unlocked as you complete the basic challenges and make progress in the main campaign so, it is a good idea to return to the Batcave on a regular basis.
Note - If you want to take up the challenges from this group immediately after the game is loaded, you can select an appropriate option in the main menu and skip, this way, the process of returning to the Batcave in order to interact with the training console.
Each of the challenges available in the Dark Knight System has been very well presented by the game, (the main description and additional info available in the Hints section, therefore you should not have any problems with understanding their premises. As a result, in this text, there only are hints that may prove useful during the completion if the individual missions.
LEVEL 1 -Counter Basics
Notes: This is a very easy challenge, especially that you do not need to perform all of the five counter-attacks during one fight.
Reward: 2500 experience points
LEVEL 2 -Batarang Combo
Notes: Do not attempt to use the batarangs at the very beginning of the fight, or right after the last combo ends, because only the attacks of the multipliers of x3, or higher, count.
Reward: 2500 experience points
LEVEL 3 -Combo Streak
Notes: The x8 multiplier can be attained at the beginning of the game.
Rewards: 2500 experience points, new ability (the Auxiliary modifications category): Free Flow Focus
LEVEL 4 -Combo Takedown
Notes: Press the special takedown button right after you receive the requisite multiplier, to prevent breaking the sequence.
Reward: 5000 experience points
LEVEL 5 -Free Flow Focus Mode
Notes: Try to complete this challenge on the groups of the weakest enemies (i.e. the ones without, knives, armors, shields, guns, etc.)
Reward: 5000 experience points
LEVEL 6 -Combo Variation
Notes: It is worth remembering the button/key combinations for quick gadgets, among others. This way, you will be able to change attack modes without breaking the flow.
Reward: 5000 experience points
LEVEL 7 -Explosive Gel Knockdown
Notes: Attempt at this challenge while fighting bigger groups of enemies and in small locations.
Reward: 5000 experience points
LEVEL 8 -Double Trip
Notes: The best way to complete this challenge is while fighting in narrow corridors, be cause the enemies often queue up to you.
Reward: 5000 experience points
LEVEL 9 -Advanced Counter Technique
Notes: Attempt at this one while fighting small groups of enemies (at least one of them must be wearing and armor, of course).
Reward: 5000 experience points
LEVEL 10 -High Risk, High Reward
Notes: You must change your attack techniques and, to the extent it is possible, try to win the fight without taking damage. It is worth reminding that the game always informs you of the risk level only after you finish the fight so, you need to try blindly (or choose crimes in progress, in accordance with the game's suggestions), while hoping that the enemies are on a level that grants completing this challenge.
Rewards: 5000 experience points, new ability (auxiliary modifications category): Free Flow Power Gadgets
LEVEL 11 -Power Gadgets
Notes: You should not have much problem with this assignment, but you need to remember that you always start with achieving the multiplier of x12 to activate the Focus Mode.
Reward: 15000 experience points
LEVEL 12 -Natural 20
Notes: As given in the description, you need to have already unlocked the Critical Strike ability Critical Strikes from the Auxiliary Upgrades.
Reward: 15000 experience points
LEVEL 13 -Complete Fighter
Notes: You will probably have more problems with achieving the requisite number of variations within one battle so, you should remember of utilizing various types of attacks. I recommend that you take on this achievement after you have unlocked the Shock Gloves, because it will be easier to increase the multiplier using them.
Reward: 15000 experience points
LEVEL 14 -Combat Synergy
Notes: Just like given in the description, you need to you need to have unlocked the Special Combo Multi Ground Takedown from the Close Combat Upgrades.
Reward: 15000 experience points
LEVEL 15 -Shadow Vigilante
Notes: It is best to leave this challenge for later, so you unlock as many of new gadgets and new attacks as possible.. You should also attempt while fighting at the medium risk level i.e. the fights with not too many elite enemies. It is going to be easier for you to succeed without taking damage.
Rewards: 15000 experience points, Shadow Vigilante tag
LEVEL 1 - Advanced Gliding
Notes: This is a very easy challenge, as long as you remember to dive and go up in turns.
Reward: 2500 experience points
LEVEL 2 - Long Dive
Notes: Bounce off a vantage point of one of the taller buildings located in, e.g. Park Row or the Diamond District.
Reward: 2500 experience points
LEVEL 3 - AR Glide Drills: Basic
Notes: There are four tasks to complete, which have been described below.
Rewards: 2500 experience points, new ability (Auxiliary Upgrades category): Grapnel Accelerator Takedown
Task 1/4
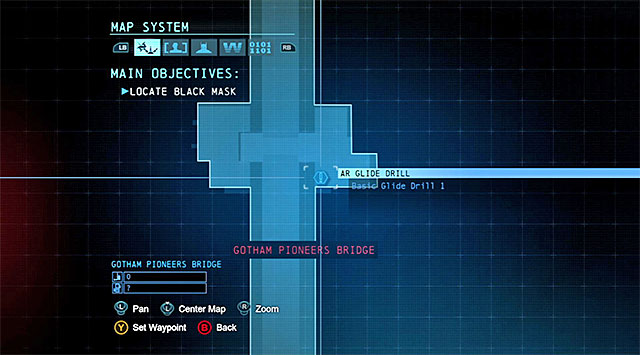
To start, you need to reach the Gotham Pioneers Bridge (the above screenshot).
 Keep gliding through successive rings
This task is very easy, because you need to perform a standard gliding, while making sure that you correctly fly through all of the rings and avoid colliding with the bridge. Finally, land on a small ledge.
Task 2/4
To start this task, you need to reach the central part of the Gotham Pioneers Bridge (the above screenshot).
Glide towards the first ring and, at the moment at which you are directly above the second one, start diving (the screenshot). Glide through all of the remaining rings in the very same way, thanks to which you will complete this task.
Task 3/4
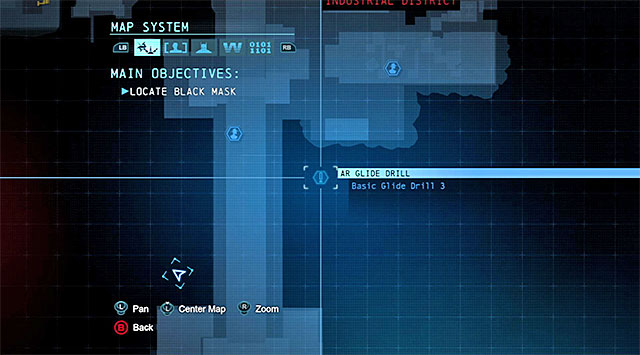
To start this task, you need to reach a small ledge located to the East of the Northern part of the Gotham Pioneers Bridge (the above screenshot).
Glide through the first ring, start diving and, right after you get through the third one, start ascending, because this is the only way to glide through the fourth ring. Finally, use the hook (aim at the hanging balcony) to pull yourself towards the fifth ring.
Task 4/4
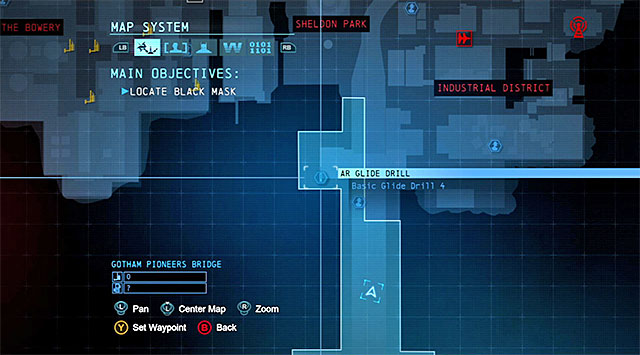
To start this task, you need to reach the Northern part of the Gotham Pioneers Bridge (the above screenshot).
Glide towards ring 1 (the above screenshot) and start diving to reach ring 2. Rise right after you get through this one, thanks to which you will reach ring 3. Again, dive and reach ring 4. Once again, ascend and try to reach the fifth ring. Finally, land on the barge.
LEVEL 4 - Grapnel Accelerator Takedown
Notes: keep looking around for enemies on rooftops of the taller buildings, while using the detective vision to follow their moves. This will allow you to determine when you need to use the grapnel launcher for the mission to conclude.
Reward: 5000 experience points
LEVEL 5 - Crimefighter
Notes: It is a good idea to attempt at this challenge early into the game, because crimes in progress are easier then.
Reward: 5000 experience points
LEVEL 6 - Smoke Pellets: Basics
Notes: In the way described in the game, try to eliminate a lonely enemy, thanks to which you will remain unspotted while trying to get him from behind.
Reward: 5000 experience points
LEVEL 7 - Assisted Gliding
Notes: I recommend that you choose the Pioneers Bridge for this task, because it is a lot easier to use the grapnel launcher on the successive anchor points, without the risk of colliding with a wall or stopping on a ledge.
Reward: 5000 experience points
LEVEL 8 - Highest Point
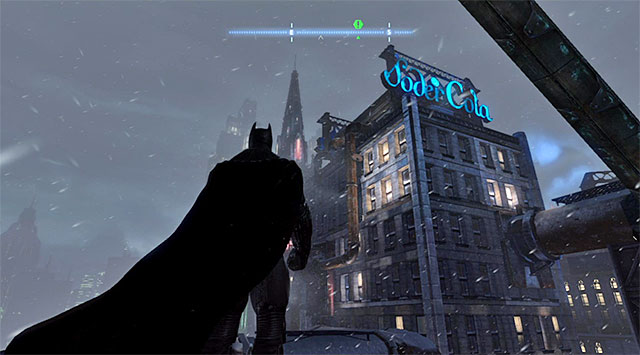
Notes: The Soder Cola building is in the North-Western part of the Diamond District (the screenshot) and you only need to reach the upper balcony.
Reward: 5000 experience points
LEVEL 9 - Long Glide
Notes: Jump off one of the taller buildings. Make sure that you do not collide with anything in mid-flight and employ the technique of diving and ascending alternately.
Reward: 5000 experience points
LEVEL 10 - AR Glide Drills: Intermediate
Notes: To complete, there are two tasks which have been described below.
Rewards: 5000 experience points, new ability (Auxiliary Upgrades category): Shockwave Attack
Task 1/2
To start this task, you need to reach the Western part of the Park Row district (the above screenshot).
 The last ring
Do not glide directly towards the first ring and, after you get above it, dive. At the correct moment, you need to stop this process to reach both the lowest, second ring and (after you start ascending) the third one. Finally, glide straight towards the final ring on the left.
Task 2/2
To start this task, you need to reach the Southern part of the Amusement Mile district (the above screenshot).
Glide towards the ring located on the left but, correct the flight path in the mid-flight, accordingly, to steer towards the bridge on the right. Start diving and reach the second ring. The next step is the most difficult, because you need to start ascending at the moment that will allow you to go under the bridge (the above screenshot), without colliding with it. Glide through the third ring and then, through the fourth one (you cannot glide too low or you will not reach it otherwise).
LEVEL 11 - Unleash the Shockwave
Notes: The best place to lunch the shockwave is where there is a crime in progress, because you can always count on meeting numerous enemies there.
Reward: 15000 experience points
LEVEL 12 - Leap of Faith
Notes: Jump off the vantage point at one of the tallest buildings located, e.g. in the Park Row district or the Diamond District (I recommend the Soder Cola building).
Reward: 15000 experience points
LEVEL 13 - AR Glide Drills: Advanced
Notes: To complete, there are two tasks which have been described below.
Reward: 15000 experience points
Task 1/2
To start this task, you need to get to the central part of the Diamond District (the above screenshot). Note - before you start this challenge, IT IS NECESSARY that you clear the neighboring rooftops off the enemy snipers!
Start by diving towards the ledge right at the building's wall, below the starting point. Turn towards the ring on the left and start ascending at the right moment (the screenshot). Getting past the third ring should not be a problem to you but, to reach the last ring, it is best to use the hook on the small metal platform.
Task 2/2
To star this task, you need to reach the Coventry district (the above screenshot), to the Lacey Towers.
The initial part of this task is the most difficult one, where after you dive and get above ring 1 (the screenshot), you need to ascend at the moment that will allow you to glide through the pipes with rings 2 and 3. While in the air, avoid obstacles and avoid the situation in which Batman touches to a rooftop.
 The final part
Unlike the initial part, the final part is very easy because you only need to dive towards the fourth ring and reach the final ring in the tunnel on the right.
LEVEL 14 - Low Flight
Notes: Take on this challenge in districts with long straight roads (e.g. the Park Row district), above water or over areas coated by ice (e.g. the vicinities of the Penguin's ship in the Amusement Mile).
Reward: 15000 experience points
LEVEL 15 - Gotham Protector
Notes: take into consideration the fact that the game counts only those of the crimes that you have actually stopped from the moment of unlocking this challenge. Your previous achievements do not count here.
Rewards: 15000 experience points, the Gotham Protector tag
LEVEL 1 - Takedown Basics
Notes: This challenge is very easy, especially that all of the three types of attacks do not have to be performed during one encounter with the enemies.
Reward: 2500 experience points
LEVEL 2 - Silent Takedown
Notes: This time, all three attacks need to be launched within one battle. Pick your targets carefully and do not let yourself be spotted by anyone.
Reward: 2500 experience points
LEVEL 3 - Unseen
Notes: First of all, you need to remember that the air attacks (combined with knocking out the enemy) will not allow you to complete a given encounter, without getting spotted. As a result, avoid such attacks. It is also a good thing to complete this challenge early, so you can reach the tenth level, of this category of challenges, still before you complete the game's campaign mode.
Rewards: 2500 experience points, new ability (Auxiliary Upgrades category): Sonic Batarang
LEVEL 4 - Bait and Switch
Notes: The action ends in success only if you distract an enemy who cannot count on the support of his colleagues.
Reward: 5000 experience points
LEVEL 5 - Old School
Notes: It is a good idea to complete this challenge during one of the initial encounters with the bandits, because they are not too much of a threat then and you do not need to watch their moves that carefully.
Reward: 5000 experience points
LEVEL 6 - Takedown Variation
Notes: You do not need to pick any location in particular, because all of the sneak-attacks can be performed in any of the predator rooms .
Reward: 5000 experience points
LEVEL 7 - Head-On
Notes: To the extent possible, it is best to complete this challenge as soon as possible because further into the game, in the rooms that assume acting silently, there will appear elite enemies who are much more difficult to defeat in a direct combat. Of course, you should not forget about the correct performance of escapes after each successful attack.
Reward: 5000 experience points
LEVEL 8 - Perfect Vision
Notes: This challenge is very similar to the one on the fifth level, if you are spotted, you need to start the scene over again.
Reward: 5000 experience points
LEVEL 9 - Loud Takedowns
Notes: Remember that you need to escape to the nearby vantage points after watch loud attack, which limits the risk of being spotted and taking heavy damage. Just like in the case of the level 6 challenges, all of the predator rooms that you visit.
Reward: 5000 experience points
LEVEL 10 - Apex Predator
Notes: The high-risk encounters are available only further into the campaign but, you need to remember that you complete this challenge before you complete the storyline mode.
Rewards: 5000 experience points, new ability (Auxiliary Upgrades category): Sonic Shock Batarang
LEVEL 11 - Sonic Shock Batarang
Notes: To all intents and purposes, it is the test for the operation of the Sonic Shock Batarang ,and not a challenge per se. As a result, you can gain a lot of experience the easy way.
Reward: 15000 experience points.
LEVEL 12 - Always Different
Notes: Avoid taking out the enemies in any way different than takedowns, thanks to which you will avoid the situation in which you have cleared the room too early and, as a result, fail the challenge. Furthermore, you should attempt completing this challenge further in the game, because it is than that the higher-level predators appear.
Reward: 15000 experience points.
LEVEL 13 - Smoke Master
Notes: I strongly recommend that you unlock the Concussion detonator upgrade: the Concussion Detonator: Stun Duration) from the Close Combat Upgrades category, because this will make this challenge a lot easier.
Reward: 15000 experience points.
LEVEL 14 - Three With a Single Blow
Notes: Do not attempt completing this challenge until you have unlocked the Remote Claw, because this gadget will make it definitely easier to send fuel tanks towards the individual groups of enemies. Thanks to this, you will not have to wait for them to stop in a strictly defined spot.
Reward: 15000 experience points.
LEVEL 15 - Double Fall
Notes: This challenge is much easier than it might seem, at first. To complete this task, you need to use the Remote Claw and connect two enemies, on two different balconies, with a single rope in such a way, as to make both of them wall after you give the rope a jerk. A good spot to complete this challenge is the main area in the Gotham Merchants Bank.
Rewards: 15000 experience points, Worst Nightmare tag.
The premises of all of the challenges from this category are identical, and they reward you for supplementing the database. These include, first of all, the Casefile Reports and the profiles of the characters that live in Gotham. It is worth noting here that to reach the final, fifteenth, level, you do not need to supplement the entire database, but only 2/3.
Making it over to the next level means, of course, being rewarded with 2000 experience points on levels 1-3, 4000 on levels 4-10 and 8000 points on levels 11-15. Unlocking the last level is, additionally, rewarded with the World's Greatest Detective tag.
 Utilize various attacks and avoid taking damage
As I have mentioned in the introduction to this chapter, the challenges connected with the training console are divided into four categories where, regardless of what type of challenge you pick, you always need to complete two challenges. The first type are the challenges which require you to amass a pre-determined number of points. They are directly connected with fighting battles against the enemy characters, which take place in special arenas. The rules are very similar to those of the main campaign mode and so, if you want to collect the maximum number of cups, in each one of the challenges you need to remember about three things:
 It is necessary that you learn the requirements of each challenge right after it loads
The second kind of challenges are ones where the cups are awarded for certain actions - in the case of the predator challenges, these include various ways of eliminating bandits silently and, in the case of combat training, these are the various ways of utilizing new skills and gadgets. I recommend that, in both cases, you get acquainted with the task list right at the beginning of the fights, thanks to which you will know what you need to achieve and, to the extent possible, you will complete all of the premises of a given challenge, still before you eliminate the enemies.
Two important points:
1) You do not need to complete a given challenge straight away, neither do you need to do that in 100%. Therefore, do not worry if you have not met the requirements to unlock one or two cups. The only difference is that, in this case, you do not receive as many experience points.
2) Unlocking all three cups at one take does not mean automatic completing a challenge, because you still need to eliminate all of the enemies and end this challenge per se. Therefore, do not allow Batman to die towards the end of the challenge, or fail it by, e.g. killing the hostage (the predator challenges).
Just like in the previous installments of the game, Batman has a very wide array of skills and gadgets used not only for winning fights, but also to eliminate enemies stealthily, and for reaching inaccessible places where, usually, valuable items are hidden.
Some of the skills are available right from the beginning of the game but, many of them need to be unlocked first. You can do it in two ways. Close combat upgrades and invisible predator upgrades are unlocked by means of skill points that are awarded each time the Batman reaches the next experience level. I recommend that you search for opportunities to collect large amounts of points by, e.g. doing well in combat, finding collectibles or by completing side missions. This will allow you to unlock better skills quickly and make the game easier. The auxiliary upgrades are also inaccessible, by default, but they are different from the two groups mentioned above in that they are gained in a different way, e.g. by completing the side challenges, or by finding collectibles of a given type.
A very important piece of information is that you can review your gadgets at any point throughout the game. It is a good idea not only to remember the correct button combination, necessary to initiate another attacks, but also to plan on your purchases because, you know very well what a given upgrade can offer.
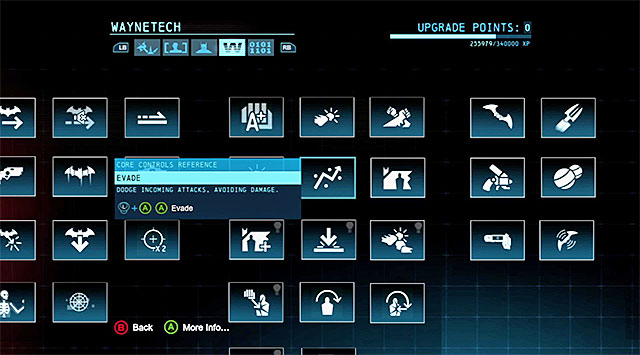 Core controls reference window
This category lists several tens of skills and gadgets. The characteristic that makes them stand out is that all of the actions are available from the very beginning of the game. You do not need to purchase anything here, or even get promoted, in the single player mode, to unlock them.
I strongly recommend that you have a look at the entire list after you start the game for the first time, even if you are well versed in the previous installments. Also, try to remember the button mapping for those of the actions that can be activated only when the player wants them to, and not only when required by the game. For example, you do not need to strive for remembering which button is for interrogating a bandit, because the game always displays this kind of information on the screen.
 The Close combat upgrade window
This category lists a few tens of various skills, whose common characteristic is that they are useful for succeeding in melee combat with the enemy. These include, first of all, the new functions for the Batman's gadgets (e.g. the ability to counter the riot shield attacks by using the shock gloves), passive bonuses (e.g. better armor) or unique special combinations that can be activated after you achieve the sufficiently high multiplier
Unlike in the previous category, skills here need to be unlocked with the skill points so, I recommend that you acquaint yourself with the hints below, which inform you of the most useful upgrades. At the same time, note that the whole is constructed with adherence to the skill tree outlay so, if you want to unlock the best upgrades, you need to purchase the previous ones first.
It is a good idea to start investing in the successive levels of the Combat Armor and Ballistic Armor skills early in the game. It is especially advisable if you have selected a higher difficulty level, because it is easier to die if you wear only the standard Batman armor.
As you progress, later into the campaign mode, you will notice that the difficulty level of some of the direct battles is higher. That is when I recommend that you invest into unlocking the Double special combo move and Critical Counter. Especially the former is useful, where you can easily disarm an enemy with a knife. What is even more, while avoiding the consecutive swings, you will not cause the multiplier to be reset.
Soon after you gain access to the shock gloves, try to purchase the upgrades connected with this gadget, especially the Shock Gloves - accumulator efficiency and Shock Gloves - Increased Charge. The gloves are definitely the best element of Batman's equipment to win combat (they deal increased damage and allow for easier attacks on some of the elite enemies and also boost up the multiplier) and, as a result, it is worth using them as often as possible.
Towards the end of the game, focus on the remaining skills, i.e. the ones connected with additional special combinations, and the smoke pellets upgrades.
 The Invisible Upgrades window
This category lists several tens of skills whose common feature is that they are useful for silent elimination of the enemies, both single ones, encountered during the free exploration of the game world, and the more organized groups that stay in the predator rooms. This category includes, first of all, the upgrades for Batman's standard gadgets, which make them more efficient (e.g. higher number of uses, increased range), as well as add new functions (e.g. mine deployment or in-built proximity detonator). You can also find here a few other items, like a very helpful attack from above.
Unlike the first of the categories, in this case, you need to unlock individual upgrades thanks to the upgrade points that you obtain so, I recommend that you get acquainted with the hints below, which will tell you which upgrades are the most useful. Note that the whole thing has the outlay of a skill tree so, if you want to unlock the best upgrades, you need to purchase several other first.
The initial upgrades are, to be honest, more useful in regular combat, because this gadget is not too useful for silent elimination of enemies. With time, you should turn your interest to the Triple Batarang, though, because it is required to solve some of the puzzles connected with Enigma's collectibles.
All three upgrades which are not connected with any of the gadgets, are very useful. The Glide Boost Attack is a good way to start a fight, because you can, this way, eliminate one of the bandits from the fight. When it comes to the Heat Signature Concealment, it is a good idea to purchase this upgrade right after you encounter the first enemies equipped with thermal vision, thanks to which you will not have to worry about being detected while staying in a vantage point. The Quick Silent Takedown allows you to cut down the time required for a takedown, thanks to which you decrease the risk of being spotted by an enemy.
Just as useful are the upgrades to the glue grenades. I especially mean here the Glue Frag Grenade, thanks to which you can stop several enemies at a time and eliminate them, or their colleagues in the other part of the location that you are currently securing. Another gadget that you will be using frequently is the explosive gel, although here I recommend the Explosive Gel - Proximity detonator only, thanks to which you will not have to wait for the right moment to detonate the charges.
When it comes to the upgrades connected with the grapple, it is a good idea to unlock the Grapple - additional line and Grapple - Increased Hoist Capacity. Using the grapple will allow you, at the outset, to clear the predator rooms and eliminate several enemies without any problems, either by pulling gas tanks towards them, or by hanging them up to vantage points (that is what the cord is for).
For the end, I recommend, you should leave upgrading the smoke pellets and the disruptor. Paradoxically, the best way in which the disruptor can be used, it to detonate the enemy mines because, it is better, and faster, to disarm the armed enemies in person.
 The Auxiliary Upgrades window
This category includes a dozen or so various skills and gadgets. As I already mentioned at the first page of this guide, the successive upgrades are not unlocked with upgrade points. Instead, you need to complete various activities, e.g. complete side missions connected with the Most Wanted, find Enigma's collectibles or complete the Dark Knight System requirements. The requirements to unlock each and every upgrade are listed in its description so, it is easy to find out what you need to do to obtain it.
One of the most useful upgrades here is the Free Flow Focus. Gaining access to this upgrade will allow you to achieve higher scores for combat, because it will be easier to keep the multiplier high. The same holds true for the Free Flow Power Gadgets and Critical Strike.
Many of the gadgets in this group increase the efficiency of Batman's gadgets. I recommend that you unlock, in the first place, the Sequencer - Increased Power and Sequencer - Increased Range, because having it on you is required to find some of the Enigma collectibles. Apart from that, you should also unlock the Sonic Batarang (a whole new gadget) and the Smoke - longer effectiveness.
When it comes to the remaining skills, the Shockwave is the most useful, in my opinion. This is an interesting alternative to the Gliding attack and it allows you to knock down a larger group of enemies right at the beginning of the fight.
This chapter includes a complete list of all 50 achievements available in the Xbox 360 version. They are the counterparts of Trophies in the PlayStation 3 version and Steam Achievements in the PC version.
 The Trophy
You need to obtain the first trophy, which becomes possible after you have collected all two hundred Enigma Datapacks and destroyed all 70 Network Relays. Return to Enigma's hideout and gain access to the concealed room. The entire process has been described on the Enigma page, in the Most Wanted part of this guide.
While fighting Deathstroke (one of the game's bosses) you need to initiate all counter-attacks flawlessly. You can find a detailed description of this fight in the chapter of this guide entitled Main Bosses and in the description of the main campaign mode.
You need to complete all nine Most Wanted side-missions.
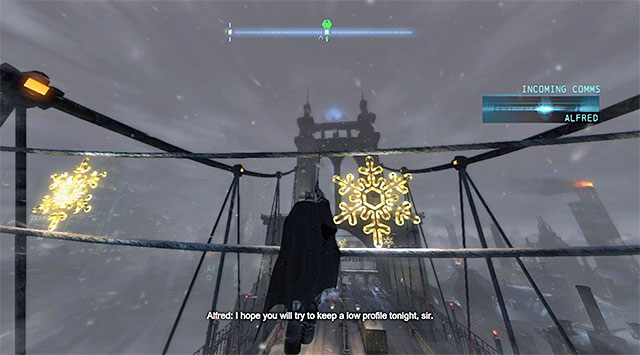 Attach the hook to the successive interactive elements of the bridge
You need to glide over the Gotham Pioneers Bridge without touching to the ground. It is a very easy achievement because you only need to use the grapnel gun to grab onto the elements of the bridge, which will catapult Batman. You should only make sure that you do not land onto one of the bridge's platforms and glide under them, whenever possible.
You need to complete the predator room (the area where Batman operates stealthily) using the silent takedowns only, i.e. the melee attacks launched by surprise. The best moment to do that is soon after the beginning of the game, because the initial predator rooms are the easiest to secure.
You need to purchase all the available upgrades (Close Combat upgrades and the Invisible upgrades). This means that you need to collect the required number of experience points to reach the highest possible experience level.
You need to attack 100 enemies by surprise, who are oblivious to the threat.
You need to use all the fast-travel points in the game.
You need to win the fight with Shiva (one of the two bosses connected with the side missions in the game) without taking damage. You can find a detailed description of this fight in the chapter of this guide entitled Main Bosses and in the description of the main campaign mode.
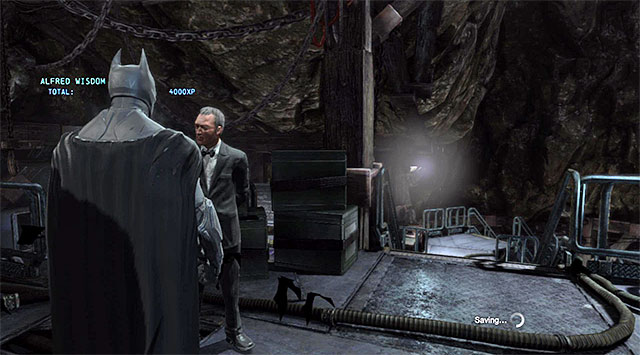 After each longer conversation with Alfred, you will receive experience points
You need to have all of the optional conversations with Alfred. It is worthwhile to return to the Batcave on a regular basis (e.g. after each longer outing for a storyline mission), and hope that, initiating a conversation, starts a longer talk that counts for this achievement. It is worth noting that each such chat with Alfred is rewarded with several thousand experience points.
You need to scan 20 out of 24 Anarky's tags. The whereabouts and methods of scanning these paintings have been presented in Anarky's Tags.
In multiplayer, you need to start playing when the server is full. Defeat the enemy hero to regain control over your gang but, you need to do that with no reinforcements.
You need to achieve the maximum overall level in multiplayer.
You need to complete any of the Most Wanted side missions.
Within a single combination, you need to use every one of Batman's gadgets. What is even more, it is required that you do that in the Free Flow Focus mode so, you first need to unlock the Free Flow Power Gadgets upgrade.
You need to save Joker from falling. You will receive this achievement automatically during one of the main campaign missions.
You need to win the duel with Deathstroke. You will receive this achievement automatically during one of the main campaign missions.
You need to locate the Black Mask. You will receive this achievement automatically during one of the main campaign missions.
You need to achieve the x50 multiplier. The easiest way to do that is after you have unlocked the Shock Gloves and the Free Flow Focus.
You need to decipher one of the extortion files. The point is to receive one of the extortion file, i.e. find 10 Enigma Datapacks connected with it.
You need to complete the predator room (the area where Batman operates from hiding) while remaining unspotted for the whole time. It is the easiest to attempt at this achievement somewhere at the beginning of the game, because the initial predator rooms are the easiest to secure. Use silent takedowns, gadgets, vantage points and venting shafts and the detective vision.
You need to achieve a level of prestige in multiplayer.
You need to complete all 60 challenges of the Dark Knight System. They have been described in the chapter entitled Challenges.
You need to destroy all 10 Network Relays in any district of the city. On the Network Relays page, you can find the whereabouts of all Relays and includes hints on how to find them.
In multiplayer you need to defeat four elite enemies within 40 seconds, perform this as a hero and avoid direct melee blows. This, of course, means the necessity to relay on Batman's gadgets and the other, more advanced moves.
In multiplayer you need to defeat six elite enemies, in six different ways, while playing as either Batman or Robin.
You need to identify all of the hitmen hired by the Black Mask. You will receive this achievement automatically during one of the main campaign missions.
While playing as Batman, you need to receive all rewards on the original training maps, available from the level of the training console in the Batcave.
You need to defeat Joker. You will receive this achievement automatically during one of the main campaign missions.
You need to complete all 15 challenges connected with the Worst Nightmare path. These are the Dark Knight System challenges.
You need to complete all 15 challenges connected with the World's Greatest Detective path. These are the Dark Knight System challenges.
In multiplayer you need to upgrade your weapon to maximum.
You need to find out who the Joker is. You will receive this achievement automatically during one of the main campaign missions.
You need to complete the I Am The Night mode, which unlocks after you complete the New Game Plus mode. The difference is that Batman only has one life and, in the case of failure, you will have to start over from the beginning of the game. So, do not take unnecessary risk and also, master all of the moves of your character, as well as all the boss fights.
You need to complete all 15 challenges from the Gotham Protector path. These are the Dark Knight System challenges.
You need to defeat all 8 Black masks assassins. Apart from the characters that you encounter during the campaign mode, you also need to stop two criminals connected with the Most wanted missions, i.e. Deadshot and Shiva.
While laying as Batman., you need to receive all of the rewards on the original campaign map, available via the training console in the Batcave.
In multiplayer, you need to win a round on all maps in every faction.
You need to win all of the available cups in the Custom challenges, available via the training console in the Batcave.
You need to cover a total of 26 miles while gliding. Sooner or later, you will unlock this achievement anyways but., if you want to speed the process up, you can reach everywhere on your own, instead of fast-traveling.
You need to collect, at least 4000 experience points in one mach in multiplayer , as an elite enemy.
You need to find all Enigma's collectibles, i.e. 200 Enigma Datapacks. You can find information on where to find them, in the chapter entitled Enigma Datapacks.
You need to stop 20 various Crimes in Progress. It is a good idea to deal with crimes from the very beginning of the game, because many of them are still easy then.
You need to complete all 15 challenges from the Shadow Vigilante path. These are the Dark Knight System challenges.
You need to solve all 9 cases described in the Casefile Report.
You need to collect all of the possible cups in the Combat Training challenges, available via the training console in the Batcave. In total, there are 12 fights (you need to receive 3 in each) and further arenas are unlocked with your progress in the main campaign.
In multiplayer you need to achieve the highest level for Bane's faction.
You need to complete the New Game Plus mode, which is unlocked after you complete the main campaign mode (at the normal or high difficulty level).
In multiplayer you need to achieve the maximum level for the Joker's faction.
In multiplayer, you need to defeat each enemy player at least once during a game.


 Bulletstorm Game Guide & Walkthrough
 Brothers in Arms: Hells Highway Game Guide & WalkthroughBorderlands: The Pre-Sequel! Game Guide & Walkthrough
 Battlefield 2142 Game Guide & Walkthrough
 BioShock: Infinite Game Guide & Walkthrough